
Leaderboard


Popular Content
Showing content with the highest reputation on 03/07/16 in all areas
-
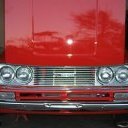
Here goes! Ever since I sold the RT40 I have had a yearning for another high powered old Toyota. Two years of grinding away at renovating a shitty house and I finally have the time & money to enjoy an OS car again. Priorities changed somewhat however and the idea of starting a project like that from the beginning after this house renovation scared me and my bank balance. So after some arm twisting and dinner cooking for the mrs it was decided to go and search for something "finished". This little car was mentioned to me by some Oldschoolers and I had followed the build thread of it over on Toyspeed since it's inception. I guess I'll start with some specifications from the previous owner (because I'm lazy) and pictures from today after I had given it a wash, machine polish & wax to a level I was happy with! Discussion Fred Engine: Model: 7A-GTE Block Internal Spec: Factory crank shaft, Forged ross racing pistons and top seal rings, H-beam rods, ARP bolts throughout, toga race bearings and oil pump Cylinder Head Spec: Rebuilt Factory 4a-ge 20v blacktop vvti head with Supertech Valve springs and TRD steel headgasket and ARP headstuds Intake system: Factory 4a-ge 20v Blacktop ITB’s and MRP 2-peice plenum with 3” intake Turbo system: New Holset turbo supplied by steve murch, x2 Tial 38mm MVS wastegates, MAXfab custom thickwall stainless steel manifold, HKS ssqv bov, Fuel System: 60L Jazz fuel cell, carter lift pump, surgetank, bosch 044 fuel pump, full braided Teflon lines through to 800cc SARD injectors, turbosmart FPR-800 regulator Ignition System: x4 1nz individual coils mounted to a CNC’d made-to-suit aluminium adaptor plate Exhaust System: MAXfab Full 3” stainless steel exhaust system, x2 inline mufflers through to custom dump tip Cooling: 3 Core custom aluminium realdeal radiator with electric fan, setrab oil cooler and 500x250x56 tube & fin intercooler with 3” inlet/outlet Engine Management: Link G3 ECU (upgraded to g4 Firmware) with 4-bar MAP sensor and electronic boost solenoid Engine Bay: de-loomed engine bay, custom aluminium oil catch can, custom aluminium overflow bottle Other: gilmer drive pulley kit, remote oil filter kit Driveline: Gearbox: W55 supra 5 speed gearbox Flywheel/Clutch: Quartermaster twin plate clutch with billet flywheel to suit with ARP flywheel bolts, willwood reverse cylinder mount pedal box with remote reserviors Differential: 4.1 ratio LSD shortened hilux rear end Other: custom 1 piece driveshaft with custom driveshaft hoop Suspension: Shocks: Front – shortened shocks and modified OEM struts fitted with coilover sleeve kits and custom CNC’d camber tops Rear – adjustable shocks and reset and stiffened leaf springs with custom made anti-tramp bar setup with chromoly rods and QA1 rod ends Others: Cusco TE27 front strut brace, custom made swaybar to suit engine position and nolathane bushes allround Brakes: Front: 4-pot FD3s s6 RX7 front callipers and sloted rotors with steel braided brake lines Rear: s13 single pot claipers and rear sloted rotors Wheels and Tyres: Wheels: 17x7” (F) and 17x8” ® genuine work meister s1’s Tyres: Pirenza 205/40/R17 all round Exterior: Panel & Paint: Prep and paint done by Jason price, finished in a custom holden green Other: New indicators, park lights and headlights, all new window and door rubbers/channel, straightened and rechromed front and rear bumpers, doors and boot fitted with solex locks Interior: Seats: x2 Racetech 1000 bucket seats and factory rear seat Steering Wheel & Gear Knob: woodgrain steering wheel and stainless/bronze gearknob Gauges/Meters: Autometer cobalt digital boost gauge and autometer cobalt oil temp water temp and oil pressure gauge Audio: Pioneer Bluetooth headunit mounted in glovebox and alpine typr-R 6x9s in rear parcel tray Performance: Dyno Power: 320kw @ the rear wheels on 23psi with previous masterpower turbo setup, have since gone to a smaller holset unit for more response, currently making 280kw on 20 psi and full boost at around 4000rpm11 points
-
Got around to doing some more on the new extractors. similar design to original's but cant do a direct copy due to pipe diameter11 points
-
after multiple fuck ups on my part involving welding the cam cover back together then breaking it again numerous times i finally got it sorted, in that Mike gave me another one with cooler text on it. the other one is usable but this one is way better. so this evening i attempted to paint it and highlight the letters. what a fuck around. so i got there in the end. I'm not a fan of painting clear straight onto aluminum but Richie wouldn't shut up so i did it this way. 2016-03-07_07-19-04 by sheepers, on Flickr 2016-03-07_07-19-13 by sheepers, on Flickr 2016-03-07_07-19-23 by sheepers, on Flickr10 points
-
thanks to Archetype for the stickers ! pretty good for a laugh Discussions; //oldschool.co.nz/index.php?/topic/50482-oldrx7s-1981-mazda-626-discussion/#entry160311548 points
-
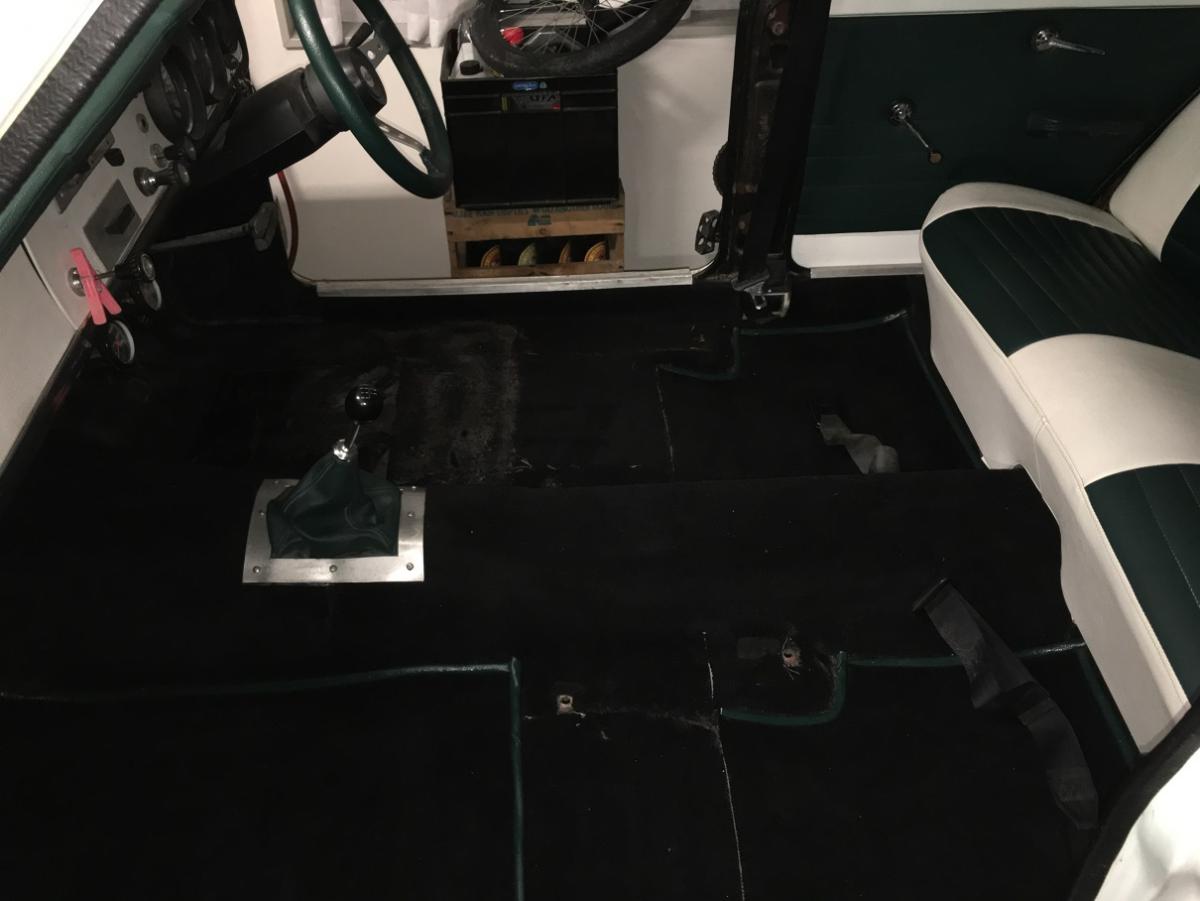
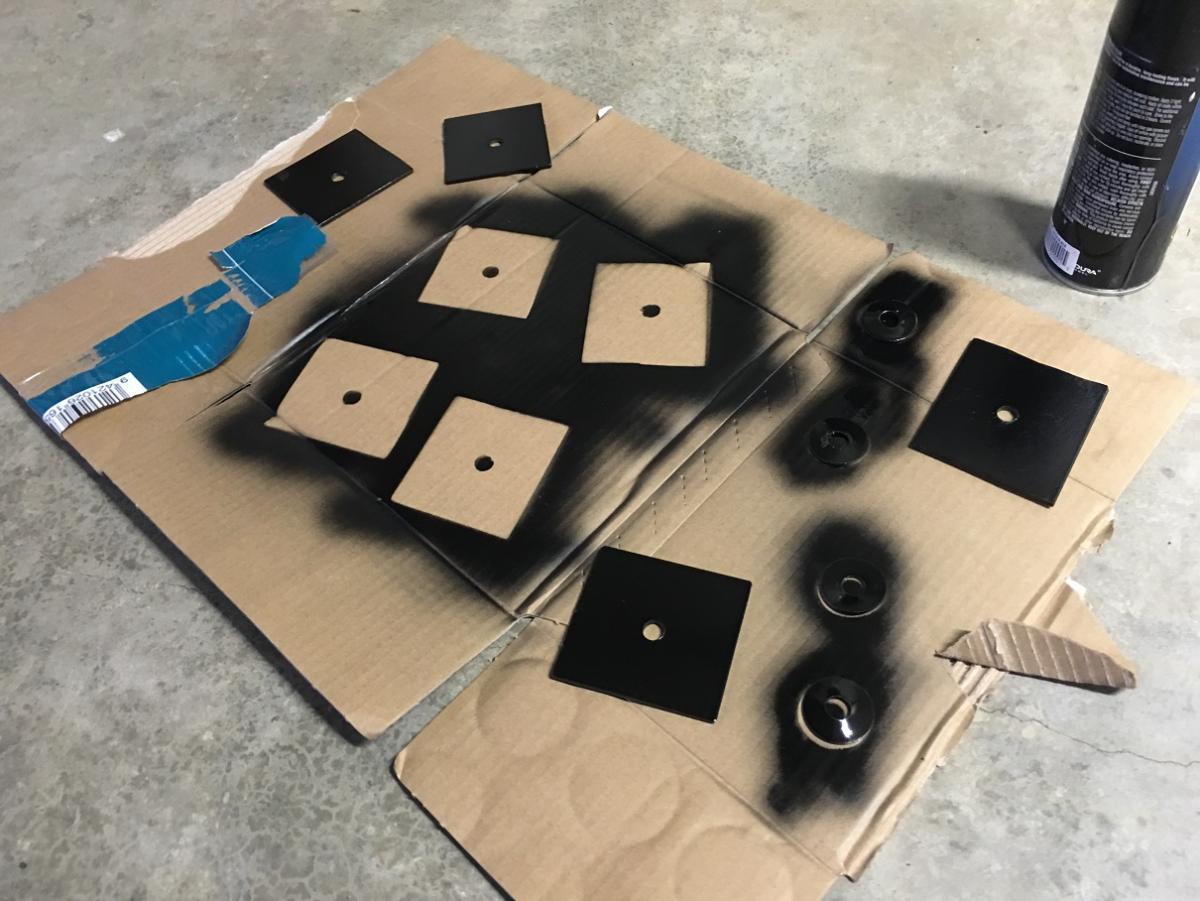
As im waiting for a diff pinion seal to arrive from the UK I thought i would get stuck into the interior. I managed to somewhat resurrect the very tired rear view mirror for now while I wait for a reasonably priced mirror head to come up and I finally got around to getting the drivers seat bracket welded up as it had cracked at some stage. Gave the mounts all a fresh coat of black to keep everything tidy. While the seat was out I decided to make up some 80x80x3 plates to sit up under the floor where the seats bolt down to give some more strength, Again painted all the hardware black. Since I was waiting for the paint to dry I thought I would give the carpet a good vacuum and clean with upholstery cleaner. The drivers floor mat had soaked up some brake fluid when the master cylinder was leaking into the car so I ripped that up (glued down??) and gave it a proper wash in the laundry tub. Gave me a chance to thoroughly clean the floor underneath it. Final step for the night was to give the back seats a really good clean and they look brand new again! Tonight's job is to put the seats back in with the new plates and give them a clean and then the interior is finished for now!
 5 points
 -
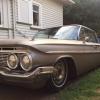
Old School Nats last weekend in National Park and visited a friend at Horopito while i was down there: Ol' mate Colin was very surprised to have someone interested in it Ol Barry: "Do you have one of these?!" Not so old Barry: "Yes, two, + 2 more tail gates making 4", lewl. Got all four monsoon sheilds and the dizzy, shields were cheap, but the dizzy was not (check out the drive!), but happy on average Cap is 'new' and my one is missing one of the cap clips, and spare parts are nice to have. Apart from those bits the car is pretty rooted. Still has its back brakes (I should have grabbed the hand brake pads!) but i doubt i would have been able to jack it out of its hole or get the wheels off.4 points
-
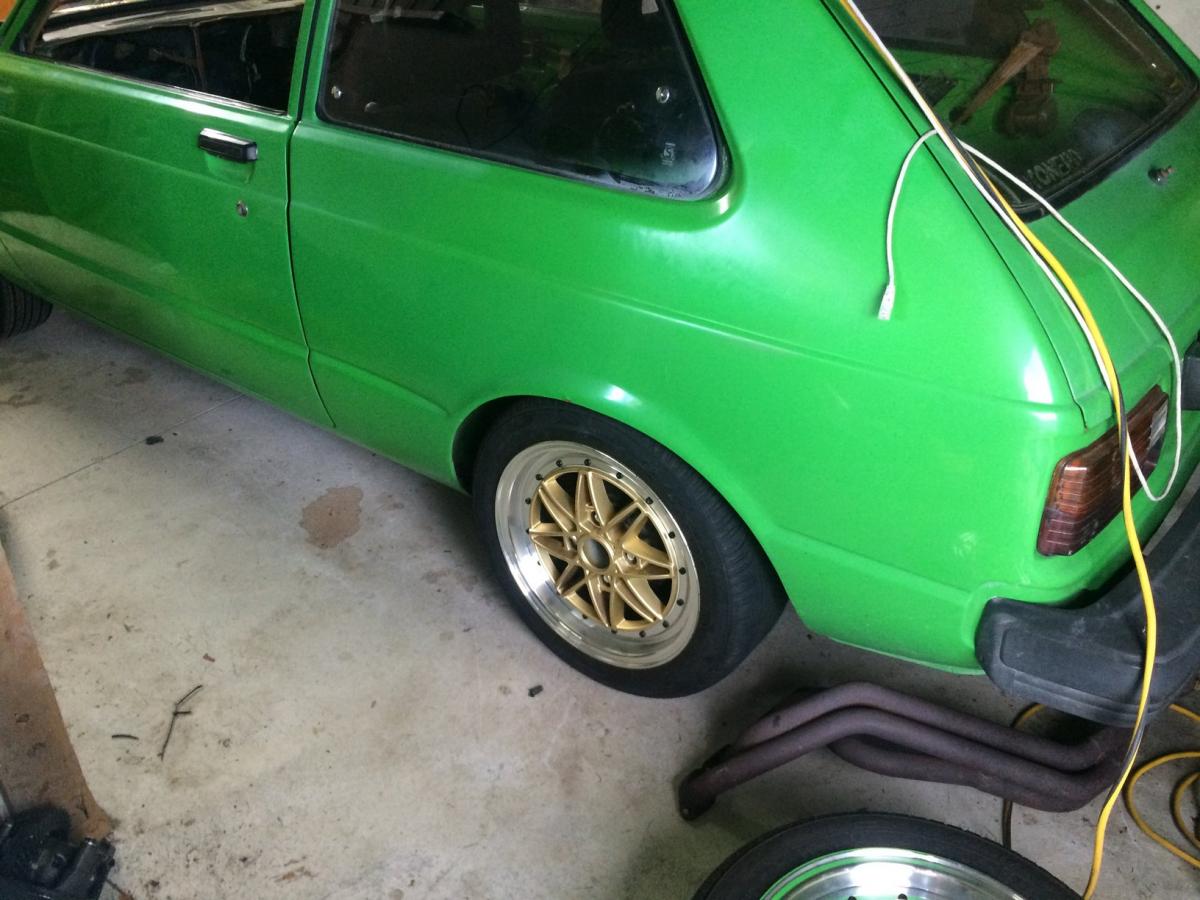
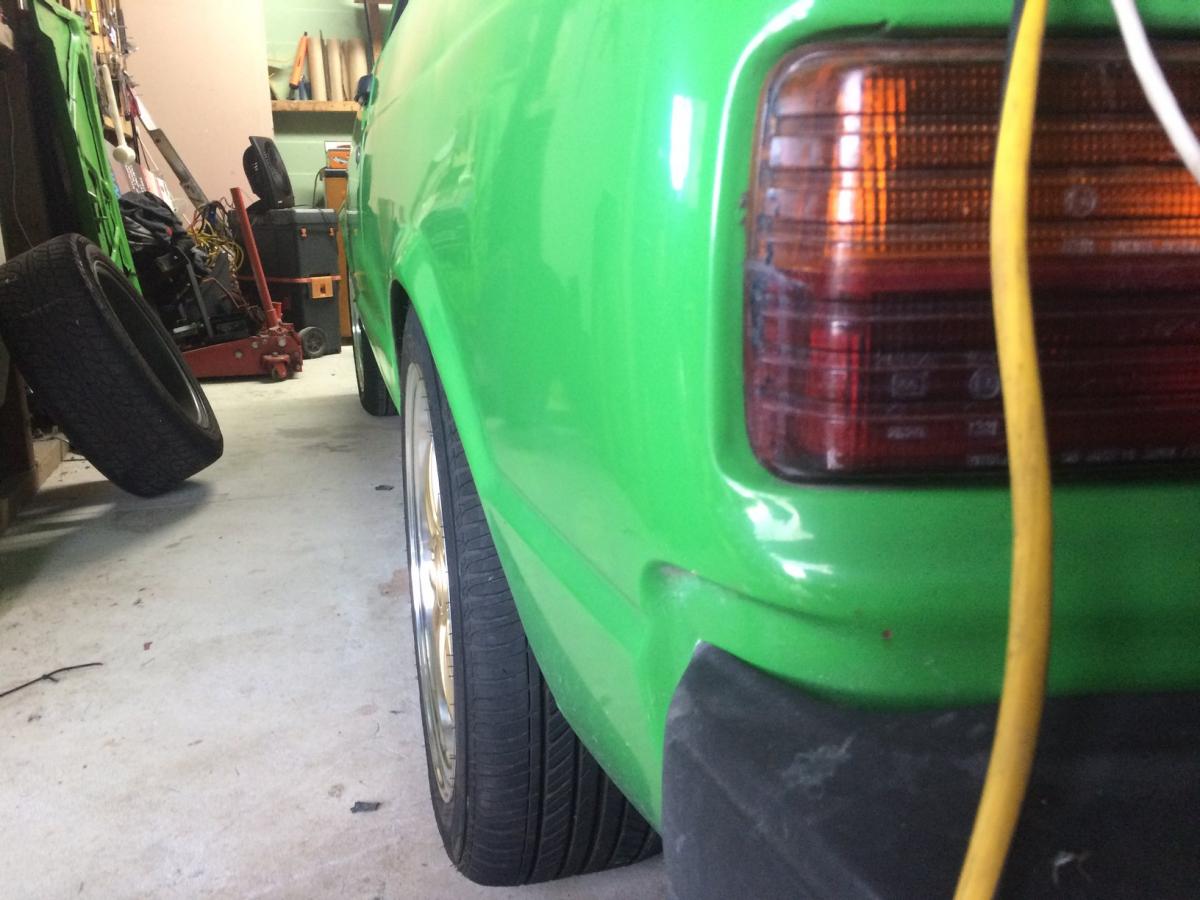
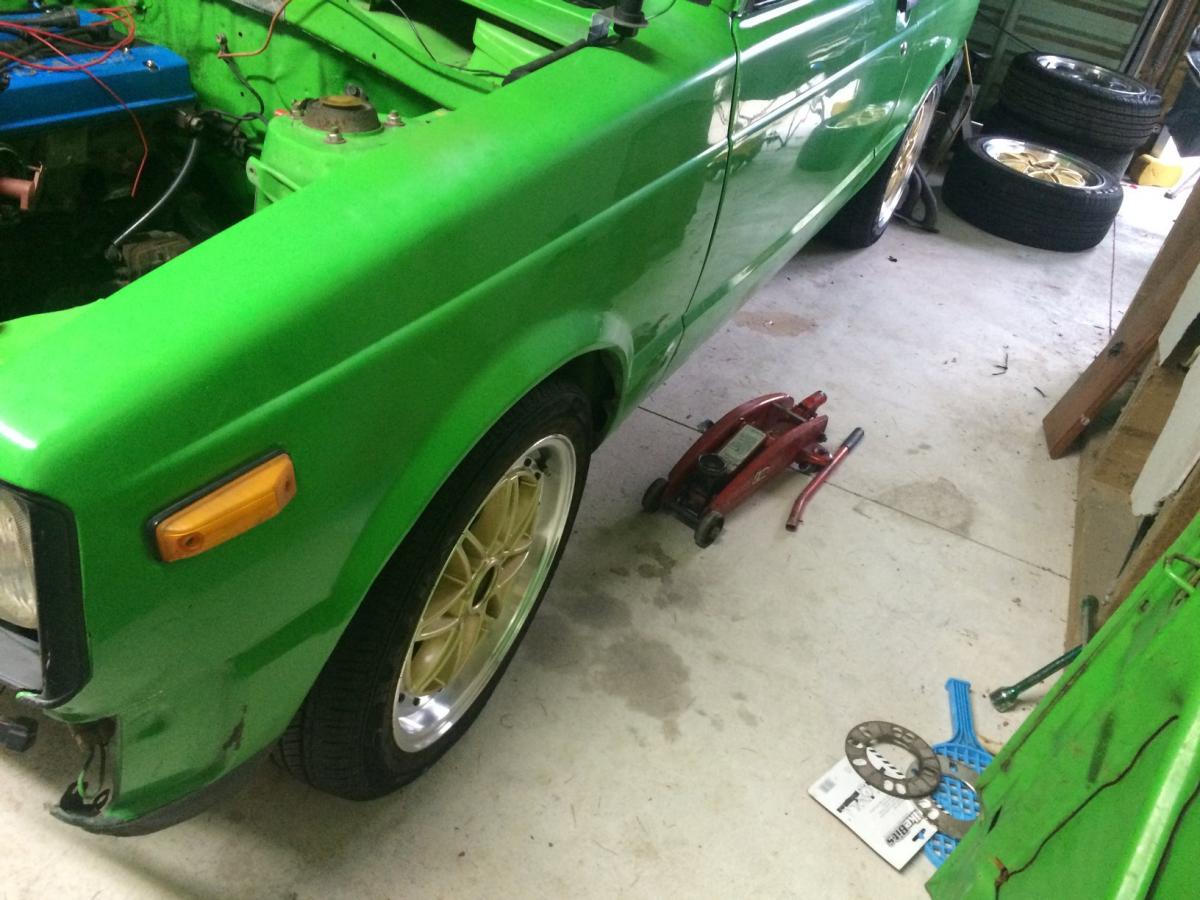
1 Month 2 Days till gumbootrally Check these out thelma. got some new shoes 15x7 +25p they were alarmingly cheap with tires so I got them so it would be with in its cert until I can decide what to do next. They look better than I thought pretty happy with the result. fitment looks great and with out driving it looks like it shouldn't rub.
4 points
-
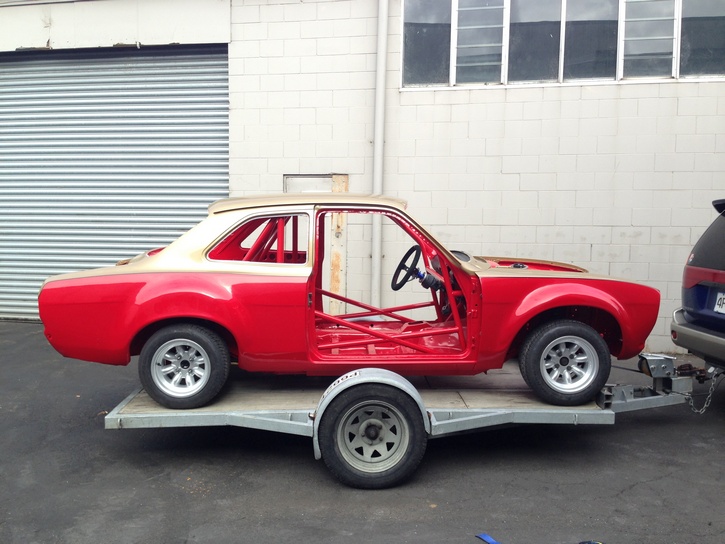
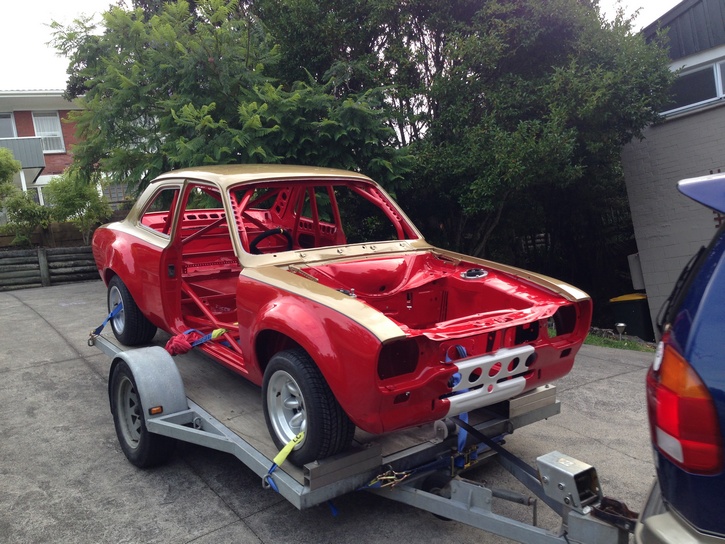
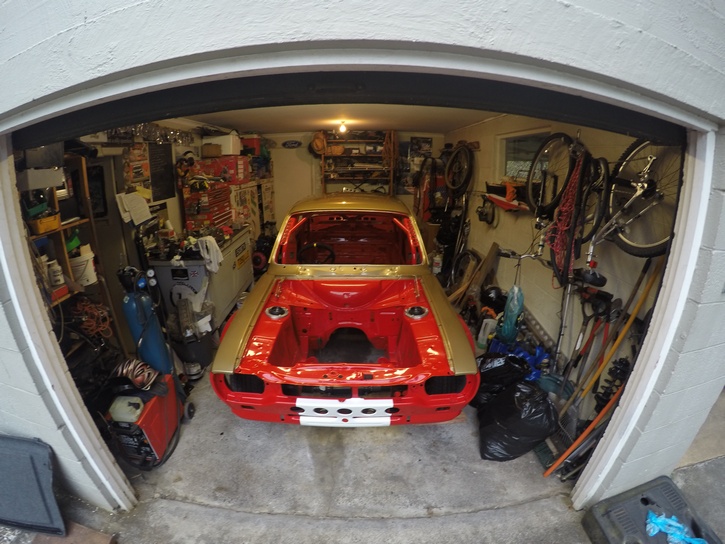
On the trailer Made it home Back in the garage Time to get assembling before the next cert inspection
4 points
-
So this year has been gayballs as little time for this thing until recently. Made a clevis and mounting plate and got my later model commodore booster mounted. Then I traced a heater box flange onto some aluminium and made a blanking plate. Today I glued it into place and will remove the few screws once it's well and truly cured. I need more damn mix gas3 points
-
Basically all I have done so far is change out the diff fluid for some new LSX90, put some Redline HD Shockproof oil in the box as it was a bit noisy (this helped heaps) and oil change. I need to get a fuel sender for the Jaz cell as I currently have no idea how much I have in there and need to mount the wiper motor on the passenger side (normally up under the pedal box) so I can drive and see when raining! I have raised the front coilovers slightly as the roadtrip back from Whakatane was harsh as balls on the front as it kept bottoming out. Need to check level and see if the back needs to come up to suit. Wheels are quite big, main issue with changing wheels are the FD3s front brakes as the calipers are huge on them. Other than that, enjoy, do drags, track and cruise the hell out of it!3 points
-
Busy day on the paint. As the kids were being brilliant (amazingly playing nicely together/not fighting) I made the most of the weather by stripping down lots of bits that could do with a smarten up (mounts, pulleys, cross member, starter motor etc) as well as recoating the bits I did yesterday. Again, no easy way of doing this, just hard, dirty graft... There were so many parts I tried hanging them on the washing line, but had visions of it snapping and biffing my freshly painted bits on the (overgrown) lawn, so I have thirty-something bits hanging off any available point in the shed... Plus resting on what looks like granny's old duvet. I tried fitting the sump in the oven incidentally, not even close, so will let it cure without baking... Anyway, a good days work, and reckon I've broken the back of this task...3 points
-
So I entered this in the 4&Rotary Jamboree here at Manfield, didn't come away with any awards but did end up the track for good 20-30 minutes doing a so called 'cruise' If cruise means fanging it as much as you can, then that's exactly what we were all doing. Only letting about 30 cars on the track at a time so was well spread out. Didn't stop the quicker cars smoking me though! I also mad dashed to paint the 14x7j Hayashi street's that I had on the front, as per the above images where they had been sand blasted by previous owner so were in need of a quick paint and sand. Chuffed with the result of a 1/2 pie job Will get a go pro and do a good video whenever the next time will be Mingle me //oldschool.co.nz/index.php?/topic/49929-pbaines-1985-ae86-corolla-levin/page-22 points
-
Would make getting a cert. worthwhile.2 points
-
Flag the Zetec, flag the Kent. Find some Baby boomer's crashed Ecoboost Fuckstang and steal the 2.3 4cylinder Ecoboost from it. Problem solved*. *more problems are bound to occur2 points
-
Yeah, could be worse wheels, least they're Works and not Rotas/TBC/Linglongs2 points
-
Drum brake front end conversion plz This thing looks like it would be an undie soiling machine.2 points
-
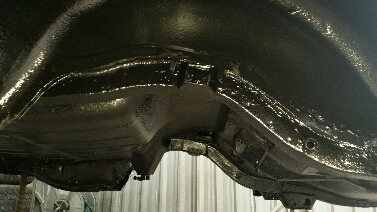
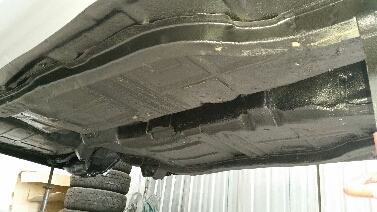
Managed to get over to work this afternoon and finished prepping under the car for underseal, now I thought that was a messy job but actually spraying the stuff was probably worse! Im still covered in black spots!! Anyway it looks the goods under there now. So happy that jobs done Now to finish the suspension and refit. Till next time...
2 points
-
2 points
-
Well its been 4 months and no progress - life gets in the way! Got a few hours this weekend and did this. Tacked the new inner sill in IMG_6576 Over the break did another order to Germany and got these new inner wheel arches, at about 15 euro each I couldn't pass them up IMG_6578 Decided if was better to just use it for a repair section - a lot less work then unpicking the whole thing. IMG_6580 Ready to stick in - tacked up the top join but the original steel is so very thin I need to get some .6mm wire for the MIG before I go much further. IMAG0698 But at least some progress. It will be another month before I get another chance now2 points
-
I finally moved the last of the parts into my shed, mostly engine blocks and heads, 3 engines worth...! These I got off the truck by the sparta method, now they sit in the dirt amongst a pile of kindling that was a pallet lol. The engine design is interesting, a lot of metal and sod all cylinder; Rockers; Looks kindof like a dohc; Big ass exhaust ports, apparently the head was tweaked by Harry Westlake; But weird ass semi siamesed intake ports; IT"S A HEMI MOTHERFUCKER2 points
-
Pulled out the old dirty 2K Friday afternoon. Gave the engine bay a clean, degrease and painted a few things that weren't very nice looking. Dropped the 4K in today. Also test fitted radiator. Still a decent amount of things need doing; make exhaust, radiator mounts, fit accelerator/choke cables, sort the water/heater lines, make a new coil mount, rewire the dizzy/tidy up the wiring, shorten braided fuel line, probably heaps more I'm missing.2 points
-
Harold is finally done!!!!!!! Well sort of.... I have finally got everything back from paint and i decided to bung the hinges on the doors and get it wofed. So for the first time in 8 years the car has wof, rego and insurance! Im so happy i can call it 'done', and just in time for my 21st birthday. And to mark the occasion, a garage burnout was in order The car was looking badass in this shot! So ill need to properly reassemble the doors and sort out some other little gremlins but for now i think ill just drive and enjoy it
2 points
-
another productive weekend2 points
-
Was talking with the boss last night and we stumbled upon the idea of a casual weekend camp or even just a day bbq for those of us that have rugrats or are also at a stage of growth in their lives. Like a normal get to gether but with family stuff instead of grass skids. Yeah or nah?1 point
-
Cool Gs and G-strings. See you there. Good spot. I'll bring the Frisbee; that legitimises purposely not unpacking it after Nats.1 point
-
Hey guys, Sorry for the some what late notice, I was a bit preoccupied with Nats! Meet this month is round Motukaraka Point, off Grays Rd in Camborne/Pauatahanui (Map below). There is one speed bump going in but it's one of them real wide ones. Simple. So bring along some dinner. There are quite a few options down Mana (Hells, Burger Wisconsin, McDolans, Curry, Subway, etc) And have a yarn at possibly the last beach meet for this summer season! MAP Discussion1 point
-
Shocks and tires have been changed since video, handbrake slides are gay with this (yes its not true 4wd) but the hand brake still wont lock the rear it just slows everything down. I think the easiest thing to do will be re drill the trailing arms to suit the bars I have. The video has a severe lack of driver skill too.1 point
-
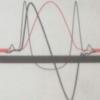
From the look of that video there is far more going on than just a lack of swaybar. Trying to turn on loose gravel like that is always a mission, so the best way to get rid of understeer is a more generous application of handbrake, then pin it to come out of the turn. (Skids for kids etc) My list of things to look at before changing the bar would include: Front shock condition Tyre condition Spring rates Swaybars are another spring in the suspension system and they work on vertical movement, so your links need to be fairly close to vertical to make them work. See the below pic - the suspension needs to push the bar up and down. You can also mount the bar below and have the links pointing up if there's space.1 point
-
Hey guy! I took some photos of this on the weekend, I think you've already seen them though.1 point
-
Also, wow @ Toyota Tax on W series gearboxes now. If anyone comes across a decent priced W57 I'd be interested.1 point
-
Cool story bro1 point
-
I finally managed to source all the parts to replace the pads, rotors and wheel bearings. Ended up having to go through three different places. Crusty old bits out: Shiney new bits in: All assembled, greased up and ready to go. Quite proud of myself, although not major by any stretch this is one of the biggest tasks I've taken on completely by myself and so far the car stops right and nothing has fallen off. Yay me.1 point
-
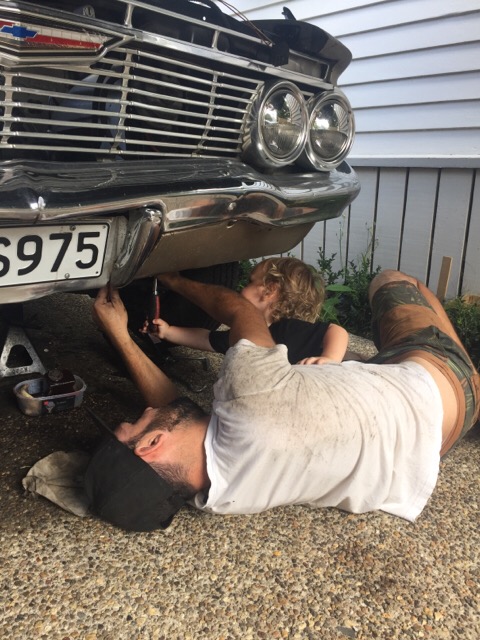
My boy doesn't know it yet, but hes working on the car he can drive when he gets his licence. Teach them young
1 point
-
Although this isn't a new idea, I thought I'd flip it round from the way it is usually mounted on solid rear axles, and put the adjustable bits on the chassis. The mount is made from 3mm steel with 3mm gusset and a 3mm box section internally to give support where the bolt-holes are. So there are 6mm thick side panels with effectively two 3mm vertical blades either side of the hole-line. 'Moveable' brackets are in 5mm steel. These give 75mm of total adjustment in 15mm increments from this: To this: Welded on to the chassis: I'm only using one pair of coil-overs which will be mounted in front of the axle.1 point
-
Modern FWD cars are set up to under steer. putting a rear sway bar on will help a bit it won't fix what is in effect a safety net. Basically the car under steers so you lift of the gas shifting the weight of the car to the front wheels allowing the car to get round the corner, not to mention the butt clench that trains the driver to slow down. The biggest bang for buck will be lower and stronger springs followed by a more aggressive wheel alignment, the difference in turn in is astounding. To really combat under steer, reduce ride height, increase spring weight, fit urethane bushes, adjustable top plates and a strut brace. Wheel alignment for fast road work, between 0.5 and 1.5 deg negative chamber and a couple deg extra caster to reduce the tram lining using heavier springs will aggravate. REDUCE UNSPRUNG WEIGHT so what you do actually gives you a real benefit. I know fitting a smaller wheel and tire with some side wall seems counter intuitive in this world of bigger is better and low profile tires but when it comes to wheel weight it works. I know race cars have low profile tires and huge negative chamber but if you actually had to drive one for a week in the real world on real roads you would want to give it back the first day. FWD corner technique is. Slow in fast out. Slow the car down before the corner, turn in a little later than what fells comfortable, hit the gas and let the power pull you out. Good on you for wanting your Shuttle to behave badly, there's to many rules and to many haters.1 point
-
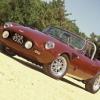
So, headlights are all sorted now thanks to some pro advice from GTO expert dwlee — on closer inspection the cups, which look pretty much identical, have a 'type' number, a 1 and a 2 for each side. So it looks like these have been installed exactly wrong for the whole time I've owned it. Much better now: At some stage I'll get around to converting to semi-sealed. It's not driven at night much so it's not a big priority right now.1 point
-
Been a productive saturday morning; Got an alternator on friday afternoon, swapped it over and boom, no more warning lights on the dash and the battery isn't f-kd which is awesome cos I thought it would of been. Took it down to the garage this morning & booyah! Fresh WOF, only a couple of minor things he noted to look at between now and the next wof, so pretty stoked it passed. I had also bought some wheels a few weeks ago, and they also showed up this week too! Had to laugh at the box they arrived in, sadly they aren't work wheels. But they're close! haha!!! They had been advertised as 16" 4x114 astrons, I was gonna run adapters, and I was stoked to find some in 16" as I thought 17" would look too big and 15's would look too small on the car. Once I opened up the box I realised they were in fact 15" , so I thought I'd check the stud pattern too to see if they were wrong about that also. And yep they sure were, and lucky for me they are 4x110, so no adapters needed. Tried them on to make sure they'd clear the brakes and indeed they do. So kind of mixed feelings, happy they fit, also a bit bummed they're not 16's. Oh well, will get some tyres and see how they look, should look decent once it's lowered. so next up is some suspension bits n pieces. Not in a big hurry but will look around and price up a few options. diss-cuss //oldschool.co.nz/index.php?/topic/50482-oldrx7s-1981-mazda-626-discussion/#entry16031151 point
-
The height adjust screw for one of the headlights was bung so while I had the grille and everything off I took the opportunity to make it all nice and clean and black. Before: After: Much better. the headlights have always been a tiny bit on the piss — the lines are not quite vertical/horizontal. They can't be rotated though because there are little tabs on the back of the bulbs which correspond to slots in the headlight cups. Am I missing something? Discuss here if you have any ideas. Cheers1 point
-
This weekend we have removed the engine from the Simca, and some of the front plate work. From the front parts about 30% of the bolts broke off due to rust. Plus a couple of cages of the square nuts in the beams come lose. Not an not easy to loosen job. A large area was covered with a thick greasy substance, which made it difficult to find some of the bolts. In the meantime I was cooking my bumper parts in my bigger Mr. Fusion container. Since it is virtually impossible to get new or good bumper parts for a Simca in New Zealand, I want to de-rust the bumper parts and smooth them out with filler. After they have been sanded I want to try to wrap them with chrome wrap. I have seen some photos on google with acceptable results http://s176.photobucket.com/user/vette427sbc/media/1955%20Chevy%20Hardtop/99529699-EA12-4280-AA01-9218812B887D-30987-00001B0AAC6CA6CA.jpg.html. (New bumpers from Europe will cost probably around 1500 or 2000 Euros, more value than the whole car) Rusted bumper part: Derusted bumper part: Sprayed in black zinc spray: Taking the engine out: Guitar photo:1 point
-
oops, been a while. So I got the head off the spare engine, got it checked over and smartened up. Everything mated up sweet except the exhaust ports on this are the round version — the original head had the square ports. The ports all line up but the mounting bolts are in a slightly different place so the flange for the headers required some slight modification. Here's the new head in place: And everything back together and running: Been going again and used for daily driving for a while now, with no signs of issues so far, fingers crossed that's it (until the next thing).1 point
-
1 point
-
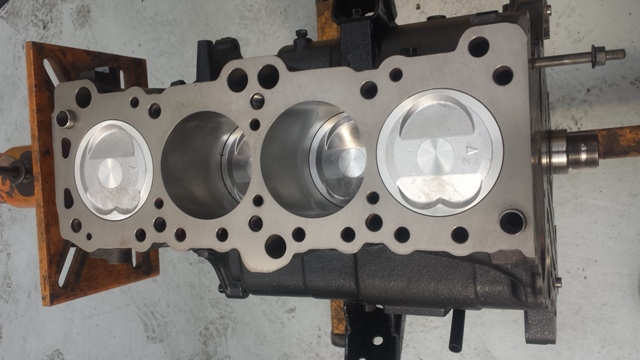
Picked the block up today. Cylinders re-bored +0.5mm, Deck skimmed, pistons machined and everything balanced, cleaned up and assembled. Could not be happier with the Job completed by Glen at Glen Durie Engine re conditioners in Woolston.
1 point
-
Here is the finished result. Down from 9.8 kg to 6 kg.
1 point
-
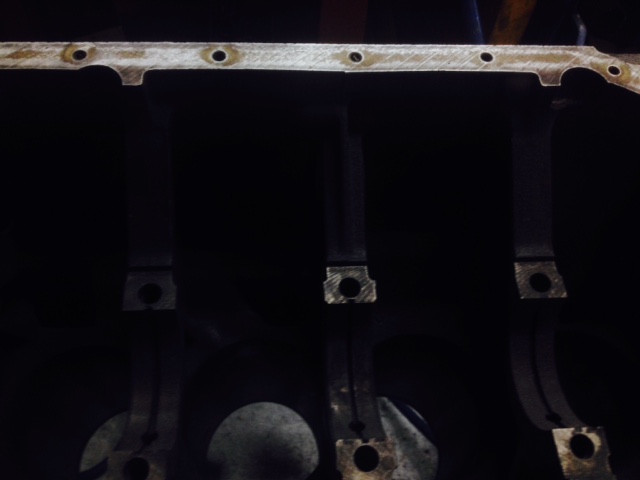
Decided to polish up the inside of my block while waiting for parts. Promoting oil return to the sump never hurts.
1 point
-
So now that I've given the old girl a nice treat and the insides are pretty much all mint it's about time for something to break as a way of saying thanks, of course. Started to present symptoms which suggested a blown head gasket. Took the cylinder head off with the help of a friend who knows what he's doing (I mostly don't) and took it away to an engine reconditioners to get it planed and the various bits tarted up, replaced etc as needed. Naturally it was not that simple and today it turns out the head is cracked between the valve seats. Bugger. So I'll be needing to do something about sorting a replacement sharpish. I have a 4G51 from a Colt 1850 sitting in the shed, so I need to see if that will fit, fingers crossed they are the same. Some pointless pics: Also decided to give the rocker cover a bit of a polish while it was off (and I was still feeling some love for the car, before I found out I was rooted). Not perfect by any stretch but looking better than it did before.1 point
-
I have one of these chassis under a glass 33 ford coupe body. To clean up the front end, I took the control rods (which run forward from the lower suspension arms to the front x member) and swapped them left to right, flipping them upside down. That way they point down, rather than up. Then I cut the front of the chassis off just in front of the front suspension and made two frame horns out of 3mm plate and 50x3mm flat. I welded them on with a pipe between and now the hole thing looks a bit like the front of a model A or 32 ford chassis. Sorry, had the engineer make mounts with rubber/steel bushes going across ways that screw onto the flipped over control rods and welded tags under the front pipe to mount them. Sounds like a lot of work but when you see it, its not that difficult and makes the front end look that much better. I actually mounted the swaybar underneath also. (flipped over also). PS after doing this I found it all works well but the front end was still to high. I cut 1 complete coil off the front coil springs (not with the gas axe) With that done, the original shocks still hold the spring tight as required. I am running 3l turbo diesel gear in this car and wanted 5 stud front end to match the 5 stud toyota rear. I got L300 discs and put them on, but make sure the discs are the same ie vented / non vented. Hope this helps. Watching with interest. Macwood1 point
-
Also, when I went to pick up the car the previous owner was like "oh yeah, it came with some wheels too, they're in the boot." Wasn't expecting much but they are actually kind of cool oldschool jap 2 piece wheels (3 piece, welded?). 6-J 13 from 1977 according to the sticker on the inside by 'Uni-Pex Parts Division' Never heard of Uni-Pex before, does anyone have any info on this brand? Couldn't decide if I liked them or not so I decided to refurb them and see how they look, split them, clean up the centres, polish the lips and replace all the bolts. Here is a before and after of the first wheel: I think I like them, so will get some tyres on and get them on the car at some stage, any recommendations for tyre size? Chur. Also, discussion here: //oldschool.co.nz/index.php?/topic/38426-sr-rollas-1974-mitsi-colt-gto/1 point
-
going shopping for tires to go on the other 2 rims and the widened Pair also1 point
-
Whariti Hillclimb mar 2011 : eventful oops fire overfilled with oil/tired 30+ year motor/rings PB 7 mins 59 secs Fastest on Day was Argyle 6 min 08 seconds vid and results on http://www.DannevirkeCarClub.co.nz 'new' upgrade Might need to start thinking about better brakes... Details on http://www.avenger.co.nz (shamless plug)1 point


This leaderboard is set to Auckland/GMT+12:00