
Leaderboard

.thumb.jpeg.384ff72c8d2b0ee0d34a7bdedb55bdcf.jpeg)


Popular Content
Showing content with the highest reputation on 06/26/15 in all areas
-
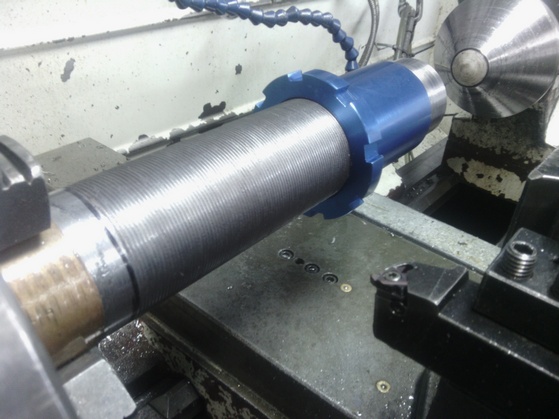
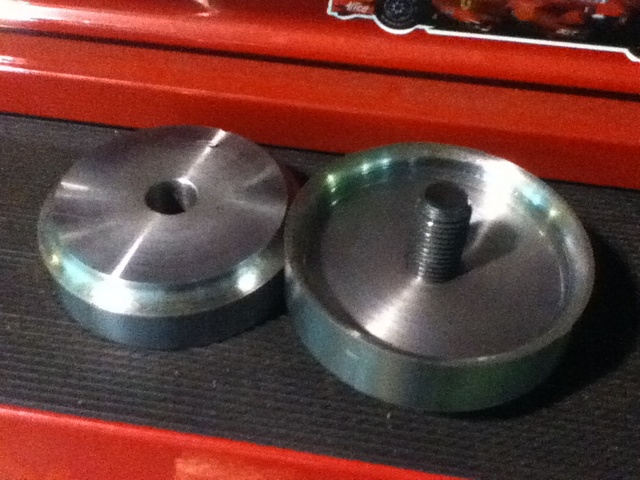
Test nut fits Ready to drop into the stub axle Groove cut for wiper seal A subject of much debate
 10 points
 -
Thank you for the encouragement everyone. Here's tonight's glueing and screwing efforts. There's lots of sanding still to come as I've made a few mistakes, but it's still better than watching TV10 points
-
Passed a Wof not too long ago which required new King Pins . So replaced them and also fitted new rotors and pads while i was in there. Currently changing thermostat and flushing the coolant Next up is some rear tailgate door window seals then i can start the cabinet making for the inside wrap around seating and liquor cabinet. Once winter is gone ill be attacking the small amount of rust at the top of the A pillars then get the englisman to Silver metalflake the roof and then get onto some lake pipes and this is the van loaded up with 3 of my bikes heading out to QCR Dirtmasters6 points
-
Update please!6 points
-
Been chipping away at this in between the other toys and family life Brought some new tires for it. 16x5.00 Avon Safety Mileage MkII 19x.3.50 Avon Speedmaster MKII pretty stoked how it looks. Currently working on the rear end at moment. modifying axle and redrilling the blank sprocket Im hunting down a rear calliper and rear guard at moment. Also made a new Coil mount that will sit in between the two cylinders and keep the leads nice and short5 points
-
Tank and 6" over fork tubes have arrived. May have a stab at it this weekend.4 points
-
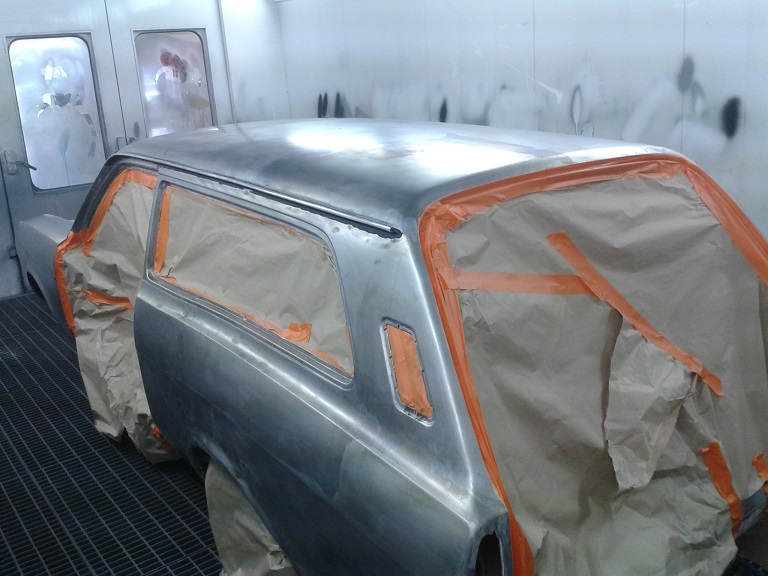
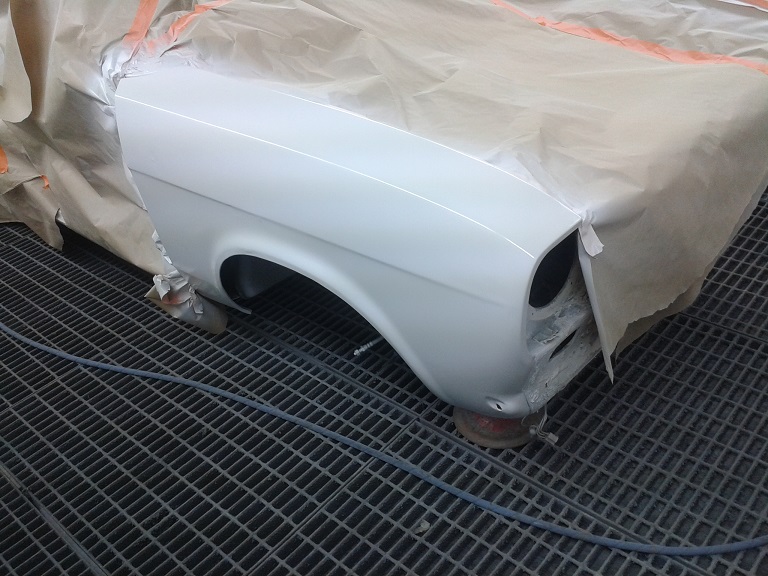
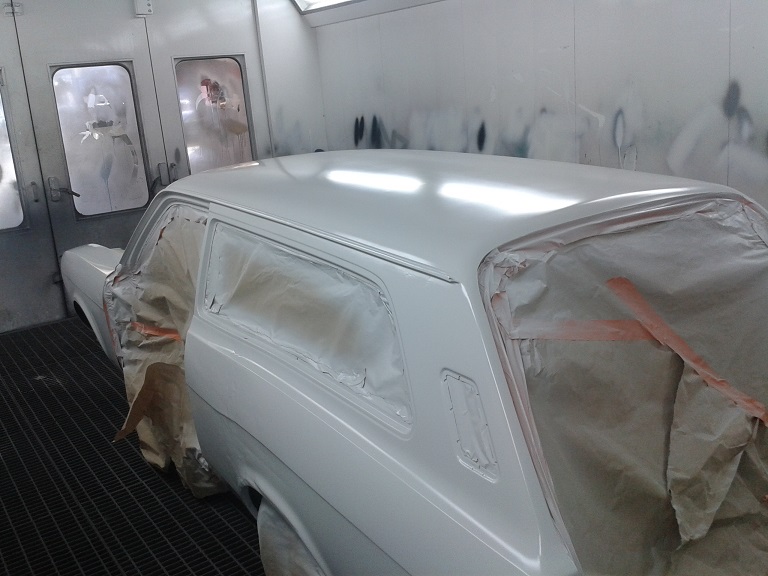
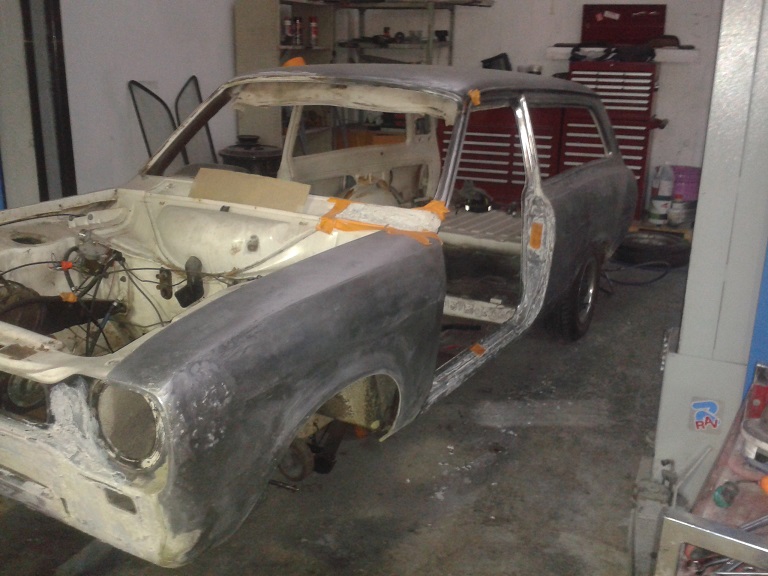
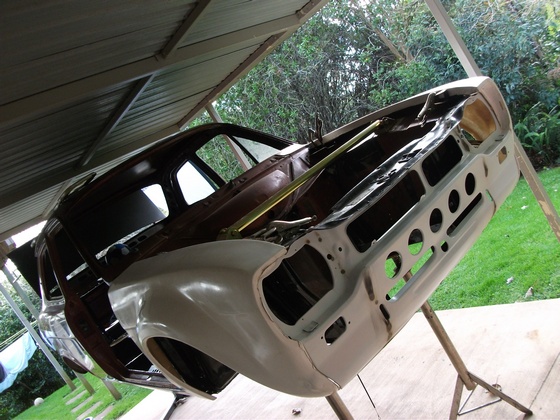
So finished off spring some areas today, hit any sign of rust with the wire wheel and gave everything a good metal prep. Here it is all masked up in the booth ready to go and here it is in a couple coats of primer After I got that done spend the last part of the afternoon striping the two doors, they are almost ready for a metal prep so hopefully might get them done on monday. Didn't get anywhere near as far as I hoped but glad to have a good chunk in primer before the weekend.
4 points
-
Ali express fuel fittings, caliper rebuild kit. Bout some centerline convos for front. Pickup tonight yusssssssssssss.4 points
-
Flashback to better times..4 points
-
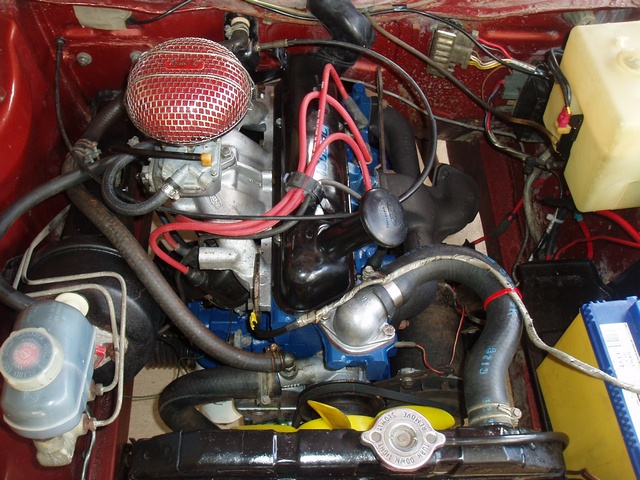
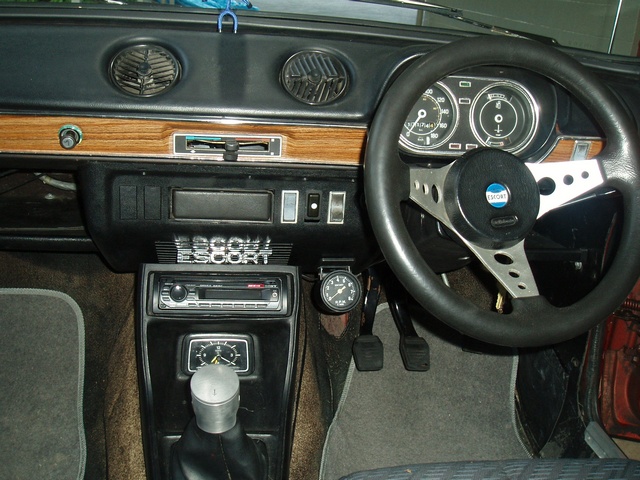
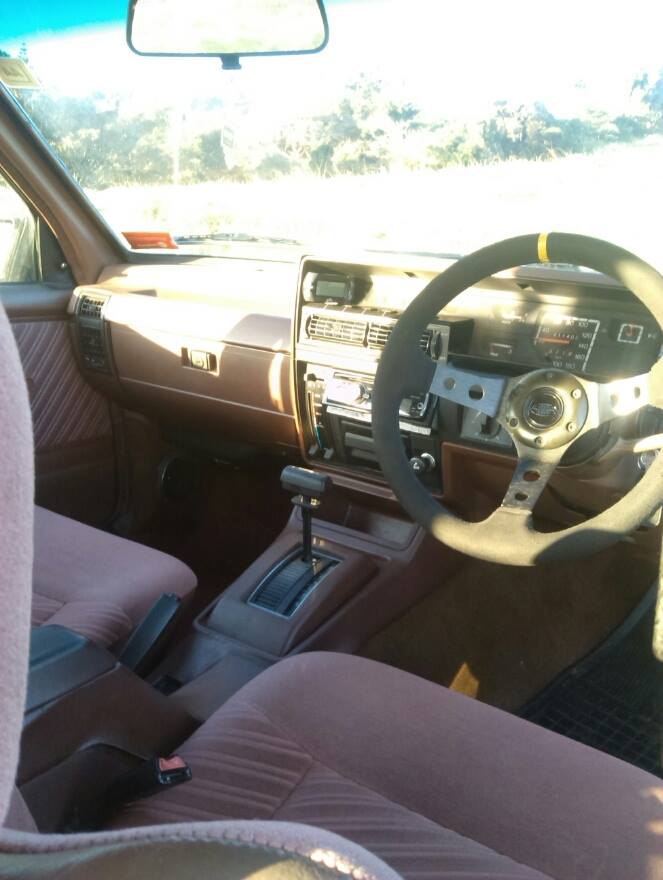
Drove the automatic for a few months but I need to learn to drive manual out with the auto in with the four speed manual All freshened up Purchased a wildcat steering wheel Fitted a mk2 escort centre console Sony headunit "Escort" tacho and a pair of FTO seats.
3 points
-
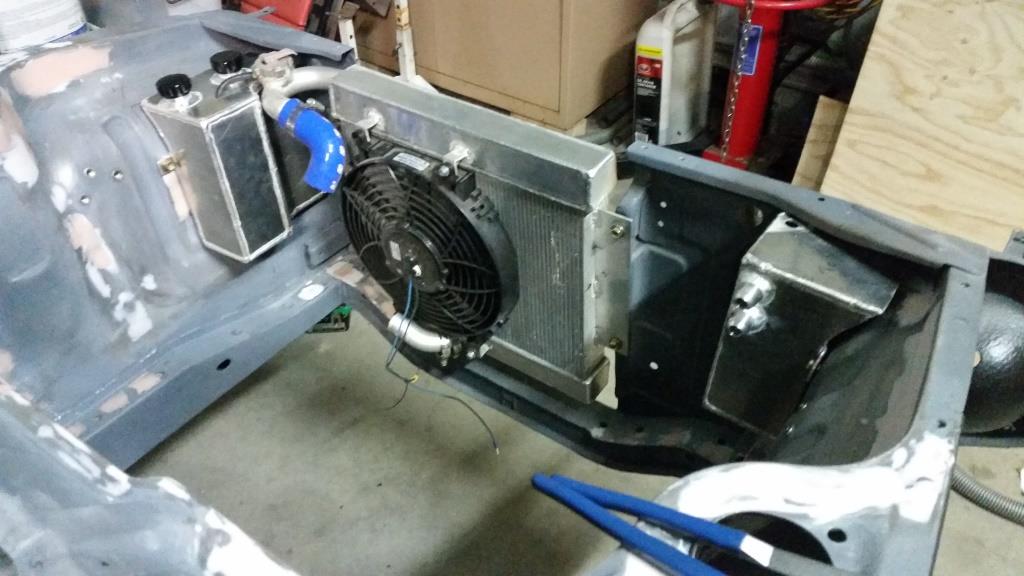
I have made the radiator overflow/washer bottle and catch can. Installed the motor for hopefully the last time. Now the car is back on all fours nearly ready for dyno tuning.
3 points
-
another day off. Andy the piner psyc'd me up at 8am not to waste the day, so i didnt. Sealed focus racing. Then set about doing coilover swap. Got it done, chucked on some 13" wheels from the garage, and took these. its fully captive @25mm. Roughly 70mm left of thread on the front too. BC's are awesome. I will be able to lay frame with 14's. Pining! //oldschool.co.nz/index.php?/topic/47514-ants-tc24-gx71/3 points
-
Just recently purchased this beauty off trademe from Auckland Had 73crownwagon & 64 valiant check it out for us at BeachHop and it they said it was all good so we purchased it. Then Denham & Peter picked it up for us on the following wednesday and then went over the van to make sure it was up to the big drive back to Christchurch. Cant thank Denham enough for sorting it all out including picking me up from the airport on sunday . Hit the road about 2pm with my buddy Vety who just brought a 06 Feilder wagon and we started our journey home. Took a few hundred Ks to get used to the Left hook. arrived in Welington to catch the 2.30 am ferry at midnight then boarded and crashed out in the sleeper cabins and woke up 6am when we arrived in picton. Carried on thru to Blenheim to have breakfast with my folks then back on the road for christchurch. 1080km later and $360 in gas and we are super stoked. The Van is super tidy with only a couple small rust bubbles at top of windscreen and a couple on the bottom of the doors Interior has been re trimmed when it arrived in NZ in 2010 when the late Ewan Gilmour brought it in. heaps of paperwork with it which looks like we are the 4th owners of the van ,3rd kiwi owners. The paperwork says its a 351 V8, C6 Auto but the guy i brought it off seems to think its a 302. Will look into it when i get underneath. We have 70s styling in mind for the interior and some factory spec stripes on the outside and some lake pipes.2 points
-
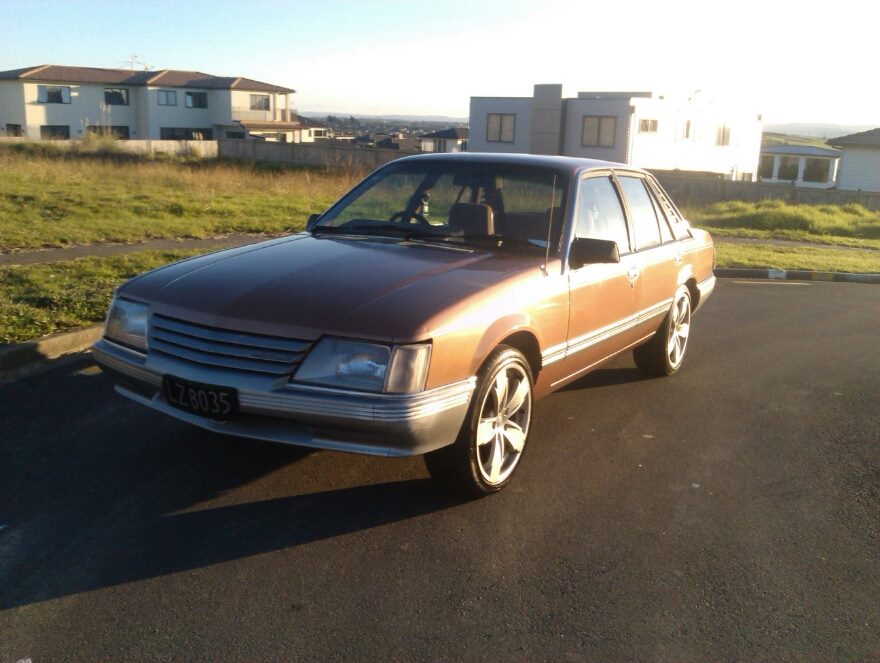
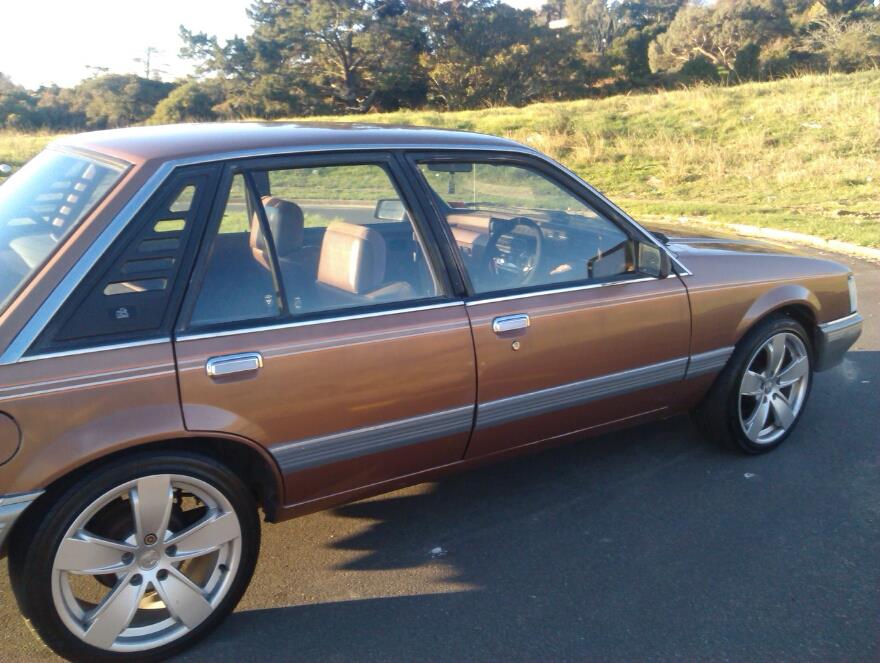
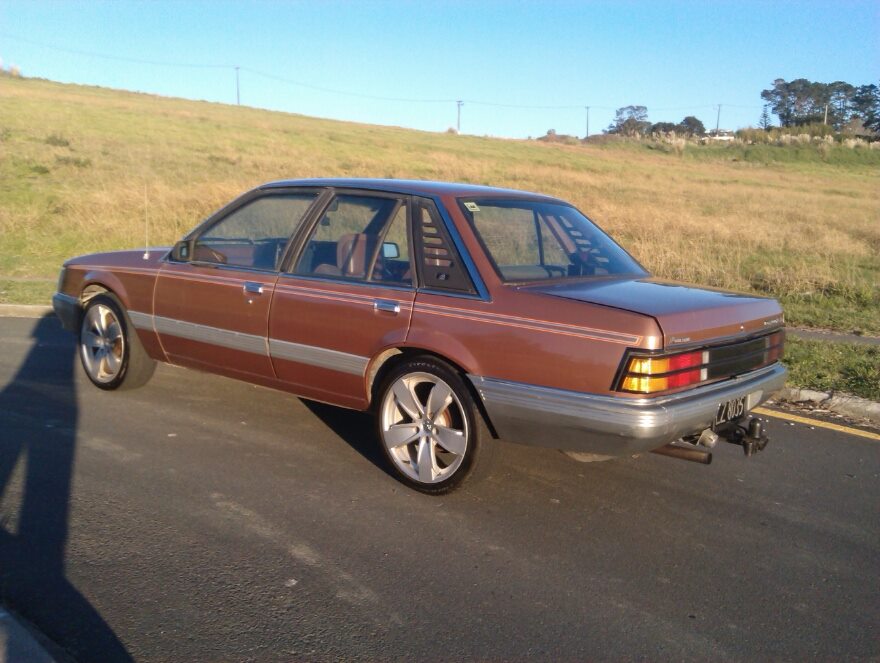
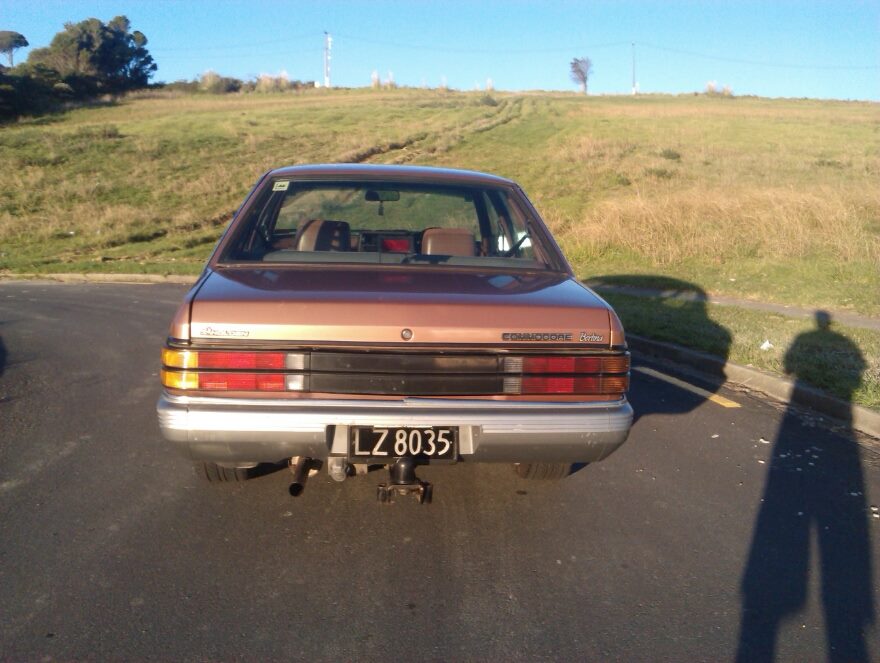
Righto, thought I should spin some yarns about my Commodore on here because after reading a fair bit of threads, you guys don't seem half bad... So, I acquired the car after my late Grandfather passed away (RIP) and my Grandma had no use for it, after a chat with other family members, it was mine (I did have to pay the sum in which the local car yard offered her to my dad's request). My Grandad was the 2nd owner of the car after it was purchased as a company car from a yard brand new (I have an impressive amount of handwritten information about the car, repair, service history etc.). He used it for a daily driver for a bit before it moved to the designated caravan hauler due to the mighty and grunty 202 and 3 speed auto. Once I got the car (Start of 2012) She flew through the wof (Have over 20 + wof sheets for the car) and dad and I proceeded to drive it home to Auckland from Palmerston north, in which we discovered how uneconomical it was, especially considering dad drives a manual LS1 daily, and usually drives it like he stole it. So once I got my restricted, I barely drove it due to not being able to put gas in the bloody thing (often have run out of gas). So it sat for well over a year after failing a wof on rear window rust and after having multiple brake booster and master cylinder issues..... BUT NOW IT'S BACK IN ACTION. Anyways, onto the junk inside her trunk engine bay... - Black 202 engine (Reconditioned short block, converted cylinder head to lead free spec) - 3 speed auto - VT Brake booster and Master cylinder Also It's on VY SS Mags which I am no longer fond of and also has a SAAS steering wheel (HAHAHAHA I KNOW. But legit feels better than the normal bus steering wheel it came with). Short term goals: - Manual conversion to M76 5 speed factory spec (Have manual pedal box and clutch cable so far) - Lower with some half decent shocks (My girlfriends swifts handles so much better than this hunk of shit) - Black steel wheels, like NASCAR kind of look - Enough said - New radiator as current one leaks so bad omfg (Convert to fans??????) - Put some goodies I've accumulated over the last month - I have mismatching tail lights after some iufweieu hit me in a car park a year or so back, so would like matching ones Long term goals: -MOAR POWER Hopefully some of that list WILL HAPPEN (maybe, maybe not), but lets be honest, I'm a poor ass uni student with a girlfriend so probably not quickly. anyways, discuss my build-ups ! //oldschool.co.nz/index.php?/topic/48943-vkzacs-1985-vk-commodore/
2 points
-
So kinda wanted a small project for hauling the crown. I have decided on a basic dolly for simplicity and price. I have read into the cons of this method but have decided on it anyway as it is about my only reasonable offer on my budget/space. Picked up 16m of 75 x 50 x 3 steel box, 1500kg stub axles and 5x114.3 hubs, and a pair of galv guards.2 points
-
The fantastic mr pusherman came round today. We have power and lights!!! Chees man! Now to get some organising done and figure out where everything is gonna go so we can add a few more lights and all power points.2 points
-
So the owner has changed but the car behaves the same. Good to know.2 points
-
^^ not always..I run 2 of my cars on laptop tunable factory ECU's both of which shit over aftermarket unless you are dropping 10k+ and plan on running some serious suspension data logging. Both run decent boost, plus bigger injectors etc.. I even considered running a factory evo ecu in my turbo mx5 until I remembered how much I hate wiring.2 points
-
Custom ECU should be any car modifiers top priority IMO. Makes dealing with any changes a breeze.2 points
-
I took the longest bits of elm and made them a pretty shape. Now that this 'picture framing' is done I just have to finish cutting up the rest of the elm to make a top. Perhaps in May Most of the rest of it looks shit, but if you squint a bit this corner looks OK2 points
-
Update time. Wow! I thought this would be a quick little write up but actually turned into an essay length spiel. Best you put the kettle on... So a fair bit has been going on in our little valley. I've been trying to remember to take photos but usually get carried away and have finished whatever before I remember. I did go up to the ridge a wee while back and take a pretty photo or two of the sunrise. Very nice up there. Cant wait to build a cabin for that place! Coming back down to the truck via the ridge track- Tuis playing morning tunes in the Lucerne tree next to truck. Since getting that lathe in place the shed has been getting used and sort of just evolving in doing so. Things/tools have found a place. With the winter weather it feels cosy- especially in heavy rain. Really needs a wood burner or waste oil burner for the colder days because man can it be chilly in the evening. I will make something but accept that it will only heat up a little area and be hugely inefficient trying to heat it all. Maybe something arond the main bench/lathe area would be good. One thing that we are both stoked with getting is the hoist. We could only afford it because we bought the secondhand lathe instead of a new chinese lathe. The bank balance is getting low as and we ummed a bit about spending the coin on a hoist but so glad we bought it instead of waiting because man its useful! I ordered it from trademe and had it delivered to a Nelson depot. Just managed to squeeze it in the van for a slow trip home which saved on the silly rural delivery charges. Shane came round the next day and helped put up the main structure. It went up pretty fuss free and seems fine for a cheaper chinese hoist. I can see where the costs are cut when compared to a Heshbon etc but its strong and well built where it needs to be. Currently we just plug the hoist into extension cord. Must order appropriate lecky supplies and lights then wire up shed! It dwarfs the Viva. Oh yeah- also note the steel rack we recently built. Was great to get all the steel we have found while clearing the block out of the rain and inside. Stepping away from the workshop we have been busy with many other things. First off we needed to get the ever growing piles of firewood out of the coming winter rains. Into our pile of telephone poles and old iron and we built this. I also nabbed some old wooden shed doors left outside a nelson garage doorplace. Free to take- i like. These I turned into a storage bin for all them little offcuts of wood that are a pain to stack. So now we have some storage but will need more. We have at least 50 pine trees big and small to chop down over next few years. Some in the gullies will just rot or be made into north shore style bike trails. Many we can use to keep us warm. Then that little sailing boat. The sun and the rain wont help it at all plus it was in the way- taking up space I could fill with another old car. So more telepoles and the 6m lengths of NEW iron that had been left in the bush edge by previous land owner came in handy. We built this... (turns out to be also very handy for lawnmower, old pushbikes and bike trailer storage) Meanwhile our neighbour has offered us her field which was overgrown with gorse and blackberry for the past 20 years. We wanted to clear it out so our view was nicer and had been intending to ask her if that was cool. Then she just said one day- hey how about we make it into a fruit orchard. OK ! So it was out with the scrub cutter and chainsaw and with a couple of days hard graft we had it all clear. It looks so much better and the soil is amazing as it originally had two pigs there then getting nitrogen fixed by gorse for past two decades. Next step is to plant it out but for now its just great the have a view with out gorse and masses of blackberry. Before.. During.. After... That little fence we have left up to plant grapes and kiwis on. We are both still very much newbies when it comes to growing things but no being stressy types what grows will grow etc etc Our neighbour- well shes very green fingered and will help us out heaps. Plus there's the nerd net for info. Main thing is I'm enjoying this whole land thingee and planting stuff way more that I thought I would Then there is the track up to our ridge. We had been planning to clear it for ages so a day or so with the scrubcutter and now its way nicer to walk up. Horse and Jen happened to turn up one day whikle there were up here for holiday so they got a tour of our freshly cleared track. We have now almost cleared out the building site at the top where we are planning another cabin build. Not photos of the now cleared track but I did take this one the other evening when we went up to watch the sunset and drink beer. When we got to the ridge a huge deer went storming away from us over the gully. Quite a sight ! What is cooler was the picture on my beer bottle... Speaking of tracks.. Hannah went away on a few days trip with her sister who was visiting. While they were gone I hooked into the start of our first mtb track. We have always planned the first track to head as gently as possible up to the ridgetop- a gentle enough gradient for an easy ride or walk. I really wanted to get something done while hannah was away as a surprise. I cut, dug, raked, carted, stacked, walked, toiled, bashed a track through the Kanuka grove just behind the cabin over two days and built whole first track. I really enjoyed it and worked through till it was almost dark. I was knackered at the end of the second day. Hannah got back from the tramp and I surprised them both with my new track. Its still a touch too steep to ride up easily up so Ive worked out a path for a track that seperates off where it gets steeper and will head back towards the truck then back again. Pretty much..more hairpins = more track = easier gradient (but also = more work....) Big thing getting built right now is our outside bathroom. We have had this planned ever since first viewing the property but had not yet decided on where, what and how. The 'what' bit we have sort of picked away at since before moving here. Discussed over coffee or beer (but not both) we have gone over ideas that have come about from years of using various homemade showers and dealing with a variety of toilets. Fascinating stuff. The 'where' bit sort of just fell in place once the cabin was up in its new location. Its on a slope backed with bush which is ideal for what we envisaged. Situated halfway between the cabin and the back of the shed its in a handy location for us and the cabin and its private with lovely views. The 'how' bit is just evolving as we build. Its an elevated building over composting toilet system. For now its the well proven batch type setup with wheelie bins. Rotated as they fill with a minimum of 1 year composting in the bins before going into a seperate compost area up off the driveway for another 6 months. Then the compost can be used in places like the fruit orchard and areas we are building the native bush back up. From all the reading we have done this is total overkill as far as dealing to any pathogens but hey. No harm there. Its going to be awesome having a decent setup that has a minimum amount of moving shit about, he he, and not have to pay or worry about involving outside services like septic systems. In the future Id like to build our own 'Clivus multrum' style system, a setup that uses a sloped bottom vessel and is continuous in operation. You can buy 1 m3 capacity units made in plastic if you have a spare $4000...which is an absurd price considering our 25000 litre tank cost $2600. I'll use stainless steel to make the structure. But that still involves more pingas and time which we dont have- the latter due to the longdrop filling fast. The grey water will be treated using a reed bed system. This is pretty easy espicially on our type of land because of the clay below. The water will only go down so far and then move along. Moving water through soil is the quickest way of treating it. It does not take many meters before any nasties are dealt to. First off we dug out the bank. This did take quite a while. I had to take breaks and sit down to sip at beer while looking at the mountains. We would take turns at this after Hannah saw how nice that looked. Eventually a large 'void'? was created and funny enough a hill appeared somewhere else. Much of this hill appeared next to the graden because there's some very lush dirt with some mighty fine looking well fed worms in it. Kevin just watched or chased clods down the slope. We also had this fella stroll out of the dirt where we had sadly destroyed his underground lair. What a huge bugger he (or she) is. I released him later further up in the bush but not until Id worked out what brand he was.. Turns out he's of the 'Stanwellia' species- related to trapdoor spiders and quite rarely seen as usually underground. His burrow was massive and we had sliced right through it with the spade. See here for another one.. http://www.nzherald.co.nz/nz/news/article.cfm?c_id=1&objectid=11307026 Then we planted four H5 treated poles set well down into the granity clay below. A thick plastic groundsheet runs up past the decking and right up the walls sealing in the treated plywood clad basement. The decking is insulated below with 40 mm thick insulation and the inside has reflective foil insulation. We want to create a heat trap to keep the interior as hot as possible so promoting a decent heat in the compost. Inbetween building we cleared out the bush around that area. When intially clearing the land last year of gorse we worked up to the bush edge and only so far in. We had left the gorse hiding within because its dying back anyway. But this area was still pretty bad so a few hours and we not only had a lovely little spot but yet heaps more firewood. Some of the old gorse was huge! So much more light into that area and on the bathroom. The pile on the left is gorse from just that little area. Above this we've built a nice solid little bathroom that measures 4 m2. It'll contain sssb - the shitter, a shower, a sink and a bench. Then we built steps using some more of the telephone poles. Its quite high up and we have to allow for our olds etc when they visit so easy to climb steps they had to be. Must build a rail soon because man I'd hate to go trippin off that ledge... We have made a little track through the bush and once tidied up will be a sweet way to walk to the bathroom from the truck. The steps come right down to this track. We picked through our pile of Rimu, picked out some possibly nice bits- possibly because you really cant tell until it goes through the planer. These became window and door frames plus some rafters. When the main shed was delivered the piles of sheets were protected some extra packing sheets in a dark grey colour. There were just enough of them to clad the roof with a decent overhang. Sweet! We still have a little left over for another wood shed too My old boss gave us a whole heap of wood leftover from his house build. All Cedar, Macrocarpa and some Douglas fir. Ideal timbers for building things with! So the Douglas fir we ripped down and planed then made doors with. They are barn style doors and Hannah has oiled them. They look nice. Photos later of them completed but heres a action shot.. Hannah painted the outside of the window frames with paint left over from the housetruck. Then I scored 4 litres of 'mist green' paint from nelson house parts. Its the same colour as the water tank and similar too the main shed. It should help the building blend into the bush nicely. I have a neat idea on an overlay method using random wood to break up what will other wise look like a tall painted ply building. I think it will work well. We will see. Here is the building so far with the primer coat on...2 points
-
This is attempt number 2, since the red car got a bit out of control and I realised it was going to take a decent amount of time to get it back on the road, if ever. I decided it would be better to have something I can drive and at least have fun with while I build it. I picked up this Vectra 2000 in late January after thinking it had been sold to someone else. It's one of the messiest cars I've ever seen, but a great base for a track car. I was quite shocked to see the state of the engine bay. It needs a lot of tidying up, but mechanically everything seems to be ok and it has actually had maintenance, just never a clean. First step was to get the rear end sitting a bit lower. This involved solid mounting the subframe and I also moved it back 15mm to lengthen the track and give a bit more guard - tyre clearance, as the wheels actually move forward when you lower these Vectras with IRS. As you can see in the above photo, removing the interior was also part of the first step The dry ice method was used to remove the tar inside, and I'll never go back to chipping the tar out. It's only around $6 a kg and 5kg goes a long way. There was some matted stuff that it didn't quite work on, but overall it's such a clean way of doing it and heaps of fun. Stripping the engine for fitment of individual throttle bodies was also happening at the same time. I was also doing a little bit of tidying, relocating some components such as the coolant header tank, and replacing some seals and gaskets as required. I'd contemplated all sorts of options for the throttle bodies, but decided to take the easy route in the end and ordered a direct to head kit from the UK. A company called QED to be exact. I was impressed with what came with the kit, and also added a few extras on top. The base kit consists of something like below It came in without too much hassle, but did take quite a while to sort it all out through customs. Probably 3 weeks in total. I was olso missing a stupid little bracket that you had to specify seperately, so had to make another order but this came in much quicker being a cheaper package (3 days from the UK to my door). On it went, and I was nearly ready to start it up. The kit comes with a mostly wired loom and a base map, but there is still a little bit of wiring and customisation required to get it to work with the Vectra (it is made for a Lotus 7 style kit car running this engine). Start up vid. This is the second time I started it up, so it was running a bit crap, but I just wanted to catch a little bit of dort on camera before pulling the suspension out for the next stage. I wanted to set the ride height close to how a touring car should be, so set about undertaking some relatively major suspension work. It's not as low as I want it, but I needed to compromise it at least a little bit so that I could drive to the OS Nats trackday, which was held at Manfeild in the Manawatu. I was concerned about the angle of the axles/CV joints and that they might break if it was too low. The front wishbones are a known weak point on these Vectras and so I had a good look at mine. I found one completely broken in half! I'm not sure if this rubber mount is factory or a retrofit, but what ever it is it didn't fix anything. If anything it appears to have made things much worse by creating a weak point where the cap screws are. Needless to say I changed this out for an uprated arm, which is what has already been installed on the other side. New on the left. I also put a better boot on the ball joint and re-greased it. It's not ideal but it should last till stage 2, when things get a bit more serious. The driveshaft on this side was also changed, as the boot was broken. The other sides boot looked fine, so short of tightening up the strap holding it on, I didn't bother replacing it. Unfortunately it didn't have any grease in it, which resulting in a blown CV joint on the way back from Nats. Before Nats I also bolted the seats and harnesses in once the car was sitting back on the ground and level. They are a little low, but I will hunt for some more suitable seats once my bank balance recovers. The oil catch can was also mounted, along with hooking up brake boost vacuum and tidying up a few other loose ends. A wheel alignment was next, then we hooked it up to a wideband and did a bit of a road tune. It took a while to get it right, the tune was very rich and the timing needed heaps put back in it. We had it about as close as you can get it in only a few hours on the road, but the next day I found the TPS was loose and had fallen out of adjustment. We adjusted it blindly as best we could (I was already on the way to Nats) but to be safe we had to set it a bit rich. This was a pitty, as it was running so well, but it didn't seem to affect the power output too much, it was more at idle that it was really bad. Final picture of it out on the track. Sorry about the windscreen wiper. Blame uncle jake for that!1 point
-
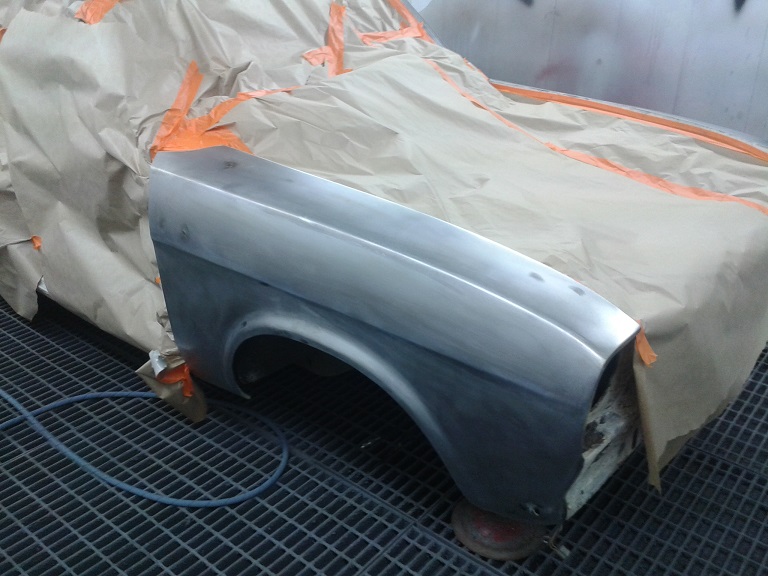
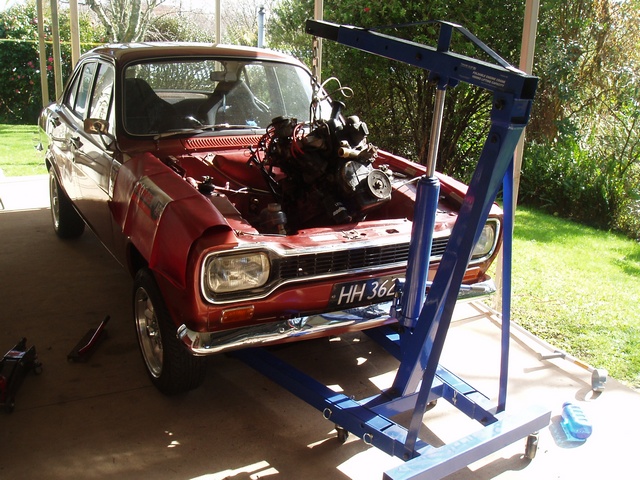
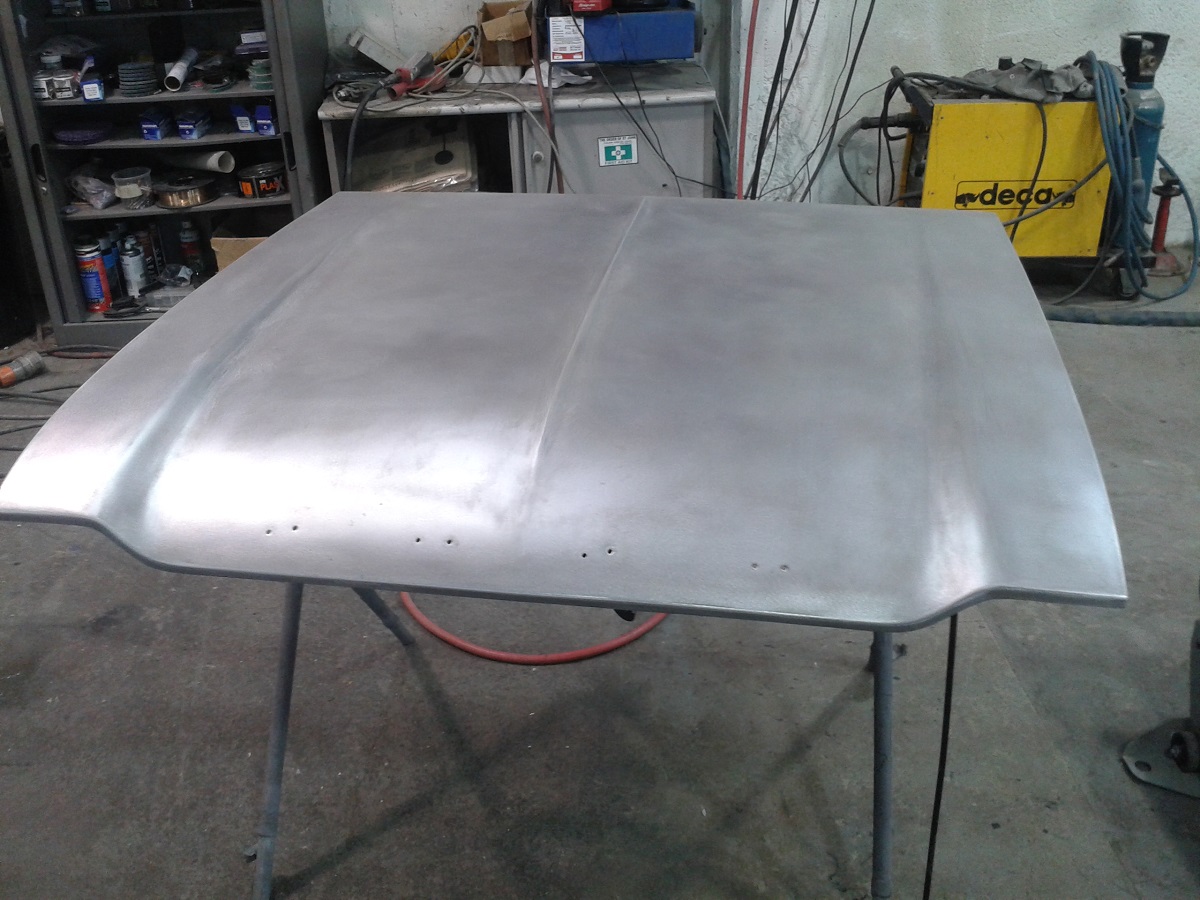
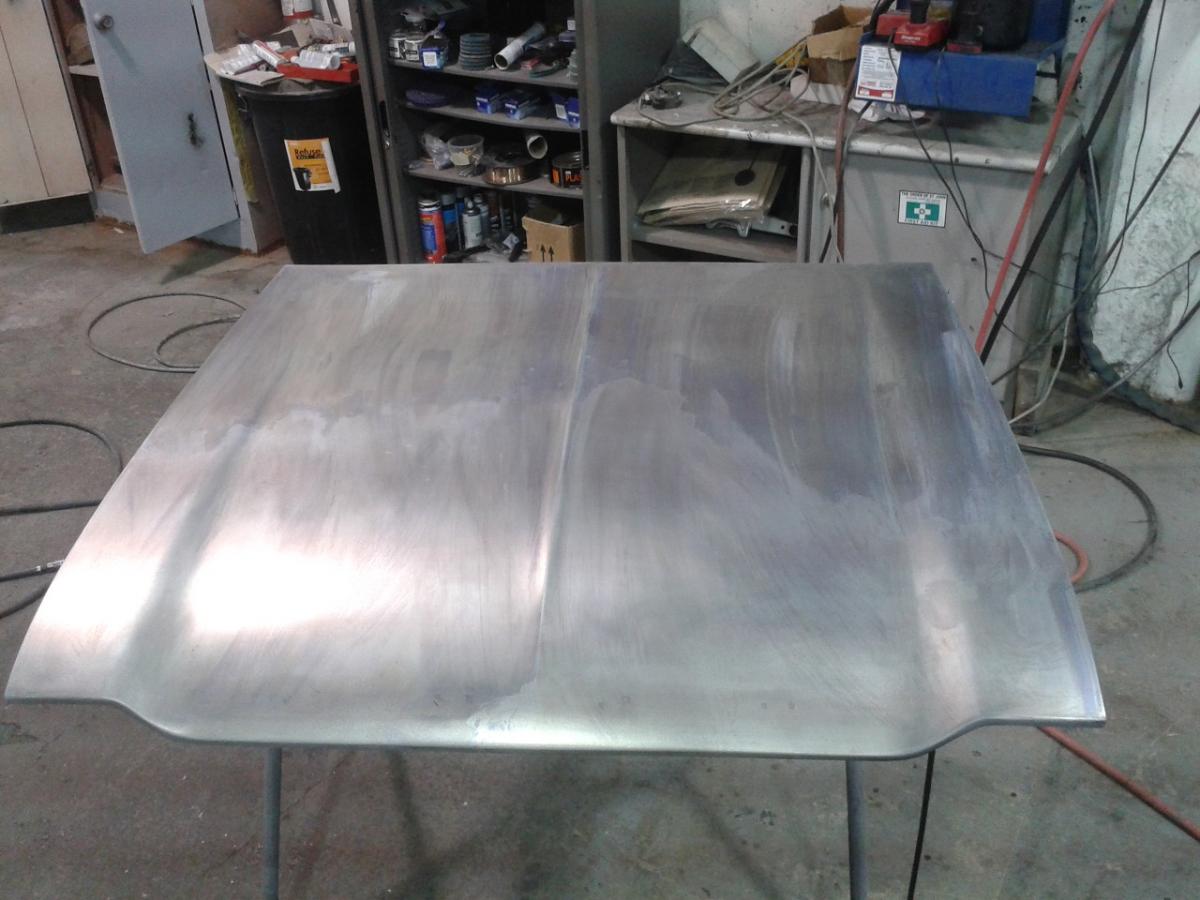
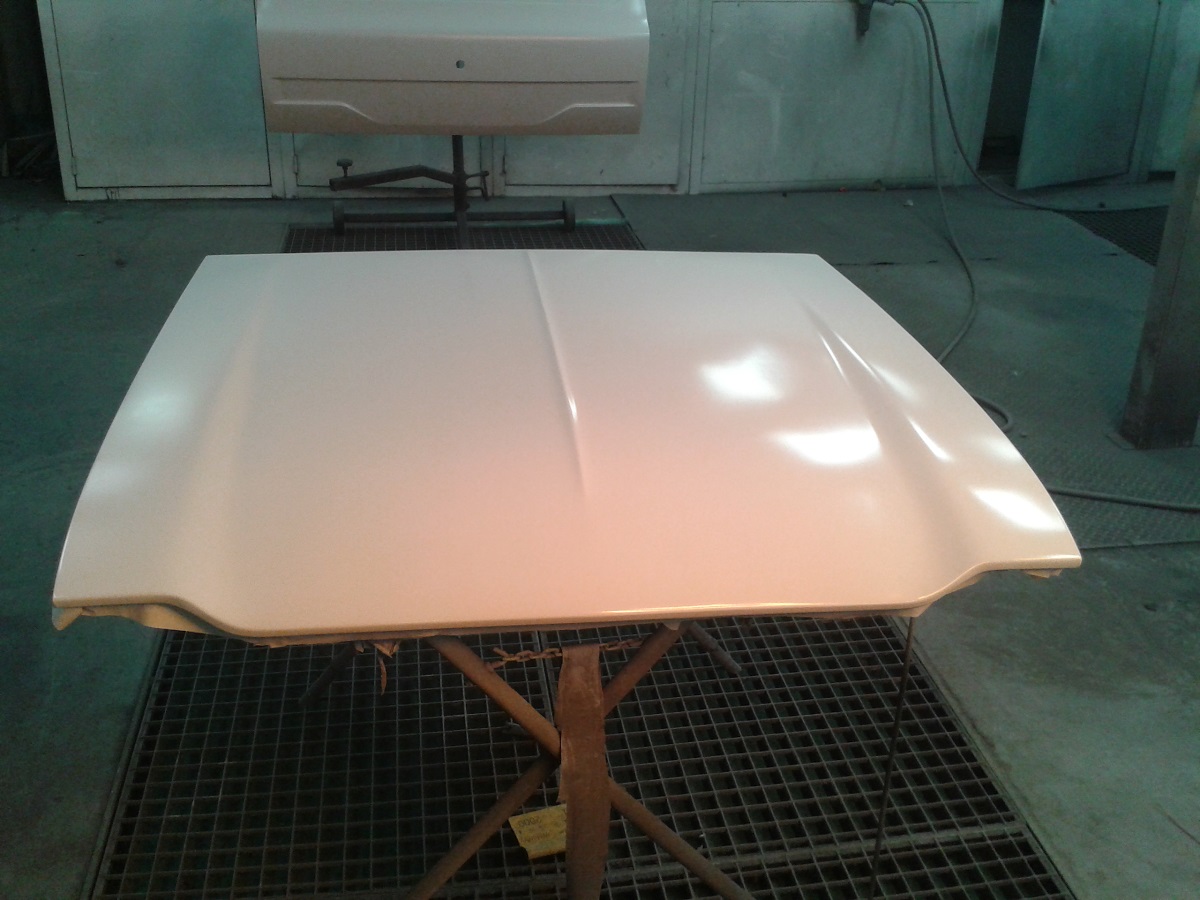
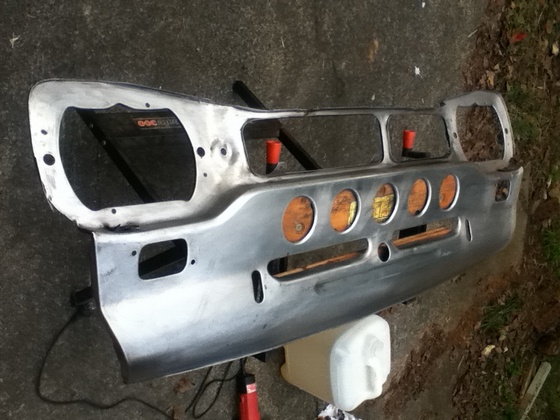
Hey guys Welcome to my escort build thread. So I've finally got my A into G and I'm going to get my escort back on the road(It's been a few years). I have purchased all sorts of new goodies for her which I hope to show you over the next few weeks as things progress. I'm a panel beater by trade and have take two weeks off work to get some serious work done on her. during those two weeks I have permission to have my car at work which makes things a little easier for me. I also have a week in between my two weeks off where I will have the car at work and will trying to spend some extra time there to get some more hours on her. So with the two weeks and any overtime hours I can sneak in I'm hoping to get a good 100hours to spend on her. So lets start with some not so exciting images of my bare metaled bonnet and tailgate. Bonnet after being paint Striped. Super Lucky to have a bonnet this straight, there are a couple minor imperfections that will require a small skimds but over I'm stoked with it, you may have also noticed, I welded up the badge holes. Don't get to angry at me please, I kept the badges so If later I decide I want to run them I can but at the moment I'm not planning to, I also keep the heat right down while welding so there is almost no distortion, also please note behind the badge holes is where the worst rust of the panel was in both cases of tail gate and bonnet. Bonnet after Metal Prep First time metal prepping in years, so careful to keen everything uber clean and pretty happy with the result. Bonnet in Epoxy primer Discission Thread
1 point
-
So alot has changed on this bike. This is what it looked like at QCR Dirtmasters 2014 Stretched frame with pullack bars I bent the main frame tube doing too many jumps and it sat in the corner for a good year Then once id set a date for Dirtmasters 2015 I set about transforming my bike again So i chopped the bent piece of tubing out and De raked the front forks bring them more upright. Then i welded another smaller diamer tube on the top bracing the neck back to the tank. Then cut rear guard off and moved top shock mount forward Fitted a XL175 21" front wheel with a old knobbly and then fitted a new 17" knobbly on the rear for grip Also fitted a solo seat and tried two different sets of bars out. with the later Chain curtain window bars being used at Dirtmasters Also fitted a 110 auto clutch 4 speed Chinese motor for more power donated by hogan. couldnt find anything i could use for a pipe so welded on a a TMC stainless steel 2 stroke Expansion pipe and it sounded wild! Overall so happy with the bike that im gonna make it a dedicated dirt bike now. So it will get a new front tire and fork rebuild and then some better rear shocks. pining1 point
-
Finally have some time off uni to give Maggie the love and attention she deserves. Took here to her first monthly meet which was a cool time, but now she's off the road again to get her engine overhauled. Haven't fully decided the extent to which we are going to refurb it but given it's mainly an educational exercise it won't be a biggy. At the moment the list is: - Main engine seal - New clutch - Valve seats hardened (anyone done this?) - New water pump - Fresh coat of paint (engine and bay) - New gaskets/seals/some hoses Got her into hover mode and started pulling it all out. Will hopefully borrow an engine crane and get it out in the next week. Chur for looking, more to come.1 point
-
Heard there's a stancedubz pre-meet you could go too, but your car is probably too old and not stance enough for them.1 point
-
I did think about that, but to look right the gaps would have needed to be on each side of every redwood fillet. The fillets are only 25mm wide, so they are glued and screwed to the edge of each elm board (rather than glued and screwed down from beneath - as the elm is) Making the 25mm wide fillets 'stand alone' seemed unlikely to end well after a year or two outside (they're taller than they are wide).1 point
-
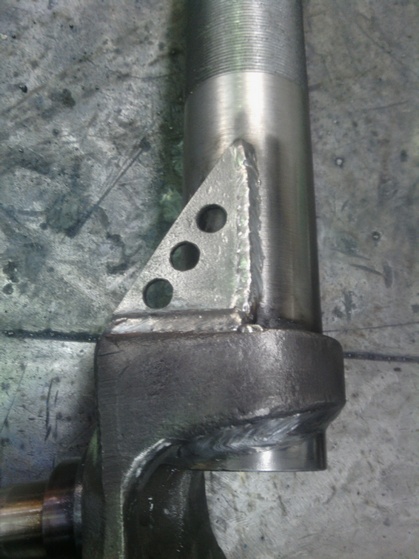
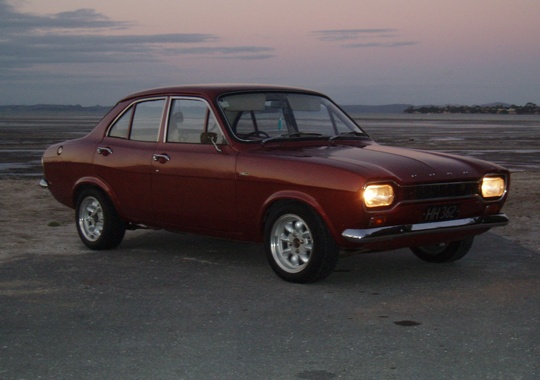
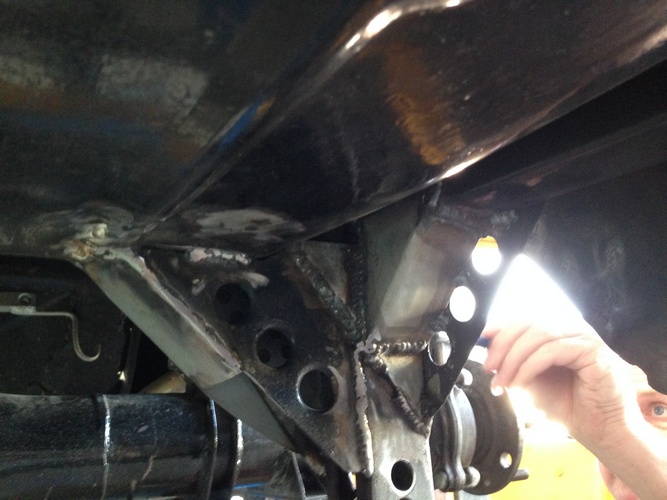
cut the gussets off and make it look like you never had them there maybe? so stupid, gusseting Capri coilover struts is standard standard group 4 escort suspension building trickery, pretty much every good rally escort has had it done, whack LVVTA, you whack...1 point
-
Keep the updates coming Elliott. Hope the leg is on the mend. Re the wedged struts - its such a bullshit call. I still dont see how theyre ok to be certed "if theyve got the factory part number on them", but everyone elses "might" fail. The ones in Shauns car will be being suitably modified soon so they comply. As I've said before Elliott, HURRY UP and get it painted Its looking awesome1 point
-
Can't get my car certified for this reason. Spoken to Clint and Mark about it and LVVTA are adamant it's a no go even if completed by certified welders. Been involved with circuit/rally escorts for years and I've never seen a stub fail1 point
-
Yeah my foot sort of slipped of the clutch a bit1 point
-
Shitttt. How had I missed all these updates, bad ass.1 point
-
ZAC!!!!! Welcome aboard!!!! Sweet write up about the history of your car. Can't beat one with history like that.1 point
-
Ah yeh might bring new c10 for spin1 point
-
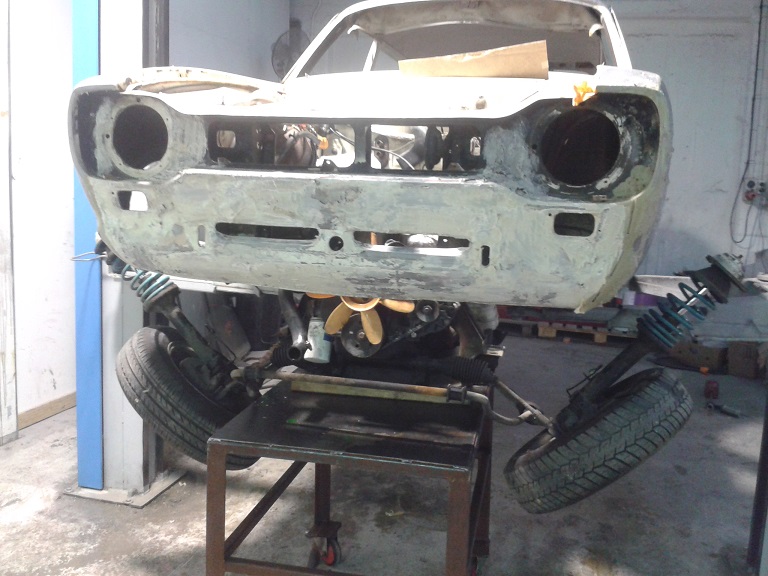
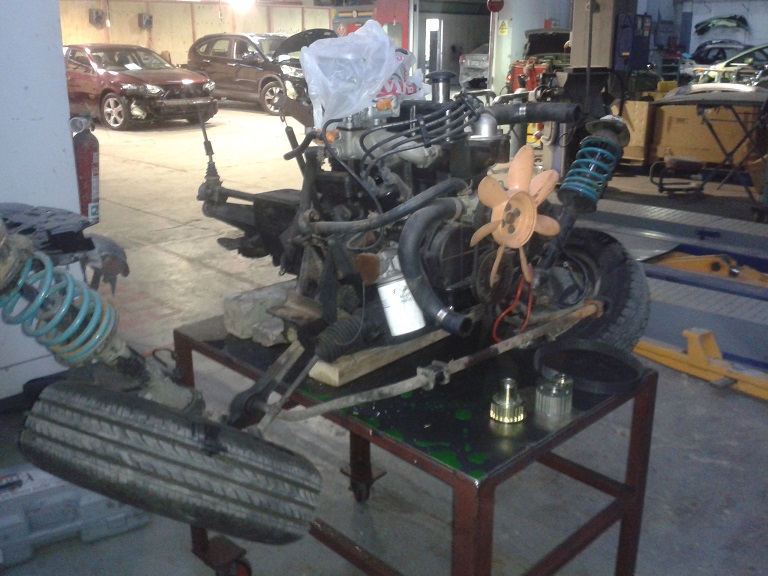
A picture of the engine being dropped out A picture of the engine all the way out note on the table there's a new drive belt kit to be fitted One of the doors almost ready for metal prep and priming Panel wise this is probably the worst panel on the car which really I have to be pretty happy about, is fairly dented but fixable. So I'll do some panel beating(little bit of metal finishing) here a small rust repair at the bottom and this panel is ready for metal prep and priming.
1 point
-
So at around 7pm last night I got sick of dancing with the stars or whatever and went into the garage. Stripped all the carpet, underseal etc off. Use dry ice they said, it'll be fun they said! Well yes but I'm not going to find dry ice at 7pm. When motivation hits you run with it. Heat gun + scraper = Removed about 30kg (yes I'm a weirdo and weighed it) in underseal and that rubber/foam underlay shit. What's that in the corner? What you see there is the jack support, footwell skin has completely disintegrated & I can push that square out easily haha, fuck... New panels on order from Walloth&Nesch. Also had surgery today, nice and high on codeine, so I'll make the most of it and start attacking the tar/glue residue with Paraffin tonight, stay tuned for fun/fails. OH and if I ever meet the original owner I'd like to buy them a beer. Every surface/nook/cranny is caked in fish oil, saved this car no doubt.1 point
-
hey man just in case you're not aware the classic method of welding a gusset into the base of escort/small ford front struts to strengthen them is illegal now. cant weld to cast steel unfortunately. as i say you probably know about it already but it cant hurt to mention it again.1 point
-
1300L - Automatic
1 point
-
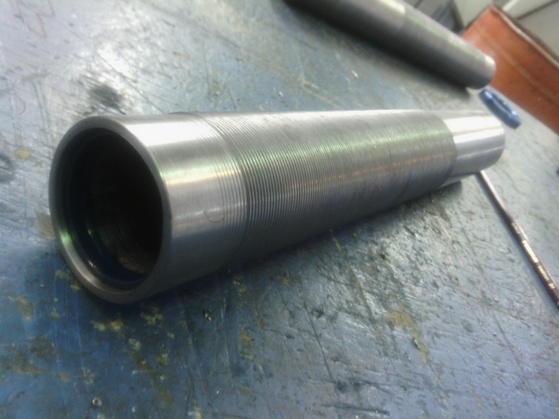
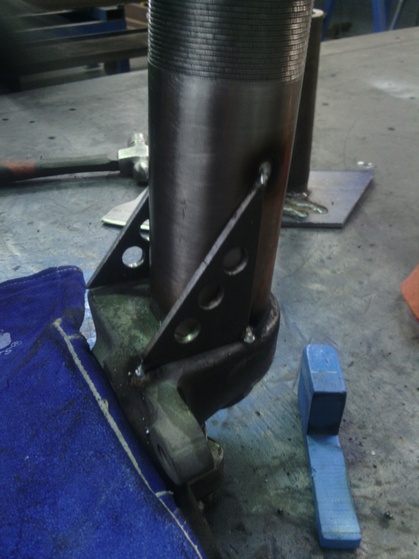
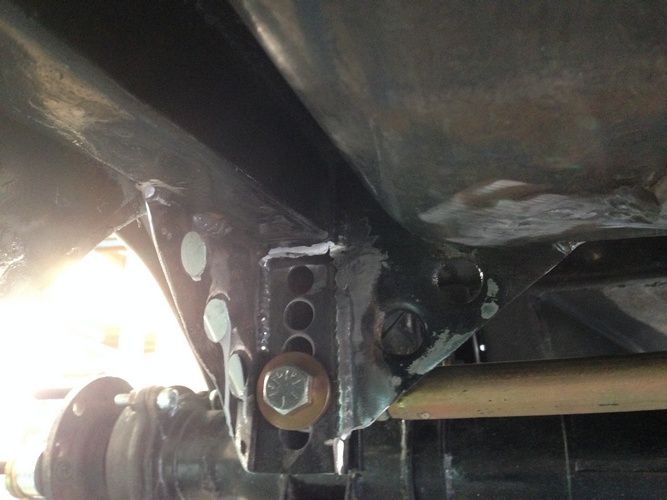
more gussets and welding Next is to build some grp4 style capri adjustable front struts Ive borrowed these from my mates Mk2 Rally car to make some plans Collected some 2.8i capri struts and heated the tubes out as all I needed were the stub axles Ive bought some seamless pipe to machine and make some new strut tubes
1 point
-
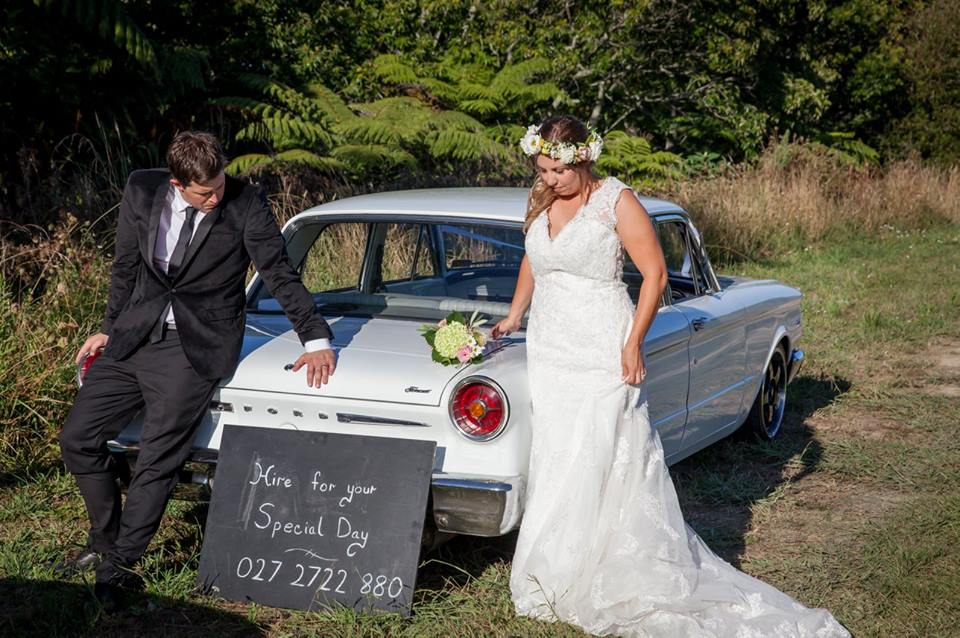
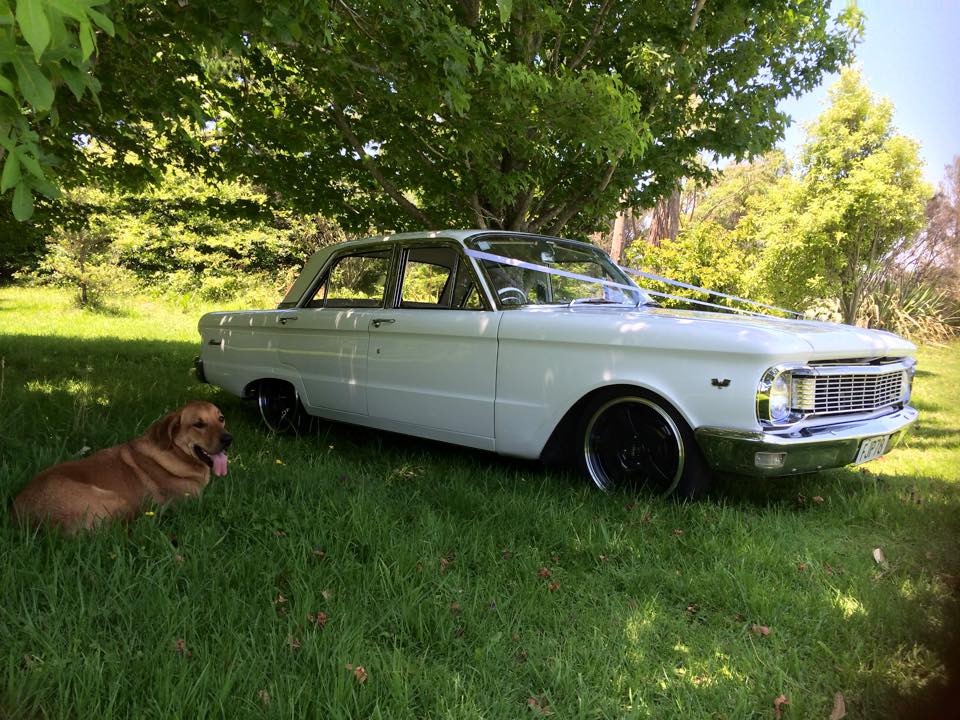
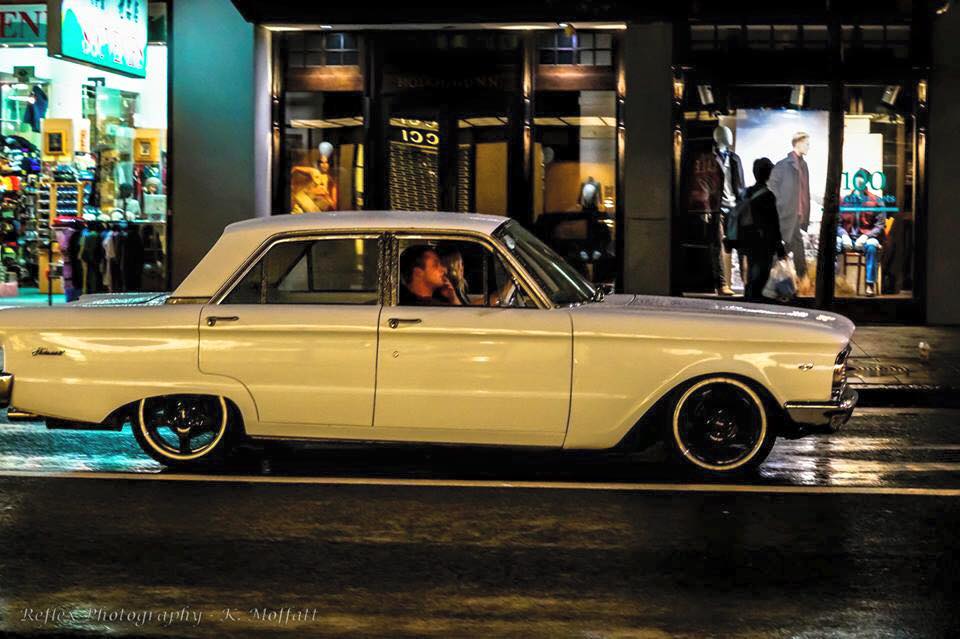
Gwils - 1966 - Ford Fairmont Brought this car in immaculate condition. Car had been acid blasted and taken back to bare steel. It had then been repainted in a brilliant white. The interior had also been totally reupholstered in white and grey. The original 170 pursuit engine had been replaced with a 250ci out of an XY Falcon. The rest of the running gear is original. The Plans, My intention with this car is to make it into a modern driver. All suspension, breaks and steering will be replaced with RRS replacement parts. Converting steering to rack and pinion with Power steering. Changing all the drum breaks to power disc breaks Changing front suspension to fully adjustable coilovers. Changing rear leaf suspension to a 3 Link set up with adjustable coil over shocks. Rear Diff will be a Ford 9" LSD shortened to fit. Engine will be a ford 302, Recently purchased! 69 302 windsor hencho en mexico block been rebuilt new gasket set, freshly honed bores, 30 thou bores high compression flat top pistons edelbrock 4 barrel inlet 72 heads been lapped crank and bottom end in good condition cobra rocker covers Trans will be a C4 with a quick shifter. Watch this space for progress Also using the car as a wedding car if anyone's interested
1 point
-
Did you use a regular compression tester or a special rotary one. They are special because they have to read 3 compressions separately through one hole.1 point
-
The mandatory remove rear shocks to bone it out picture. We all do it.1 point
-
Het guys really struggling to find a panel beater in auckland to have my car ready by hanmer meet .. anyone no someone keen on cashie in PM me Ok so I put the eclectic dizzy n ignitor in and I couldn't get the car to start I had it sparking n wanting to start but when I turned key back off the start position it would like die / stop running.. unsure of why just yet. Also put some new shocks in the front and put some proper lowering springs in so now sits at 100 mm off cross member ! Also after geasing through the show us ya sheds thread I decided to build me a work bench . 3.6 m x 600 mm deep. Haven't finished shelving units etc ran out of timber ! Also took the car outside n gave a quick wash engine bay was getting dusty ! Arse still needs to come down by about 20 mm to match front but will do that last . Thanks for looking1 point
-
Roughly threw on fuel tank (Stu my good friend says hes gonna make me a sweet ali one... ) and some other bits together, so could test a few things. Seems to be working well apart from a few drama's. Brakes don't work, need bigger master cylinder im thinking. and the spring situation. some soft 10" springs should fix that. Droped the clutch with a few rev's, and the ass didn't jump up in the air or squat from what i could see. so the 4 link angles must be pretty close! Extra light weight version. / Show us your 4age1 point
-
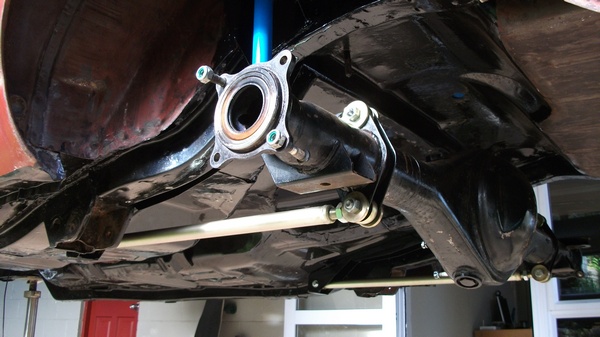
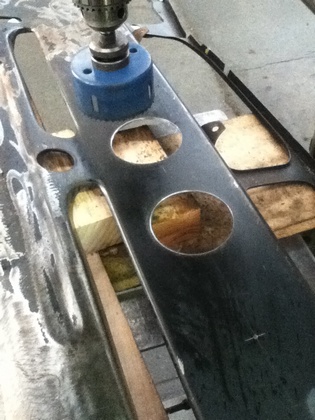
four link from underneath hole sawing front panel to add 3" swaged holes Made a press tool at work In the press Panel done and ready to weld on
1 point
-
yeah I need to make a build page for it, I've done lots of overhauling of everything, and was getting to the good bit near the end. ready for the first start up. and then I found the oil leaks, that turned into gearbox damage and a rebuild check everything. . . but the person i bought the (cough) rebuilt engine/gearbox has done a remarkable job of being a douche bag I got stuck with the flywheel threads had been fucked . then needing shims/lock tabs for everything, I've got it all just need to just got to find the motivation again hahahaha should be a fun little car, has mild cam, new oil pump, new pistons. 40mm side draft and a Nissan pulsar electrical distributor . and I've replaced everything else in the car too. its good to read others build pages and actually recognize all the parts, nice to see some one else tackling same stuff that your doing. I've gotten sidetracked buying wheels for the mini hahahaha .1 point
-
Finally a successful day at Hampton - managed to drive back on the trailer after 3 races. Lap time down to 1:28.6 but still lacking a bit of talent around turn 1 and 5?. Some GoPro footage to come.1 point
-
Haters gona hate.1 point
-
Also, I got sick of the squashy steering wheel so upgraded to this: And this morning some total dickhead was too distracted admiring my car (he claims) that he drove right into the back of it. I was pretty unhappy to say the least. Luckily he was only going slowly, there doesn't appear to be any significant damage, the bumper is snugged up a few mm closer to the body. I'll take it off and make it's all nice and straight but I think it should be fine. Should be addressing the low properly in the next couple of months as it's still rolling at original nanna spec height. Will get new wheels at the same time. I put the weird Uni-Pex wheels on for now, they look okay, but not great, definitely need more width/less tyre wall. Lastly, I really need to get the carbs cleaned up and tuned, anyone know a good carb place? Around New Lynn, Avondale-ish way would be good, or anywhere between there and town where I could drop it off on the way in. Cheers. http://oldschool.co....mitsi-colt-gto/1 point
-
Hi there, Sorry to see the result of your hard work, and immaculate rebuild come to an untimely end - your car is stunning. Havent read through this thoroughly, but just a suggestion. Did you run the engine with the factory PCV valve? I ran a Pinto with factory PCV valve, and its a sure fire way of pressurising ther crankcase. Solution - extract PCV valve and remove the spring and plunger from it, and vent the engine from both the PCV valve casing, and the top of the rocker cover. Like I say - sorry if youve already thought of this, or someone else has mentioned it / had a better idea previously on the thread Cheers1 point


This leaderboard is set to Auckland/GMT+12:00