
Leaderboard


Popular Content
Showing content with the highest reputation on 06/25/15 in all areas
-
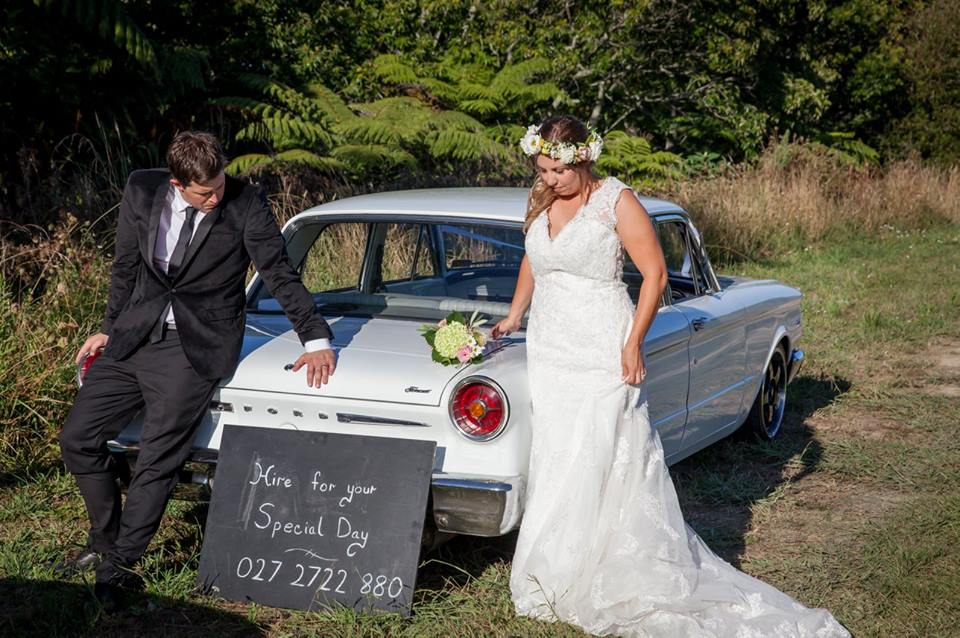
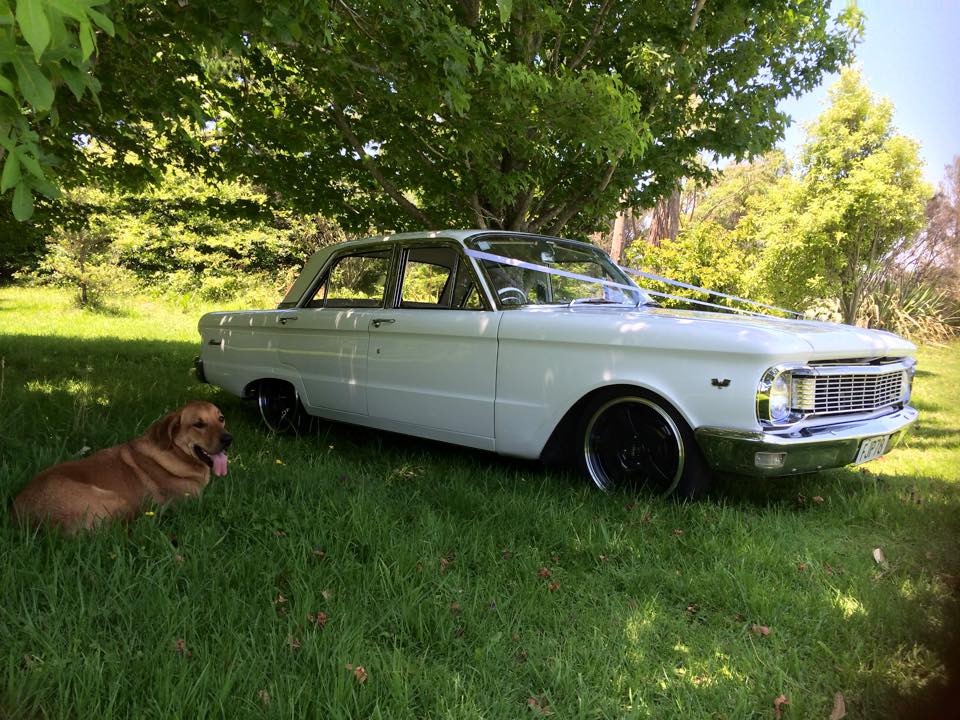
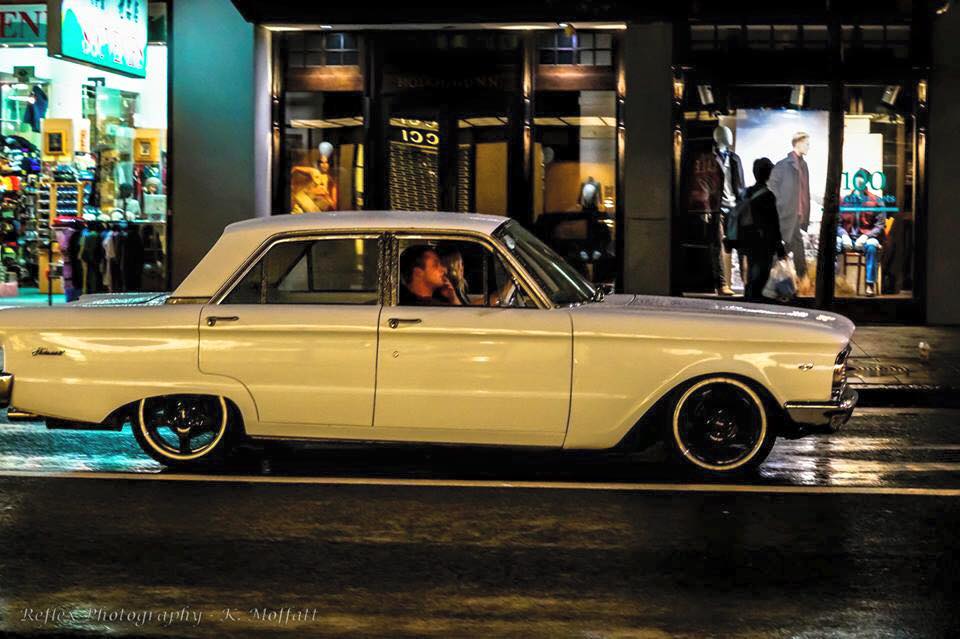
Gwils - 1966 - Ford Fairmont Brought this car in immaculate condition. Car had been acid blasted and taken back to bare steel. It had then been repainted in a brilliant white. The interior had also been totally reupholstered in white and grey. The original 170 pursuit engine had been replaced with a 250ci out of an XY Falcon. The rest of the running gear is original. The Plans, My intention with this car is to make it into a modern driver. All suspension, breaks and steering will be replaced with RRS replacement parts. Converting steering to rack and pinion with Power steering. Changing all the drum breaks to power disc breaks Changing front suspension to fully adjustable coilovers. Changing rear leaf suspension to a 3 Link set up with adjustable coil over shocks. Rear Diff will be a Ford 9" LSD shortened to fit. Engine will be a ford 302, Recently purchased! 69 302 windsor hencho en mexico block been rebuilt new gasket set, freshly honed bores, 30 thou bores high compression flat top pistons edelbrock 4 barrel inlet 72 heads been lapped crank and bottom end in good condition cobra rocker covers Trans will be a C4 with a quick shifter. Watch this space for progress Also using the car as a wedding car if anyone's interested
 9 points
 -
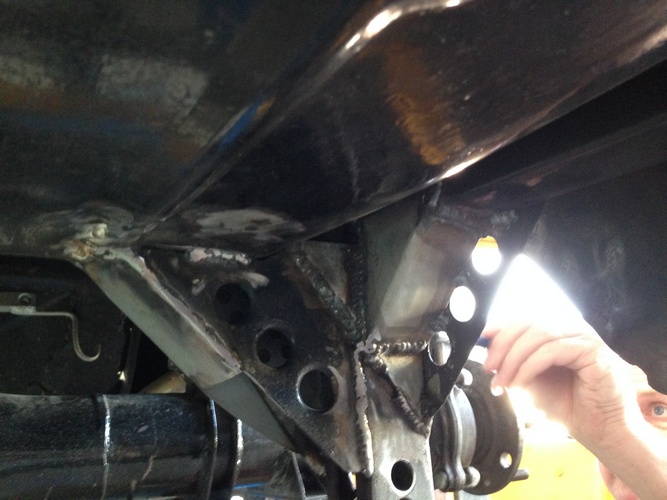
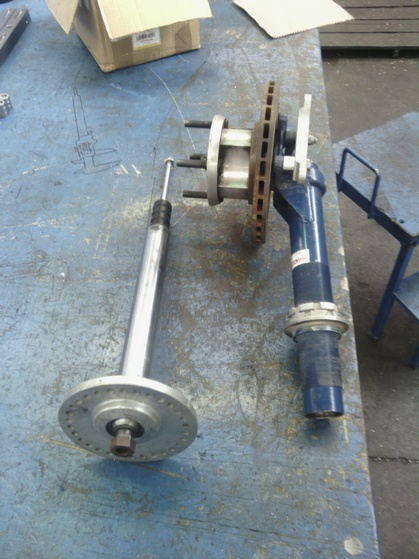
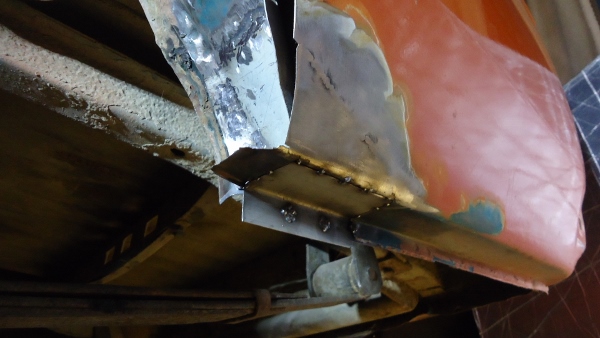
more gussets and welding Next is to build some grp4 style capri adjustable front struts Ive borrowed these from my mates Mk2 Rally car to make some plans Collected some 2.8i capri struts and heated the tubes out as all I needed were the stub axles Ive bought some seamless pipe to machine and make some new strut tubes
7 points
-
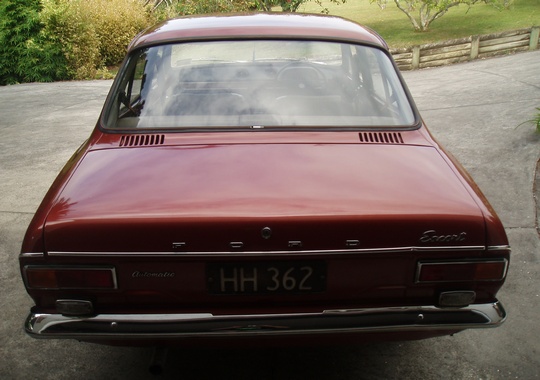
1300L - Automatic
6 points
-
another day off. Andy the piner psyc'd me up at 8am not to waste the day, so i didnt. Sealed focus racing. Then set about doing coilover swap. Got it done, chucked on some 13" wheels from the garage, and took these. its fully captive @25mm. Roughly 70mm left of thread on the front too. BC's are awesome. I will be able to lay frame with 14's. Pining! //oldschool.co.nz/index.php?/topic/47514-ants-tc24-gx71/5 points
-
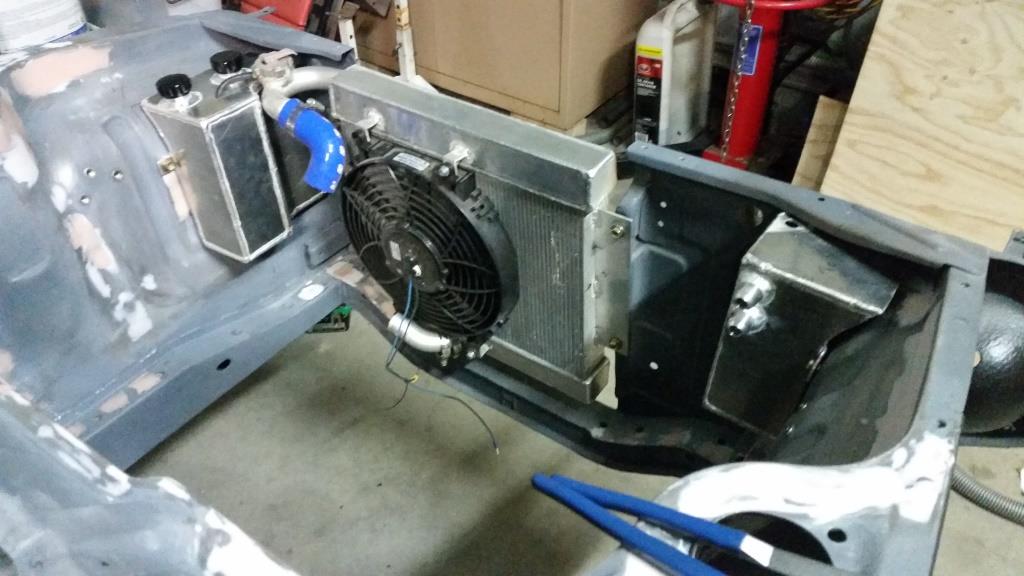
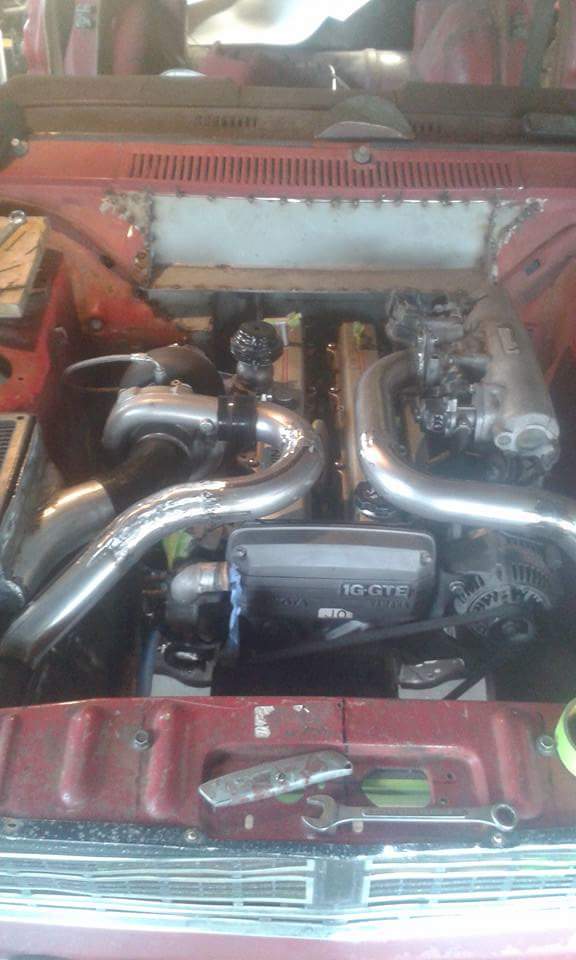
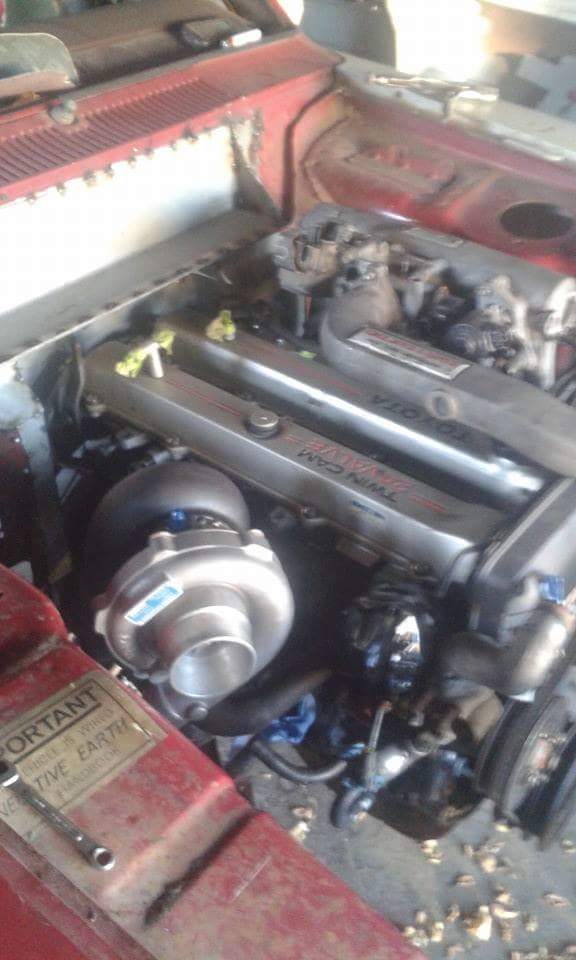
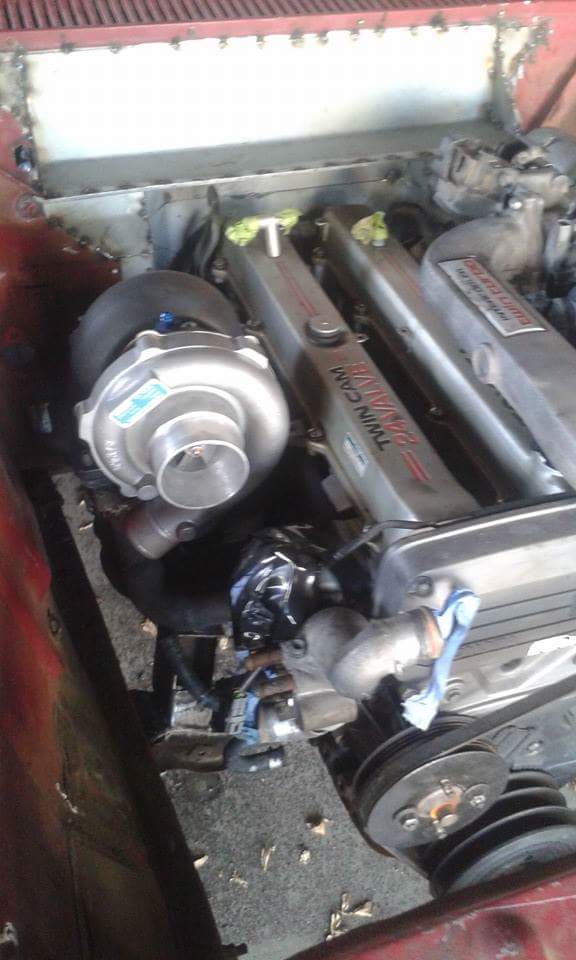
I have made the radiator overflow/washer bottle and catch can. Installed the motor for hopefully the last time. Now the car is back on all fours nearly ready for dyno tuning.
4 points
-
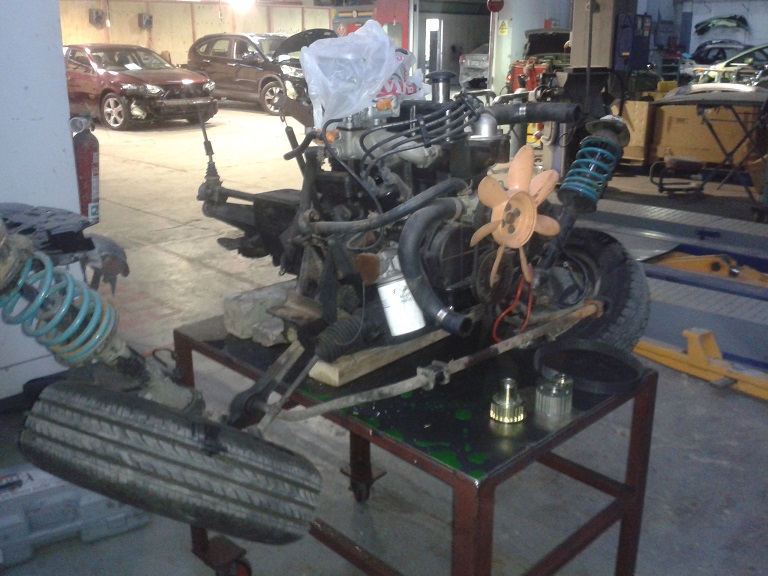
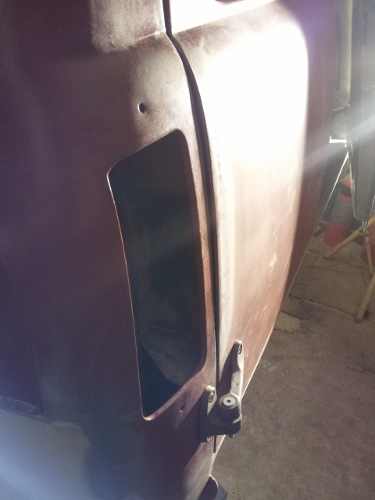
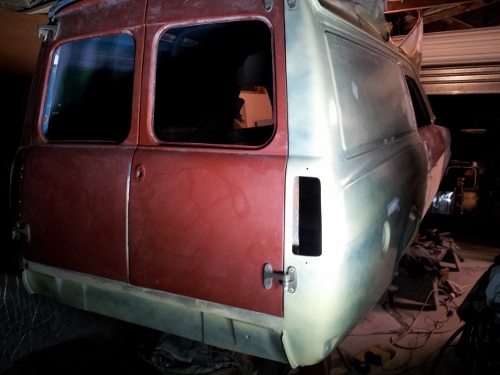
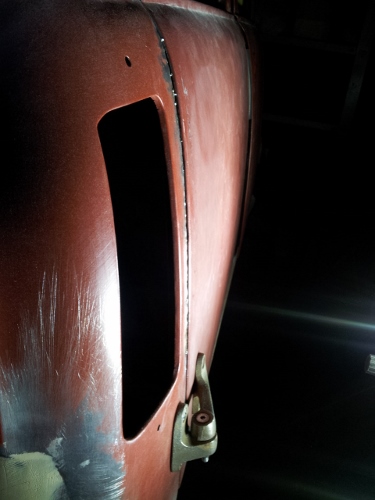
A picture of the engine being dropped out A picture of the engine all the way out note on the table there's a new drive belt kit to be fitted One of the doors almost ready for metal prep and priming Panel wise this is probably the worst panel on the car which really I have to be pretty happy about, is fairly dented but fixable. So I'll do some panel beating(little bit of metal finishing) here a small rust repair at the bottom and this panel is ready for metal prep and priming.
3 points
-
its a later master from a v6 surf. so will be drum. long as some brakes work, not worried for now. I also threw away the bias valve becuse it looked heavy. who knows whats gonna happen3 points
-
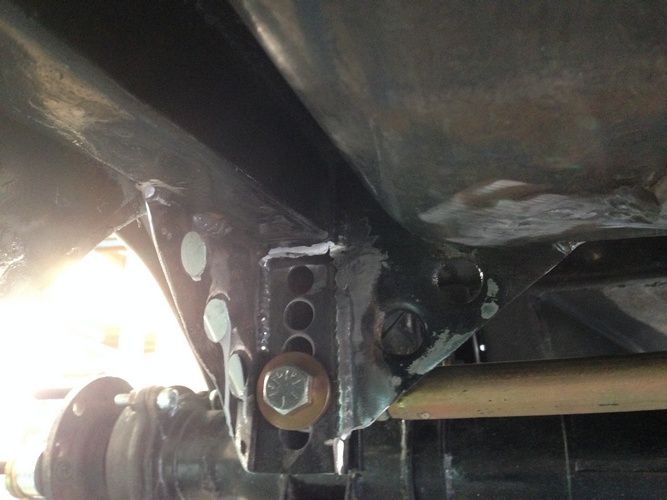
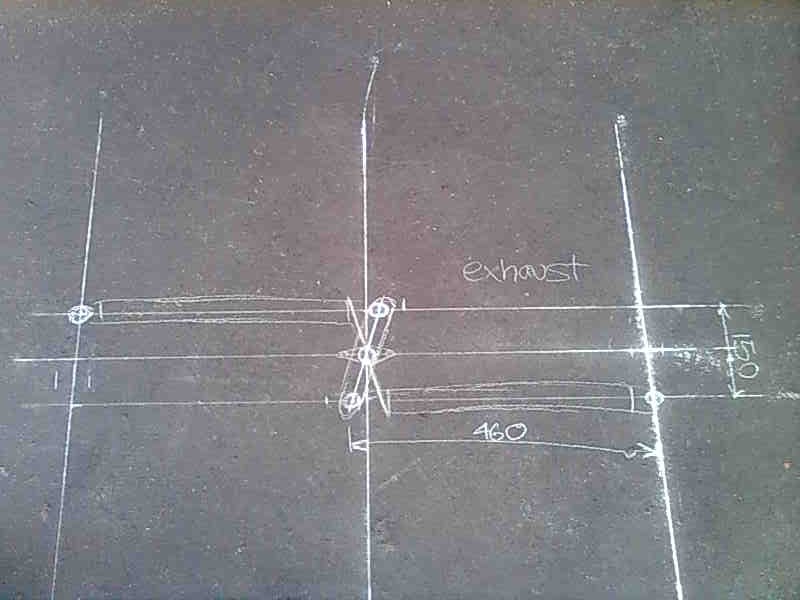
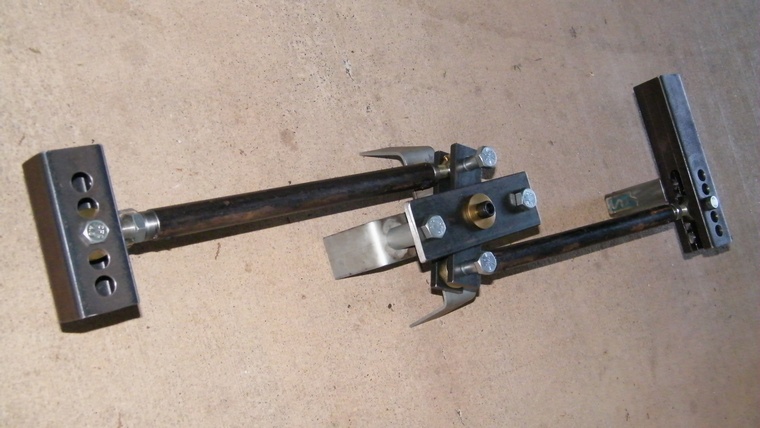
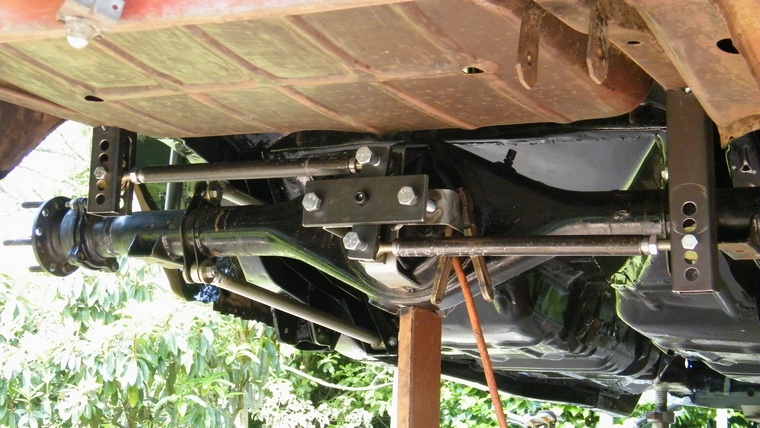
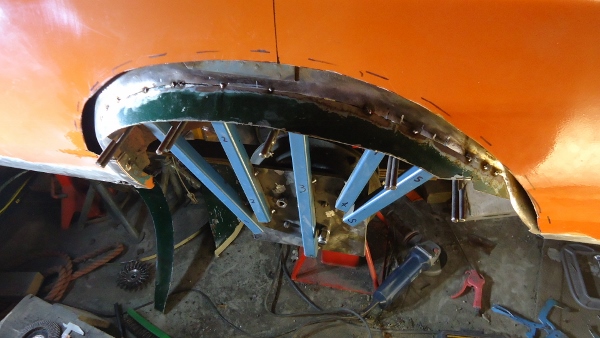
Watt's Link Ideas Concept Trial fit few gussets
3 points
-
Flashback to better times..2 points
-
Got the master on. its ali and the old one steel, so light weight bonus. Has some brakes now. May need bias valve in there, as it's locking the rears first, but still need to bed in the front brakes so may come right.. The back of the truck weighs piss all. so doesn't need much rear bias. I can dead lift it off the rear x member, wheel barrow spec. when the diff isn't in there, and im a skinny white guy.2 points
-
I managed to get a full day working on this yesterday. Put the new throttle, brake and clutch cable in along with new levers. Clutch doesn't jam on now when it is engaged which is sweet. Also did some more work on my voltage controller and put it in an enclosure. I wired up the key and starter solenoid and went to fire it up.... unfortunately with the top end rebuild there is now too much compression for the electric starter to turn over . So you can see in the attached video I have to give it a hand by spinning the back wheel haha. I also whipped up a seat for it but it doesn't look as good as I thought it would. Does anyone have any ideas for seats?2 points
-
oh man excited to see this on the focus!!! The 13s are great tho. I remember when me and Rawb put my 13' streets with 215/50 eagers on the waka and it looked like a Japanese version of an XD falcon hahahah. will have to drag up a pic2 points
-
So I found that the tappet cover was leaking so removed the tappet cover and cleaned as much sludge from the top and took about half a margarine container of muck out of both rocker cover and head. Put a new gasket on and and bolted it back on with no leaks now. Next will be a filter and oil change using diesel oil. I have some spare lifters If I can't shut these ones up and the Holden has side covers so you can do this without pulling the engine apart. And if the lifters are not quiet by 2k then maybe buy a new set of lifters at about $9 each, Oil pressure is good for a stock engine and quite possibly just as good as new. This is distracting my main mission so I am in a hurry to sort it out so I can get back to my Starlet2 points
-
Buy a wideband and then go from there.2 points
-
can go from carpark, can also deliver y'all back there afterwards2 points
-
Lots of little bits and pieces lately, been collecting parts: some spare chrome trims, a couple of interior pieces and some badges – a rechromed boot badge and a NOS rear quarter badge. Also got some nice new black carpet. The carpets aren't moulded, they're all just shaped flat panels, like lots of mats, so it was easy to cut new pieces and get them all edged. I'll get some pics when the new carpet is in. More excitingly, I decided on a fairly extreme fix for the little tears that were starting on the base panel of my driver's seat. The metallic green colour was going to be pretty impossible to match, so I got a set of slightly tatty seats from a Colt GSR, sporting several shades of green and got them recovered by Greg (64valiant) at Midnight Upholstery. Super recommended, they came out great, can't wait to get them into the car. Before: And after: Decided to try something a little different with the back panels, I think they came out pretty cool. Greg was super easy to work with, real nice guy and the quality of the job done is excellent, definitely check him out for any upholstery stuff you need.2 points
-
Lots of shaping, guide coating and sanding. Nothing too photo worthy but heaps of hours going in. Had a mate make up some new front door pins and rear door ball joint type insides for the hinges. No more play in the hinges, holds the doors in place a whole lot better. Old vs New Aligned the rear doors with the new hinges. Pretty happy with all the work to the doors. Still more to do underneath them. Heard you like gap. I don't so i cut along the edge, opened it up slightly to match the door and tack welded it for now. Will continue working on the rear doors and then start aligning the drivers door, guard and bonnet.
2 points
-
Update time. Wow! I thought this would be a quick little write up but actually turned into an essay length spiel. Best you put the kettle on... So a fair bit has been going on in our little valley. I've been trying to remember to take photos but usually get carried away and have finished whatever before I remember. I did go up to the ridge a wee while back and take a pretty photo or two of the sunrise. Very nice up there. Cant wait to build a cabin for that place! Coming back down to the truck via the ridge track- Tuis playing morning tunes in the Lucerne tree next to truck. Since getting that lathe in place the shed has been getting used and sort of just evolving in doing so. Things/tools have found a place. With the winter weather it feels cosy- especially in heavy rain. Really needs a wood burner or waste oil burner for the colder days because man can it be chilly in the evening. I will make something but accept that it will only heat up a little area and be hugely inefficient trying to heat it all. Maybe something arond the main bench/lathe area would be good. One thing that we are both stoked with getting is the hoist. We could only afford it because we bought the secondhand lathe instead of a new chinese lathe. The bank balance is getting low as and we ummed a bit about spending the coin on a hoist but so glad we bought it instead of waiting because man its useful! I ordered it from trademe and had it delivered to a Nelson depot. Just managed to squeeze it in the van for a slow trip home which saved on the silly rural delivery charges. Shane came round the next day and helped put up the main structure. It went up pretty fuss free and seems fine for a cheaper chinese hoist. I can see where the costs are cut when compared to a Heshbon etc but its strong and well built where it needs to be. Currently we just plug the hoist into extension cord. Must order appropriate lecky supplies and lights then wire up shed! It dwarfs the Viva. Oh yeah- also note the steel rack we recently built. Was great to get all the steel we have found while clearing the block out of the rain and inside. Stepping away from the workshop we have been busy with many other things. First off we needed to get the ever growing piles of firewood out of the coming winter rains. Into our pile of telephone poles and old iron and we built this. I also nabbed some old wooden shed doors left outside a nelson garage doorplace. Free to take- i like. These I turned into a storage bin for all them little offcuts of wood that are a pain to stack. So now we have some storage but will need more. We have at least 50 pine trees big and small to chop down over next few years. Some in the gullies will just rot or be made into north shore style bike trails. Many we can use to keep us warm. Then that little sailing boat. The sun and the rain wont help it at all plus it was in the way- taking up space I could fill with another old car. So more telepoles and the 6m lengths of NEW iron that had been left in the bush edge by previous land owner came in handy. We built this... (turns out to be also very handy for lawnmower, old pushbikes and bike trailer storage) Meanwhile our neighbour has offered us her field which was overgrown with gorse and blackberry for the past 20 years. We wanted to clear it out so our view was nicer and had been intending to ask her if that was cool. Then she just said one day- hey how about we make it into a fruit orchard. OK ! So it was out with the scrub cutter and chainsaw and with a couple of days hard graft we had it all clear. It looks so much better and the soil is amazing as it originally had two pigs there then getting nitrogen fixed by gorse for past two decades. Next step is to plant it out but for now its just great the have a view with out gorse and masses of blackberry. Before.. During.. After... That little fence we have left up to plant grapes and kiwis on. We are both still very much newbies when it comes to growing things but no being stressy types what grows will grow etc etc Our neighbour- well shes very green fingered and will help us out heaps. Plus there's the nerd net for info. Main thing is I'm enjoying this whole land thingee and planting stuff way more that I thought I would Then there is the track up to our ridge. We had been planning to clear it for ages so a day or so with the scrubcutter and now its way nicer to walk up. Horse and Jen happened to turn up one day whikle there were up here for holiday so they got a tour of our freshly cleared track. We have now almost cleared out the building site at the top where we are planning another cabin build. Not photos of the now cleared track but I did take this one the other evening when we went up to watch the sunset and drink beer. When we got to the ridge a huge deer went storming away from us over the gully. Quite a sight ! What is cooler was the picture on my beer bottle... Speaking of tracks.. Hannah went away on a few days trip with her sister who was visiting. While they were gone I hooked into the start of our first mtb track. We have always planned the first track to head as gently as possible up to the ridgetop- a gentle enough gradient for an easy ride or walk. I really wanted to get something done while hannah was away as a surprise. I cut, dug, raked, carted, stacked, walked, toiled, bashed a track through the Kanuka grove just behind the cabin over two days and built whole first track. I really enjoyed it and worked through till it was almost dark. I was knackered at the end of the second day. Hannah got back from the tramp and I surprised them both with my new track. Its still a touch too steep to ride up easily up so Ive worked out a path for a track that seperates off where it gets steeper and will head back towards the truck then back again. Pretty much..more hairpins = more track = easier gradient (but also = more work....) Big thing getting built right now is our outside bathroom. We have had this planned ever since first viewing the property but had not yet decided on where, what and how. The 'what' bit we have sort of picked away at since before moving here. Discussed over coffee or beer (but not both) we have gone over ideas that have come about from years of using various homemade showers and dealing with a variety of toilets. Fascinating stuff. The 'where' bit sort of just fell in place once the cabin was up in its new location. Its on a slope backed with bush which is ideal for what we envisaged. Situated halfway between the cabin and the back of the shed its in a handy location for us and the cabin and its private with lovely views. The 'how' bit is just evolving as we build. Its an elevated building over composting toilet system. For now its the well proven batch type setup with wheelie bins. Rotated as they fill with a minimum of 1 year composting in the bins before going into a seperate compost area up off the driveway for another 6 months. Then the compost can be used in places like the fruit orchard and areas we are building the native bush back up. From all the reading we have done this is total overkill as far as dealing to any pathogens but hey. No harm there. Its going to be awesome having a decent setup that has a minimum amount of moving shit about, he he, and not have to pay or worry about involving outside services like septic systems. In the future Id like to build our own 'Clivus multrum' style system, a setup that uses a sloped bottom vessel and is continuous in operation. You can buy 1 m3 capacity units made in plastic if you have a spare $4000...which is an absurd price considering our 25000 litre tank cost $2600. I'll use stainless steel to make the structure. But that still involves more pingas and time which we dont have- the latter due to the longdrop filling fast. The grey water will be treated using a reed bed system. This is pretty easy espicially on our type of land because of the clay below. The water will only go down so far and then move along. Moving water through soil is the quickest way of treating it. It does not take many meters before any nasties are dealt to. First off we dug out the bank. This did take quite a while. I had to take breaks and sit down to sip at beer while looking at the mountains. We would take turns at this after Hannah saw how nice that looked. Eventually a large 'void'? was created and funny enough a hill appeared somewhere else. Much of this hill appeared next to the graden because there's some very lush dirt with some mighty fine looking well fed worms in it. Kevin just watched or chased clods down the slope. We also had this fella stroll out of the dirt where we had sadly destroyed his underground lair. What a huge bugger he (or she) is. I released him later further up in the bush but not until Id worked out what brand he was.. Turns out he's of the 'Stanwellia' species- related to trapdoor spiders and quite rarely seen as usually underground. His burrow was massive and we had sliced right through it with the spade. See here for another one.. http://www.nzherald.co.nz/nz/news/article.cfm?c_id=1&objectid=11307026 Then we planted four H5 treated poles set well down into the granity clay below. A thick plastic groundsheet runs up past the decking and right up the walls sealing in the treated plywood clad basement. The decking is insulated below with 40 mm thick insulation and the inside has reflective foil insulation. We want to create a heat trap to keep the interior as hot as possible so promoting a decent heat in the compost. Inbetween building we cleared out the bush around that area. When intially clearing the land last year of gorse we worked up to the bush edge and only so far in. We had left the gorse hiding within because its dying back anyway. But this area was still pretty bad so a few hours and we not only had a lovely little spot but yet heaps more firewood. Some of the old gorse was huge! So much more light into that area and on the bathroom. The pile on the left is gorse from just that little area. Above this we've built a nice solid little bathroom that measures 4 m2. It'll contain sssb - the shitter, a shower, a sink and a bench. Then we built steps using some more of the telephone poles. Its quite high up and we have to allow for our olds etc when they visit so easy to climb steps they had to be. Must build a rail soon because man I'd hate to go trippin off that ledge... We have made a little track through the bush and once tidied up will be a sweet way to walk to the bathroom from the truck. The steps come right down to this track. We picked through our pile of Rimu, picked out some possibly nice bits- possibly because you really cant tell until it goes through the planer. These became window and door frames plus some rafters. When the main shed was delivered the piles of sheets were protected some extra packing sheets in a dark grey colour. There were just enough of them to clad the roof with a decent overhang. Sweet! We still have a little left over for another wood shed too My old boss gave us a whole heap of wood leftover from his house build. All Cedar, Macrocarpa and some Douglas fir. Ideal timbers for building things with! So the Douglas fir we ripped down and planed then made doors with. They are barn style doors and Hannah has oiled them. They look nice. Photos later of them completed but heres a action shot.. Hannah painted the outside of the window frames with paint left over from the housetruck. Then I scored 4 litres of 'mist green' paint from nelson house parts. Its the same colour as the water tank and similar too the main shed. It should help the building blend into the bush nicely. I have a neat idea on an overlay method using random wood to break up what will other wise look like a tall painted ply building. I think it will work well. We will see. Here is the building so far with the primer coat on...2 points
-
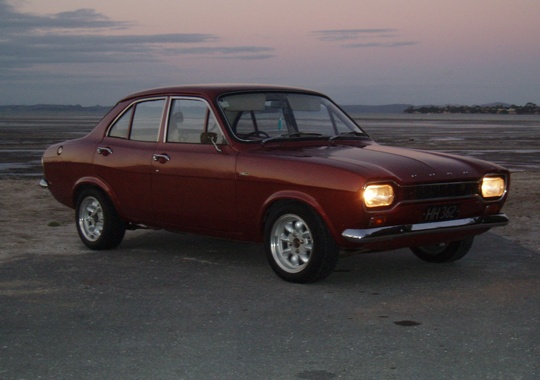
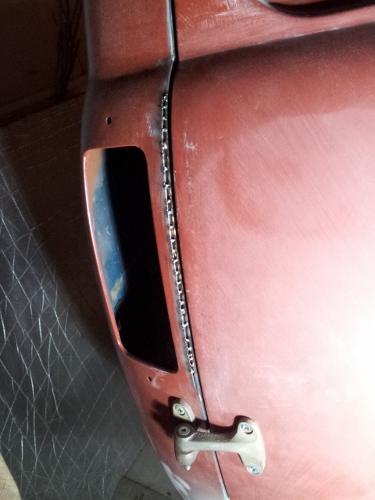
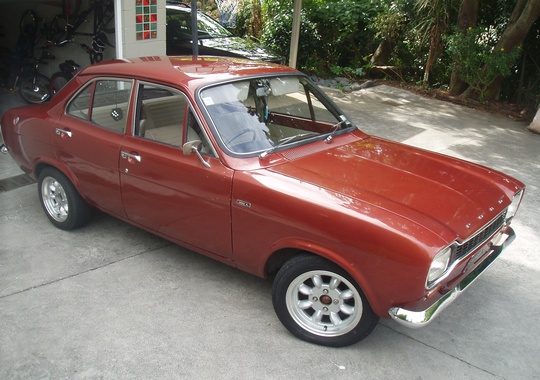
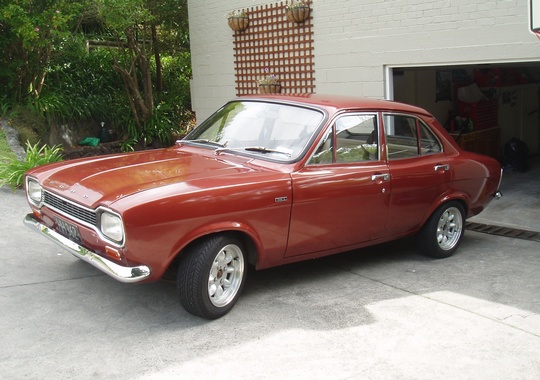
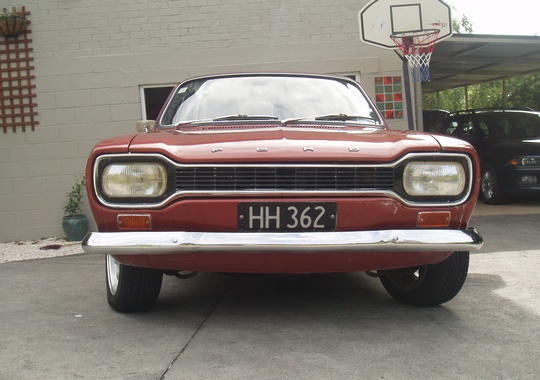
My 1974 Mk1 Escort I purchased in 2007 when I was 14 years old Auction Read Very tidy condition. Previous owner had for 27 years. Upholstery in good condition, as are carpets. Recently reconditioned starter motor. Has got Minilite 14 x 6" mags on it. All original condition apart from mags put on it. New Warrant and Rego.
1 point
-
So at around 7pm last night I got sick of dancing with the stars or whatever and went into the garage. Stripped all the carpet, underseal etc off. Use dry ice they said, it'll be fun they said! Well yes but I'm not going to find dry ice at 7pm. When motivation hits you run with it. Heat gun + scraper = Removed about 30kg (yes I'm a weirdo and weighed it) in underseal and that rubber/foam underlay shit. What's that in the corner? What you see there is the jack support, footwell skin has completely disintegrated & I can push that square out easily haha, fuck... New panels on order from Walloth&Nesch. Also had surgery today, nice and high on codeine, so I'll make the most of it and start attacking the tar/glue residue with Paraffin tonight, stay tuned for fun/fails. OH and if I ever meet the original owner I'd like to buy them a beer. Every surface/nook/cranny is caked in fish oil, saved this car no doubt.1 point
-
1 point
-
I might be missing something here, but why not make all the changes, then get cert? Or otherwise skip cert and save yourself the $$$ if it's going to be modified away from cert specs anyway?1 point
-
Really? no sequential injection? Just cut a box in the firewall to take the CAS and move on. the early evo / galant CAS will work sweet as on an evo 4 + head and contain all the trigger wheel action you need , not sure if they slot in to a 92 though.1 point
-
If you just run a crank wheel then you will only be able to run wasted spark, and batch fire injection; neither of which is a bad, just not optimised for economy. If you want a tps you can use it for accel. enrichment and over run fuel cut etc but it isn't mandatory on a map sensored injection system. Basically depending on how techy you want to go with it will depend on what the ecu will need to see, but all ecus should be able to deal with simple injection setups.1 point
-
fucking killing it man! such nice work, well done.1 point
-
nothing is ever finished. but trying to get it together enough to take it out in a few weeks time. got more springs and a bigger brake master on the way, which should hopefully sort out the two main problems1 point
-
I took the longest bits of elm and made them a pretty shape. Now that this 'picture framing' is done I just have to finish cutting up the rest of the elm to make a top. Perhaps in May Most of the rest of it looks shit, but if you squint a bit this corner looks OK1 point
-
A table needs leg, which is what the LVL was for, but I was dumb and ordered LVL so big I couldn't cut it with any of my saws properly so I chopped it up into bits and took it to a mate who has access to a big mother planer. I gave him a drawing which my dear friend Mathers helped me with, and here's a leg. I like it. After the legs was done it was time to cut up some rails and dummy assemble the table base. Ummm, yeah. It's pretty big. Ooops1 point
-
Took a sick day today. WOF & REGO'd again, let the fun begin. Coilovers and wheels asap.1 point
-
Het guys really struggling to find a panel beater in auckland to have my car ready by hanmer meet .. anyone no someone keen on cashie in PM me Ok so I put the eclectic dizzy n ignitor in and I couldn't get the car to start I had it sparking n wanting to start but when I turned key back off the start position it would like die / stop running.. unsure of why just yet. Also put some new shocks in the front and put some proper lowering springs in so now sits at 100 mm off cross member ! Also after geasing through the show us ya sheds thread I decided to build me a work bench . 3.6 m x 600 mm deep. Haven't finished shelving units etc ran out of timber ! Also took the car outside n gave a quick wash engine bay was getting dusty ! Arse still needs to come down by about 20 mm to match front but will do that last . Thanks for looking1 point
-
Wof and reg aquired, forgot how fun it is to drive. Also picked up these (set of 4) for chump change. Should polish up nicely. 13s so can just roll current tyres because Im a jew.1 point
-
That's some beautiful work mate.1 point
-
Its getting closer now keep the photos coming. You have far to much spare time in that new job of yours1 point
-
Hot damn! Looking sweet!! Cage or no cage? Was this a one lady owner car? I seem to recall being offered a brown auto before getting mine years ago. Are you keeping the boot chrome? I know of a home if you want to sell1 point
-
Fuck yeah Elliot, looking so rad. Really need to pop out your ways to check it out in the flesh.1 point
-
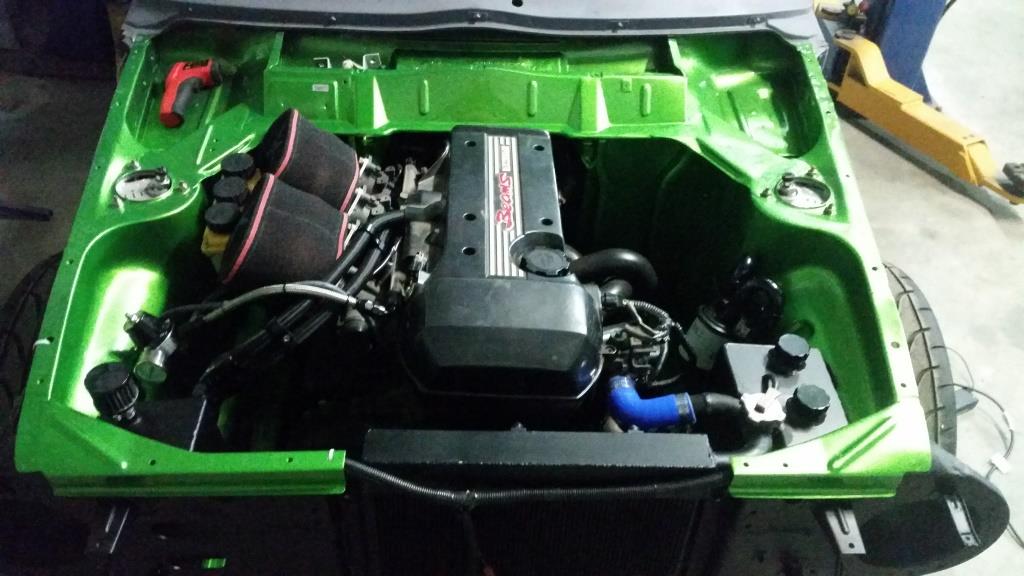
All 4 silicon joiners in place and that's the air system all sorted from air box to intake manifold.
1 point
-
Before pics, carb sent off to be rebuilt, Stripping engine down for rebuild.1 point
-
Sooooooooo I bought a single turbo manifold , new t04e turbo ( may change at a later date) , oil feed and return hoses and a tail waste gate. Bug thankd to mitch w for selling them and getting them sent off.cheers mate. Well they arrived yesterday and the manifold wouldnt fit in the cortina engine bay with yhe wastgate pipe on so i chopped it off. Took the manifold to work today and cut then flange of to rotate it . but while i was at it i extended it to make the turbo sit a wee bit higher also added a divide for the twin pulse turbo and shaped the pipe to flow in to the outlet so it wasn't hitting any flat surfaces.. Still got to sort out where to do the wastgate. Before After A shit load between then the factory set up.....very happy
1 point
-
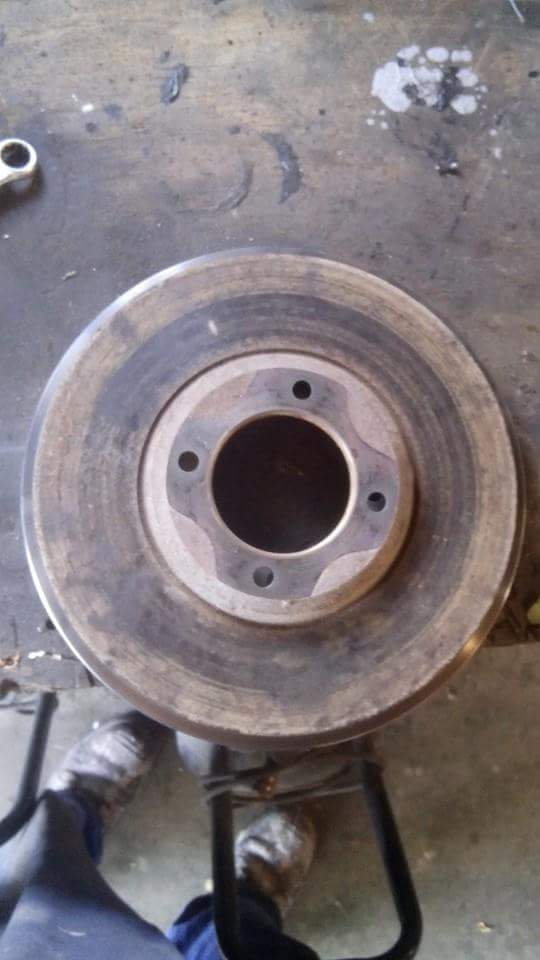
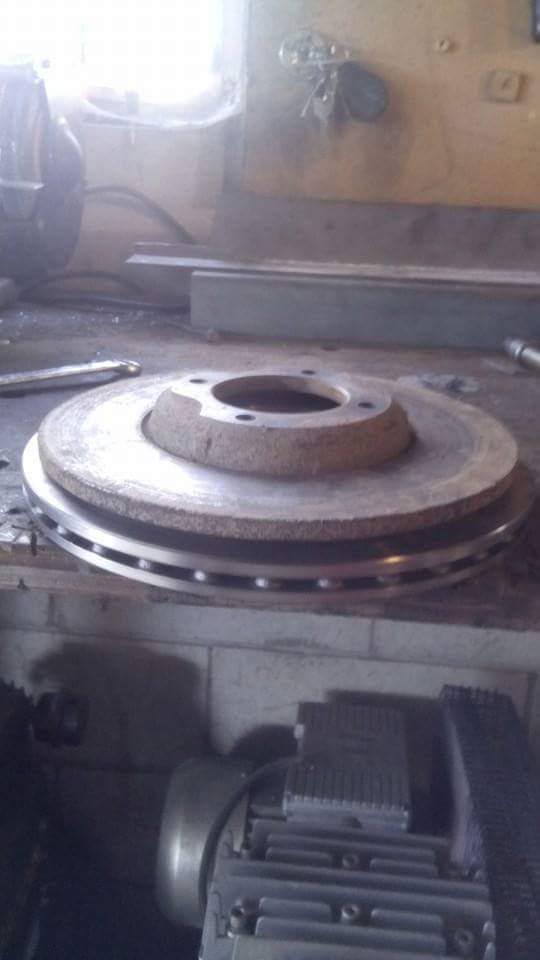
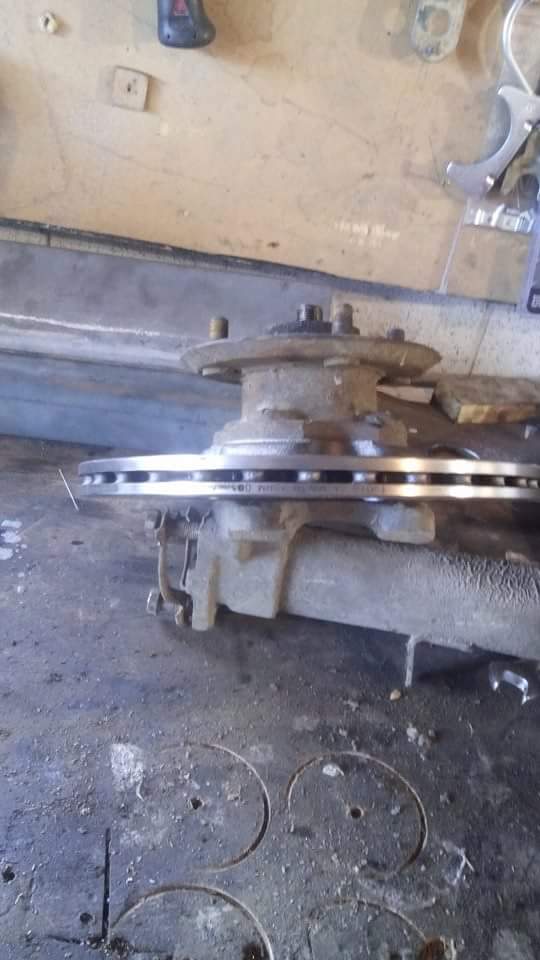
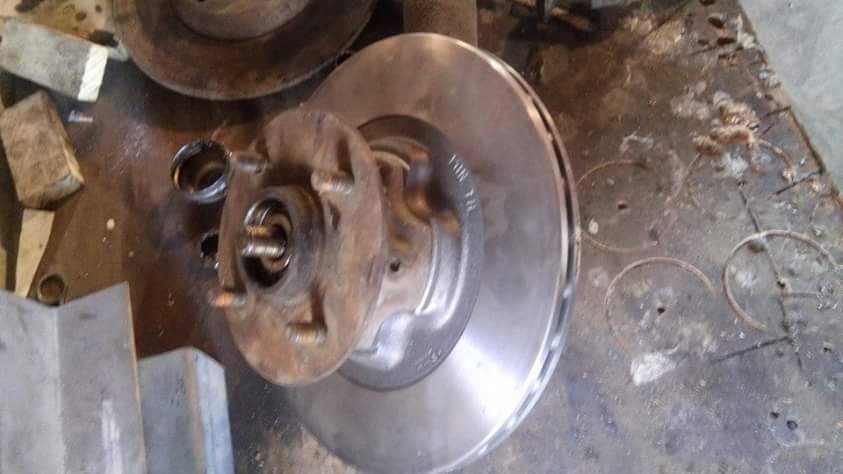
Just a quick 1 Nice wee disc upgrade for the old cortina/escort Brembo 260mm x 19mm vented disc.direct bolt on....but will need to change calipers. Disc is for a ke ford laser 1.6 tx3 turbo As you were
1 point
-
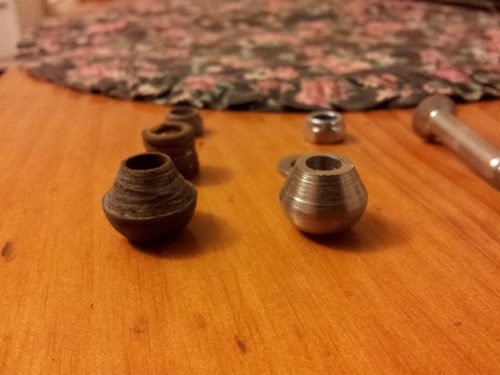
I also made these this week. this is the end cap thing for the front of the heater channel these hold the nut plate things in place inside the channels, the second one I made was a much better design. and goes together like this. The old nut plate(is that even what they're called?) where badly pitted so I had the guys across the road knock me up some new ones. this resto is brought to you by woodstock bourbon and cola.1 point
-
1 point
-
Shocks as a bit of a upgrade to the ride1 point
-
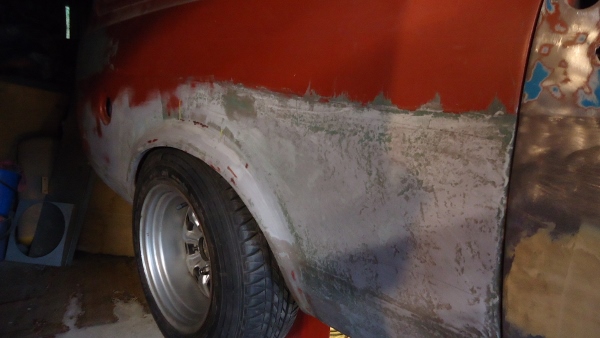
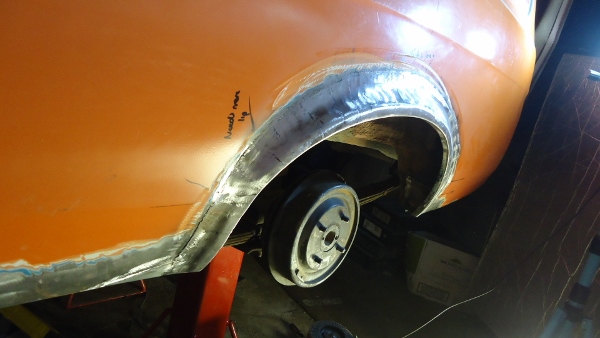
It just didnt look correct so after alot of measuring i decided the passenger flare didnt match the drivers side and stuck out 5mm too much in the centre. Decision was made to cut the edge off and move it back. Wasnt too much hassle, just disheartening. Finished the rust work in the corners under the flare while i was there Took away the supports and sat it down on the reset leafs to see how low it sits. Bonners all round. 99% happy with it now, need to cut another small section of the flare out and move it back in. 2 steps forward, one step back it seems
1 point
-
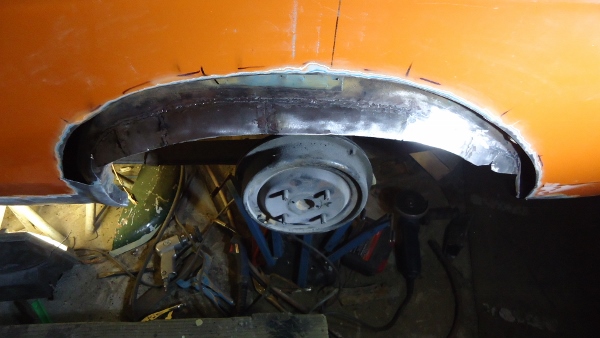
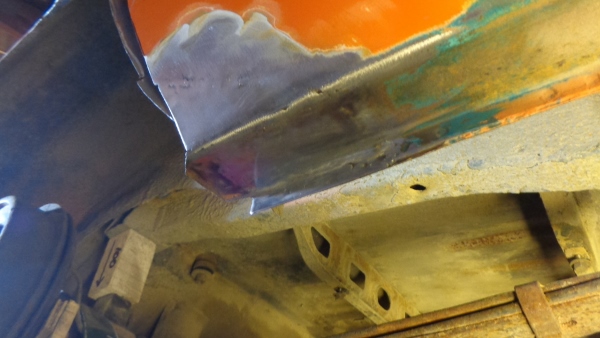
Have been doing alot of rust repairing and prepping for the flare. Tidied up the ends of the sill, the under skin, cut to suit, gave as much clearance underneath as possible An age was spent cutting and welding, and re cutting and re welding. Turning this shit... into this.. Makes it worthwhile but still not 100% happy with it
1 point
-
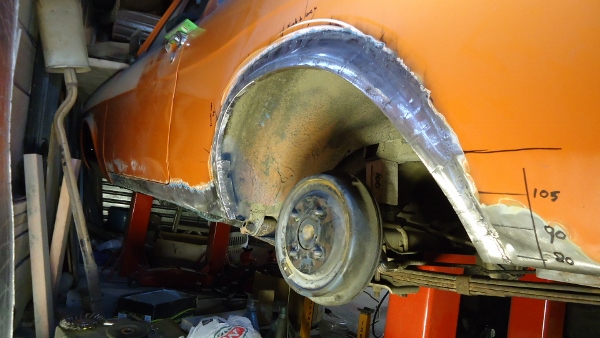
Have been replacing it with new metal this week. Then started on the skin under the flare. Cut back the old rusty stuff and tacked on a new strip. Will trim it later to suit
1 point
-
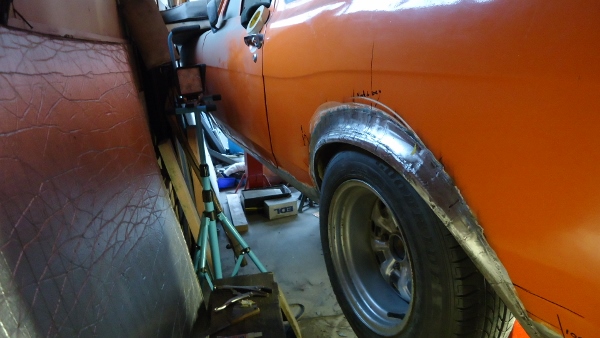
Skim of filler and 2k primer Just been cleaning up the little bits on the drivers side. lining up the door and guard. Took the guard off to do rust repairs earlier, will be bolting this back on instead of welding. Soon to start work on the passenger side with the flare and replacing the side windows
1 point
-
So I scanned some old pics of the rag the other day, the first 2 where just after I first got it. The front was wound right up, with very old zx whereveryoucallem michelins,fucked shocks, stock seats(drivers side also shagged) nasty old 1200cc something something, one windscreen wiper But it was shiney, red and had mags! and this is the new engine being installed by my brother and myself at the VW shoppe in Hamilton.1 point
-
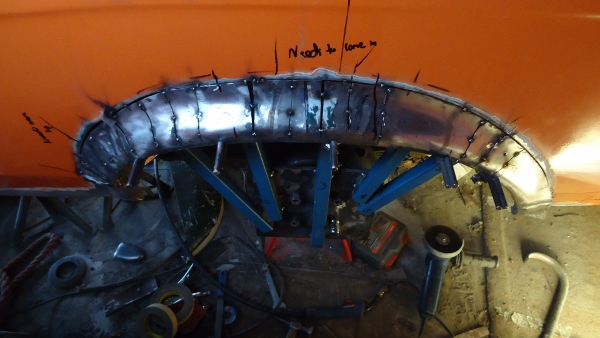
been bustin my ass on this thing this last week, sleep when you're dead bitches! I think I blew a hole in every single one of these, I think when I drilled the spot welds out all that time ago, I had drilled though about half the bottom layer as well, making the metal very thin, very well stuck together now. the frankenfender is taking shape this is the difference between the two fenders. this is me trying to hold things together, in the correct place. it's alive! it's alive! might just pull this off go everything ground down on sunday, gave the fender some hammering, starting to look good. chur1 point
-
one more pic of how it use to look, 20 footer, good from far, far from good. so the plan was to start at the front and finish it as much as possible, and not blow the whole car apart, get overwhelmed and give up(ant' happing) car has four differant fenders of four differant years and models bugs1 point
-
Discuss: //oldschool.co.nz/index.php?/topic/30253-sp450andles-austin-mini-1000-le/ I am not a happy chappy. There's a weird problem where the car coughs and splutters sometimes in 4th gear, uphill. I can't figure out why. But that isn't even the bad news. This happened today: At a friends house. In his driveway. His mum drove her stupid X5 into it. And it's worse than what you can see in the pic. So I'll be getting a new door out of this, fuck just popping it out and bogging it. And to top it all off, a bird pooped purple poo on me when I was taking that photo. RAGE RAGE RAGE EDIT: Hah, lovely start to my second page1 point


This leaderboard is set to Auckland/GMT+12:00