jacknz123
-
Posts
98 -
Joined
-
Last visited
Recent Profile Visitors
867 profile views


jacknz123's Achievements
Advanced Member (3/5)
193
Reputation
-
Oh nice thanks for the heads up about parts in India. Yea want to keep this one fairly standard at this stage.
-
Thanks guys, I will get it all sealed up with epoxy first.
-
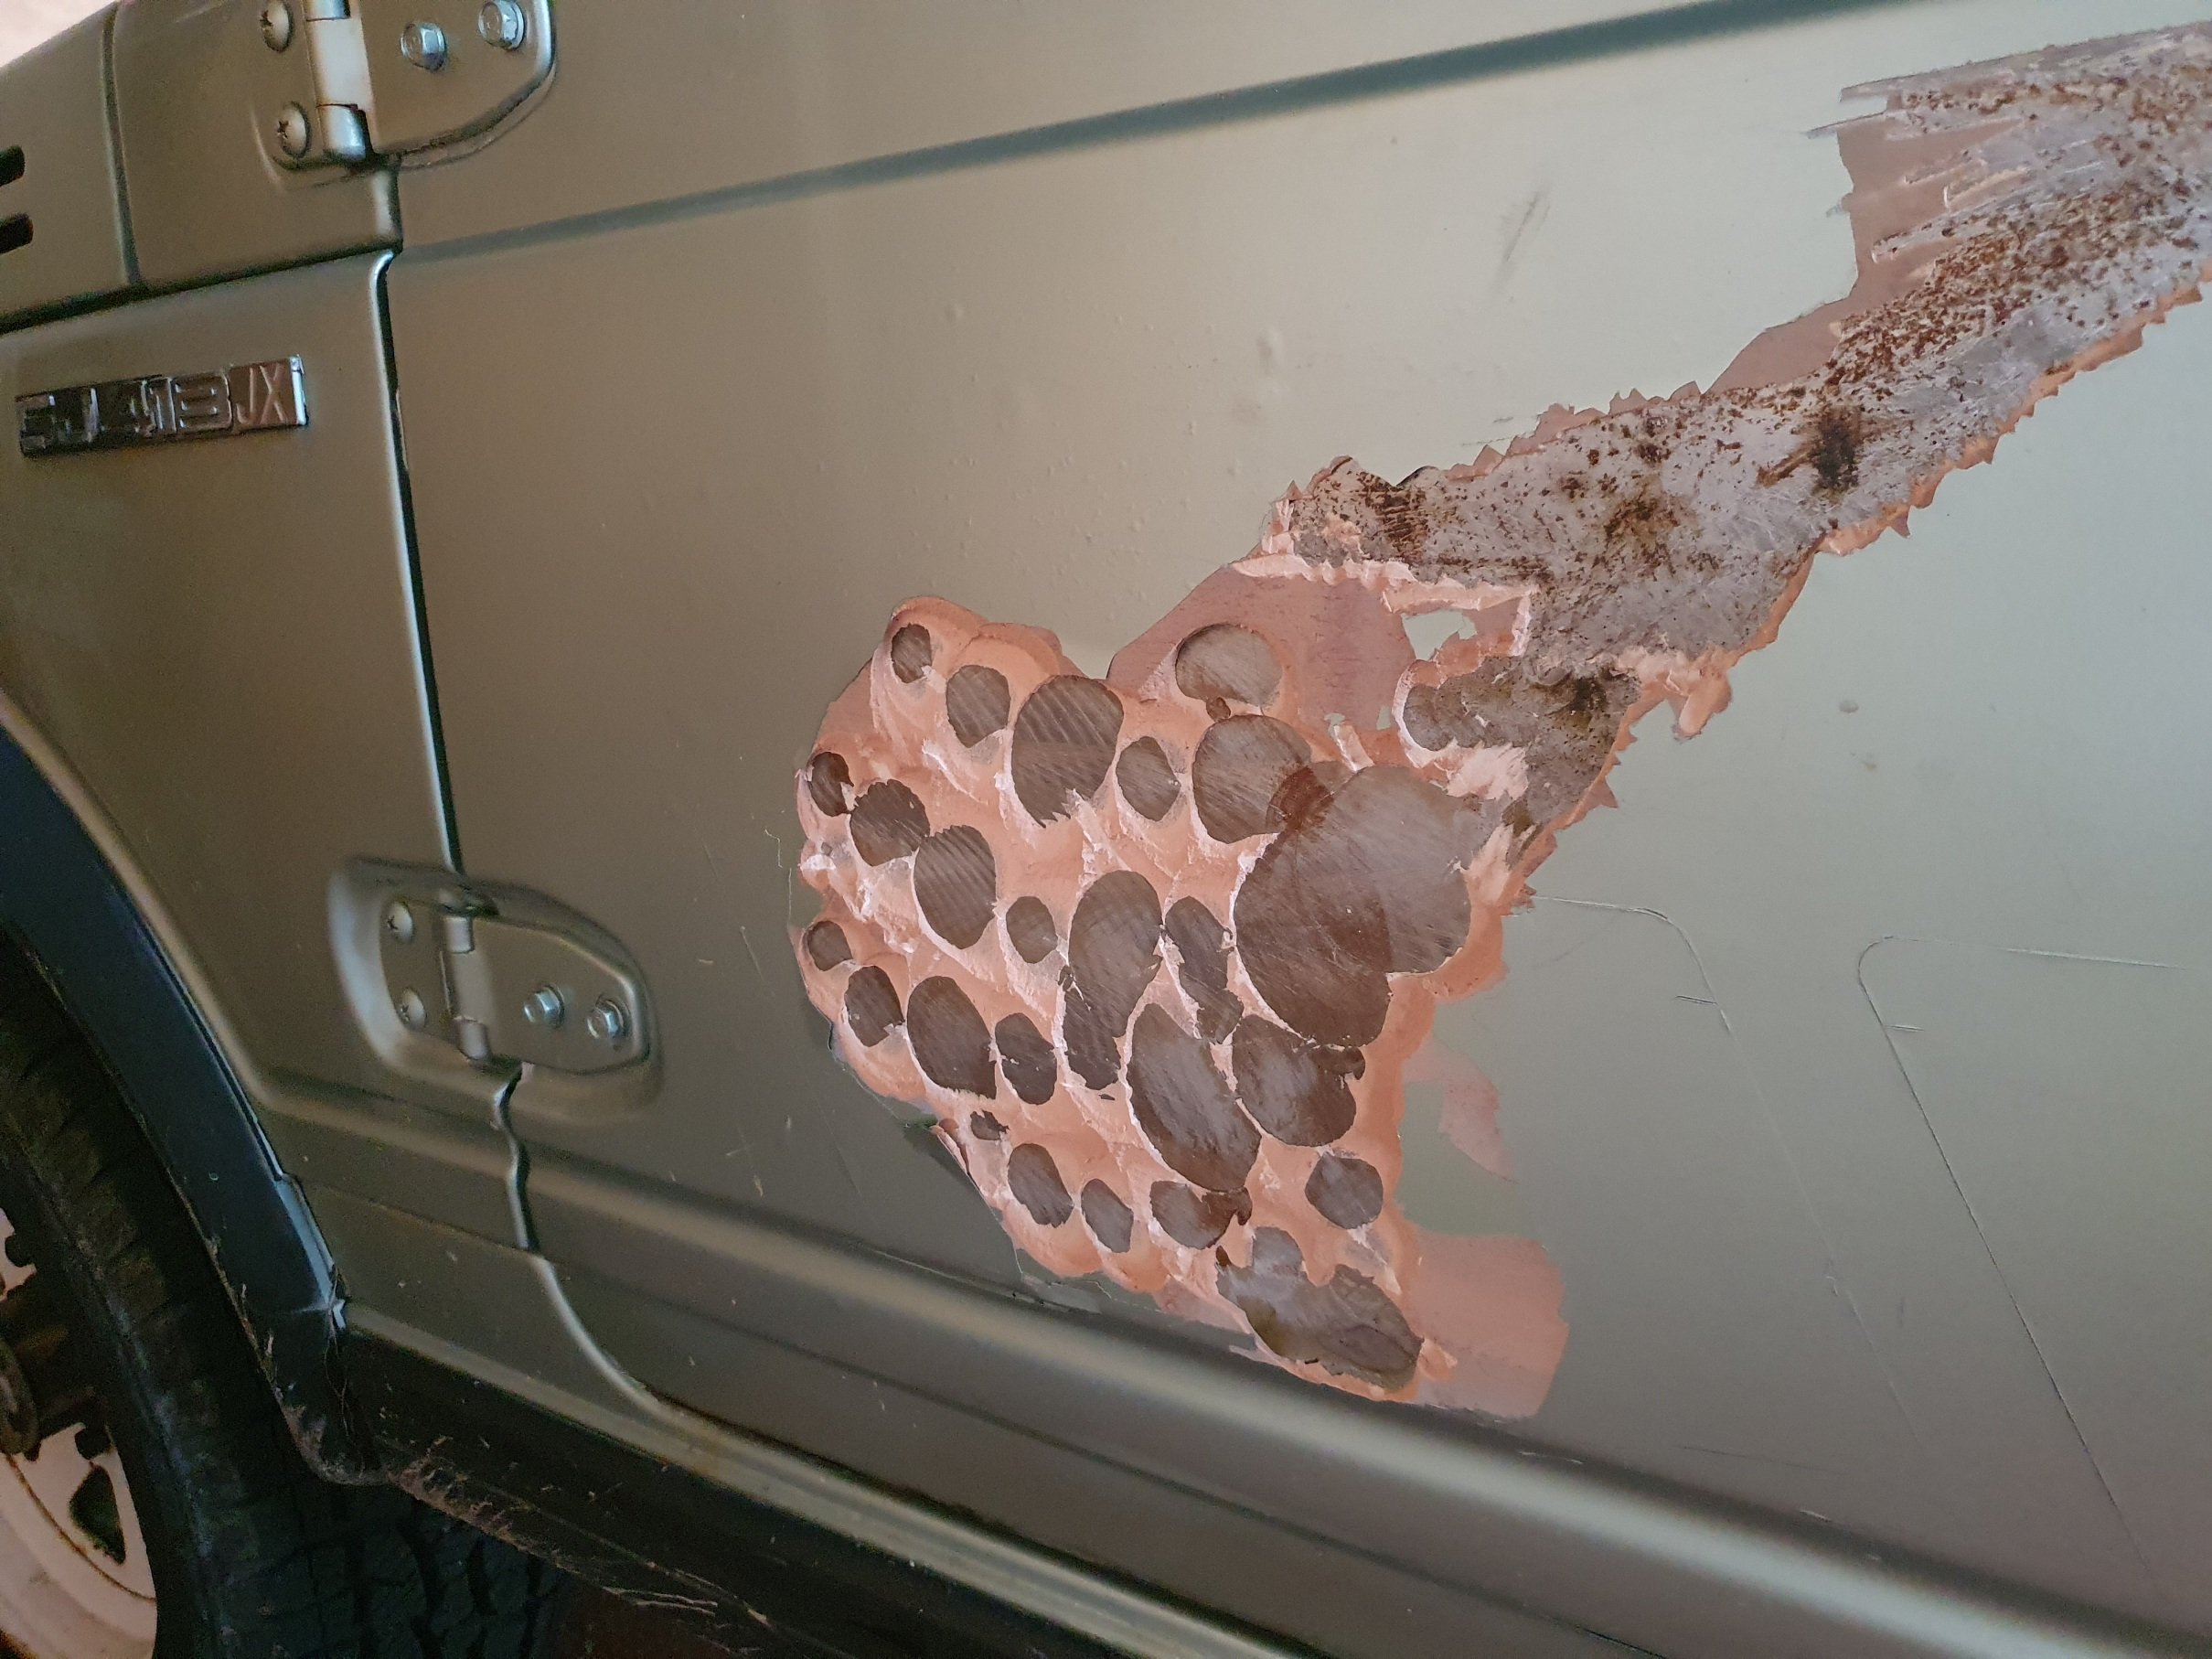
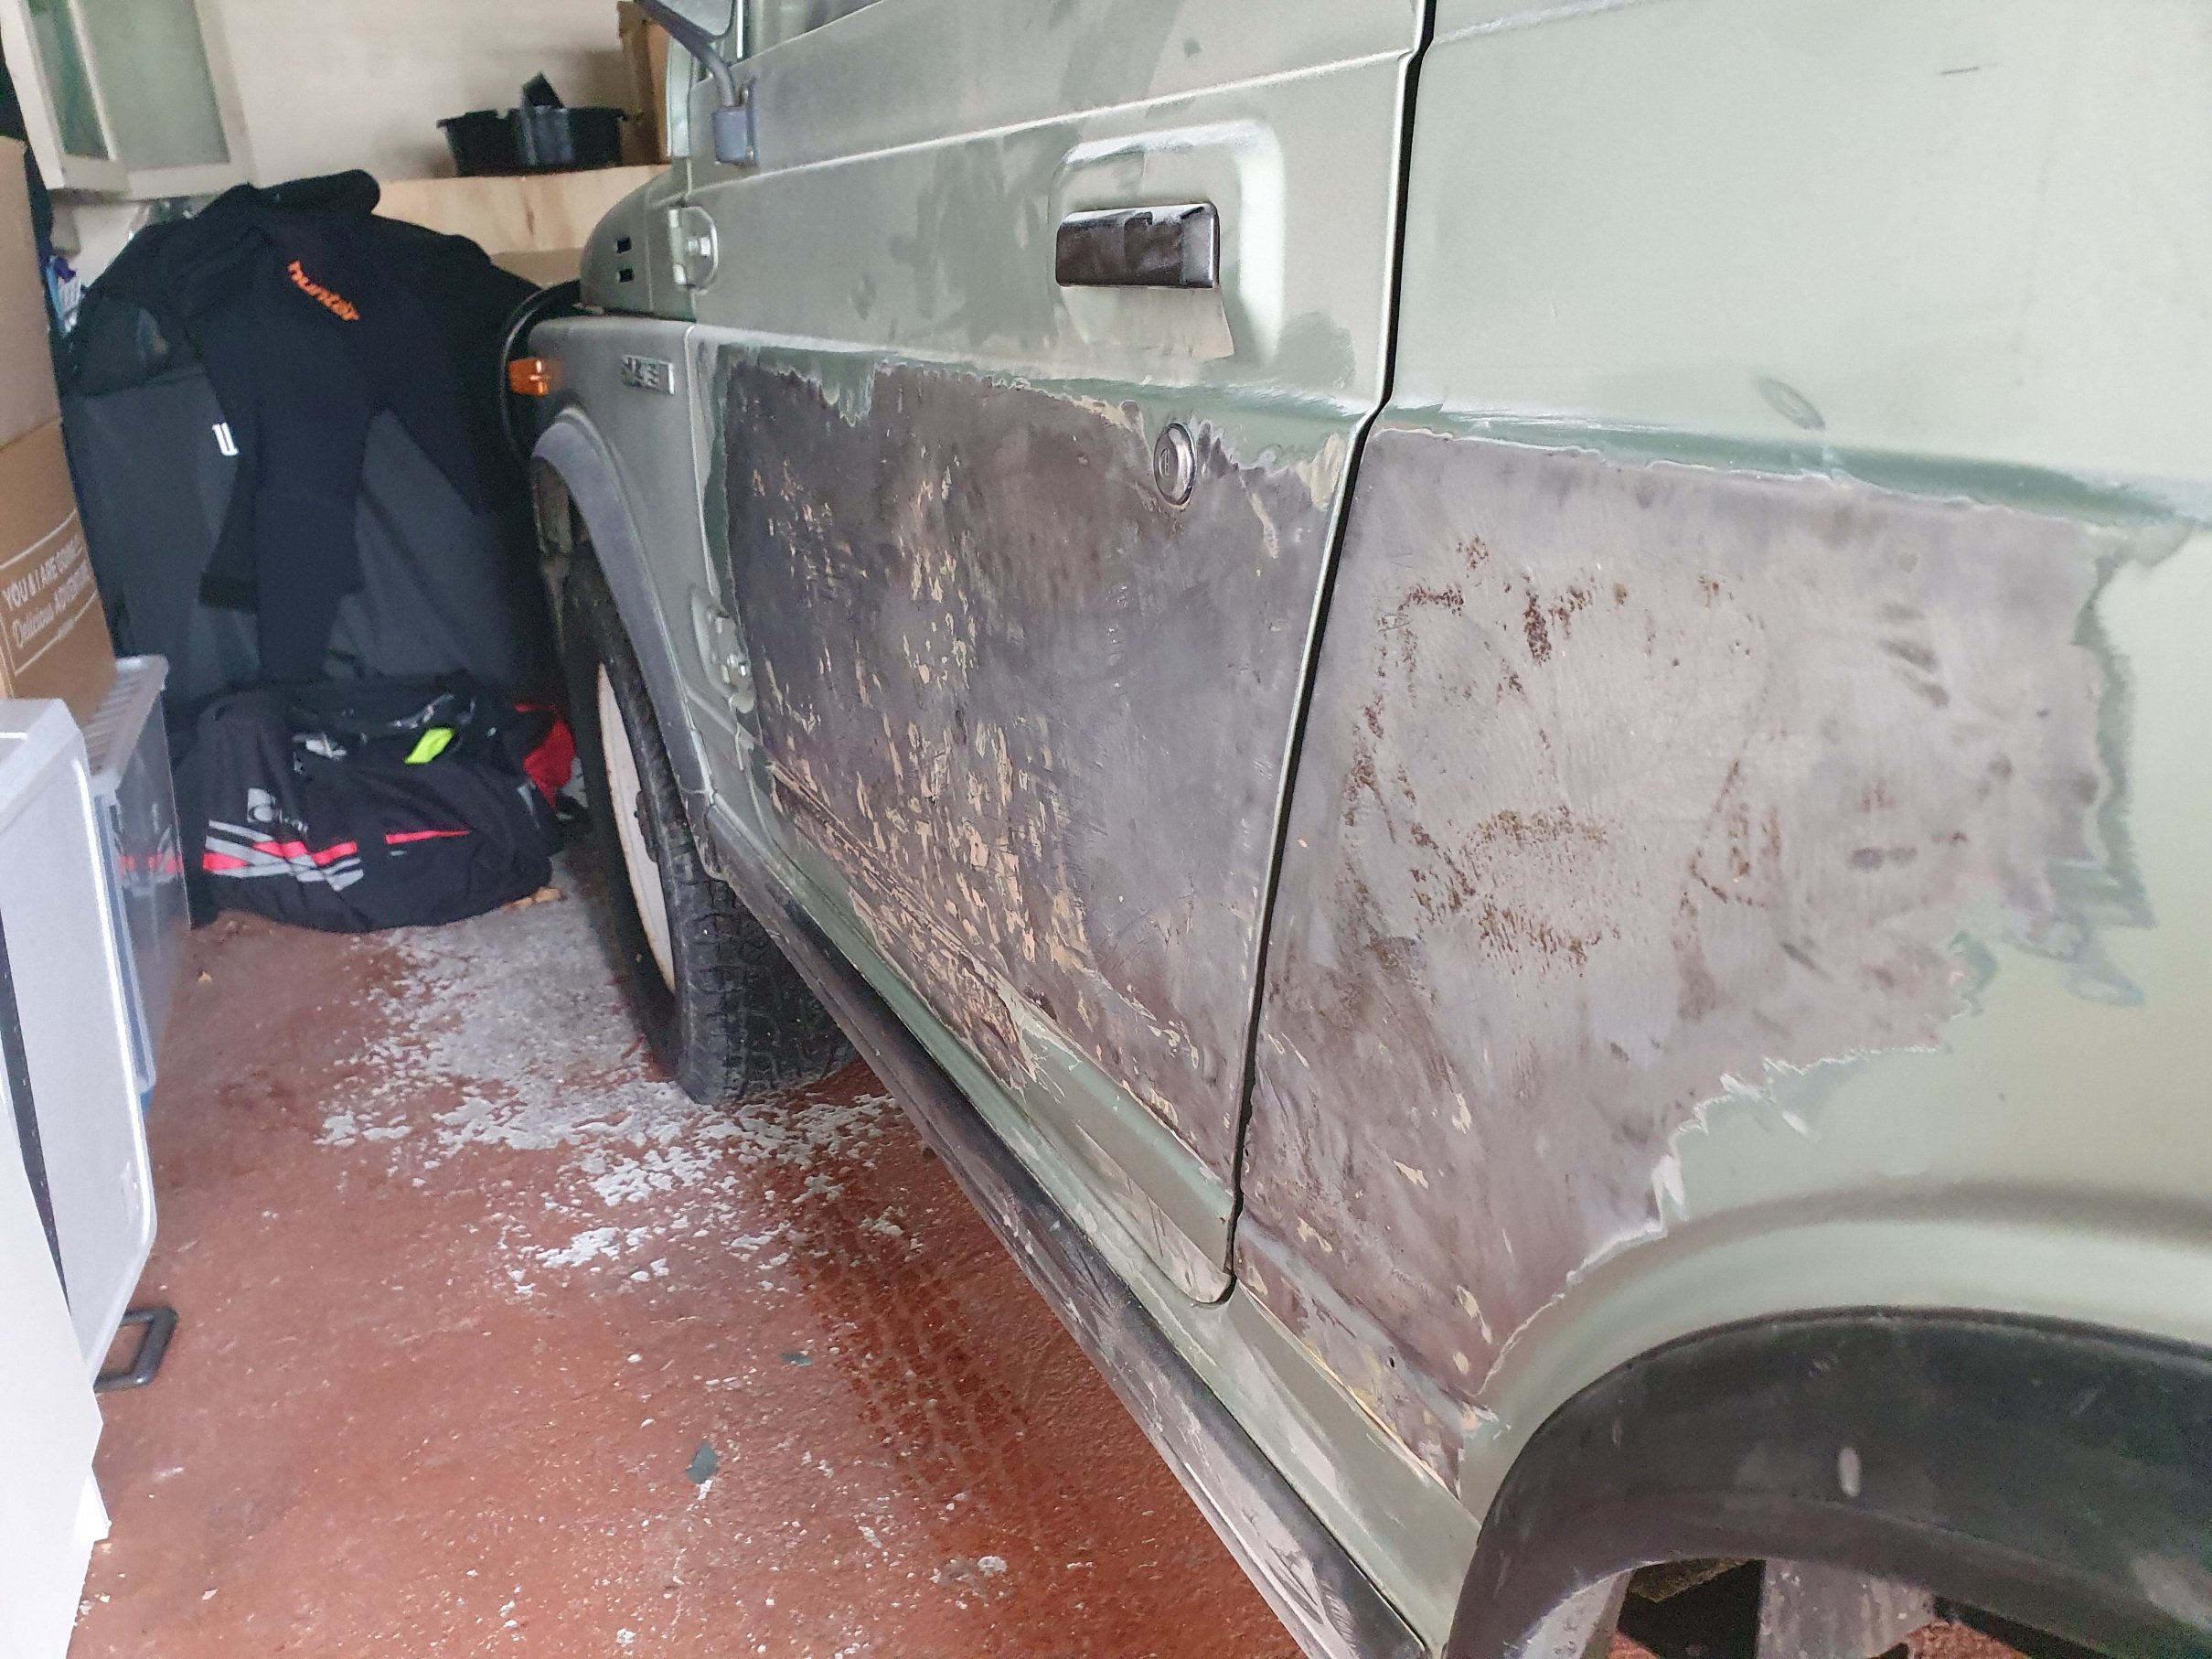
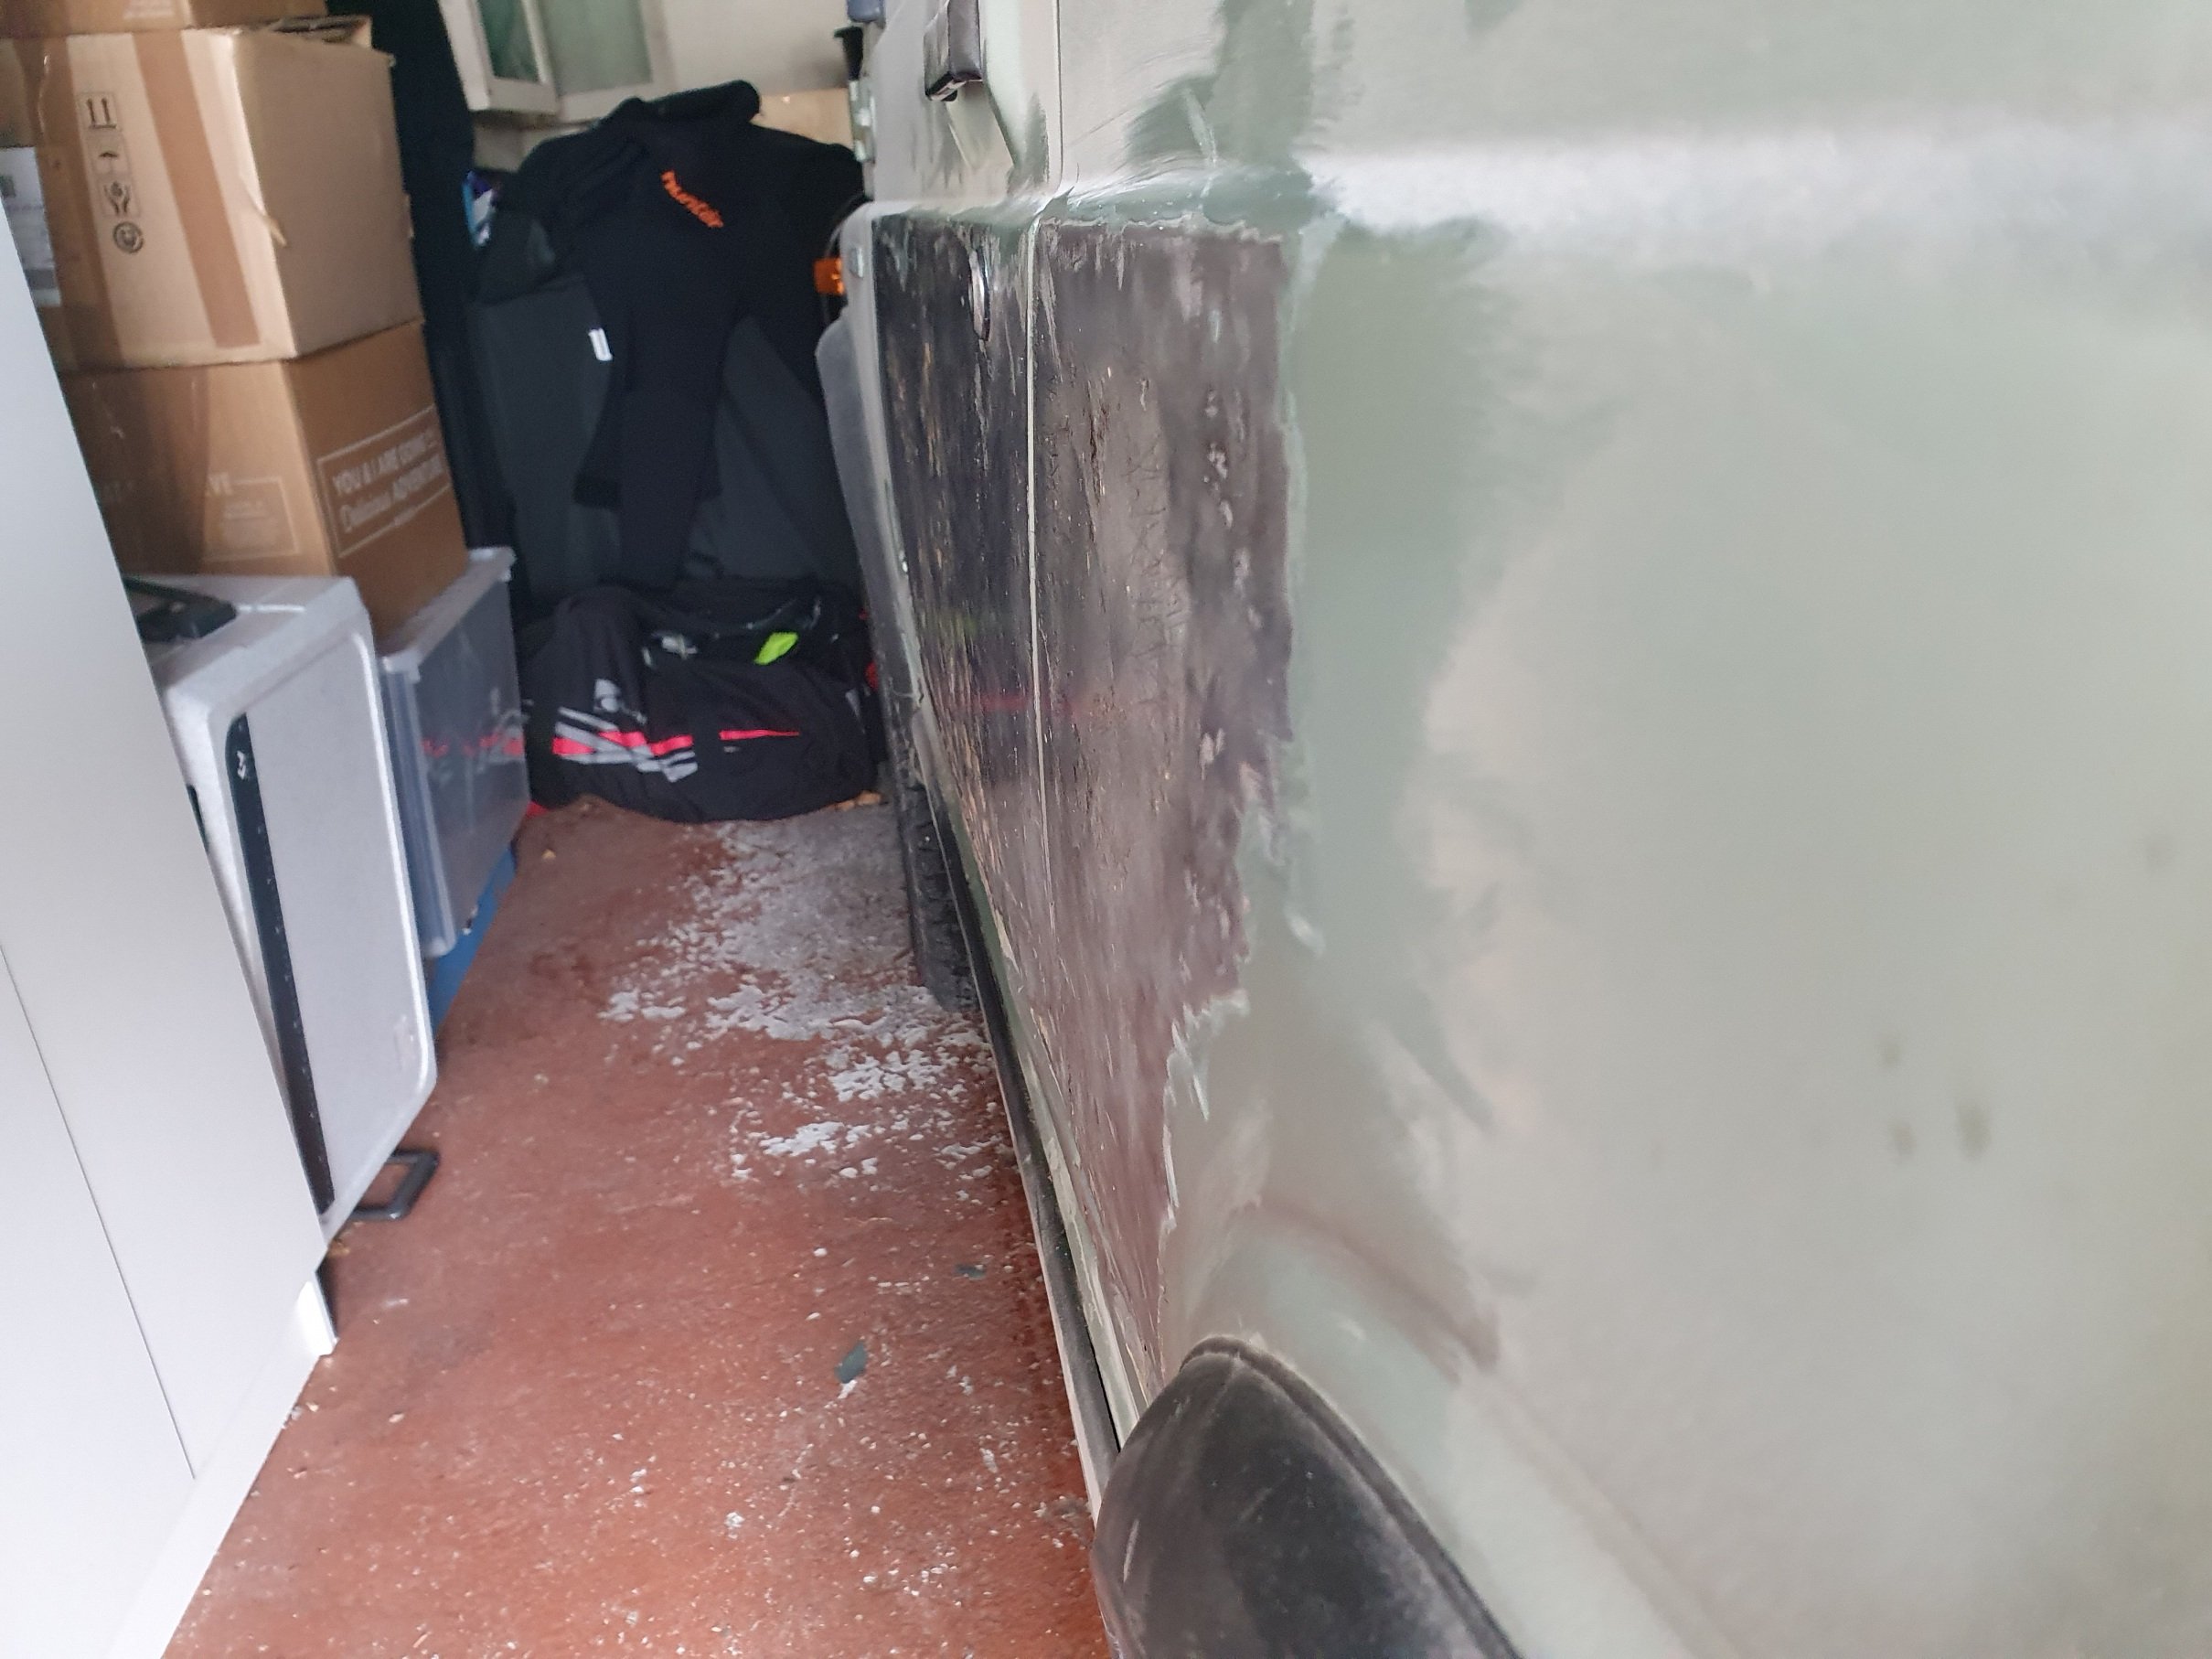
Lockdown finally got the better of me today and I decided to have a poke around at the paint bubbles in the passenger door. This was one area of the car that showed less attraction to a magnet so I was already skeptical... The bog is probably around 10mm thick in parts but fortunately there was no significant rust underneath. Probably an unnecessary amount of bog considering that the panel is quite straight. I have already cleaned and rust treated the steel while I work out what to do. I am thinking finish stripping the panel, epoxy primer, filler, and top coat with colour matched rattle can. Would appreciate opinions/experience regarding bog on steel vs epoxy primer first. Seems to be a lot of divided opinions on the matter. Thoughts?

-
I didn't want an Aux cord floating about so I went and grabbed a bluetooth adapter. This one from Logitech had good reviews and required 5V power so I hacked up an old 12V usb converter. I needed to access the pairing button on the top when it was installed so I drilled a hole to suit and tucked the adapter underneath the head unit. I then tidied up all the wiring, replaced the 4 inch speakers and installed everything in the car. Really pleased with the result. You can switch between bluetooth and AM radio with the tape insert button and the bluetooth unit automatically pairs with my phone when I turn the ignition on. Sound quality is not bad considering the setup, goes hard for what it is etc.
- 7 replies
-
- 26
-

-

-
I temporarily wired it up on the bench to test and it worked! Next step was to package everything together and install it in the car. The original mounting plate had been hacked up and no longer fit so I decided to employ the 3D printer to produce a new one. Here it is next to the original, finished in PETG. And reassembled on the bench.
- 7 replies
-
- 12
-
-
-
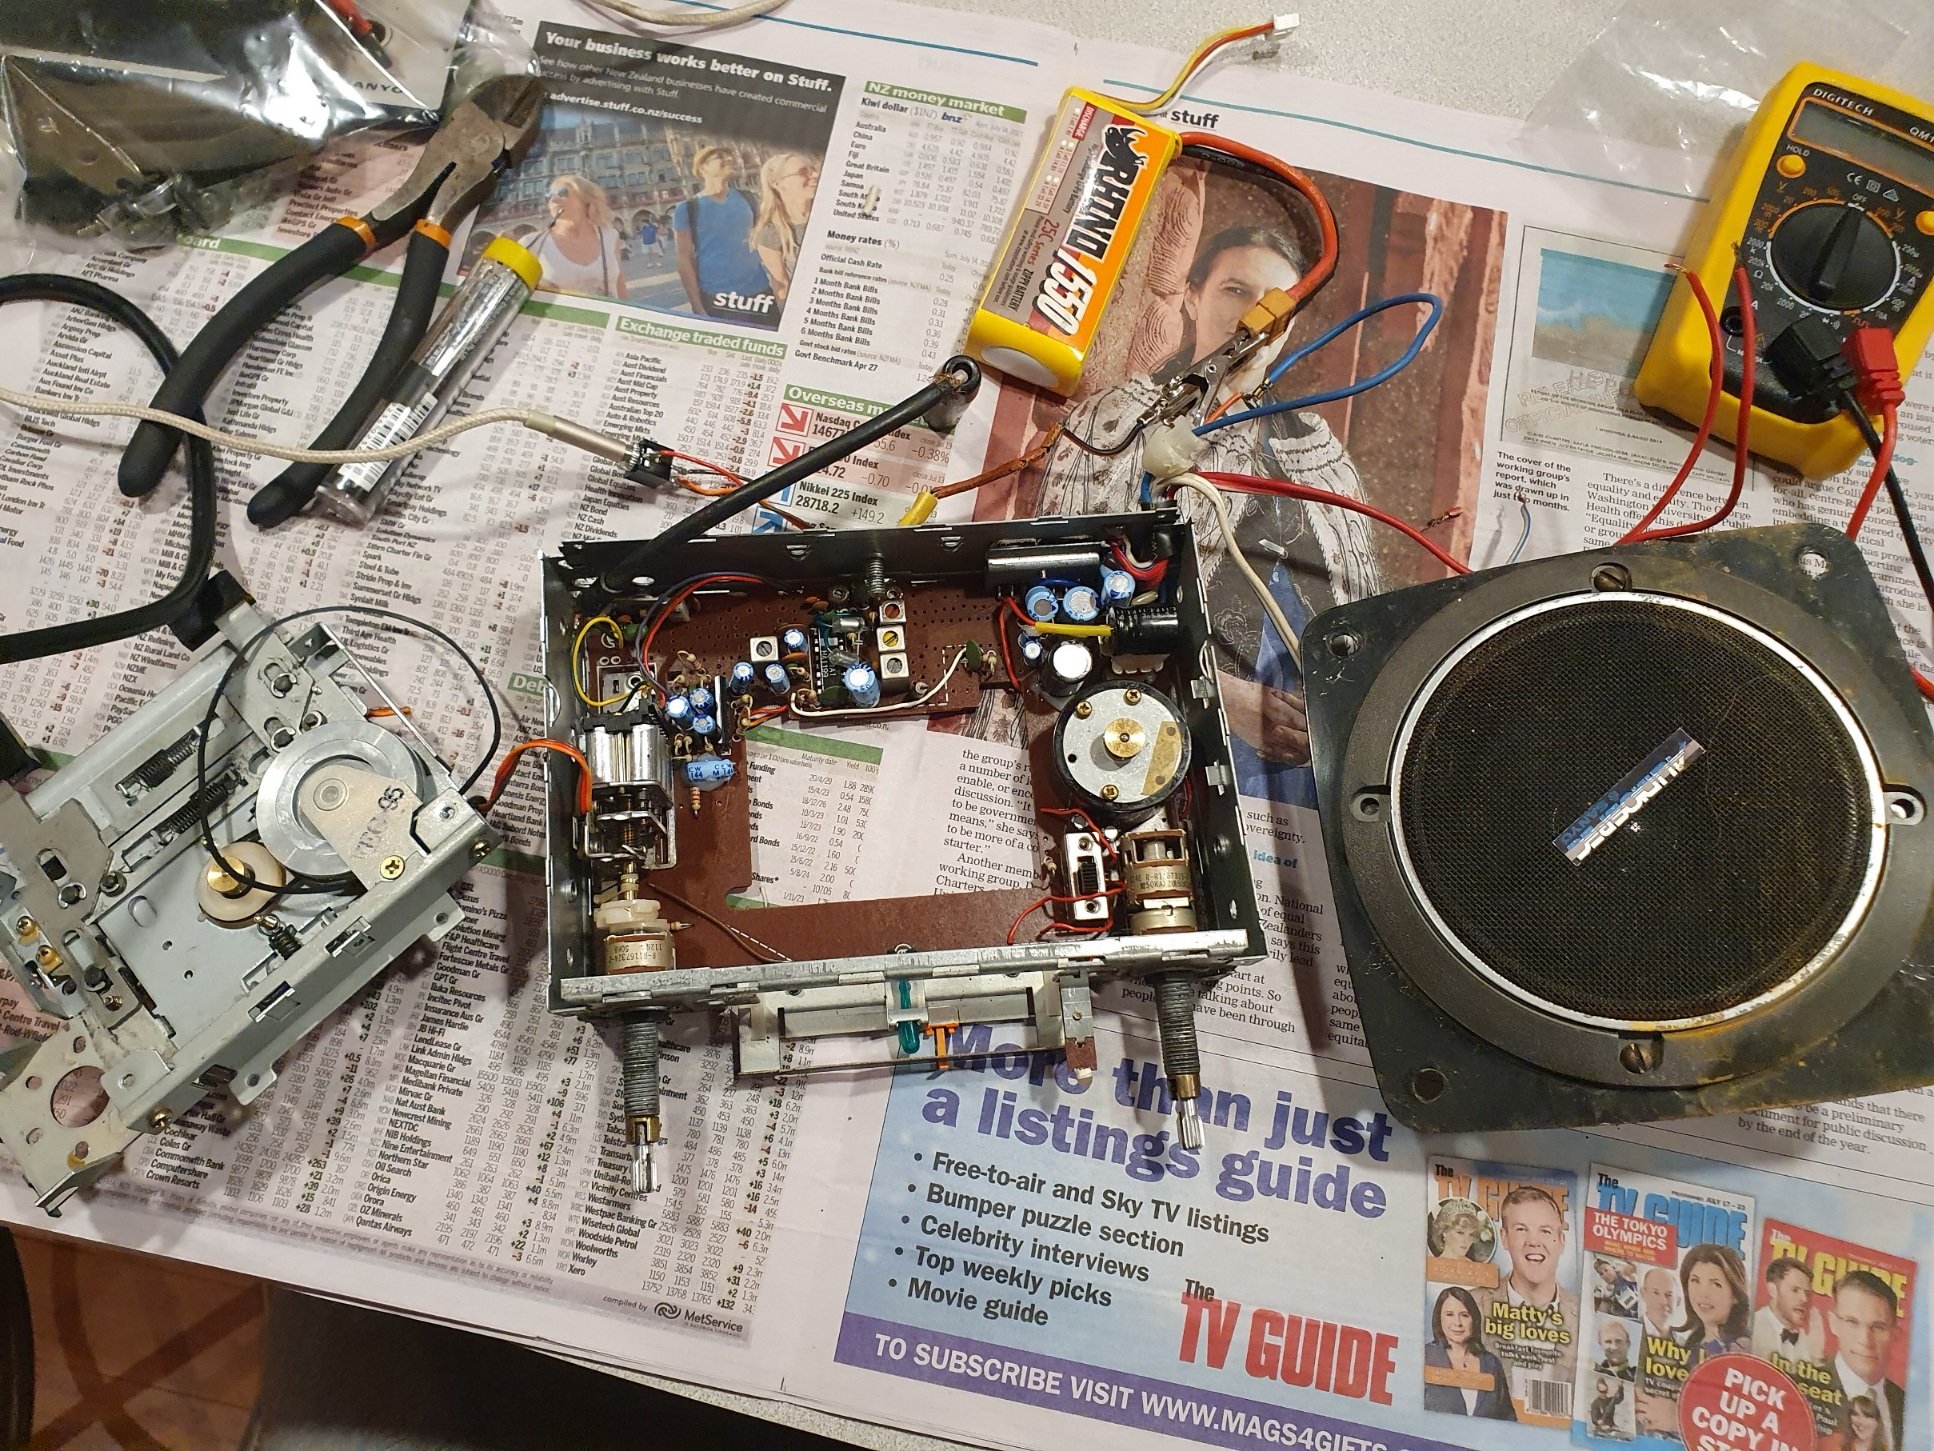
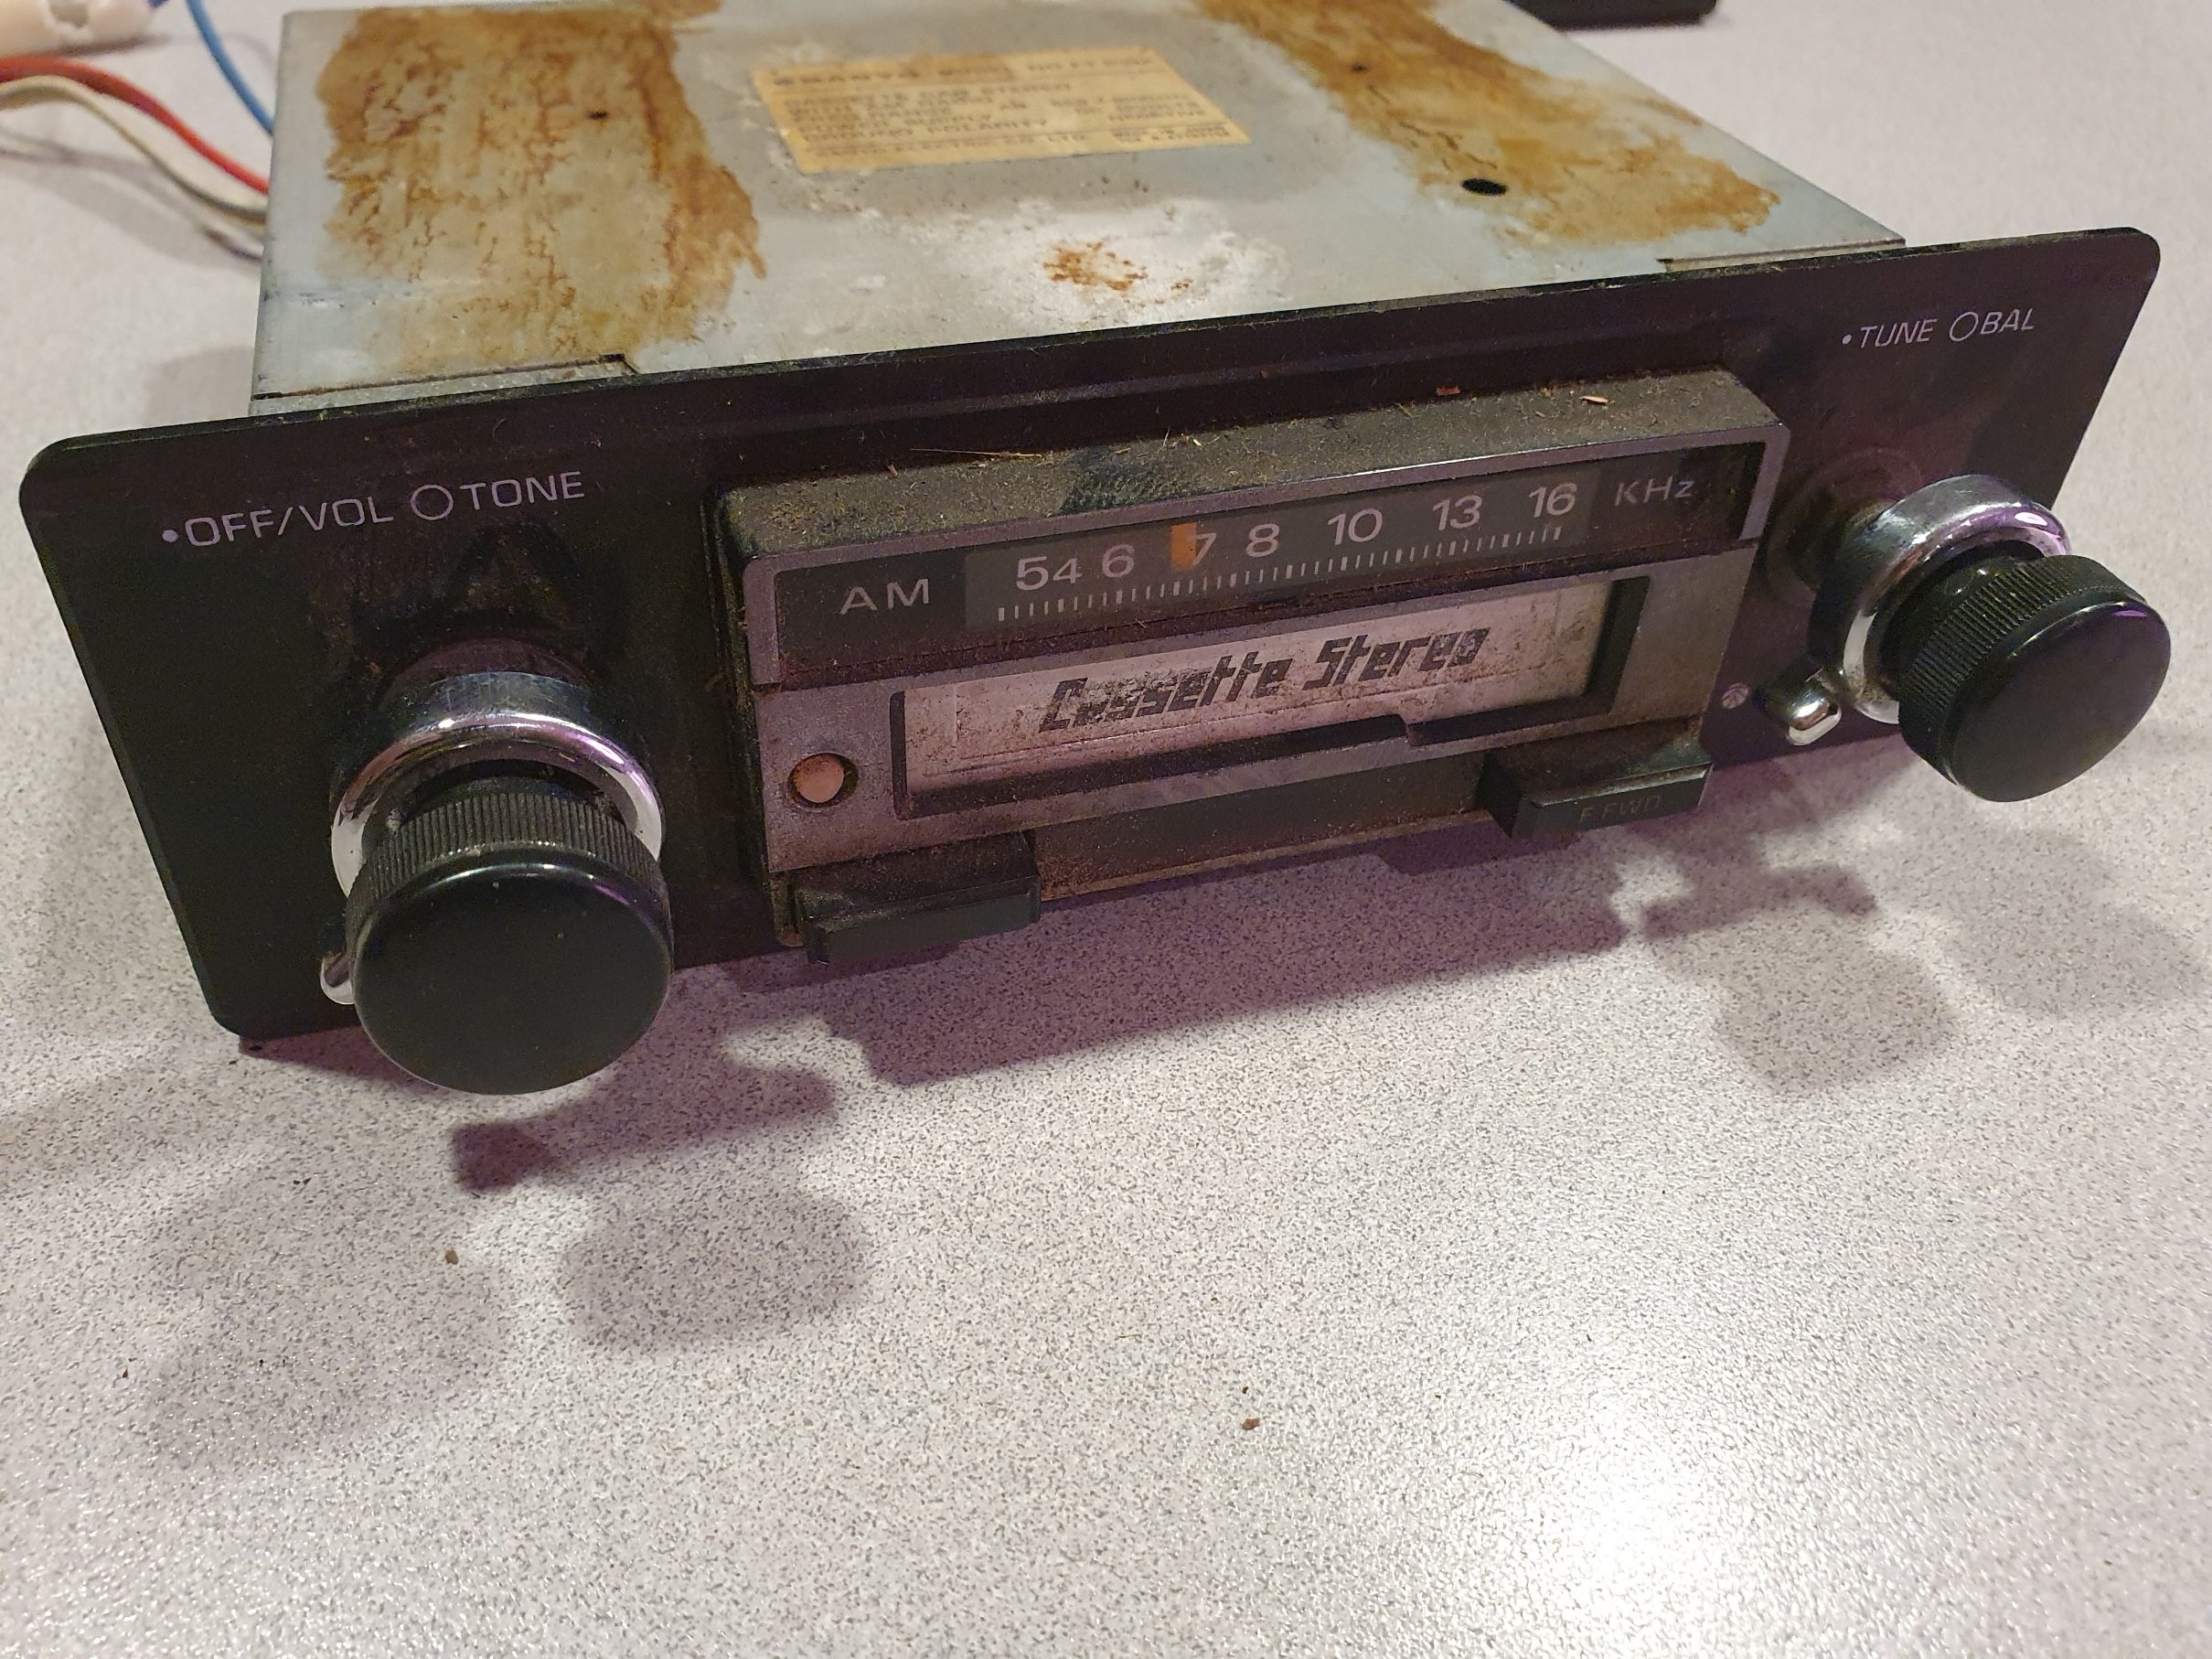
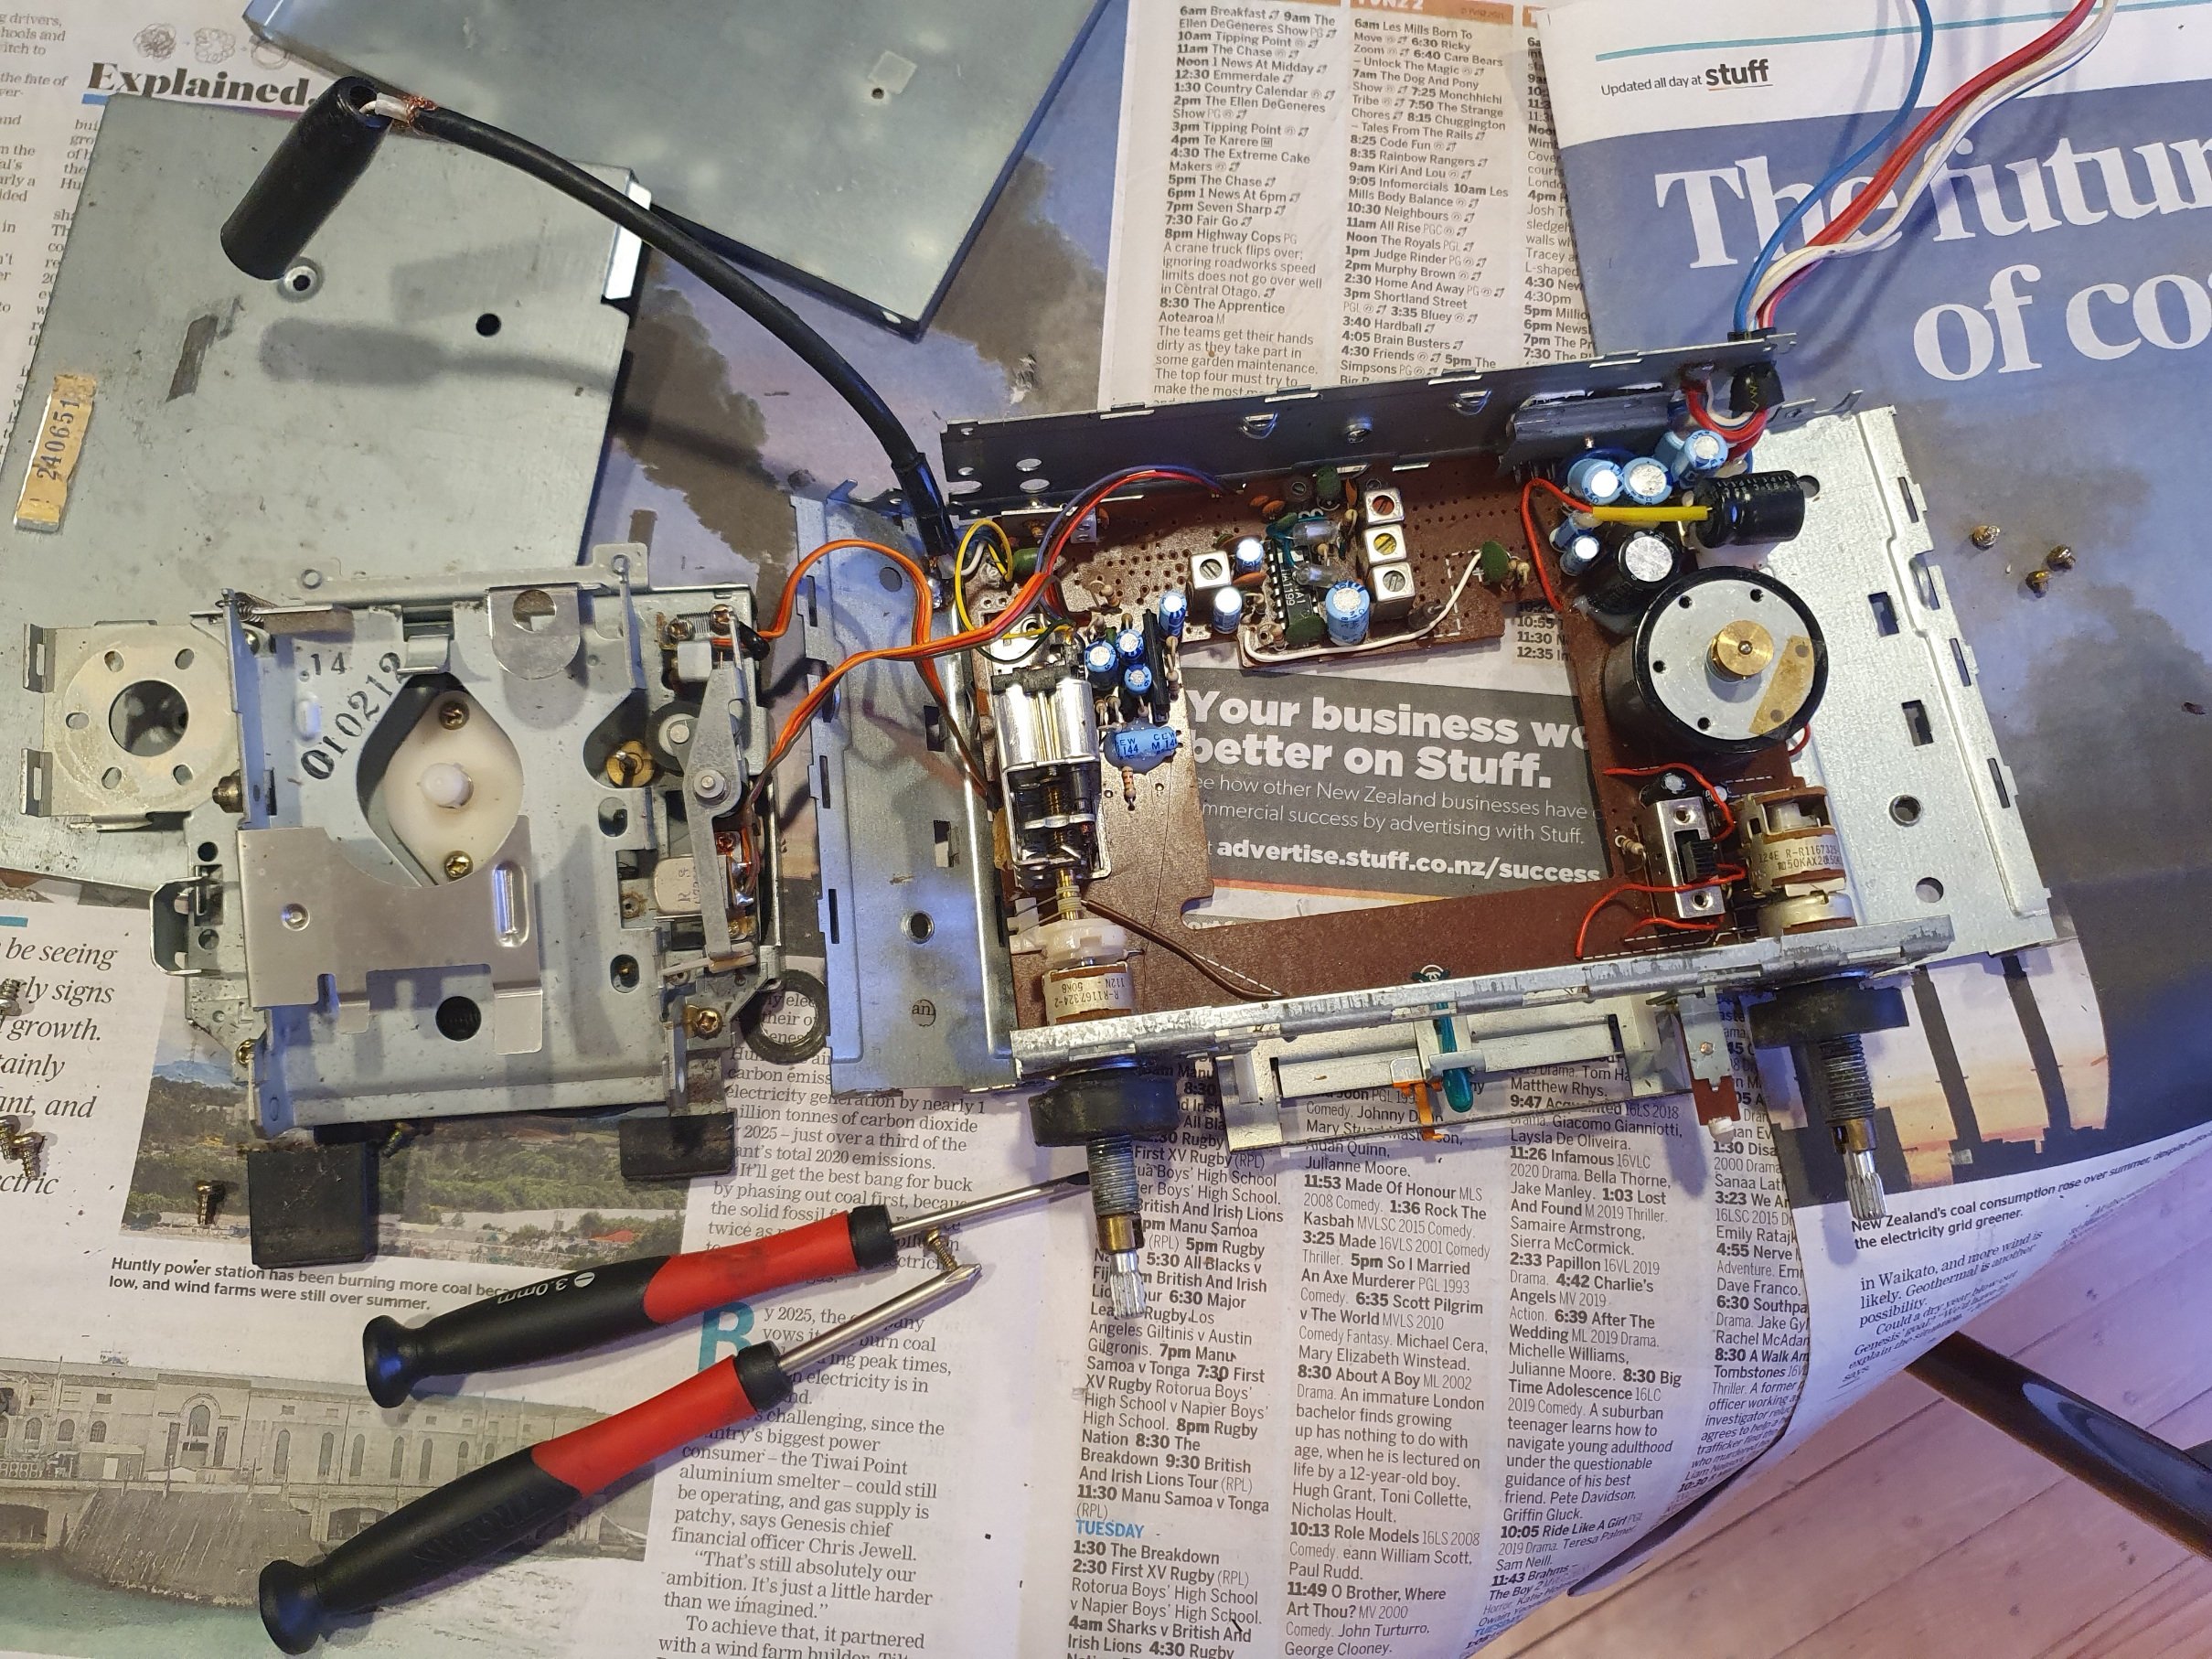
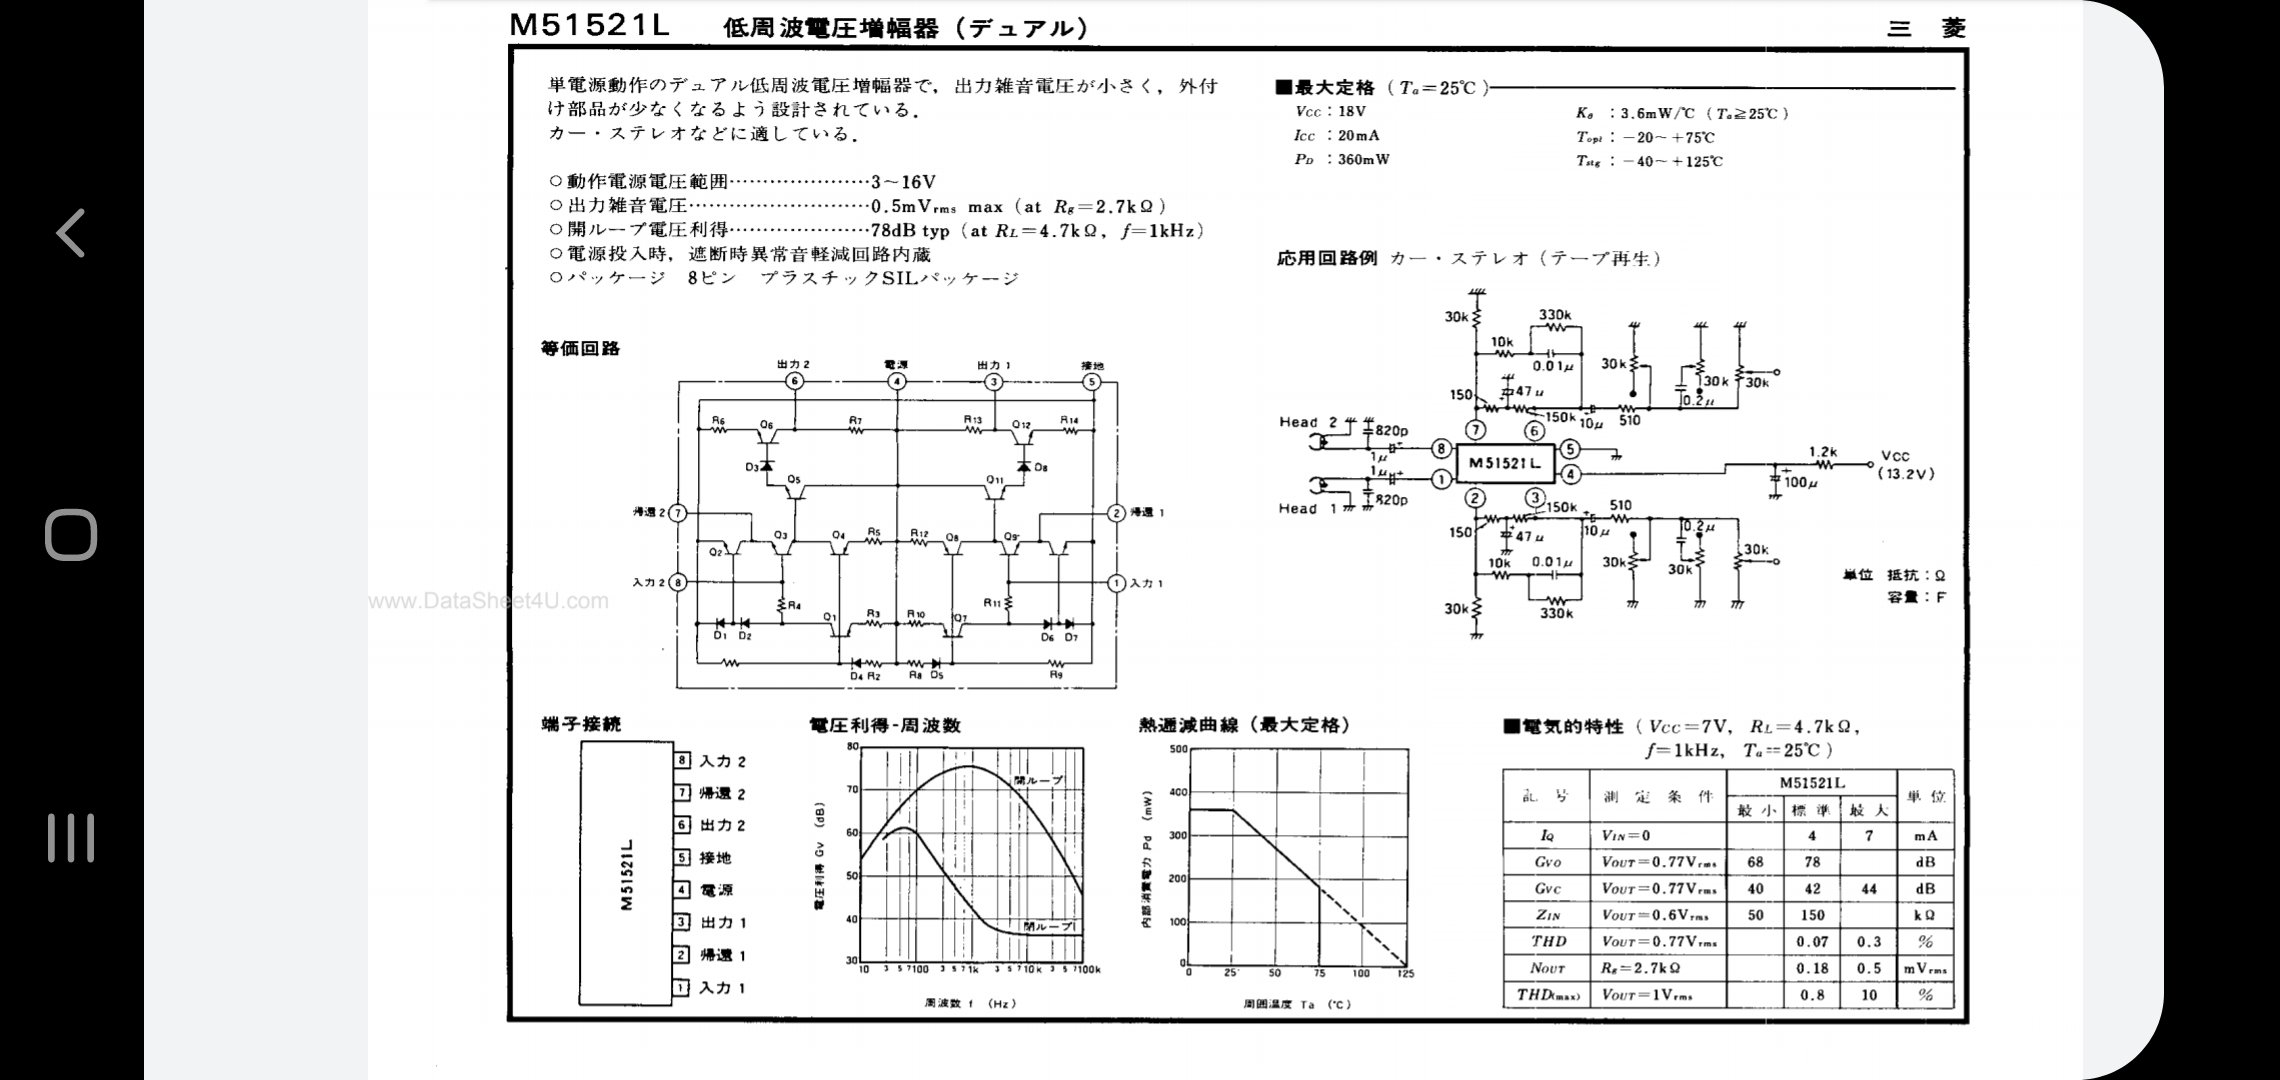
Very rainy weekend in Wellington so I decided to tackle some inside jobs. Next thing on the list was the audio system of which I still had the original head unit shown here. This was just floating about in the car and wasn't wired in but I was keen to use it, if it still worked. I also wanted to have phone connectivity to listen to tunes when outside of radio reception, so I decided to try and add an Aux port to the original head unit. A bit of research showed that this could be achieved by wiring the Aux to the output of the tape preamp. Internally the head unit looked like this. There were two cables coming from the tape unit. One was connected to a microswitch to presumably detect when a tape is inserted, the other cable was connected to the tape reader thingymabob. This was the one of interest. I followed this cable to the preamp chip and then looked up the datasheet from the numbers written on the chip. After staring at this for a while and poking around with a multimeter, I worked out that pins 3 and 6 were the left and right outputs from the preamp. I went ahead and connected an Aux socket to these pins and connected the ground to pin 5. I also disconnected power from the preamp as I didnt want it producing any noise.
-
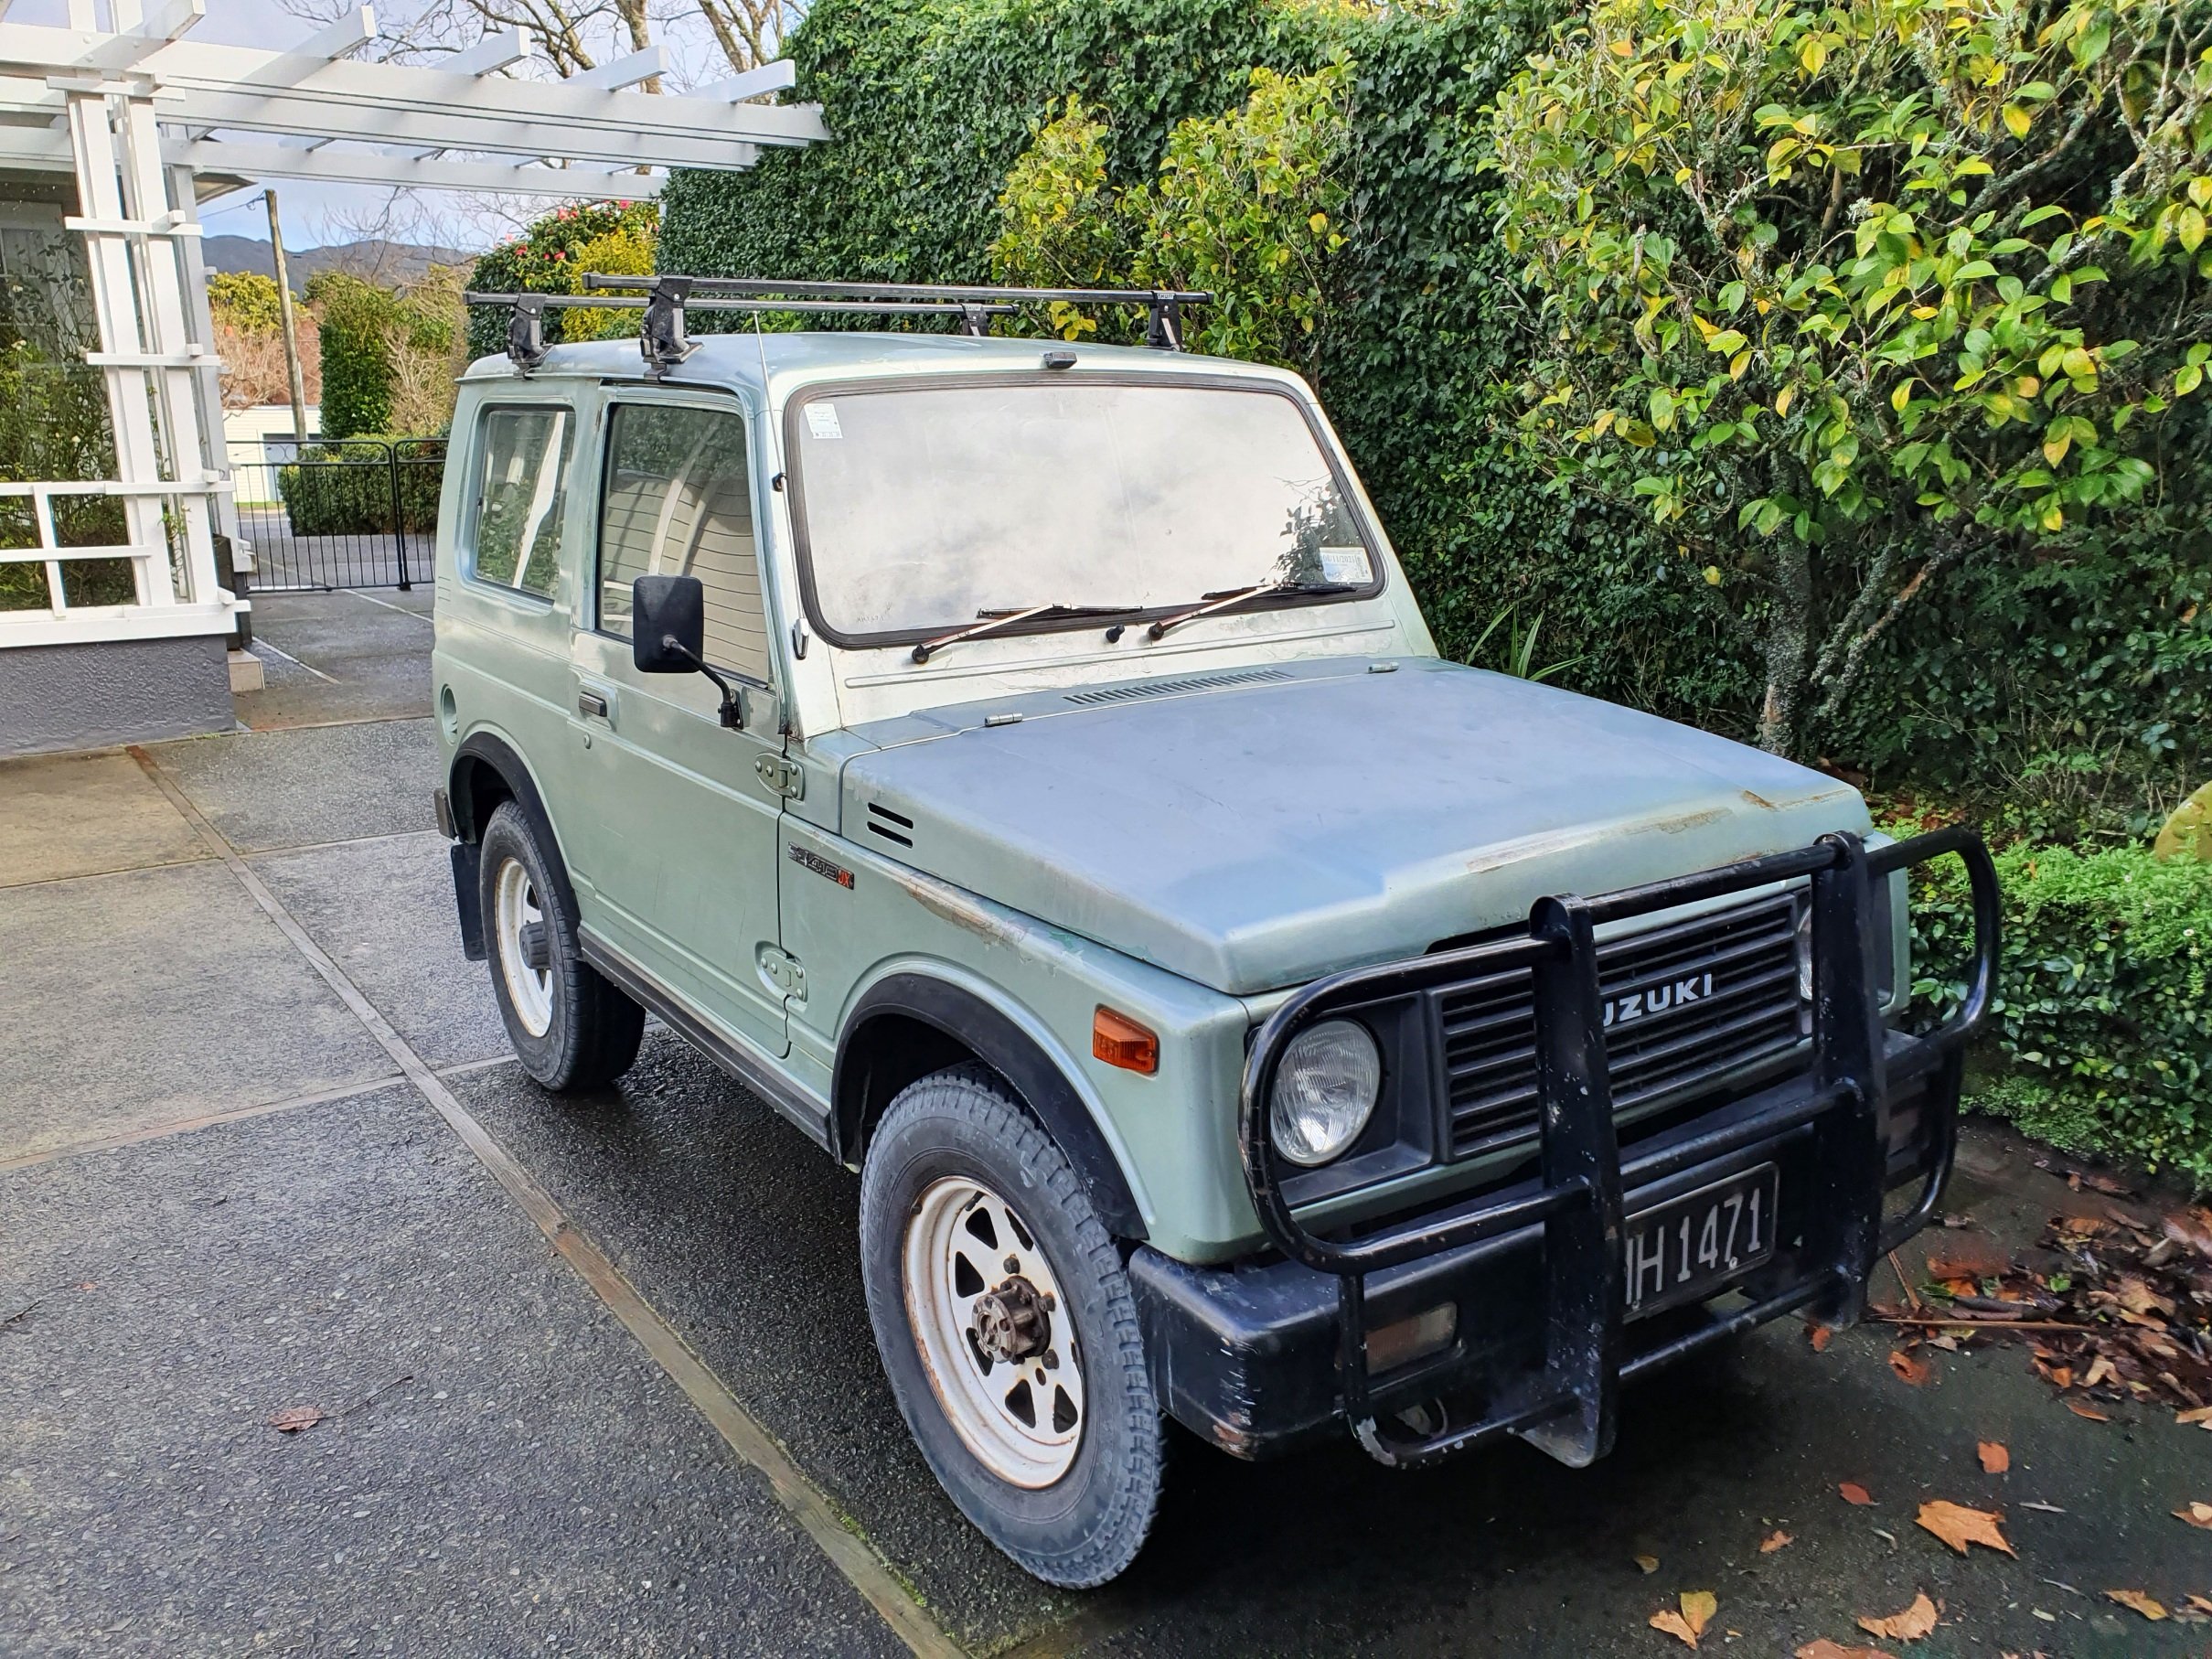
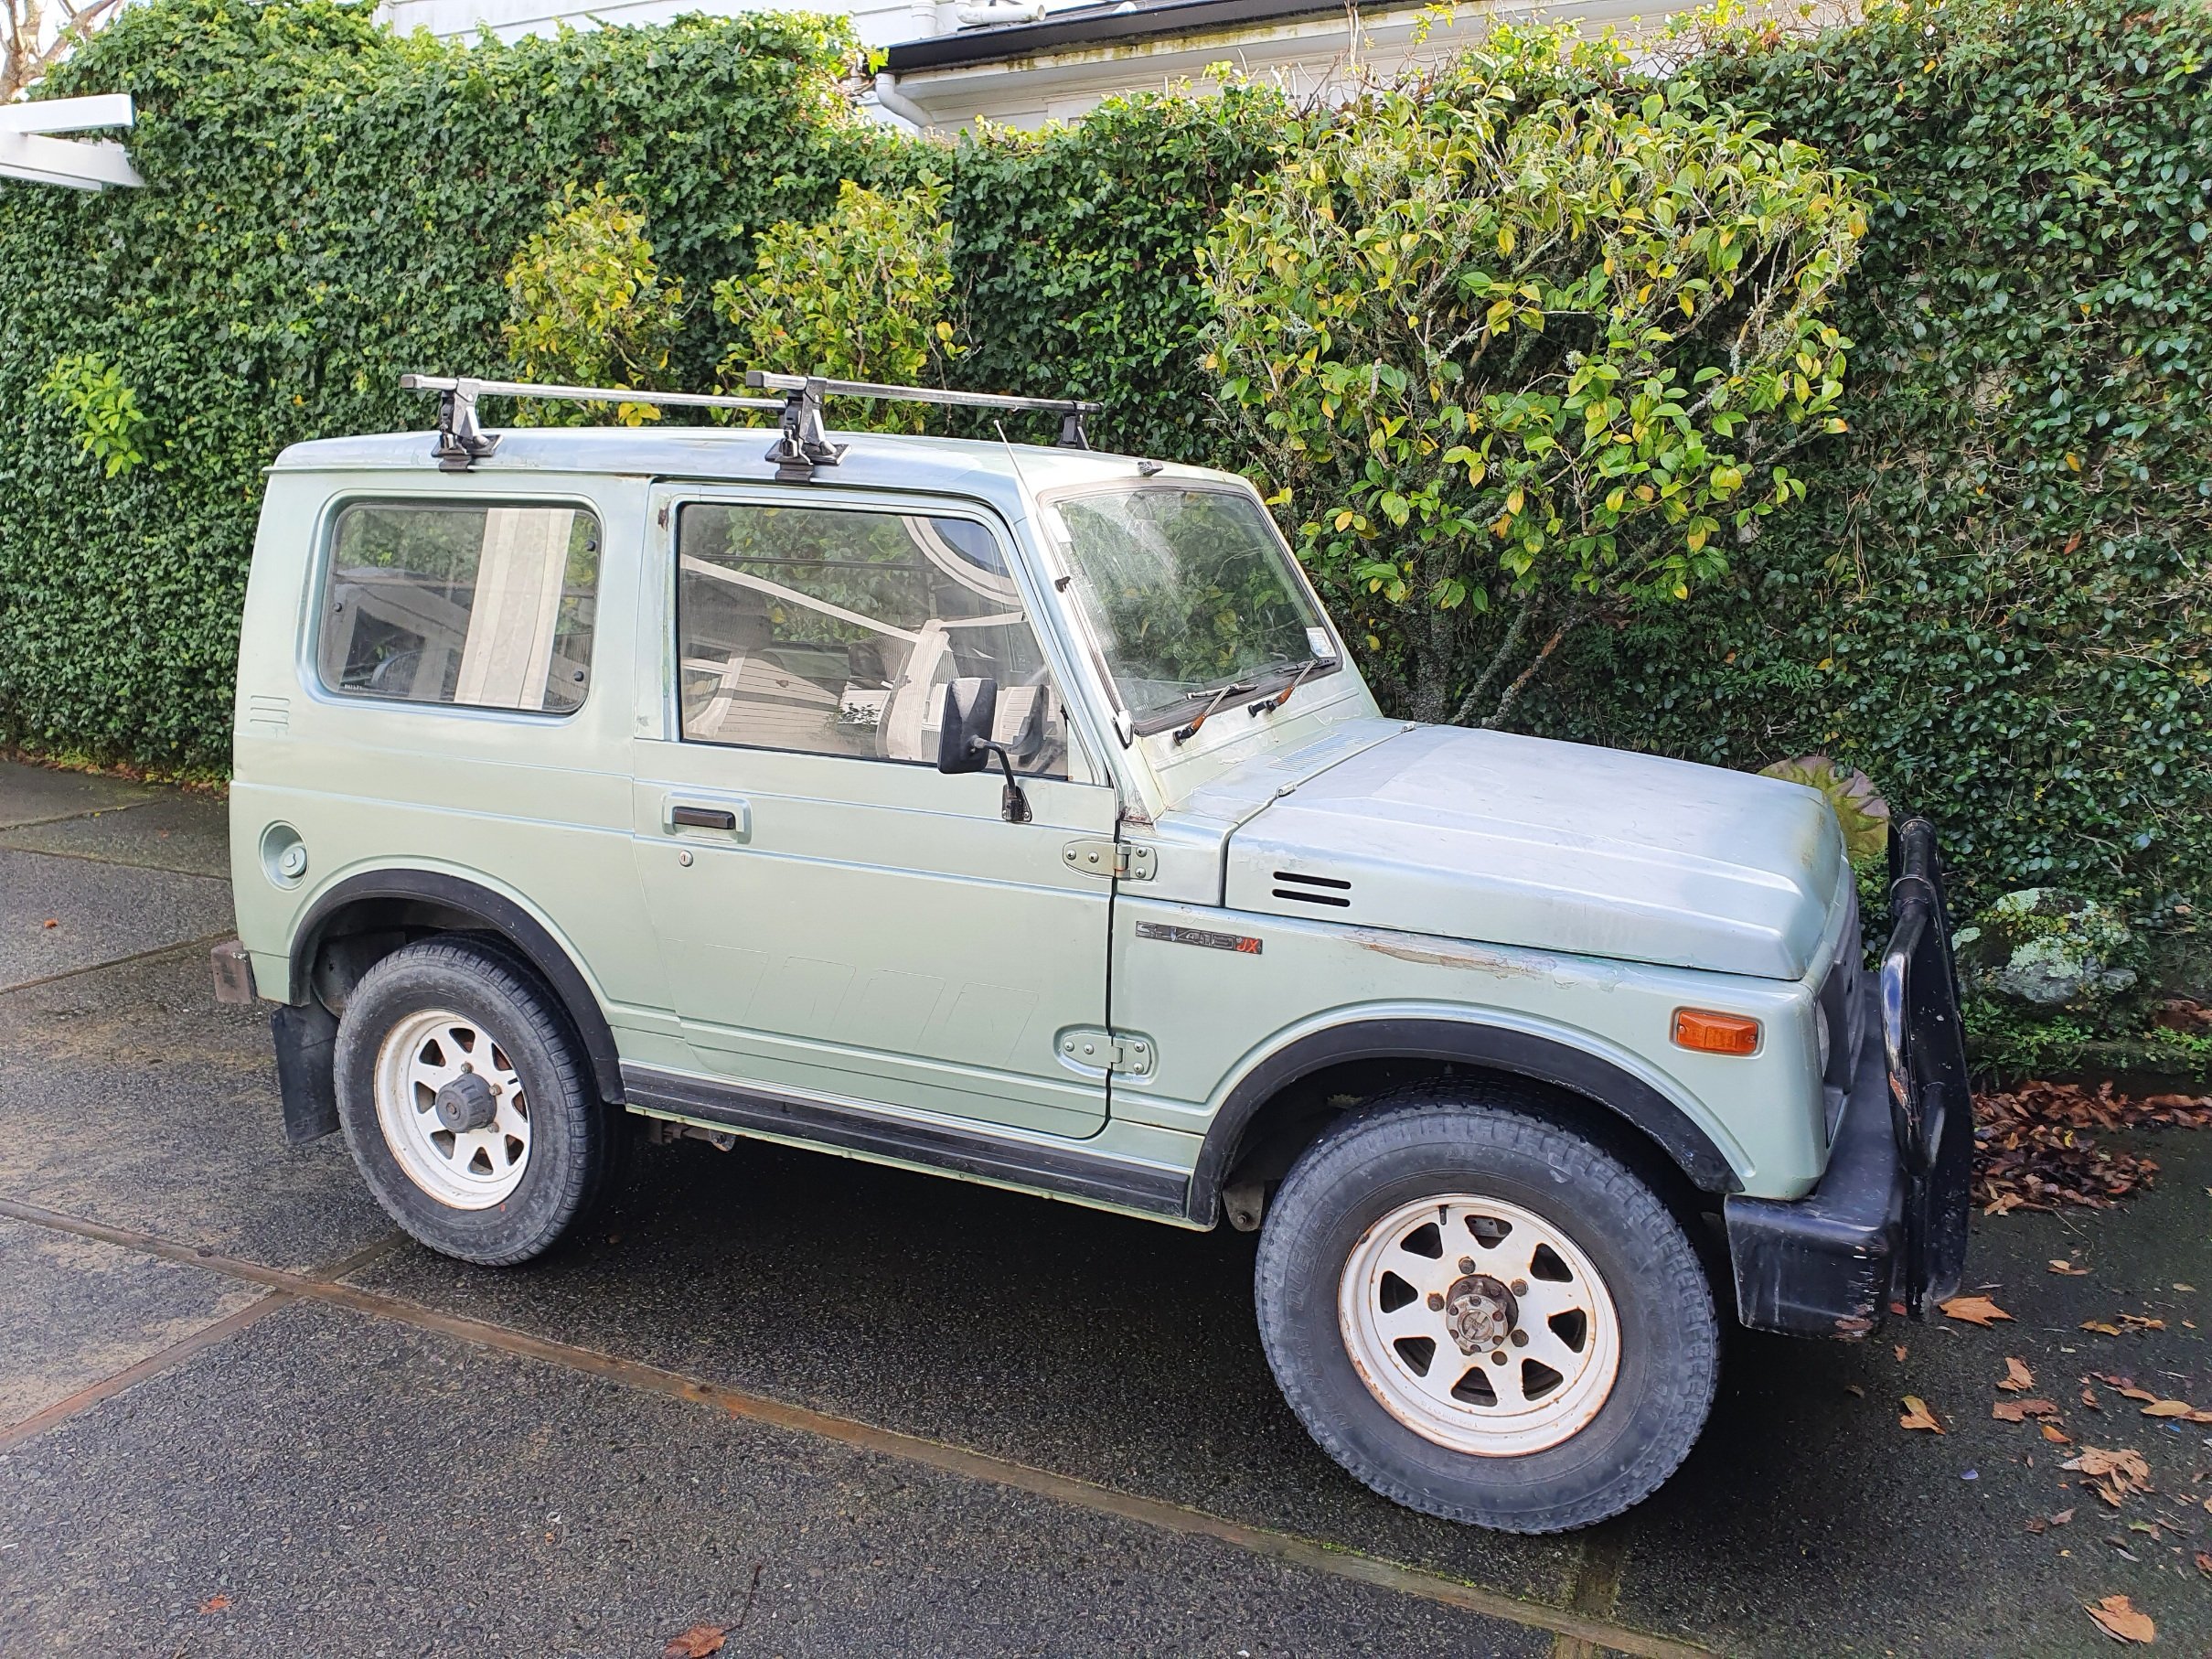
Thanks guys, plan at this stage is to keep it pretty original rather than going full lifted 4wd spec. There are a few areas of surface rust coming through that need attention but I will do it in sections rather than taking off the road.
-
Convince me to source big tyres and lift kit here:
-
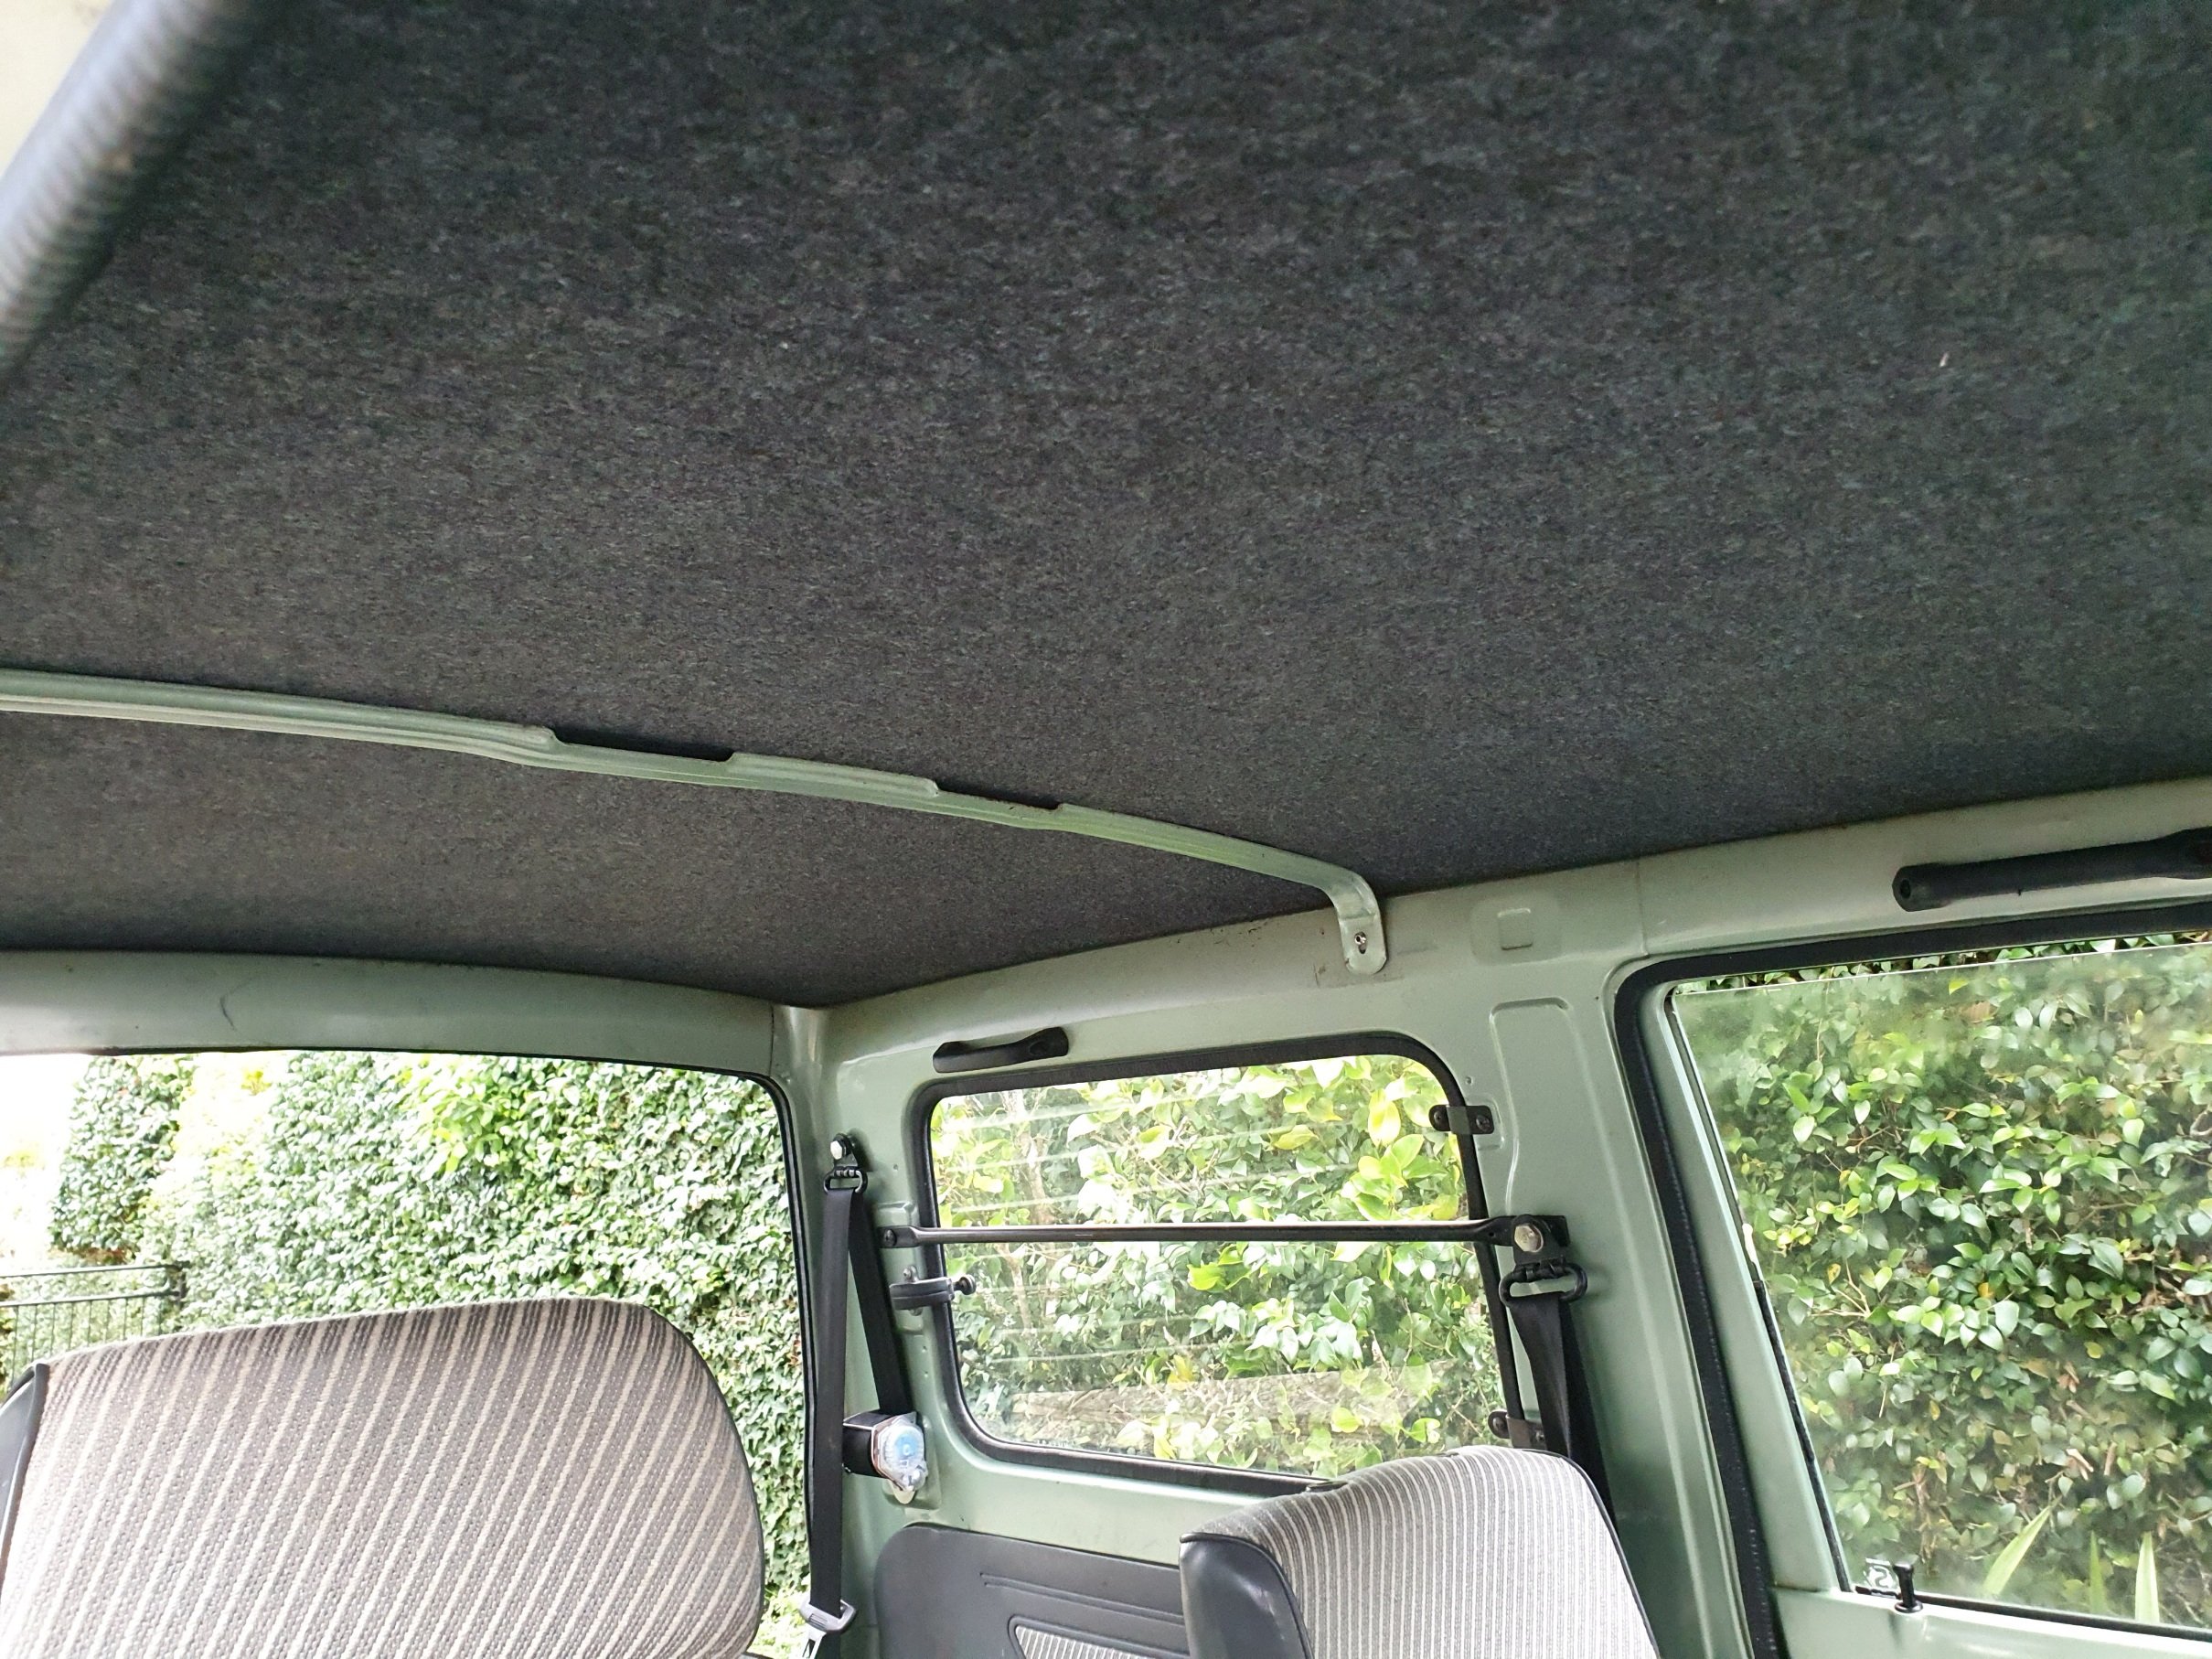
I cut the hardboard to size splitting it in two to allow me to tuck it into the roof gap. The cross brace could then be used to cover the seam between the two pieces. I used some ados ultra strength spray adhesive to glue the felt onto the hardwood and tucked it around the sides before sliding it back into place. Really pleased with the result, big improvement over what I had and only cost $70 in materials.
- 7 replies
-
- 34
-
-
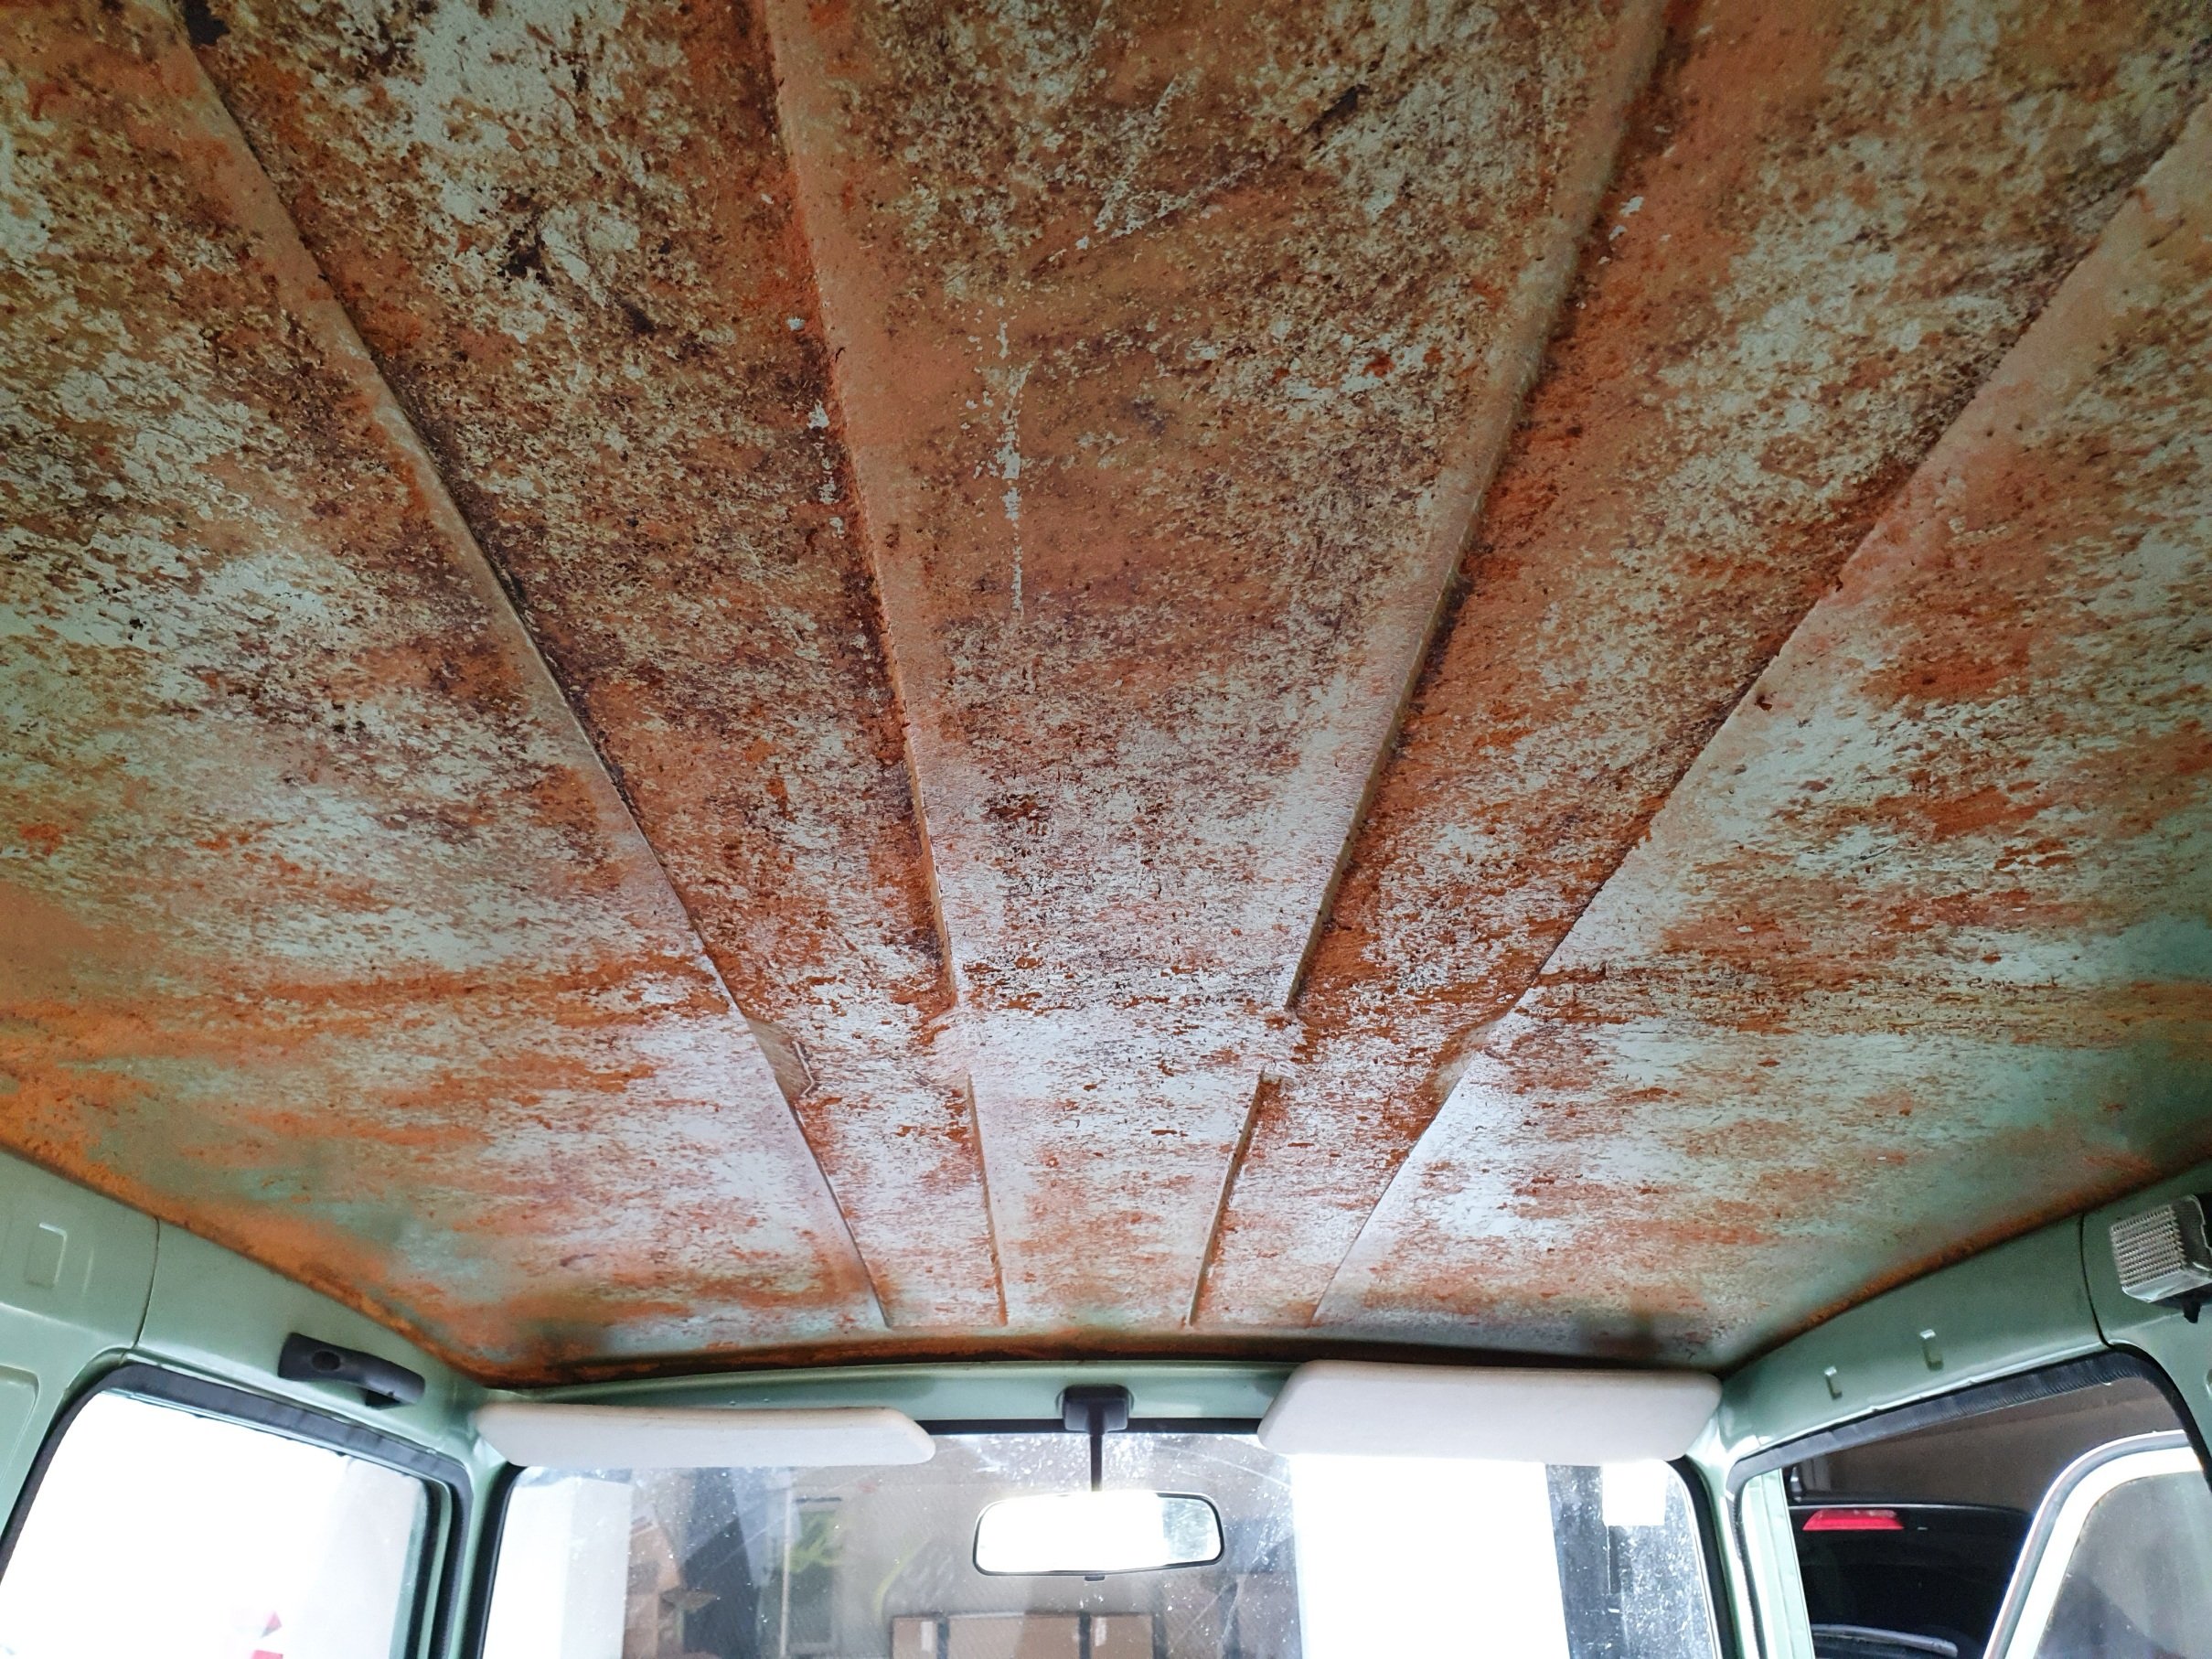
First issue to resolve was the headlining. The old one had been pulled out leaving this mess. The orange is left over glue and foam. So off to bunnings for some 3mm hardboard, then to spotlight for some felt before stopping on the way home to check the conditions.
-
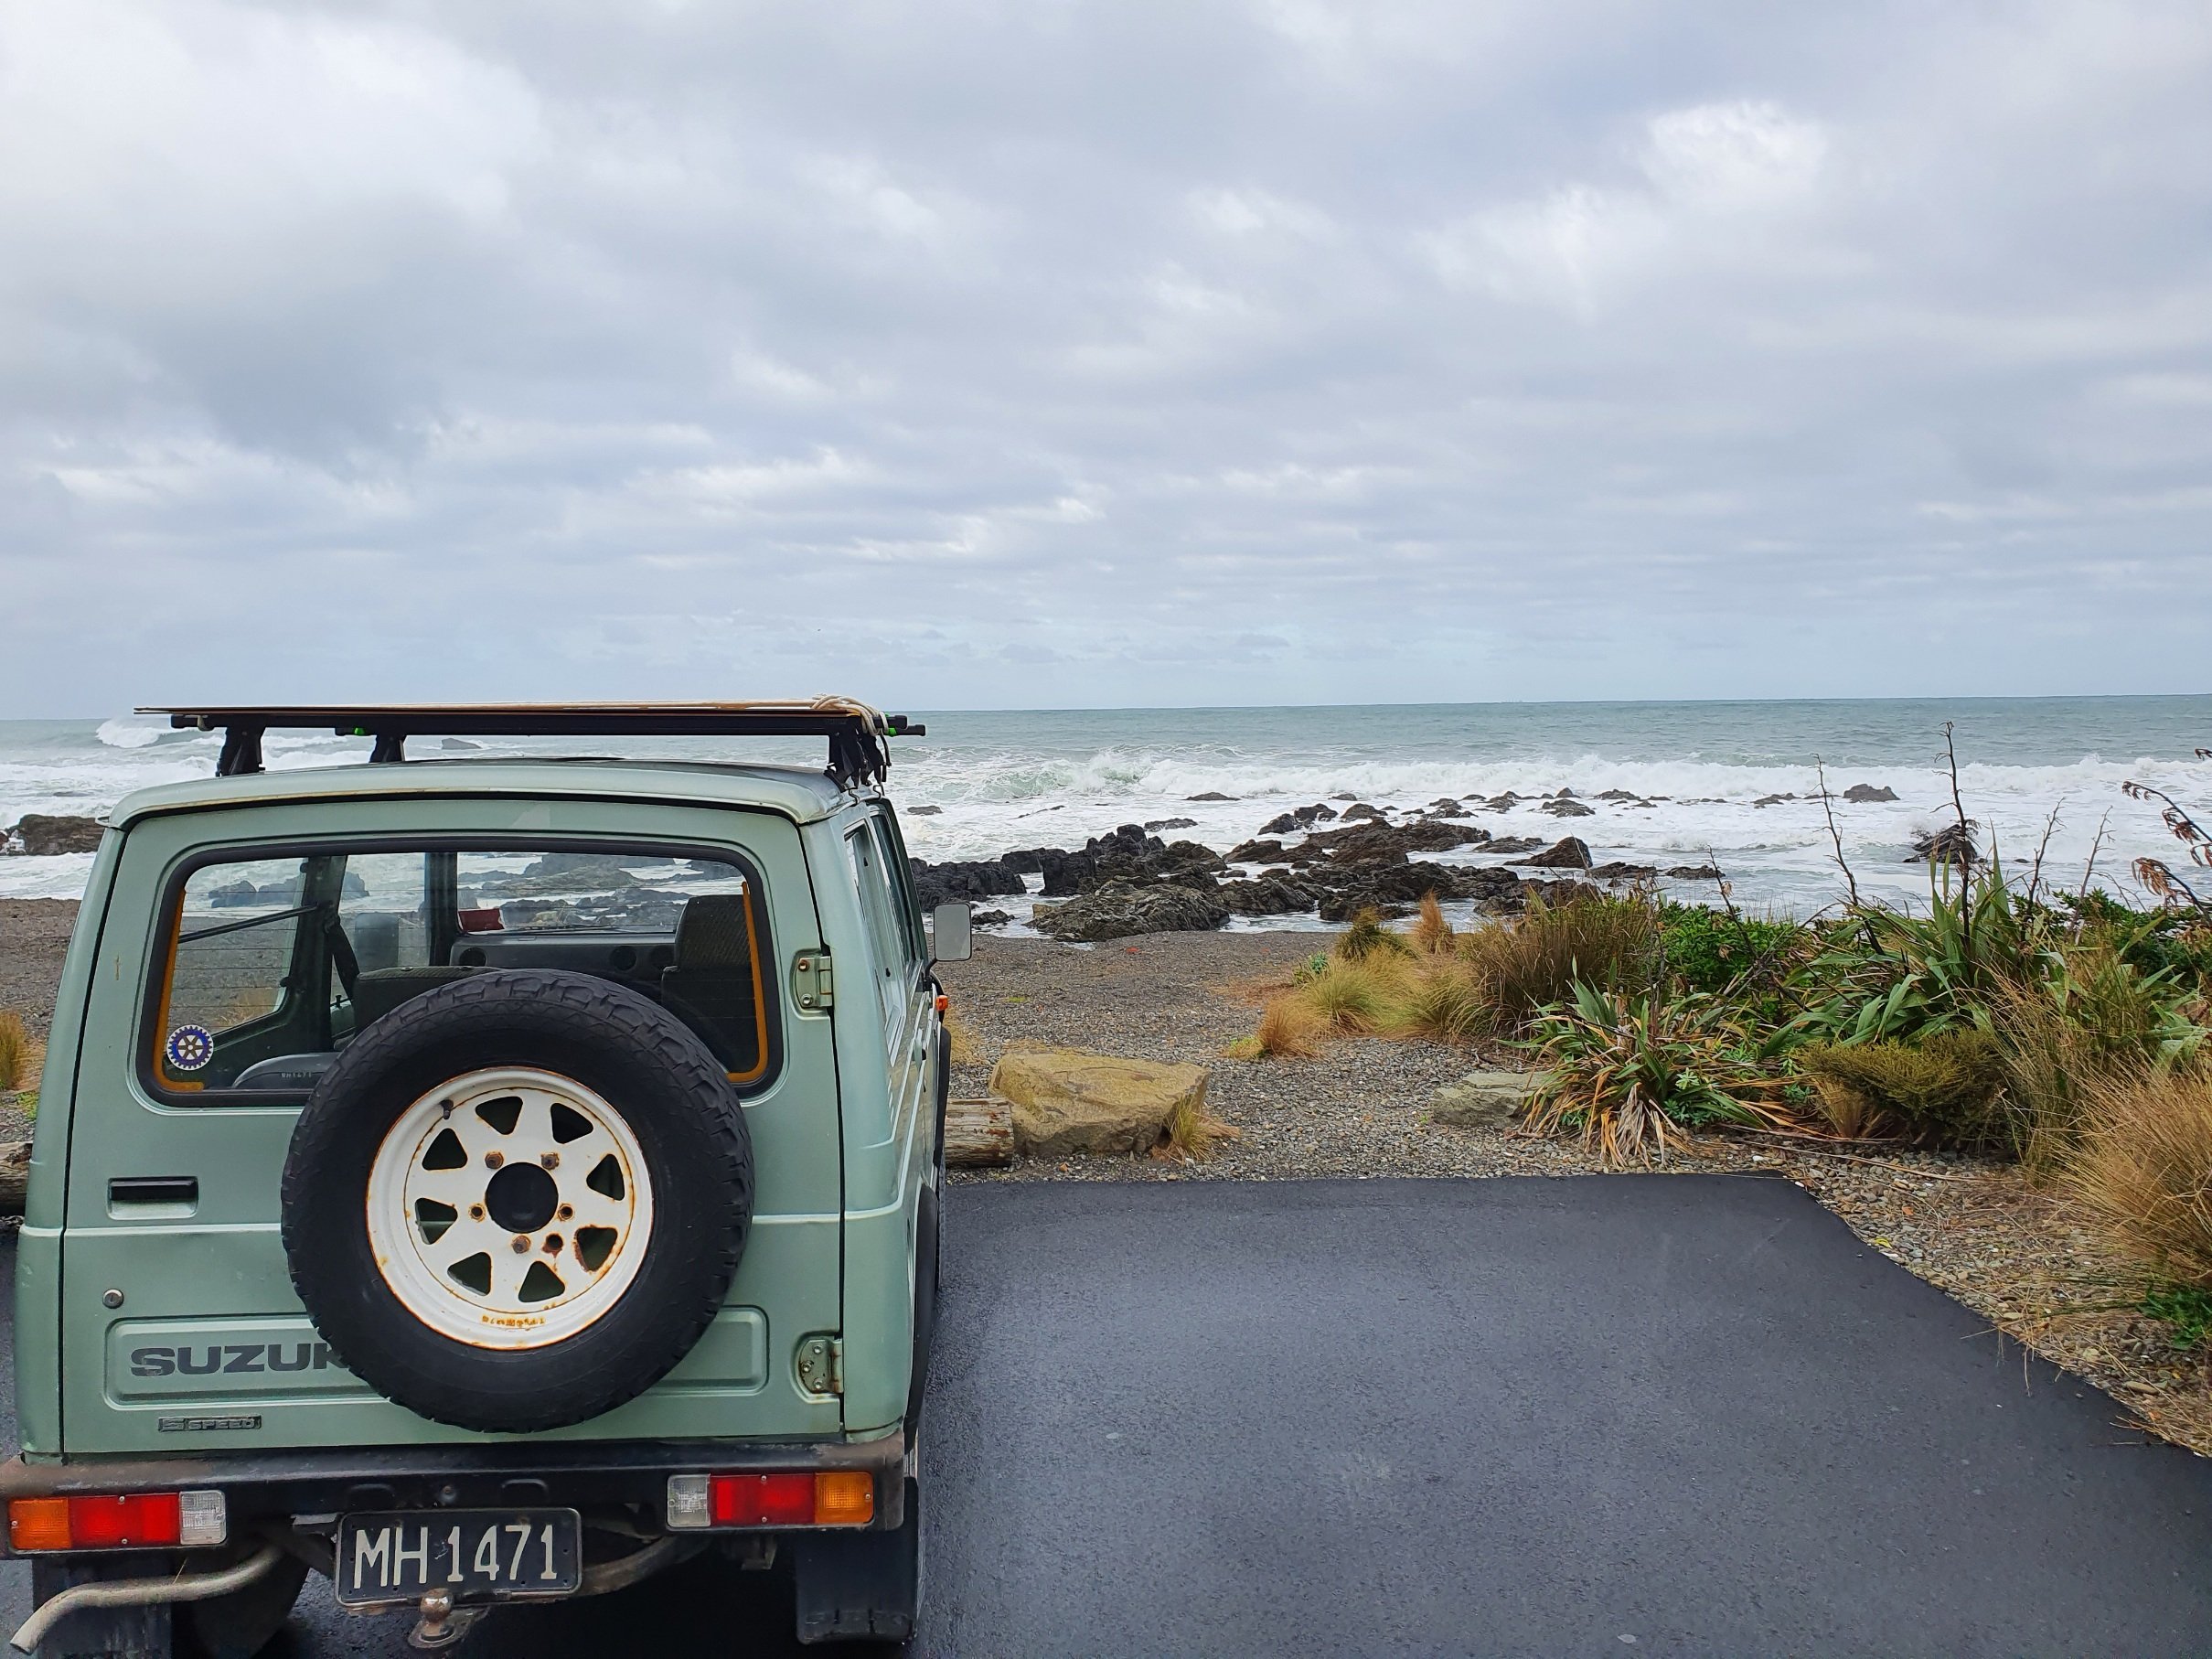
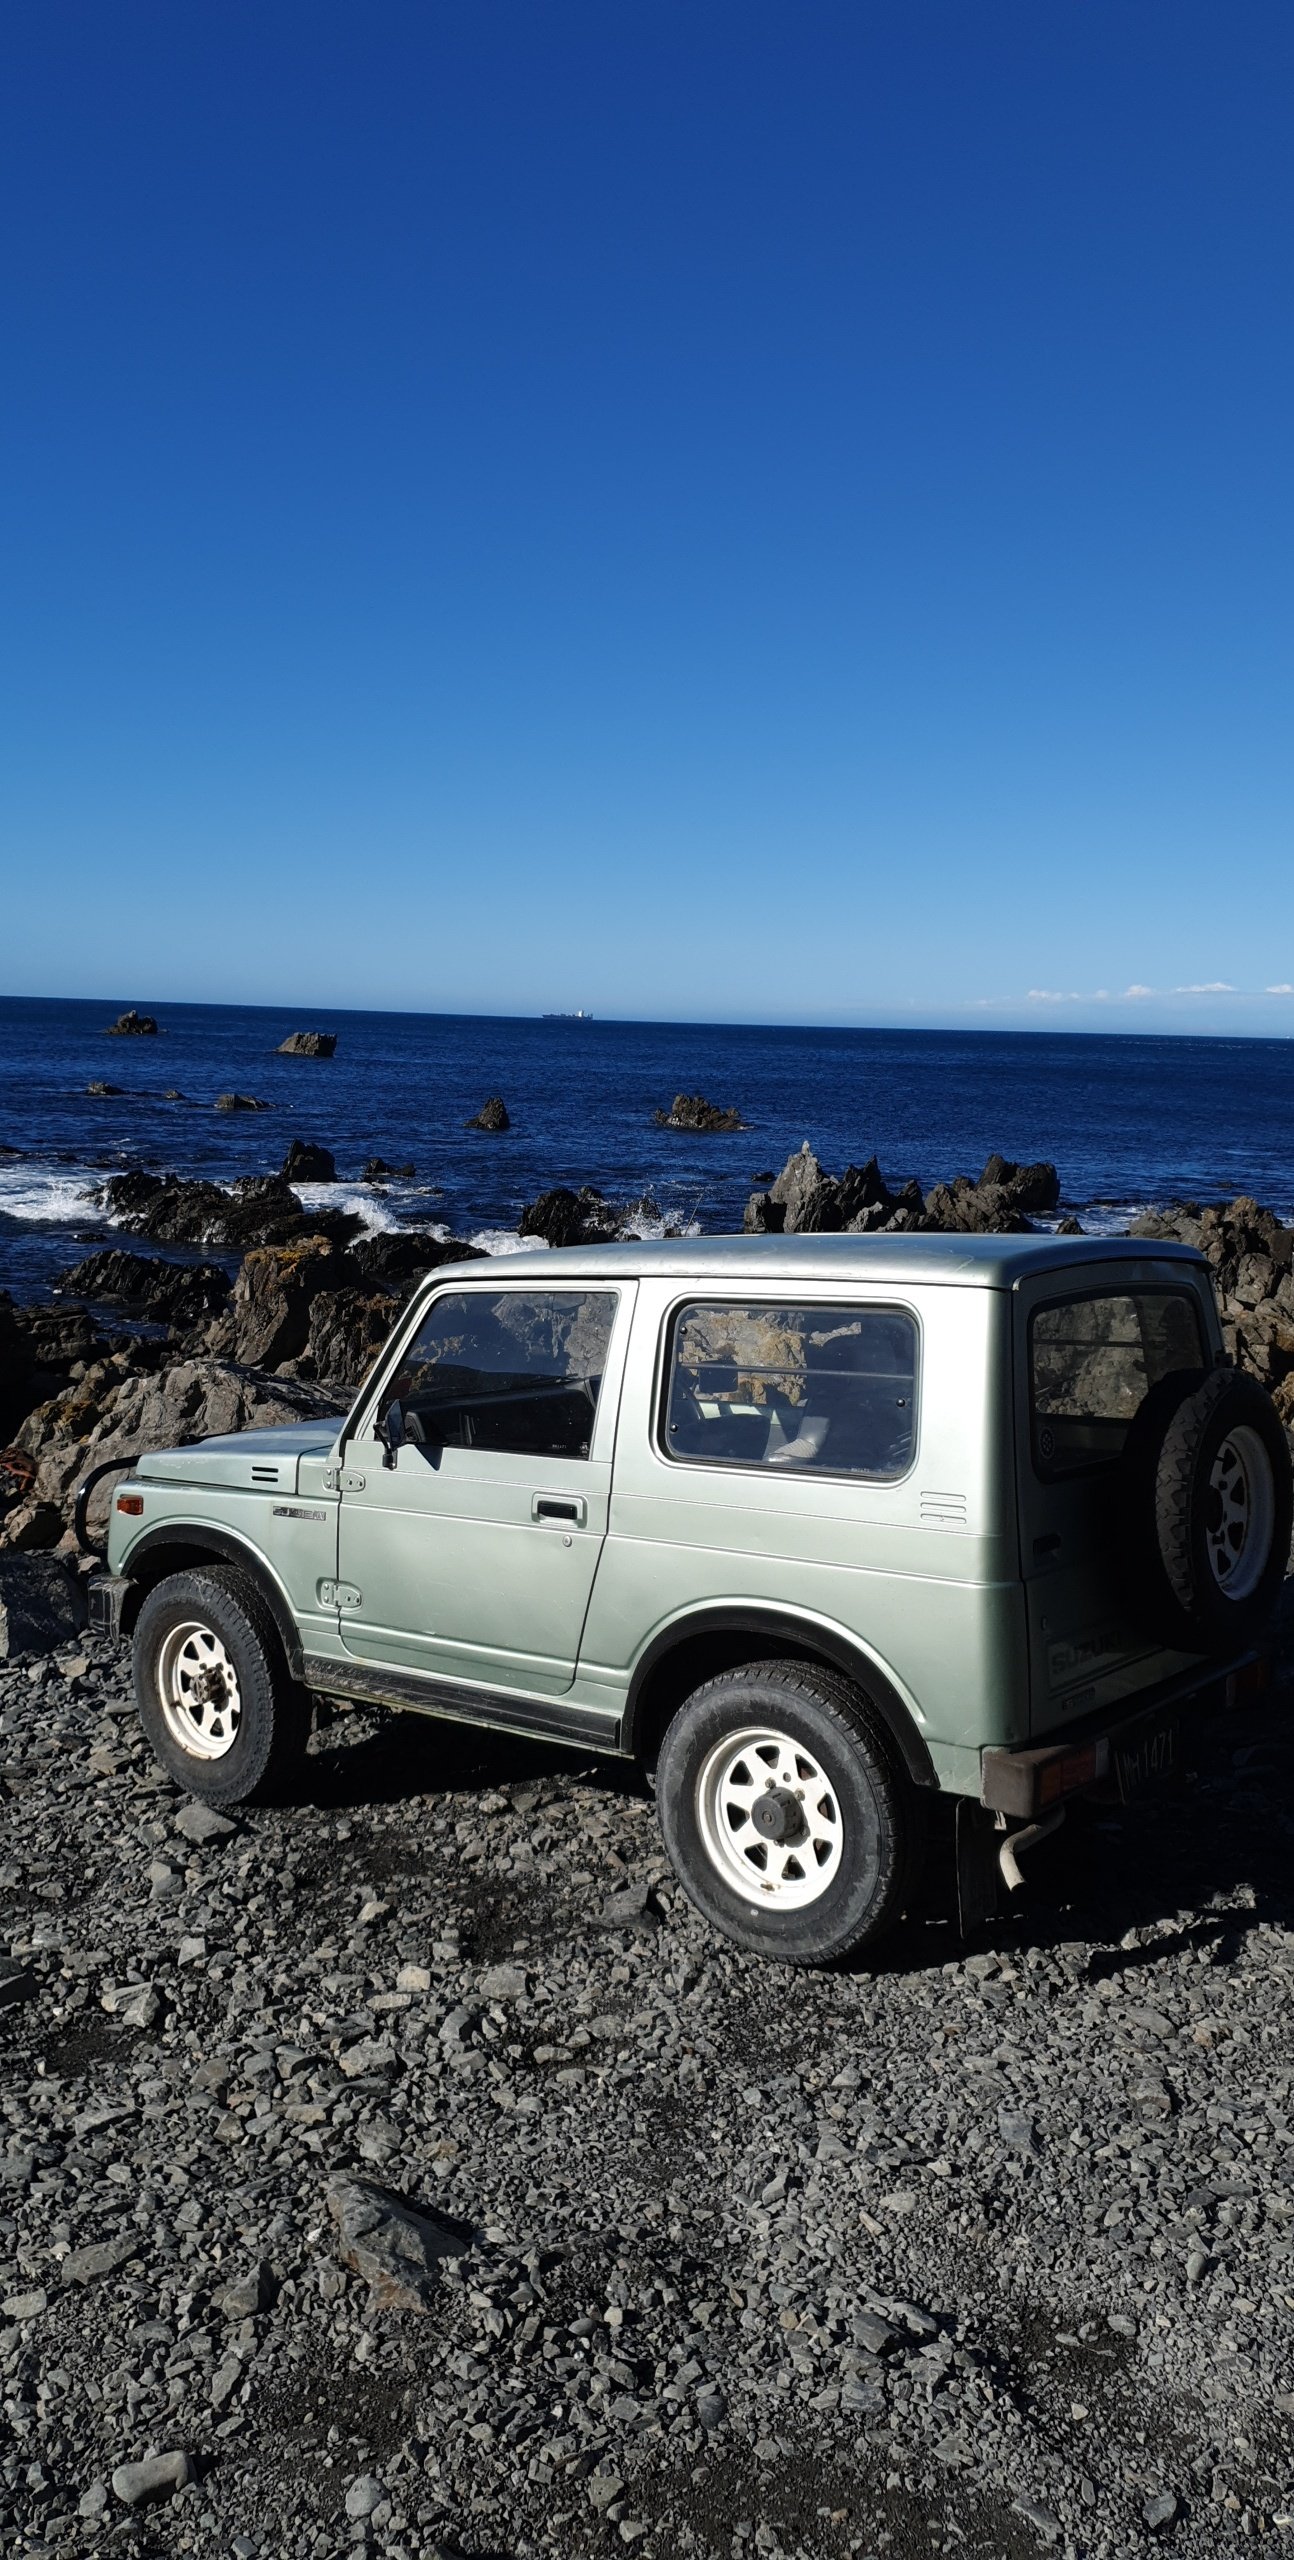
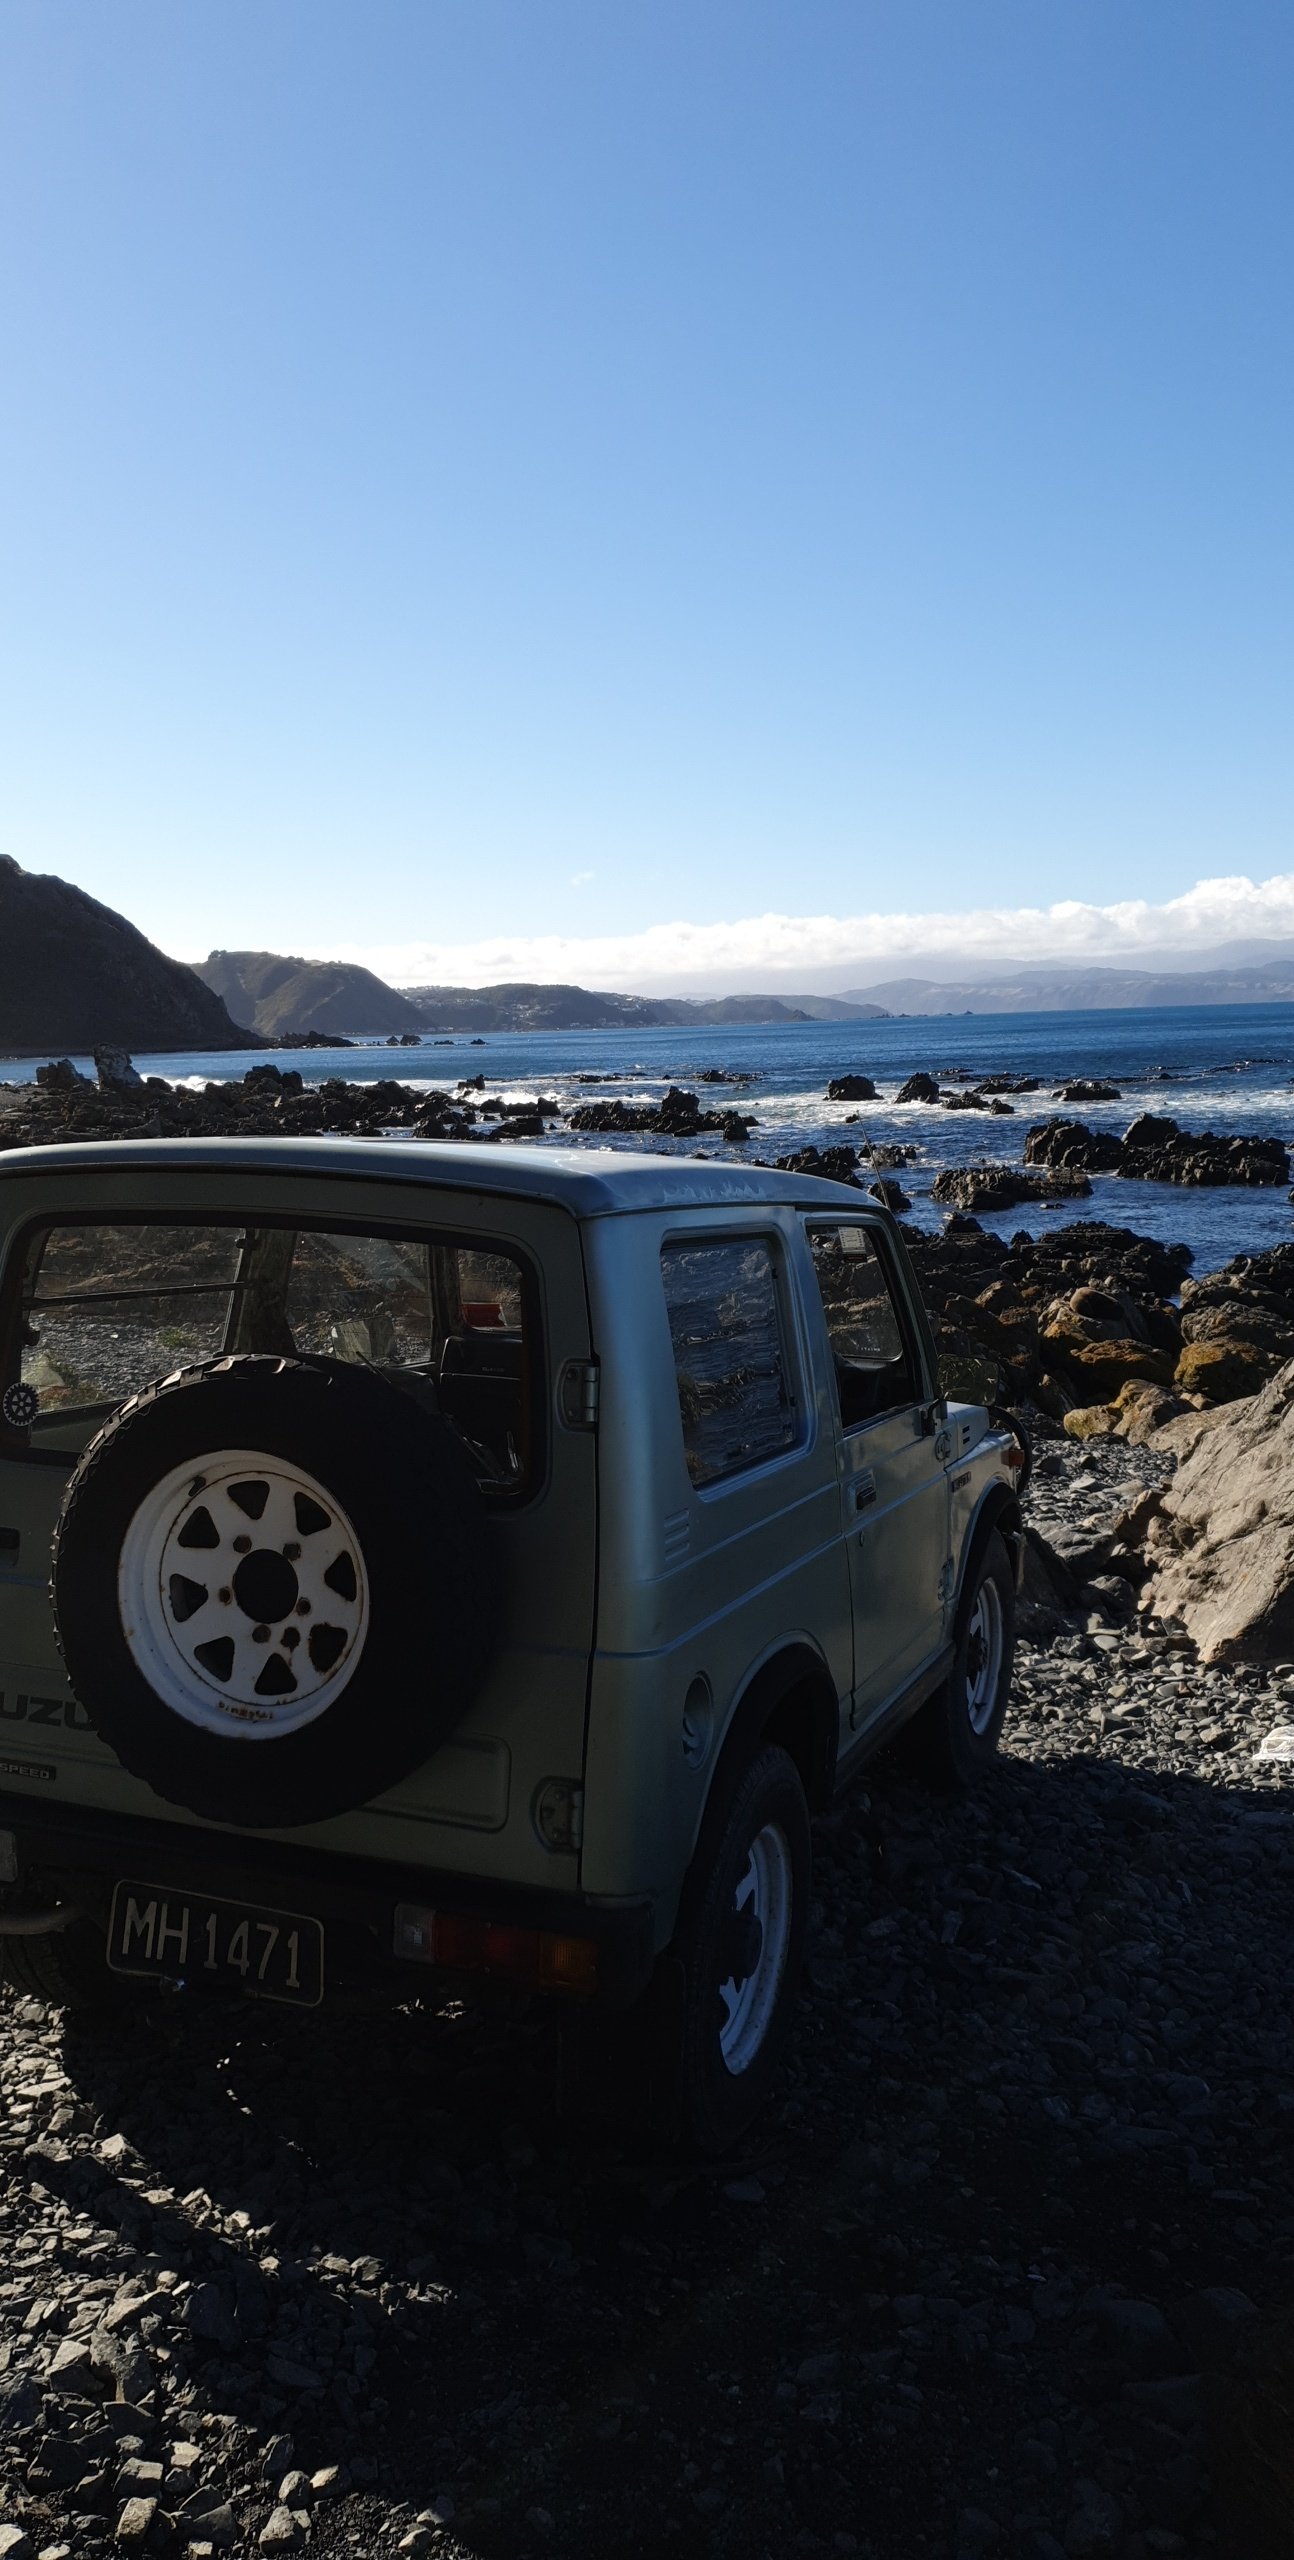
It seems that this one was assembled in NZ and is very original, it even has the plate number etched on the windows. Based in Wellington we are fortunate to have the south coast 4wd access which I also enjoy diving. So far I have had a couple of trips out.
-
For years I have pined over these little Suzukis and have had a watchlist on Trademe keeping an eye on them for over a year. Then one day this one popped up on facebook marketplace for a good price and not too far away. I decided to go for a look and ended up driving it home!
- 7 replies
-
- 14
-
-
Hey Ross Thanks for the info, I will definitely look into that as mine does have circular clips. Once you cut off the tabs how do you plan on removing them for replacement?
-
Cool man will PM you now!
-
Here is the requested video of the electric start. Have been riding this to uni a bit which is easily the highlight of my day. I am also continuing to improve aspects of the bike but it is great being able to ride it in between. I put a new front tyre on as the tube was beginning to bulge through the old perished one. Next on the list is new brake pads as the brakes are pretty marginal and other minor boring wiring stuff to sort. This will probably be the last update on the project as I consider it pretty much done, kind of glad to be honest as this bike has definitely been a bit of a challenge. Big thanks to all the guys who helped out along the way, especially Kempy for helping me with the electrical side of things, if it wasn't for you this bike would still be sitting in the corner of the shed in pieces. mmmm what to do with my spare time now?