
Leaderboard


Popular Content
Showing content with the highest reputation since 02/06/25 in all areas
-
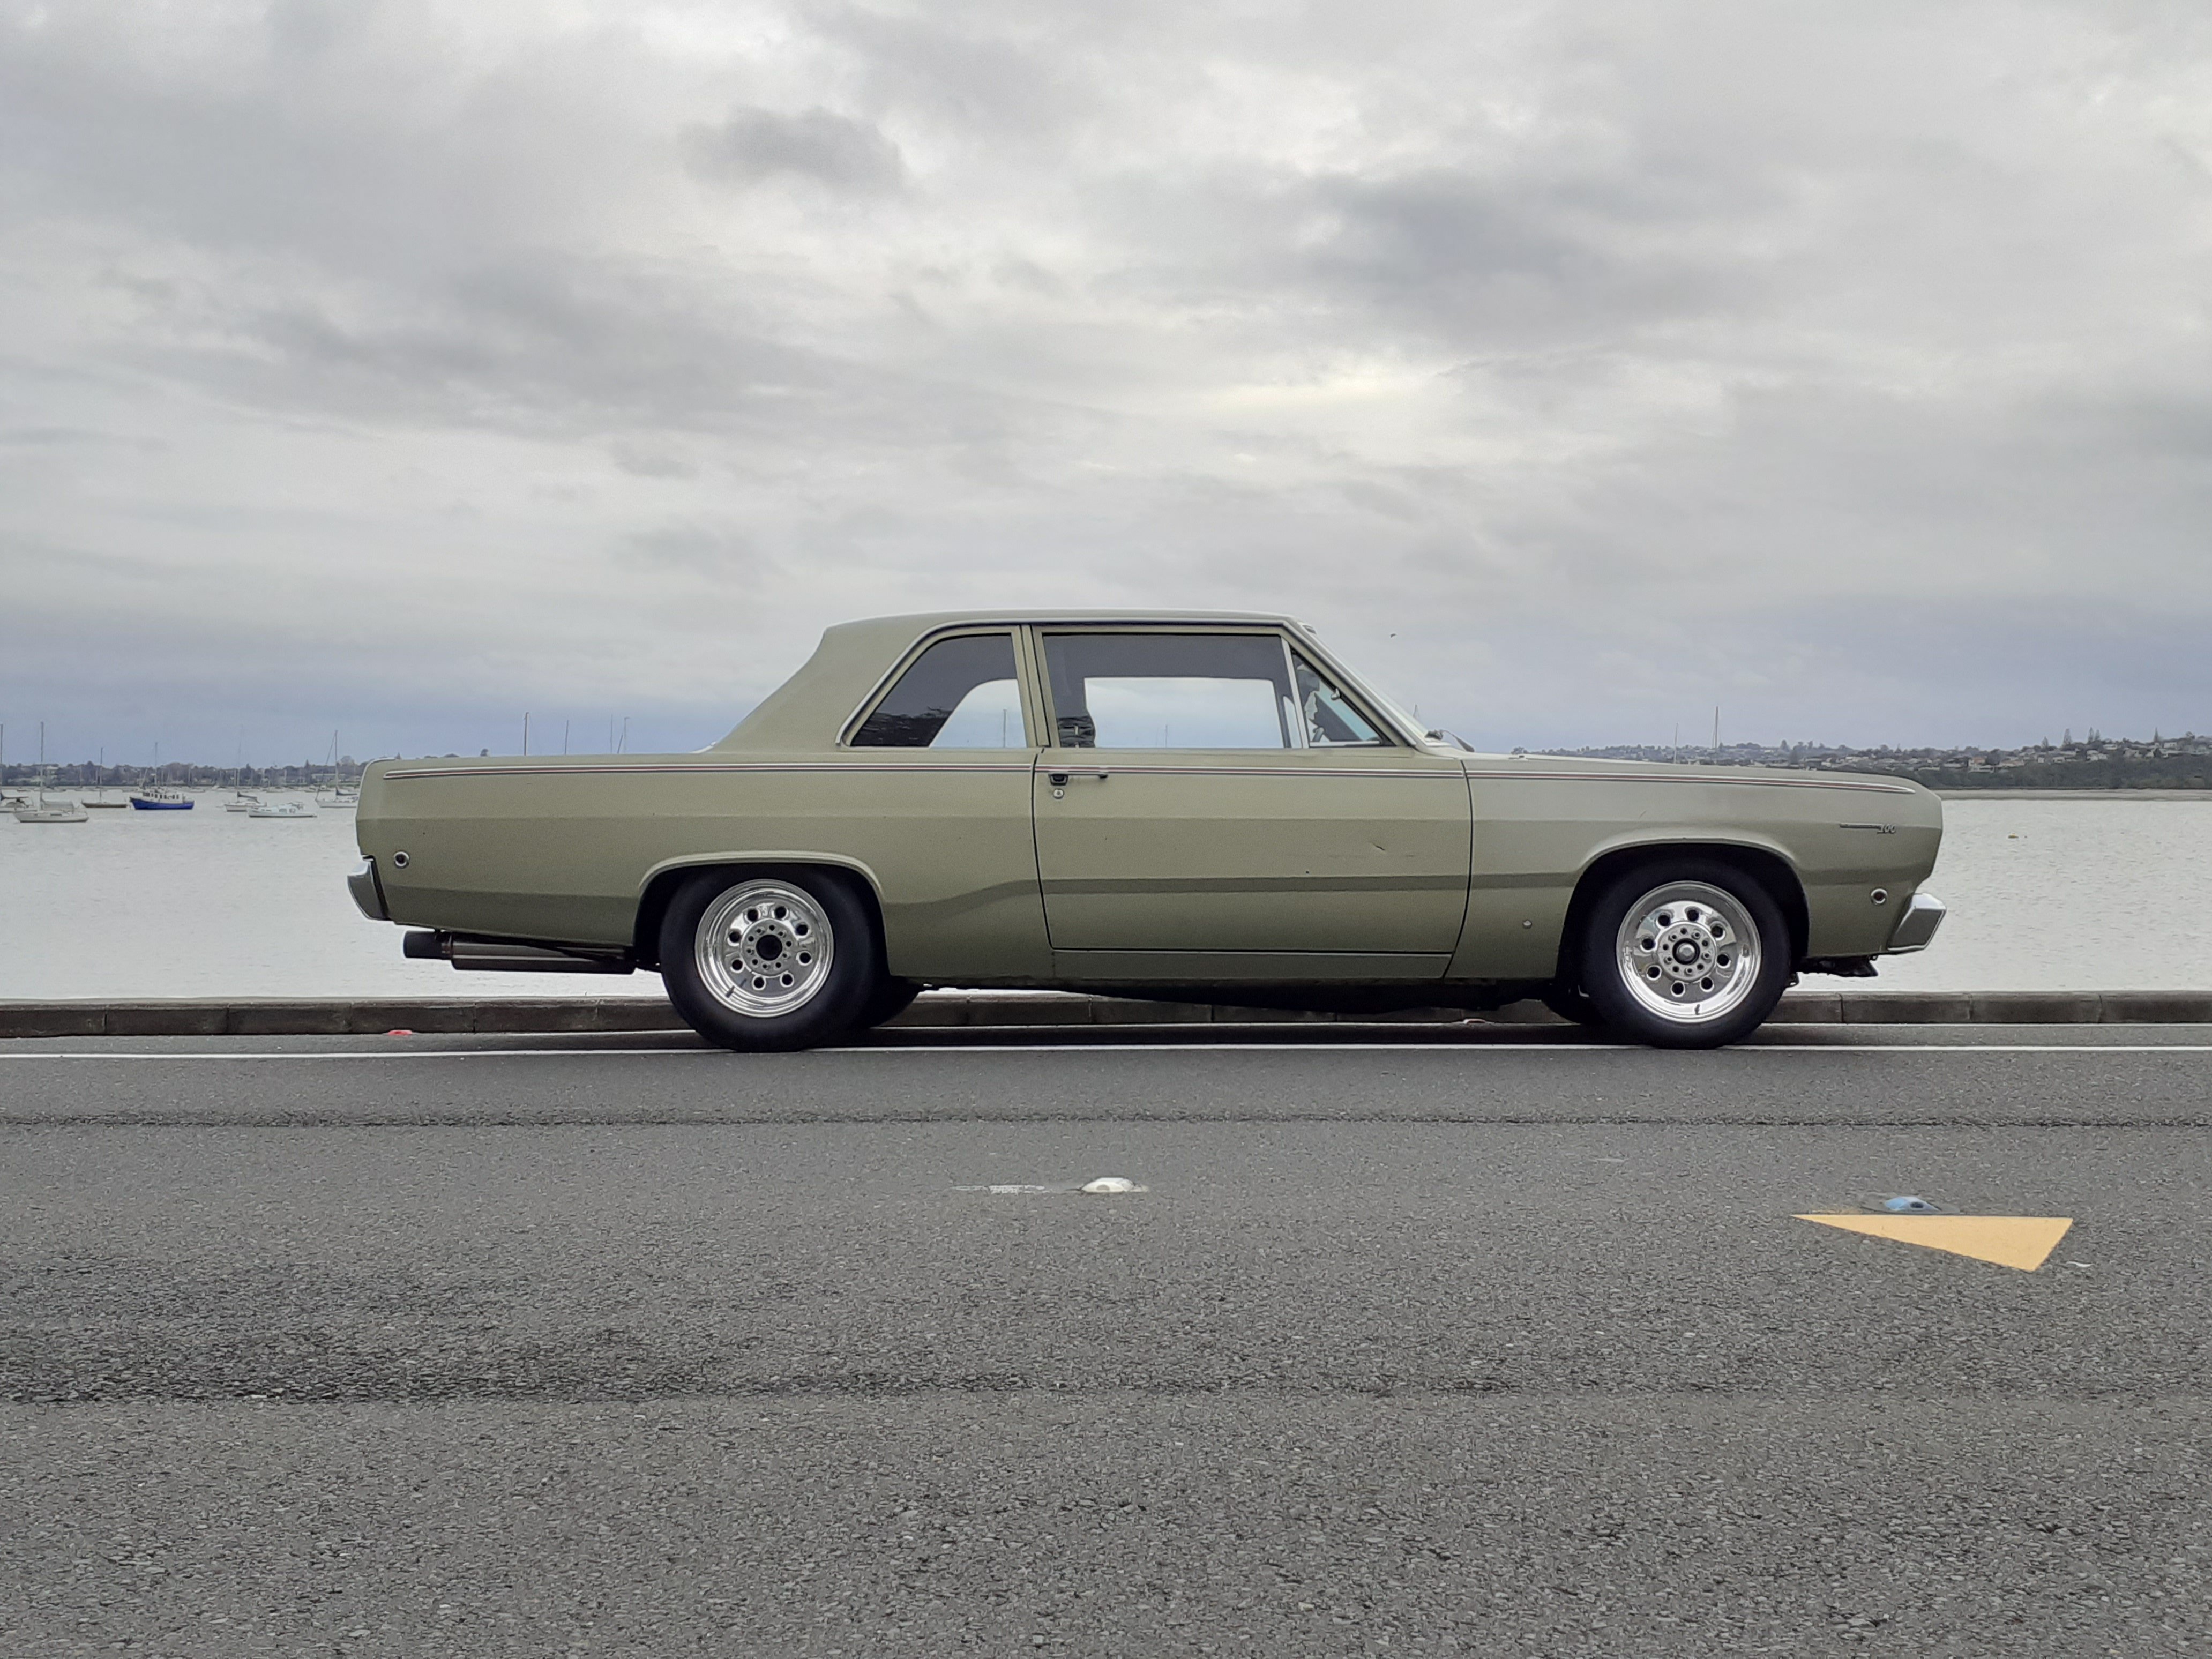
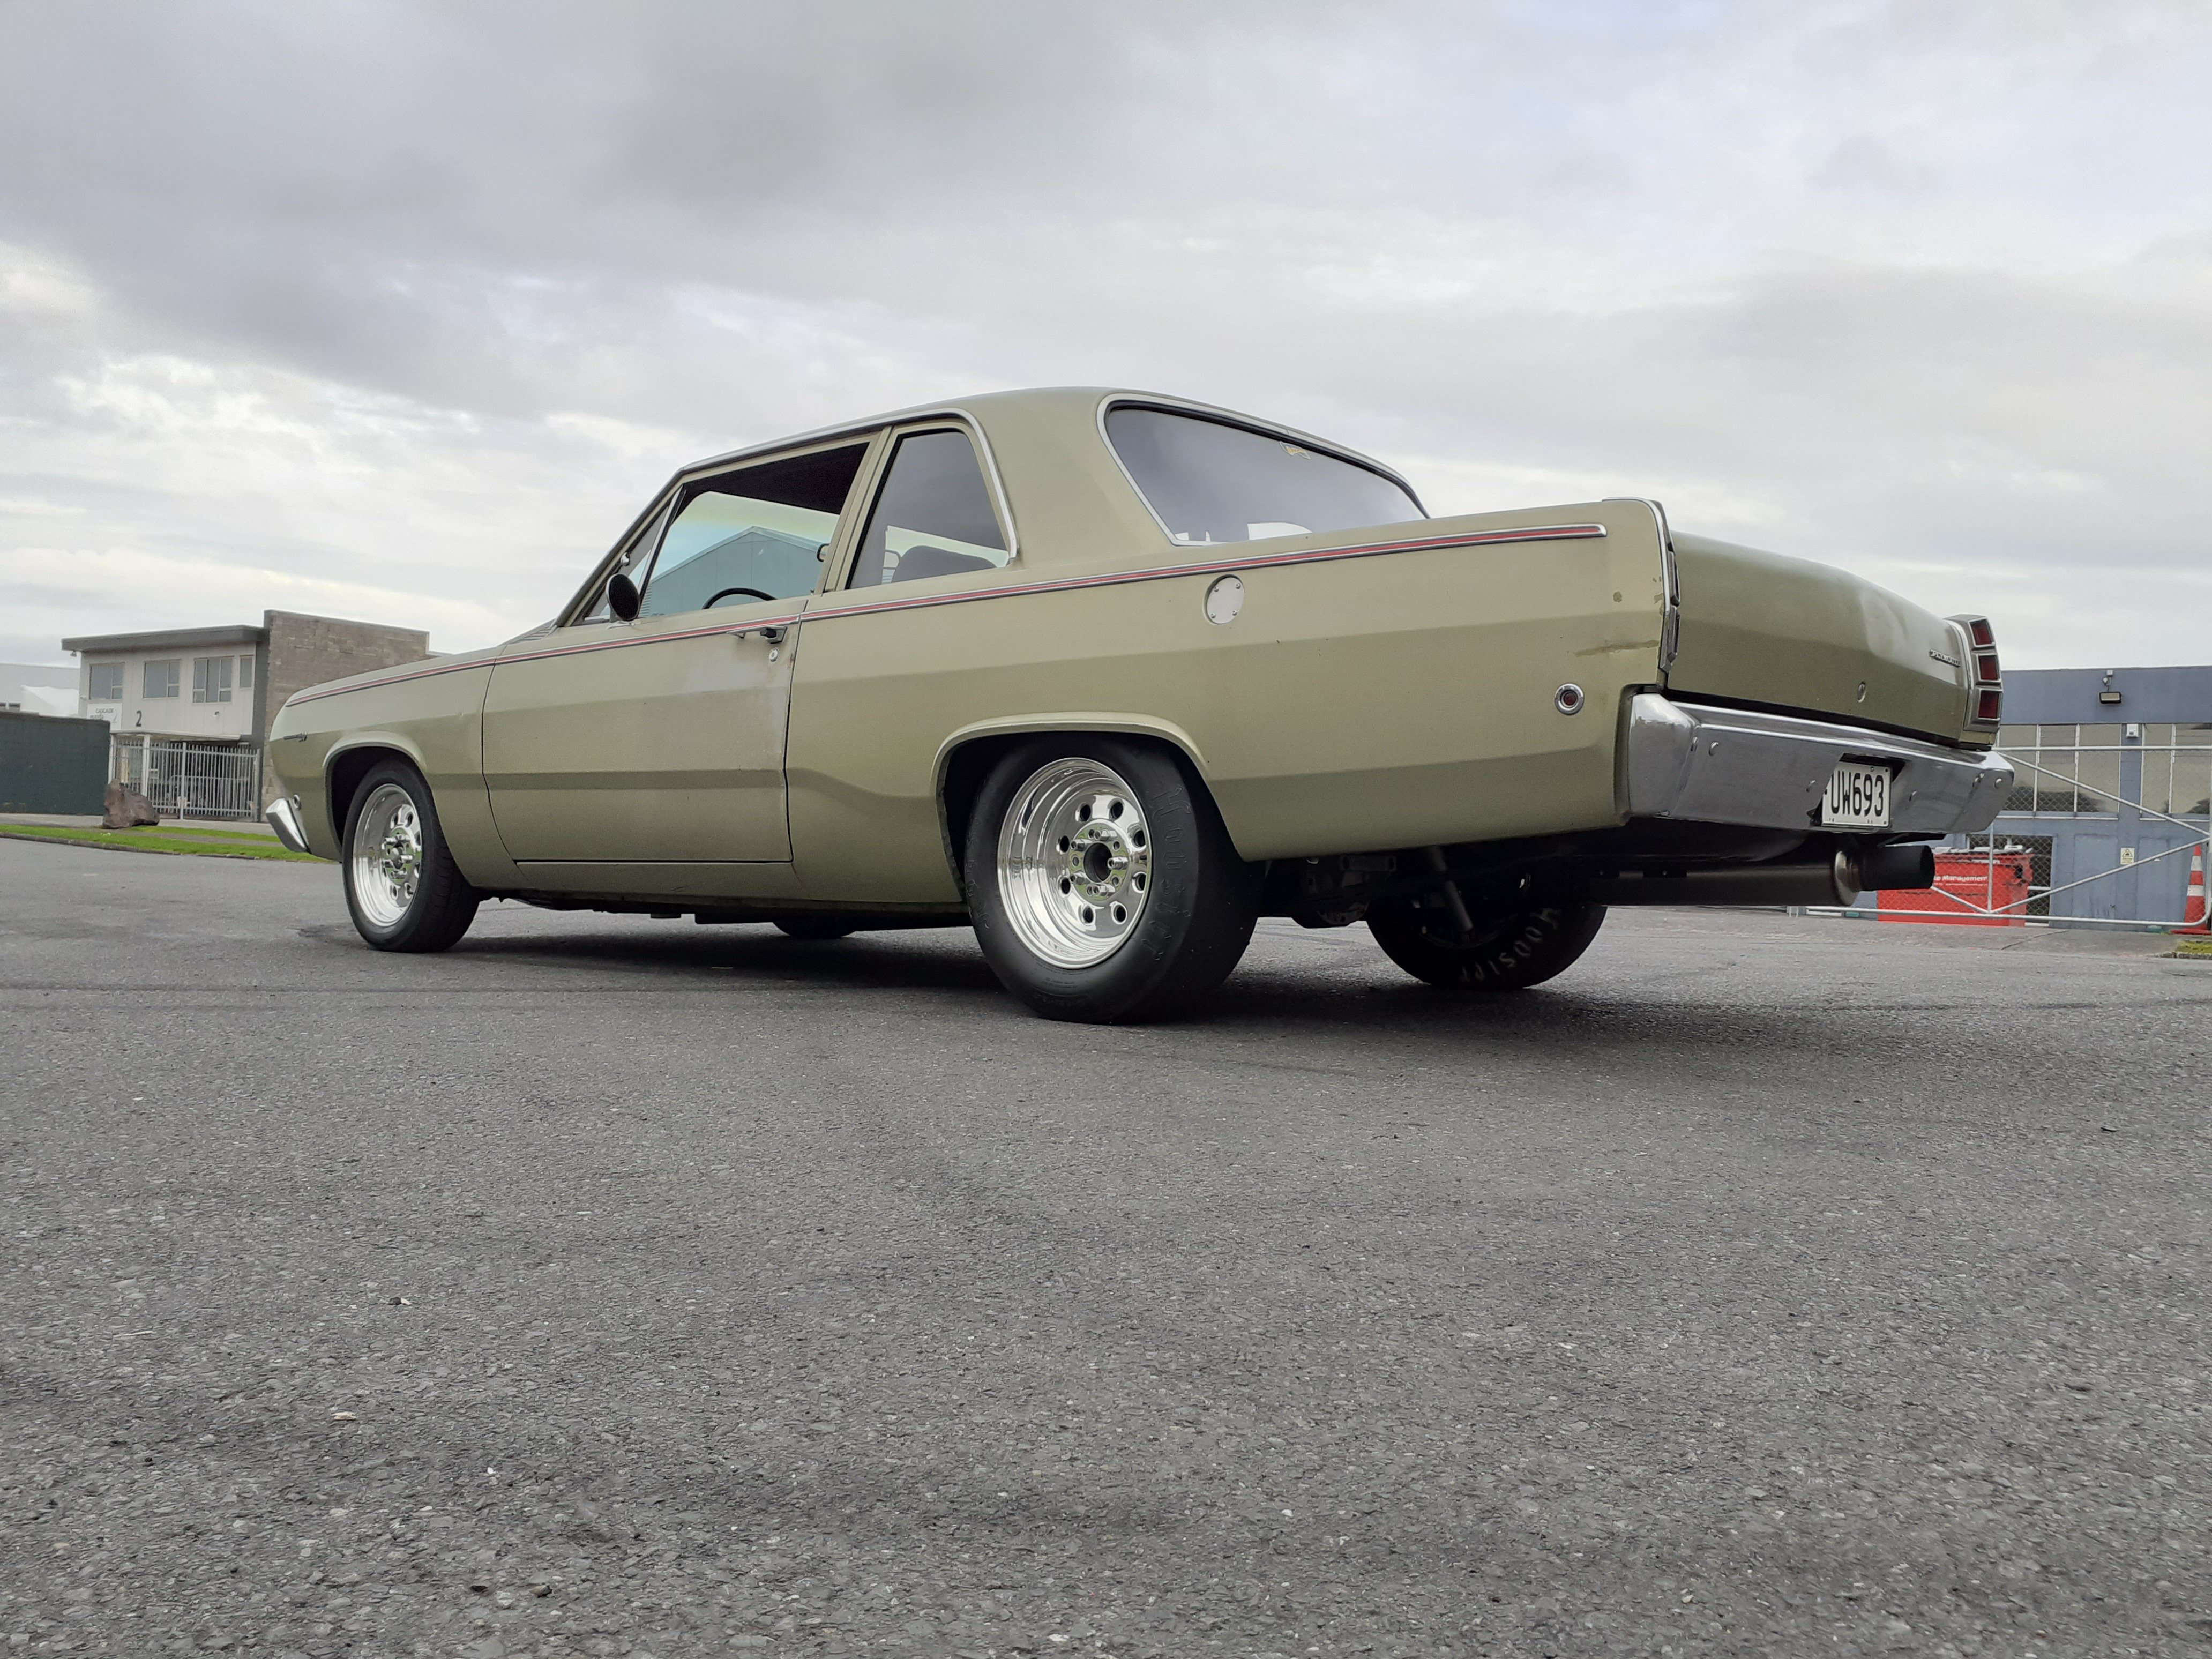
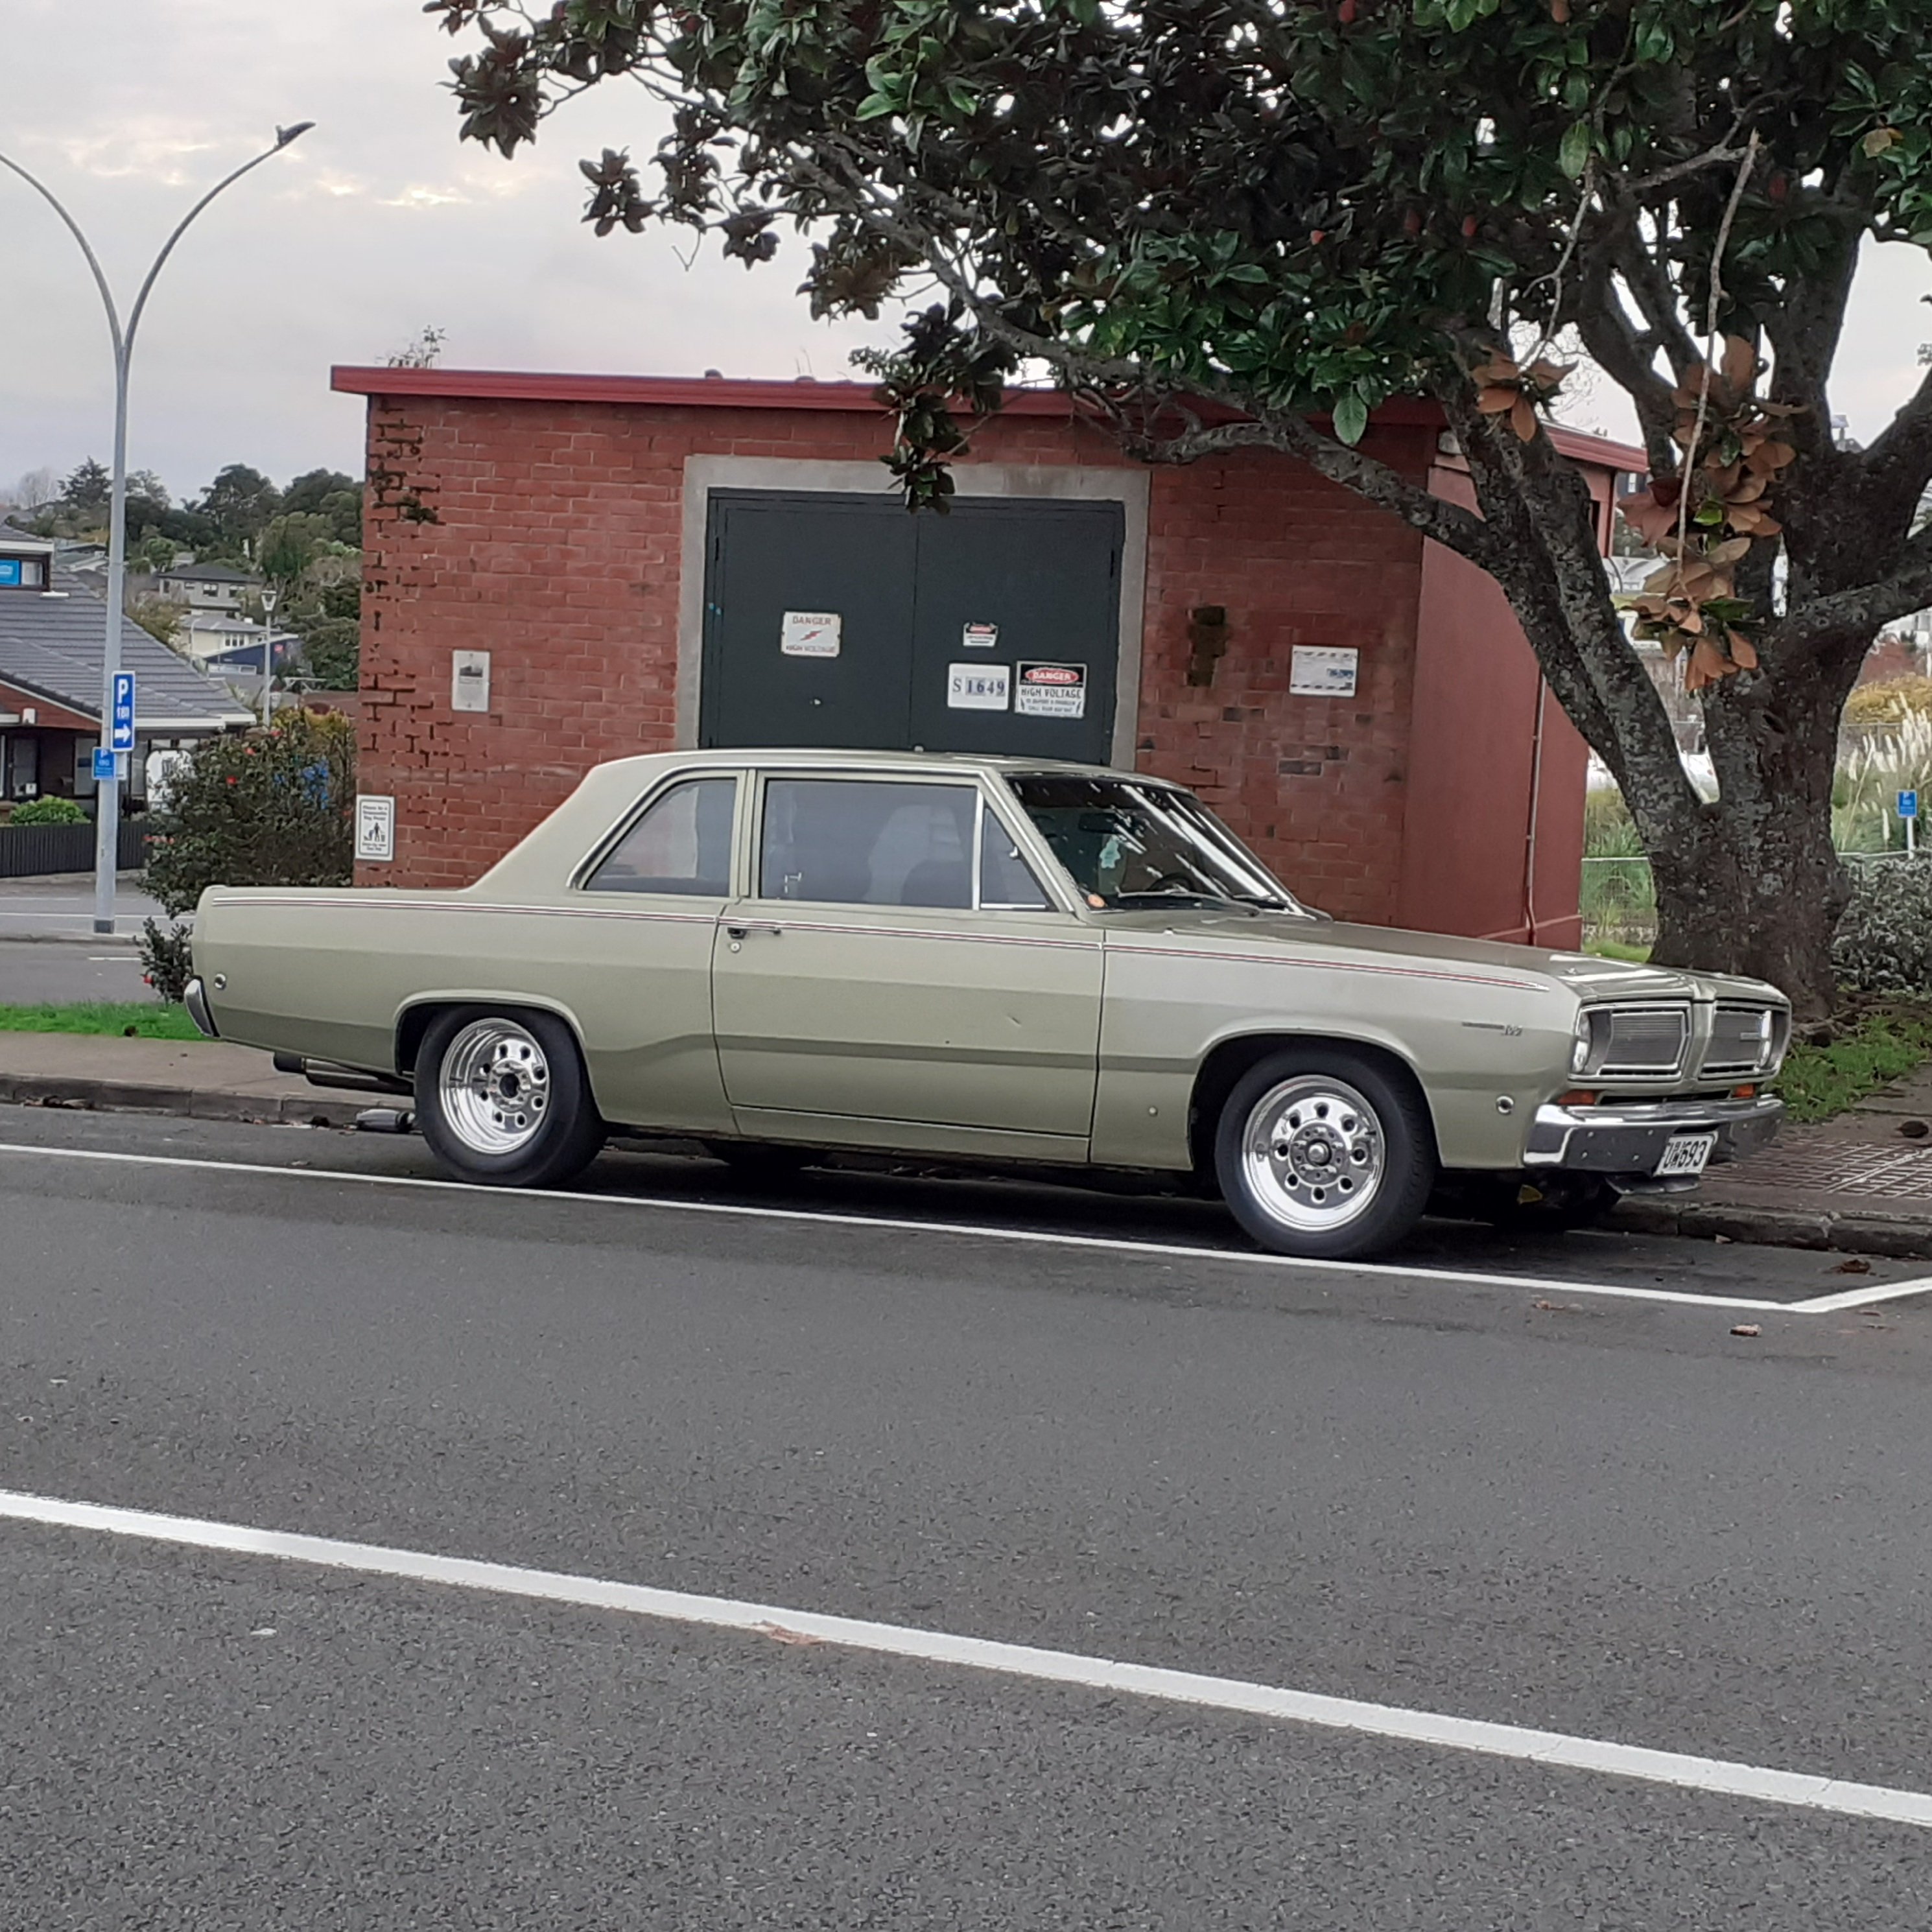
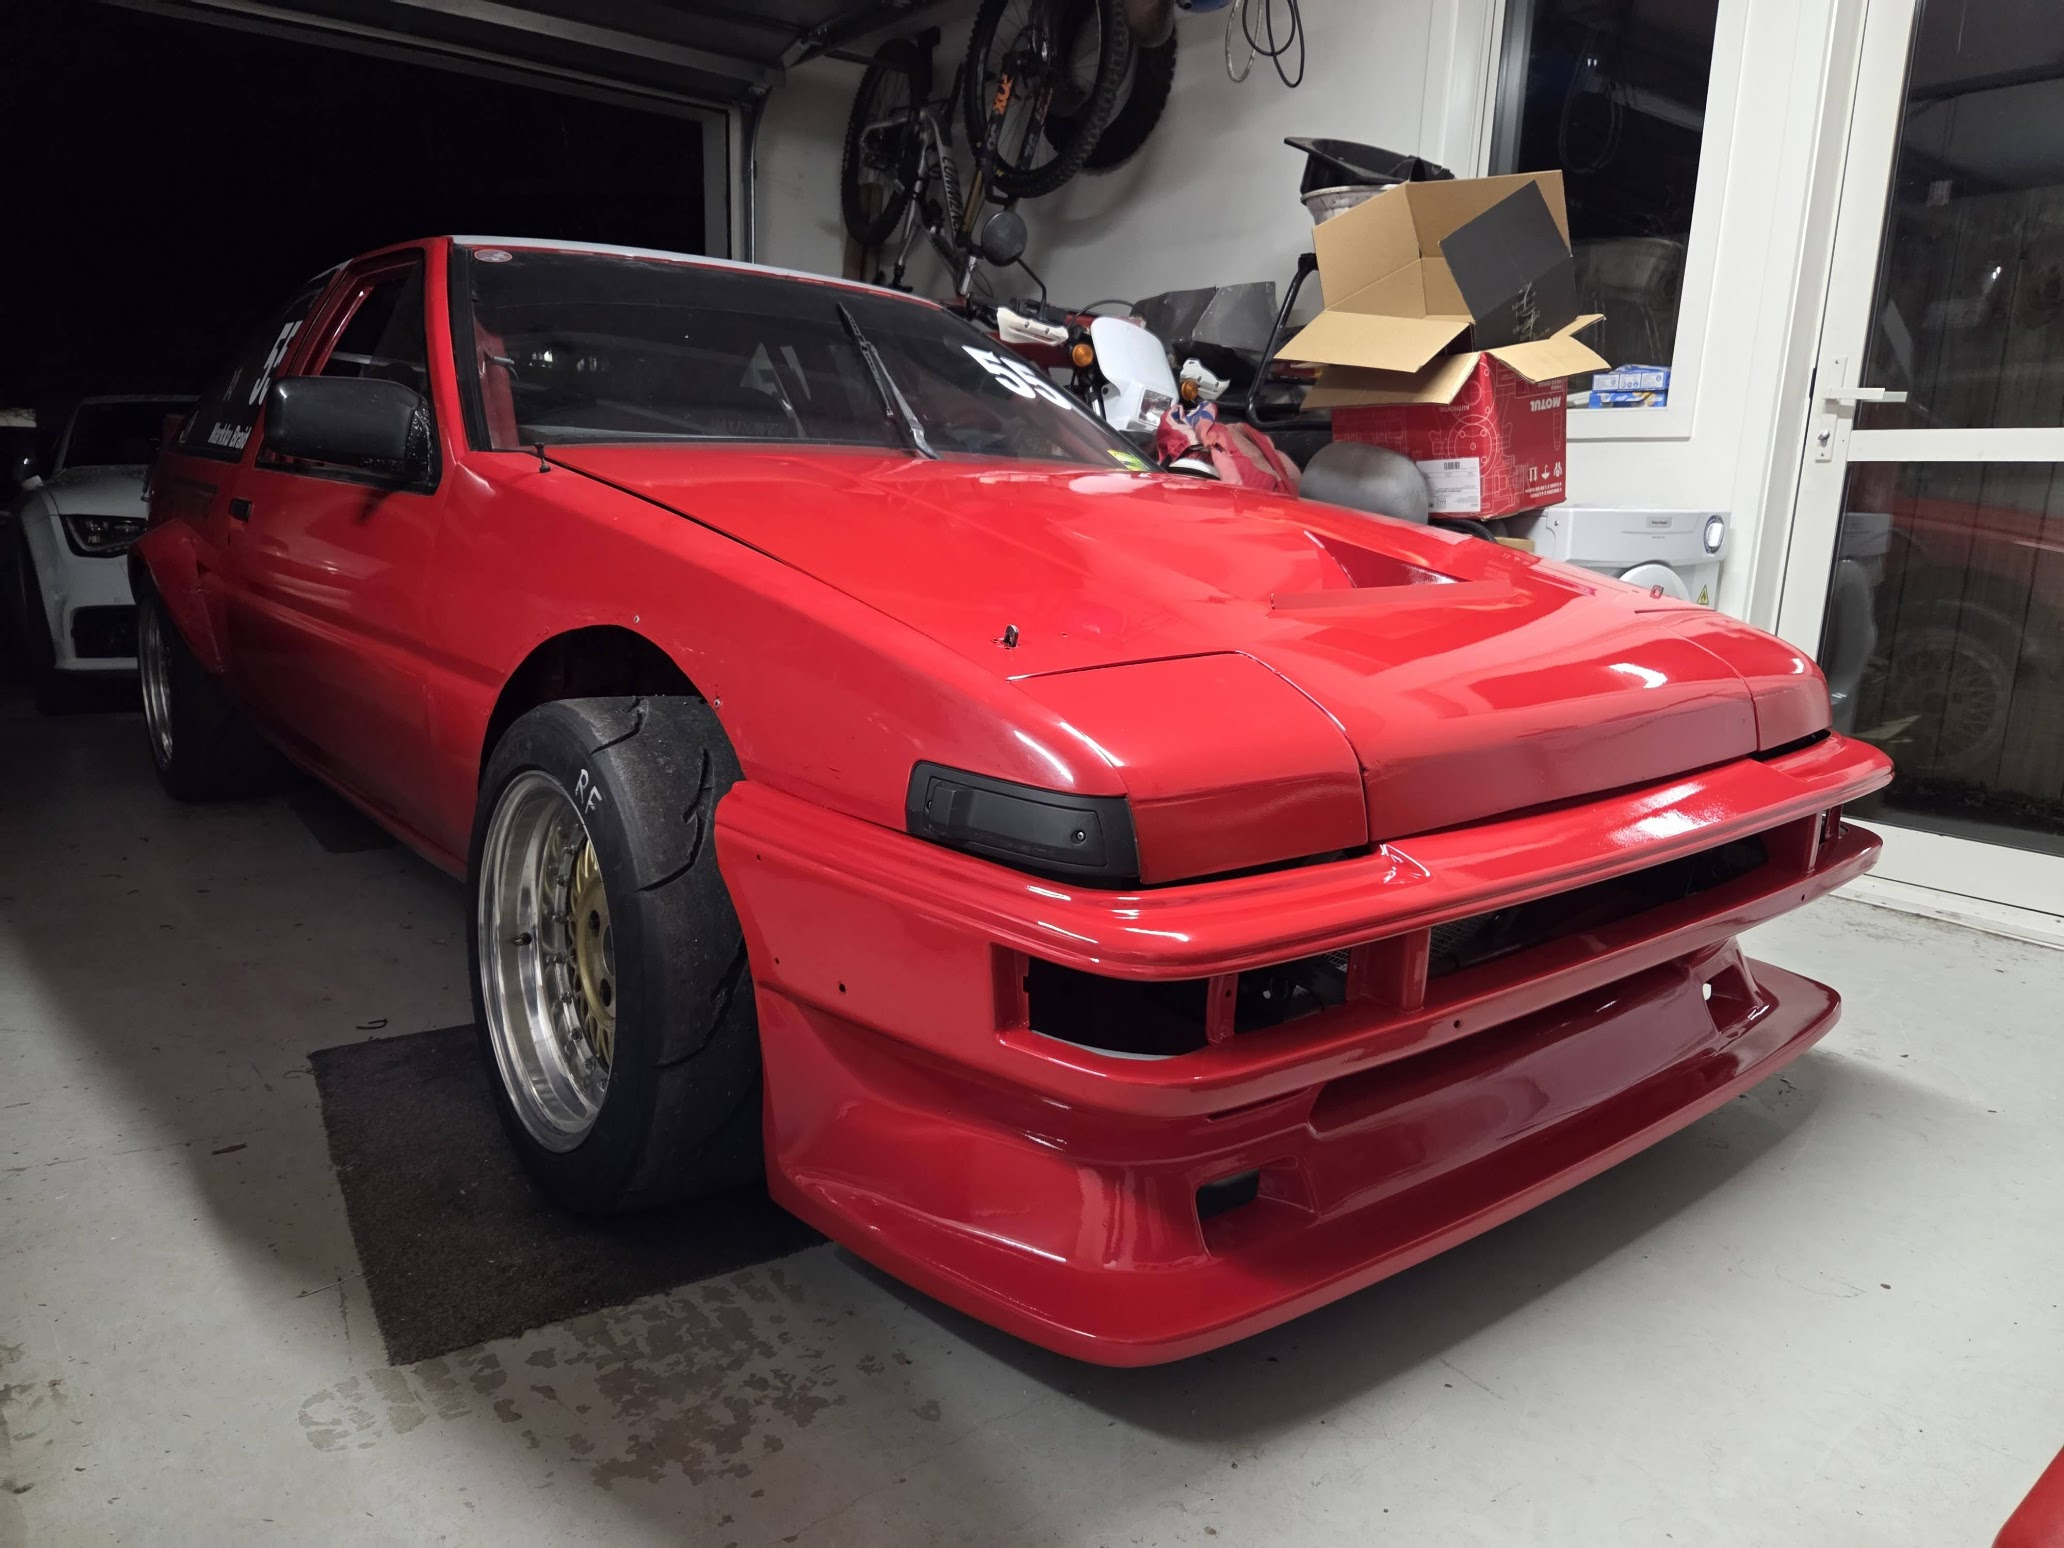
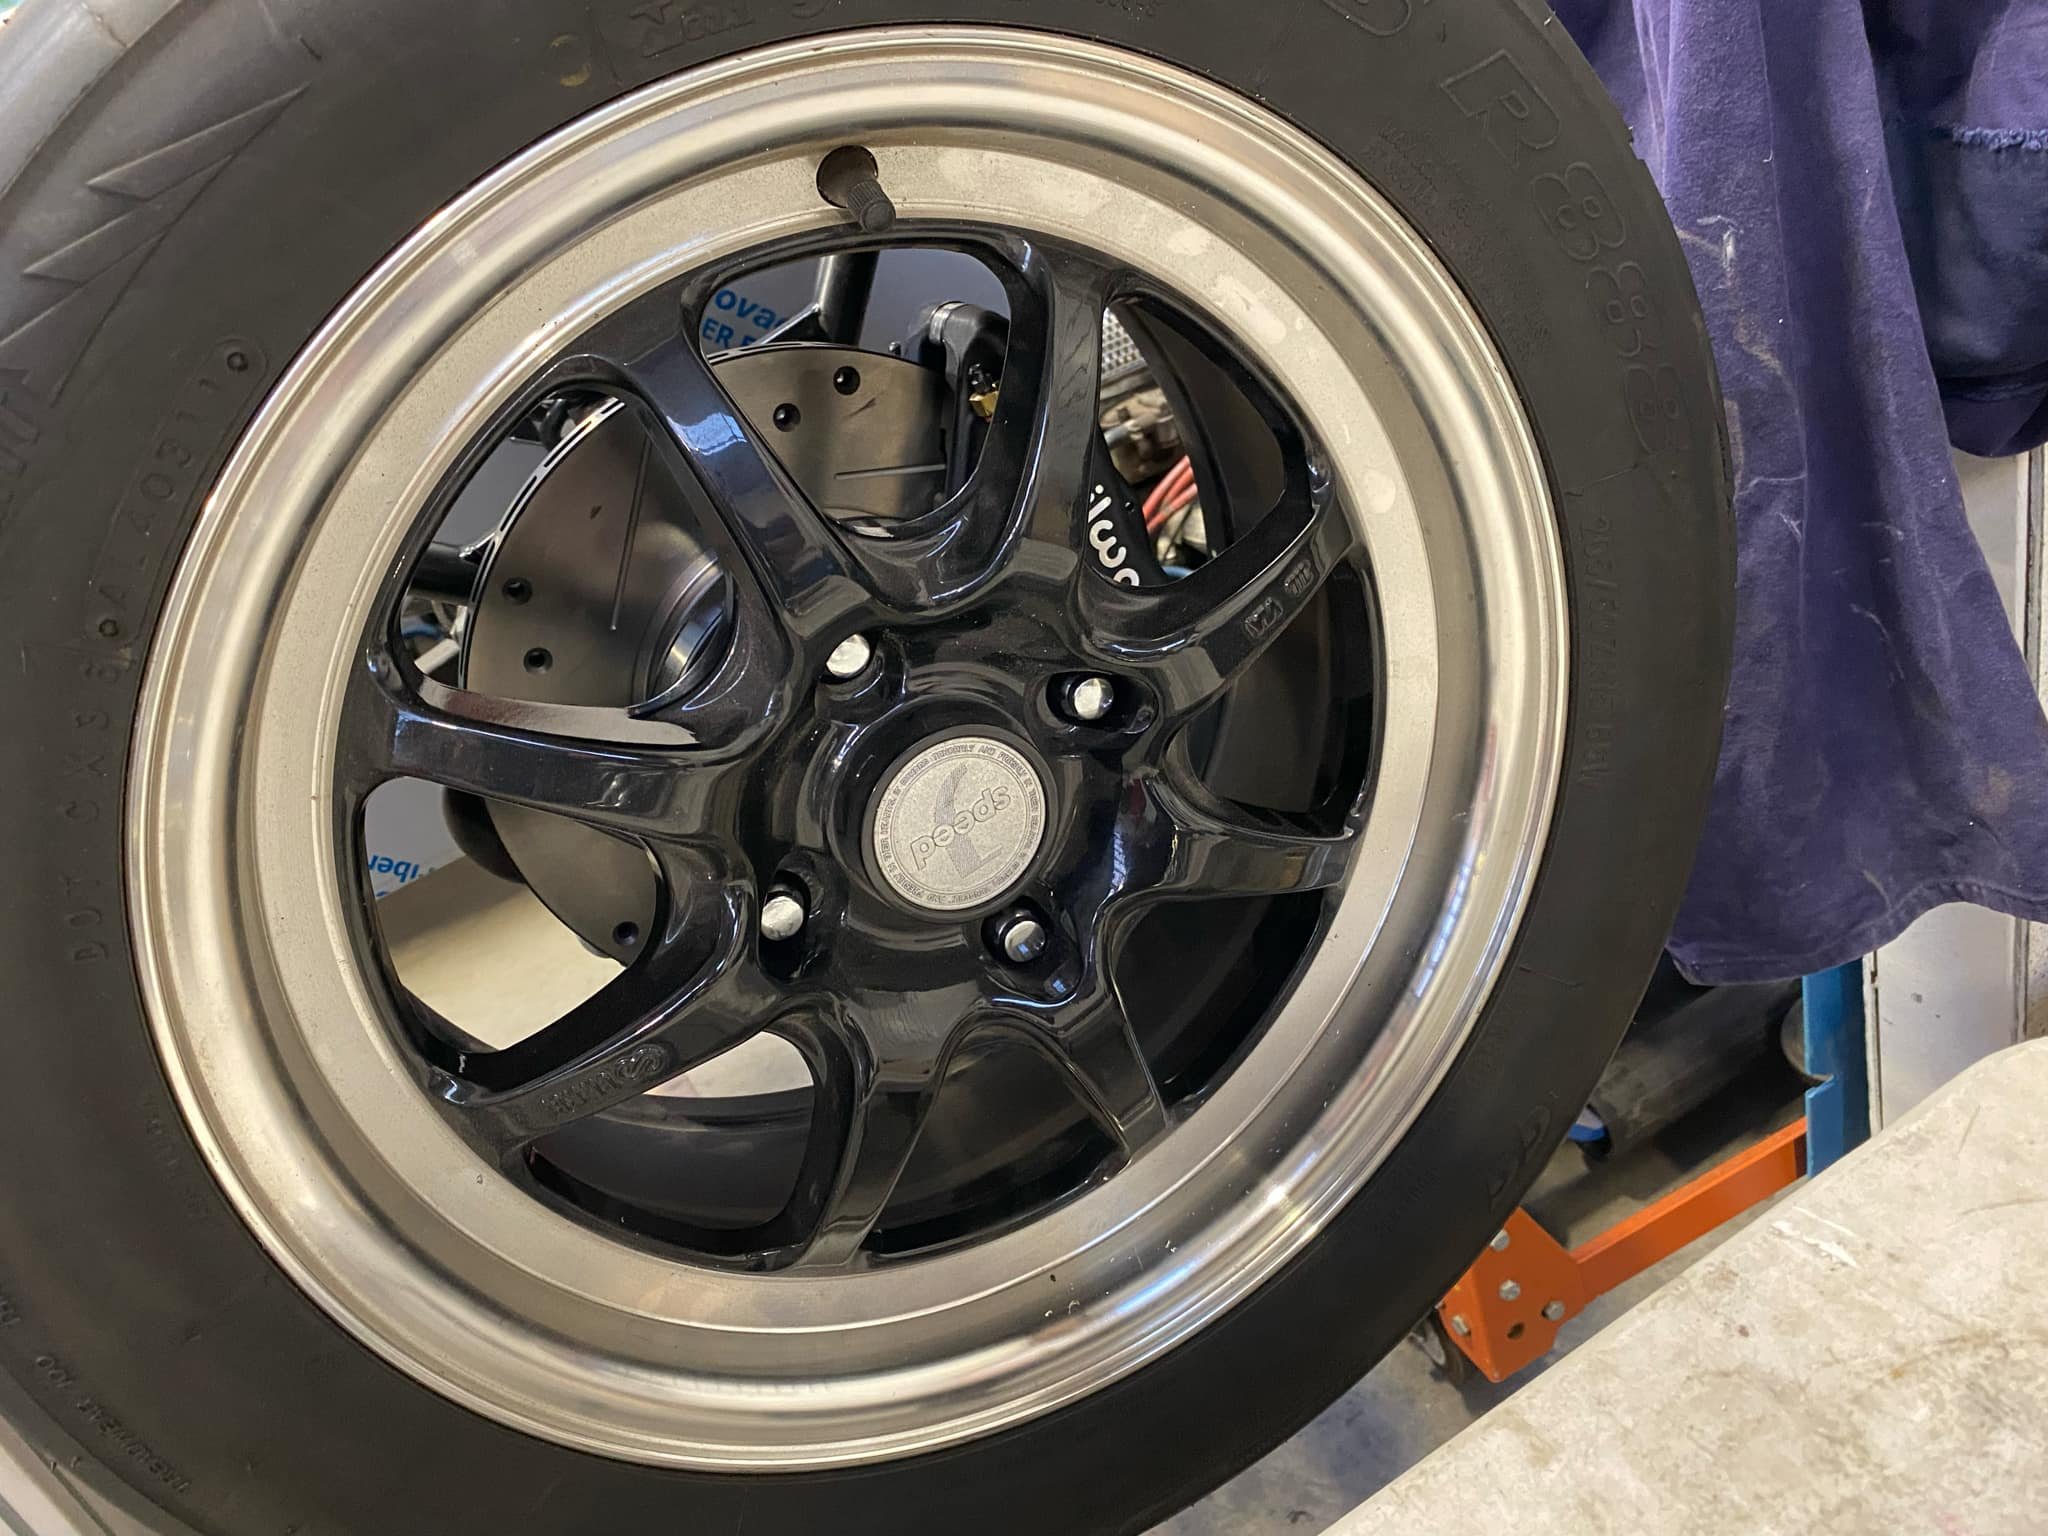
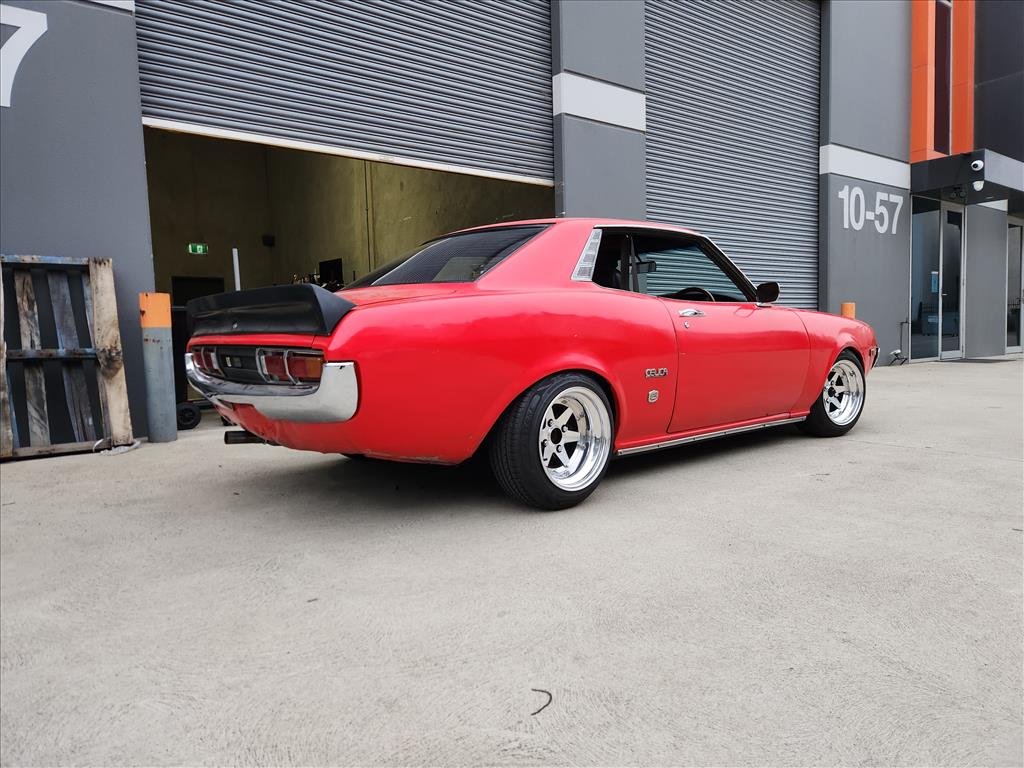
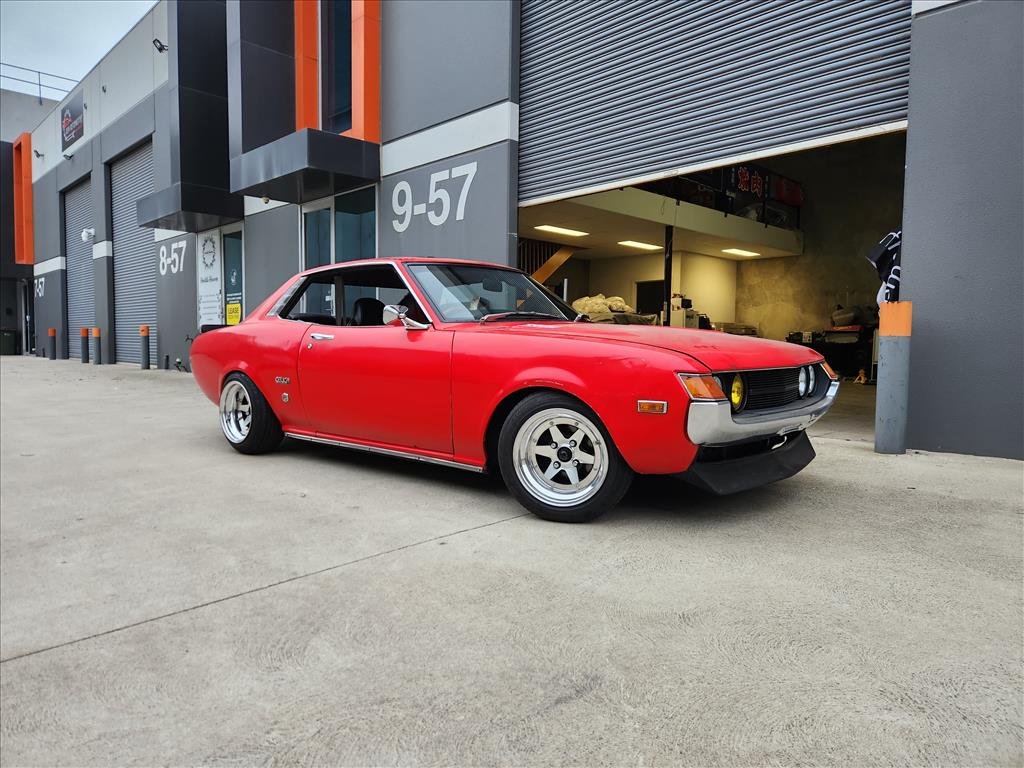
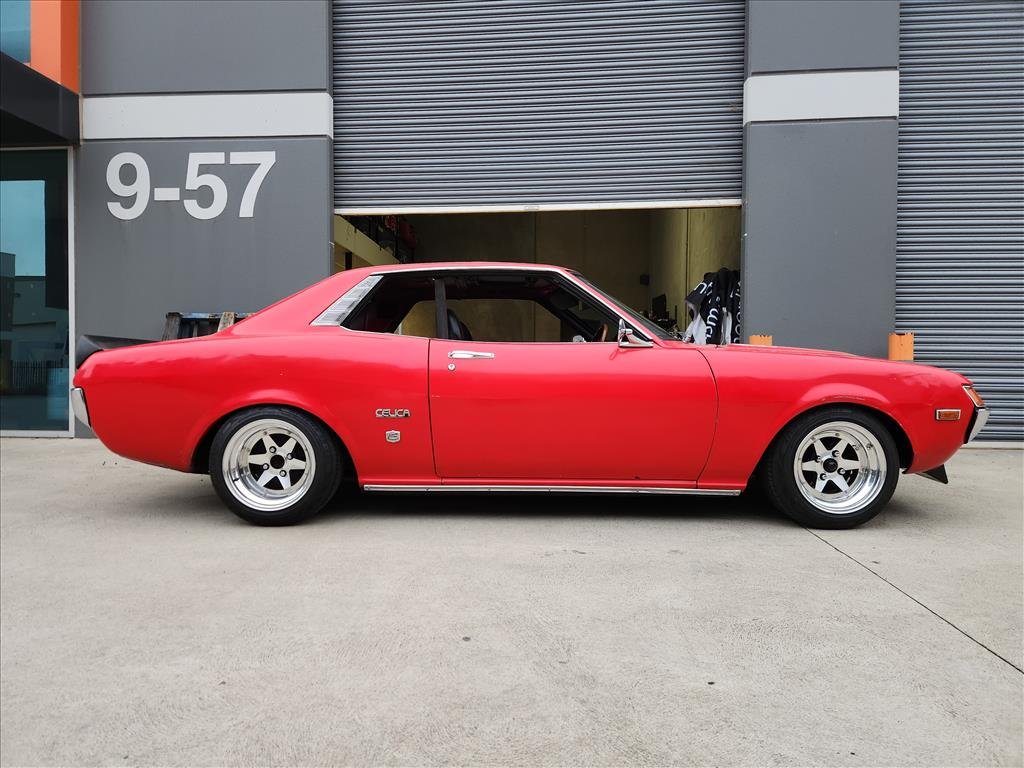
Got the draglites polished and tyres on, some 175 65 on the front and Hoosiers on the back with the white lettering removed can actually use full steam ahead in 1st and 2nd without it doing wheelspins so maybe I need a better tyre for general use
 39 points
 -
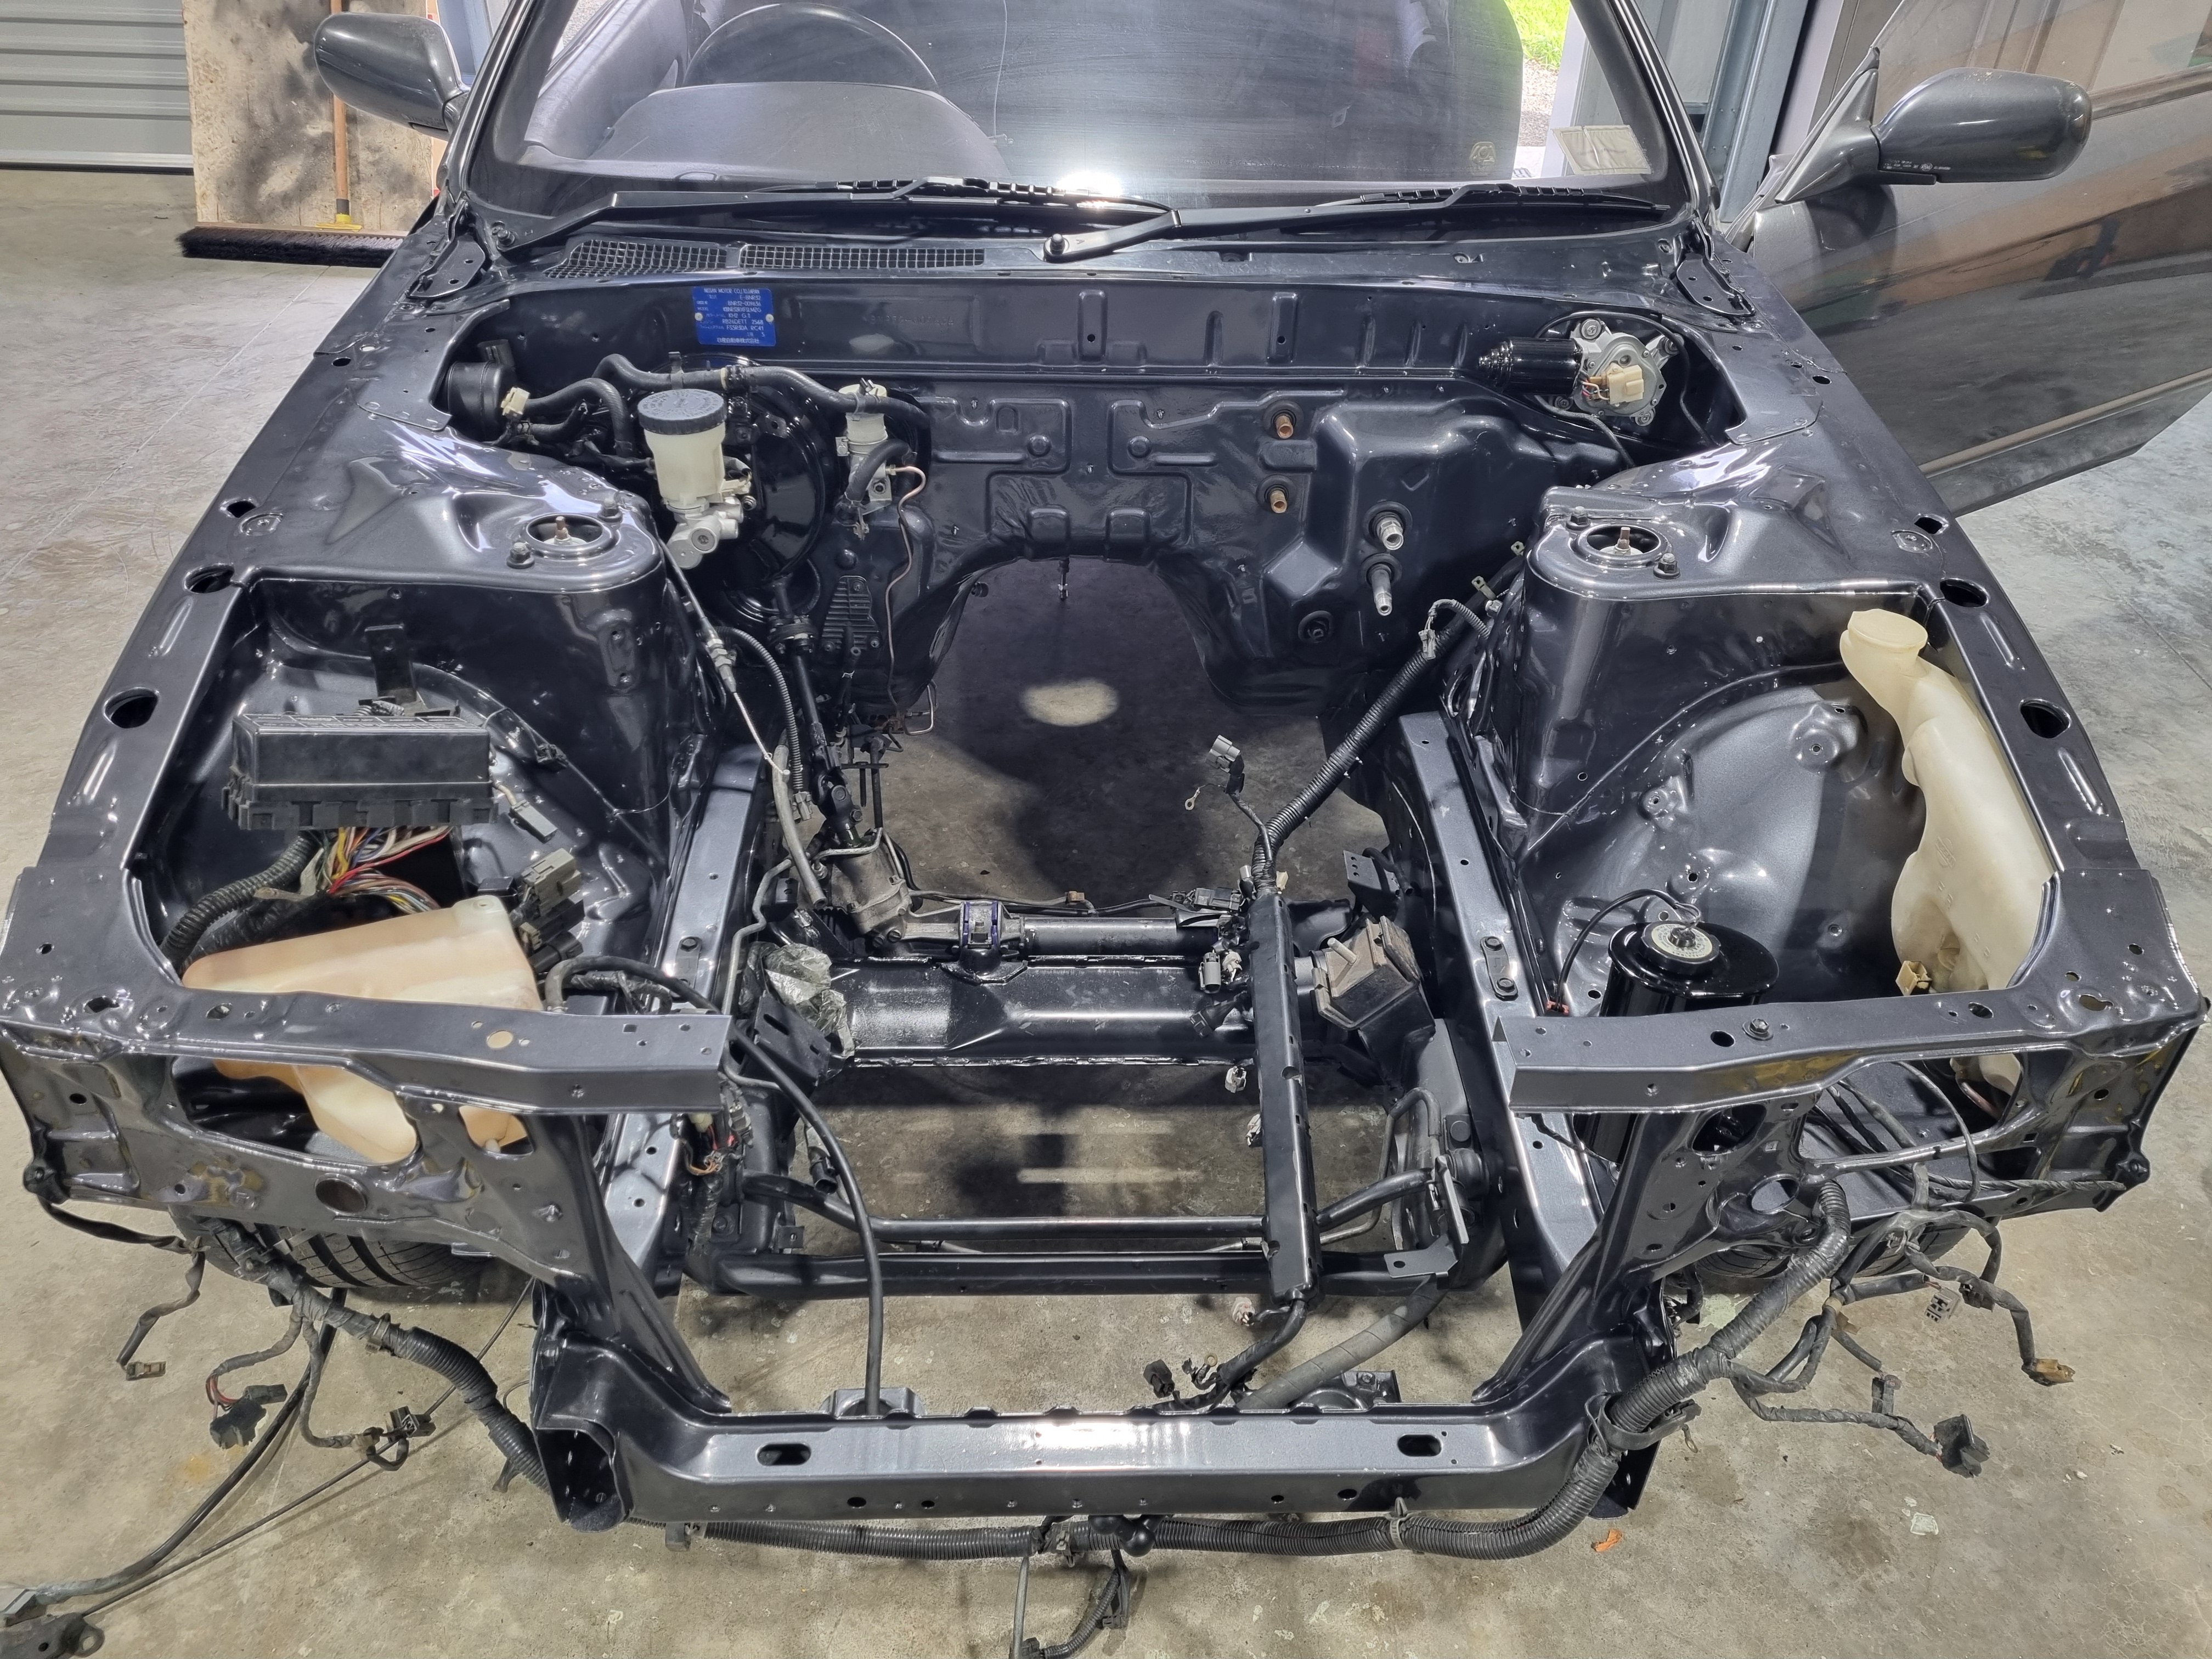
So.. When you have too many projects..... An old mate has had a Mk1 Cortina since 1997. Started as a run about, turned into a project, then along came life, so it was parked for ??? years. The time has come to bring it out of hibernation and see if some life can be breathed into it. Disclaimer: This is not my car, this is not my project, but I'm involved and connected and figured some of your might enjoy the thing. Also disclaimer, the owner and chap who's restoring it are 100% happy for me to share the project here. Step 1: Unbury The light of day for the first time in ???? Load 'er up Delivered down to the (Hawkes) Bay and ready for revival. Since the car was imported pre 19?? it doesn't have a vin. Annoyingly the rego had lapsed with an address change, so it required a trip to VTNZ for us to tell them how to do their jobs and get the car a VIN. Tow vehicle activated. As we'd researched the process and let VTNZ know what to do we got through this pretty easily so the car was back to the workshop in good company. Some tidy up required. Throttle body was pretty well stuck, fuel tank has a leak, oil was ??? years old. Some remedial work and.. Gotta love that toyota reliability and a link ECU with an good link base map, albeit a bit rich. The body looks pretty straight, it's had some repair in the right rear at some point in the distant past. There's some re-work to do on some questionable mounting that was done in it's early mod life but nothing that can't be fixed etc. Other projects have been moving in the right direction so there will be some more movement on this coming soon. Further disclaimer, Projects are fun but take time and I have little of the latter. I'll try to keep the updates rolling as they come in but don't expect them weekly. P.P.P.S. I'll get an engine bay shot next time I'm there. LeftChevronThree.36 points
-
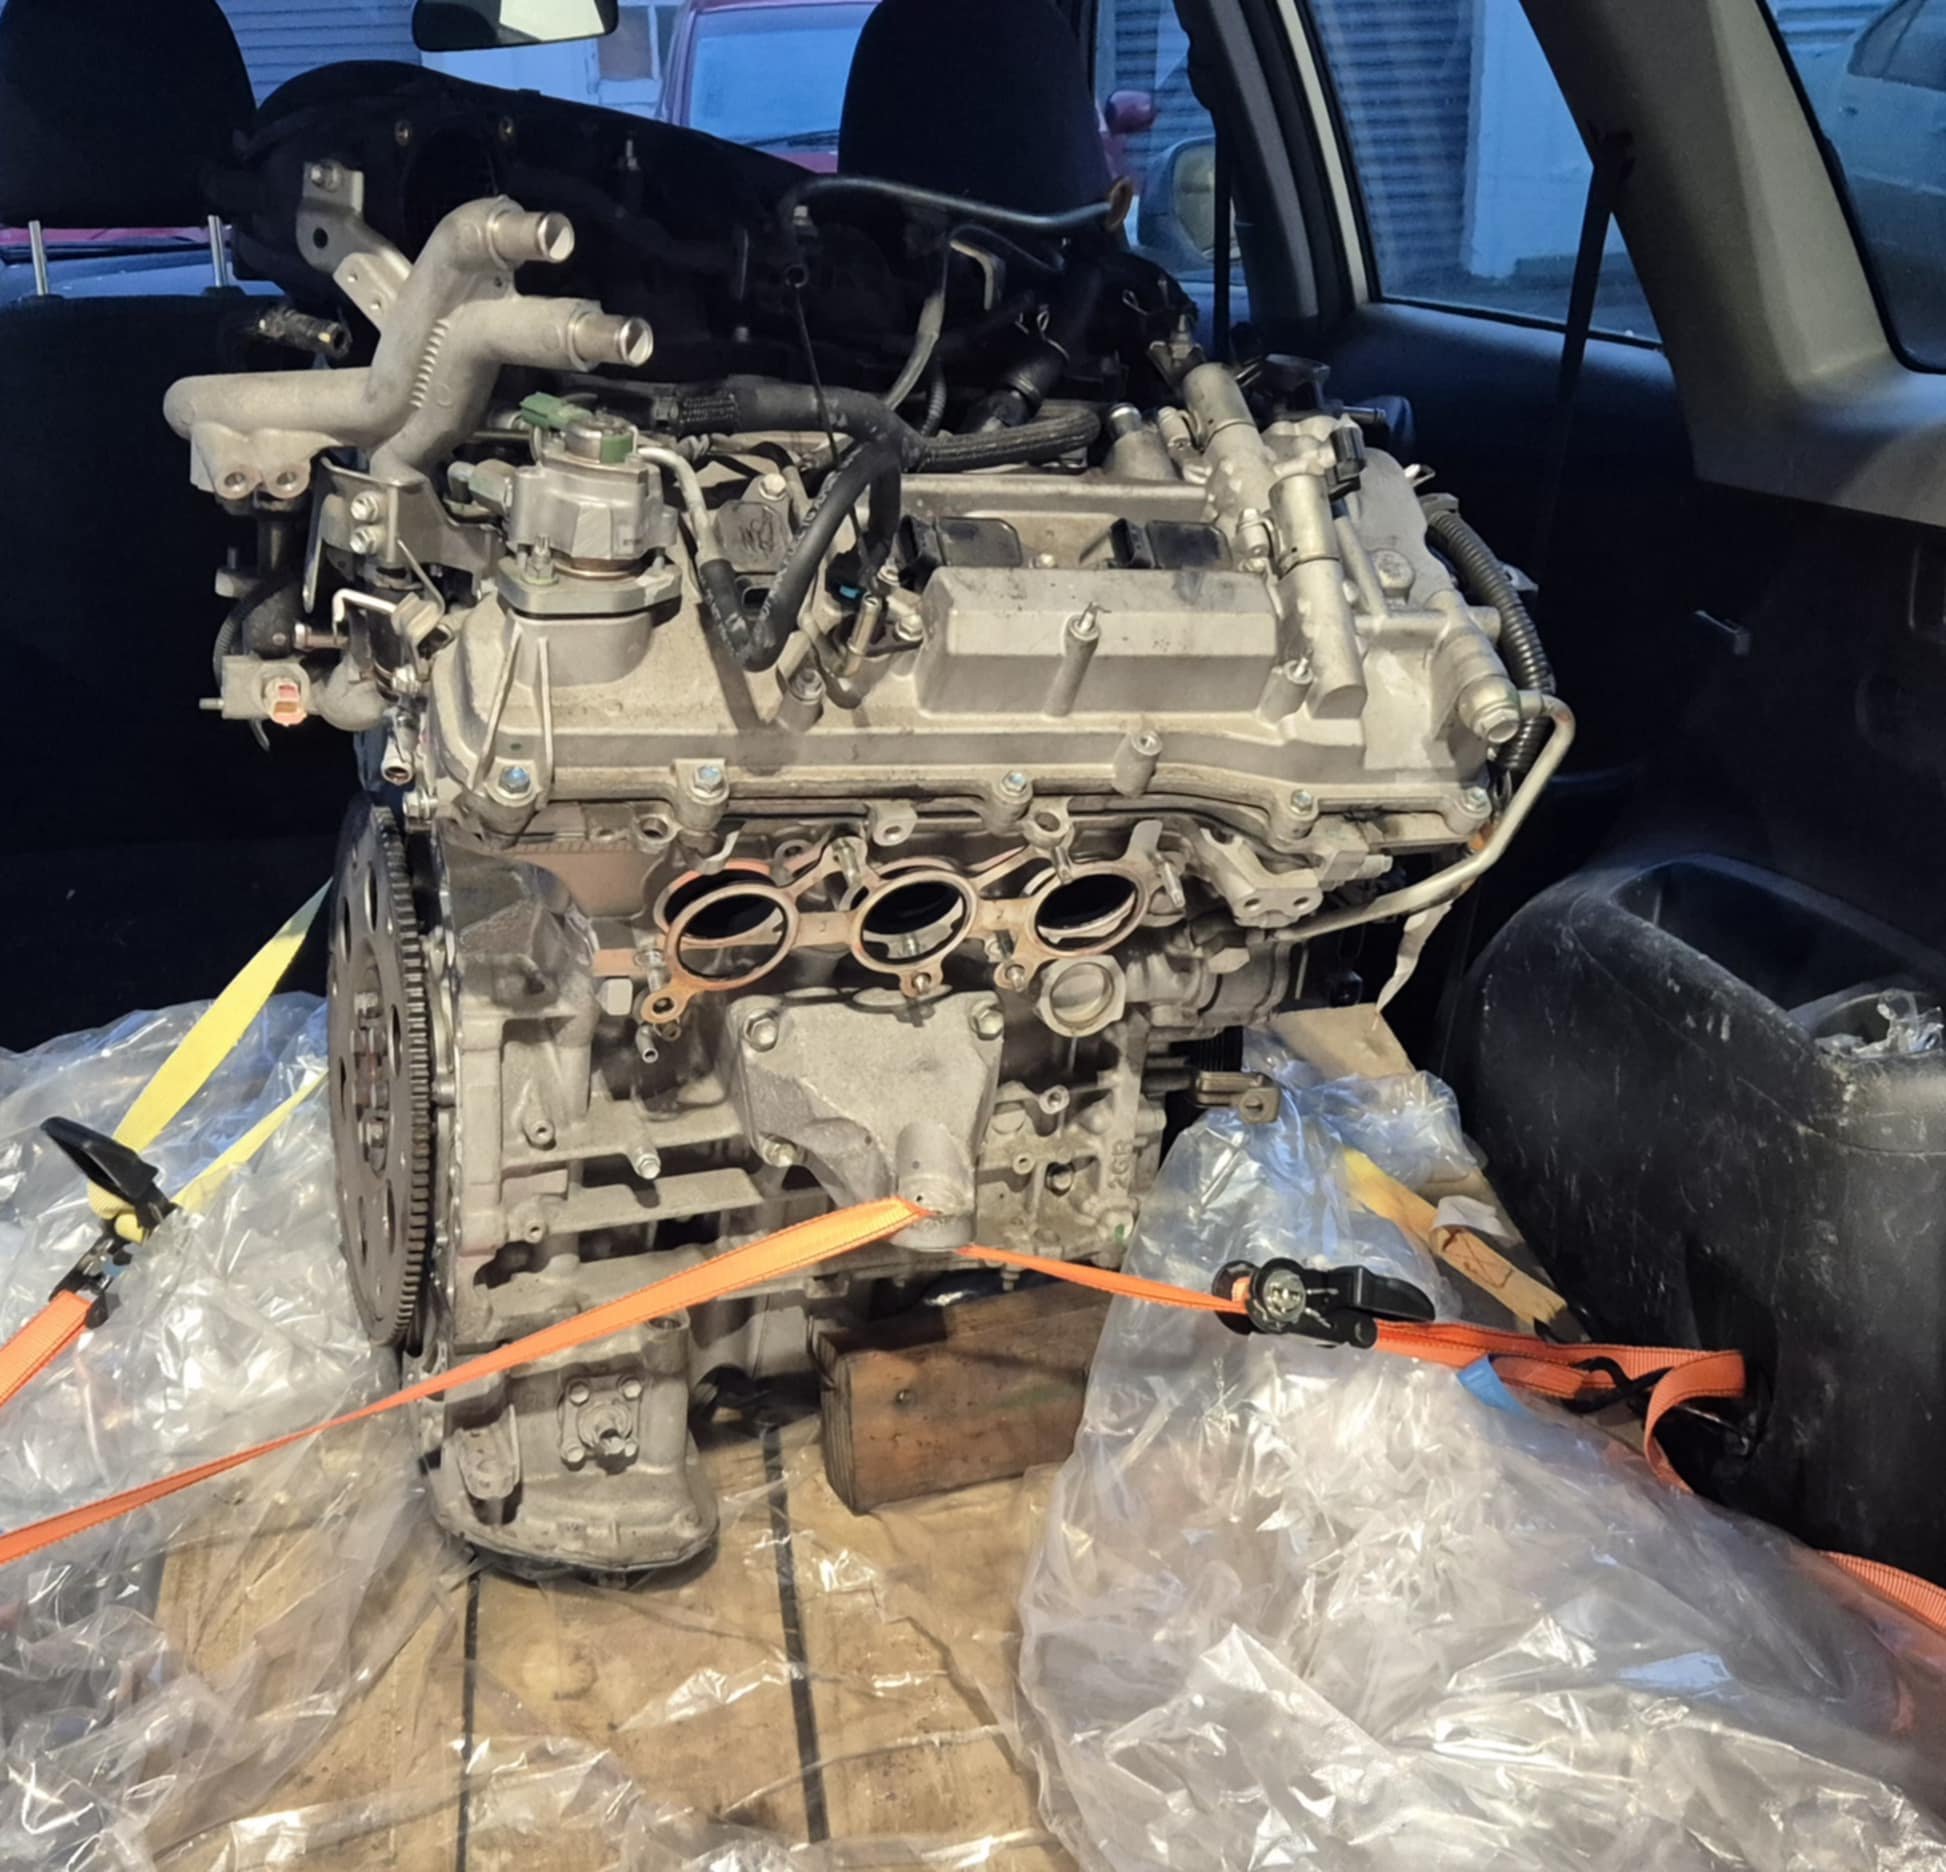
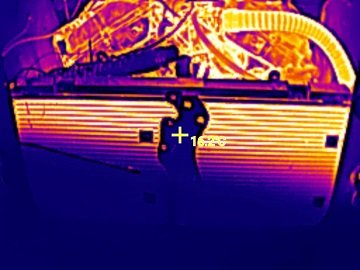
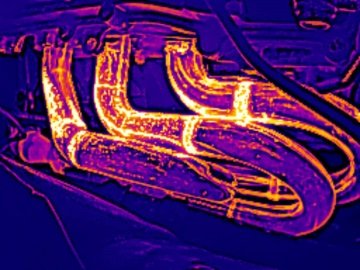
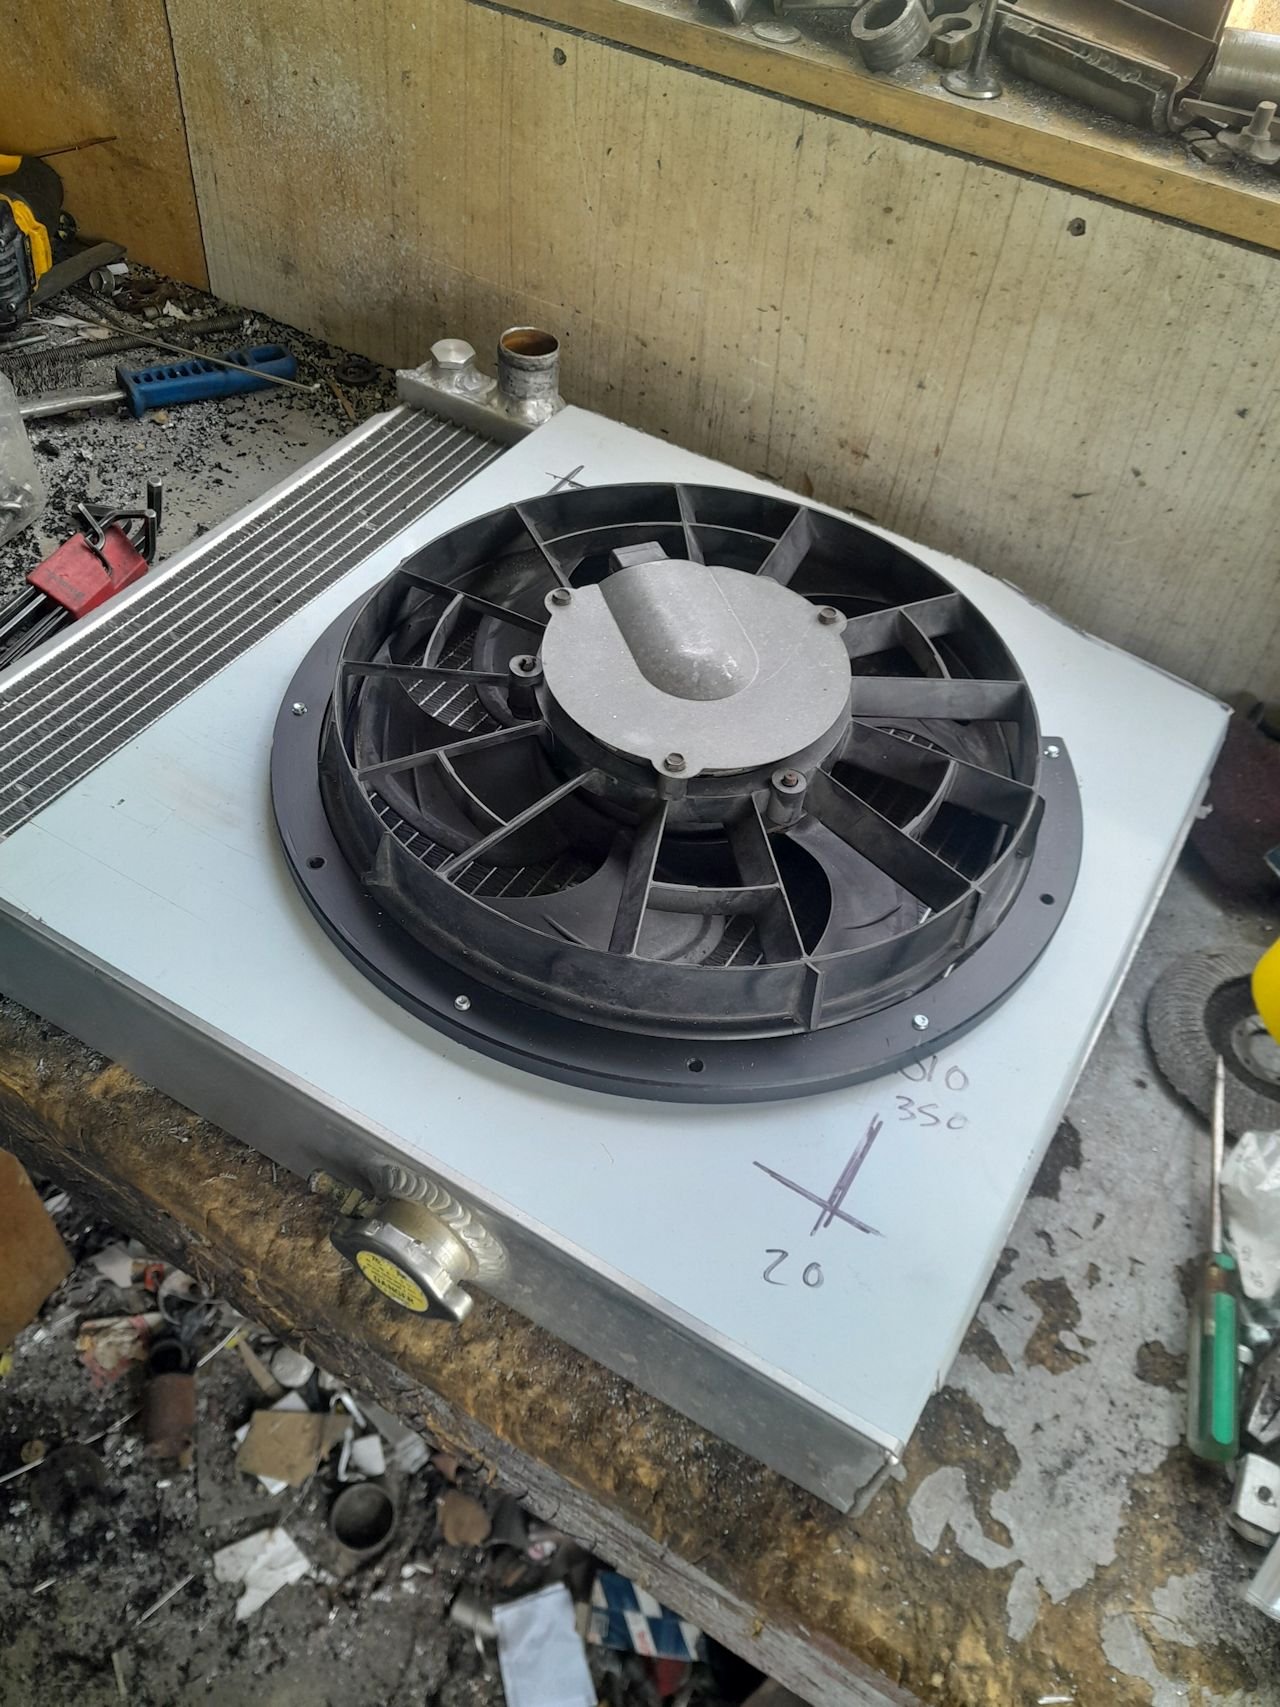
Another motor? Be rude not to A friend had a customer's car come in with a seized 2GRFSE engine. It was deemed uneconomical to try and repair, so they replaced it. Being the local V6 weirdo, I was asked if I would like the seized engine for V6 activities. Why, yes I would! Thanks. I've mostly stripped it down, and found nothing particularly wrong so far. It turns over smoothly except for a small portion of rotation where it "sticks" for some reason. I found a broken chain tensioner, but this looks to be a symptom rather than cause. With the chain fully off, it still does the same thing. With a camera stuck down the spark plug holes, all of the bores are looking good as best I can tell. I am guessing either it's a main bearing that is stuffed, or maybe a piston has cracked a ringland, so it jams when it first starts going up (or down) But it's looking though its still going to be a useable engine with a minor fix hopefully. So, what to do with this motor? Well, it looks like a good candidate for destroking with the 5GR or 2MZ crank. Hopefully the heads and the bores are 100% okay on this motor. As the crank and rods get binned anyway. Once I've confirmed its all okay, I'll just put it mostly back together and park it in the corner of the garage for now. The only "downside" of this motor is that the ports on intake and exhaust are incompatible with my existing manifolds. However it'll be no stress to make some new ones later on to test. Throttle Pulley problems It seems I messed up my measurements for cable length for the dual ethrottle setup. So it's now working amazingly, and both banks are getting to target and really quickly. However I can only reach about 70% throttle before it runs out of cable pull. So my pulleys are off with Dad to cut them down a bit with the CNC machine, so I can reach full travel. Ahhhh well shit happens. Airbox stuff Height of airbox to the bonnet is still the main issue I'm contending with. Rhys had a suggestion to try trumpets that are parallel to the roof of the airbox, to gain a bit more clearance. Good idea! So just printing some of these out. Thermal camera side quest I last had a thermal camera about 10 years ago. Technology has come leaps and bounds since then. My last one was very low resolution, and limited to either 5hz or 10hz refresh rate. It could only read up to 200ish degrees, which wasnt hugely useful for things like brakes or exhaust stuff. My new one is a little device the clips into the bottom of my phone. It can record video at 25hz, has 256*192 resolution, and scales up to 600 degrees C. Considerably cheaper than last time too. Bloody awesome! The thing about it that will be absolutely magnificent though. Is that I've confirmed it works with a decent quality USB-C extension cable. So this means I can mount the tiny device somewhere in my engine bay, wheel area, brake area, or whatever else. Then record and view results from in the cabin. Gonna be awesome. But obviously I need to have all of the bread and butter parts of the car sorted before this will be much use. Although 256*192 resolution seems low for a modern type of camera. It's awesome when you think about what it's replacing. If you put a temp sensor into something, you only have 2 datapoints. temperature and time. This has over 50,000 datapoints instead of 1. So instead of "radiator is hot at this particular spot" you can now see the temperature gradient across the whole thing. Interesting to see the temp gradient on this SW20 radiator, which has both its inlet and outlet mounted at the top of the radiator. It's cool to be able to see the exhaust pipes without maxxing out the sensor instantly. The bright areas are because of the different emissivity of the material, not because my welds are bad. That's my story, and I'm sticking to it.
36 points
-
Fuck I'm so stoked. This is so So Rad.
35 points
-
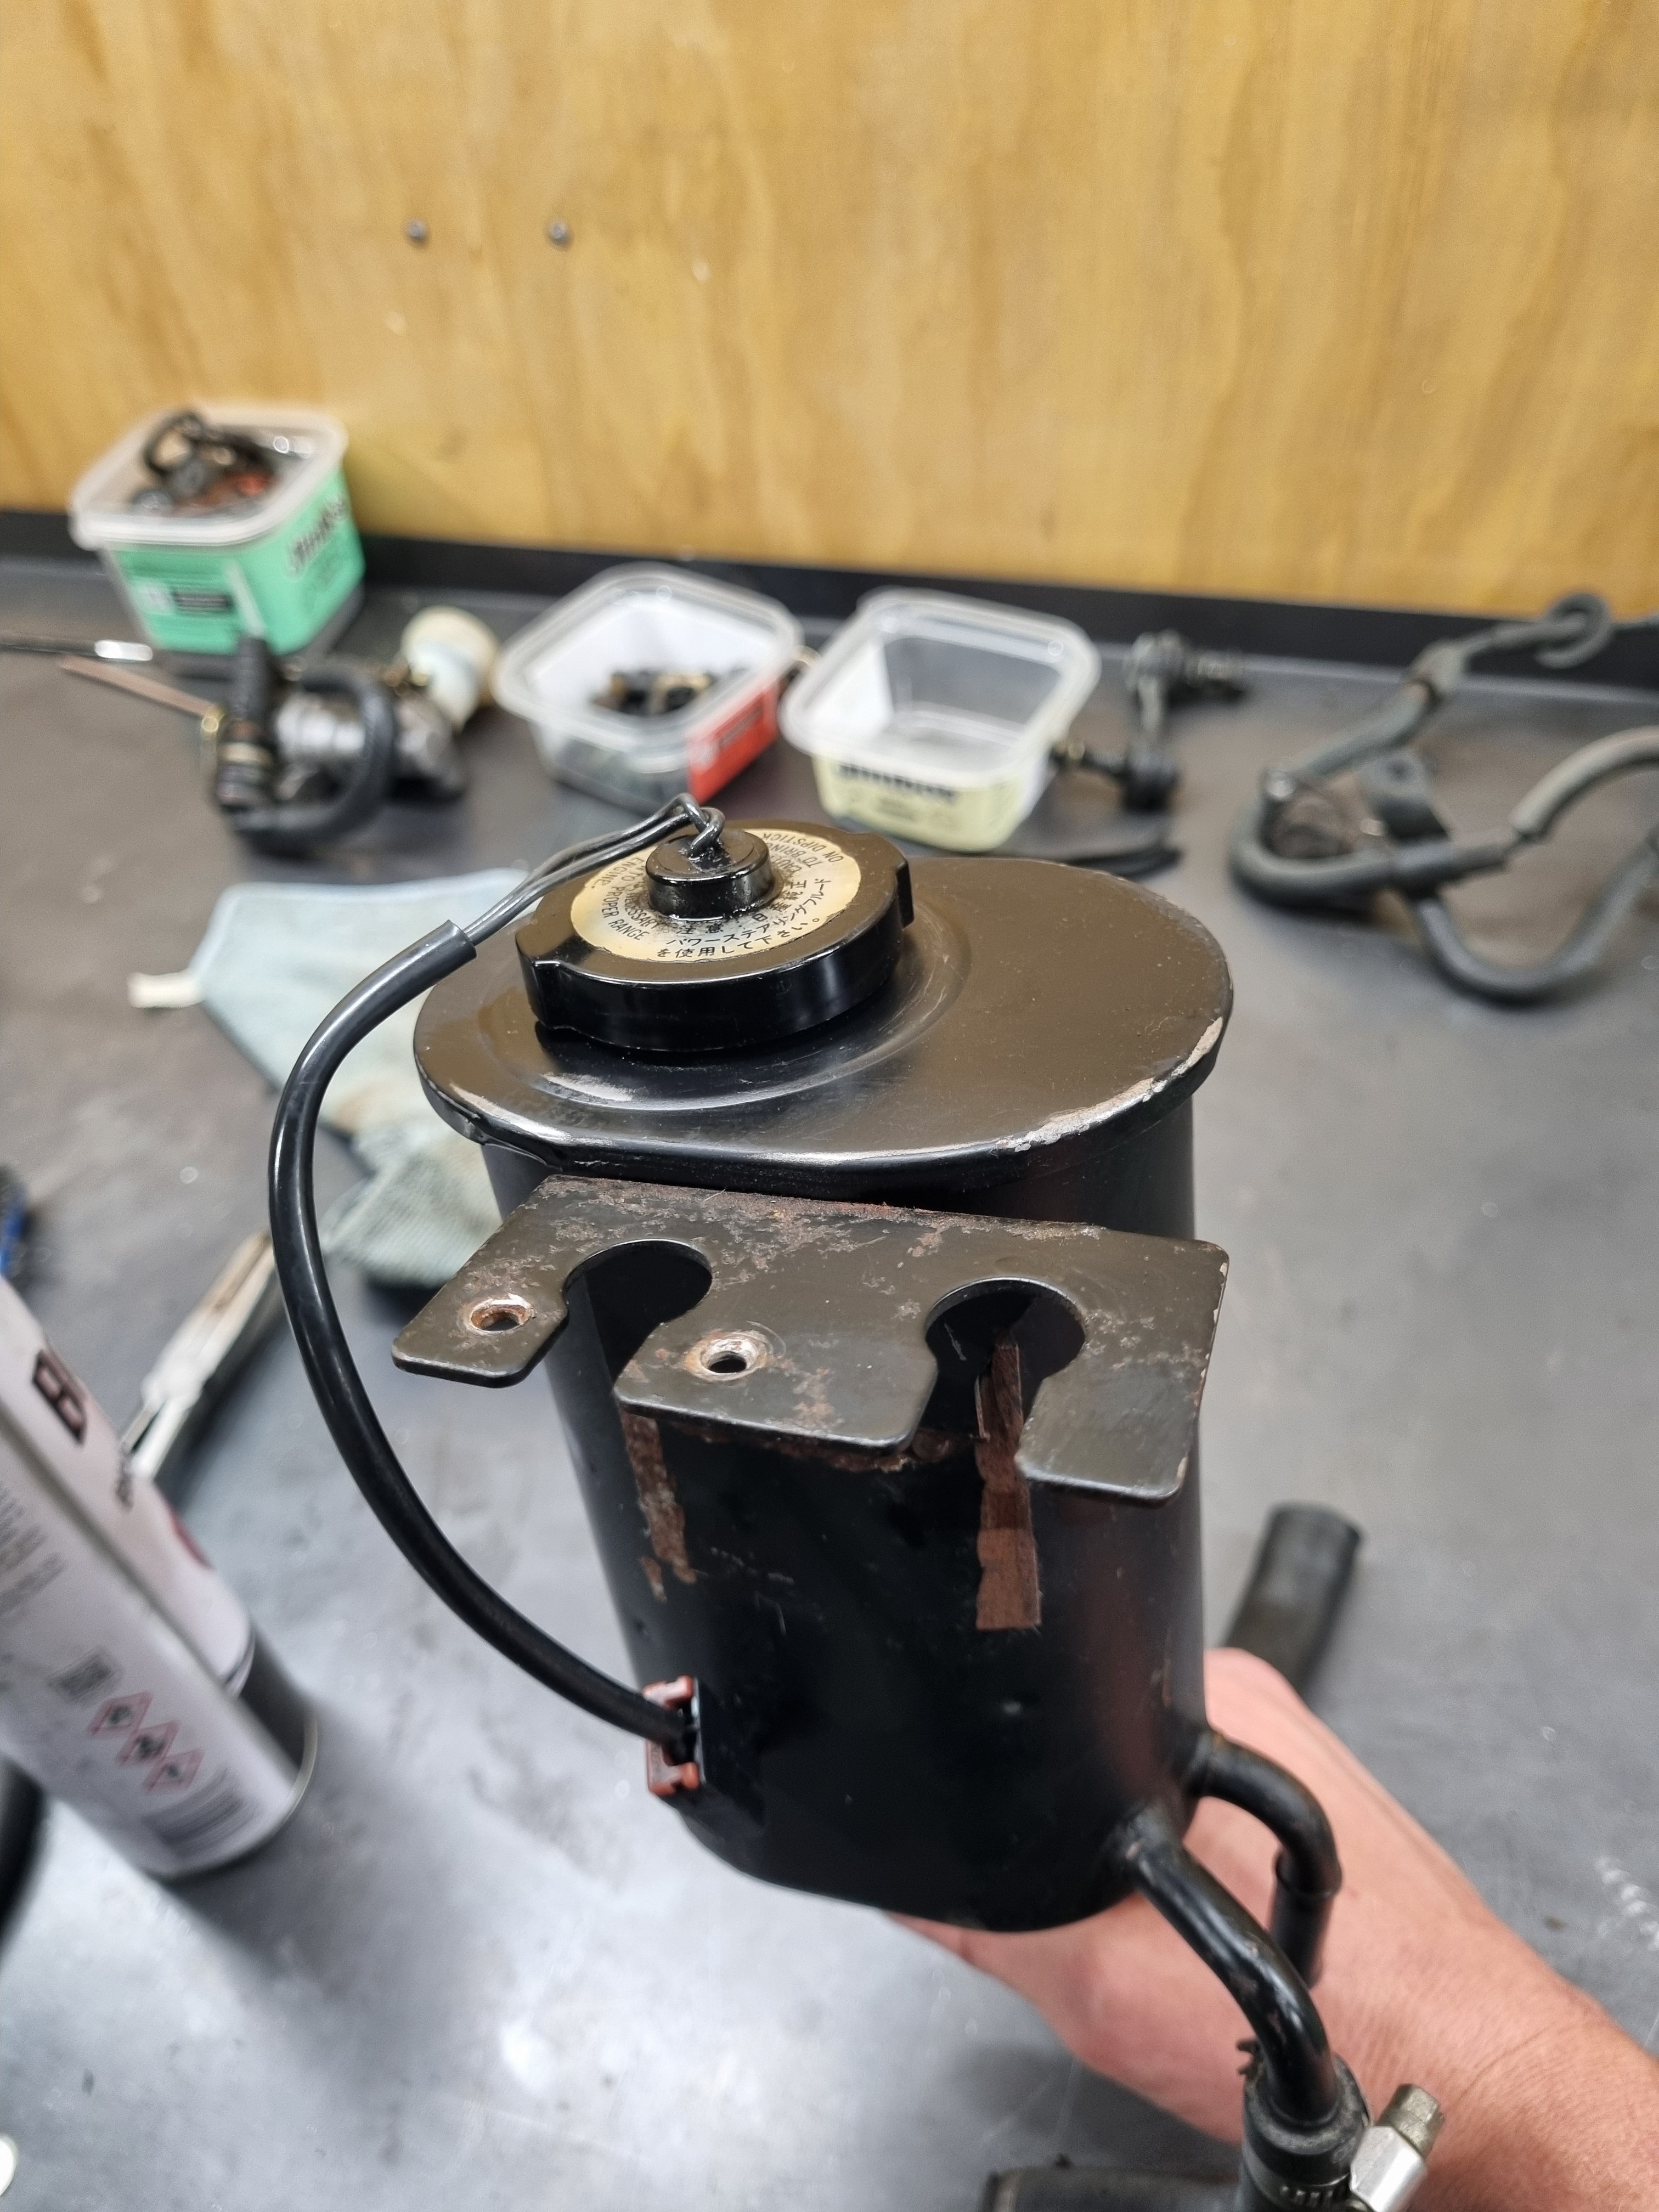
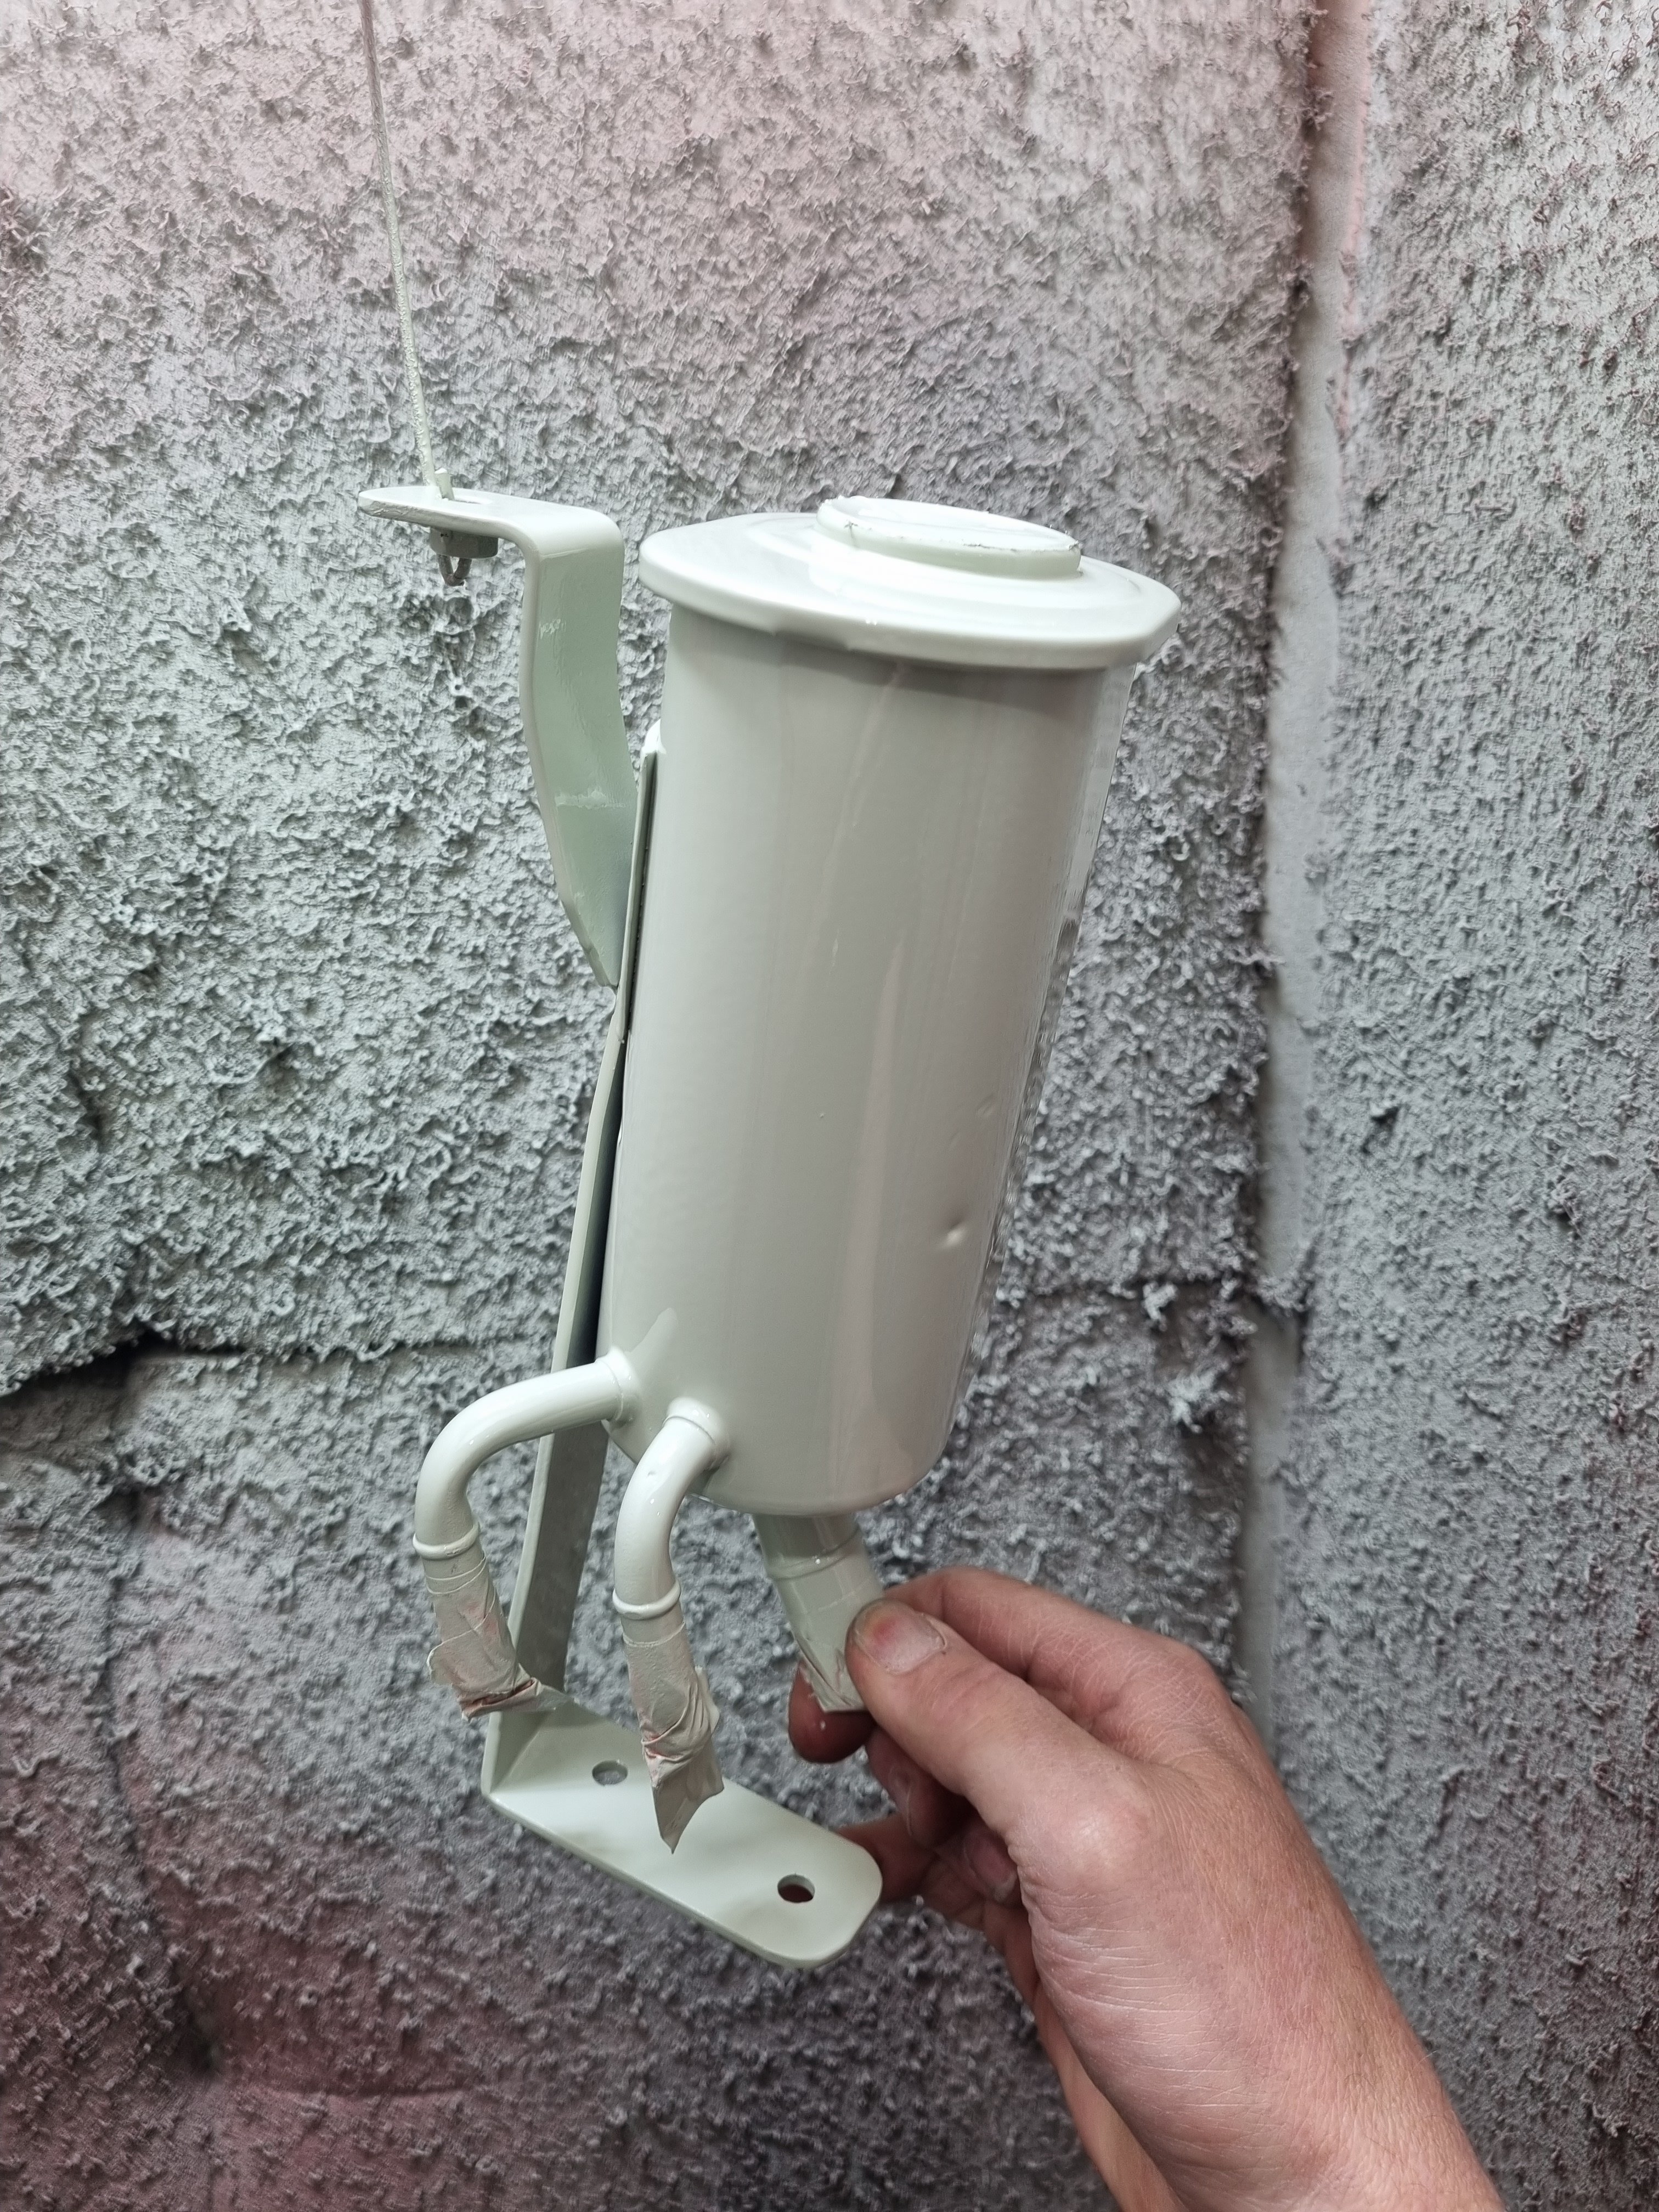
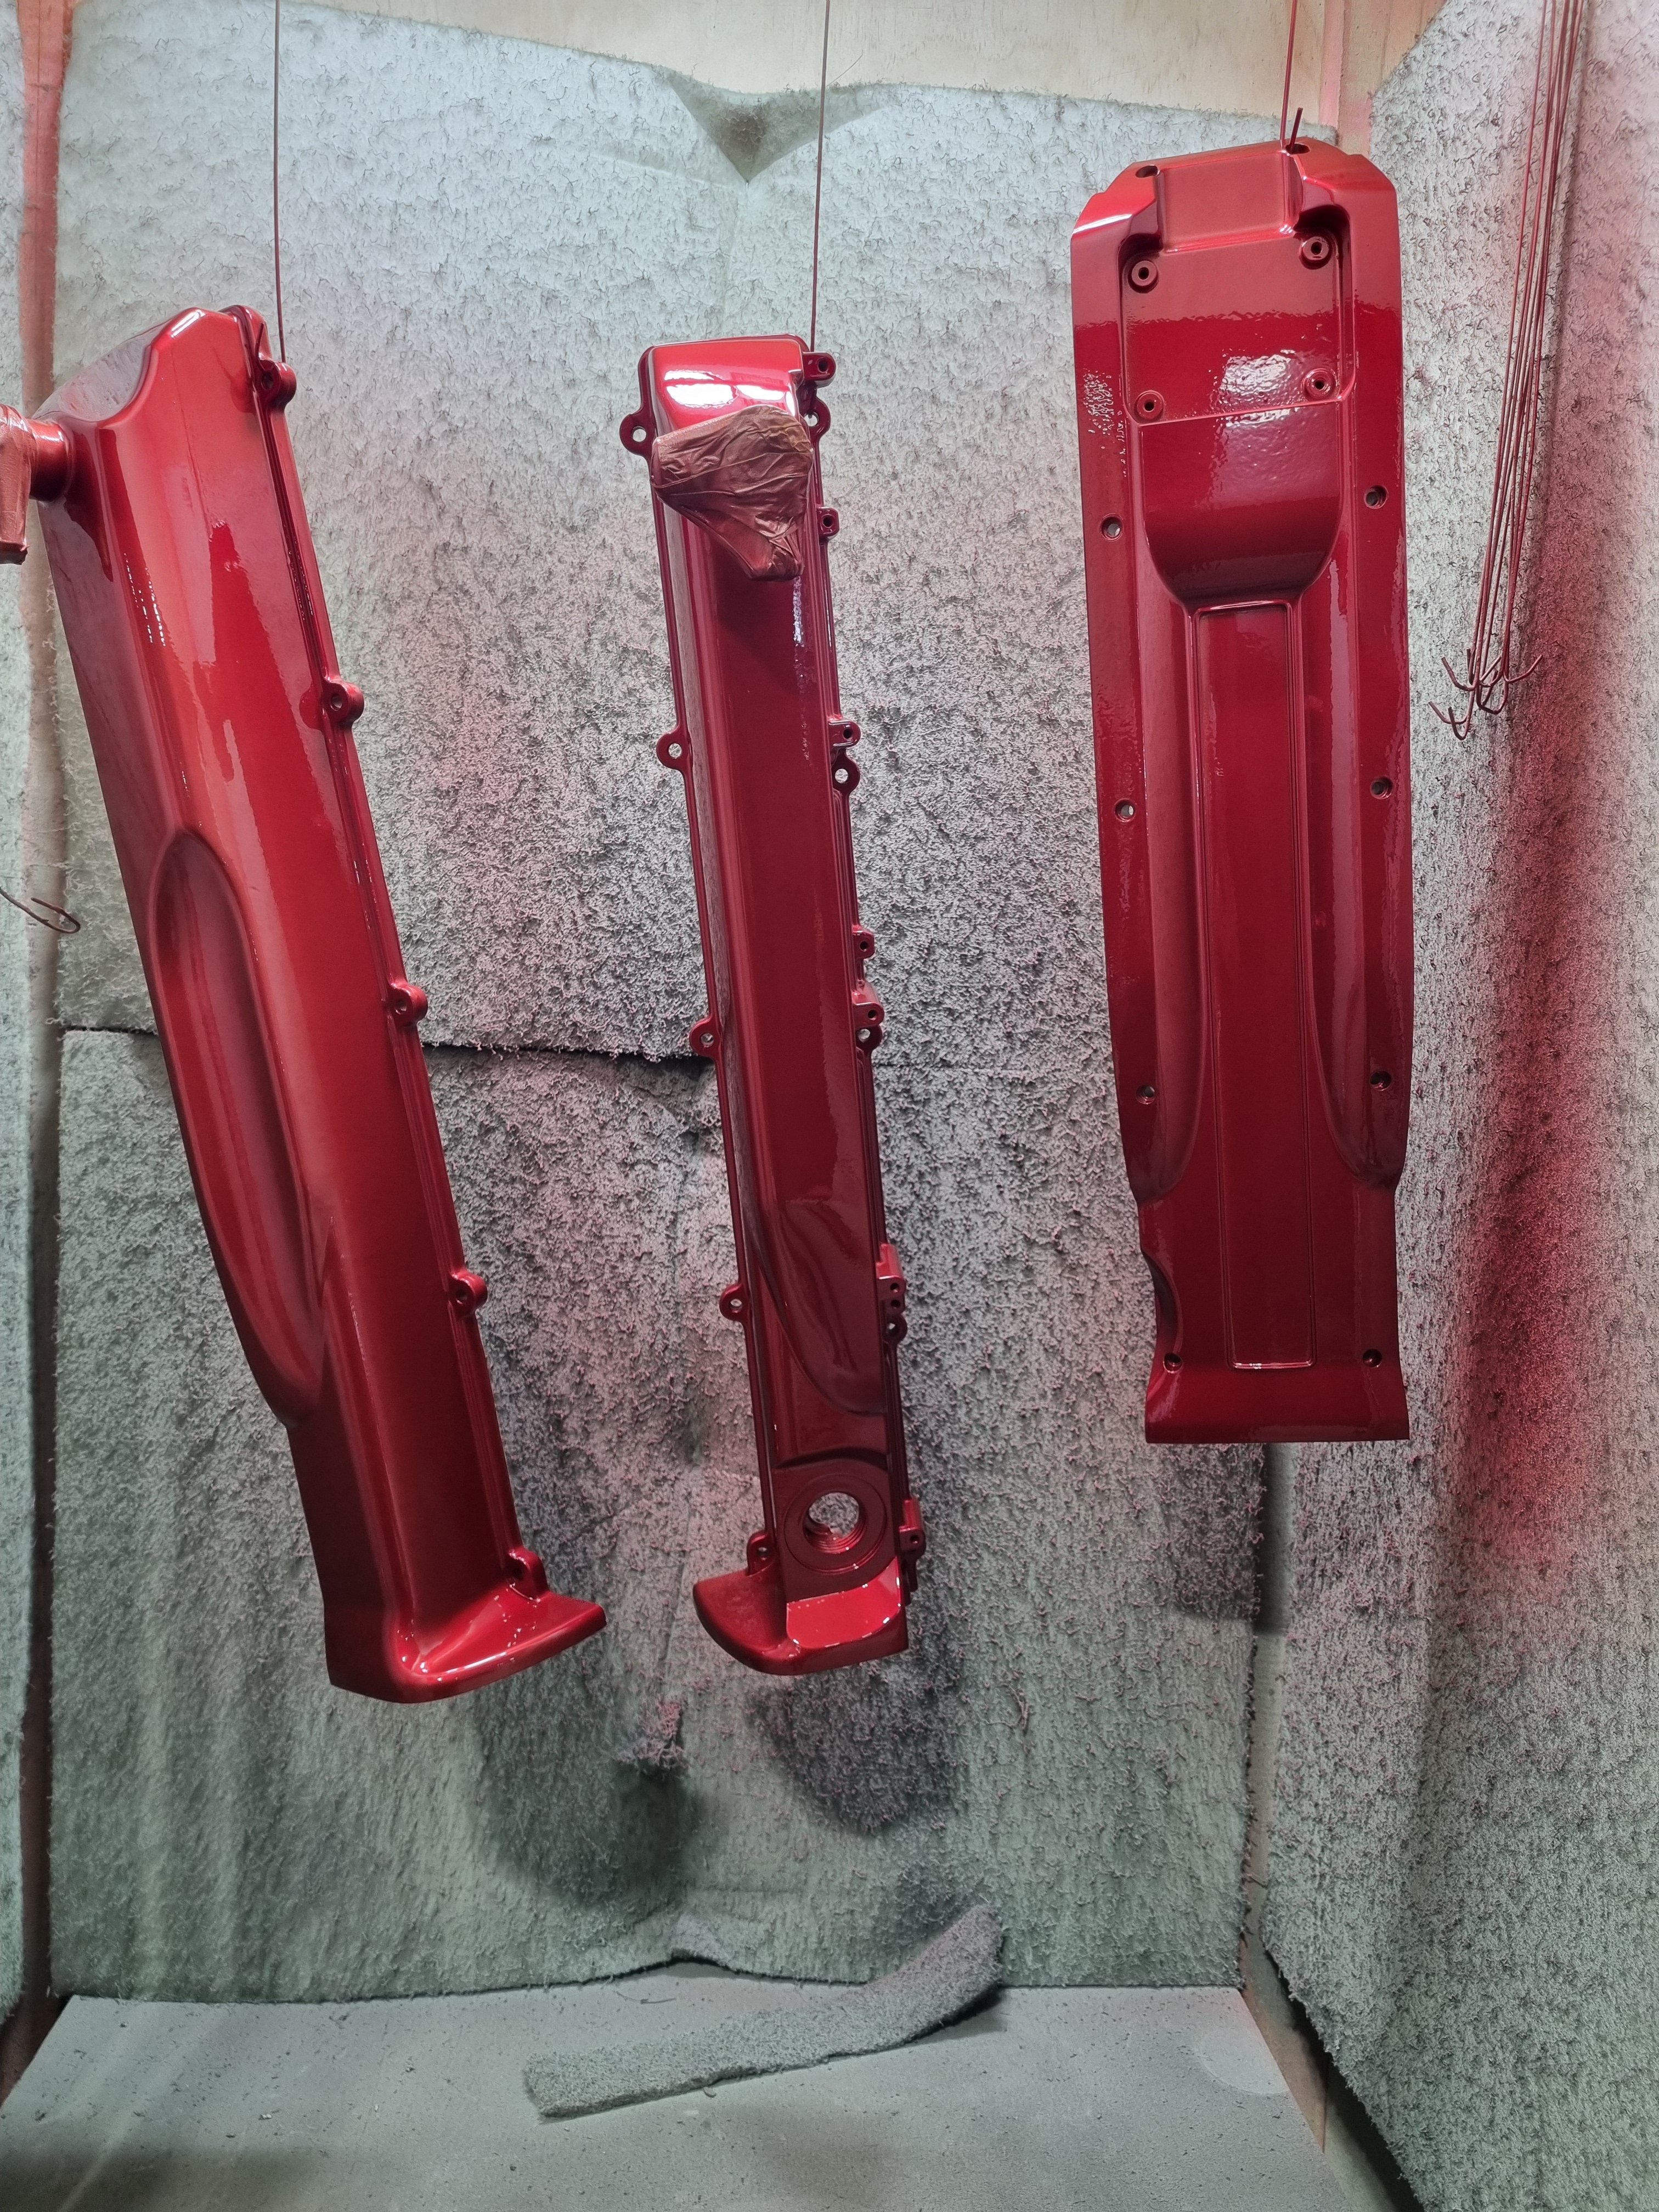
I painted some things. And I made the bracket for relocating the PS tank a bit better. Haven't finished painting that yet. In theory I'll get suspension bushes early this week then I can get it back on its wheels.
35 points
-
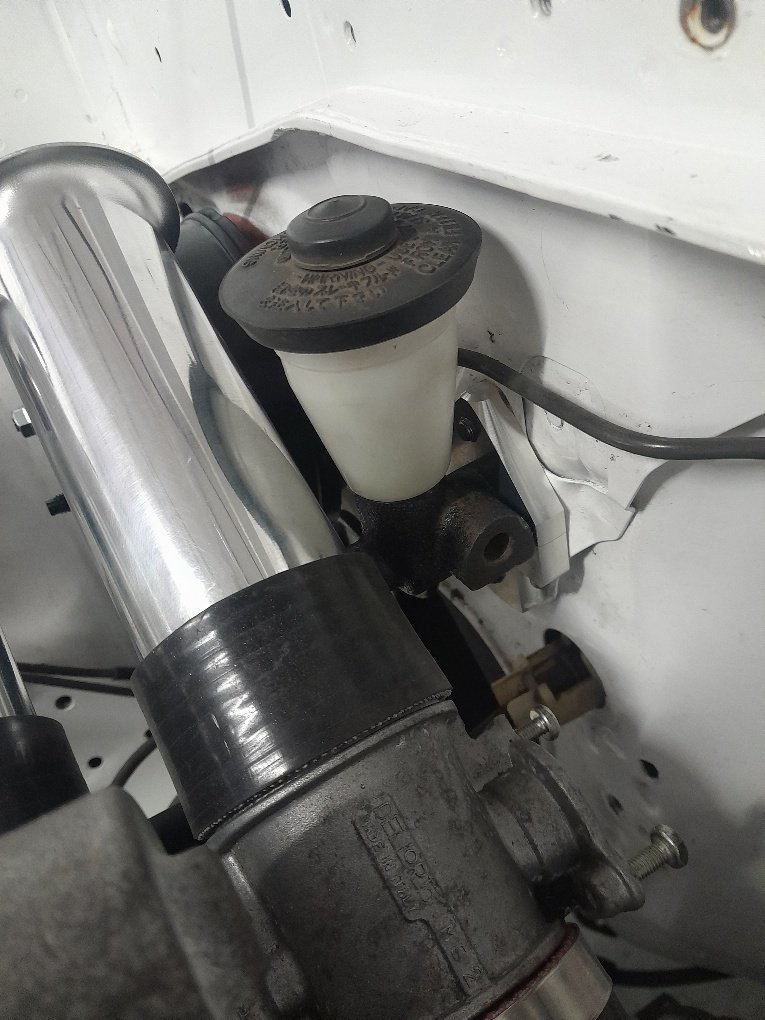
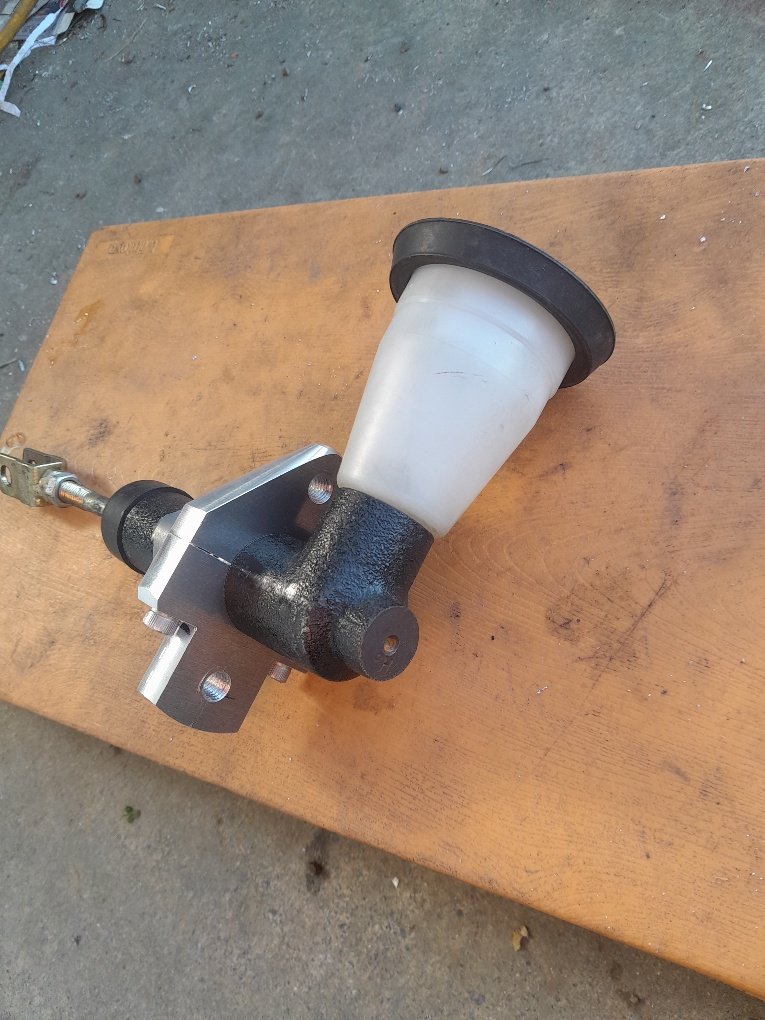
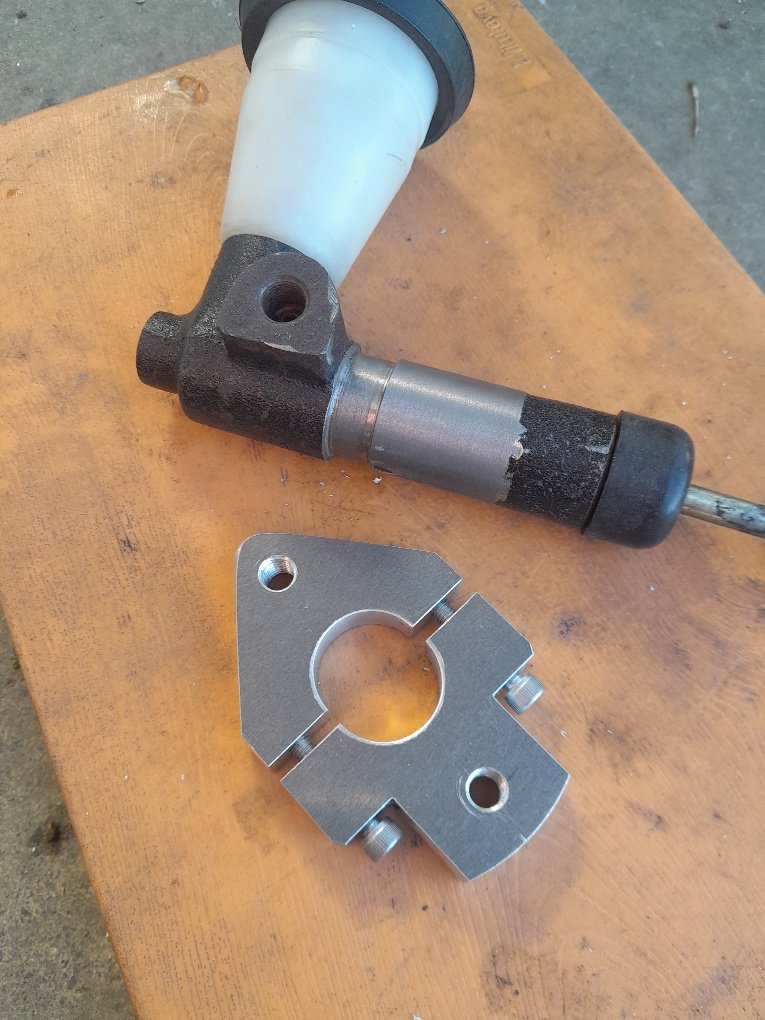
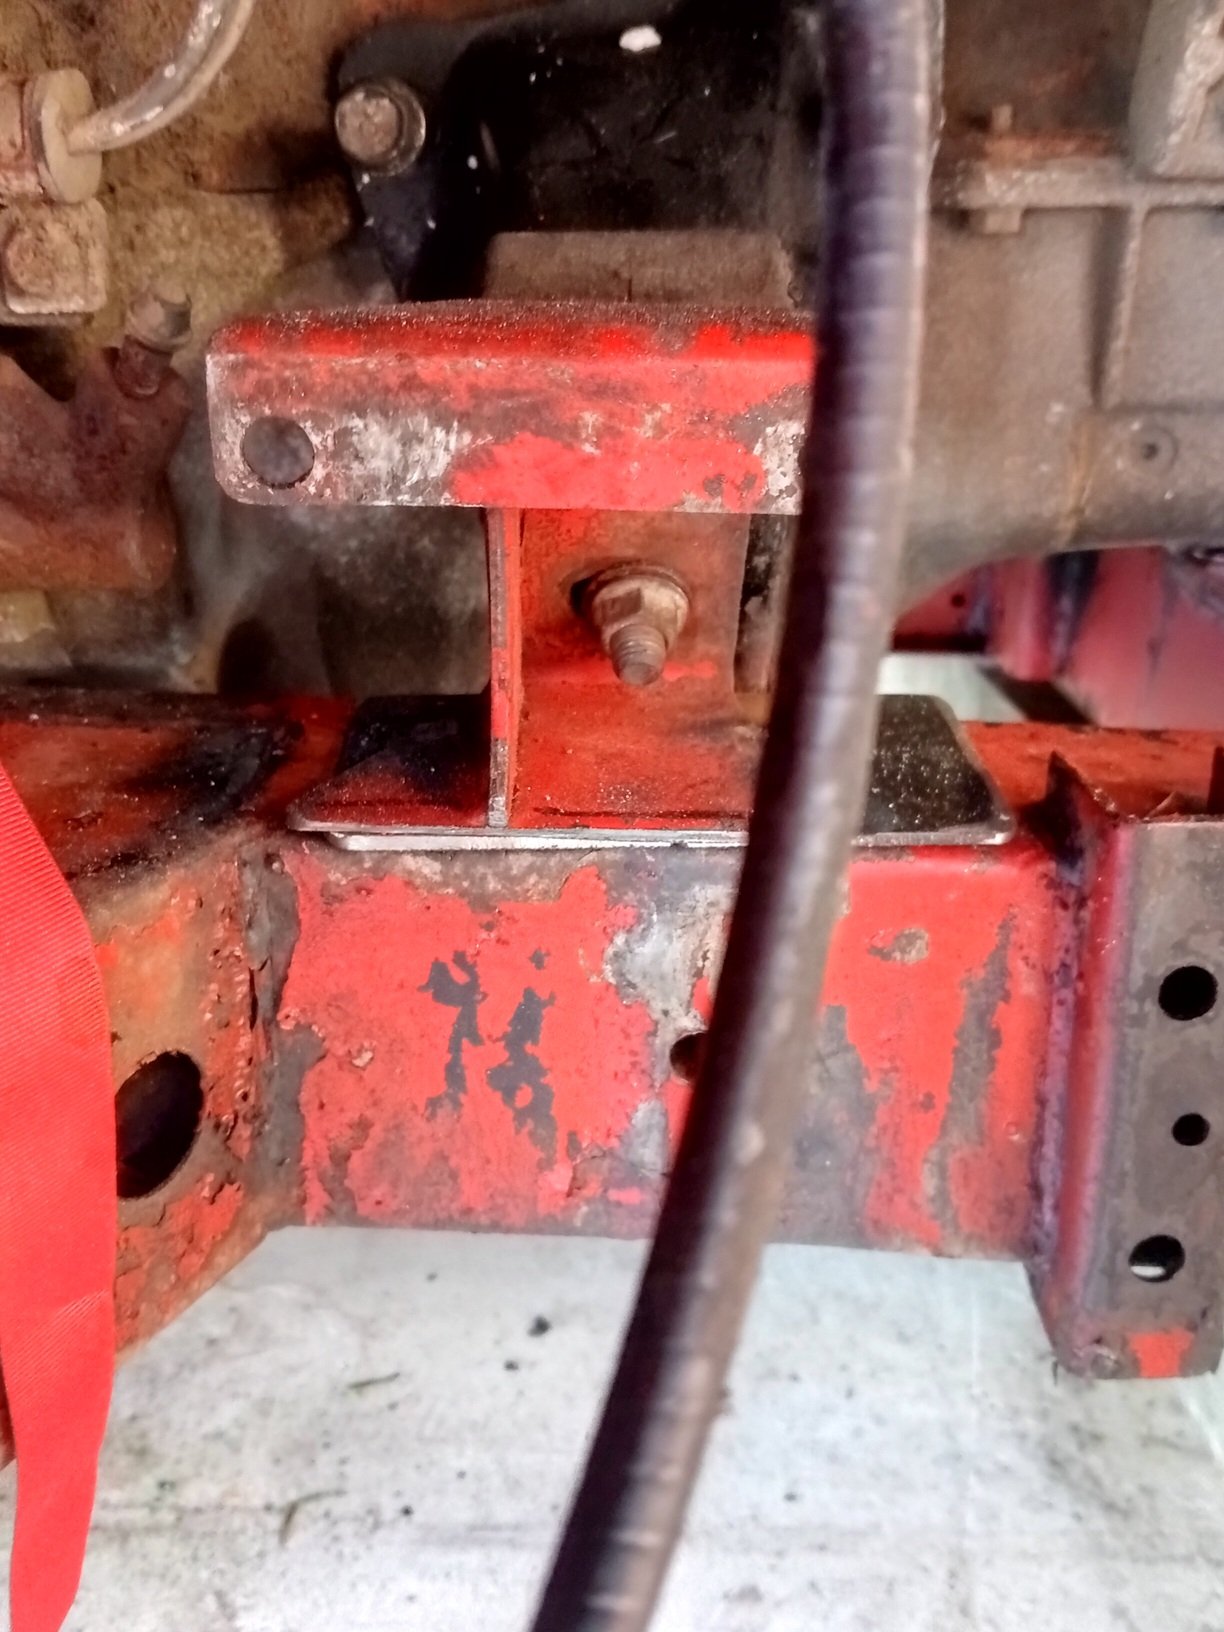
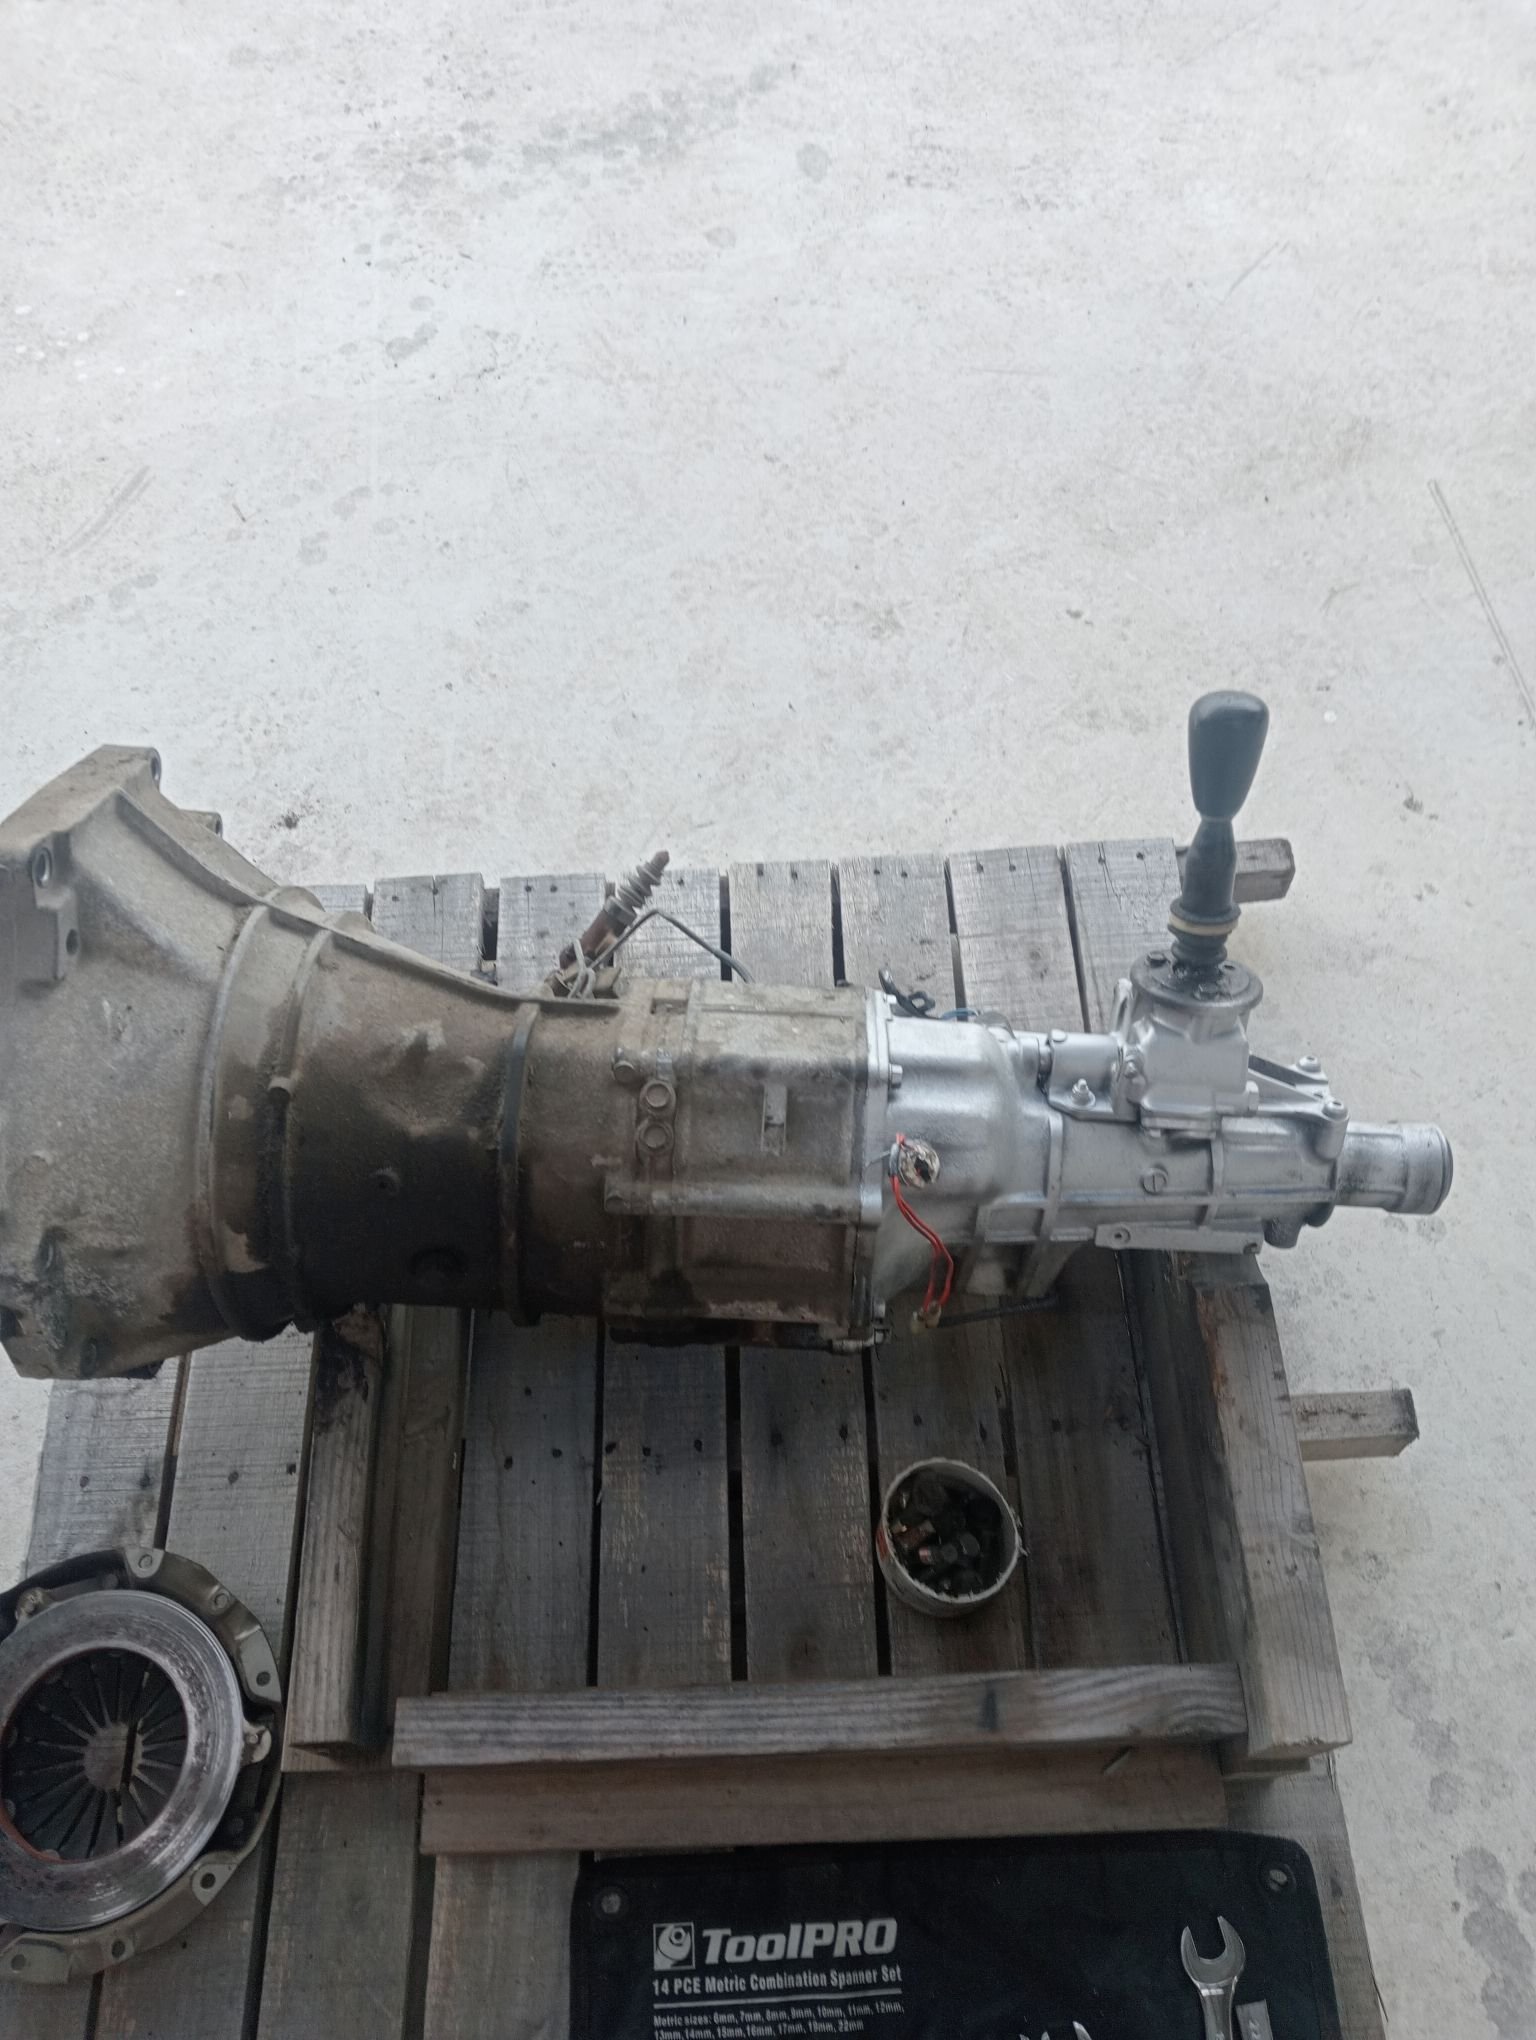
Got gearbox mounted, which isn't exciting update wise. But means i can confirm everything fits and start on things it was holding up. intake runner number 4 is tight on the brake booster. but can tweak the intake or trumpets up a touch and should be happy days. as have a little clearance left on number 1 to the bonnet I was going to do a reverso mount on the clutch master like a fellow os geezer done. but ended up with a little more room than expected. So a shorter master or one that mounts closer to the firewall looked like it should fit. Rather than spending forever trying to find something that would work. picked up the angle grinder and zinged the flange off the one i already had. Tidied it up in the lathe and cut a groove in it. then wasted half my life making a clamp on flange.
31 points
-
Got the bush/balljoint kit delivered so I put all the suspension back together. Unfortunately the rear balljoints were the wrong ones so I couldn't finish the back. Should get replacement ones on Wednesday. The castor arm bushes were huge with flanges on each side and there is no way on the planet I could have pushed them through without a press. With a press however the job went really easily.
31 points
-
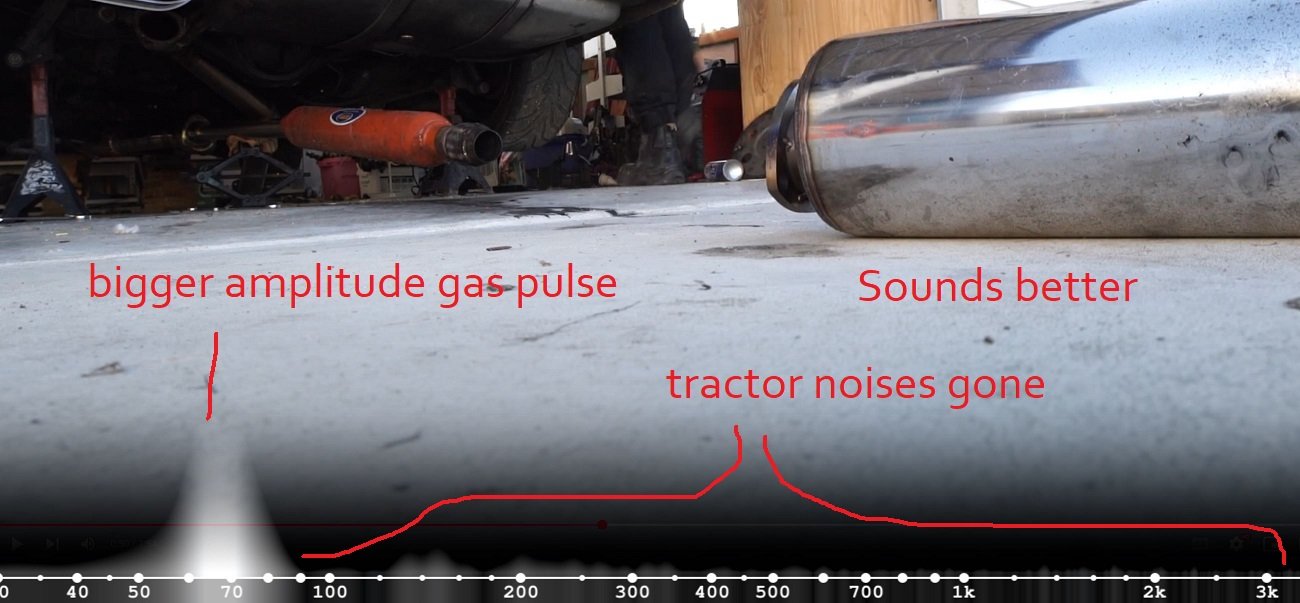
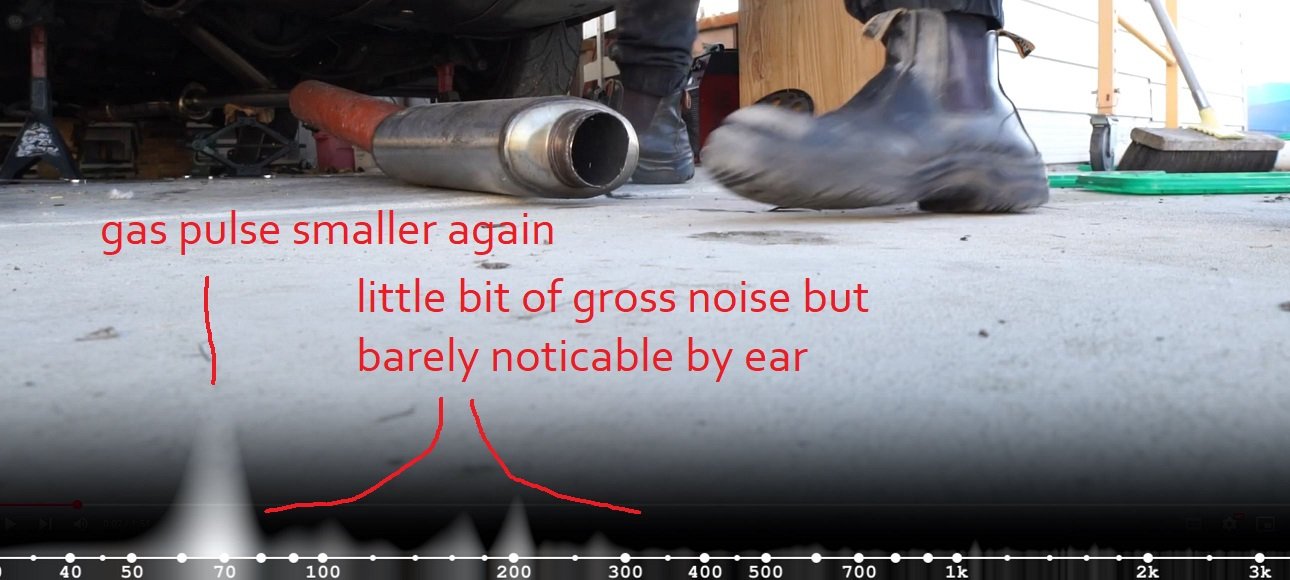
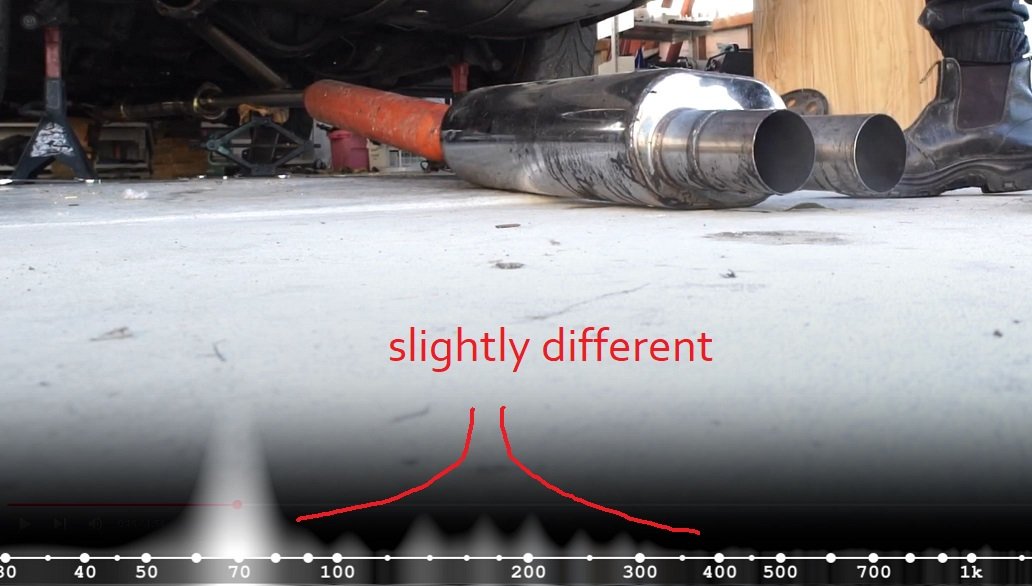
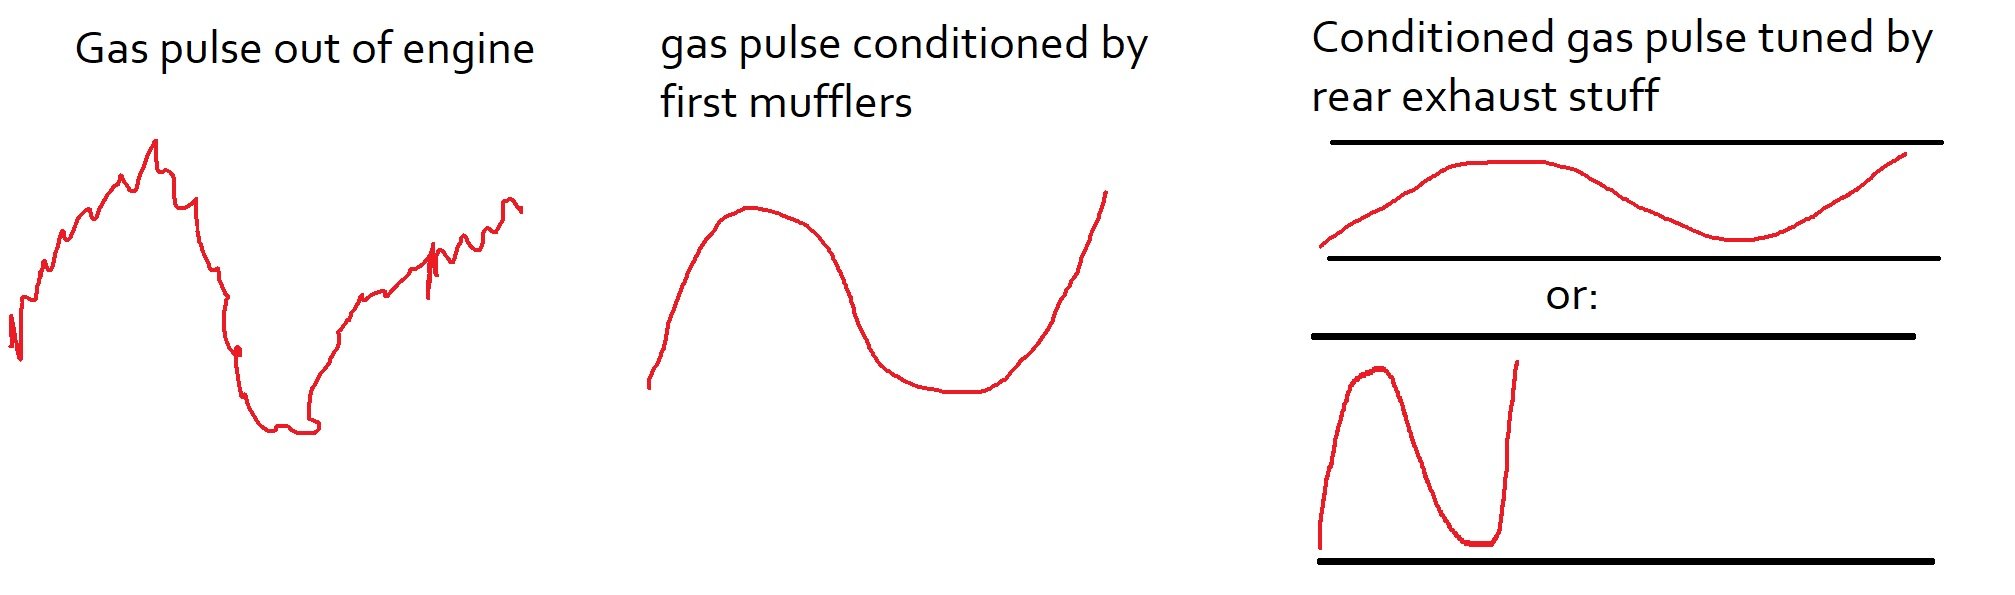
Very small update. So whilst I have been making exhausts to create certain noises I have also been chasing other noises I don't want. First off though is a pic of exhaust version 3.0 with added 0.1 extensions... Pointing out at roughly 45 degrees and extended further these have so far seemed to have really improved the fumage issue. I'll have to do more driving with the window down to confirm. I still want to spend some time doing more tuning as well, smooth out the map and get rid of the really rich spikes sometimes seen. So the other noises I mentioned? Well for roughly the last couple of months I have noticed that after startup whilst in warming up and the idle is high there's a funny whirring sound coming from somewhere in the engine. It was hard to tell where when the car was sat on the ground. I'd look underneath and try my best to pinpoint it but it's tricky with all of the general mechanical sounds bouncing off the ground. I was thinking the only thing it might be was the chain drives for the oil pump having bedded creating a bit of slack on the free side and somehow whirring. The release bearing was also occasionally making a tinkling sound, or possibly its actually the 3 bearings I had fitted in my 'thrust bearing 2000' assembly that resides between the back plate and the flywheel. Oh and the new exhaust has a tiny rattle on one side. Only noticeable if I smack the box up on that side (a quick lesson was learned not to do this when its searing hot) and I suspect its actually the tube the runs through the flexi joint just touching. Hopefully I can rectify it by adjusting the bobbin height on that side. But this whirring sound? It goes away somewhat when the idle drops as the engine warms up and I cant hear over the exhaust from then on. So this morning I started the car up, moved it from its garage and out into the sunshine. I let it warm up. Then moved it inside and onto the hoist. Once up in the air I started the car (using my go go gadget arms) and listened from underneath. Being fairly warm the sound was barely audible until I reached up with my arm to the throttle body and gave the engine a rev. Bingo- there it is! Its in the cambelt cover! Its a flappy whirr. A rubbing flappy whirr. I let the engine cool down, went for a pushbike ride and then this evening it was off with the cover, which luckily is super easy to remove once the alternator pulley is removed from the crank. Zoom in.. That bottom belt run on the left was a bit loose. Not terribly but certainly a bit more than the specified 5-7mm Honda advise. When the engine is cold its free to move that amount. I presume as it warms up it gets a touch tighter (boxxer engines 'grow' a little in width as they warm) The manual states that if the belts are too loose they can flap against the cover. Too tight and they whine. I could see where its been rubbing on the cover.. I have now tightened both belts just a smidge. Its a bit tricky to exactly measure 5-7mm but they seem about right. Cover back on and I'll test it tomorrow. (I'm not keen on filling the workshop up with warm up fumes tonight when our bedroom door is about in line with the roof of the Imp) Also to note. This morning was an especially cold 'late summer' start to the day of only 2 degrees. After I started the car later in the morning and moved it out (around 12 degrees then) I opened the engine bay lid for a look while it was warming up. I soon spotted one of the injector rail hose clips at the front was leaking. I promptly tightened it up and leak be gone. I can only presume the rubber hoses had shrunk ever so slightly in the cold night and allowed the fuel at 40 psi to weep past. I checked all the other fuel line hose clips in the engine bay and one other was slightly loose. I must check the ones in the frunk too!31 points
-
I’m either a genius or a idiot or both Old man said to throw the starter back in it cranked over fine….. the belts flung about a lot as it’s still stuck to the crank pulley So either playing with and lubing the starter/solenoid or removing the belts was enough for it to happily churn over now to wait for my ROCKAUTO order of plugs and leads eta 10th June31 points
-
Got 2 great sump castings and a 3rd with a small defect that would be fine once welded.30 points
-
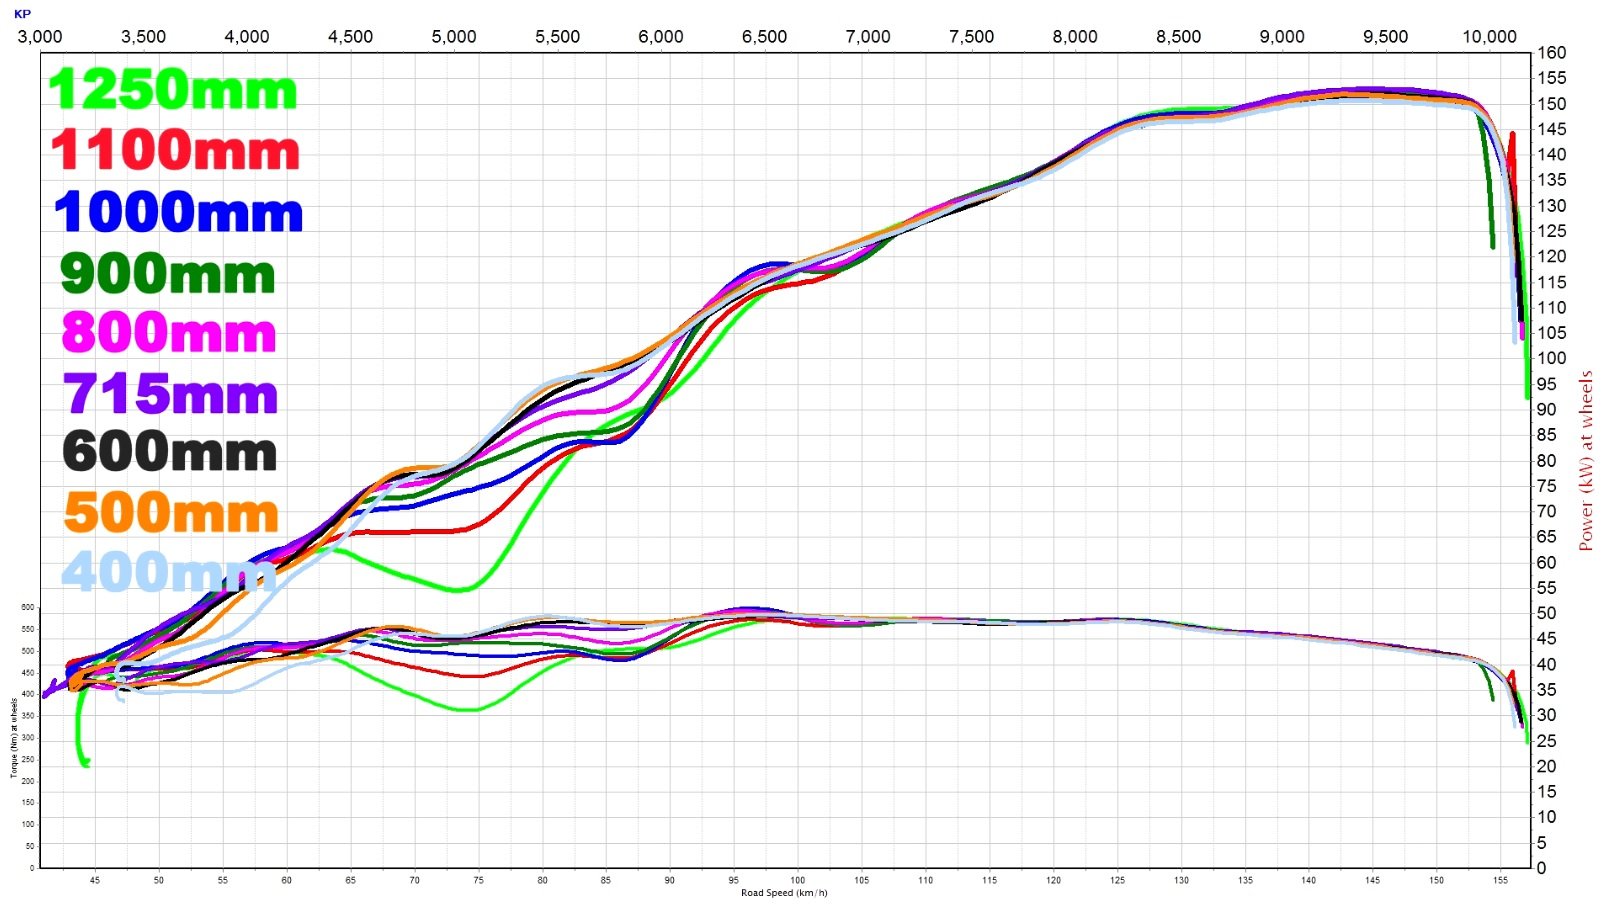
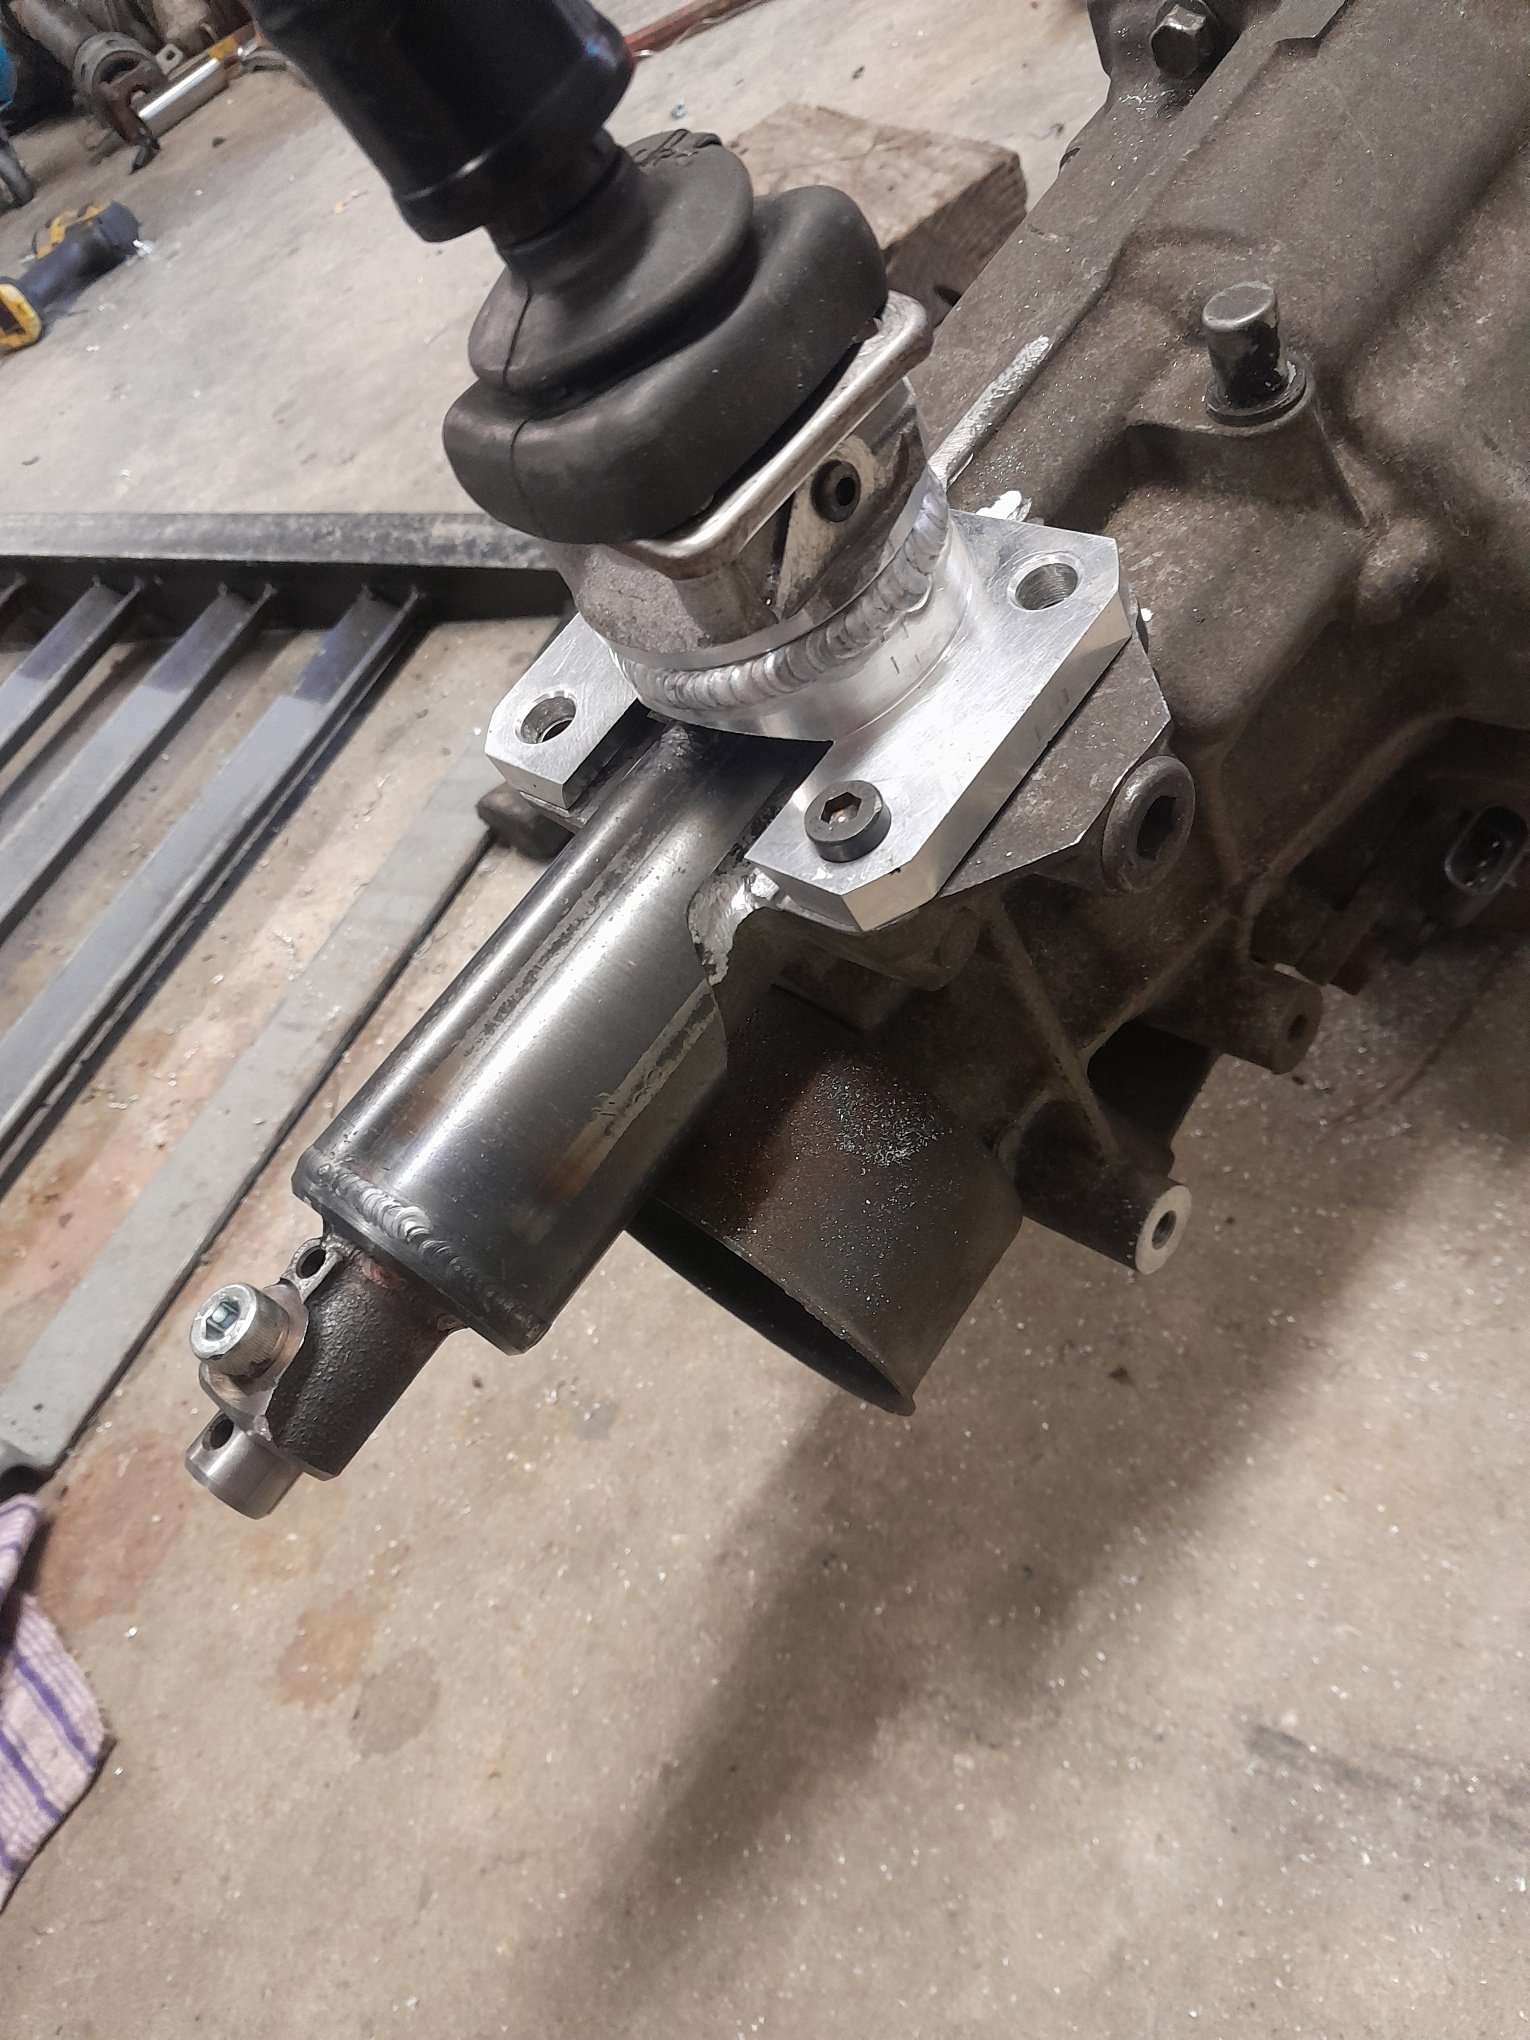
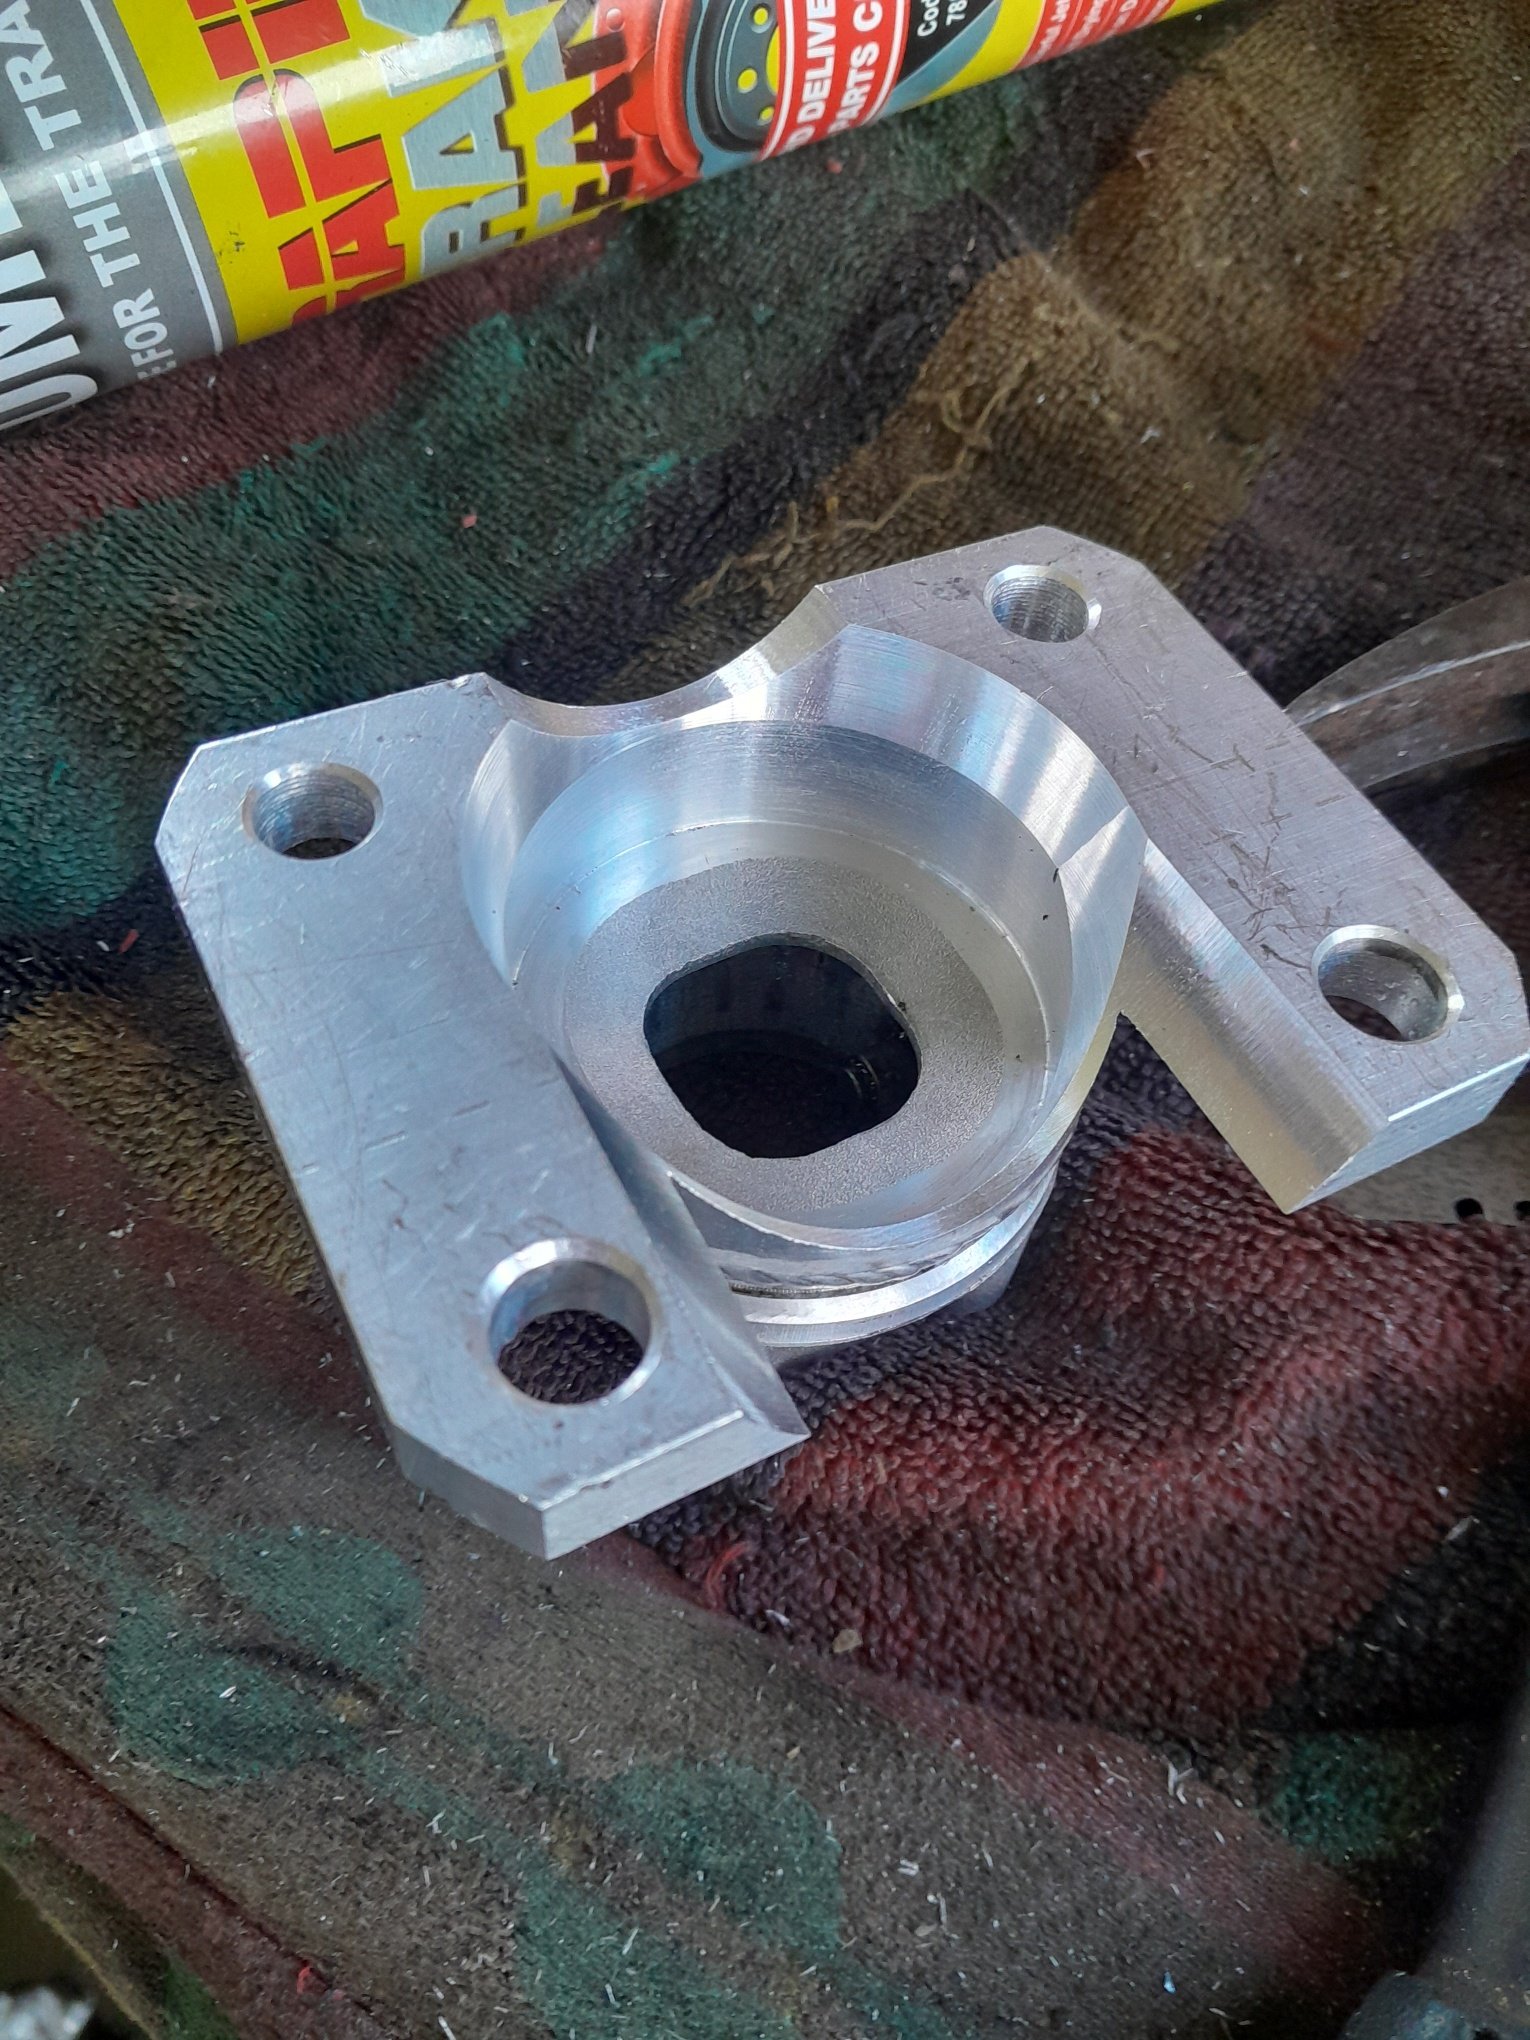
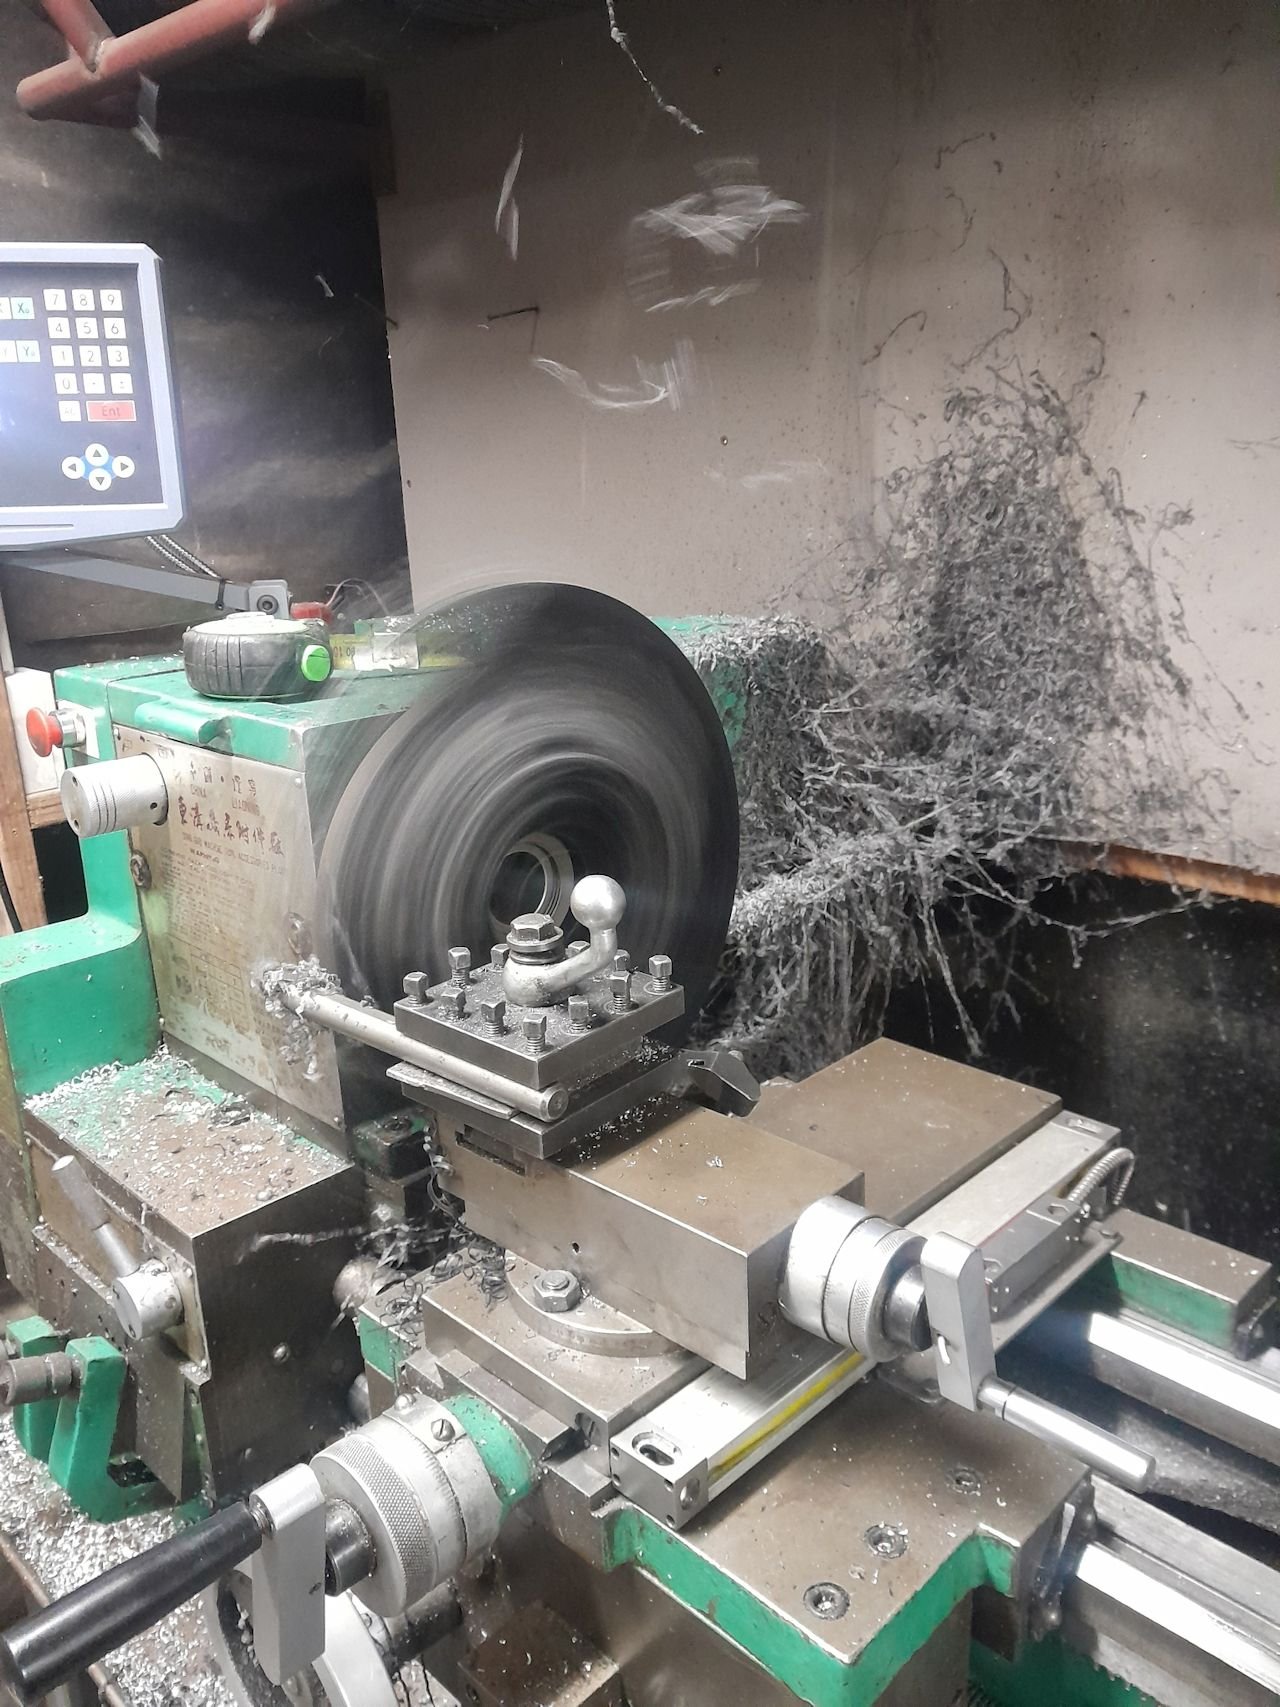
results from the 4-2-1 testing numbers are length of the 2-1 section. yep the super long ones were junk in the bottom end.. in other news have been making foward shifter for the j160. is similar to what others do, the top of the factory shifter is cut and welded to the part i made from a bit of 25mm thick ali in the lathe
30 points
-
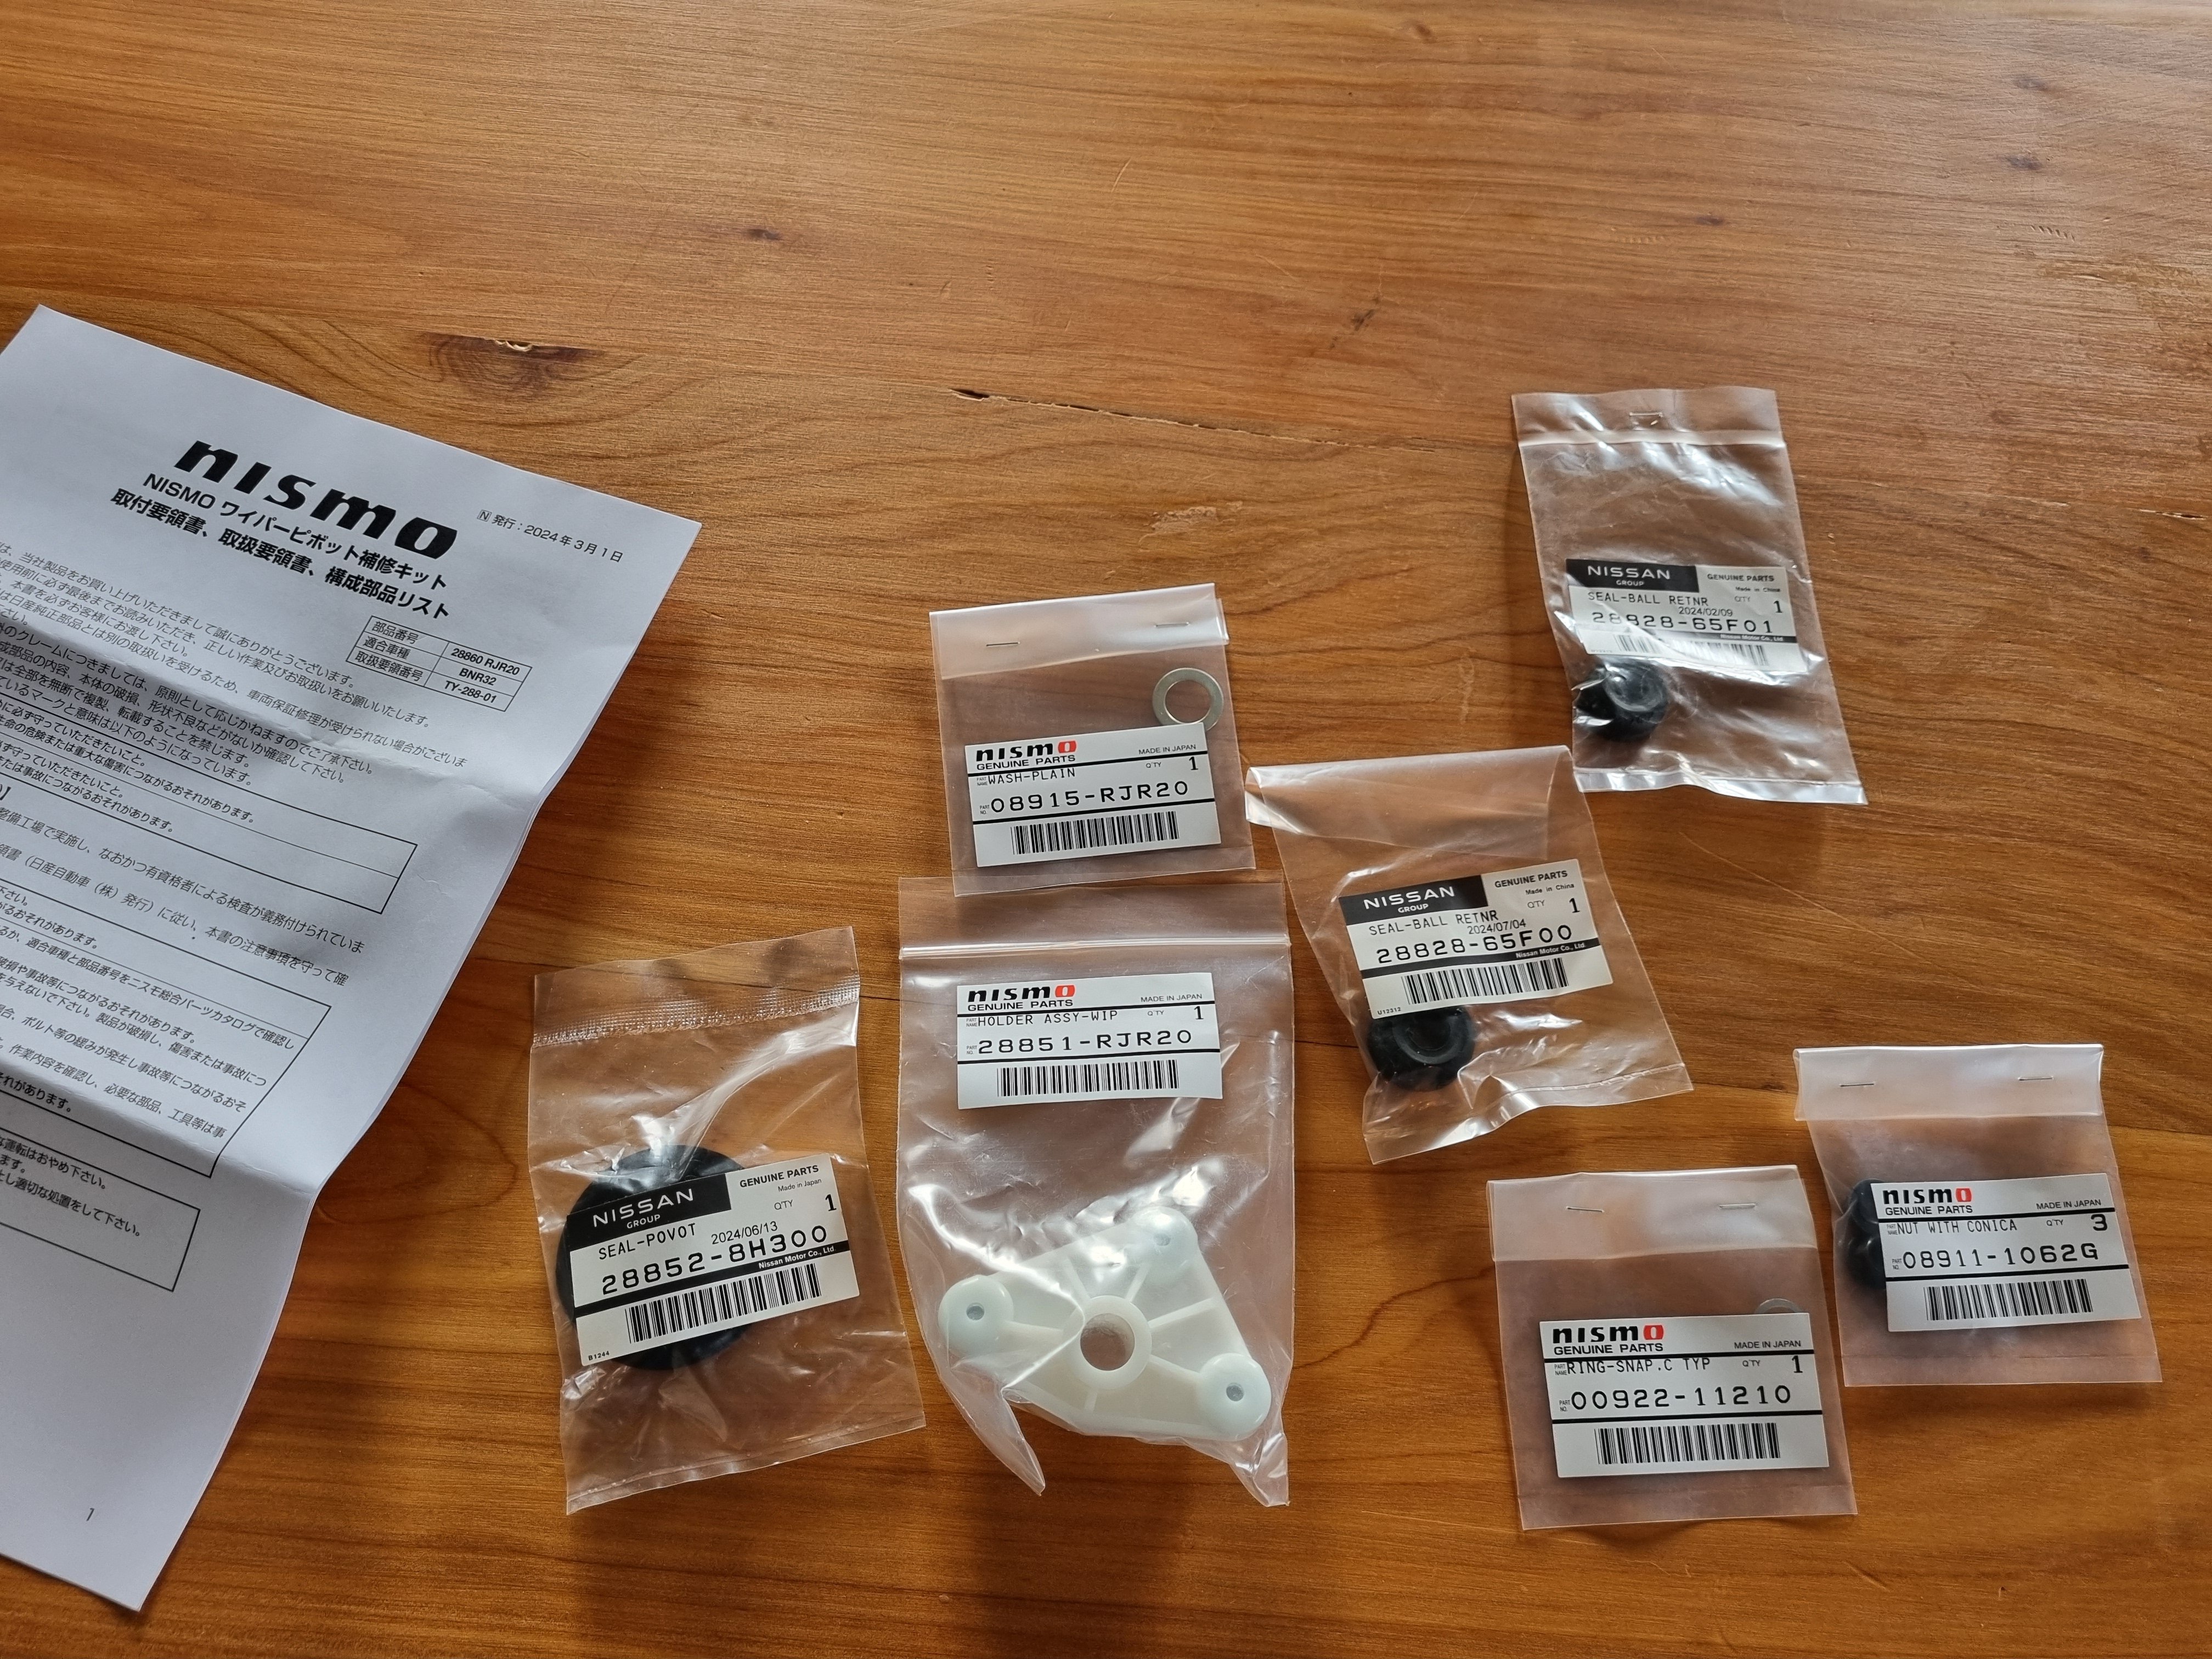
Overnight parts from Japan. 5 days from place order to arrive rural delivery. Pretty fuckin good
29 points
-
Not bad.
28 points
-
This is so fucking great.
28 points
-
Looks like its come out great! They will do another one and Ill pick them up next week. Next up I think Im going to machine the blocks. Need to make a big trunnion for the 4th axis!28 points
-
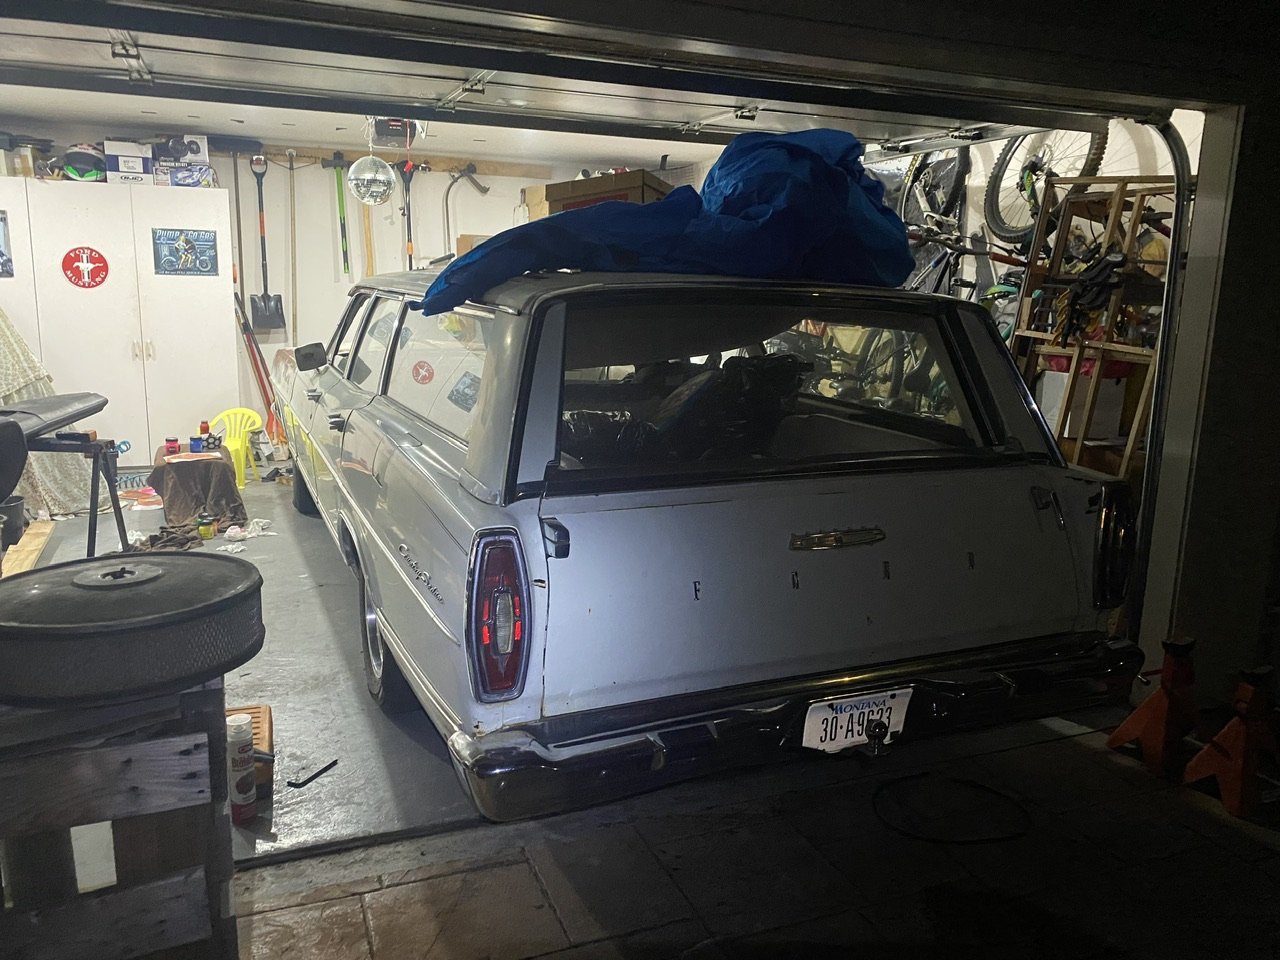
*it’s not mine missus uncle passed away and she was promised this when she was 17ish bittersweet moment finally getting to see it out of the shed where it’s been since somewhere around 1987 was apparently parked up due to perished tyres and rear shocks…. anyway pictures…. As found A trailer load to the dump some tugging with a ranger and slowly rolled it down the driveway with little to no brakes hired the longest trailer they had Old man did some demo work to my shed to turn it back into a double garage27 points
-
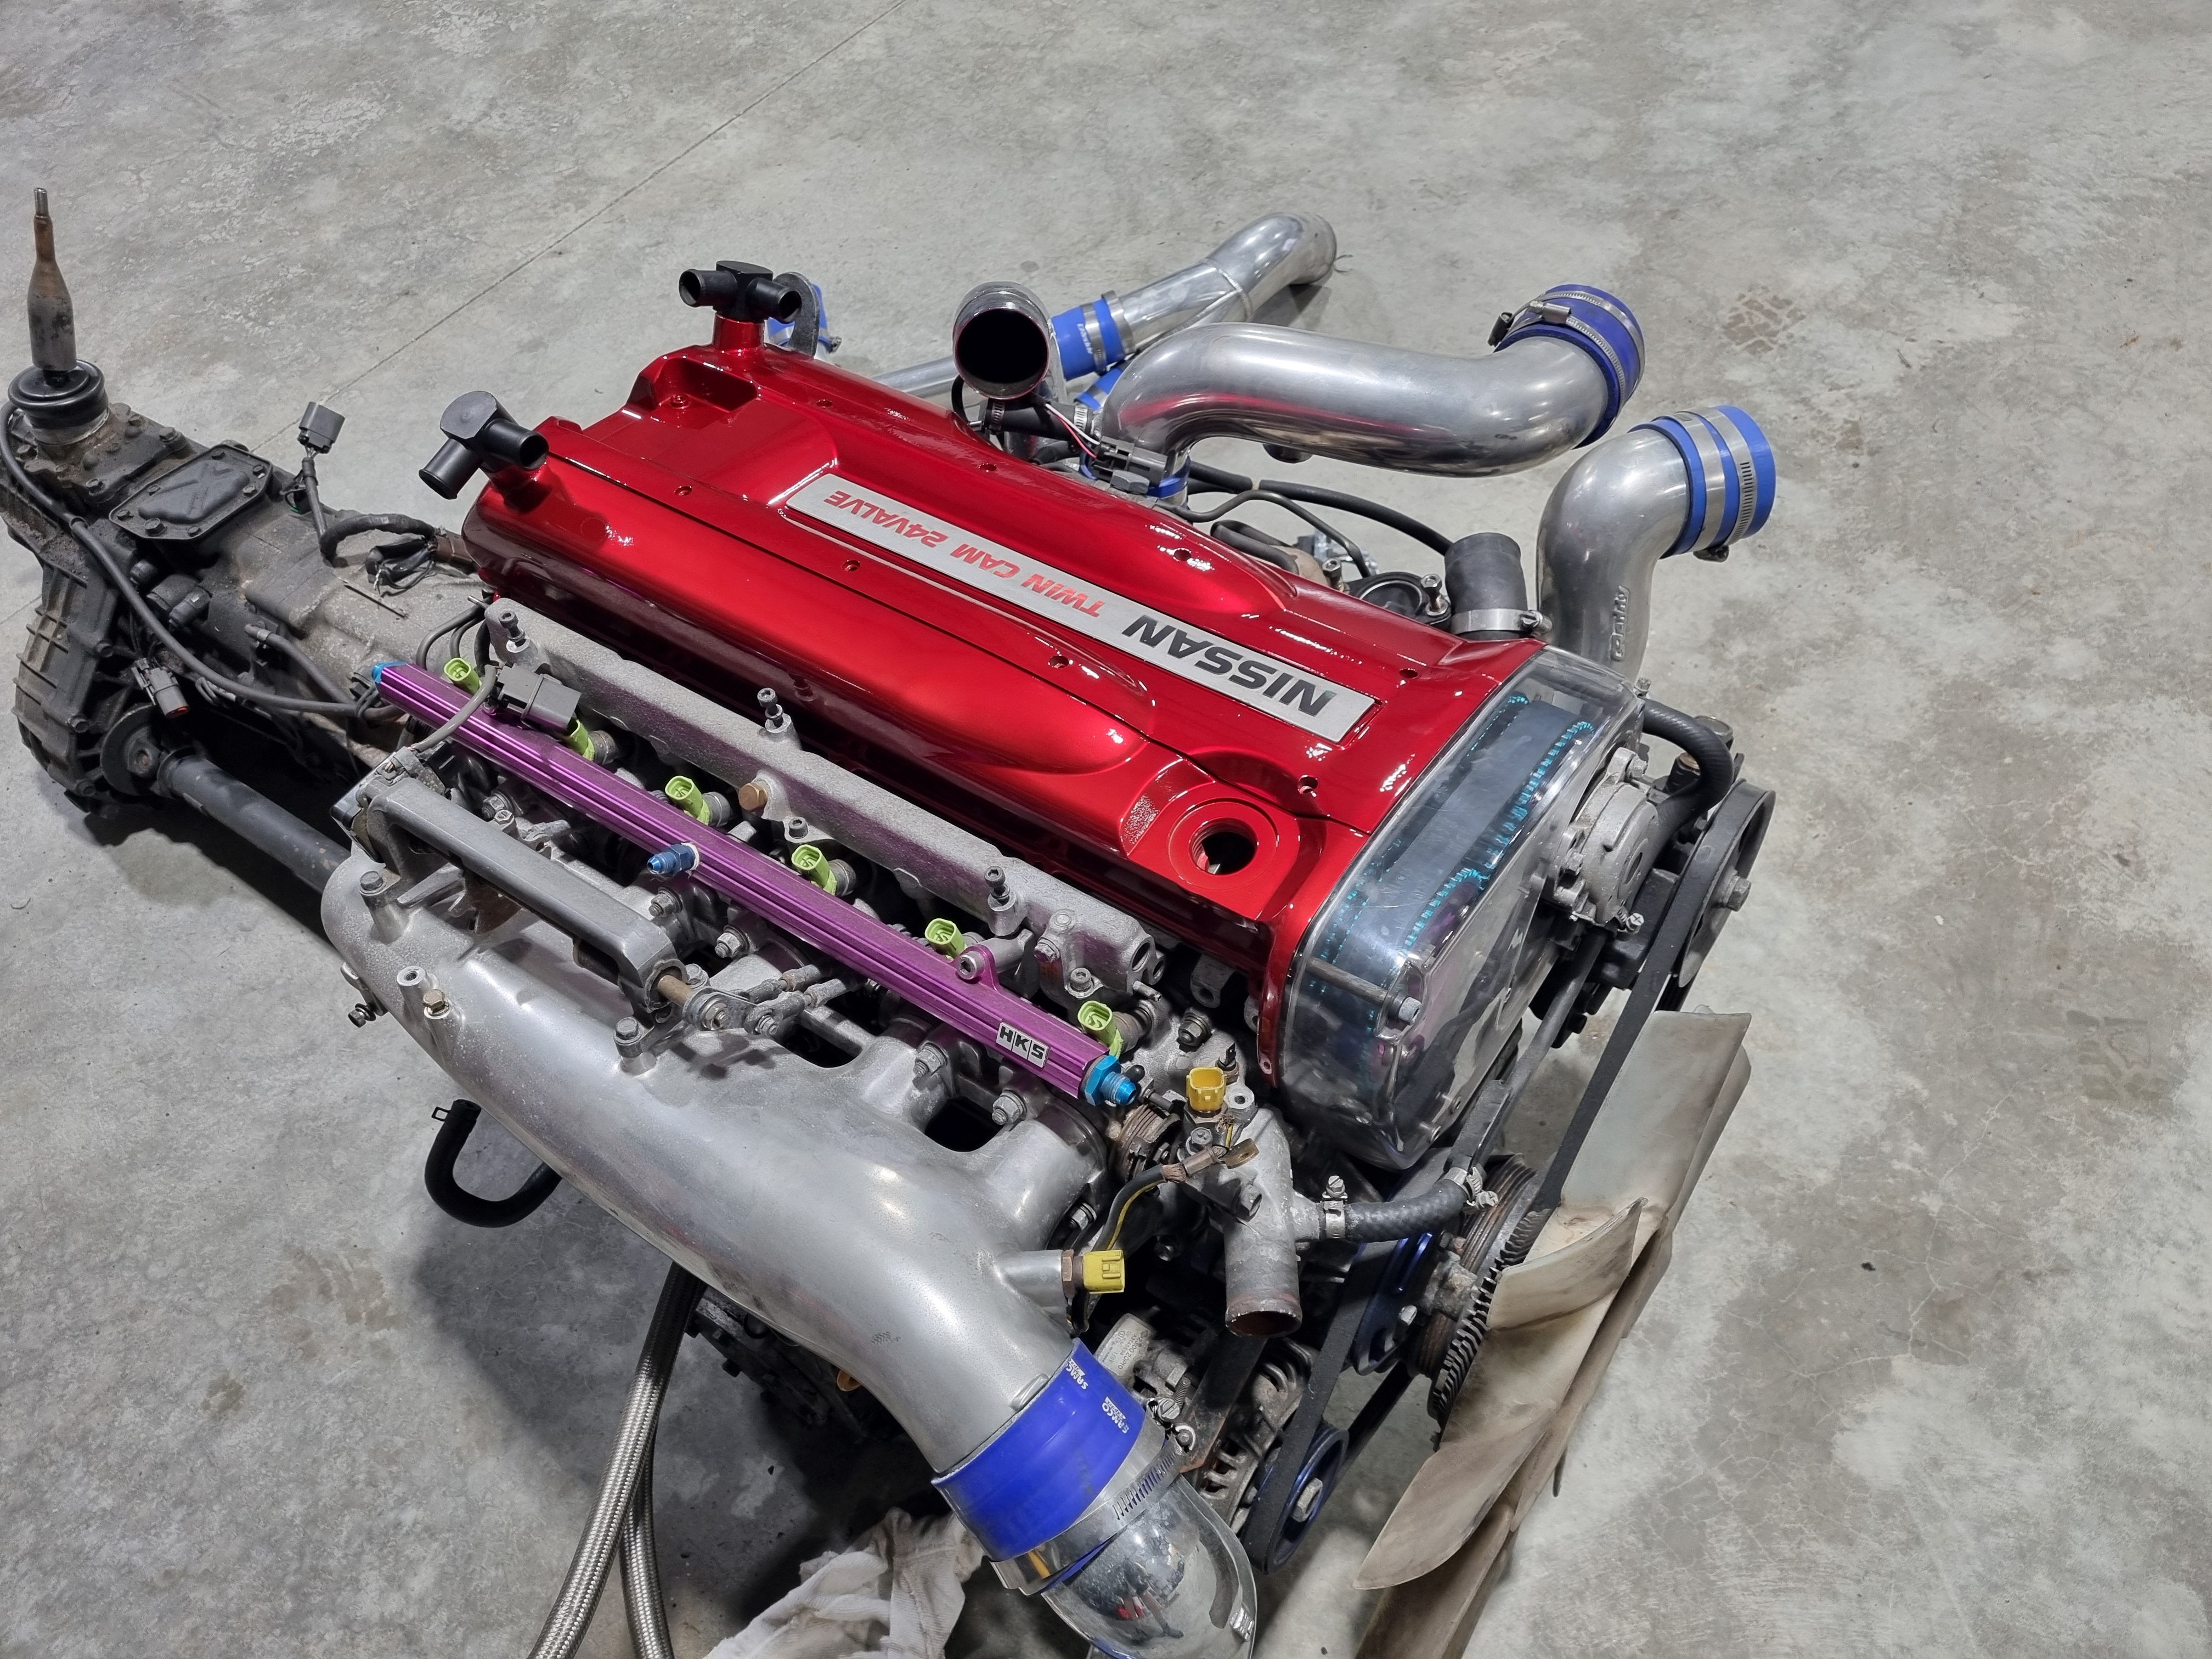
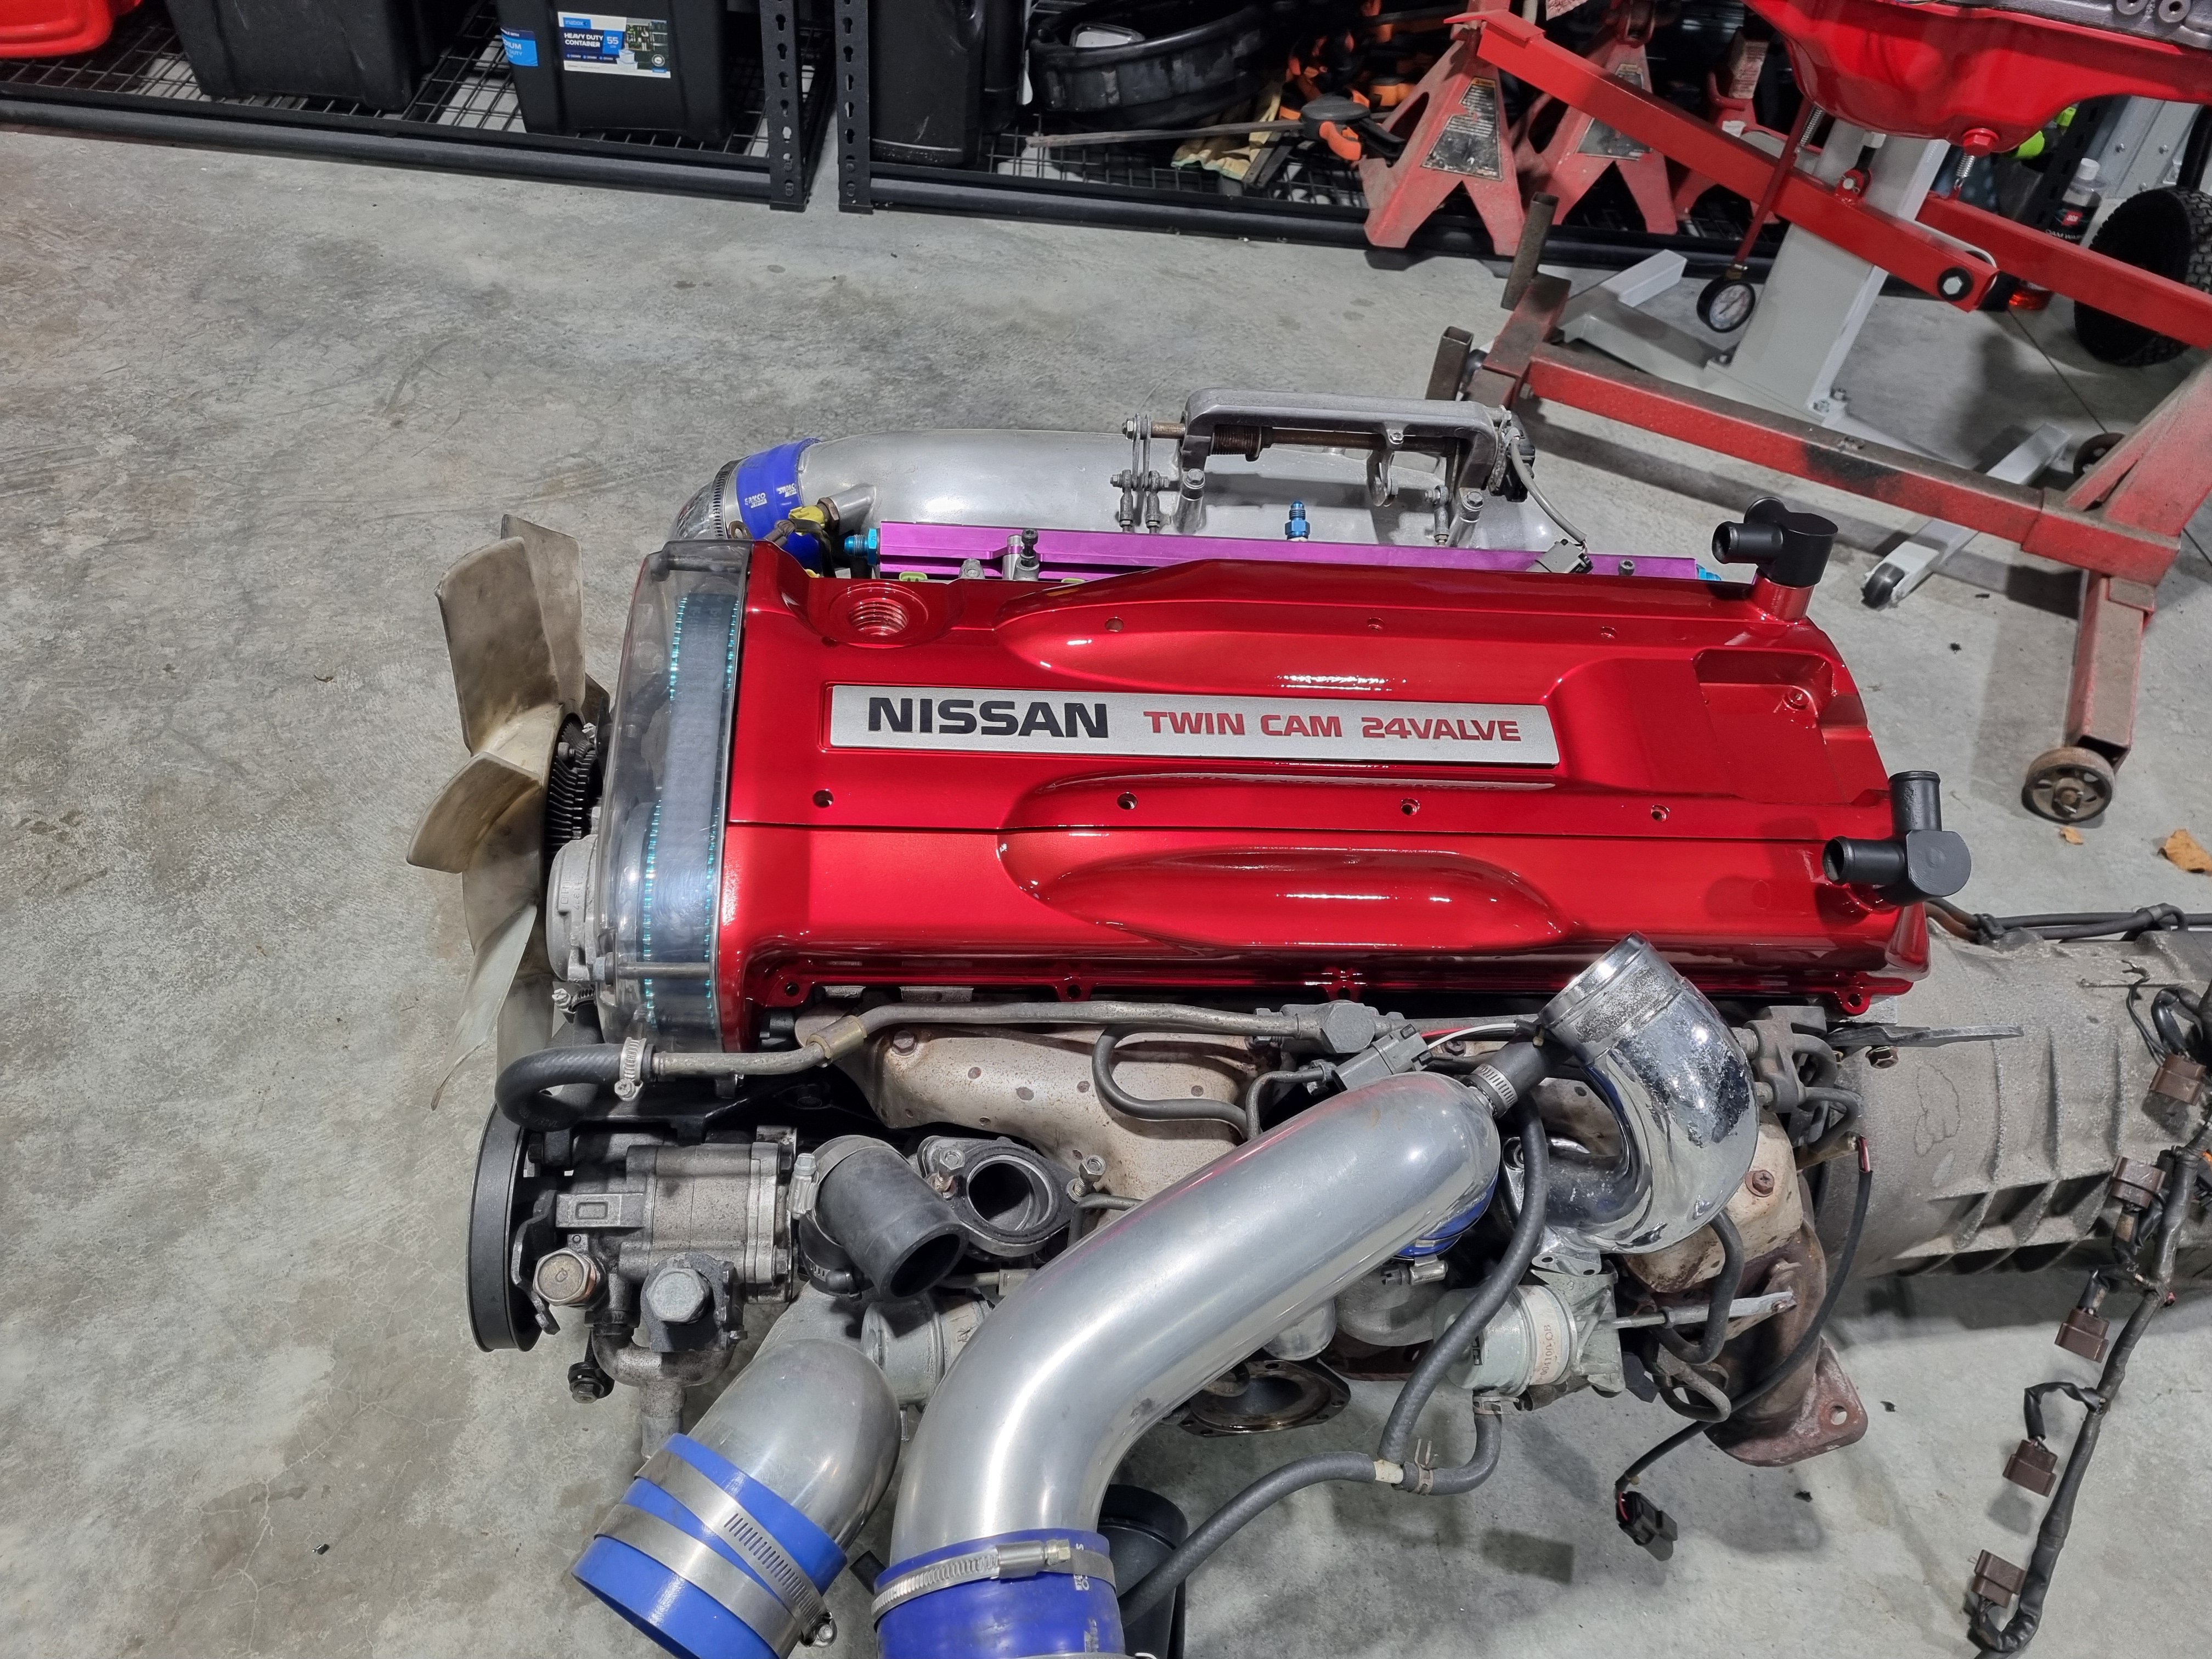
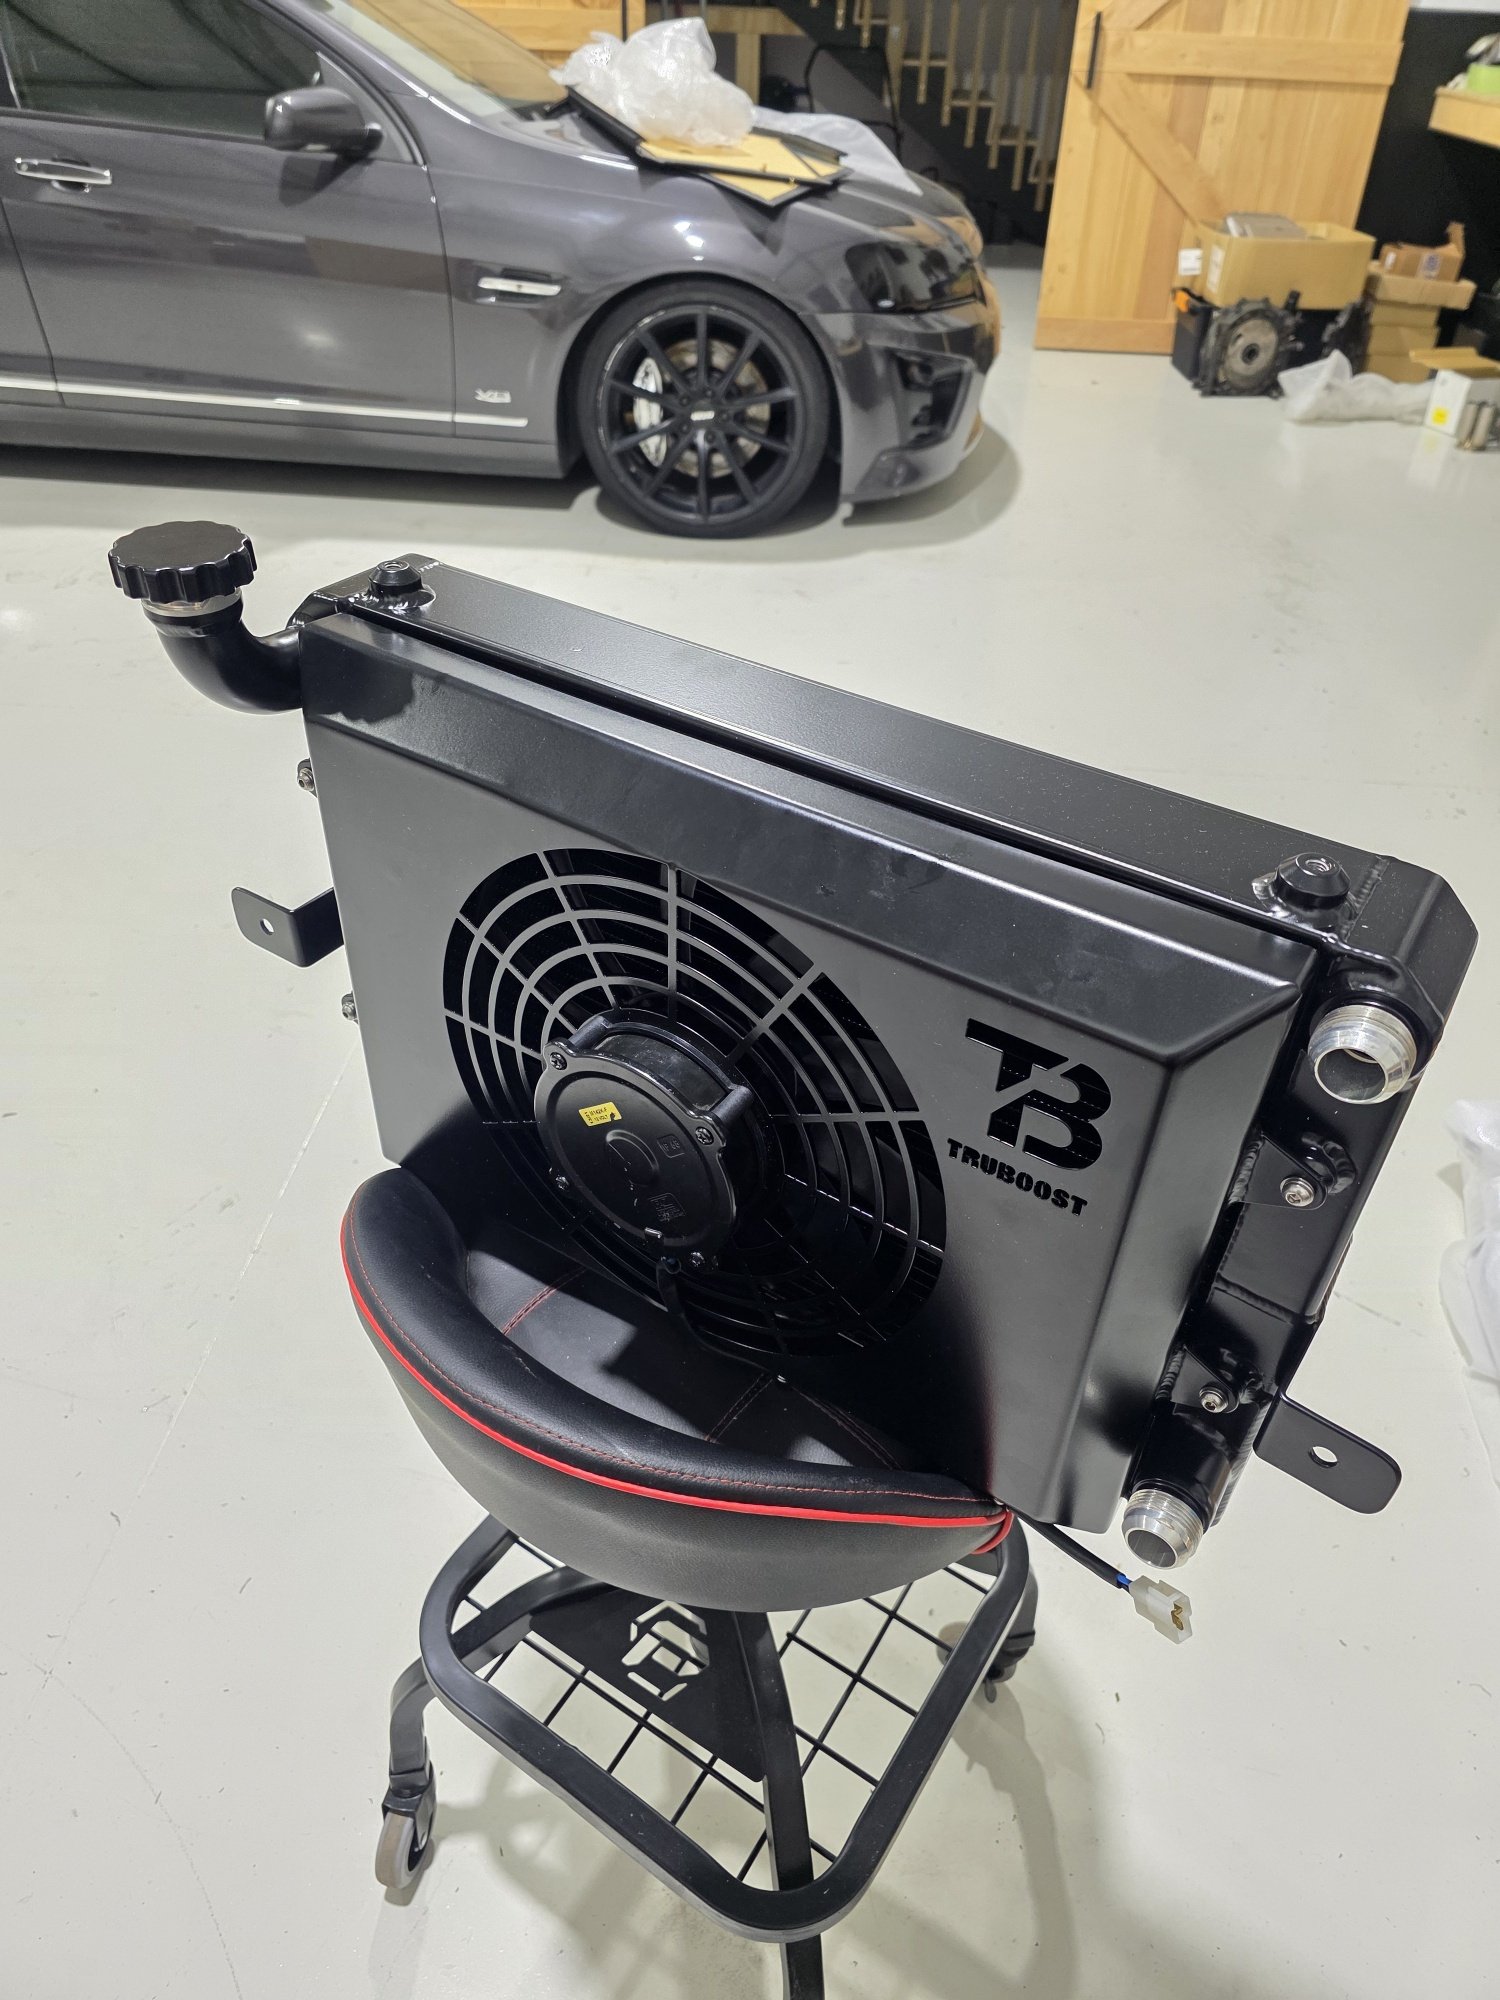
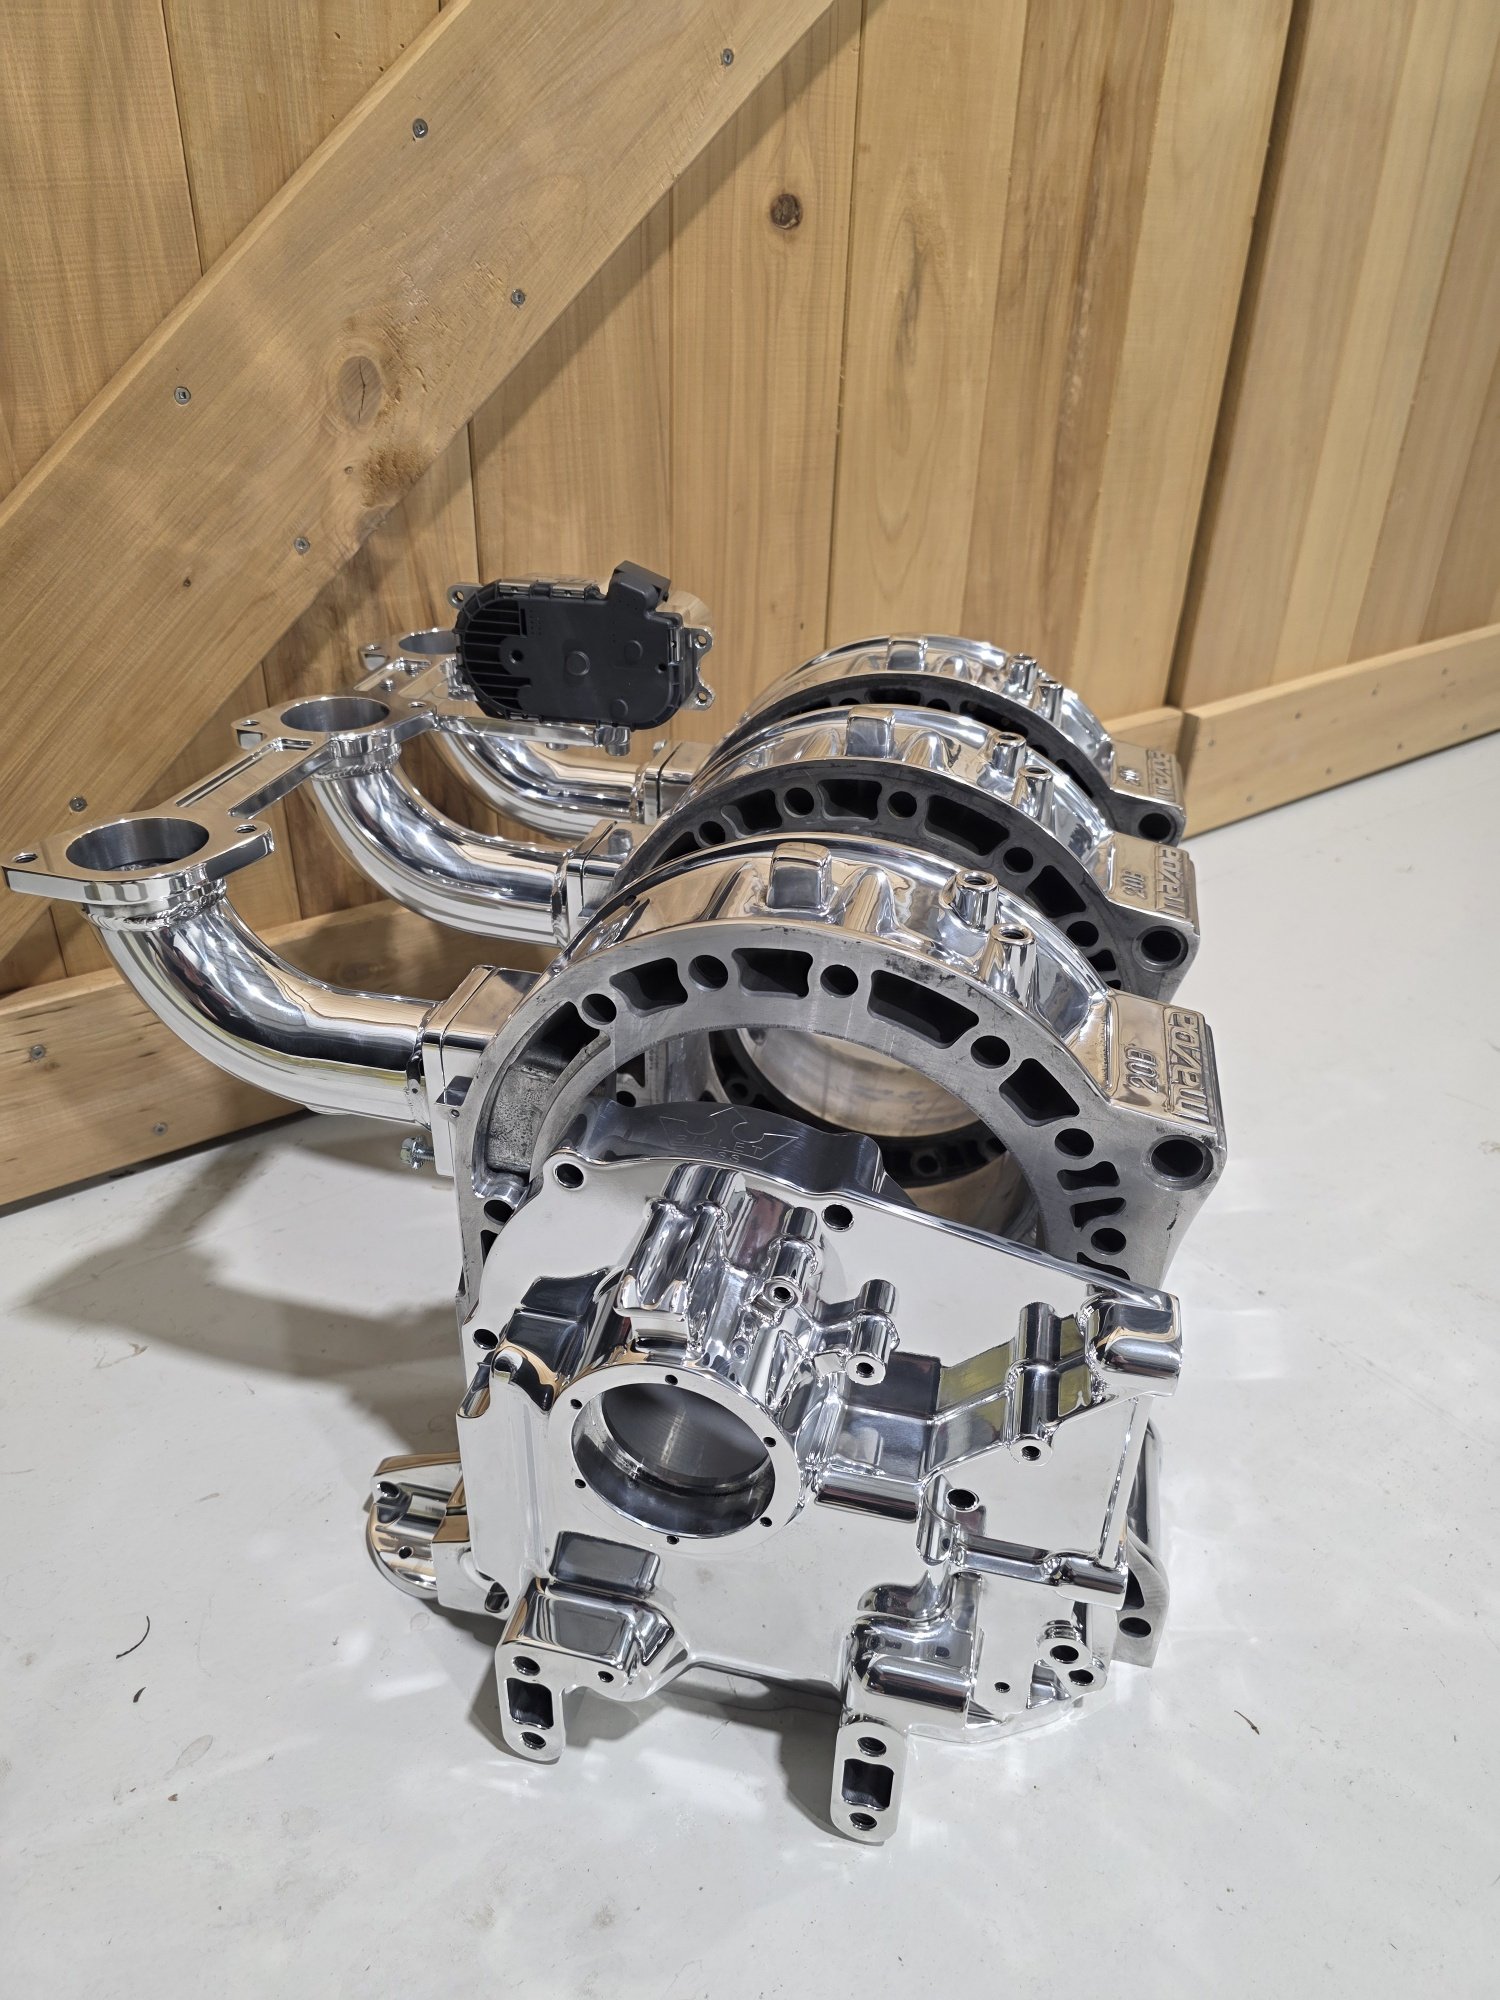
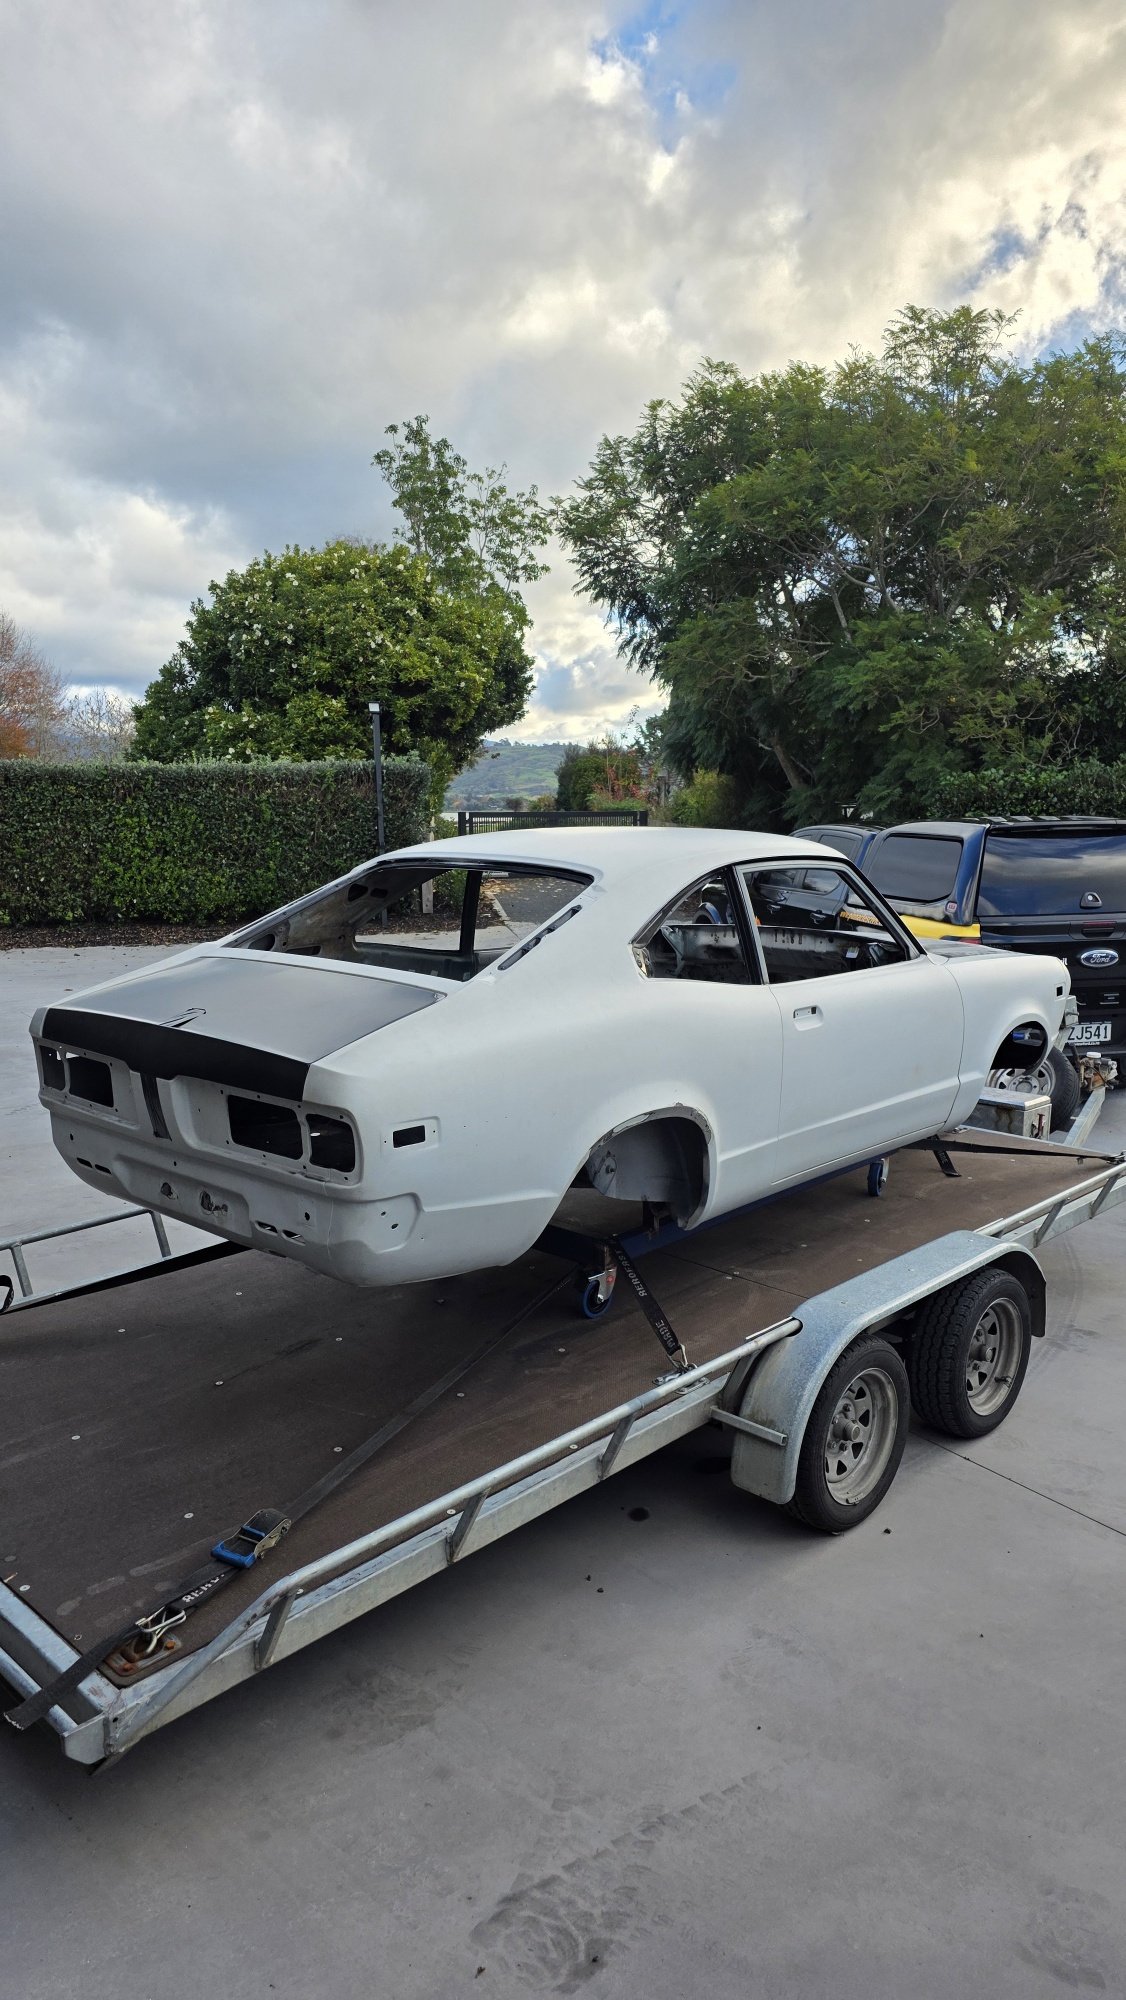
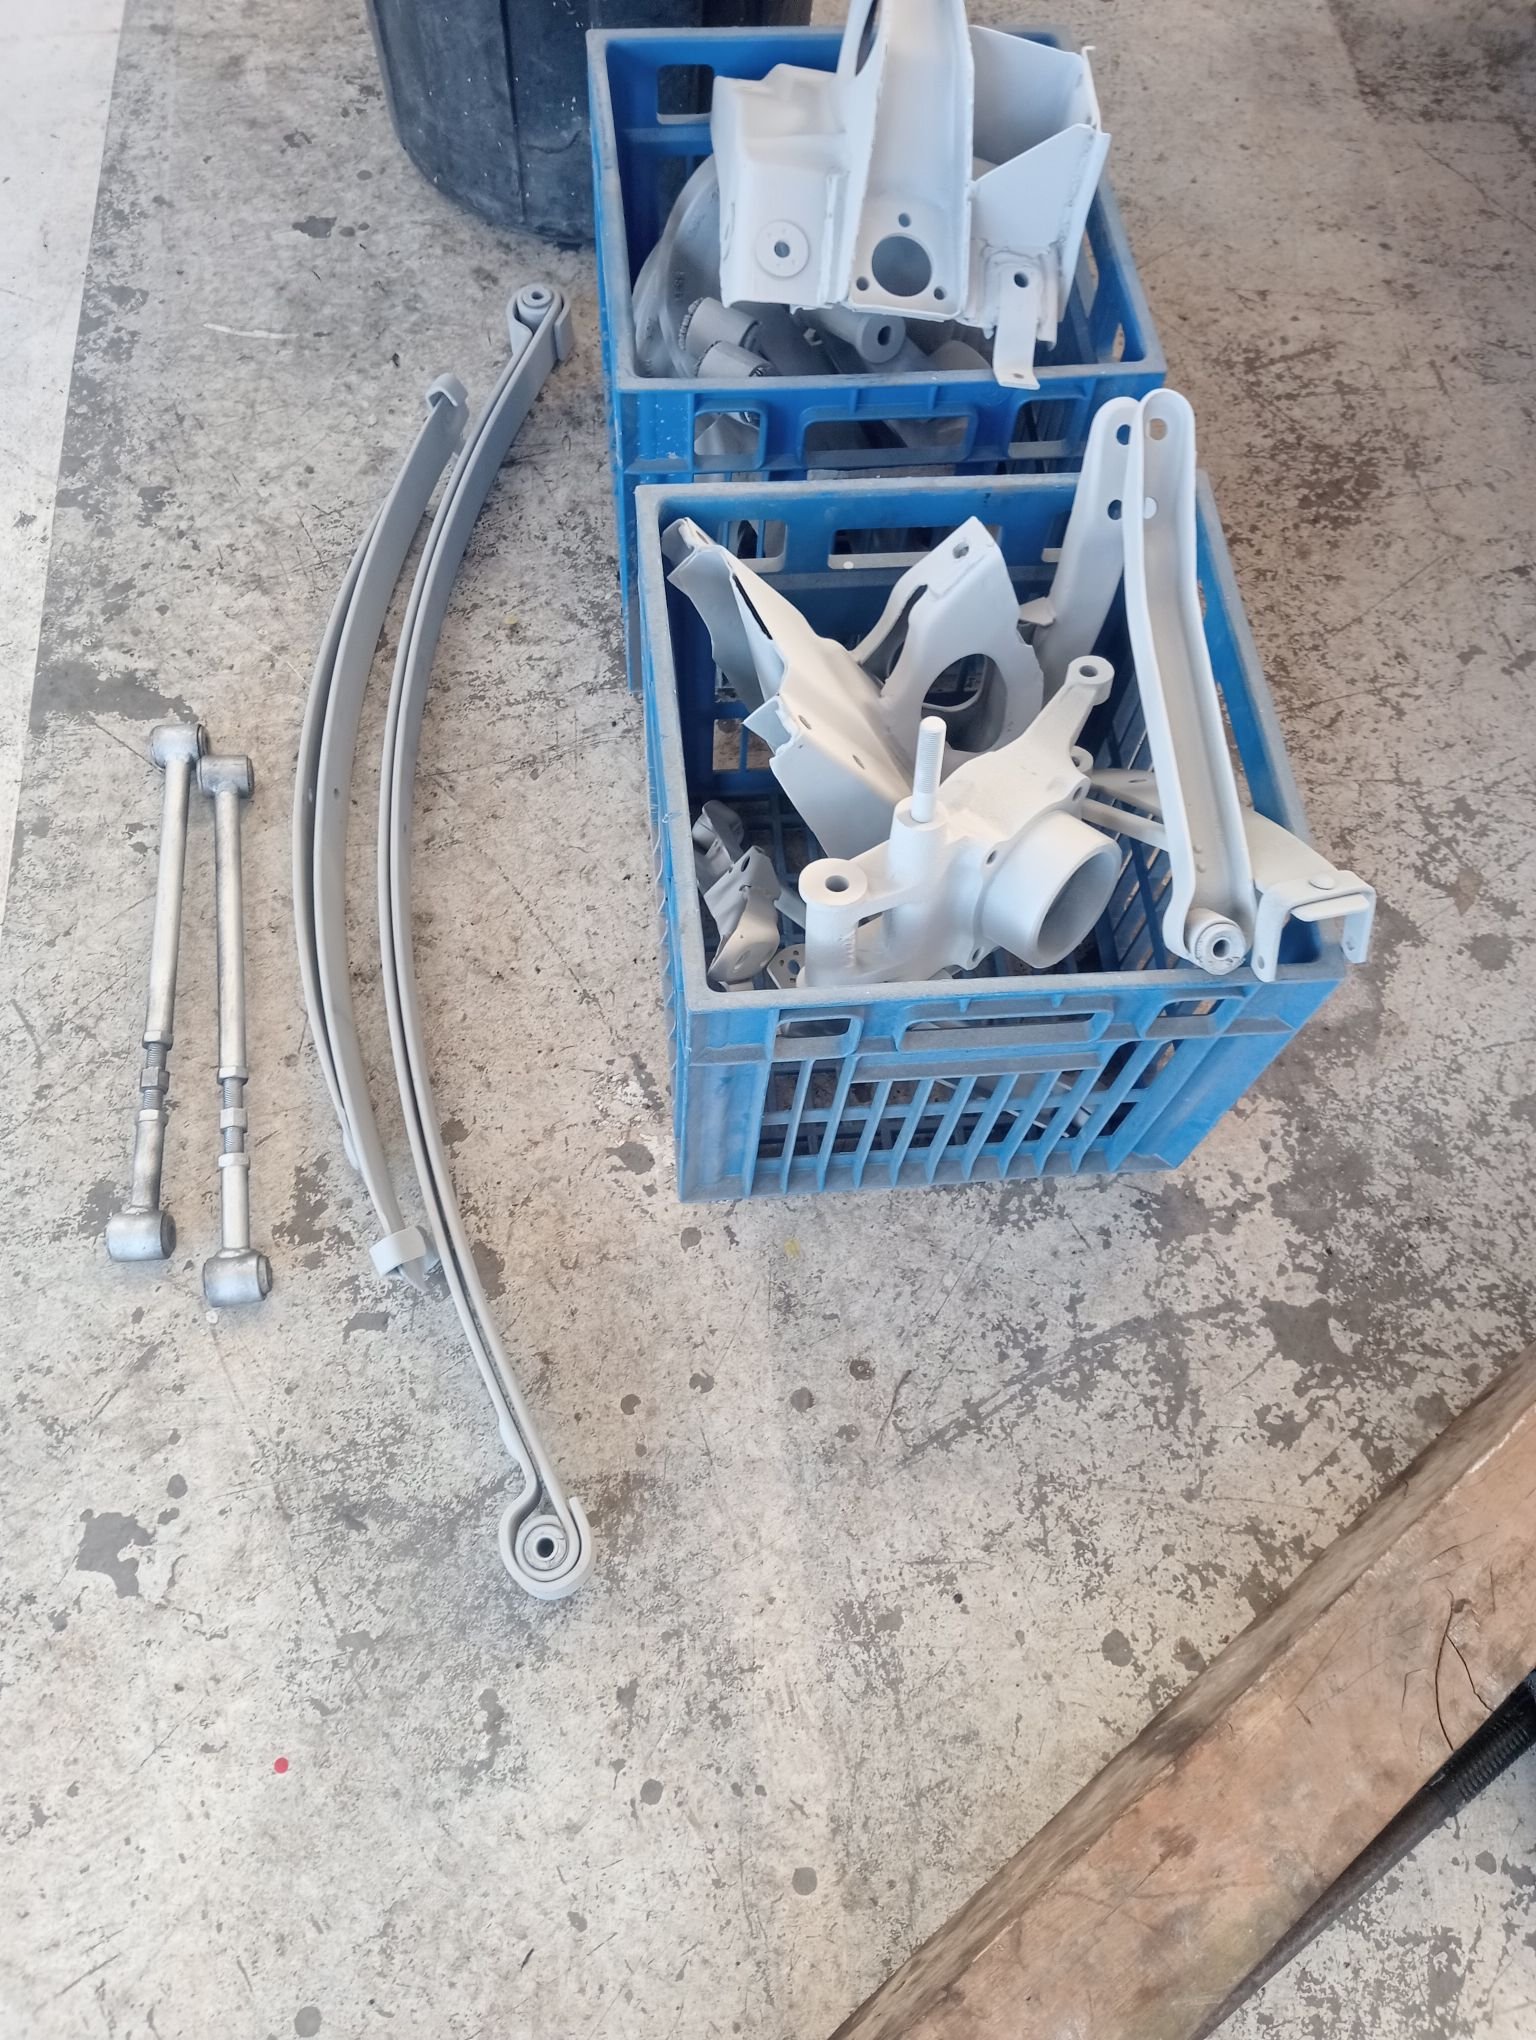
Well shes been all bloody go round here! Progressing along real nice getting alot of finishing touches off Got a ton of stuff powder coated, subframe, lower arms, gearbox xmember, radiator, oil cooler, catch can, over flow, all the dash brackets, a ton of brackets made for the loom etc. Came up bloody mint! Also got a few engine bits and gearbox adaptor etc anodized black. And RKM polished my housings, front cover, intake manifold, water pump adaptor, EWP etc. Came up bloody mint And the shell has been back at my painter for about 4 weeks. All go, Blocked in 80g and 140g and about to hit it with the 240g before final prime. Body lines, gaps etc are coming up mint! Photo before the journey to painter, looking alot different now!
27 points
-
Just a quick update. After a visit to the local compliance centre we've put the car in storage awaiting the results of our "request To Use Alternative Documents" (CA30) application. Have to say once they saw the car they the guys from the North Shore Compliance Centre were very enthusiastic and have gone out of their way to be helpful. I've sent over 15 MB of documentation and affidavits to to VINZ - so fingers crossed!
27 points
-
All boxed up at the foundry and moulds filled. They added their expertise with risers and runner system. See how it goes in the next couple of days.27 points
-
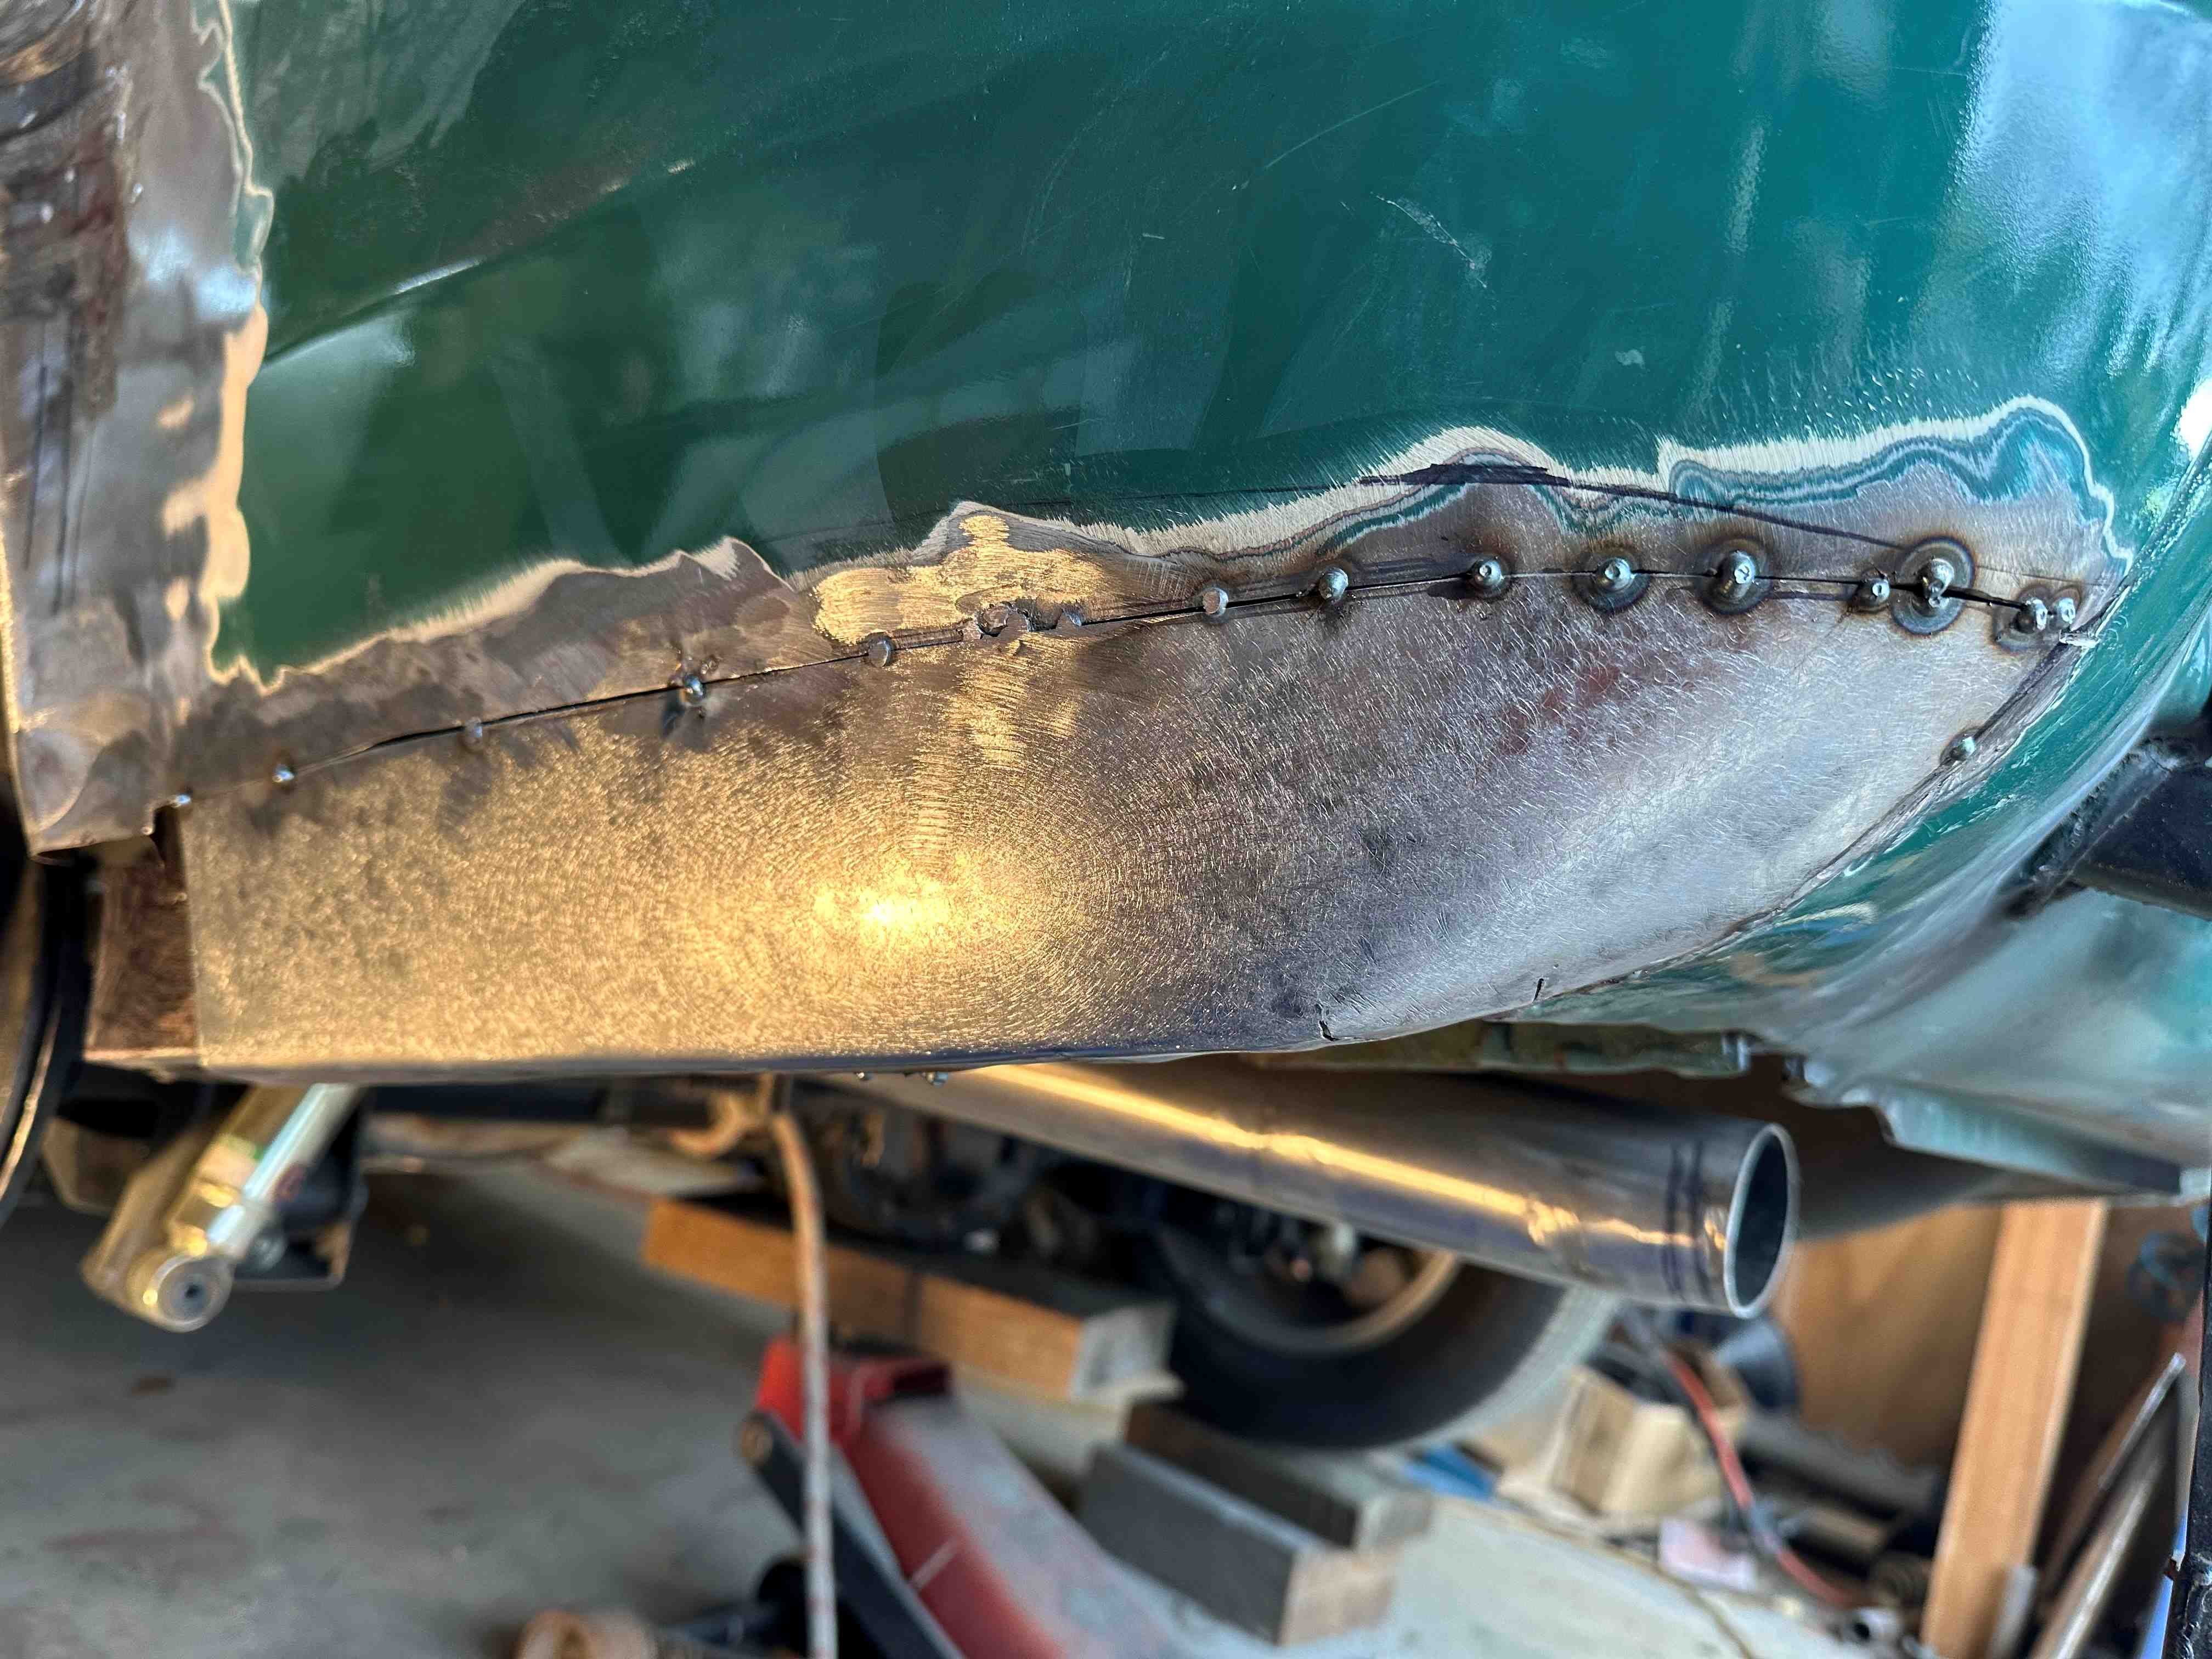
One. Two. Miss a few. 99. Paint! Came out good enough. Satin black for the pillars. PPG 2K epoxy primer, seam sealed & Deltron single stage. The previous repairs stand out quite a bit. There's a bit of dust in these photos from removing the masking.26 points
-
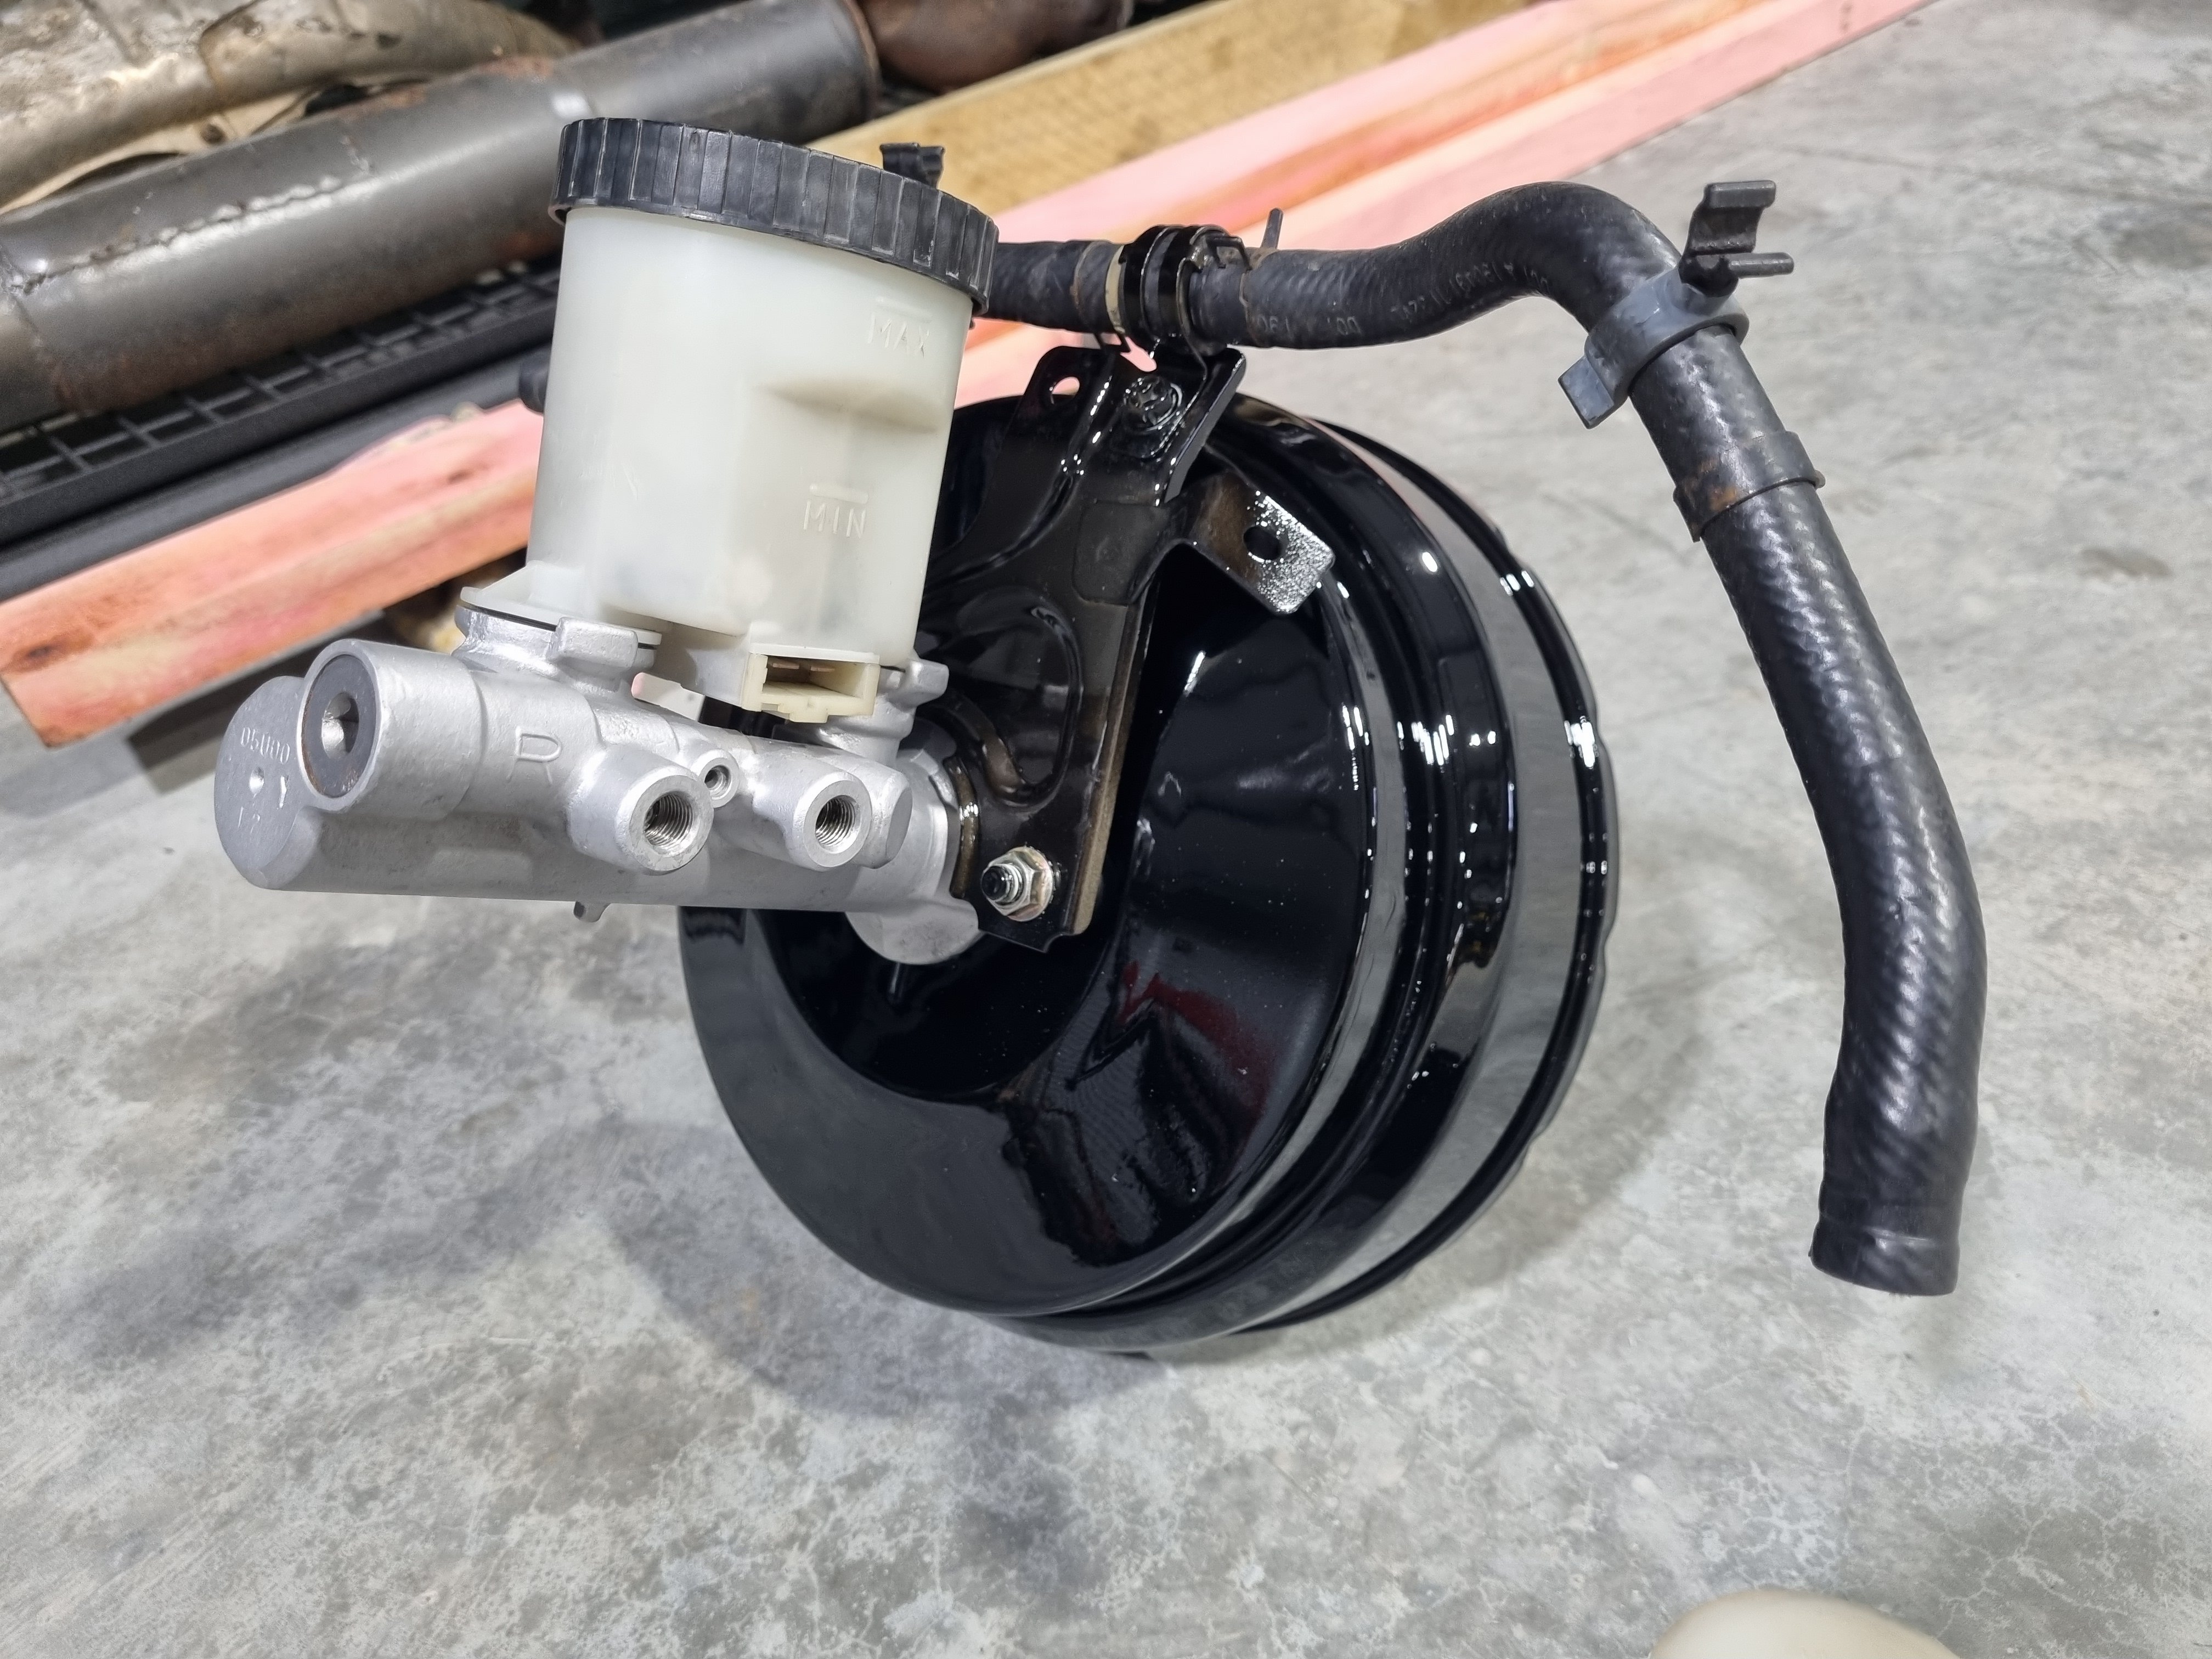
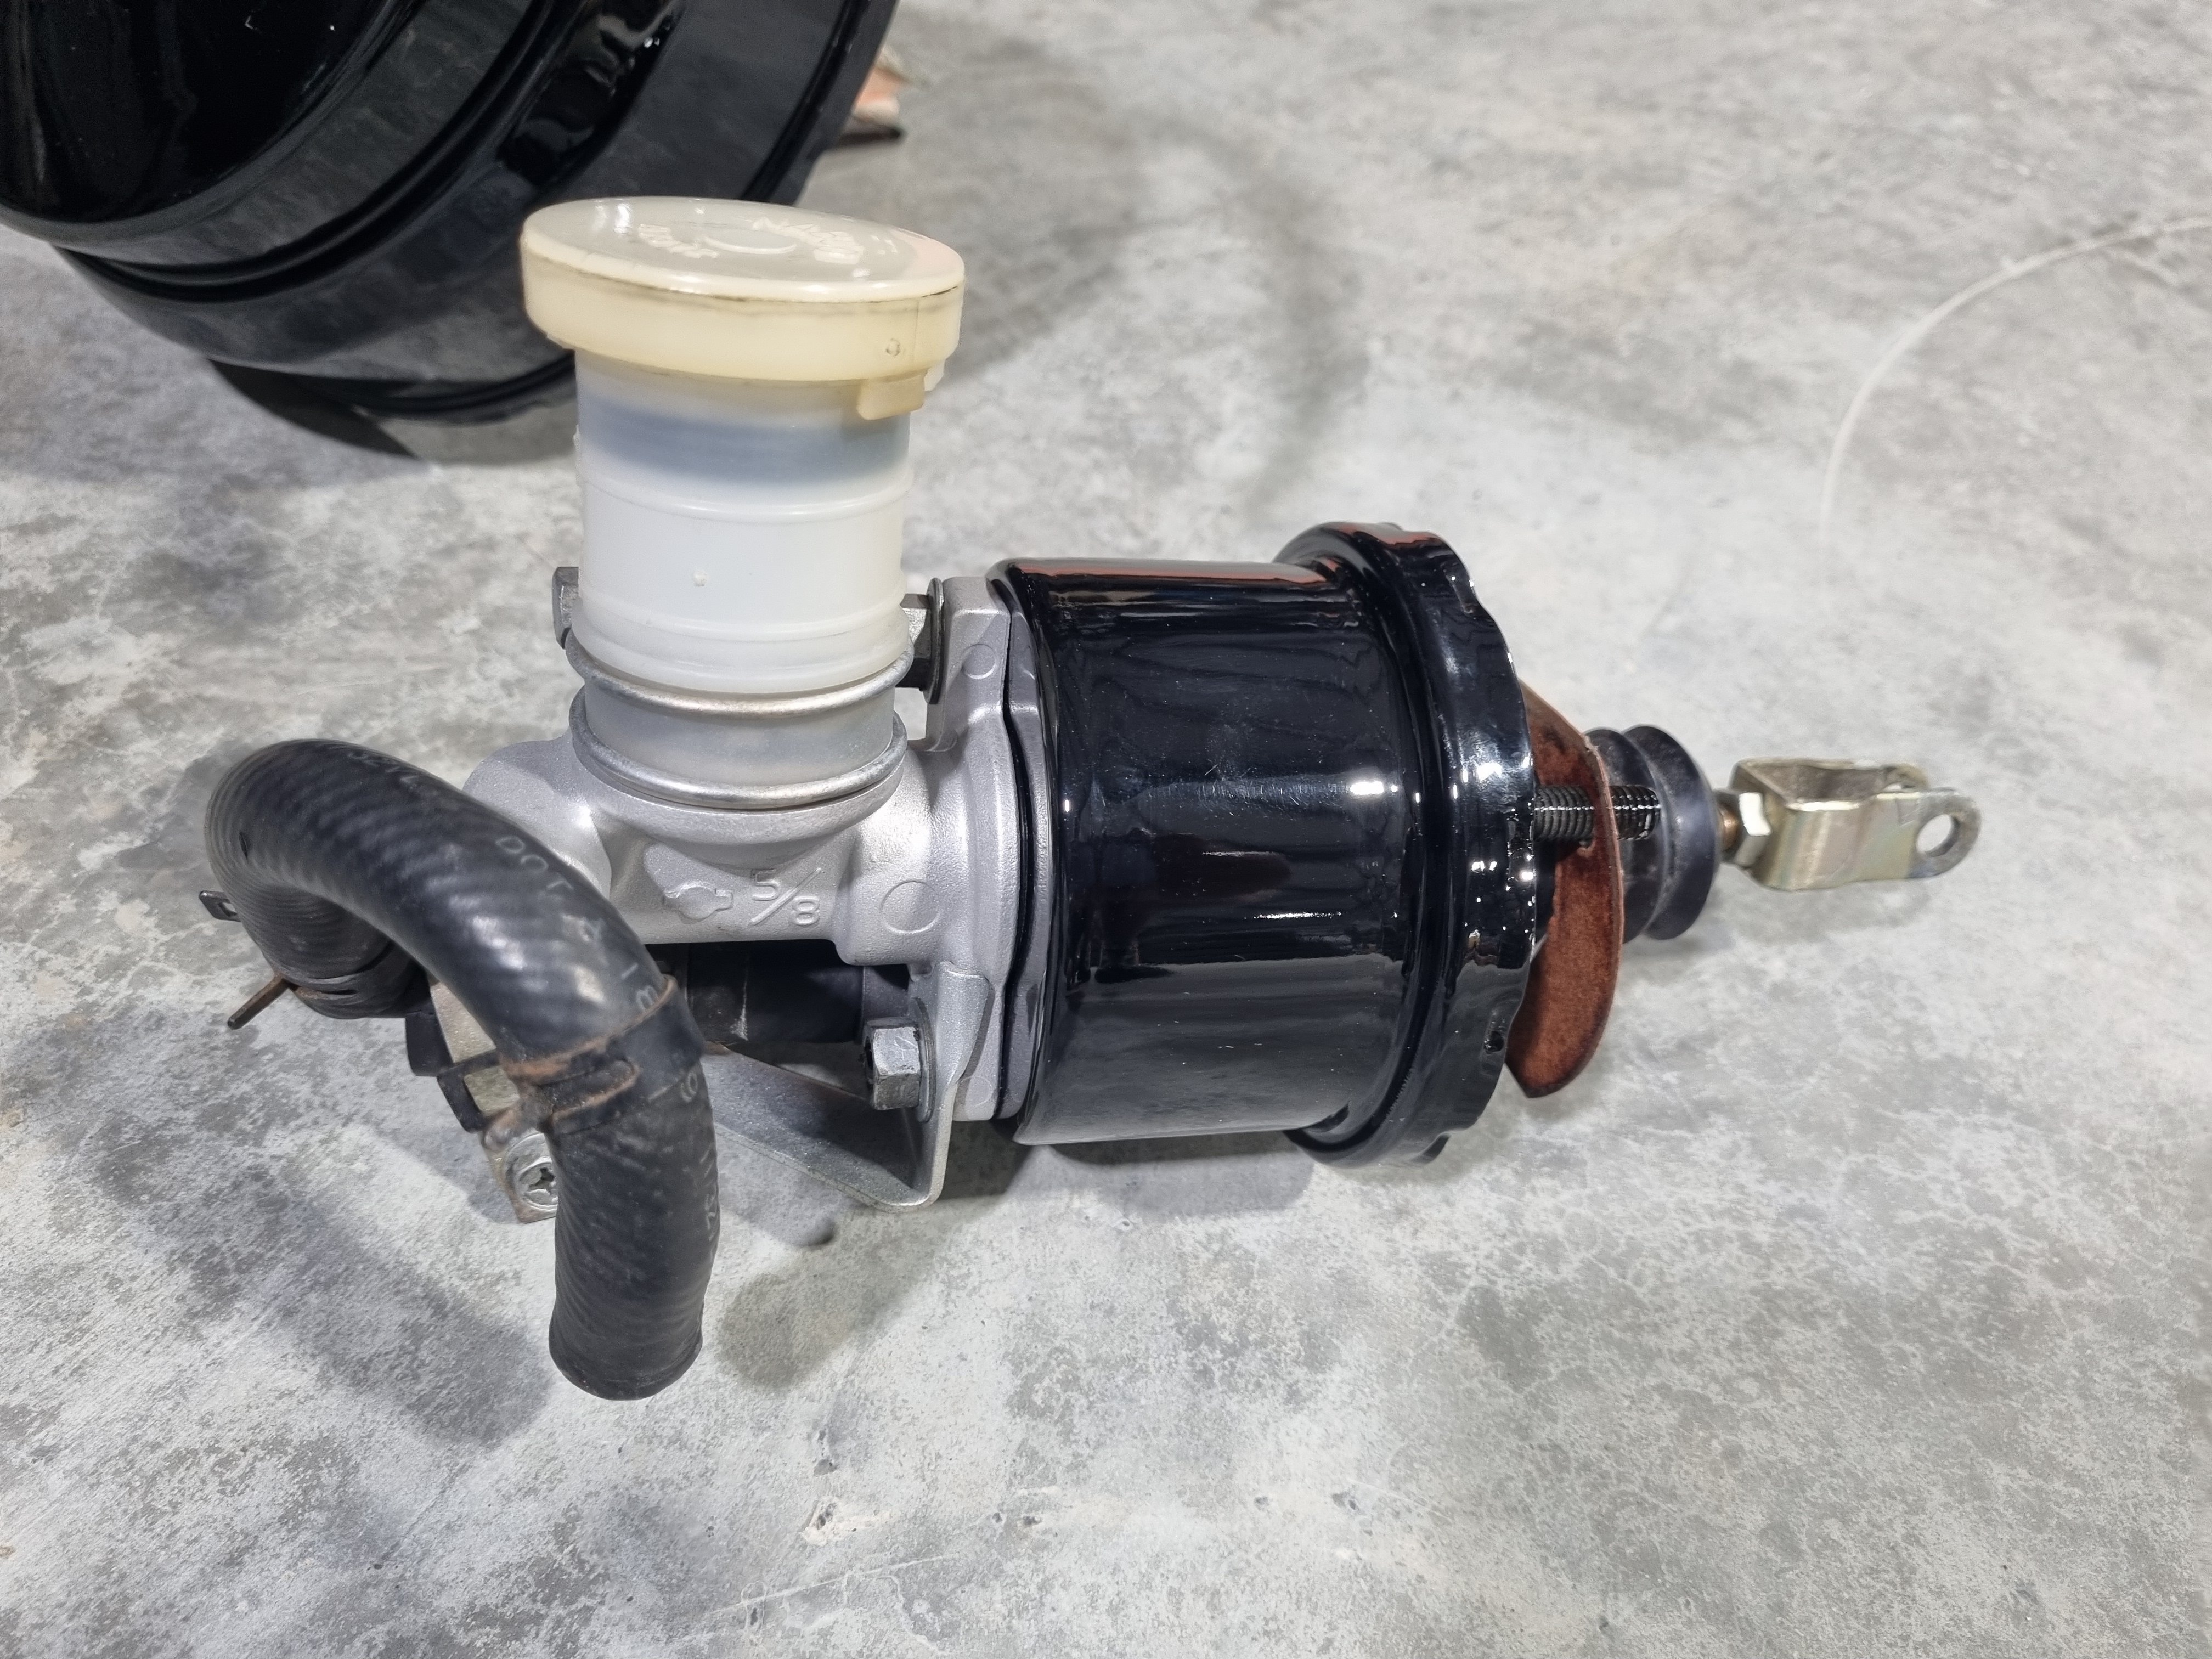
I really struggle for free time these days but have been ticking off the odd job when I can. Now the engine is in I could continue with the game of making the trumpets fit. In the last photo of the previous post the rear pair of trumpets weren't fitted as they hit the brake booster. I had various schemes in mind for sorting this including a change of angle for the quads, or printing different trumpets, but an easy solution was to change the booster to a smaller unit. Quite a while back I managed to pickup a second hand KE70 booster to measure up, and seeing as it looked like it would all work I got a new one and finally got around to fitting it. Here's the comparison: I also picked up a new master cylinder and threw that in. The rubber line from the reservoir to the master touches the strut tower but I'll muck around with that later on. At least now there is ample room: Also finished up the fuel rail spacers and fitted the rail Got some new cam cover washers so bolted them down properly and fitted the coils: Can't decide which spark plug cover to run, tempted to stain the wood version and run that till it catches on fire: I also took the starlet for a quick loop around the neighbourhood, When I got back one of my nieghbours was waiting for me which made me worry for a bit, but he just wanted a ride... Poor things gets warmed up then trashed, then put away again. One day I will revisit it and make it betterer... or worserer... but definitely faster. Anyway, thats all for now. PS: All of this is @kpr's fault24 points
-
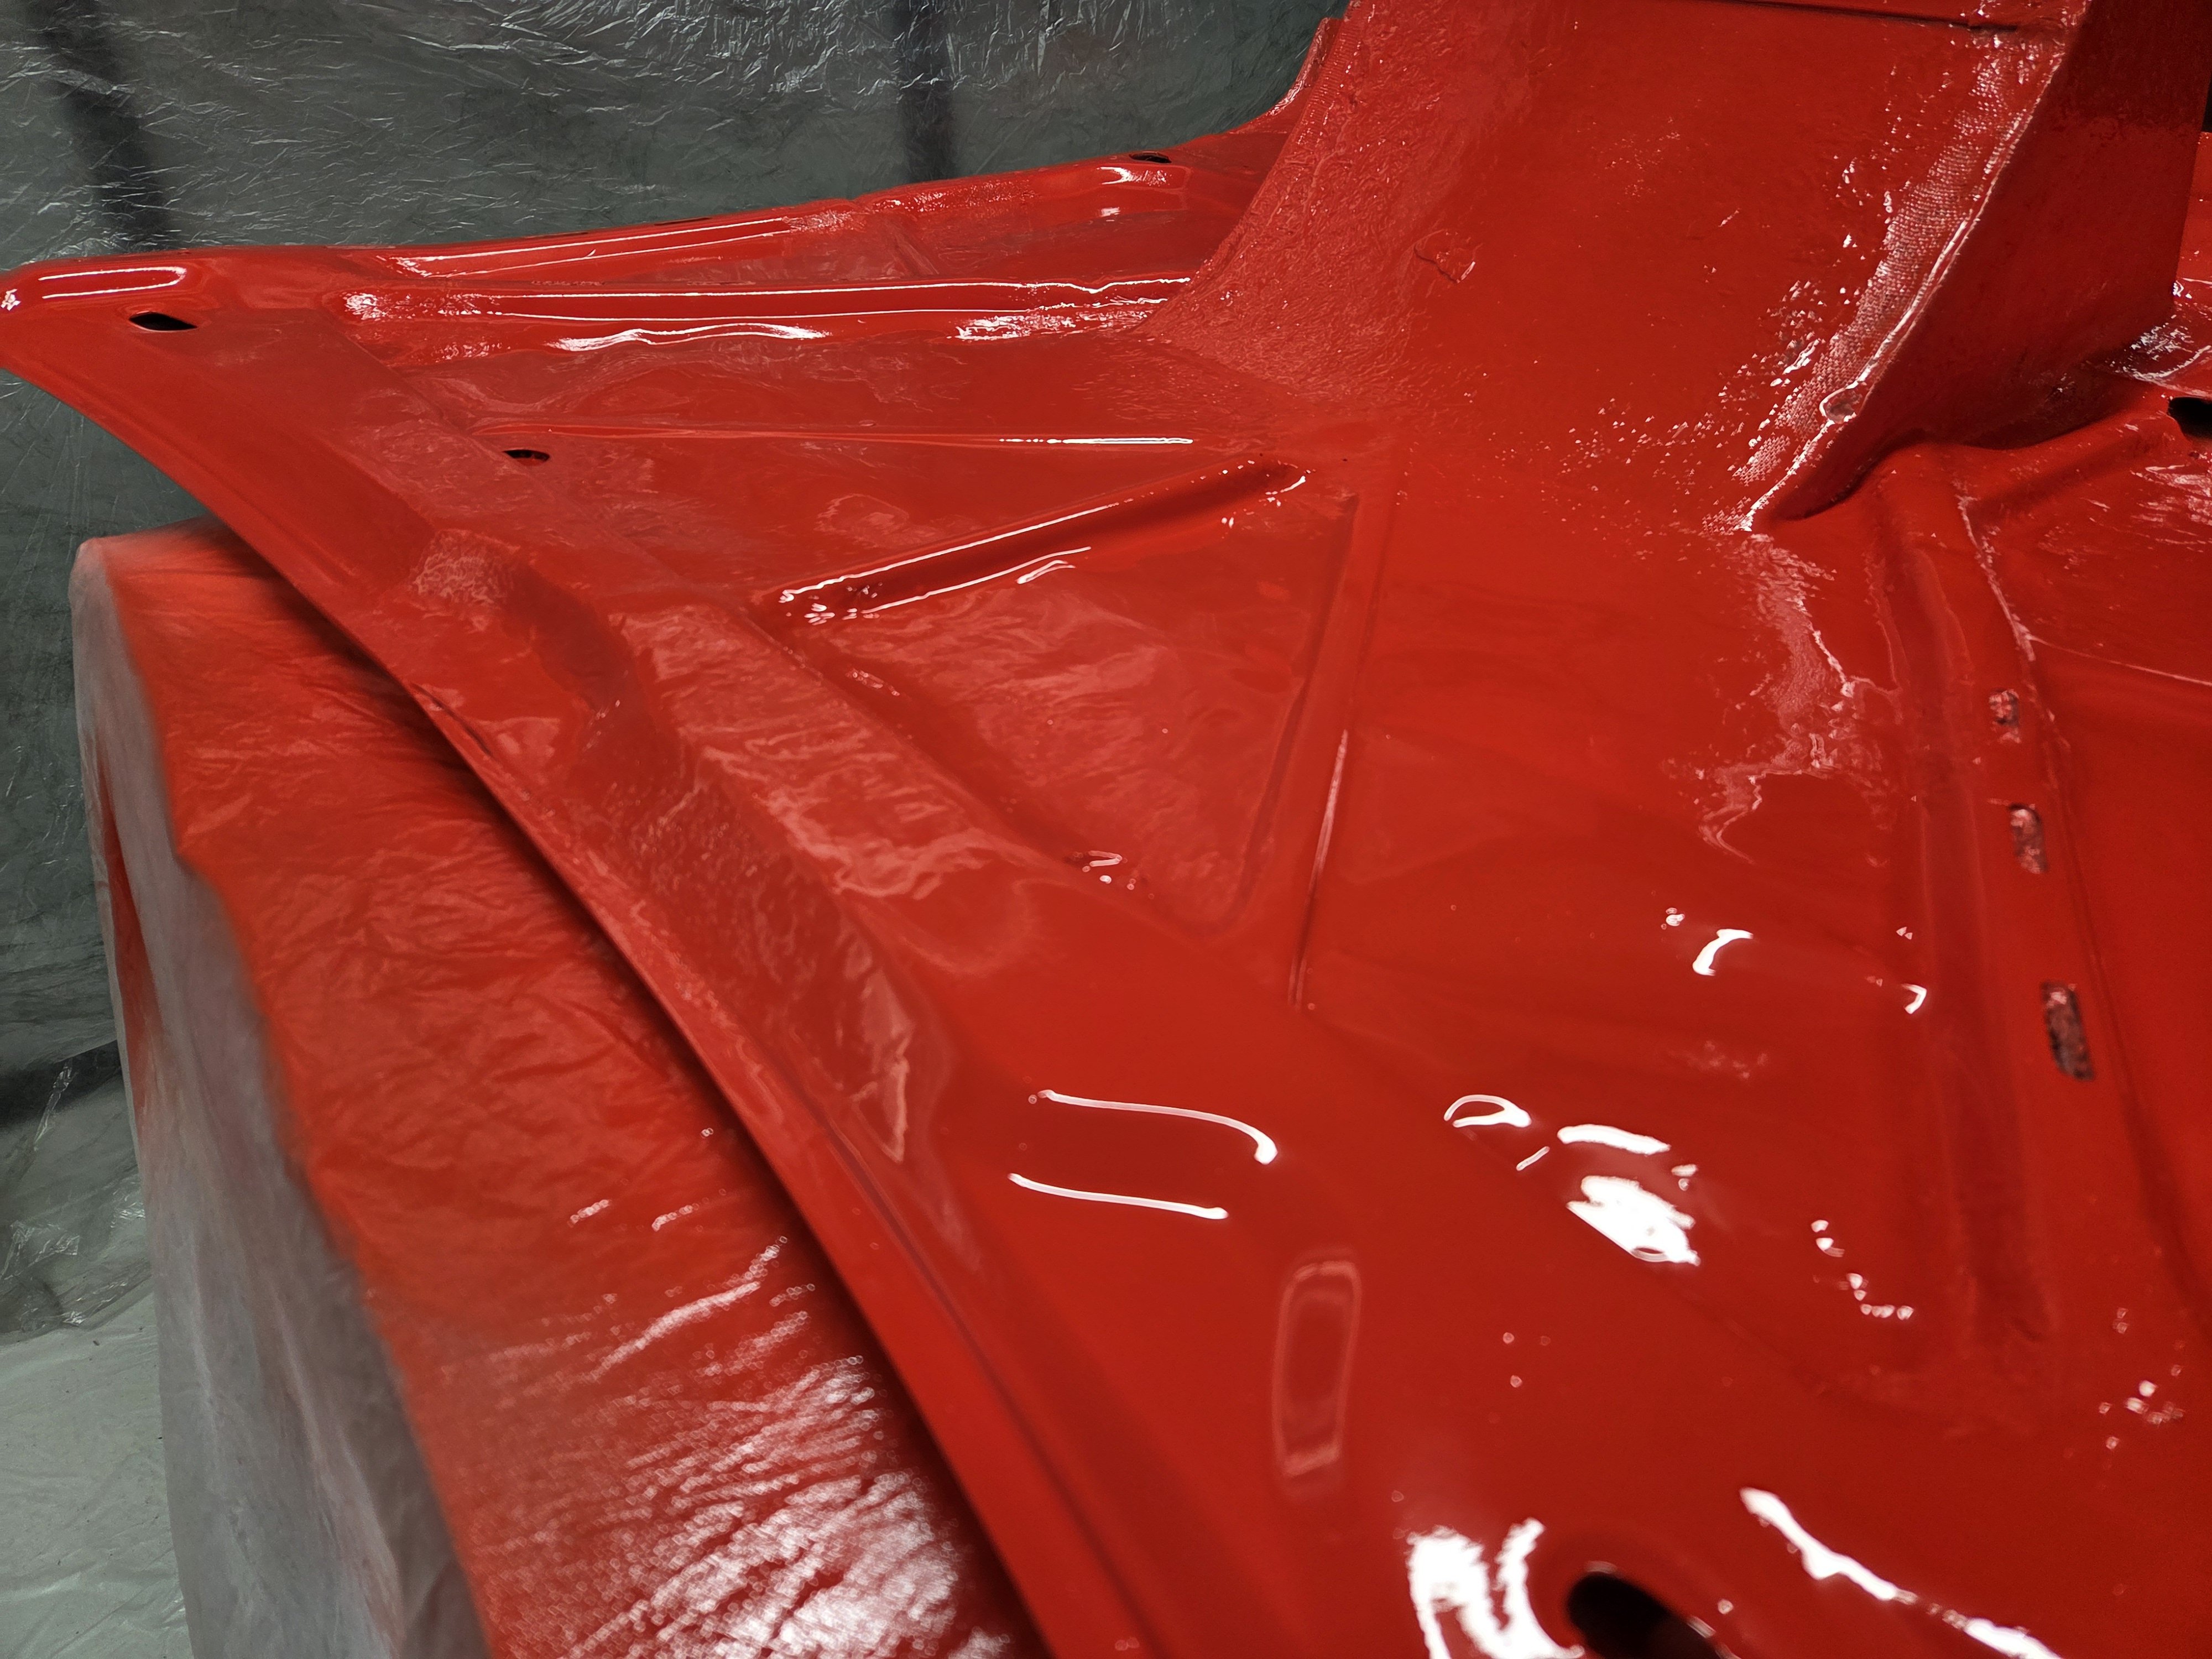
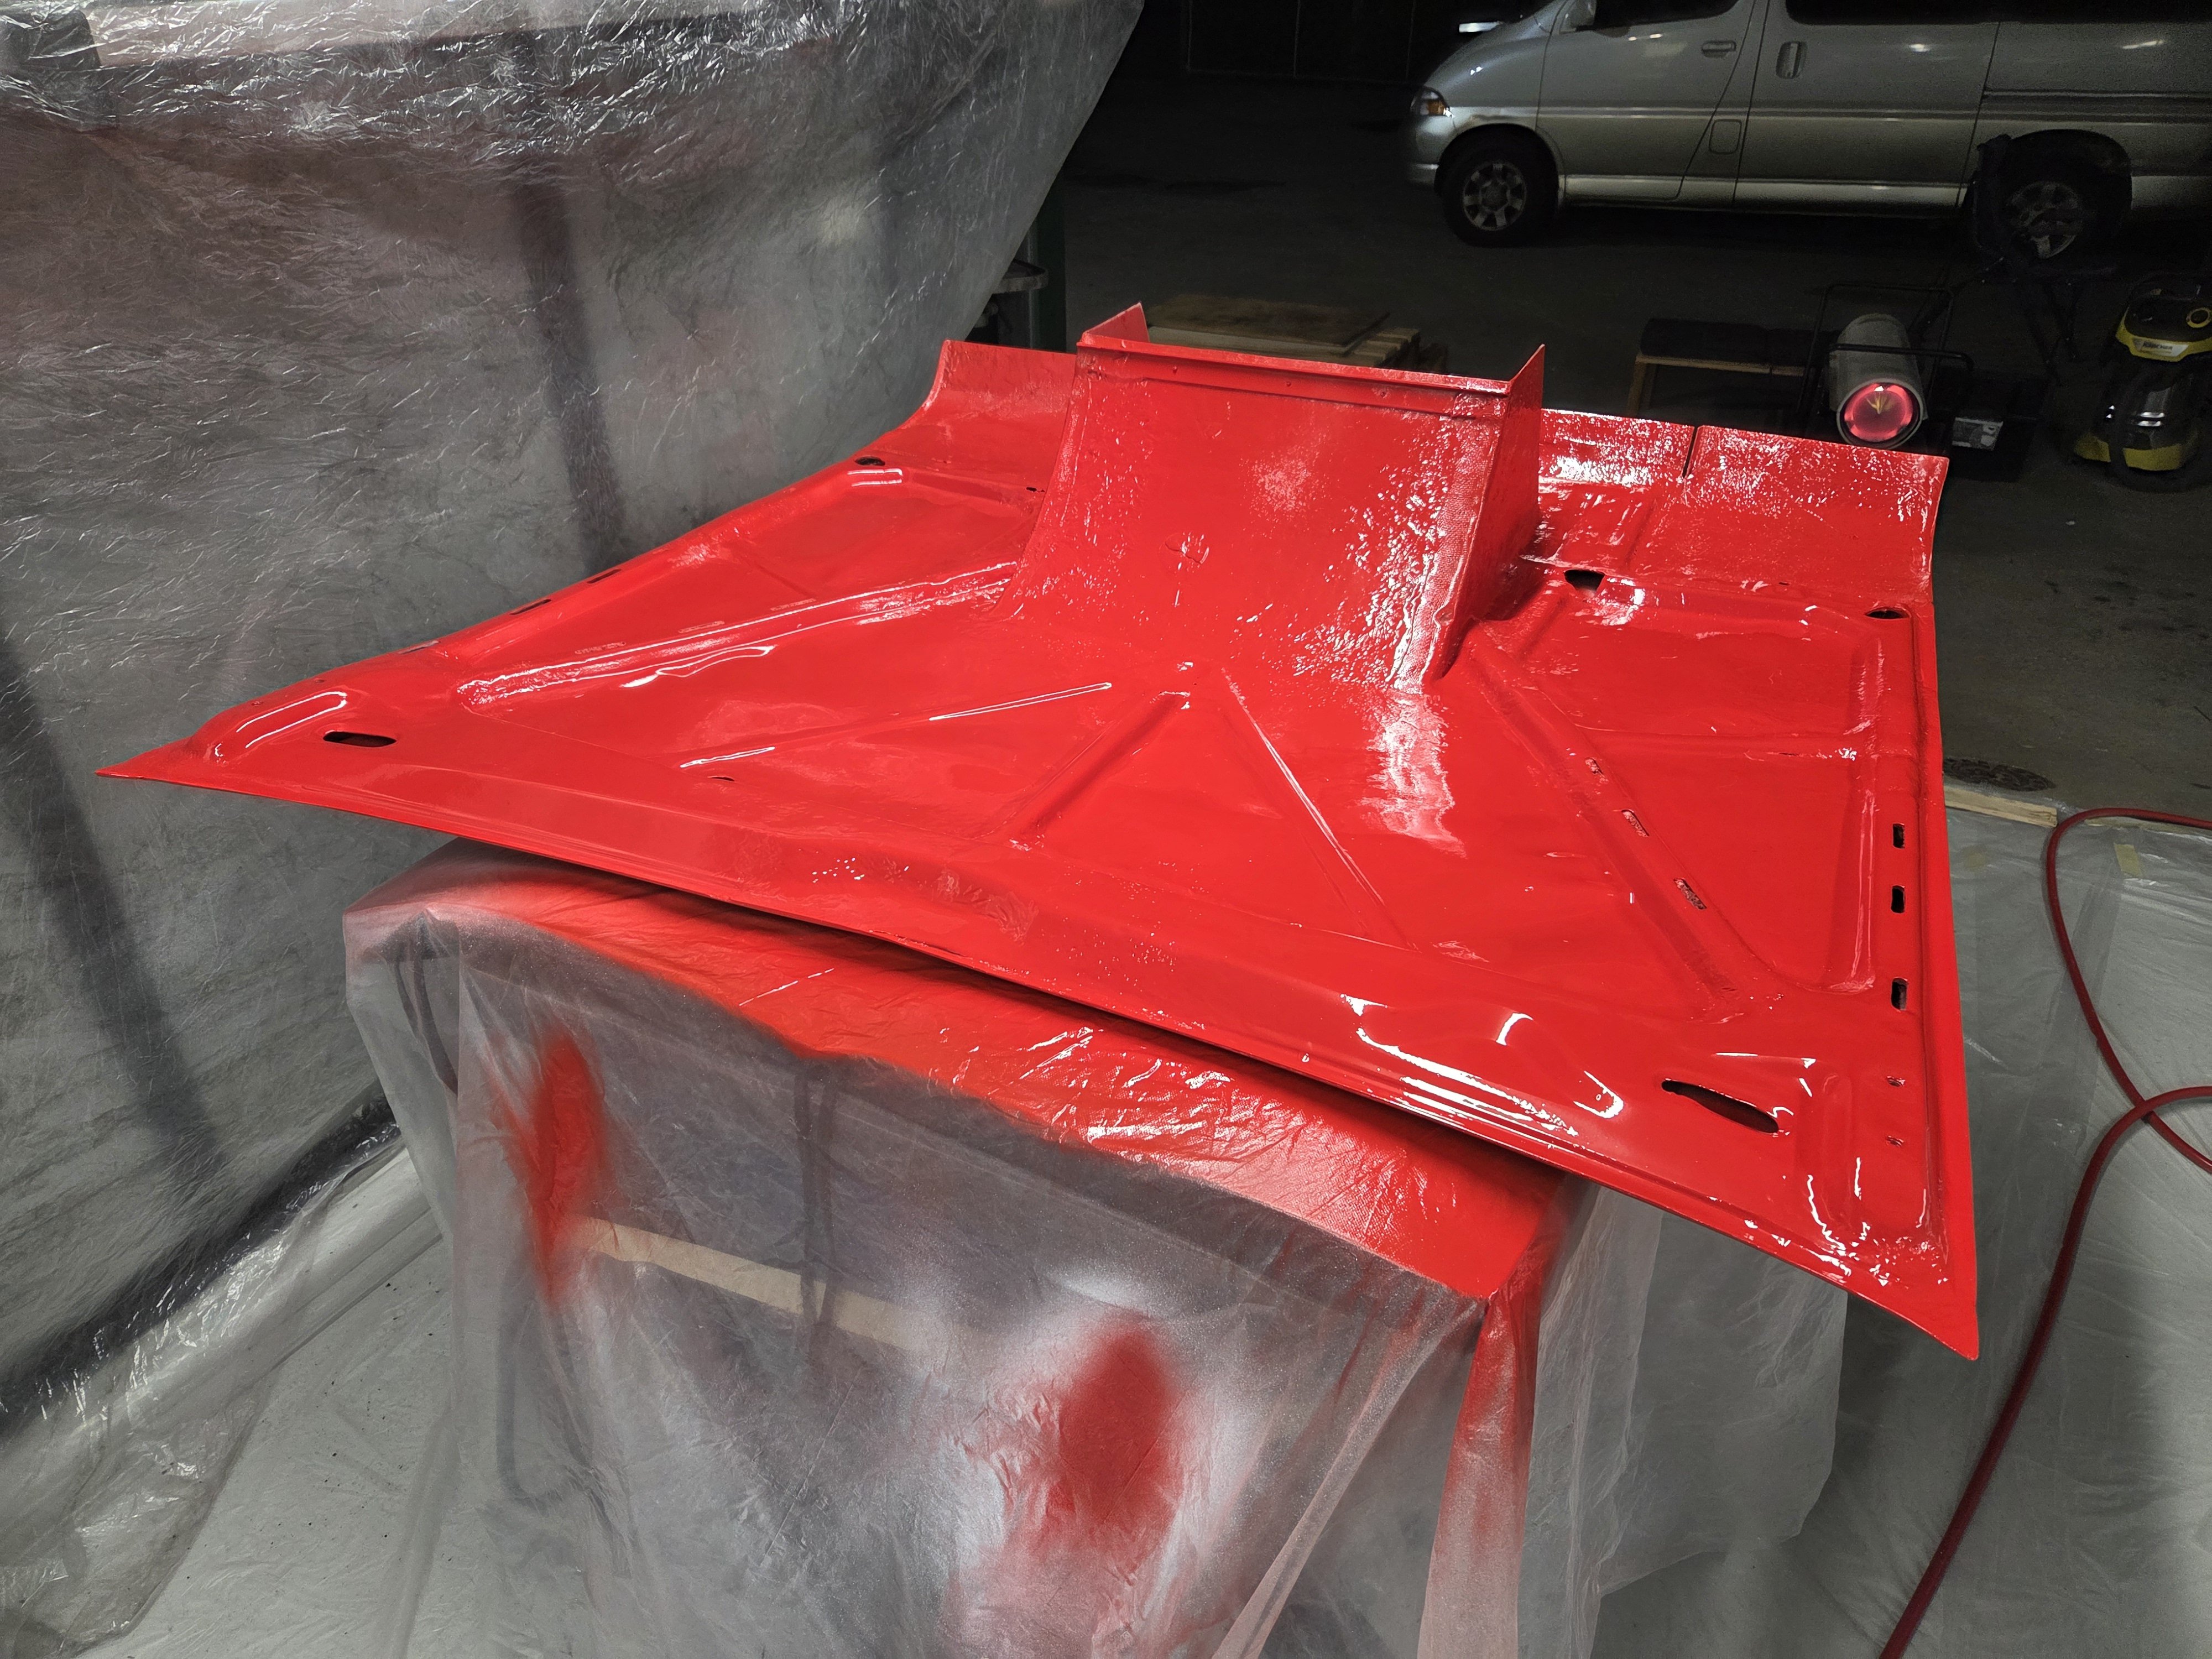
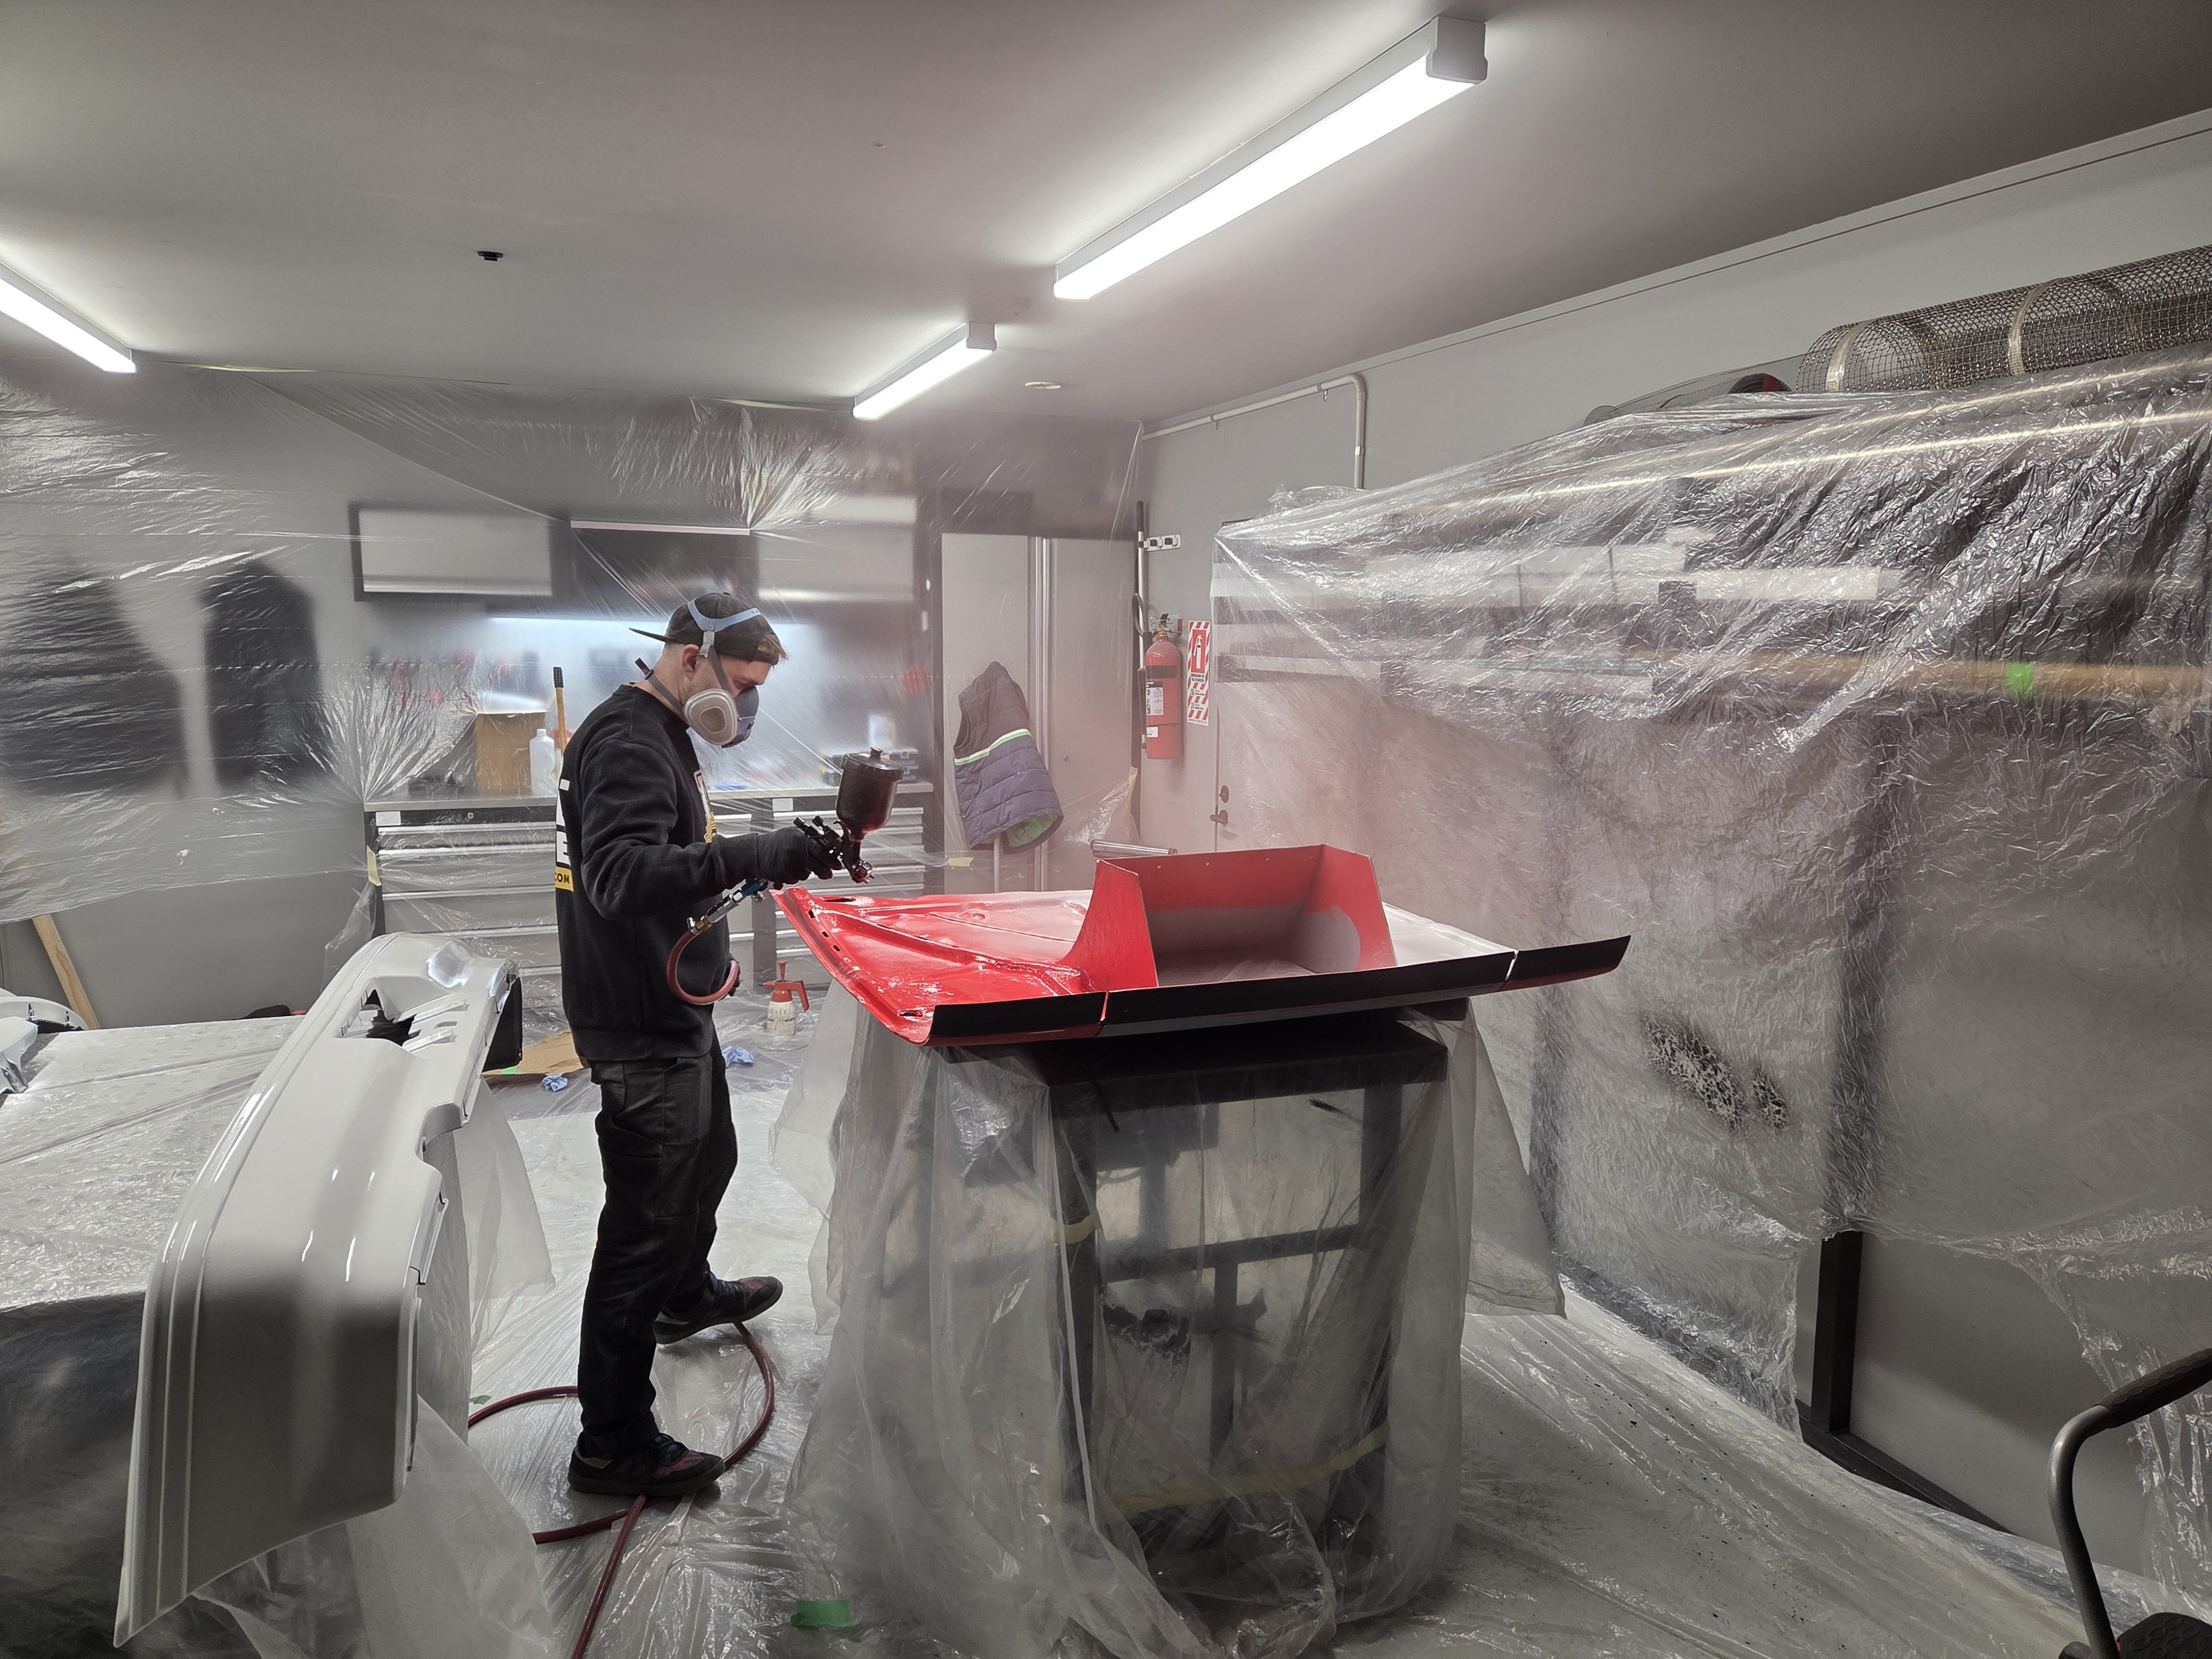
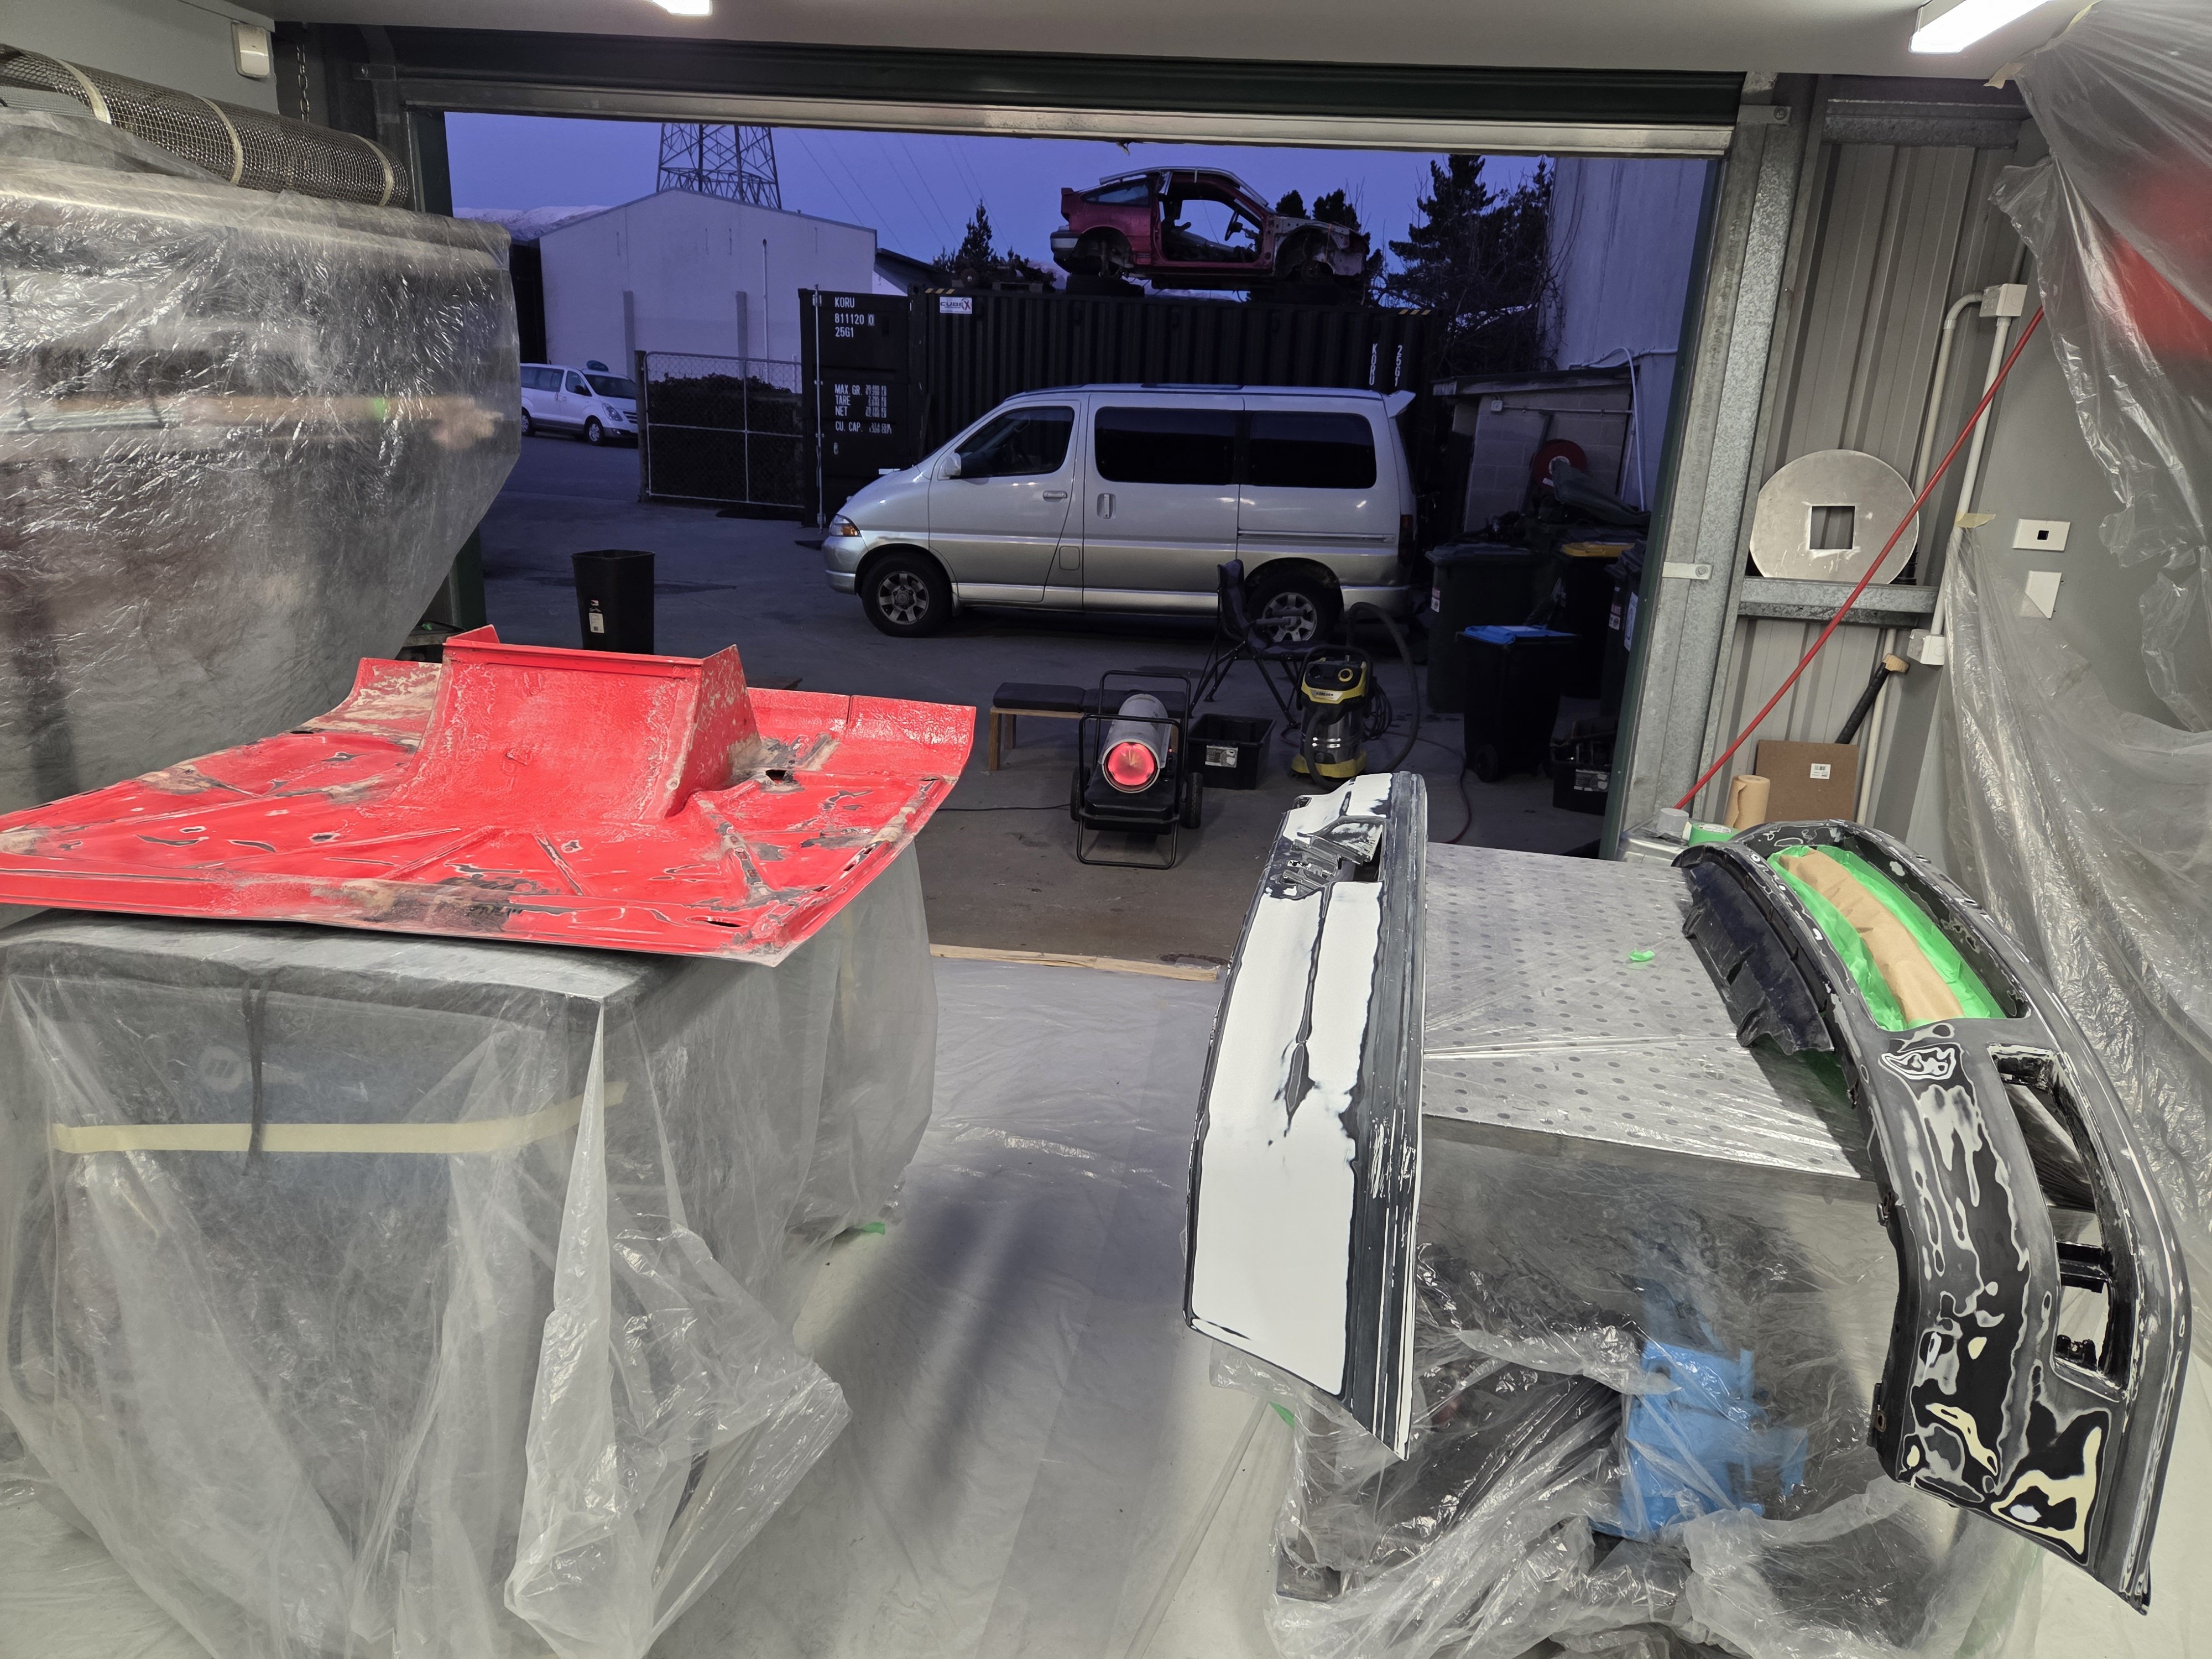
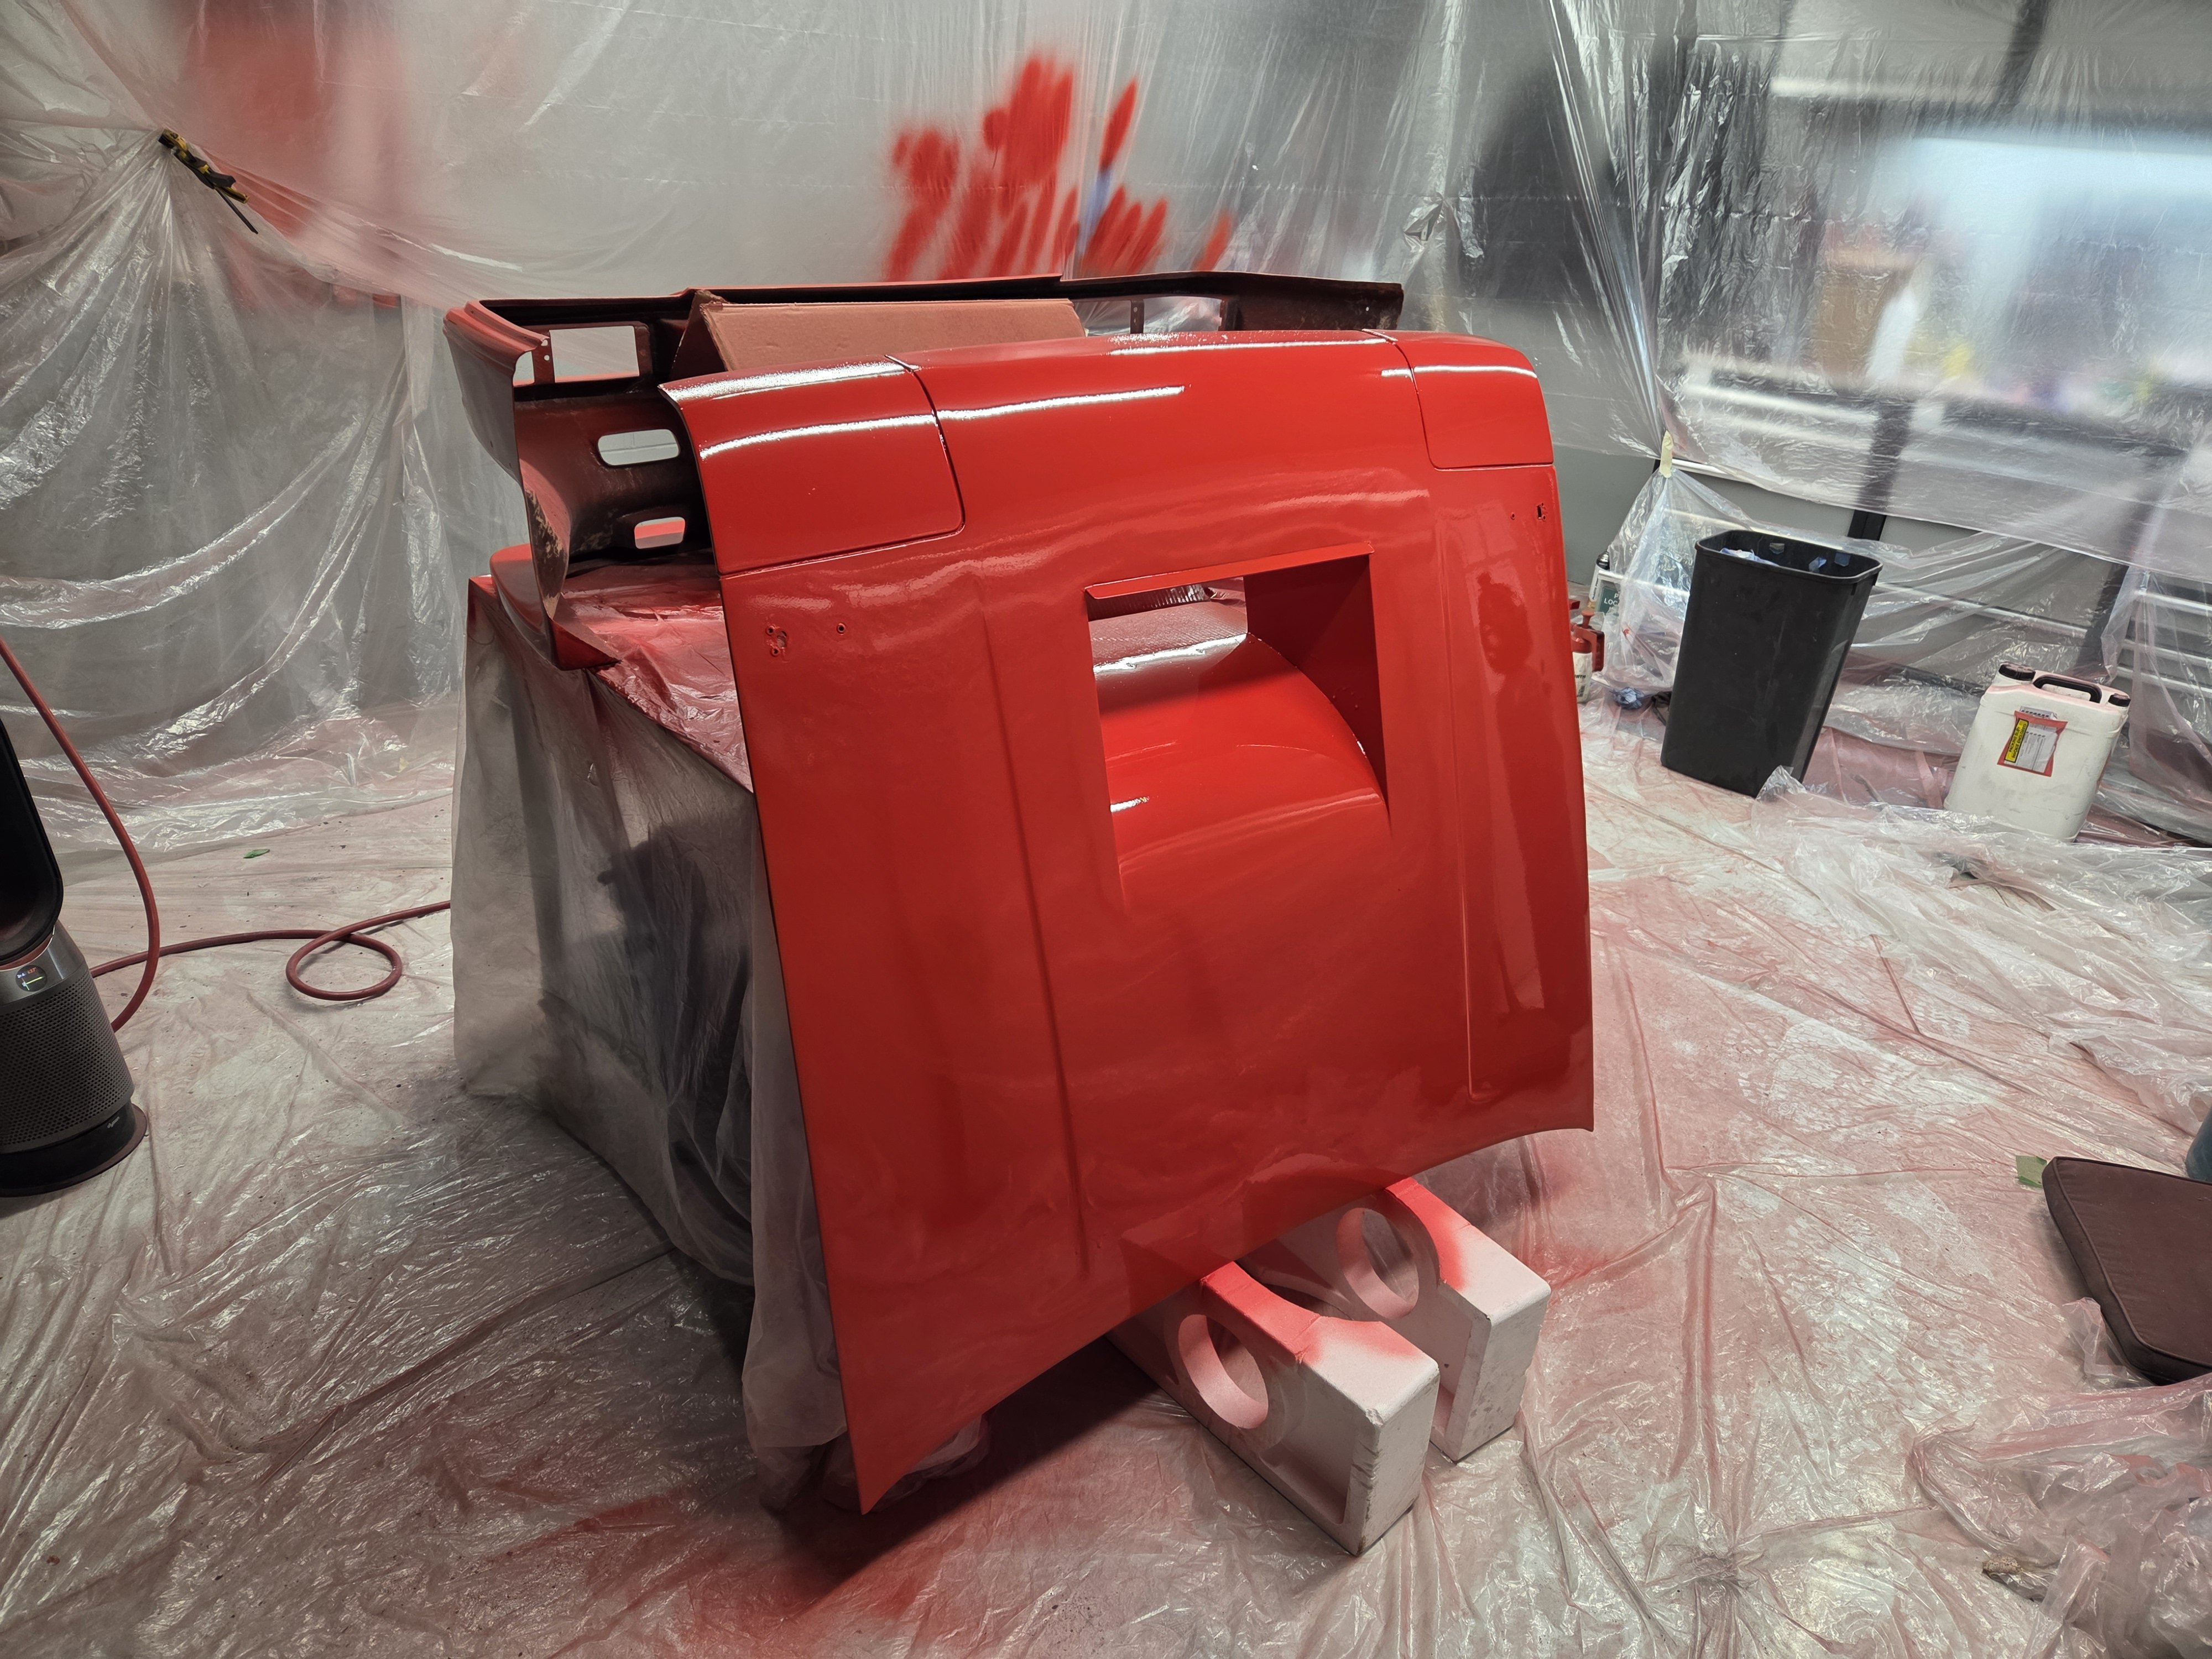
Bit o' red going down. My workmate Brandon is the man on the gun. Got the lab set up first: Got the room warmed up. Then made a murder scene at the mixing station and Brandon got to work: The results are great, which is promising for the top side! This part of the bonnet is rough because I hate sanding, but the smooth parts look lovely and glossy. hopefully we'll get some top side work done in the next couple of days.
24 points
-
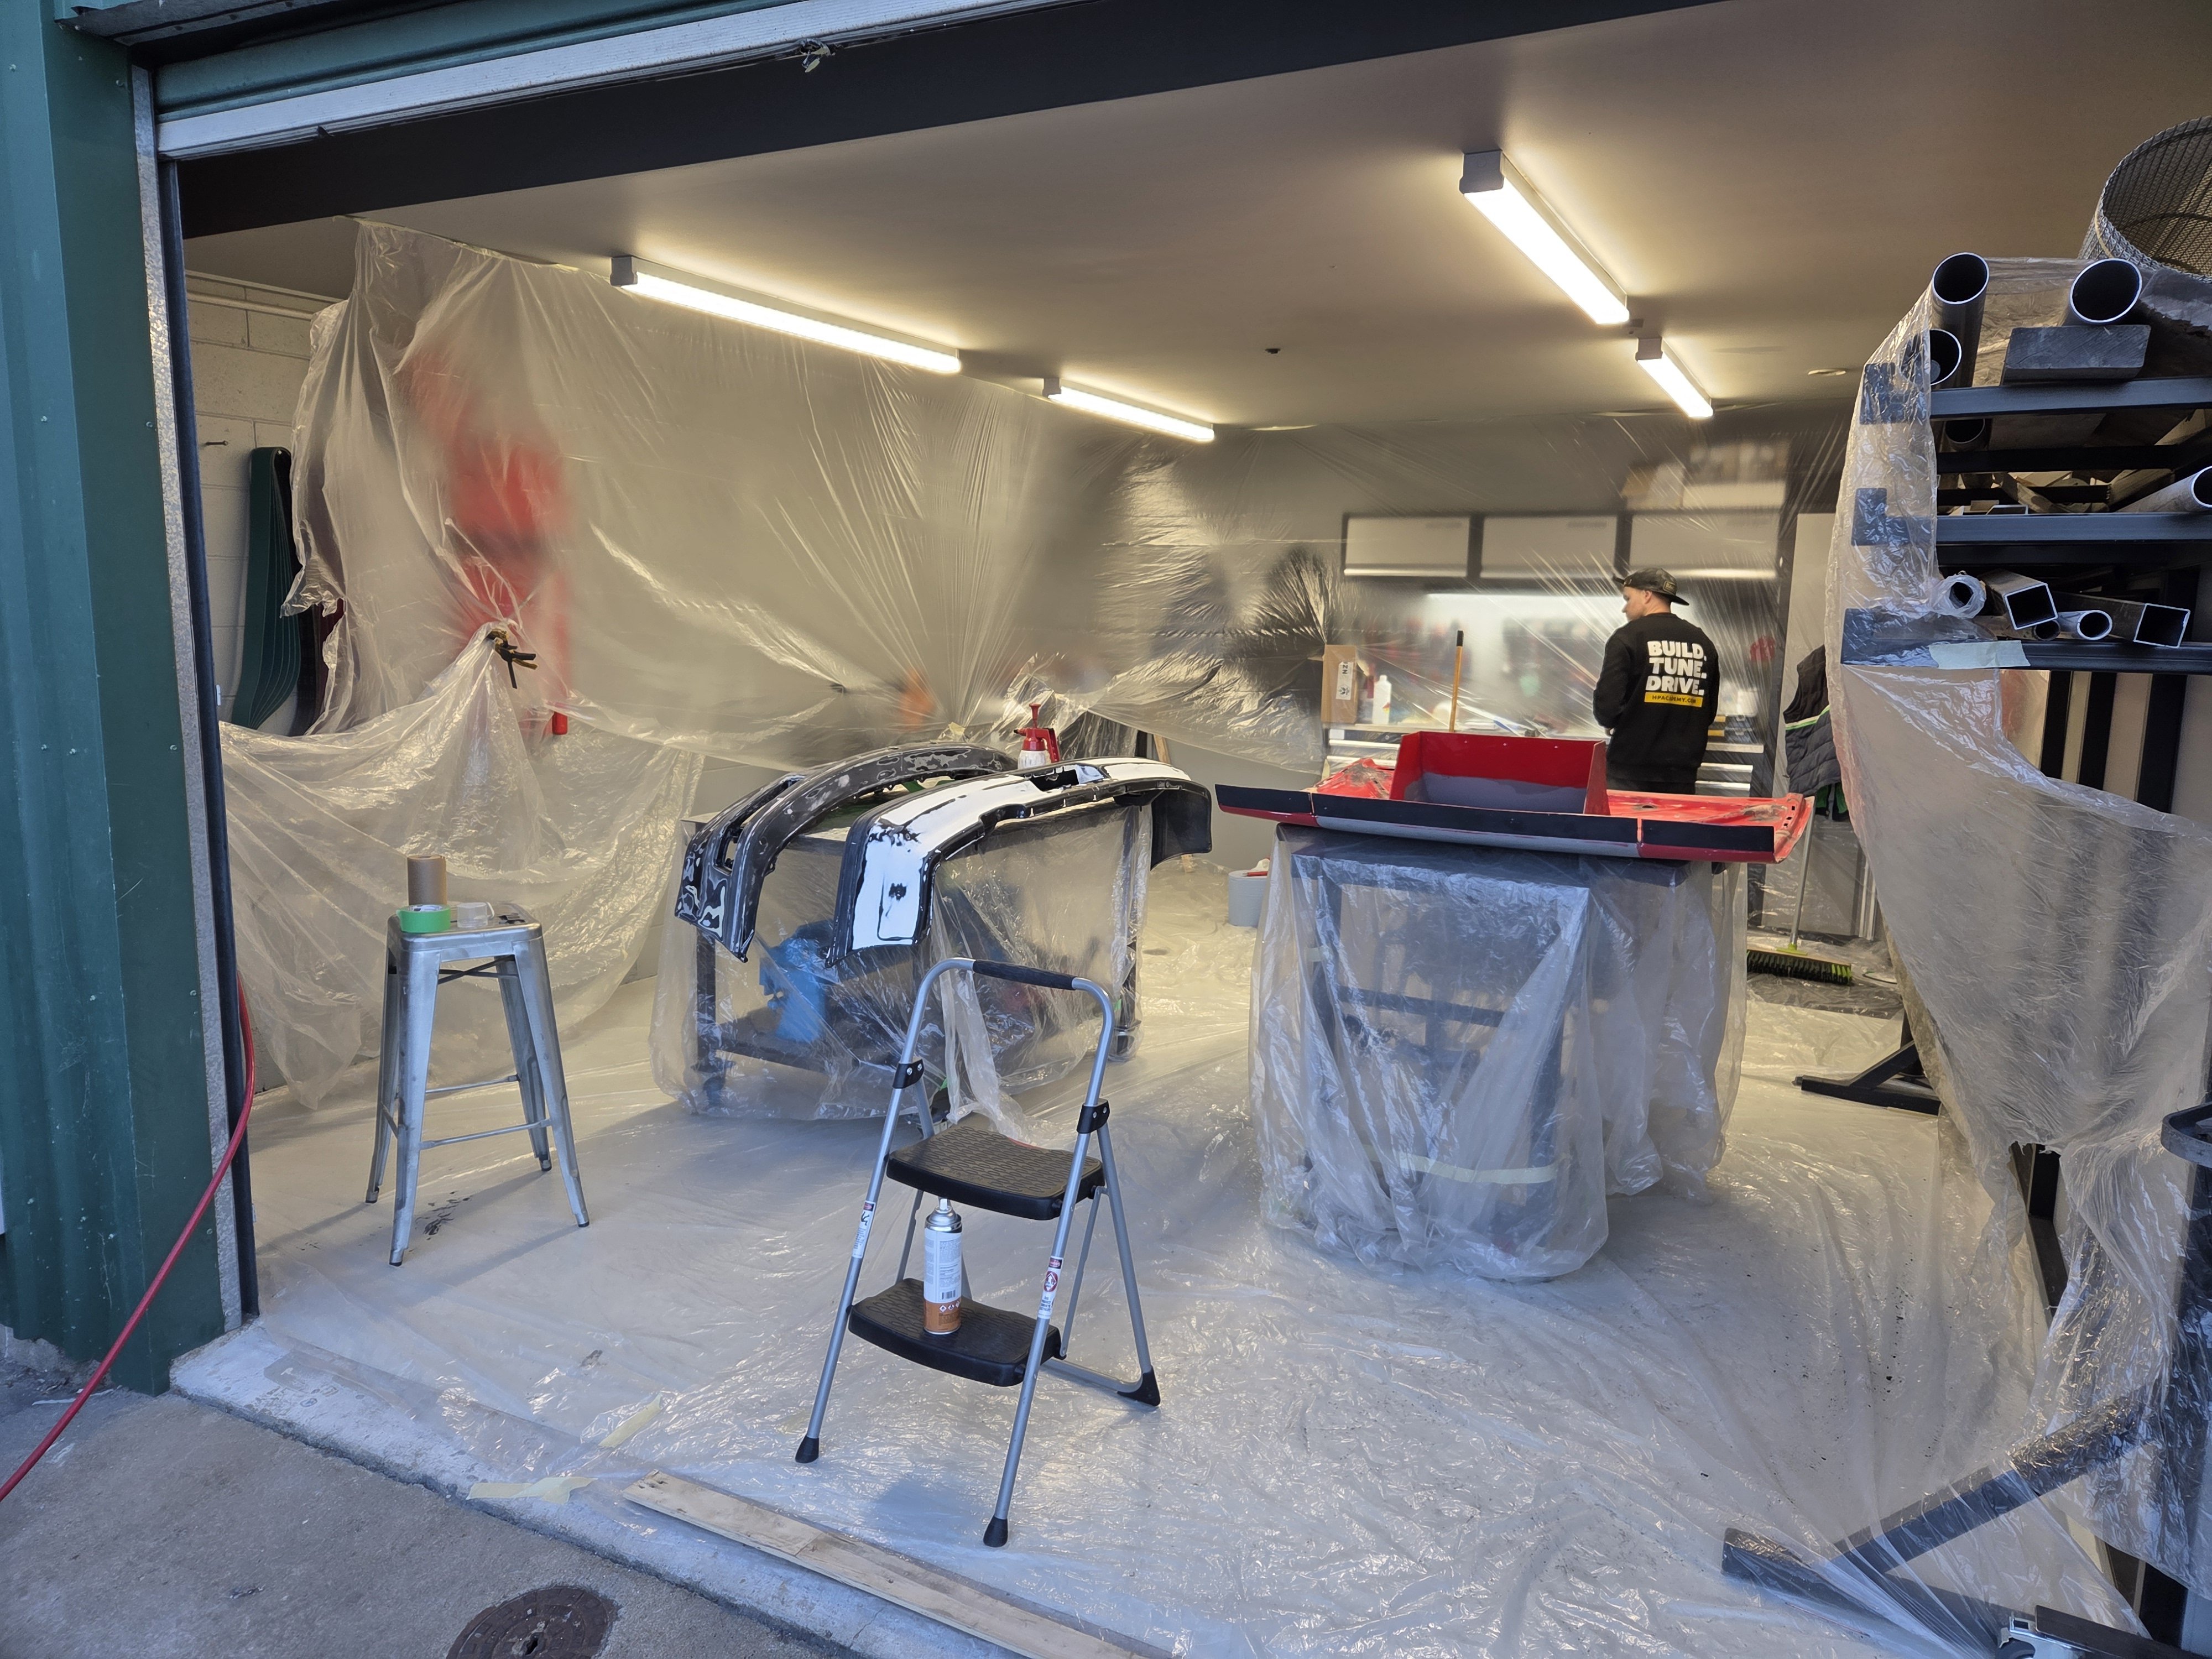
It's starting to look like a complete dogs breakfast in here. That's how you know you're making progress.
24 points
-
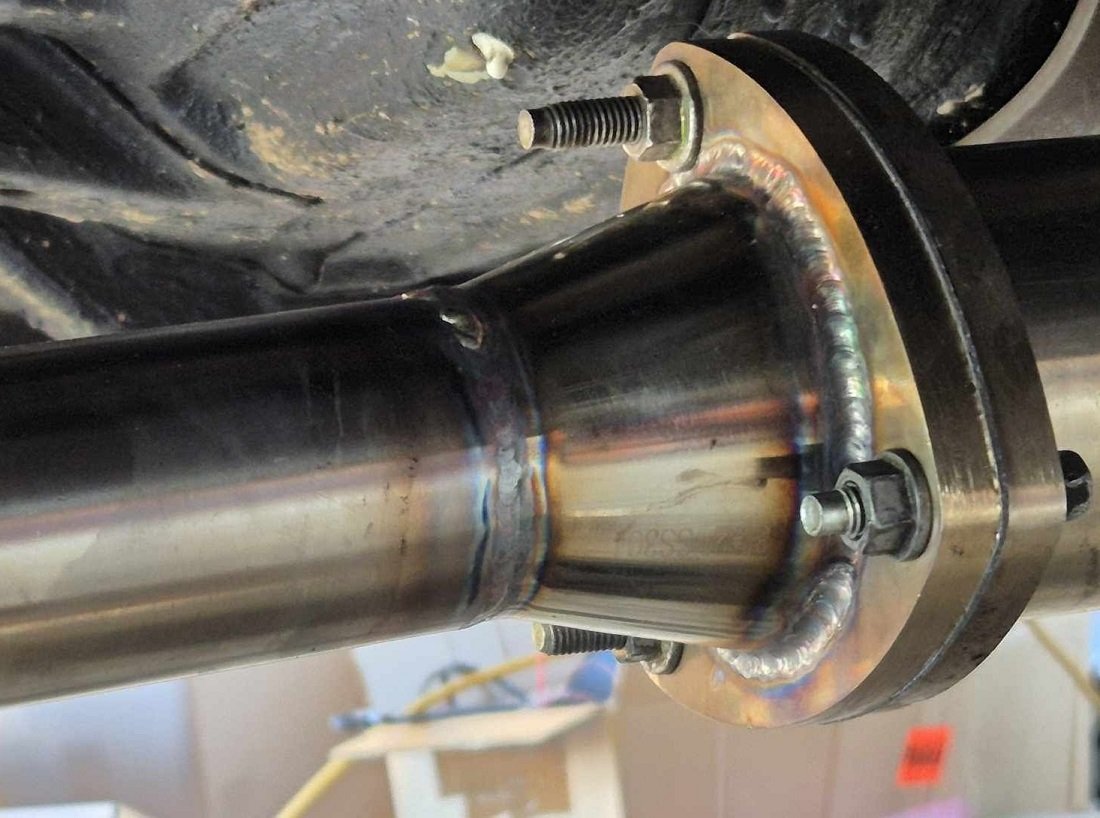
I got the tyre with the slow leak sorted (which was a valve), then though I would have a look at the front struts. These have a flat hardened steel washer running on a fiber type bush to provide the steering swivelling action, and these clag up and stop spinning freely. I thought the steering was a wee bit heavier at slow speeds than I though it should be, although some of this is the wider rubber I have on. Anyway it was probably time. I borrowed a set of spring compressors off @Willdat? to make the process a wee bit safer.. what a good man he is. While unbolting the passenger strut and moving the wheel position to get bolt access the drivers side strut was making some funny noises..... and so it turned out that the bearings were so clagged that the bit actually turning was the rubber in the top bush. I dismantled the tops, cleaned and greased the swivel and bolted things back together, hopefully improving that situation. I did have to make a tool to grab the top of the damper to be able to unscrew the retaining nut. It kindof looked like the nut was bottoming out on the damper thread which meant that the rubber probably wasnt getting as well clamped as it wanted, so I replaced the spacer in there with slightly longer bits I found in my box of bits, atho first I tried stacking washers, which didnt work. My special tool So thats all back together, but you can get a proper flat needle roller bearing to replace the fiber bit, so I might order a set of those as one of the fiber boys was looking a bit sorry... Then it was time to address the gearbox leak, so I drove to Repco to warm the oil and buy some replacement 80/90 non EP gear oil. I pulled the drain plug and modded it a bit to take an O ring rather than a flat copper washer. I did this by welding on a sleeve to create the crush stop and retain the Oring, hopefully this might work a bit better. The thicker oil will probably help too. I topped up the box and called it a day..24 points
-
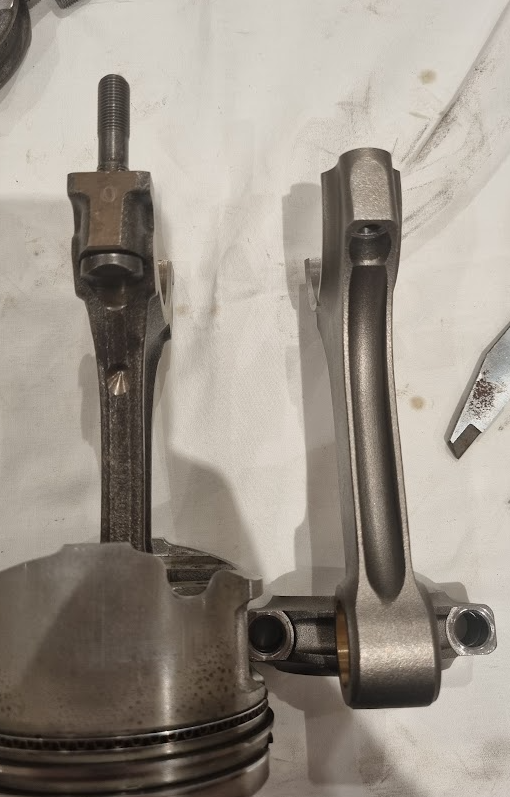
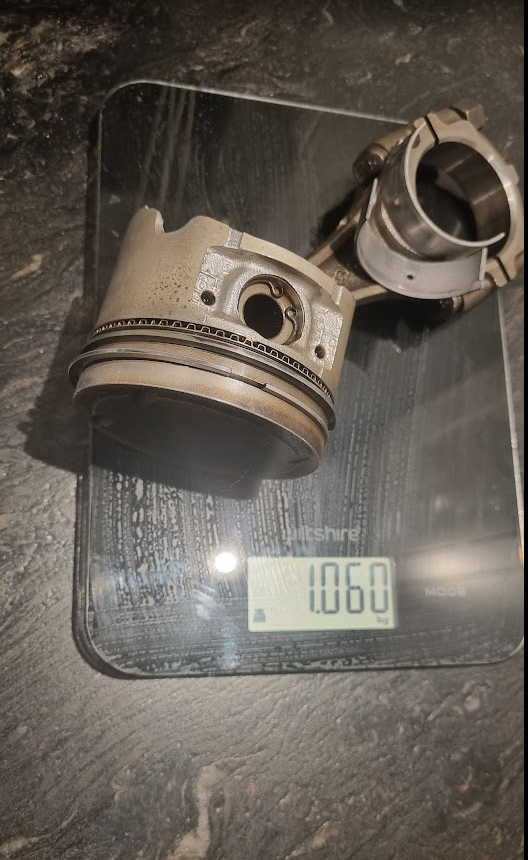
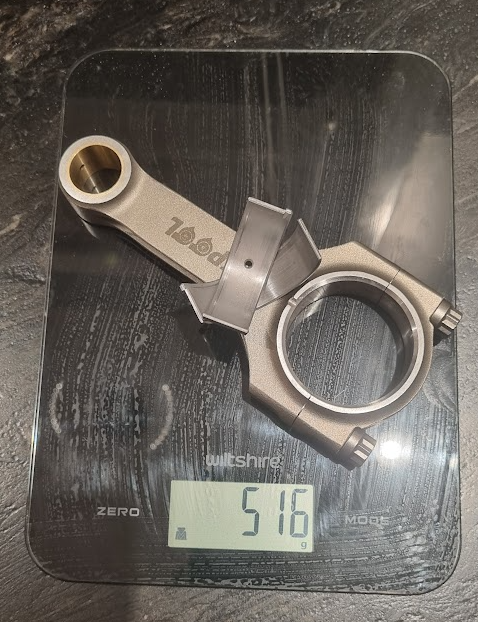
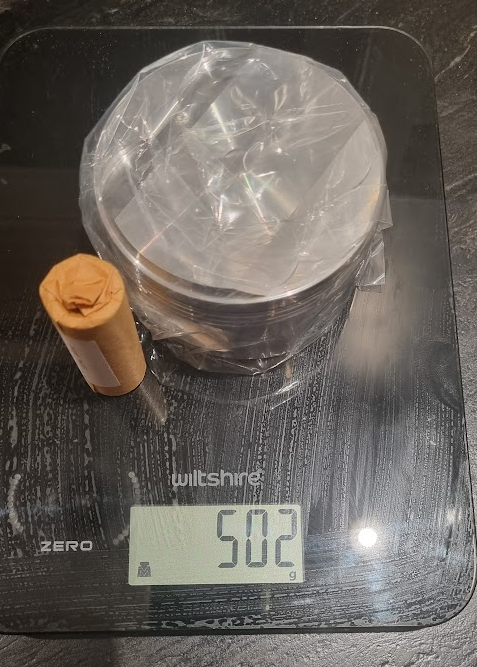
And a bit of a weight comparison Factory RB20DET 1060g And Spool RB20DET rod plus HKS piston (less rings) + = 1018g Im guessing once the plastic and paper is gone and rings added it might be a handle of grams more net... plus the 4mm extra length in the rod to come So all in all looking like pretty much the same sub-assembly mass for the 20det factory rod and piston (121.7mm rod, 78mm dia piston) and the "RB24" combo (125.5mm rod and 86.5mm dia piston) which while i was hoping forged equals lighter, it is bigger so its good to know I havent significantly added mass Next steps are dummy up the rb20det crank in the rb25det block and cradle to verify the mains are the same size as all the literature says, and I should probably fit up one rod/piston to confirm the relative height to deck before pulling the trigger on the rods tell me im silly etc
23 points
-
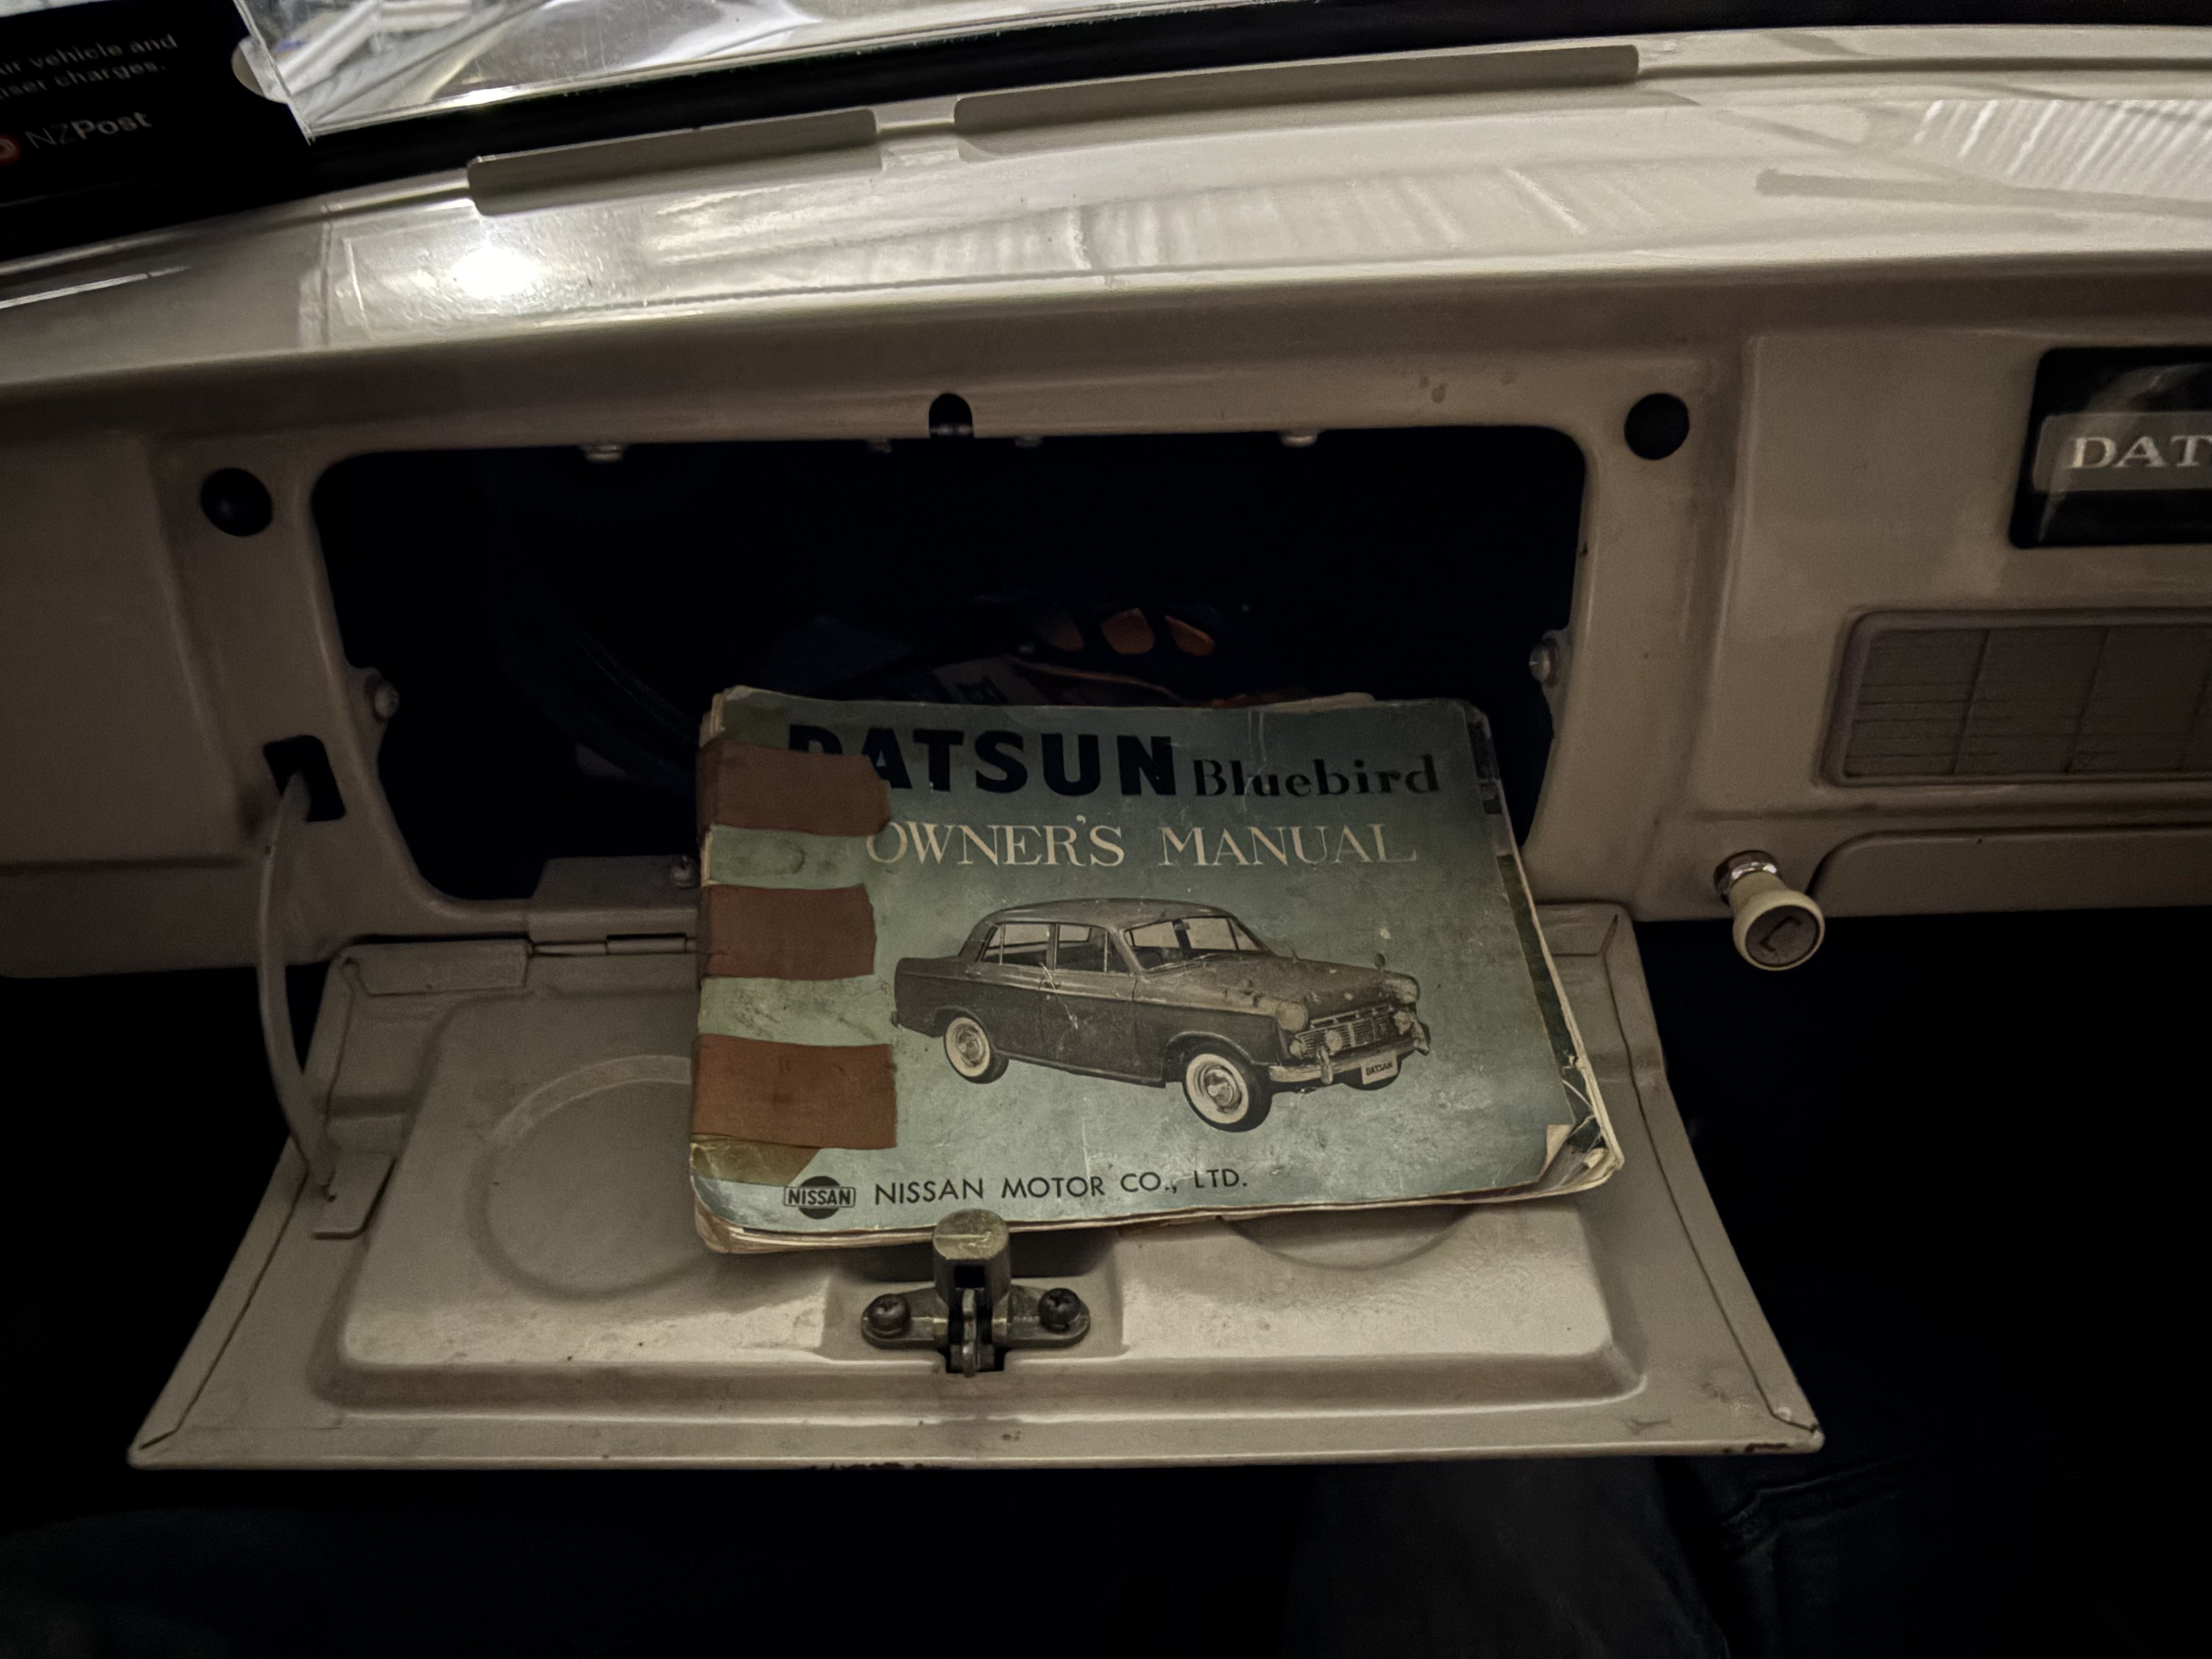
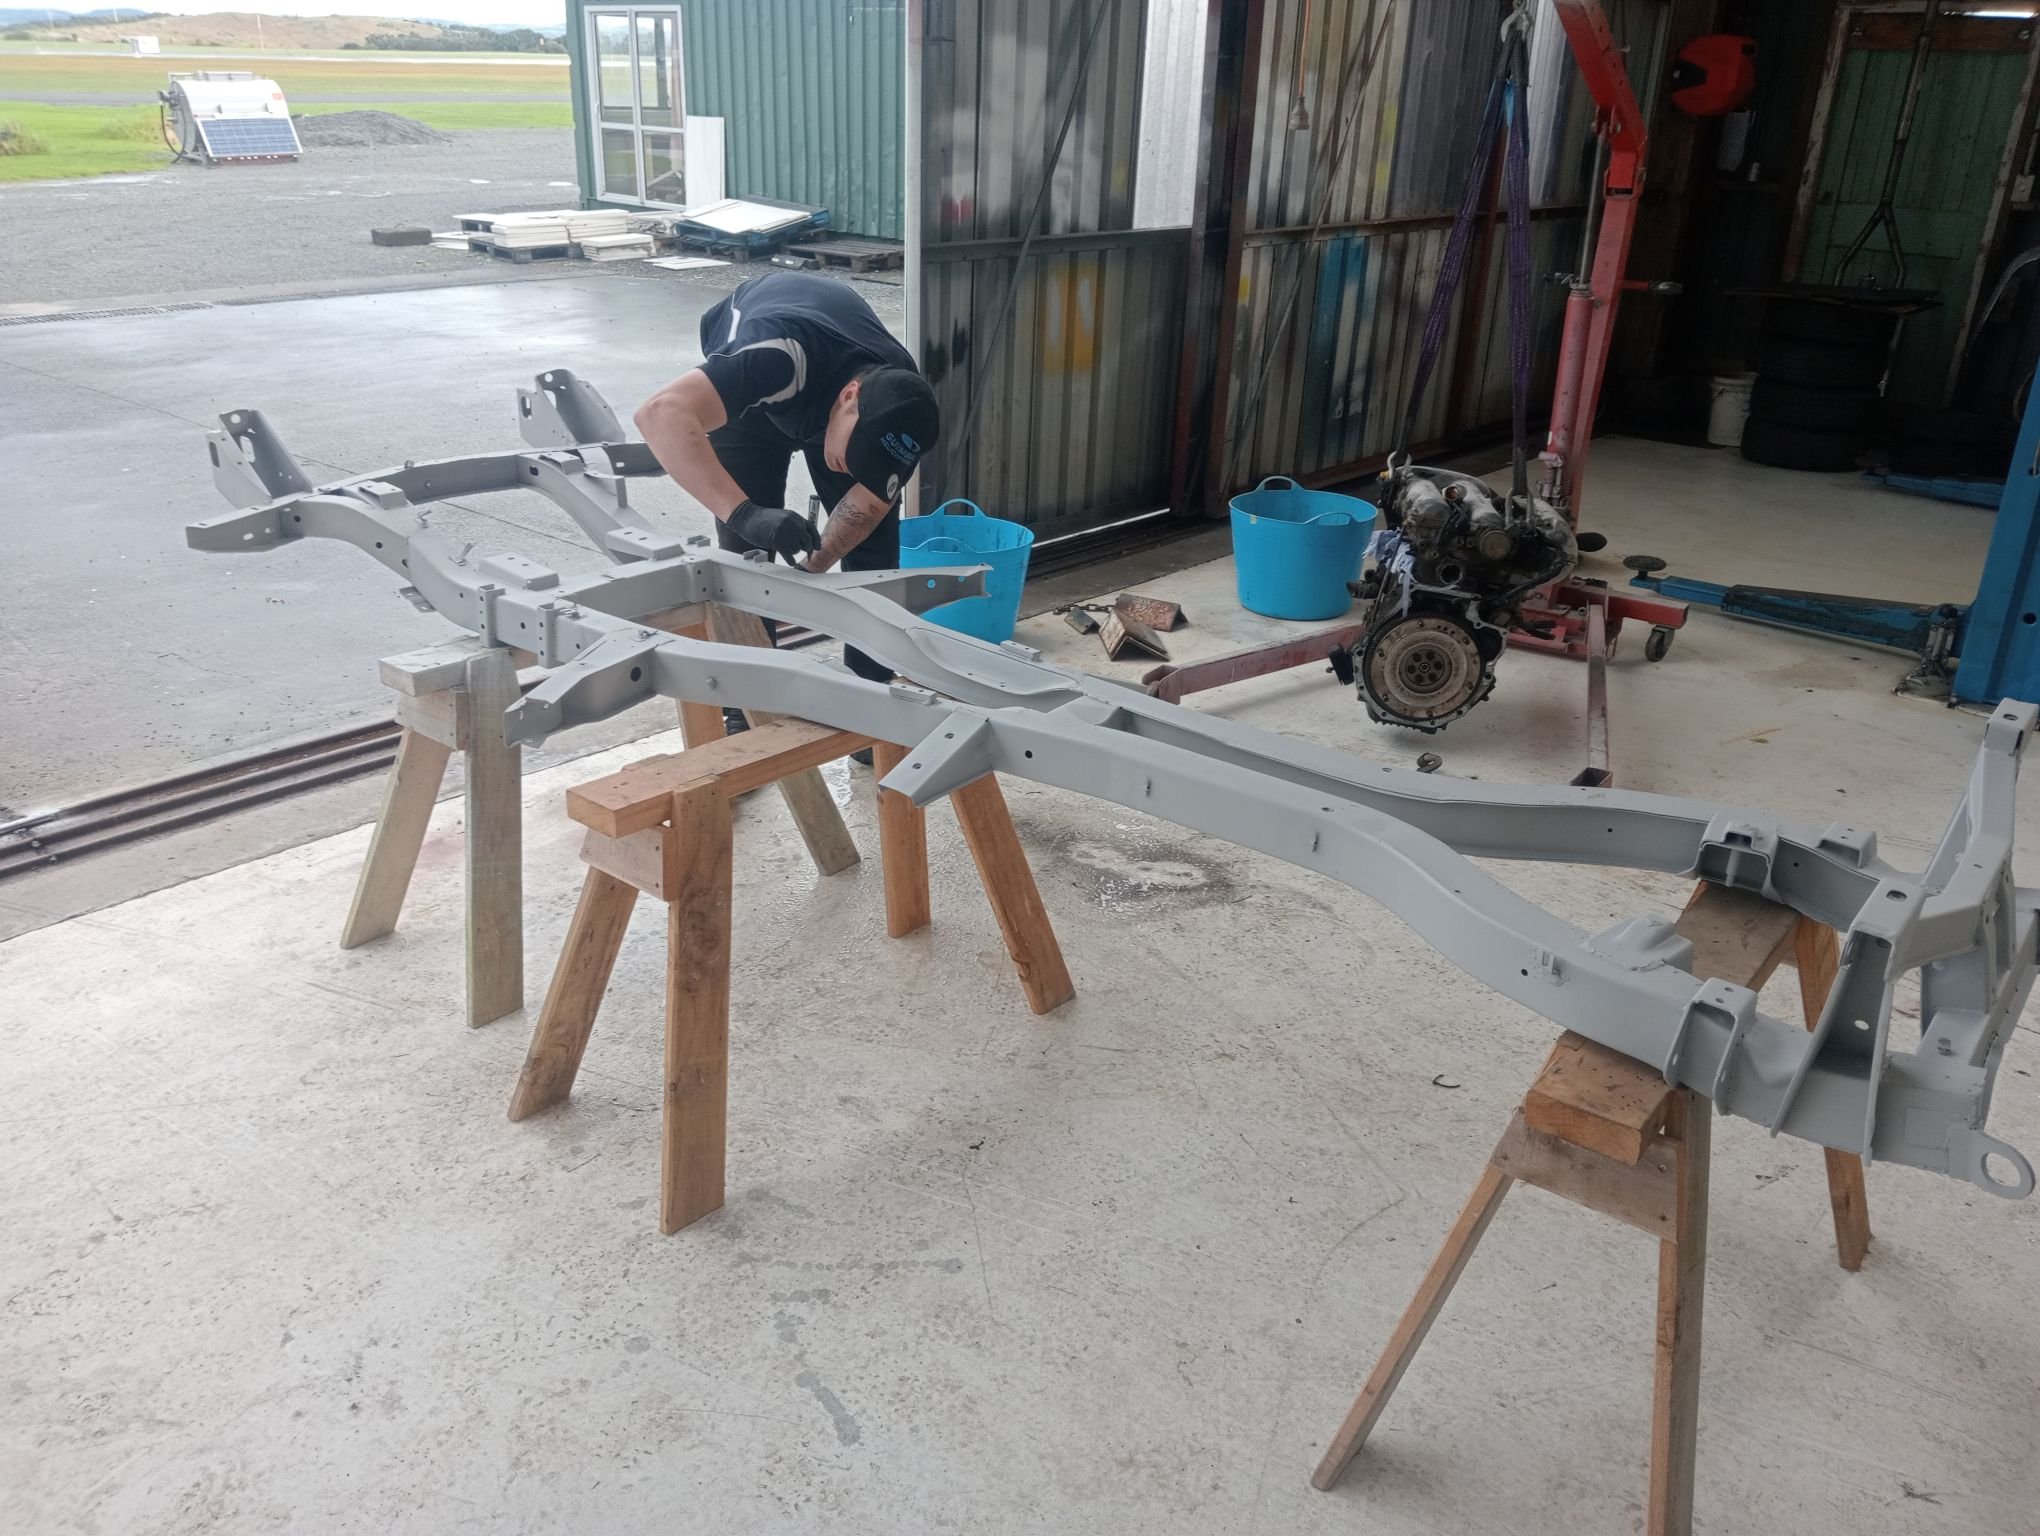
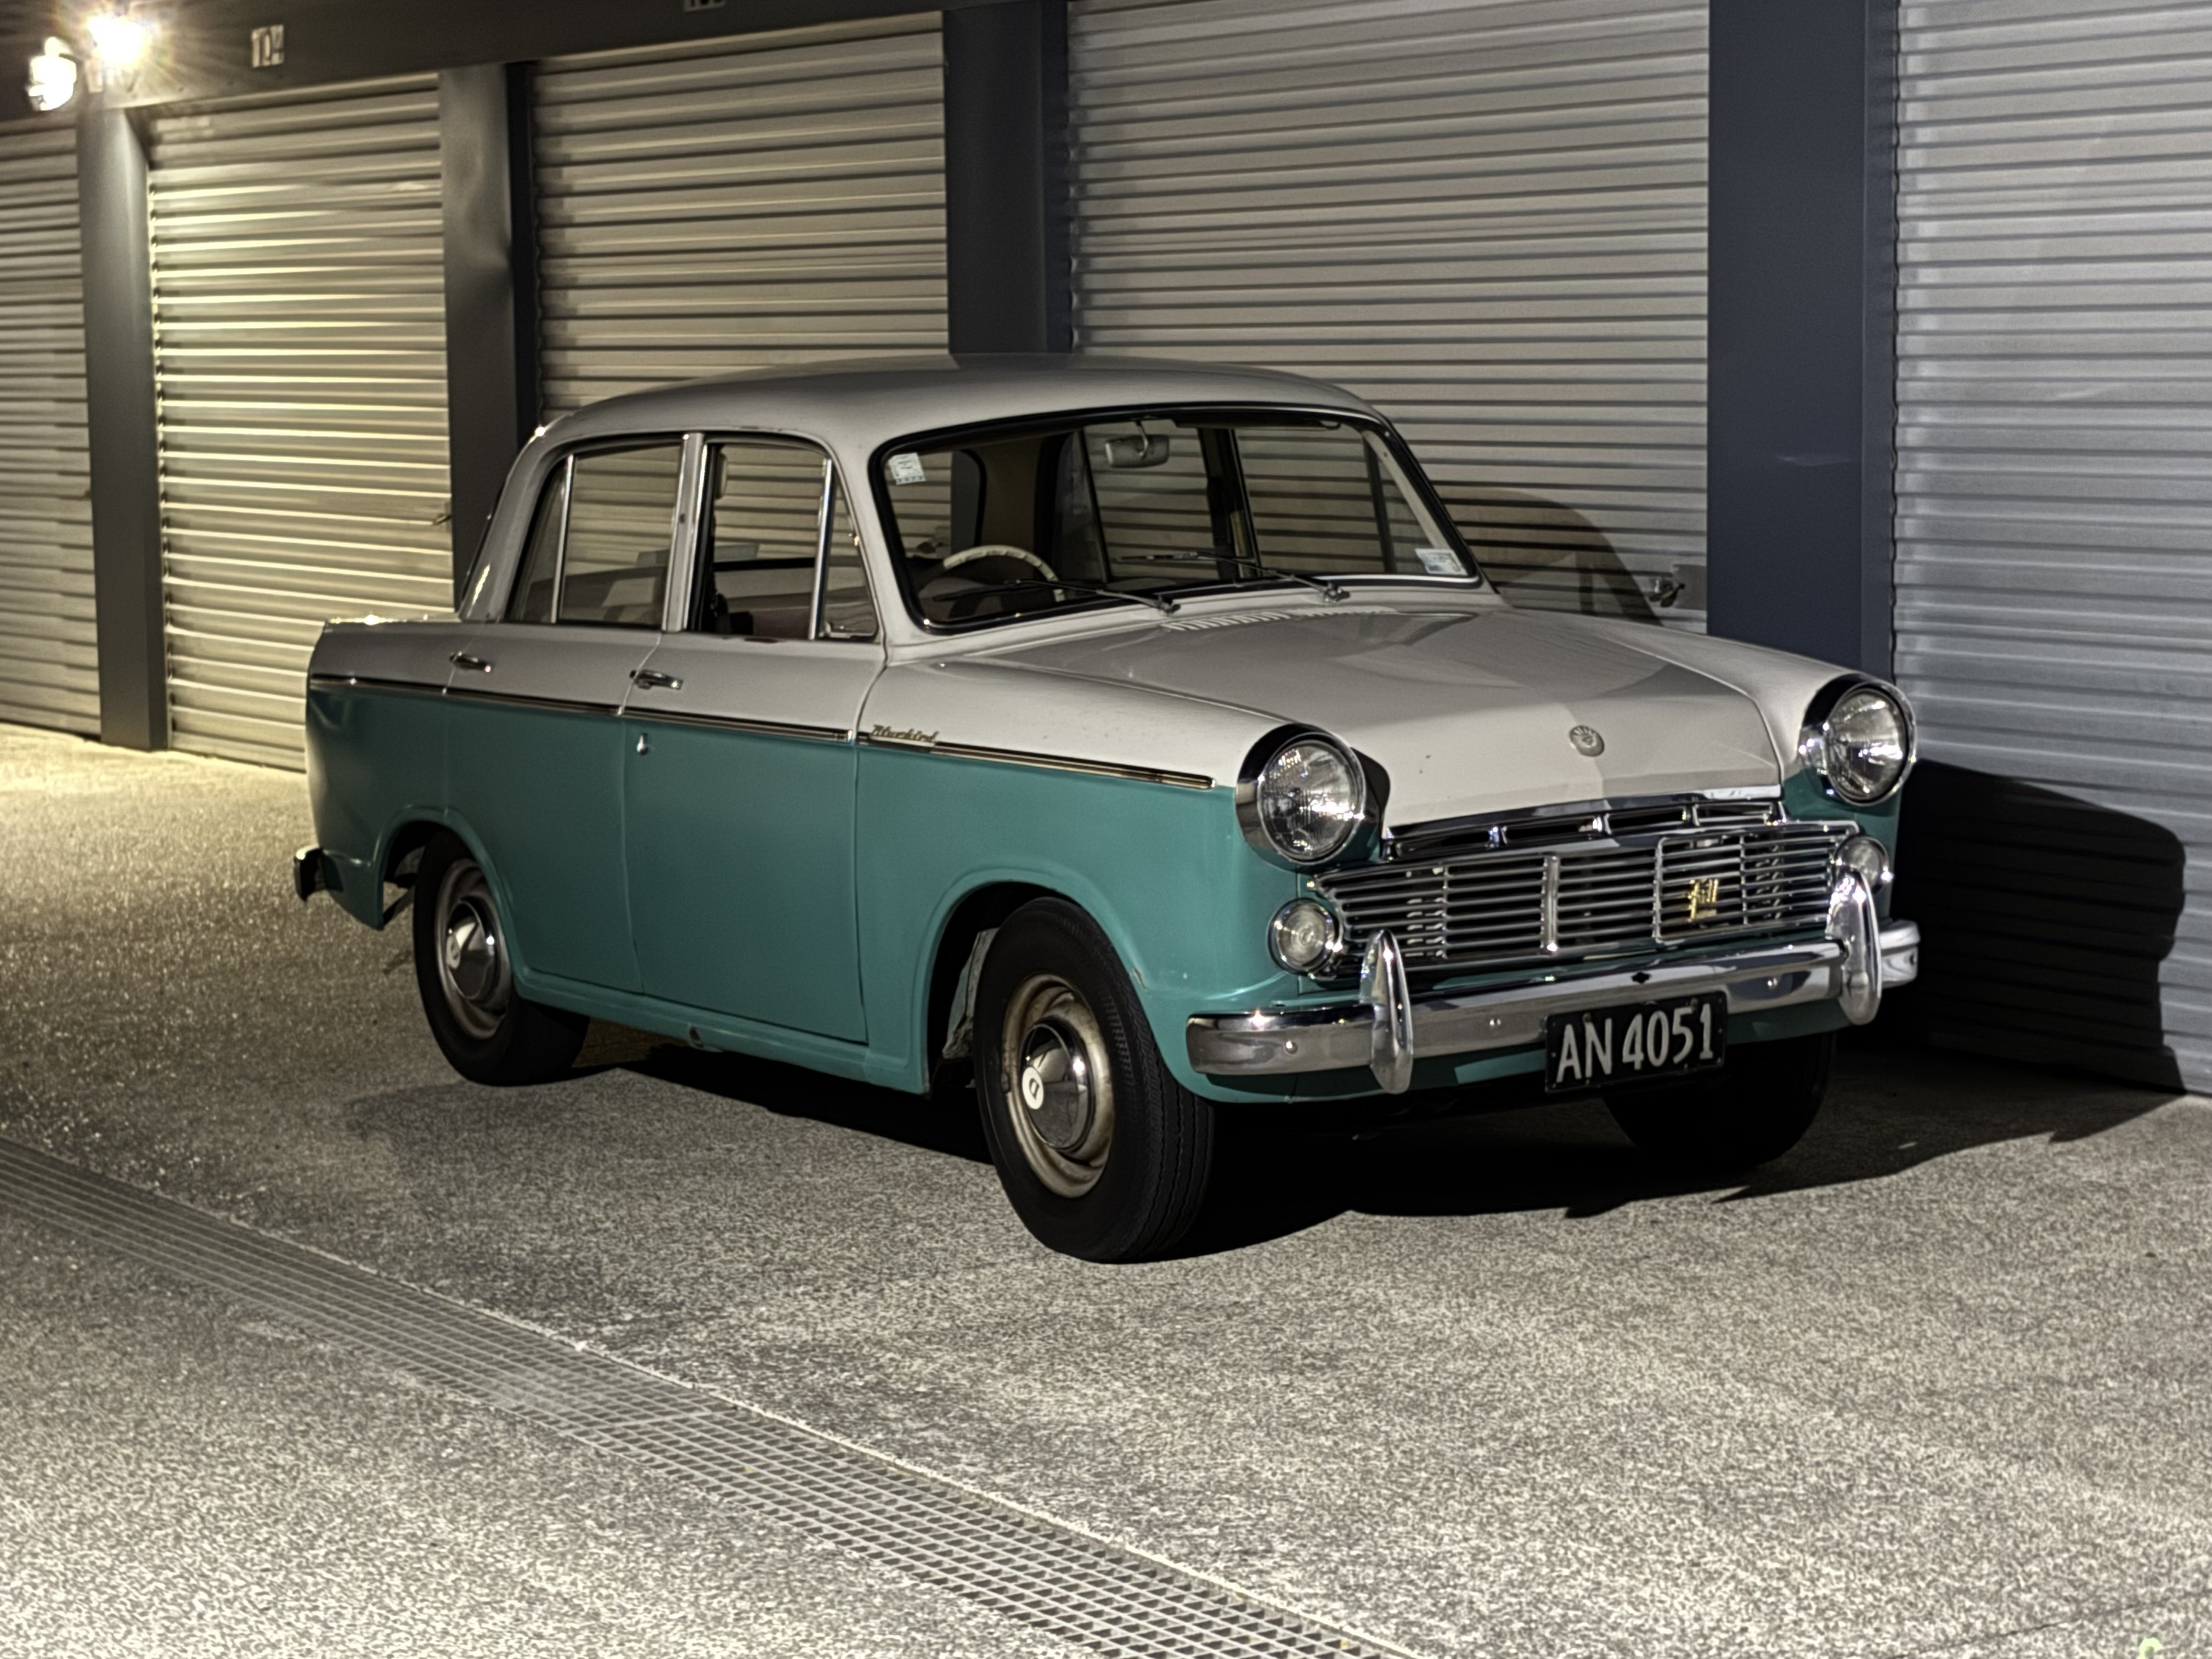
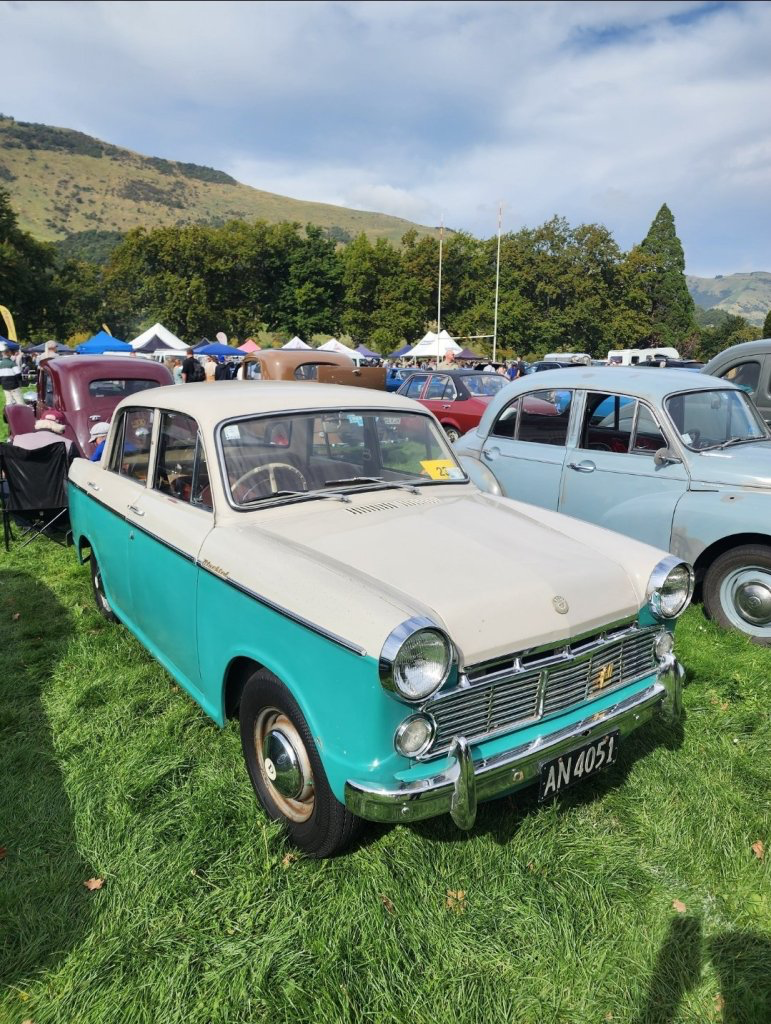
So I purchased this in march for a decent price compared to repairing rust on my other cars, It’s a 1962 Datsun Bluebird sold New in Chch and after two family owners I own it. needs a bit of mechanical refinement but came wof and reg
22 points
-
oh where to begin. this little car has been a part of my life for almost two decades now. one decade where it was driven, and one where it languished in it's current state. Here's a photo from better times such a pretty, poorly designed car. anyway since another car took it's spot it's been relegated to hanging out in the workshop and generally getting in the way (luckily it's tiny). one day I woke up and thought we may as well sell it. so it looked it over, considered the rust in the sills and around the windscreen, how it's impossible to get into gear, how the brakes are jammed on, how the engine leaks like a sieve, doesn't like to start, makes weird noises when you select gears, has crankshaft play... and thought "why just sell it, when I could waste a lot of money on it and THEN sell it?" and so, this build began The plan, aside from a general refurb, is a 1.6L NA MX5 engine and transmission swap. Nothing that I am doing here is uncharted territory. The MX5 engine is considered one of the easiest swaps and everything has been done before is documented... well, everything is anecdotally documented. ie there's a lot of build threads that encompass what I'm doing, but they all seem to skip over the nitty-gritty and focus on the successful bits. I am not a fabricator. I am impatient, and rough, and careless. I'm going to try and make a note of all the bits and pieces that I wish I had seen prior to starting this swap in the hopes that it helps the next guy And if I totally fuck it up I'll just repost all the pictures in reverse order and pretend that I rescued the car from some butcher and restored it
21 points
-
its hard to keep track of all of the different revenue gathering that us certifiers do, especially after i hurt my head diving into my swimming pool full of money, i wasnt thinking about my money diving because i was preoccupied with thinking up new random rules to make things difficult for the peasants modifiying their motor vehicles and also trying to find a new hitler uniform because my old one is worn out from wearing it to work (where i do 10 minutes of work and write out an invoice for $2500) also i have a tiny penis, that is why i became a certifier21 points
-
Bit more red today. Man, the overspray goes everywhere! I was aggressively pink after this one. I'll need a bit more paint to do the roof. So far we've used about 700ml of the 1L colour.
21 points
-
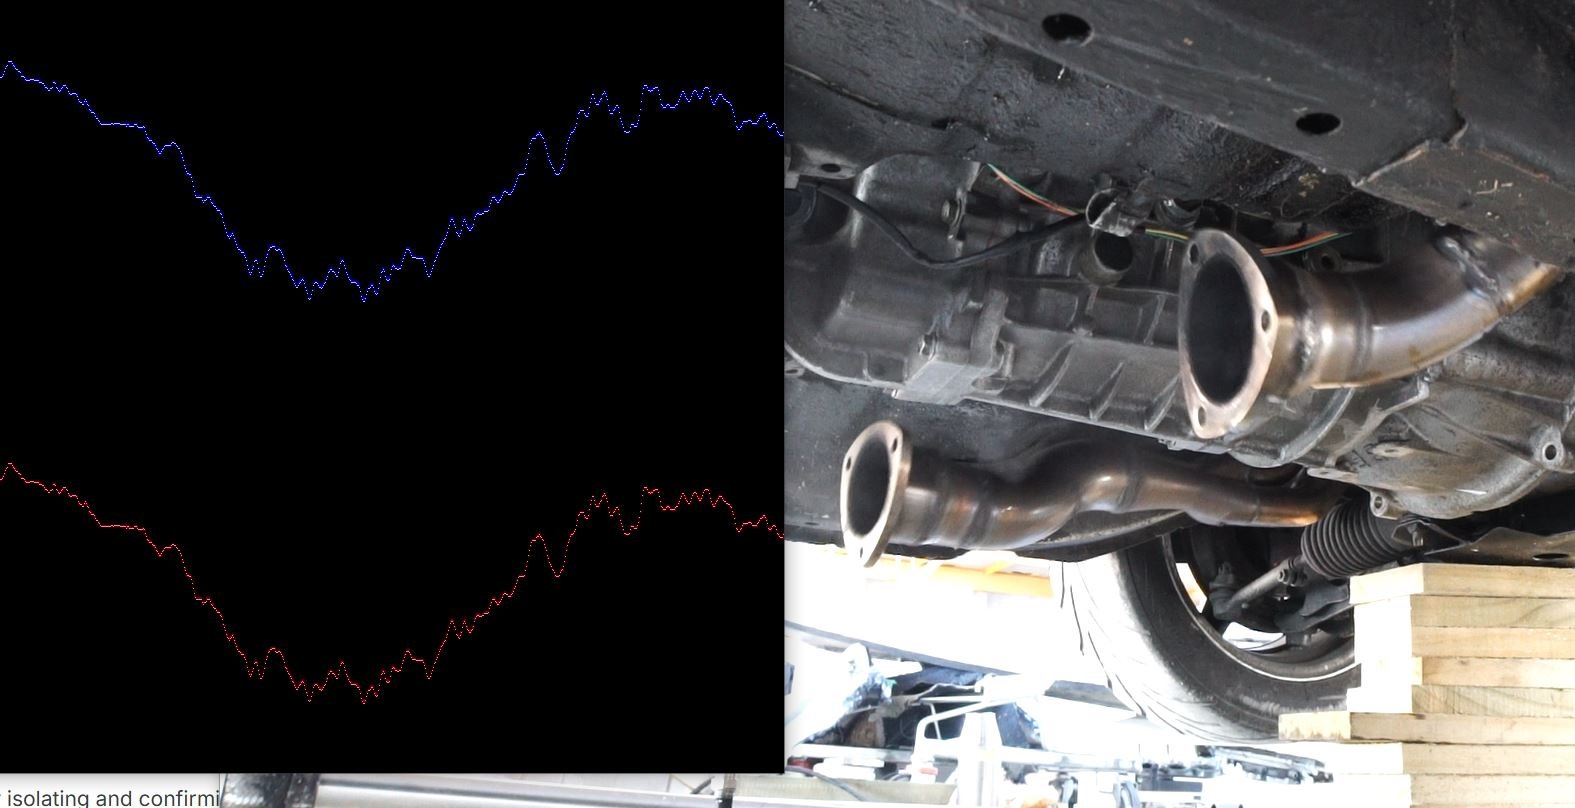
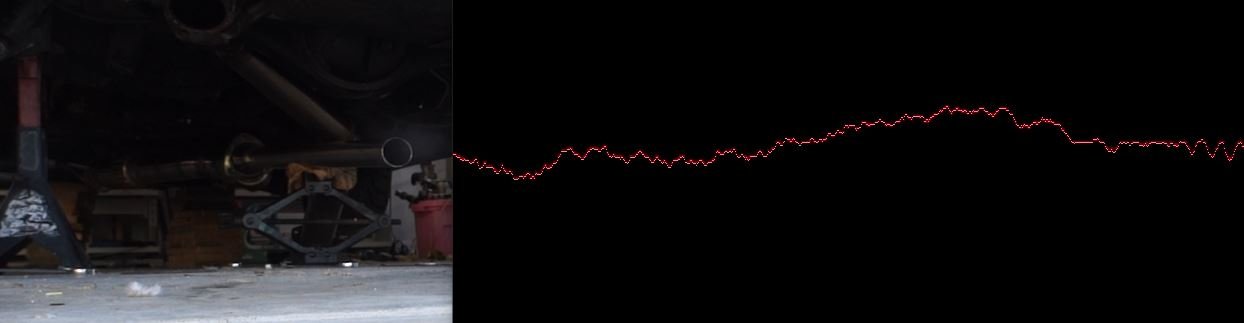
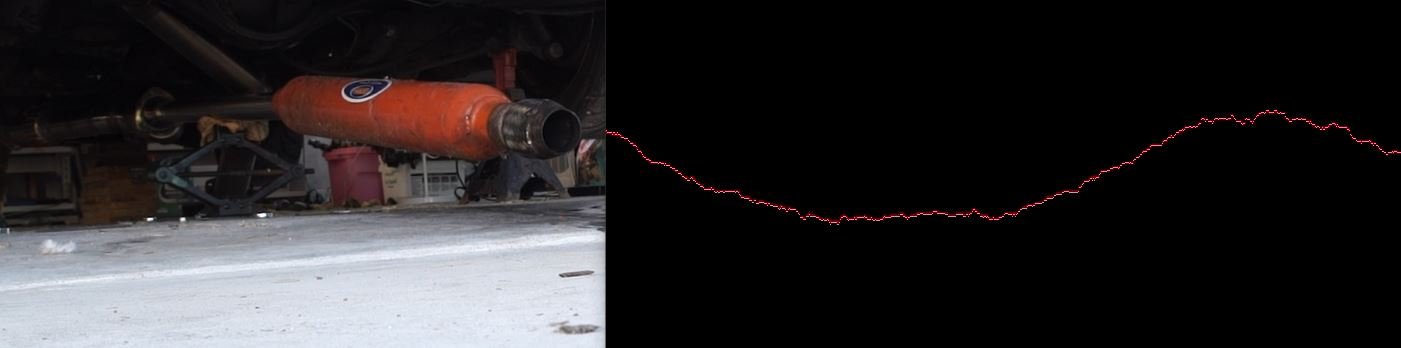
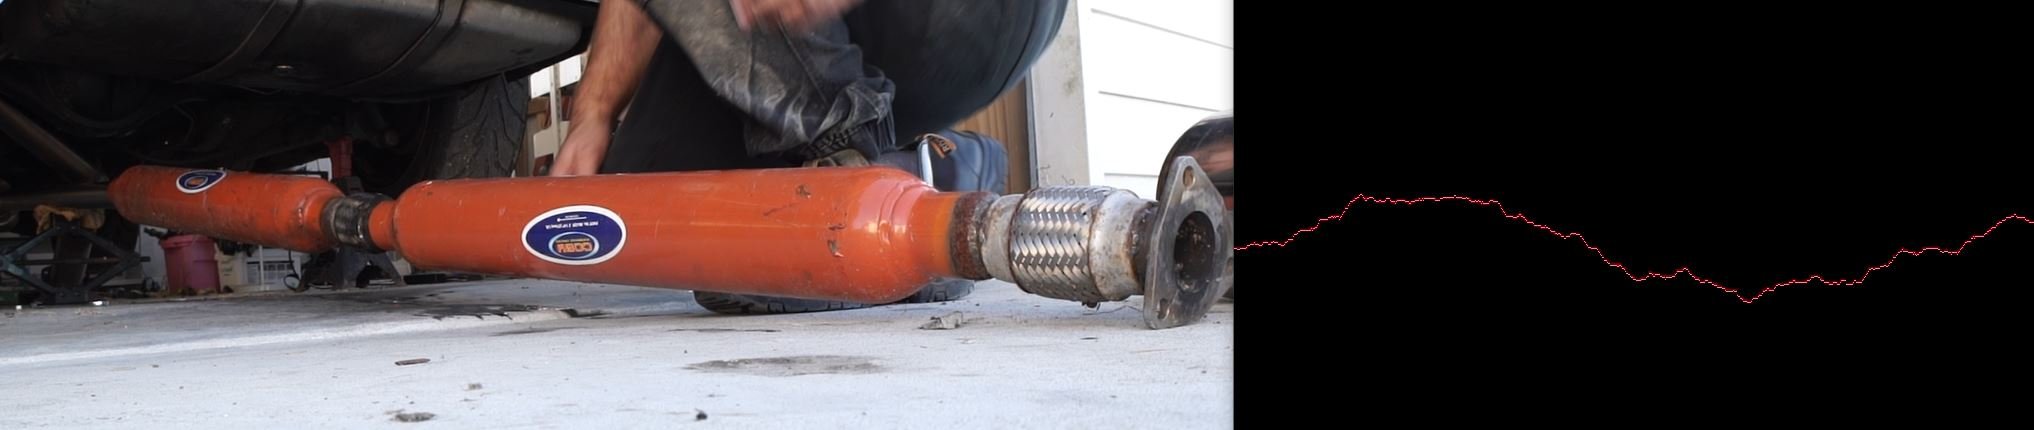
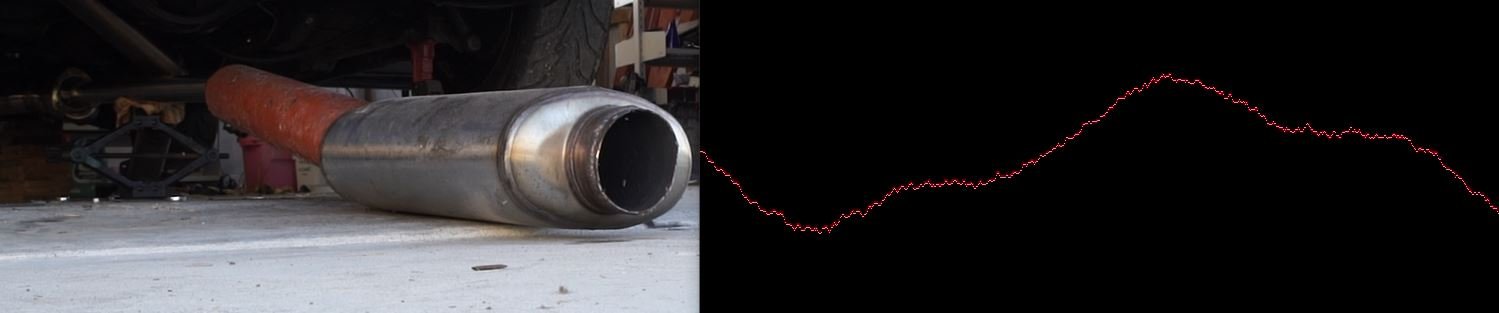
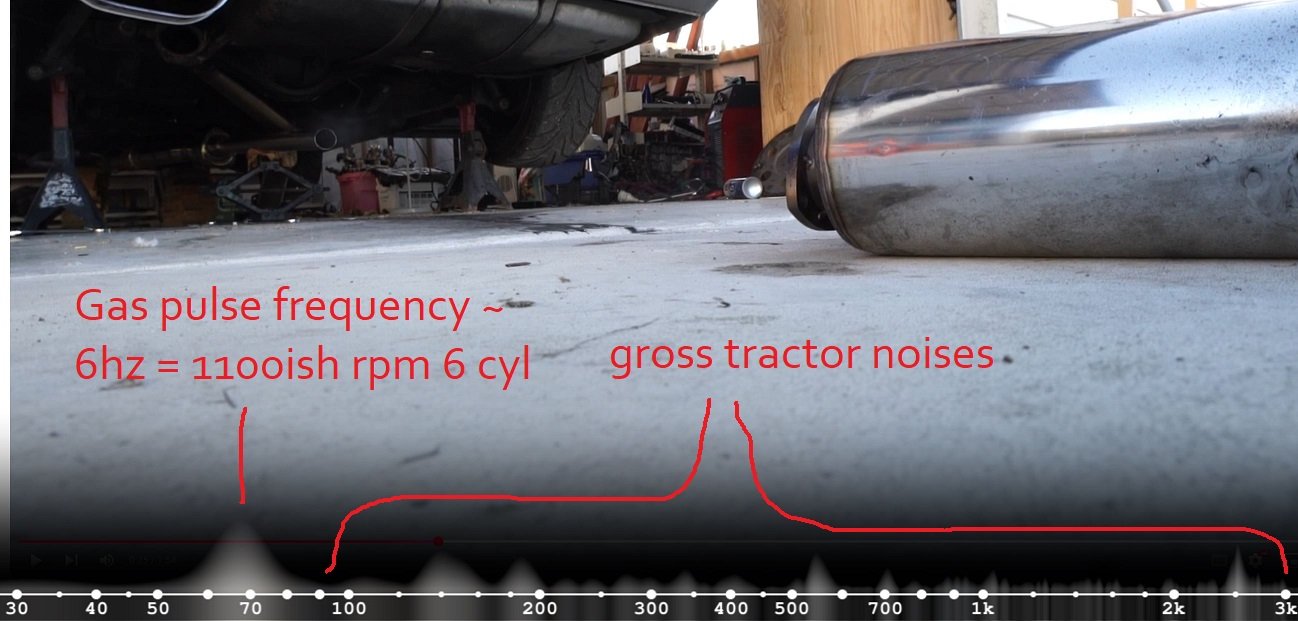
2GRFSE pull down I finished pulling the 2GRFSE to bits, and found that the total sum of damage was: 1x exhaust VVT pulley starting to push its guts out 1x chain tensioner broken 2x big end bearings damaged 1x big end journal on crank looking damaged So the great news here is, all of the damage is confined to bolt on stuff, or, relating to the crank/rods that I am planning to bin anyway. Perfect! If anyone has a 2MZFE motor kicking around, or just the crank, let me know. Keen. Exhaust noise rambling part 2 I thought I would try come up with some practical testing methods for further isolating and confirming what "good noise" is, and isnt. So I can quickly make some iterations and see if they meet objectives or not. Keeping in mind that this is nothing to do with what makes best power, just sounds "better". At this stage this is just testing at a constant idle speed. Which obviously isnt indicative of full throttle performance, or noise. However I'd prefer if it does not sound like a clattery bag of dicks at idle too. So its a relevant test. I will do some medium and full load testing once my ethrottle setup is sorted properly. For a TL;DR version of this considerably overlength post. Here's a video of me just putting a Coby hotdog muffler on or off the back of a 2" exhaust pipe. It sound different with it on or off. The end. Rest of post here:
21 points
-
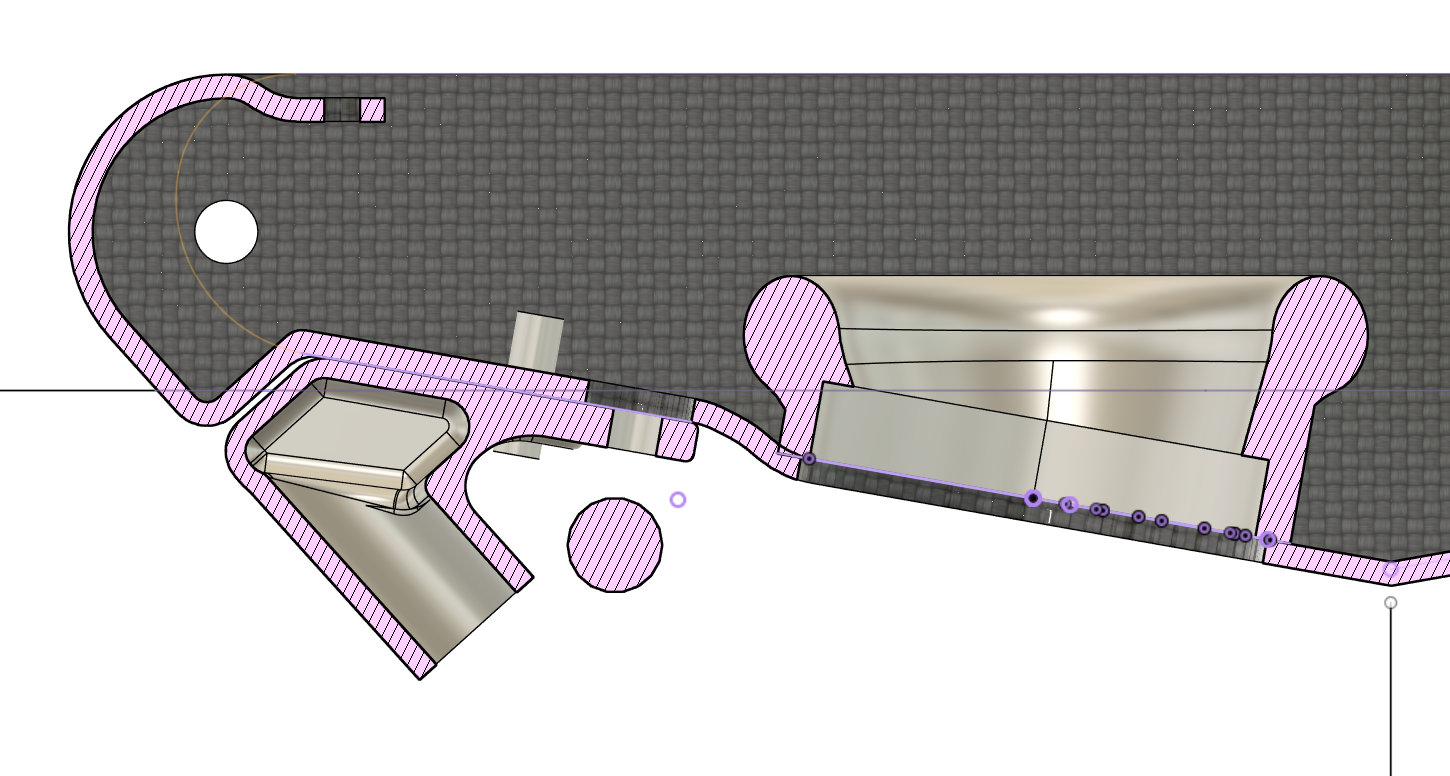
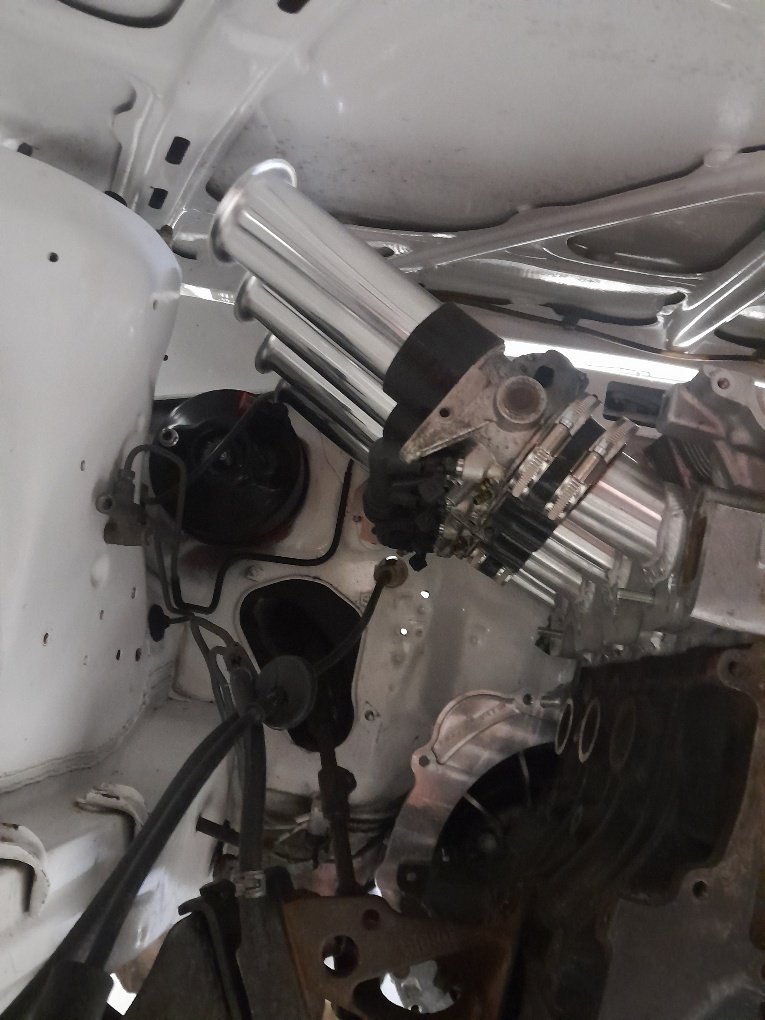
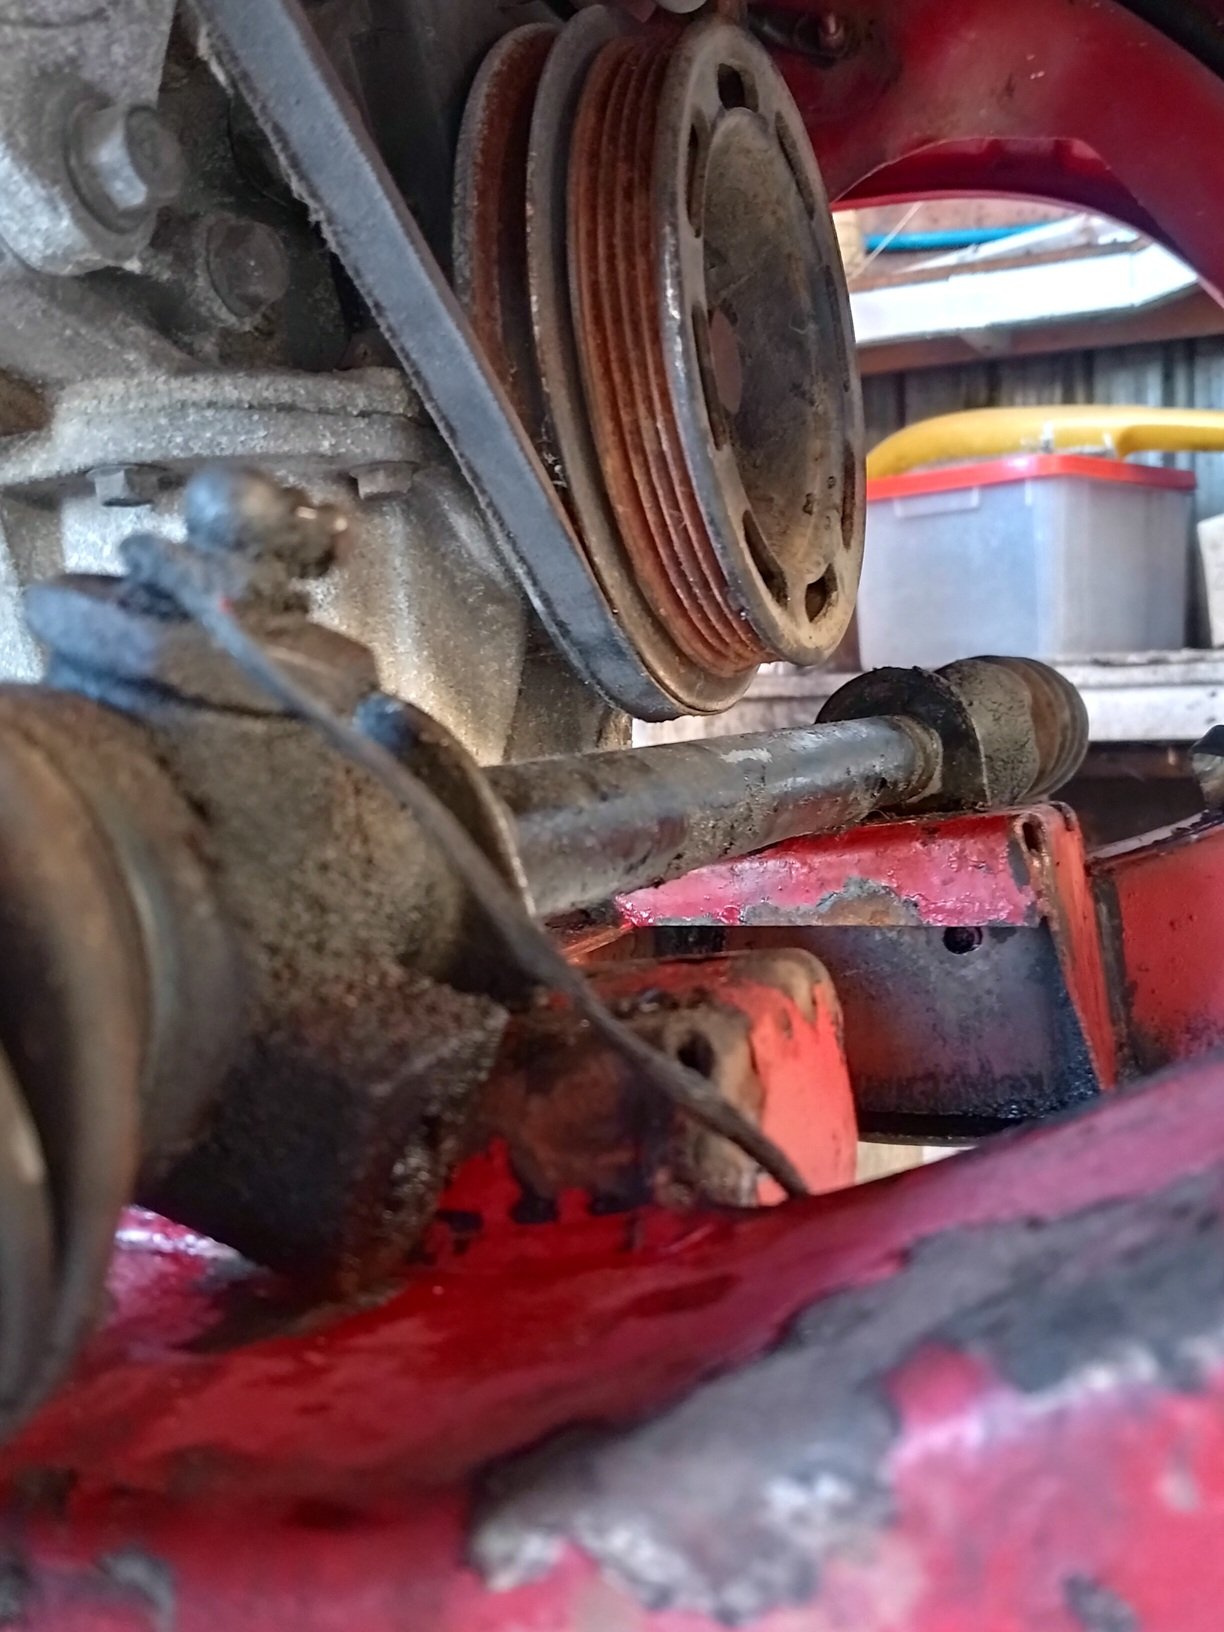
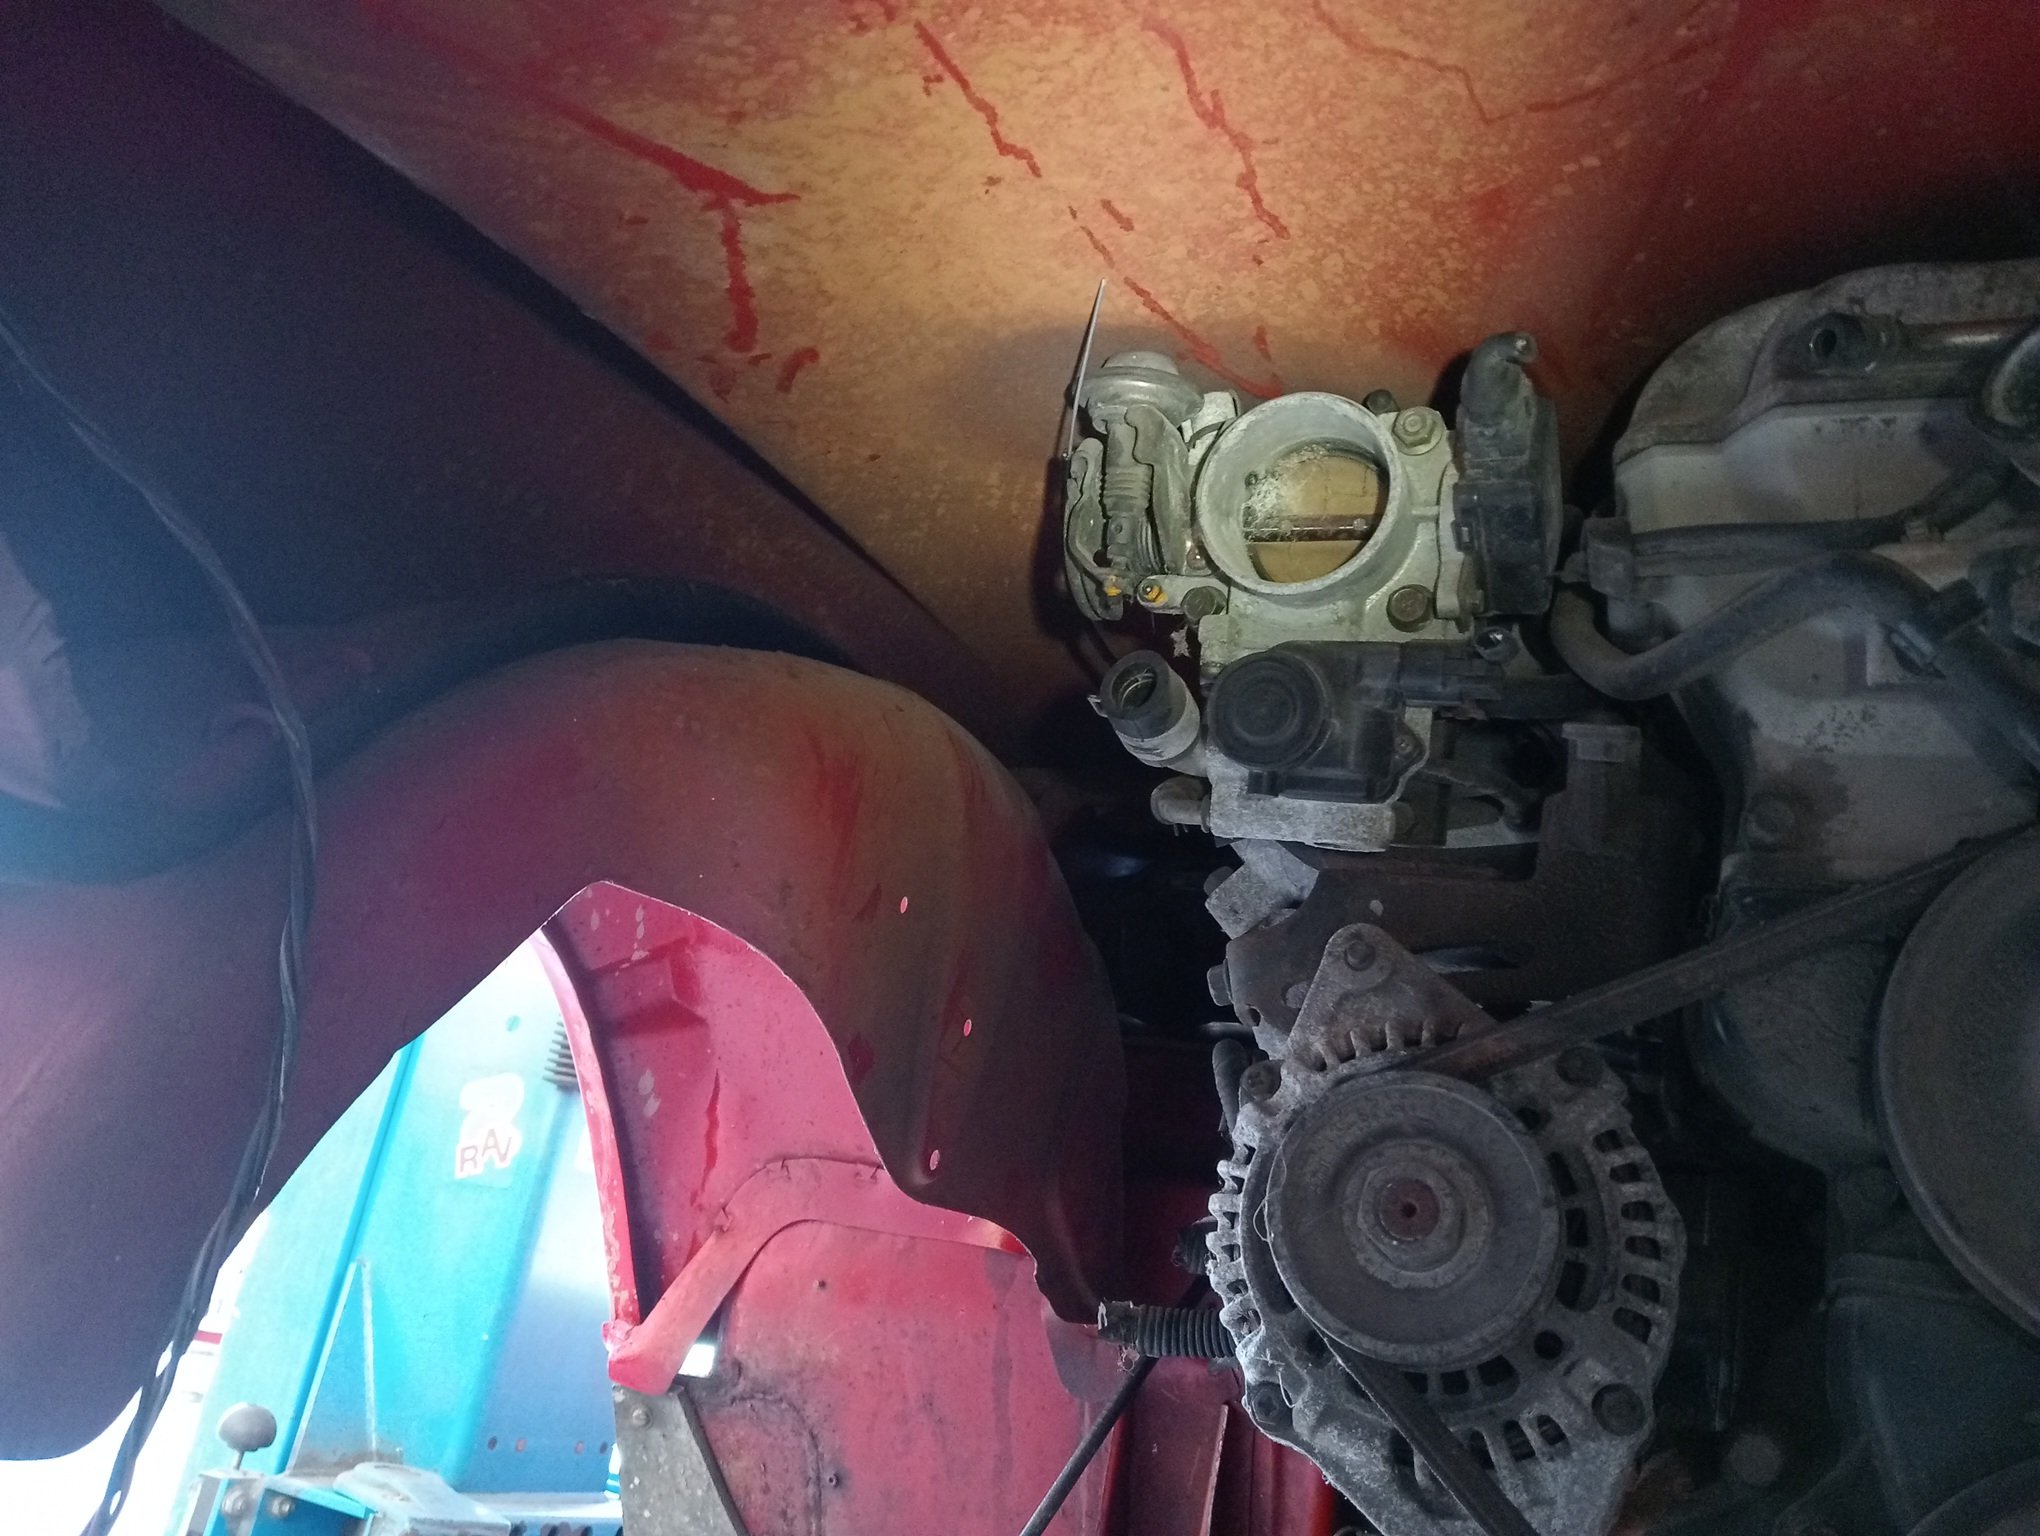
some uninteresting photos unless you're interested - here's the current longitudinal alignment; which results in this arrangement over the steering rack and this somewhat tight throttle body clearance under the bonnet (with bonnet set to it's lowest) - but clearance nonetheless
21 points
-
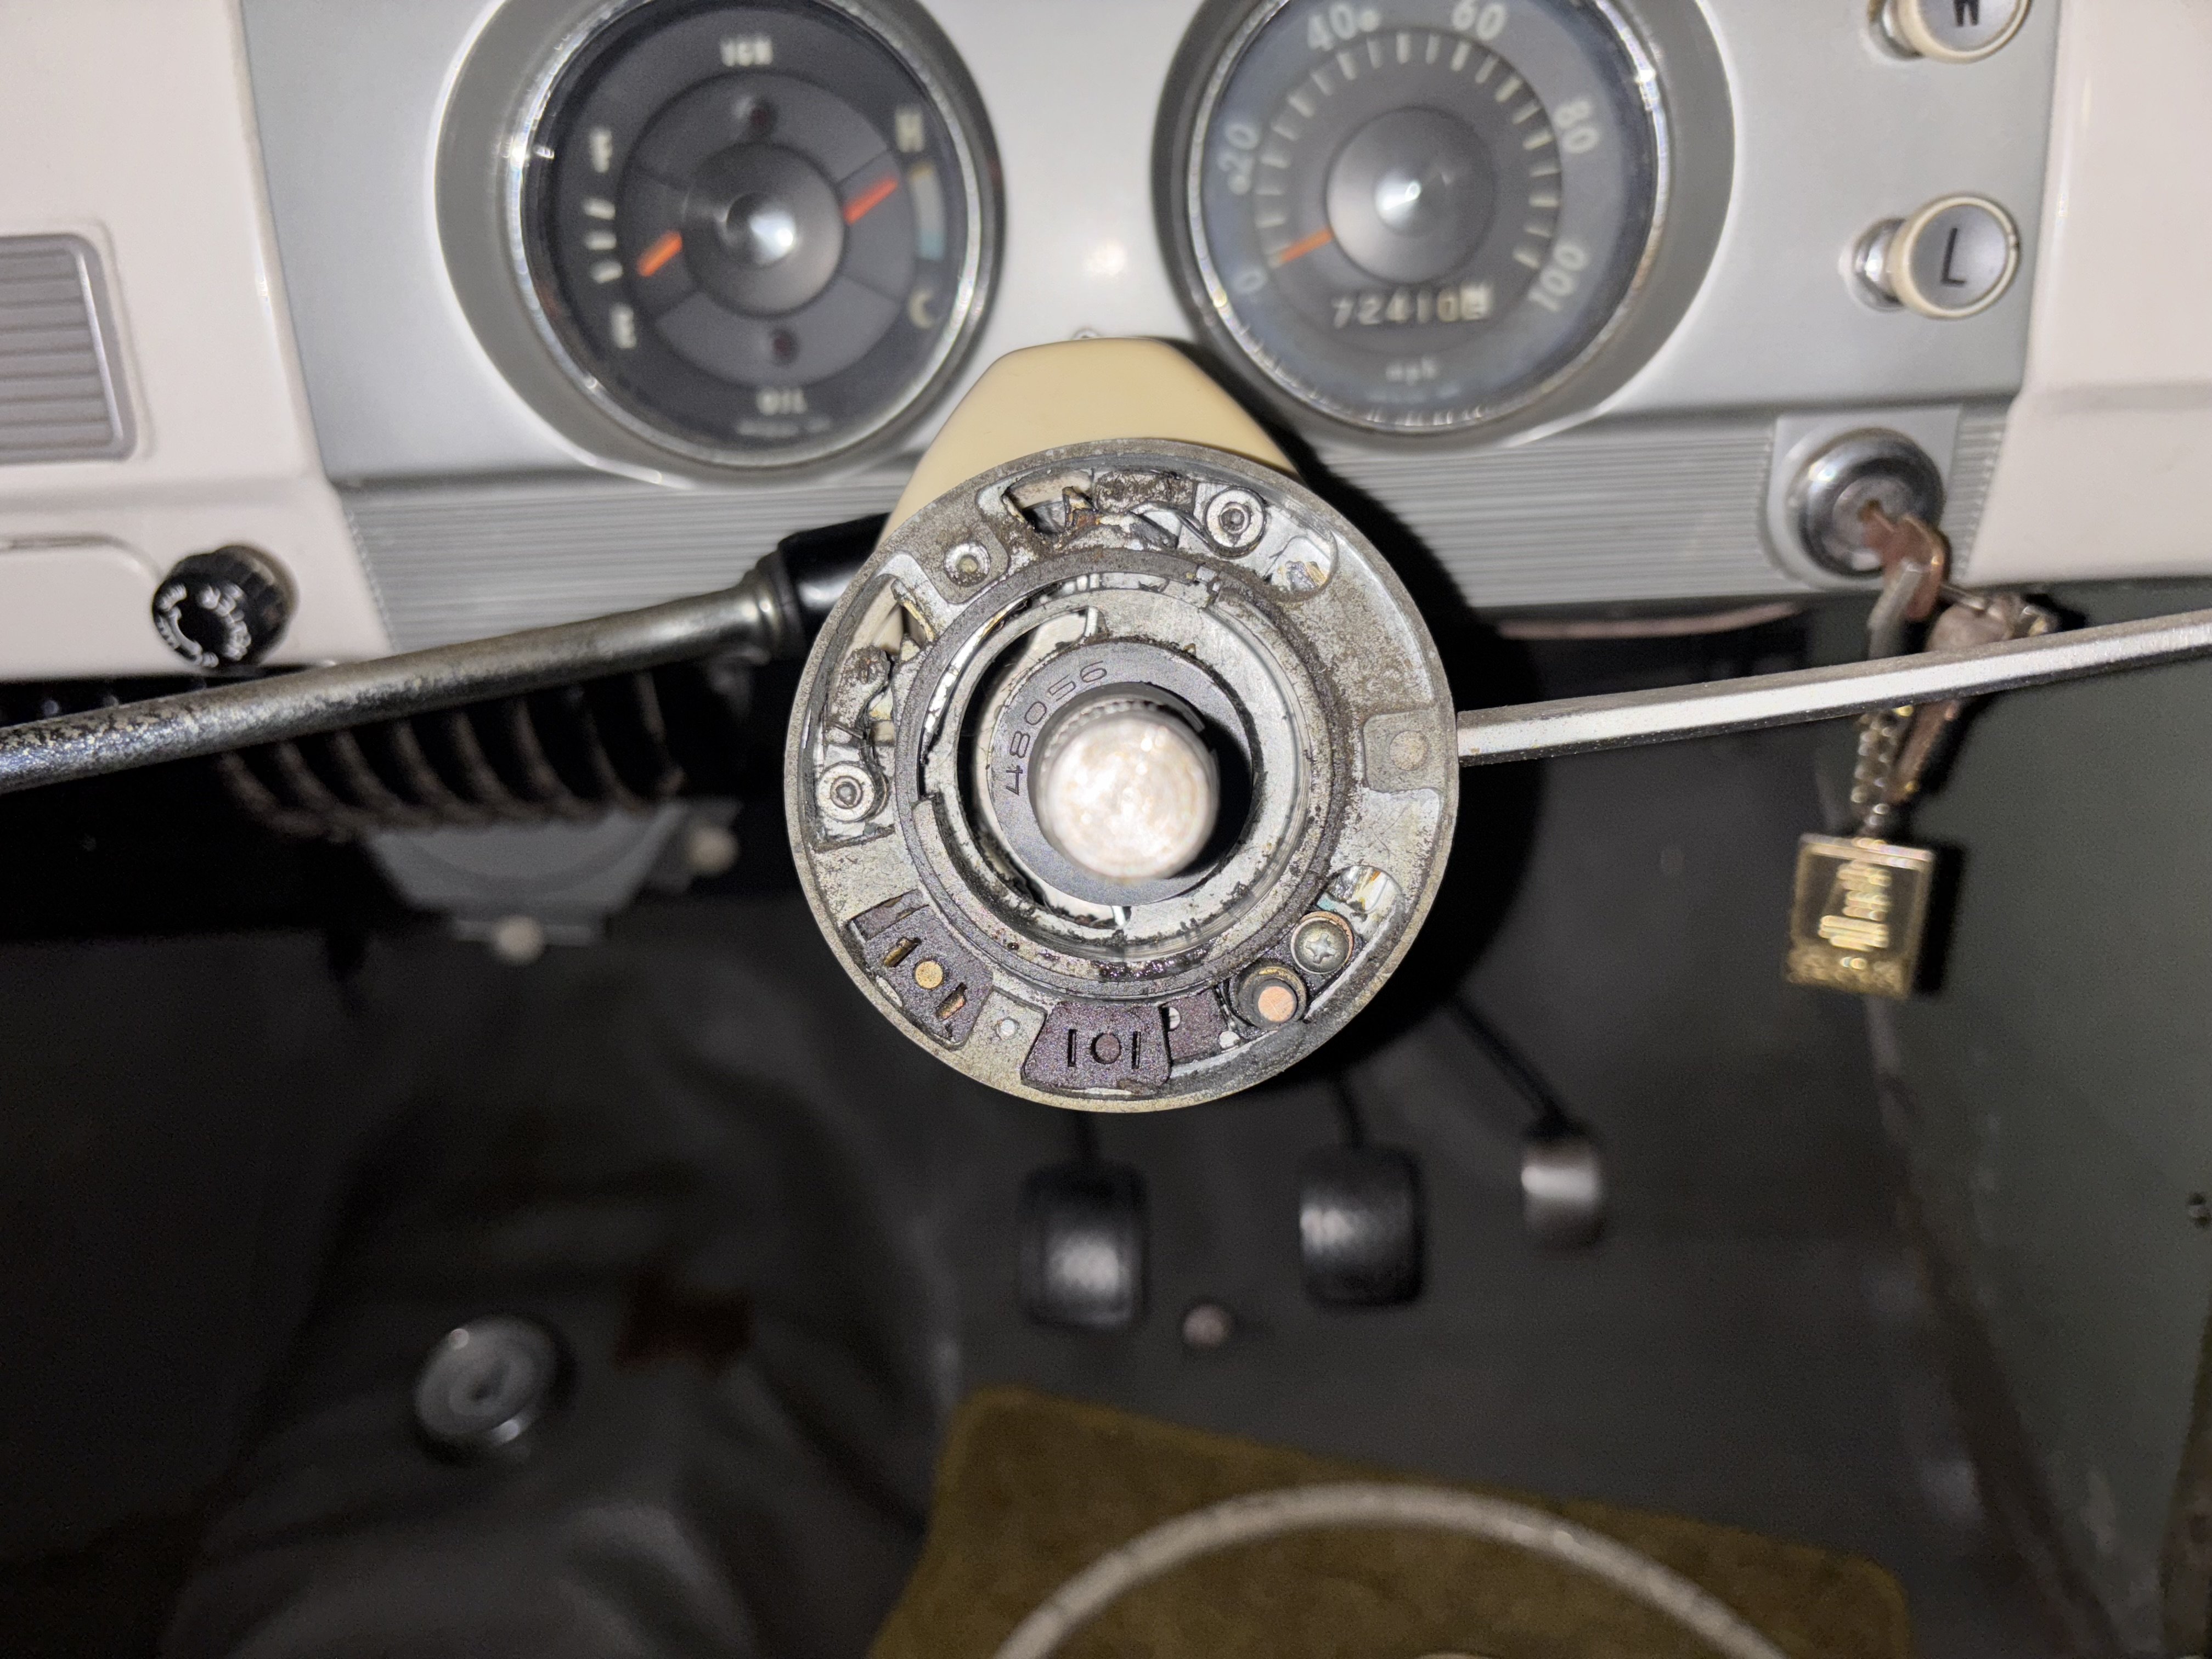
So before I picked it up I had already planned its first outing in two weeks but had a few things to fix (tho lockup rules state no working on vehicles) first was the LH Indicator not selecting. so after carefully removing the cracked bakerlight wheel I cleaned and played with the mechanism to get it working again.
21 points
-
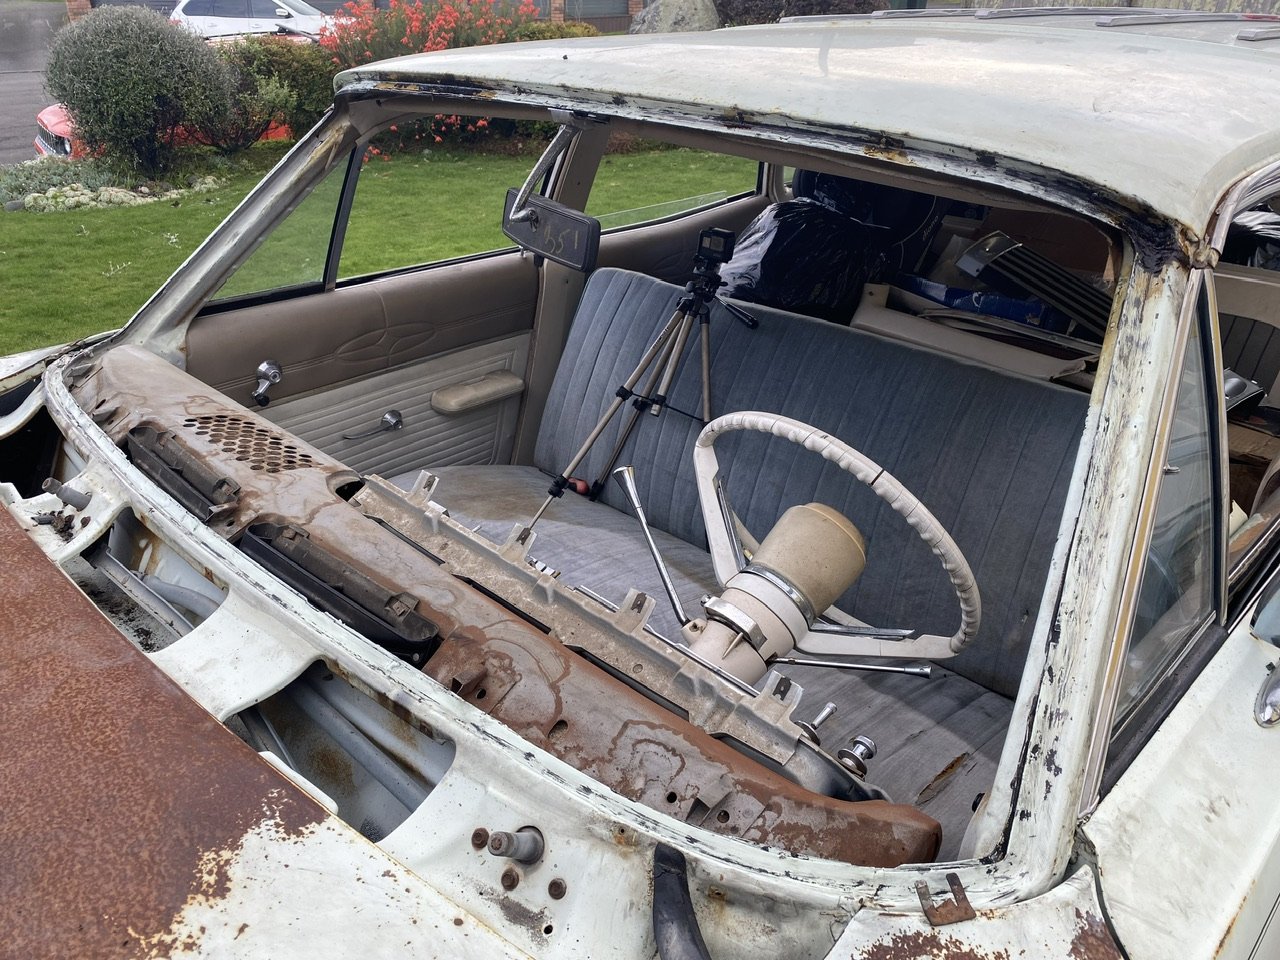
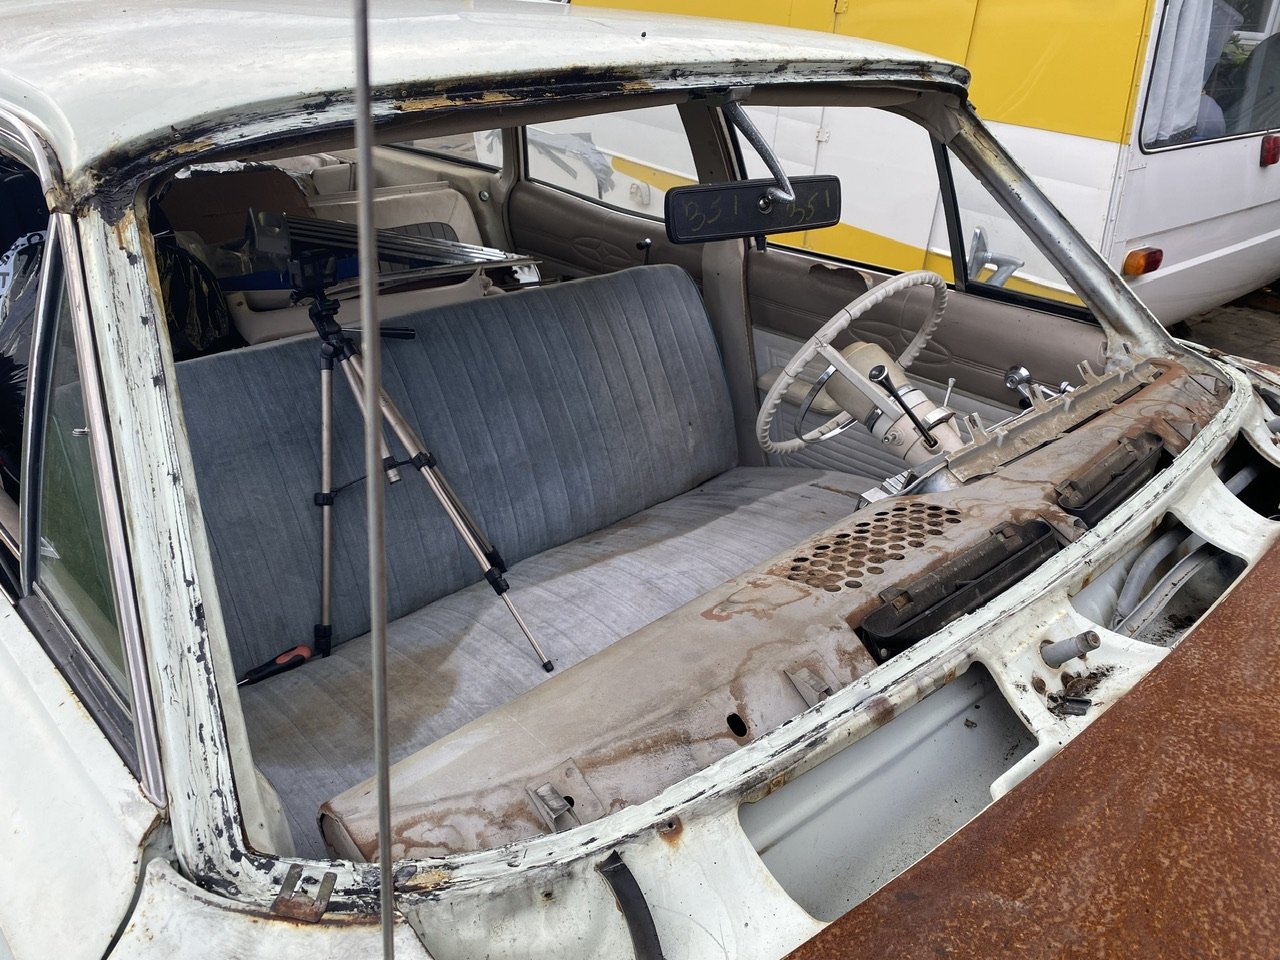
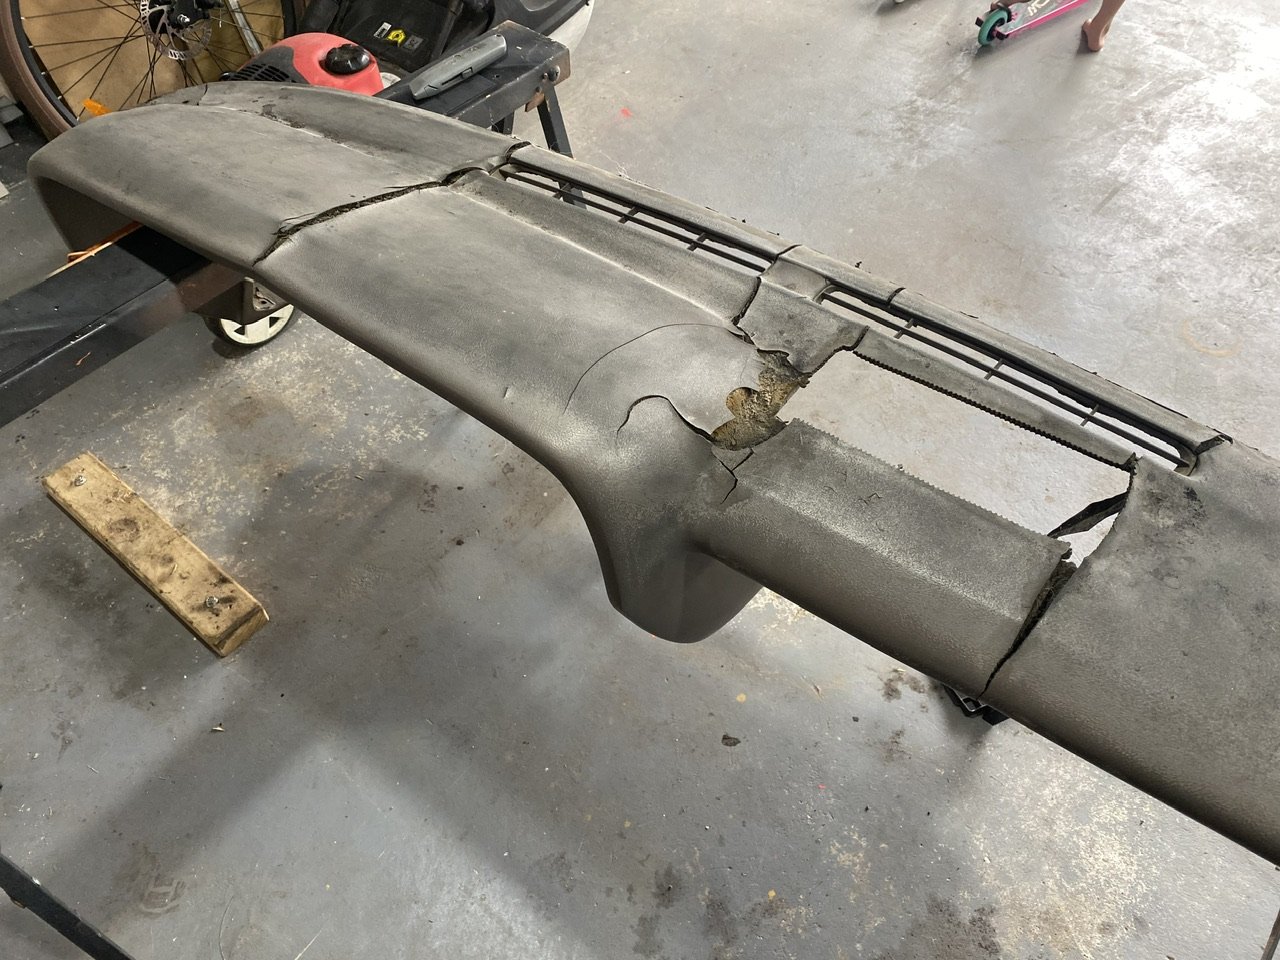
Today I took the day off work with the plan of pulling the engine and box, but that plan fell through, so I shifted it outside and took the opportunity to give my shed a decent sweep out for the first time this year. Then I spent the afternoon getting all the windscreen adhesive off. What a shit of a job. It’s resting with some rust treatment on the surface rust at the moment. It’s in surprisingly good shape. Next on the list is to tackle the dash pad.
21 points
-
Fooo Palmside is a danger zone! Came away with: Bonnet rest rubbers Headlight Bowl gaskets Fibreglass front lip spoiler Boot rubber Door rubbers Outer Window seals 1/4 Window seals Rear side glass rubbers Door hinge pins and an ‘ah fuck it’ luxury purchase of full Mexico front guards. Ive had since ages ago, some well made weld-in steel flares to attach to Standard guards (mine are pretty rough to be fair) ..and I also got expensive Fibreglass ones years ago too. Instant regret when they arrived with no mounting flanges (or filler panel down the A pillar) other than the one you see when you pop the bonnet. WTF Ive since learned fibreglass tends to keep moving then degrades and I can’t have that under lovely paint on something as obvious as the front guards so I flogged them on trademe last week and recovered about half the Owage which was cool. I was looking at my standard guards and they need all the flanges remade to attach to car as they were spot welds drilled. There’s old repairs to re-do along the pillar and bottom, the front edges are so thin they have split and the general shape is hours away from coming back so I picked up my balls and biffed them in the naughty corner. https://imgur.com/a/1iAMu1m Everyone watching probably already knows, but the RS/Mexico/Sport arch is maybe an inch wider and 2.5ish higher towards the midline than standard. Watch this momentous purchase backfire as future me cuts the guards to get wide wheels under with max slam.. Present me Wishes to utilise tyre stretch and camber to achieve this21 points
-
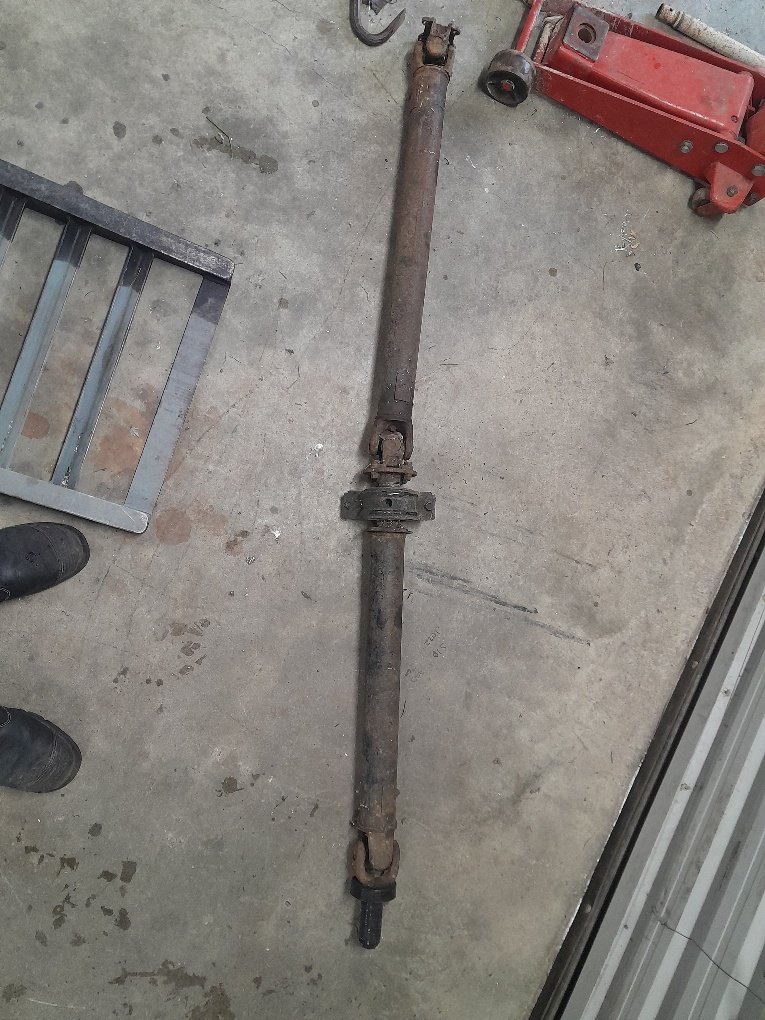
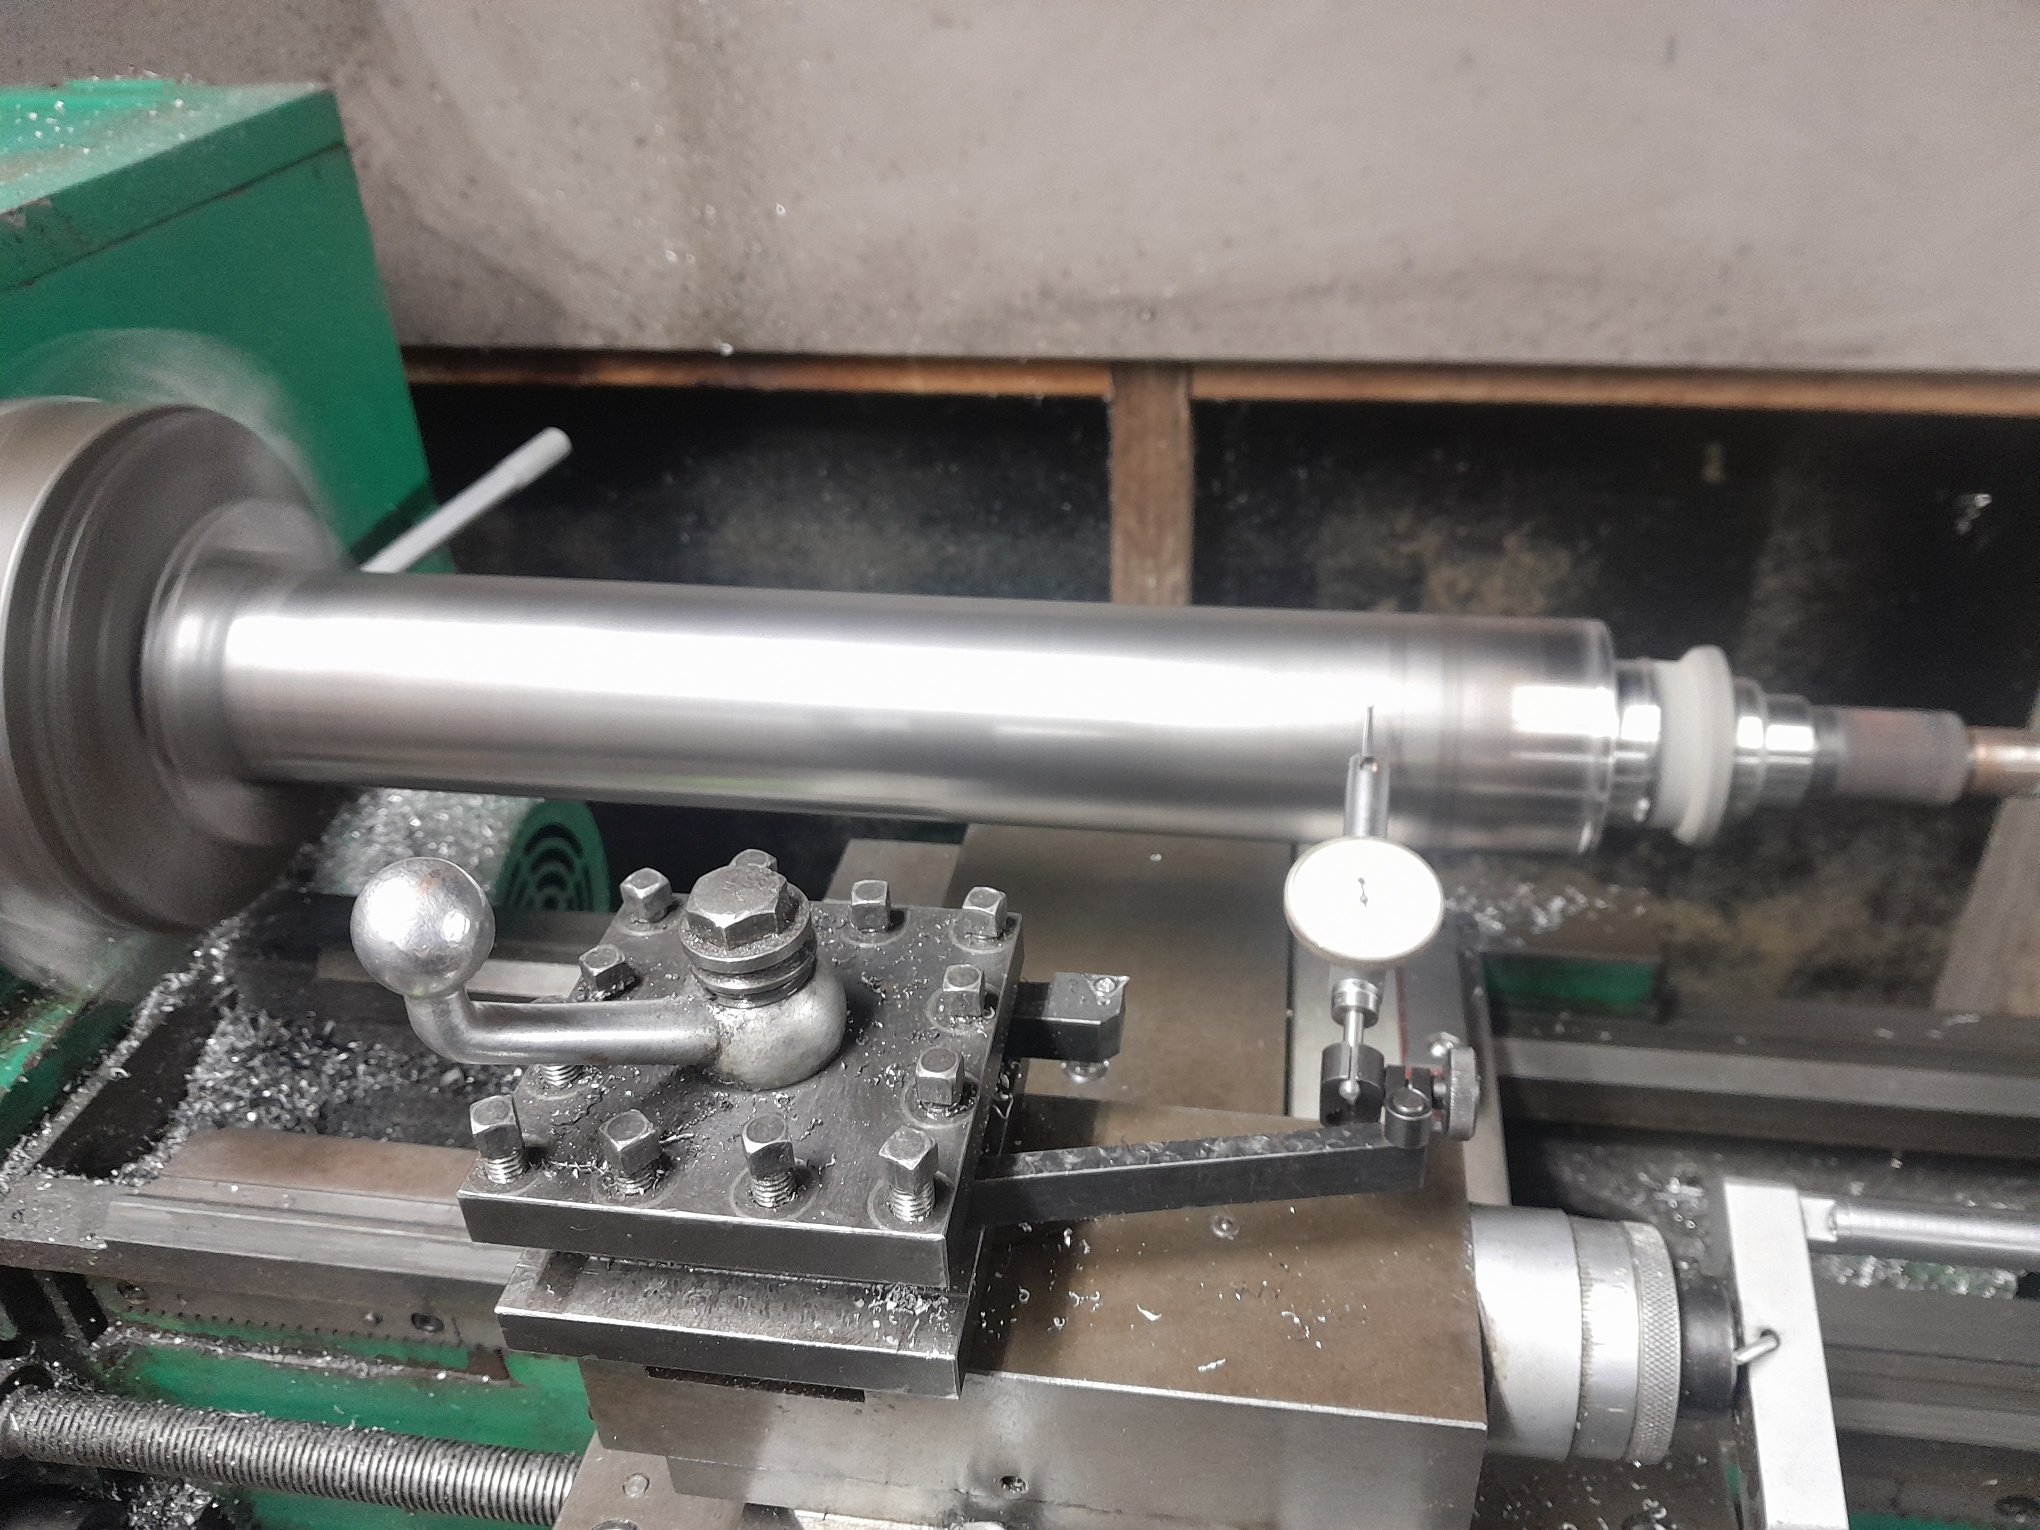
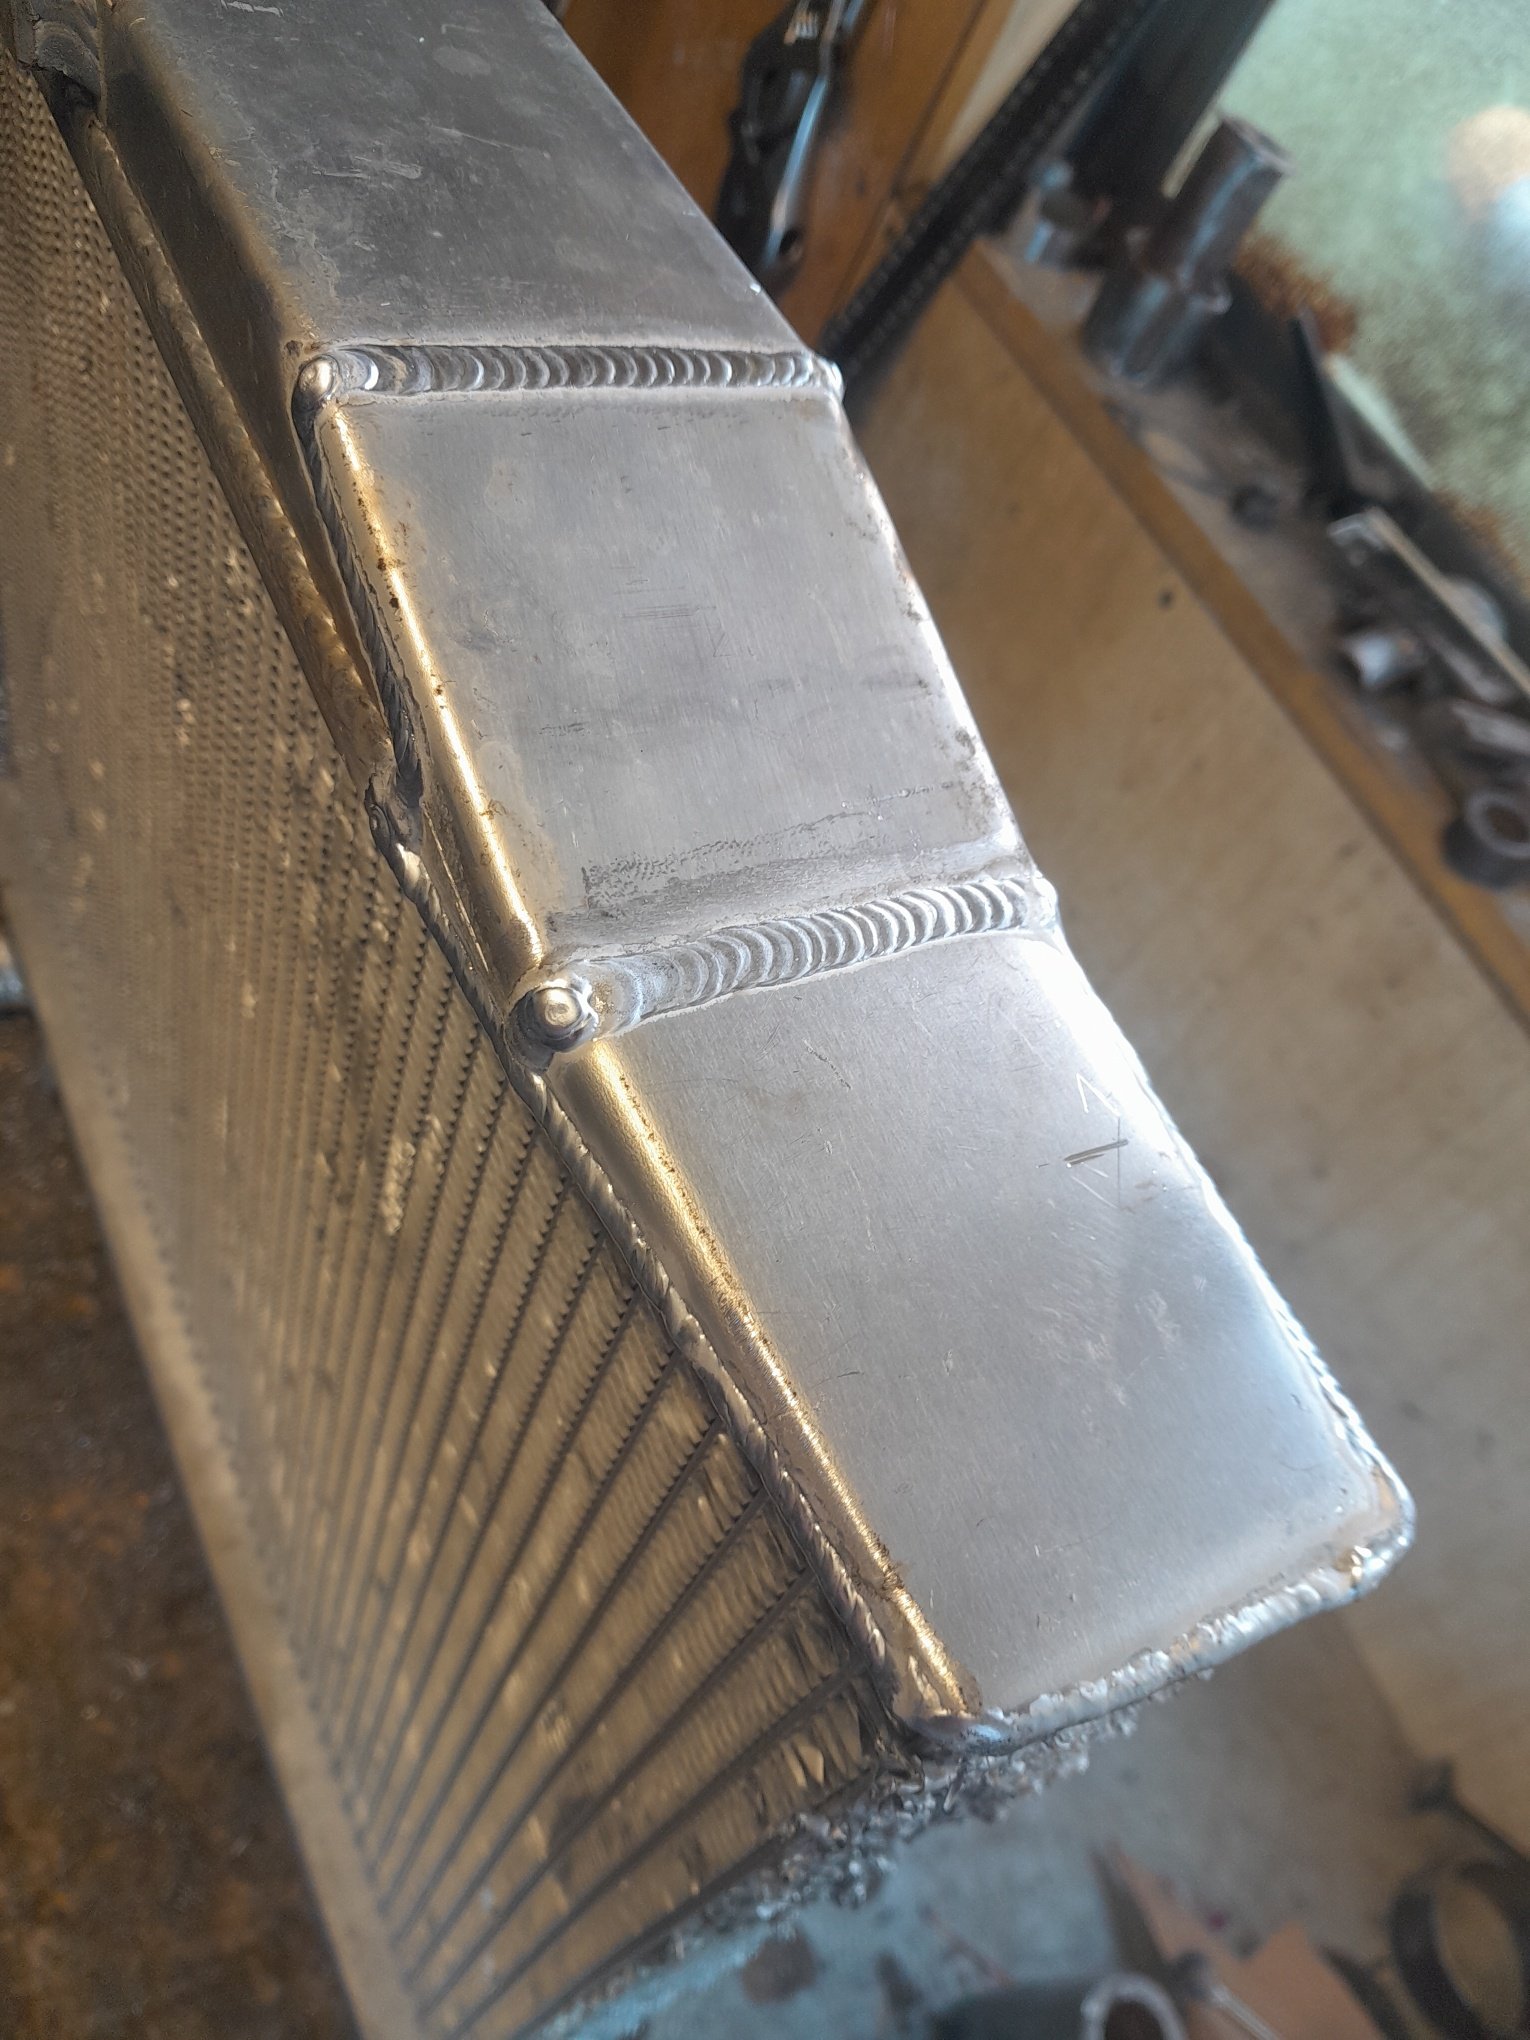
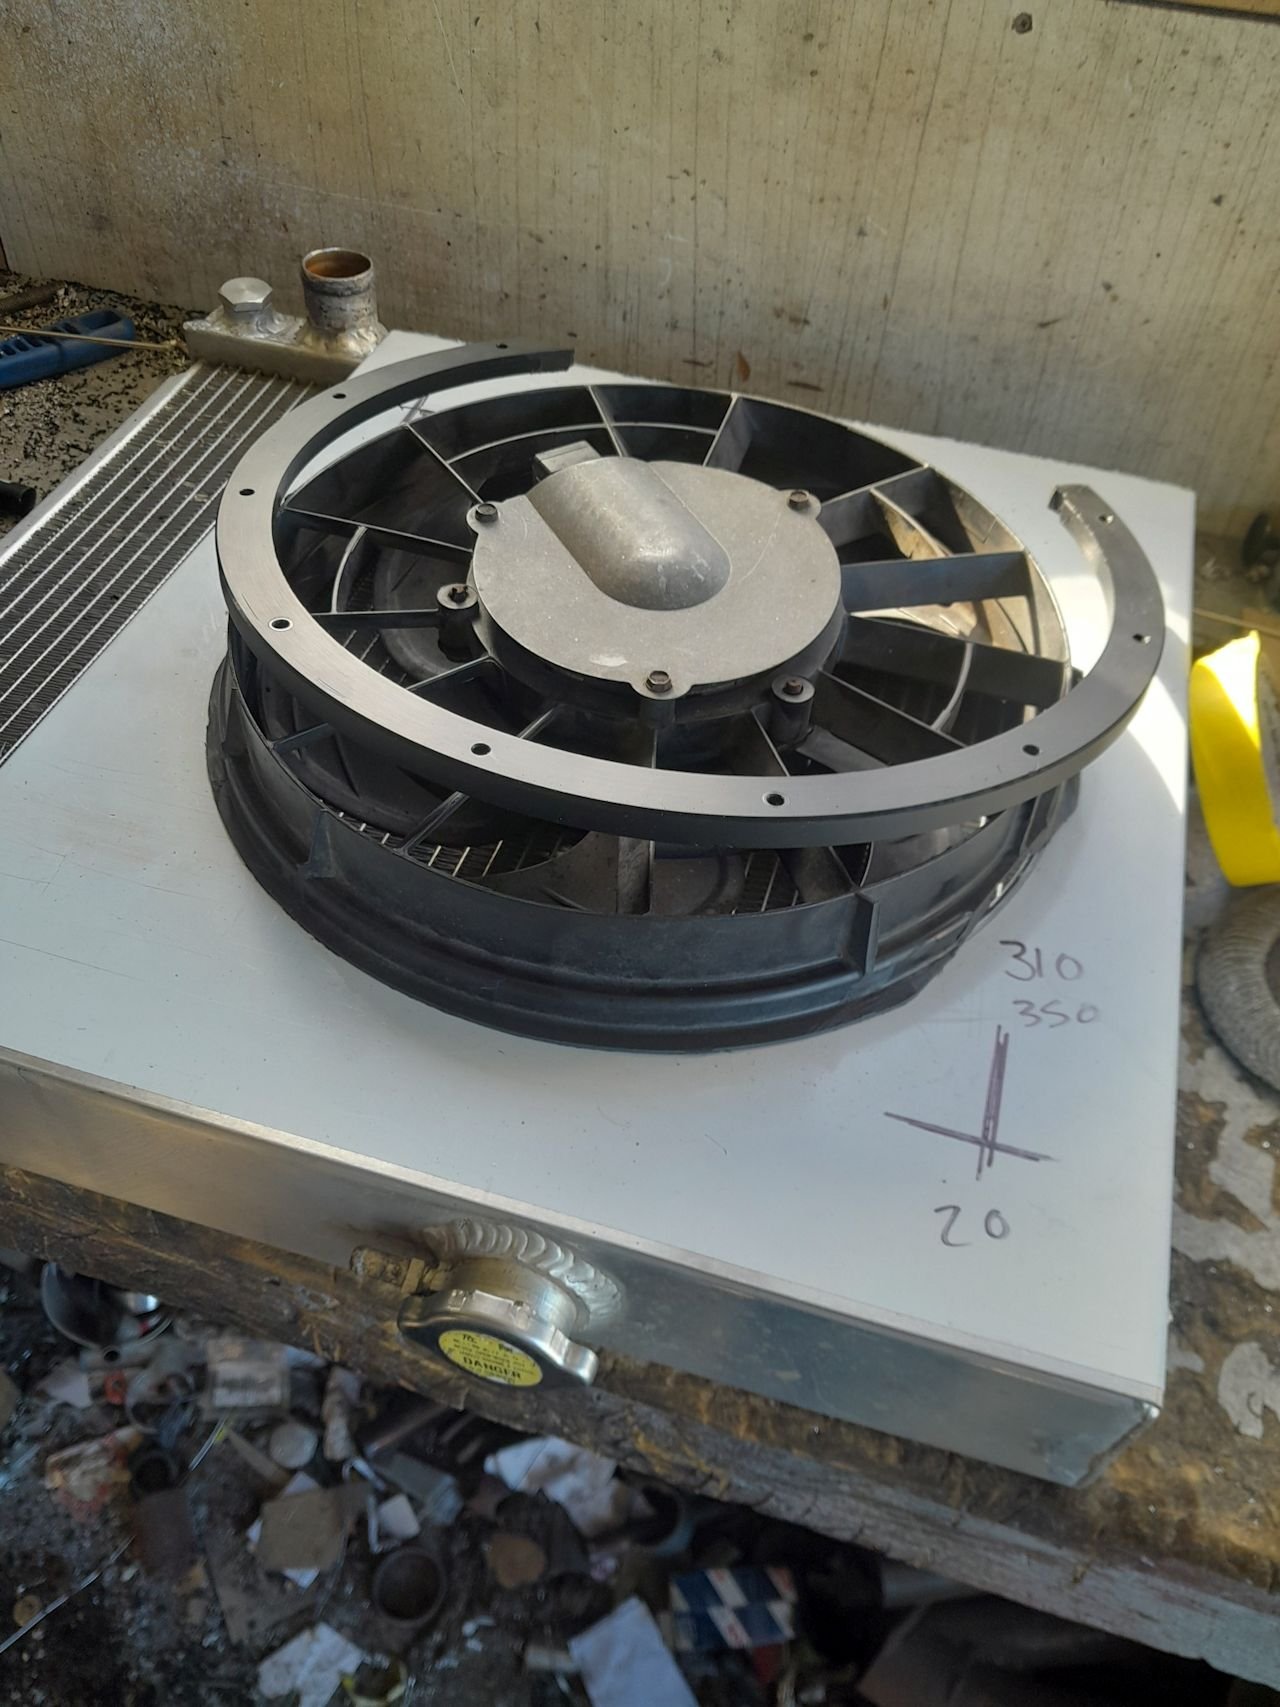
Avoiding making the pedal work with that ^ So started on some other stuff that i haven't finished either I have a 2 piece hilux driveshaft, which has the right ends and the hanger bearing will directly fit in the chassis, once zing the captive nuts off. Just need shorten both the front and rear shafts. plan was to just cut the end off each. shorten, weld, done. But decided to put front half the lathe as is and dial it up, before giving it the chop. turns out it spun like a skipping rope with around 0.7mm run out on both ends. Mr toyota just wacked some balancing weights on the low side at both ends. And yeah turns out the tube wasn't just welded on the piss. the bits the tube spigot onto were machined wack. So far i have trued up the hanger bearing end, building up the low side a touch then machined to a tolerance fit . Got the tube on there and is bang on. Probably getting way to picky but yeah. Rest is on hold till new uni's show up Next for no particular reason. decided to do some stuff with radiator Old setup used to look like this Some kinda nissan radiator. which i still had. was too tall to sit in normal place without sticking up and looking ugly, so done some butchery to the bottom tank to drop it down further Buying a radiator that fits may sound wise. but I wanted to make a gap on the intake side to feed the intake cold air. so an ae86 specific one would need to be cut anyway. So yep i cut some more off the side of this one which you can kinda see the rough cut above^ That meant the twin fans wouldn't fit anymore (they didnt fit good anyway) Again a normal person would have brought a fan that works But i despise junk aftermarket fans. So i cut one of the twin fans out leaving a flange around it. made an ali shroud. then wasted half of my life making this plastic ring to clamp the fan to the shroud Would have been a good job for a 3d printer and made in a couple of bits. but i have lathe and a bit of acetal that has been hanging around forever I haven't finished it yet either. still need to attach shroud to radiator and but made an amazing mess
20 points
-
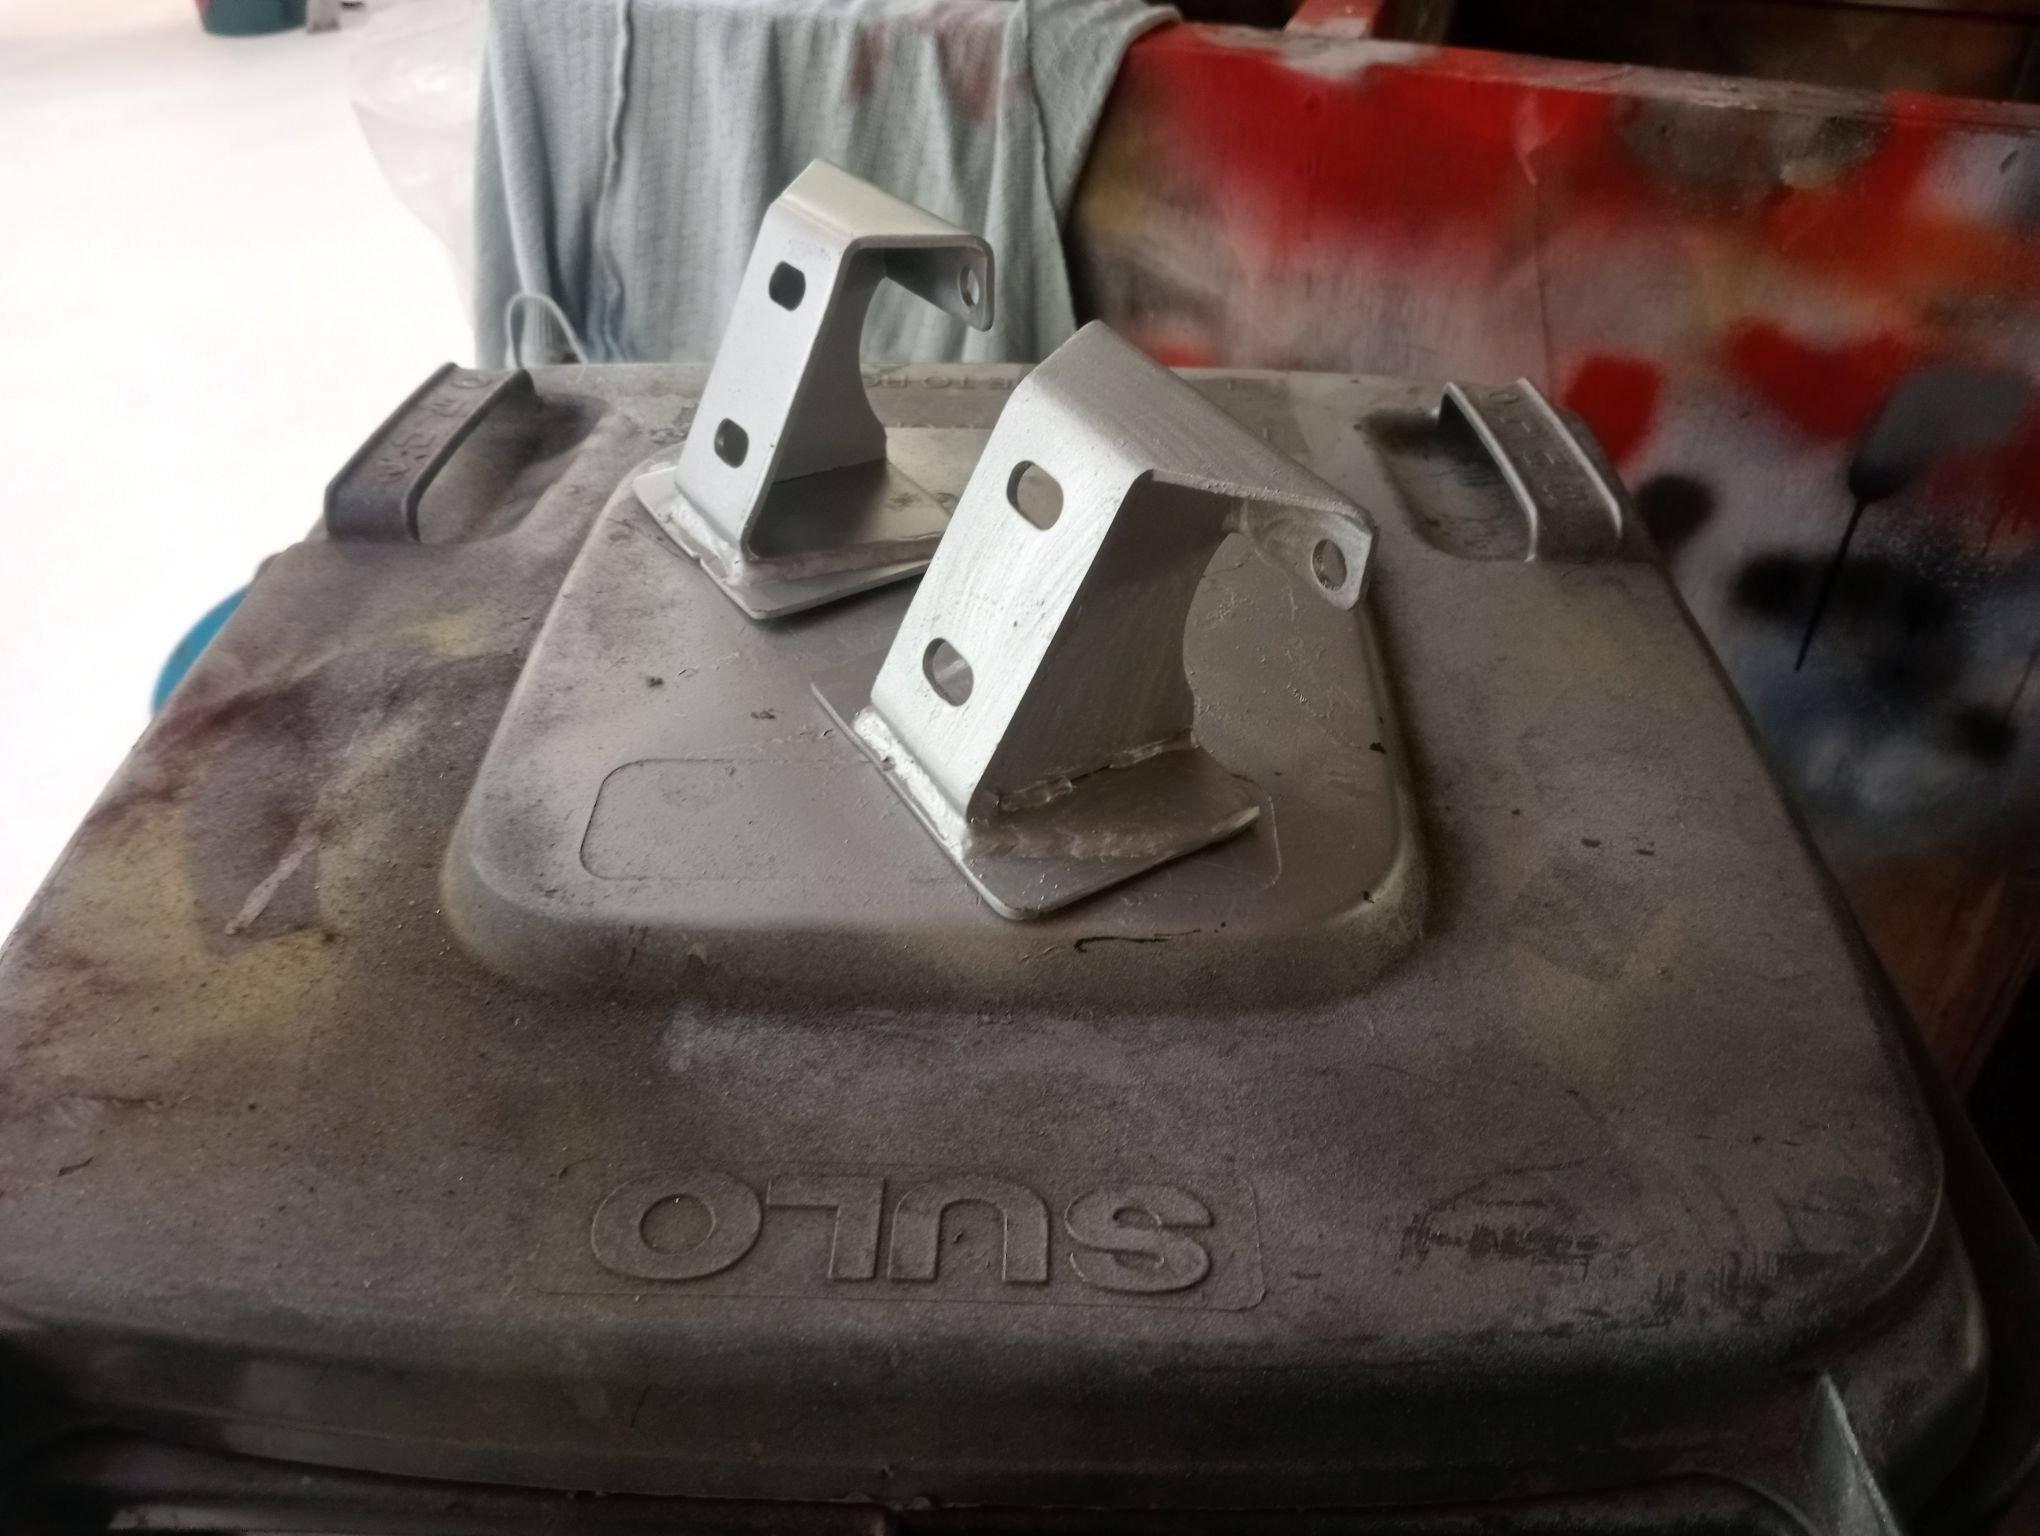
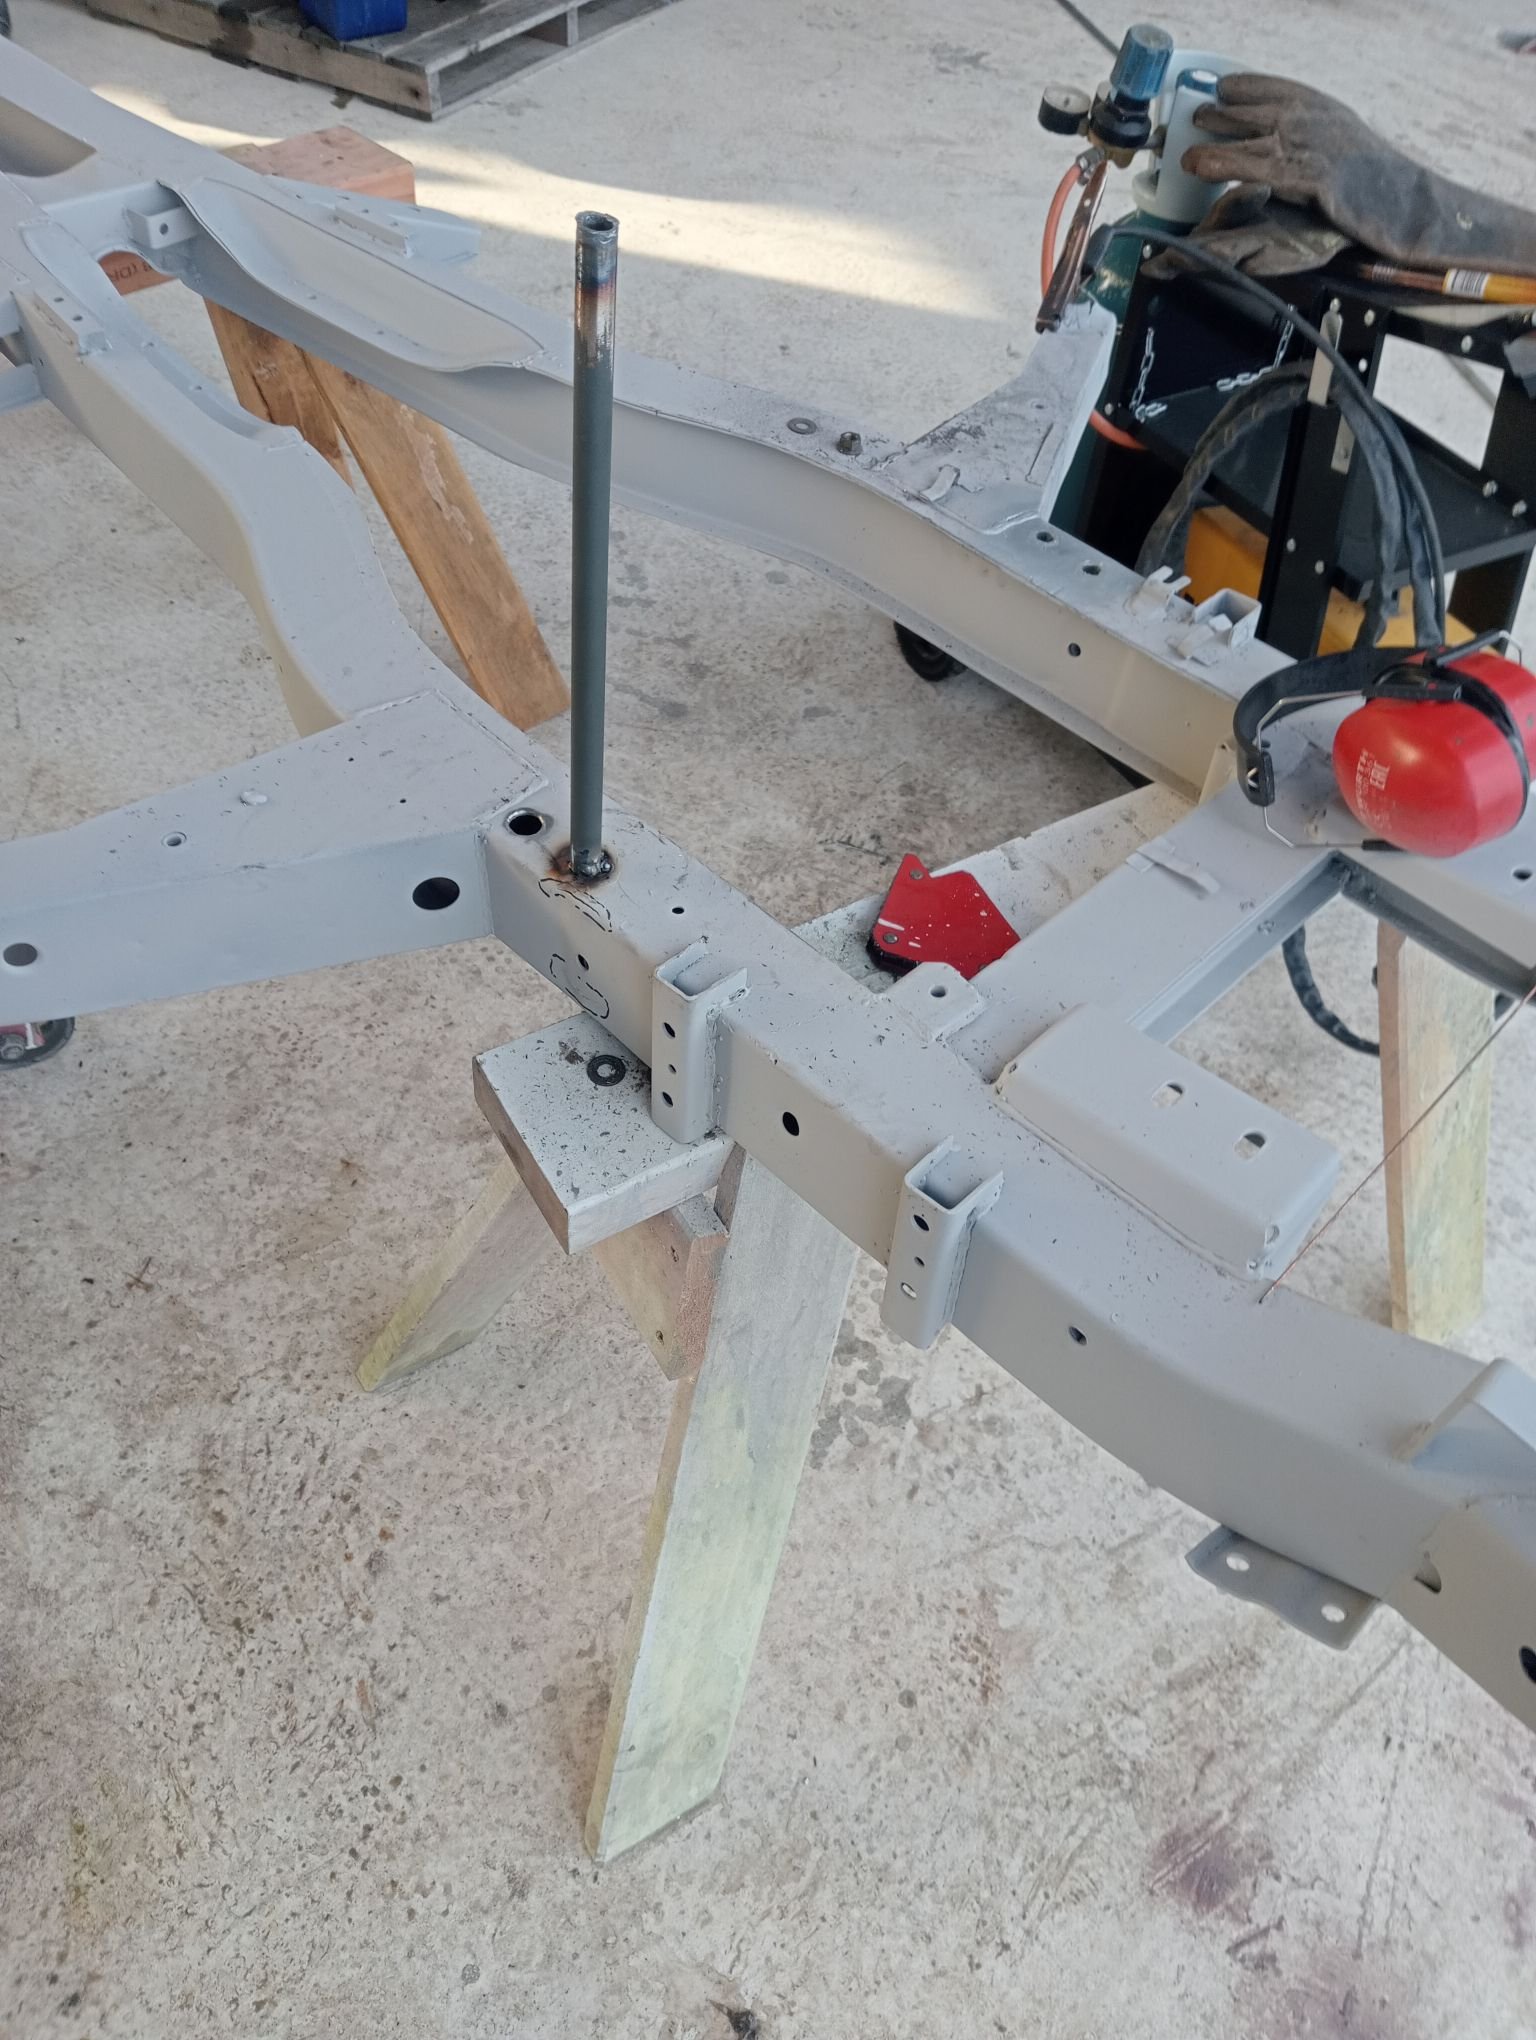
extension housing finished, installed and cynically painted in a coat of hammerite direct-to-shit silver. presented on this angle which just so happens to hide every single weld, how convenient. Ended up having to ream it out as the selector rod kept getting locked up mounts welded up and pretty much finalised, these are comprised of 80% stock triumph mounts on their side and 20% bunnings pool umbrella stand. chassis came back, one of my guys got to play "mark all the cracks" uh oh. as suspected, it was definitely time for a birthday. (Also, are all chassis welds this bad under the paint?) RHS lower wishbone attach point lots of other bits came back at the same time I was having a mental health moment earlier, the diff did NOT have a drain port. It does now. crush tubes going in for where the mounts will sit. I guess I could have welded the brackets on directly but it might've made getting the engine back out a bit funny. Plus the chassis is so thin I'd much rather have the big bolt sandwich Frustratingly I don't have half the suspension bushes that I need, otherwise I'd probably have the chassis repainted and all the doodads back on it this week. Also waiting on a new clutch and drive axles.
20 points
-
So I made went to check it out, looked it over, started it, drove it back and forth in the driveway and said I would pay asking price. went to pick it up a couple days later and drove out of the driveway went to select 2nd … nope it will not select any other gear while stuck in 1st??? Stopped tried it with engine stopped- no problem except for a bit of play in selectors eventually just drove it to my lockup with 2nd and 3rd gears #pooroldclutch
20 points
-
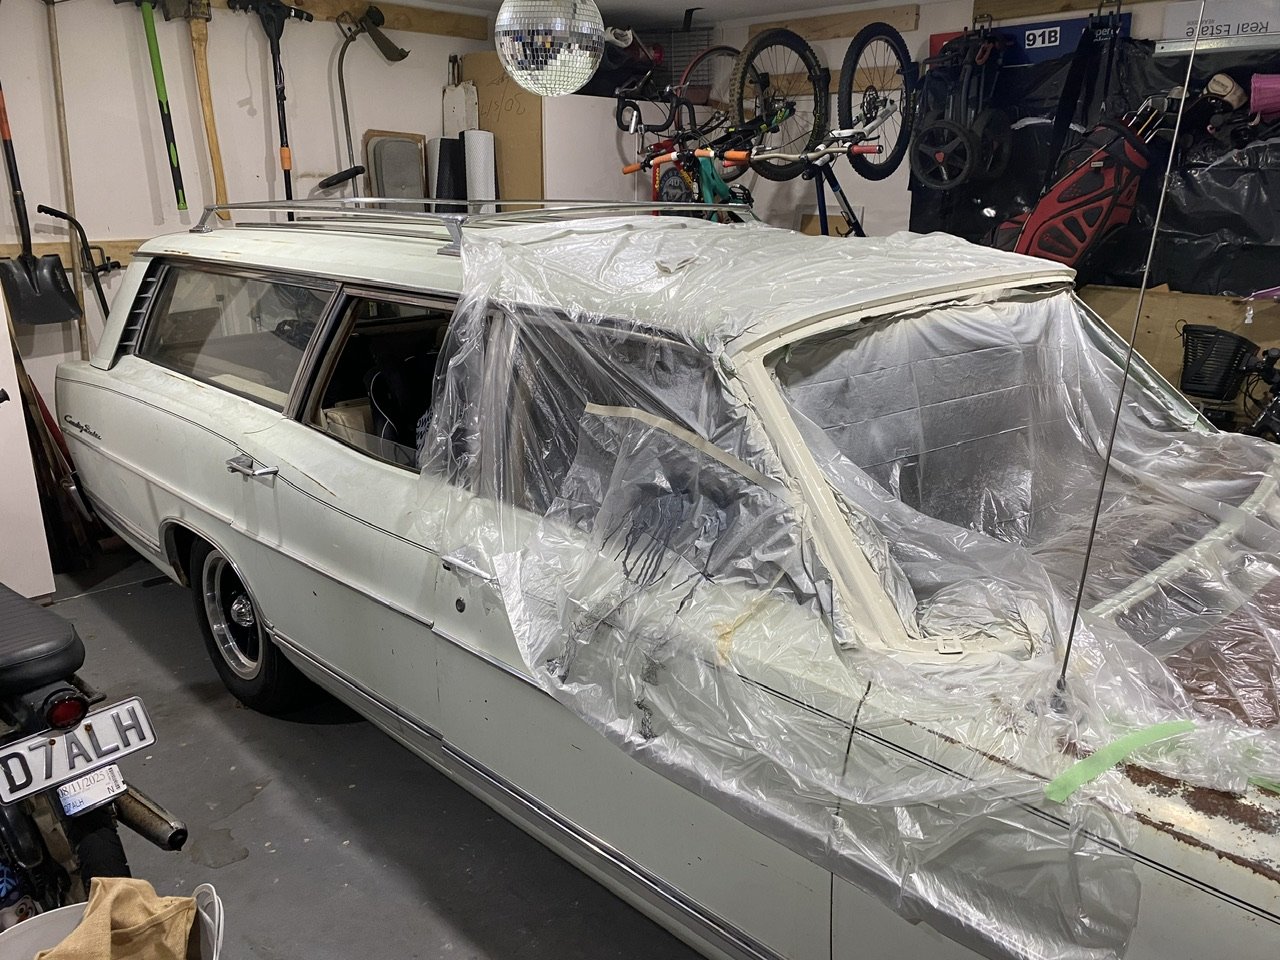
I’ve been spending some time locked in my garage with a heater running and some strong aerosol paint fumes this week. Primed it, smoothed out some pitting, primered again, and sprayed white. Don’t let me forget the clearcoat… I only remembered that as I’m writing this… It’s nearly ready for the windscreen to go back in. I also fitted the roof rack. It’s a proper wagon now.
18 points
-
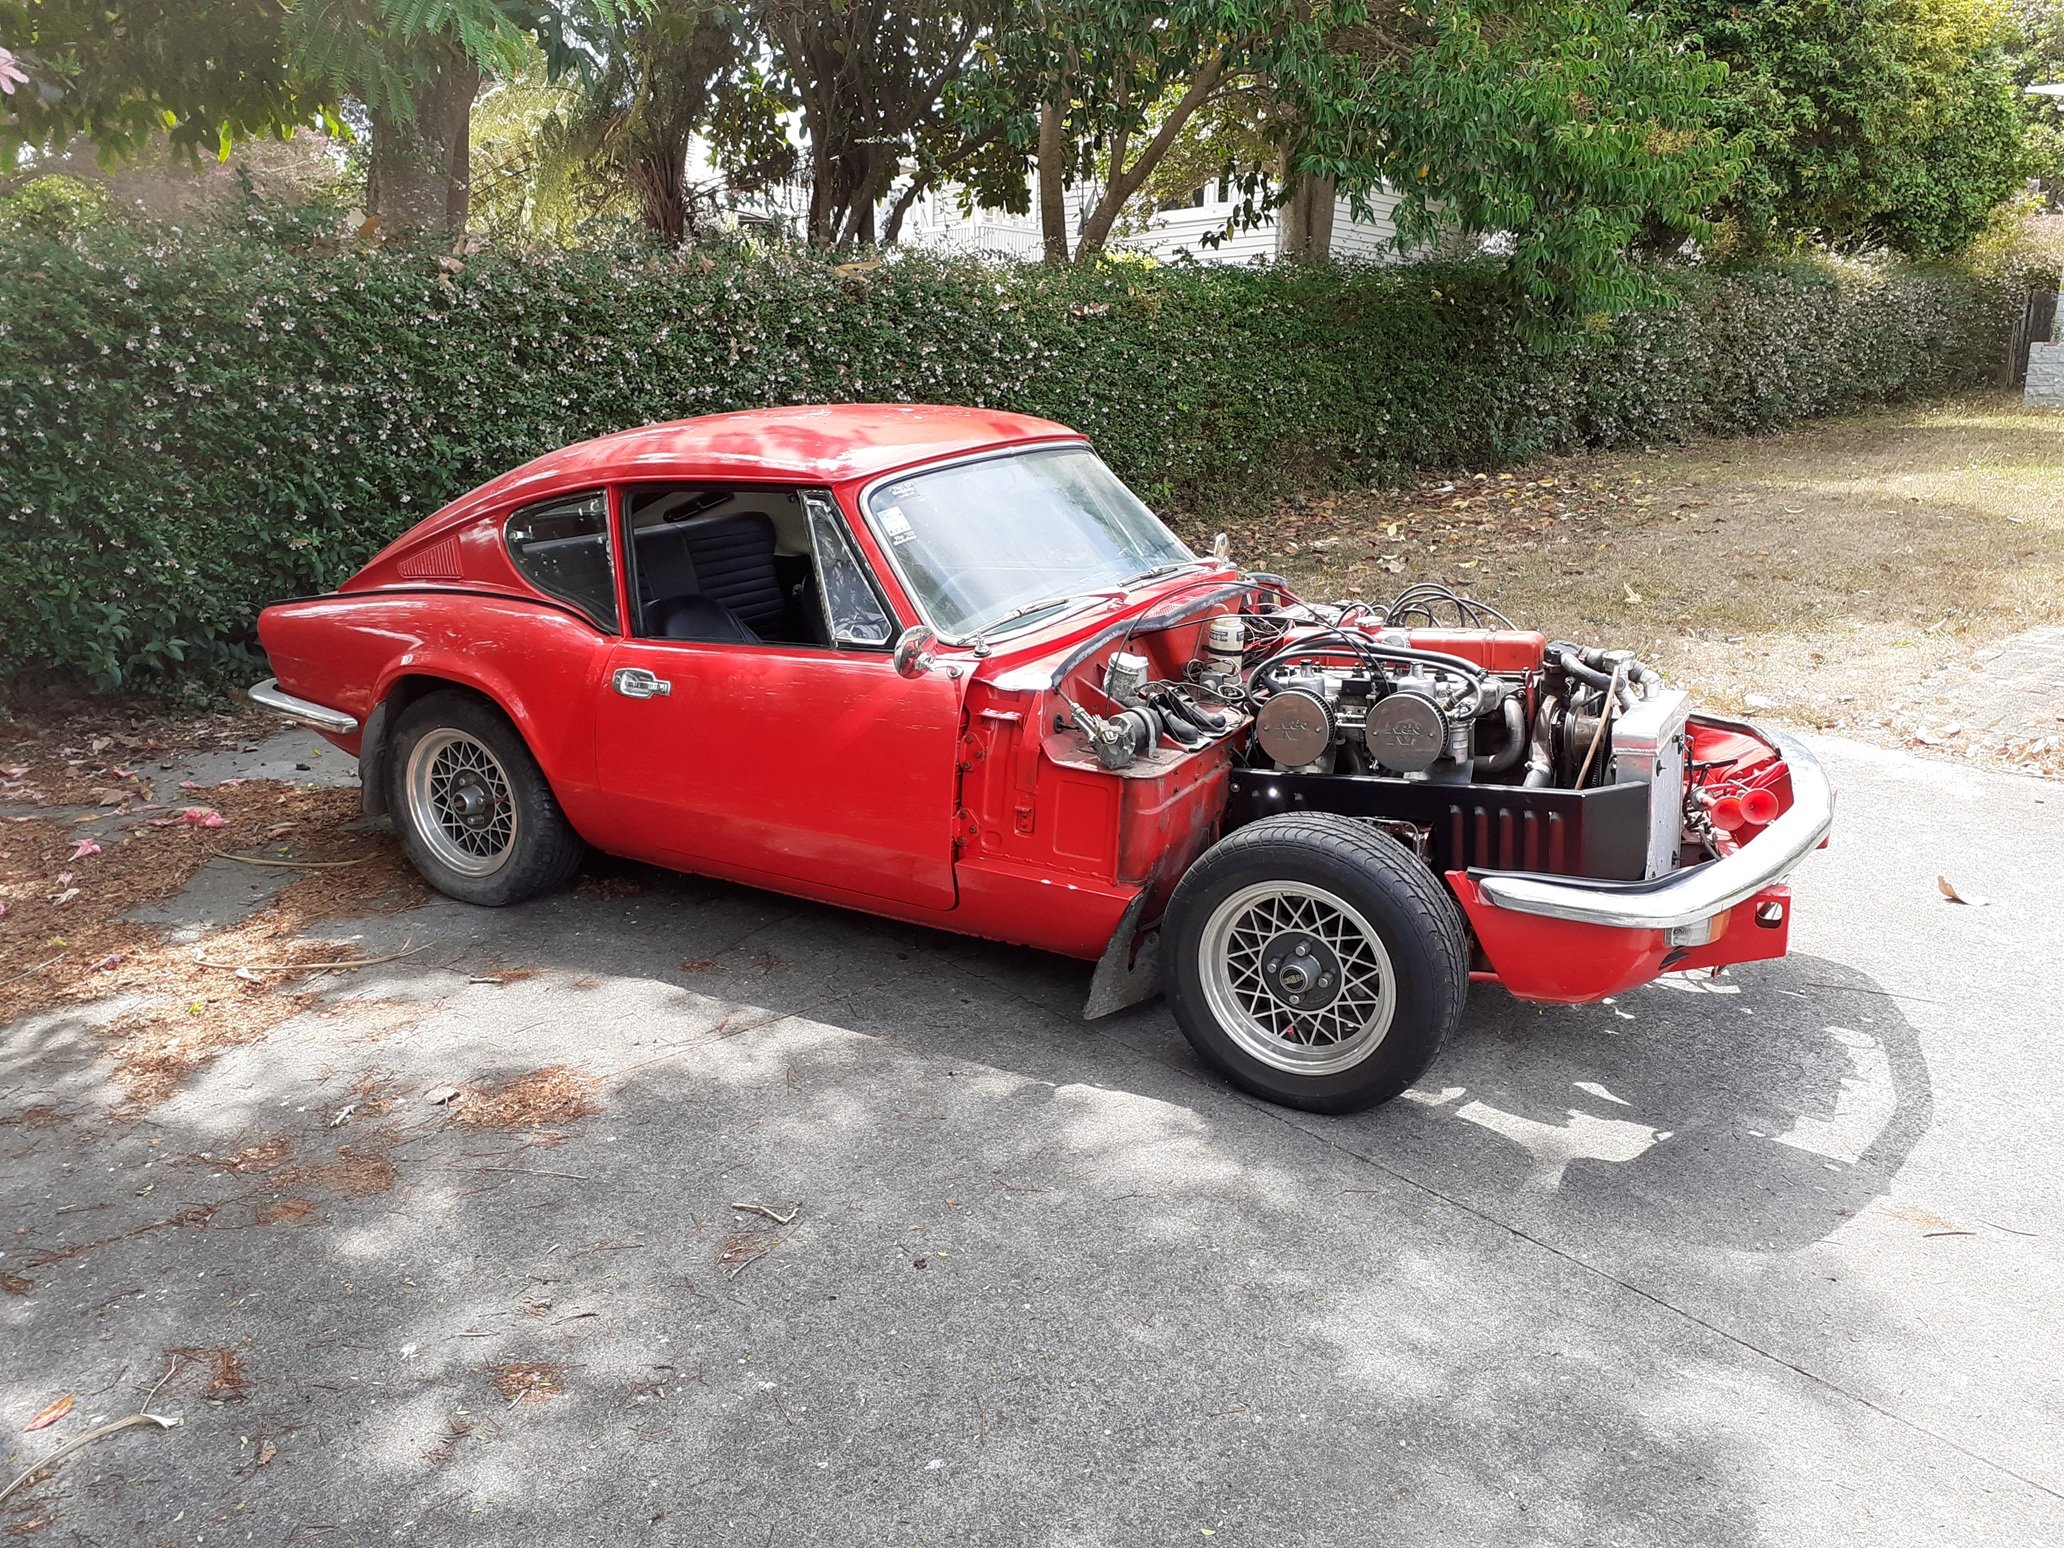
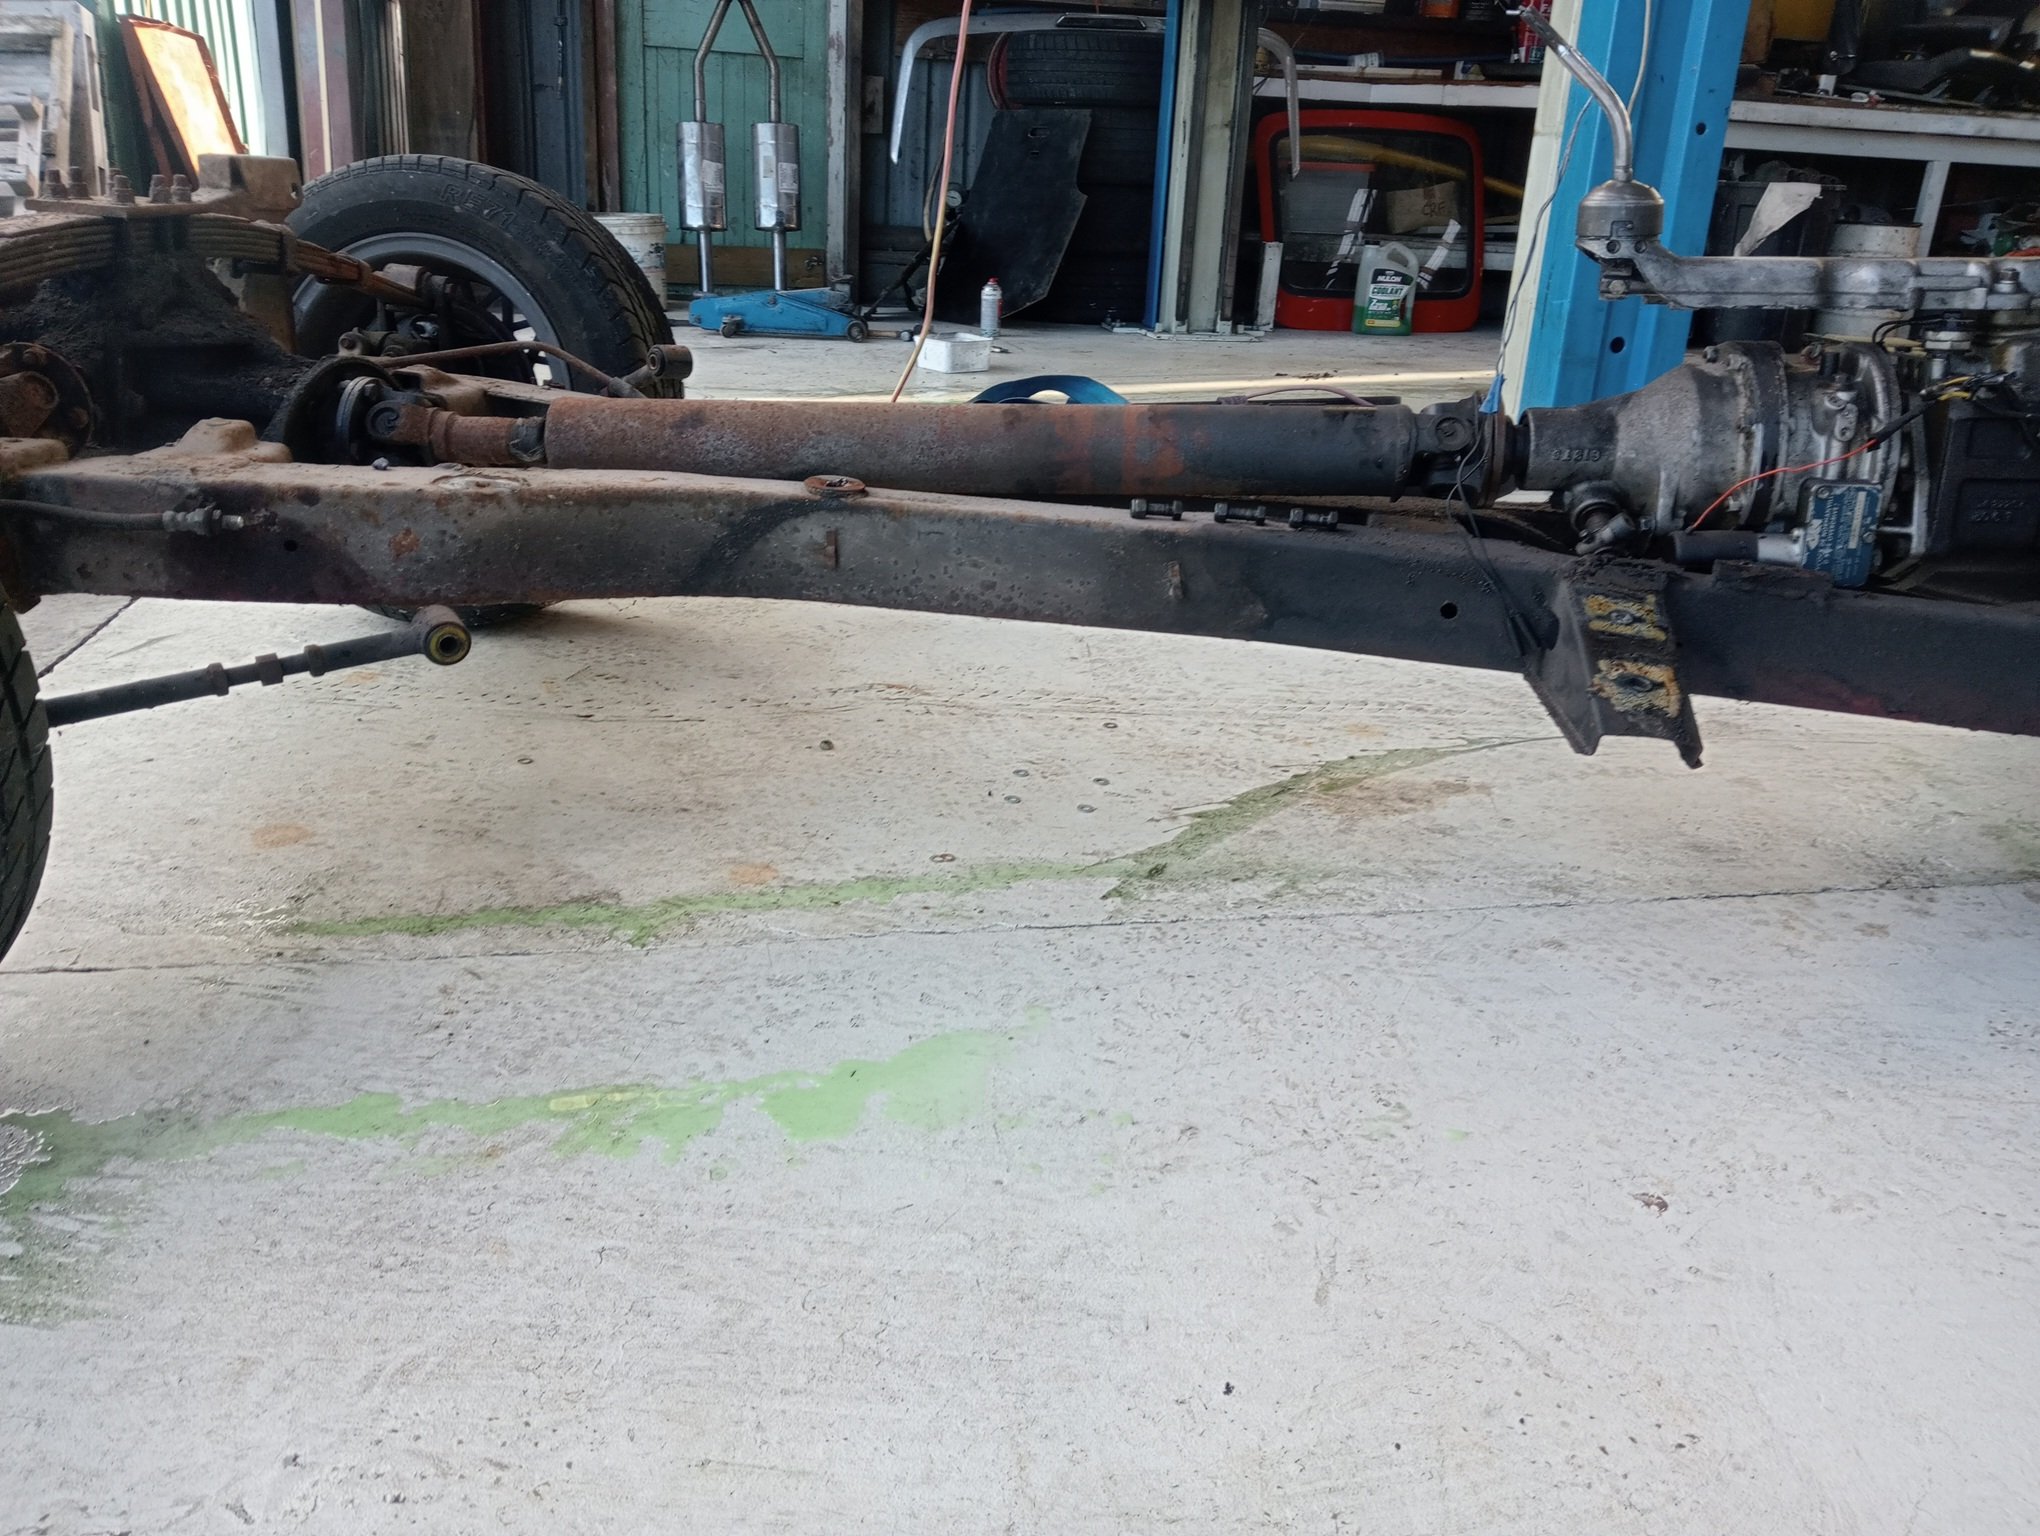
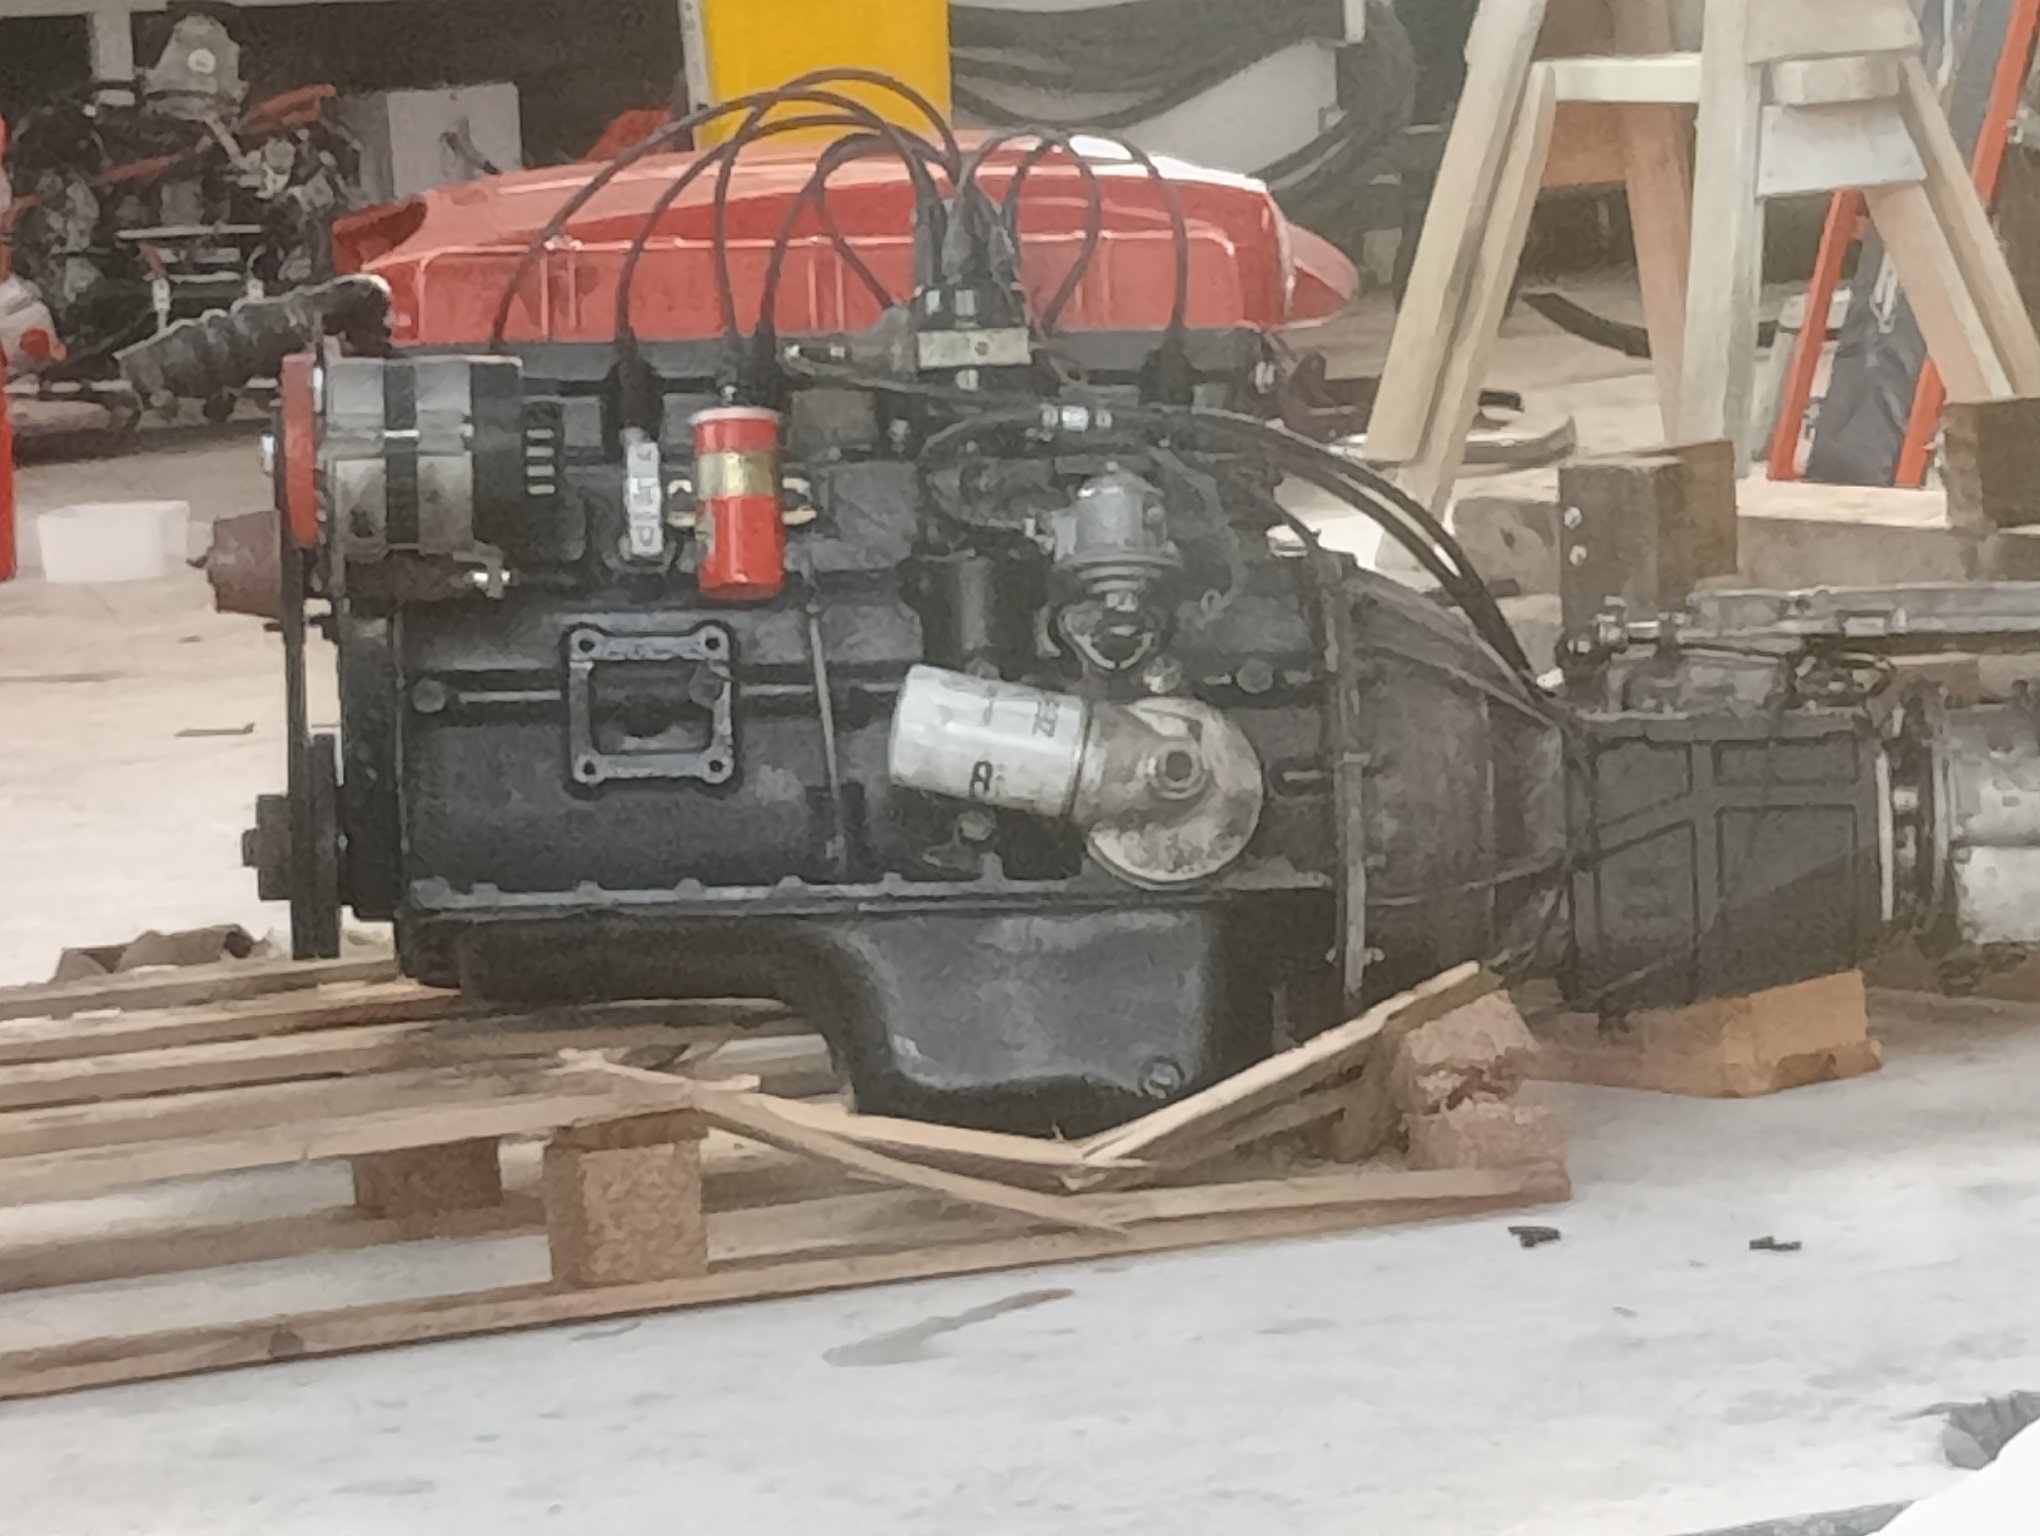
So I pulled the body. I had a GT6 "workshop manual" which was totally useless. Didn't even mention disconnecting the radius arms or rear suspension. I don't actually have a photo of it with the body off and engine still in because by the time the body was off there was pretty much nothing left to remove so I forged on and tore the motor out. only thing I had was this reference photo of the propshaft angle: the motor was then removed and carefully placed on a pallet which it immediately destroyed because it is the heaviest son of a bitch I have ever come across my phone decided to spruce up this photo, I don't know why
18 points
-
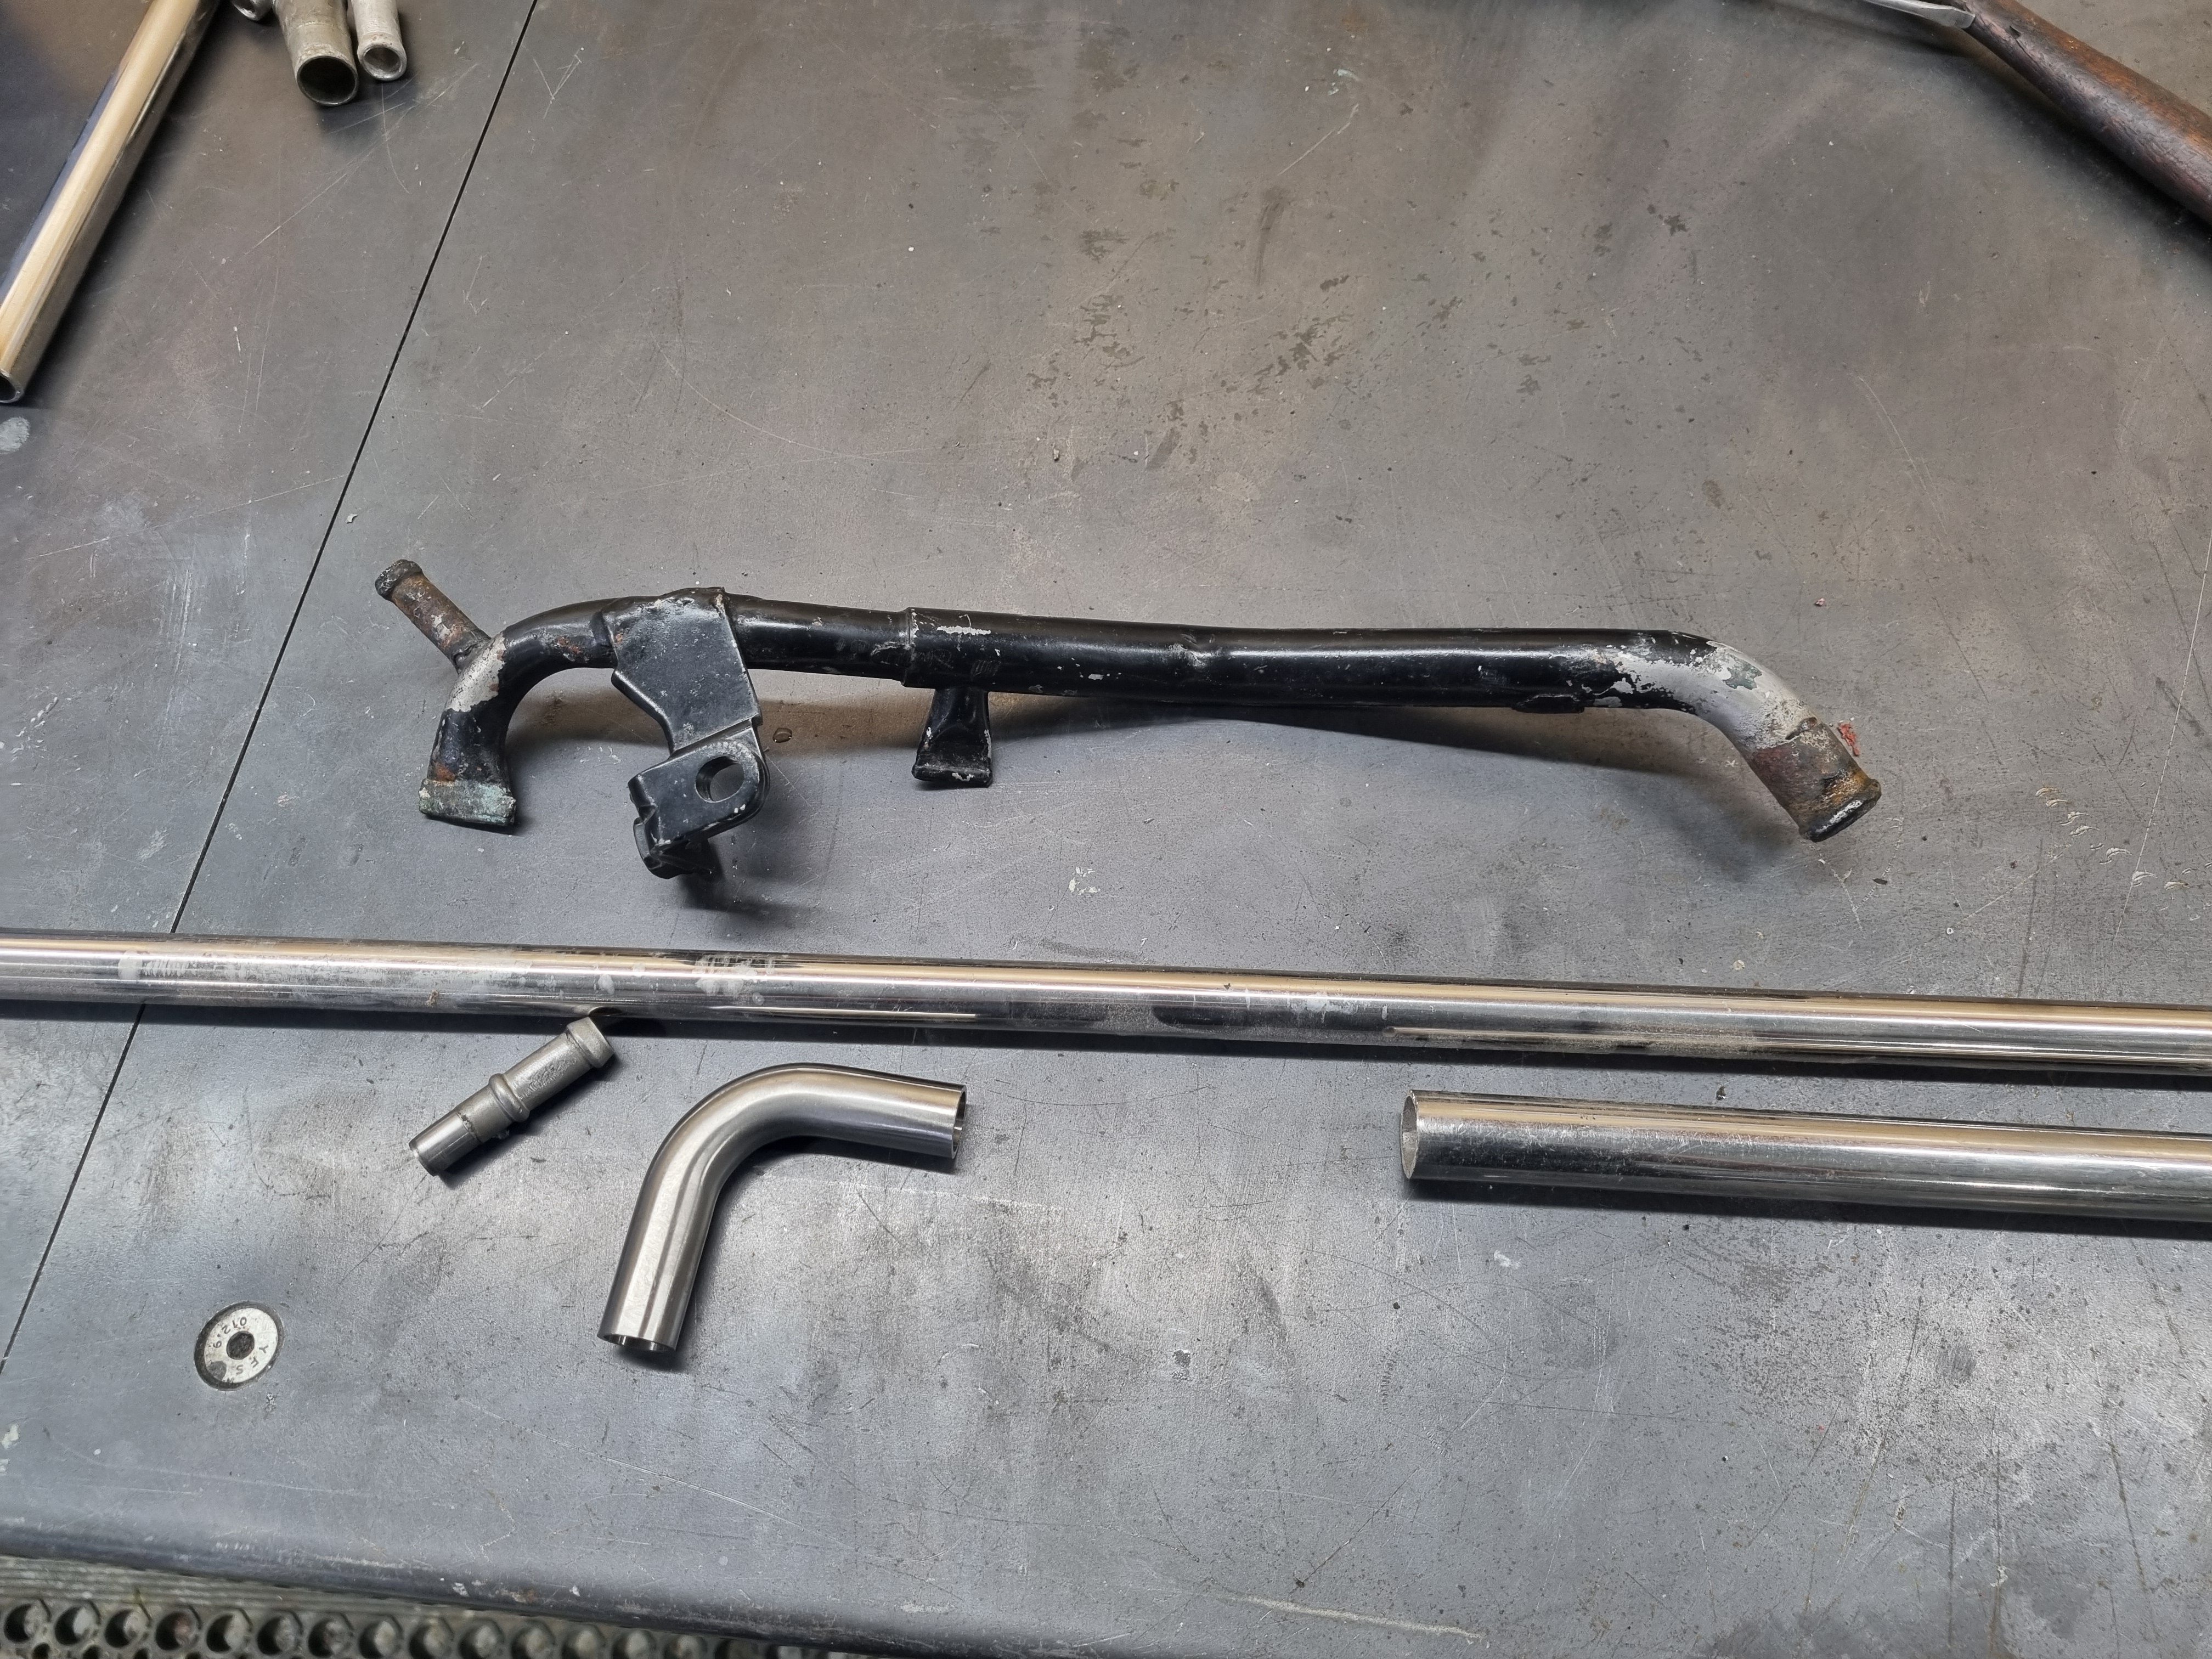
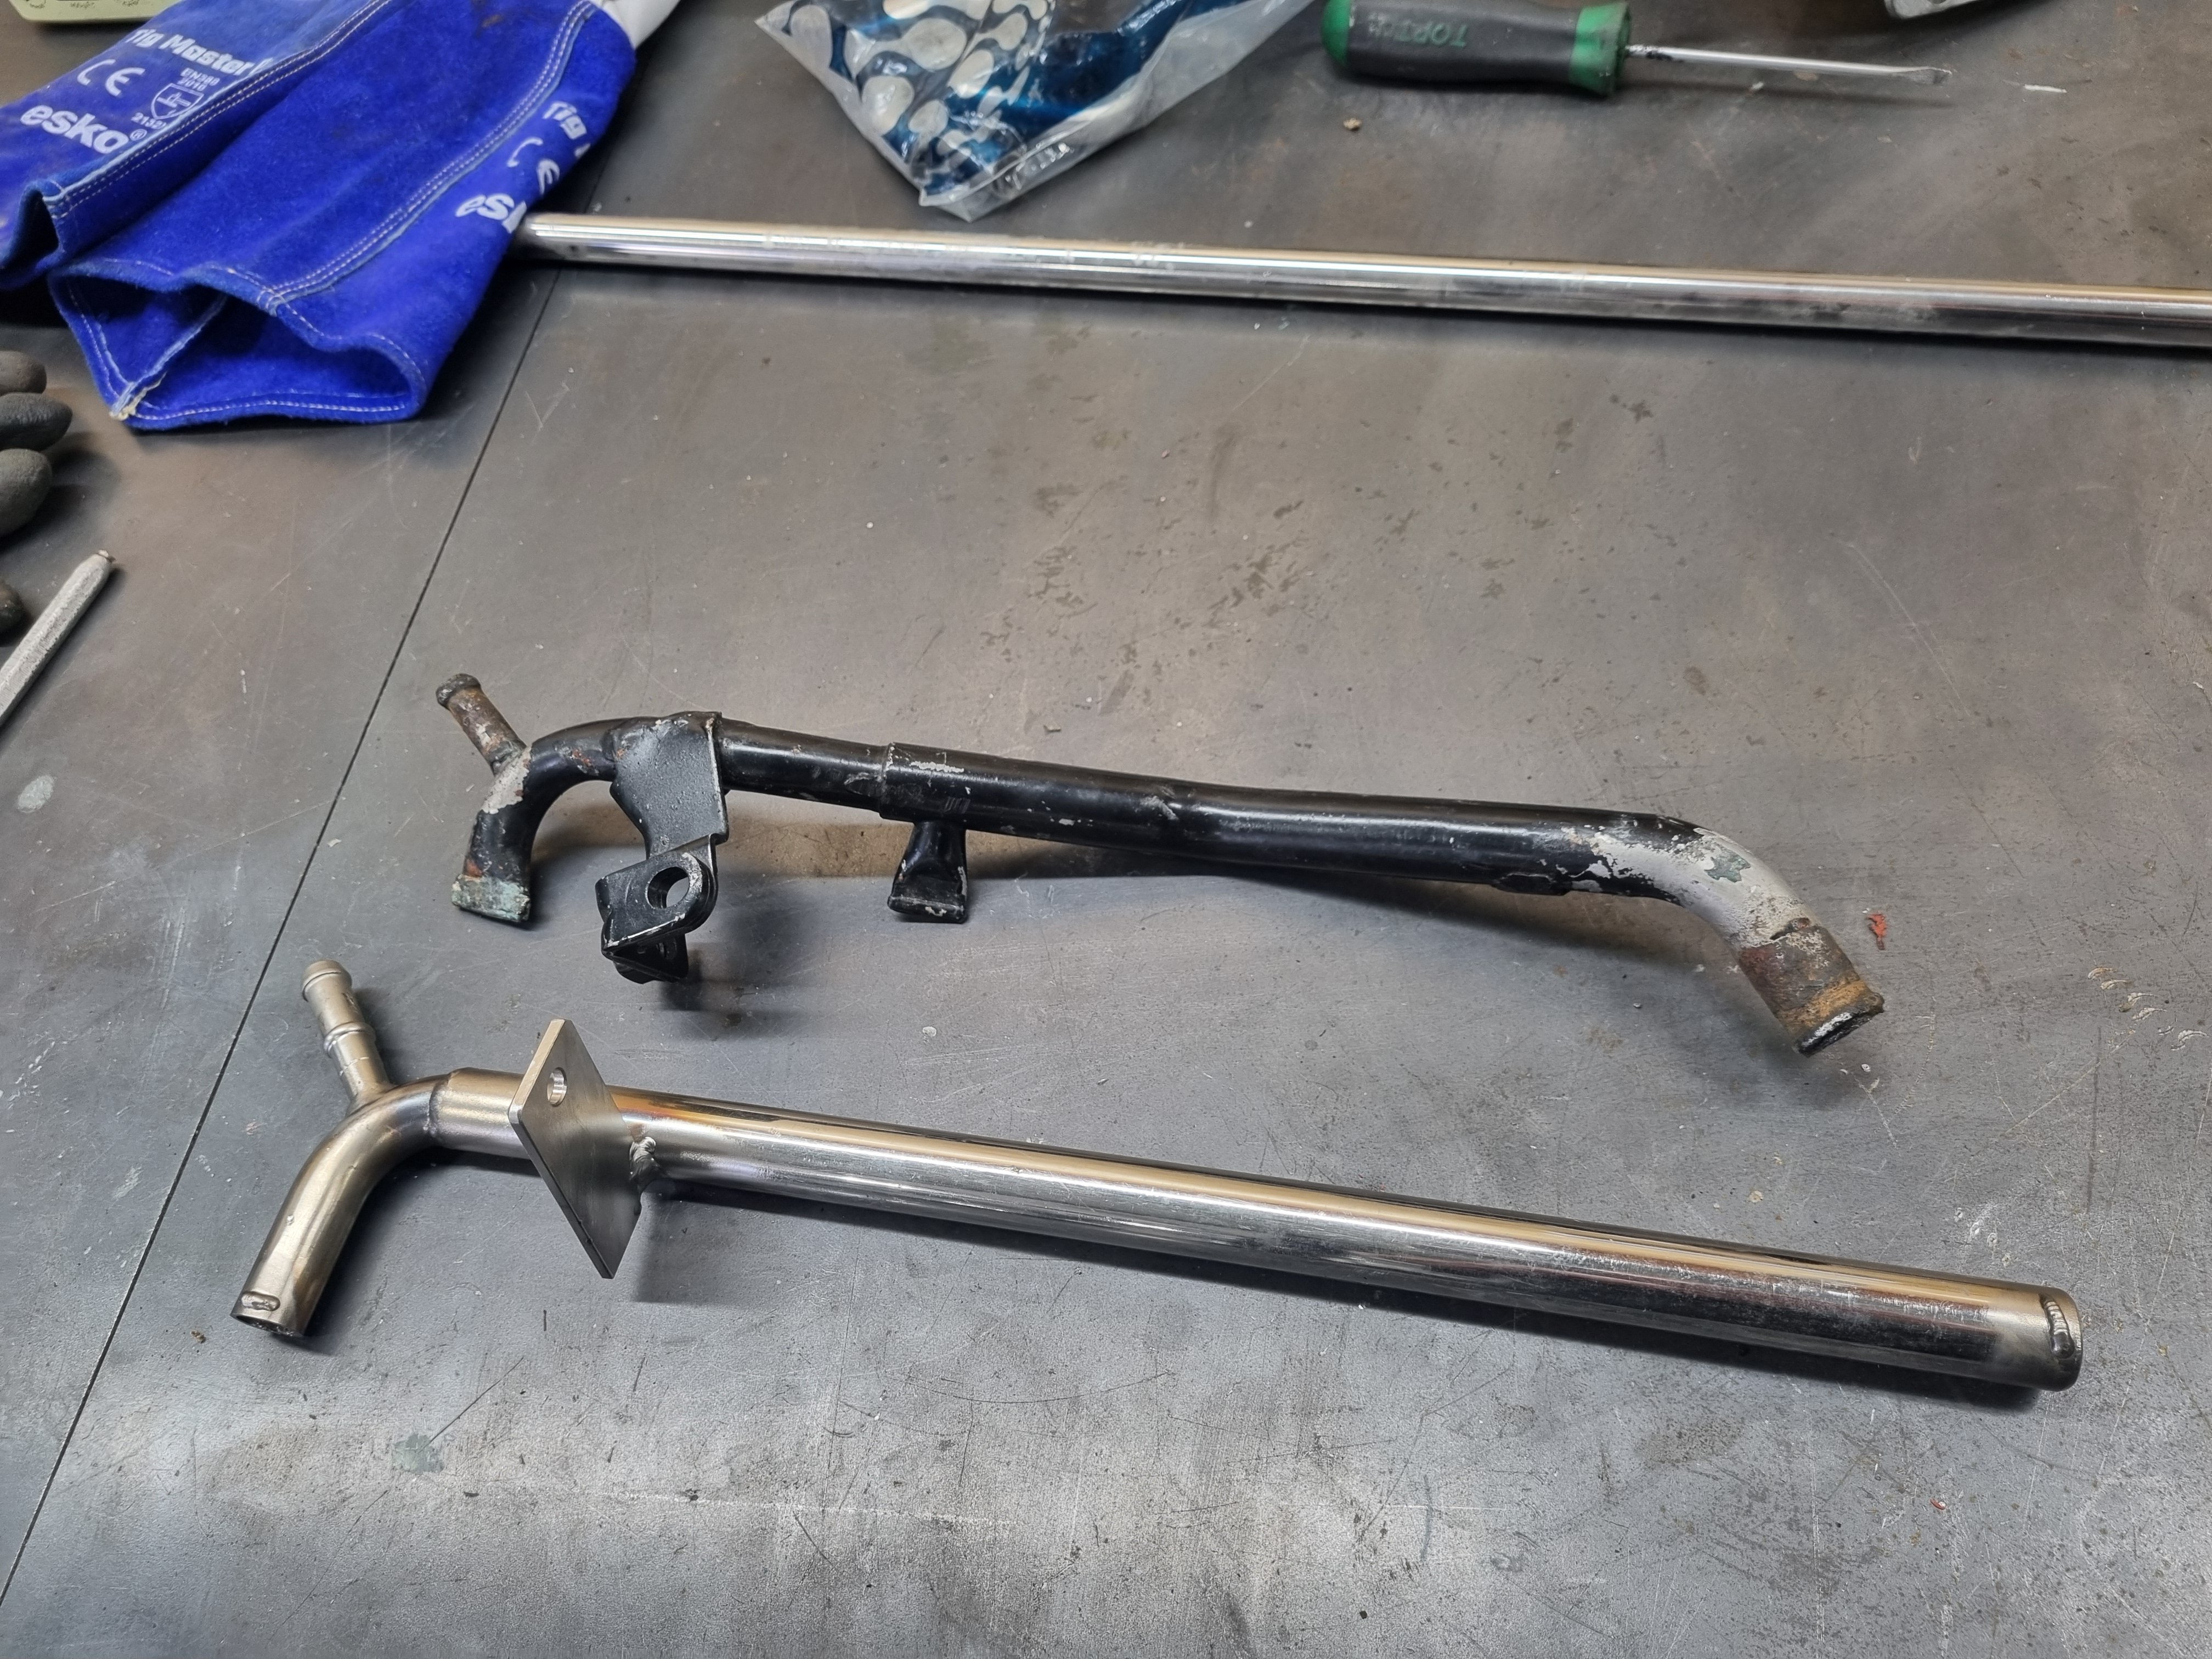
I'm trying to get the motor back in the car. Couple of mods that have been made to the engine that I need to unmod. There's no feed or return for the heater because racecar so I need to reinstate them. Block part was easy, I found a spigot off a 5M that I could make work by drilling and tapping the blanking plug. easy. The other bit was a bit more fucked so I ended up making a whole new one out of stainless. is made from the hot water feed pipe for a 1UZ idle speed controller that I managed to get out of the aluminium body, a bit of 19mm ss tube and a generic 16mm ss bend. added a bracket and Bob's your wombat.
17 points
-
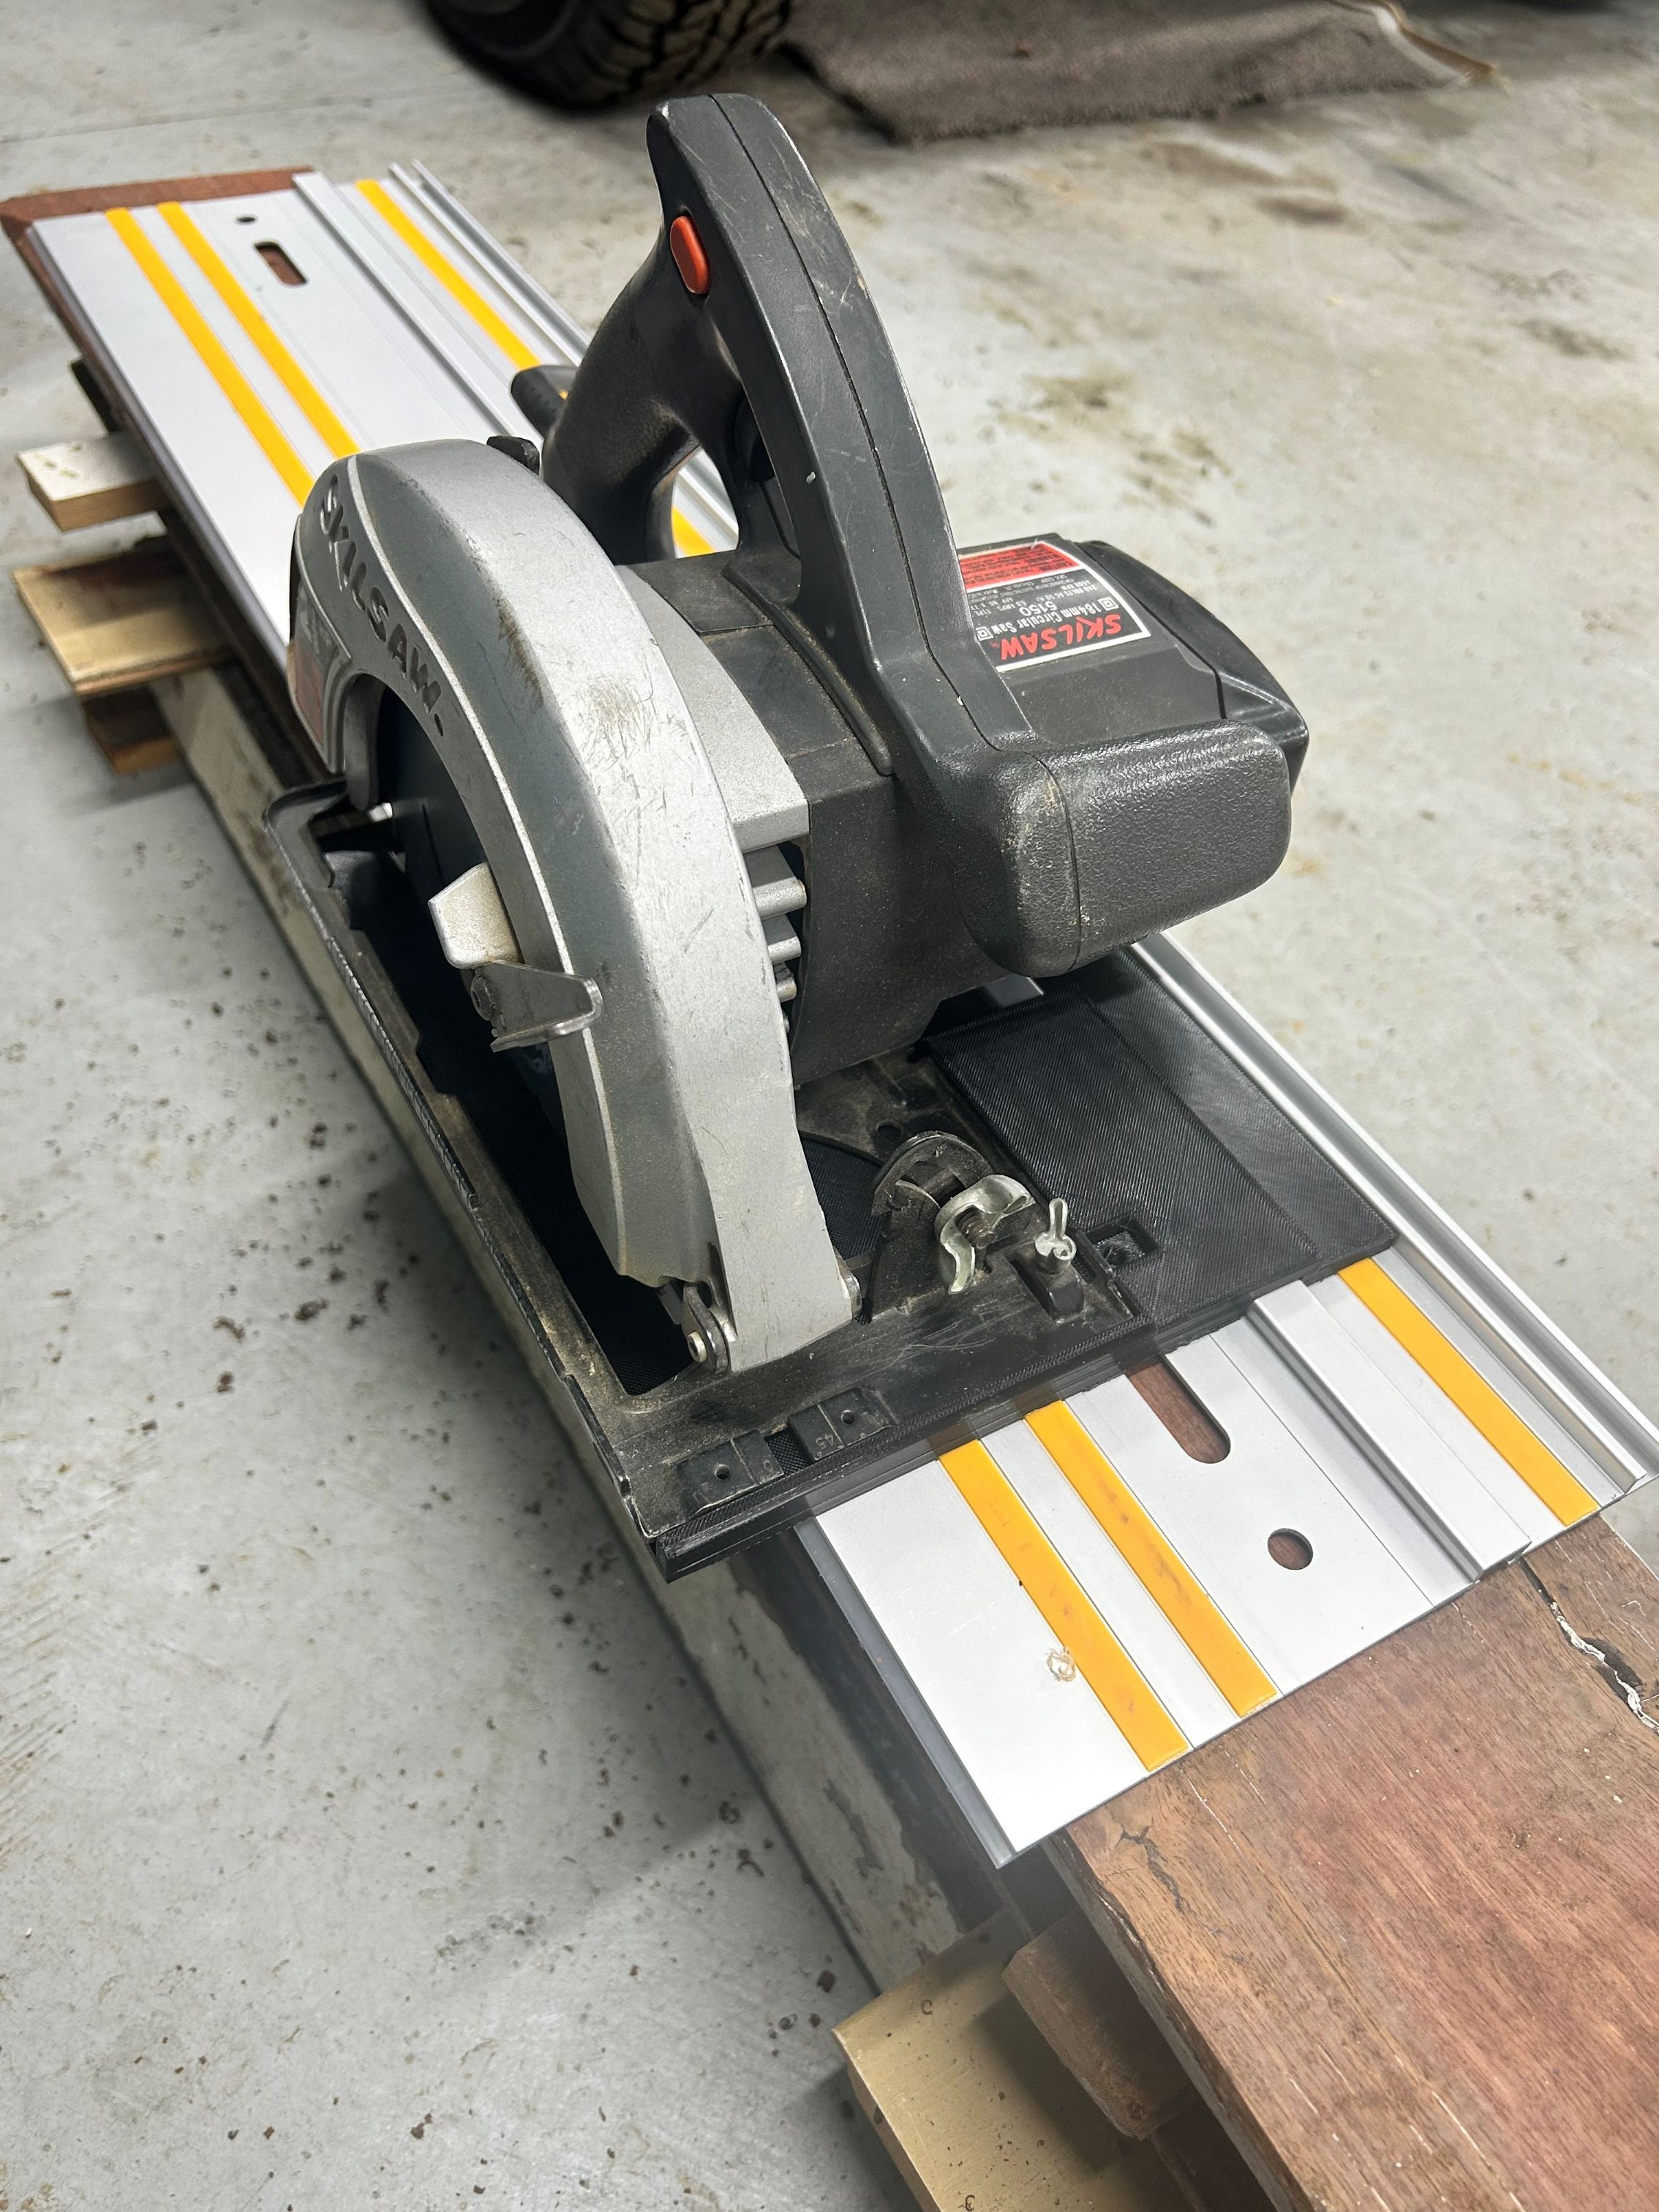
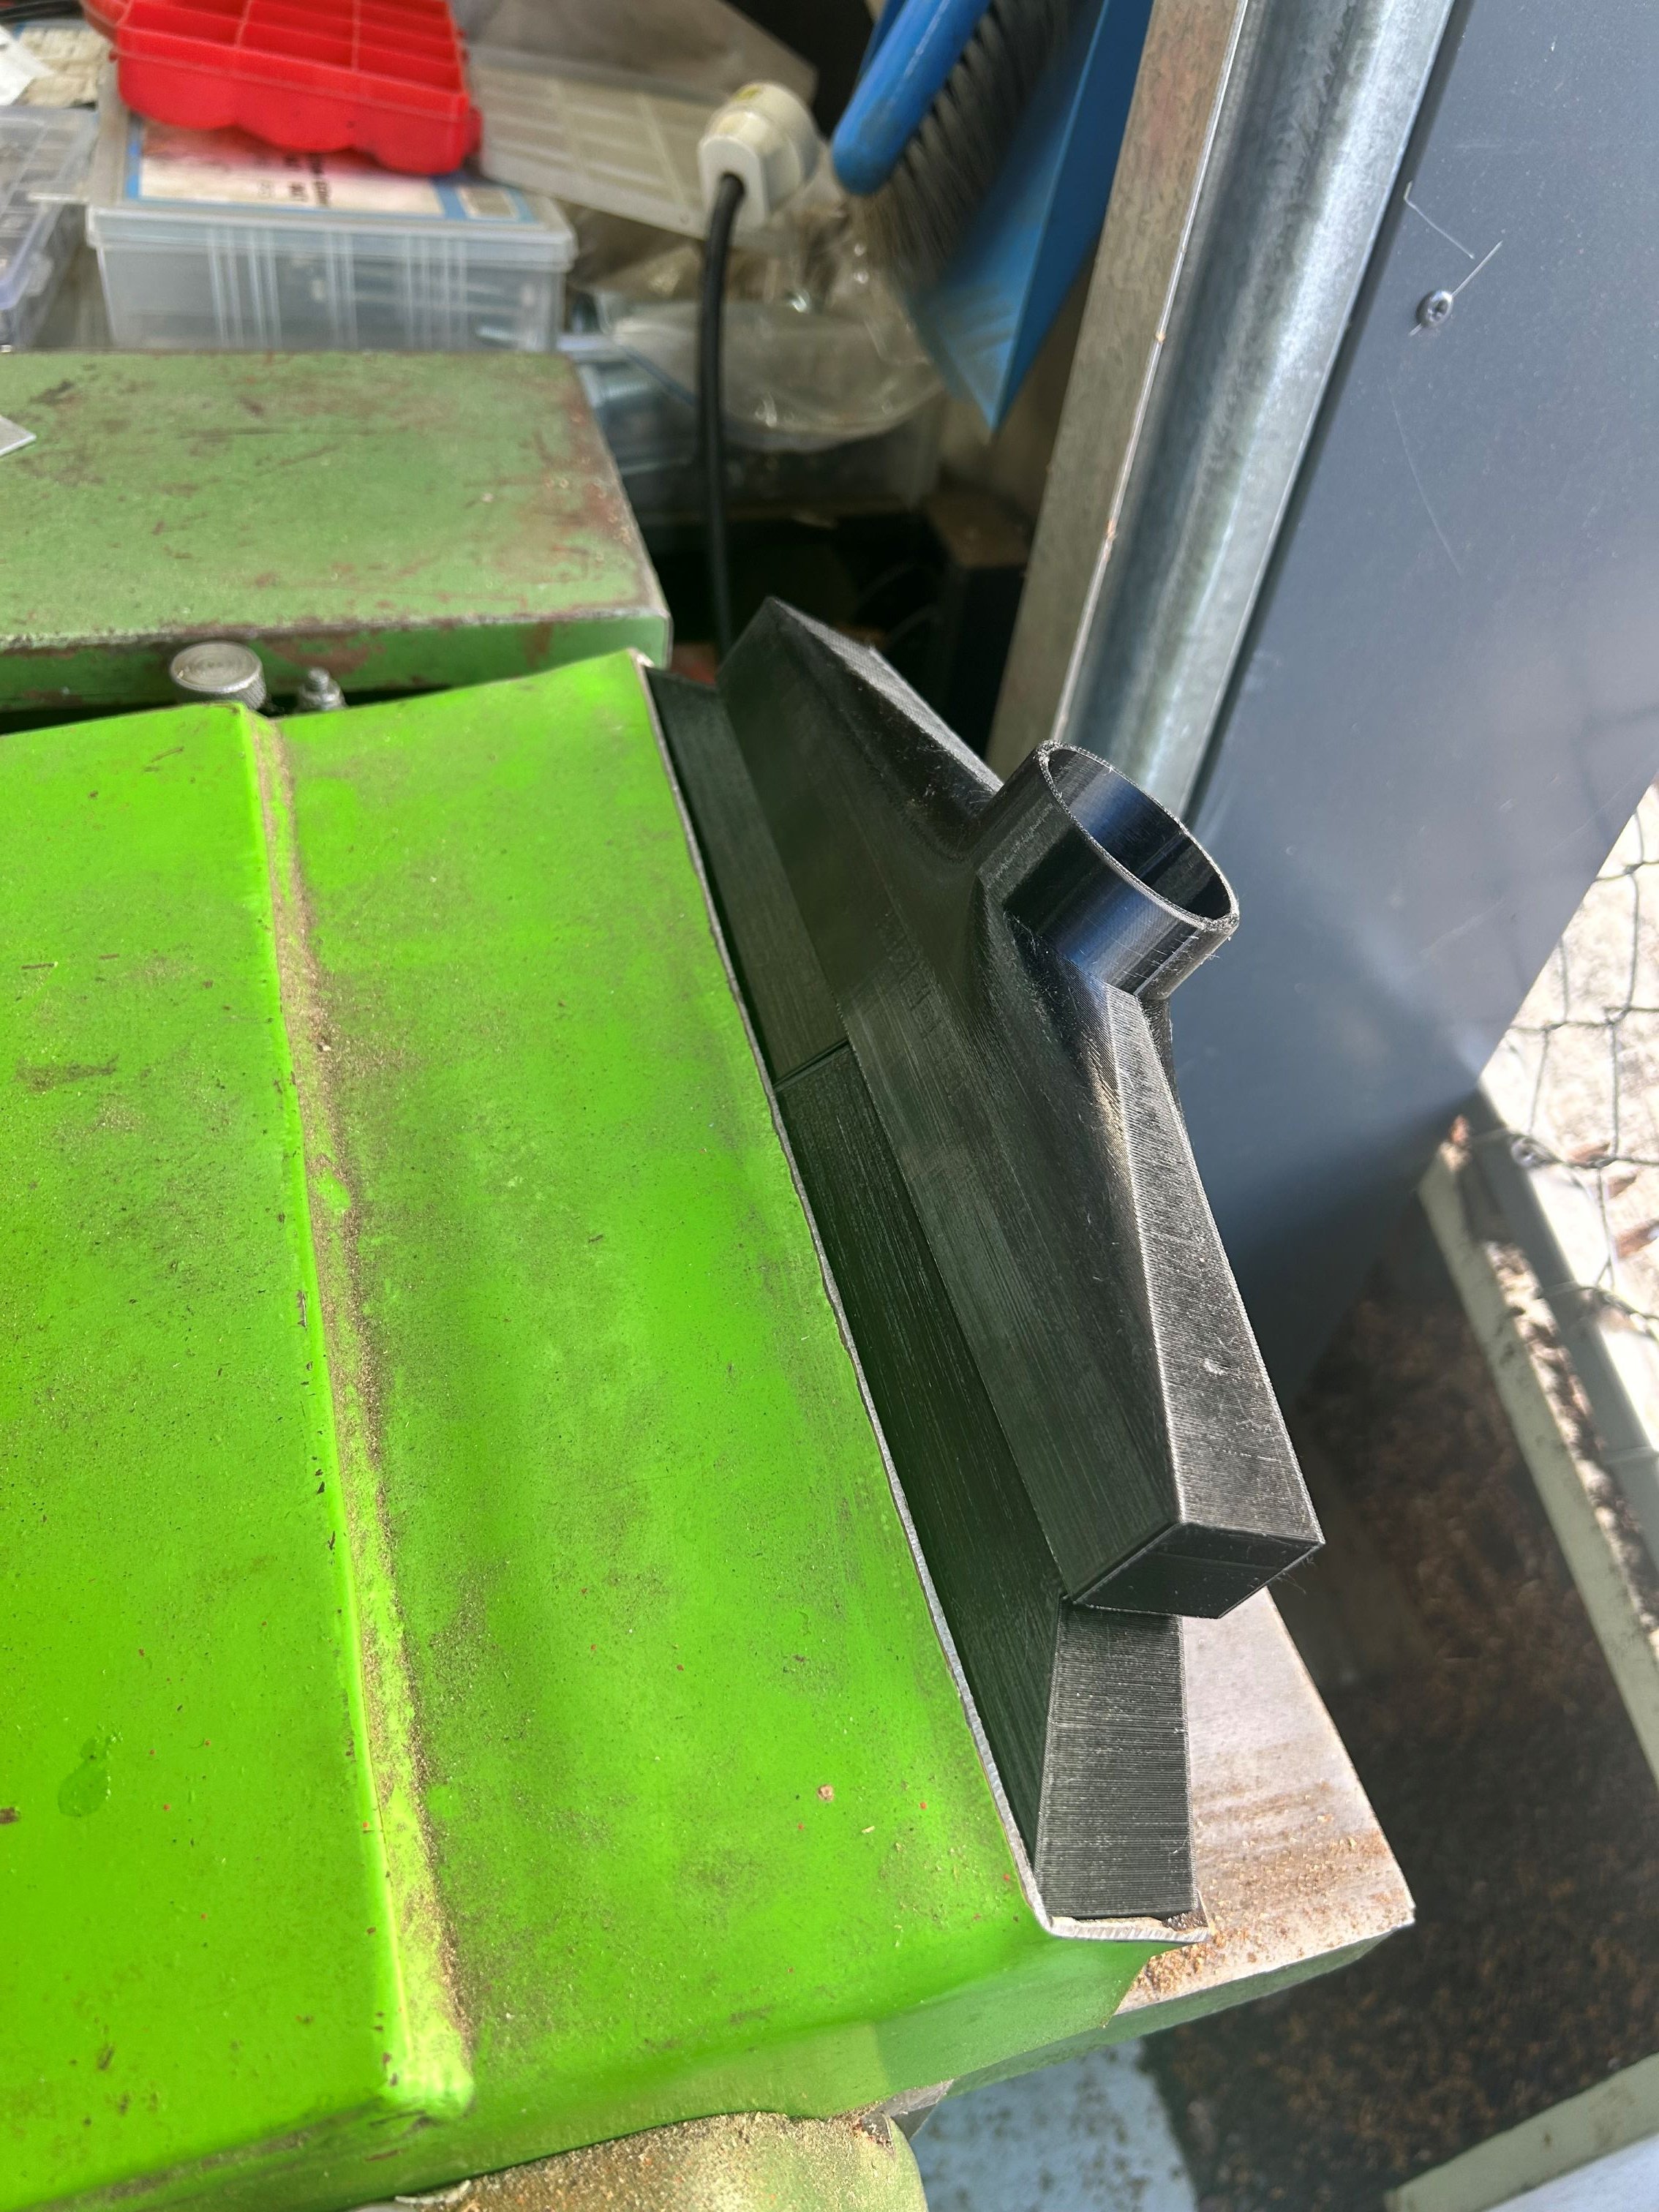
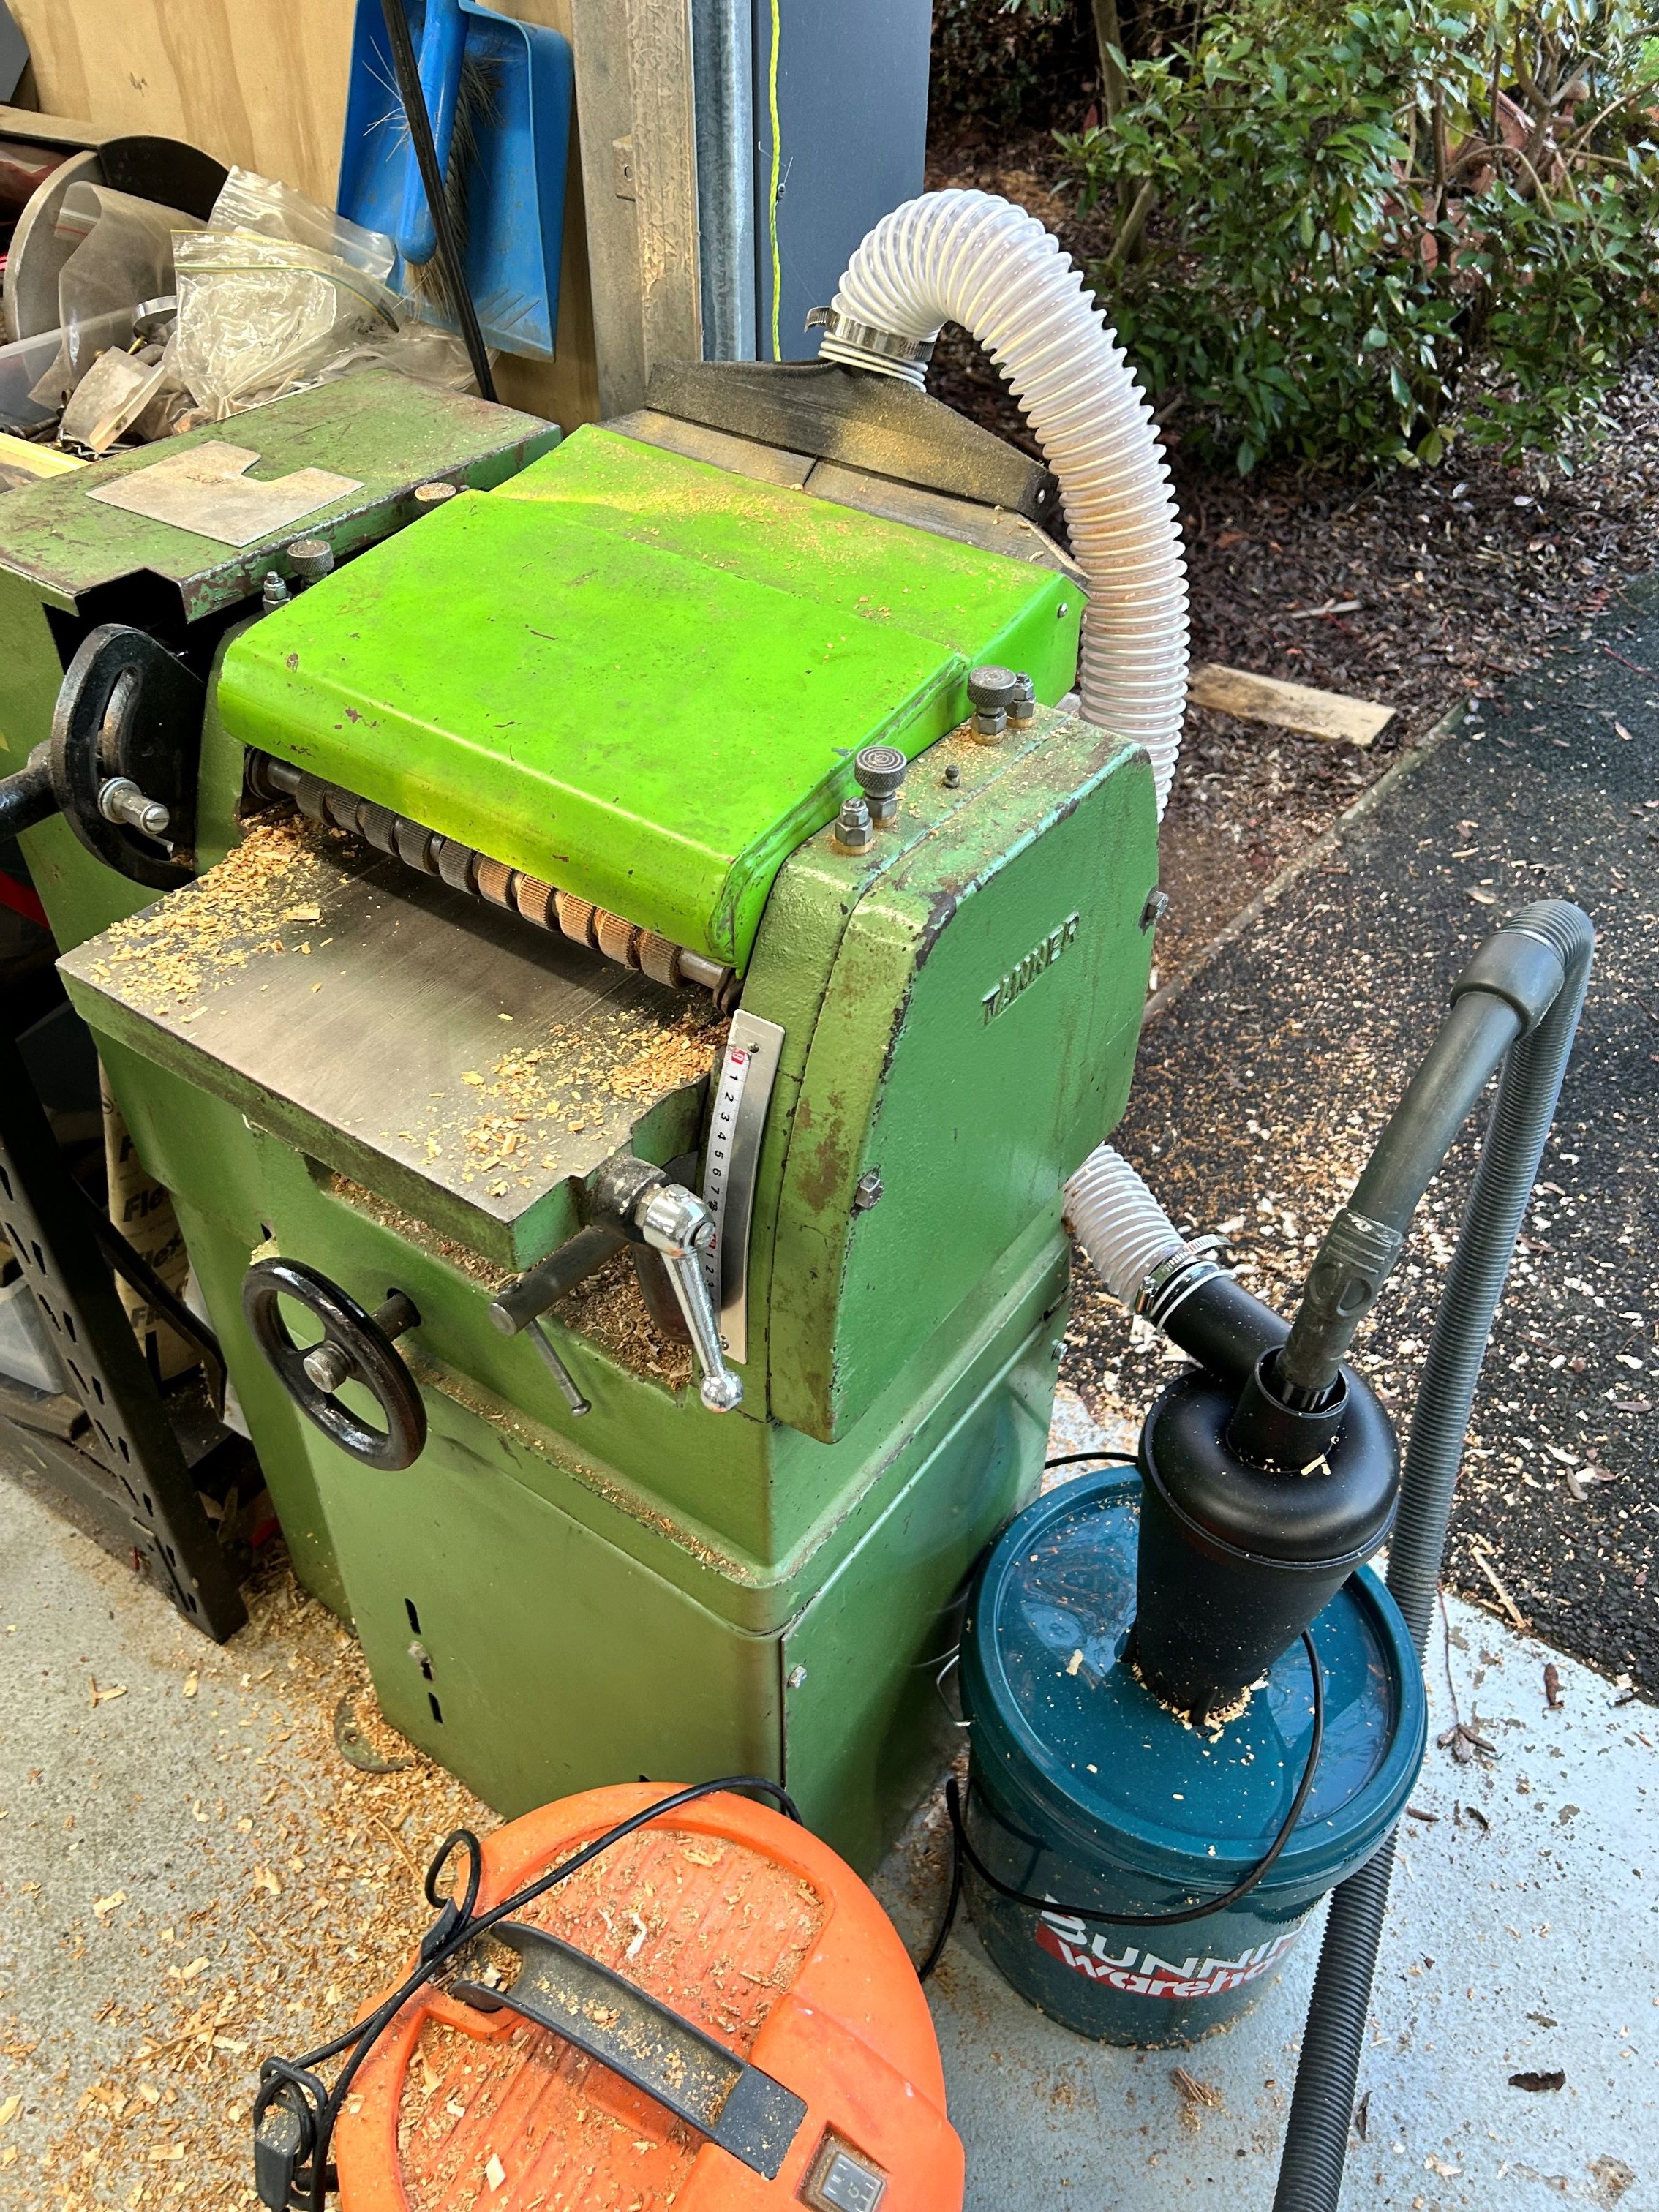
Kinda 3d print thread, but also here. I have decided that I do need a little bit of dust collection on my thickensser as have a project upcoming where I'll be using it alot. I made up a simple 2 piece collector housing to go on the thickesser and printed it out in PETG, found a cheap vortex separator on Temu (though in hindsight I could have printed that too), then a bunnings bucket + hose completed the ensumble. Isnt 100% (but I dont need it to be) and a quick test run has it working fine as long as you're not expecting it too much of it. Beware of the 'dust collection barry' rabbithole which exists on the internet. Continuing the wood tool theme.... I very much like the concept of a track saw (and will be handy to process some beams I have here) but refuse to pay the $$ that is demanded by festool + others considering. Found some alloy extrusions from Temu for ~$40 which come close to the Festool profile and the printed a 'sled' which matches the groove profile + my skilsaw base. Doest have the depth of cut as a retail plunge saw but worth it for the $ I have into the whole affair.
17 points
-
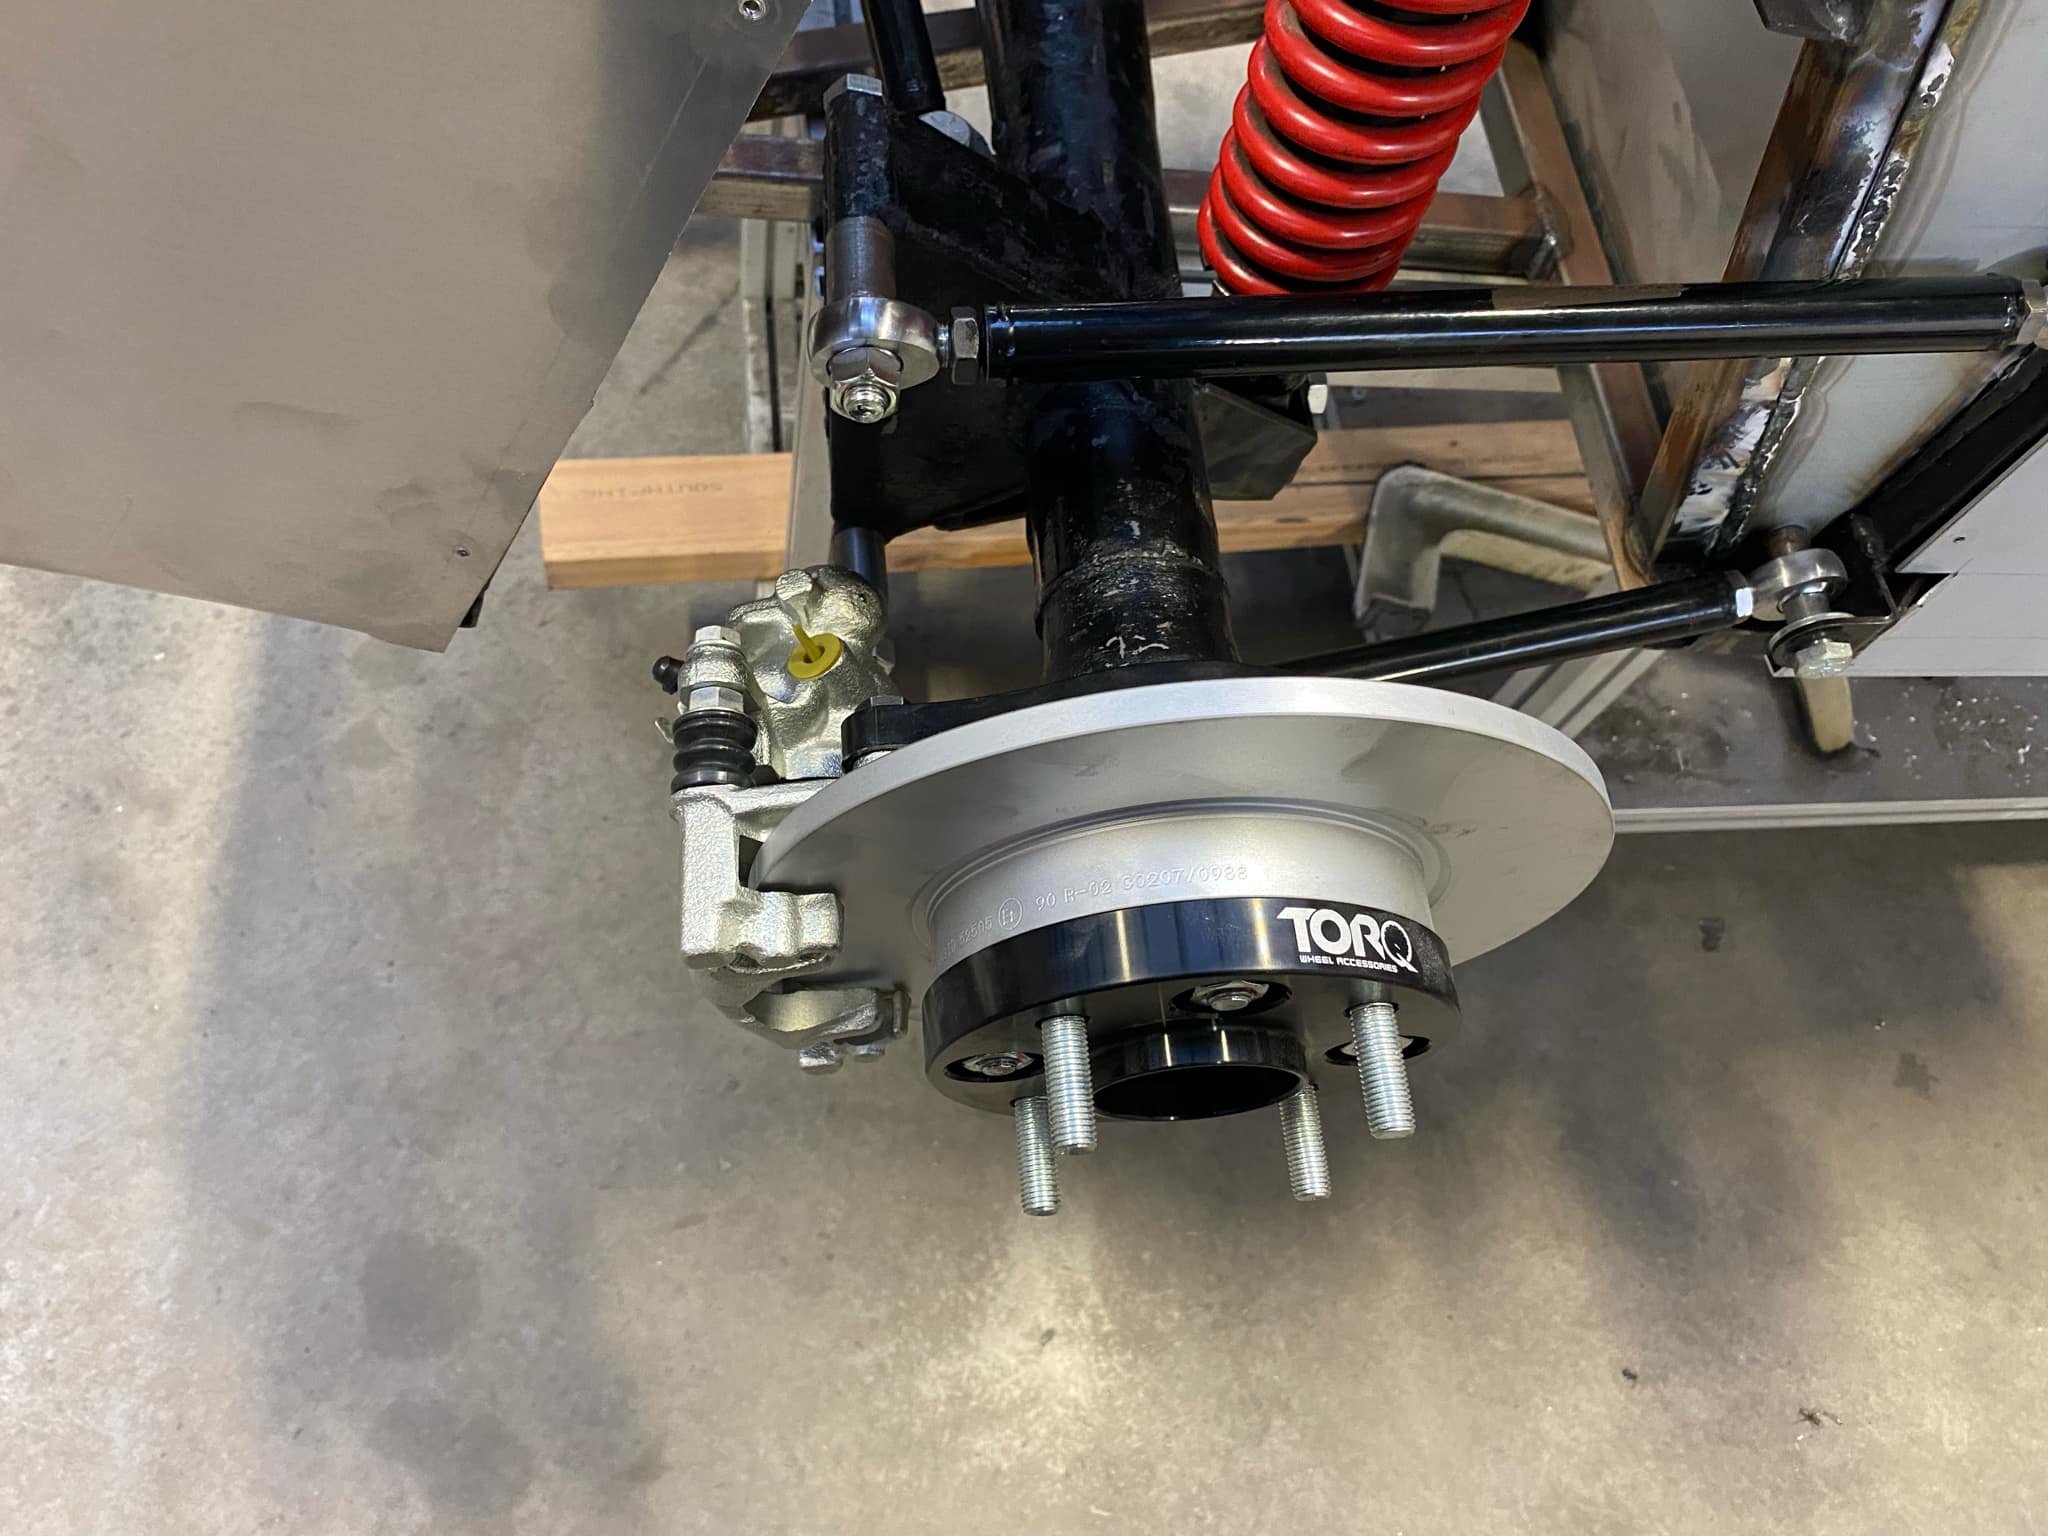
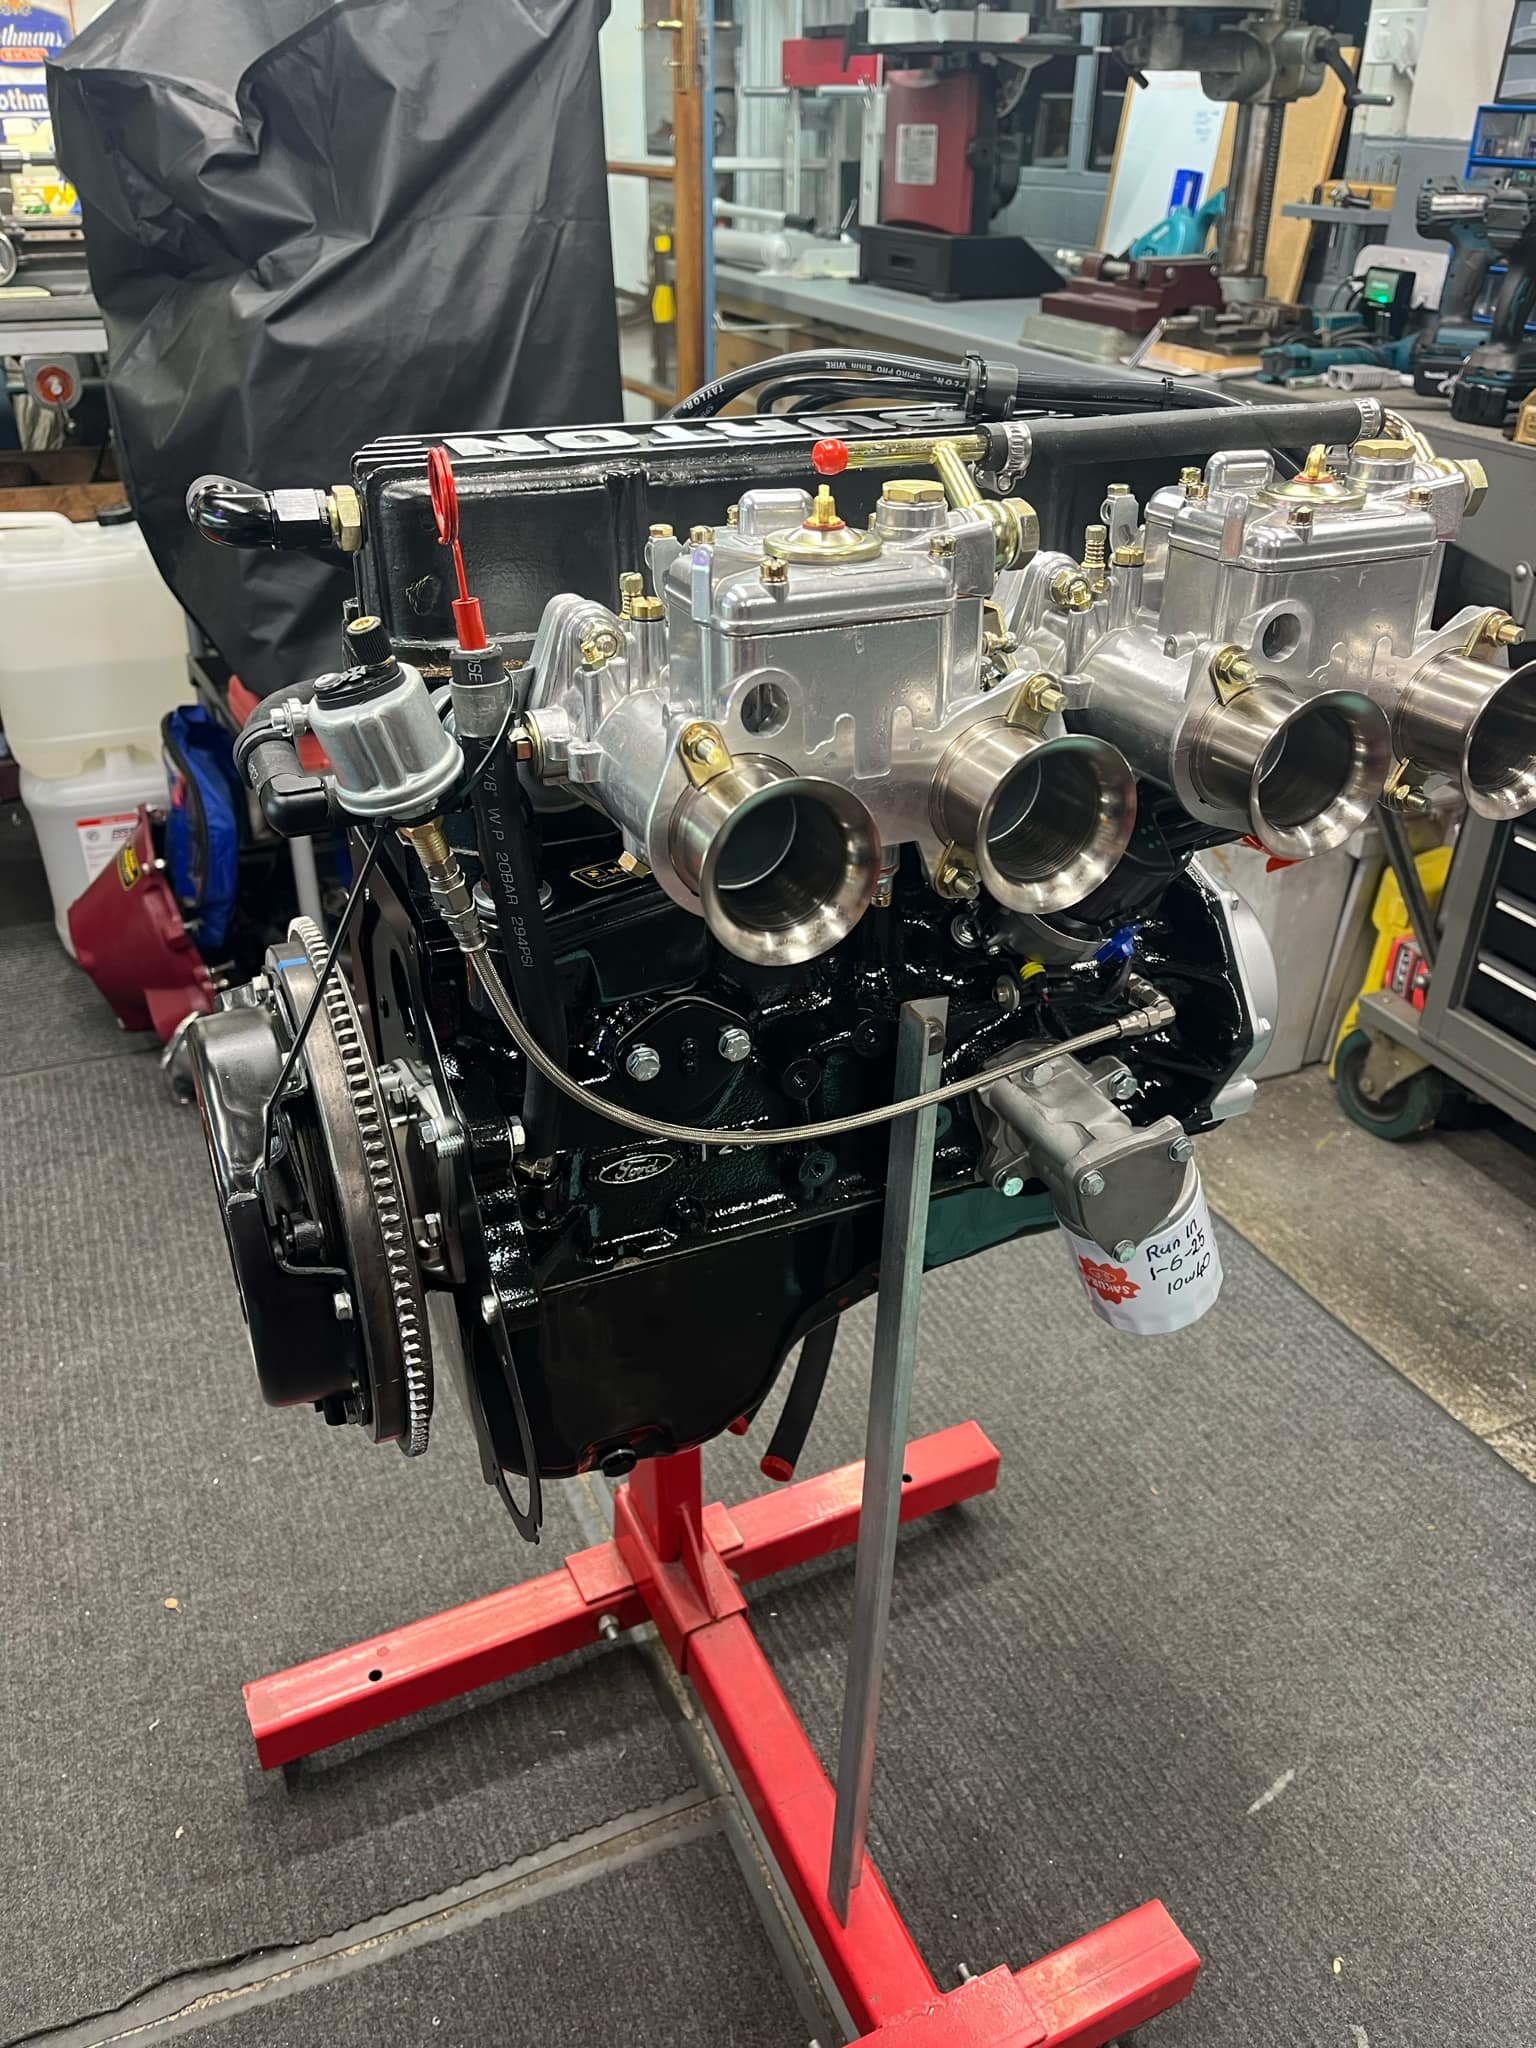
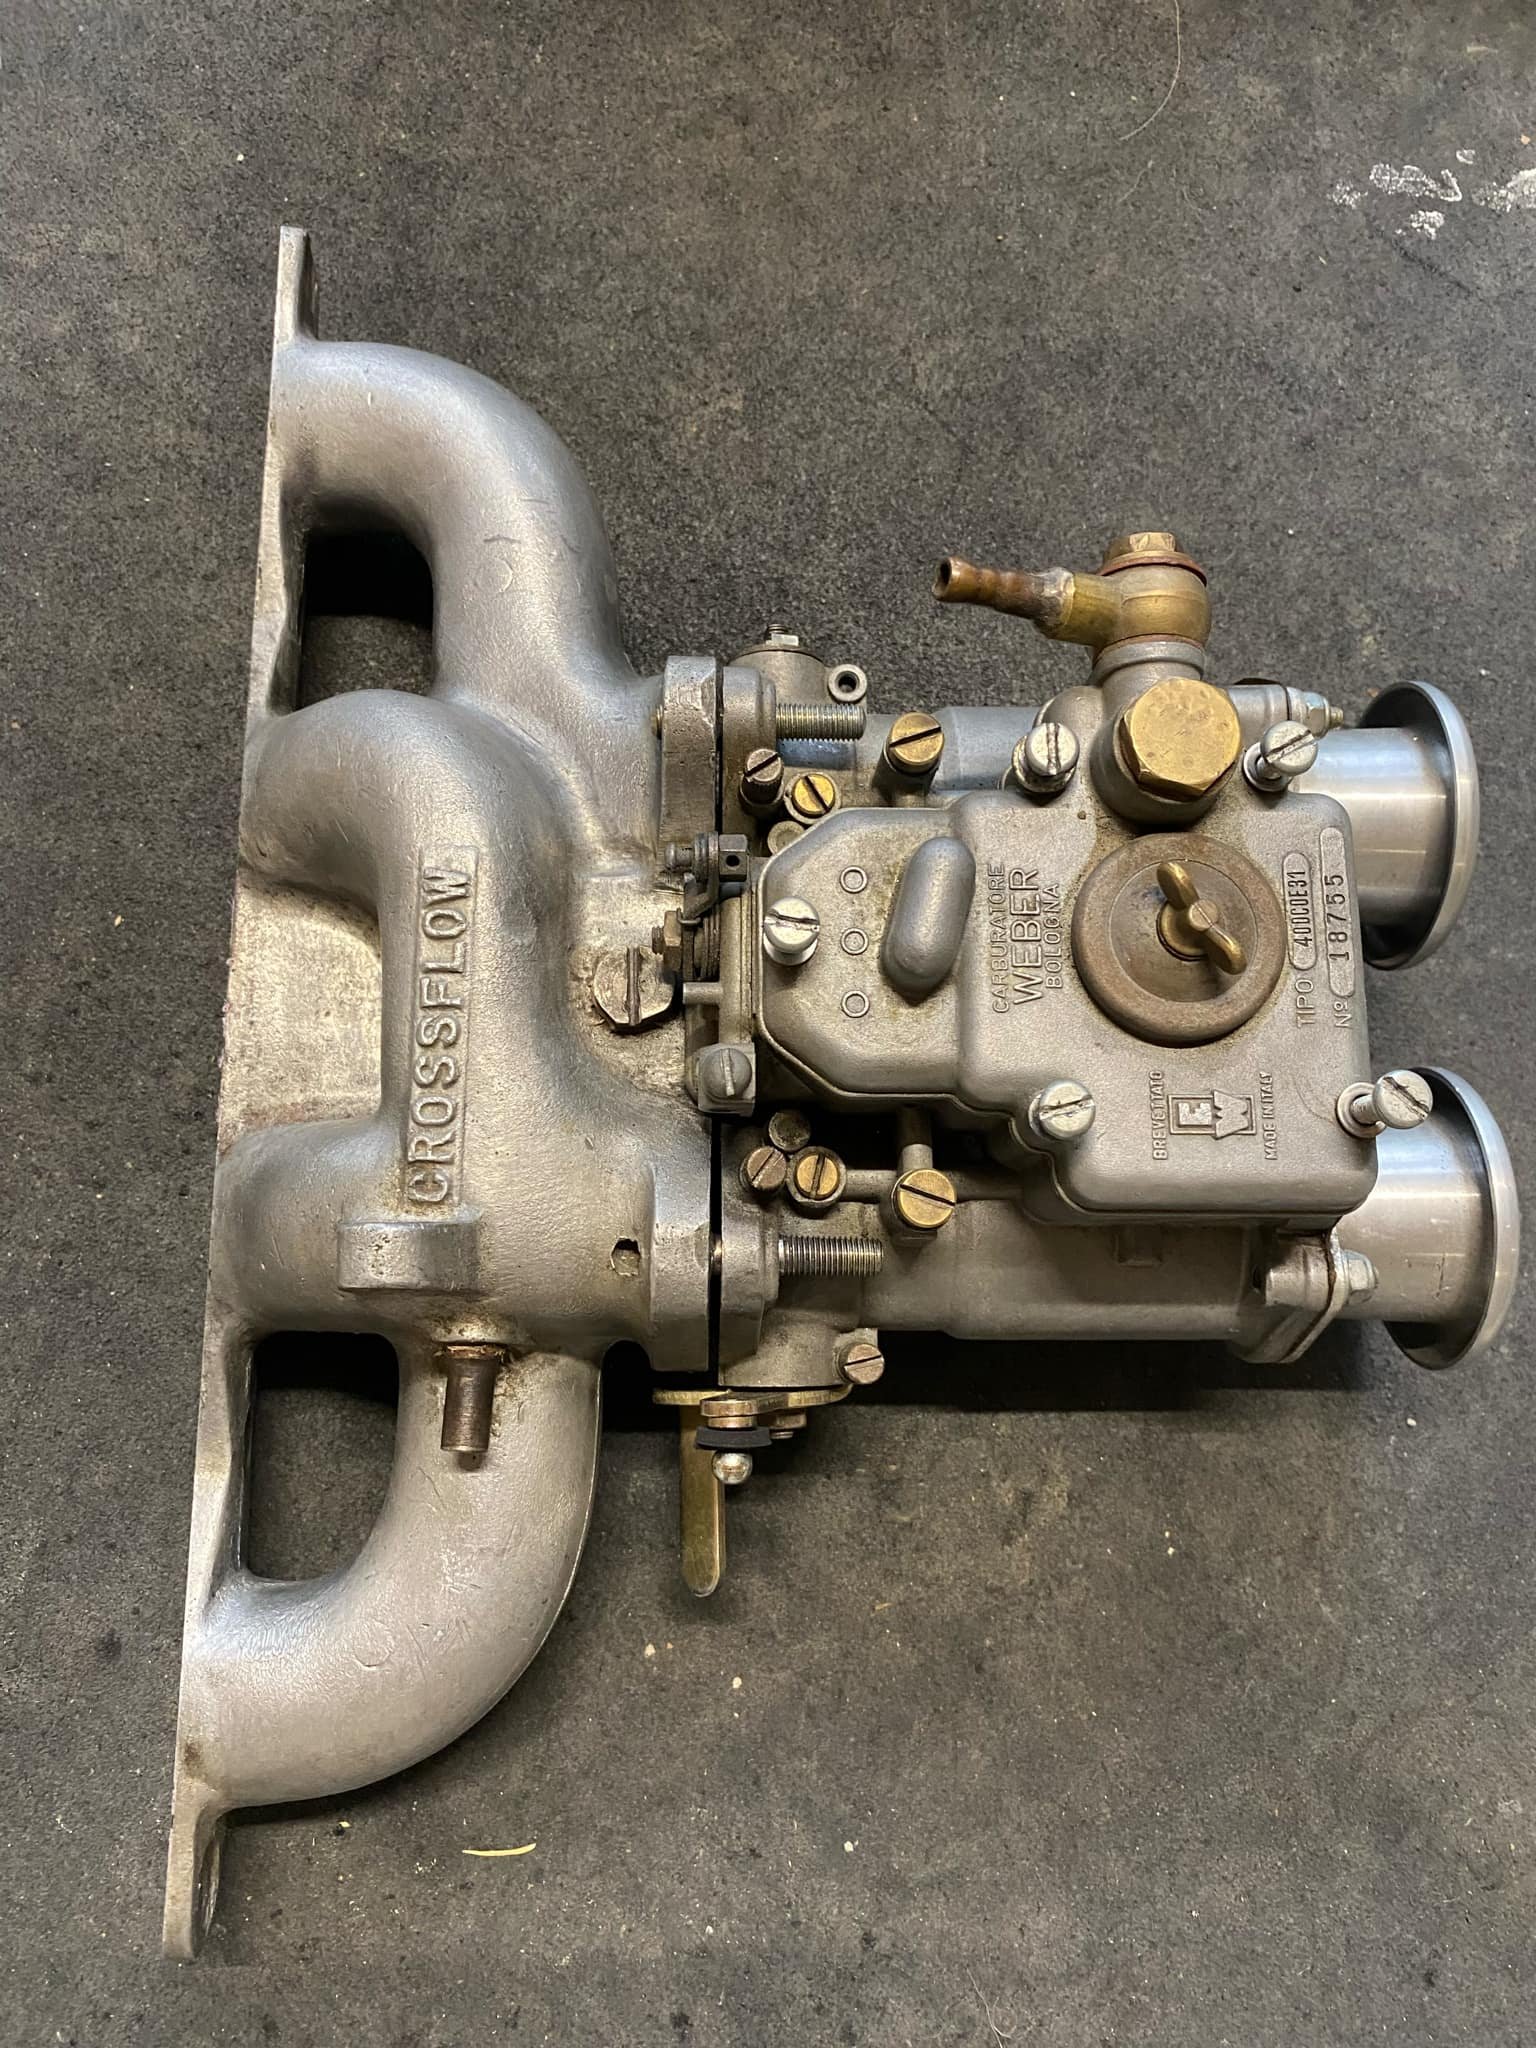
Lots of progress made in the last few months. Have upgraded the front and rear brakes. Wilwood dynalite fronts and a disc conversion on the rear. To go with the added stopping abilities, the engine has had a birthday as well. Twin faux Weber 40’s, re ground cam (K276), double row timing chain, +040 pistons for a bit more compression. Looks the business If anyone wants to buy some Anglia bits let me know. Rear brake setup is complete with backing plates, drums shoes etc, and a pair of girling front calipers. Will also sell the Italian Weber 40 I have, has a crossflow manifold to go with it if desired.
17 points
-
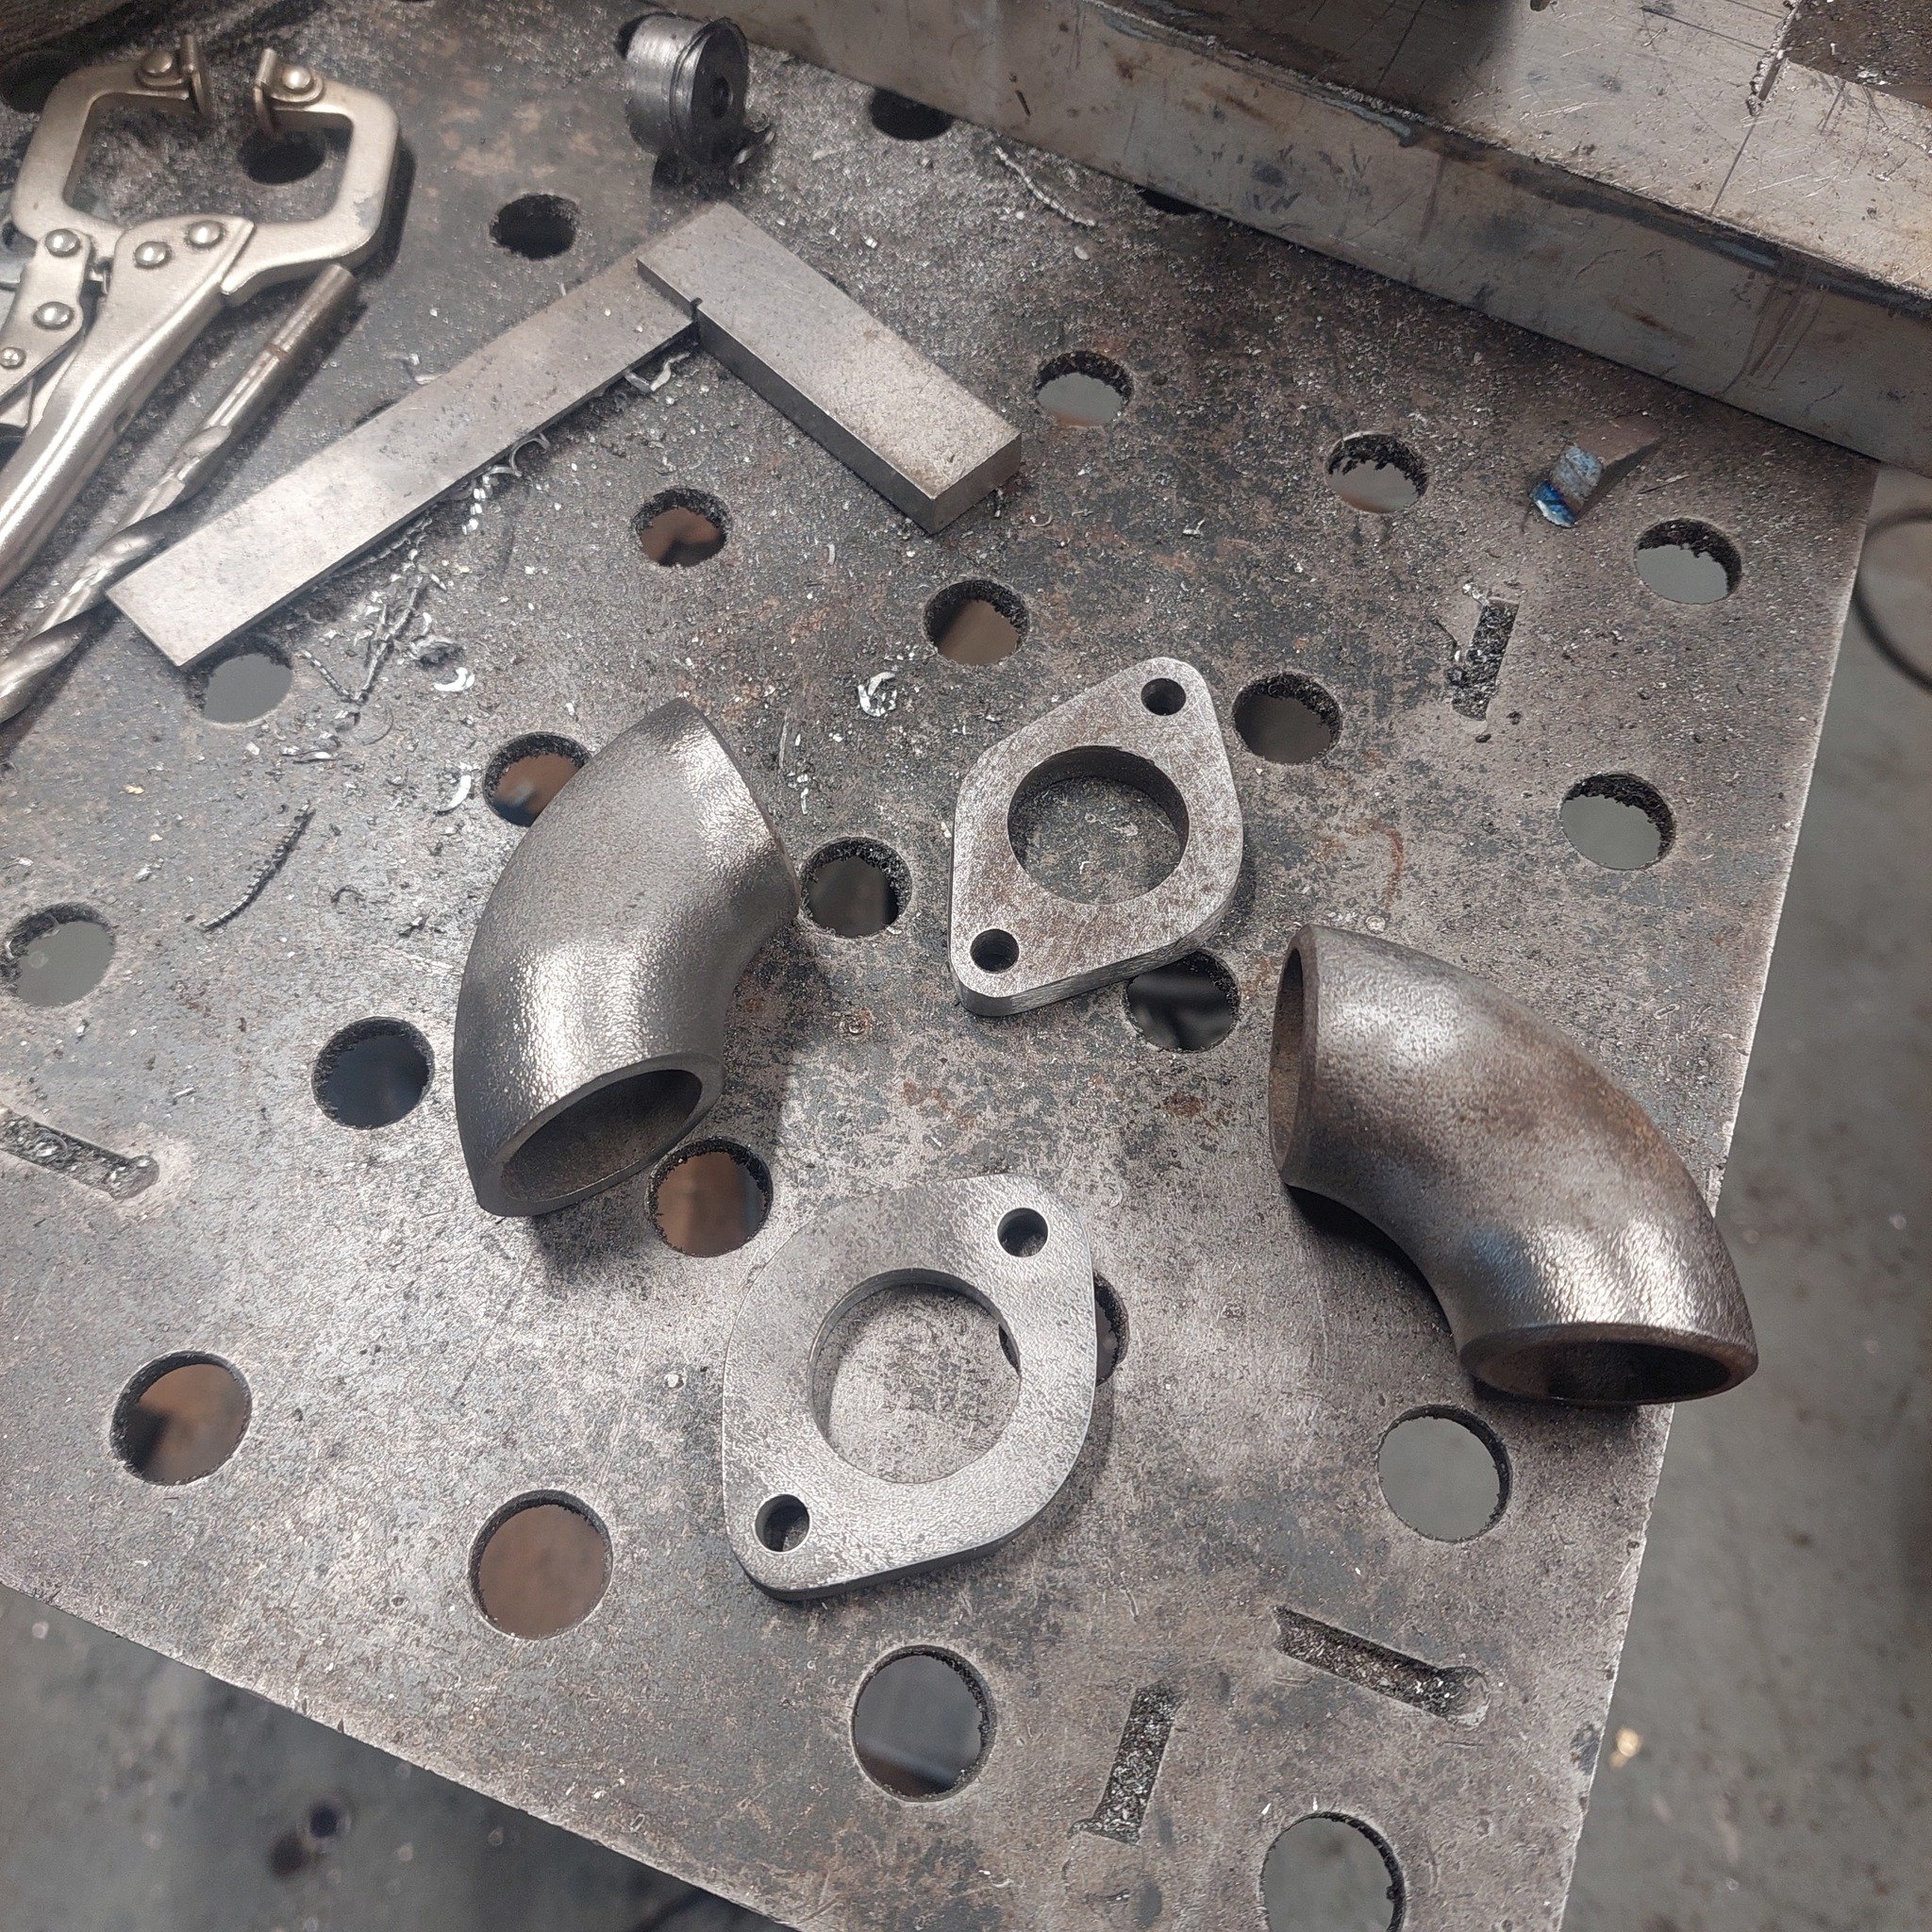
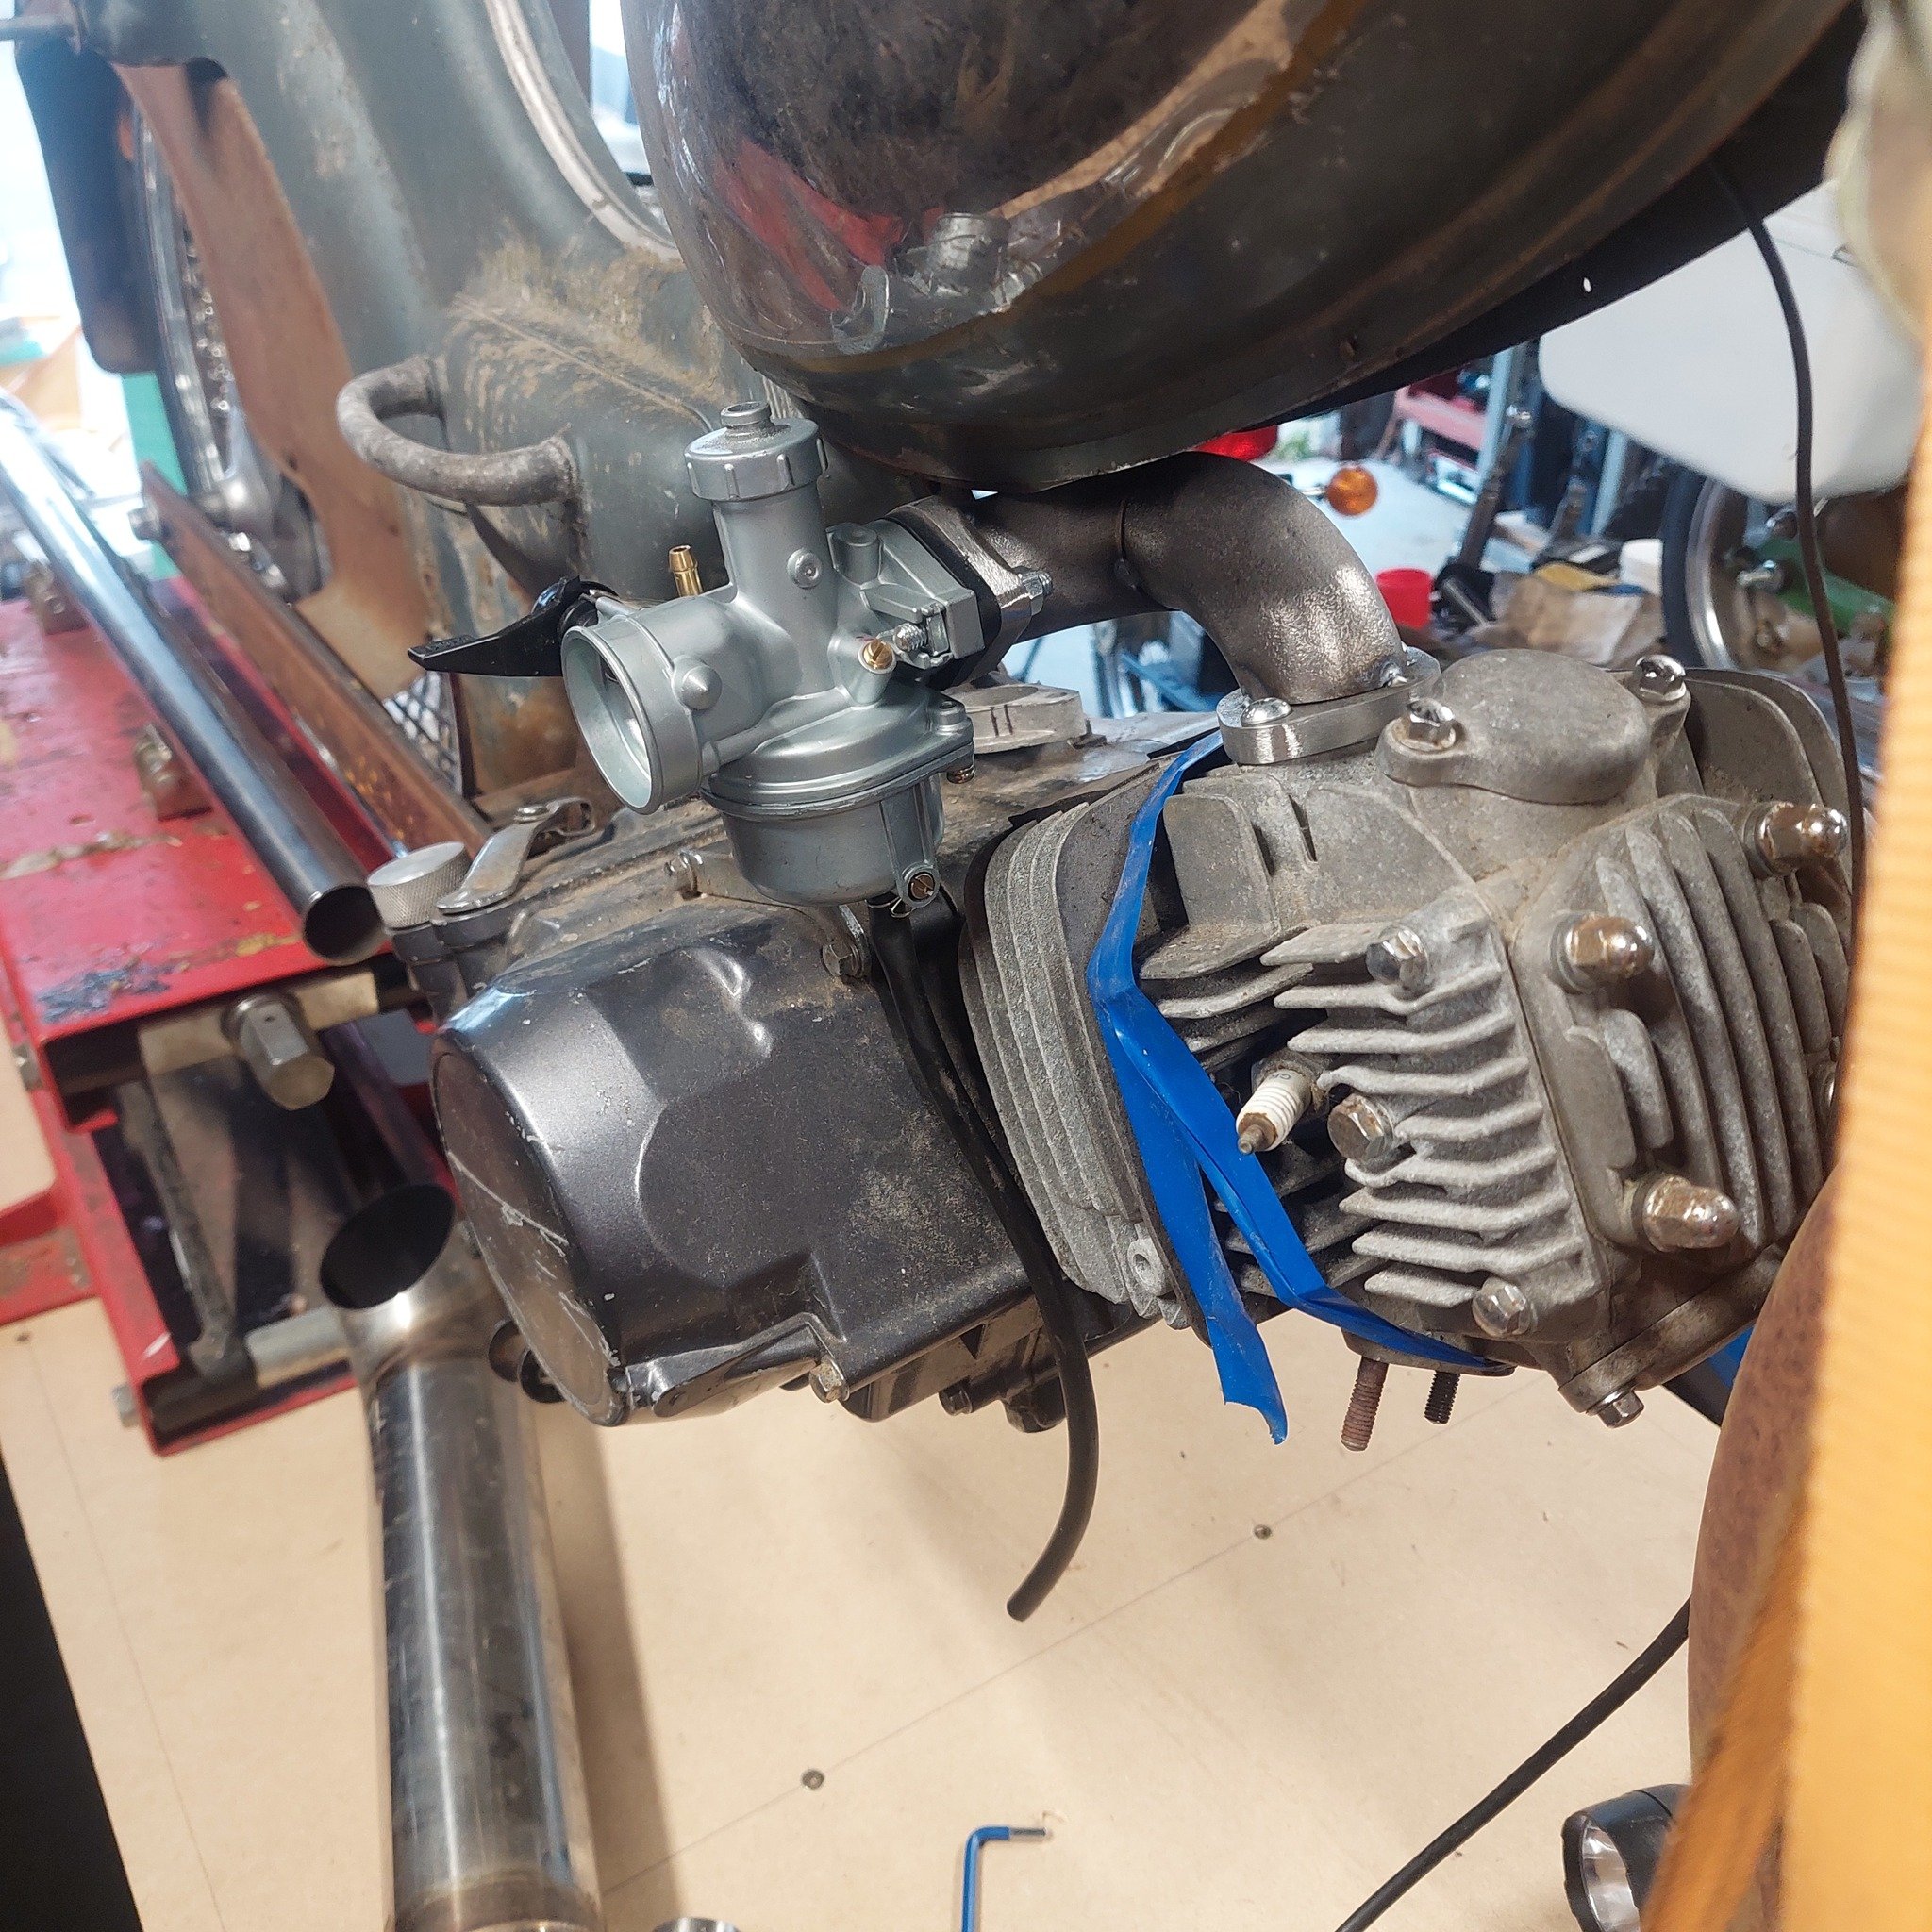
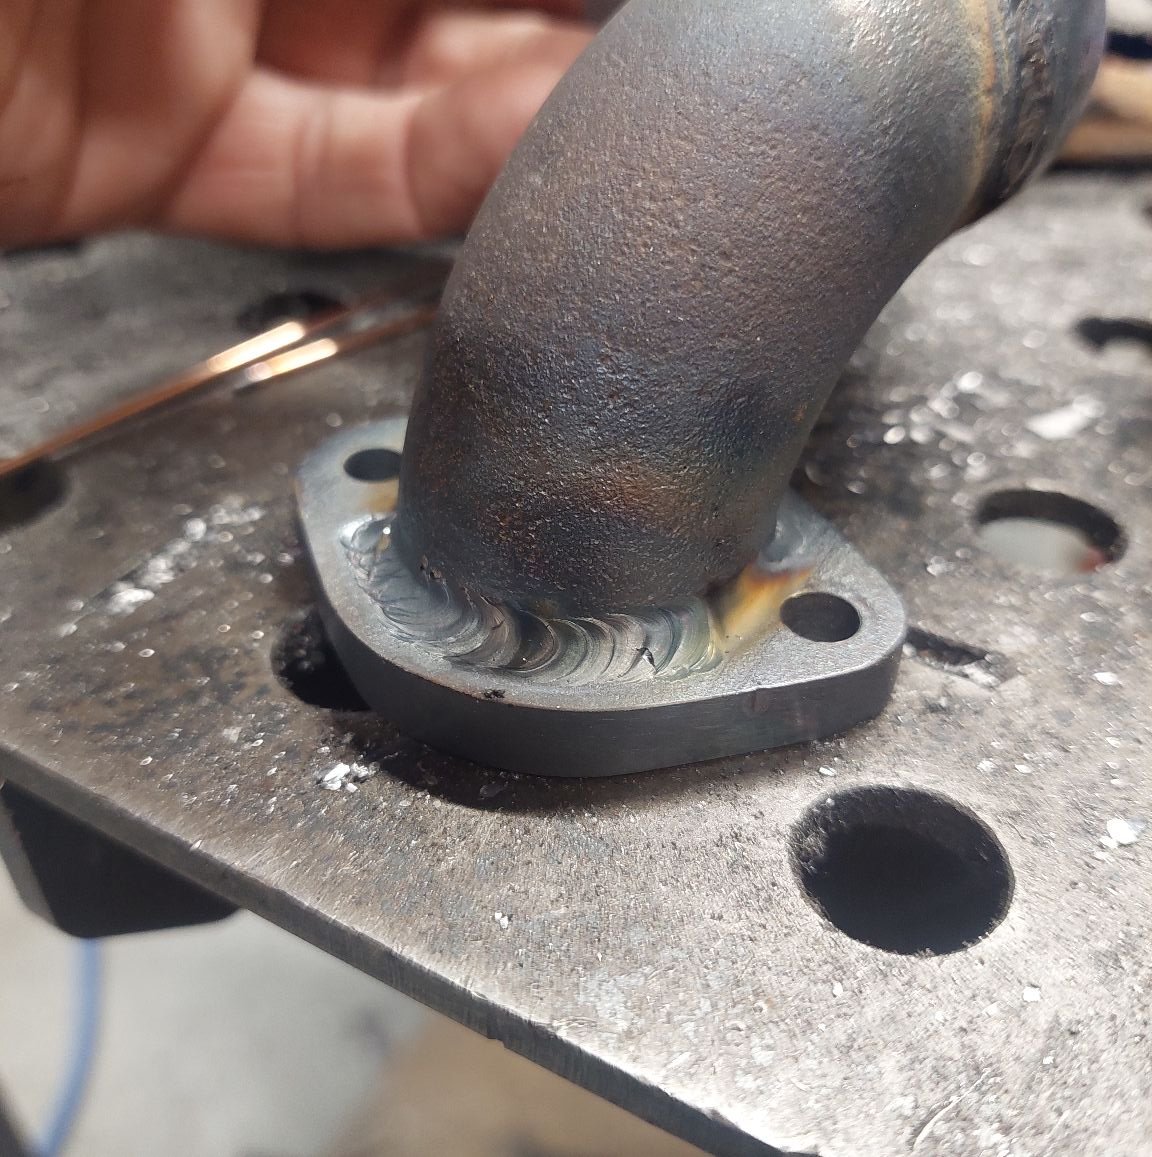
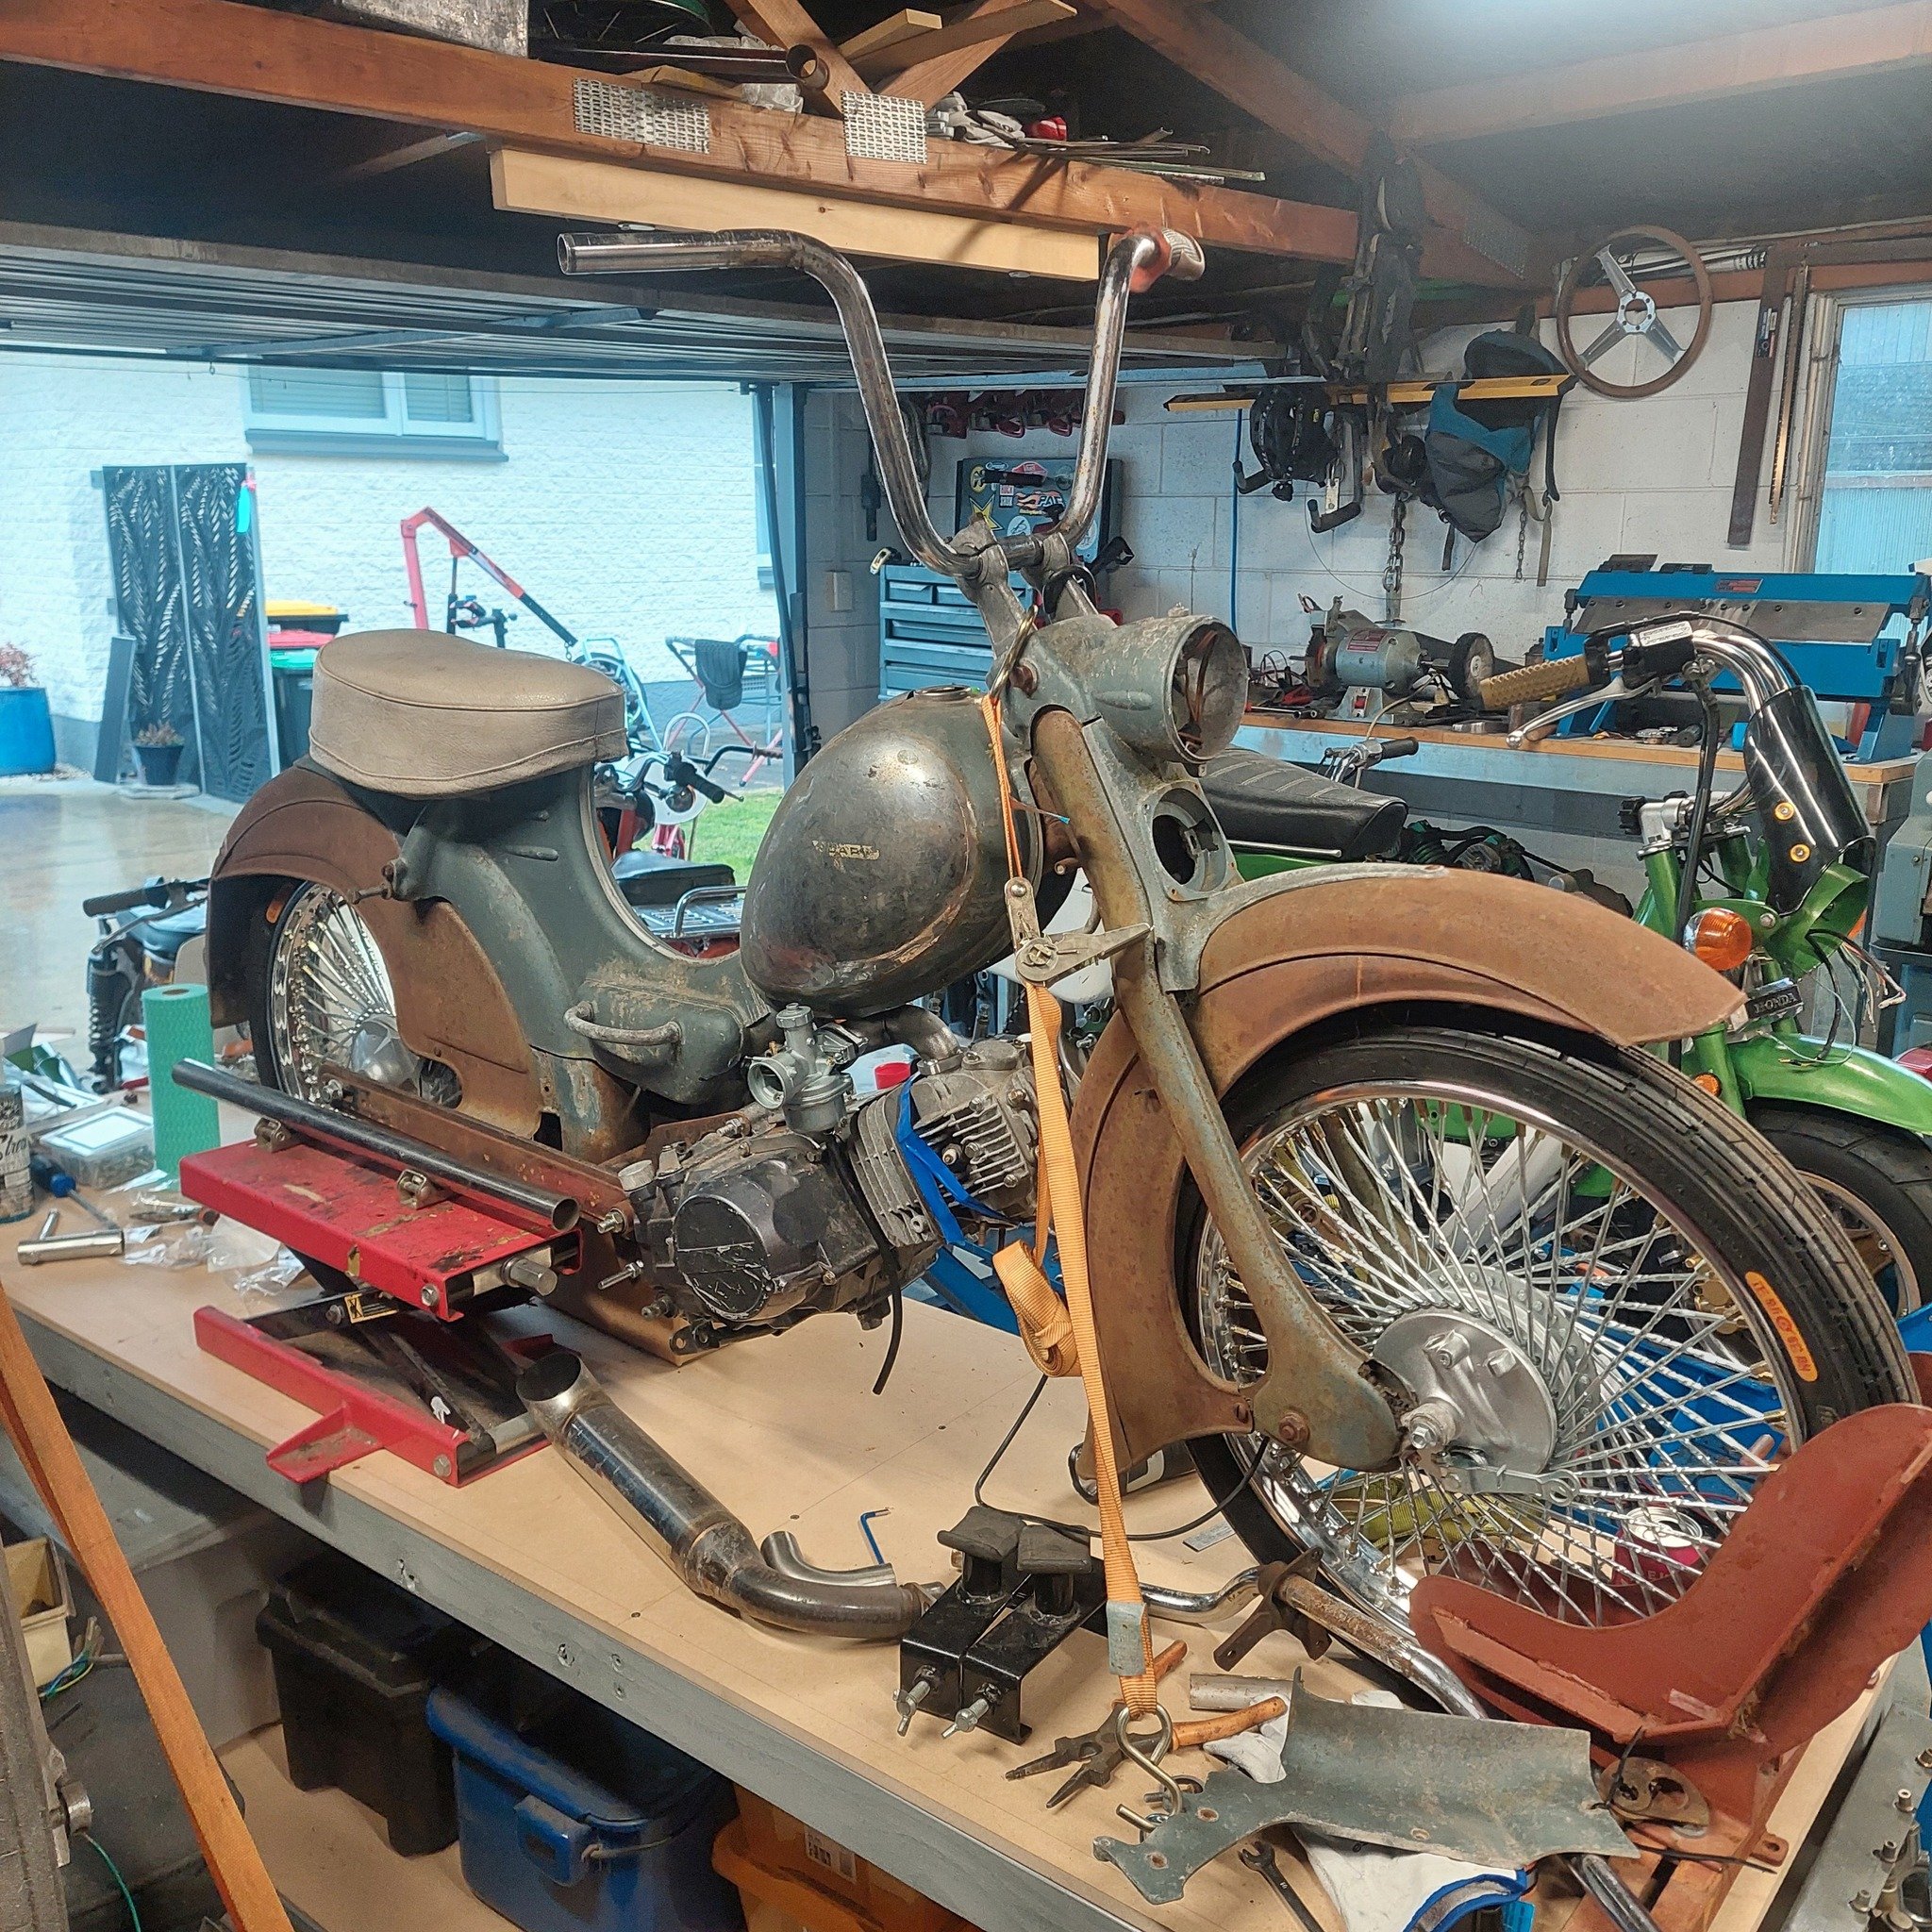
its been a while since I actually put a hand on this bike, Ive been off work on ACC recovering from a dislocated shoulder (the same one I dislocated in 2018 and the same one I had clavicle surgery in 2020) and felt up to start tinkering with it and getting some motivation to maybe get it ready for this years Syds. I thought I'd took photos of the engine mounts but i hadnt. I'll fully weld them up tomorrow and take some then. Today I nutted out the intake manifold and got that buttoned up. I had a few 90 degree bends kicking about and some flat plate which I made some flanges from and just jigsawd them together. I thought I'd try on some factory chaly bars and I think theyre a winner
17 points
-
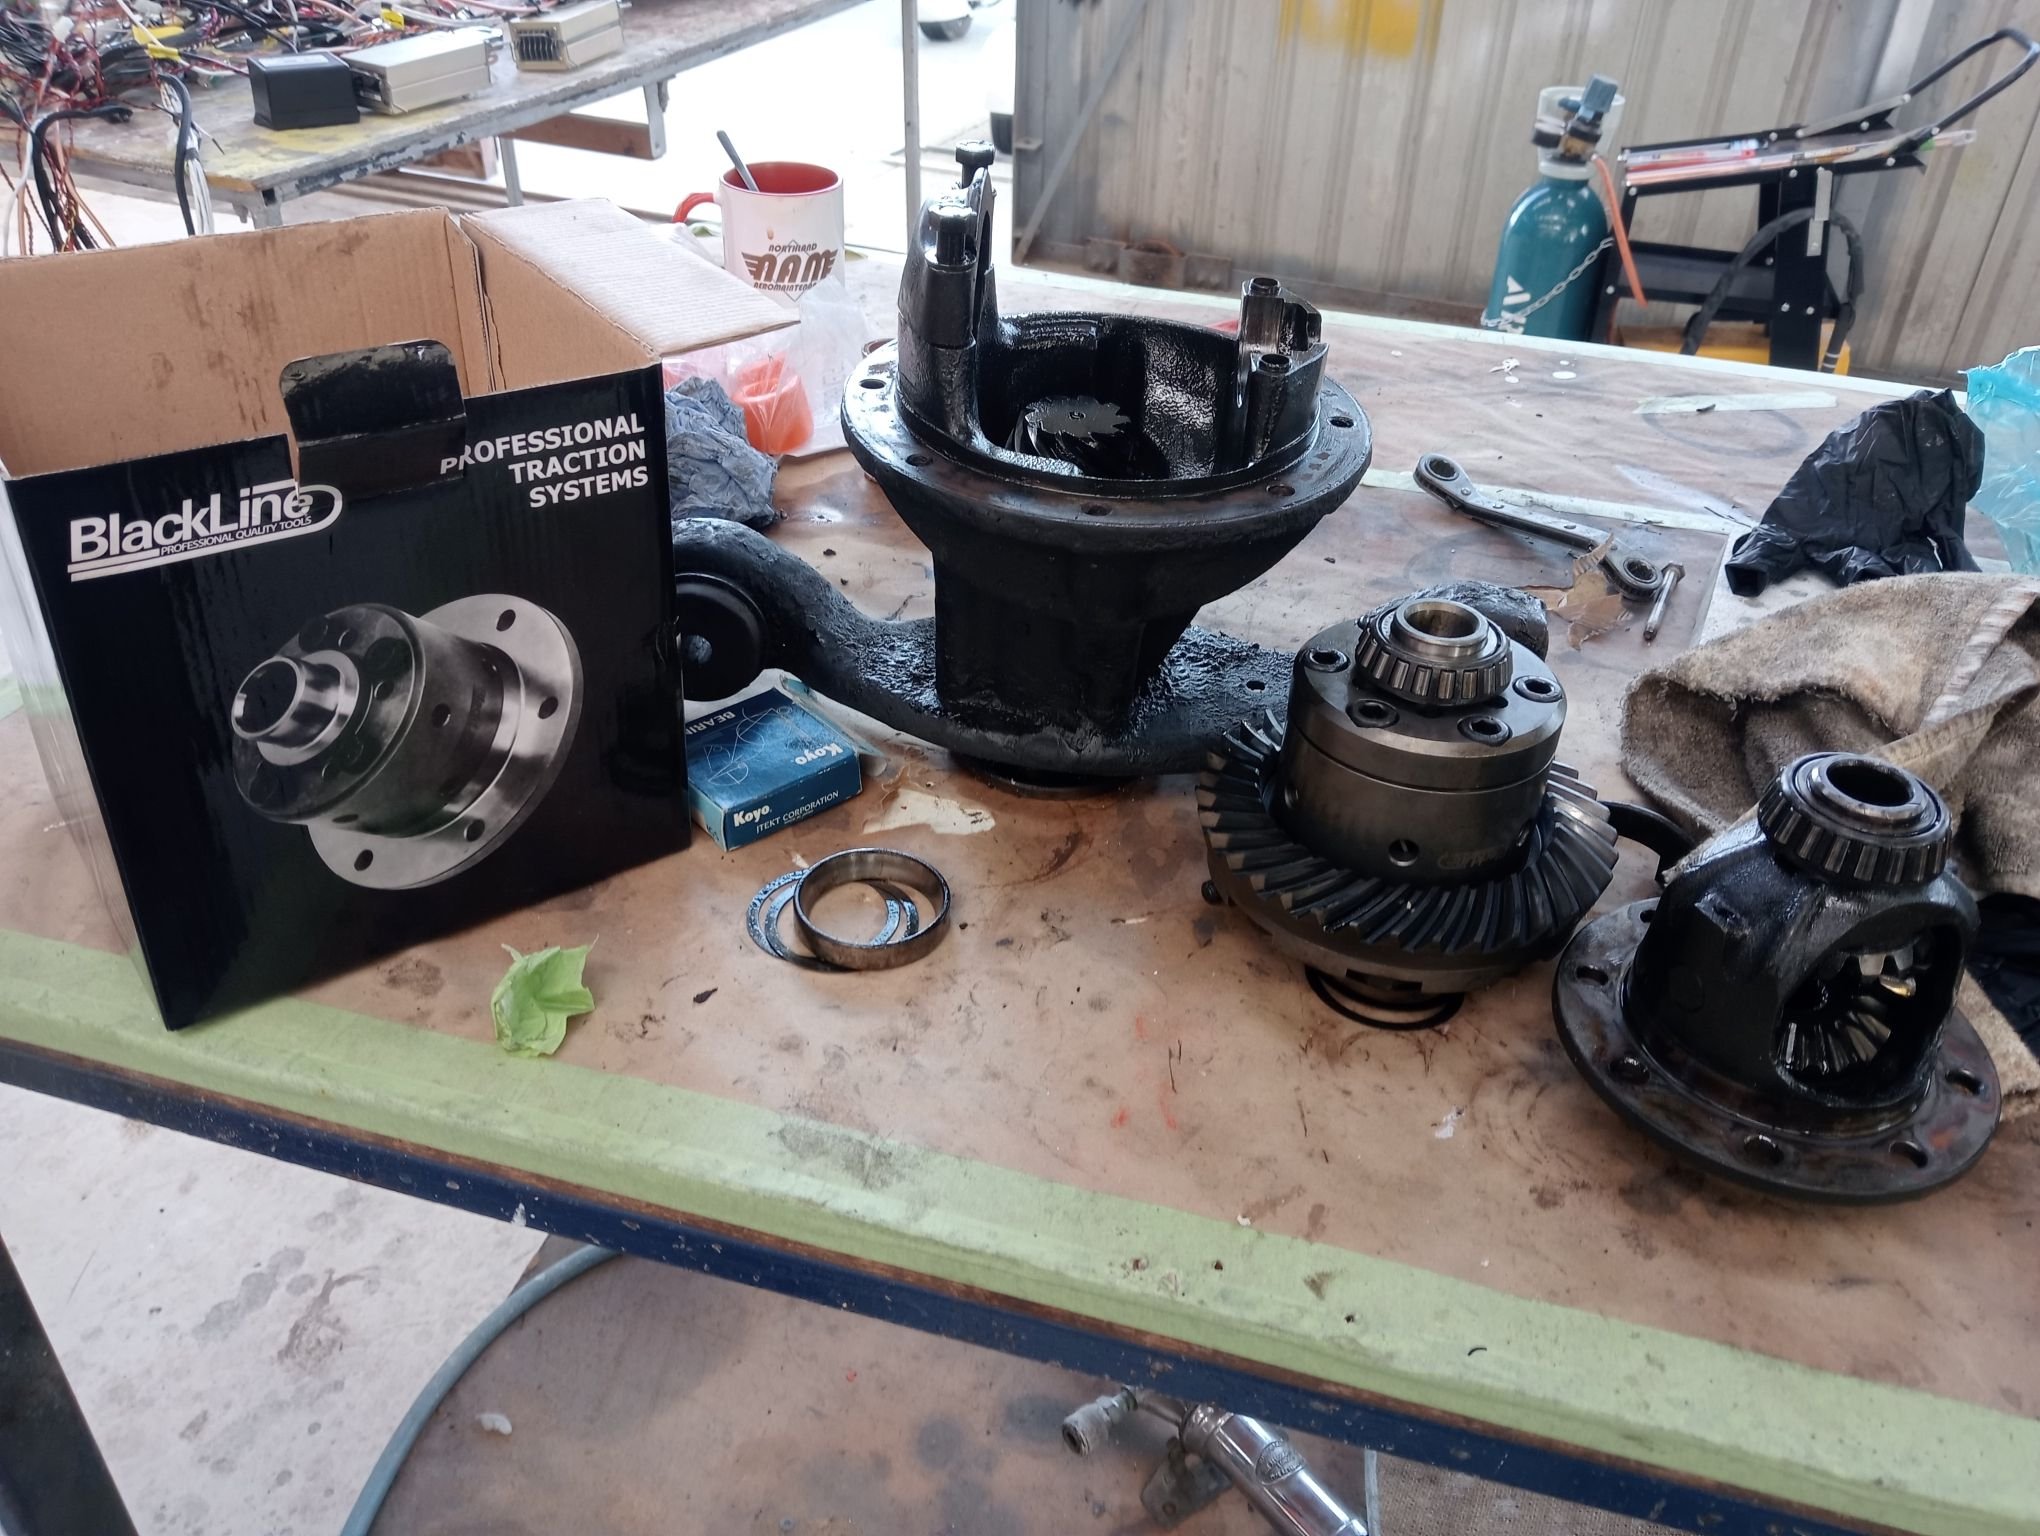
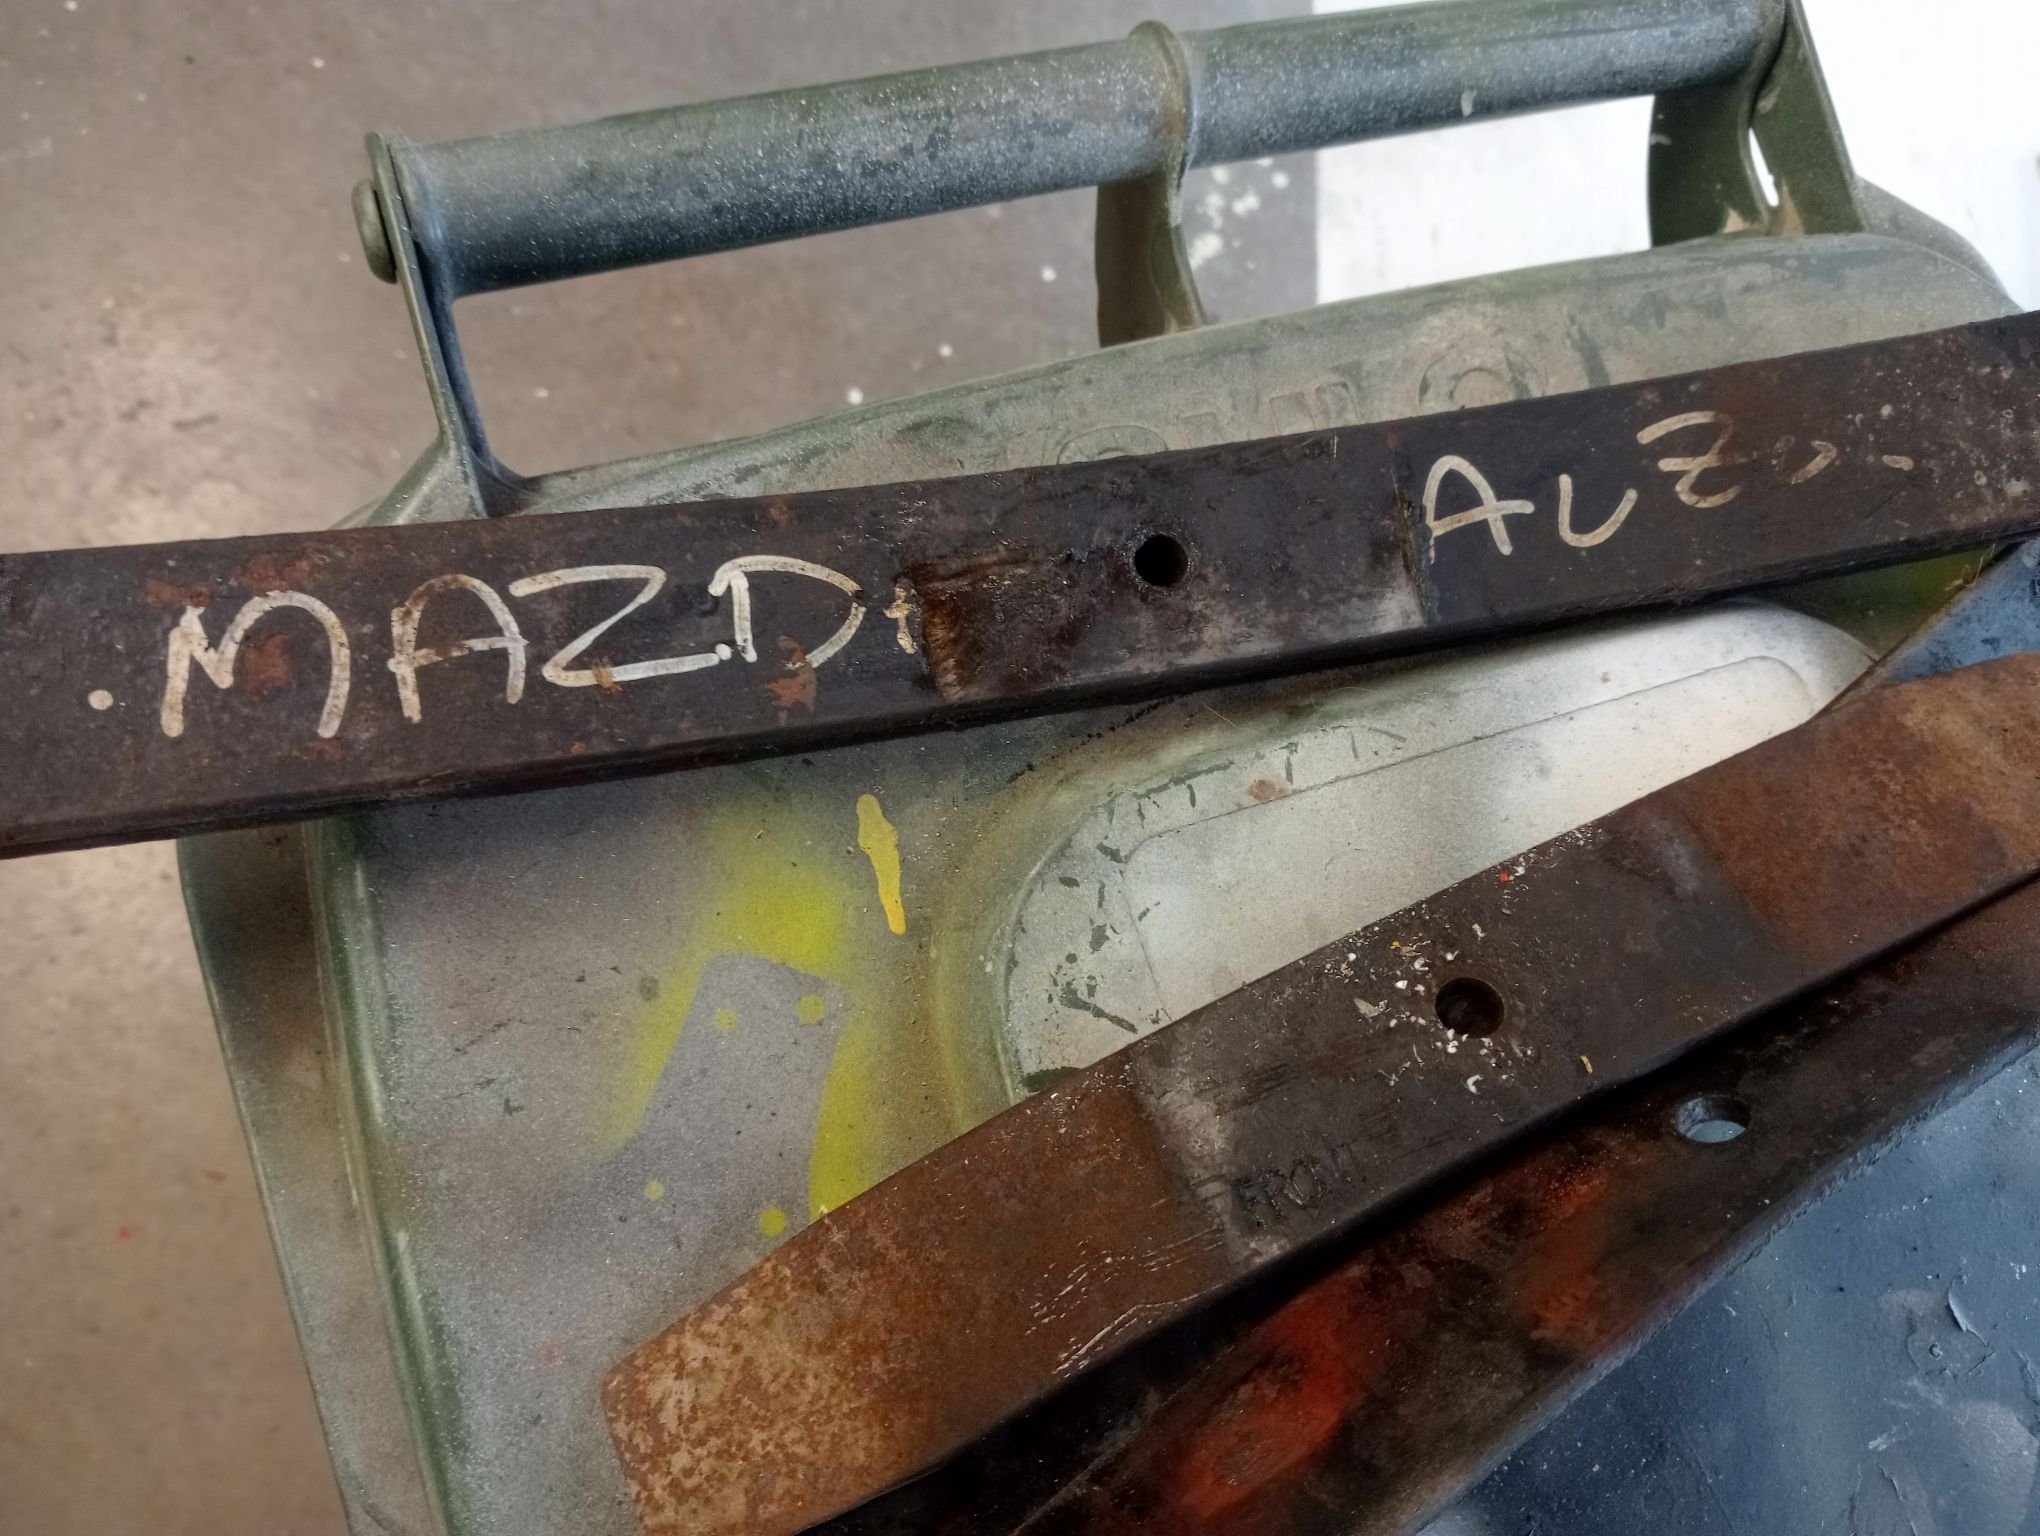
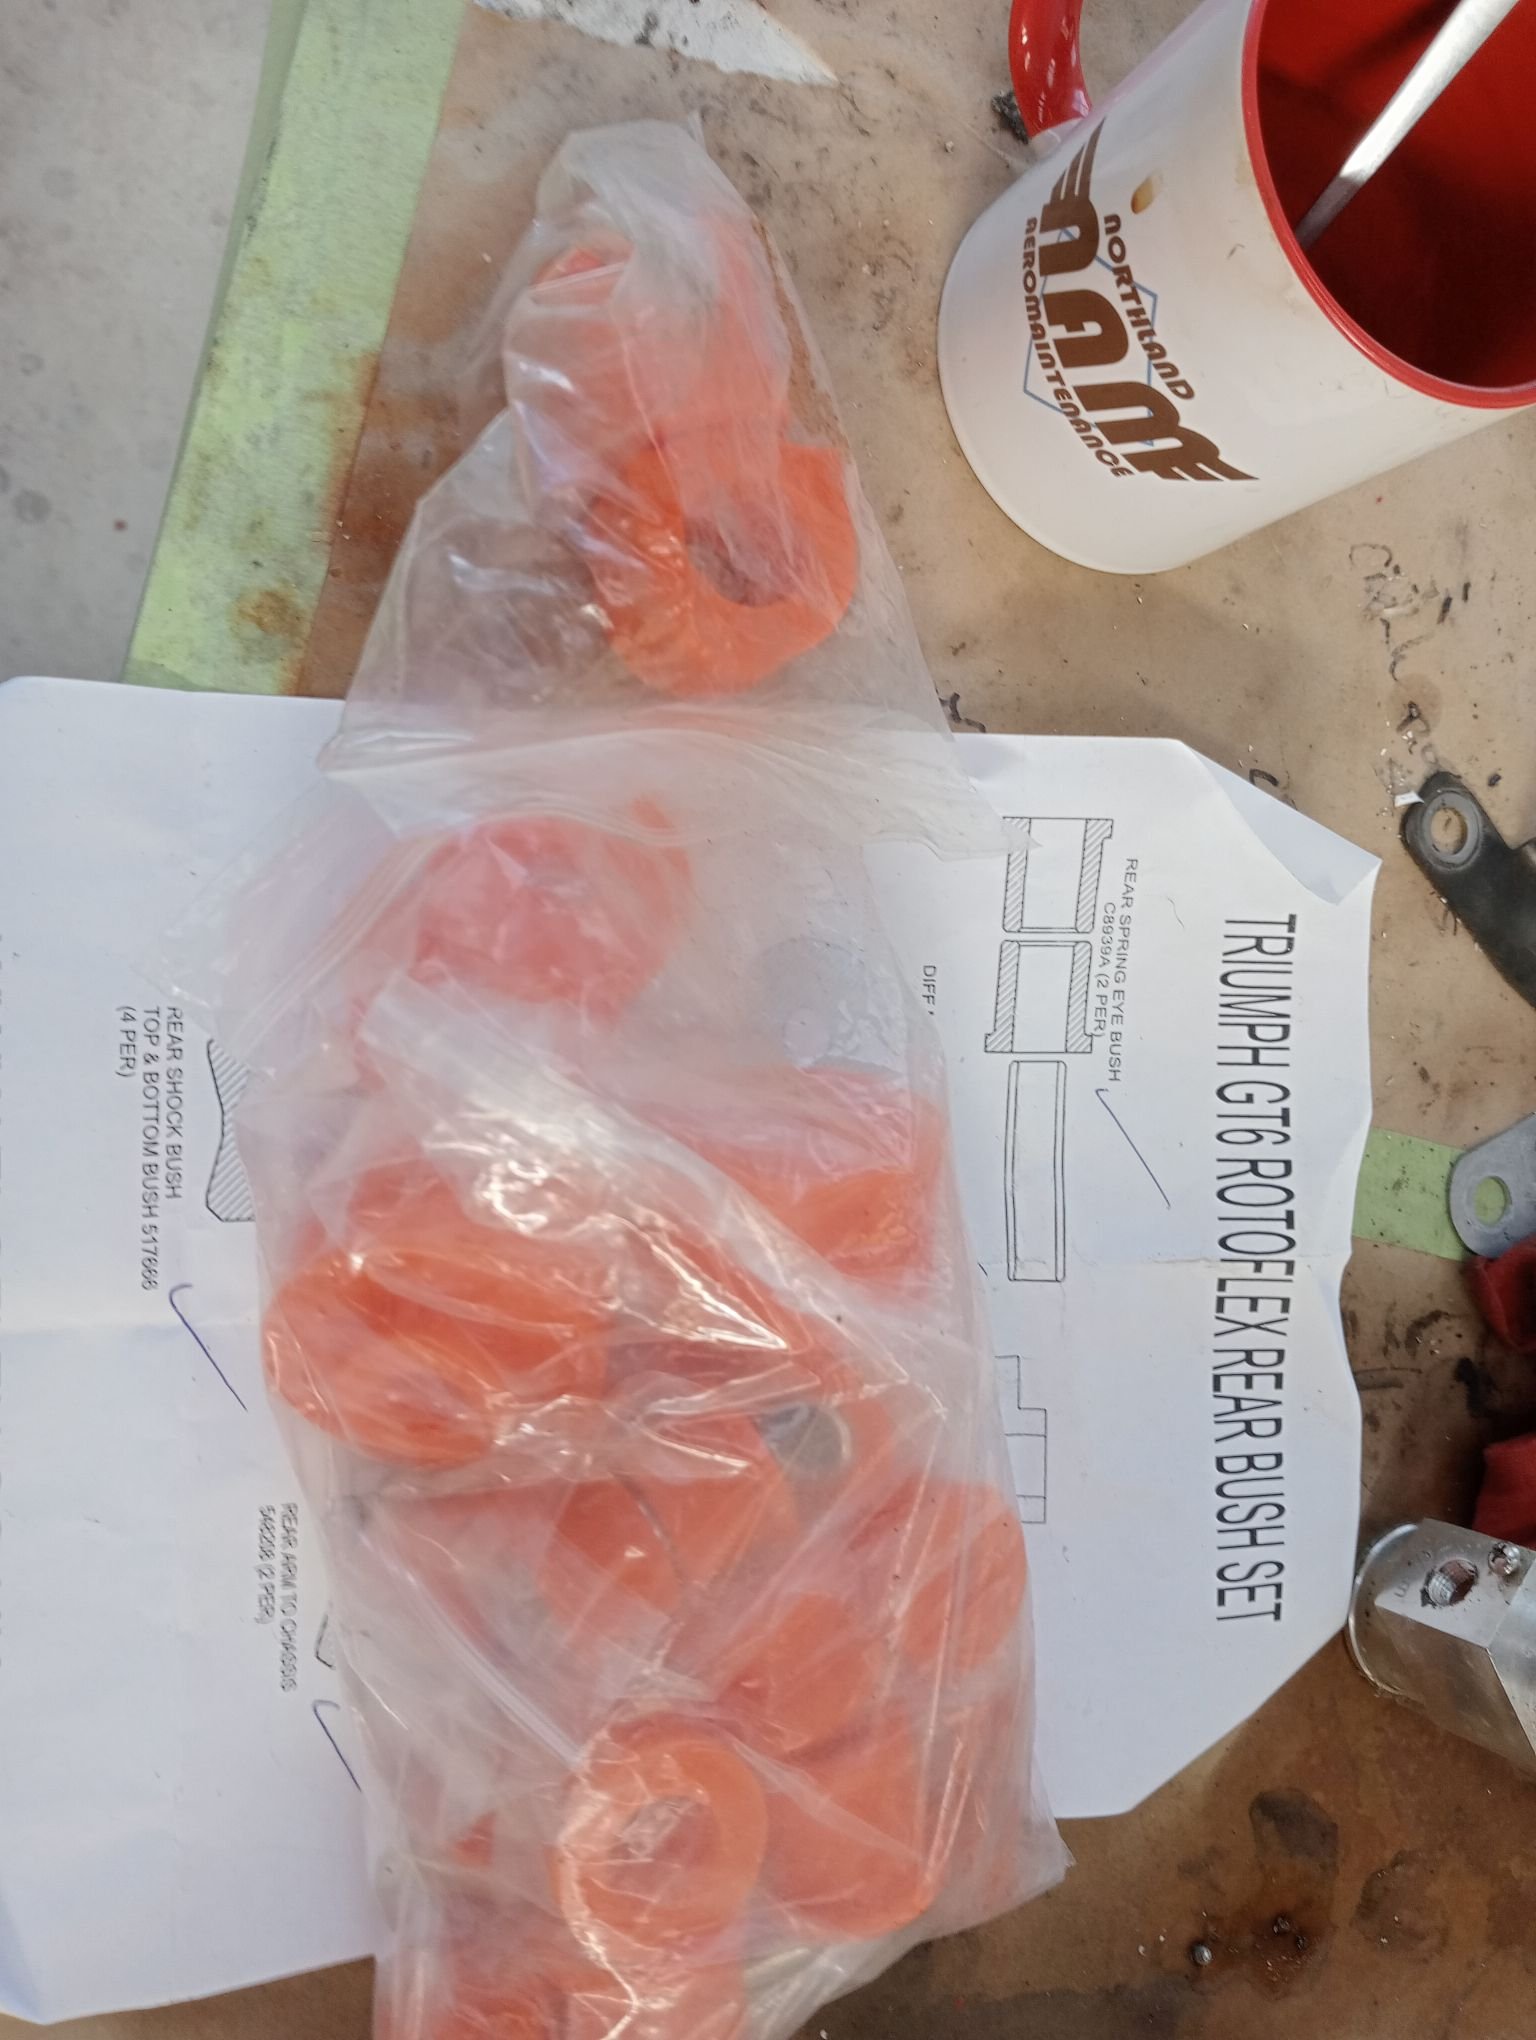
the wife and kids went away for the day so I snuck downtown for some filthy rear end action Having being informed that the gear carrier was the weakest point of the diff, and that the diff is the weakest point of the car, it seemed the simplest solution to replace the whole unit with an "I Can't Believe It's Not Quaife" LSD. The maintenance manual talked about carefully spreading the carrier bearing caps with a Churchill tool in order to extricate the carrier, well mine just fell straight out, but I decided to not be worried about this and forge ahead. By the looks of things someone has been in here before. Another thing to do was install a drain plug, and that's already been done. It was difficult to see originally because the entire diff looked like a small planetoid consisting of mud and oil. Surprisingly had a lot of oil still in it. Going to give it the mega clean off but I'm doubtful it'll ever get clean enough to repaint it. Incidentally the carrier on this on is in good condition, perhaps it's worth something to someone pulled the rear suspension and hubs to bits, which was shitty and greasy but not difficult. Did some research and couldn't see any truly compelling reason to not send the drums off to the sandblasters along with the rest of the bits and pieces. The buggered bushings can stay in place because I suddenly had an ancestral memory from decades ago and remembered; I still have a set of rear poly bushes in the garage! I bought them shortly after I bought the car, did the fronts which was a huge pain in the ass, took one look at the rears and decided it'd keep for another day. Incidentally the radius arms and lower wishbones in the rear already have polybushes, guessing the previous owner was slowly replacing them as they crapped out. They actually look pretty good and sometimes I wonder if a quarter-century old bush is actually better than a modern pirate part made God knows where pulled the rear leaf apart and wondered why it has "MAZDA" written on it, very odd. There's apparently some button guide thingies which are supposed to be between them but they are long gone there is now a large and growing list of things that I am waiting on which is preventing anything from going back together. Ergo the only way to progress is to pull things more apart. I also have some major grudge purchases like new engine mounts, probably a clutch and a cambelt and all the other bits and pieces you really wished you did when it was in bits and easy
16 points
-
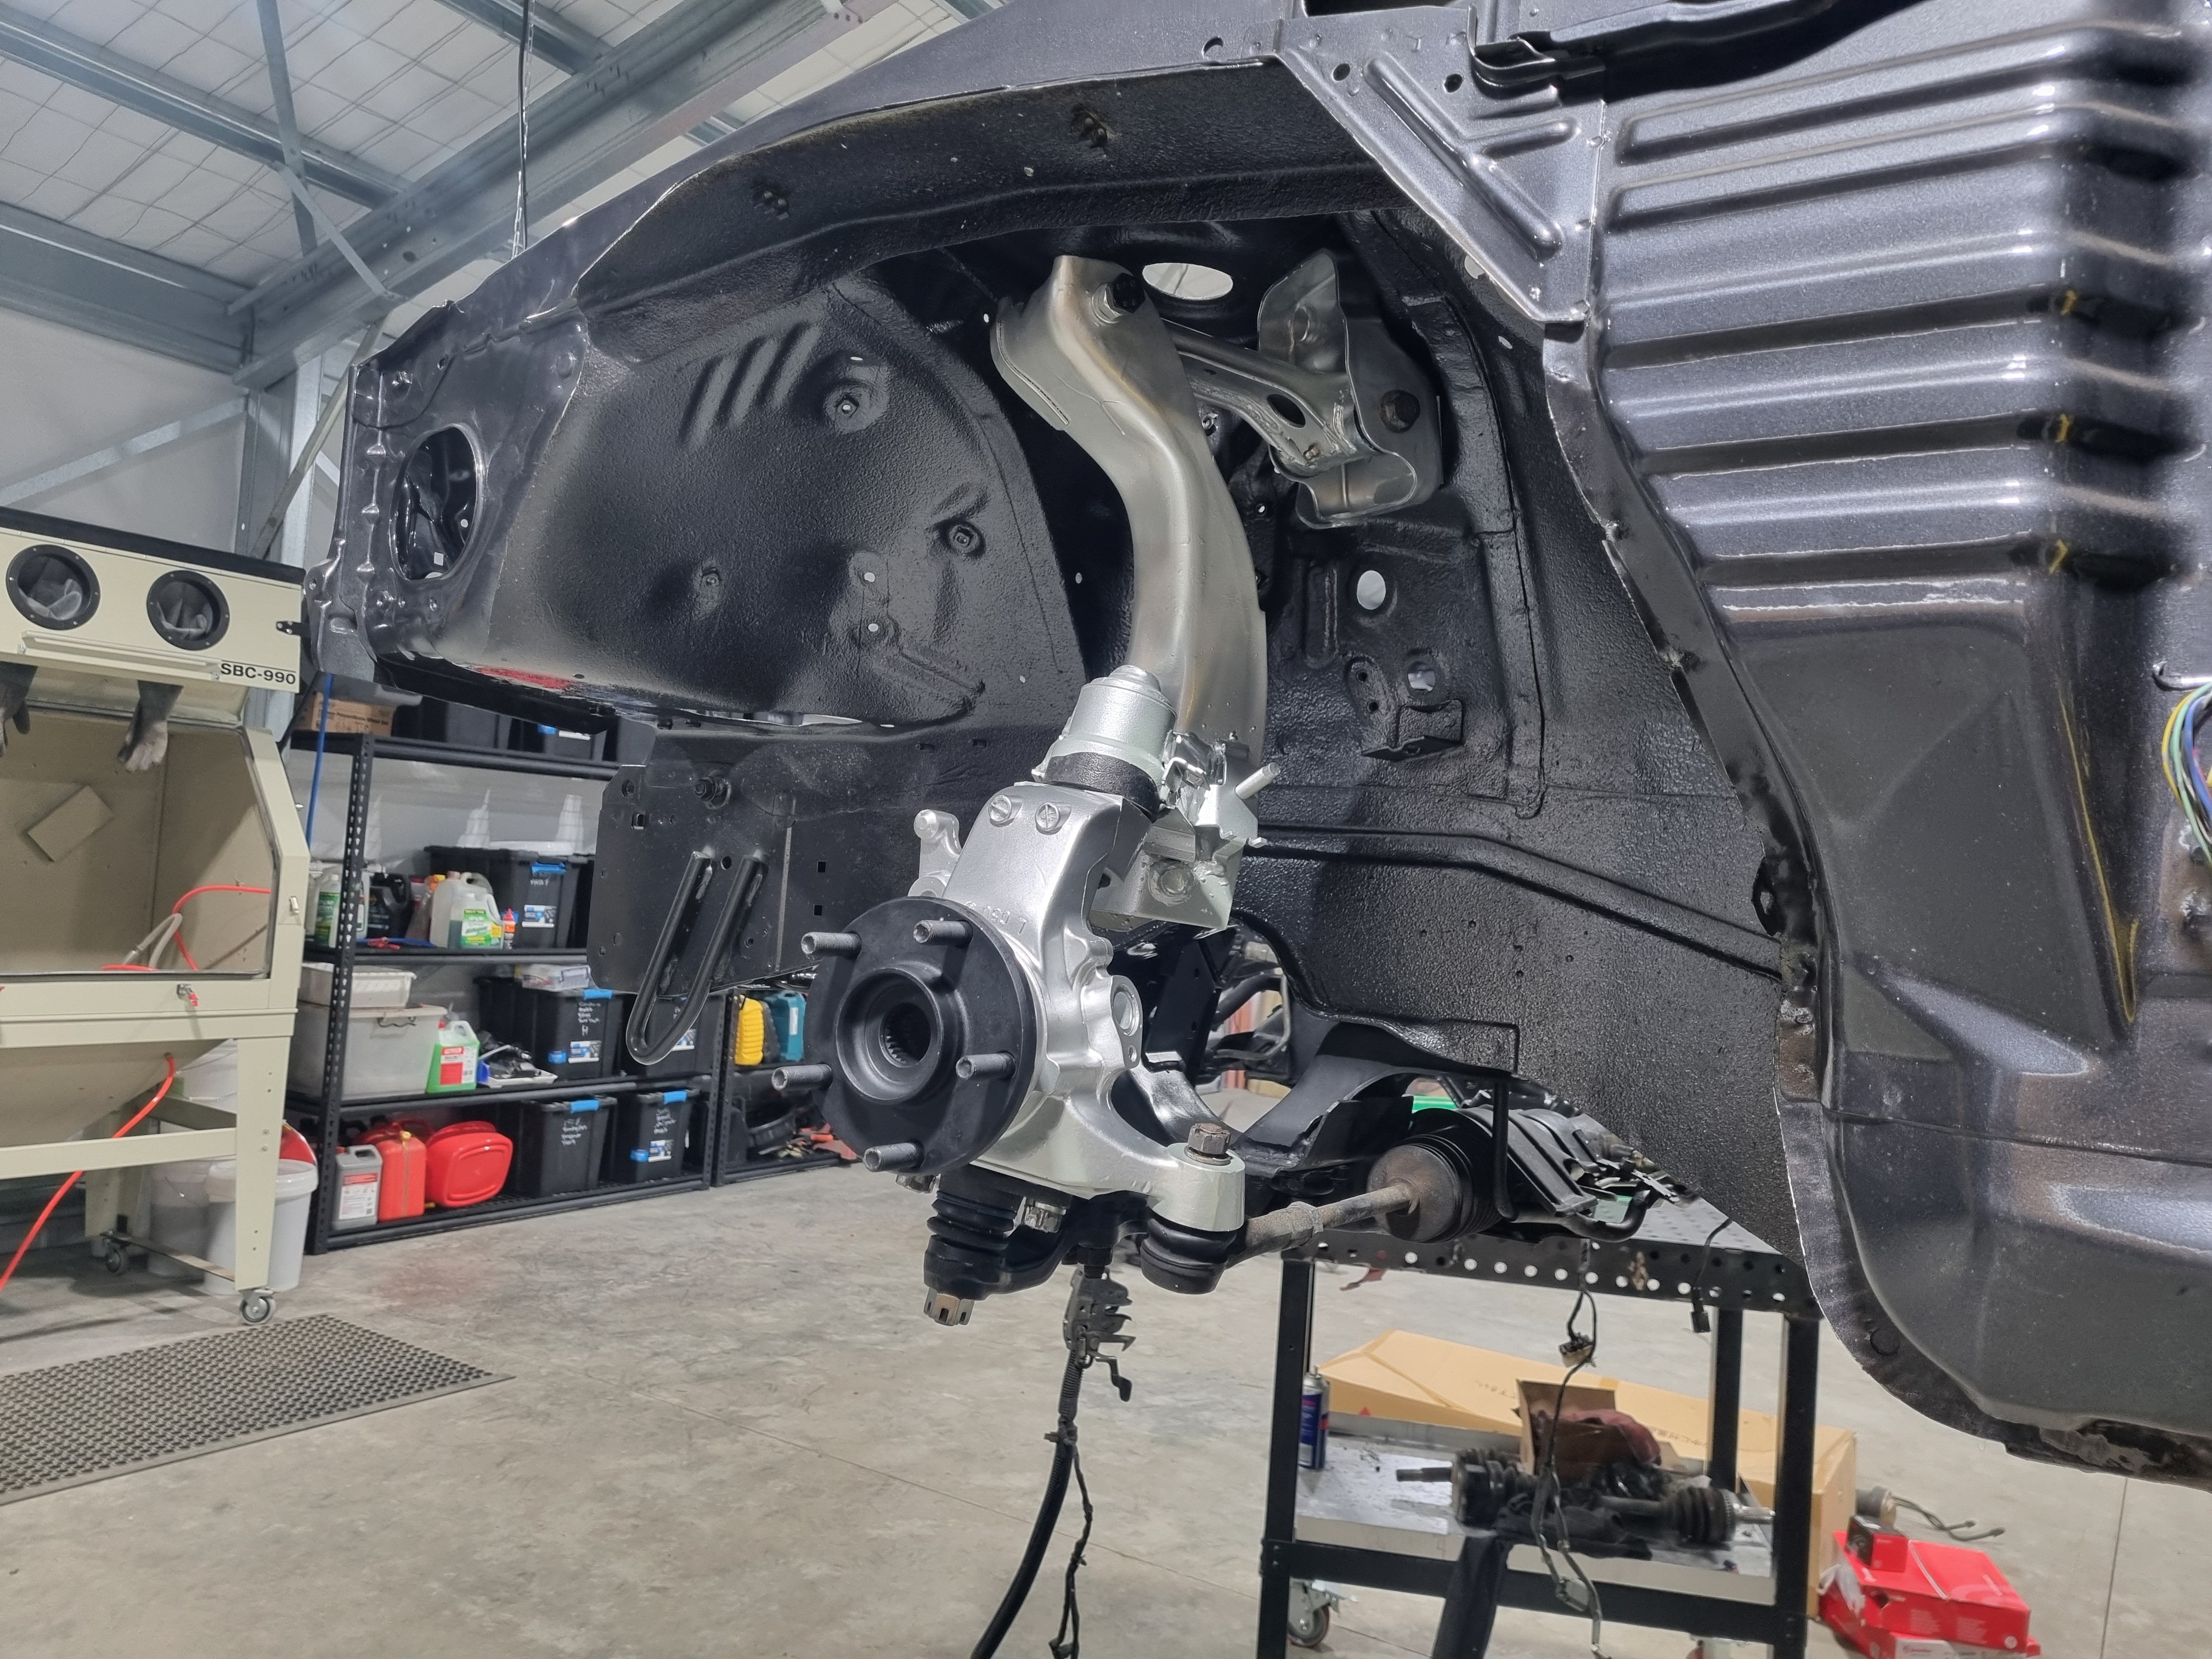
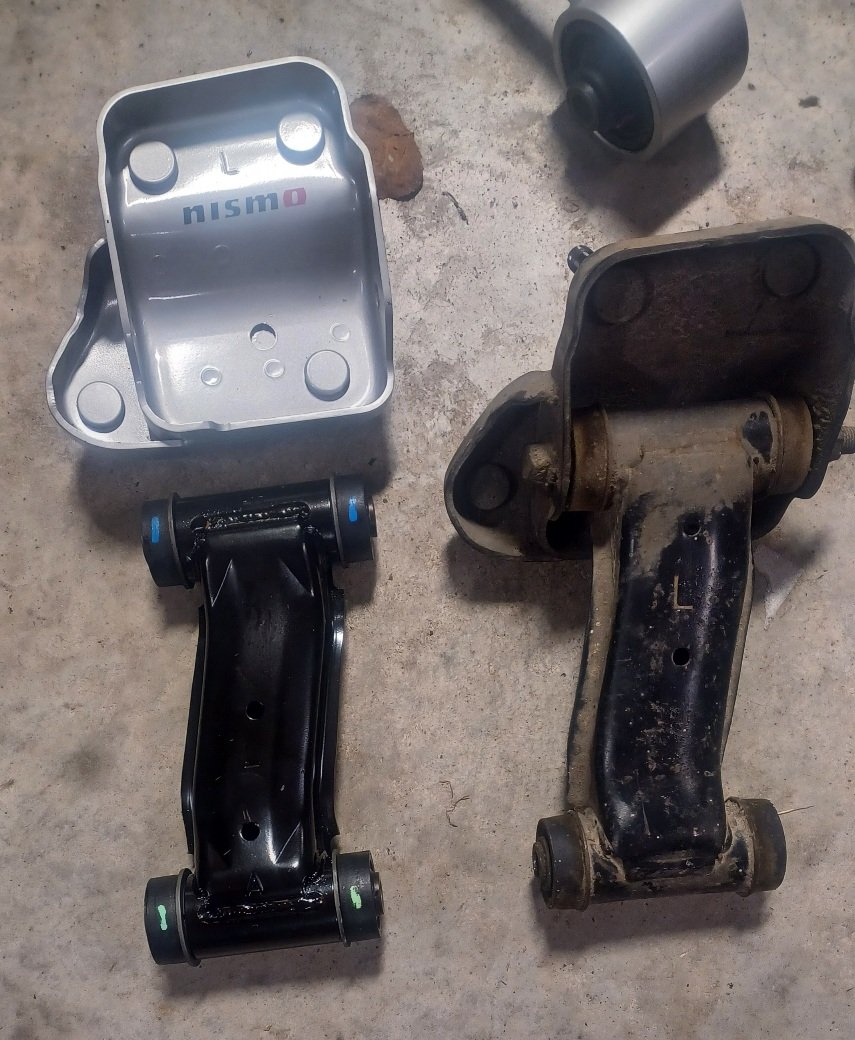
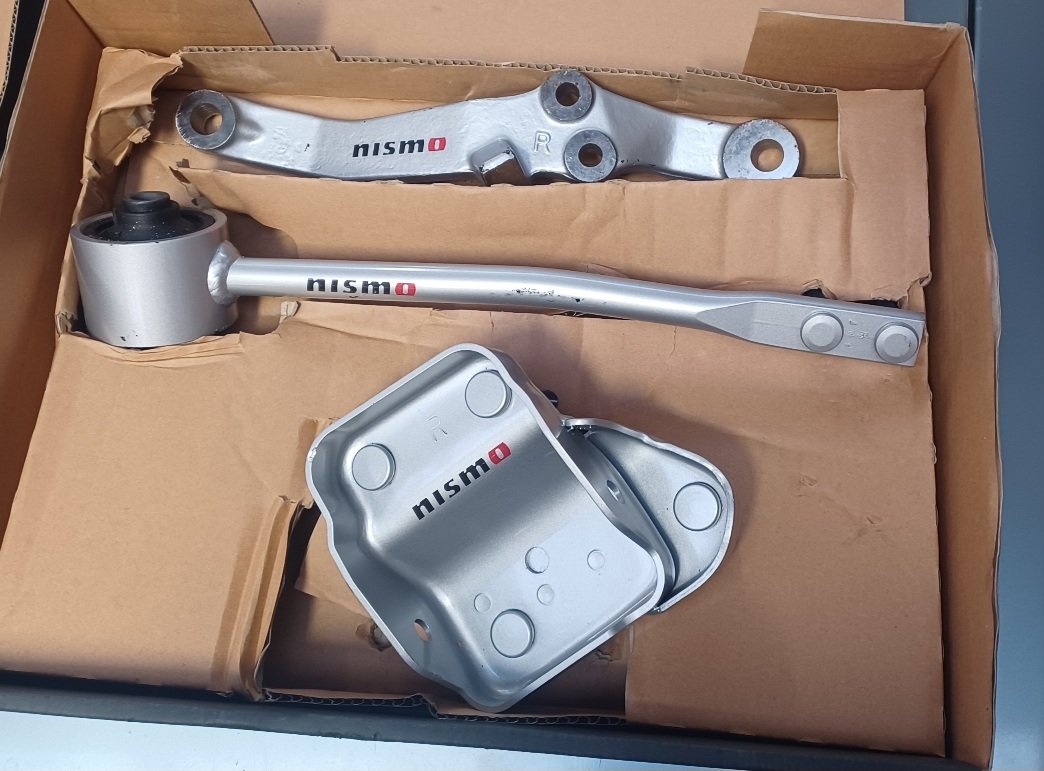
Pretty much all the front bushes and joints were stuffed so I am replacing as many as I can. Many years ago I got a good deal on some upgrade suspension parts. Nismo circuit link upgrade. The caster rod is a bit shorter than standard, the lower arm is 4mm longer for a bit more negative camber. The upper arm mount has the holes drilled slightly differently to try and reduce the misalignment in the arm so the bushes last longer. I also bought new upper arms. All of the ones I have are stuffed and it was similar money for a whole arm as it was for new bushes.
16 points
-
So for the first outing I joined the local VCC for a run out to little river for a school fair/ pumpkin festival was quite the test for the car, it did OK, going up the steep hills in mt pleasant was difficult to keep momentum when doing a 1-2 shift. Also was a test that the cooling system is good as it’s a long way up for a 63yo 1.2L to go but it did it. pic stolen from os spotted..
16 points
-
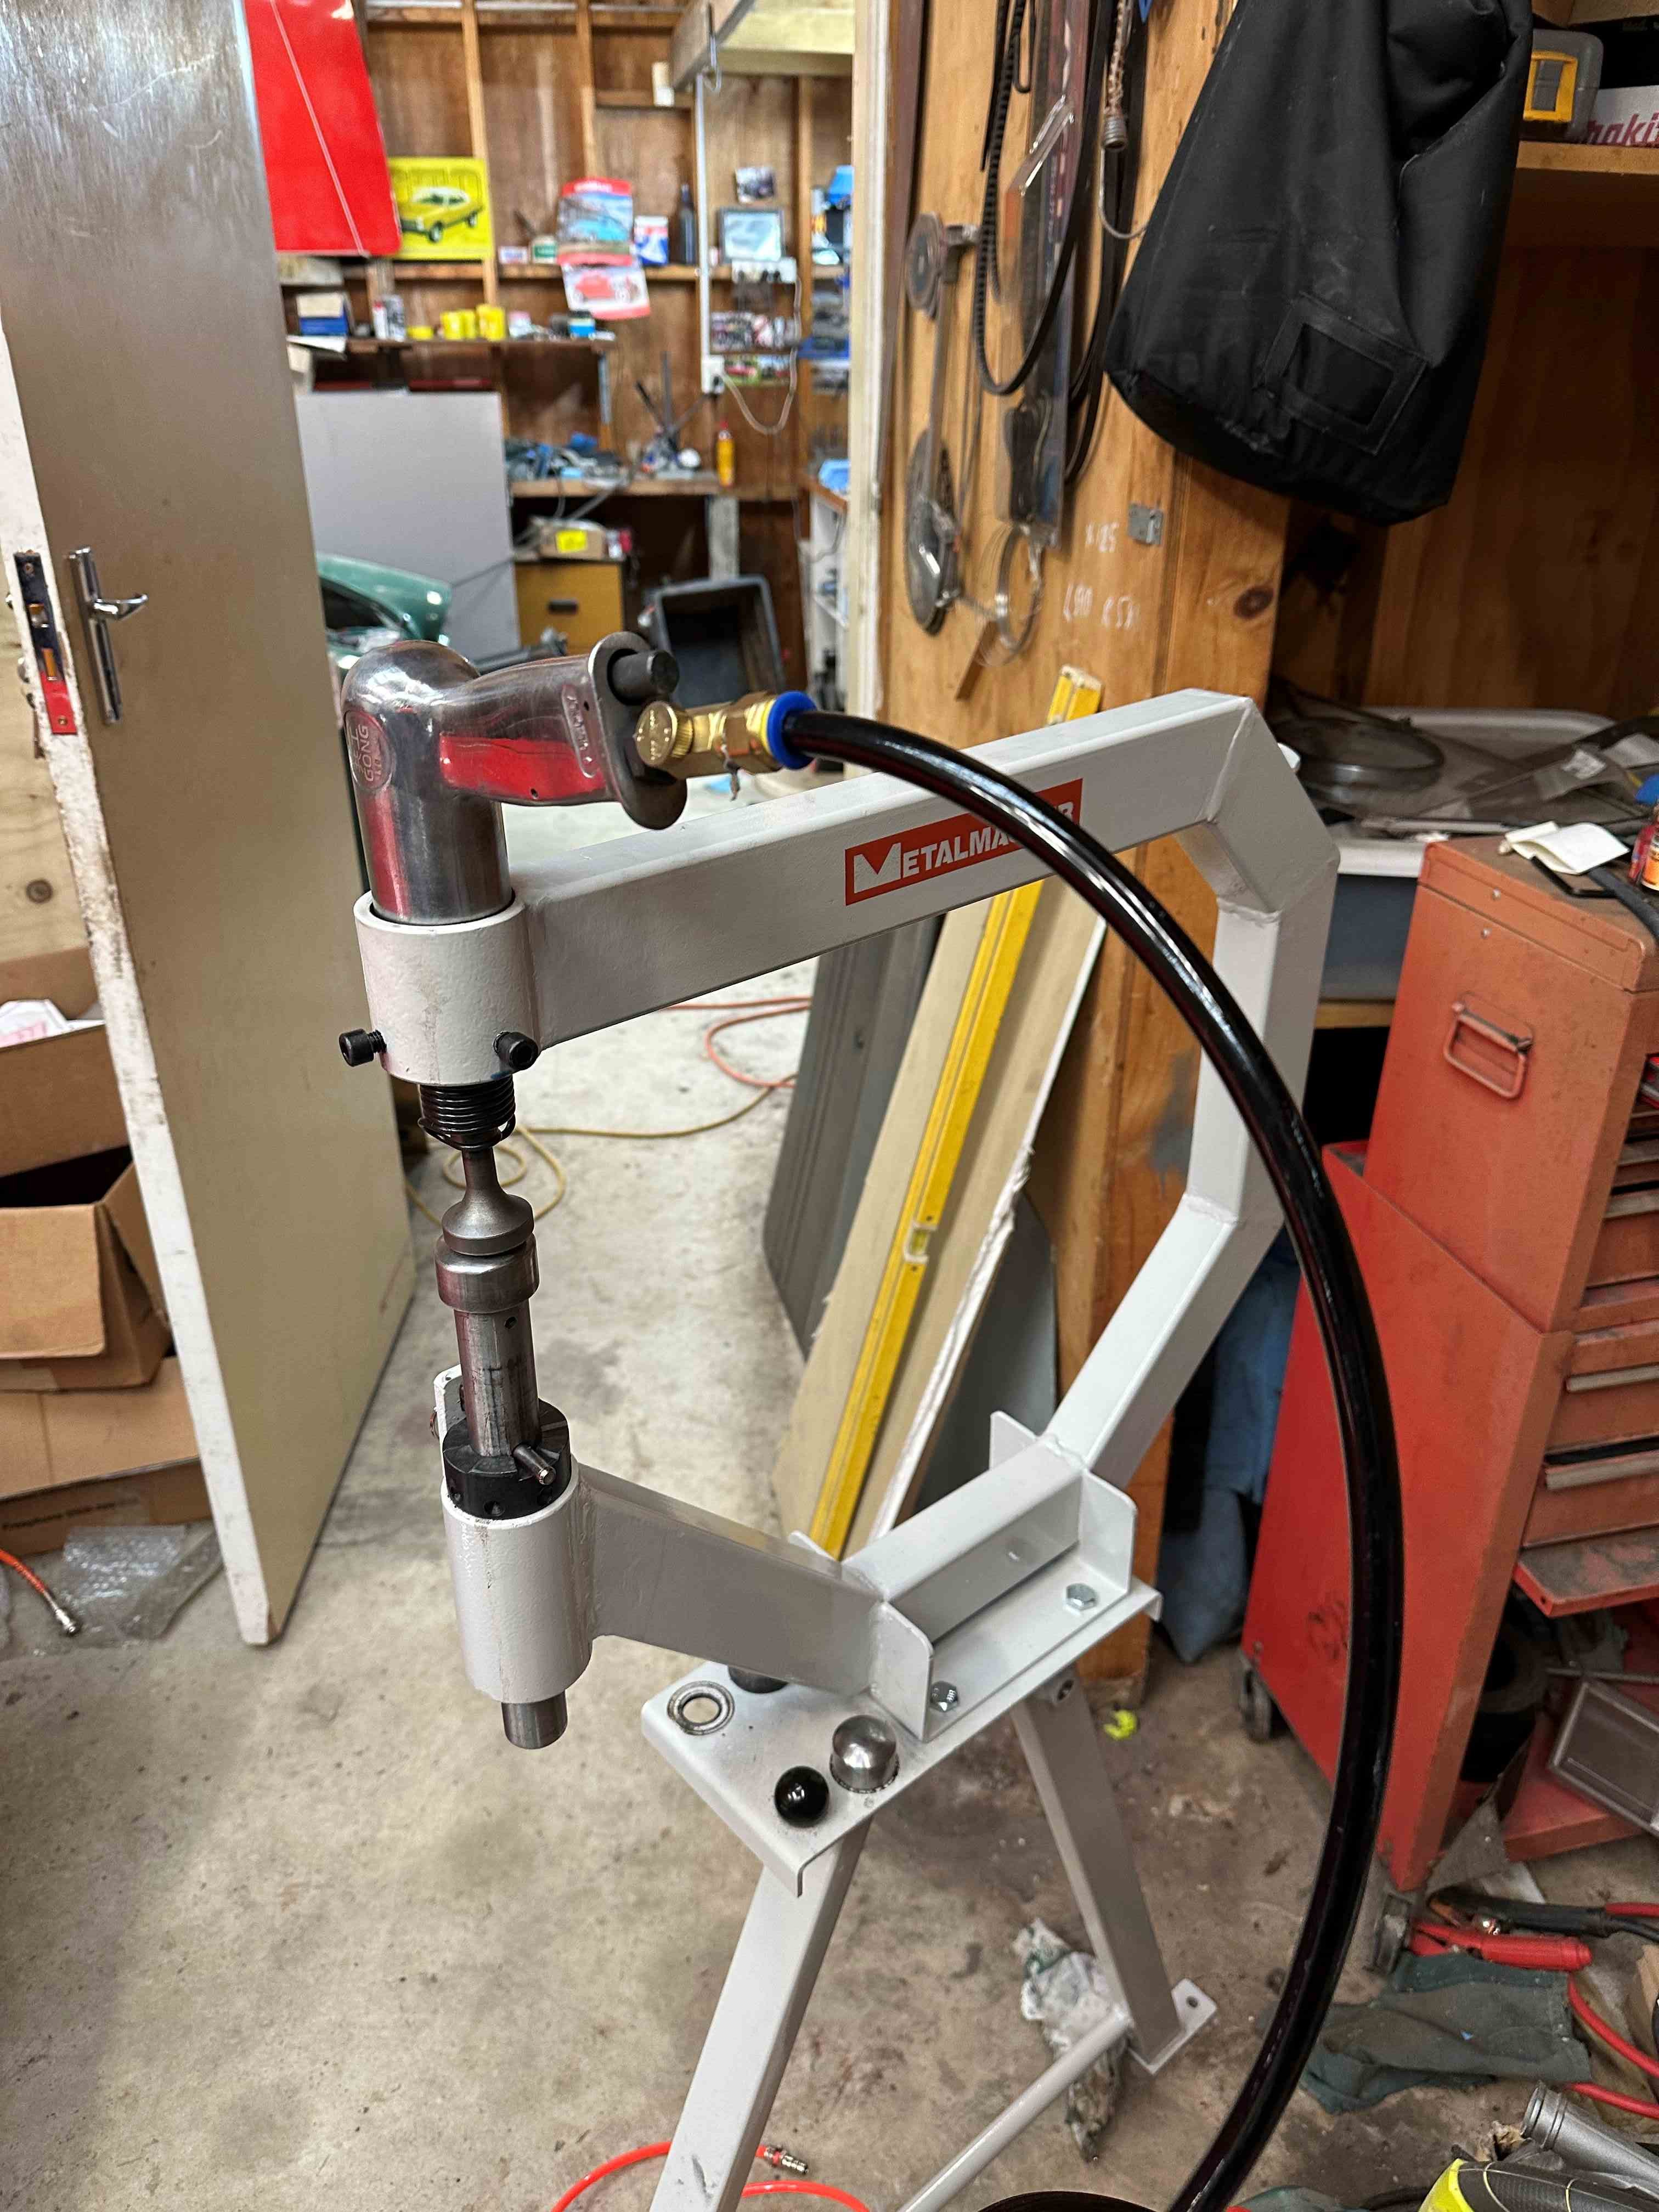
As I mentioned earlier, I bought a planishing hammer to help smooth and shape patch panels. It's just the basic one but seems to work well enough. You can bash a piece of panel steel into shape and the planisher will smooth out all the hammer marks and dents you have made. I still found to finish it a hammer and dolly was the way to go but I still need to learn how to use the planisher properly. So I made up the bottom patch panel for the passenger side and welded it in. It came up quite close to shape but will still need a little filler. The car has had panel damage this side so there is quite a bit of lead and filler there. I think I will leave it alone as it seems to be done well.
16 points
-
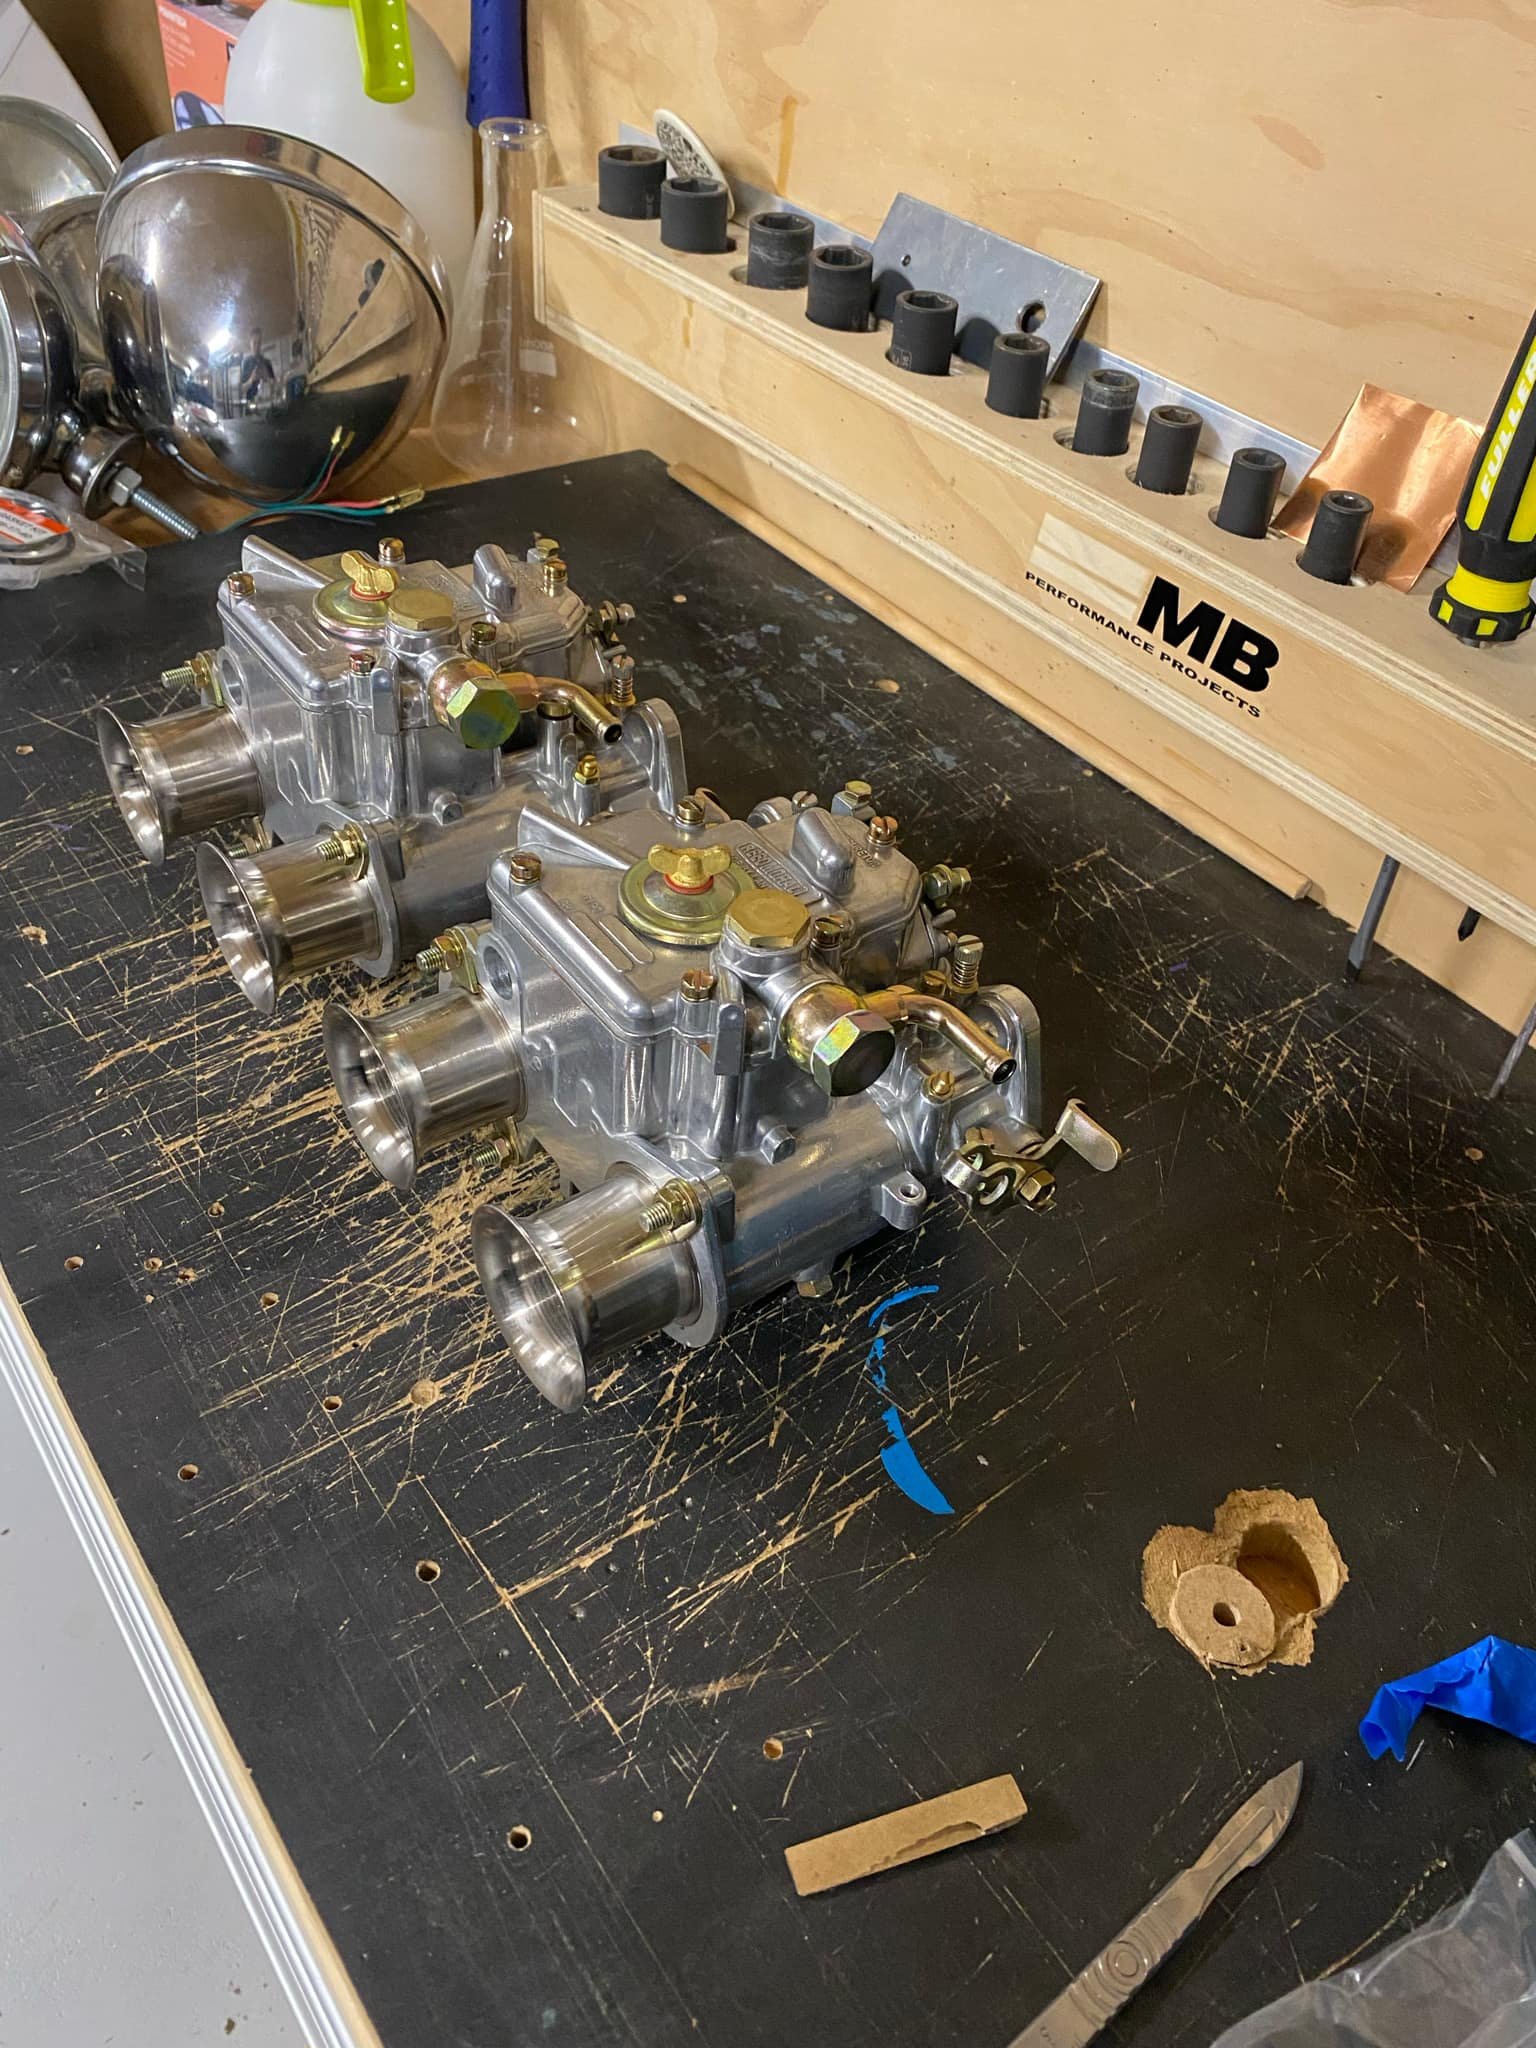
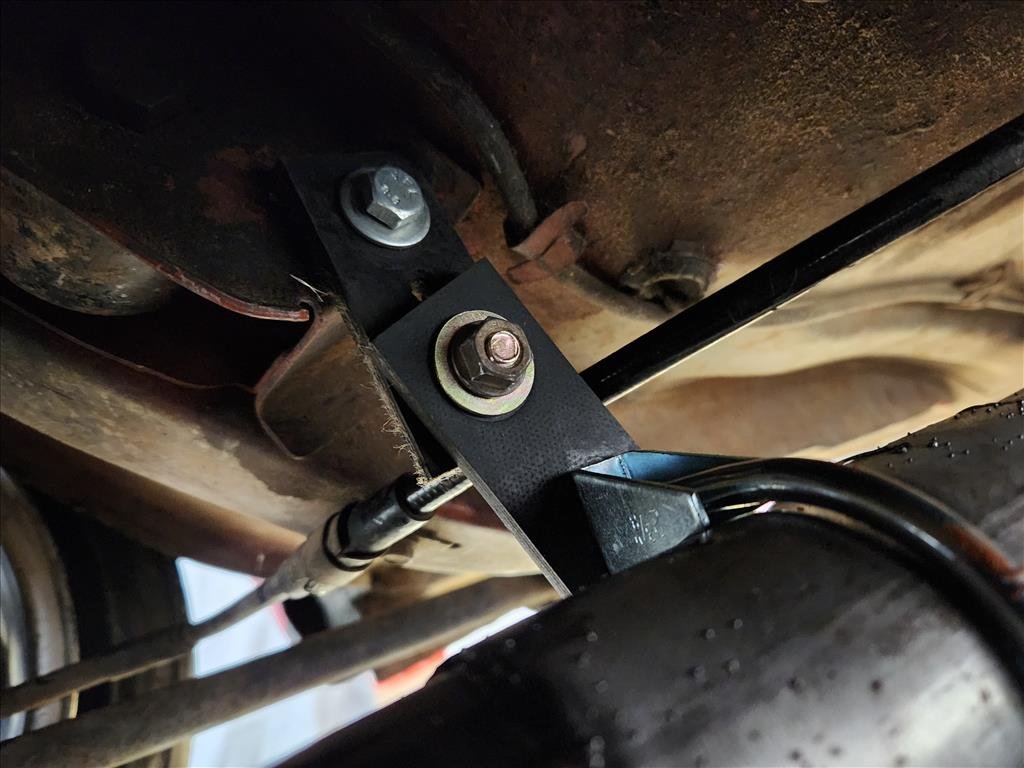
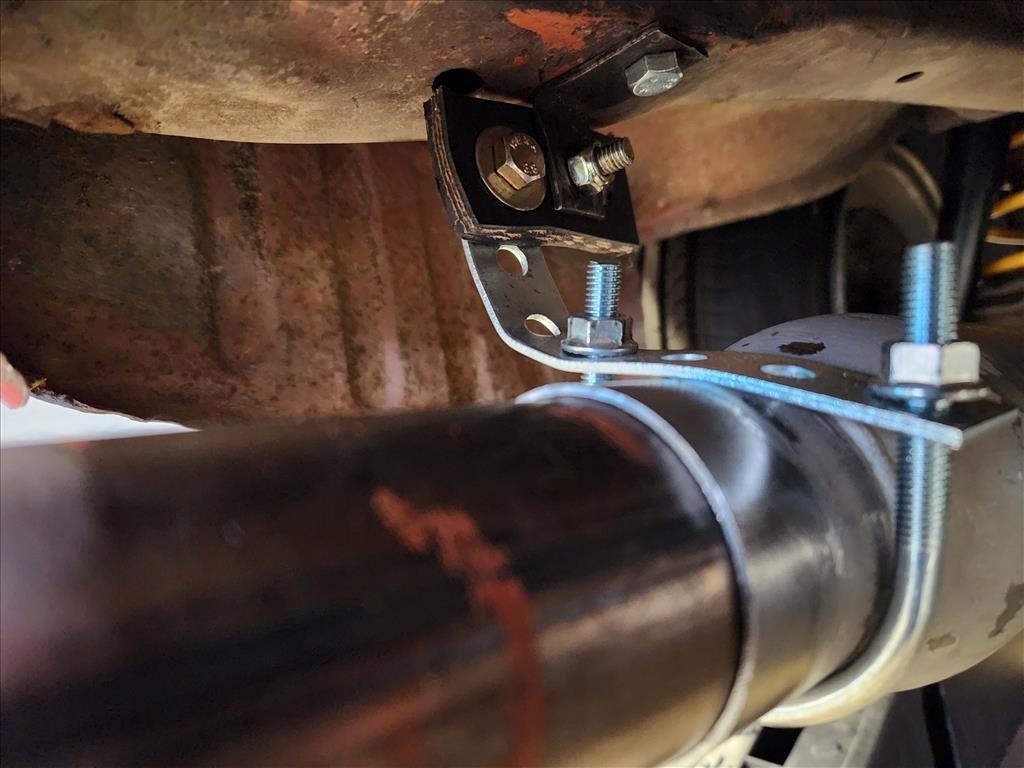
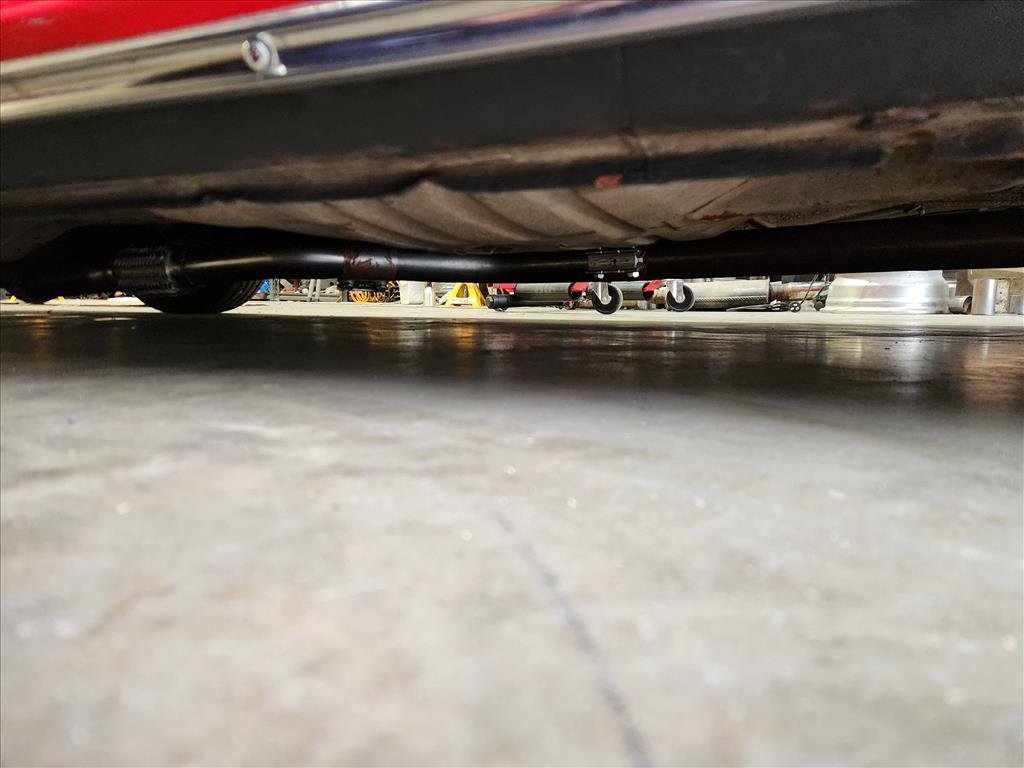
Finished up (pretty much) the exhaust today, ground clearance is much better. The front flange which was there from previous is still a bit low but seems to be a minimal issue. I might have to rotate one of my slip joins around but otherwise I'm most impressed because there are less leaks than I was expecting. I worked out a couple of questionable but working hangers and took it for a blast around the block. Does it look good? Not really. Does it sound good? Questionable. Quite raspy. I have a small cat converter I might put in to see if that does anything. Anyway, considering I'd never welded before this I'm happy with the result. This is also the first time I'd actually had the car on the road with the front "coilover" sleeves installed and while it's no Rolls Royce it could definitely be worse. Not sure I'm in love with the middle mount touching the handbrake cable but it's rubber on rubber so not super worried. It definitely looks the part now I've finally got the front pair of Longchamps widened and fitted. Could even run a small spacer on the front to get it sitting a bit more flush. I can run full lock to lock without rubbing though so maybe I'll leave it for now. Onto the next task - The carbs.
16 points
-
Well it’s not terrible? Left rear looks the worst and just looks to be surface rust spec i had sprayed some Wurth line down them when I first removed the spark plugs so hopefully that’s the small amount of gooo at the bottom of each one edit: I’ve ordered 4litres of acetone so I’ll let it stew over ther weekend hopefully16 points
-
Added the base/surround plates to them. Doesnt look like much but they need to be very flat as they are the datum face for the core. So if either side is bowed itll lift the core up higher than it should. Bonded a couple together on a surfaced table but even then it bowed afterwards. So they are now mounted to some box section. Now they are completed! Happy with how they turned out. Ill be taking them up to the foundry next week to try them out!16 points


.thumb.jpg.570970b401ac8d26ce9af7c1bf2bd8cd.jpg)

This leaderboard is set to Auckland/GMT+12:00