
Leaderboard


Popular Content
Showing content with the highest reputation on 30/09/24 in all areas
-
There are no lvvta rules, and the wof requirements are very minimal for light trailers, by drawing a design that's not in crayon you are already ahead of most trailer makers12 points
-
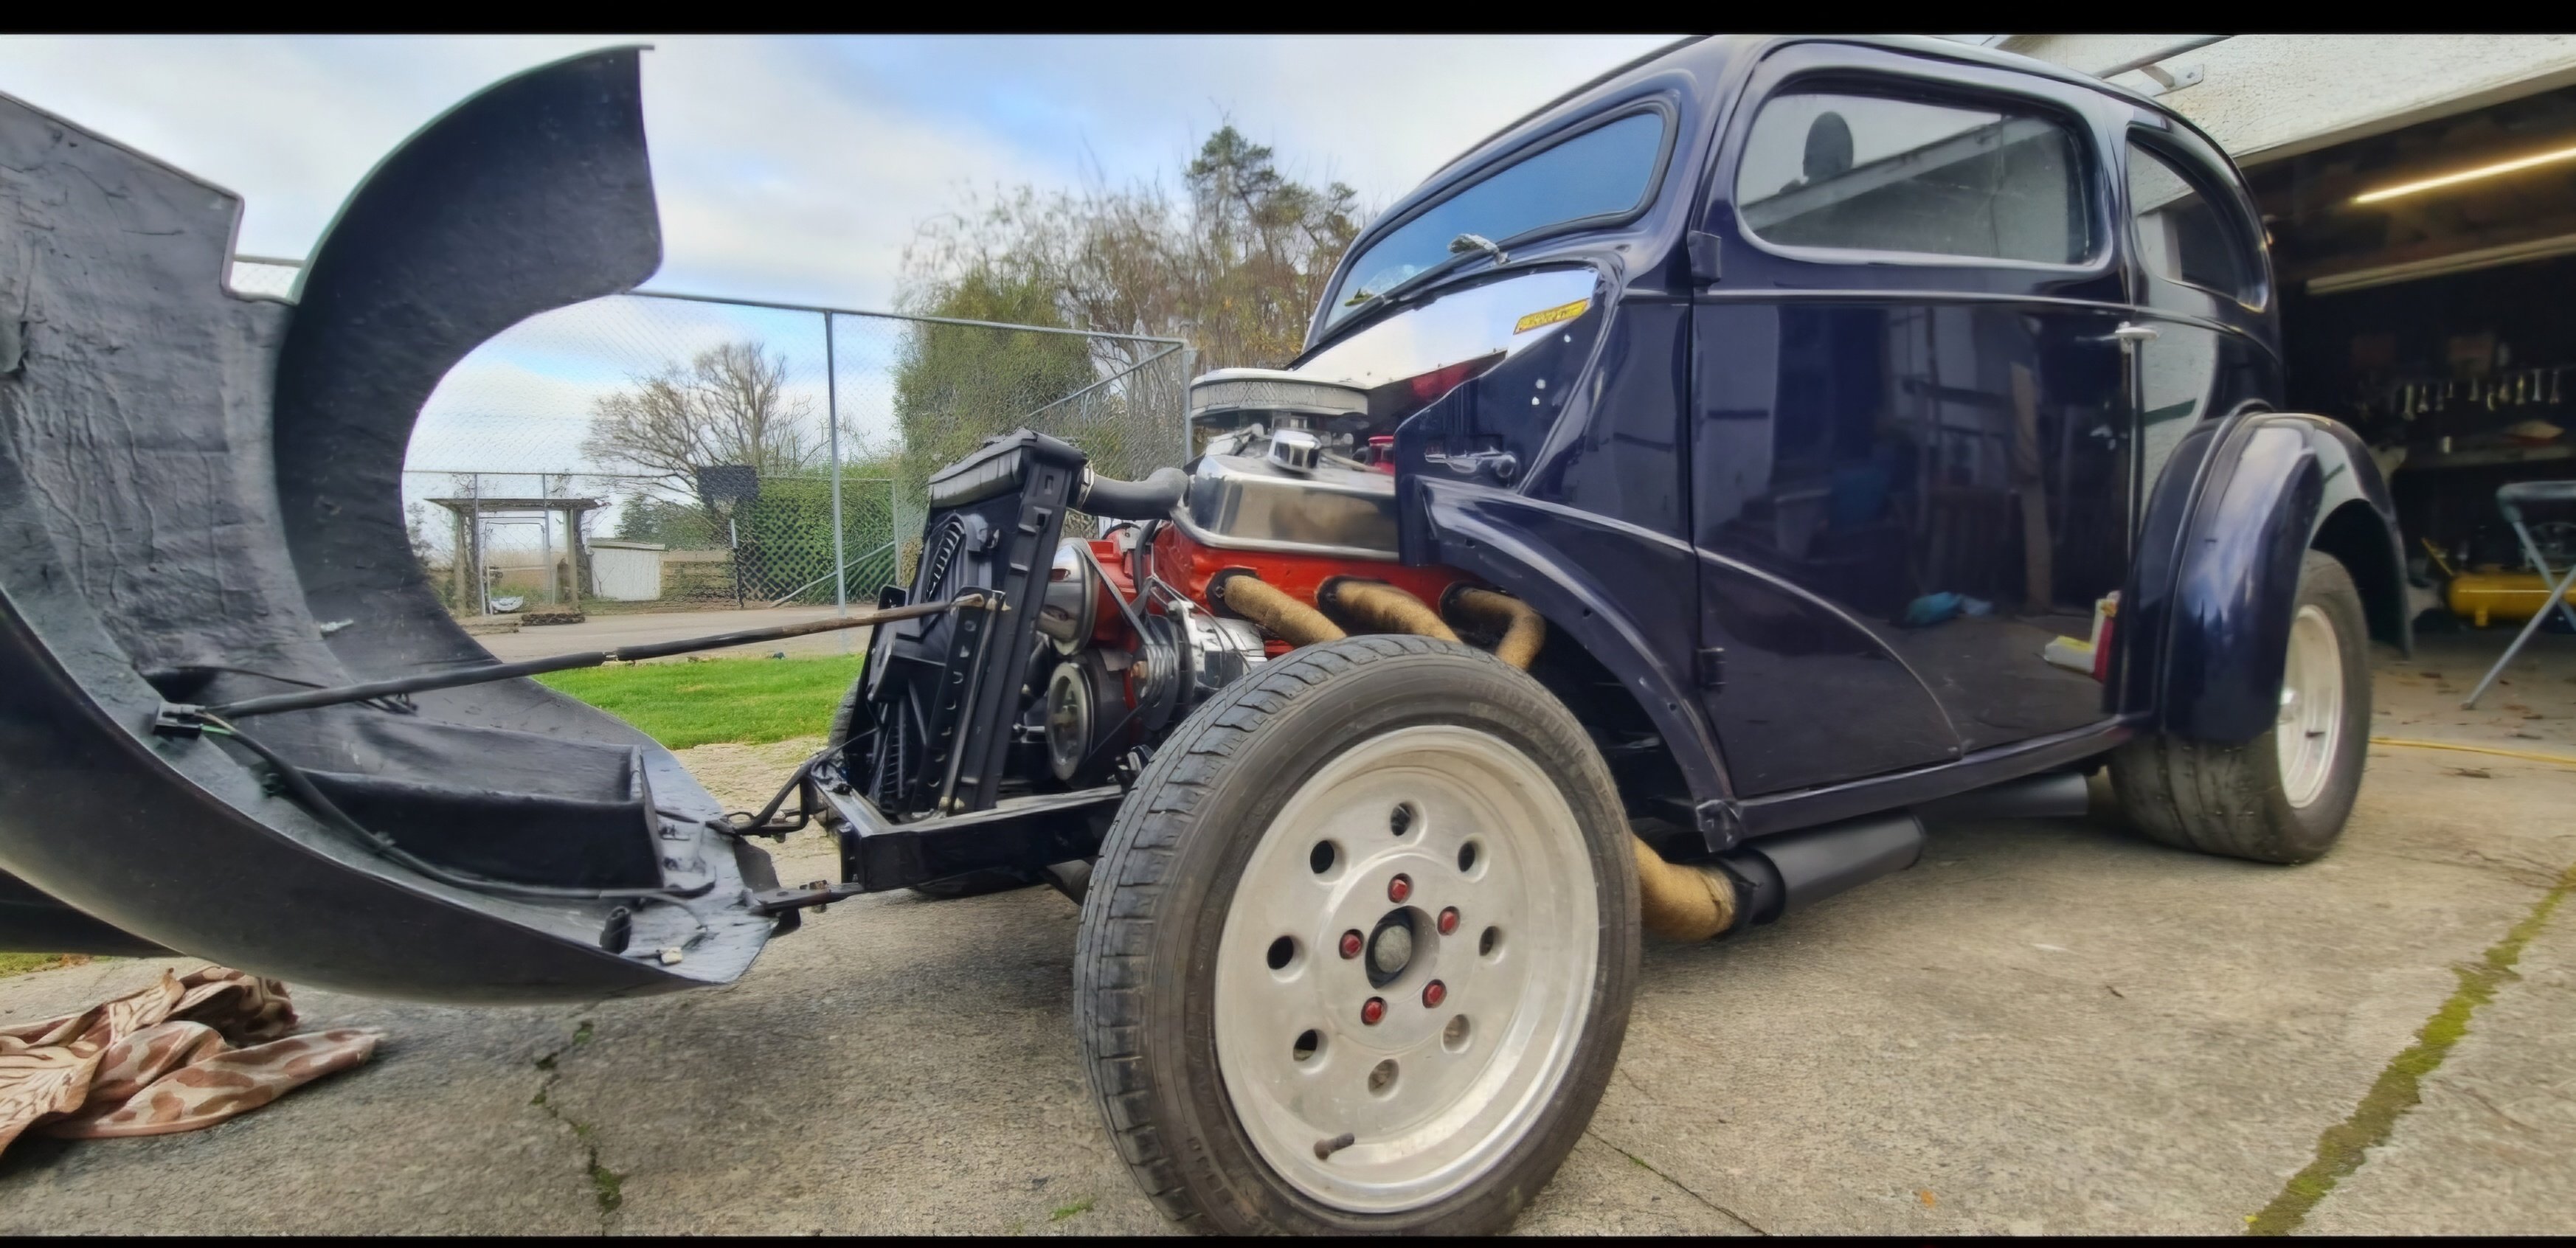
3 inch roof chop Mild rebuilt 350 cam head work etc Power glide, 9 inch viva front. end basic old school hot rod.
 8 points
 -
The Imp has a blacktop 4AGE in the front. It goes extremely well. Imp purists hate it.... you two would probably get on well
8 points
-
Yesterday I filled the gearbox with oil, and installed the shifter. It didn't work out the first time, so I threw out an SOS to @DJZ to find out wtf I was doing wrong. all sorted now.
8 points
-
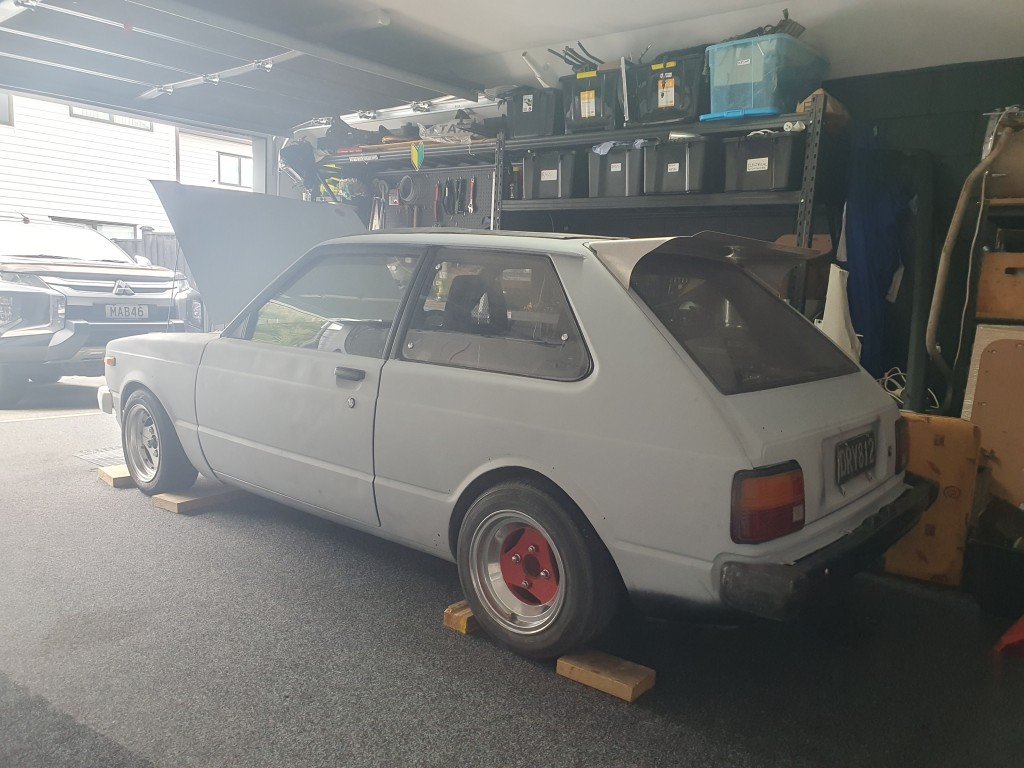
Was looking for a new project for the shed, have wanted a pop since I was a kid. It's a good base with minimal work
5 points
-
Cortina is sold!!! Yay I have floor space again. now I can get the bagged chassis off my hoist and back on the floor so I can get my fab table back. about bloody time5 points
-
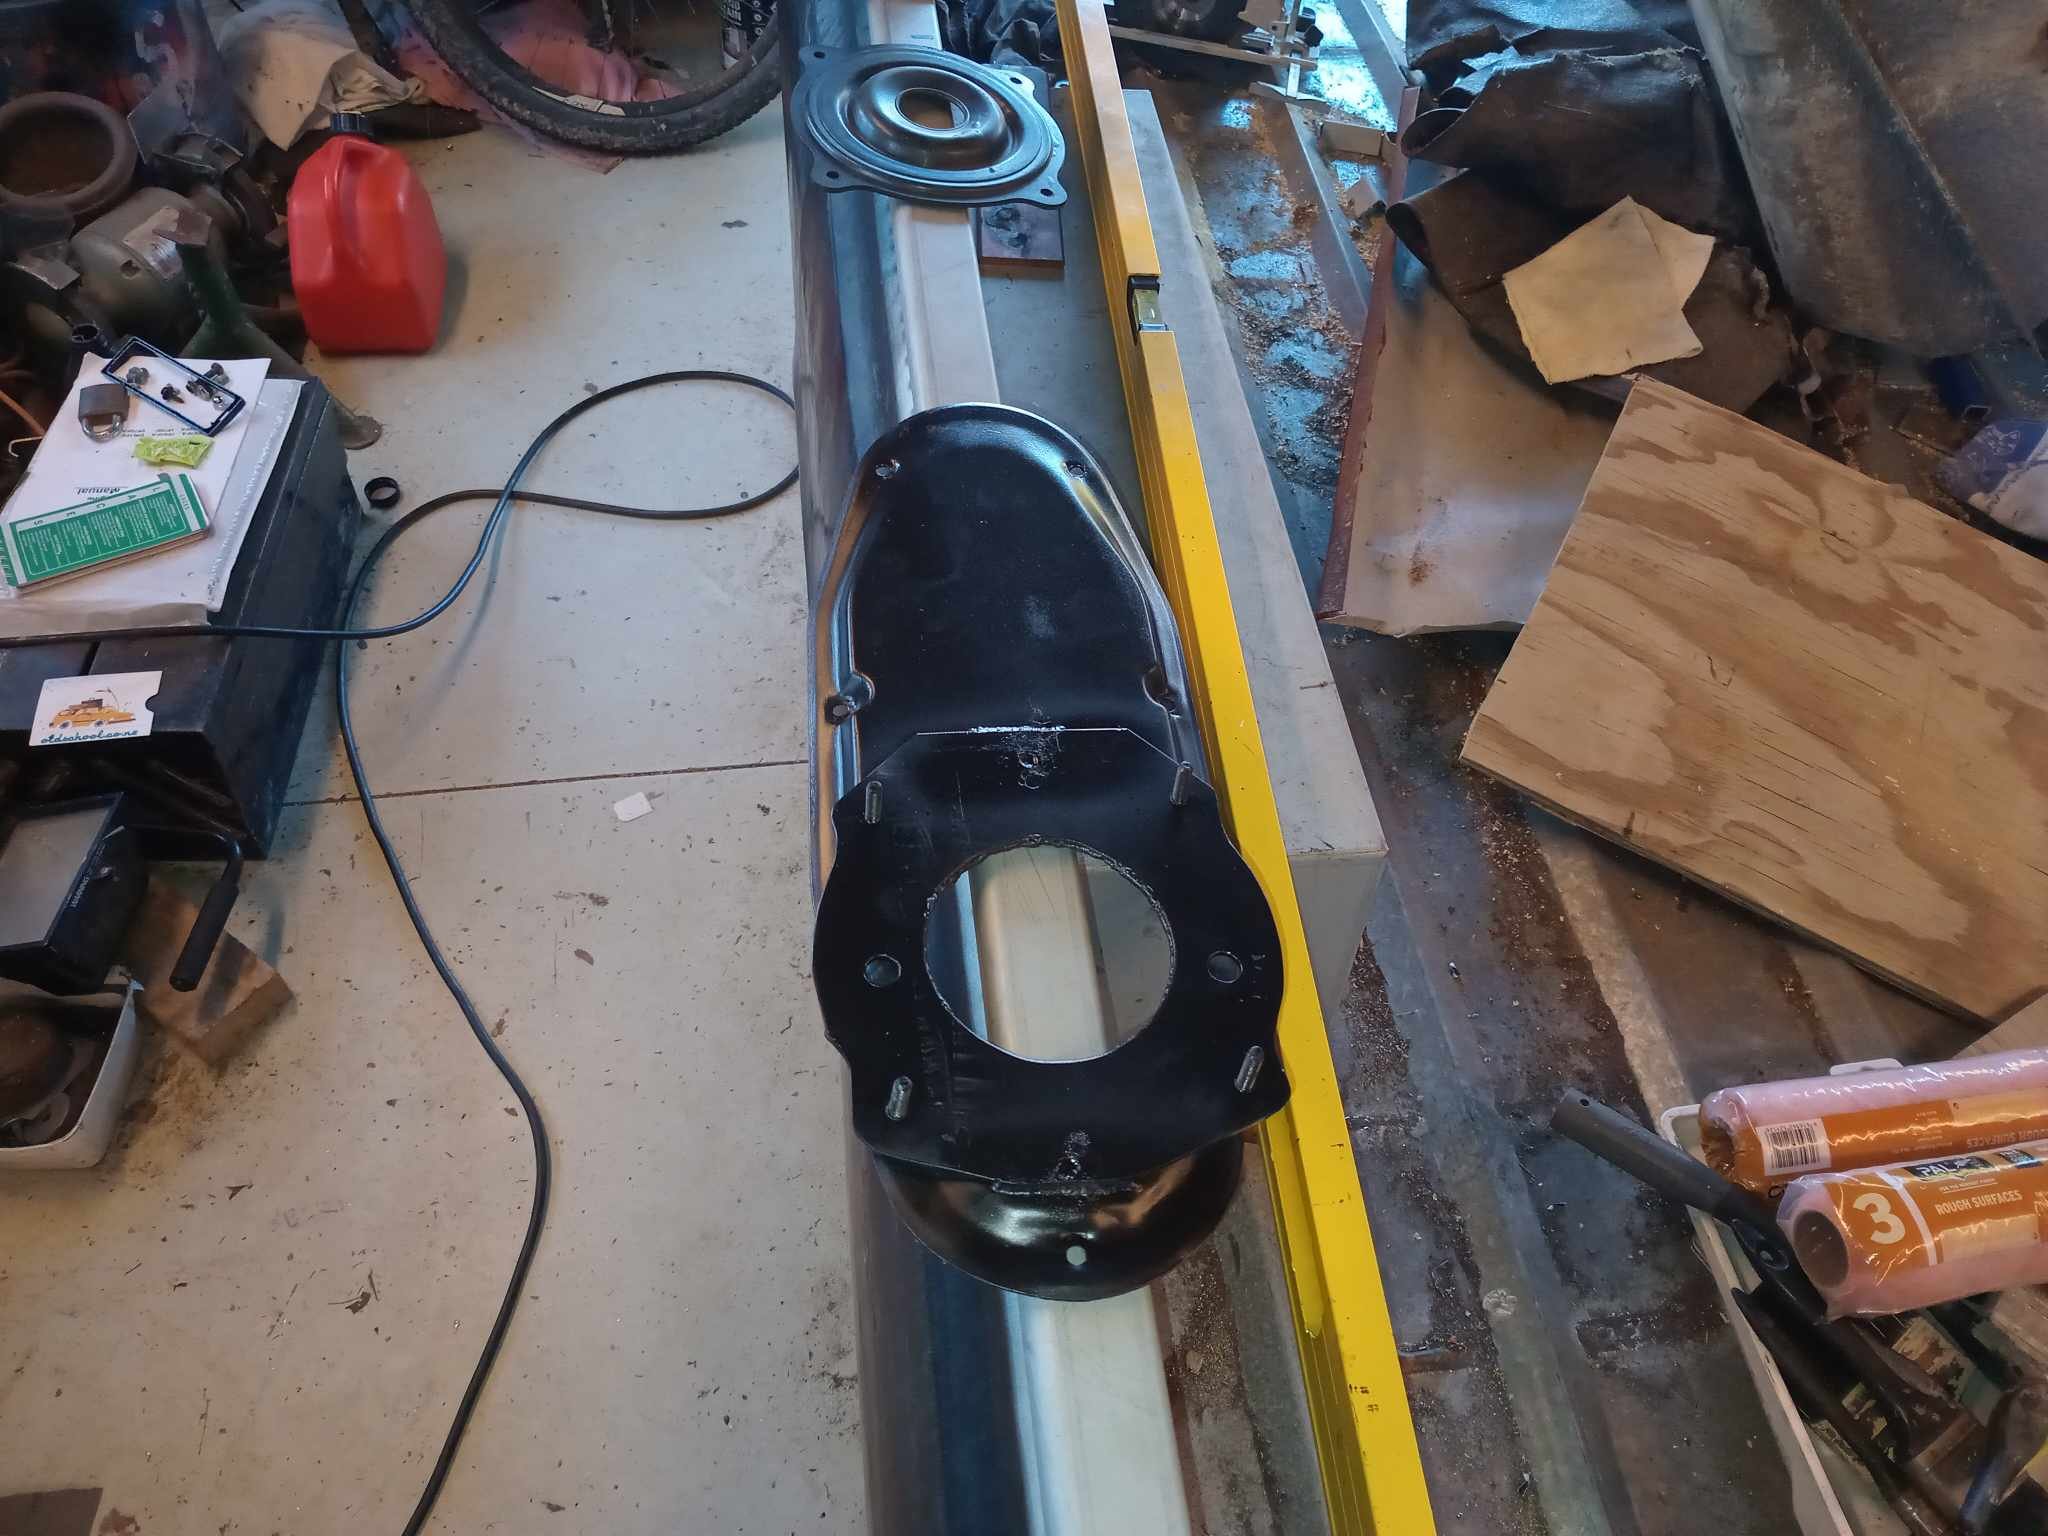
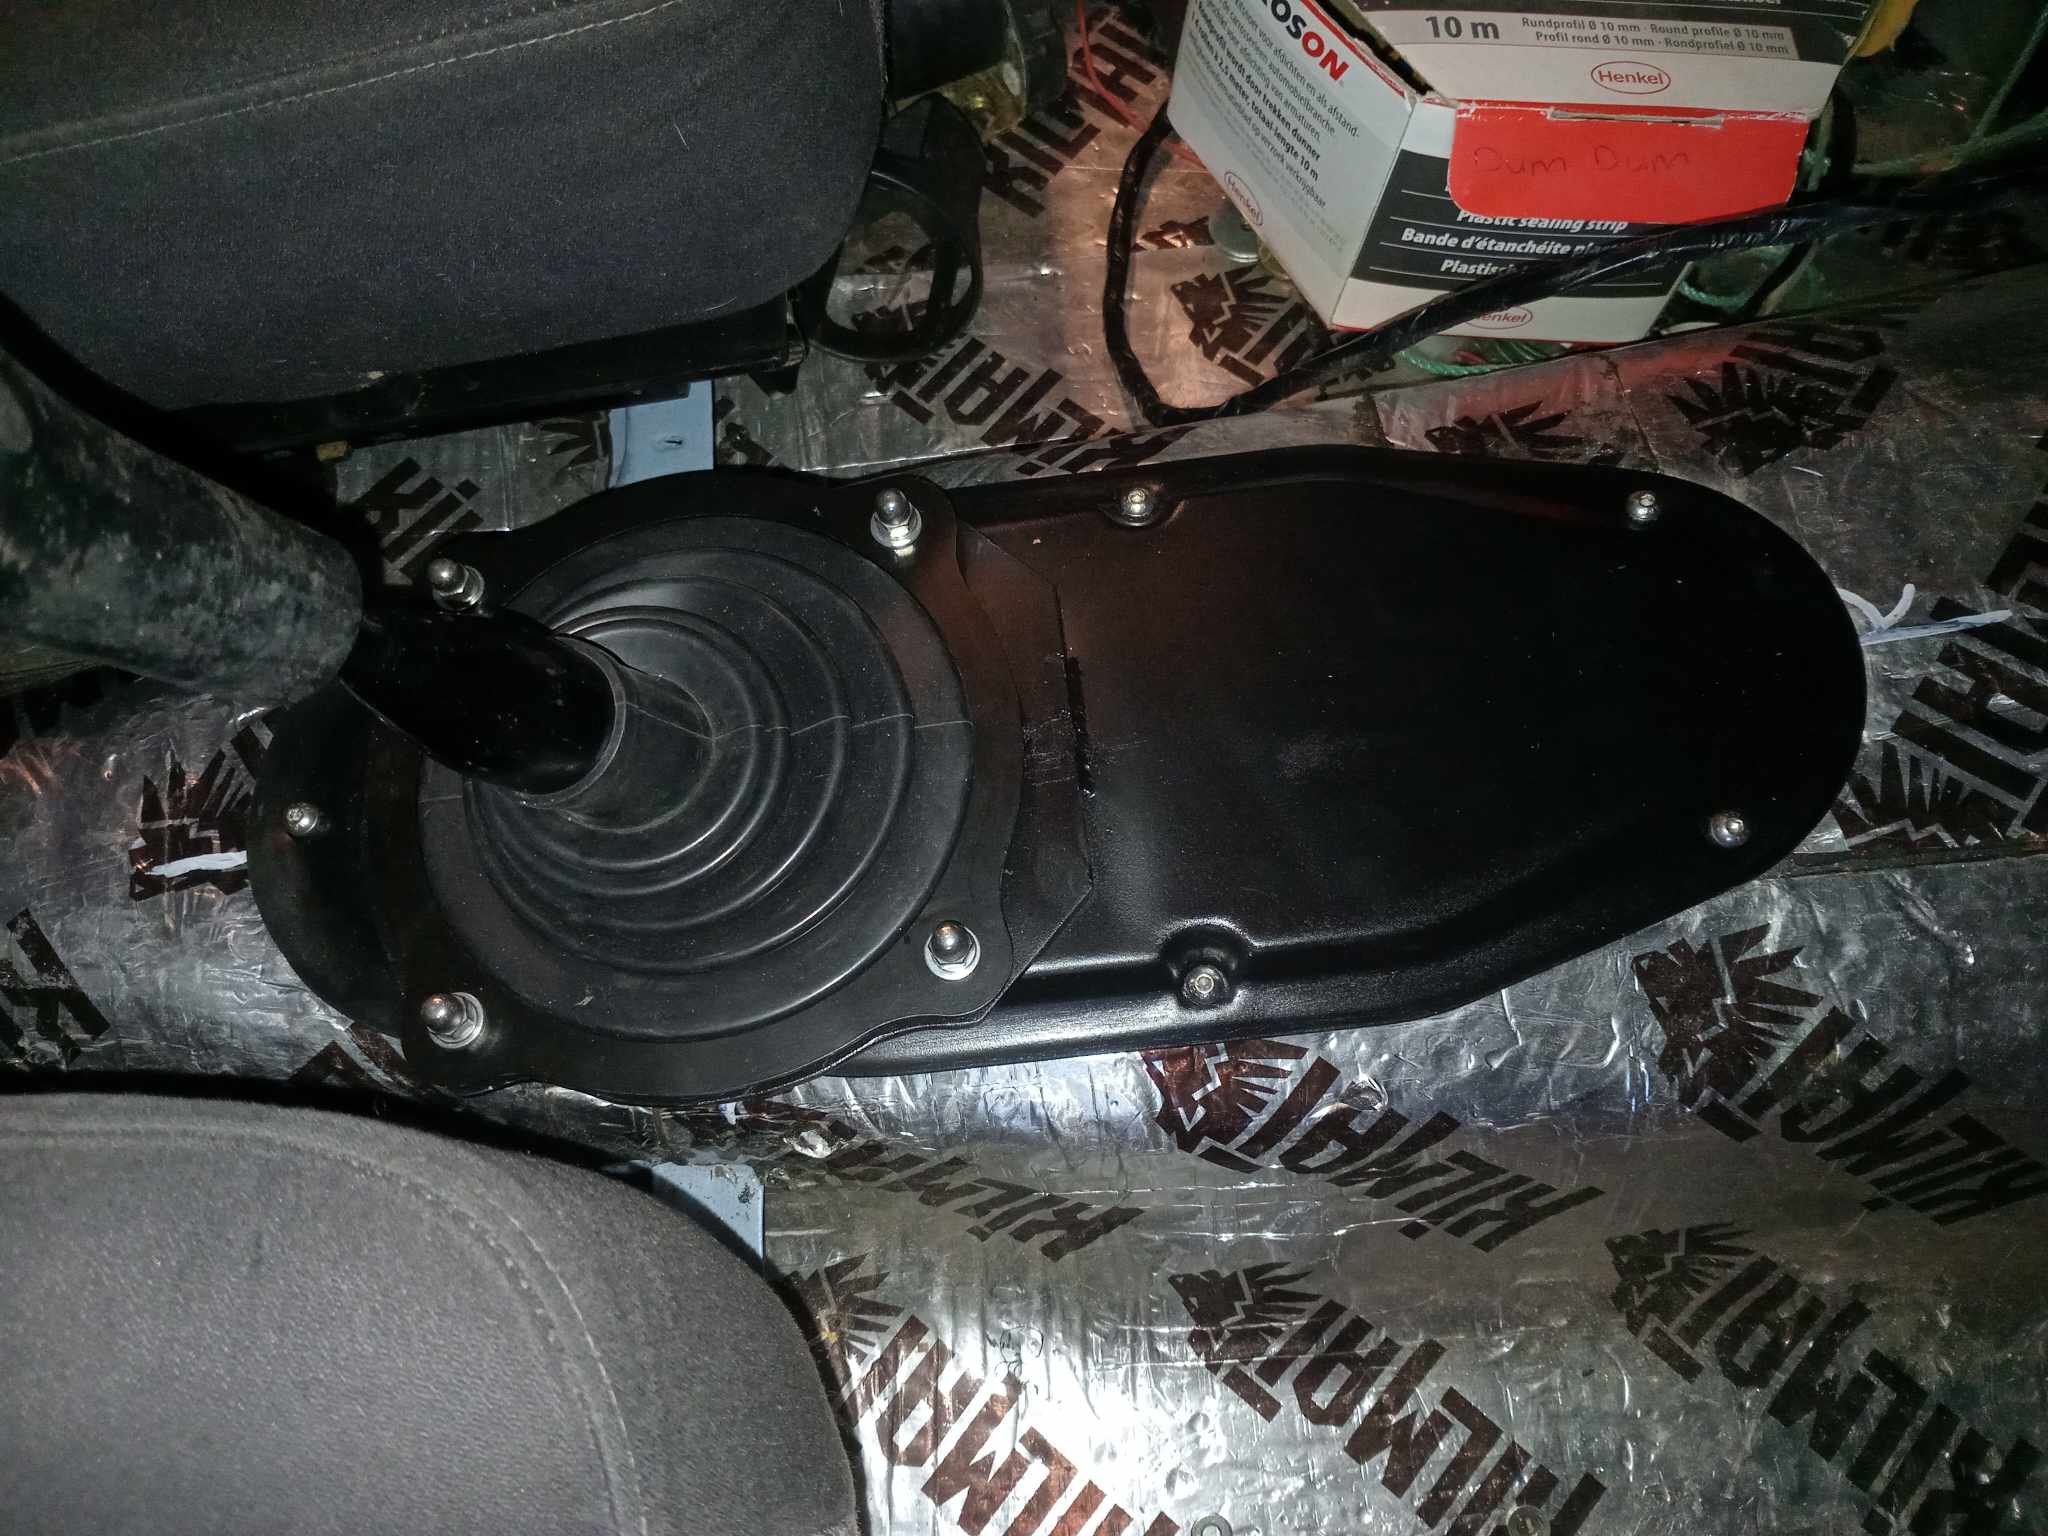
Because you can get brand new parts for "drift chassis" nissans really easy, I opted to use silvia gearshift grommets etc. However the removable panel on the floor didn't have a big enough footprint to bolt the hold down plate to. I sourced some 3mm plate off a mate, and made a rough (emphasis on ROUGH here) facsimile of the hold down plate to weld to the cover plate. It's good from afar. But up close far from good. The knee-sans use bolts into captive nuts to hold the plate down. I would have used rivnuts, but again the floor cover didn't suit that. So I grabbed some m6 threaded rod, and fizzed the zinc off with some pretty nasty acid. Then being 3mm, I tapped the holes M6, and would them most of the way in. The hardest part was making the big holes. My only holesaws are ones that @peteretep left at my house. They're fine for wet cardboard. But they really baulk at steel. Buy the time I'd bashed my way through the 1mm floor cover plate, the saw was almost done. (It may have also been the one Peter and I munched a hole in the floor of his transit camper with) after bashing away untill the saw just made smoke and noise. Then I finished the hole by drilling eleventy billion holes around the outside and making the hole round with a carbide burr. A mate then tig'd the two pieces together, and welded the back of the studs I gave it a splash of black zinc, and slapped her together. Mr datsun used self tappers to hold the floor plate on. I elected to use rivnuts with caps crews. Pics for Fred.
5 points
-
Have done fuck all on this really. I have Driven it a couple times. Still chuffing smoke a bit. I have brought a new Turbo CHRA so will strip it soon when I have a bit of time and swap that over. I figure I will also do a compression and leak down test on it while I’ve got the intercooler off too and give I a good once over.4 points
-
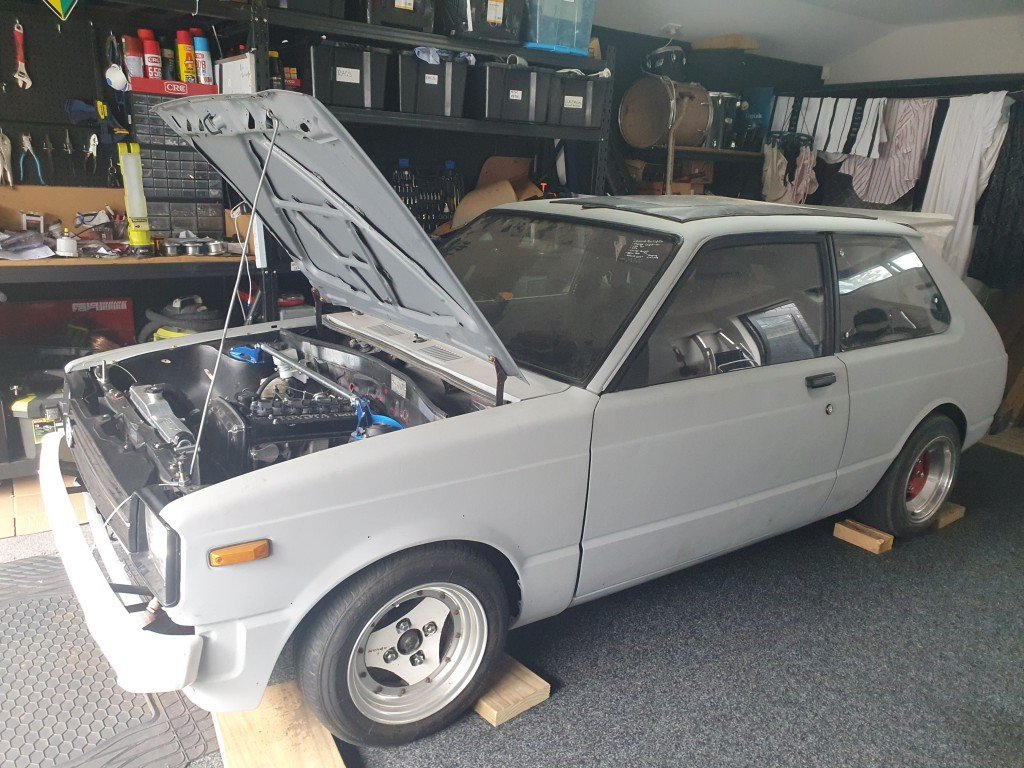
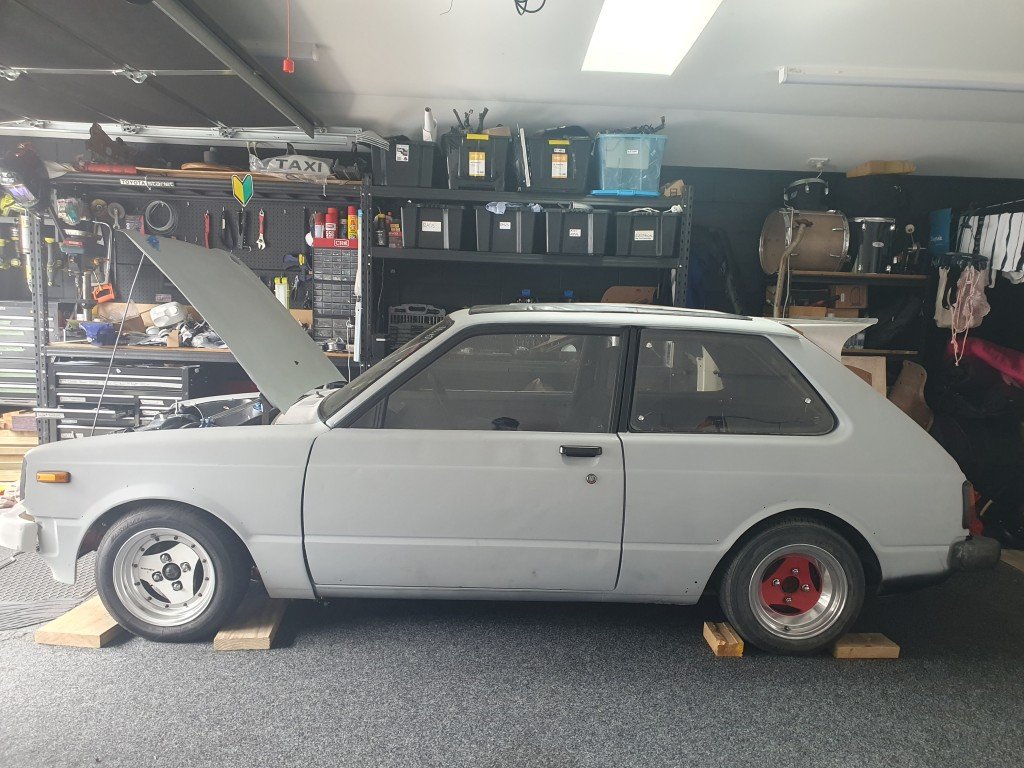
Got the KP down off stands for the first time in a while. Looks great! Definitely need some new shocks. Its off to RSL this week for an exhaust all going well. Part of the list, time dependent is maybe moving the engine mounts forward 20mm and modifying the gearbox mount. The driveshaft has enough in it for that. Driveshaft hoop to be done (just to be safe, even though its all certed already). Put a baffle in my spare valve covers and weld on some fittings for the catch can. One thing that will get you taken to the stocks is having a 3 inch exhaust on an NA 4AGE with no mufflers or reso. We get enough of that at 2am down the main straight. So I've gone for a 2.5" chambered muffler and a resonator for now, we are here for induction noise not exhaust noise. The 2.5" decision was made by the headers on it already being so. Going for mild steel for now just to get something on there. As the car gets on once everything is working, a SS one will surely be on the cards. Its part of the "jDm BrUh" Kaizen philosophy. Main thing that has me distracted is trying to fine a family Sunday car. Been really after a GX61/71 or an E28. Something fun, still classic, with AC that we can all enjoy. The KP will not be that car. If anyone knows of any decent ones (non-project) ones going, send me a message!
4 points
-
Found source of exhaust leak, my Manifold has very little meat on one side of the flange this may be a casting defect as my original doesn't have this issue and the new gaskets probably won't seal on what's left as they are a round port. My welding job has held up on the bits I added on so fairly confident building up with mig and shaping up with some careful filing will get enough beef for it to seal properly.
3 points
-
Fingers crossed its 100% dust, draft, noise, and fume free.3 points
-
Brakes all done. Brake lines sorted, discs, pads, brakes shoes, brake hoses all replaced. Suspension is next. Had to order new lower ball joints and inner tie rod ends but everything else will be sorted locally. Suspension guy is looking to lower the wagon around 70mm3 points
-
So I went into the workshop this morning to make a gate. then got grossly distracted by this thing. bolted in the driveshaft (into the static 3 ute). then had to figure out how to run the oil cooler lines as the cooler -an port is right in front of the crossmember. I’ve figured if I can do a -10an 90+90 that gets me a clear shot to the rear by jogging over the crossmember. the upper will need 2 -10an 45s to get a direct hit. i also planned out the EWP so just need to get the hard pipes bent up/fabbed to suit. then I got sidetracked for the 1000th time and bolted in the seat mounts. Now I only need to sort the crush tubes and doubler plates. then, yet another sidetrack moment I fitted the dash pad and checked that the vent cover and dash eyebrows will fit. One needs some tweaking to be perfect. then yet another bloody sidetrack, I shot to Taupiri to pickup a set of gauges that I hope to adapt to the dash. (Factory Mazda). I also figured out how I’ll run all of the cab wiring forward of the firewall. should be tidy. no photos cos I got too distracted3 points
-
I got the carpet into blue. It makes it marginally quieter and adds a certain scent that I am not sure is an improvement. The drivers side is way worse than that but its fine. I went at the green meanie today, I have collected lots of incredibly useful parts; That dash isnt mint but is significantly tidier than mine, i might chuck it in. It now looks pretty sad tho. If anyone wants this Sportline steering wheel let me know. Its pretty dirty but sound enough. It also comes with what I assume is an OEM Fiat boss kit;3 points
-
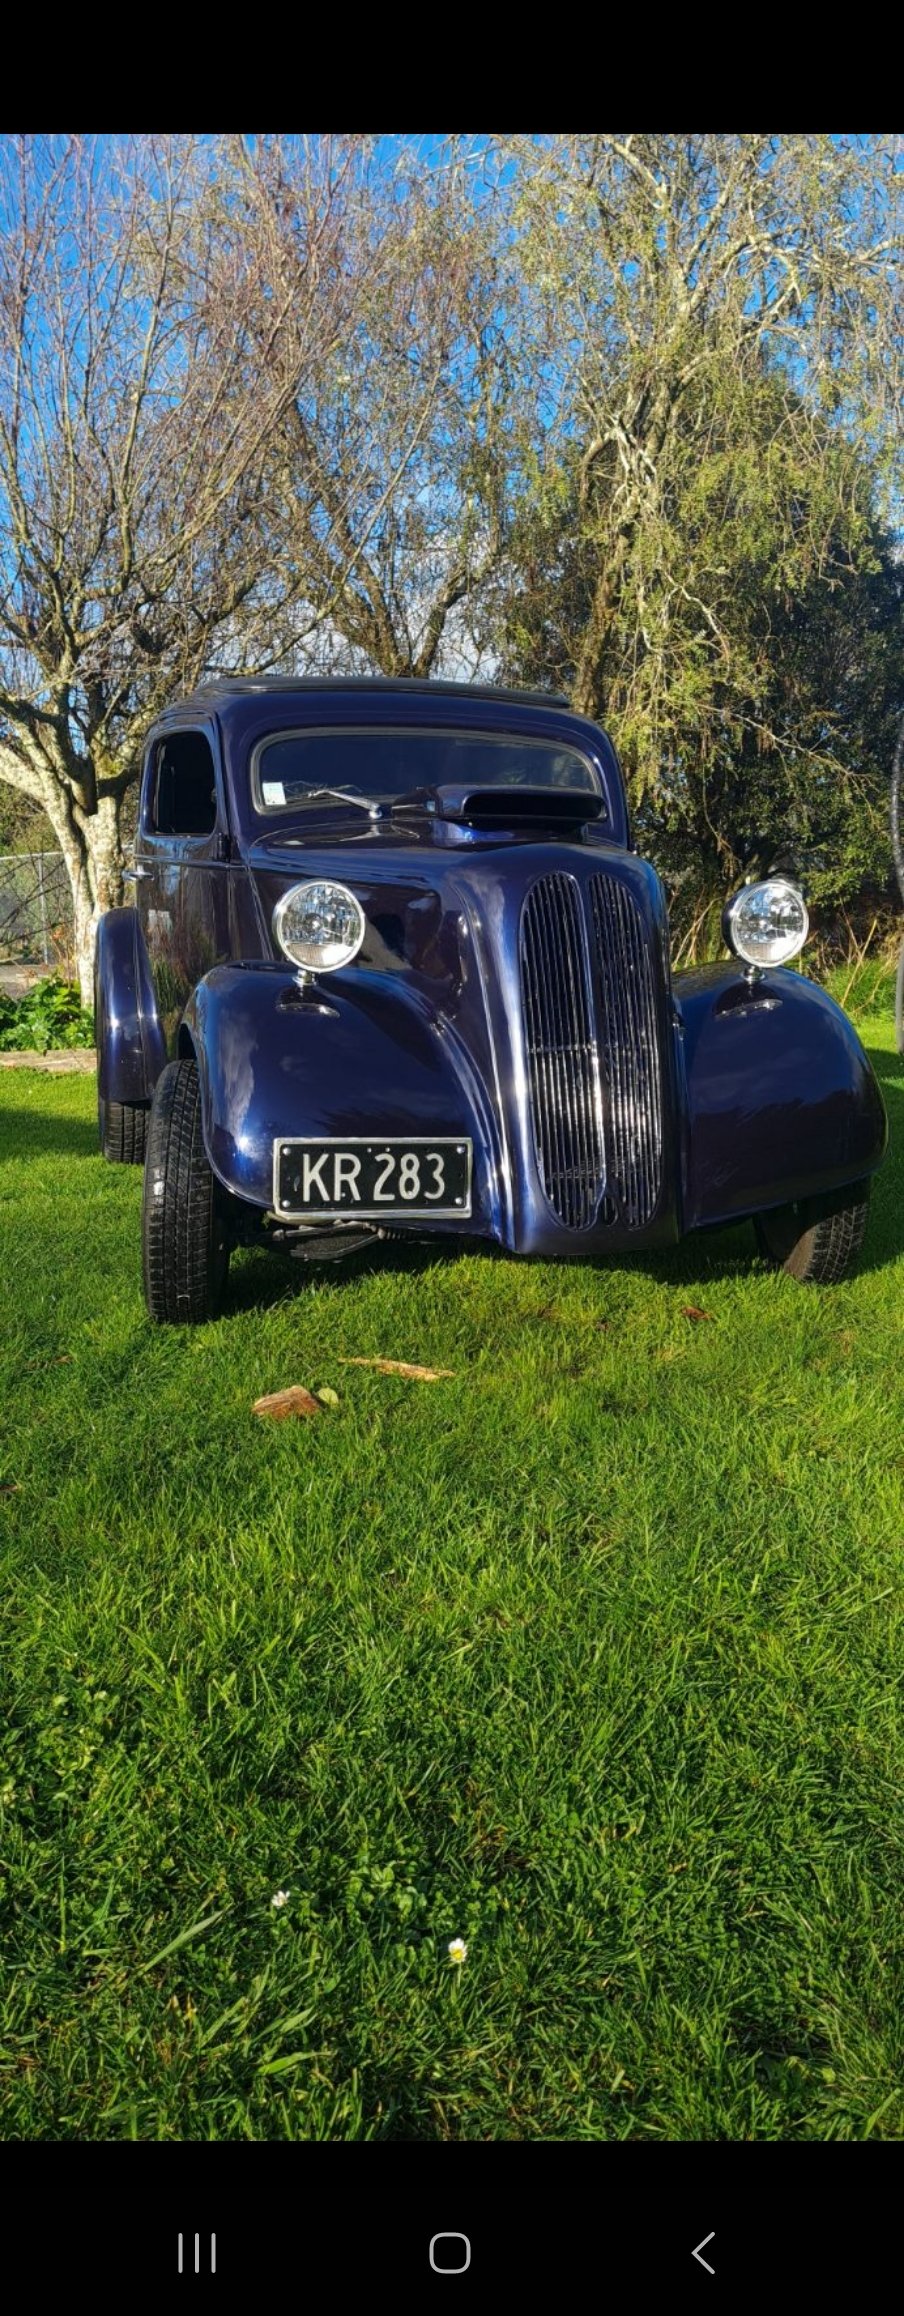
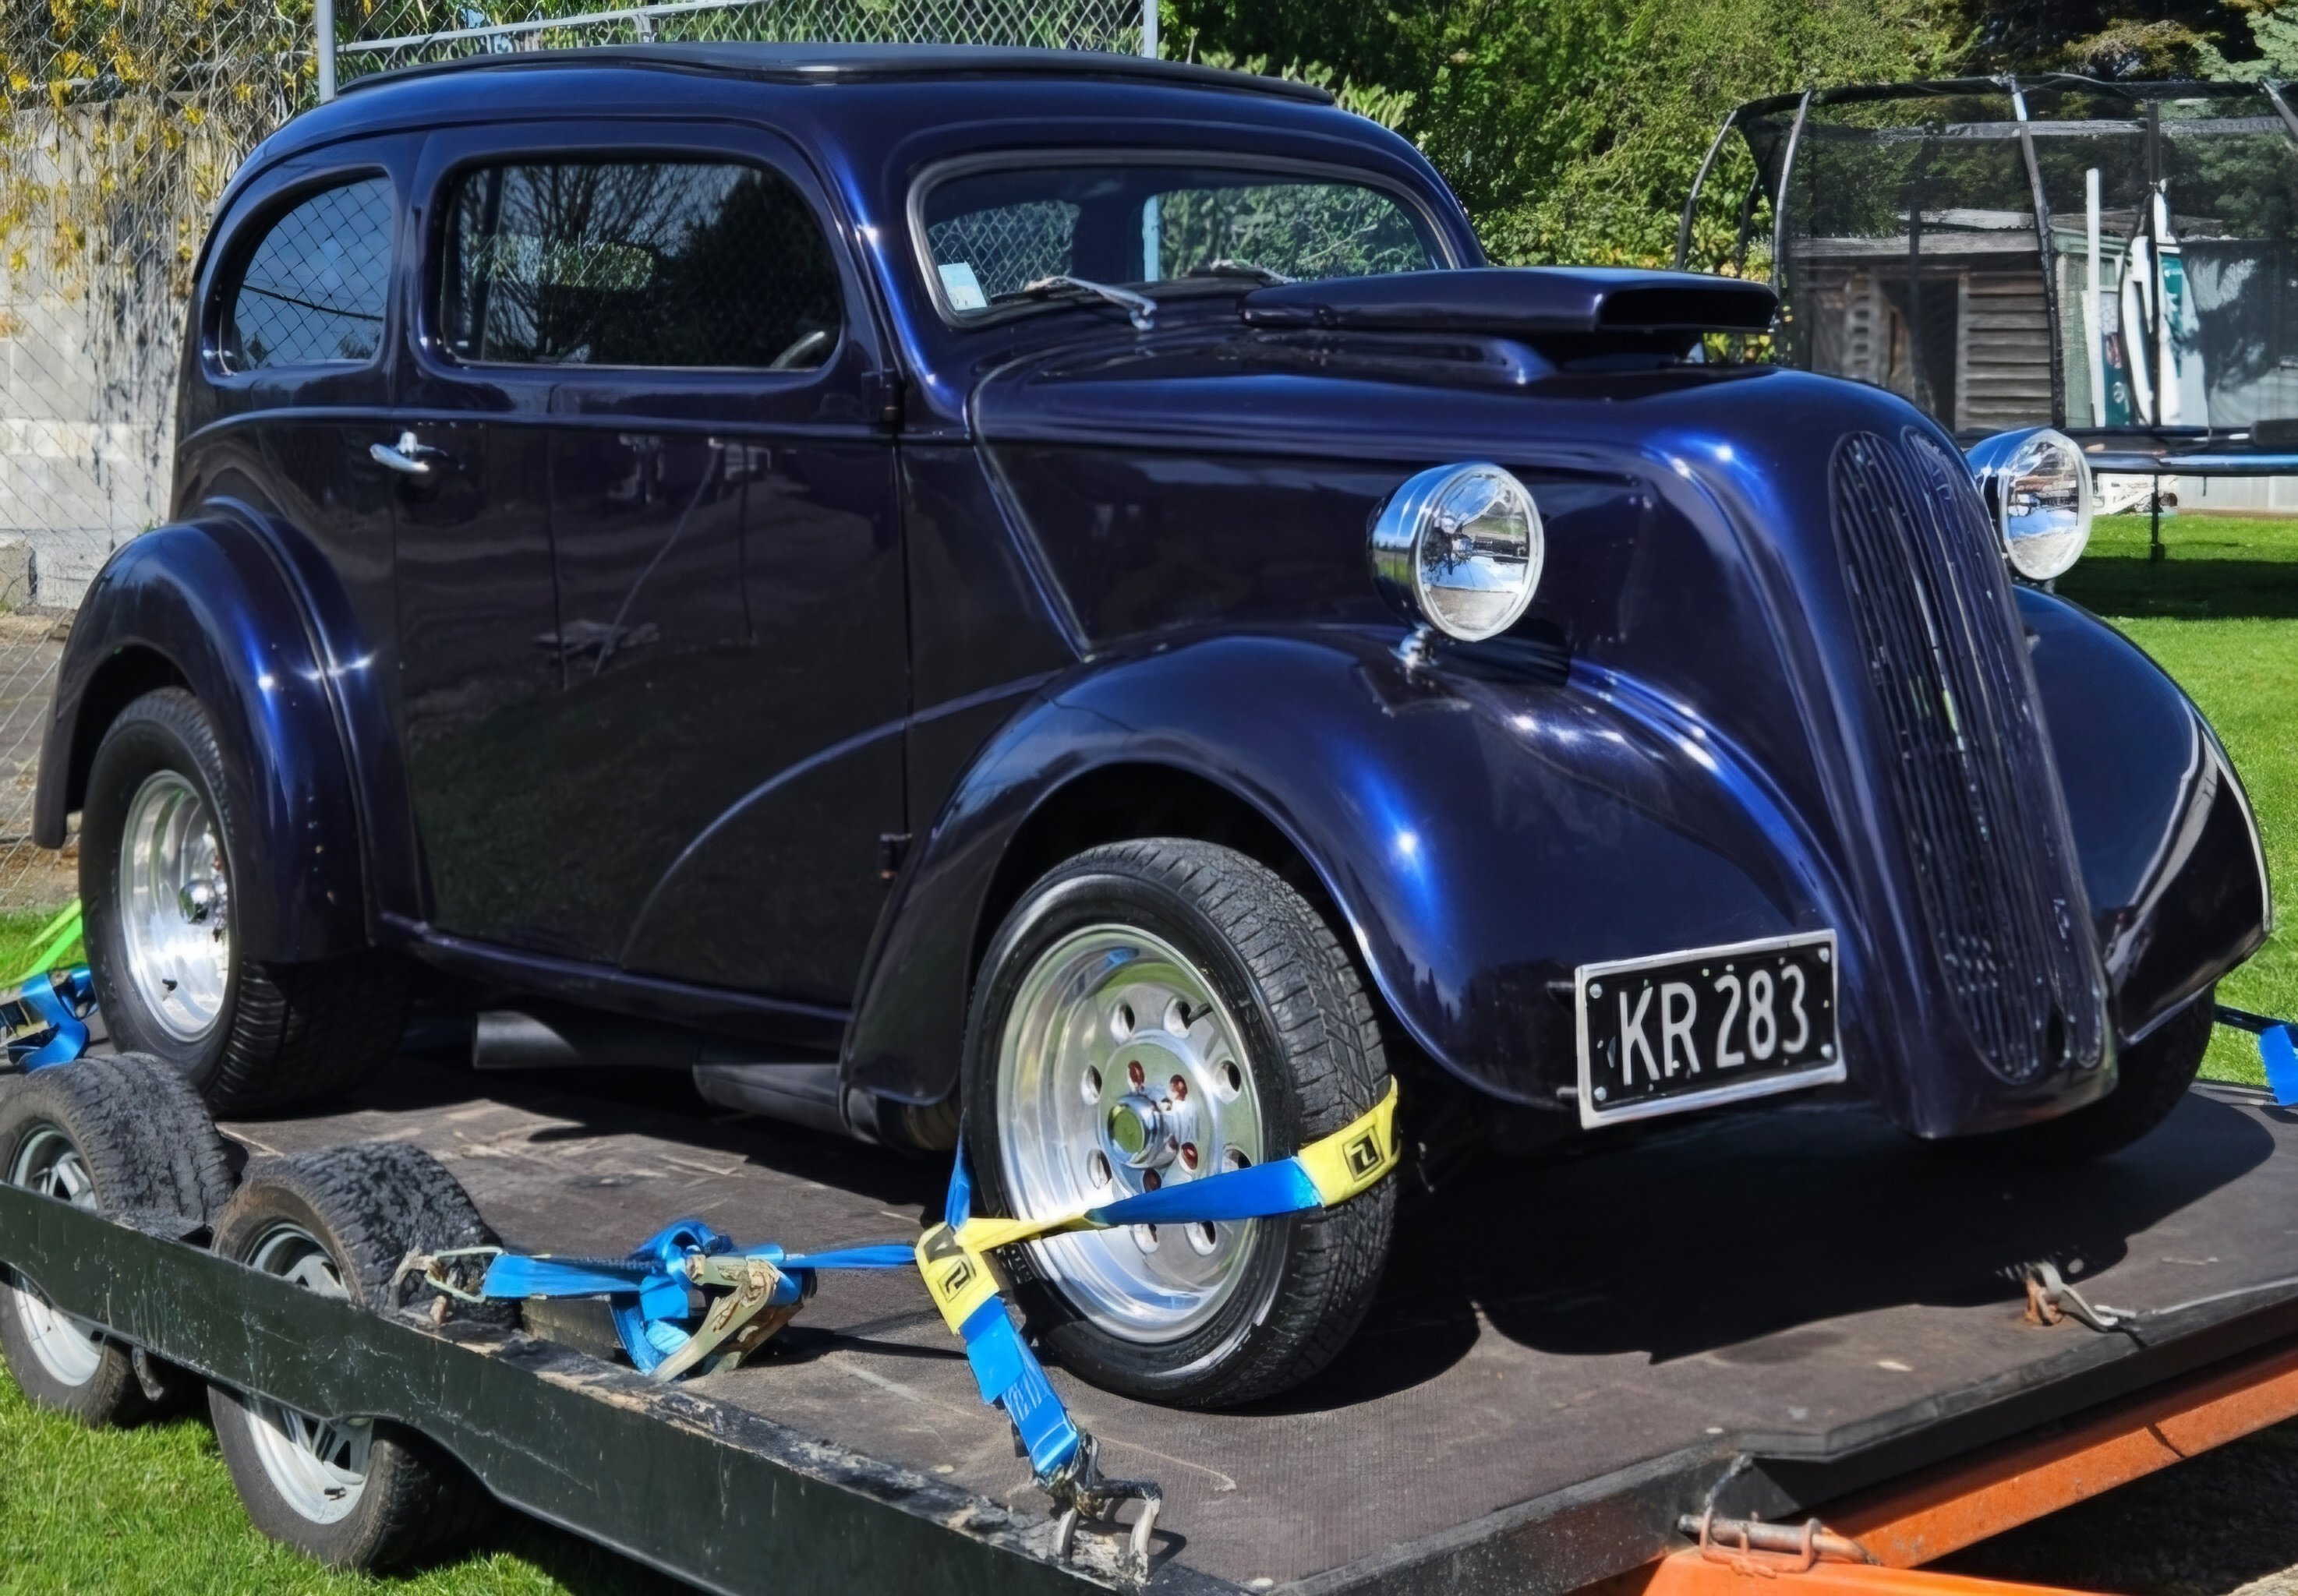
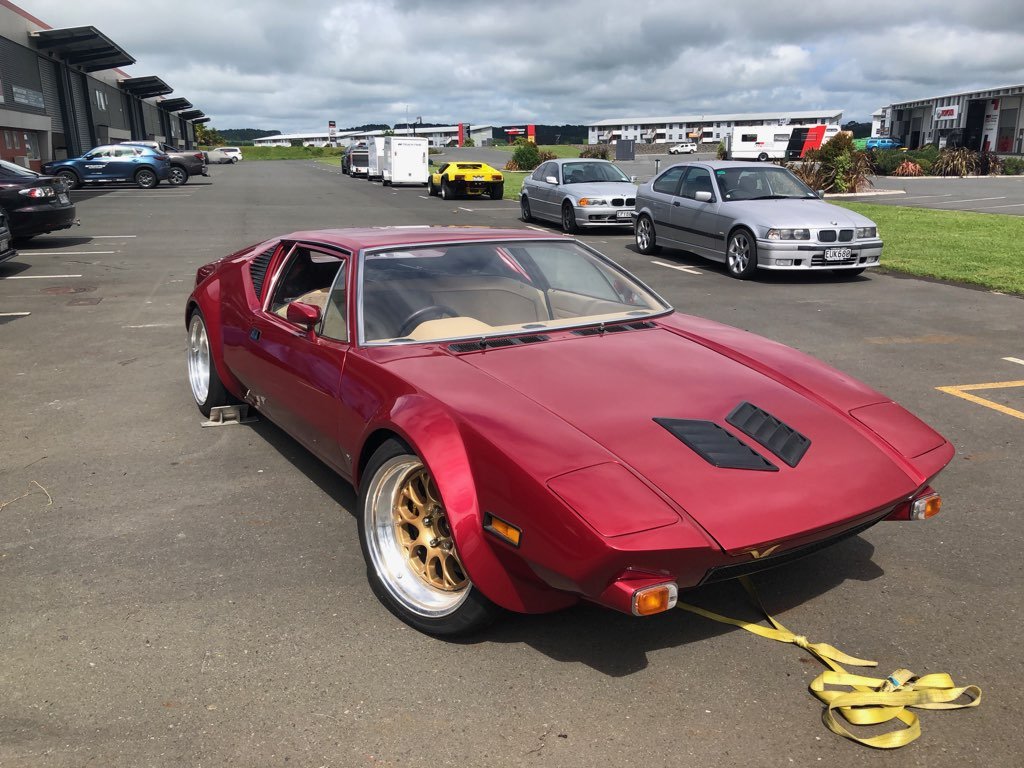
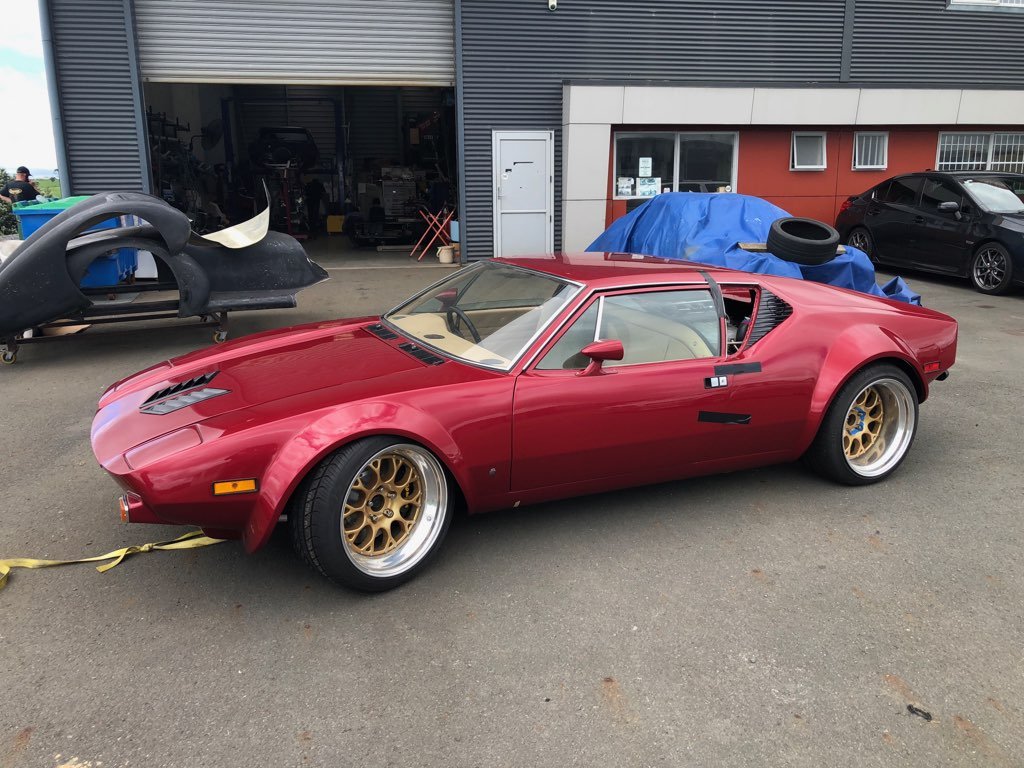
Just a quick update. I've been in contact with the original NZ owner, he's a real character. At the age of 85 he's just bought a McLaren only to find he couldn't get in or out of it, so has bought a new supercharged Vantage as well! (Oh how the other half live). Good news is that he's helping all he can and although he hasn't any registration details he does have some early pictures and has offered to swear an affidavit saying that to the best of his knowledge it is the same car. Being an ex MP and well known public figure it will hopefully add some weight when we put in an "alternative documents application" to NZ Transport. I'm still researching the cars history; we bought it as a pile of parts from a Turners Police auction after it had been confiscated in 2000 under the proceeds of crime act and had been in police storage for about 6 years, (the previous owner had been locked up for manufacturing meth!). It's a crazy story and I'll post a quick thread of the rebuild when the history is all confirmed. A quick few pictures of the almost completed car.
3 points
-
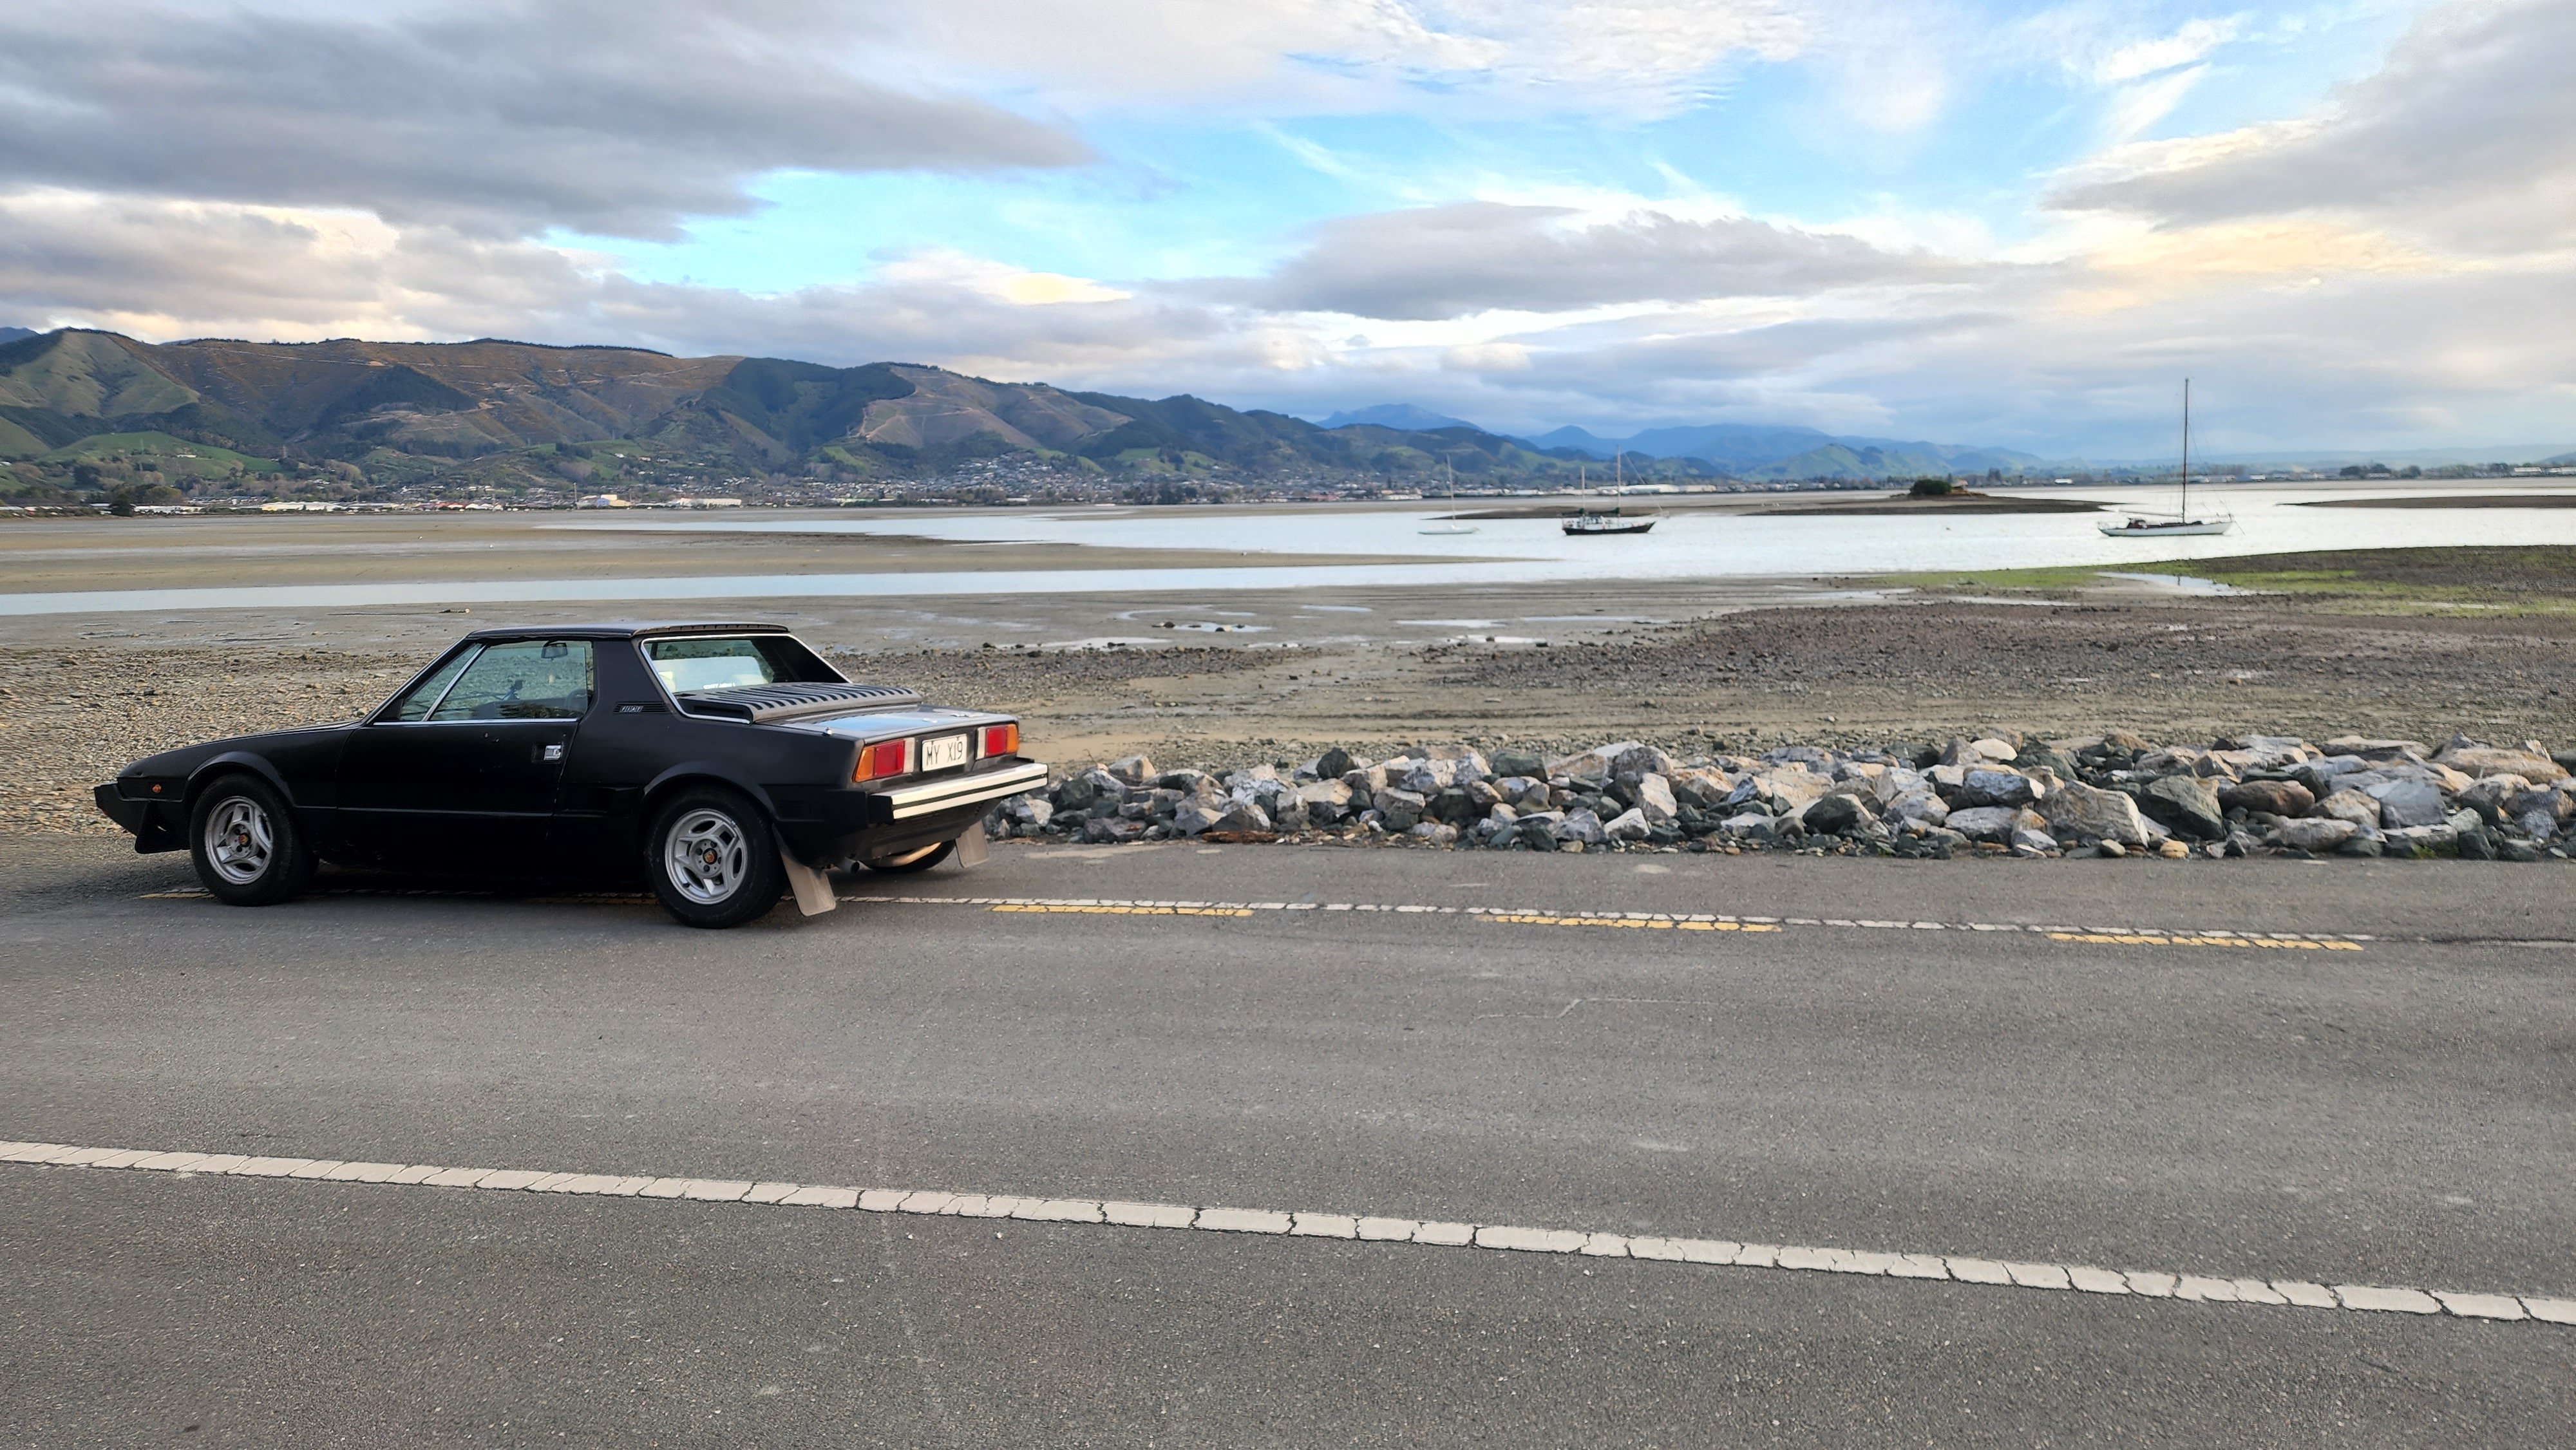
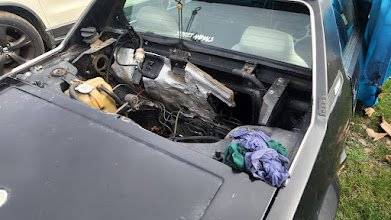
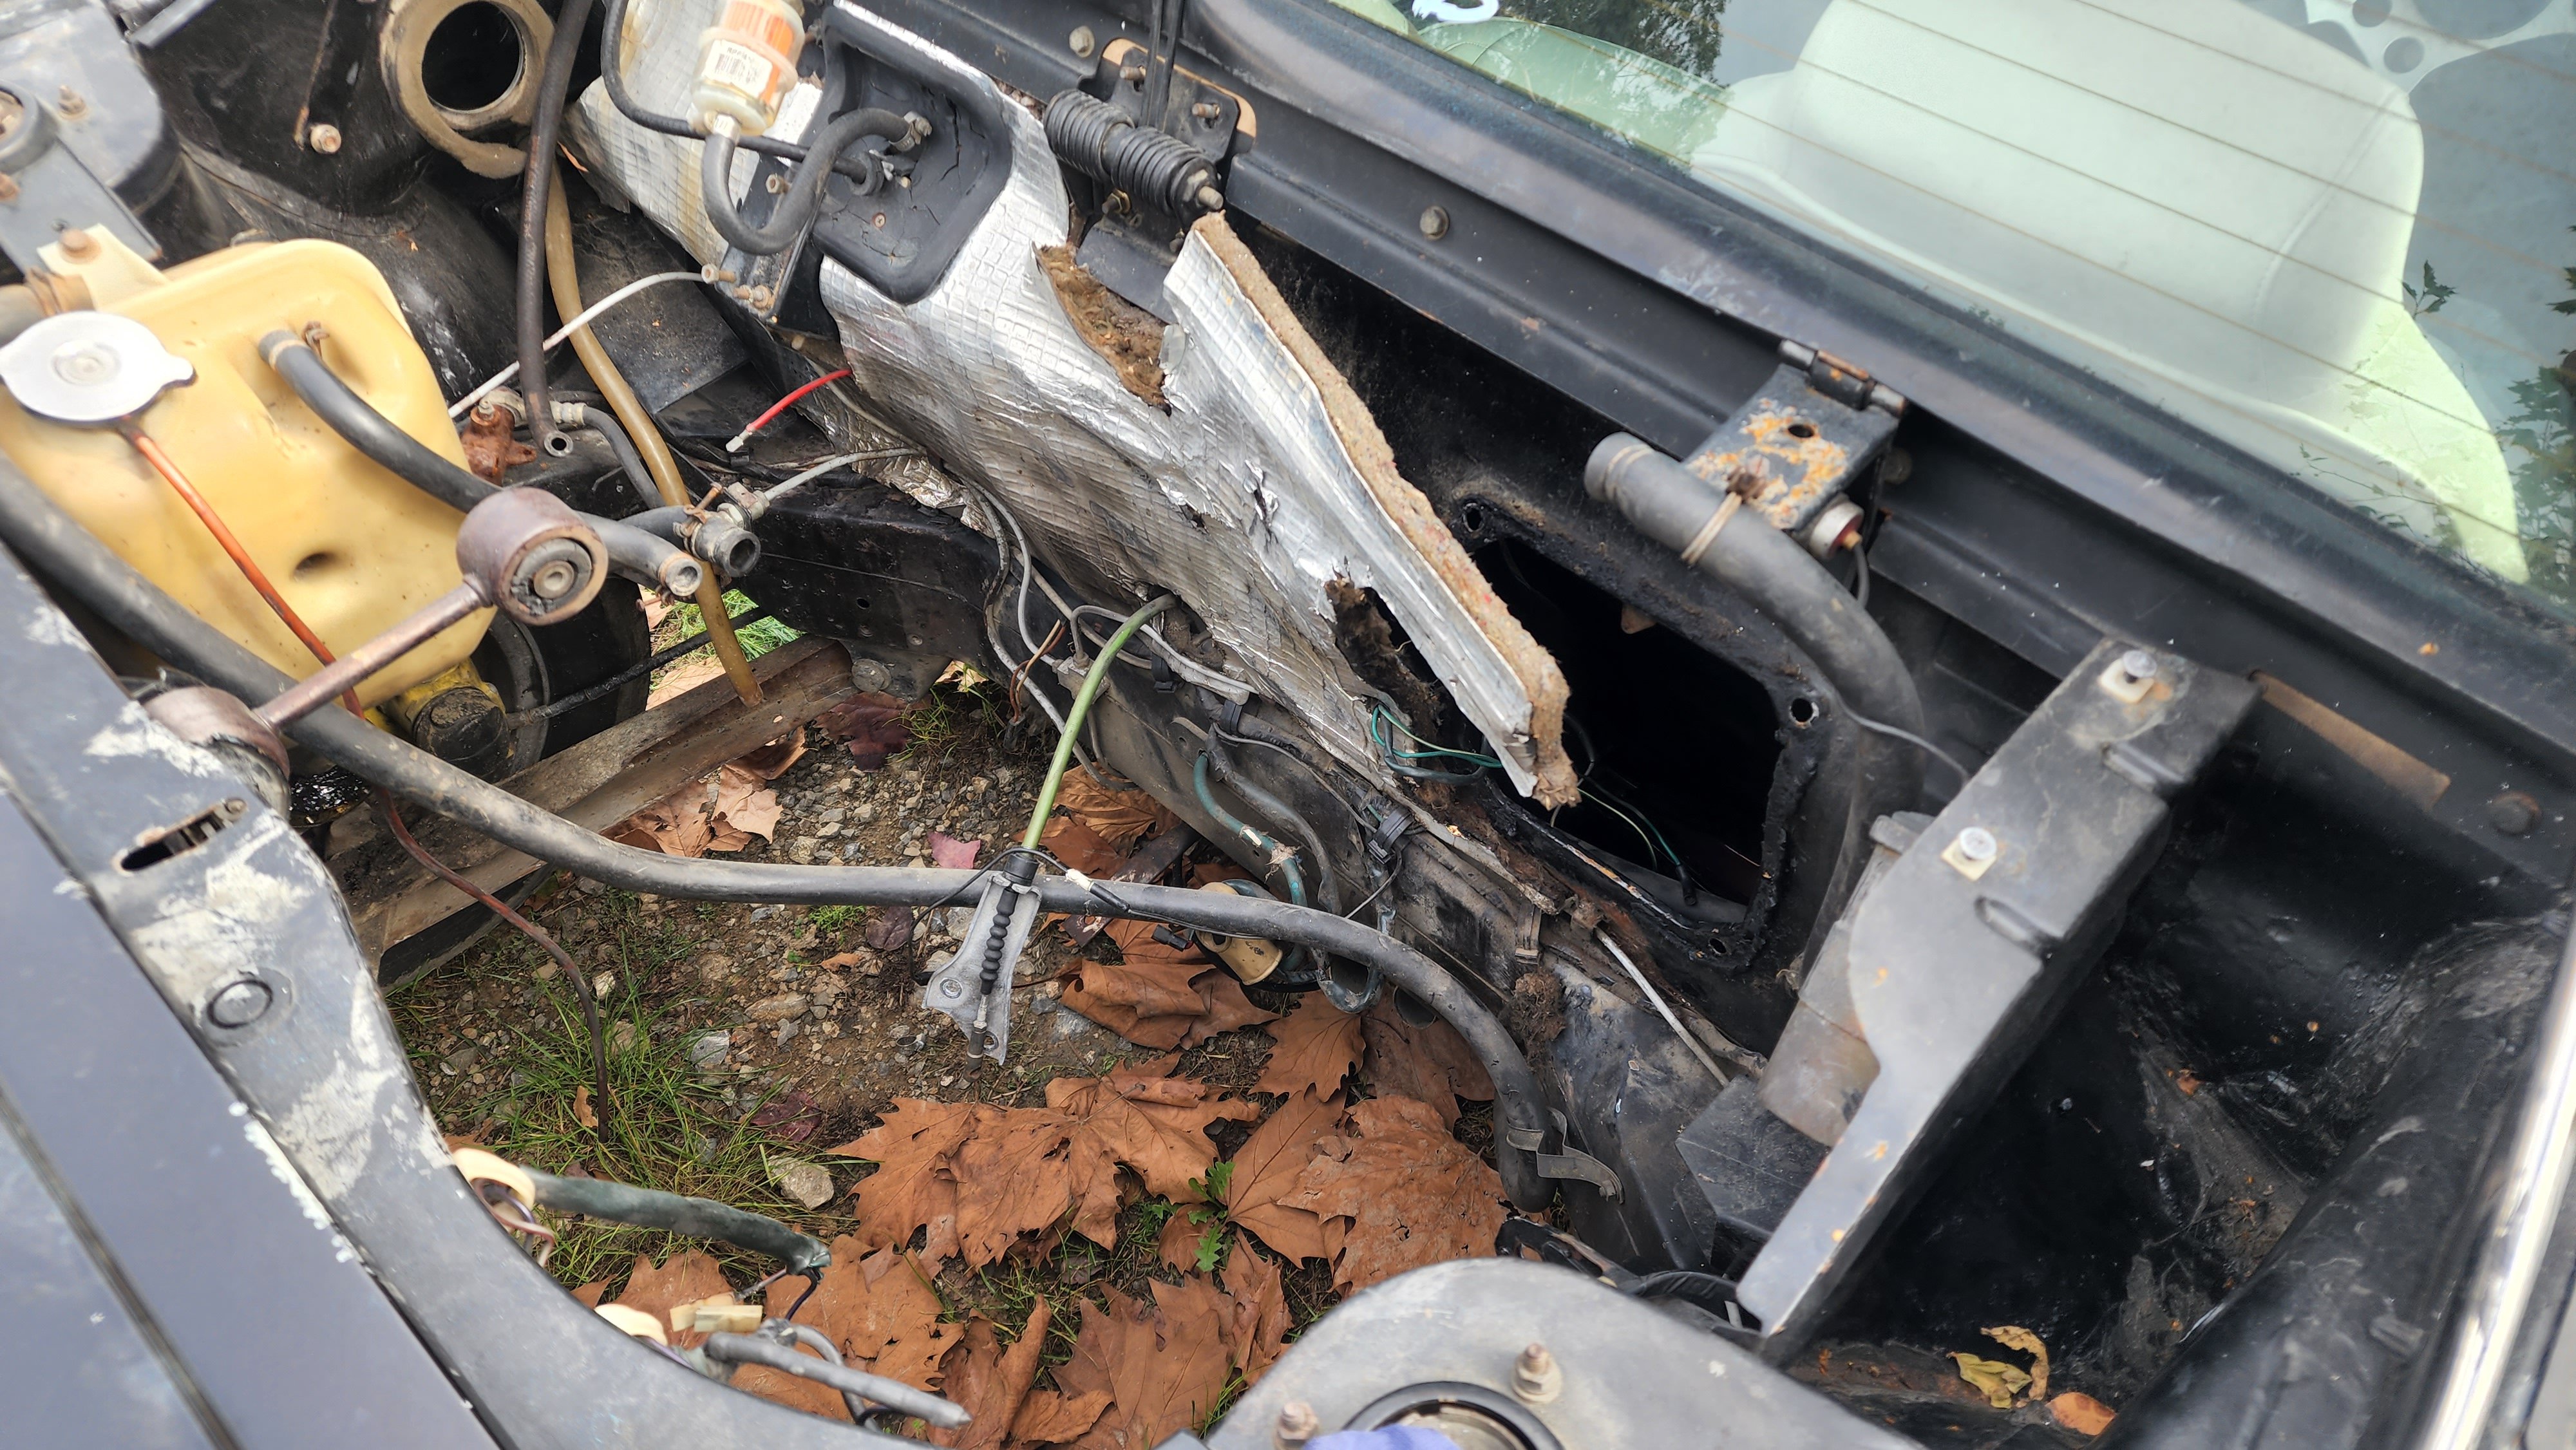
INTRODUCTION This is my 1984 Fiat X1/9 project, I first got this car back in 2021 around a month after my 21st birthday as I had always wanted one, I found her sitting rotting away in a cul-de-sack near Isle Park here in nelson, I grew estatic to see one and was sadded to see how bad a shap the car was in, after a while of walking past it, my great uncle and I went to see if I could buy the car, we spoke to the owners, a lovley older couple and they agreed, at this point some how them being from christcurch came up and my mum also came up, turns out they used to teach my mother in highschool and even remembered her, it gets even weirder as one of mums old boyfriends lived with them as an exhange student and they had photos of my mum and him, I told mum about the car and to her supprise she remembered seeing it driving around Christchurch long ago, and so the project began with many rust repairs and ripping the car apart over and over.
2 points
-
Drag day prep time, since I did the exhaust it hasn't had any front mounts it's always hung off the turbo which is bloody naughty no flexi joint and all one piece from the front pipe. So its time to fix all of that and get rid of a God awful exhaust rattle that's driven me nuts. Switch to the MLS Exhaust Manifold gaskets then refit the exhaust add in a vband and the flexi joint mounts etc after all that remove the turbo and make up a bypass from Manifold straight to downpipe...... then get a wof. Just bloody get it certed? Yeah I've got a few more things I want to do suspension wise so I best buy myself some time to do all at once.
2 points
-
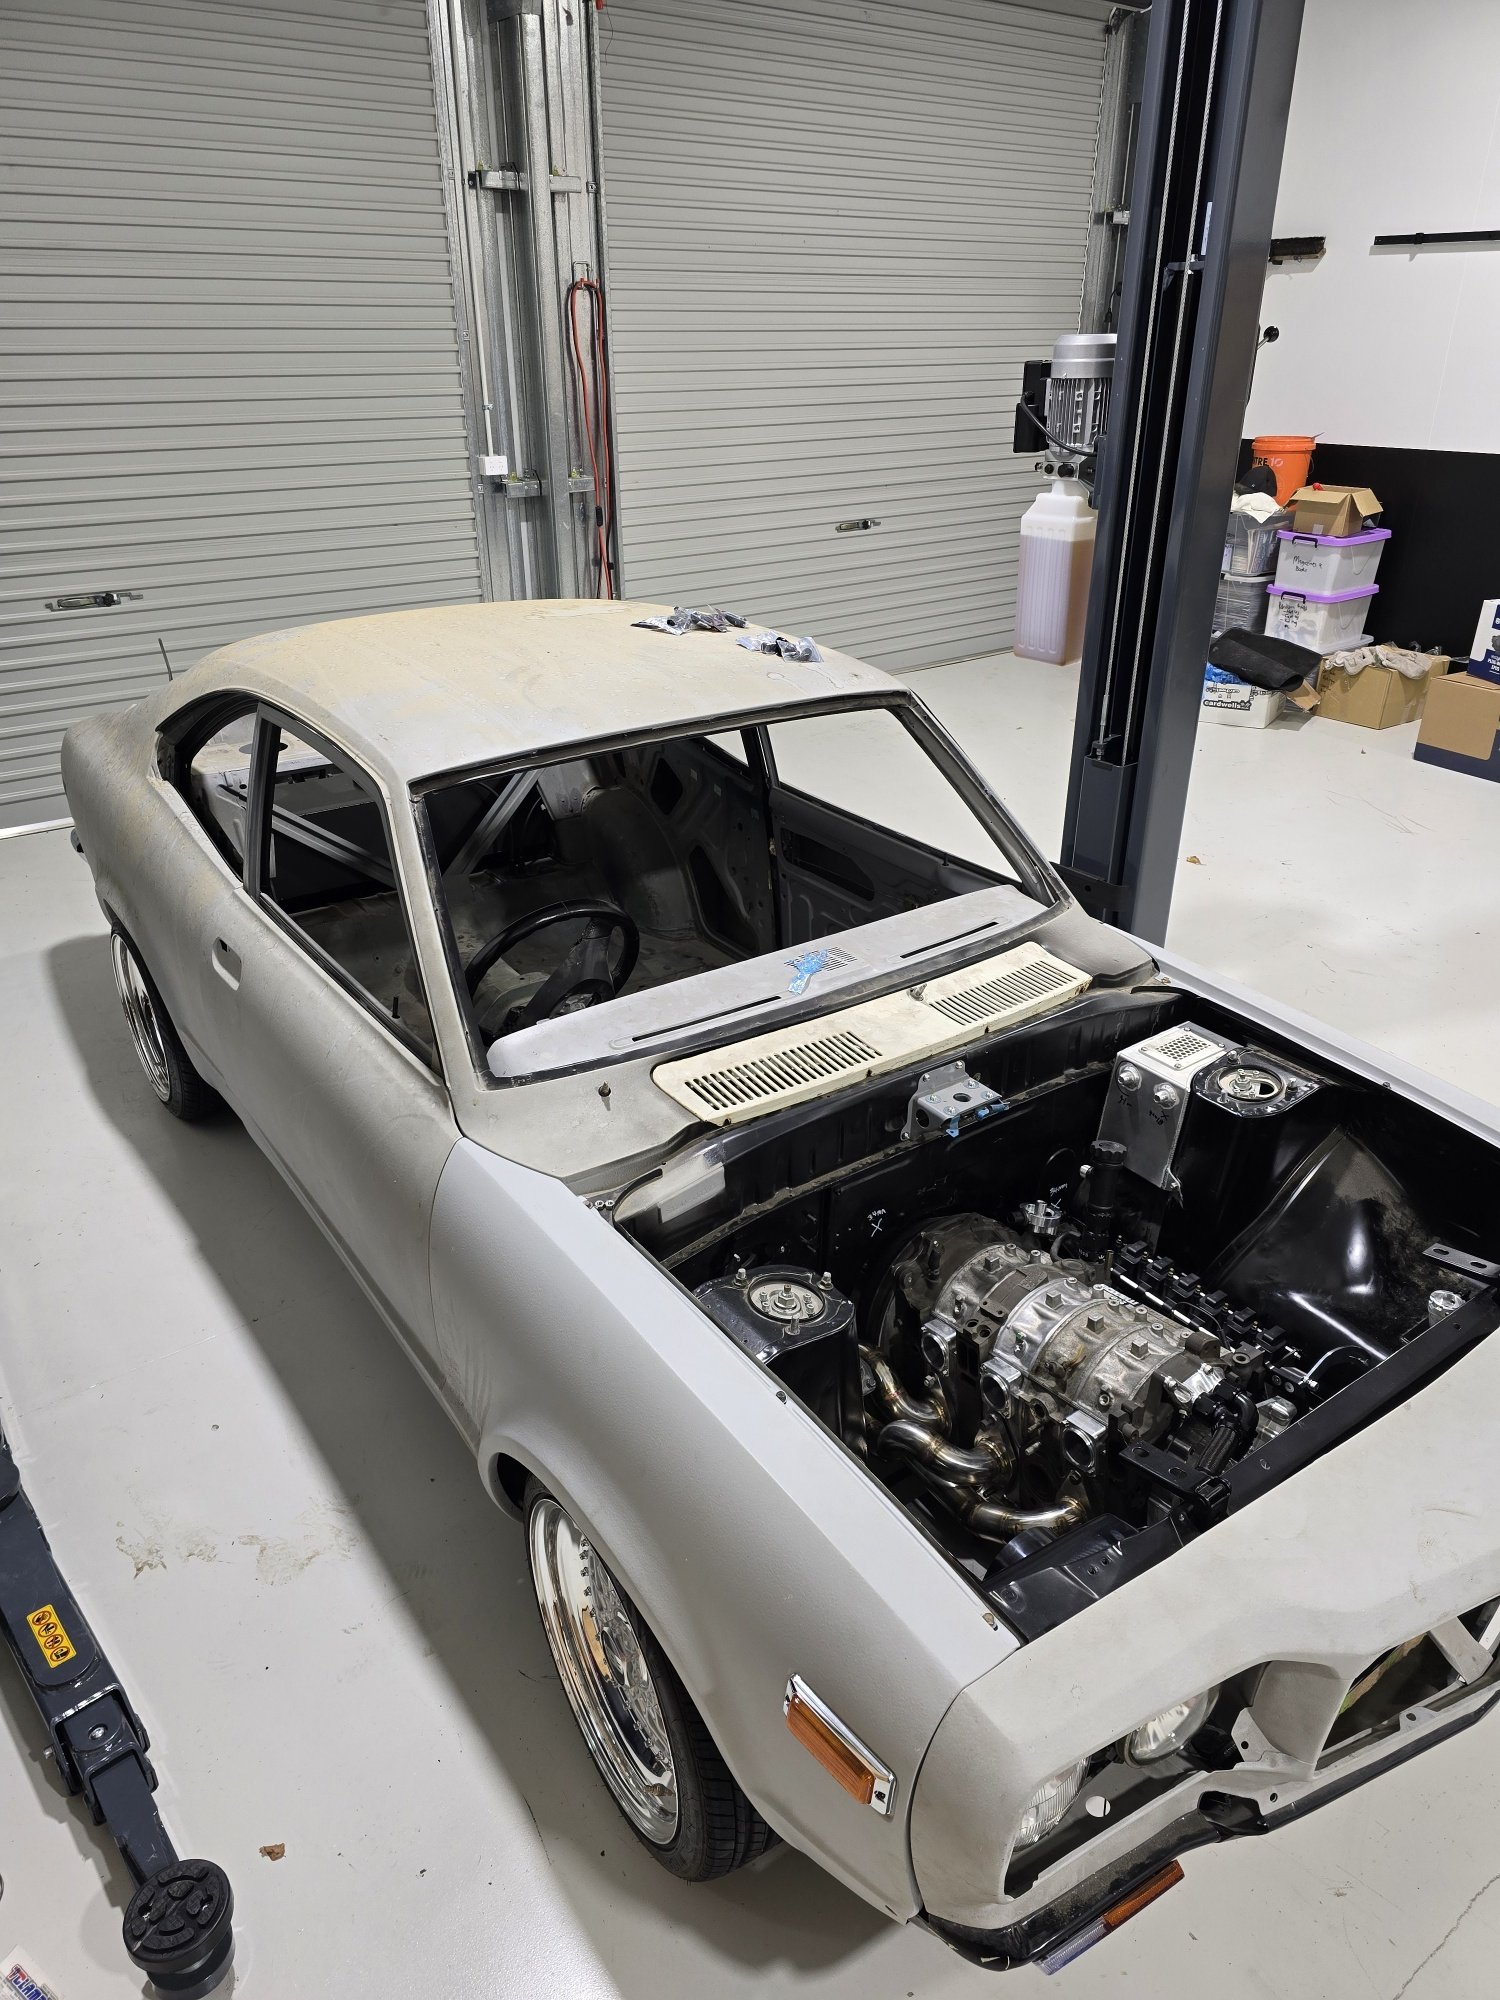
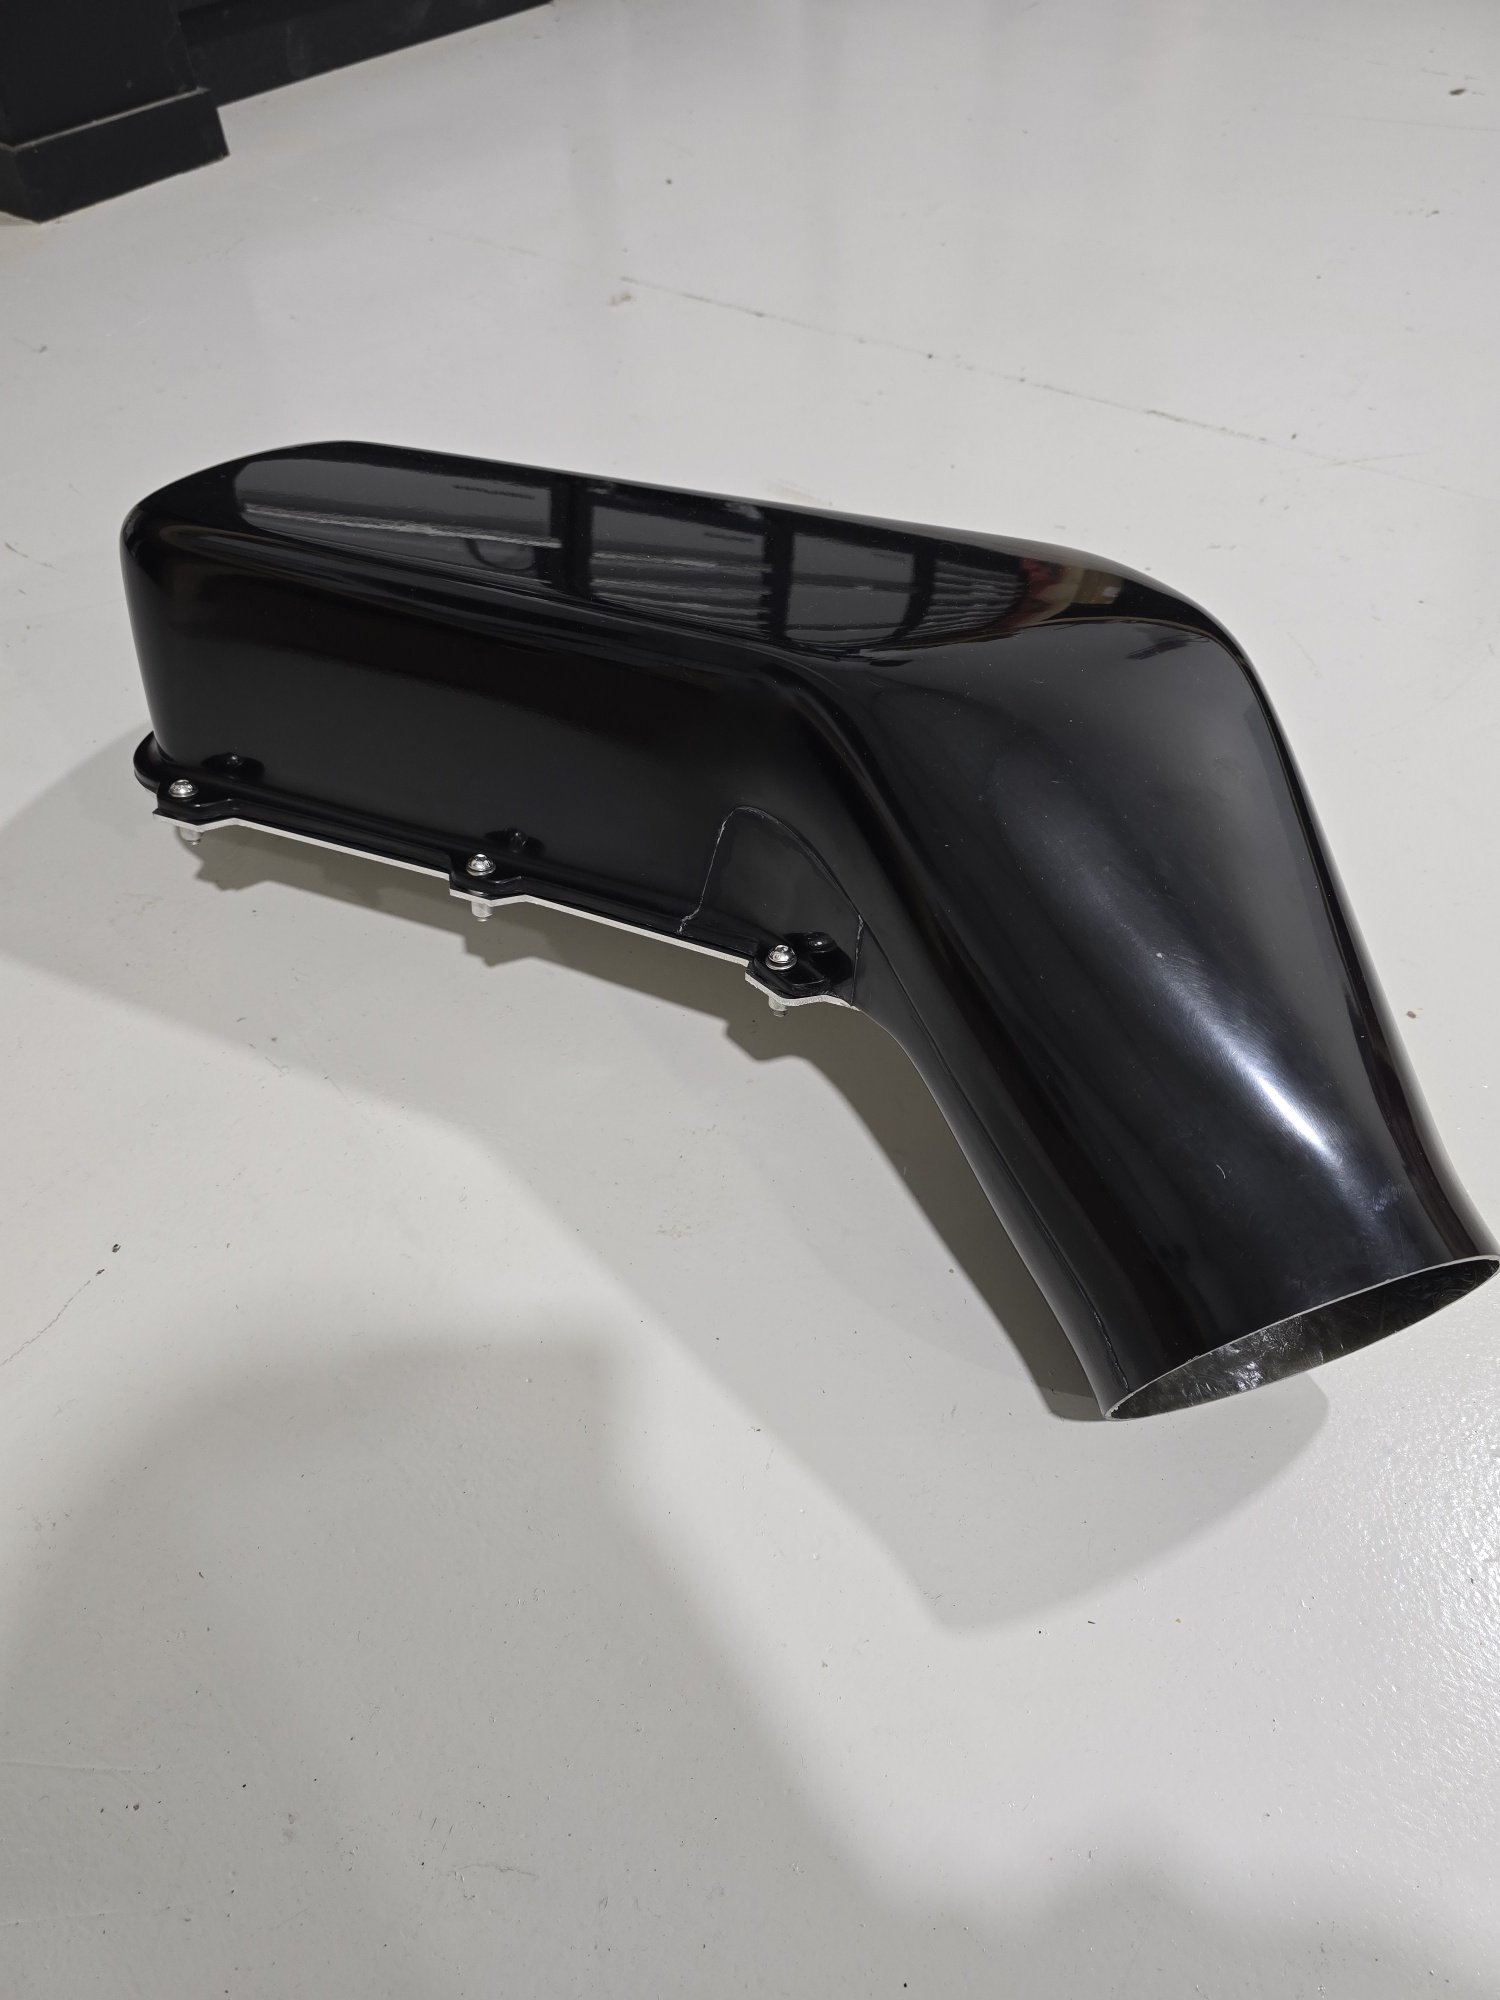
Anyone who knows me knows that I've been hanging out all year for this day. It was trackday time! The previous trackdays have been so much fun I have been eagerly awaiting the next one. Of course, after the last trackday, my first in the recently purchased Alto, I left a little lukewarm on the car and had a large list of things that needed to be changed before the next one. If you have been following this project since the start, you'll know since its last trackday the Alto has basically had a full going over; all new suspension including lowering, an added rear swaybar (and functional front one), stiffened rear engine mount, replaced thrust bearings, lowered seat rails, an intercooler change, and bigger brakes, amongst other smaller things. In the build up to trackday there was one project I have been quietly working on; the intercooler water sprayer. As mentioned when I swapped the intercooler to the SWK one, I wanted to reinstate the water spray the previous owner had set up, using the stock shroud My goal, since reading that the previous owner found the 1L bag of water under the bonnet too small for his use case, was to fit a 5L bottle in the boot, with a pump, and have it pump water to the front. This is similar to what he ended up with; a 3L bottle strapped to the rear panel. Obviously since I spent great expense refitting the interior, including the foam insert in the boot, a bottle like that was of no use to me, so after lots of research I settled on a bottle from Aliexpress which fits in the foam insert, almost perfectly. The filler cap sits a little proud, so I squished the top of the bottle down a bit to make space To run the setup I was going to use a cool little timer relay, which was adjustable and triggered by a momentary button. I set it to run for 30 seconds each time it was triggered Unfortunately despite initial testing showing great promise, the damn thing decided to go pop when bench testing and never worked again. As did the button, which is a damn shame because it was a nice JDM button with blue illumination which I was going to use to show when the output of the relay was turned on (thus, showing when the pump was running). With that disappointment I decided to run the hoses and wires and mount the bottle anyway. To feed the pump, I drilled a hole in the top of the bottle and fed the hose through a grommet into the bottle, using an alloy fitting that came with the bottle as a weight I only had a Tee joint, so blocked one side off. This keeps it nice and low profile Using some trim tape, I stuck the pump to the side of the bottle and ran hoses to and from it Before wiring the whole thing in I gave it a quick test by feeding power to the pump The pump primed fine, but instead of pushing water along the hose, it decided the path of least resistance was through the joints on the body. The pump leaked like a sieve. Useless. At this point I was getting pretty pissed off with everything failing, so flipped to Plan B; the week before trackday, order a universal washer bag kit and hope it arrives in time. Yes, it's the same setup the Japanese owner was running that was too small, but I don't care if I have to top it up between each session (I did). Thankfully the courier pulled through and the kit arrived in time. I quickly set about installing it into the engine bay Before wiring it in, since everything else was failing, I jumped the two pump wires right to the battery and tested it Great success. You can't see it but both jets are working and creating a lovely mist in the shroud The kit comes with this ugly generic button, which being momentary I would have to hold down to spray, no good when going full attack Rummaging through my spares I uncovered the toggle switch that came with my clutch start canceller. A nice metal switch with a good click when toggled I chose to power the pump right from the battery, using a fuse holder I pulled out of some other project and ran another wire into the cabin to the switch, so all it was doing was grounding the pump. I was originally going to install the button on the right side of the steering wheel, where the other buttons are, but this seemed like a nice "temporary" place to put it, on the bracket that came with the kit. It's just taped in place, so easy to remove later. It's easy to access, and visible from the drivers seat. The big long toggle is handy when wearing gloves With the dash put back together, the wiring tidied up, and the bag filled with water, the IC water spray saga was complete, for now. The next owner can do the boot install if they care enough That was that. Friday rolled around, I cleaned the car (check out those big brakes) Packed my tools, checking things off my list as I went, so I didn't forget something important like the camping chairs and chock last time... I rolled the Alto into the garage to pack it, as the weather was being a bit less than great. I suddenly thought, "I should apply some old CarPro Reload sealant I have to the bonnet and bumper, just in case I get oiled again". This resulted in me spending an hour or so coating the car in Reload, top to bottom, front to back I will say even though that stuff is well expired, it works really well. There's more gloss, the paint feels smooth, and the water beads off. Impressive considering the paint really needs a machine detail. And we were off. We had a two hour drive ahead of us, in the dark. The Alto did really well, and the new suspension was miles ahead of the last trip to Manfeild where the rear kept bottoming out (blown shocks and soft springs). The one thing that did suck was some a-hole following me in a late model BMW SUV hunk of junk, with his LEDLAZERBEAM headlights, shining right into my eyes through all three mirrors. The dipping mirror I fitted was a godsend, but I still ended up having to fold the wing mirrors in to stop us being blinded. I pulled over at the next town and let him pass, only for him to turn off anyway. Dick. The next morning we were bright and early to the track, having stayed only metres away, and picked out our pit to camp in for the day. Considering it had been heavily raining the day before, the weather was mint all day. Shortly after, the rest of the crew rolled up. Yes, even blue Alto friends were back, rebuilt engine and all! Huge respect for the work they put into that car, and they were still keen to bring it back to where it all went wrong last time and try it again. Thankfully it was all good this time, and they had a blast punting it around the track. I loved seeing it out there We did a couple of sessions together We had a couple of nice little battles. I was surprised, even on my high boost, their Alto wasn't easy to catch. It seems it may not be quite as stock as they expected That pass was caught from both inside and outside, thanks to me remembering my action camera and external mic The Alto managed to surprise a lot of cars on the track, and got thoroughly thrashed by others (that 206 GTI just danced in the corners, was a treat to watch) It's an angry looking wee thing A casual flyby of both Altos And a flyby of my Alto, being driven in anger So, how did the Alto do? Very good. The first big improvement was the seat lowering, which meant my helmet was no longer pressed into the head lining, and I felt like I was sitting in the car, not on it. The big brakes, using Chery rotors, worked an absolute treat. Heaps of stopping power, and didn't set a foot wrong all day. I brought the stock brakes with me just in case, but weren't needed. Finally being able to run most of the day on high boost was excellent. Intake temps were a lot lower than in Jan, which would've been helped by the low teens ambient temps, but the intercooler water spray did a great job too. Generally when running, it knocked 10-15c off the intake temps, and when turned off the residual effect worked well to help the IC shed heat once off boost. The most surprising thing was how cold the intercooler was once I returned to the pits. The Greddy IC last time was hot to the touch, but with the water spray, the end tanks on the SWK intercooler were cold. Not left overnight cold, but almost colder to the touch than ambient. Very impressive. On high boost the LSD works a lot better too, especially if you're brave enough to power on early in the corner. The amount of cornering traction was incredible. You brake hard into the corner and get straight back onto the power and let the LSD pull you around it. The suspension upgrade was well worth the money. Last time I had issues with the car wandering, not really wanting to go around corners and bumps really upset the stability, but now the suspension just settles into the corner and holds on. The rear follows the front, as it should. It really boosted my confidence in the car compared to last time. So, times. Last time, on high boost, my best time was 1:42 This time, in my first session, running standard boost, 9 laps into it, I ticked off a 1:39. I was already faster than last time, and I wasn't even on high boost yet! That pretty well set the tone for the day, unless there was heavy traffic, I hardly did slower than a 1:40. The real surprise was one particular lap in my third session, where I went full send and dropped into a 1:36! I was skedaddling for sure There is heaps of room for improvement in the corners. Although I picked up some speed, it was mostly through the middle and on the straights, where the power and braking came into effect. I believe at this point I'm limited by the road tyres, which although good tyres (Yokohama ES32), just don't have the grip to hold on and get that cornering speed up. I have done some digging around to see what is available in 165/55R15, and the options in NZ are almost nil. Zestino has an option, but at $300 per tyre, that ain't happening. Yokohama can order in some AD09 from Japan, but there is a 3-4 MONTH lead time on those, subject to production. Bridgestone won't even consider the idea of bringing in RE004 in that size. The day was an absolute hoot. I love being on the track, and will be looking to do more trackdays next year and maybe even get into autocrosses and the likes too. The best thing was that everyone drove home, in their car, under their own power this time. No one really had any mishaps, except for my friend in his recently acquired Swift Sport who decided the tarmac was boring and he'd rather do rallycross. My wife unintentionally caught this on the very end of the clip she was taking, and none of us even saw it happen (as a side note, how good does that K20 powered EK9 sound...) No harm done, just some mud up the side to wash off So that's another trackday done and dusted. The Alto was excellent, all the mods worked perfectly and the car was a cohesive machine of awesomeness. In saying that though, the Altos days are numbered. It'll go up for sale at some point soon, when I can be bothered, as although I love the little dingus, I have other stupid ideas for other stupid projects that I need to liquidate the funds invested into the Alto for. I'm hoping to move to something that I can use in basic motorsport events that is worth a lot less than the Alto and has ample parts availability in NZ just in case I send it too hard. I have a car/project in mind already, so we'll see how that goes. Until then, if I still have the Alto in Jan 2025, it'll be out on track again at the next trackday.2 points
-
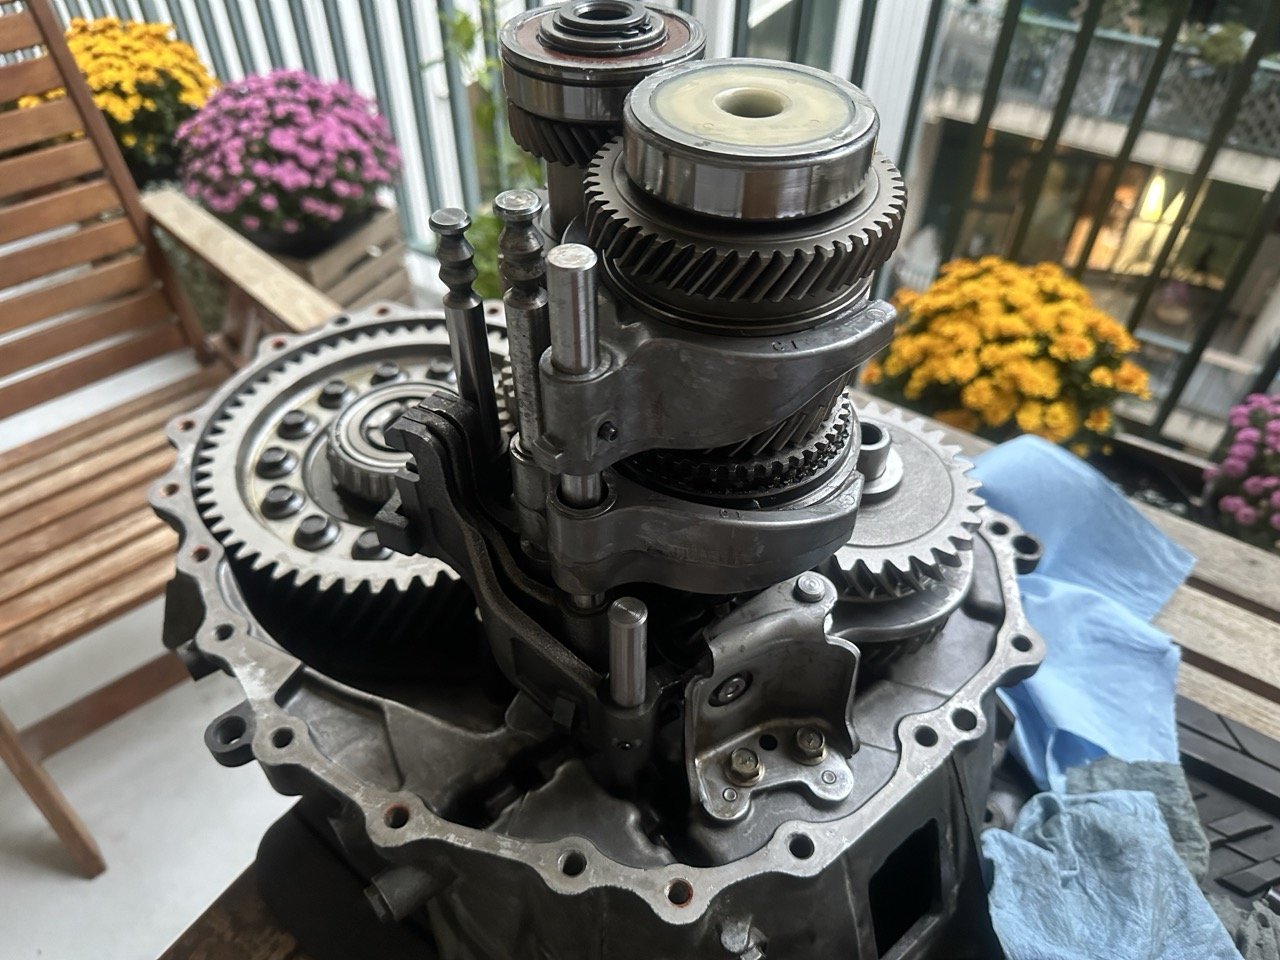
Starting to get the box back together Have got the other half of the case on and it seems to shift through the gears fine, but I ran out of daylight at that point to take more pics. Over next few days am going to seal it up properly after doing some more thorough testing and paint up the case.
2 points
-
Not too many plans. Chuck my Personal wheel in and find some whiteline tail lights maybe. Drive it.
2 points
-
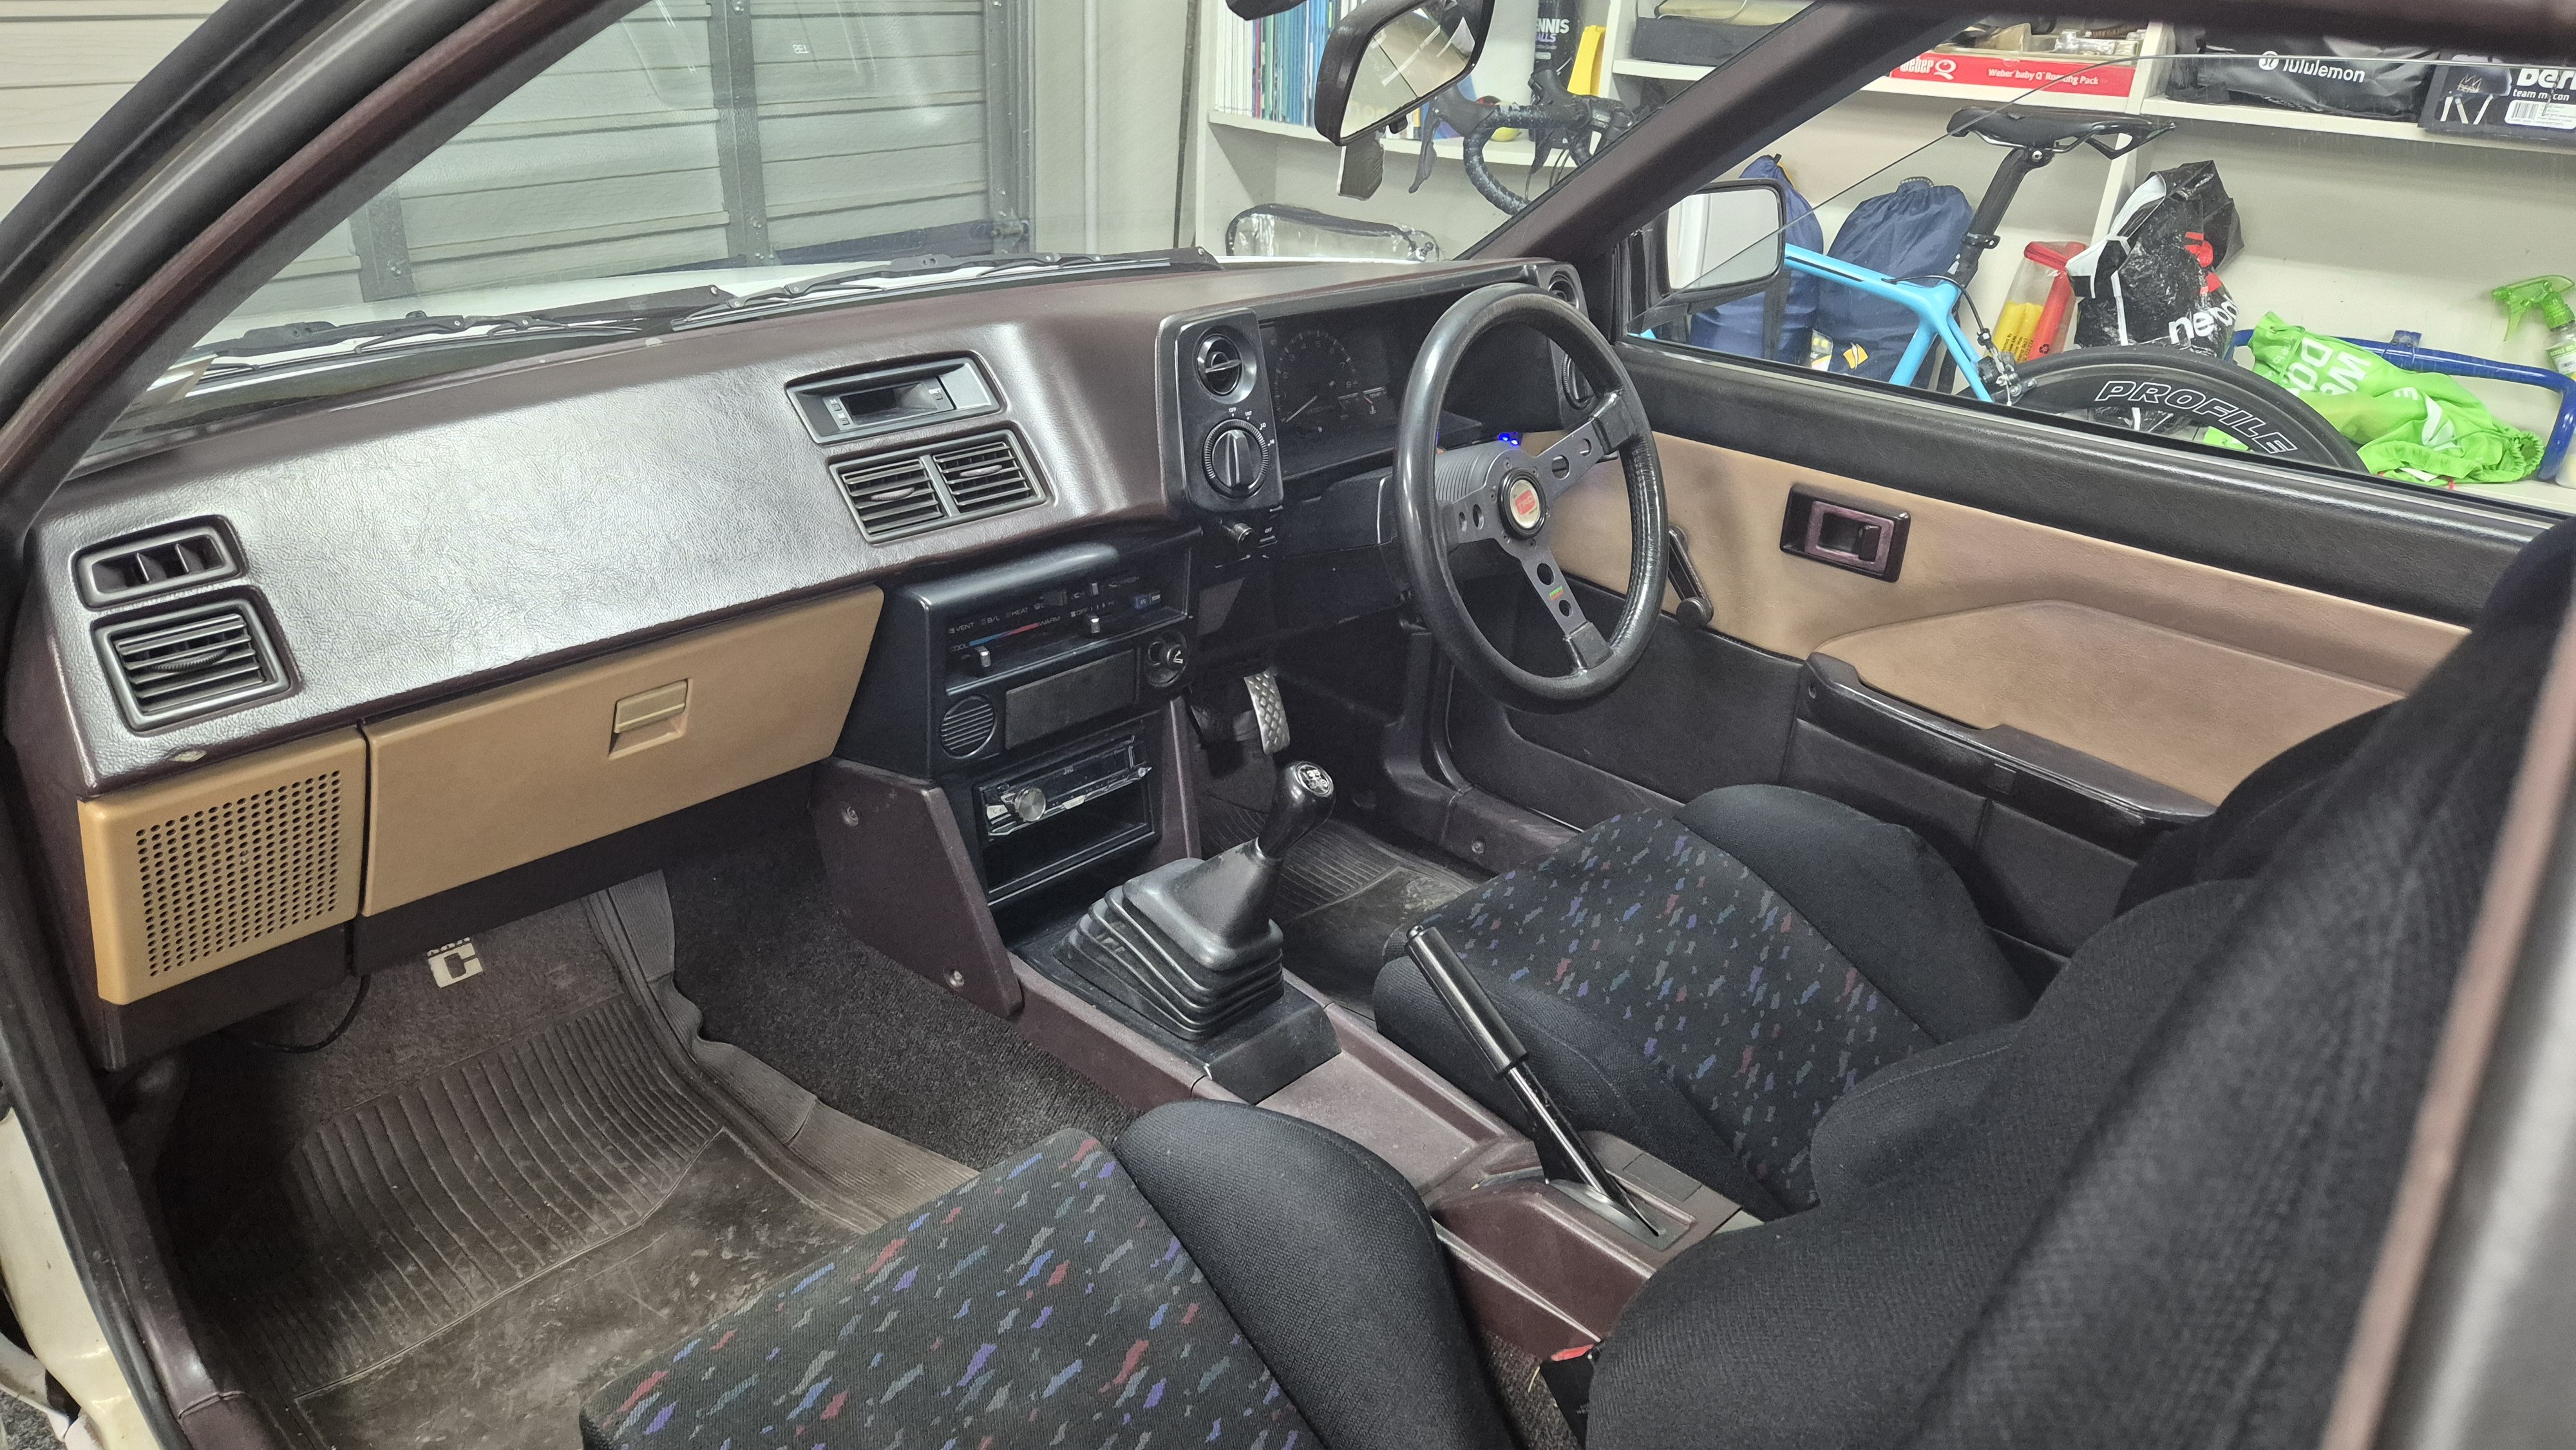
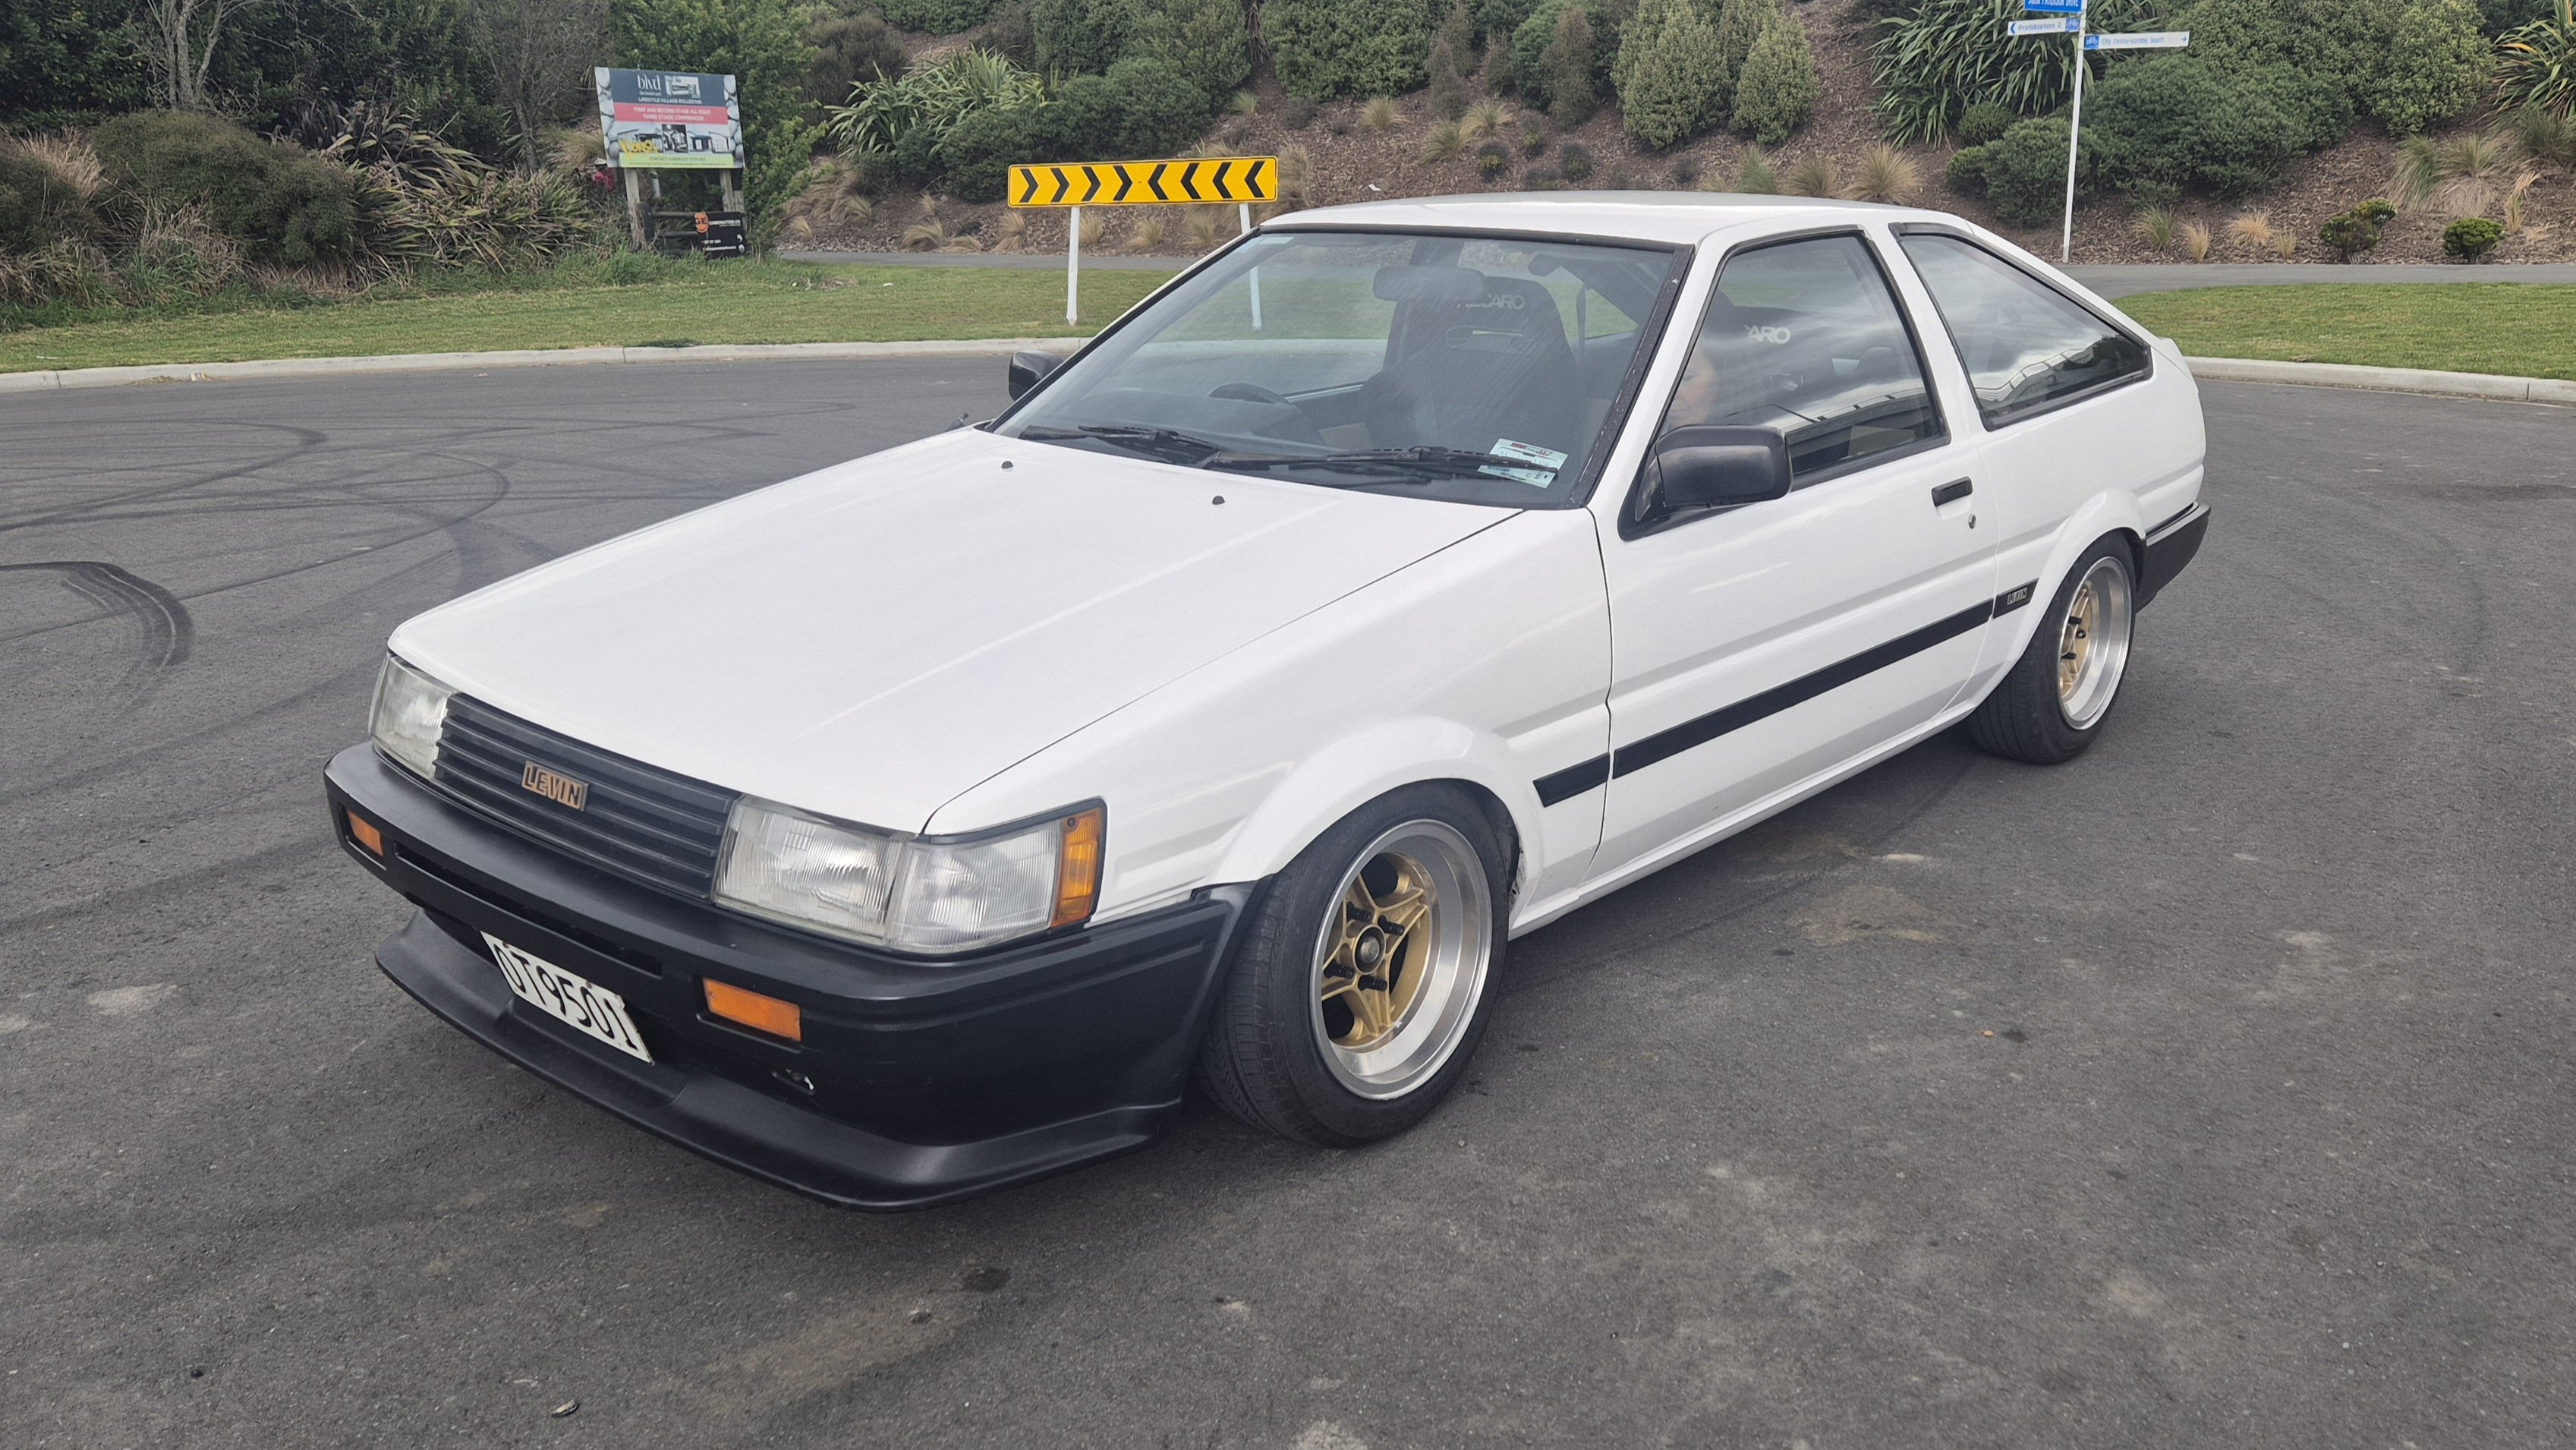
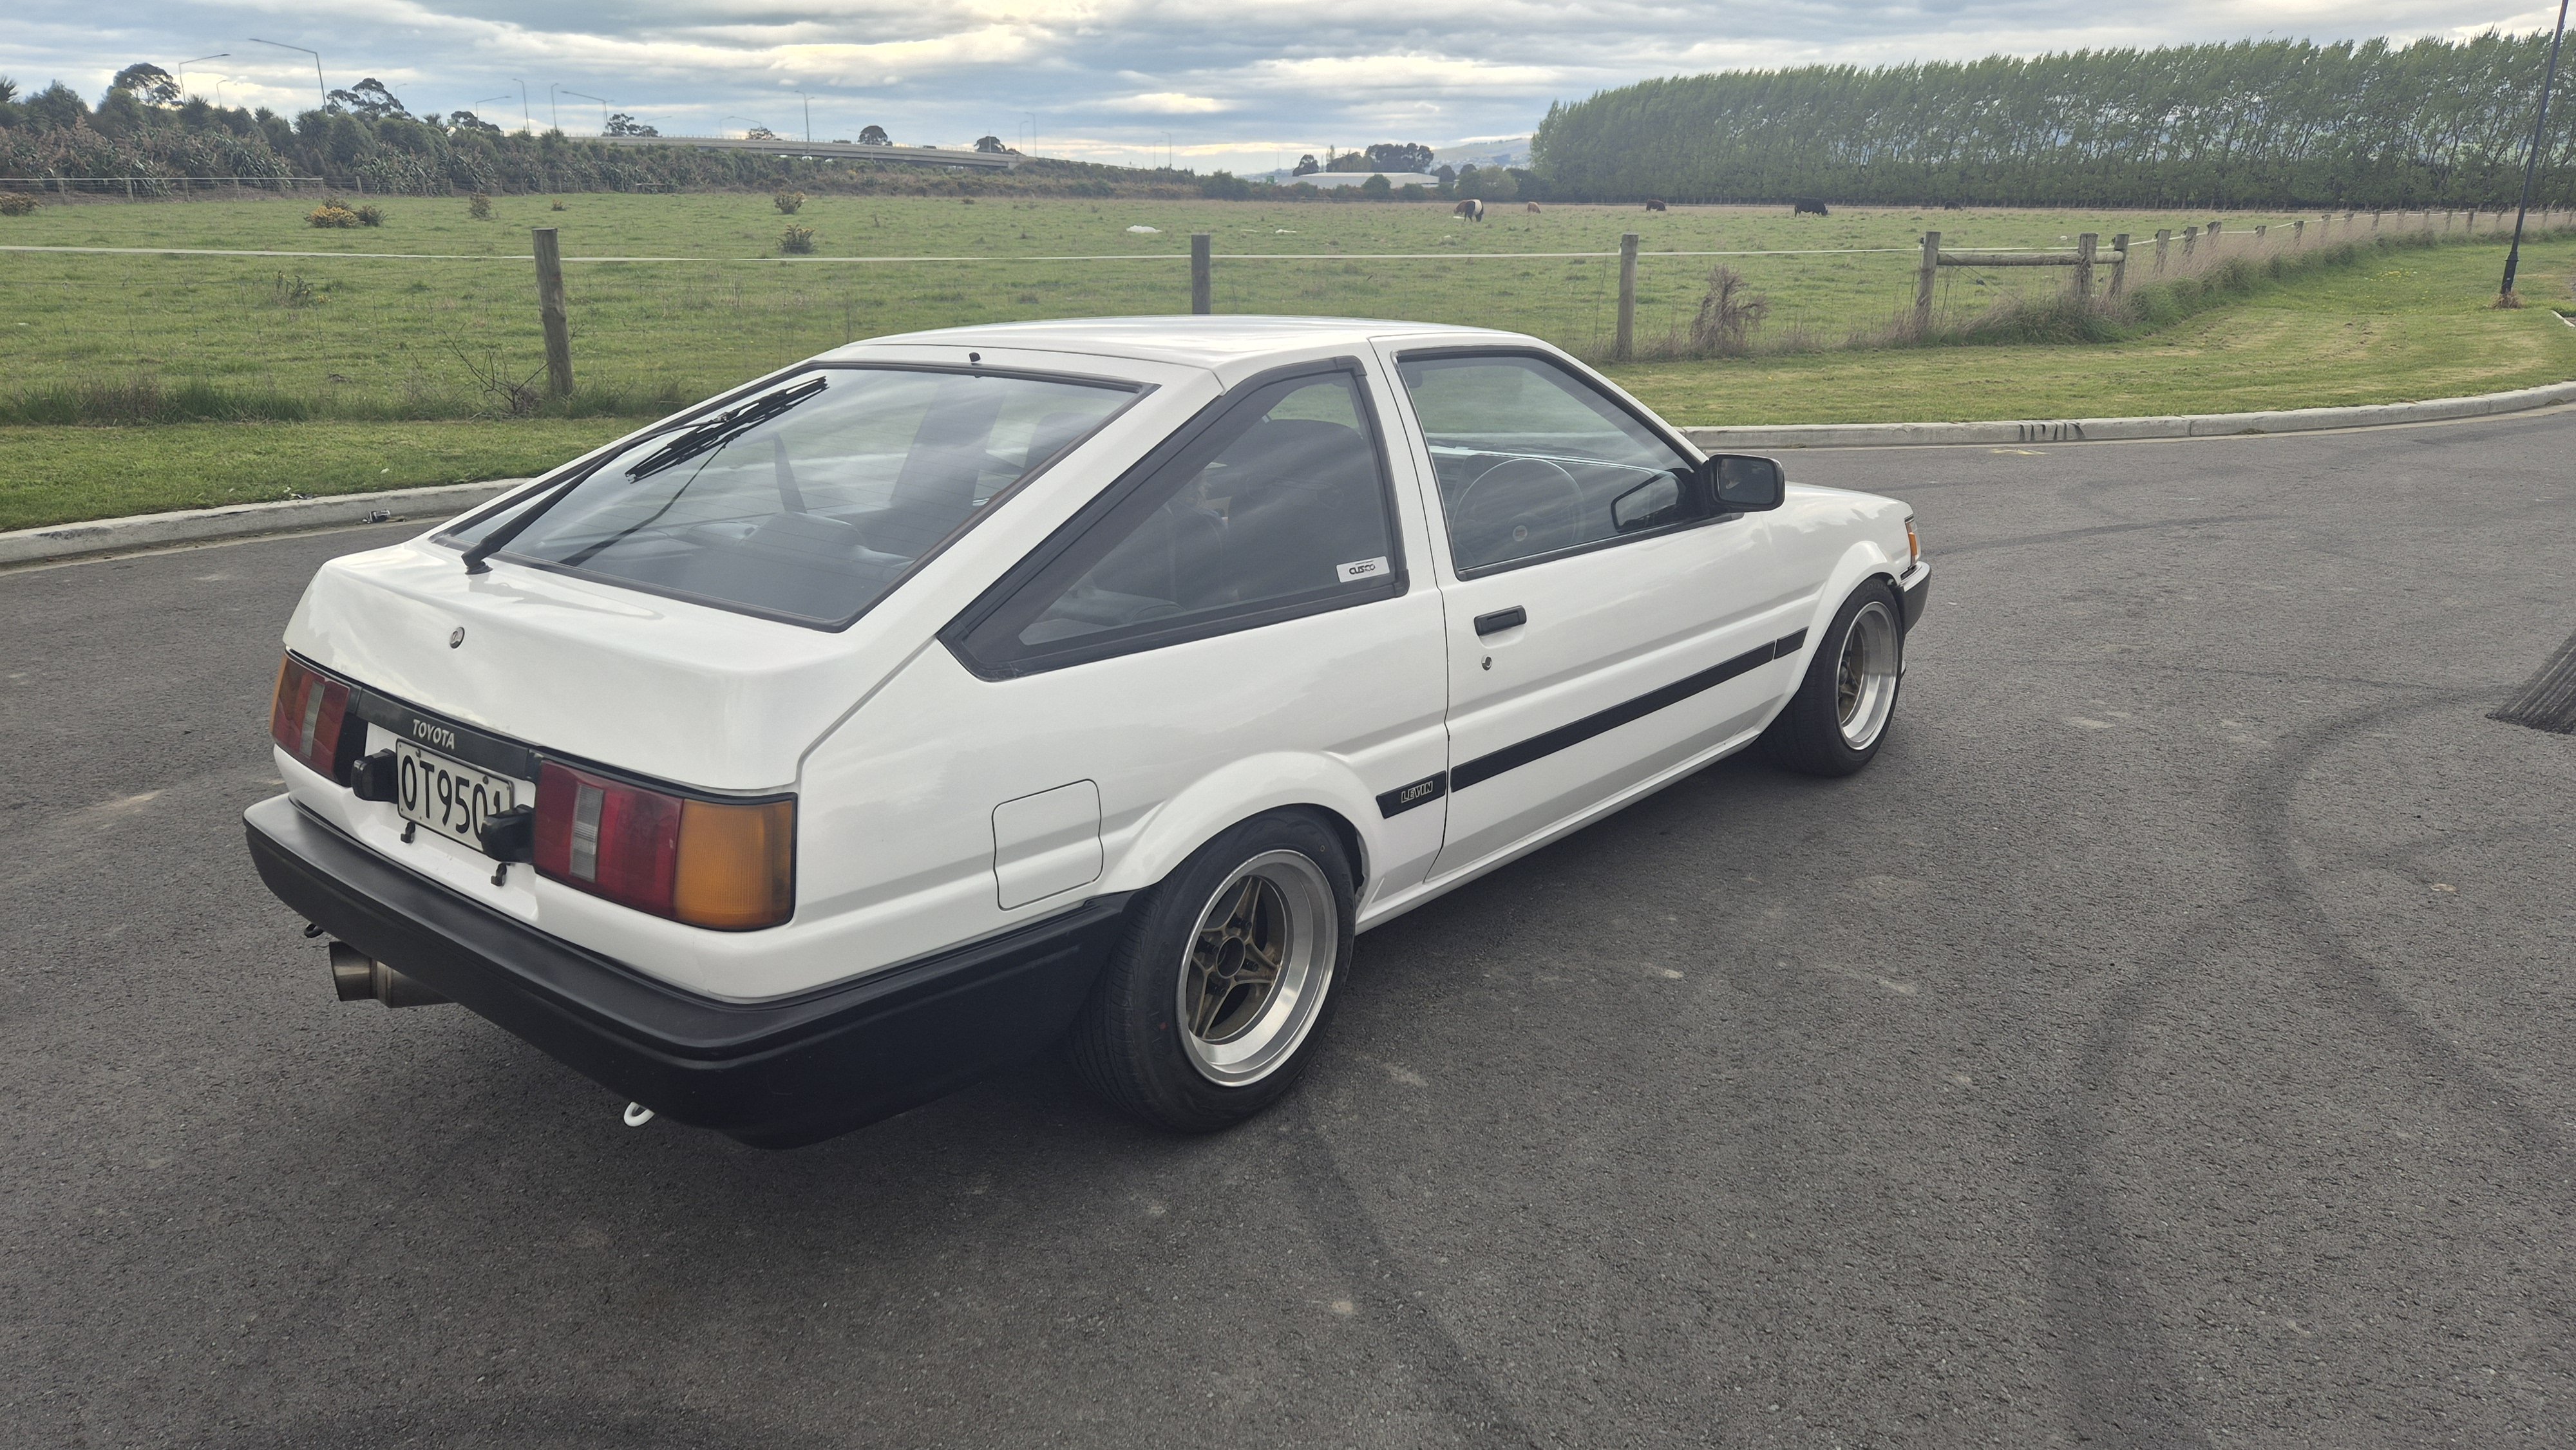
G'day. New motor vehicle time. I've had ae85/ae86 on my trademe search list for a while and a couple of weeks ago one popped up local to me at a reasonable price. Sent it to a mate with three of the things (including a Black Limited) and he reckoned we should have a look. The main selling point was the extensive amount of documented metal work that had been done only a couple of years ago by a reputable fabricator. Almost all the rust prone areas had seen work and an old repair had been improved on. Run down on it as follows. Tickled up Blacktop 20V, T50, TRD lsd. BC Golds, adjustable panhard, panhard support brace, traction brackets, adjustable trailing arms, cusco swaybars etc etc Its on Takechi project racing harts in 14x7.5 and came with a spare in the same size. Recaro sr3(?) confettis. Has a cert for 4AGE and adjustable suspension so is legalish. Pretty stoked to be fair.
1 point
-
How bout this one...? https://www.facebook.com/share/hPXjrLTapMHExDWA/?mibextid=kL3p881 point
-
Did you do the wire? Asking as I’m about to do the same, if so where does it run too/from? Please and thank you1 point
-
Yus! It's up and running, better than ever too! No wof but bugger it let's roll!!!
1 point
-
We went to the MG club's driver training event again (same one from Feb) at Manfield. Most of the same crew turned up and we nabbed the first four bays. I brought tools this time I had been feeling run down so wasn't super looking forward to it, but I knew I should come and would enjoy myself in the end, so I pushed to. I just told myself that I'd take it easy for both myself and the car's sake. The day of the event I woke up with a solid headache which didn't bode well, however it slowly resolved itself over the day. Girlface went out first and had some fun, just in case I broke the car again. Then I went out, with my Ek9 mate in the passenger seat, who I'm very glad who was there - he's a great track buddy and a good teacher. By the end of the first session I was feeling more confident and much better at hitting lines. He then had a go with me as a passenger which was tons of fun and great to see how hard the car can really be pushed, also great to see that my lines were getting pretty close to his. Girlface also got a run with him and did great. I was terrible at capturing any video or photos so this is pretty much all I have. :\ https://i.imgur.com/XHakpcy.mp4 We definitely took the day easy and I'm glad we did. The weather was great, the car was great, we had awesome runs and a bunch of people from Feb wandered over and congratulated us on getting the car up and running again. It was the most ideal way to validate our work returning the car back to health, and to overwrite our previous track day's experience with nice new happy memories. It turns out we had also won car of the day thanks to the combination of our car and story (though we had left by 4pm and missed the organiser by like 30 minutes). He mailed us some swag. He had no Alto stickers but I forgive him for that. Next time we'll can get some lap timing going and go a little harder. edit: more pix from group1 point
-
I couldn't help myself, I wanted to know what the cold start was like now with a working choke, correct mixture and advanced ignition timing. It's very good. It has never started like that when cold. Usually it's ages of cranking, the starter kicking out a few times when the engine tries to fire, a couple of backfires out the intake and then eventually it would rumble into life, begrudgingly. Once it was running it wouldn't take any throttle until it had warmed up a bit, and the choke was a balancing act (particularly since it wasn't working properly). The engine is running so well I need to completely reassess how I use the choke. Apparently this time I had it out for too long and it started to misfire, but pushing it right in, the engine dropped to idle and ran smoothly, like it was already warmed up, and that was less than a minute after starting. I'm very impressed, for a 50+ year old car to start and run like that.1 point
-
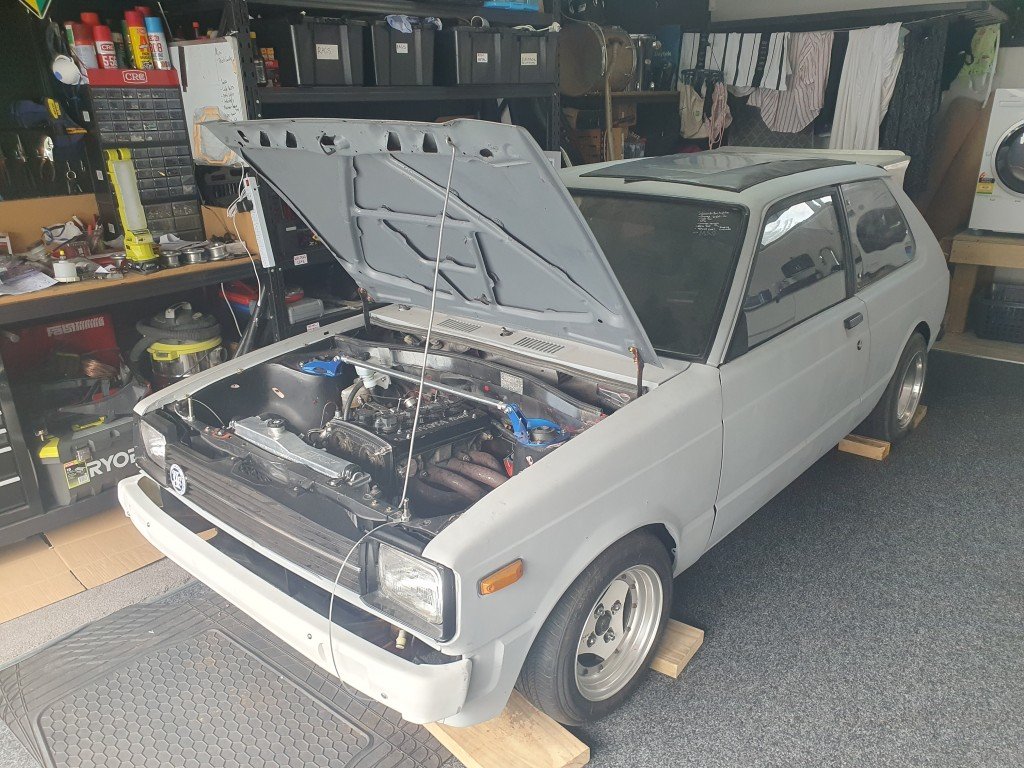
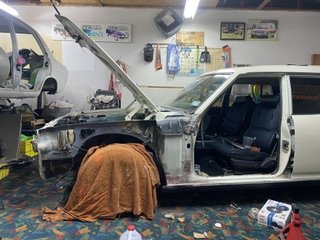
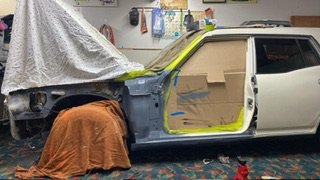
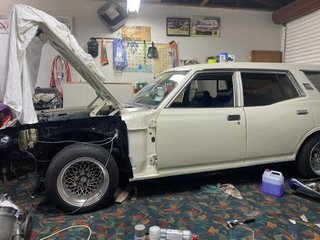
2024 Motor Rebuilt And Engine Bay Rust Repairs. This year I got the motor rebuilt, did rust repairs in the engine bay ect.
1 point
-
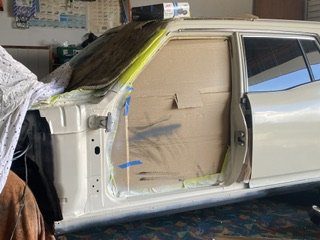
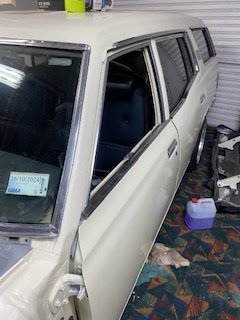
The Car Becomes Road Legal After a bunch of rust work and some mechanical bits the car finally became road legal, I drove it like this for a good while until the motor started to leak oil from just about every piece imaginable.
1 point
-
I haven’t driven this thing in months! I mainly haven’t had the time to commit to removing the dash to address the leaking heater core, so I’m afraid it’s bodge o’ clock Sucessfully hooned.
1 point
-
Today's the first time I've had it outside since I started messing around with the front suspension. I only drove it around the estate parking because not convinced it can actually get out of the driveway as it sits. This is just getting out of my unit. I will say the front suspension is bouncy as fuck, my titties were goin flying everywhere. Might have to tone down the spring a bit more. Love being able to even out the height though, very useful. Didn't notice any immediate rubbing at that height but I didn't take it on the road. I did get some measuring done and have confirmed the new lips for front pair of Longchamps so now they'll be built to match the rears. I think what I'll try to do is cut this muffler out and run a straight pipe slightly larger and clamp it either end like slip joints. See if that works or not. I figure the exhaust can't really get any worse than it is at the moment; looks like 30 muffler shop Barrys have fingered this one. Next problem I have is trying to get it to idle properly. I reckon these carbs are so cooked that air is leaking in from everywhere so it pretty much only idles when it's on choke. I get some new gaskets and give refreshing them sometime in the future. Good news is the gas pedal works well but I think I'll install that other spring back in.
1 point
-
crunchy plugs were crunchy. I tried being nice and de-pinning the coil plugs but it ended up being easier to snip them apart with my flush cutters I'm glad I got 8 replacement plugs as they were all pretty brittle. Put it all back together and no misfires (not that it had any before) so that is a win1 point
-
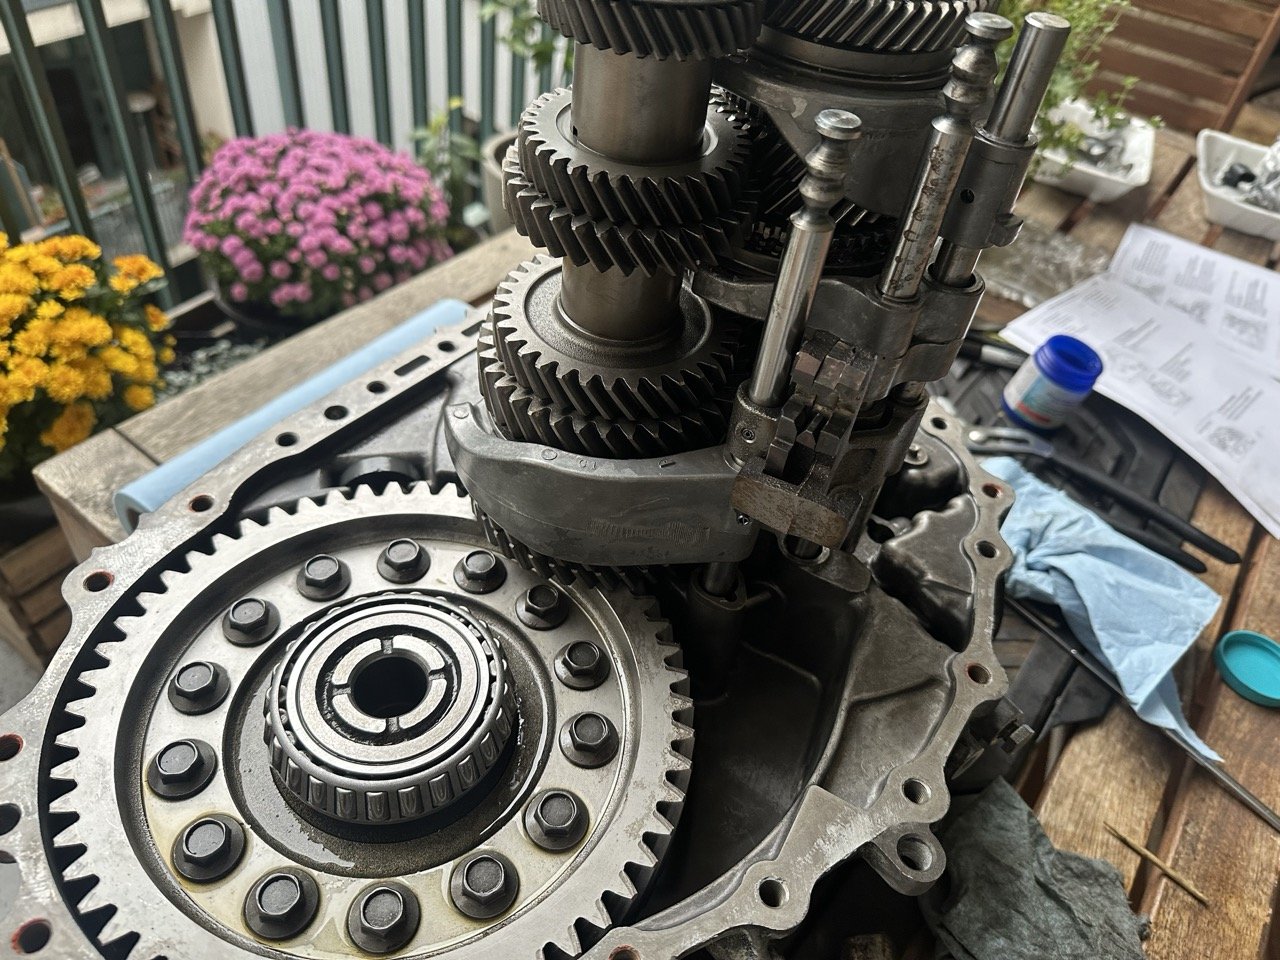
haha yeah doing a ghetto apartment balcony build, it's the only place I could really do it - can't leave all the parts out in the open in the parking garage and don't want the apartment smelling like gear oil haha. I had all the parts organised in either trays or little baggies. I did lose a c-clip that sprung off to under the centre diff right when I got all the shift forks back in, which required me to pull the damn lot back apart again which was fun. But at least it allowed me to double check my work and I felt more confident putting it together the second time round.1 point
-
Are you not on the ground floor, holy moly rebuilding a gearbox on a table outside above ground makes me want to hide. how did you not lose every single detent1 point
-
Found a sedan rear sway bar to fit to the wagon. Already had the mounting points on the diff so assumed it would fit up sweet….nope. No bracket coming off the rails. Unsure if the effort to cut and weld in the mounting points is worth it. also, started just a general scrub/clean and somehow got distracted. Not paintshop spec but better than what it was. Where I could I rubber wheel’d down to steel but there wasn’t enough patience to wheel all of it. Plus the bloody primer never went hard. That sucked balls as I then had to thinners the whole dammed thing off and start again.
1 point
-
1 point
-
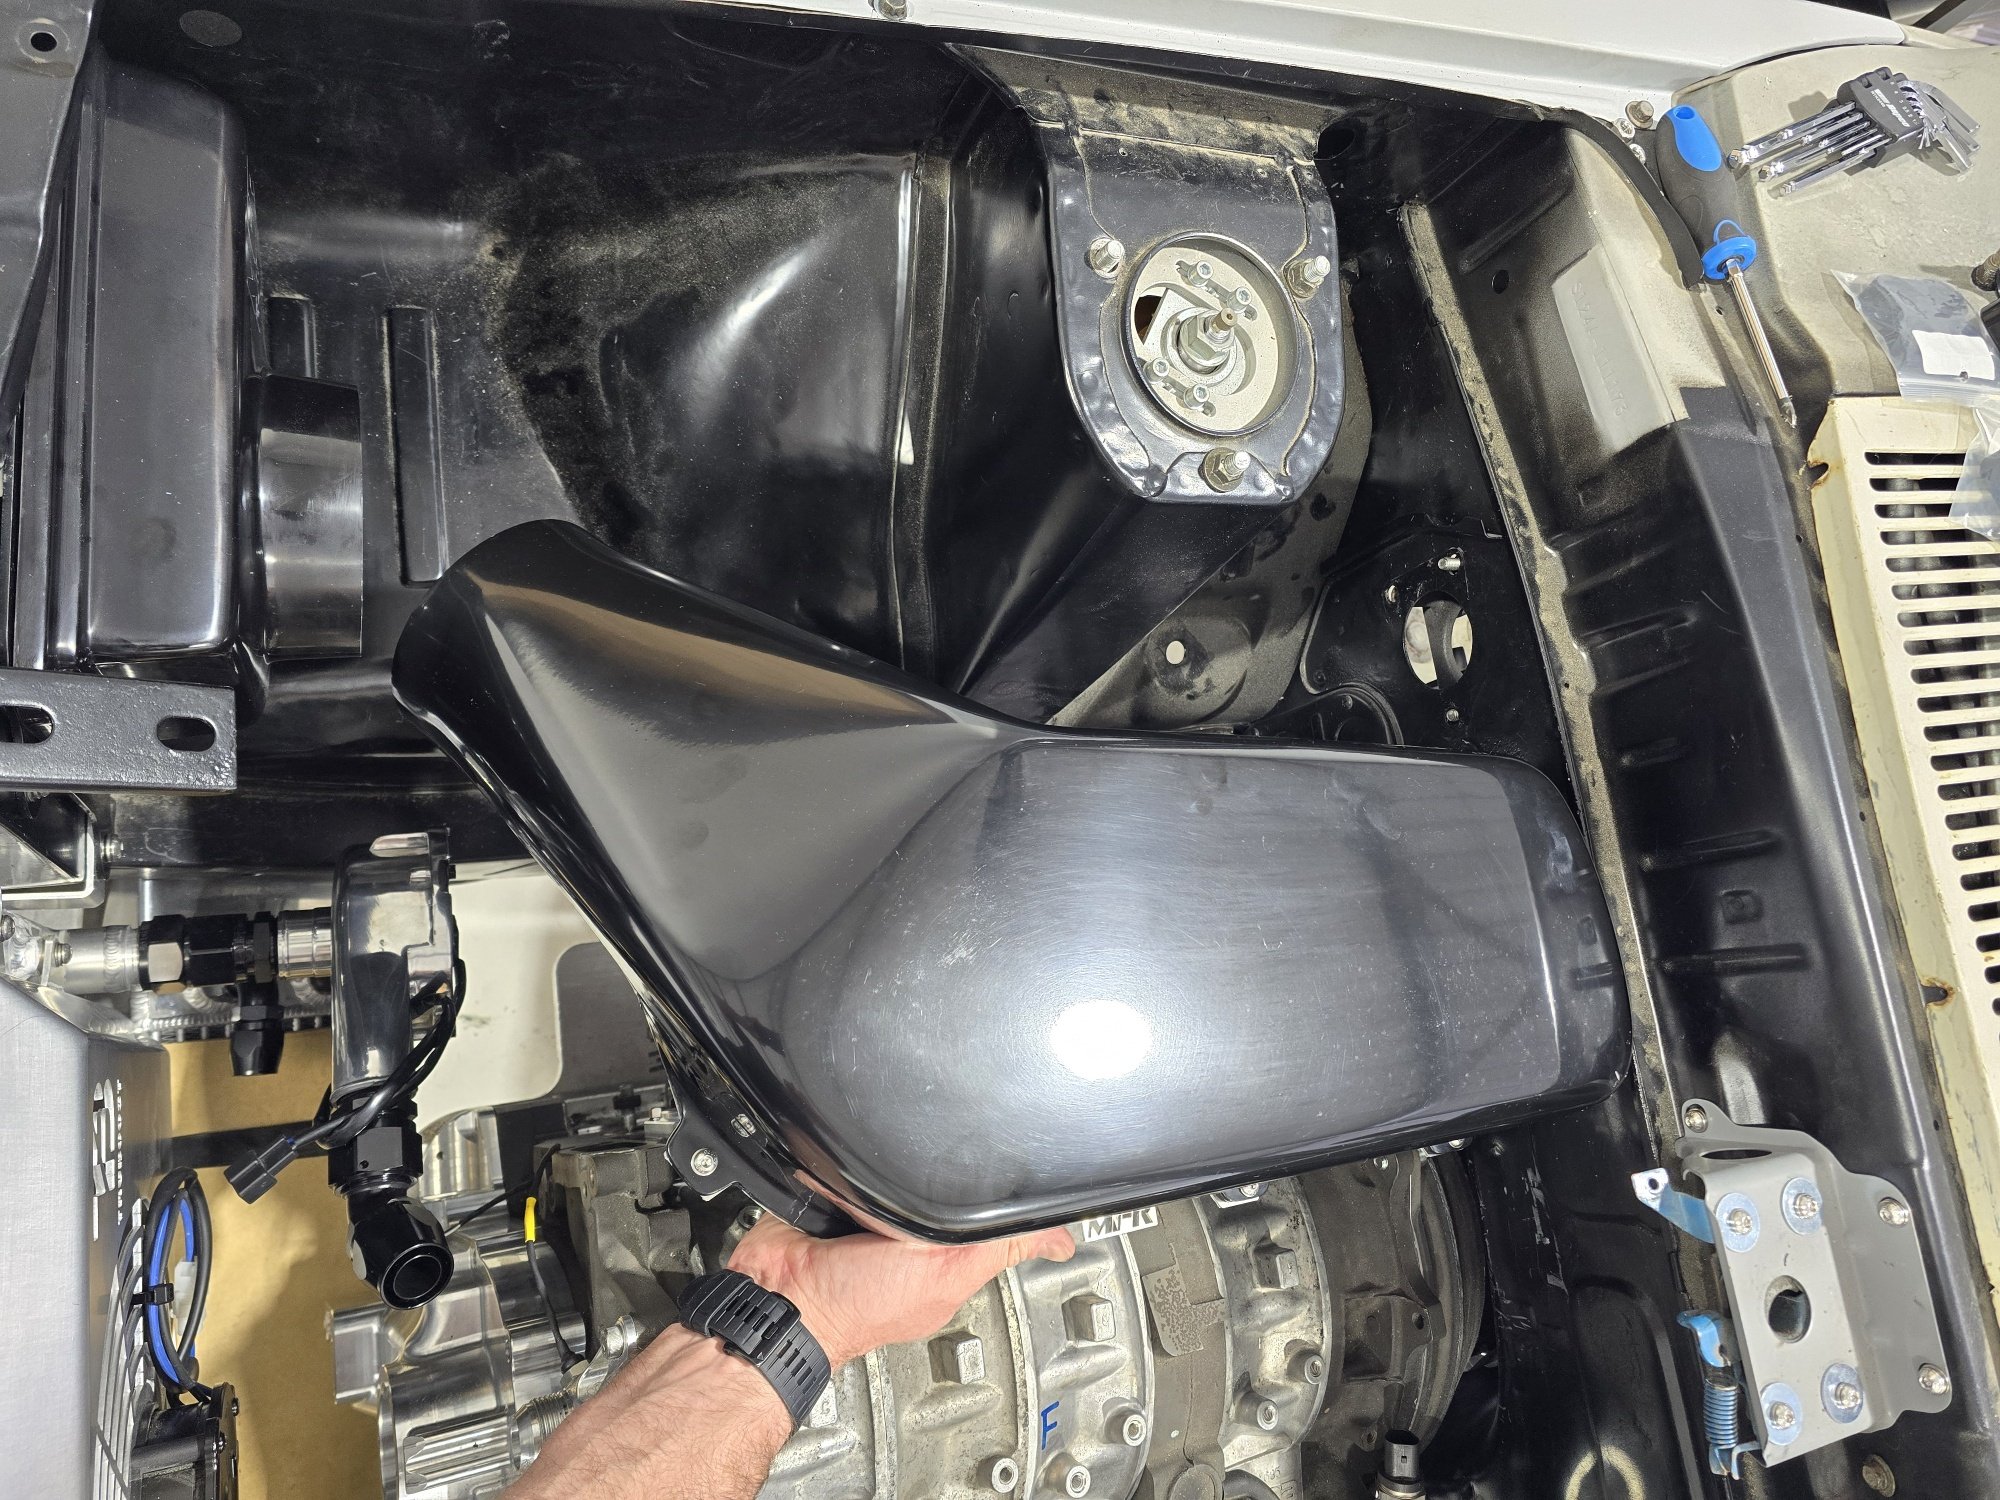
Bit more things going down. Bought a MFR Moffat style airbox to run with a behind headlight panel filter feed as well. Cars getting loaded up tonight to get dropped off to Rocket tomorrow (Did a heap of Tim Woods car) for a list of things - Gearbox xmember to suit Tremac - Clearance floor and tunnel for diff and lowering - Change rear diff shock brackets to suit BC Gold - Intake manifold - A "quiet"exhaust running a dual muffler setup under the boot floor now its flat floor - Mount pedal box and reservoirs - Few minor small bits and pieces to finish it off \
1 point
-
I can assist with getting closer to you if you can wait till November or December. Could do next month if it worked out also1 point
-
Not sure if youve seen this1 point
-
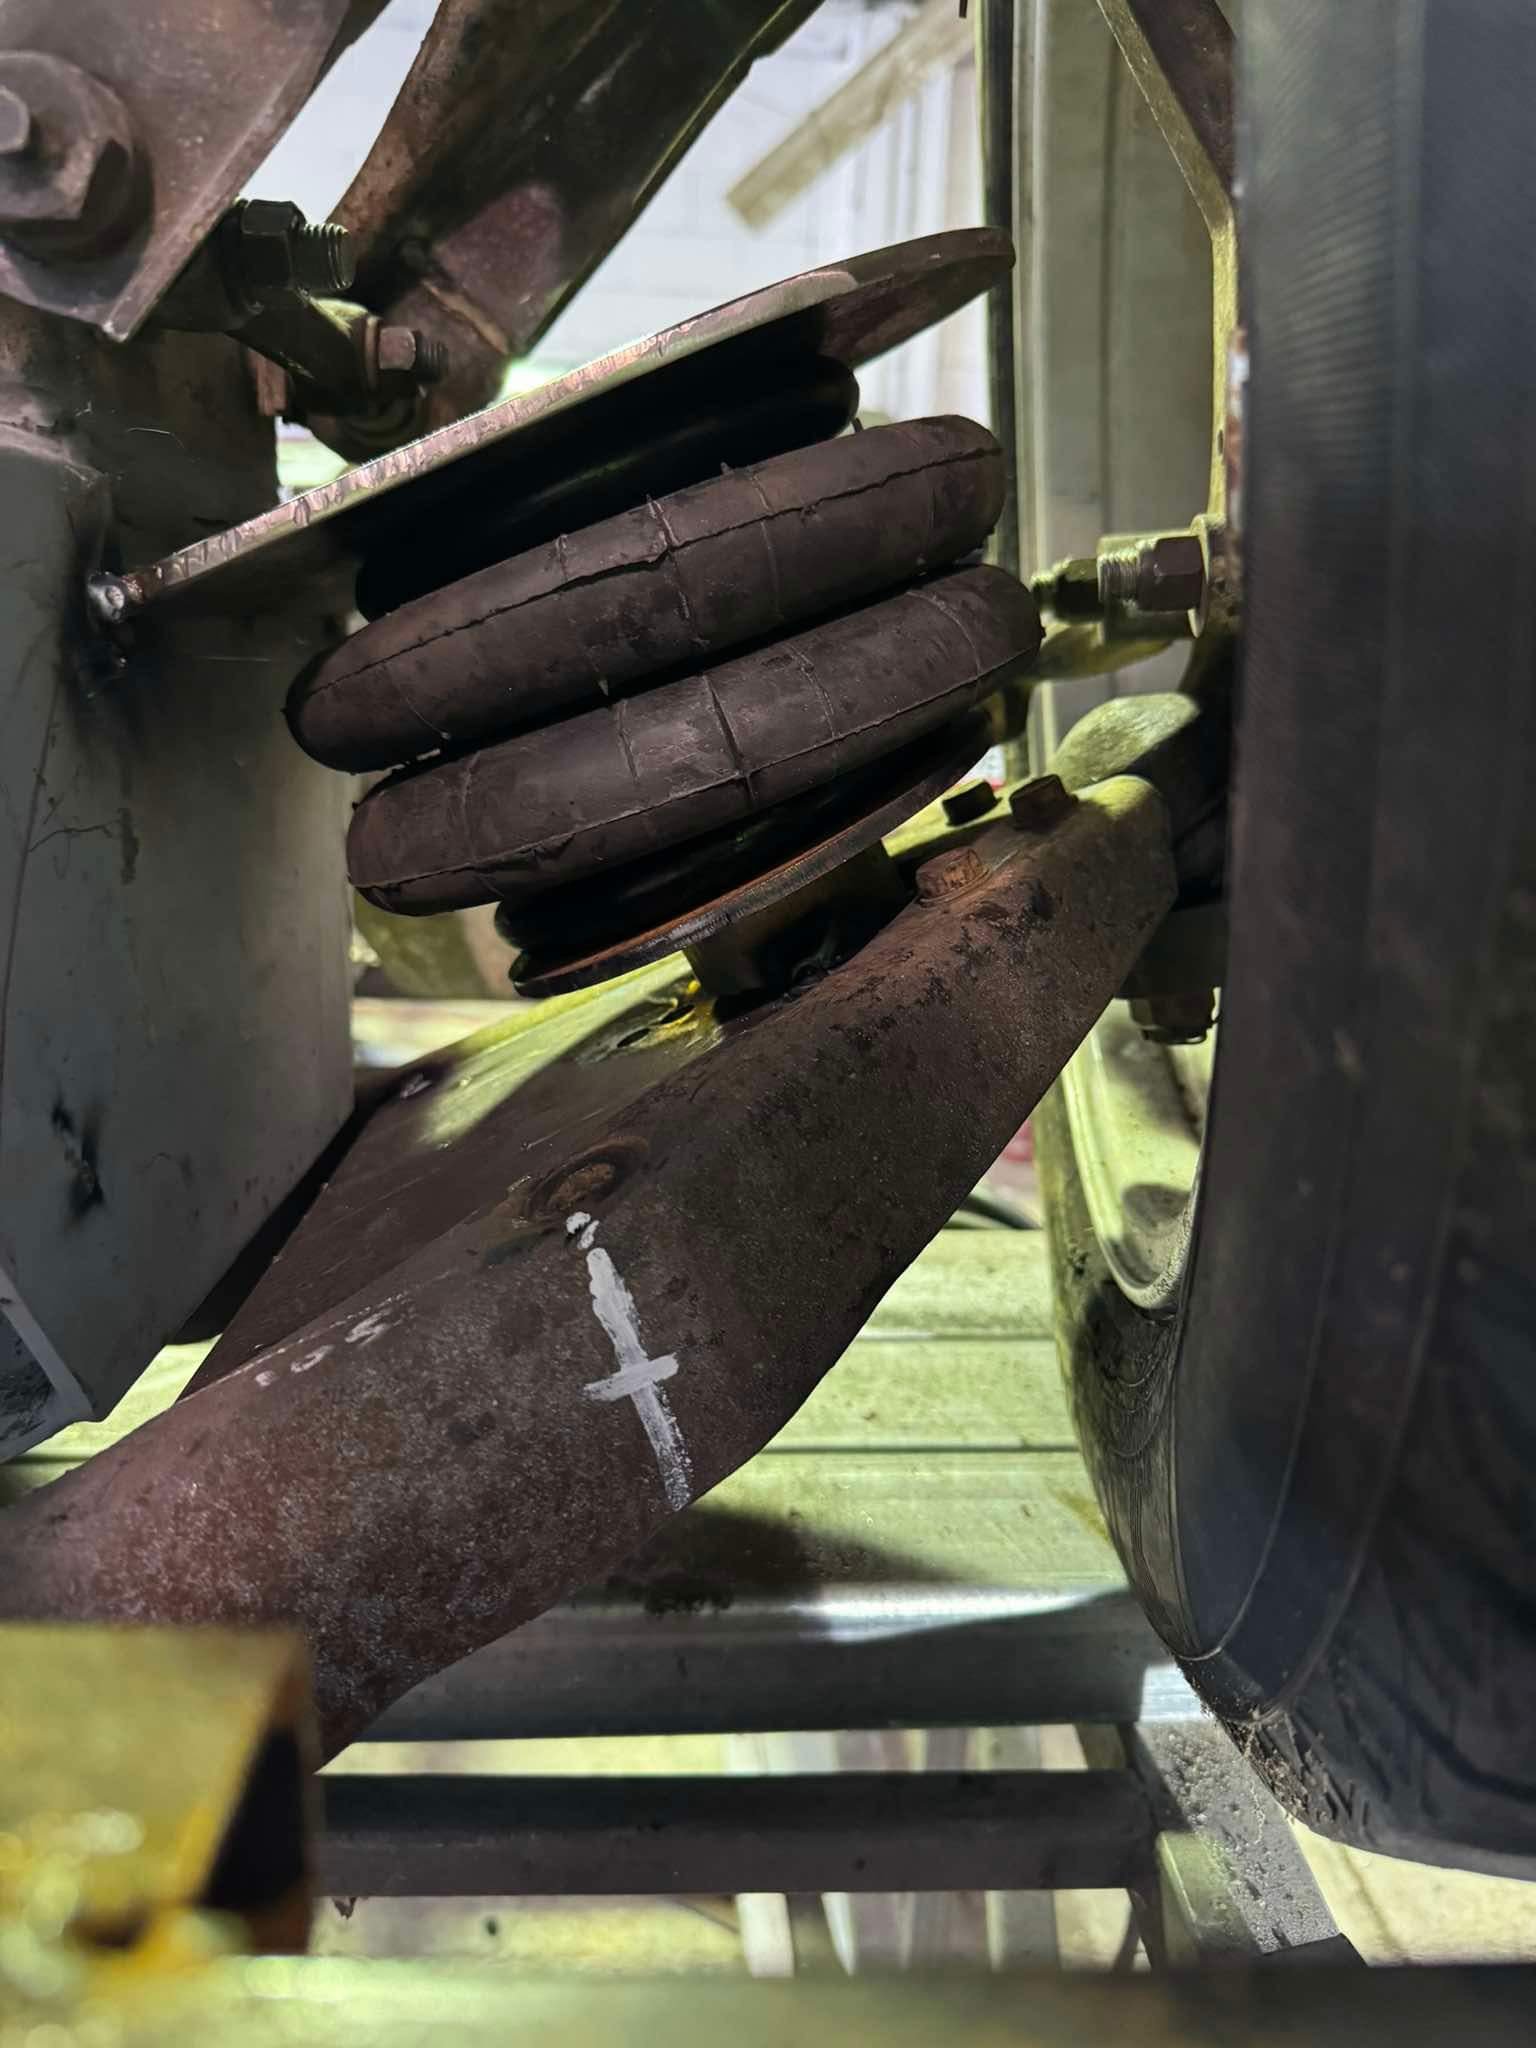
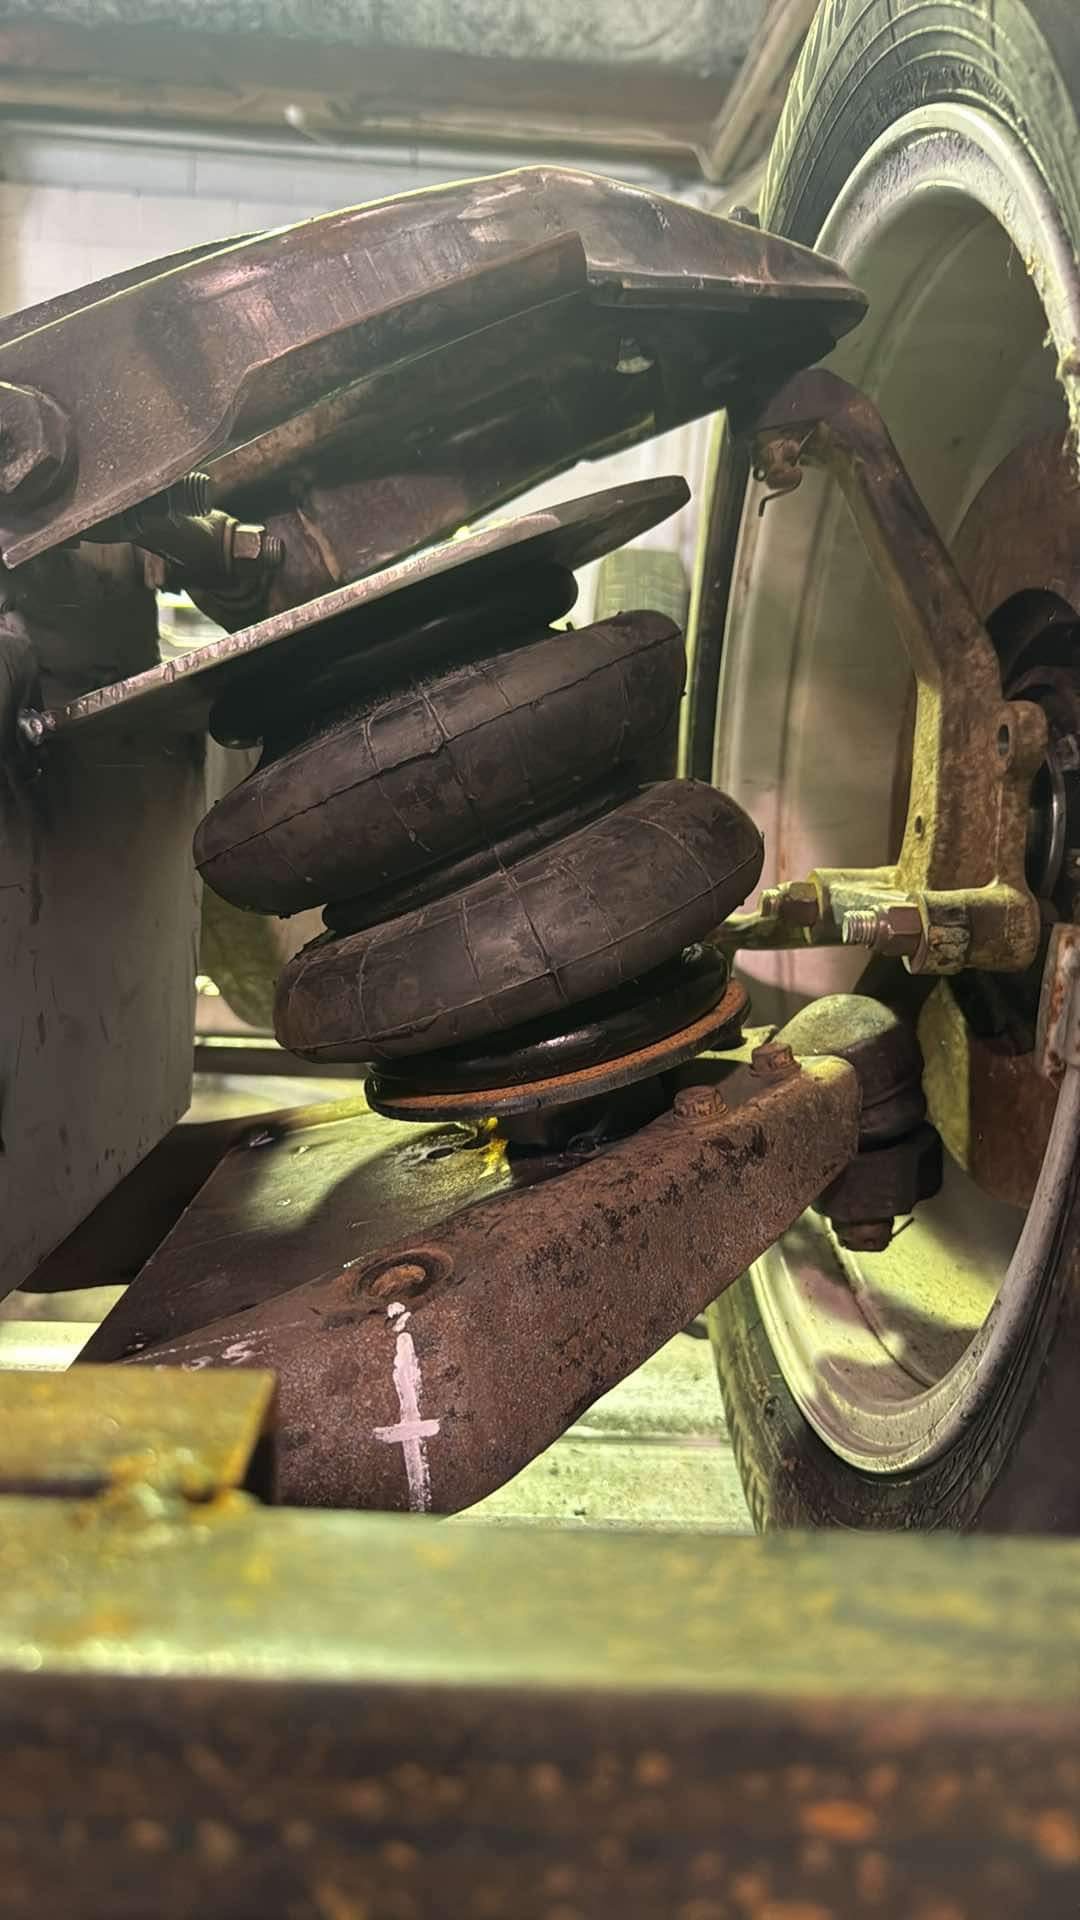
Getting close to shelving this chassis project and just roll static , yeah it’s a shit ride, but I’m over the non answered calls to “certifiers” and other “qualified” people in the trade. Just makes it so much harder than it needed to be. i just want to save everyone time and pain later on by getting advice now. yes i know theyr all busy, but Jesus, message back or even check emails once a while. (not directed at Clint- already chatted). anyway. This is where I’m going to leave it for now I think. got a set of wheels on it which I believe is around the same circumference as a 17” with a non rubber band tire. then sat it at optimal ride height. then started playing with bag mounts and locations. these utes are a bit dicky due to the arms sitting horizontal at near full lift as standard. but here is the 3 bag settings (close to full lift +/-30mm, ride height and full slam) it won’t get to full slam once I fit a bump stop. I don’t want the bag to be taking the impact at full slam. what I’ve had to do to get bag clearance is to use the base plate, then a 50nb tube to lift it above the BJ bolts. The pipe is angled inwards 5 degrees to find a happy medium for full lift/slam. the upper plate will still be gussetted. the back end can wait until I figure out the panhard/watts link set up but at full slam the diff clears the notch tubes by 10mm. i still don’t like the driveshaft travel with the 2 piece driveshaft, the rear section is quite short which makes it on a hell of an angle. anywho, here’s the pics.
1 point
-
Whilst the car was in the air for its brake upgrade, I wanted to chase a knock I've had in the front suspension. After spending a lot of money and redoing everything in the front end, I was a little annoyed when there was still a noise when going over bumps. The only thing I hadn't touched was the front swaybar D bushes. I had done the end links, arms, shocks, mounts, everything. Thankfully in one of my previous orders from RHDJapan I added a pair of the Cusco D bushes for my upgraded front swaybar. So while the brakes were off, and the car was in the air, I removed the clamp brackets and bushes. I started on the LH side, which I haven't touched before. Access is a bit limited, so ratcheting spanners are a lifesaver here. I didn't notice at the time, but what I believe is the cause of the noise is visible in that photo. With the two bolts removed, I removed the clamp, spacer under the bar and the bush The bush was visibly deformed compared to the new one The reason for this was obvious once I inspected everything. There was this weird mark on the spacer plate and bush Ah, that's why. The spacer plate wasn't fitted correctly, was twisted, held in by one bolt and not supporting half the bush. You can see the hole the bolt should be through here Instead of twisting as it should, the bar was moving around within the unsupported bush. I don't know how long it's been like this, definitely before it came to NZ though. Thankfully with the new bushes in hand, I was able to reassemble it correctly. The old bushes were also very dry with no signs of any grease in them. I used some Superpro polybush grease I had kicking about to lube the bushes first It's a bit of a fiddle to get everything lined up, and the bush clamps the bar quite tightly, but reassembly wasn't too bad once the bolts were lined up. Using a bar to push down on the clamp helped a lot as the bush wanted to push it up and off. I tightened the clamp at ride height, not that it probably matters since the bar rotates in the bush. I've had the other side apart before, when I did the rear engine mount, so that was just a simple repeat of the other side A test drive whilst bedding the brakes in shows the knocking is completely gone now, and the car feels more planted in the front. I suspect the bar was significantly less effective than it should've been. Hopefully I can get a couple of good fast runs in it this week and see how it's affected the handling. With that done, the last thing while the car was in the air was to remove the front lip and reaffix it, since it was sagging on one side With a bunch of improvised fixings removed, the lip fell off. Apparently none of the tape was actually holding it up Looks weird without it now Removing the old tape sucked. It wasn't stuck to the car at all, but it wouldn't let go of the lip easily. I used a heat gun and my thumbs to roll the tape off New tape was applied And the lip was put back into place, using some old and new fixings to secure it a bit better. To give it the best chance of sticking, I supported each end with a jack and block and gently heated the tape. It's not perfect, but it's better than it was and hopefully won't come loose again1 point
-
When I get an idea in my head, it's very hard to make it go away without giving it a satisfying conclusion. I wasn't happy with how close I was last time, but ultimately failed at upgrading my brakes. Let's recap, the HA36S Alto Works and Turbo RS have dinky little 230mm rotors. These are the same size as the previous model Alto Works back in 1998, when they were smaller and lighter. The Kei Works, about the same size and weight as an HA36S, was gifted the bigger 14V caliper brackets, and 257mm rotors from the Swift/Ignis shopping basket. 230mm is probably fine for stock power, and how you'd normally drive an Alto, but when you add more power and want to drive it hard, particularly on a fast track like my local one, the little standard brakes leave something to be desired. There are a couple of suppliers out of Japan for bolt-on big brake kits, but after shipping we're talking $500+NZD, which is madness. Silkroad makes the cheapest one, with a 255mm rotor and custom-designed bracket with joined bridge. You would also be limited to sourcing the replacement rotors from Silkroad in future. The 14V brackets from a HT51S Swift/Ignis are a bolt on to the Alto, using the existing Alto calipers. These space the caliper out in order to use the bigger rotor. This would all be nice and easy, except the Kei/Swift/Ignis rotors all have a different 49mm hat height, which pushes the rotor backward toward the strut. The causes unhappiness with the clearance for the caliper bracket. You cannot alter the position of the caliper bracket since it's mounted to the front of the knuckle. The solution is to either space the rotor out from the hub, use rotors from some Toyota (Cynos iirc) and machine the center bore out to the required 60mm (thanks to the weird stepped center bore on the hub), or find a pair of rotors that actually fit (an easier job said than done). I hated the spaced-out rotor idea, everything became studcentric, including the rotors. So the Suzuki rotors were a no-go. There was some discussion about centering rings and things, but it all became too complex. The Toyota rotor option was also a no-go, I don't like the idea of having to machine consumable items in order to fit. All I was left with then, other than buying the Silkroad kit from Japan, was to find a rotor that met the criteria. This led to many hours of trawling through every single rotor catalogue and website I could find. Eventually, finally, I had a breakthrough on some random website in Europe. Enter, the Chery J1 from China. By some bizarre miracle, this horrible little shopping box of dubious quality was reported as having the perfect rotors. 257mm diameter, 17mm thickness, 60mm CB, 4x100 PCD and a 44mm hat height. The height is 1mm different from the Alto brakes, but otherwise everything else is perfect. Had I found the secret sauce? For future reference, the OE part number was S21-3501075. Apparently it's also used on some Mercedes, I don't know what though. After some more digging, I found RDA in Aus actually makes rotors for these too, using the P/N RDA8423. I'm sure other suppliers are out there, the EU sites have a few options. Anyway, thanks to the help of a great chap on the Oldschool forum, I managed to get my hands on a pair of front rotors from a Chery J1, from Pick A Part, spiders and all. Half a can of fly spray later, the spiders left me alone They were used, and rusty, but were barely worn, didn't have a lip and still measured the full 17mm thickness. I pulled the Alto in, jacked one side up and got to work fitting the Chery rotor and 14V bracket. Promising. How does the centering look? Perfect. No clearance issues, the rotor is centered, and it's all hubcentric. The next task, now that I knew it fit, was to have the rotors skimmed by a local company. They came back looking very good. The guy did audibly shudder when he asked what they were off and I answered Chery J1... He didn't ask further questions when I said not to worry since they weren't going back on one. Probably already wrote me off as a wrong'un. The surface rust is already returning... Before I could fit them I had to prep and paint the 14V brackets. The Alto comes with red calipers and brackets, because racecar, but the standard shopping basket models were unpainted. The mismatch made my eye twitch. I cleaned them with brake cleaner and then wire brushed the heck out of them before hitting them with a few coats of VHT caliper paint, focusing on the visible areas once fitted. After a couple of days to cure, it was time to fit everything once and for all. The Alto once again returned to the garage, this time both sides were raised The pile of bits was laid out for prep I removed the slider pins, which were all free, and cleaned and regreased them with some ceramic brake grease. One of the pins had a tear in the boot, so I later stole the boot from the standard Alto pin on one side. Interestingly I noticed the Swift pins were all solid, whilst one pin on each side of the Alto has rubber bushings on it to allegedly reduce noise and vibration The pad retaining clips were cleaned up and refitted The wheels were removed, and I began the removal of the standard brakes Remember to hang the caliper securely so it doesn't stress the hose The old rotor was pressed off with a bolt I then cleaned the hub bore up with a wire wheel on the drill and added some copper grease so it won't rust into place. You can see the stupid CB step here The big rotor was then slid into place with a wheel nut to hold it, and the 14V bracket bolted on and torqued to the required 85NM. The Alto pads were then slipped into the 14V brackets, with new grease. I found my calipers were missing whatever this insert is, so I stole it from the Swift calipers The caliper was then fitted and the slider bolts torqued to 26NM The difference in the size of the rotor doesn't look huge there because the caliper is still close to the center hat, but what isn't immediately obvious is that the hat has a larger diameter on the bigger rotors. If the hat had the same diameter as stock the caliper would be a long way from the hat. With my braided lines, the hose is a little tighter to reach the caliper than stock, but it's not stretched or strained, it just takes a little wiggle to get the caliper into place without pulling on the hose. Rinse and repeat for the other side of the car, and the brakes are done. They really do push the caliper out and make a pretty good visible difference. Stock 230mm brakes Now I needed to give them a pounding to bed the pads into the fresh surface and make sure they weren't going to fall to bits the first time I tried to stop. I took the car on a gentle drive out to some open back roads and set on my usual break-in procedure. Turn the wick up to high, and do a series of 100kph-20kph near-stops. I ended up doing 4 or 5 of these, getting the brakes hot enough that I could smell them, and then cruised around for a bit with minimal breaking (and no stopping!) to let them cool off. After a little bit of cooling off, I stopped and checked the wheel nut torque, and grabbed some cheeky photos. As a side note, the Cusco mud flaps have been doing a great job So, how do the new brakes feel? Well, the brake feel on the Alto has never been amazing, it's a bit soft and vague for my liking, even with the braided lines and new fluid, but it is an economy car at the end of the day. The new brakes haven't fixed that, but they have made the pedal feel like it's doing more when you do press it. If you really stomp on it, the car will pitch forward on its nose and shed speed like an anchor was dropped. If you press them hard enough the ABS will kick in and remind you it could lock the wheels if it wanted. Even on the track I had a hard time braking hard enough to hit ABS with the stock brakes. Very happy with the upgrade so far. Was it cheaper than the Silkroad kit? Yes, by a couple of hundred dollars. Would it have been cheaper if I didn't buy used Swift rotors that didn't fit, and used Chery rotors that needed skimming too? Yes. Knowing what I know now, you could grab a couple of 14V caliper brackets from an old Swift or Ignis from Pick A Part, order some new RDA rotors and away you go. I'll be driving the Alto around a bit in the next week or two just to shake it down before the trackday at the end of the month and make sure we're all good. I can't wait, this thing should be a weapon on track now.1 point
-
Technically no In the threshold it mentions that spring seats must be oem unmodified The circlip adjustable bilsteins have always required cert, unless they were factory fitted in that specific vehicle when manufactured However they are often one of those things that gets wofs without cert, usually because the wof guy doesn't notice or read the rules properly A guy I know had some in a falcon and that got wofs because the circlip fell down into the lowest position so the other slots were not visible any more A person could be a criminal and remove the adjustableness and paint them black or something and try their luck I guess but that would be illegal technically so I would never suggest that you might get away with that I have heard stories of other criminals that just swap suspension once a year to get wofs and they say that's pretty easy to do and then they don't have to damage their bilsteins1 point
-
Does the old guy remember what it's rego number was? There's a reasonable chance I have the plates somewhere under my hydraulic press1 point
-
If its anything like the brake upgrade I did on my daily, the caliper is the same but the carrier bracket is different to allow for the bigger disc1 point
-
I was chatting with a fellow hanmeet organizer tonight. Would their be any appetite for one of these meets in the future? They and I both had a fucking blast. I'd like to assume that most who came did too? Would trade again, or nah?1 point
-
Car is at Sterling brake and clutch at the moment getting all the brakes sorted out. Having trouble finding things like brake shoes and some of the dust rubbers on the brake drums but it least I am slowly making some progress. Once the brakes are sorted then it's off to get the suspension done.
1 point
-
Thought I'd post a few pic's.
1 point
-
Can we get pics at some point? I'm moist in the pants area for a Pantera1 point
-
Drove this from my work shop to home on the weekend. I live on same street as work shop so we are talking less than a 2km drive. I had my wife and 4 year old drop me down at the workshop to pick it up. When i backed it our of the workshop my young fella who was in his car seat with the window down goes "I DIDNT KNOW THIS WAS FIXED!!! CAN I GO IN IT!!!" unfortunately the interior was such a state with no rear seat and car parts all through it that it wasnt possible this time, but he was FIZZED. Got it home and had a pretty big grin on. Reckon its time to push on and finish this thing so can load the family in it and do some summer time driving. was a big mood booster thats for sure1 point
-
Haven't put many ks on this thing since I've been busy buying yachts and otherwise bankrupting myself. I thought it would be nice to drive over the Christmas new year's period so moved the Mazda to get to the Corolla to get the Isuzu in to pull the boat out of the driveway to get the Jag out of the shed. It took a little throttle to unstick the brakes, moved about 1 metre then stopped. Rolled it back into the shed where the brake pedal went to the floor. Ah, there's your problem1 point


.thumb.jpeg.b39a639a8ff8a614681c3c9dca730a70.jpeg)
This leaderboard is set to Auckland/GMT+12:00