
Leaderboard


Popular Content
Showing content with the highest reputation on 12/04/24 in Posts
-
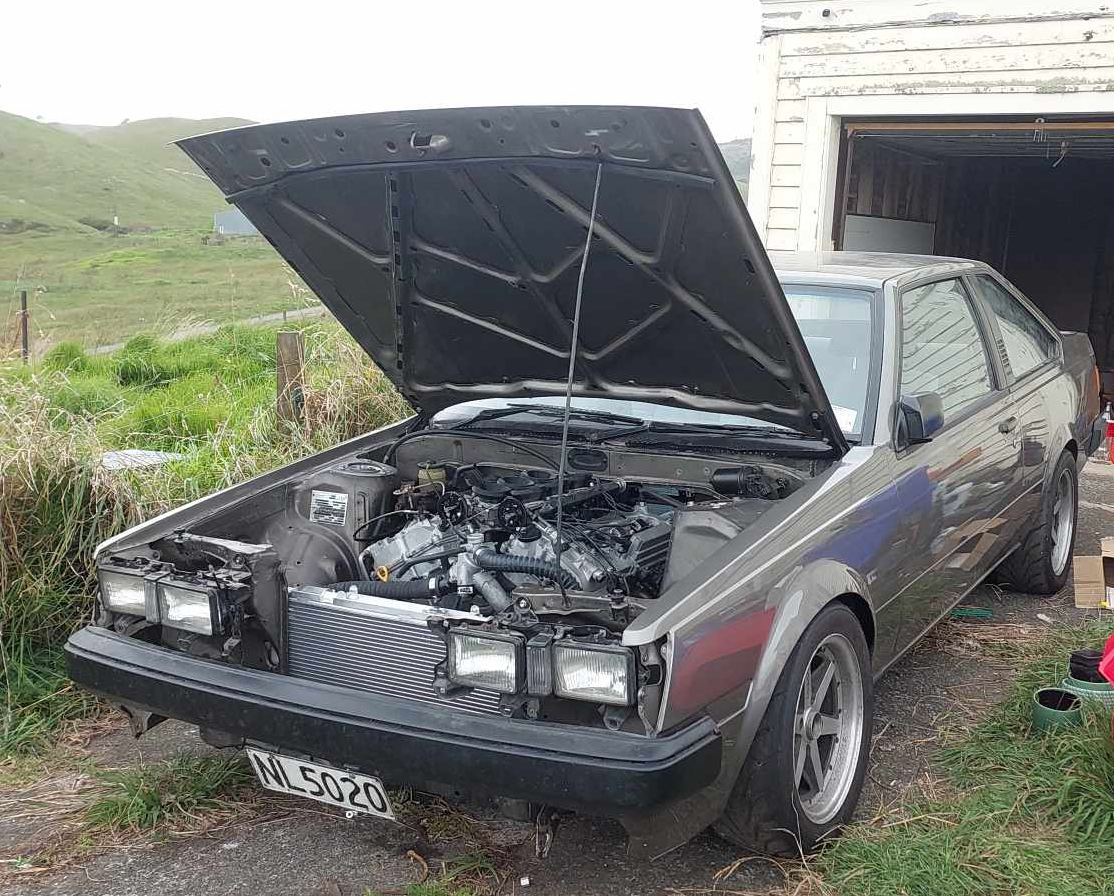
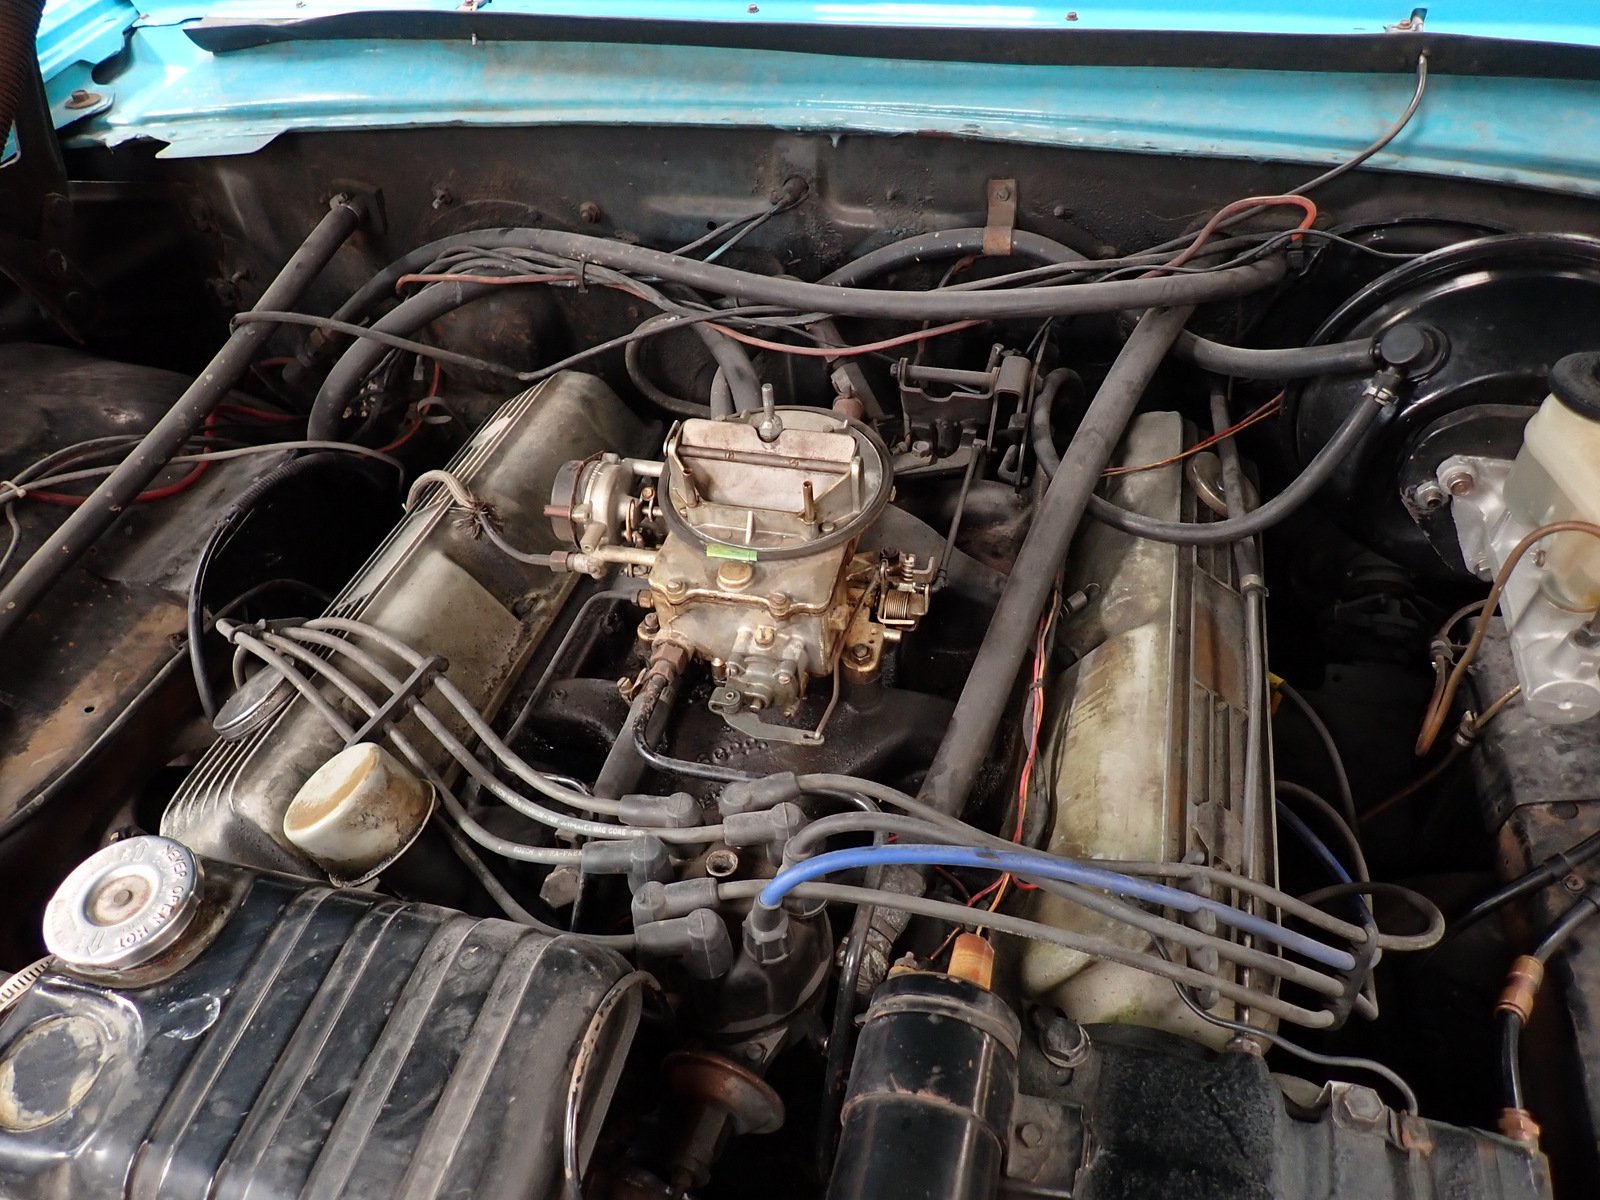
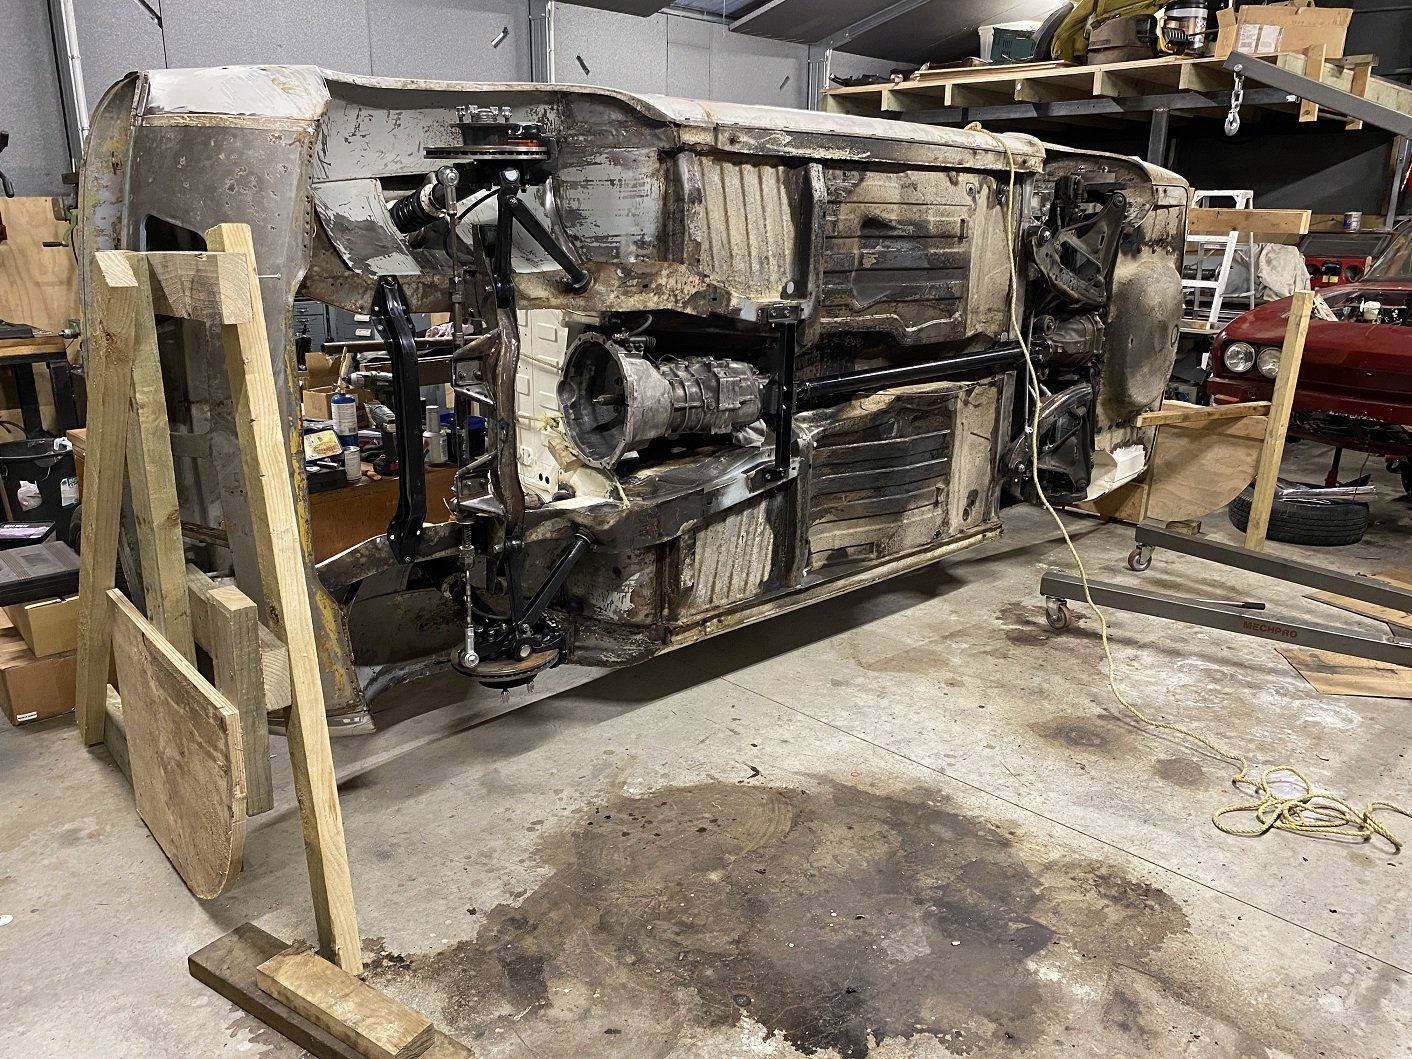
Alright alright alright! So I pushed the car outside this afternoon so I could reach some wiring inside to try fire it up. I filled the car up with coolant, by which I mean water because I was expecting things to leak. Sure enough each head had a hole up the front where water started leaking out. I couldnt remember what these were for, then found out that they are like an air bleed channel that goes back to the thermostat housing. So, these seem to have gone AWOL when moving house so I'll need to pickapart some more. I must have removed them when taking the heads off to clean them. Easy fix. Then I got the fuel pump working and fixed a few fuel leaks. It turns out that AN fittings arent very good at sealing if you havent tightened them up? Crazy. Then I got my tune somewhat sorted, and tried cranking the motor over.... and the bloody battery died! Ugh. I mucked around to get another battery, it sort of spluttered a few times but not quite. I had a look through the tune settings. Engine size was still set to 1500cc from using this ECU in the Echo - woops. I needed to disable the fuel pressure sensor allocation. As since this isnt wired in yet, it took 0v to believe that the motor had zillions of psi worth of fuel pressure. Then when I cranked the motor it was registering the crank trigger, but not cam trigger. Checked the settings, had this wrong. Both were set to VR sensors, but the crank is VR and the cams are hall effect. So once that was fixed... Bam! We are running. It was absolutely awesome to reach this point. So whats next? Lots. Get the coolant system functioning properly. Make an exhaust for it. A lot of wiring work, get the fusebox setup all connected nicely and mount all of the wiring nicely. Need to put some gearbox oil in the box, will do this before running the engine any longer. Pull the fuel rails off, and do tests to work out the CC rating and deadtimes for the injectors. Calibrate all of the sensors Mount a radiator fan Check intake for leaks (I think all of the air bypass screws are currently all the way out) Install the wideband Finish wiring up the alternator And a bunch of other little similar jobs. Most of these I can peck away at over winter with limited space. Making an exhaust will be difficult when weather starts getting darker and wetter and I can only really work outside. Will push ahead as best I can. Super excited for first start though!
 36 points
 -
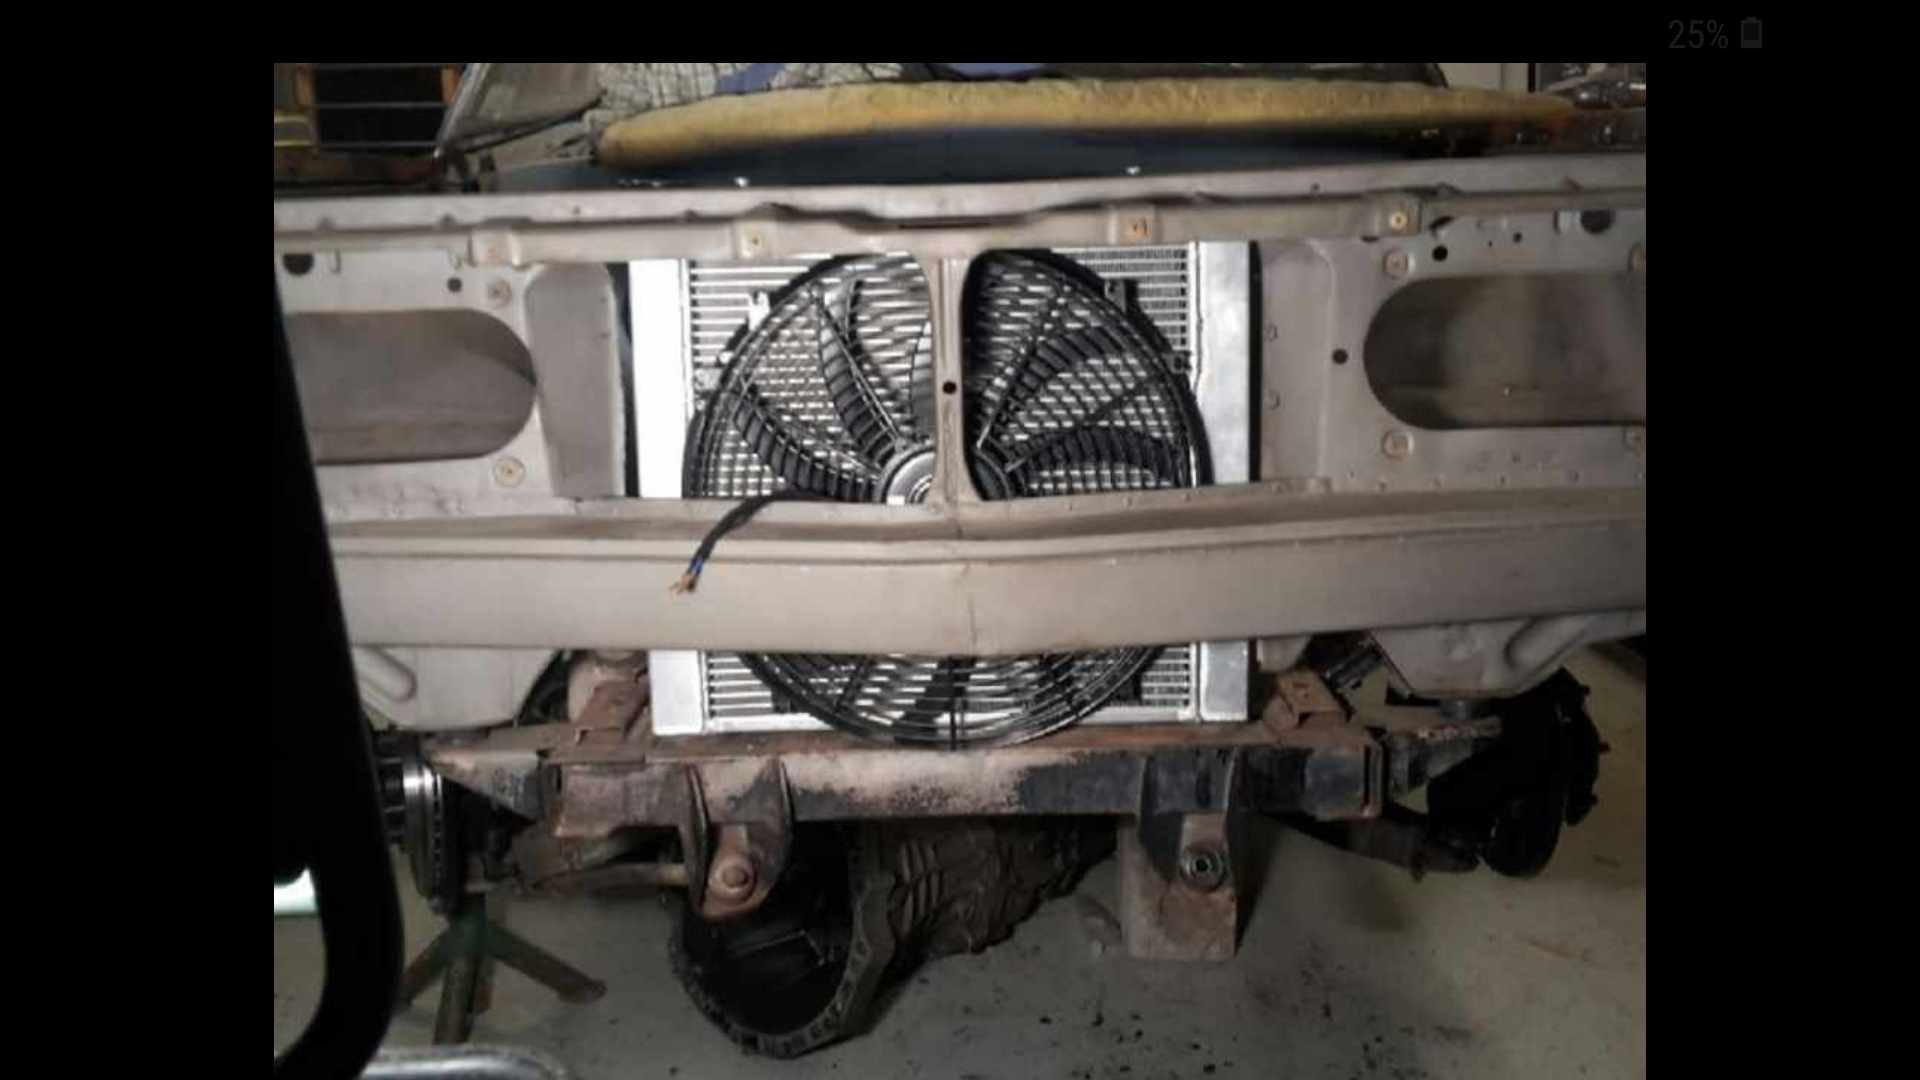
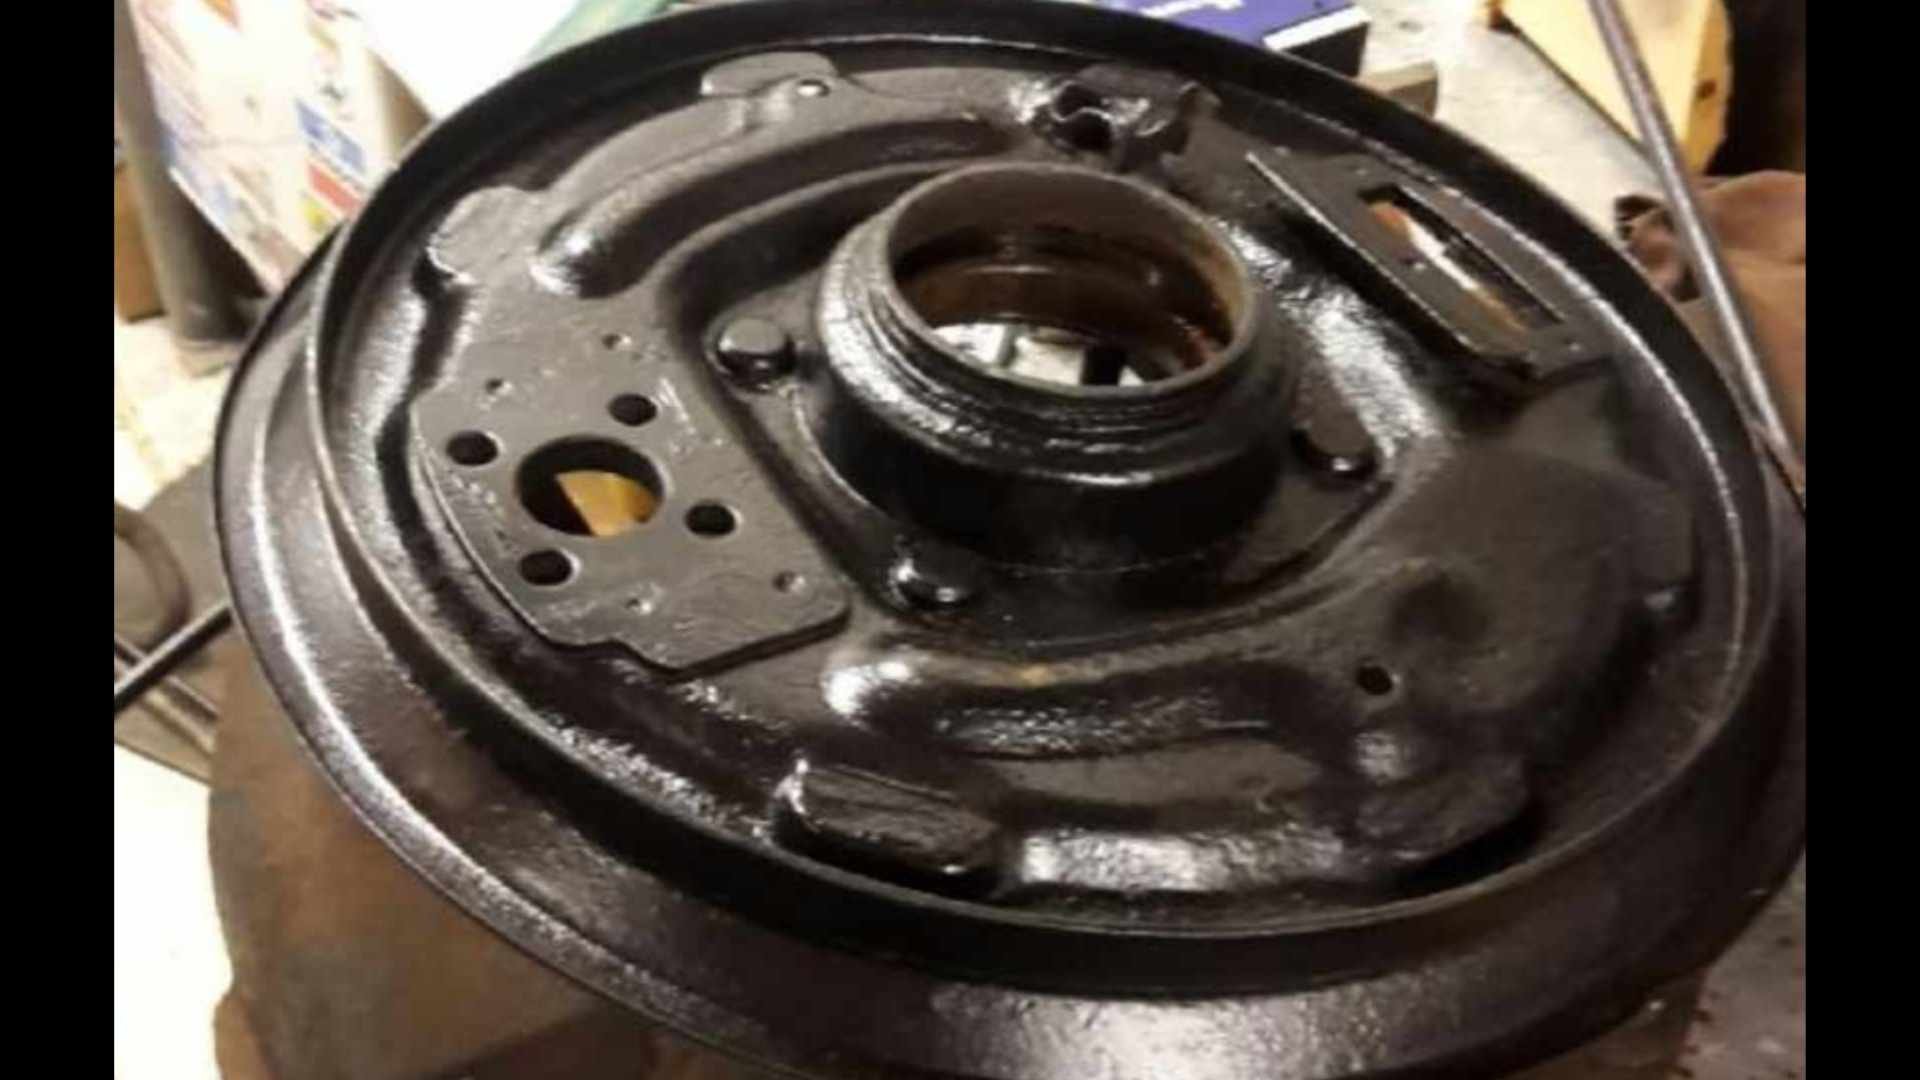
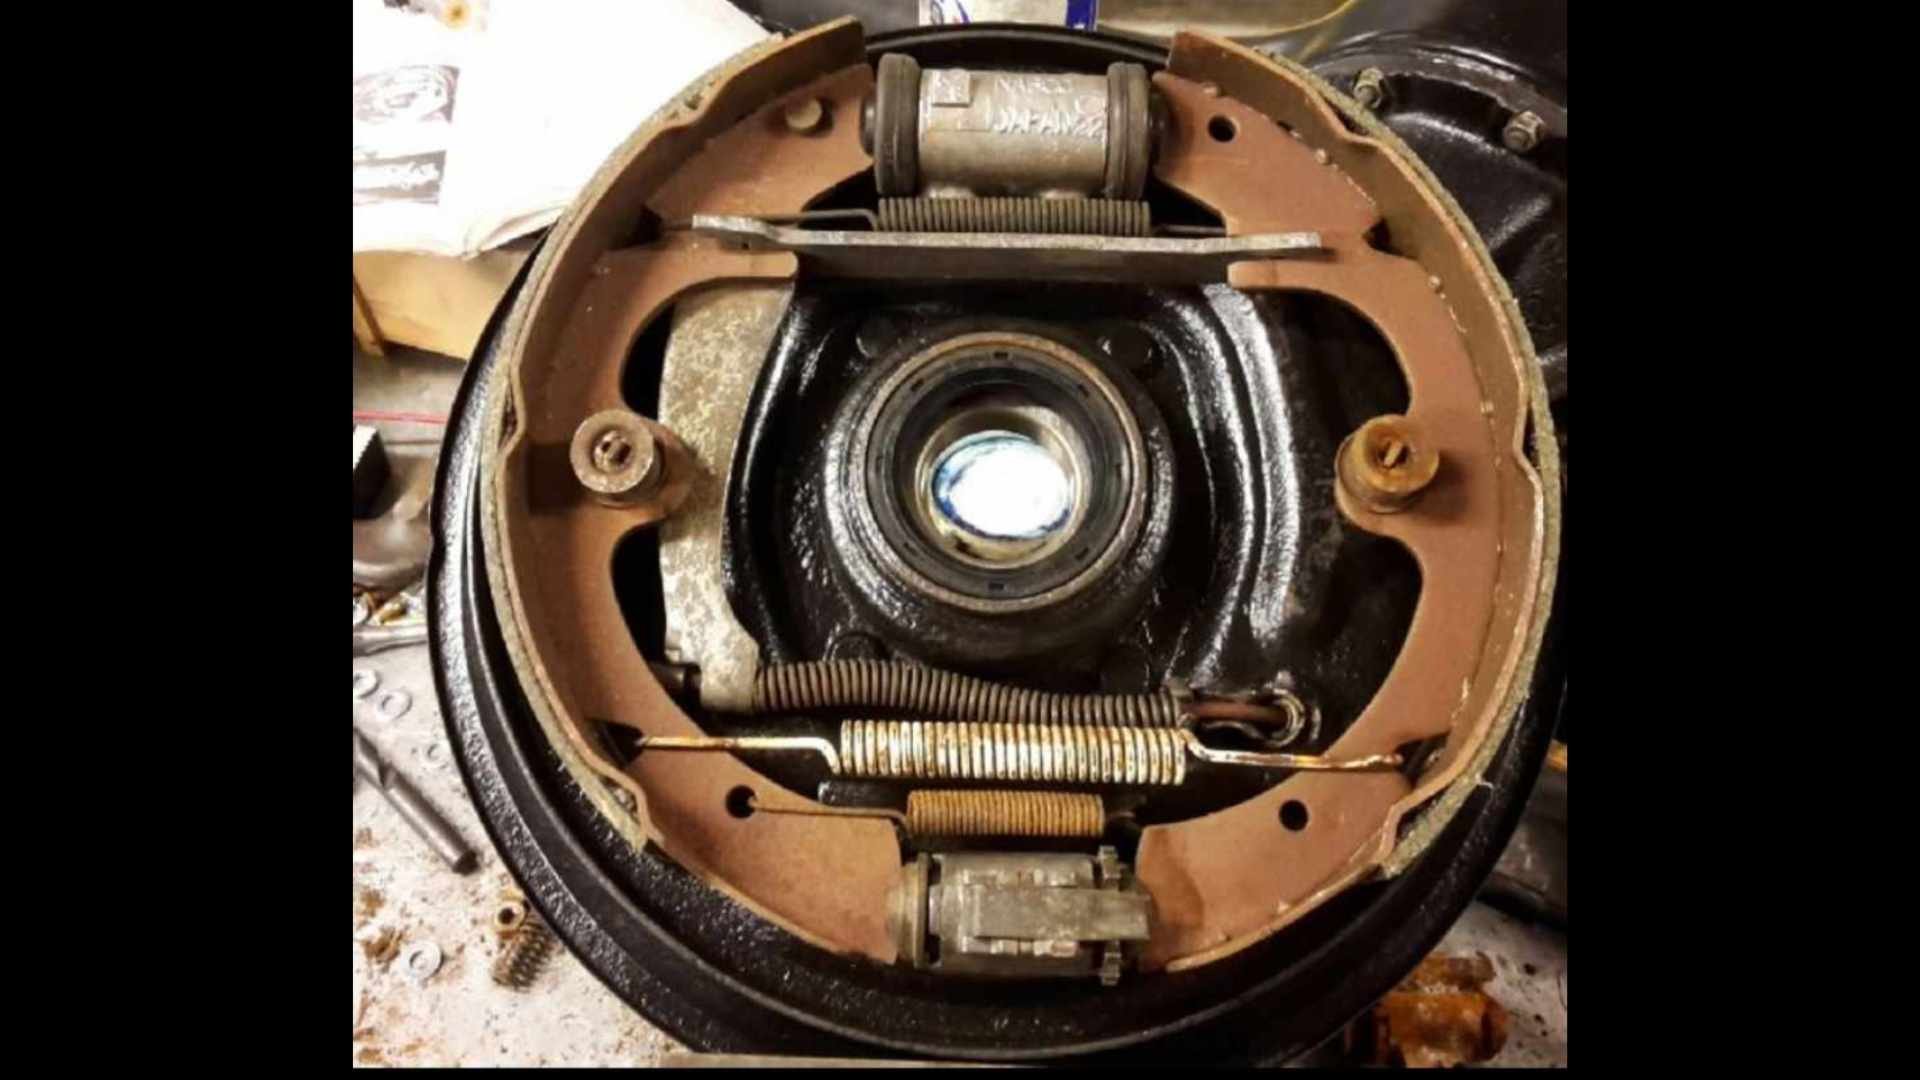
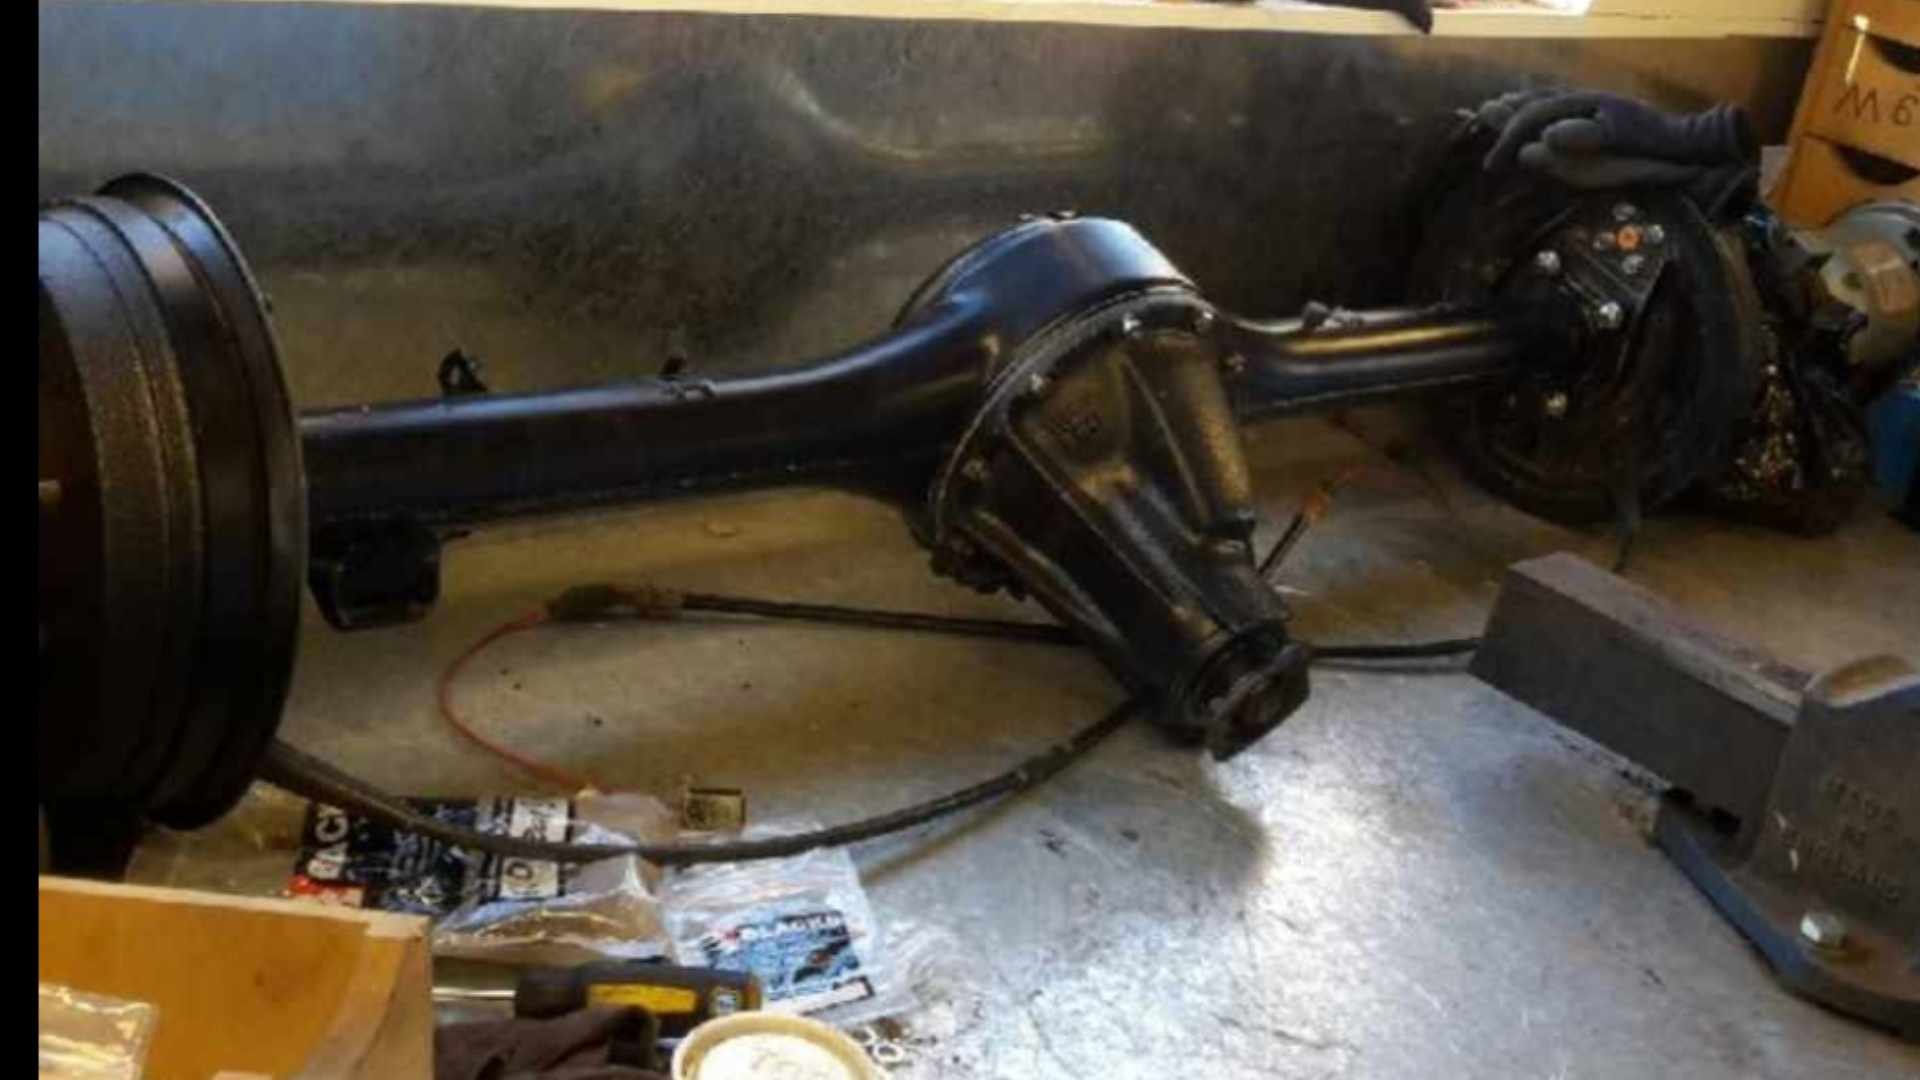
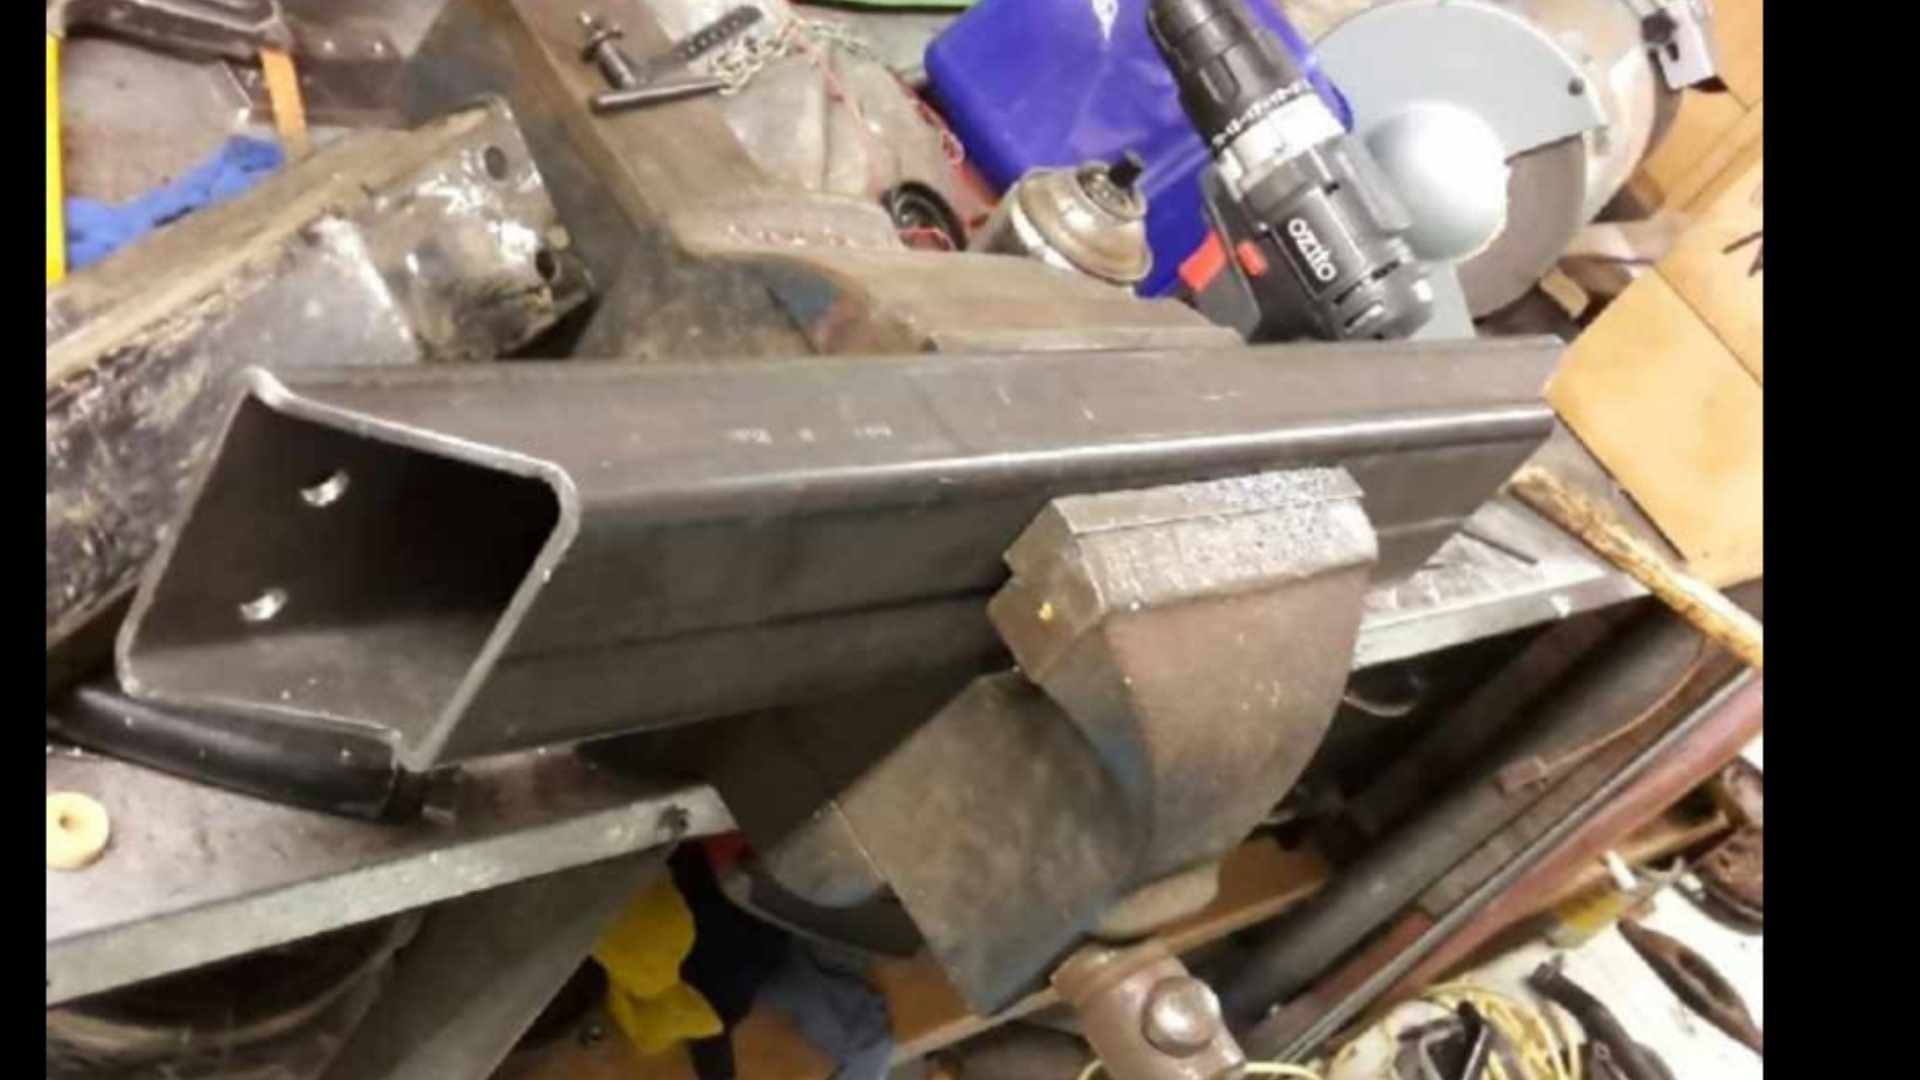
Id made a bet with @Luke that id have this thing drivable in time for an event aaages ago. I lost miserably. Id been sending him pictures of my progress at the time. (Before i had messenger, so by txt at fantastic cost) talking to him the other day, he still had them, and sent a few back to me. I manages to squeeze an Ebay special fan between the custom radiator and the front panel. And i got some pics of the diff too. 620s run an H190 diff, with an aluminium centre housing. However because they were an underpowered light comercial vehicle, they run a 4.6:1 ratio. Great for rally driving, or farm duties. But and absolute fucking nightmare for open road driving. I found a 3.9:1 head somewhere in Hamilton. @mark105 kindly delivered it to camp Rangiwoods for Old school nats 2013. (I might have had the yellow truck that far back) since we were only rolling in a dastun 1200, @Gomaxgo kindly dragged it back down to Christchurch for me in his 6cyl KE70 ' goon. Because reasons, i finished up using the axle out of the one i parted out for the front cut. As i mixed and matched a few bits, (my handbrake cables were fucked) i discovered this axle was ~15-20mm narrower each side. I had the housing blasted by Blain at FastBlast. And @LowTech powder coated the housing back when he had a powedercoating booth. I swapped the pinion flange over. This also required a hefty sleeve be fitted. Both because the seal journal was bady cut/worn, and because the seal journal was considerably bigger on the 3.9 diff. A lick of paint on the head, and it was glued in. Absolutely nobody had a listing for new brake drums. And all of mine were worn out of spec. ROCK AUTO to the rescue. (For all the parts your car will ever need) they were something stupid like $20 each. I gave the backing plates a brush up and paint. And rebuilt the brakes/ew cylinders and shoes. (My bench hasnt been that clear for a looooong ass time) I dont have any pictures, but these diffs use a turbo gay cup and cone arrangement on the axle bearings. You have to set the axle bearing preload by changing shims. (Theres a thrust block in the centre of the side gears that the tip of the axle runs in permanent contact) i fucked these off, and replaced them with deep groove bearings. The deep groove bearing was a few mm narrower than the Cup of the cup and cone. So i had to make a spacer ring as insurance that the bearings could never migrate in and out within that pocket. The other picture i found was of the gearbox X member i made. Its nothing fancy. The material was kindly donated by @Chris.QCR
13 points
-
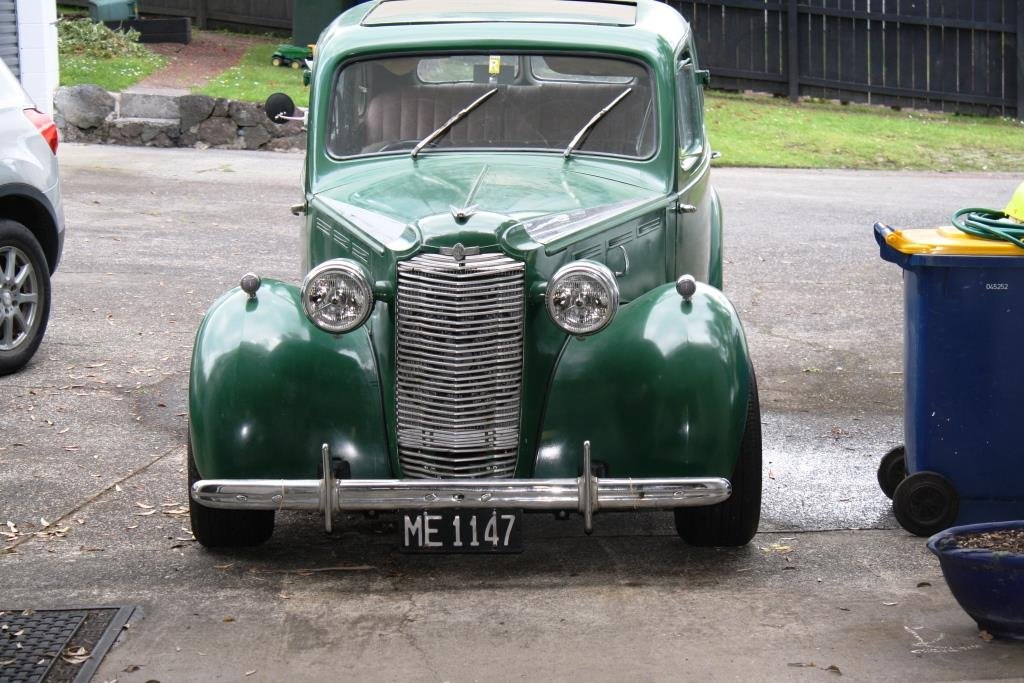
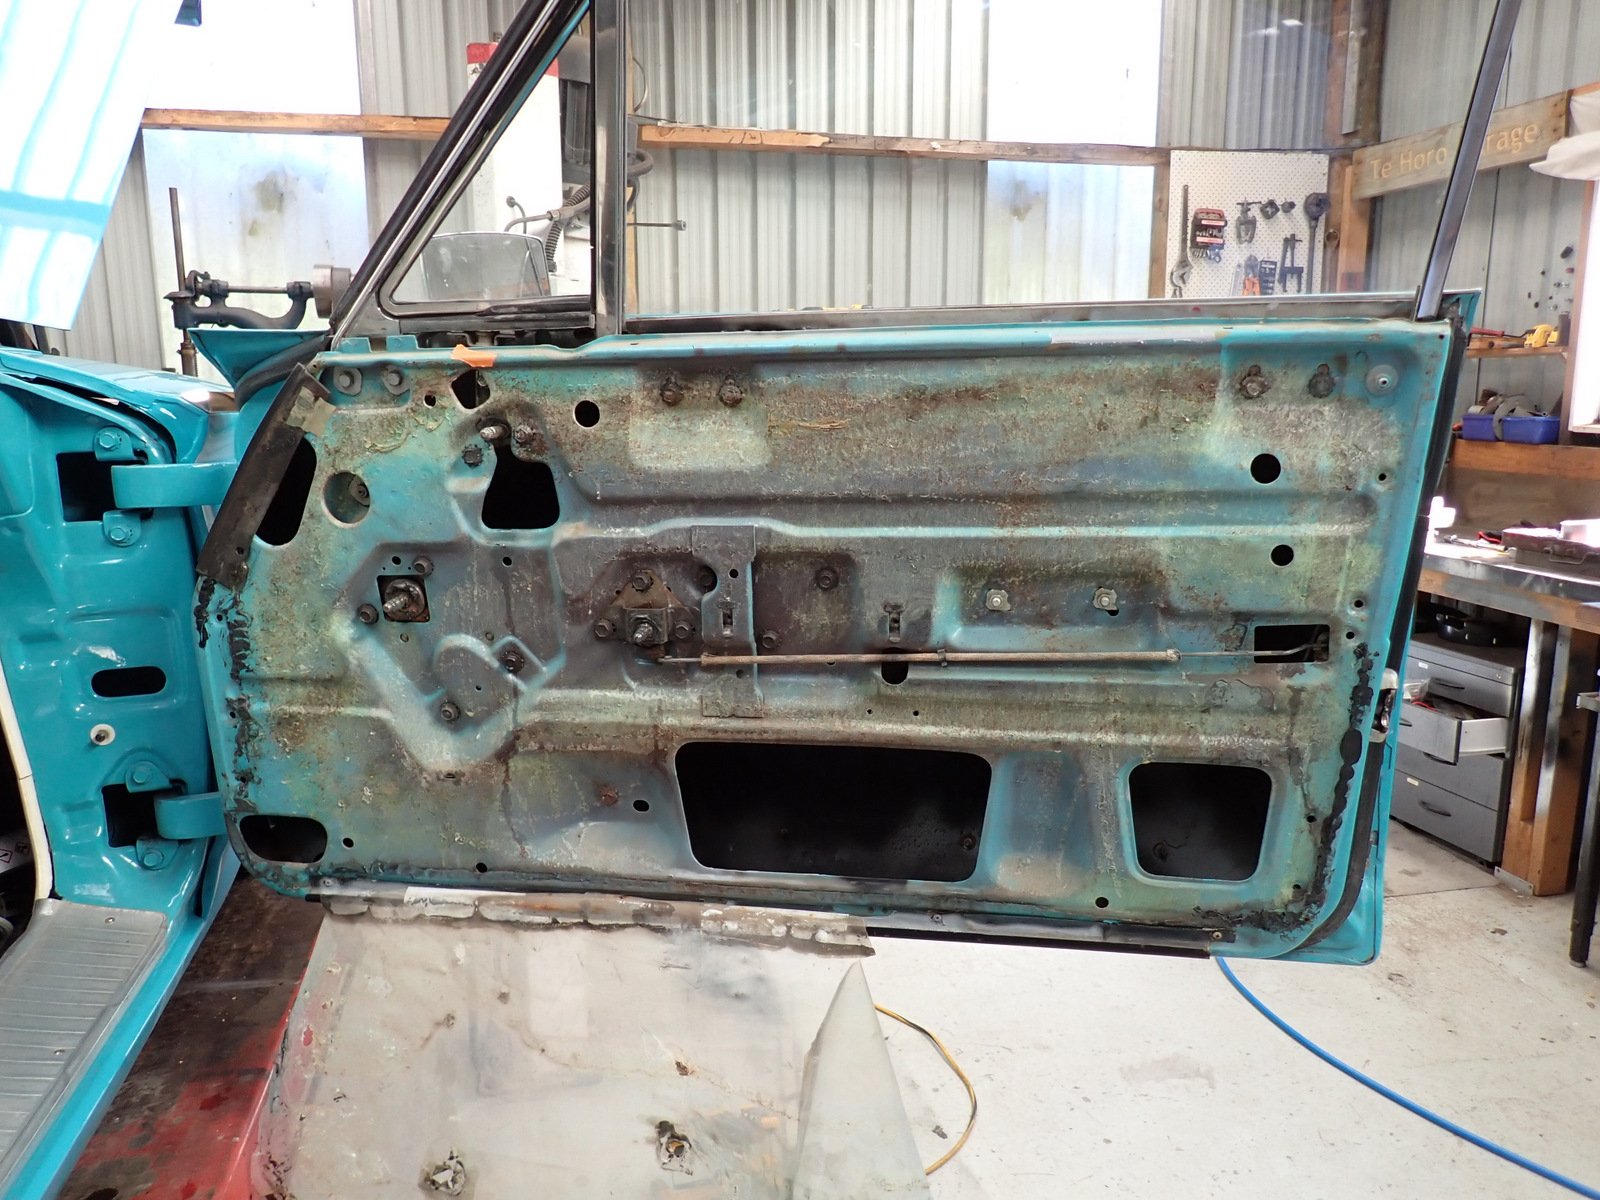
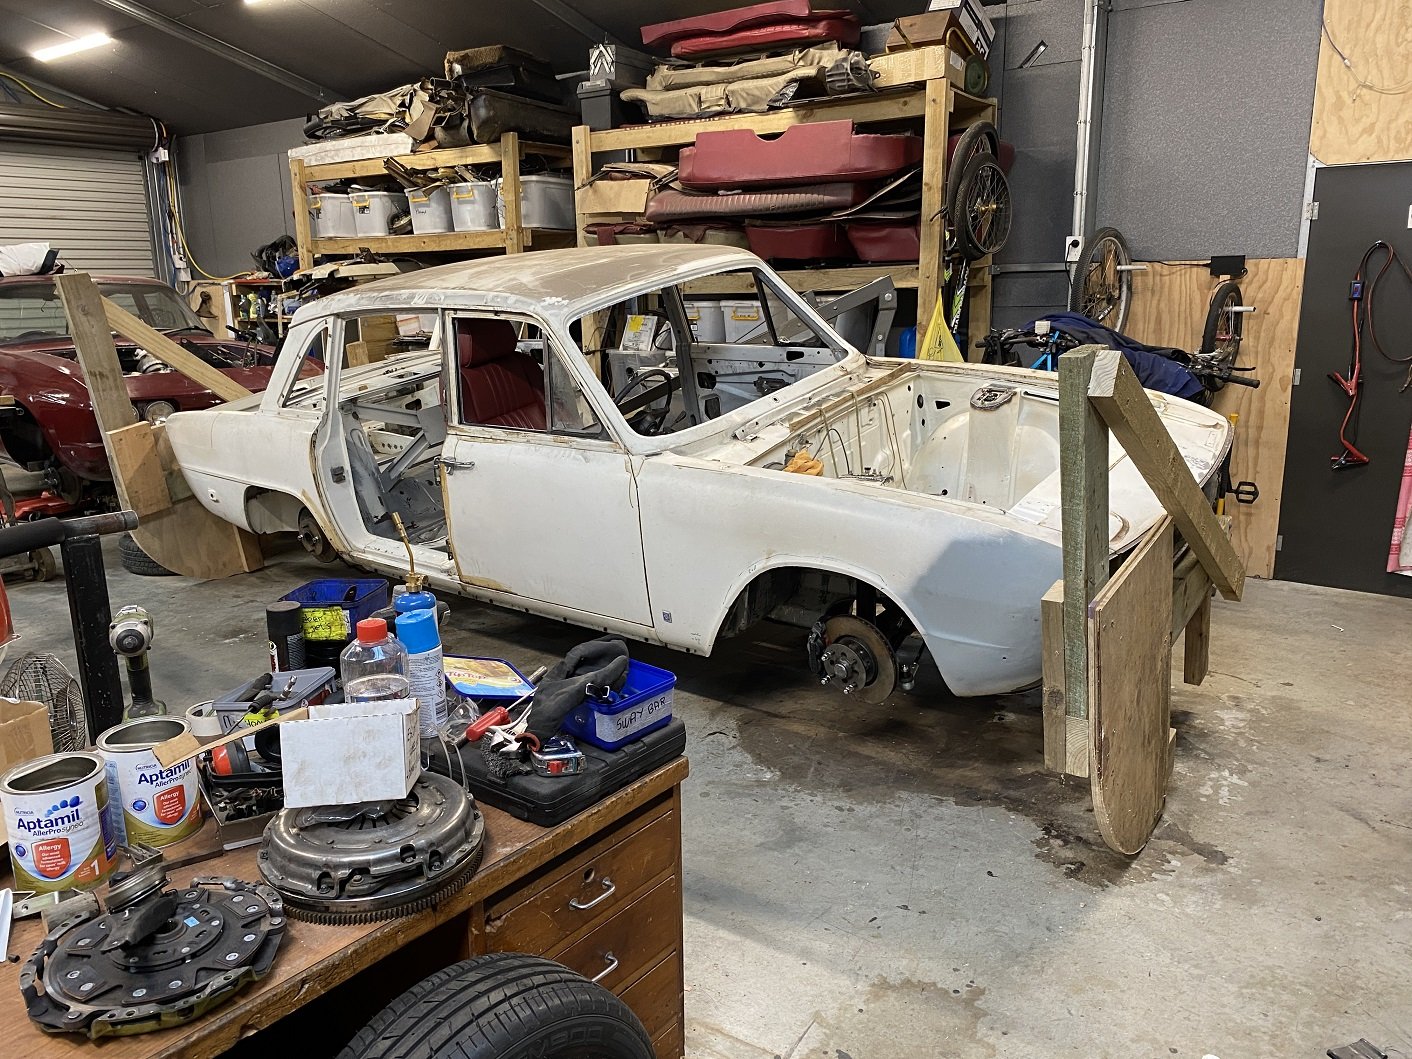
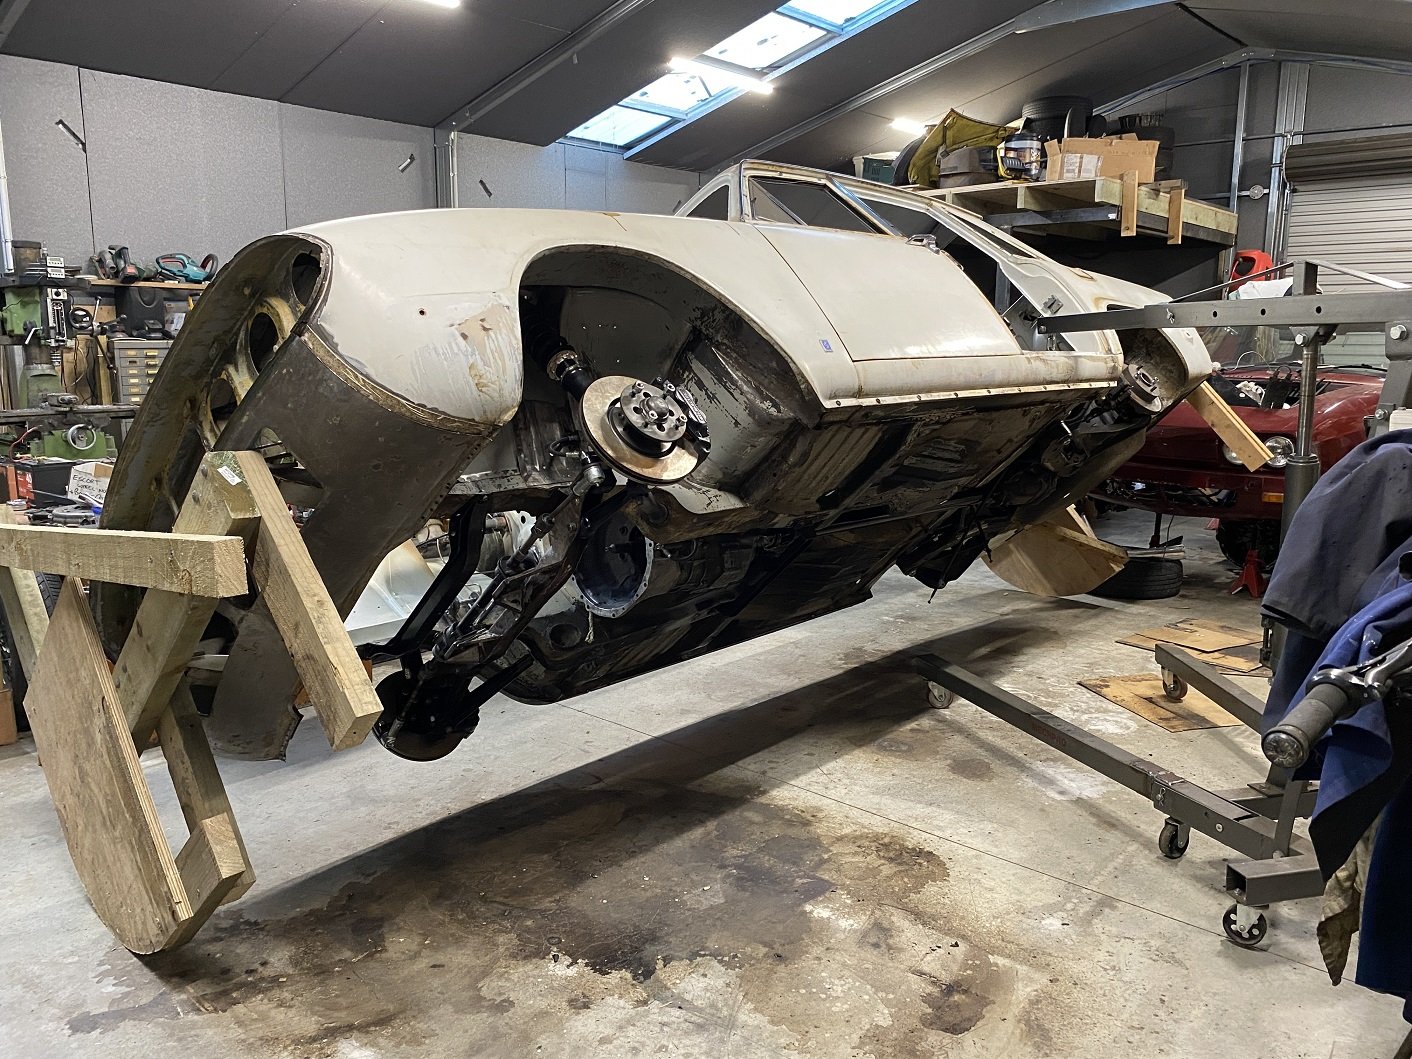
After a bit of messing around I've got the flywheel, clutch and master cylinder sorted. I was looking into the different types of sound deadening, Dynamatt seems to be the go to but fuck it's spendy. Just to do the front half of the interior it was going to cost about $450. I went the cheap Chinese route instead. I bought enough to do almost the entire inside of the car and it was $45 including shipping. Time will tell if it's any good, but it seems about right. I pulled the dash and trim parts out from under the bench and gave them a clean up. It was the first time I've seen them in about 16 years. The stored really well. I have had the instrument cluster in at Parrot and son to have a little work done, the main thing was having the tacho modified to suit the 6 cylinder and they fixed a couple of small issues. I've wired the engine up more or less. I'm waiting on the electronic ignition to arrive, I'm going to run some hard fuel lines, install a fuel pump, regulator and make some new brake lines. The drive shaft is being built and should be ready in a week or so. Hopefully not too much longer until she's running. The interior is mint apart from the front seats, they need recovering and probably some new padding. Does anyone have any recommendations for someone in Christchurch? Cheers.11 points
-
Went to Pickapart yesterday with tape measure in hand to try find a more suitable and readily available radiator. Turns out it was quite a mission as most radiators are too wide or too tall or have the water outlets in the wrong place. After checking everything there it came down to 2 options. Honda CRV or a Ford Telstar. Telstar was the winner on the day as it had a thicker core and was that bit bigger than the CRV unit. Quick test fit was promising bar 1 issue, top outlet is right where the alternator sits so getting a hose on there isnt happening. Was thinking of going to see the local radiator barry and maybe find a top tank that will fit the core but have the outlet on the drivers side then do a swap. Other option is find a diesel Capella radiator as its the same overall dimensions but the outlet is already in the right spot and is a full copper unit with a slightly thicker core10 points
-
When did you get a DeLorean?
9 points
-
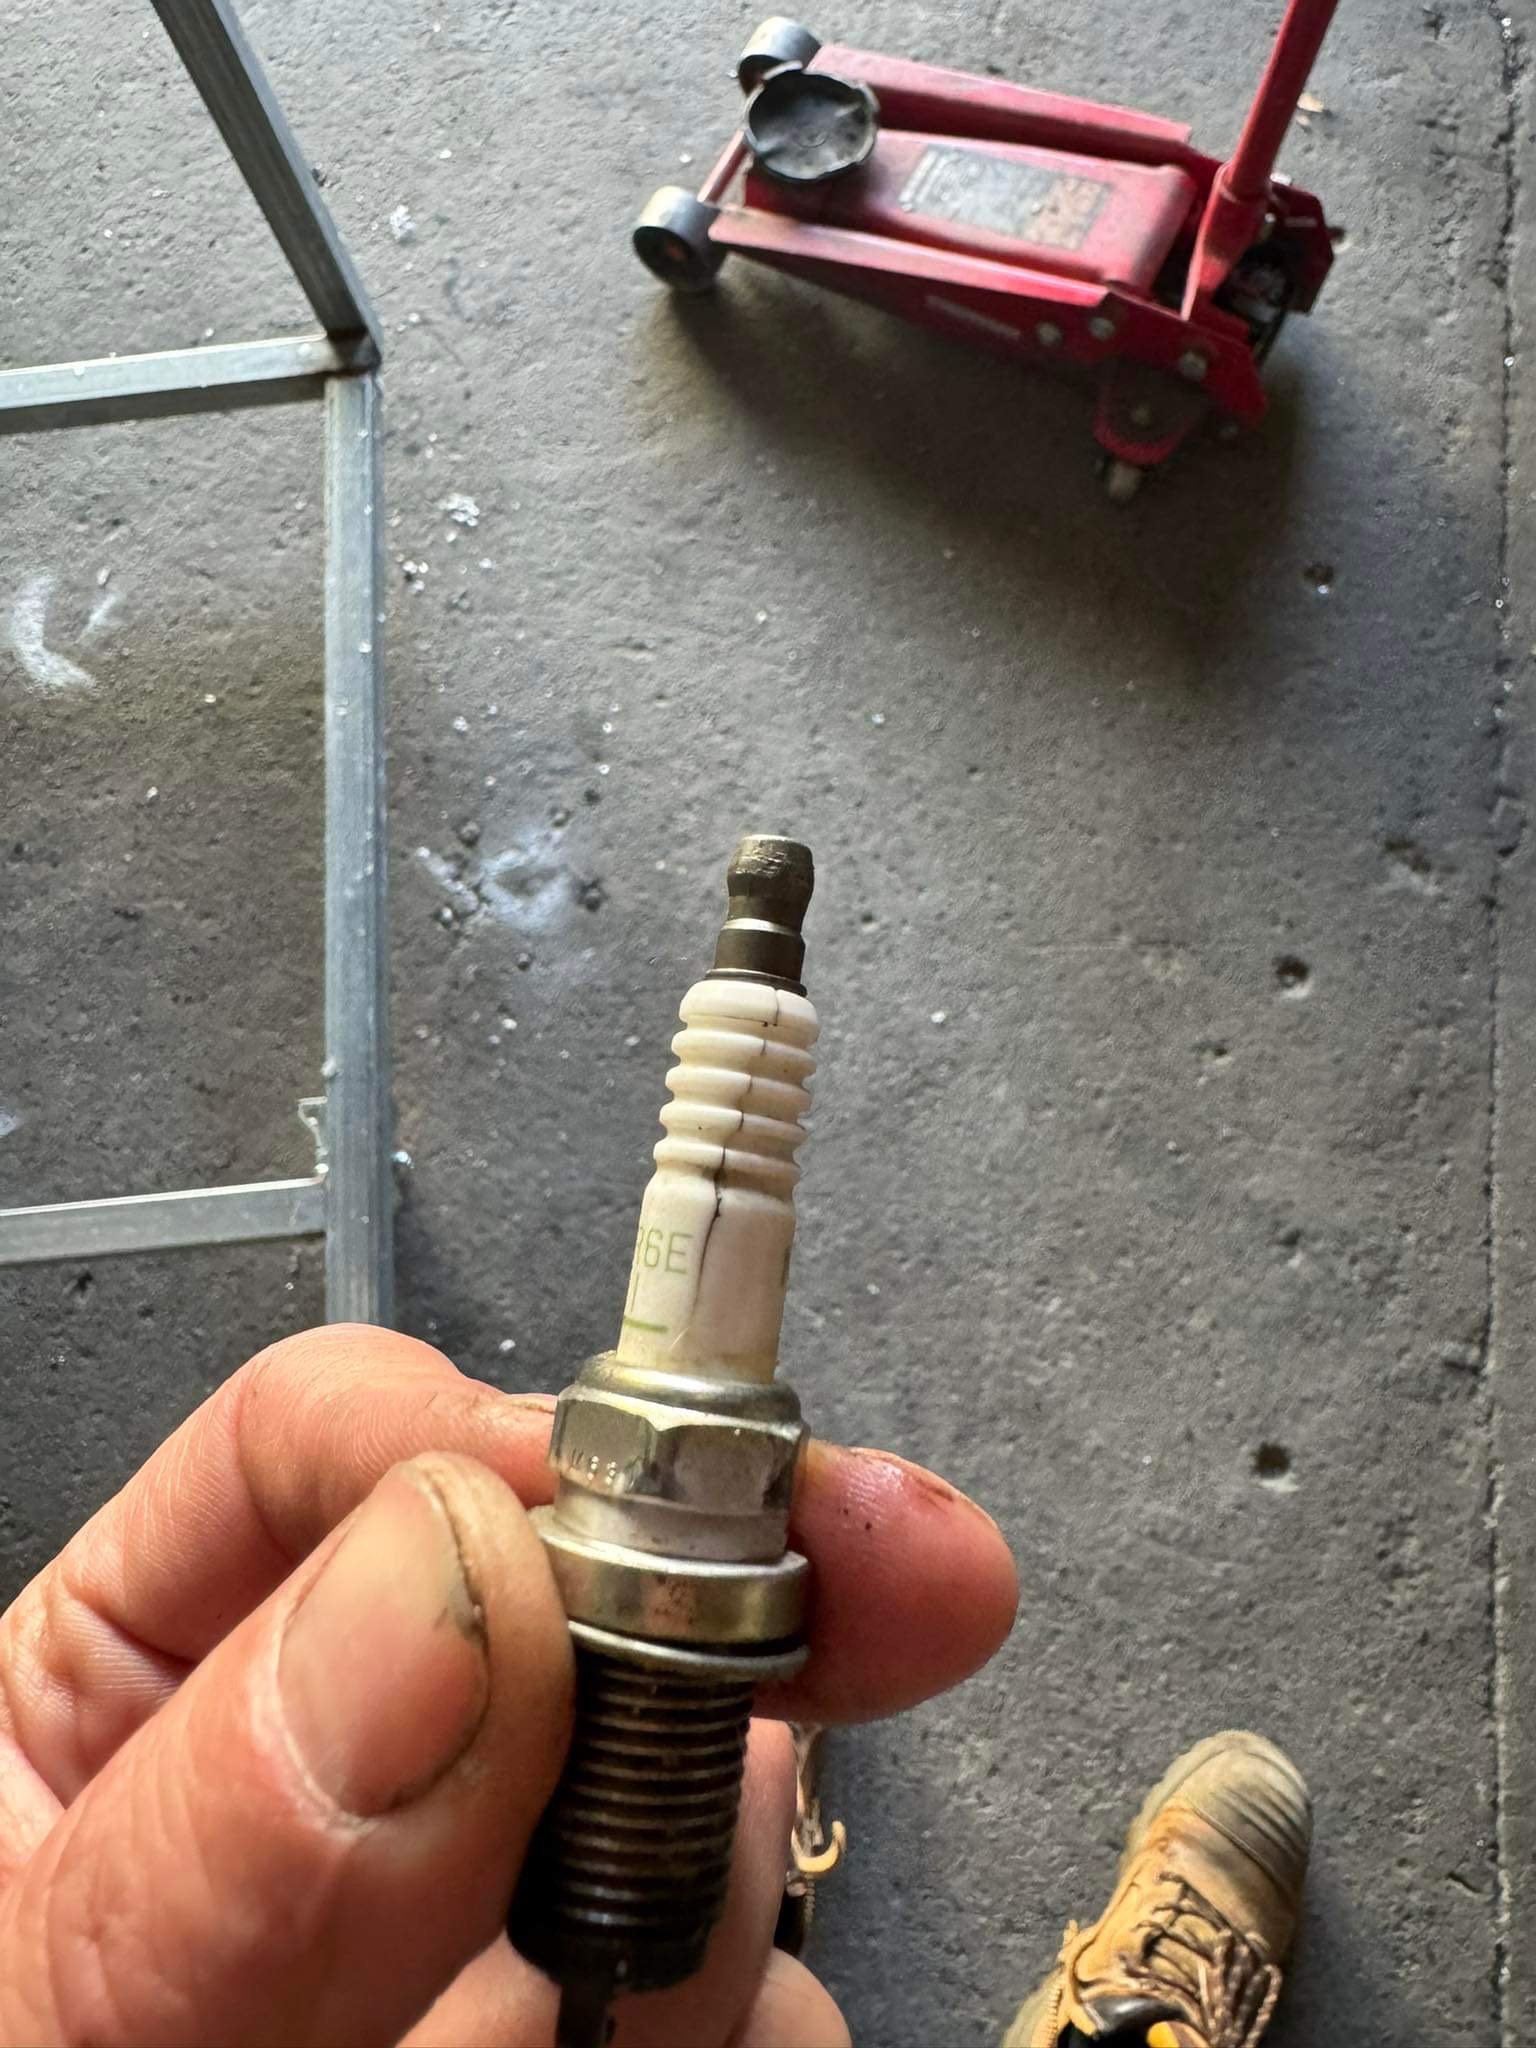
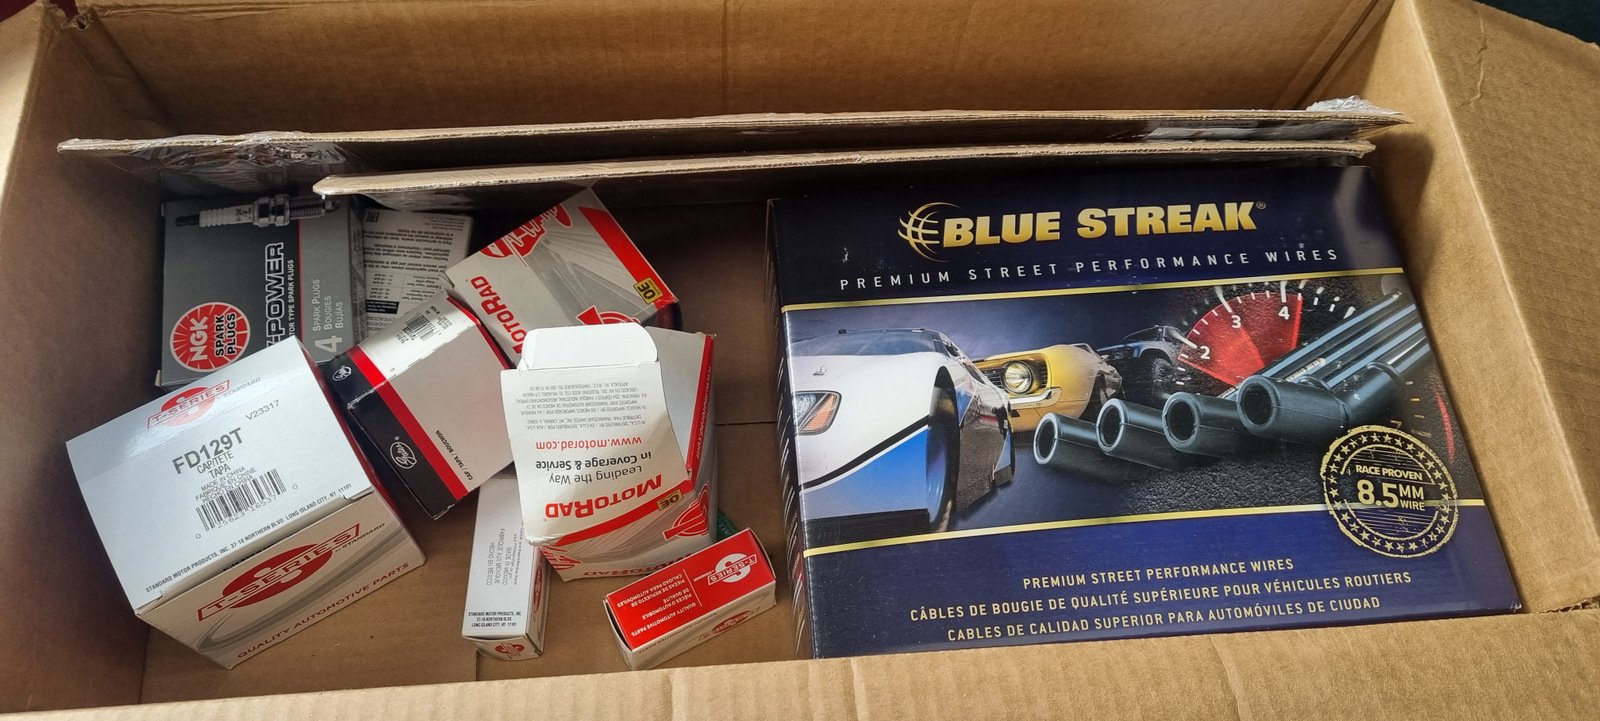
Found the misfire. This was after I took the injectors out and had them clean and flow tested, new filters and seals. $175 later in platinum plugs
8 points
-
Yeah I bought a delorian in another 10 years time. Ive had it for ages7 points
-
Nah, I think I punished him enough with non 4AGE related work already. Apparently he stays up late at night washing his hands, still trying to get the stink of 1NZ off them... For now it'll just be the factory manifolds and then try do the rest of the exhaust nicely-ish to suit end goals. Then flanges to suit putting some nicer manifolds on as things progress.5 points
-
Well that escalated quickly. Figured may as well go ham on this /learn how to do some concentric twisting etc. Got some lengths of dr25 and a bunch of different size pins to suit bulkhead connectors. Have some cable on the way too. Should keep me busy for winter4 points
-
Awesome work dude. Looking forward to the stage when you can zing the throttle and see how good the dort is.4 points
-
It's taken longer than I hoped to get to this point, but damn it sure felt good to hear it fire up. Even though all it can do at the moment is idle (poorly) at 2000+ rpm haha.4 points
-
Was each side of the floorpan designed by people in different rooms who refused to talk to each other? The raised sections of floor are not visible inside, there is a second 'floor' that the seat bolts to. Those are pretty much identical. WHY the different shapes?! Is the floorpan also used in the Stag? Is there something there in the Stag?
4 points
-
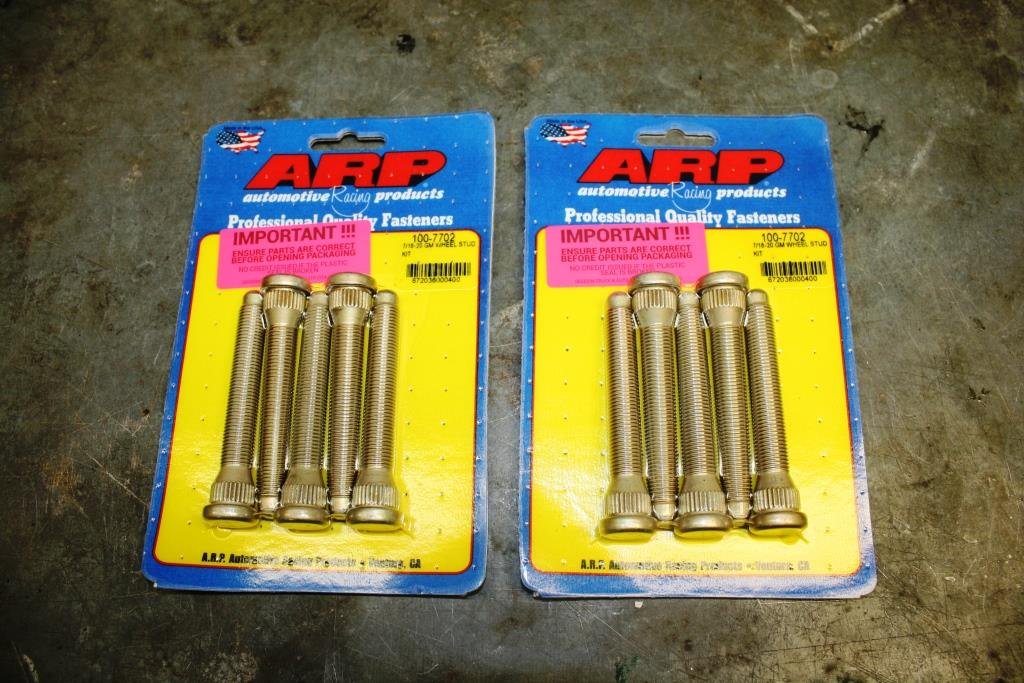
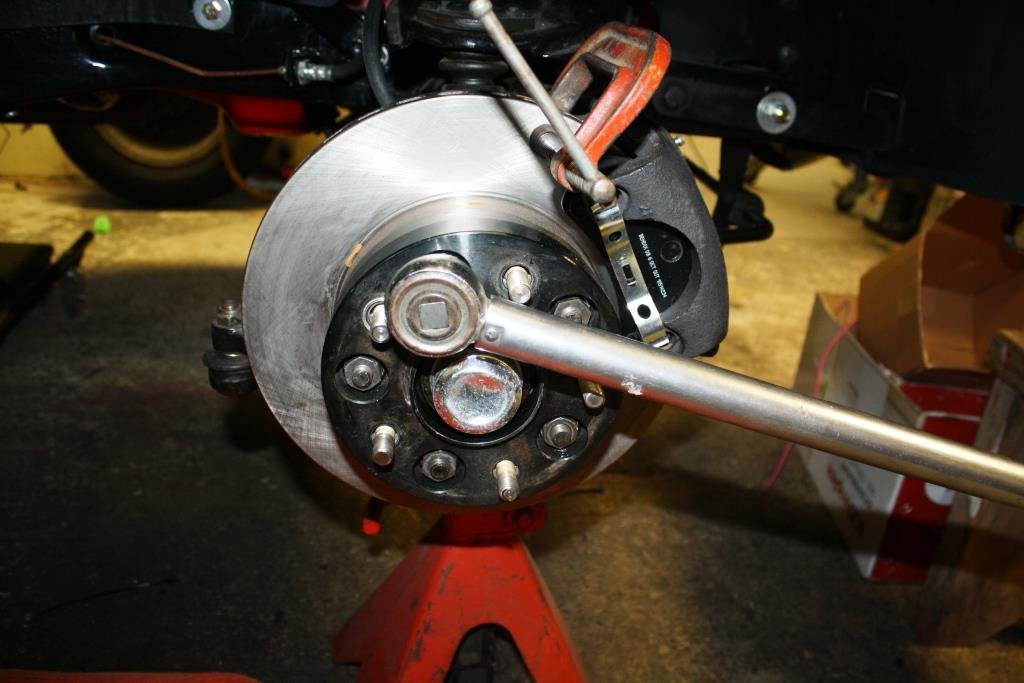
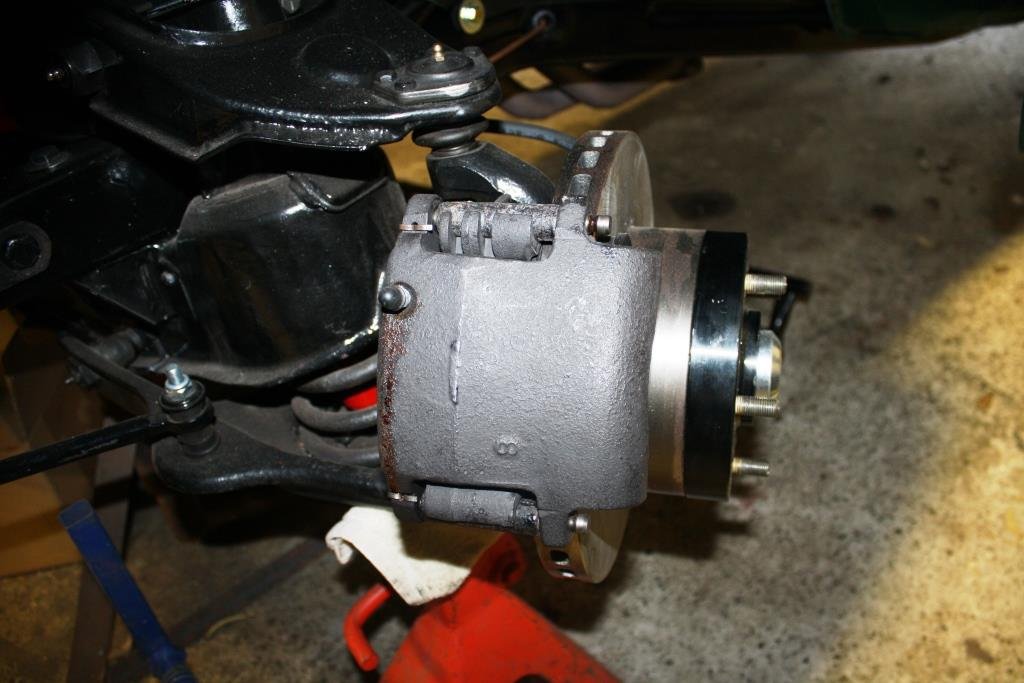
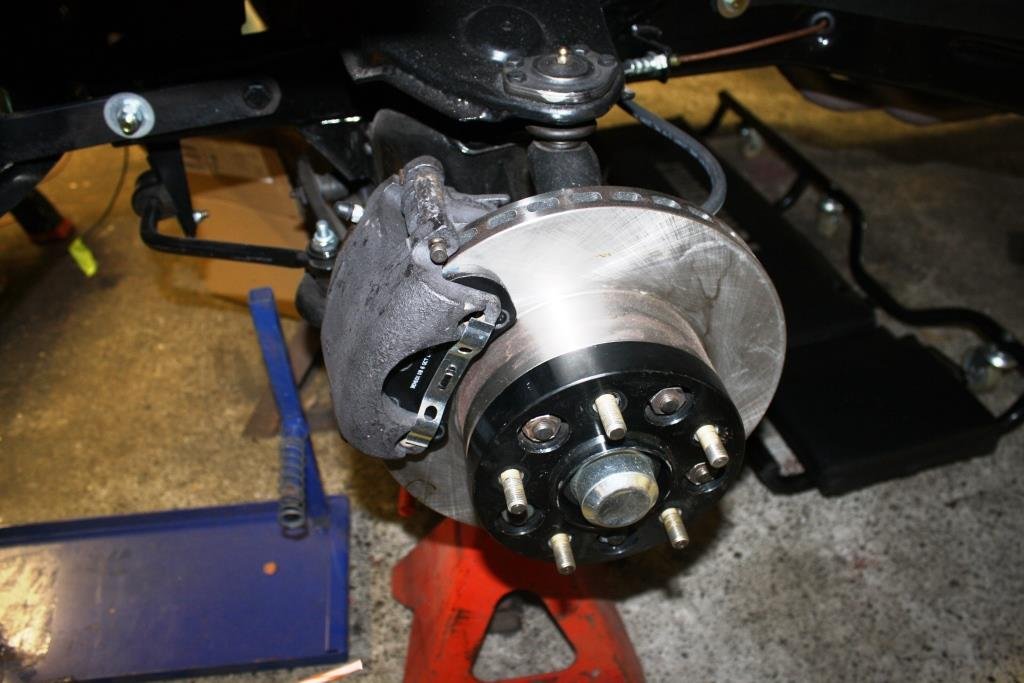
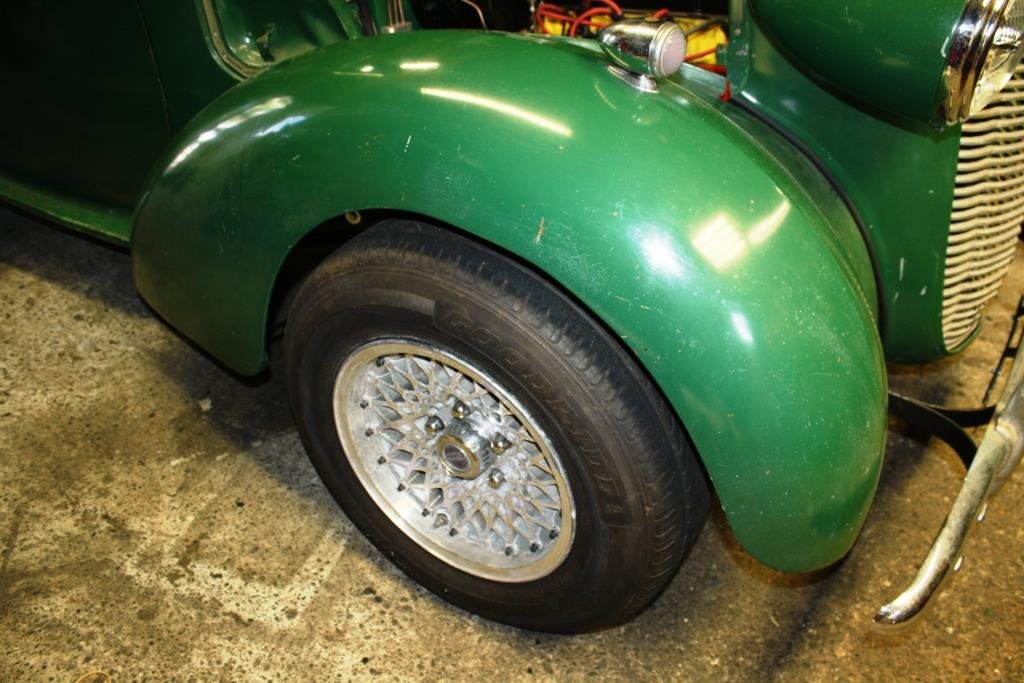
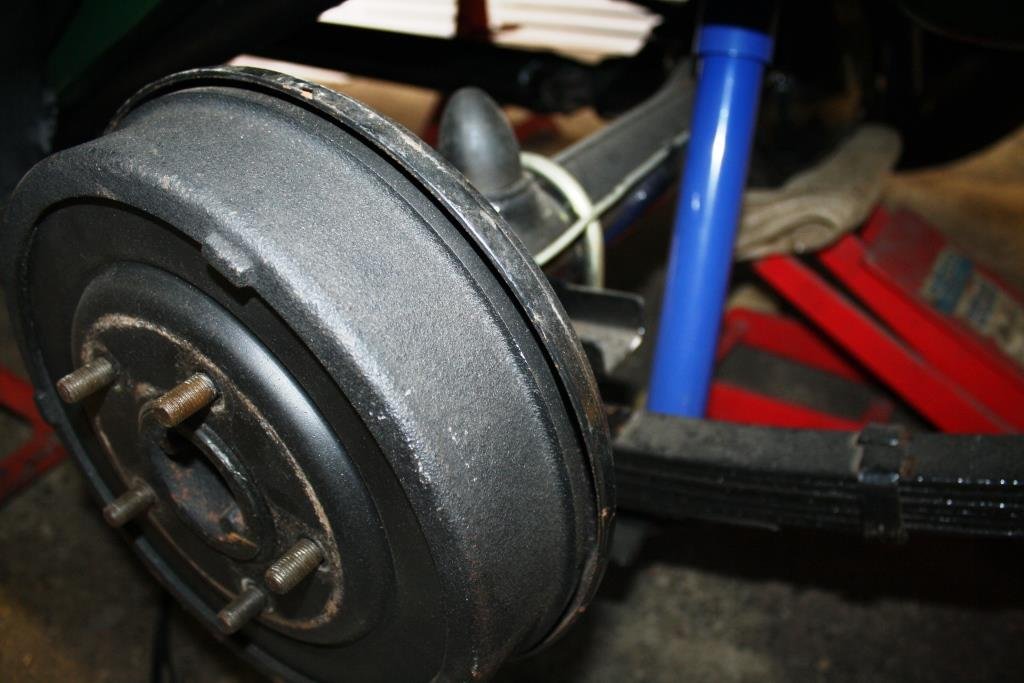
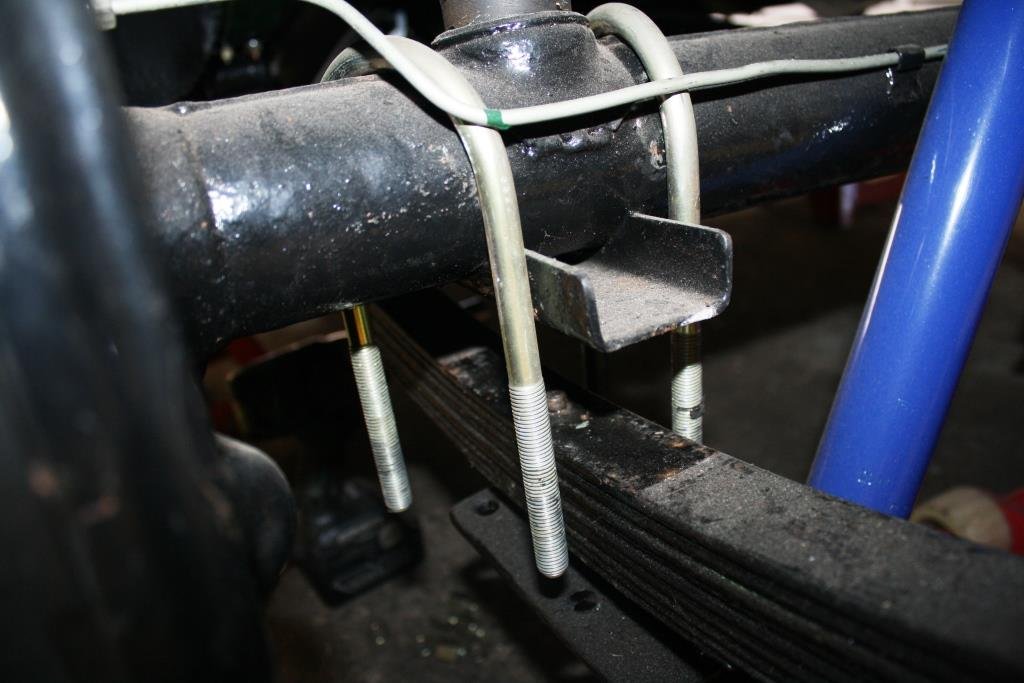
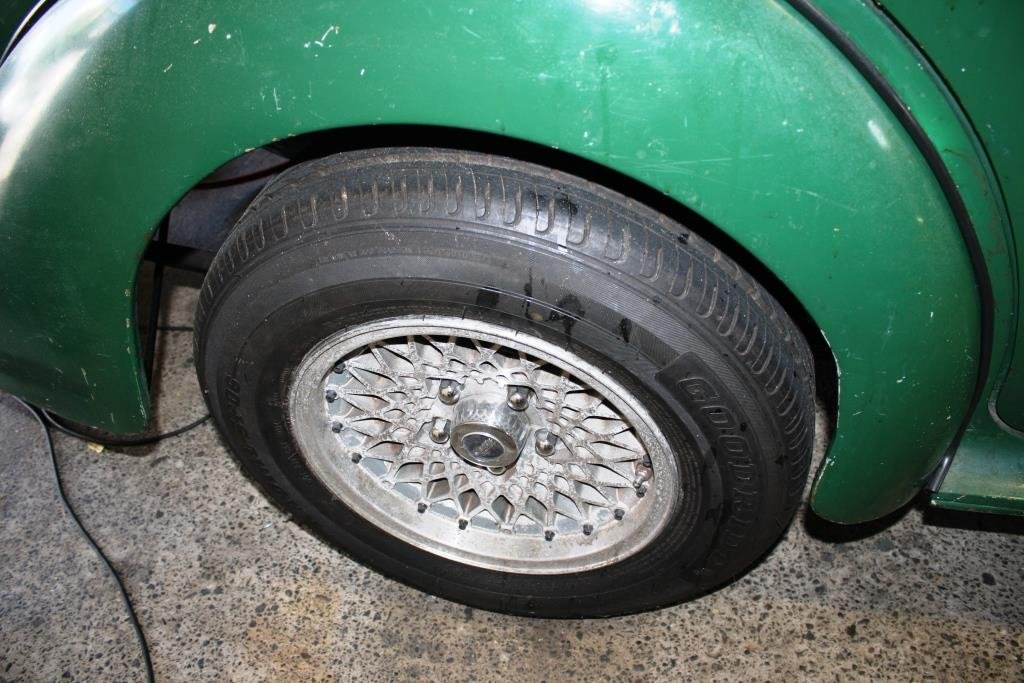
One of Rigamortice’s dirty little secrets was a set of these little shockers hidden behind the front wheels! I found a pair of proper hub-centric spacers on Trademe for a very reasonable price. I then upgraded to some ARP studs at a very unreasonable price. (Talk about charging like a friggin wounded bull!). All torqued up with a snug fit on the hub and wheel. Finally got the front ride height and wheel track just where I want it. Decided the rear needed a tweak, so I backed off the rear U bolts…. …and figured out how much I could safely lower the rear. I ended up using solid bar for the spacers I’m expecting the rear springs to settle with a little use….. Have to say I’m finally happy with the old girls stance.
4 points
-
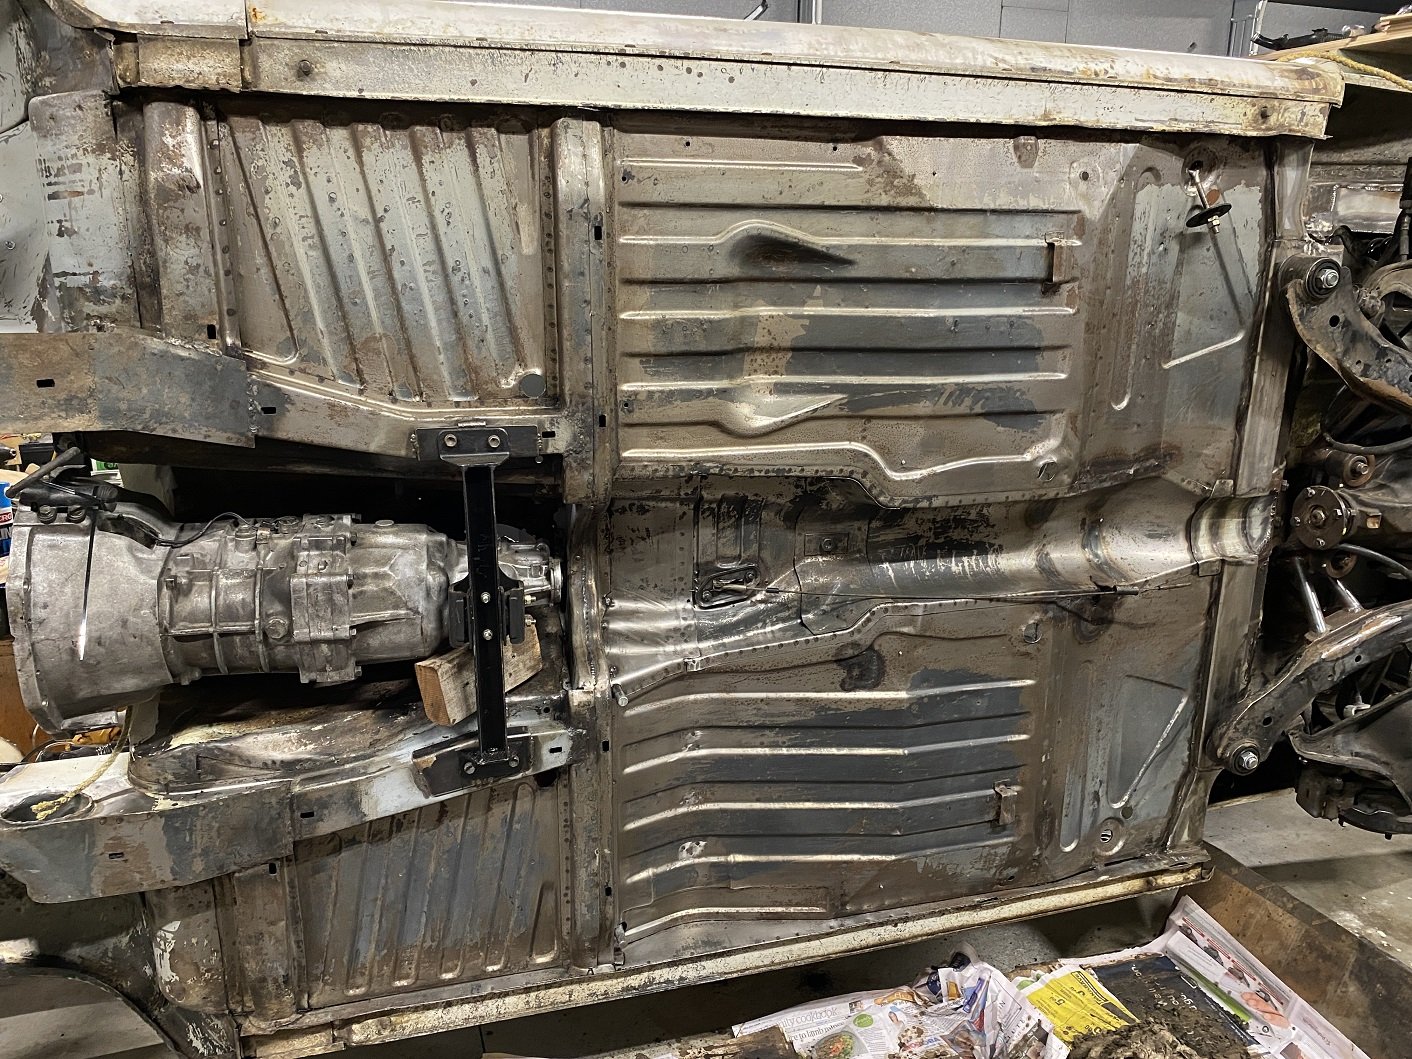
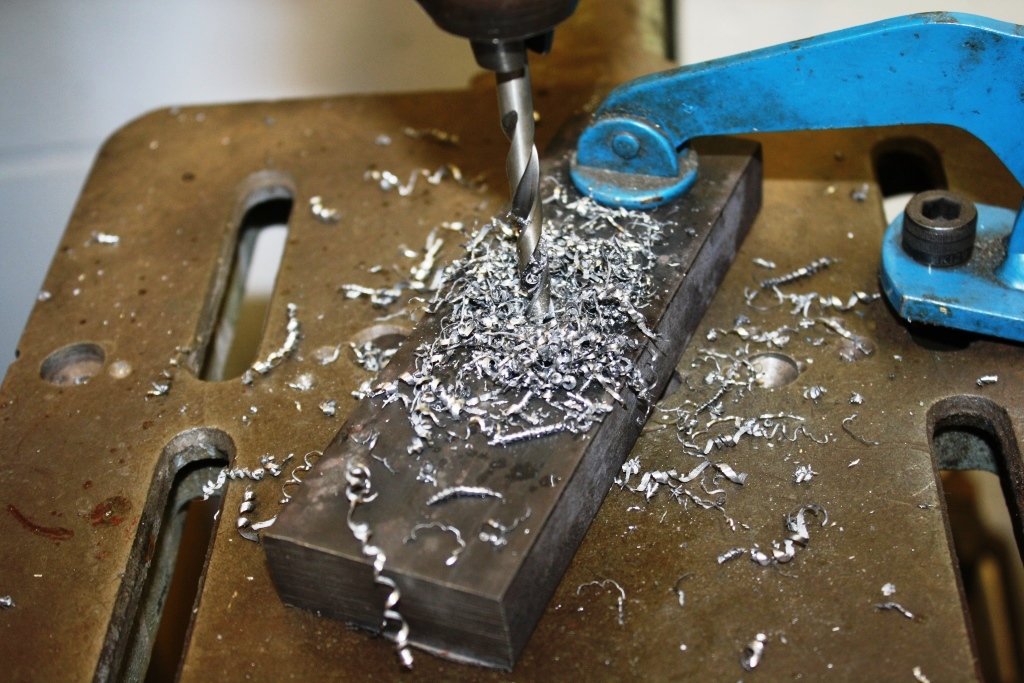
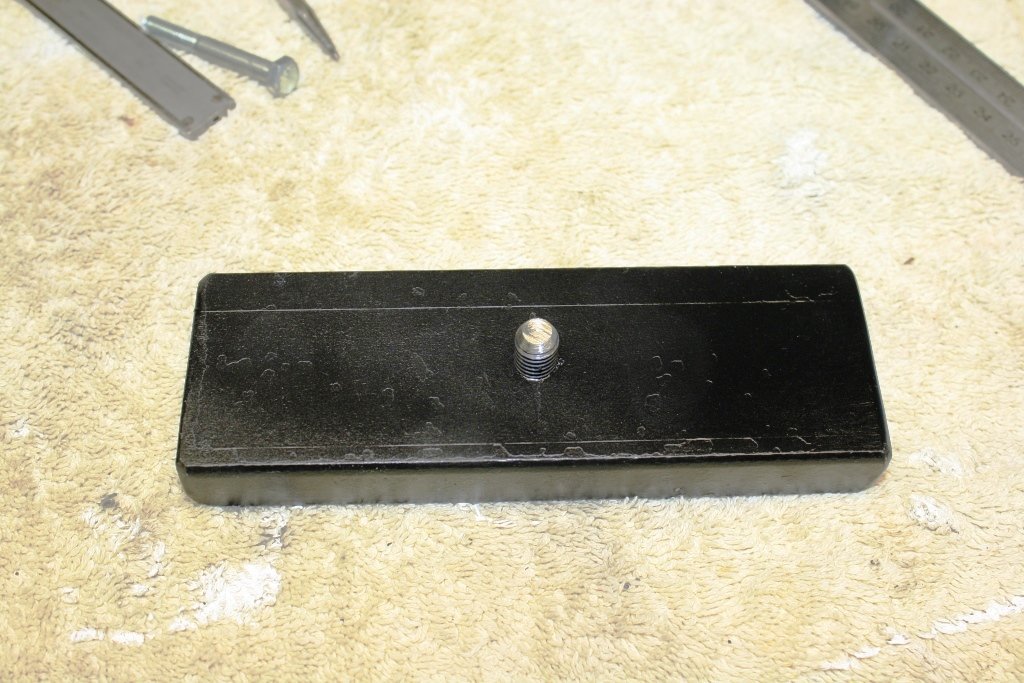
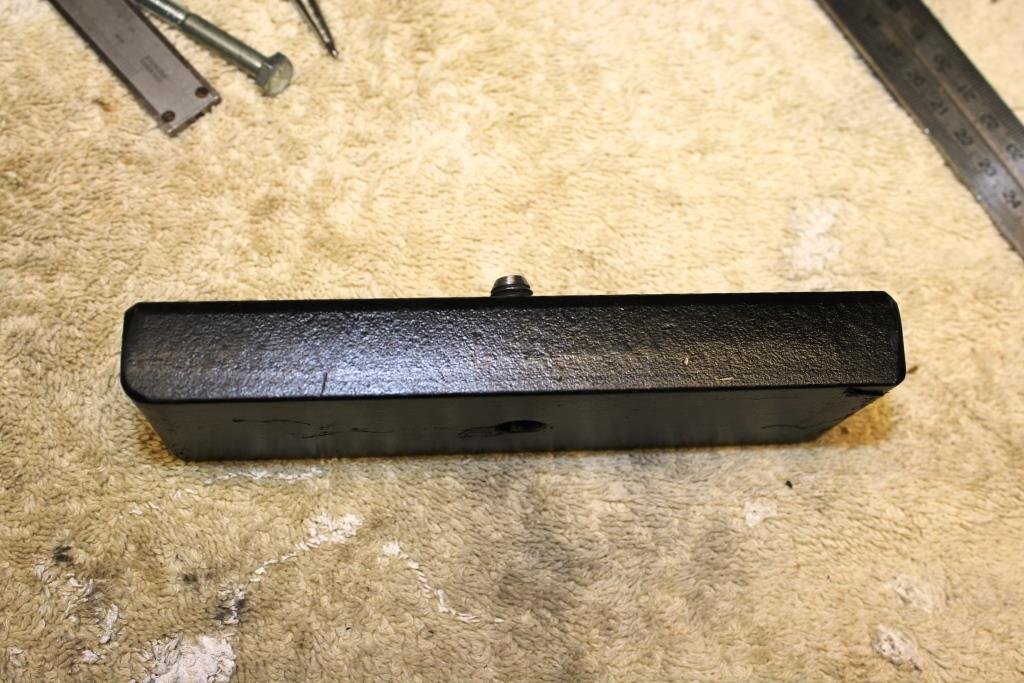
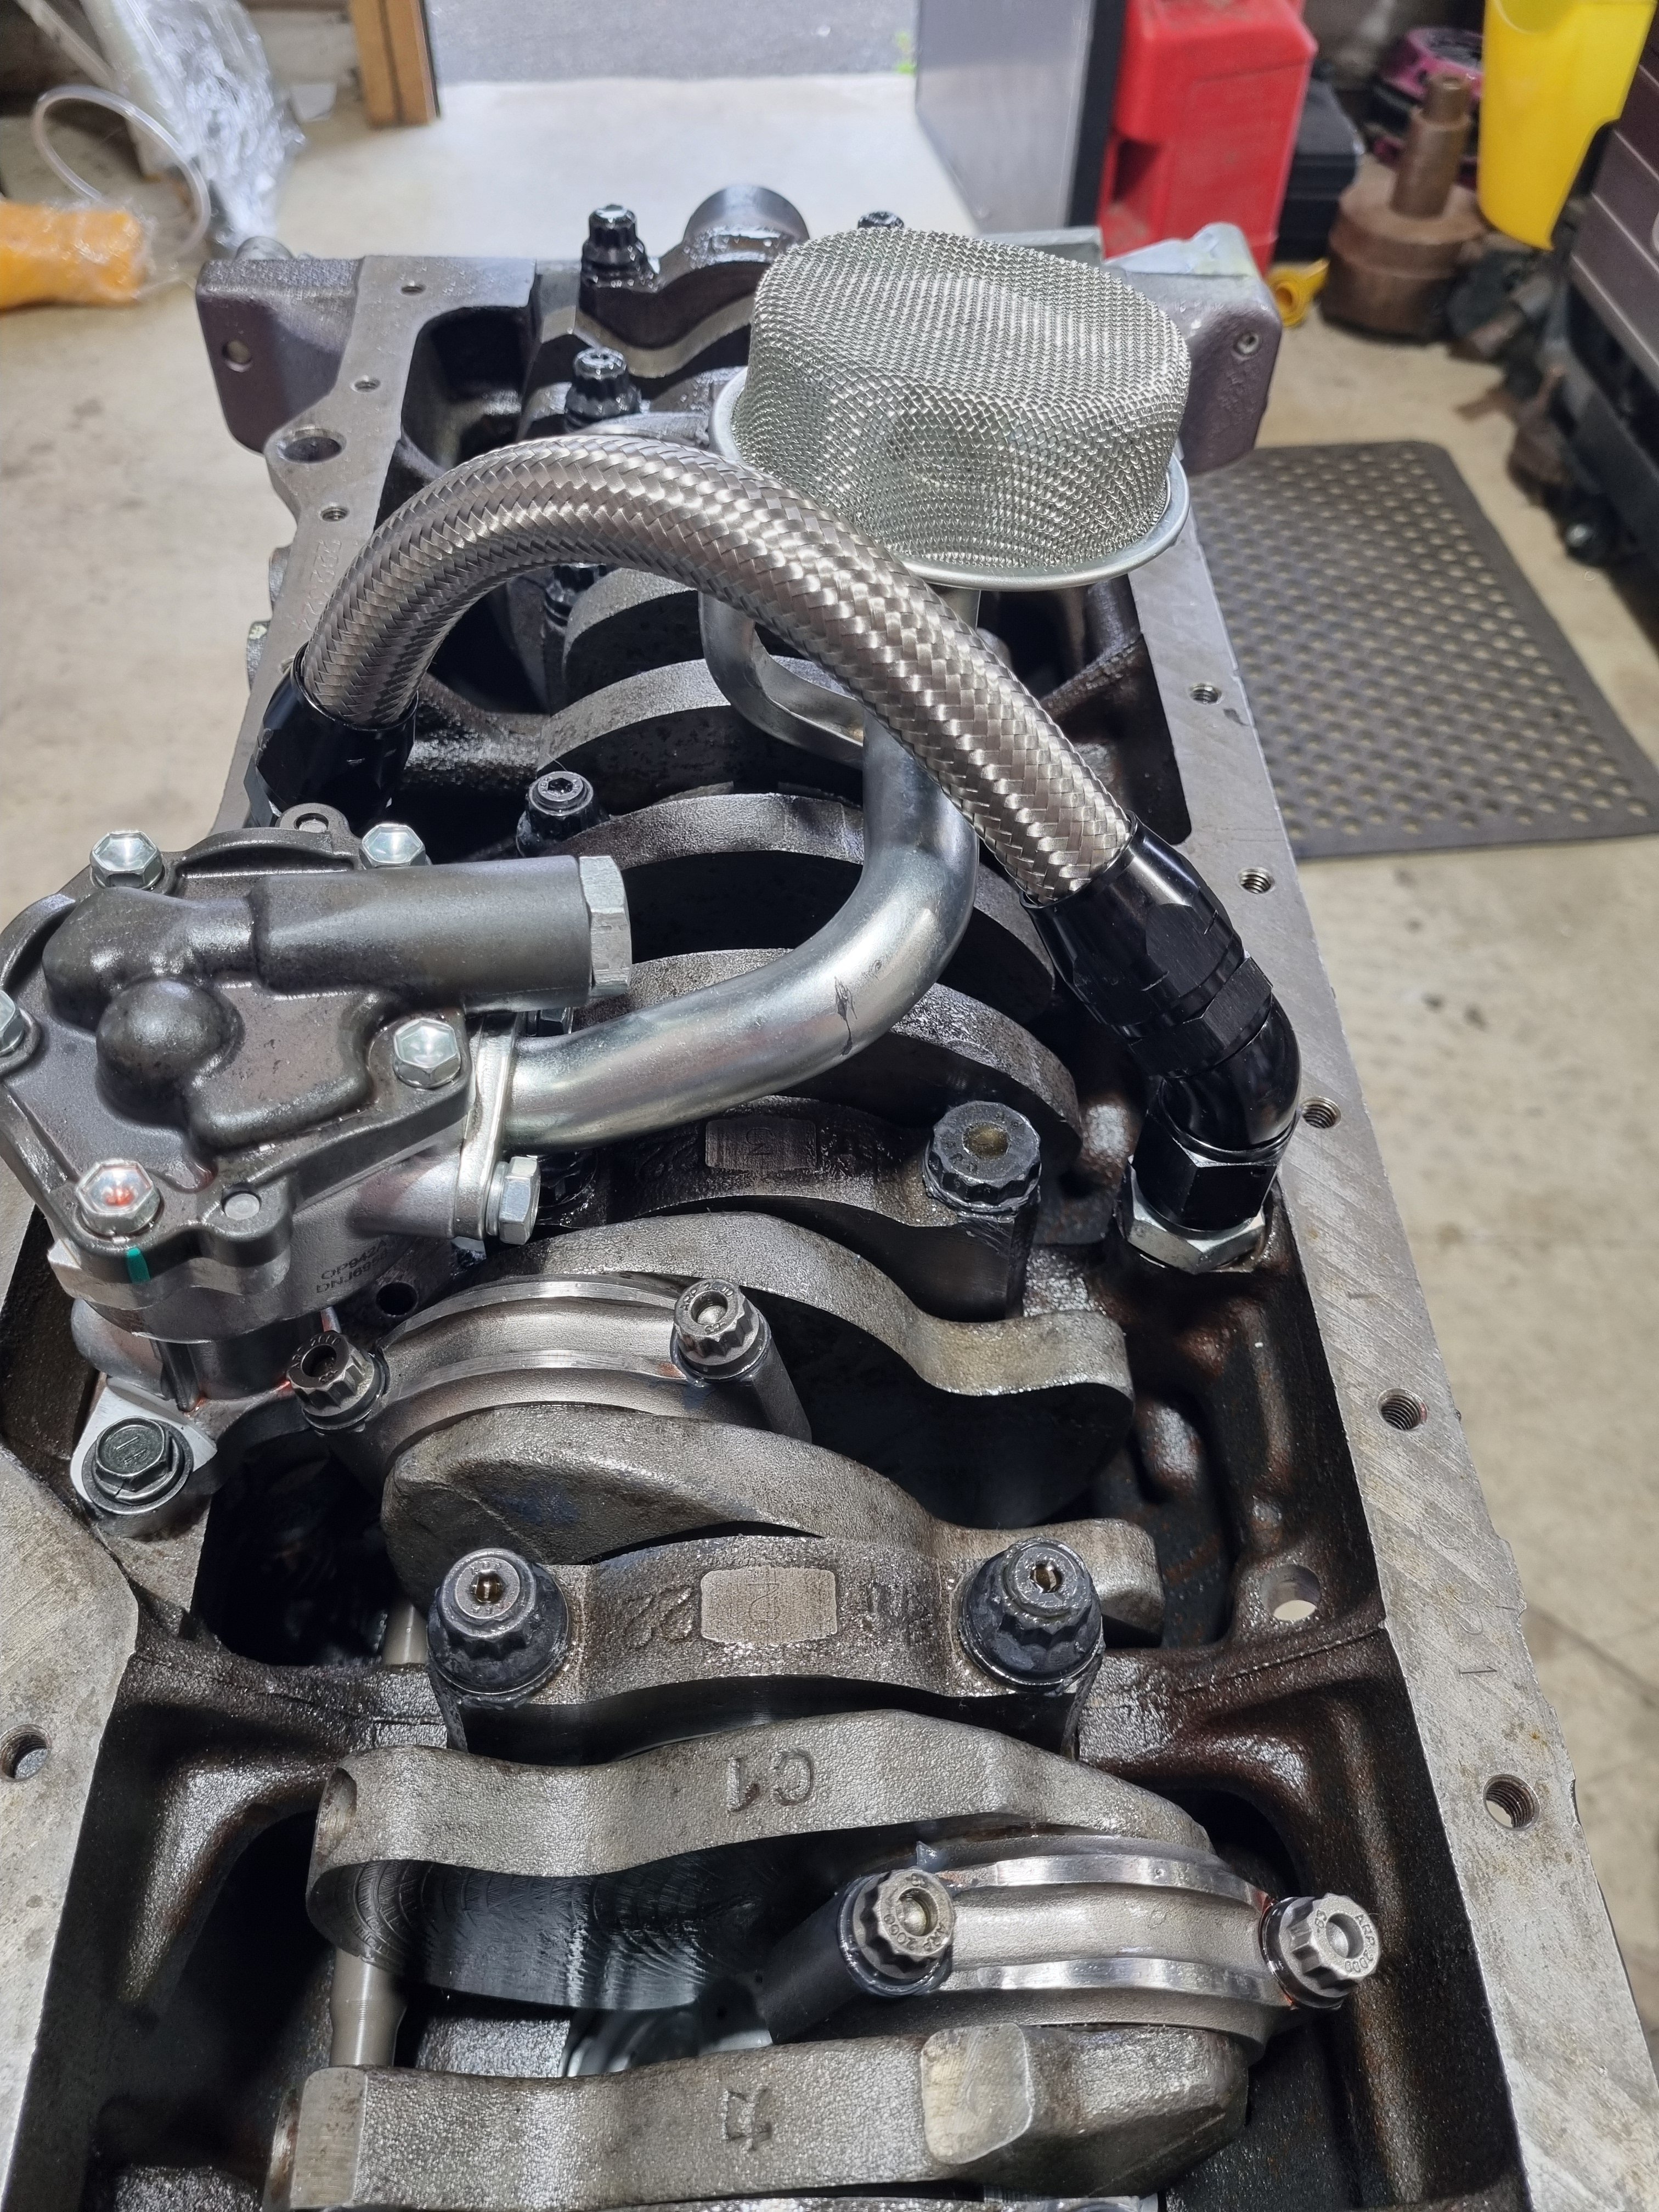
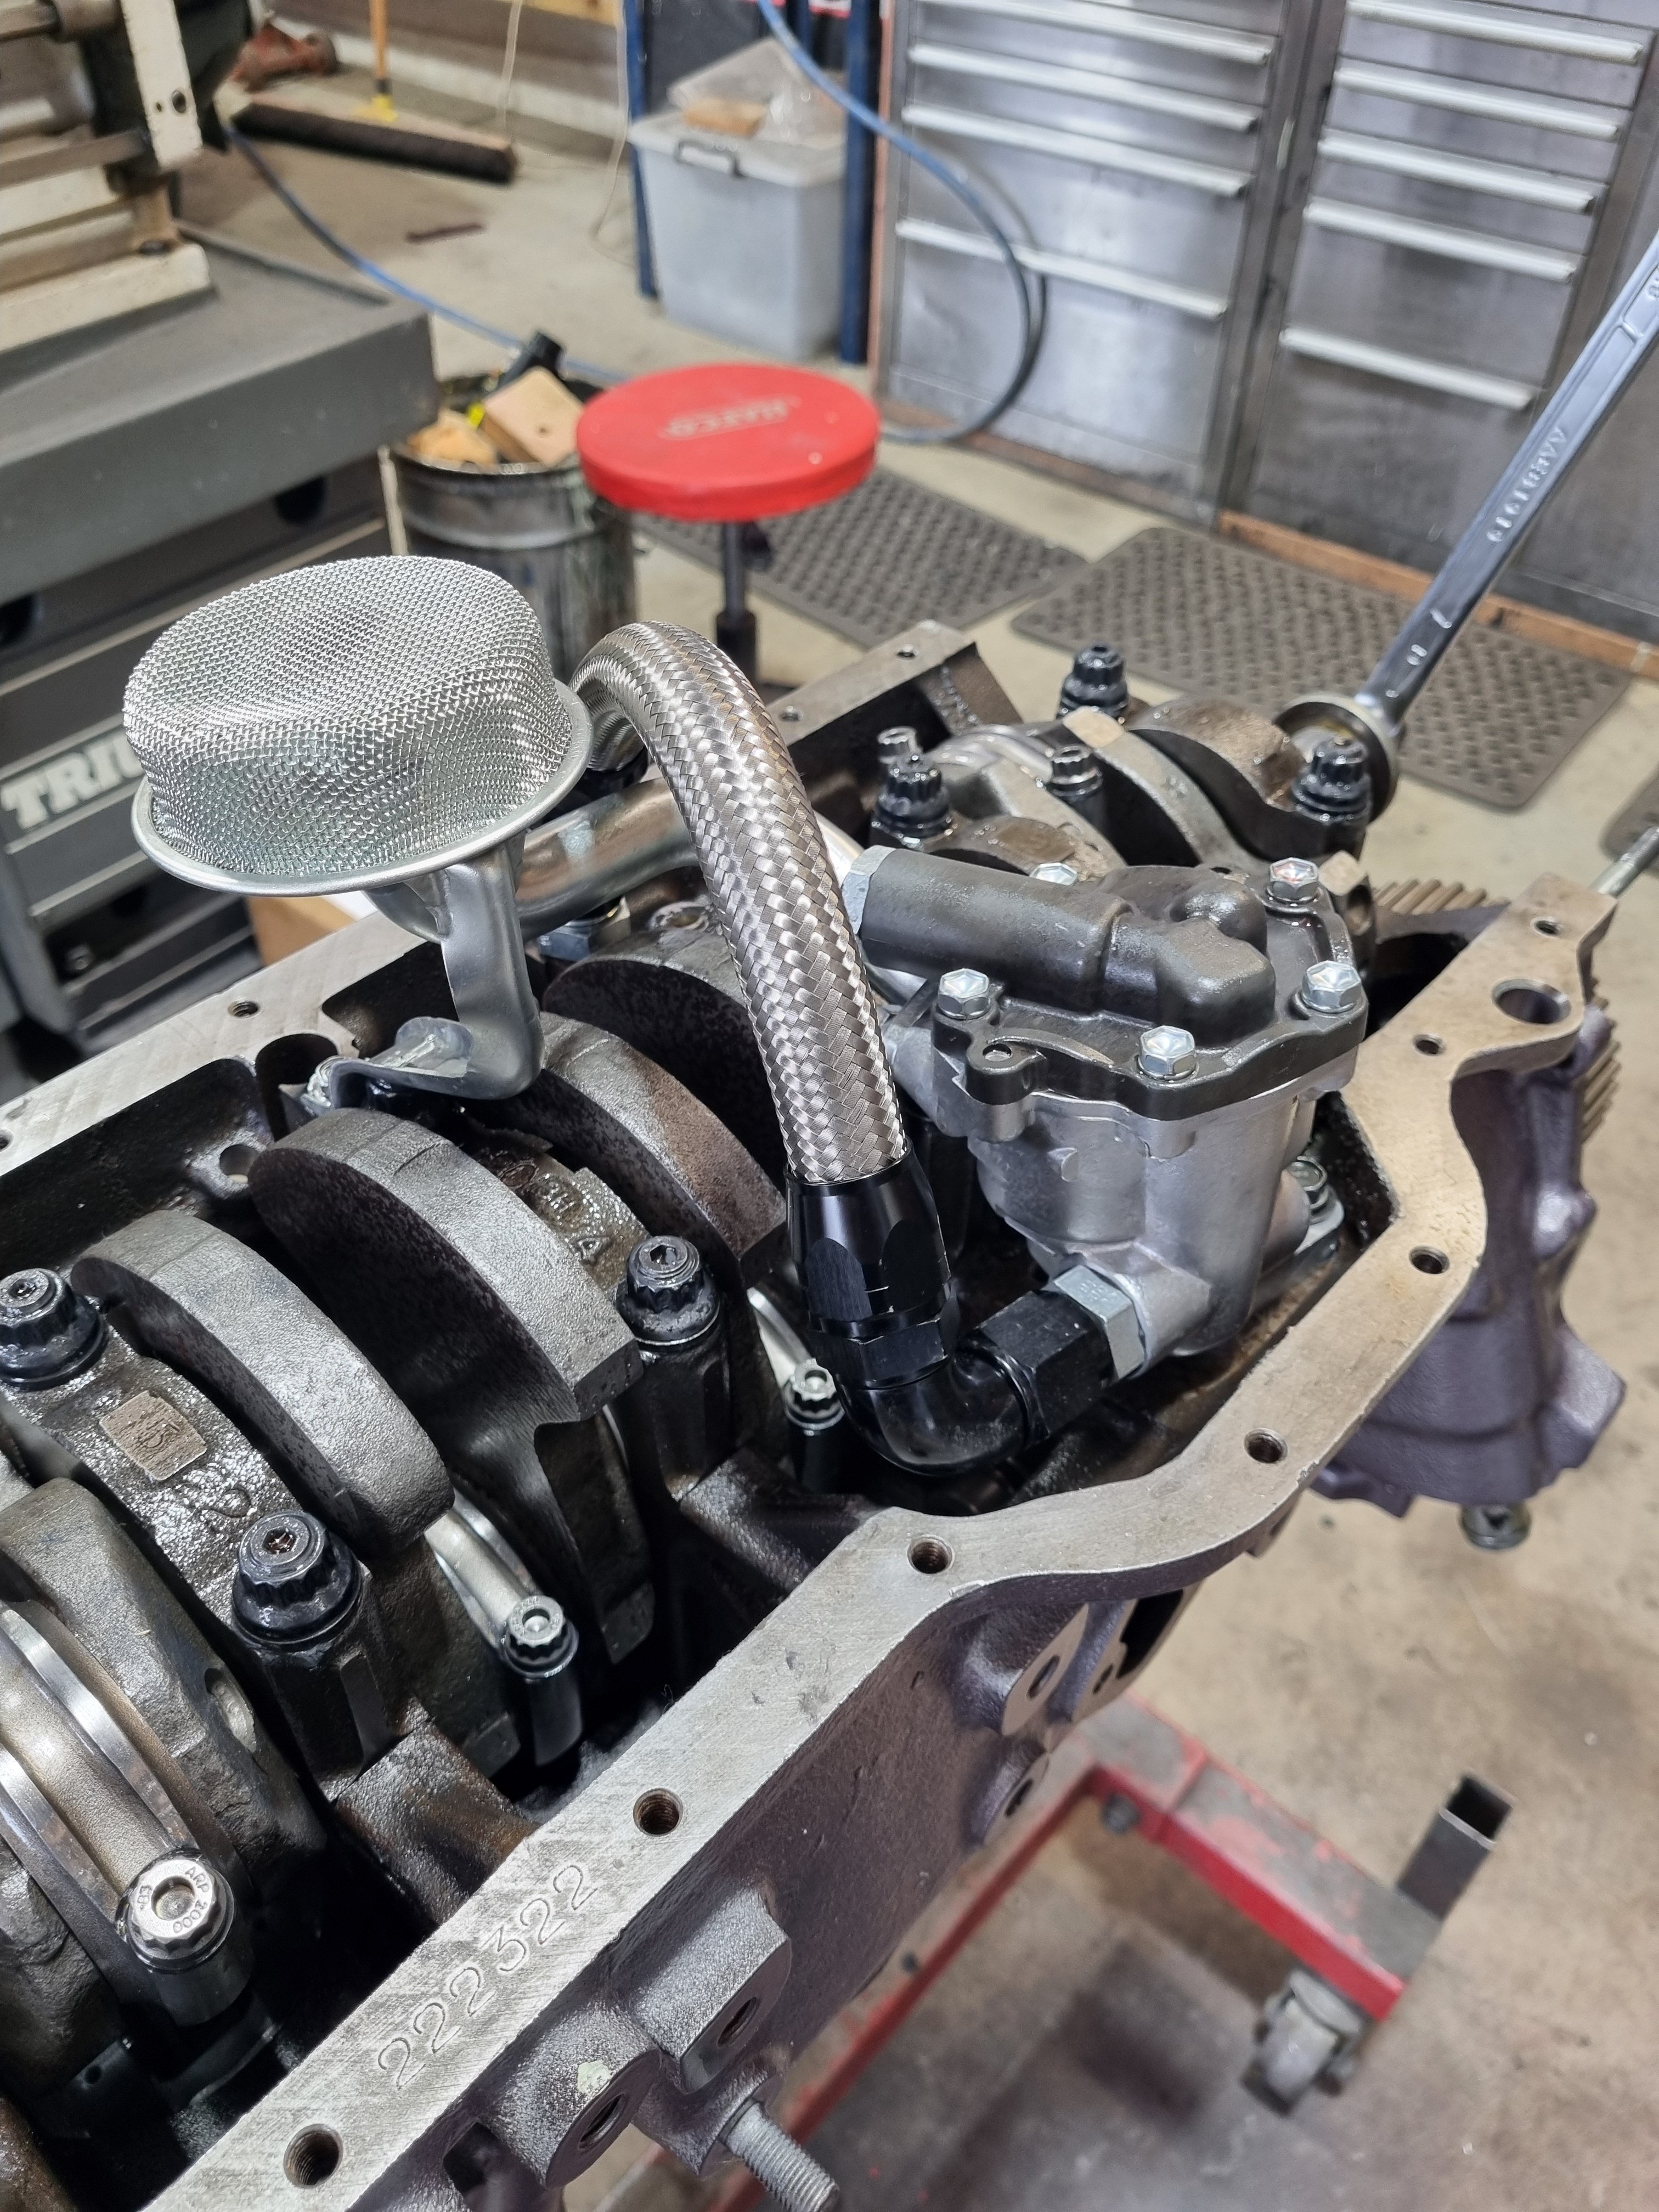
Final oil pump and pickup setup. Slotted pump hole to rotate the pump a bit. Dash 10 crossover pipe with a bit taken out of the block to clear the pipe. 7M oil pump pickup raised 8mm to clear the shallower sump and relocated pickup brace.
4 points
-
Ref the different floorpans….. IIRC the really early MK1s had a transverse exhaust box tucked into that space (some Dolomite variants did too). That arrangement was dropped quite early on for the more familiar crazy afterthought hodge-podge, but seems they never changed the floor pan pressing….3 points
-
if you paid yourself a dollar an hour for all the multitudes of fucking around you've done you could afford to just buy a radiator that fits perfectly and does exactly what you want it to do.2 points
-
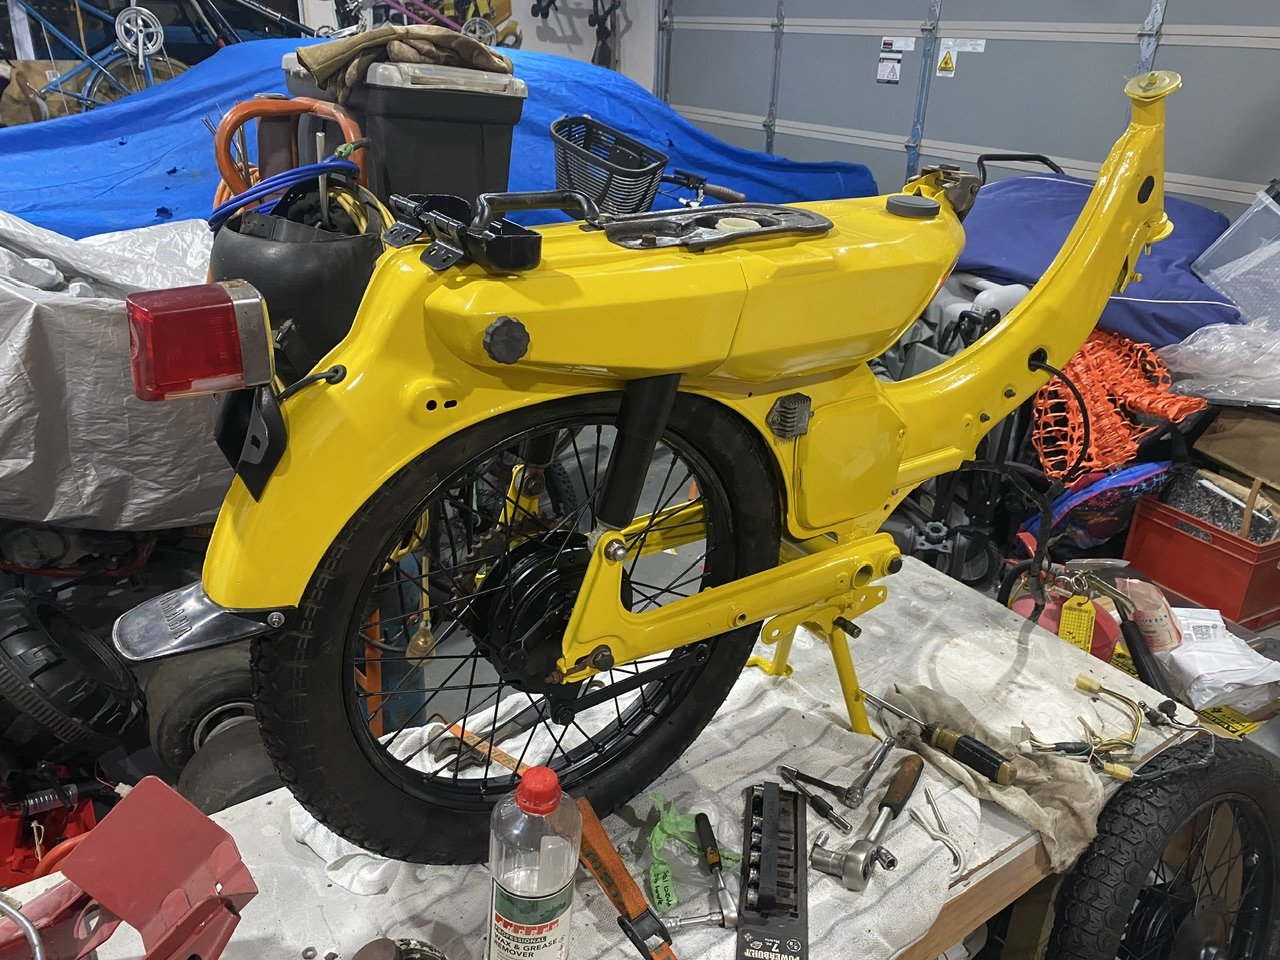
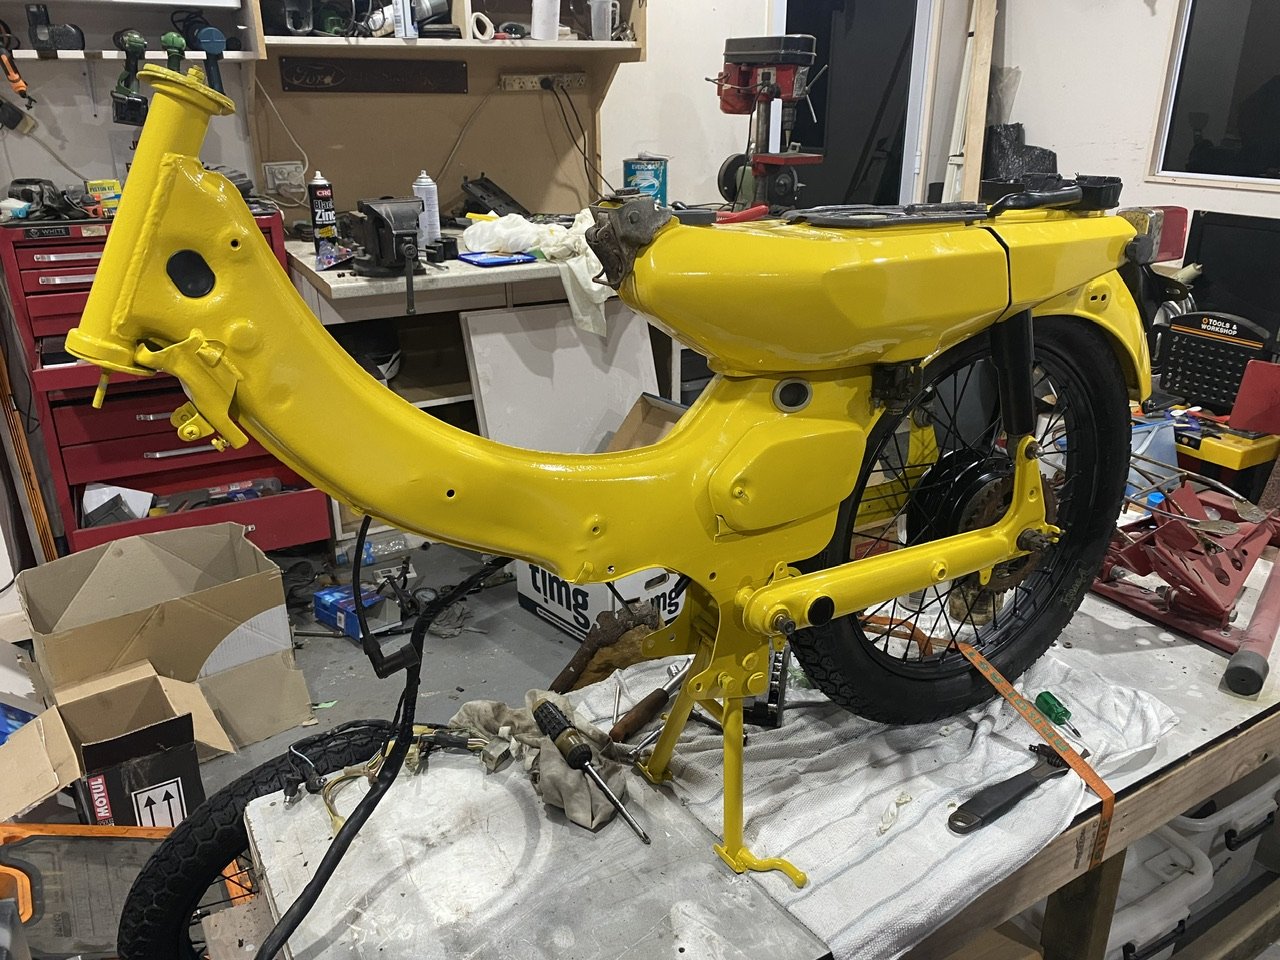
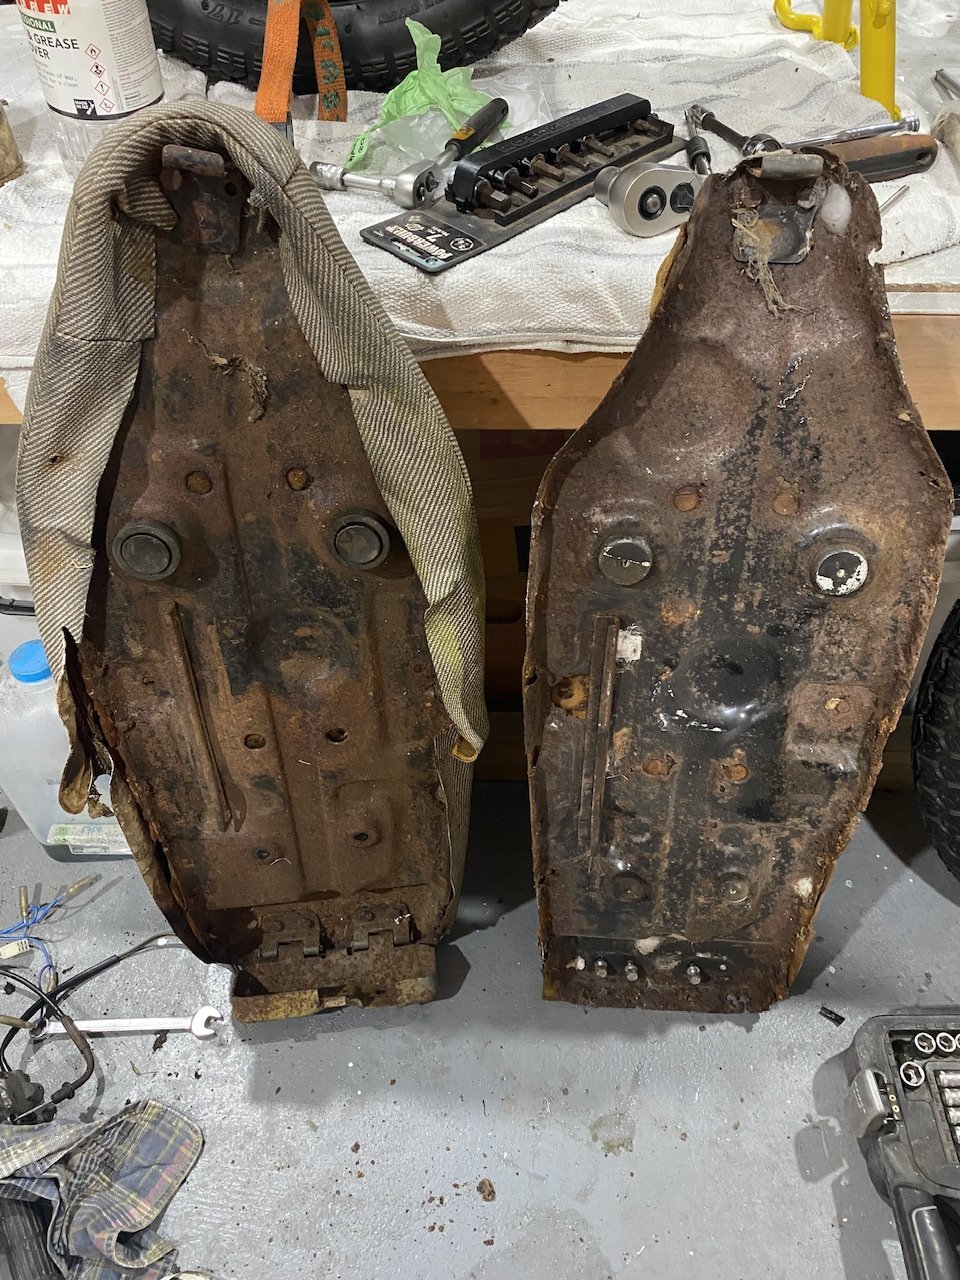
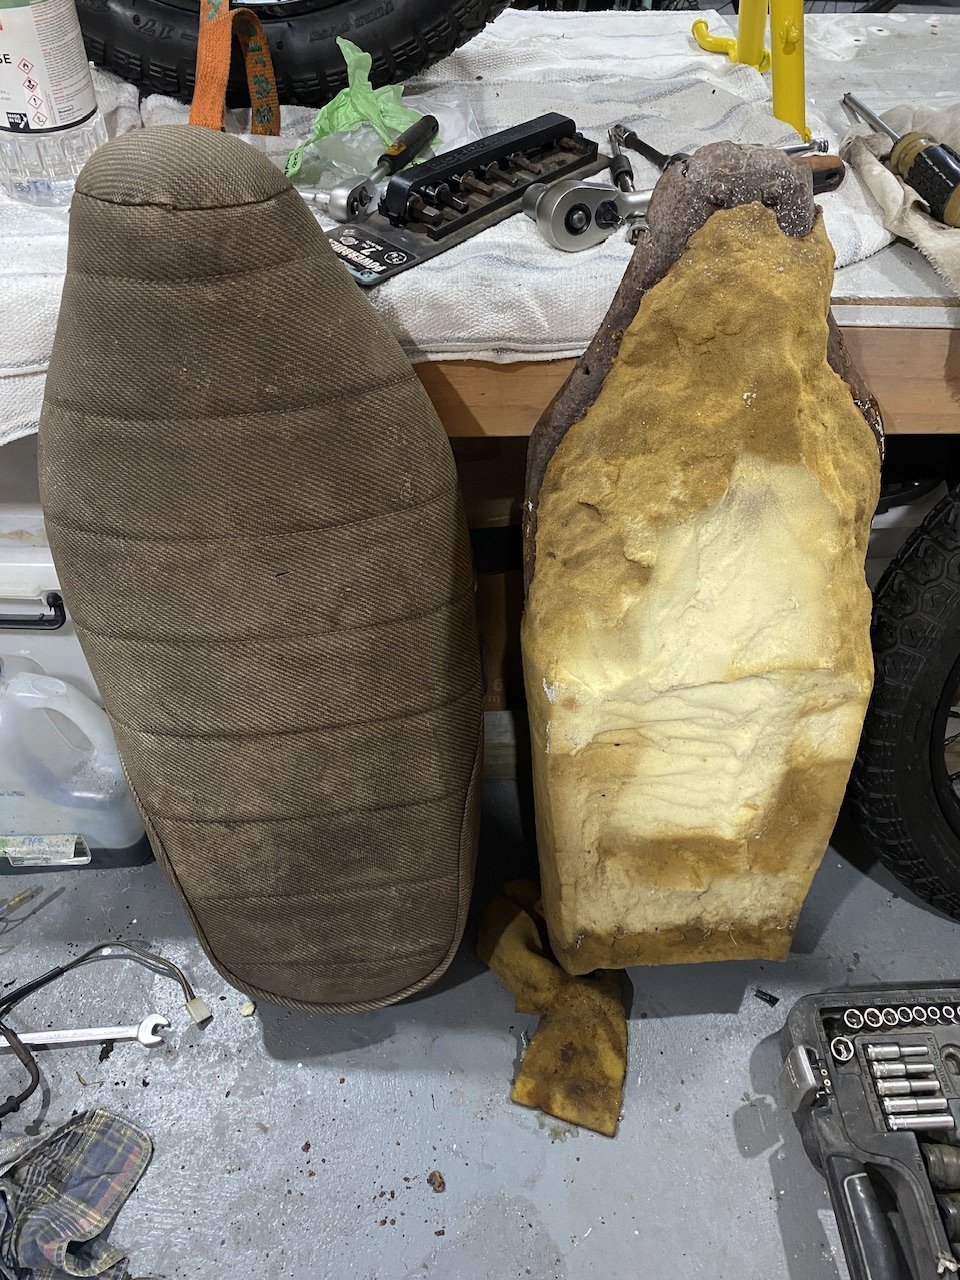
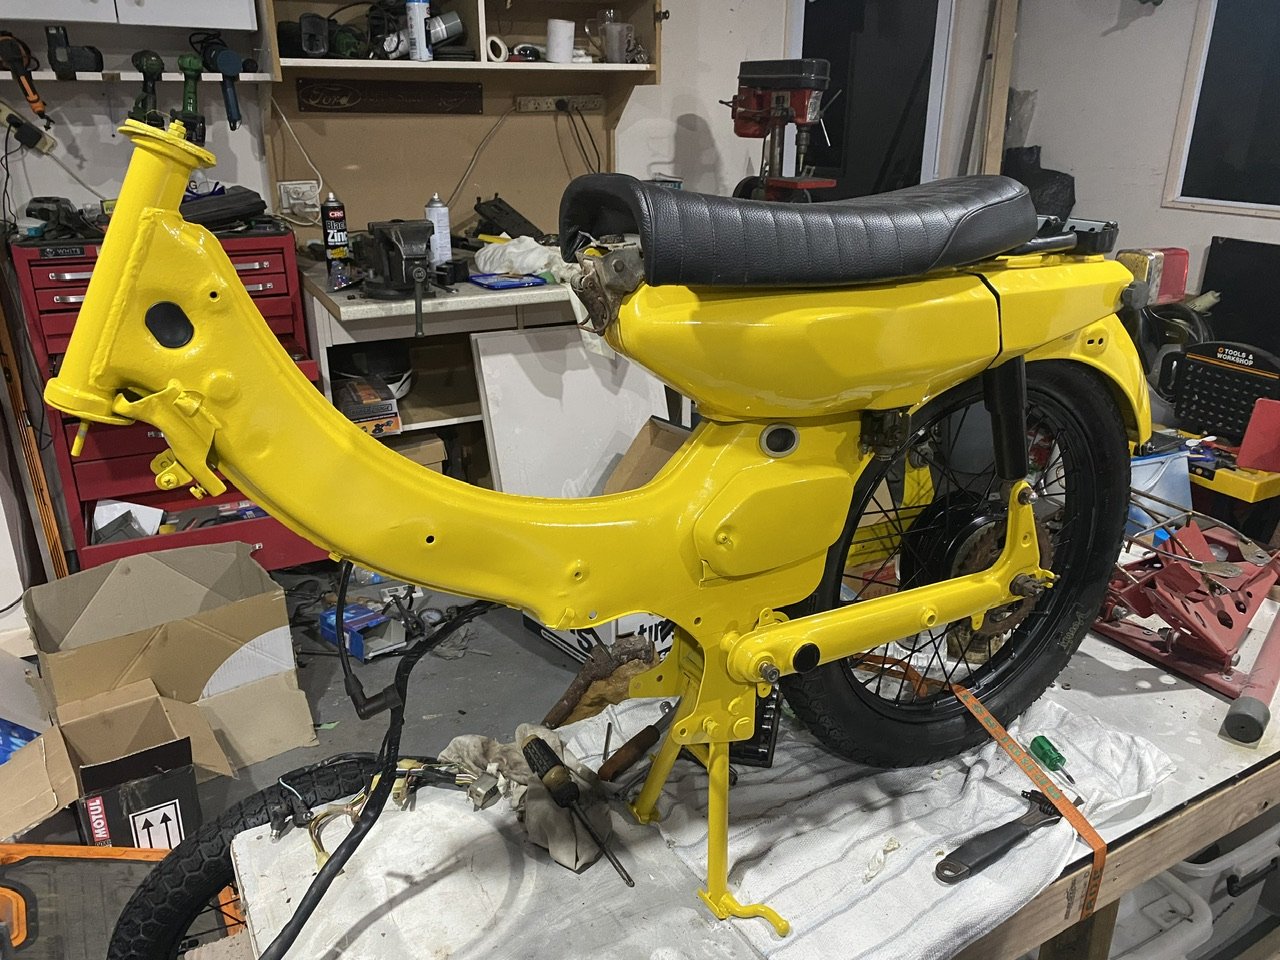
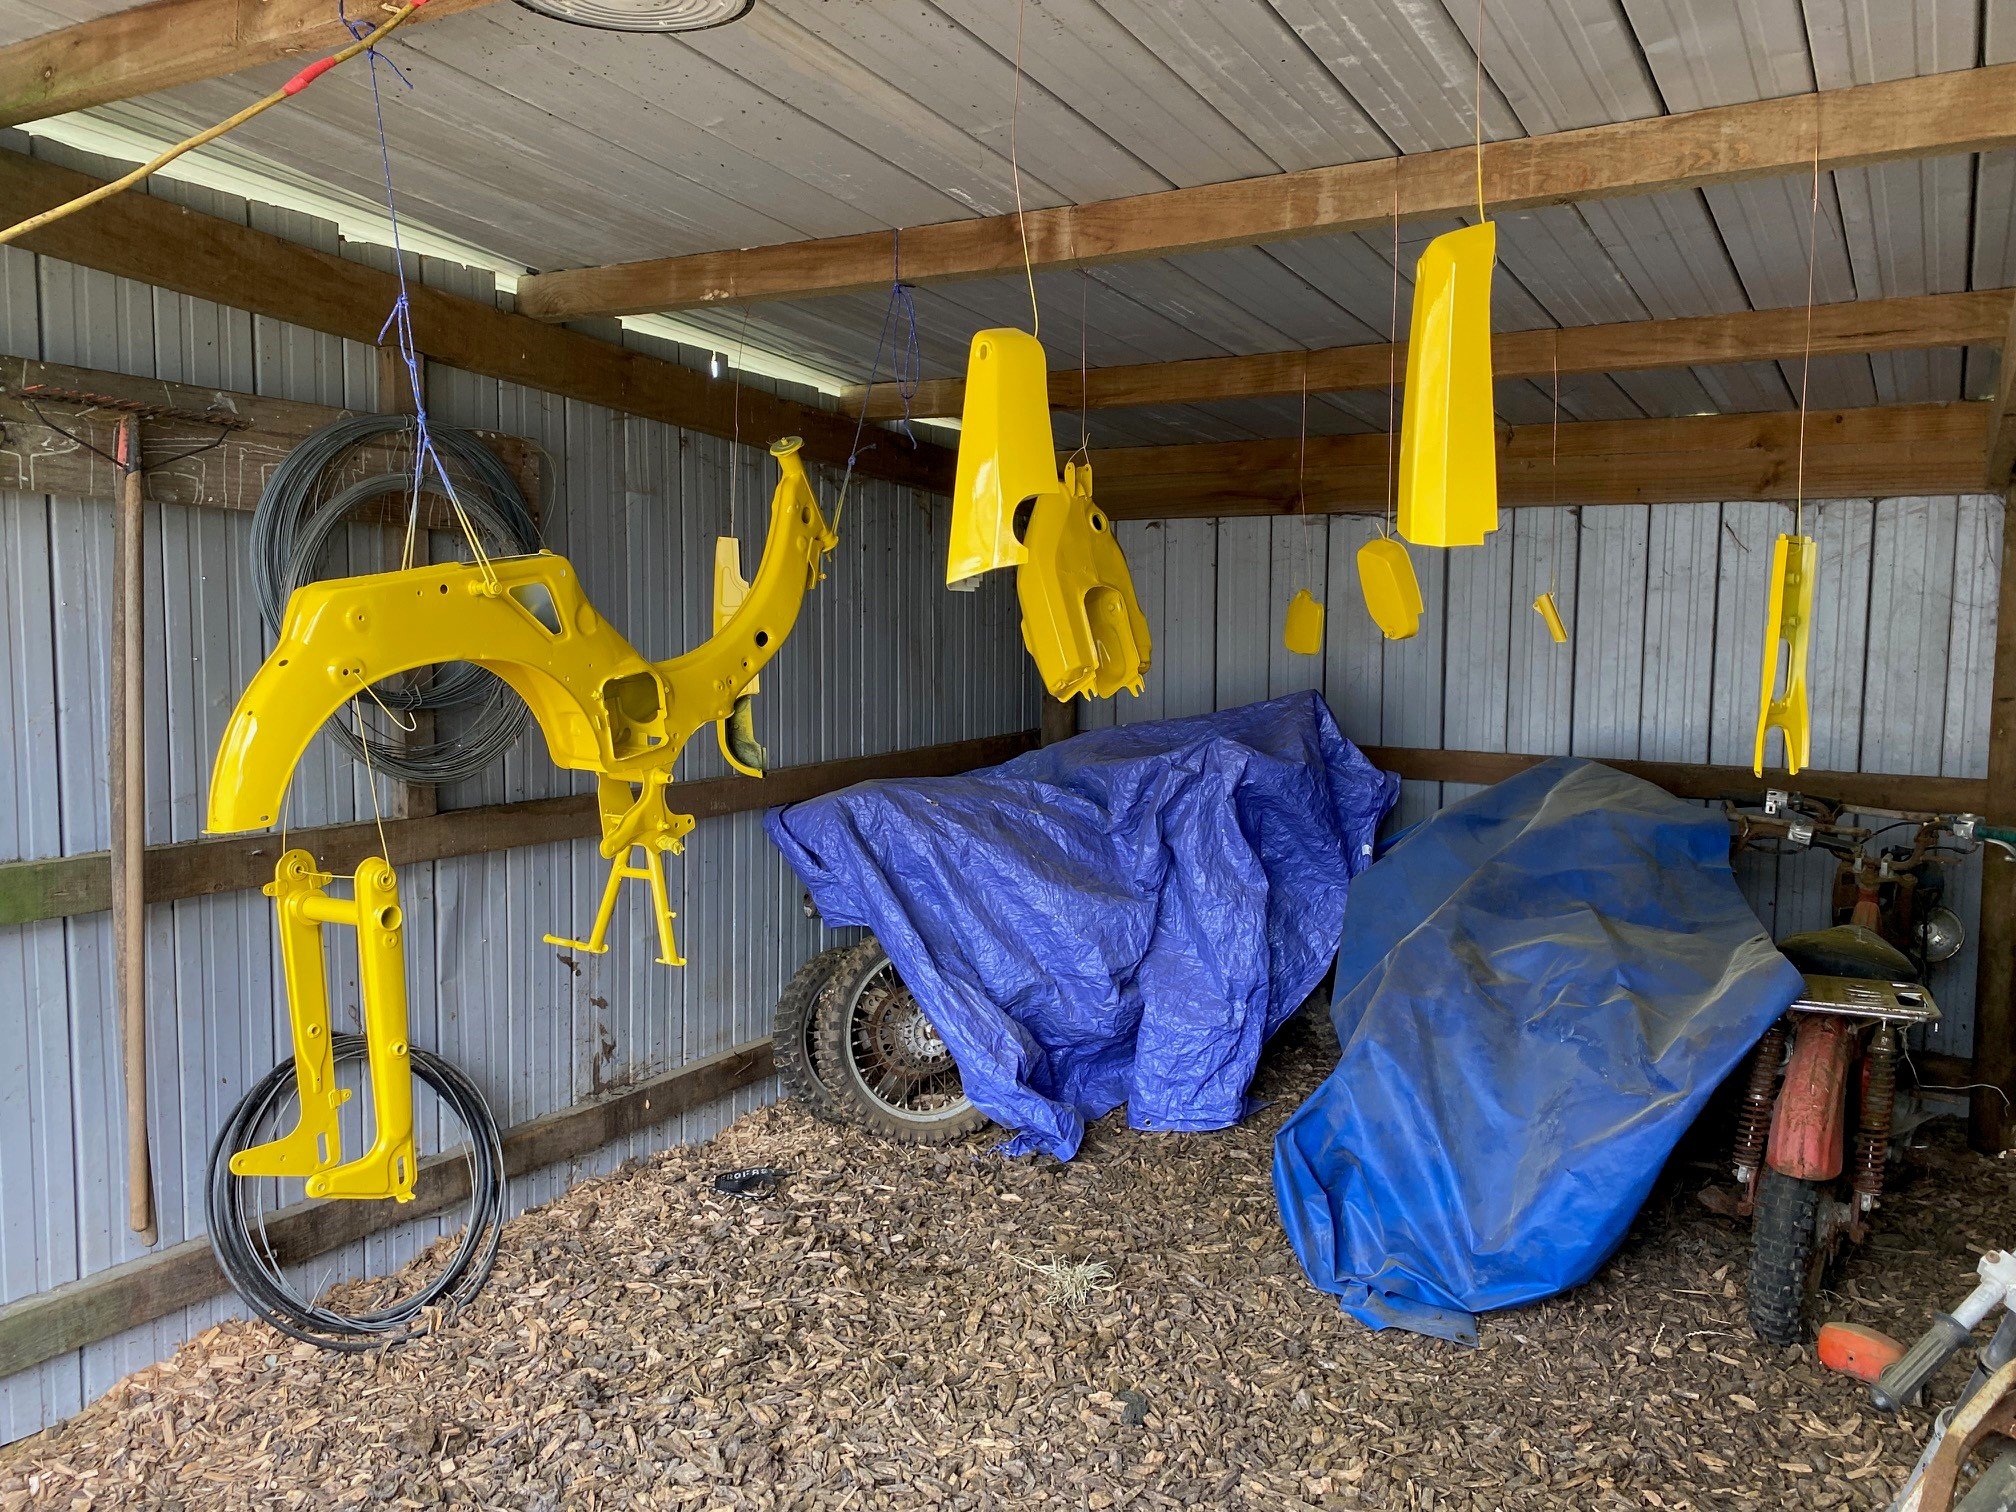
Got some work done last night. It’s hard to get a decent photo of it since my shed is such a mess at the moment. i need to come up with a seat solution. I’ve got 2 x V50 seats that are varying levels of fucked. I think I could make another seat pan but that would take time… I do have a generic china cafe seat that might adapt without too much effort to get me going. In a wee hurry as I want to be riding this next week. im loving all the black and yellow. I’ll get a leg shield for it and I think I’m going to need to paint that black too!
2 points
-
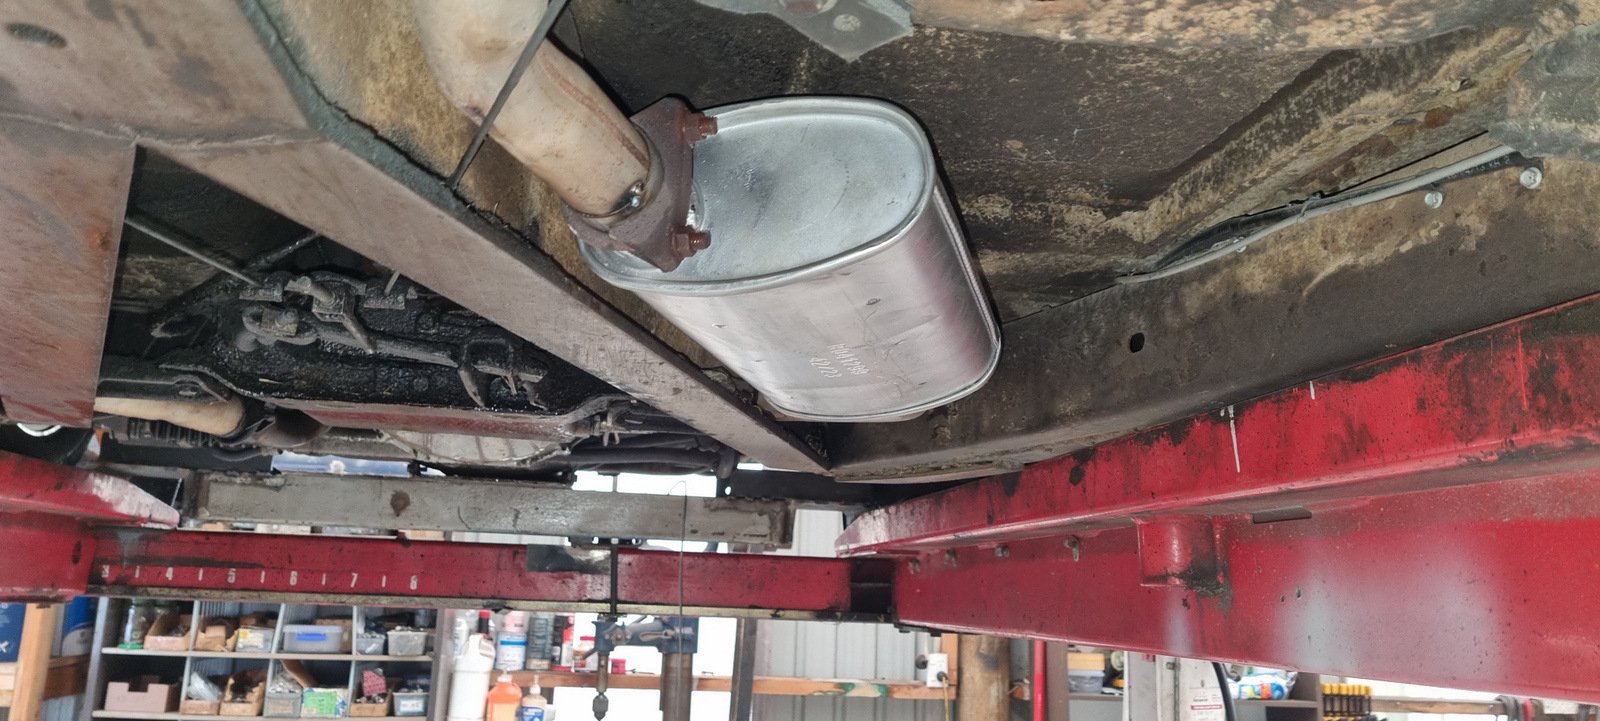
Lets see Muffler replaced, I left the other side there as it didn't look too bad Pulled the door trim off to put a speed nut on the self tapper holding the wing mirror Got some Rock Auto Looked at a grotty engine
2 points
-
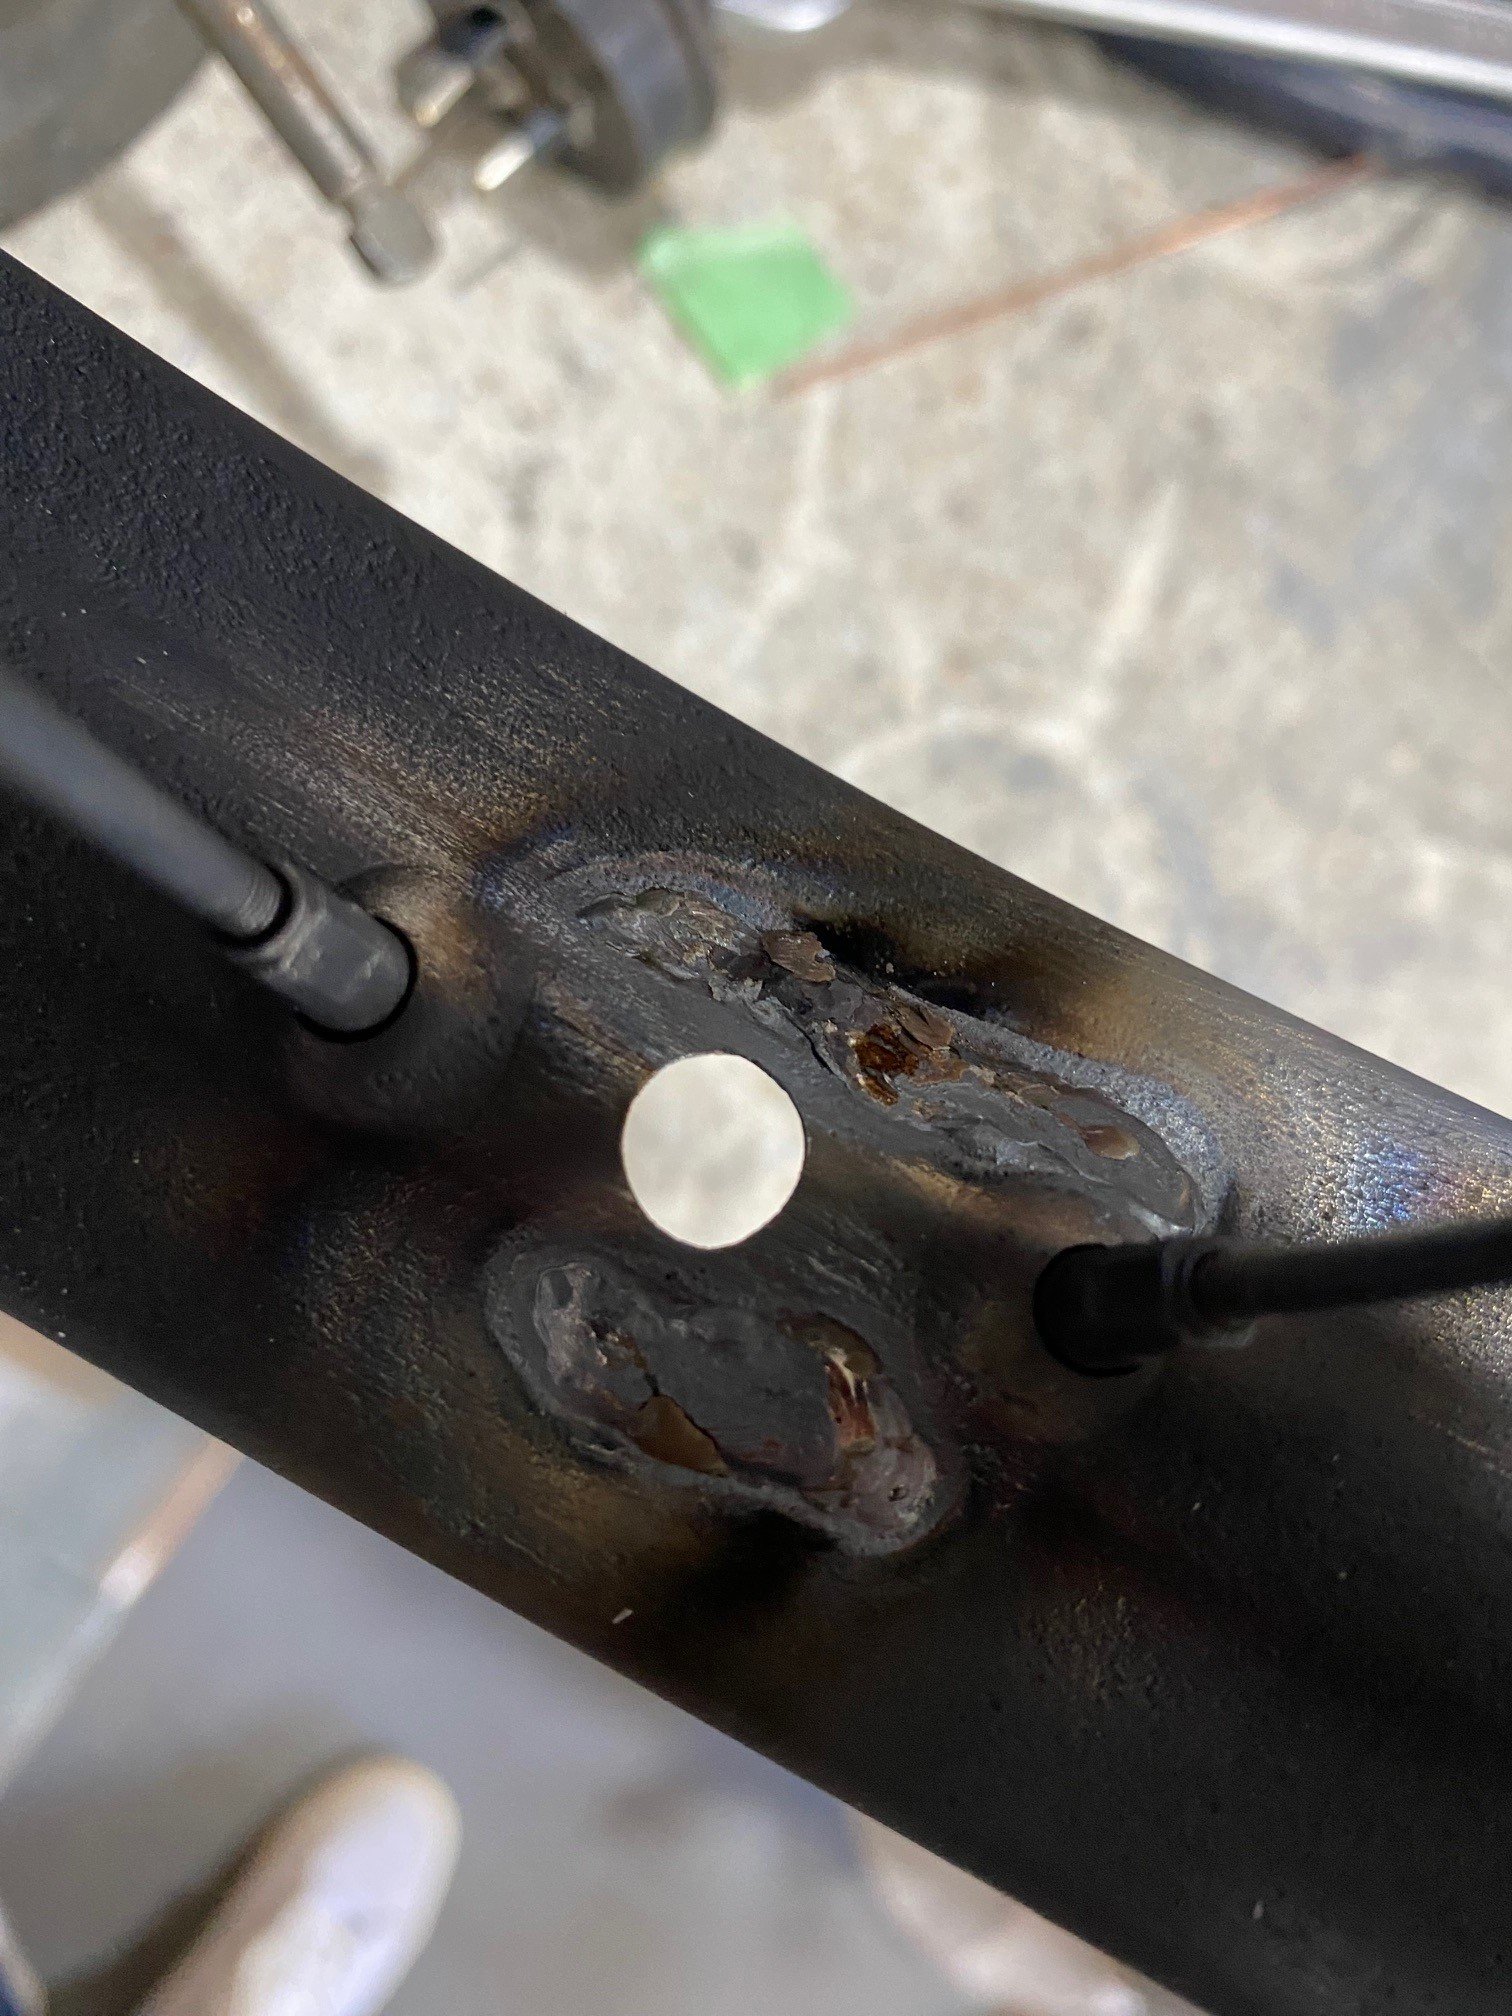
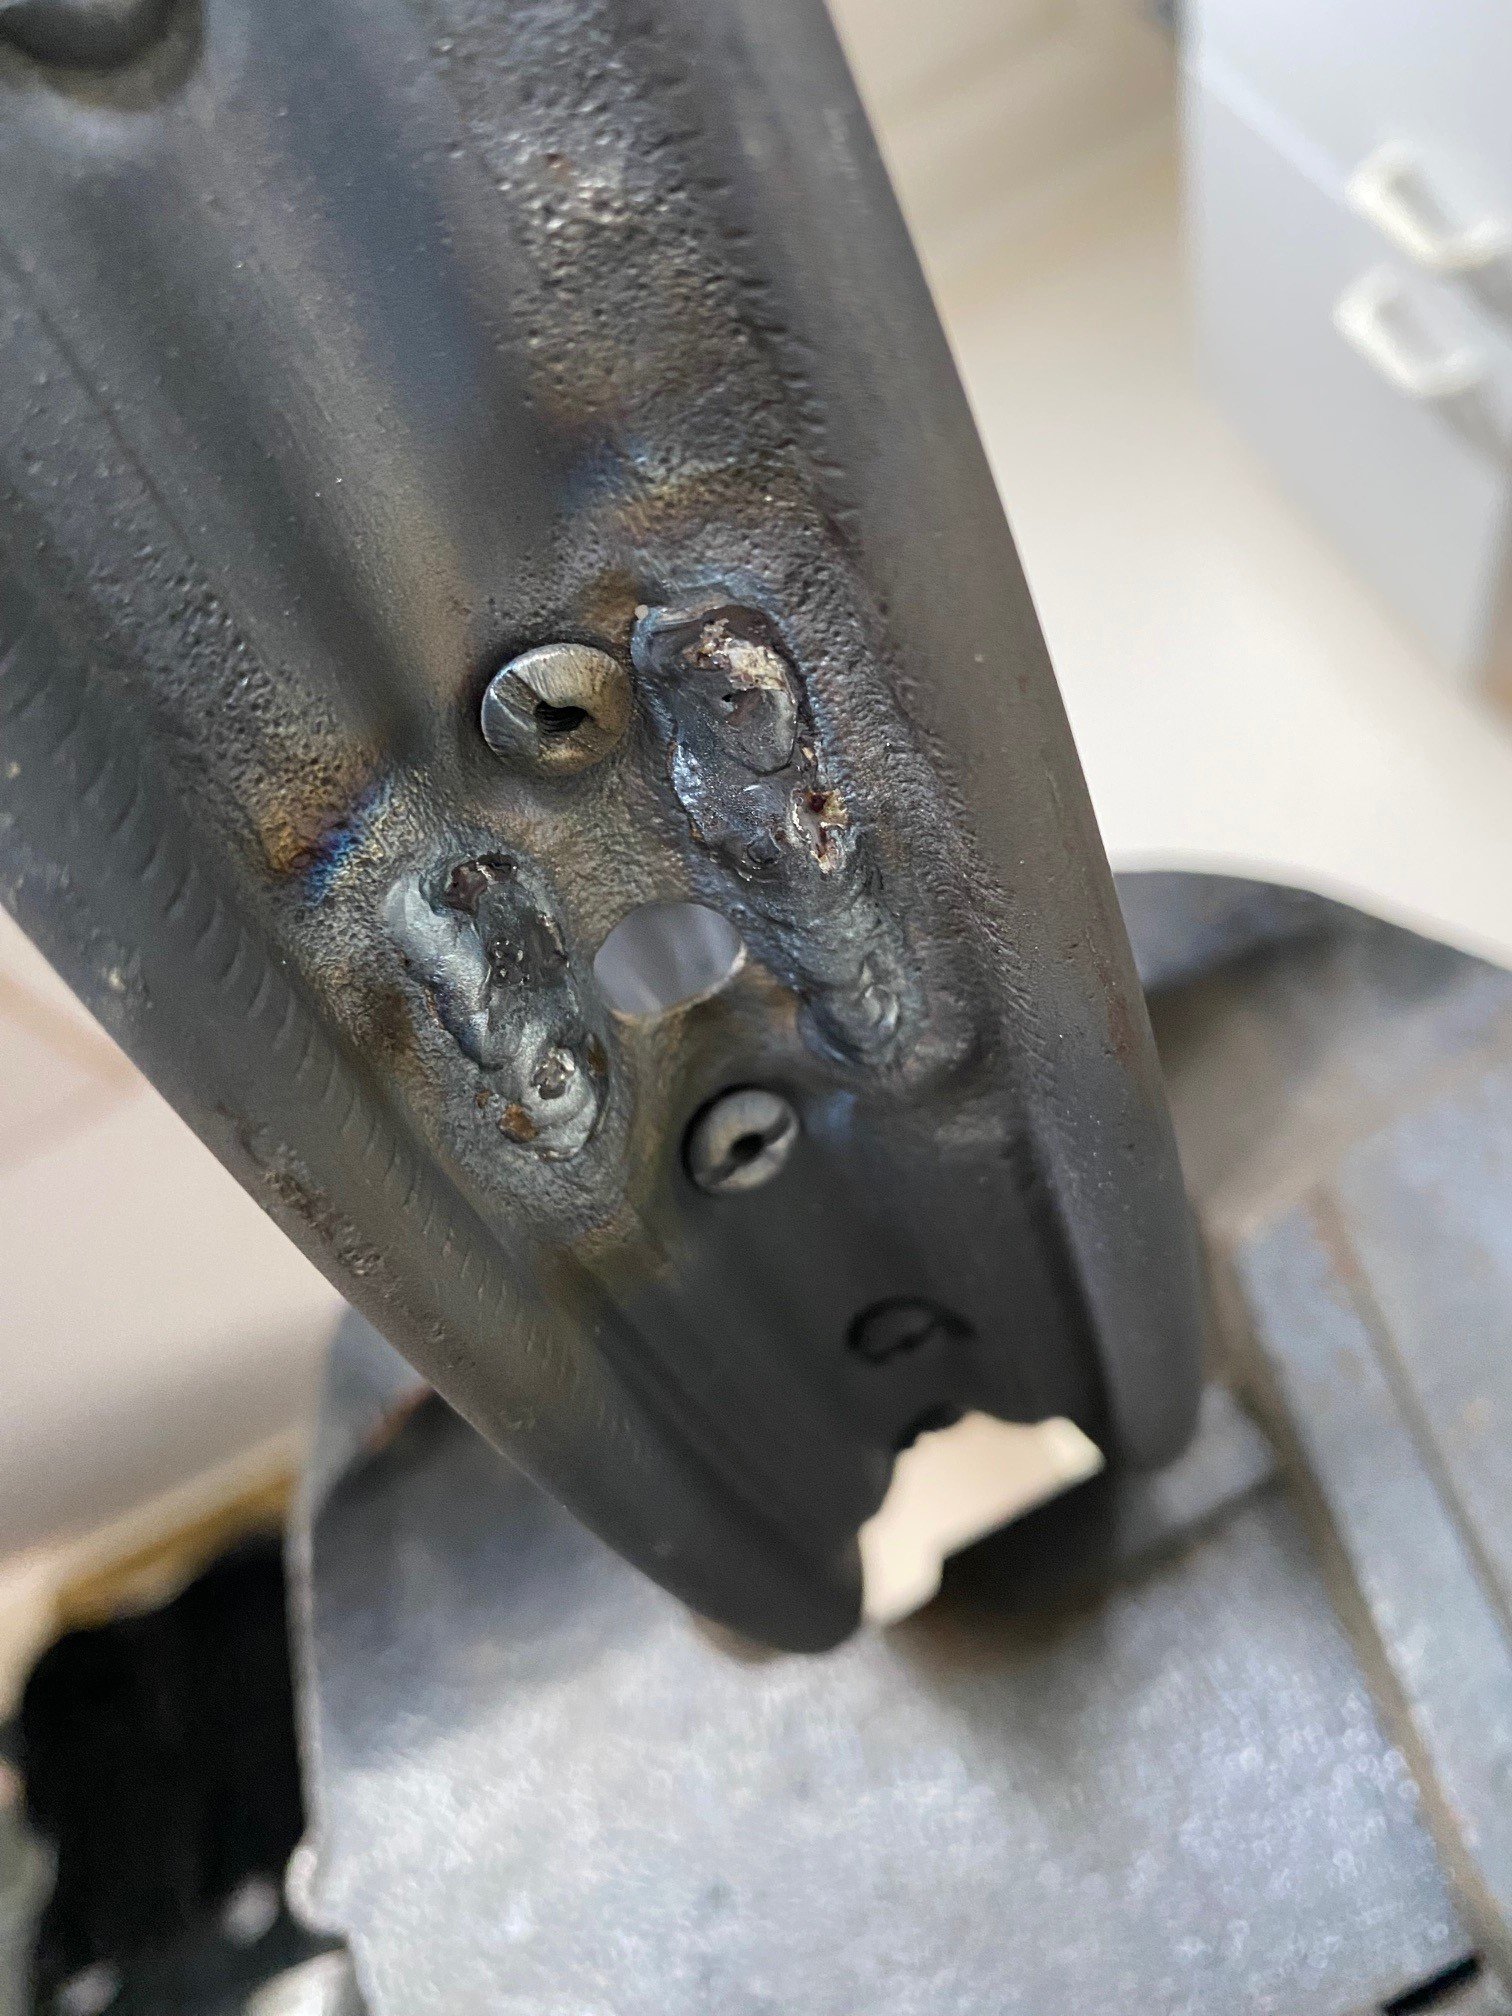
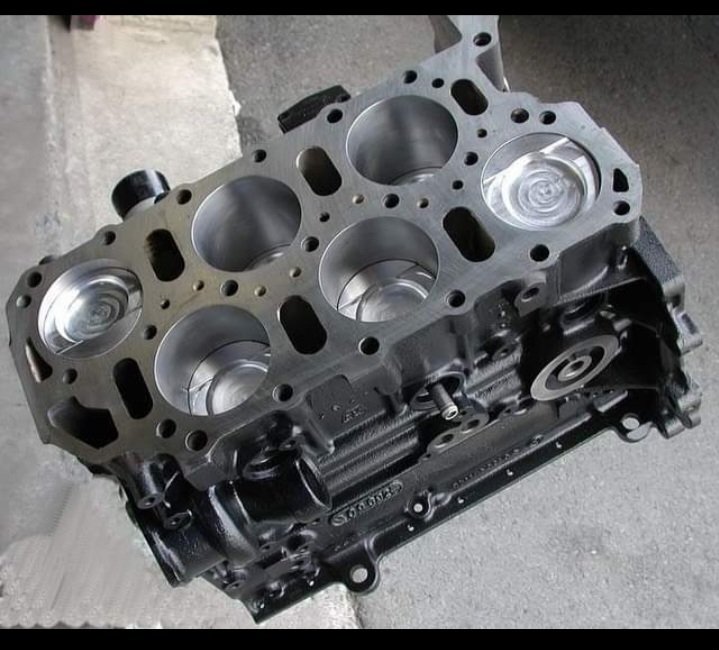
While things are apart I wanted to replace some wear components. The clutch was suggested to me but I was already eyeing it up. Firstly I brought the clutch to MP auto parts to see if they could find or build an uprated solution (they were side-eyeing me HARD when I said I wanted it to take up to 90kW), but they weren't able to source anything off the shelf, and joogling the interwebs overloaded my already taxxed noob brain, so I just went with Kelvinator's suggestion and elected to get OEM replacements. They're made by Exedy anyway. Kelvinator also suggested I skim the flywheel - MP auto parts pulled through here (though they destroyed my bearing and charged me for it thanks lol), and actually informed me that clutch manufacturers require a flywheel skim for the warranty to kick in. It's nice to get multiple angles of confirmation. I also wanted to prep some special tools for the reassembly phase, and my clutch alignment tool came out acceptable after a couple of tests to ensure the splines were shaped correctly. I'm getting better at using onshape, I only swear at the screen a few times per hour now. We'd taken the cams off the head to be able to remove it, but it still had the springs and valves in it. Disassembly time! I blindly got a generic spring compressor and uh... no part of it is compatible with this engine. I tried pressing in with pliers, which was okay for a couple of the springs, but a bit too easy to slip off them and I foresaw myself destroying something. So we found an alternative. Then we learned very quickly to ensure limited travel of ejected components... It went pretty well and before we knew it we were all stripped and down to the valves. Finally, the valve stem seals came out with some long nose pliers and some cardboard to protect against grazing the edges of the camshaft seats. I stopped stripping it there, because I didn't see any need to remove/replace the guides and I wanted to get the head tested and cleaned professionally. I dropped it along with all the rotating assembly off at the machinist for inspection and cleaning. He quickly told me it wasn't worth my time to have the conrods weighed and the crankshaft balance checked, saying that the manufacturer is very reliable in this space or else they'd lose a lot of money honouring warranties. He also told me that usually, when the rings are replaced, the block should have its bores honed - so I left that with him too. And finally he told me that it's probably worthwhile for him to perform the rotating assembly installation as he'll do a much better job of checking oil gaps and what have you. With the damage to the bearing guides and my own inexperience, I decided to take him up on that. On Monday the bearings all arrived so I dropped them off and gave him the go-ahead, estimated completion mid next week. Also the head and the valve stems are fine, just some minor pitting on the valve seats which he said will lap right out A lot of stuff relies on the block and head to come back obviously, but I could still crack on with stuff. The chain cover actually doubles as the oil pump casing, and is called as such, and as a separate component I could get that sorted. Along with finding homes for some of the ADHD'd bolts spread everywhere... First, the new front main seal. Easy. Followed by a thorough scrape and clean - order, I know. I thoroughly cleaned all components; some stuff has a stubborn brown oil tinge that I'm not worried about. The main thing is to ensure all possible hidey holes for bearing material are gone. To this end I also disassembled some bits that the manual never specified (I guess because they're totally replaced), such as the oil pump housing. My cleaning process is to use the D20 parts washer that girlface's old work has forgotten we have, followed by a healthy(?) rinse with brake cleaner. Once re-assembled, the oil manifold gets gets attached to the case, ensuring that the spring doohicky is oiled up but the faces are totally clean. I've forgotten what sensor this was but it was next... Then it's new oil pump time. Both sides of the housing appear to be totally fine so I'm re-using them, but the gears were toast, so new gears. Measure all the things to ensure clearances are in spec and fortunately all is well. I should have measured pre-oil but I got there And making sure to have the gears lubed up, but the face clean, the other side of the housing goes on and gets torqued in the specified pattern, and the bolts marked. It's only then that I noticed some unhealthy marks in the crank timing sprocket which drives the oil pump... so a new one of them is on the way. Next up, the water pump gets cleaned and goes back on with a new gasket. One of the bolt holes goes through everything to the block so that remains empty for now. Next up is the rear main seal and its housing. I used a failed ring compressor print and punched the old seal out, then gave it a solid scrape and clean. The manual says that the new seal needs to be 1.5mm below the surface of the housing, and names a special tool to perform this. I measured everything up and printed a solid PETG version of the tool. It's just a 1.5mm deep ring with a lip face to prevent it going further. ... and a larger seal driver as my set ran out... Hit it flush with the face, then drive it another 1.5mm with the special tool. The plastic tool isn't as good as the real one; it flexed slightly with each tap, so i needed to go back around the other side and tidy it up a little bit after going slightly too far. But it did the job and I got it in the end. Meanwhile, girlface got to cleaning the sump. She found sad glitter!2 points
-
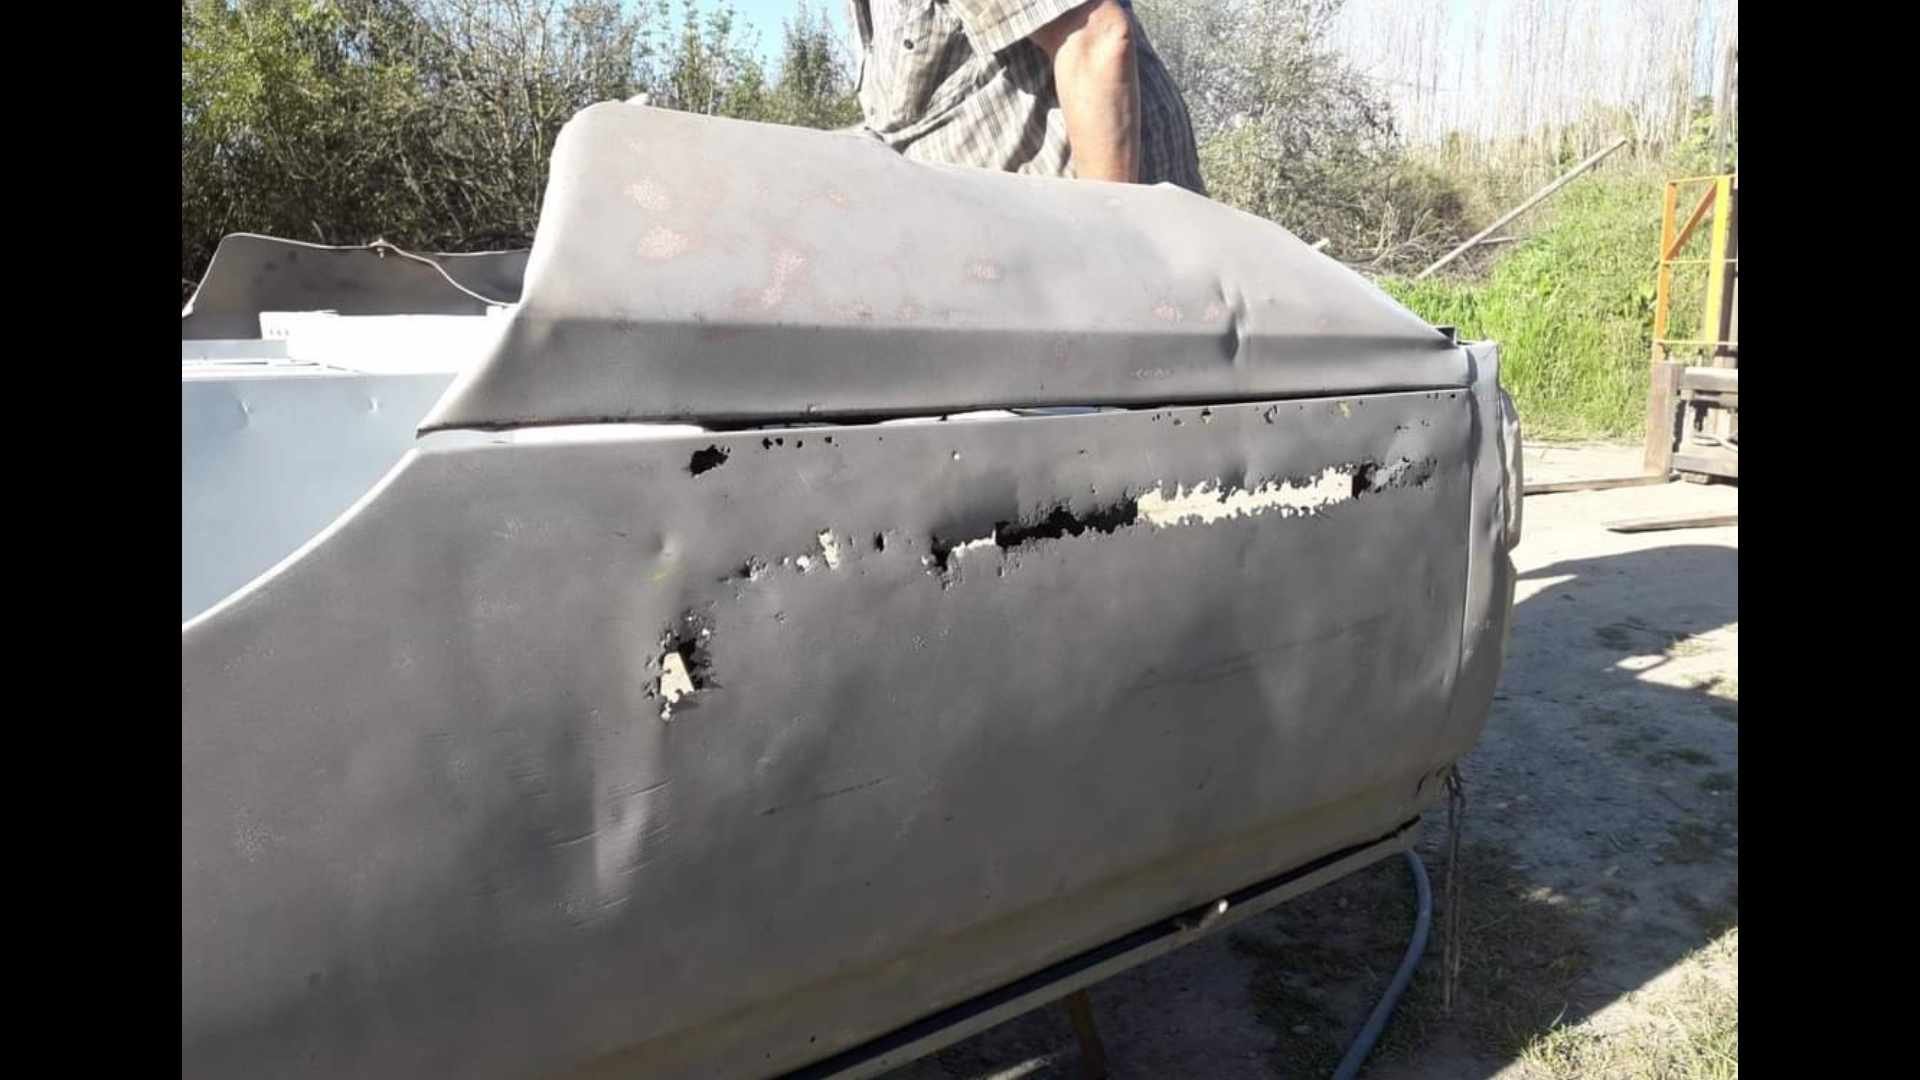
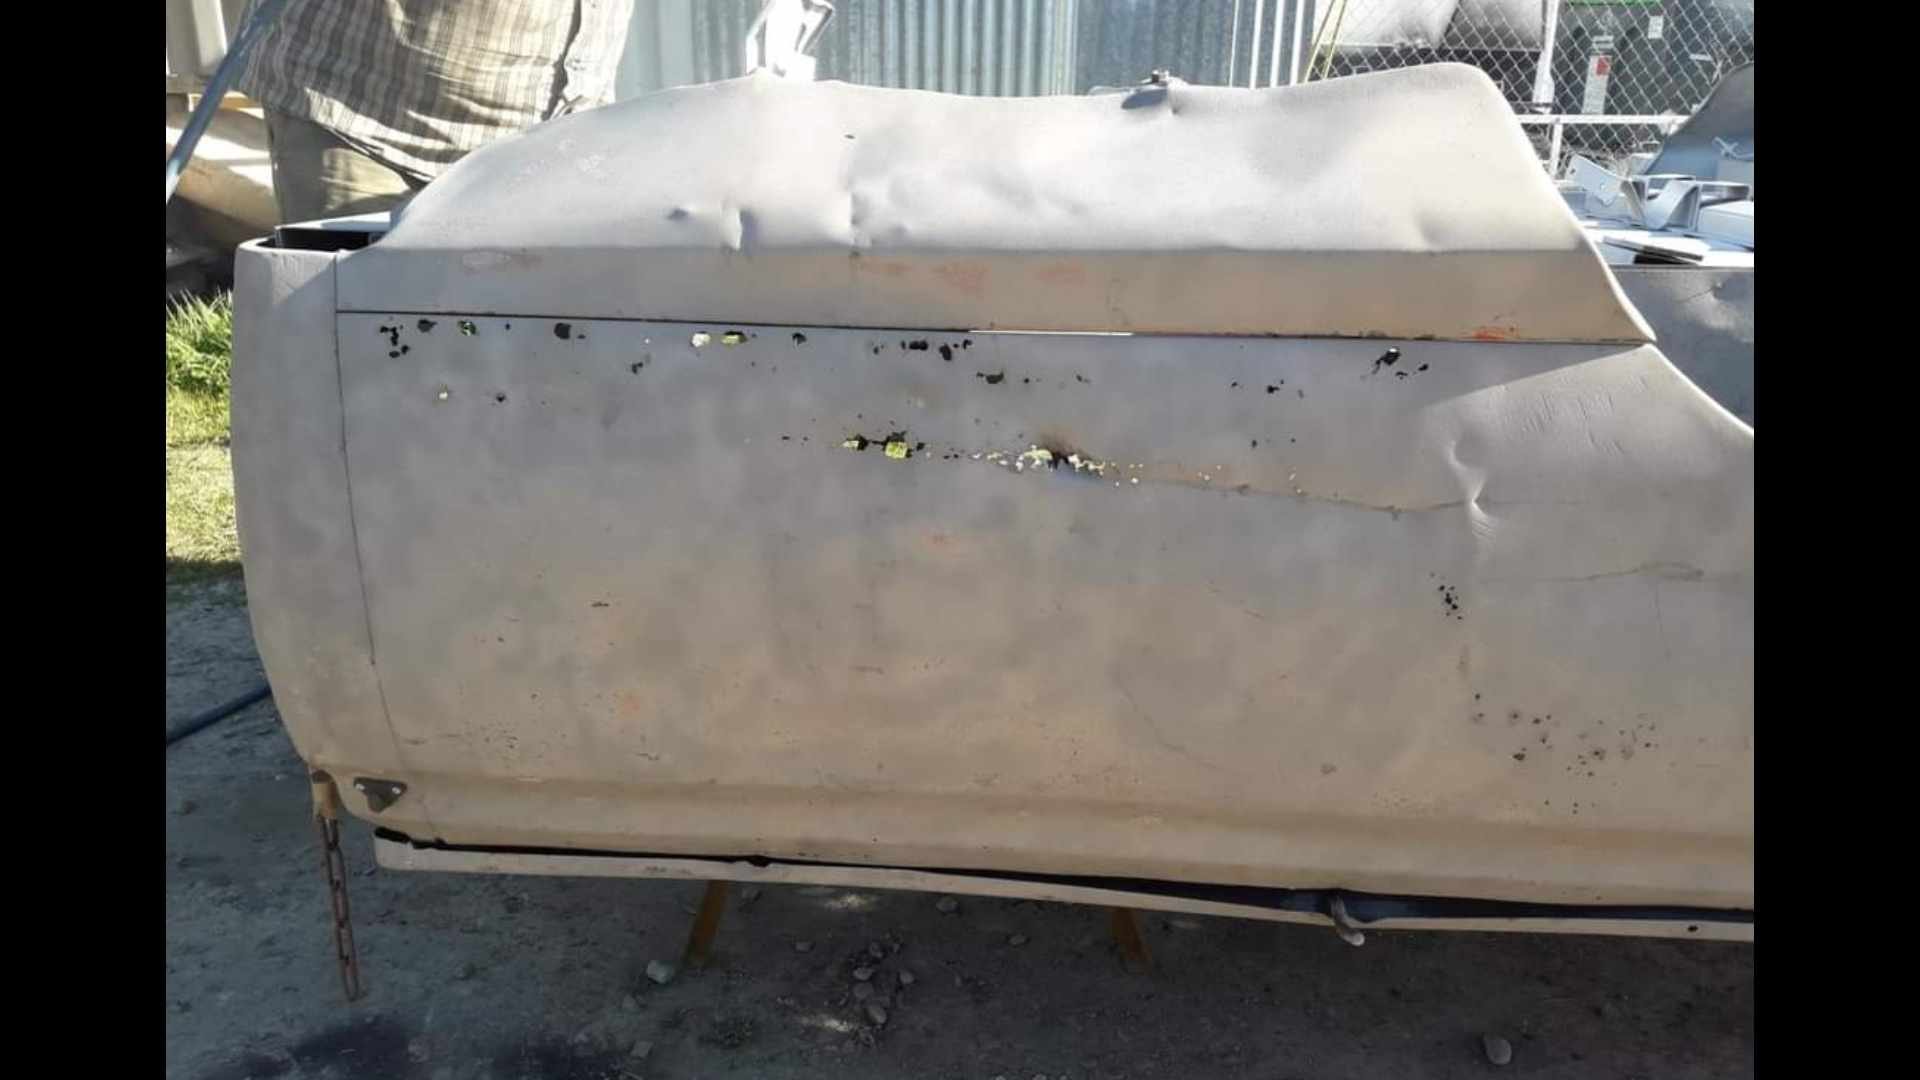
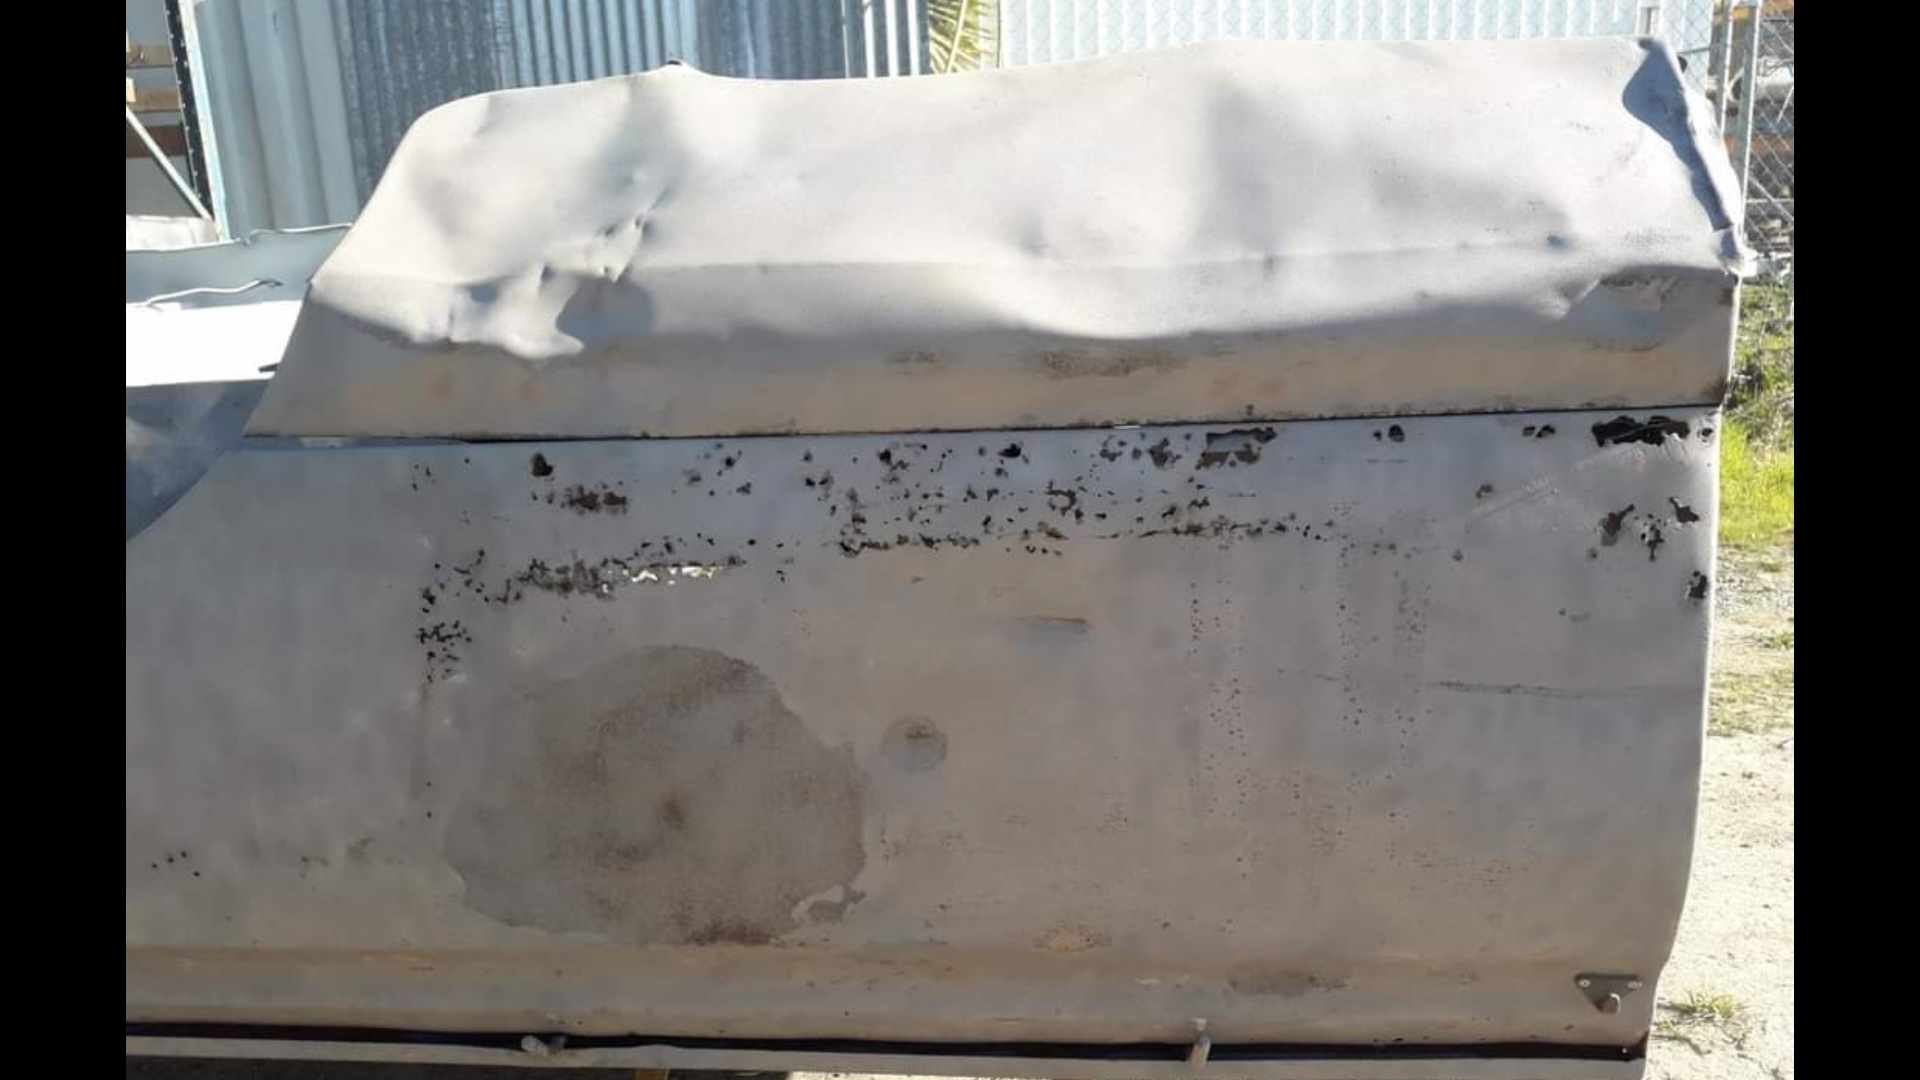
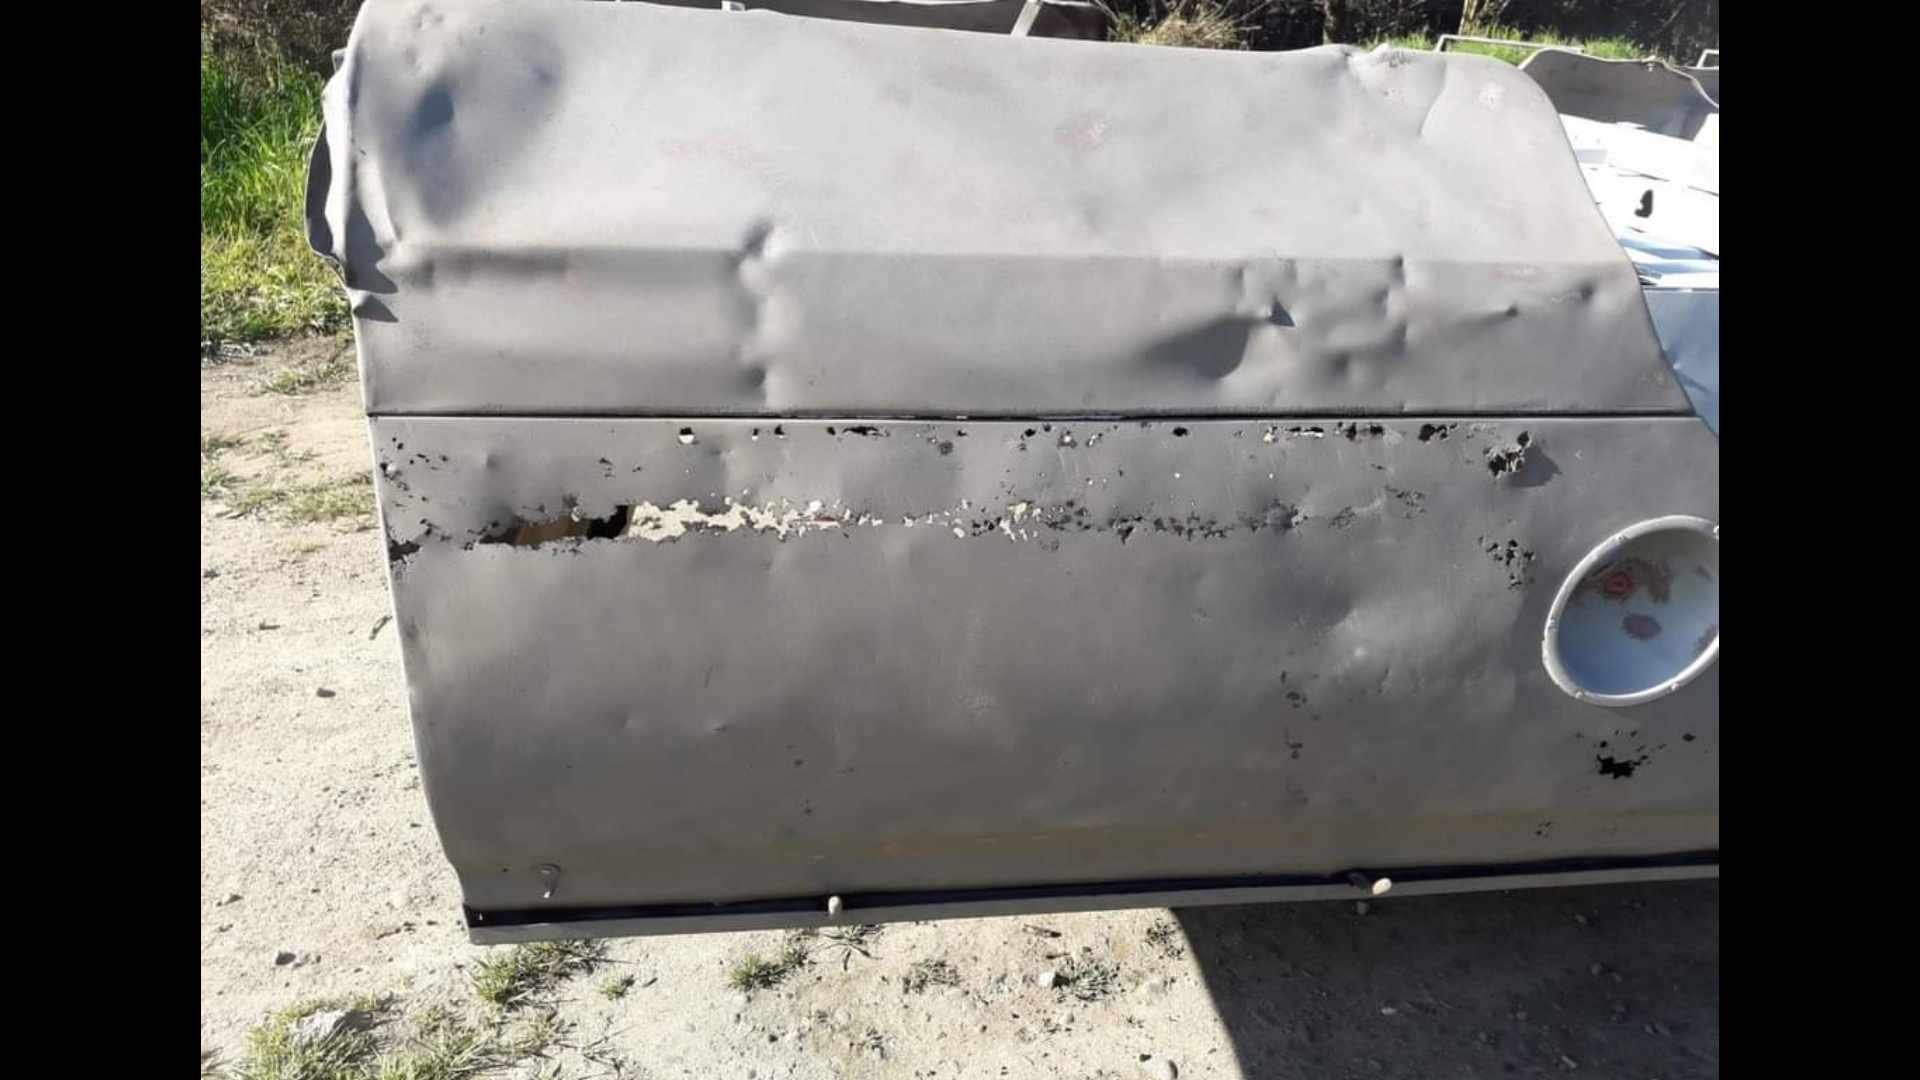
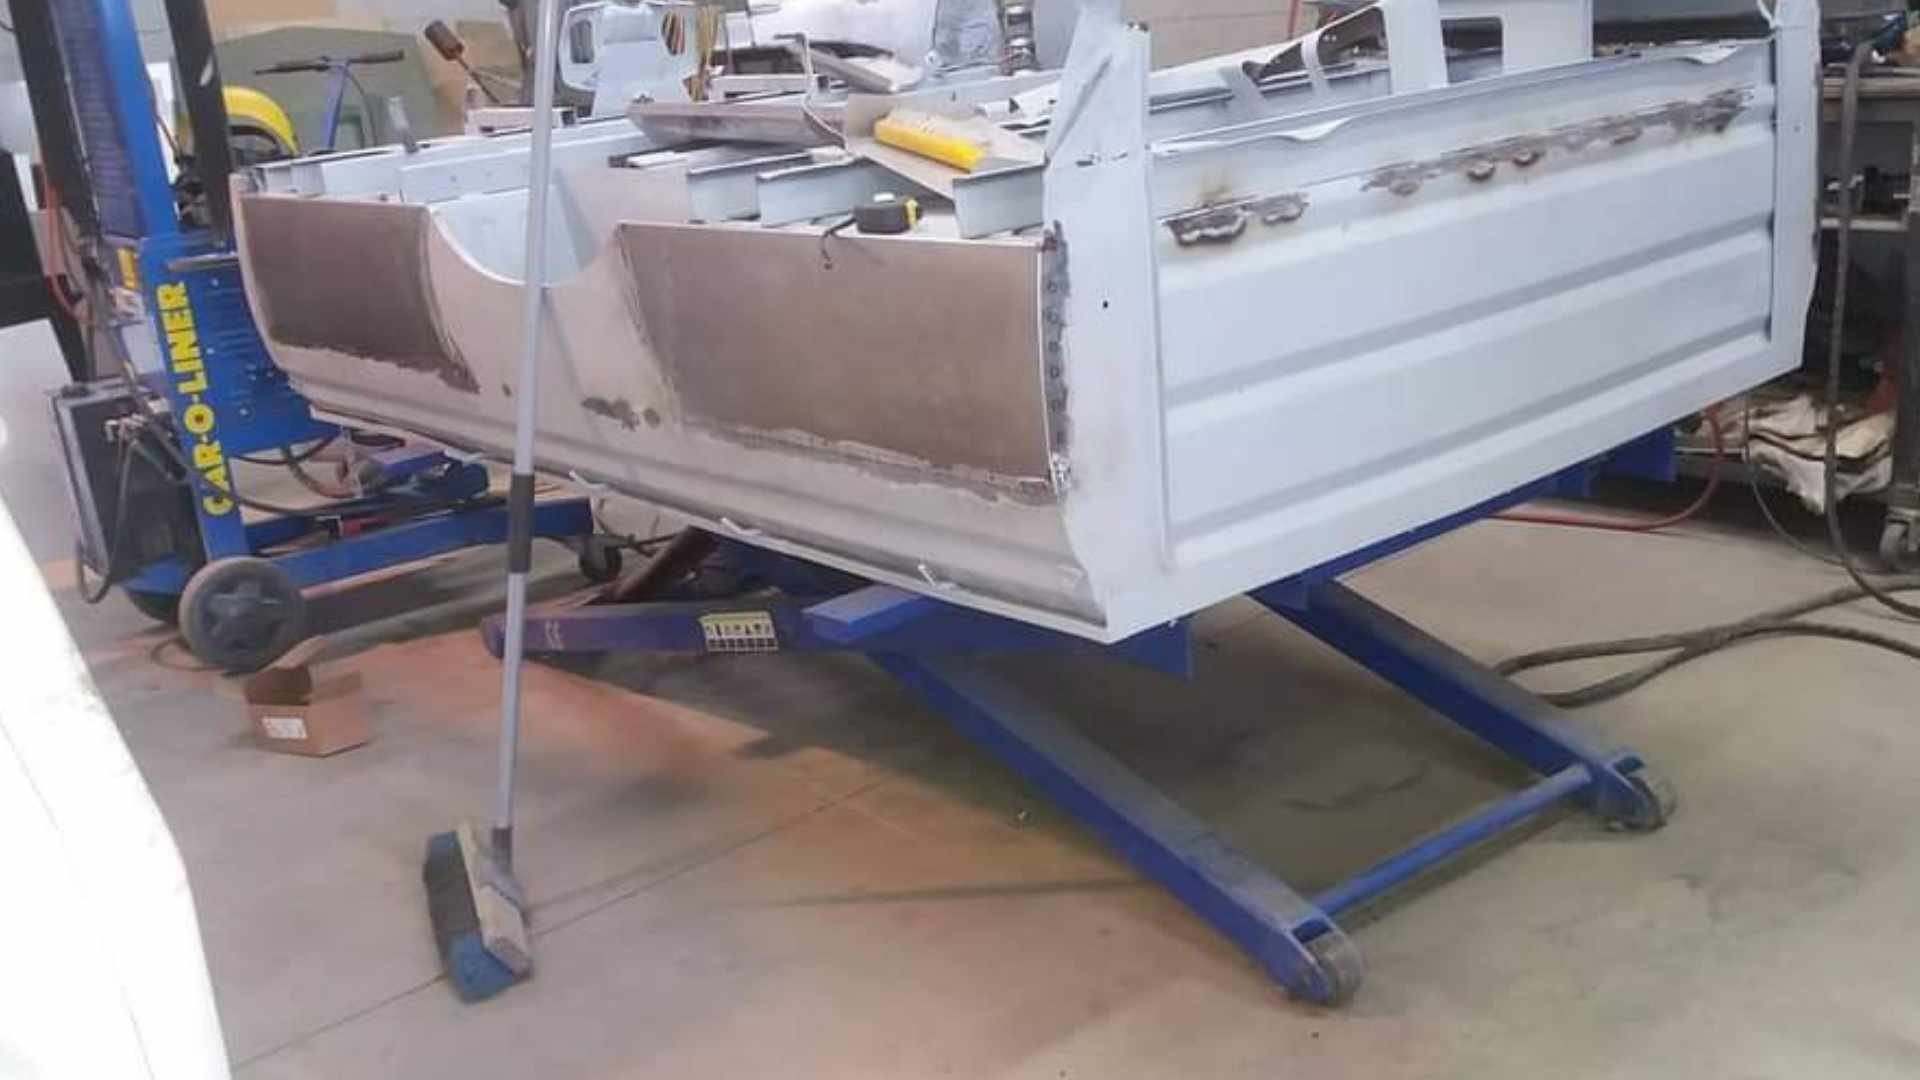
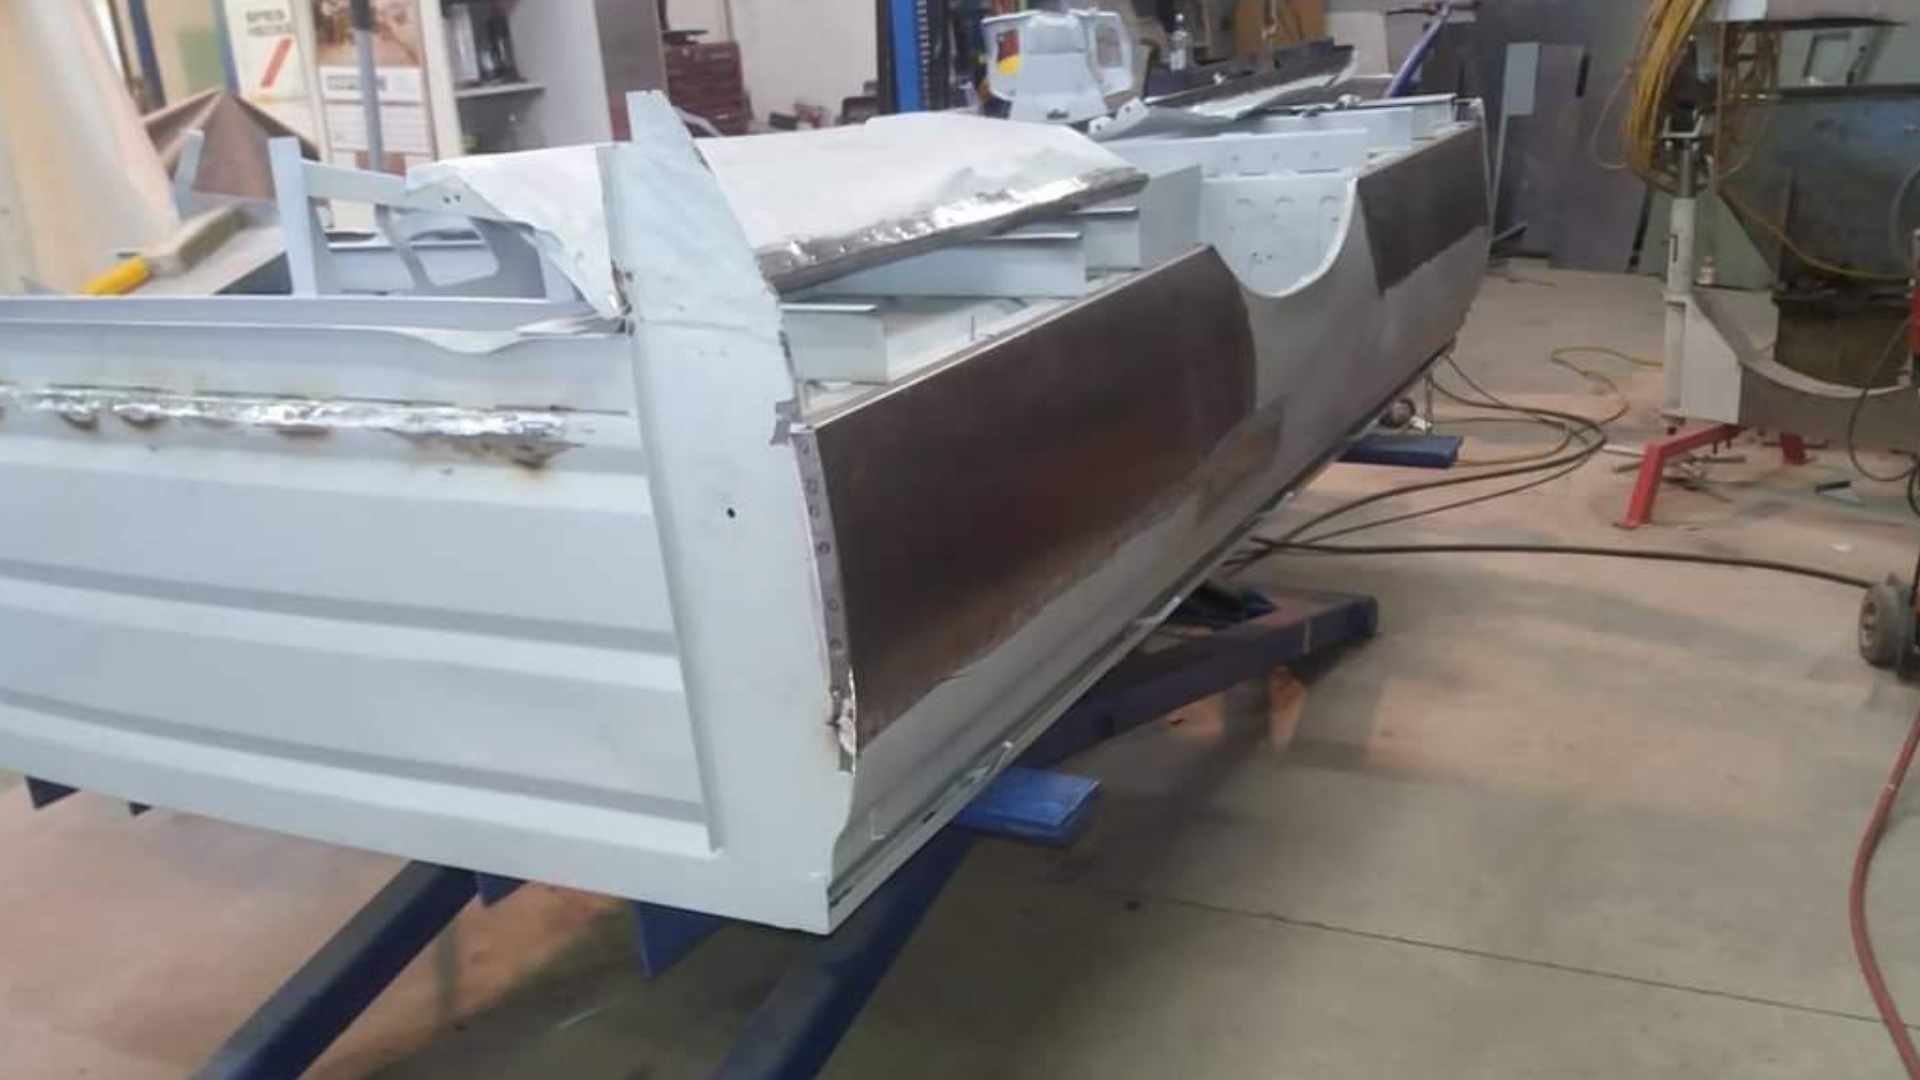
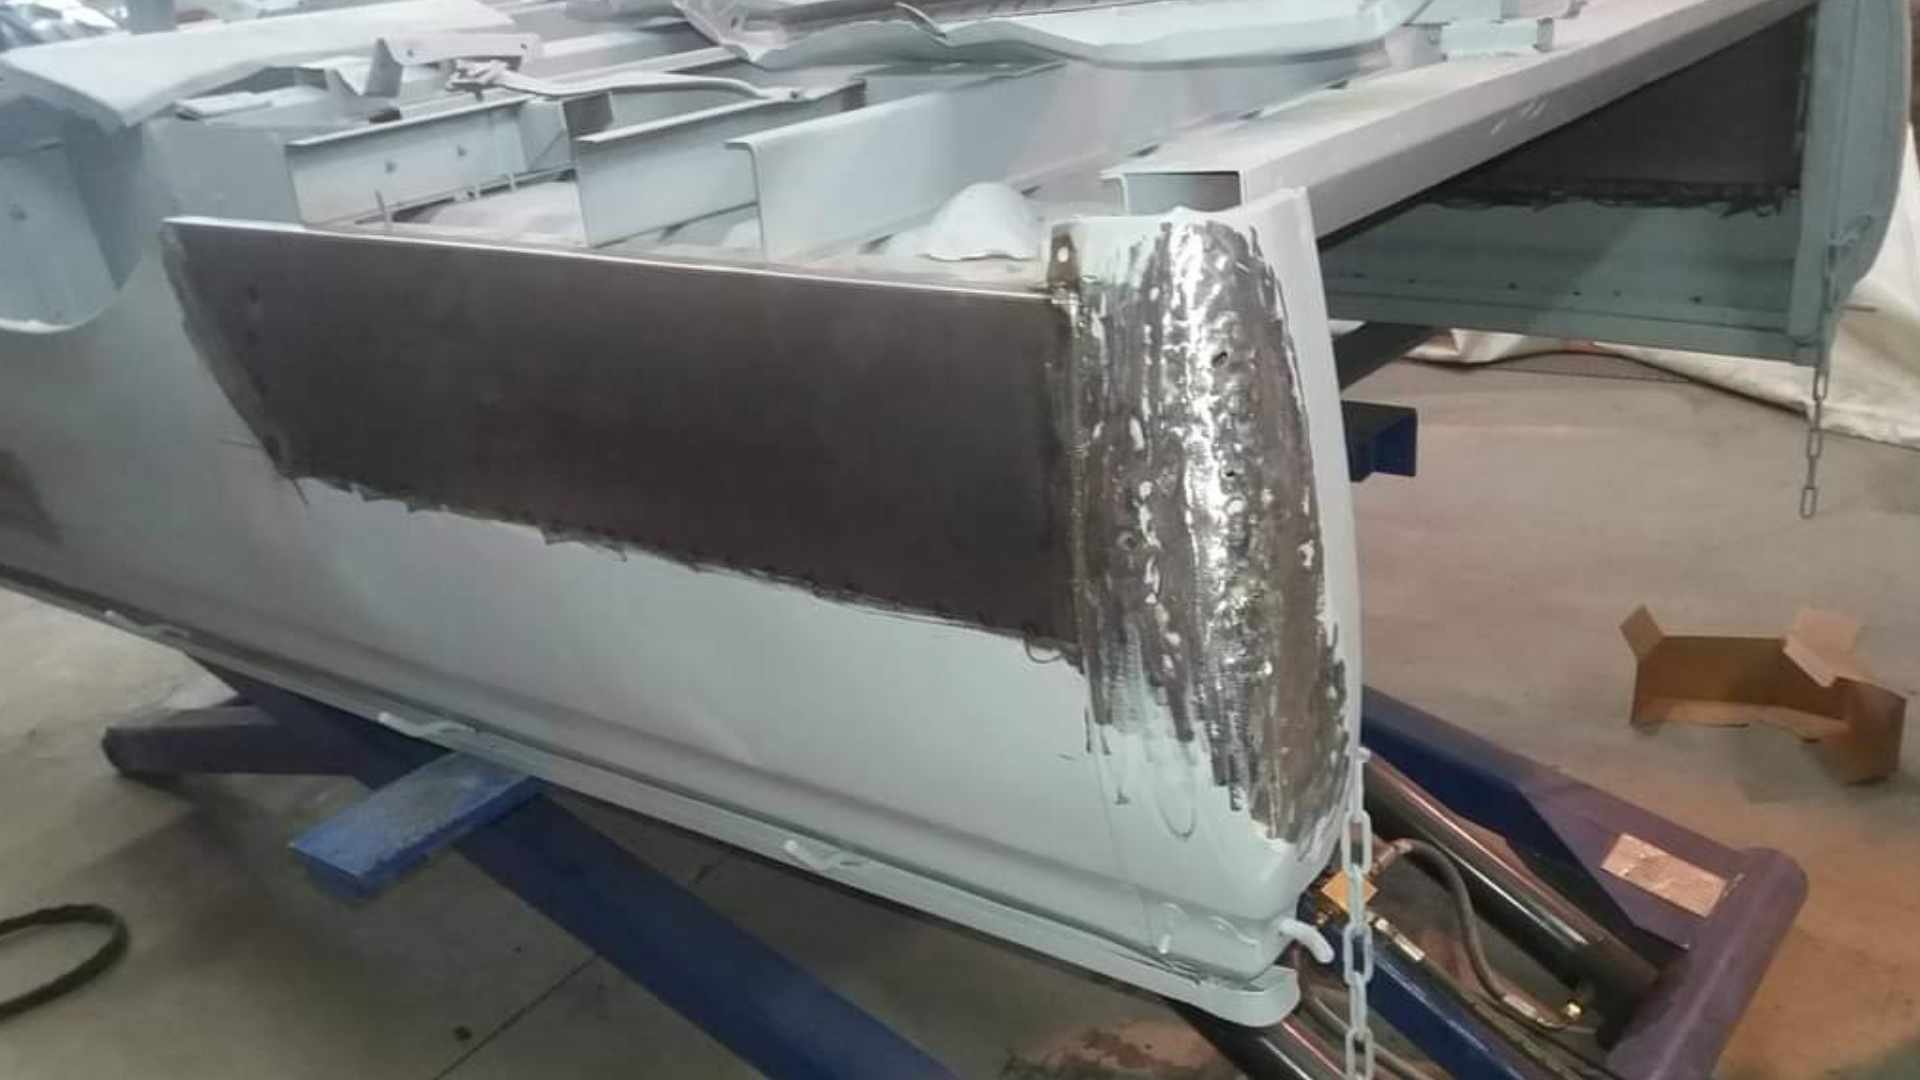
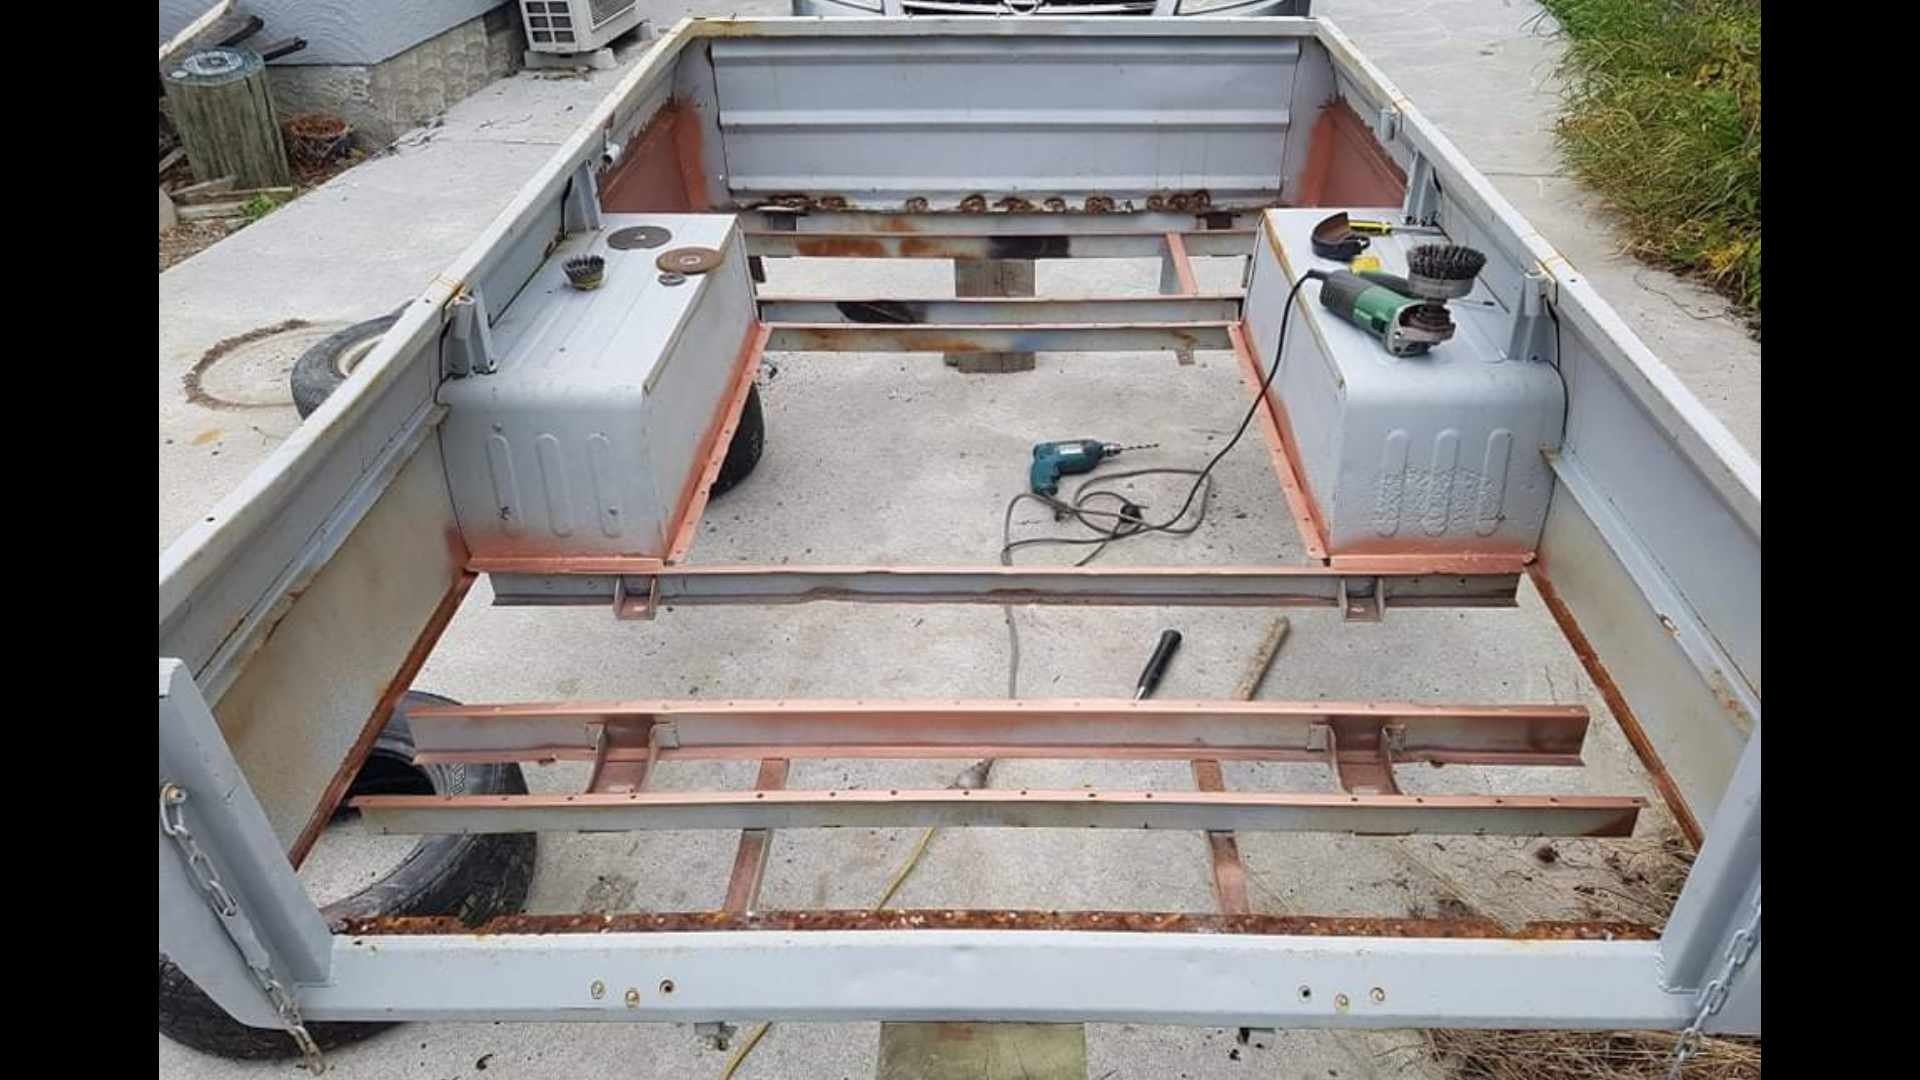
How about that wellside tray i hear you ask? Well, thats an ongoing saga. To start with, i had is sandblasted. Yep, she was a "bit" rusty. it must have been left sitting full of geass or the like i think. Anyway, i was somewhat worse for wear. Dropped it off to a mates shop, and he sid this with it. fast forward to lockdown, and i removed the floor. (It was fuuuuucked) I disovered this was a new Zealand made tray. (Possibly made in Timaru) they had a different profile on the floor, different wheel tubs, no swage around the whel arches to match the front. I replaced the floor with like for like. And a sheet metal mate halped me make new wheel tubs too. ( @JustHarry grafted these in) the same mate helped me reproduce the top edges which were also different. (Harry grafted those on too) Harry also grafted in wheel arches out of some fucked front guards to mimic what a proper datsun tray would have had. The tail gate is actually off a proper datsun tray, and its needed quite a bit of fettling to fit. (The NZ tray is a bit deeper) The tray is still a work in progress. Harry has opted to make new lower sections from scratch, rather than attempting to strighten the mangled mess that was there before.
2 points
-
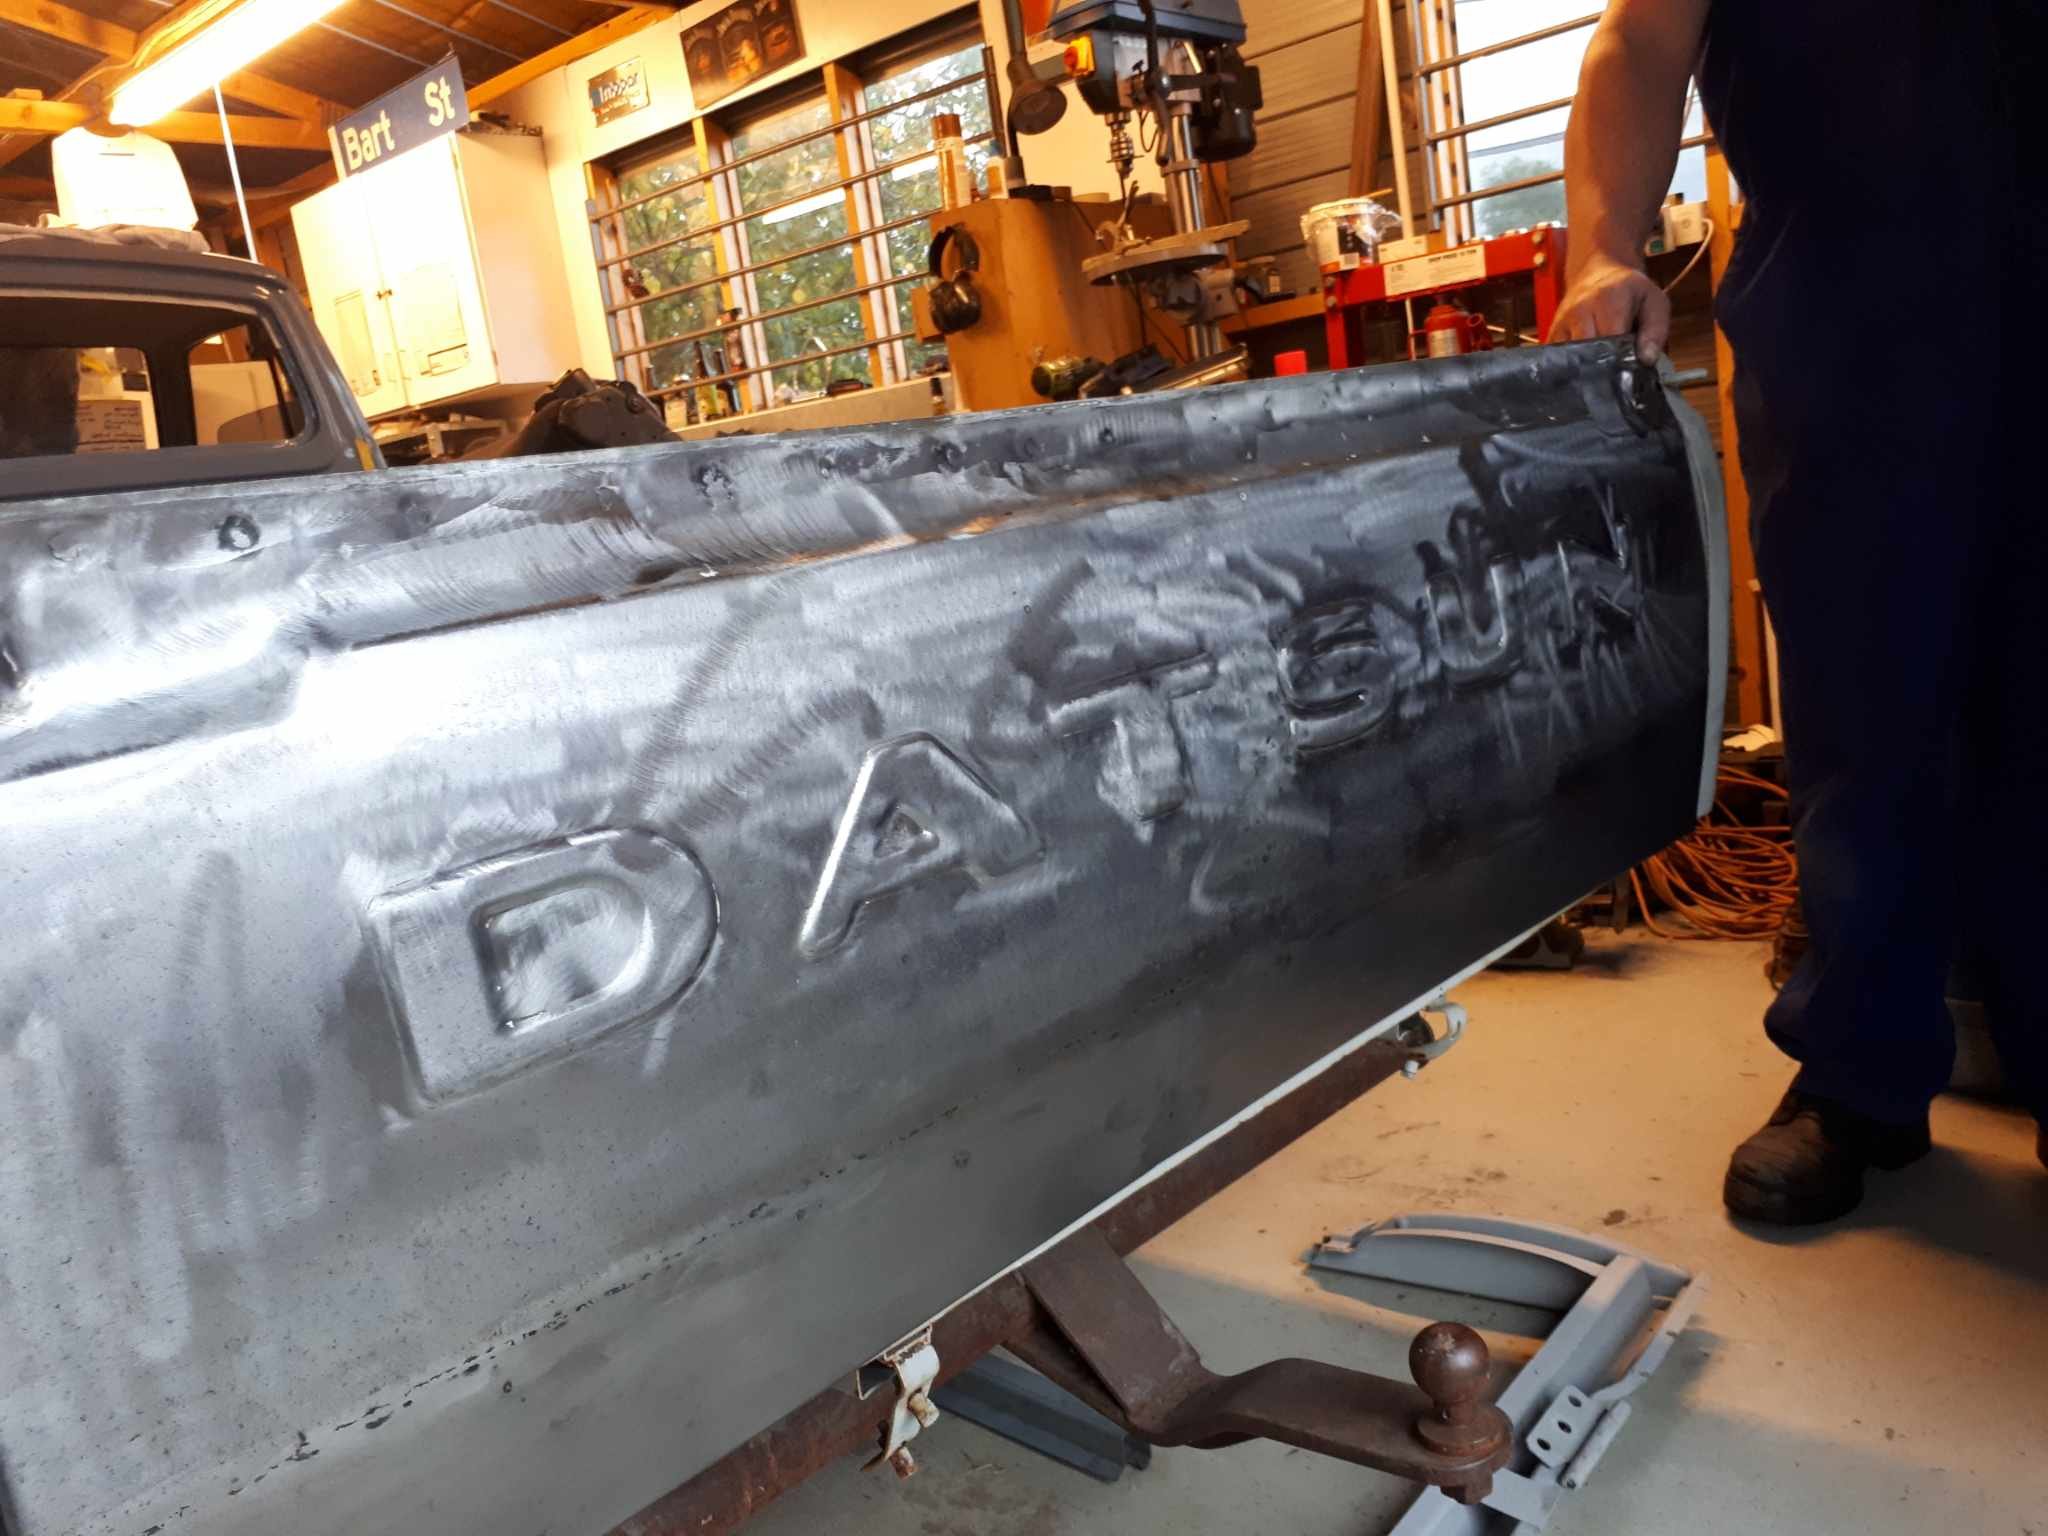
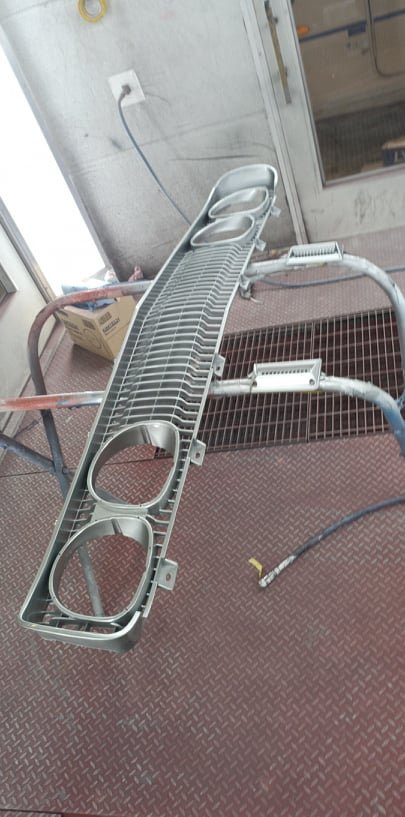
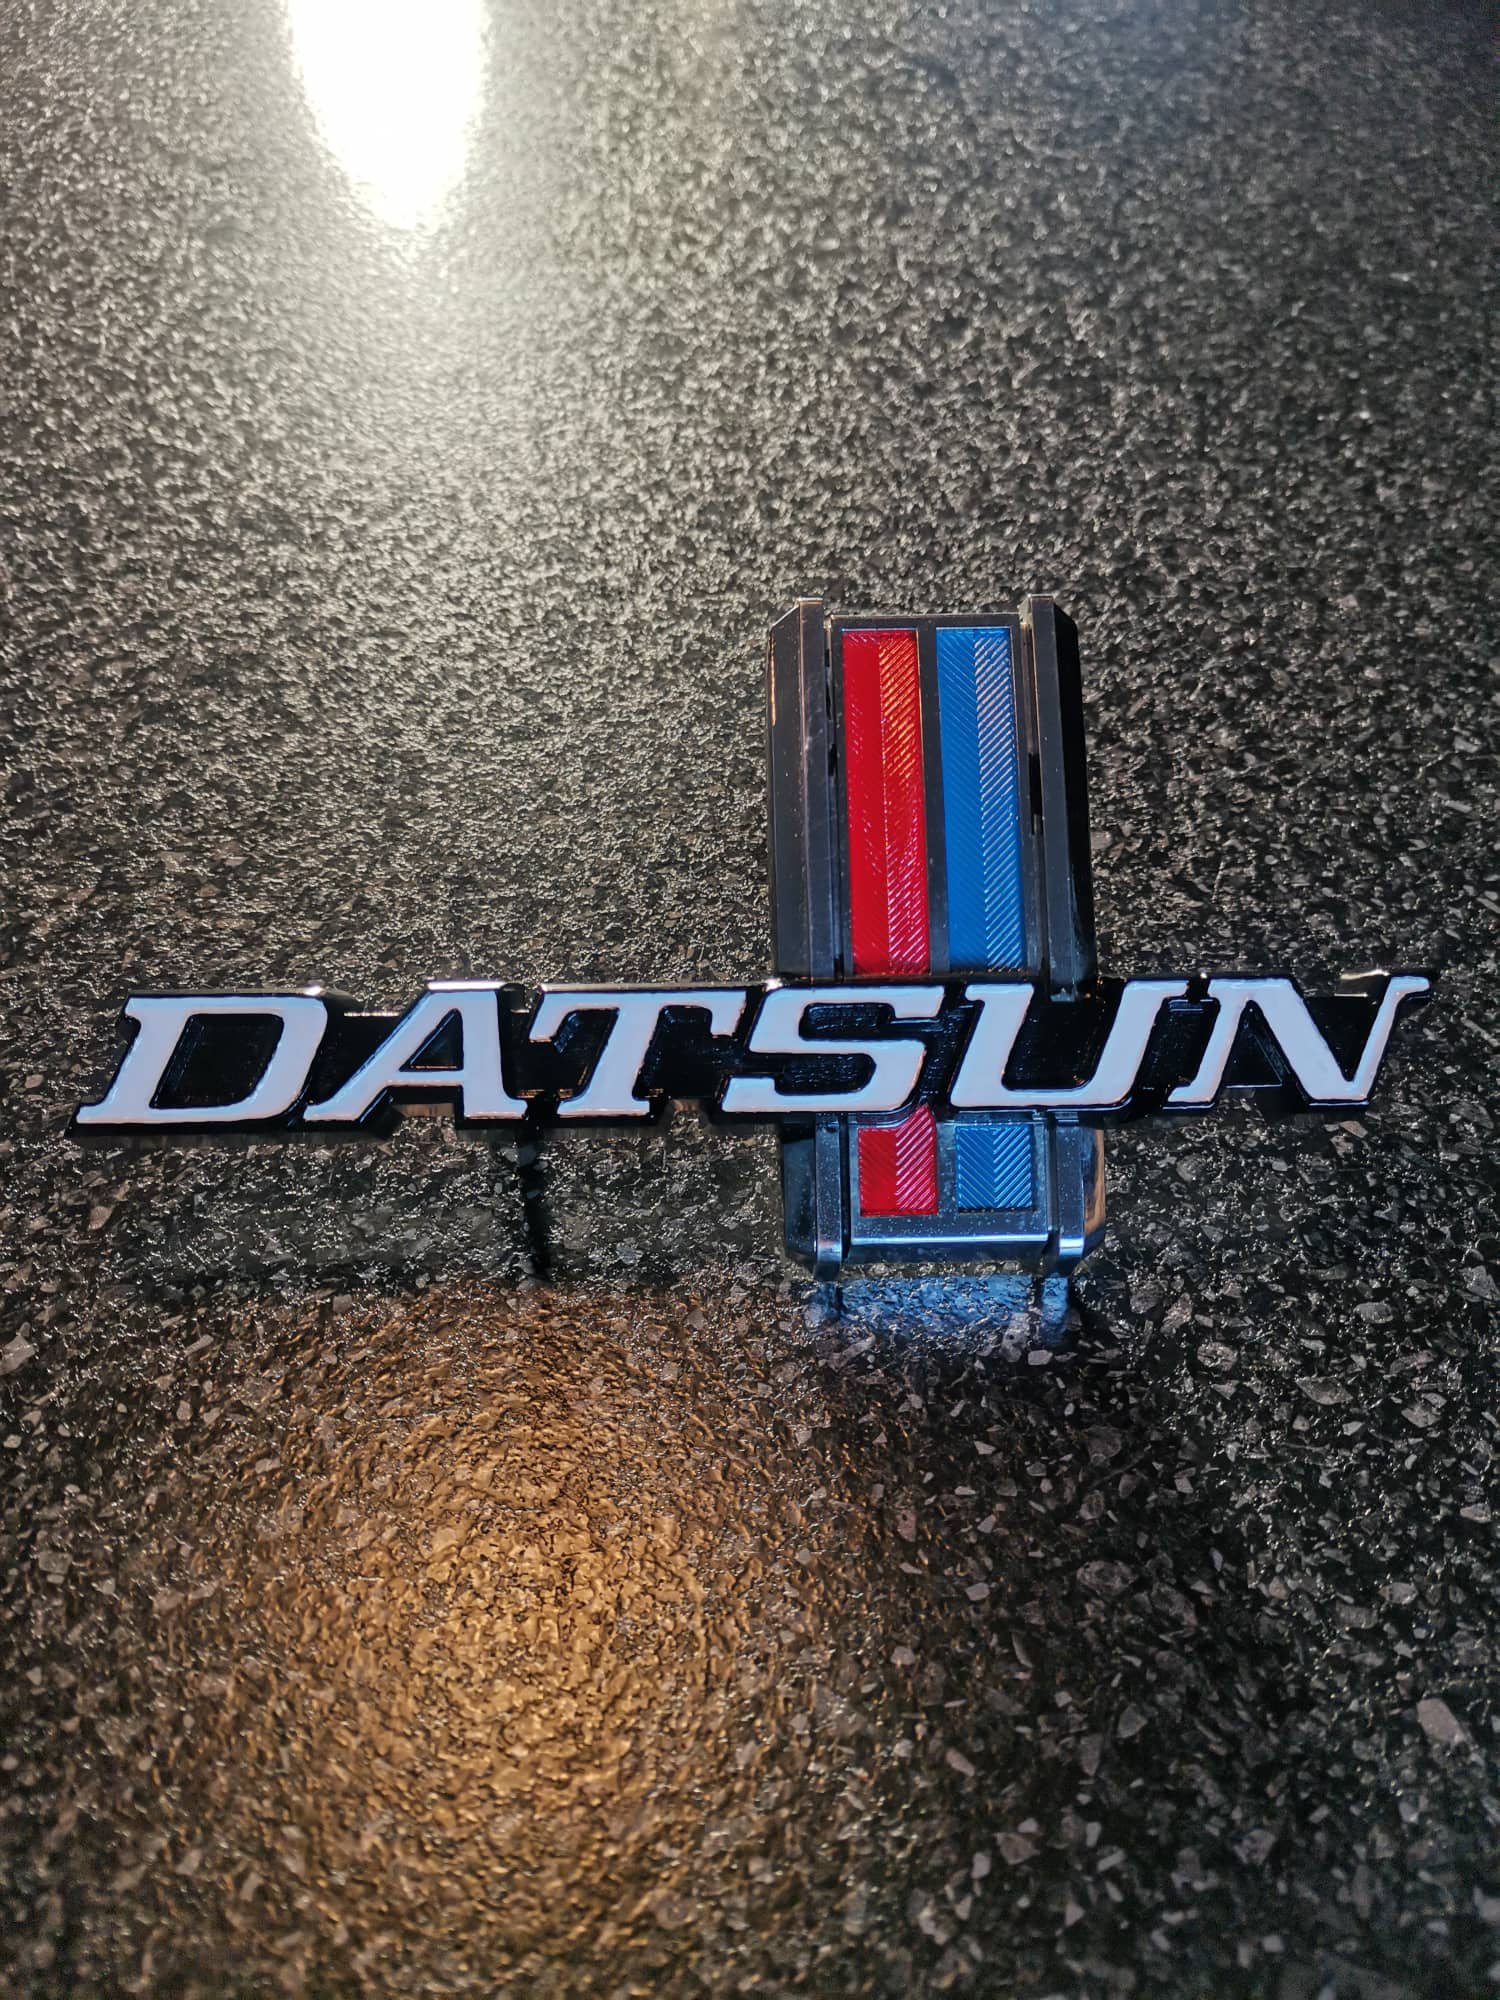
You can see the grill just didnt look nice enough with the rest of the truck painted. So once again i called on Hamish to give it a birthday for me. And the grill badge likewise looked pretty used. I enlisted the help of @filthy one mrs (Gemma from twisted sister customs) to give it a birthday for me.
2 points
-
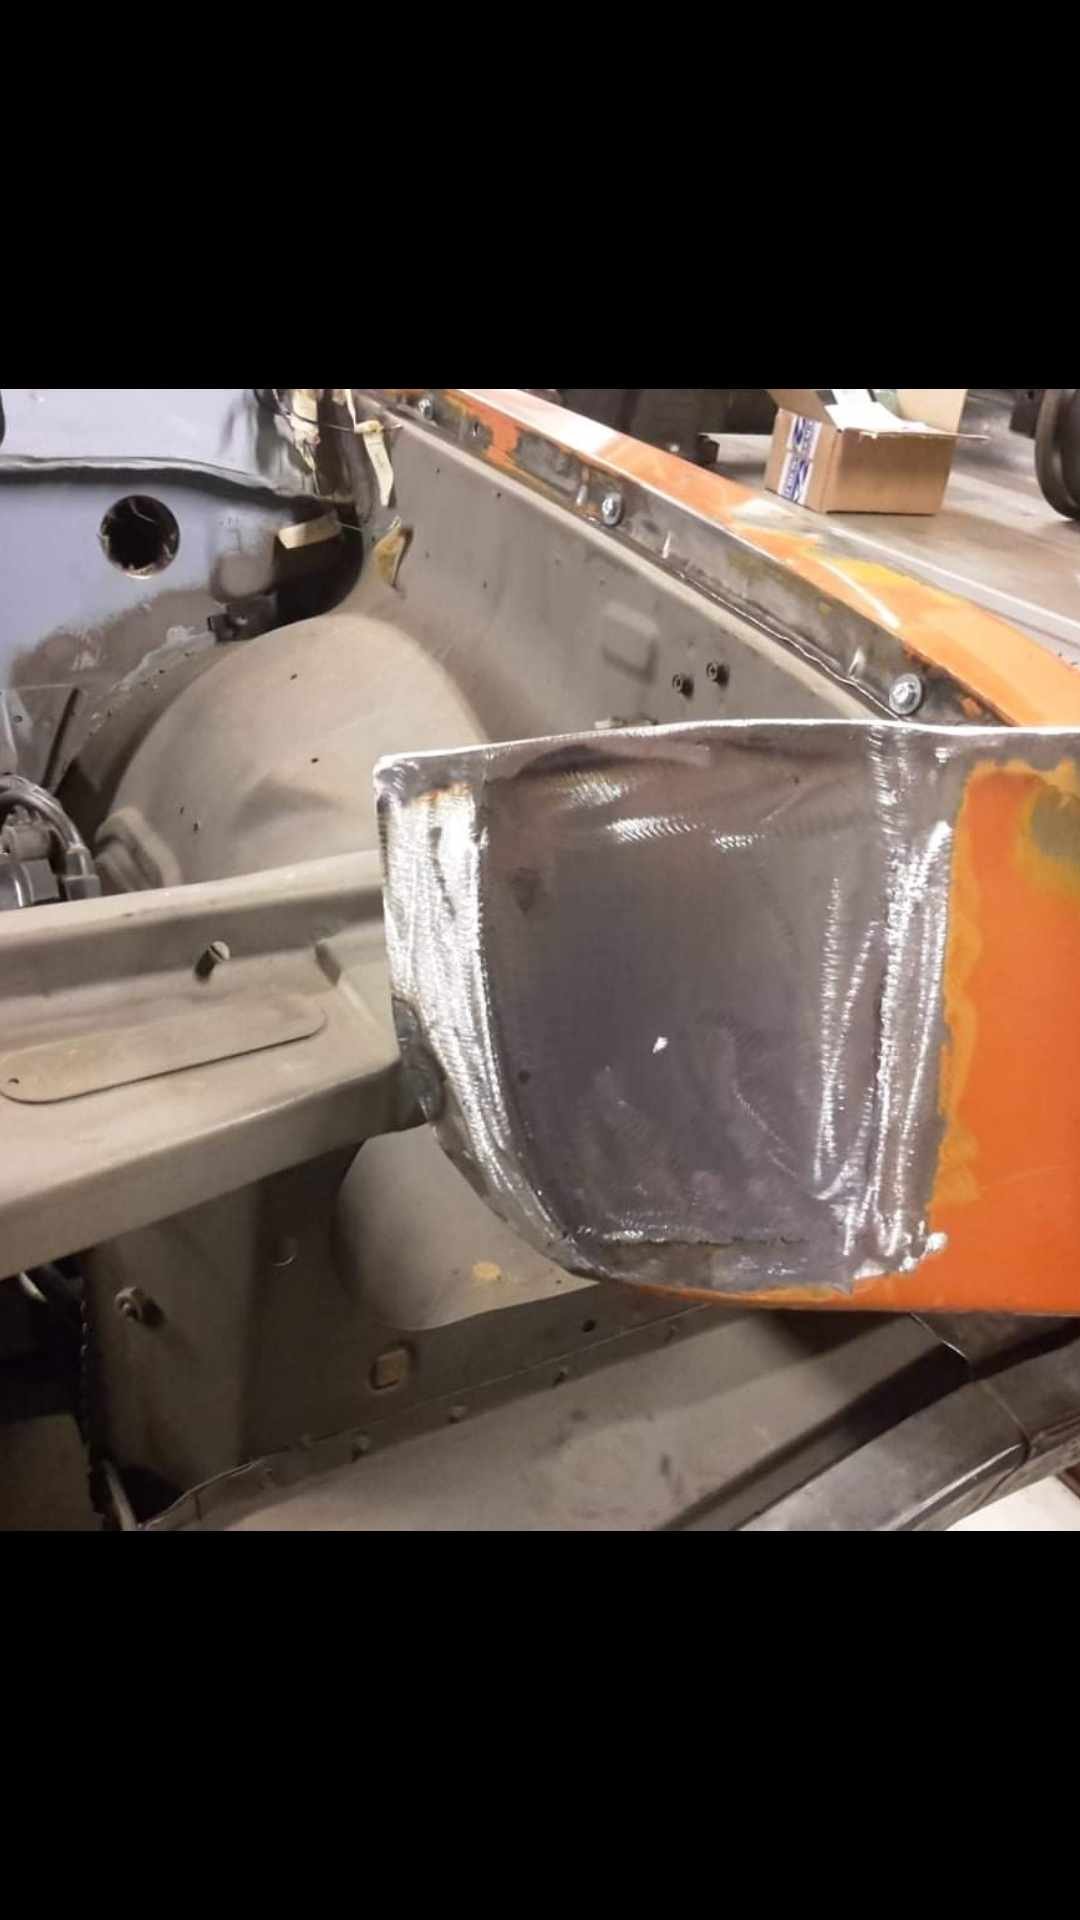
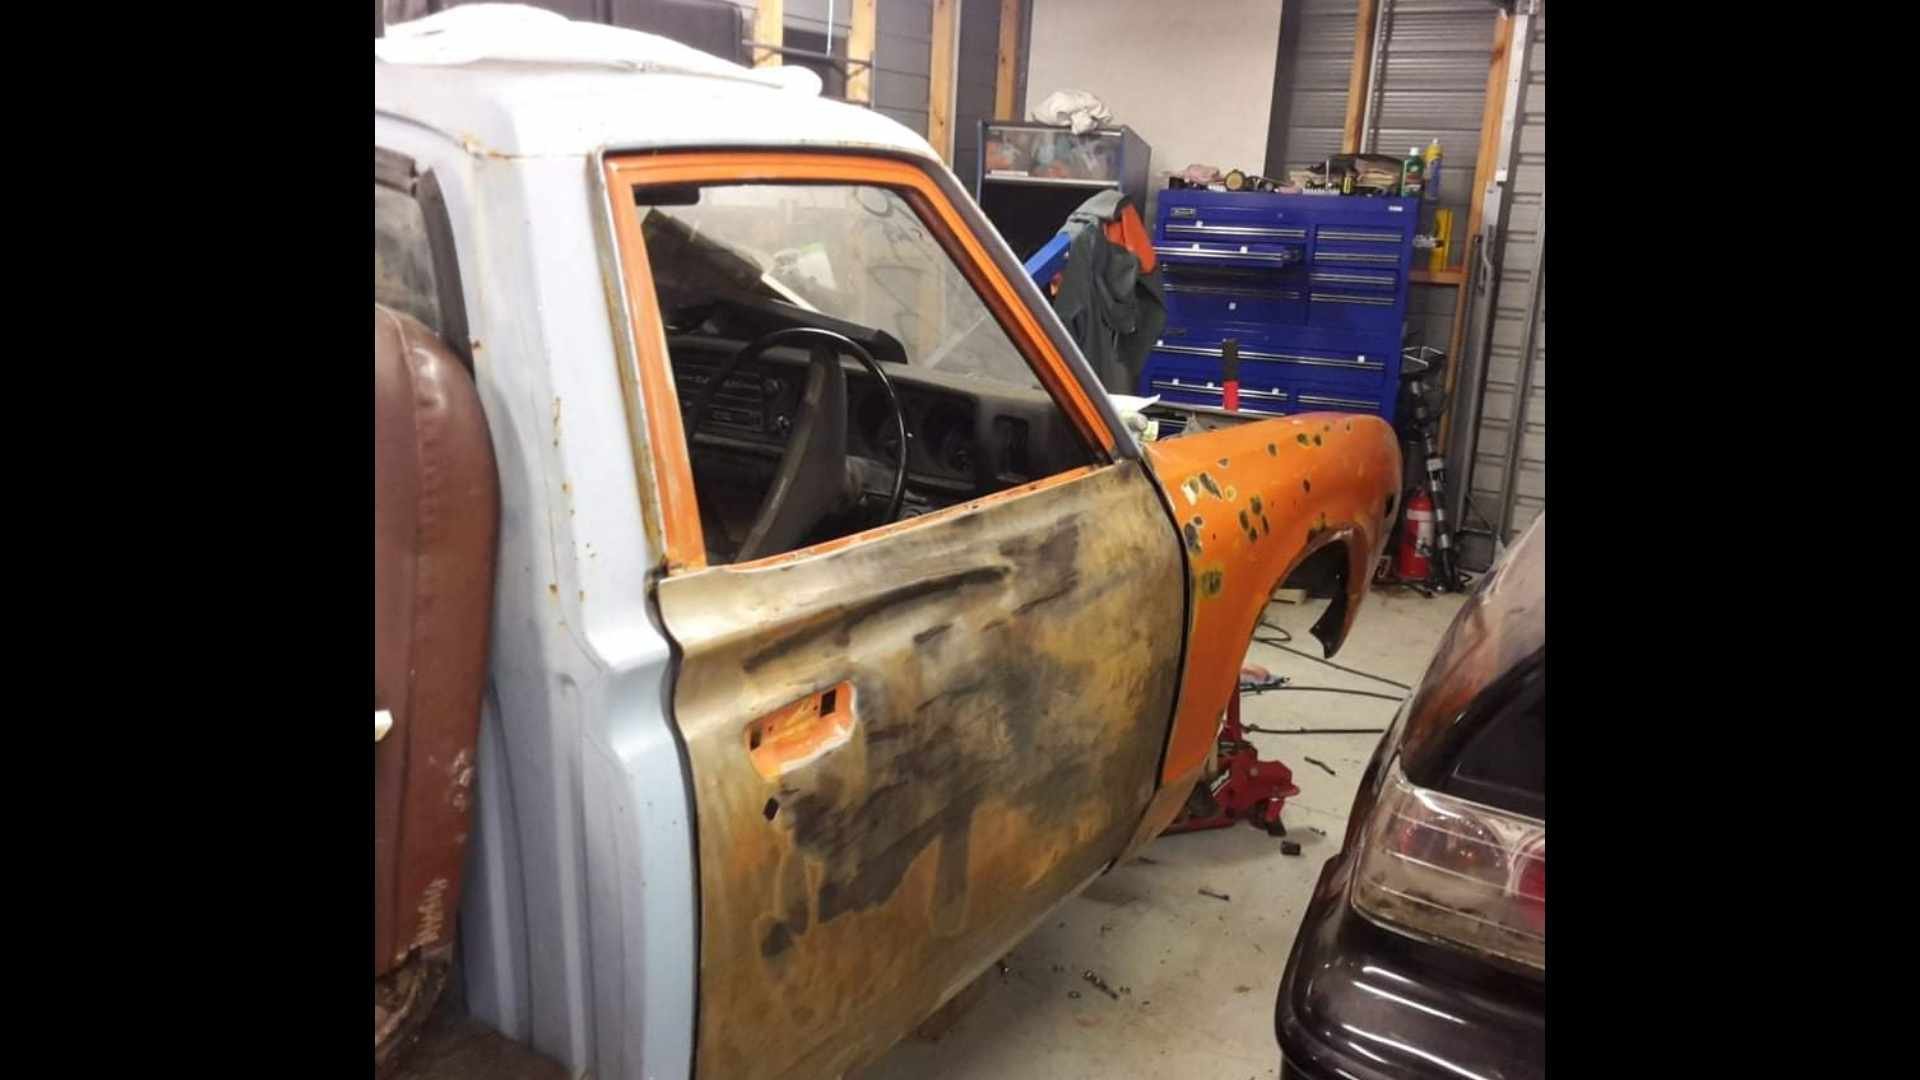
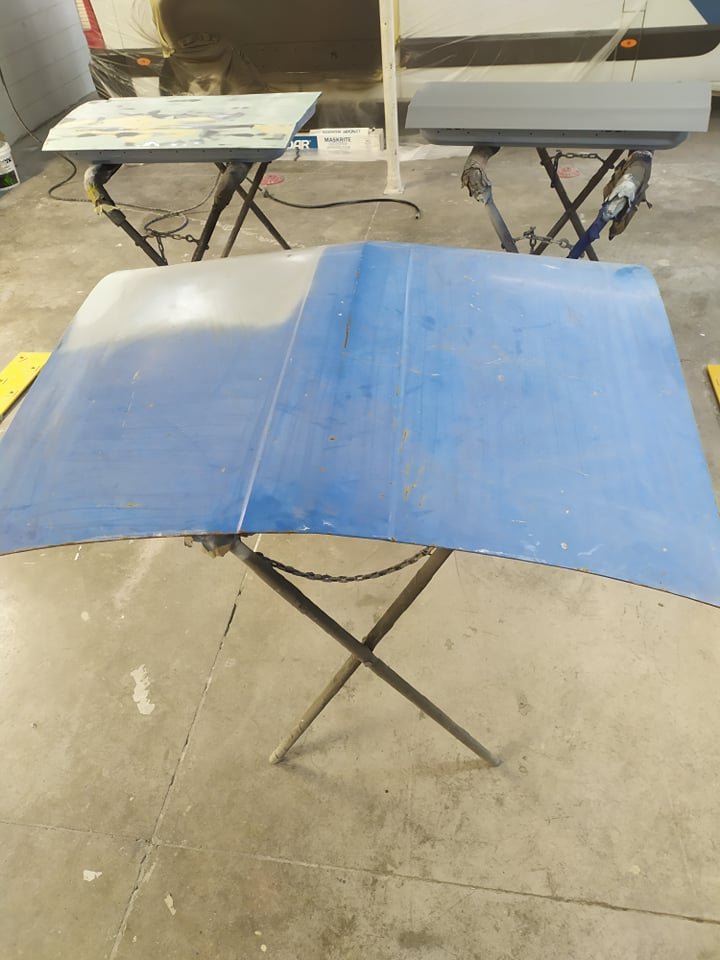
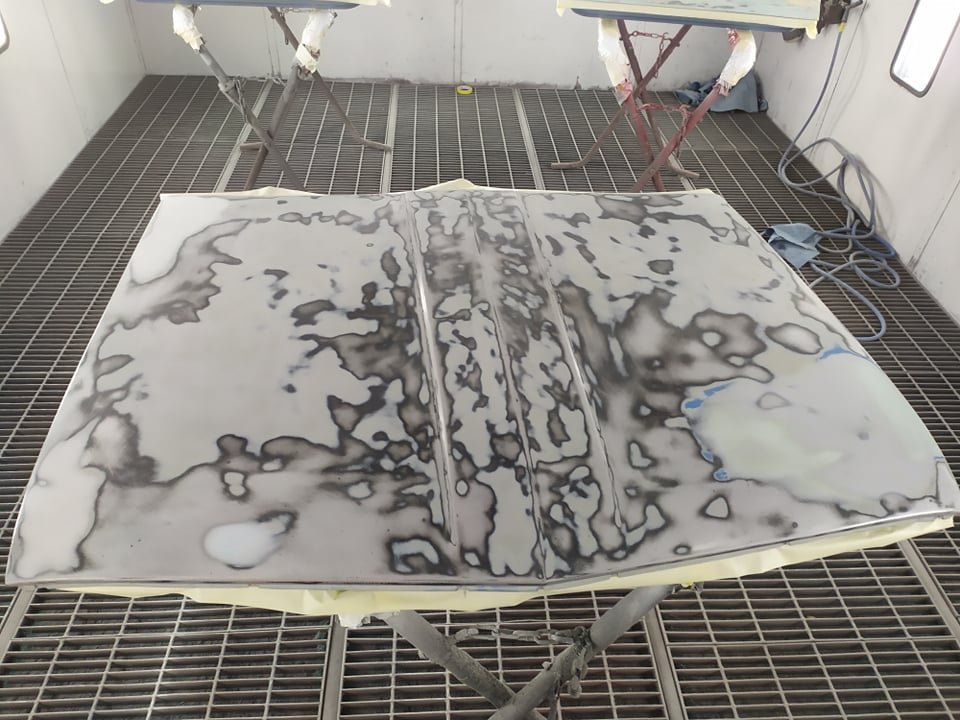
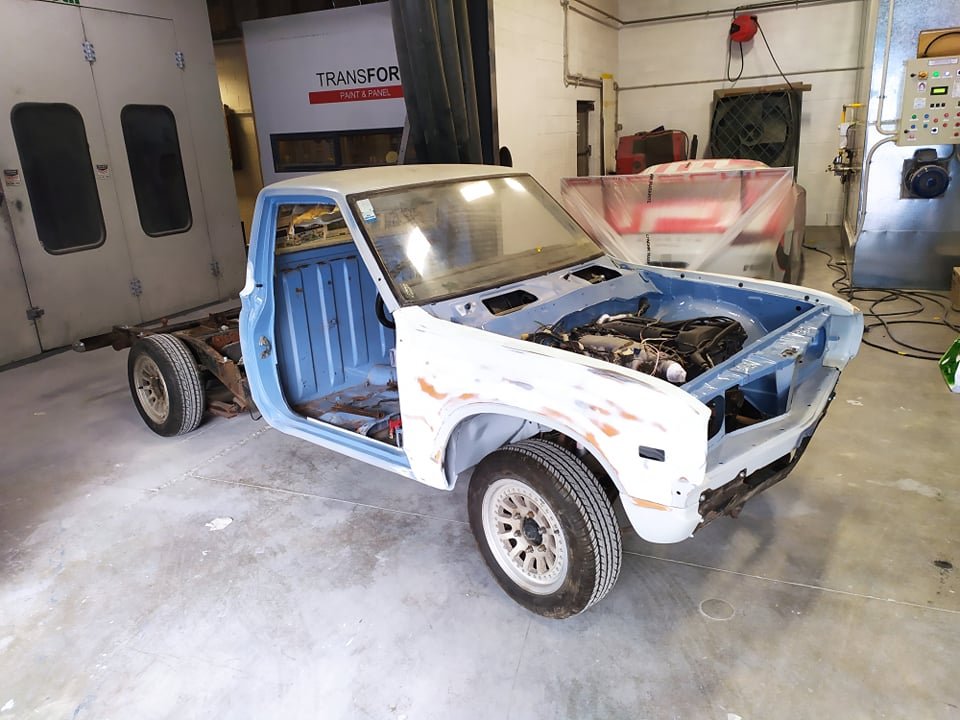
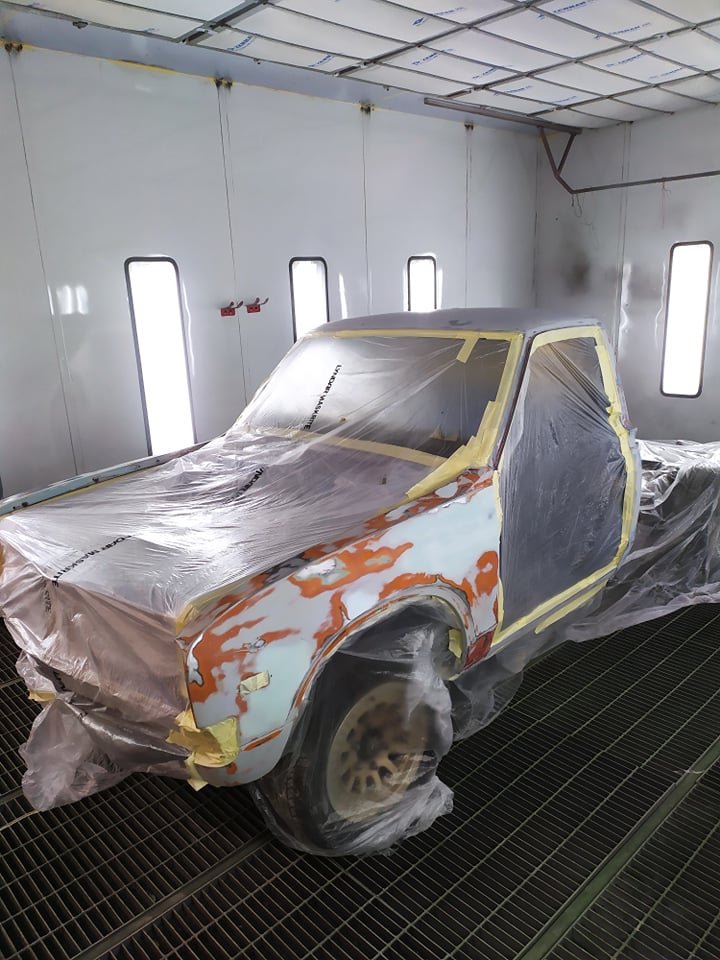
Then theres the body work, So it began pretty rust free. But sitting around outside in Christchurch, a bit of cancer began to show. My coarch builder mate fabricated me a new drivers side sill, and @governorsam grafted it in for me. (As well a couple of other small bits) i dont have any pictures of this either. And one of the gaurds needed a patch too. Again no pics, but i got a panel smasher to come weave his magic. Id fitted the front guards, and they did not match the shape of the doors at all. Also i found that old repairs etc meant that the drivers door was beyond economic repair. And needed to be replaced too. So mister panel smasher had the guards fiting beautifully afternonly a couple of hours. I removed rhe back window, and dropped the headlining down so he could pop some dents out of the roof. (It had been a working truck in its former life) he did a bloody good job all told too. I told him, im not some file finish fuckwit. Its a datsun, and its a ute. You can use as much filler as you need to. Because i knew he wont use more than is necessary. I also said, u donr expect a show car result. If its good enough fo you, its good enough for me too. But as a tradesman, i also knew he would do a good job. The last car he did for me came out really really nice. After the panel smashing was done, a mate brought over one of those paint spectro camera thingos. We took a picture of the paint on the underside of the roof skin. This gave me the colour the trauck was when new. Most of the rest of it had suffeeed 40+ years of central otago UV degradation. Some paint was procured, and it was sent into @I'm new here work on a long weekend. Hamish really pushed the boat out with stopping all the repairs, before paint
2 points
-
Hello, Maybe it's just my age, and to do with the cars that I learned about when I grew up. However I seem to be stuck in thinking of all of the motors from the 90s or early 200s as the "golden era"? Where anything before that was a bit primitive, and anything much after that is too modernized and hard to do anything with. So only things from around this time are good. Legendary little rippers such as the 4AGE, 4G63, 2JZ, 1UZ, 13B, LS1... Gotta love em! Cheap, plentiful, great potential, great aftermarket support, and so on. However a lot of these older motors are getting hard to source, expensive, and a bit less fun when it costs 10x what it used to. However I feel like there are some good modern options which are slept on. So, what are some cool modern engines that should have some potential for swapping into shitty old cars? @shrike noted a few cool options in a recent project thread. I figure it's a worthy topic of it's own, going into some more detail on each type of motor. I will write a few posts below that I've seen some success with, with some different engines and pros/cons. In my mind what made those older engines great, was a combination of few factors -Easy to make power in factory form. -Good modding capability. -Good aftermarket support. -Plentiful engines / not too expensive. Now to be fair I am Toyota biased, not because I think these motors are best, it's just what I know about from top of my head. Feel free to spam other alternatives if you know of something cool! First up Toyota 2ARFXE engine This is a 2.5 litre 4 cylinder engine with a 90mm bore and 99mm stroke. This is normally found in a hybrid car like a Camry. There is a non hybrid version too (2ARFE) Think of it as a slightly less good Toyota version of a K24 I guess. Why consider it? It uses all of the Toyota hybrid engine tricks, for good economy - that are good for power too when modified. High compression ratio, huge ports, big standard cams, somewhat bolts to a 3SGE gearbox (Easier for FWD than RWD though) There's currently one on Trademe for under $900. How does it go? These motors have a really big factory intake cam, and this can fit on the exhaust side too. So you buy a 2nd one and fit it on the exhaust side for a cheap and easy upgrade. Then retime the cams away from atkinson cycle, and you make big stacks of power with some basic bolt on mods. This guy was making 270whp with an NA motor with 2x factory intake cams fitted. Pretty awesome! It somewhat bolts up to a 3SGE bellhousing pattern, which works well for transverse engine swaps. Downsides are that it's a fairly tall engine, some people have had to cut their bonnet to fit in smaller RWD cars. Okay so that's cool for a low budget throw together, but does the aftermarket support scale up? How about a full $$$ turbo build? As this motor was common in america, there's heaps of stuff available. Papadakis racing made a 1000hp variant.1 point
-
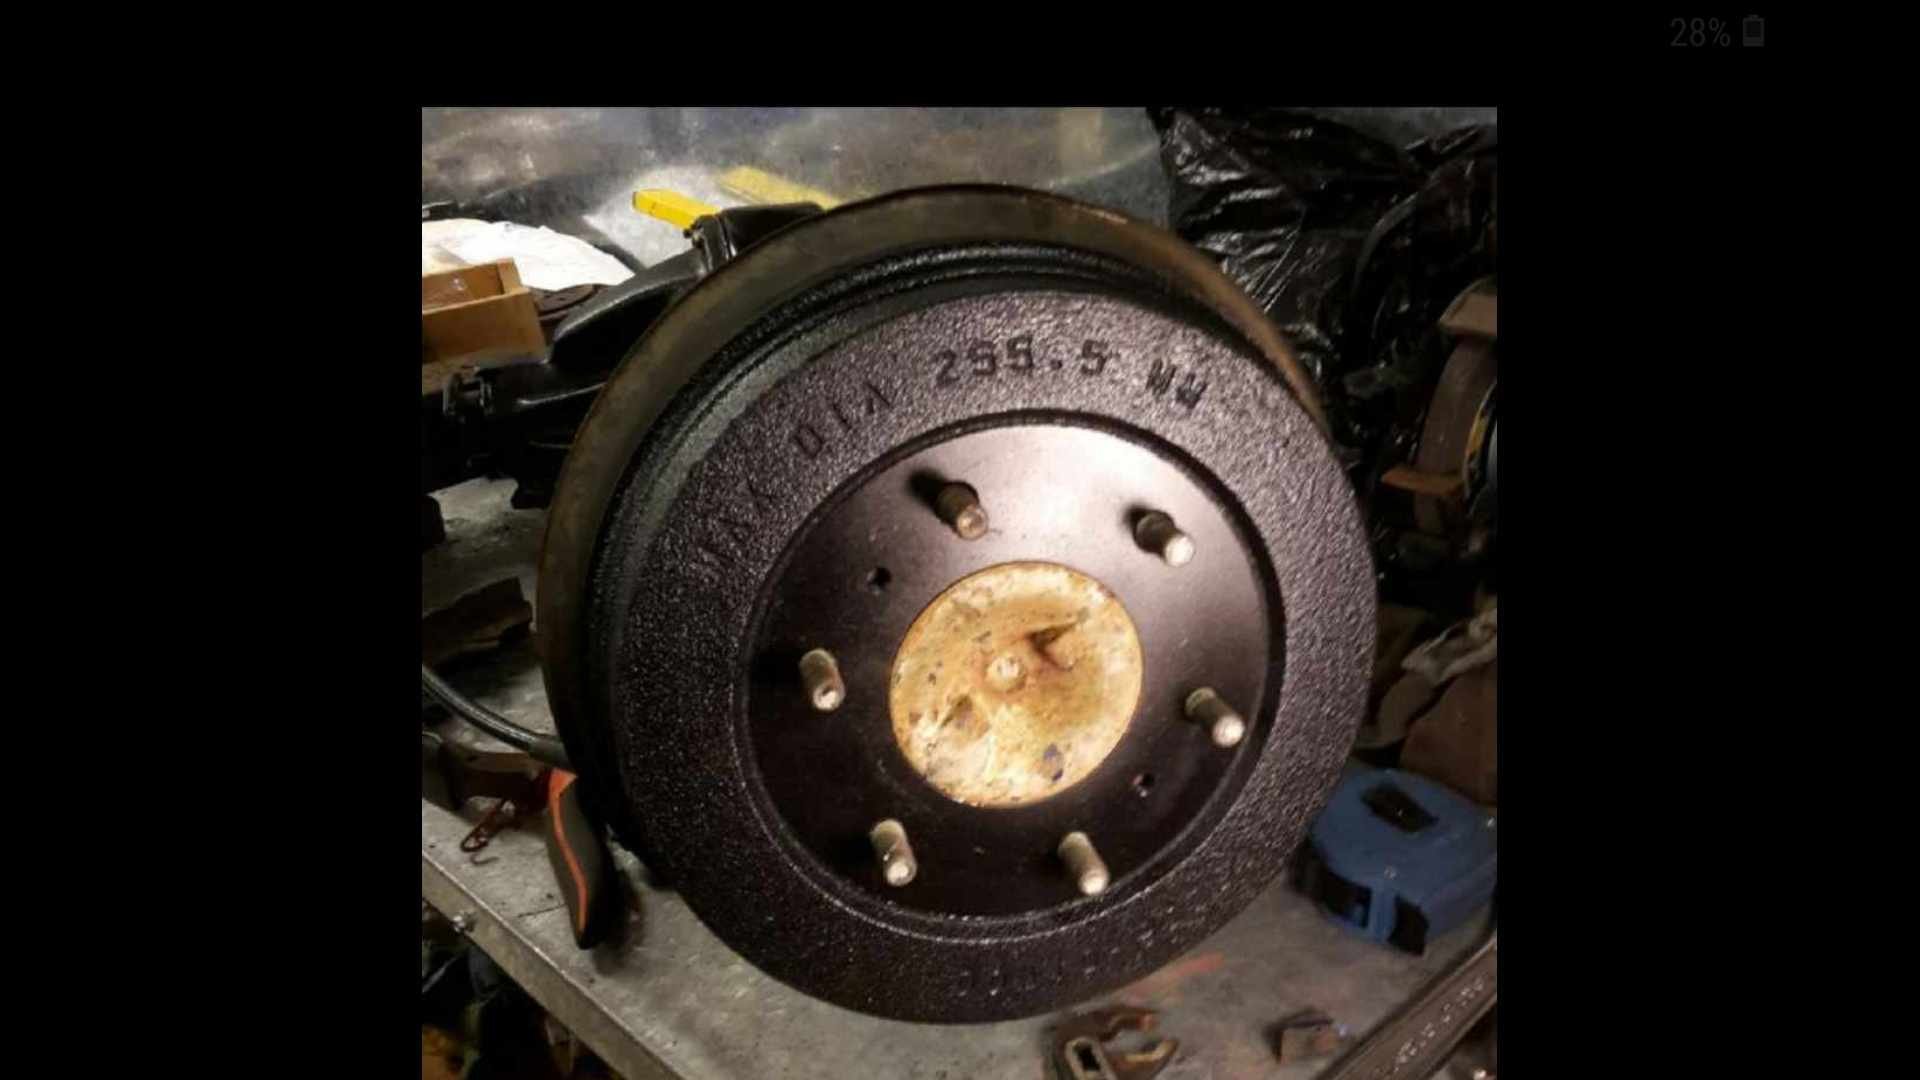
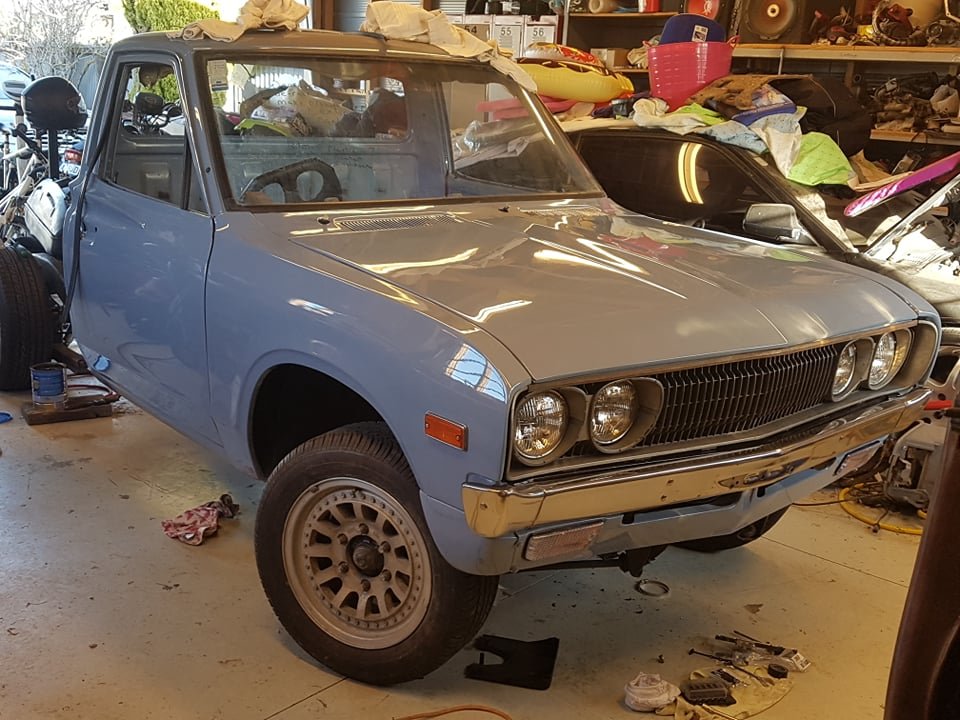
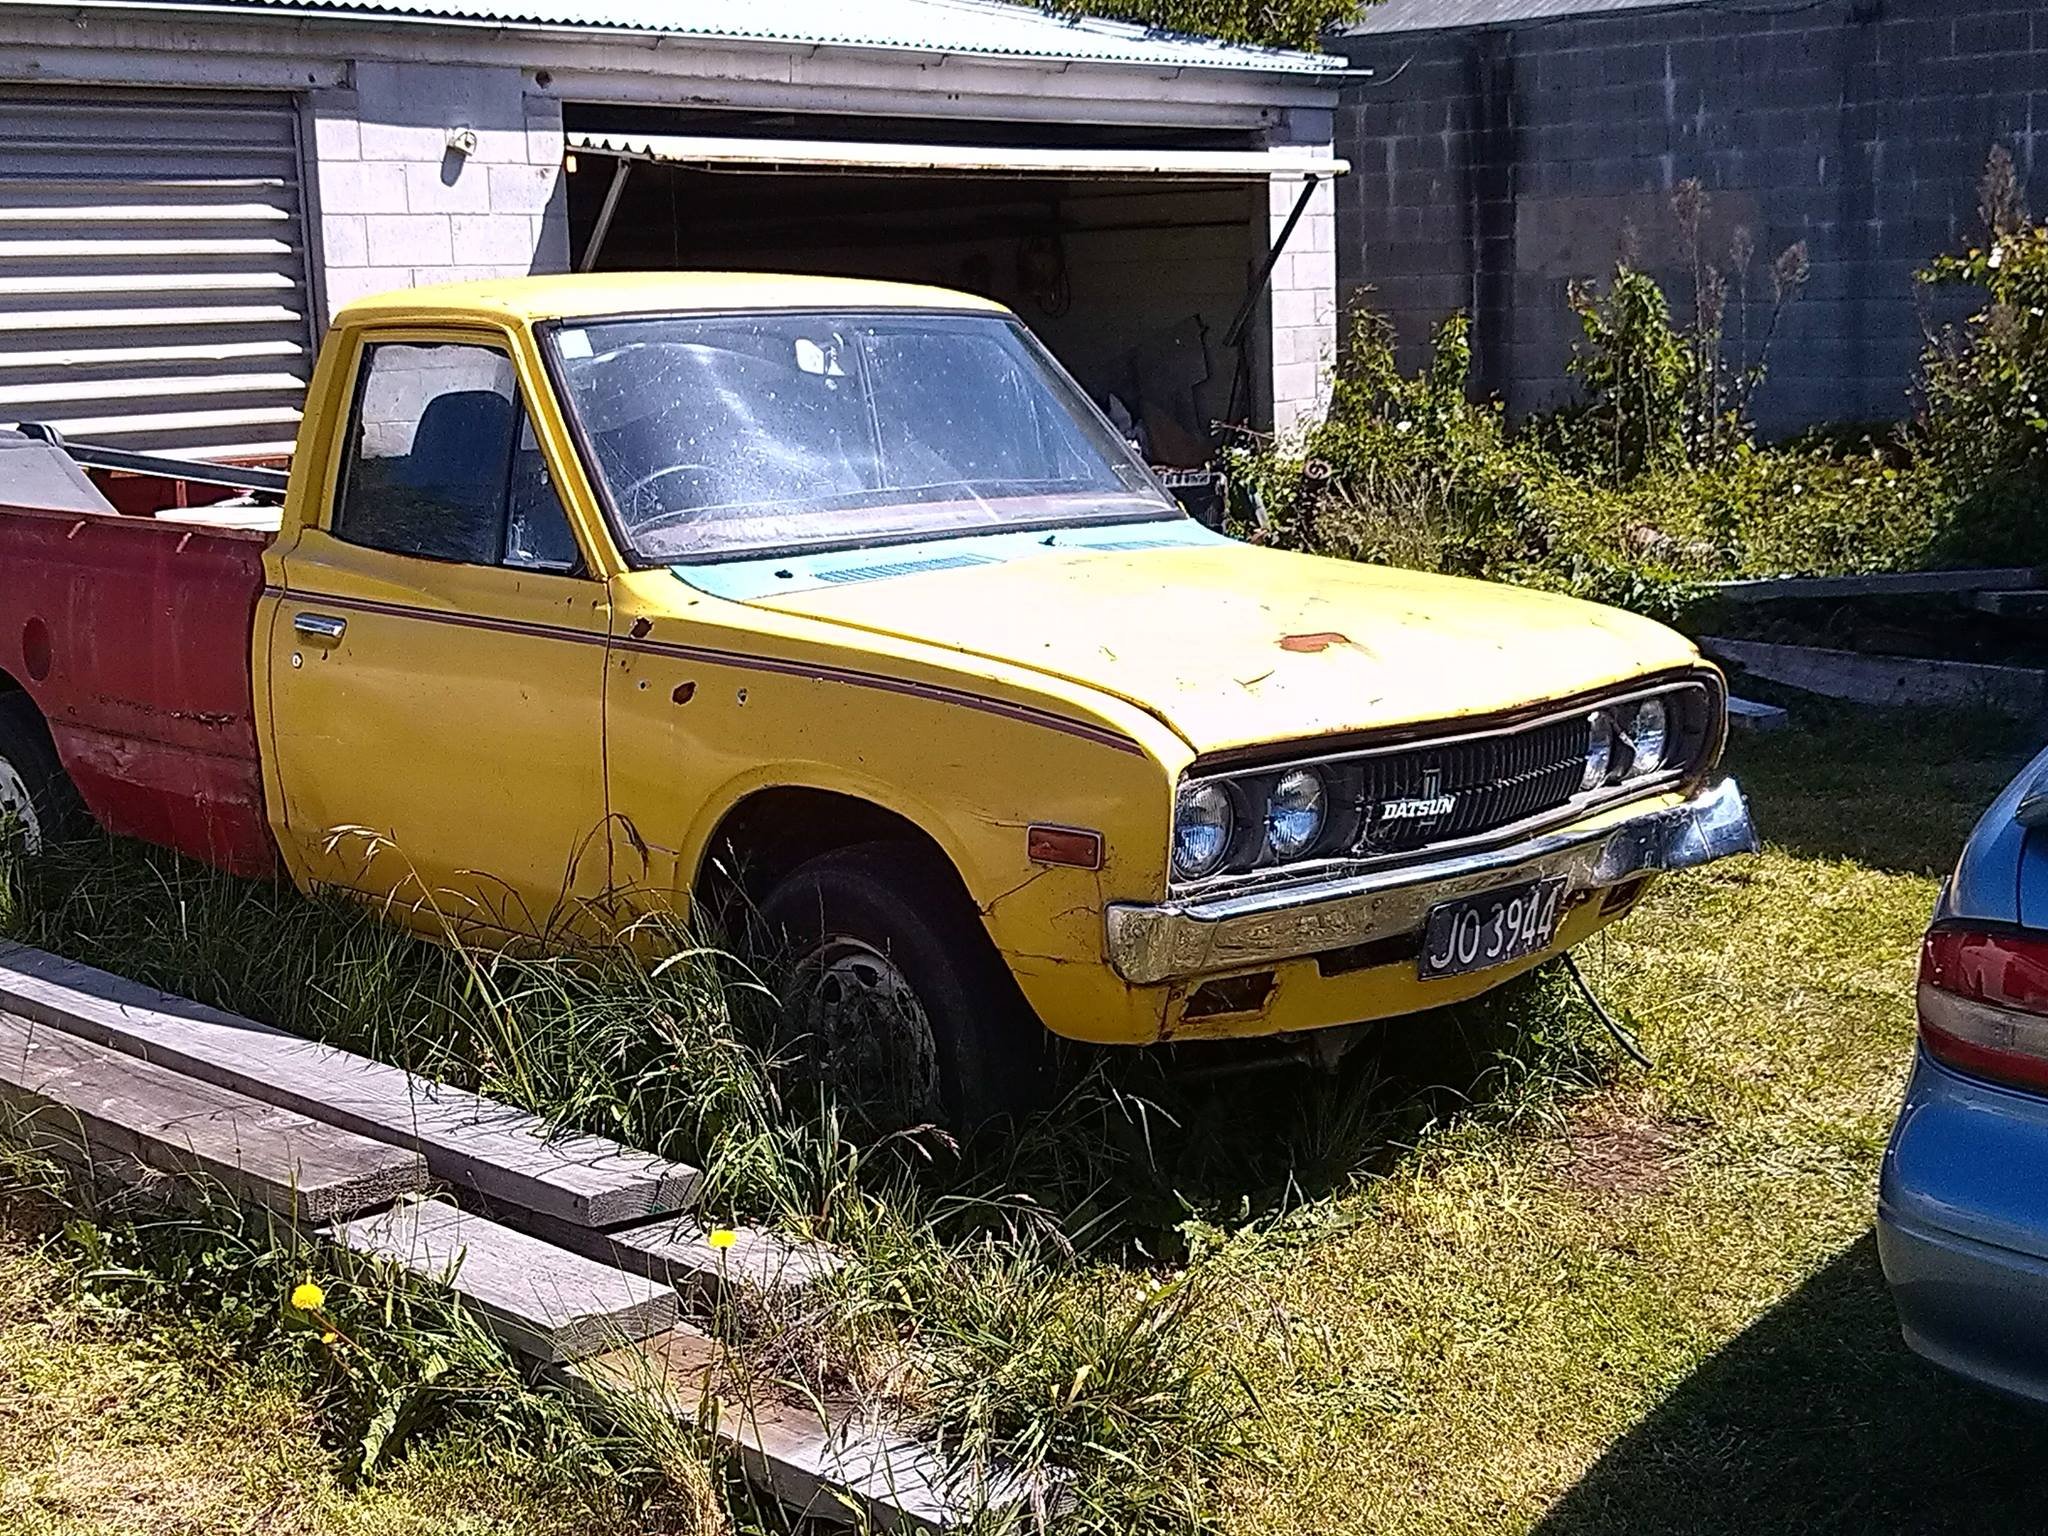
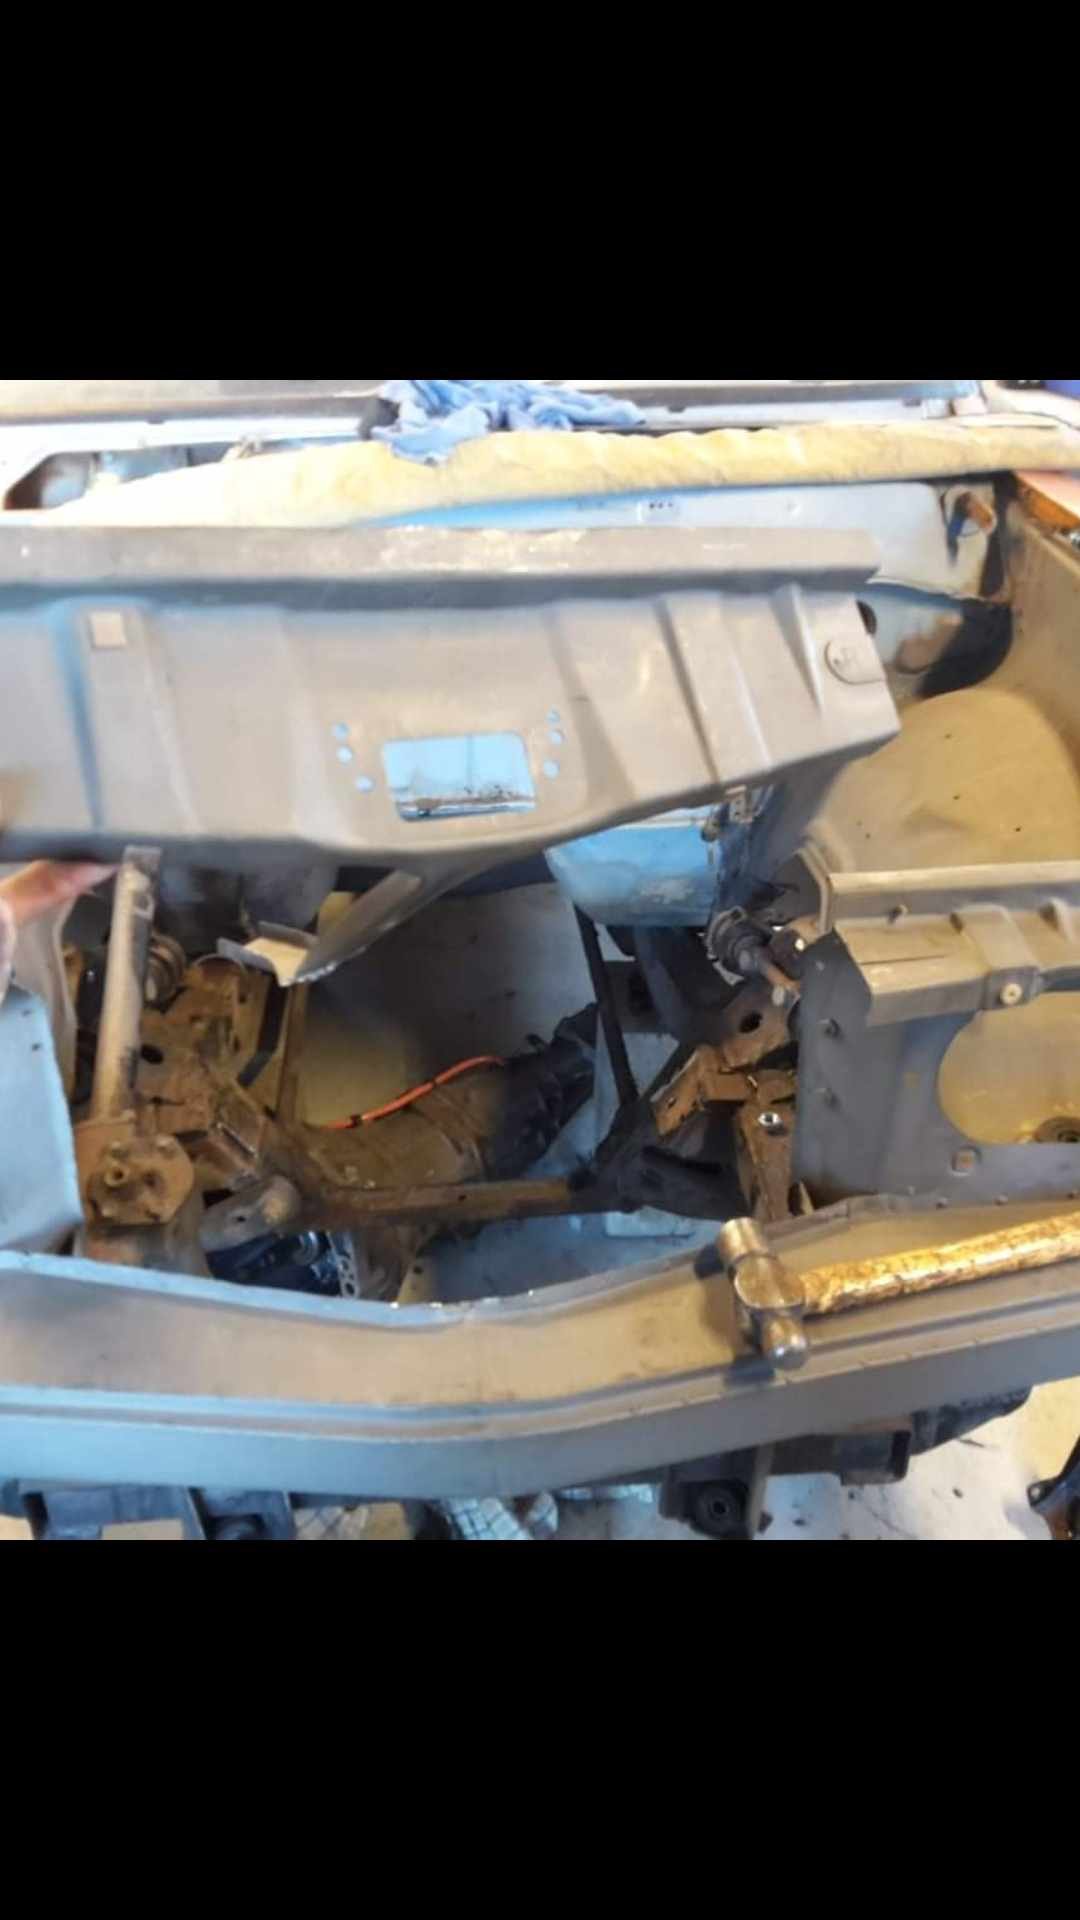
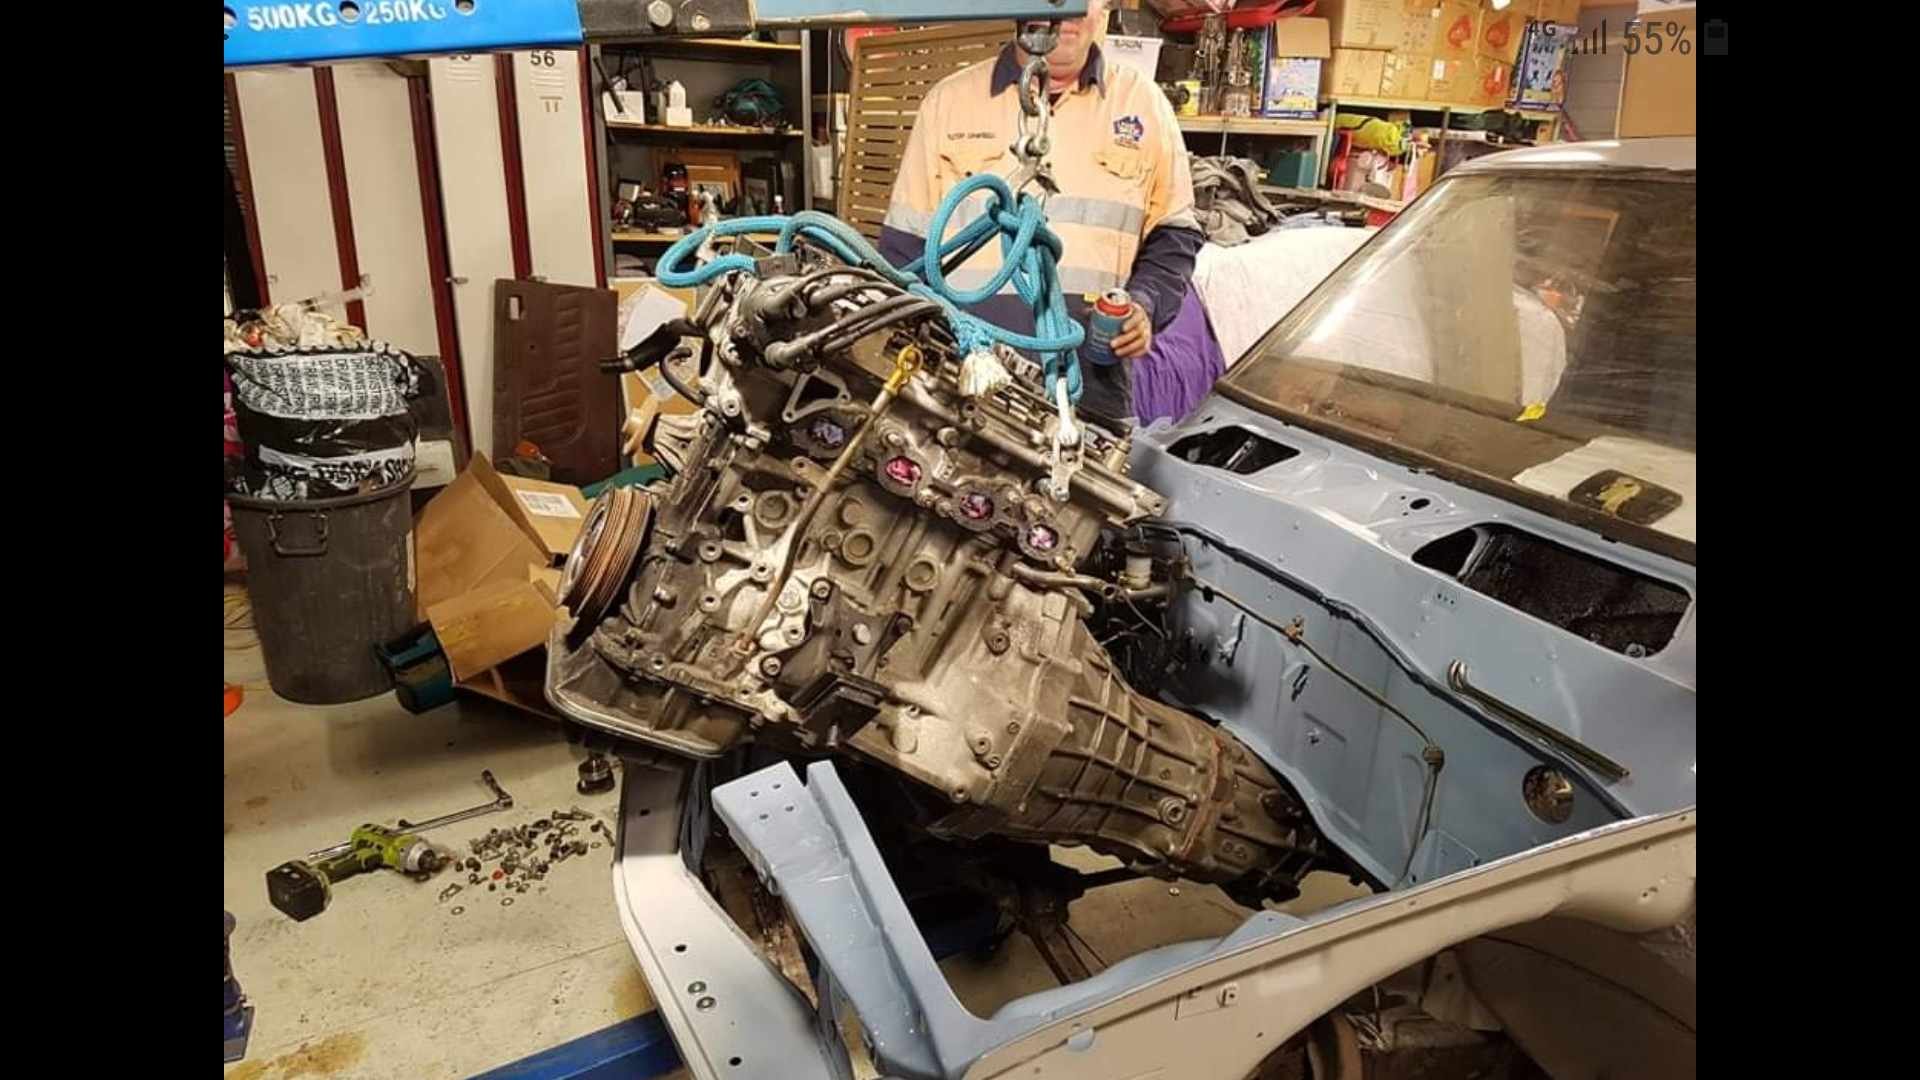
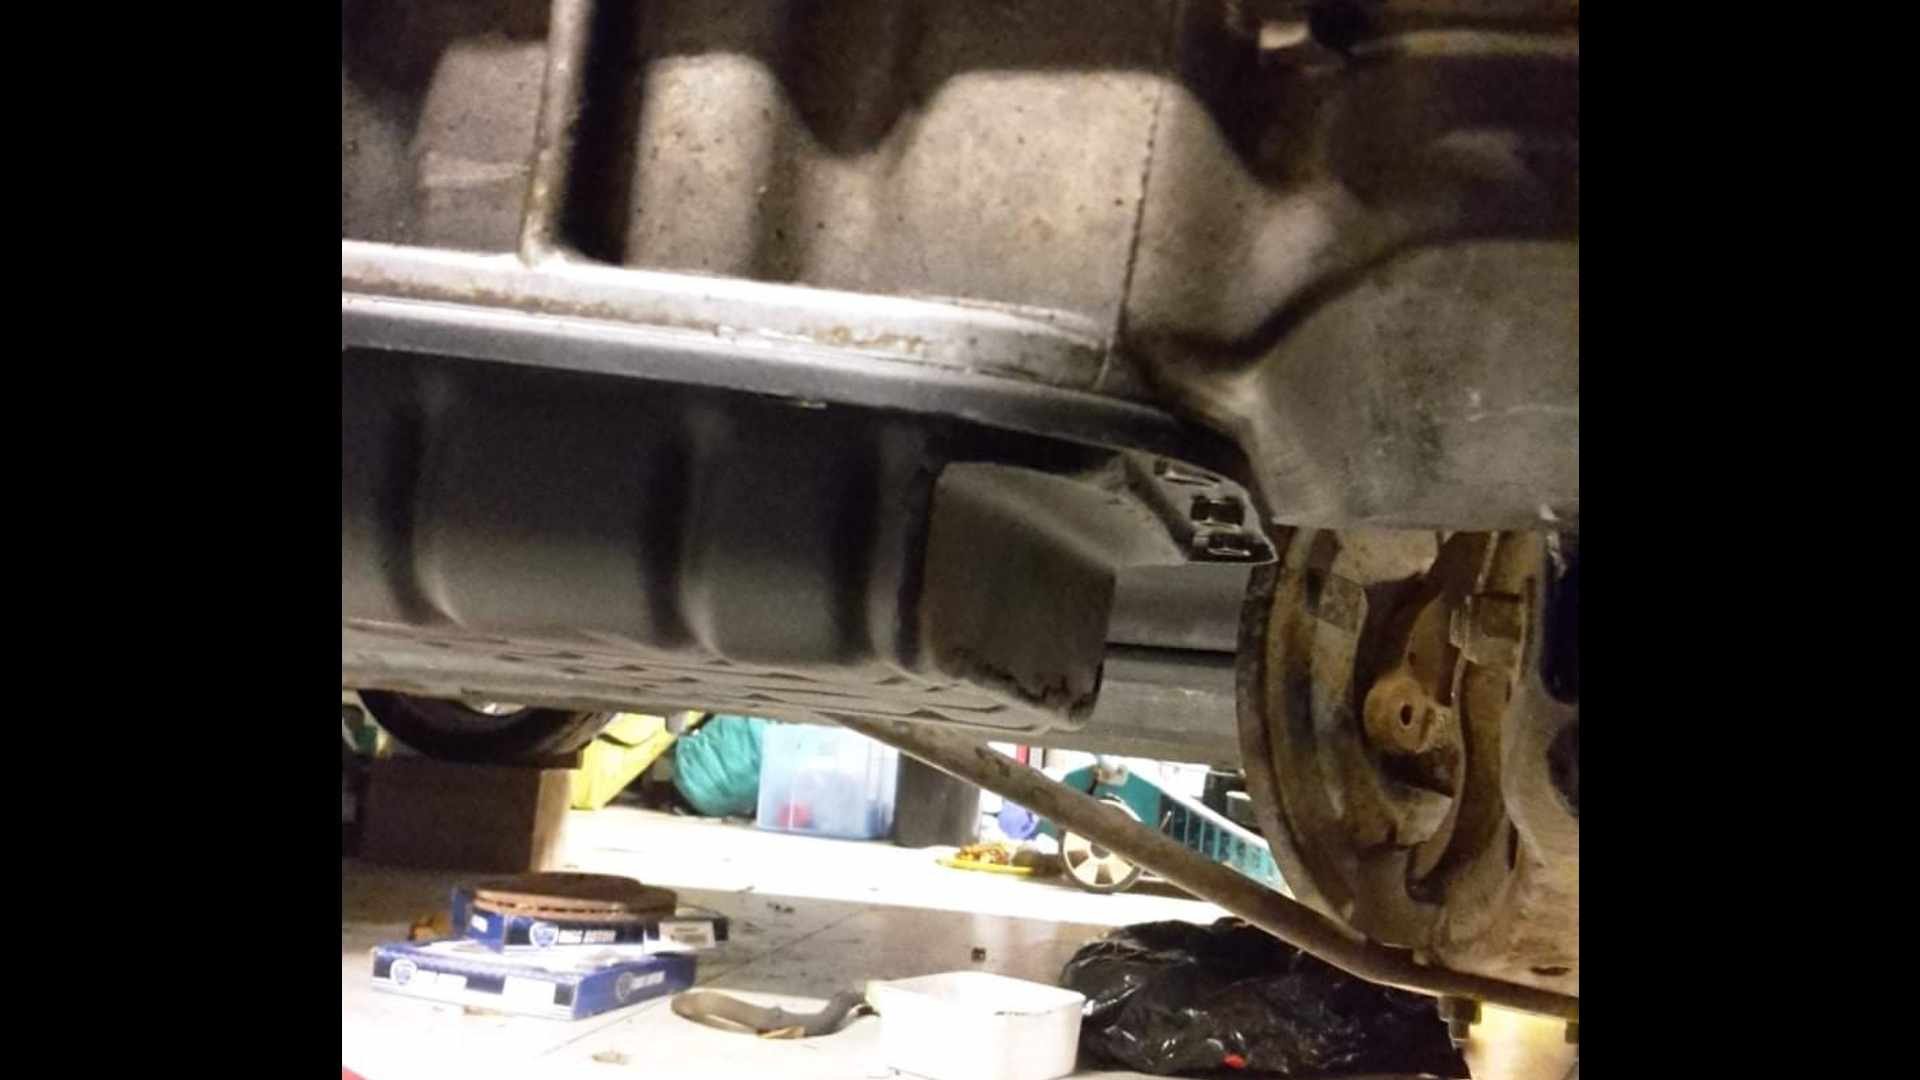
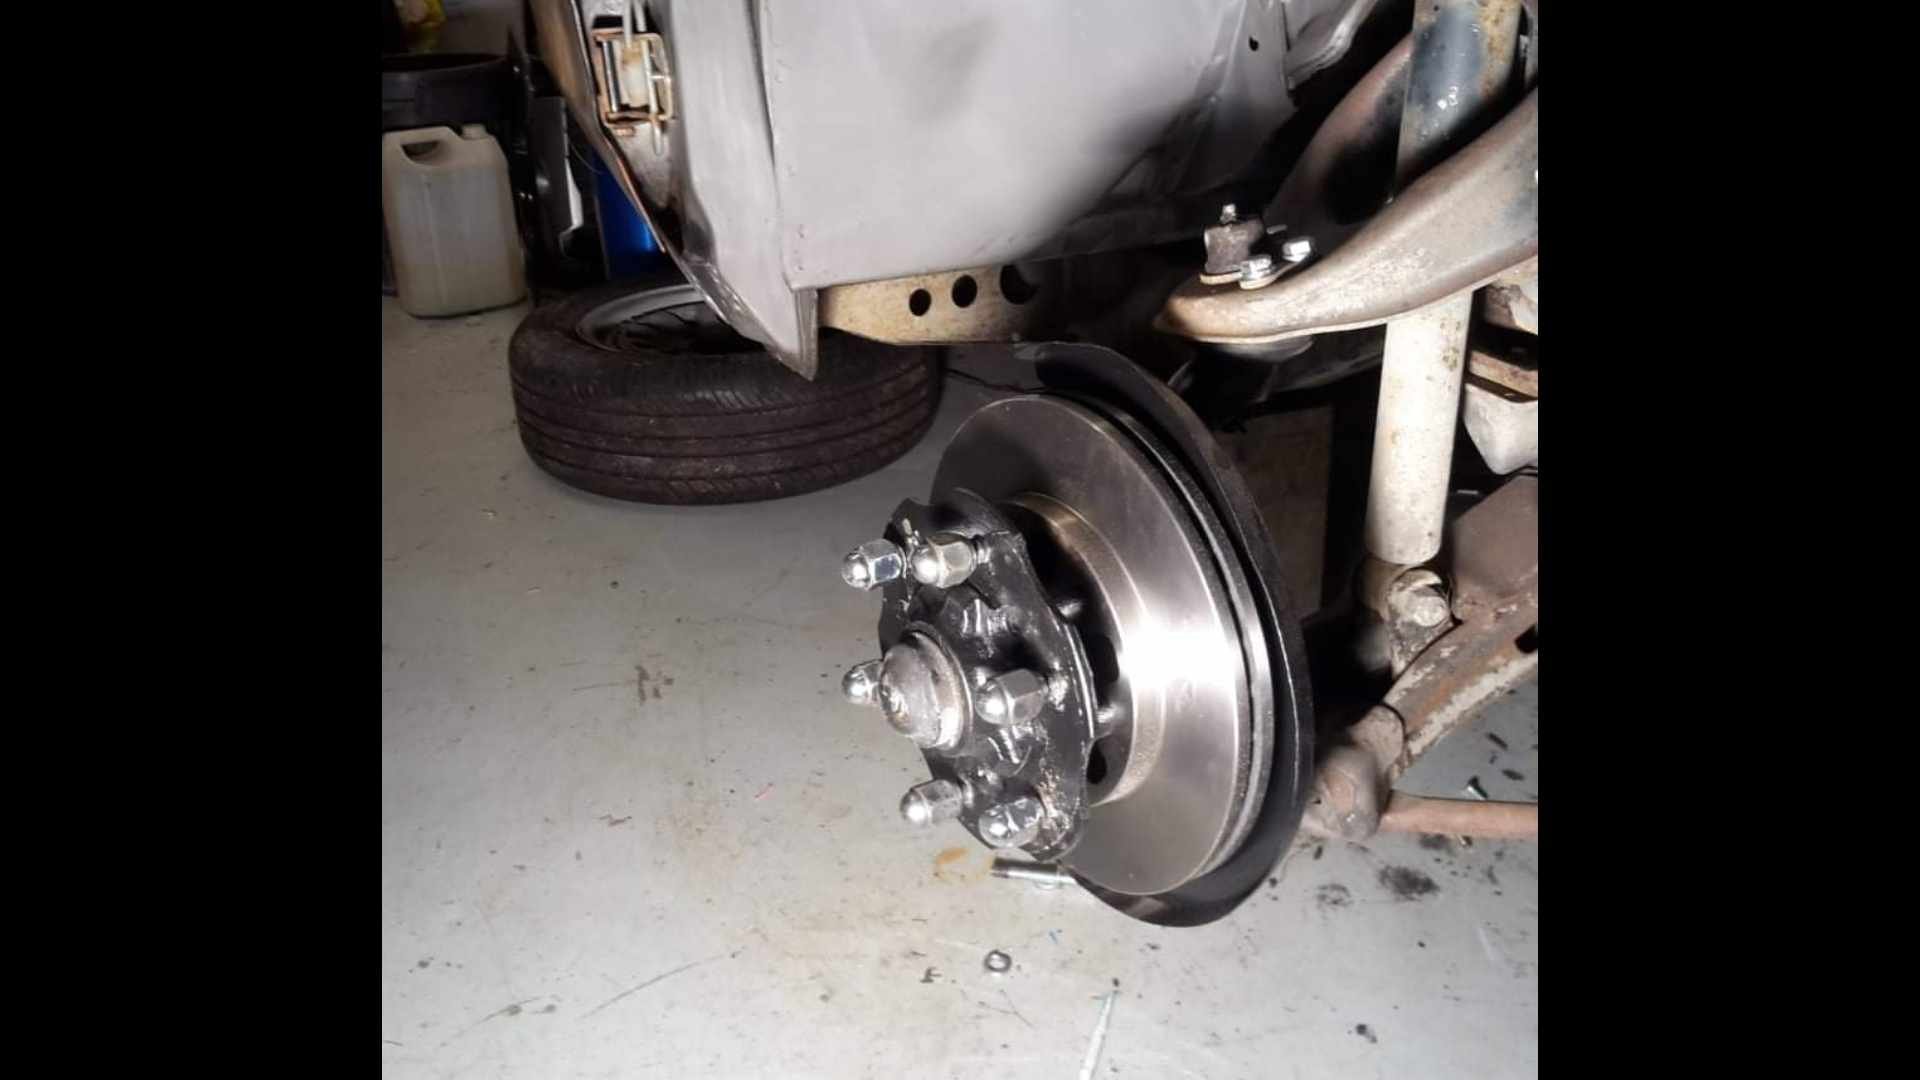
A few people have asked why theres no thread for this vehicle. (Because the owner is so useless tbh) i showed some pictures on my phone to some people at Garlic nats. And one of them convinced me i should post them up. (Thanks @Sungai Sungai) The story begins quite some years ago when i bought a datsun 620 ute of @Mr.Mk1. He'd rescued it from scrap. He also found a pretty fucked wellside tray for it. (Which is also rockinghorse shit 8n terms of rarity) it would seem i only have one picture of that truck. It needed plenty of work, but the rego was on hold, and it was (mostly) complete. When josh and i did the mission down to Alexandra to collect it, he showed me another 620 ute. It belonged to the landlord from whom his brother rented his business premesis from. Daily driven, and a real sweet honey. Because Alexandra is as dry as fuck with no foreplay, it was completely rust free too. (For what its worth, 620 are without a doubt the most rust prone vehicles on planet earth) Some time later, i learned that the elderly gentleman who owned that truck stacked it. And some time later it popped up as wrecking in Christchurch. Hoping to get some parts, i shot around there. Where i met @Agent75. The truck was still pretty rust feee. But unfortunately Shane had cut the radiator support panel off to make removing the engine easier. The inner gaurds were a little bit puckered, but it could have been straightened out. A deal was struck, and i dragged it home. Another mate had another 620 he wanted ro move on. ( @I'm new here) it had been completely dismantled. And had some prettt cunty rust. So i bought that, and had a coachbuilder mate graft the inner gaurds and rad support panel off that cab onto this one. Unfortunately i have no pictures of this. I also picked up a pair of front guards off another mate. As i didnt get the nasty, underpowered, leaky, J15 with the truck, i opted for an S14 SR20 that i bought off @mint16. With the gearbox attached, i had to make the centre of the rad support panel removeable. After id painted the engine bay, @fletch have me a hand to do the final engine installation. Because id slung the engine so low, and so far back, the sump had to be notched to clear the drag link. Seeing as this chassis is the later model/last iteration of the 620, it was fitted with ball joints, rather than king pins. This is a wicked bonus, because i learned that if the top ball joint is swapped over, that D21 navara hubs and stubs are a bolt in affair. No more gawdaful drum brakes. Best of all, a mate gave me a set for free. (Less calipers, which i then sourced of marketplace) because im not a total broken arse any more, i threw on a pair of new rotors too. Discussion,
1 point
-
Massive mate! So good getting that first start up!1 point
-
No space for 3.5" then, considered Oval exhaust :p Keen to see what you come up with :01 point
-
Like I commented on the grams of insta - fit a ramflo filter and you're sorted. Congrats Dave. Looking forward to hearing this scream!1 point
-
Does it have a name? The killer Bee, The Bad Banana, Caution tape, The one man school bus, Smokachu, Yellow bellied road snake?1 point
-
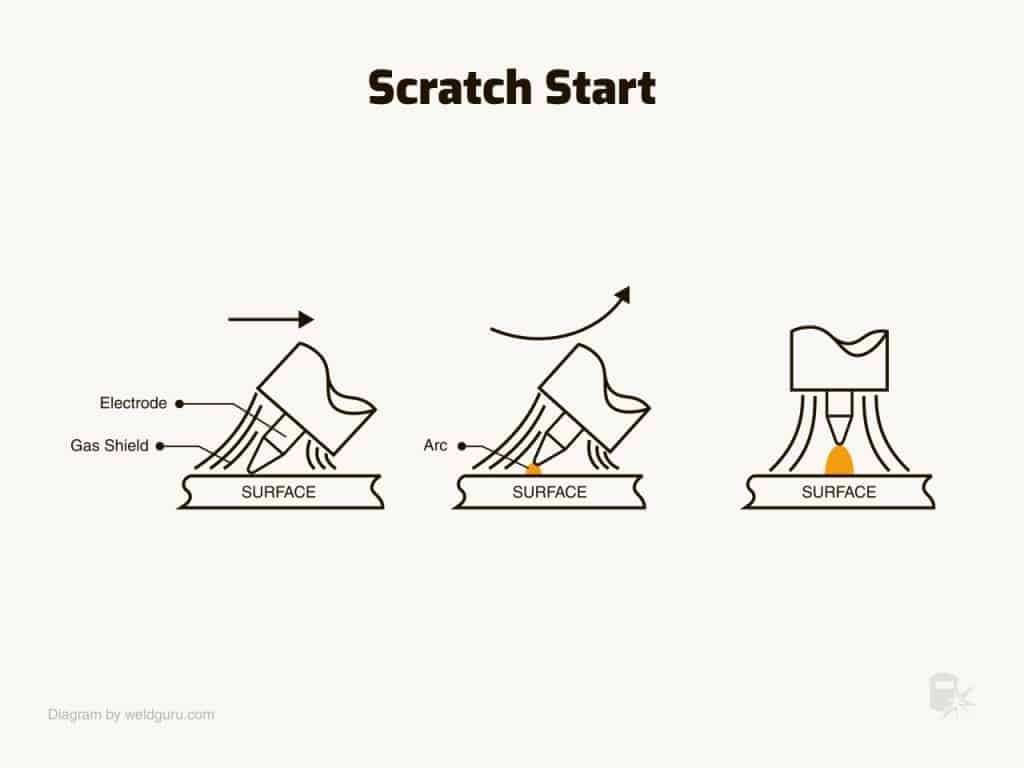
Yeah it's a thing, predating lift arc start. You want to be real good at sharpening tungstens with a scratch start machine as you will be sharpening a lot of them!
1 point
-
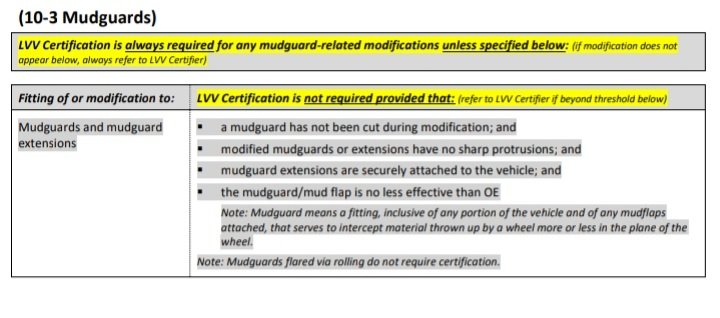
Not required Will need mud flaps though1 point
-
Is a rear bumper required for cert? Barry's going for the Lancia group B look:
1 point
-
Damn good deals those, just shits me as i was about to list my little arc welder with tig kit for $550. Might just hoard it in back shed instead, out of sight out of mind etc etc.1 point
-
And just like that she’s gone….. dropped off to fielding what a Kent of a drive. Started with a flat tyre on the van, so had to swap all 4 wheels over from the other ute, that was a mission in itself. then drove all the way to fielding, dropped it off and refueled. As soon as I hit the main road from palmy to Sanson the ECL and DPF lights came on. limp mode engaged, no boost. FUGH!!! decided to send it. Hills were fun. crawled into the drive at 2am the next day after starting at 10am. van is booked in for a service and dpf delete next week
1 point
-
I'll post that up as a reply1 point
-
Theres a facebook group called 'Engine porn' suggested to me 2 nights ago. It looked interesting so yesterday morning at smoko time I put up some pics and a quick blurb about my engine build with a link back to the build thread here on oldschool. Thought they'd appreciate it and crikey - the response has been amazing Of course there's always going to be a Barry lurking...
1 point
-
Also, the courier brought my birthday present today: And I just got home from an extended lunch break cos the weather is mint today... I'm fucking fizzing. Can't wait to start putting it back together!
1 point
-
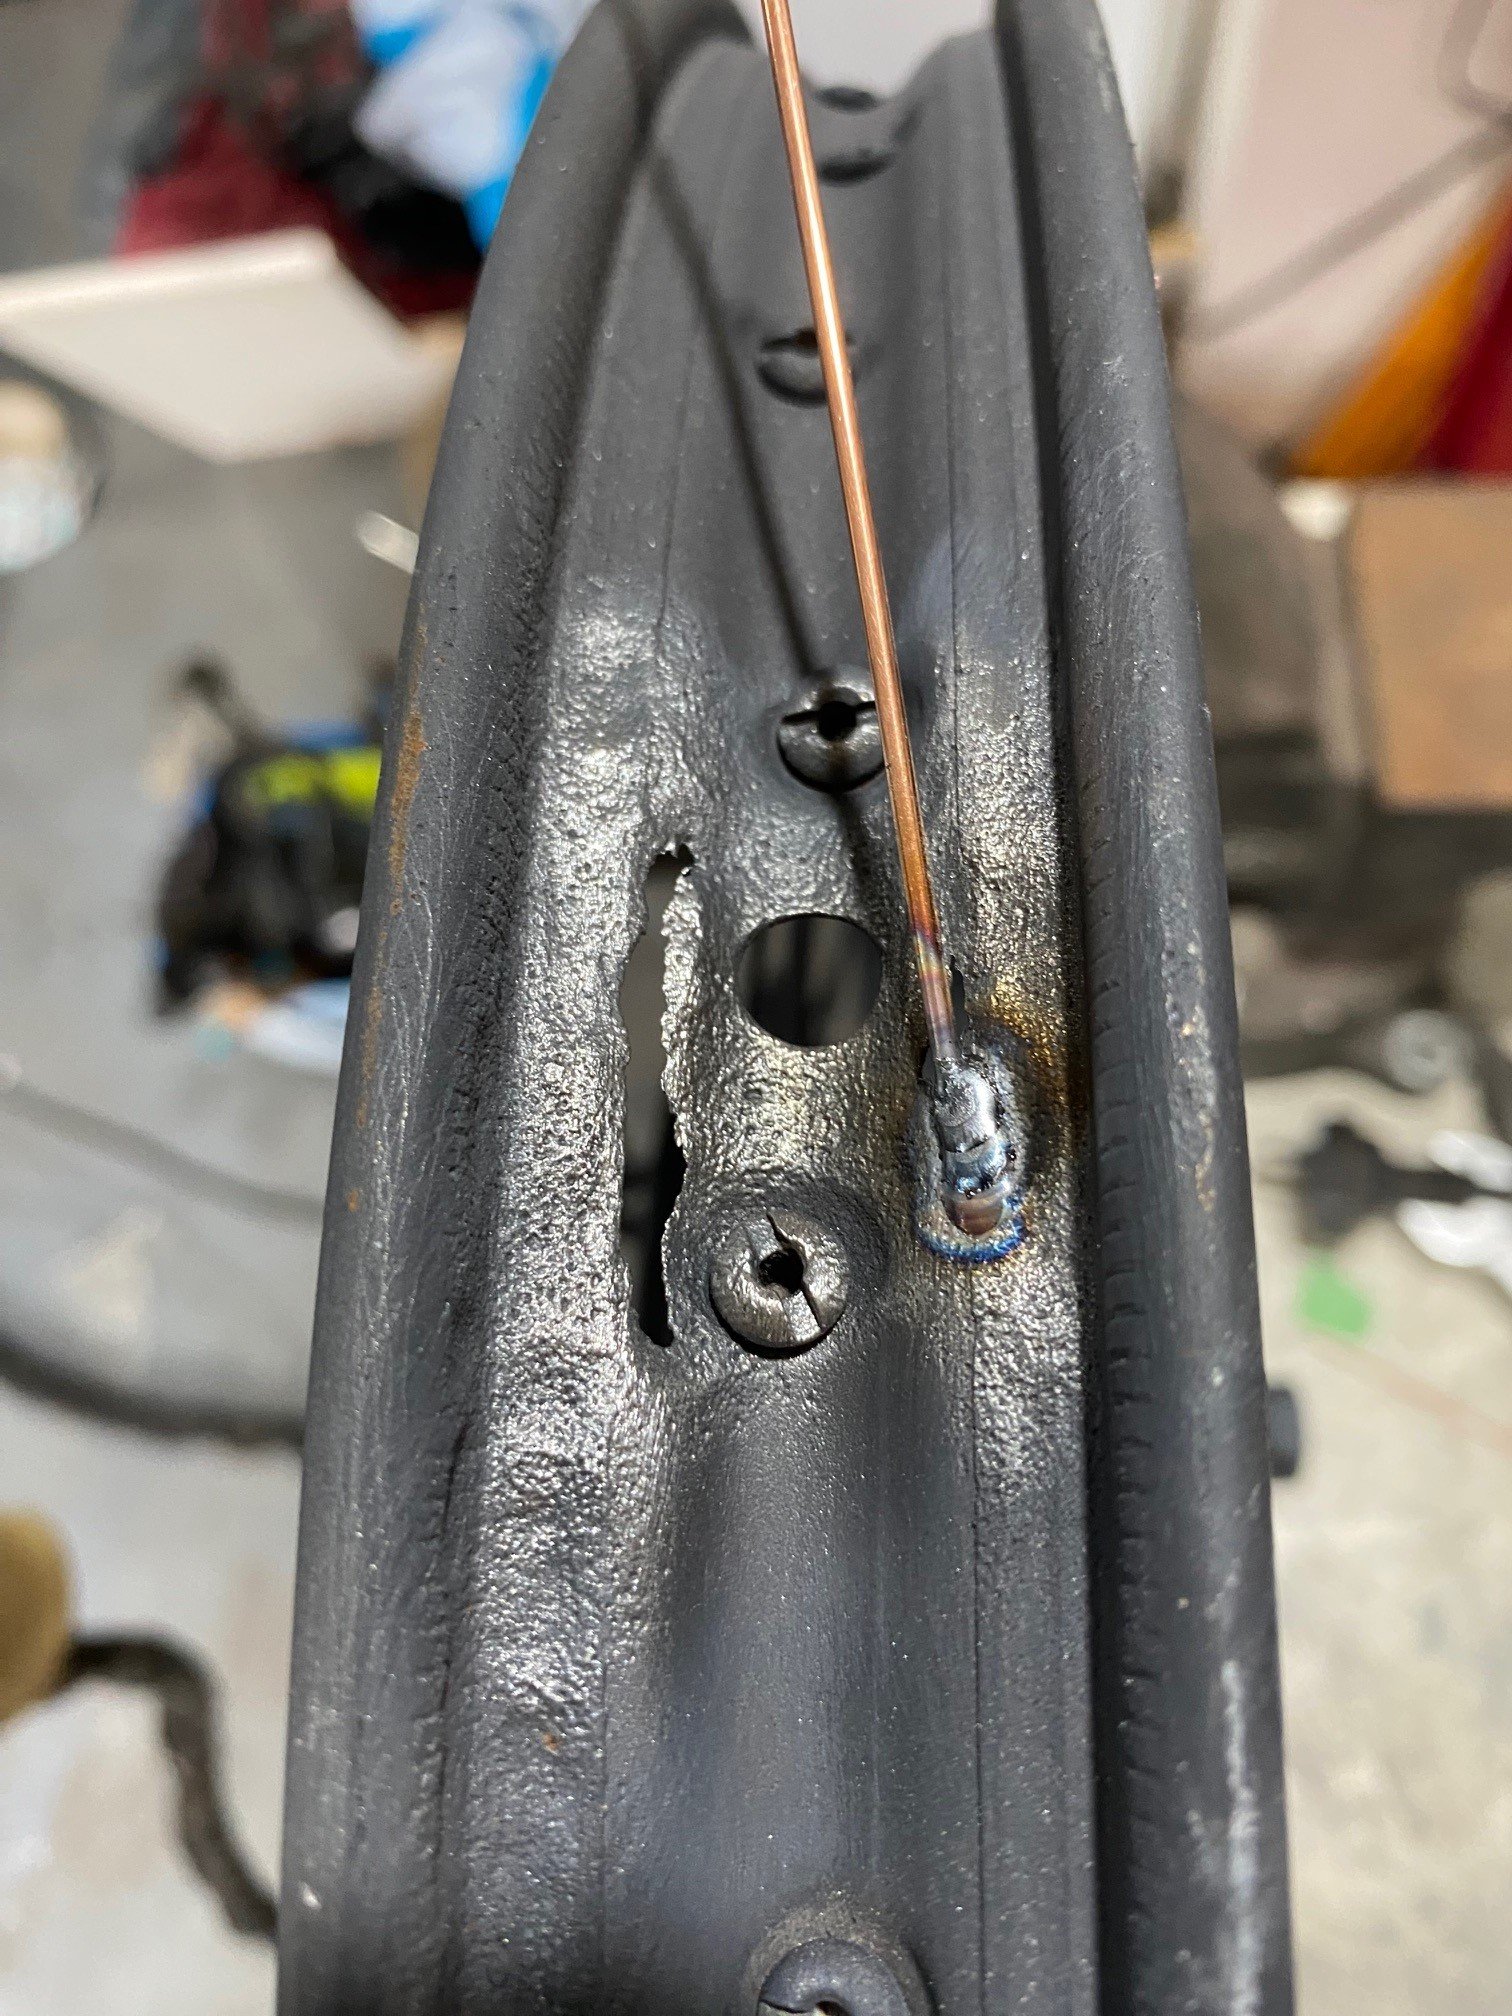
There was a rust hole in one of the rims around the stem hole, so I welded it up. I was really quite chuffed with myself for A) Not blowing the hole through into the stem hole. b) Not welding the spoke nipple to the rim. Paint is progressing, but no photos yet. Not flash, but it will do.
1 point
-
2.4m stud height, definitely not tall enough to be useful for a hoist. But not worried about that. One thing I've learned is that no matter how fancy and comfortable your garage is. Whenever you go to an event you still end up lying down on the ground trying to look for your 10mm spanner or something. Haha.1 point
-
The golf R32 engine has intrigued me, I haven't done any real research, so it's probably a garbage idea for some reason, and is probably not ideal for high rpm, but from a capacity vs physical size, it could be alright... it seems like a likely candidate for a +t conversion, just check out the head gasket surface area between the bores, and the number of head studs.. (2 things not easily changed on an engine)
1 point
-
This make some things easier.... I bolted the don't-fall-on-me props on so they can't accidentally be knocked out. It's a bit bottom heavy with all the suspension still attached so it does want to come back down.
1 point
-
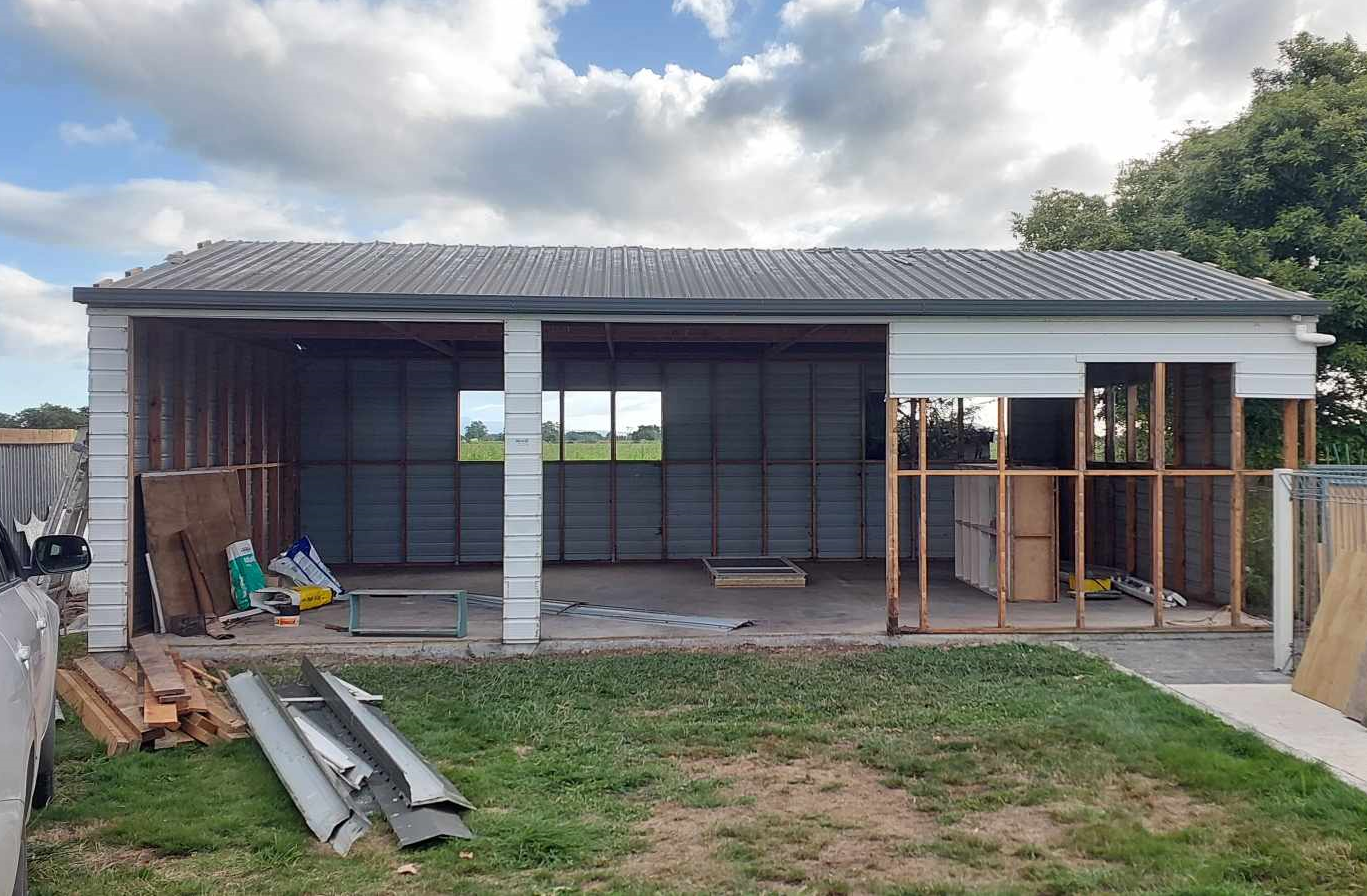
It is tantalizingly close. I probably could have done that a week ago. Except for that I've been in the South Island for work, and we found a second hand garage for removal that is a significant upgrade over the tiny one I've currently got. (New one 9x6m 2.4 stud height) So have had zero free time for car stuff. I'm picking up the last of it tomorrow, then hoping to do some carina stuff in the afternoon. I want that start up damnit!
1 point
-
getting a bunch of sizes wont be that cheap even from aliex? Even scooter jets arnt that cheap a set of jet drills and some solder would be cheaper once you know the size you need Dellorto.co.uk Carbparts.eu1 point
-
Modification threshold specifies guard rolling as not needing cert. That fb lvv unofficial questions page is full of misinformation and people who will do anything but read what the rules are
1 point
-
Dads finished up a radiator shell. Looking great. The original cores are made from hex flared tube to make a honey comb bundle which is all soldered together. There are about 5000 tubes! The plan is to make a false tube core /front but use a custom aluminium multi pass radiator to work as the real radiator. It will be nickel plated once the core brackets are figured out and any other tweaks.1 point
-
Aahhh so these injectors might be okay, at least for starters. I left them all to soak in CRC overnight, then made a up a lead to tap them on/off straight onto a 12v battery, and they all clicked. So then I setup the injector test mode in the ECU to run them through 10,000 cycles while they were full up with CRC. Then tested all 6 outputs on my loom and they're all working. So they might have just been ever so slightly stuck. They still might be partially blocked or whatever, but I'll flow test them first to make sure they are balanced and that the spray pattern looks okay. If I can avoid a $500-600 bill for new injectors, that's money this month for stuff like the exhaust which is much better!1 point
-
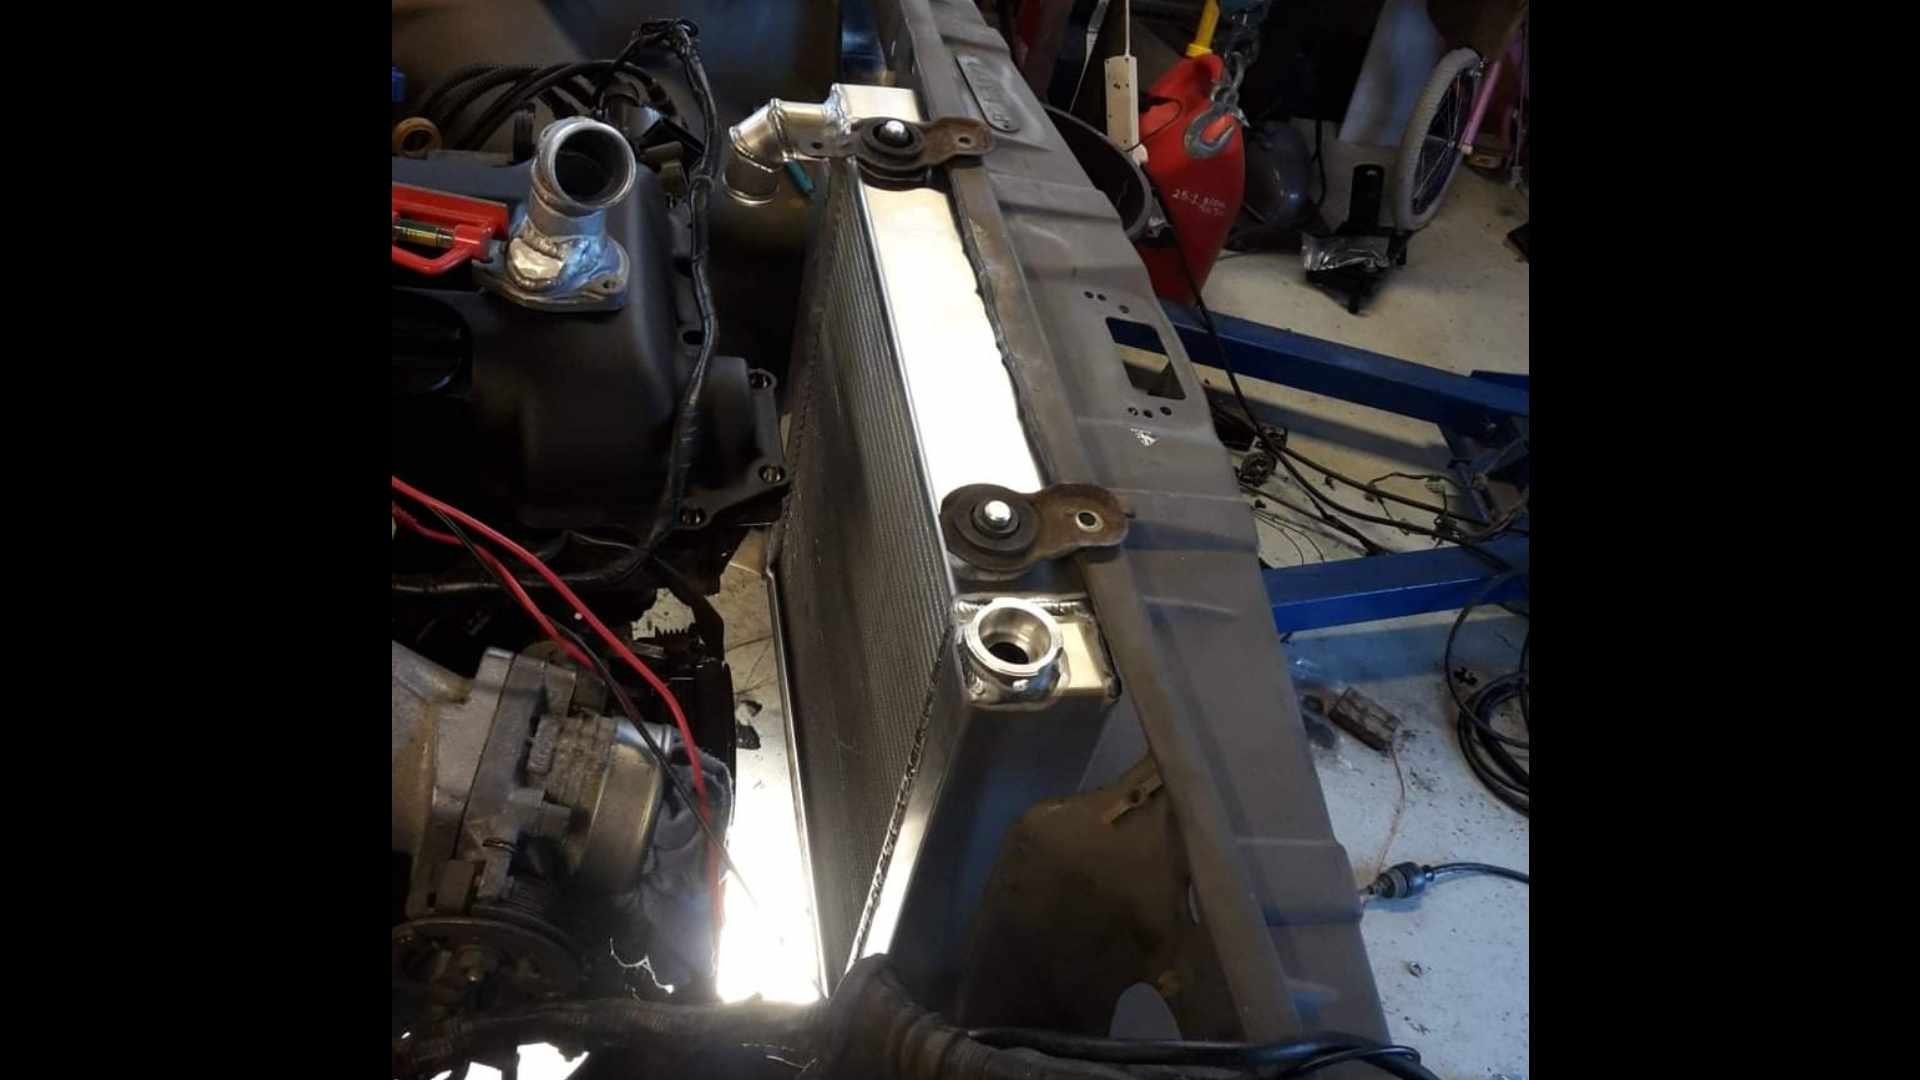
The donor front/radiator support panel came from a farm ute, which had had an L16 repower. Some butcher had gas cut the radiator supporr panel out so they could fit the larger L16 radiator. I tidied this up as best i could (not very well) and got a mate to make me a custom Aluminum radiator to fit in the space i had.
1 point
-
This is a picture of when i beought it home. Its a good pic because its in the sun. But the doors had just been thrown on to bring it home, and it grates me how poorly hung the door is.
1 point
-
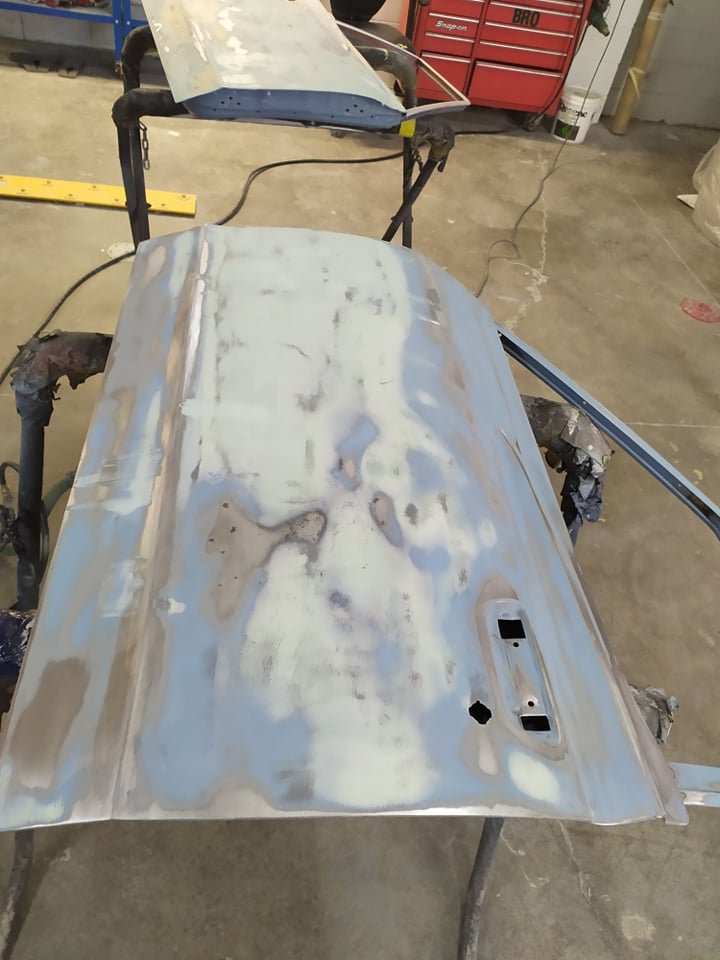
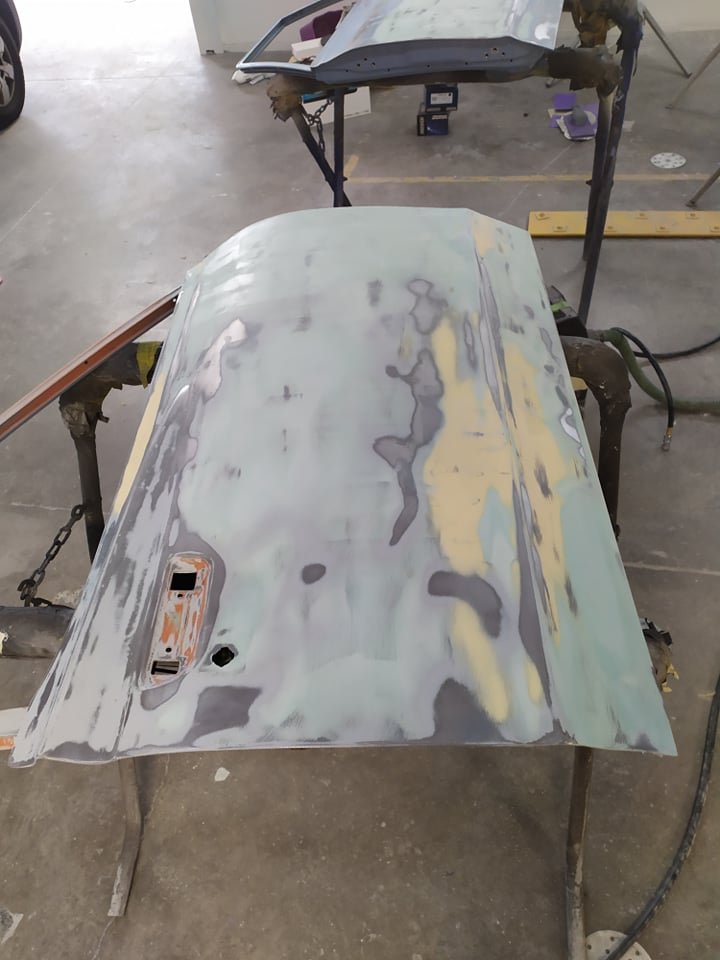
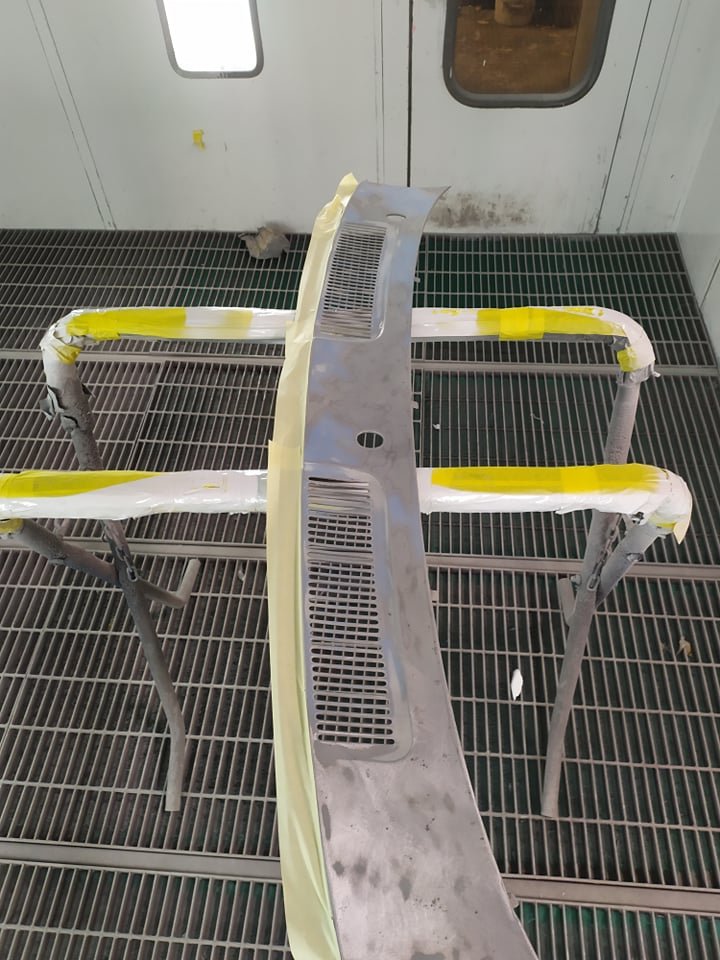
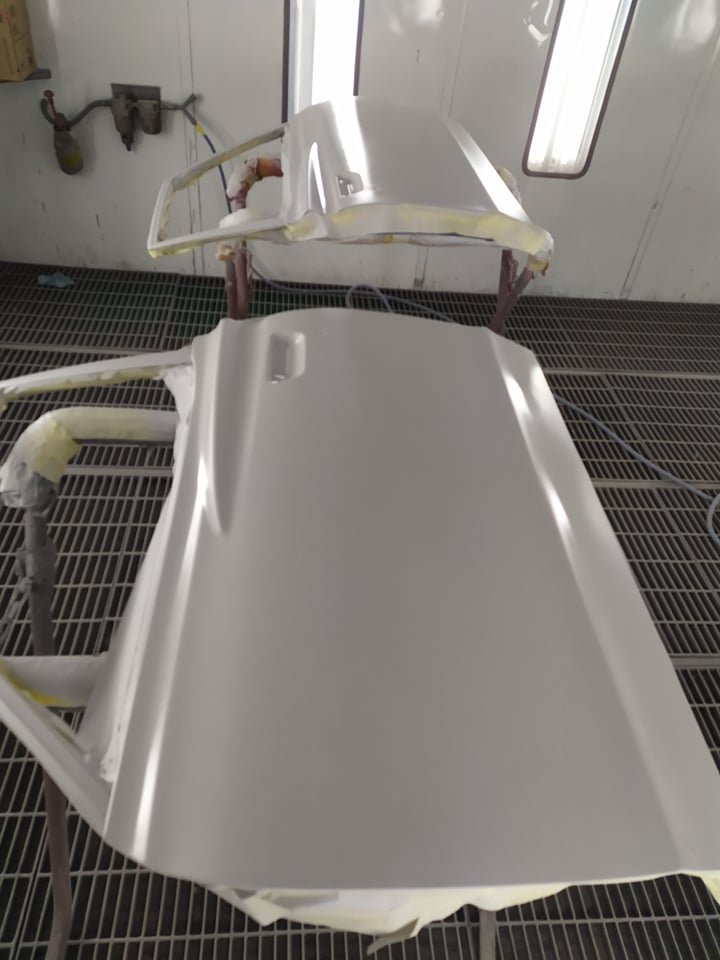
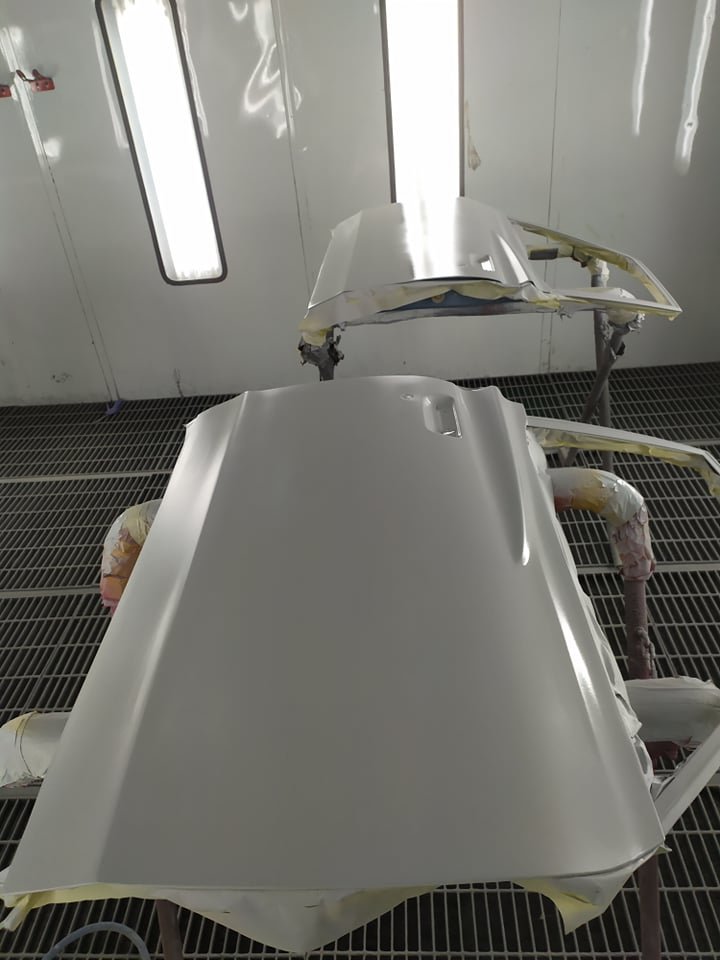
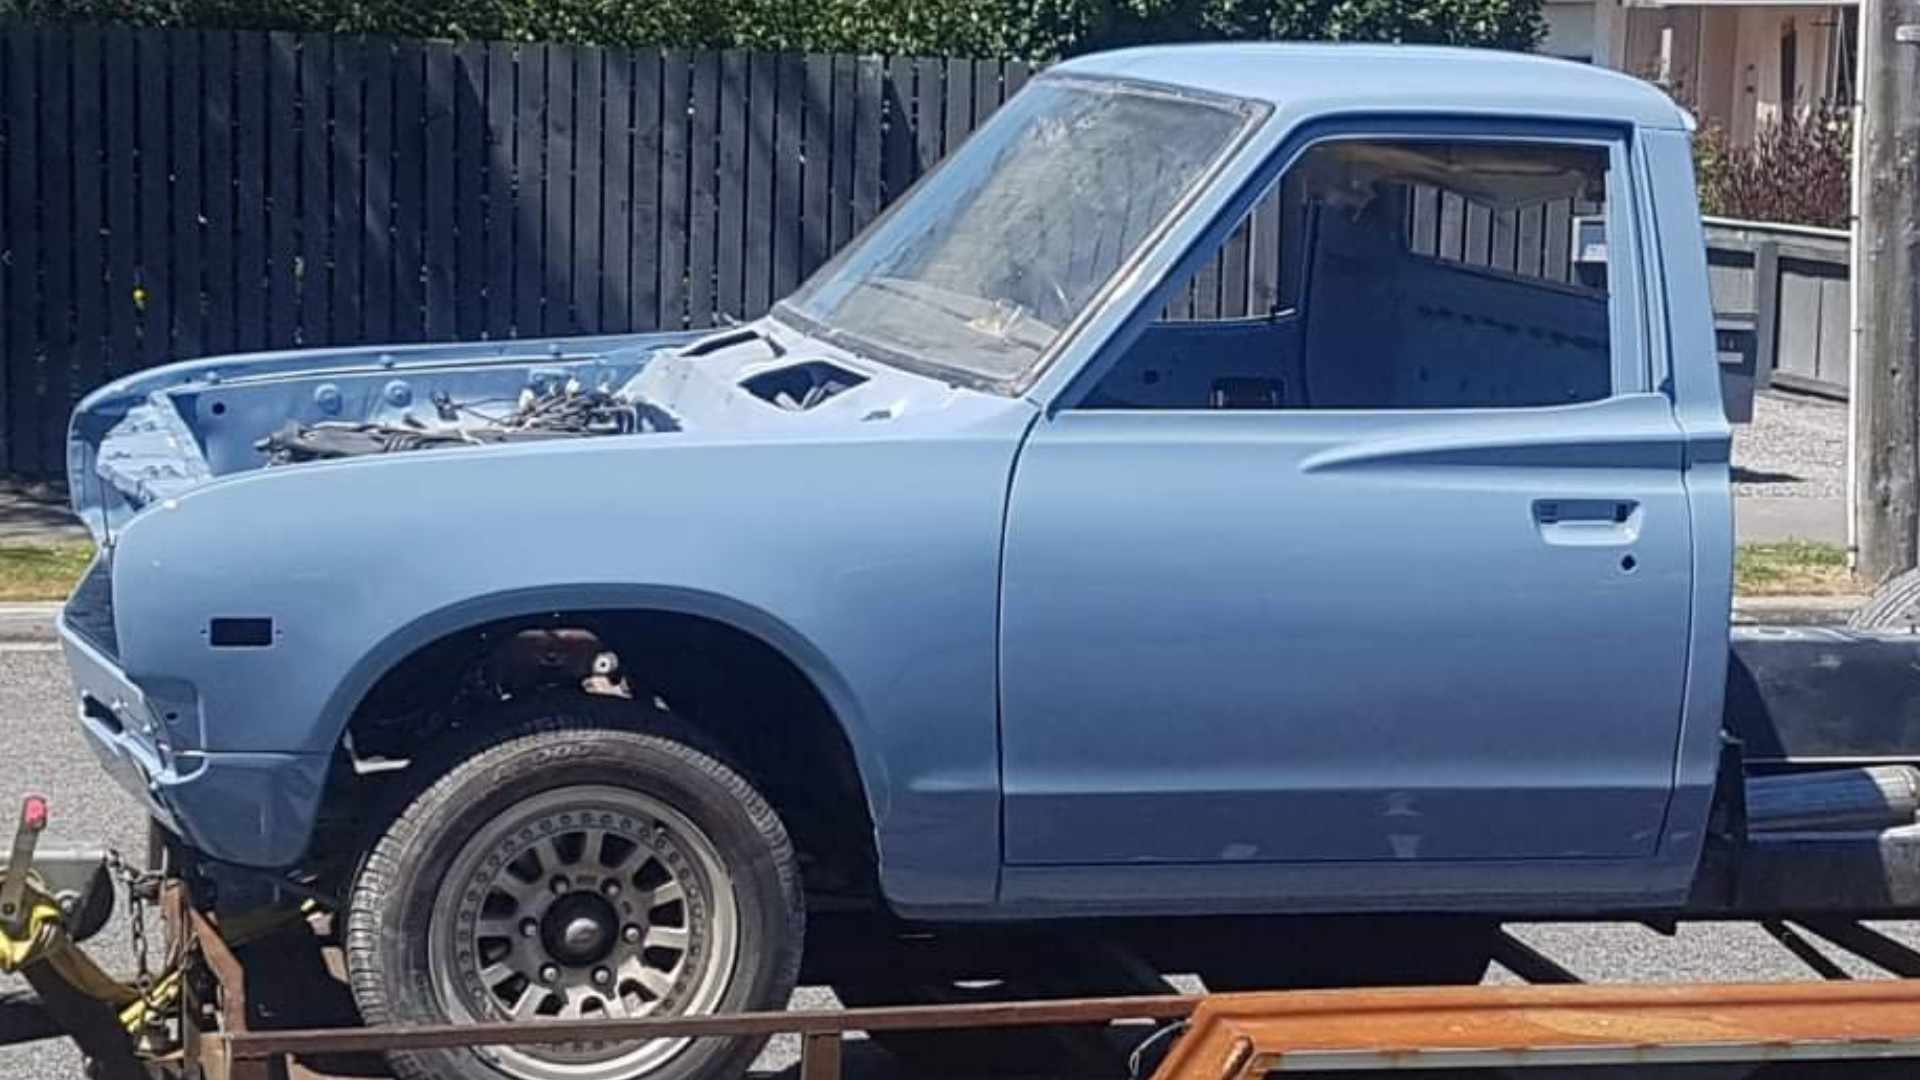
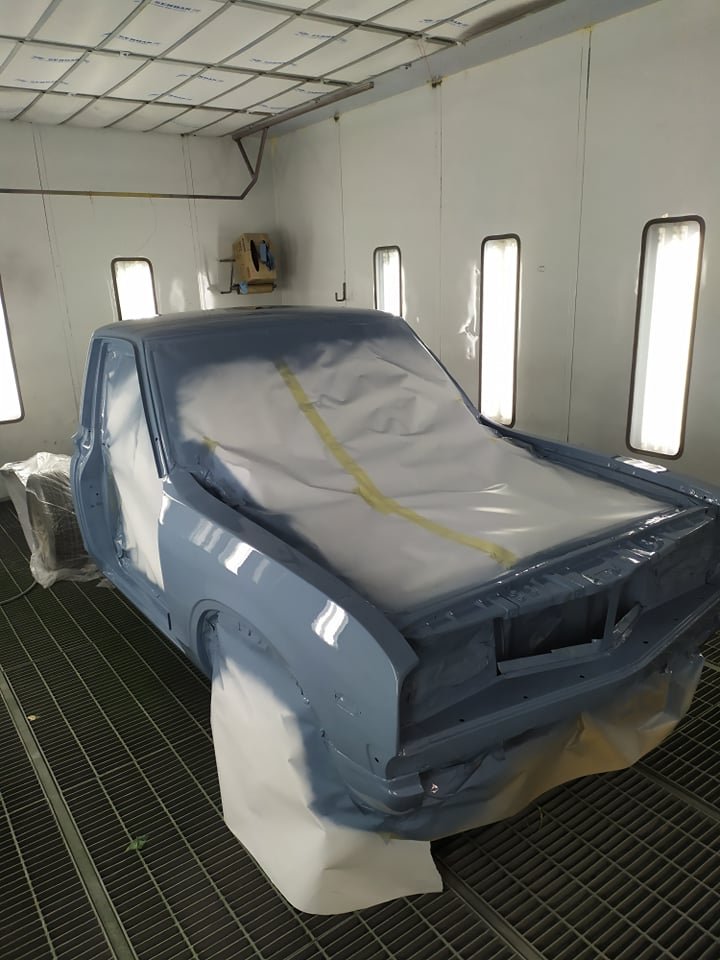
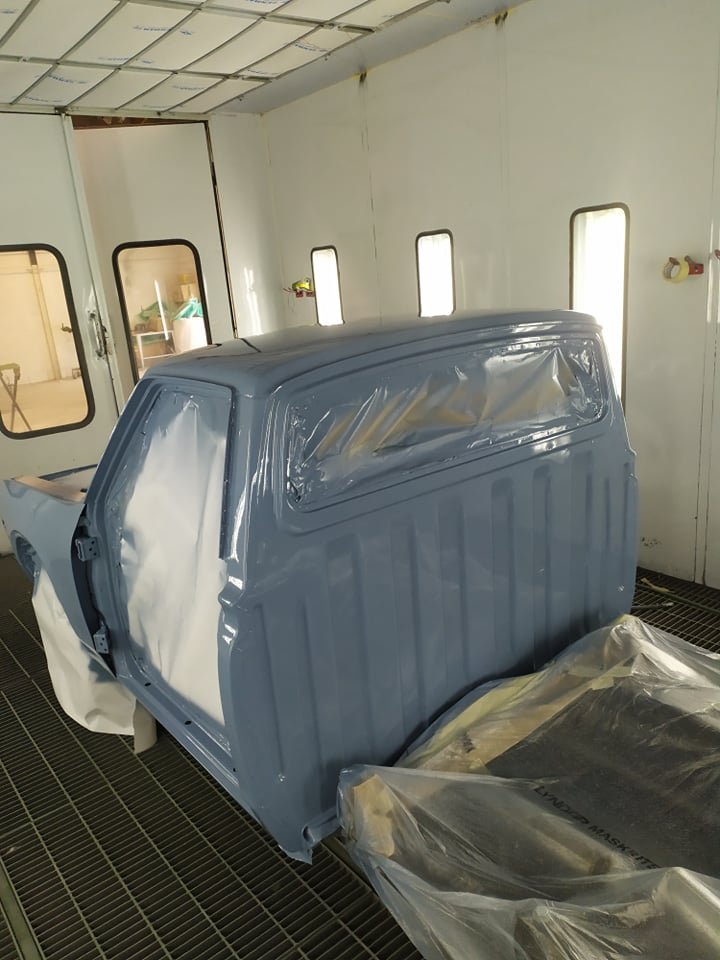
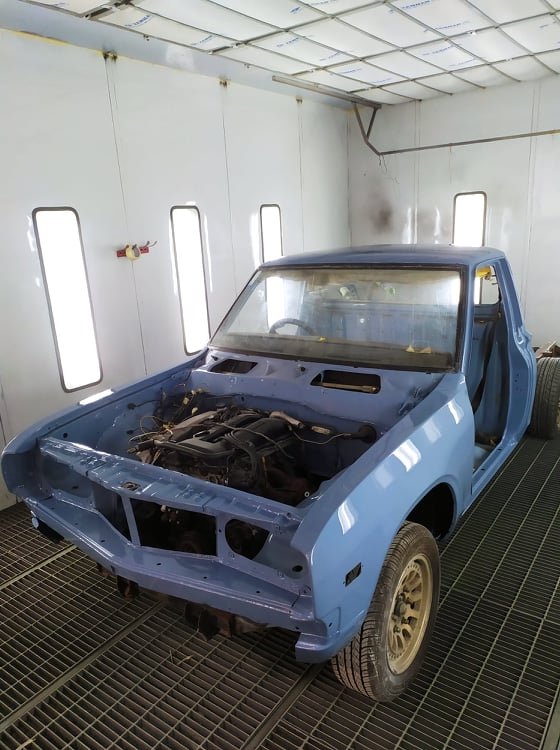
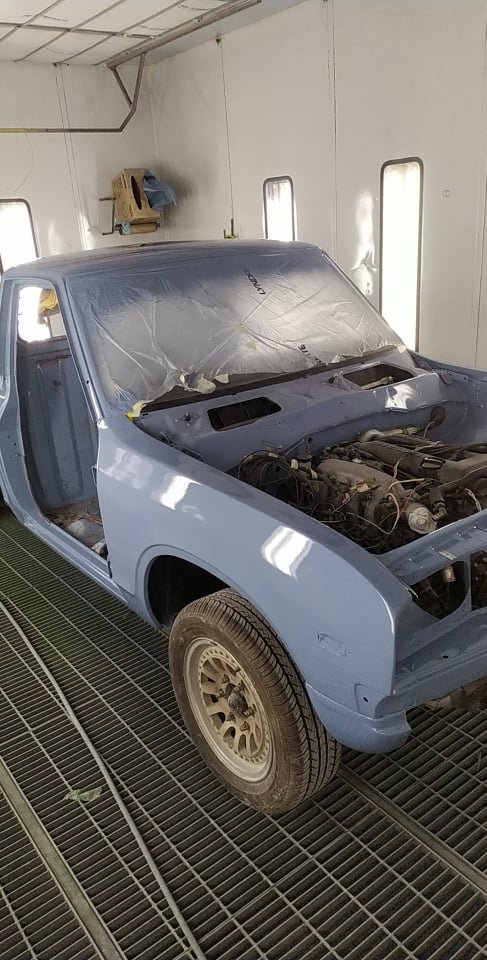
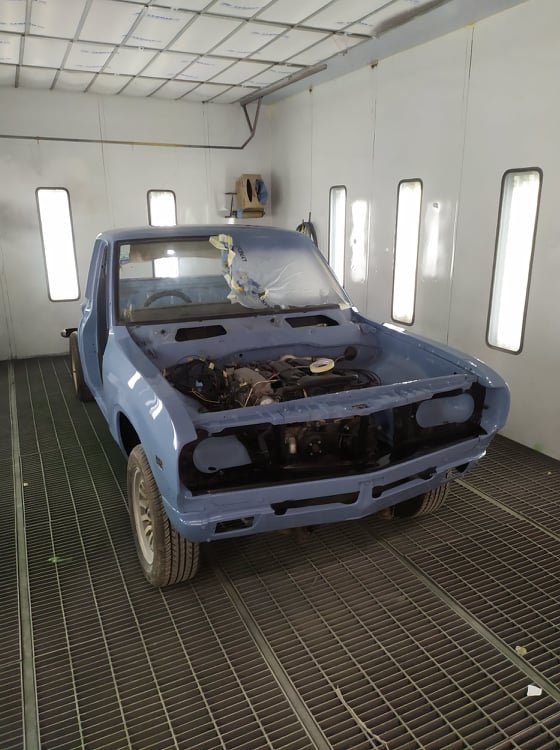
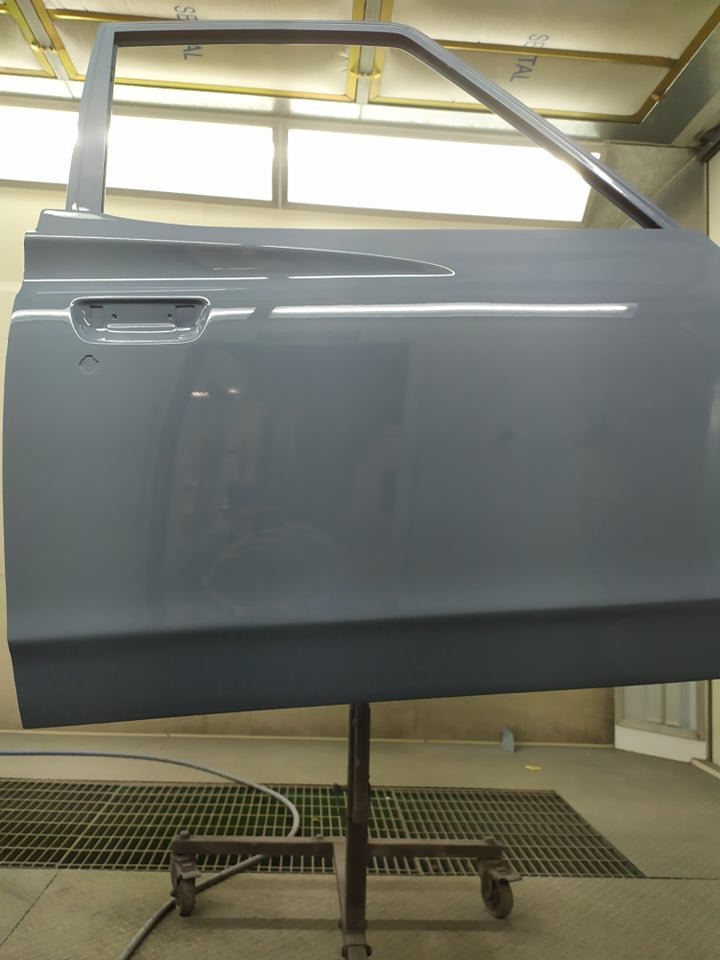
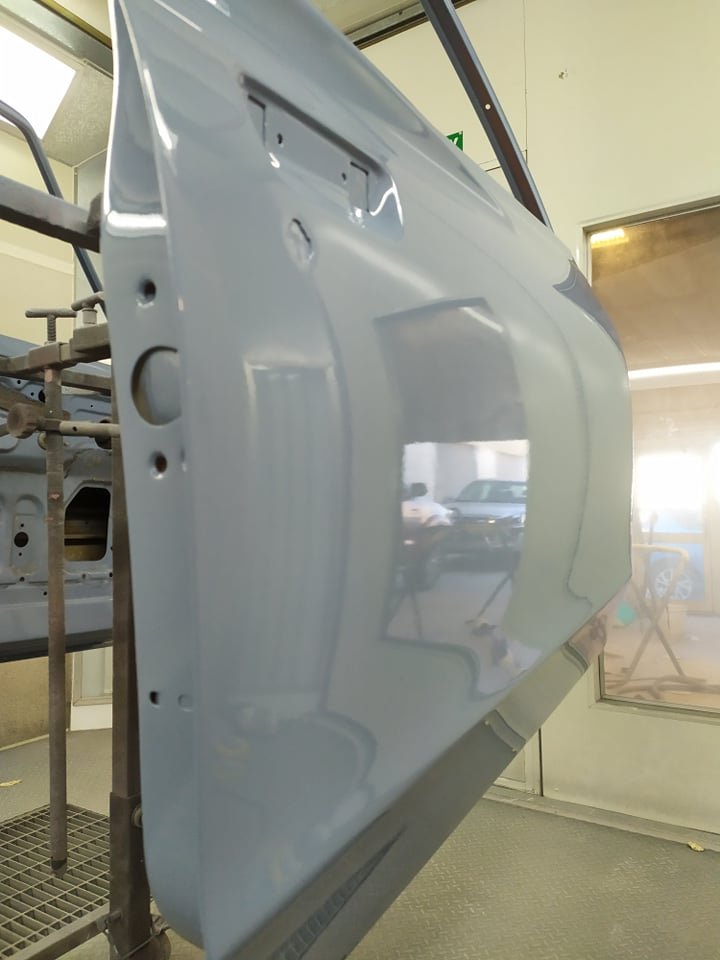
Bit of colour went on too.
1 point
-
Posting for project update support1 point
-
Gotta think big my man - Forget about some jiggly anime. We could fit the entire MSpaint dick pics thread on there1 point


.jpeg.1603ca396f5f5ca7931a30fe7ed40cf8.jpeg)


.jpg.e5226961c8b56751858f2c87ff66f33b.jpg)


This leaderboard is set to Auckland/GMT+12:00