
Leaderboard


Popular Content
Showing content with the highest reputation on 03/22/24 in all areas
-
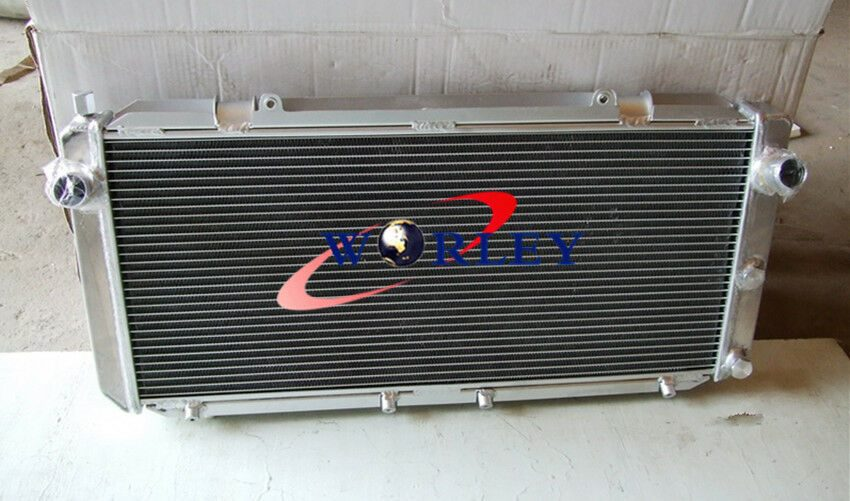
The SW20 radiator turned up, and thankfully it was indeed 755mm wide, not 770. So just needed a small snip up one side to fit. There isnt actually too much in the way of the fins being shrouded by the front panel, because those side parts are mostly the end tanks. So ended up better than expected, it will mount up to the front panel nicely. This is the amount of room to the crossmember level: My next problem was that the radiator outlets are 32mm, but on the motor they are 38mm. Wellllll, turns out that you can buy flexi hoses with 32mm at one end, 38 at the other. At what looks like good lengths (400 for one side, 300 for the other). So ordered some. Too easy! I'm glad to not need a join in the hoses this time. I printed some lower radiator brackets which bolt onto the crossmember similar to the ones I had for the Altezza radiator. I remember we made the altezza ones out of aluminium, and it seems like it took forever and was a really hard job. Now with a printer it's just incredibly easier to test print and test fit a few iterations within hardly any time at all. I've also got all the fuel lines connected, throttles are now mounted on carbon nylon manifolds, throttles are balanced and connected. My to-do list for getting the motor fired up is rapidly shrinking!
 21 points
 -
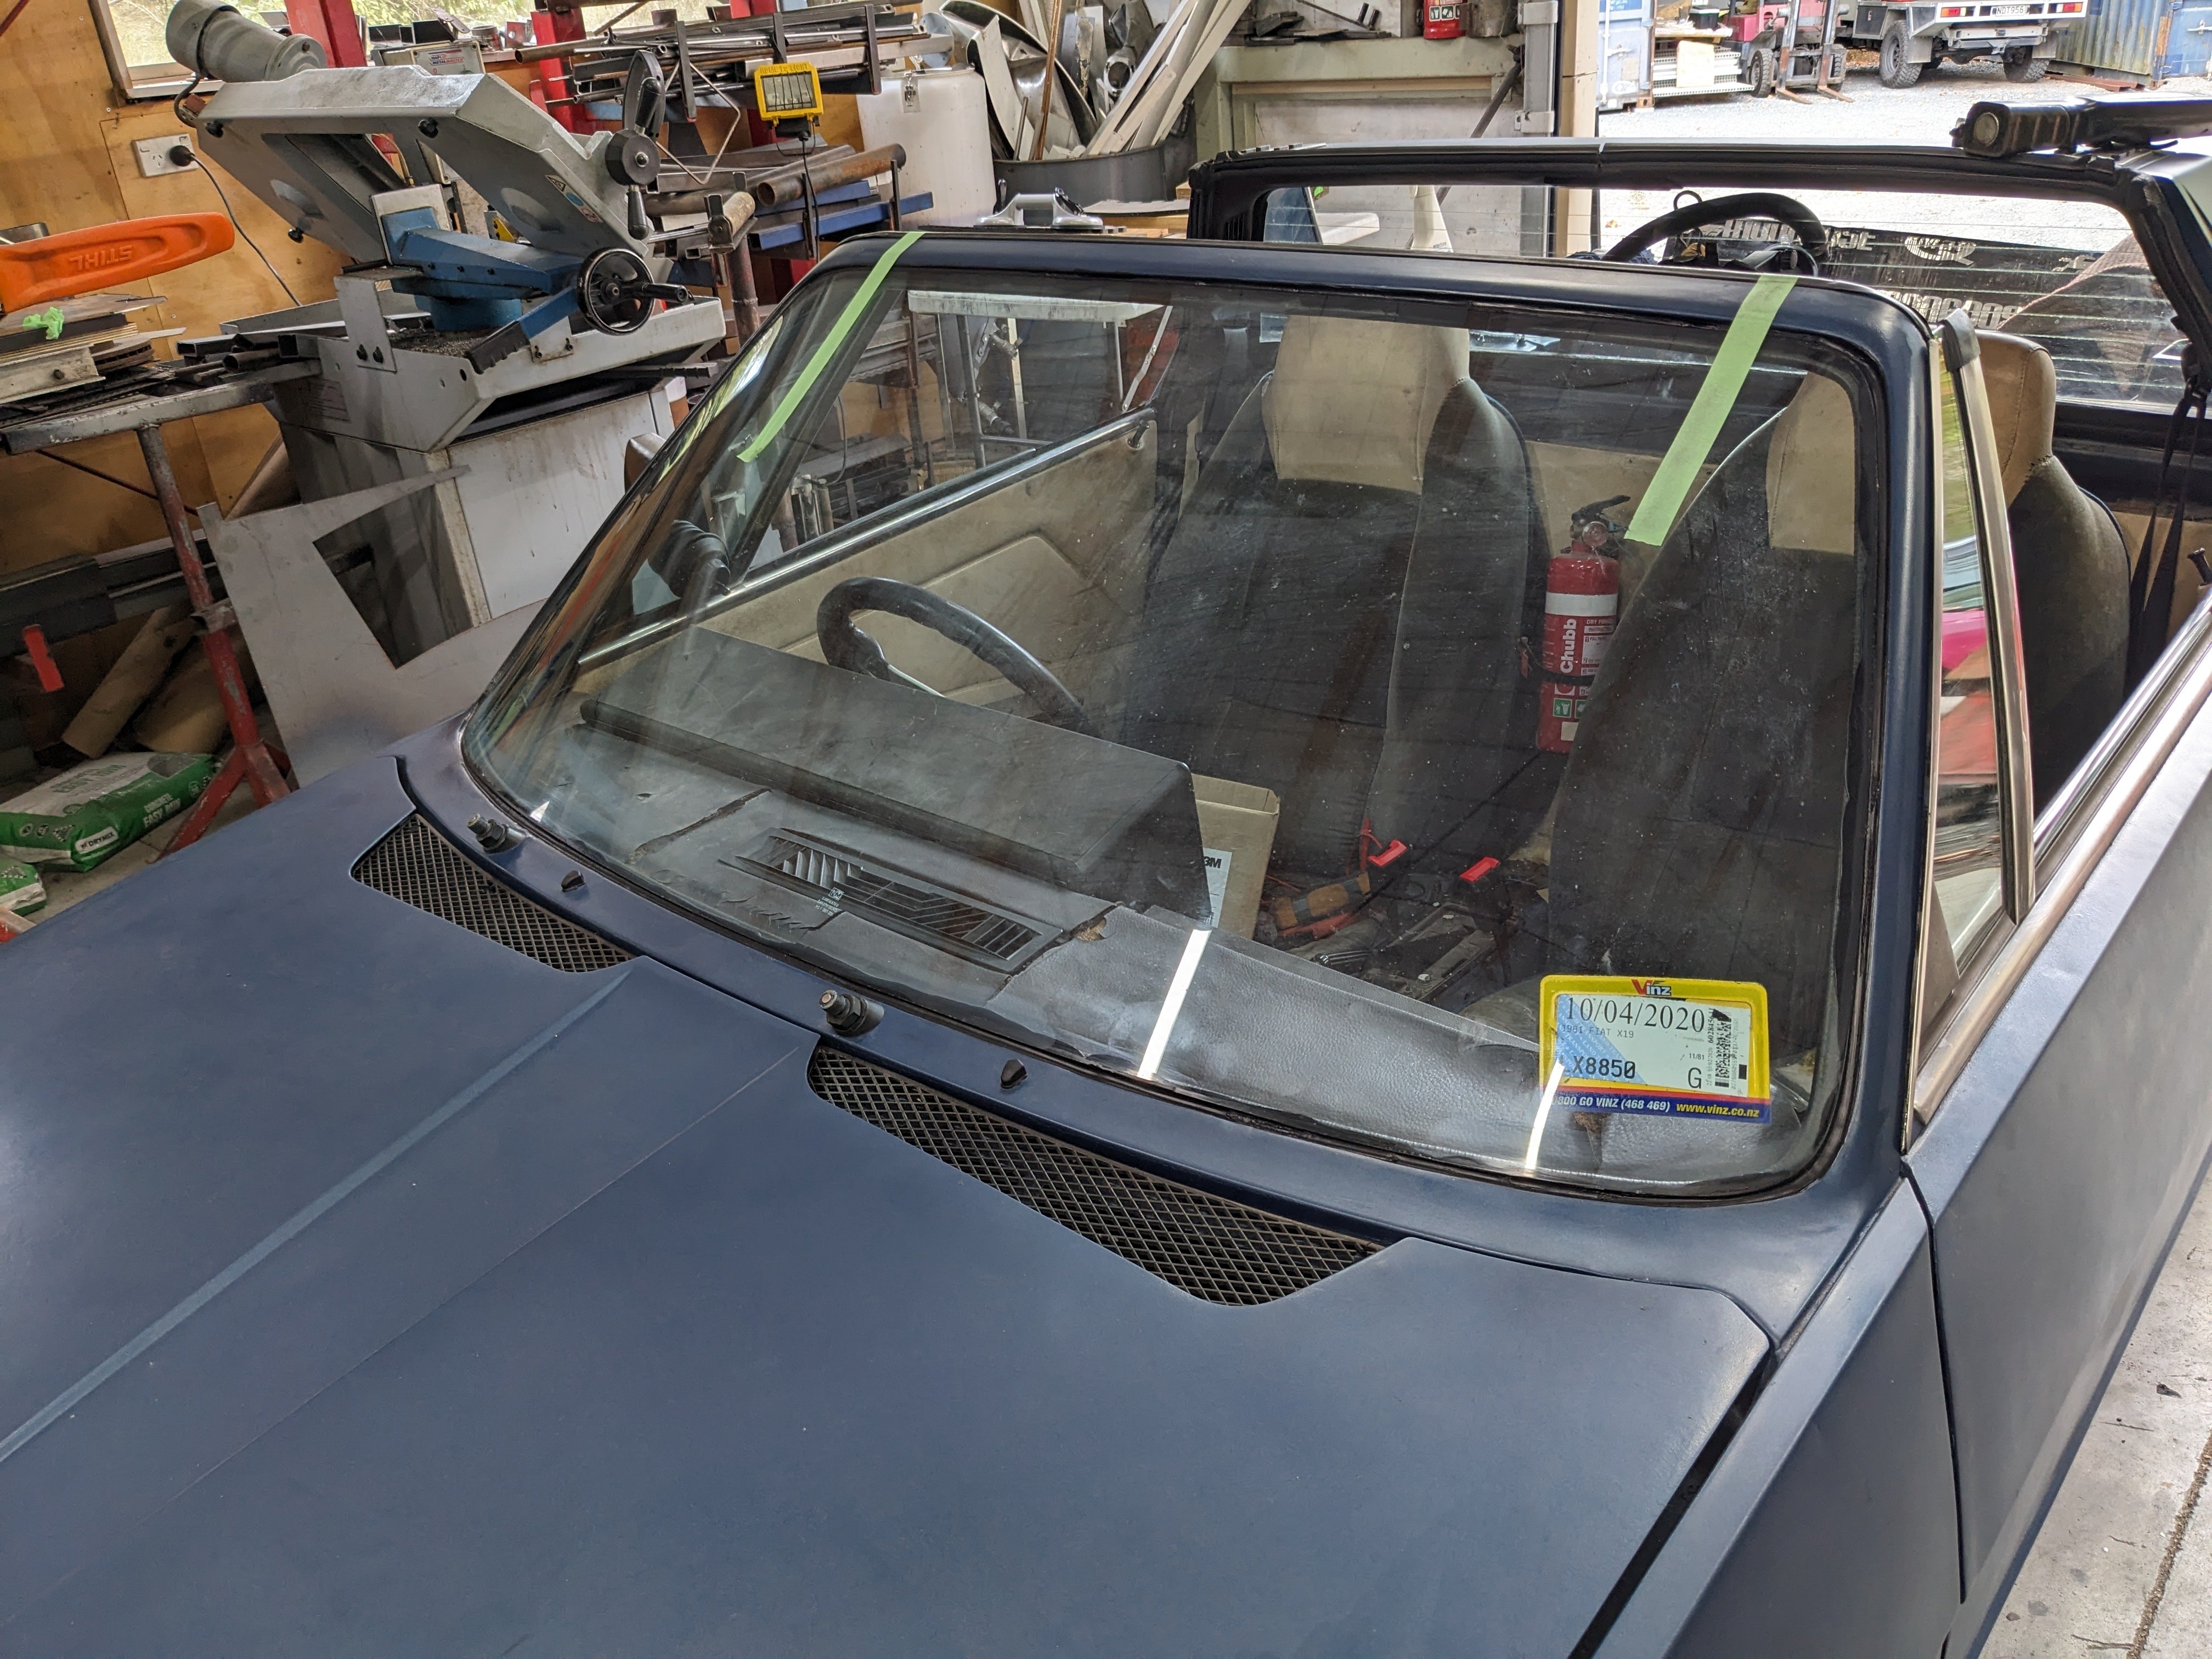
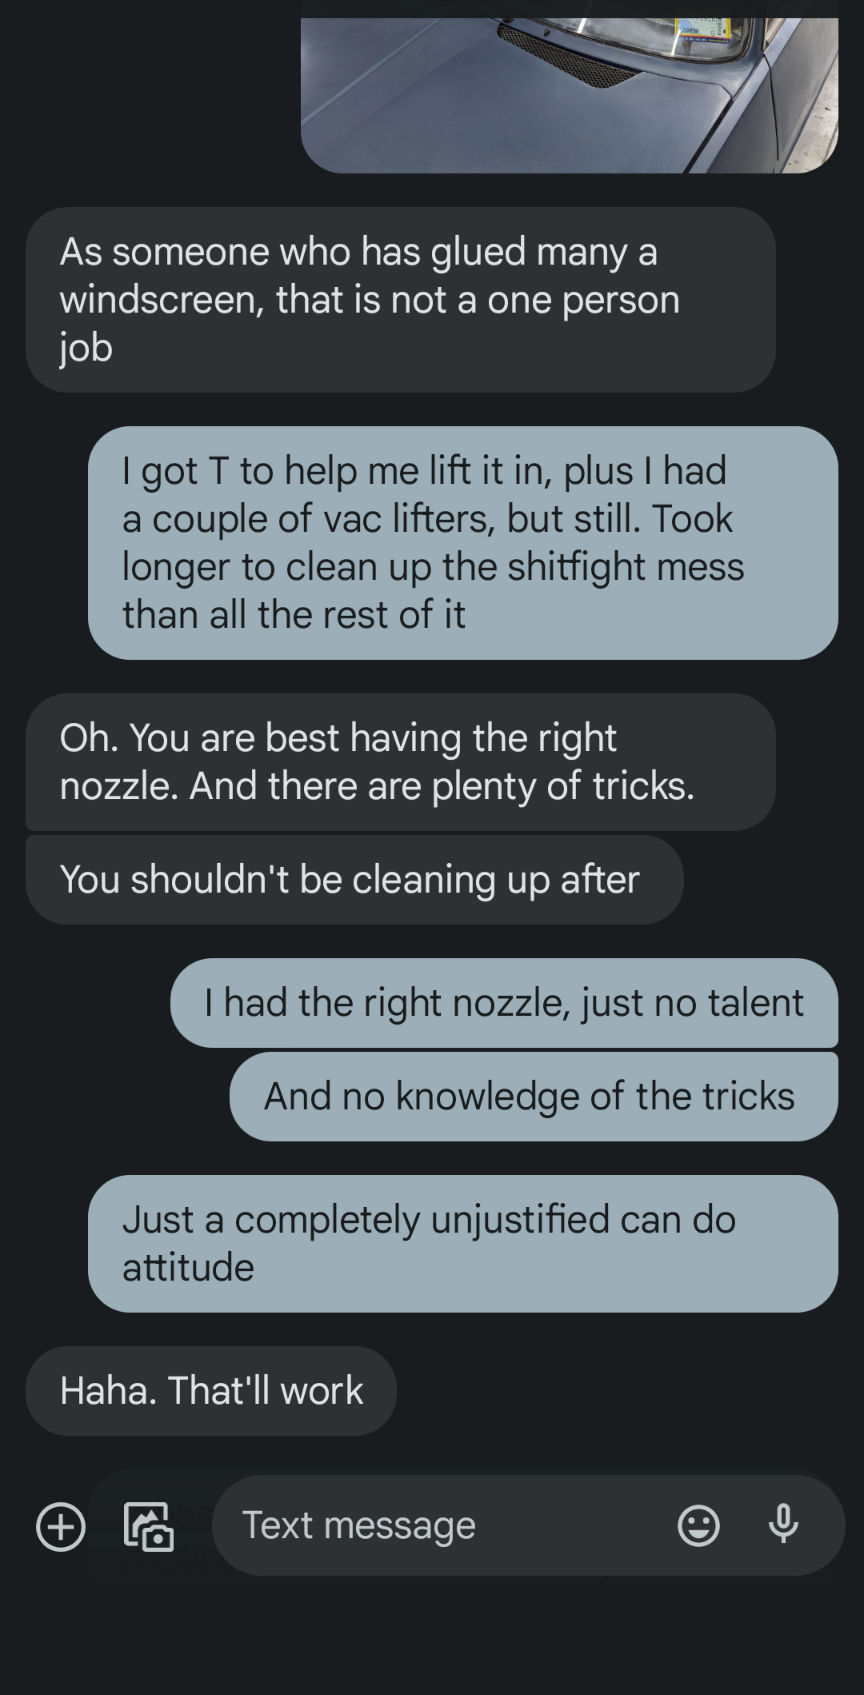
Just glued the windscreen in cos I am too cheap to pay someone to do it. I should have done so. The experience is best described by this convo with @HumberSS
9 points
-
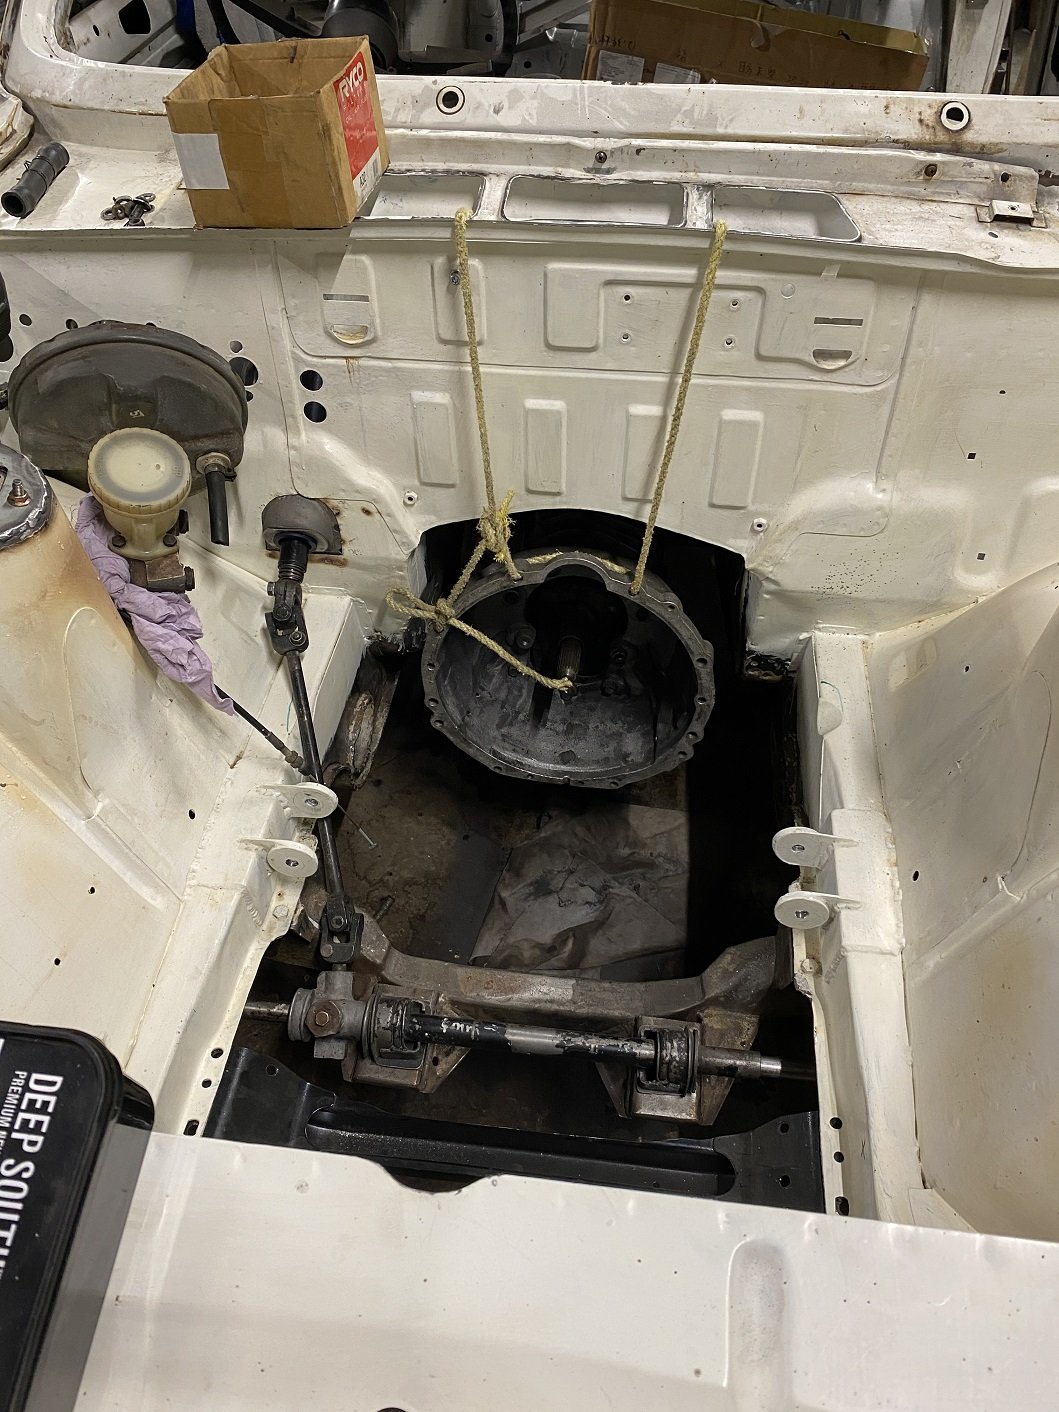
Here is a wee update. The fist job was to sort out a couple of issues on the hydraulic clutch setup. I realized that the slave cylinder I had that came with the bellhousing fowls on the headers. After a bit of head scratching and hunting I found another slave cylinder that just fits. I heated the headers then tweaked them out about 15mm to give a bit more clearance, it is still very tight. I still only have about 10mm of clearance. I'll make a heat shield I think. That is the new one, only problem is that the bolt holes don't line up with the holes on the bellhousing. So I milled slots in it. I was going to TIG the bellhousing holes and tap them but I decided not to just incase this new slave cylinder doesn't end up working out. For the master cylinder I welded a backing plate to the fire wall and mounted it in the engine bay between the booster and the header. Tight fit but it works. That picture makes it look much closer to the header than it is. I couldn't have it directly behind the clutch pedal unfortunately, so it's off set from the pedal. I used some steel rod linking them all together and threaded the ends. It's nice and smooth, I'm hopeful it will work well. Engine in for hopefully the final time. I couldn't mount the gearbox as when I went to fit the fly wheel I realized I don't have any flywheel bolts. Doh. ARP ones are on the way. Next I'll start wiring her up and put the dash back together. Cheers guys. P.S. Pro tip... Don't spray a car in jandals. That was taken after 2 showers.8 points
-
Scooped the engine back out the hole. Then put the gearbox back in so I can do the clutch and brake lines. I'll also be redoing the engine mounts as cert man wanted them thicker. And I can weld in the relocated steering column lower mount. I'll also be clearancing the chassis rails a bit more for the passenger side exhaust cause I put it in the wrong place the first time. And some clearance for the steering intermediate shaft. Epotec goes a bit toasted marshmallow if you use a MAP gas torch to soften underseal for scraping it off...
7 points
-
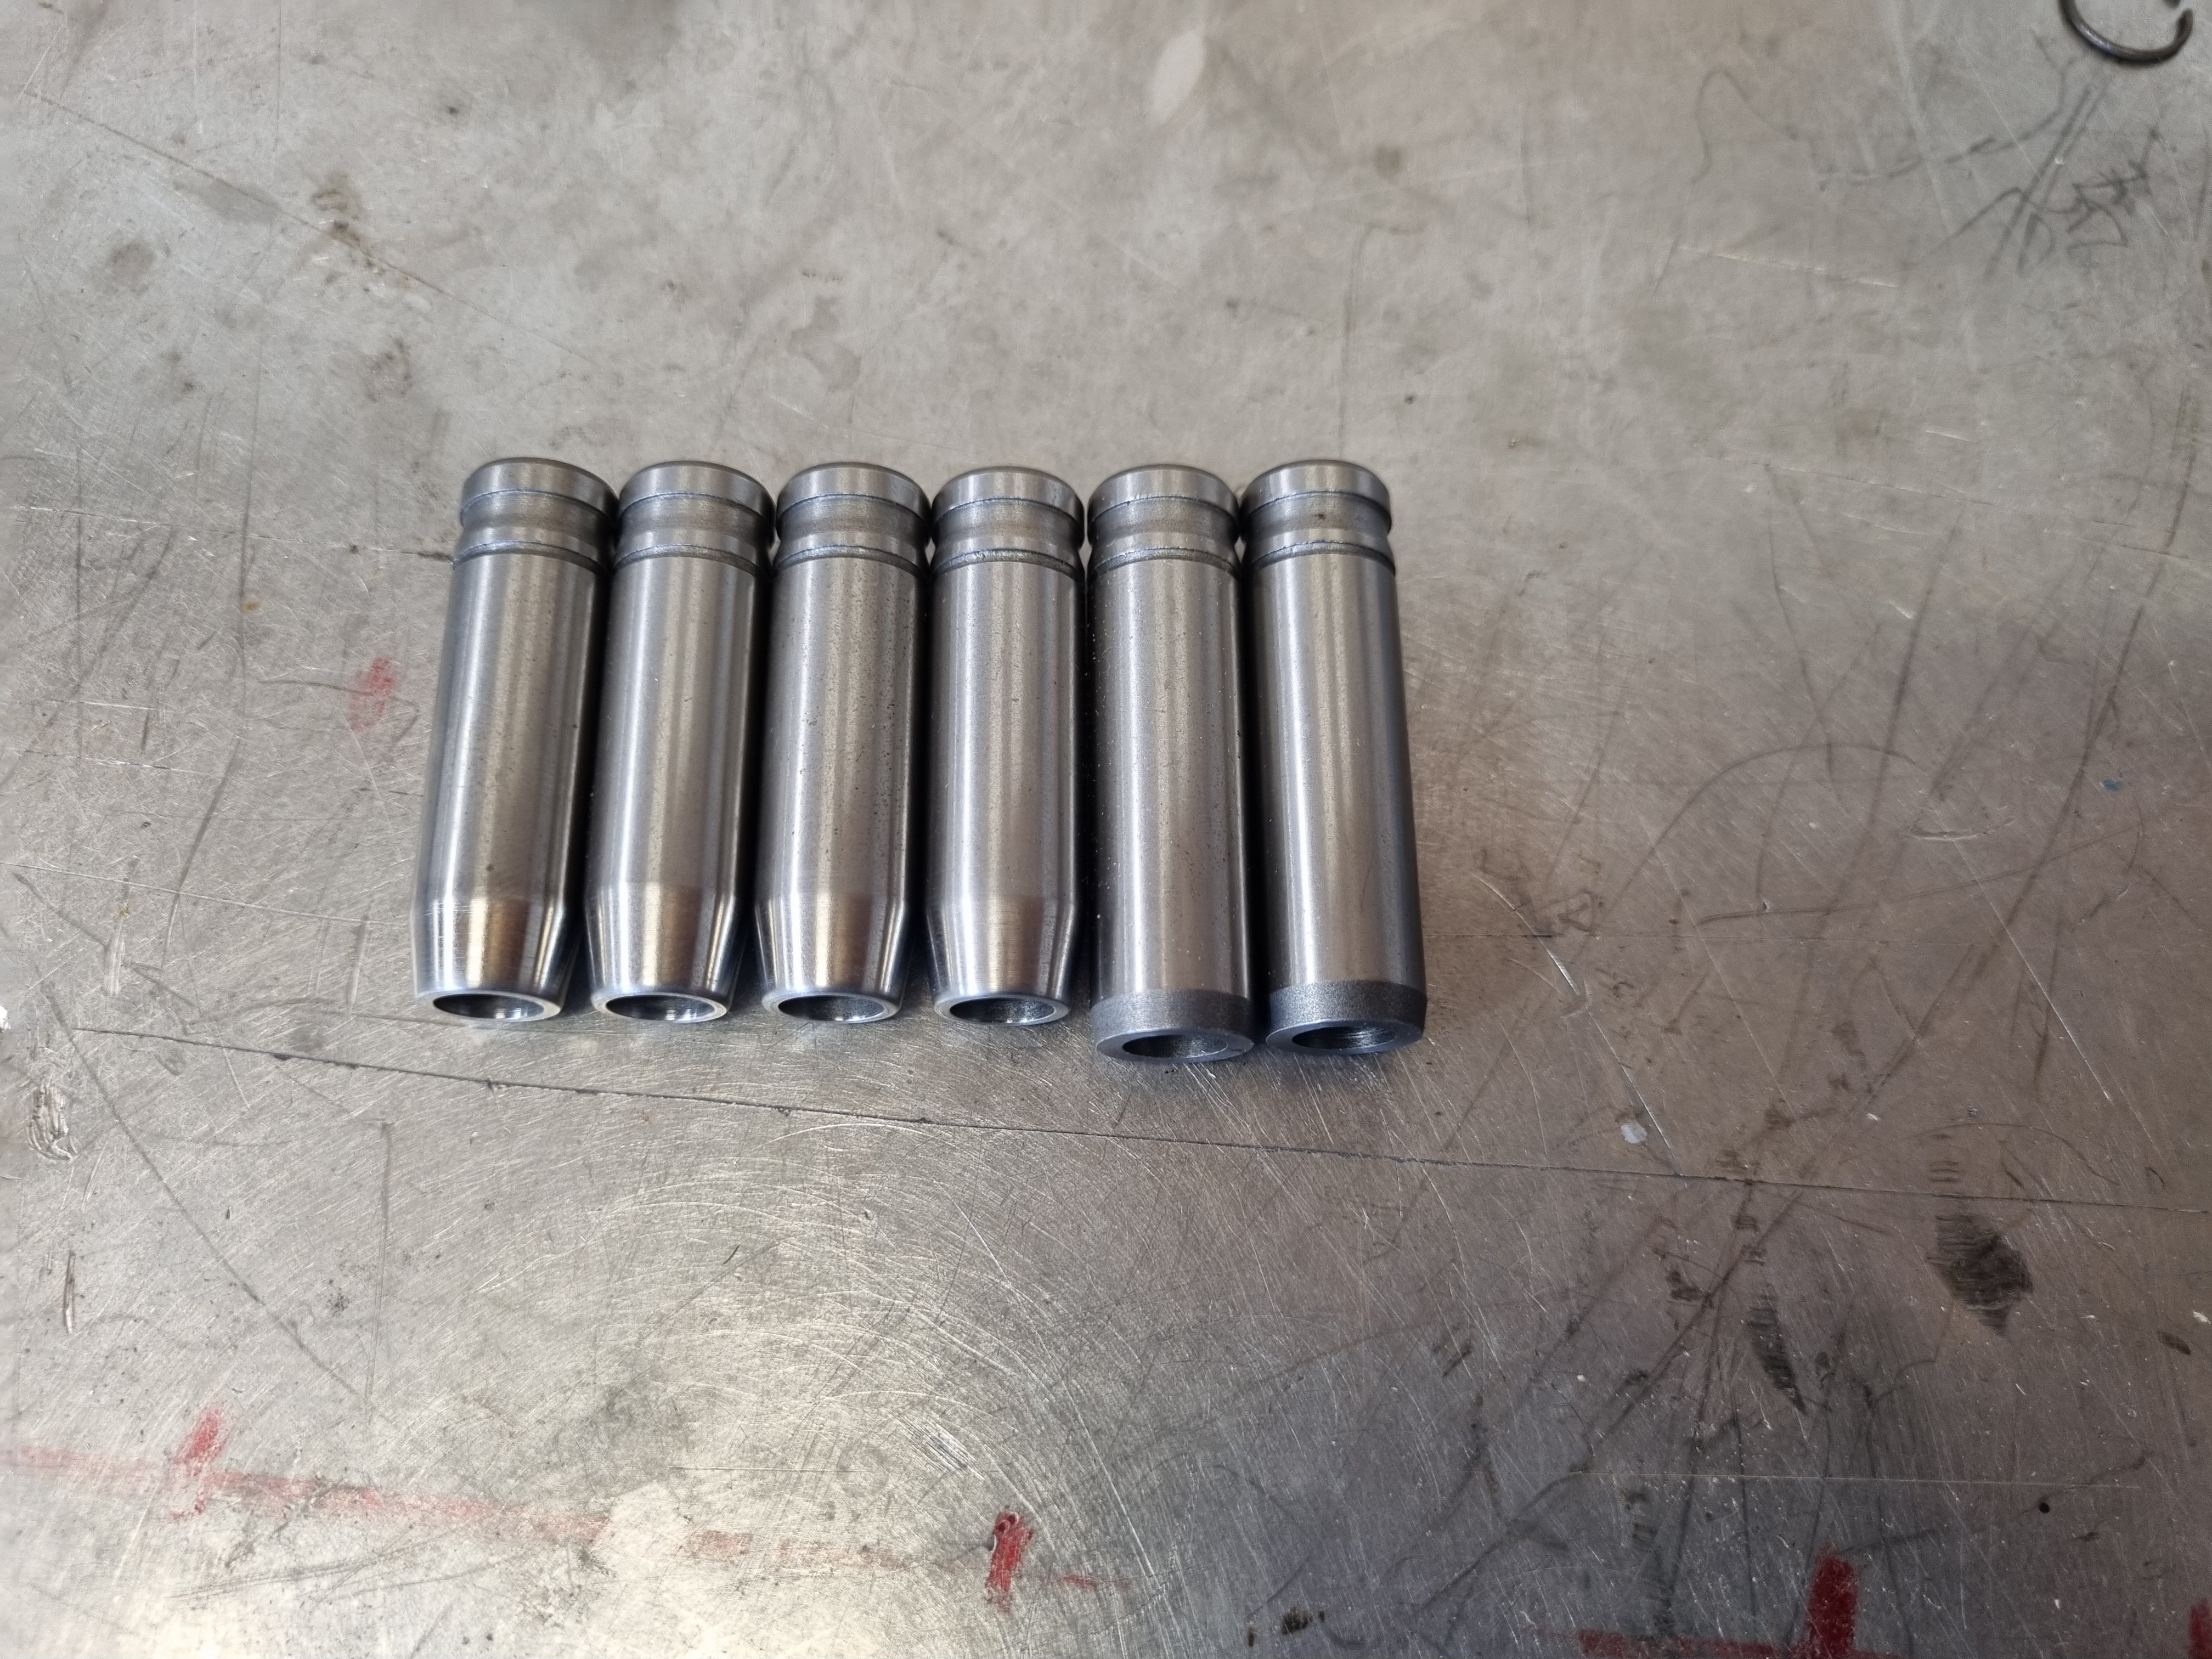
So when I left off the motor was back to completely disassembled. I got the cap machined and now it's back together with the correct crank end float. The other thing is that I got the head flow tested with the porting and bigger valves. It shows about an 11 percent increase over stock. I was kind of hoping for a bit more but using the "no science just hog it out" method is probably why 11% was the result. Anywho, now it's time to get the head all sorted and I can bolt it on. Need new valve springs, new spring washers and retainers - all of which will need to be custom or at least sourced from some other engine. In preparation for this I shortened the valve guides to suit the machining that the head needs to clear the higher lift. 3mm off the exhaust and 6mm off the inlets
7 points
-
The start of a probably long process of repair and conversion Get my hands on it in a few days finally. Will upload photos then Link to discussion:5 points
-
So what you're saying is, a modern car would be better? That's it! Close the forums, we're done. Let's not forget a 2J is 5 miles long and weighs the same as a bus.5 points
-
The black ones look better I think the key is low rpm, and Bic pen valve springs
5 points
-
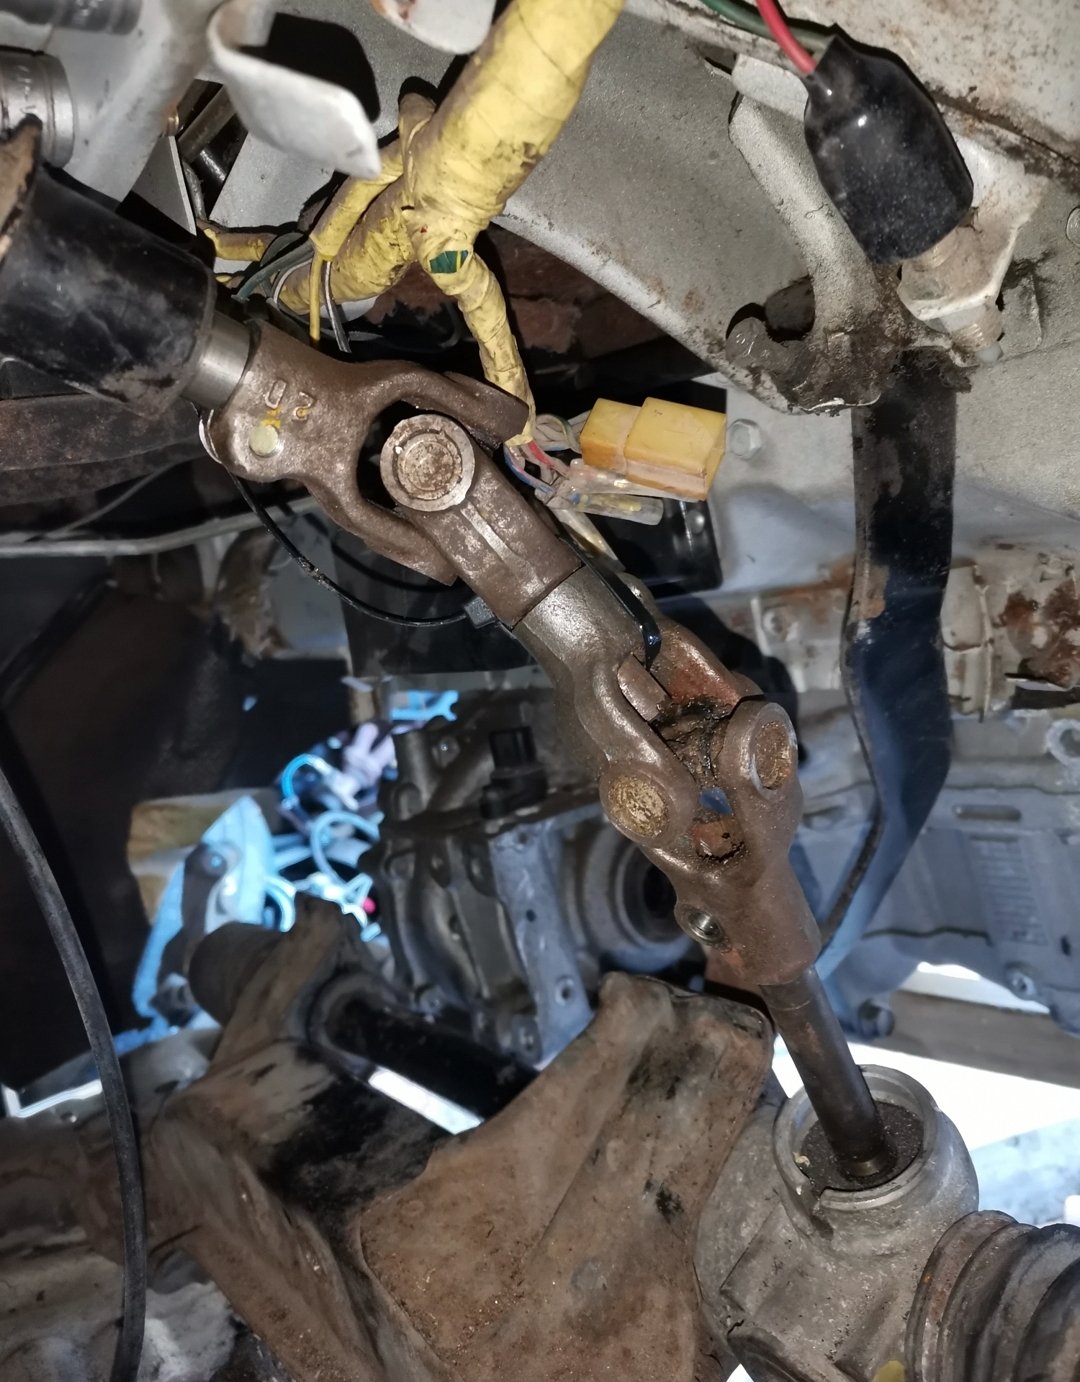
Rack in, u joint angles aren't stuffed.... Be it a touch short. Everything rotates and doesn't bind. Tried jazz axles, too long by about 10-20mm both sides, need to trip to pap and conduct some research. Passed pictures and vid to Julian cert man, so we'll see if this is going to the metal recyclers or not soon
5 points
-
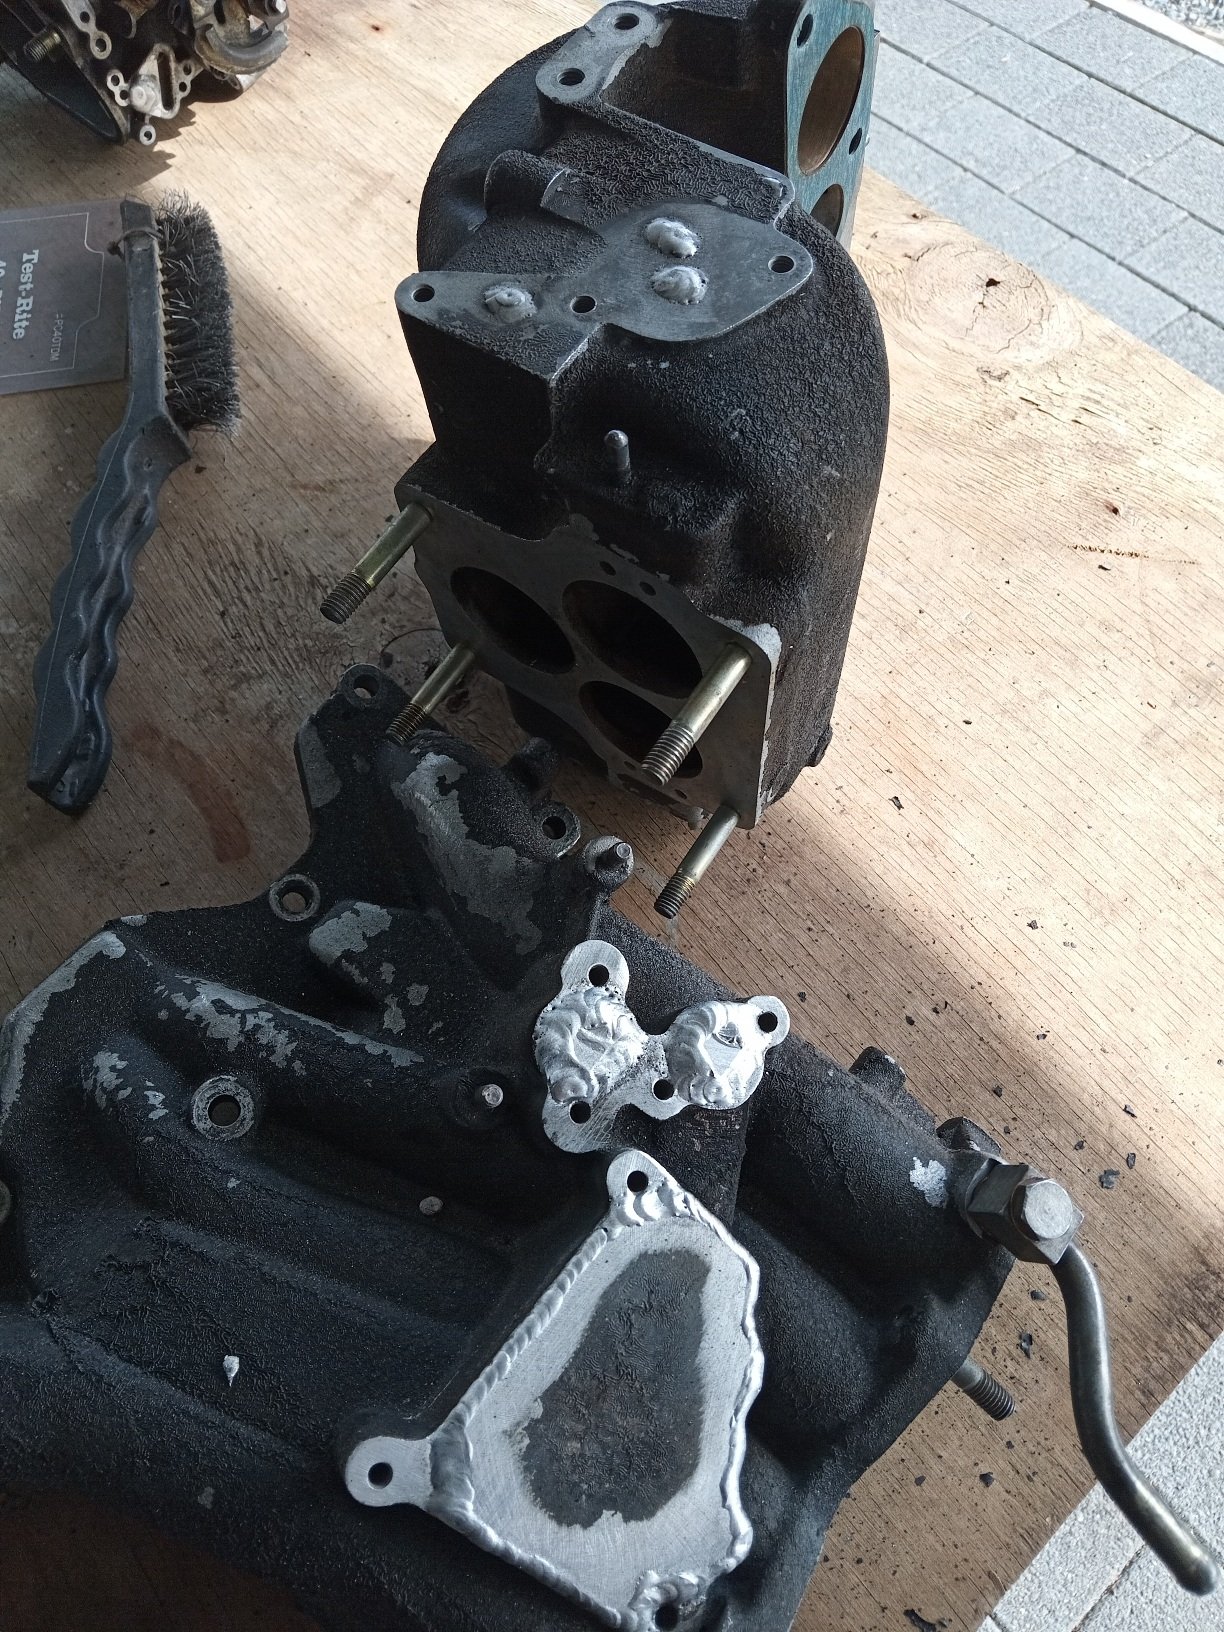
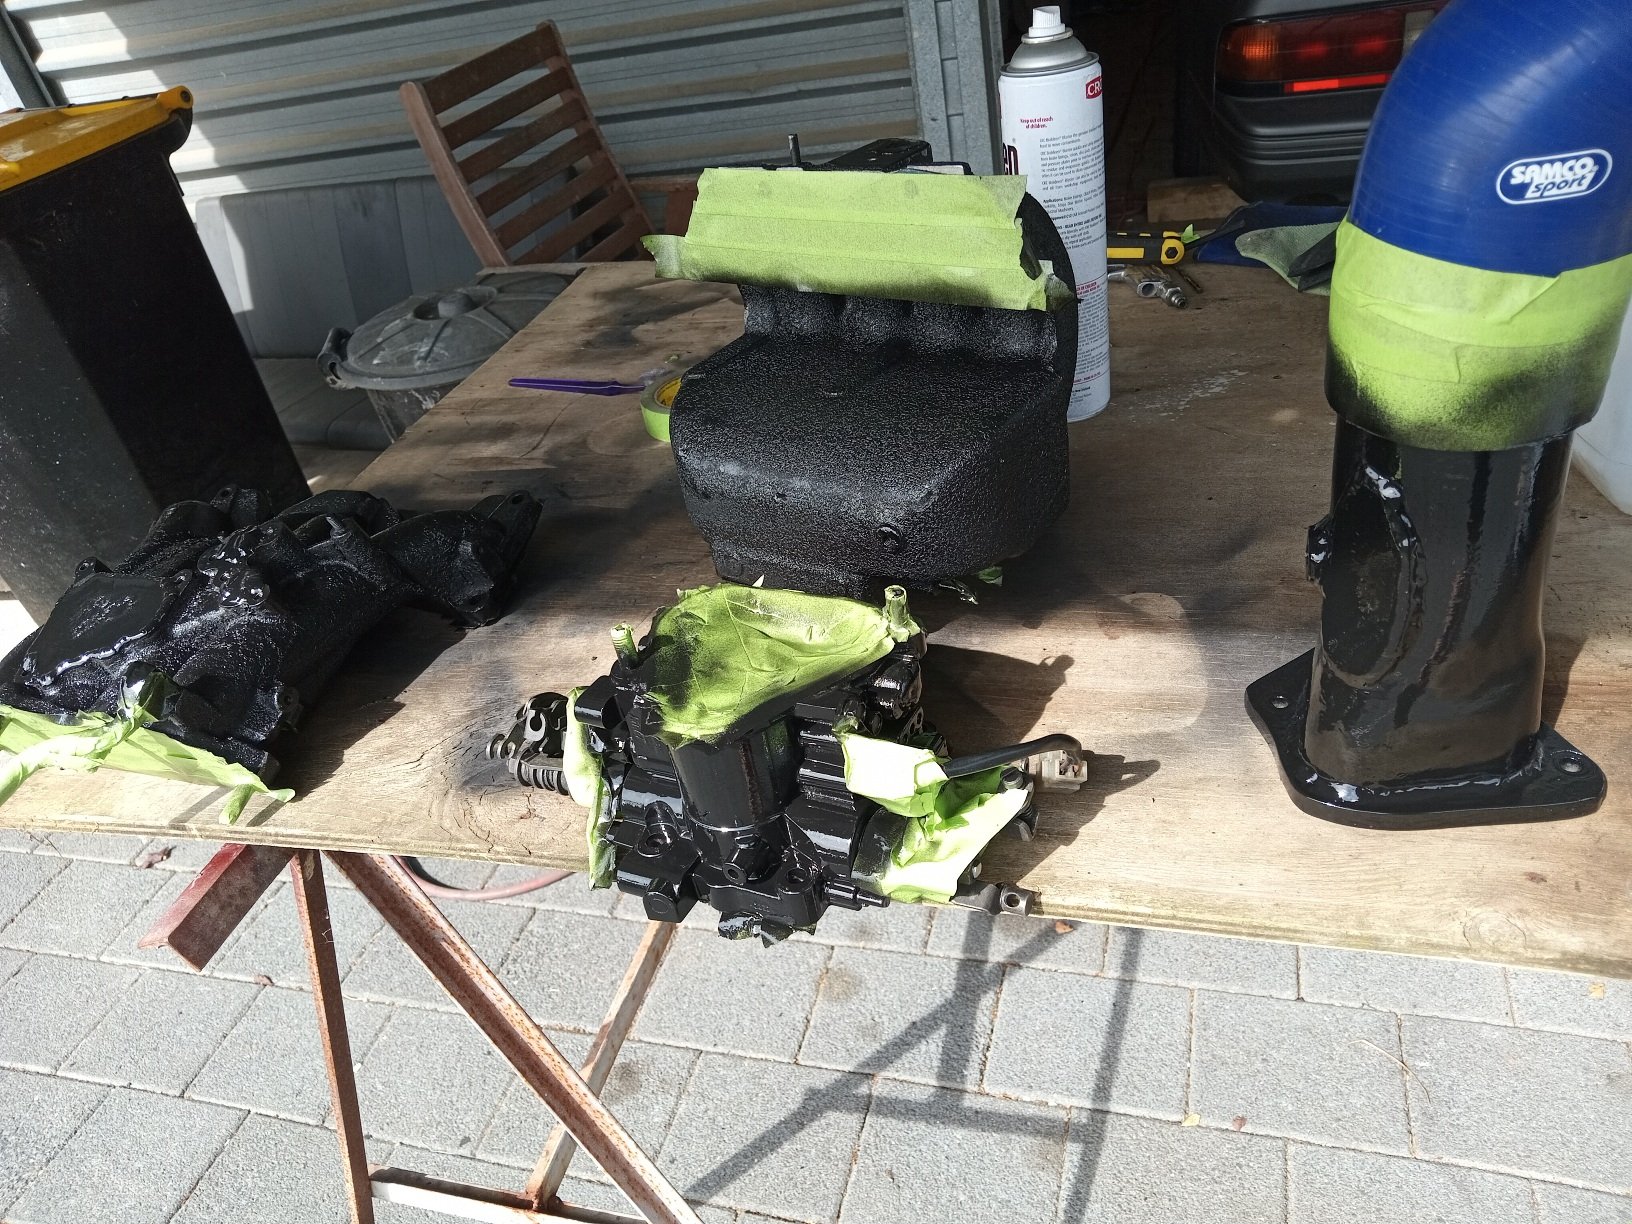
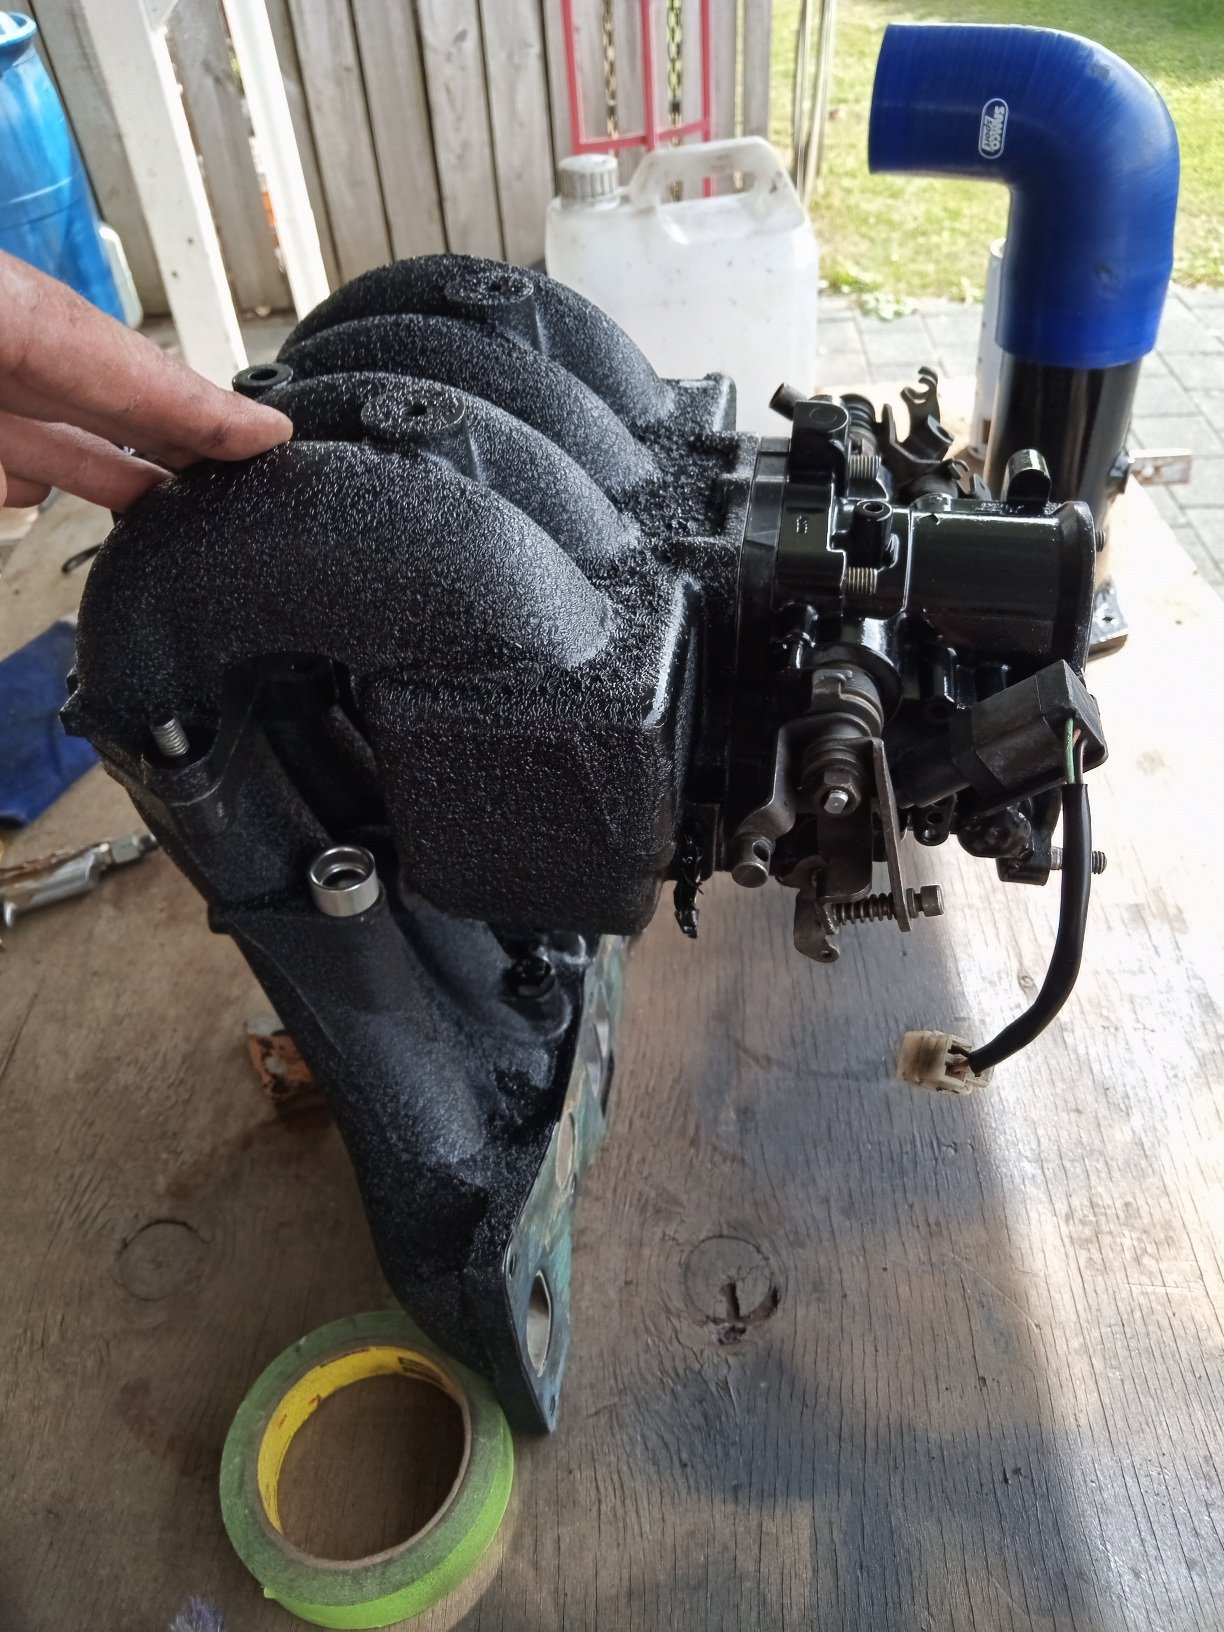
Welded up all the emissions and unused ports, this got rid of about 5 plates and gaskets as well as 3 or 4 hoses with bolts in them, sprayed in high temp black, should tidy things up a bit
4 points
-
3 points
-
posting to express interest, should be around the south island a bit this winter. always keen on intents sharns3 points
-
I bought mine as a 2l petrol converted to a camper. Ripped out the bunks etc but kept the lining and the PC Cresta diff. After one extremely expensive trip to Teretonga where we had a headwind all the way and had blown our fuel budget by Gore it got the LD28 conversion. An outfit in Waterloo Rd ChCh did it. They were doing one LD conversion a week at that time. When I went to pick it up I was met by a mate from speedway who'd already driven it and raved about how quick it was compared to the others they'd done. Told them what the diff was. It would cruise at 115k with two bikes on board. Never did find out absolute top whack as over 120k it was still accelerating - but very slowly. Went to most NZ race circuits in the following 5 years Puke to Teretonga. Had to keep it on 13in rims as 14's would have geared it too tall. Bit hard on rear tyres - rolled one off the rim running fast and empty once. Rust killed it ultimately. Far as i know it's now a mobile shed on a farm around Waddington. The wife loved it. She dragged off a Porsche once. Nail it hard and the left front got very light. From my experience I'd look hard at a taller diff than standard. But also fit bigger rims. They've got enough torque to pull something taller.3 points
-
As these motors go forever and a day, (but take forever to get there, i would love to see someone fit an Eaton M90 to one of these engines.3 points
-
Hey good news I've fixed all the broken image links in this post.... Soon I'll update it on everything me and the wee car have been up to.3 points
-
Pity the access to cow stream hot pools is closed for winter, 4wd camping up there would be good fun and no one about to complain about noise2 points
-
You need at least 0.5° operating angle on a UJ. Lesser the front shaft angle difference the better but not less than 0.5°. Currently you are at 0°. And max 3-3.5° operating angle on front UJ out of box. Now if you raise the hanger bearing so front UJ operating angle is 0.5-1° (front shaft initial angle of ~4° down) it will lessen the centre and rear UJ angles and still be within the max 3° front UJ angle. Centre and rear UJ's still have pretty bad angles but not much can be done about that without a fair bit of rework. If you set the pinion to ~6° down (flange pointing up) it will compensate for a degree or so of bushing flex under acceleration and get you close enough to where it should be happy. Link design/geometry will play a big part in driveline performance too, but thats confusion for another day.2 points
-
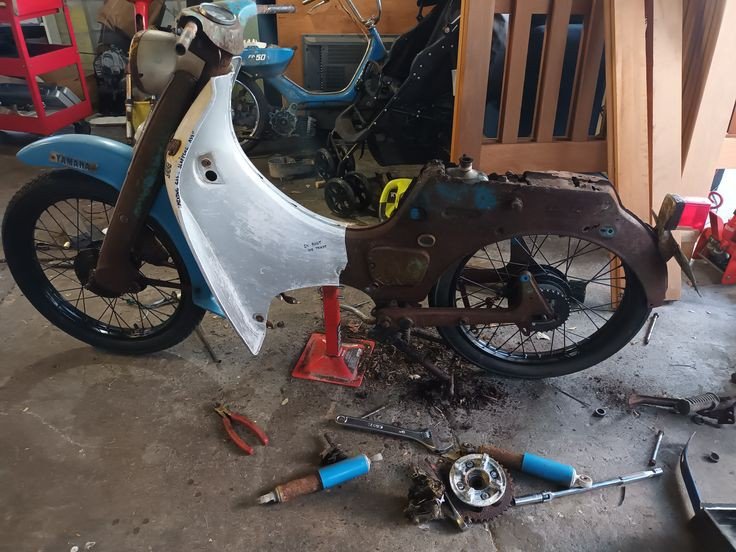
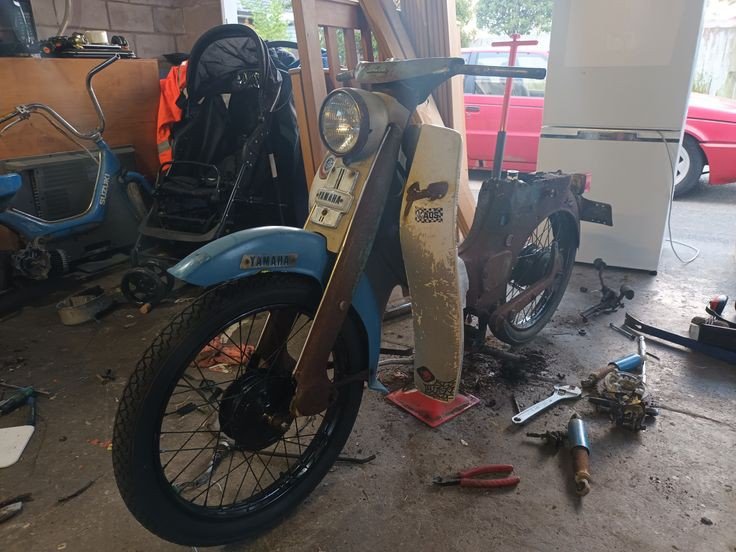
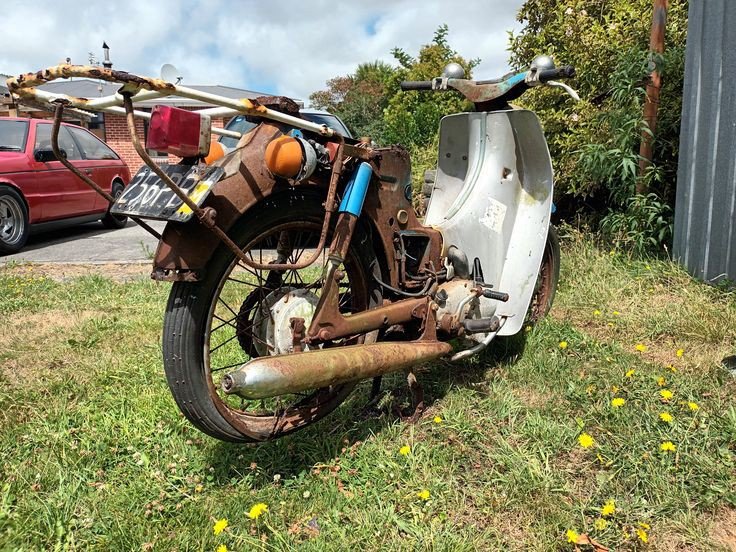
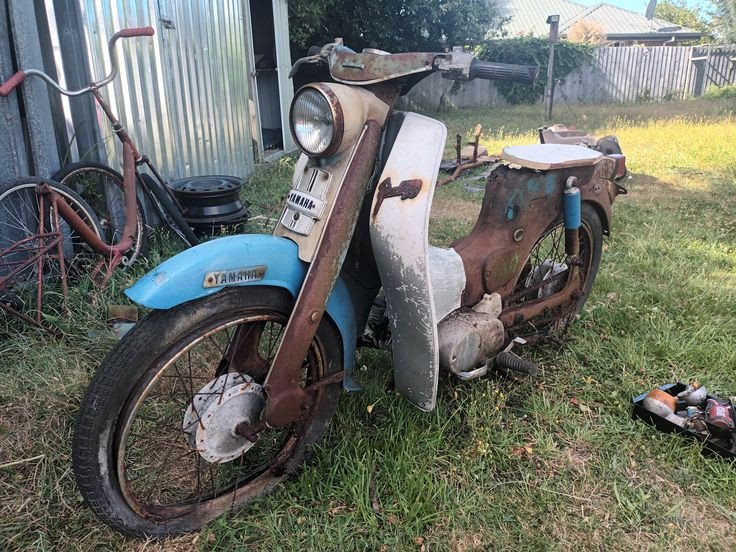
Wheels aquired, from a suzuki fr50 but are a 90% fit. The best bit though? Freeeebie...Zip, Zero, Naadaa Need to de spring the front and get the whole bike as low as poss, might be able to scrape the leg sheild on turns (doubt it) Also removed the motor, its well cooked so if anyone wants it for whatever reason its yours for a crisp high five Anywho heres some pickys
2 points
-
Here’s the daytime running lights I’ll be fitting: same as what I had before, but this time I’ll spray some 2k clear on them to keep them neat. I like them because I want that mouth breather who’s still half asleep scrolling through tiktok to see me at a roundabout. the major challenge I had was that they have three wires. Red : DRL; Yellow : Indicator, Black : Ground. I previously had given up trying to make the indicators work, and just settled for this method of wiring, courtesy of my good mate and former president of the MR2 nz owners club, Charlie: however for those that like a little more pizzazz, after much head scratching and Coke Zero, I’ve worked it out - a simple 5 pin relay: the electromagnet is controlled by the headlight switch. The relay can be either normally open or closed; for the 87 open pin, I’ve connected a 12v positive that’s only hot from when ignition is on, the red wire from the DRL is spliced into that. The ground is then hooked to the 30 pin, which has the black wire from the DRL spliced into that. The 87a closed pin is left vacant. I’ll have a proper diagram up soon when the headlights are flicked on, the relay is activated and the DRLs no longer work. the indicators just get power from an indicator on their side, and use the same ground as above. shine bright like a diamond With the indicator on and drls on: I was a little frustrated when i saw this, but upon closer inspection, all indicator leds flash, it’s just some led wizardry that it flashes the white leds on and off With headlights on: should be 100% road legal, as wof virms state maximum 2 front pairs of indicators, and the corner ones are more side than front so should be legit did a bit of test fitting just to see where every wire would go, and how the harness might look: shouldn’t be too hard, just a whole lot of planning, fitting etc, I’ll make the indicator harness longer than needed. Removing the bumper should not pull on the wires too much.2 points
-
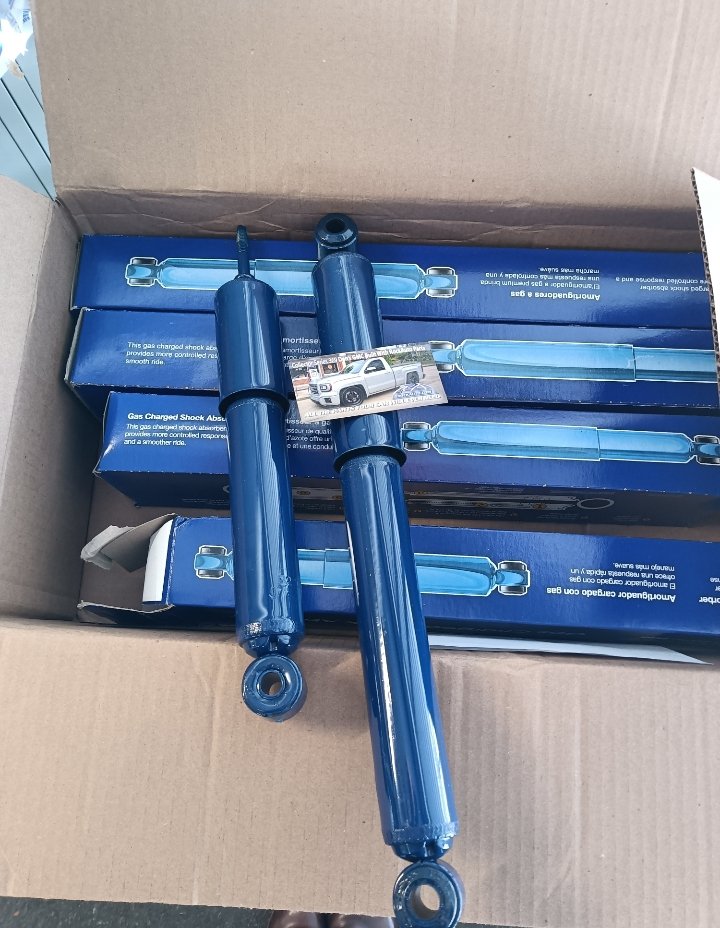
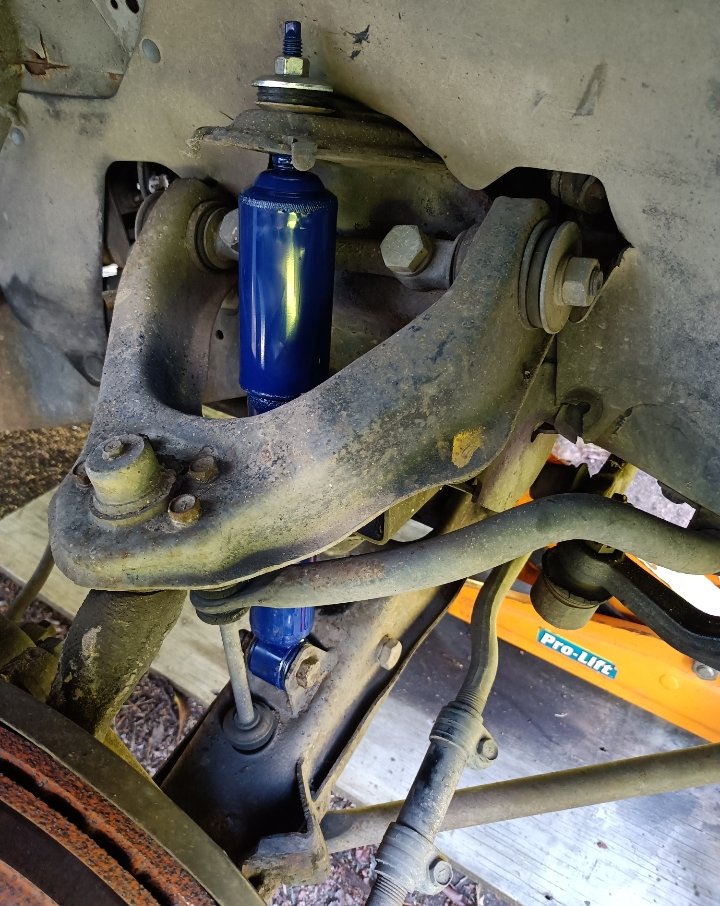
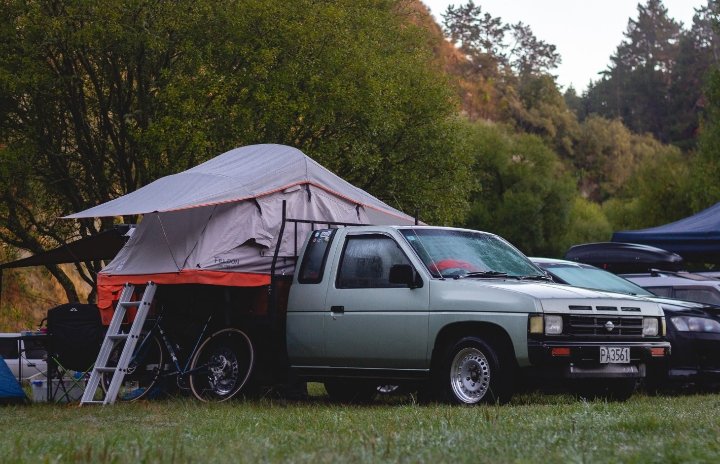
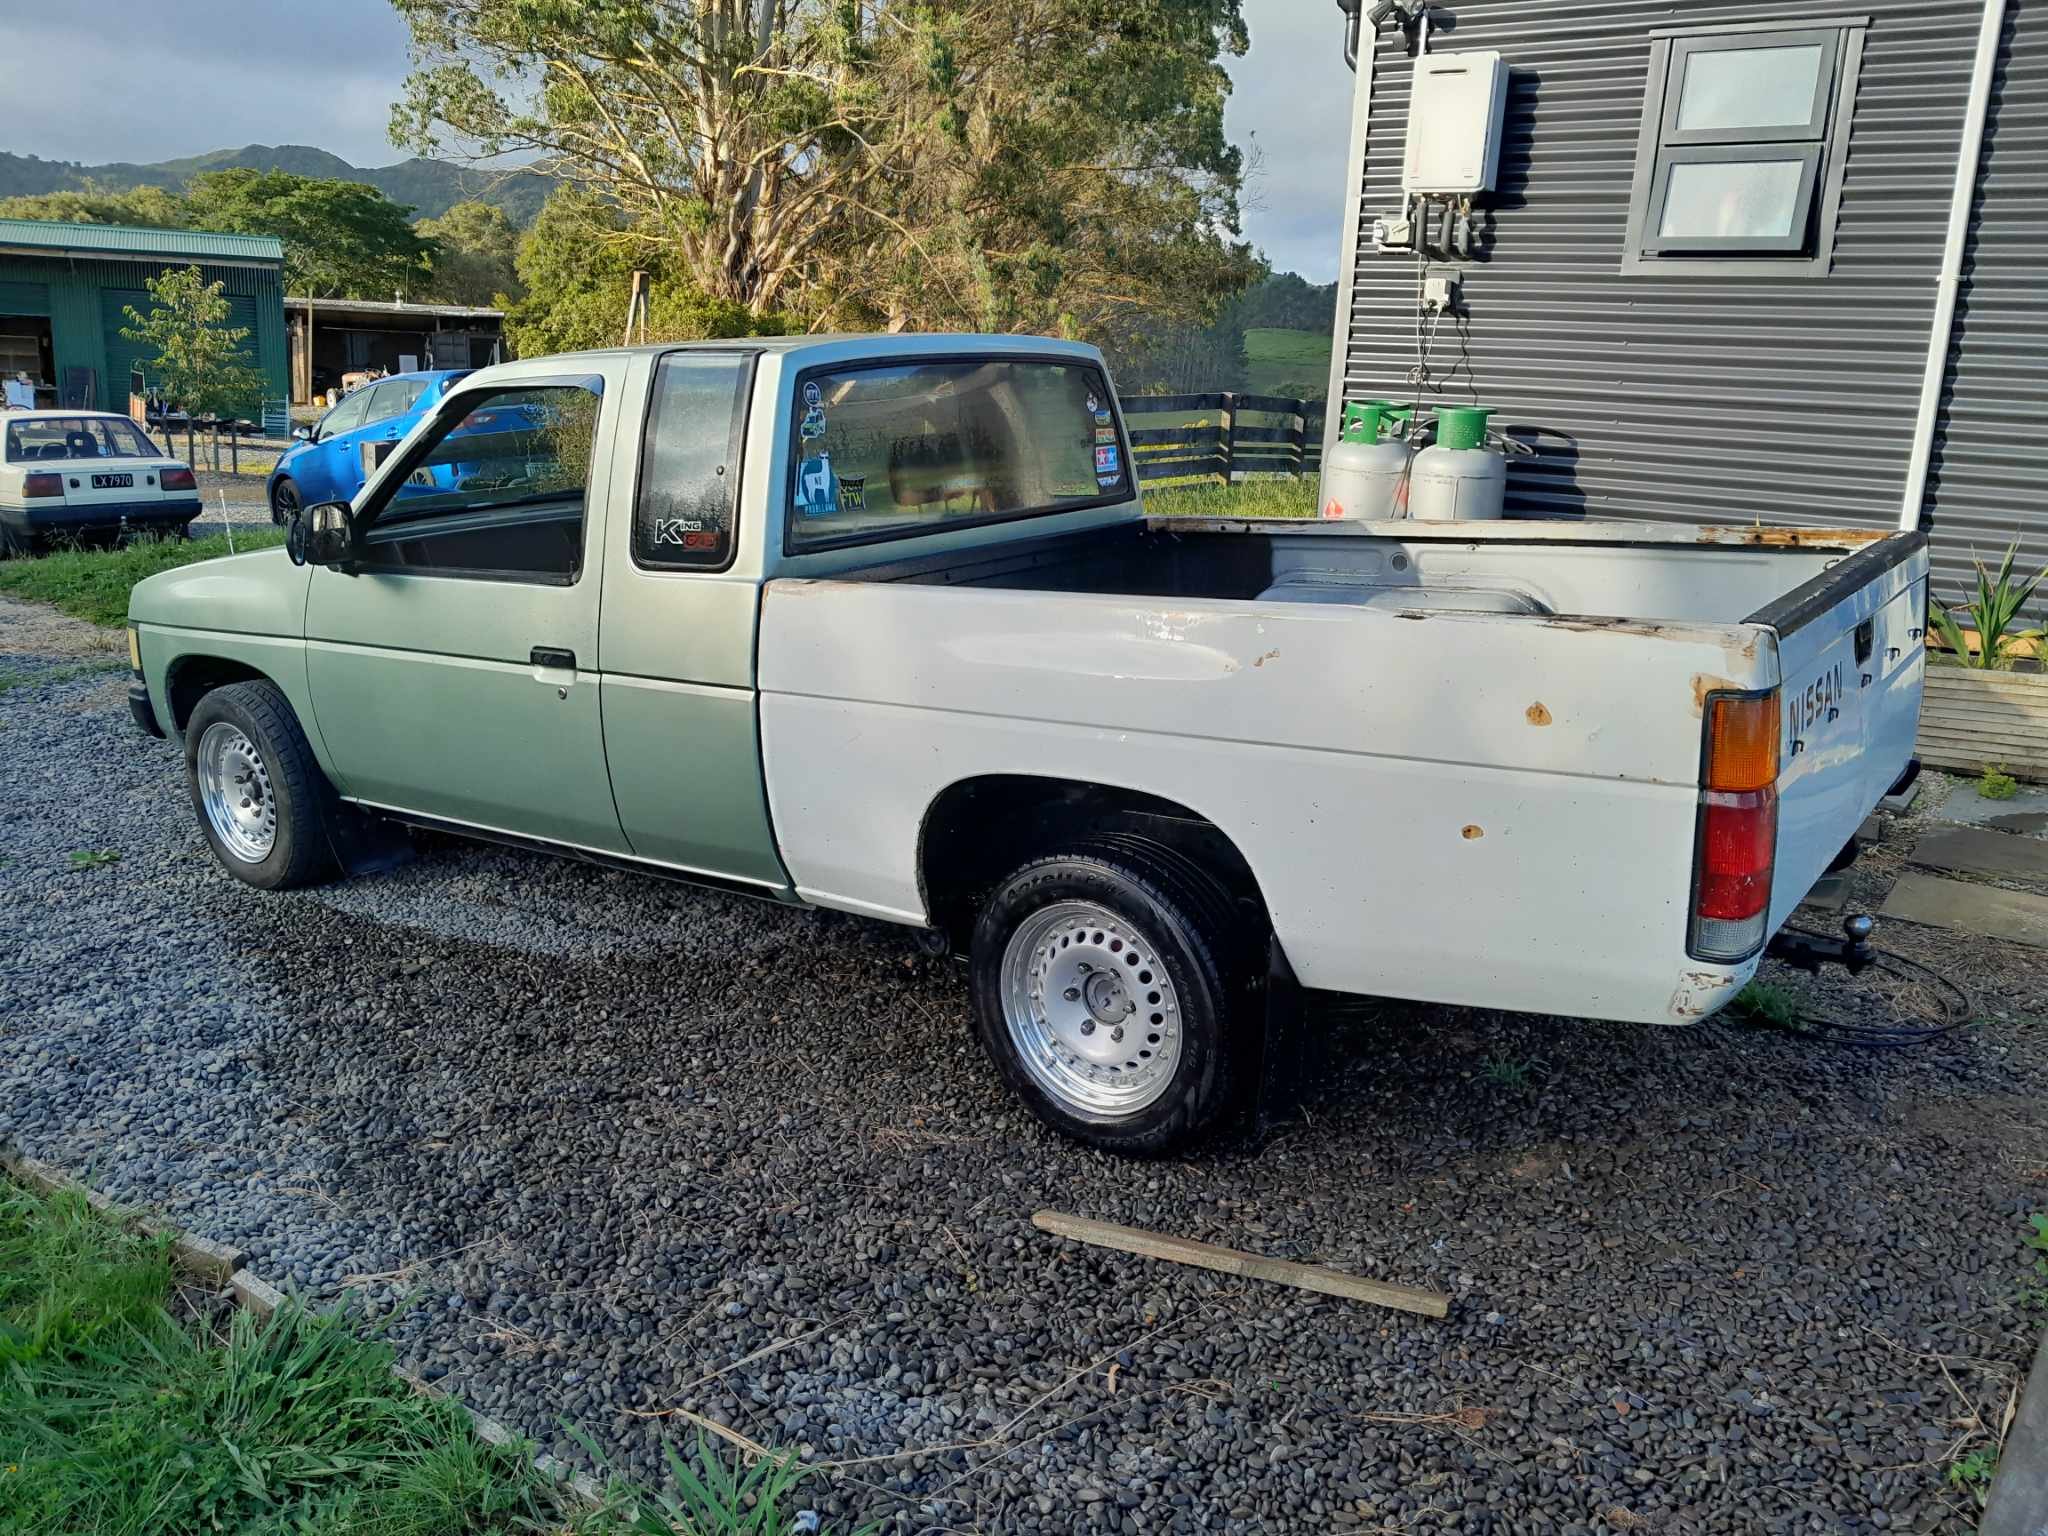
And new shocks all around. 4x4 d21 up front (shorter than the 2wd ones) and Nissan Quest rear shocks in the back which are shorter than the factory ones as well. All bolted straight in and feels as good as a 35 year old truck on bumpstop should feel like ...haha. Front is touching bumps, rear not quite. So need to have a play there.
2 points
-
Pulled the tappet cover and sump, all looks well; Printed a new faceplate for the heater mech with the knobs set back a few mm as the cables were pulling it a bit, plus I printed a white insert for the indication to make it tidier, this just got coloured in with permanent marker for the red and blue bits; Clutch arrived; Also my younger self had bodged something for the top engine mount as the original one didnt work with the new engine, this was an unconvincing effort. So I spent some time with the lathe and the welder and made something much nicer with replaceable standard bushings;2 points
-
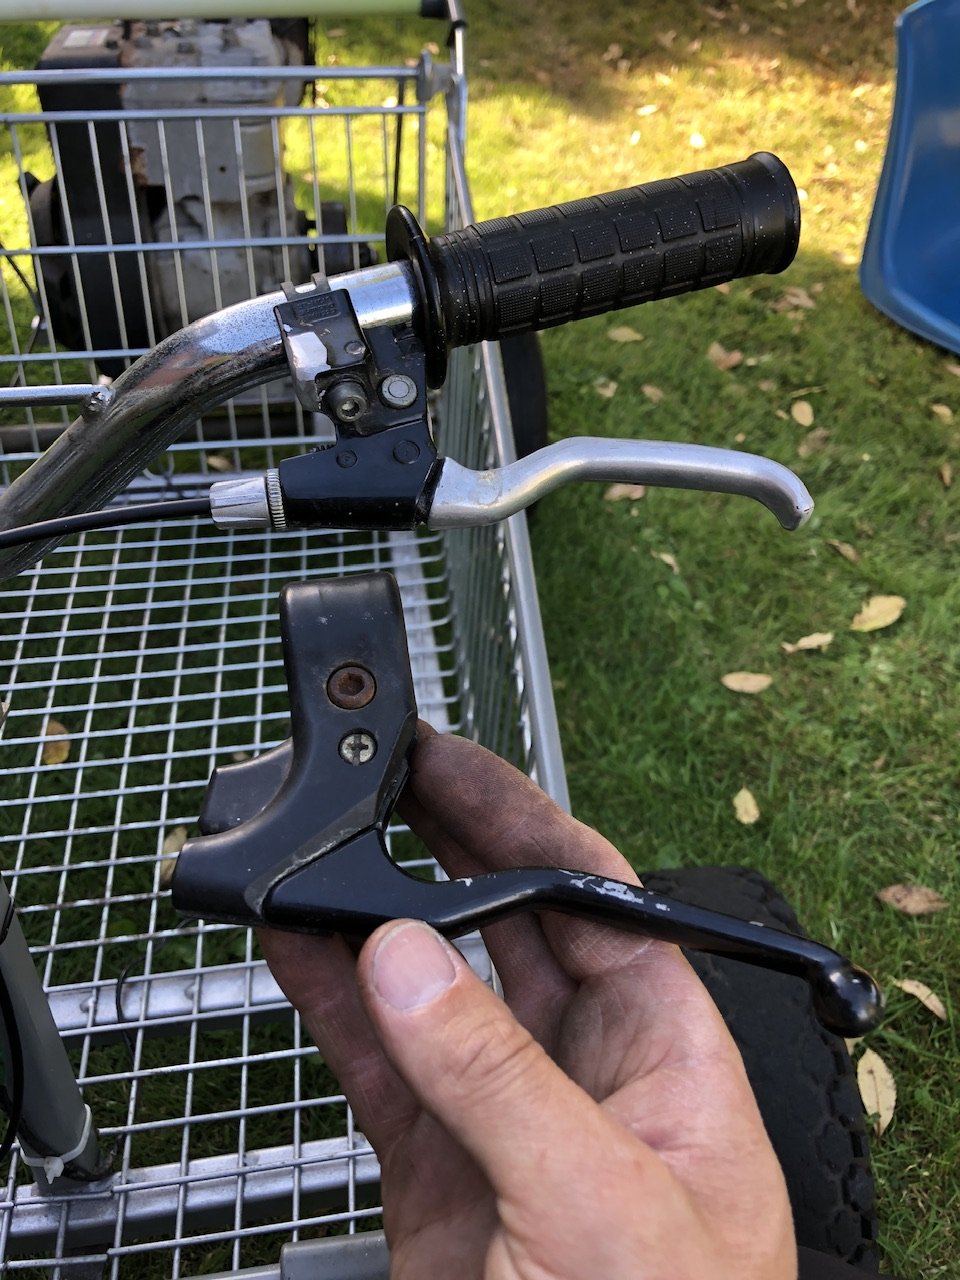
Wow that was a while ago. I went to hook up the brakes and found the little adjuster thingy had gone south on the last joyride. I didn’t have any adjusters in my stash that fitted so chopped up an old mountain bike brake/gear shifter combo. Now I had brakes it was time for more hooning. At this point I’m still sporting a decent exhaust burn on my right hand from the last test runs. So I wedge my hand in hard against the choke/ throttle/ spark plug area and go for gold again, still kneeling in a similar pose to driving a dingy with an outboard. So fun. So fast. So dodgy still. Work mate watching from the roadside reckoned 60 clicks easy. I was catching up on cars real quick and the brakes were only slightly better than the foot dragging on the road option. By the time I pulled back into the workshop I’d cut my hand up fairly bad, blood down the side of the motor. And one knee was sore as fcuk and starting to swell up. All in all a great time was had and received many roadside thumbs up. Glad @xsinclairx wasn’t patrolling the area that day
2 points
-
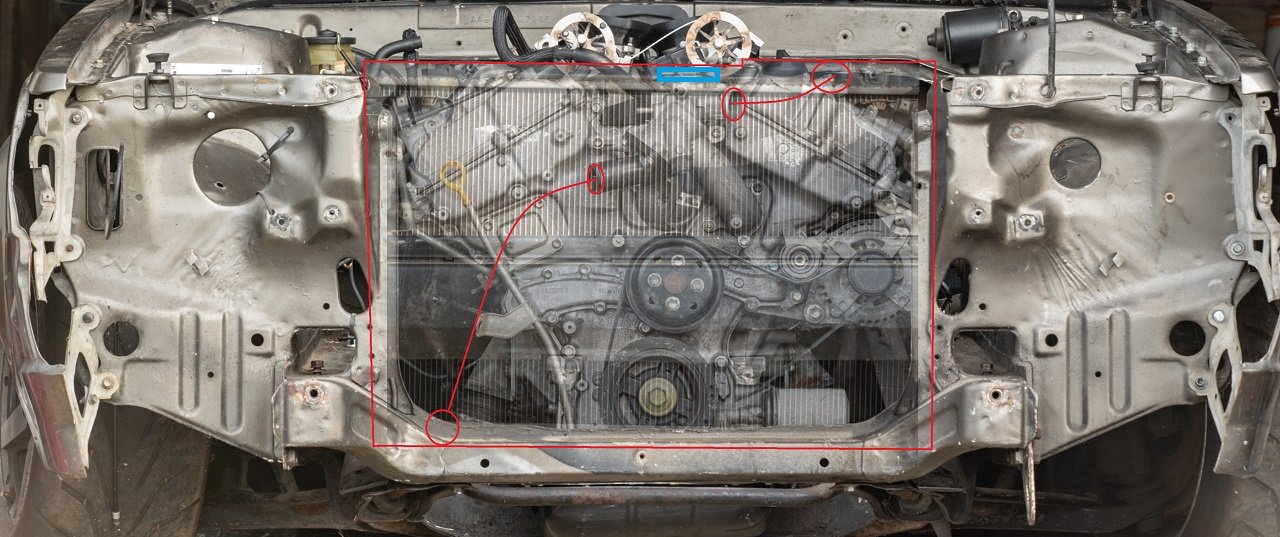
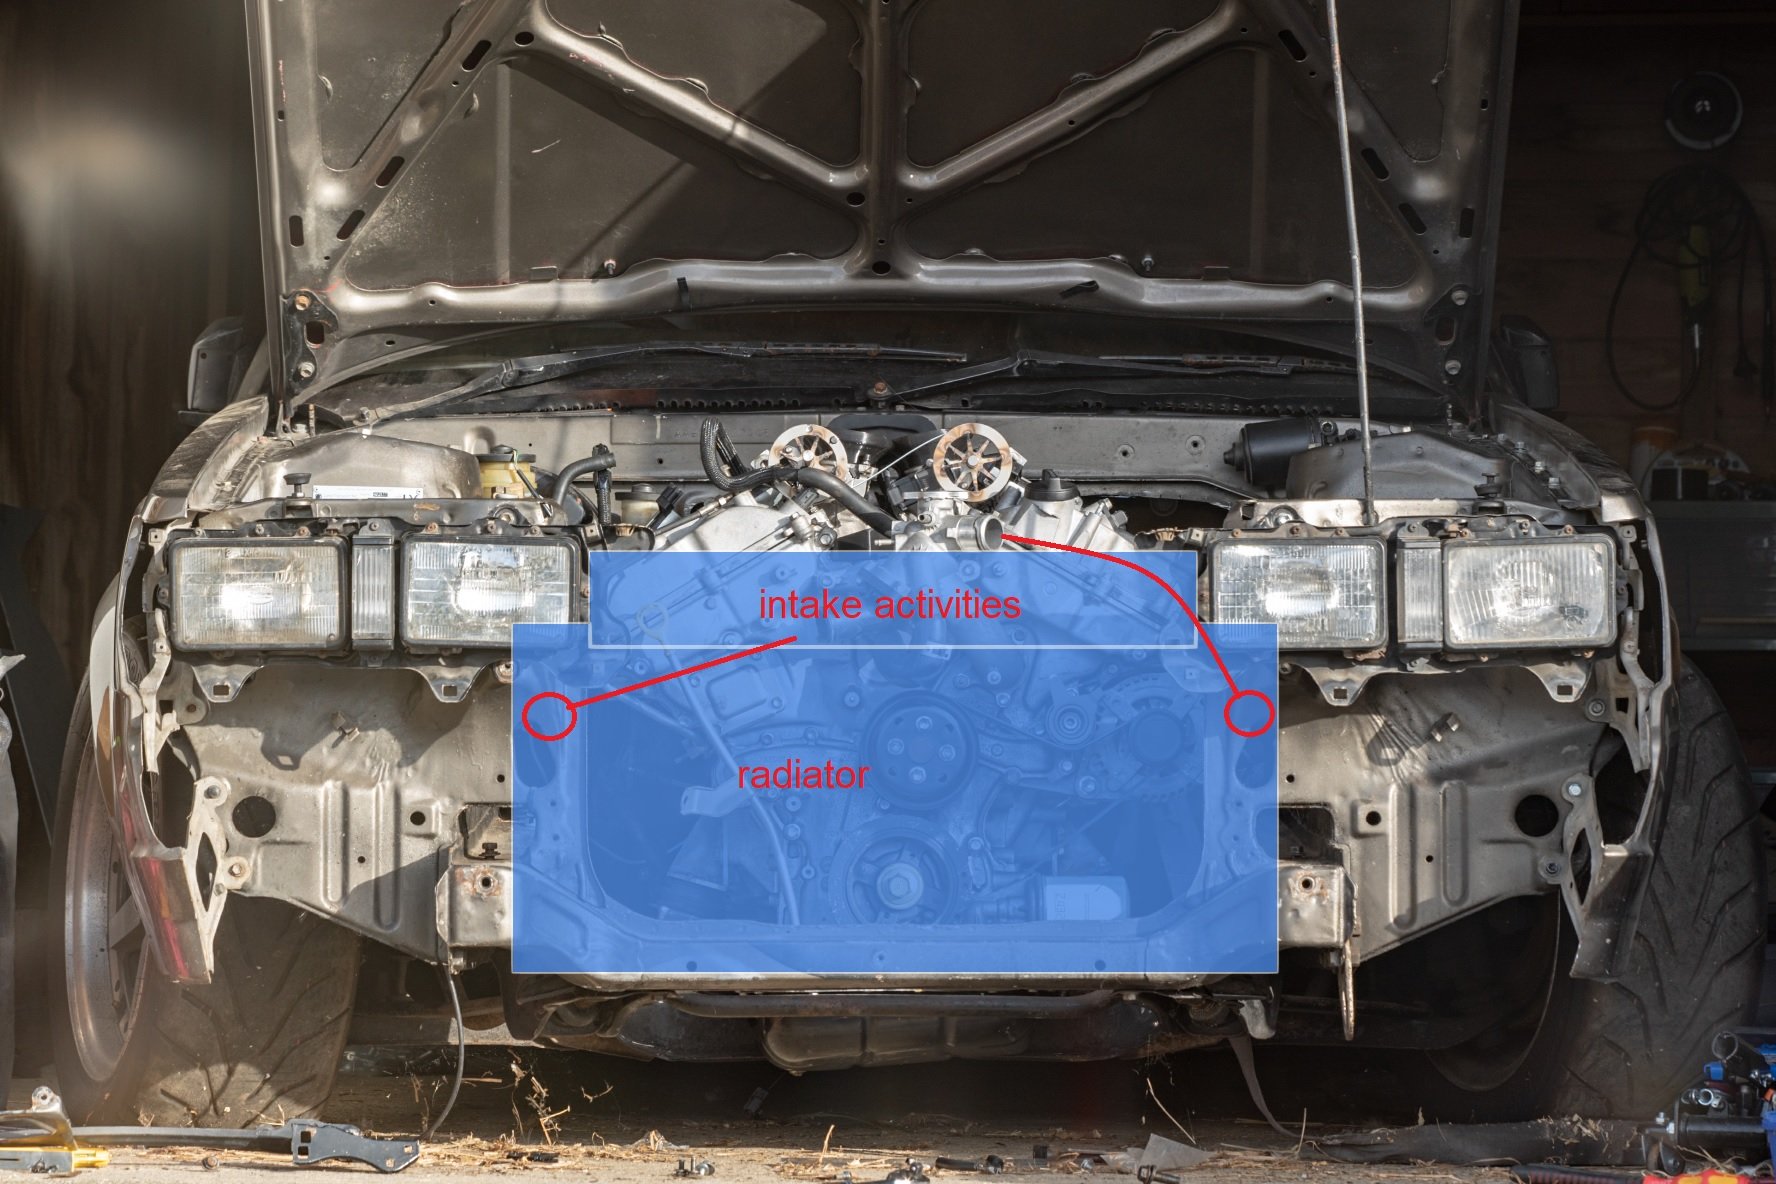
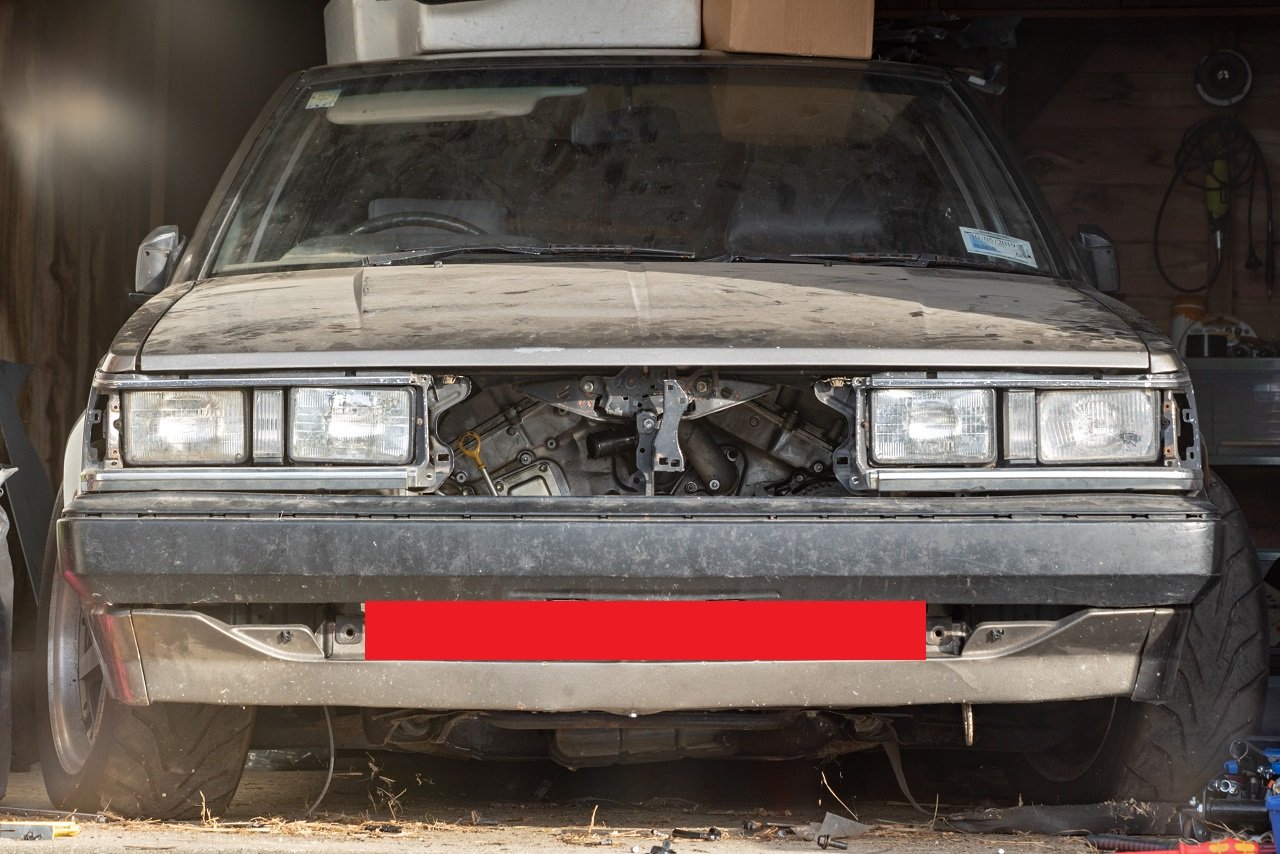
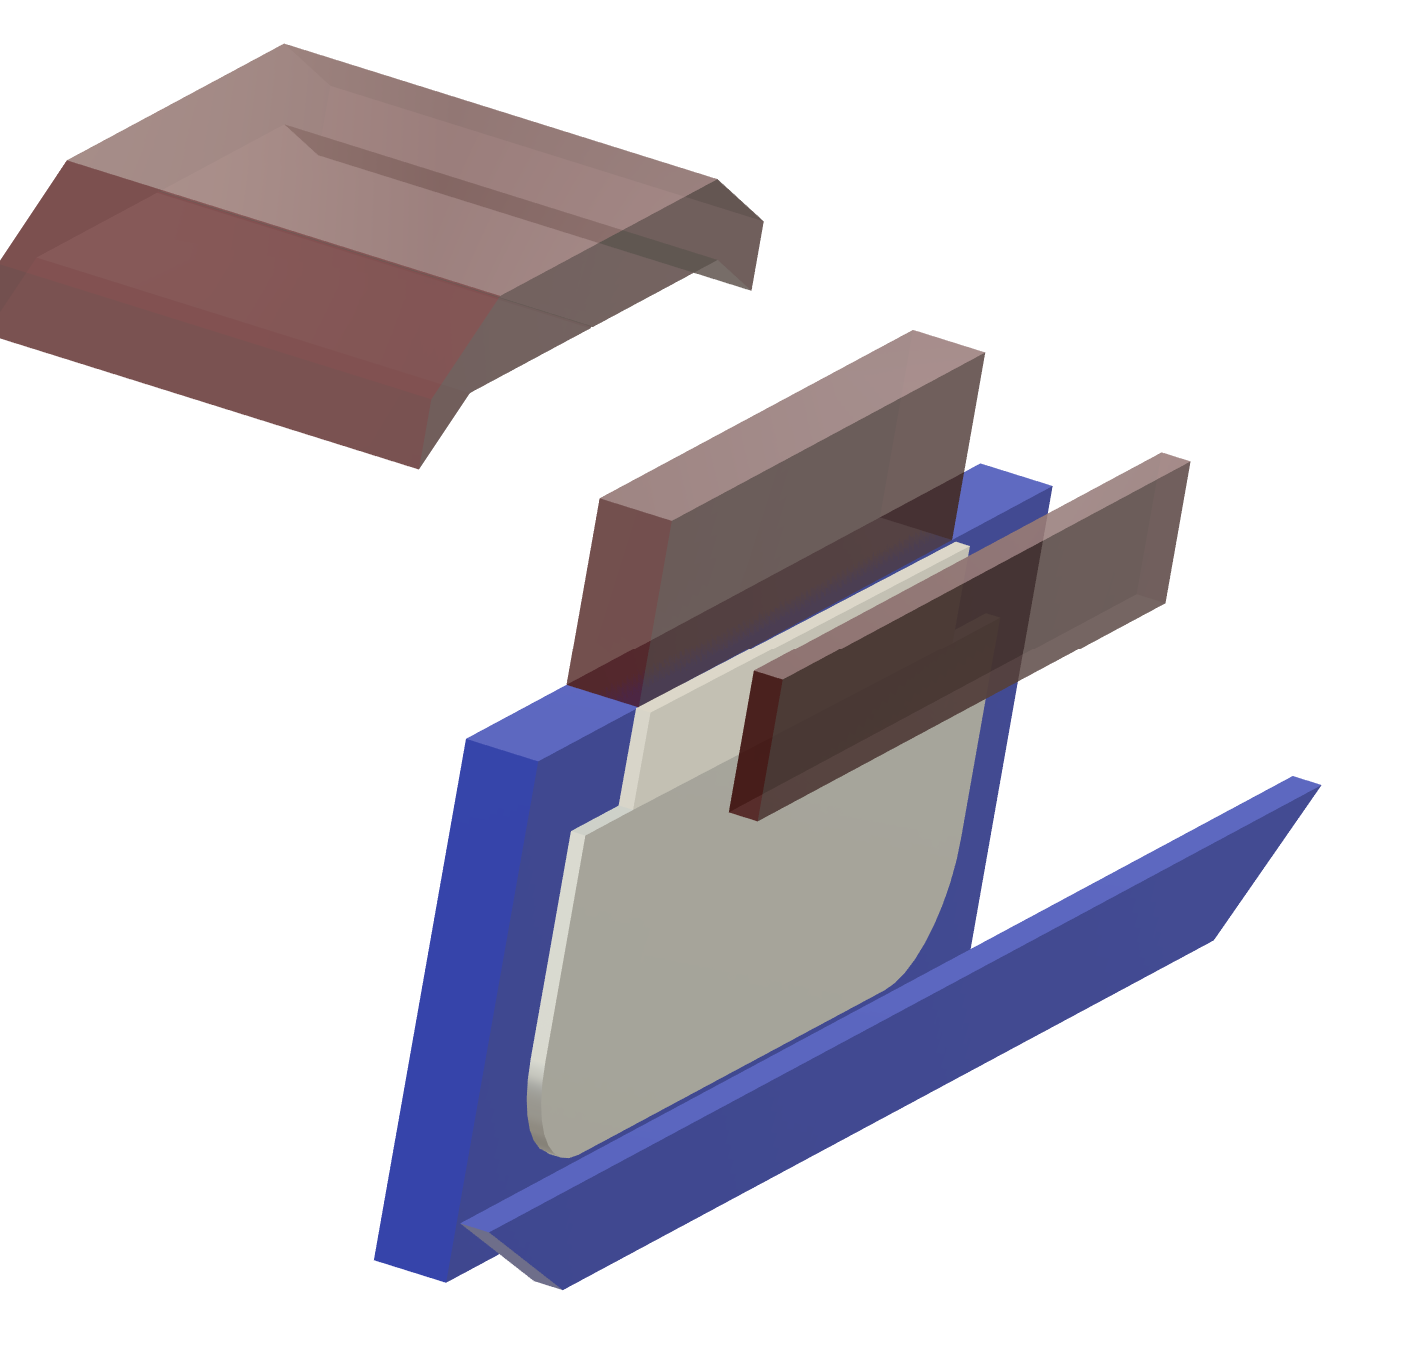
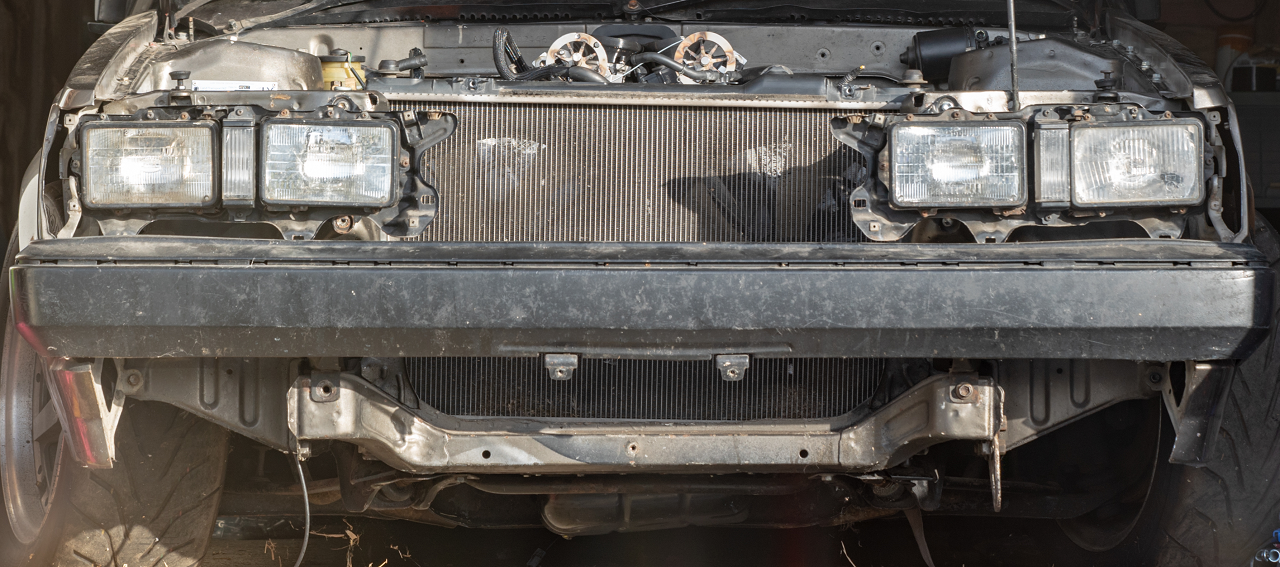
Radiator situation I've got the Mark X radiator in there currently, and although it made everything nice in a lot of ways in the back of my brain I know it's just not going to work quite right. As the top pipe sits too high. You can see it sits a little higher than the top crossmember too, and this isnt on any mounts yet. Just sitting hard against the bottom. The motor's radiator cap (in blue) sits a little lower than the radiator, and the top hose to the radiator flows uphill towards the radiator. All bad news for ever trying to bleed the air out of this thing. Another issue is that I'd love to have a front facing intake airbox that goes through to the front grill, like a lot of the BTCC type cars have. The best option I've found for a low, wide, twin core radiator that doesnt have a radiator cap (and does have an air bleed) is from an SW20 MR2. Being so much shorter, I can dedicate all of the front grill area for the intake. And they're a common upgrade item for MR2s, so cheap and plentiful. The radiator is 5mm wider than my chassis rails, but the end tanks are alloy and on the sides. So will just need a little slice and reweld to fit at the bottom. If I dedicate the top grill to doort noises, then I dont have a huge amount of frontal area for the radiator coming in from just underneath the bumper. Possibly need to remove the bonnet catch as well, but I'd prefer to keep it over having bonnet pins or whatever. This is a rough approximation of how much space I've got for each thing Red is intake stuff, blue radiator stuff, white is the open area that the radiator can get air through. So a lot of the radiator area will be fairly useless if hard mounted against the front of the car, as it wont get any air flow. so I'll try mount it as far back as I can towards the engine. All of this stuff is a bit off topic to my path towards getting the engine fired up, but I've been working on that too. Last night cut the fuel rails a bit shorter, so there's more room at the back. for the fuel dampers without hitting the body. Then also had the underside of the rails milled down so the throttle linkages dont hit the rail anymore. So that's just about all finished once I've retapped the ends and remade the AN lines to suit.
2 points
-
I had a $23 keyless entry kit laying about, and the key fob looks os enough, so went about installing it wow yuck, not sure who did this, super easy install, door lock, unlock runs off the oem switch, indicators off steering stalk, and I’ve installed a switch in the alarm horn positive wire for when it’s not needed disarming/arming. Unfortunately it is just keyless entry. I’ve been messing about with adding a relay that sounds the horns if someone attempts to start the car without disarming the alarm first, but the diagram I’ve seen suggests it requires constant ground when armed. My testing shows the circuit is only momentarily grounded when armed/disarmed. so it’s not compatible/I don’t wanna hack up starter wire and will eventually install a mongoose alarm. kick panel: I’m still in the process of tidying this up, ground wires from the keyless entry module, amplifier rca’s, dashcam, radar detector, a lot of it is just extra length but when I installed these I didn’t have a good crimp tool nor the butt connectors. Easy to see why manufacturers started using mini fuses. also I tried to remove my steering wheel to remove the makeshift spacer I had in there to take measurements. I ended up needing to buy a stupid steering wheel puller and bending my Ali steering wheel. so to those who warned me against buying a fake momo, you guys were right, and now I will advise others to steer clear of fake steering wheels. Old real momo wheel from my mr2 fitted, until I have enough to buy the real version of my knockoff:2 points
-
Not really an update but this thing is going pretty well so far, I've put 8000km on it (more actually as the speedo/odo wasn't working for at least 500km as we couldn't initially get it to read a pulse from the speed sensor - a moderately long story but it's working mint now). So what's been happening? I entered this in 4&Rotary Nats show, because I wanted to tick that box really, nothing more, nothing less. So myself and @oftensideways made the trip up, both trailered - in my case now wanting to get it all grubby due to spending hours cleaning and sprtizing. As it turned out, this was the weekend those hectic rains came in and hit Auckland, so we drove up in generally garbage conditions, and the car was coated in a thick film of schmutz when I got theire (engine bay included) which meant a hurried cleaning mission to get it ready. I reckon we presented pretty well though! KP61 4nR 2023 Show1-2-Edit by Richard Opie, on Flickr KP61 4nR 2023 Show1-5-Edit by Richard Opie, on Flickr KP61 4nR 2023 Show1-3-Edit by Richard Opie, on Flickr KP61 4nR 2023 Show1-11-Edit by Richard Opie, on Flickr Lots of sweet car yarns and hangs ensured throughout the following day, and when prizegiving rolled in I was pretty humbled to receive the Best Toyota trophy, against what I think were some pretty wild cars (Supercharged LS KE70, a big power JZX100 dripping in all the lush Japanese parts etc). So when I got home I wiped it down and took a few pics - note the addition of the limited edition Momo Heritage Prototipo, with a TRD horn button I've been hoarding for some time. This is likely as good as the car will ever look. KP61 Orakei Rd-219-Edit by Richard Opie, on Flickr KP61 Orakei Rd-230-Edit by Richard Opie, on Flickr KP61 Orakei Rd-44-Edit by Richard Opie, on Flickr KP61 Orakei Rd-48-Edit by Richard Opie, on Flickr KP61 Orakei Rd-111-Edit by Richard Opie, on Flickr KP61 Orakei Rd-147-Edit by Richard Opie, on Flickr KP61 Orakei Rd-144-Edit by Richard Opie, on Flickr KP61 Orakei Rd-137-Edit by Richard Opie, on Flickr KP61 Orakei Rd-158-Edit by Richard Opie, on Flickr KP61 Orakei Rd-172-Edit by Richard Opie, on Flickr KP61 Orakei Rd-175-Edit by Richard Opie, on Flickr KP61 Orakei Rd-218-Edit by Richard Opie, on Flickr KP61 Orakei Rd-89-Edit by Richard Opie, on Flickr KP61 Orakei Rd-239-Edit by Richard Opie, on Flickr KP61 Orakei Rd-102-Edit by Richard Opie, on Flickr2 points
-
KP61 Hero Contributor-6-Edit by Richard Opie, on Flickr Still running well, clean sheeted it's first WOF after cert and generally been relatively minimal, but happy motoring. No 13's on it because, I'm lazy. And it drives really nicely on these, but the 13s will find their way back on soon. I've had the paint (that was done in 2007) colour sanded and corrected and it looks ridiculously good. This shot doesn't really shot it, but it's flat, glossy and much more vibrant. All I have to do now is look after it!2 points
-
If you're looking at getting that wagon, probably want to do a rack and pinion conversion as the steering box stuff takes up heaps of space where you'd want to run the exhaust. Also most likely has leaf spring in rear of that wagon which is a bit gross compared to 4 link. Also, at the best of times with some $$$ spent these cars handle... not amazing compared to modern stuff. But with standard suspension etc they just wallow all over the road haha. Costs a fair bit of $$$ to get them handling and braking a bit better. With lots of weight in front and not much power would be kind of like wielding a marshmallow sledgehammer.1 point
-
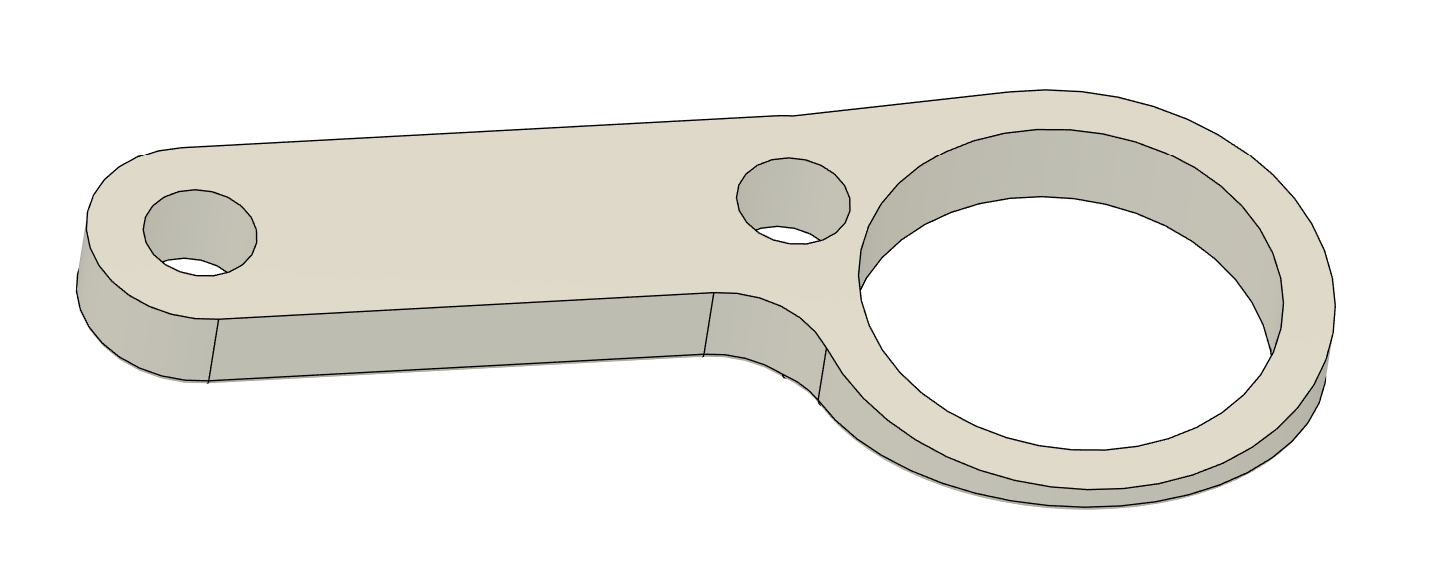
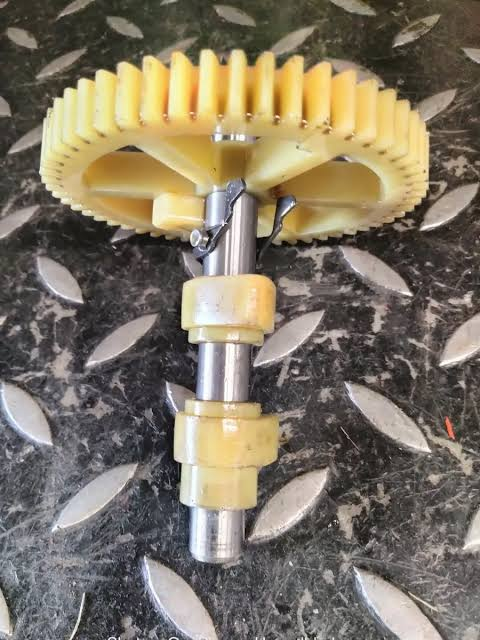
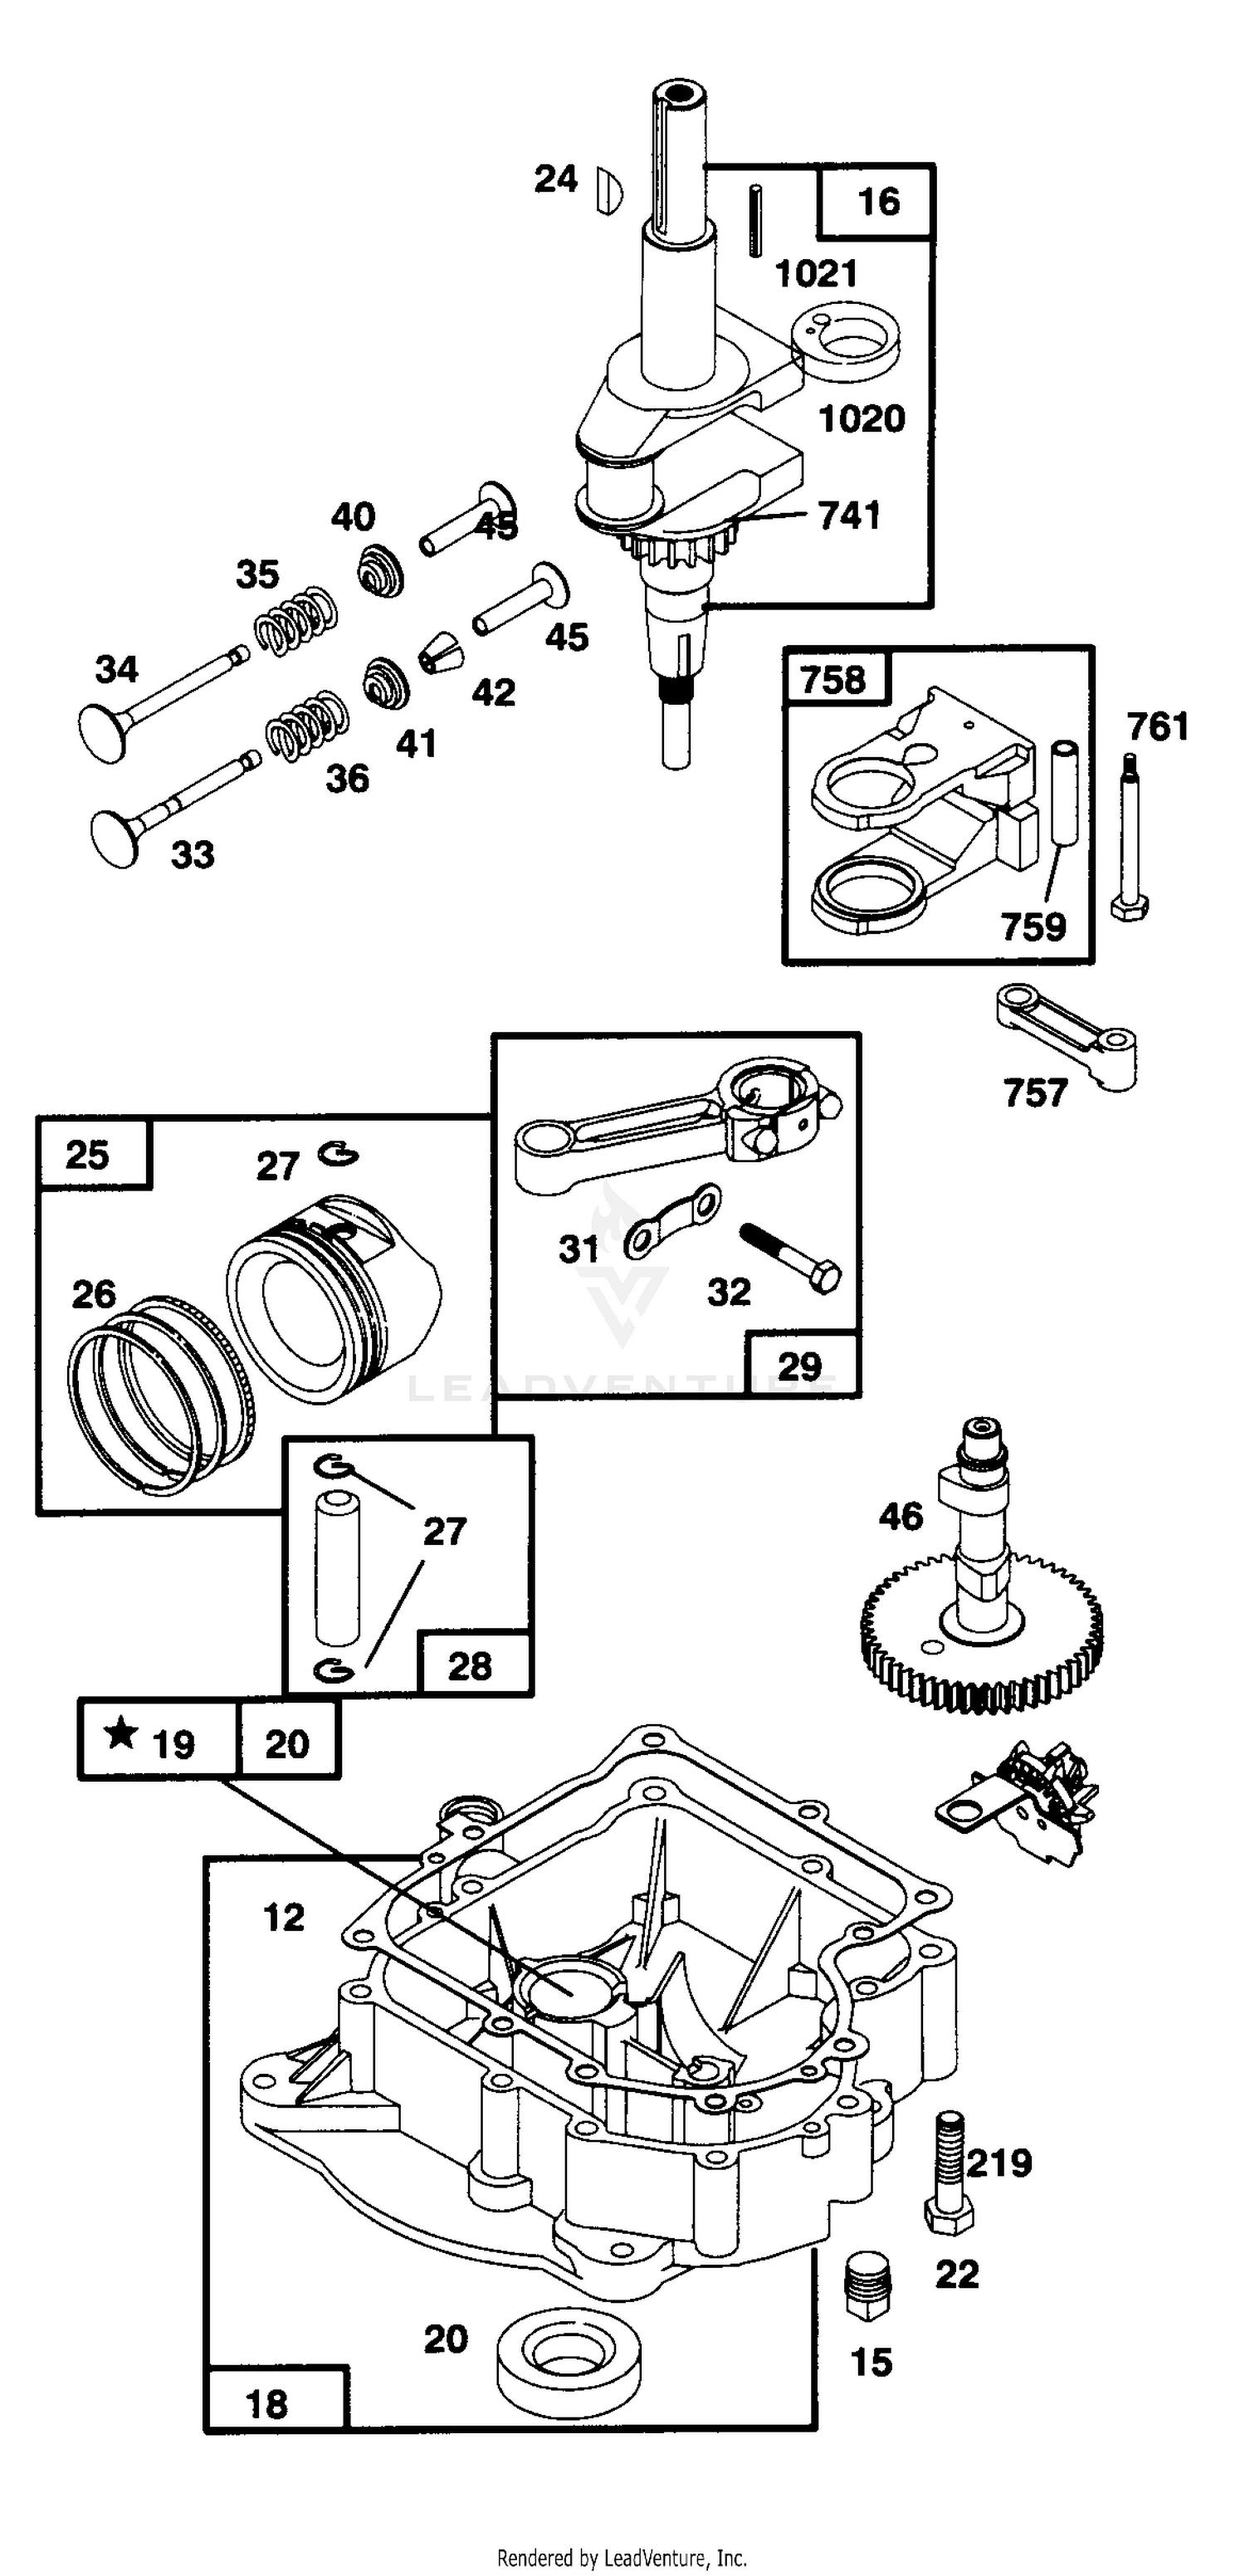
I remember pulling apart the motor that was in the ride on mower I bought off @Nominal a number of years ago and thought the plastic components were surprising and you can’t help but think that can’t be good, but in saying that the reason that motor had given itself an upper cut was due to a metal (cheese) part giving way. I think if any of the plastic gave up it wouldn’t run but unlikely it would have ventilated the case either. Was the little pivot arm 757 in this diagram that let go.
1 point
-
*potentially Already sussed a front wheel, once rear is acquired I can atleast roll it round. the bro is gonna take the motor to his as he is bored and wants to have a play, dunno if it's saveable though but can't hurt to try
1 point
-
Probably wouldn't be cold for long if the frost pot is under trees.....1 point
-
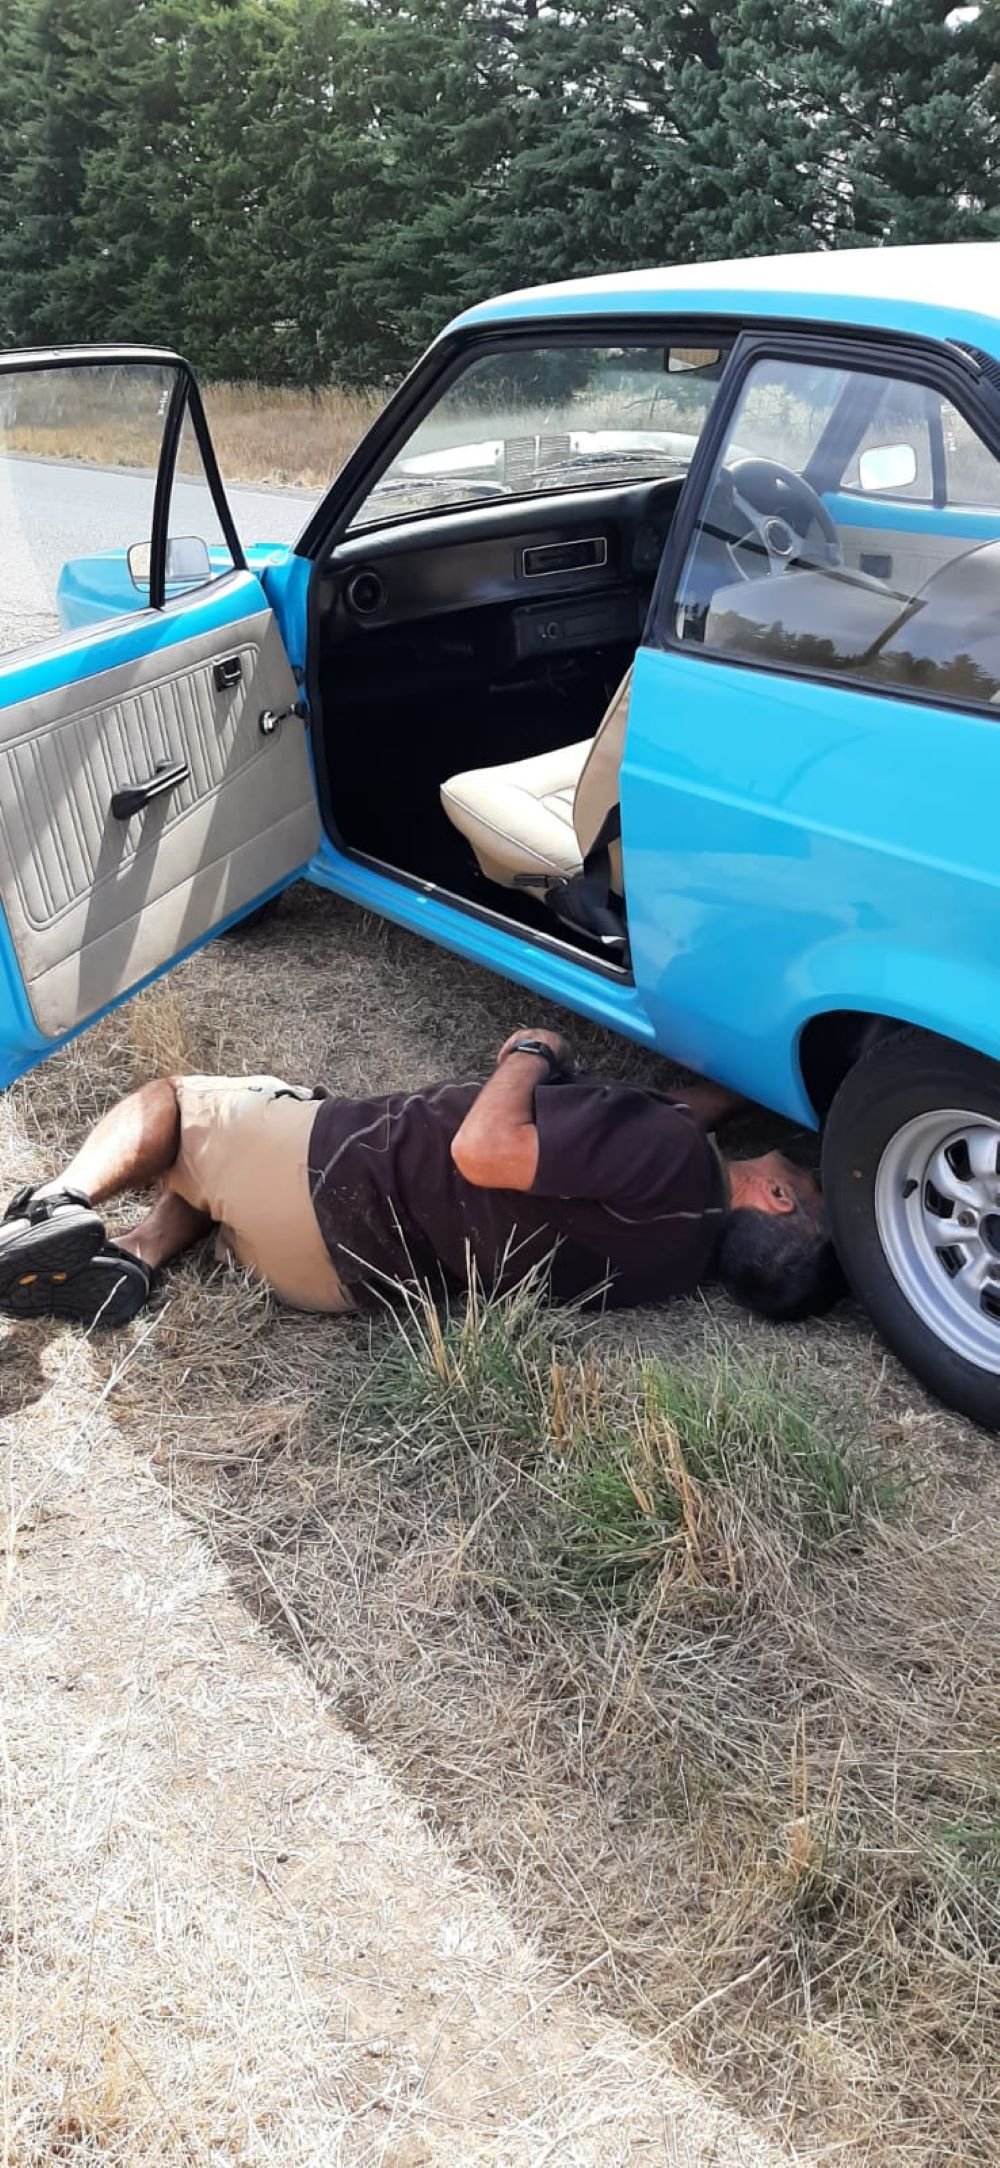
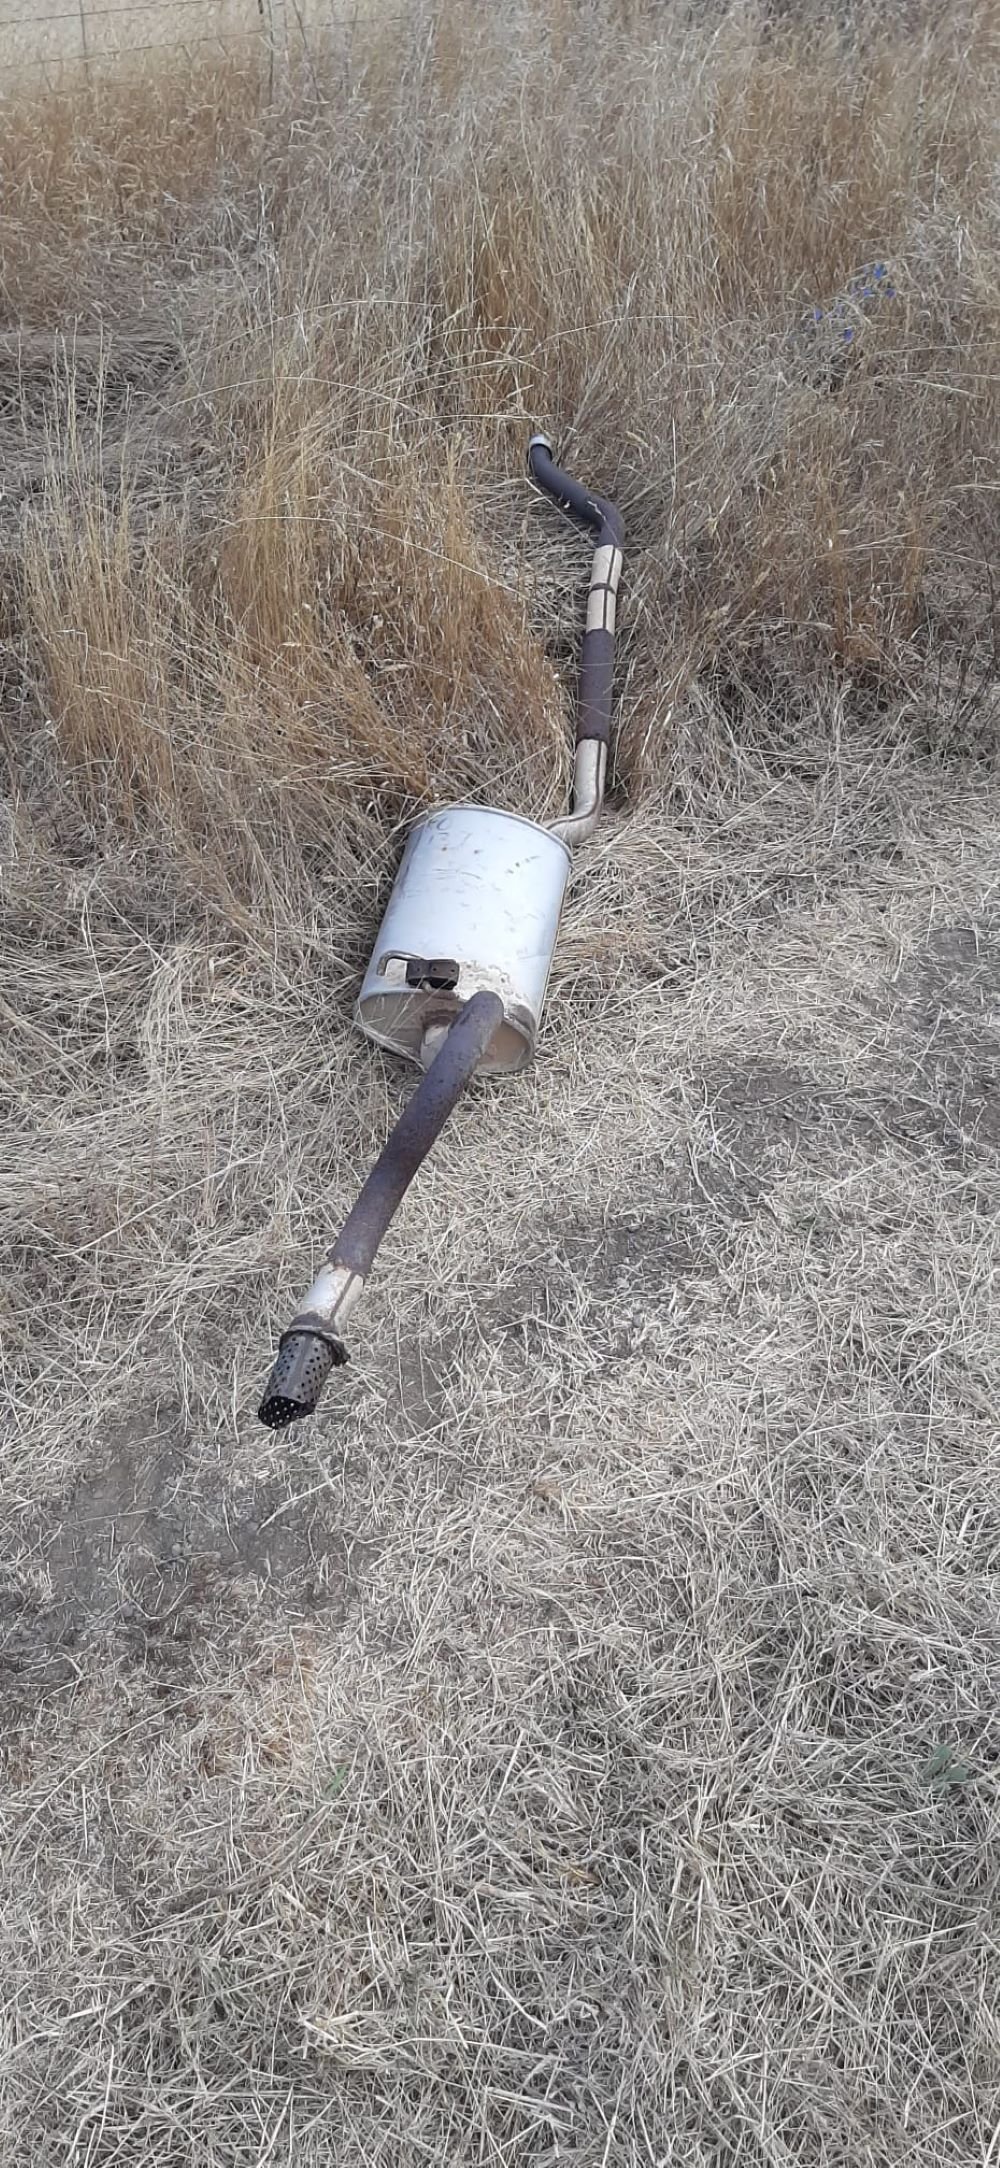
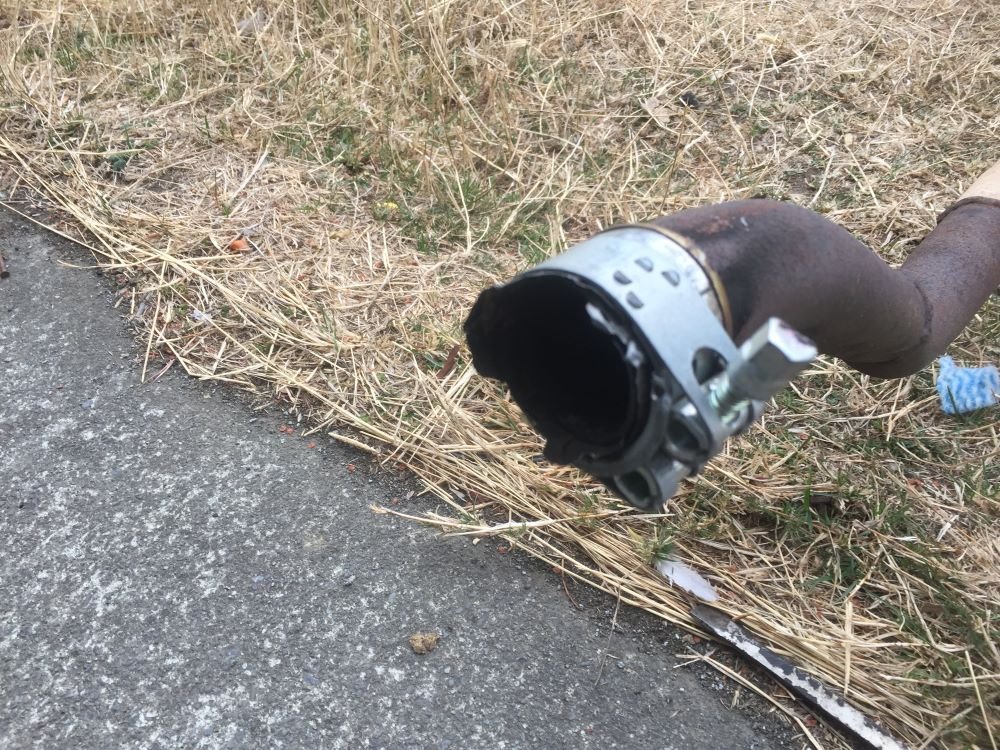
We had great weather in the weekend so decided it was time to take Jenny, my long suffering wife out for a drive in the escort. Things wrer going really well until I noticed a change in the exhuast sound followed by metal scraping on road. Quick stop and inspection shows that they don't make baked bean cans like they use to. Managed to remove exhuast from under car while jen was busy taking photo's and letting family and friends know how her first outing in the escort went. Needless to say it was a very noisy 8km trip home. Lucky we live in the country so left exhuast on the side of the road to be picked up later and booked in to get new exhuast fitted. Project Discussion https://oldschool.co.nz/index.php?/topic/84912-petes-mk2-escort-1600-sports/page/3/#comment-2625686
1 point
-
You wanna camp there in winter? Thats a Tori level of misery.........1 point
-
some of the quick cars there was a Lexus GS-F that sounded amazing, the CT5 Blackwing (also on Michelin PS4S's) and some large overwight mild hybrid Merc/AMG thing that somehow was the second fastest vehicle all weekend
1 point
-
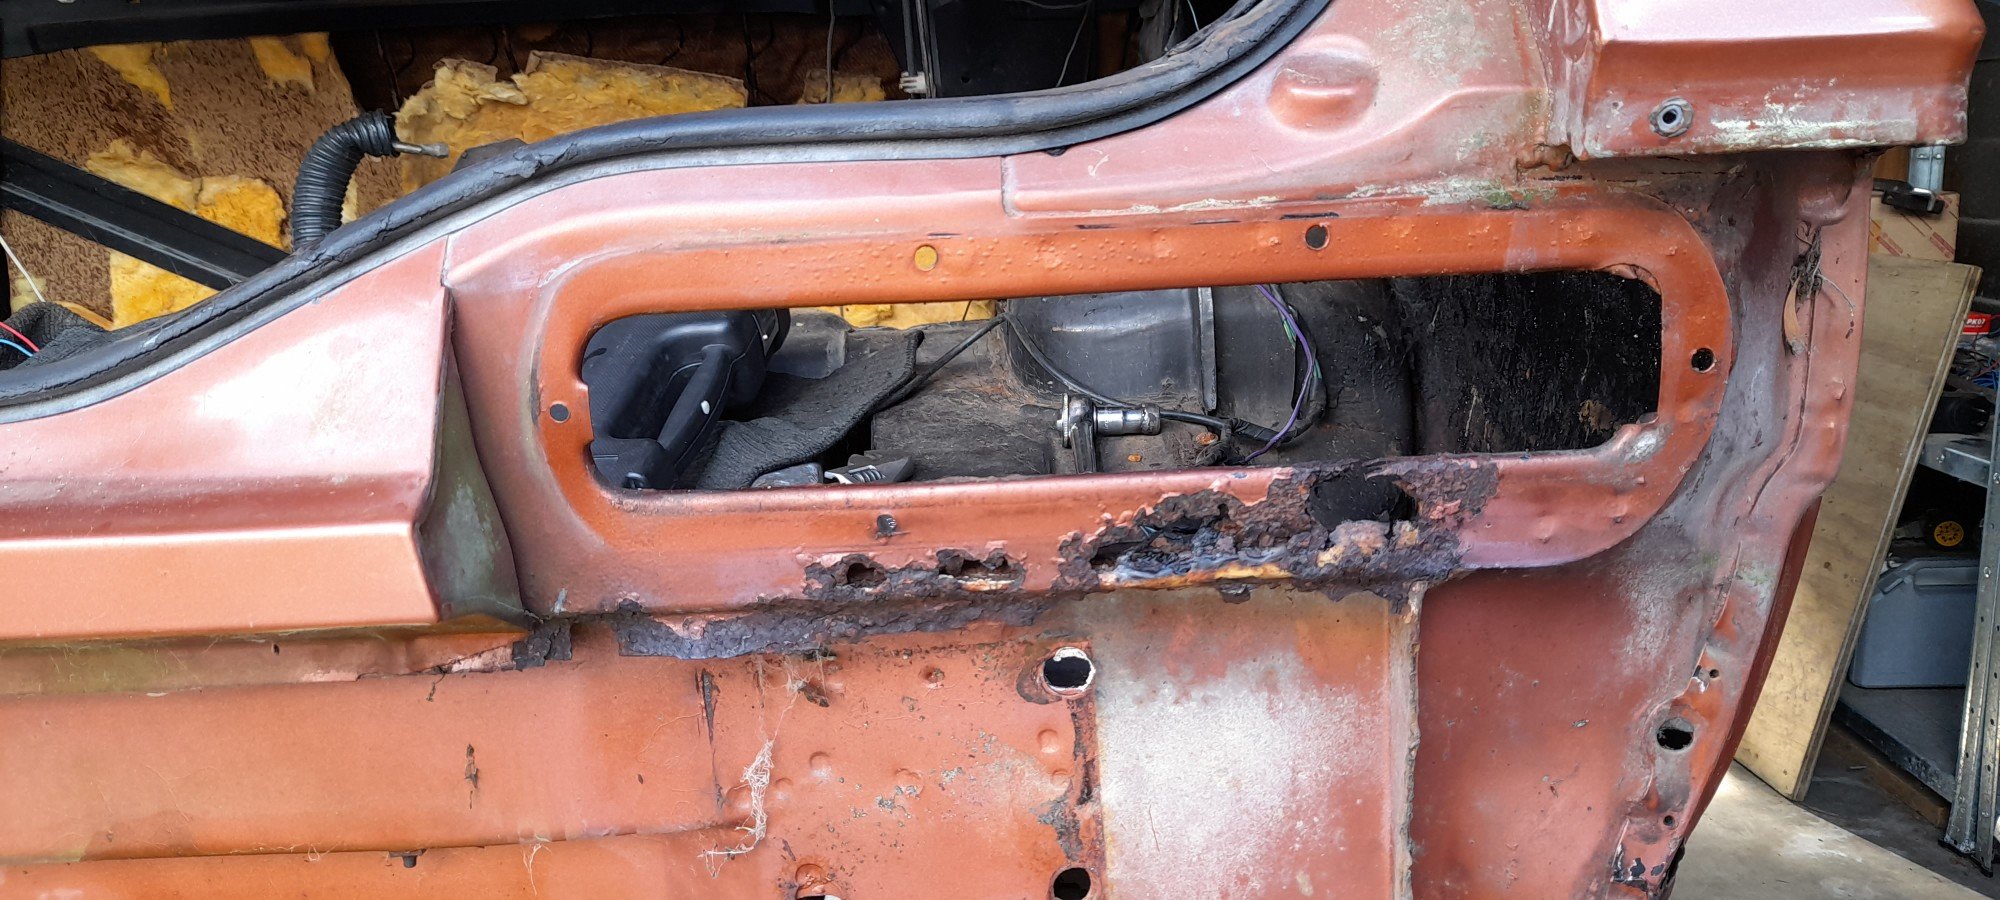
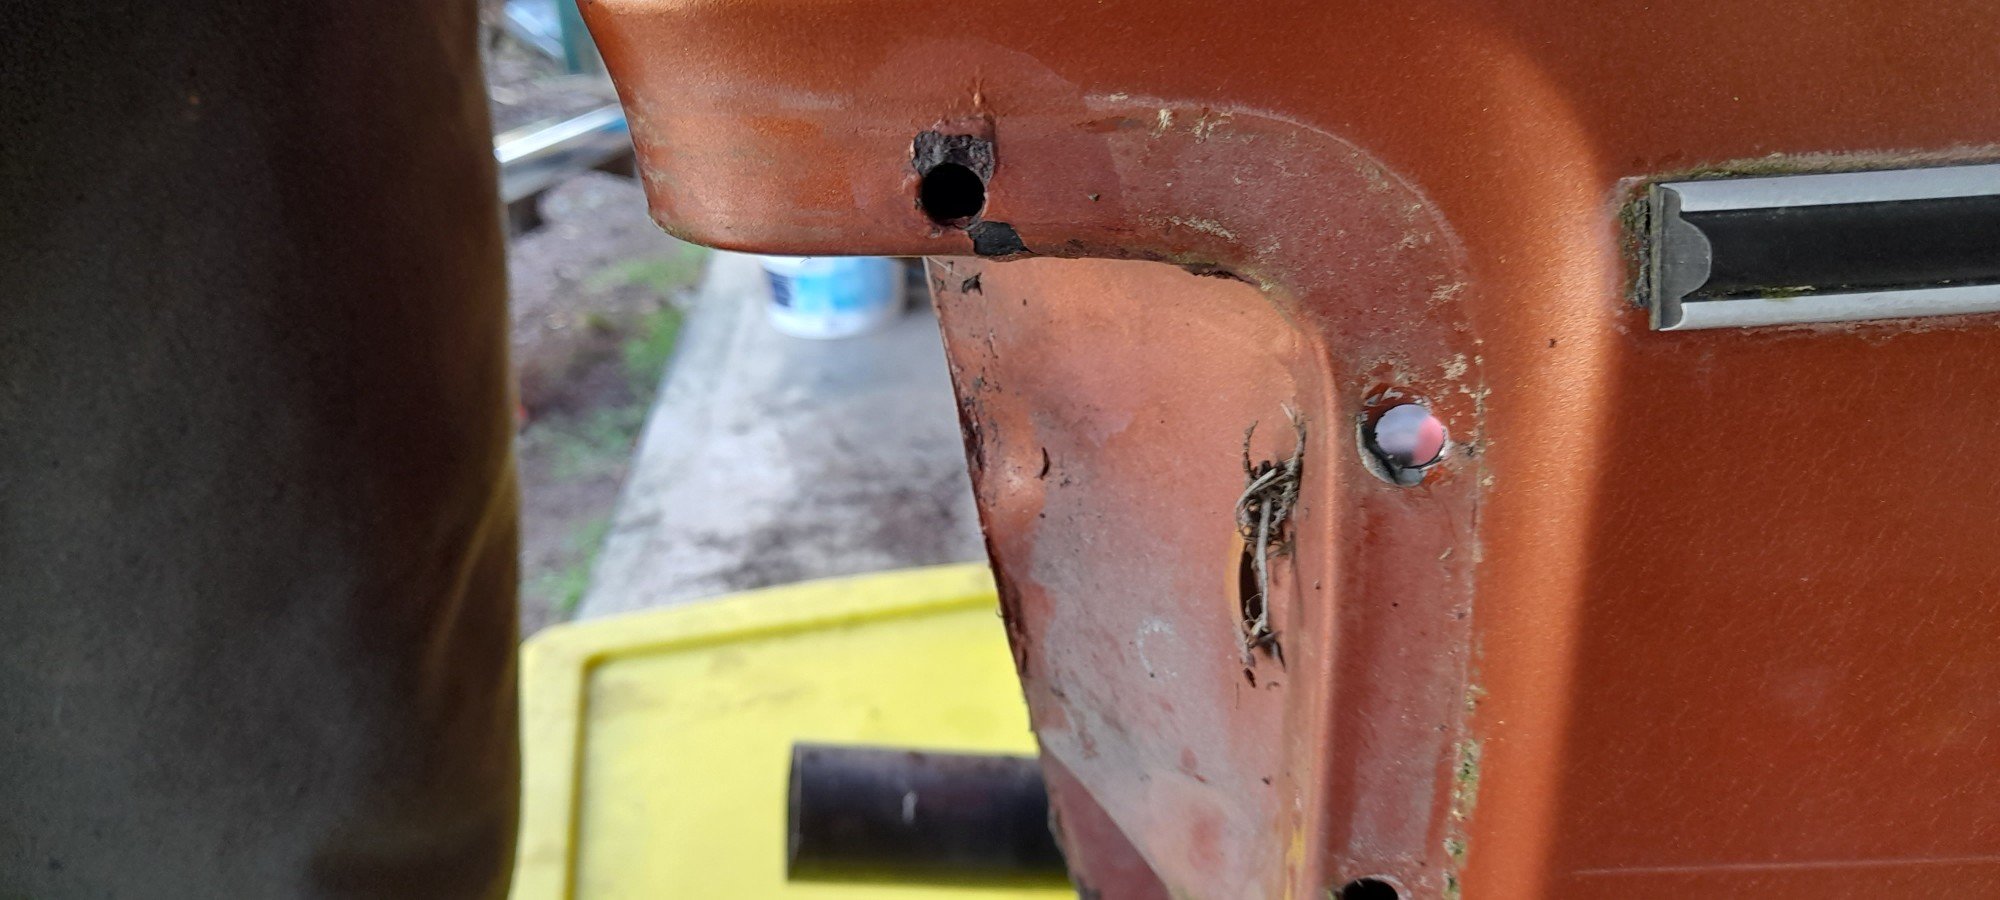
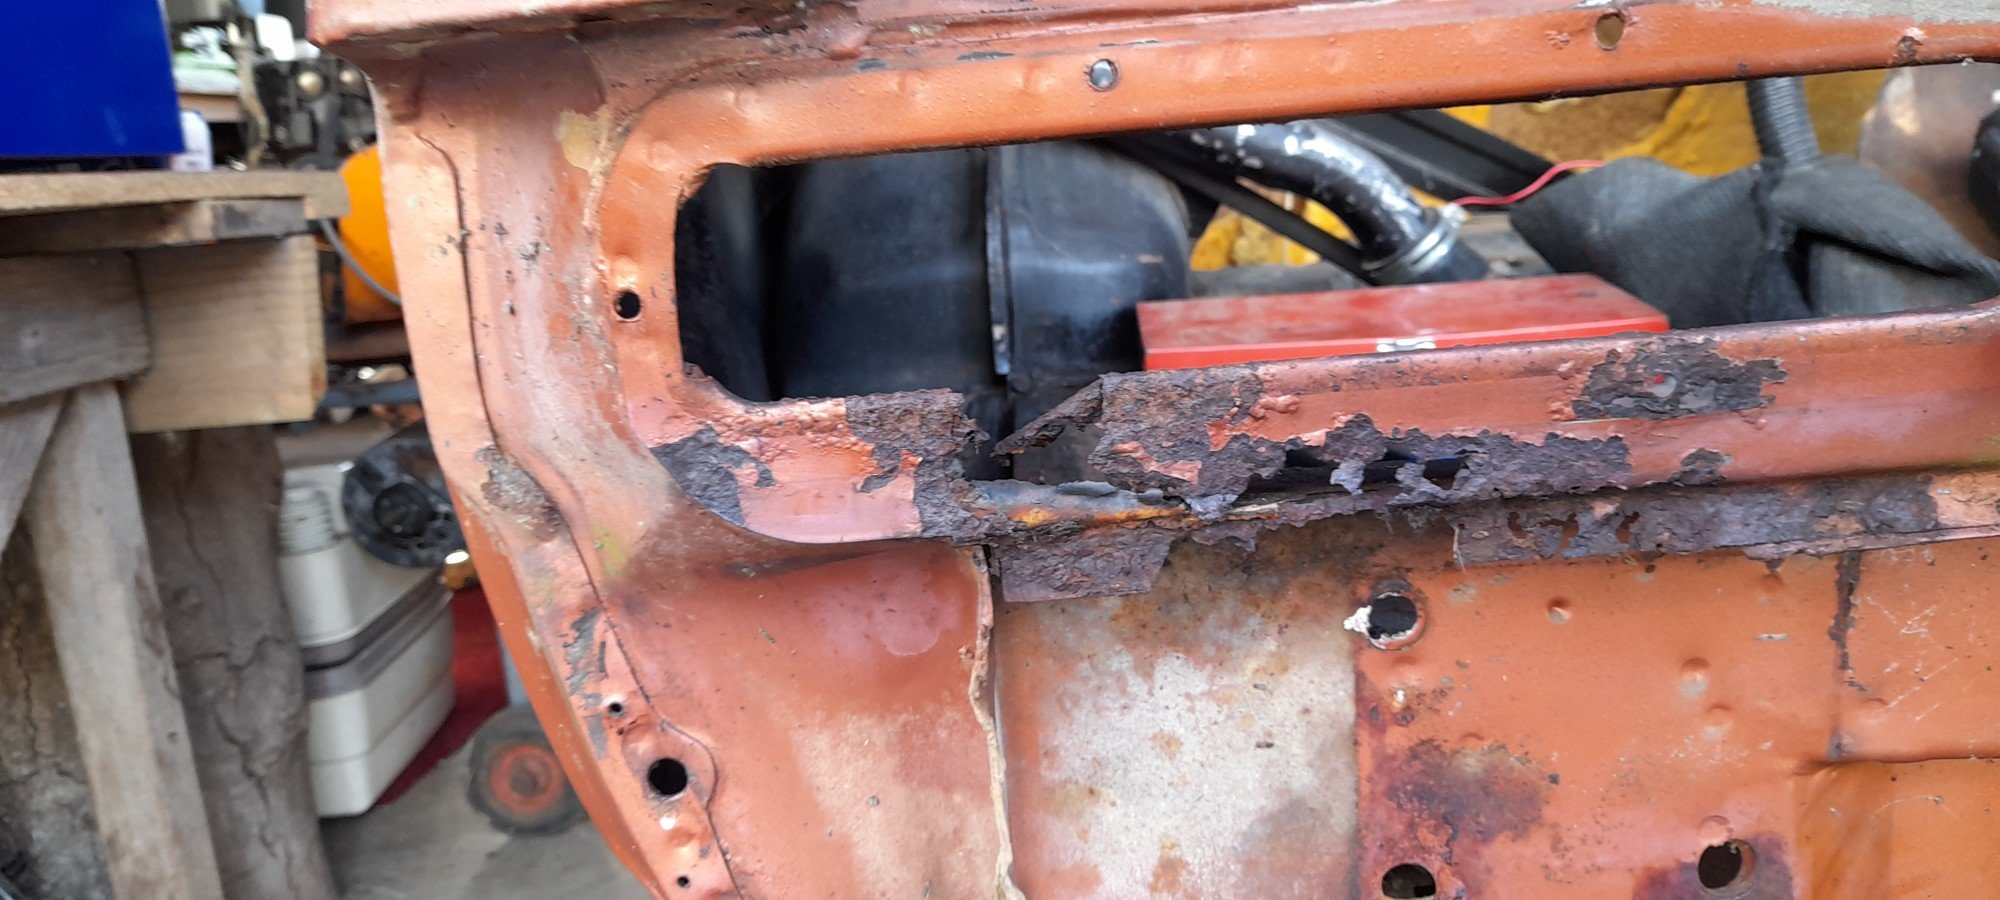
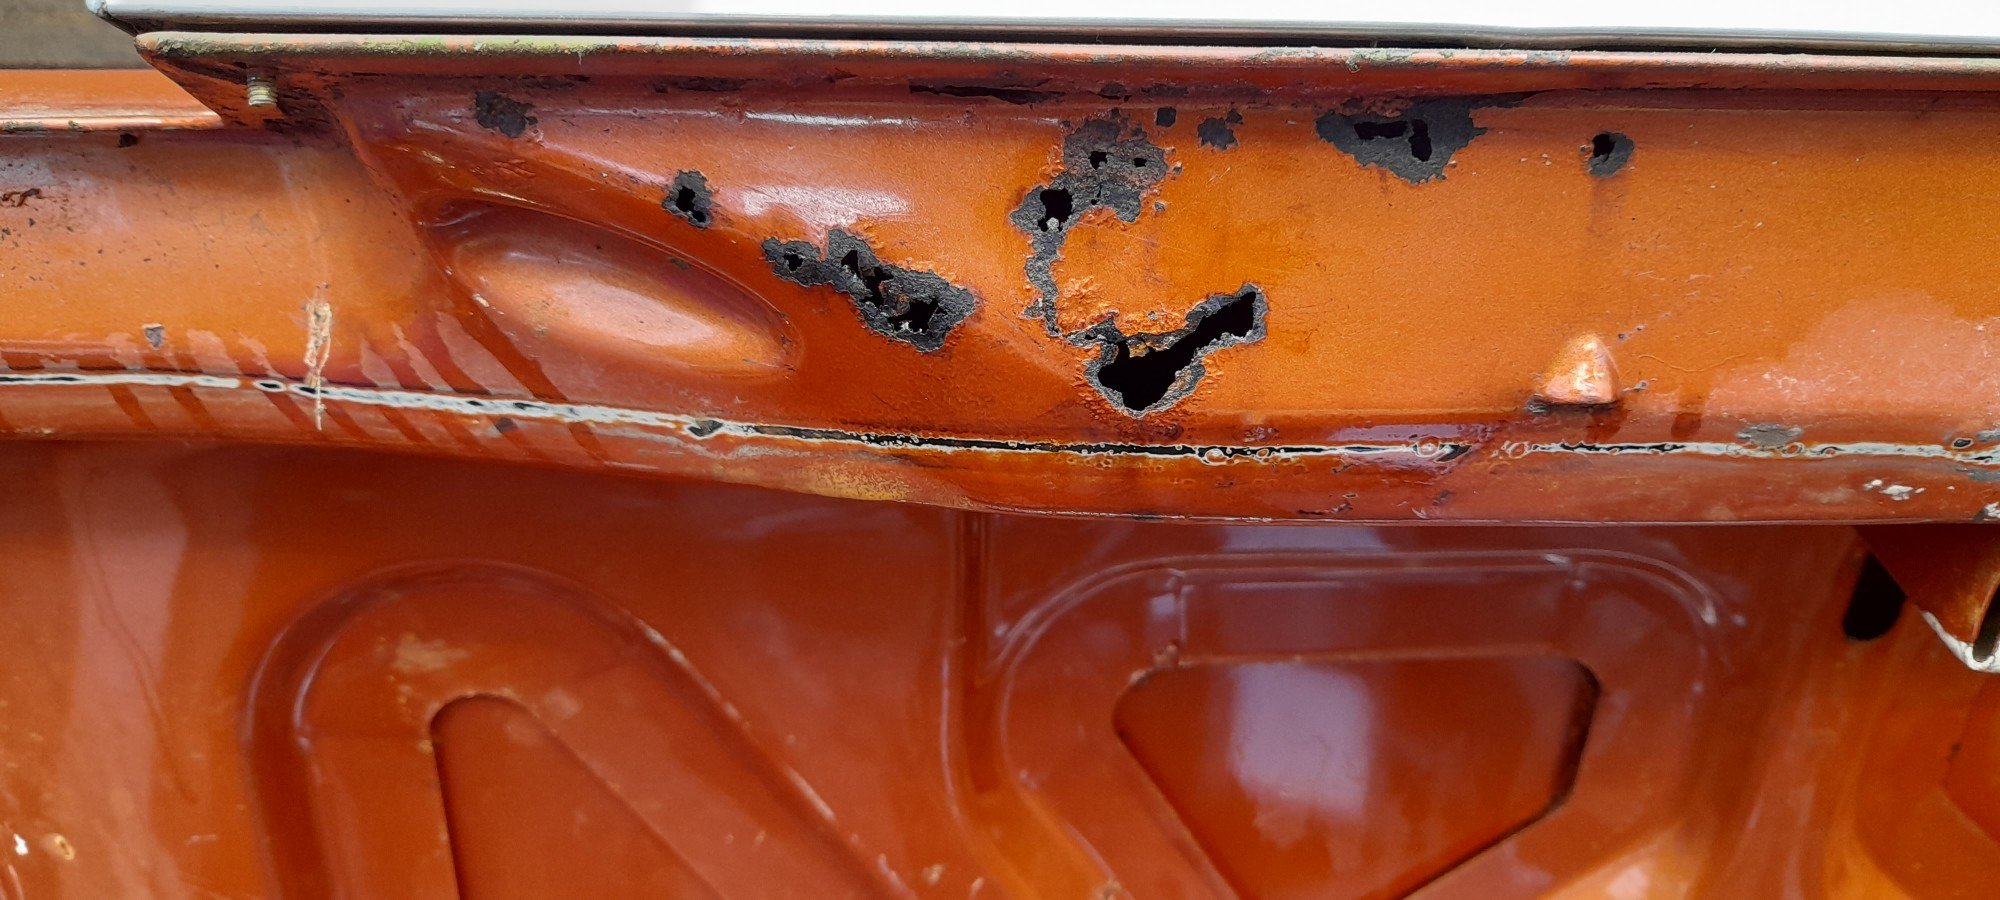
I had planned to have to weld in the front portion of the yellow guard because I deemed the panel damage beyond my skill to repair. The step thing on the corner had been totally flattened by someone else's previous attempt. I had a go at it myself maybe a year or so ago. But then the other day, I thought I'd have one more go, if I fucked it up I could still weld in the other panel. So I just hit it much harder... I think it's acceptable now, I reshaped the step and didn't fuck up the two... ridge line things. Should only need minimal filler. I also trimmed the doner front panels so I could trial fit them. This car had run into something and pushed in the front panels, folding over the lower front seam. I was unable to get the panels the budge with a slide hammer, so I decided I'd use the front panels from the yellow one, which were surprisingly rust free, unlike the rest of the yellow car. Front panels look like there will be no issues fitting them. I'm not ready to weld the panel back in, I still need to prep behind it for epoxy.
1 point
-
Springs off to the shop. Can't scratch the new paint just yet..
1 point
-
One more from yesterday And one from wagnats last weeked, photo credit to @Brimmy
1 point
-
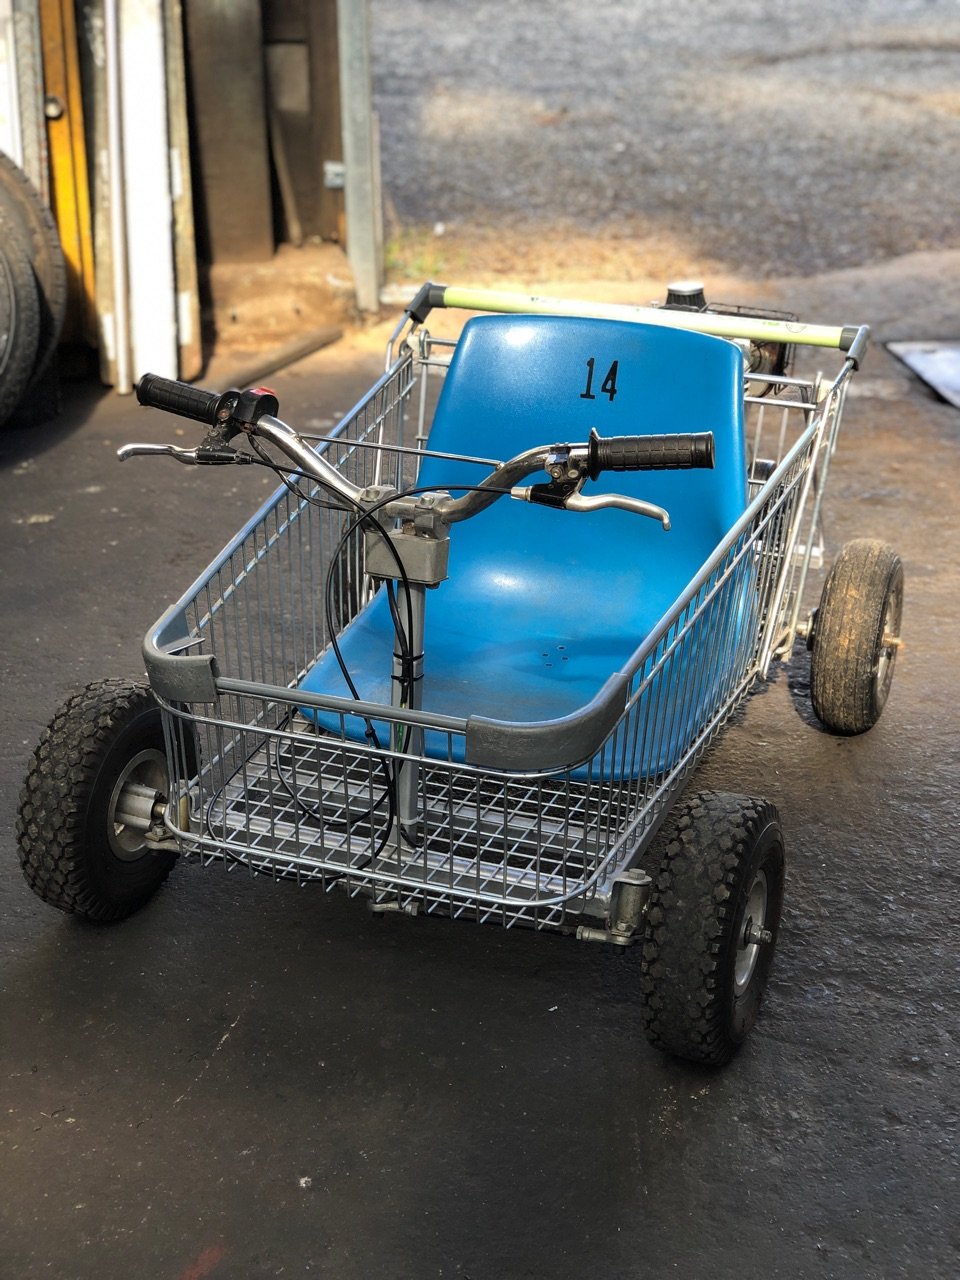
De-clutterised some of this turd Actually looks a lot better already Lots of crispy bits still falling off it Cut up a fence paling for my seat base Need some baleing wire to patch up the leg sheild
1 point
-
So the new misery is a 1984 CT200 auto ag, which has a WOF (surprisingly) and rego (farm, but will switch to std, is classic now too!) which is a bonus. It's in pretty good nick for a 40 y/o farm bike, but still needs a bit of love. I purchased it site unseen, so didn't know what condition it was in. I took it for a rip Friday night, and it started off well, but died under de-acceleration into a turn, then gas started pouring out the float bowl overflow. I managed to get it running again, but it was being a complete pile of cocks. I got home and whipped the carb off, and found a bit of detritus on the side of the float needle, and the idle jet was completely blocked. I had a senior moment and found the idle jet fit a 1mm drill perfectly in both ends, but wouldn't go through. I thought that was the blockage, but I've since bothered to look up the jet size, and it's meant to be 0.35mm, lololols. So yeh, it won't idle now (it's mega rich), so looking for a new jet. A few of the things I would like to fix/replace/attain are: Both foot pegs are no longer flippy uppey spec, so would like to replace them. Seems they might be shorter than they are supposed to be too. The foot brake pivot is super loose as well, so will need to buy/make a bush for that. It's also missing the front and back racks, so would like to find them. All four indicators are held together with tape, so will replace all of them. The back ones mount to the rack normally I think. The old owner must have had freakishly long thumbs, I need to move all the switch things closer to the grips. The wiring around headset has all been rejoined, I assume due to rubbing through, but hasn't been covered, so will sort that. The stand is all caddywhompus, it came with a few spares, so I'll make a decent one out of them/some steel tube/plate. The forks have been changed to longer/better spec ones, but the speedo cable is hilariously long, so will try shorten that. Both tyres are roooooted, dry rotted and grot. Hard to get a pic, but somehow the front has worn down every 2nd or 3rd knob way more/less than the next, so odd. But it came with a brand new set of Dunlops, so we are gravy. So yeh, has decent bones, just lots of barryness to correct. The motor had a top end rebuild some time ago, and seems healthy. It has an XR200 piston, new cam chain, and seals etc. The other night it would sit at about 90/95 wide open in 5th, my mission is to get it to 100/105 so it can do open road speeds. It came with a few sprockets, and maybe with an exhaust and carb it might do it. This thing is meant to be 13hp, and the XR200 that's the same core motor, just with a better cam (maybe head too?) etc is like 23hp, so there are options. Regards, V "get in behind you mongrel" G.1 point
-
I swapped MR2 front bumpers with a guy from the MR2 owners club. My old one is an unobtanium rarity Sard MC2, I got his Border one and cash my way. he loves mr2s more than I do, and plans to replicate a rare part/kit, whereas mine patiently waits at the back of the shed. ‘‘Twas a good trade.1 point
-
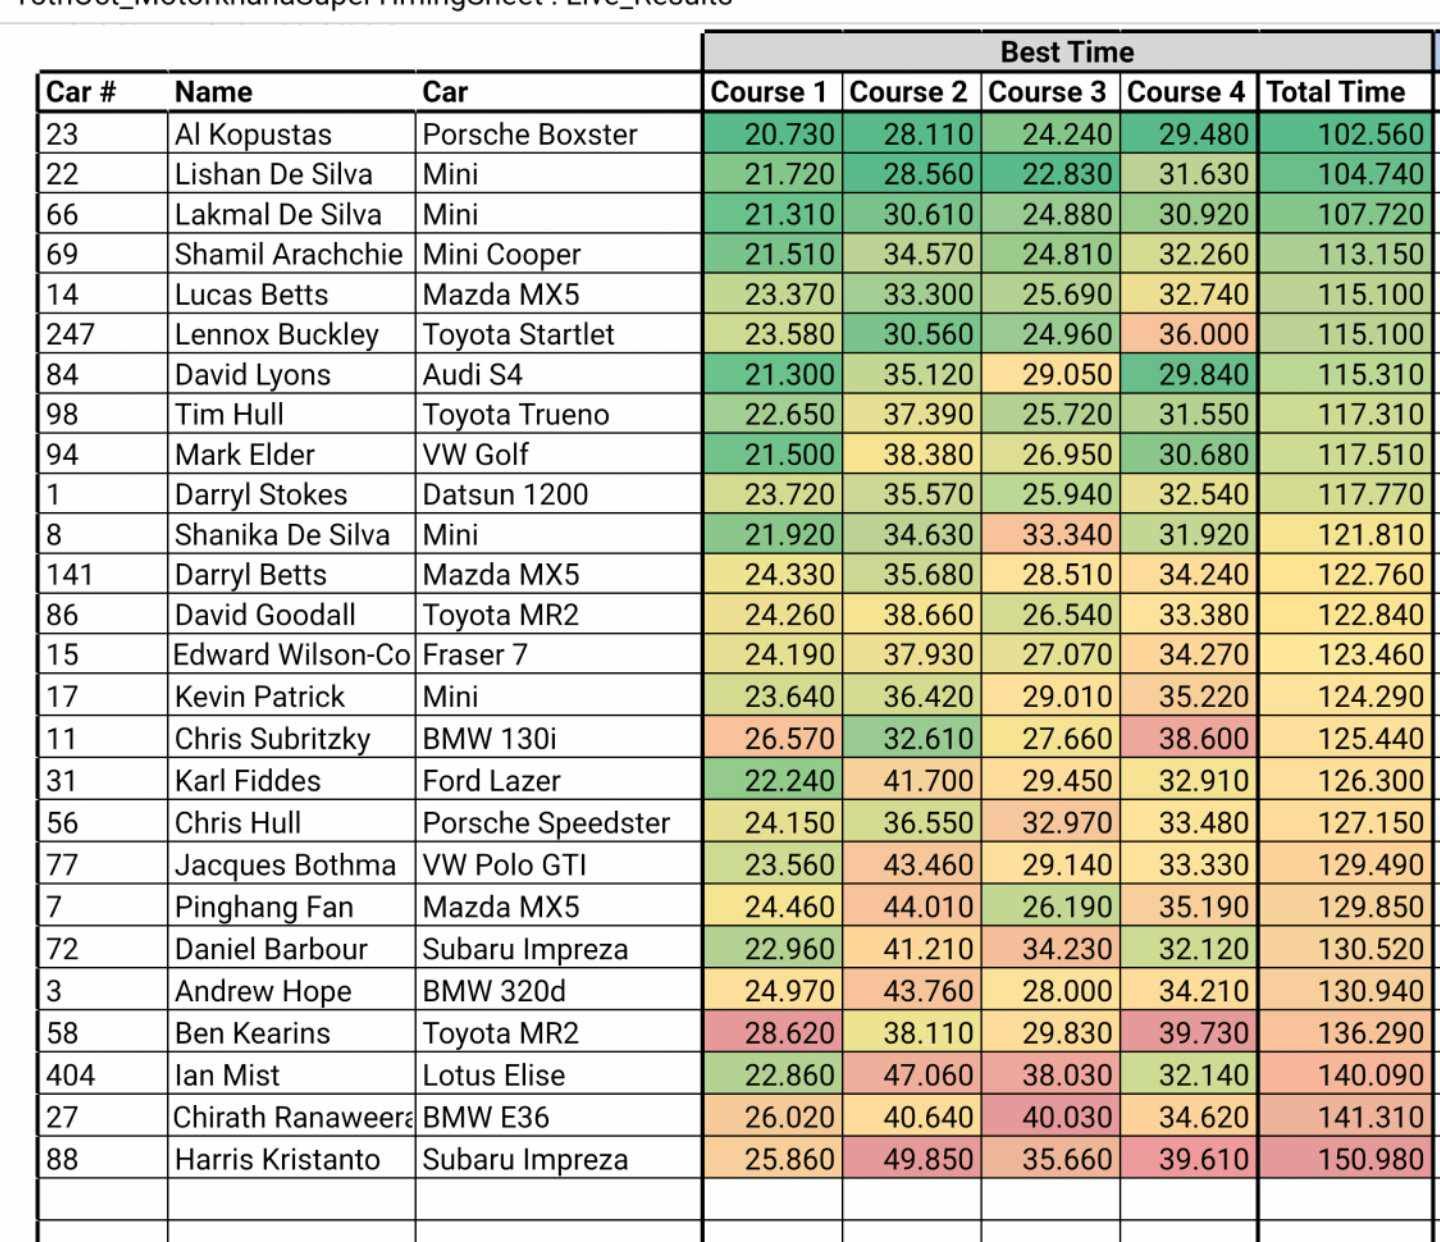
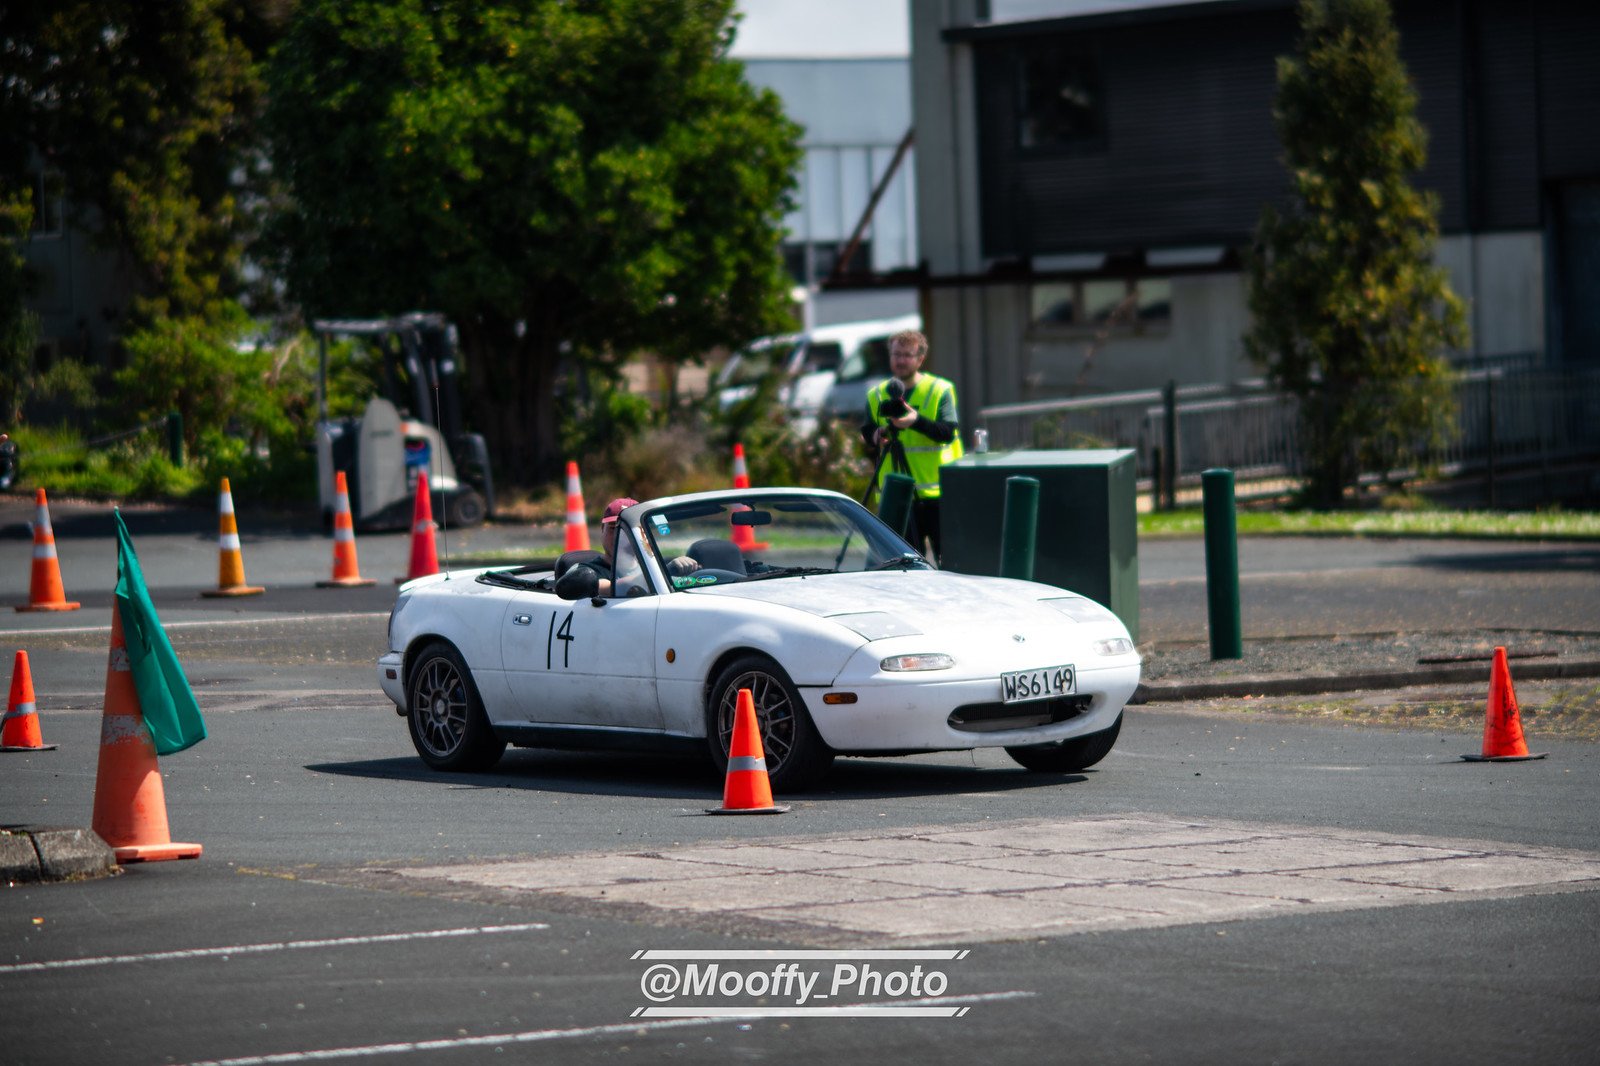
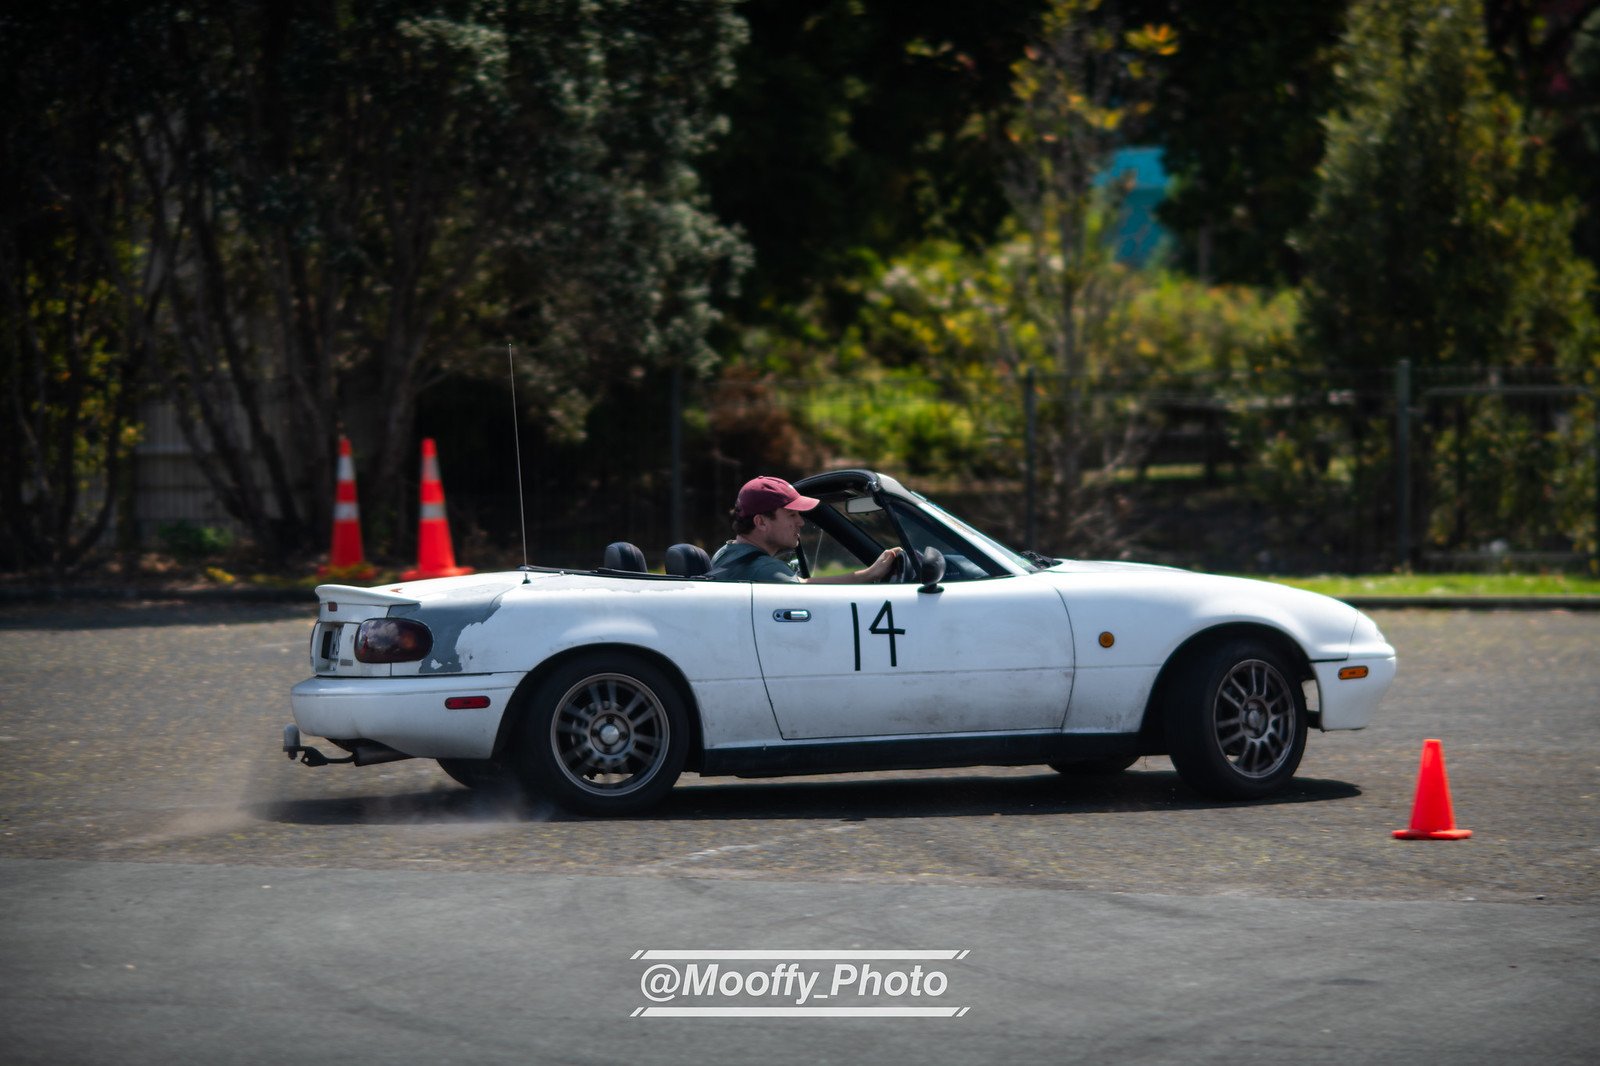
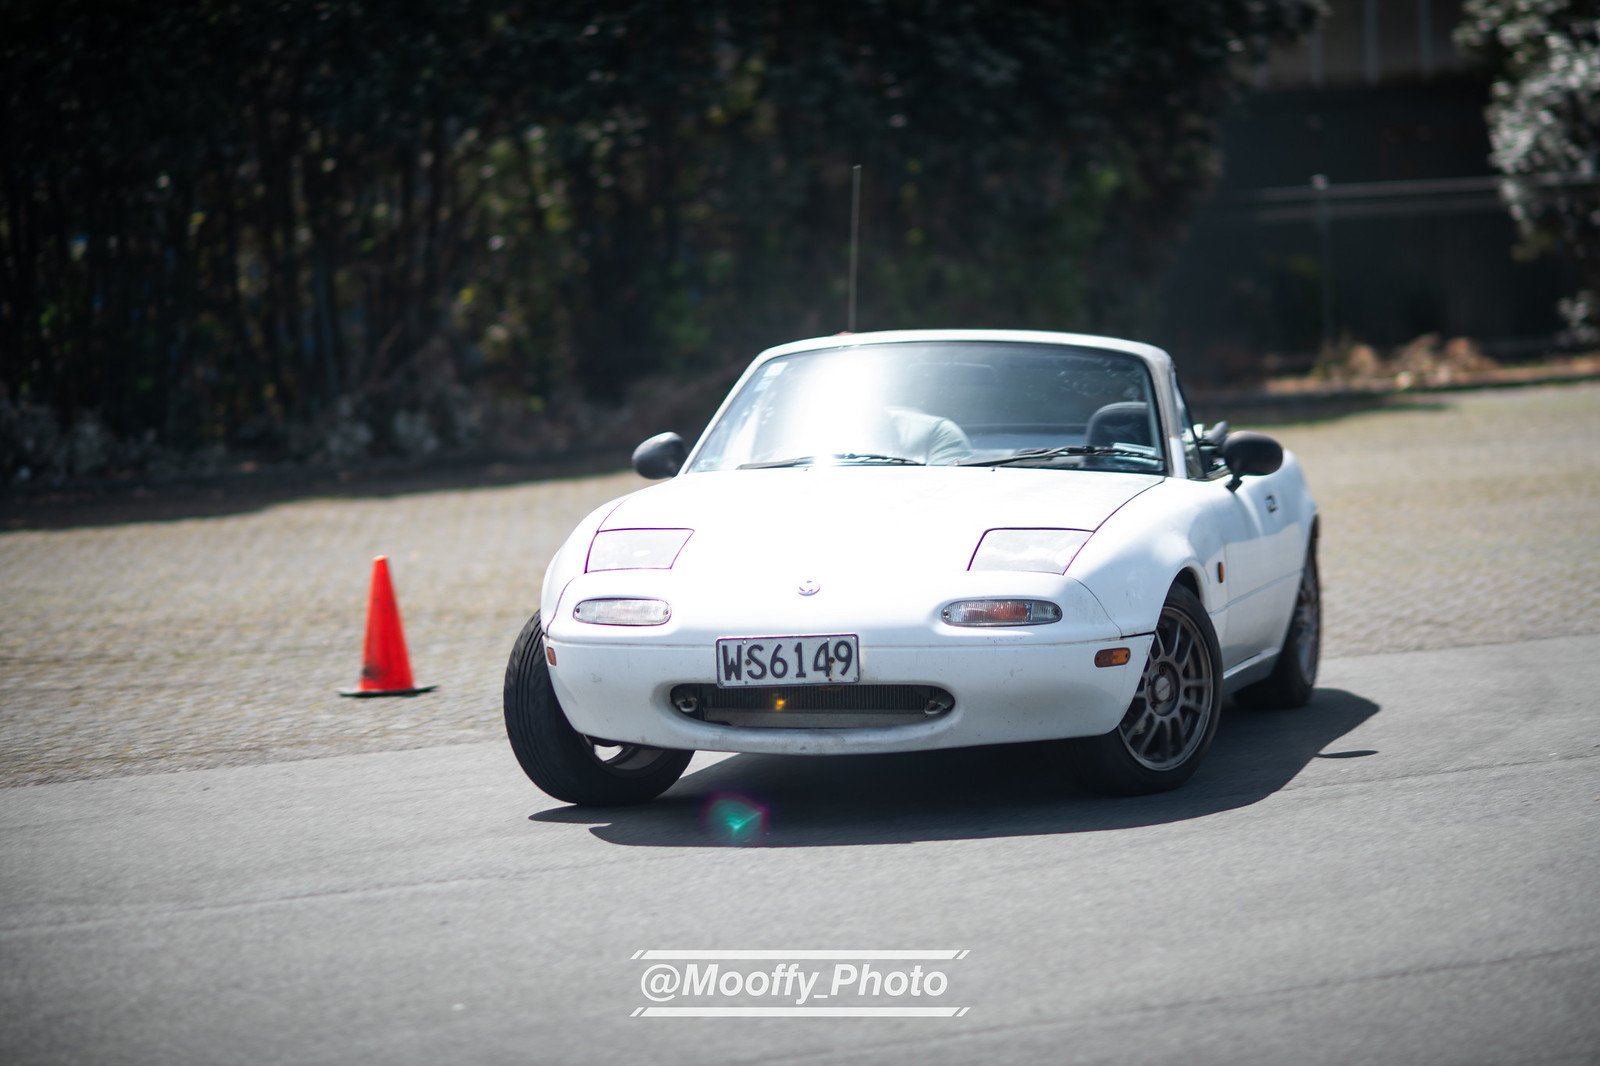
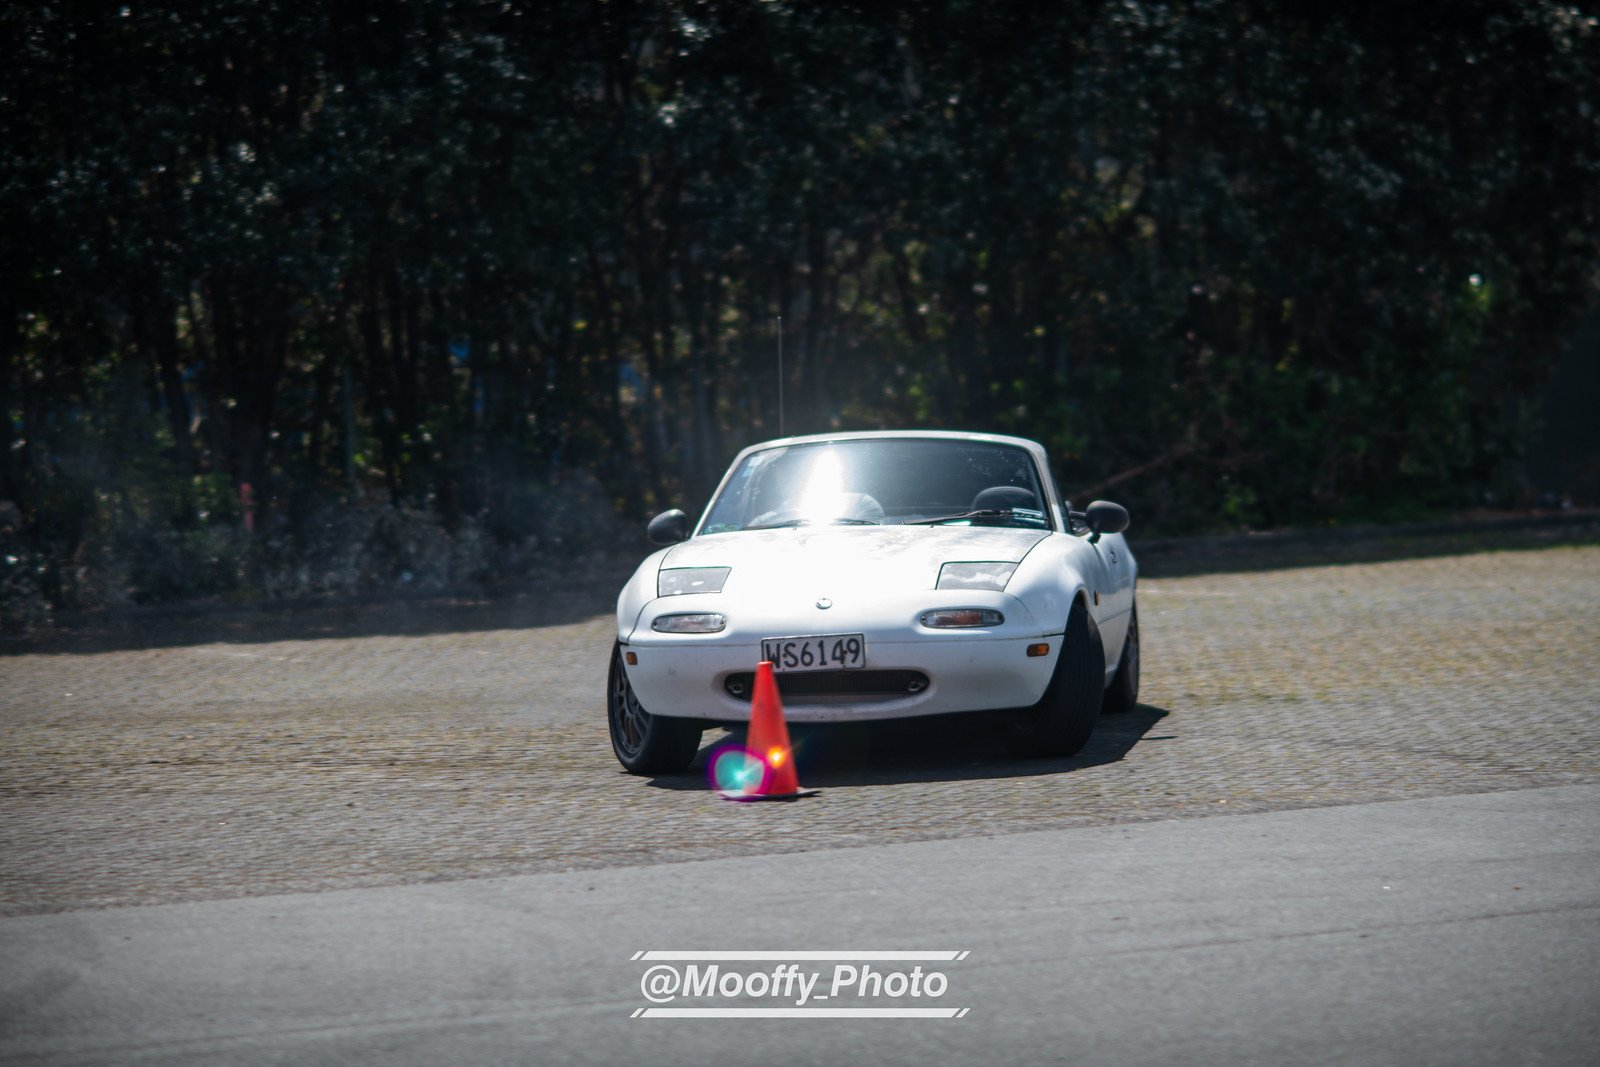
Okay so the handbrake is still NFG but the brakes themselves are awesome. It's probably just having fresh fluid and non glazed pads but the brakes feel far more linear to lockup, whereas before they didn't do much until the fronts just completely locked up. (I didn't hit that cone, somehow) I did a sccnz motorkhana yesterday (Sunday), placing 5th overall which I'm stoked about! I think the bigger cars struggled on some of the tight courses and I'm sure it would be a different story in an autocross. My dad also drove my car earning a very respectable 12th place in what might have been his very first time trying to drive a car with more than 20% throttle! Someone also took a video of my slower run of the fourth course: https://drive.google.com/file/d/1aCg9DYelcsQd_GZSELs4I_Cb2tV9oiOn/view?usp=drivesdk Still need $$ for further car improvements. Up "next" are new equal length headers and probably replace the muffler as I am now pretty sure the combination of my crap unequal-length headers and a cheap muffler are causing the last of the tinnyness in the exhaust note. Then I'll need to replace my suspension, the car still behaves very soft even with the dampers set as firm as they will go. Photo from @mooffy_photo (@mooffy_photov2 on insta)
1 point
-
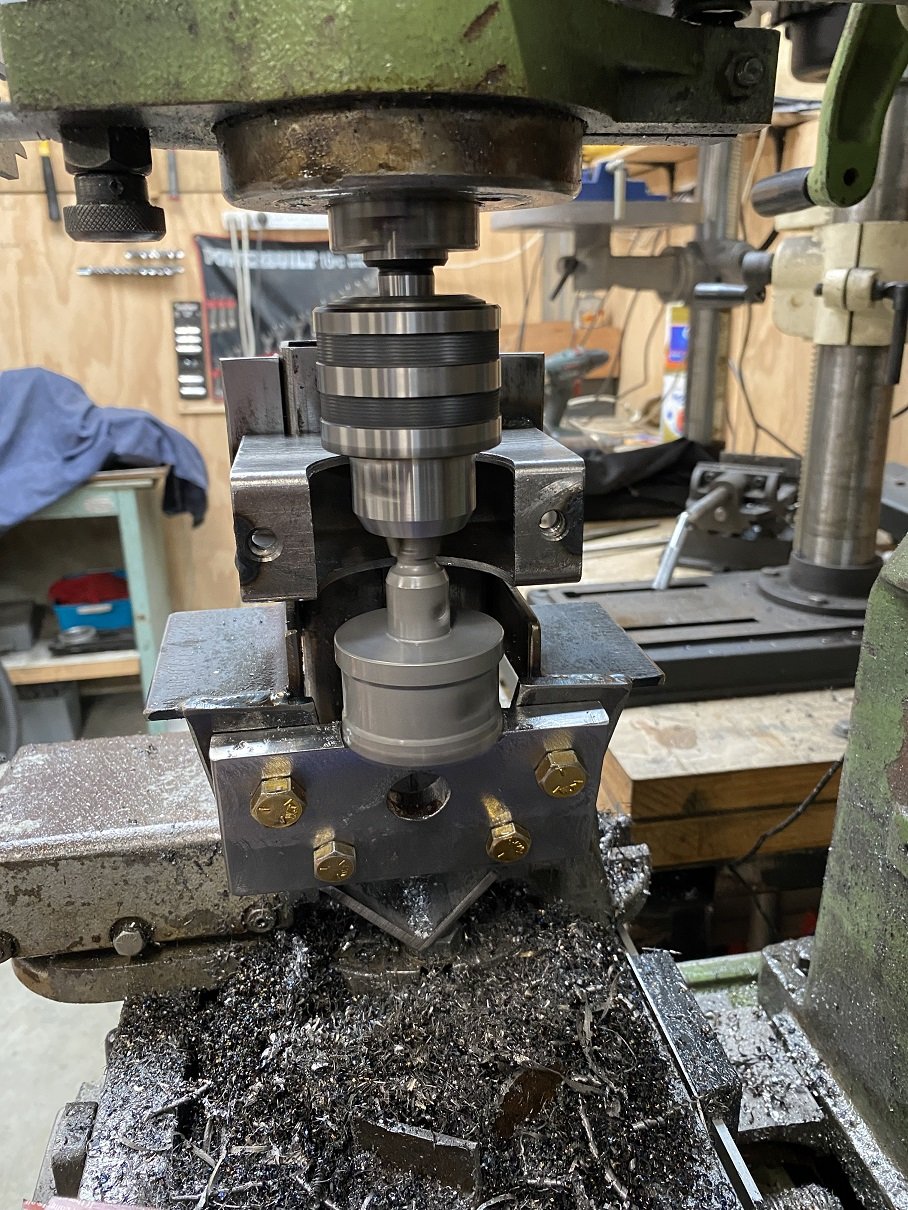
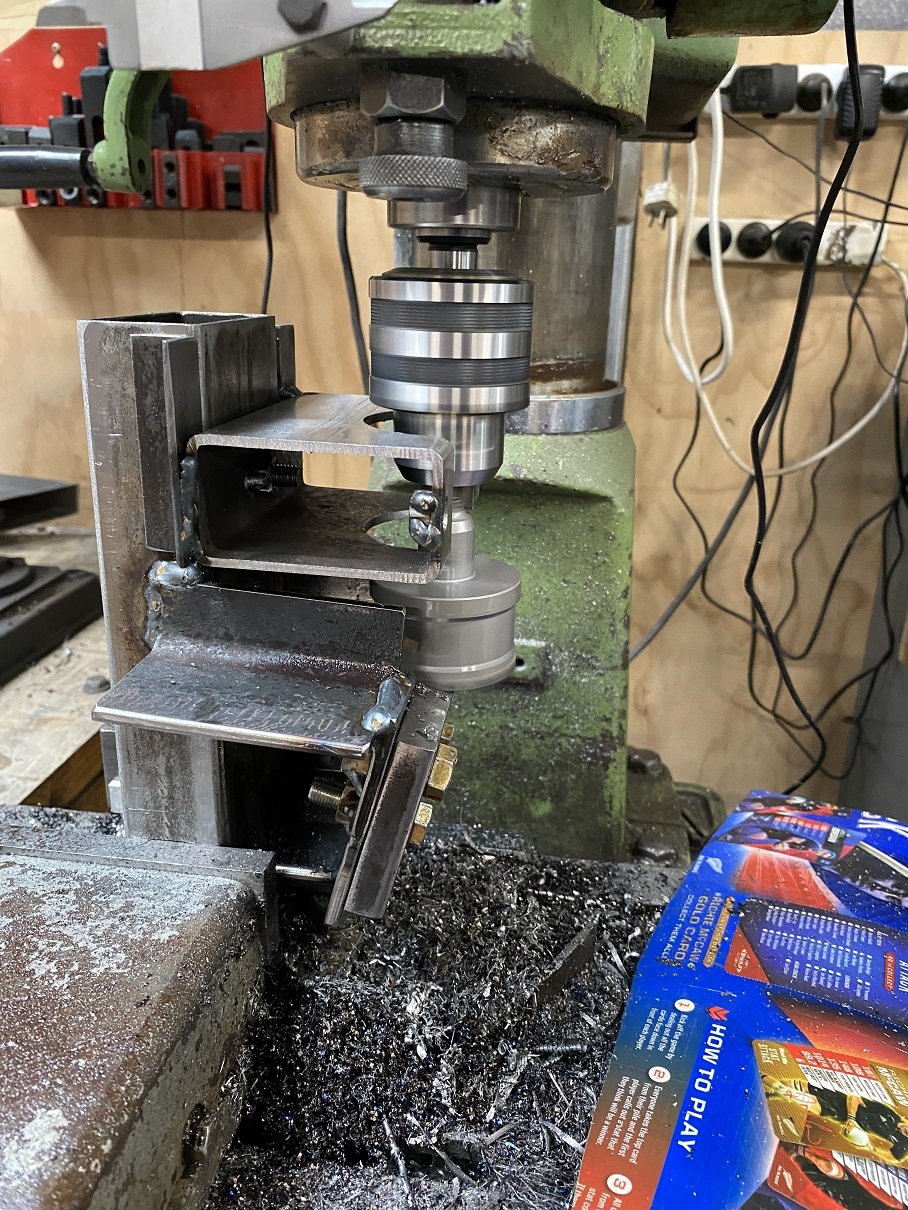
Well, the holesaw in the mill kind of worked, right up until I tried to push it too far and it jammed, chipped a tooth and bent the holesaw shaft. I finished it off with the vertical bandsaw and powerfile.
1 point
-
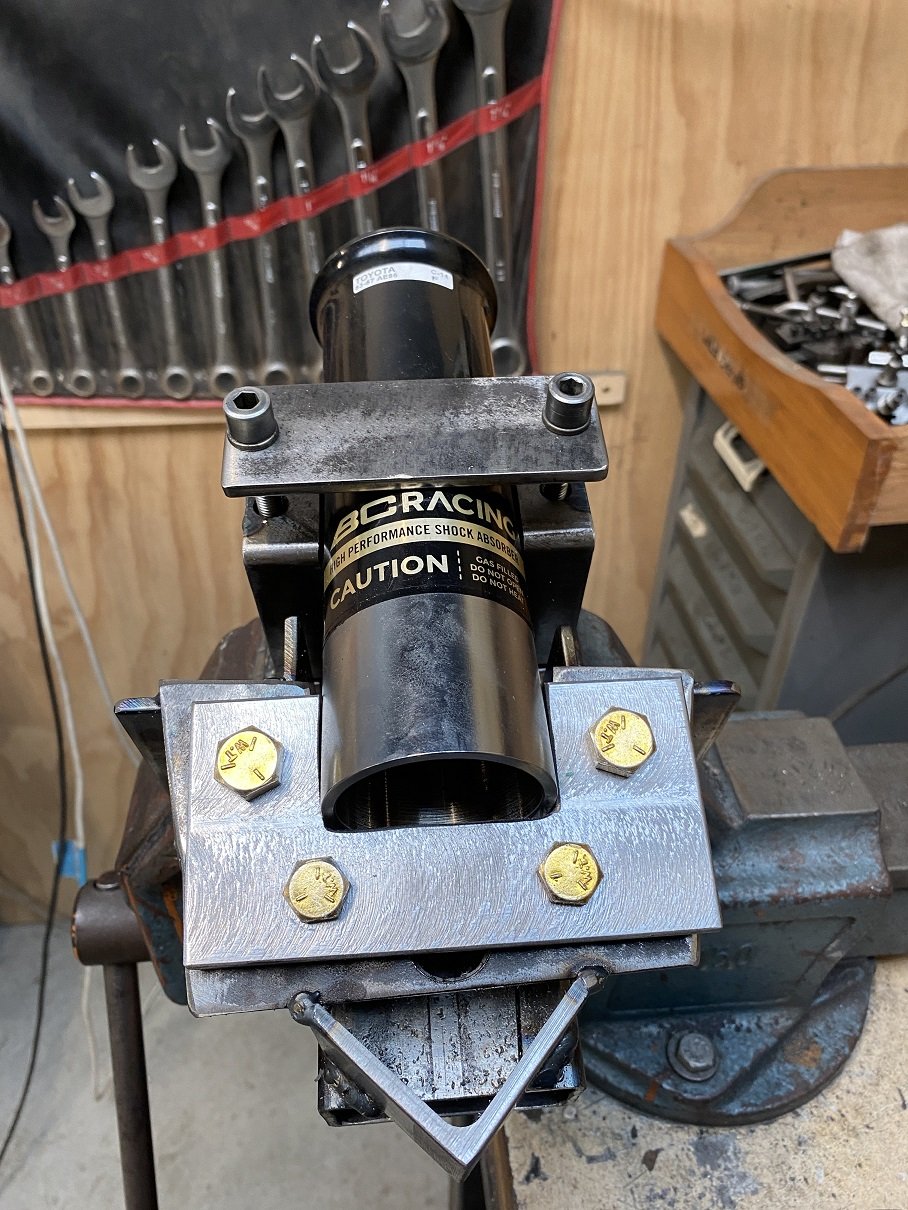
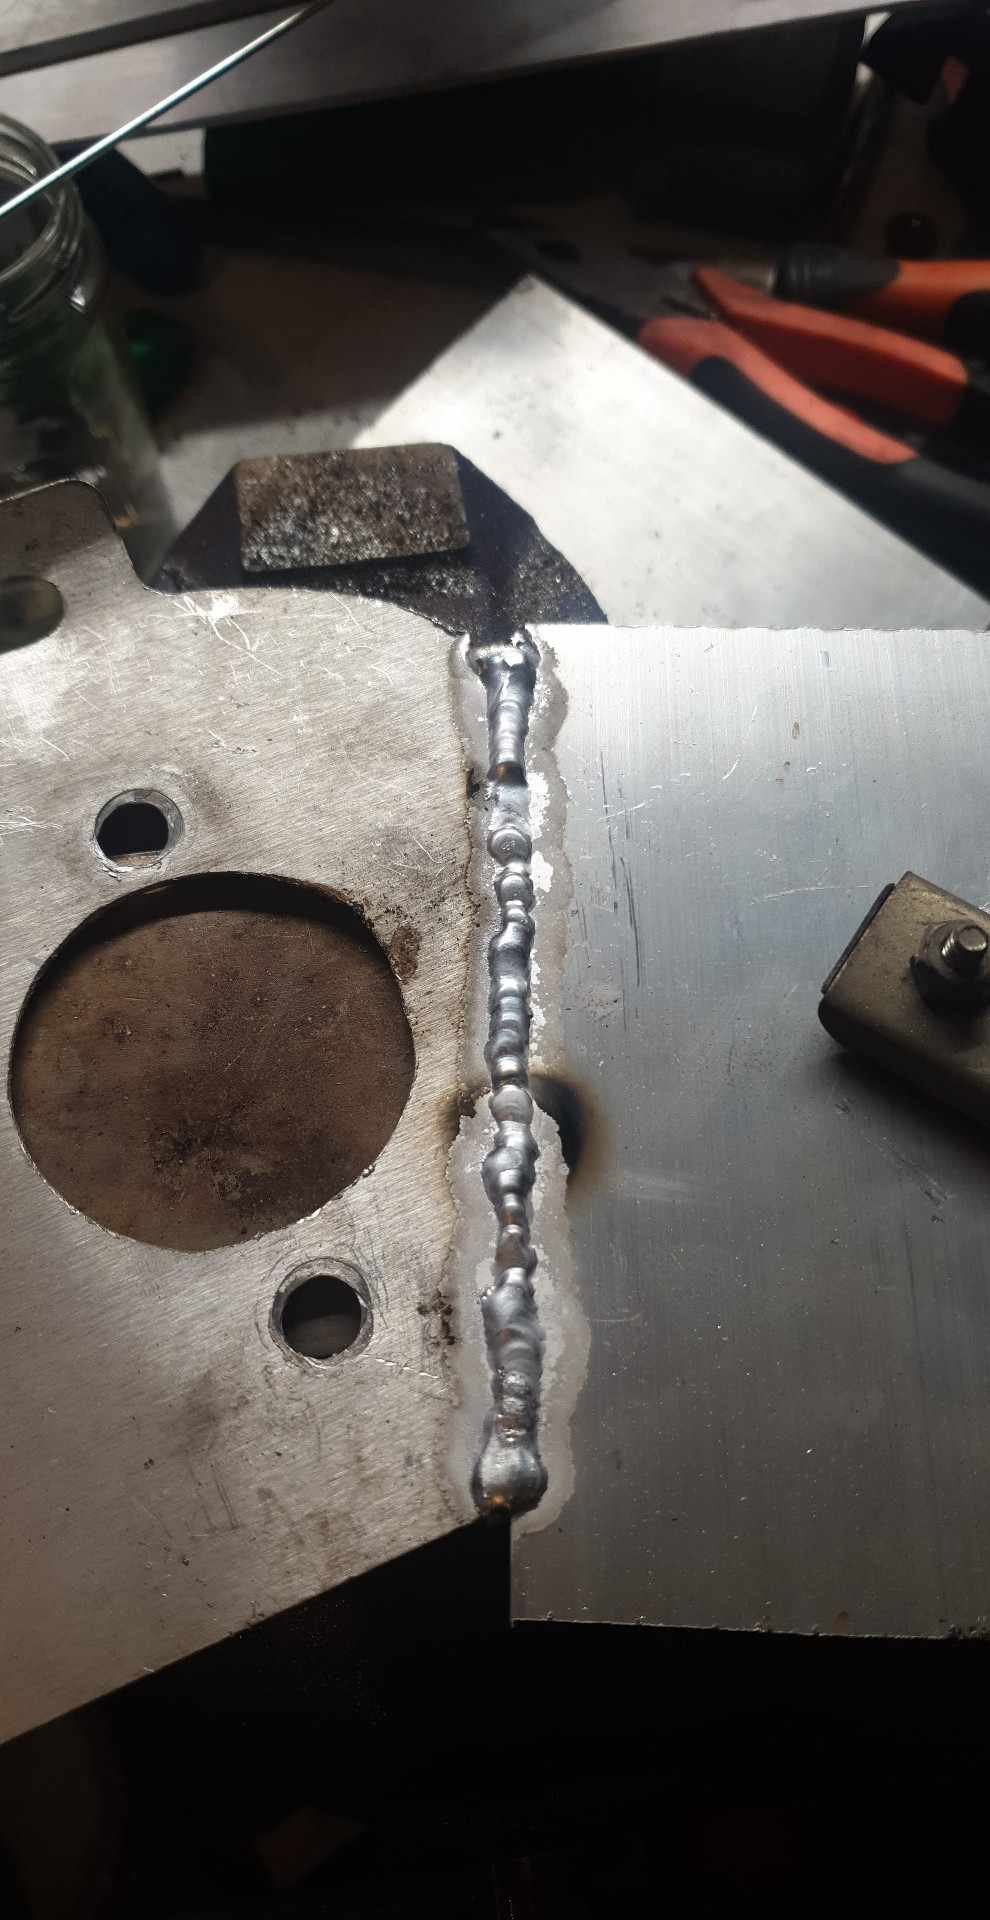
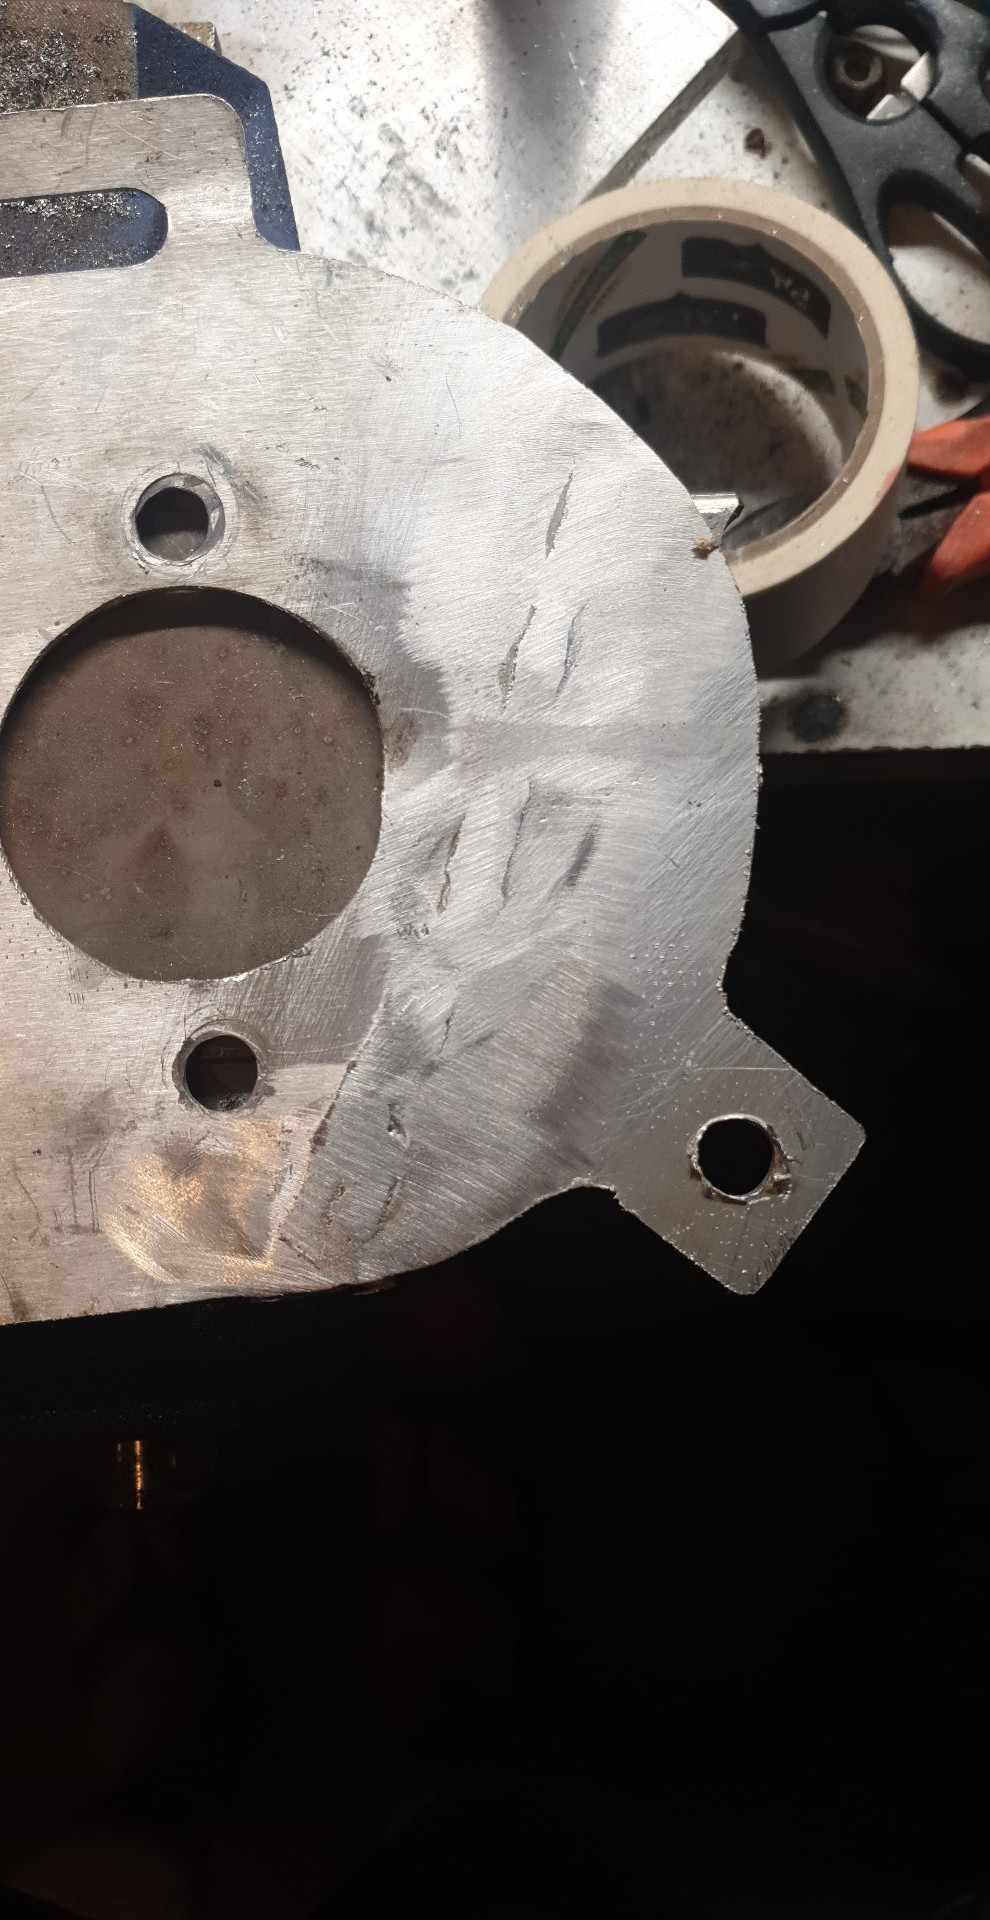
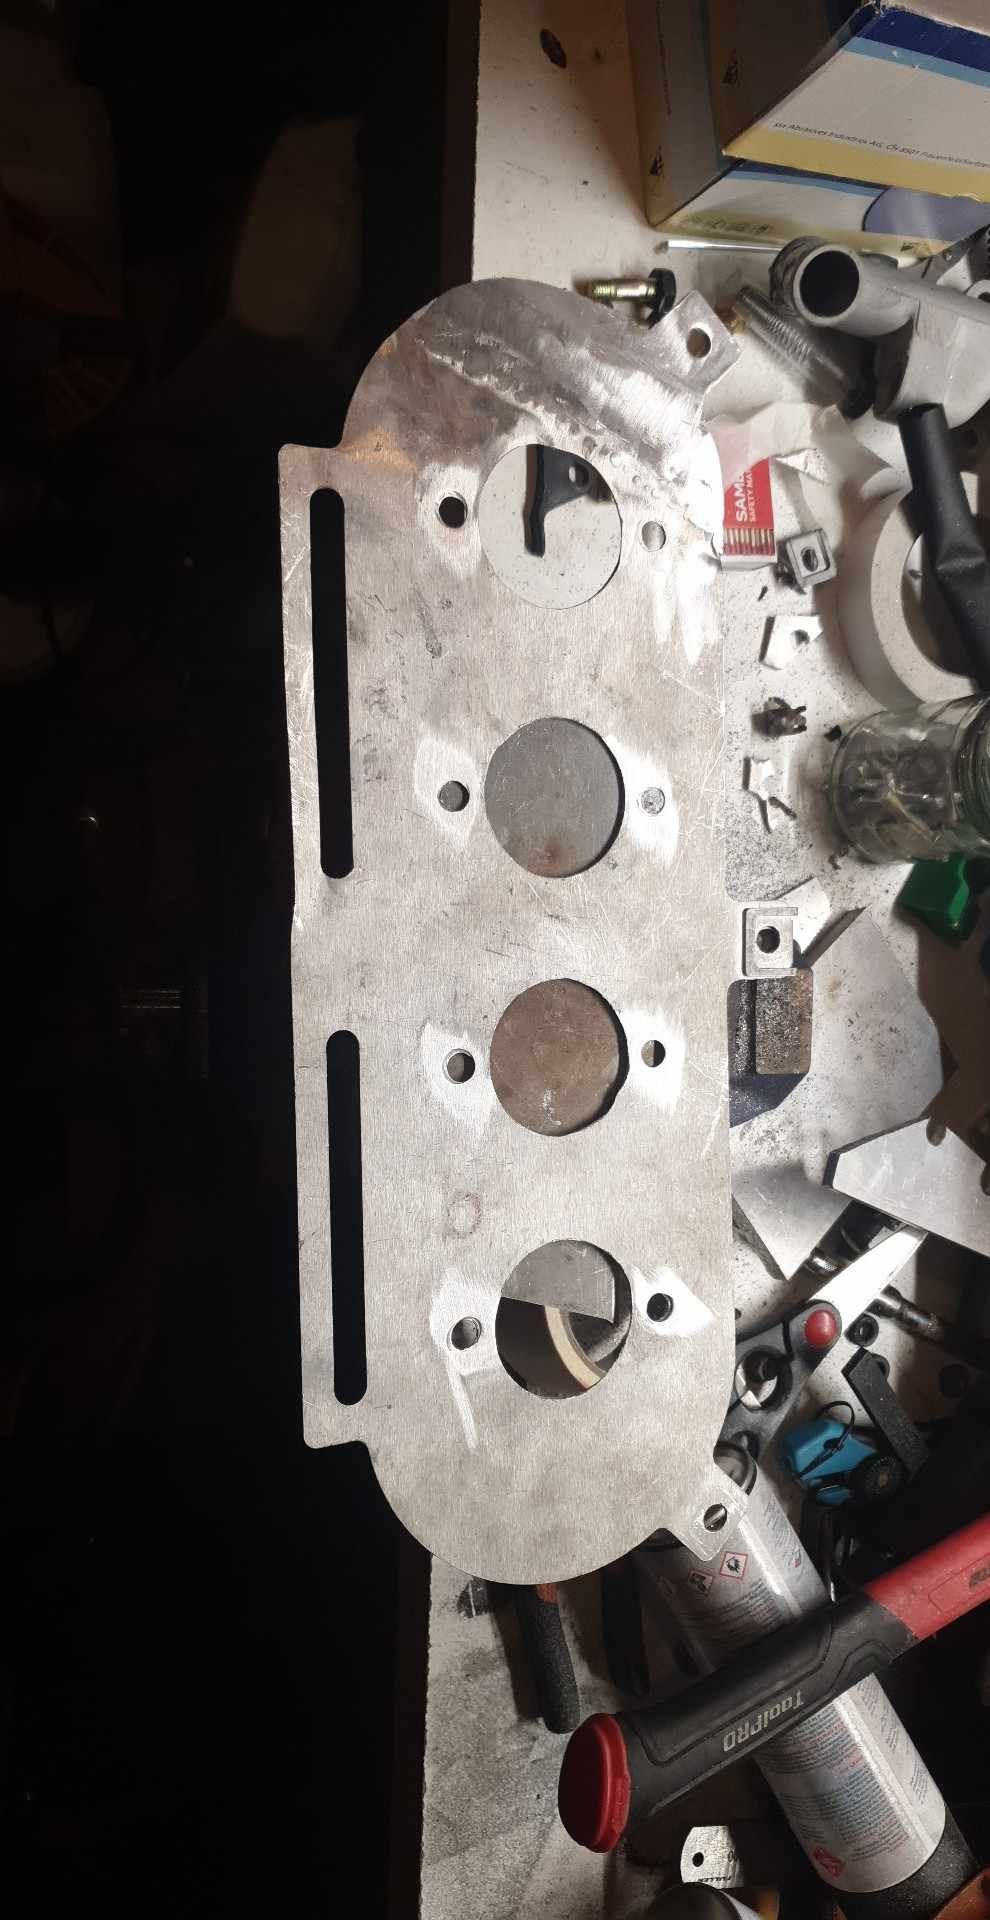
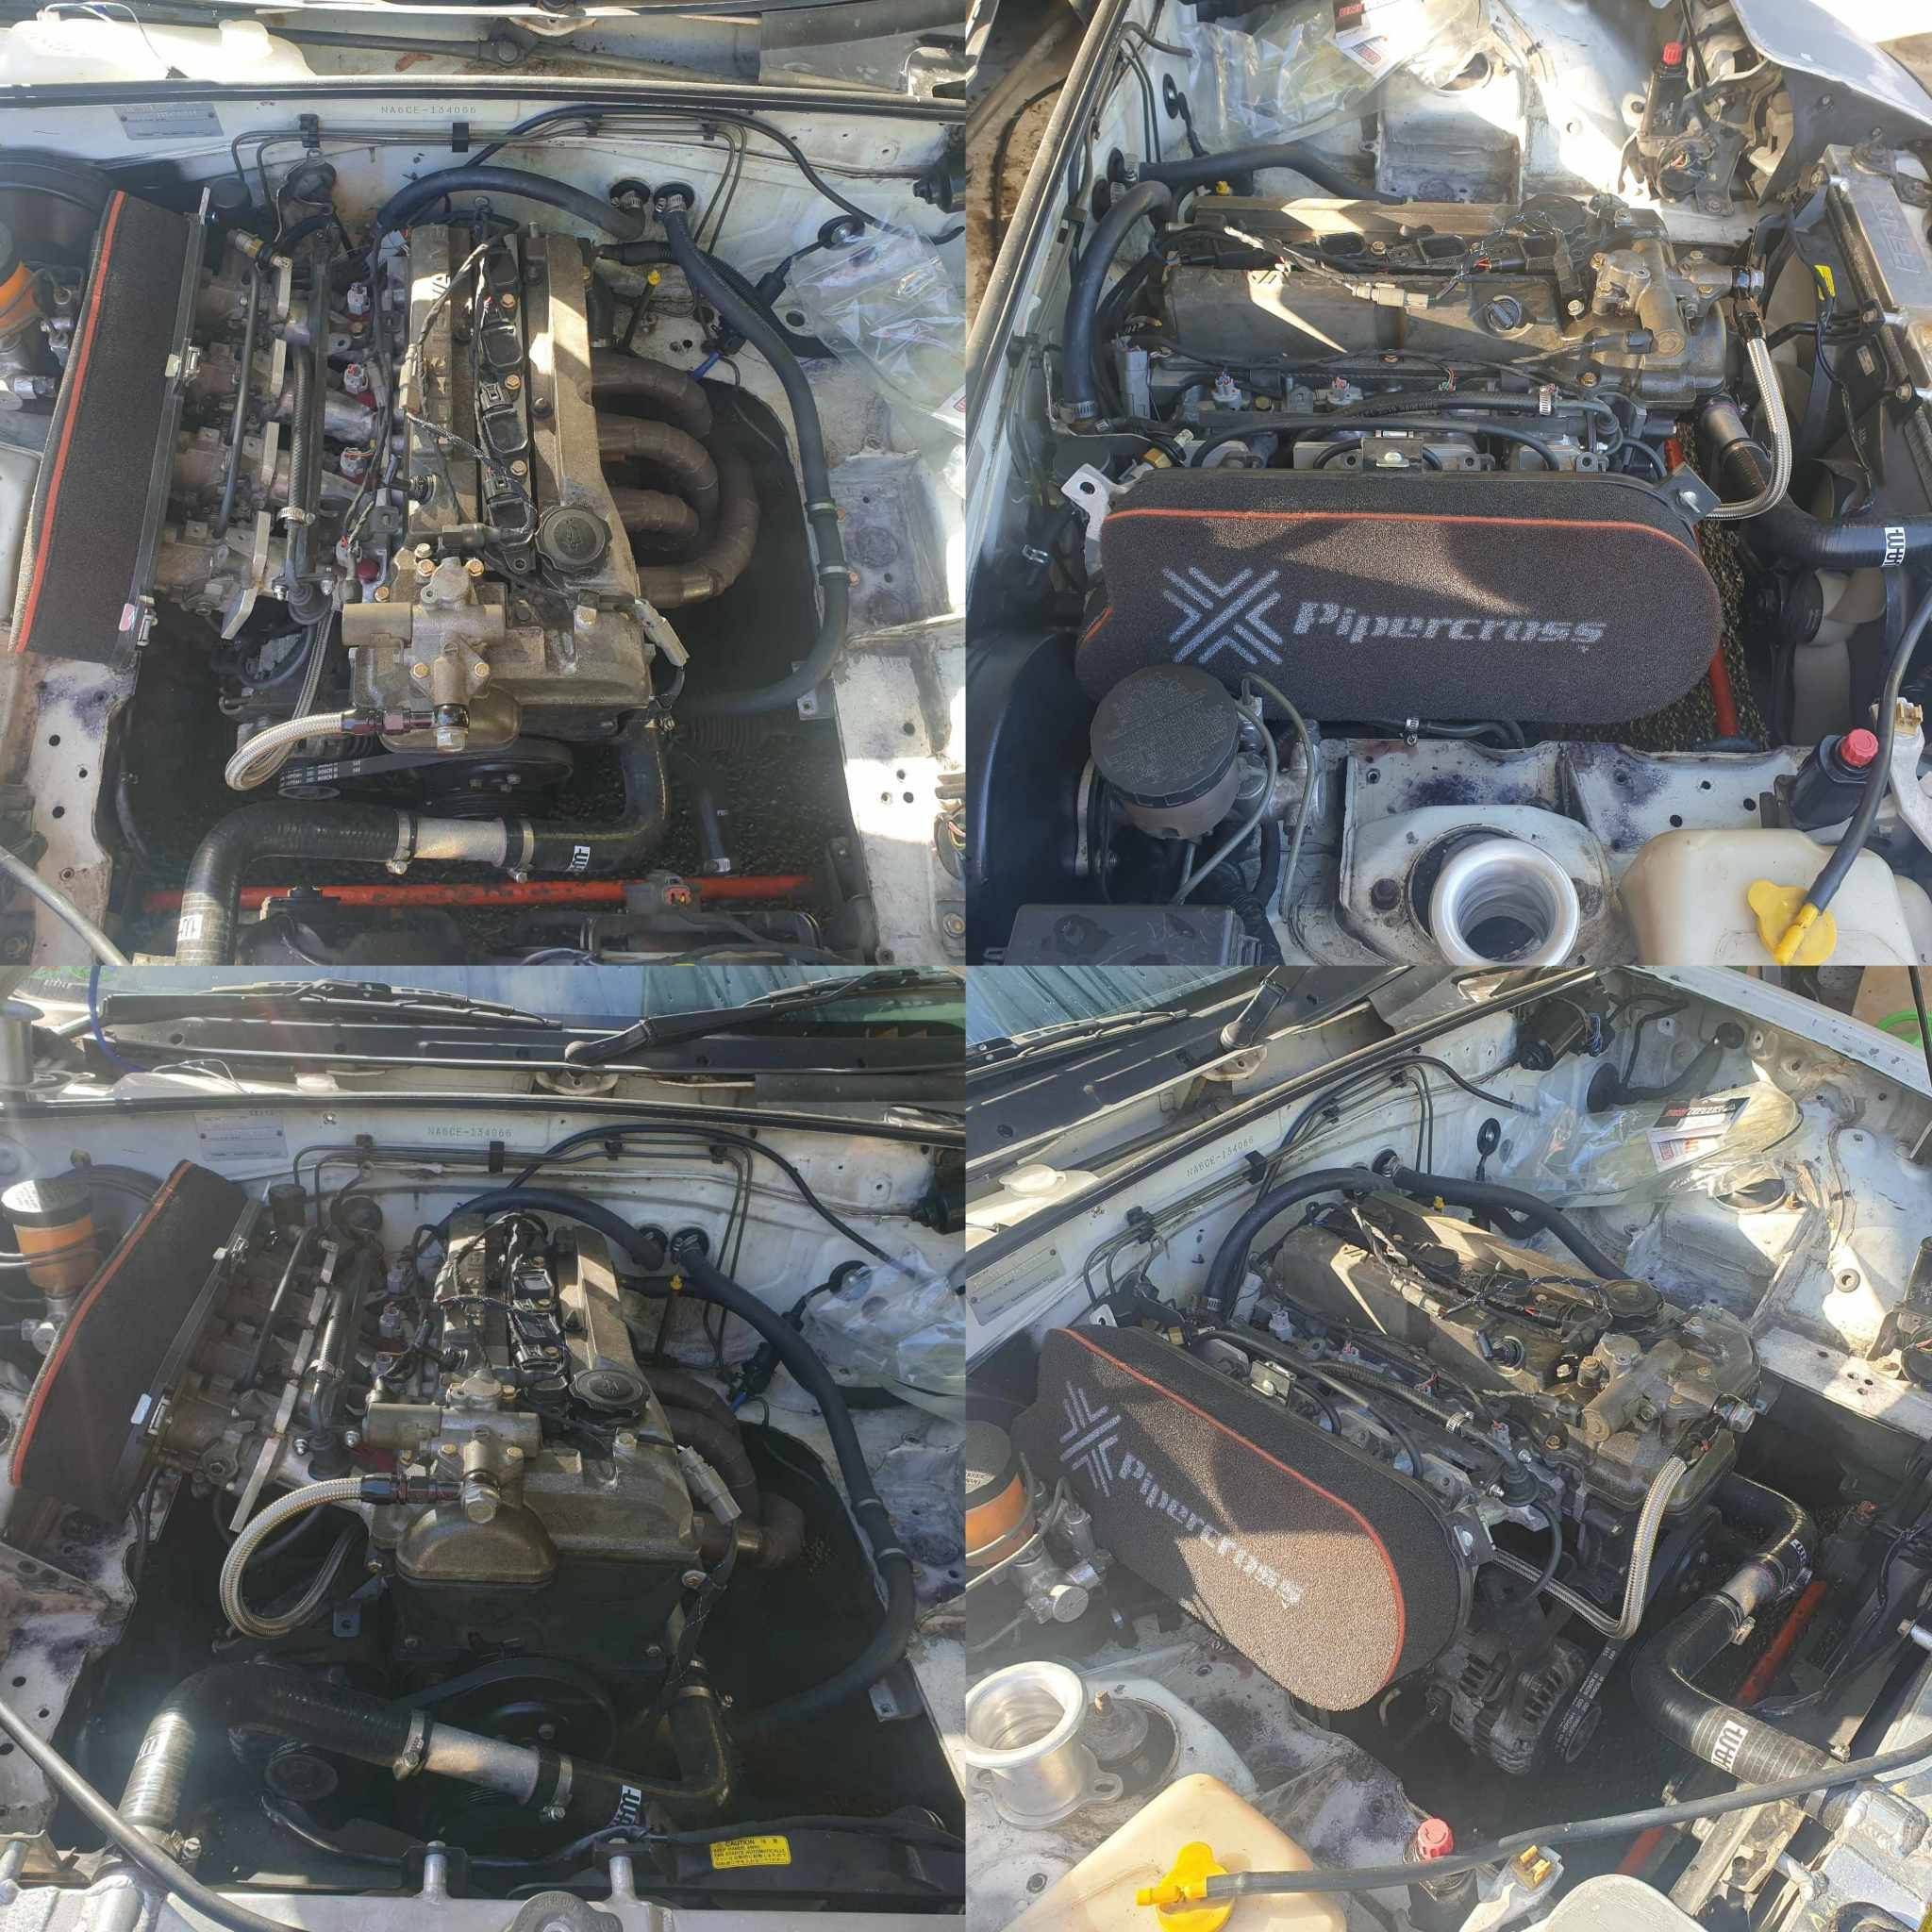
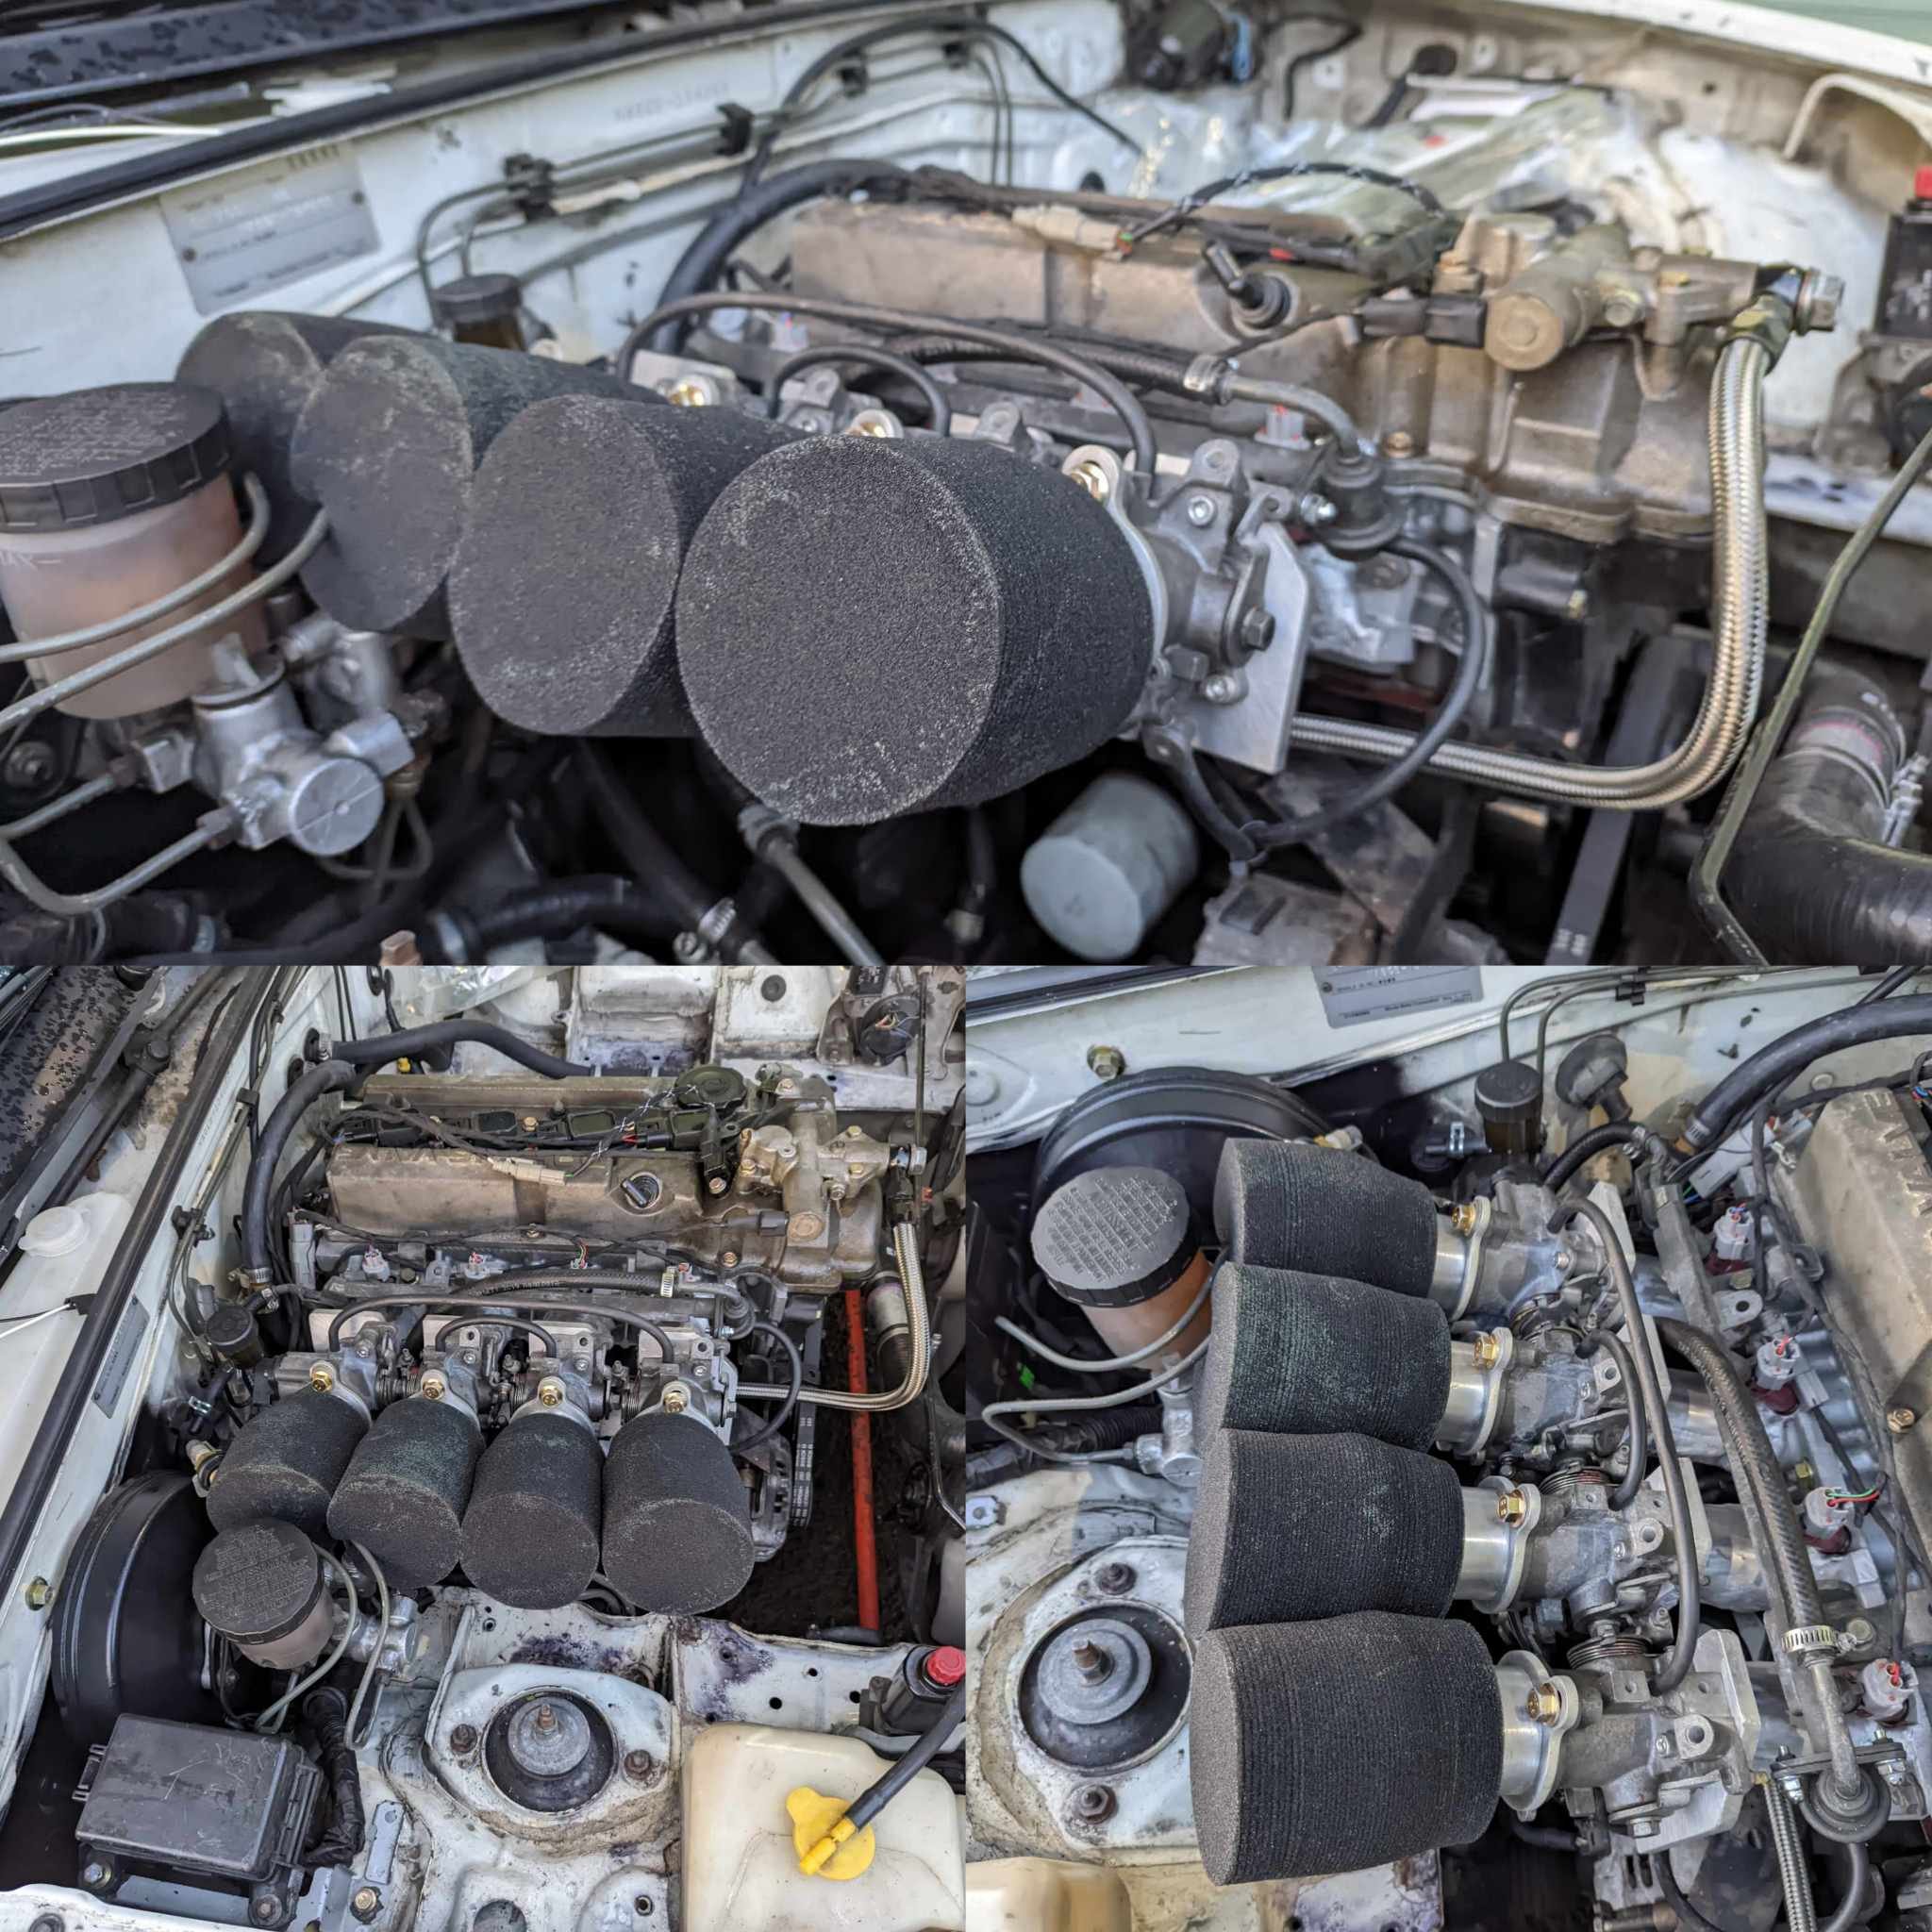
Alright air filter time. Bare trumpets are cool, but every bit of roadworks or loose surface scares the shit out of me. I don't have an engine undertray so rocks are a very real concern! Some cheap filter socks came up which fit great. I don't mind the look, but they are very restrictive for airflow. A friend had an ITB'd BP on the Dyno and gained 10kW removing his socks, so they aren't excellent for performance. Some may have seen that I used to have a pipercross px600 box air filter, which I had modified to clear the clutch slave in my old setup. Well I wanted to un-modify the backing plate to save money, and possibly eventually replace the box filter with an unmolested one. I welded a new plate on where I cut earlier, then ground it flat and cut the shape up. Now I have to replace the box filter but we have option number 3: a badass box filter setup. My trumpets don't fit under this filter and the filter is a bit hacked up at the back, however I love the look. Soo yeah, filters are cool but the box one will prove expensive. I'm not sure what option I'll settle with but if anyone has any thoughts (or a cheep box 80mm or domed 120mm px600 filter) let me know!
1 point
-
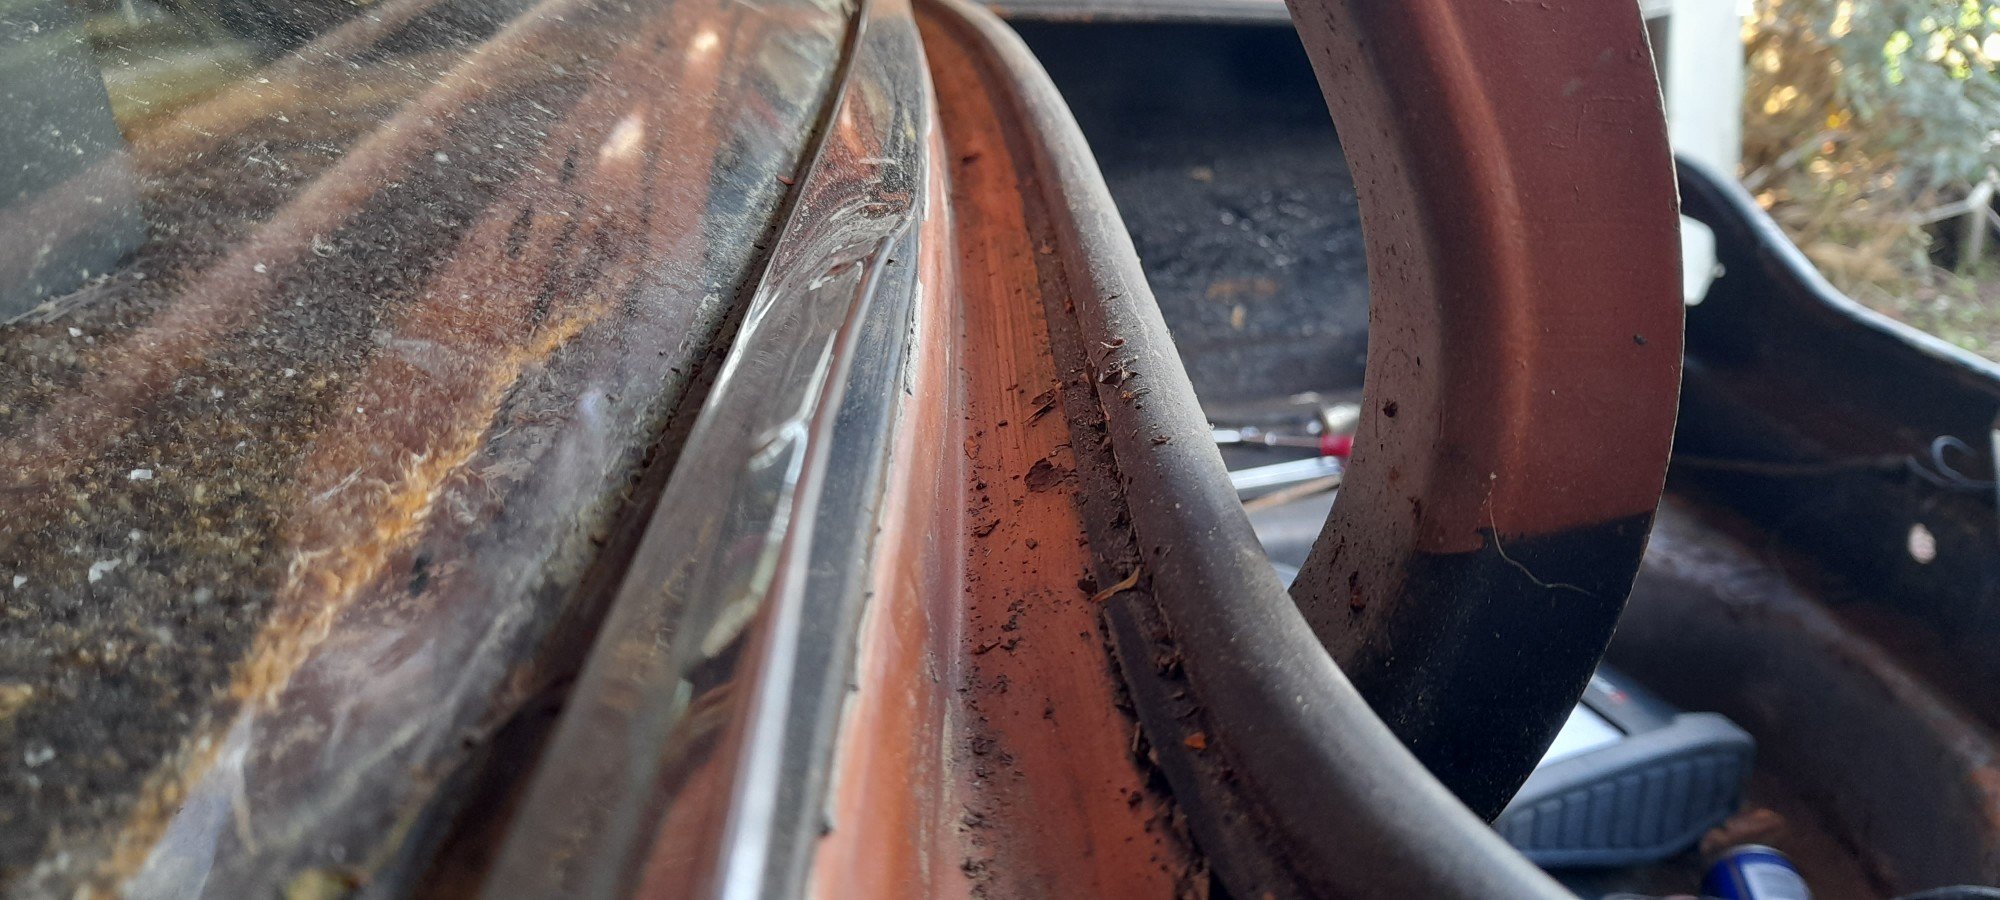
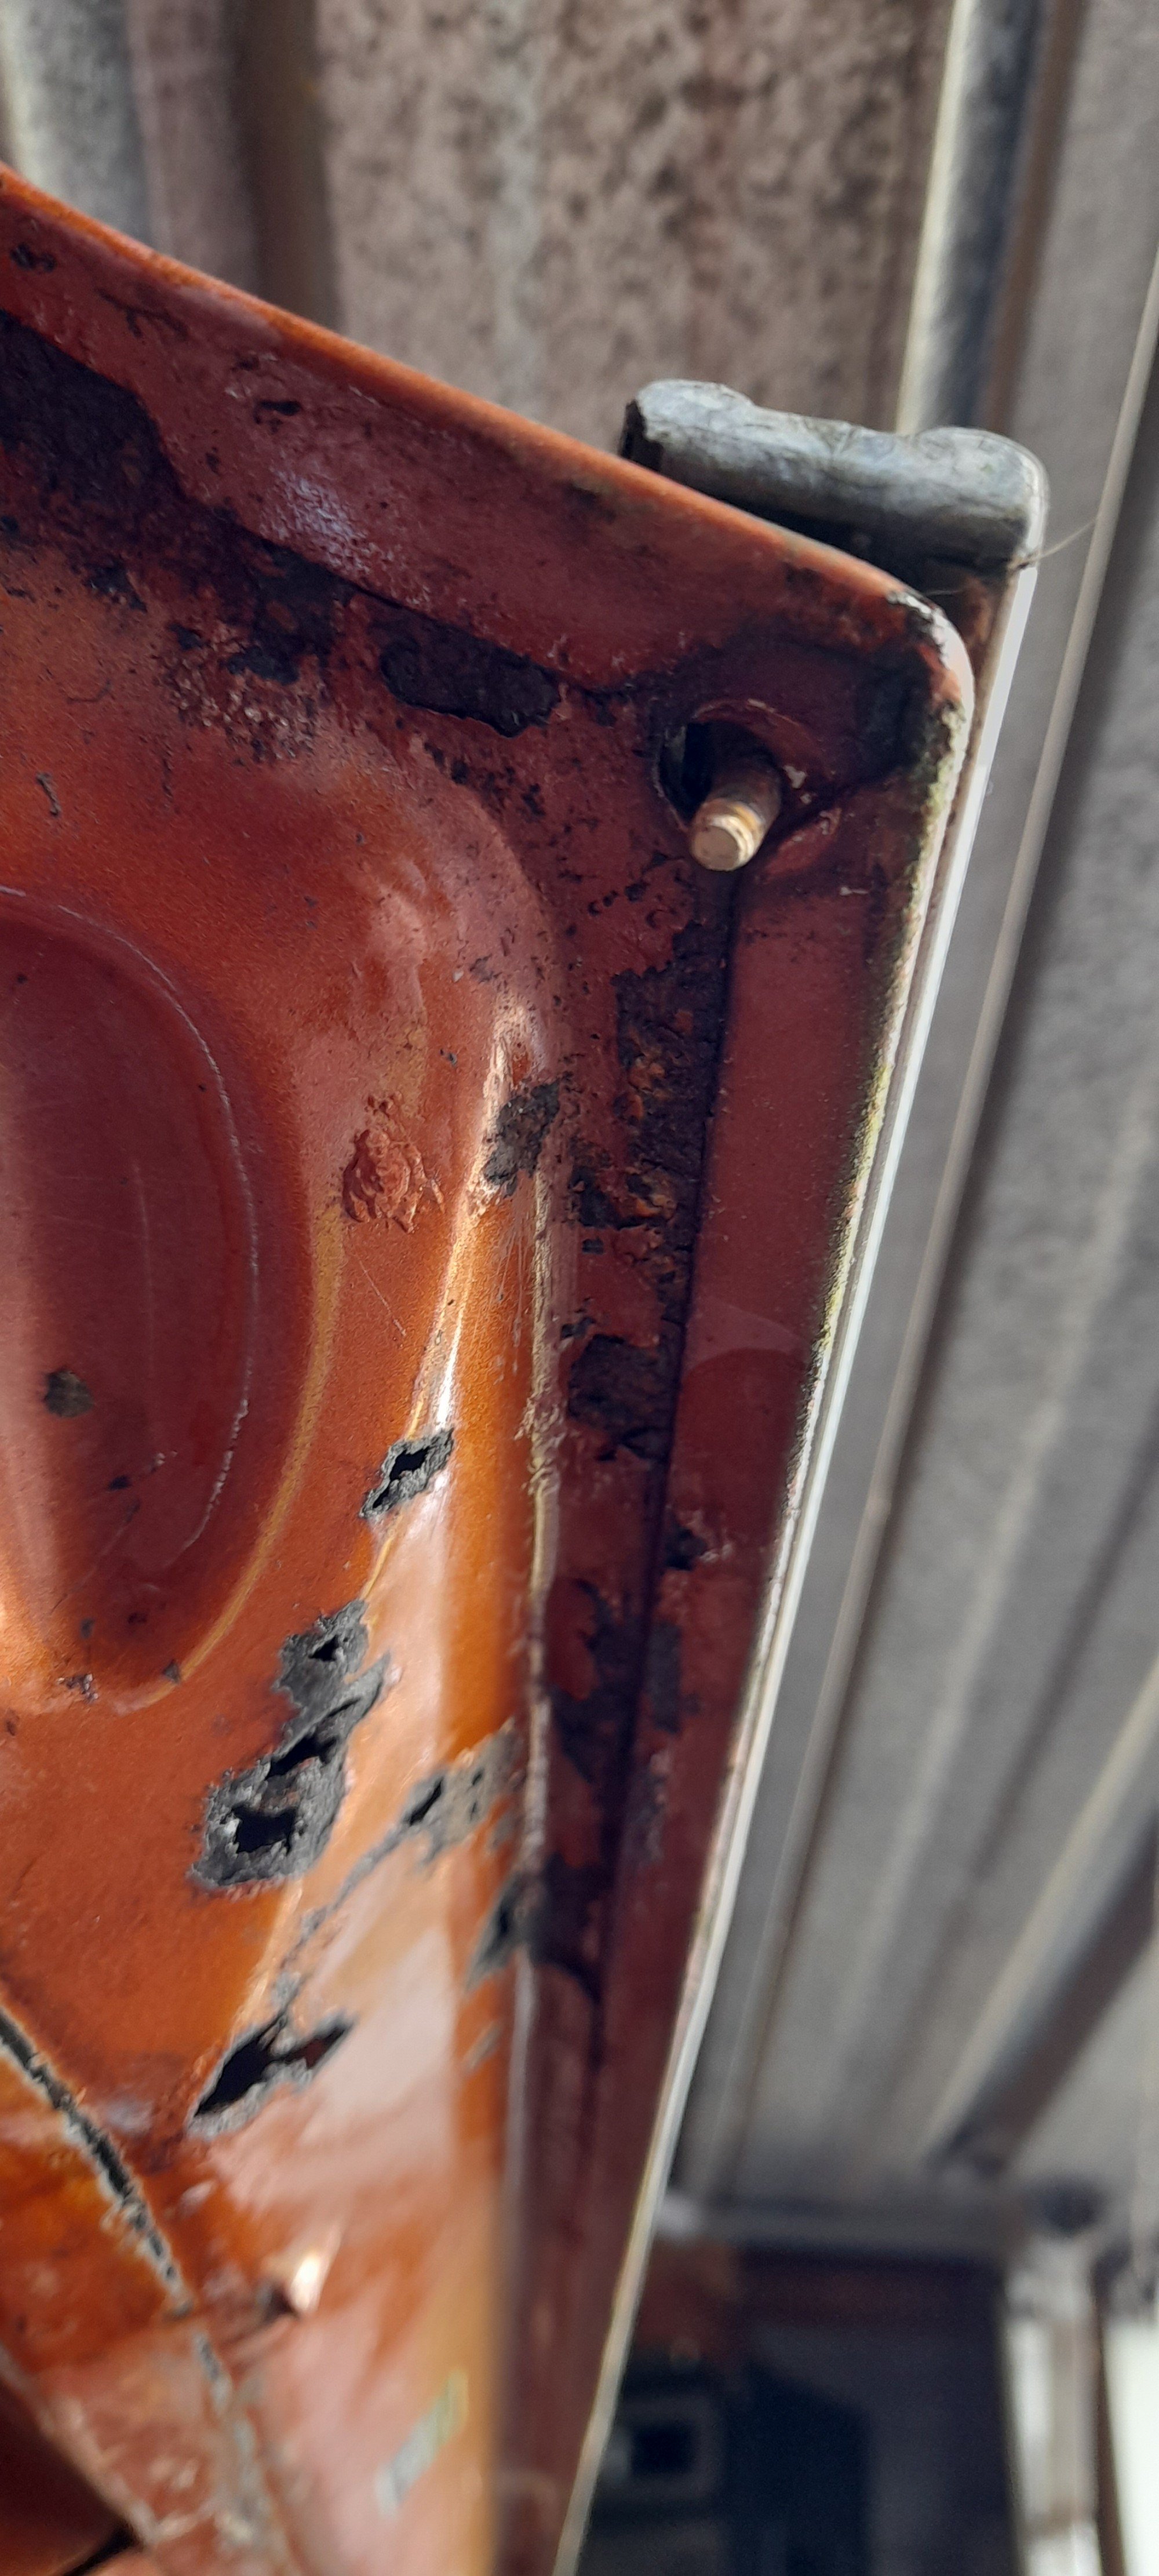
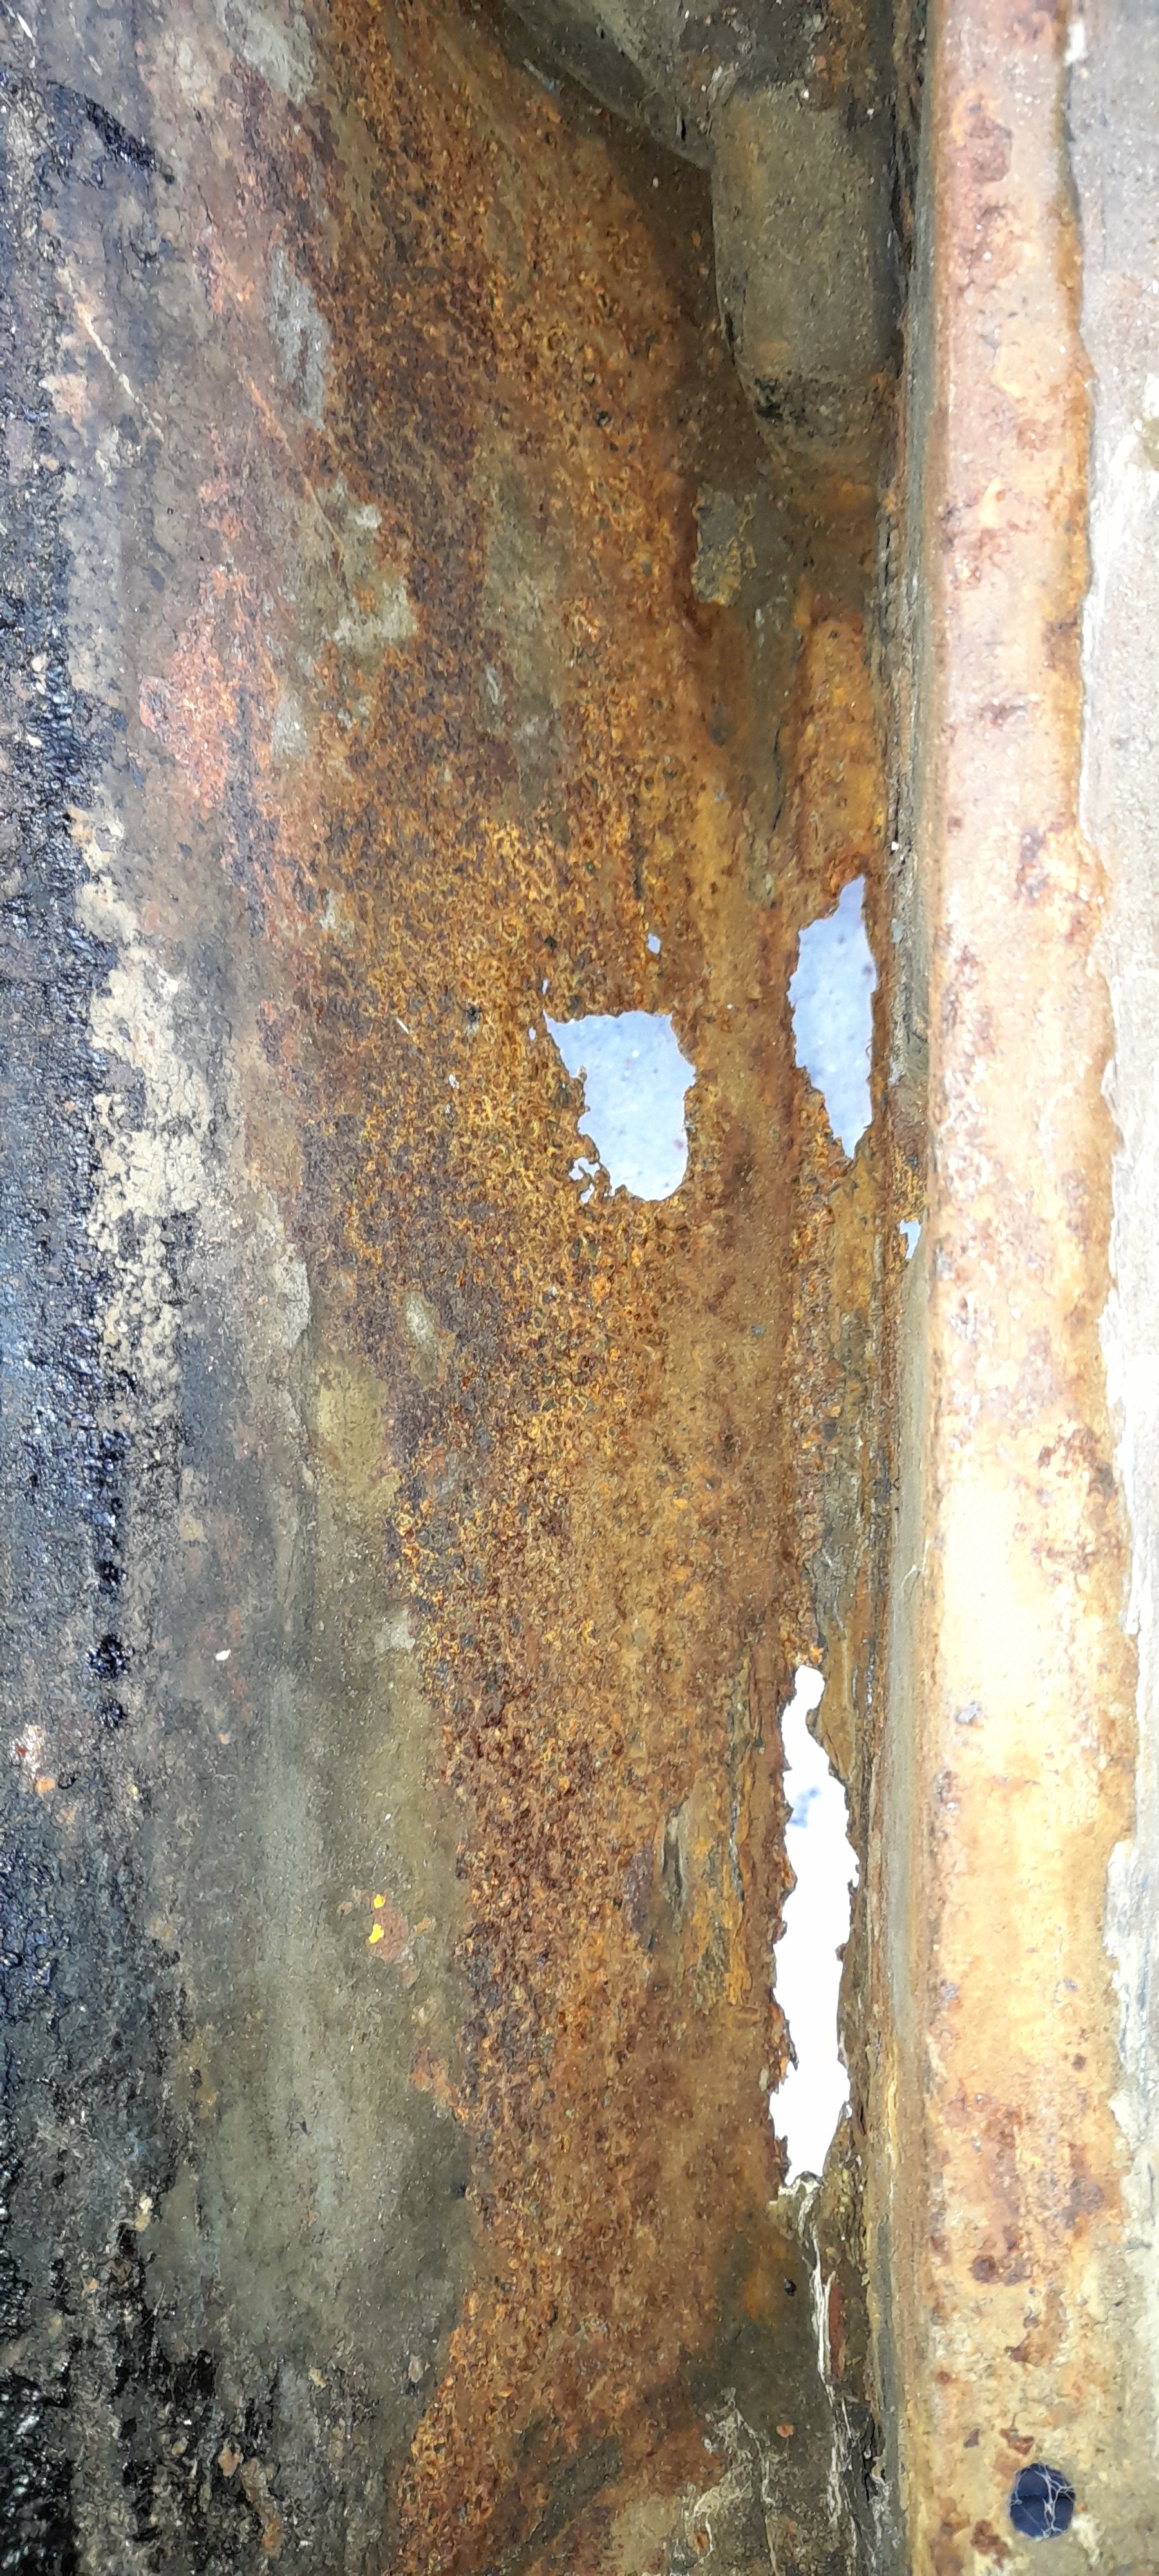
Some carefull grinding sliced the nuts nicely. Lights out and quick brush off revealed some nasty shit. A little bit in the bootlid. But..... the channels are mint! The scaly bit behind the chrome trim mentioned earlier. Barely a fleck in comparison.
1 point
-
Lh side.
1 point
-
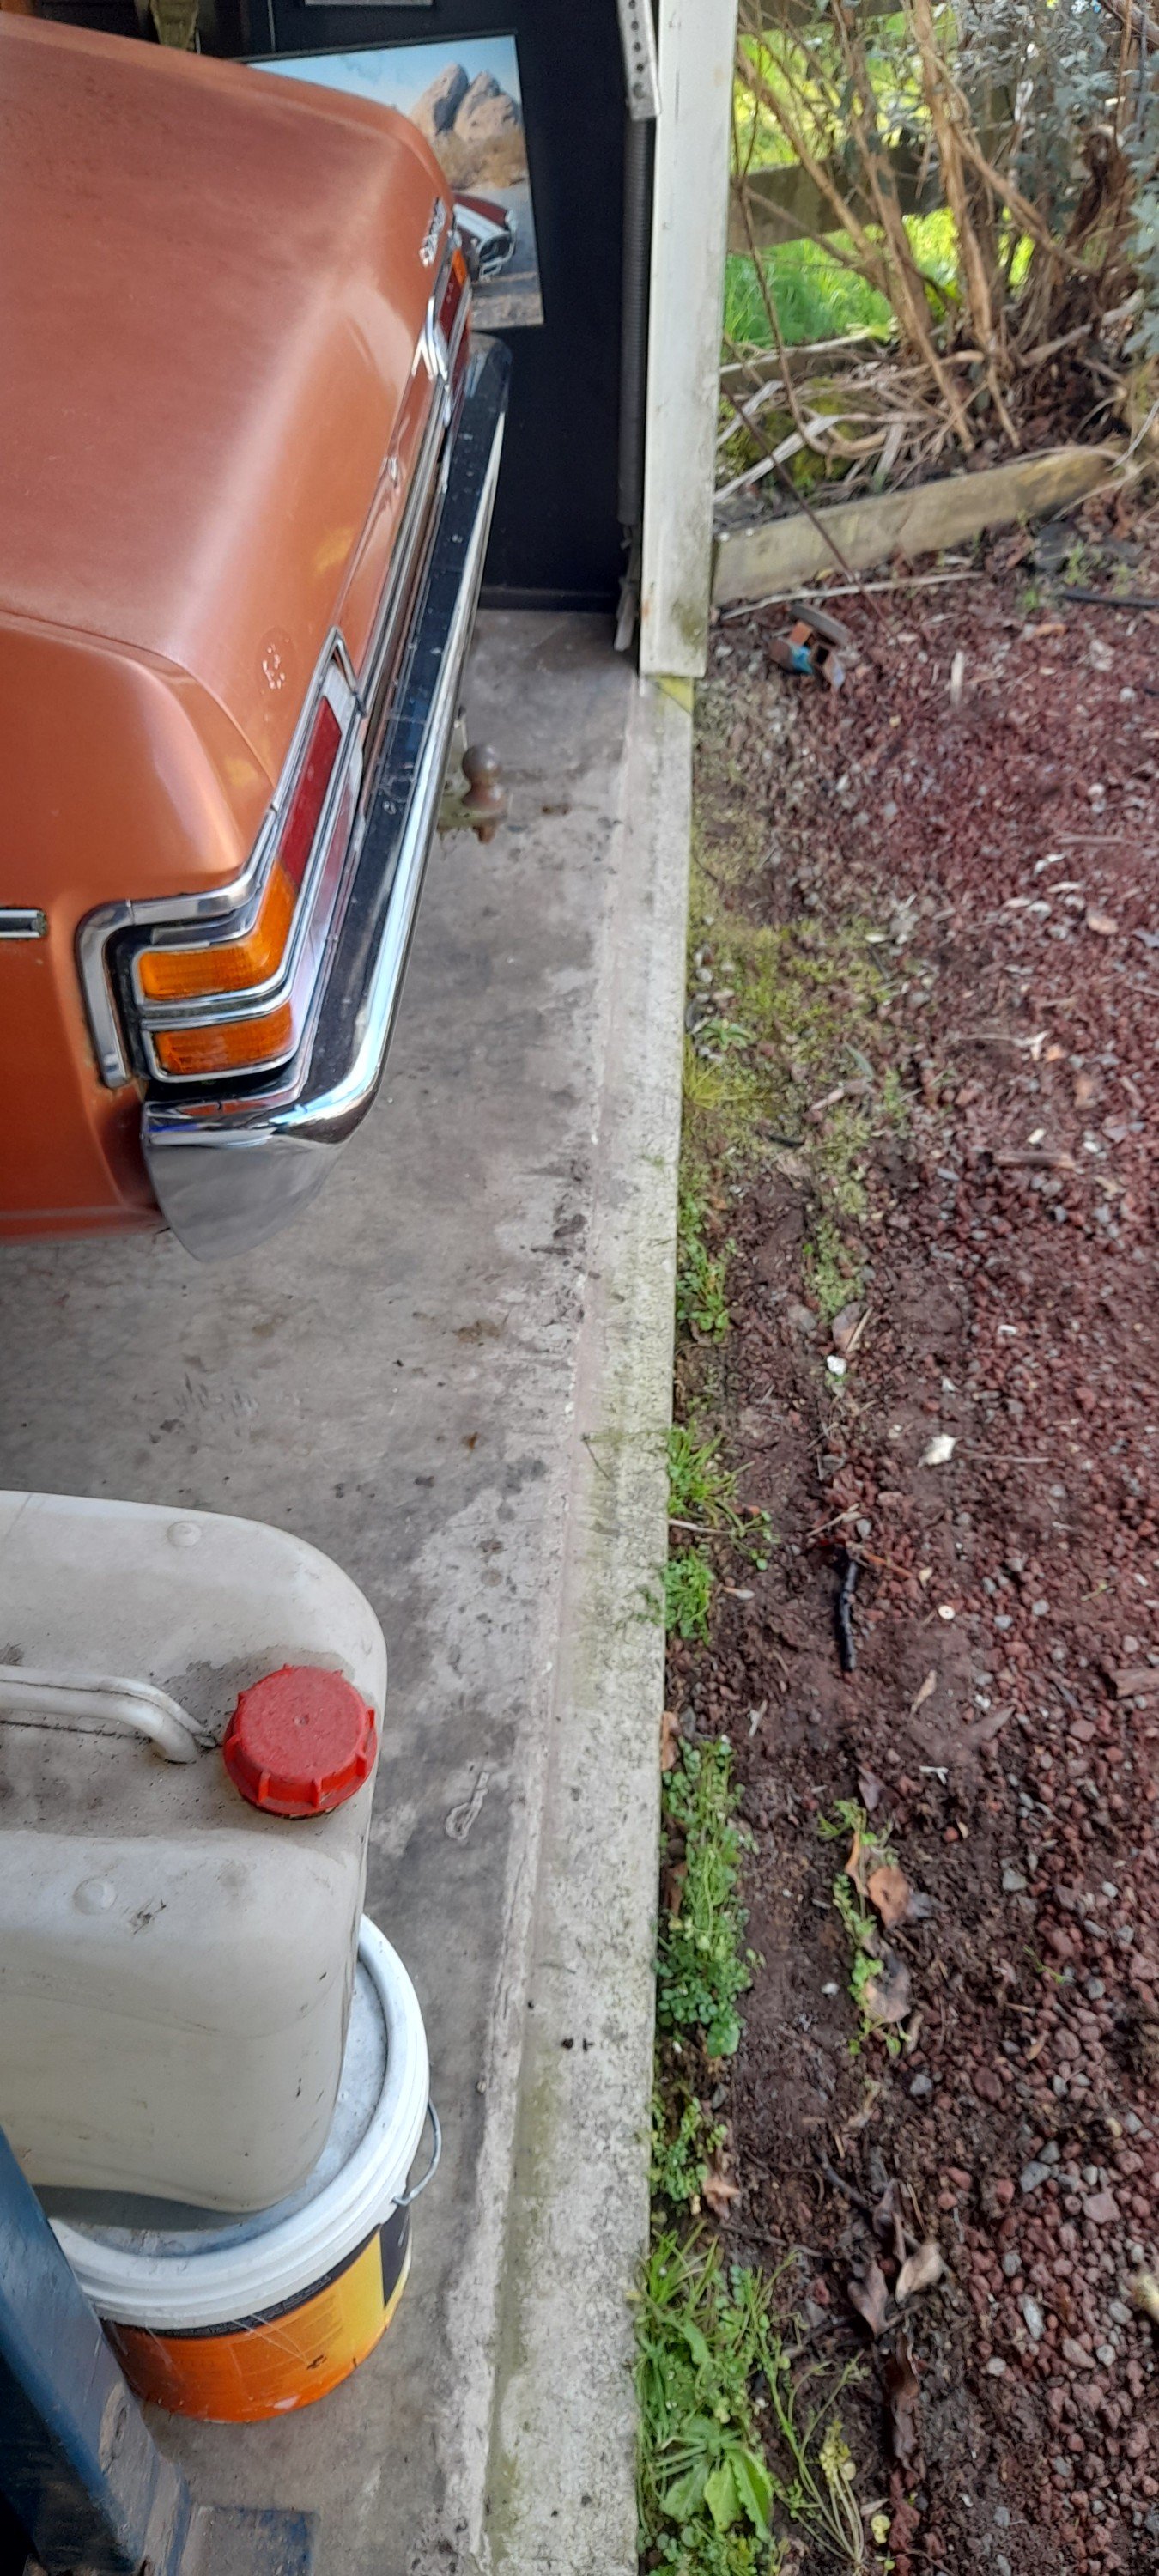
Went for quick drive up the road to turn it around, some more crud got in the fuel line and got some big leanpops during the 'u-turn'... fuel system is all getting redone so not too stressed. 3 year old fuel in a 43yr old tank was never going to run perfect. But it fits.
1 point
-
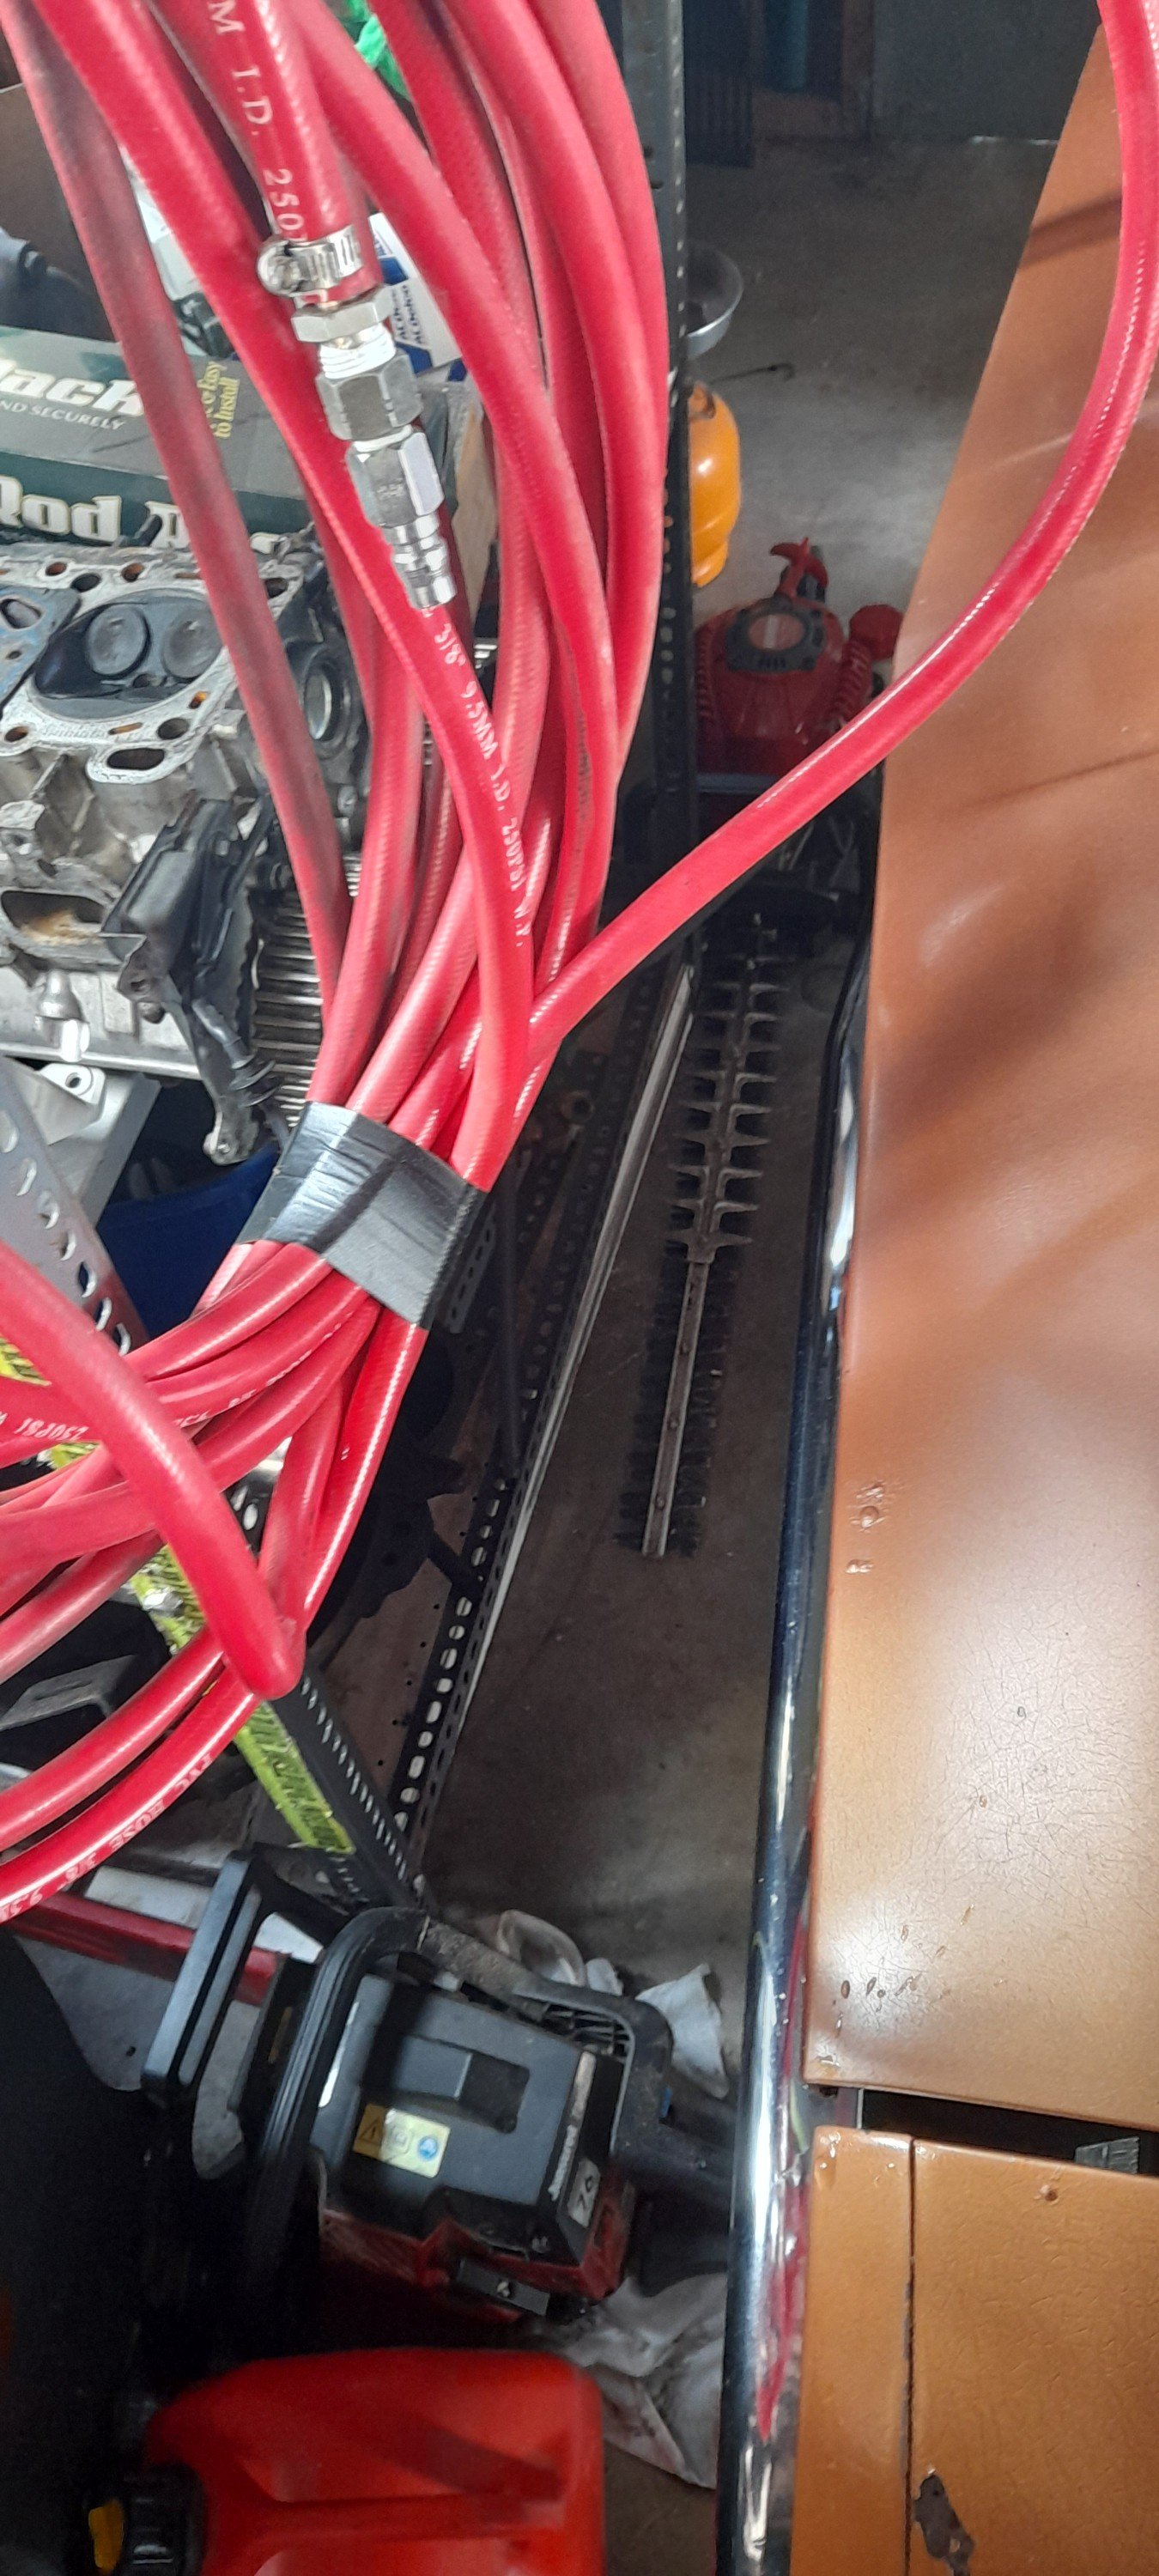
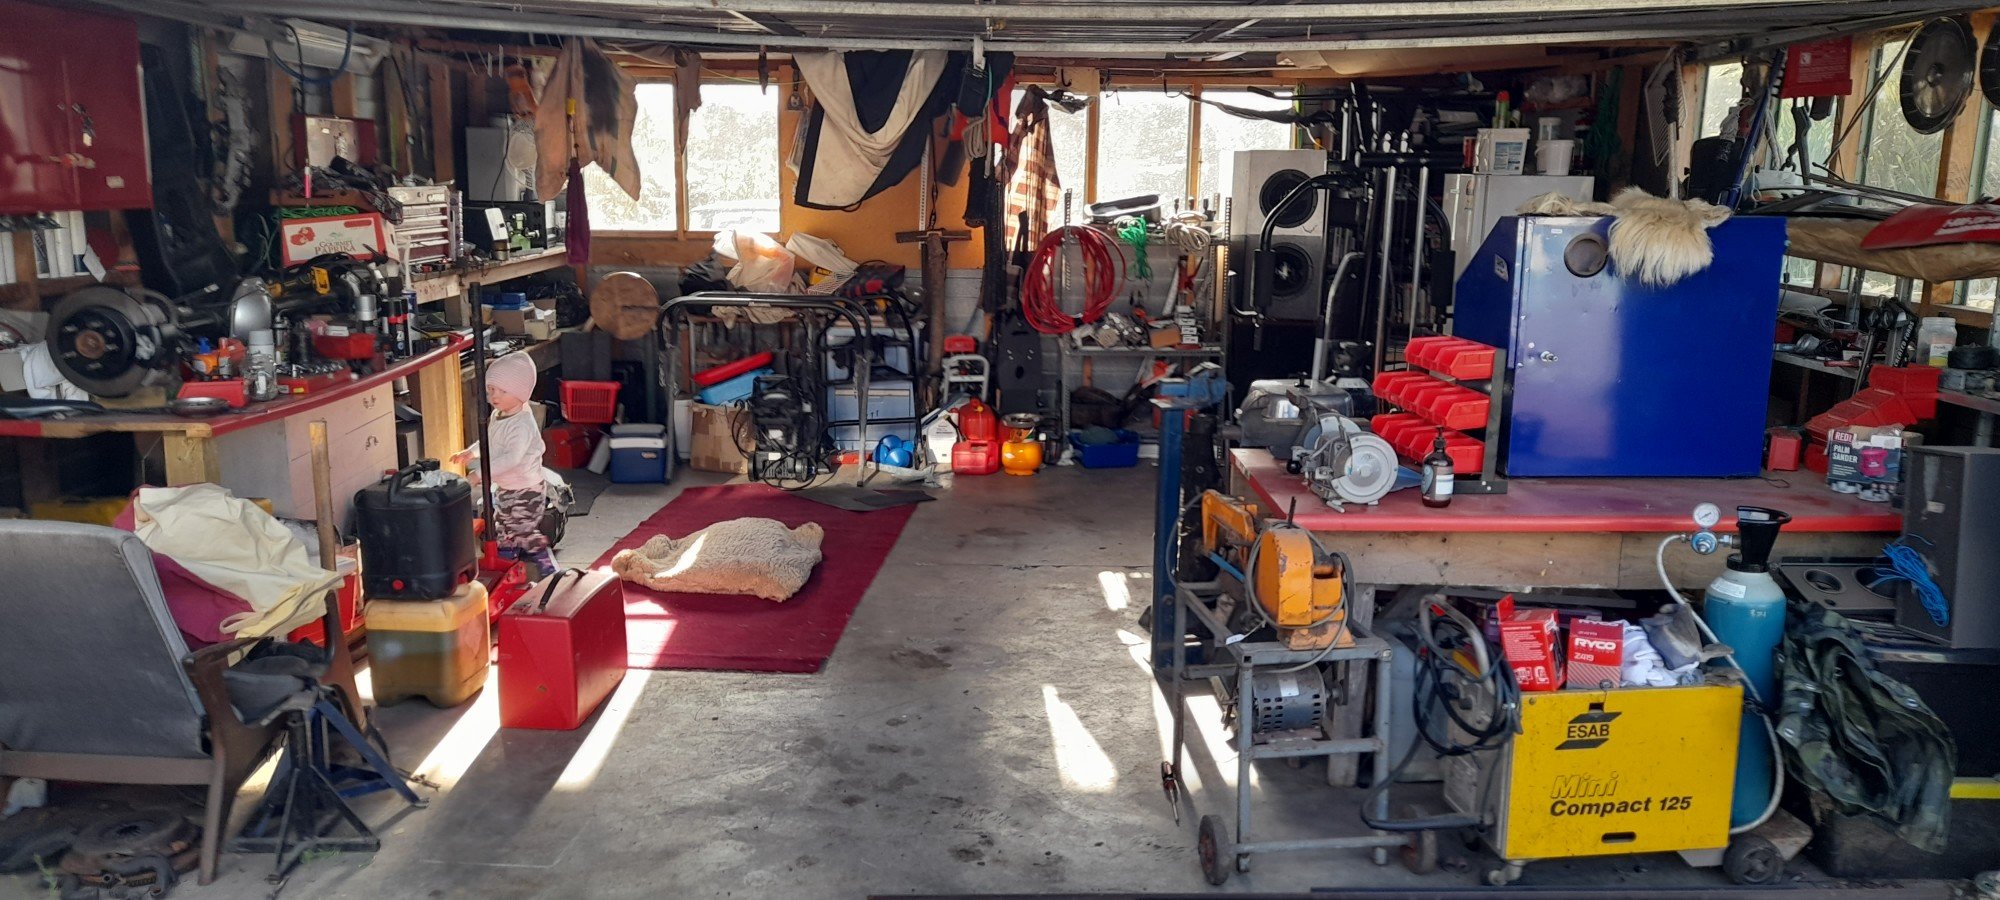
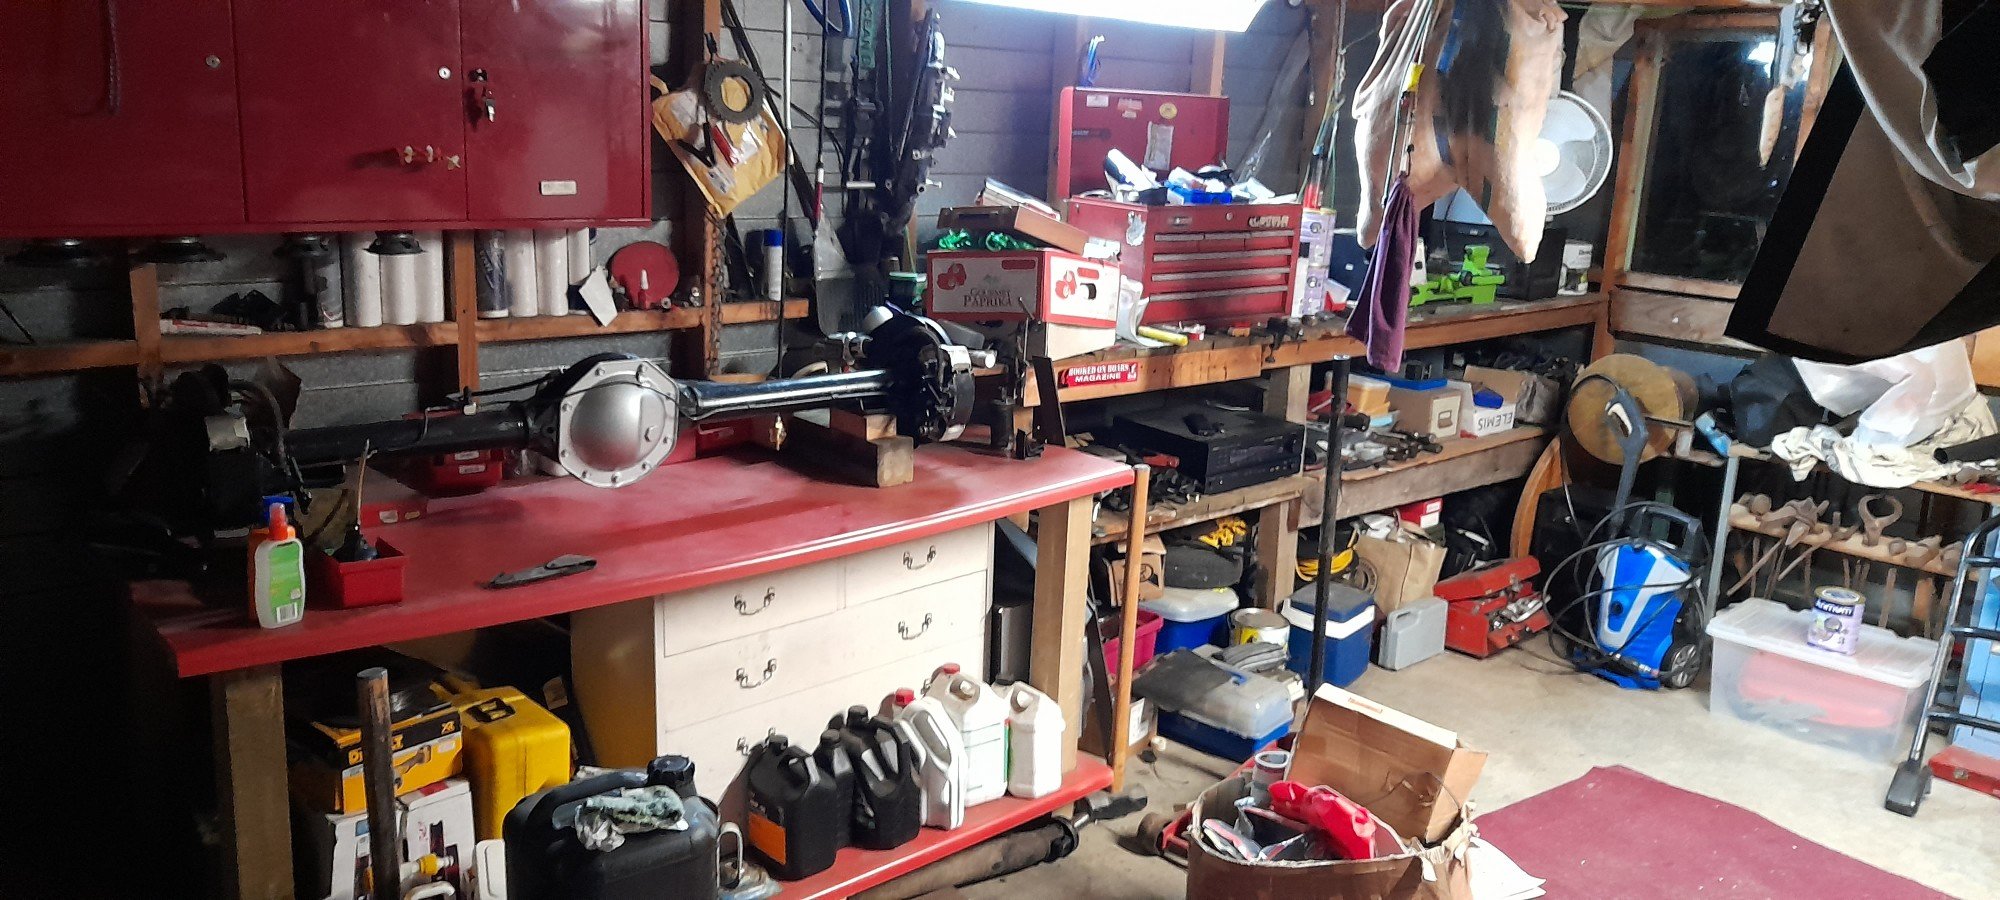
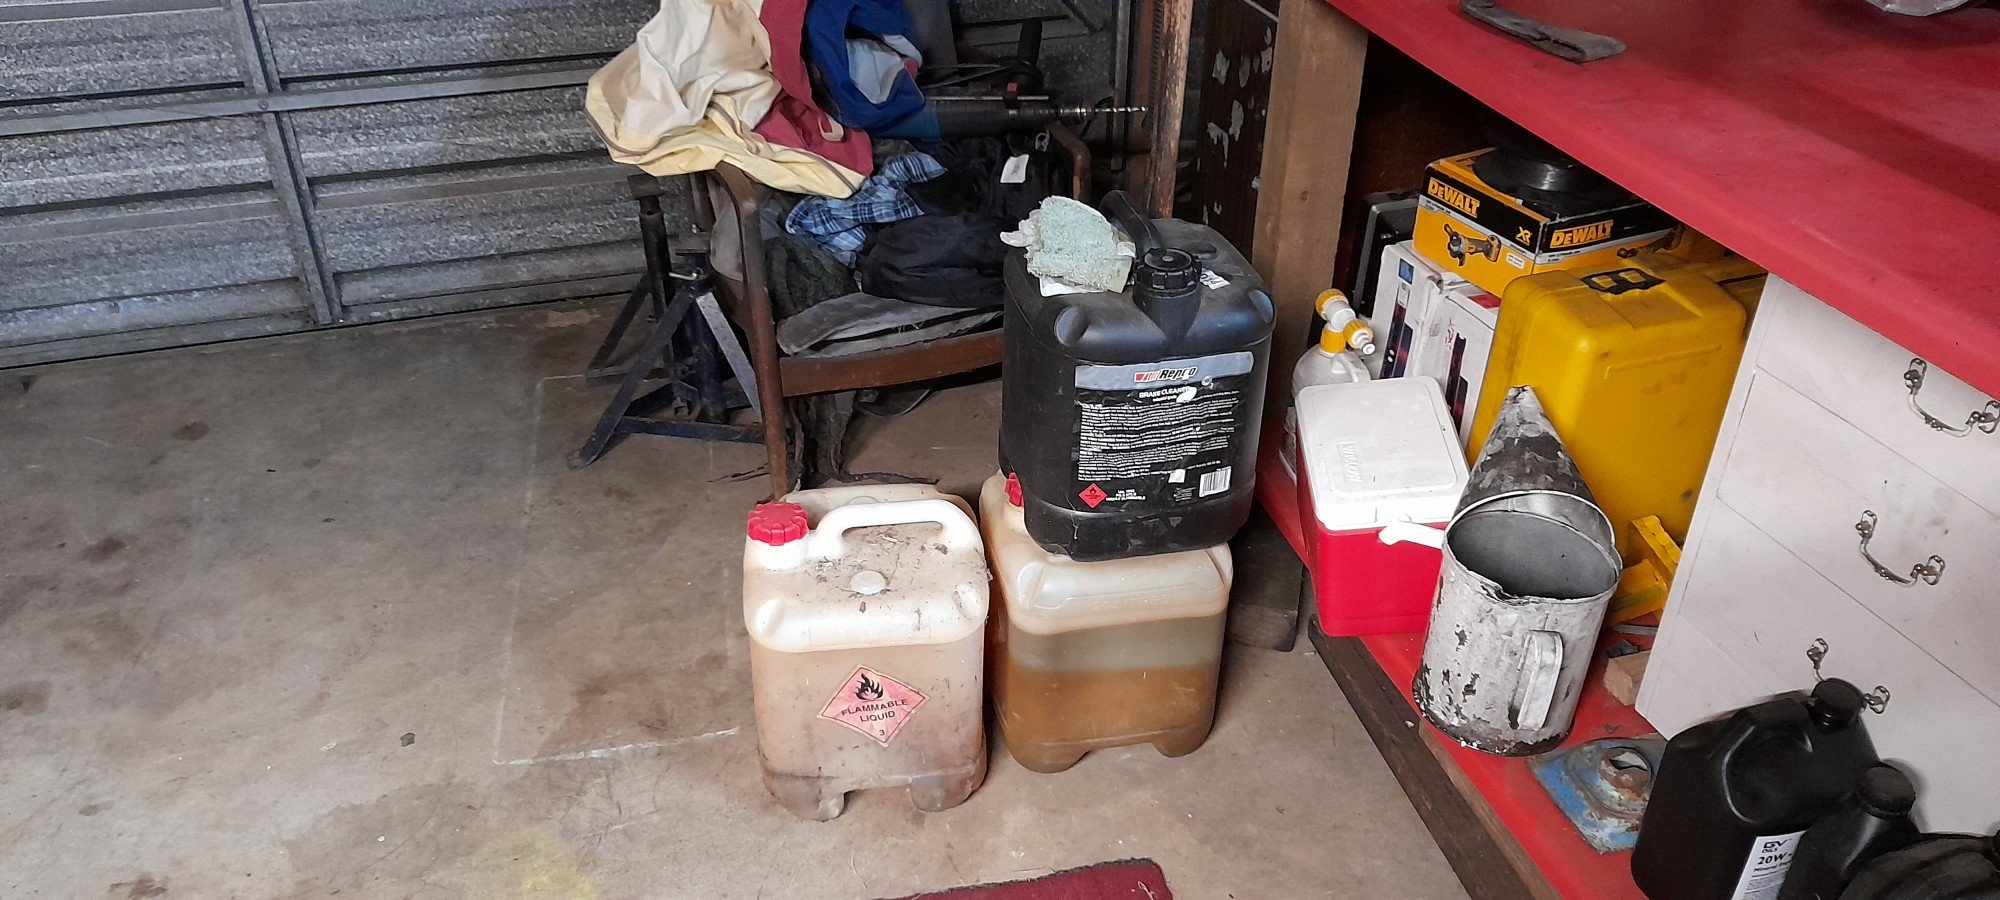
Shed has been a mess for 4 years at least. Started as organised clutter then progressed to utter shambles. Took most of the weekend, and a few hours tonight. But it is nearly ready for car again. Done one trip to the dump already, have to take some waste oil/dirty fuel containers to work to empty out. And move a few things to the garden shed. Nearly have room for the tv too!
1 point
-
1 point
-
For some reason i feel like some kind of under qualified doctor, giving slightly dodgy medical advice but anyway I would cut it off just before your last muffler. see how it sounds. (its going to have to come off either way) will sound a little different after straight seciton is on, but will give a pretty good idea, what it will sound like! likely find you will need to put a straight through glass pack in its place, to make it sound decent.1 point


.thumb.jpeg.e0a4bff61111e0c8c7396950fcc94da1.jpeg)


.thumb.jpeg.384ff72c8d2b0ee0d34a7bdedb55bdcf.jpeg)


This leaderboard is set to Auckland/GMT+12:00