
Leaderboard


Popular Content
Showing content with the highest reputation on 03/16/24 in all areas
-
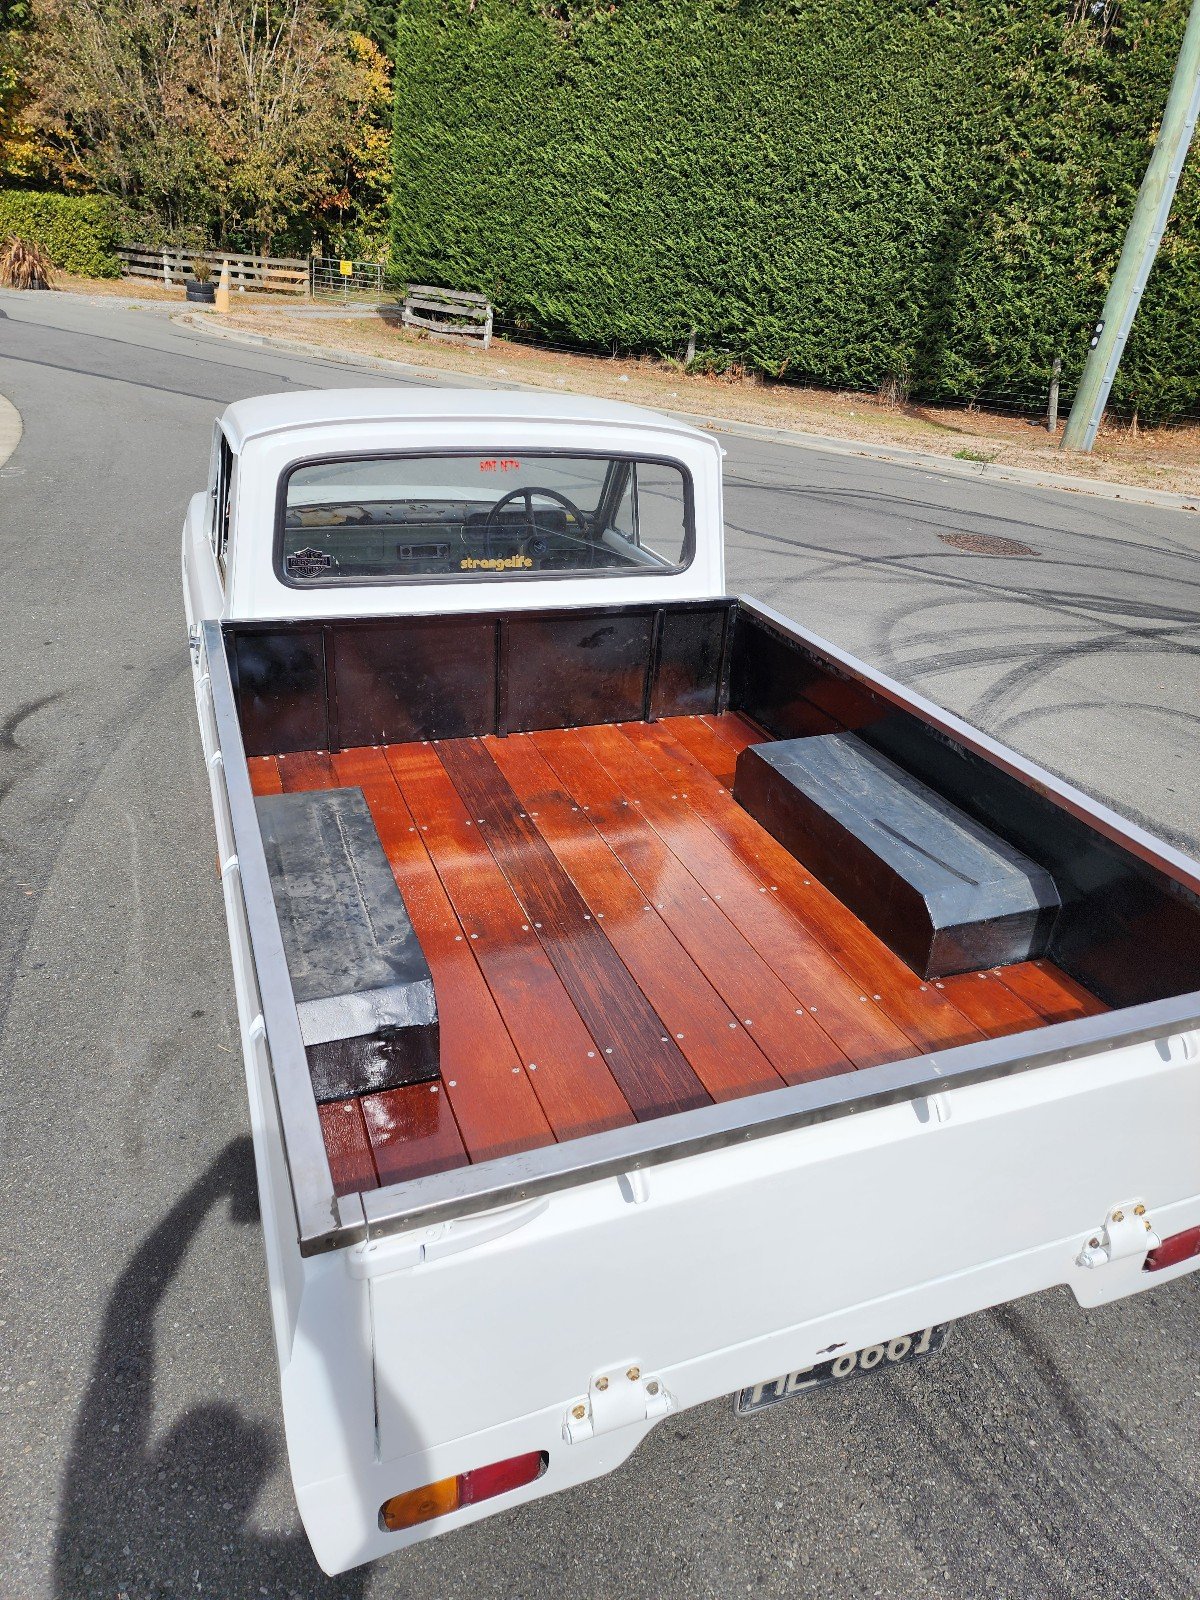
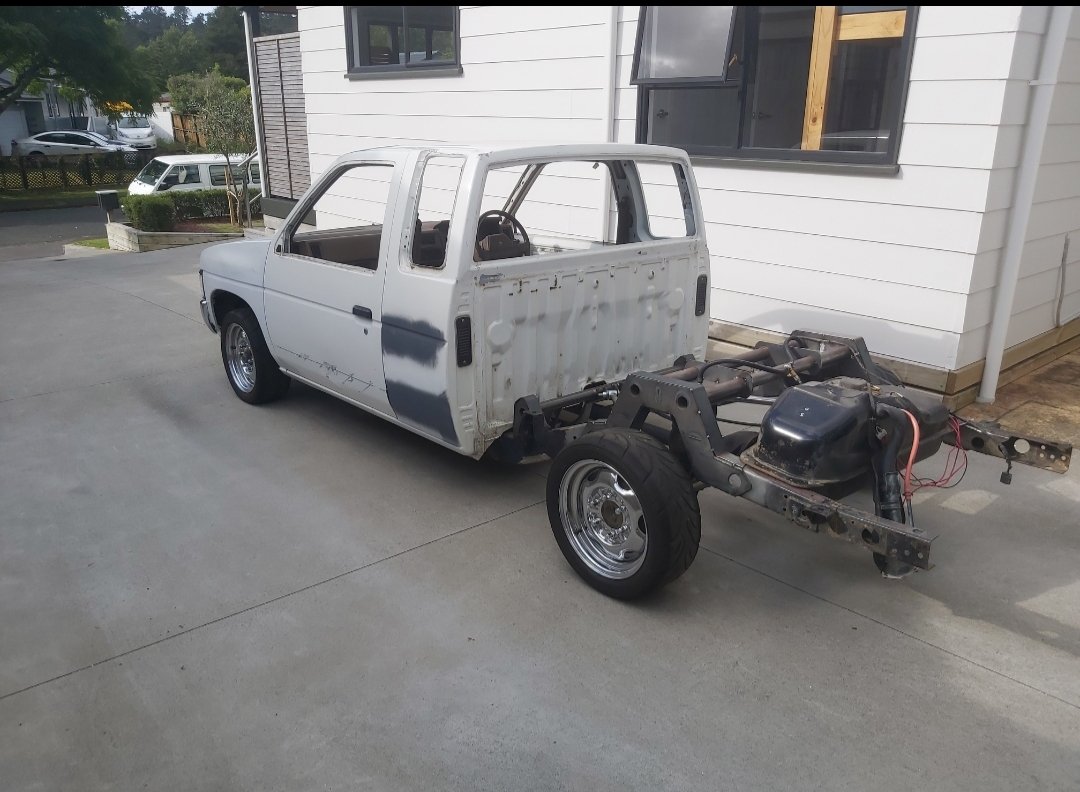
Just took this for its maiden voyage. Zero travel in the front . 50 percent of a exhaust. So bumpy and so rowdy. Love it . Still a shit load to do but darn it's a good feeling
 13 points
 -
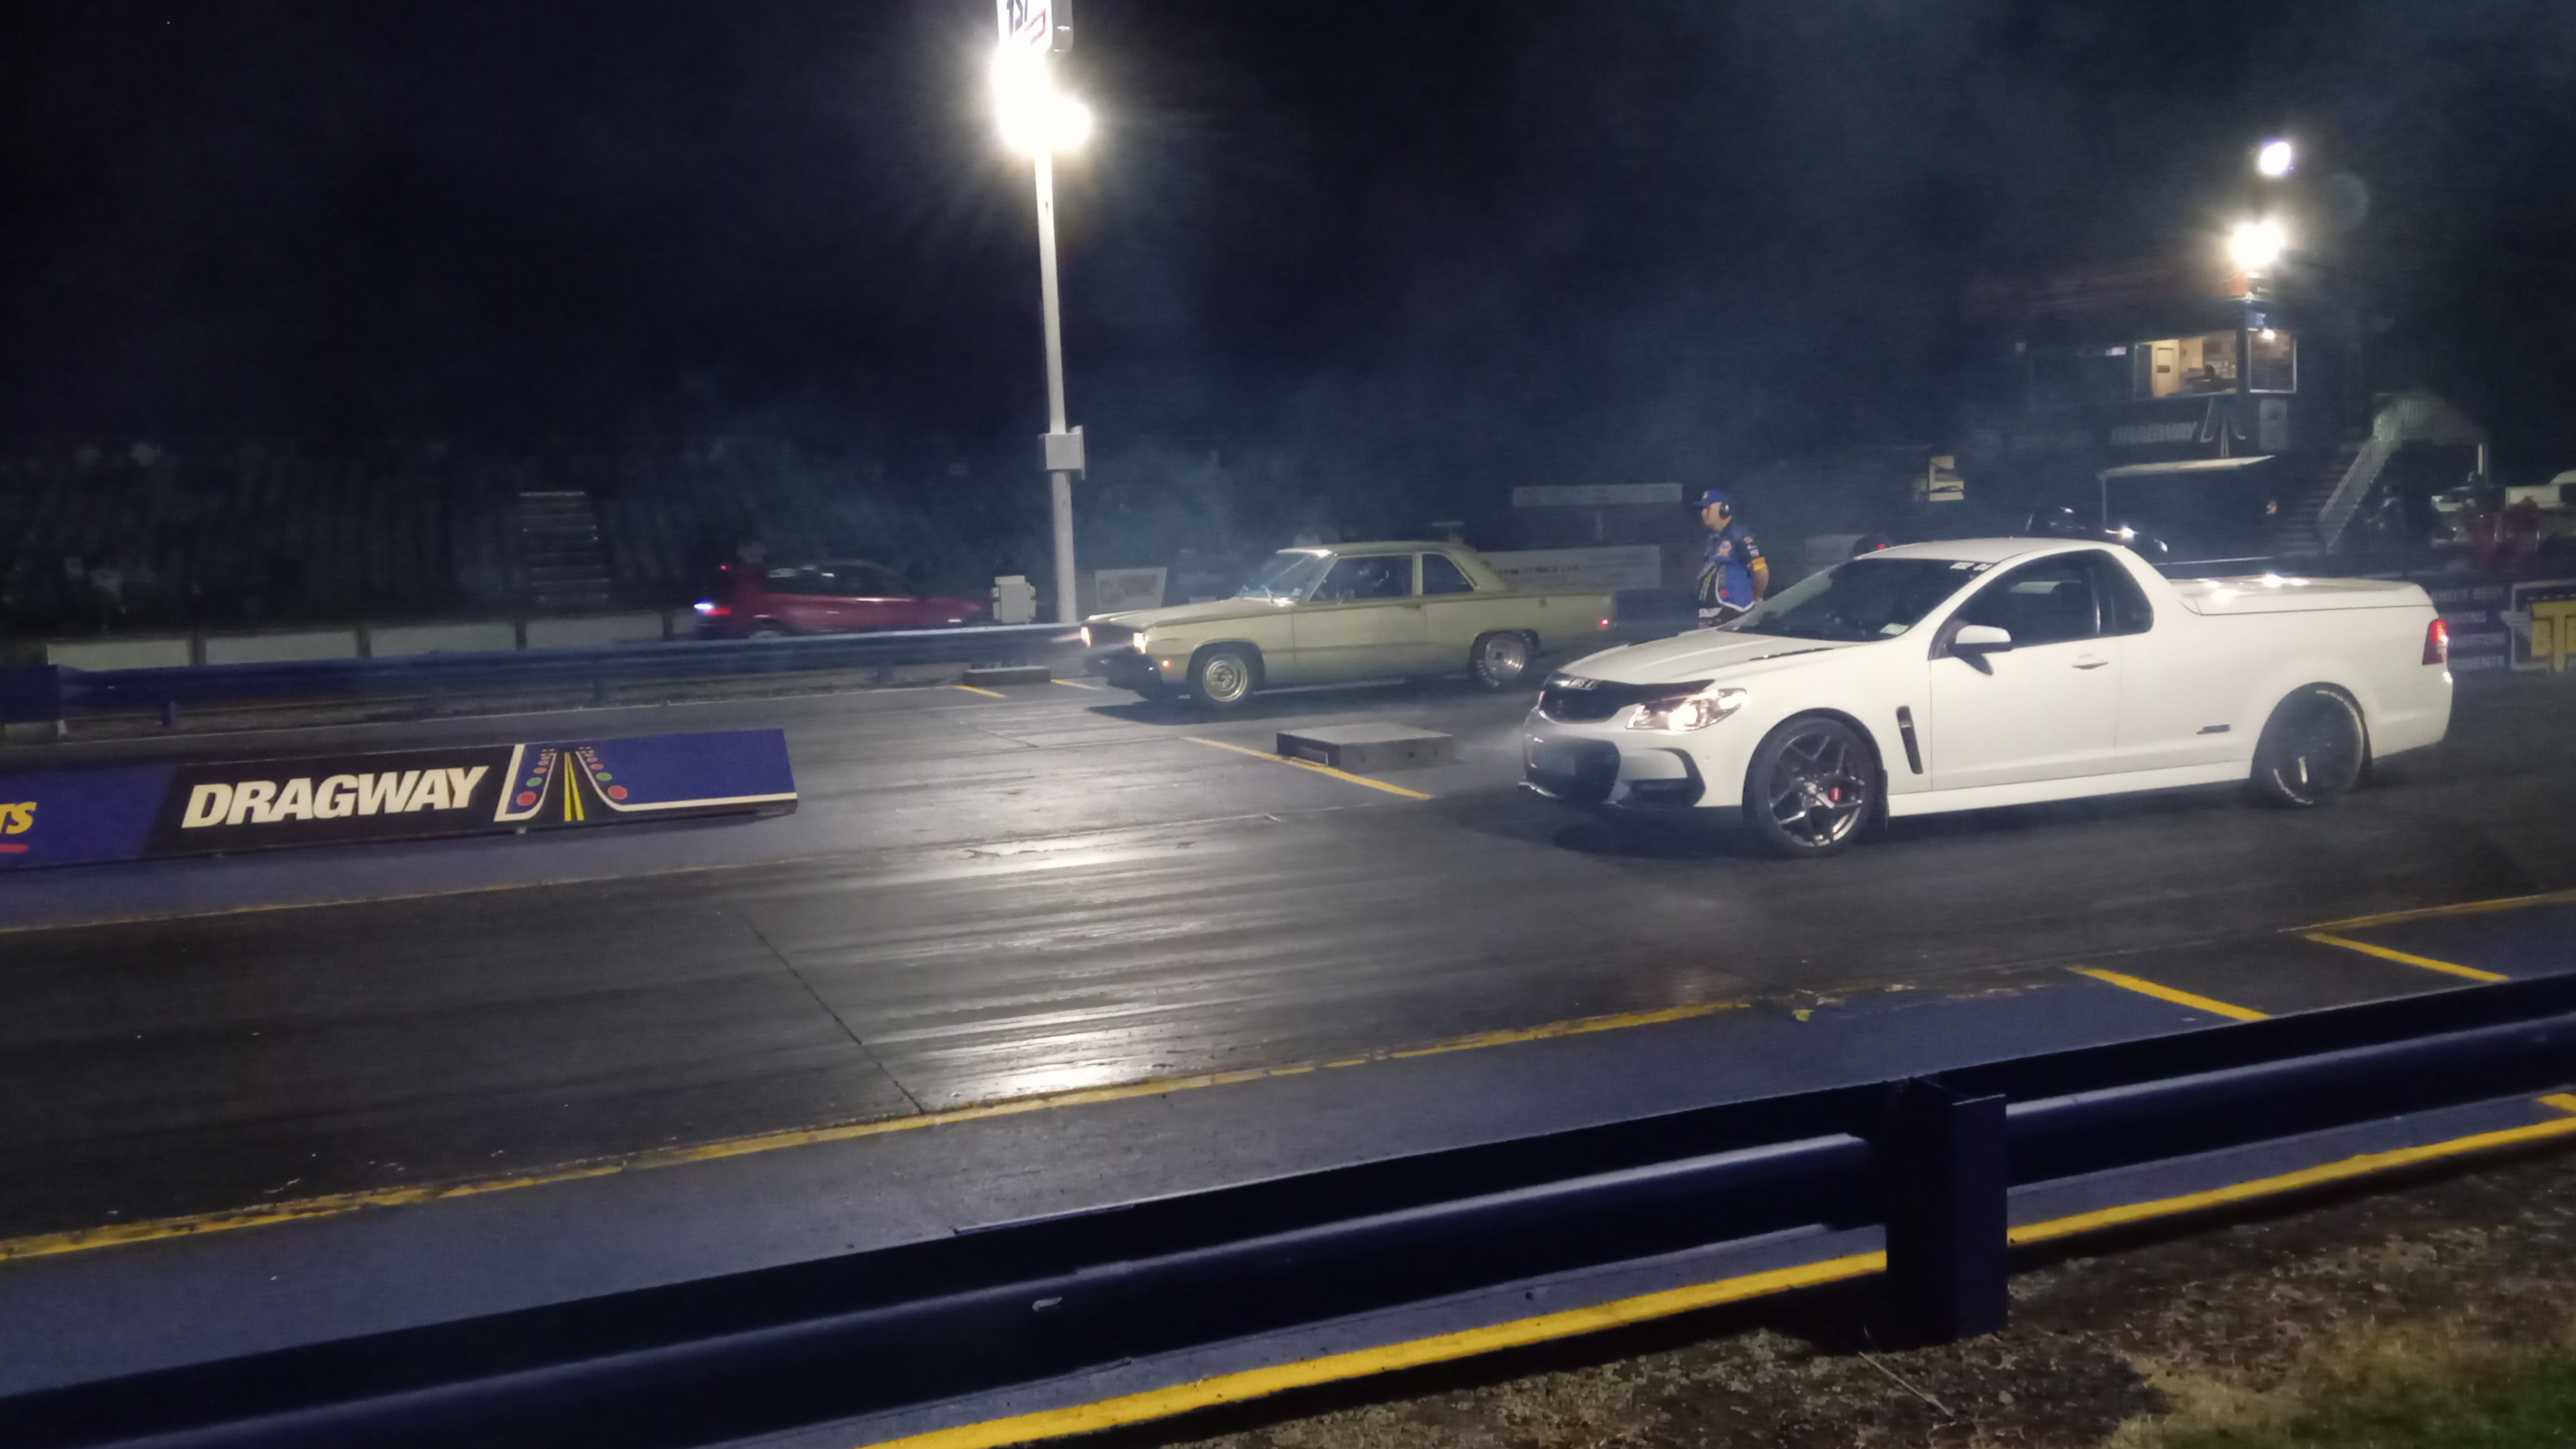
New springs made it more consistent,although slightly slower. Different wheels and muffler off when it did the 11.35 previously 11.5@118 every pass I have turned the 2 step rev limit down slightly as it was having trouble holding on the brake which I can probably fiddle with to improve I'd like to get it down to 11.0 so it's more competitive at the night drags https://m.youtube.com/watch?v=kdfGgT2pKHw&pp=ygUMVW5kZXJjYXJ2aWV3
7 points
-
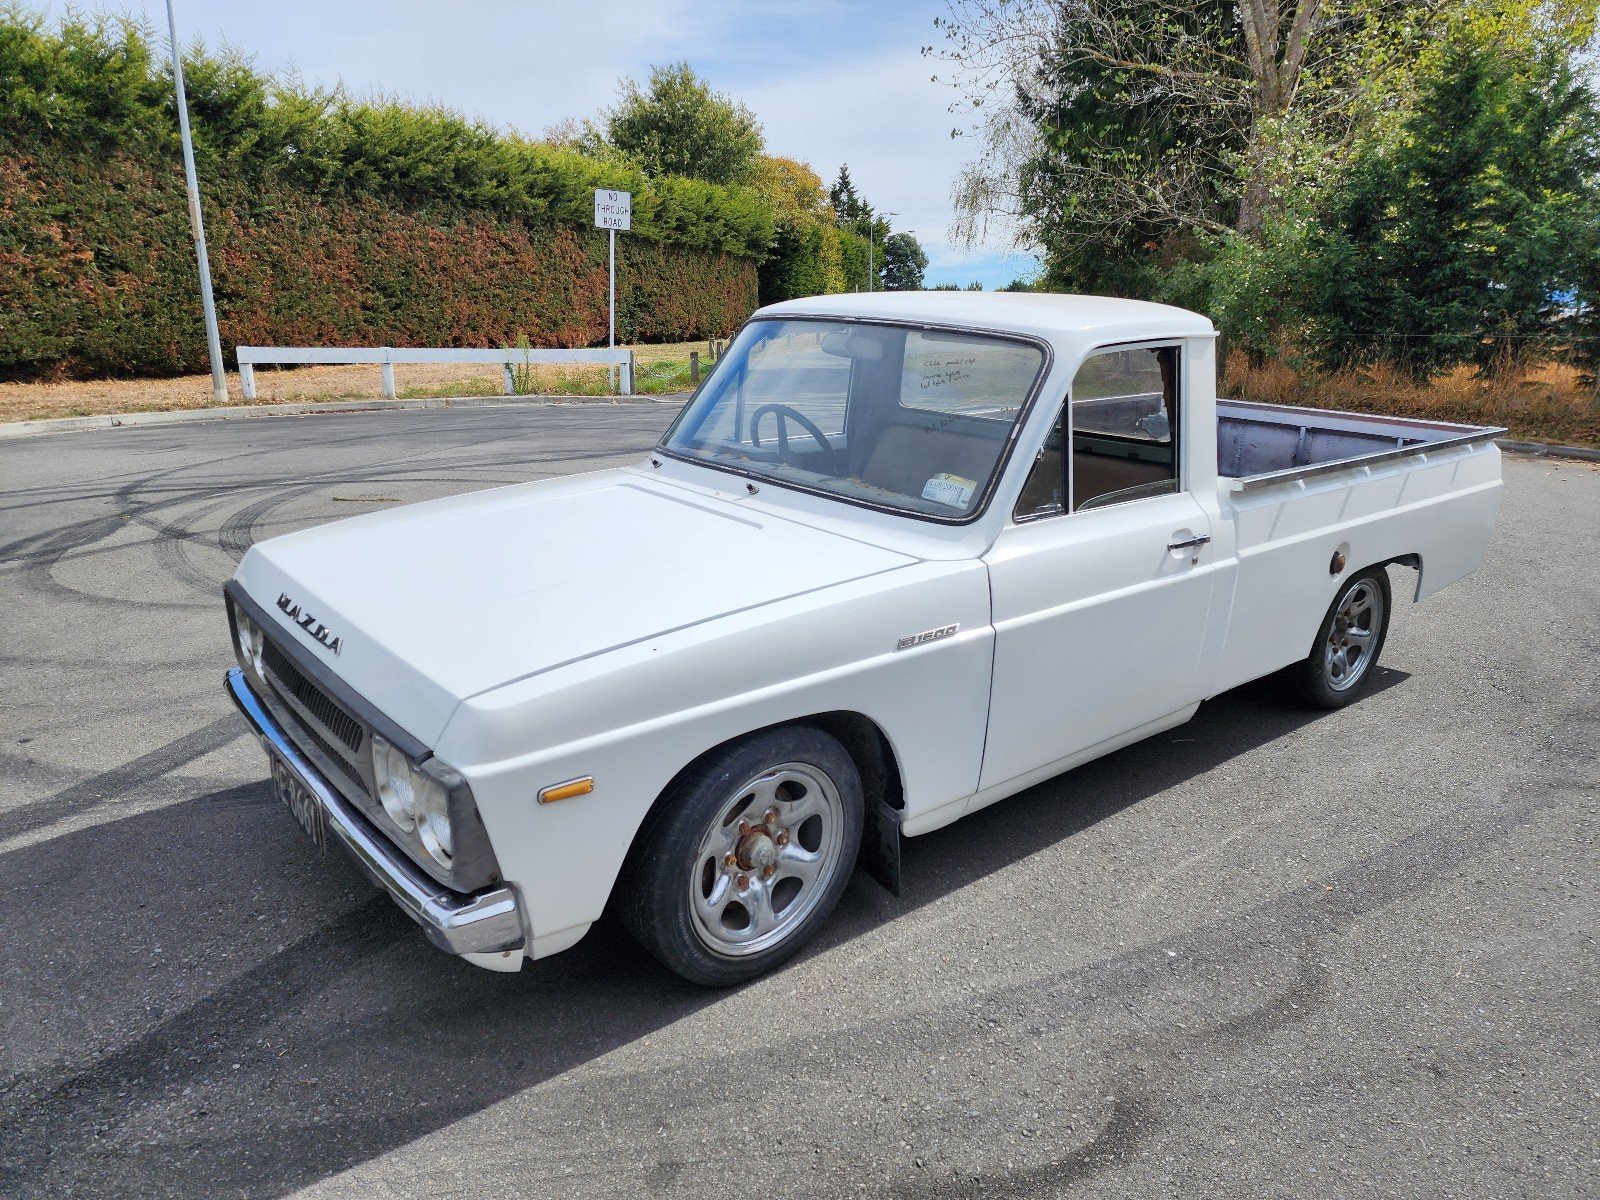
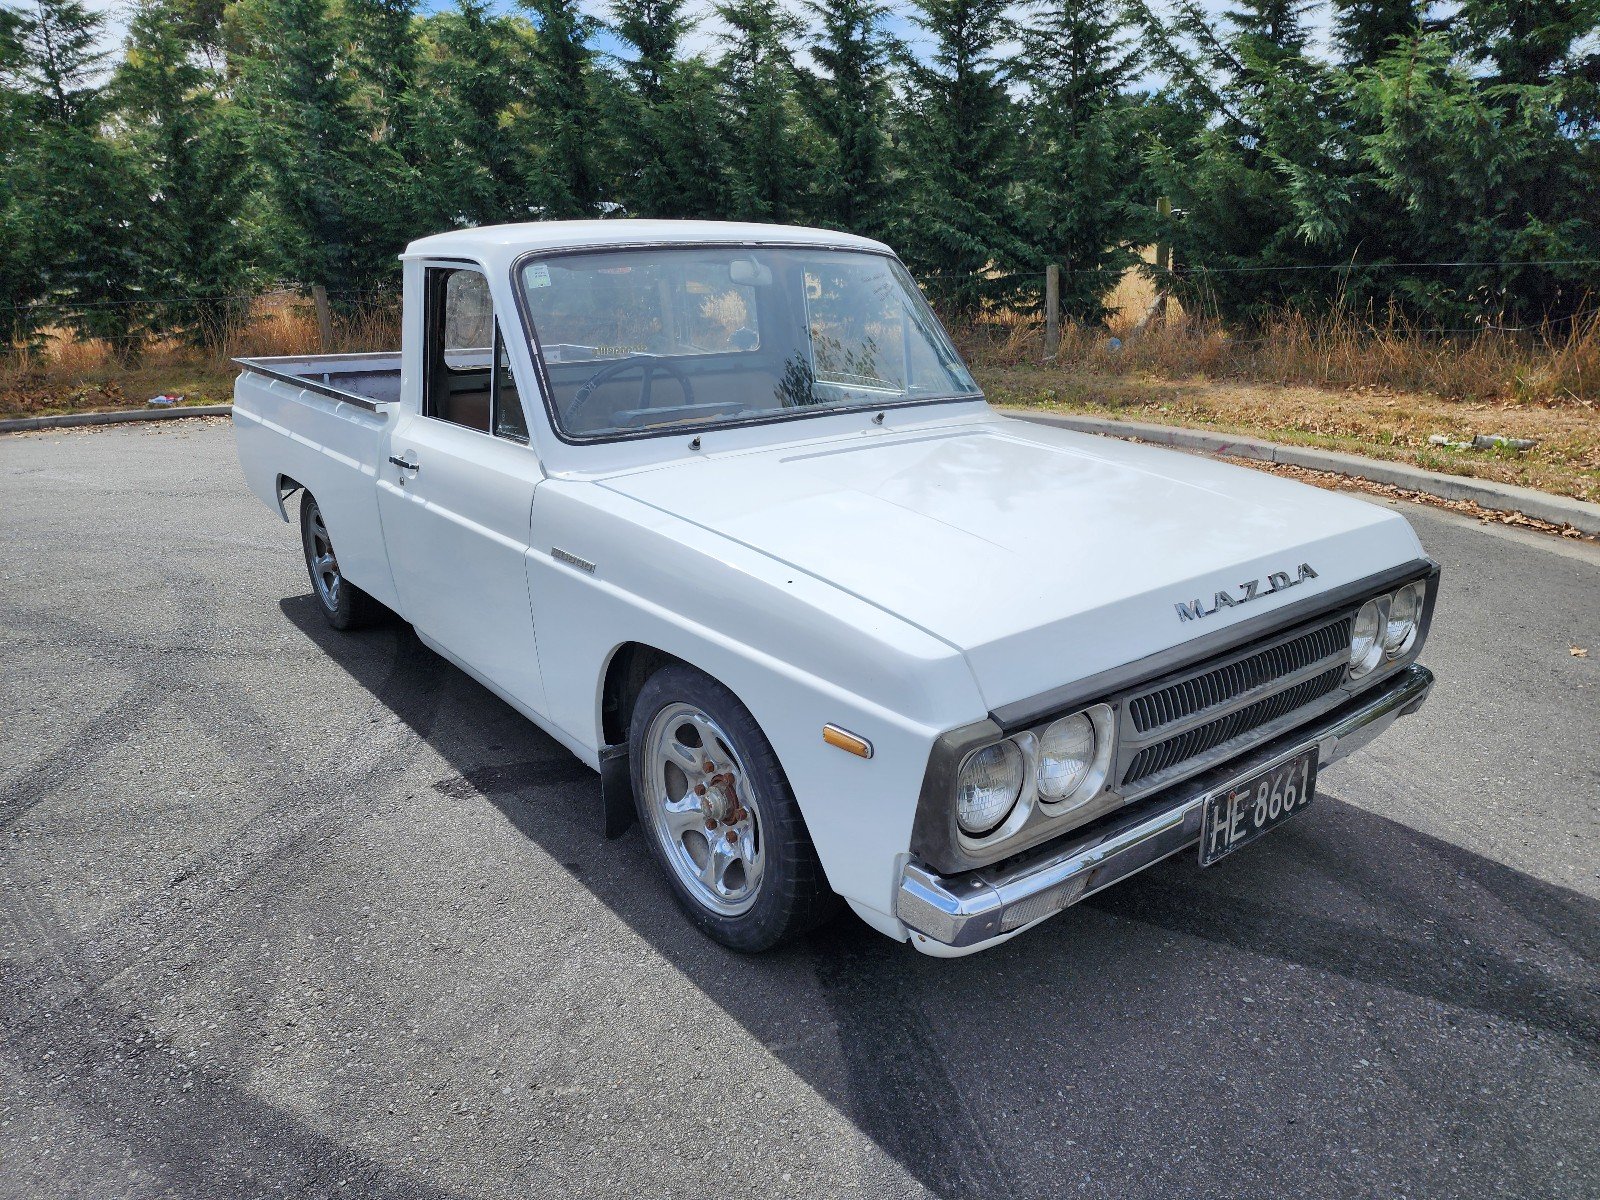
I wasn't expecting to buy another bike this week, but you know how it goes. An old man came into work and asked "How's your mates gyro going" referring to @Raizer sick rig, so obviously I'd mentioned it to him in the past. He then says he's going to sell his, so I had to go look at it. I then proceeded to fall in love. It's so hilarious. The dude I got it off was 76, and the previous owner was also an old man that got it for his import wife to use, but she never did. So it has quite a few old man spec "improvements" which include LED strip lighting riveted to the body with a crap ton of rivets. Paint "touch ups" which means badly applied rattle can paint with lots of over spray. Lots of random holes drilled in the body, every fastener they have applied is a different drive, and an oil line blocked off with a cupboard shelf support pin and copper wire. So she needs a bit of love and attention, but I was surprised to see it had aftermarket rear rims/tyres and an expansion chamber, so she might be making a few extra microwatts. Anyways, the new bike/trike is a 2001 Honda Gyro Canopy Wagon: Note method of light attachment, and modified floor mat, The lean over/hand brake lever has snapped off, so I need a new one of them. I'll also have to try clean up the windscreen, it's a bit messy. Phat tyres, rice pipe, and old man reflective decorations. The OEM lock is gone, has old man spec latch, will sort something better, Douglas racing rims, and sweet dice valve caps. 100% I'm going to redo the white lettering, Powerplant. Needs an air filter and a few mounts made for fuel pump and coil, plus a few hoses need replacing. The pipe is quite neat, I fucken love these rims/tyres TBH, It's totally getting vinyl stuck on the headlights to make JDM angry slantey eyes, The LED lights are coming off because the are horribly fitted and stick out like dogs bollocks, but I will probably refit them underneath and a more discreet manner. They have like a trillion settings too, So yeh, lots to do, but pretty excited to finally have a gyro. Regards, VG.6 points
-
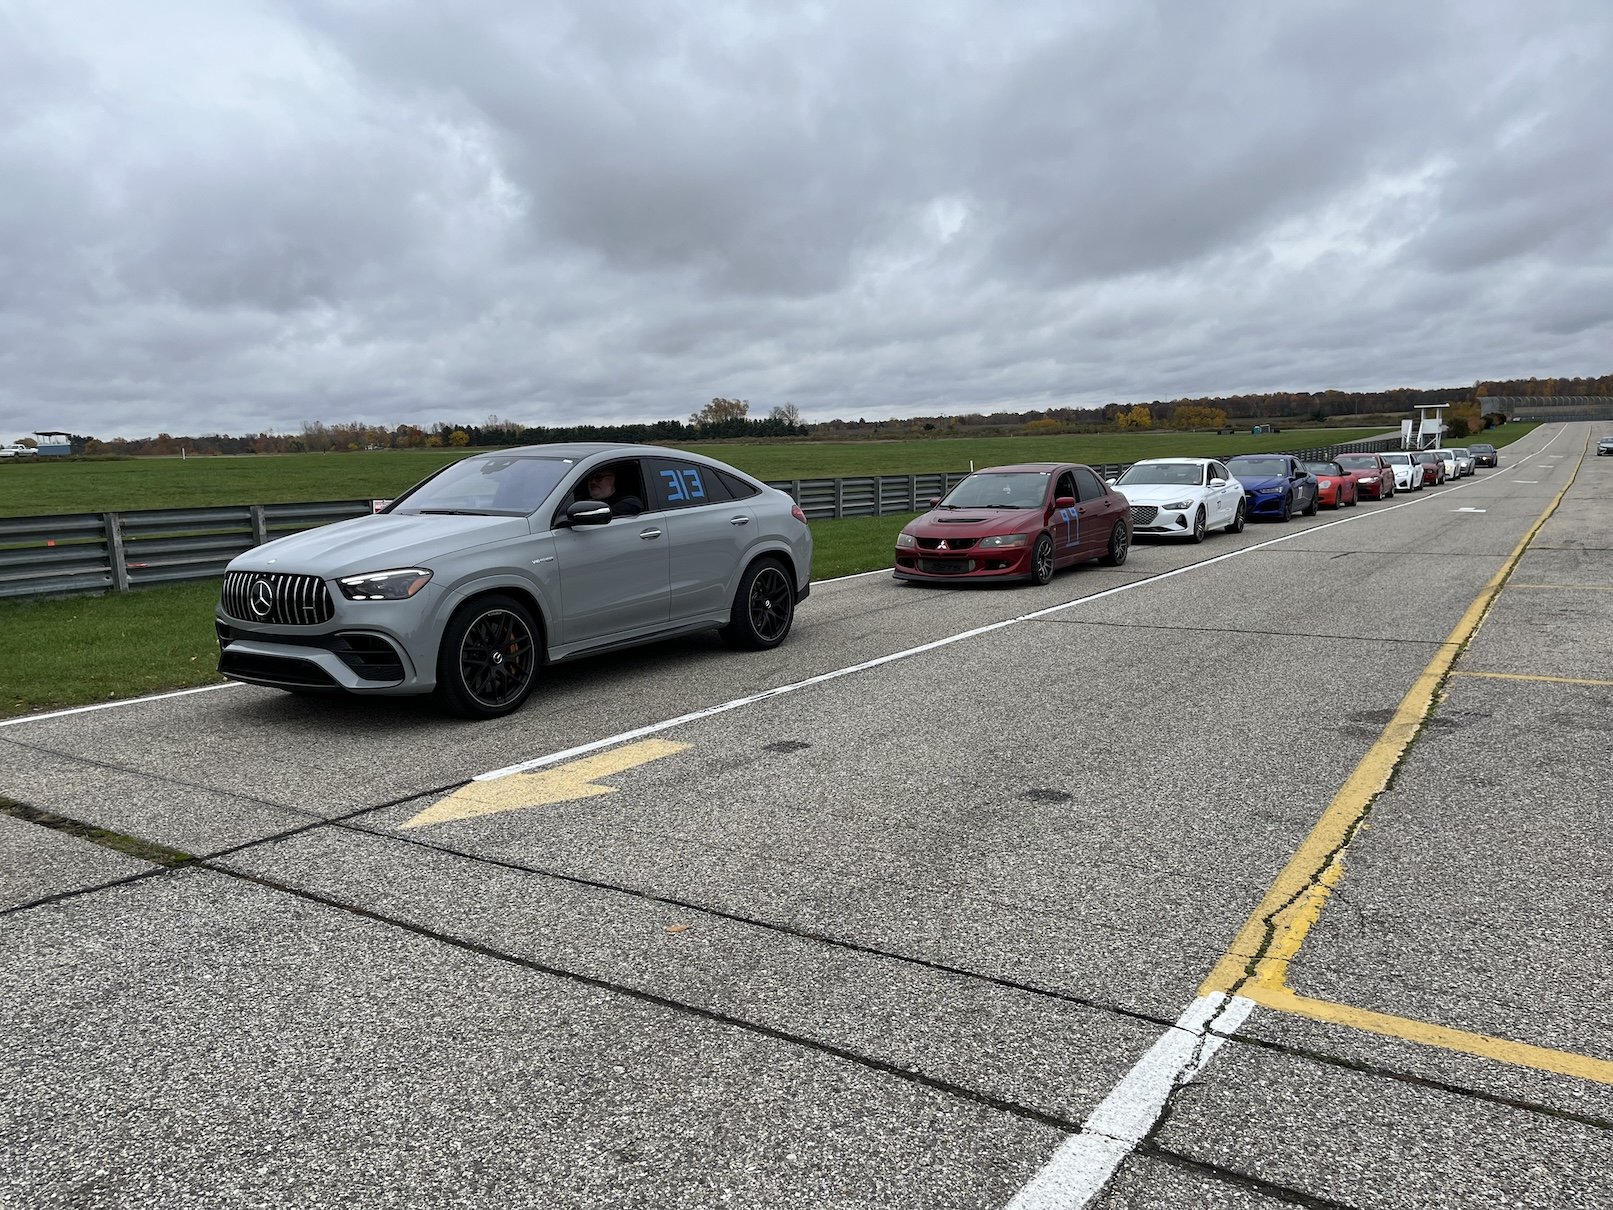
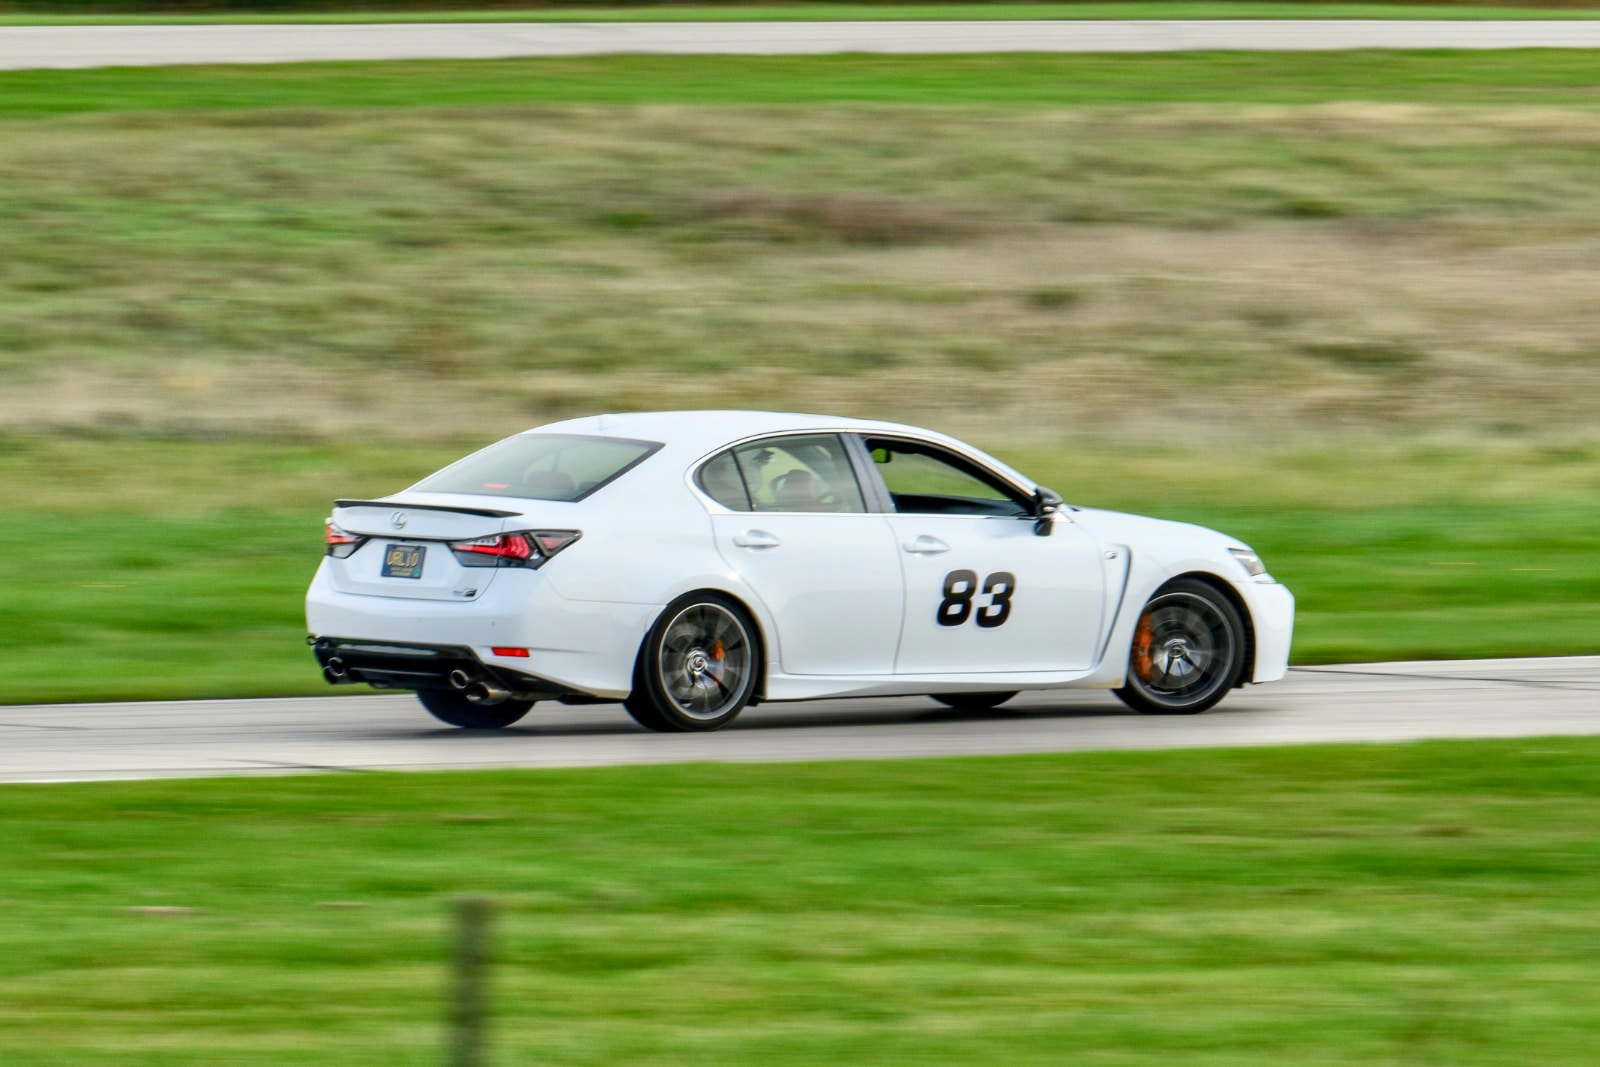
some of the quick cars there was a Lexus GS-F that sounded amazing, the CT5 Blackwing (also on Michelin PS4S's) and some large overwight mild hybrid Merc/AMG thing that somehow was the second fastest vehicle all weekend
5 points
-
Gah I don't want to diagnose something I just want to fit new parts and get on with my life.4 points
-
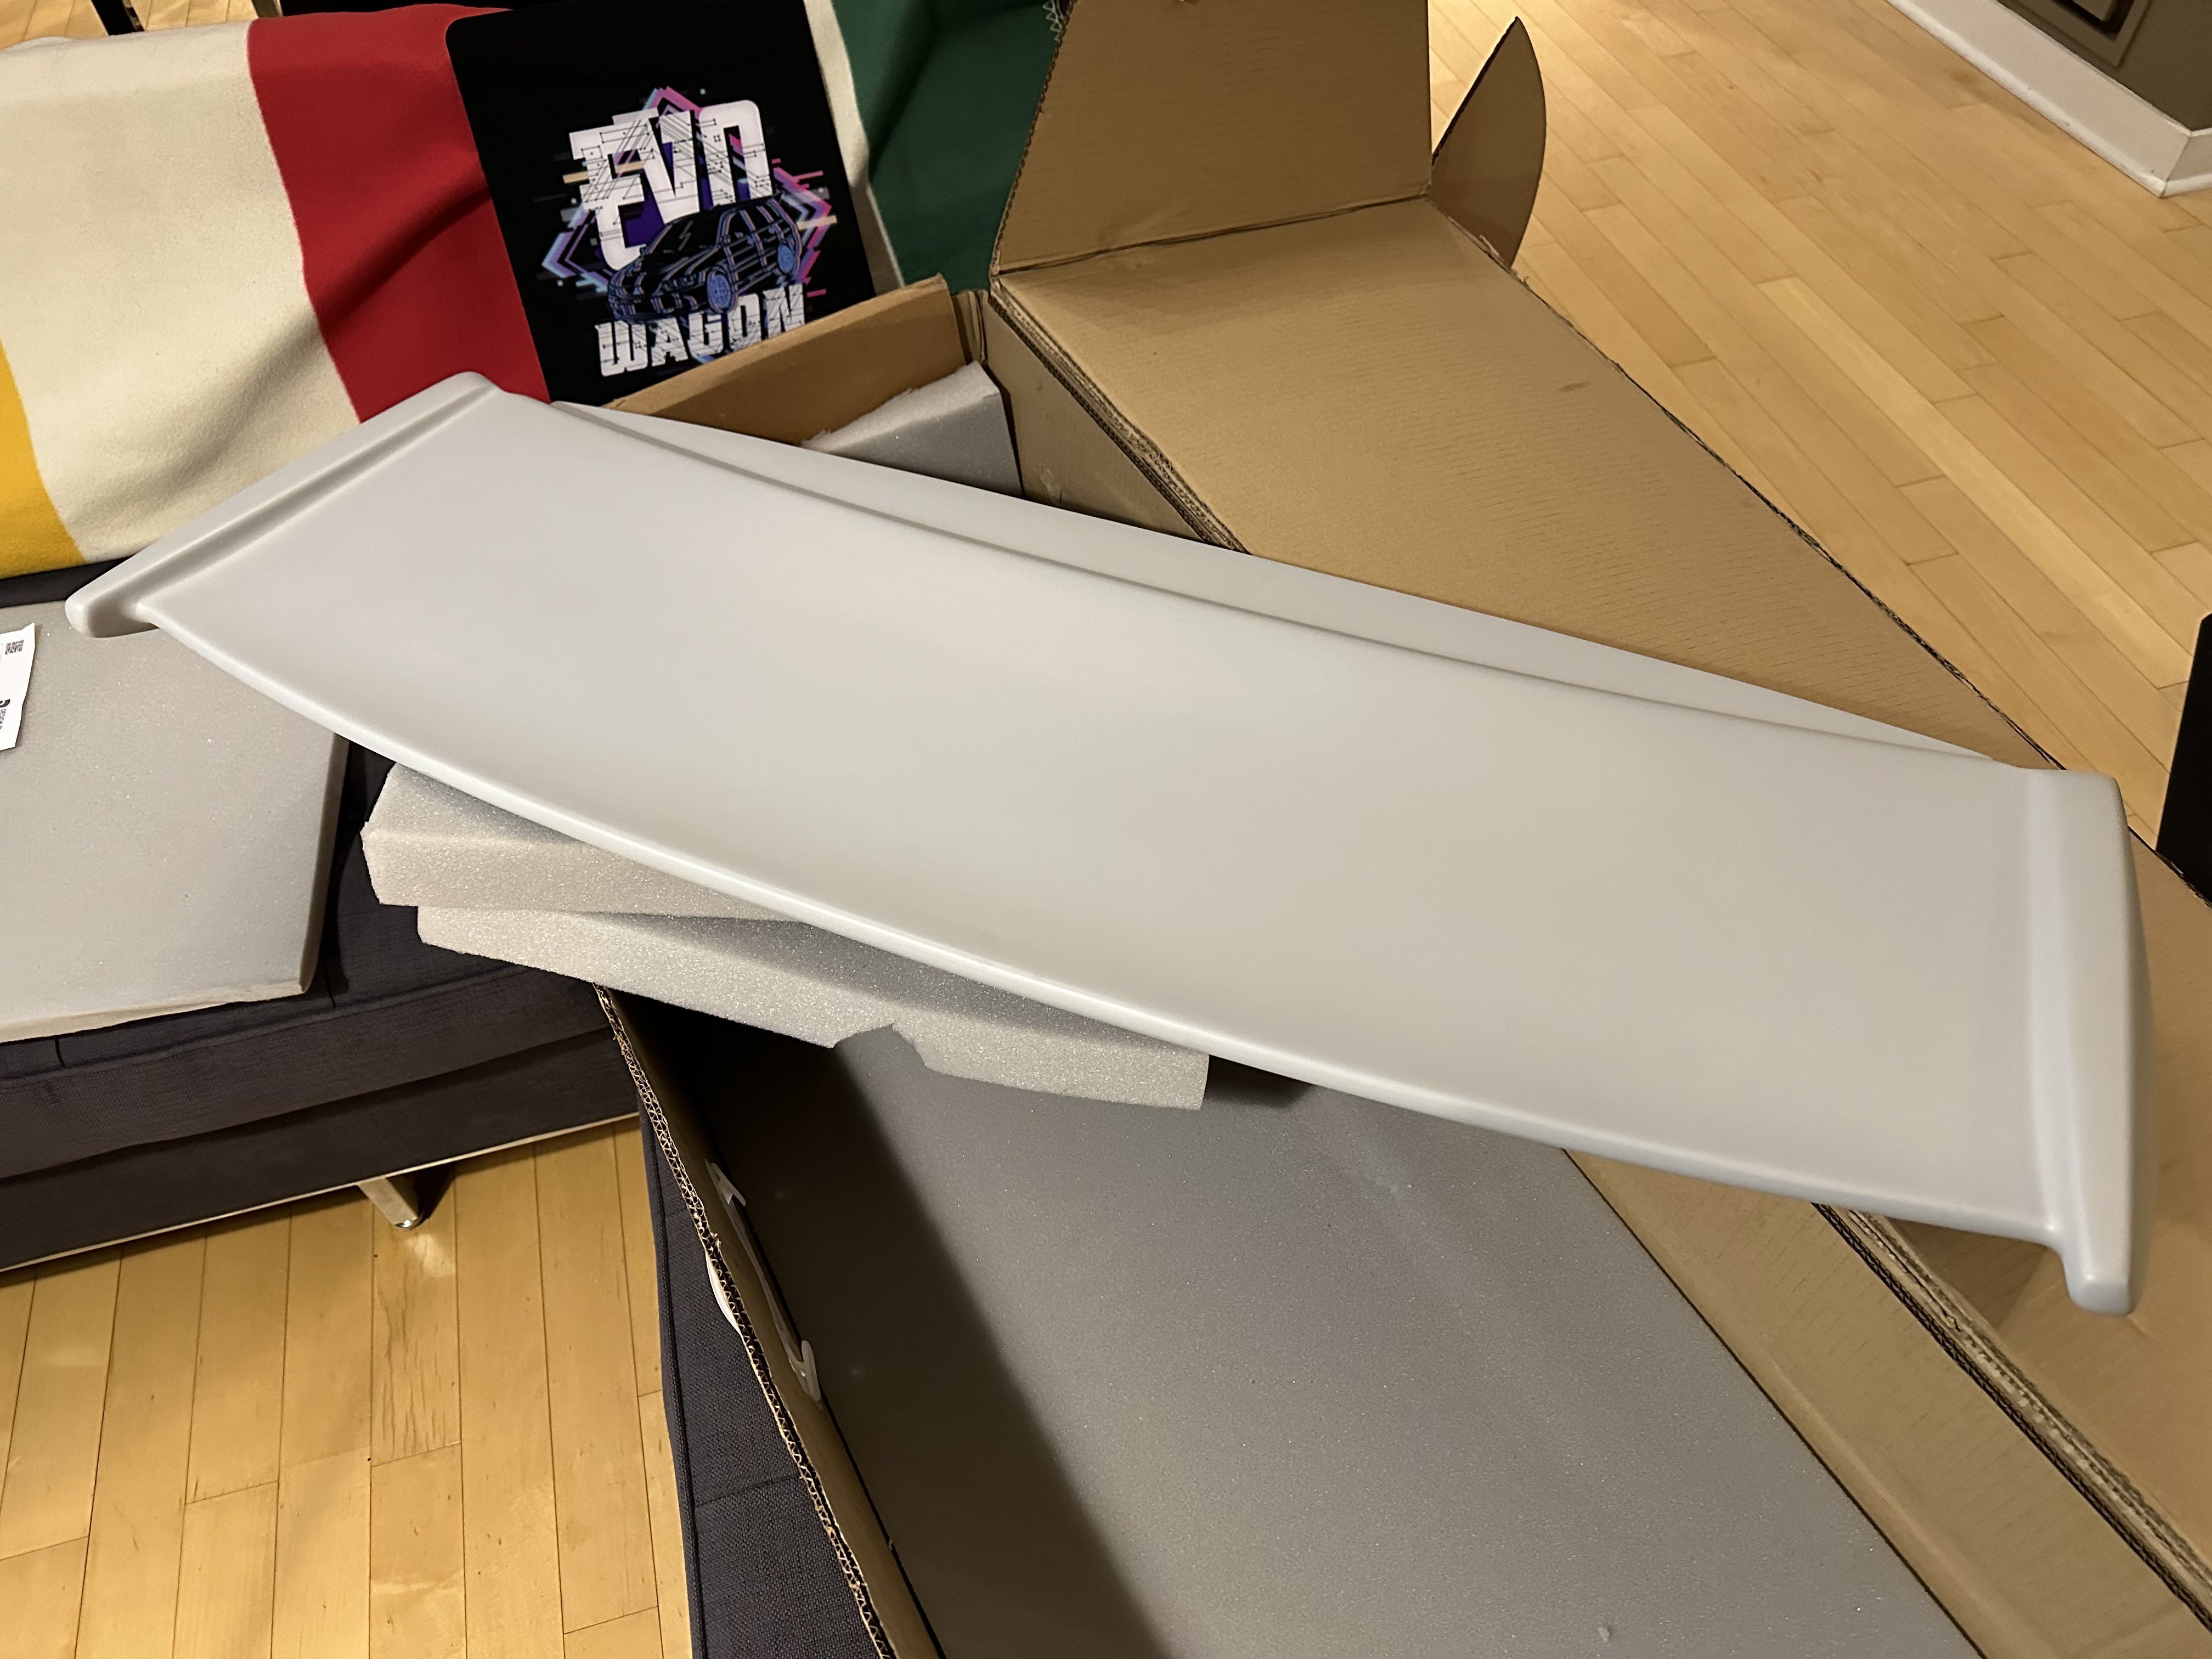
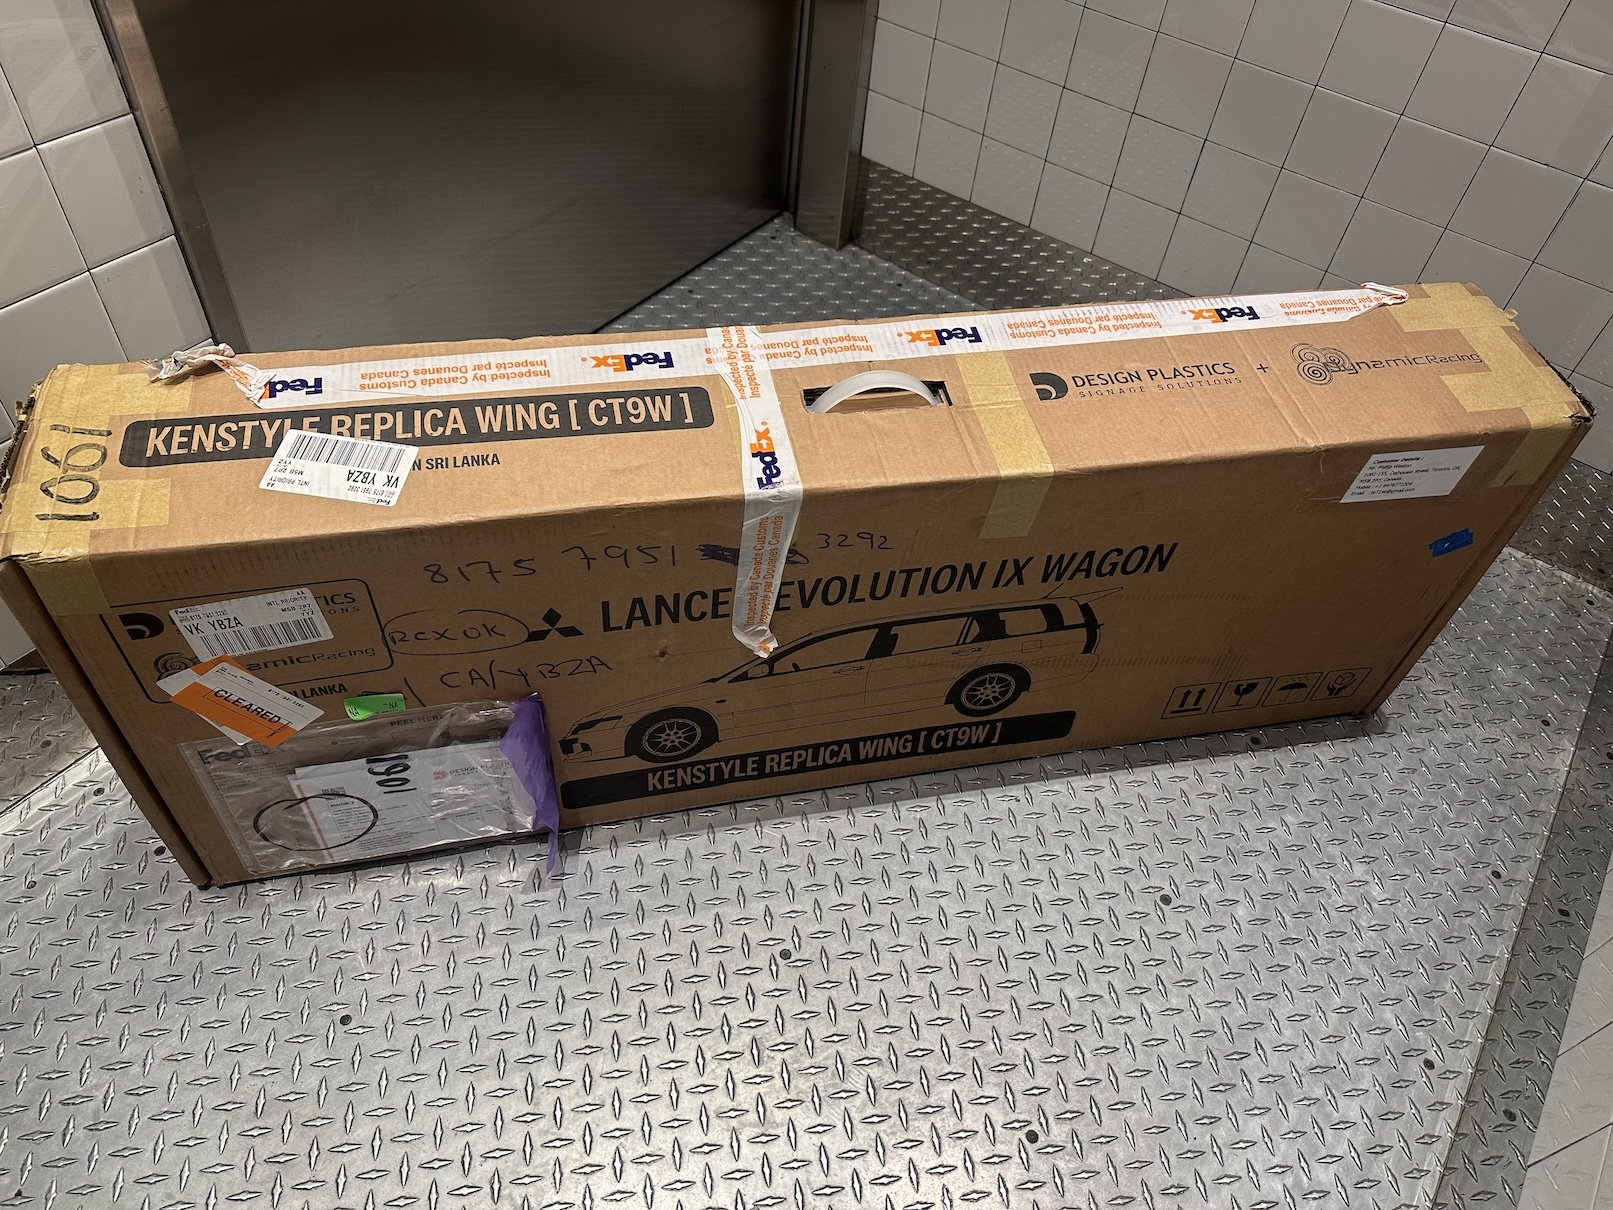
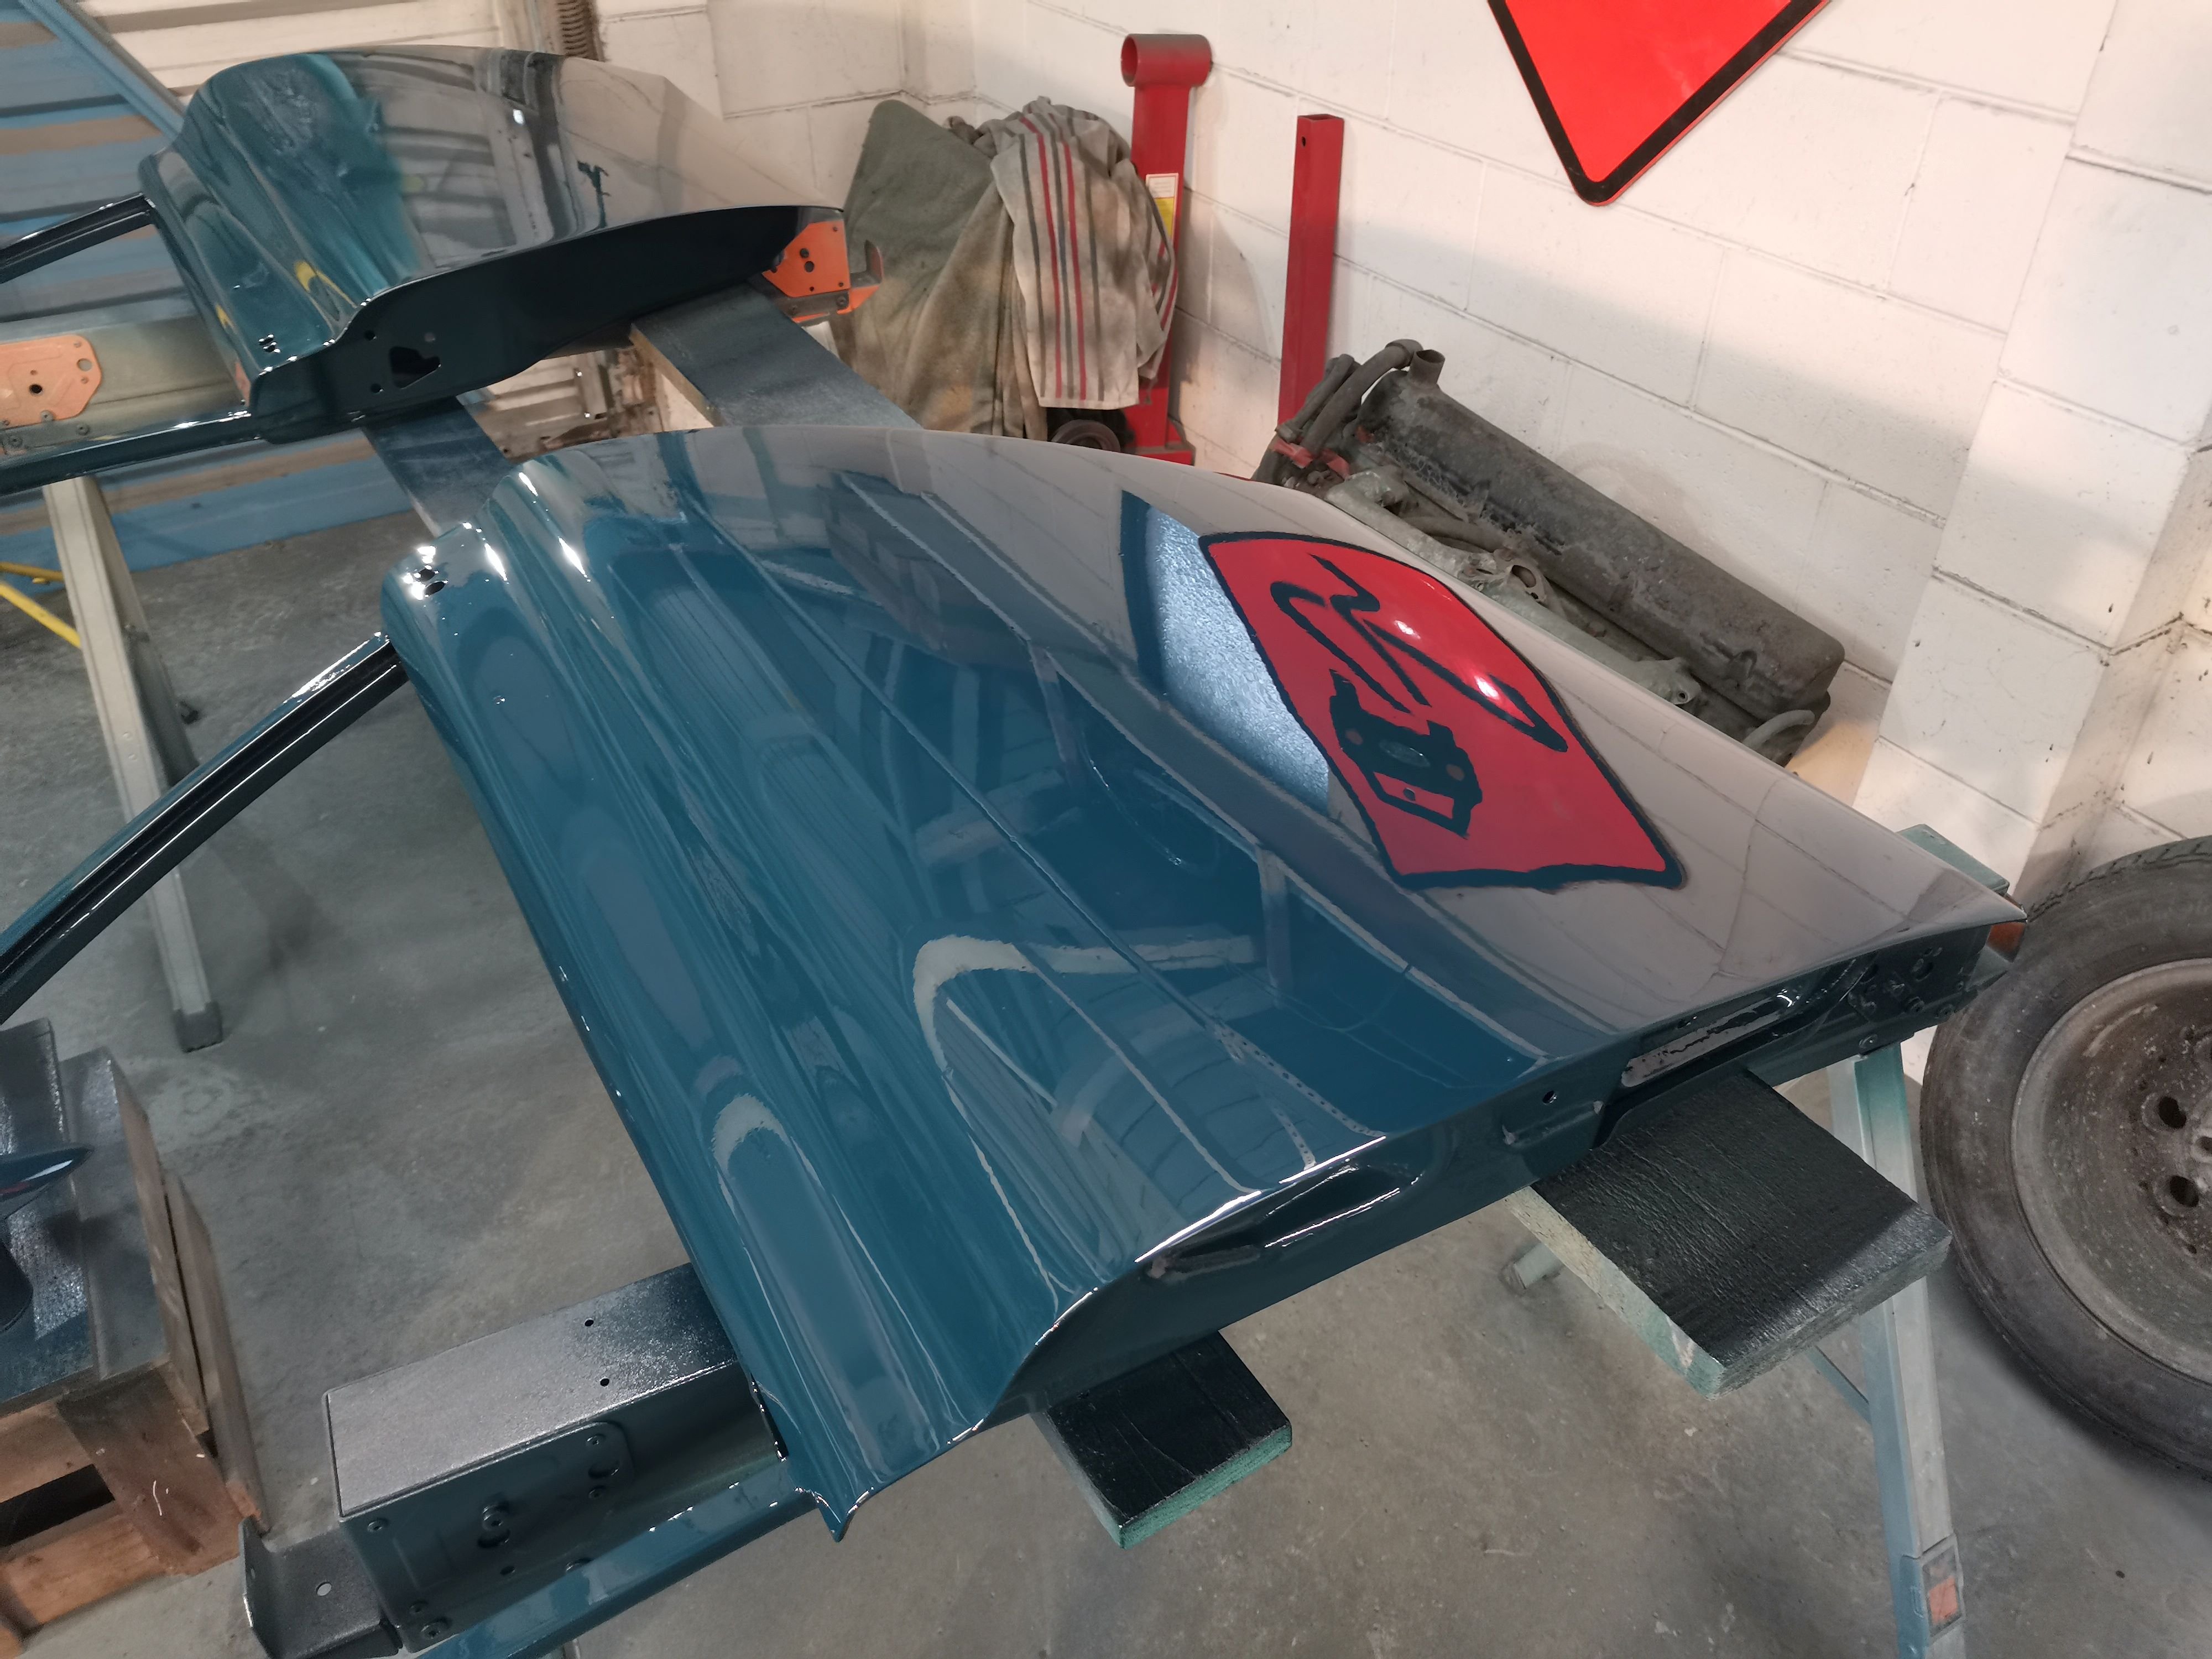
Having said that, finding a Kenstyle certainly isn't any easier and when they do pop up for sale they are too big $$$. I paid more than I wanted to for my Kenstyle in NZ, but still significantly less than the going rate because it was missing the regular Lancer wing base to make it complete. So enter in the Kenstyle replica, made in an initial small run of five units by a fellow Evo wagon owner in Sri Lanka who happens to have his own plastics manufacturing company. The replica is different in the sense that it combines the regular Lancer wagon spoiler into the Kenstyle mould, therefore negating the need to source a regular Lancer wagon spoiler, but also does away with the gap that is present between the regular spoiler and the Kenstyle wing that traps moisture and general muckyness: So here it is unpacked in its primer glory and will go on when I have some time to get it painted.
4 points
-
After some poking and prodding I decided it was play in the inner end of the tie rod, not a lot, but some... I do feel like a bit of a scumbag for reusing the steering rack boot and outer tie rod end, but they passed my inspection, it did at least get a new lock tab.3 points
-
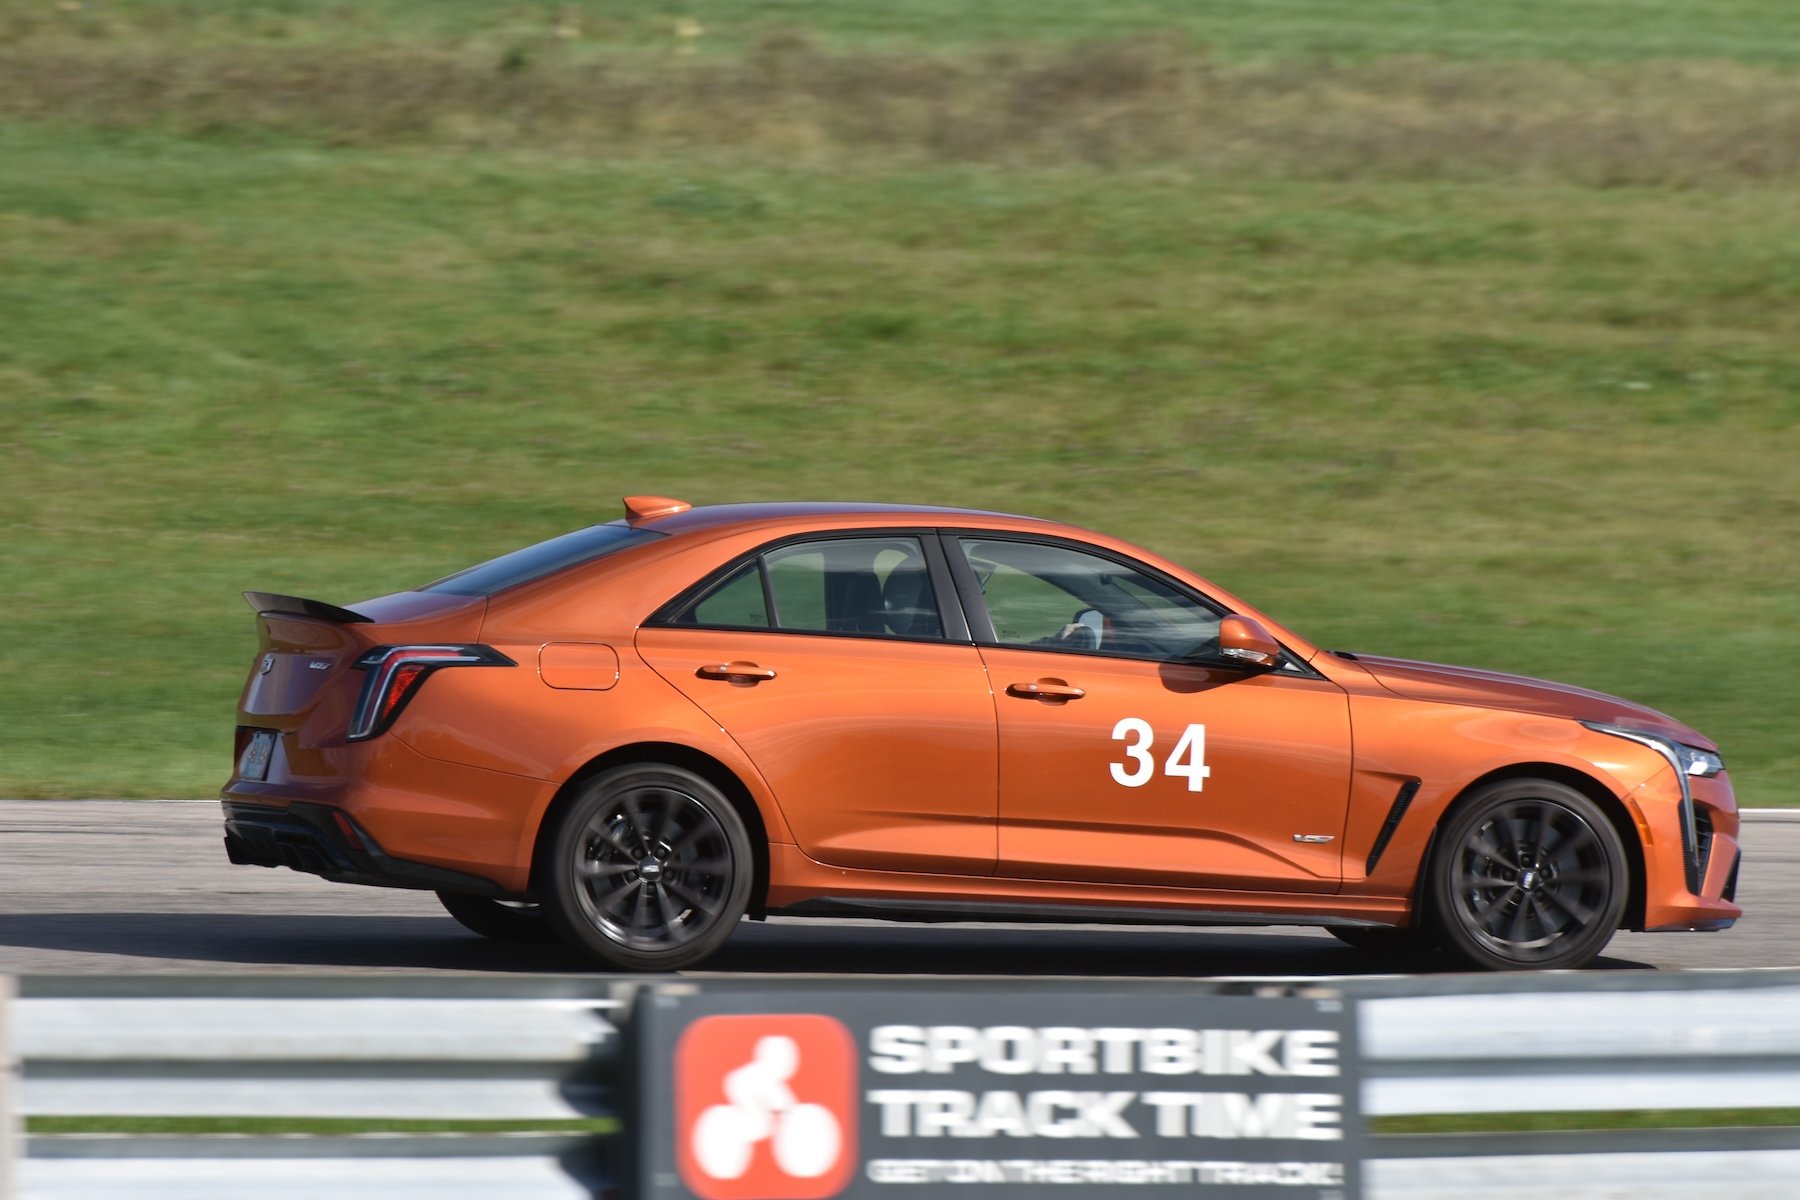
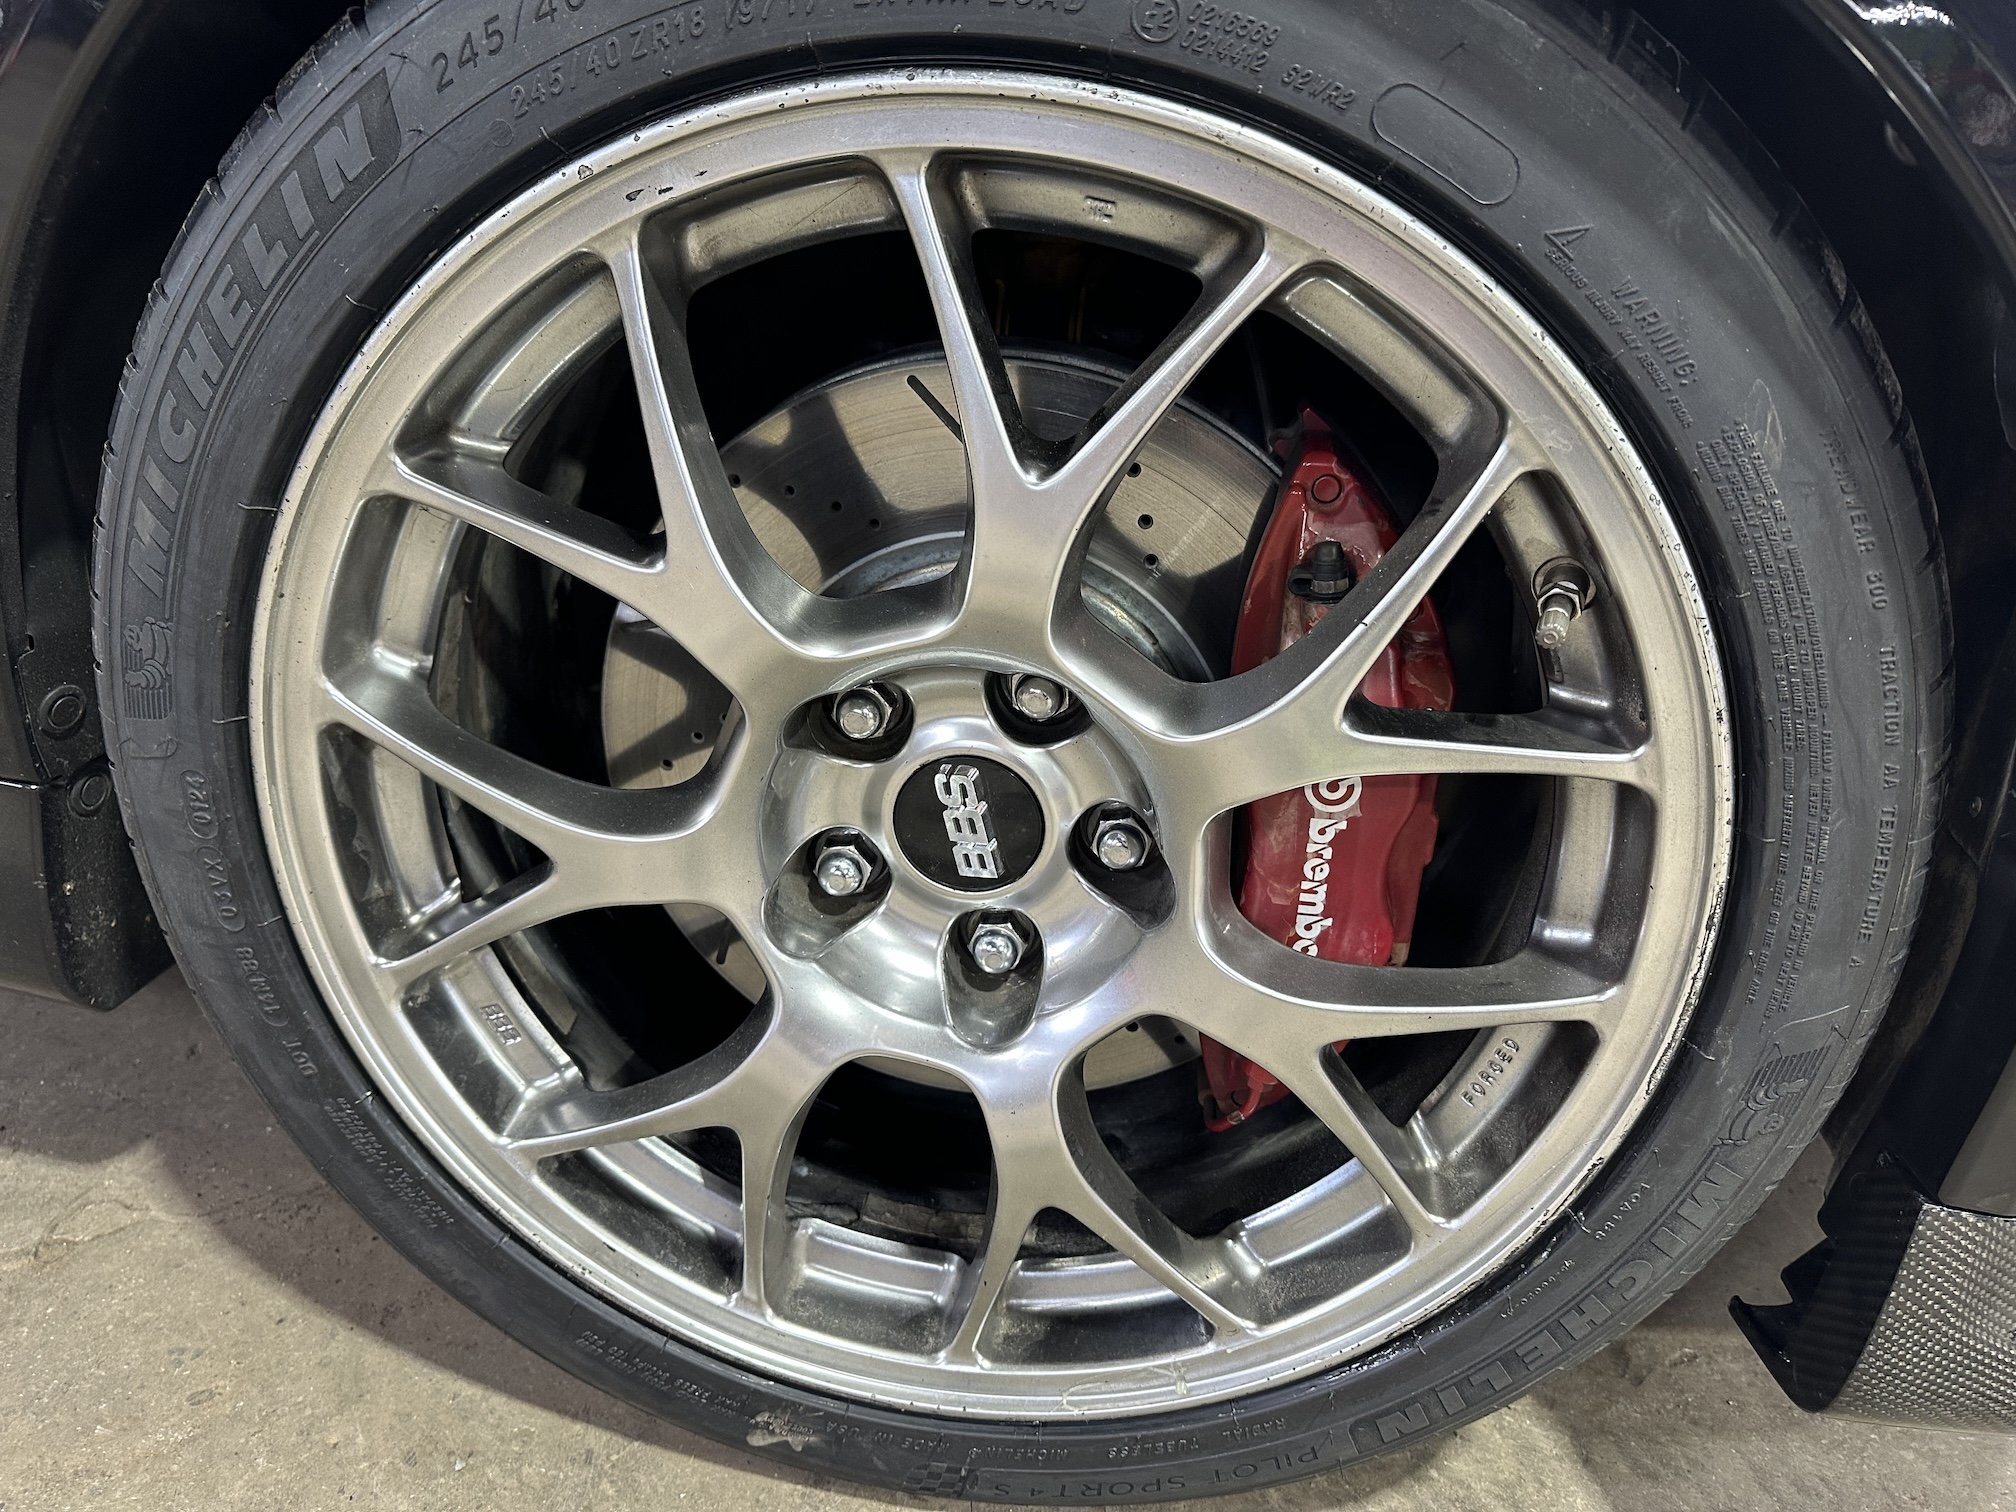
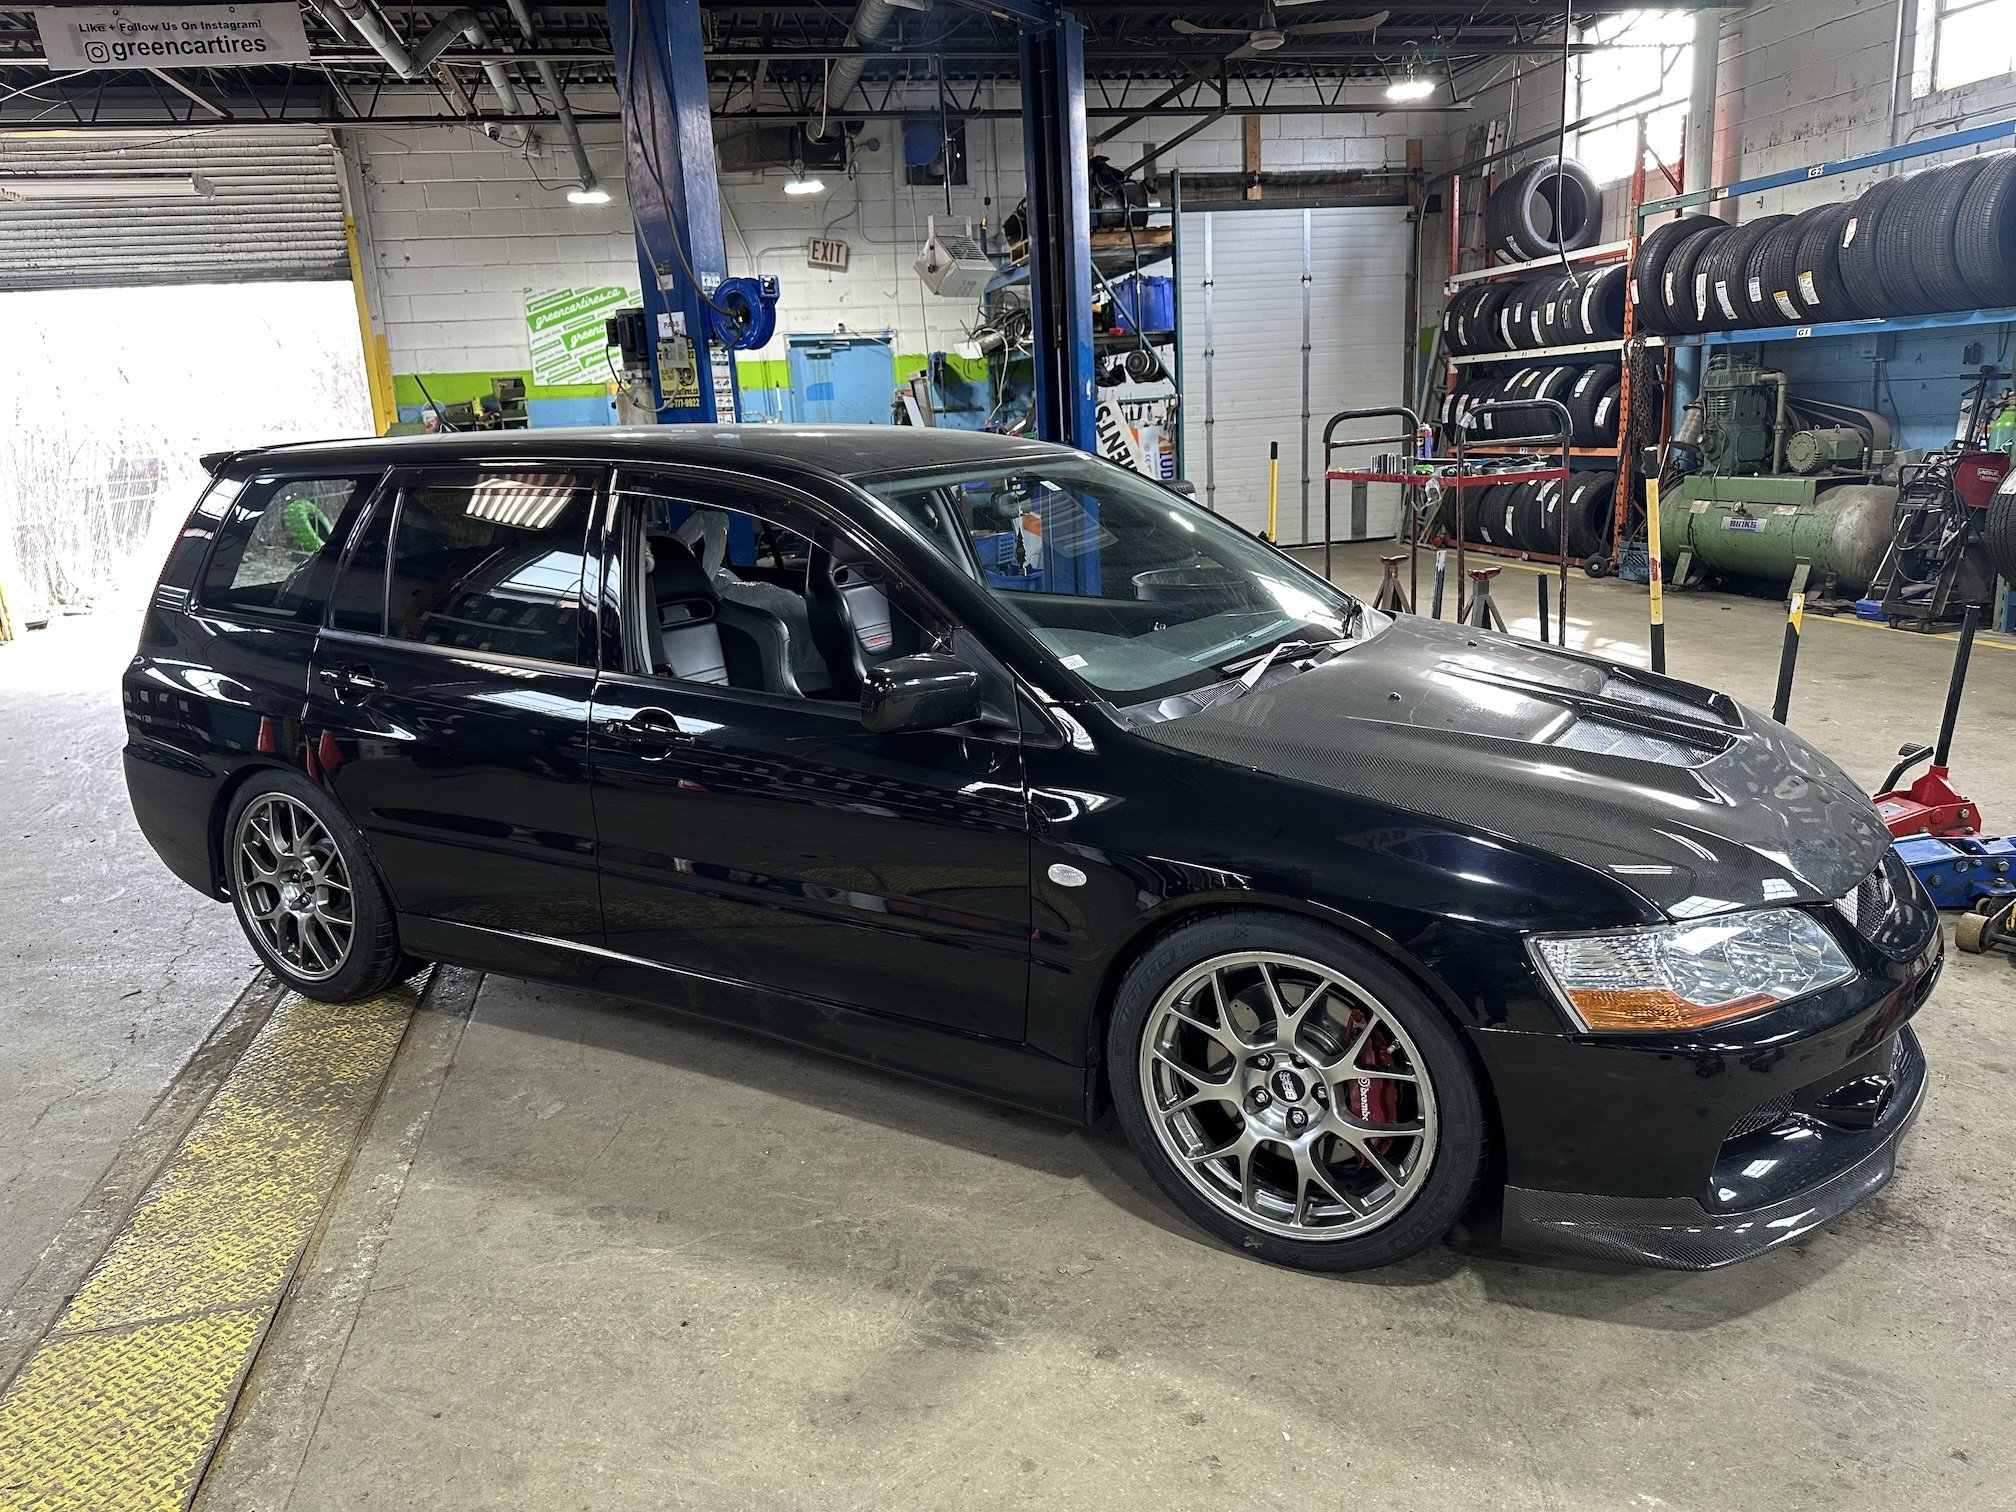
definitely more of a driver limitation than car limitation haha - I did have to drive the ~650km back to Toronto from western Michigan and didn't want to ruin the car haha. Being on all season tyres that started to feel super mushy once some heat got into them didn't help. I've since fixed that by getting a set of Michelin Pilot Sport 4S's earlier this week:
3 points
-
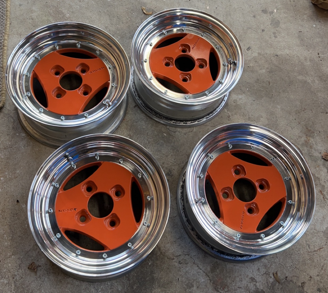
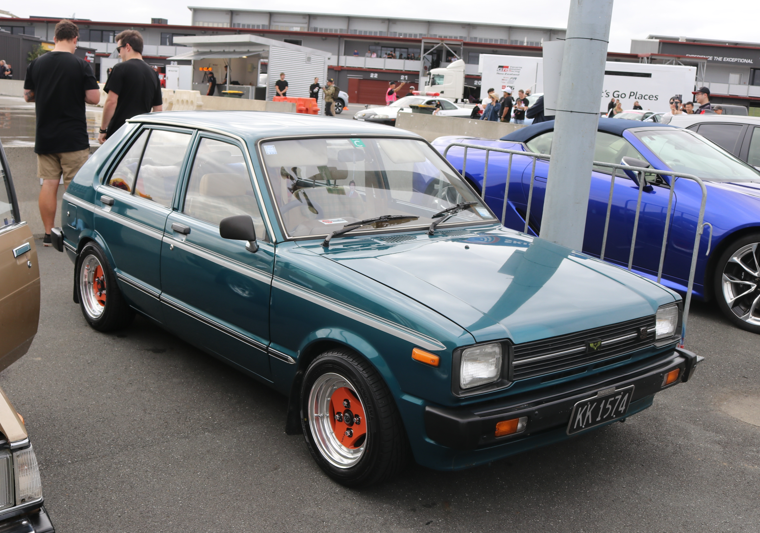
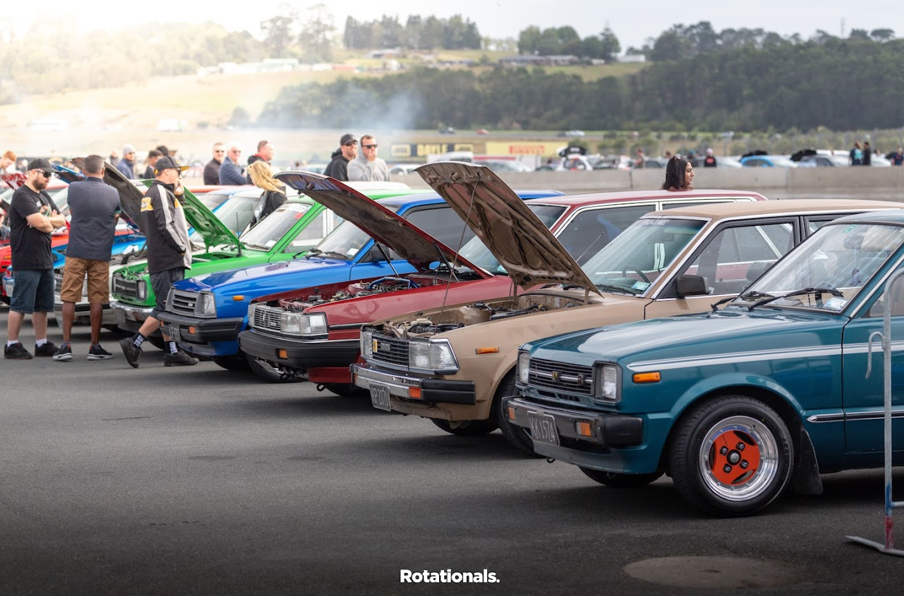
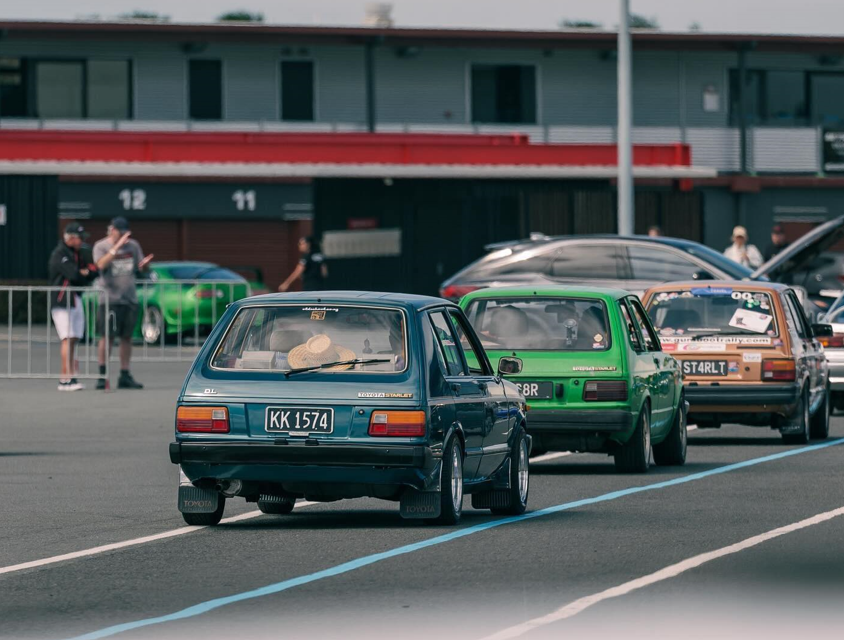
I have always loved Advan A3As and I managed to I pick up a set of 13x6s. I got the lips fixed, painted the centres and convinced the bro to polish them for me (not a member but cheers mate). Orange and blue is a sharp contrast, but it's grown on me Which brings us now back to first sentence of the previous post. I've just driven this from Wellington to Horopito to Toyota Fest at Hampton downs and back (1300 kms) with a couple of mates. There were a couple of small issues with the KP on the trip but those were quickly and easily rectified. It might be slow, but it got there ha } Have a squiz the oldschool.co.nz sticker I got over a decade ago and never used until now. That's all for now
3 points
-
how often does this happen. if i was a layman who don't know nothing about cars (pretty much true), what am i meant to do?2 points
-
On a recent trip to mexico, i got to experience this machine first hand. Hooooooo boy! Its quite jolly rapid! Not slow at all!2 points
-
big wang arrived all the way from Sri Lanka. Canada customs definitely had a big nosey at what it is. So what is this 'Kenstyle' you may ask? It is a Japanese manufacturer of a rear spoiler that was originally destined for the Lancer Cedia in the early '00s, before the Evo Wagon was released: Out of the other wings available, such as the Ralliart which is big $$$ and hard to find and the Varis which has now been discontinued and even more harder to find The Kenstyle is by far my favourite - though it does have a caveat (as does the Ralliart) in that it requires fitting a regular Lancer wagon spoiler because they attach to the regular model spoiler rather than the larger Evo wagon spoiler. I did end up finding a genuine Kenstyle in NZ but it did not include the base model Lancer spoiler (which I have since found thanks to @Bluebird_U). I still was faced with the more serious and expensive problem of getting a rather large wang from NZ to Canada. Unlike the Ralliart CF front lip I was able to get away with cutting right in the middle at its smallest and least noticeable point, I can not do the same to the spoilers.
2 points
-
The door with the plasma cutting was pretty wonky, so ended up finding a replacement. Managed to get all of the doors paneled and into paint. A bit of dust and a couple of runs, but I'm definitely getting better with the paint gun. Now working on sandblasting the door hinges and cleaning up the boot lid, before reassembly, wet-dry sanding and a final coat. Stoked to be making some good progress again.
2 points
-
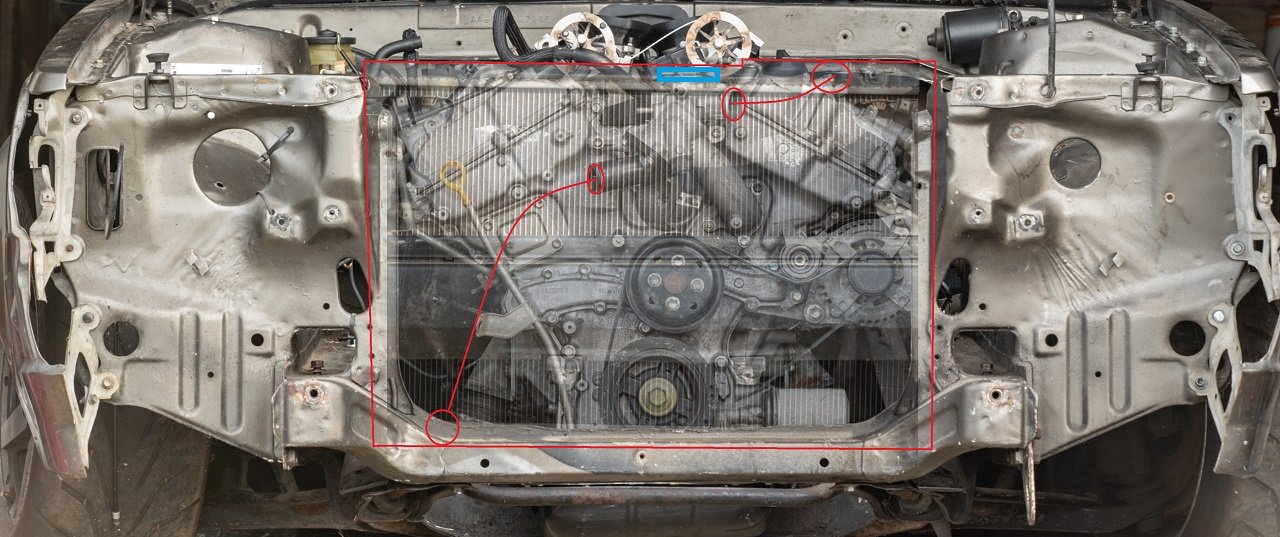
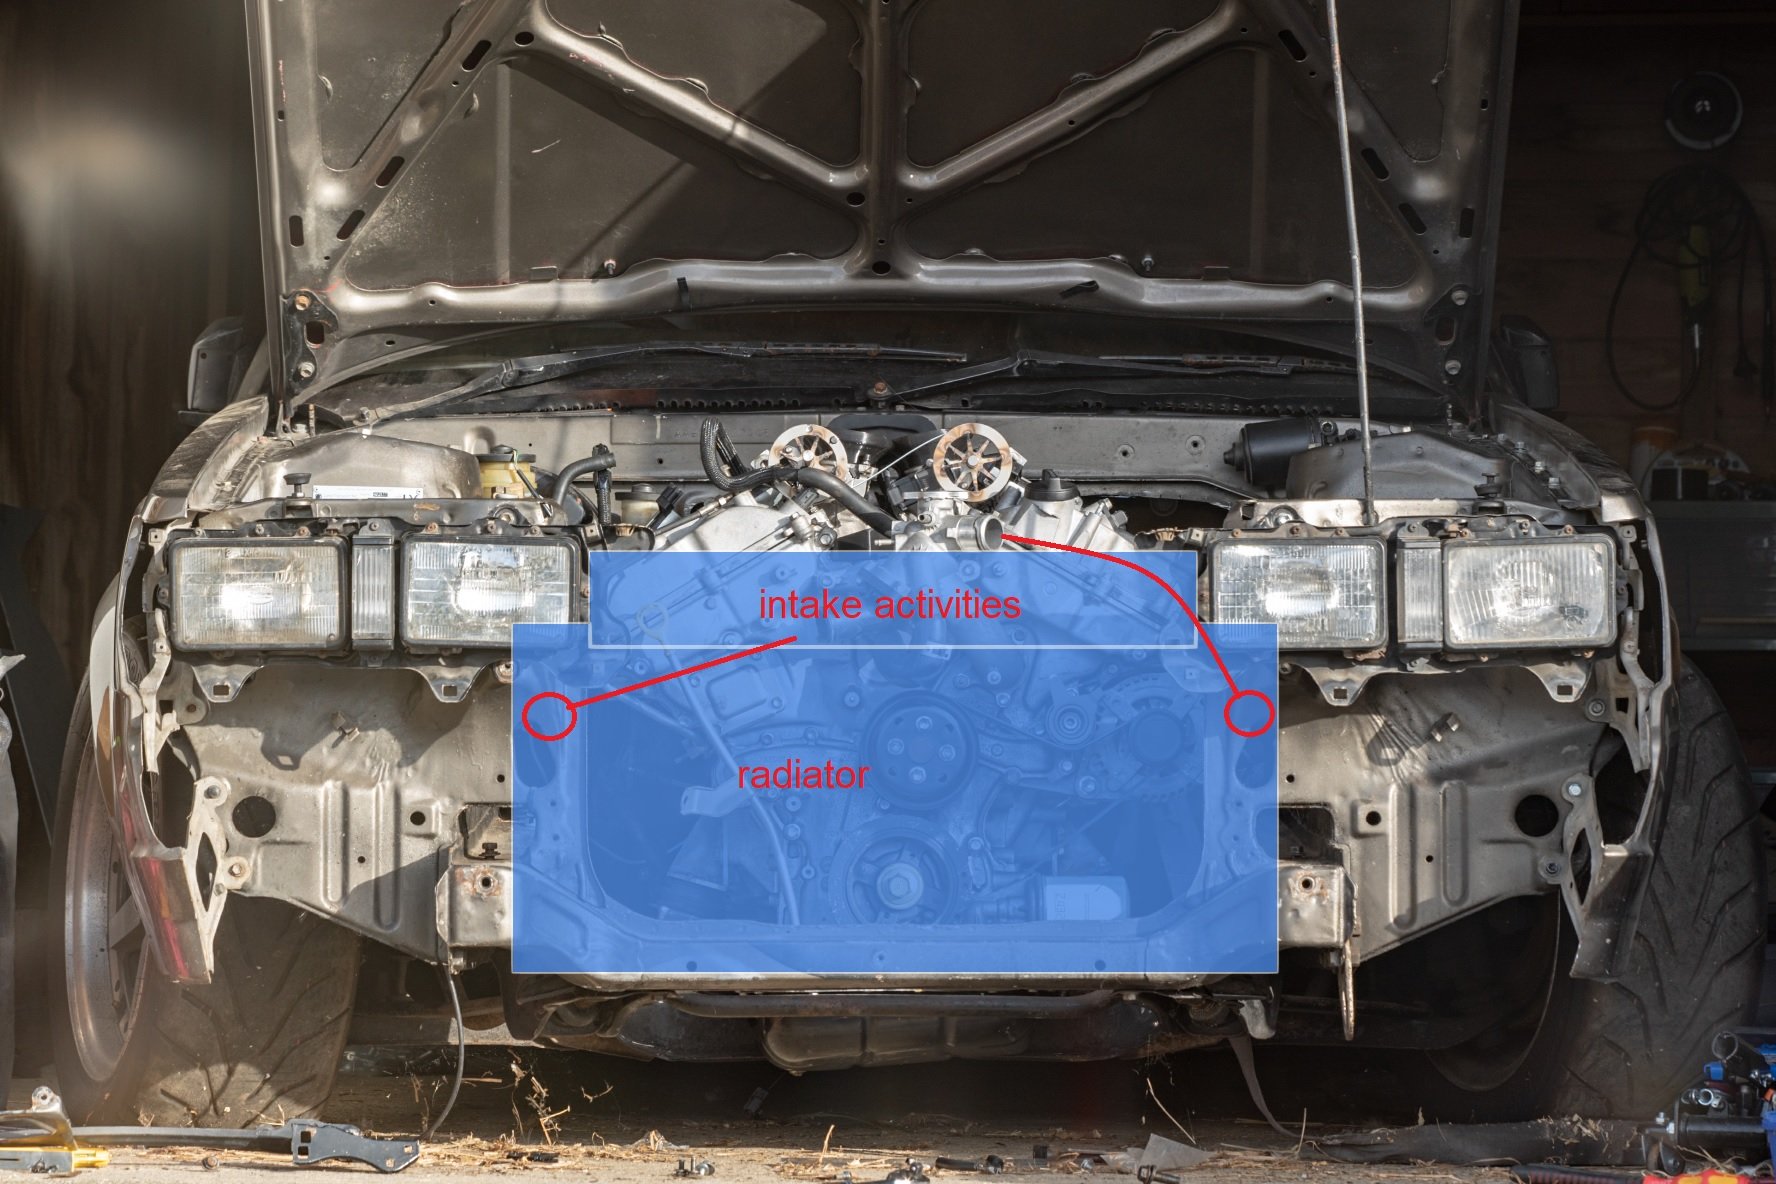
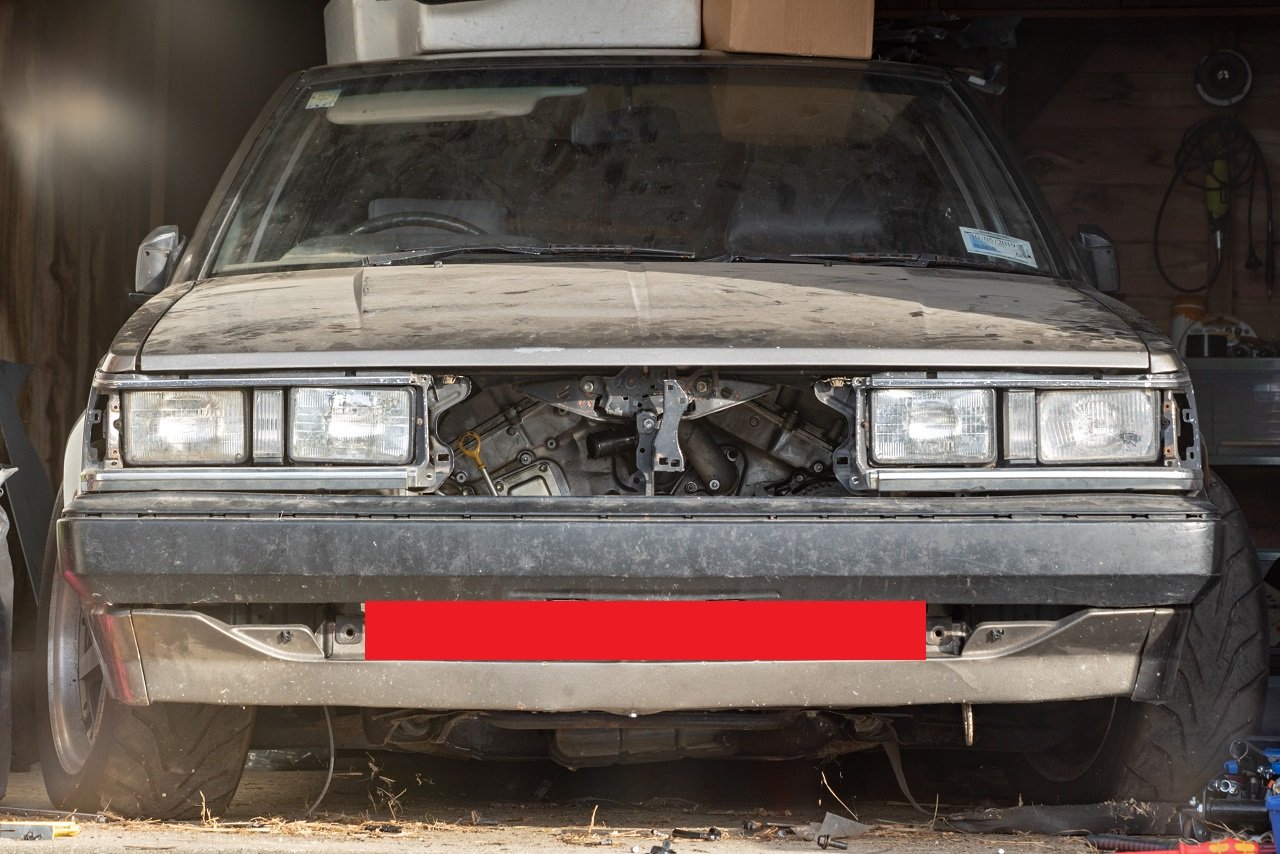
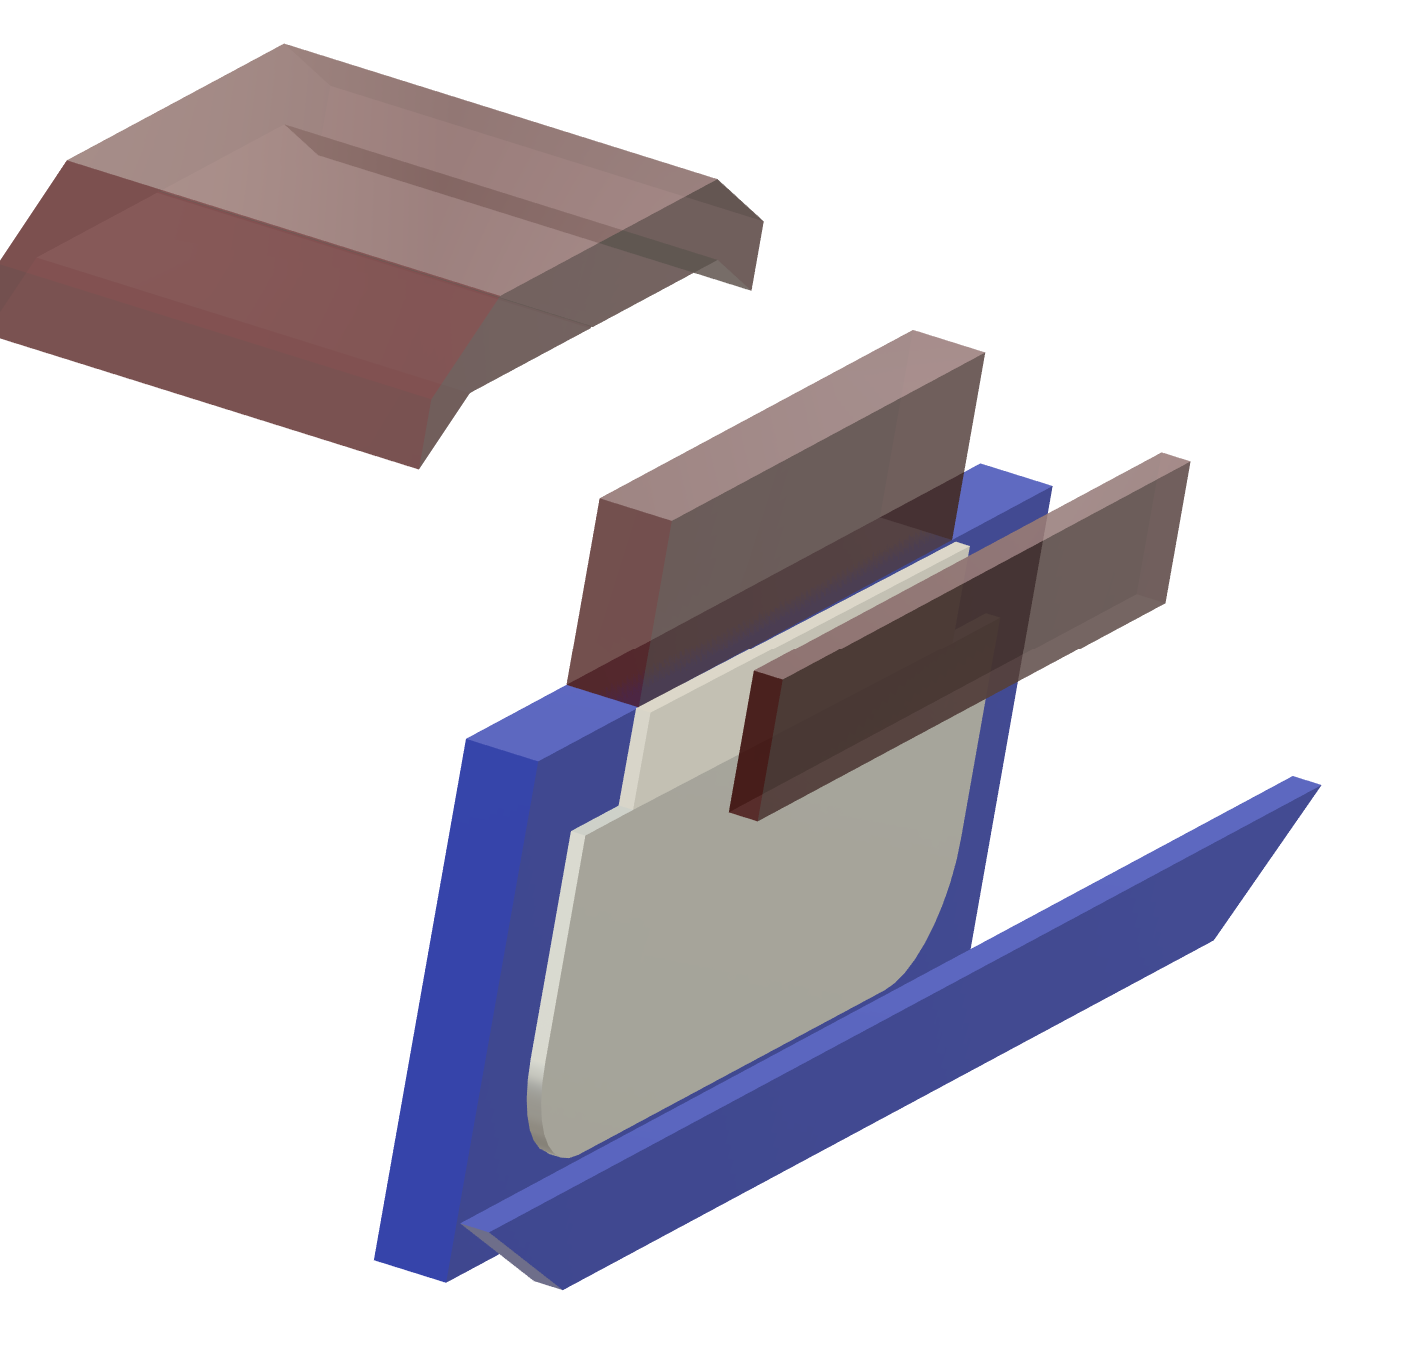
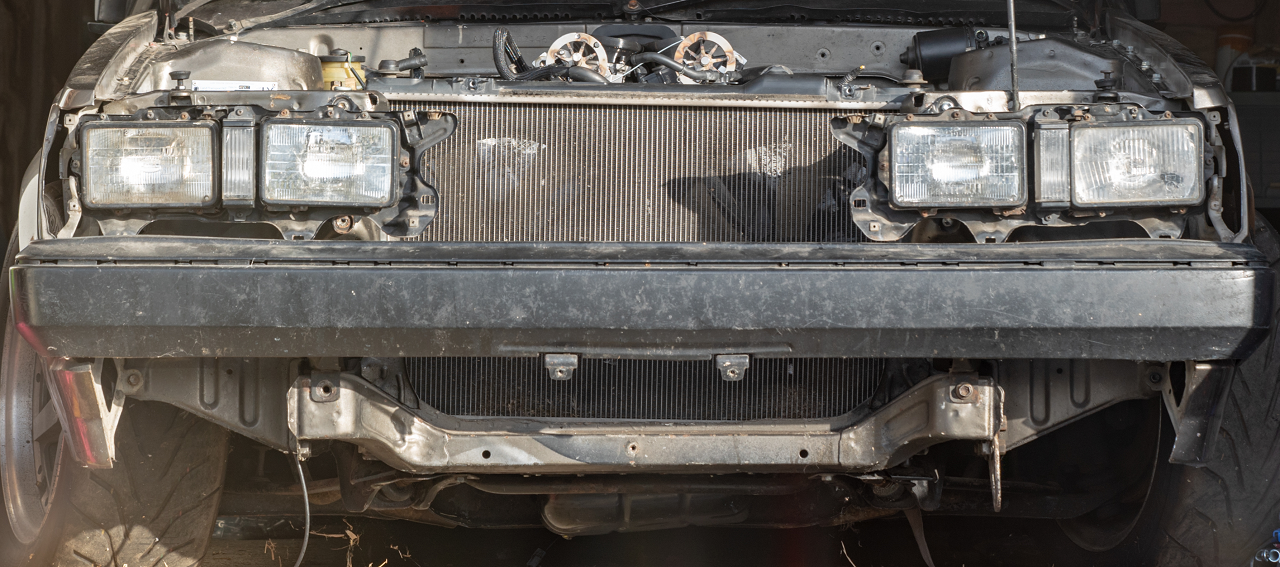
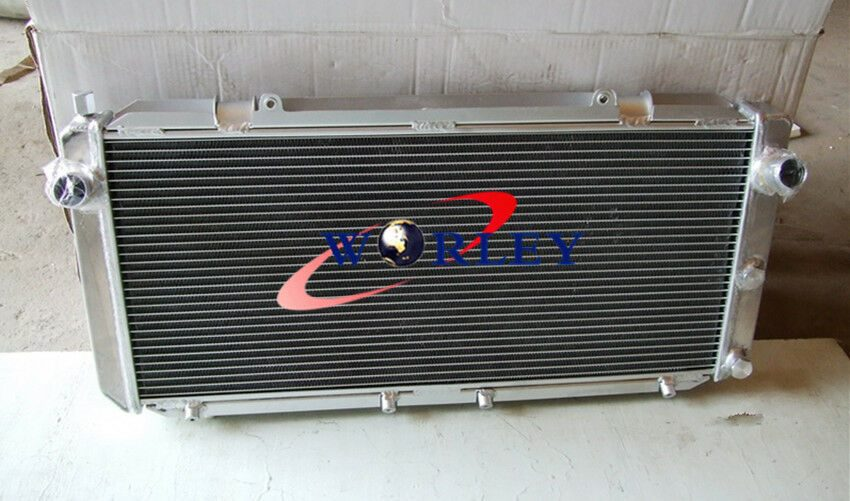
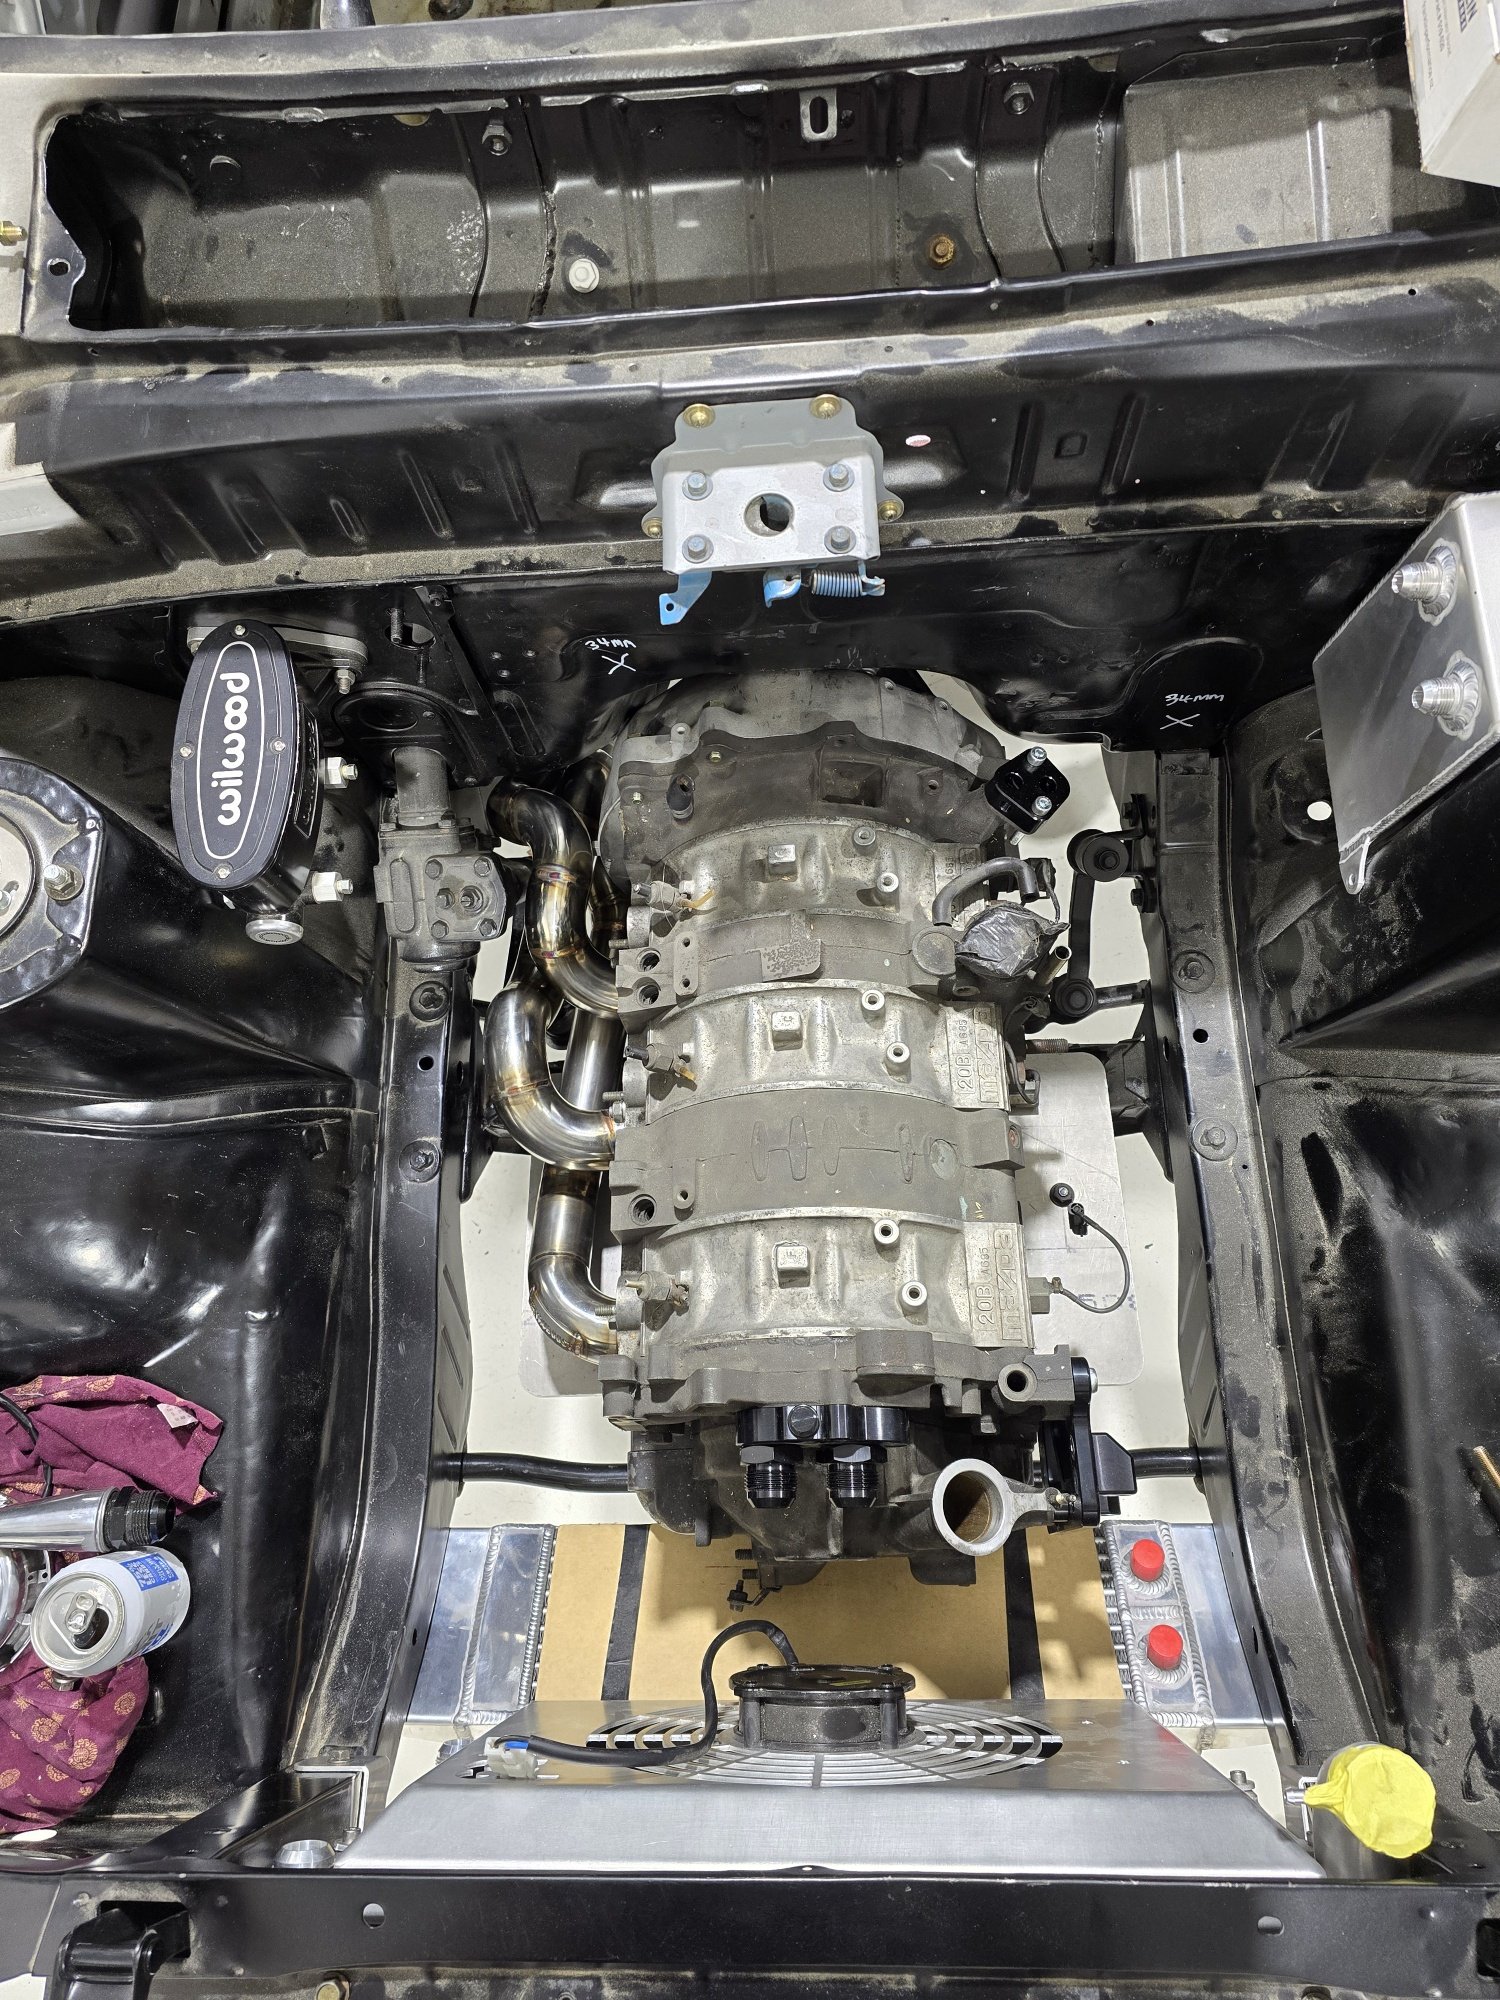
Radiator situation I've got the Mark X radiator in there currently, and although it made everything nice in a lot of ways in the back of my brain I know it's just not going to work quite right. As the top pipe sits too high. You can see it sits a little higher than the top crossmember too, and this isnt on any mounts yet. Just sitting hard against the bottom. The motor's radiator cap (in blue) sits a little lower than the radiator, and the top hose to the radiator flows uphill towards the radiator. All bad news for ever trying to bleed the air out of this thing. Another issue is that I'd love to have a front facing intake airbox that goes through to the front grill, like a lot of the BTCC type cars have. The best option I've found for a low, wide, twin core radiator that doesnt have a radiator cap (and does have an air bleed) is from an SW20 MR2. Being so much shorter, I can dedicate all of the front grill area for the intake. And they're a common upgrade item for MR2s, so cheap and plentiful. The radiator is 5mm wider than my chassis rails, but the end tanks are alloy and on the sides. So will just need a little slice and reweld to fit at the bottom. If I dedicate the top grill to doort noises, then I dont have a huge amount of frontal area for the radiator coming in from just underneath the bumper. Possibly need to remove the bonnet catch as well, but I'd prefer to keep it over having bonnet pins or whatever. This is a rough approximation of how much space I've got for each thing Red is intake stuff, blue radiator stuff, white is the open area that the radiator can get air through. So a lot of the radiator area will be fairly useless if hard mounted against the front of the car, as it wont get any air flow. so I'll try mount it as far back as I can towards the engine. All of this stuff is a bit off topic to my path towards getting the engine fired up, but I've been working on that too. Last night cut the fuel rails a bit shorter, so there's more room at the back. for the fuel dampers without hitting the body. Then also had the underside of the rails milled down so the throttle linkages dont hit the rail anymore. So that's just about all finished once I've retapped the ends and remade the AN lines to suit.
2 points
-
Axle shortening or joining, if it's just an axle, should be fine if it's done well and with a suitable weld process etc, take notes of what you do, what filler rods etc The exception to this is jag rear ends, this is because the driveshaft is the top suspension arm. These need a more specialized process because a failure would likely be way more badderer Battery- if your fuel system is modified then the CCM requirements apply, so battery has to be isolated from fuel in a non conductive box. I have had a customer with a stainless battery box who didn't want to change it, line the inside of the box with rubber sheet so it was no longer conductive between the battery and everything else2 points
-
Sometimes it can also be they are not sure if the play is minor in the rack bush (less dangerhazard) or in the rack end/inner tie rod end (more likely to fail sooner. I have come across a few xtrails where this is the case. Easiest way solo to check is to slip the rack boot along the tie rod and off the rack, then have a look at the joint. Slide boot back over with a new tie and job done. Easiest way with help is to turn the wheels to extend the side of the rack with play, and pull down on the rack inside the boot while someone else checks to see if the play is still there. If it is, inner rack end. If play is gone, rack inner bush.1 point
-
I get that every time with the hunter. If they don’t know or can’t find the manufacturers specs for play etc, then they request that you find this info and return. i took a workshop manual with me last time to show steering box play etc. theyr just covering their ass1 point
-
It looks like they are asking you to check if the play is within manufacturer specs Ie they don't want to make a decision themselves1 point
-
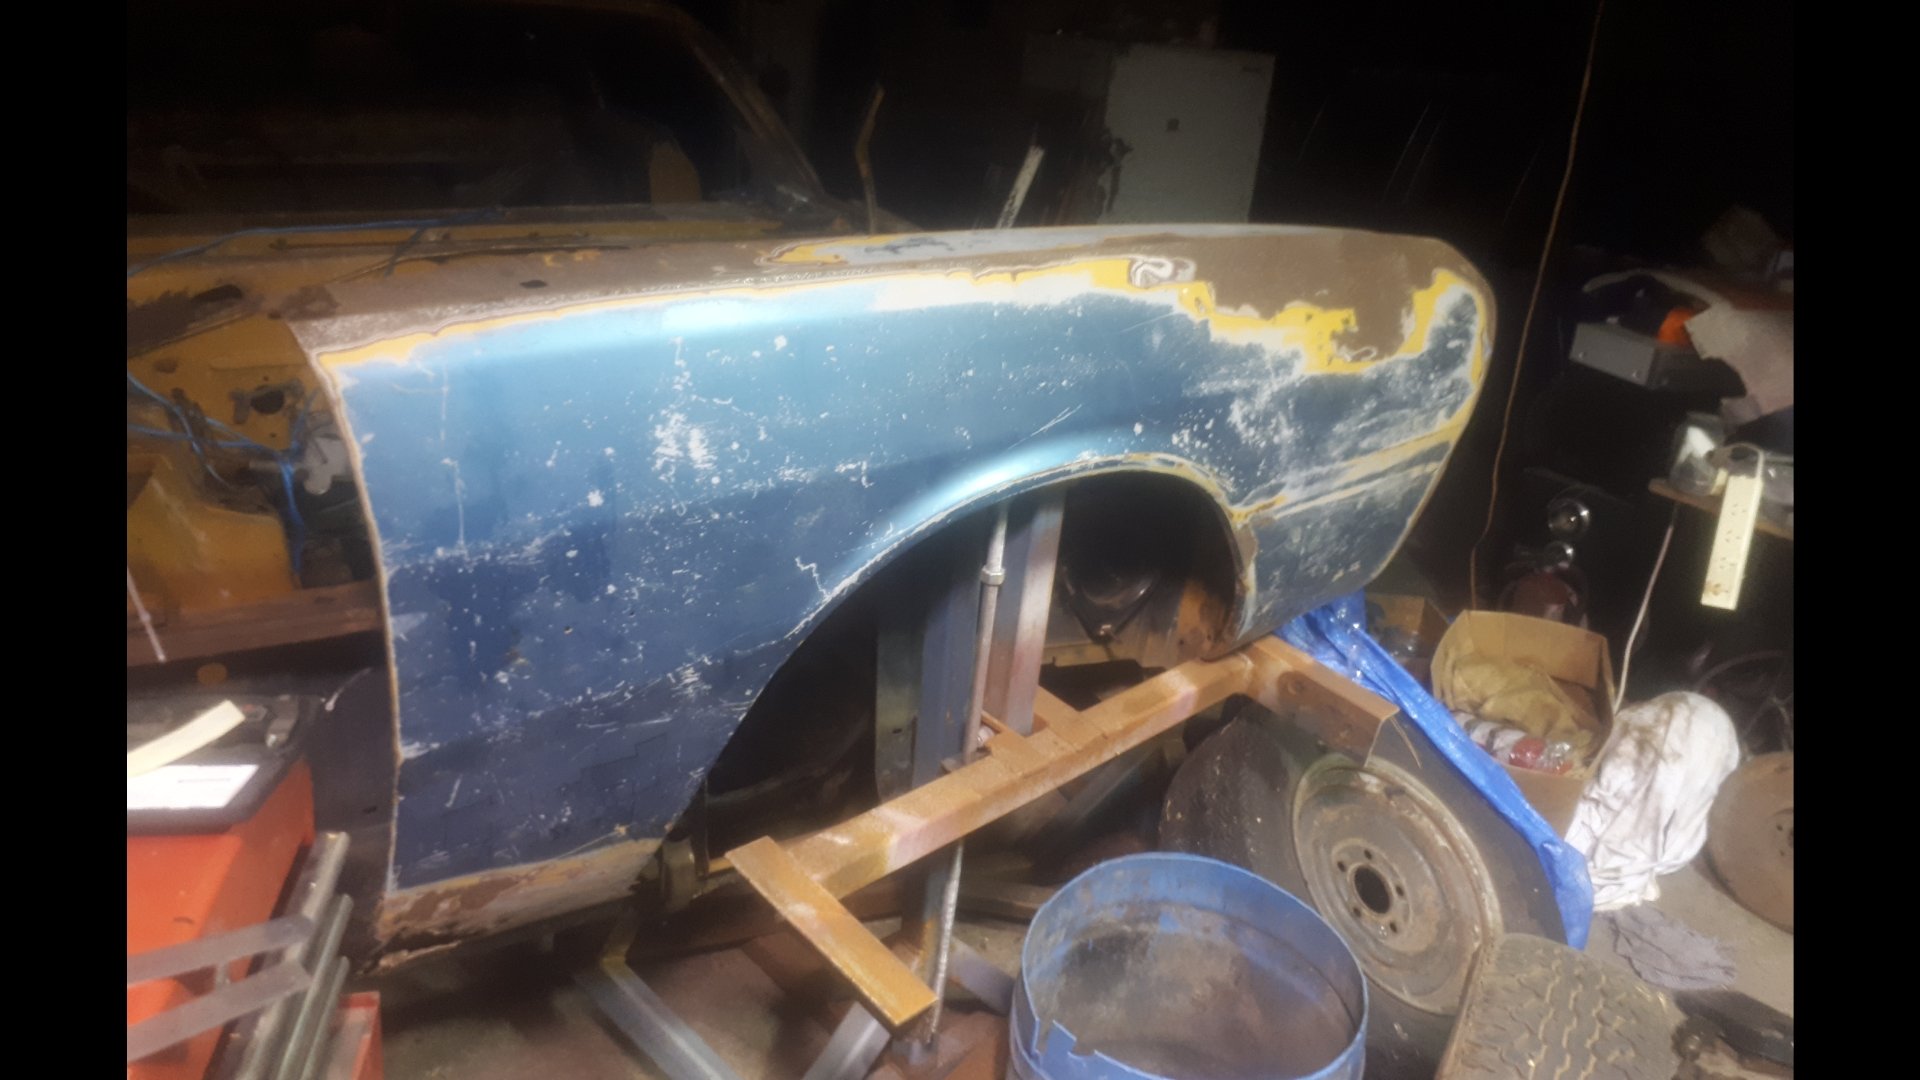
Im still thinking about this once in a while. Tracked down a less fucked right front guard. It was up welles ways. @Goat kindly let me use his house as a freight forward depot. The seller dropped it off, and a mate who was passing by collected it the next day. Picked it up tonight. Defo needs a wee bit of work. But i can buy the inner and outer bottoms off the shelf from Automotive Panel Craft in Oz. Thanks to @Classicdat for lugging it south for me too!
1 point
-
Self declared map-nerd1 point
-
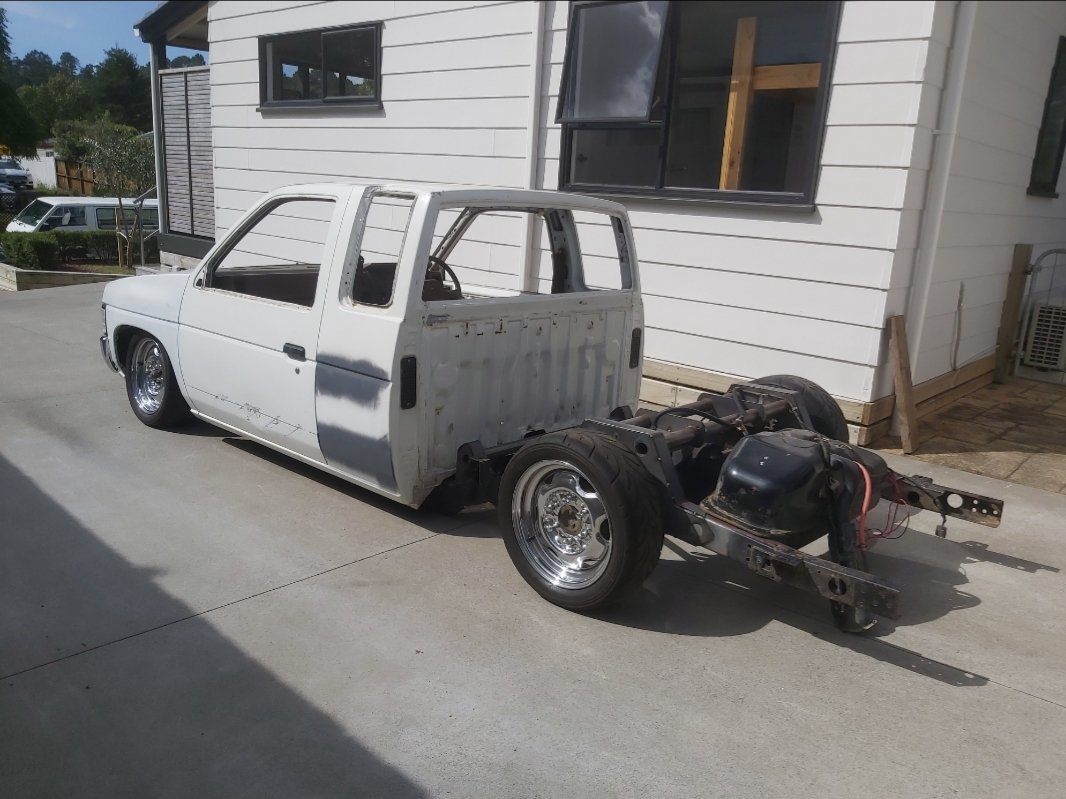
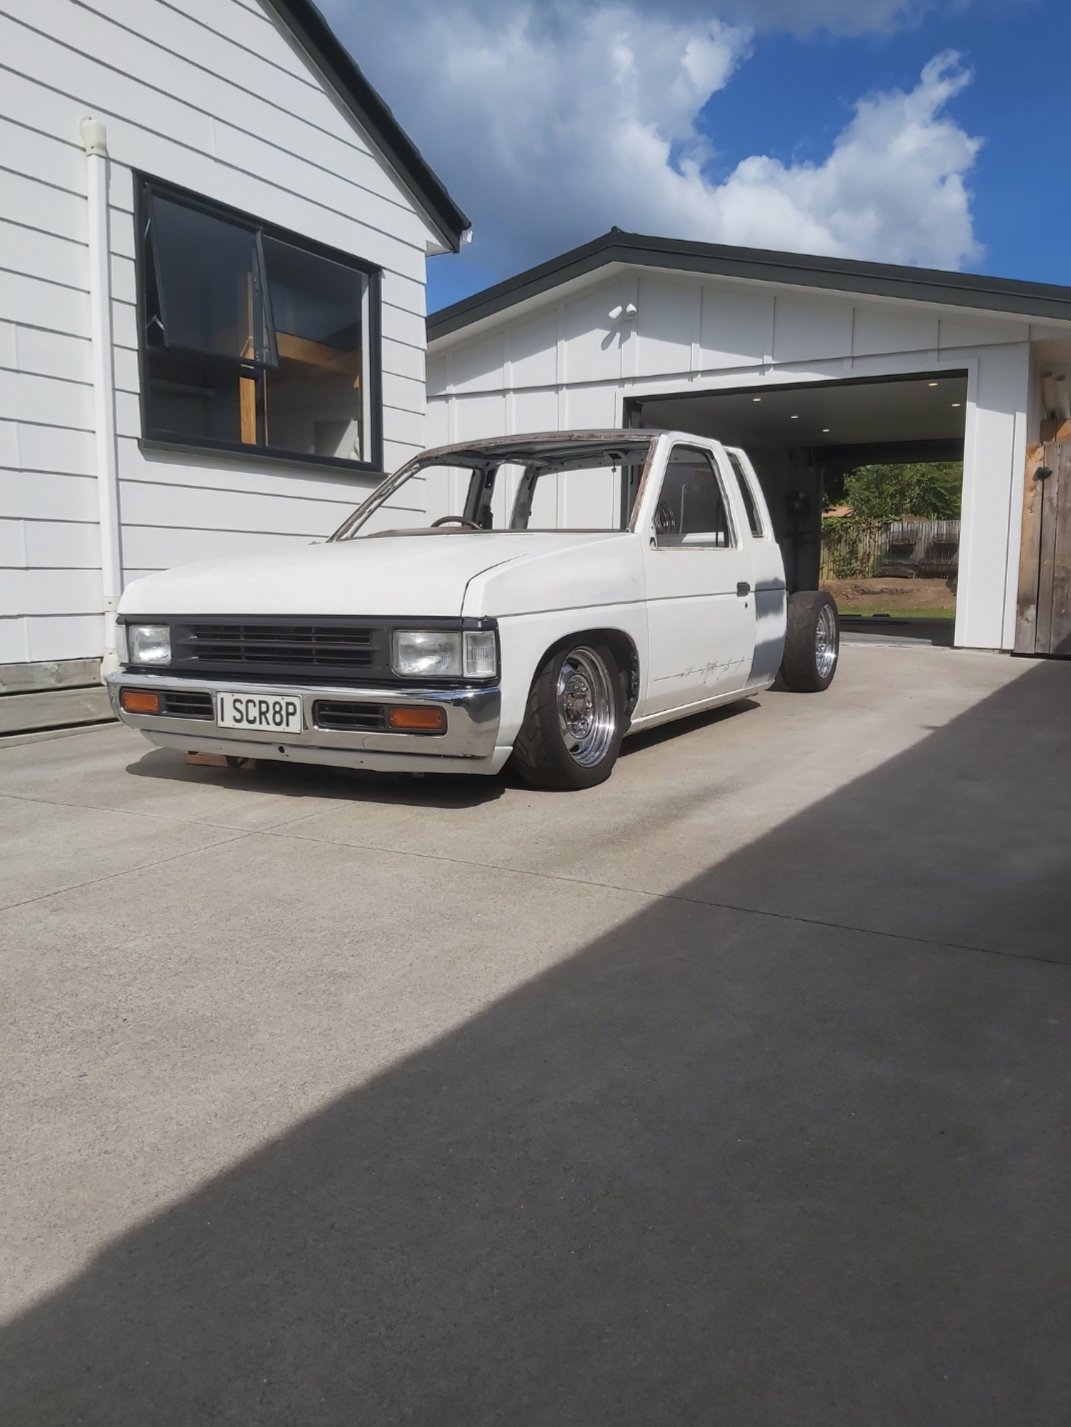
Been through a few ups and downs with this lately. Pardon the pun. Took it off the axle stands to get the full lay frame experience but unfortunately my bag mount bracket on the diff is a bit to tall. Same with the top link bracket. Unsure if it's also got something to do with the front not being fully slammed yet. But once the 15s on it sits quite healthy on the ground. Pushed outside today for a bit of sunshine. Here are the results. As far as progress is concerned there has been none apart from planning how I intend to rectify the problem. Thanks for looking.
1 point
-
Got home from Low Key Nats to find a nice package had arrived.
1 point
-
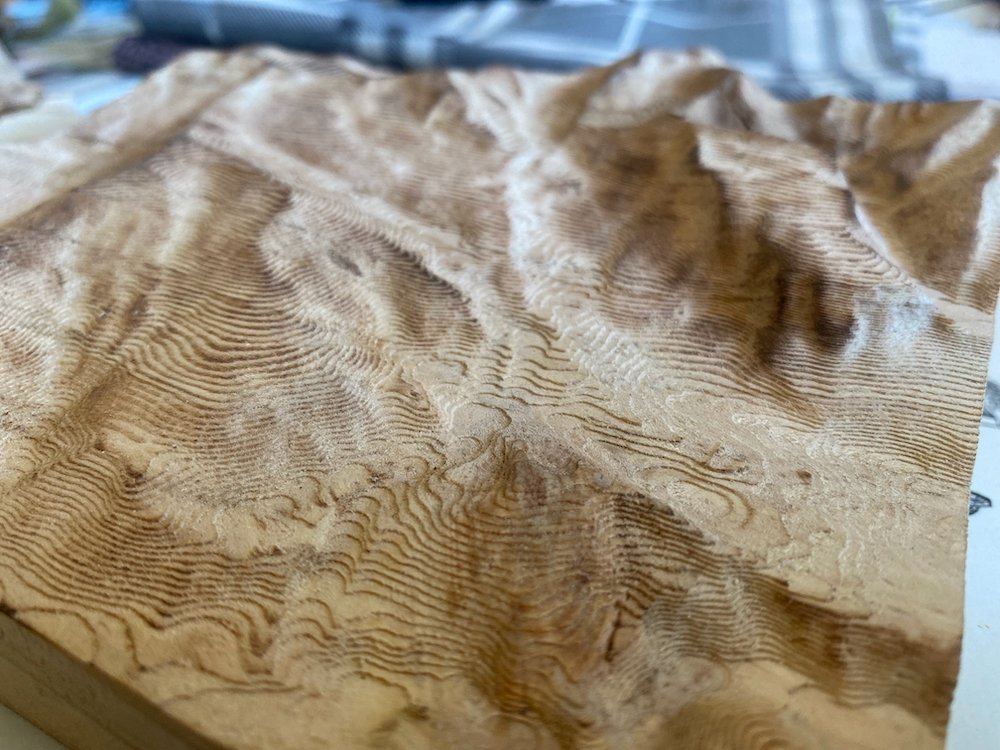
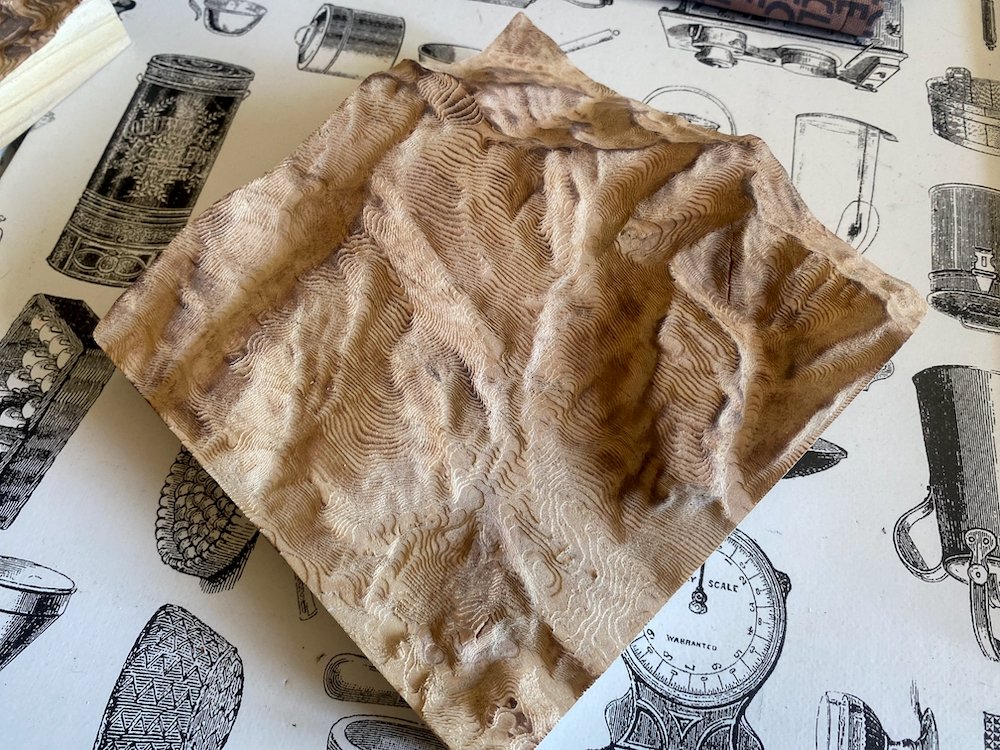
Making some thank you gifts for friends that looked after us on our recent trip overseas, reliefs of the mountains they call home. Carved out with the cnc to replicate contour lines on a map then run over with the gas torch to highlight the ridges.
1 point
-
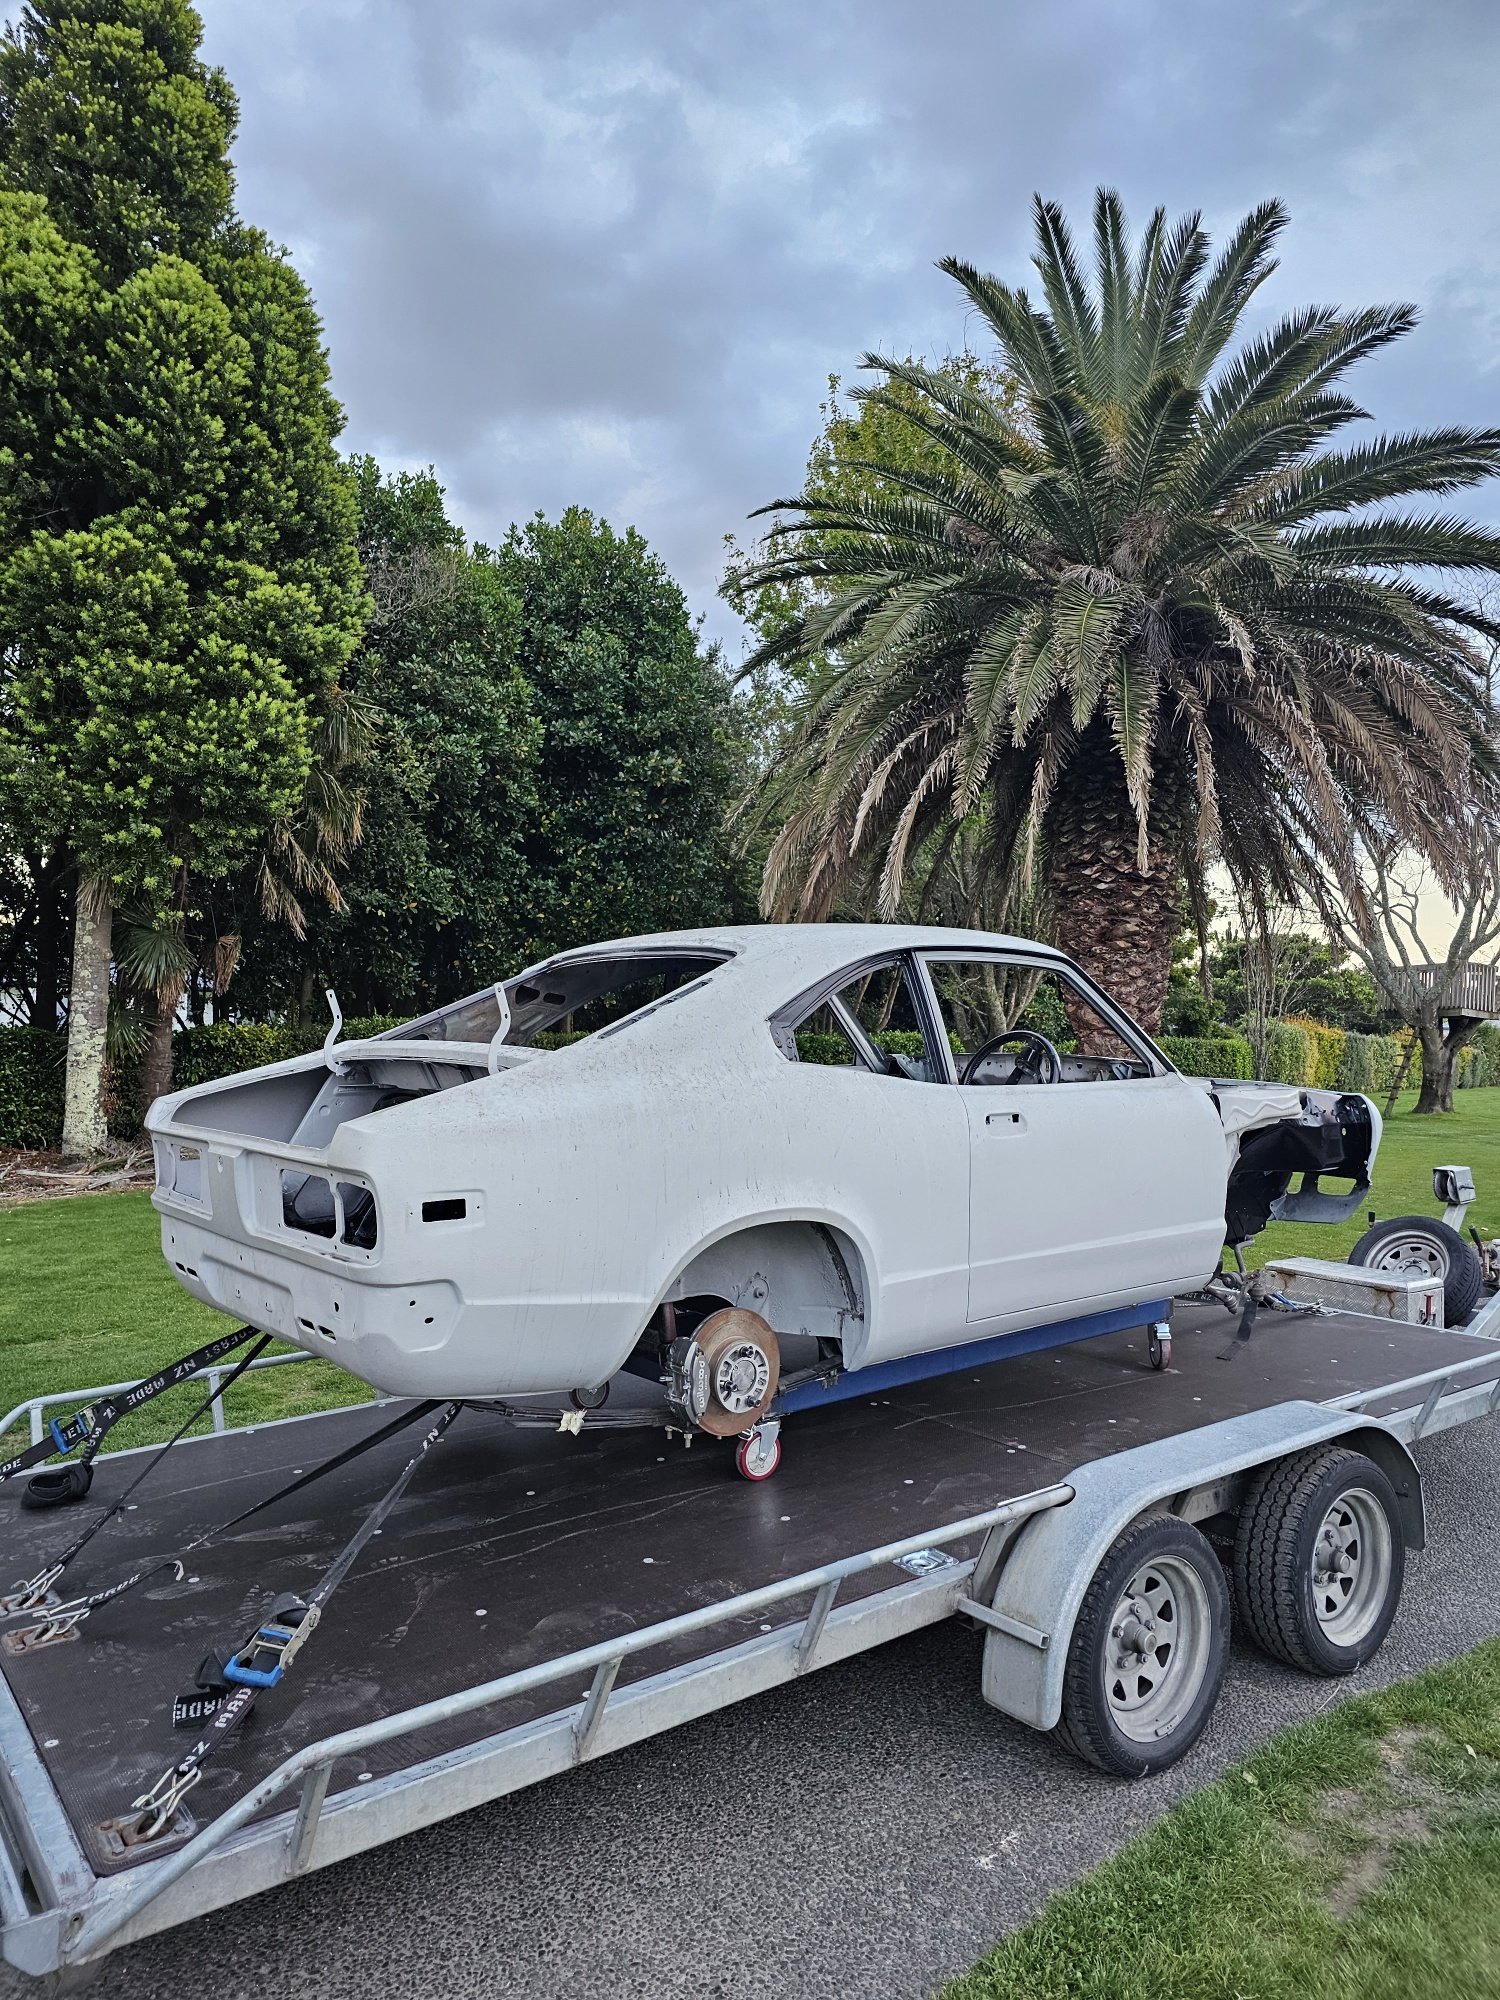
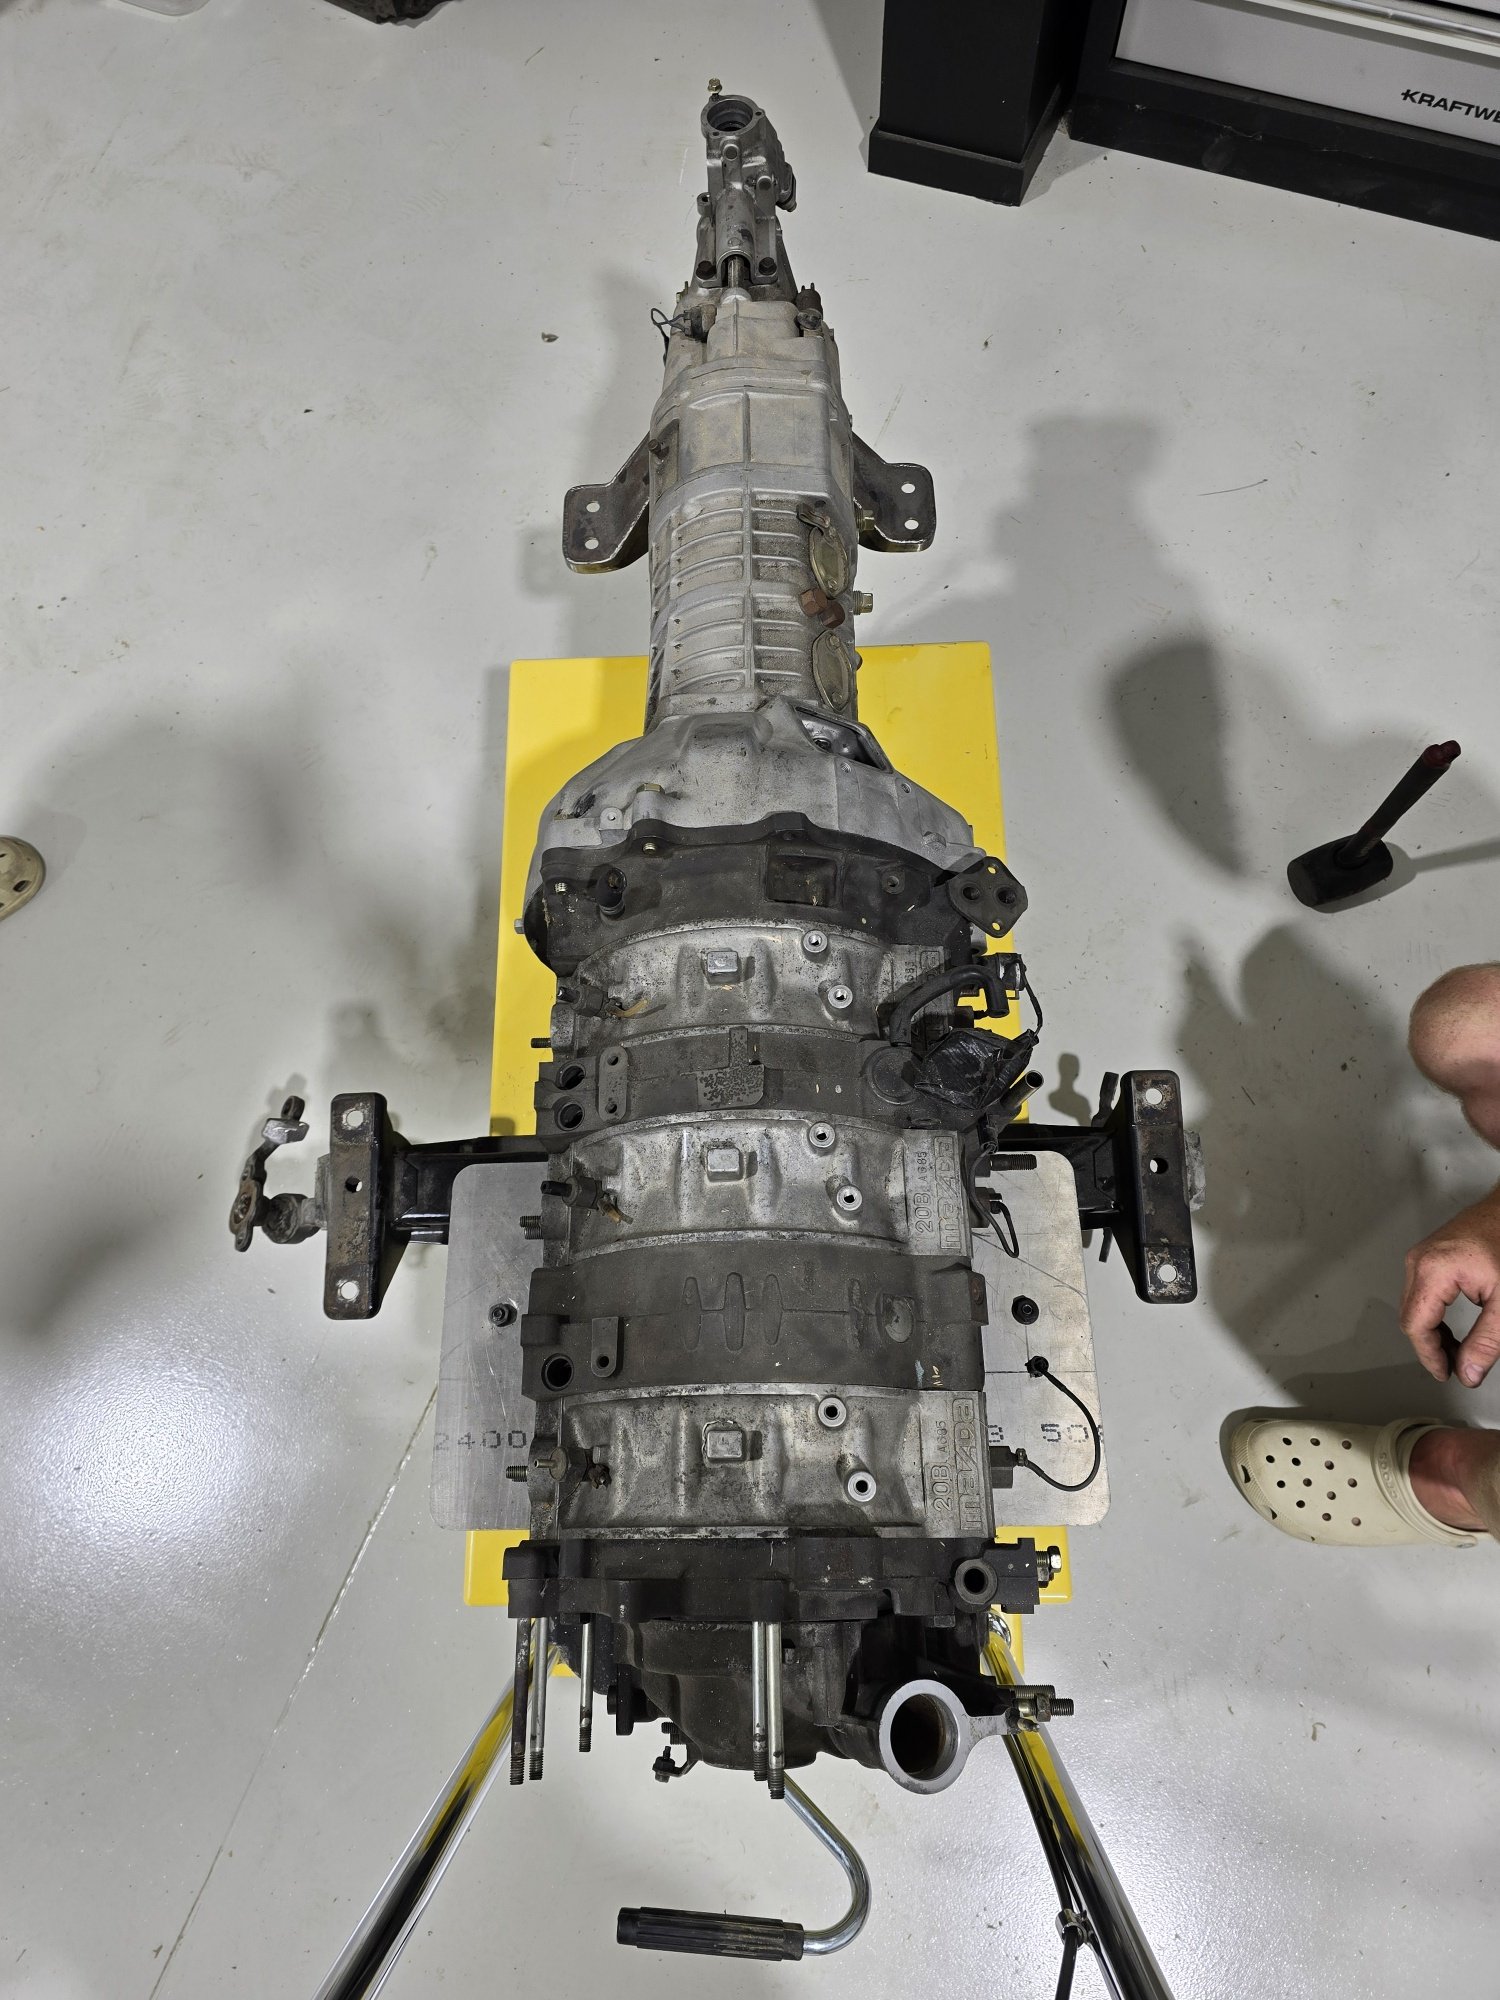
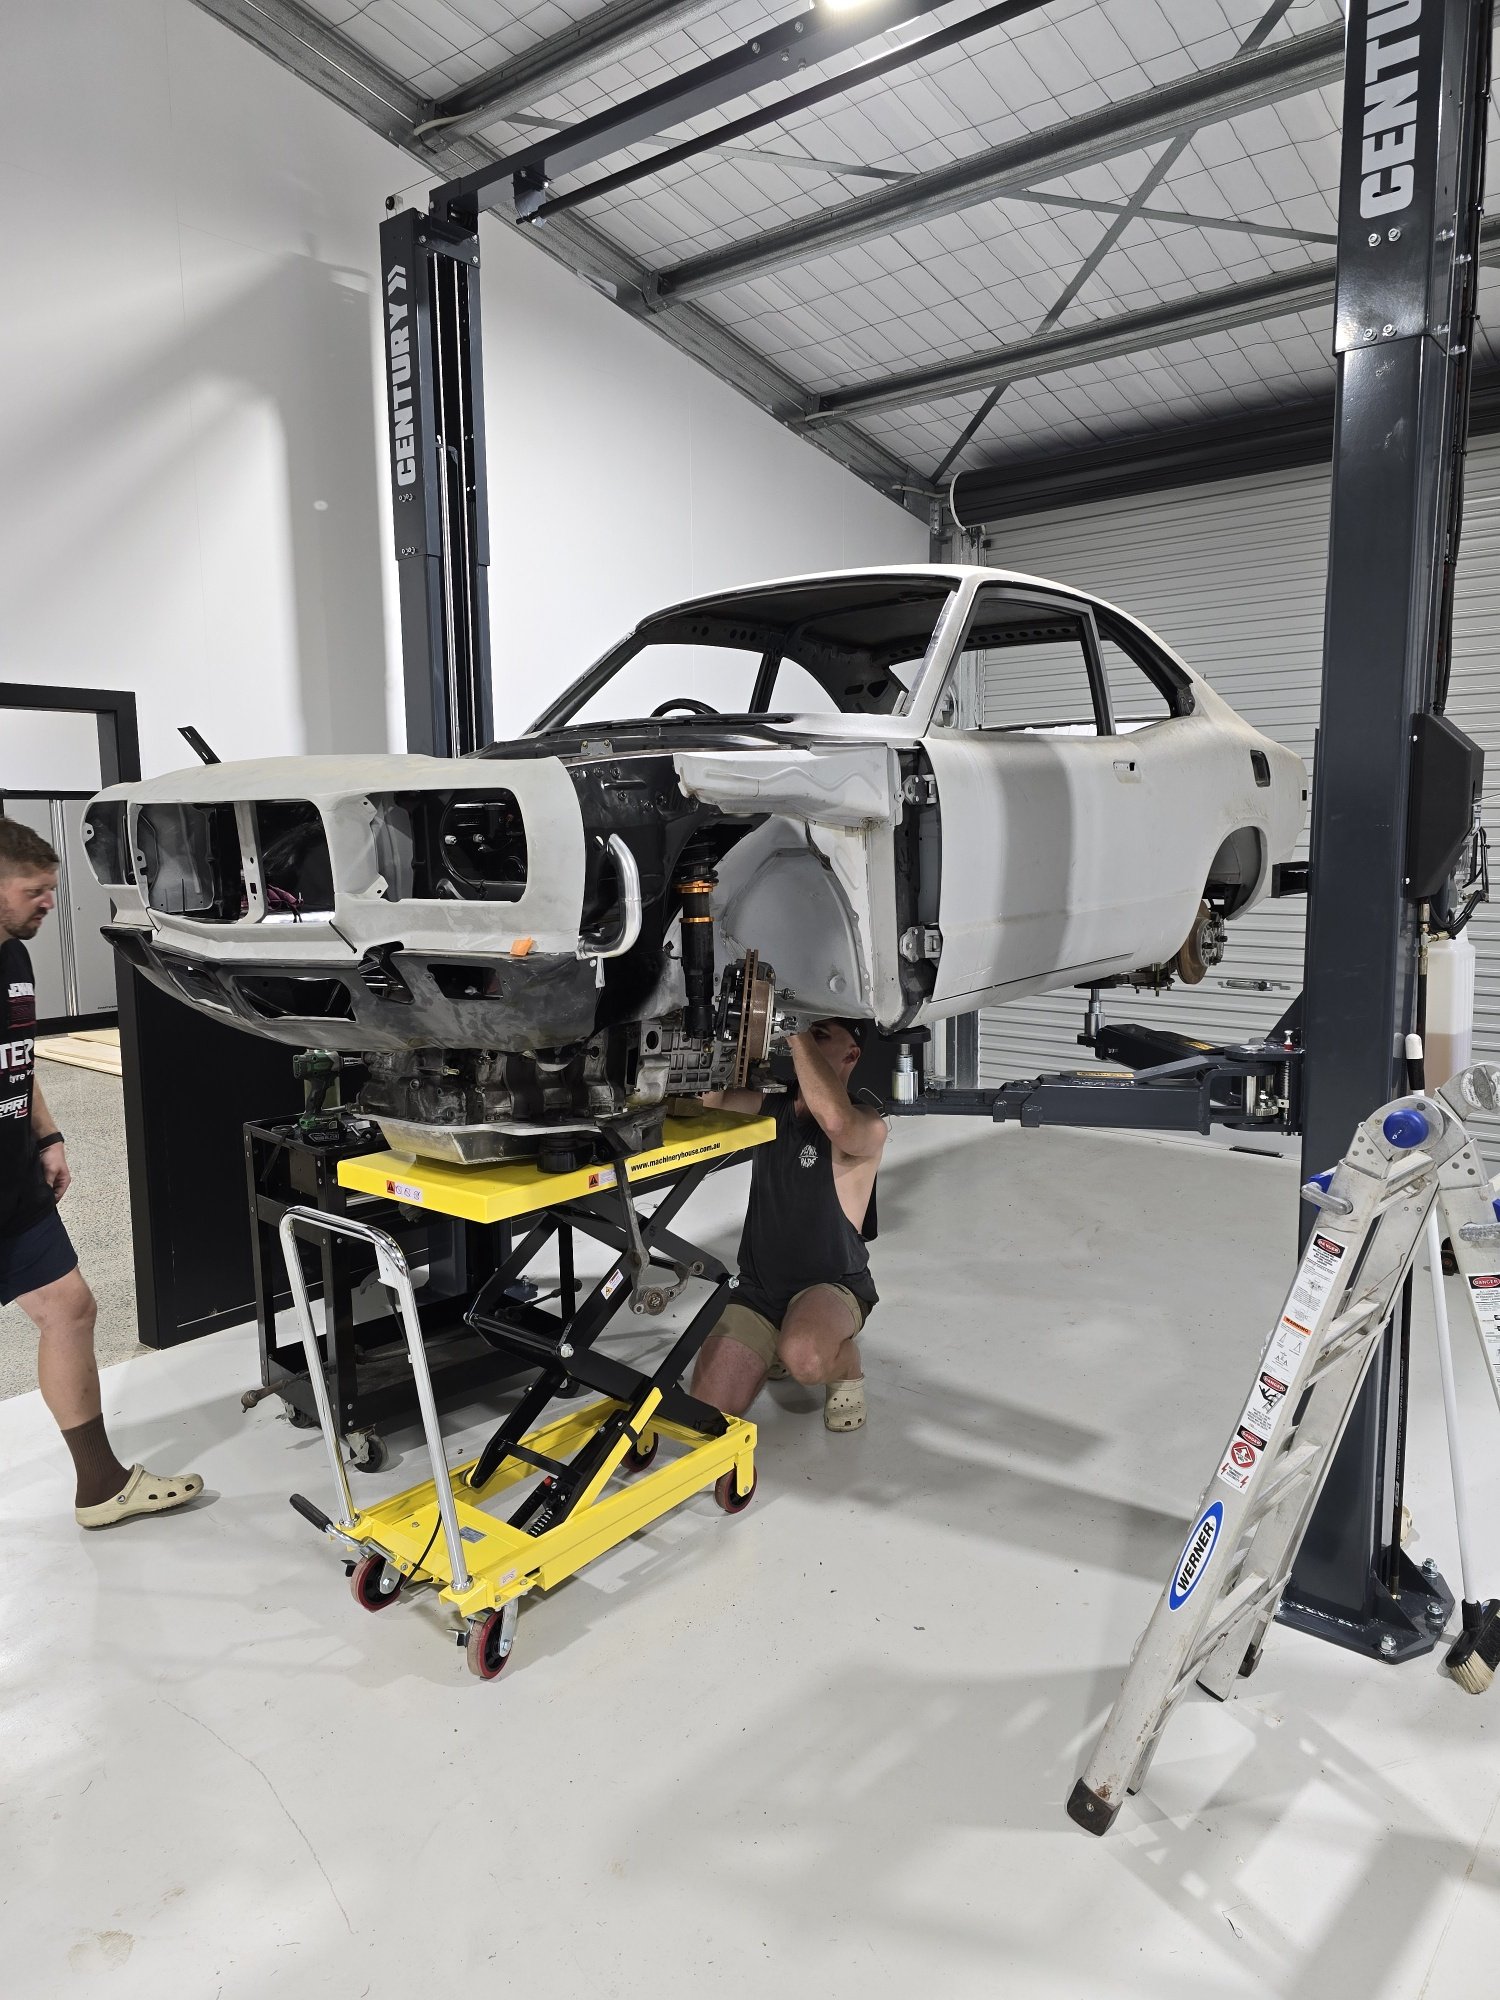
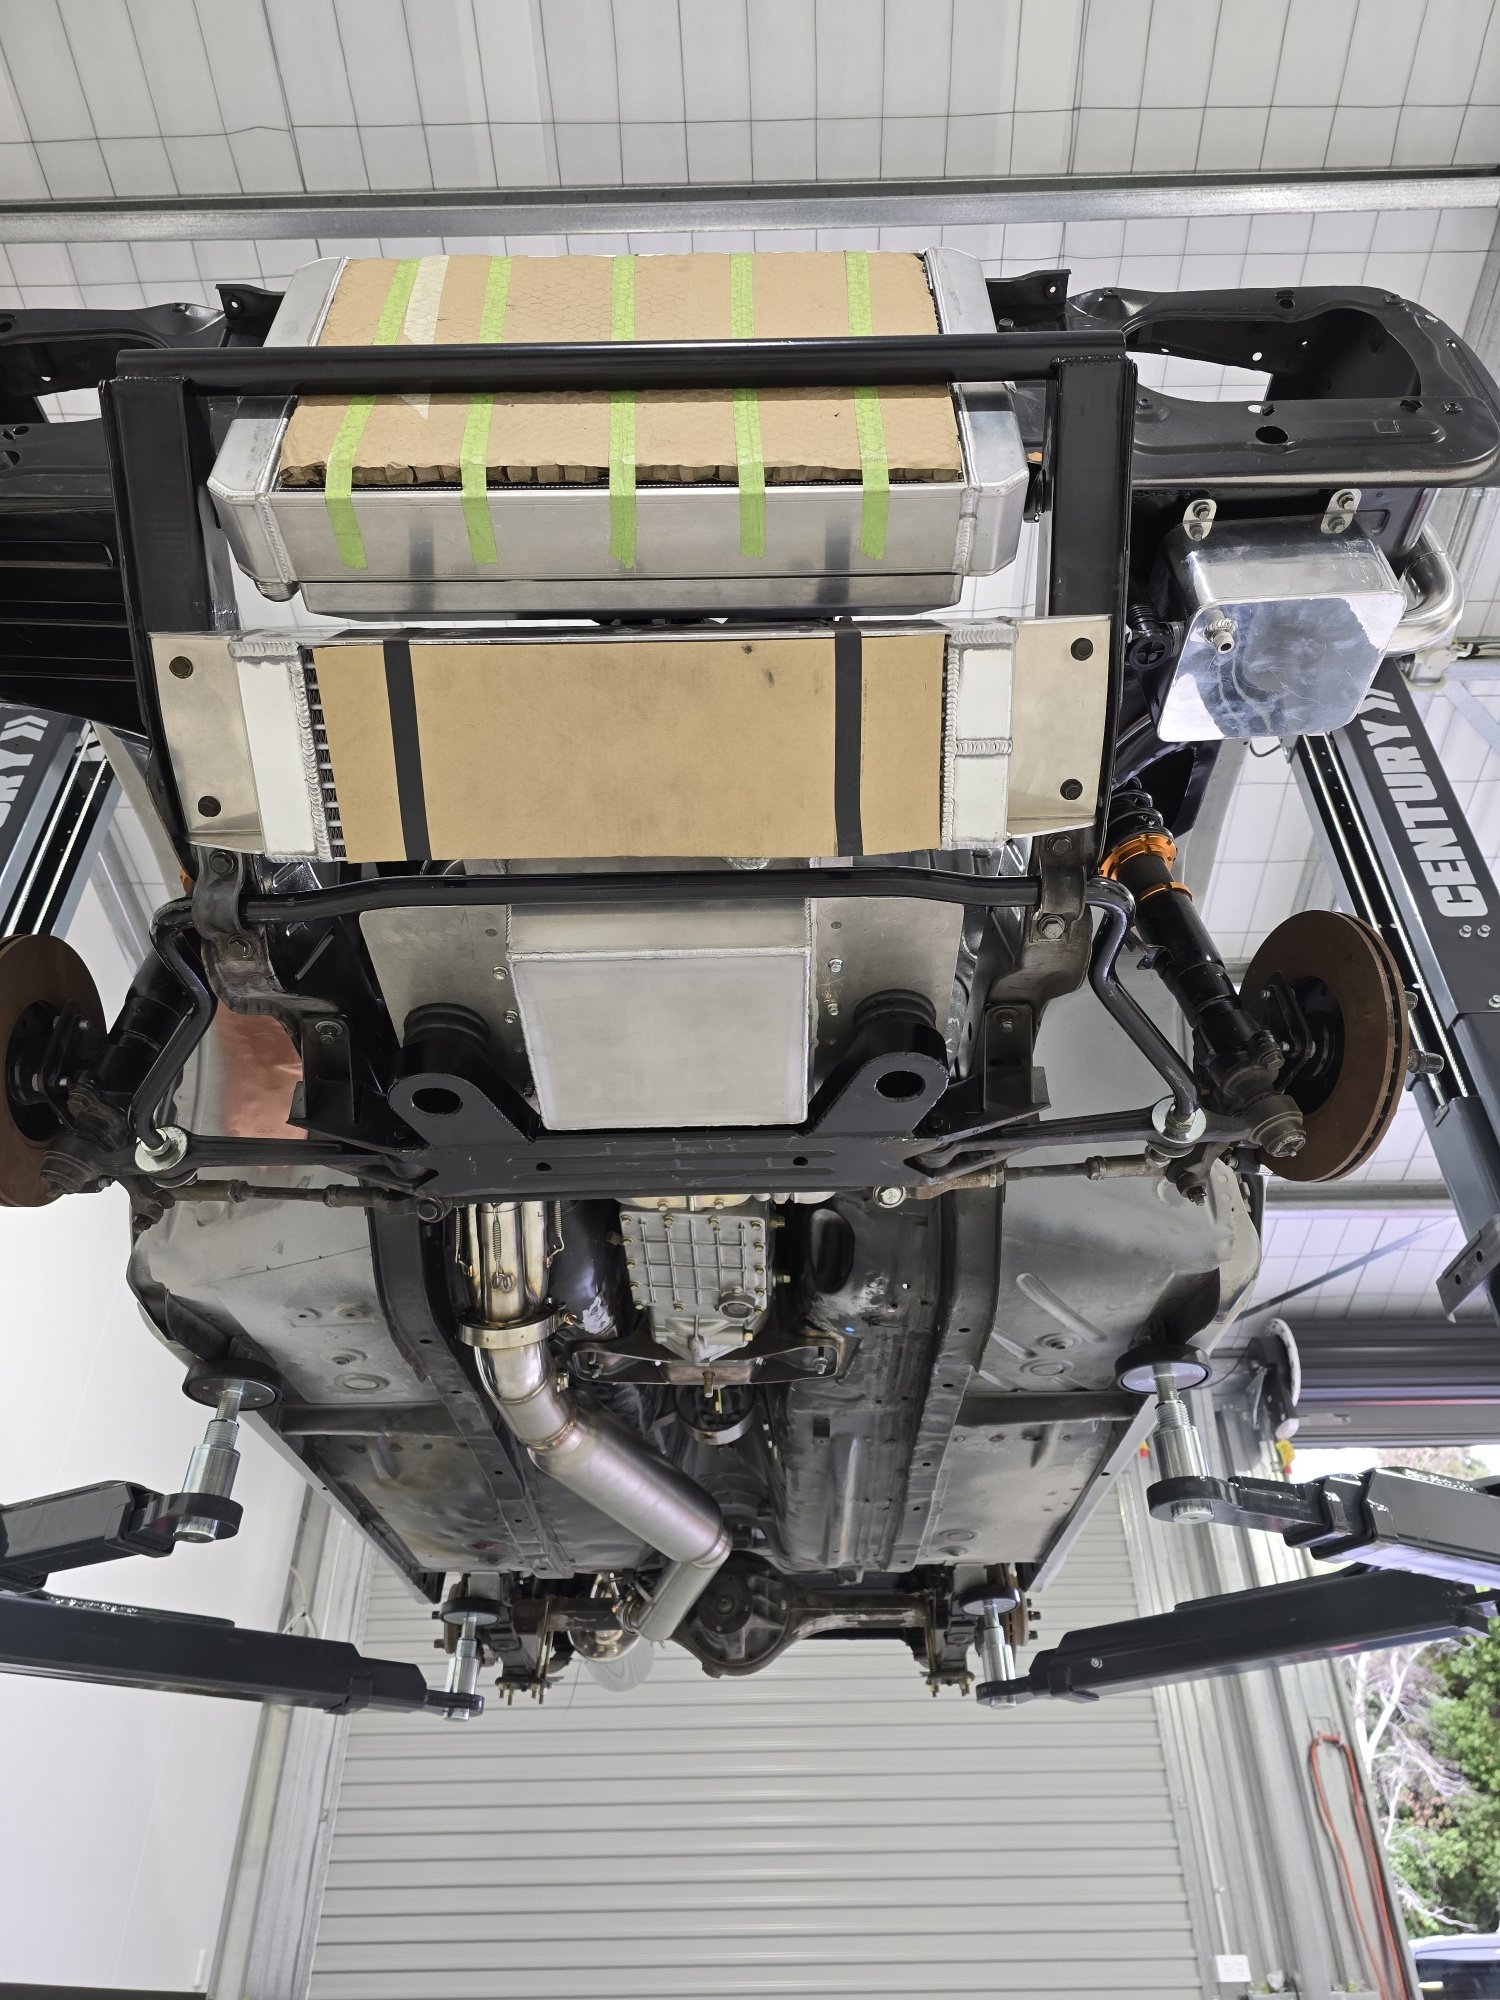
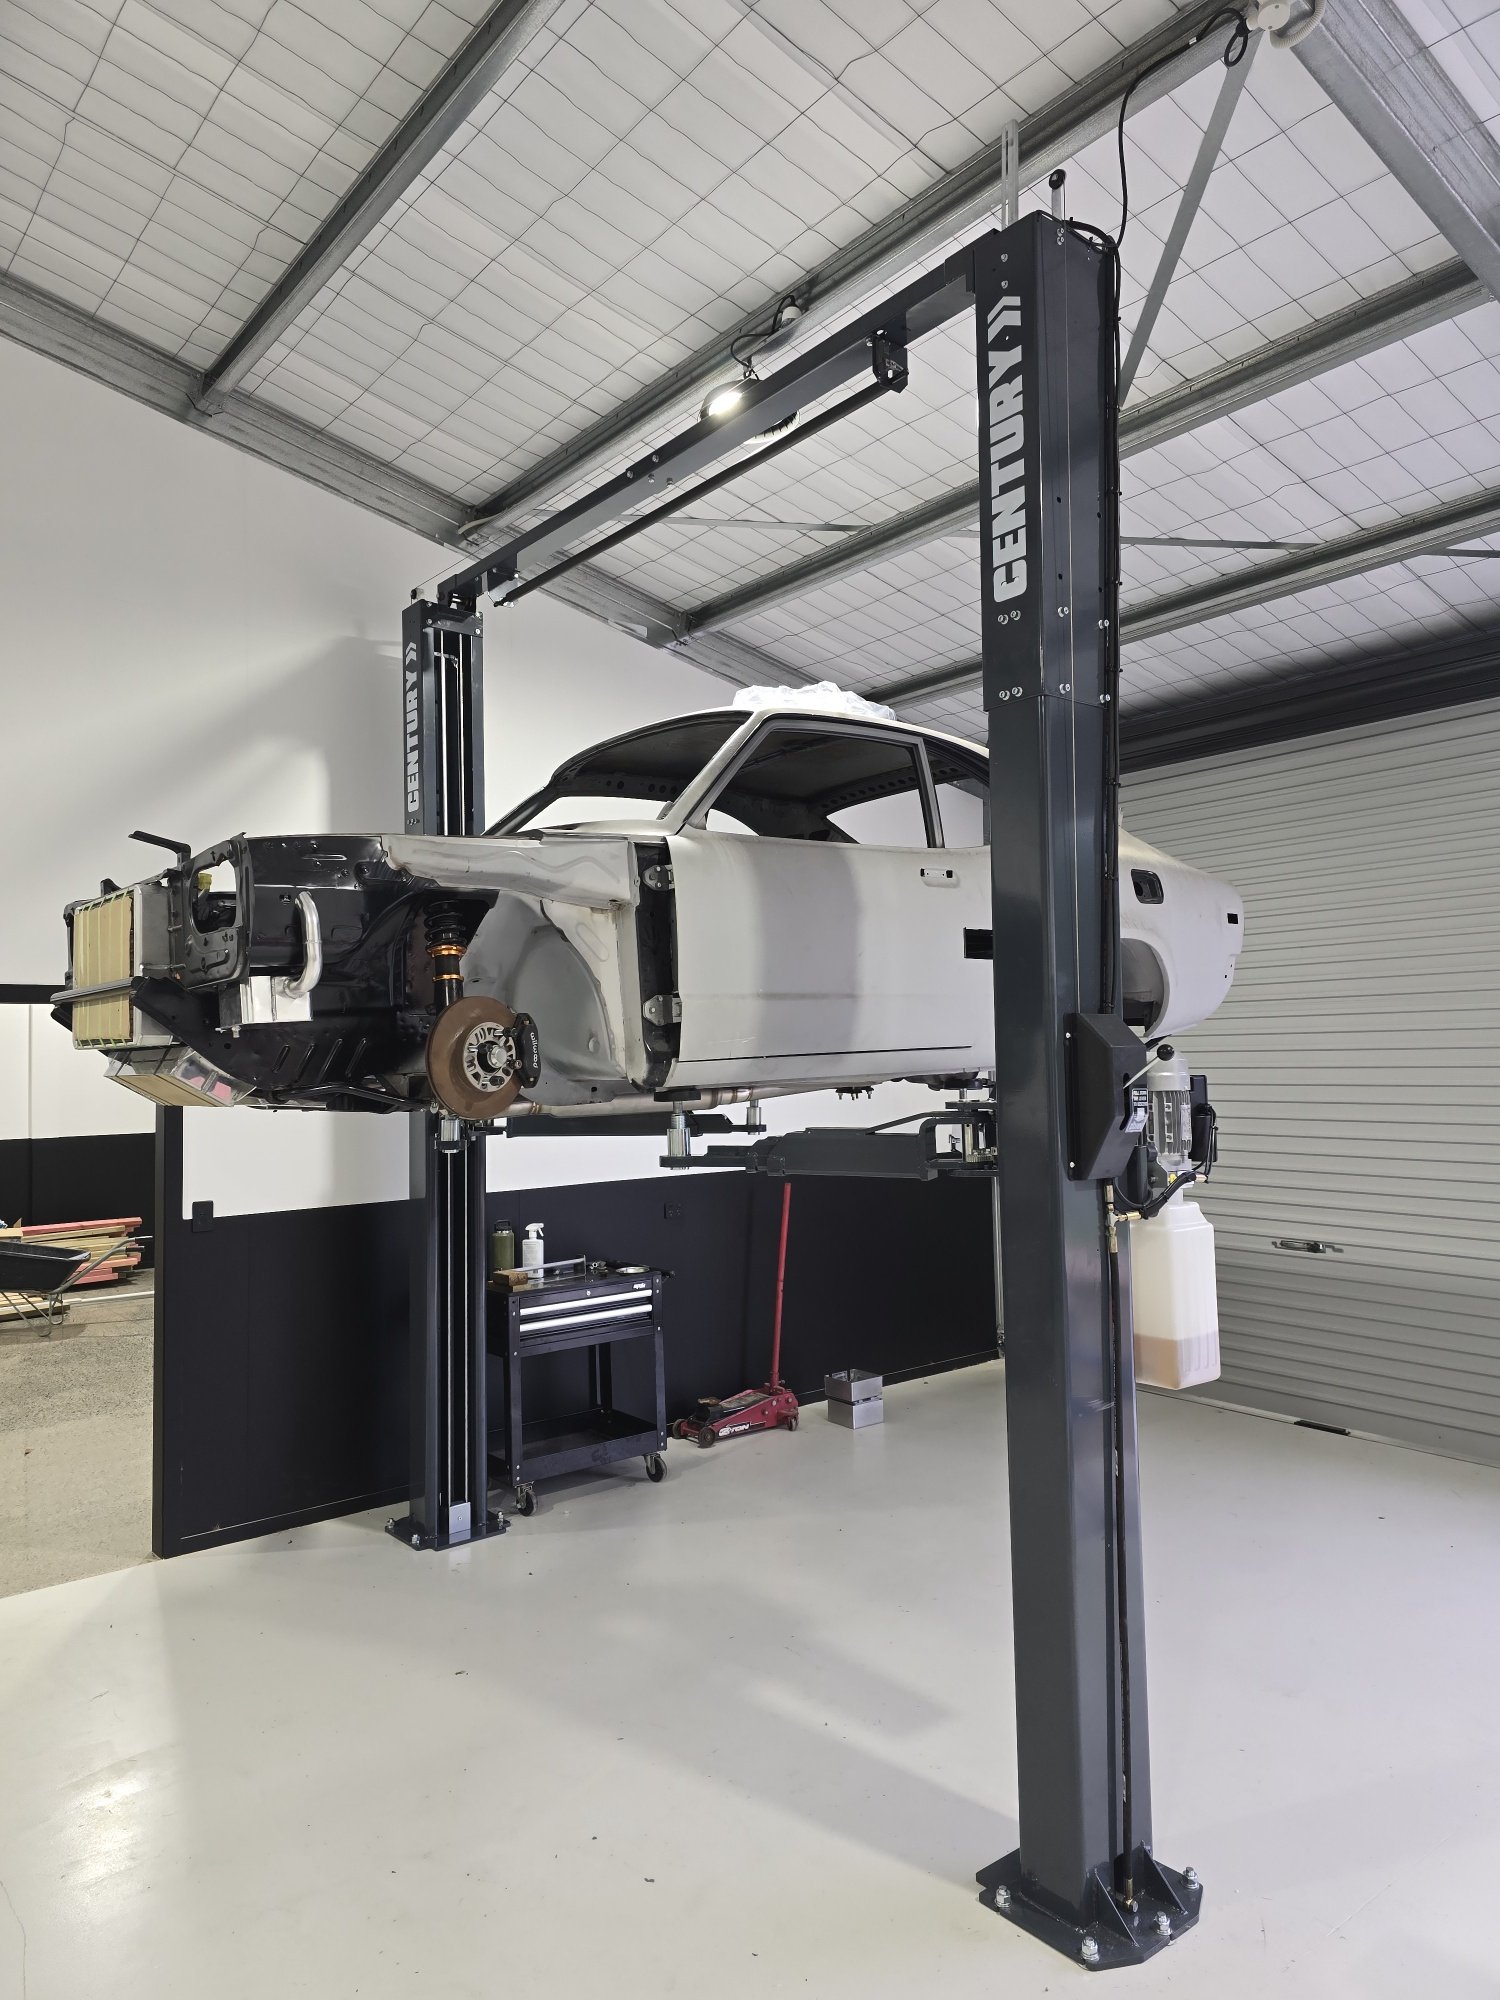
Been a bit slow last few months as been trying to get new shed finished but finally in there and got hoist up so back into the car. Motor and box need to go in as one piece from underneath with front subframe so bought a trolly lifter thing which made life so easy. Chucked the motor and box back in with the cooling system last weekend to work out a plumbing list to order all the oil, water, fuel braided lines and fittings. Also working out brake line routes and working out what else i need to do to finish off prep to strip it and get it back to the painter. Basically want to have the car dummied up in full then get painted/motor built etc so once painted its just assembly to finish.
1 point
-
In January 2024 I suddenly needed somewhere to live in a hurry ... so I figured on building something small out of scraps of building materials I already had.. There's no power, water, sewer on the property, but 10 days ago we got most of the driveway in. I'm the kind of guy who thinks a fair bit before I act, so after some further thought most of the scrap timber/plumbing/etc. I had available got pushed to one side as they just weren't going to work. Queue more invoices for better timber (plus freight) I think this project will take until spring 2024 to be weathertight. Shipping delays and huge freight expenses will add to the timeframe and budget. For example I have $500 of under concrete insulation here at the port. The freight bill for that insulation alone was $1,200. The proposed dwelling will be single bedroom and about 60m2 I always start very well but never finish anything. Let's see what happens this time.1 point
-
Thank you for wearing pants whilst taking the pics...1 point
-
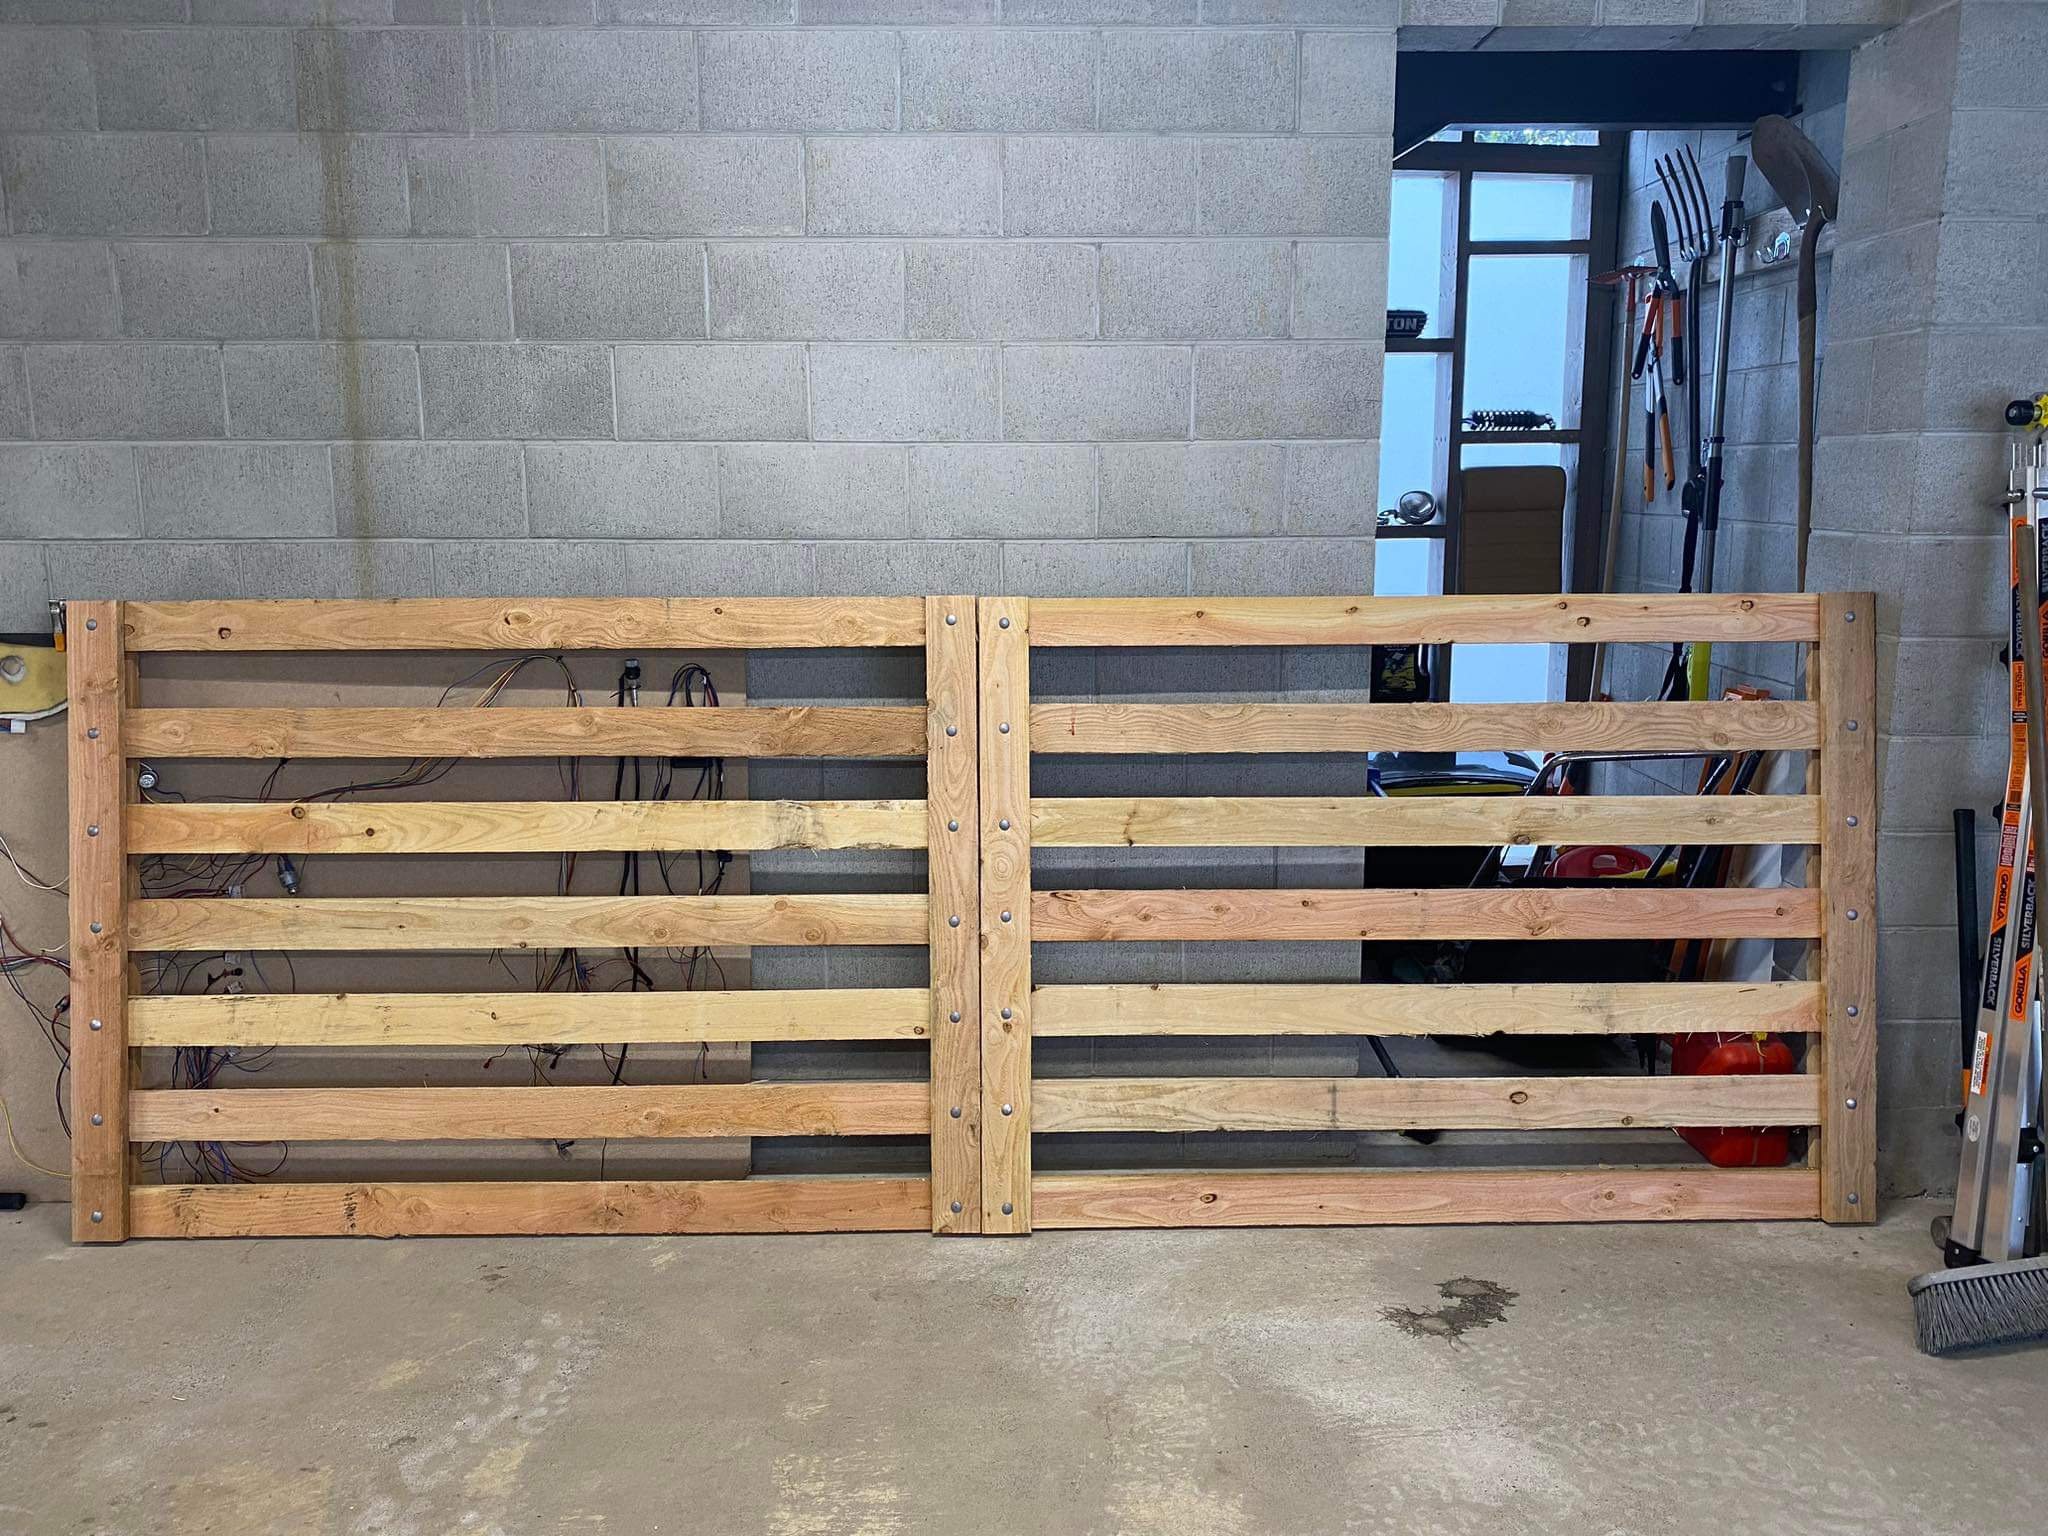
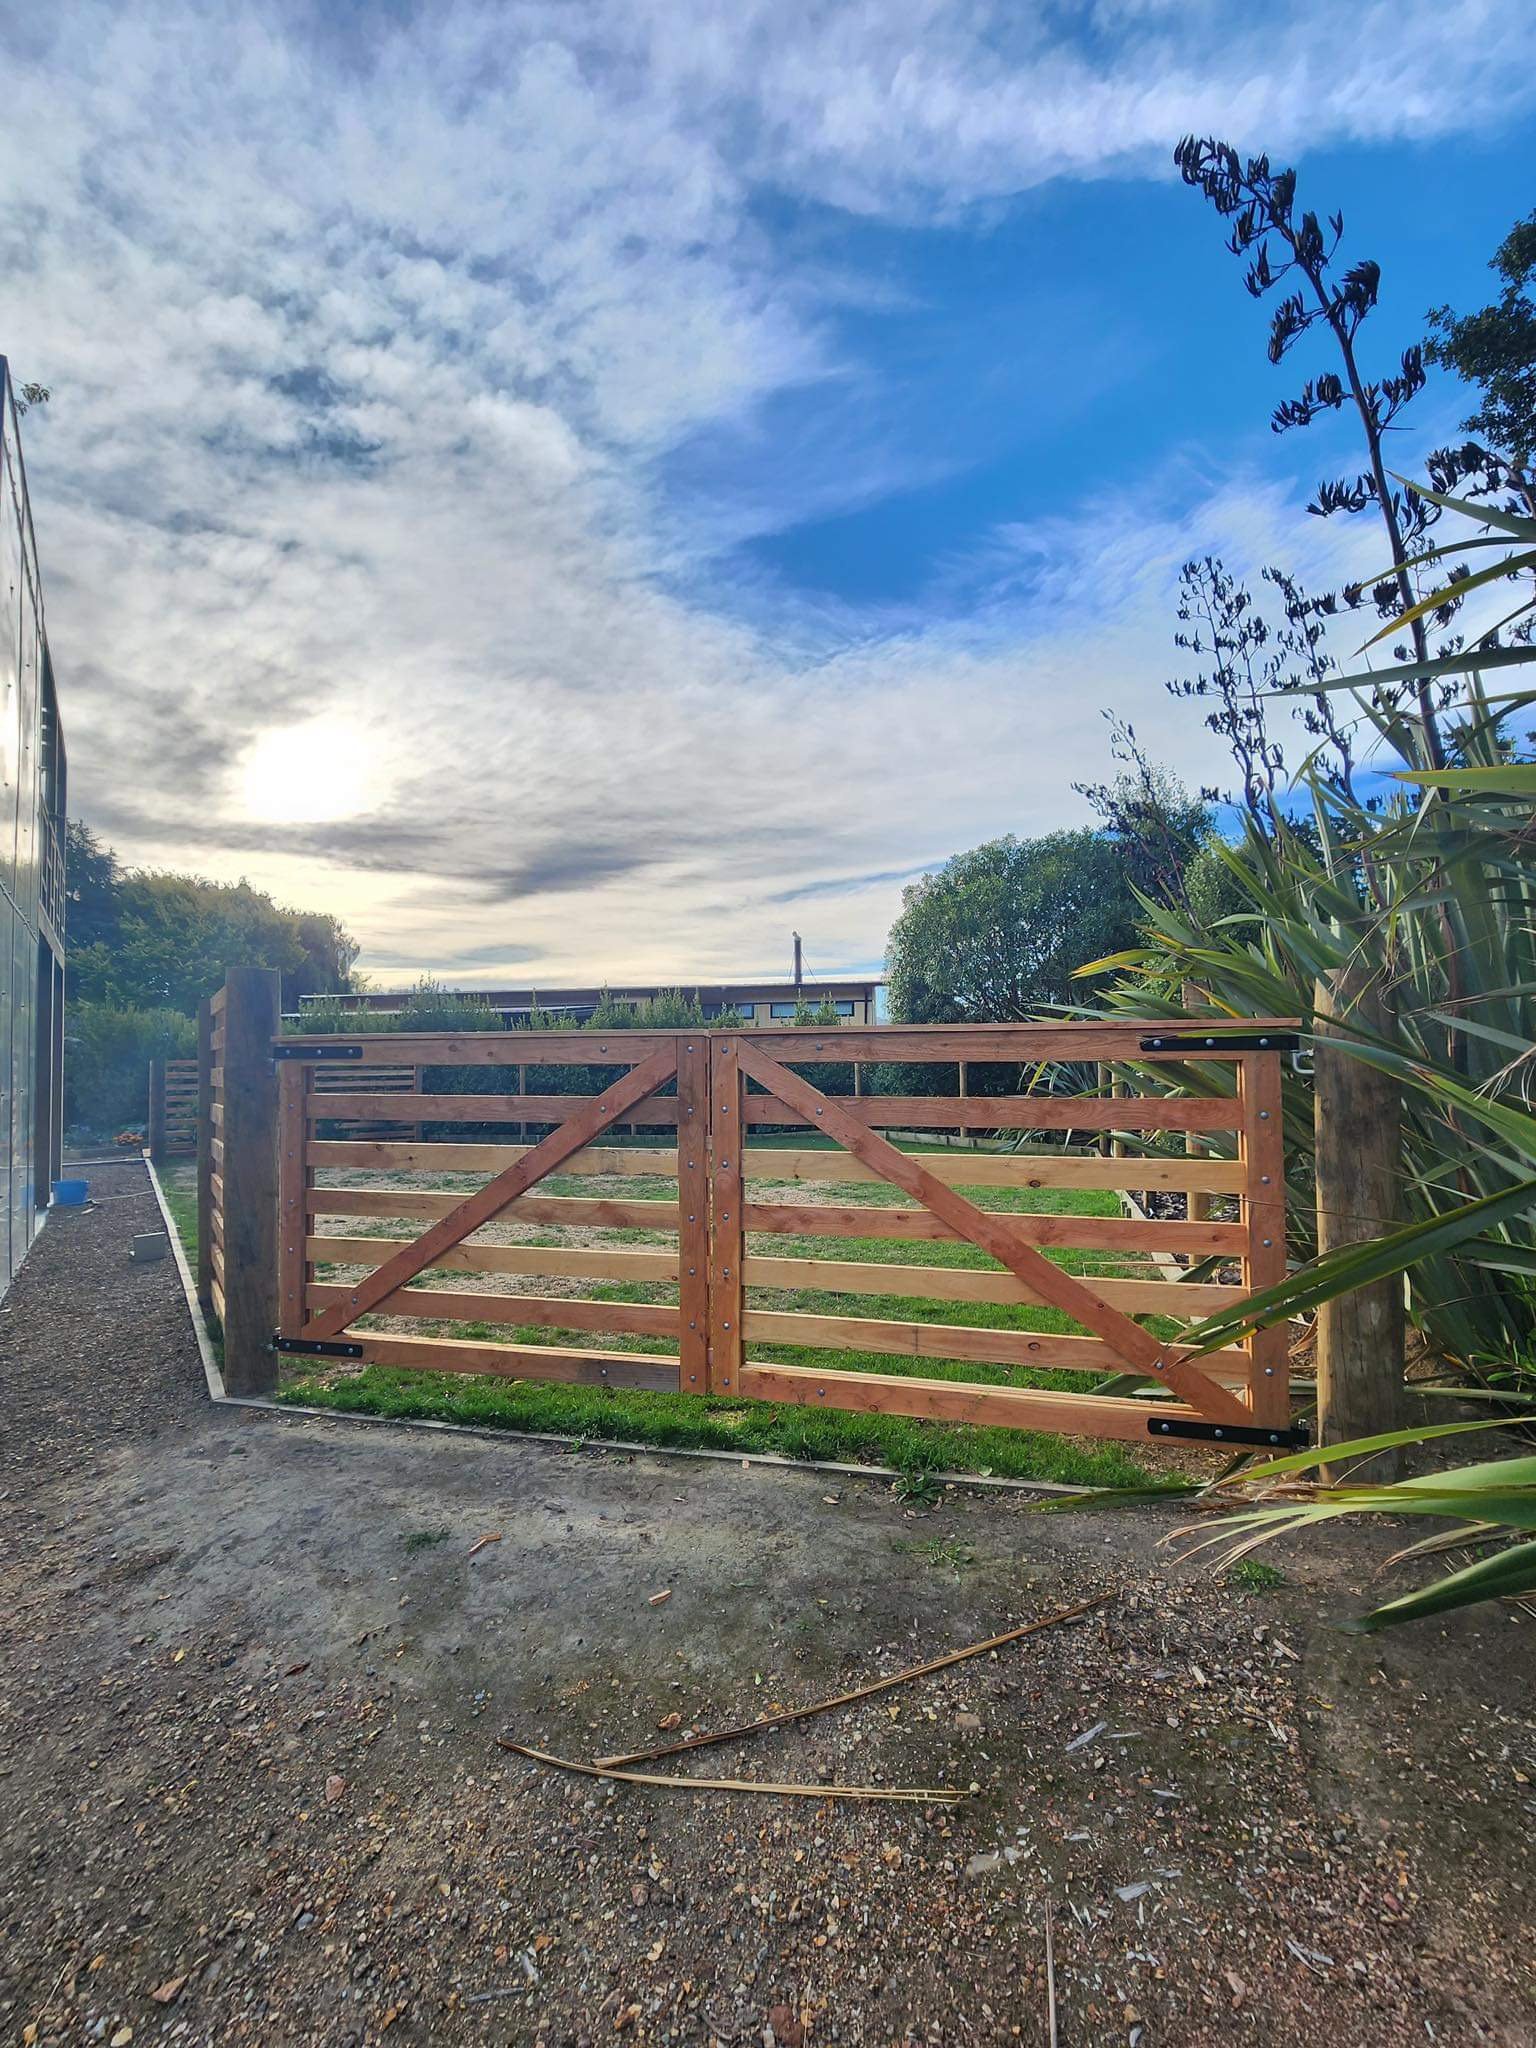
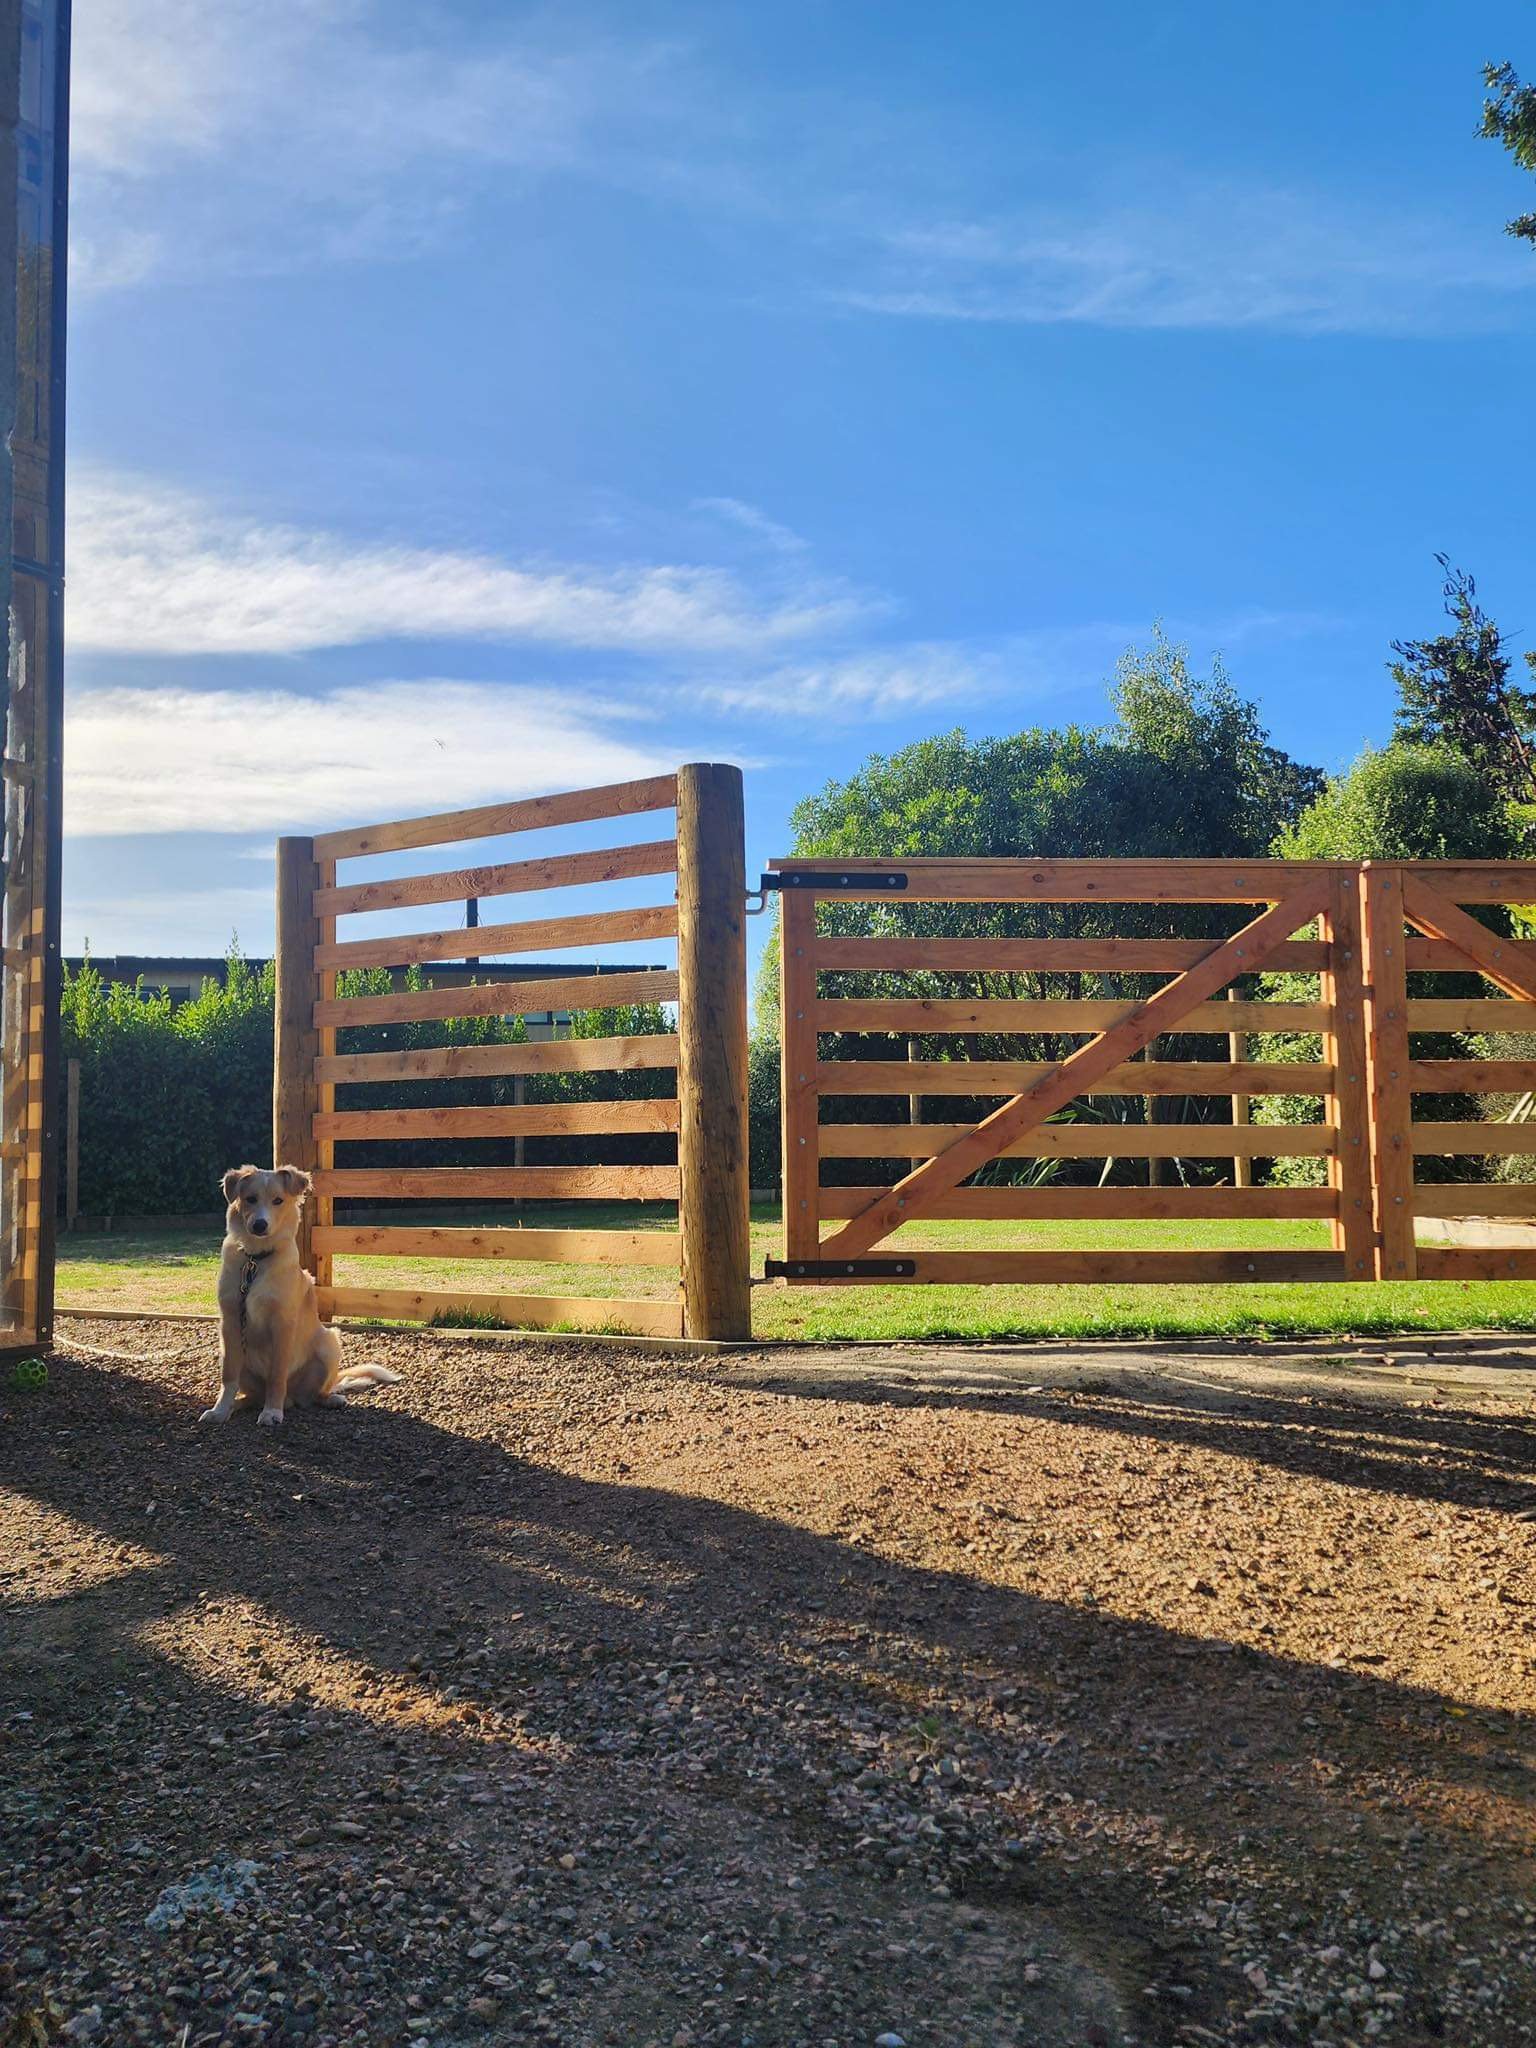
Made some gates so Finn has a nice place to hang out off the lead. Gates are 100x25 Oregon and 200mm round strainers for each gate post buried a meter per side, pretty sturdy: He was keen to show that he could still escape if he wanted to… Alcatraz it is not… yet…
1 point
-
Back home in Porirua. I picked up another set of wheels that are looking pretty schmick. Recaro seats are also in after drilling one hole in each of the factory Toyota runners. Exhaust fell off on the way to Shannon but easily fixed with tie wire.
1 point
-
They want plates to be mounted right way up so the smart cameras can read them. A lot of trailers have them sideways because there’s no where else to put them.1 point
-
This has now been postponed due to everyone saying WTF to NZTA. Especially for trailers.1 point
-
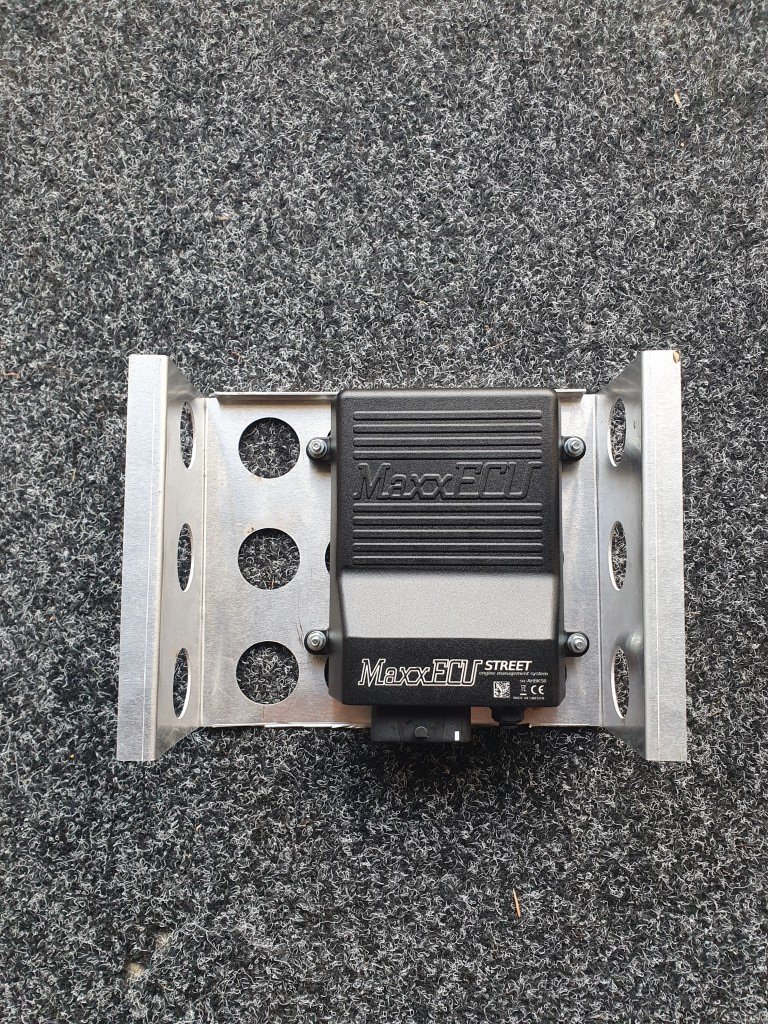
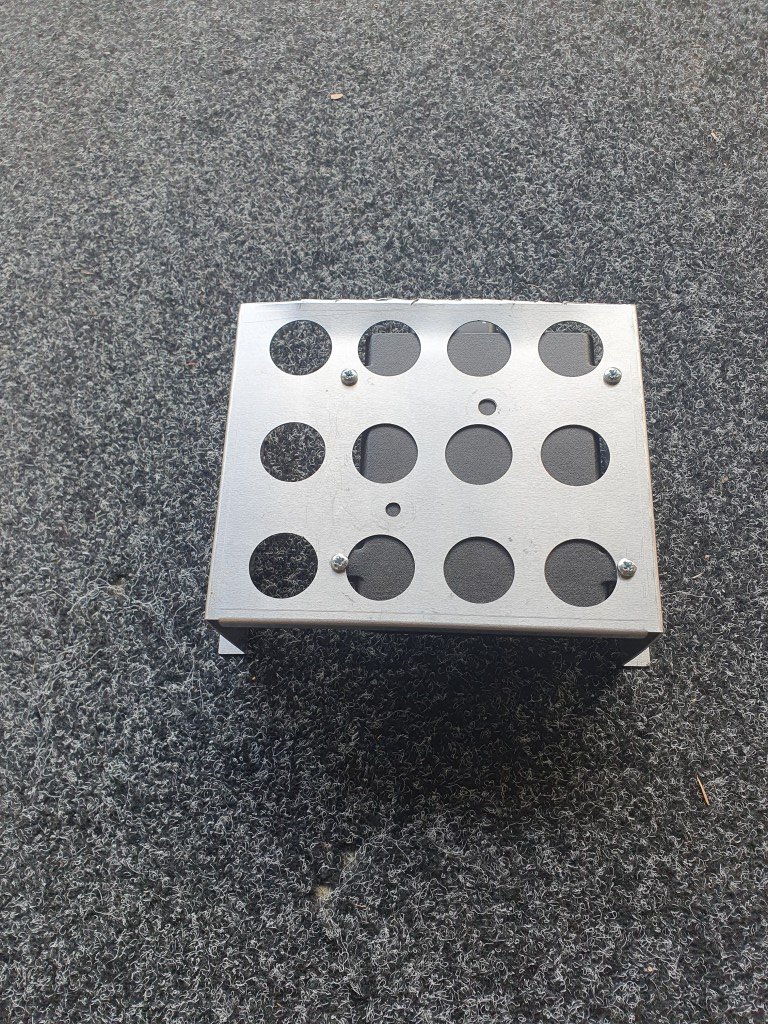
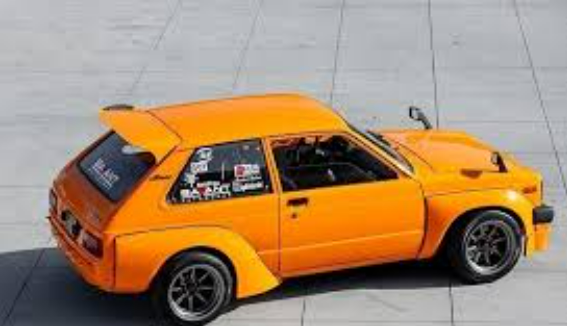
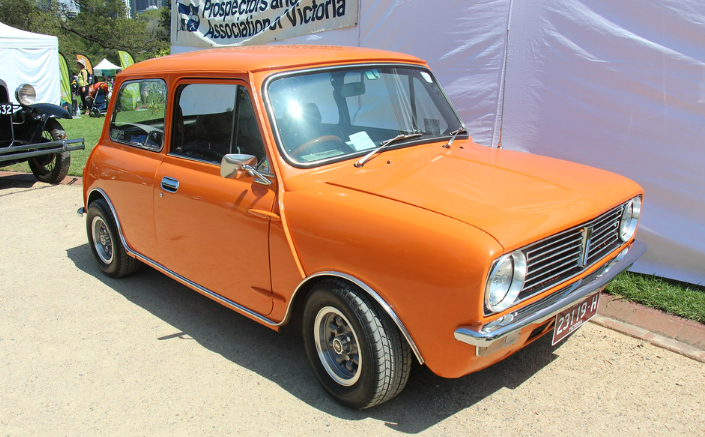
This build was never supposed to make it to a "next page", oh well. ECU mount which will be tucked up behind the glovebox/footwell. Needs some rubber isolating washers and fixings. REVISED, now attached to the back of the glovebox for even more space saving. Its got a nice locking plug but also needs to get the vacuum feed with minimal kinks to the MAP sensor from the vacuum block. Also its nice and close for the wideband as the wideband plugs into the ECU. The plug is bigger than the actual sensor so the cover plate for the gear lever hole will have a wideband sensor sized hole with a grommet. Working on a mild wire tuck, battery all wired up and will be unnoticeable once carpet is in again. Other than that, motivation is at an all time low so updates will be slow. Turns out getting married is quite expensive so not sure if the KP will be driveable this year. The Mini is currently in for a small birthday, new tyres and a once over. Working towards paint. I think a nice orange for both cars eventually would be nice. Inspo:
1 point
-
1 point
-
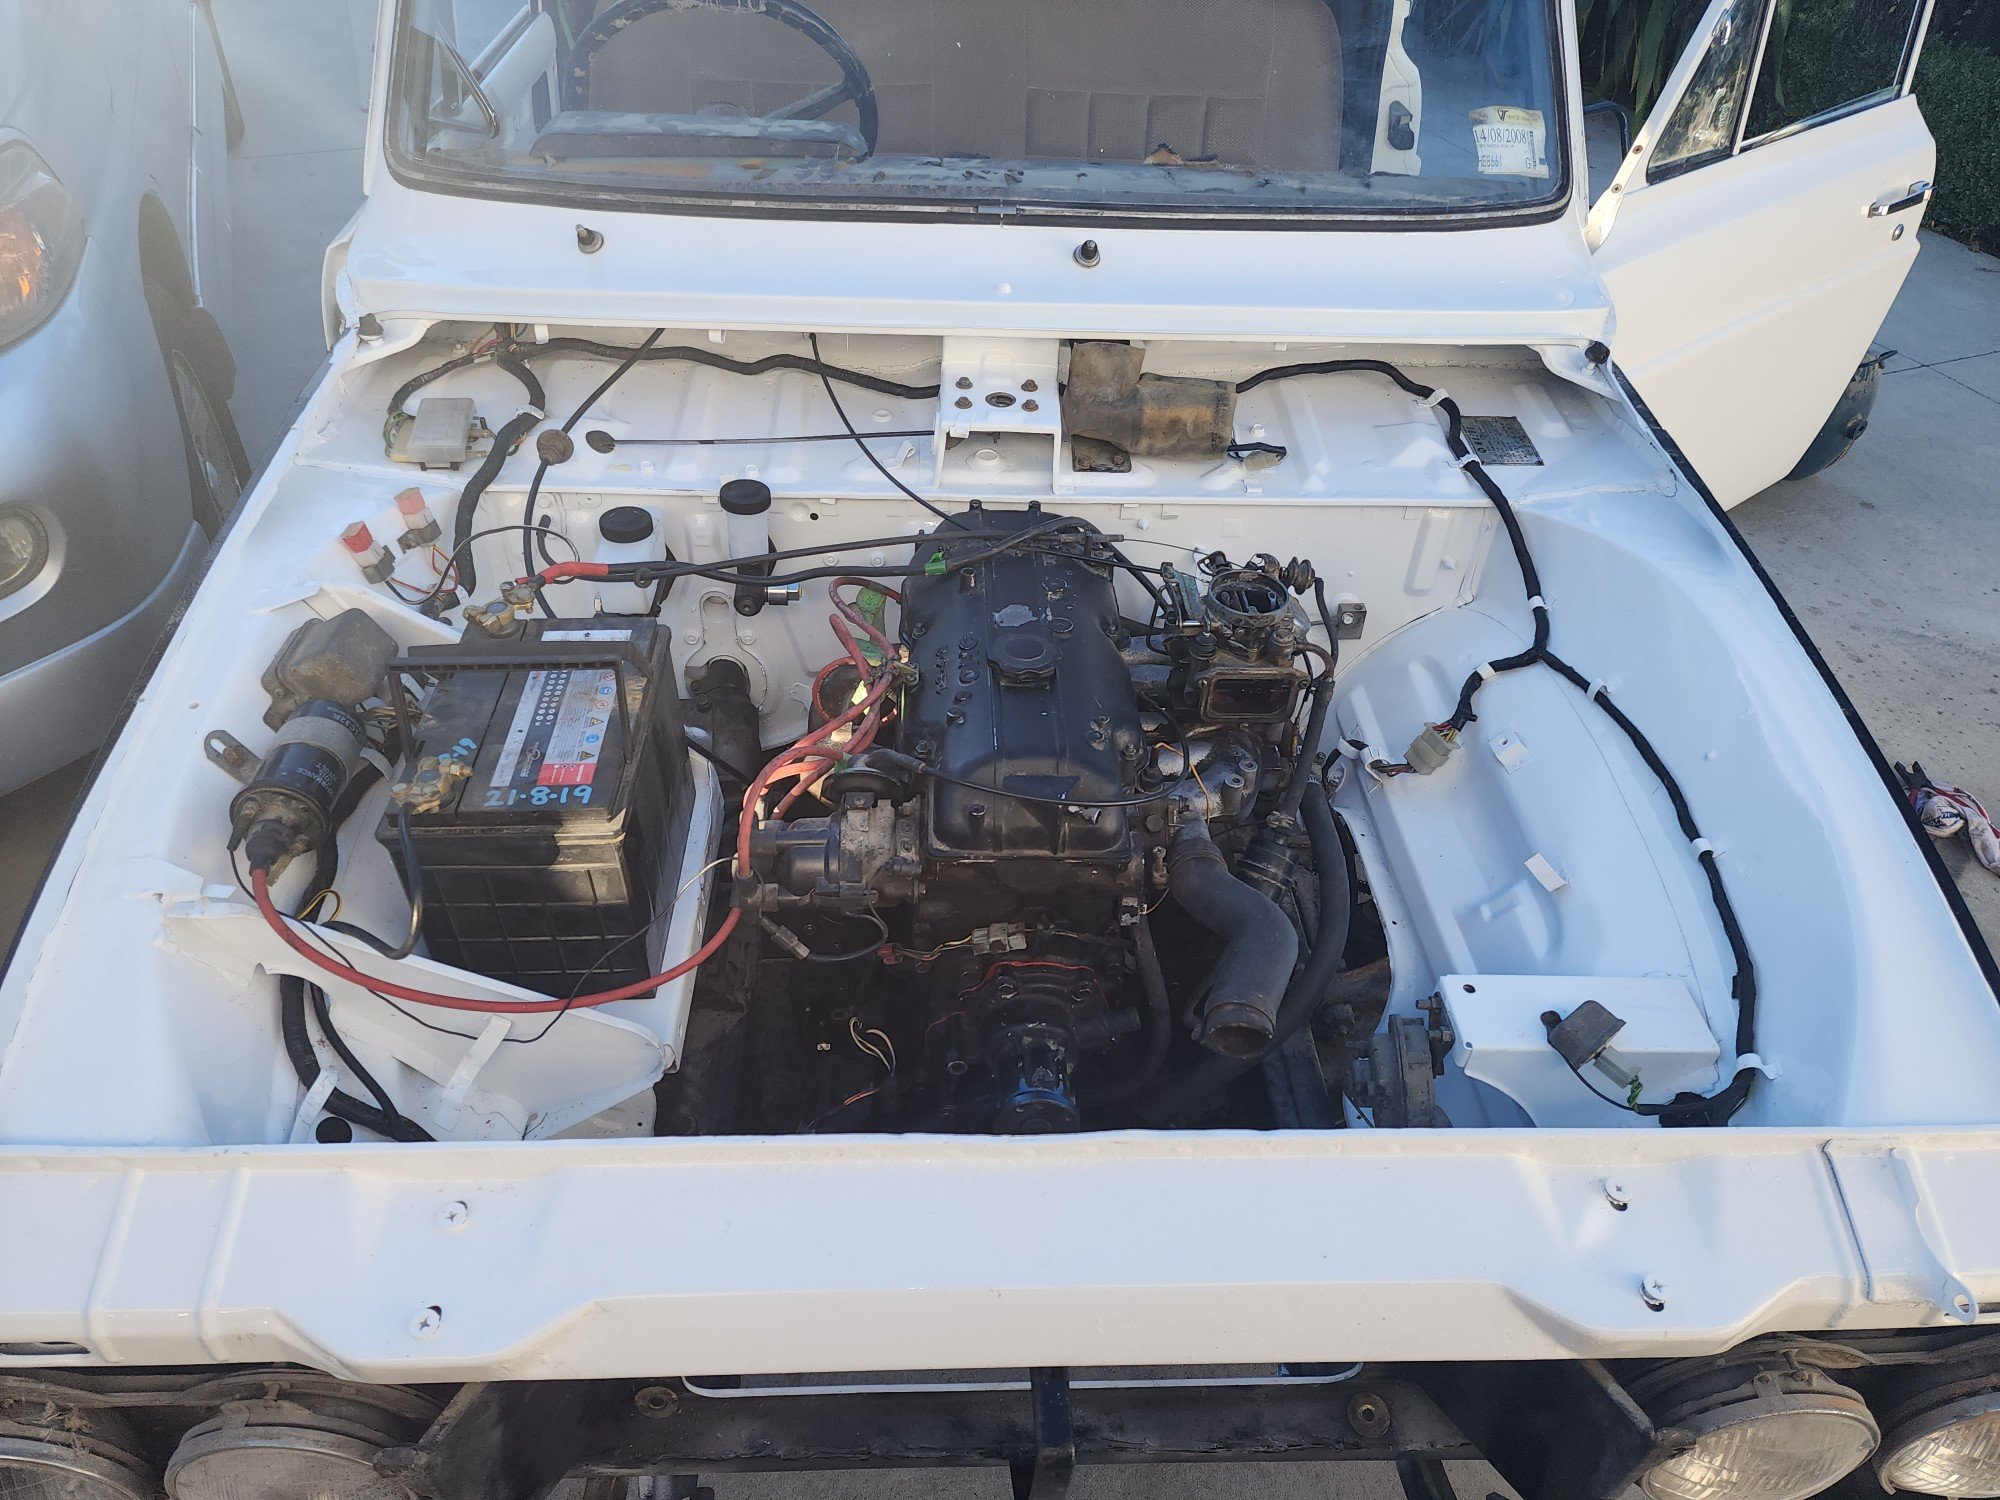
Progress is coming thick and fast now. Motor back in . Gearbox back in . Got it running today for a short moment. Seems to run like a champ. Waiting on a new waterpump then I can get it up to temperature.
1 point
-
Well surpisingly this thing took an absolute repeated hiding today at the OsDrags like a champ, and the hot air induction and exhaust worked it went as quick as 16.0 but settled into repeated 16.2's the rest of the day and even started turning the tyres off the line a bit as well as the day went on. Plugged the laptop in during day, small changes did show results mainly bumping stuff around with the trans line pressure and shift points in setting the rev limit to 6000rpm got me the 16.0. Was more fun then last year not having my ass handed to me every race will probably do a night speed meeting soon before bolting on the turbo. I raced a guy in a 300zx and im sure if i turned off the aircon i would of got him! Was bloody close1 point
-
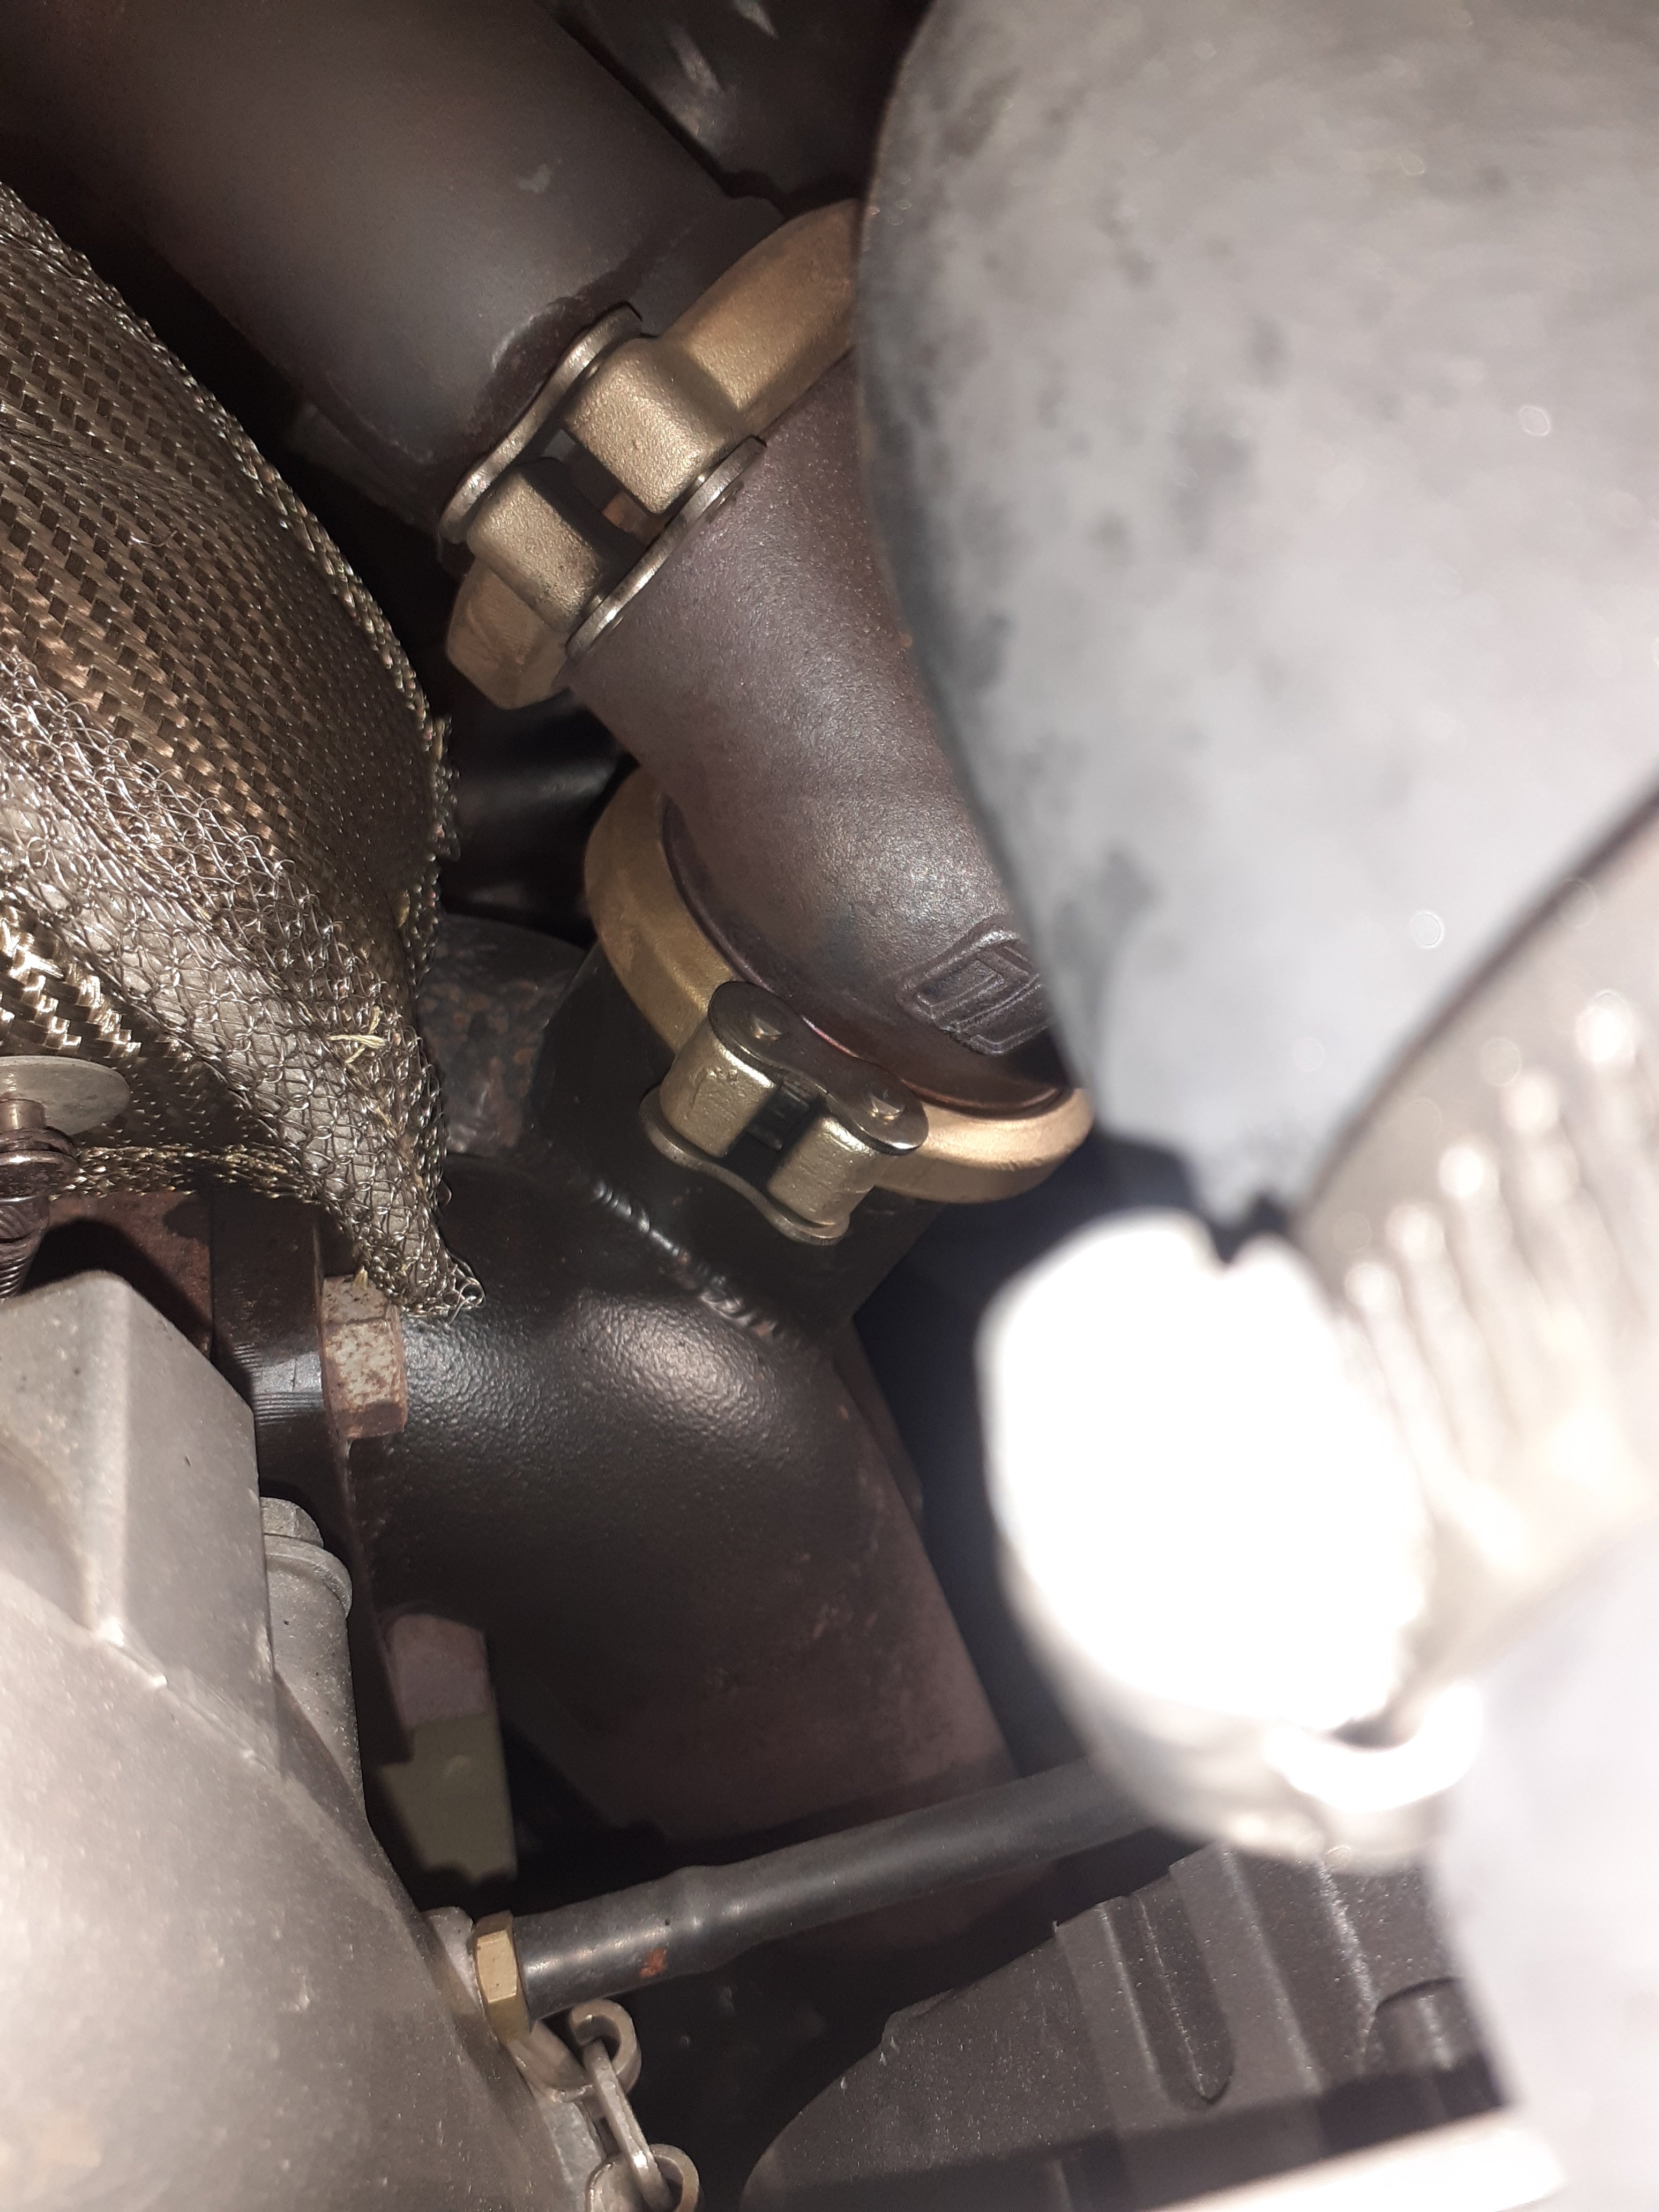
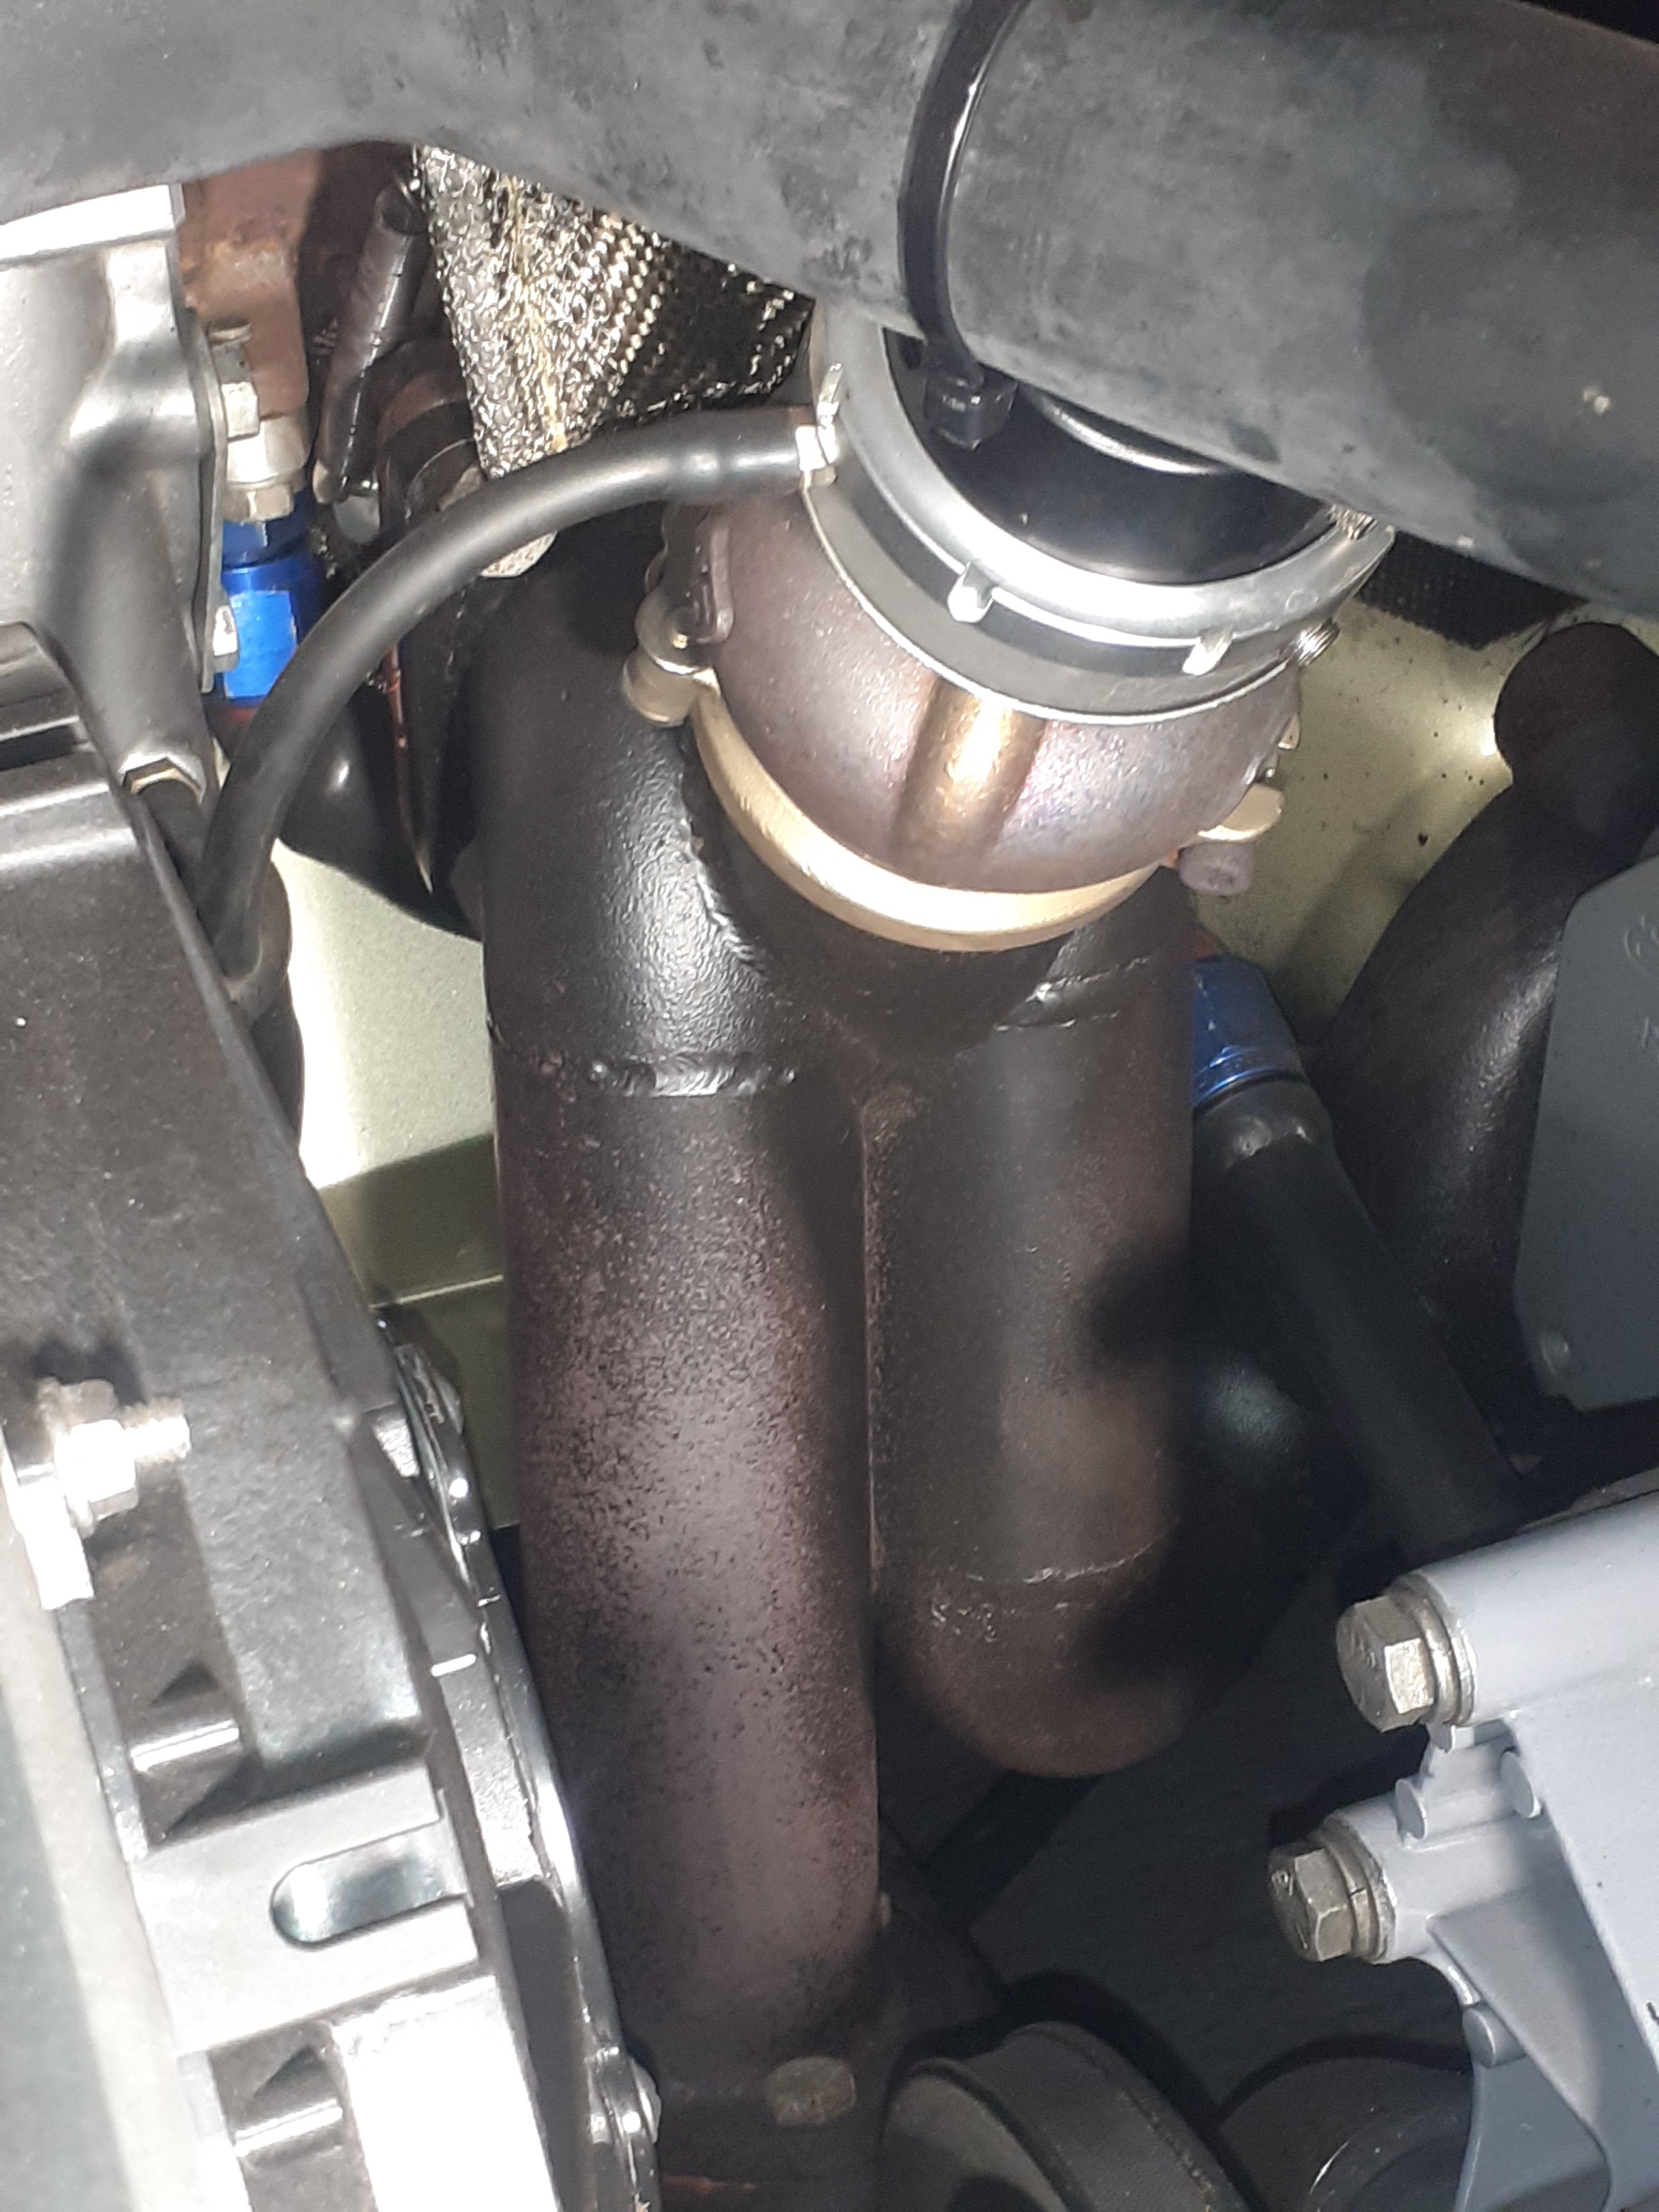
I kind of took a guess where the wastegate would end up against the plenum surprisingly I hit the mark looks good. Enough clearance to pop the v bands and slip it out for spring changes.
1 point
-
Something like that would be better In my opinion (and I'm not a tuning whiz, it's just stuff I've done that hasn't caused any problems) wastegate flow is important, even more so on something that is going to run lower boost (as the gate is going to flow more) and might be a bit fragile or sensitive to boost spikes or fluctuations
1 point
-
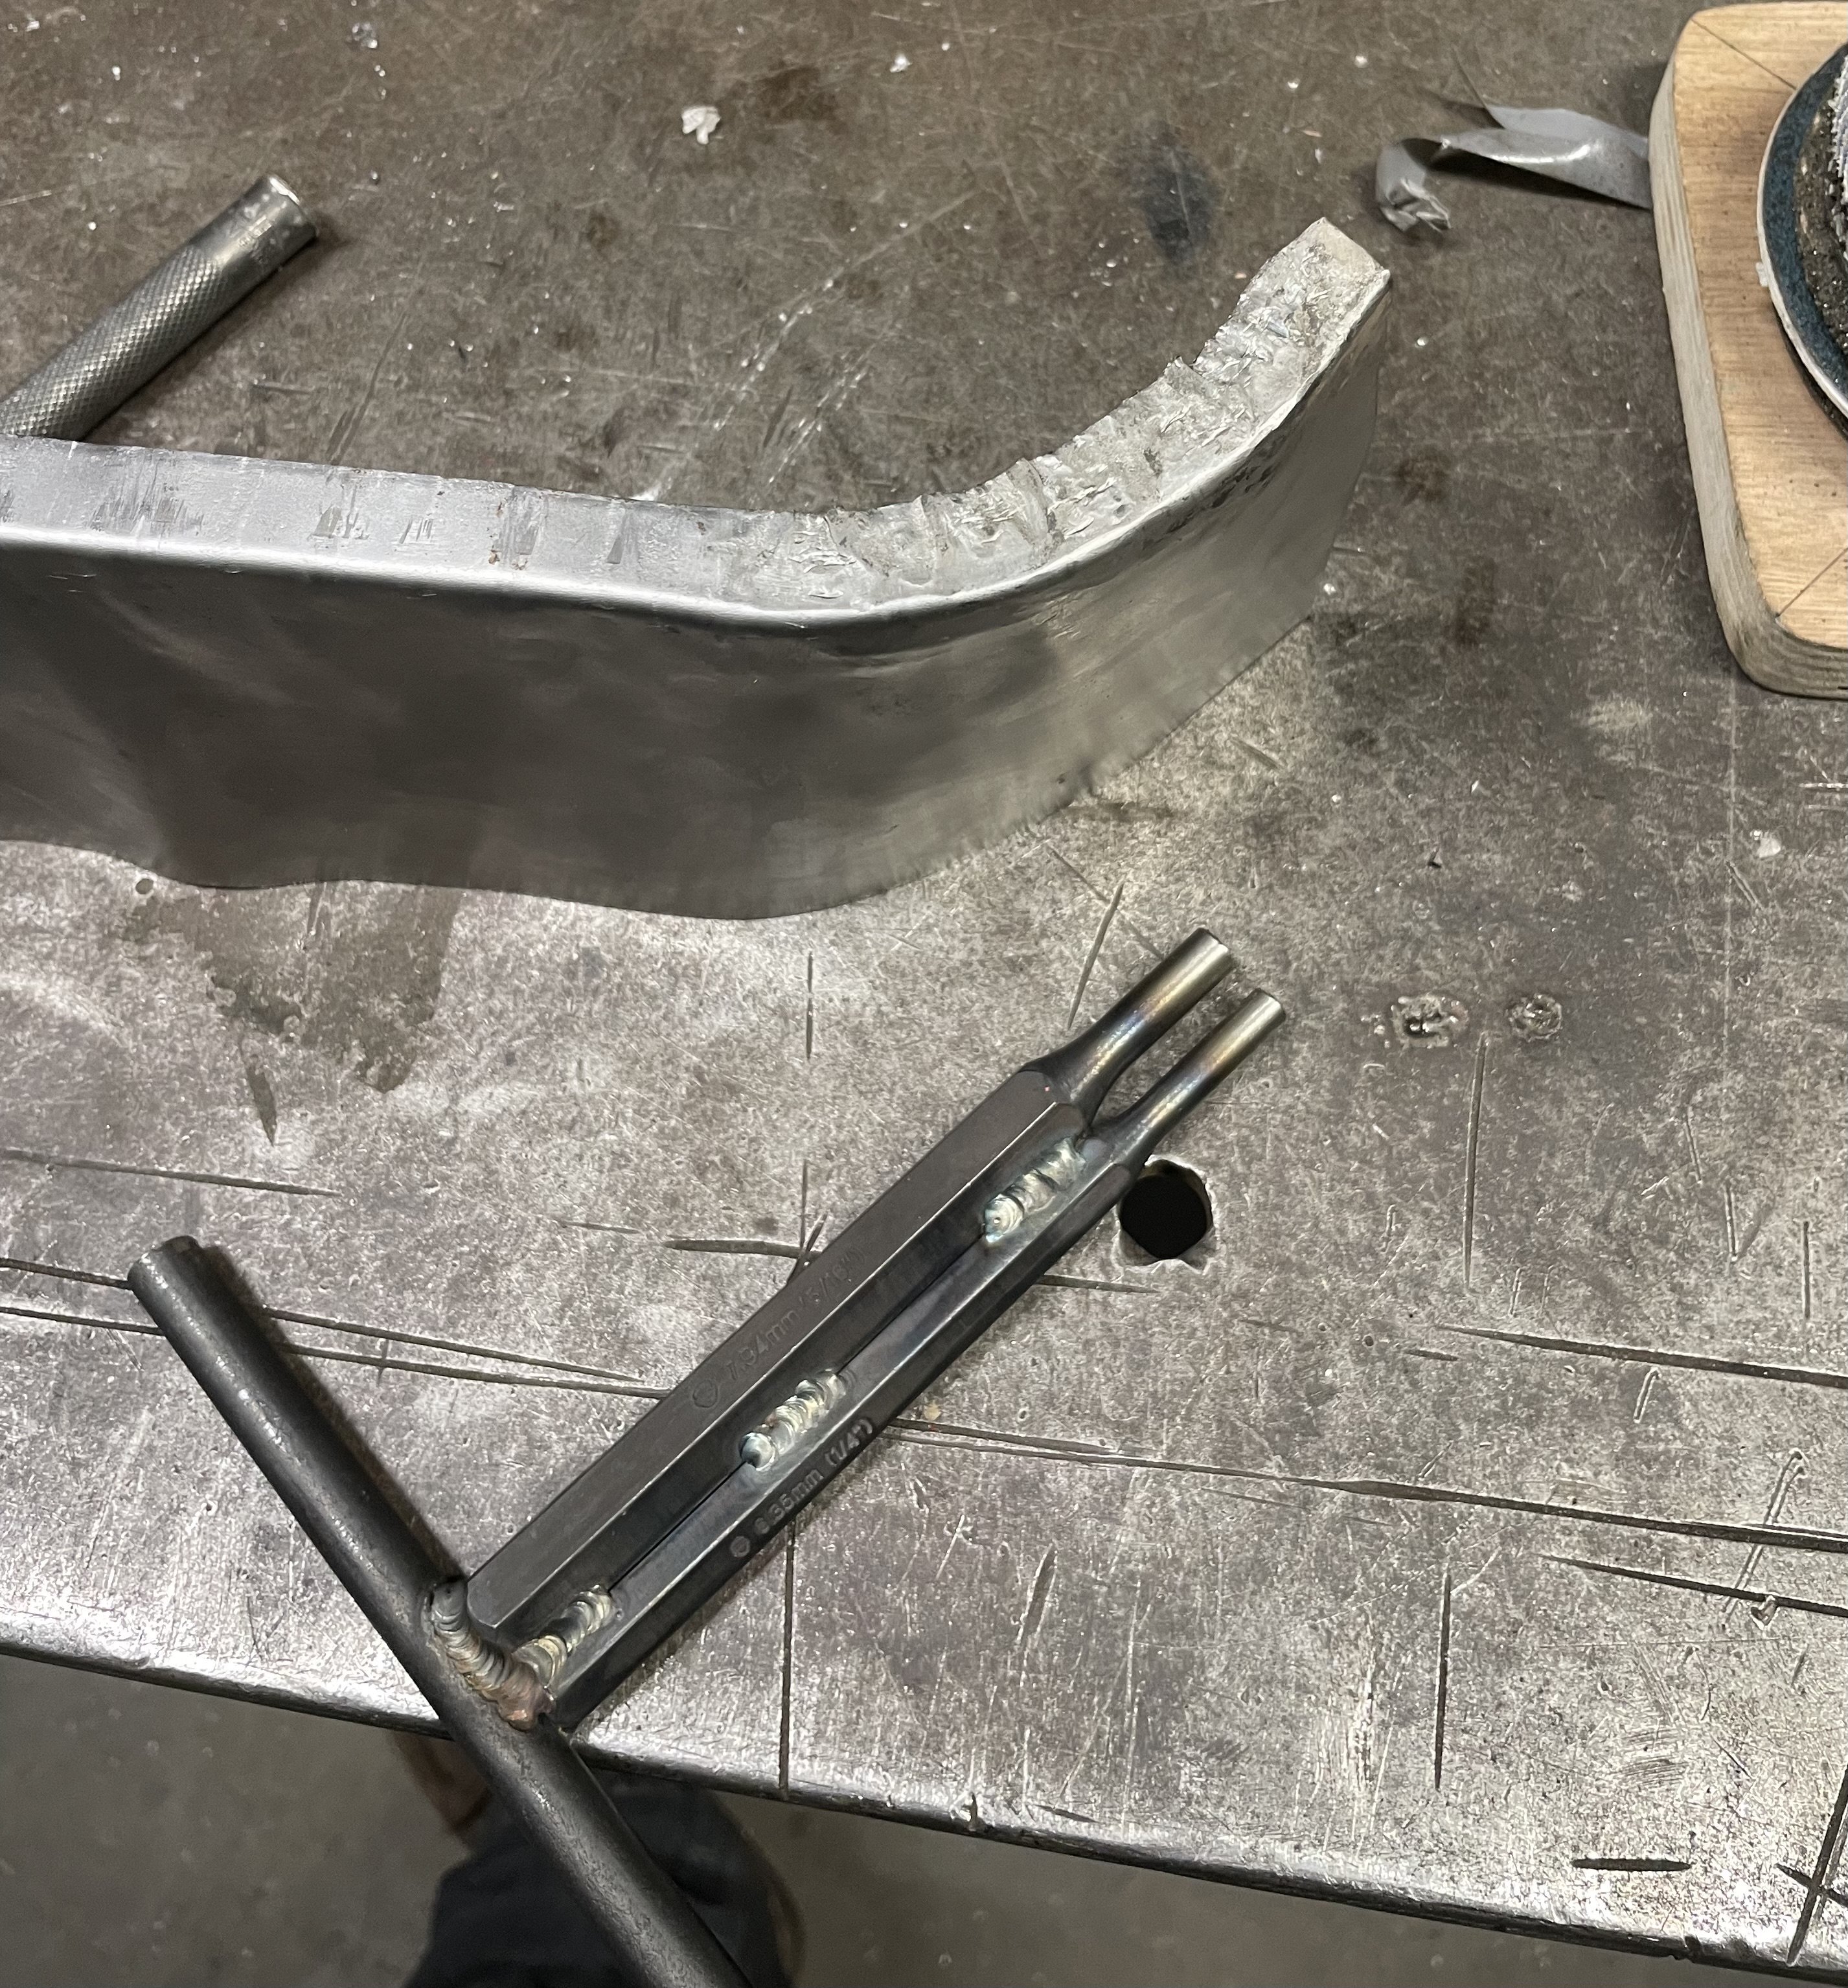
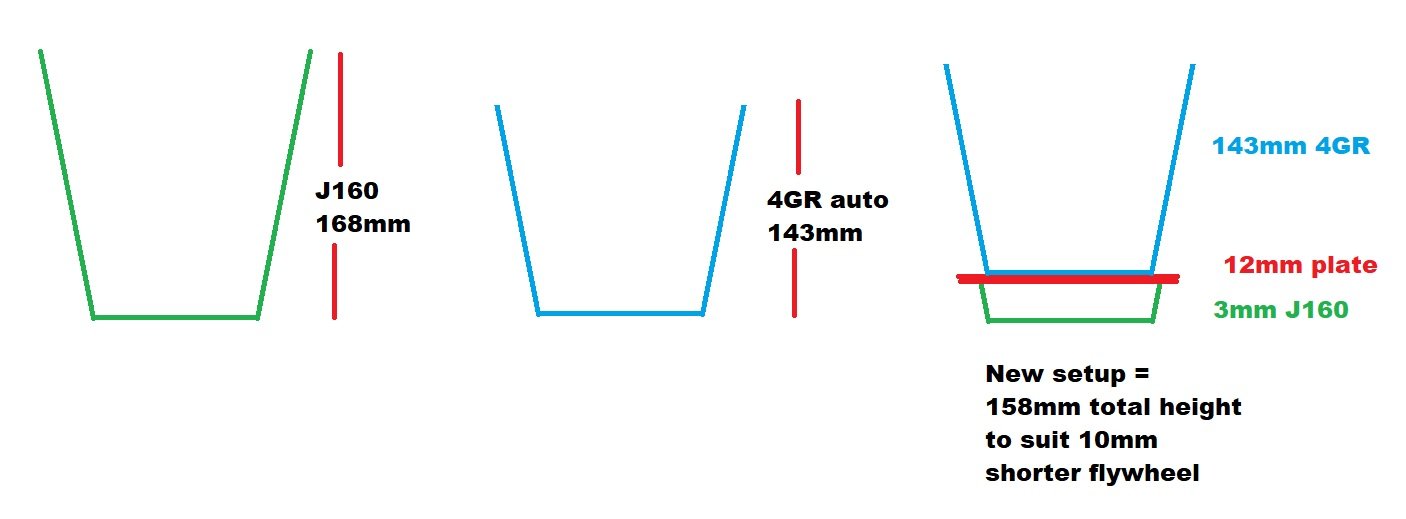
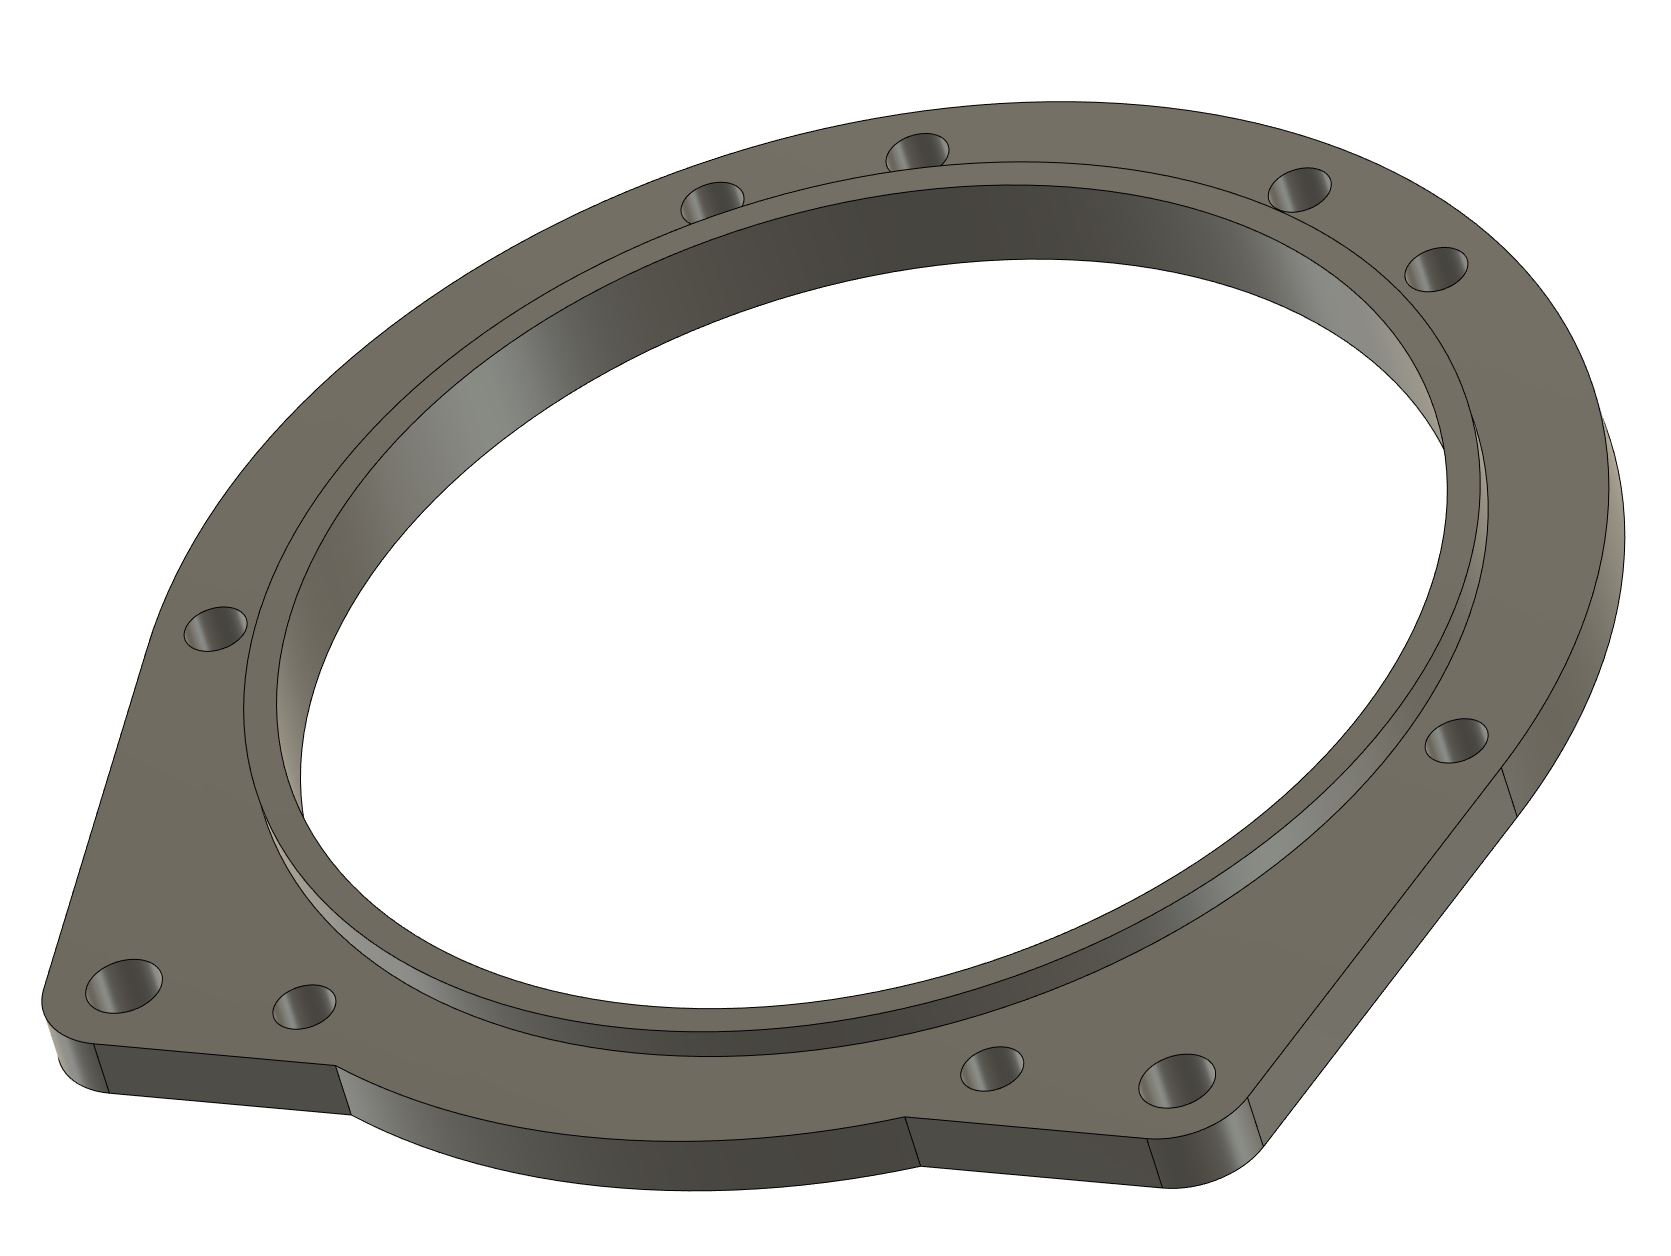
Alright so one of the reasons I've been dreading dealing with the bellhousing situation, is that usually things are located with 2 or three dowel pins, and then held together with bolts. The problem is that unless you get the dowel position exactly correct to the centreline of the input shaft, it can end up being way off. Then you might end up having problems like the gearbox runs real hot, or keeps wearing out bearings or whatever and wont necessarily know why. So, I think the universe decided I deserved a bit of a win after the adventure of aquiring the box. Because the Mark X auto box doesnt use dowel pins or anything like that, to locate the bellhousing onto the gearbox... It just has a giant circle, and a giant round hole that press up against each other. Too good! So a bit of brain storming with a few mates and taking some measurements, I think I've got a plan. Basically the J160 bellhousing is 25mm longer than the Auto one (hooray) So I'll basically cut almost the whole thing j160 front off, and weld on a flange/ring that will be easy to position relative to the input shaft hole. As the bellhousing wont be in the way. Then the bellhousing locates on the ring, and bolts up. Sweet! Also this bellhousing pattern is bloody easy. Both sides are symmetrical and it's really easy to index their positions relative to the round hole. So something like this will end up welding onto the gearbox. I am thinking could use a second plate in the middle that also slots into the input shaft hole of the gearbox. So it will be exactly central. Then once it's welded on, the bellhousing can center itself on the ring, and bolt into the correct place easy as! The only issue will be that there's no hole for the clutch fork to go through, and will need some bosses welded on for a slave cylinder. EDIT: no, the existing slave cyl holes will work as they are further back. Sweet. So I'm gonna chop up a bellhousing, print a test piece and then I'll hopefully have @Stu be able to work some magic with machining and welding etc. Pretty awesome that this looks like it'll work easily, as long term I've always viewed this sort of job as really difficult / above my paygrade.
1 point
-
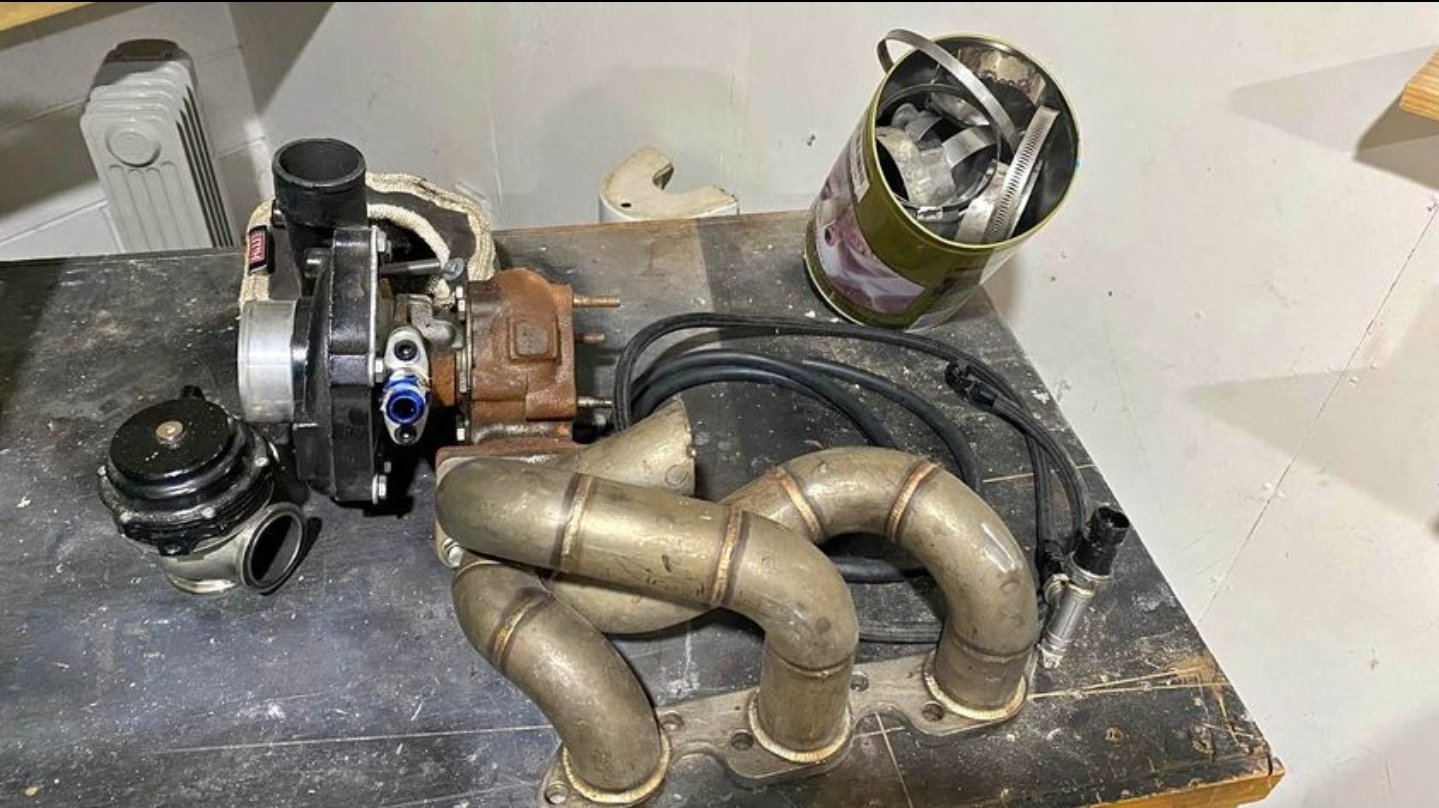
Remembered I have an old engine laying around. Dummy up time for motivation! Turbo may get flipped over to drop it depending on bonnet clearance higher keeps heat away from ac system so we'll see once I take some engine bay measurements what I can get away with. Will jam wastegate somewhere very close to turbo. Opposite side manifold is a stock cast unit off Passengers side so it faces forward and under power steering pump. I've cut all the egr shit off so it's nice and simple will weld on some steam pipe bends as needed to clear everything.
1 point
-
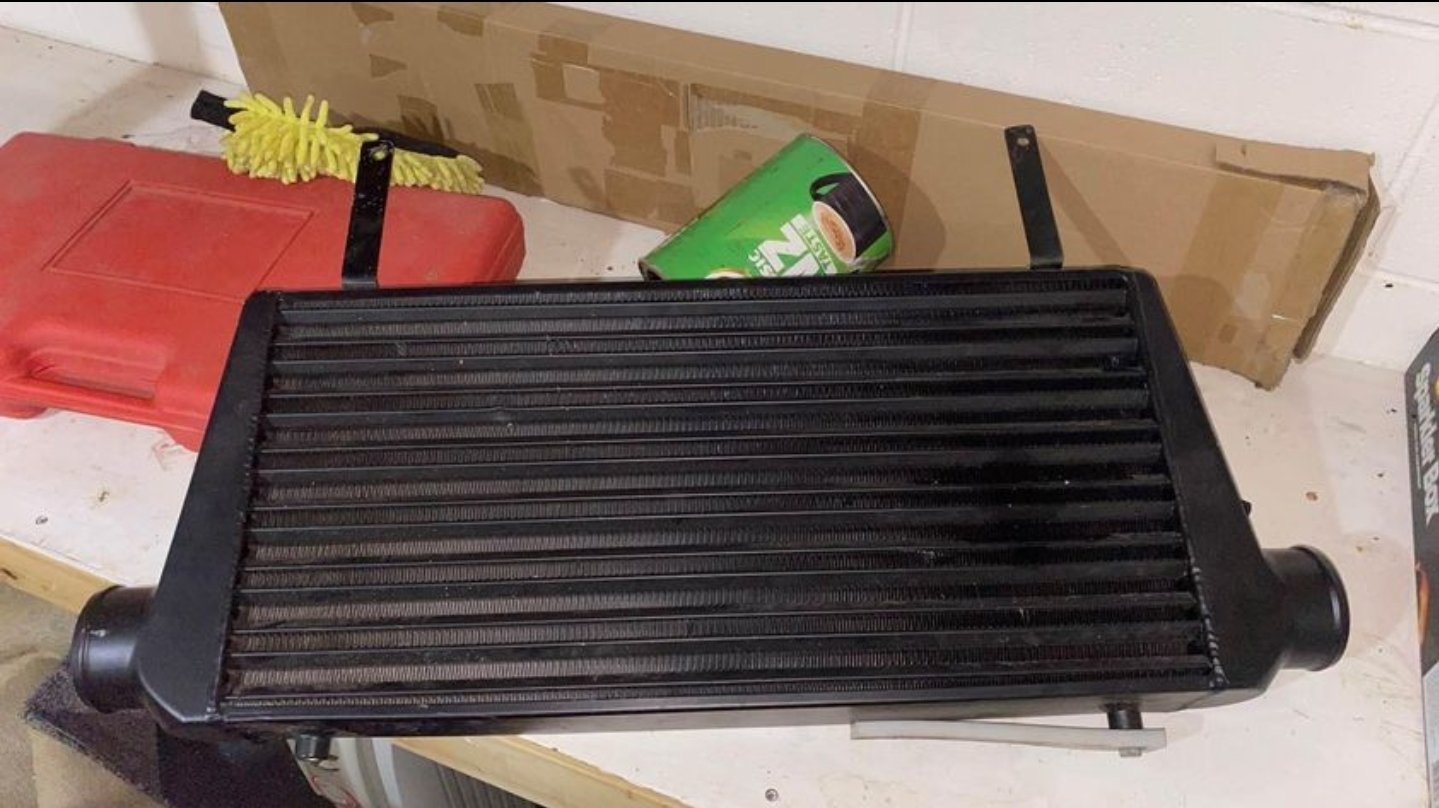
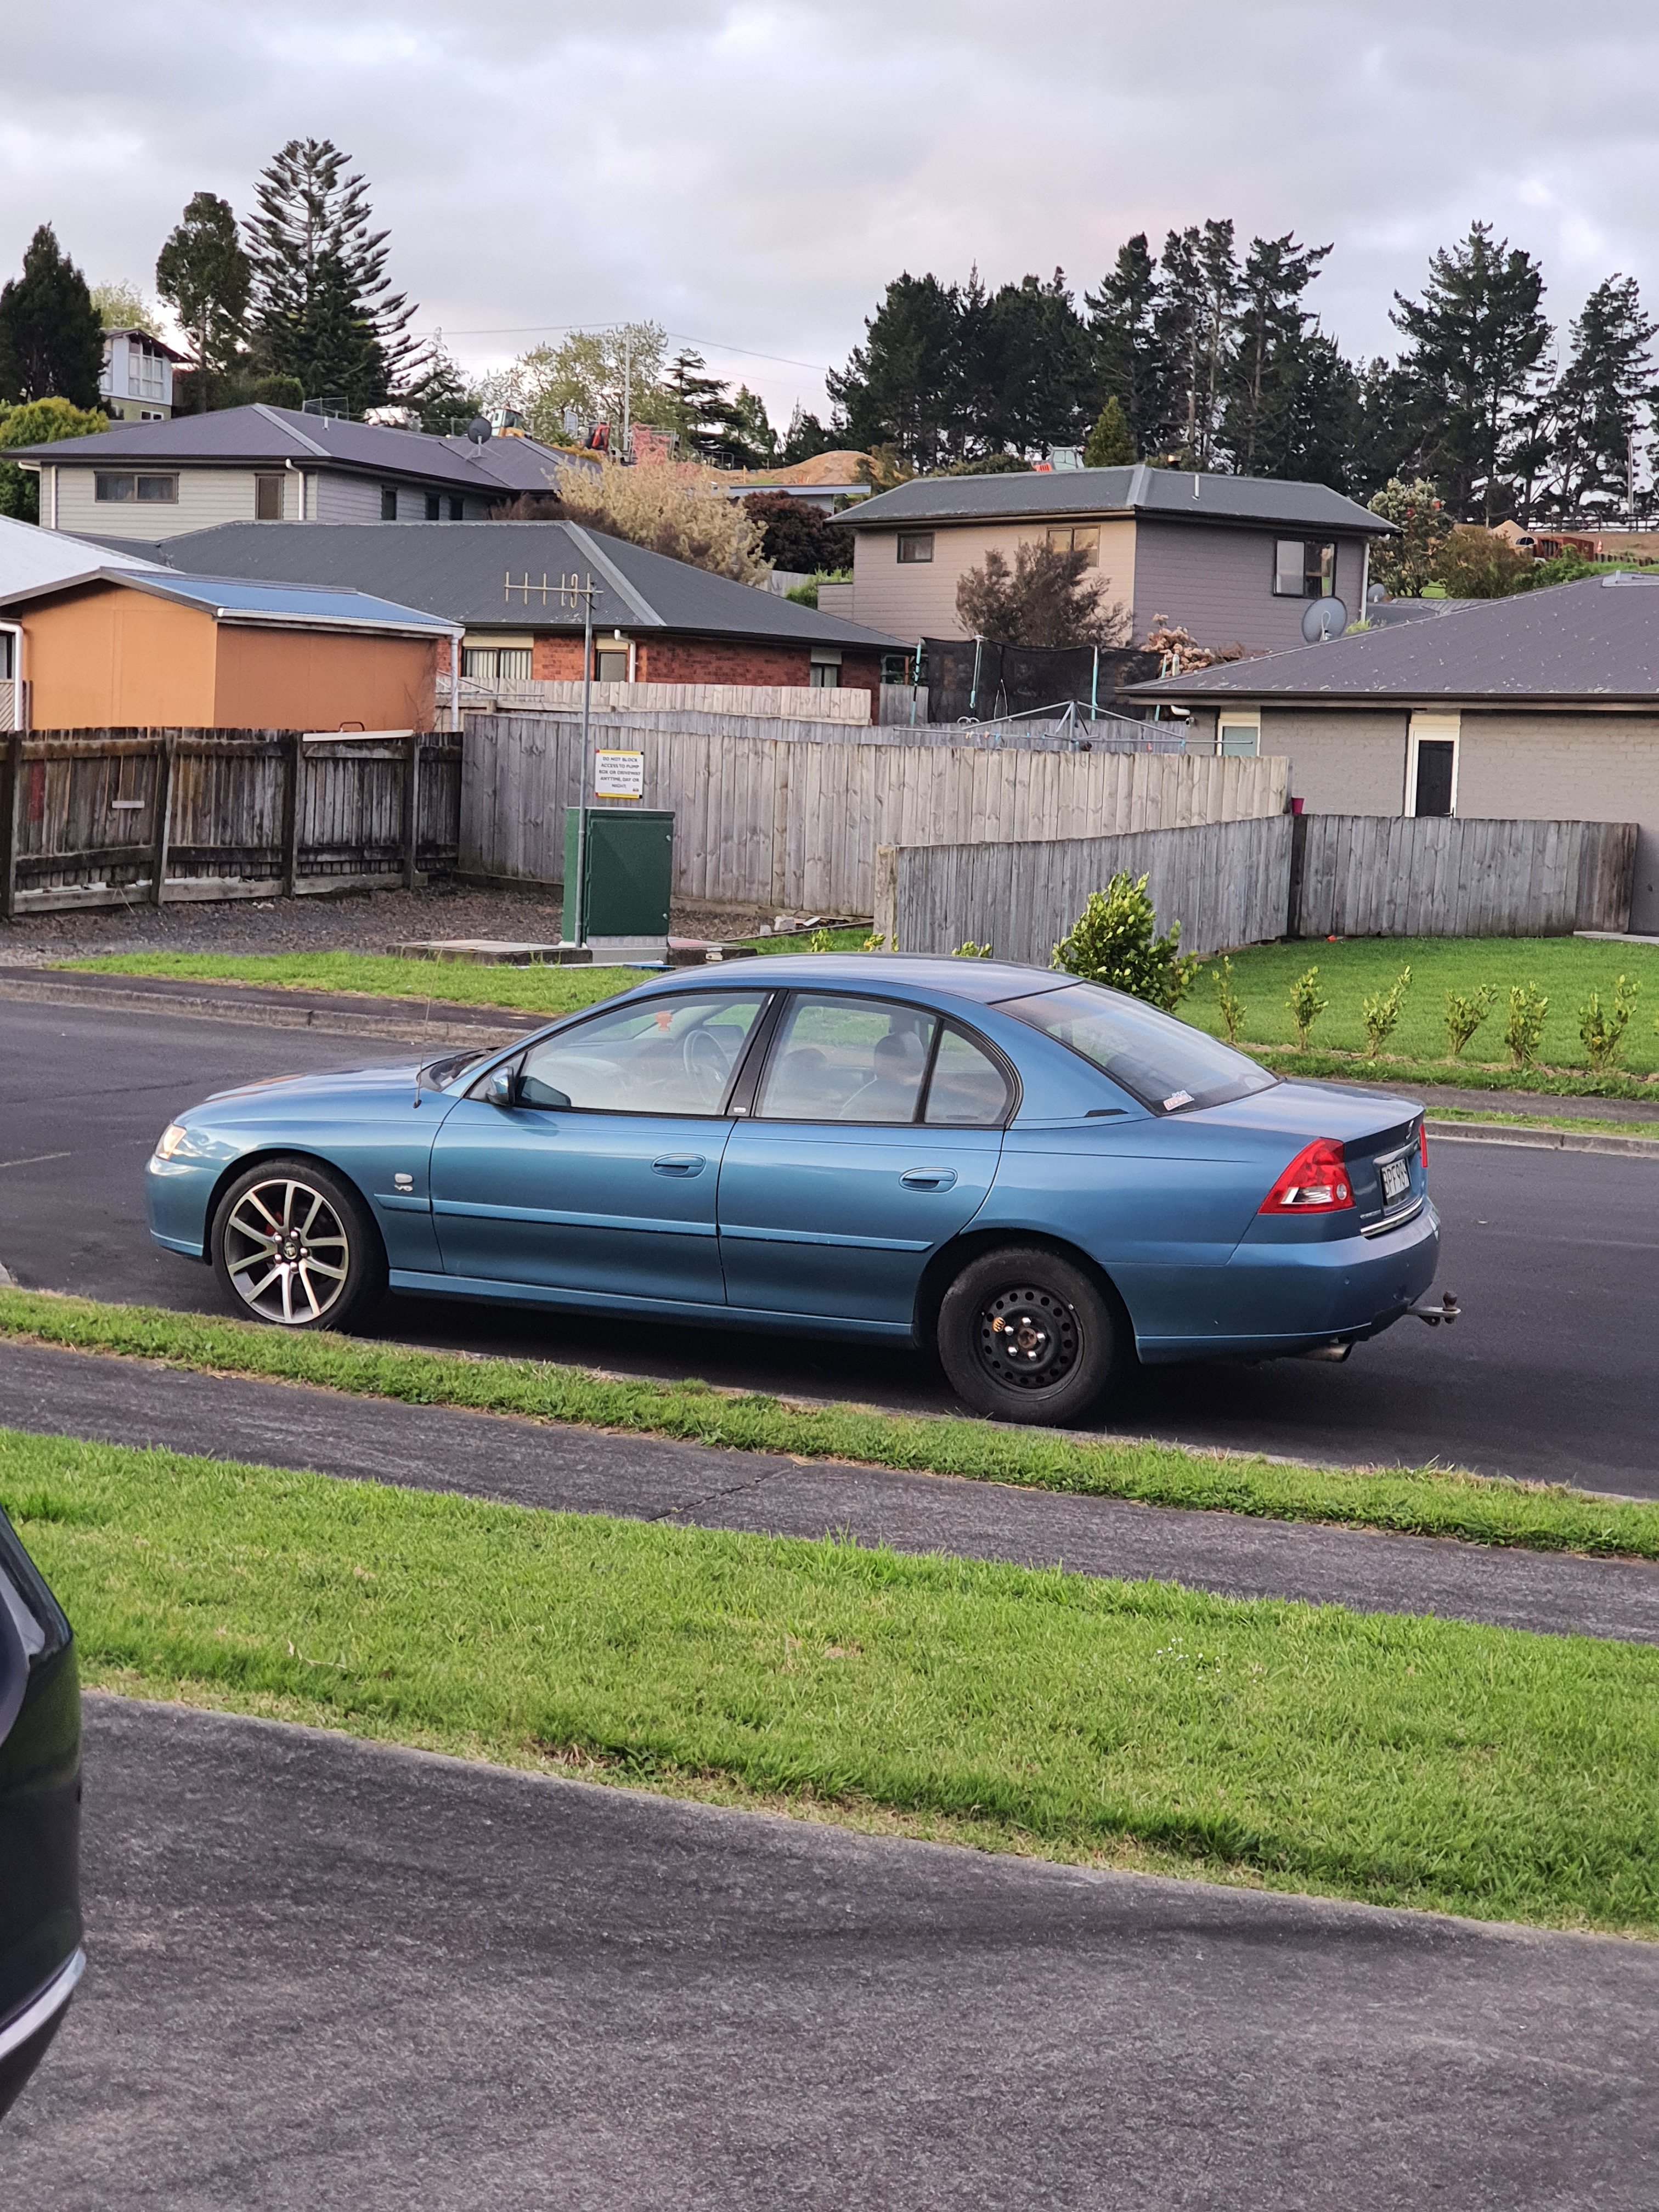
Long time between posts.... so just bought someone else turbo ecotec project eg all the bits to get the turbo on, plus another turbo which will be up for grabs I'll be running mine rather than this thing. Surprisingly expensive build im 10x the cost of the car and counting now to be fair car was cheap as fuck originally. Will maybe be at dragday as a spectator this year. But lookout this summer! Going to have to do something about the paint too poor things not so great got hit by a garden shed in a storm a wee while back.
1 point
-
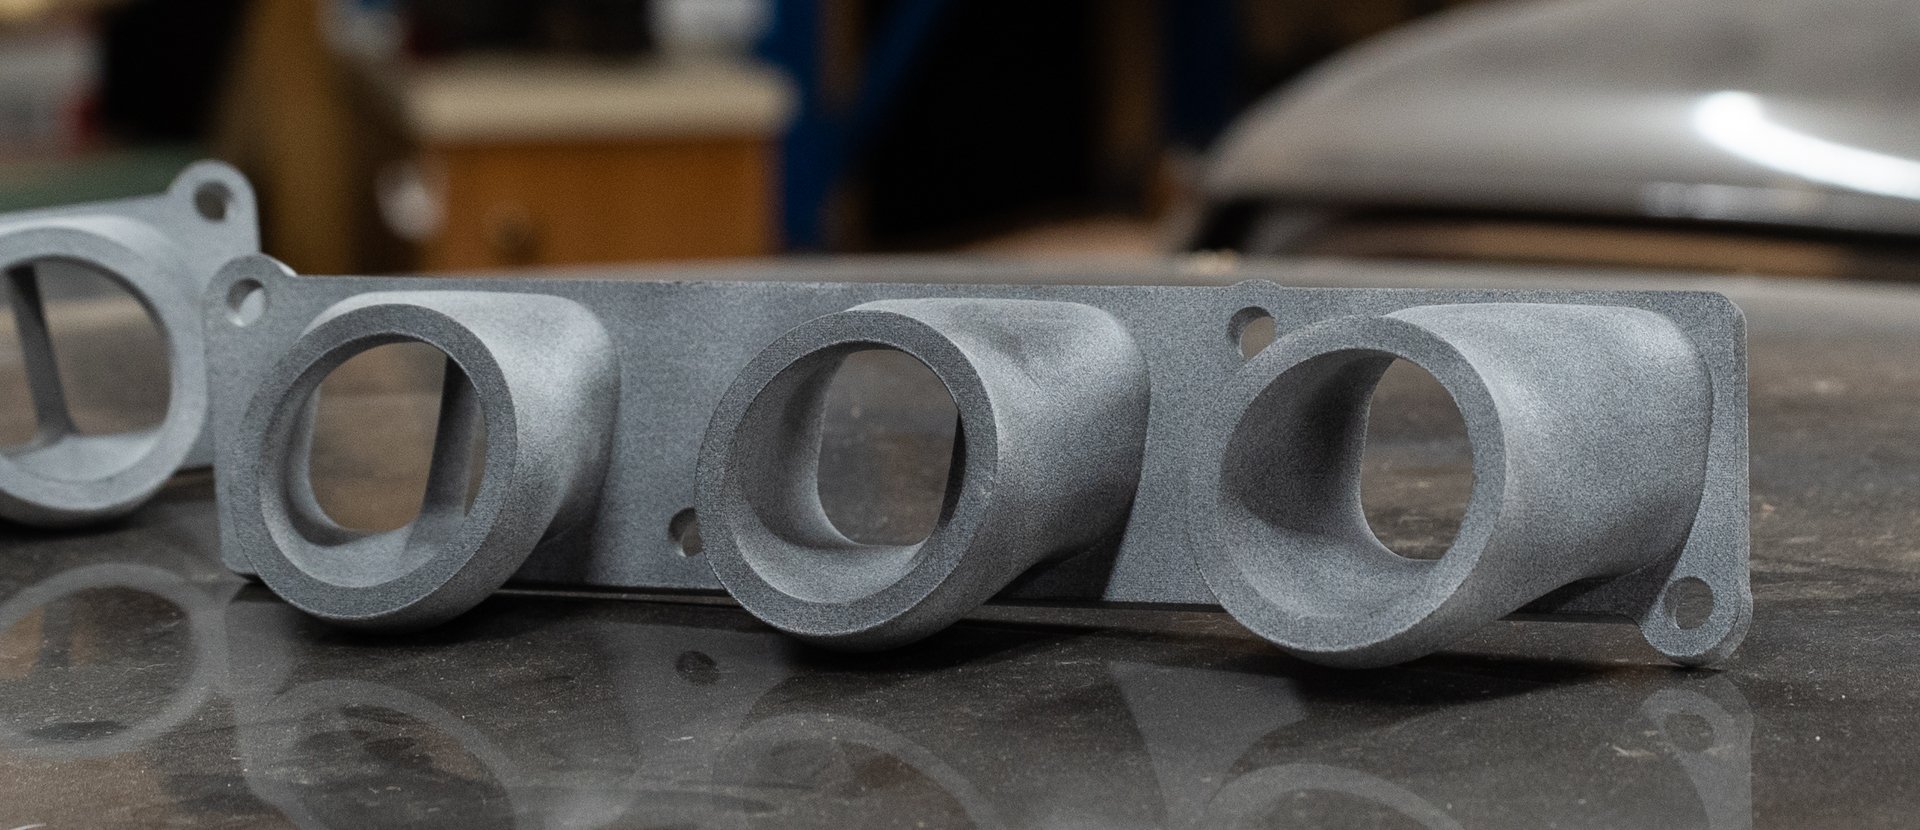
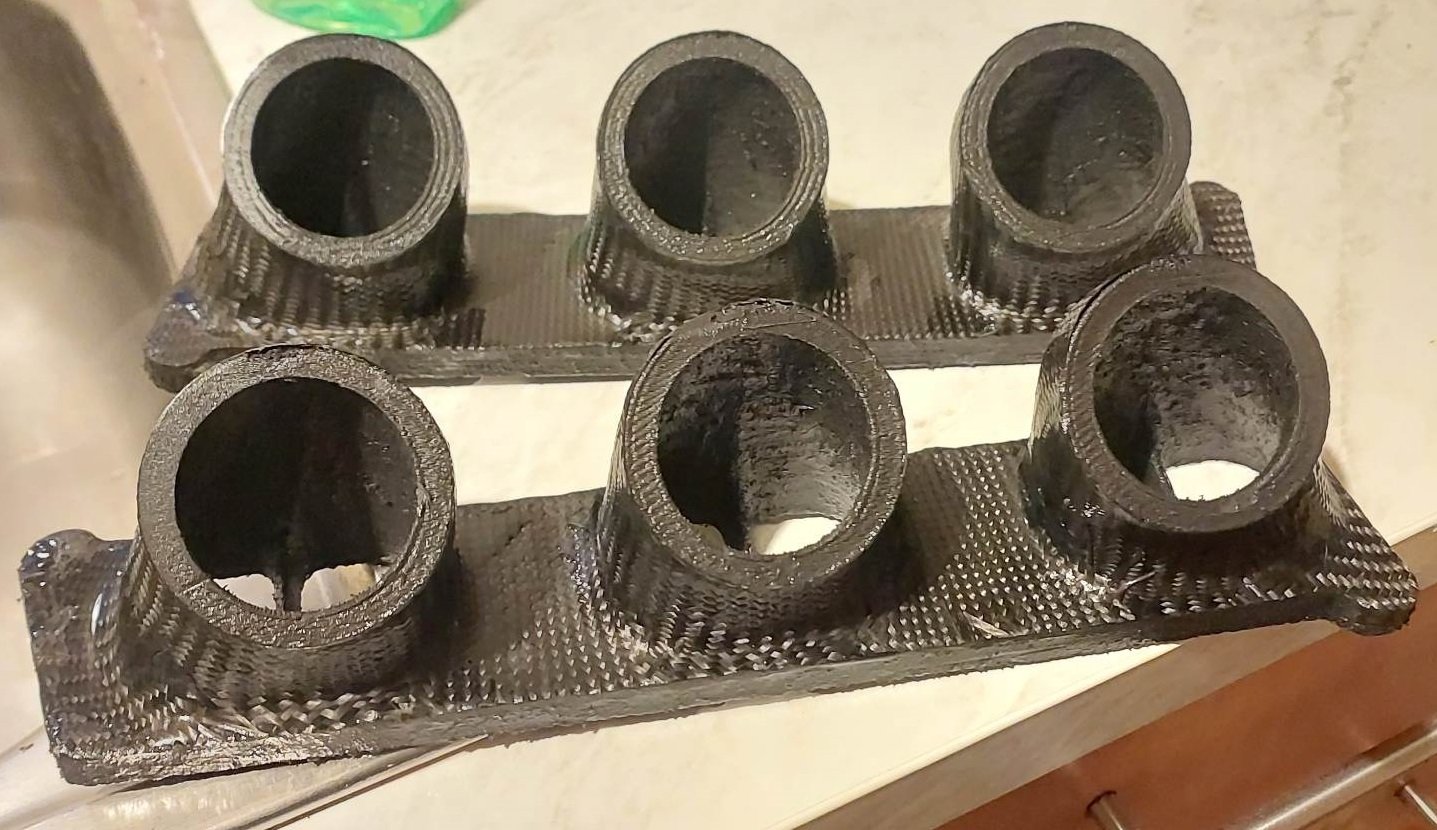
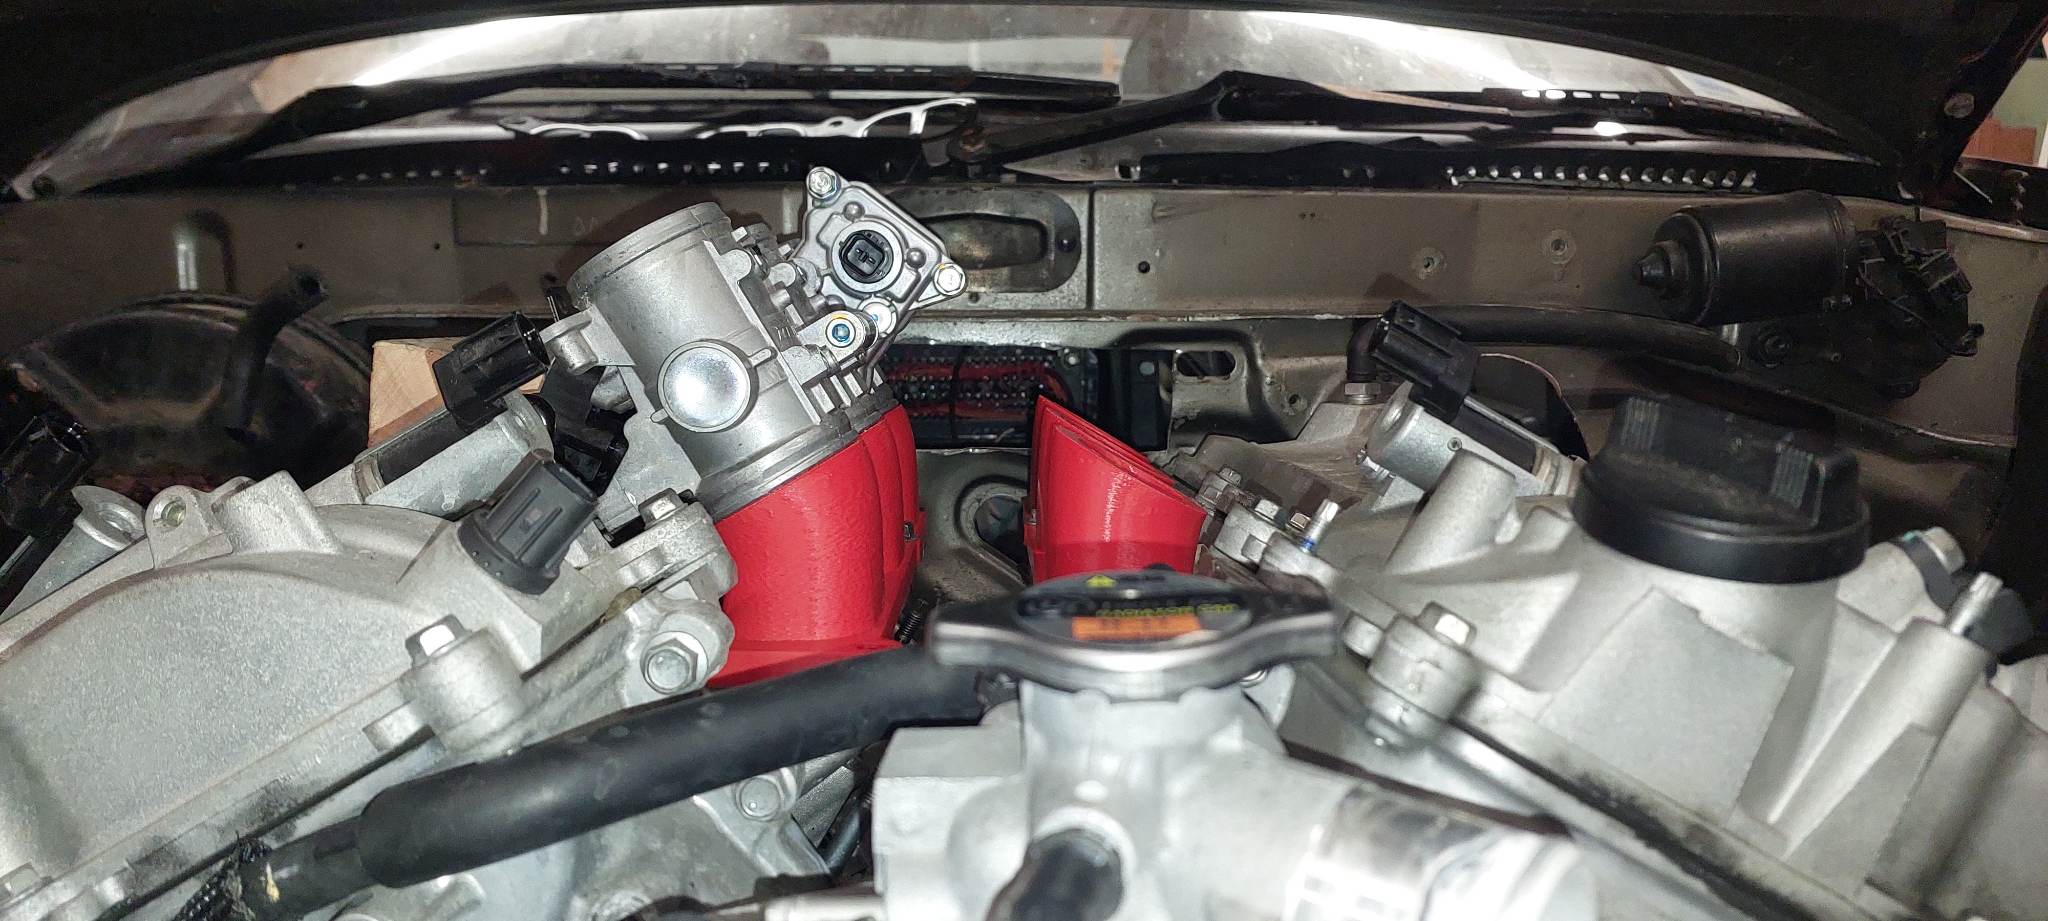
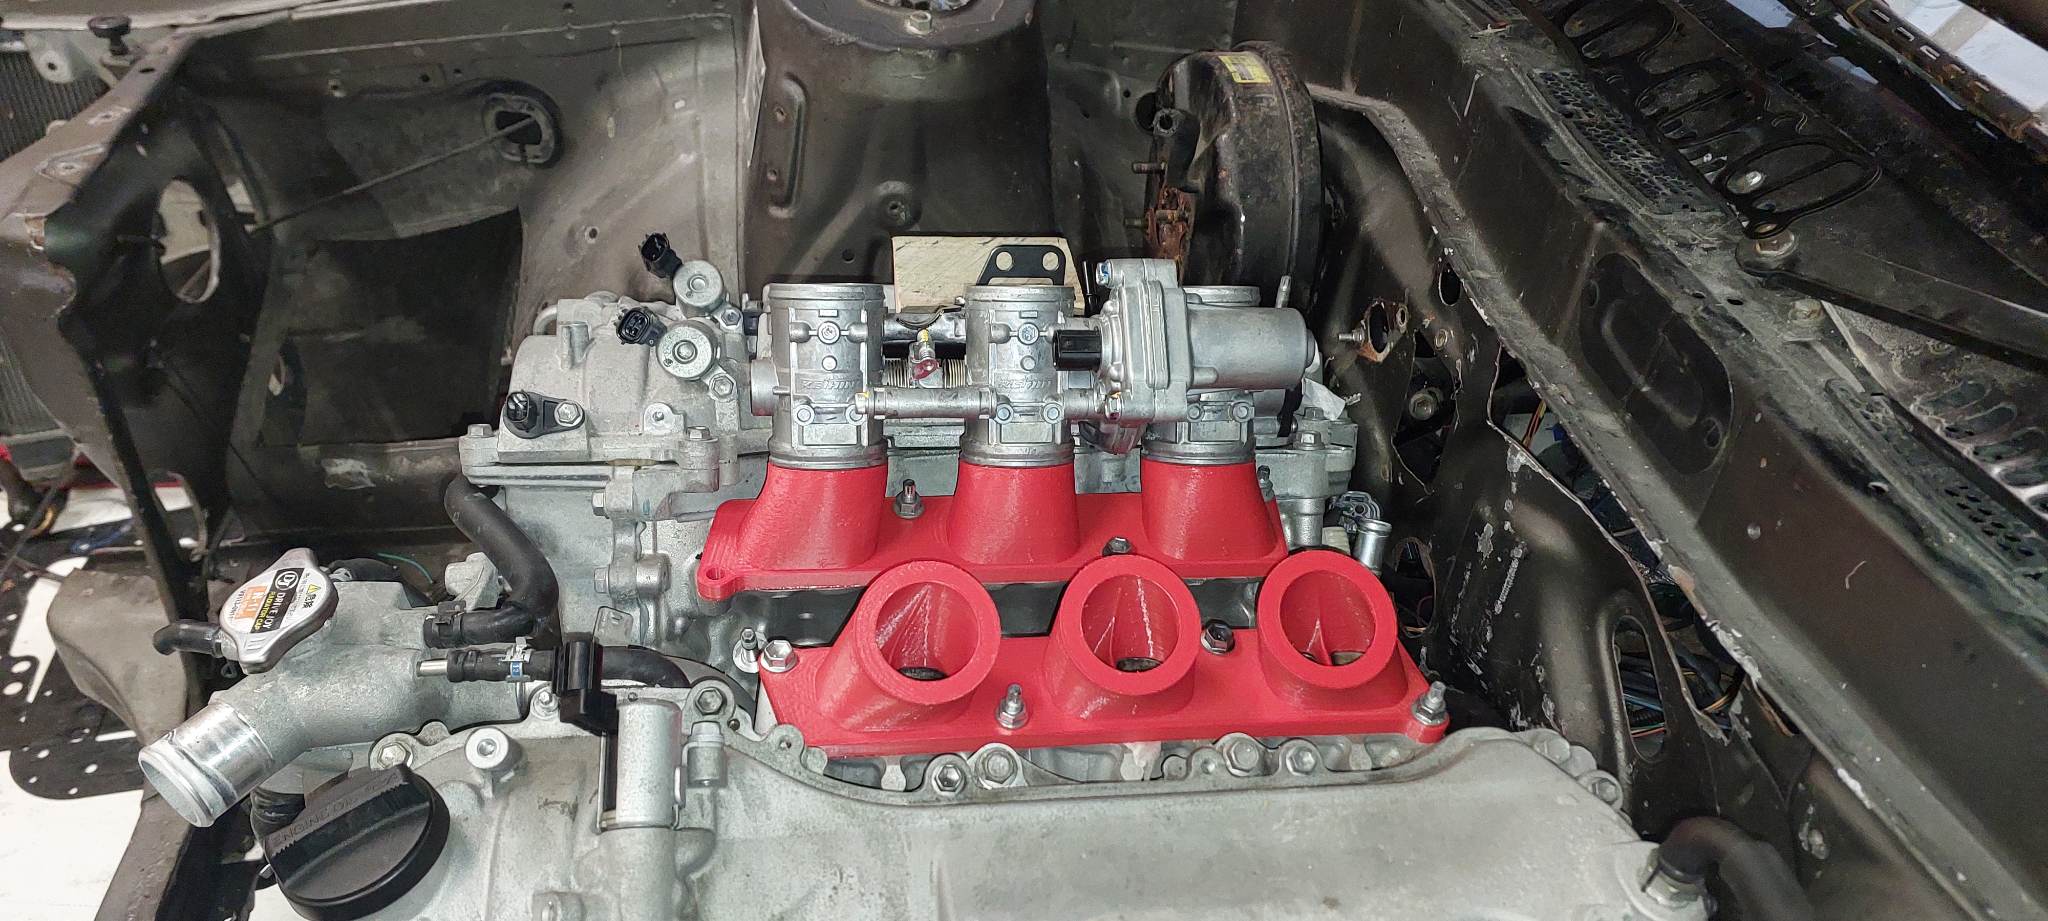
New manifolds turned up, and hooooly hecka they are amazing! No infill, no layer lines - fully solid so they feel really strong. The dividers have a super sharp leading edge on them, and all the details are great. I think from now on, I'll keep using my printer mainly for PLA based prototyping, then will have final parts made this way.
1 point
-
To hid the ugly wiring and improve aesthetics I think I'll make some engine covers. Seems easy to follow the natural contours of the top, then the two looms can come together in the backside of the engine. In actual wiring news though, it looks like the Triumph TPS's are made by Denso - who is basically Toyota. Looking at the plug shape - looks identical to 4 pin Altezza TPS. Ha! Hopefully it is, then that's another problem solved.
1 point
-
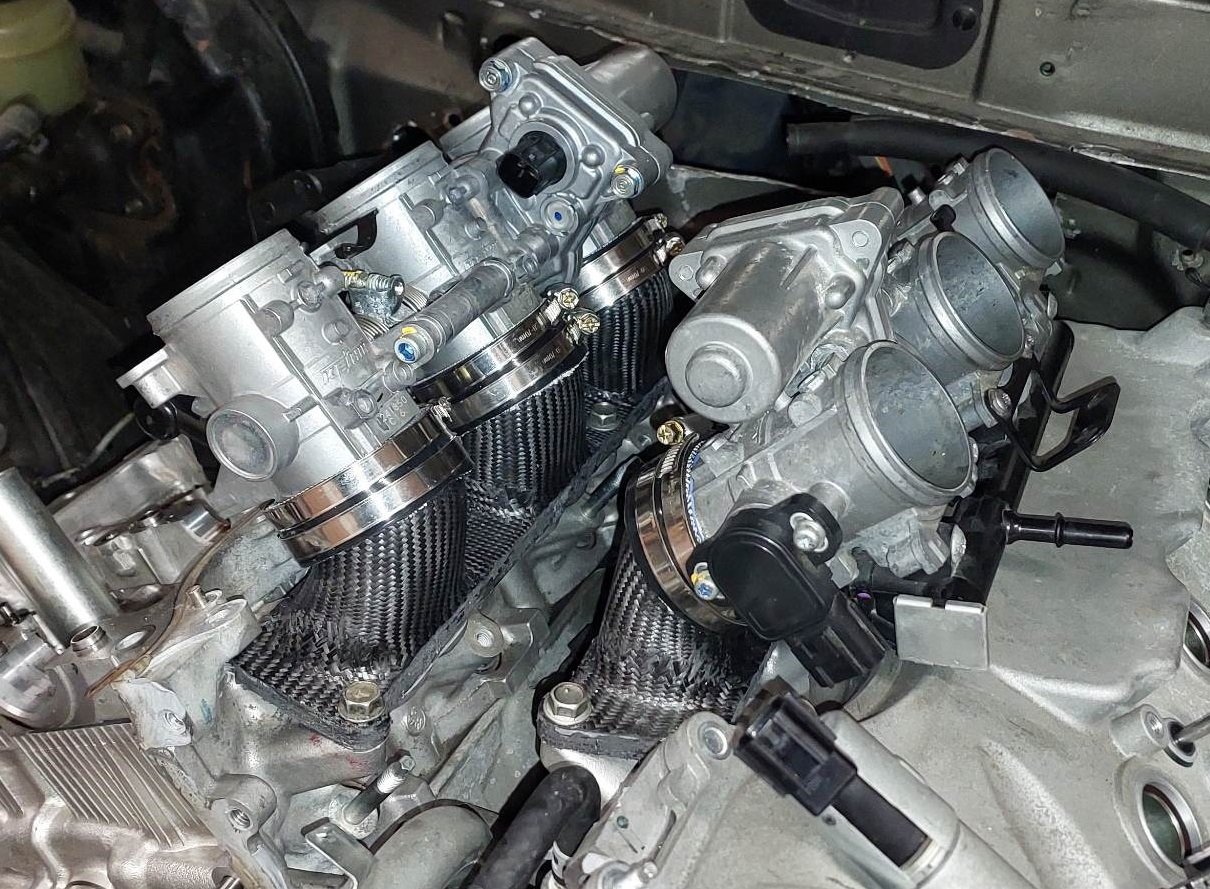
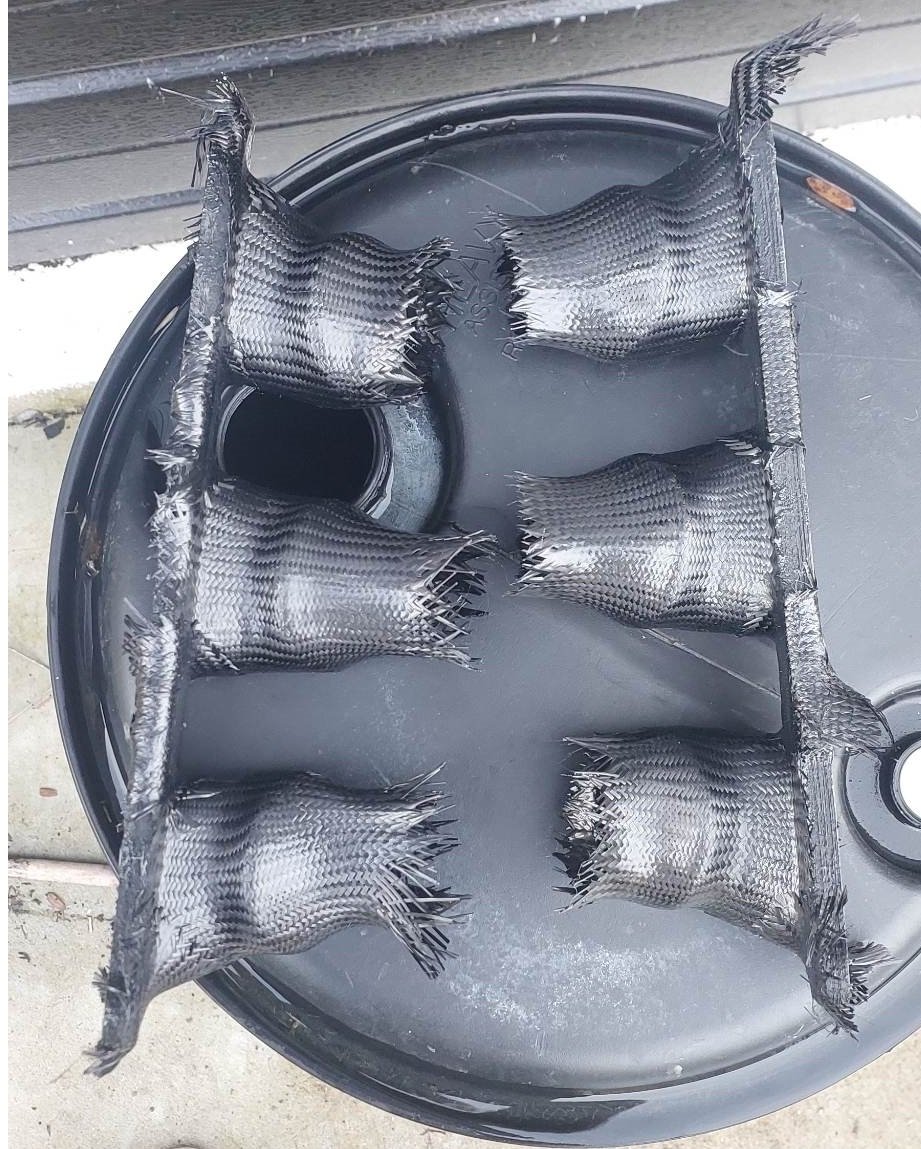
Mike Tyson was famously quoted as saying "Everyones got a plan until they get punched in the face" Well, thats about as well as my equal length exhaust lego has been going. haha. My scheme for equal length was nowhere close to working, mainly because of the engine mount below the middle cylinder making life hard. It's also been difficult because of the Vee angle - you can make a nicely fitting thing that works. But then you cant get the damn thing on or off as it wants to hit the chassis rail. So it's looking more like it'll need to be a bit more compromised on lengths until everything's past the steering column. then can maybe do some swishy bits to bring them close to even again. So, what do you do when something is too hard? Have a sook and ignore it. So here's some progress on the intake. Same recipe as the echo, which seems to work well enough. CF nylon PA12 print, then carbon sleeve over the top. I've been talking to @flyingbrick about our concurrent CF projects. I thought I was making some manifolds, but turns out I was making a 6 pack of chodes Then tidied up a bit Then very nearly finished!
1 point
-
I got both sides fitting nicely. Sweet! I guess I should try find some injector plugs and TPS plugs that suit the bike, hopefully they're fairly generic.
1 point
-
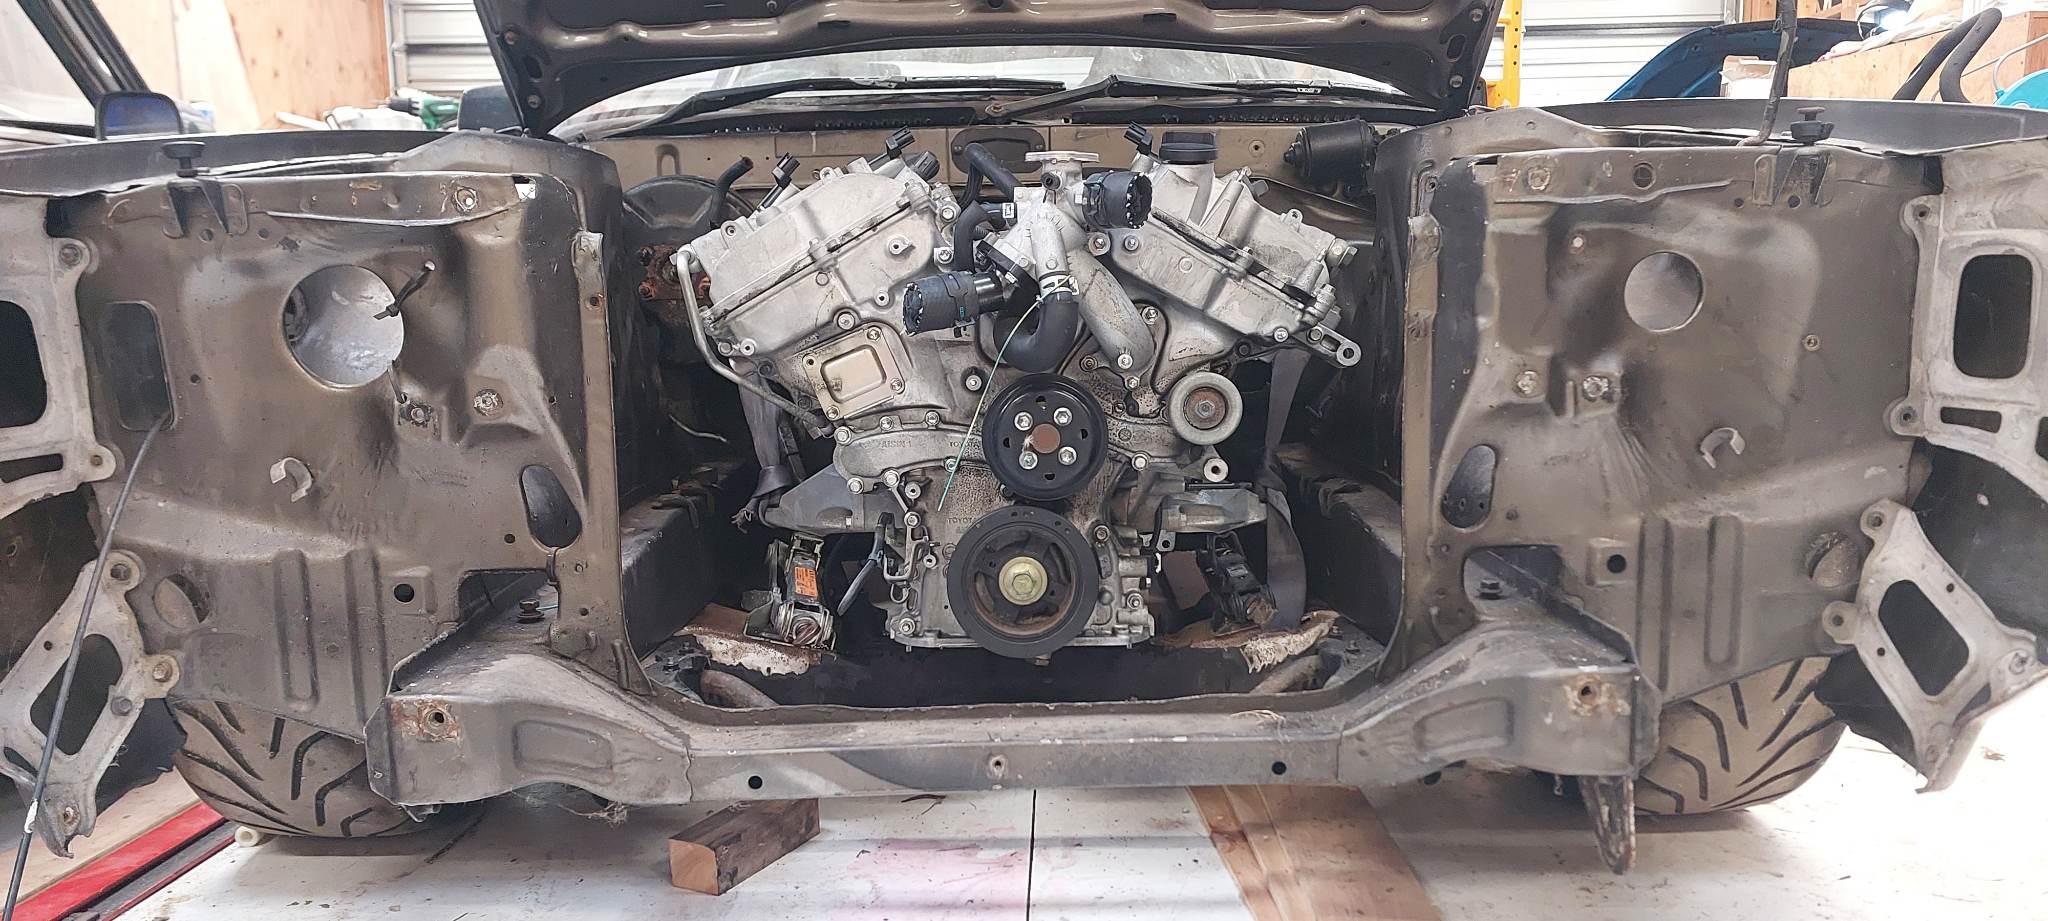
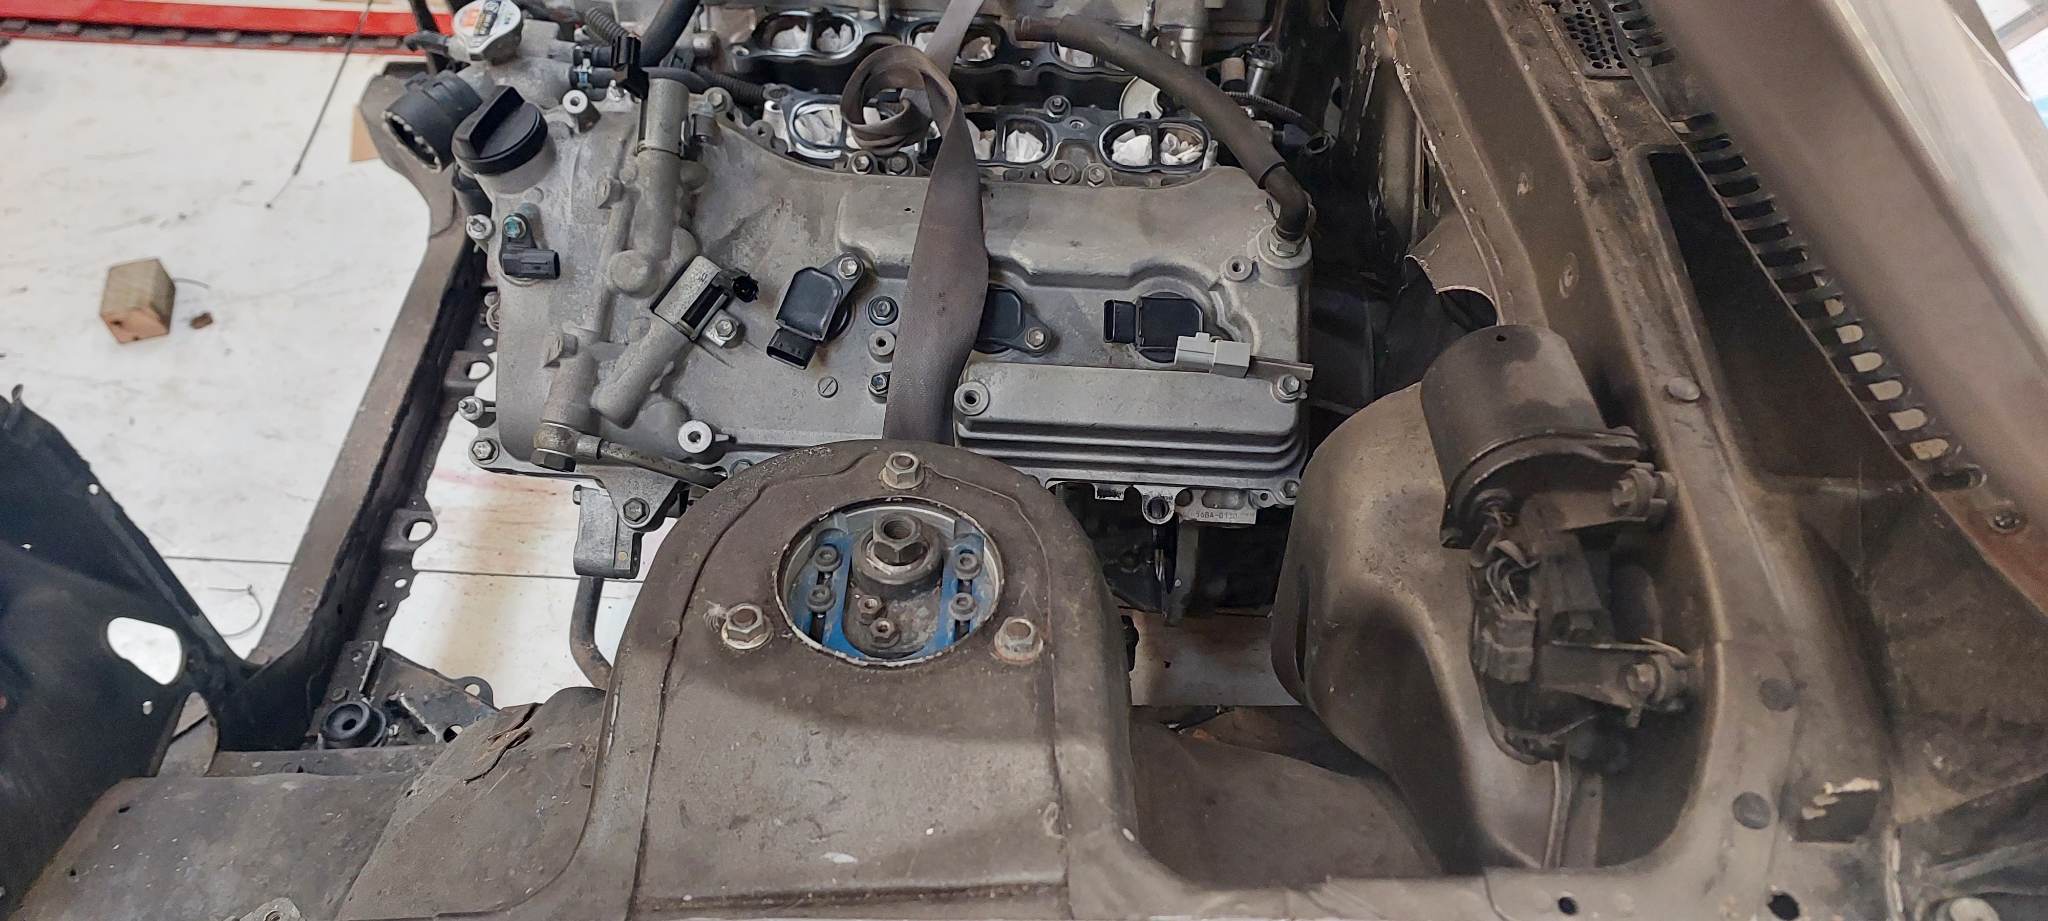
With the sump off everything's a piece of cake! Just slides in from the front, easy as. I can still push the motor a fair bit back , should be able to get the centerline of the first cylinder fairly close to being in line with the struts. (on this bank at least) So that should help the weight distribution a bit. So, that's good news. There's also some fairly decent looking clearance to the bonnet line as well. There's a decent amount of room for a front bowl type oil pan on the front. So will make some engine mounts, get it in the right place then start drawing up a sump.
1 point
-
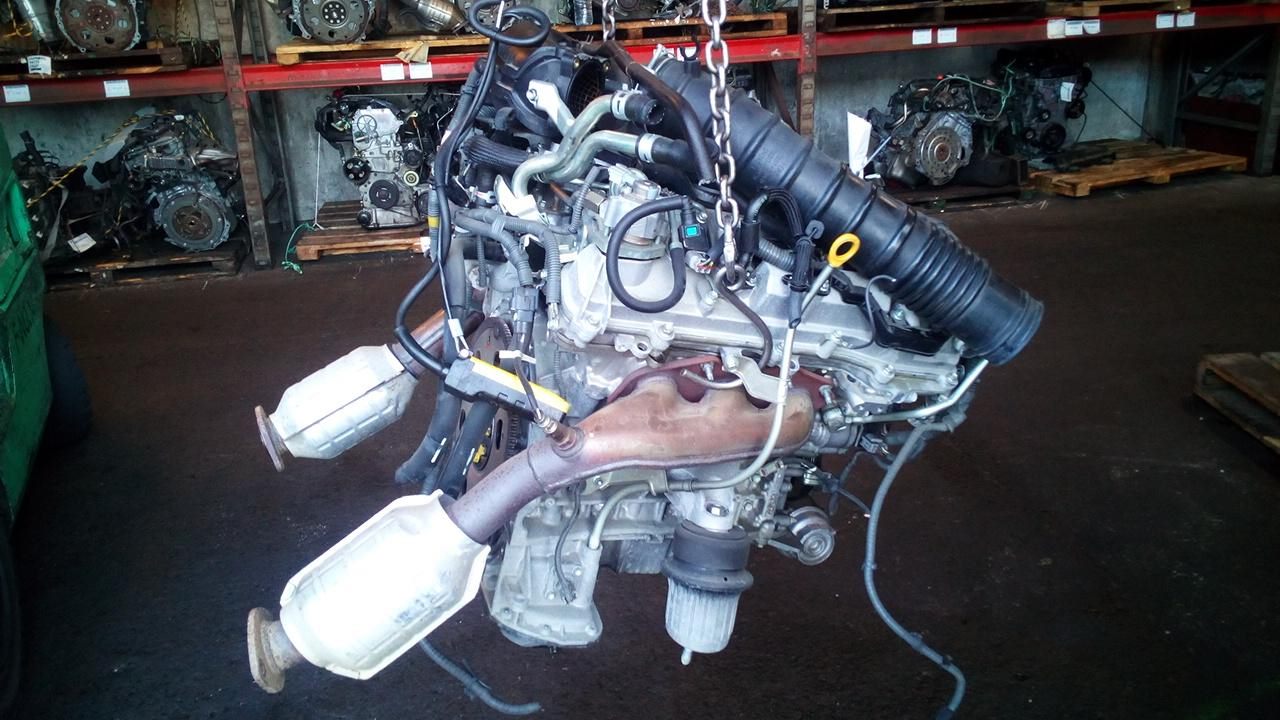
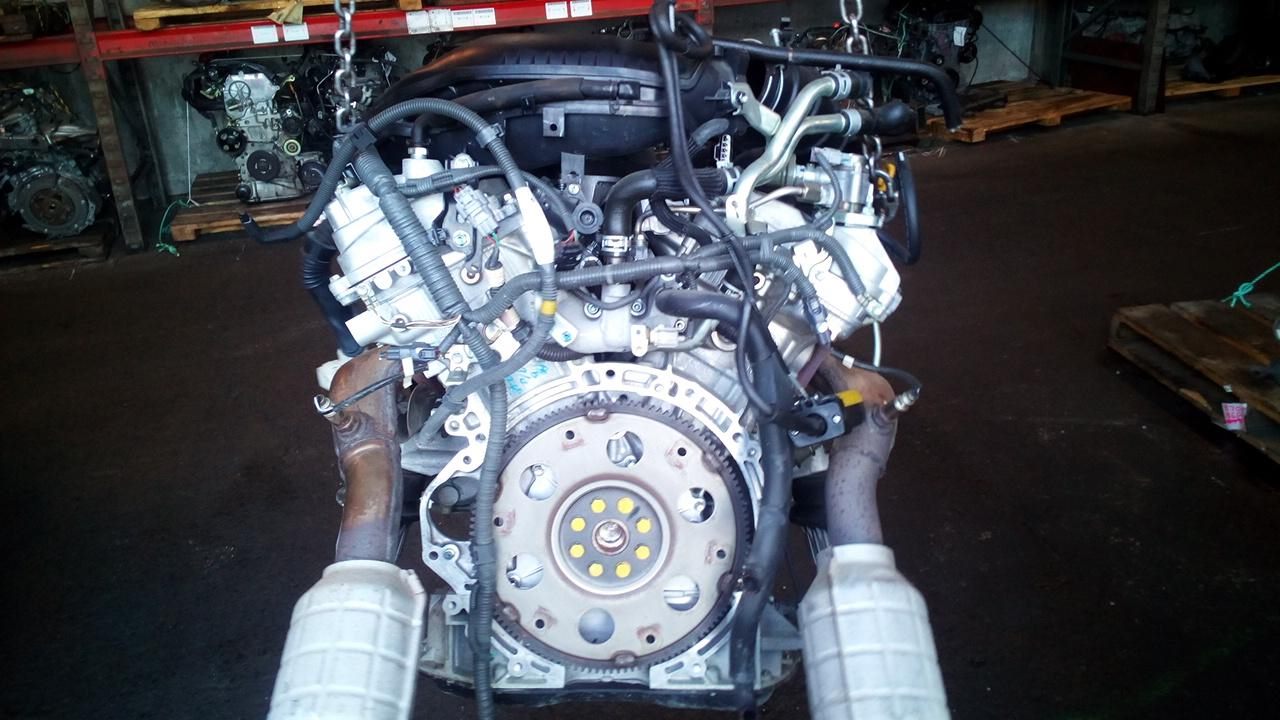
So a basic overview of where I'm currently at, and where I hope to be. My Carina has been running a beams 3SGE motor for many many many many years. I think I bought the redtop motor for it in 2005! And it's been awesome. I've also done heaps of driving in the car and I've done my best to keep it as a nice weekend car and a bit of an all rounder. It's been great! However, as time has marched on the state of Altezza engines, and Altezza owners, has deteriorated considerably. After having the echo project, where it was like working on a brand new engine. I decided I wanted a new motor for the carina that was a bit newer, still common/cheap, and where the average kms isnt hovering around the 300,000km mark. So, for that and a variety of nerdy reasons I've outlined in the tail end of my beams 3SGE thread. Time for a 2500cc 4GR V6. Exciting! This is the motor that I've bought, but not picked up yet. Unlike the other GR motors this one is designed from day dot to plonk into an upright FR configuration. Also, it somewhat bolts onto a 3SGE bellhousing pattern, so I can use my existing J160 gearboxes with it.
1 point
-
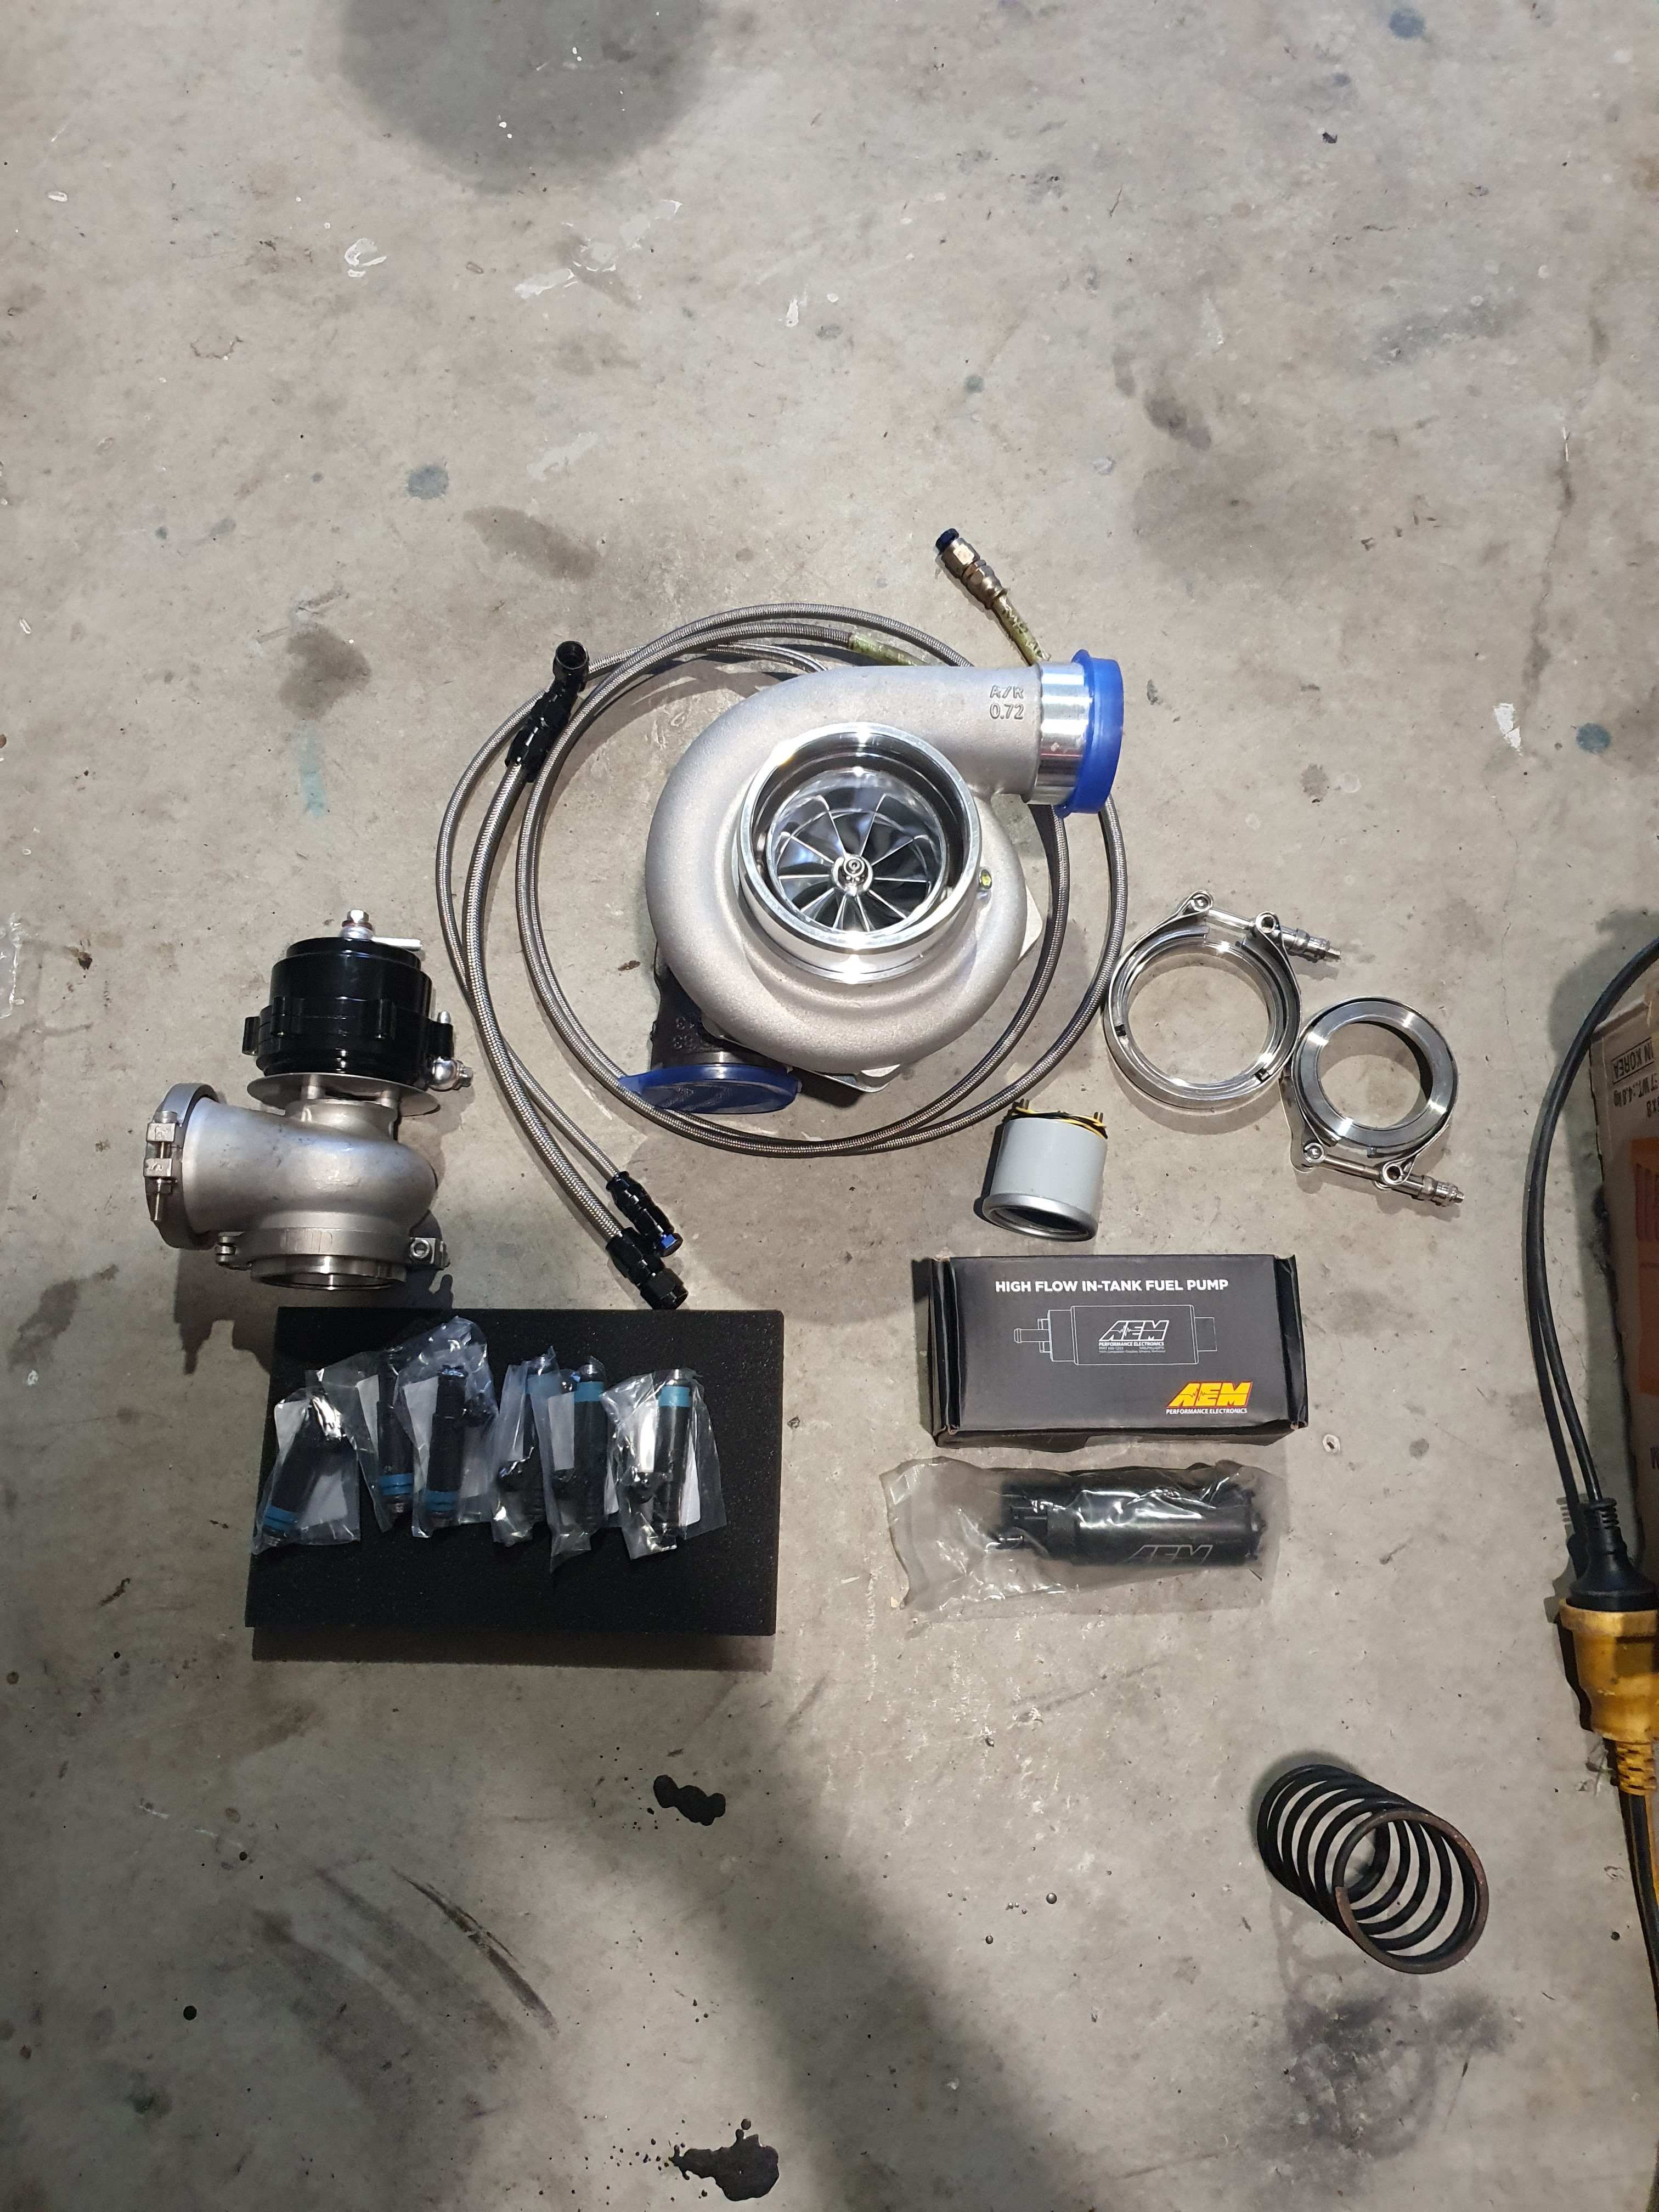
Drag Day is coming up fresh wof acquired so thought I should do a stock take of what I have already bought and start thinking about what I still need to turbo this nugget. Deka 850cc injectors supposedly a good starting point AEM In tank fuel pump supposedly good for 1000hp with an10 lines Pulsar 60mm wastegate have already got tube, bends and v bands for this Pulsar GTX3584RS Turbo AN Lines and fittings acquired where possible fitted Have some Greddy gauges from ages ago might be cool to use. Needs: Buick L67 long block that needs a rebuild with fucked heads, this supposedly was a good runner when I bought it clearly has been thrashed bores are scored to buggery. Do I throw rods and pistons at it and ARP studs and call it capable of whatever I can throw at it or just do a stock rebuild with new stock pistons supposedly very strong as is. Difference is like $5k in scheme of things. The transmission hasn't been forgotten about either........ home-brew upgrades I reckon spoken to a specialist parts are cheap as but should wait till nz dollar improves.
1 point
-
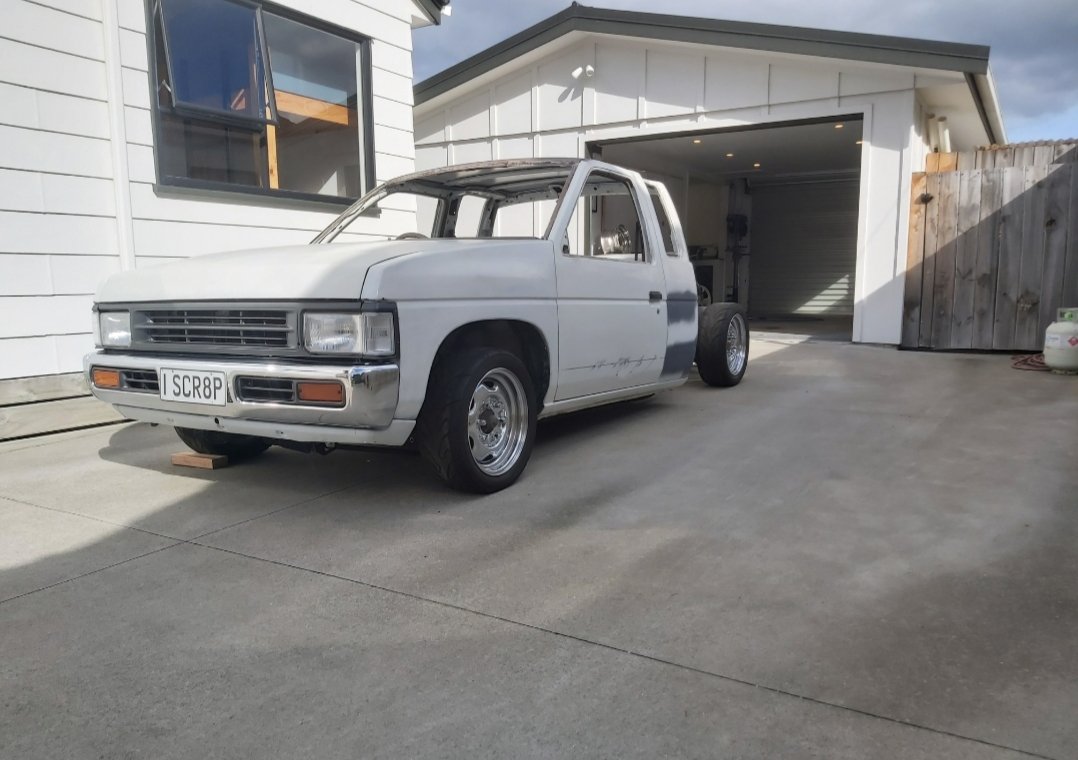
I'm ready for drag day Or getting impounded either or..... Just kidding I need a licence for work this things not doing skids anywhere but meremere.
1 point
-
Make the Mang Sing1 point
-
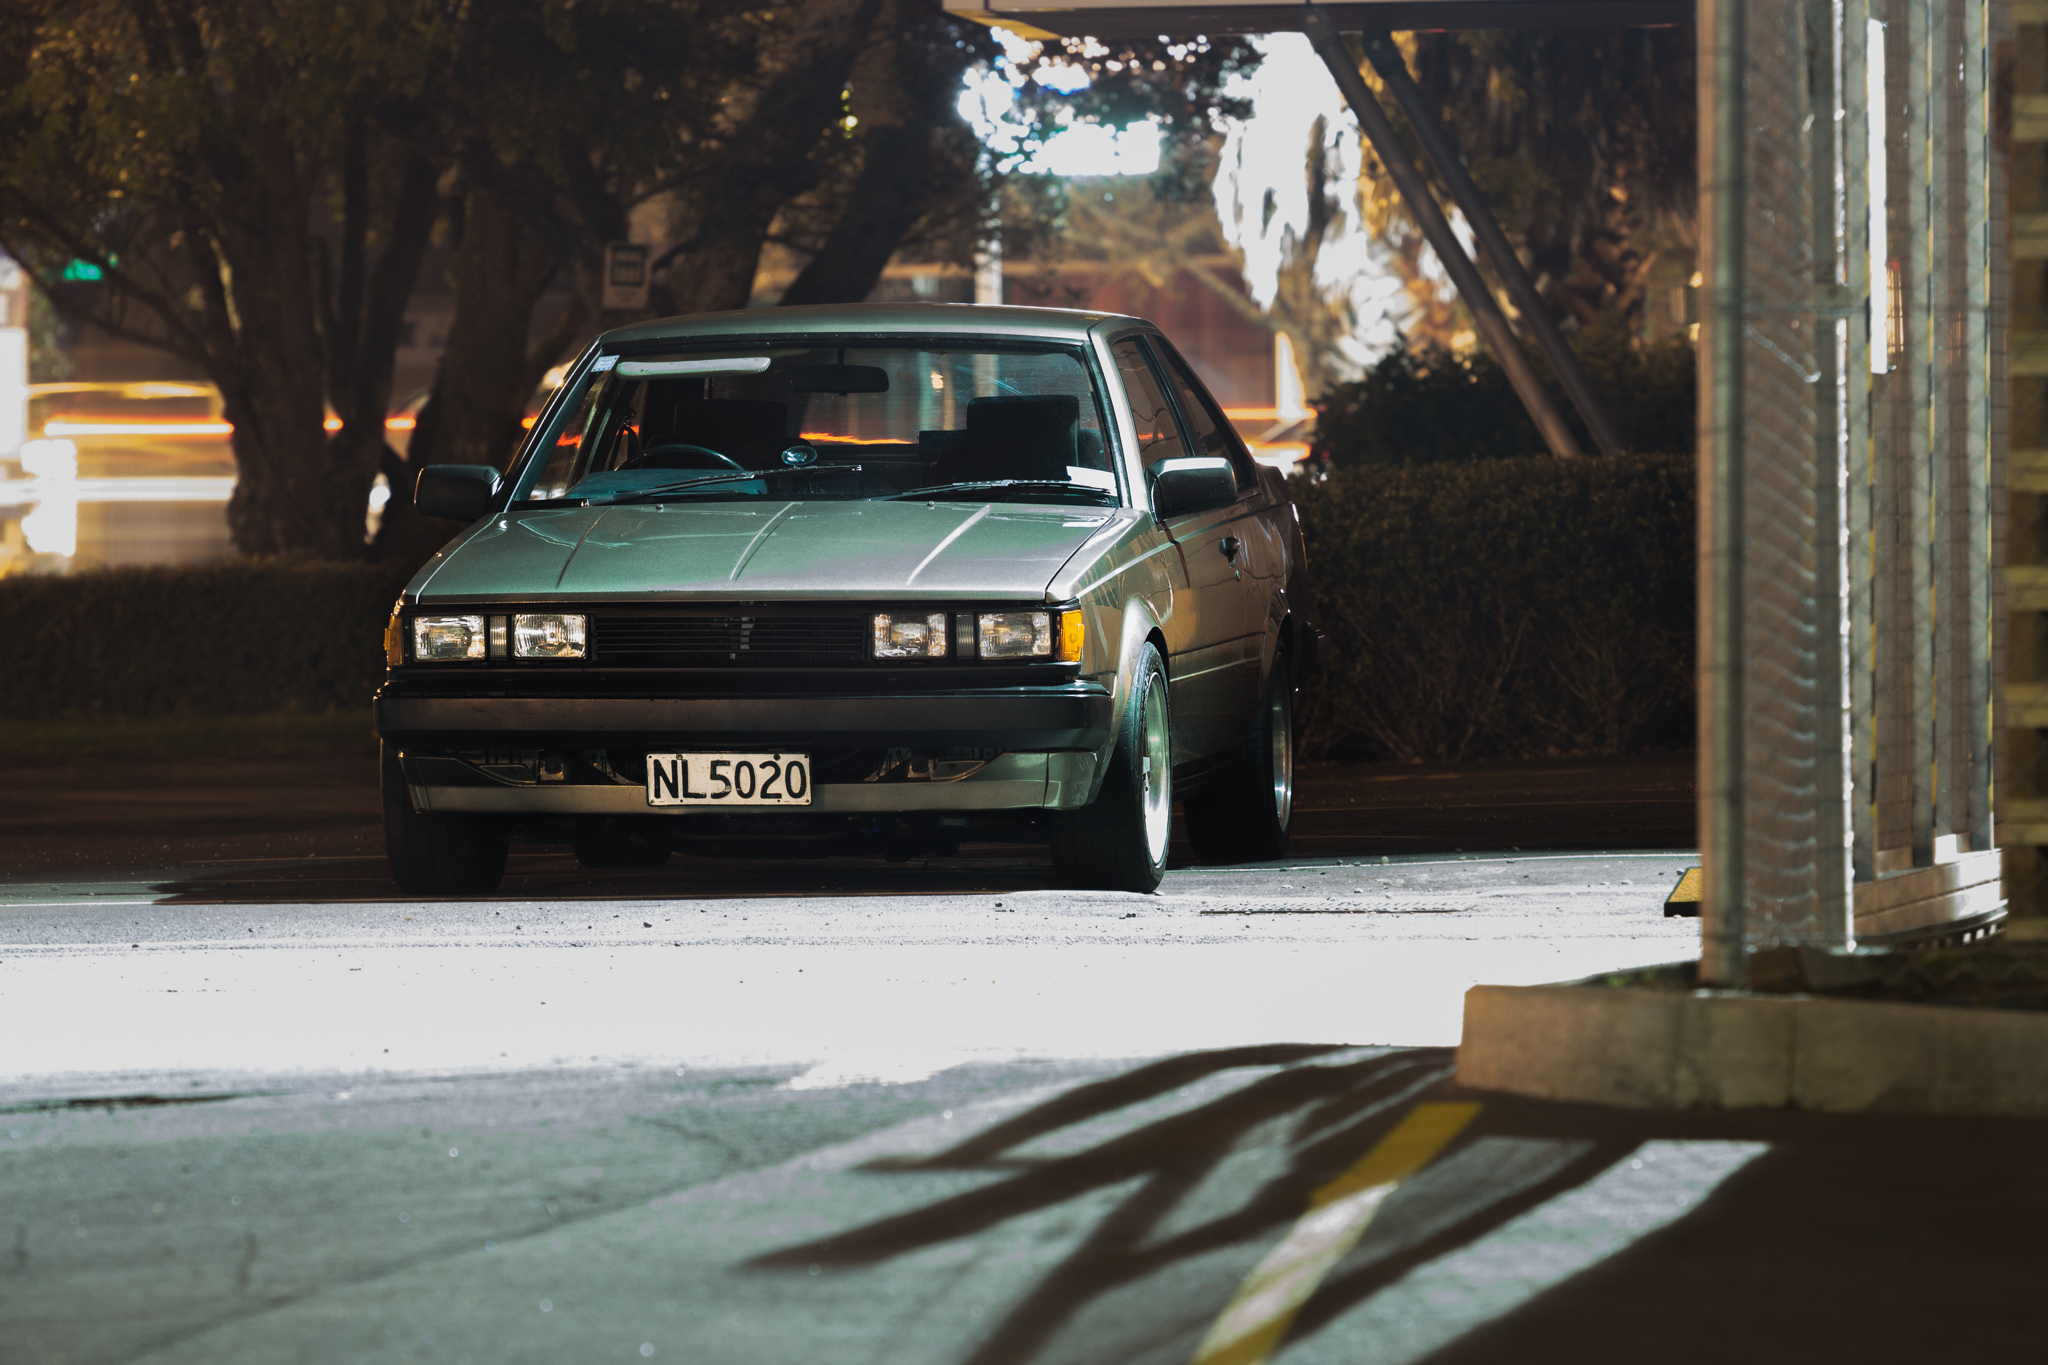
Right, got my hands on my good camera, less my good lens..... bastard. Ah well, these will have to suffice. The plates that are on it some how appeared on there, will be sure to make sure they don't sneak back on there!! I will be getting the plate P AE86 put on it, should be here within a couple of weeks. Here we have all of the interior bits so far that I have acquired. I lastly need a gearbox surround piece. I have eyed up on on Yahoo! so should be able to pick that one up. So newly installed are -New center console lid -New Alpine head unit -Accessory surround unit, with new ash tray too. Though I will probably end up trying to find a black one -Instrument surround unit -New gear knob. Can't remember the brand. It feels so bliss to change gears! The two red wires are going to go to the fog light switch that I will have to find (Should be able to go down to the wreckers and pluck anyone from an 80 series toyota) fa And lastly I edited this image a bit, looks prettier All in all very happy with how it is looking. Going to see Mr. Cert man tomorrow and get it all booked in.1 point
-
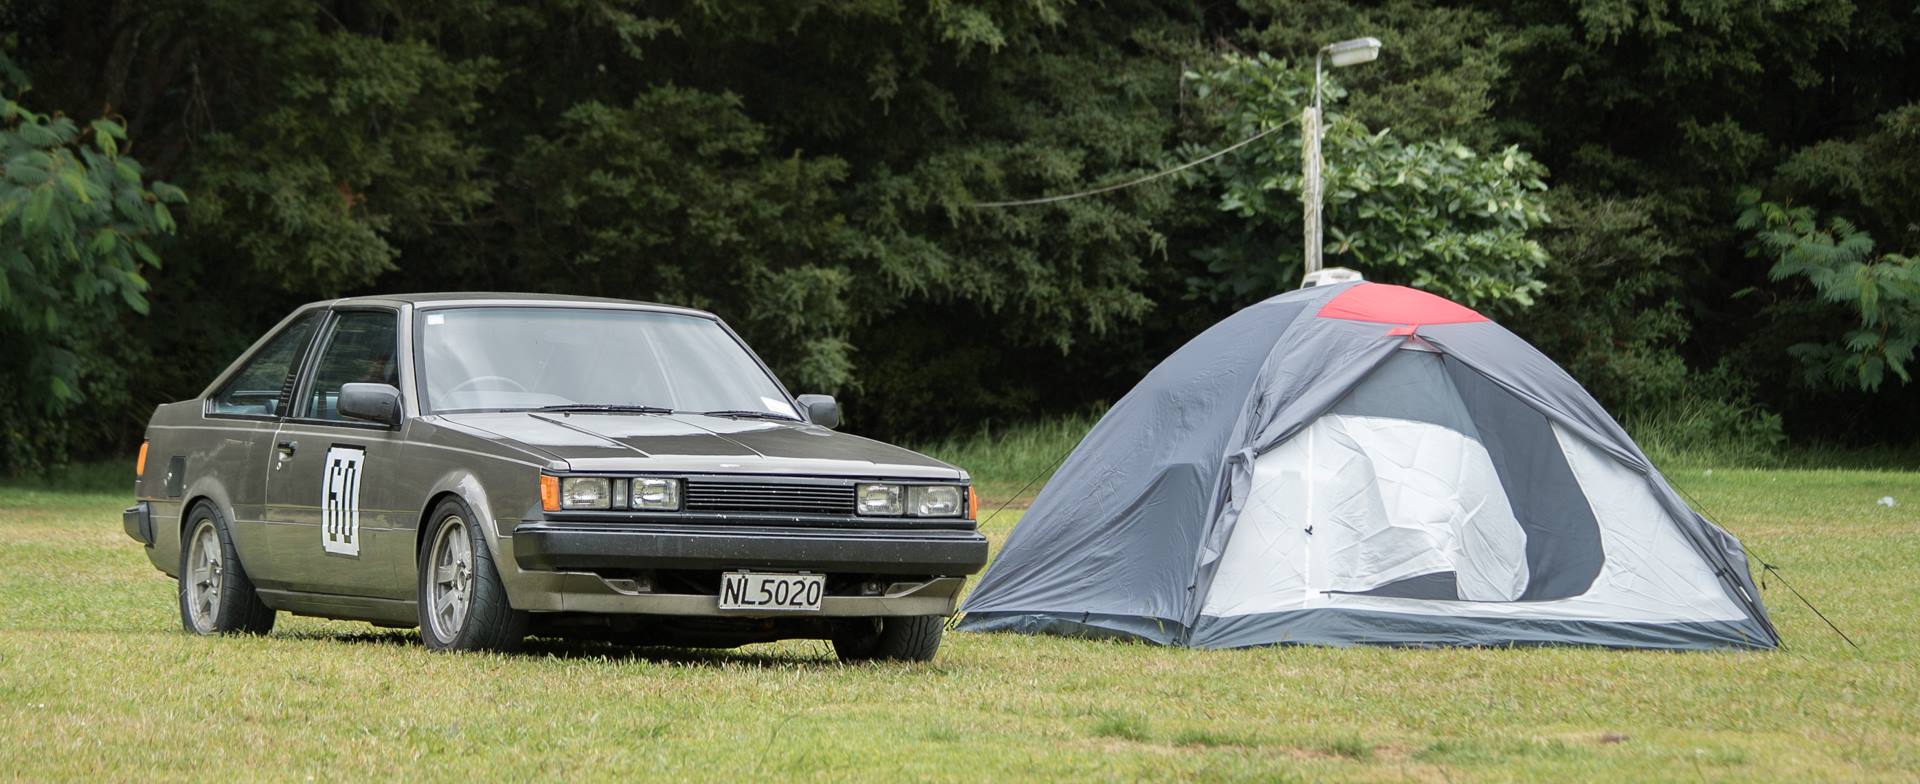
I have just gotten the car back from the panel beaters, and the team at Friend & Wistrand (Palmerston North) have done a fantastic job overall. Colour matching wasn't necessary as the car uses the original colours. You wouldn't know where the areas that they touched up so very pleased with the results. Not the greatest of photos, but here are the photos that Steven (Person in charge of my car) sent through to me, feel free to have a look I decided it would be nice to take a photo of the ol' girl on top of a hill in one of my parents paddocks, now i've lost the panda in the foliage.1 point


.thumb.jpeg.384ff72c8d2b0ee0d34a7bdedb55bdcf.jpeg)


.jpg.9298a81b37527e20991ea9282033a829.jpg)


This leaderboard is set to Auckland/GMT+12:00