
Leaderboard


Popular Content
Showing content with the highest reputation on 03/12/24 in all areas
-
I modelled and printed some door card clips which as always gives me the deepest pleasure. These worked pretty well after some tweaks. These are not exact copies and are designed so they are easier to print, but functionally they are sweet. The drivers side window winder mech was deeply wrong, the wire tension adjustment was maxed out, hacked and the maxed out again, but the wire was still as loose as fuck and while it kindof worked it made horrible grindy noises. This came from the barrel where the wire was straddling grooves cos it was so loose. It was all down in a difficult to reach place, and those mechanisms are notoriously cunty to pull out and put back. Amazing that I got a bollock into that shot as well. The passenger side was sweet and the wire connection looks like this; After a bit of thought and dicking around trying to take slack out of the wire a genius idea came to me; I routed the wire like that through both lift points, which took up enough slack that I could tension the mech properly. Another 1/4 hr of contortion with a torch, phone and screwdriver and I had the wire slipped back into its rightful track. It works perfectly again, yay!15 points
-
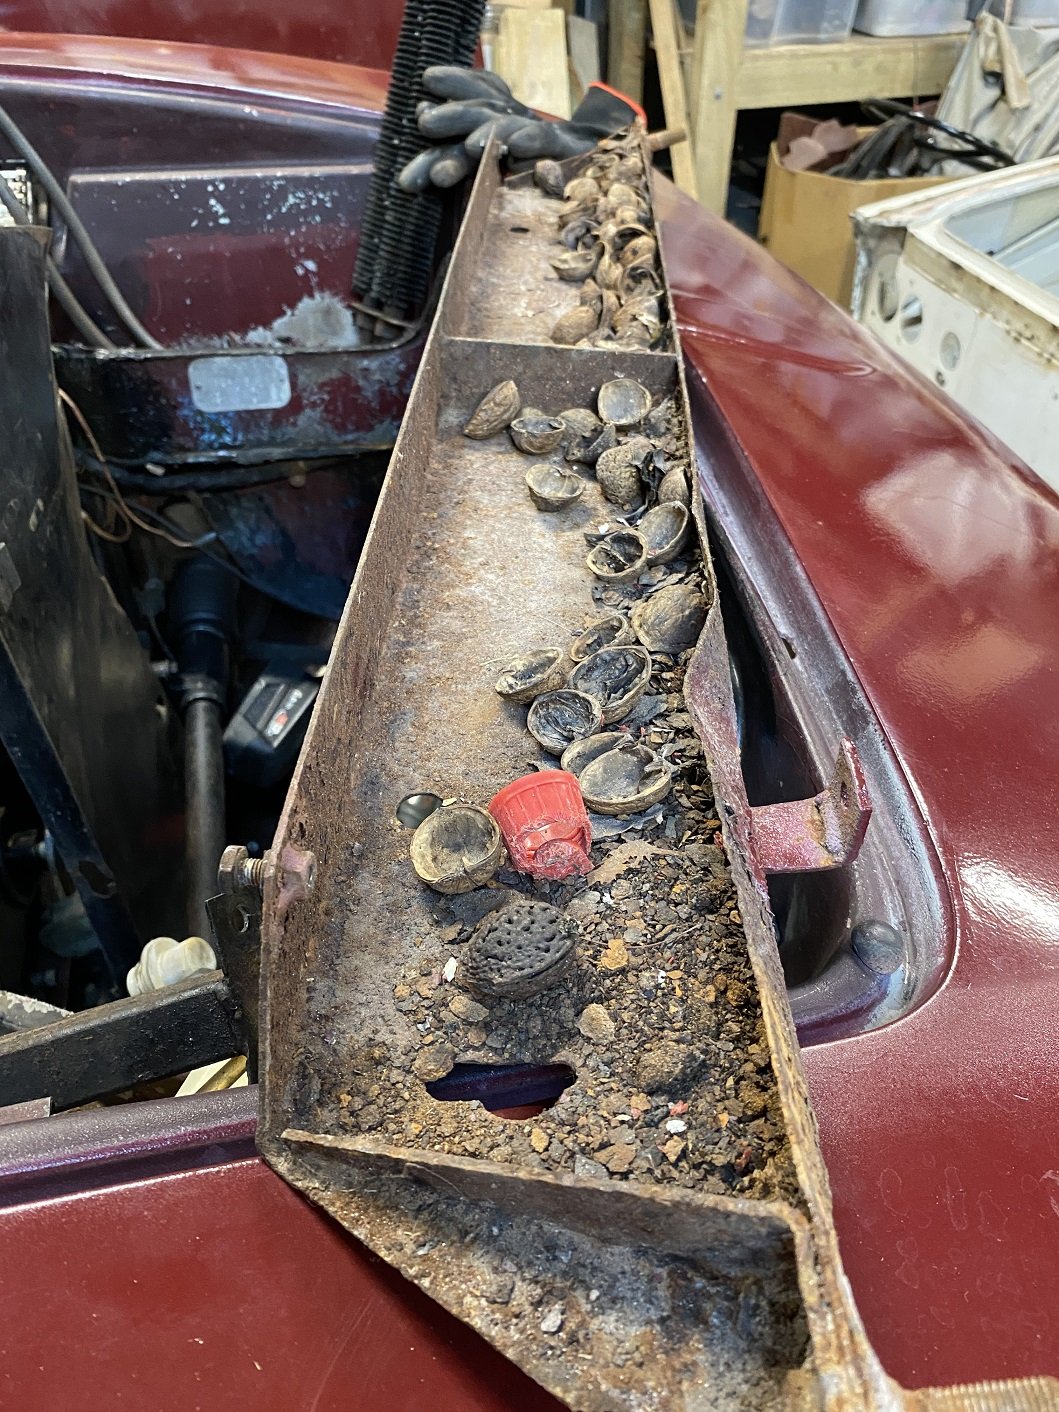
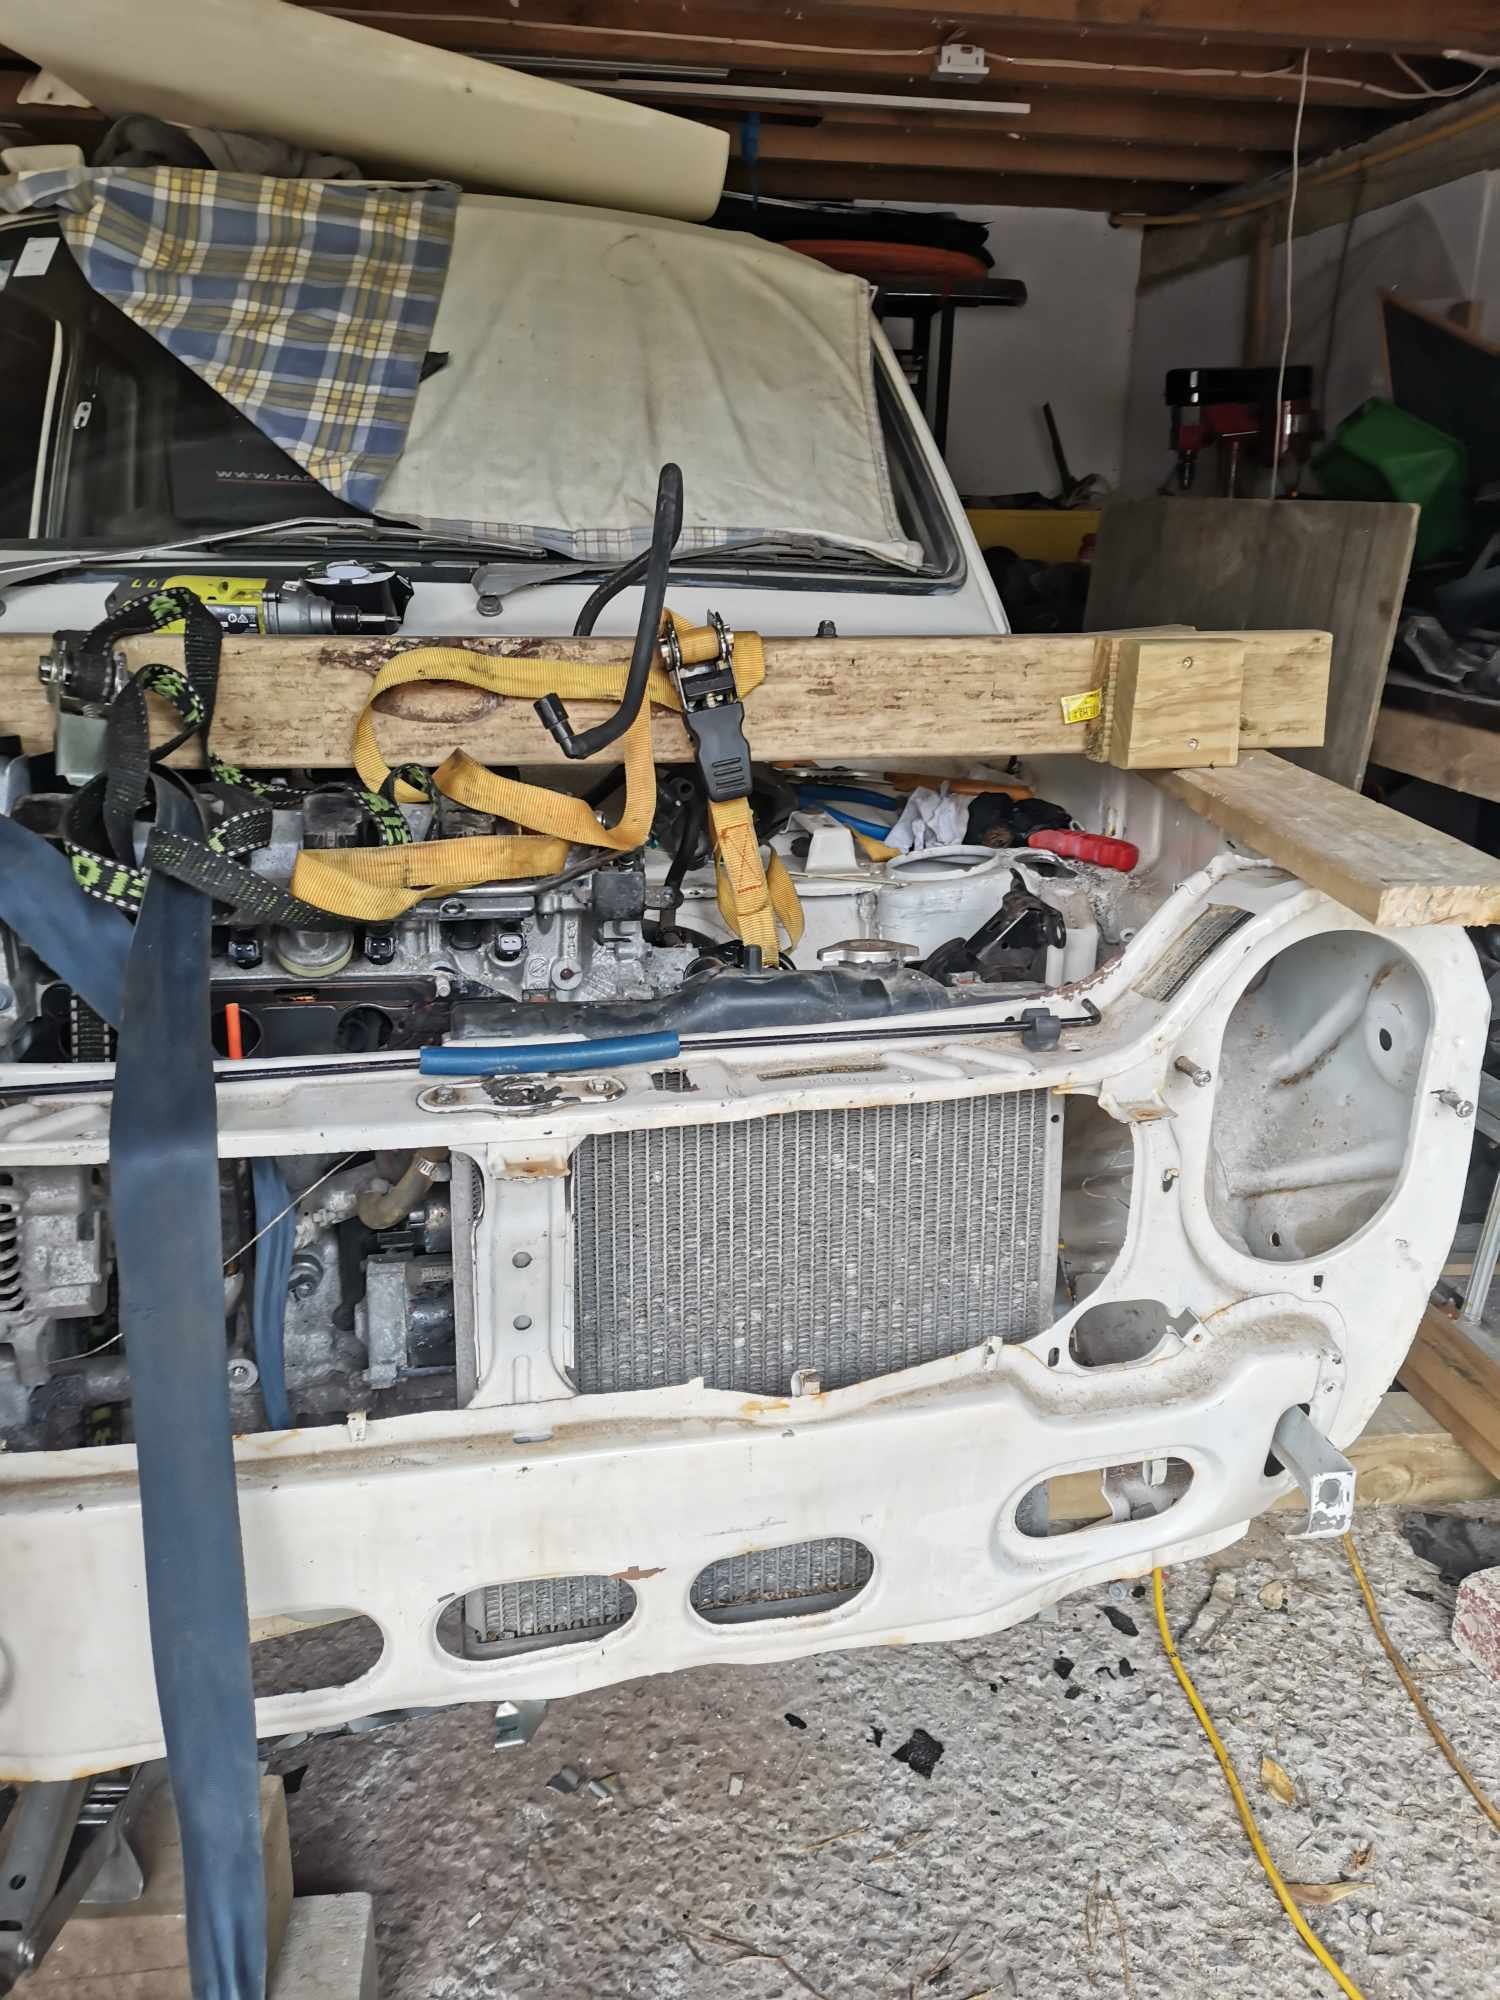
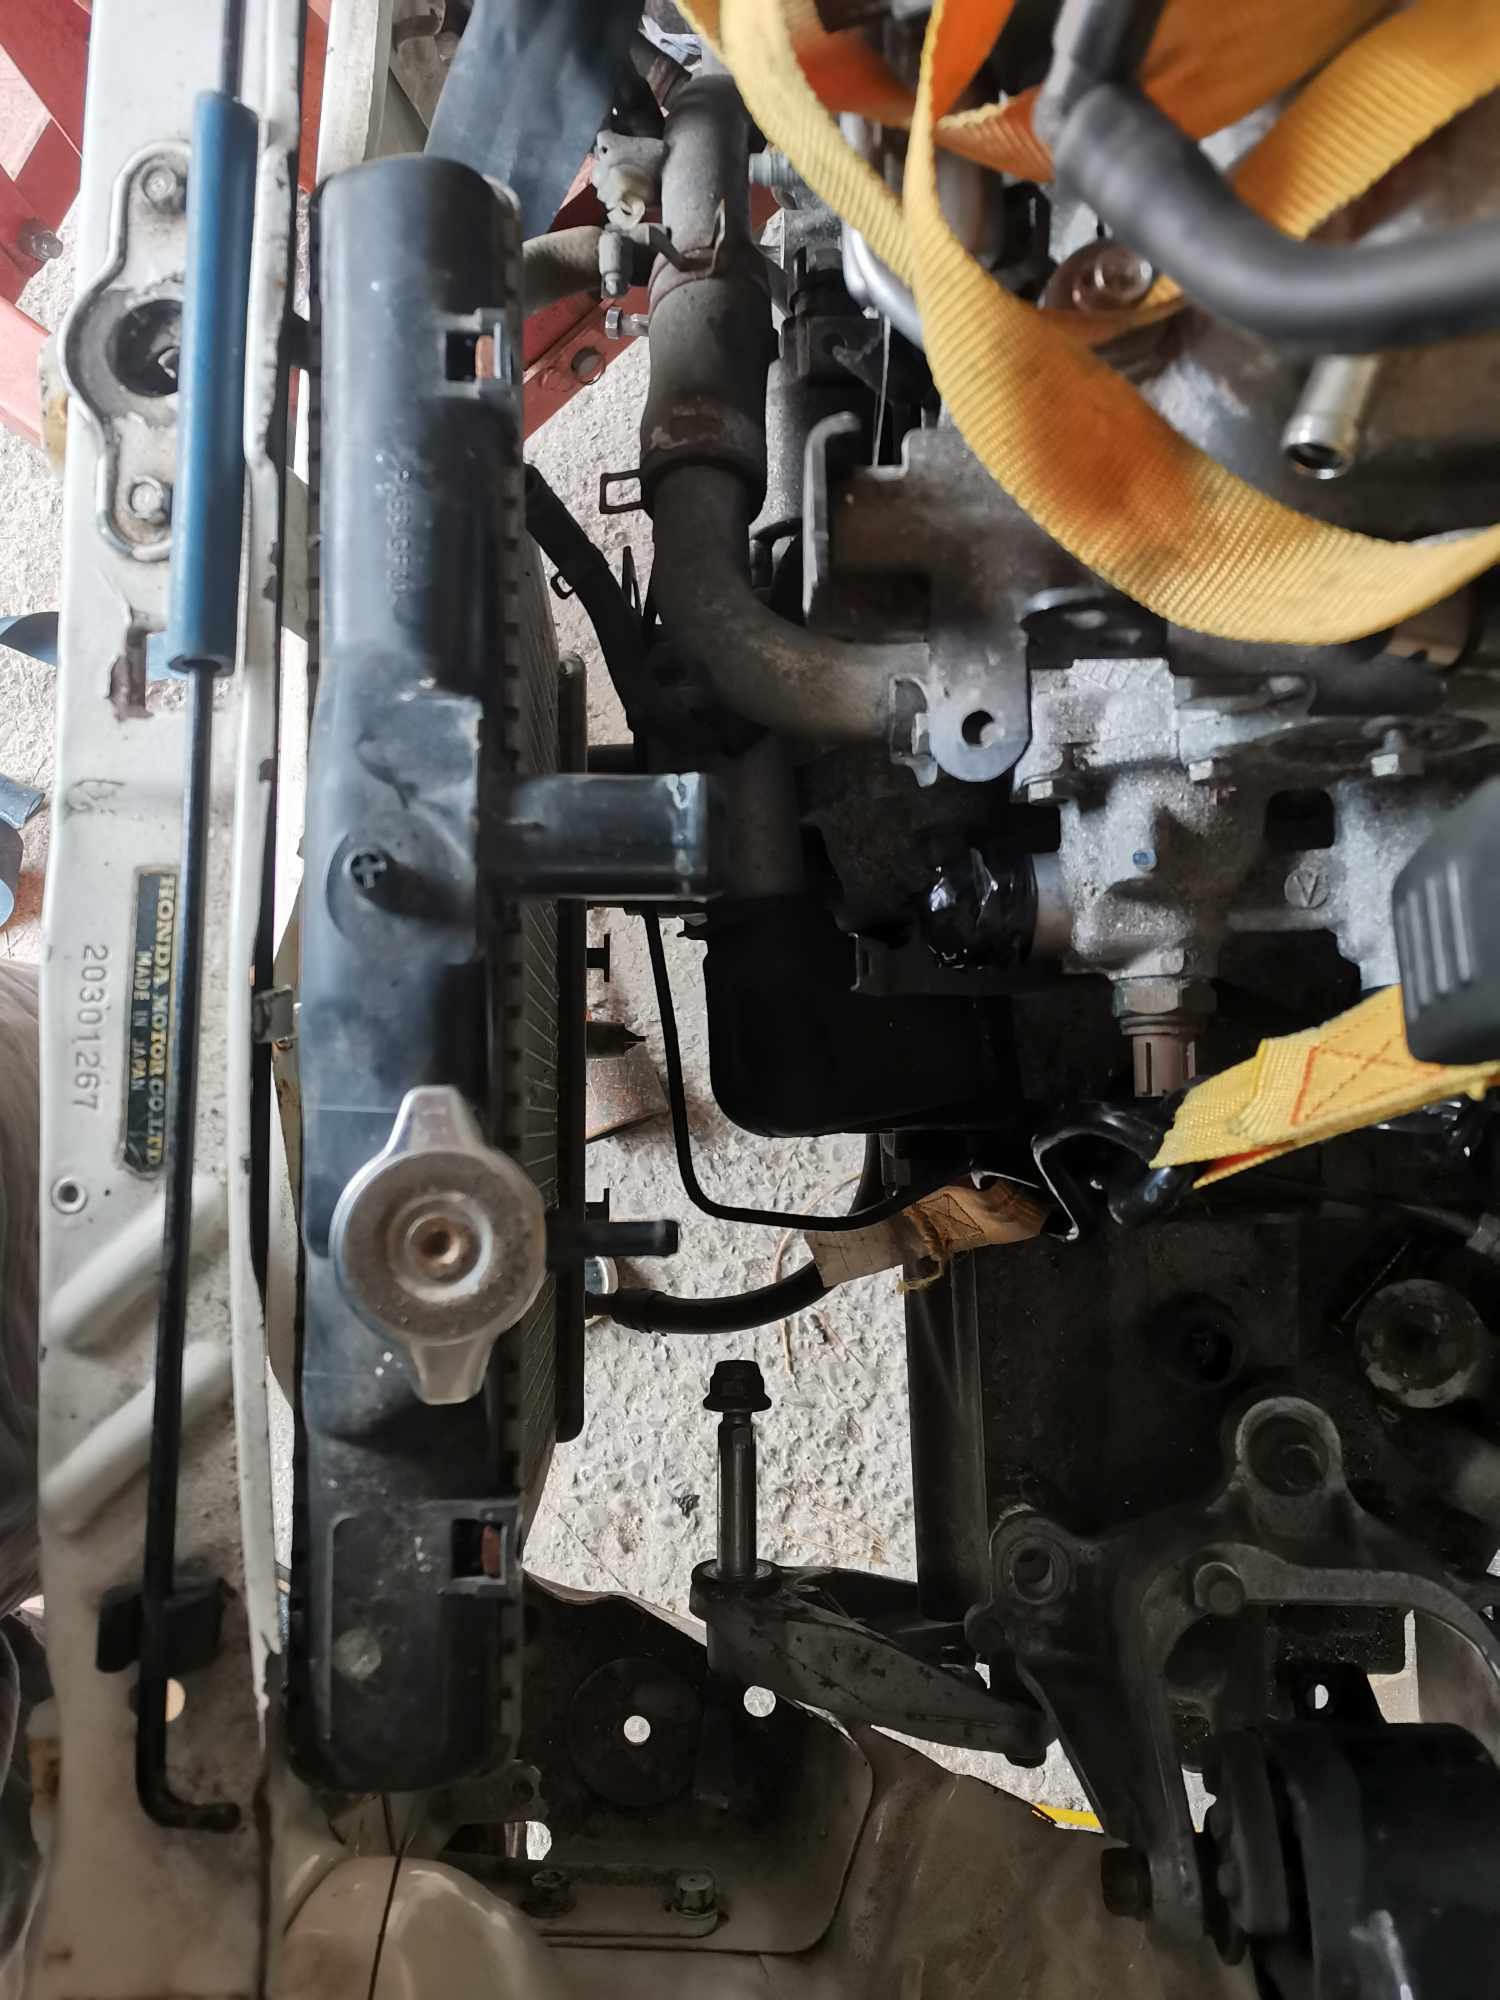
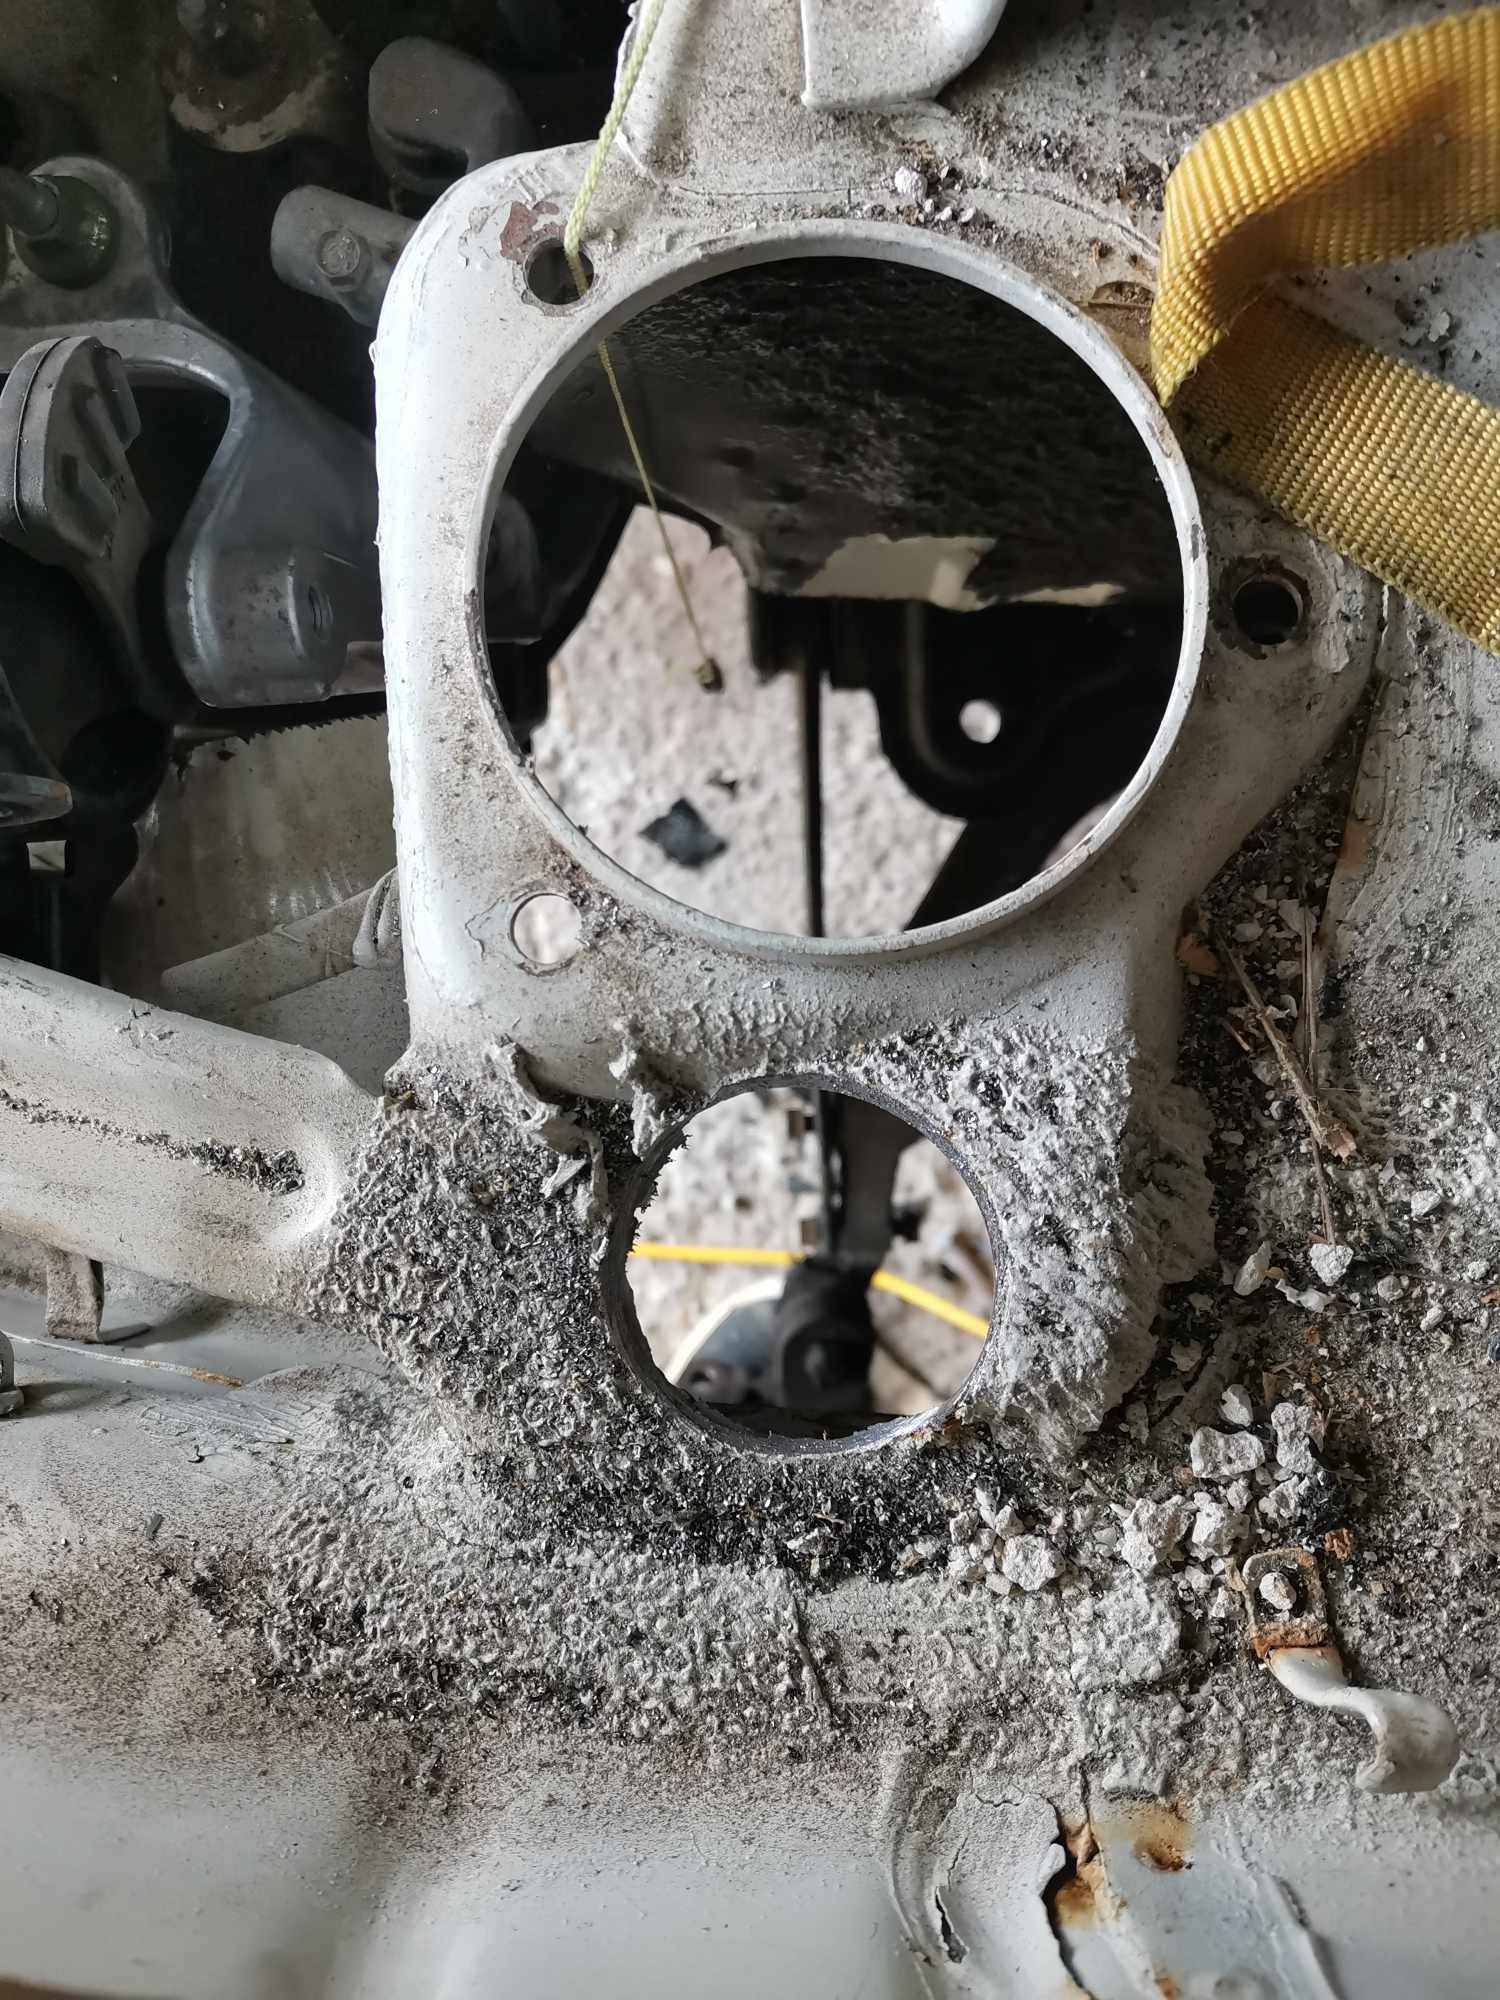
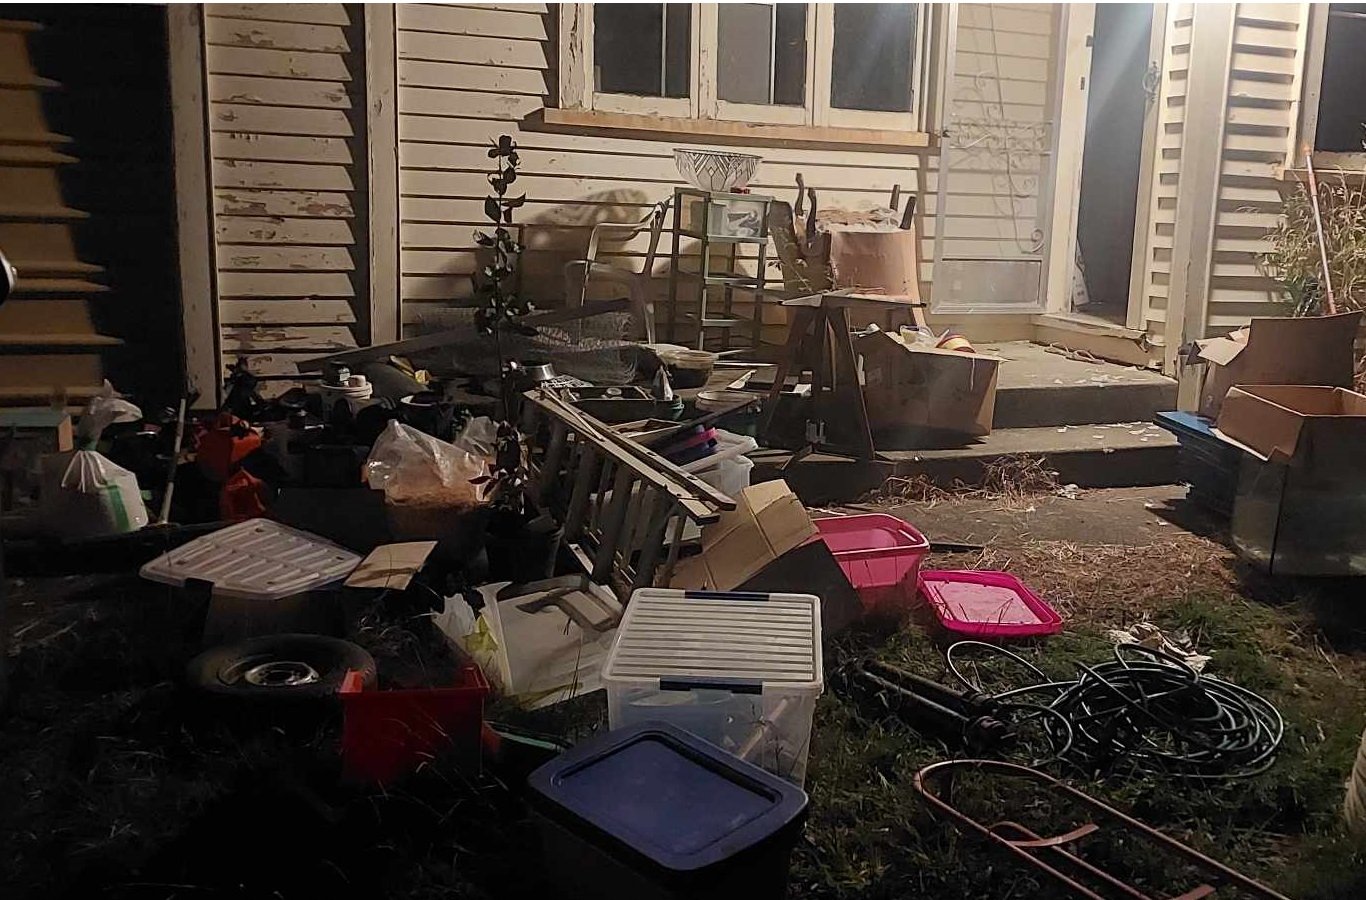
There is a bolt together structure forward of the chassis rails to support the 'nose' of the body and provide mounting points for the bumper. It had some damage from a front end impact. I dunno if that predates @dmulally 's ownership. Some of the structure was bent and rusty. The loom was also earthed on part of it, but that part didn't seem to be bolted to anything and just floating. I decided to take it out. WELL... I guess some rats were using this as a dining room for a while... Some of the fibreglass was also damaged and sorry if it was you Damo, but OMG it was not patched together very well and is failing. Who ever laid the glass mat probably also scrunches toilet paper rather than folding. There's delamination and big flappy bits of mat sticking up all over the show. I assume it was done by feel, upside down, because of poor access. I think I'll cut/grind/sand it out and have a go myself.
 11 points
 -
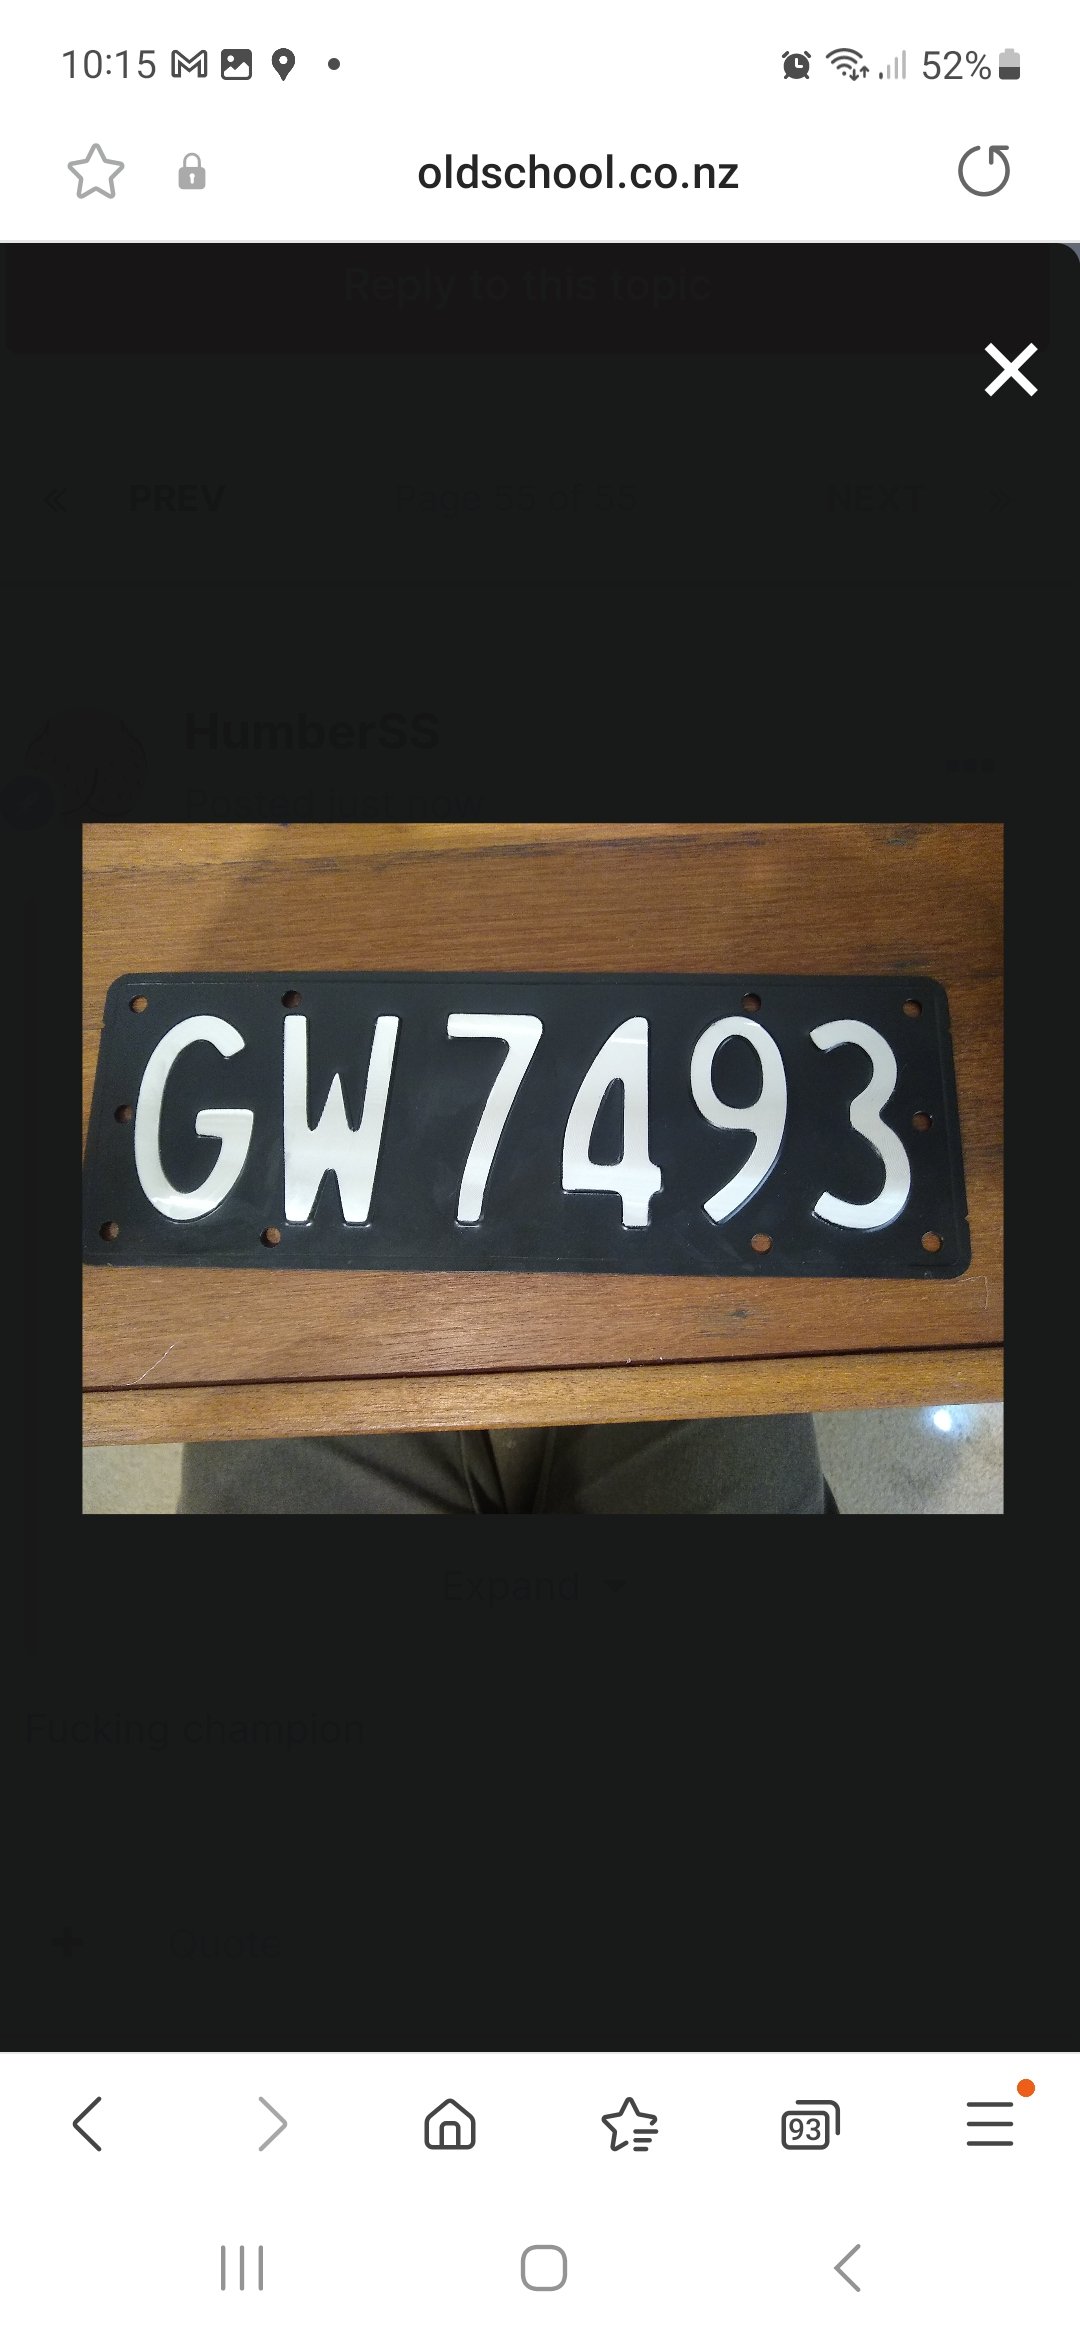
Im still thinking about this once in a while. Tracked down a less fucked right front guard. It was up welles ways. @Goat kindly let me use his house as a freight forward depot. The seller dropped it off, and a mate who was passing by collected it the next day. Picked it up tonight. Defo needs a wee bit of work. But i can buy the inner and outer bottoms off the shelf from Automotive Panel Craft in Oz. Thanks to @Classicdat for lugging it south for me too!
8 points
-
I was given a John Broadwood a long time ago that was badly broken. My wife went to the UK for a month so I sat the action on the dining room table and slowly worked my way along it replacing springs and tape etc. Getting the parts was hilarious as the man at the piano shop had a full on rant at me cos i asked if he also had a tuning key I could buy or borrow, he lost his shit and told me loudly and in the thickest Scottish accent that he had been fixing pianos for 40 years and what made me think I could do it in any way shape or form. I suggested that playing guitar for 20 years might have developed my ear for these things somewhat and he lost it so bad that he had to walk out. His boy was cracking up in the background and sold me all the parts I wanted once the old boy was gone. I didnt get a tuning key so jimmied one out of some square sockets in my socket set. It was never spectacular but played and sounded pretty nice. Unfortunately I had to store it in a shitty shed for a few years and it got ruined again. So when my daughter had her 16th we had a piano smashing party and they laid into it with sledgehammers and axes while drunk. She has one friend who is an unusual girl but holy shit she could wield a sledgehammer.7 points
-
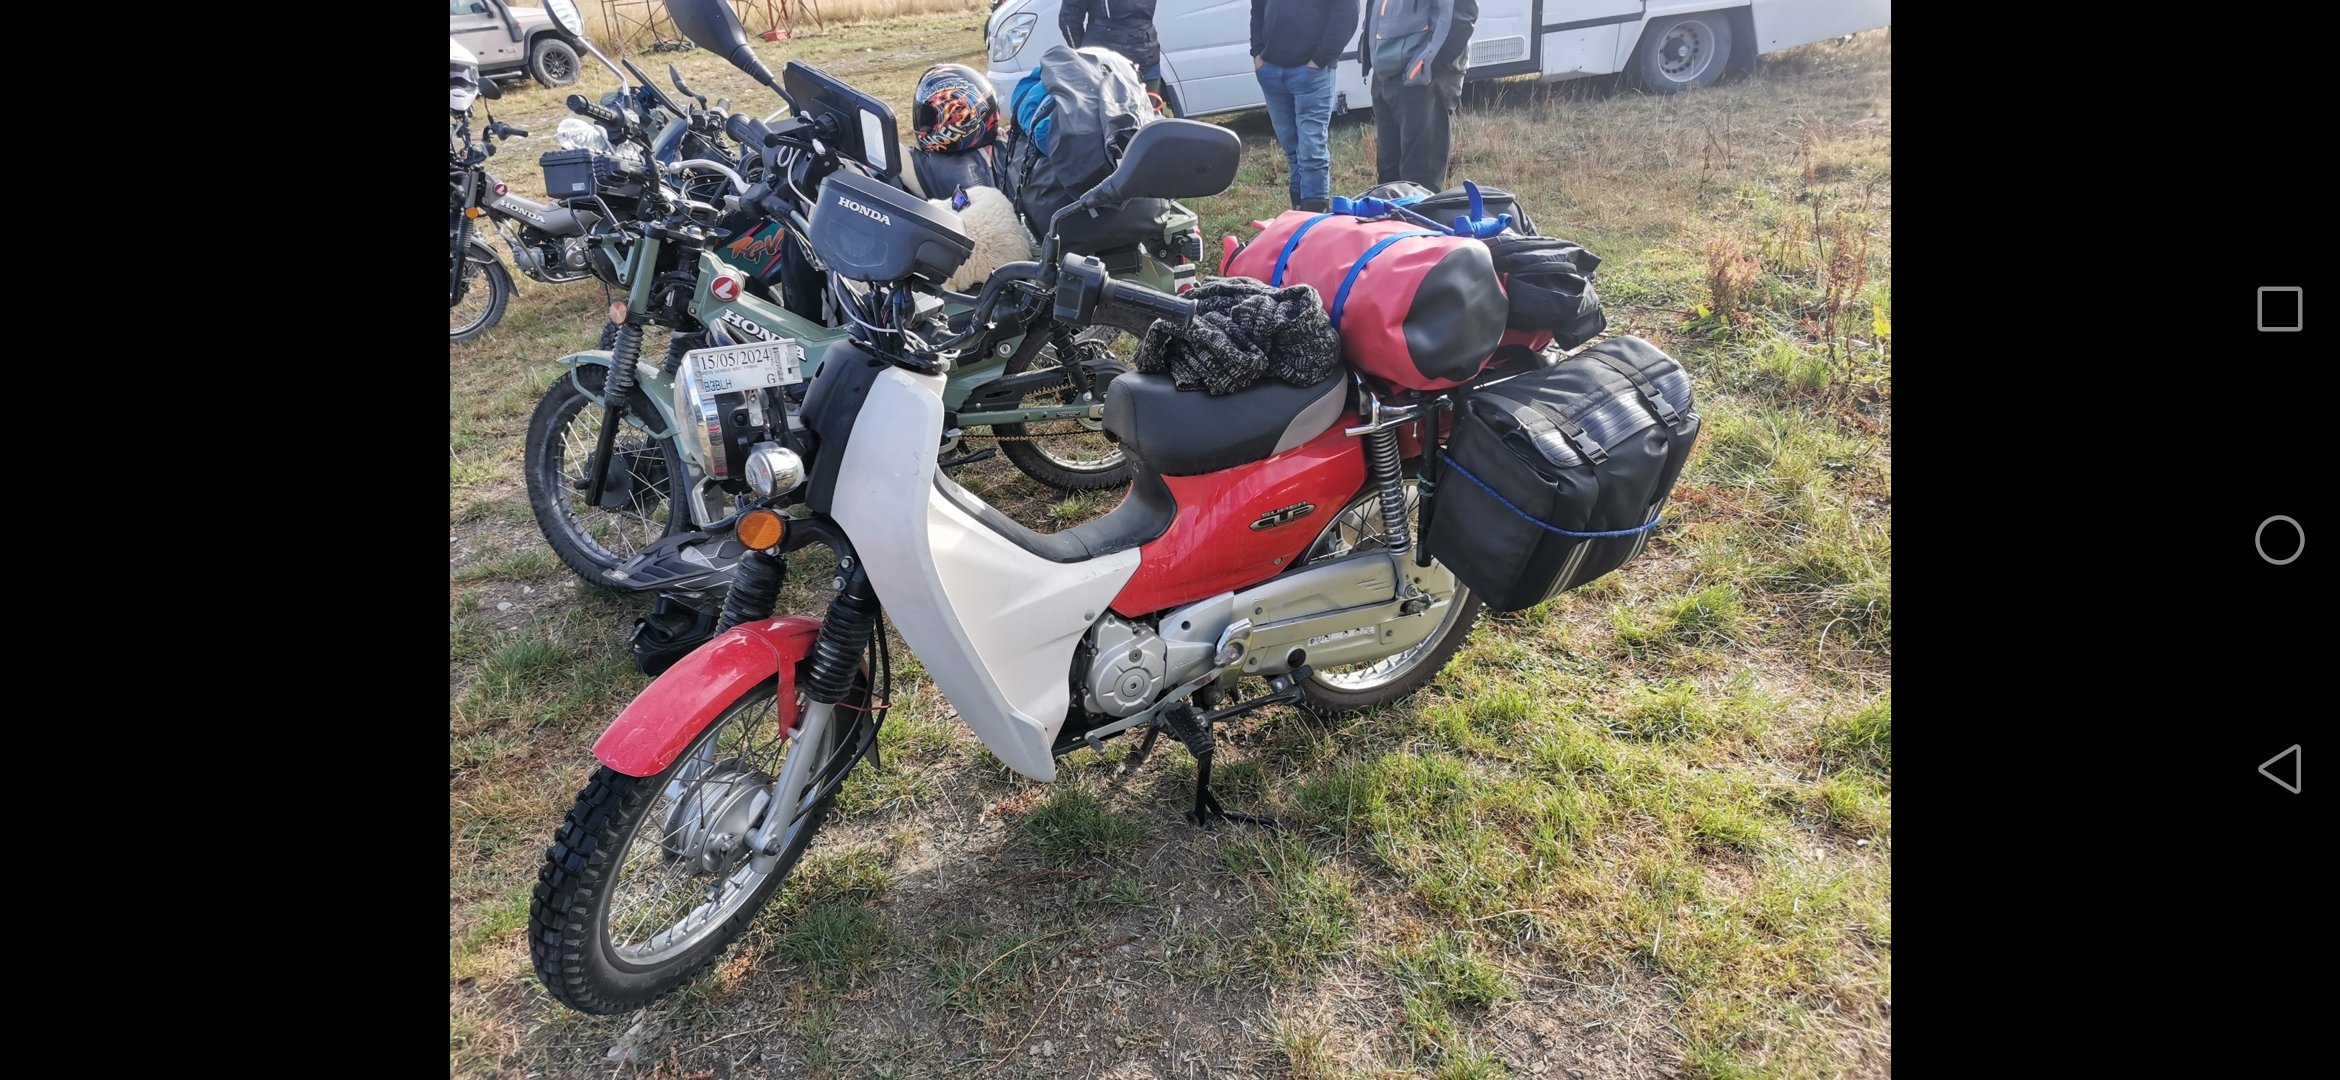
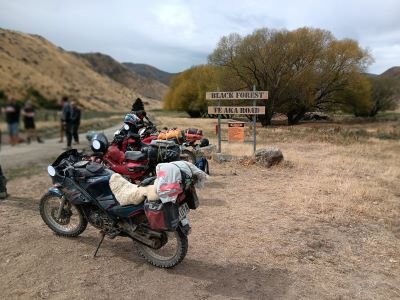
Have done a few very short rides on this bad boy, and its running pretty damn good. Its quite nice to ride also, which is a bonus. At nats I did a 75km trip from nats HQ to a museum in Cambridge, and just to be safe, I decided to re-fill it before departing for nats HQ on the return trip. It went onto reserve in the middle of the road in front of the service station, which was a bit of a surprise, as I was told it would do 200km on a tank (6L) but had only managed 75ish. That's around 8L/100km, which isn't great. J5's bike which is very similar, and was pulling the same speeds, and is only 15cc smaller in capacity, used just over half as much from memory, so somethings not quite right. Its defiantly running rich, and often smells a bit gasey, but I cant find gas leaking out anywhere. Will dropping the needle make a noticeable difference? Cant really think of anything else to check/change? I did manage to hit the metric ton in a two lane flat express way race with J5 though, so that's a new PB. Also also, a person on TM who confirmed they had both racks I need, then ghosted me super hard when I tried to buy them. BUT I mentioned to a customer that I yarn to about shit old bikes, what I was after, said his best mate apparently has at least 6x CT200's laying around, so he is actively trying to source the racks for me, excite. Pic4fred: Regards, VG.6 points
-
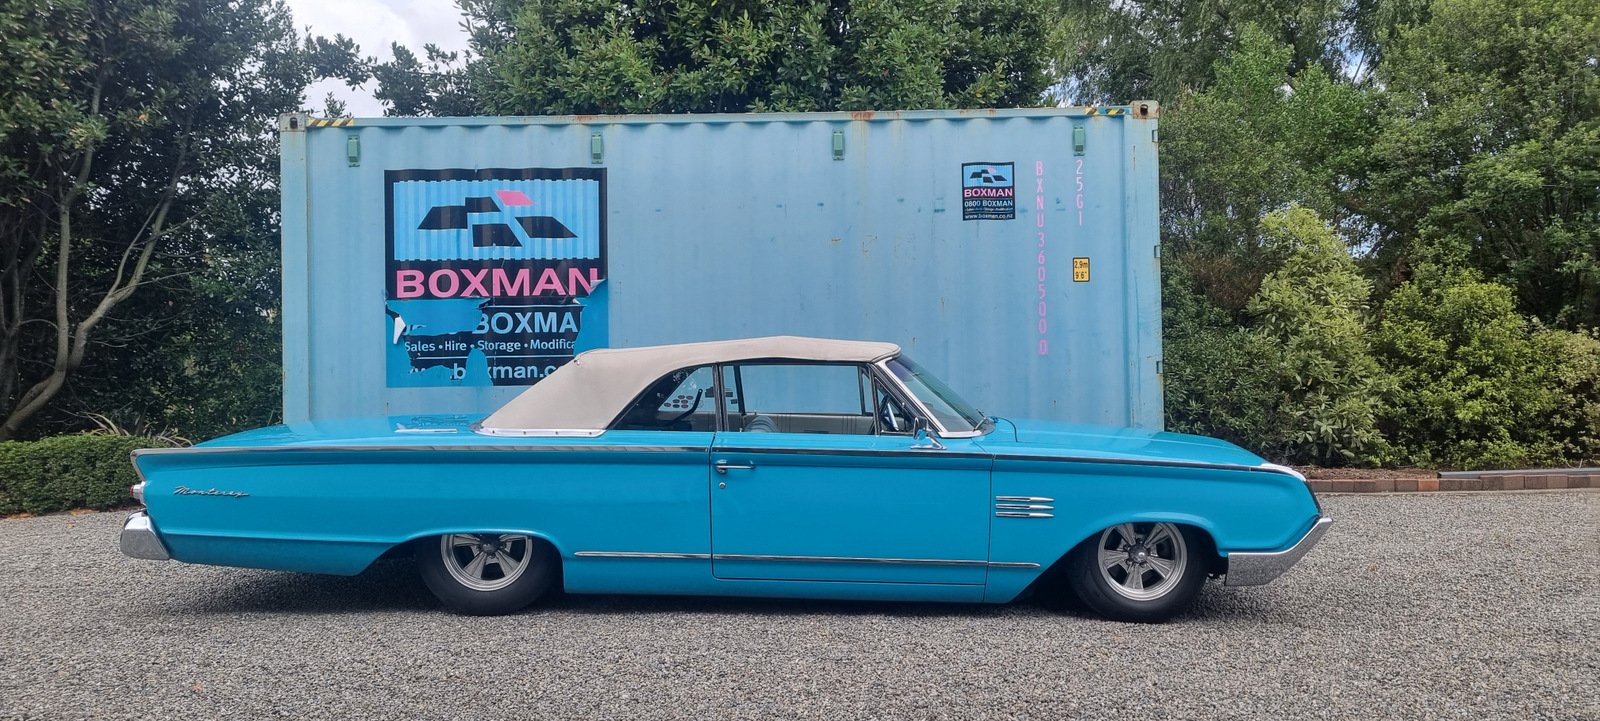
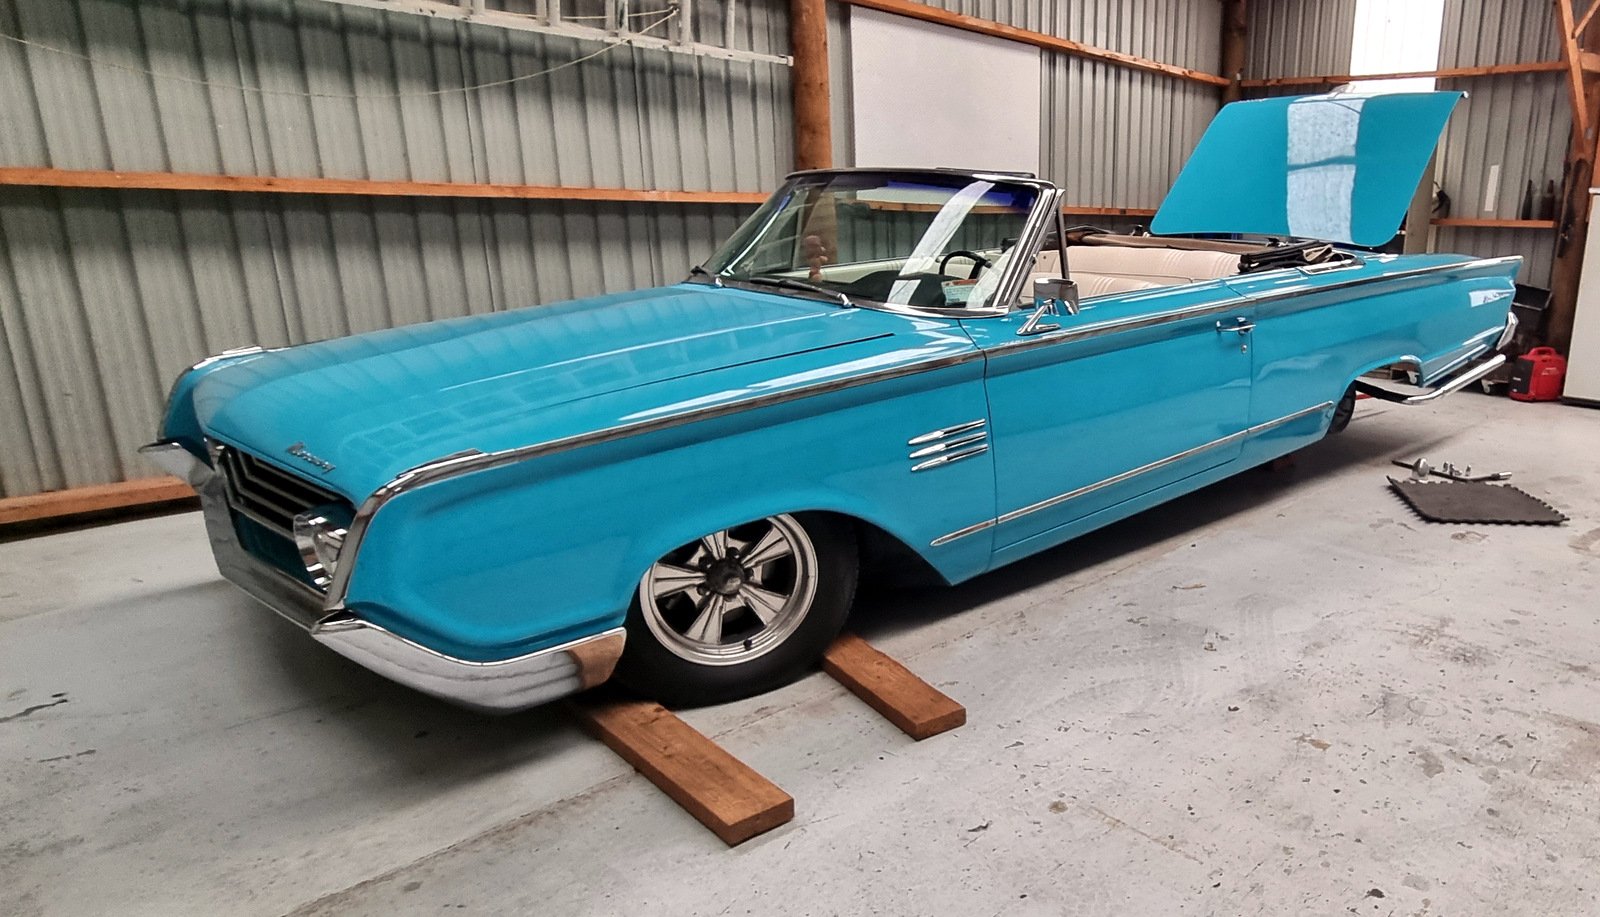
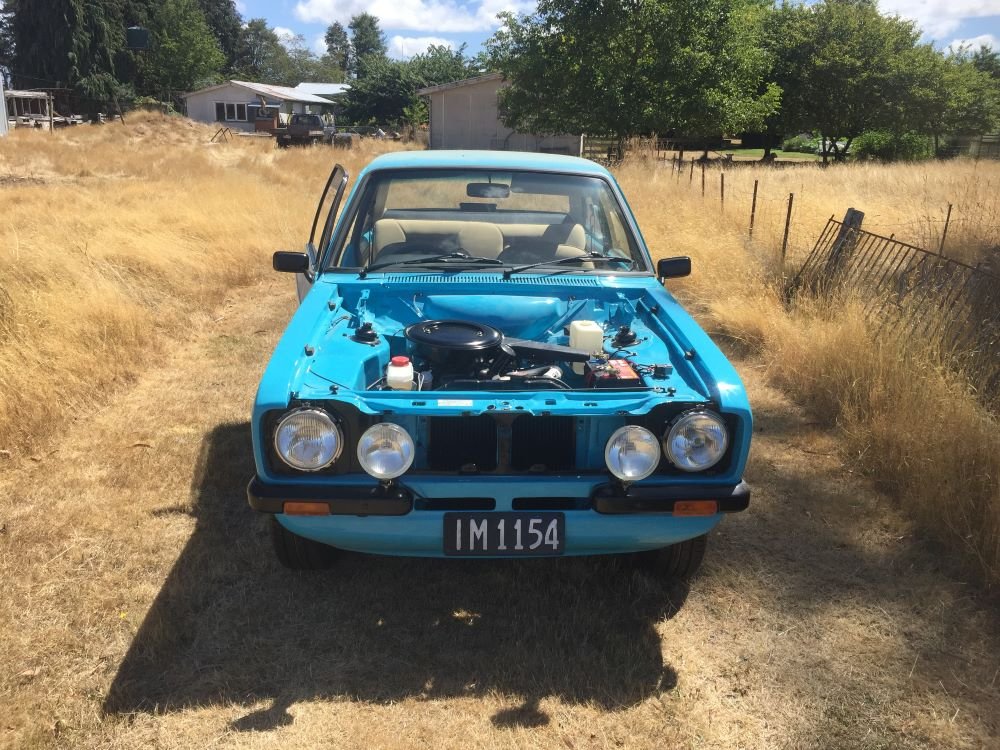
Collected from the paint shop on Tuesday basically a closed door repaint in the stock colour, nothing fancy Had a bit of reassembly to do, the bellflower pipes and the back seat and associated trim. Also had to find a bolt to fit one that went missing from the convertible top linkage (you can see the disconnected link in the photo above) Might have to hit up @ajg193 to make me a proper one as it is a special shouldered design. Looking it over the rear tyres looked a bit sad, so I pulled the wheels (which needs the tyres deflated) and got that sorted. WOF acquired today so have paid rego too. Just needs a bit of a clean up for the Beach Hop.
6 points
-
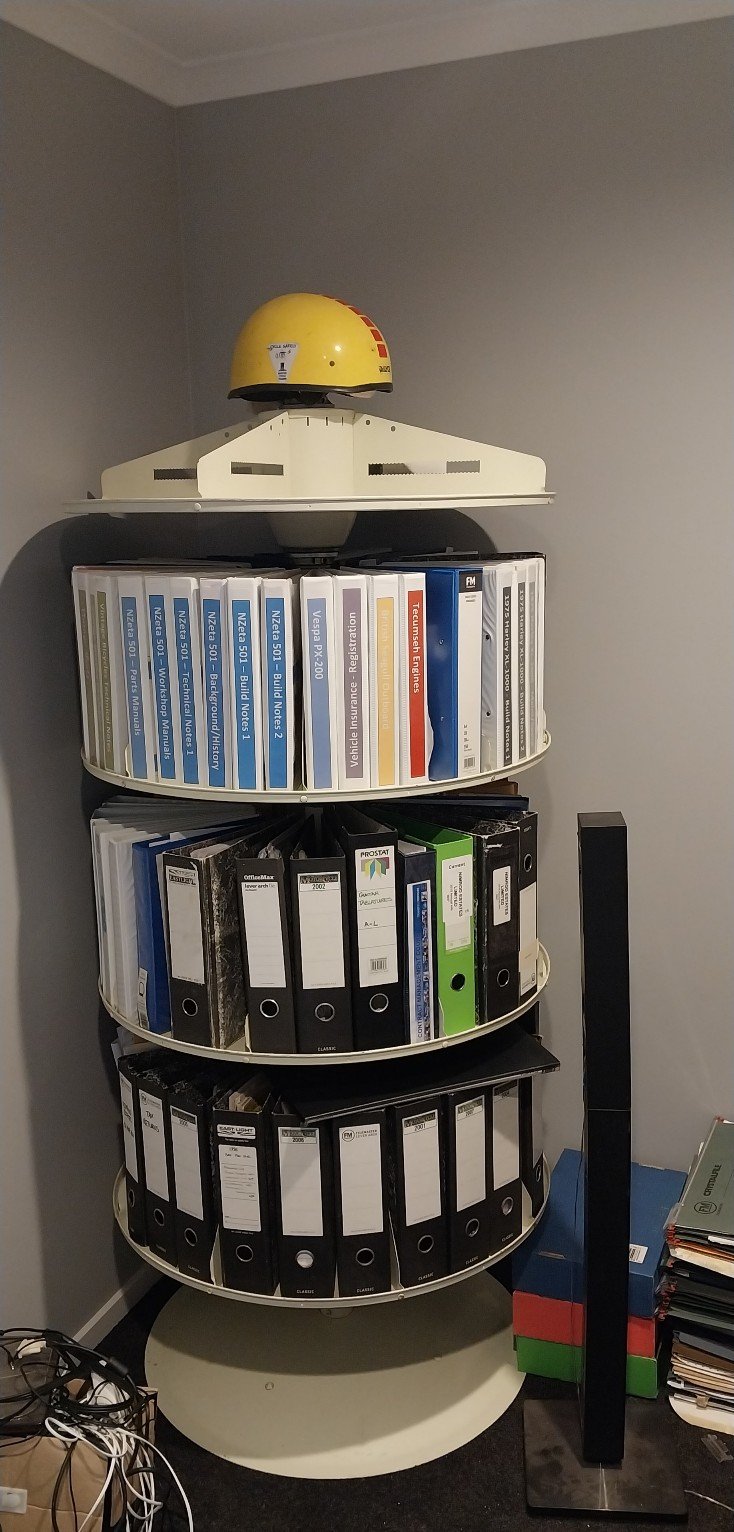
Legit thought that was bacon & egg pie... Sorting the garage/office, found an old rotating file thing at the tip shop for $20, pulled it apart, gave it a clean, greased bearings and assembled it inside. Shit it's heavy...
5 points
-
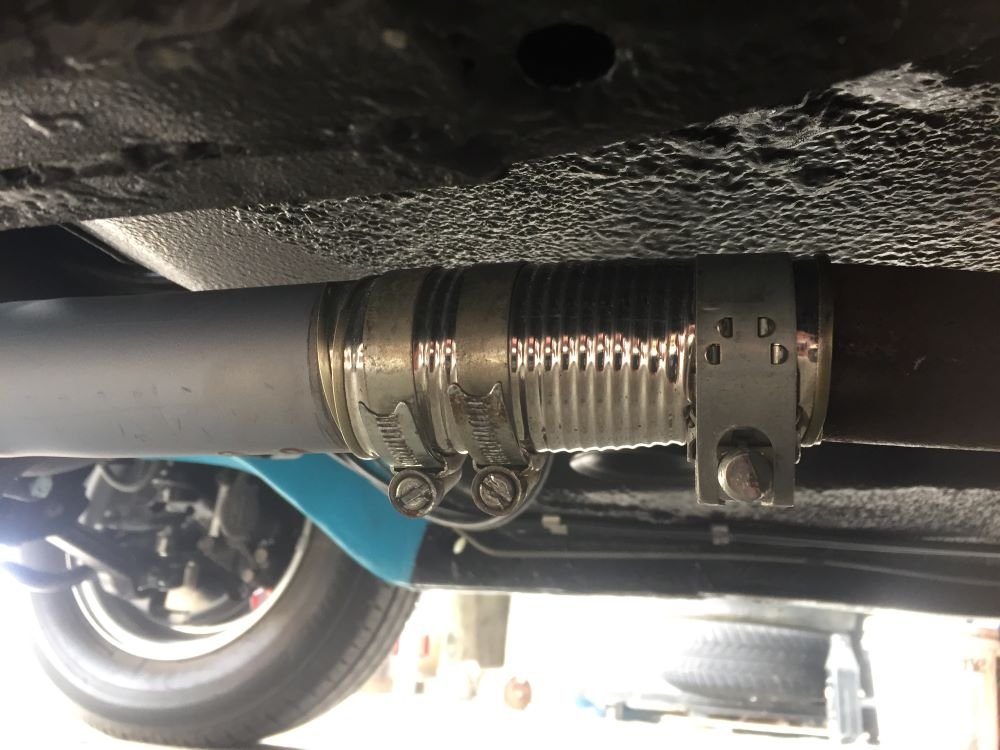
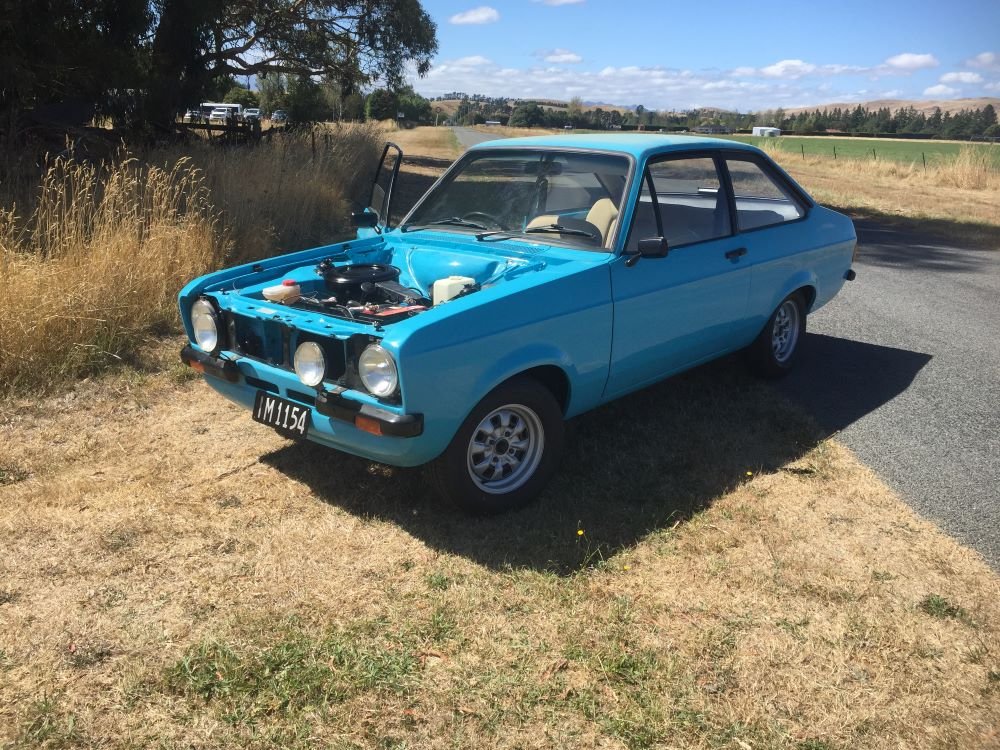
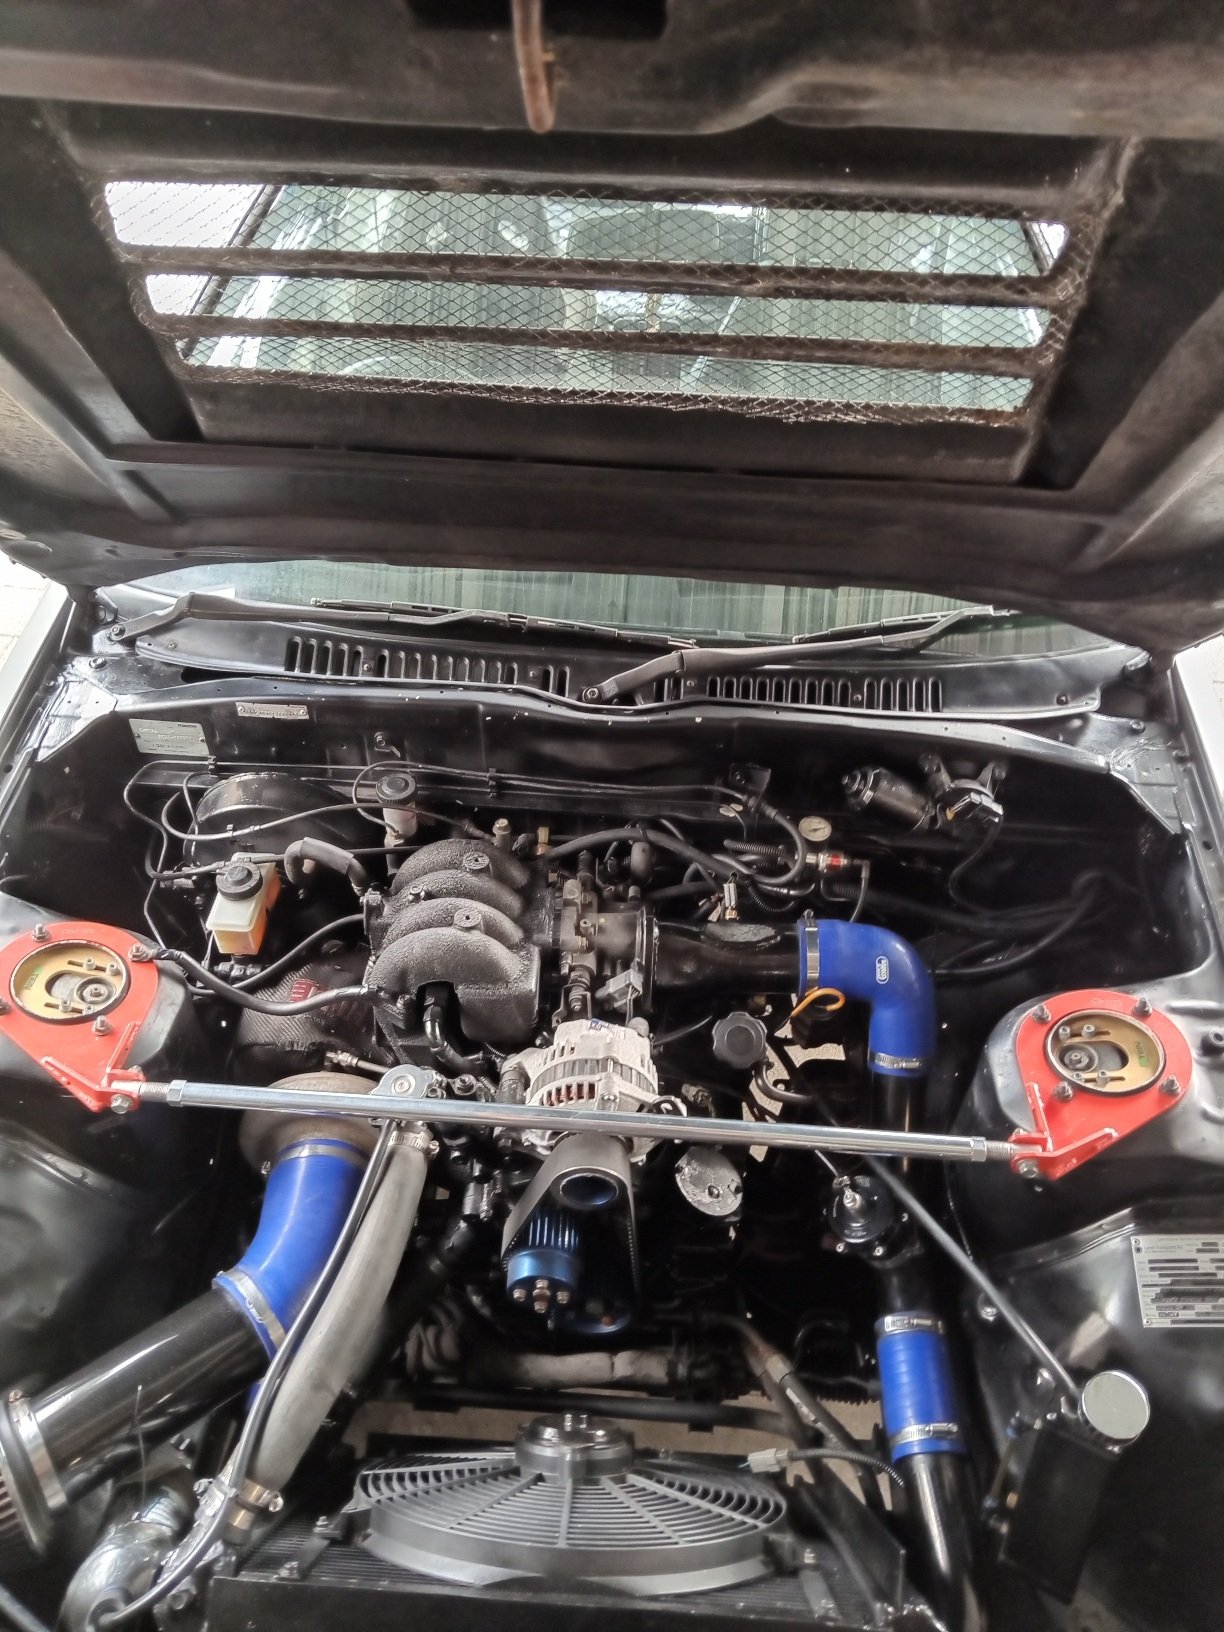
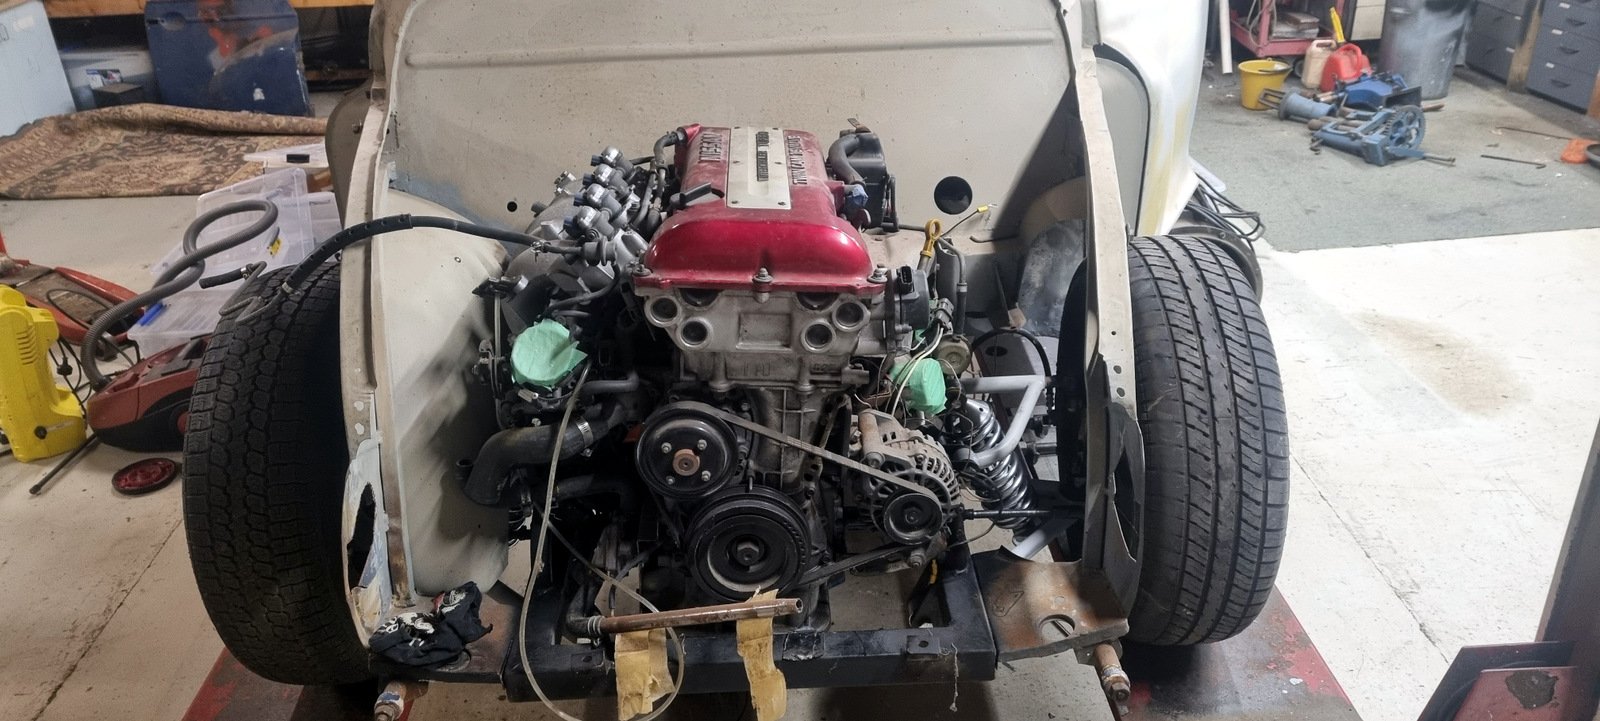
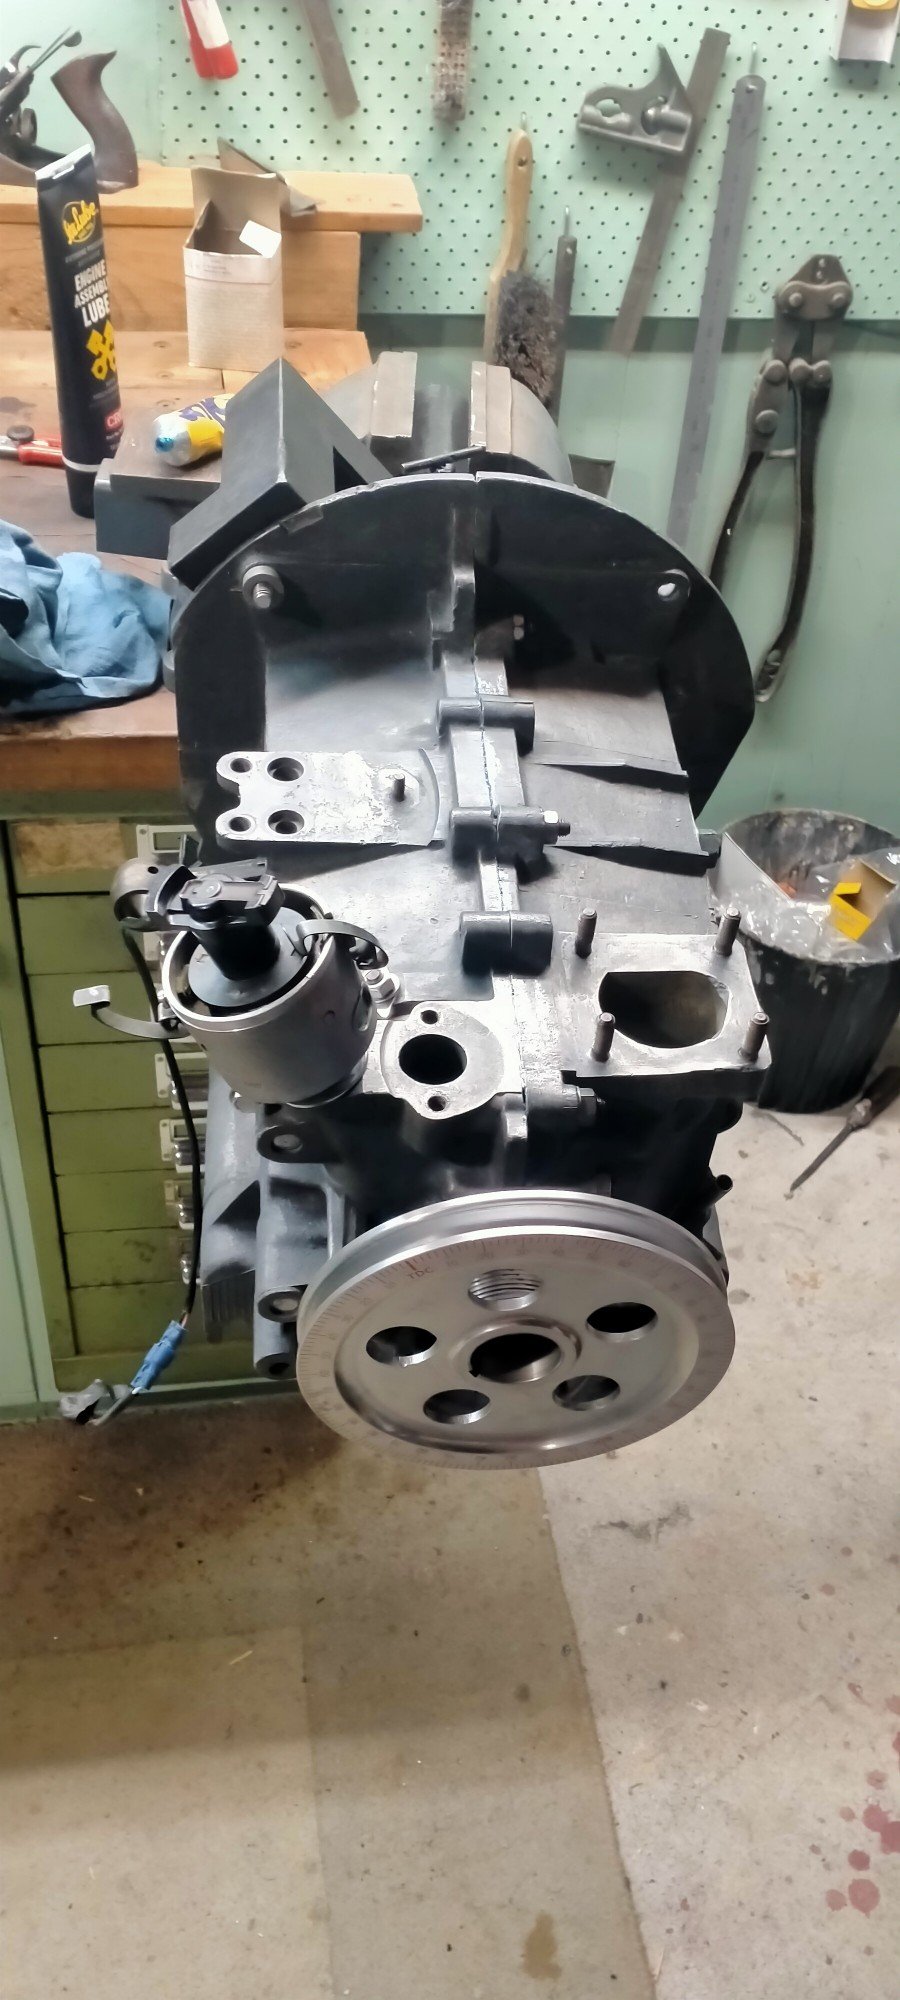
Nearly ready for first startup. Just a couple of jobs to do, one being to attach old exhaust to new headers until i'm able to get a proper system made. Don't laugh but I cut both ends out of a baked bean can, slit it down the side and with the help of some hose clamps, made a sleeve and clamped over both pipes. Should be ok for a while. Checked all fluid levels and filled radiator with hot water as mechanic suggested as been sitting for a while since build. Removed plugs and cranked motor until oil pressure light went out. Replaced plugs and turned key. Motor started straight up and sounded really good. Ran it up to temp and checked for leaks of which there were none. Time for a trip around town. Goes well but needs a tune. Brakes are good and everything else works except fuel gauge. If anyone has a suggestion of where I could get my 32/32 weber carb tuned around Christchurch could they leave a message on Project Discussion page. Cheers Project Discussion https://oldschool.co.nz/index.php?/topic/84912-petes-mk2-escort-1600-sports/page/3/#comment-2618039
5 points
-
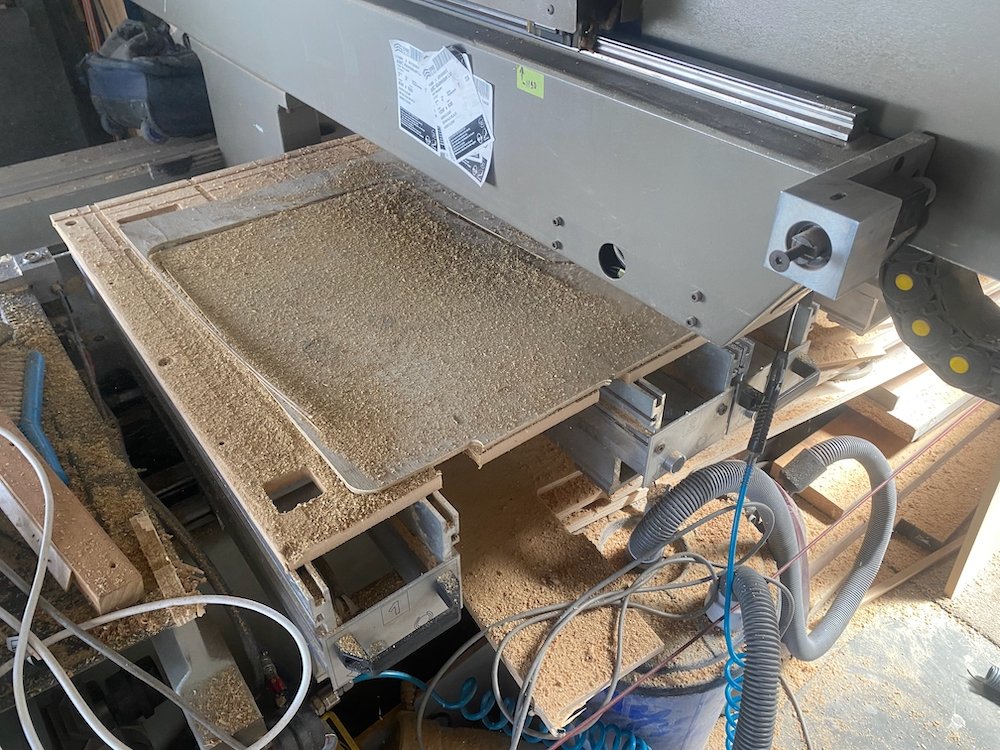
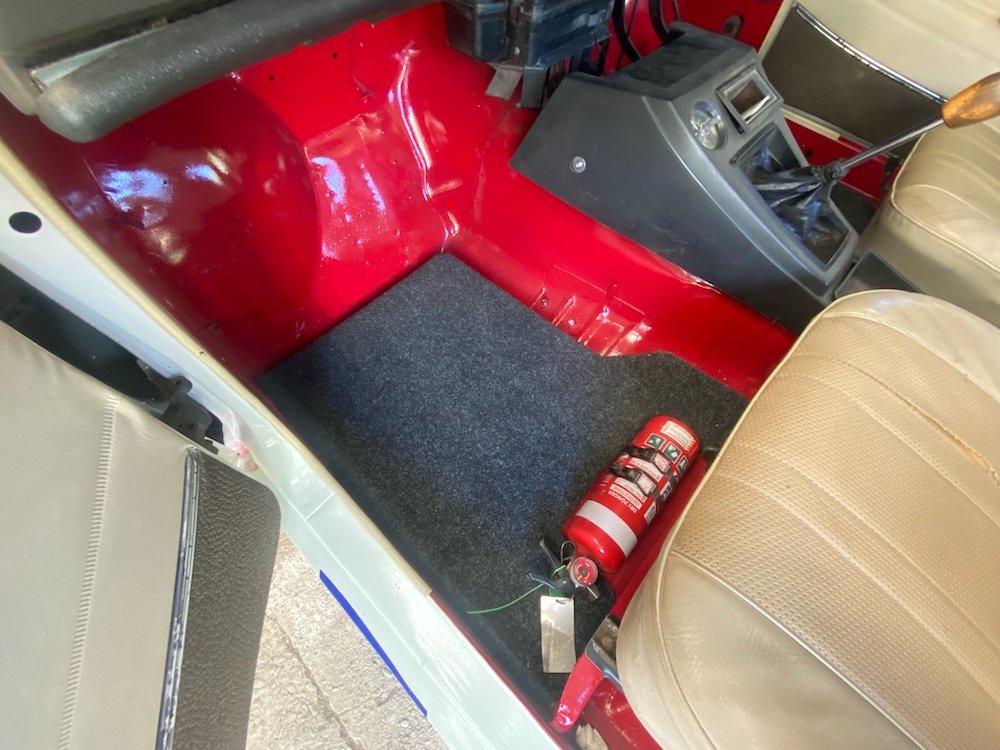
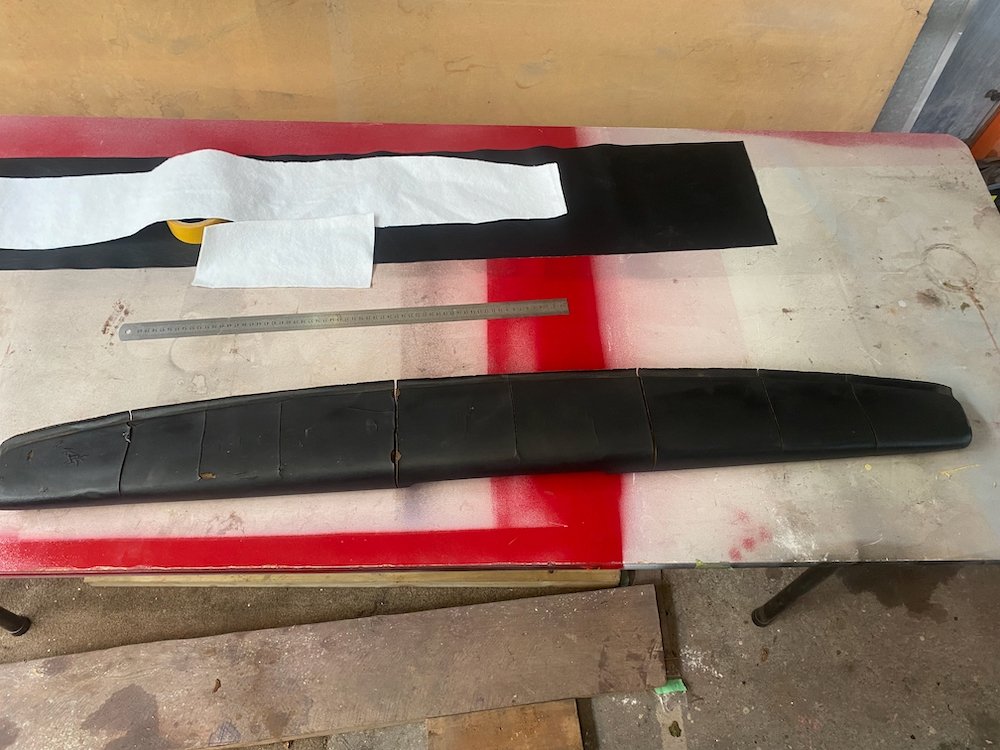
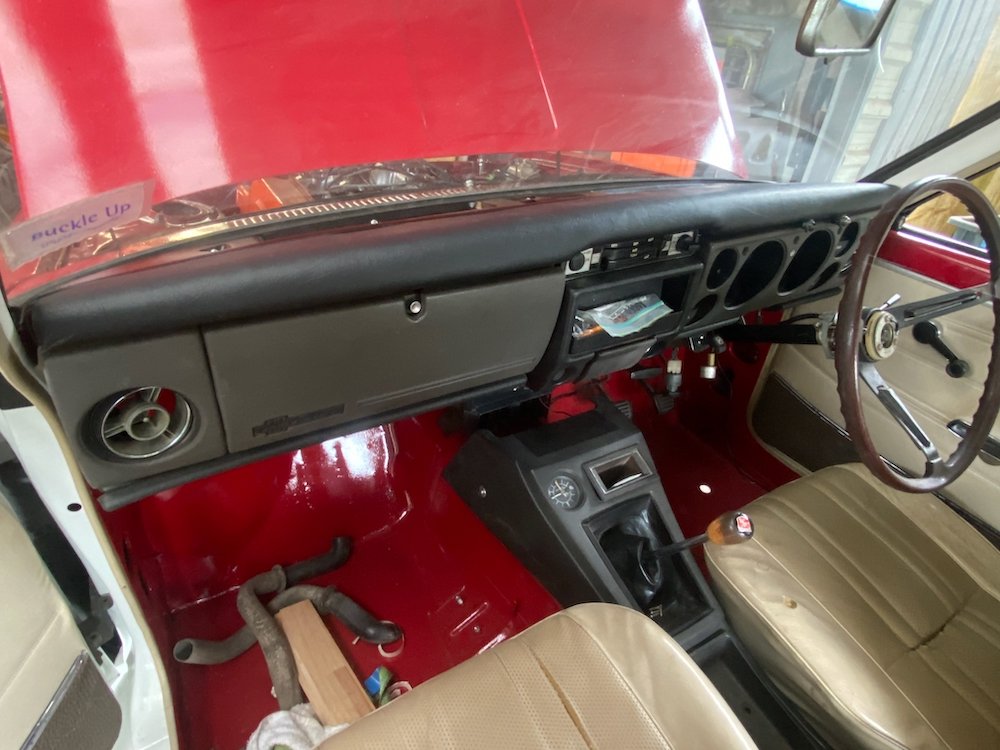
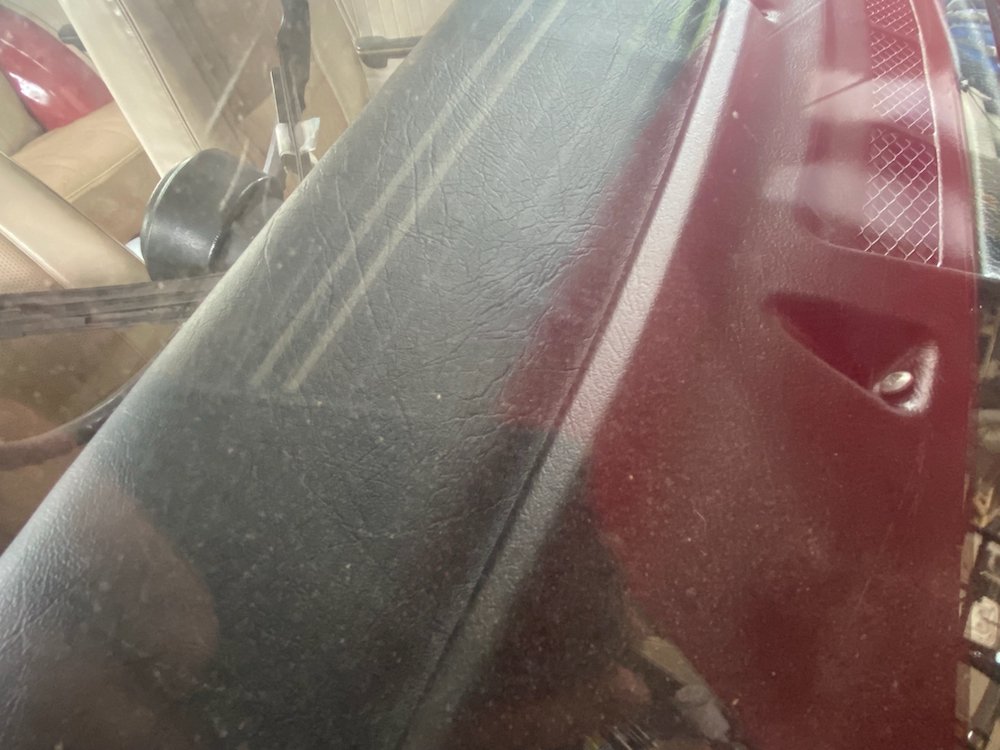
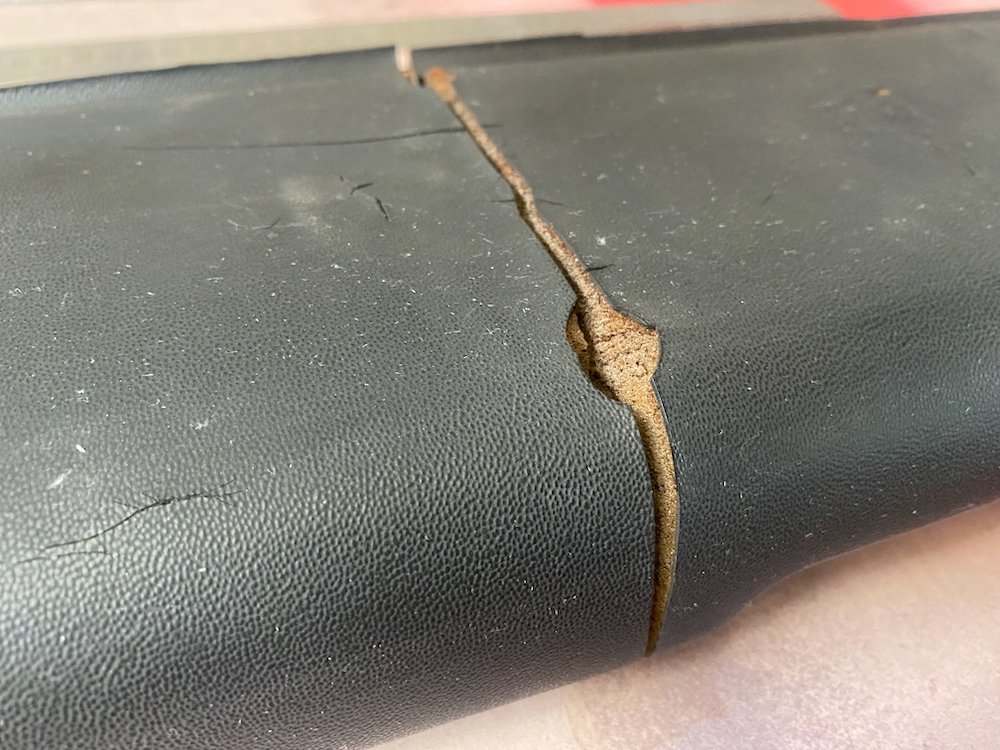
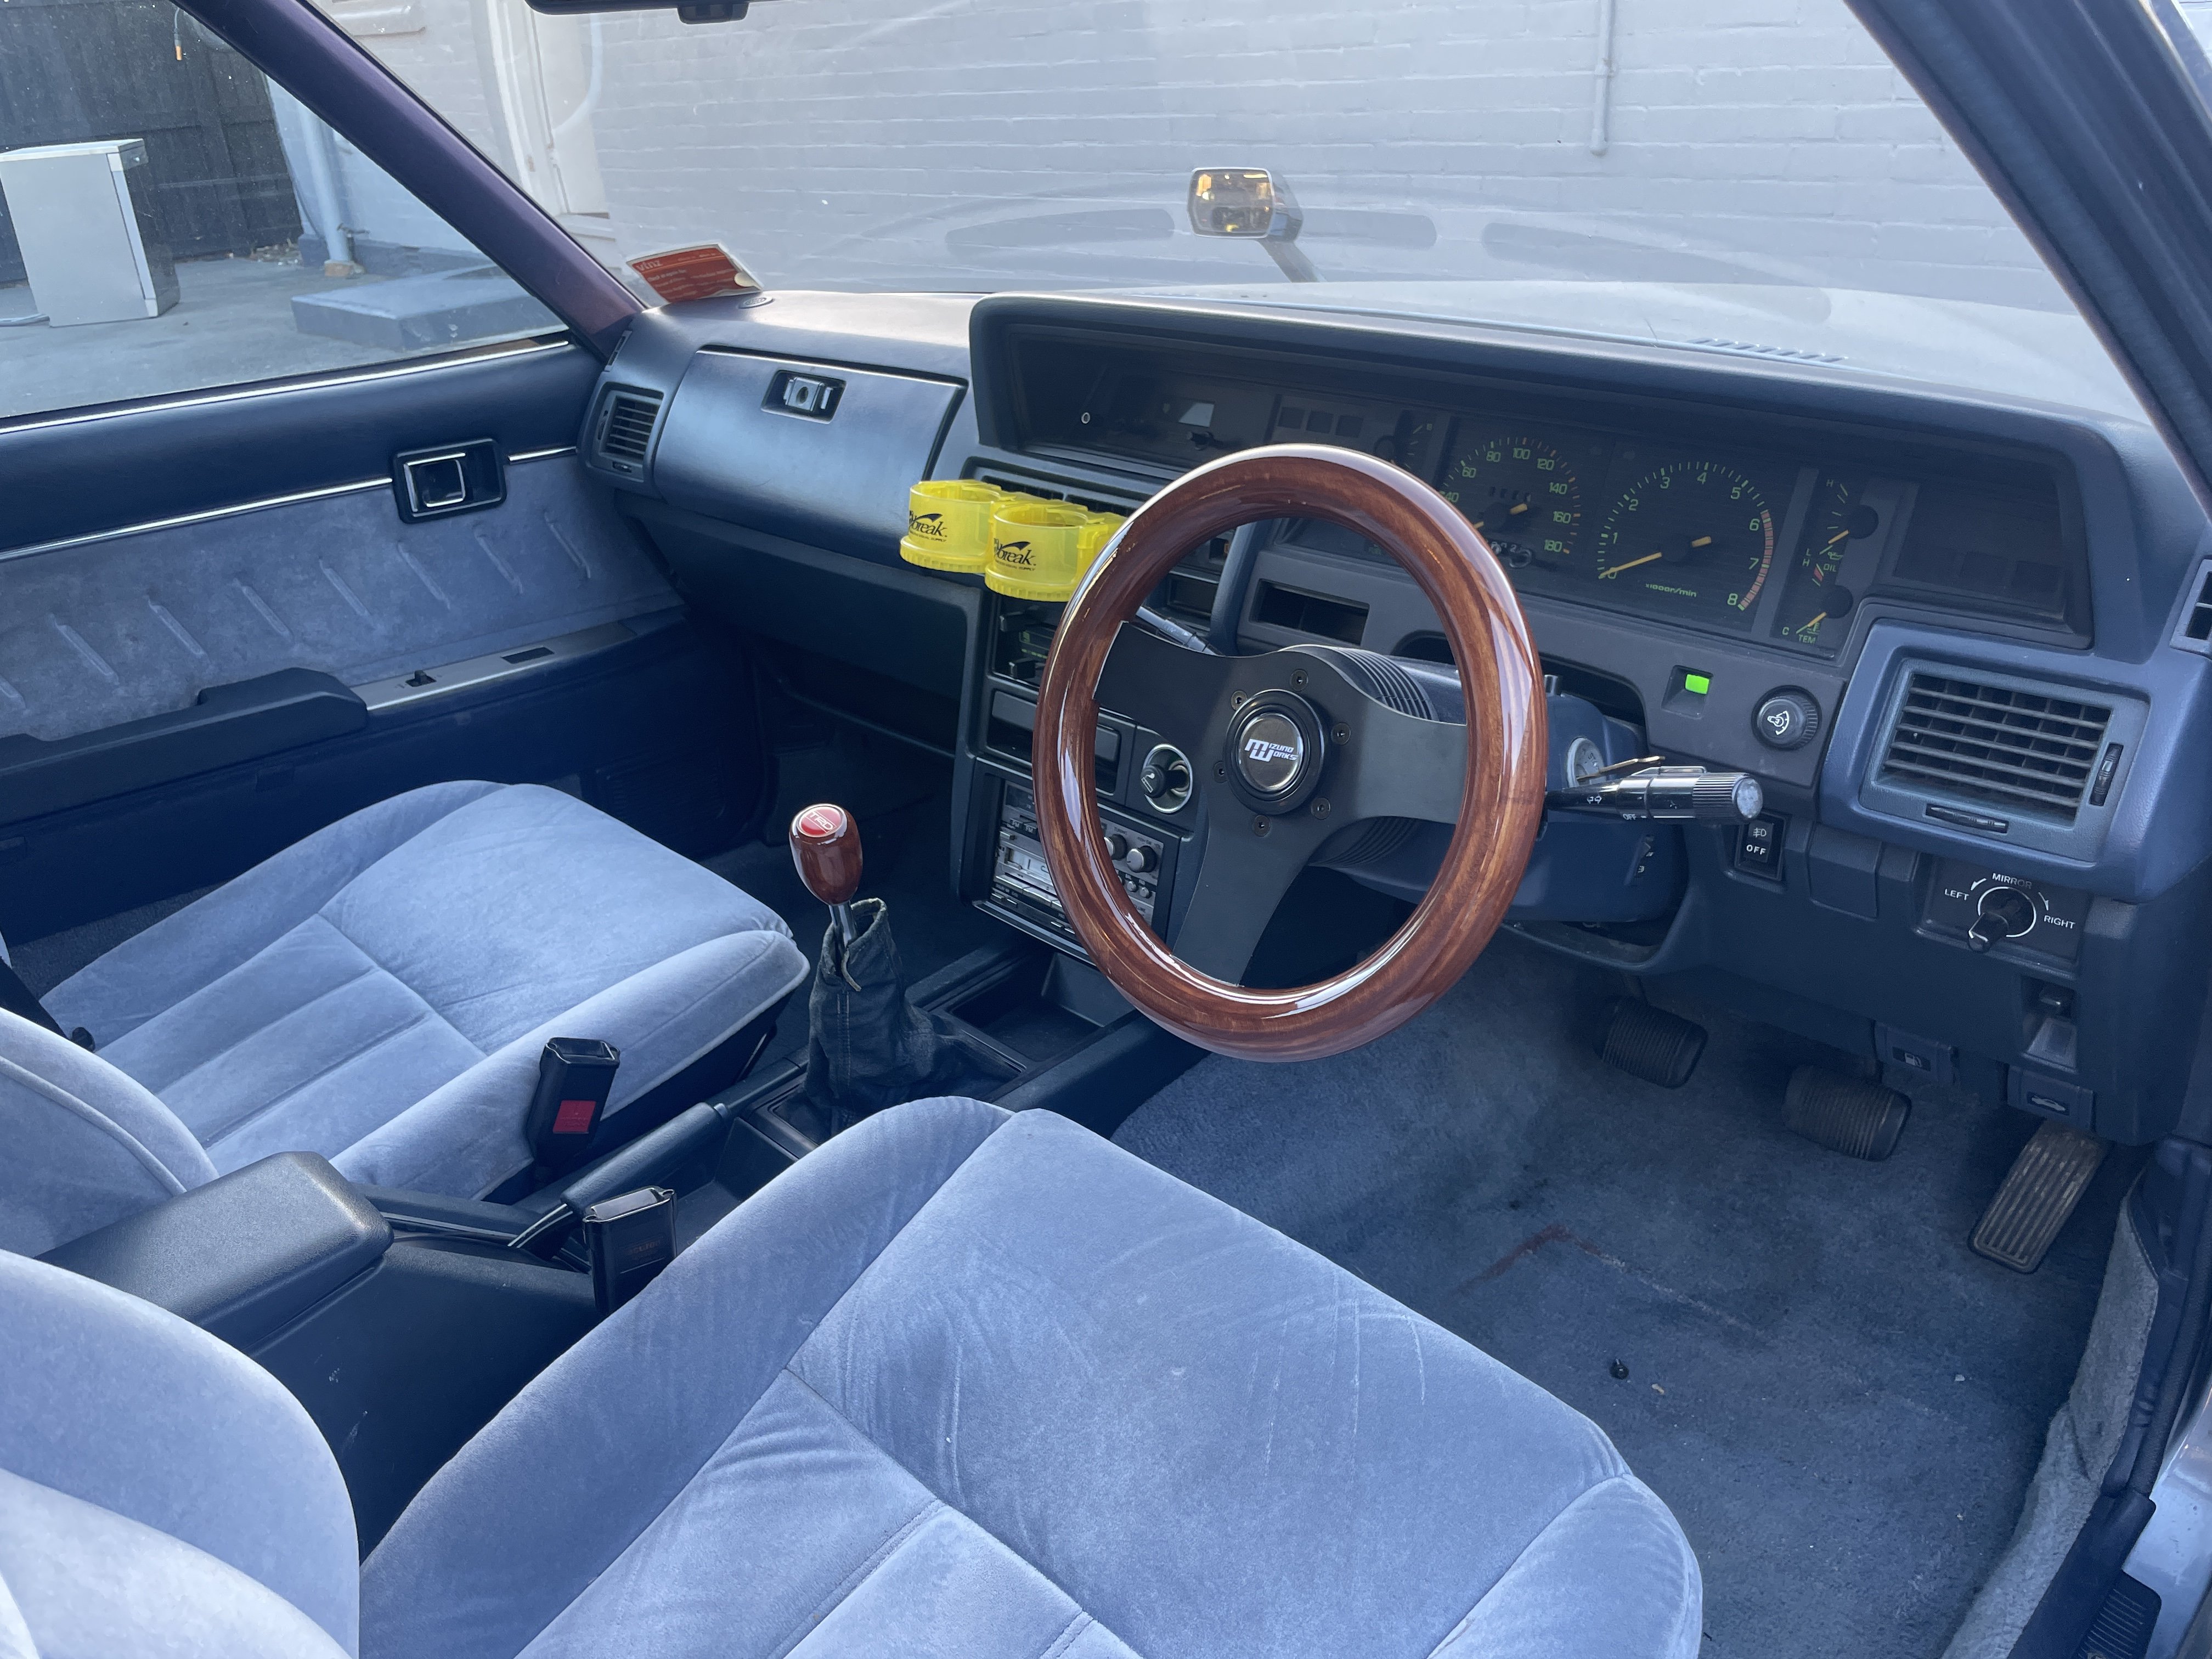
Interior polishing: Like most 50yo cars, the dashpad had cracked up pretty bad, long term i'd like to throw the check book at it, but in a budget friendly manner I called on my lovely GF and her knowledge of spotlight. We trimmed off the worst highpoints and double sided taped a layer of tablecloth liner to the pad, the idea here was the padding would hide the worst of the cracking once the vinyl leather was stretched over This was put on with the bare minimum of contact adhesive to keep the dashpad in close to original shape if needed for proper restoration further down the track. Finish result blends in well, of course the corners are a bit messy, but far nicer to look at than the old pad. Haven't been able to make a firm decision on the carpets but had an idea Chomp out some 7mm marine ply on the cnc, wrap in carpet offcuts from the 4wd.... Floormats that don't shuffle around.
4 points
-
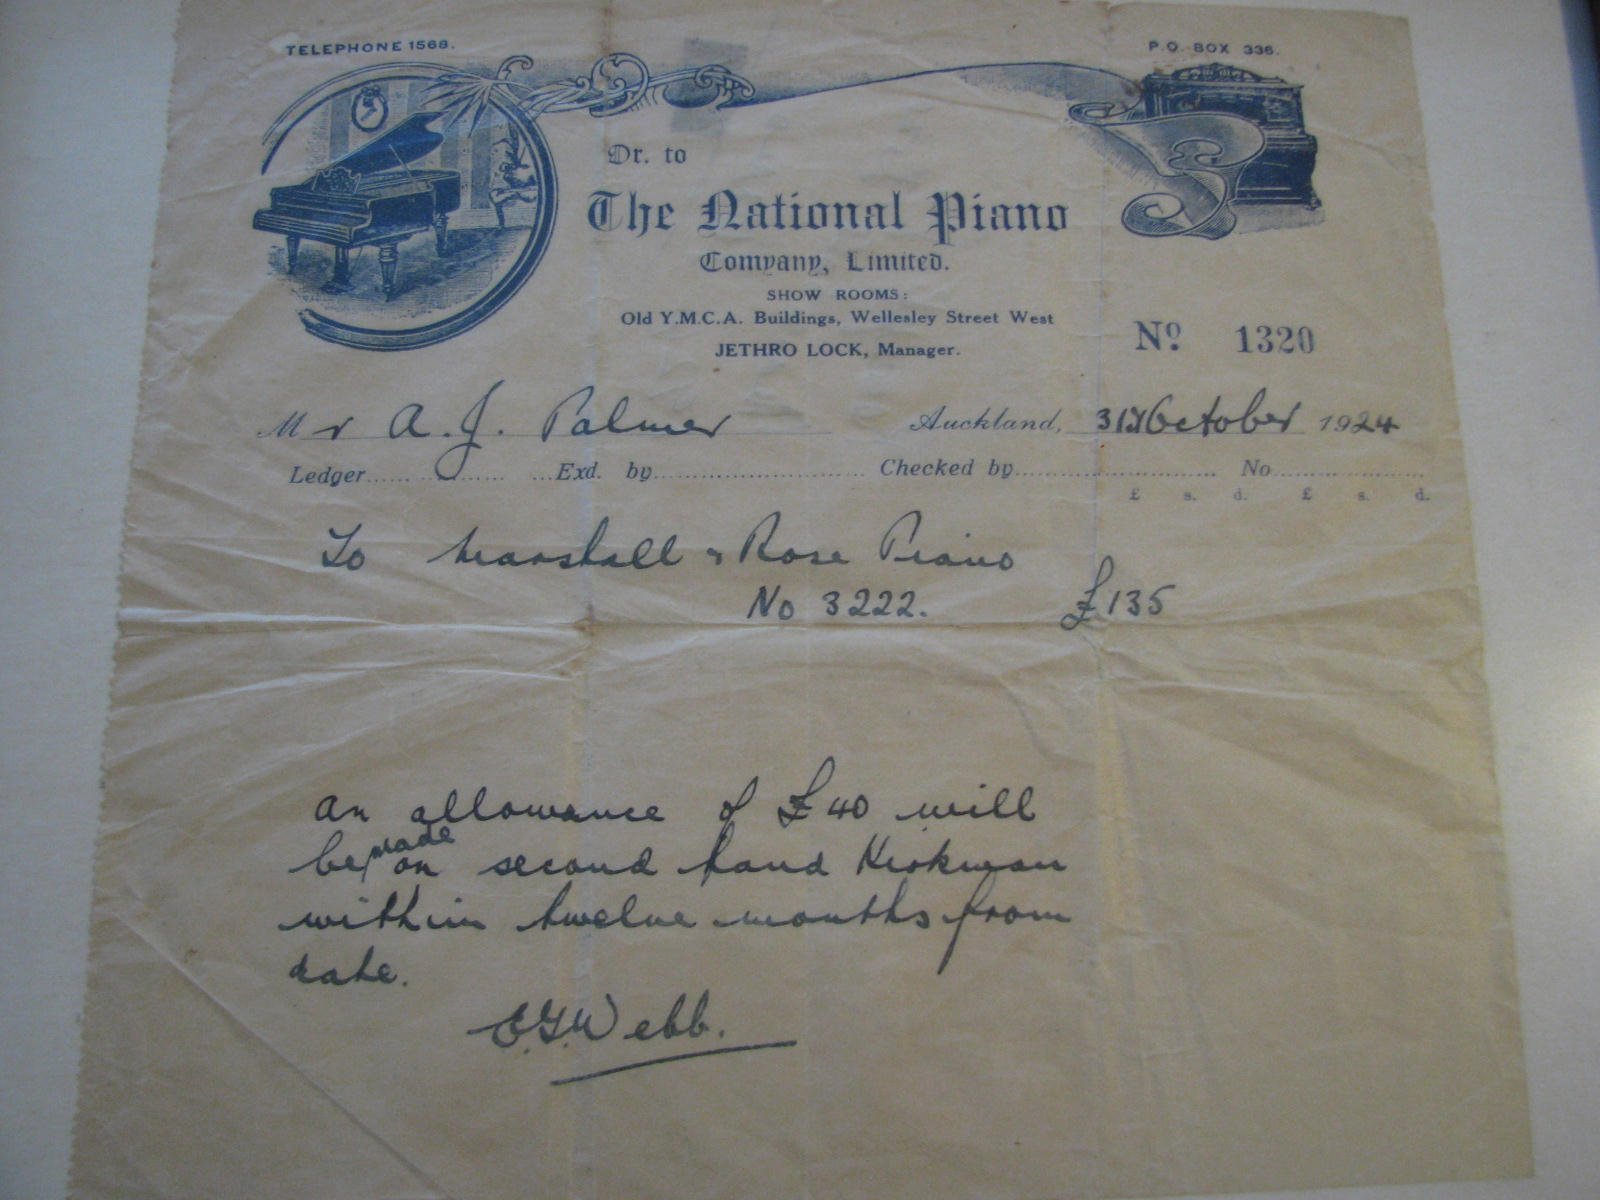
Uh-oh, it's time. This thread will be long and tedious and you probably shouldn't read it. Eventually there may be some videos but I need to bury them behind off-putting Barry stories. Four score and nineteen years ago, before the internet, computers, CDs, cassettes, before NZ switched to decimal currency, before TV, vinyl, WW2, the Great Depression, the popularisation of radio, before the majority of NZ families owned a car or even had electricity in the home, it was still the golden age of the piano. My great grandfather on my mother's side had just upgraded to a shiny new British piano (Japanese pianos weren't a thing yet, and German pianos had fallen out of favour in recent years for some reason). Somehow the receipt from that piano purchase survives to this day: More recently we also unearthed this photo of Great Granddad playing said piano: OK, so he's only "playing" the piano using a push-up pianola. These were a mechanical contraption that sat externally in front of the piano, somehow read scrolls of music via pneumatics and played the piano keys the same way a human would. A human was still required to power the device by pumping foot pedals, and then to take credit for the performance. They could also adjust things like volume and tempo on the fly via hand-operated sliders. Here's a random photo of a push-up pianola being used with a grand piano: When you think about it, this is a ridiculous amount of complexity, weight, cost, physical space, maintenance, effort etc just to reproduce music. Anyway, although using a pianola doesn't qualify one as a musician, my grandmother told me that Great Granddad would put a great deal of focus into adding expression via the pianola's levers. She recalled one instance where he finished a performance and heard applause coming from outside his window - someone walking down the street had stopped to listen. That's it, that's the highlight of the first part of this piano's life. From there, the piano's life was presumably pretty standard - a lot of sitting in the corner. My great grandfather had six children and the piano wound up with his youngest, my grandmother. Possibly the earliest memories of my life are of visiting my grandparents' house, where the piano sat in a back room down the hall. I would go down there, bash on the keys randomly, come up with a convoluted name for my amazing impromptu composition, then head to the front room where the adults would be talking and try to get their attention: "Did you hear that? It was called... um....um...." (invariably I had forgotten the name of my composition by then) The piano then passed to my parents while I was still young, possibly because my dad (who isn't from the piano's side of the family) showed some interest. Here's a top tip for any parents of young children: Tell the kid that if they go to bed early without any fuss like a good boy, their dad will play them a song on the piano as they fall asleep. This will mess them up for life. So I inherited the piano when I got my first house. Here it is at my place ten years ago, with a duvet jammed behind it: It's a Marshall & Rose upright, made in London in 1922 (best guess based on the serial number). That manufacturing date should have given it long enough to take a slow boat to NZ prior to its purchase here in '24. In car terms, you could liken this piano to something like a Rover P6 - an above-entry-level product, manufactured by a still-independent British company who would later be swallowed up by a conglomerate and produce less-unique products until the conglomerate went out of business for British reasons. Just as Rover would outsource the odd driveline component (a transmission here, an engine there), this piano uses a complete action assembly (the internal moving parts) from an outside supplier. The candleholders are aftermarket accessories which I added - basically they're the piano equivalent of fitting a roof rack and an external spare tyre to your P6 to make it look more 'classic car'. The piano's finished in burr walnut veneer hidden under darkened old varnish. Believe it or not I cannot find another exactly the same online. My plans for this thread are: to bore you all silly by rambling about piano stuff to document my project to record ten songs to celebrate the centenary of the piano's purchase. I've picked one song from every decade of the piano's existence (judge's decision is final and no correspondence will be entered into), and I plan to record one a month between January and October of 2024. Whether I find time to achieve this, let alone in video format, and whether I go through with making the results public, time will tell. The goal is that January will be the 1920s song, February the 1930s etc, and I will regret this very much.
3 points
-
Join the Moped Melee 2025! The places you'll see, the people you'll meet. You'd be a fool to miss it.
3 points
-
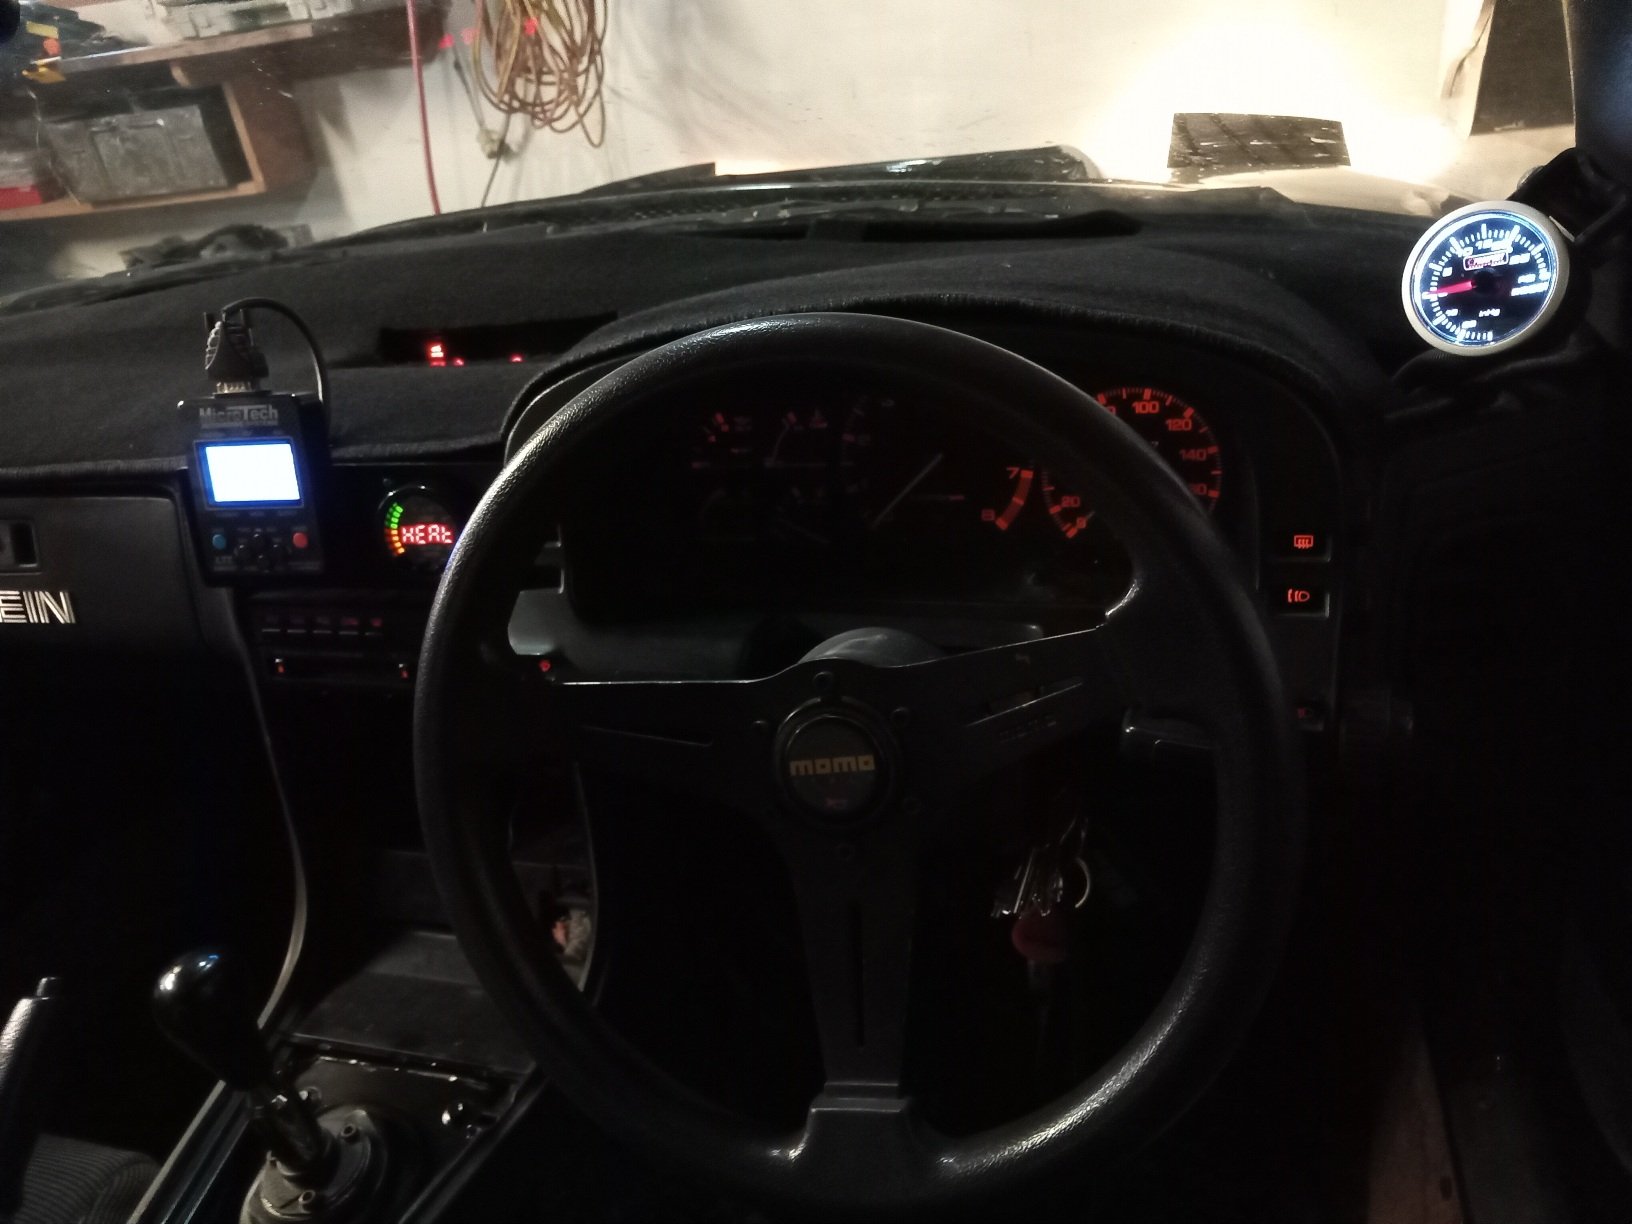
Have also been mucking around in the engine bay, i fixed a bunch of split hoses, put the strut brace back on that came with the spares for this car, cleaned up lots of areas, some paint, cleaned the wheels inside and out, put new tyres on the back took it for a drive and its running good, bit of a miss when it first goes into boost at low revs but im working on sorting that, still lights the tyres up in the dry pretty easily, but they are only 225s on the back ... Hooked up the boost gauge lighting to power so i can read it, and tidied some wiring away, i still need to buy parts for it, but these jobs all help, definitely will have to sort out some paint but i want to get all the parts on and working and warrantable before i do anything like that so excuse the mismatched colours and that haha
3 points
-
My chassis rails were a bit pushed in, and most likely would have failed a wof, so i took it to blairs panel repairs, he did an awesome job and even fixed the pinch weld areas that were also bent up, and undercoated it all for a great price and all done in a day, couldnt ask for more really, one less thing to fix on the road to a warrant ..
3 points
-
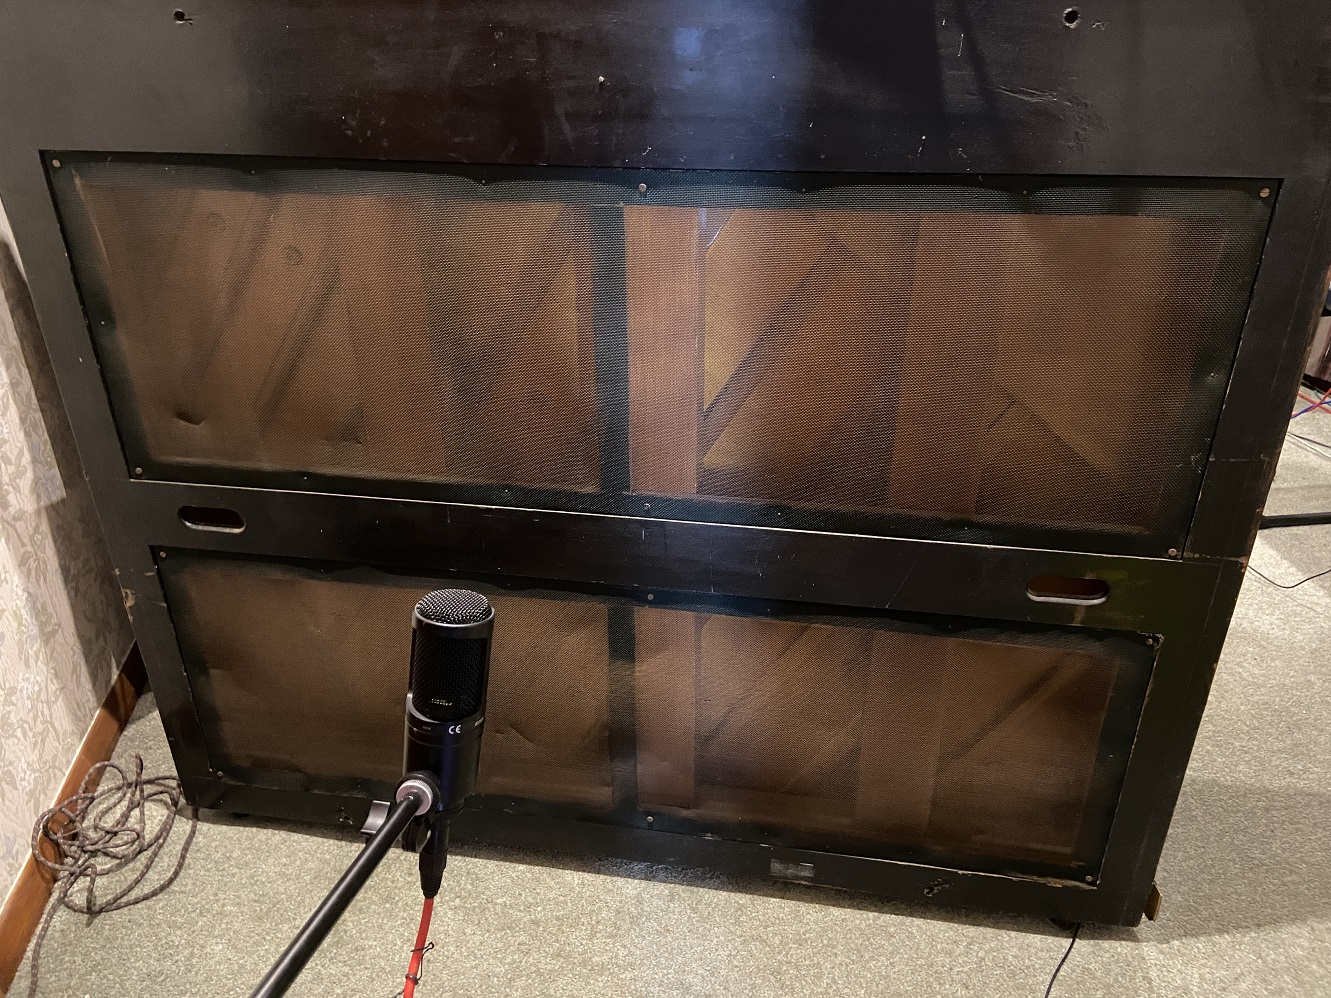
I'm behind schedule on this and I haven't posted anything because of no progress. I put the piano in the middle of the room and set up some microphones. I found that you could hear the rattling of these wire screens on the rear of the piano: I took them off. The next problem was too much typewriter clatter from the piano's action when recording with the upper front panel removed. I know I should expect unwanted noise from something ancient, British and worn out, but the level of rattling was a bit much to be excused as character. With the upper front panel back in place, the mic doesn't pick up the clatter as much but I lose a bit of clarity. So the technician took the whole action away to replace the bushings responsible for some of the clatter, and to reshape the hammer felt to remove the grooves and compacted areas. I got the action back last week, but now it's a matter of working through which new bushings are too tight or too loose, fixing the already-broken bits we found, and fixing the newly-broken bits which resulted from working on something so old. So far the tone and the dynamic range are a bit better. An old piano like this is never going to set the world on fire, but I encountered four other old pianos over the course of Nats and they were all miles worse than mine. The bar is low. I have been tasked with playing the piano and making notes on what's still not right for the technician's next visit in April.
3 points
-
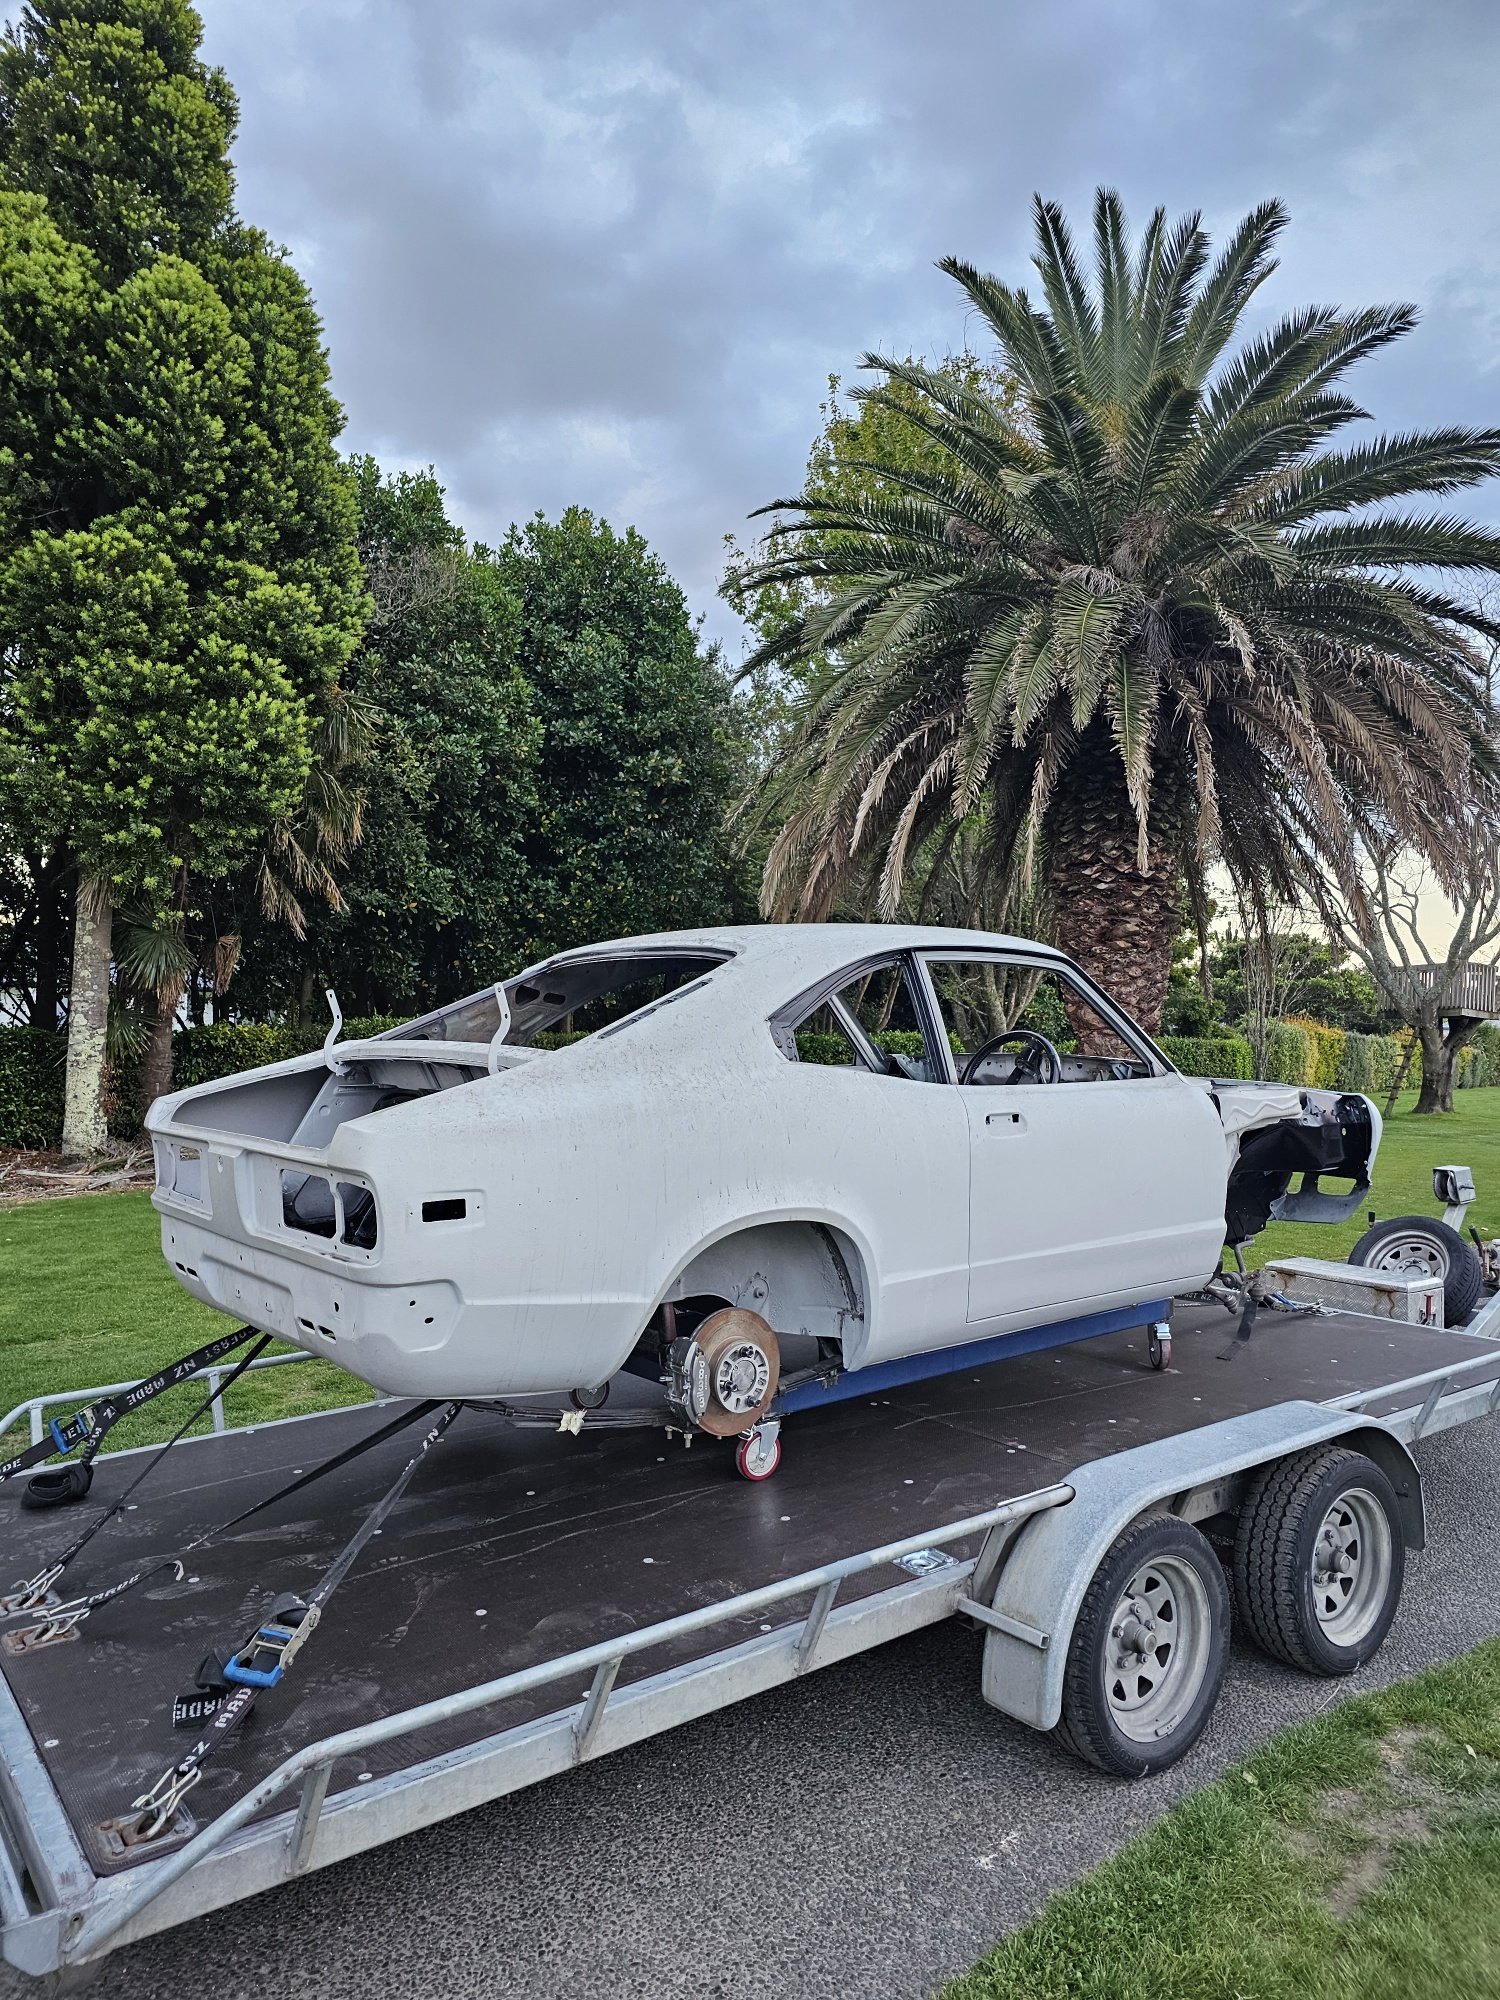
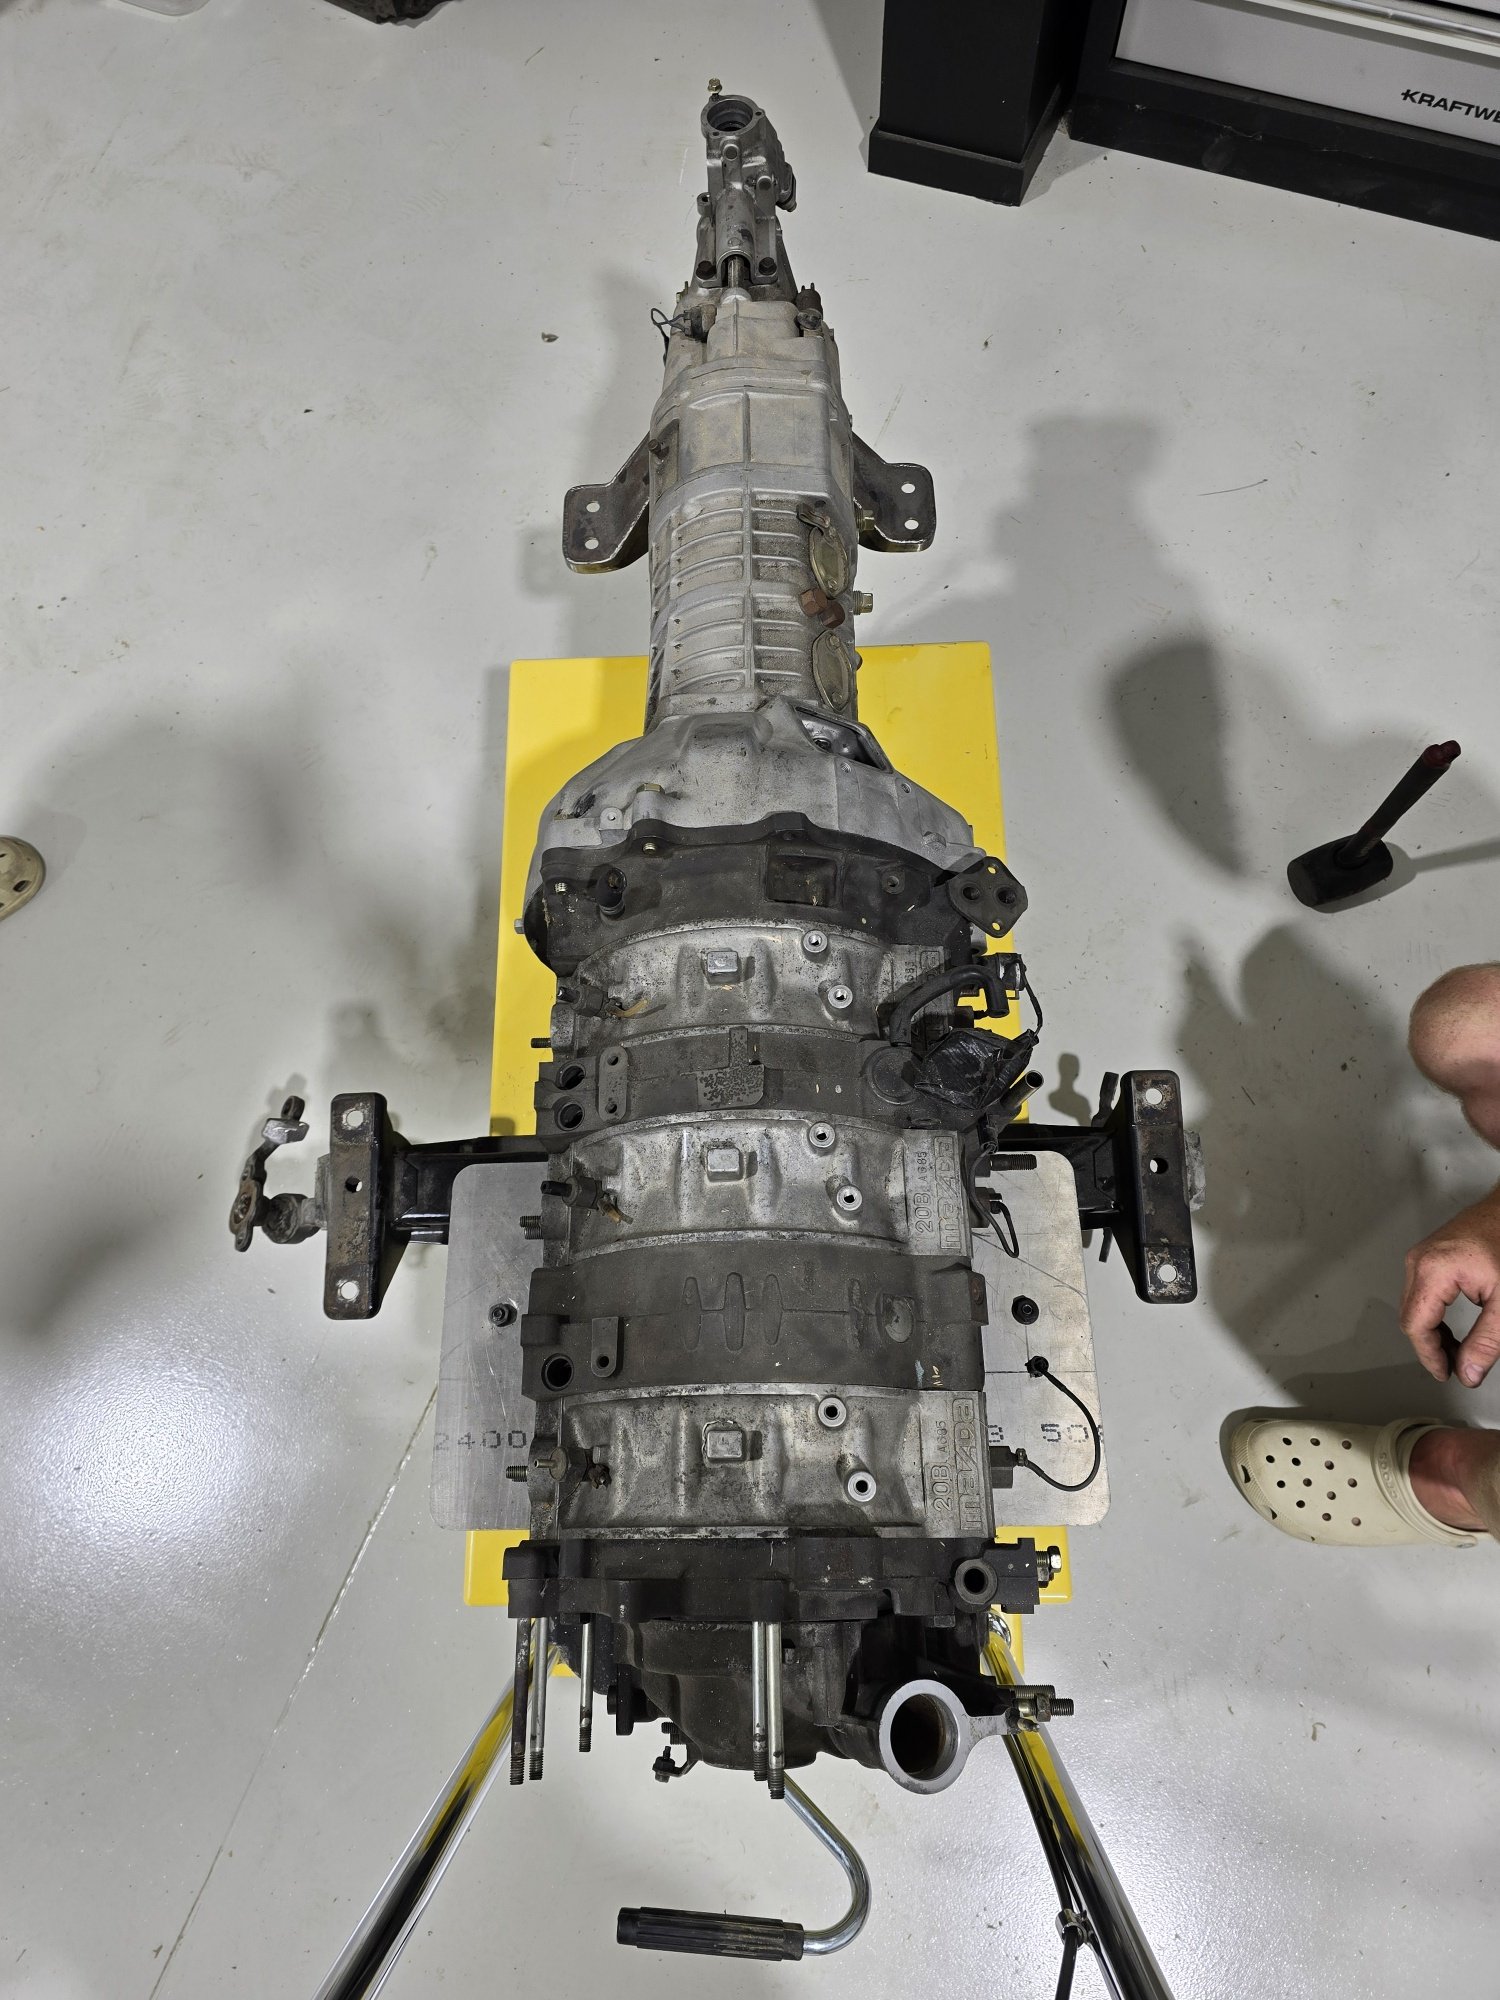
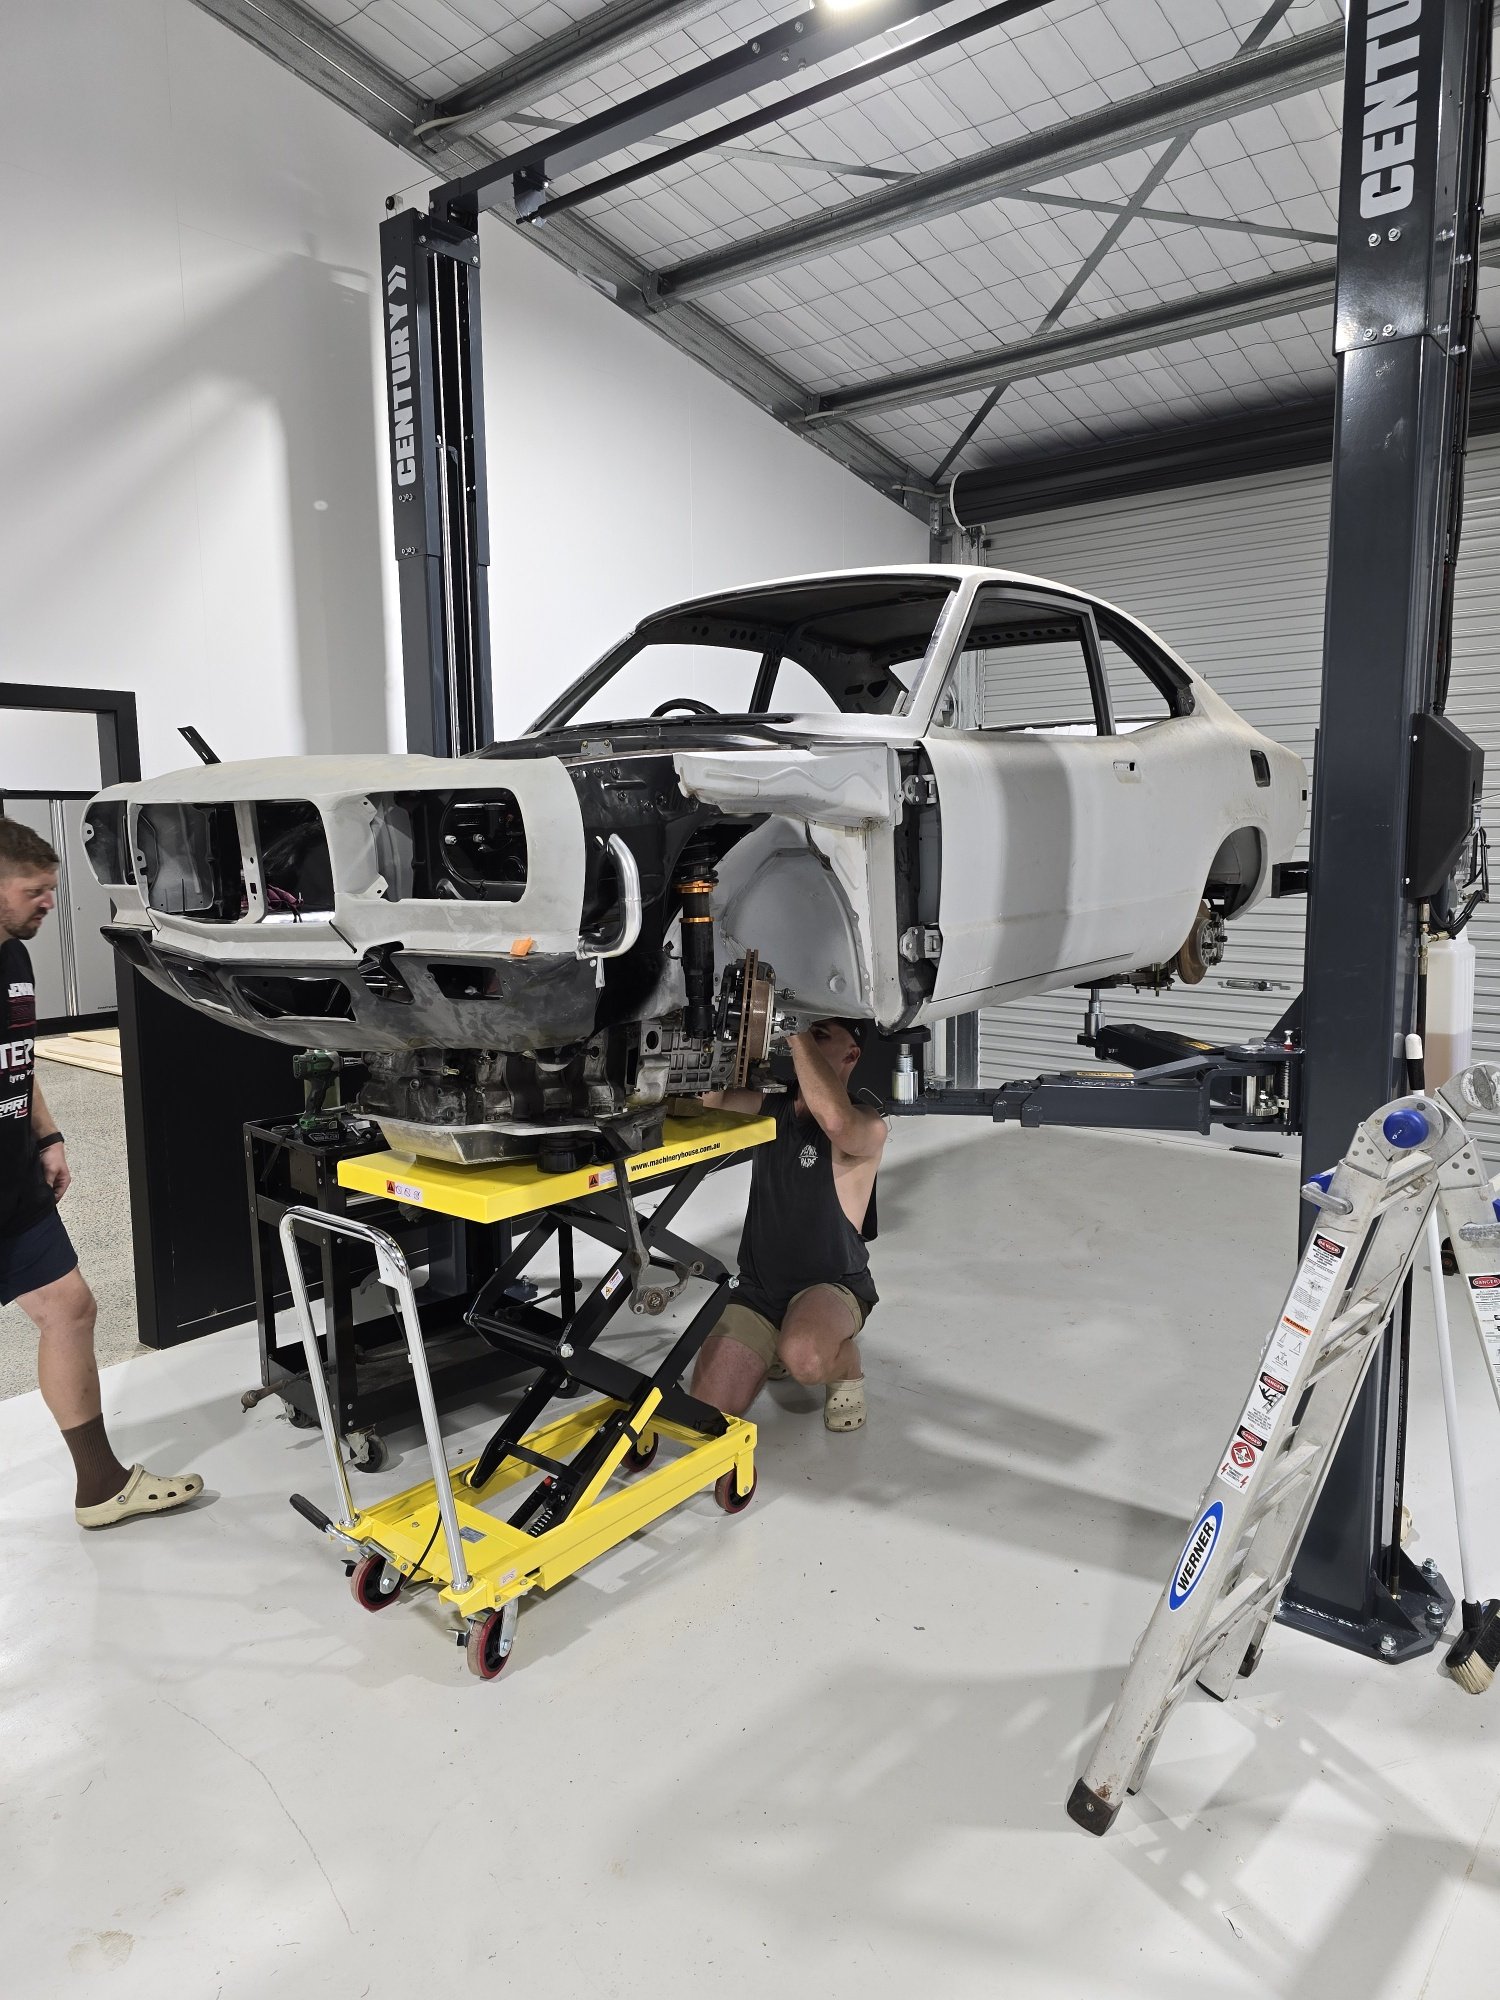
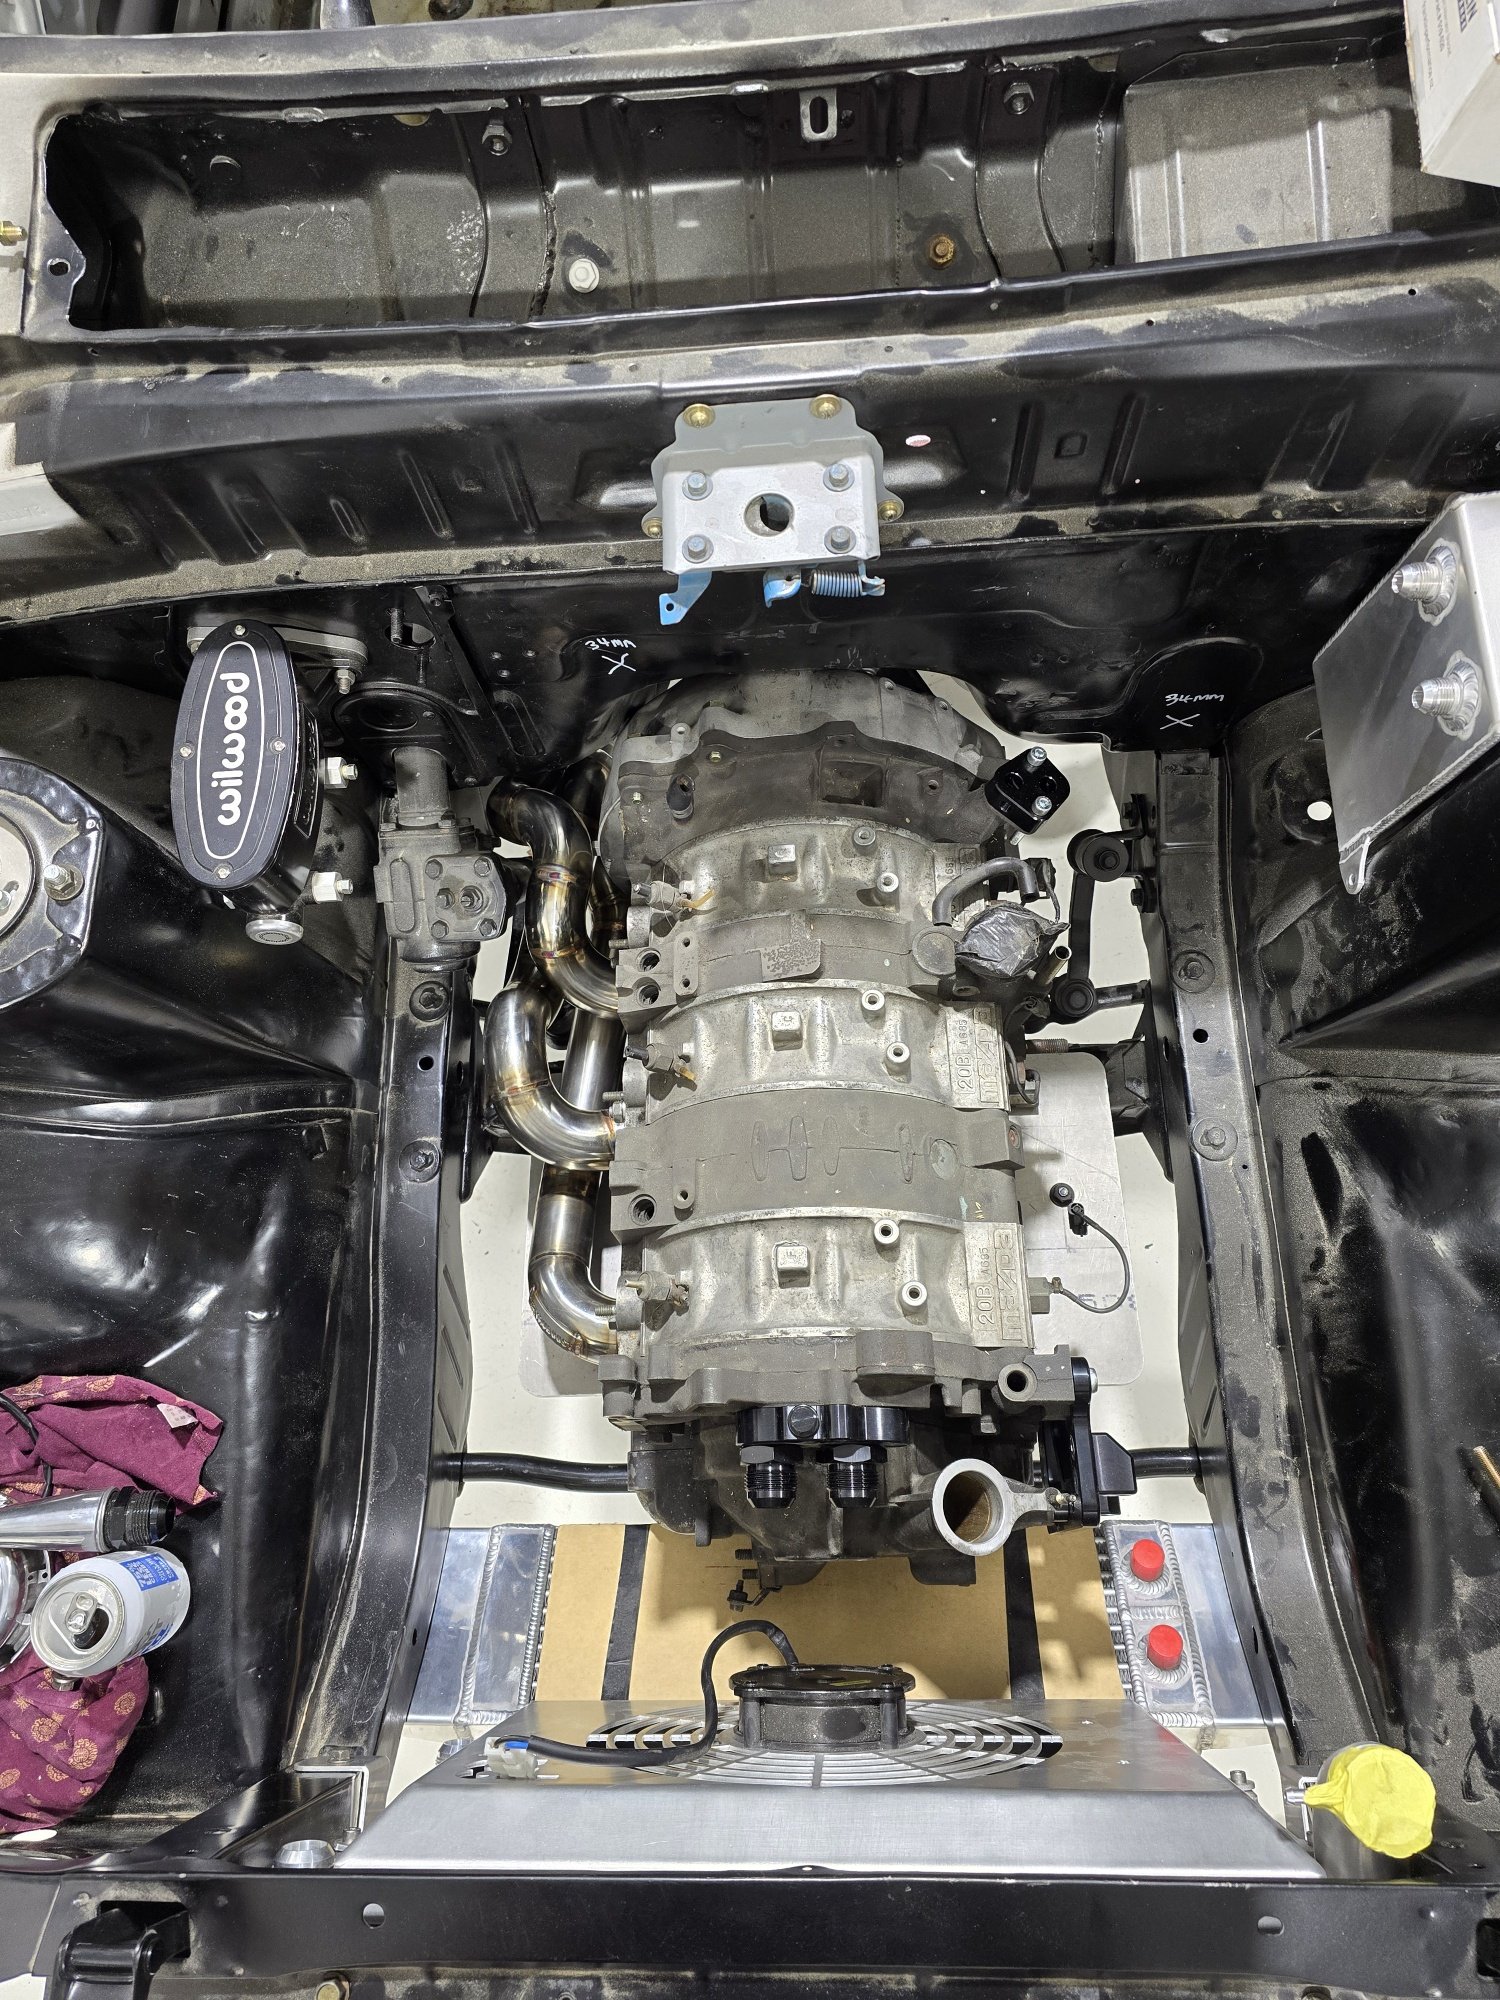
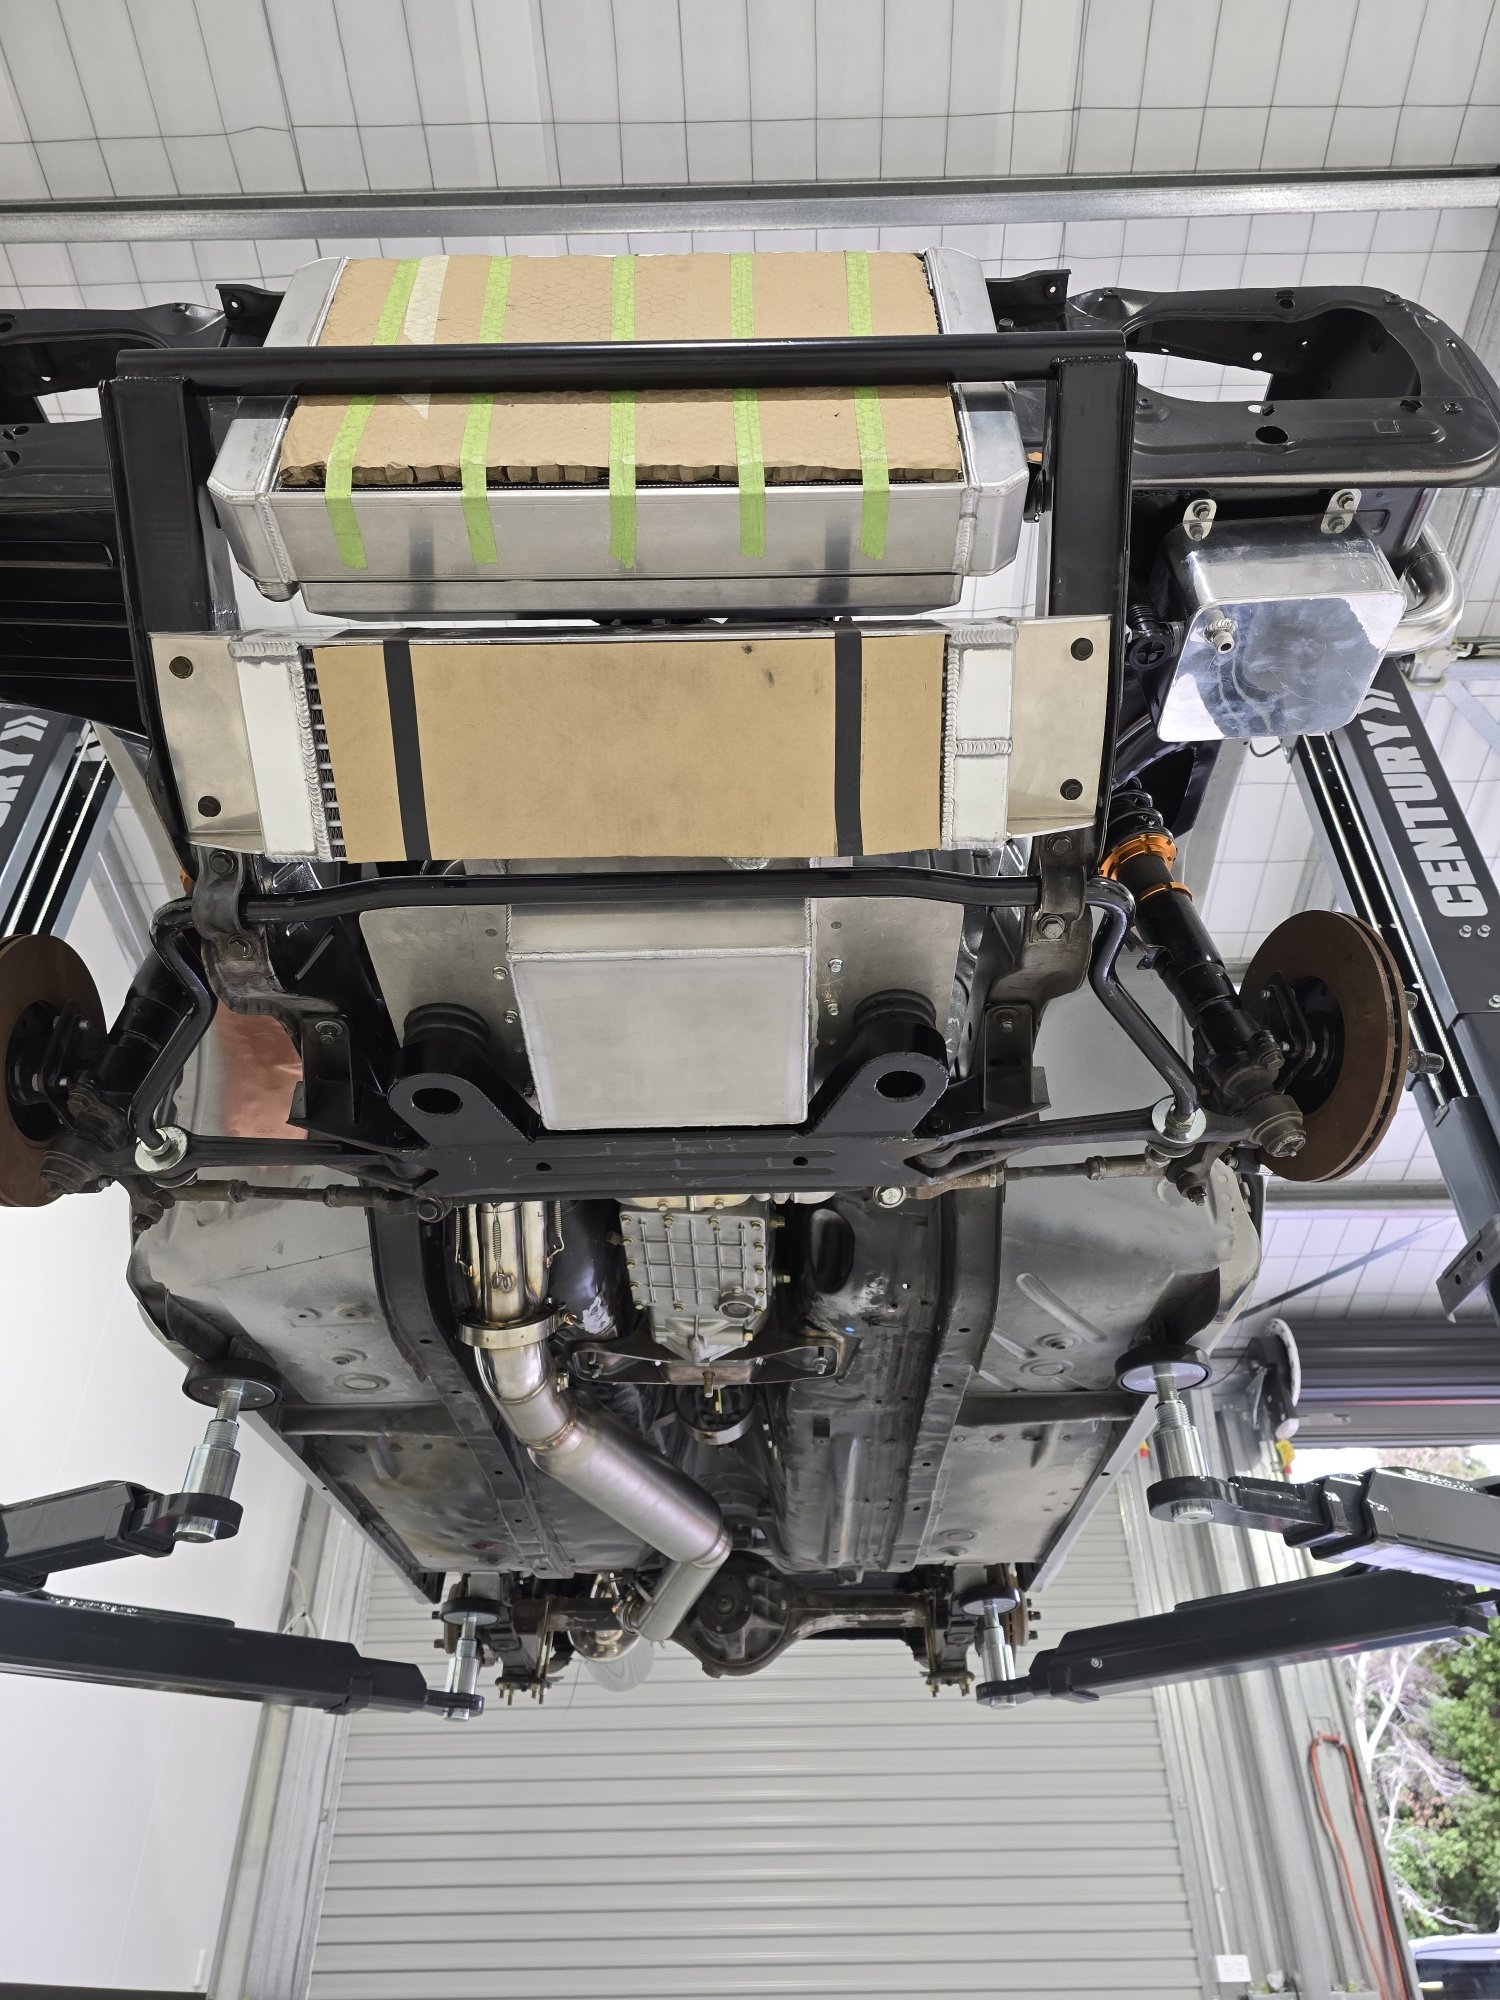
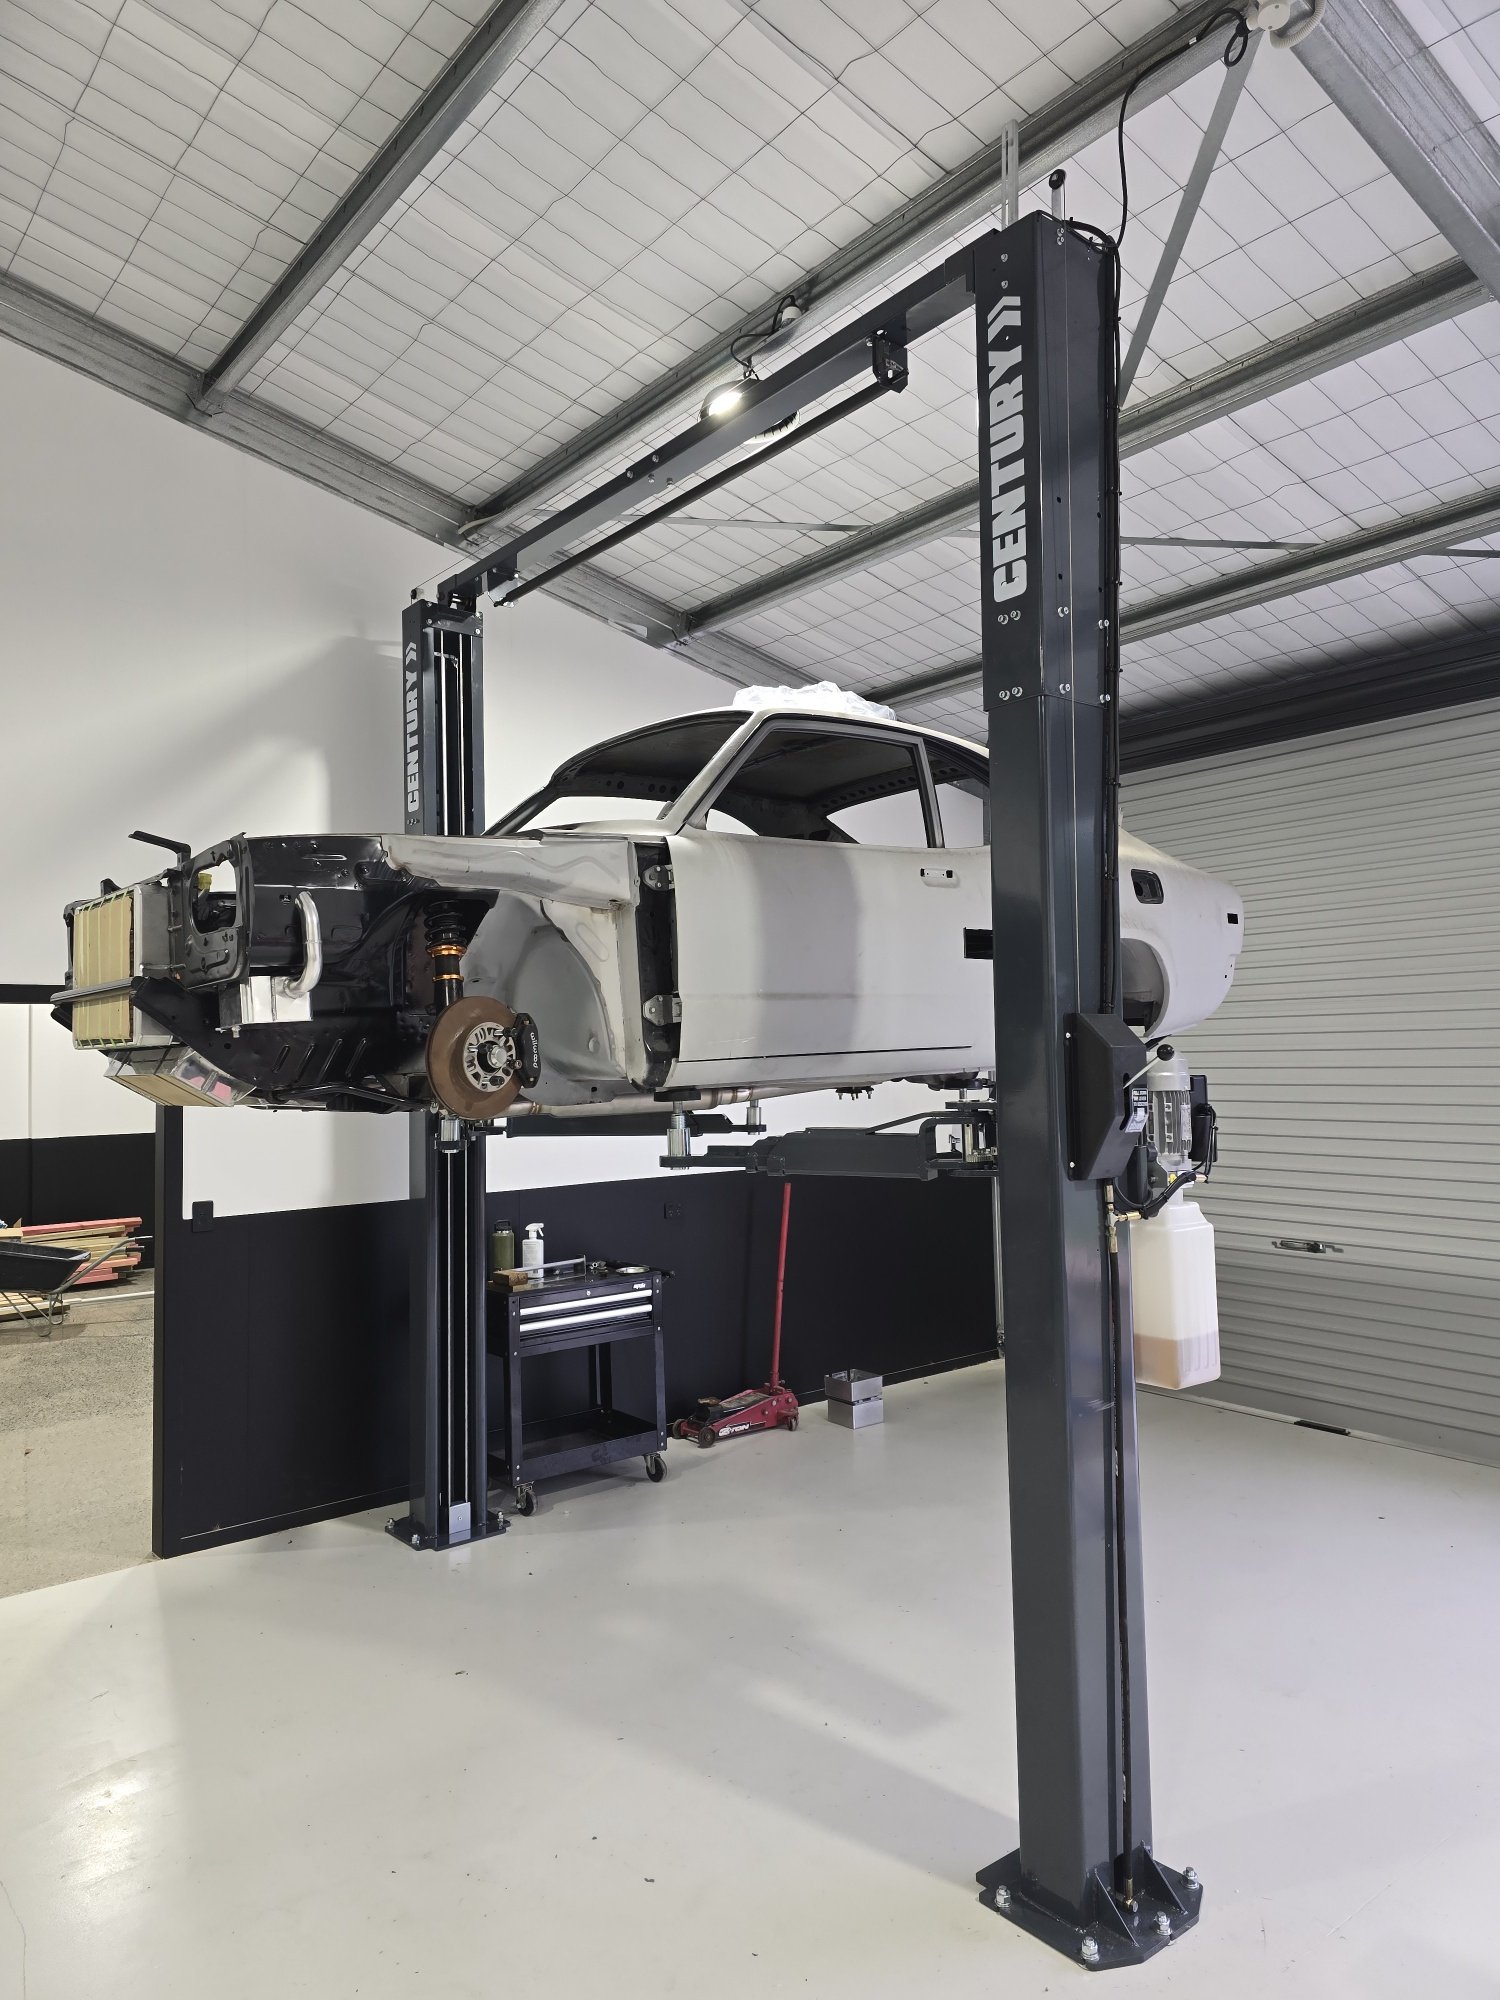
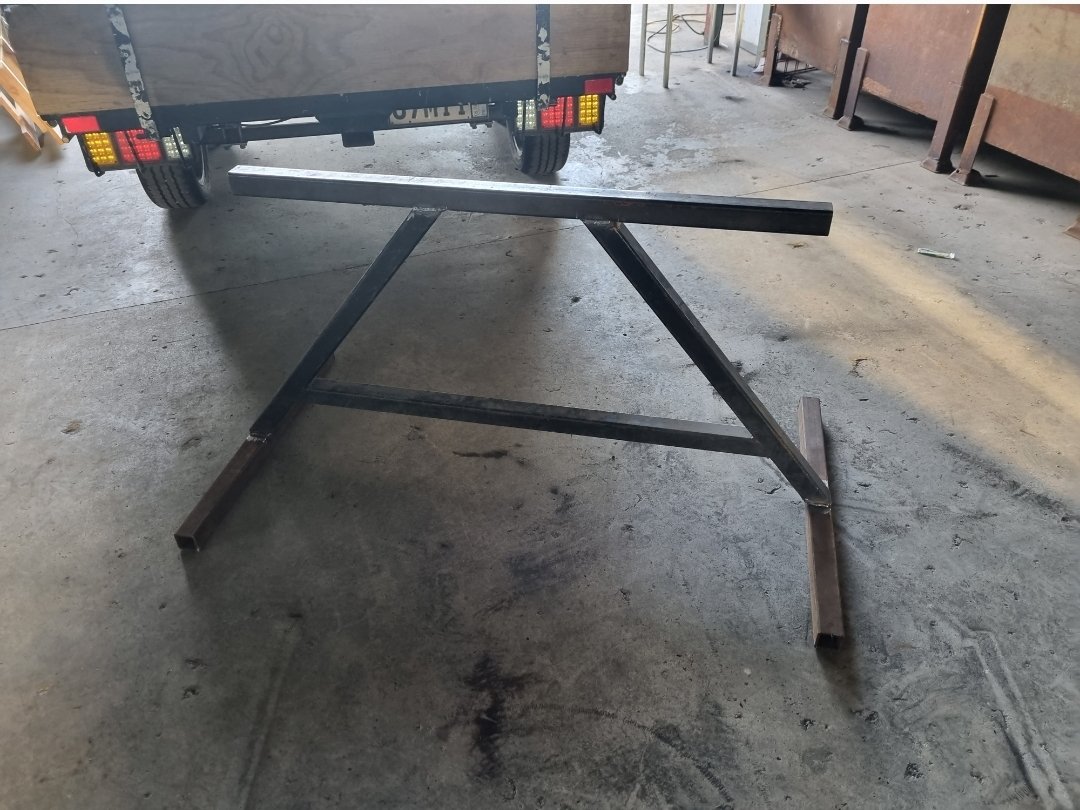
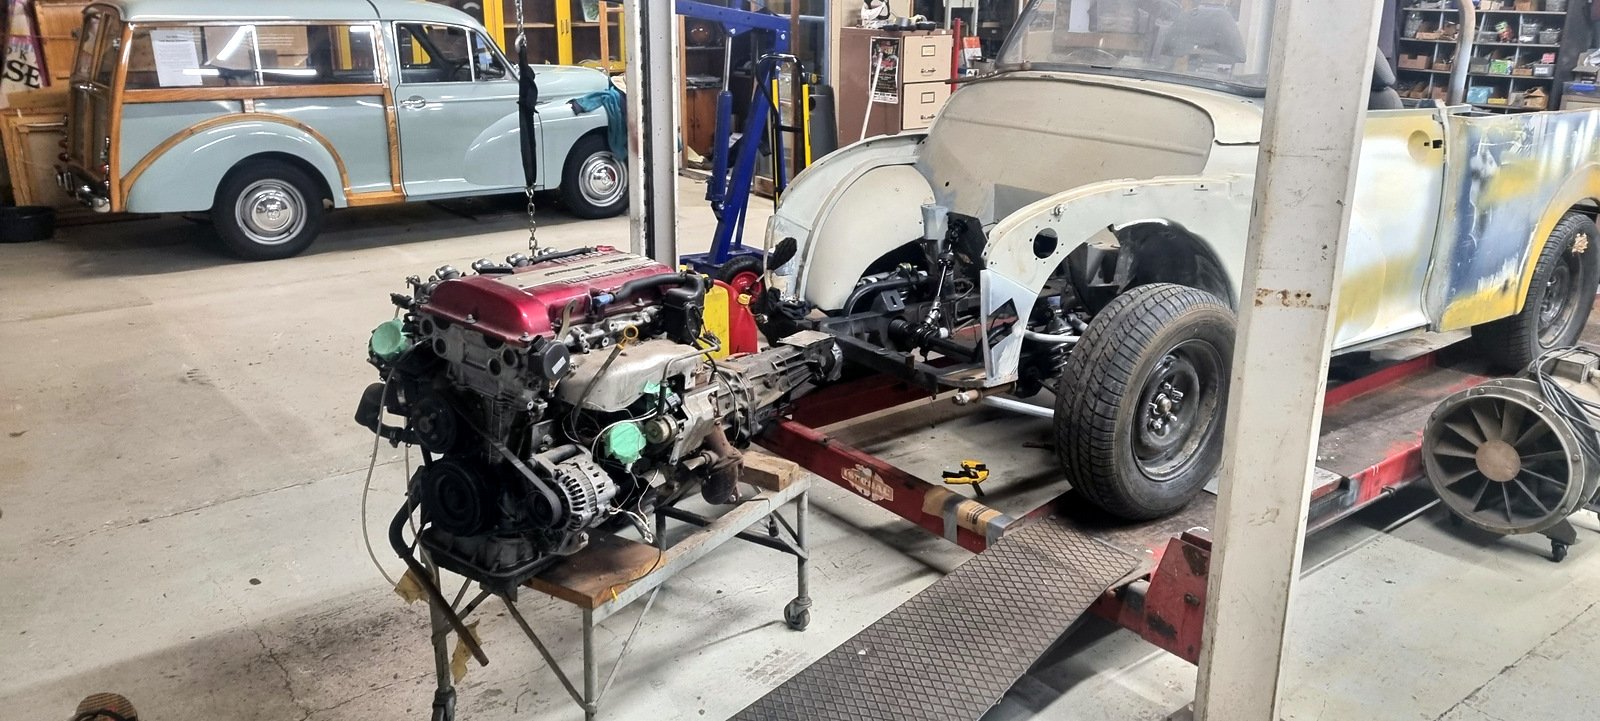
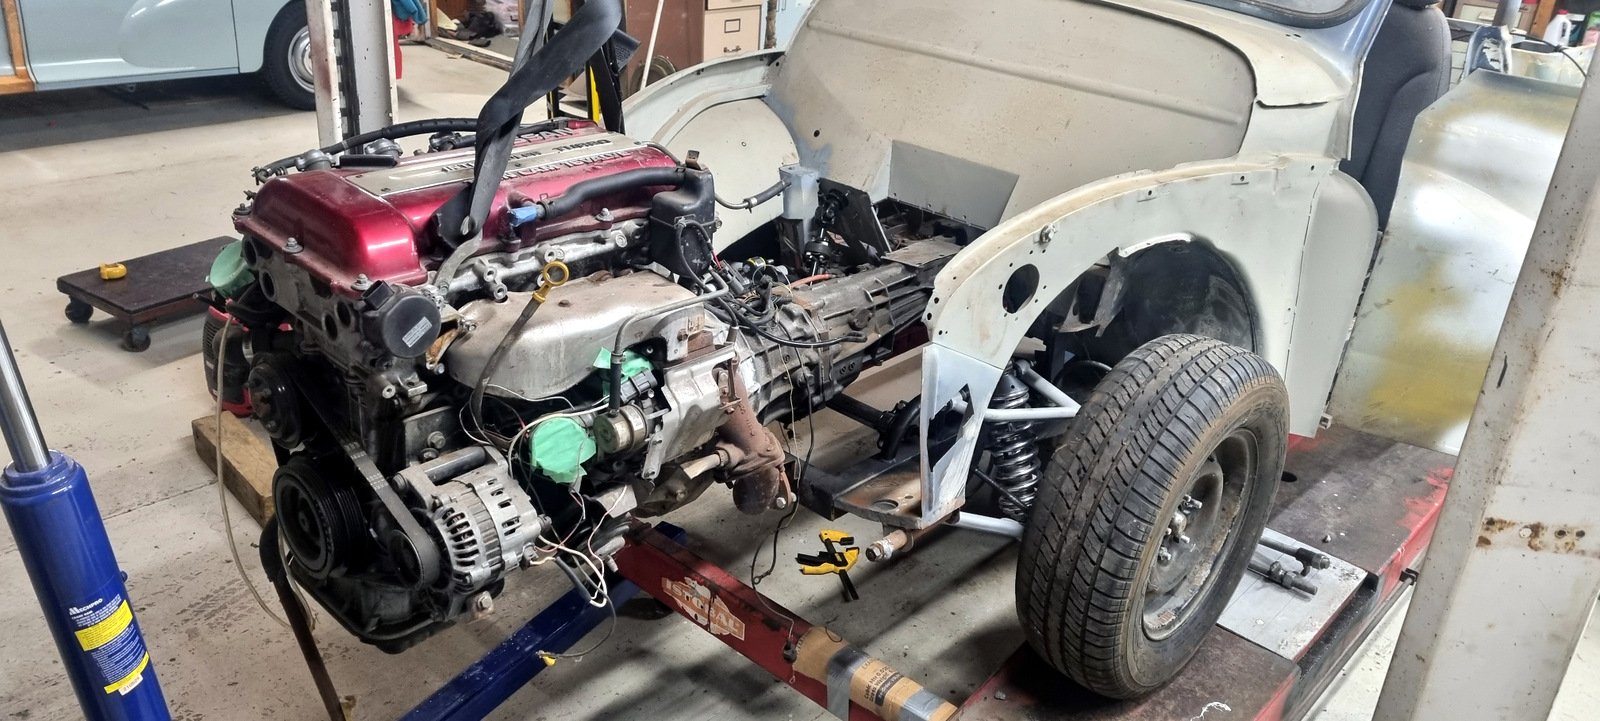
Been a bit slow last few months as been trying to get new shed finished but finally in there and got hoist up so back into the car. Motor and box need to go in as one piece from underneath with front subframe so bought a trolly lifter thing which made life so easy. Chucked the motor and box back in with the cooling system last weekend to work out a plumbing list to order all the oil, water, fuel braided lines and fittings. Also working out brake line routes and working out what else i need to do to finish off prep to strip it and get it back to the painter. Basically want to have the car dummied up in full then get painted/motor built etc so once painted its just assembly to finish.
3 points
-
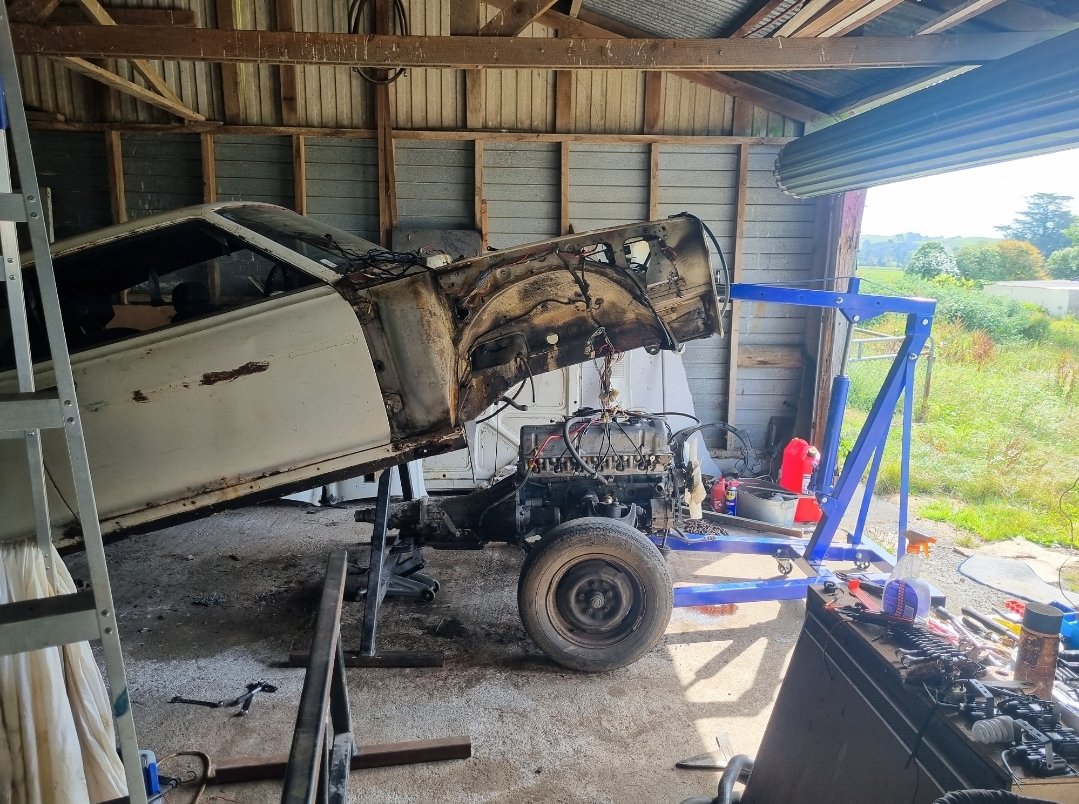
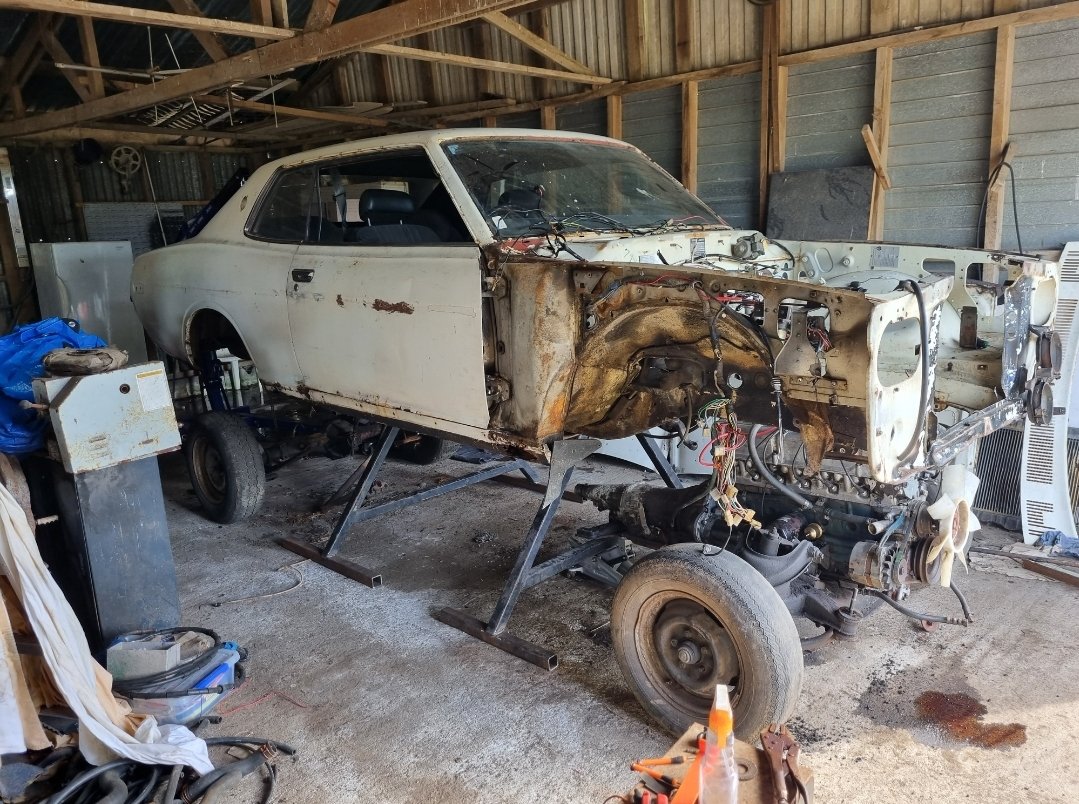
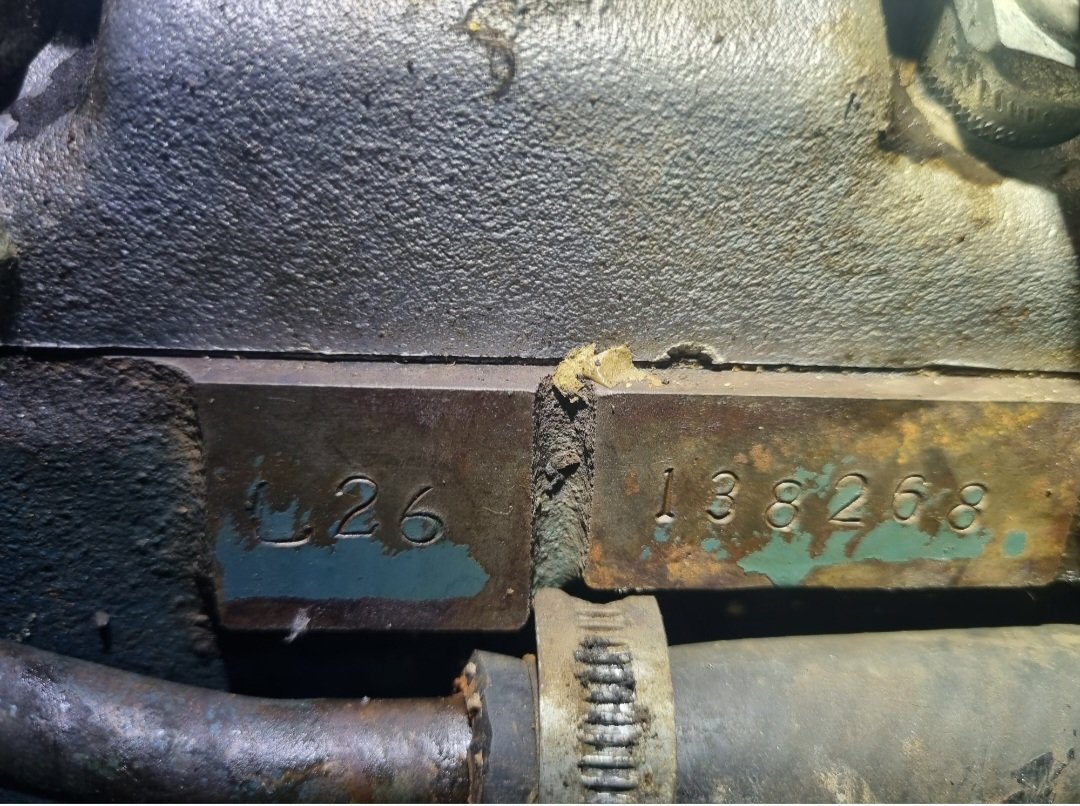
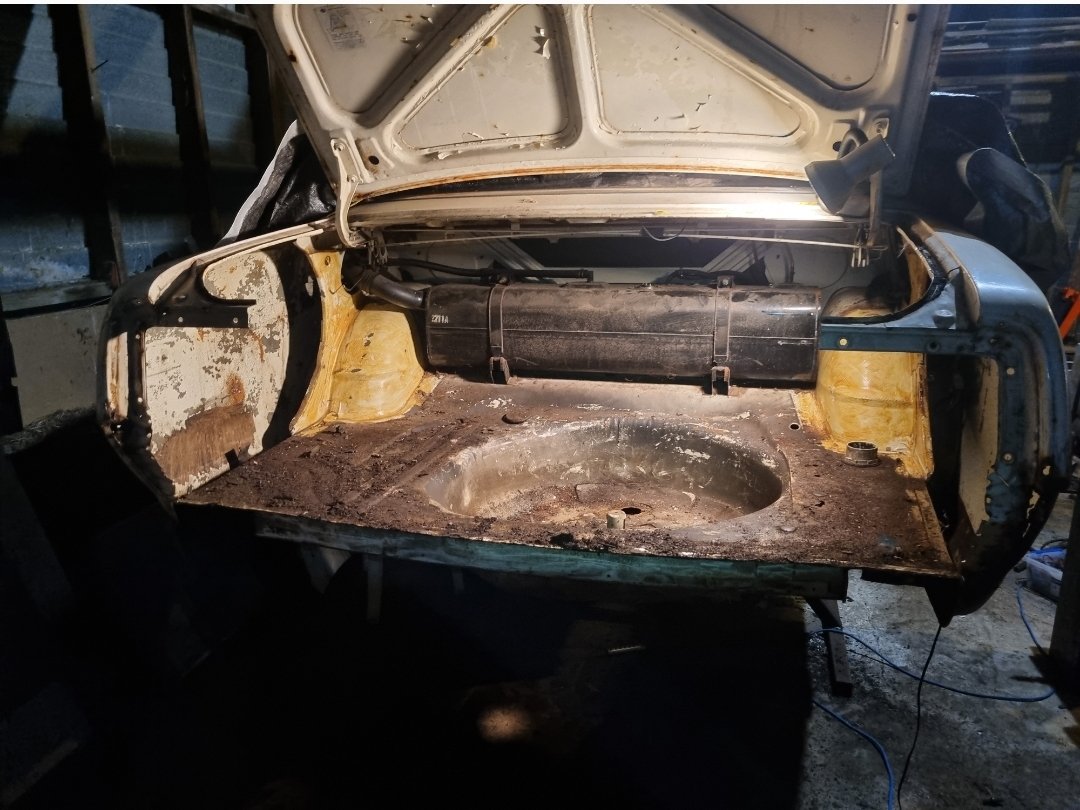
Sporadic sunday morning update. Intention with this project was to do the bare minimum and get it to functional. So that doesn't appear to be happening, shock horror. If it's worth doing, I guess it's worth doing right. Or burying myself deeply it in and selling on OS in boxes for $500... Finished tidying up and rewrapping all the loom in the front. No pics. Decided to get it up off the ground so I can make the floor all pretty, I figure with revinning I'm not going to fuck around and have them pick holes it it, the jobs just have to be done. Easiest way to do that was drop the running gear out and lift the body off on to some stands I hacked up. It was a surprisingly simple task. Might turn it into a brodozer on 37s... I haven't taken many pics, but I've scraped all the under seal off the underneath from the doors back, it's really sound and haven't revealed too many other gremlins. I've dropped the brake and fuel hoses out as these are toast. Thinking I'm gonna get a little pot sandblaster to deal to all the surface rust, then brunox/paint/under seal. Also discovered another 20hp under the bonnet. Not sure if they get picky on this shit for revin?? Meant to be L24.. I wanted to start at front and work my way back, but I need to bits to ensure I can align everything, so until such time I decided instead to attack the rear. Drilled and cut rear panel off, have started cleaning shit up and deciding how I'm going to attack the patch work. It needs new floors either side of spare wheel well, but weirdly the well itself is fine. Needs ne bottom quarters and a little bit of inner quarter and inner wheel tub work,so I'm just gonna start picking away at all that. I'm enjoying the process. Also, @ajg193 found my missing plate under one of his presses. And @ThePog found me some sweet widened Jeep rims which I'm gagging to get my mitts on
3 points
-
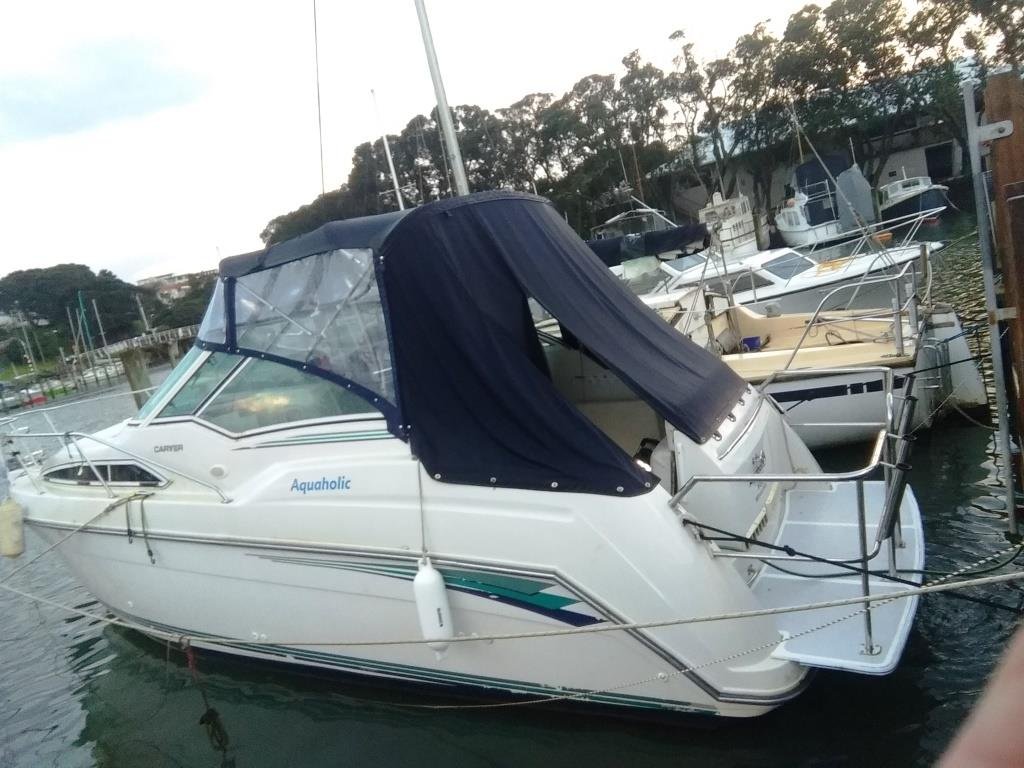
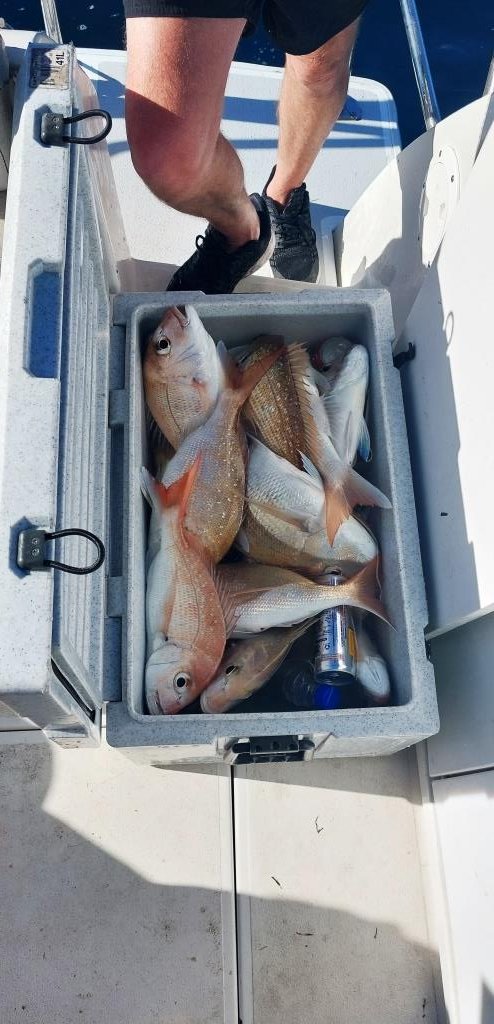
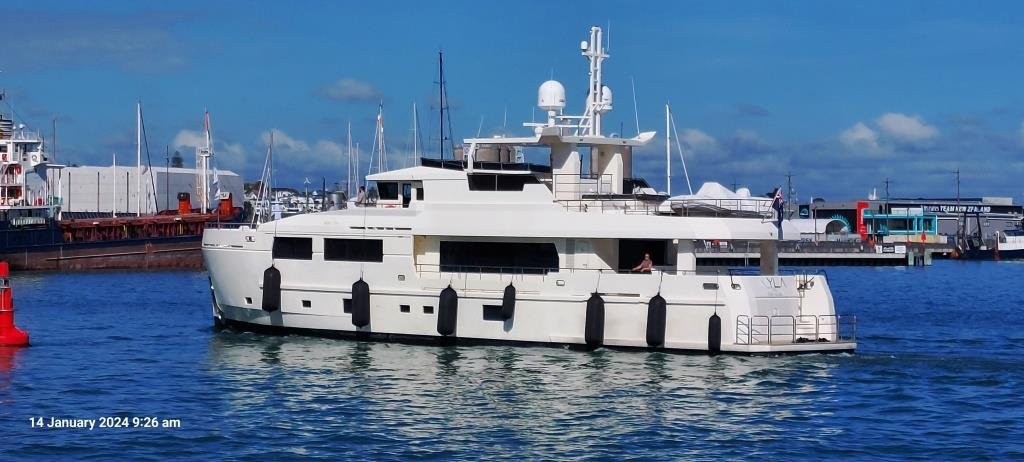
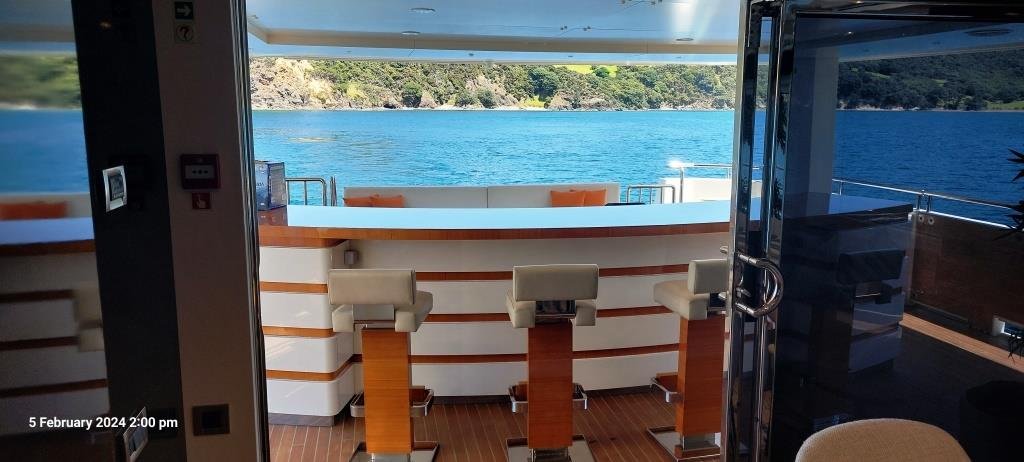
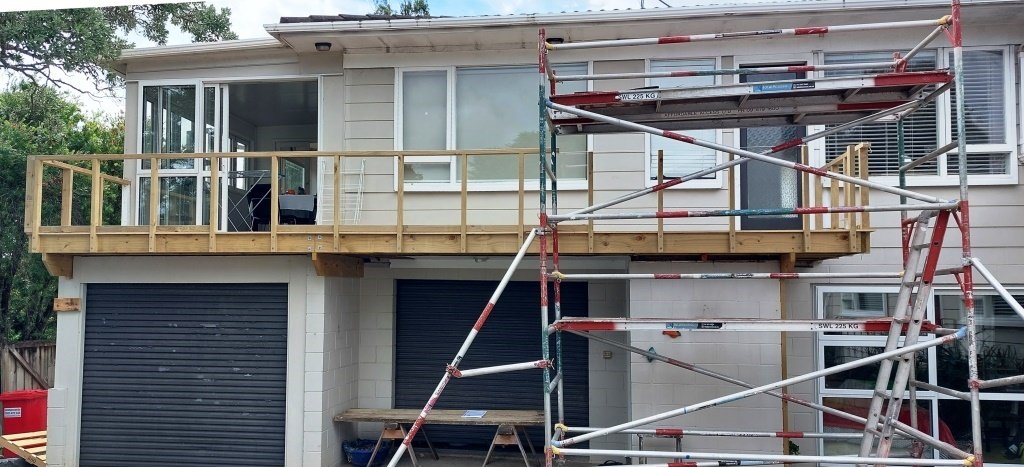
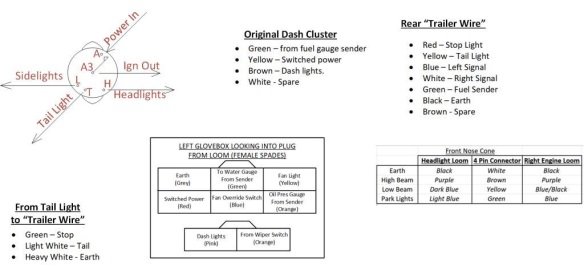
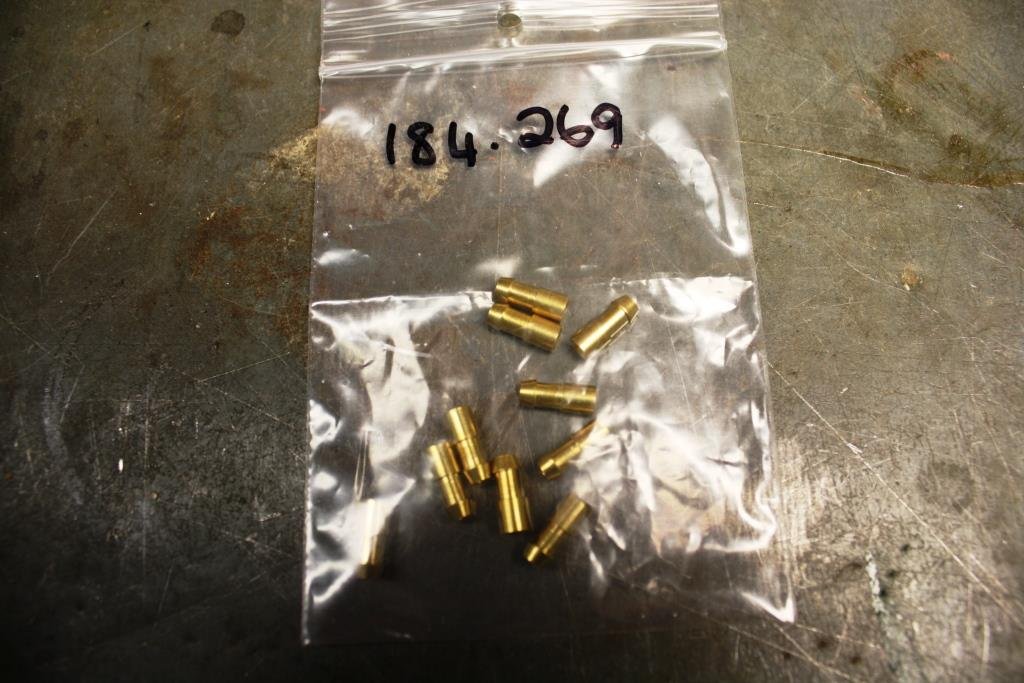
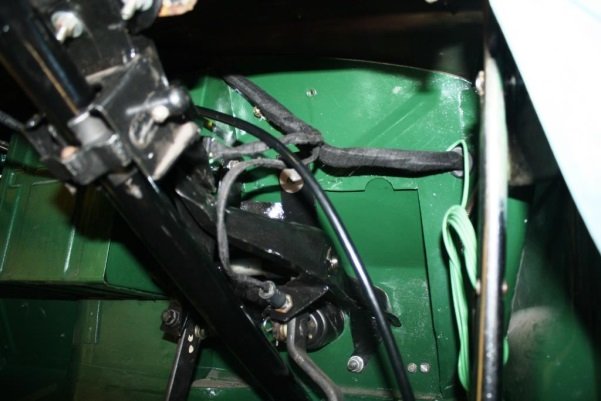
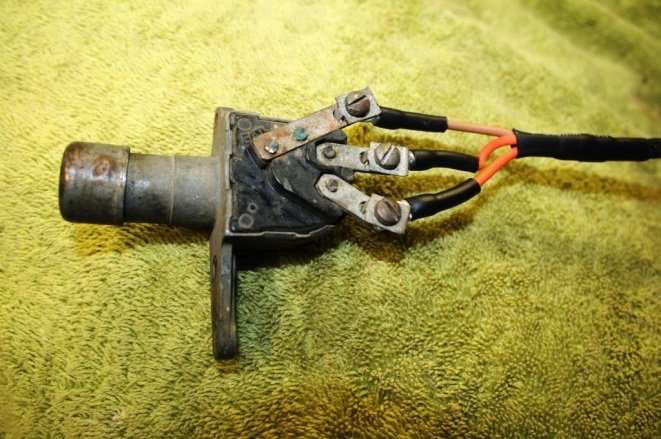
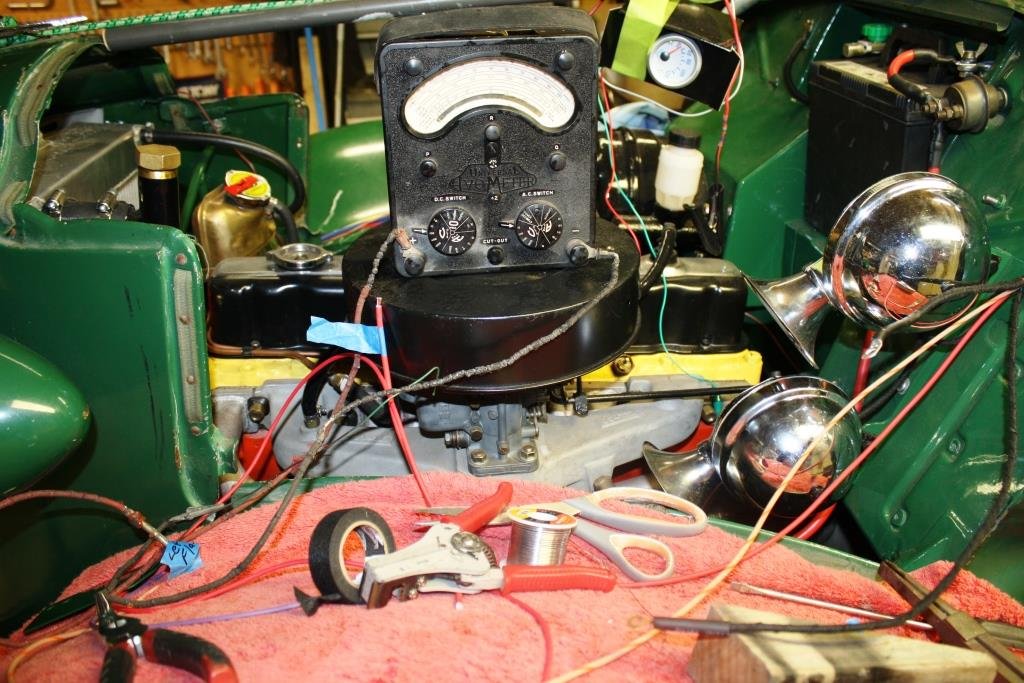
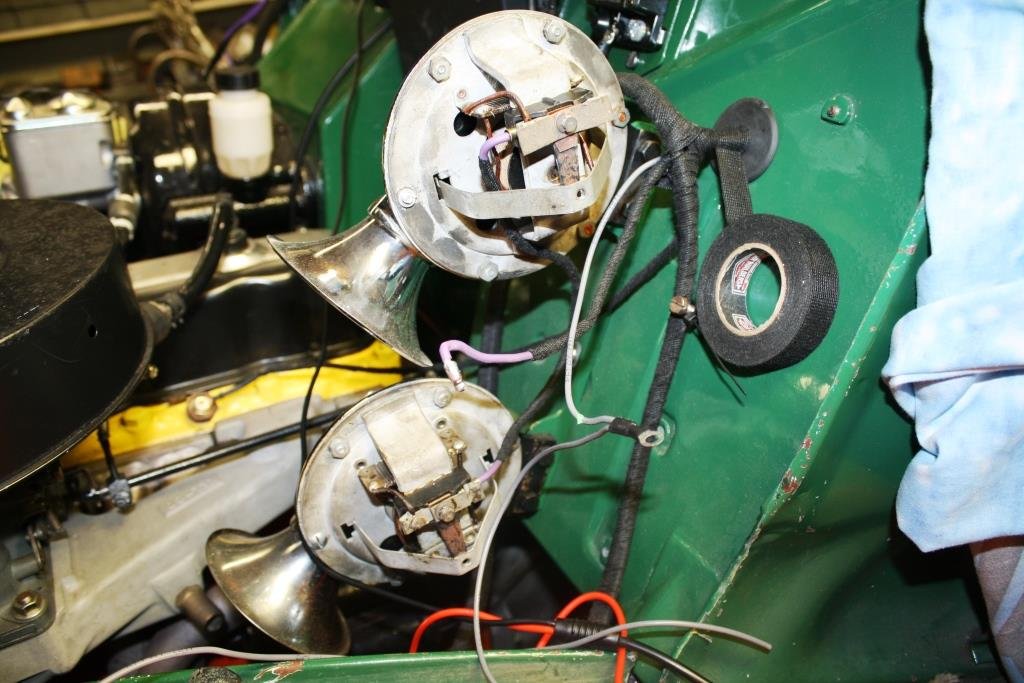
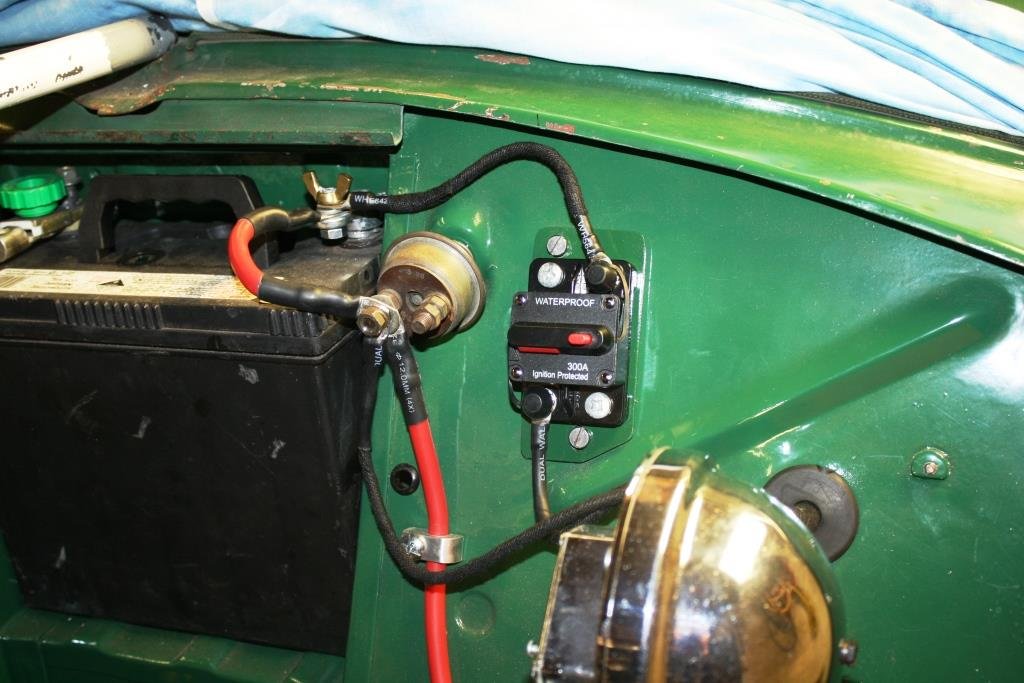
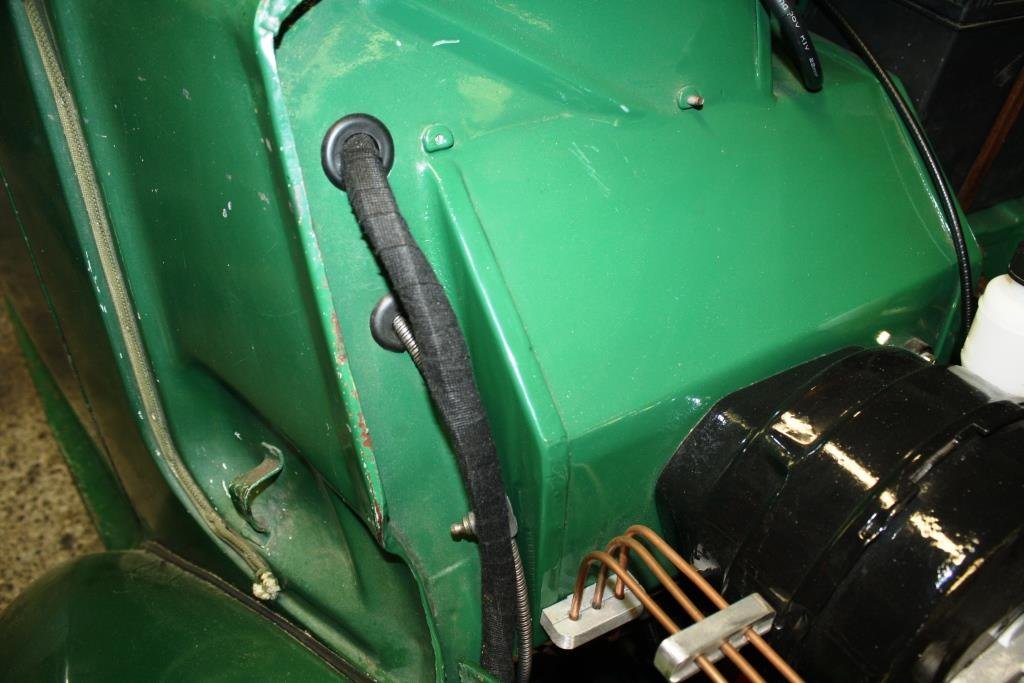
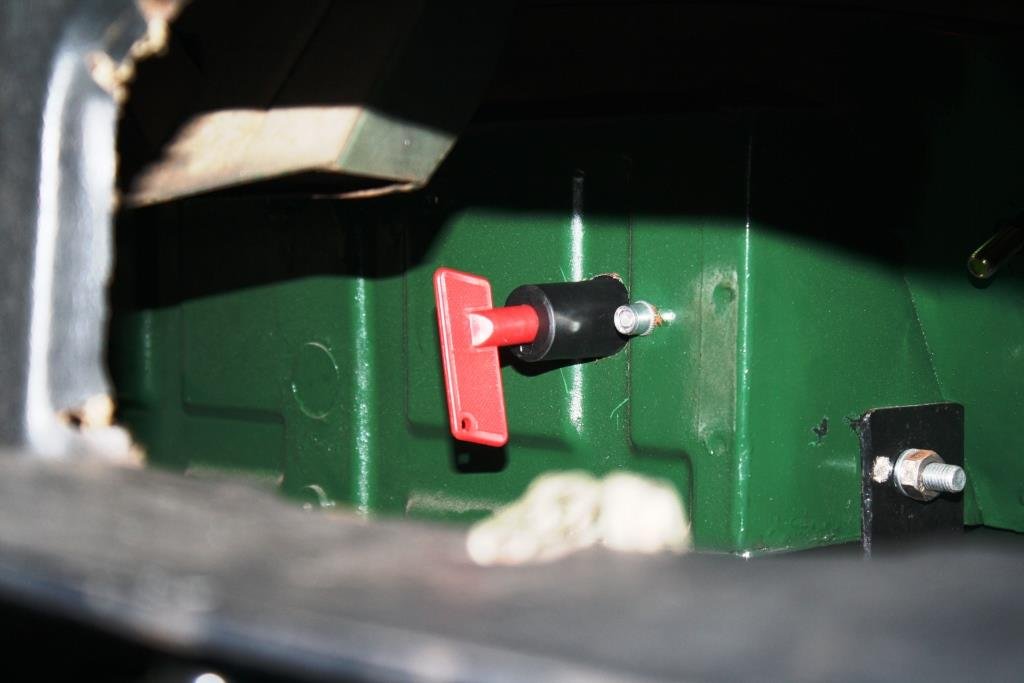
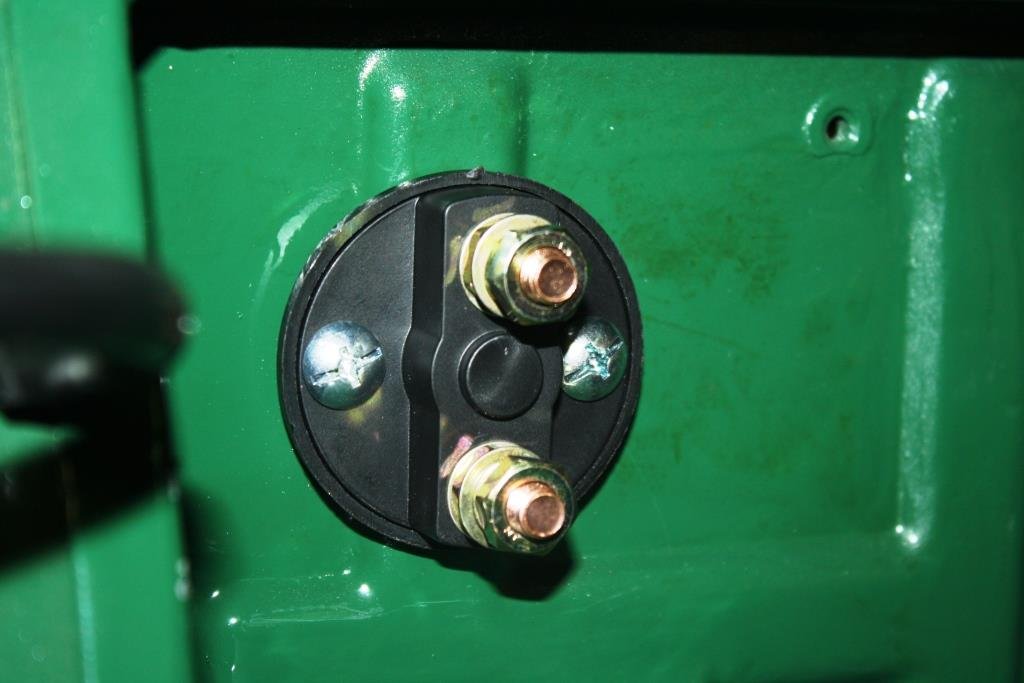
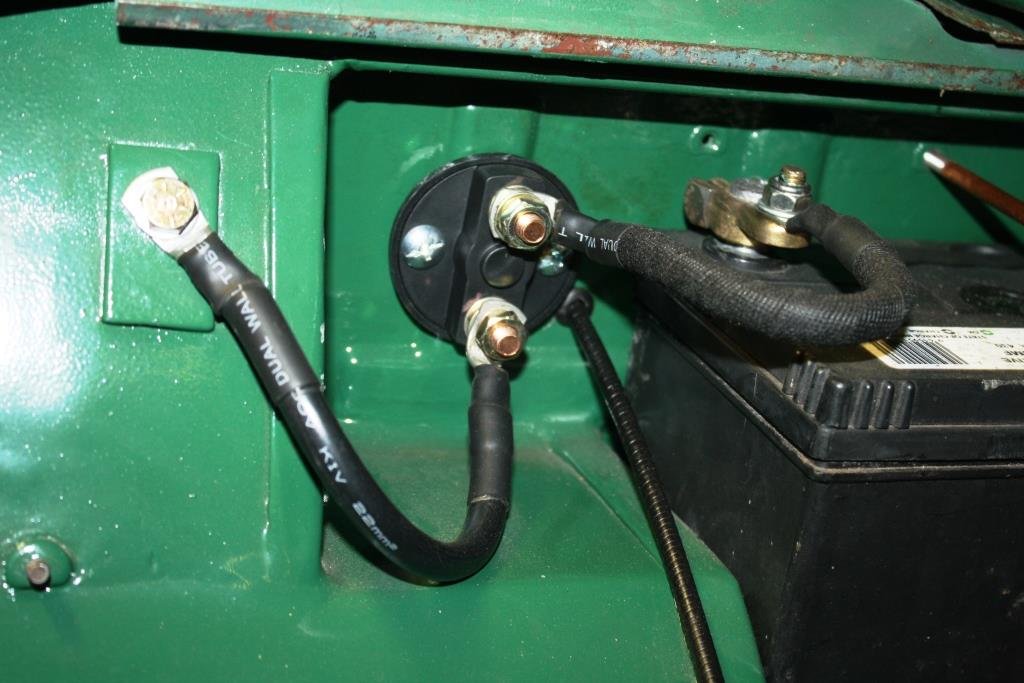
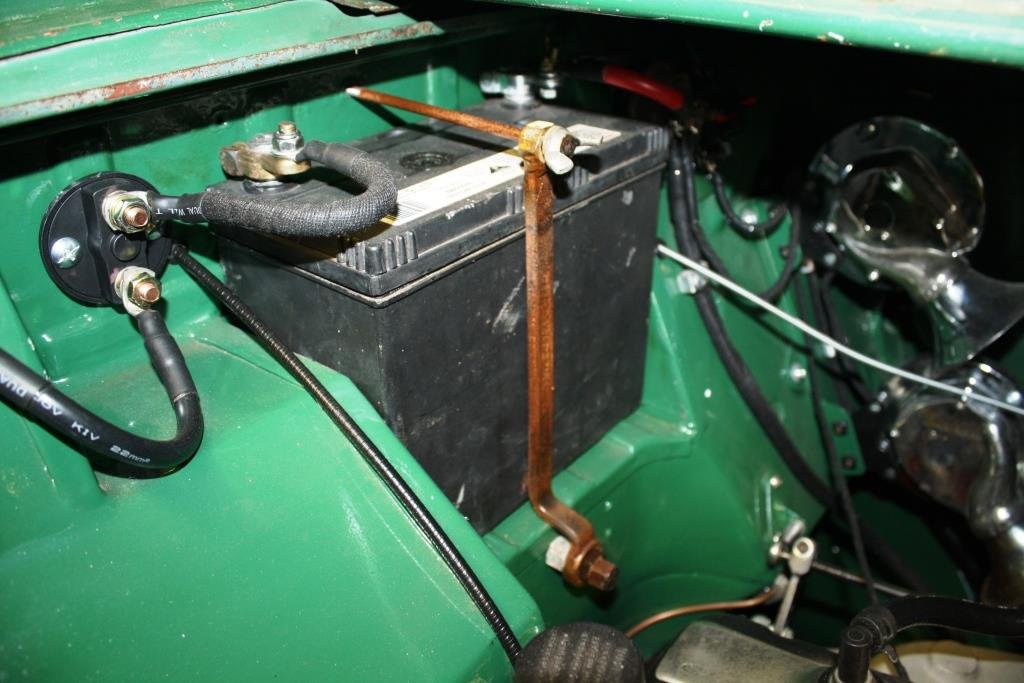
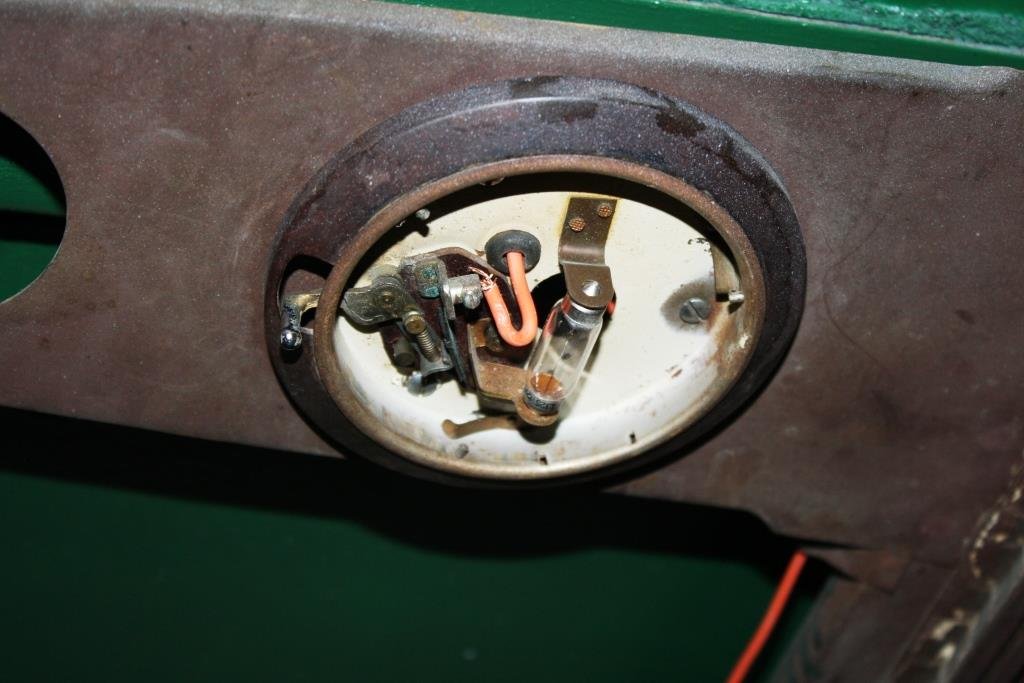
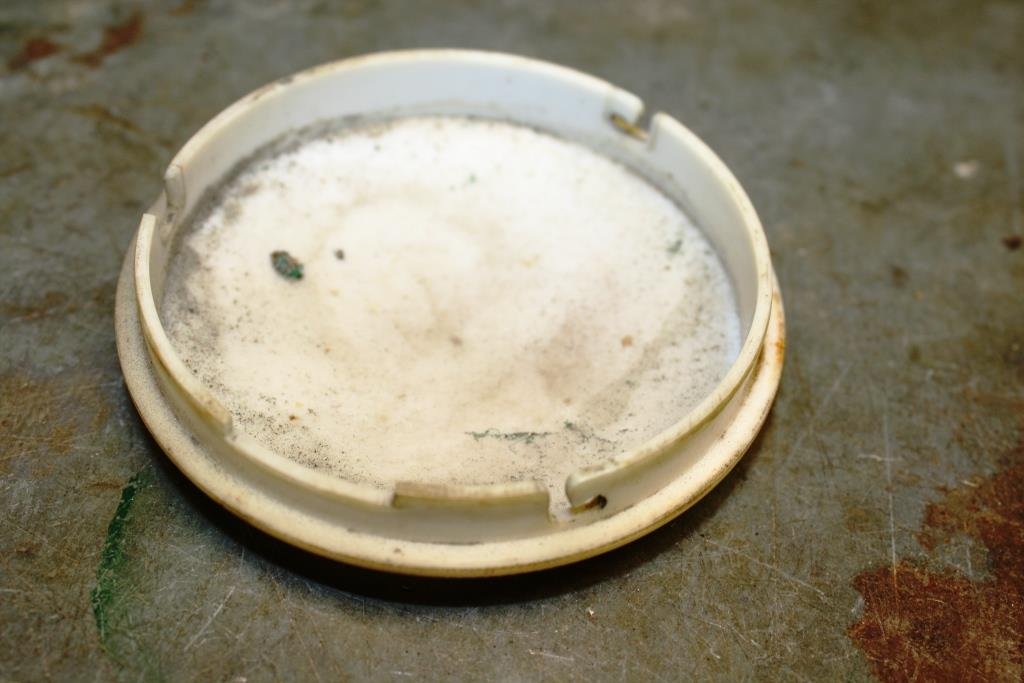
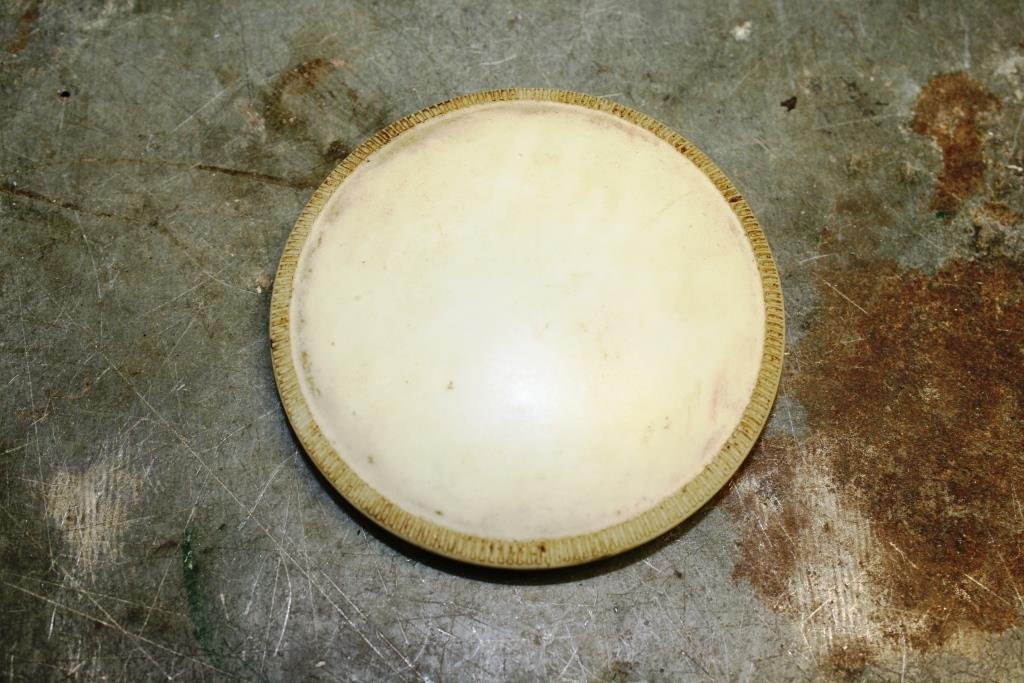
…………Yes I know I’ve been a slack prick, re: this thread. With final arrival of summer the good ship Aquaholic insisted that I take her and some of my disreputable mates out fishing… (What could possibly go wrong?). It was a hot day, we got thirsty, we drank heavily and we “got fush”…….(as you do). A few days later my brother turned up at the Viaduct in this bloody monstrosity, and the good ship Aquaholic (and a certain part of my anatomy) felt very, very, …. small…….(Sibling rivalry can get complicated!). ….so we headed north. The view from the bridge was cool…… Accommodation wasn’t too shabby…. …. And the lounge was bigger than the one at home… Thankfully there was a bar on board for self medication! Back home I was stricken with a bout of the much feared “home handyman-itis” and I accidentally started rebuilding the front of the house… (Note the cunning accumulation of Brownie points with the “ever lovely Mrs. sr2”). After the above brief hiatus I’m finally back to Rigamortice’s wiring. I’m trying to document as much as I can because my memory is like a sieve. I managed to source some cool old fashioned bullet connectors…. I’m almost finished under the dashboard, getting sick of working upside down. The dip switch still works so I hit it with some contact cleaner and we’ll see how it lasts. I’m running relays on the lights so it won’t be carrying the amps that it used to. I’m using my 70 year old meter just because I can. The horns are all wired up but they sound like two strangled cats, I’ll have to do some research on how to tune them. Circuit breaker in place instead of a fusible link. Mounted the battery earth cut out through the fire wall Repurposed an old offset ring spanner for a battery clamp. Managed to get some life out of the interior light with a new bulb and fresh wiring. Cleaned a ton of crud of the diffuser…. And it works.
3 points
-
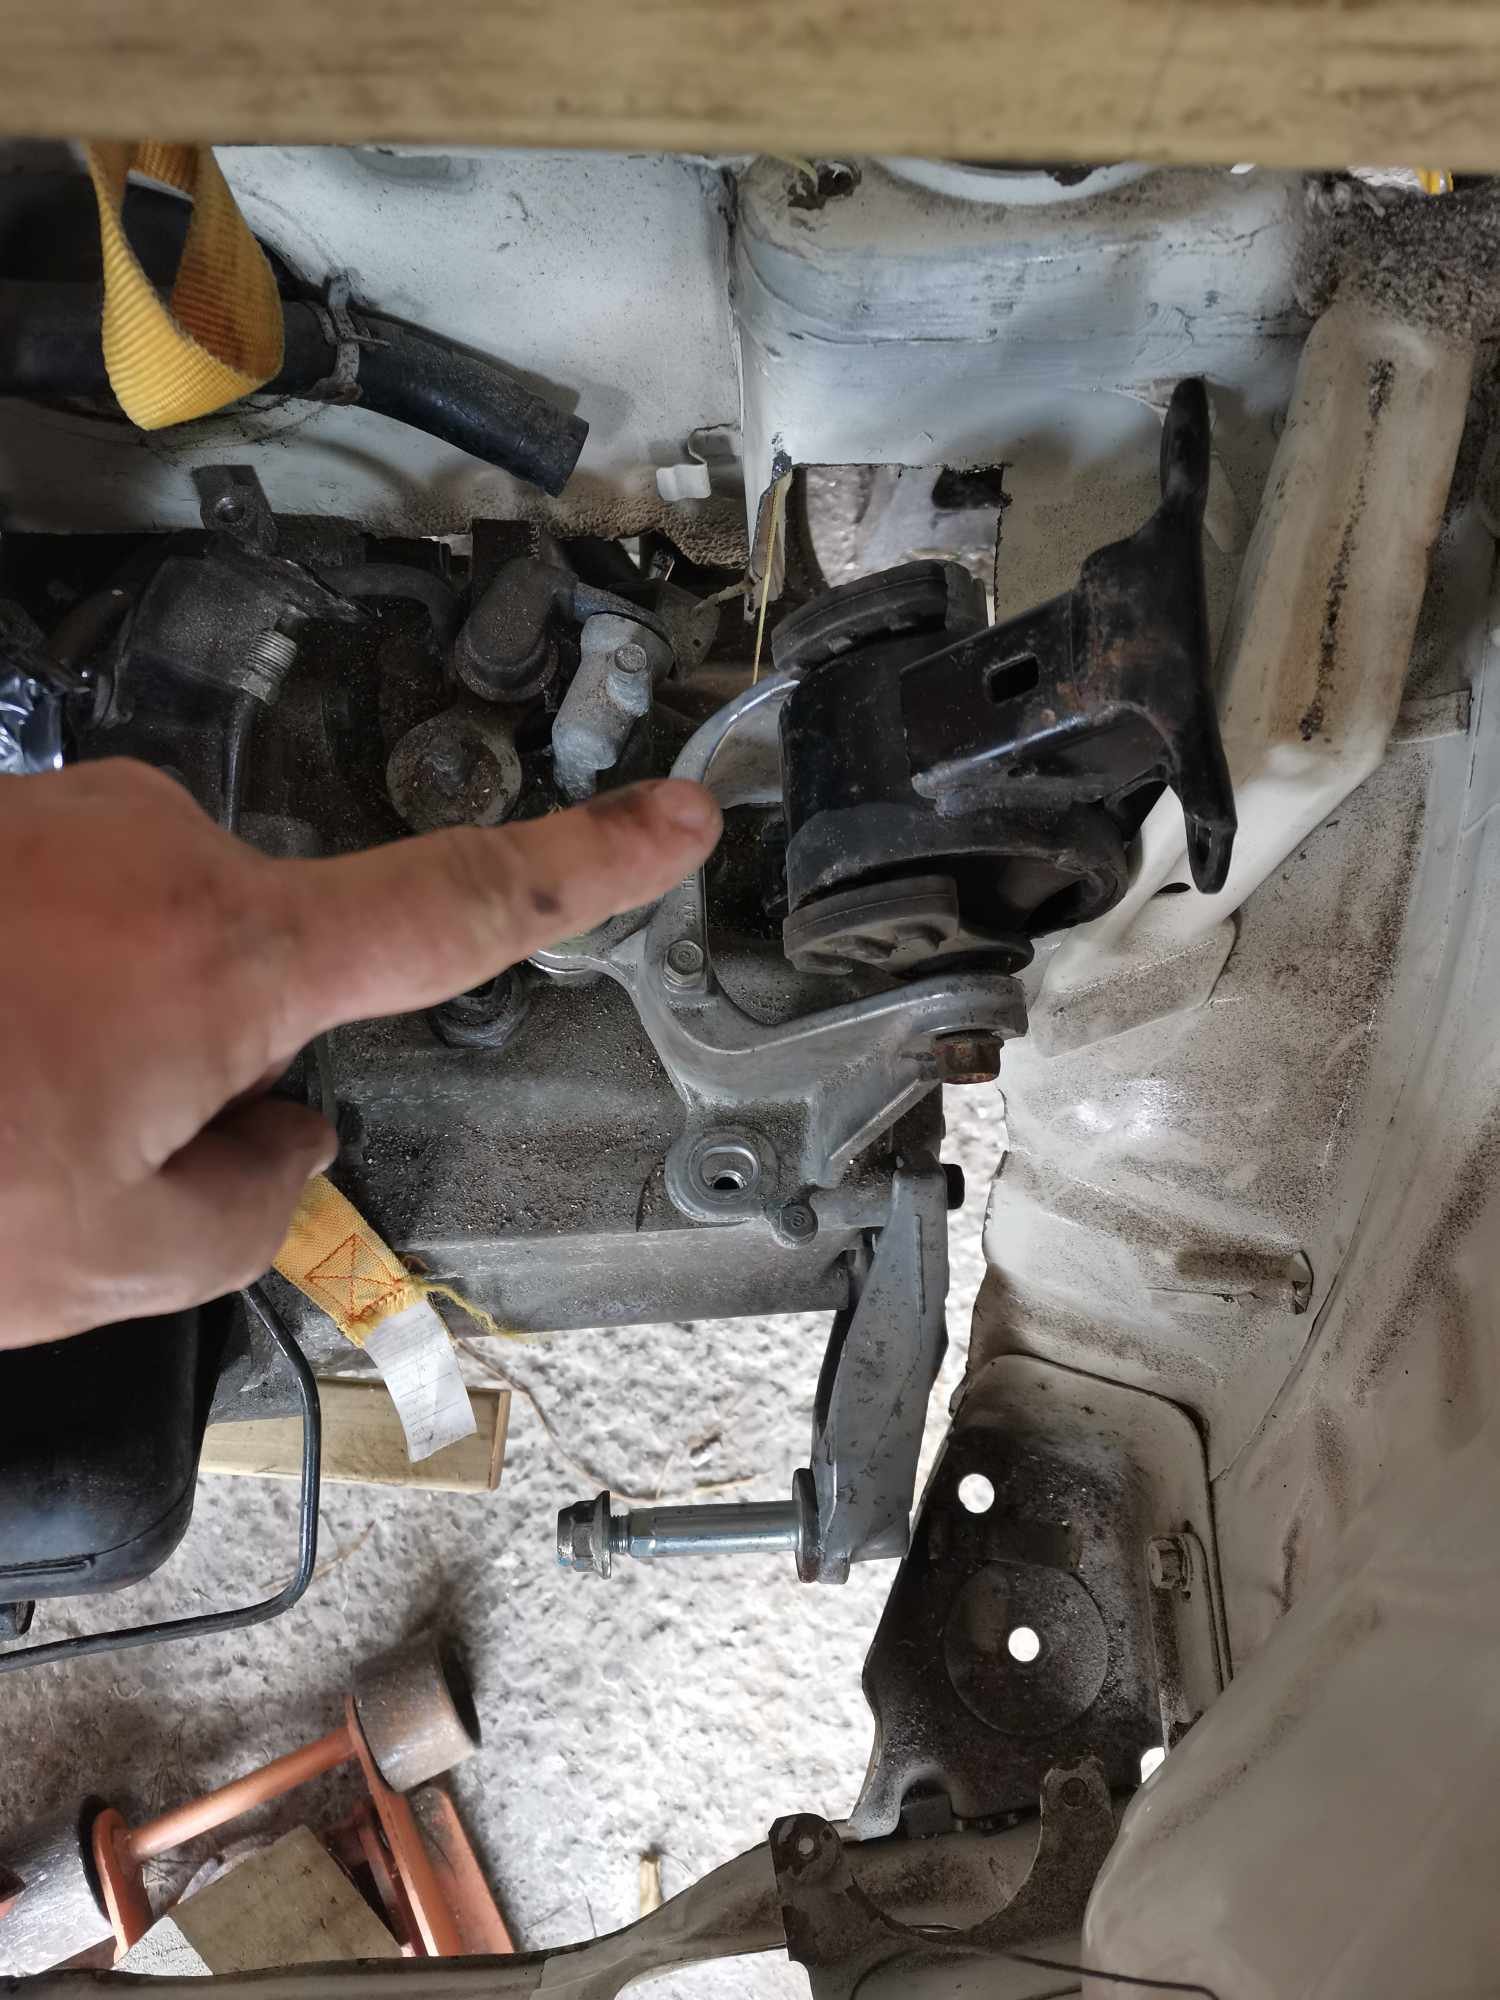
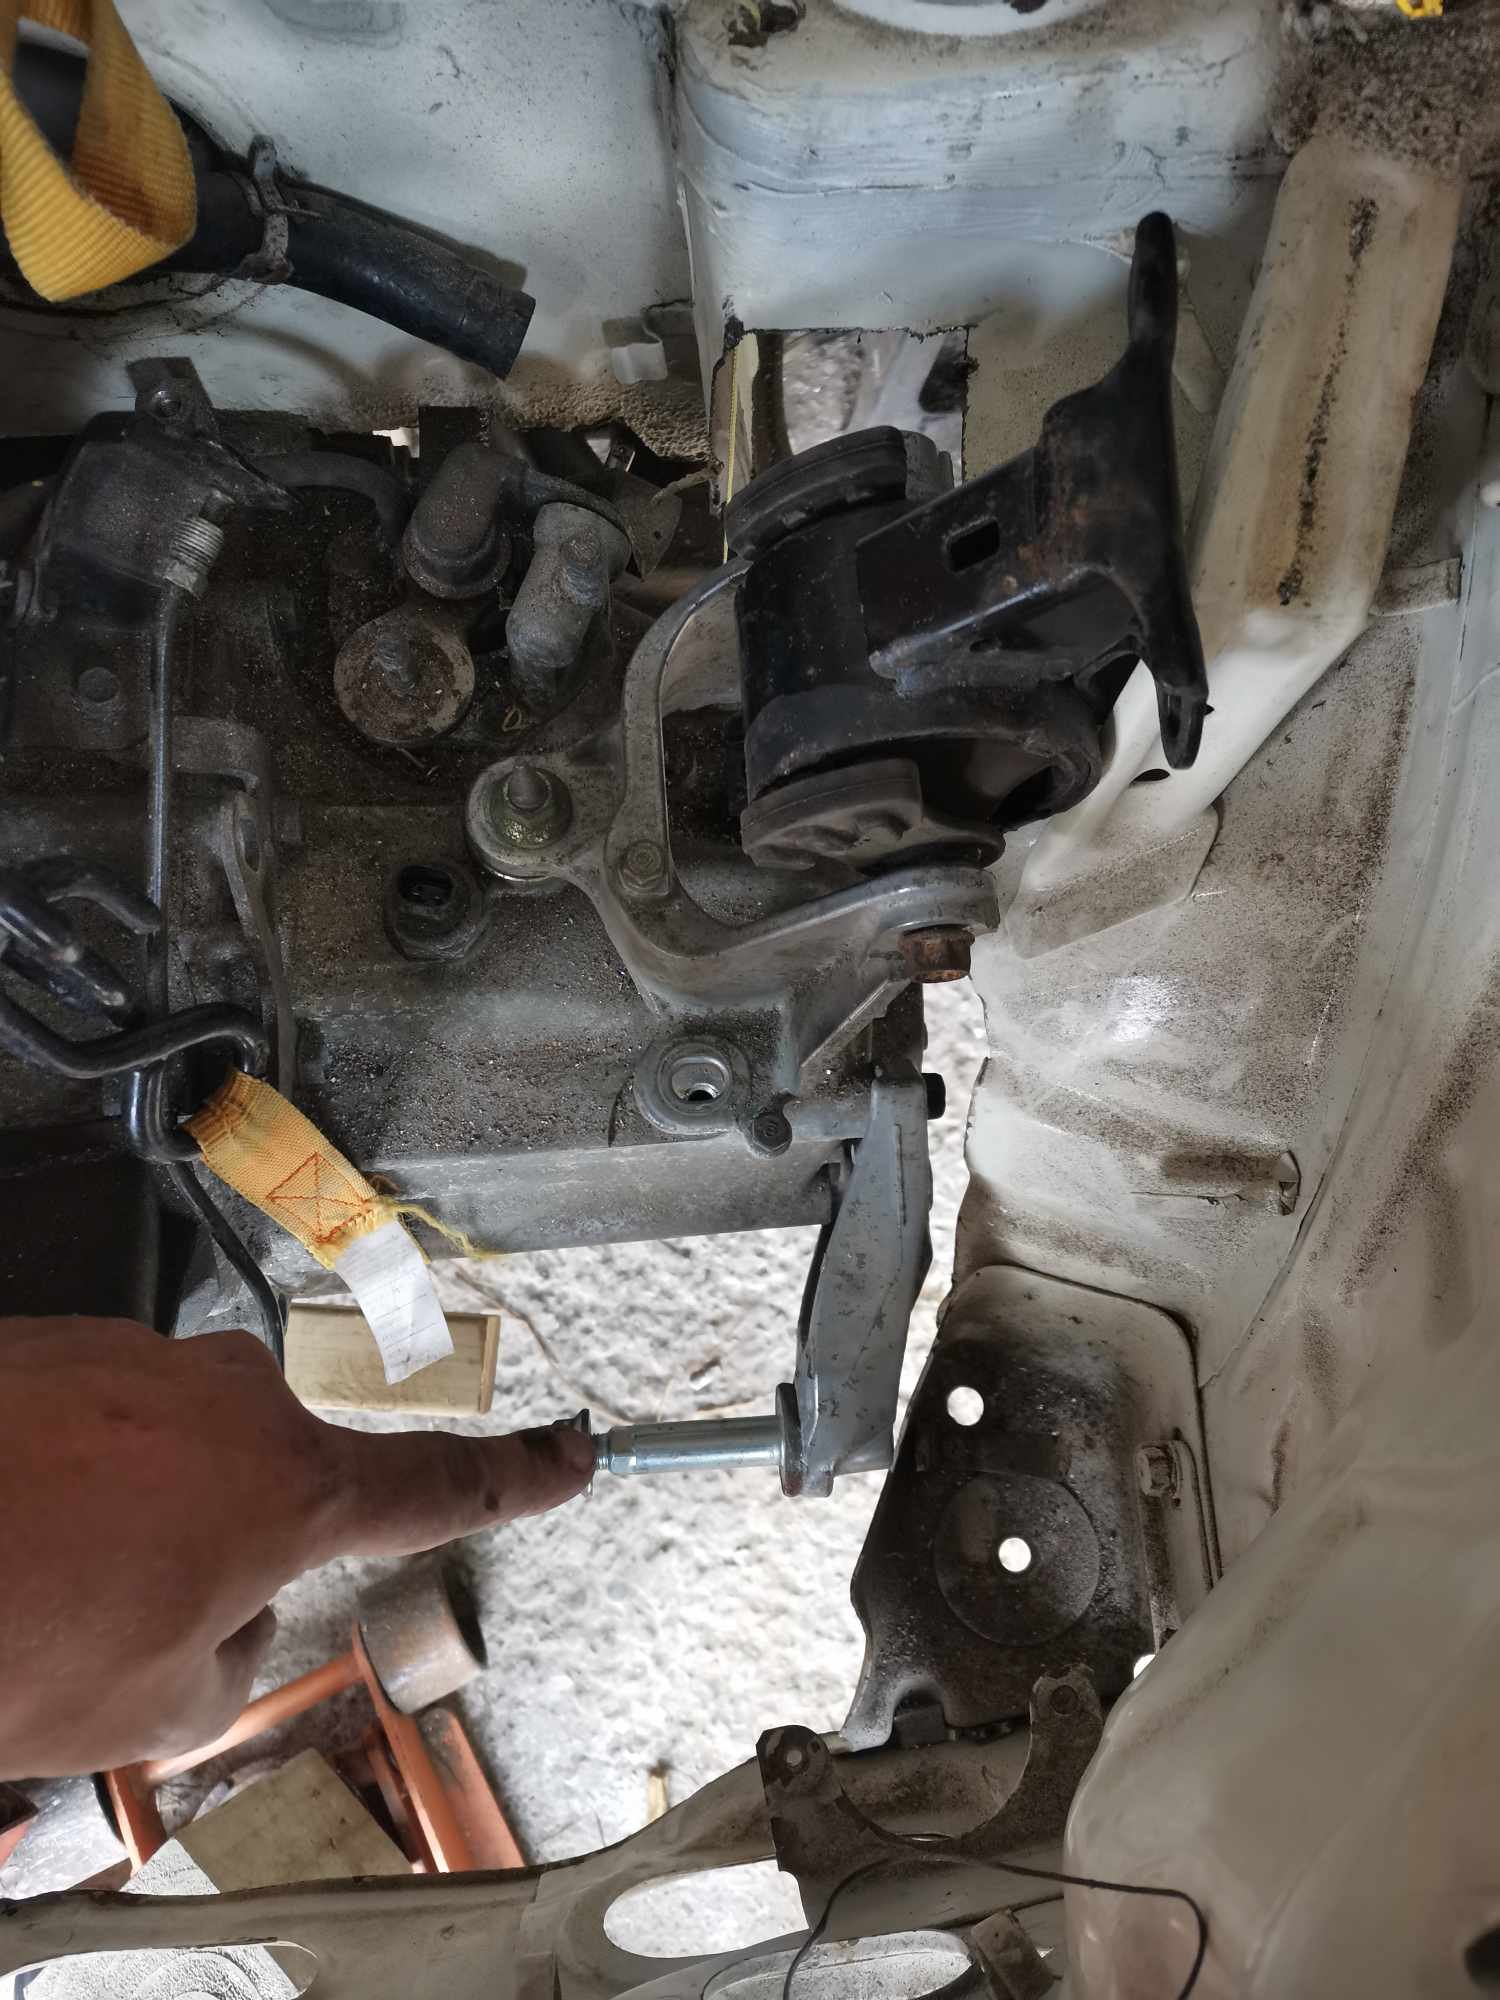
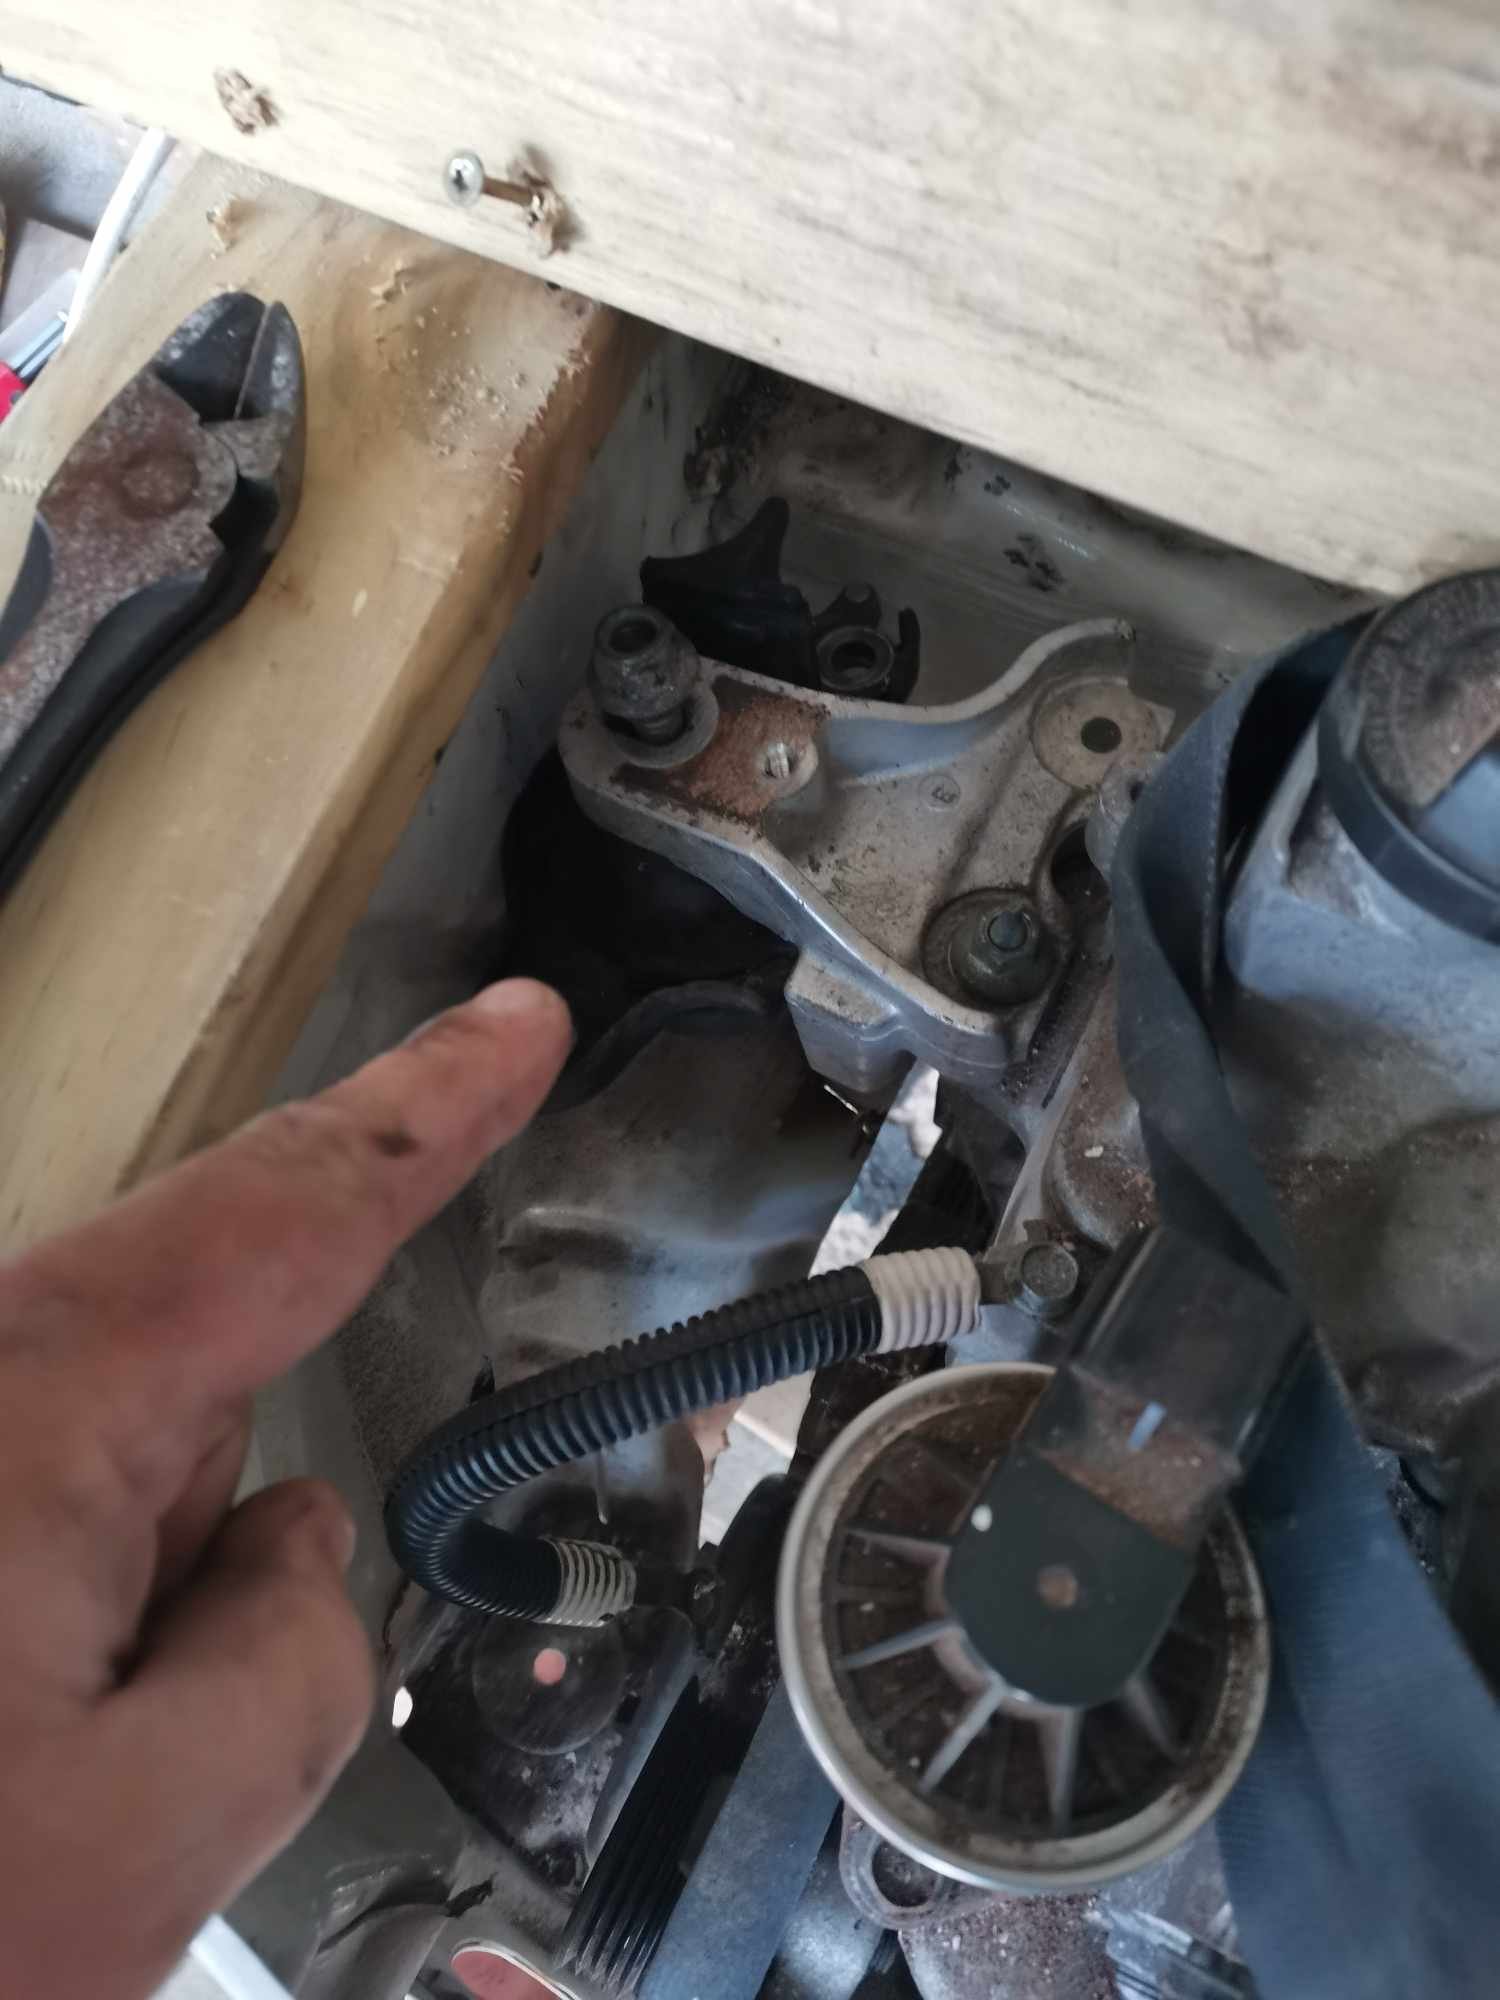
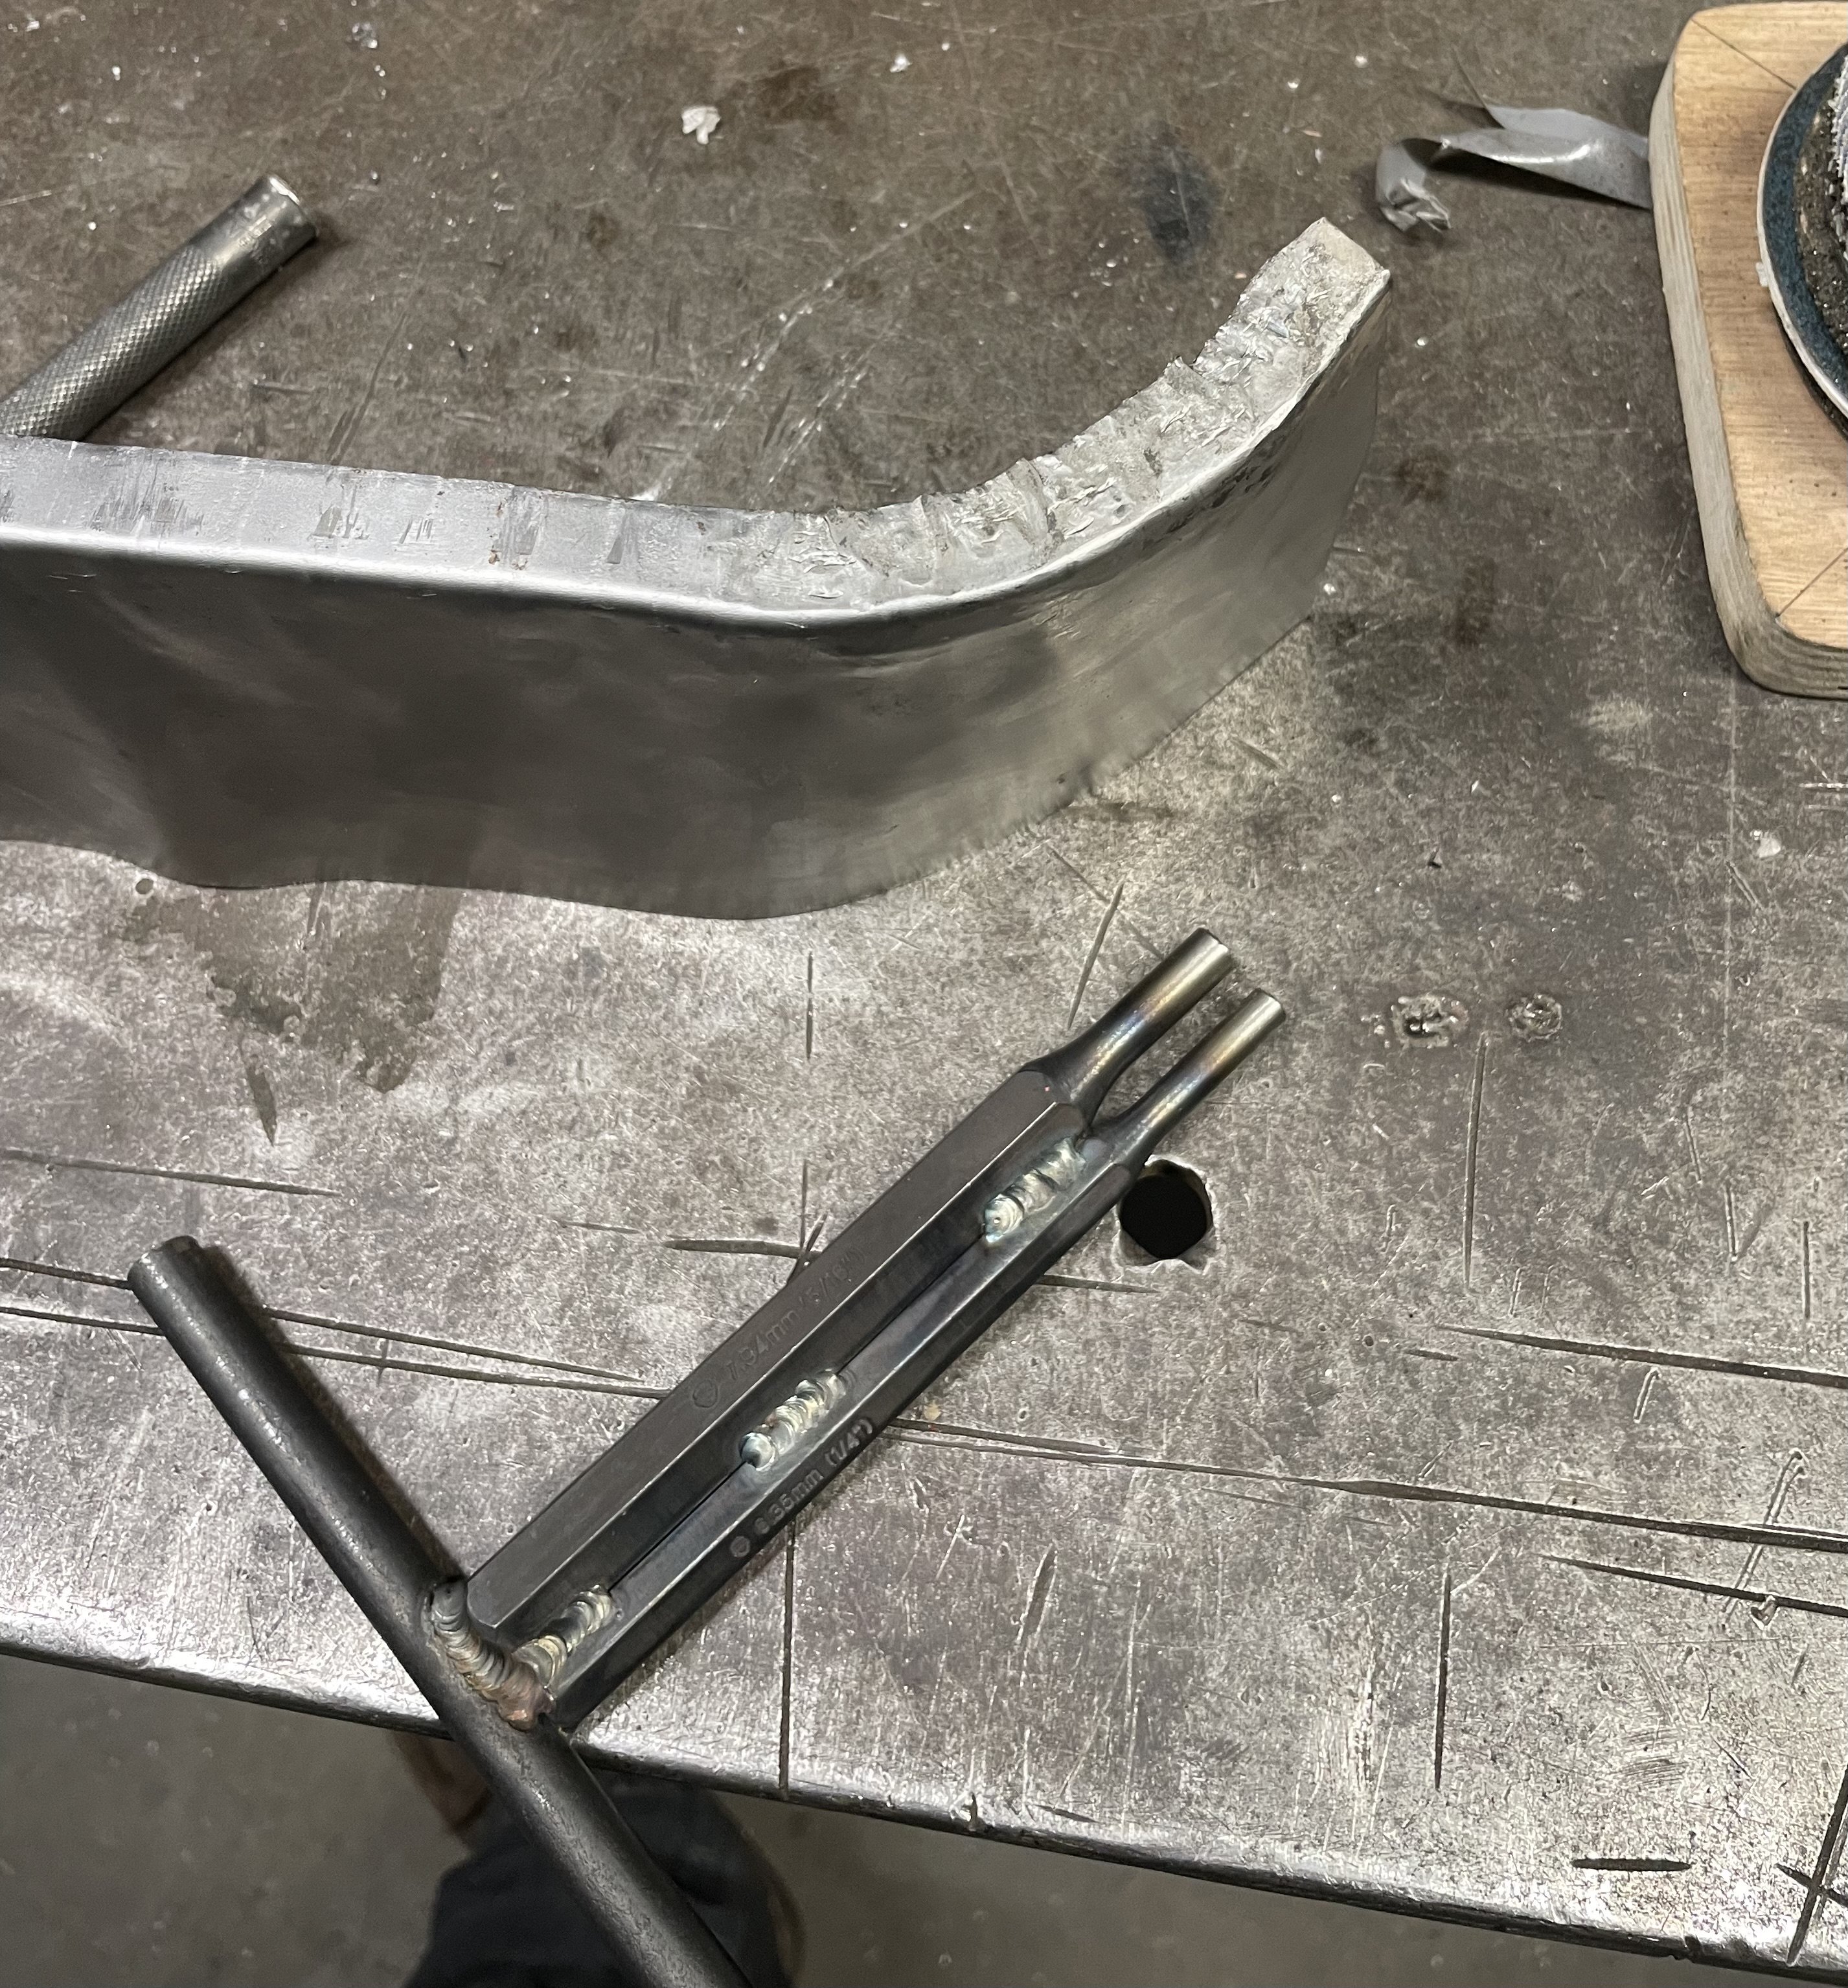
Fitting on factory mounts to see where they kinda land. Gearbox mount mostly fits. The mounting to the box bracket needs to be spaced up 20mm at least. Lots left on threads This bracket is reversed 180, used to point outwards, but this solution looks promising for a front mount Engine side looks half OK, needs a little clearancing with Mr hammer, might look for other options though. EG civic half size seems to fit vertically. Outlets ideally need flipping. Top needs to be to the bottom of the picture and bottom needs to be in the middle. Wondering if I can flip an alloy radiator and swap the fill neck... Hole in strut tower temp drilled so I can line up the evuk 7 shock on passenger side. Next up is steering rack, passenger knuckle and maybe drive shafts? Still keen if someone wants to come have a nosey in Wellington, I'm quite over my head here but continuing on regardless Discust below, https://oldschool.co.nz/index.php?/topic/49007-sirges-1972-honda-n360/
2 points
-
"If ye don't tek yer meat, ye can't tune any piano! How can ye tune yer piano if ye don't tek yer meat?" I have a tuning hammer that I bought online, and I could probably do an OK job with the aid of an app, but I'll save that for when I move out of Auckland to where there aren't any tuners. Until then, I know I cannae match fahrty yeers of expeerience in any wee, shepe or farrim. Barglaralarrum.2 points
-
Axle shortening or joining, if it's just an axle, should be fine if it's done well and with a suitable weld process etc, take notes of what you do, what filler rods etc The exception to this is jag rear ends, this is because the driveshaft is the top suspension arm. These need a more specialized process because a failure would likely be way more badderer Battery- if your fuel system is modified then the CCM requirements apply, so battery has to be isolated from fuel in a non conductive box. I have had a customer with a stainless battery box who didn't want to change it, line the inside of the box with rubber sheet so it was no longer conductive between the battery and everything else2 points
-
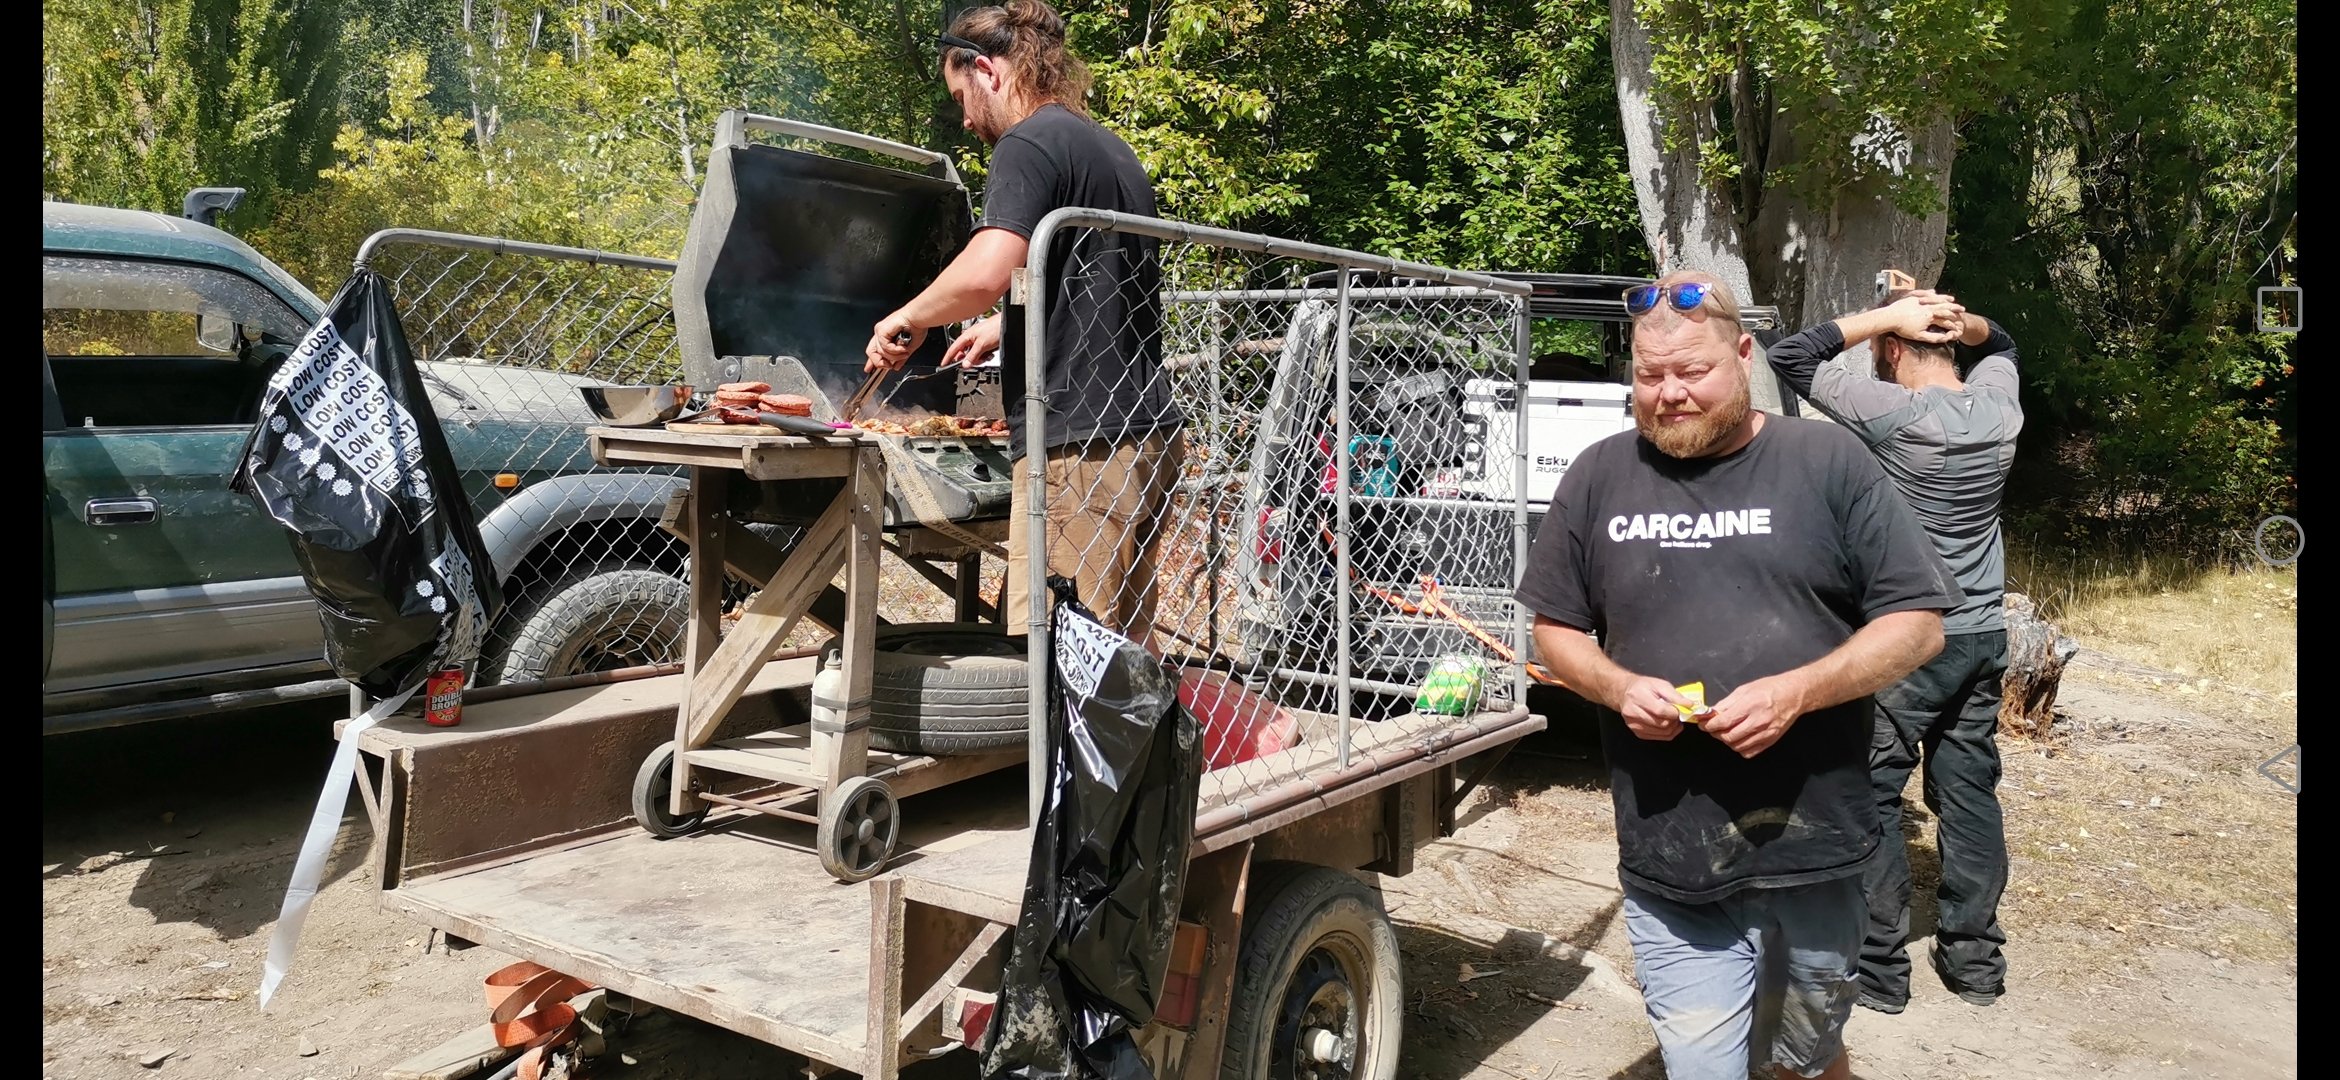
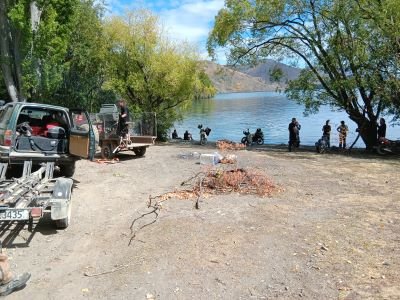
These 2 absolute fucking legends (and Josh) making it possible. Feeding and watering the troops as well as the odd rescue where required. Even taught this old dog a thing about Old School values, rescuing the Subaru fools. Top effort fellas, you're fucking awesome
2 points
-
Had a great time catching up with the fella over the 4 days. Only known this guy @RUNAMUCKfor 41years. Hoping to convince the other 2 horsemen in future years. Looking forward to our next drink fella, MEOW
2 points
-
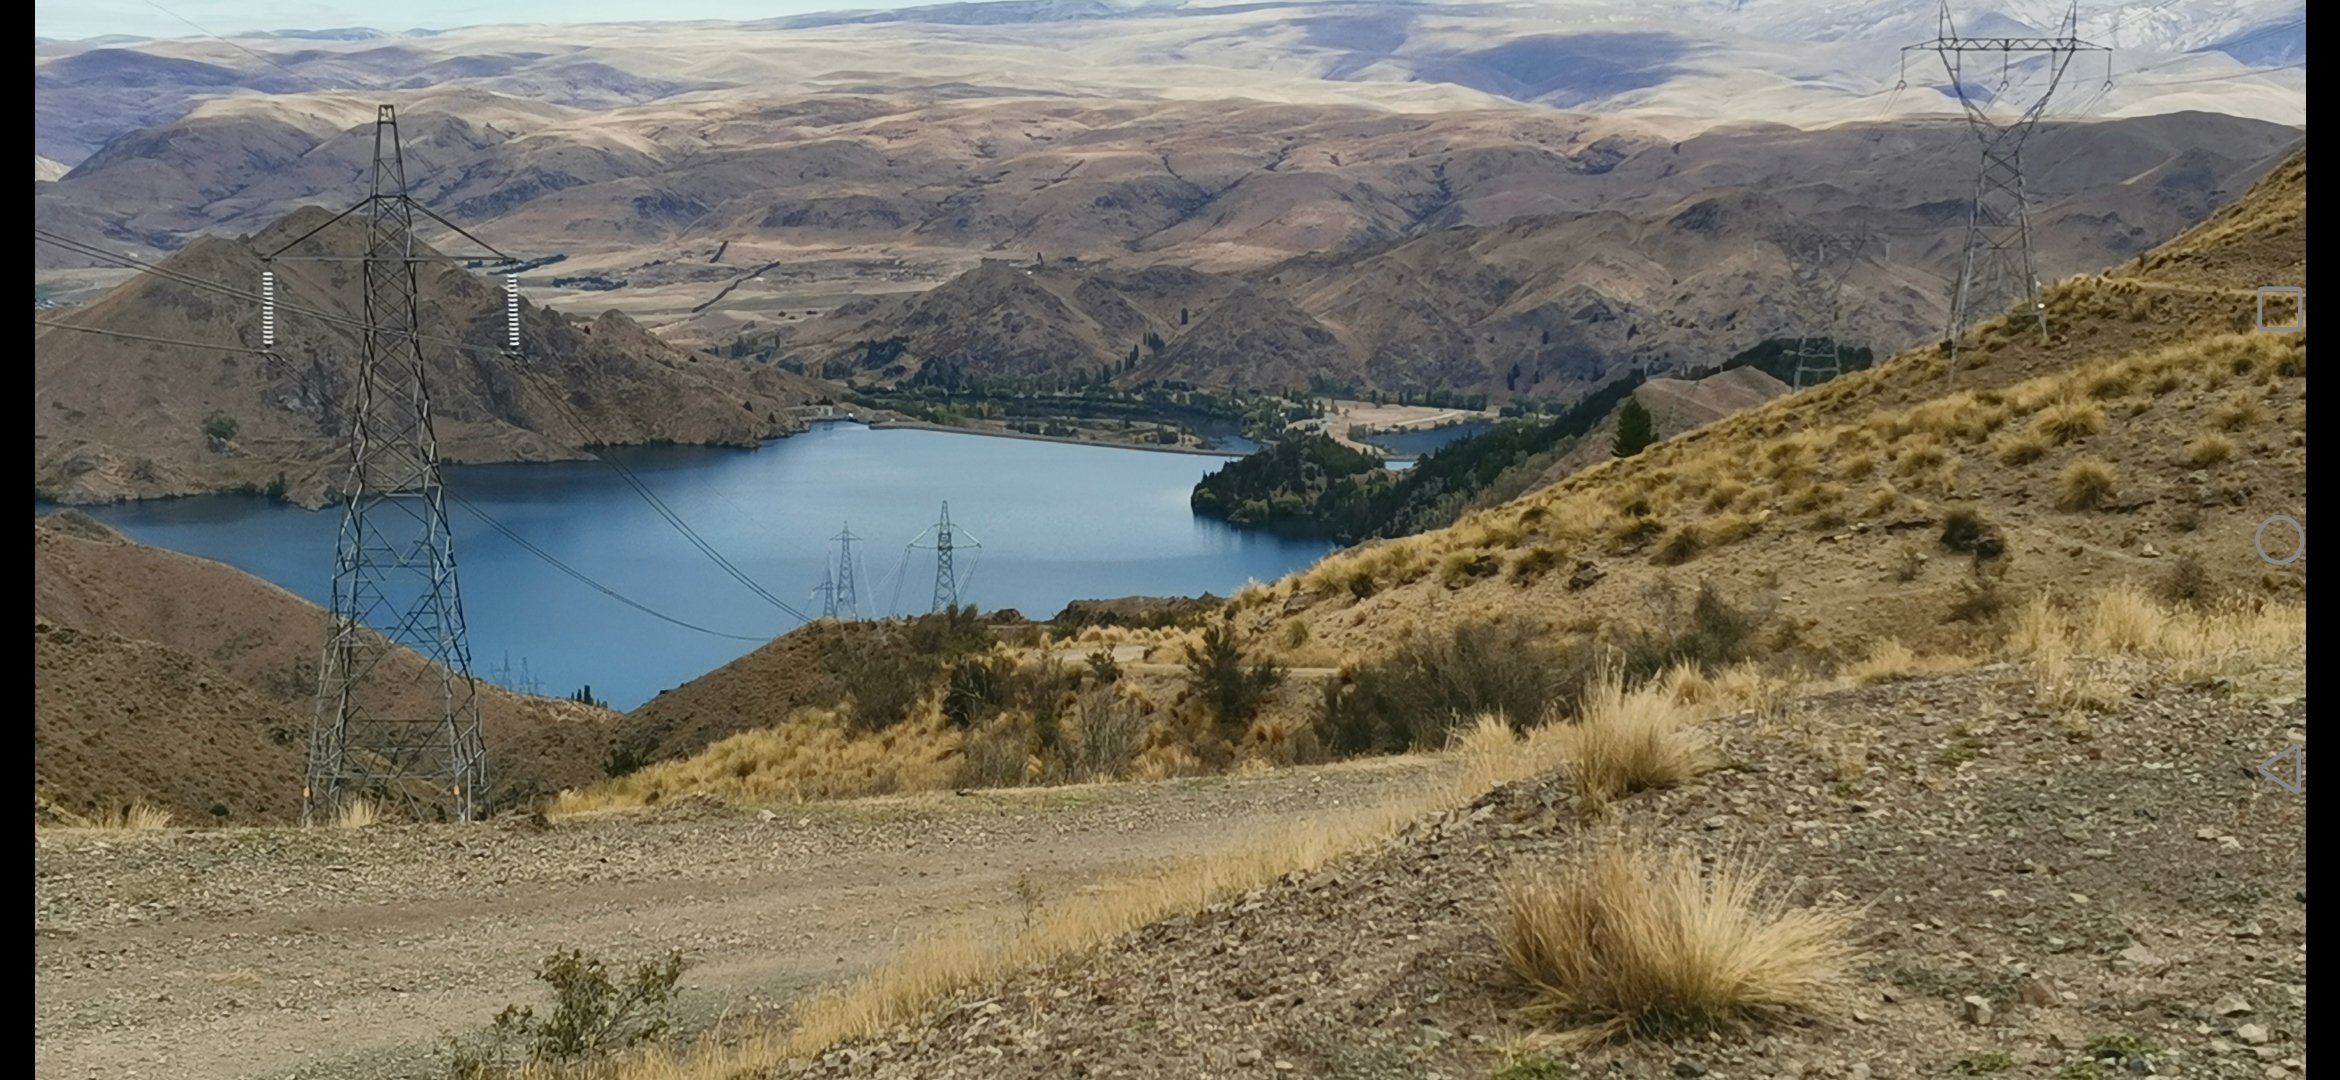
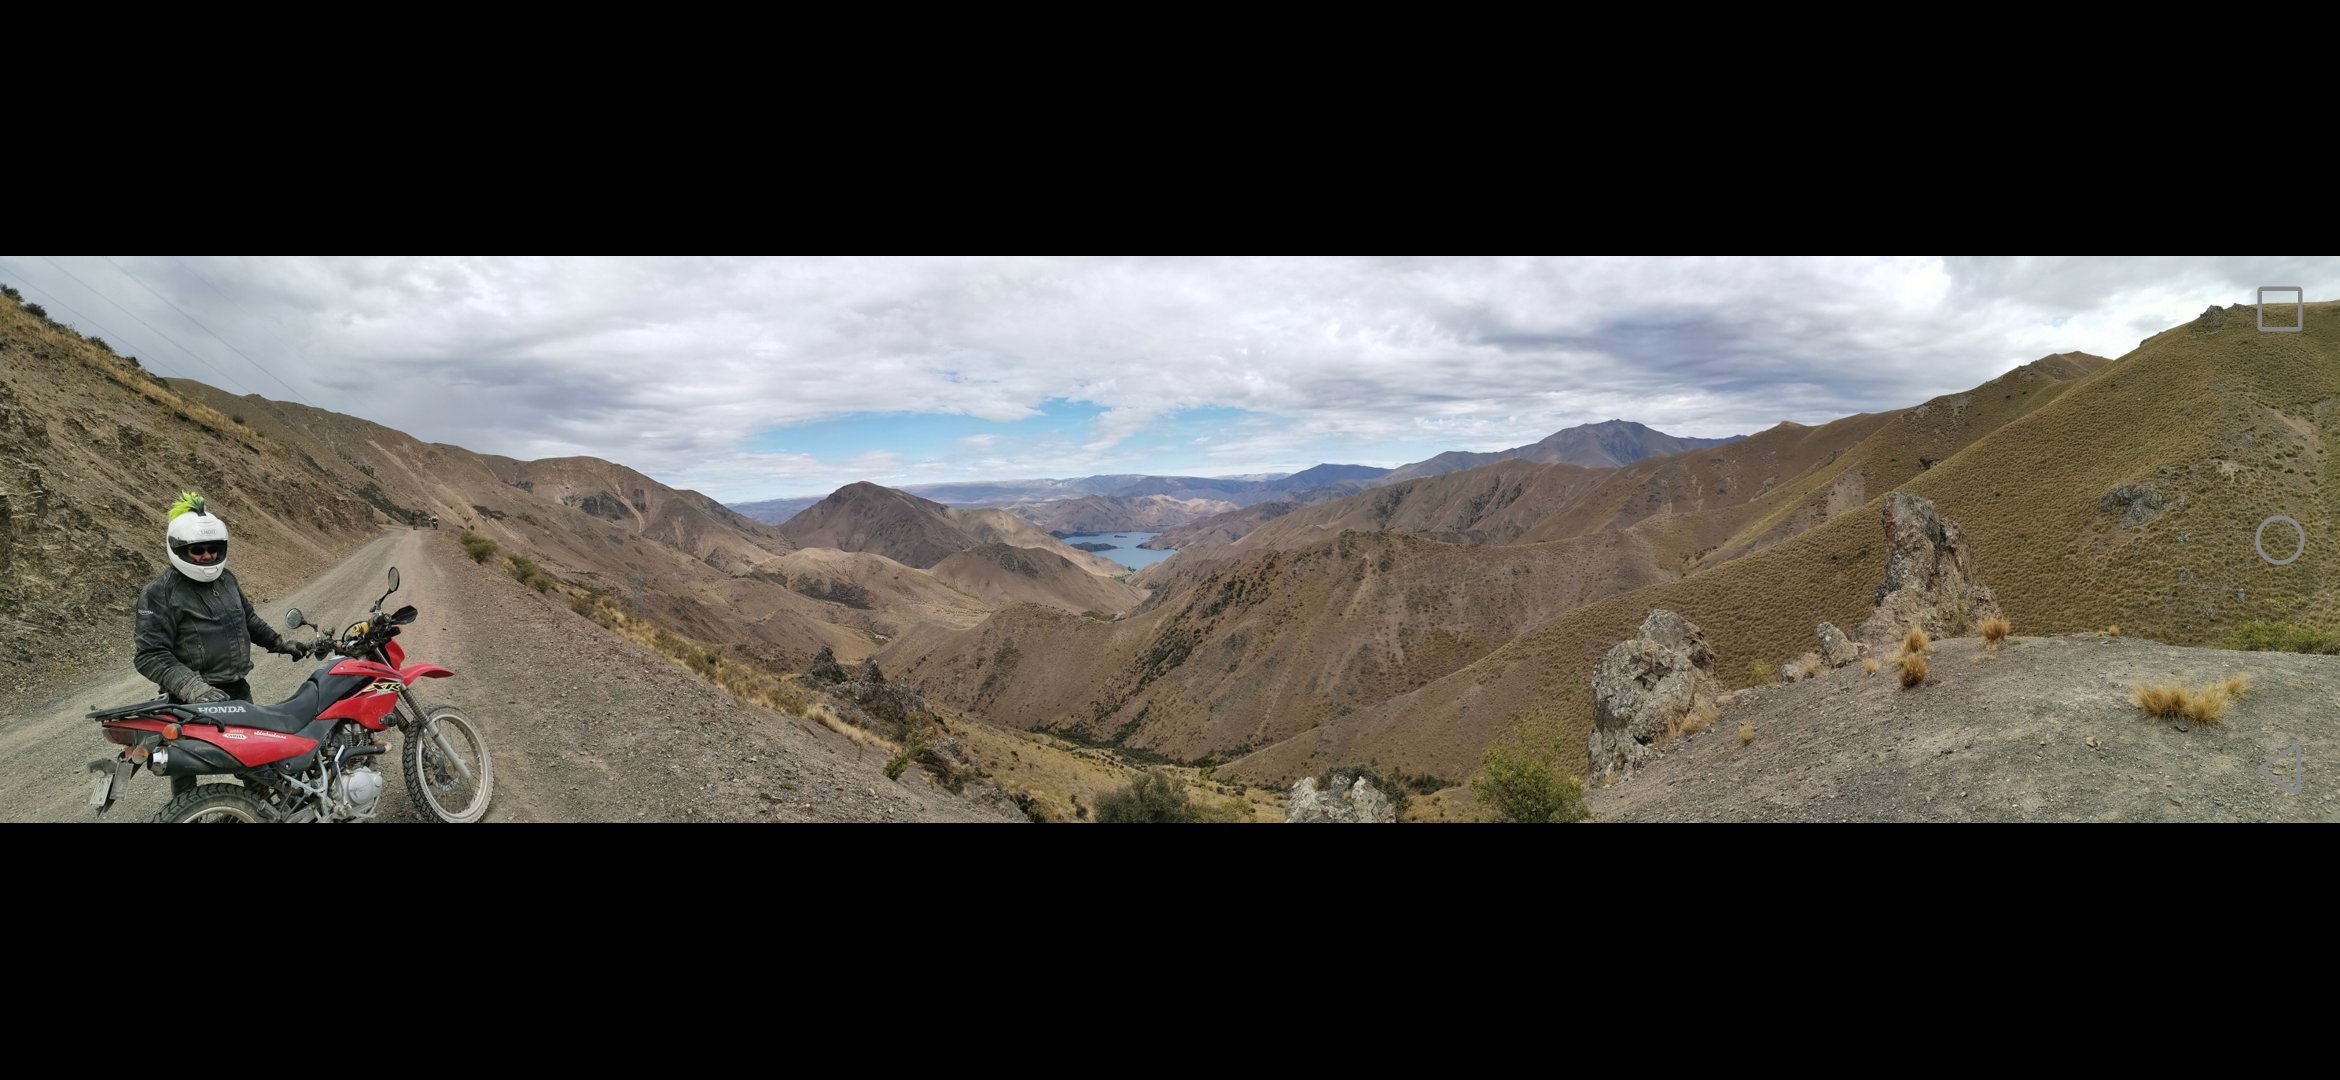
@governorsamtaking in the panorama
2 points
-
Headed out on my first moped melee this year. Really appreciated the invite @RUNAMUCK. What an awesome group of legitimate GC's. Had an absolutely amazing time and already looking forward to doing it all again next year.
2 points
-
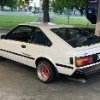
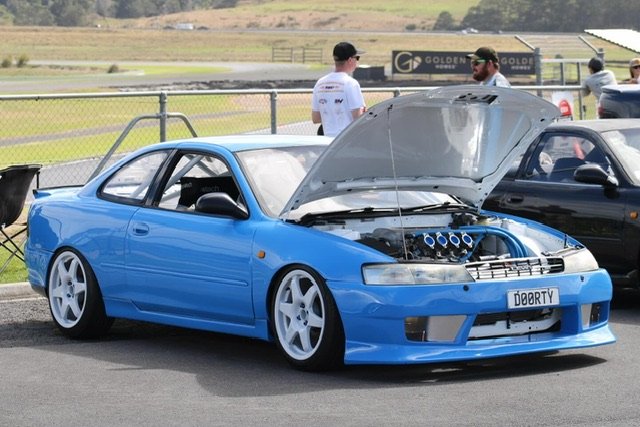
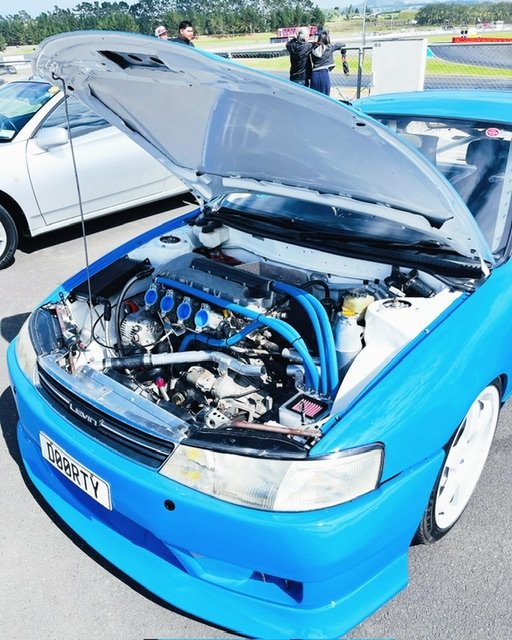
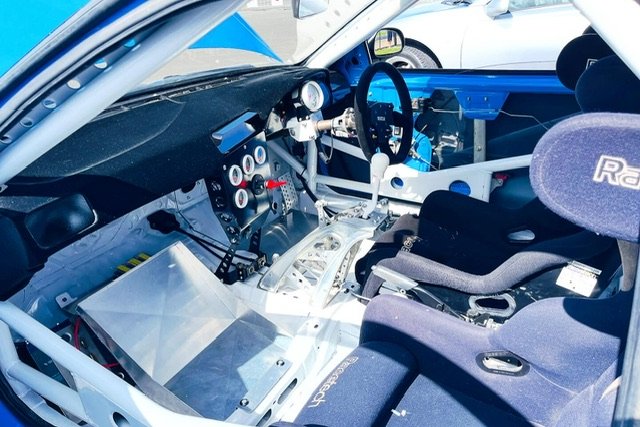
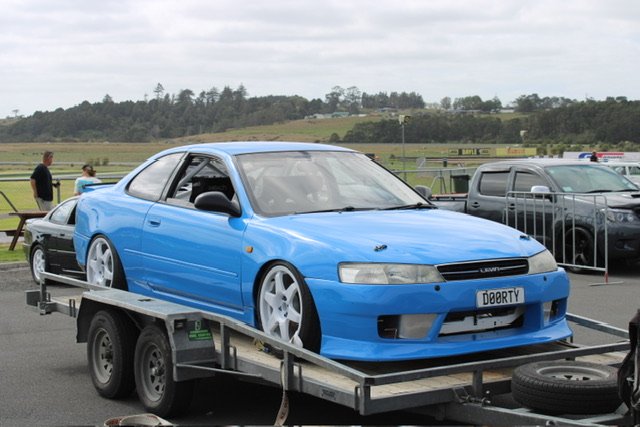
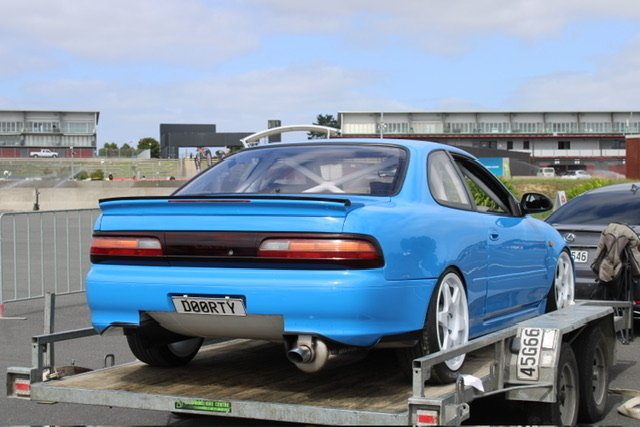
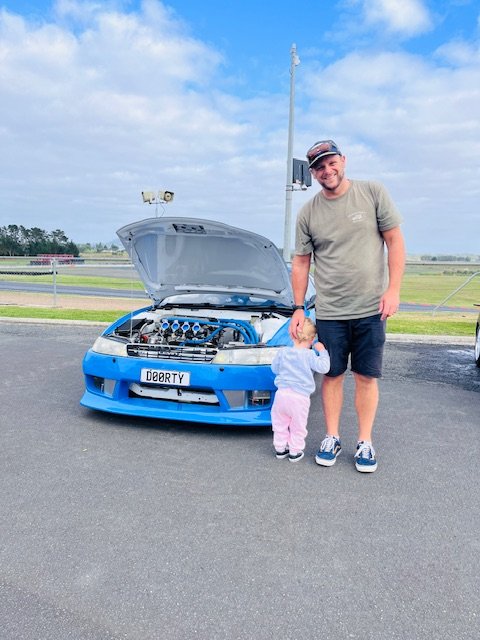
A few snaps from Toyotafest. If anyone got some feel free to share as well. Great to get the car out and chat to lots of people about it. Lots of motivation to finish it now! Trailer queen for first and last time hopefully Finley loved it too
2 points
-
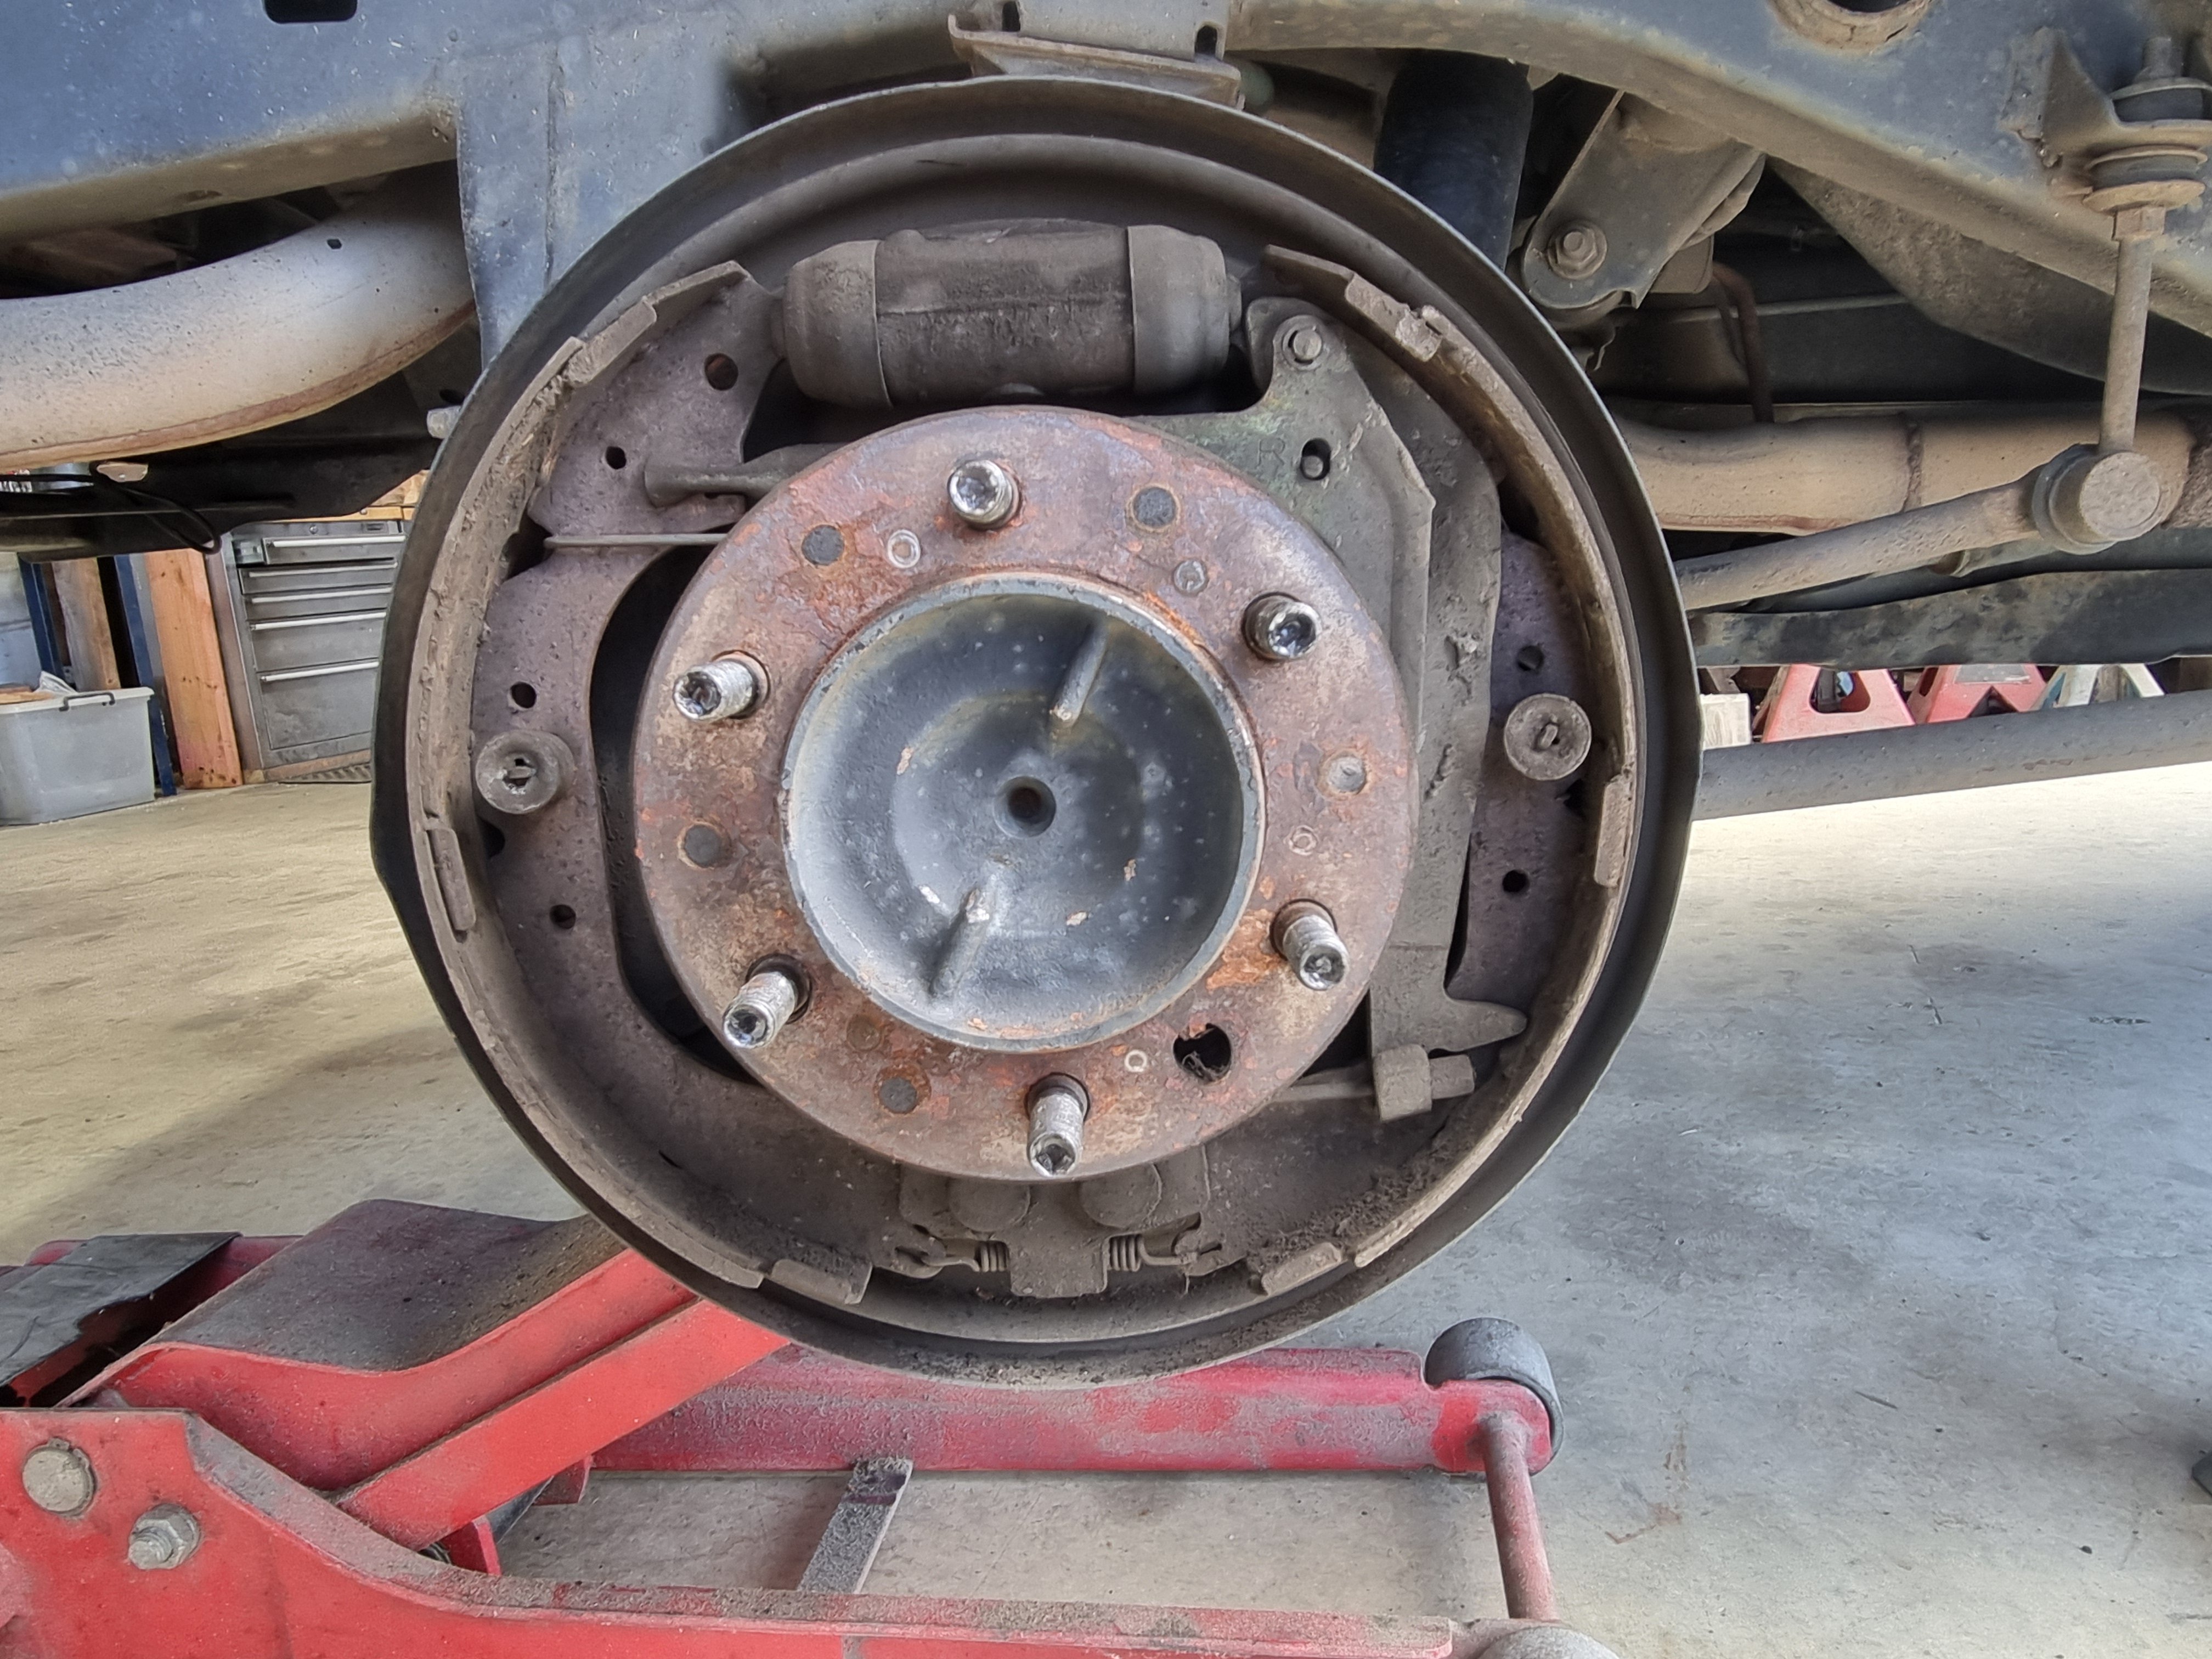
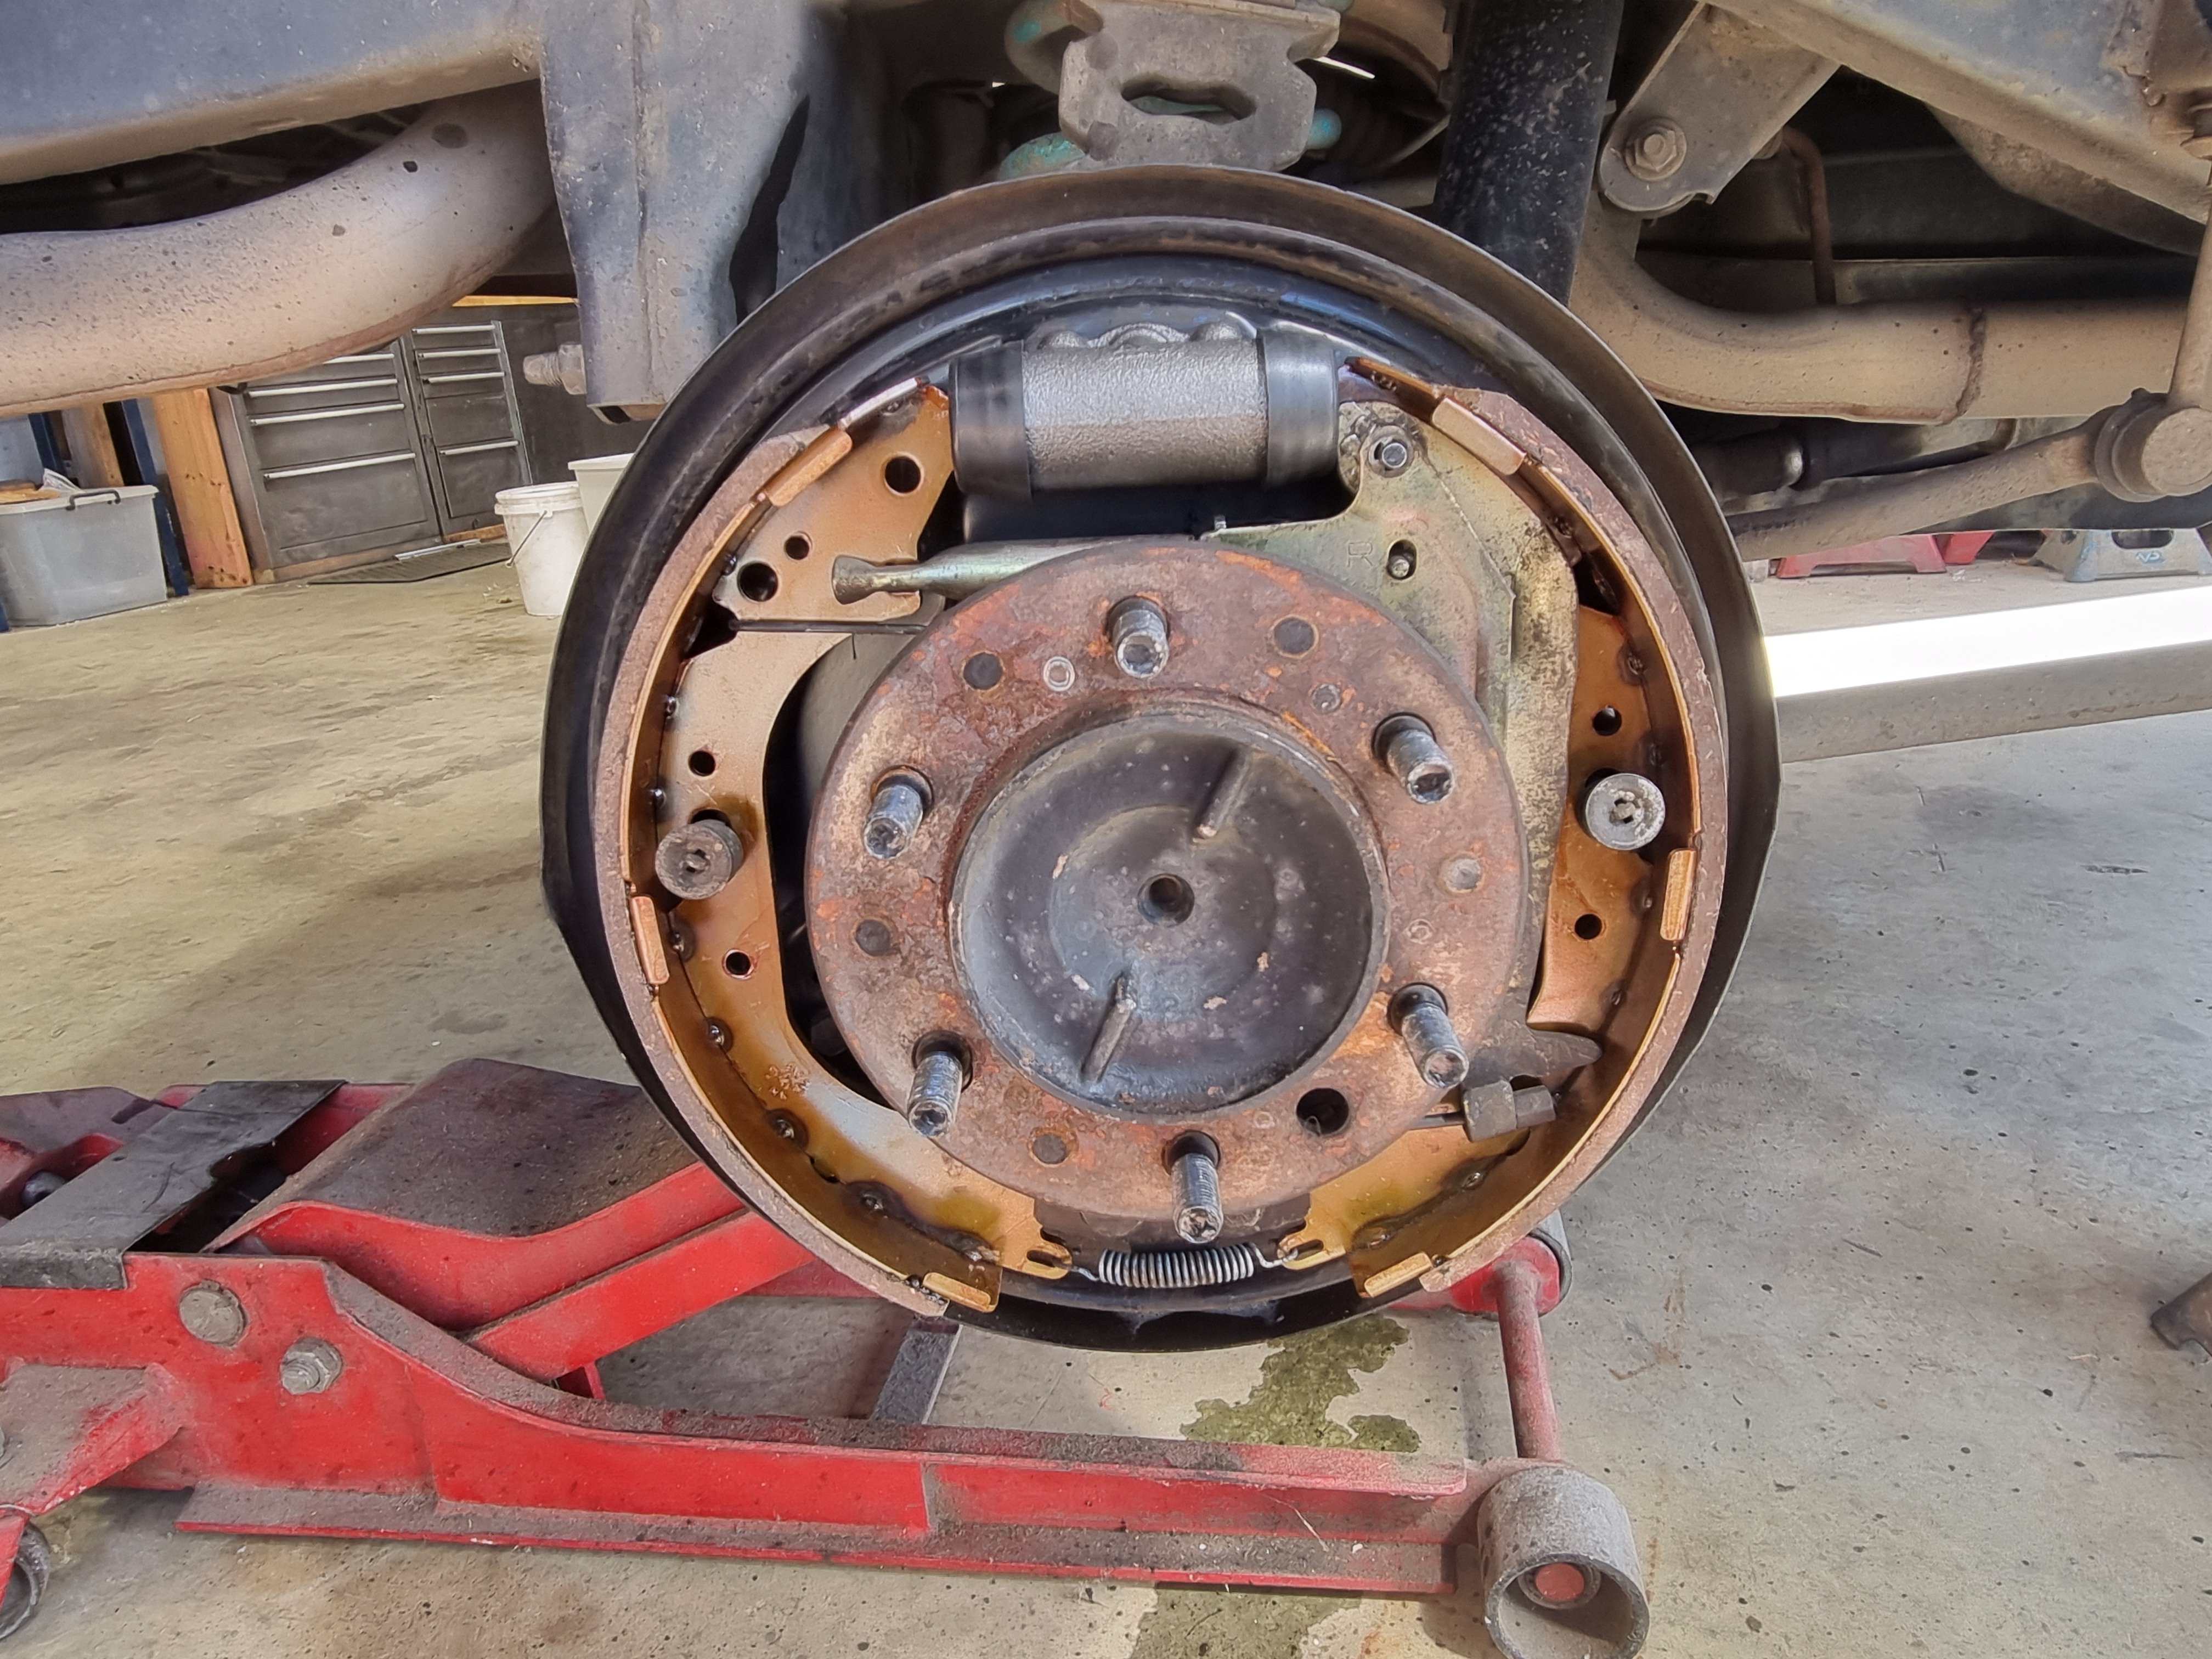
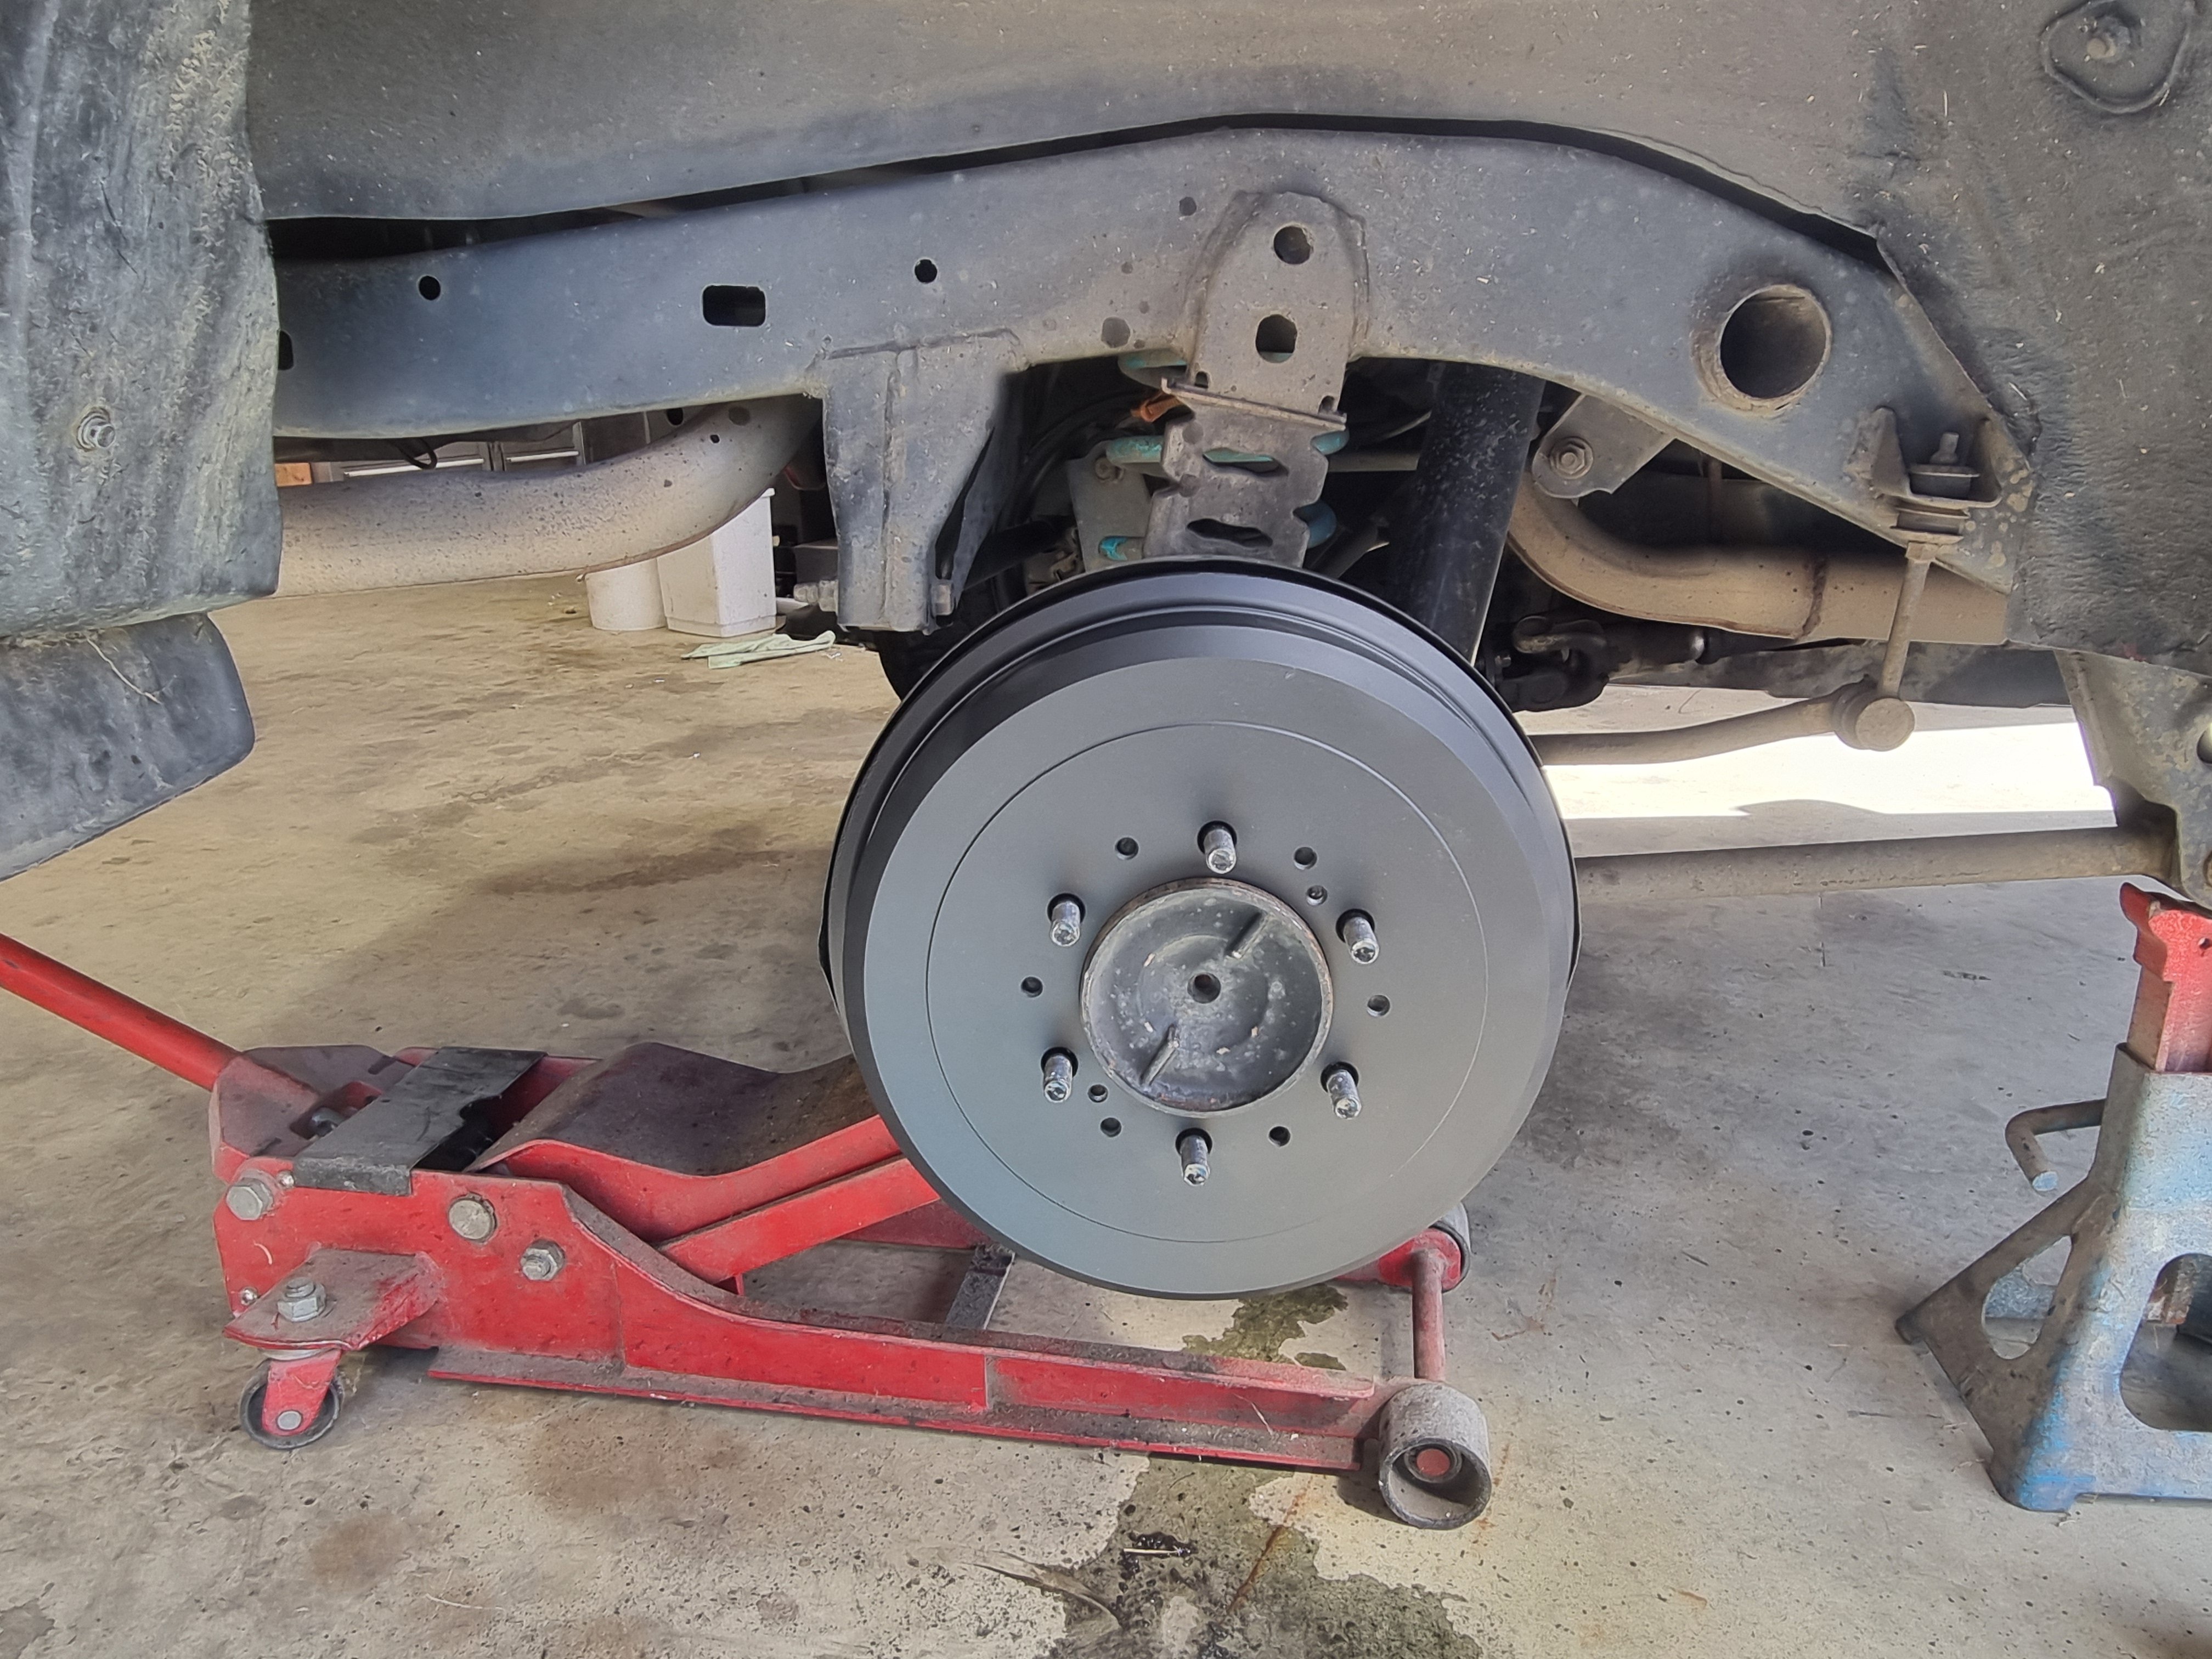
Finished up the new brake install. New shoes, new wheel cylinders and not pictured new front brake pads. To say that it stops better now is a bit of an understatement.
2 points
-
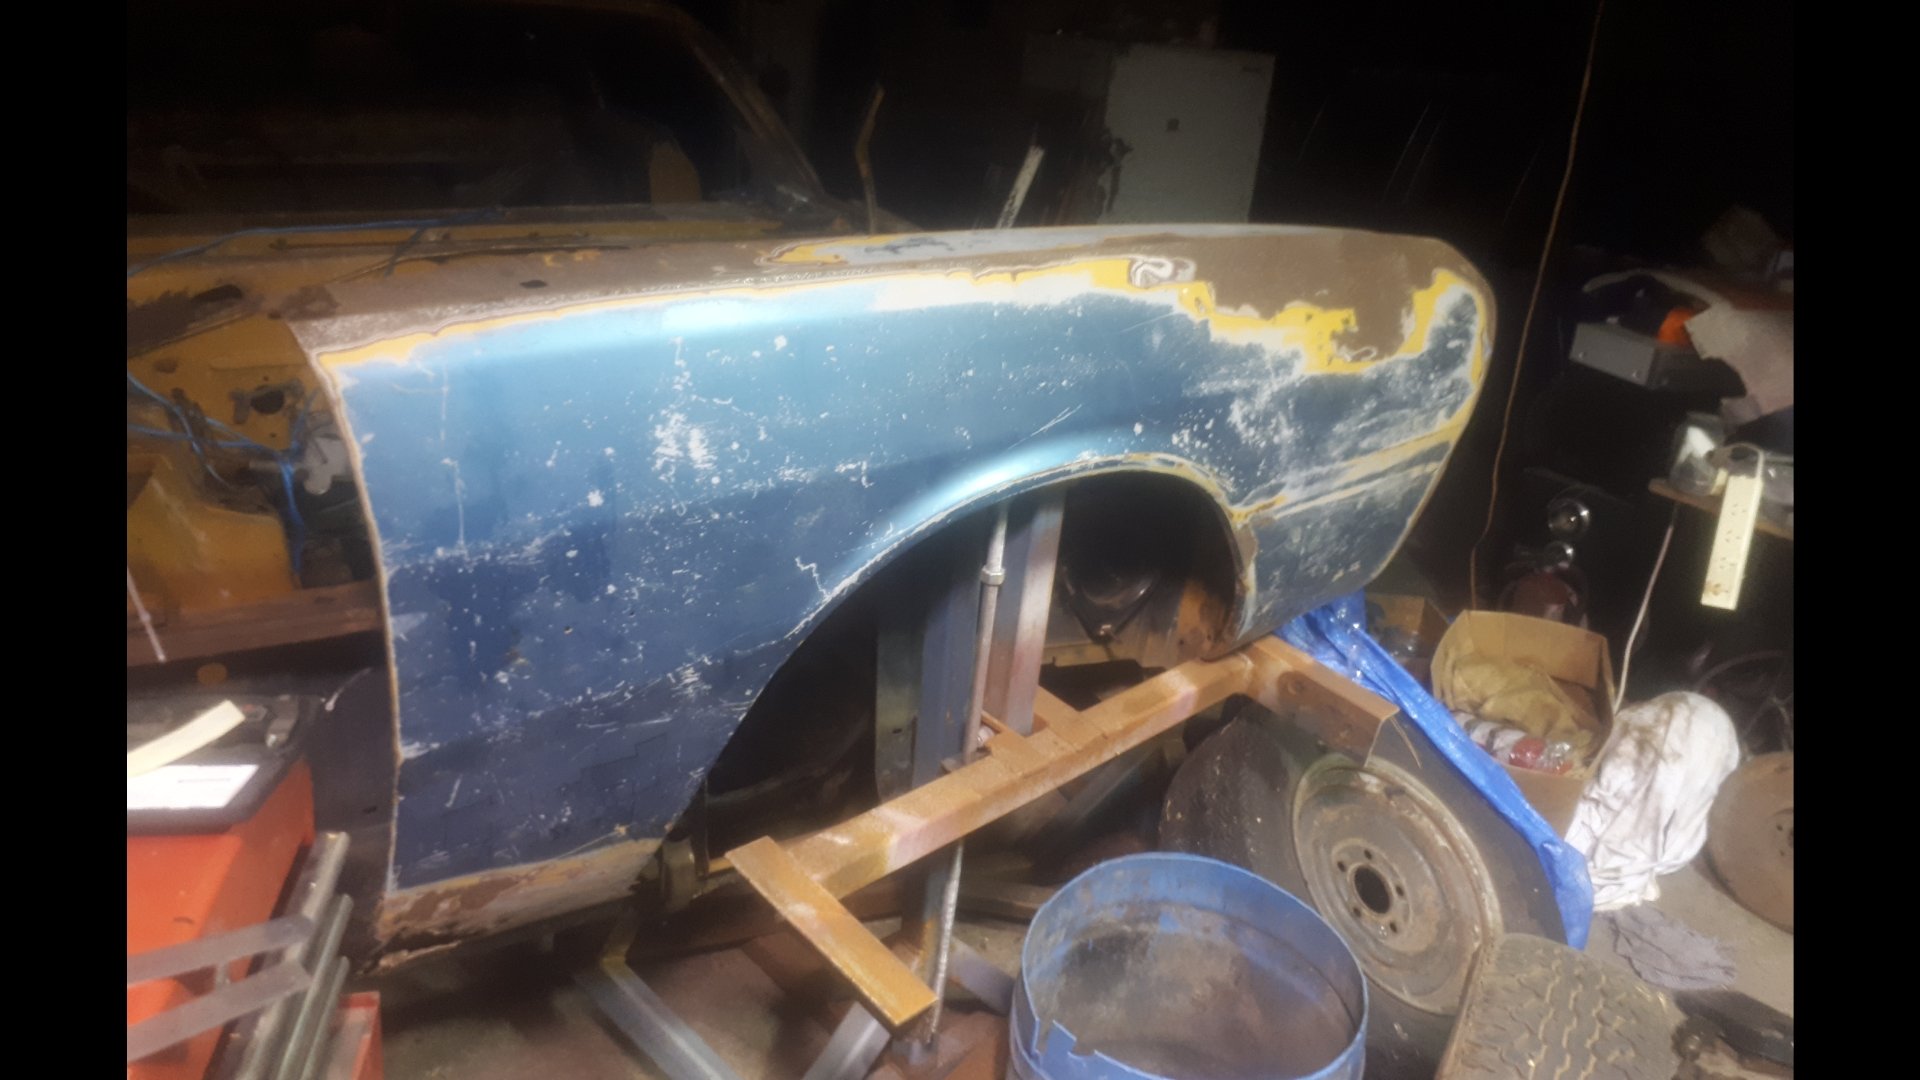
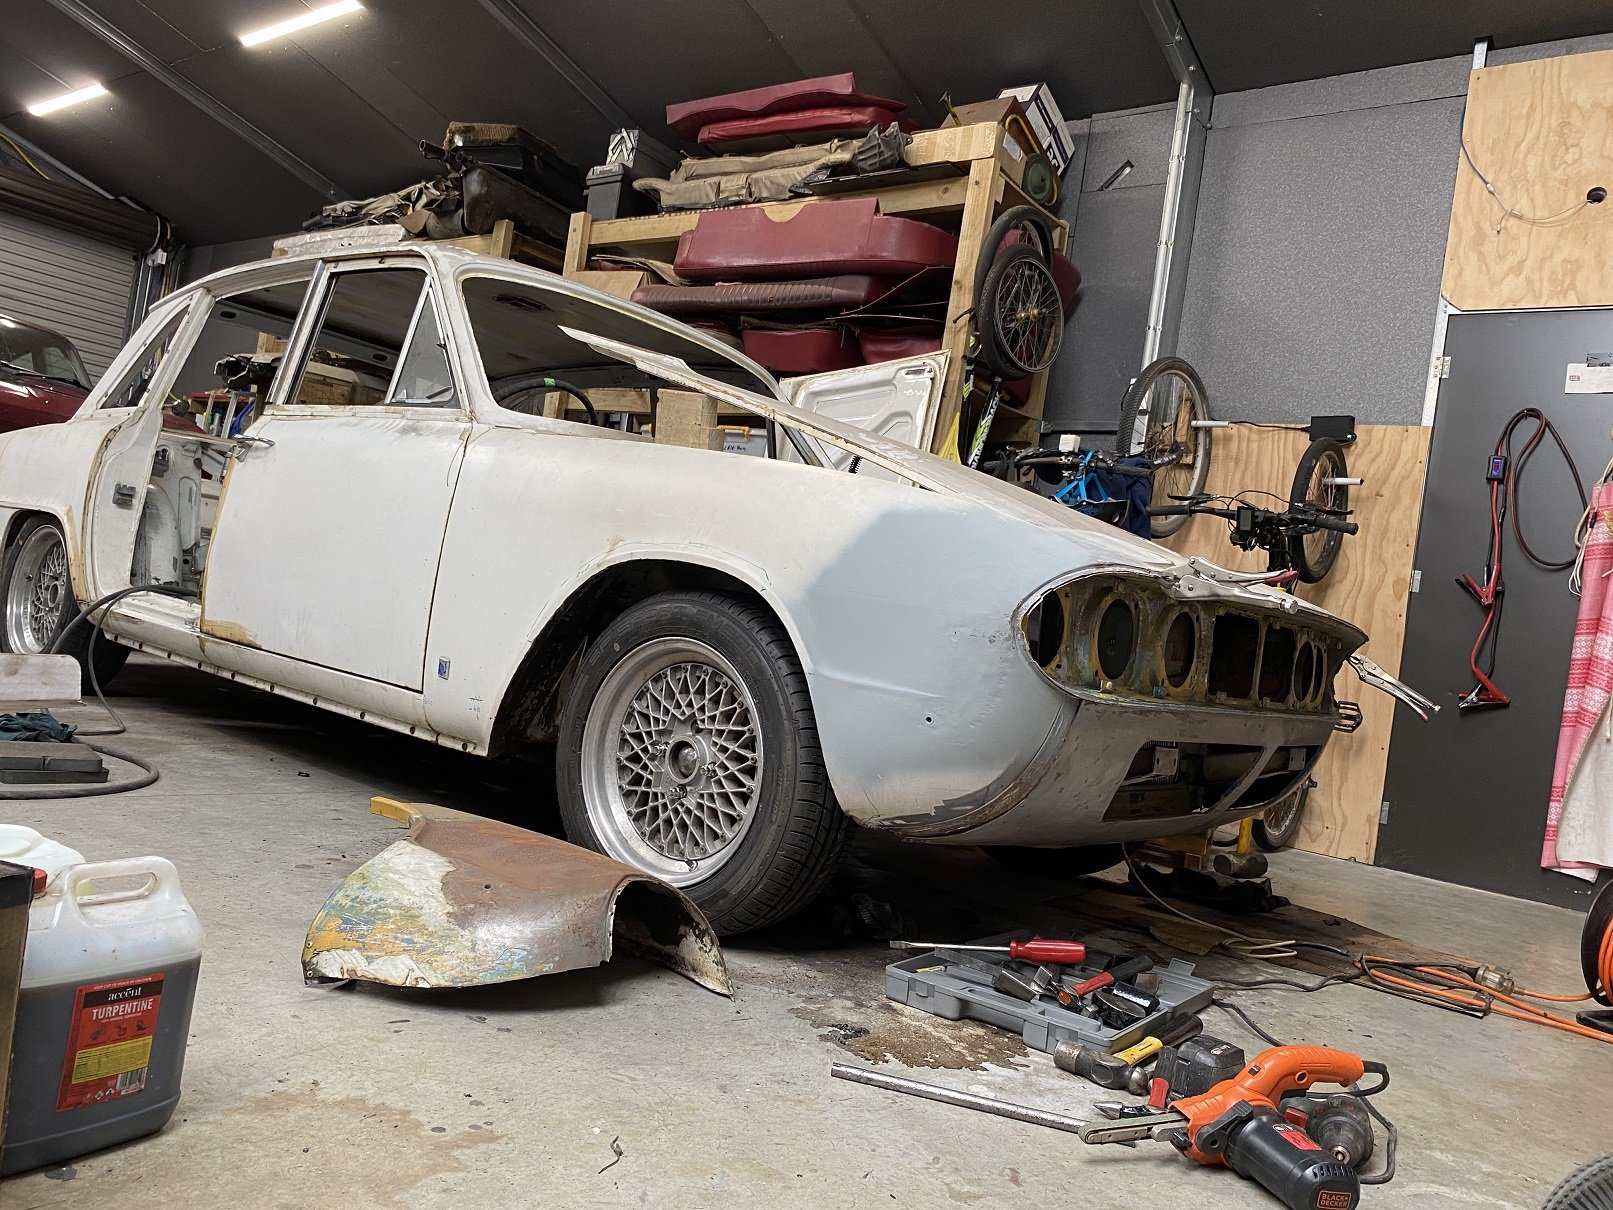
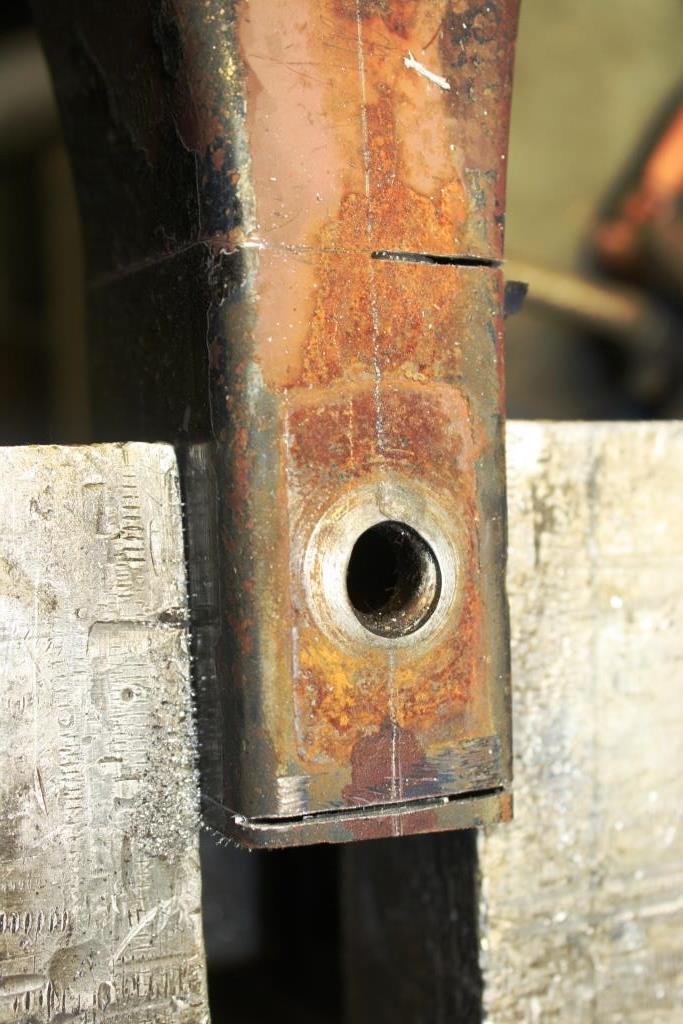
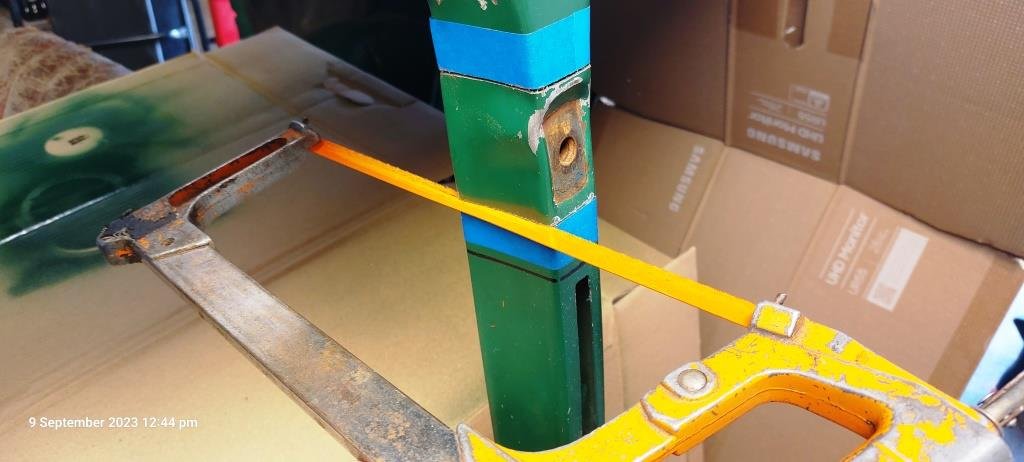
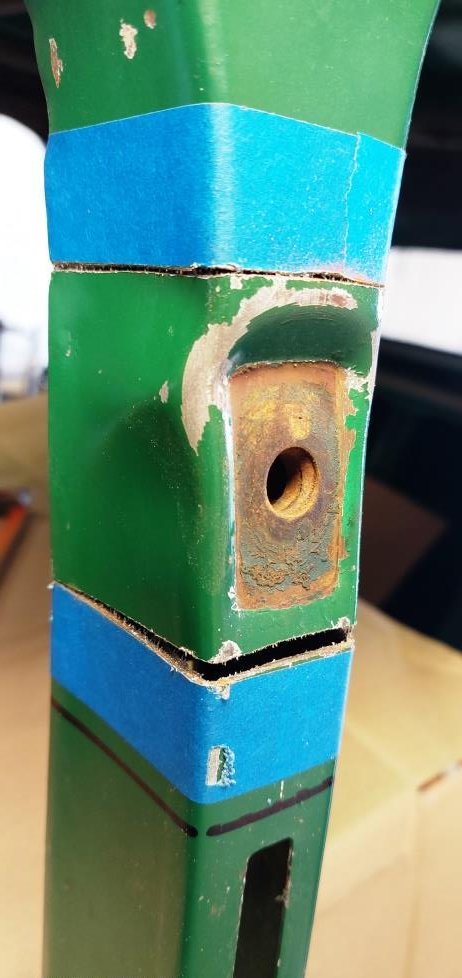
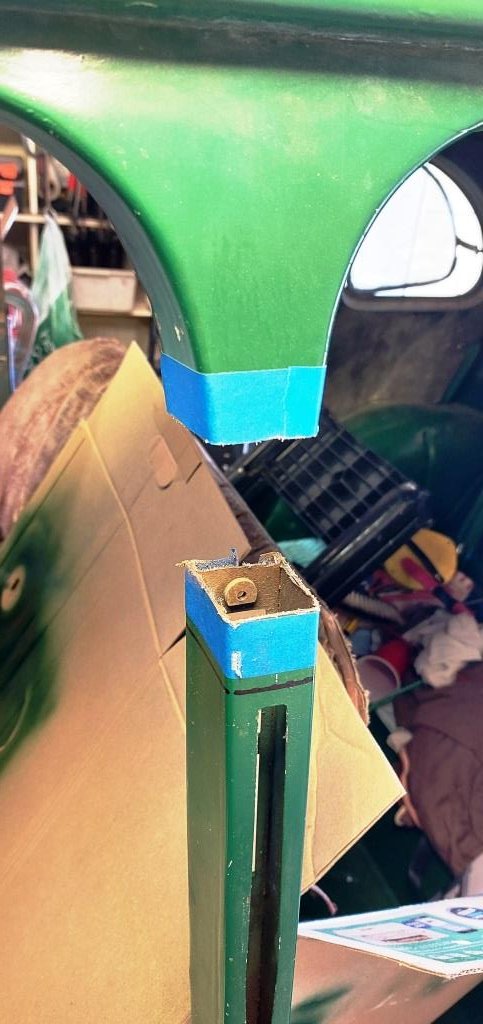
I had planned to have to weld in the front portion of the yellow guard because I deemed the panel damage beyond my skill to repair. The step thing on the corner had been totally flattened by someone else's previous attempt. I had a go at it myself maybe a year or so ago. But then the other day, I thought I'd have one more go, if I fucked it up I could still weld in the other panel. So I just hit it much harder... I think it's acceptable now, I reshaped the step and didn't fuck up the two... ridge line things. Should only need minimal filler. I also trimmed the doner front panels so I could trial fit them. This car had run into something and pushed in the front panels, folding over the lower front seam. I was unable to get the panels the budge with a slide hammer, so I decided I'd use the front panels from the yellow one, which were surprisingly rust free, unlike the rest of the yellow car. Front panels look like there will be no issues fitting them. I'm not ready to weld the panel back in, I still need to prep behind it for epoxy.
2 points
-
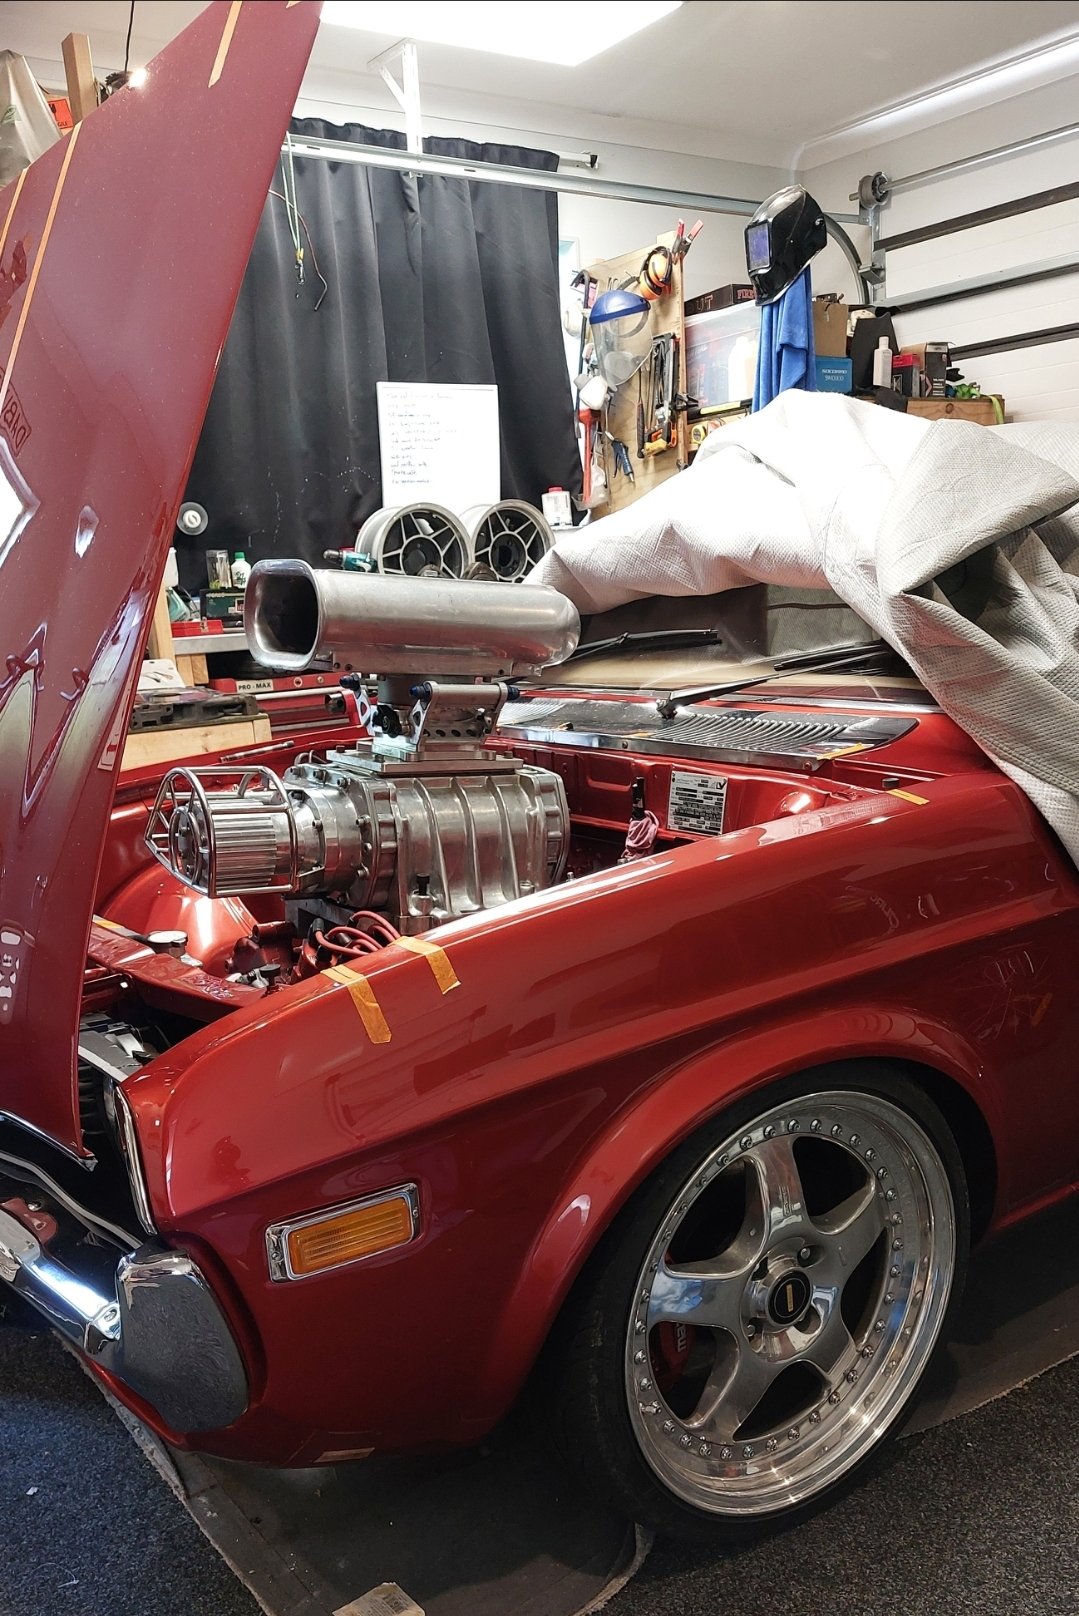
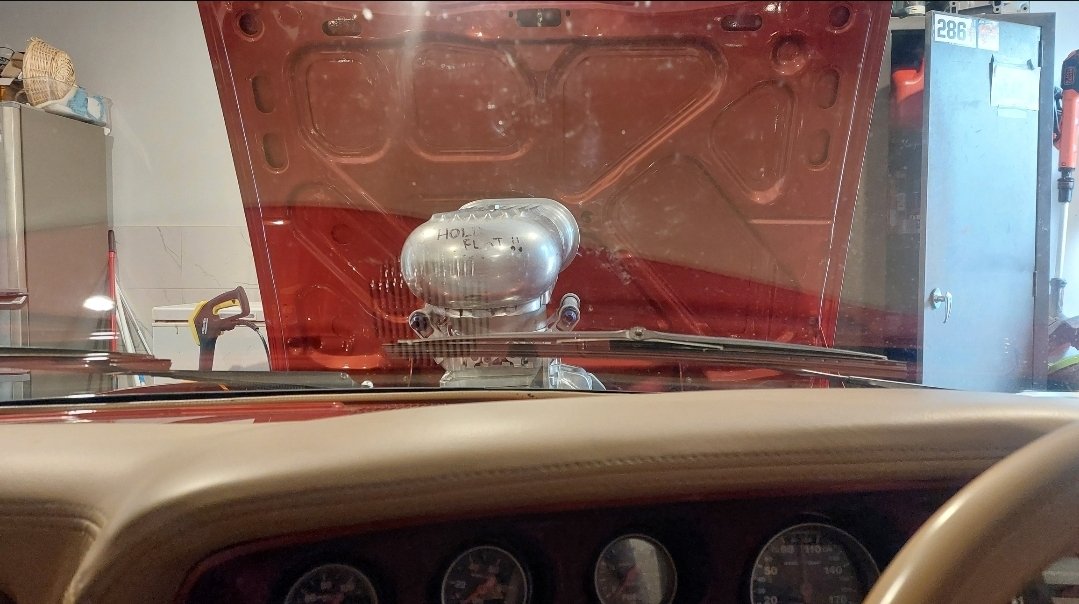
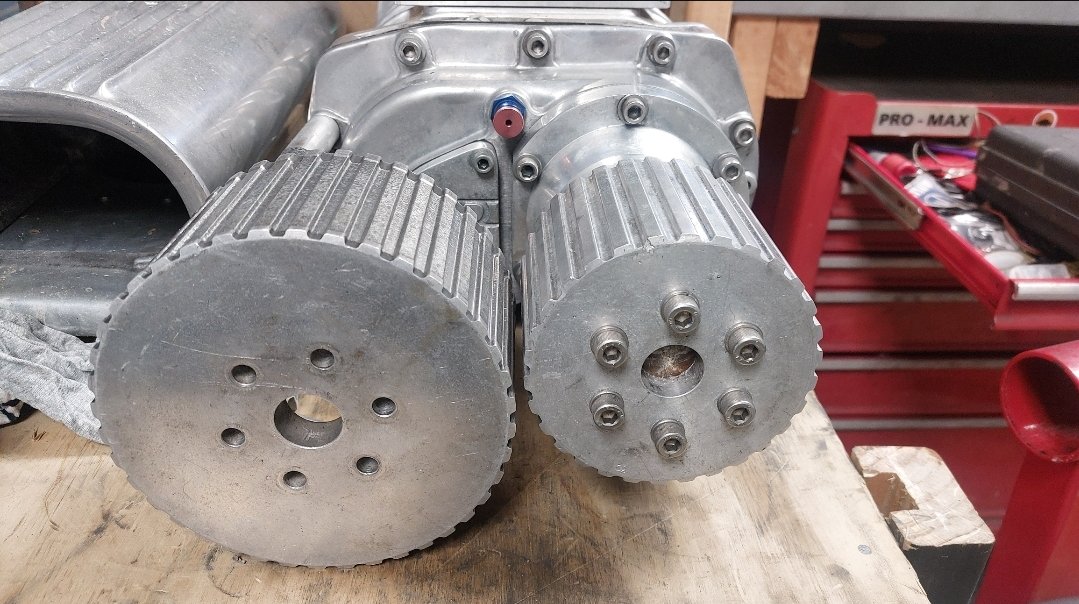
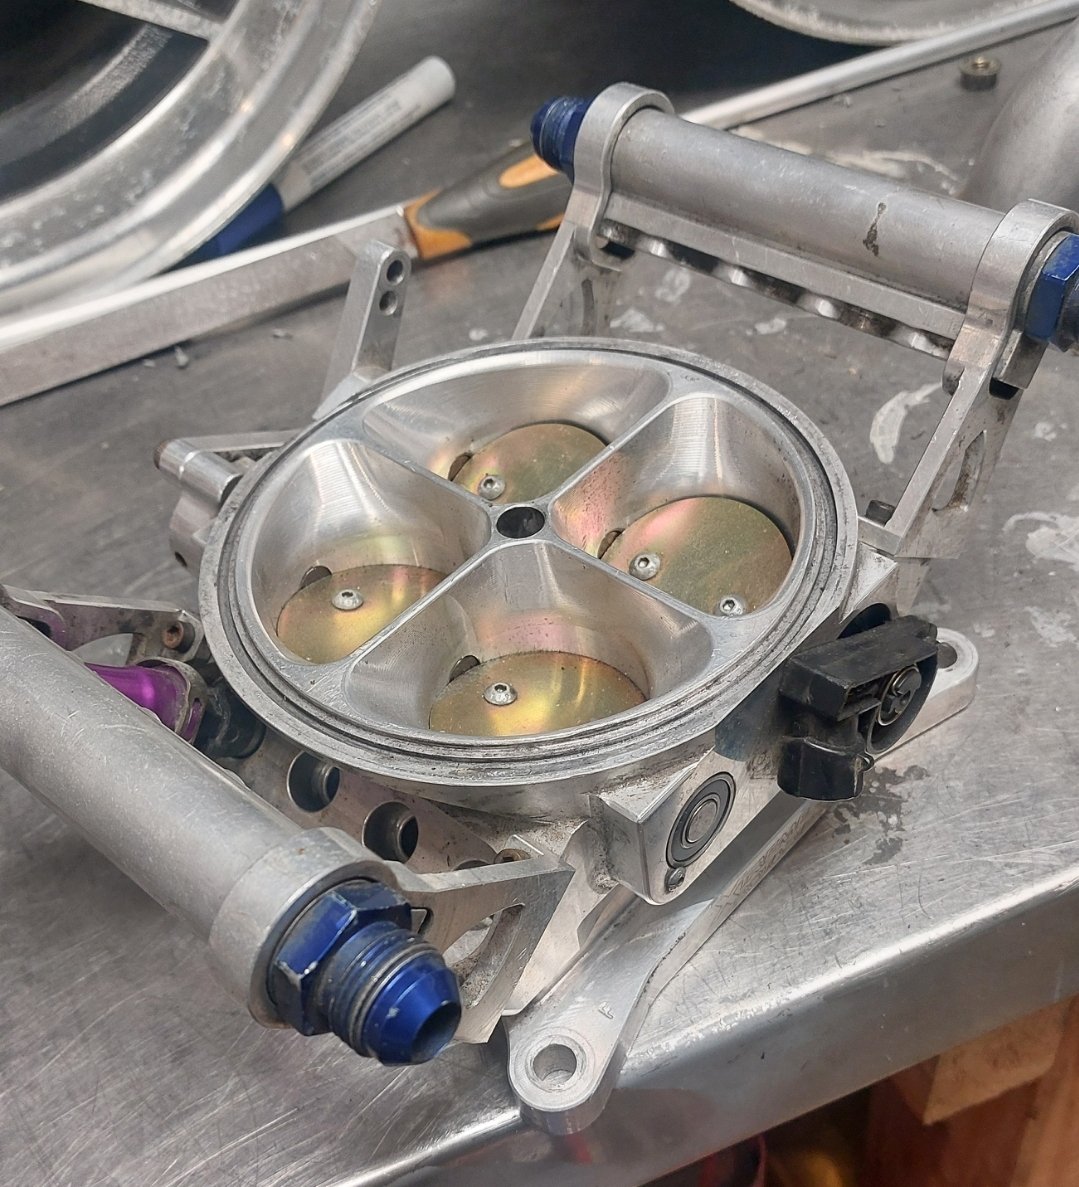
Sold the ROTECH BP, but before I whip it out, have dummy mounted the blower to check cut lines for the bonnet, so I can put a massive hole in it. 40 vs 30 tooth (1to 1) pulley, Unfortunately I'll have to run the under driven pulley to get it through cert which is only 7-8 psi. The small pulley will be double that, but intake temps will skyrocket, and I won't have enough money to get car legal as well as work on cooling. Water meth will be on the cards, as is maybe Water to air intercooler. I'll just focus on redesigning the intake, building a fresh new block, setting up EFI and a host of other items before I worry about decent power. Also that scoop won't pass, so I need to find a low profile solution for air filtration into the Xtreme rotaries 1200cfm 8 injector throttle body., I'll only need to run 4x 1000cc injectors for what I'm doing
2 points
-
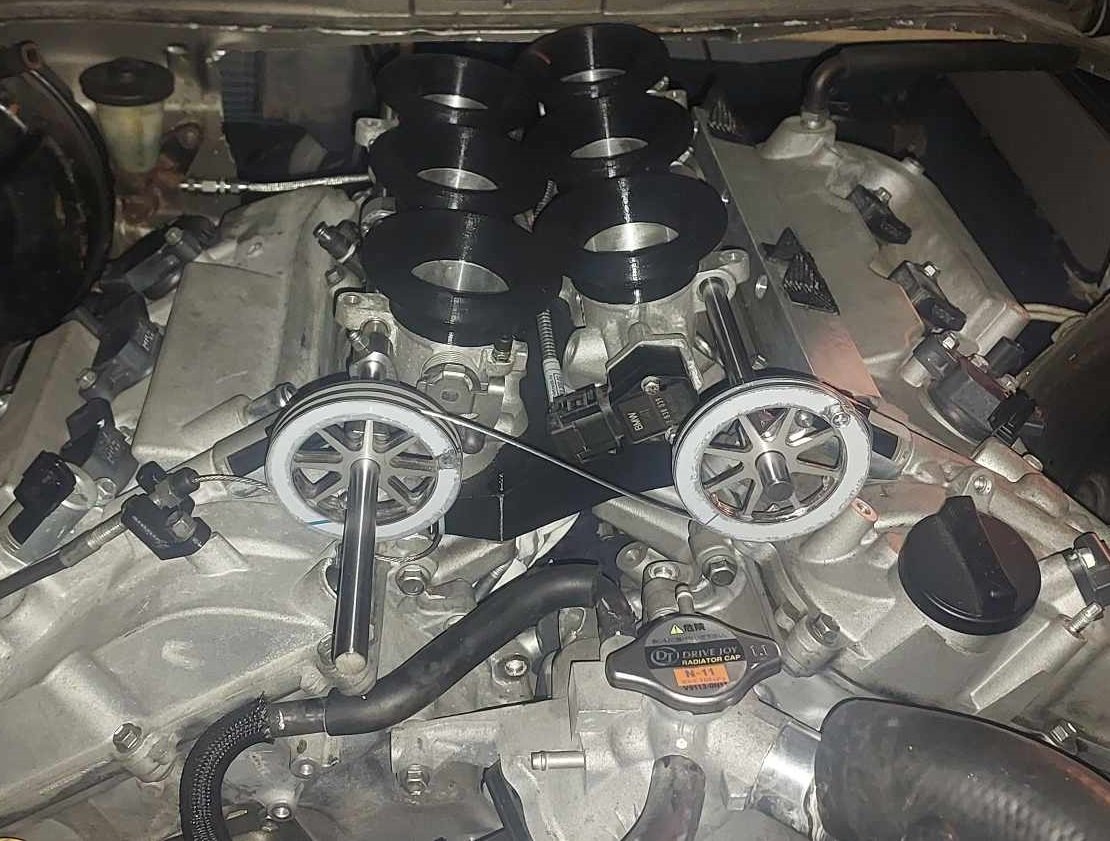
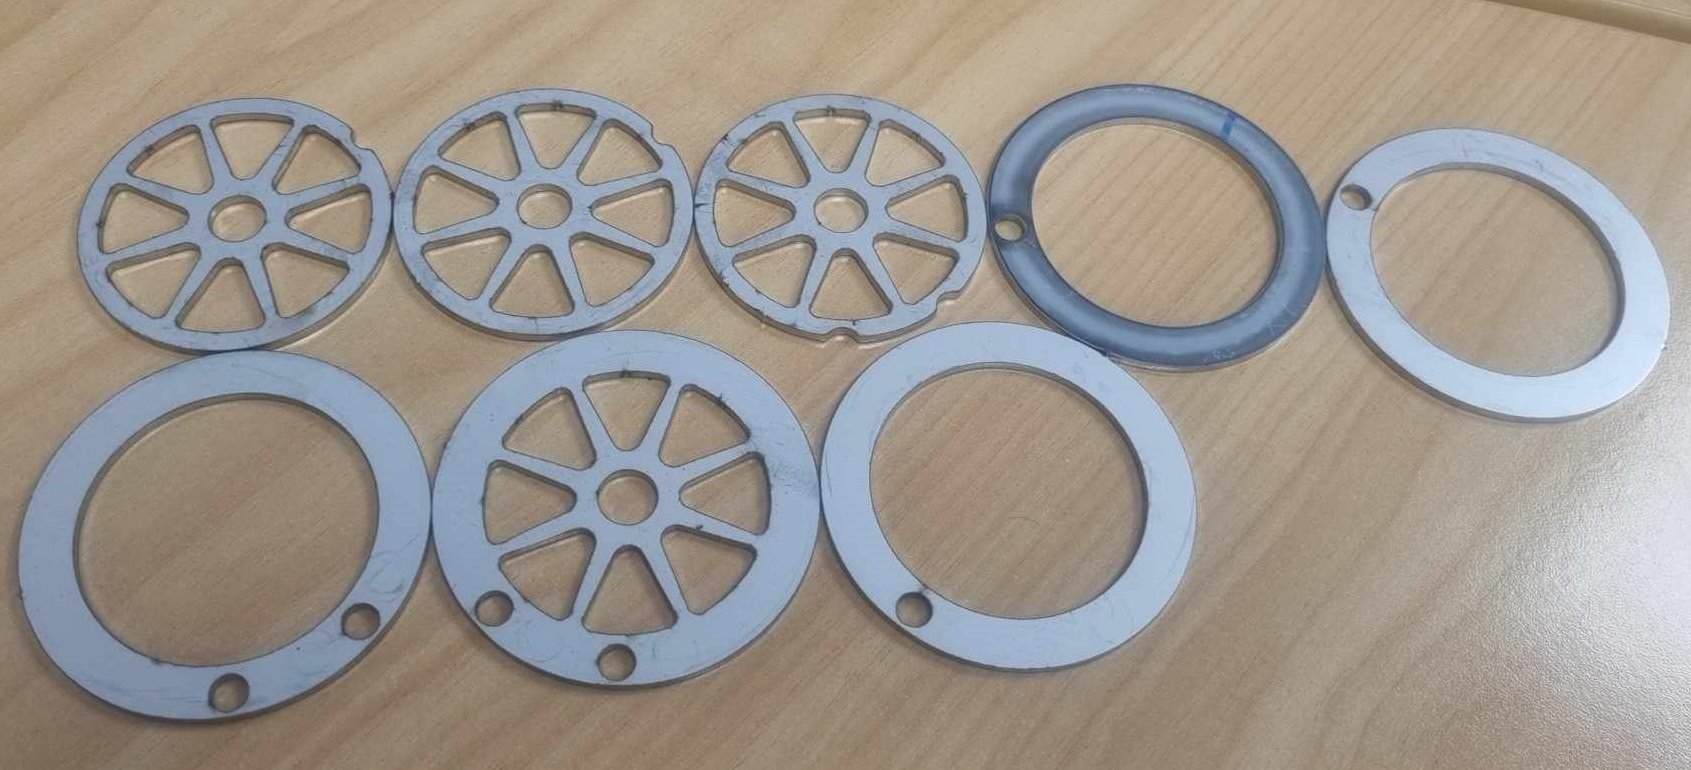
Alright so as of yesterday I'm finally out of mortgage prison! I finished moving house with heaps of time to spare, I definitely wasnt biffing trailer loads of stuff onto the lawn the night before settlement. I got some throttle pulleys cut from stainless. I'll put a radius on the inside of the pulley edges and deburr a few spots, but on the whole they came out really nicely. Quite heavy though, probably could have made some parts thinner. (Everything 2mm stainless) It's looking like it'll be fiddlier than expected to balance the cable length and pulley positions to get the banks even. One thing that I didnt take into account is that there is no tolerance for having a cable that is "overlength" as you physically cant slide the protruding end of the cable into the pulley. However I could probably chop out the relevant section of the pulley to allow this without any issues, as these are still significantly beefier than they need to be. I need to make some end stops of some sort to stop the throttle rails moving forward or backwards so everything stays aligned correctly. You may notice that in this photo I've got the linking cable on the wrong way up. It looks dumb having these on the front of the motor, but down the back is getting very crowded and I've got ants in my pants to get this damn thing fired up. I got the throttle rails drilled, took about 3 hours to drill 6 holes! We had to grind flats onto the rod to get through the hardening. Otherwise carbide bits didnt even make a dent. Next jobs are to print a final iteration of the manifold from Nylon, get fuel lines connected up, and keep working on the exhaust. Then I'm preeeeety close to firing it up!
2 points
-
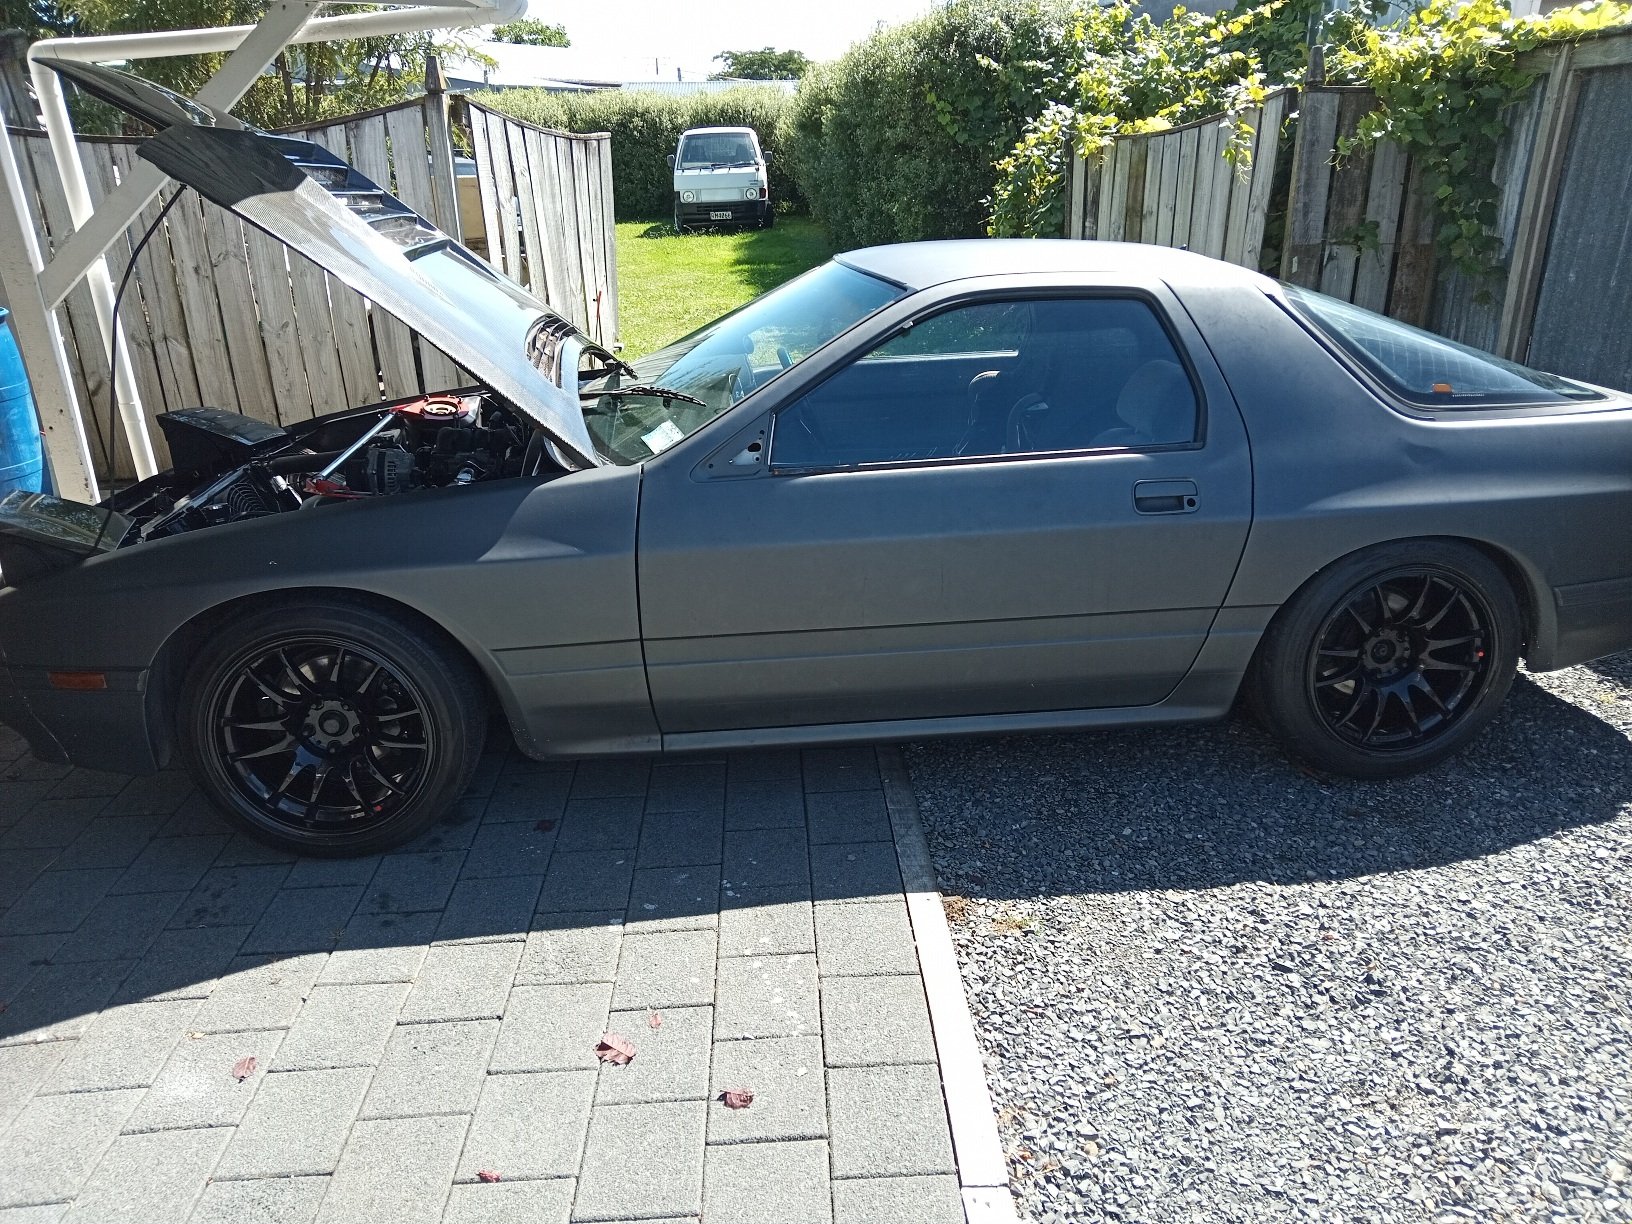
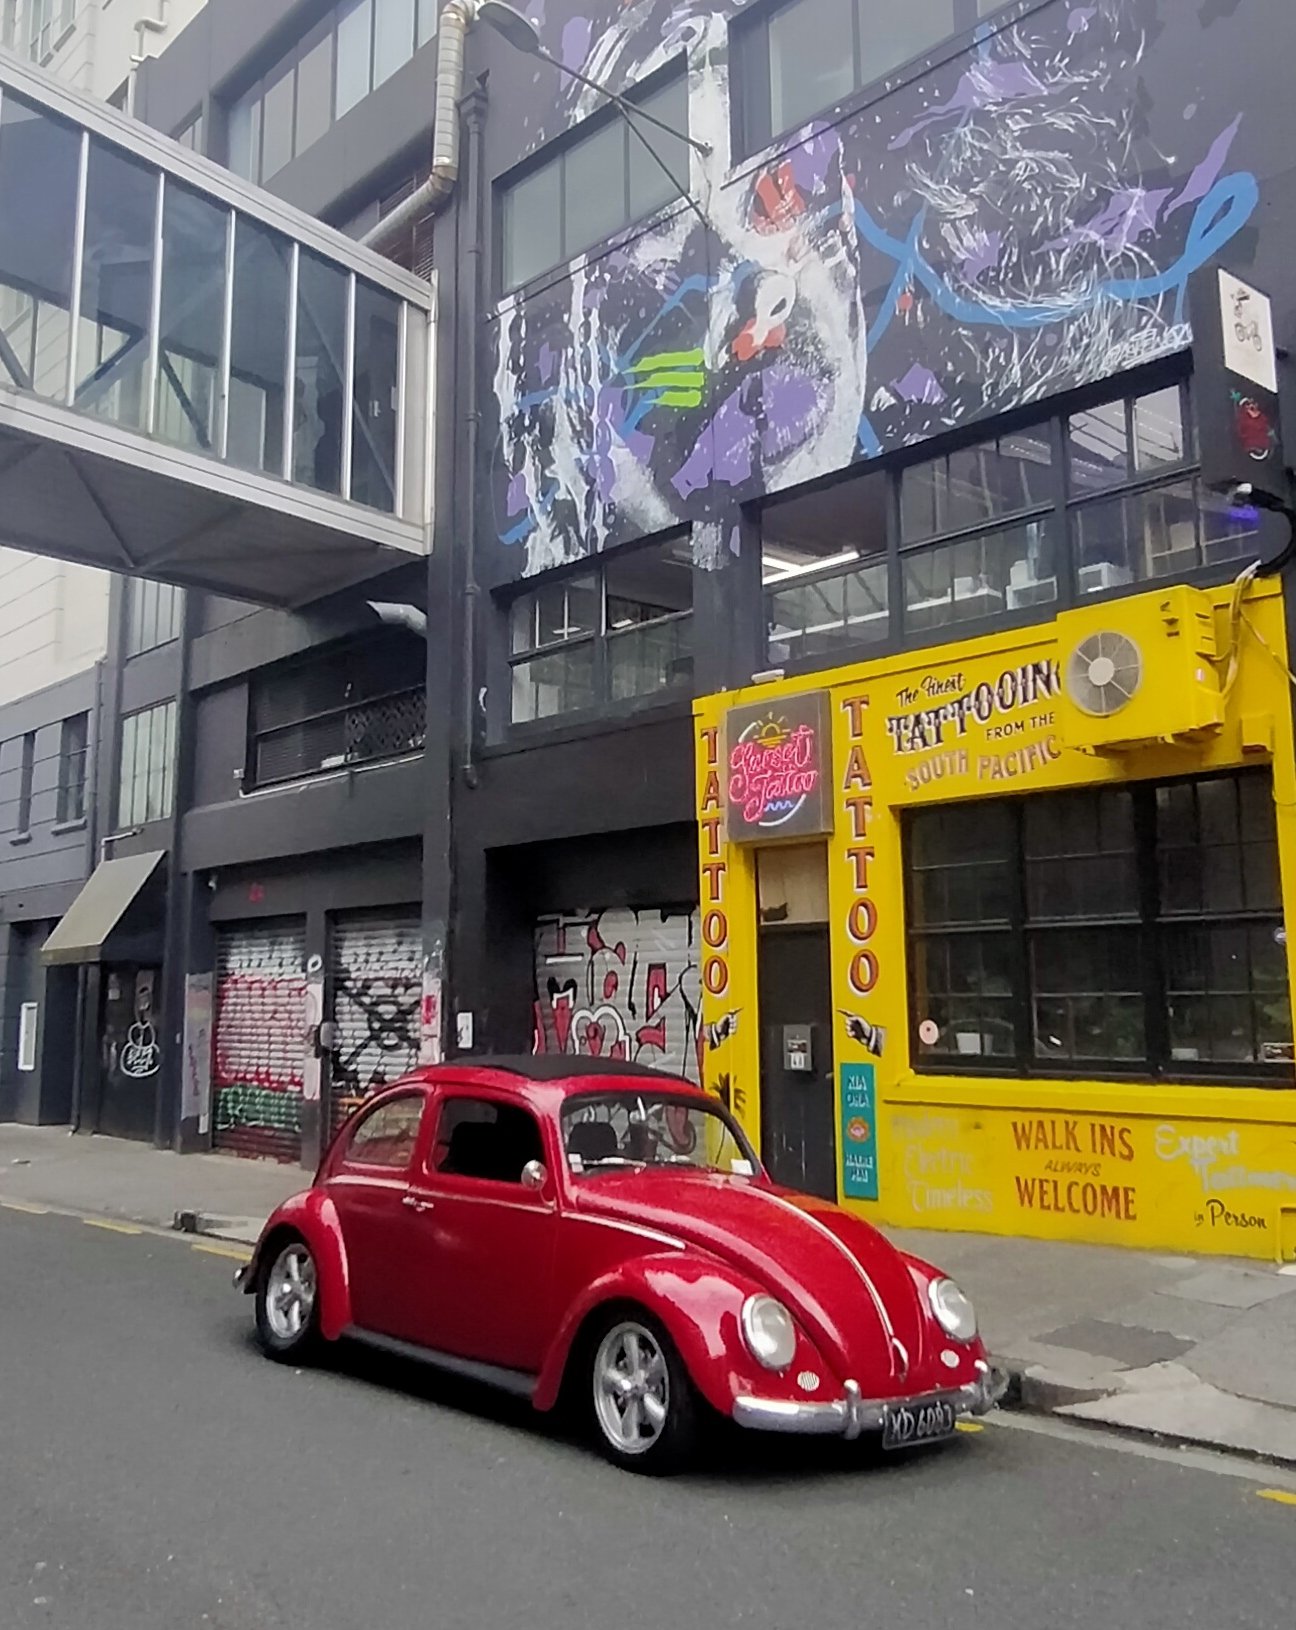
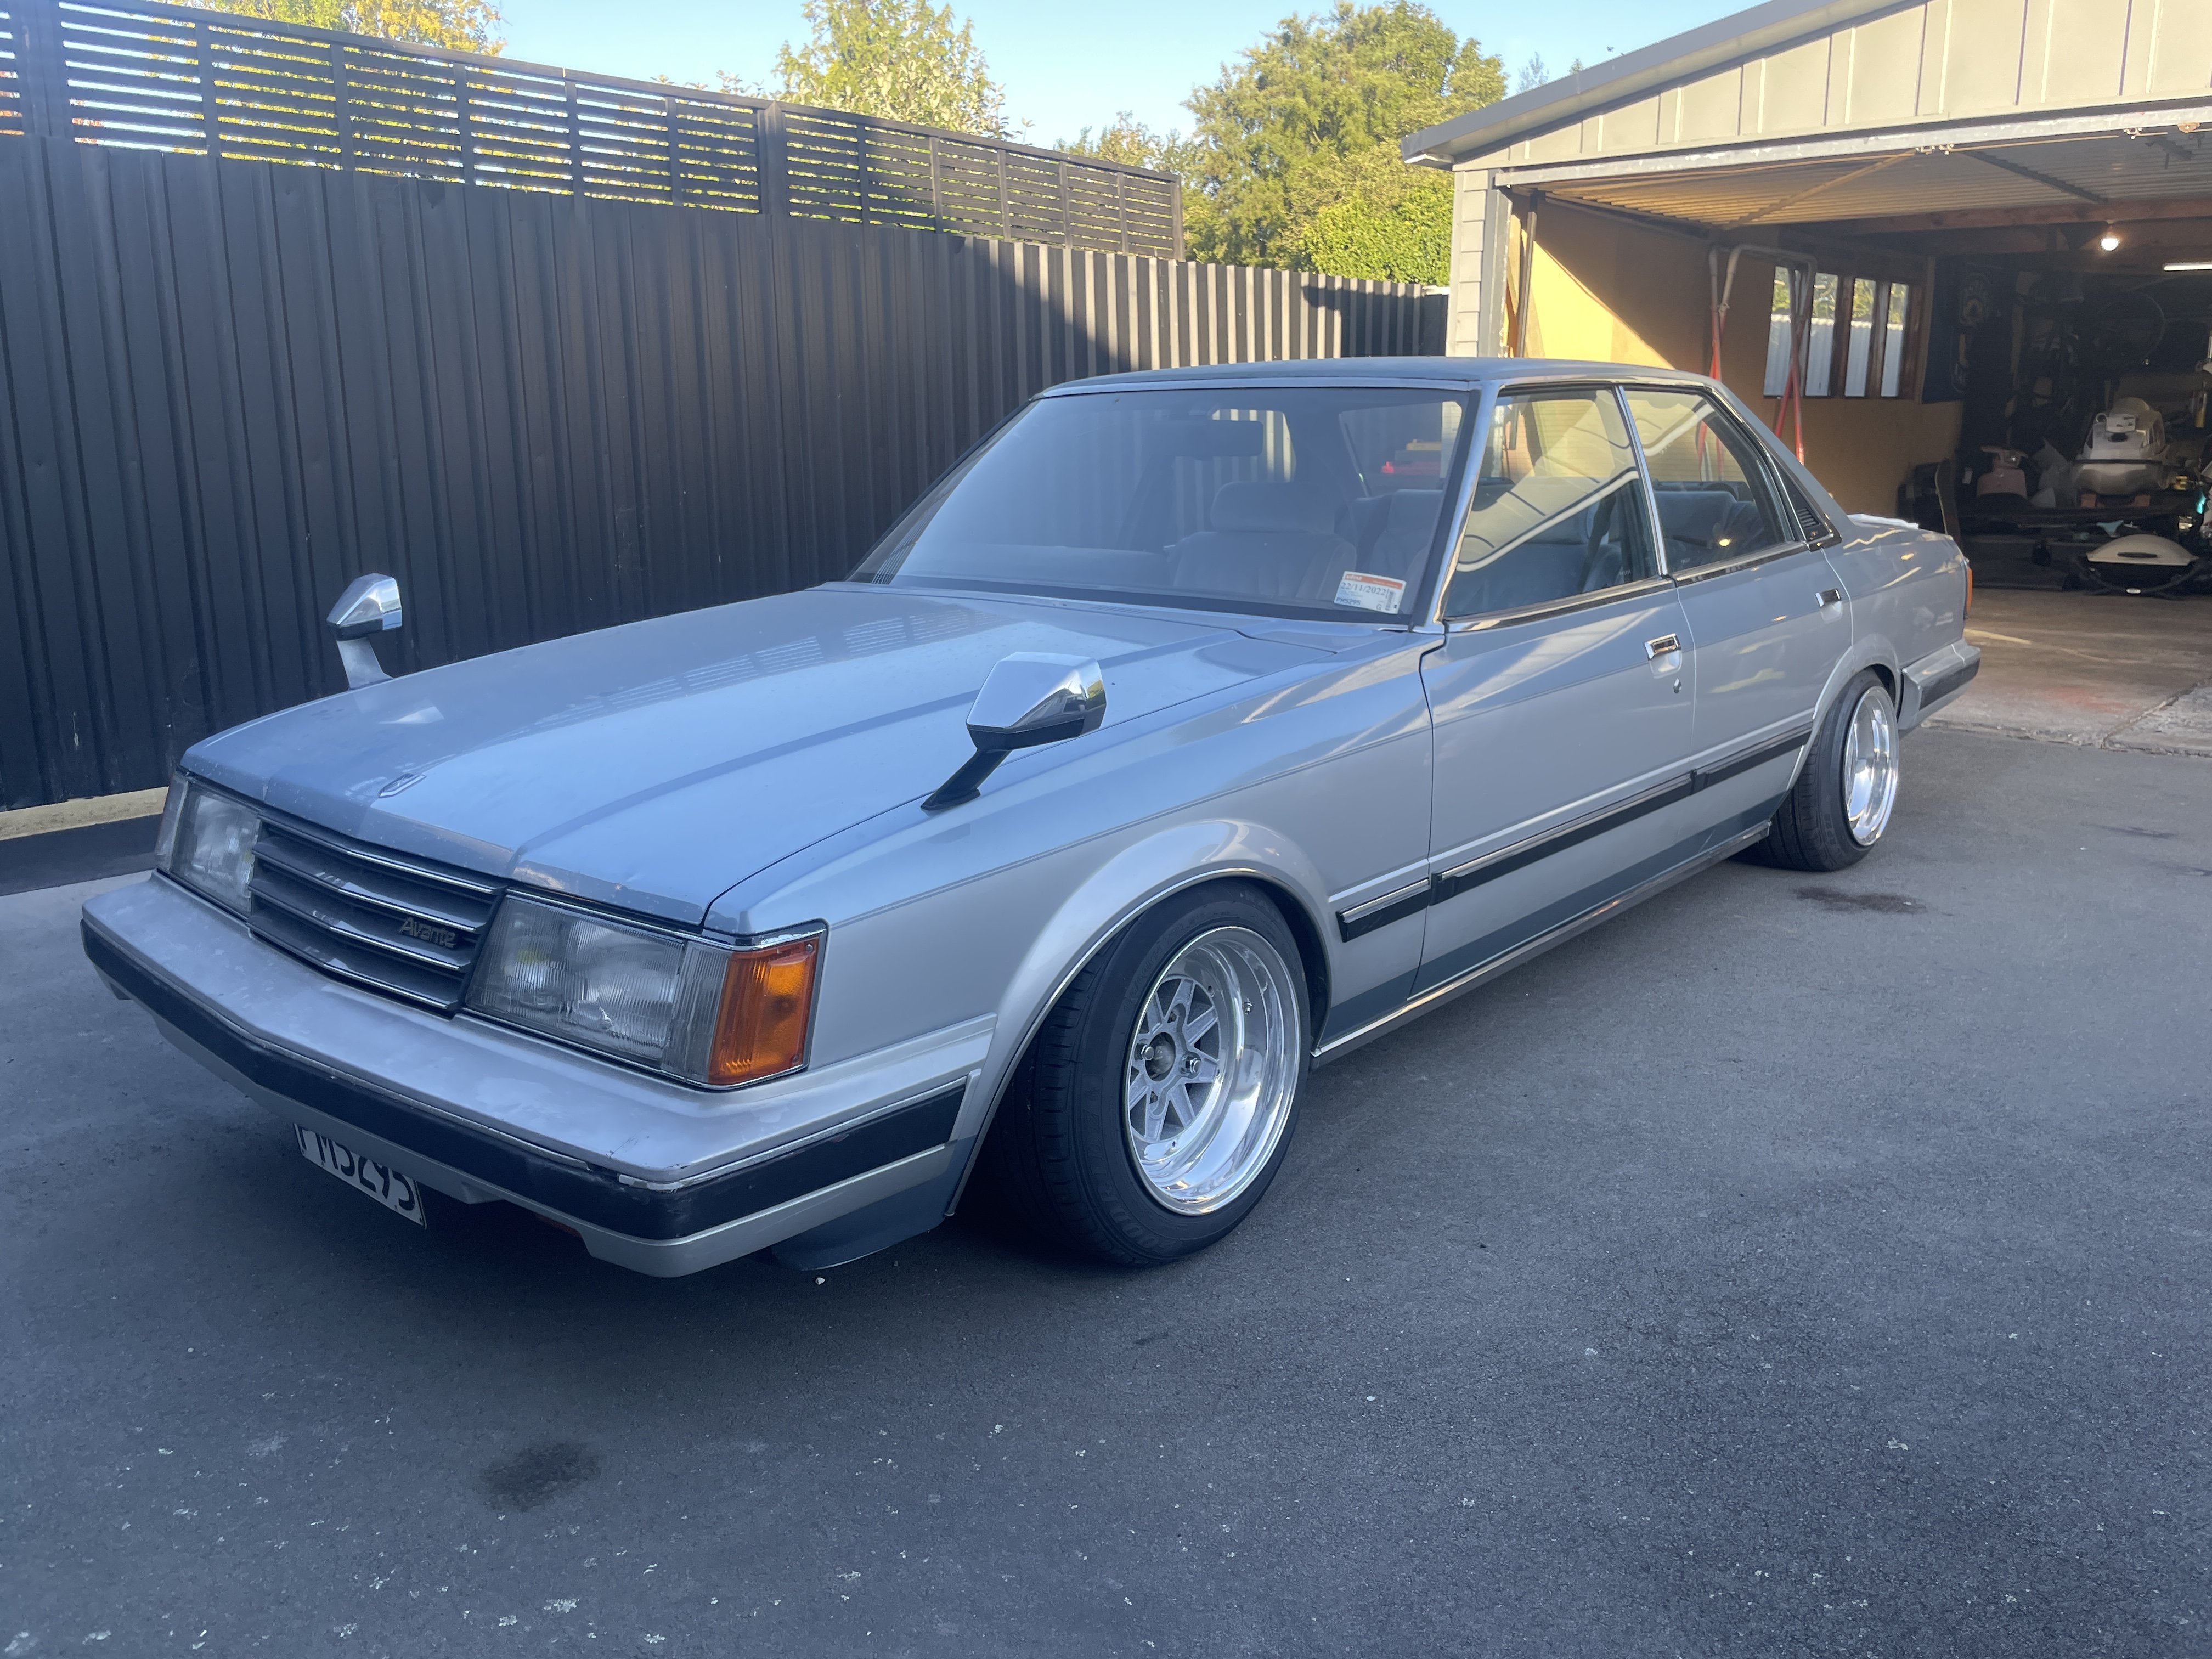
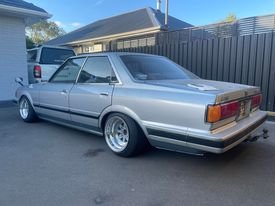
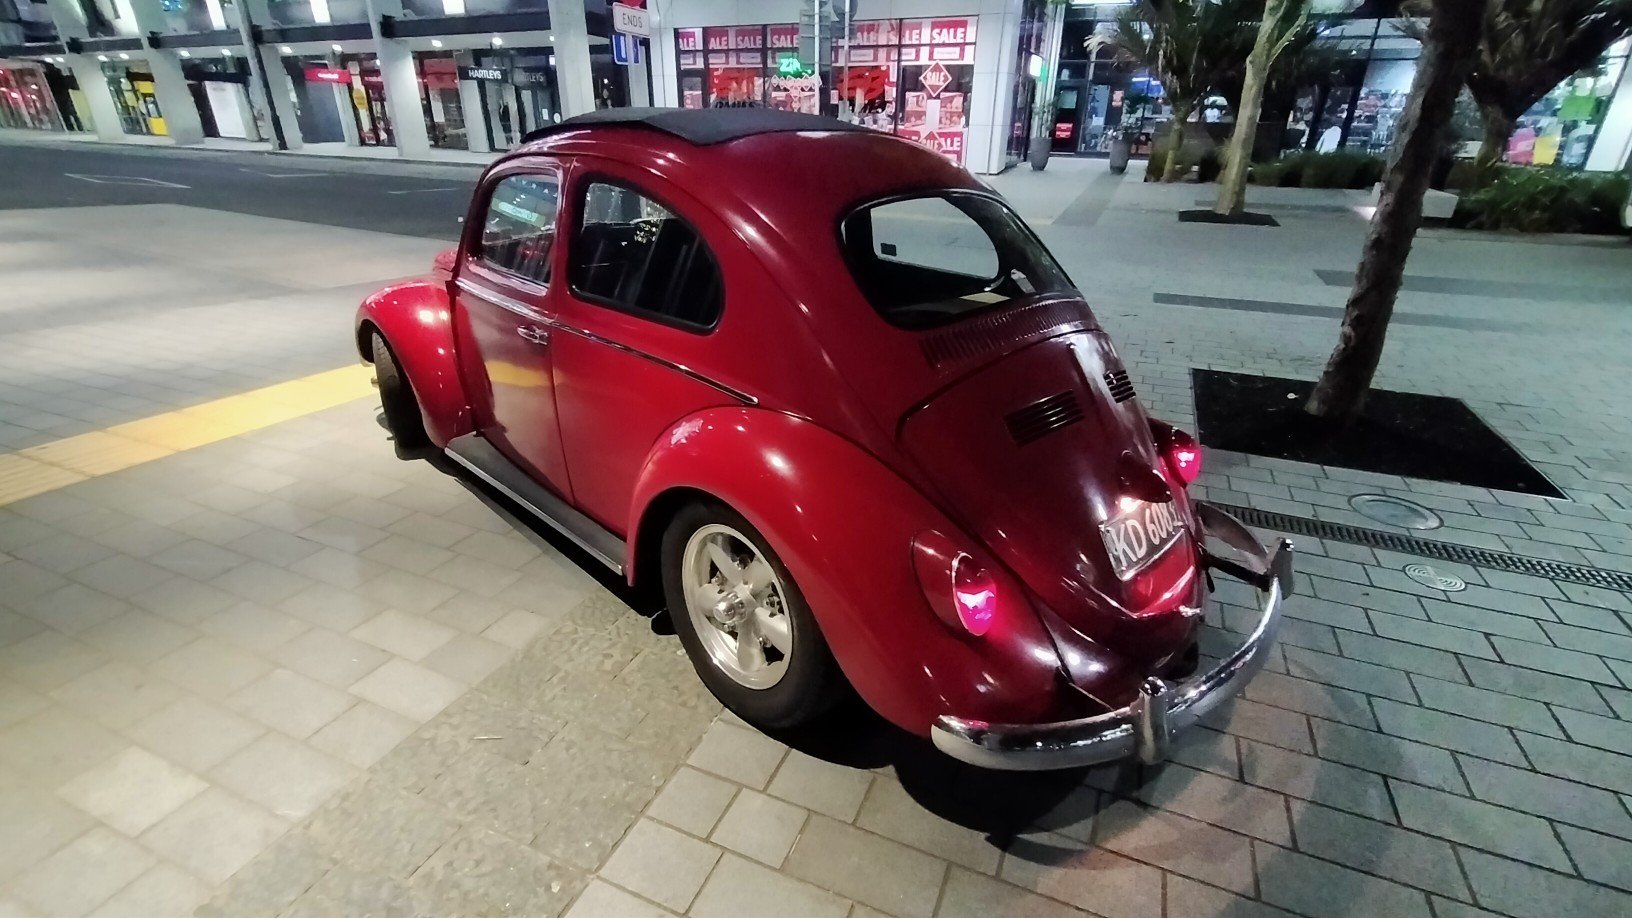
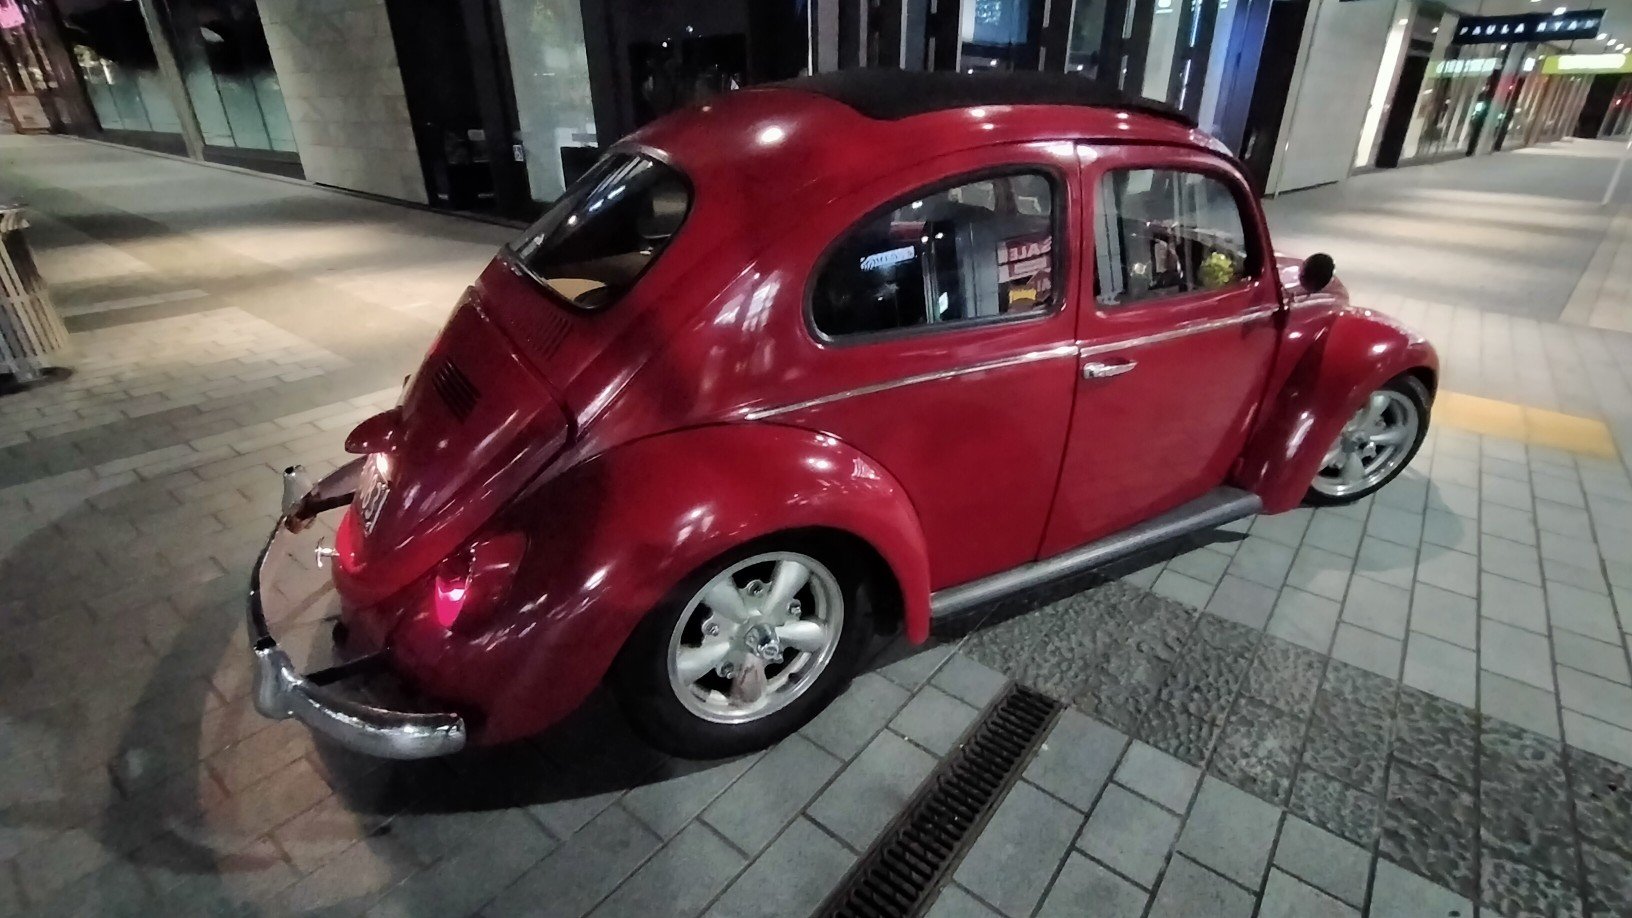
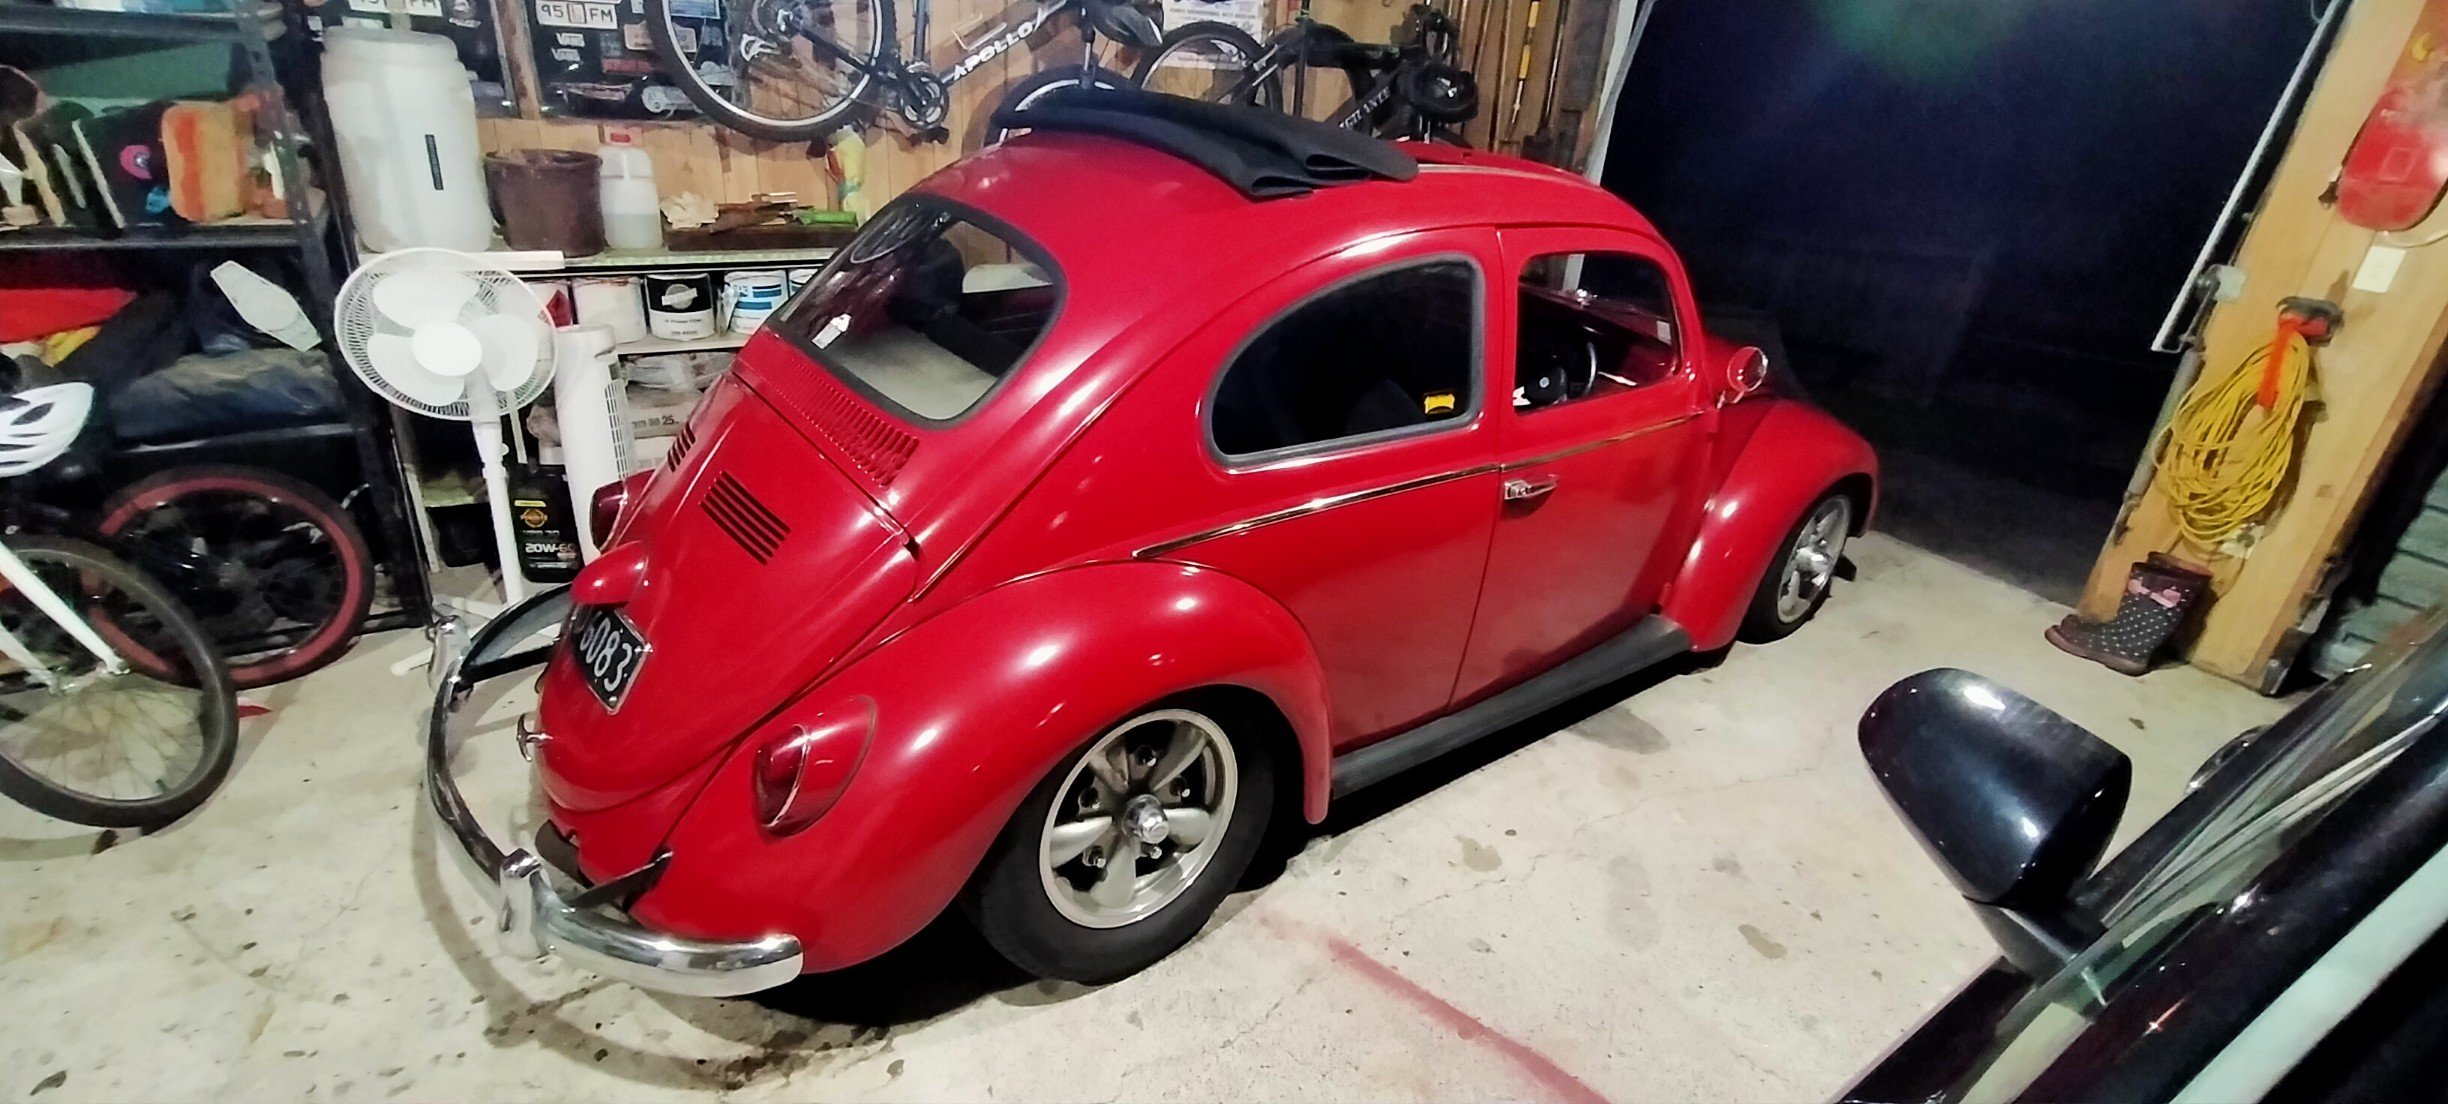
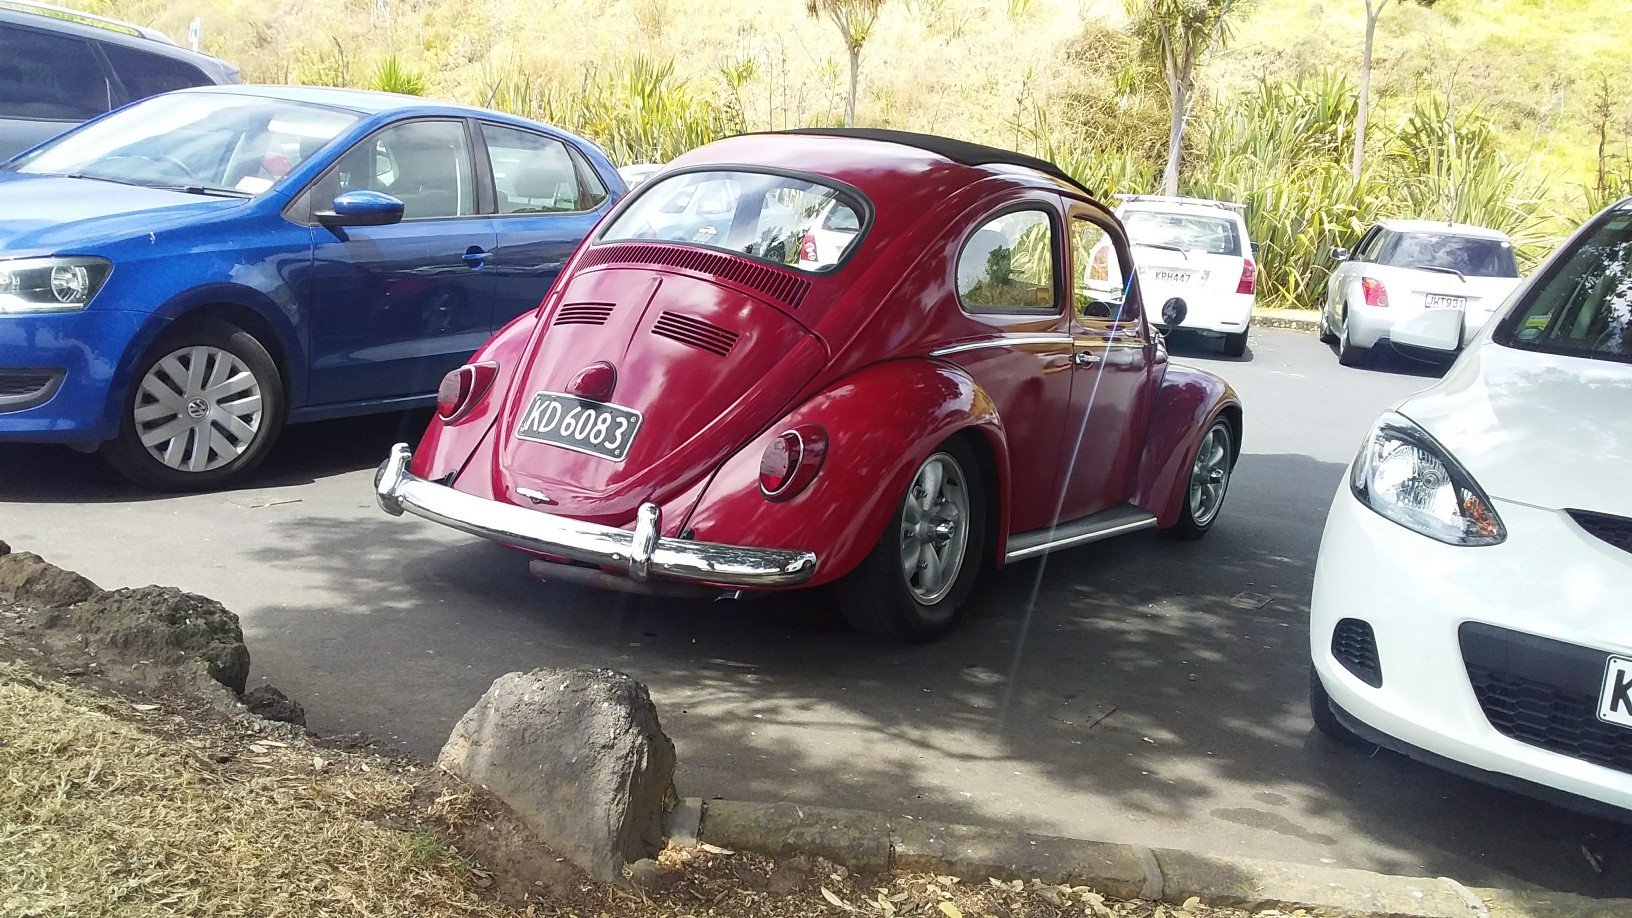
This thread needs a decent pic of the car right? Really want to go get some sunrise/sunset pics, but that will need to wait til daylight savings pulls the sun back to more gentlemanly times, for now, a not so potato pic
2 points
-
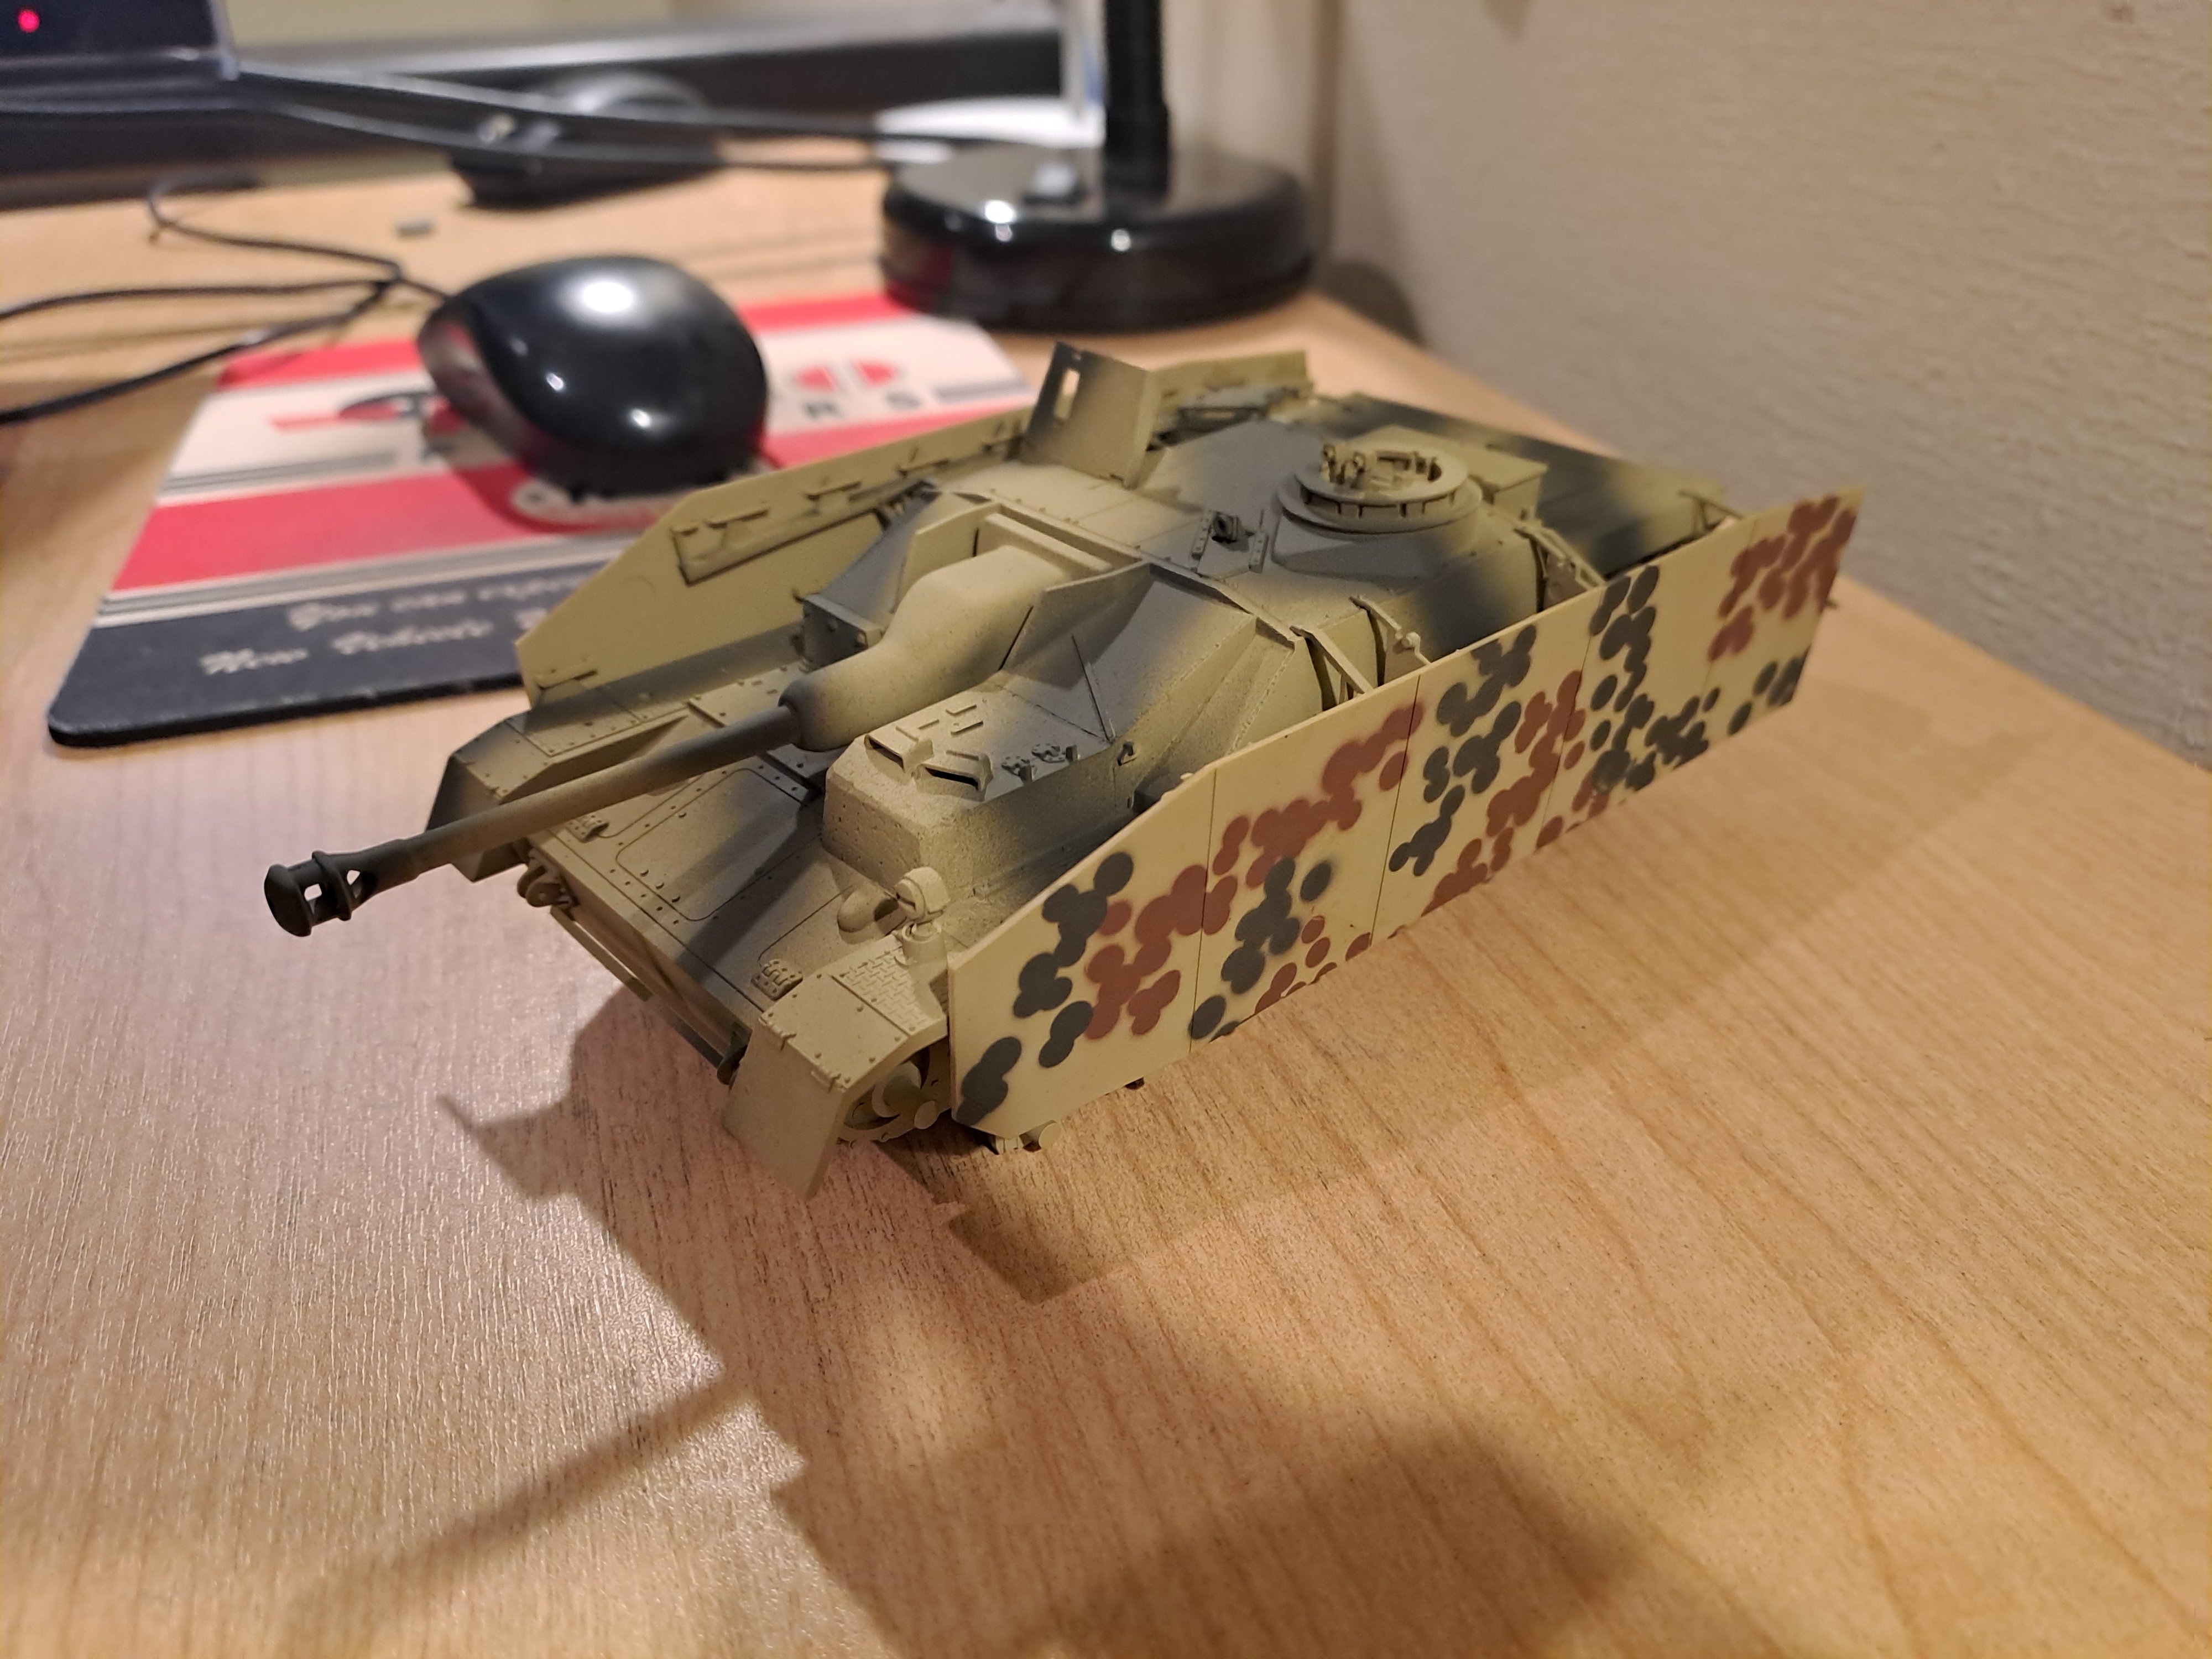
Update on the stug
1 point
-
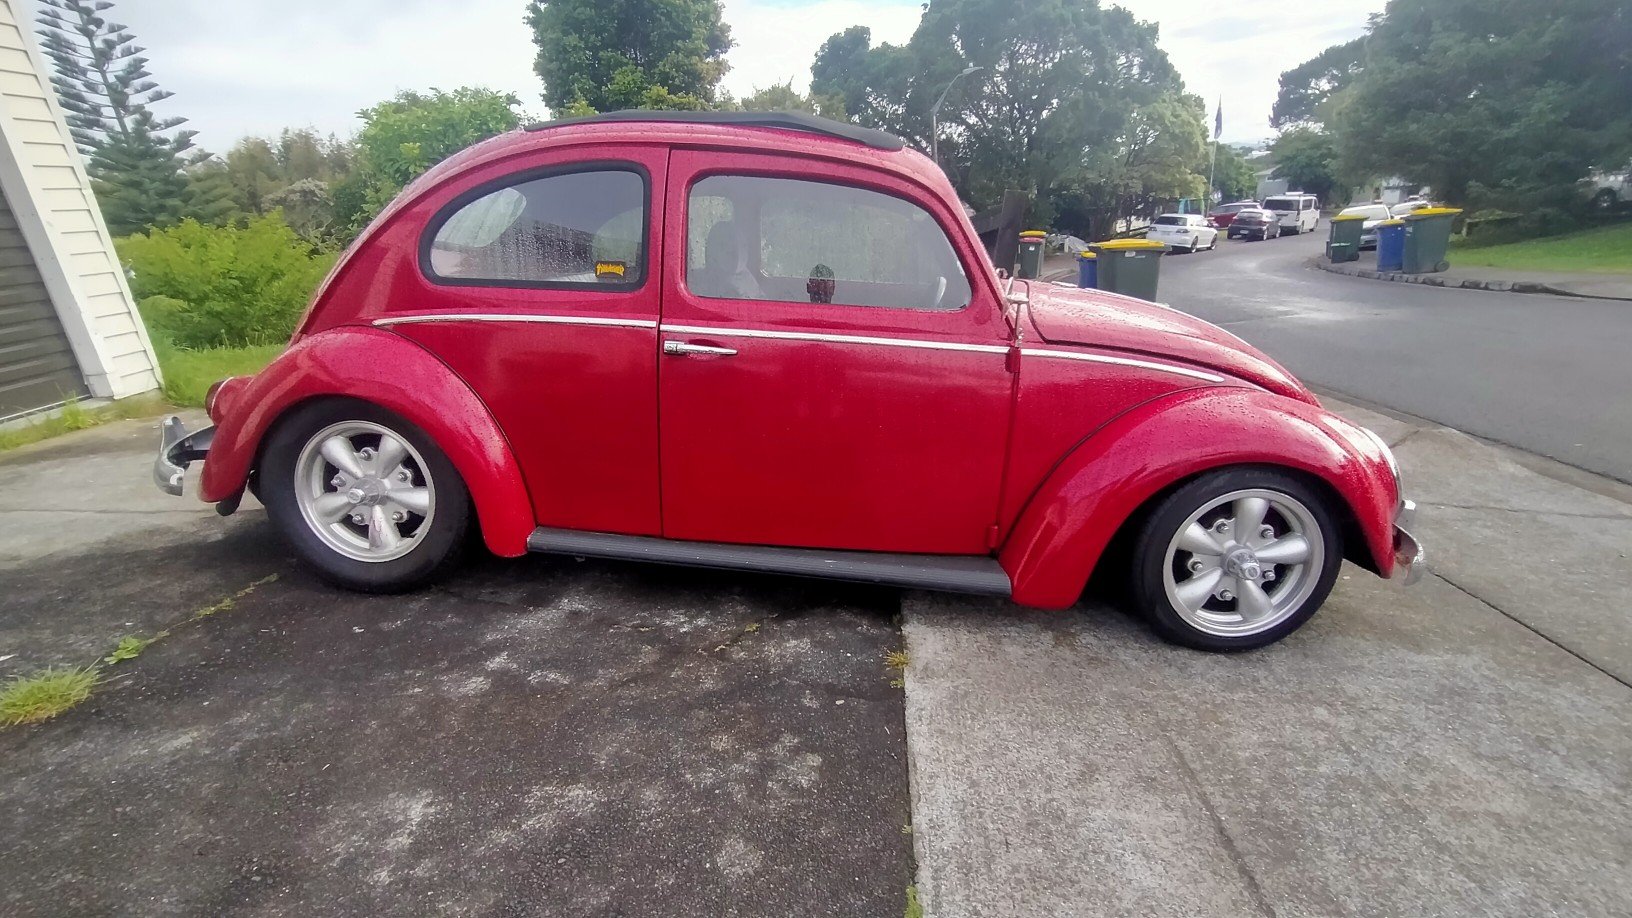
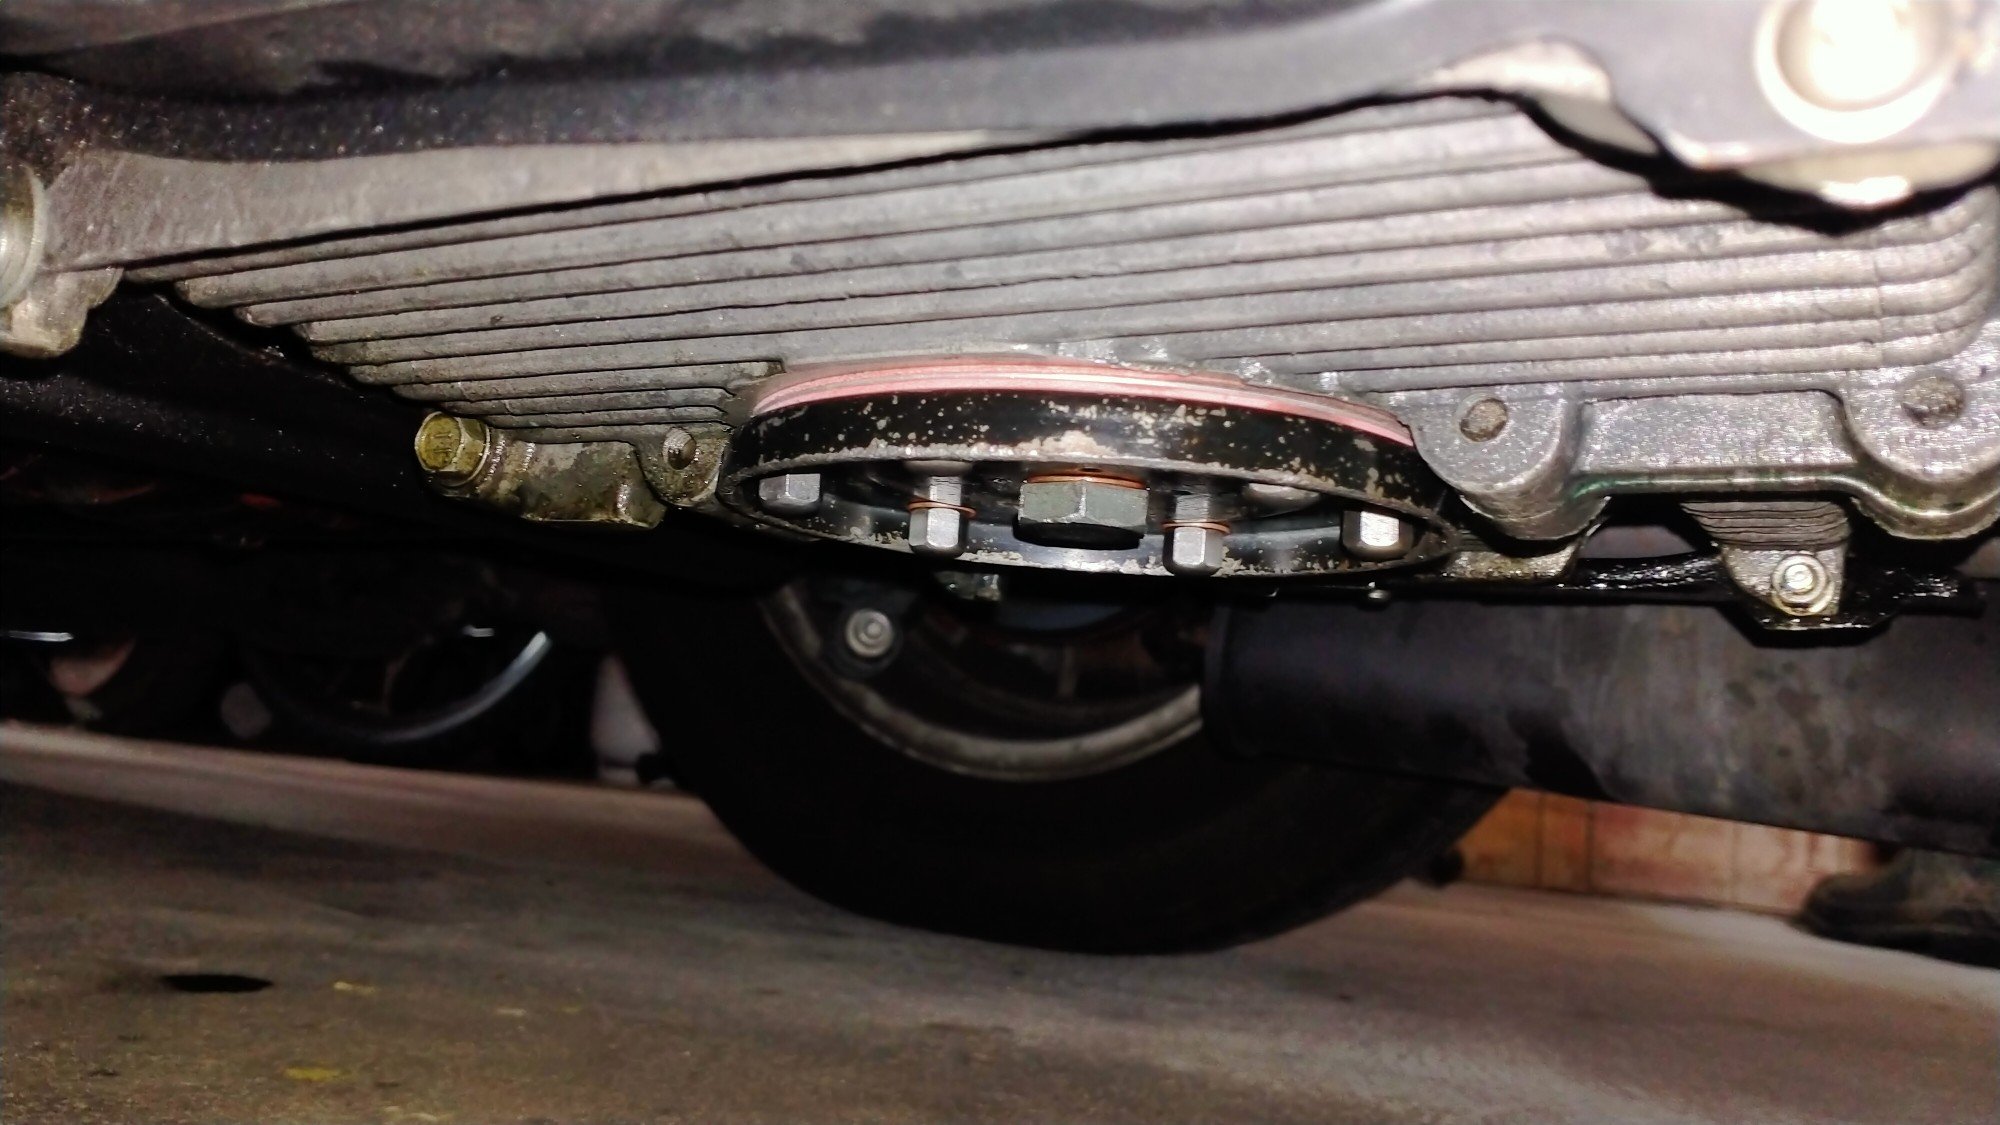
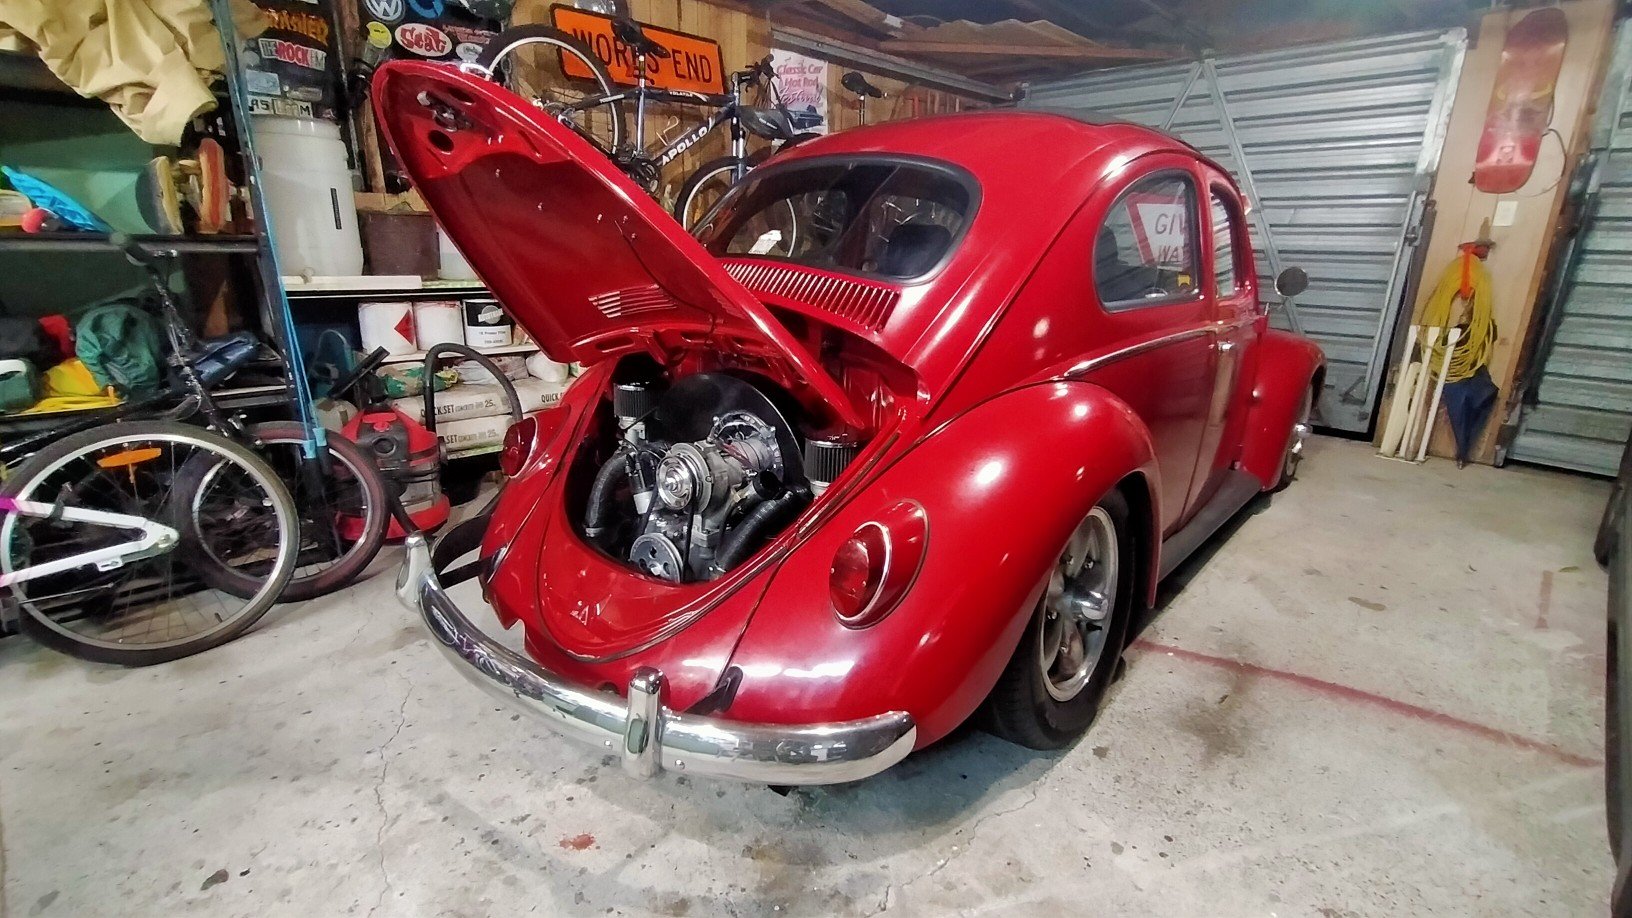
Always looks better after a wash. And from my favourite angle. Finally got around to changing the oil, really should have been done sooner, there was so much crap in the sump, all that lifter paste. VW's don't really have a sump, or a filter, just a sump plate with a tea strainer around the pick up. Ignore the big square sump in the picture, that's aftermarket and my car is probably to low for such things All was going well until I went to reinstall the tea strainer plate arrangement. The gaskets in the oil change kit have recently gotten at least three times thicker, so now the six little studs are getting very short. Only had just enough engagement, one but had to go sans crush washer. Have continued tuning the carbs, @sluggy suggested cranking the accelerator pumps, so I've been doing a little at a time, everytime it's gets a little better and nicer to drive, idle is very low but very smooth and doesn't stall, just seems weird not having it shake the car at the lights. Mrs even commented on it.
1 point
-
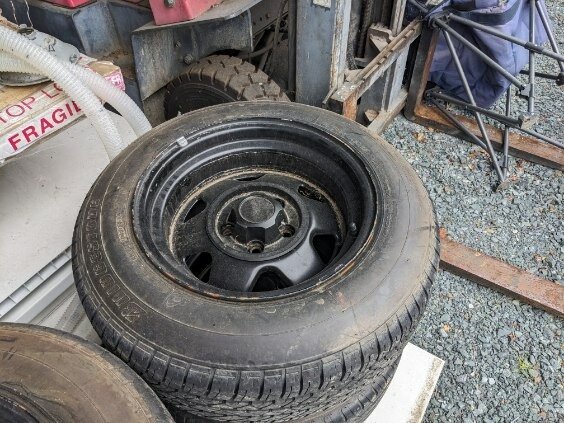
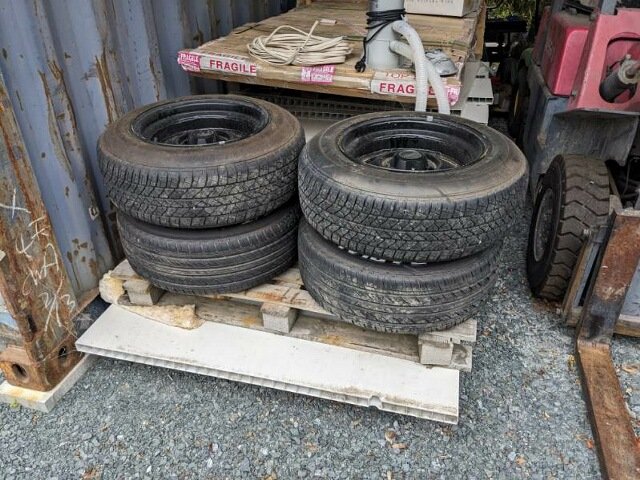
Back home in Porirua. I picked up another set of wheels that are looking pretty schmick. Recaro seats are also in after drilling one hole in each of the factory Toyota runners. Exhaust fell off on the way to Shannon but easily fixed with tie wire.
1 point
-
Damn I am pissed off. My new clutch cable went tight after about 20kms so only used it to stop and take off then checked it at the lunch stop and was going to take it off but found that when I pulled the cable to get it out of the handle the inner protection pulled out the end, no more clutch so made the call to return to Farlie and go home at least I got to enjoy 1 part of the ride. Have Fun.
1 point
-
1 point
-
Say Aaaaaah
1 point
-
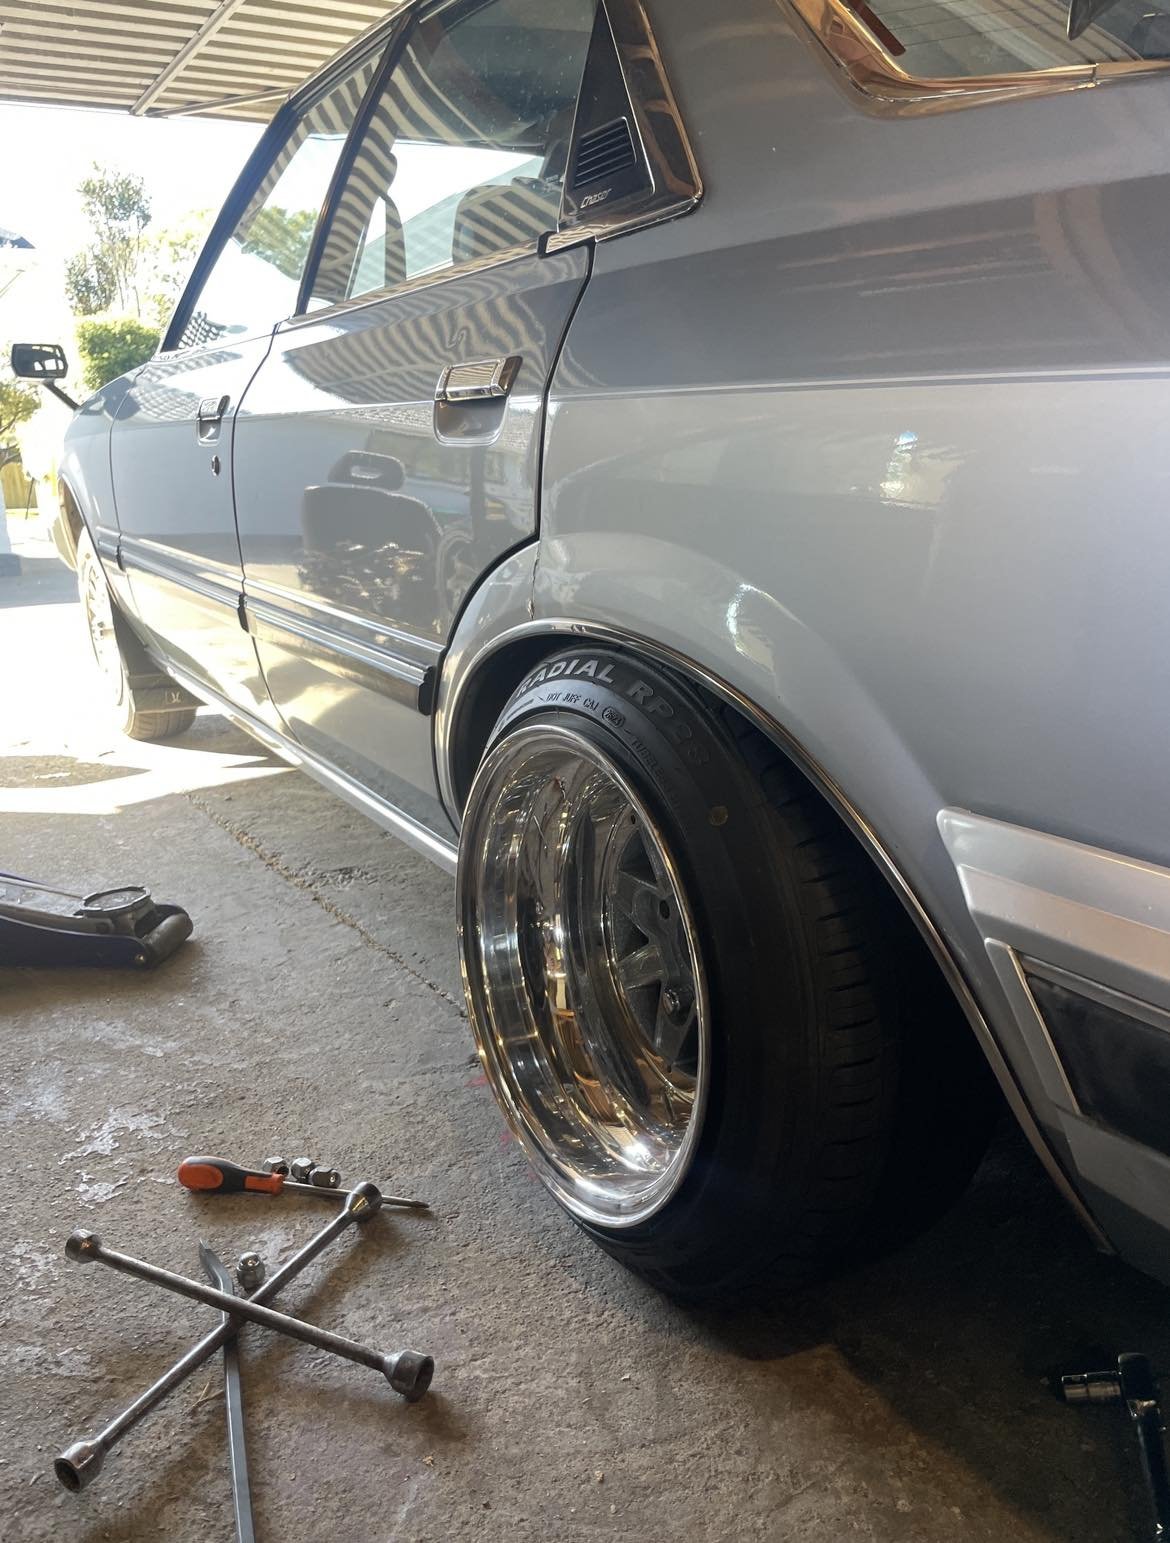
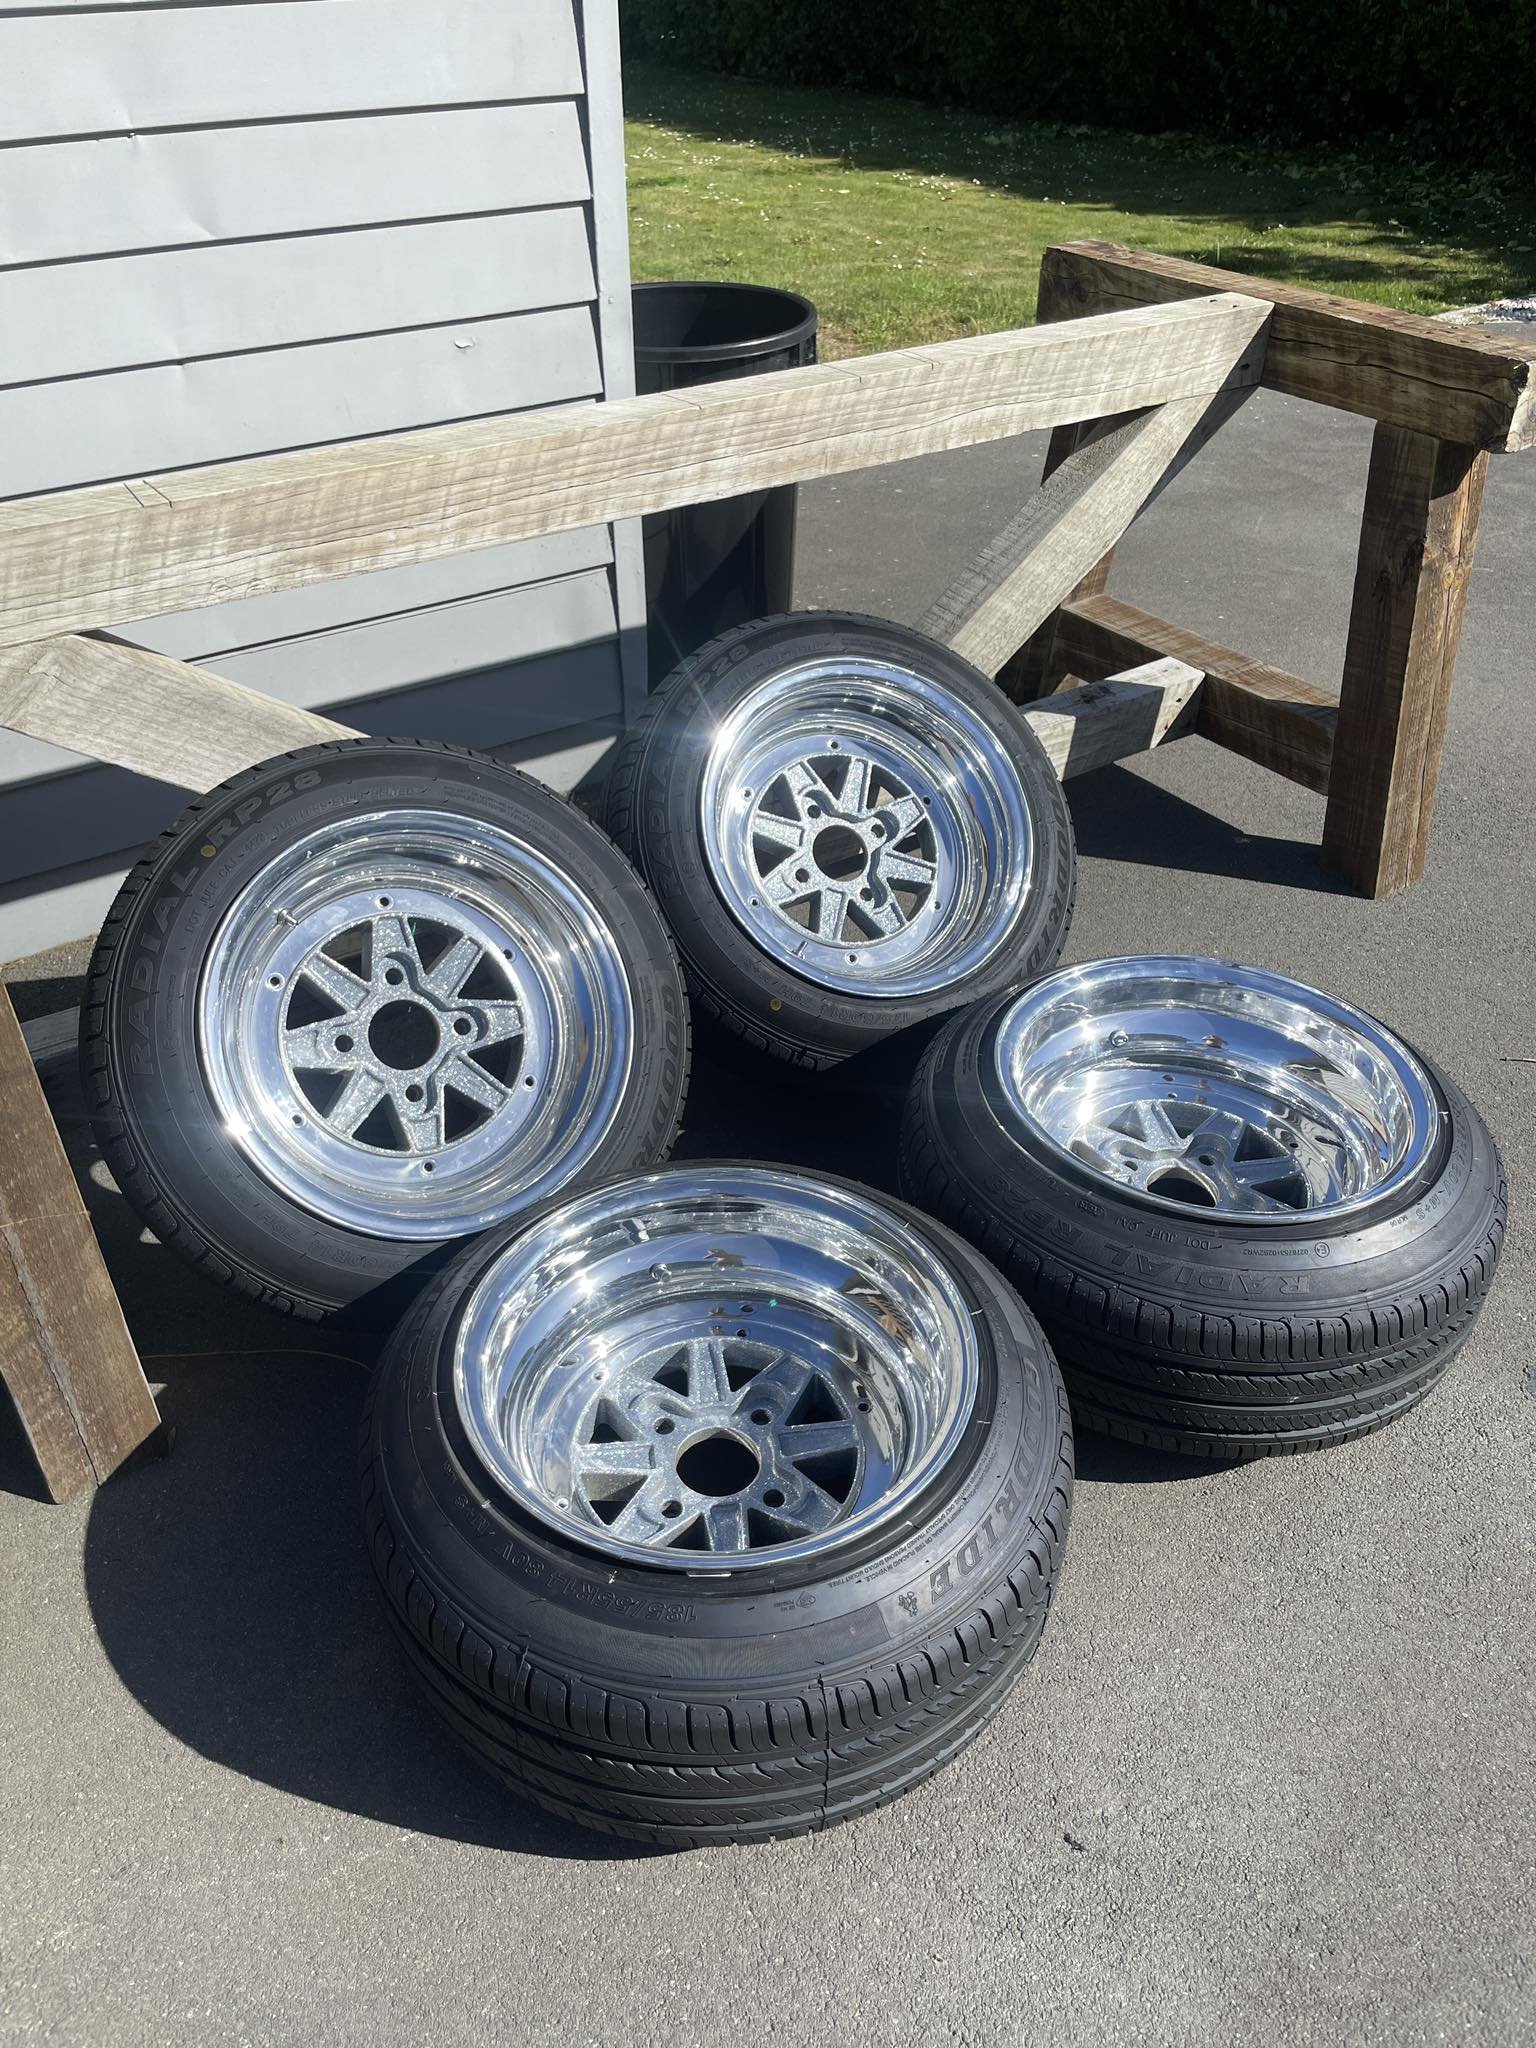
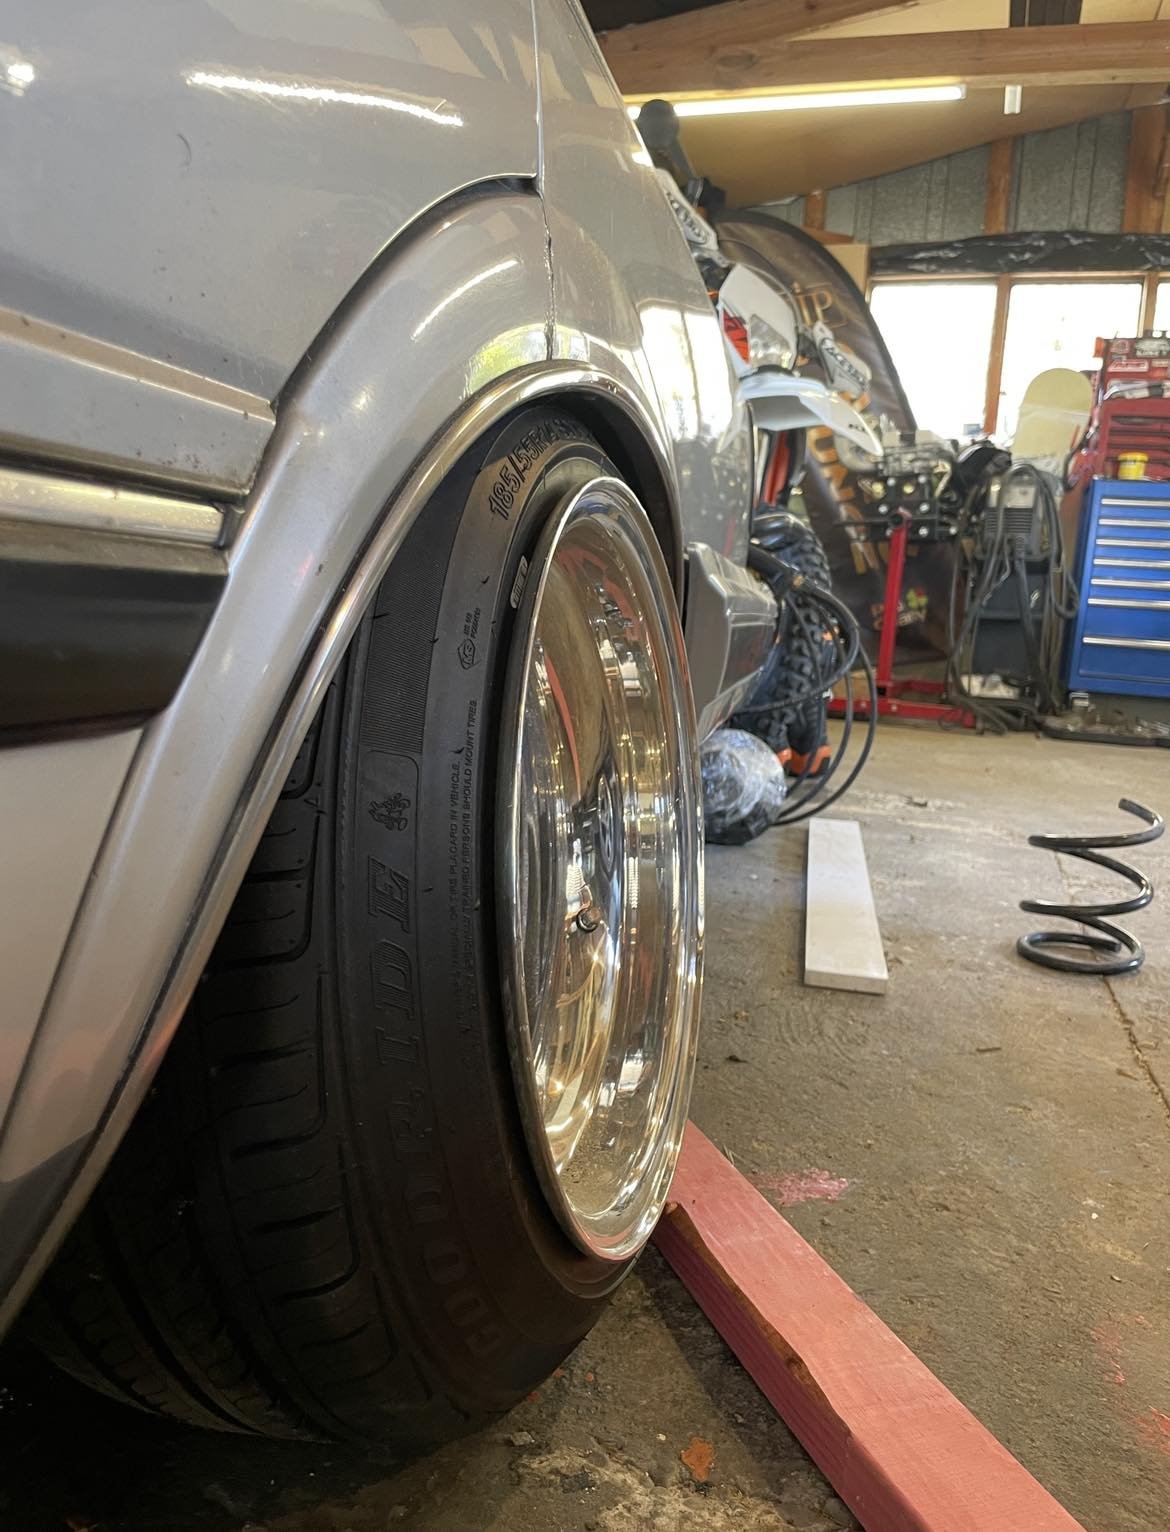
So I’ve been in a battle with these back wheels, 14x9.5 -33 doesn’t fit well in stock rear guards as I wanted and I still had no luck trying to find factory 9j A type mk3. I got these polished up and painted them in a krylon glitter blast paint which was a pain in the ass to spray. after much deliberation I decided to stick with the ones I have, I then decided I should try and narrow the subframe to fit, I friend mentioned another old Toyotas axles weee slightly shorter and could work, so i set about jigging up the subframe and moving the trailing arm mounts in 12mm or so. Before After Both images on an unrolled stock guard which worked great. while I was there I decided I might aswell raise the diff and make a bit of an exhaust tunnel. I’m terrible at taking photos as I do stuff so here’s the finished result, only needed to fold the lip up of the guard and it fits great. needing to drop a tire size in the front to 165/60 and get it lower all round but it’s starting to get there. I also got a custom made Jeff emporium steering wheel which turned out great and he also refurbished the trd gearknob that came on the car too. still need to clean to OEM floor mats and get them back in the car to tidy up the interior
1 point
-
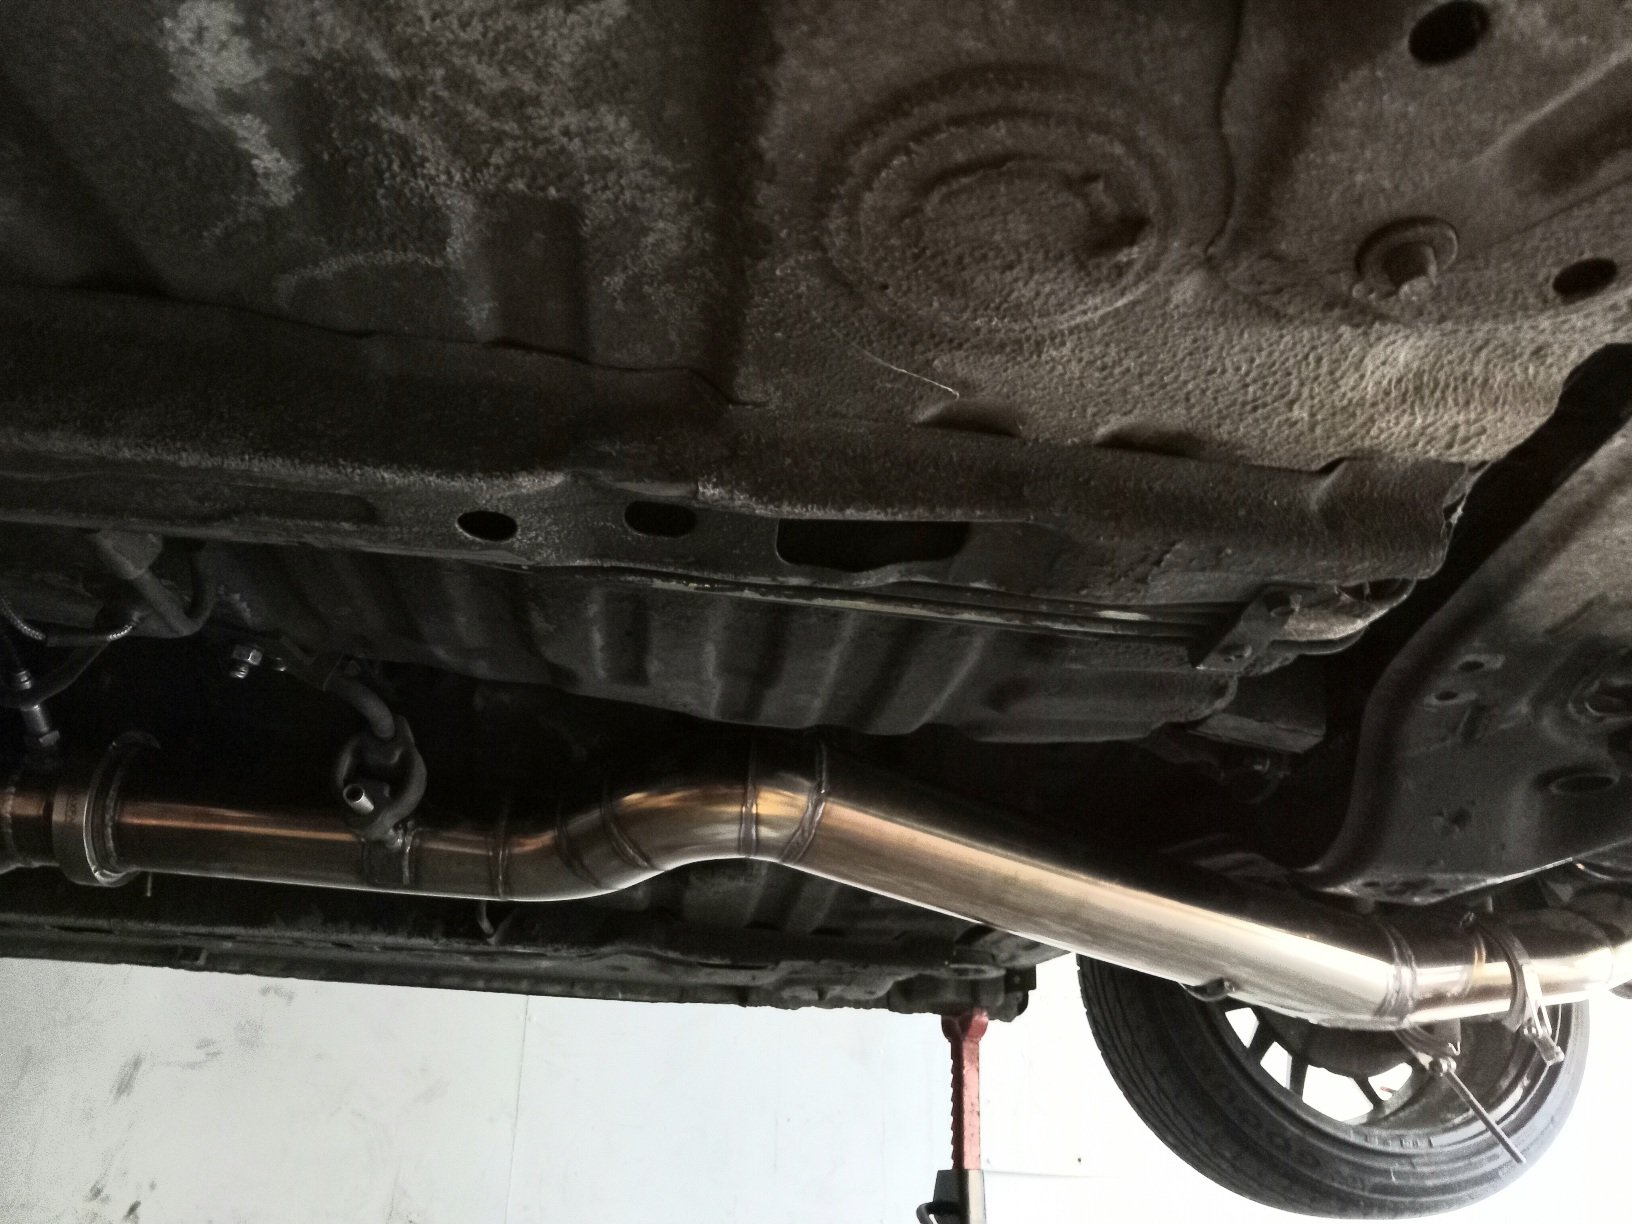
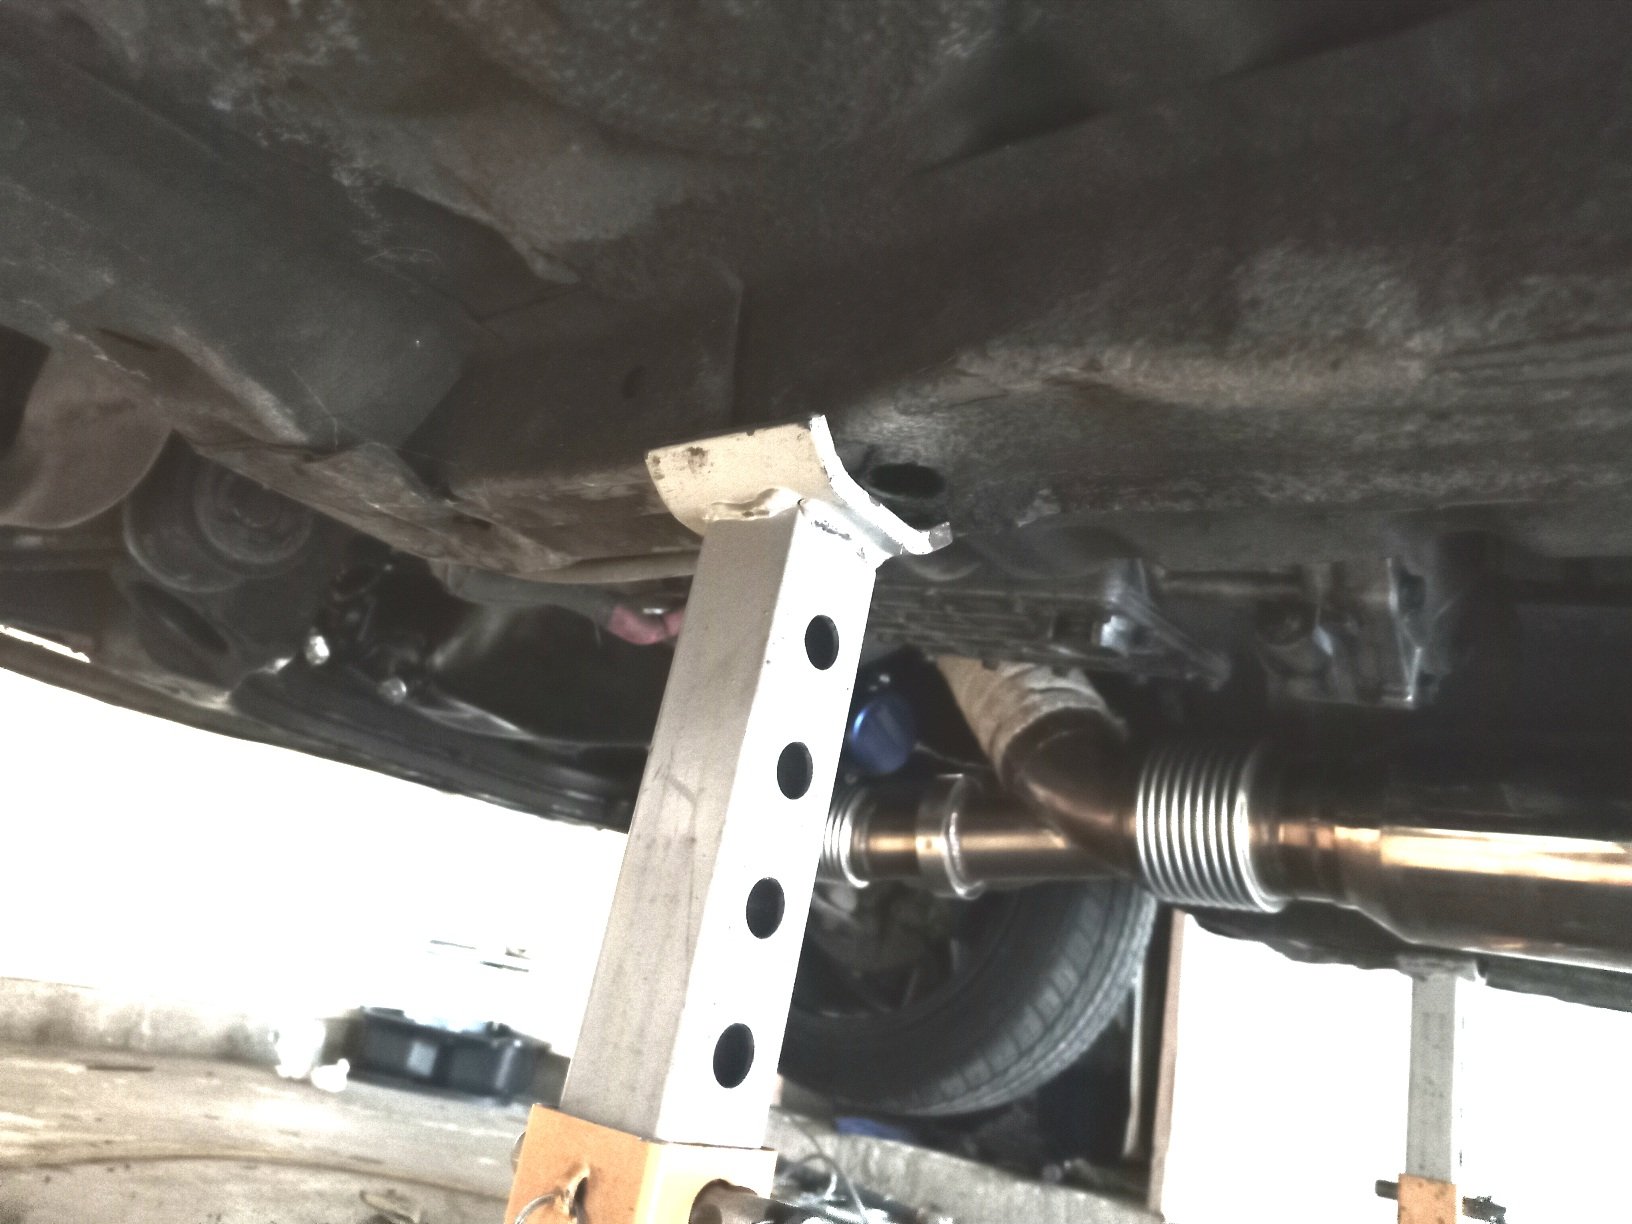
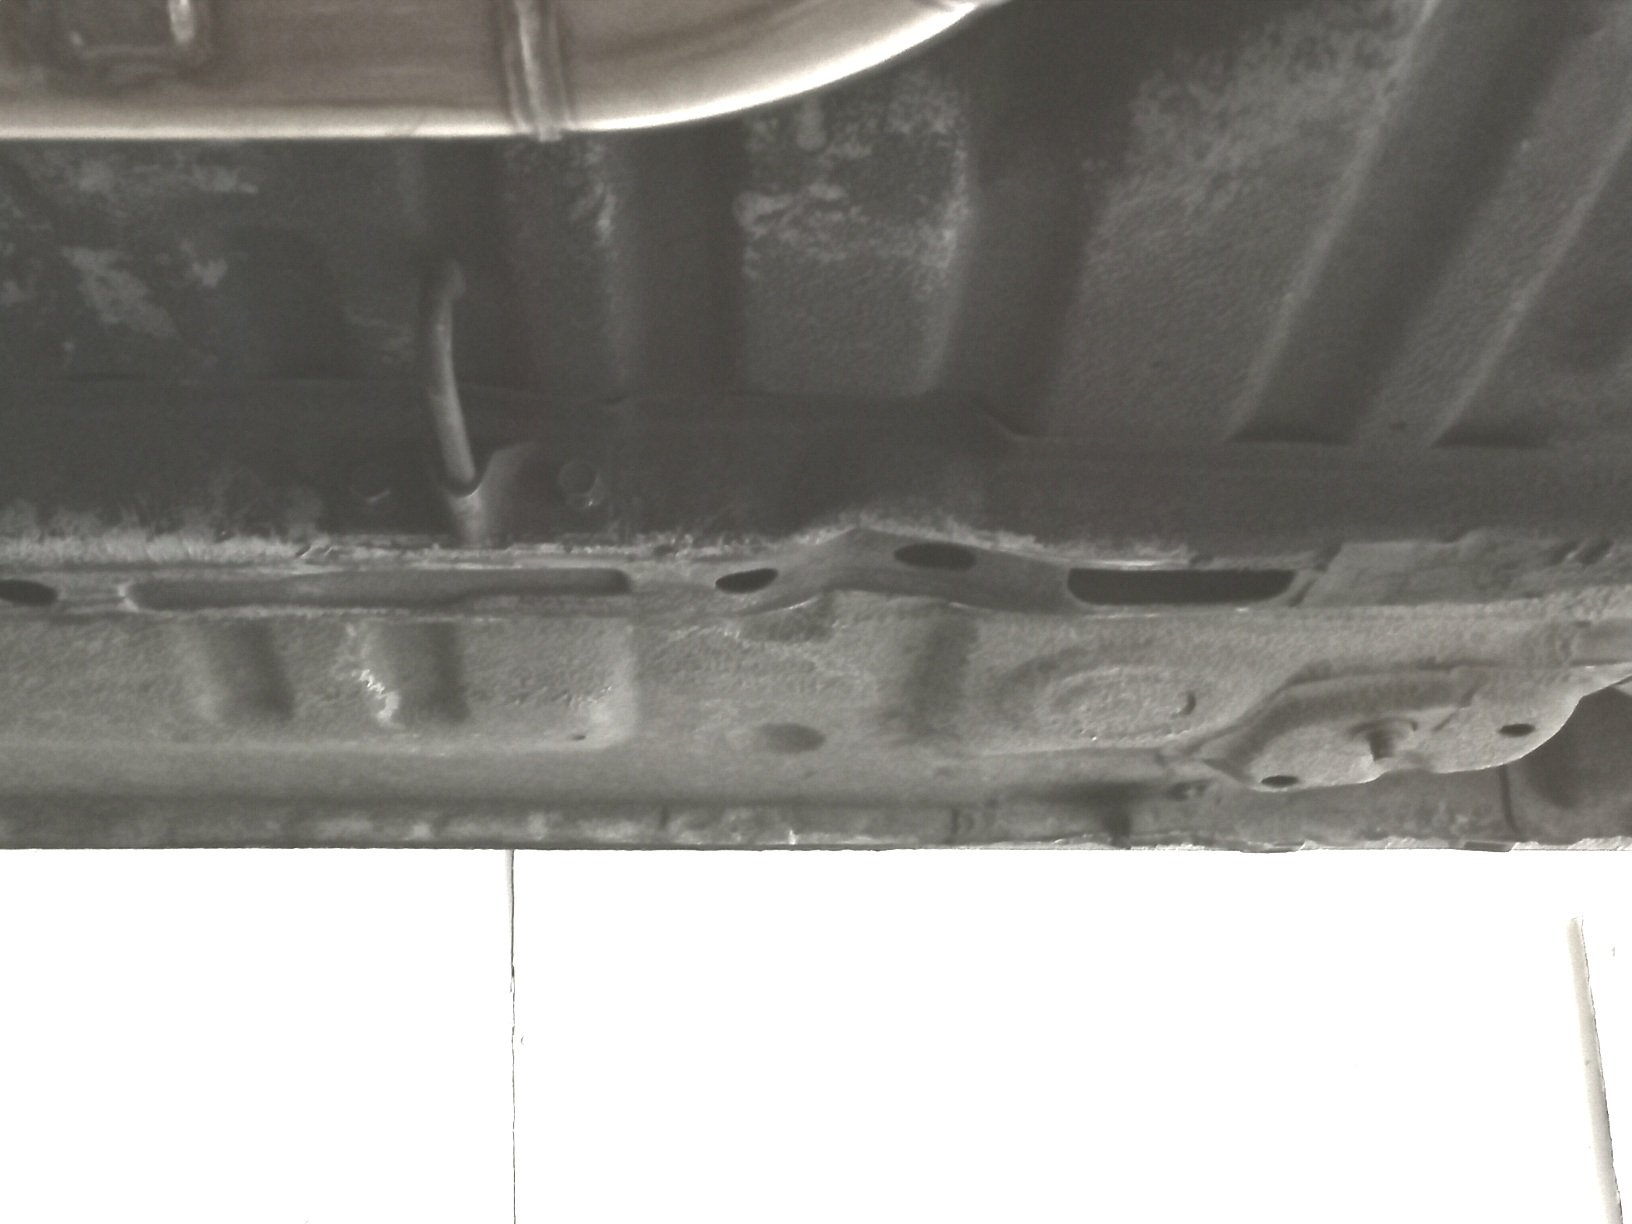
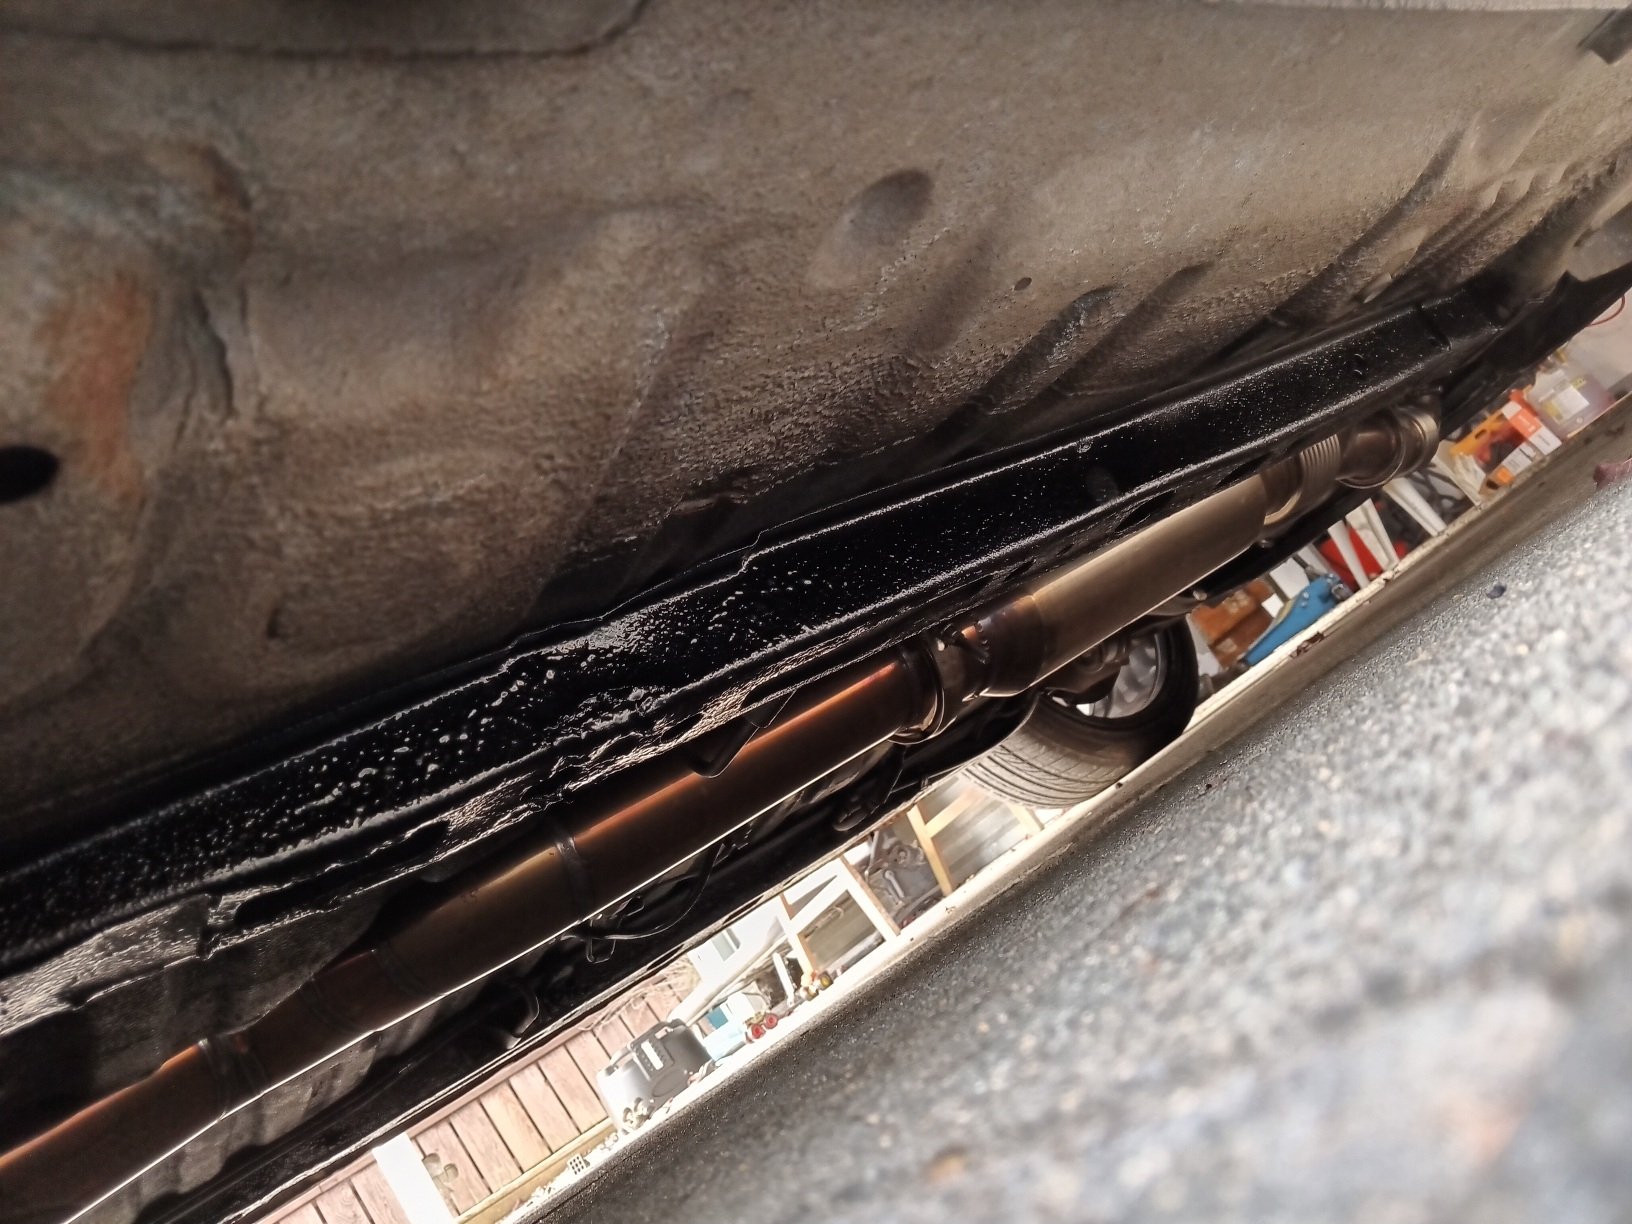
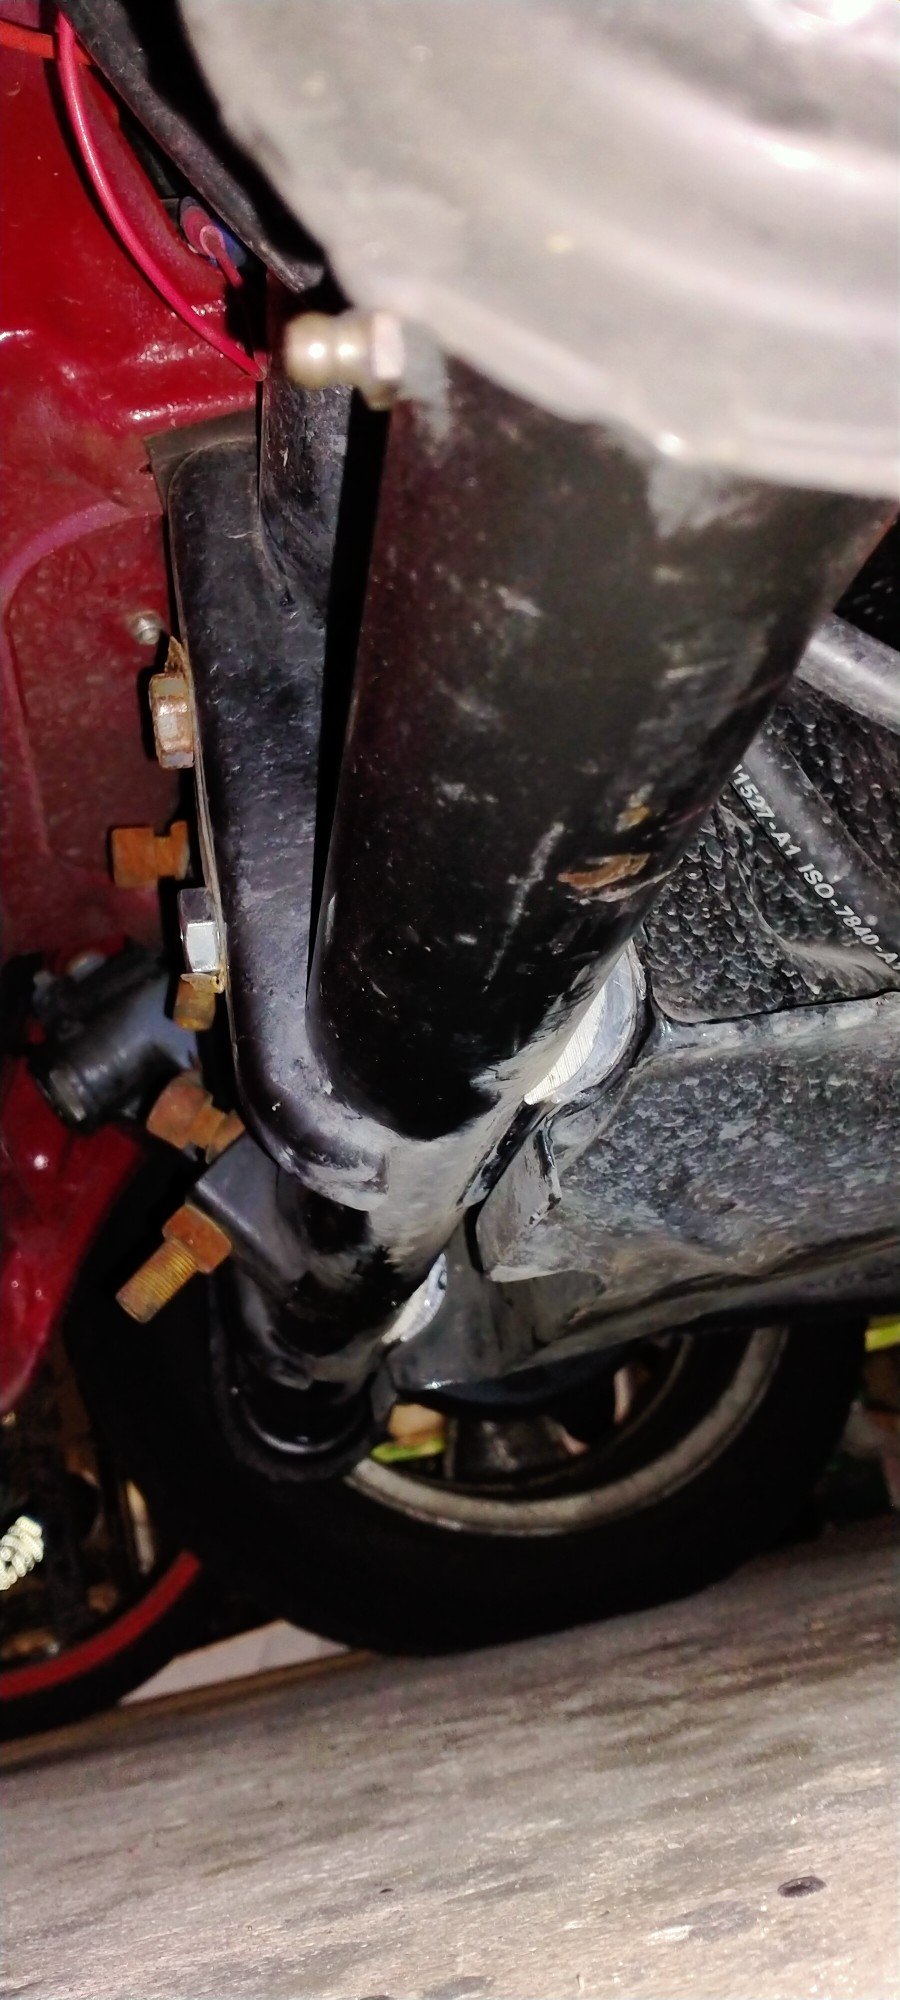
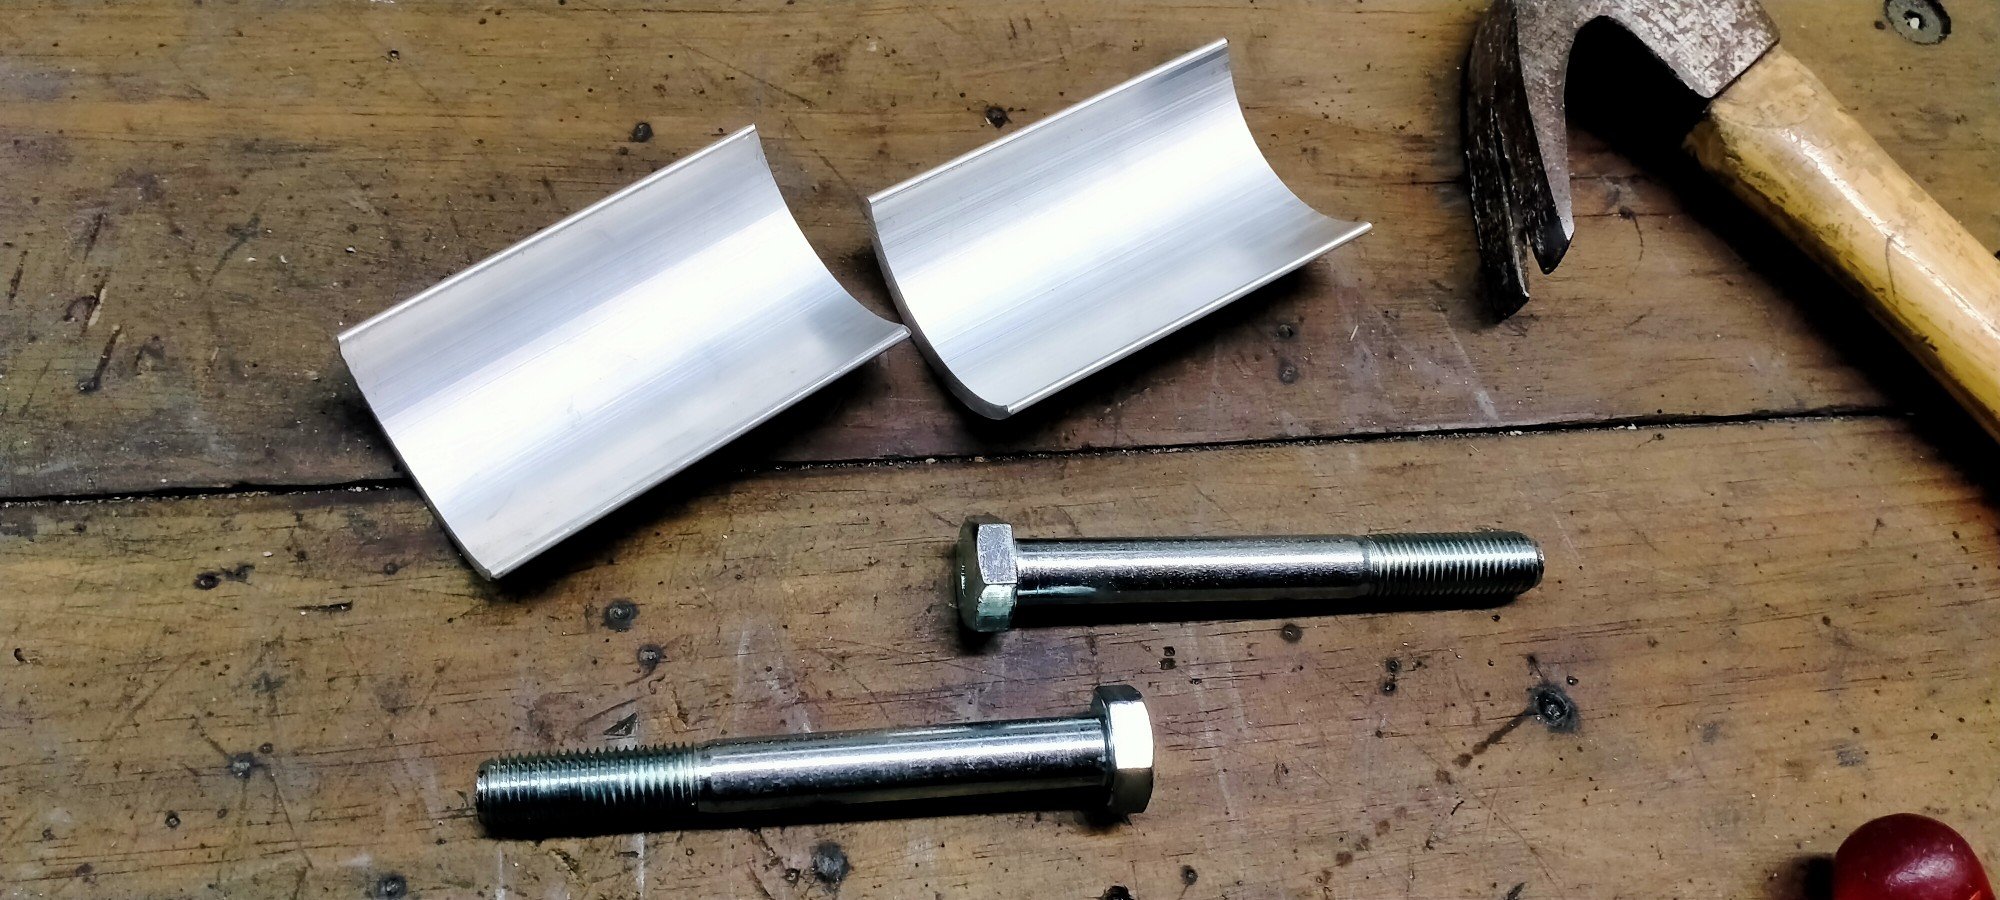
Been driving around some more. 2200-2800 rpm is punishing to cruise at. Transitioning through this band is fine and generally it makes bad-ass old car tunes. The rear muffler is a straight through bullet style and this needs to change, I think. I have a new problem with clearance though. The exhaust isn’t banging the floor anymore but now the rear axle housing is banging on the inverted U section. I think I need to ditch the slip joints and weld flanges in instead. This will give me some more wiggle room to play with angles before welding the flanges on. Also I may investigate adding another leaf or part leaf to the rear springs. They are so soft I can make the diff housing touch the bump stops (and exhaust)by pressing down firmly on the boot! Increasing ride height is not an option. Servo pic: 8.8 l/100km on this one. I was expecting 10-11 so call me pleasantly surprised.
1 point
-
Been chasing what i thought was an exhaust leak from my down pipe/ turbo vband, turns out the manifold had a decent sized leak, pretty easy fix and should be all sealed up tomorrow, with a resonator and the muffler its still bloody loud though, have tried plugging the exhaust tip with increasingly small pipes for wof but no luck... So im looking at repacking or getting a bigger muffler now
1 point
-
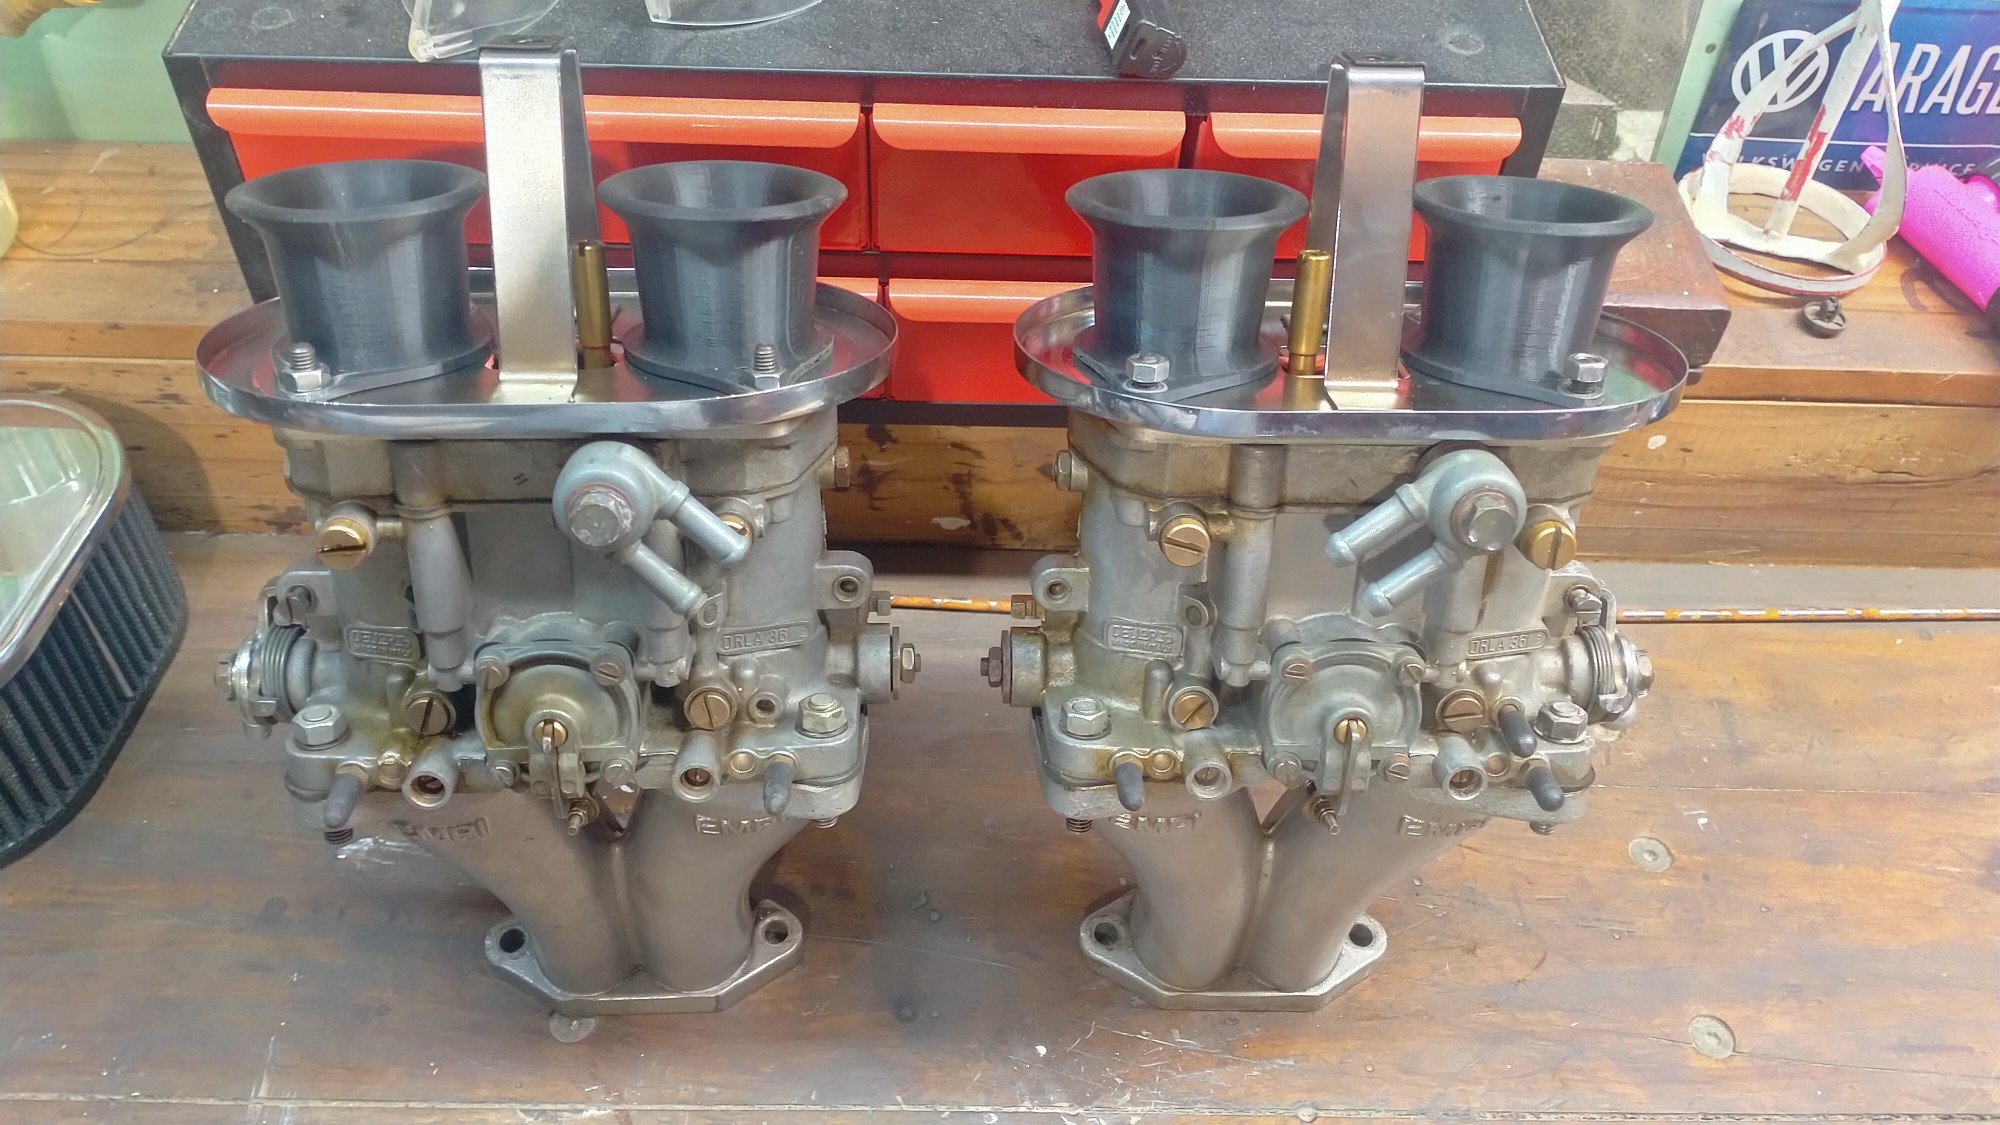
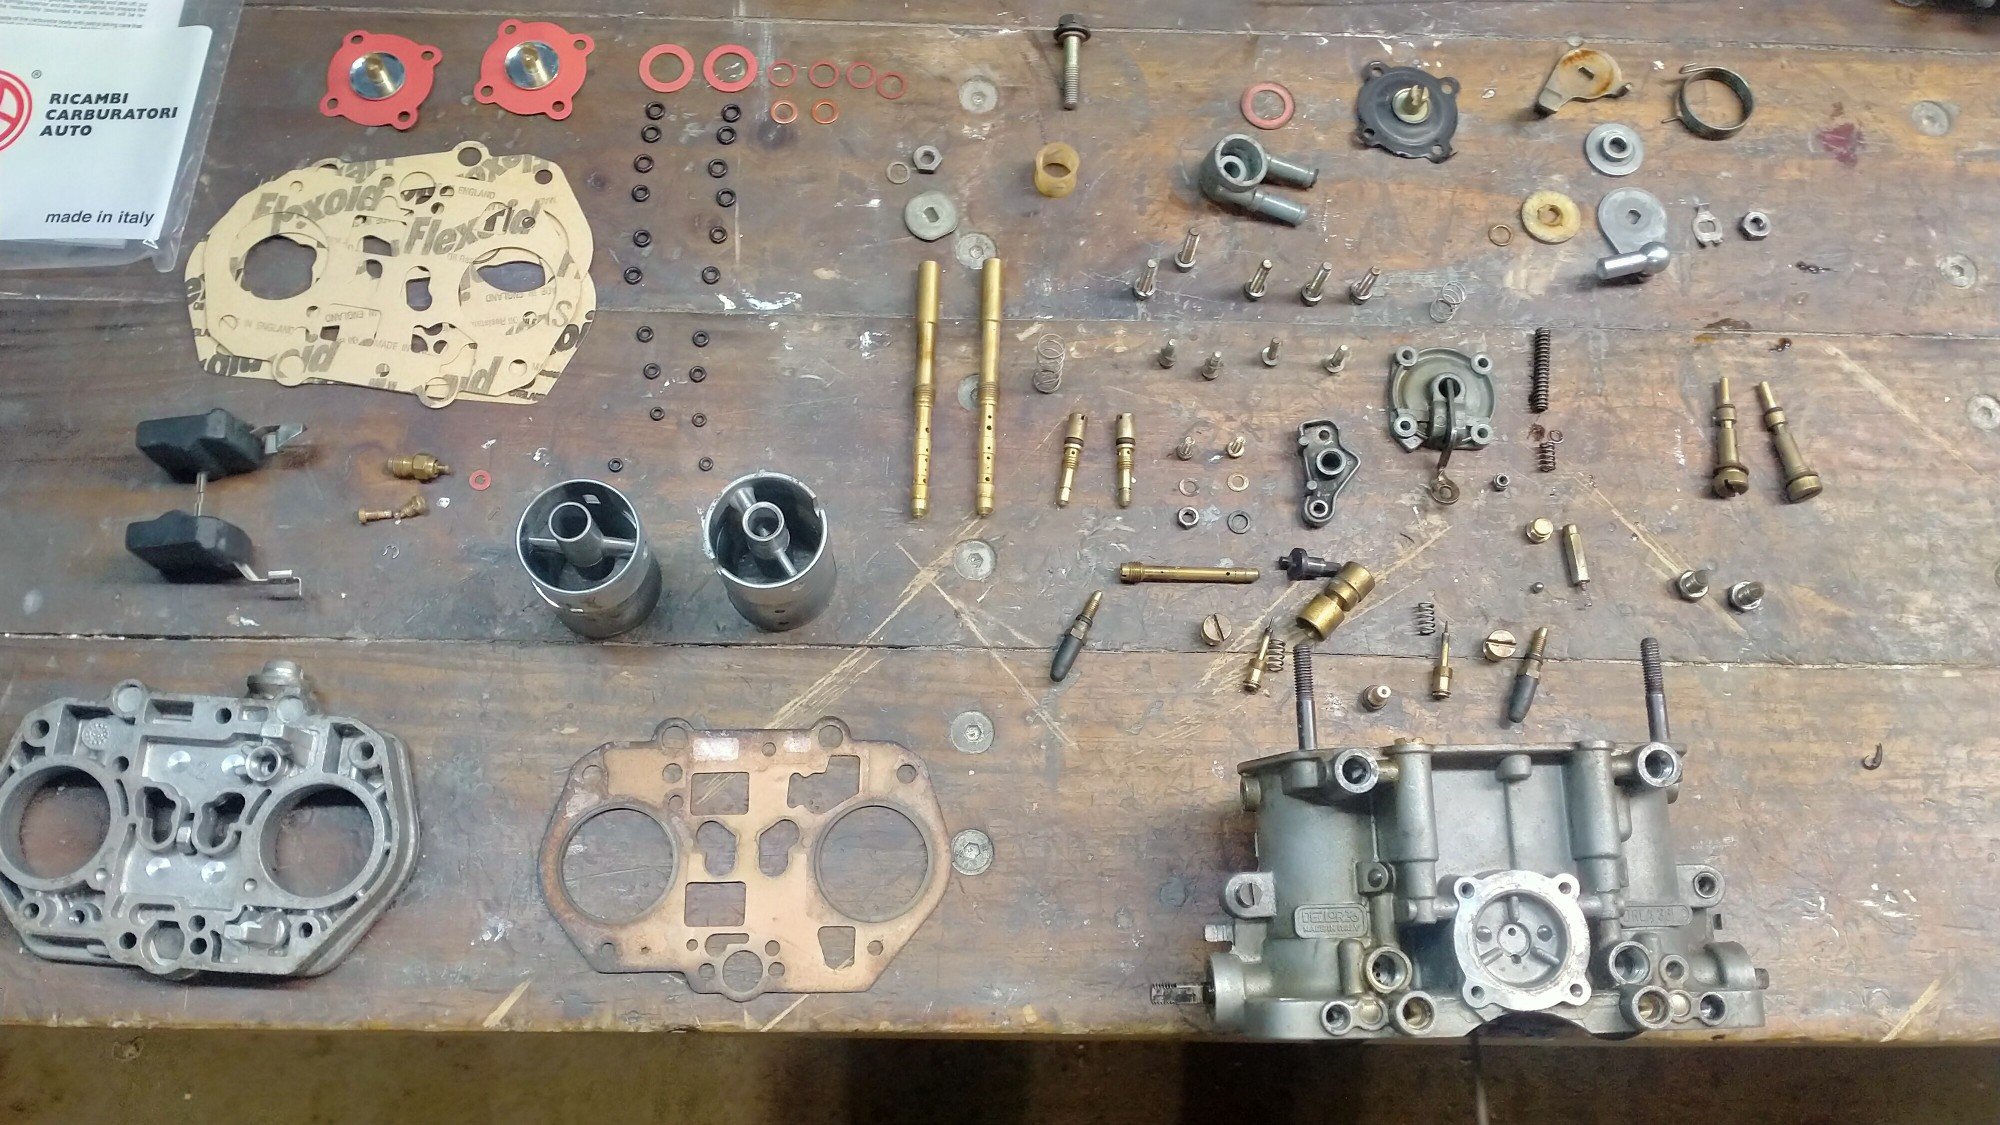
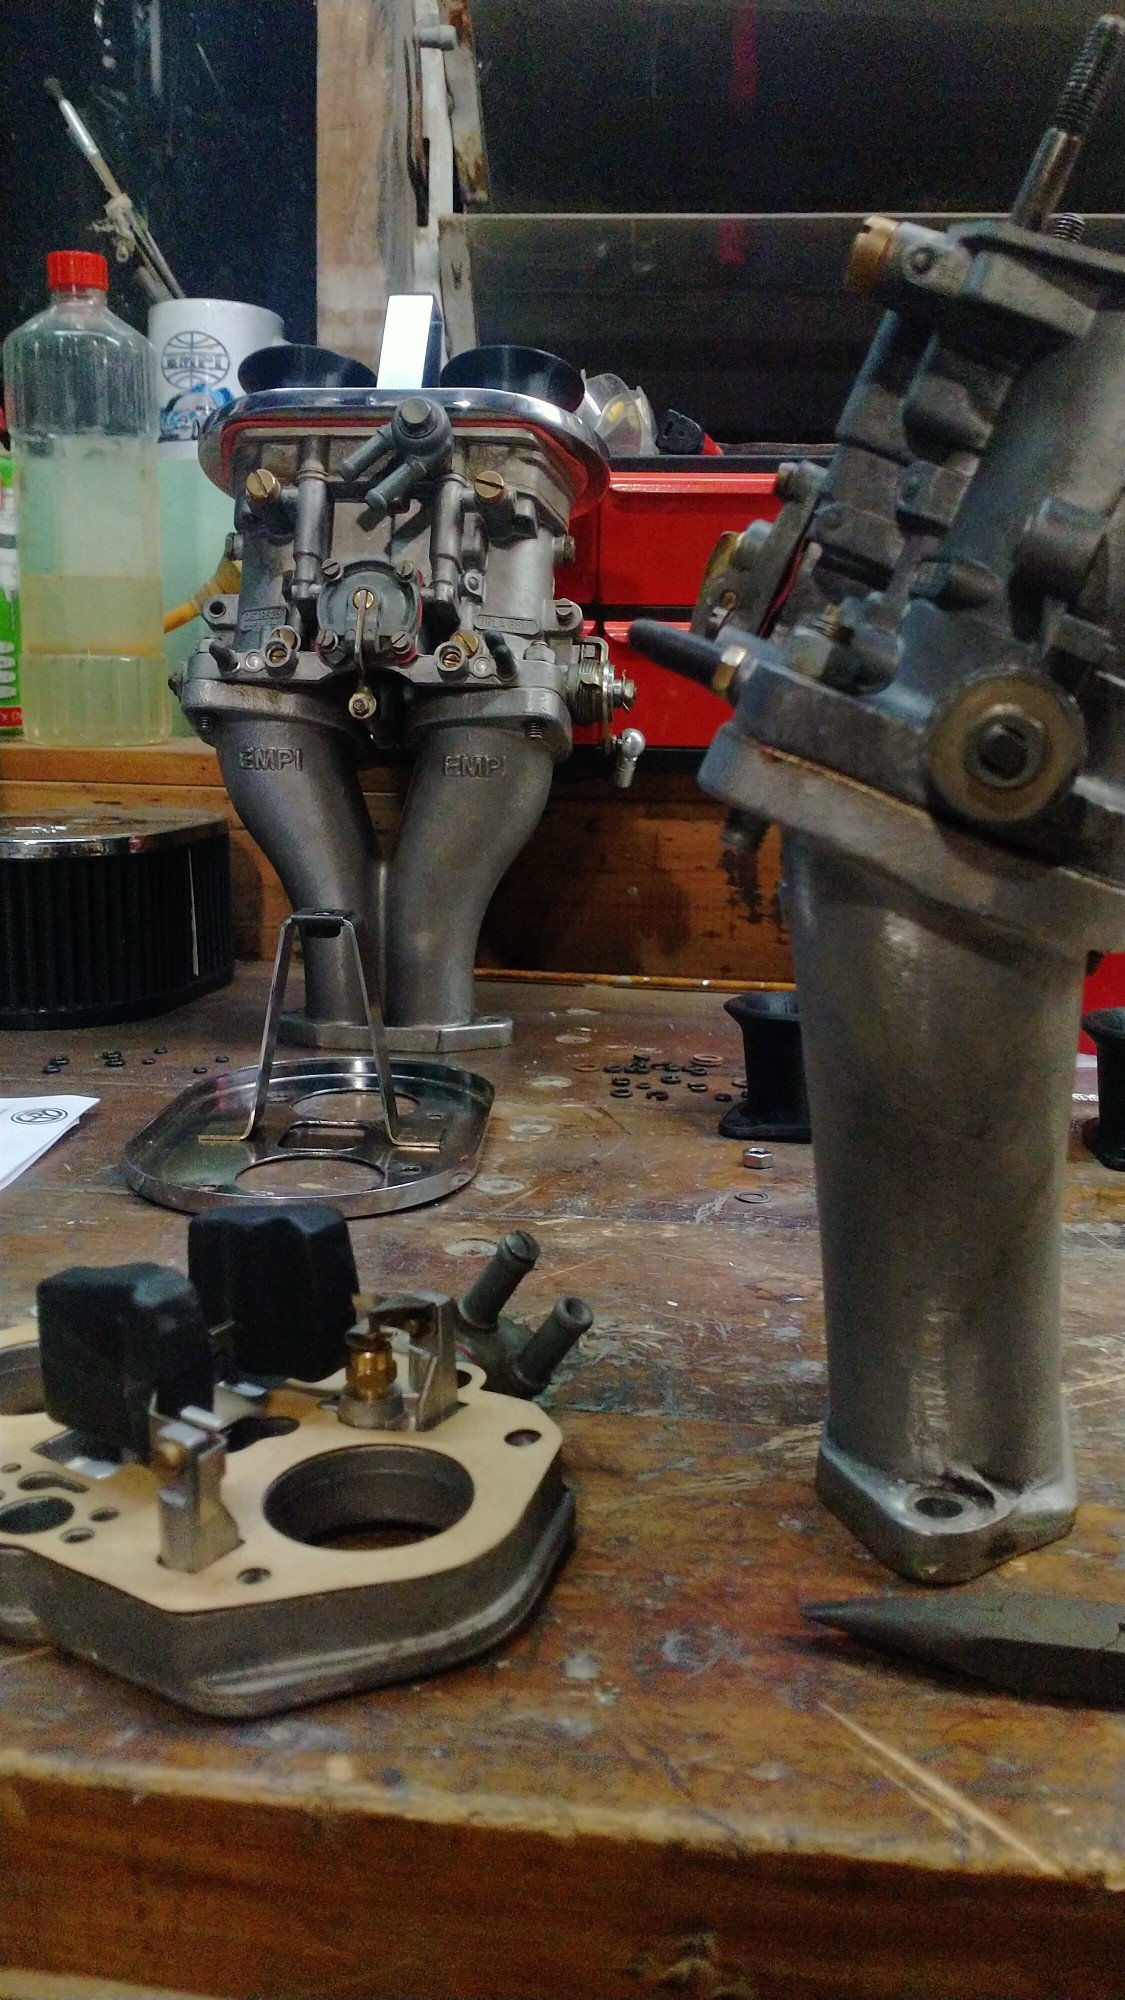
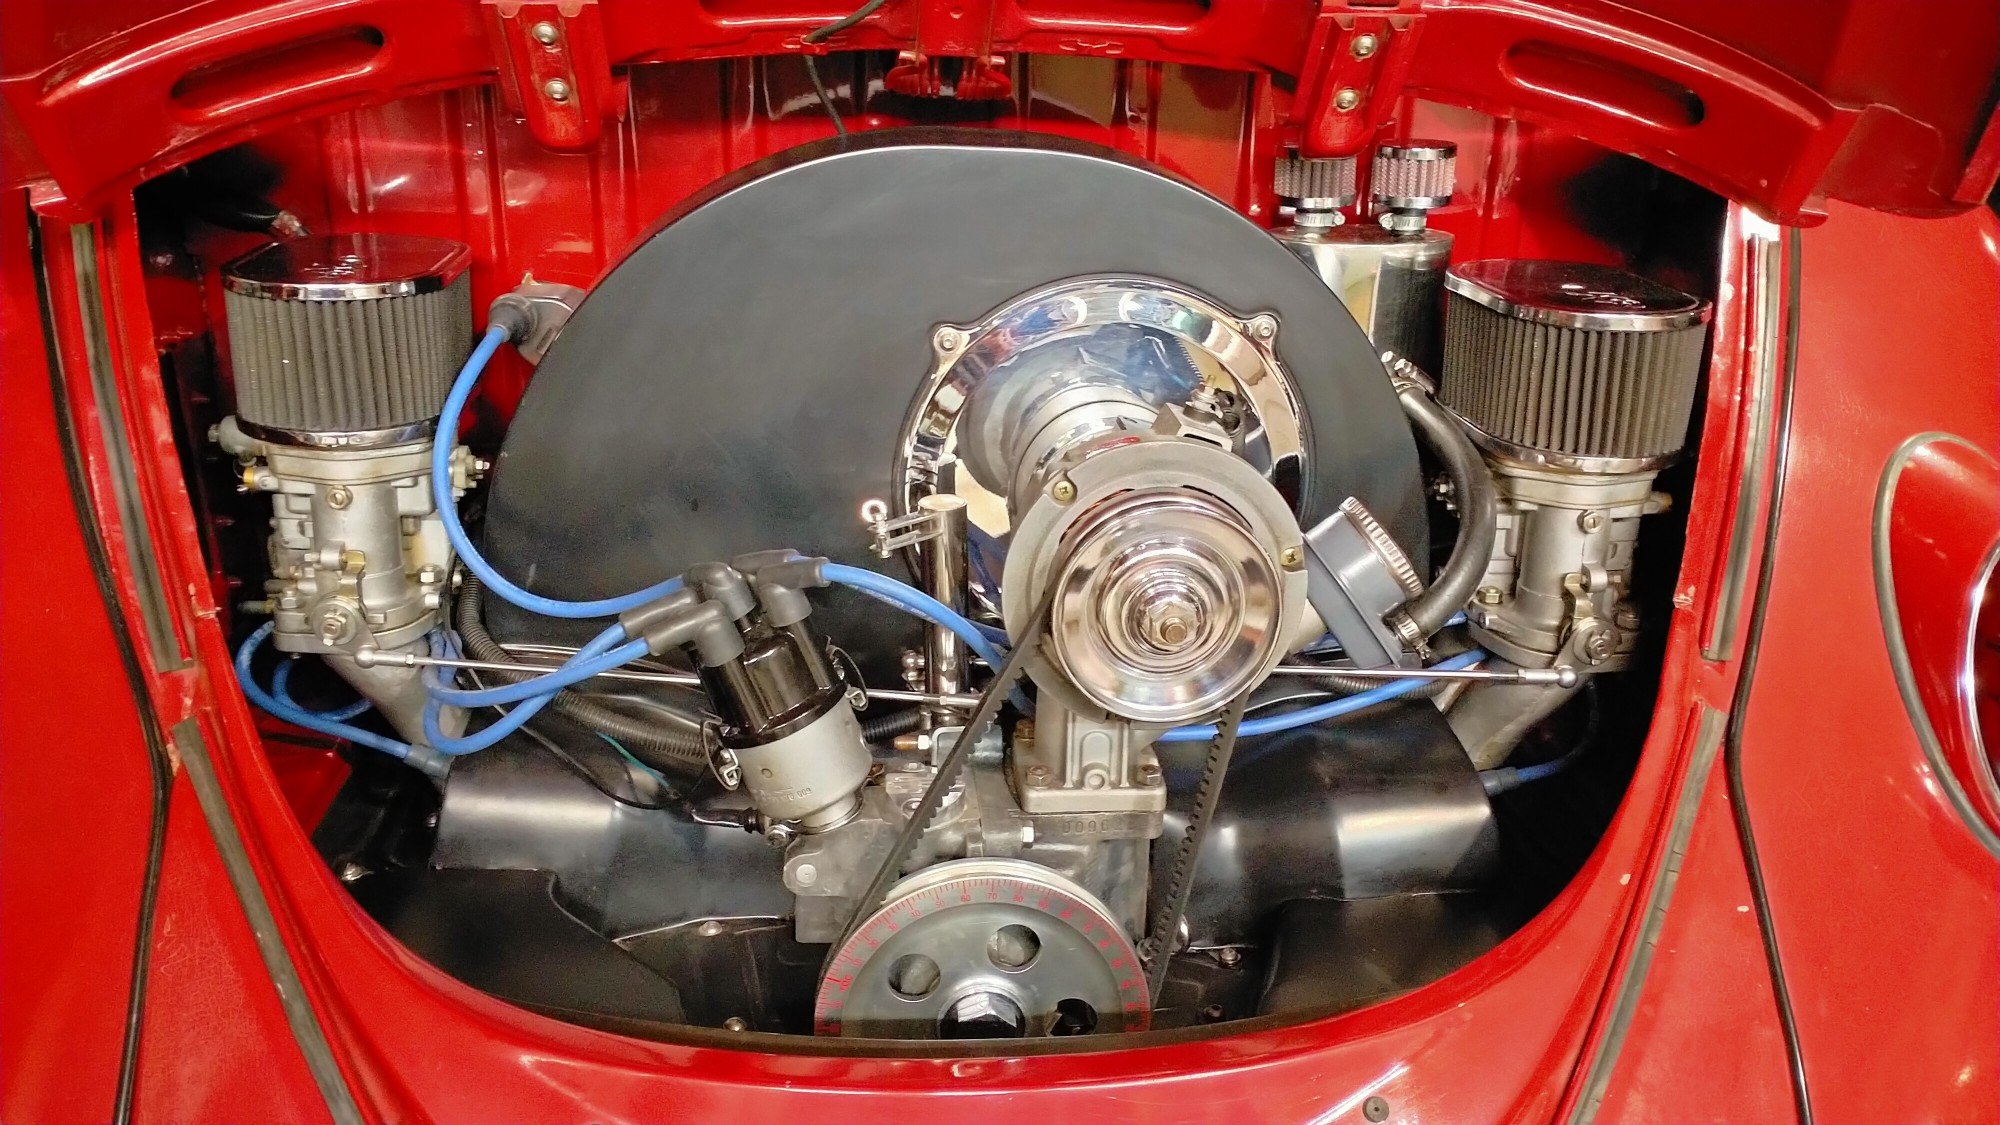
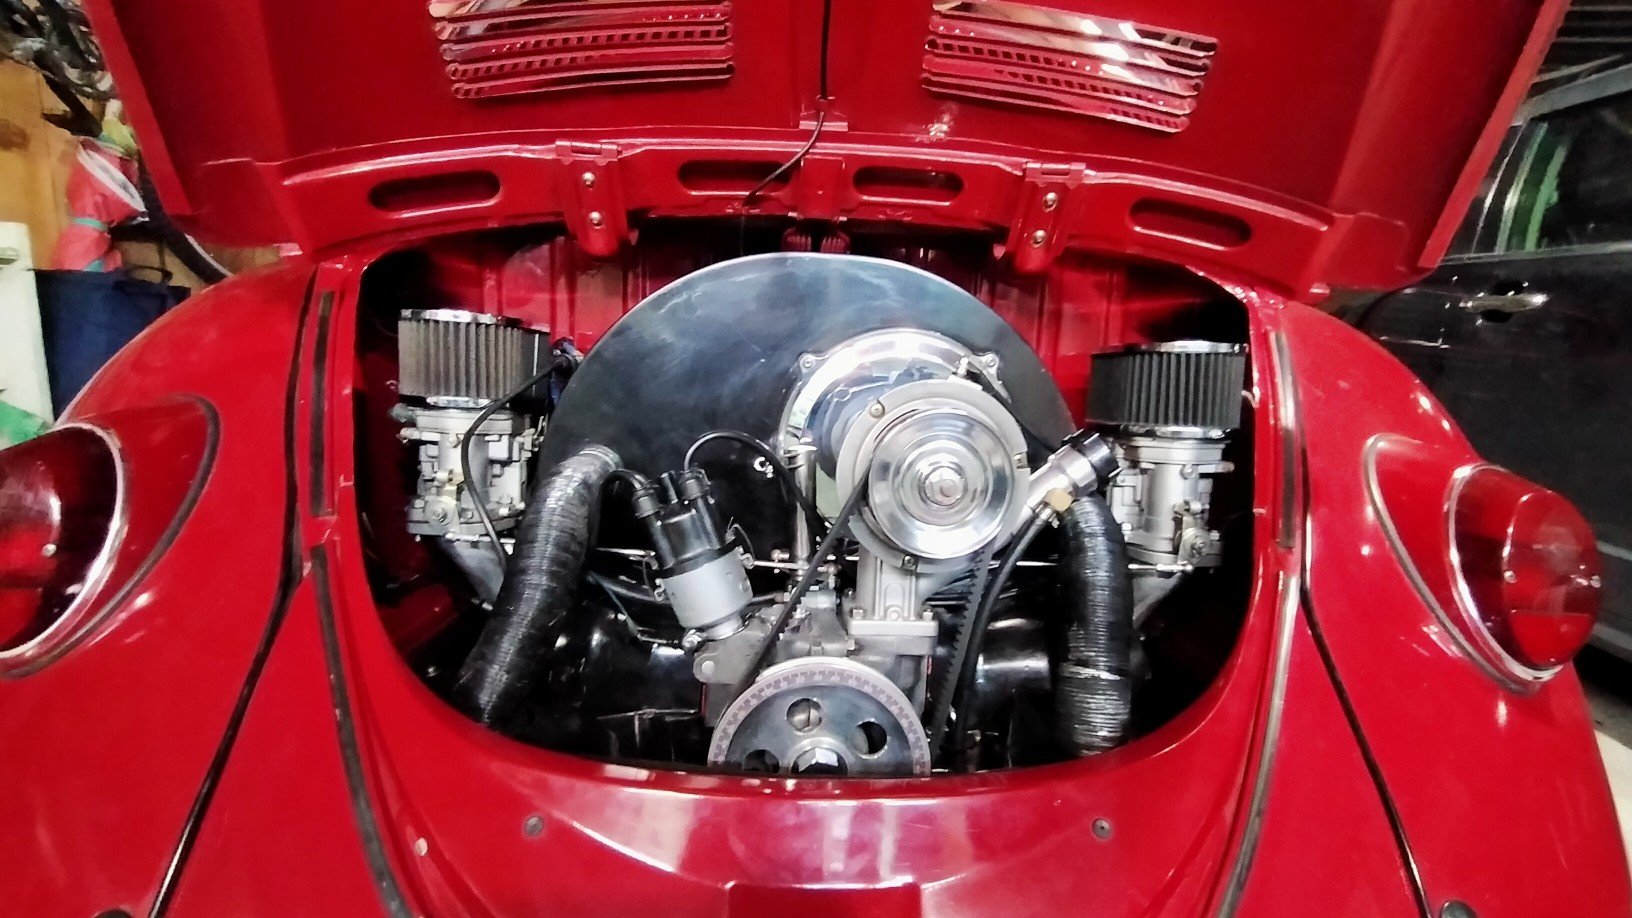
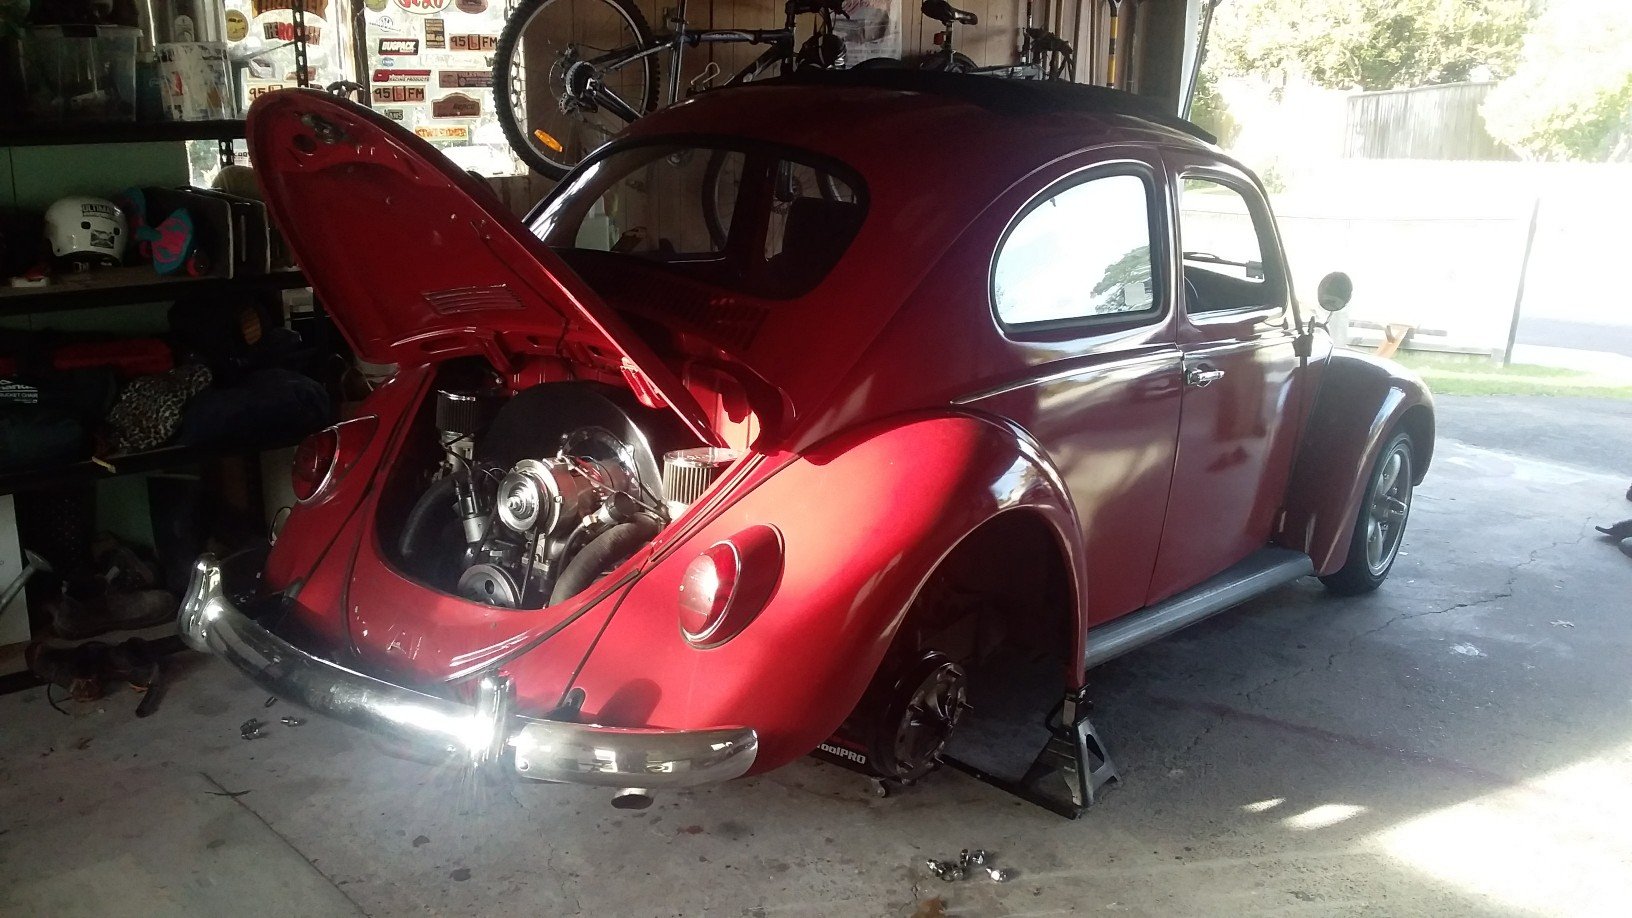
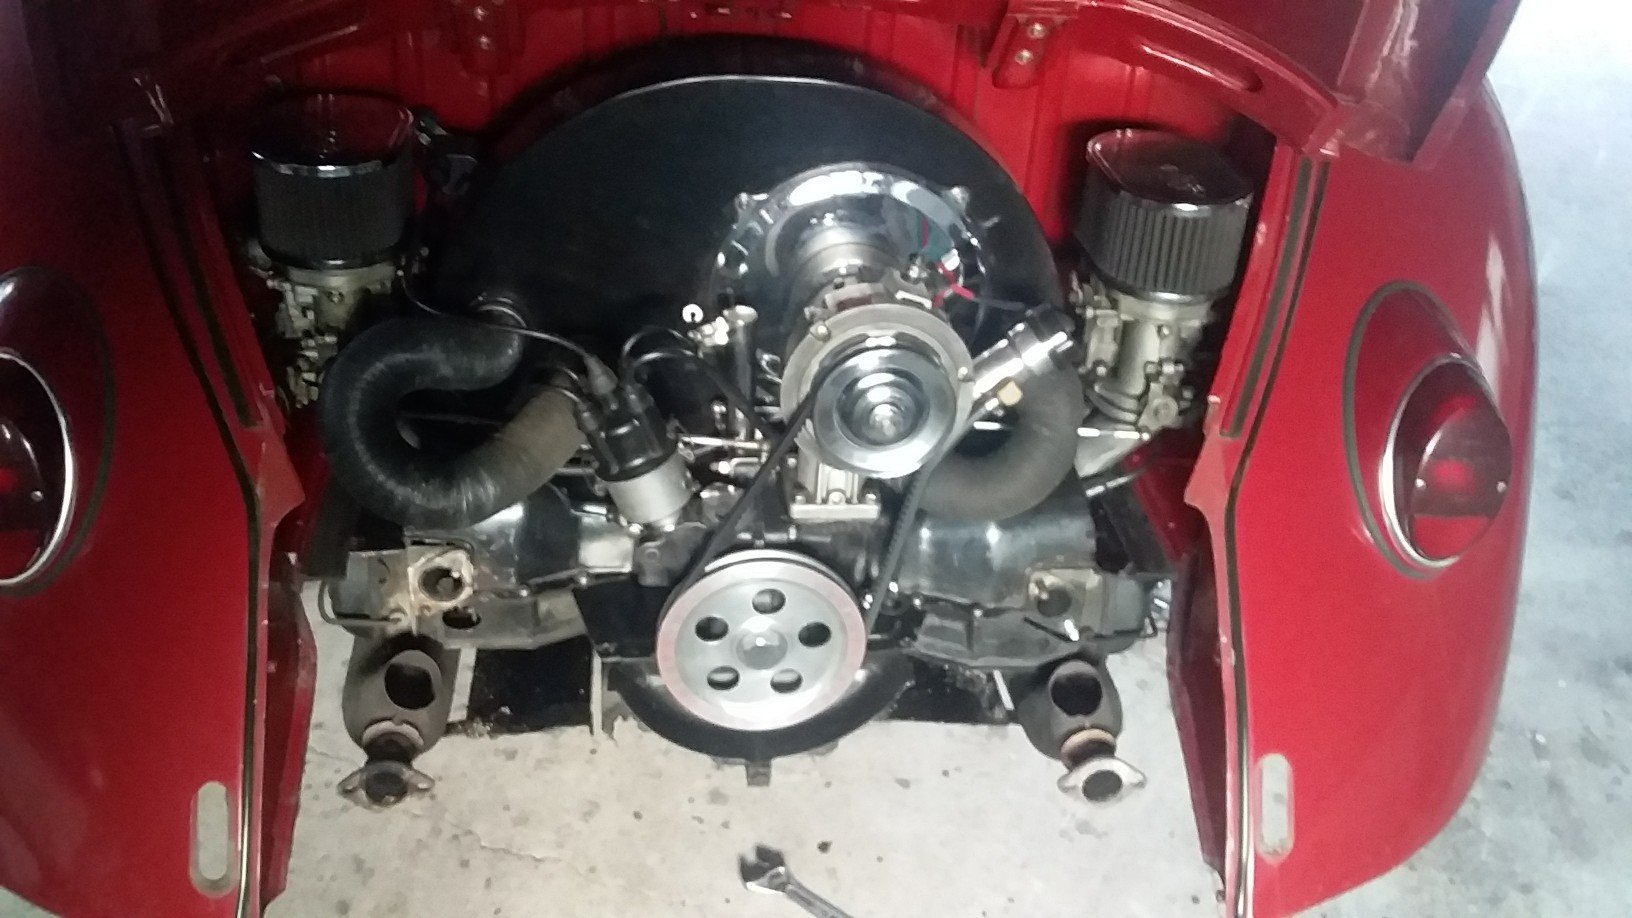
Gentlemen, after a good six months of neglect, general wear and tear I finally had time to service the VW. Living outside had not been kind to some of the so called stainless steel. Was to embarrassed to pop the hoop open at Kumeu. It been driving okay, it runs hard but it's that traffic speed, just puttering along off idle, it just didn't sound right, but fine when accelerating, something was a miss. One of the projects at work is up Silverdale so popped in the see the carb Barrys at Weber specialist, got a complete rebuild kit for the Dells. Alfa Romeo, very fancy, much racing cars. Having been through everything else the carbs are the last thing needing sorted, I don't think sitting for nearly two years on a shelf whilst I built the motor and various other life admin got in the way, helped. Borrowed the ultrasonic cleaner from work and cracked into it about 8:30, Friday night. Fuck there are a lot of very small parts in a 36mm DRLA Dellorto, and I've got two. many hours later and into the early morning I was nearly finished, didn't want to stop half way and forget where something went or lose a tiny jet. Had to stop drinking so I could concentrate! In a very rare occurrence I got to spend nearly all weekend just working on the car and not the house or the yard or visit relatives or anyone. After forgetting to tighten half the screws on the right hand carb, it started and ran pretty good. So took the time to sand back all the rust and polished it all back to a mirror finish, cleaned and wiped everything. No excuse for a ugly engine bay. Carried on adjusting the brakes, always amazes me how much a badly adjusted handbrake affects the overall performance of the old drums, seems to take up a lot of slack in the system. Popped the valve covers and set the rockers and checked the headstuds were tight still. Just need to grease and adjust the front end and actually change the engine oil and the maintenance will be up to date. Continued playing with the carbs, the access windows I put in the rear wheel wells make this easy and actually possible. I'm pretty happy with how's it's running now, so much nicer to drive, smoother, quieter better performance, more responsive. Maybe the tiniest flat spot just off idle, but nothing like the spluttering bullshit I've been driving around. Much nicer at motorway speed, just cruises.
1 point
-
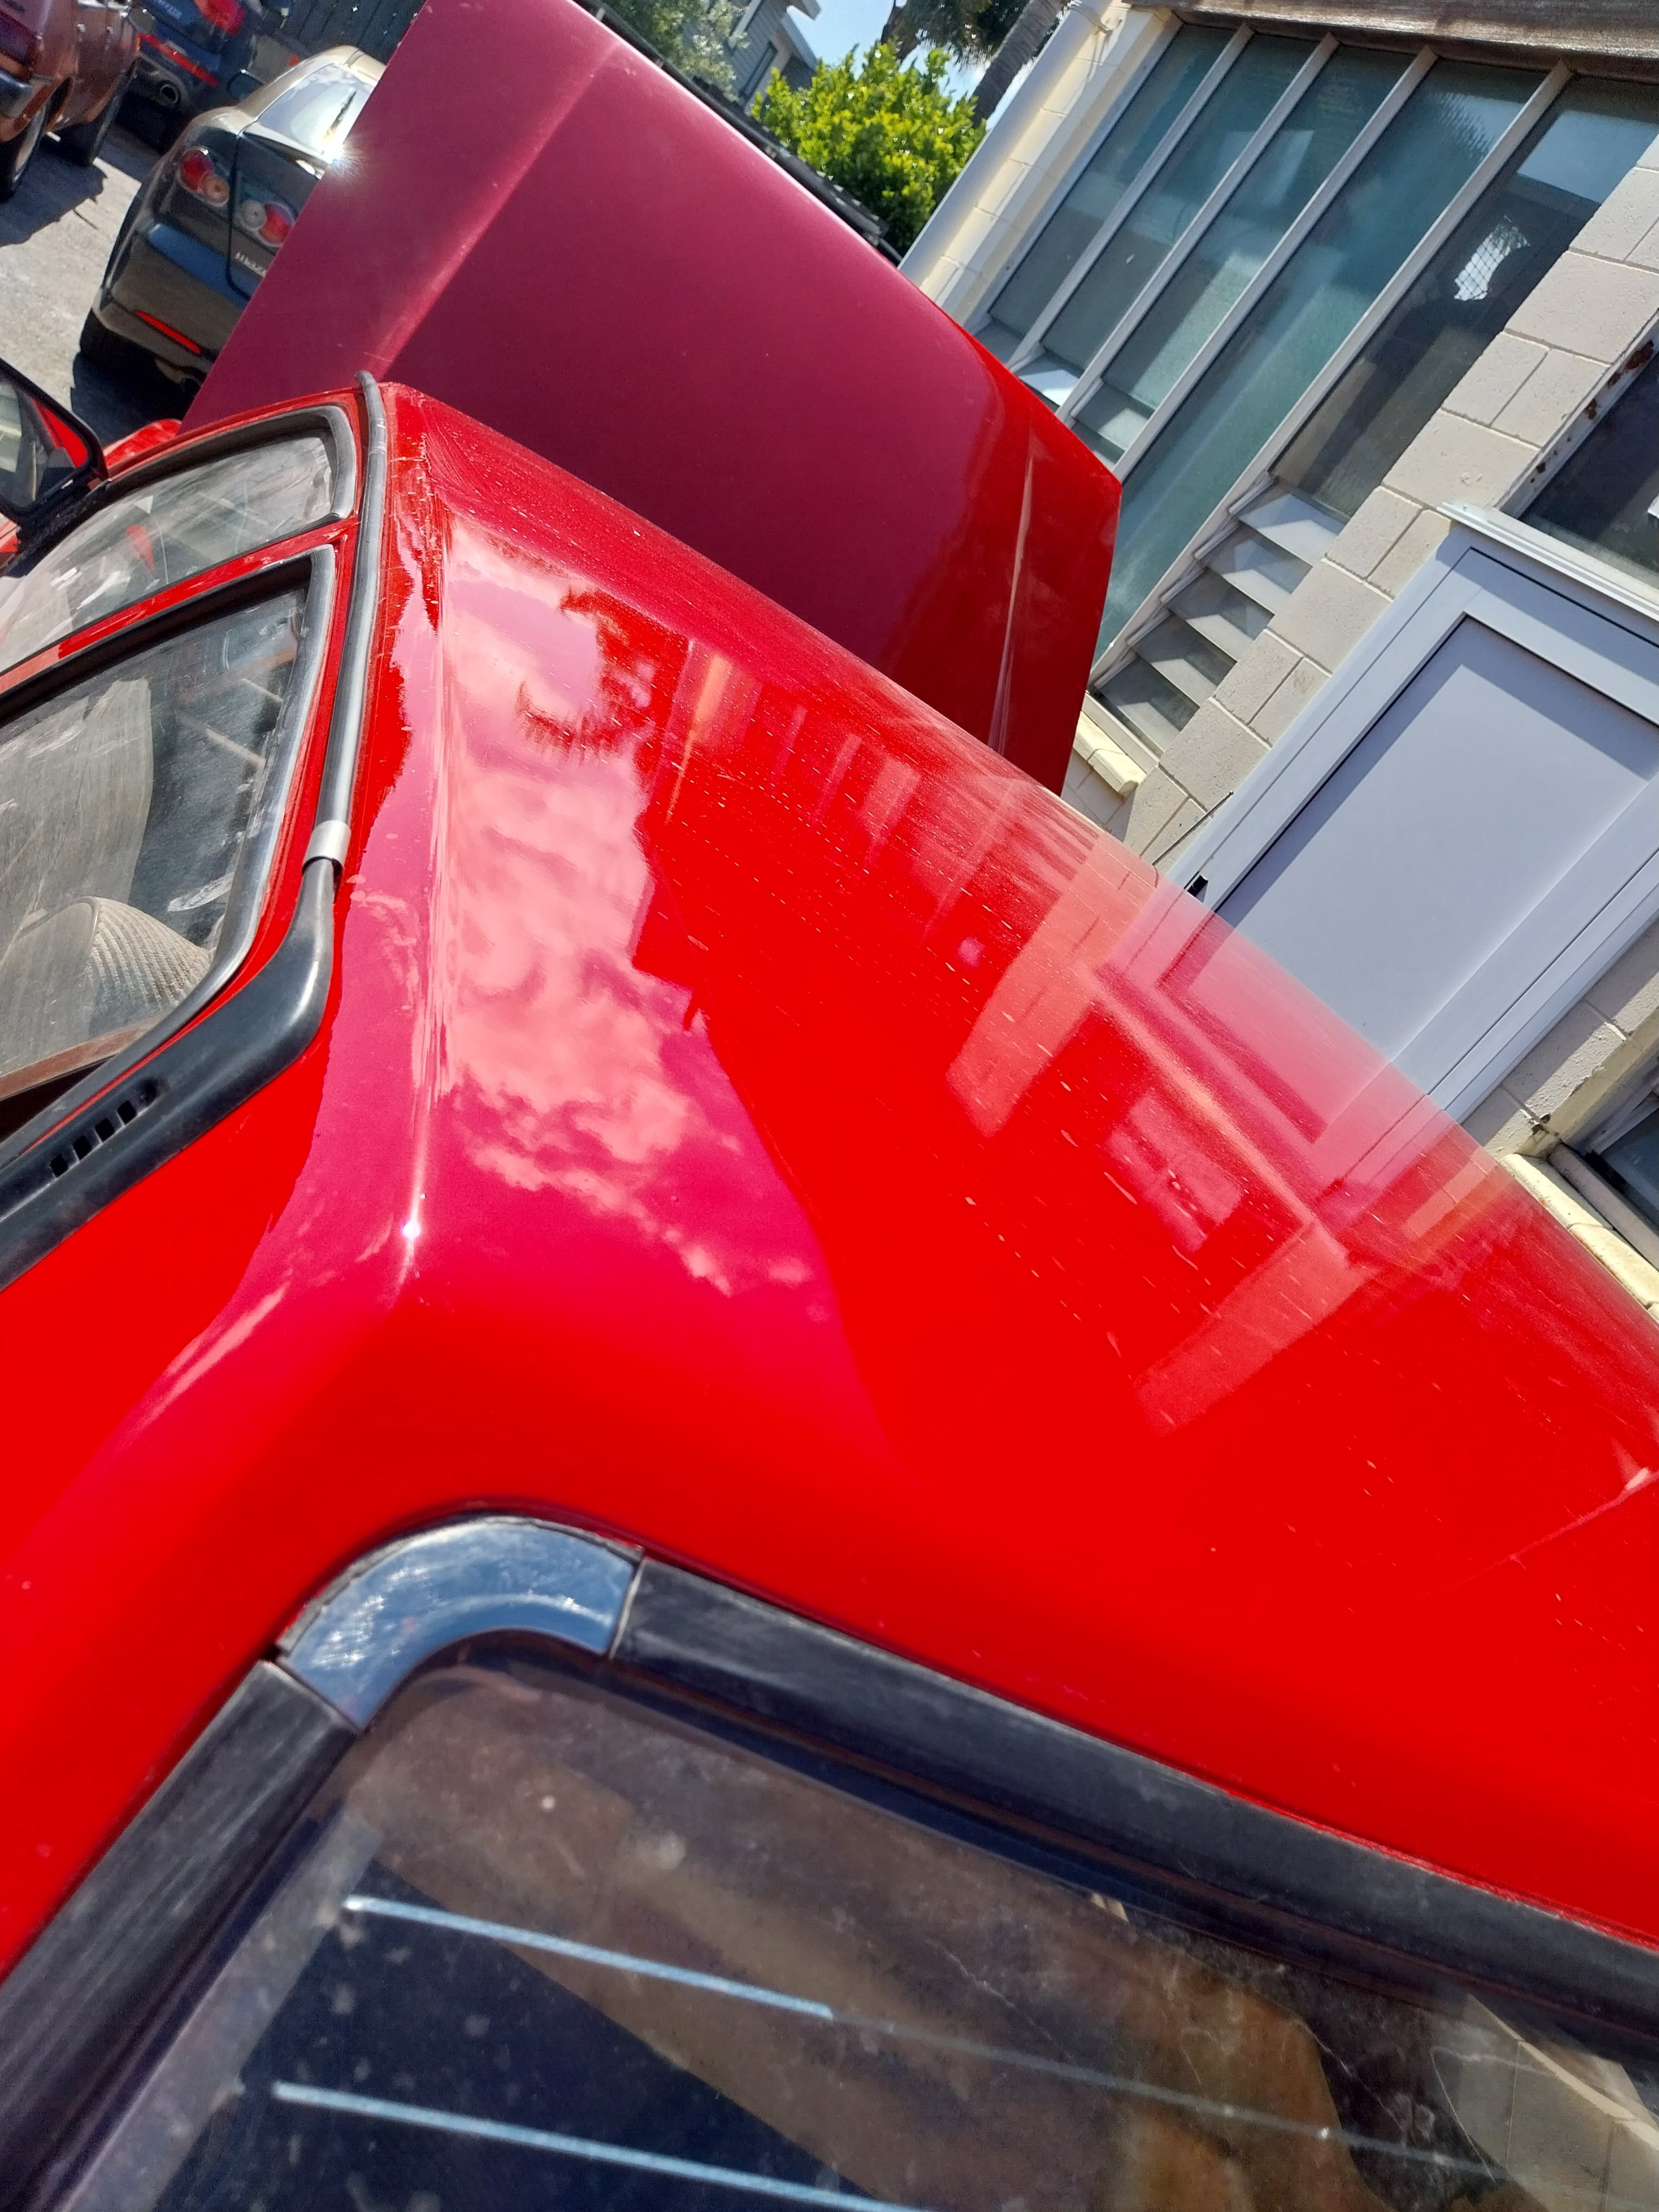
That red shine. Wow.
1 point
-
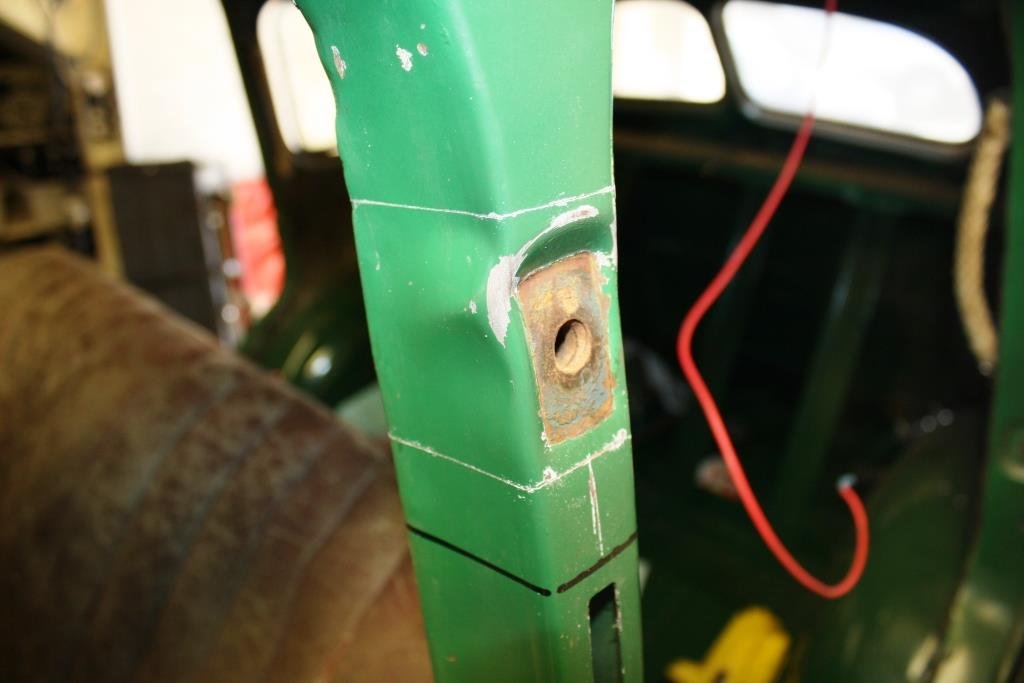
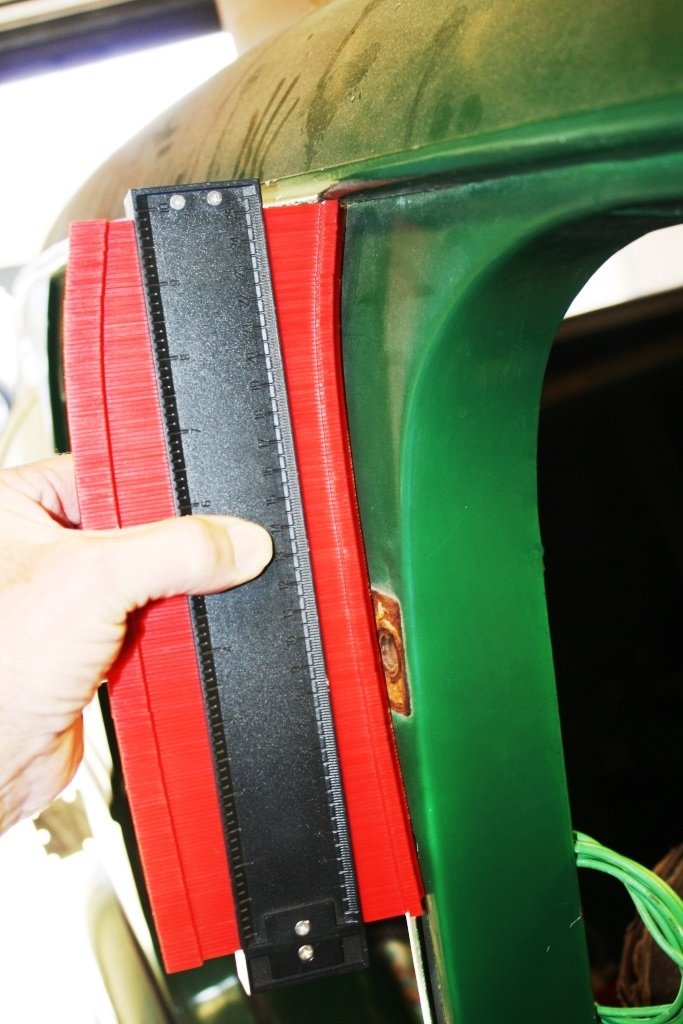
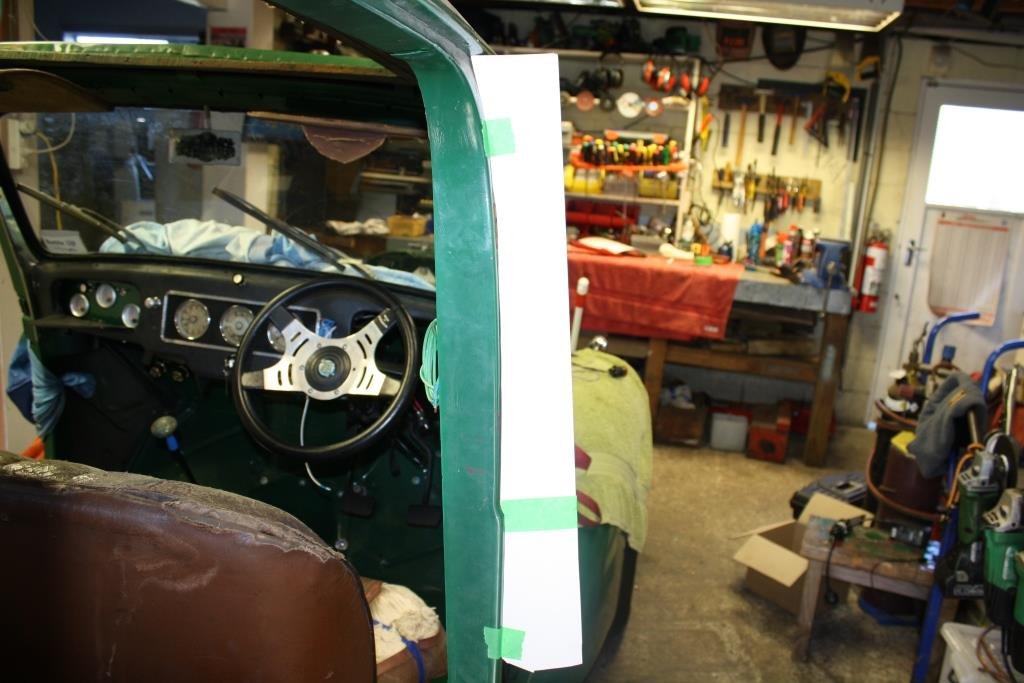
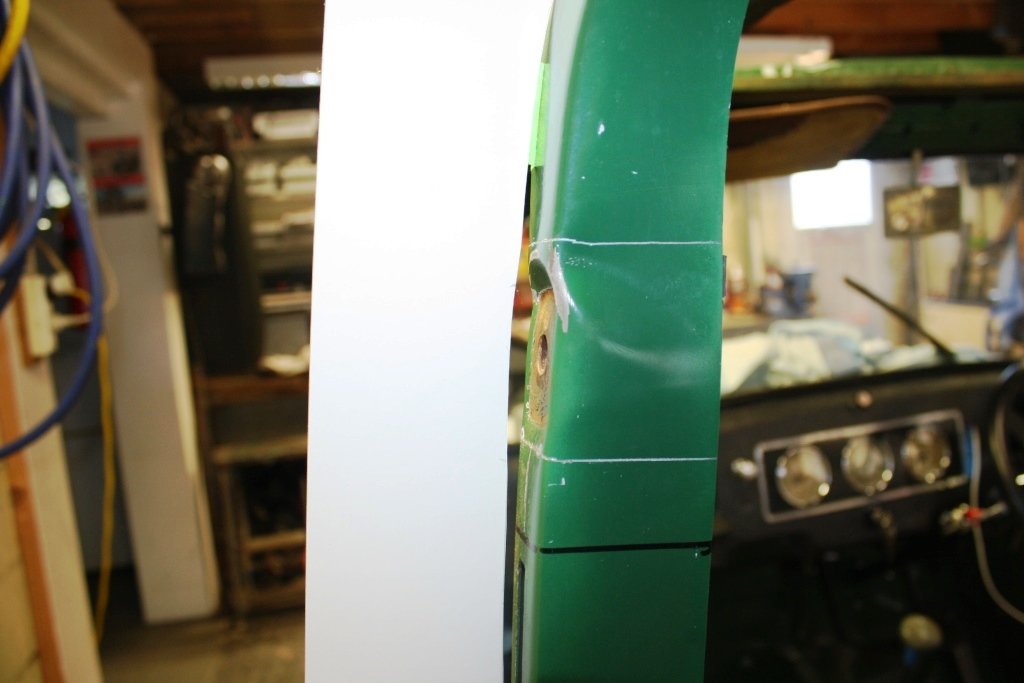
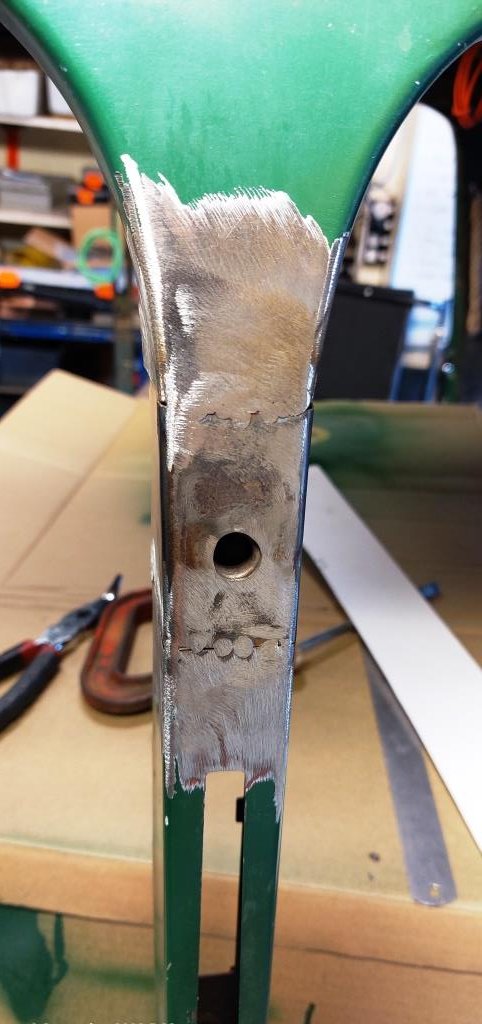
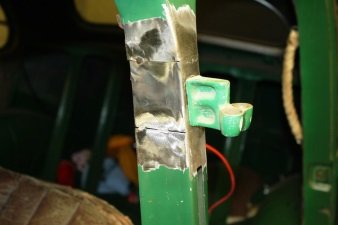
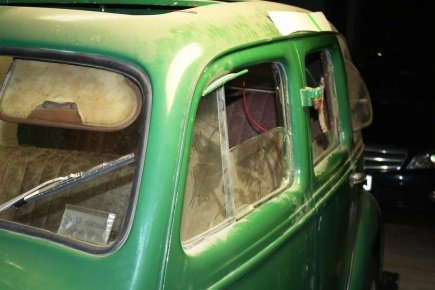
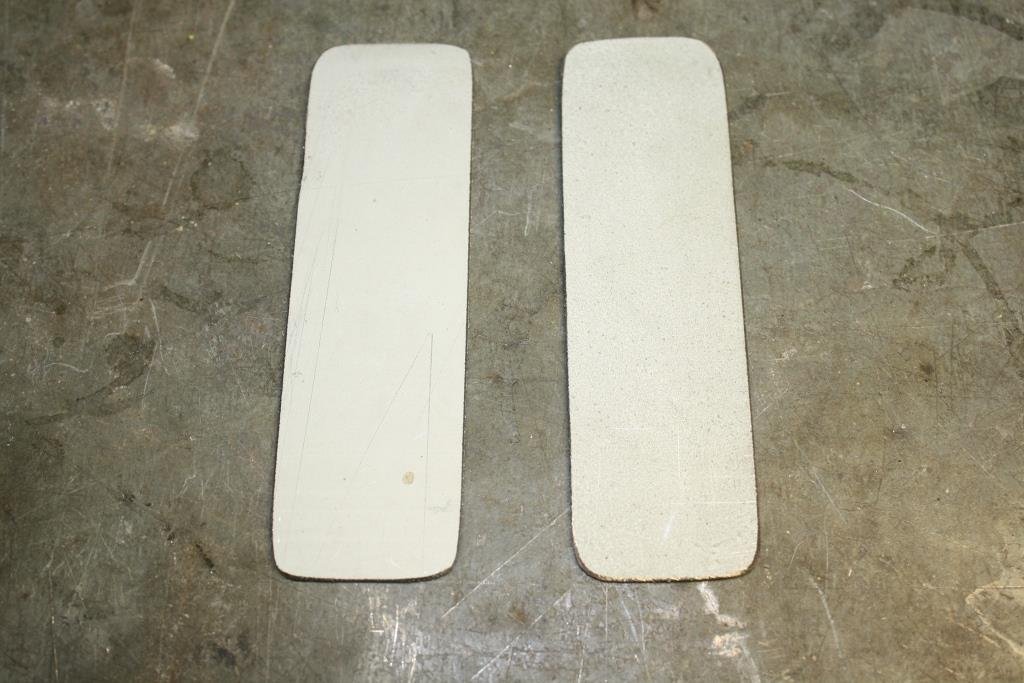
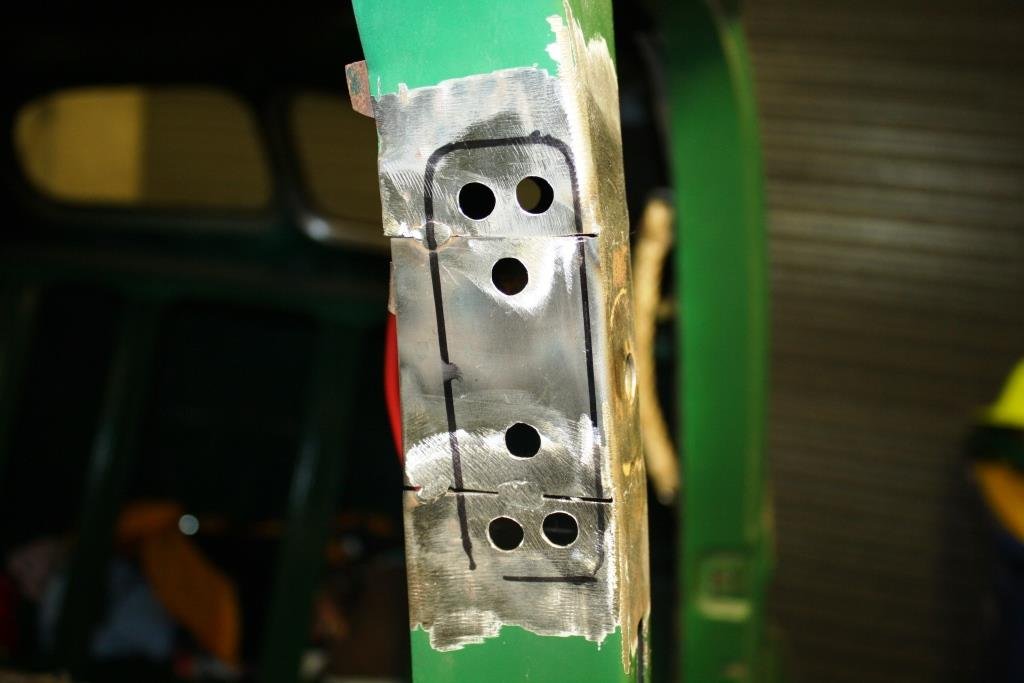
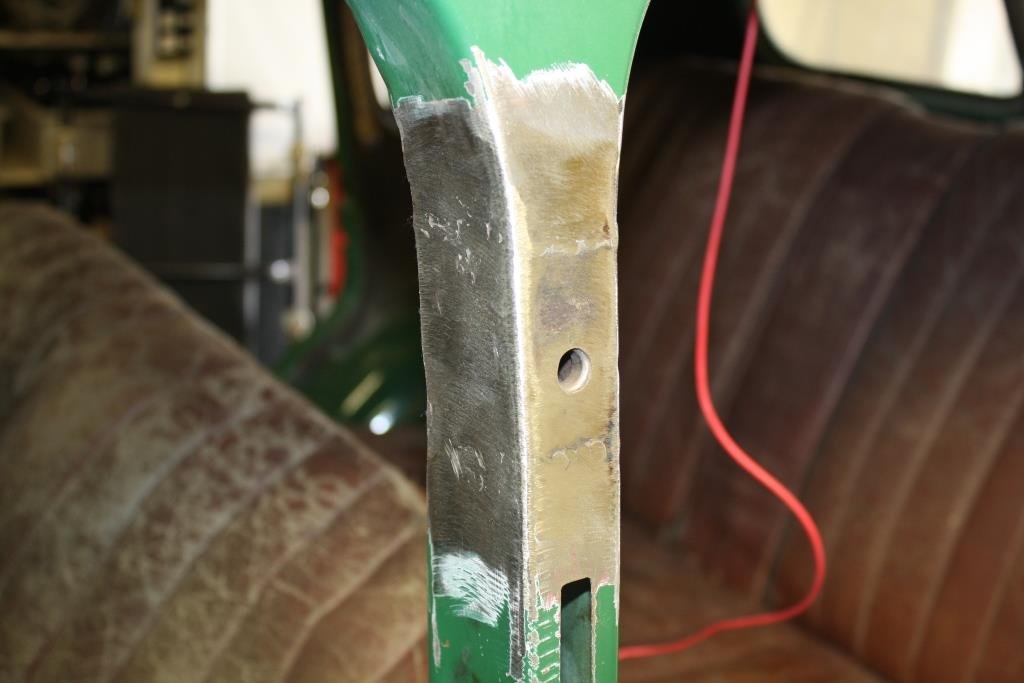
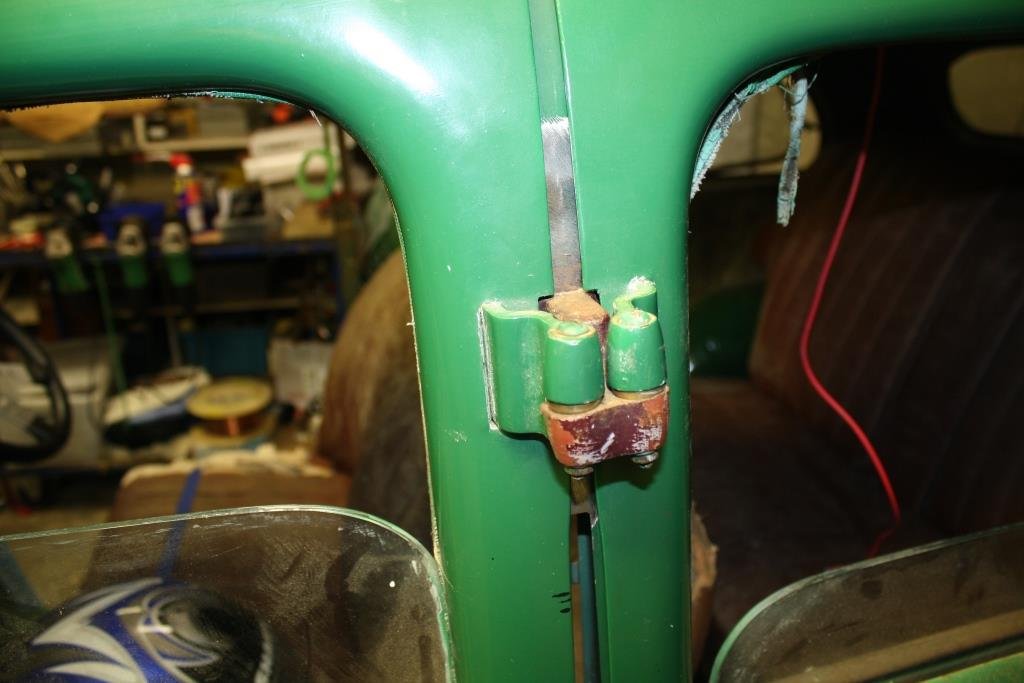
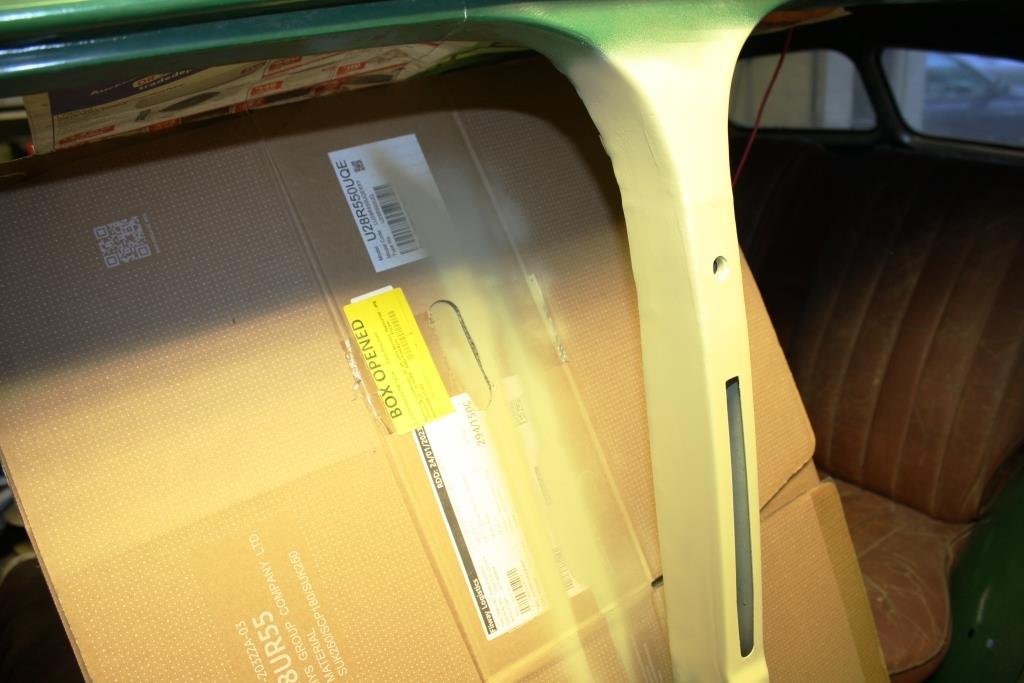
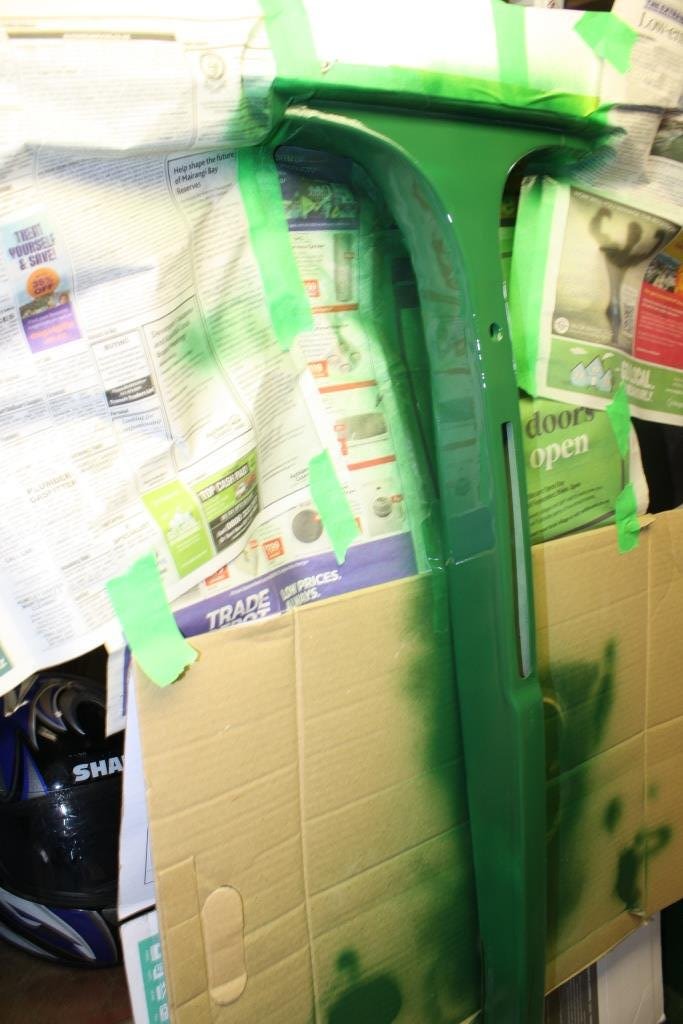
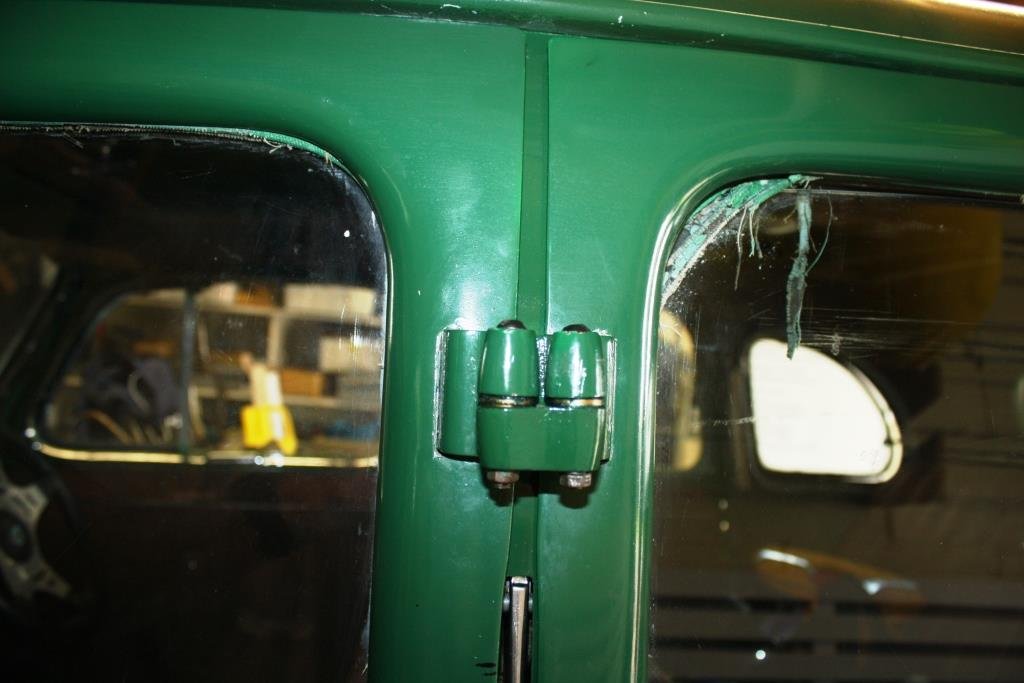
Time to take on a job I’ve been dreading somewhat; repairing the damage to Rigamortice’s port side B pillar that was the result of the body falling off my homemade body rotisserie. I used a profile gauge on the good side…….. Converted it to CAD……. Swapped sides…….. …. And it was easy to see how out of shape things were…. After a lot of measuring I cut a section out of the replacement B pillar…. And did the same on the car. I went back to using an old school hacksaw - far more accurate than an angle grinder for me. It popped out with a bit of a bang, obviously under some tension. Started tacking the repair piece in… Checking it with the CAD template…. Still just little tacks, a bit messy but I’m cognisant of avoiding putting too much heat in and distorting things. A quick test fit of the doors and it looks OK. Cut out some 16 gauge zintex strips… Marked out and drilled for plug welds.. Put the reinforcing strips inside the pillar and started welding……. A quick test fit of the doors and nothing has moved….(phew!). A few coats of sandable primer… The obligatory insipid green… Doors finally back on and everything fits.
1 point
-
My tyre situation was: Factory wheels: 3 x sketchy 10-year-old Linglongs which would probably never wear out, 1 x unrepairable Linglong, 1 x unusable spare Aftermarket wheels: 2 x good Potenza RE003s, 2 x cracking 10-year-old Potenza RE002s, no 5th wheel to use as a spare, rolling radius does not match factory wheels. Swapping between sets of wheels confirmed that the car doesn't drive as well on the 1-inch-wider aftermarket wheels and their lower-profile tyres. I think these wheels are at least partly responsible for the car wanting to fight you and to swerve drunkenly at speed. Maybe their offset isn't right. So I decided to go with the factory mags for Nats, and to get four new retro bogan tyres with raised white lettering for them. As mentioned previously, the only tyre choices in this size are of the harder-than-a-whore's-heart / real-men-smoke-Eagers variety. On the plus side, this gives me a viable spare tyre in the form of one of the Linglongs. +1 to motorway smoothness, now up to an unbelievable 9/10. +1 to annoying the classic car snobs, because raised-white-lettering tyres on an XJ-S look like this: The Gingerbeard Man is more photogenic than me, and his car's tidier, so just imagine the discount version of this photo.1 point
-
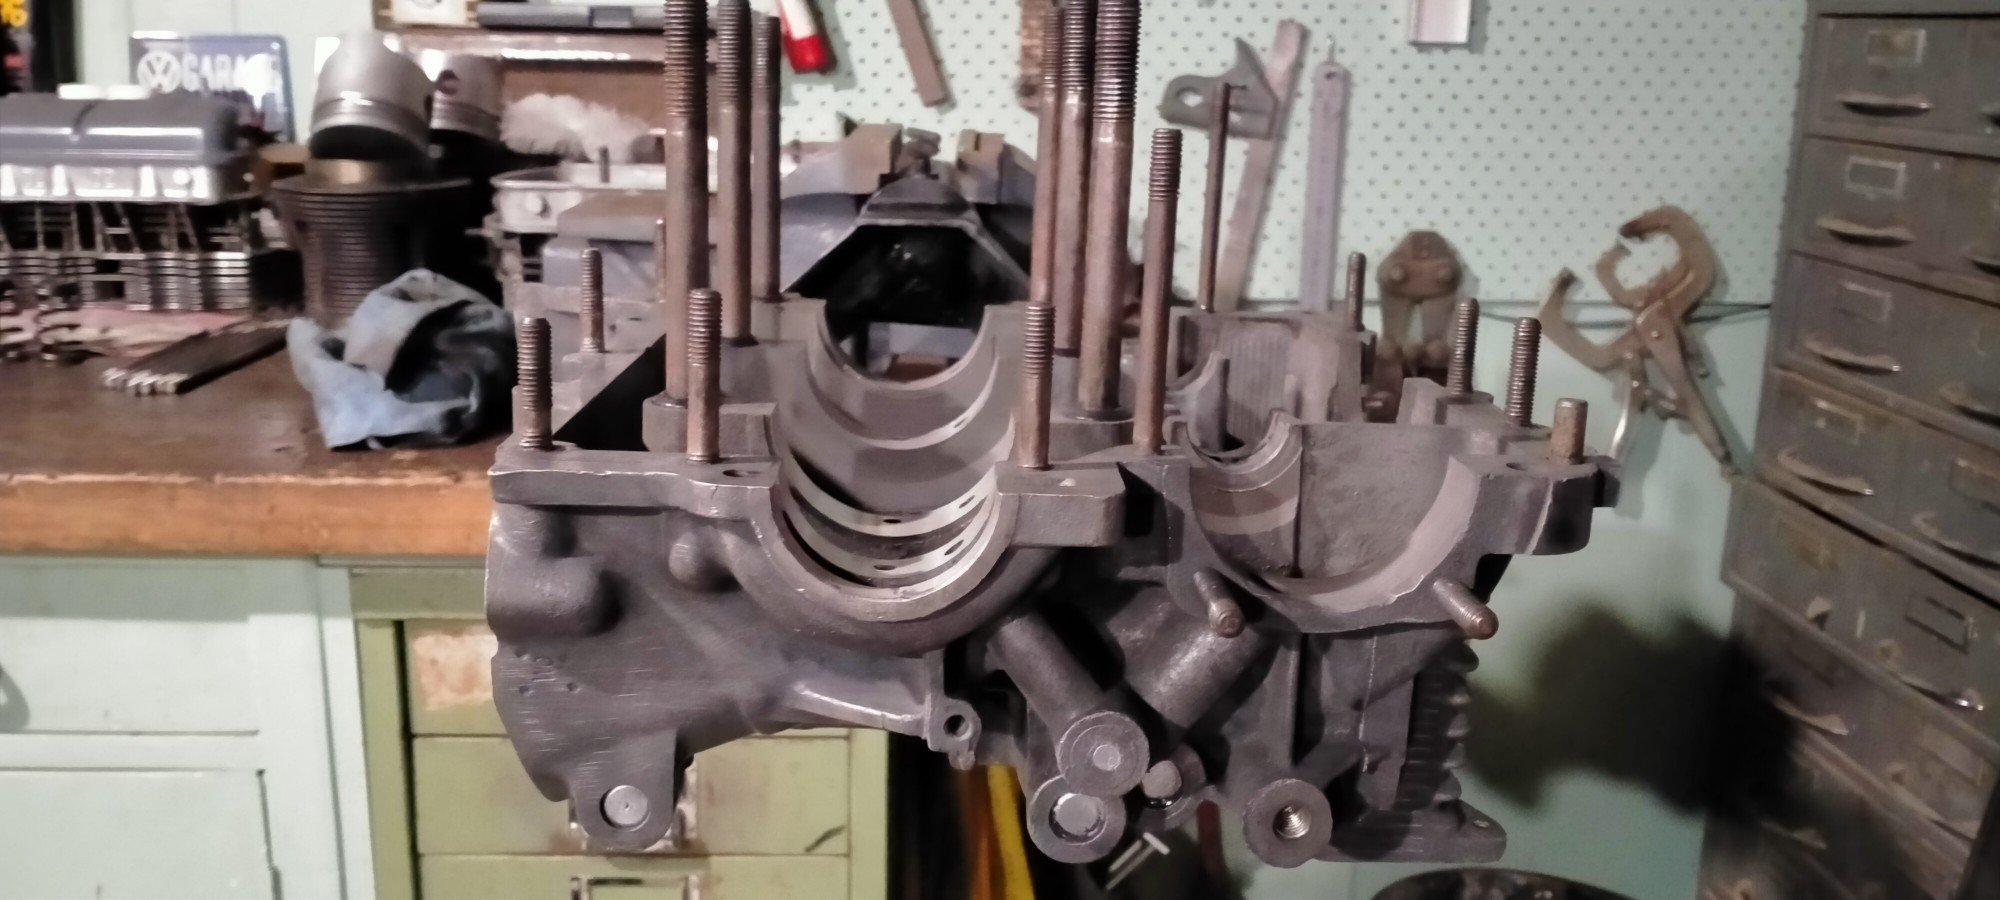
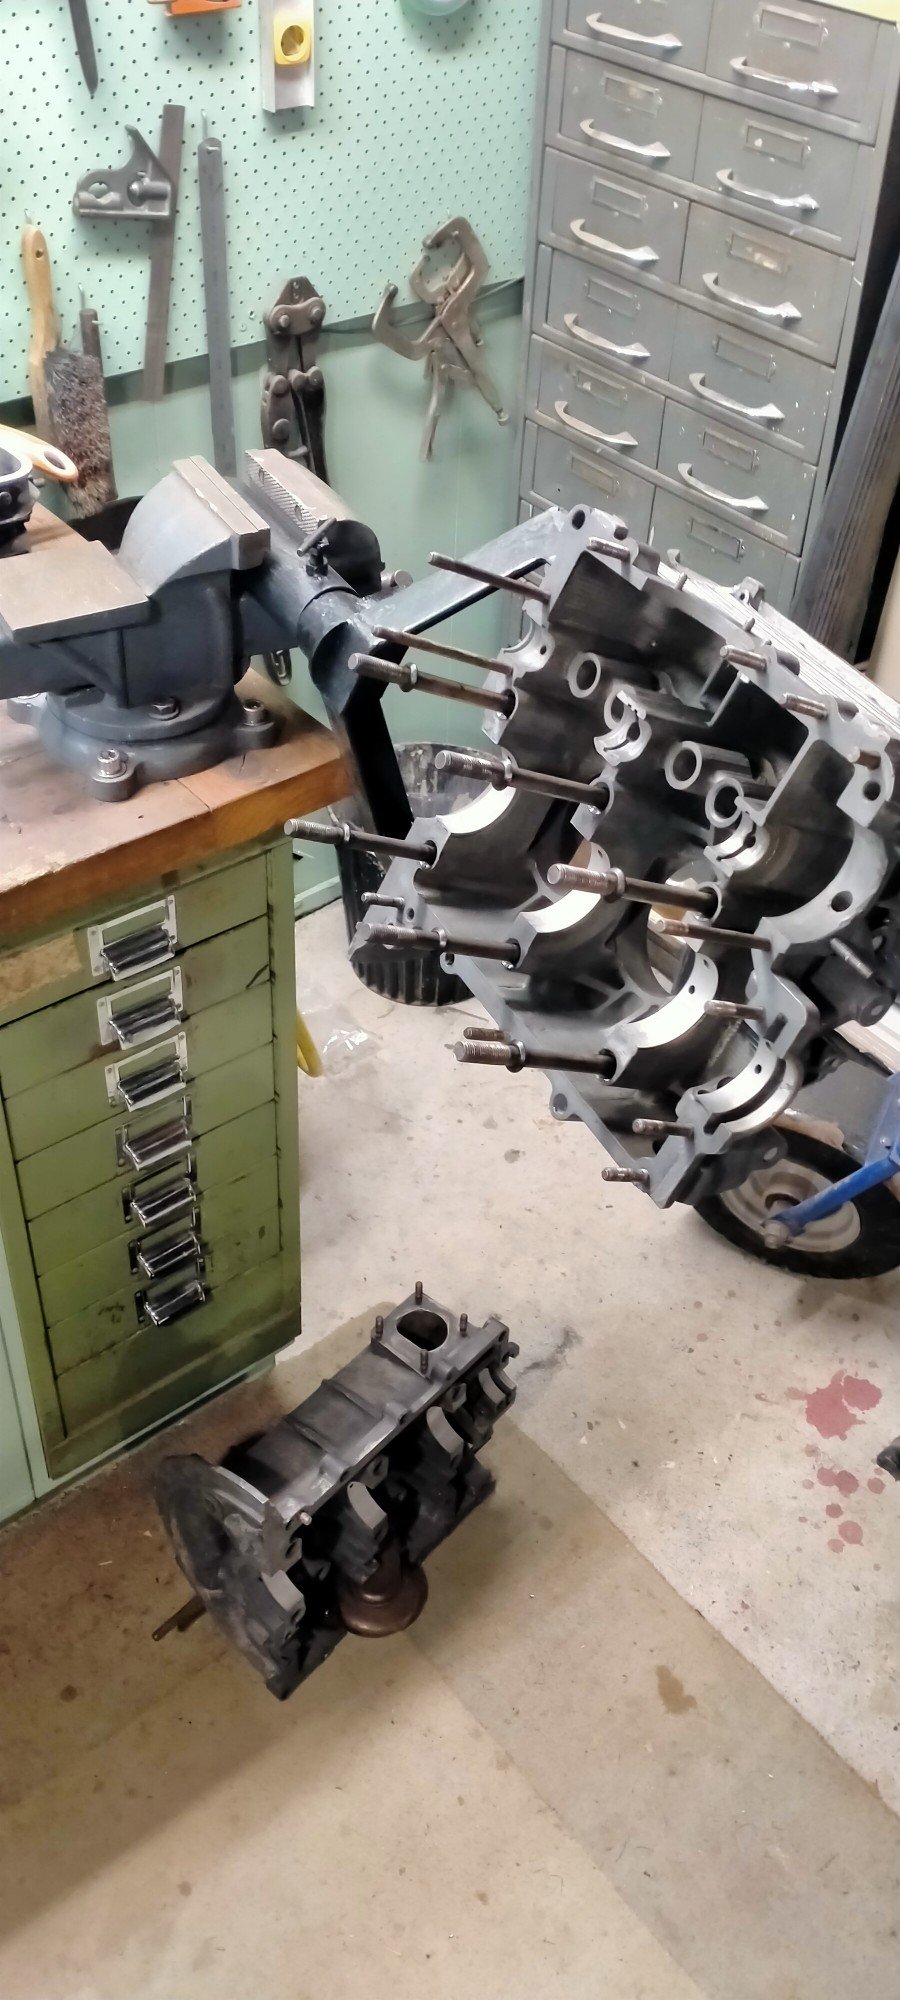
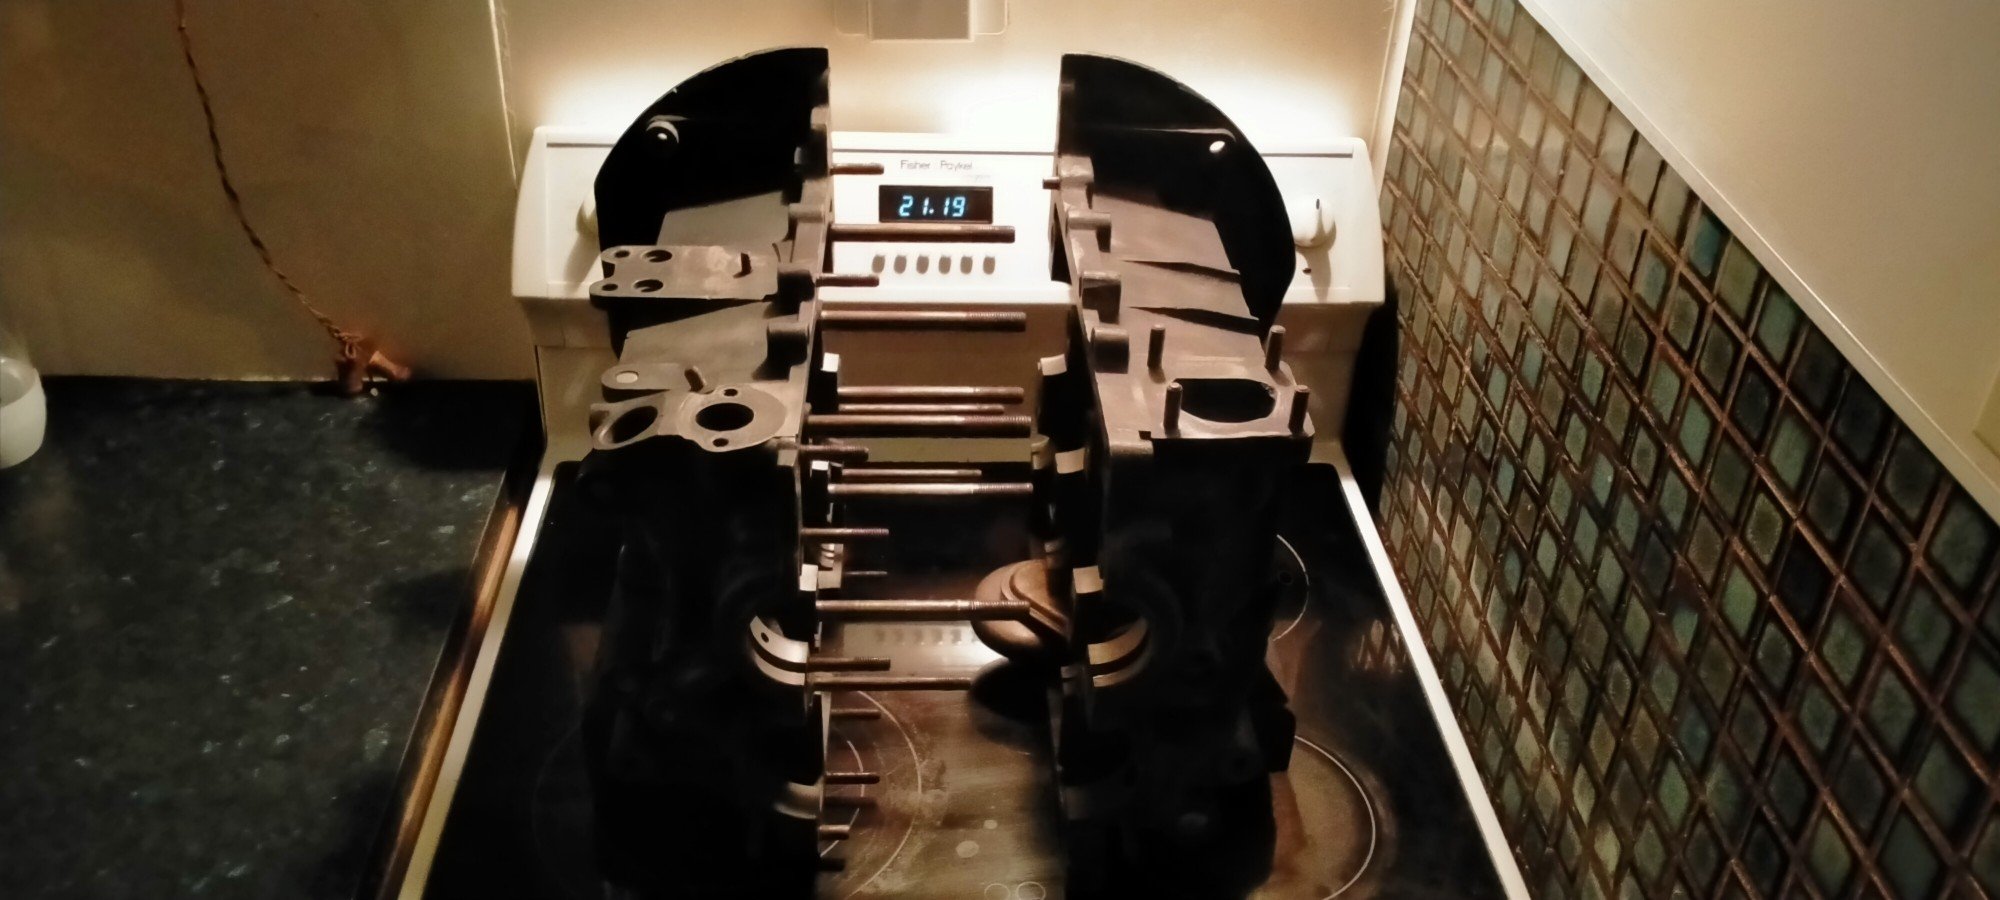
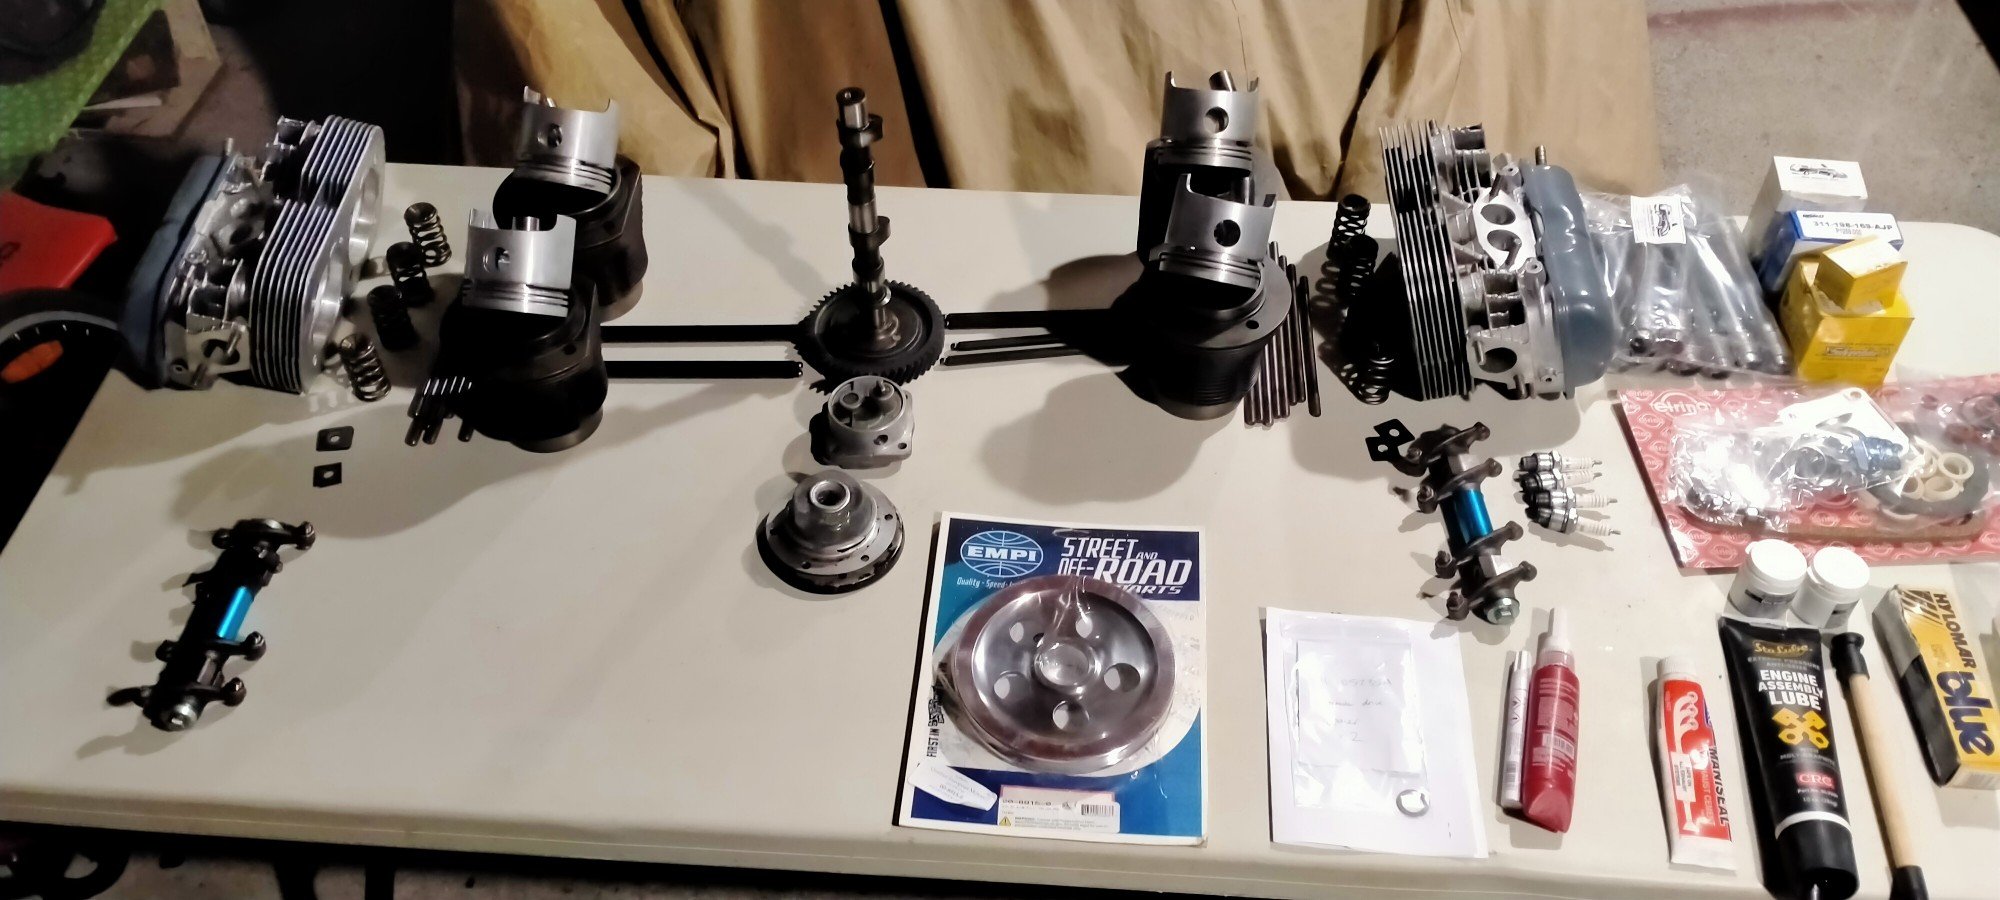
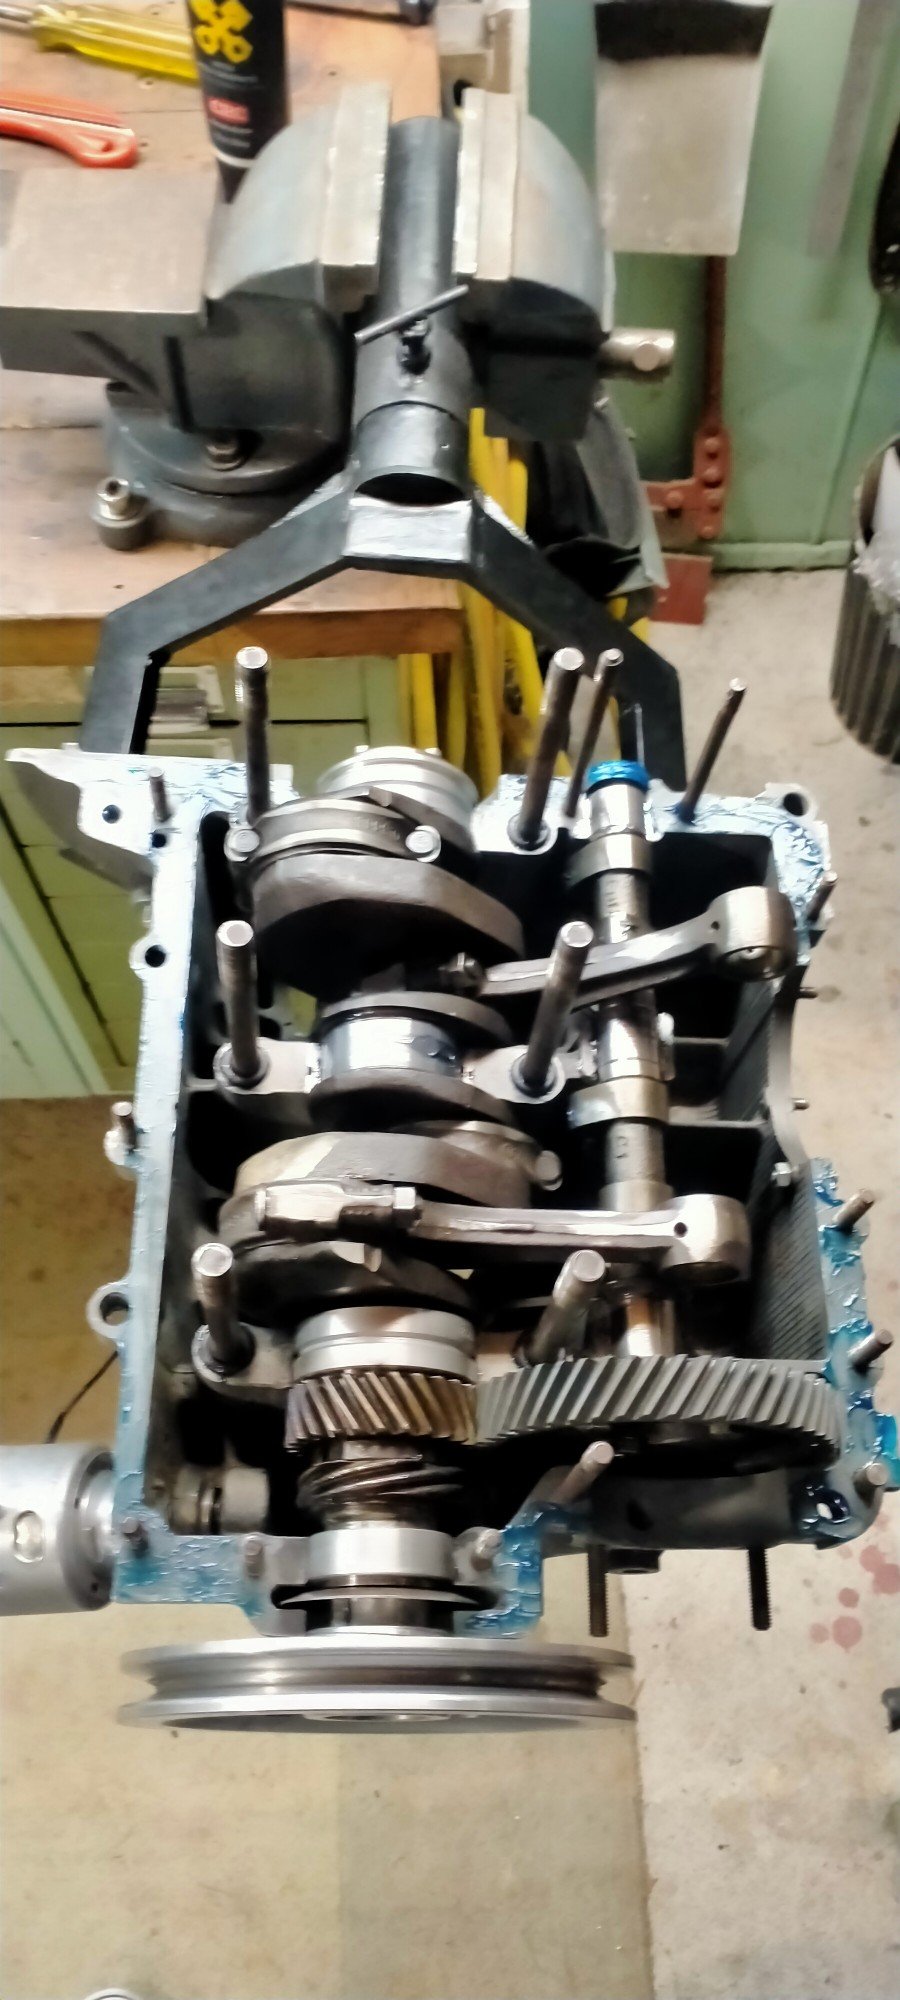
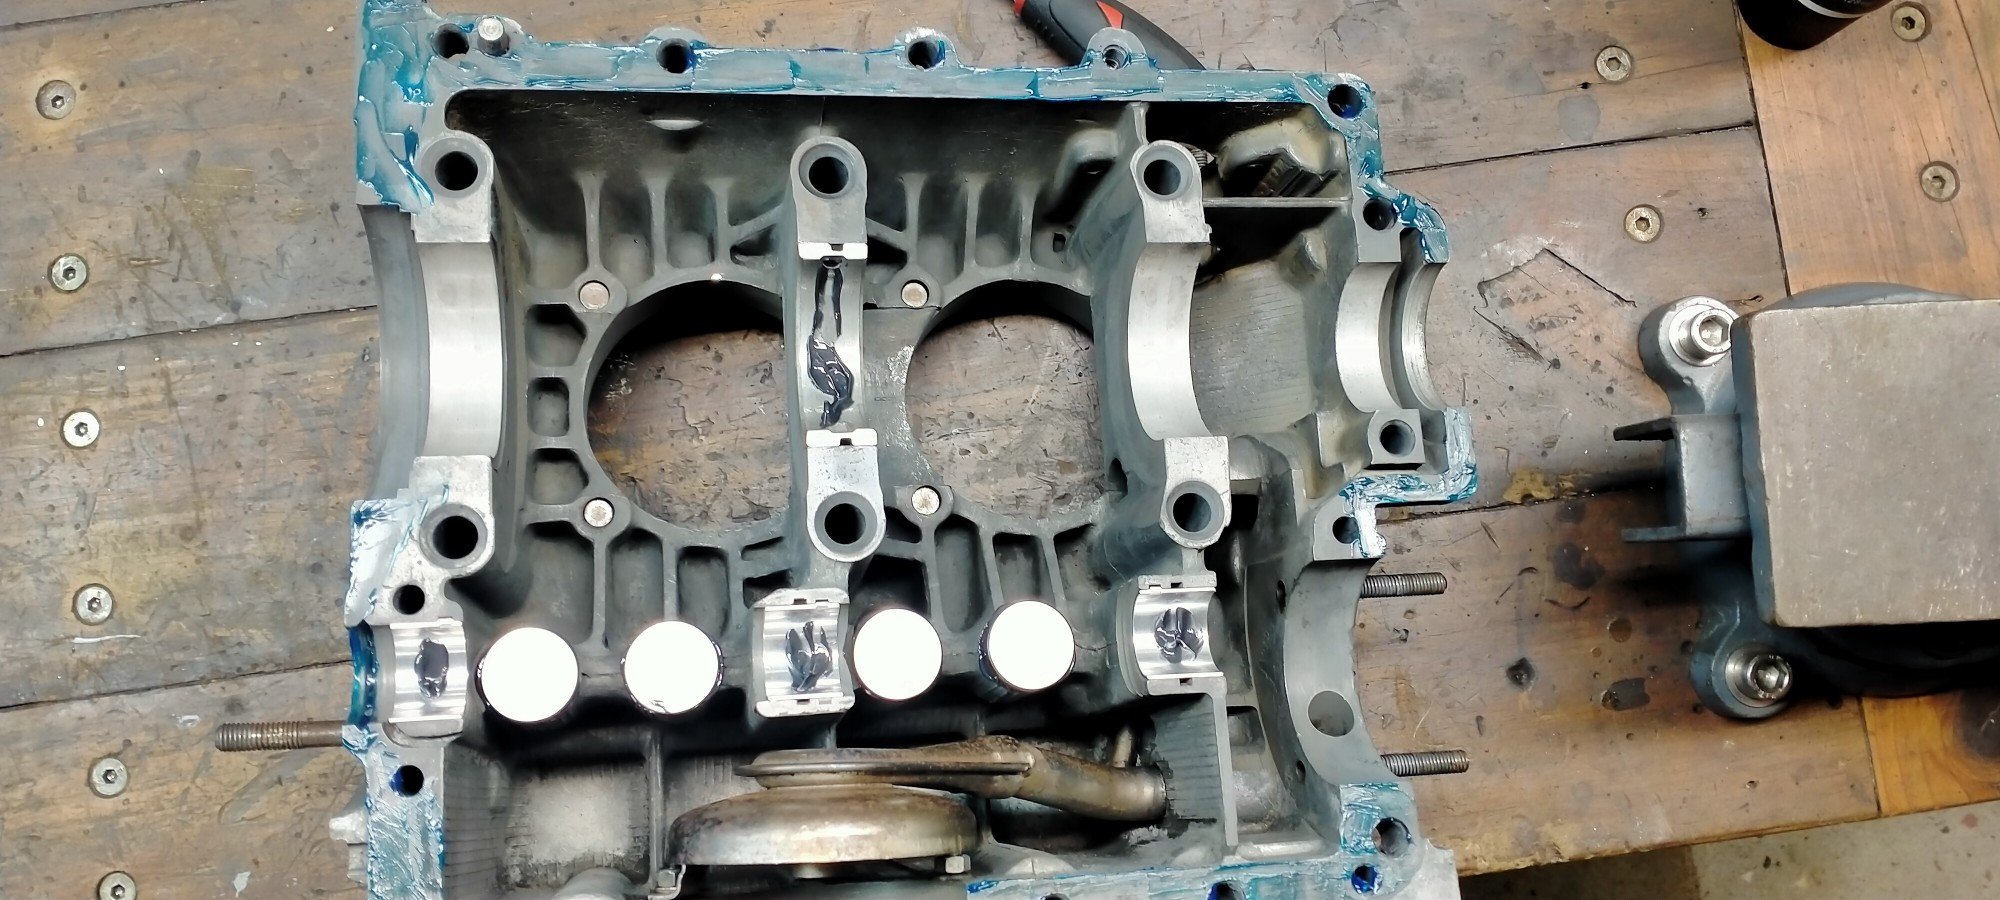
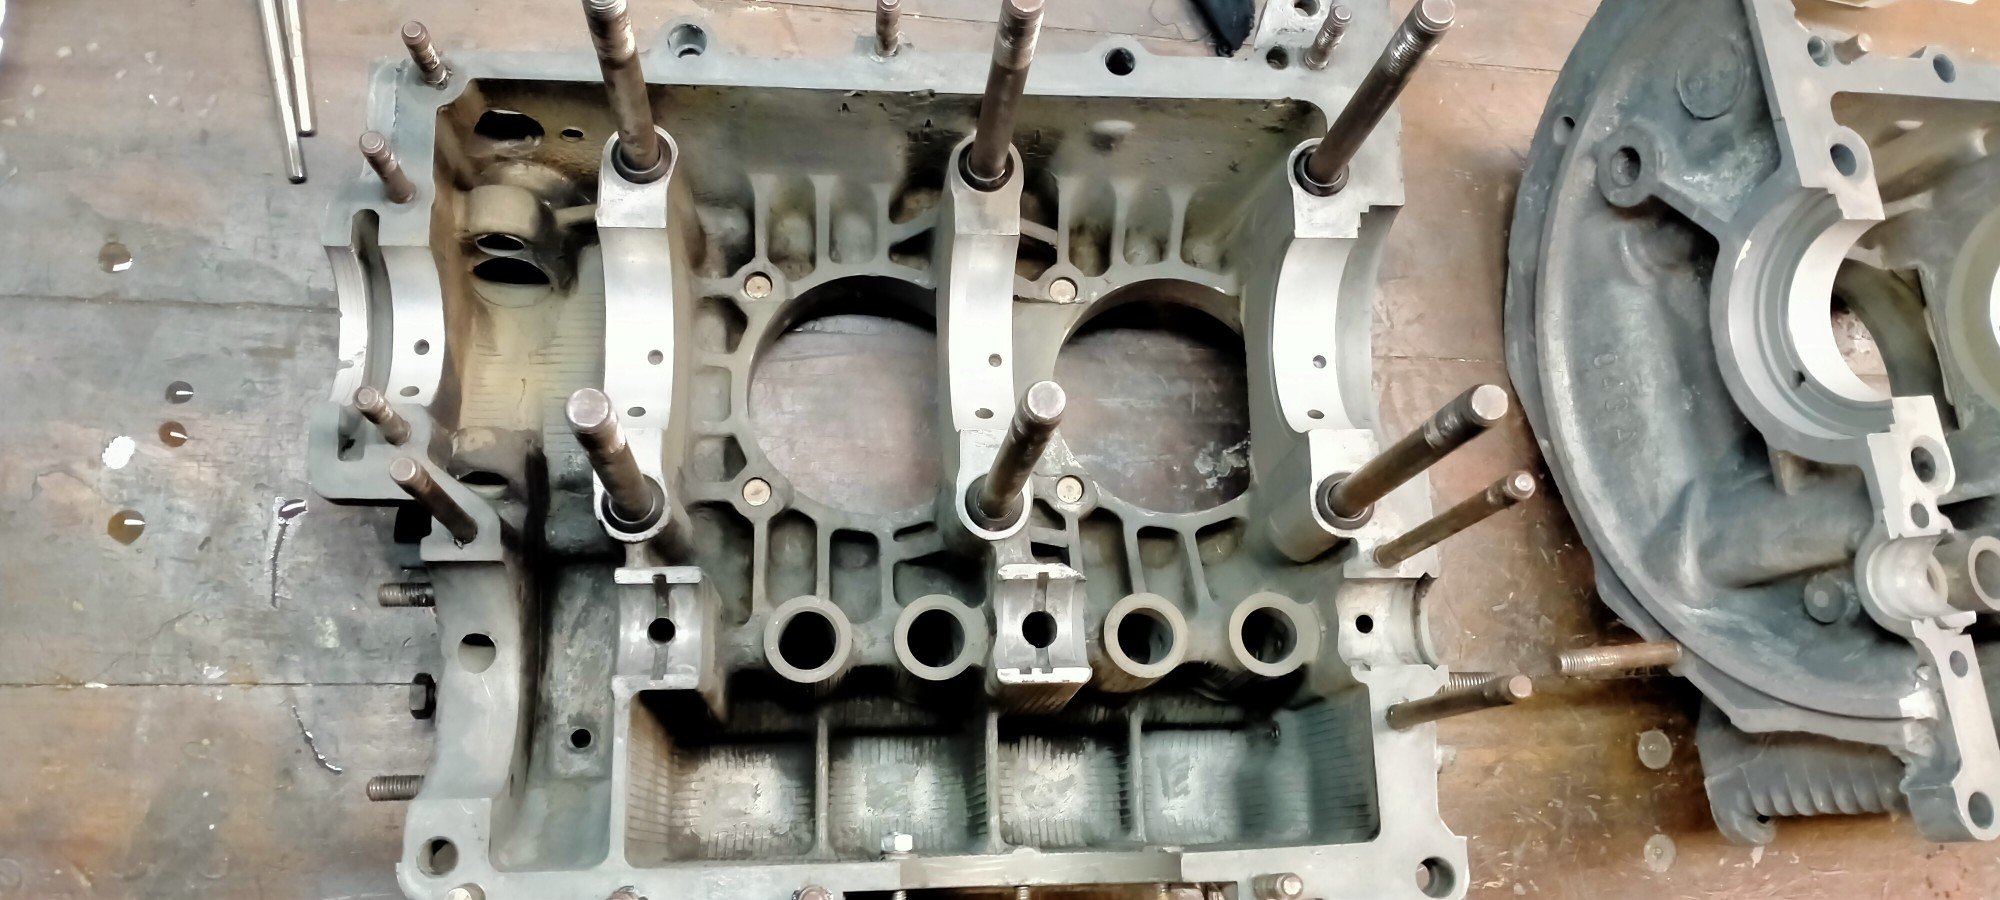
Shopping complete, I layed everything out in an effort to not screw anything up. If I ever have to wash any engine parts again, it will be to soon! Here is the case drying out one evening on top of the stove after dinner, obviously lighter than a SBC. Mounted on my handy dandy engine stand. This made assembly much easier. Many bullets where sweated this evening, making sure the bearings stayed put, matching timing marks, not really a lot inside these things eh? Top half ready to be dropped on, forgot to take a pic of the 3D printed lifter clips I printed at work, you can get metal spring clips but why not I thought!? These keep the lifter in place as you lower the top half over the crank and cam side. Just as l was getting to this point, my neighbor turned up with a beer having just returned from a party and keen to continue, took every piece of control I had to concentrate on the torque pattern!
1 point
-
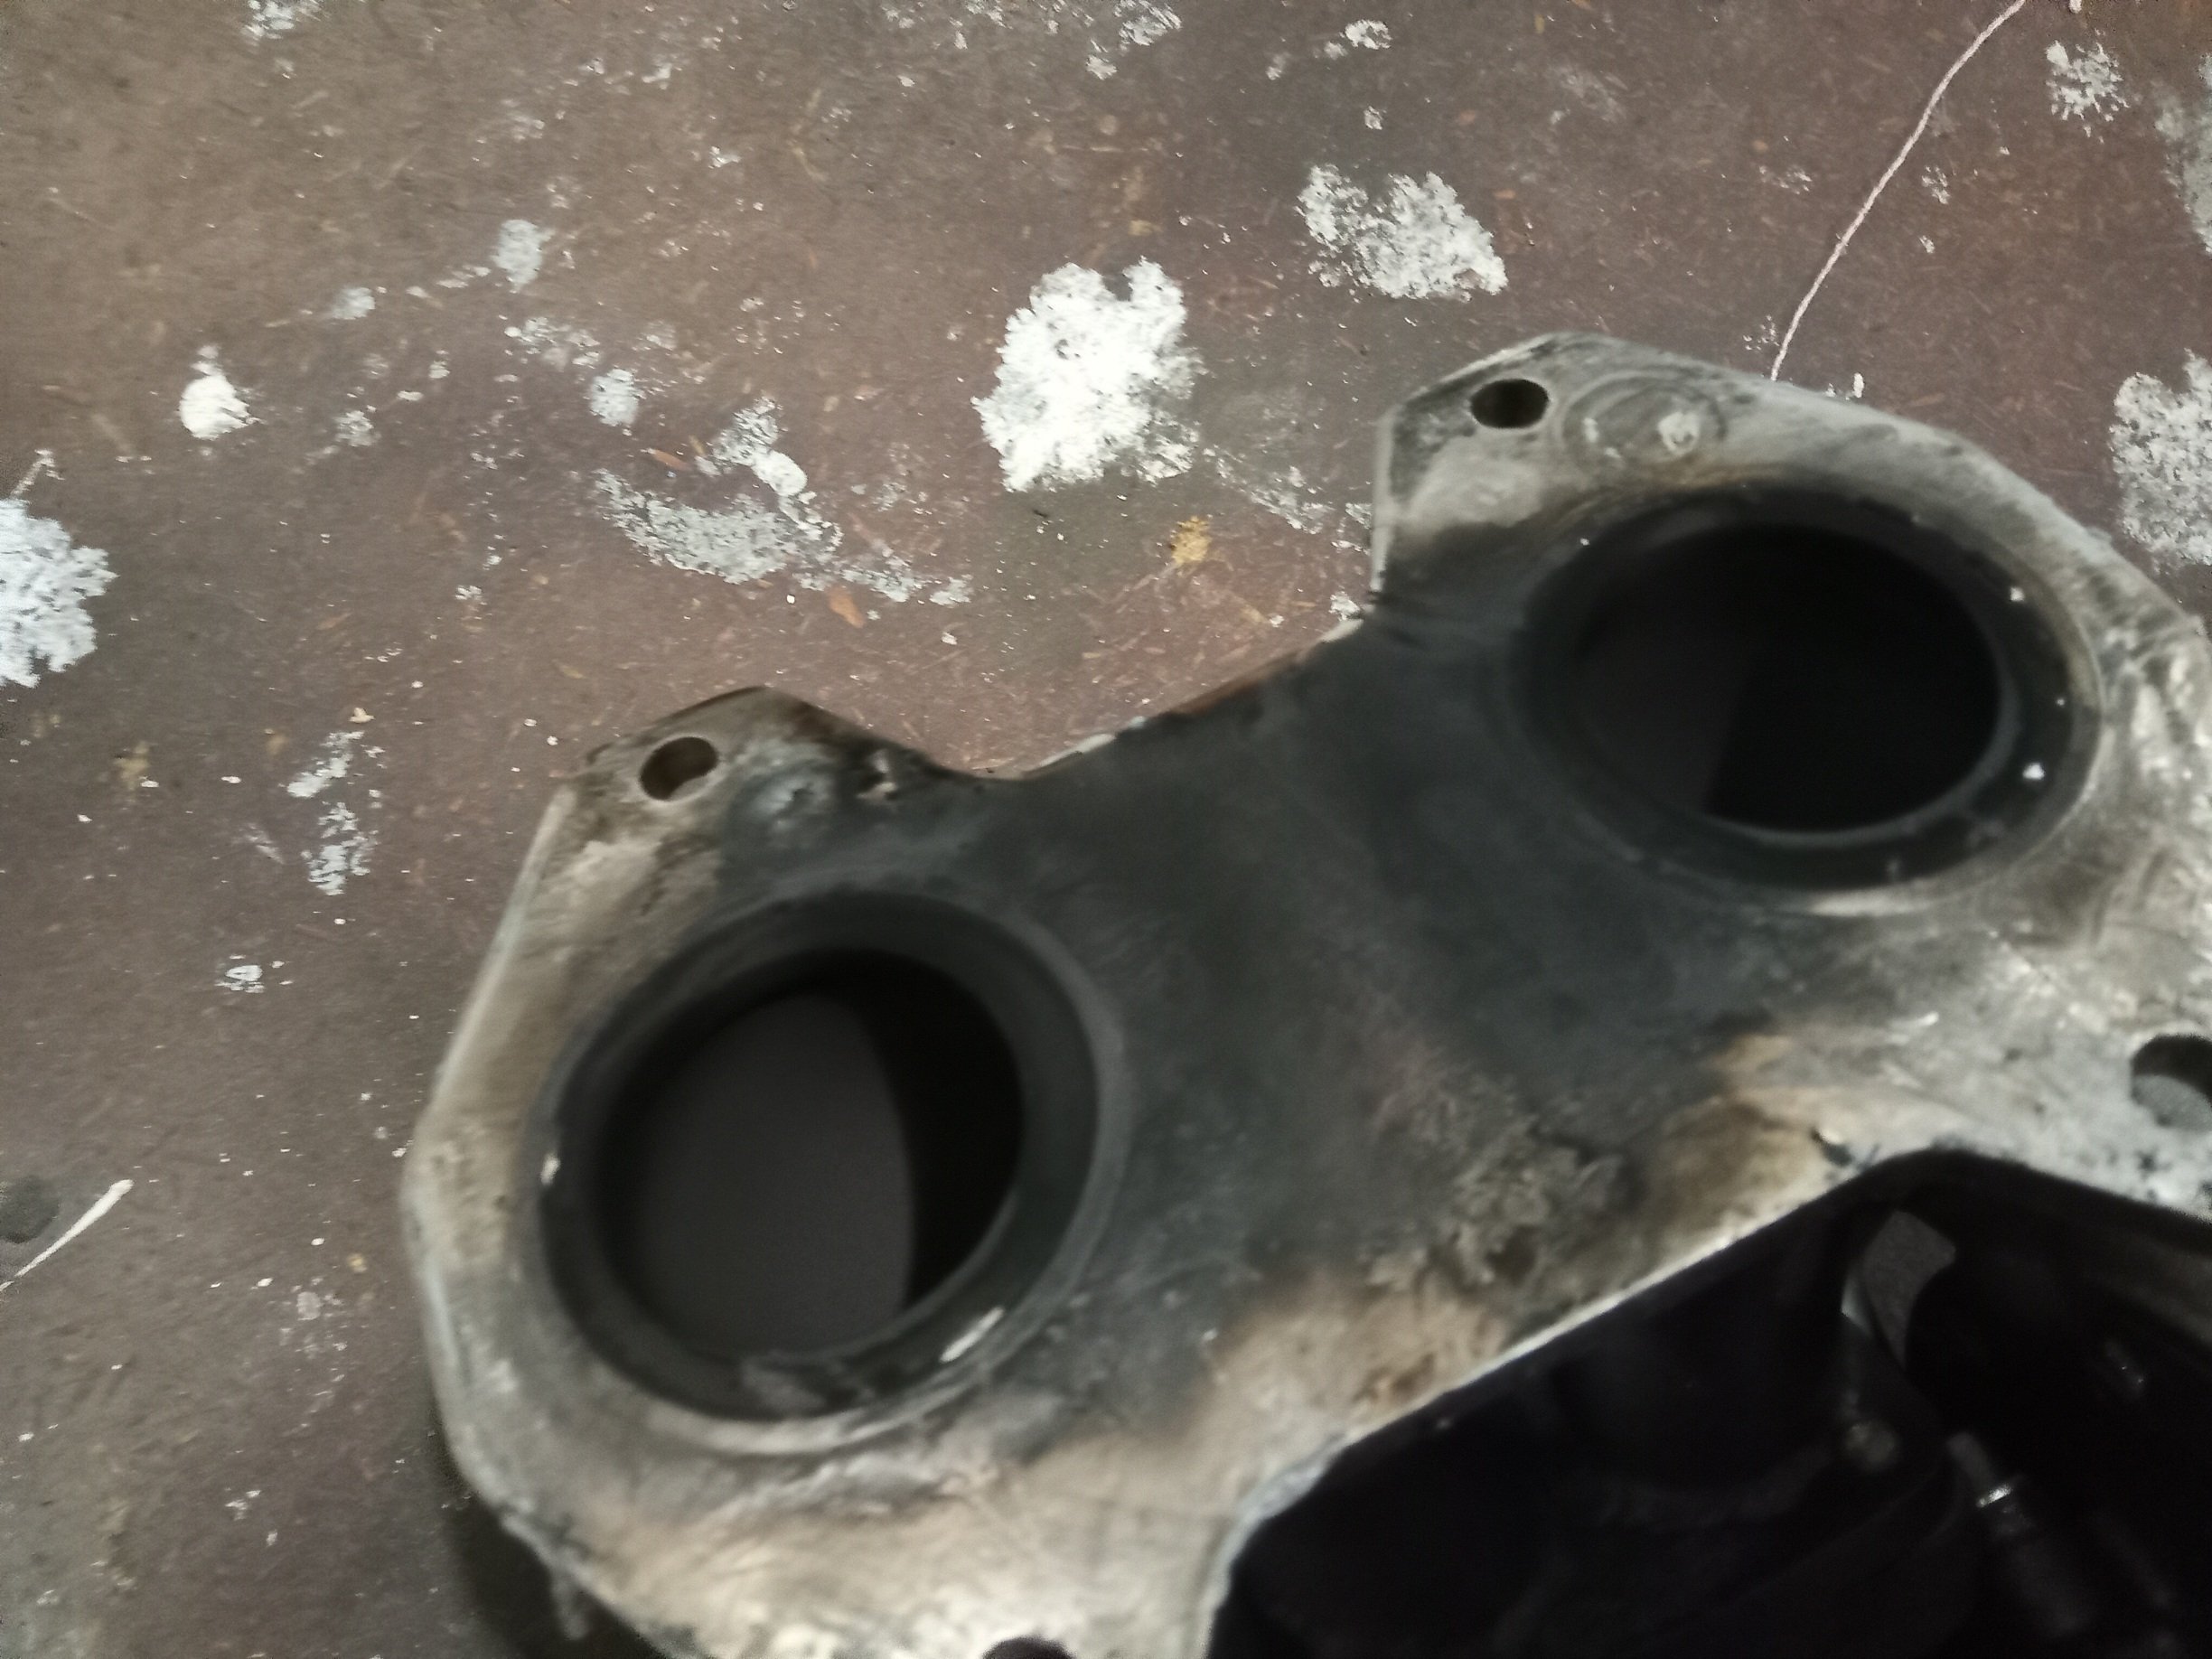
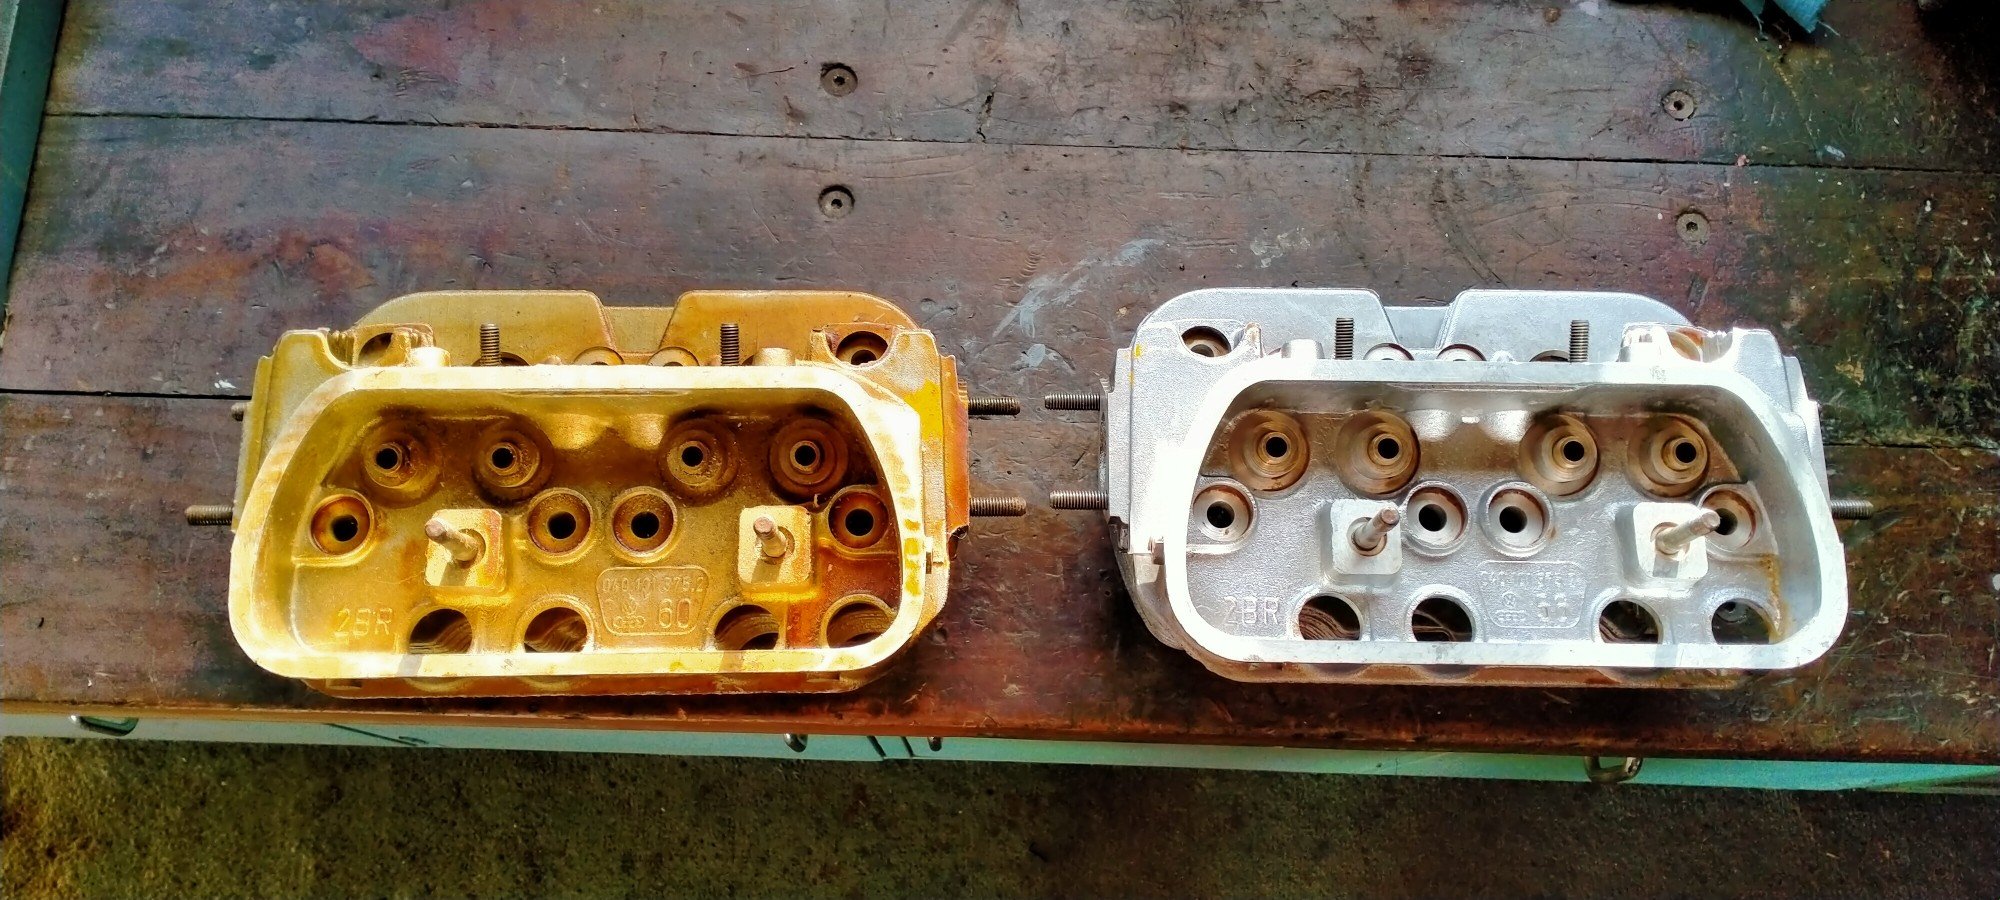
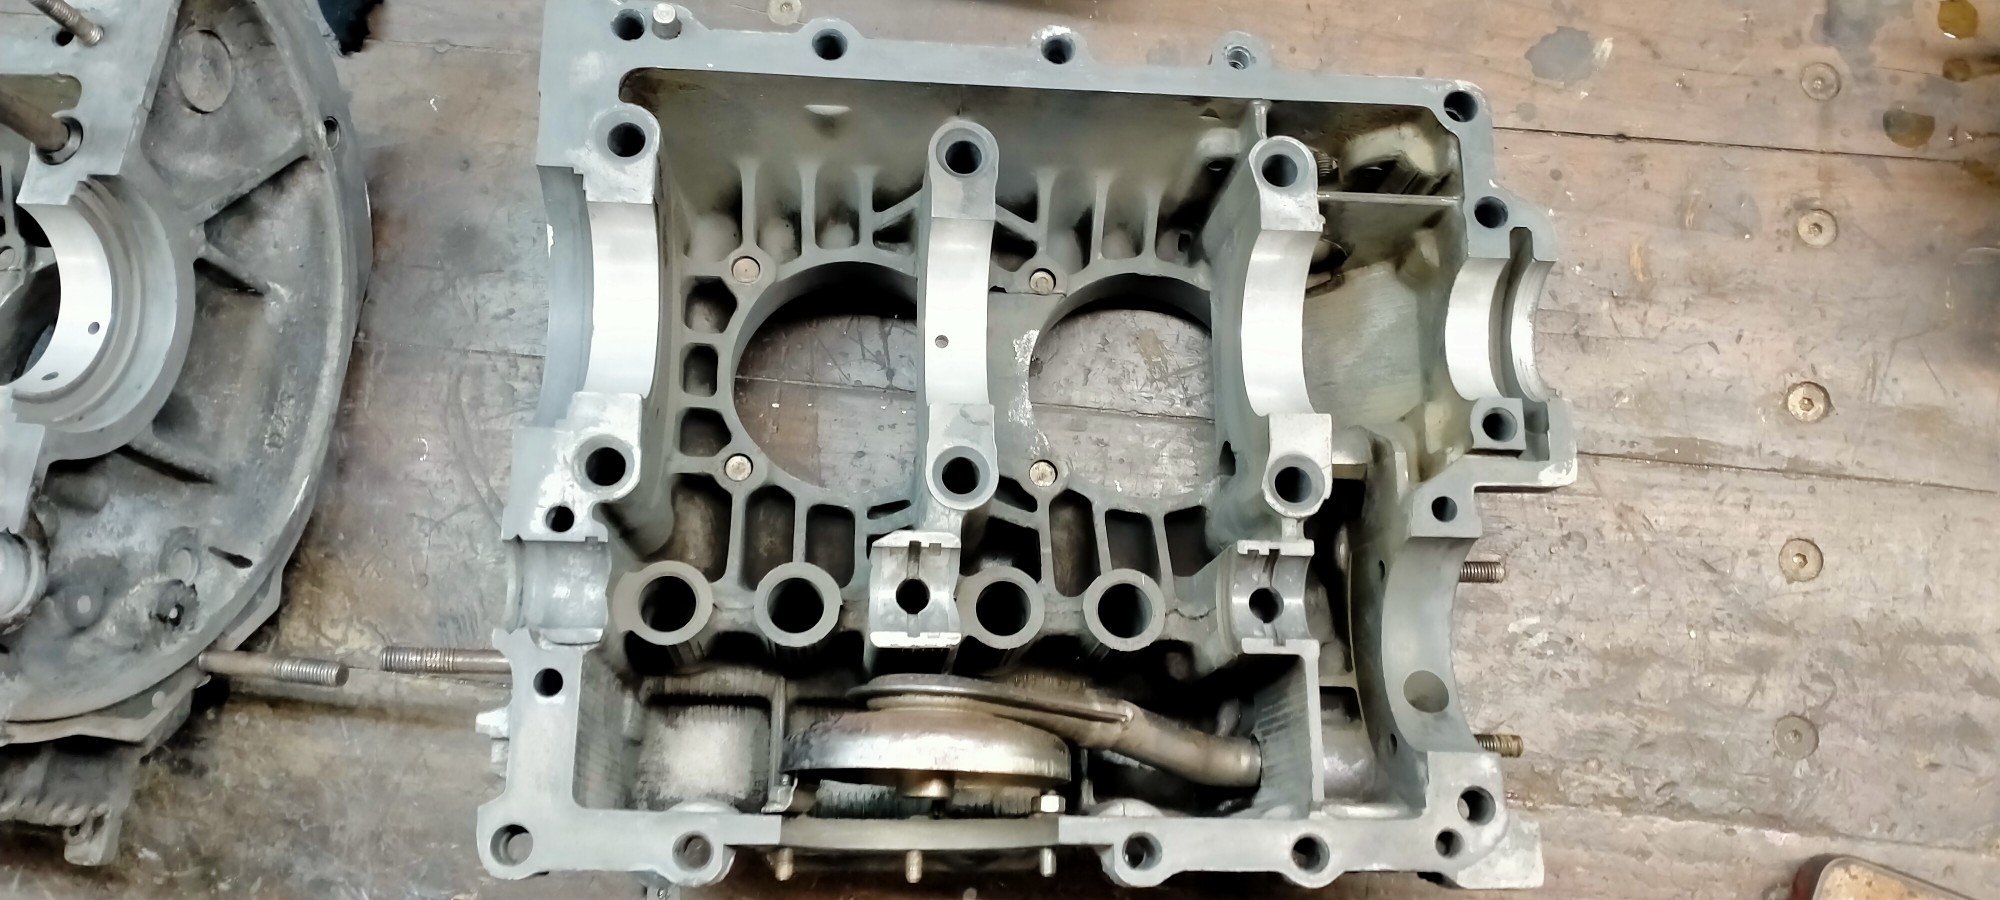
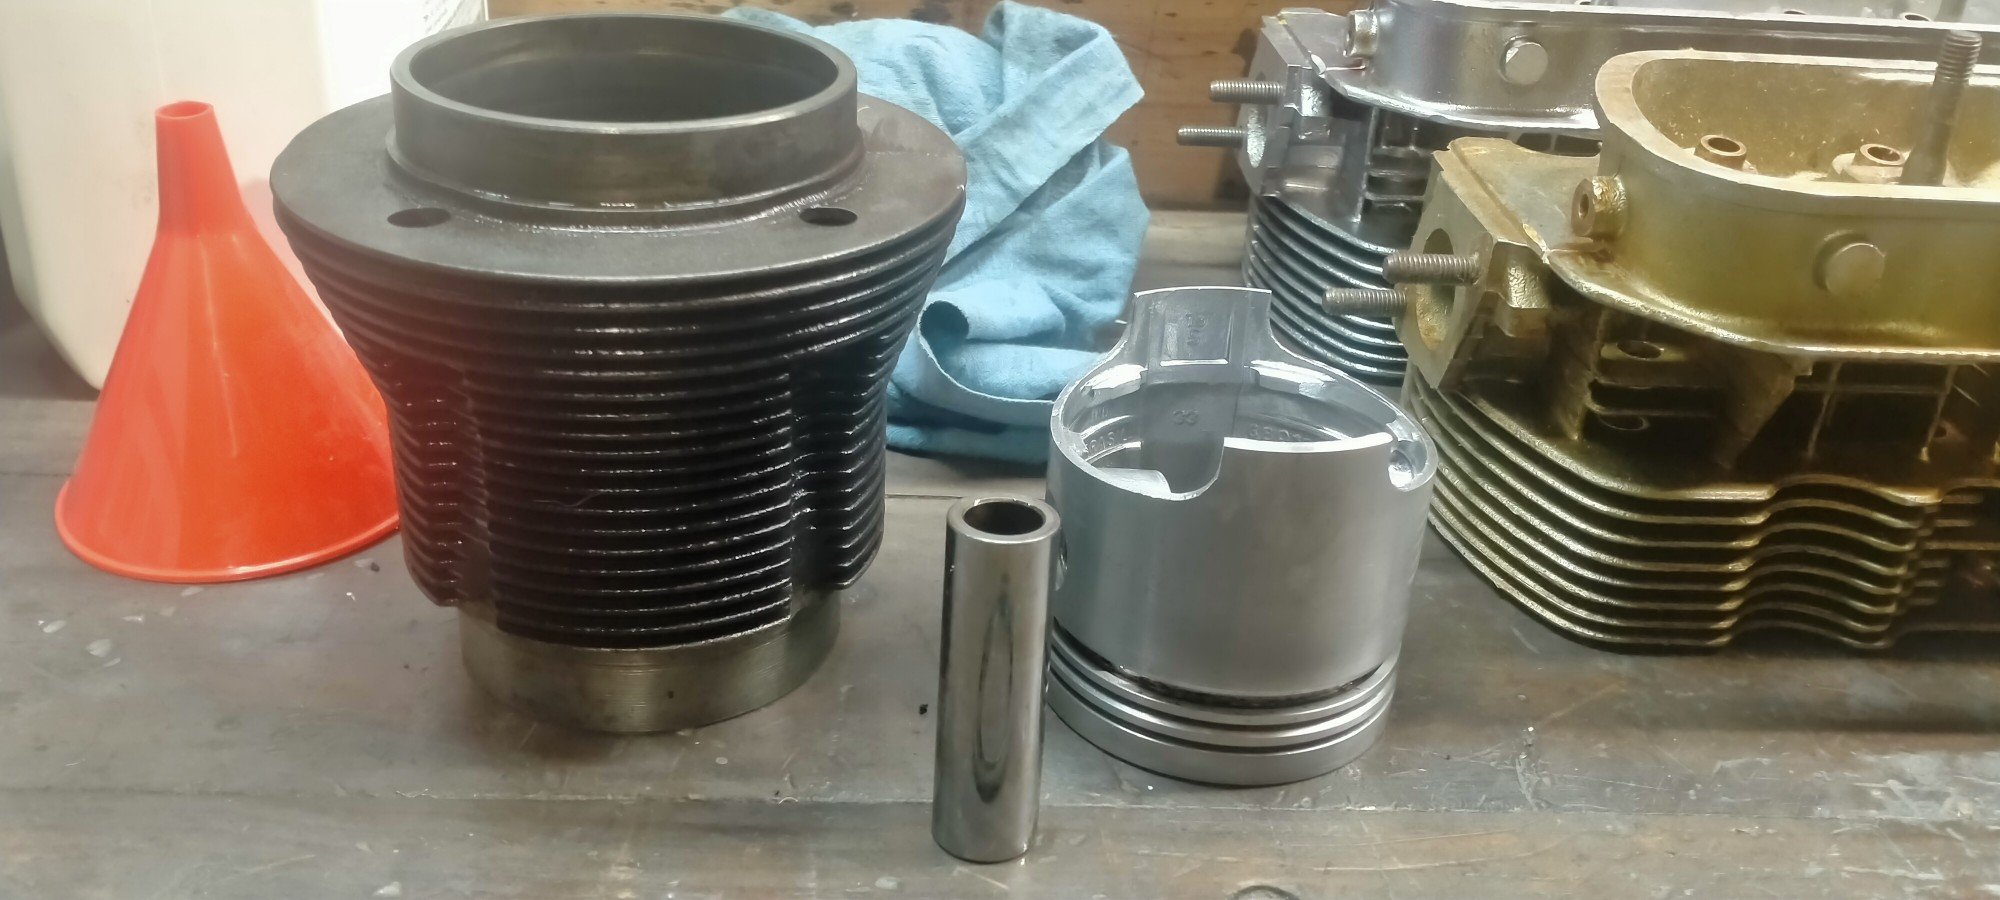
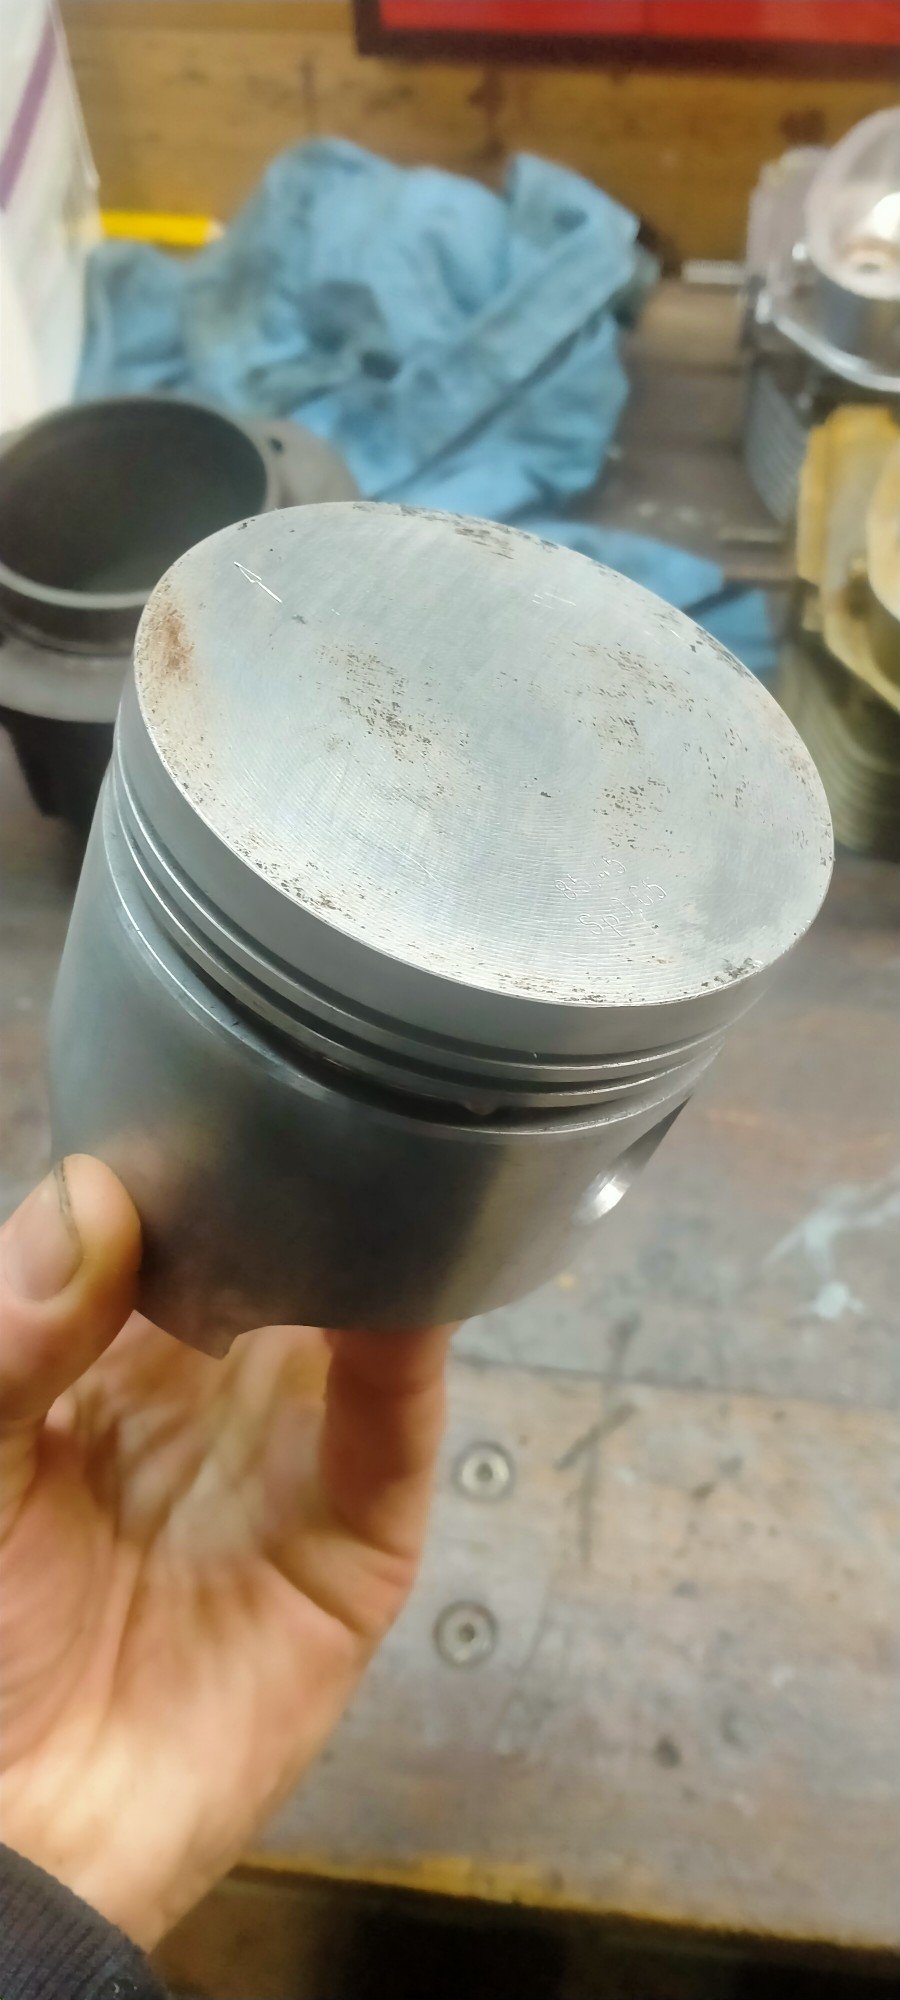
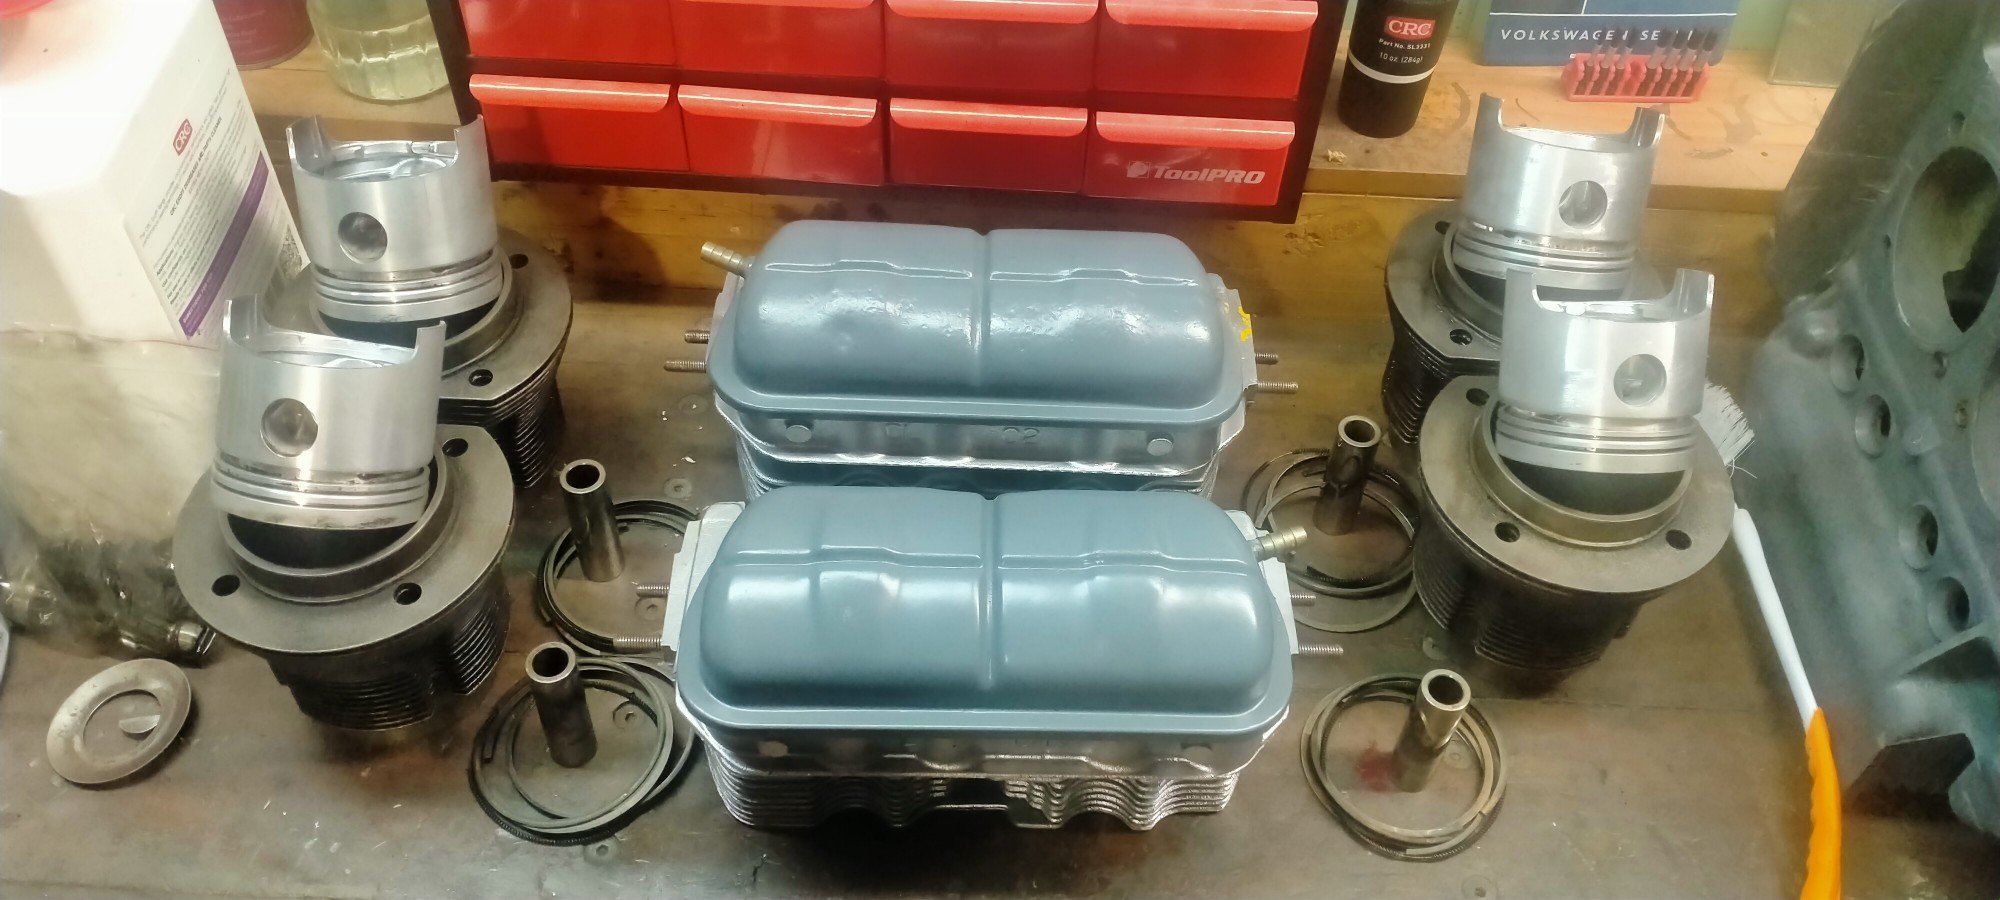
Found a crc product, exoff. It's a pretty good degreaser and with a couple small wire brushes I got the gold stuff off. Took the rings off and cleaned all the nasty black carbon shit off. Some new rings and this stuff should be good to go. Done some research about the step around the edge of the combustion chamber. The new heads will have a tighter squish, hopefully not to much! Gave the inside of the casehalfs a good scrub, will need another before assembly. 1 2 3 4.
1 point
-
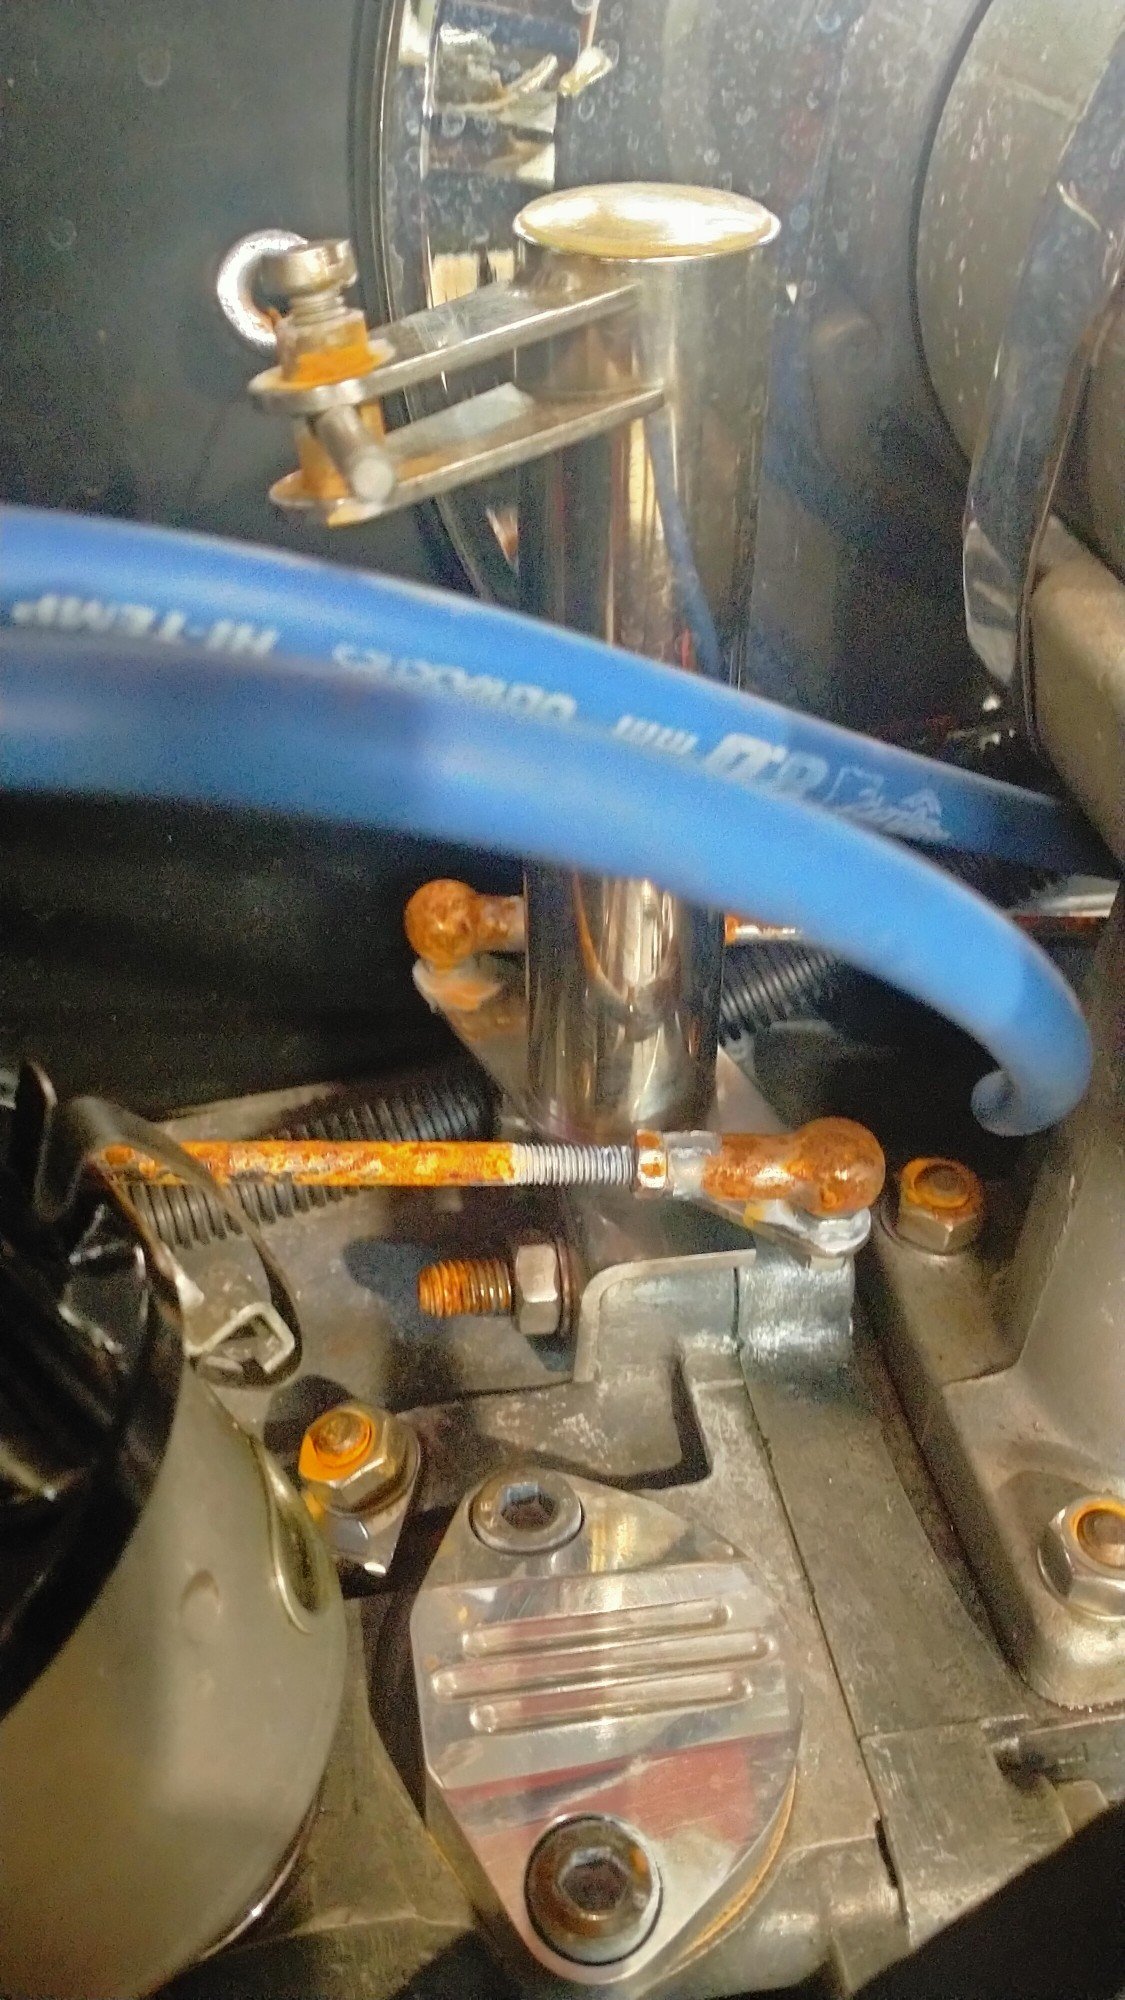
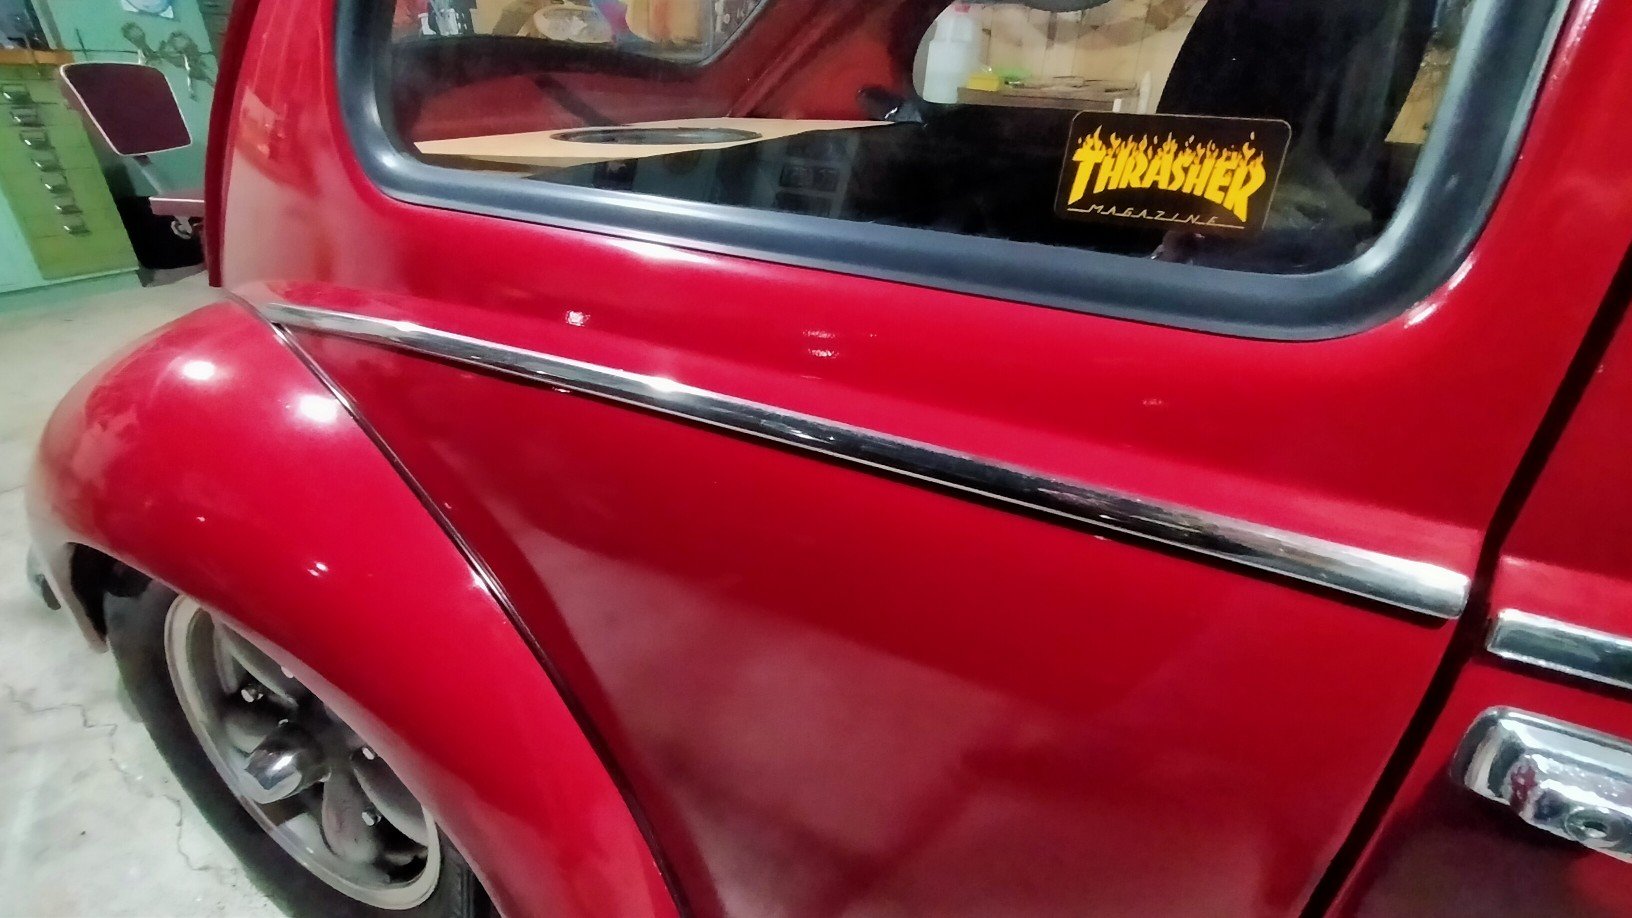
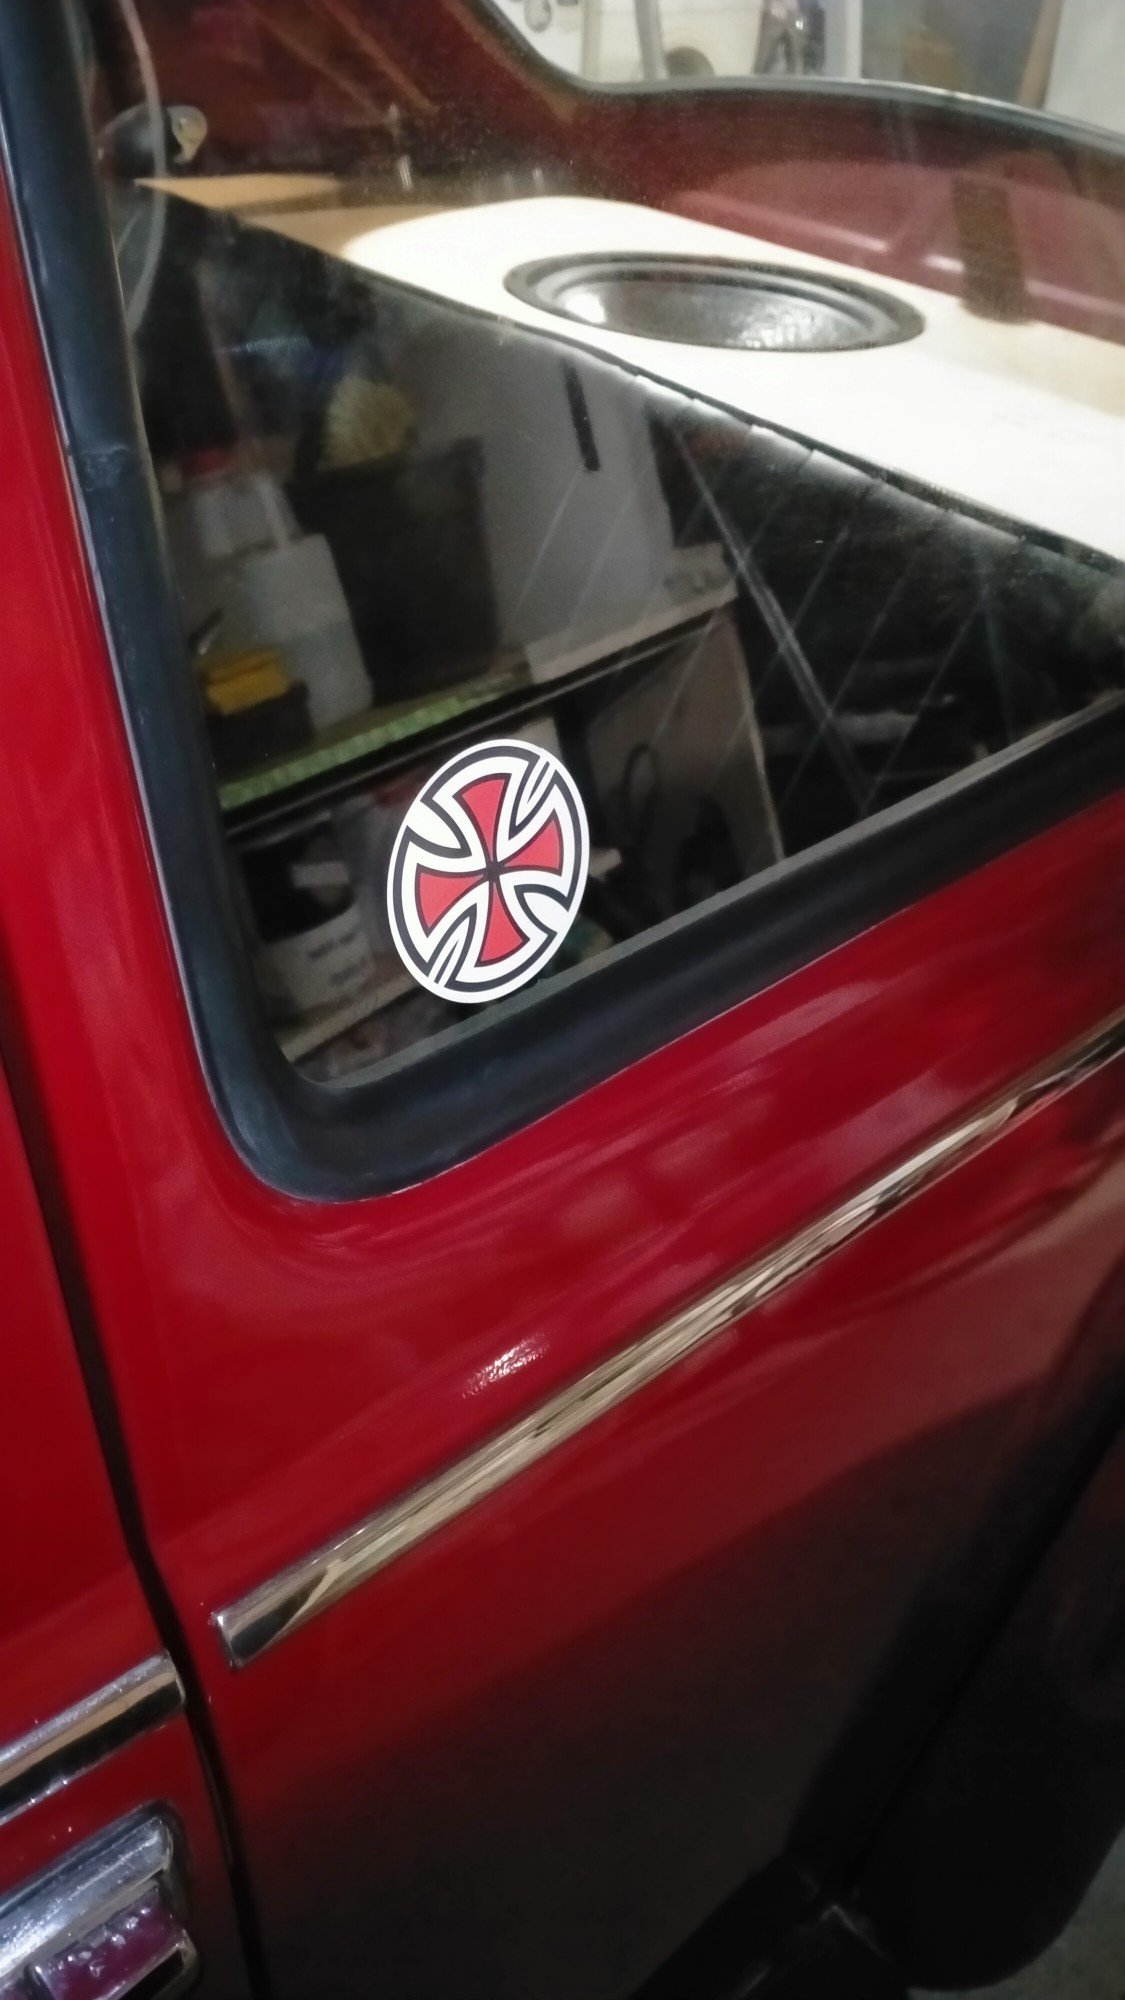
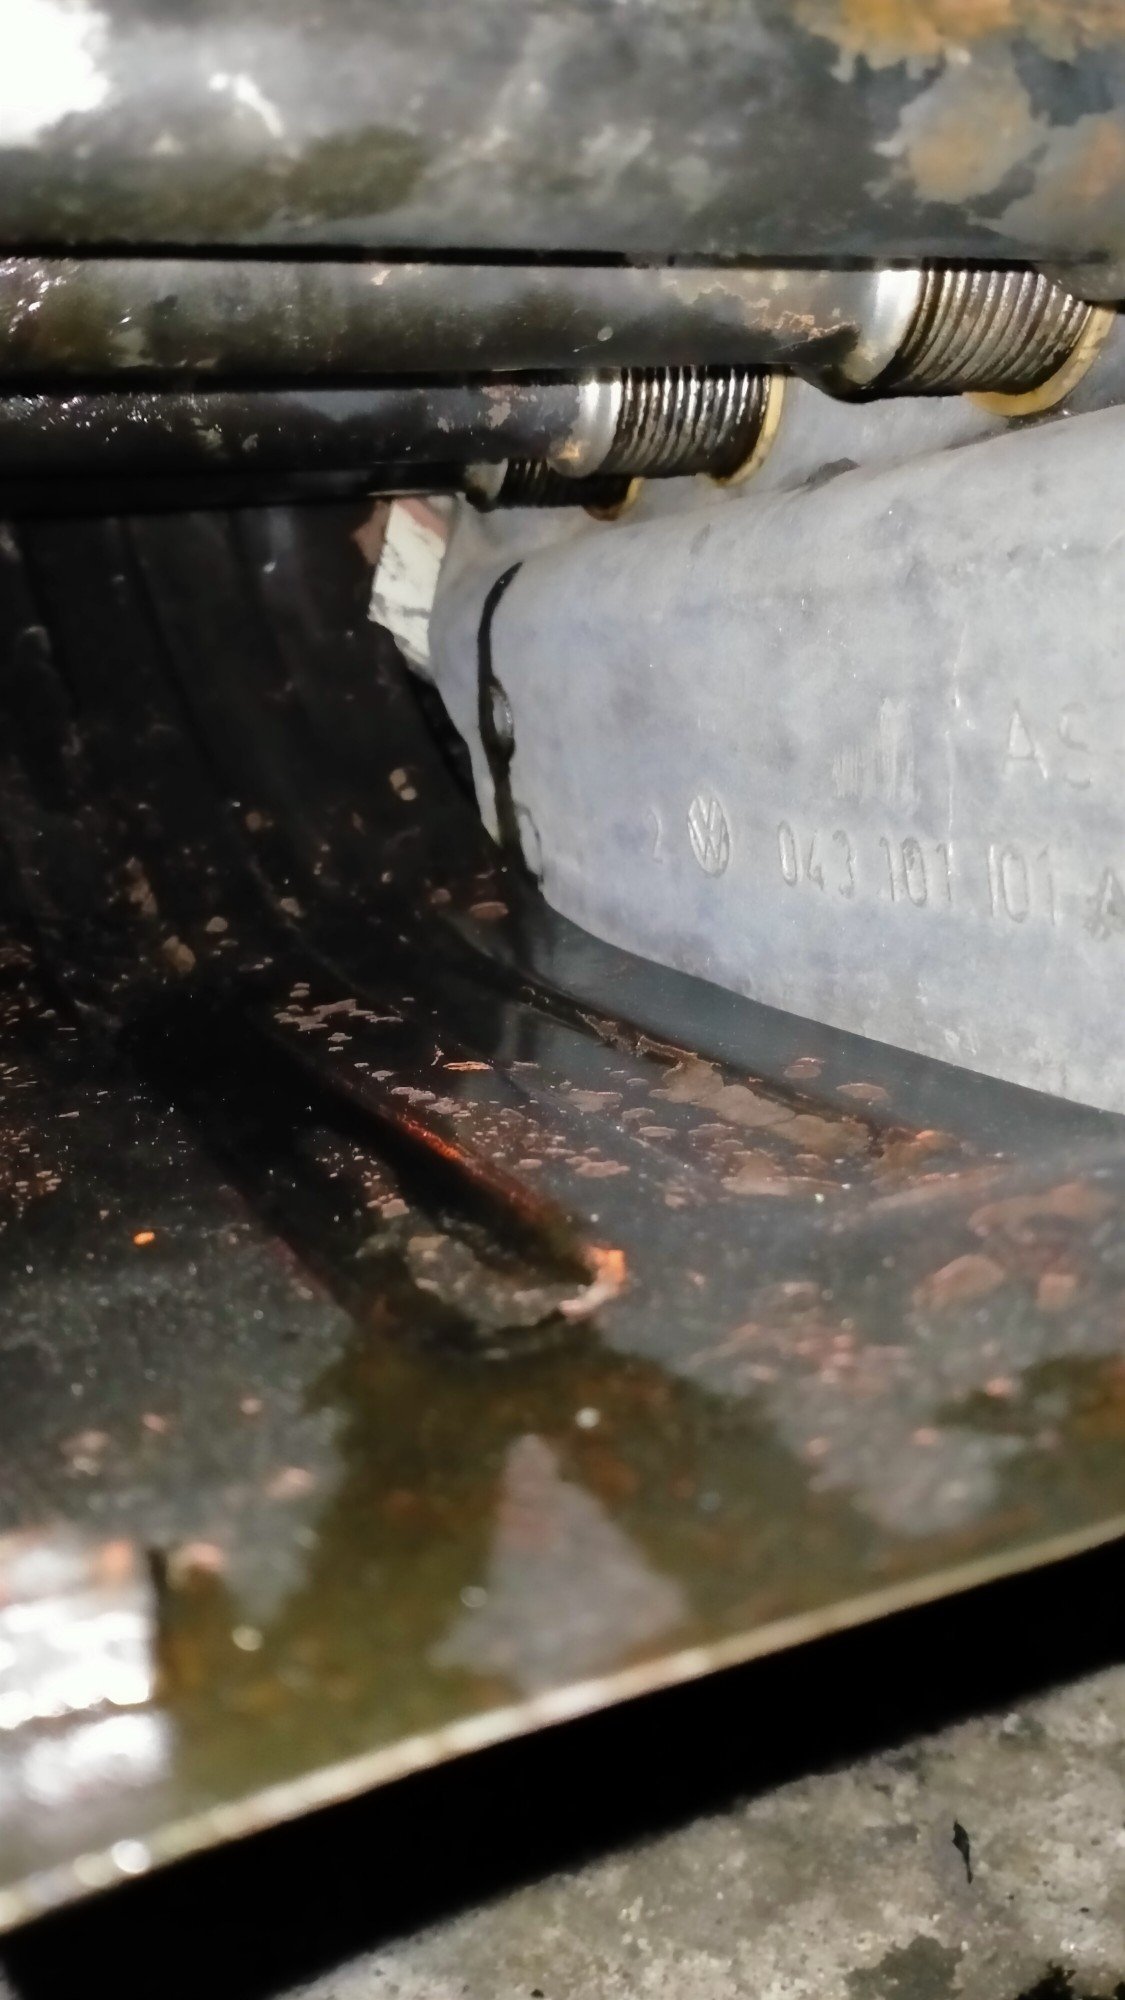
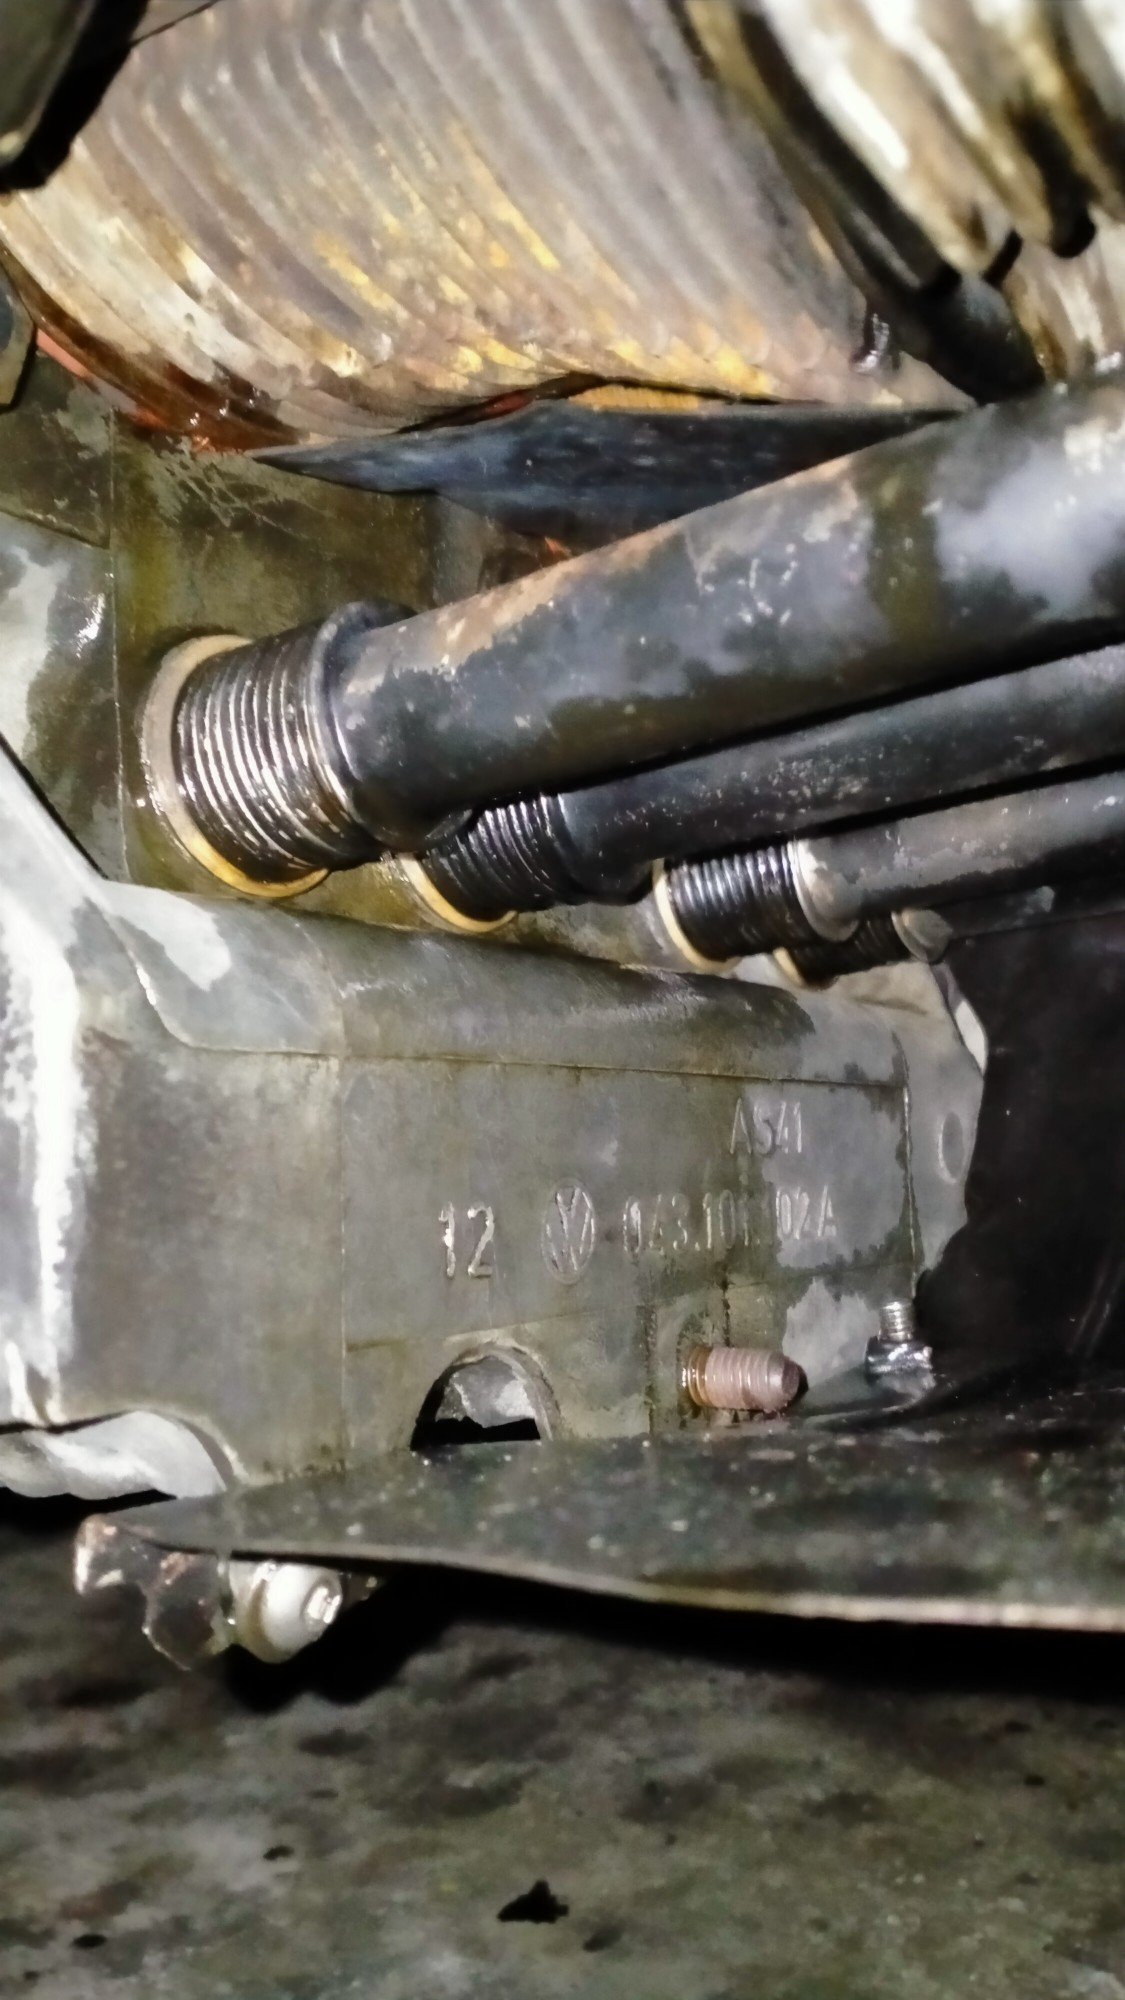
Gave the crabs a birthday, both seemed to be weeping gas from the between the top plate that the floats attach to. Cleaned everything and reassembled. Also installed a new set of plugs, really need to buy some leads, these fuckers must be nearly twenty years old. Anyway, one of the plugs was only finger tight and a couple had oil stains around the thread? Maybe those rings are stuffed? When I had it on the bench, I re torqued all the head studs, very carefully as to not pull any out of the magnesium engine case. After a quick test of oil pressure, it started up okay, needed a small clutch adjustment,warmed it up around the block, clutch works so nice, like butter, very pleased. On return, it was idling a bit fast, which is a pain. This engine must be warm to set the carbs. Disconnect the throttle linkage completely, and get both carbs to match. Got both down to 2-2and a bit on the air meter. It's never run this smooth, imagine if I could actually tune the Dells! My son found this for me in a thrift shop, I've been looking for one for a while. To go with my og 90s thrasher sticker. Stoked. And yes it's already leaking!!! Quite badly! Seems to be mostly the cylinders, between the case on side1-2, and from between the head on 3-4? Dogs will hunt! Still really pleased with the work done, clutch works well, flywheel hasn't fallen off, I did it to spec but man, if that was 270lbs it musta been 4 or 500 when I took it off. Engine mounts are definitely softer, it does not like hard launch's. All the axle tramp! Not to worried, I said I'll renovate the house next and I'm not driving it daily but it's nice to have it ready it go.
1 point
-
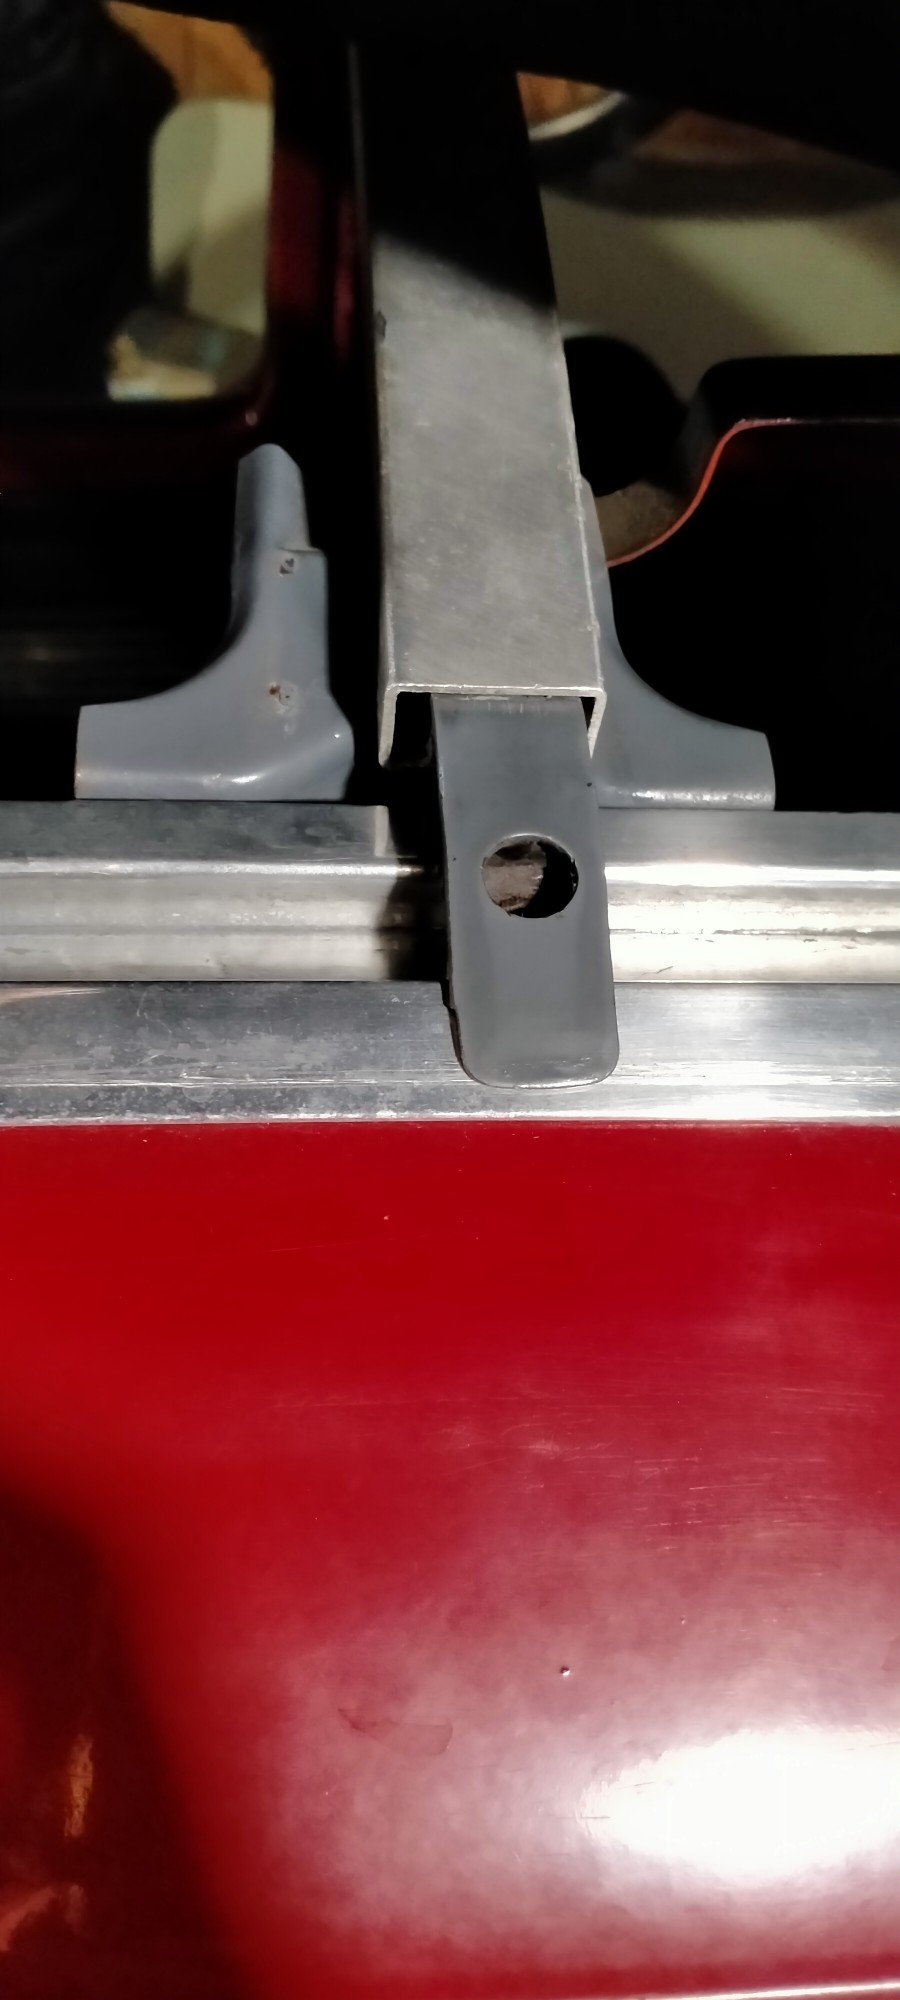
Had a play with the sunroof the other night, things been a bitch to open and close since the resto, put some of it down to not having a headliner to help pull the second bow forward, but it also a dickhole going the other way. Had a good look and tried the second set of hole in the end of the wheel holder thing. Much better! Why the fuck hans drilled the second set I do not know. The only other instructions I've been able to find say bend the outer runner to fit? Was never sure how. After some careful prodding with a screwdriver and little progress, I found the use of the round hole in the runner. The two small rollers inside need to be even so the bow moves smoothly, by putting a screwdriver in the hole in the opposite side you can easily and gently bend the steel to just the right tension. Clever hans. These are castor shims, and longer beam bolts. These improve the road manners of a lowered vw at highway speeds. I already had a set installed but on very low cars, another is needed. As the shims space the bottom beam away from the pan longer bolts are required. Managed to install them without dropping the beam out. Easily the best 40-50 bucks I've ever spent on the car, it will sit on 60-70mph, one hand on the wheel, relax. Before you needed to keep your wits about you as it was very twitchy and unsettled. Now, just need to sort the vibration at and after 70mph, the deafening noise and smell of hot engine fumes and we're sweet. An't she cute dough?
1 point
-
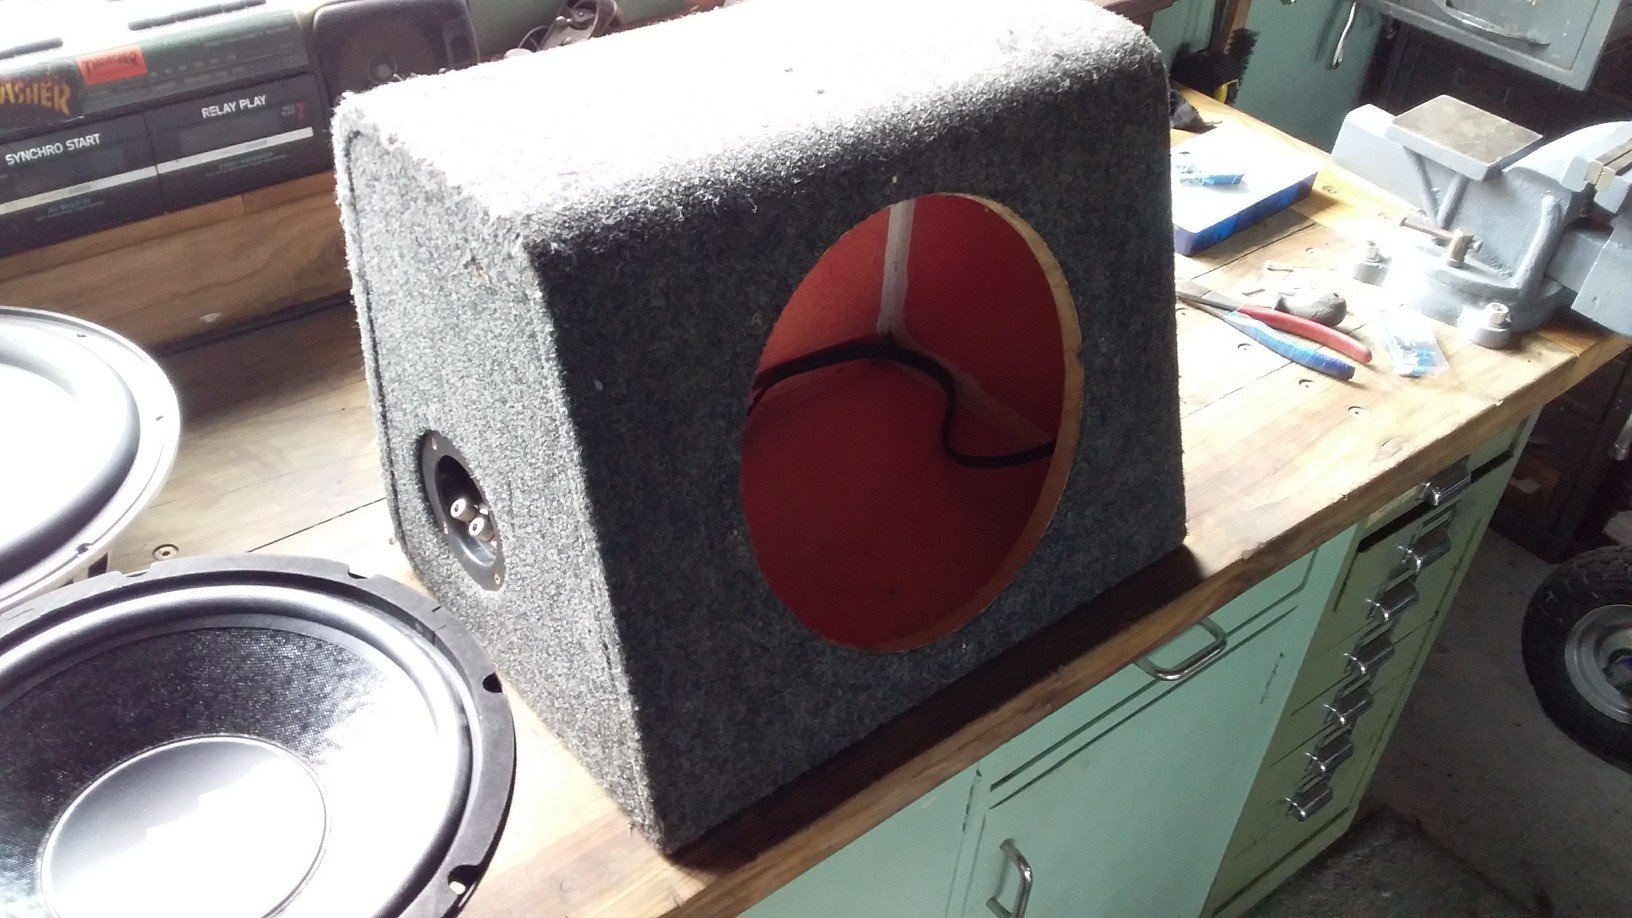
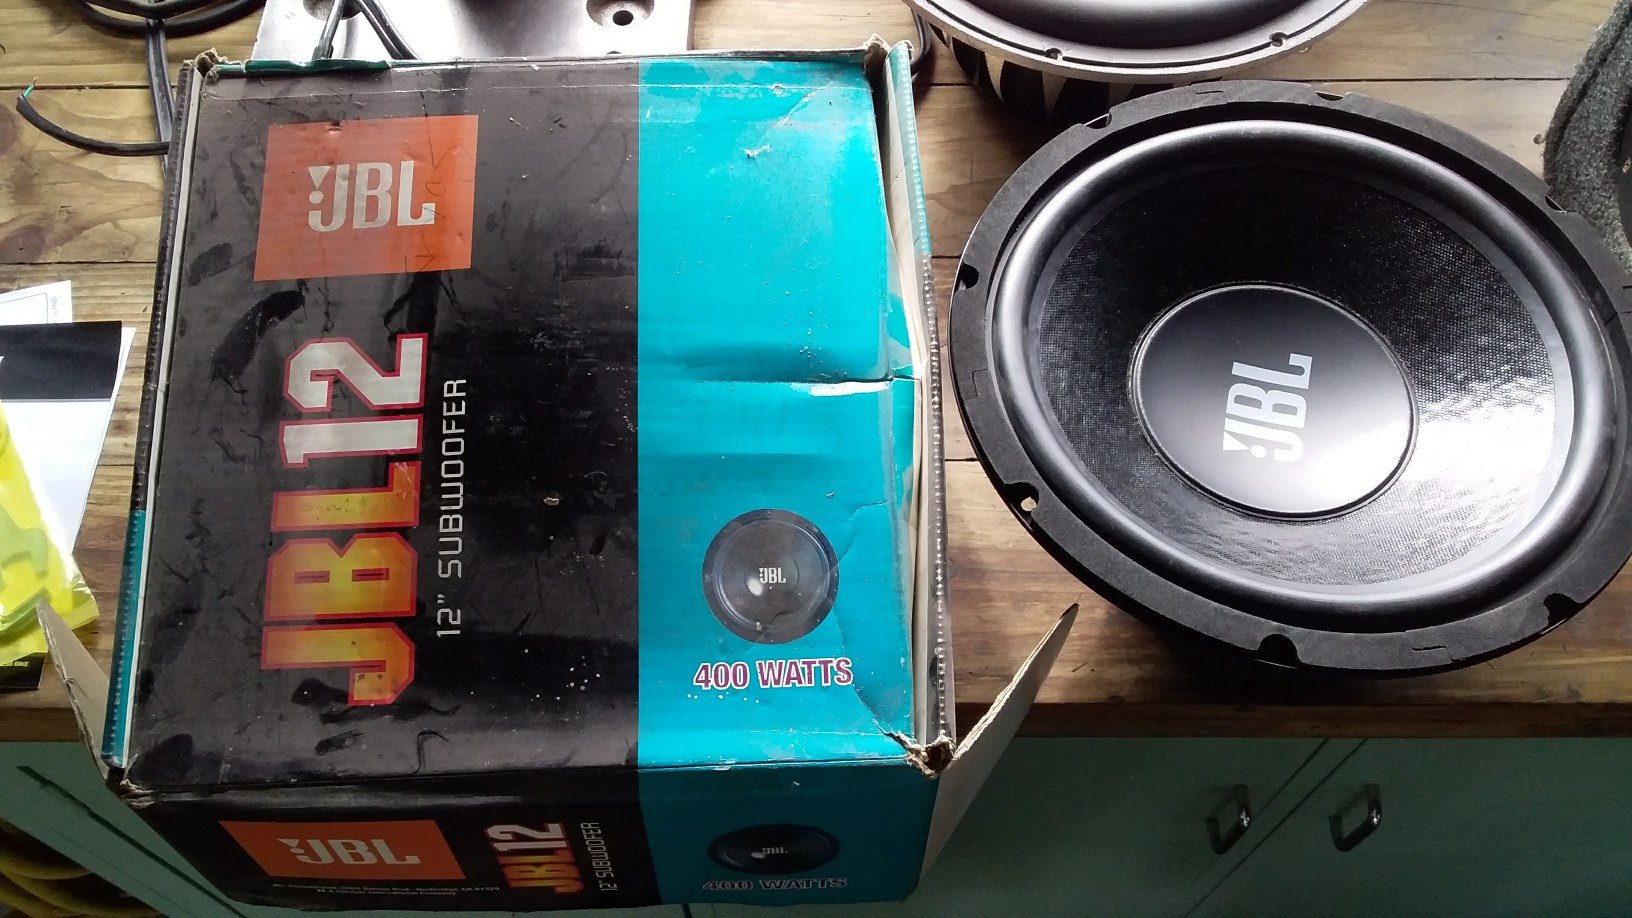
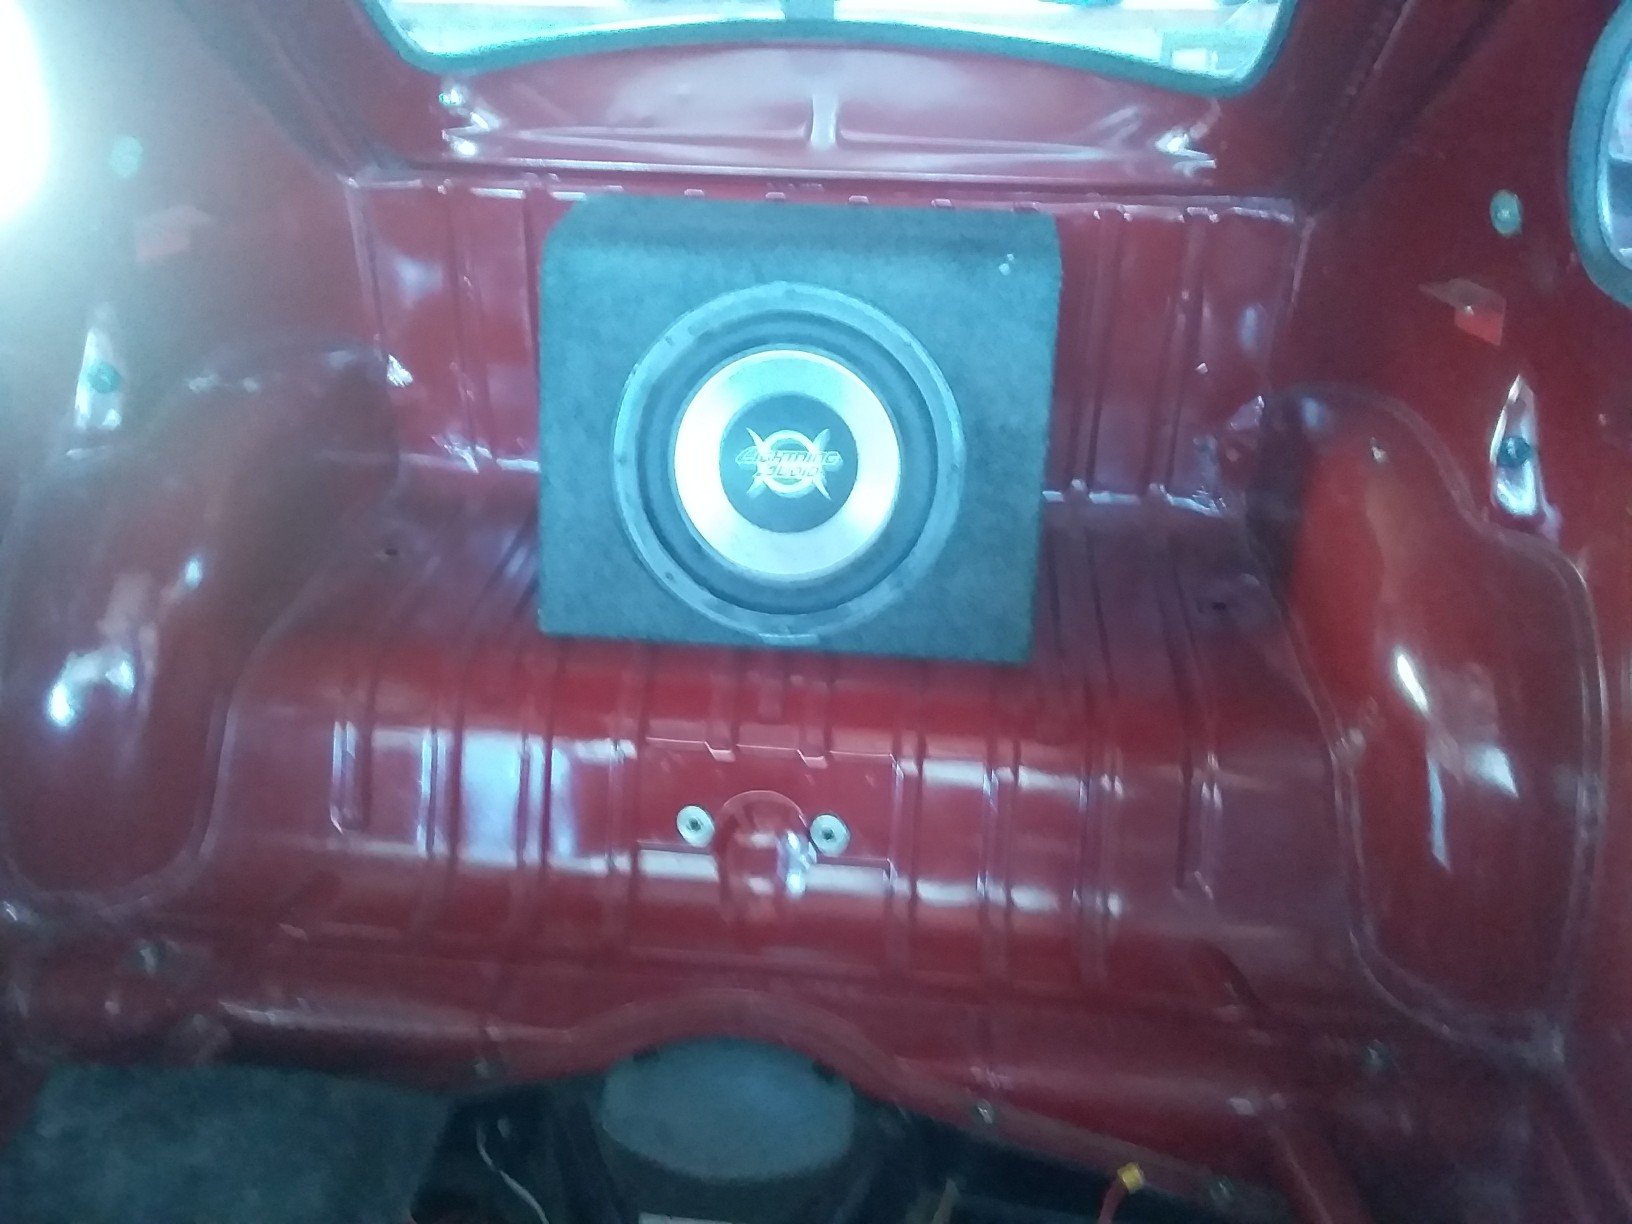
Well, after a small break over winter, I got a new wof for summer Feels good to be back on the road, been thinking about the subwoofer, I bought that box with the shitty lightning audio 12 inch, for 10bucks at the dump shop, It's super well built, better than the cheap repco ones and a lot better what I could build. The old sub is stuffed but I have always wanted some doffdoff! I have own this JBL12 for nearly 20 years! But the old vw genny has never had enough juice to run one. Time to see if this thing still works! Bridged the mighty 222watts and stuck it on the back seat for now. Gets ya right in the kidneys. Fuck yeah.
1 point
-
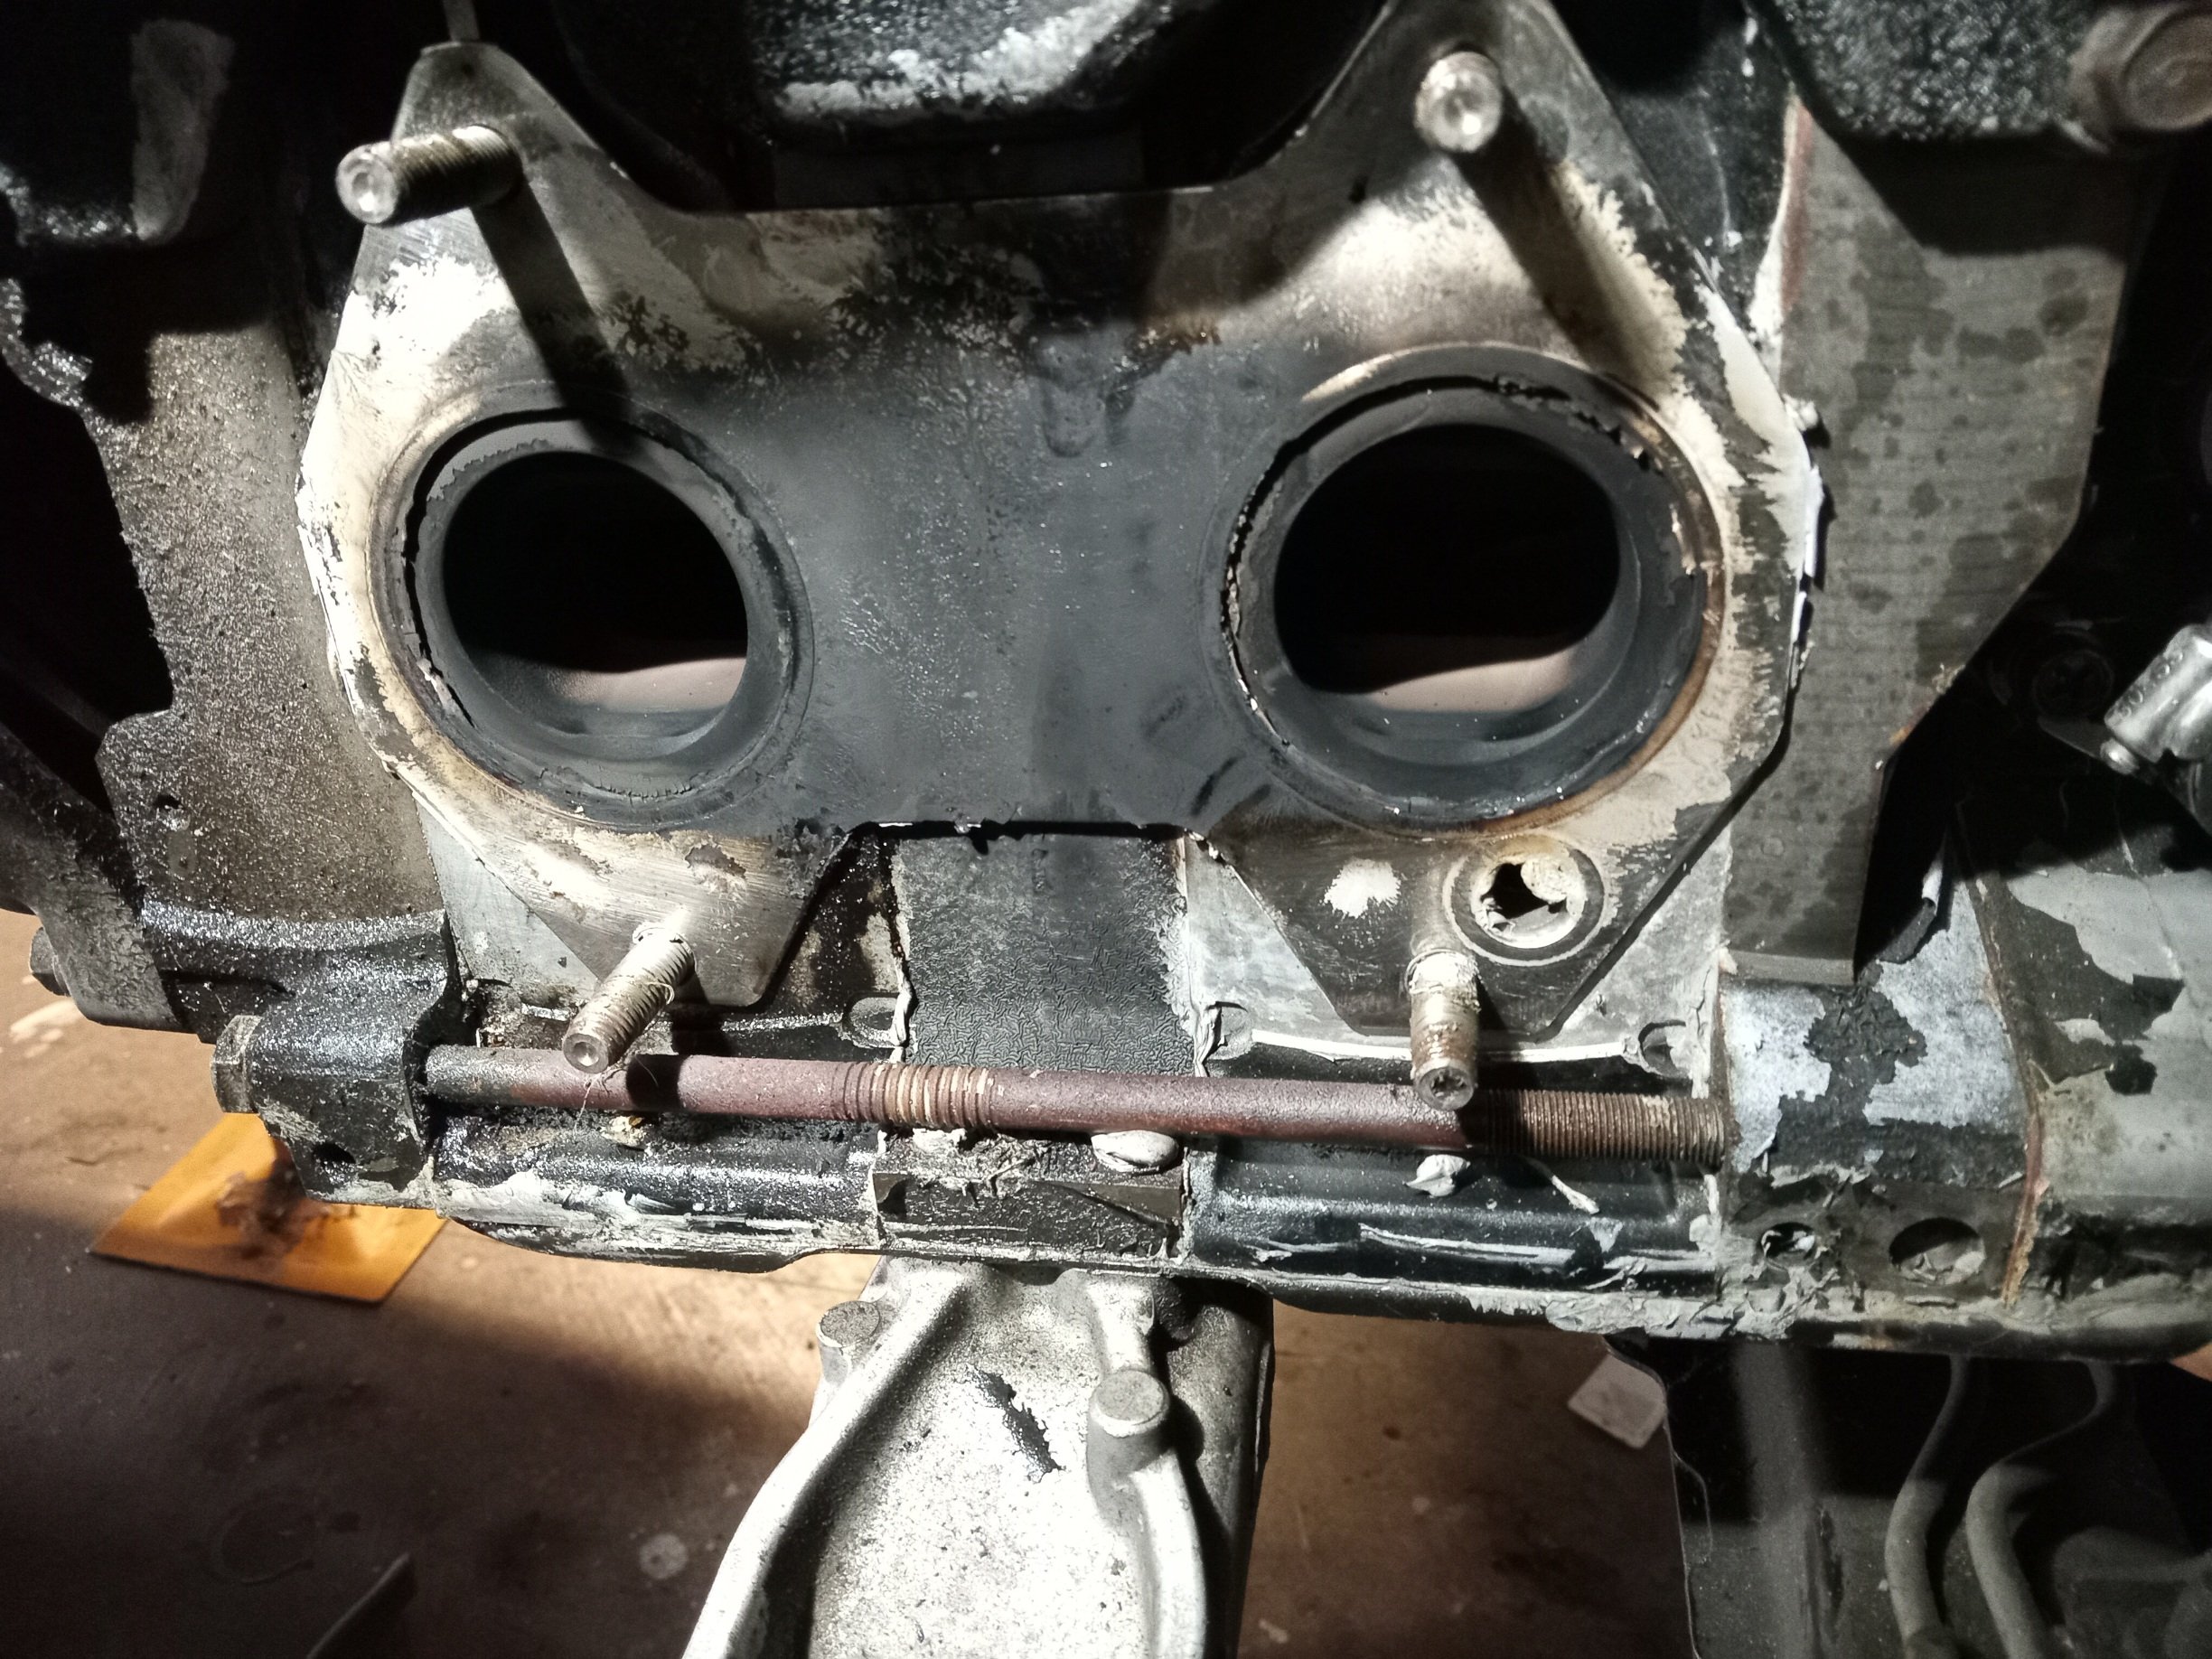
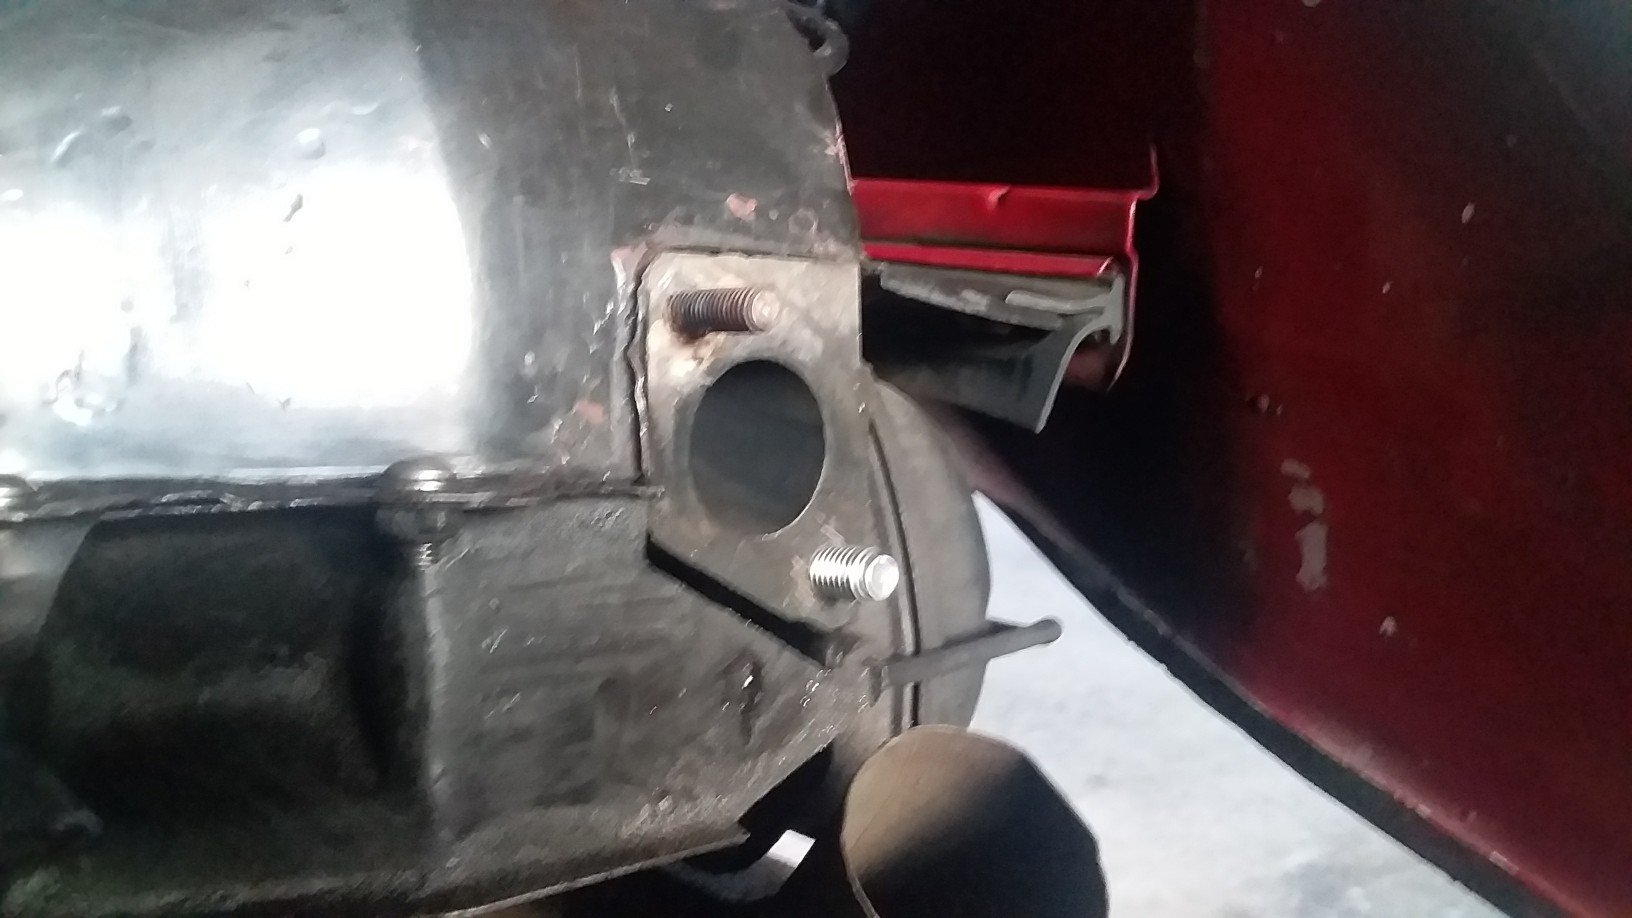
So here we are again. I've said it before but this thing is farkin loud to drive around in, one of the exhaust studs had pulled out way back, so has been on the list of things to do for some time. Still even with all the leaks, I started noticing a weird noise from the rear end, wheel bearing? Drove around for a week or so and it was not getting better. My hatred of vw rear hubs is as high as ever, so I dropped it off at Frank's because fuck vw rear hubs with their 300pound foot of bullshit. Turned out both rear drums had flogged out and where fairly close to falling off! I think these new drums are made of cheese? So we'll see how long these new new ones last? Don't think the last ones did 10k? Realized I had a M10 tap and some threaded rod, dunno if this was the right way to go but thanks to the drums and fuckin covid it will have to do! Can see all the carbon on the head there. Removable rear valance made this job super easy! Engine is still going well, sounds very tappy tappy and the bottom is covered in oil. I would like to install a better oil breather system as it doesn't really have one, I'm sure this would help keeping the black stuff inside the case. My long term plan was to built a nice new engine before this one fucks out and straight swap them, I have also had naughty thoughts of a nice modern sohc Subaru engine, minimal chopping to install and an easy 200% power increase. Thanks for watching.
1 point
-
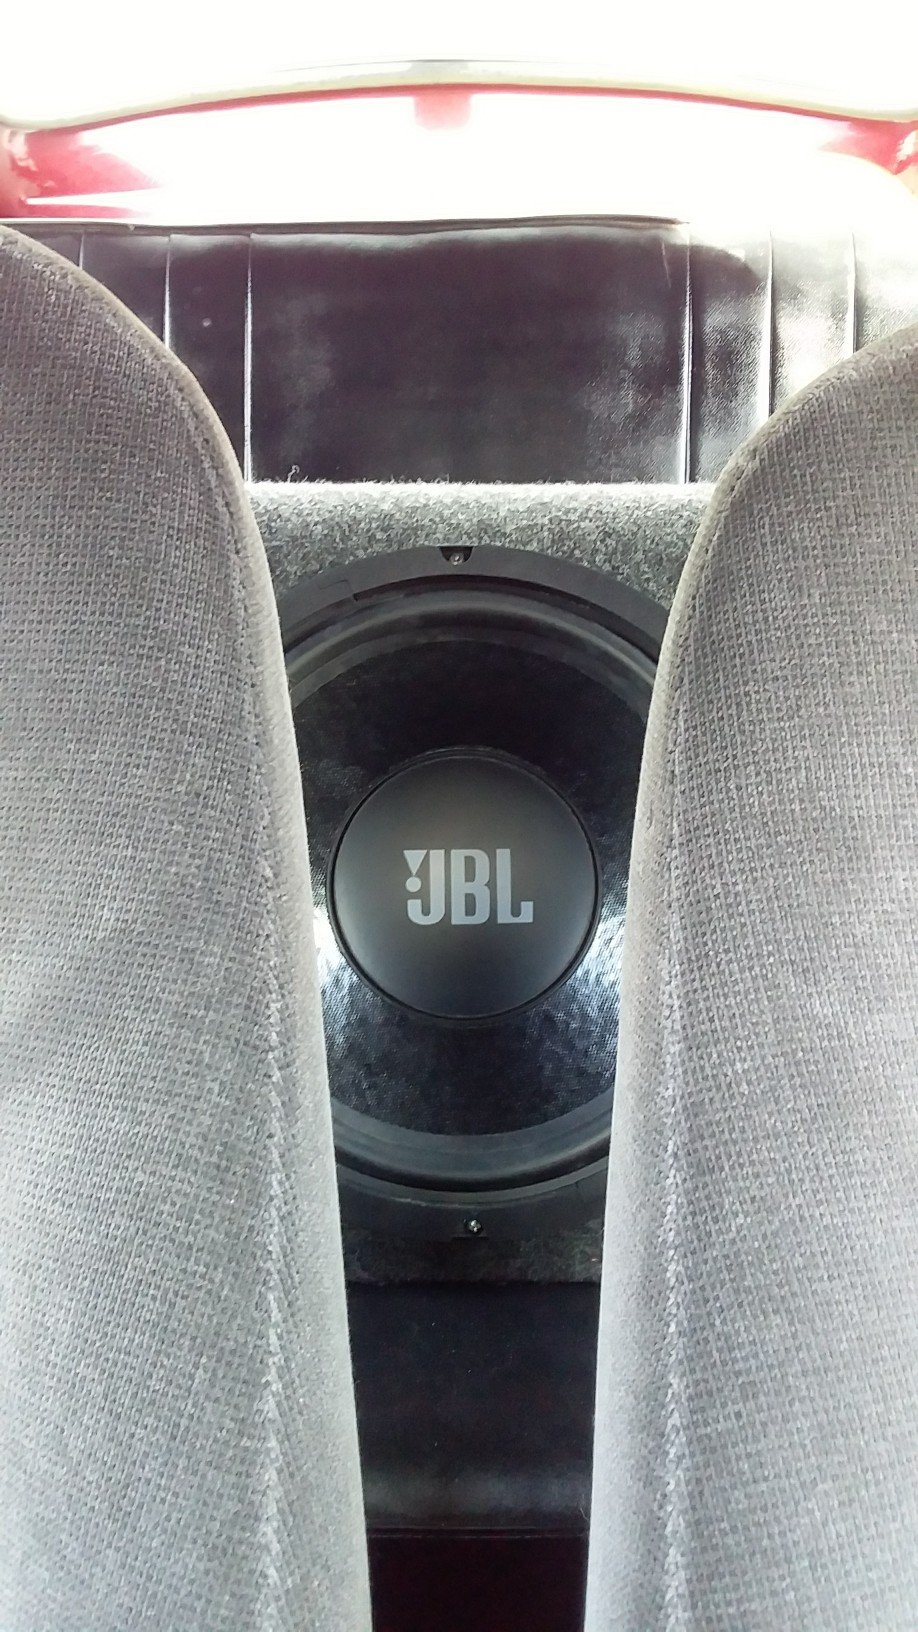
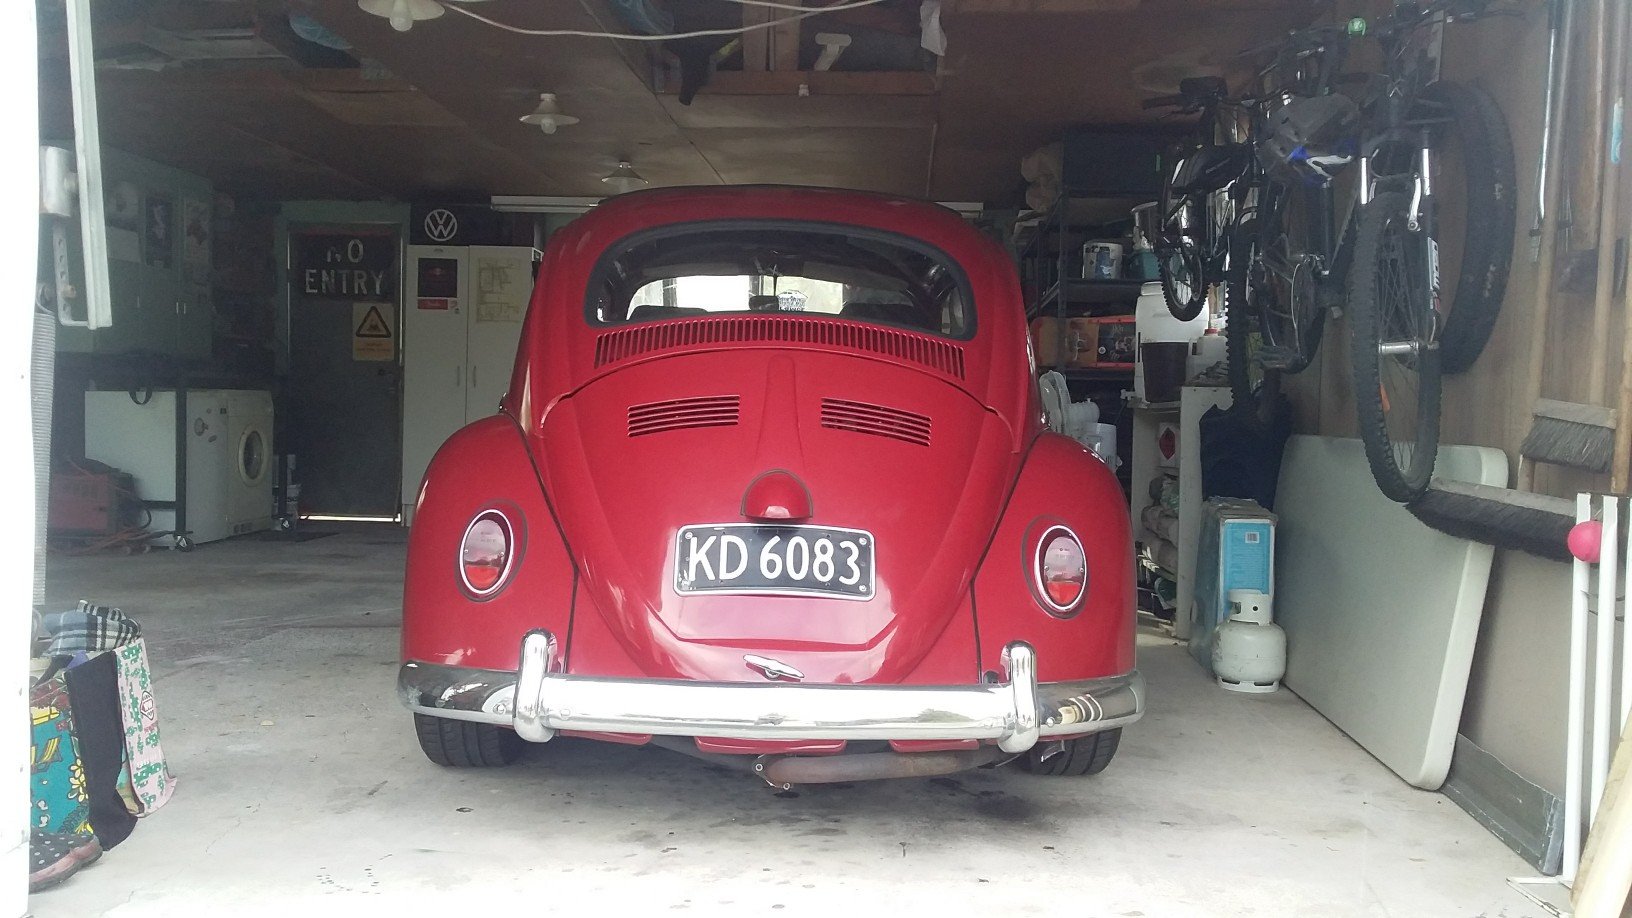
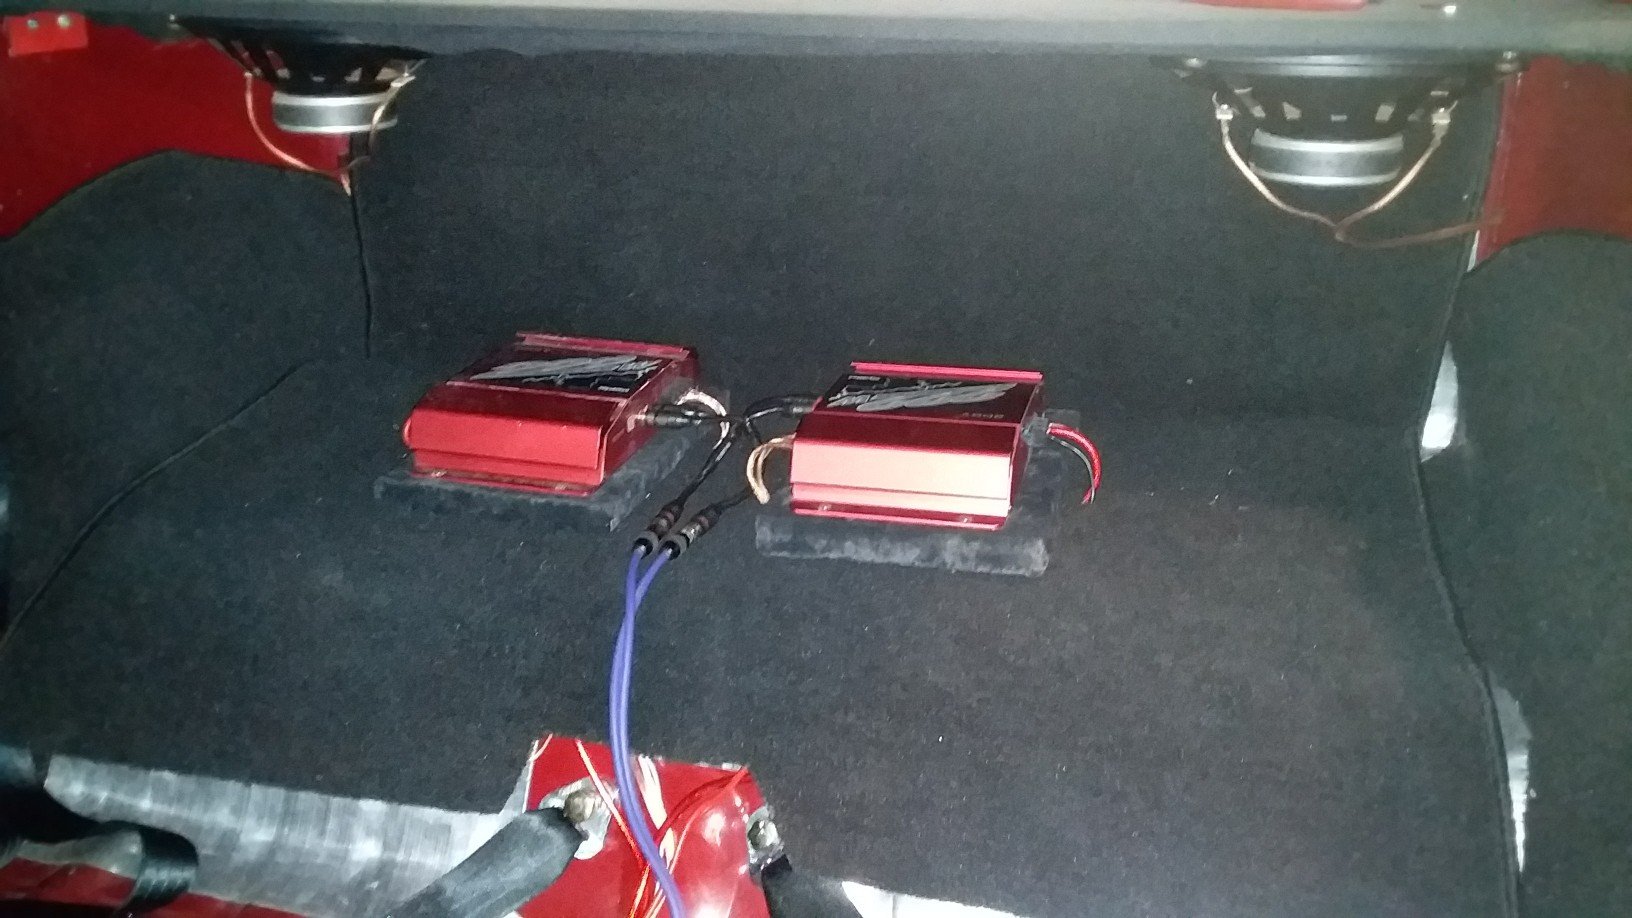
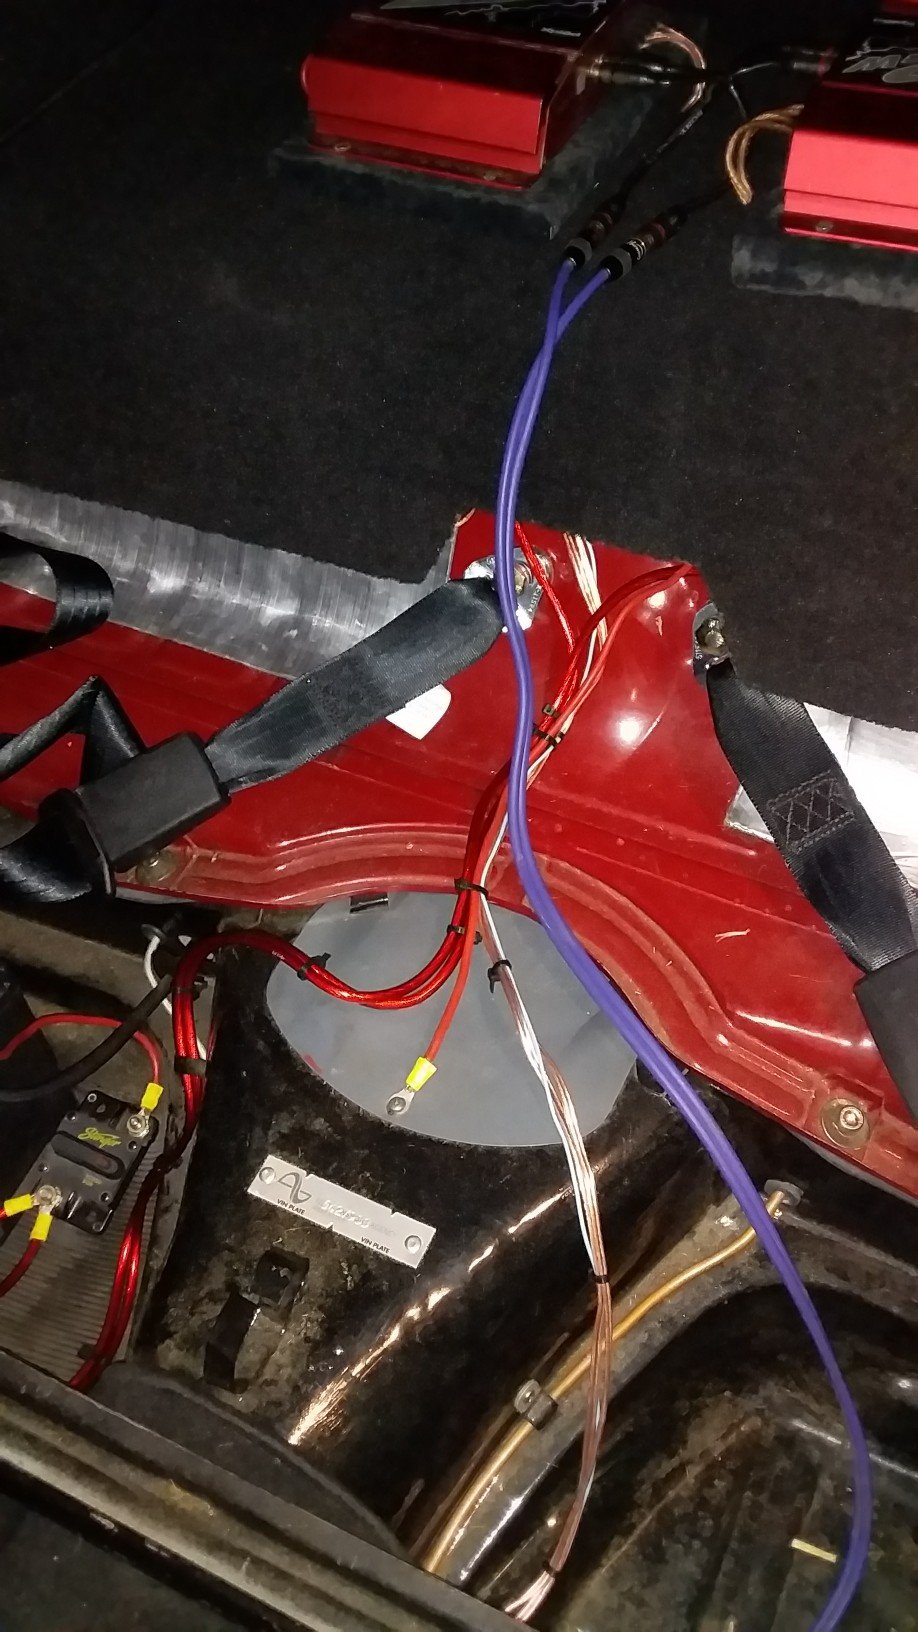
But first, more important things! As I don't have radio, I've just been plugging my phone into this 222Wattts of retro power! With speakers in the front now, I was keen to get them going, luckily I have two 222Wattts amps. After way to much time trying to somehow fit them both under the back seat, I realize there's heaps of room behind the back seat, I was going to but this behind the back seat. But, without drilling holes in my floor there's nothing to anchor it's considerably weight to. So. Ye ol 6x9th, shall suffice. Tidied up the wiring. Been fiddling with settings, running the low pass on the 6x9, not bad. Had a stupid idea of just mounting the sub like the 6x9s as that rear area is pretty good box. Took the family out for a drive over to Devonport, they weren't that thrilled about not taking mums limo. Well not limo, but a 04 Odyssey is infinitely more comfortable that this tiny smelly noisy little car. Started off great, got on the motorway, had gone about 2kms and the engine stuttered and we're outta gas! Fortunately I always carry spare gas. Are we making memories yet! Had a swim and drove home our wet toggs with an ice cream, i always have to turn the car off a drivethu, cant hear the little man in the box! By the end of the day we all a most excellent day out.
1 point


.thumb.jpeg.384ff72c8d2b0ee0d34a7bdedb55bdcf.jpeg)


.jpeg.dc79046ad09d73b9fdc8de9e6e6d9c09.jpeg)


.jpeg.3d2734e1be46c4b230b2cafddc6c95e6.jpeg)


This leaderboard is set to Auckland/GMT+12:00