
Leaderboard


Popular Content
Showing content with the highest reputation on 03/07/24 in all areas
-
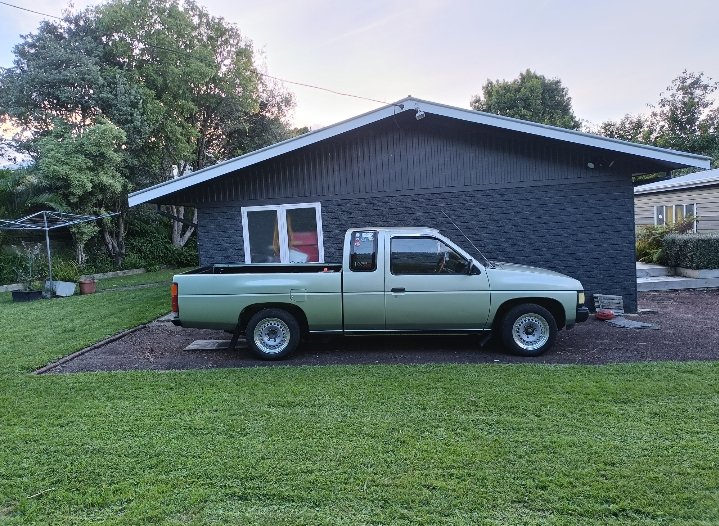
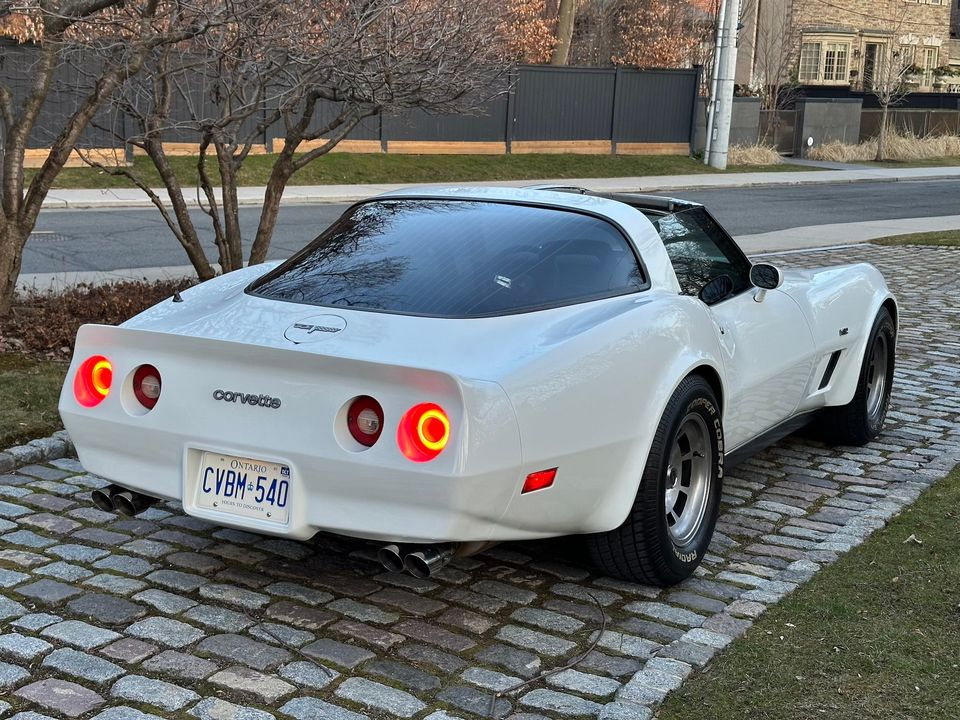
Reset springs in. It's not actually low but it sites level now now and looks a lot better. New shocks are on the list, these don't have any shock left in them.
 7 points
 -
6 points
-
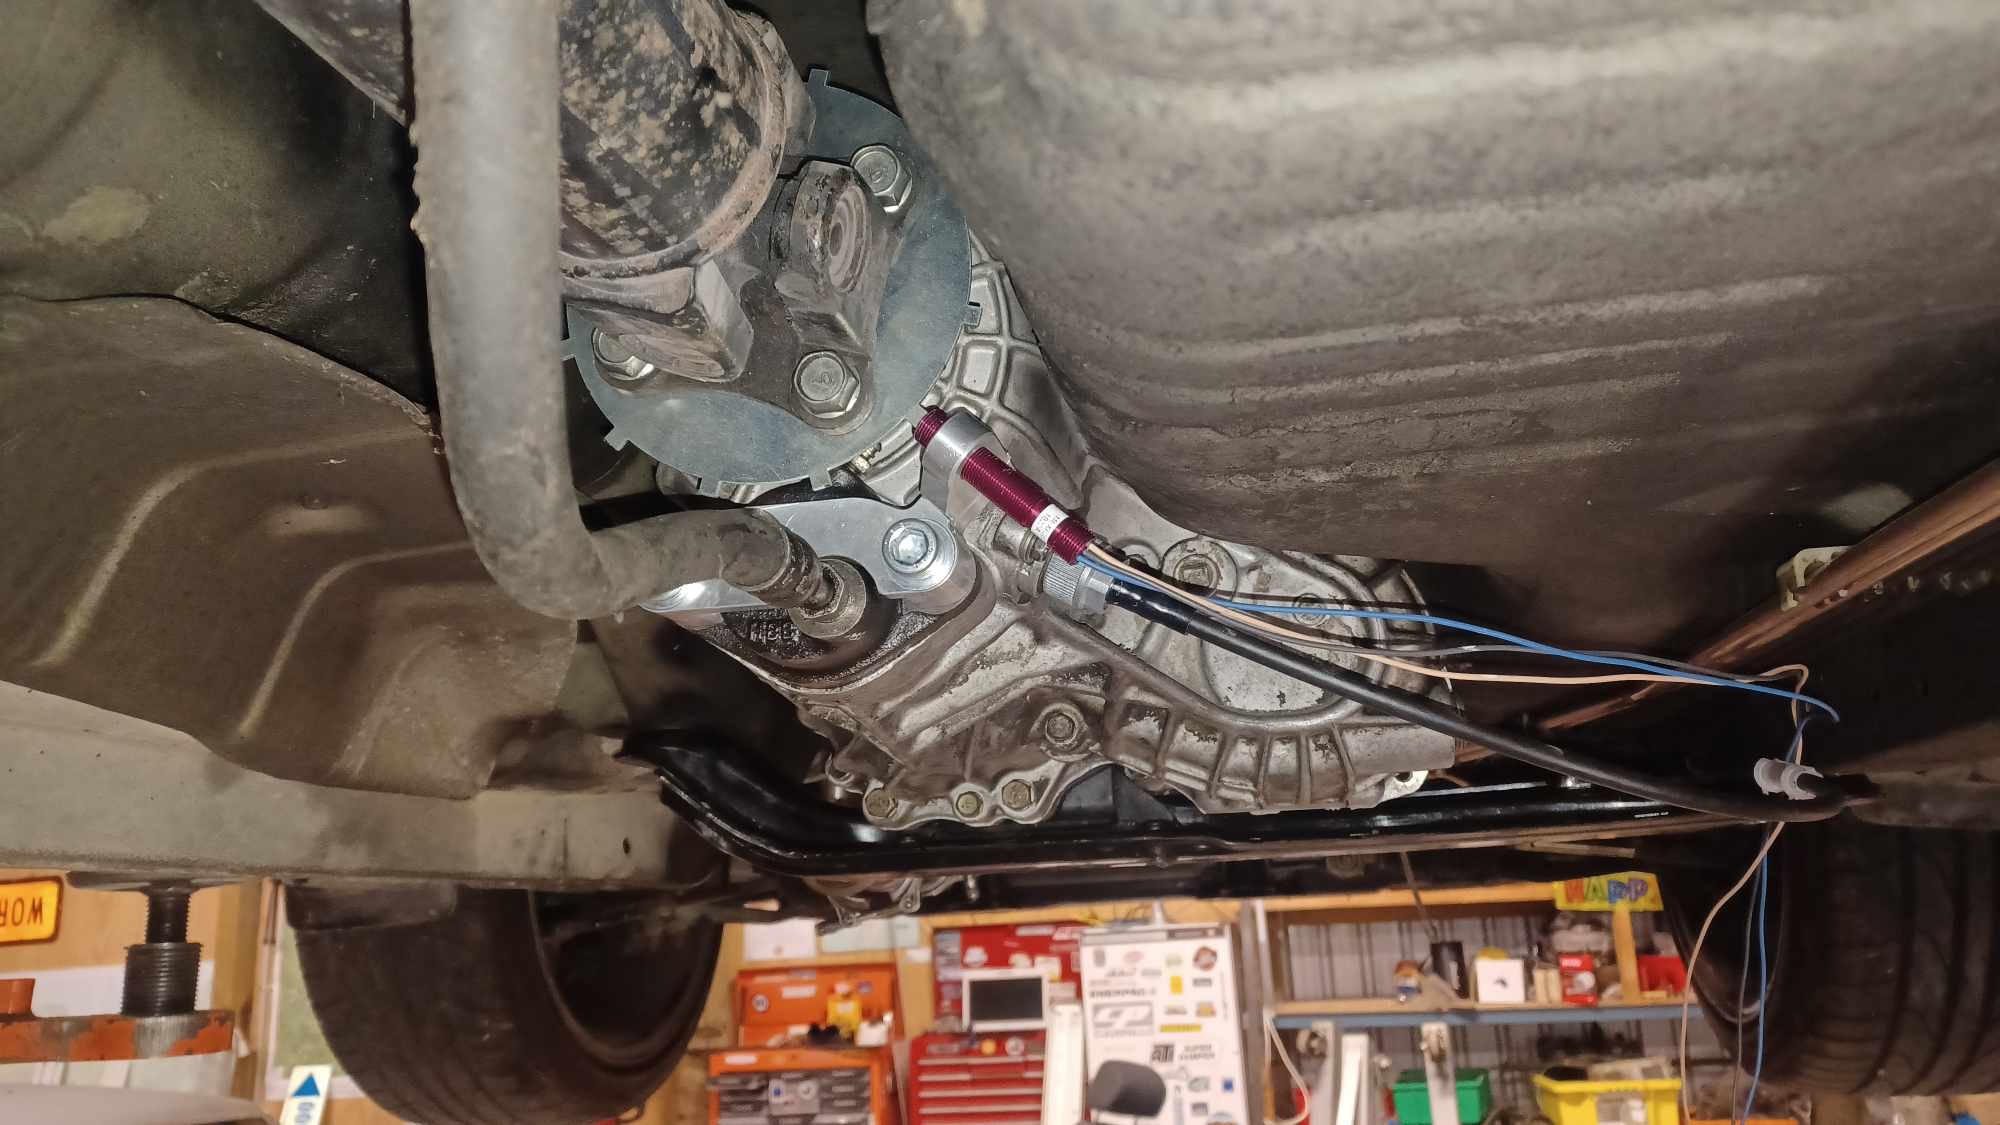
Mostly finished up the tail light wiring tonight, brake lights and everything work, yay! Also I pulled the gearbox to inspect the clutch, it still looks brand new apart from surface rust. I will take it to the clutch man tomorrow to see if it cant be tweaked for a bit more clamping force. If anyone has a suggestion to improve this then let me know5 points
-
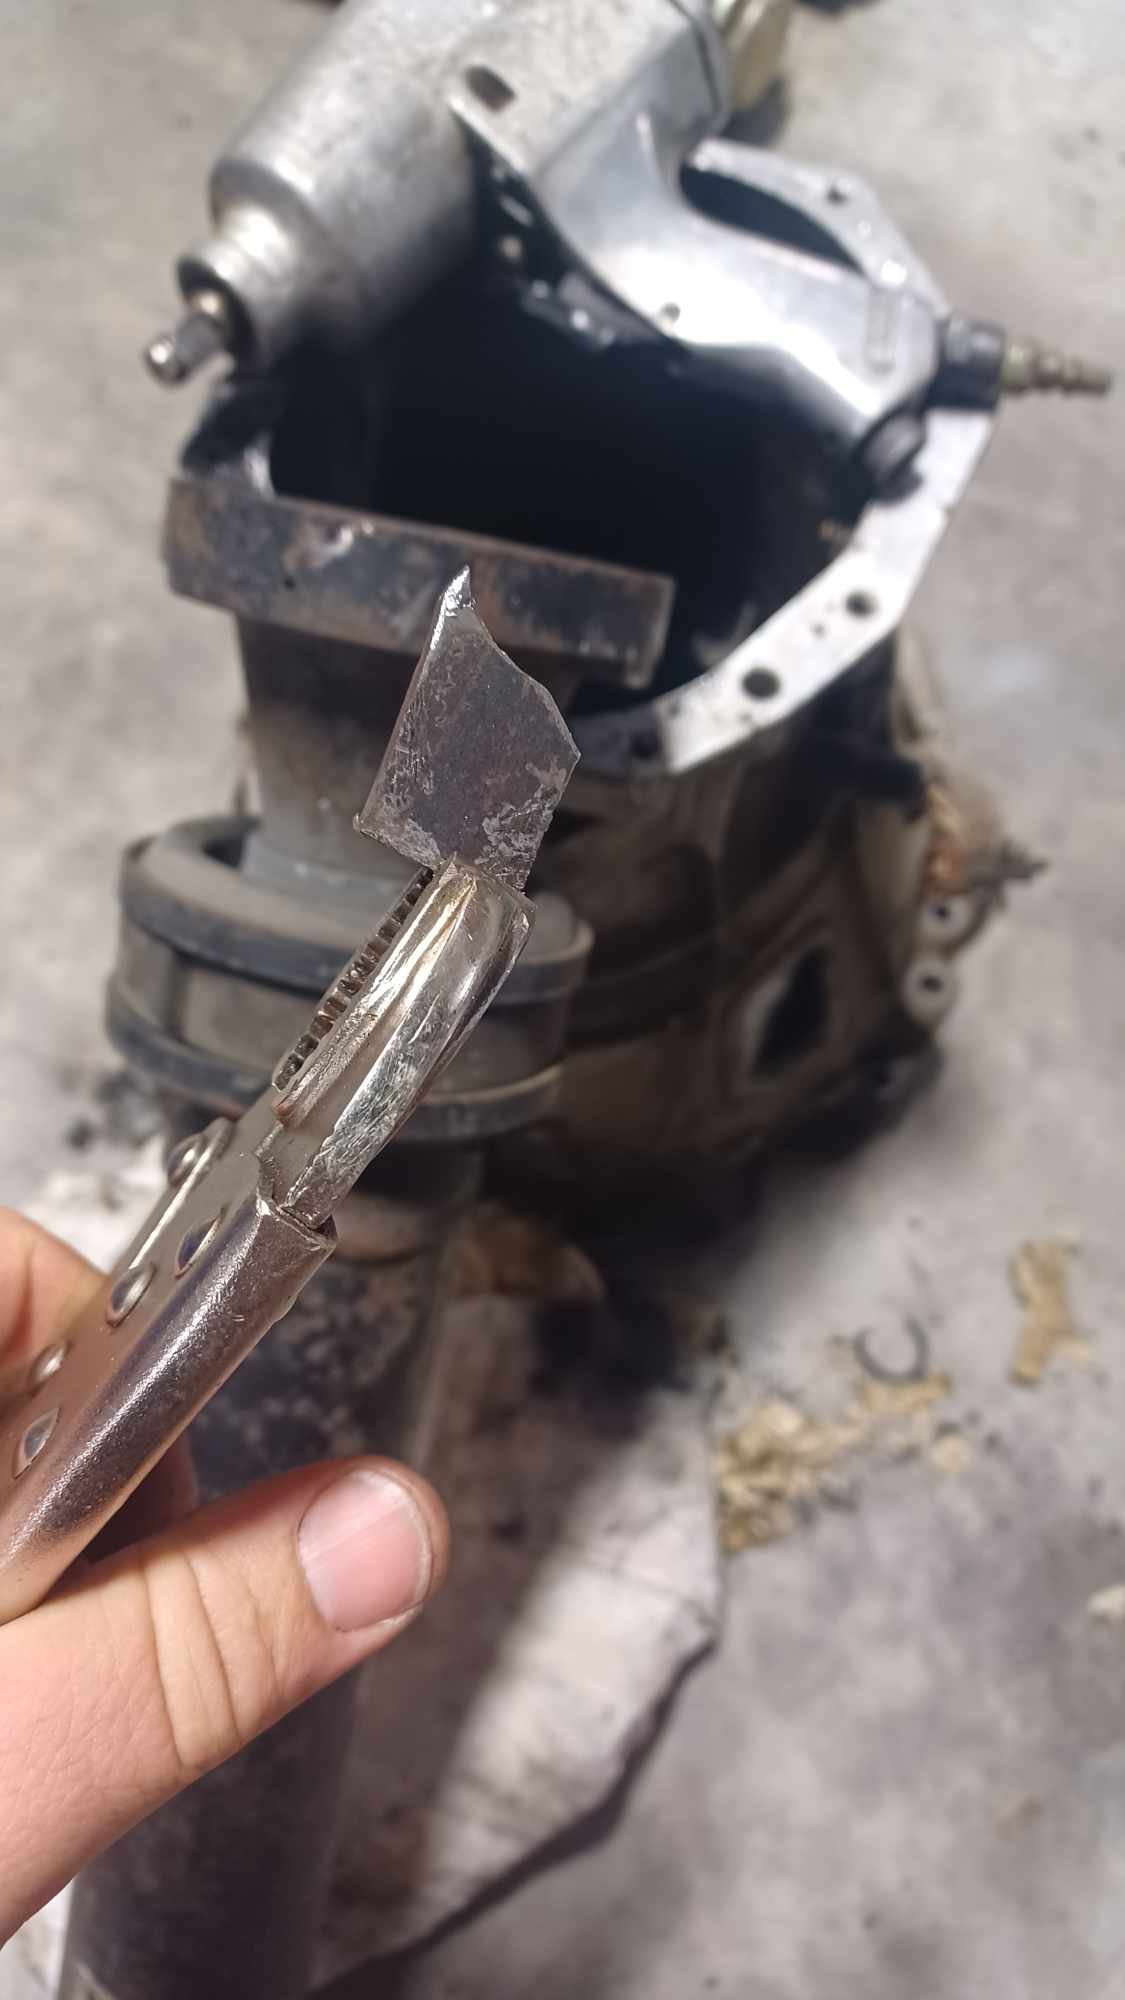
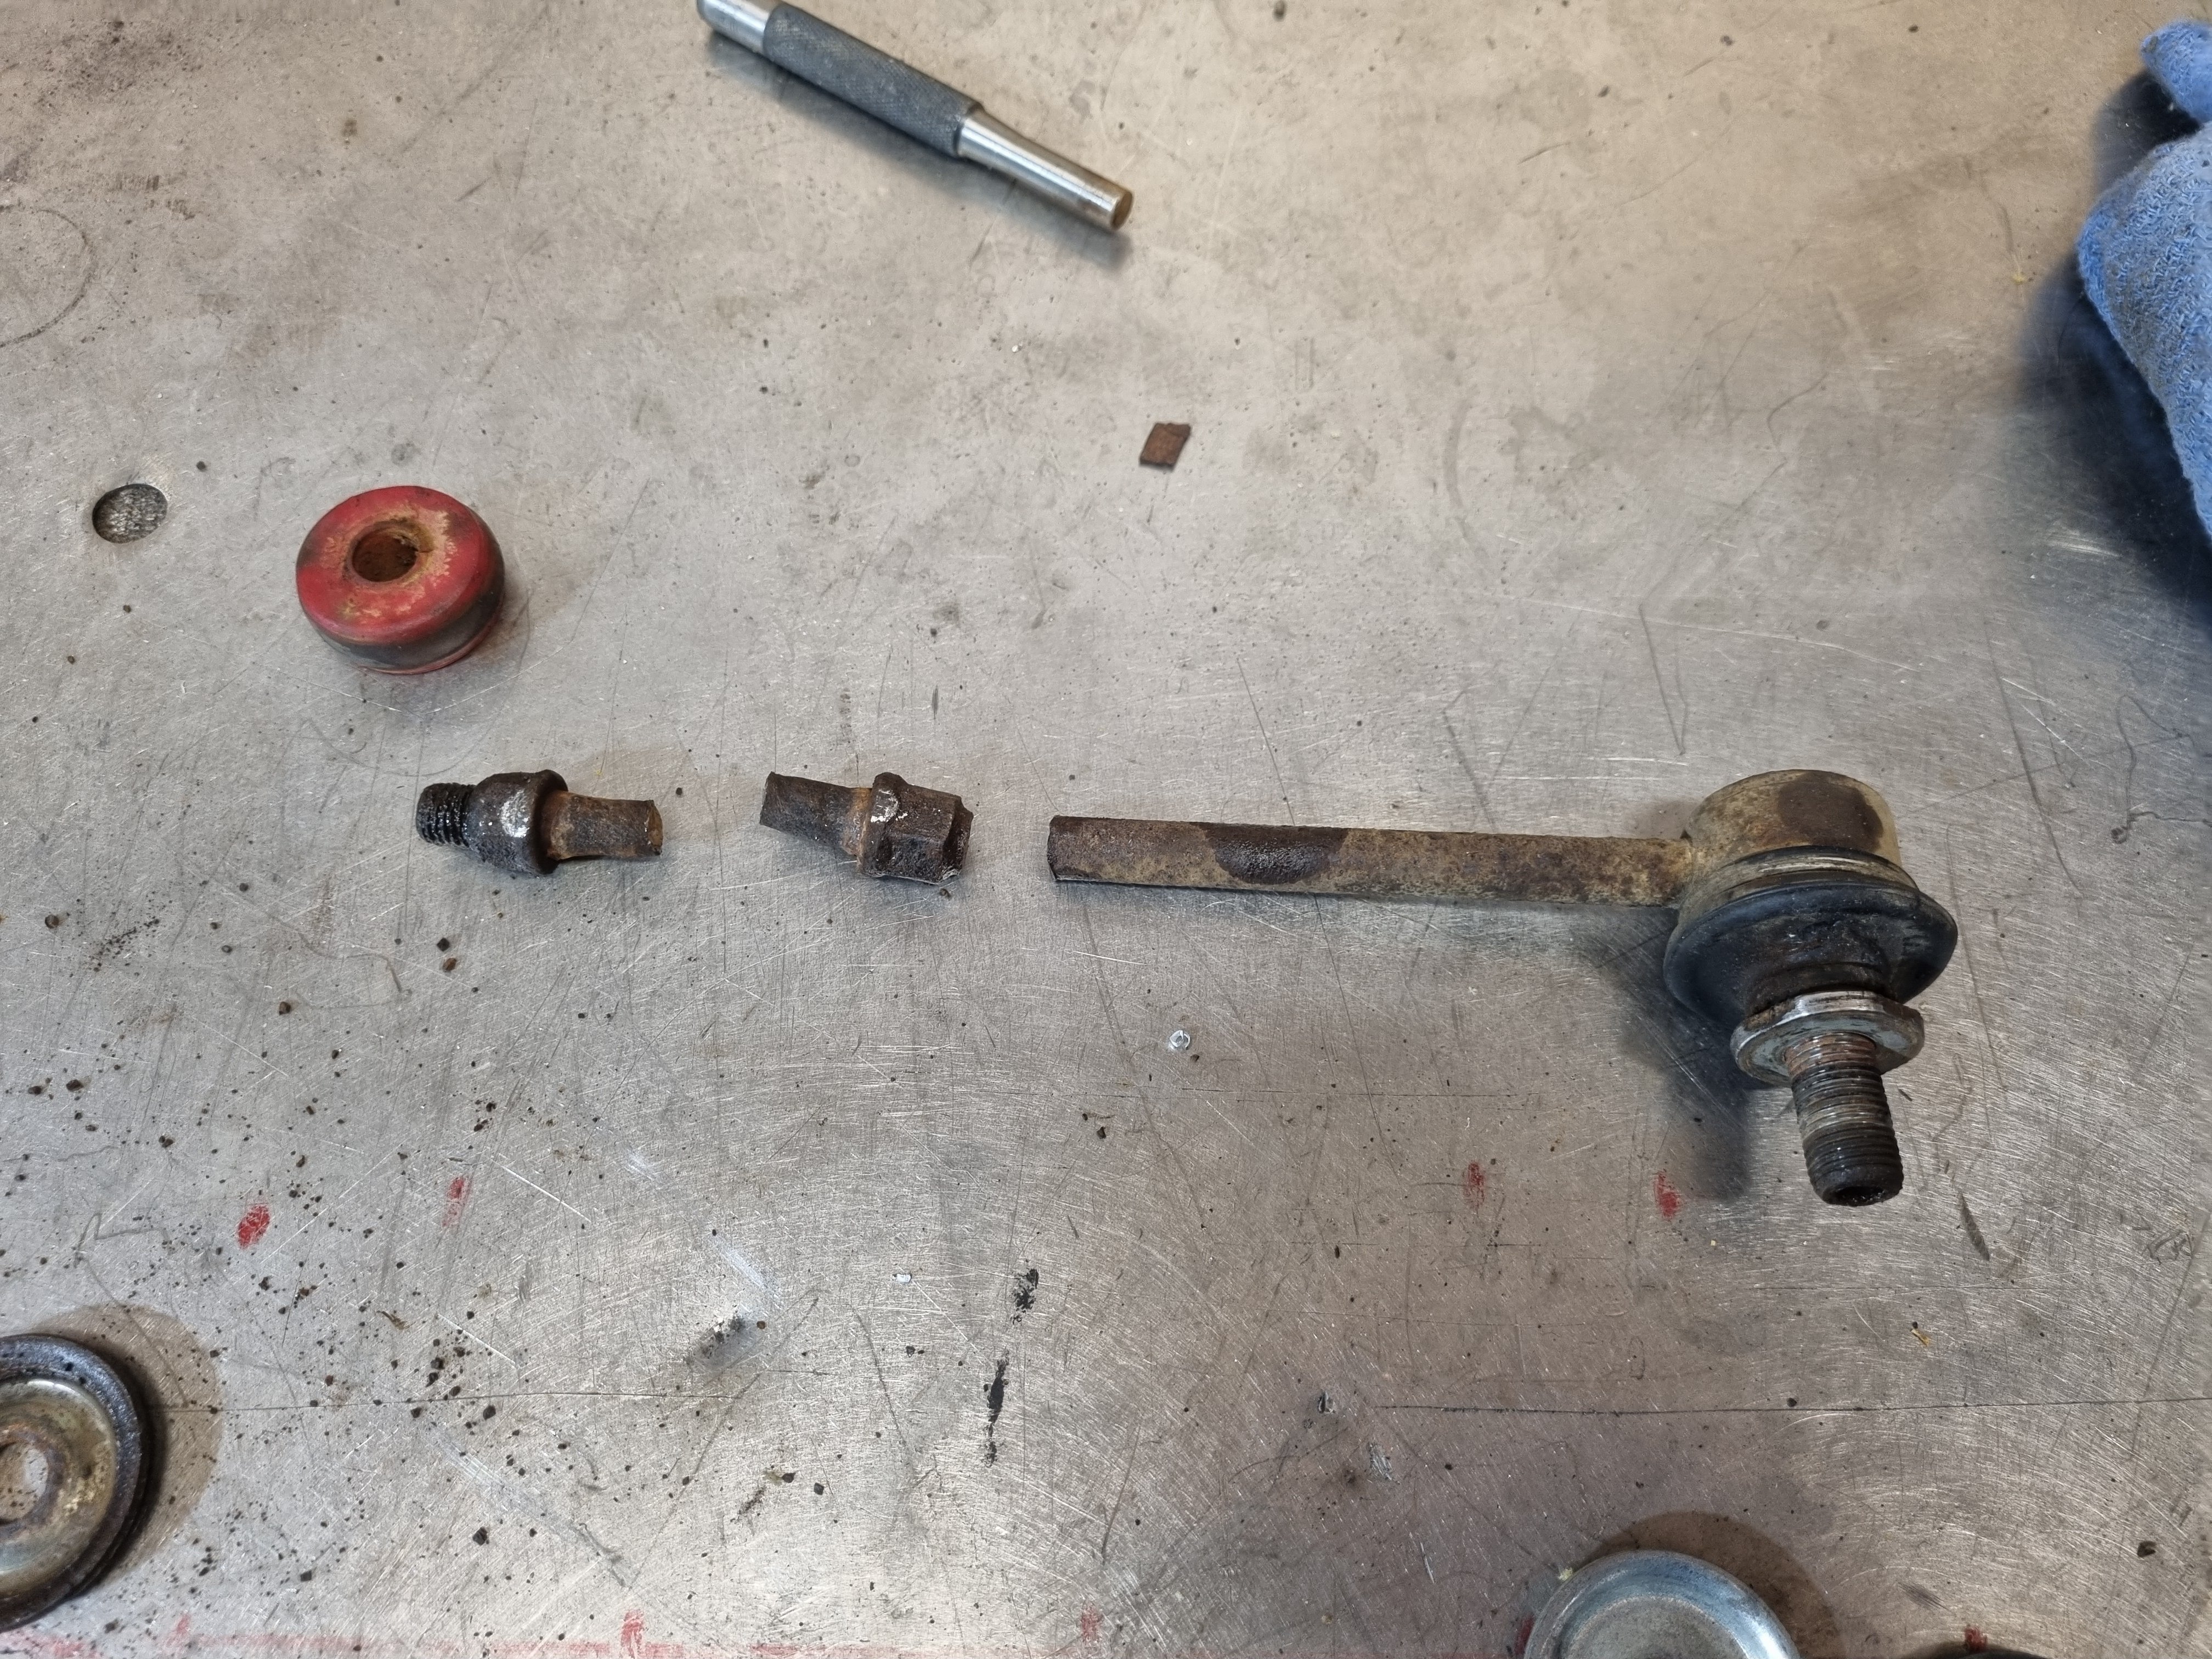
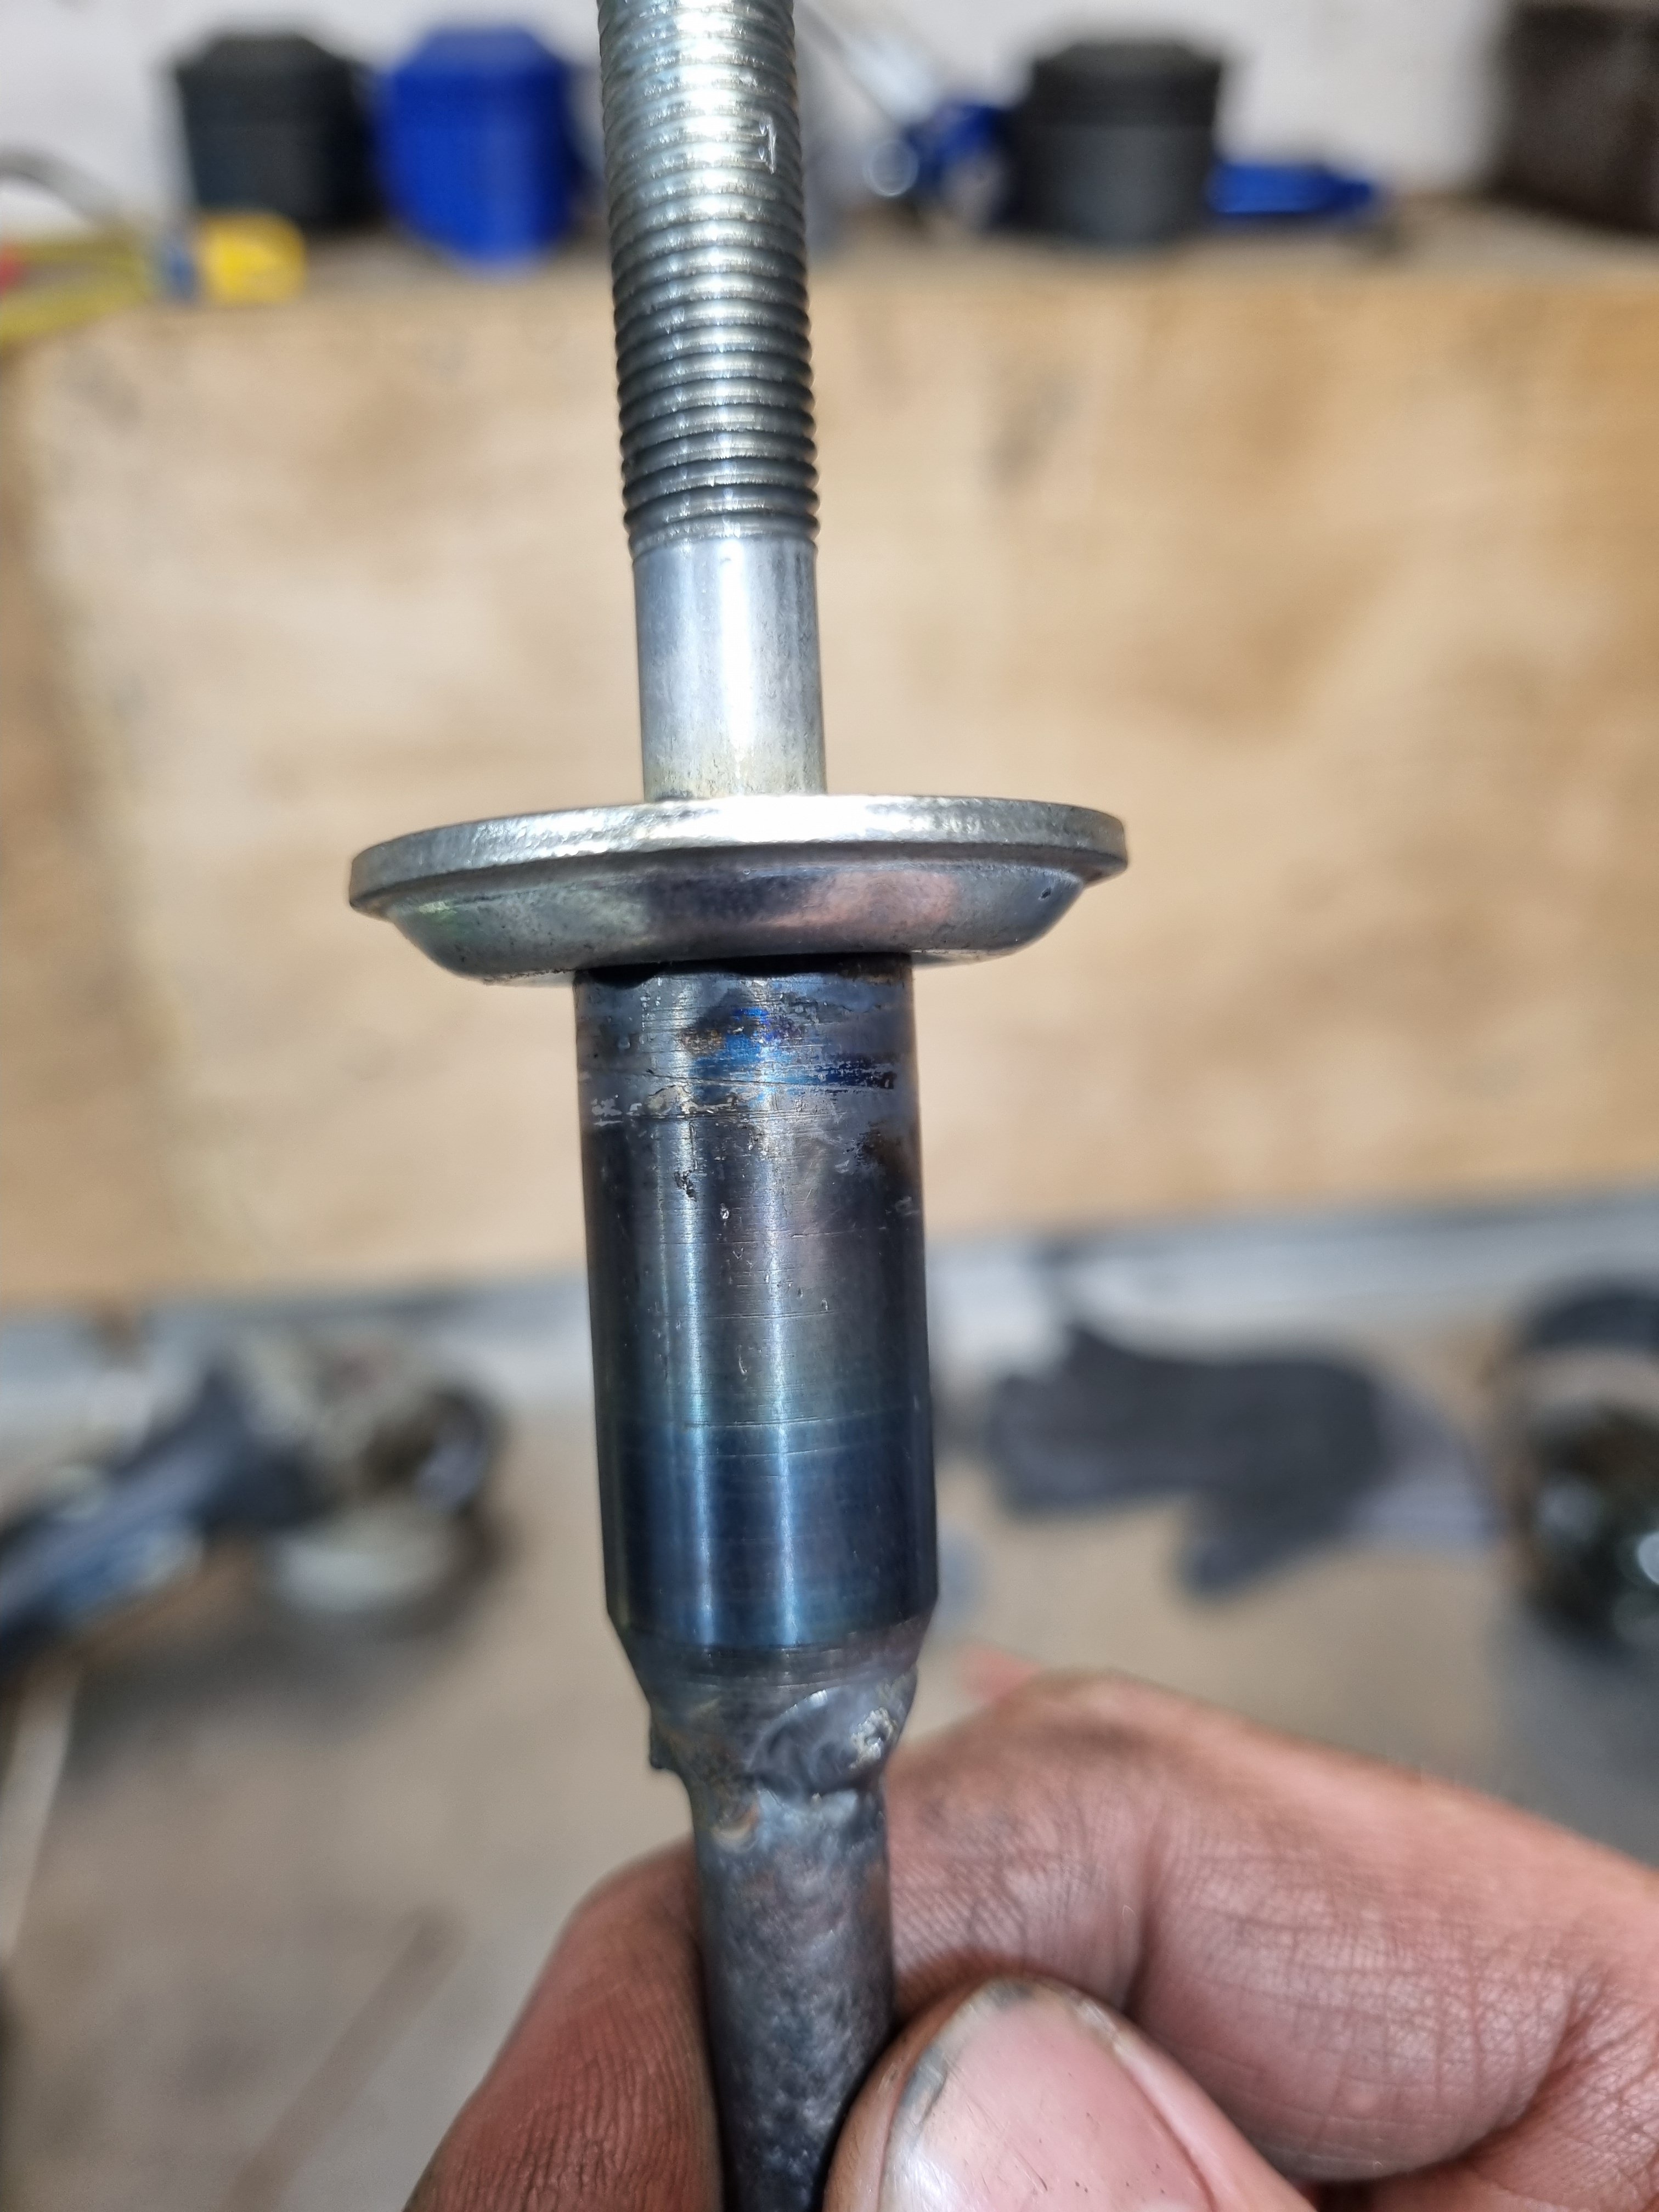
Here I was thinking that a swaybar link was so cheap that noone would screw around welding a shagged one back together https://www.amayama.com/en/part/toyota/48820350304 points
-
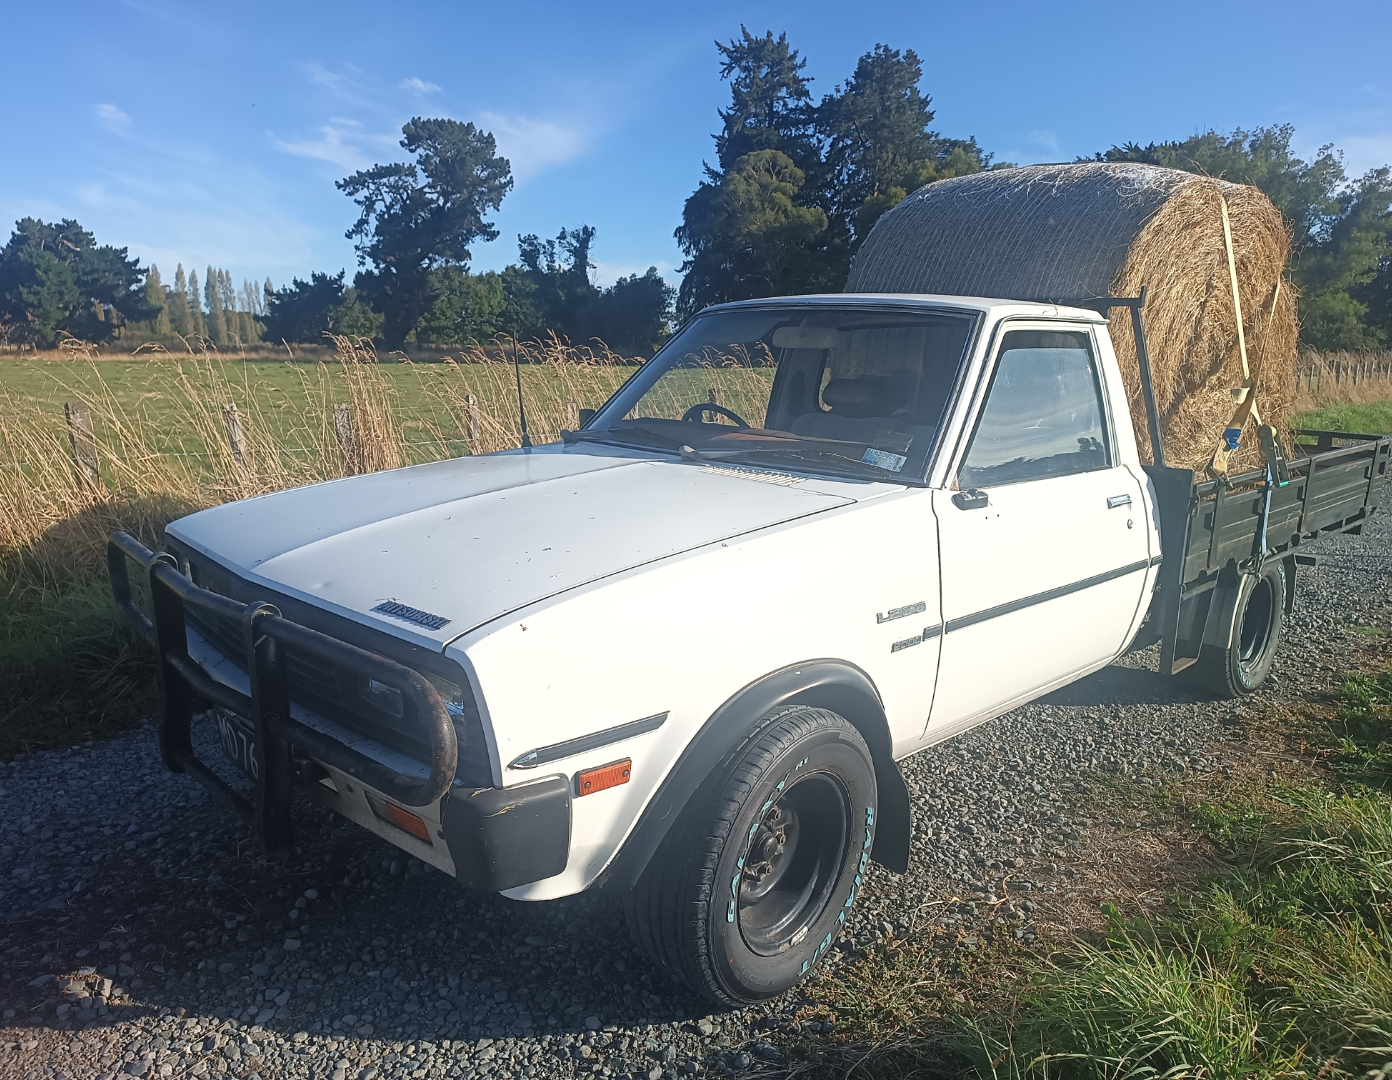
Put her to work again. Hardly noticed it were there.
4 points
-
3 points
-
5 wings is a lot of downforce phil3 points
-
Yeah CANbus is kinda industrialised i2c-ish, but made robust for auto use, and it has deterministic servicing order, so the brake controller messages go through before the one asking if the light for the lip-stick-heater-indicator lamp is on.3 points
-
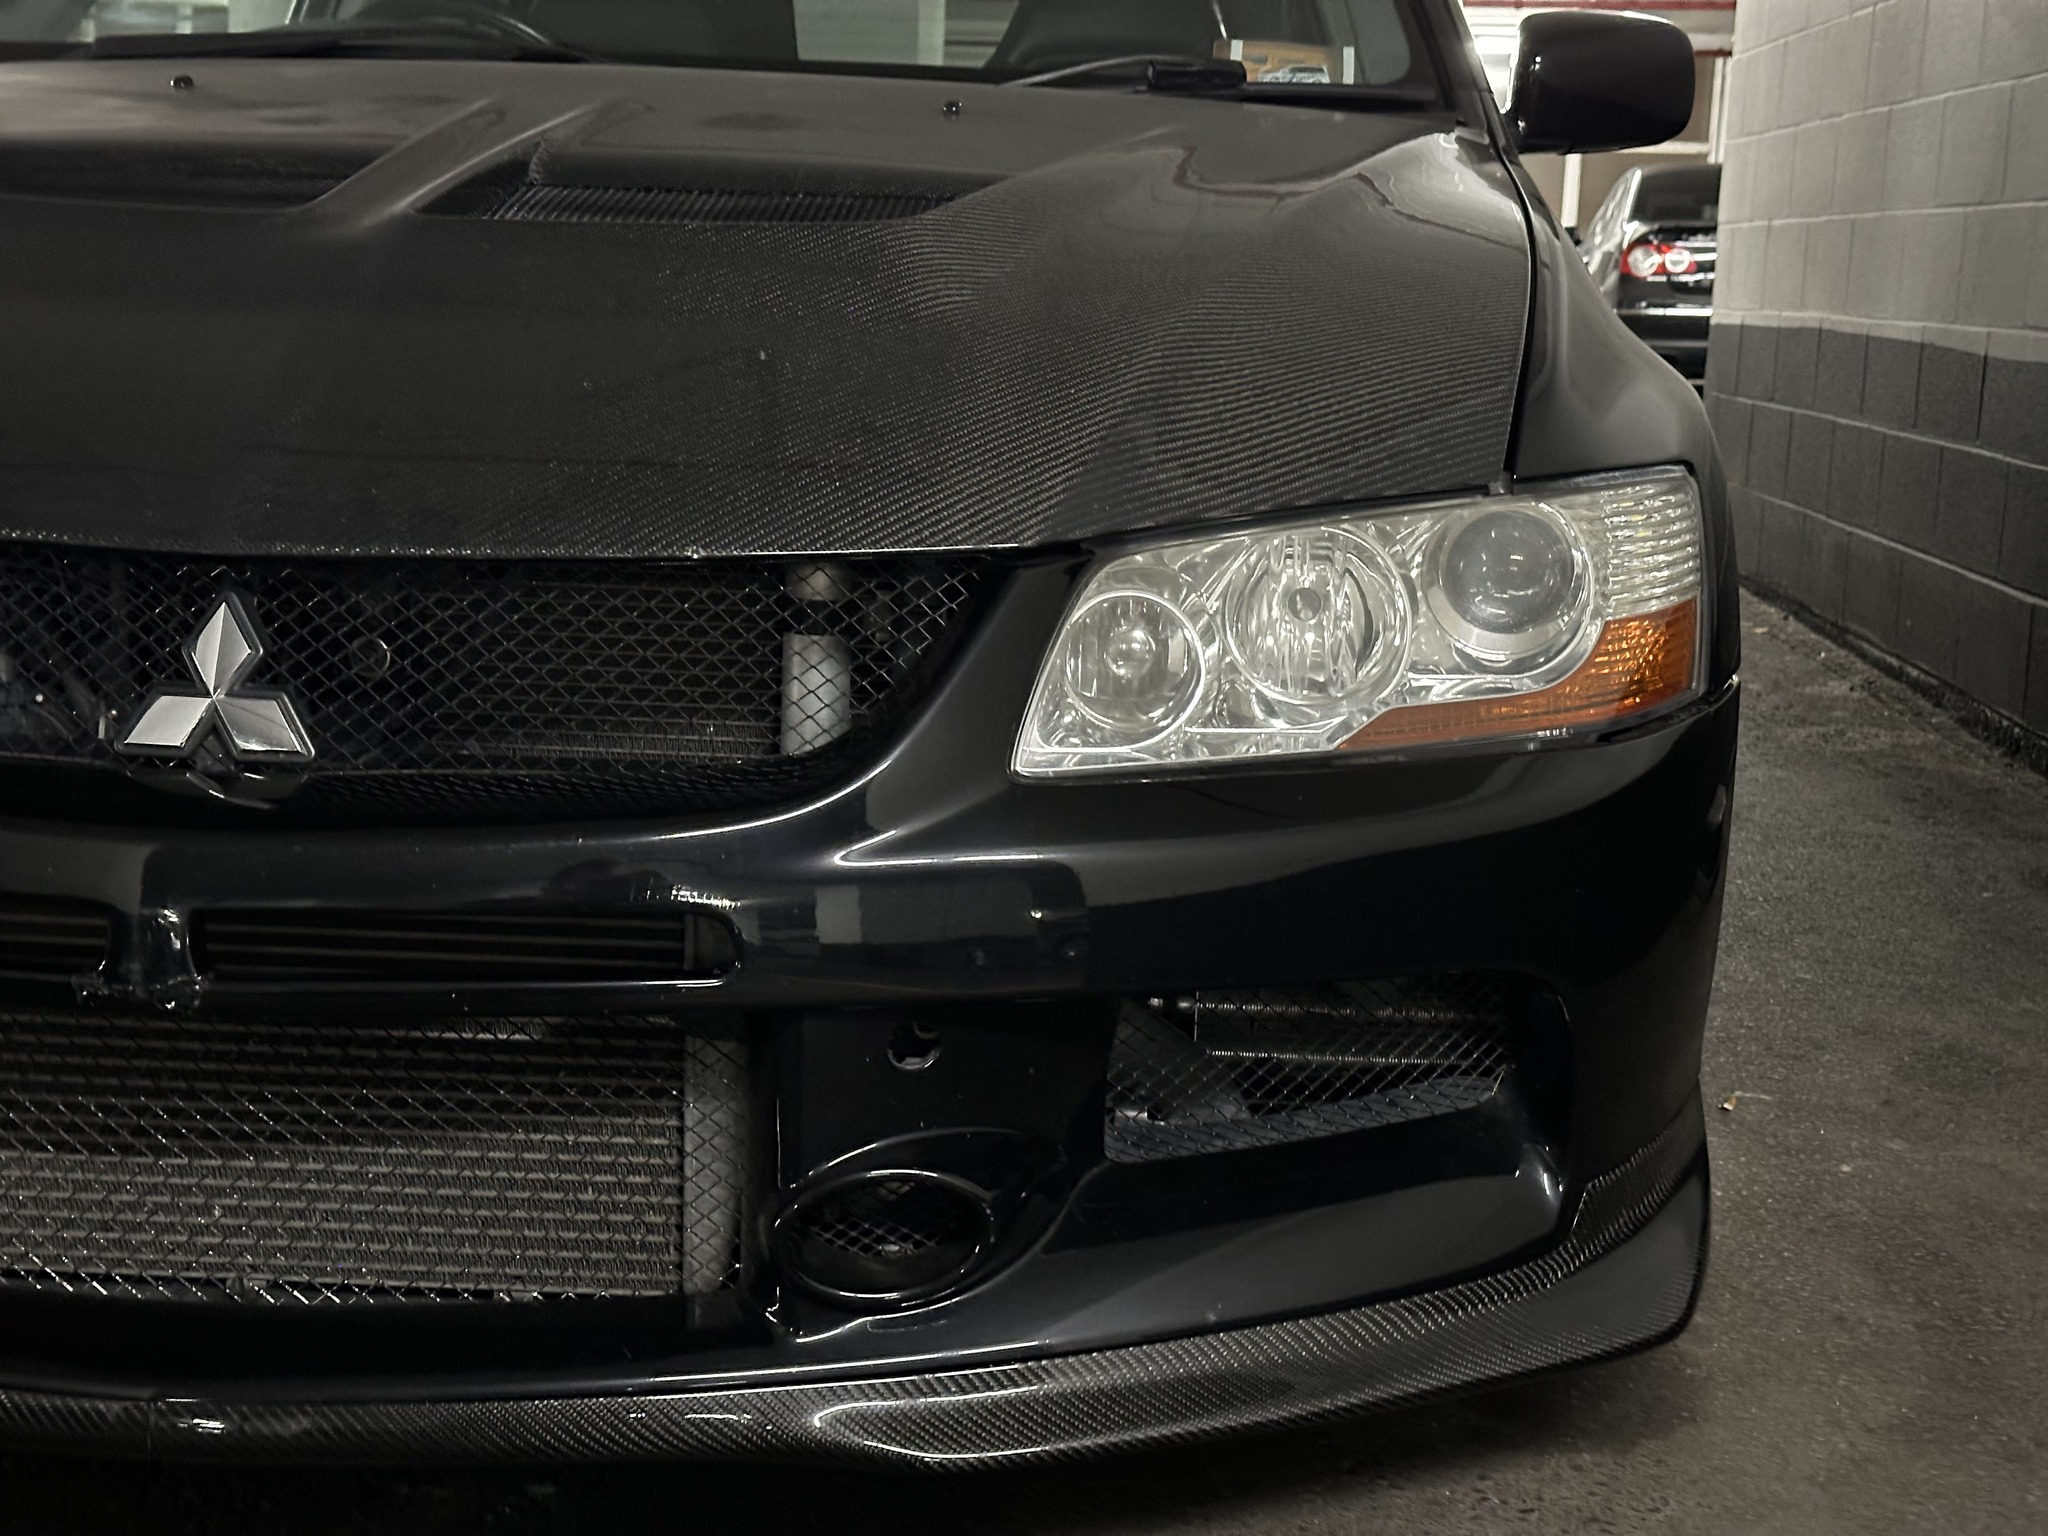
Finally got around to fitting the Ralliart CF front lip. I ended up cutting it in half in order to transport it from NZ to Canada so will tidy up the join properly in time, but for now it's hardly noticeable. I'm going to place a Ralliart sticker over top of the join anyway to hide it further
2 points
-
Took it to the clutch man, they are going to put stiffer cover springs on, hopefully that will be enough...2 points
-
I have done some pretty cool things with arduino but seem to forget things just as fast as i can learn them. I have no idea what he is talking about most of the time but the moving lights are pretty.2 points
-
I spoke to the brother in law last night. Asked him about the fire ban in the region. (Hes in Alexandra, ex firefighter etc) He said the guy who runs that camp is a card carrying wombat/numpty/ejeet. And the fire ban does not include gas bbqs.2 points
-
Insta famous
2 points
-
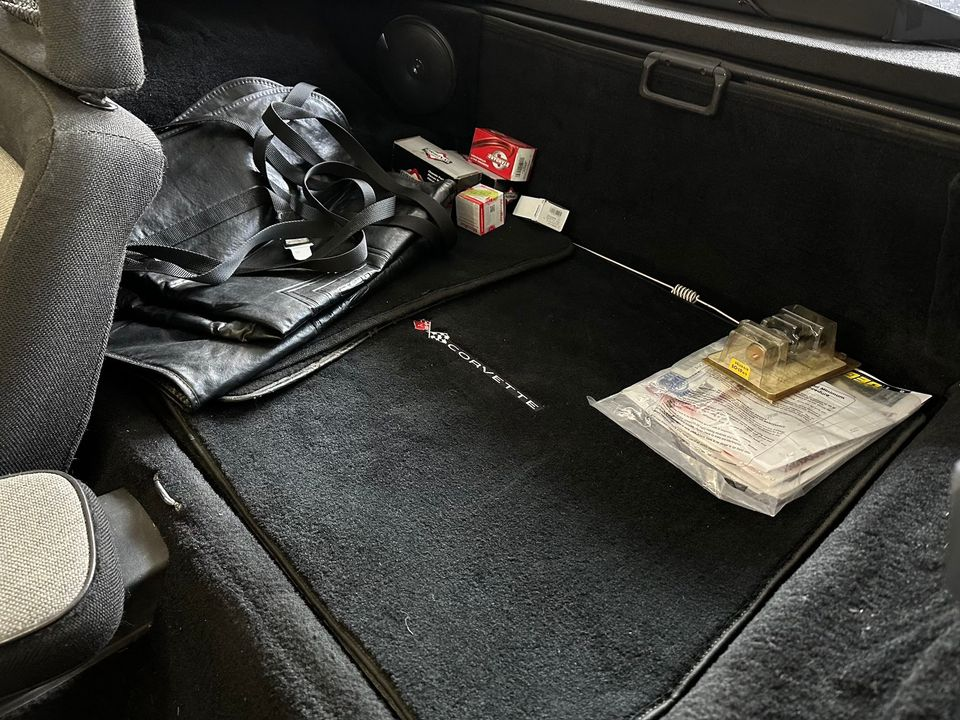
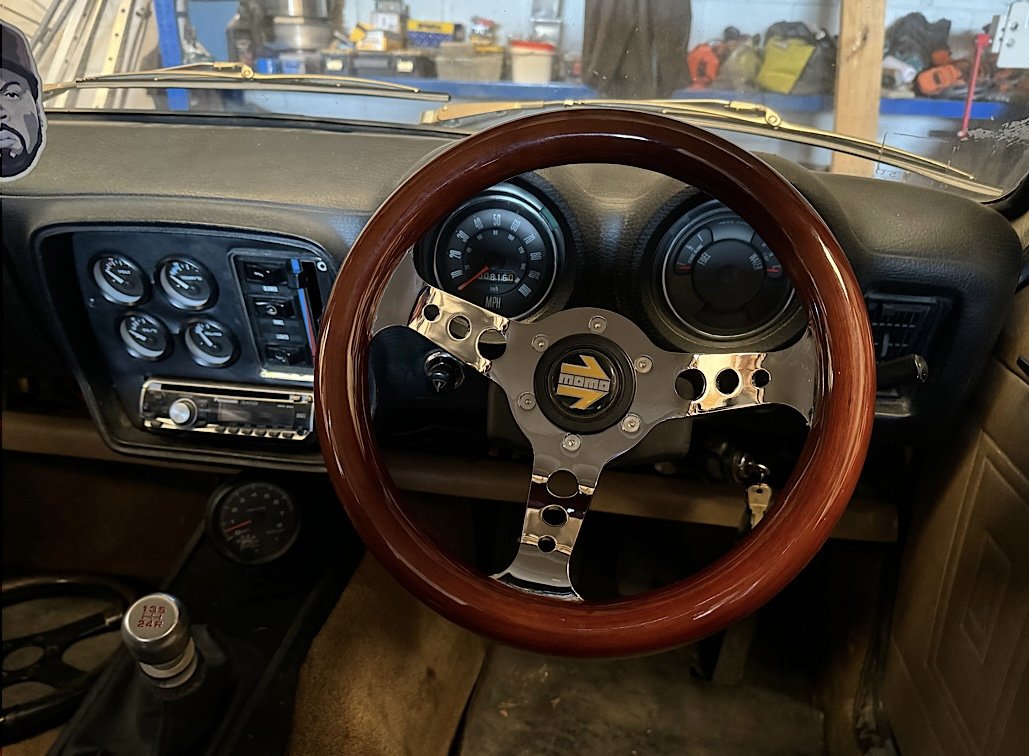
Added LED lamps to the interior and put in some new floor mats to help tidy up a bit of the roughness: Disco fred here -
2 points
-
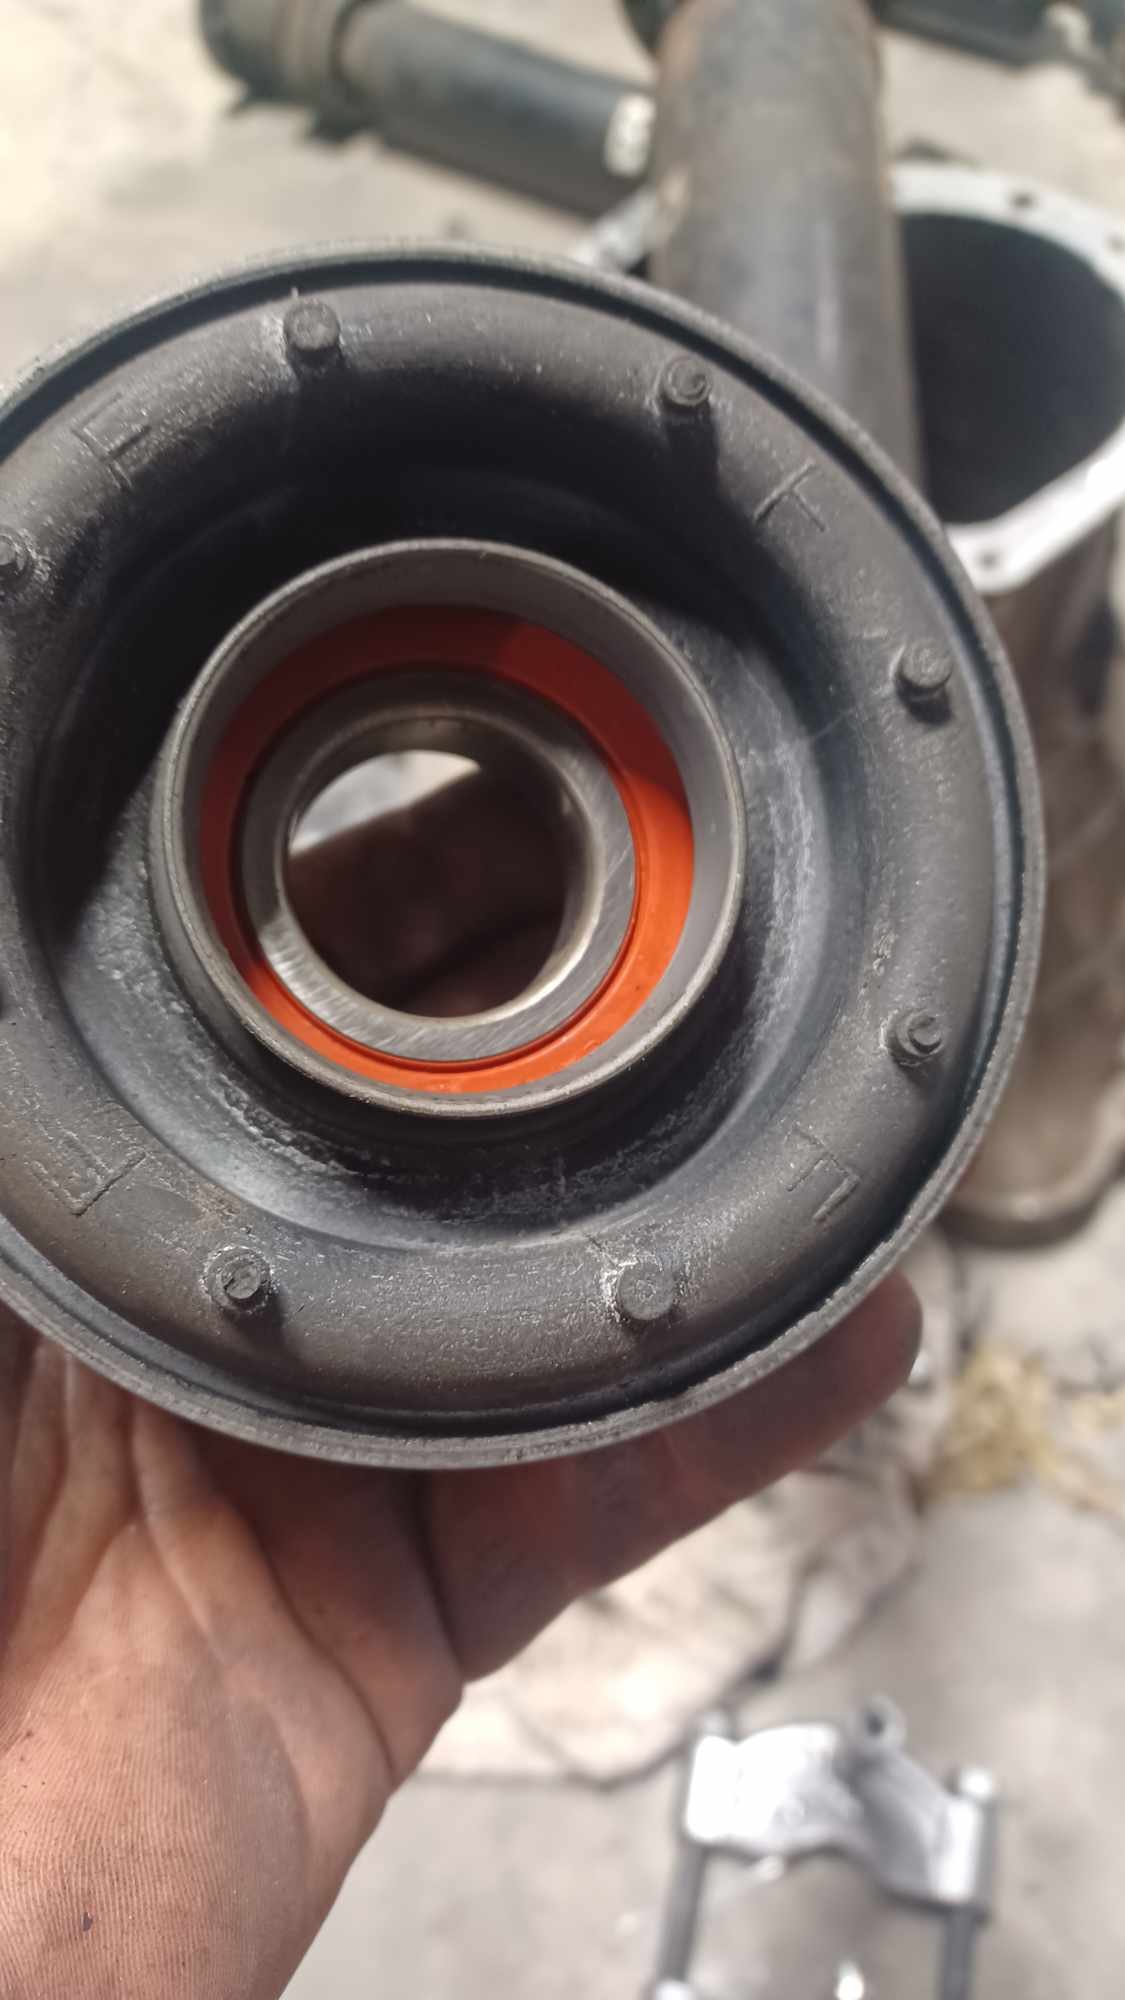
I ground a chunk of steel to hammer into the nut to free it up Then had to cut all of the rubber off the old hanger and press the bearing off. The new one should have gone straight on and I blindly slapped it on with the F facing the front. However, the F is supposed to face the back and the price was jammed on. It took a hour to get it off without fucking it. Fortunately the new bearing came with a new nut as that was fucked too. Haha. Reinstalled the driveshaft and also a trigger wheel to get driveshaft speed for the ecu and 4wd controller I am going to run.
2 points
-
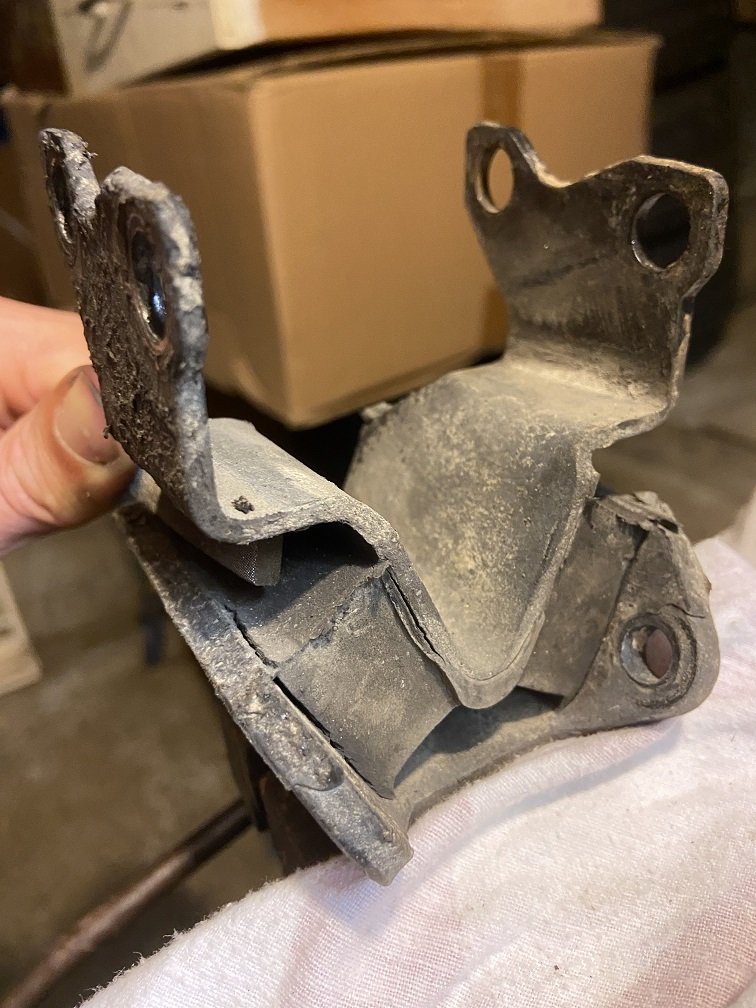
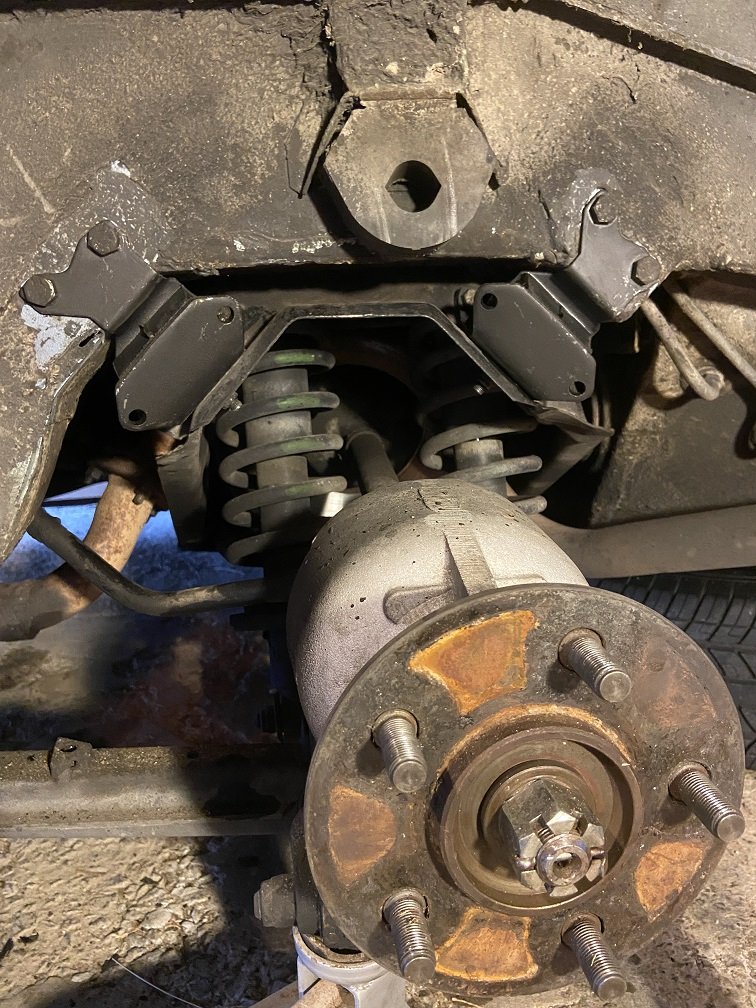
Boring update: I finally changed the rear subframe mounts. Here's the one I had been most concerned about. I had expected to find it in worse shape once it was off the car. Hardly worth worrying about really. This rubber-to-metal bond is the only thing that seems to keep the IRS assembly attached to the car. There is a radius arm connected near each rear hub which twists the whole IRS assembly in its mounts as the car leans in the corners, creating a passive rear wheel steering drunken snake effect. Wikipedia says this "...may result in significantly improved handling". May? Anyway, the mounts can fail from age or too many burnouts, and then you definitely won't have significantly improved handling. In this shot, the two subframe mounts have been removed: You can see the IRS cage thing, the tricky double shocks and springs, the light reflecting off the inboard rear brake disc, the skinny anti-roll bar terminating at the base of the RH spring (not present on all XJSs).... You can also see that I managed to change the mounts without disconnecting anything such as the exhaust, brake lines, roll bar, driveshaft, radius arm etc. I did one side of the car at a time, using a jack and an axle stand. New mounts fitted (this is on the opposite side of the car, to mess with your head): Now that these mounts are done, I'm not gonna be THAT guy:
2 points
-
Back home in Porirua. I picked up another set of wheels that are looking pretty schmick. Recaro seats are also in after drilling one hole in each of the factory Toyota runners. Exhaust fell off on the way to Shannon but easily fixed with tie wire.
2 points
-
I glooped the two halves together, bolted them up, bolted the tailhousing on and let it set. Following morning it was bolted onto the engine, unsurprisingly a bit heftier with all the gubbins placed back within the box. Its about 9kg heavier than the standard imp box. I then started to fit the first part of the gearshift linkage. The first of those snazzy universal joints, handily available in a diameter to suit the shifter shaft on the Subaru box. I just needed to add a small locating hole for the grub screw... Universal in place.. Engine and box were then bolted back into the car. This bit is so quick and easy when using the 'engine stand 2000'. It takes about 10 mins and I'm getting quicker. It'll be slower when there's shift linkage to undo and driveshafts to slip out of the way. But at least the main heavy awkward part is actually easy. That lot in place I took some pics. Its neat to be able to look out from the one of the lounge room windows down onto the workshop floor and see this... With that lot in place I was able to suss out the angles I could get away with, as shallow as possible and allowing for the handbrake mechanism. I had this old imp gearstick assembly that @dmulally kindly posted over to me. Some previous owner of the car he got it from liked painting things. Everything. Multiple times... I scraped all the layers off, took it apart and cleaned off the dirty old grease. Discovered it had been cobbled together from two old shifter bases. It was originally a very early Imp unit when the very first cars had an automatic choke, which often proved problematic. Hillman then changed the cars over to a manual choke with a nifty little lever in front of the shifter. This mount had been added to the early base. Which means they must have chopped up a later baseplate to get the choke mount. Why they didn't just fit the entire newer base plate I don't know. But what I had in front of me was a frankenstein of base plates with barry spec welding and fixes, but also including a not too badly made bronze bush on the lever where there is normally a (wornout) plastic bush. I had a couple of shift rods to choose from. I chose the least worn. Moving back to the gearbox end I machined up some shaft ends from stainless bar to suit the universal joints. I had some stainless tube and welded the ends in place on the first shaft that runs from the gearbox universal down to the tunnel. Now I needed a sturdy, slippery support to mount in place of the second universal joint. This will not only take back and forth movement on the shaft but also a bit of thrust loading created by the angle on the connecting shaft. I had already bought a lump of slippery hard engineering plastic with this application in mind when I had ordered the plastic for the flywheel thrust bearing a while back. It was bright yellow. Luckily not seen under the car as it would clash with the blue paint. I put a hole in it and machined the outside down. Which also created a pile of pretty swarf.. Then reamed it out to 1" Still a bit tight so out with the adjustable reamers.. until it was just right... Then made a stainless cradle .. The cradle got some wings welded in place and I dug the rivnut tool out.. Mount now bolted in place in the tunnel I had to chop the last tube to the right length, weld on the end and bolt the universal in place.. The front end below the shifter was was standard imp stuff and this is where problems popped up to throw a medium sized spanner in my workings. The side to side gearstick movement across the gate was minimal. Ridiculously so. Like about 1". Or 25mm in new money. Yet the fore and aft movement was about right. But quite stiff. I was contemplating why this was so and what I could do to remedy this when I also noted that 1st gear was where 3rd was and 3rd was where 1st was. Poos. Four years ago when I had compared the Subaru gearshift pattern at the box to the imp unit I thought they were exactly the same. But I had not accounted for the reverse rotation taking place under the imp gearstick. Also I never really thought much about how little of rotation the Subaru box needed on its shifter shaft to shift the internal selector across the 3 rods. Its a tiny amount, like 3 degrees say. Whereas the Imp box has a shorter internal selector and requires more rotation at the shaft. Hence the Imps gearstick knob only moves a teeny bit when coupled to the Subaru box. But the Subaru box has a standard/similar amount of rod movement within (ie 1-2 and 3-4th) which was going to make things trickier to fix. Simple linkage/leverage multiplications that is easier to see than explain. Sorry if your brain hurts. I had to hurt my brain a little bit to suss out a solution but there was only a little bit of smoke. The reason the scooby box is different becomes obvious when you see the scooby shifter setup. Which luckily I can show you because last week thanks to @Leone I was put onto a local fella to me who happens to have many old Leones and Brats kicking about his property and he had a spare leone front wheel drive box that I wanted (always handy just in case...) His property is amazing!!! Long 4wd only driveway up to a ridgetop house with stunning views out over Tasman Bay. Old leones just kicking about... Luckily we have our trusty old 4wd Hiace and that became the days gearbox transporter... Box on bench. Look at that shifter mechanism... The shifter rod attached to the gearstick only rotates a tiny amount when the stick is moved sideways across the gate. But the rod moves 10mm in each direction when shifting for and aft. Simple. Robust. Very Subaru. I can't copy it though because I have turned my box 180 degrees. No matter where I put my pivot point (below or above) I'll have one of the planes working backwards. So I decided to build a new shifter base setup. The most important thing was to reverse the rotation so the gearstick pattern is correct. The imp pivot point needed raising to allow the offset shaft end to be rotated to above rather than below the centre line, so reversing the across gate movement. I would add the ability to adjust both rotation and lineal movement. Started with a new pivot cup because I was not happy with the worn and Barried pressed steel item.. I dug out a large lump of steel bar... Chopped out a square and cleaned it up in the mill.. Big drill = big hole.. Rough machined out a cup shape. Cut a form in cardboard to suit the brass ball and used a die grinder bit to finish the shape... Grinding paste time... Slots for pivot pin.. Lightened the lump down.. Built the shaft up with weld and machined it down so I could add a lower pivot point. Milled some steel like so.. Welded a boss on.. New socket for shift lever ball end... Cut out Barrys previous workmanship... Machined up some spacers and a base plate.. Welded up a little tower (my stainless and steel tig welding is definitely improving, helped muchly by realising that not being able to see what I'm doing does not help much and finally admitting to my age and buying some reading glasses....) Welded tower to base.. Now all together please... Bolted together. You can spot the adjustable rotation, which the spacers allow for, along with adjustable pivot point. In place... Yay- it works! The shift pattern is correct and the action is much smoother. The spring loaded indents on the internal gearbox shift rods are quite stiff, which I noted was the same on the other box with its stock shifter. Its a bit baulky to push past the synchro baulk rings into gear but I think will feel better when the gears are actually rotating. There's certainly no slop in the system and it feels very mechanical - not rubbery. I now note how much flex there is around the shifter base in the imps tunnel (granted a very rusty shell..) Its something I might just try to stiffen up on my blue Imp when fitting this lot in. Phew. That was a little mini engineering mission I was not expecting but that's this project in general2 points
-
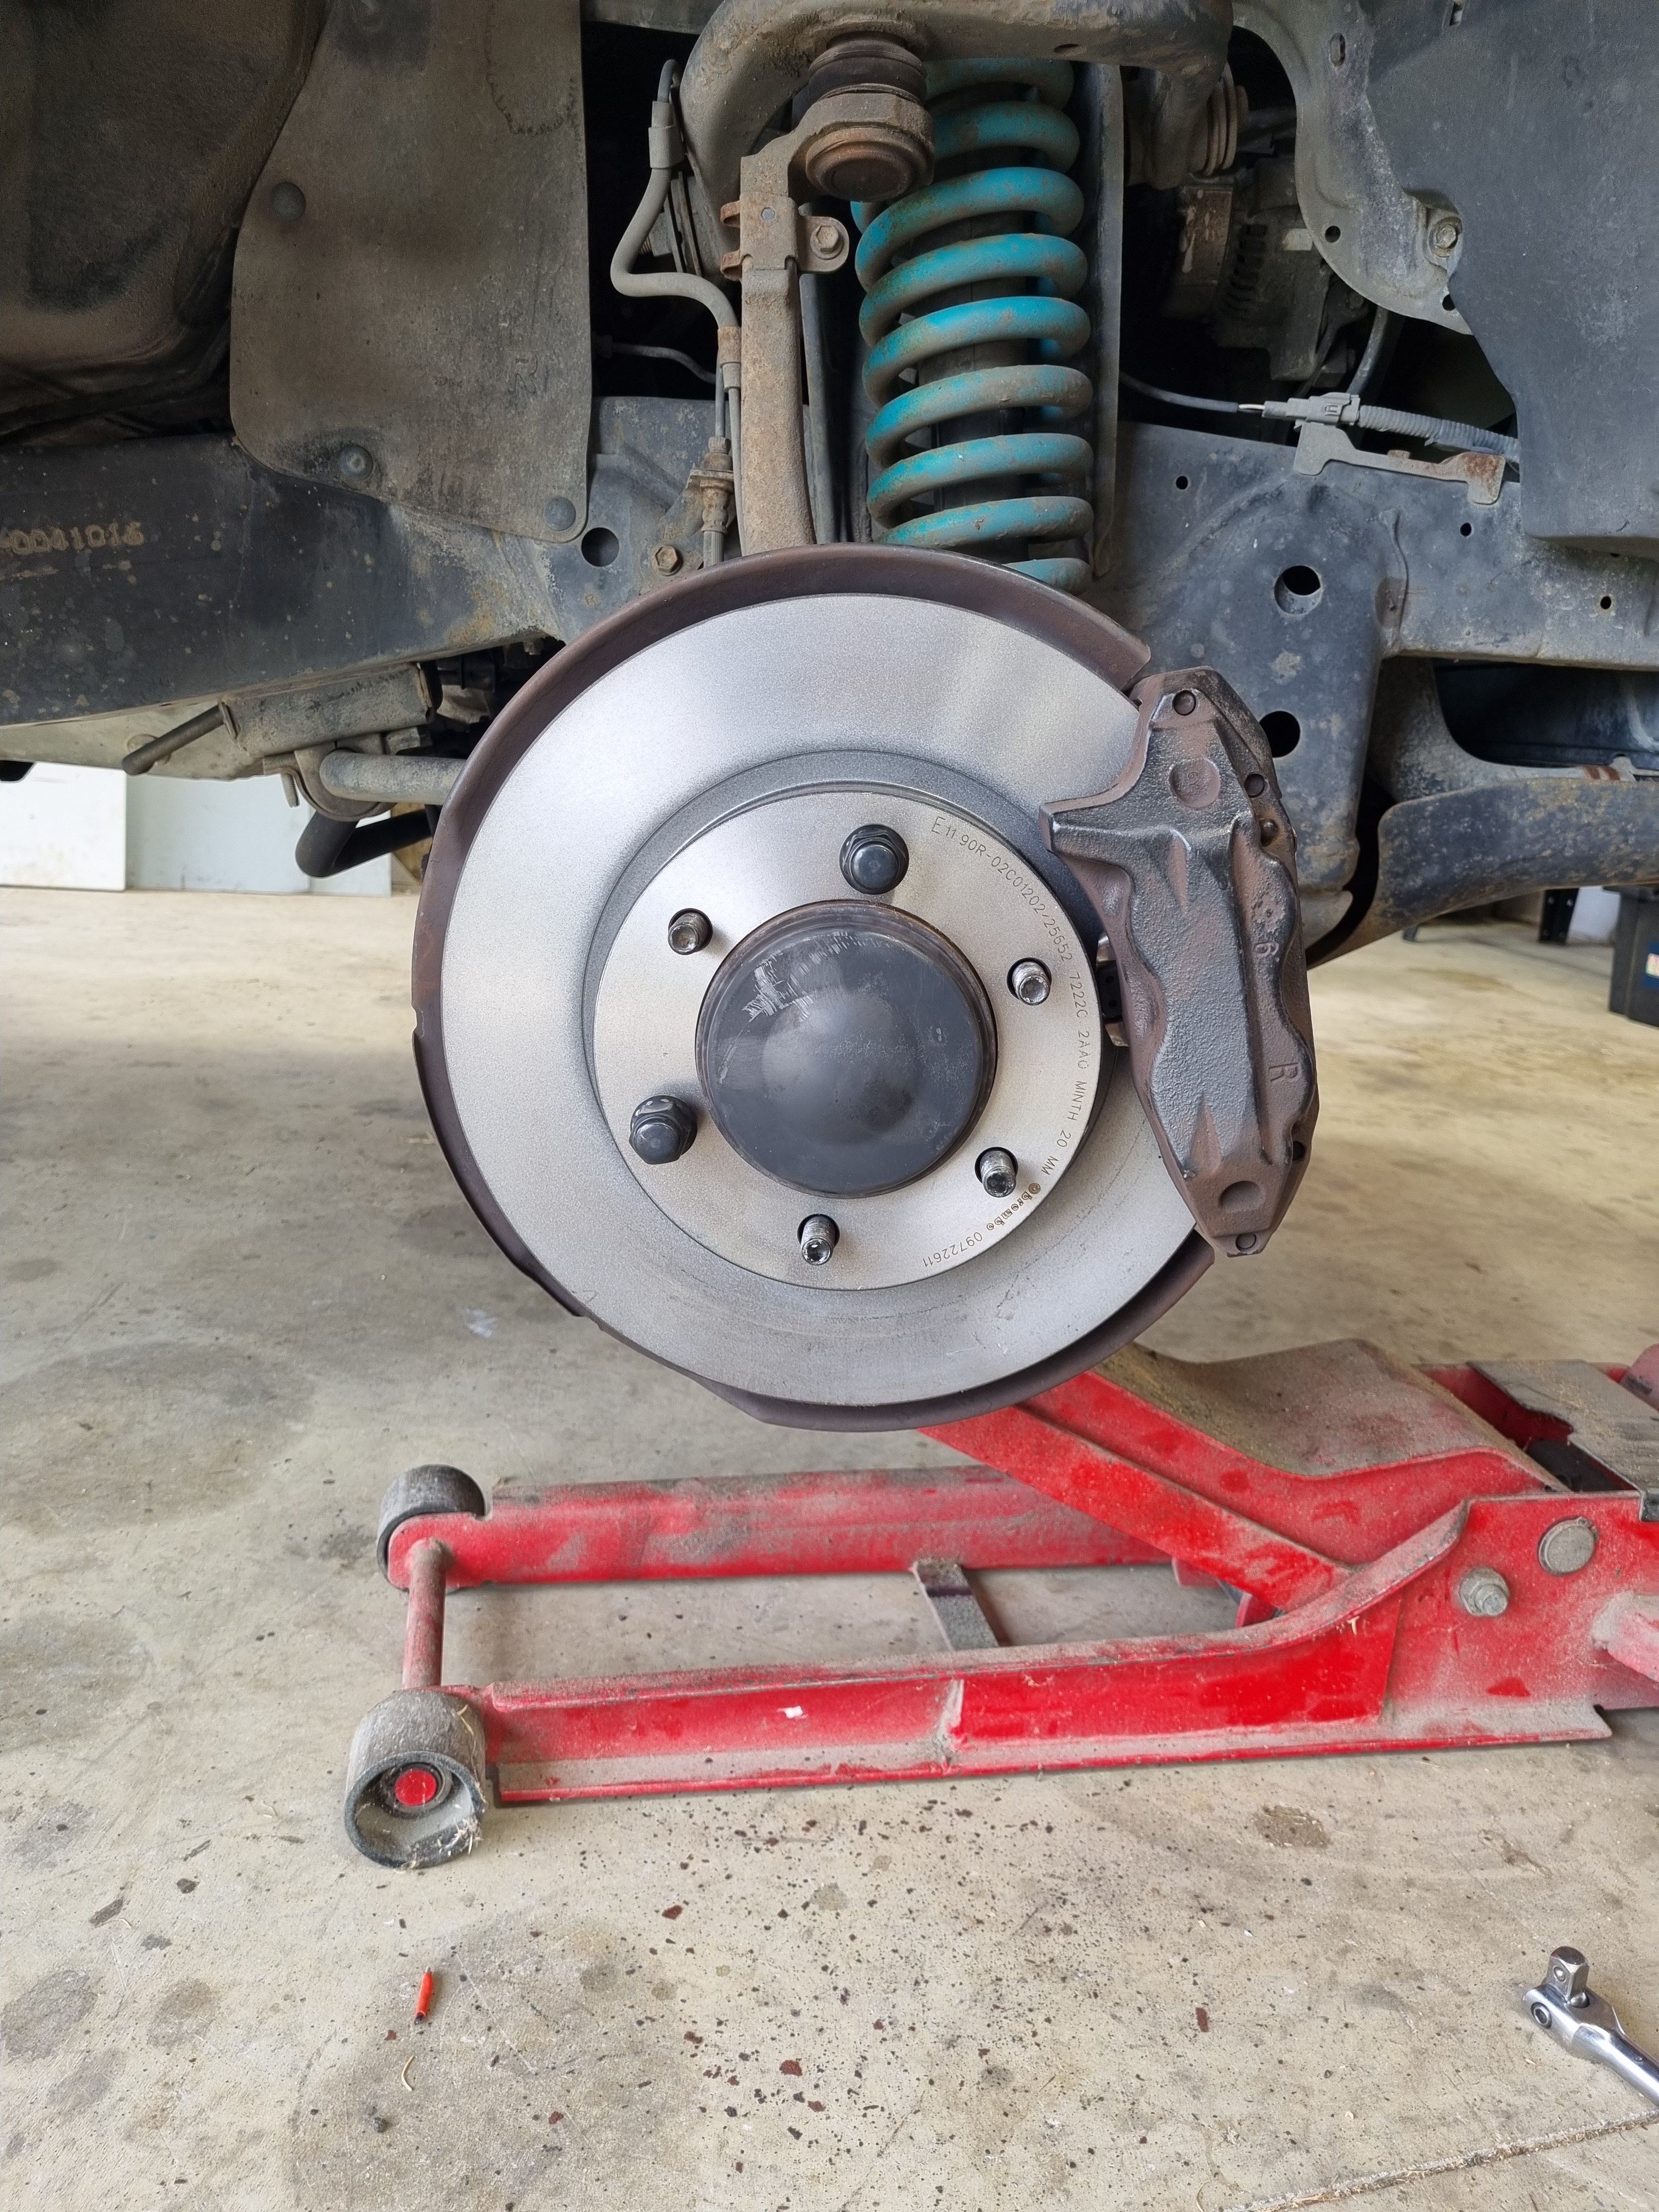
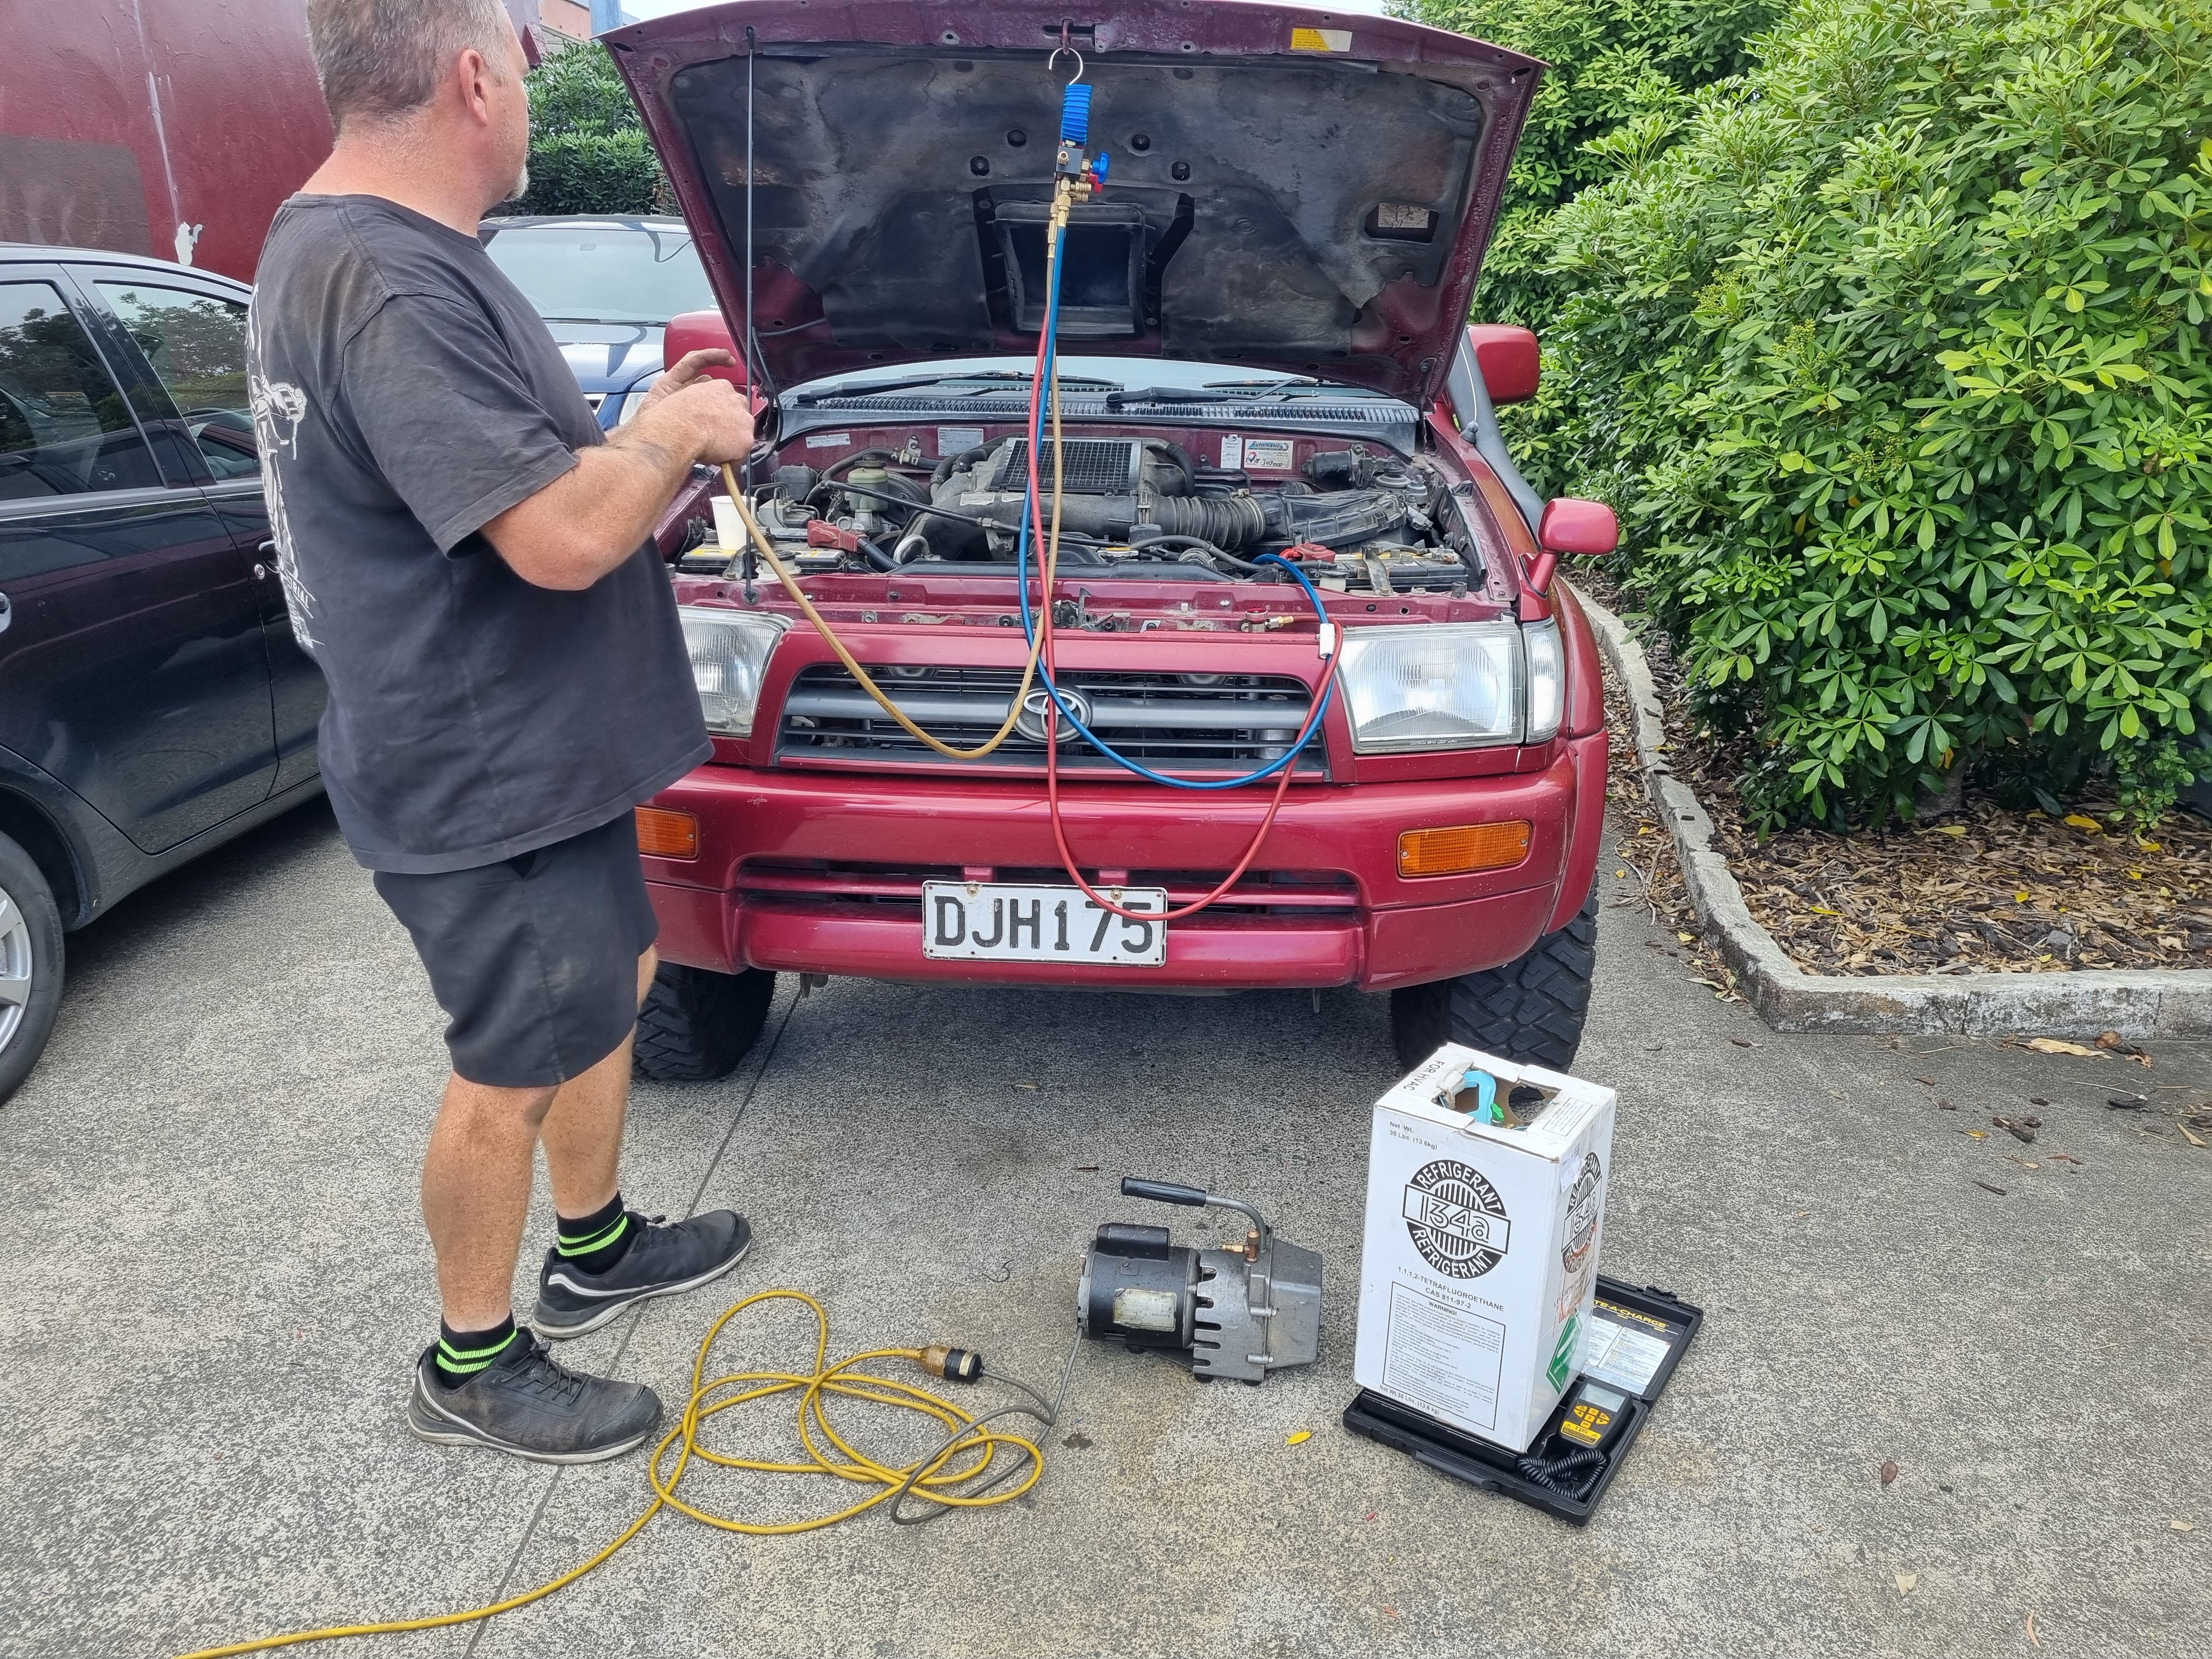
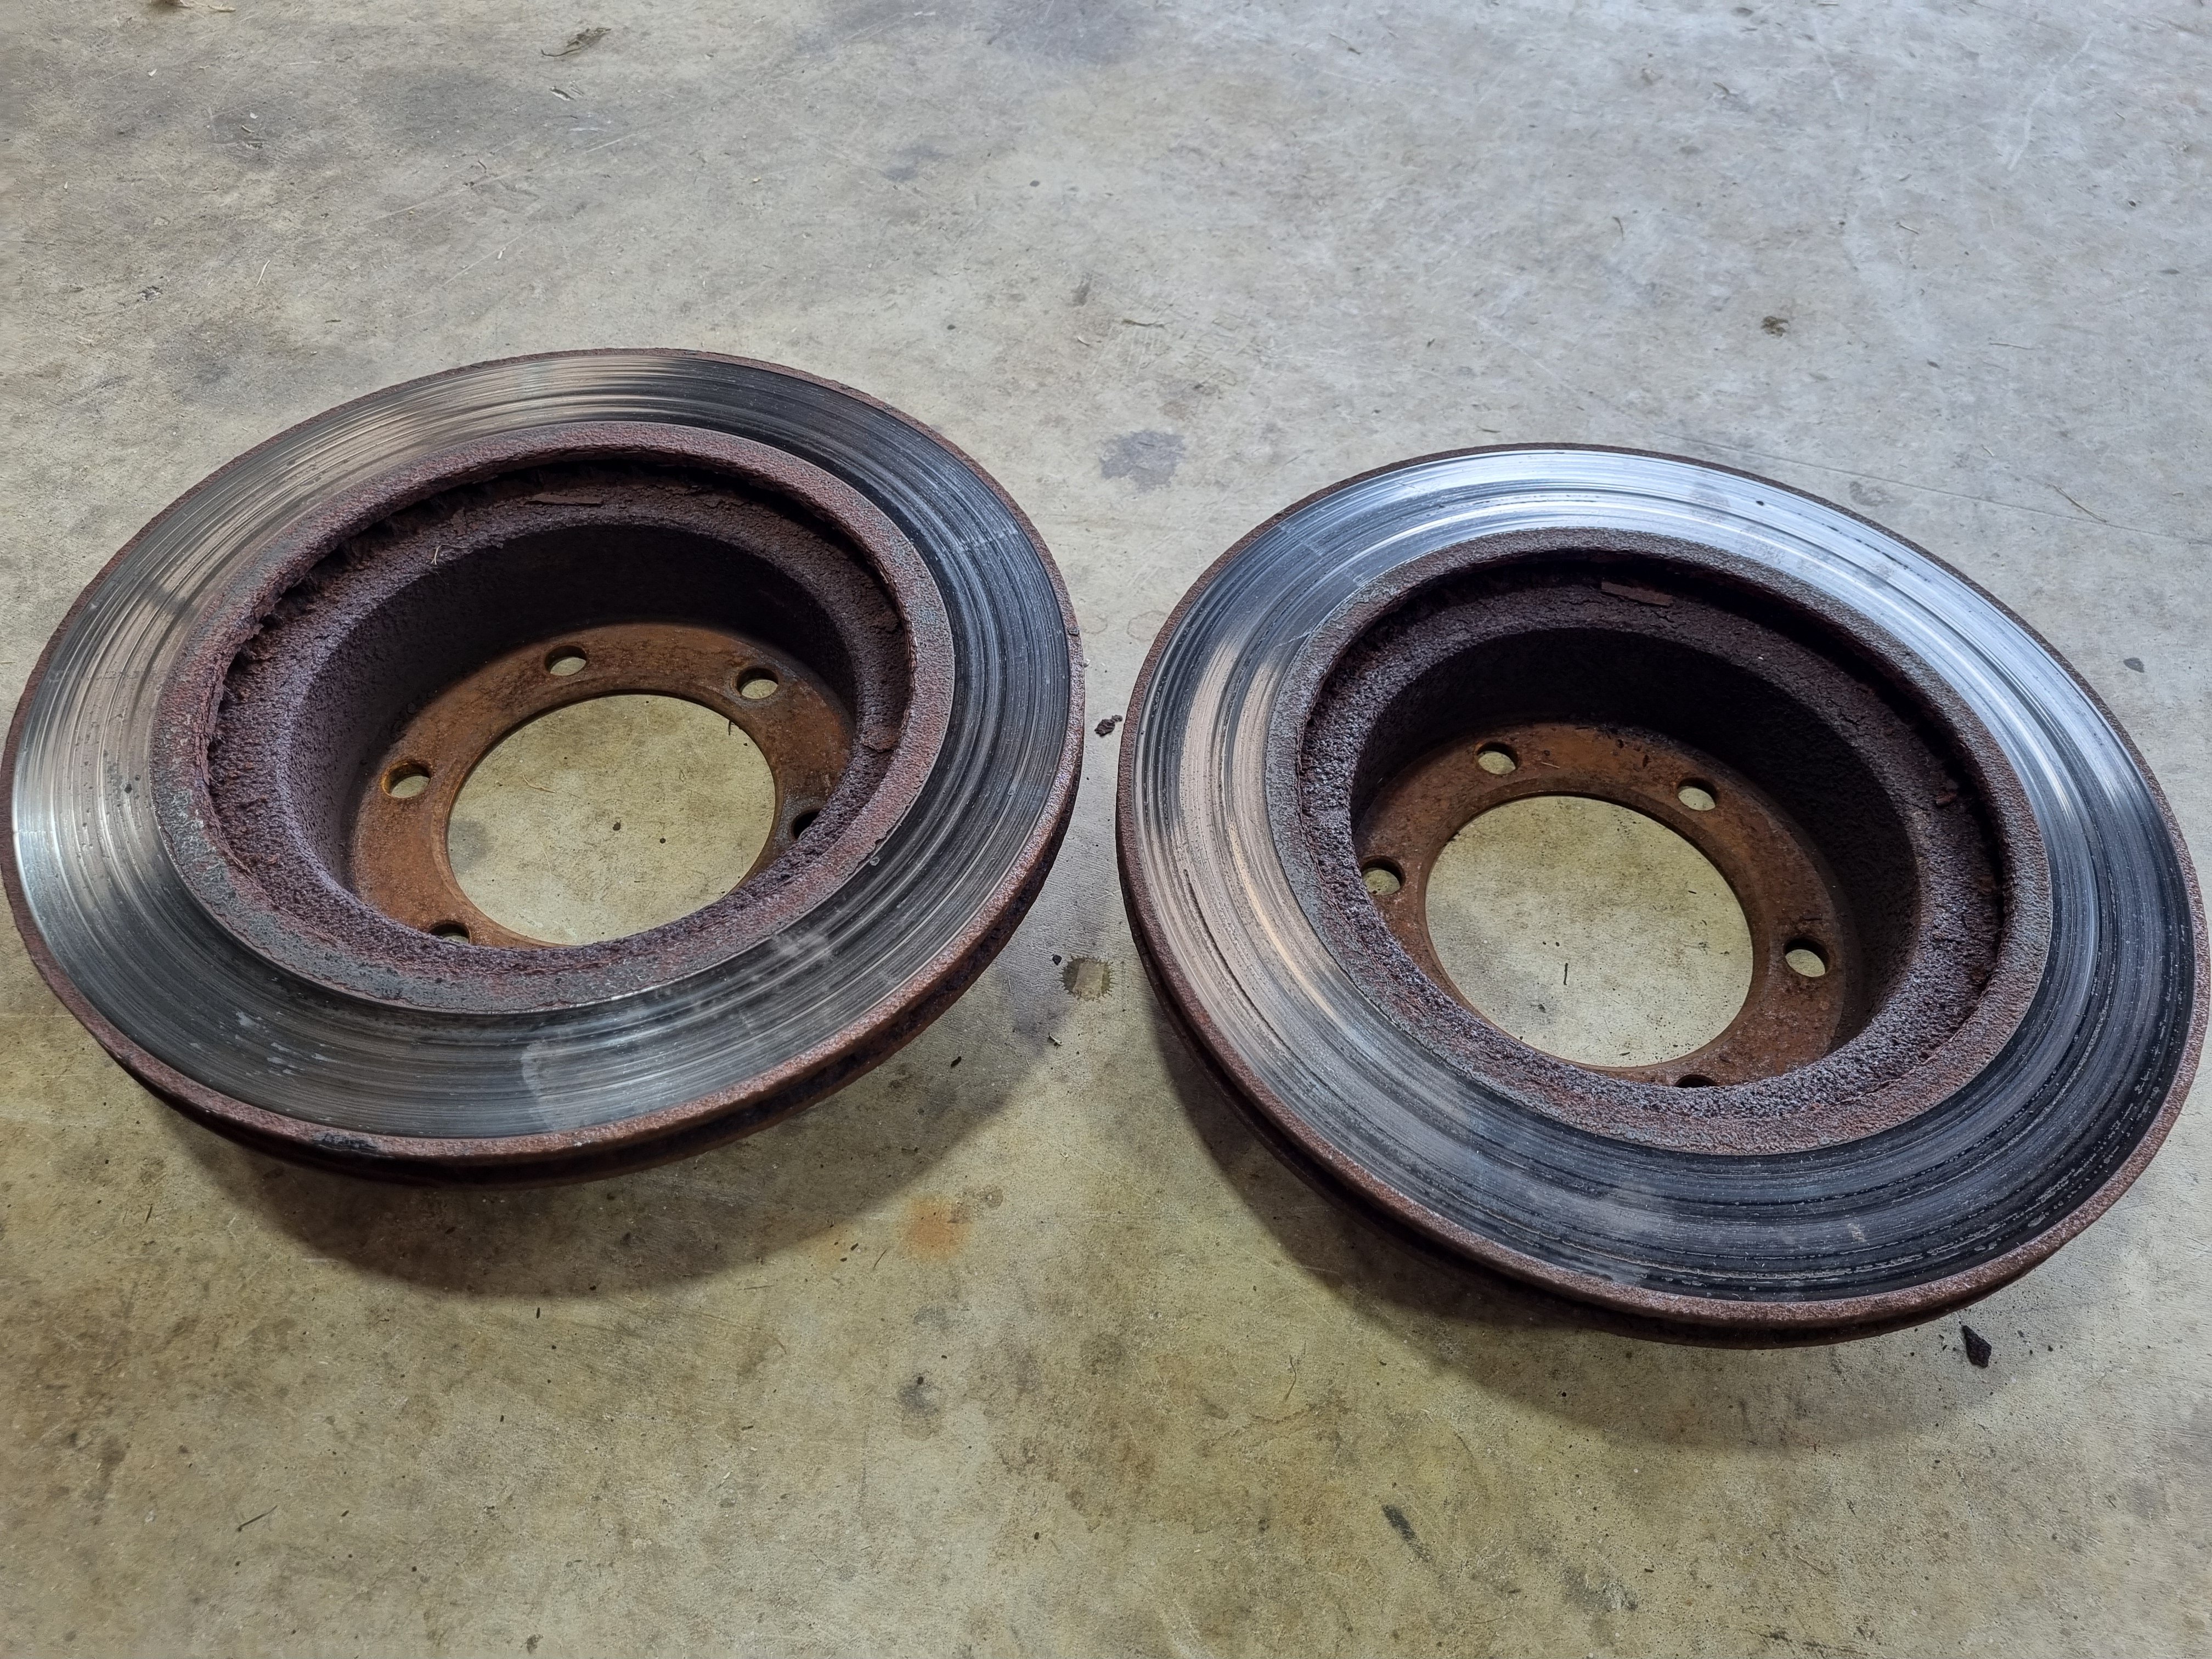
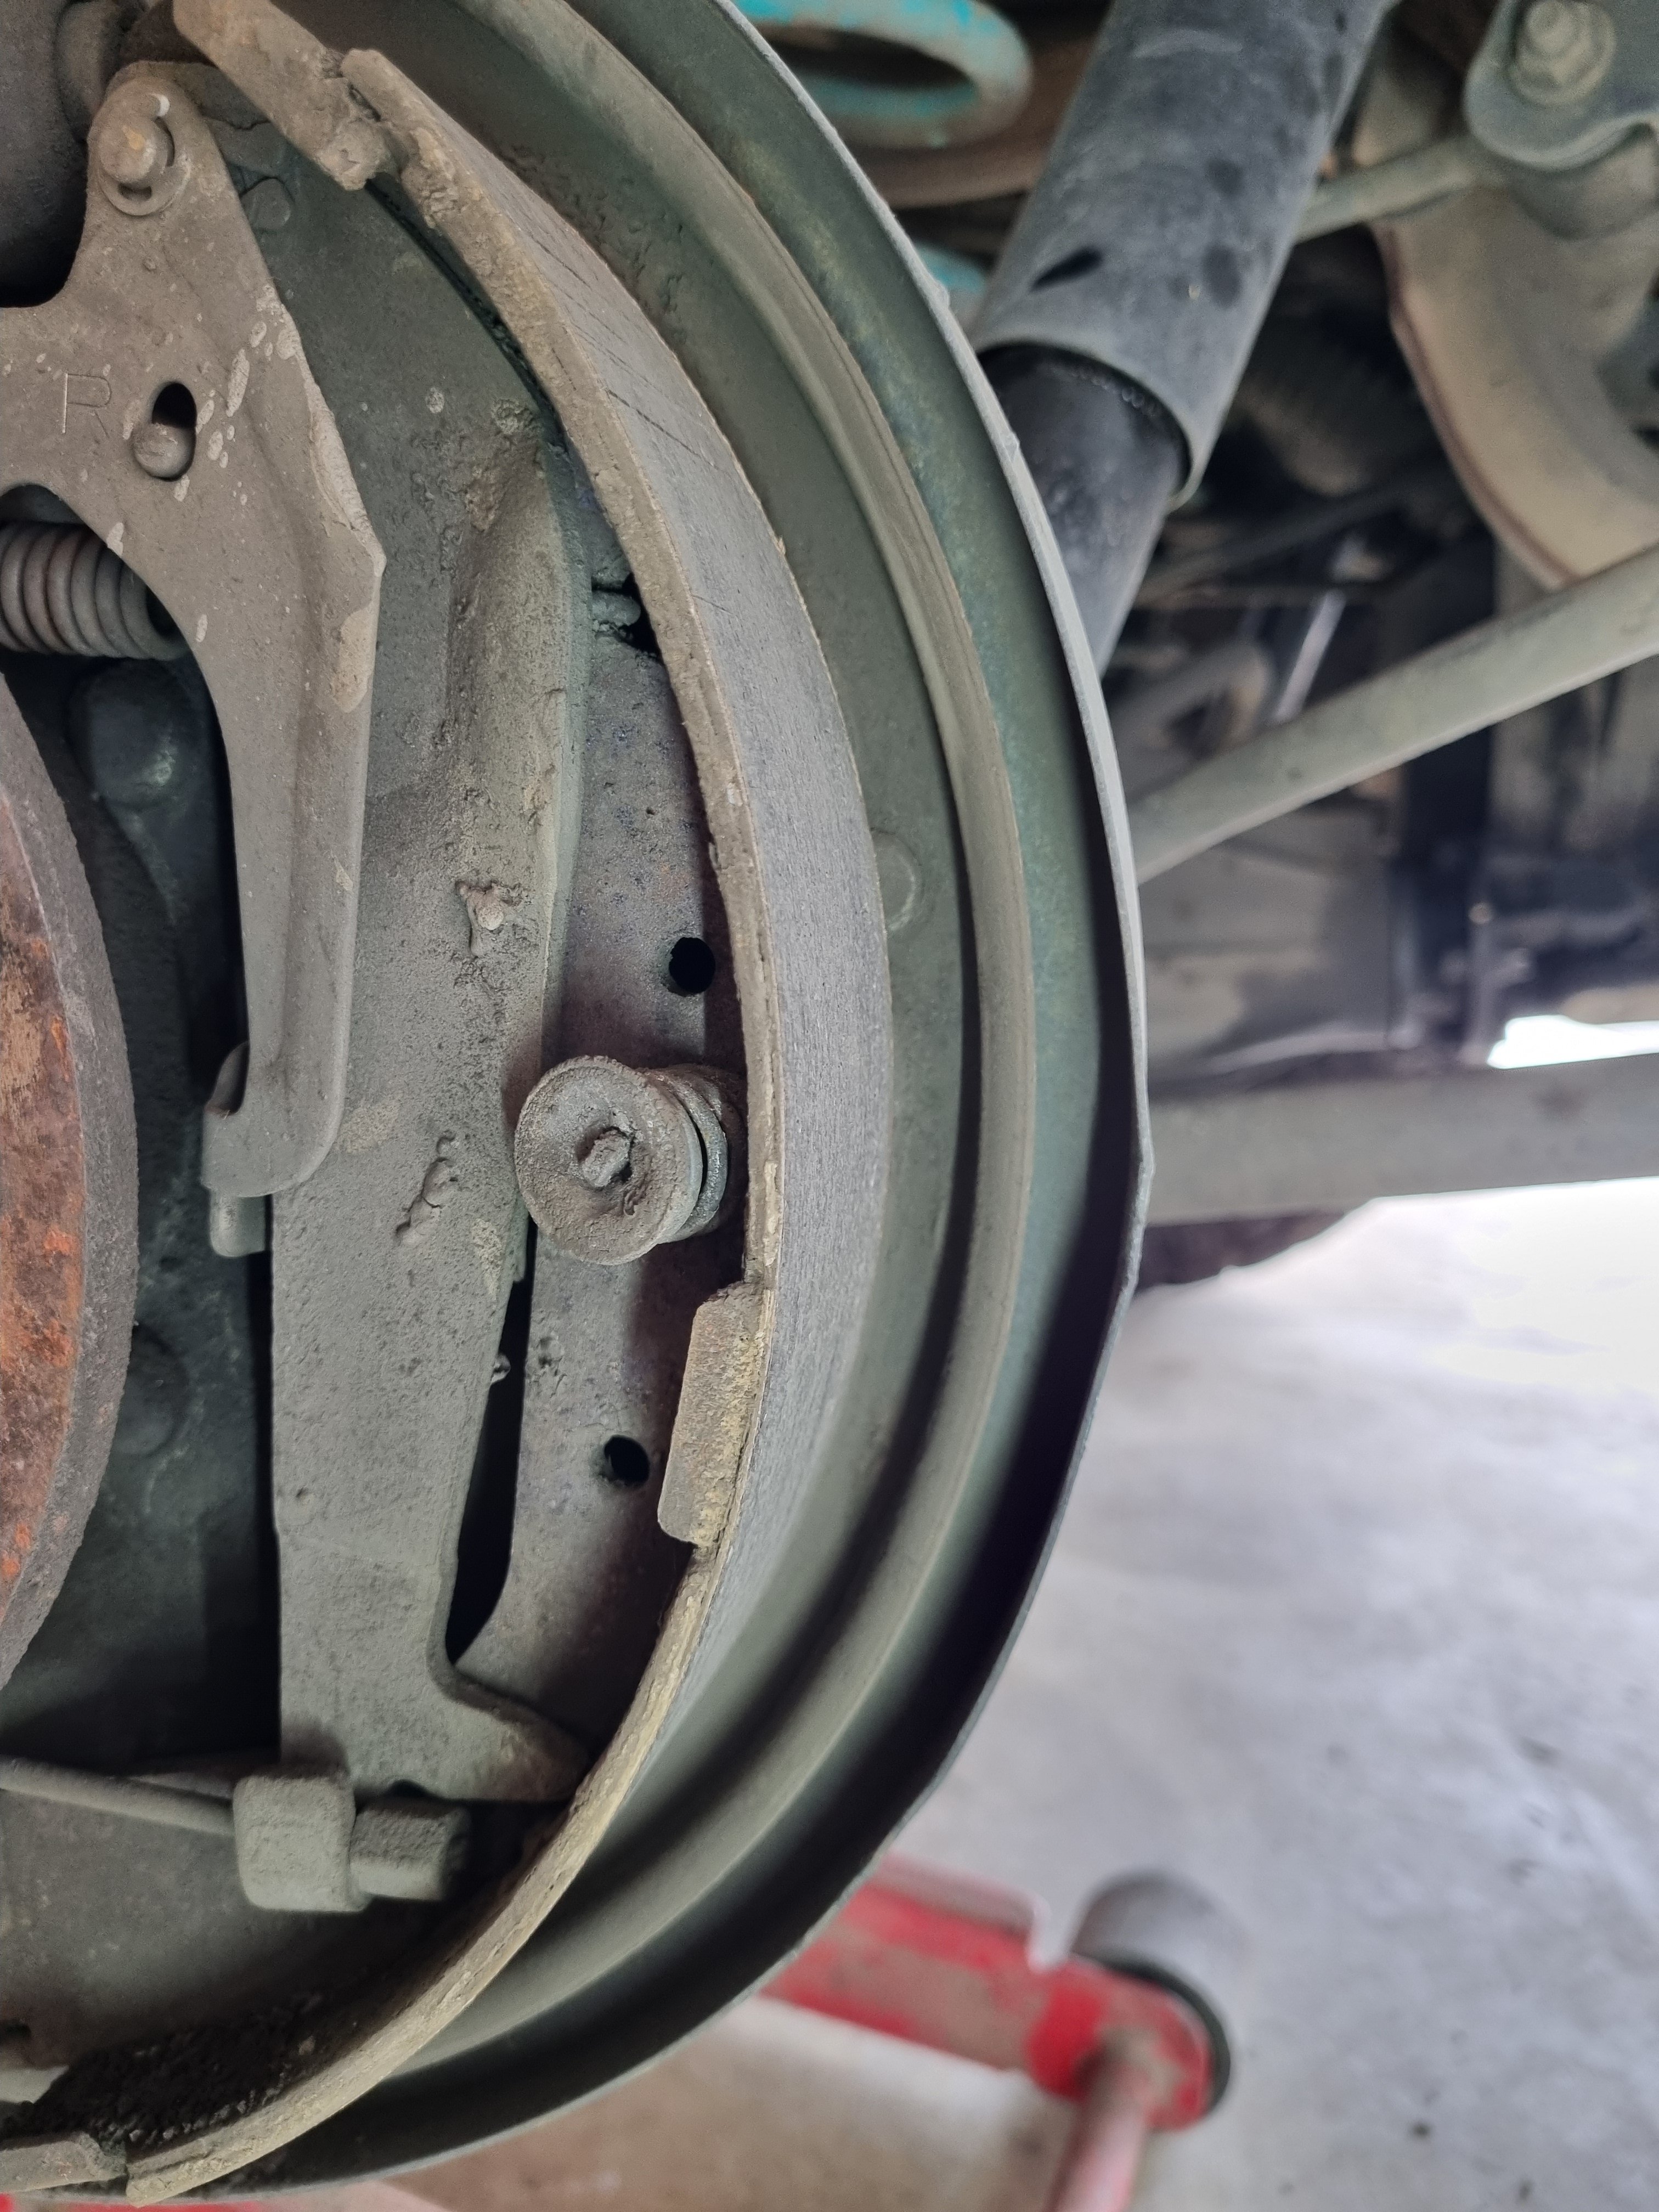
Nick recharged the AC system and now it works fucking ace. Couldn't feel my fingers by the time I got home so I'm calling that a win. Installation of new discs and drums. Front was easy, as you'd expect. Rear was a bit bit difficult to get the drum of due to the massive lip on the inside. However once I got the drum off I discovered the thinnest brake shoe I've ever seen. And of course the wheel cylinder was leaking so I'll get new bits next week and re- do the whole back brakes. Also I found the reason why I'm now the best 4wd driver in NZ. Auto disconnected sway bar for max flex bro. That's what the 4wd people say, you wouldn't understand.
2 points
-
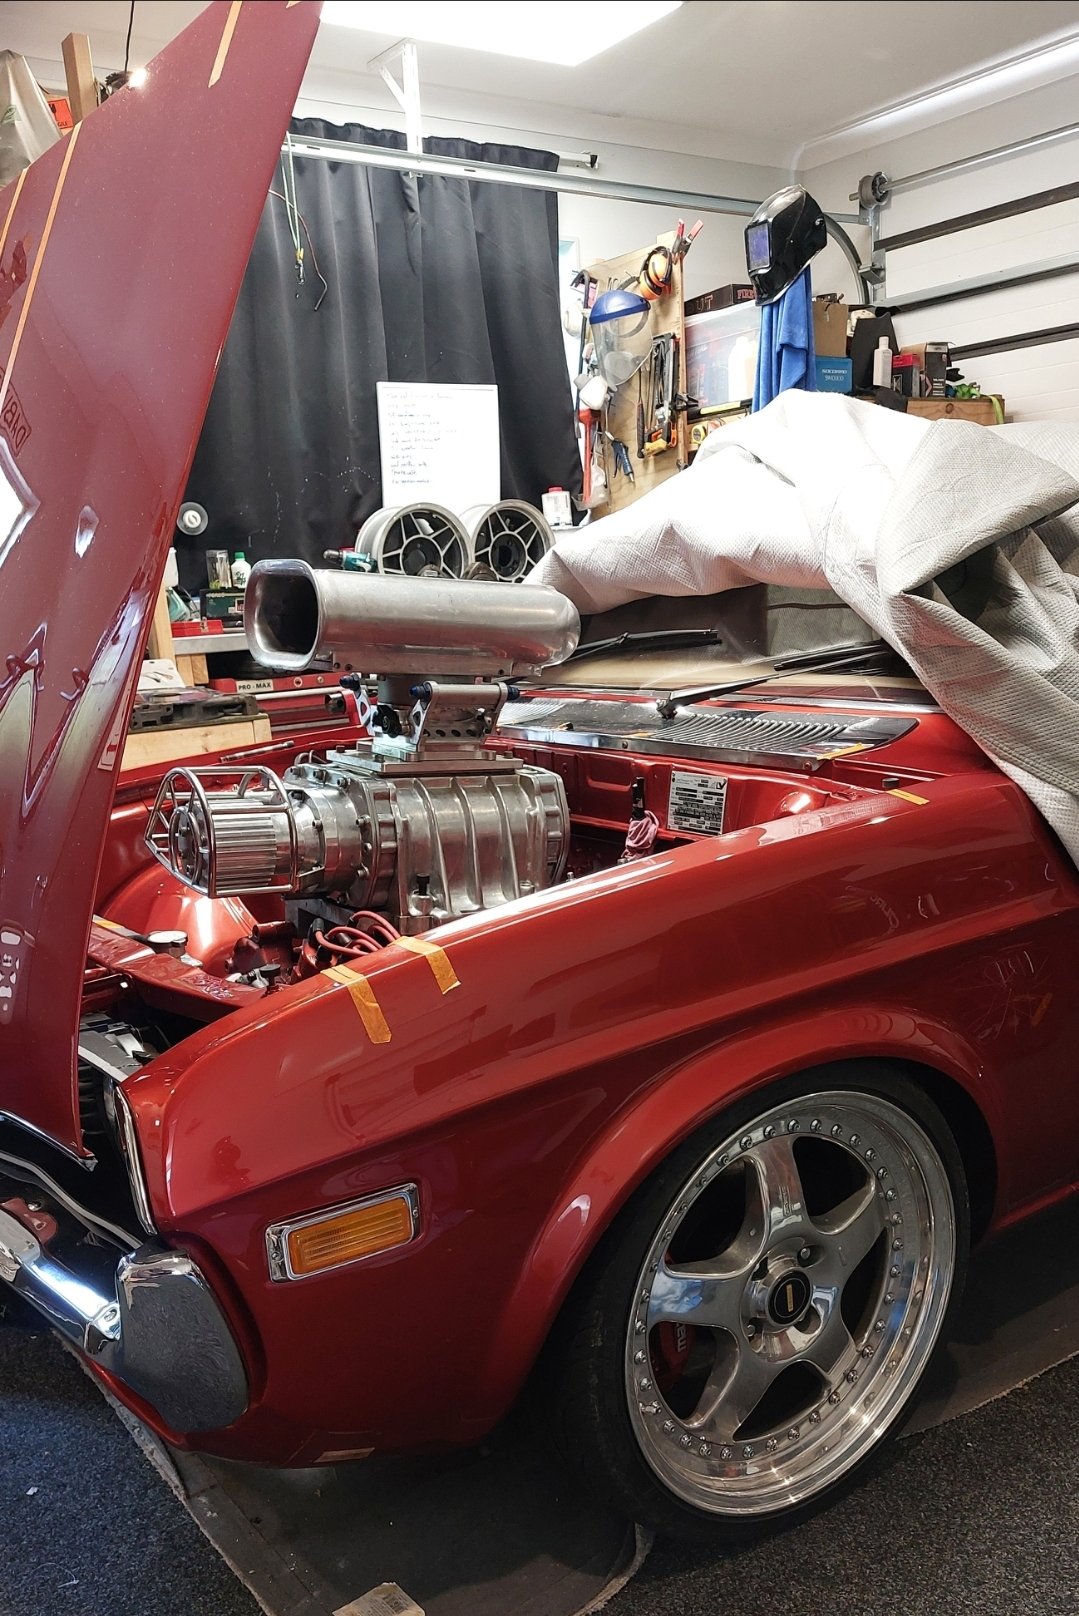
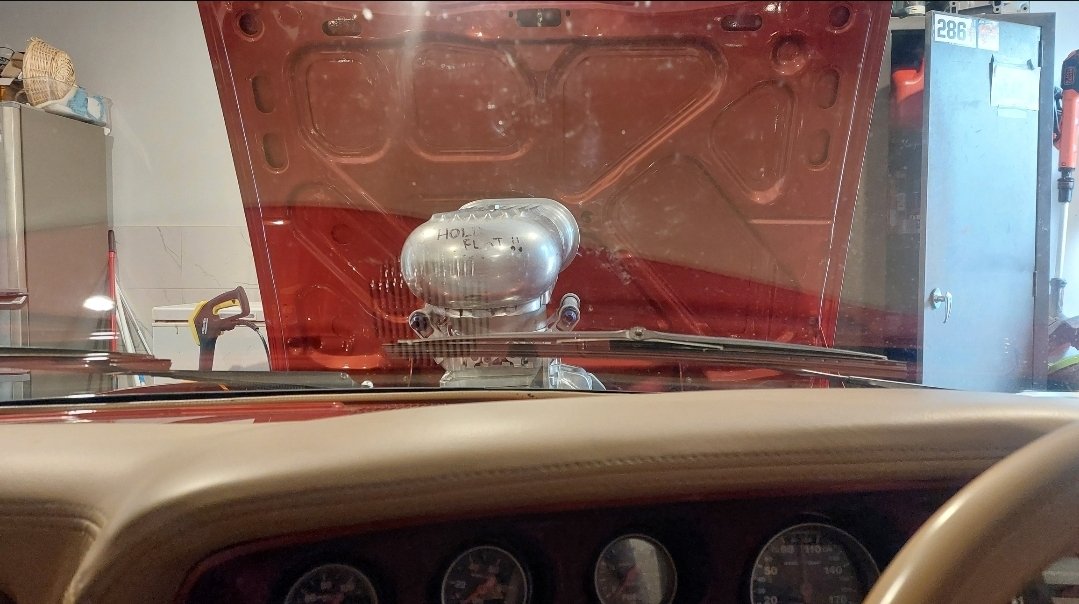
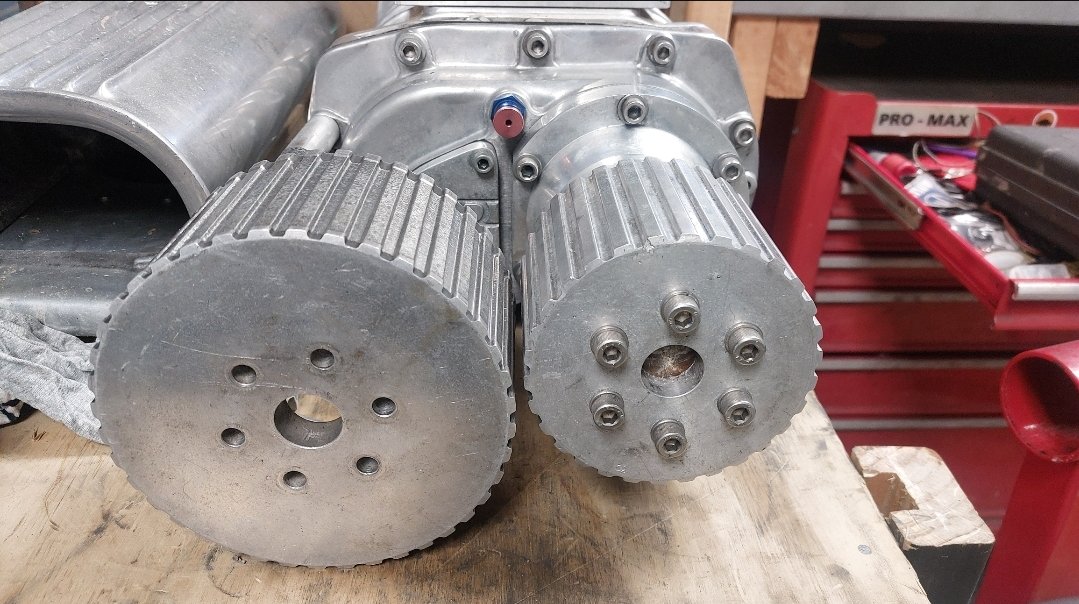
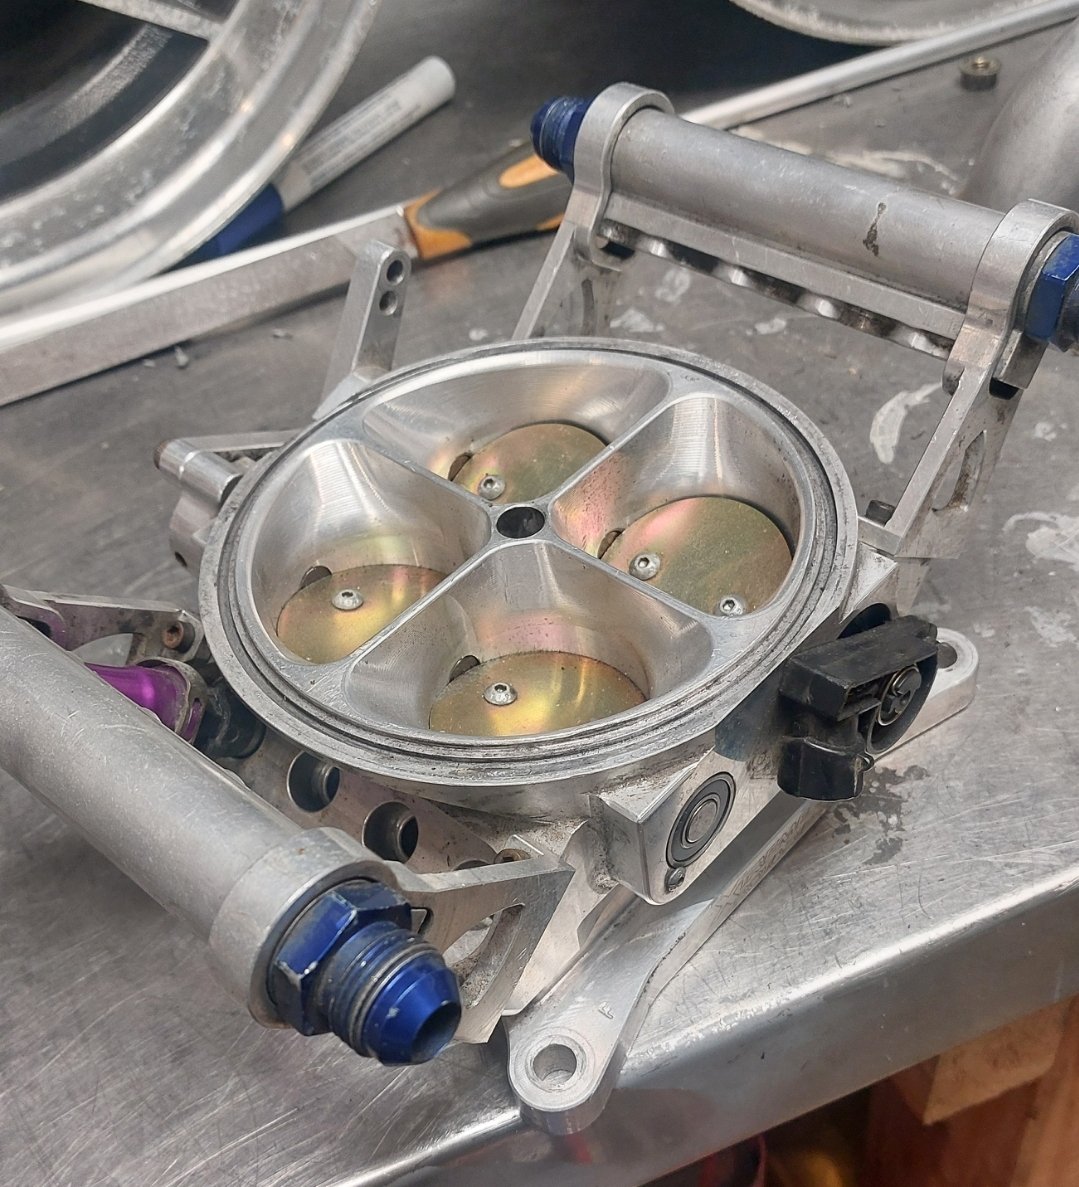
Sold the ROTECH BP, but before I whip it out, have dummy mounted the blower to check cut lines for the bonnet, so I can put a massive hole in it. 40 vs 30 tooth (1to 1) pulley, Unfortunately I'll have to run the under driven pulley to get it through cert which is only 7-8 psi. The small pulley will be double that, but intake temps will skyrocket, and I won't have enough money to get car legal as well as work on cooling. Water meth will be on the cards, as is maybe Water to air intercooler. I'll just focus on redesigning the intake, building a fresh new block, setting up EFI and a host of other items before I worry about decent power. Also that scoop won't pass, so I need to find a low profile solution for air filtration into the Xtreme rotaries 1200cfm 8 injector throttle body., I'll only need to run 4x 1000cc injectors for what I'm doing
1 point
-
I have to control its xspower somehow1 point
-
also teaser of what is meant to be arriving soon
1 point
-
Recently Dad's car broke the rear door handle, and no inside button. But it turns out he could log in with a canbus scan tool to pop it open.1 point
-
Old post, but I'd like to say- It can be amazing which things ARE controlled by canbus these days. It would not at all surprise me if brakes and tail lamps were more often than not canbus these days. Even tail lights on new motorcycles can be canbus. the BYD's horn has an annoying delay which im sure is because its controlled via canbus. Its definitely not hard wired like traditional.1 point
-
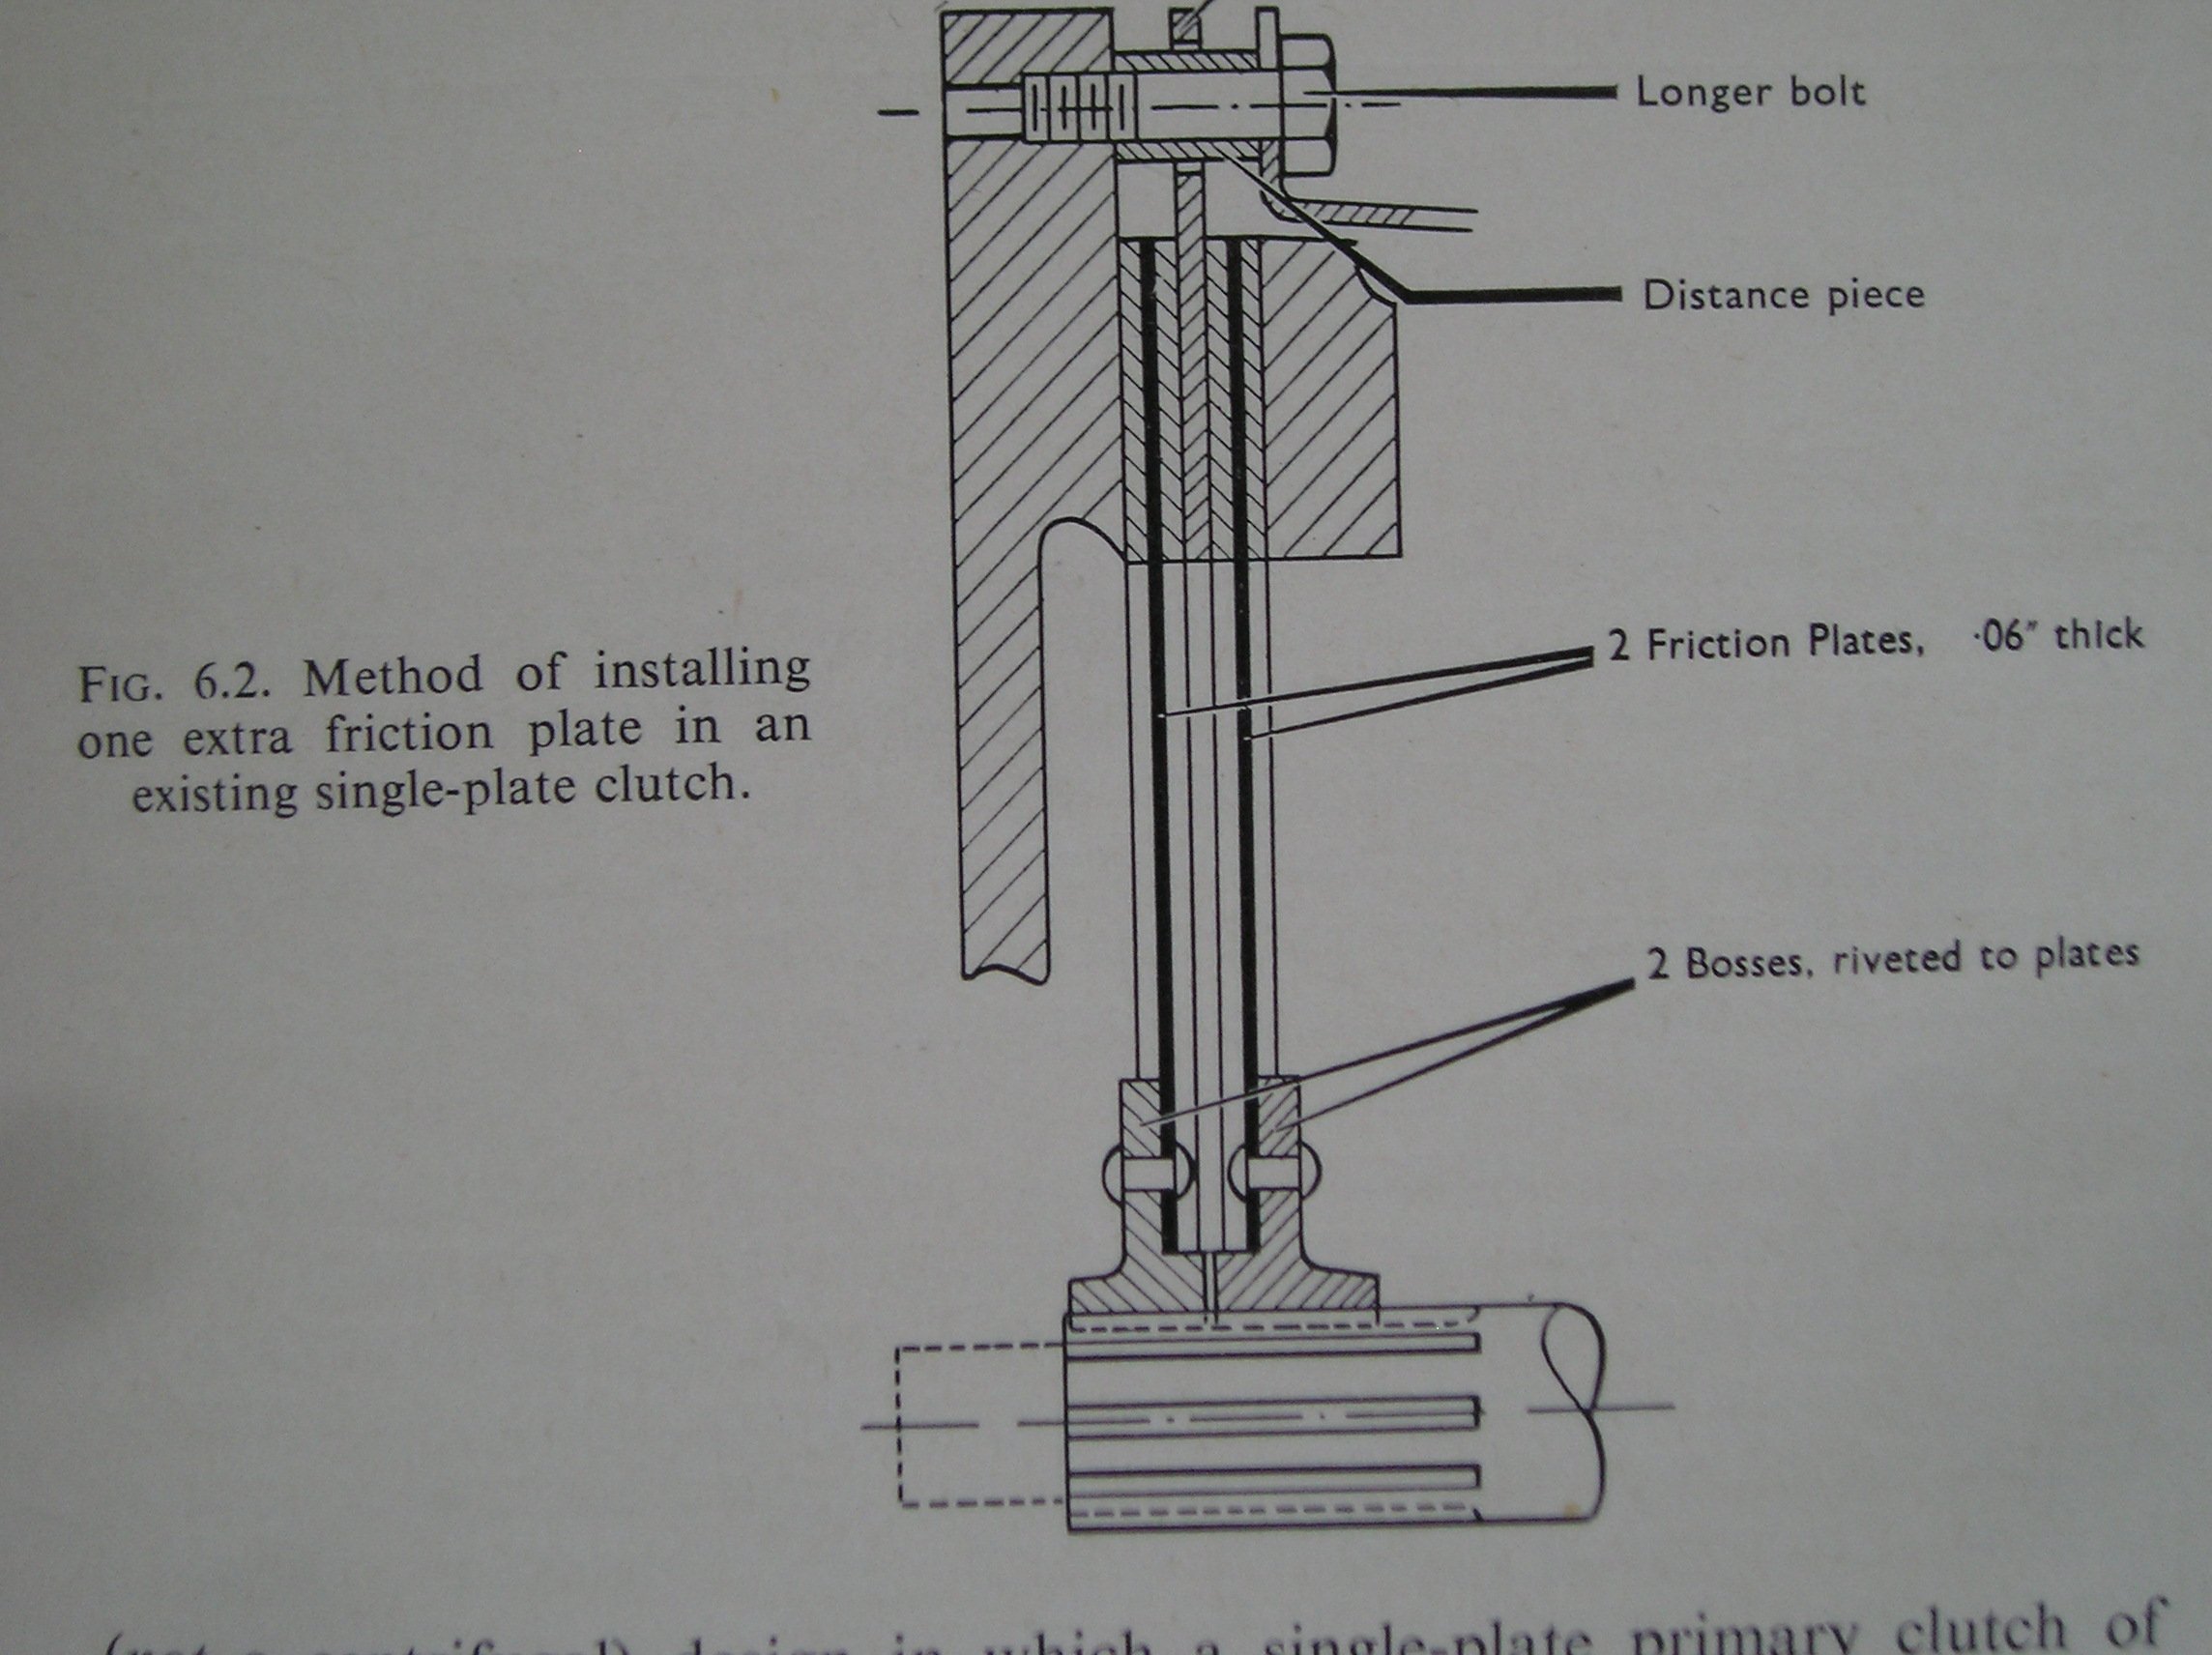
As promised. I'd think the pressure plate spacers would be the thickness of the extra friction plate plus the plain steel plus maybe .020-.040in. It'd be a case of mocking it up on the bench to see if the release mech fits or if the bellhousing needs spacing.
1 point
-
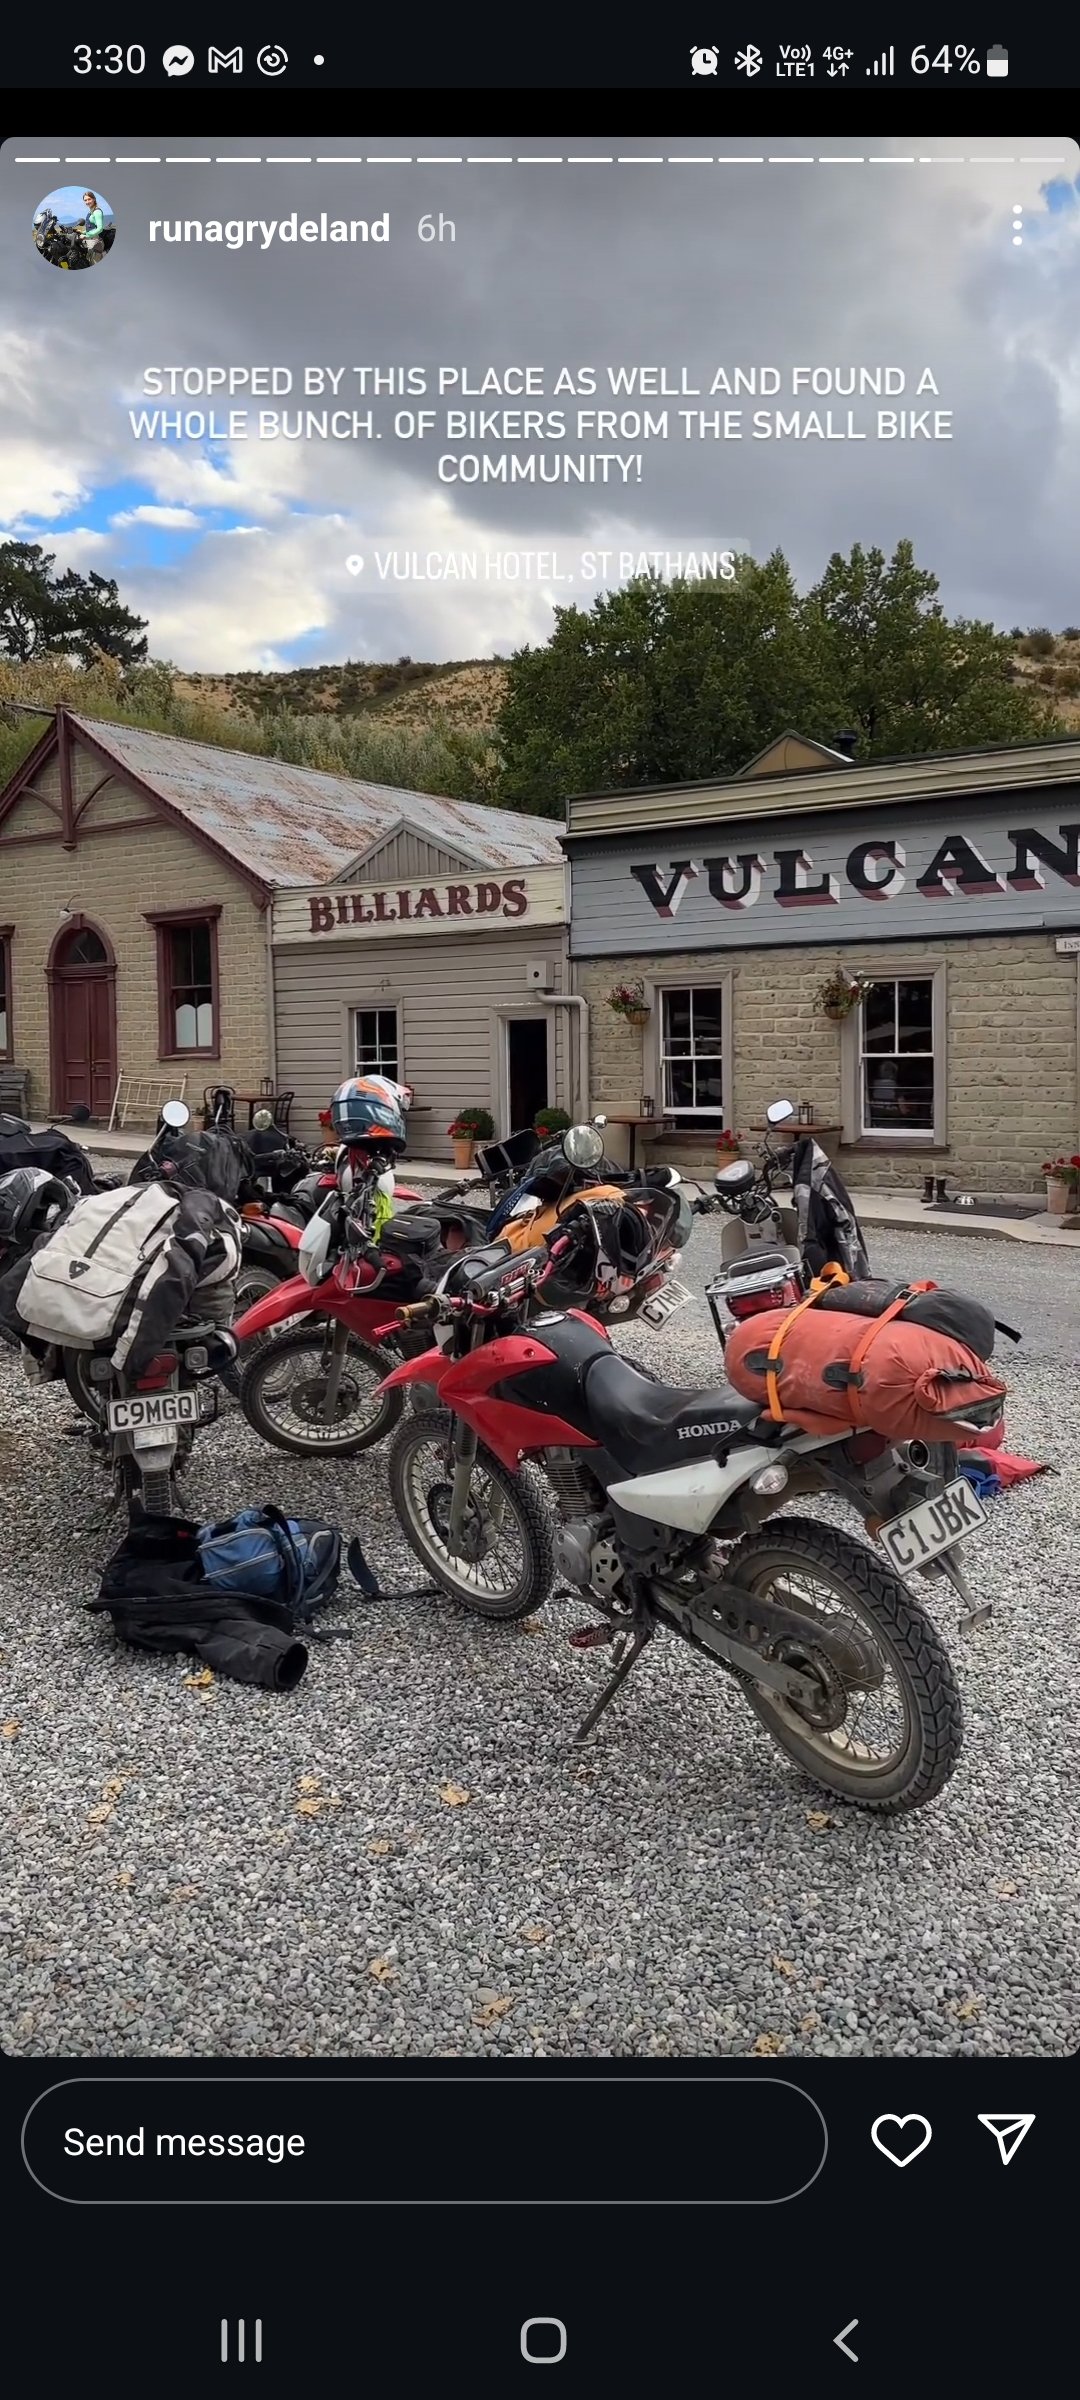
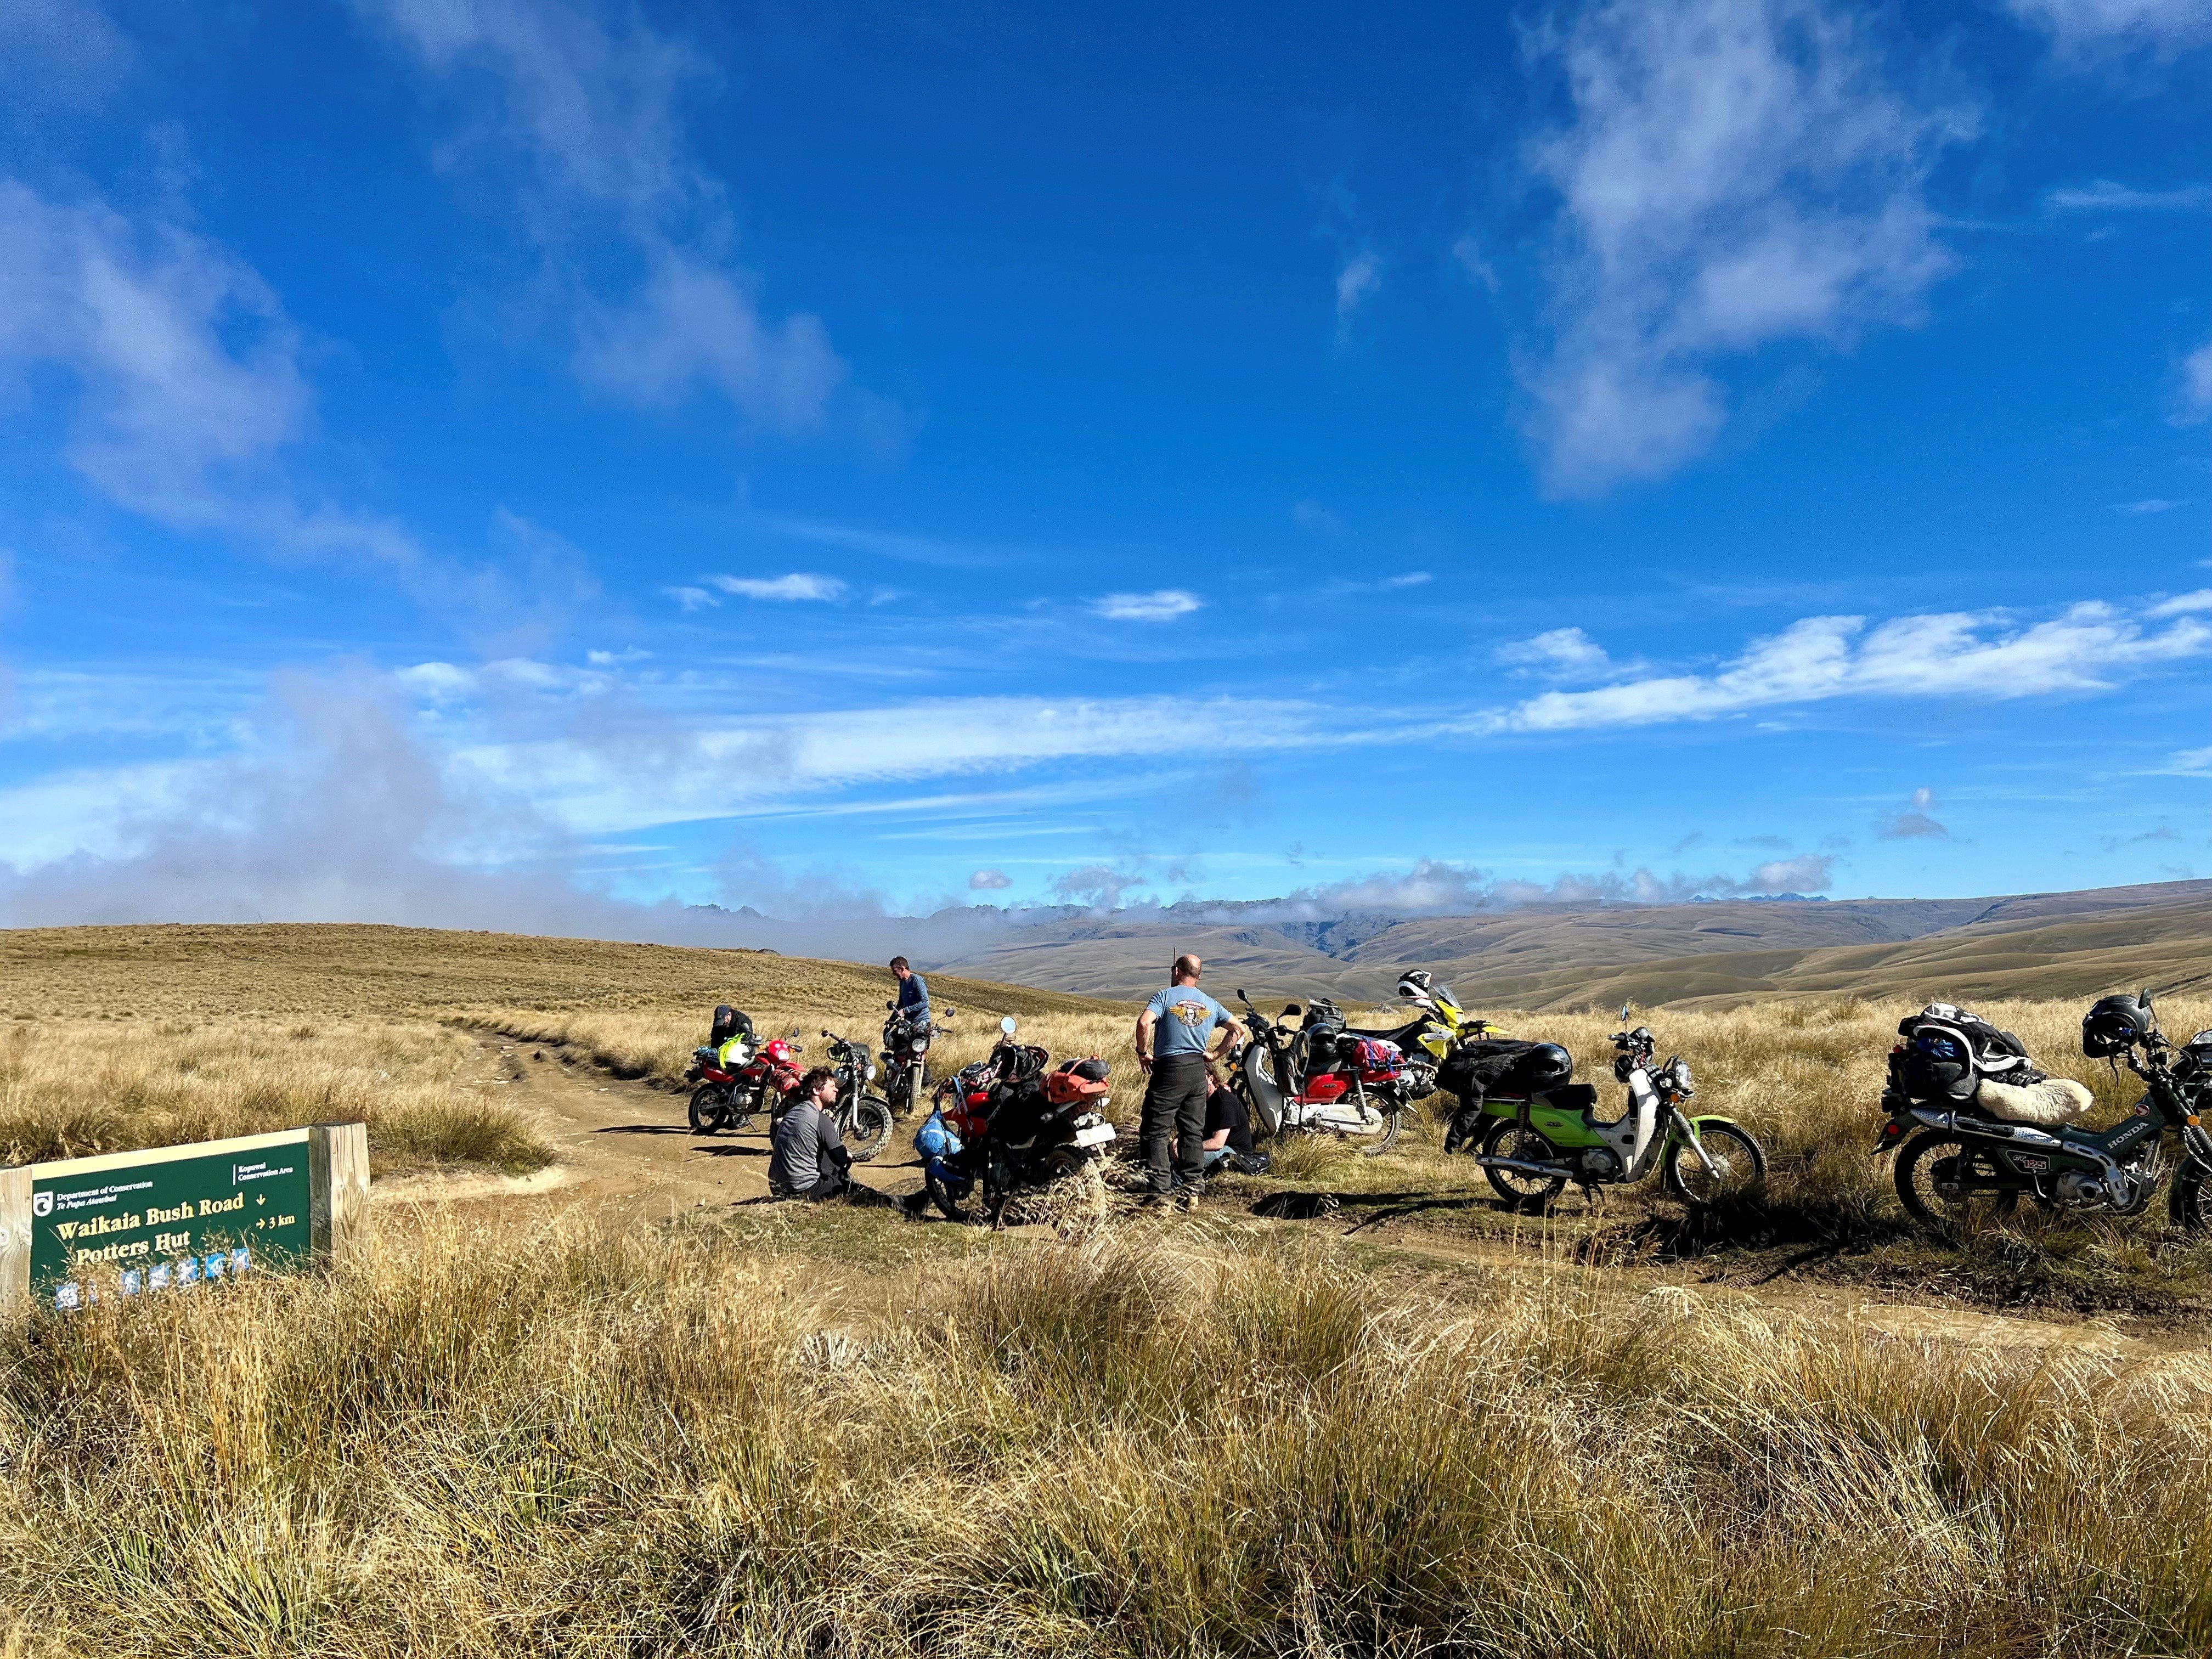
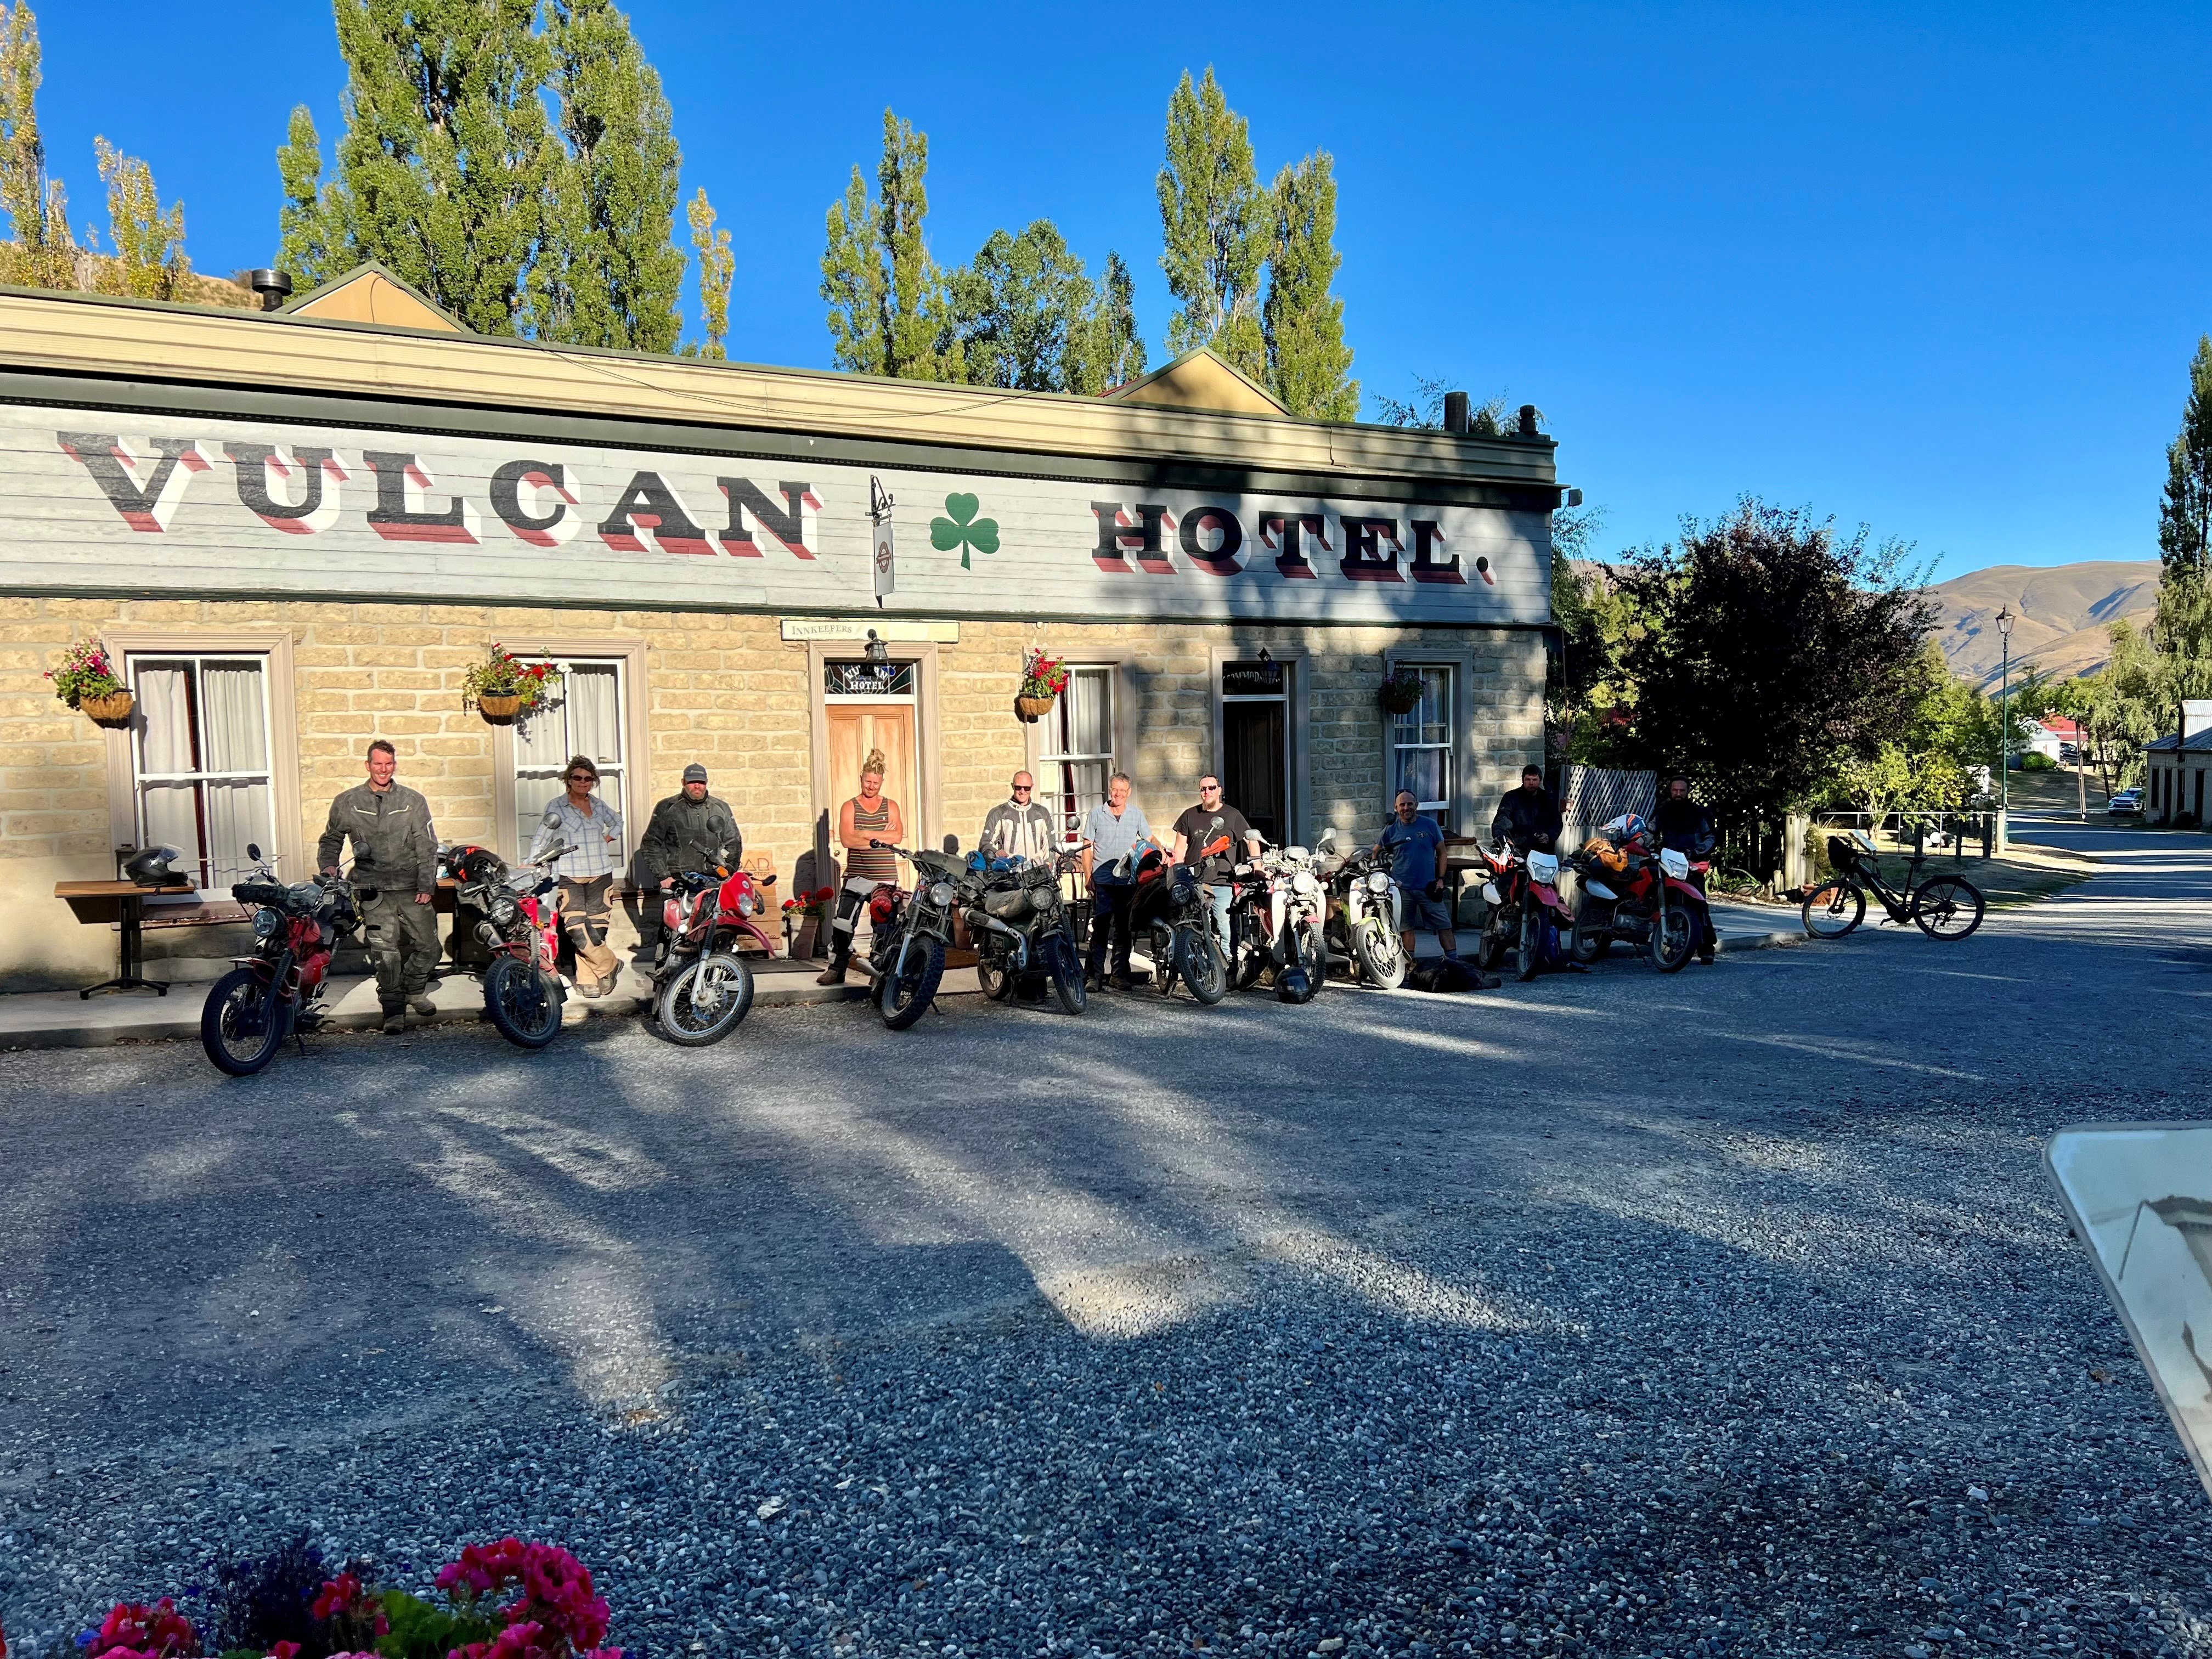
So much dust, everywhere, all the time, upto the point it rained on the last day. muddy visor smears. Random grader. drowned Subaru. giggling behind Bart going full send with all limbs flailing in every direction. never lift. fire ban in the campground, barbecue was driven across the road to cook meats for the hungry. broken clutch cables. flat tyres. ( not myself) Myself crashing in a small creek crossing (on the same leg/cracked rib side) good food, delicious ice cold dobros. amazing group of people, some who were new, had never met the Sharn master. Lots of smiles, (fuck that last bit was a bit squillery/steep/dusty/dodgy as fuck.) so good. Did 1400ks over 4 days. when’s the next one? keen.1 point
-
Watch your head in the mine
1 point
-
Orthia update. Done a few hundred km since the tune. Turns out more midrange torque/power means better economy. Best since the vtec conversion. The 7.8 L/100 was when it was stock auto non vtec The local ac shop redid the suction hose for me, was a bit more than I expected to pay but it's hopefully done right. I'll get a conversion fitting for the service port and let's hope that's it.1 point
-
Found some hidden speed holes
1 point
-
Let's not get ahead of ourselves1 point
-
Long time no post - I still have this, though I have put it up on the market to sell as I need to downsize and this was the easiest to put on the chopping block. I did end up fitting the spring, strut rods etc along with new outer UJ's as they were worn and weren't helping out with keeping the rear geometry in check. I then had an X pipe added to the exhaust and replaced the yunk down-turn tips with quad chrome tips. I also converted rear lamps to LED halos, converted reverse lamp into dual purpose reverse and orange turn signal and fitted a high stop lamp in the parcel shelf. Some better pics I took of it over last few days:
1 point
-
Welcome to Roman Dave's guide to drawing a circle on a screen when you are mathematically smooth brained Surely drawing a circle has to be one of the most common and easy things, so there would be heaps of libraries for it? Yeah there are, but they all use radians which makes absolutely no sense to me. So instead of figuring out why radians are good I'm going to brute force my way through the problem by not understanding anything. My LED screen has a resolution of 128x64. So If I want to draw some circles on it, or having a sweeping needle on a gauge that is circular, or, whatever. The answer is something to do with Cosine or whatever calculation right? YEAH PROBABLY. Instead you can draw a circle in Mspaint that is 64 pixels tall, then count all of the pixels around the perimeter. So thats the maximum possible number of visible divisions that my circle can have. Works out to be something like 3.something degrees per division. So I make a lookup table with 45 values in it (2 degree increments) then draw a quarter of a circle in fusion 360 and measure the X and Y coordinates as I rotate the line in 2 degree increments. It turns out that the X axis values are the same as the Y axis values, just starting from the other end. So I can have a lookup table with only 45 values in it to describe any point in the circle's X and Y coordinates to 2 degrees accuracy" (Flipping X or Y values depending on which quarter of the circle it needs to be) //X value = circleLUT [degrees/2] //Y value = circleLUT [46-degrees/2] int circleLUT[46] = {0,17,35,52,70,87,104,121,138,155,171,187,203,219,235,250,264,280,293,308,321,334,347,360,372,383,394,405,415,424,433,442,449,457,463,469,476,481,485,489,492,495,497,499,499,500};1 point
-
Thank you for wearing pants whilst taking the pics...1 point
-
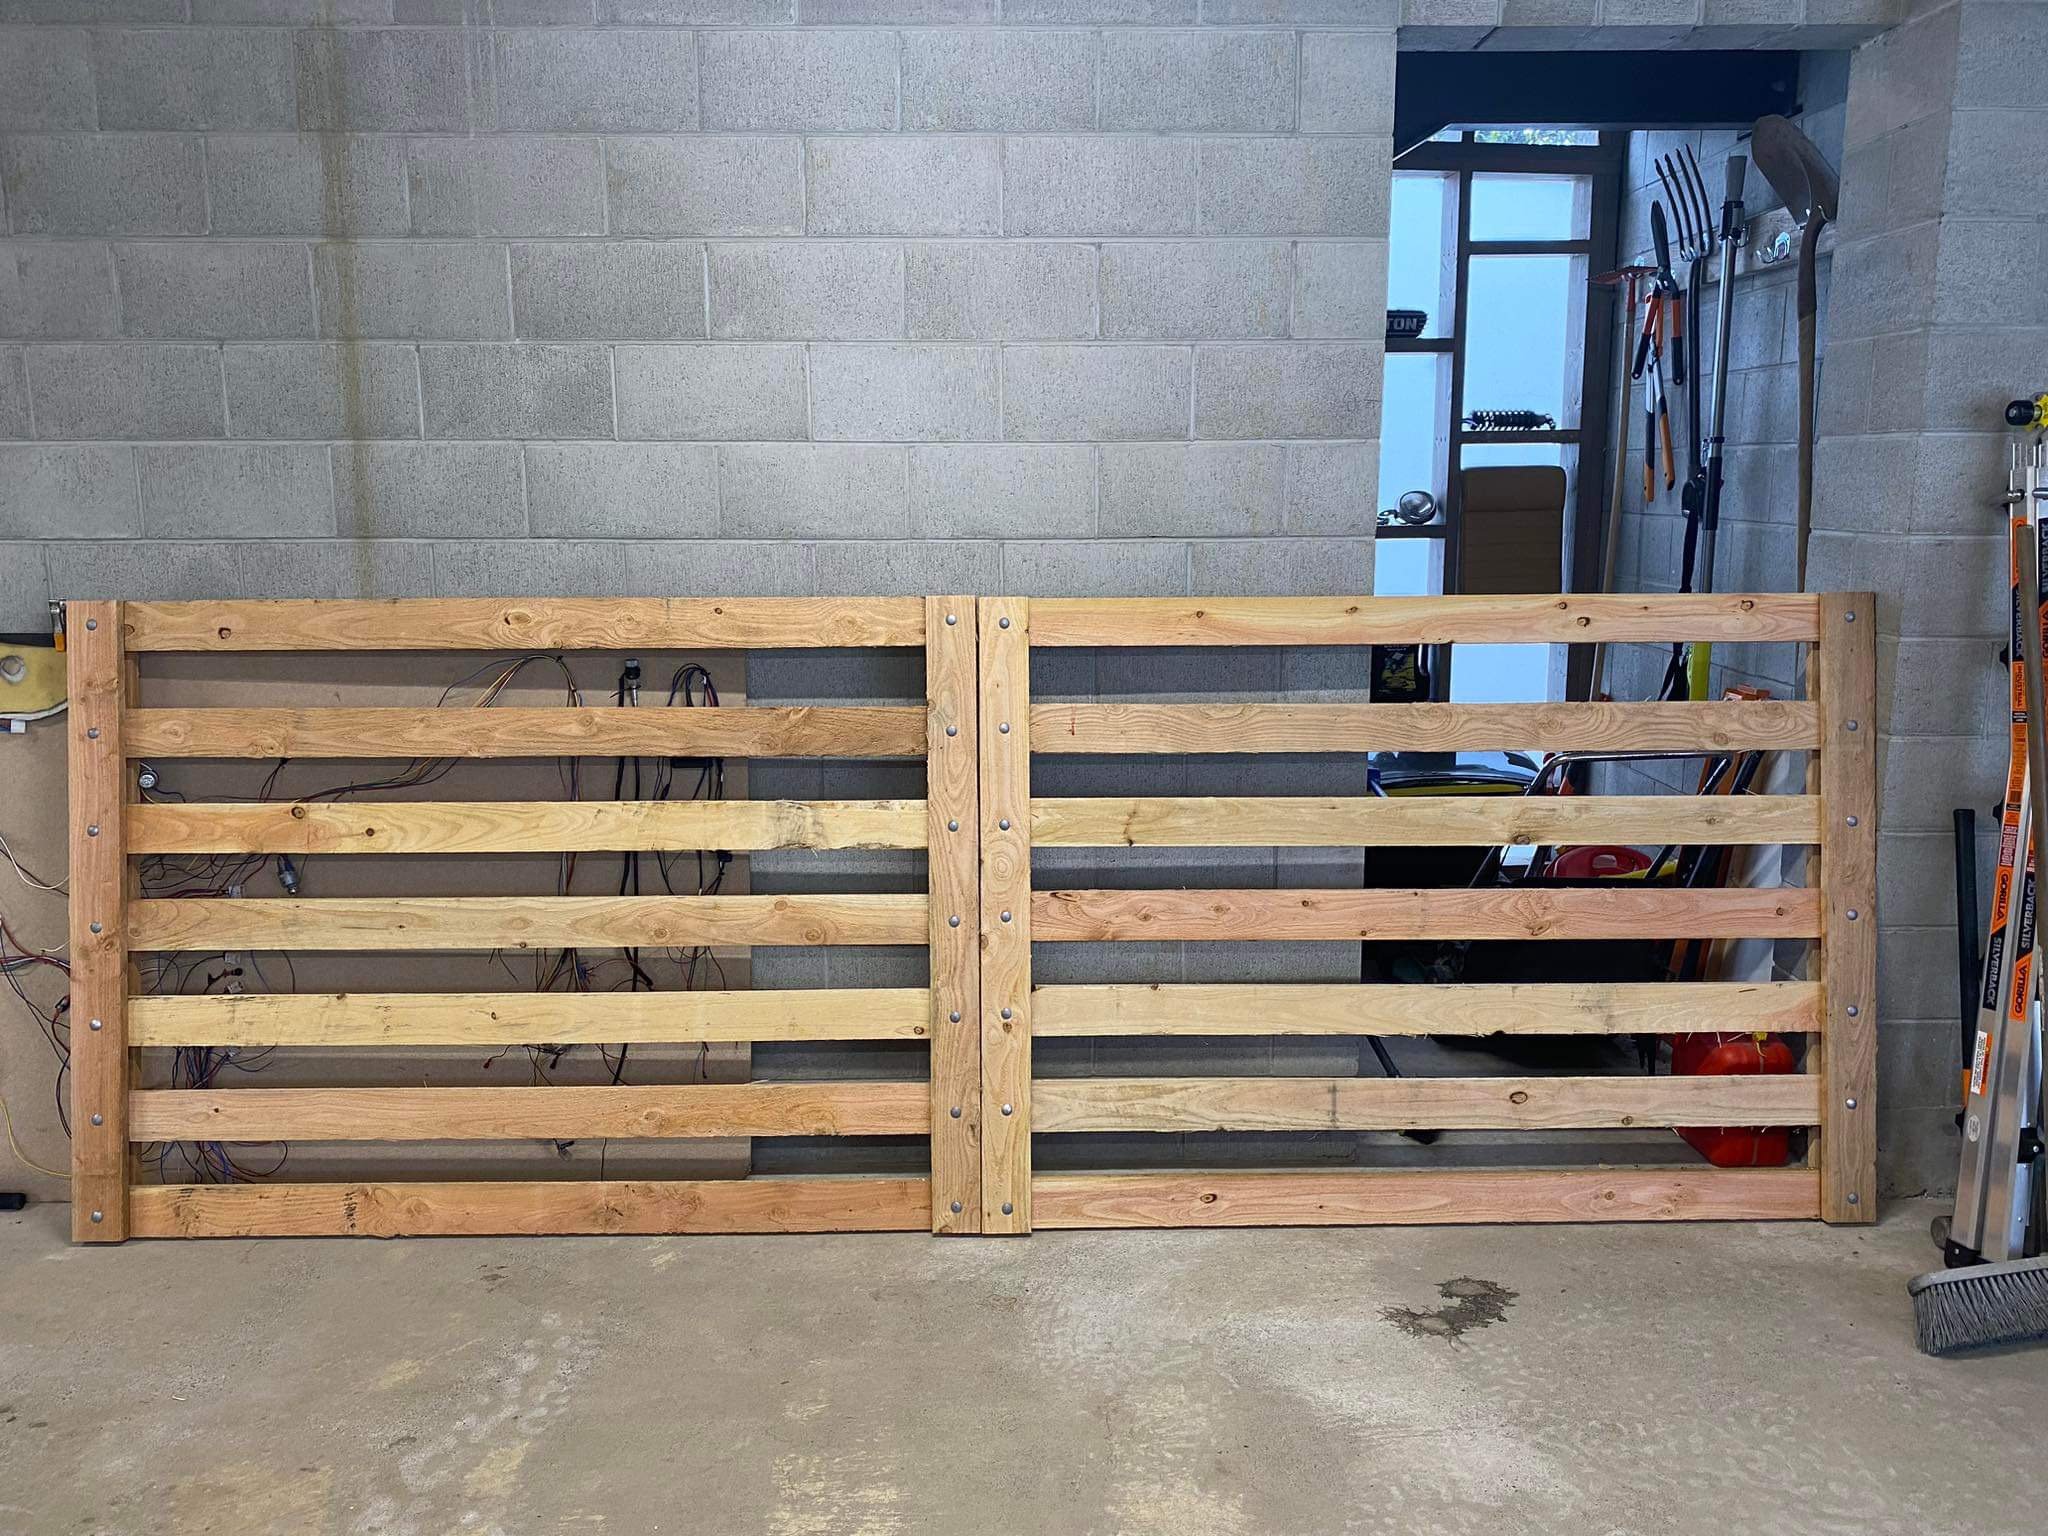
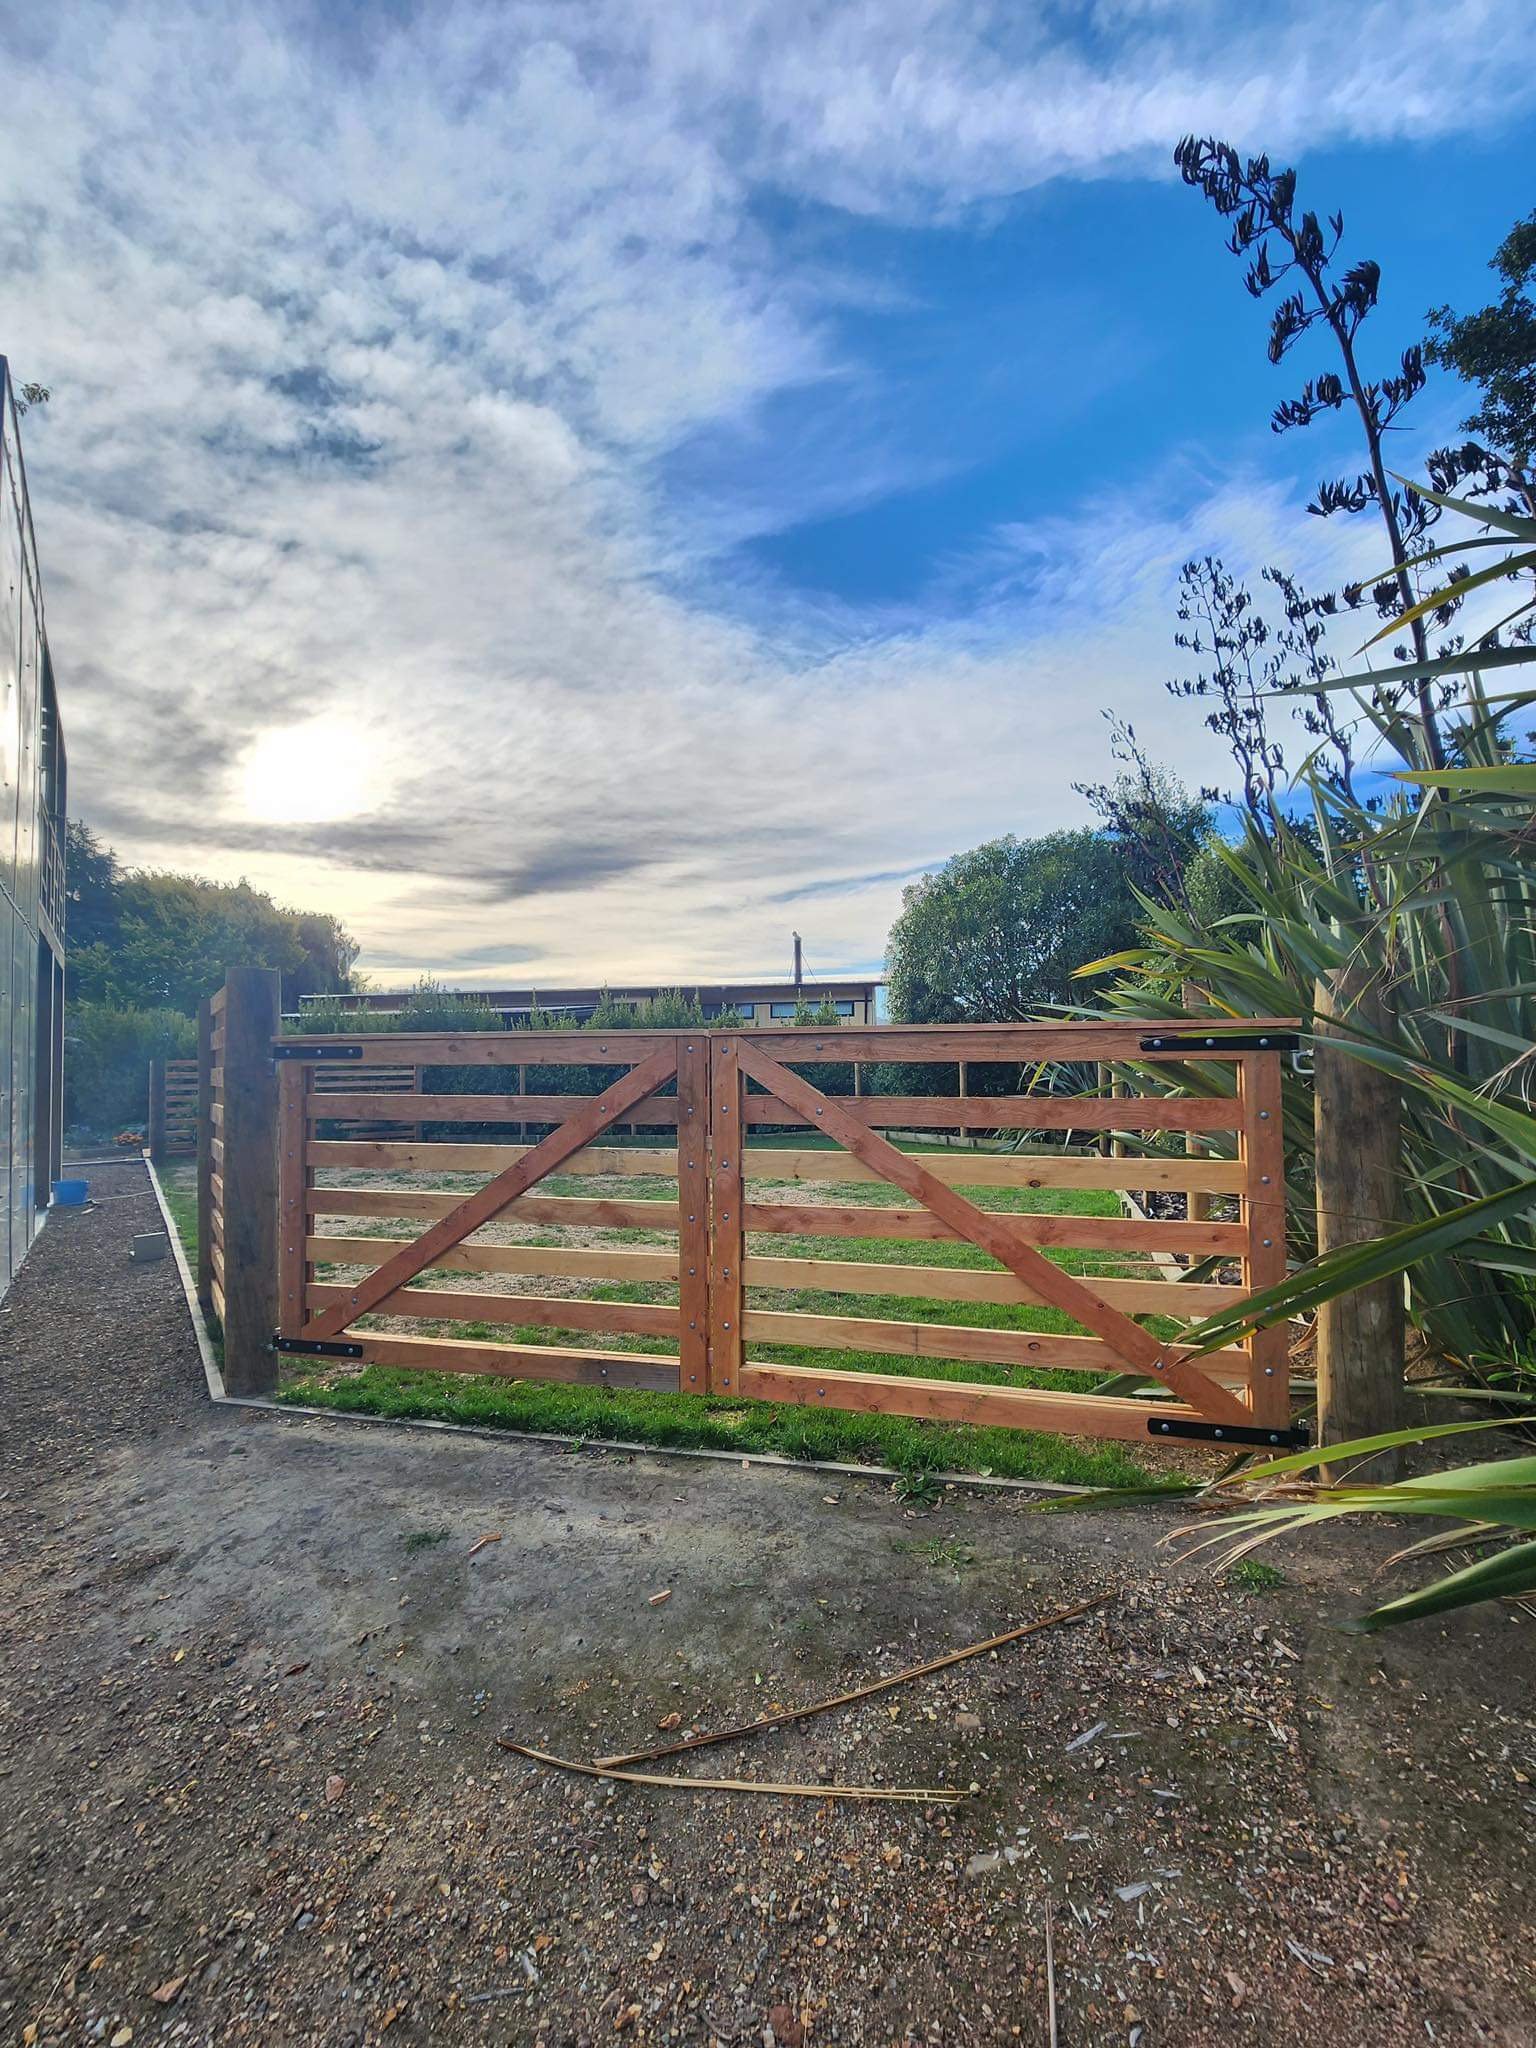
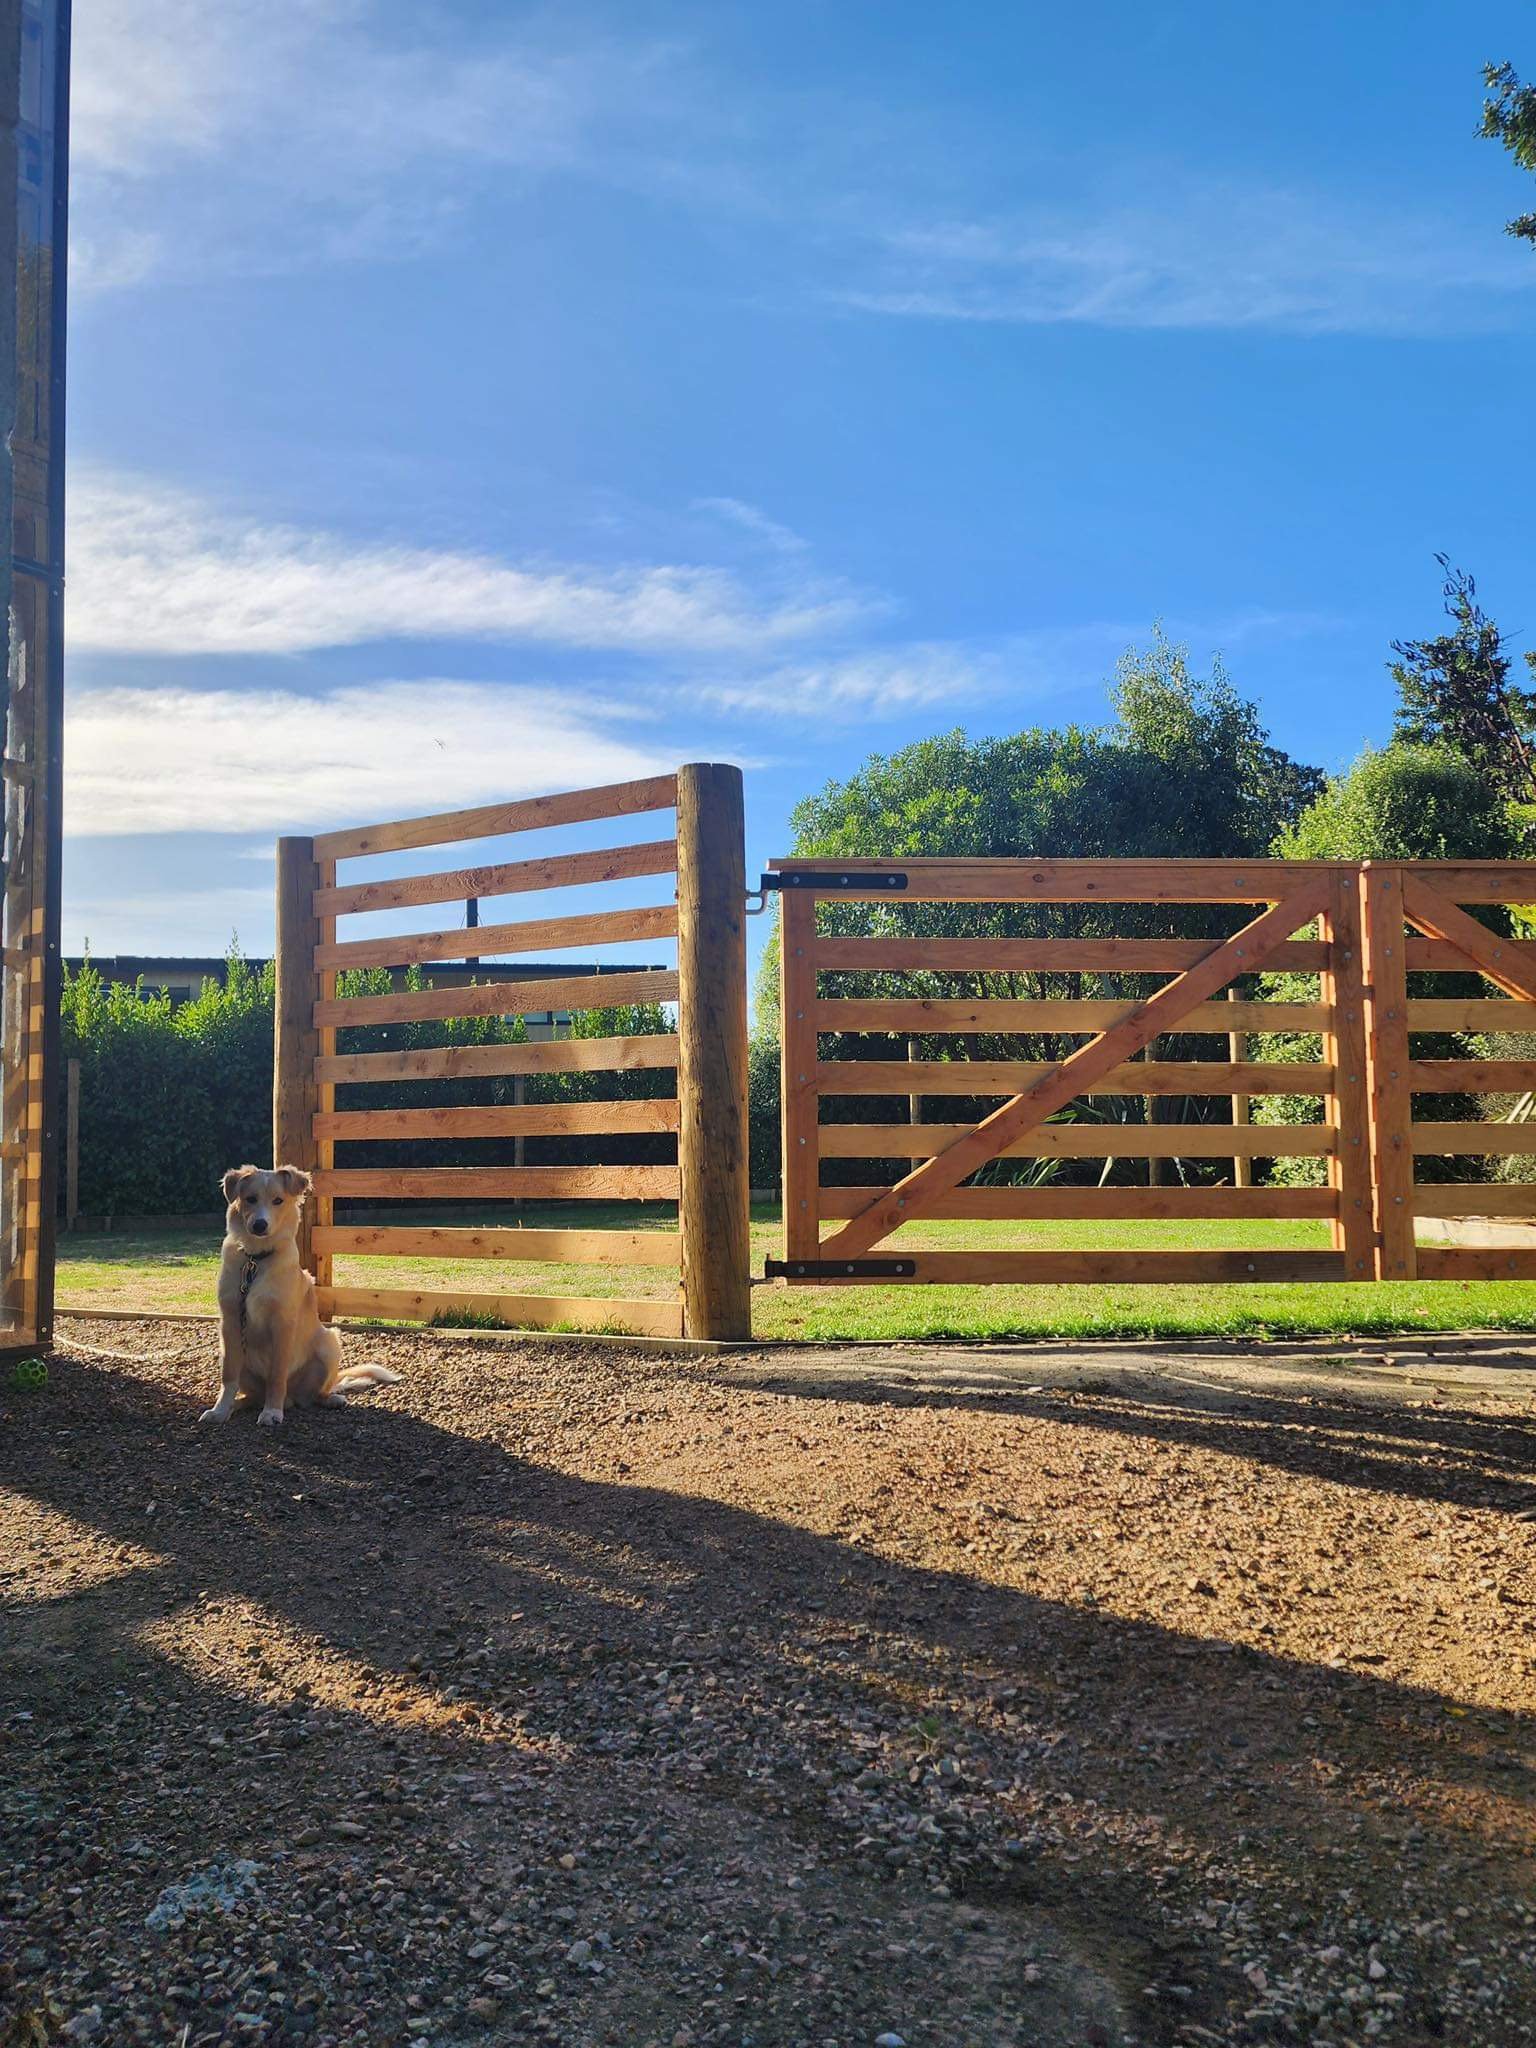
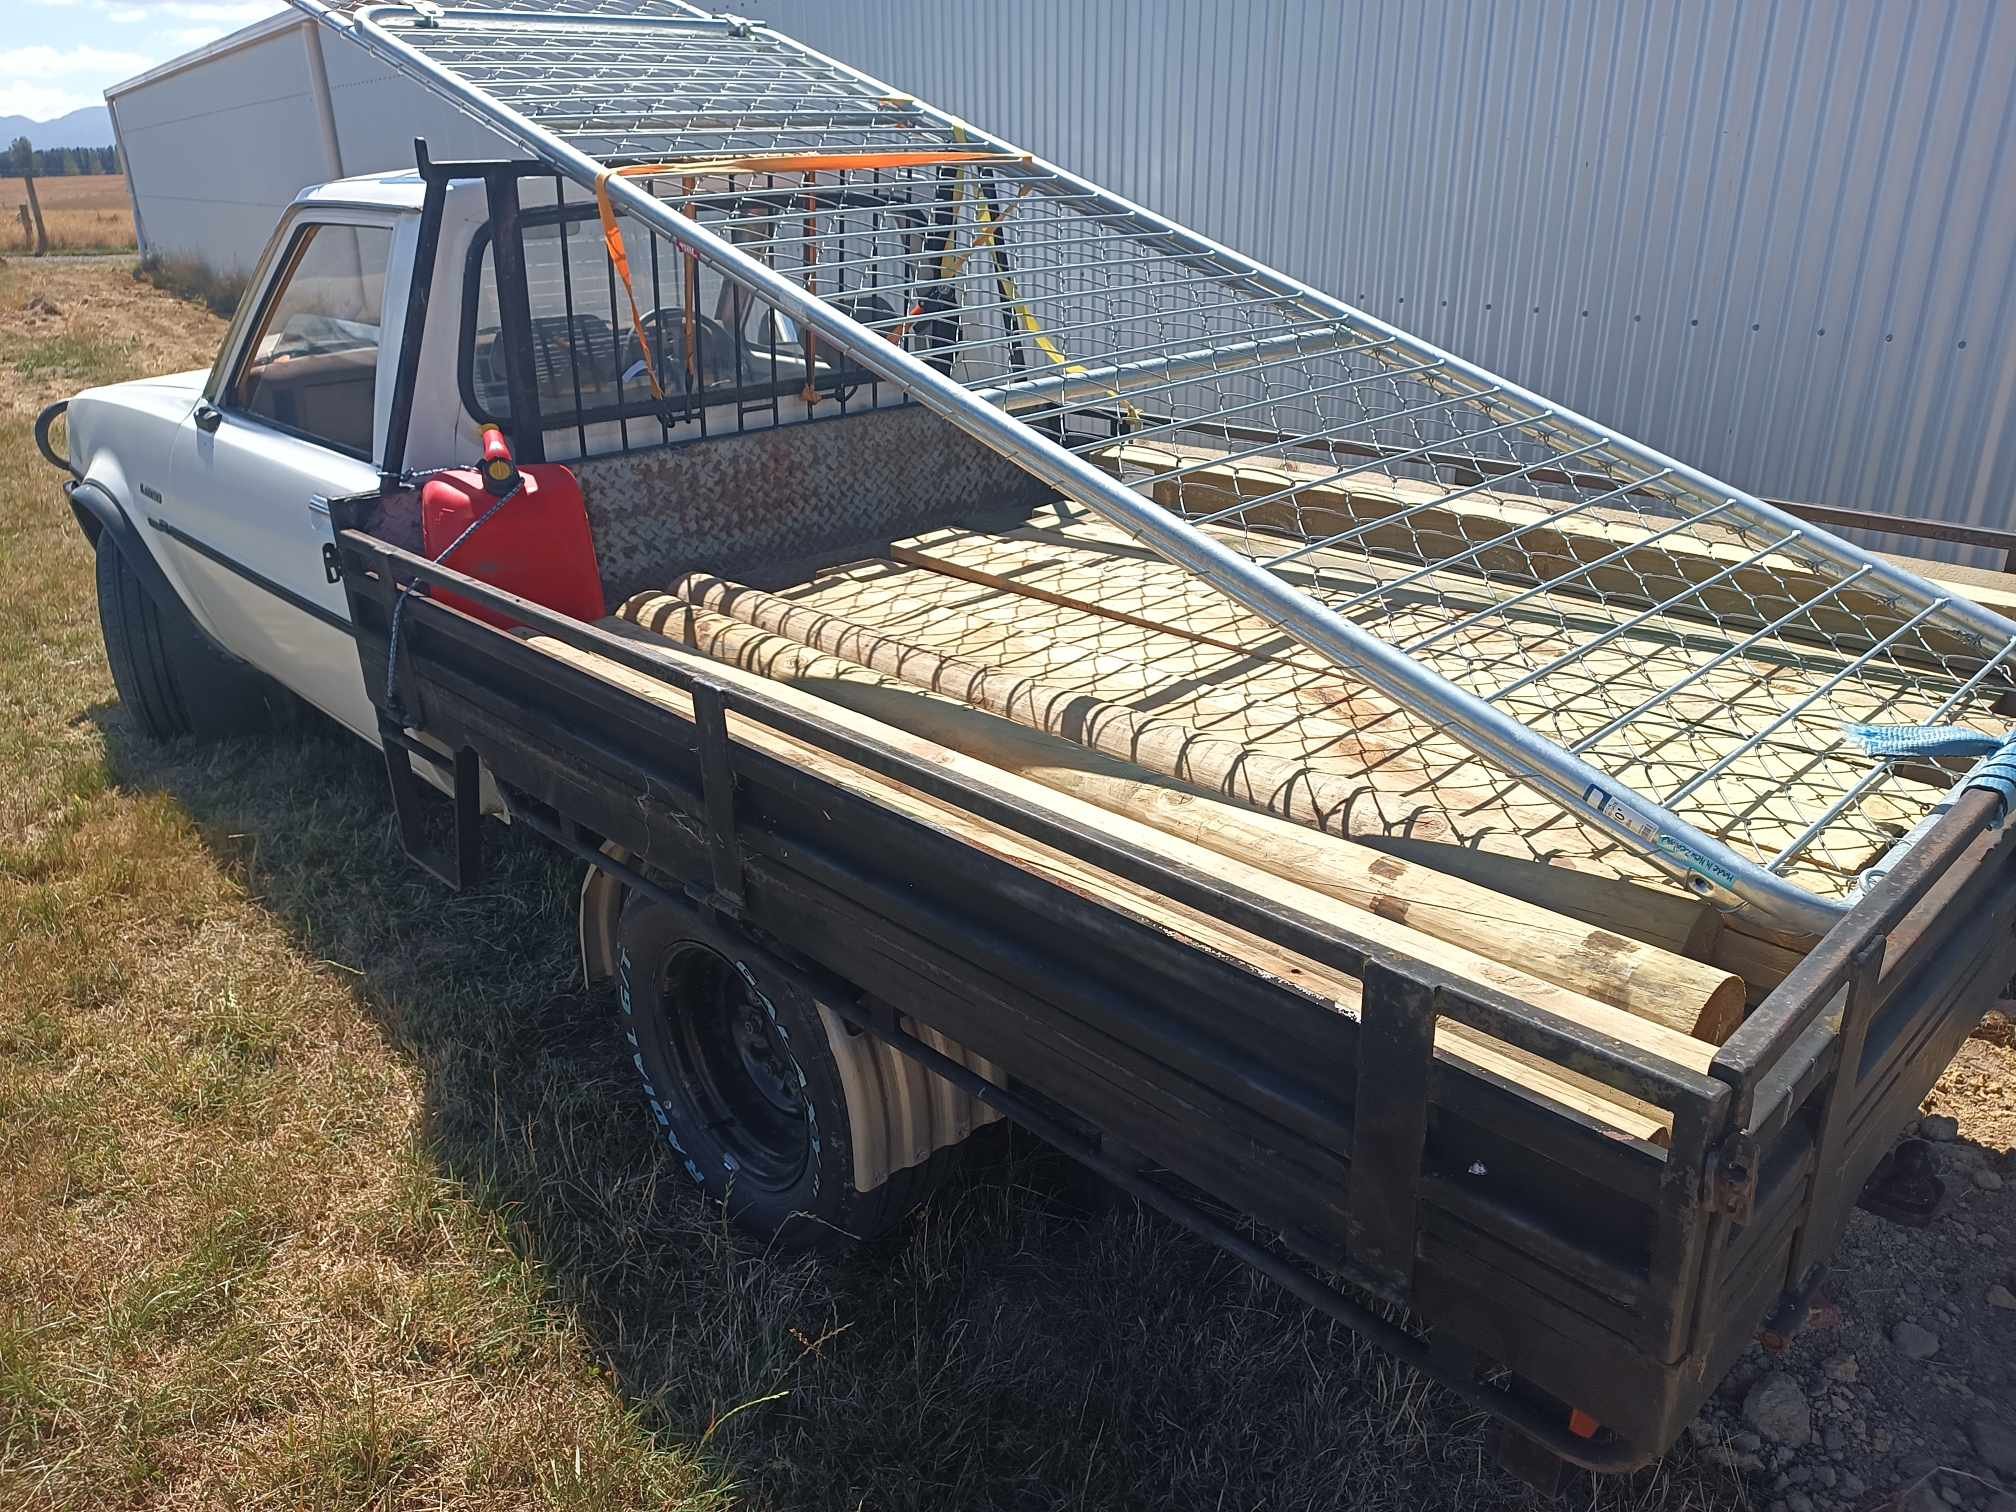
Made some gates so Finn has a nice place to hang out off the lead. Gates are 100x25 Oregon and 200mm round strainers for each gate post buried a meter per side, pretty sturdy: He was keen to show that he could still escape if he wanted to… Alcatraz it is not… yet…
1 point
-
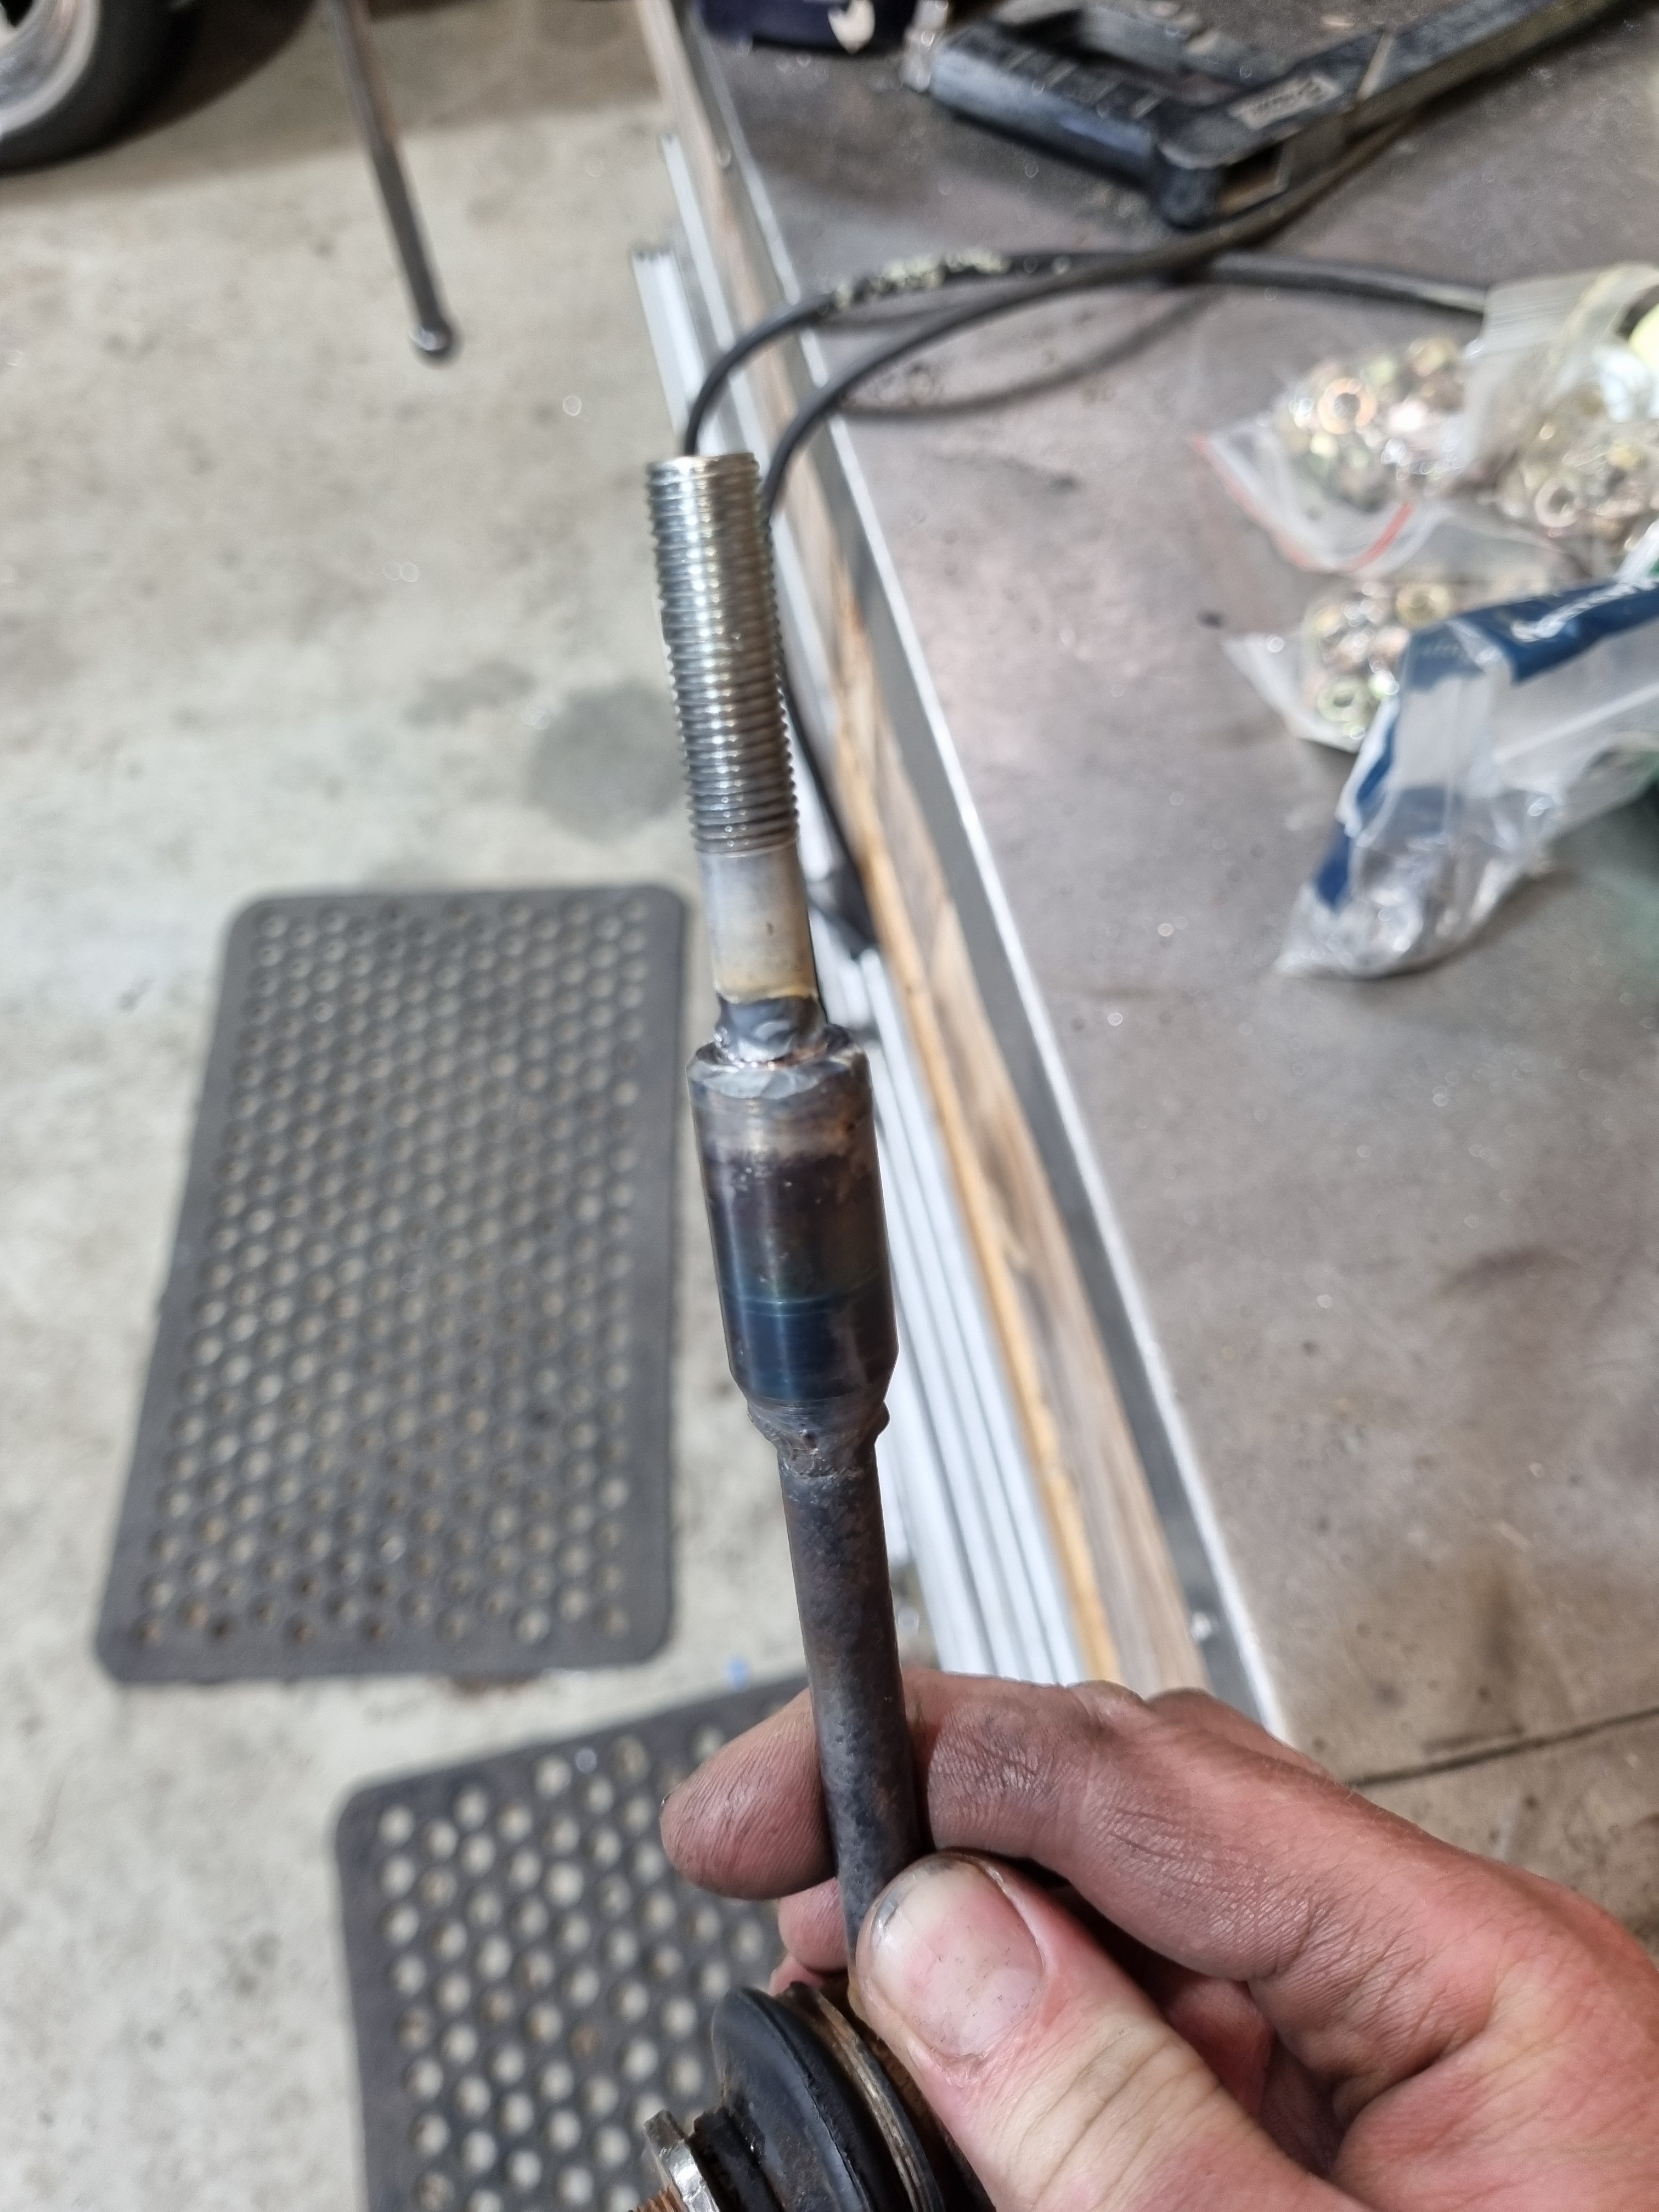
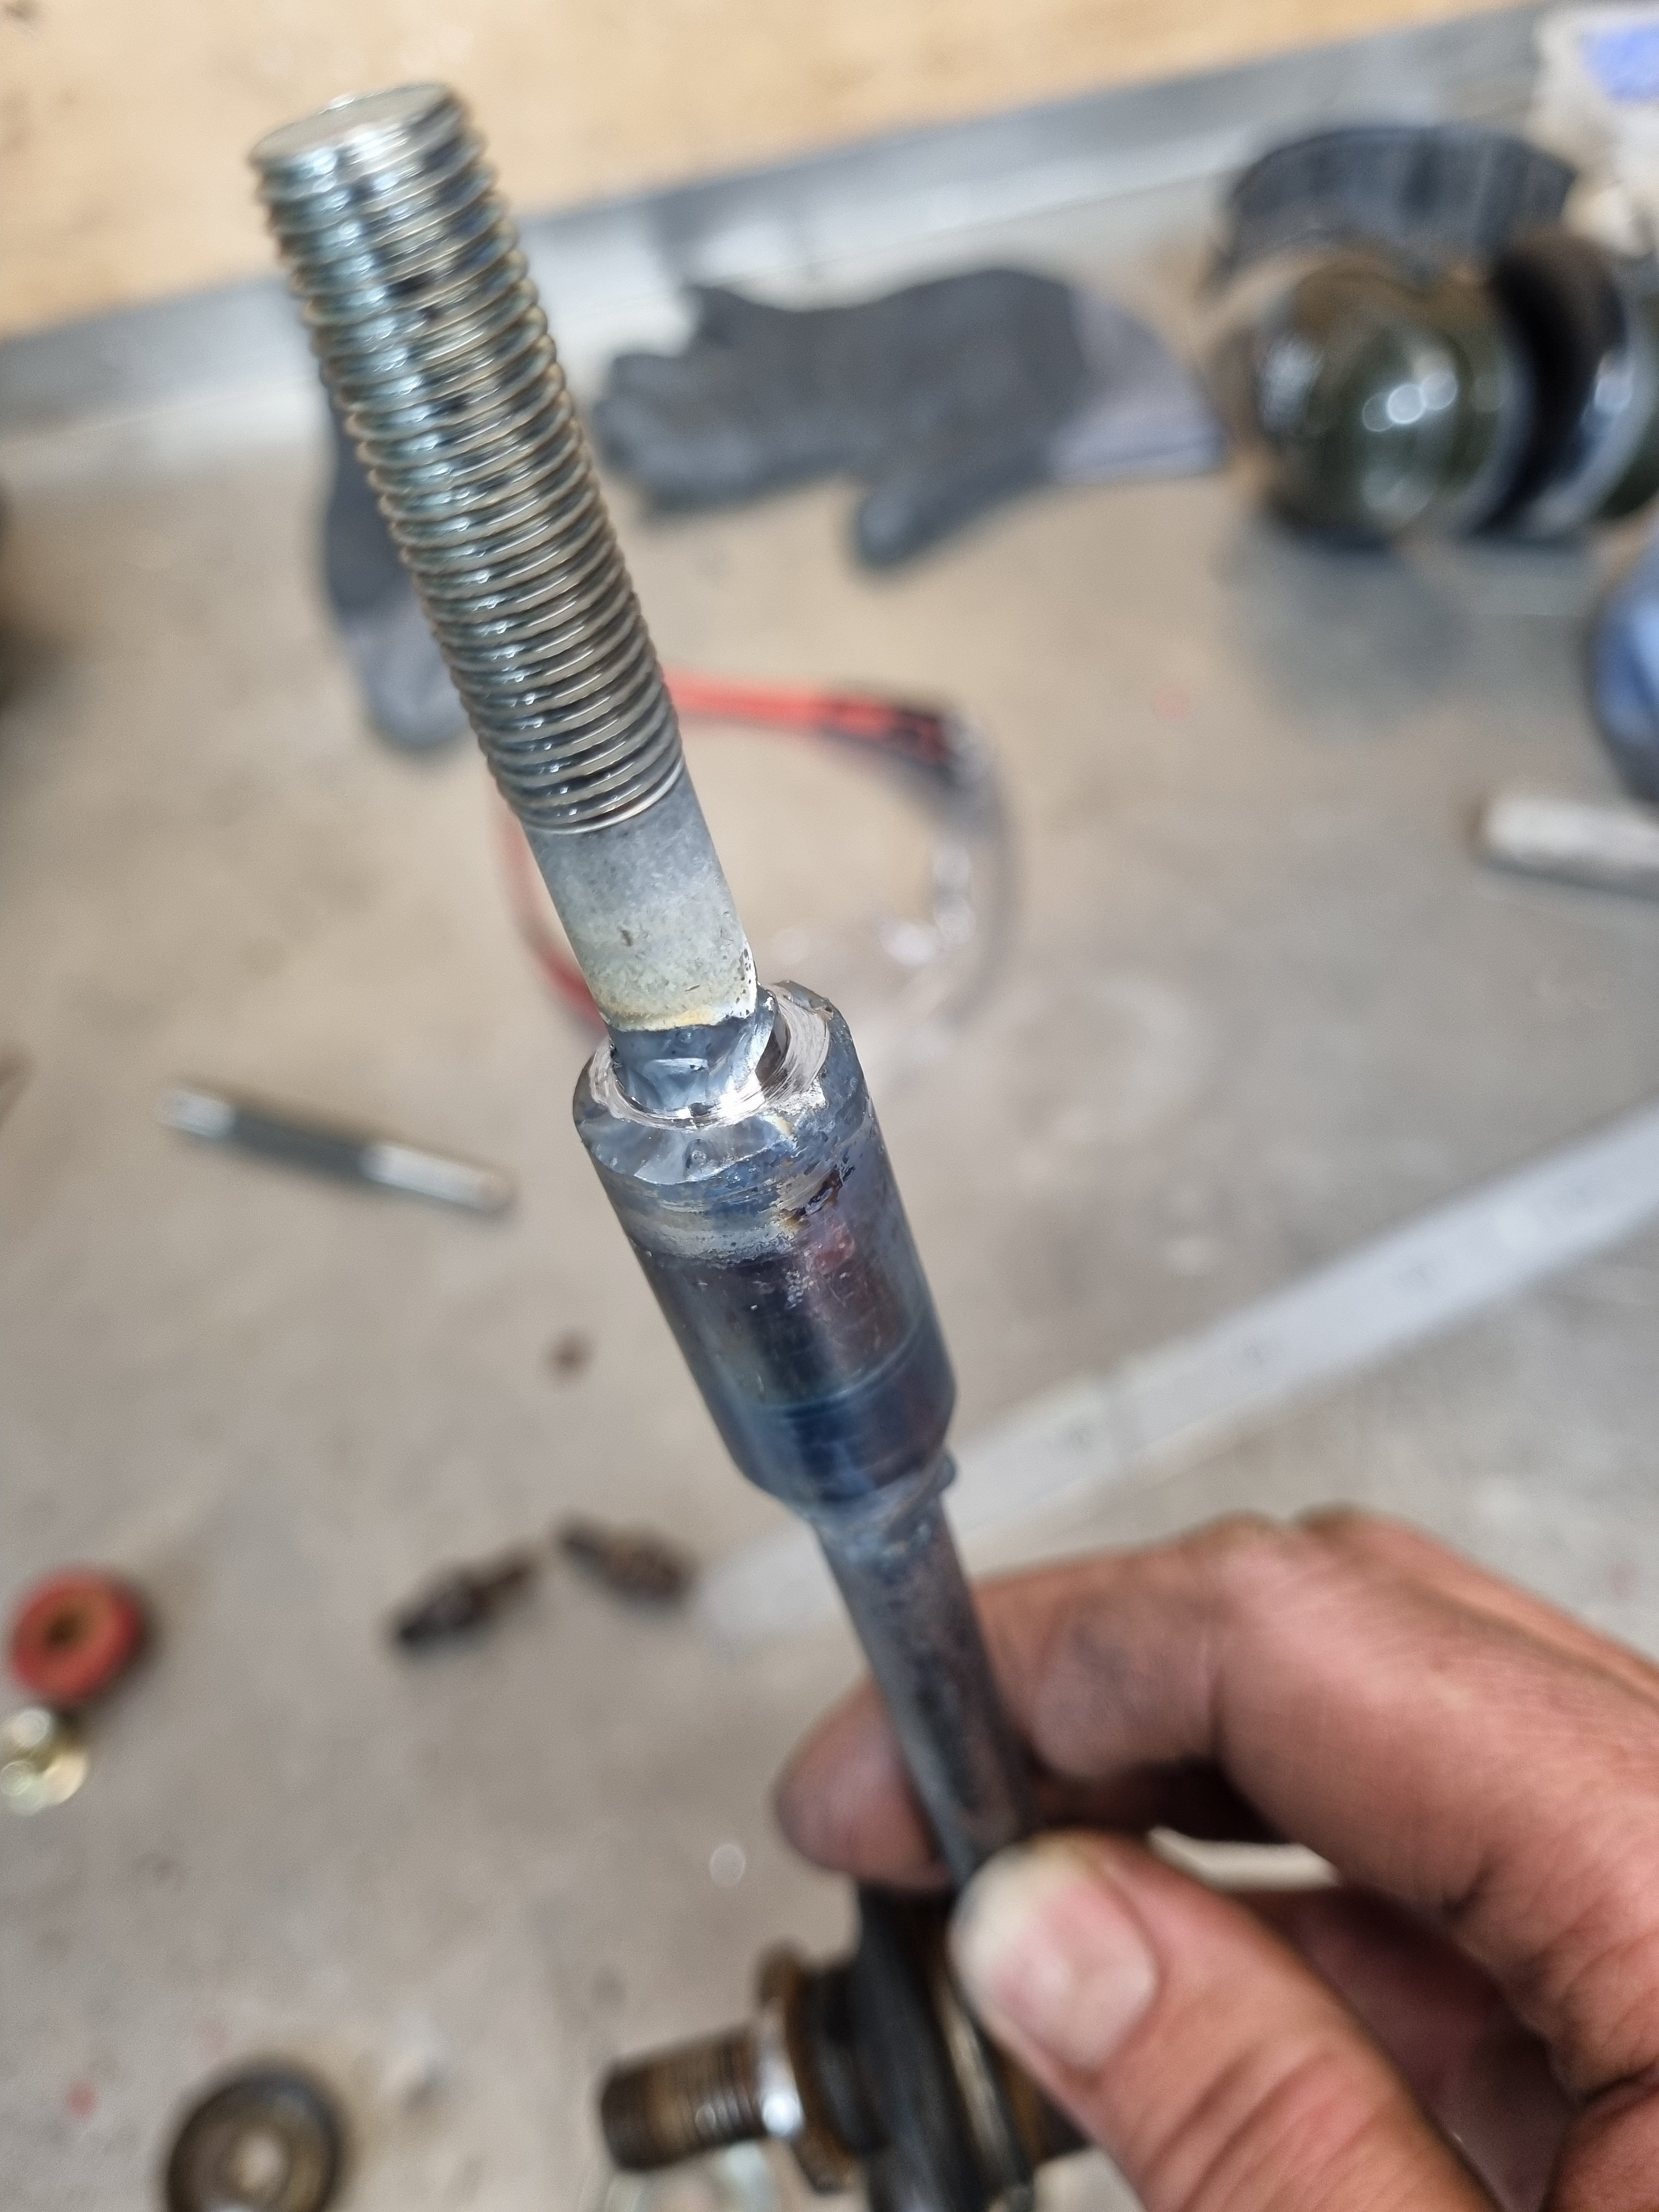
You're not going to believe this but the top bit of the swaybar link that wasn't broken broke when I tried to undo it. So I welded a new end on it.
1 point
-
All of which I have on order.1 point
-
Replaced oil pump with other unit I have with the SQ Engineering additional relief valve spring setup to bump up the pressure, we seem to be good! If that still doesn't give me good pressure at all times i'll flick the cam caps off and have a measure up New Speedo drive is in so I've now got a work speedo Think that's it really, time for cert? Bumper is back and looking absolutely insane if you compare to what it was previously!1 point
-
Nothing went bang, 3% average gain overall and a bunch in the midrange. Will upload pics and vids when I get home. Stock airbox is worth 3kw up top so I'll have to look into butchering it or making something more free flowing1 point
-
Got back from Japan with my little UP Garage purchase. fitted it as soon as I got to the shop this morning. Dayyyyyyyyyyyyyyyymmmmmmmm
1 point
-
Passed the wof no worries. But rather annoyingly I took it for a decent spin today to get some light fencing supplies and by the time I got home the replacement power steering pump was making the same noises as the one I shitcanned. Which is pretty frustrating as it is apparent that something is causing it to eat pumps and I have no idea what. It seemed to be a little slack so I tightened it up and although it fixed it at low speeds it was still there when turning. Gah. Might have to look for a manual box as this sounds like a project!
1 point
-
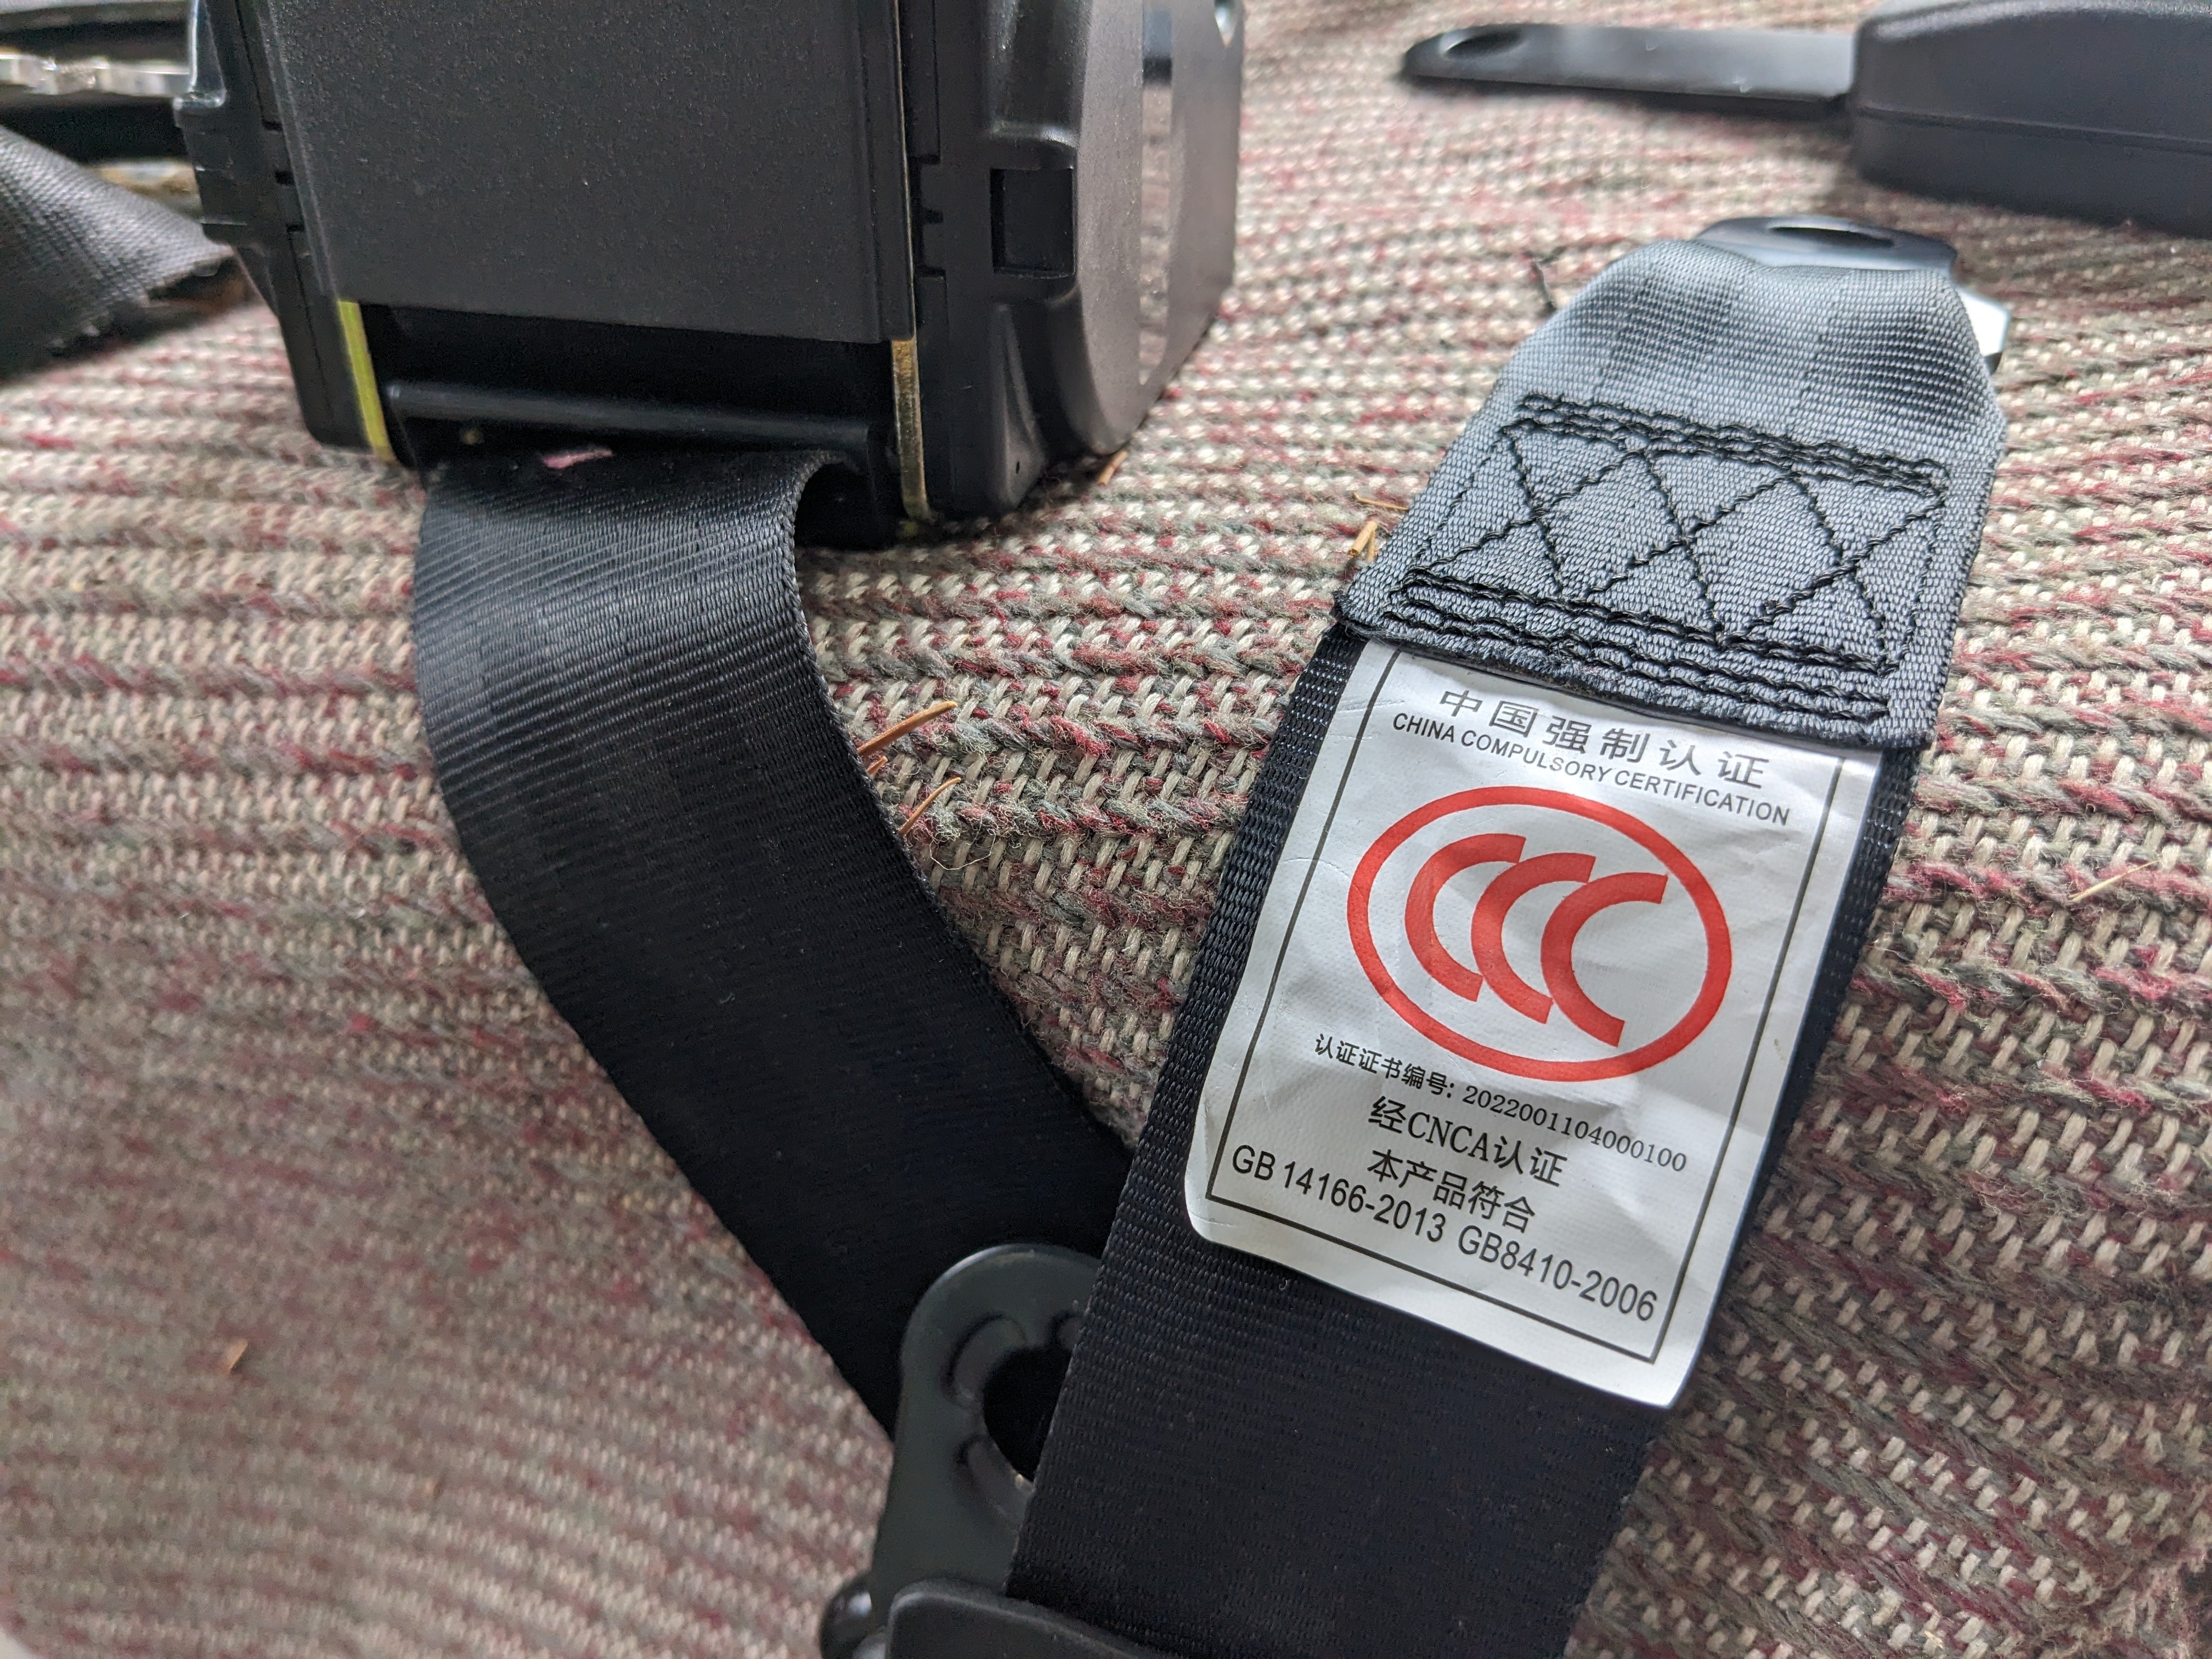
Yea so this got the backburner big time as the next day from that ^ I wound up in hospital and spent 8 days there. This is a tedious story where my partially removed gall bladder decided to spontaneously weld itself back together, make gallstones that happily blocked my bile duct, which basically meant my liver was pumping bile into the wrong bit of my insides. I turned very yellow until they flew me to chch on the flying doctor plane (this was actually pretty awesome) and reamed me out. I still have a drain in and hopefully will be getting surgery mid Feb to sort the rest of it. This is all very very boring, I would not recommend in any way. -43/10 So many wasted shed hours. But in the meantime I have been slowly picking away at things, nothing too serious tho. Splashed out on some new hoops, Goodride something's at $80 a corner fitted. They may not stay but will be an improvement on the tyres that were there, these were the same ones it had when I sold it. Then I installed the heater and dash, this hurt me and I probably shouldn't have done it. @HumberSS has found a heater mech out of an NA MX5 for me so I should be able to hack that in there. There is a wrecker in chch who quoted $260 plus shipping for an original heater mech, which is more than a 1/3rd the cost of the entire car so they can get fucked. I had to draw up and print a vent that was missing, some previous owner decided to bin all the heater gubbins and had weirdly blocked off the screen vents which wasnt particularly solid thinking. I also spent a bit of time rerouting and extending the control cables as the heater is out of an earlier car. I bought a cheap AFR off AliX a while ago so I mounted this while I was at it. The seatbelts were pretty toast and of different makes. I had bought some cheap seatbelts off FB, but when I picked them up the tags were unconvincing; So when I got flown to Christchurch to talk to the surgeon last Wednesday I (again probably stupidly given my state of health) grabbed a lime scooter over lunch and made my way to NZ Seatbelts and picked up some proper ones. These got fitted up; Now I just have to look wistfully at this and hope that in a month or so I will be fit enough be able to drop it so I can finally sort the wiring;
1 point
-
Righto, time to thread dredge I decided it was time to smash this out. Some things were unbolted and I got to seeing if it was possible to replicate 40 year old italian paint with some cans of brunox, custom colour and matt clear coat. 'Kinda' is the answer. This is what it looked like, although I did wire brush it and wiped it with prepsol. One coat of Brunox Two coats of Brunox Some colour; No clear on that yet but I kindof sorted the boot as a test, this went well apart from I needed to scuff up the clear to get it looking shitty enough, it might need a bit more loving. So yea roast the fuck out of my sad efforts in the discussion, even though you and I both know I am a massive useless dickhead when it comes to paint. It least it will be mostly the same shade of blue at the end.1 point
-
Took the old girl along to the Pukekohe car clubs Xmas grasskana . it was a sack, single wheel peel , so zero traction. but I did have shitloads of fun. one really good course in the afternoon, basically doing the old scandy flick (handbrake did f all), power over, sideways for 90% of that course was good fun. needs an LSD asap. might have to find an LSD or get one through palmside for the escort English diff I have.
1 point
-
Curiosity got the better of me and I ordered one with a 2.8" touch screen. $28 shipped from aliexpress. Also a micropython book from the library. I have a grain mill for flour, but each flour works differently from supermarket flour so I need more control over my bread maker. I also want to be able to do sourdough which needs a longer rise time.
1 point
-
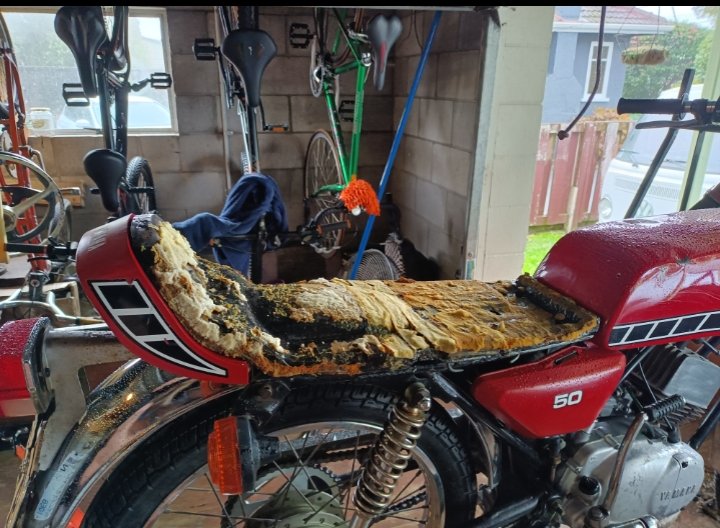
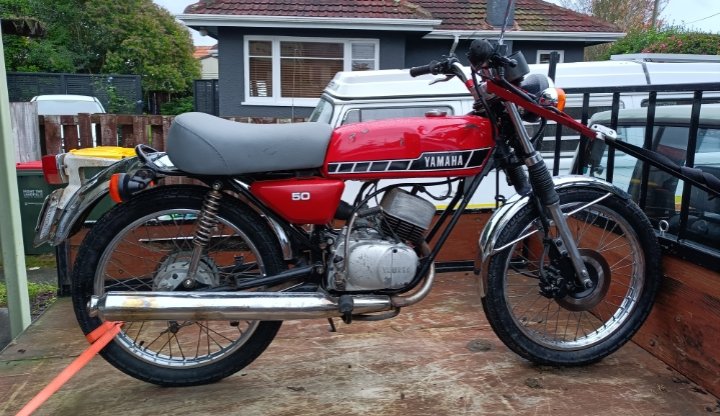
New tyres and tubes fitted up, and seat is with @64valiant getting some much needed love. The seat base was quite bent which was kicking the tail up too high making it look like a banana, and someone had a go at being a DIY seat builder and upholster with pretty poor results. Not only did it look terrible is was very uncomfortable. Will look and feel much better when said and done, and give the bike the nice flat lines it deserves. Had some fun with some seats Greg had in stock. Turns out a mudbug seat fits quote nicely!
1 point
-
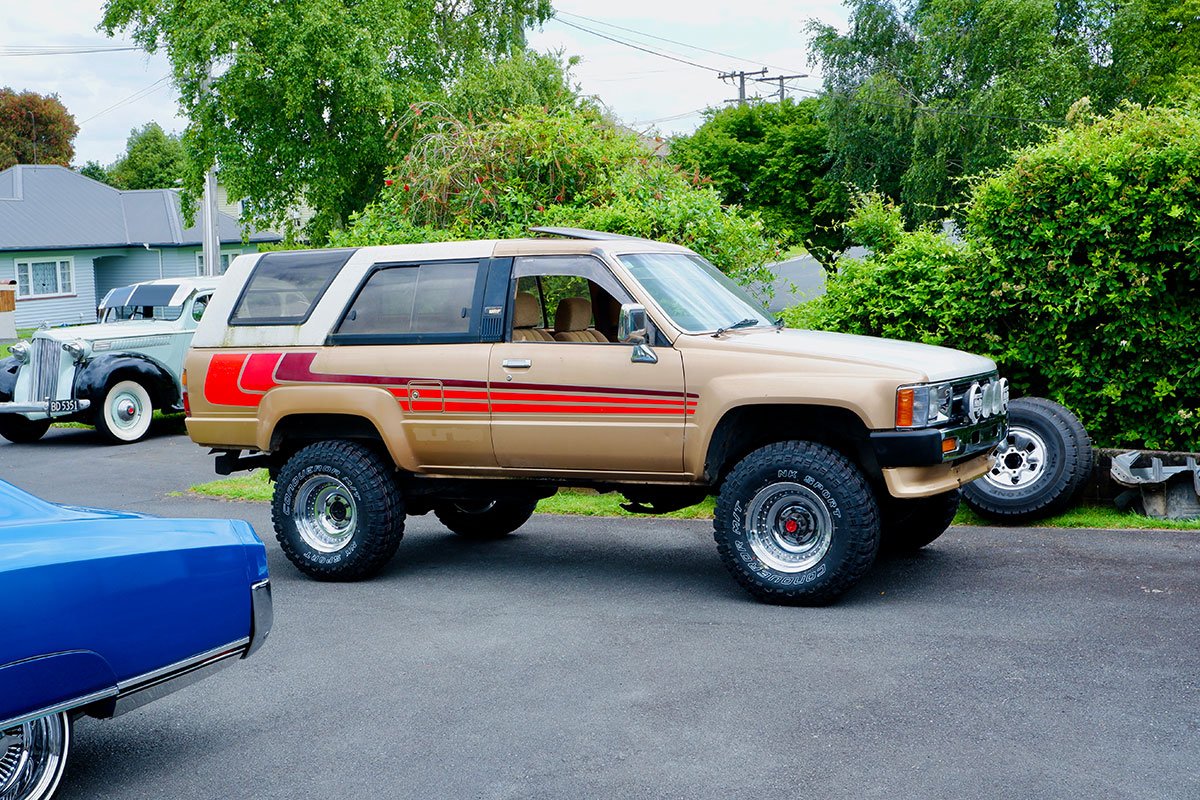
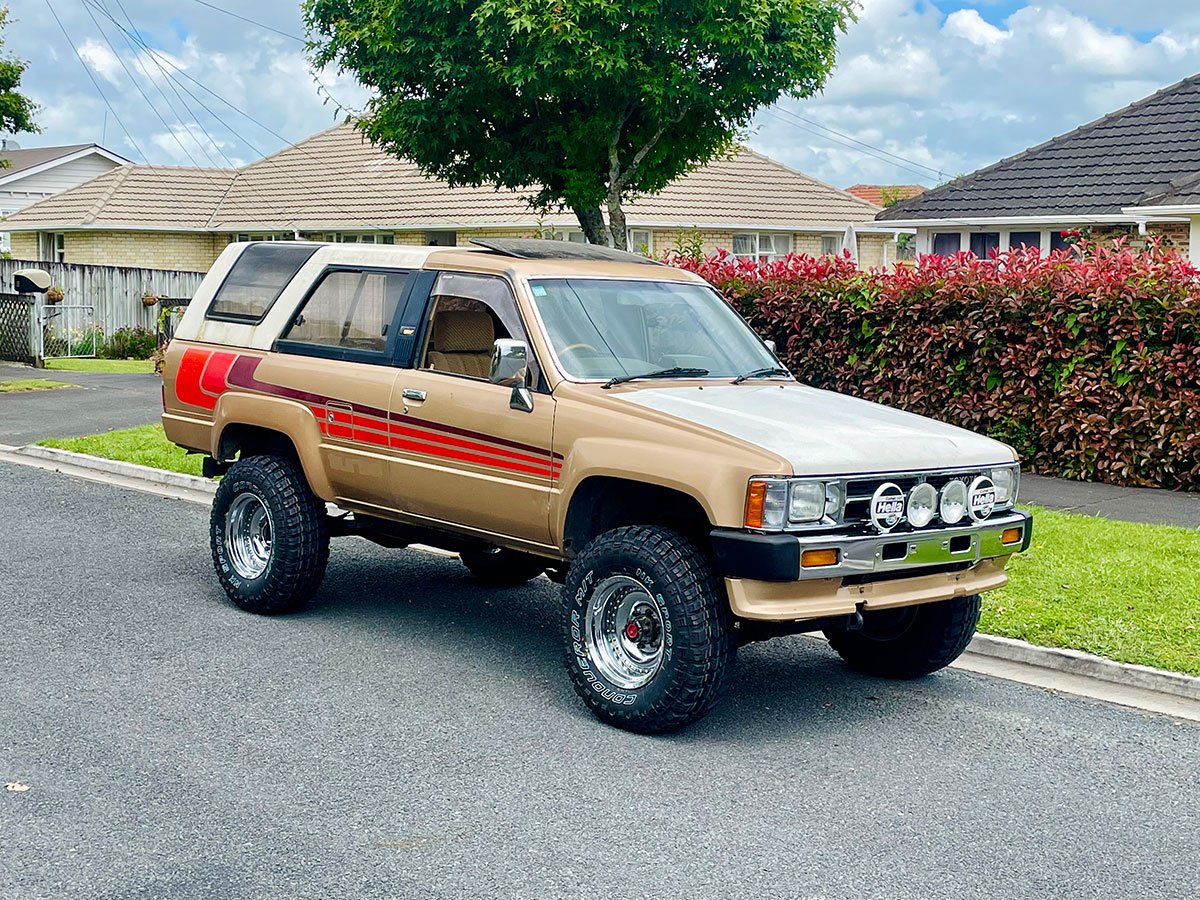
Got the bonnet on and fixed the a few wiring issues with the lights. I actually don't mind the white bonnet on there, it goes with the canopy. I'll probably eventually paint it. Even cooler is I got the wheels on, couldn't be happier. The vision is coming together... And they sit pretty flush with the body which was the aim as I don't want to run flares. Still in dire need of a clean. That'll be in the next few steps.
1 point
-
Hosed the boys KXD (Chinese KTM) with some of my homemade chameleon paint looks awesome and covered really well over black 2 light coat and satin clear i had laying around. Hes pretty stoked.
1 point


.thumb.jpeg.e0a4bff61111e0c8c7396950fcc94da1.jpeg)


This leaderboard is set to Auckland/GMT+12:00