
Leaderboard


Popular Content
Showing content with the highest reputation on 11/11/23 in all areas
-
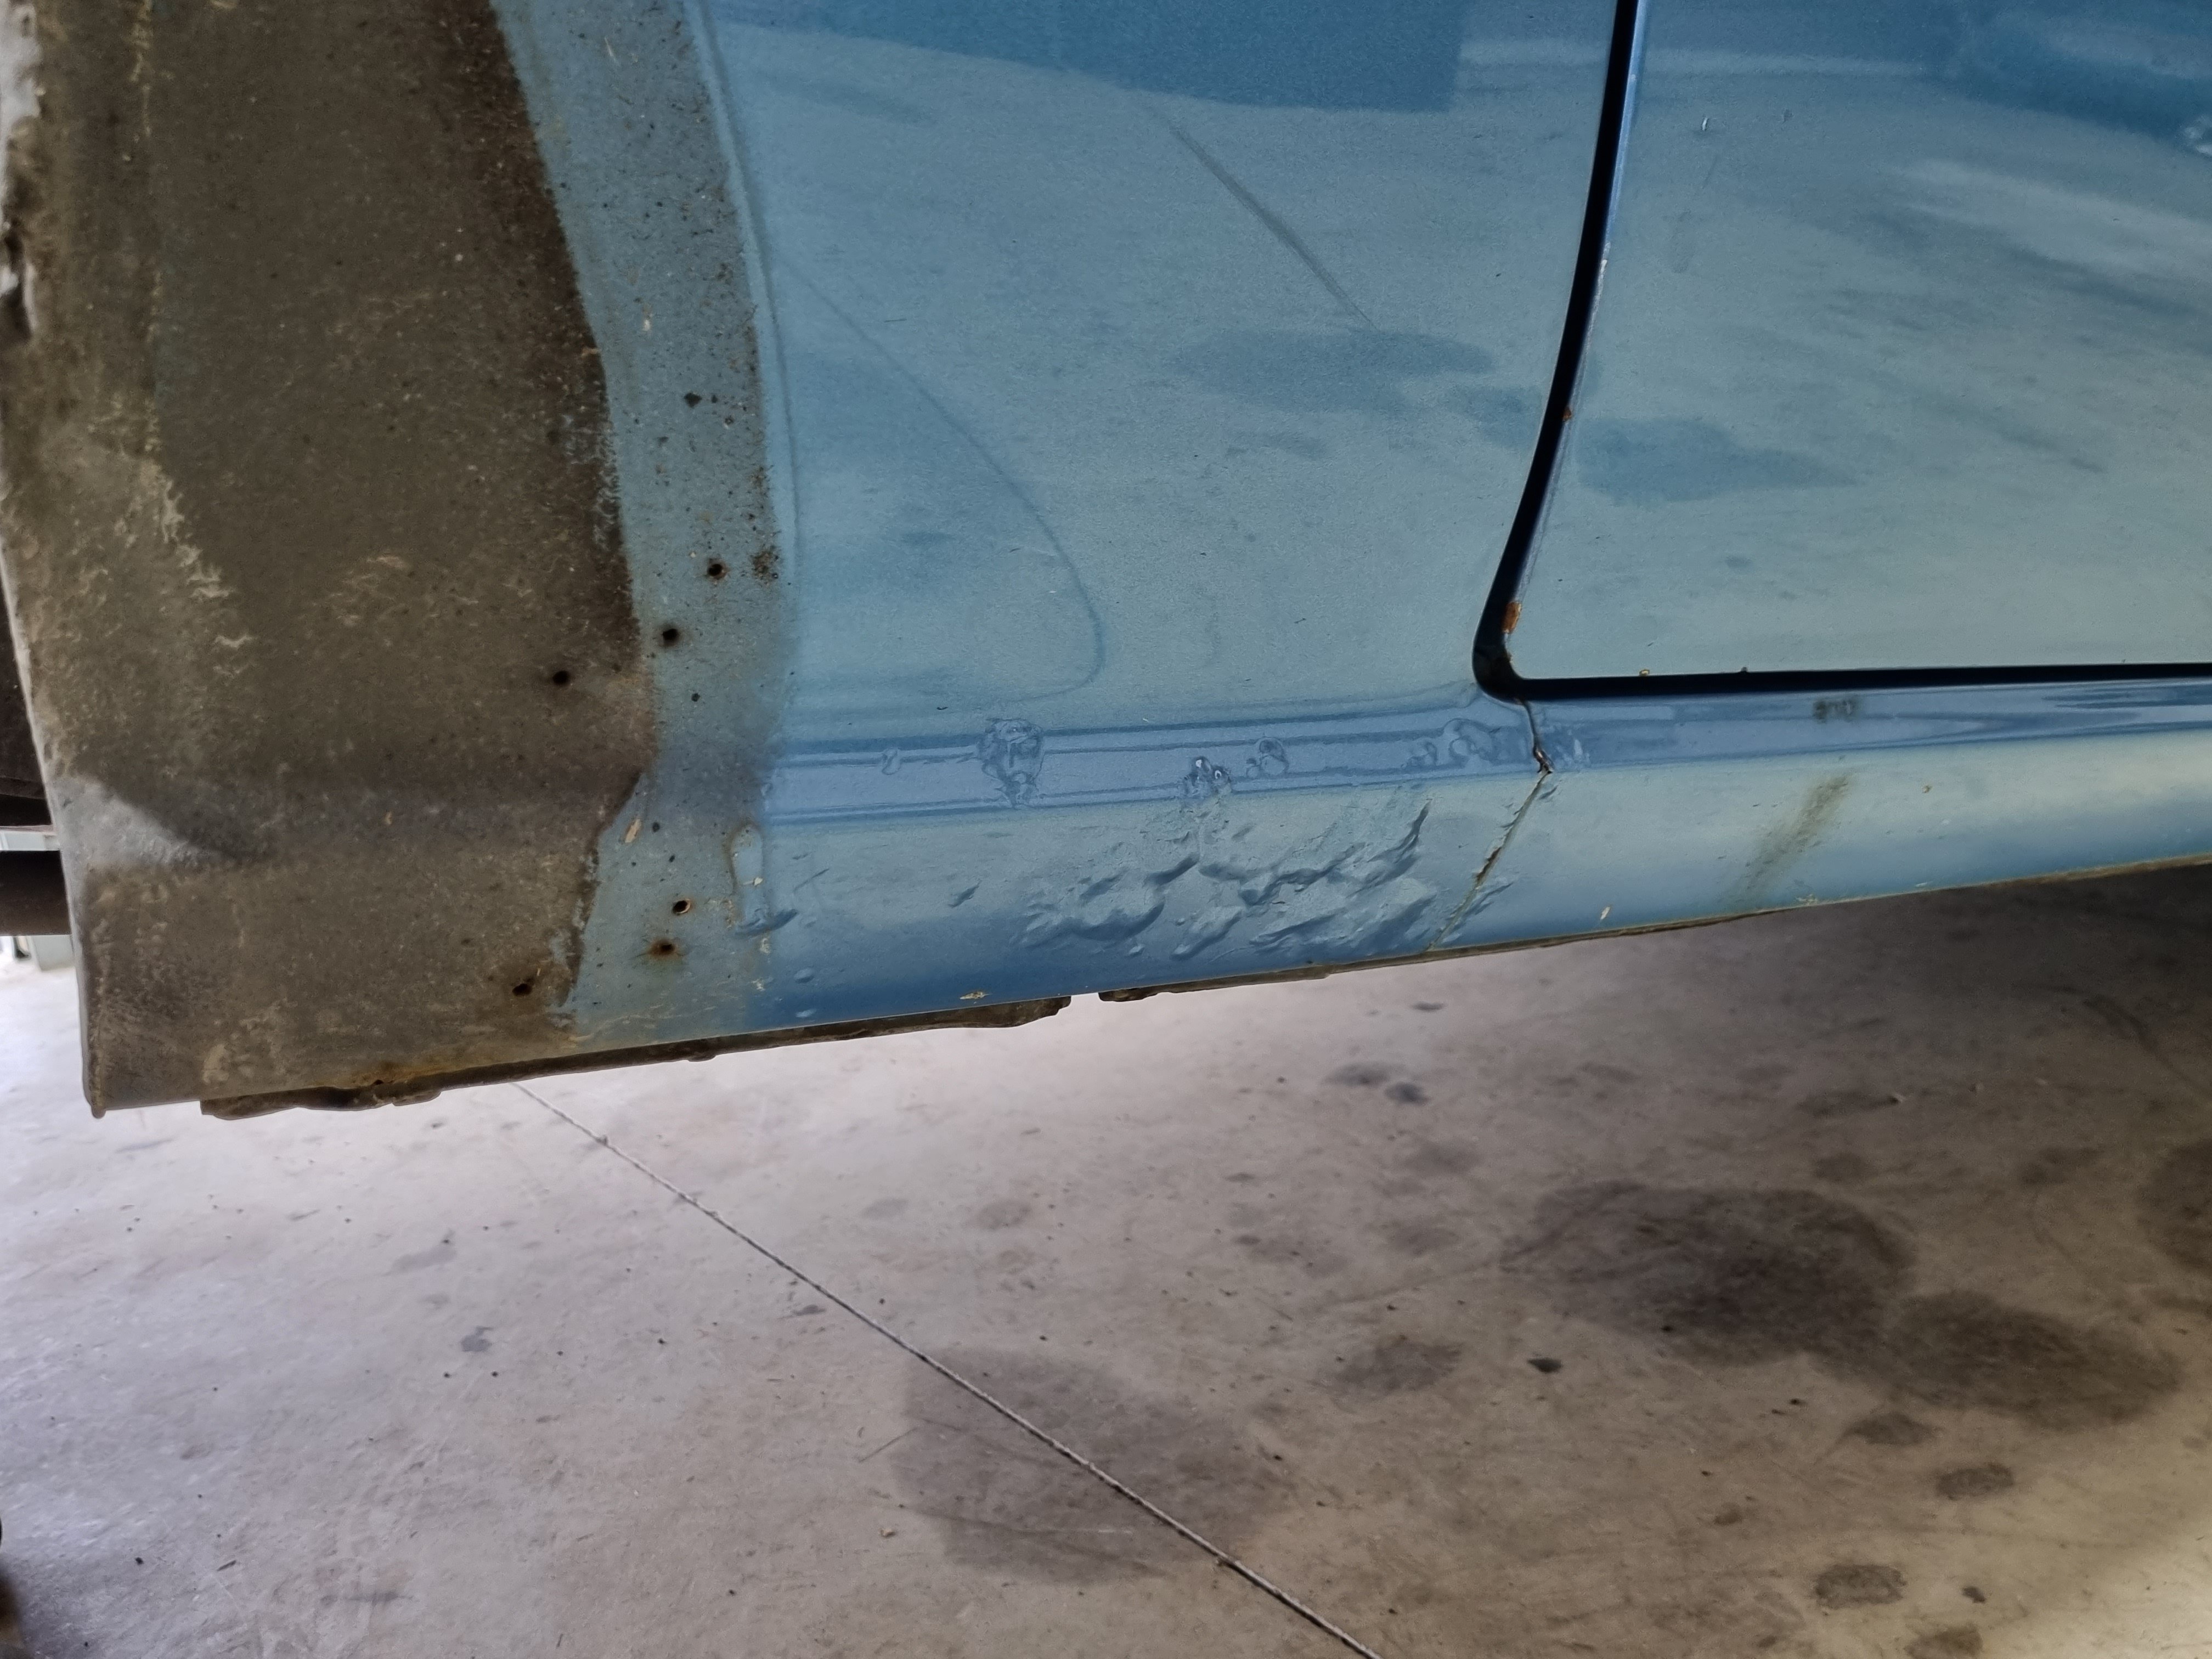
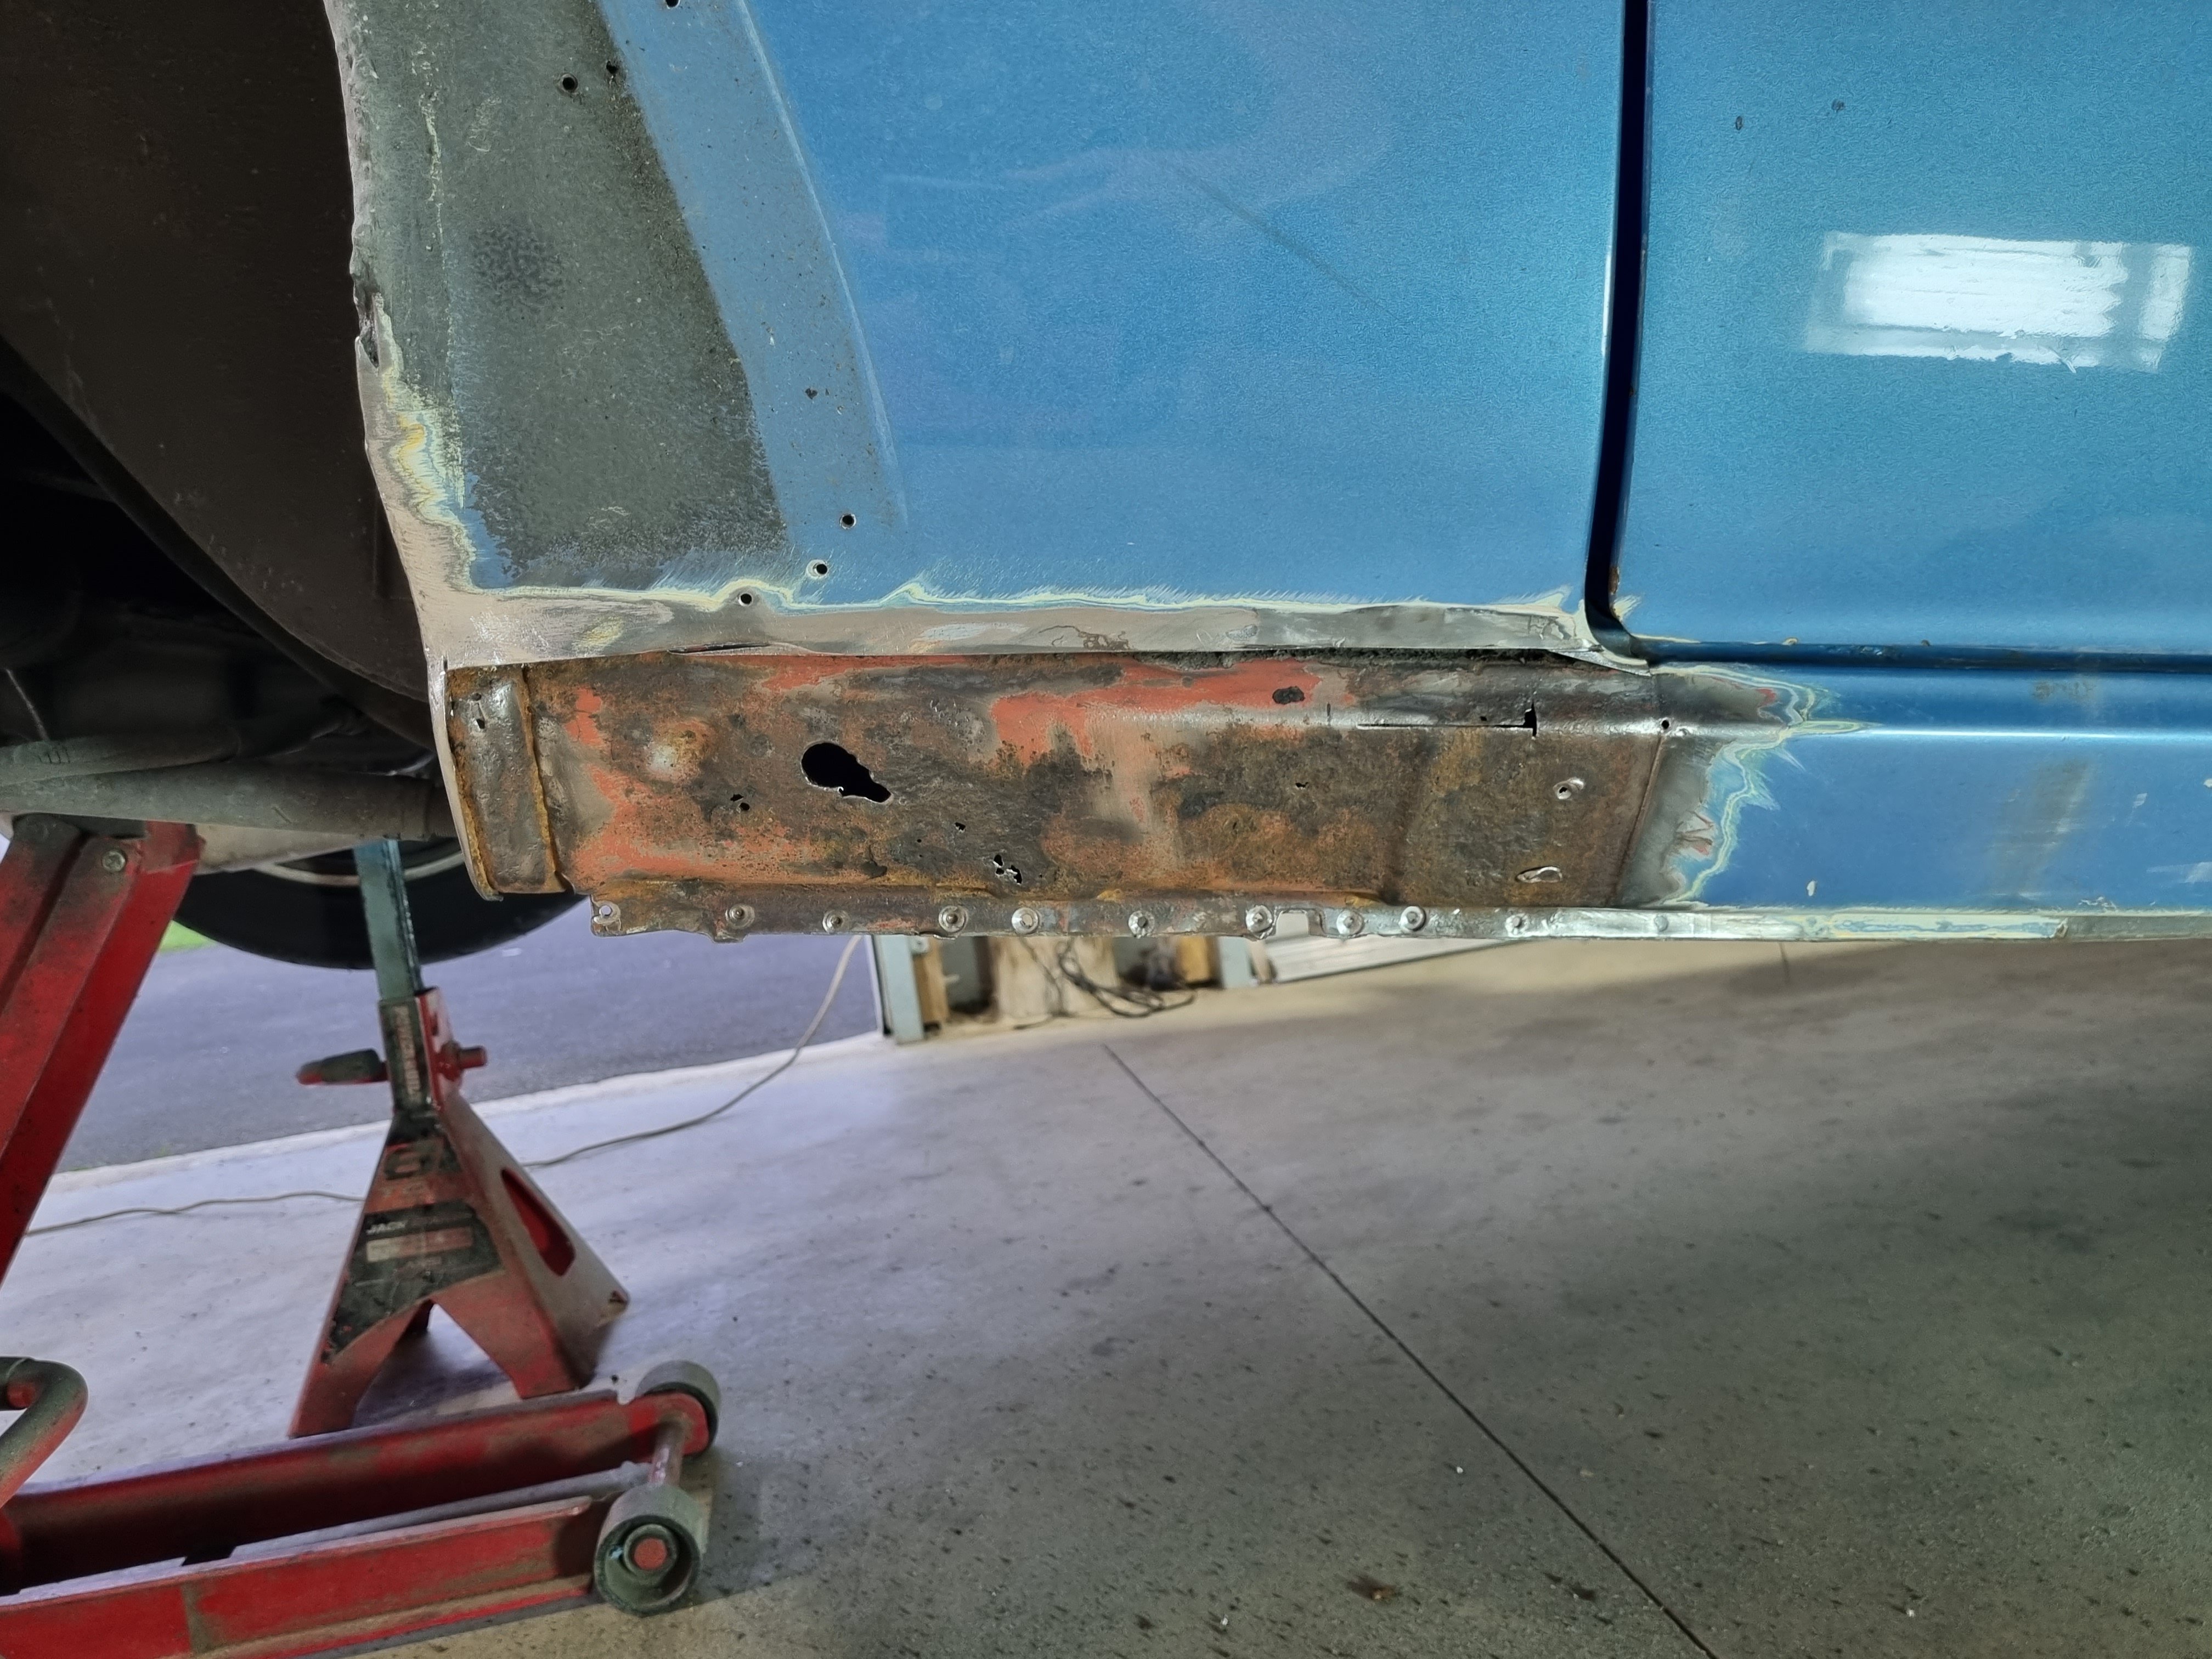
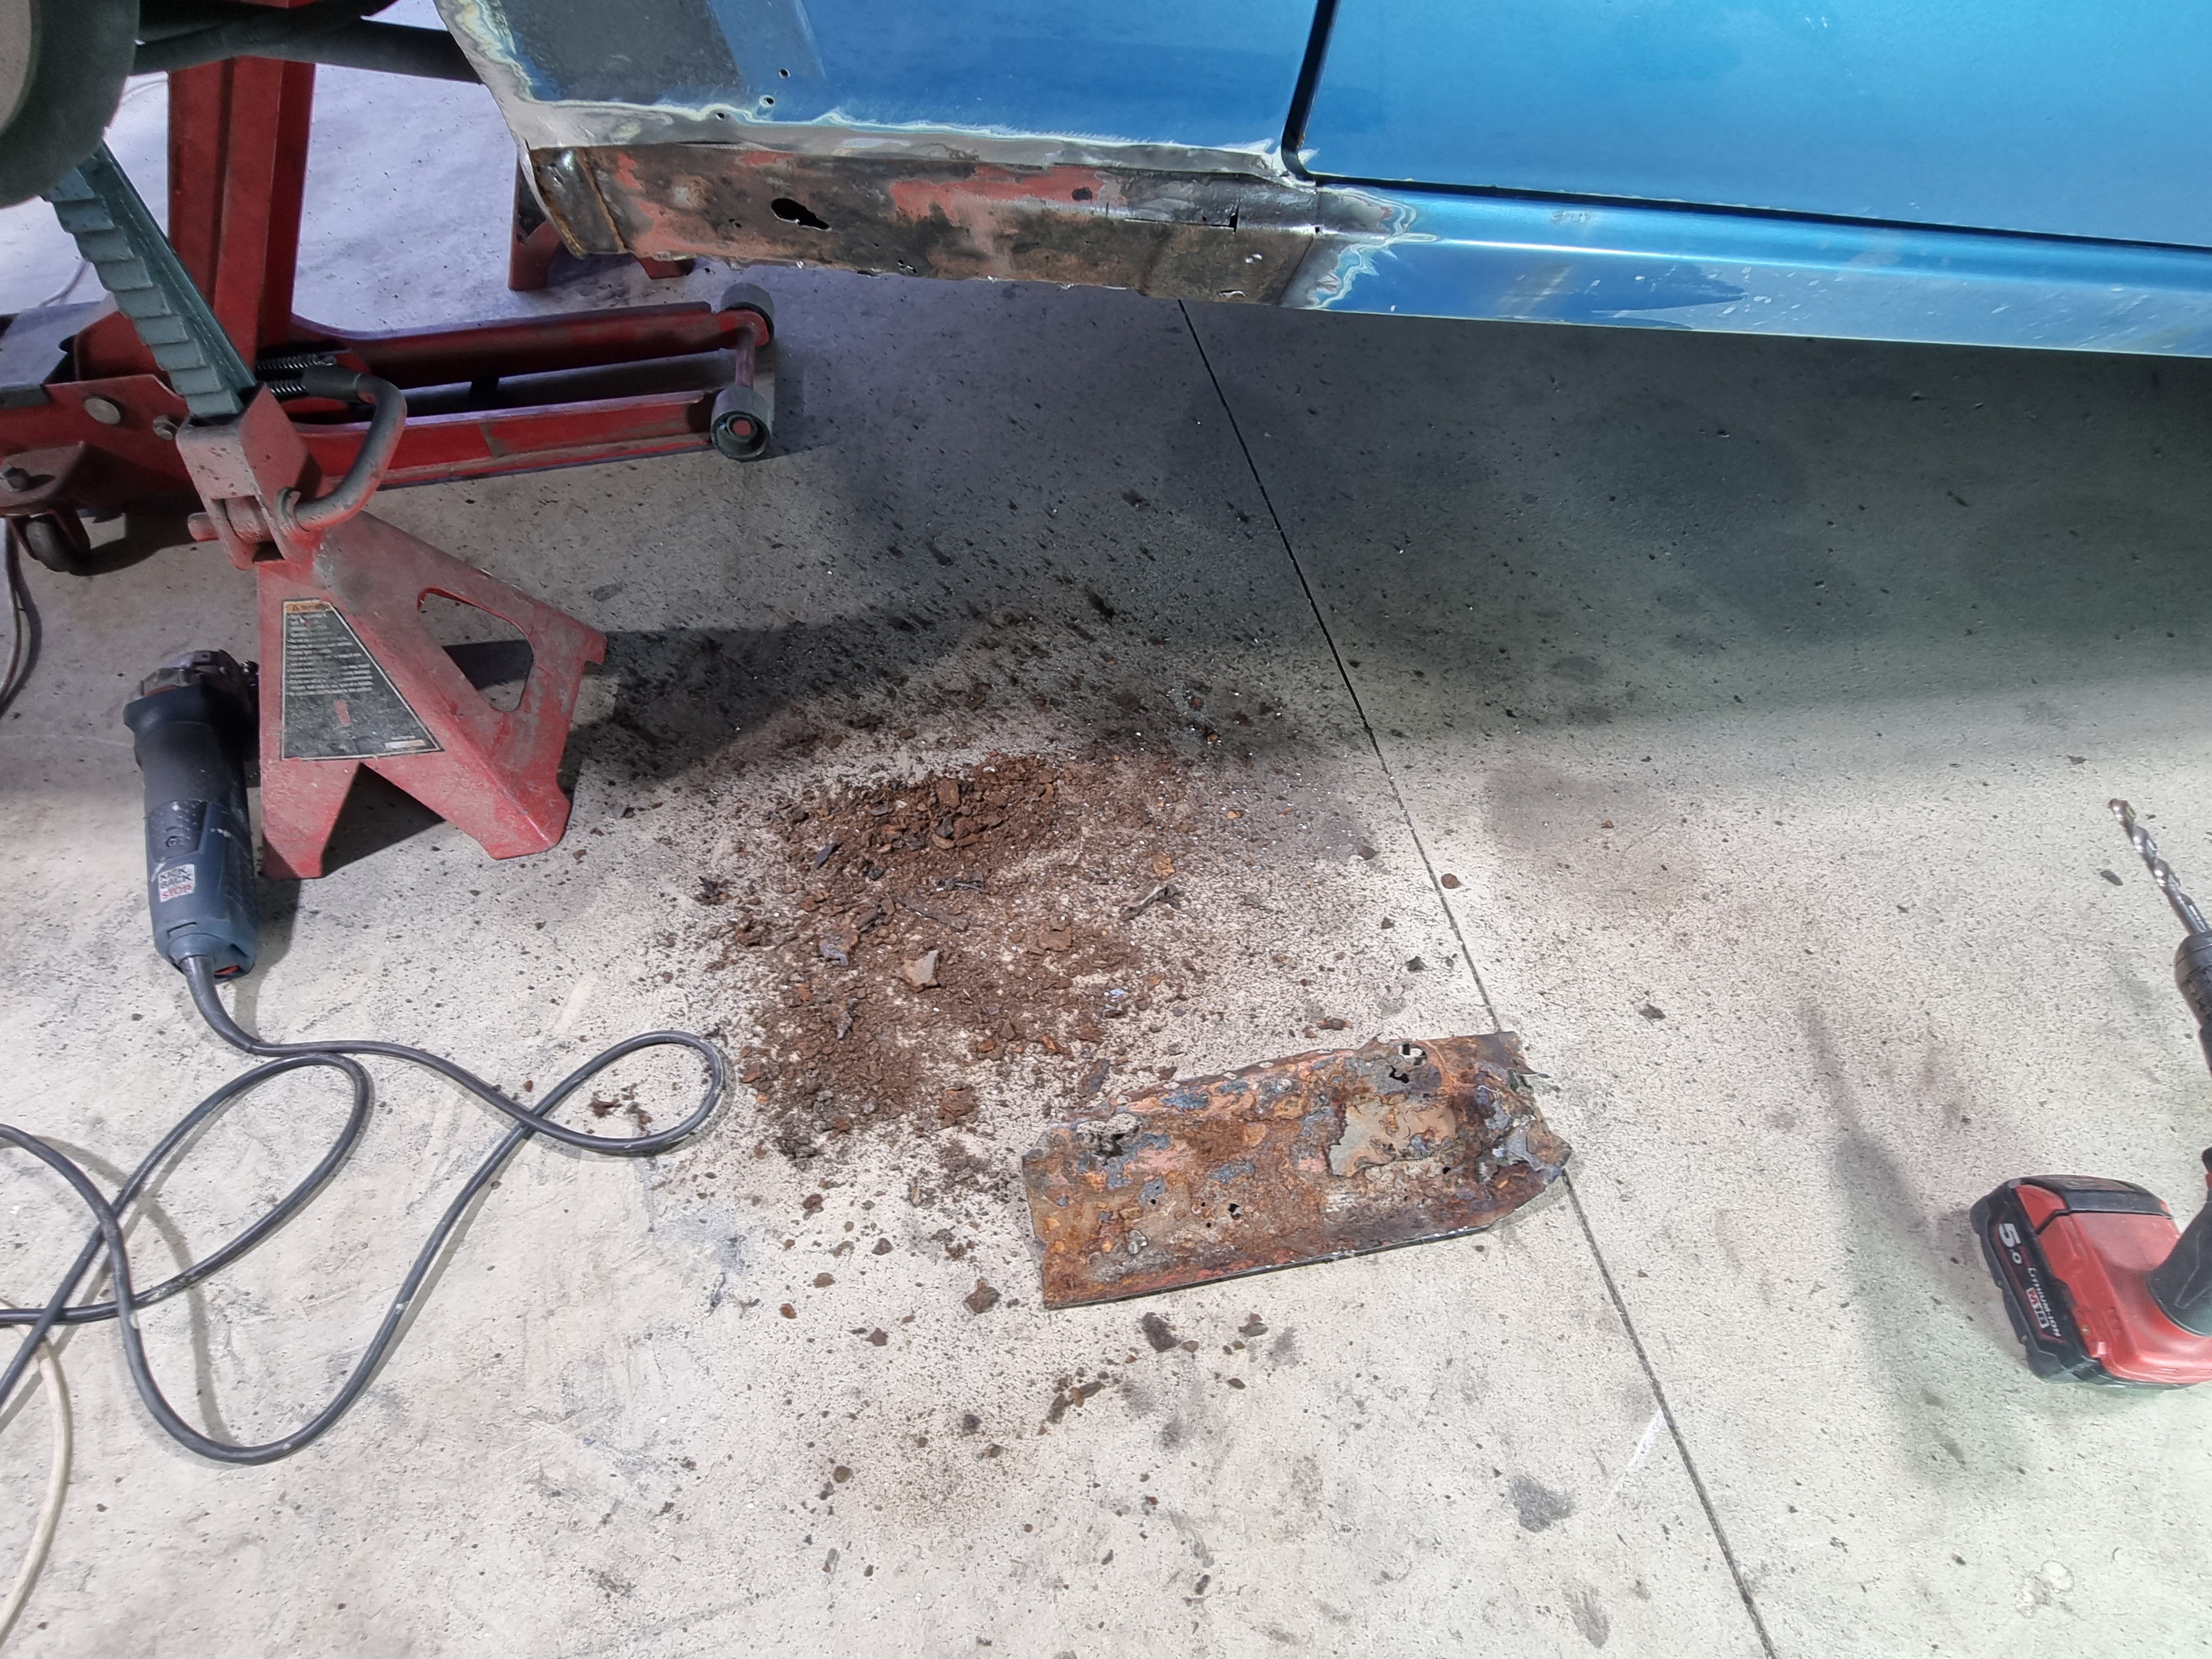
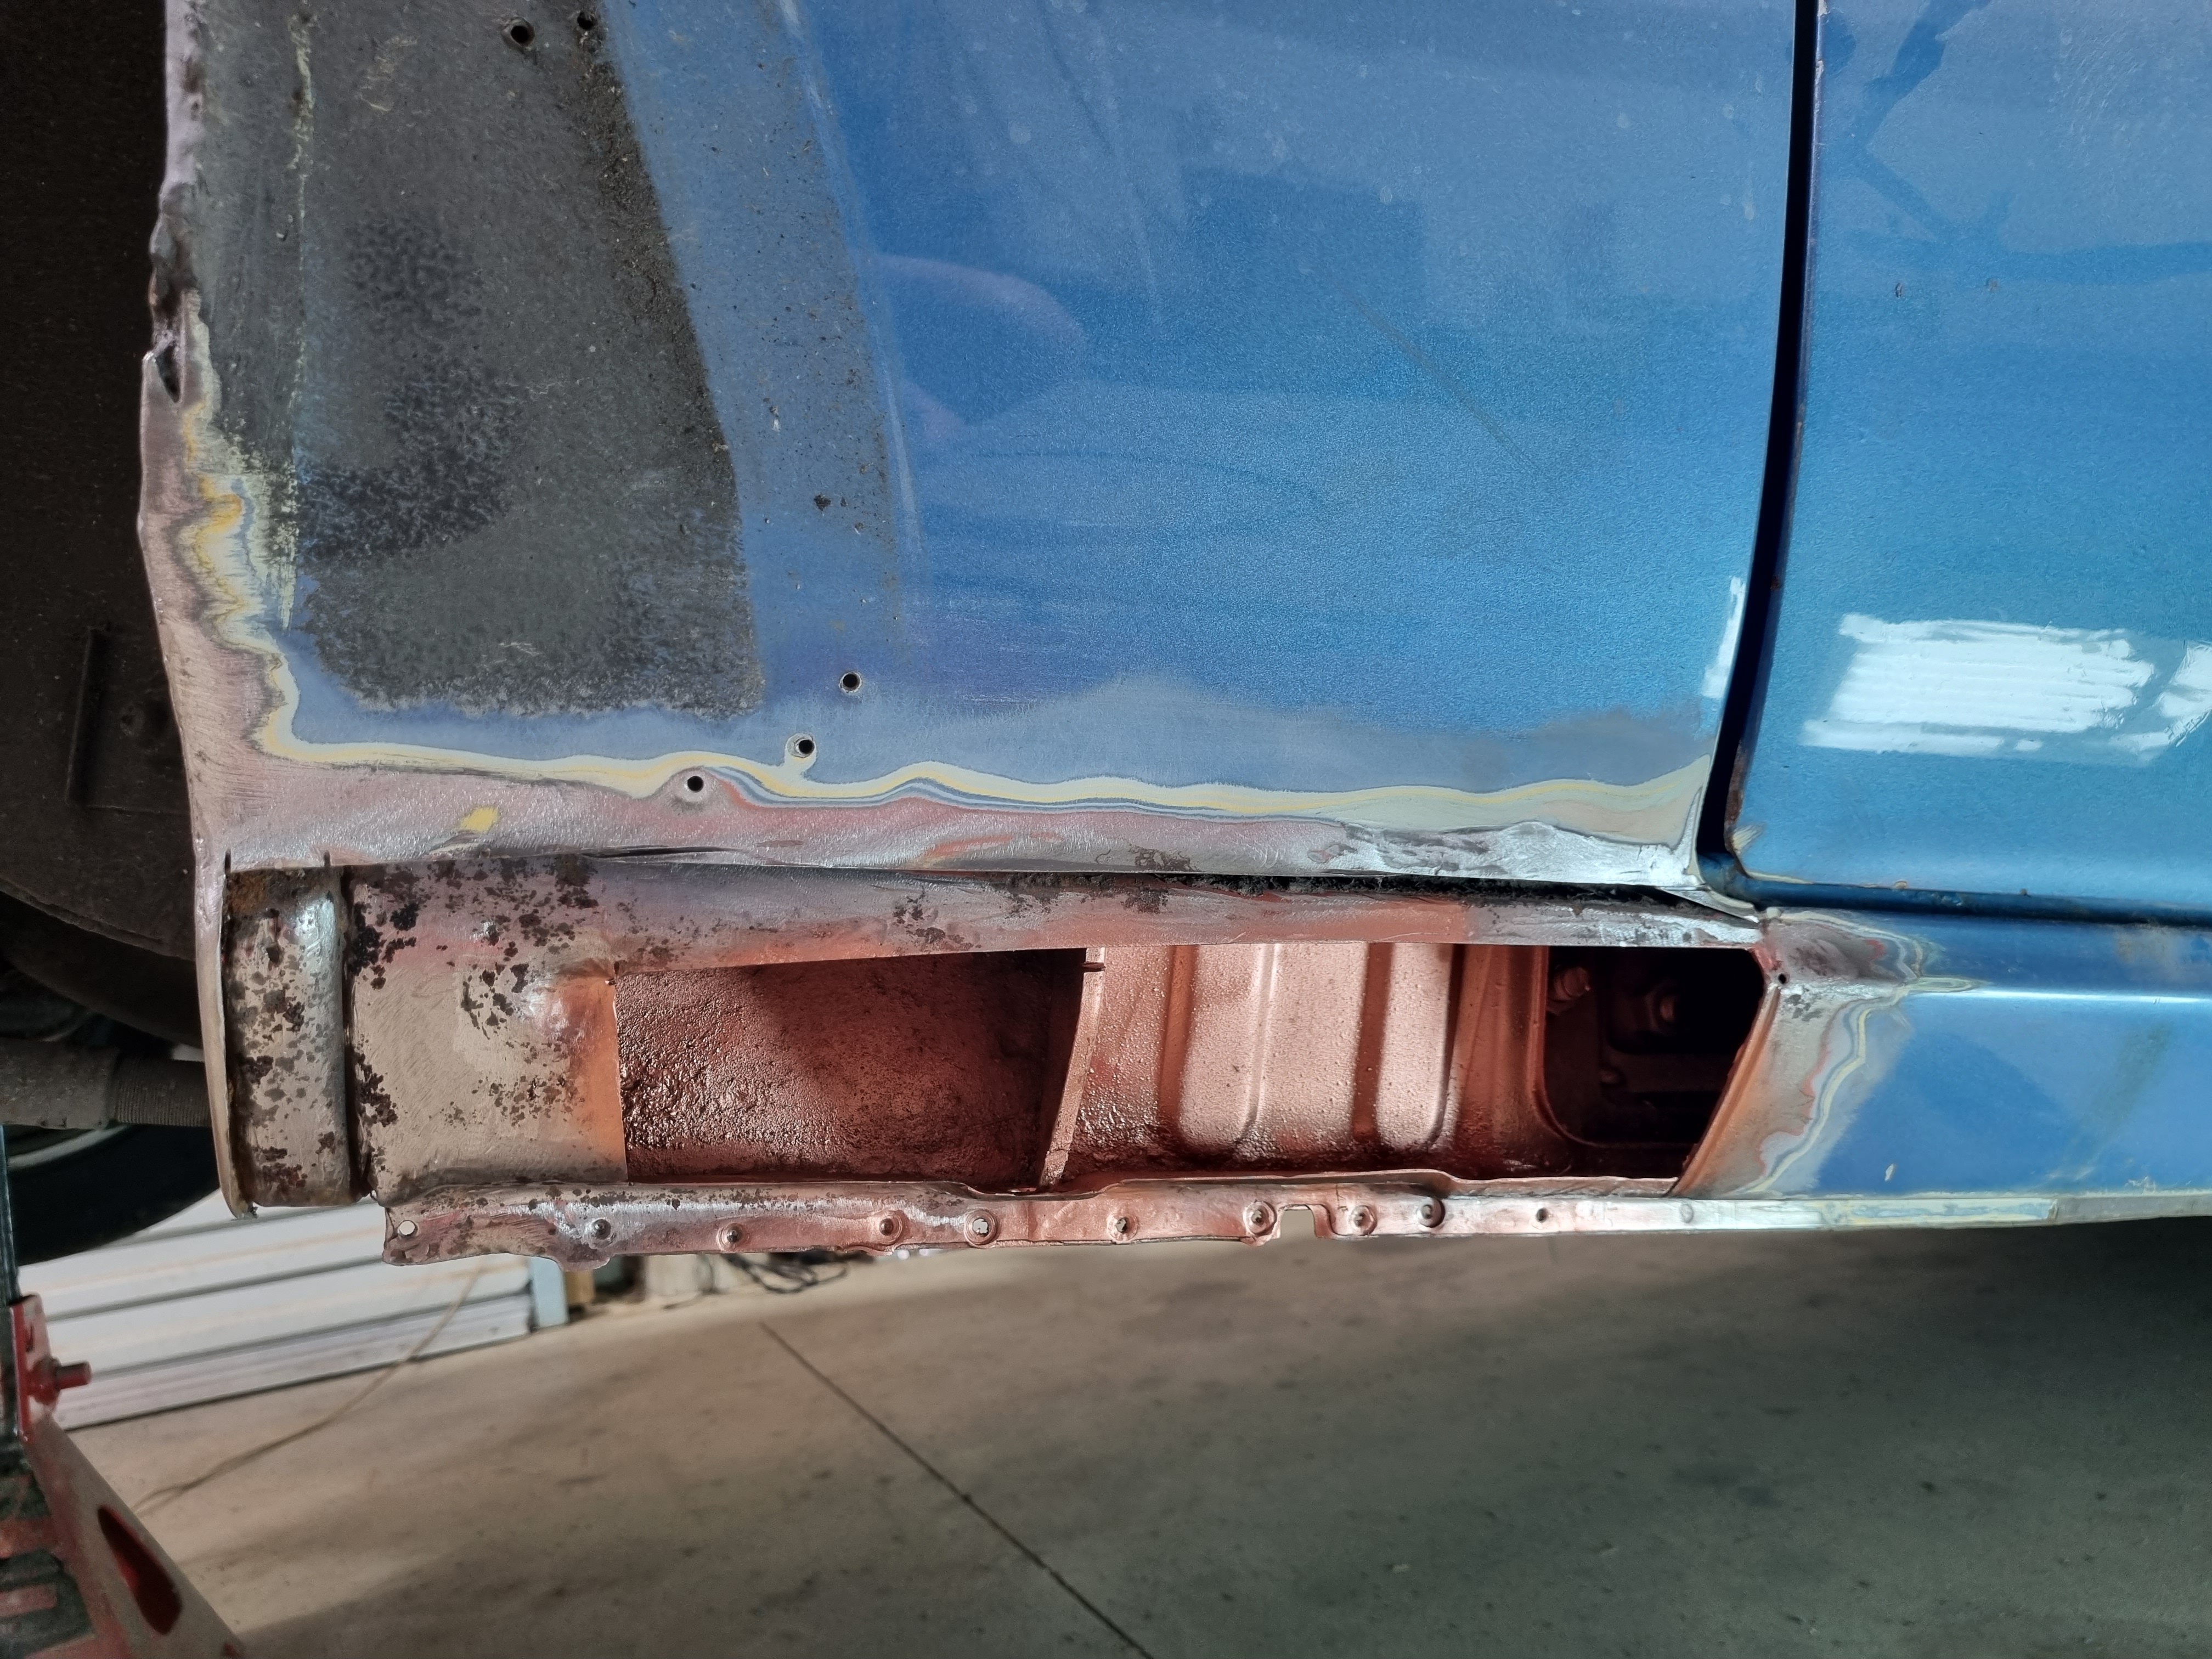
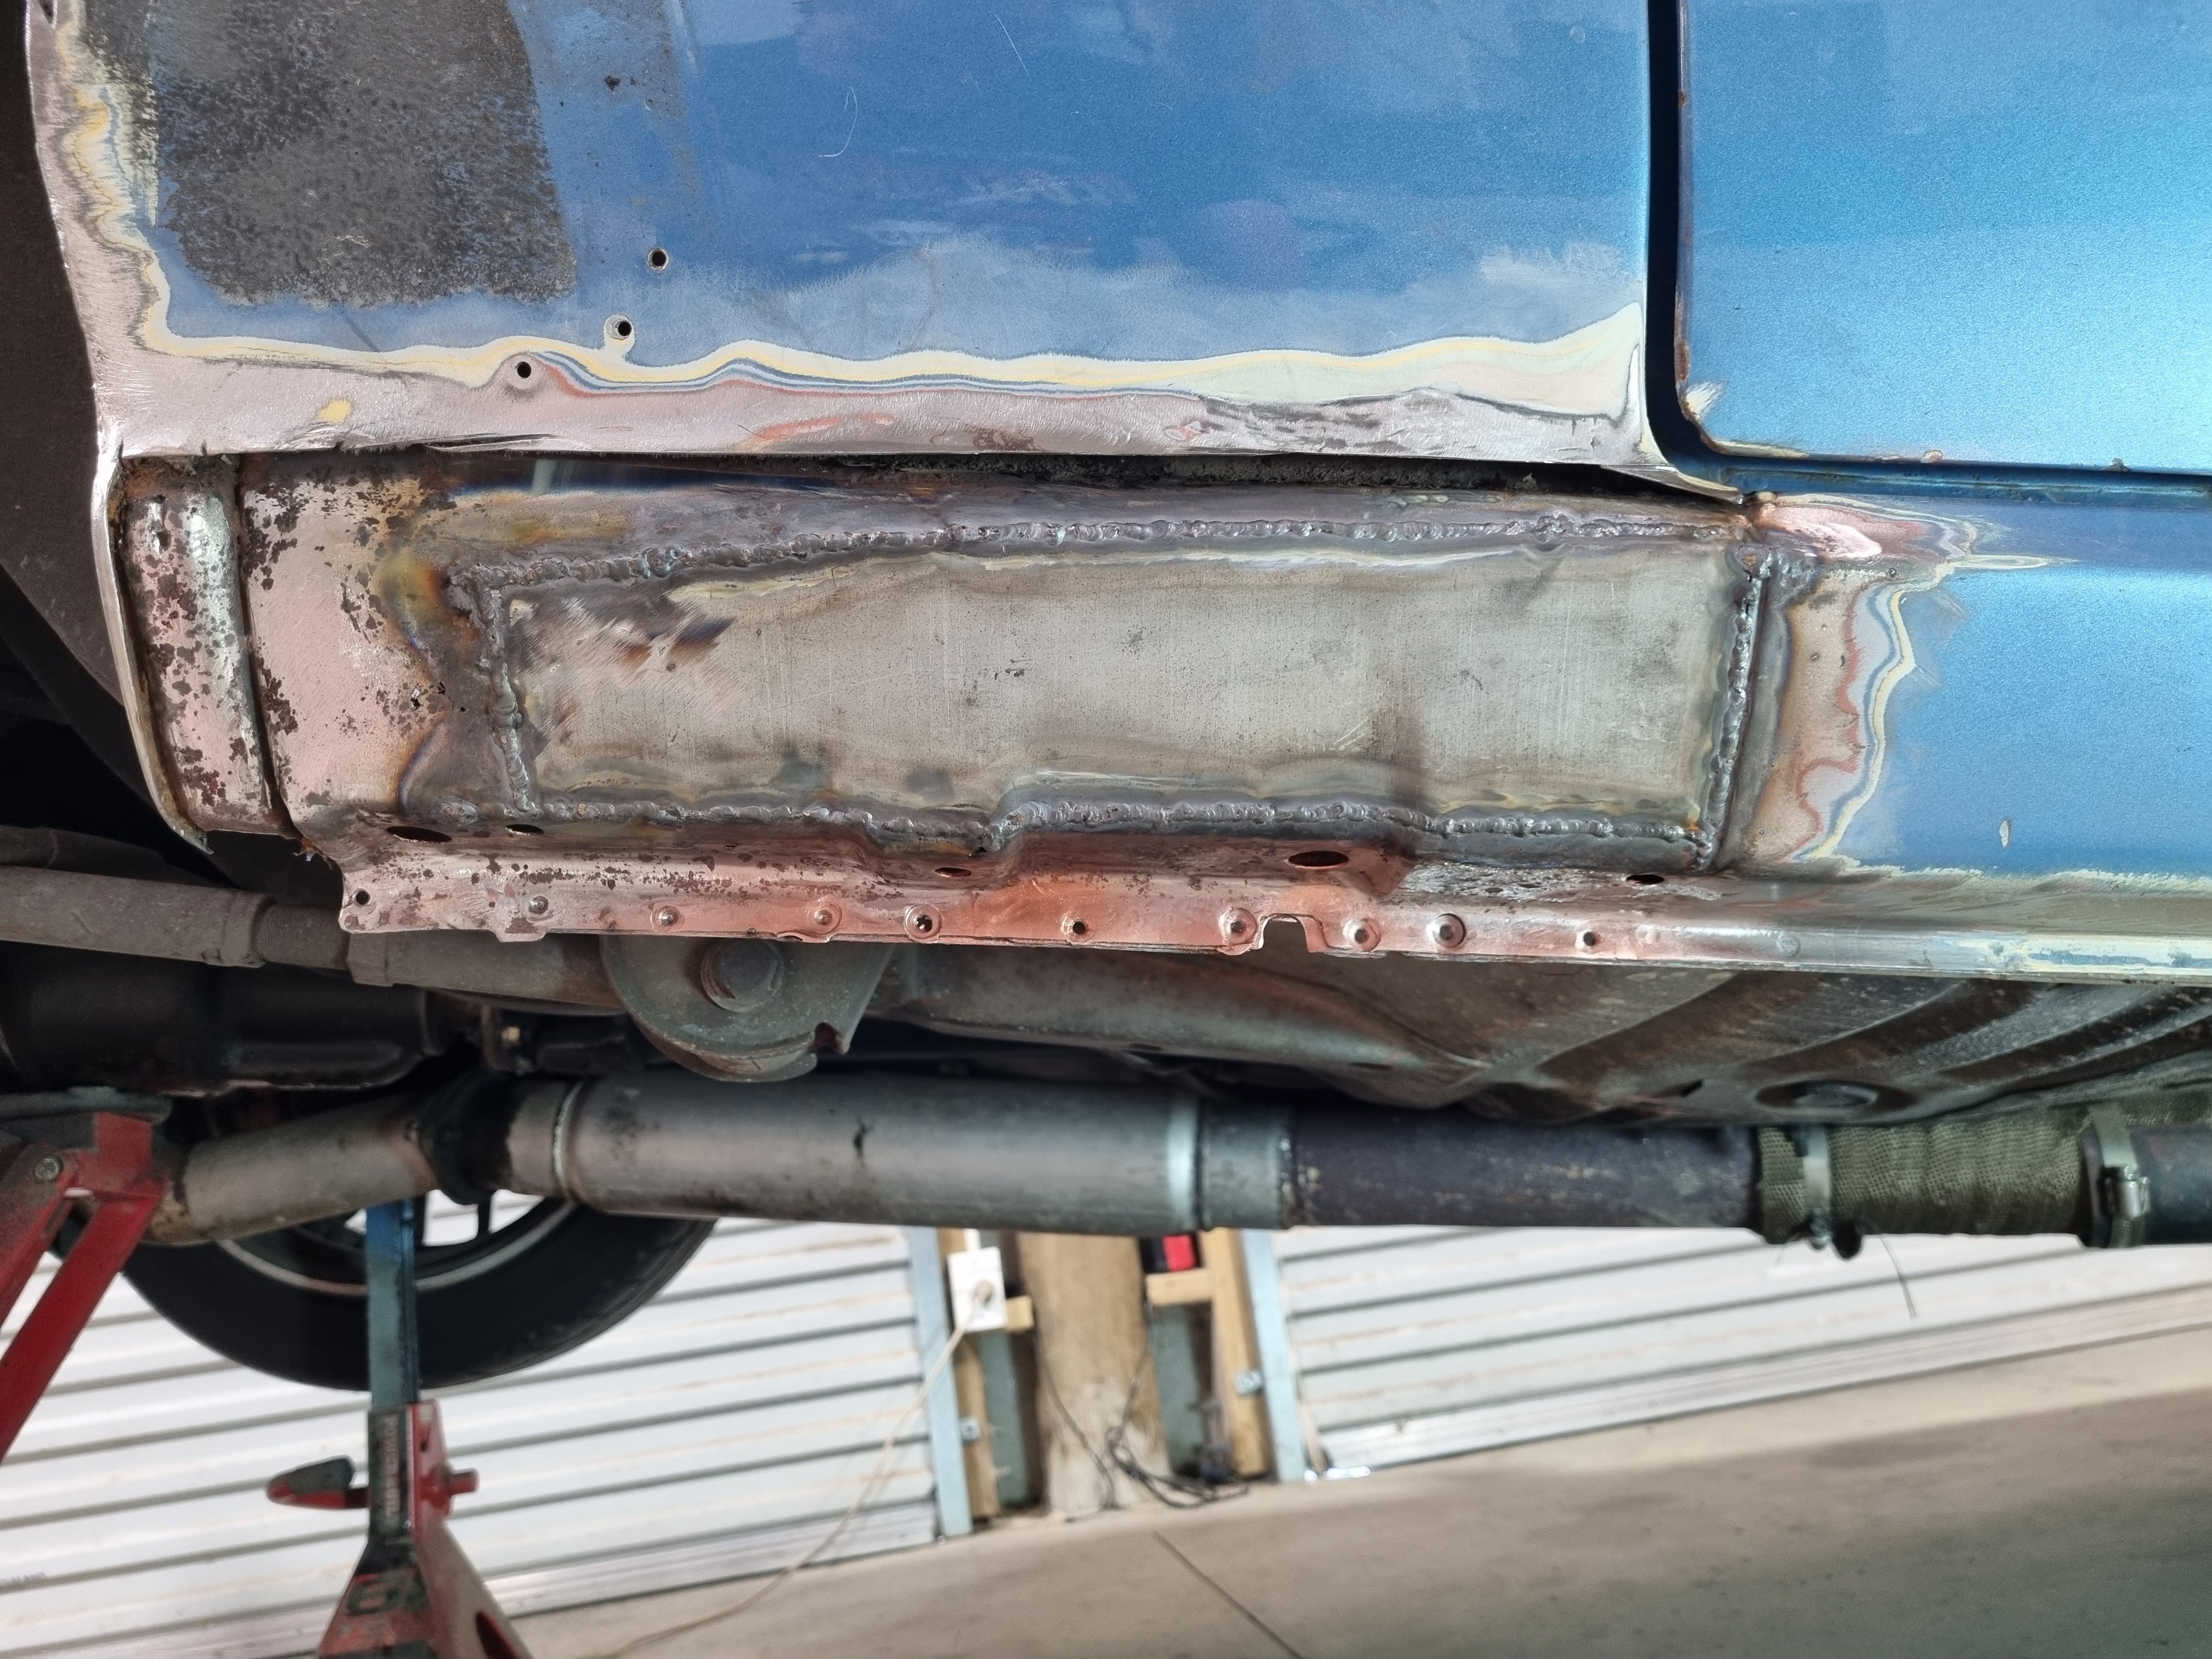
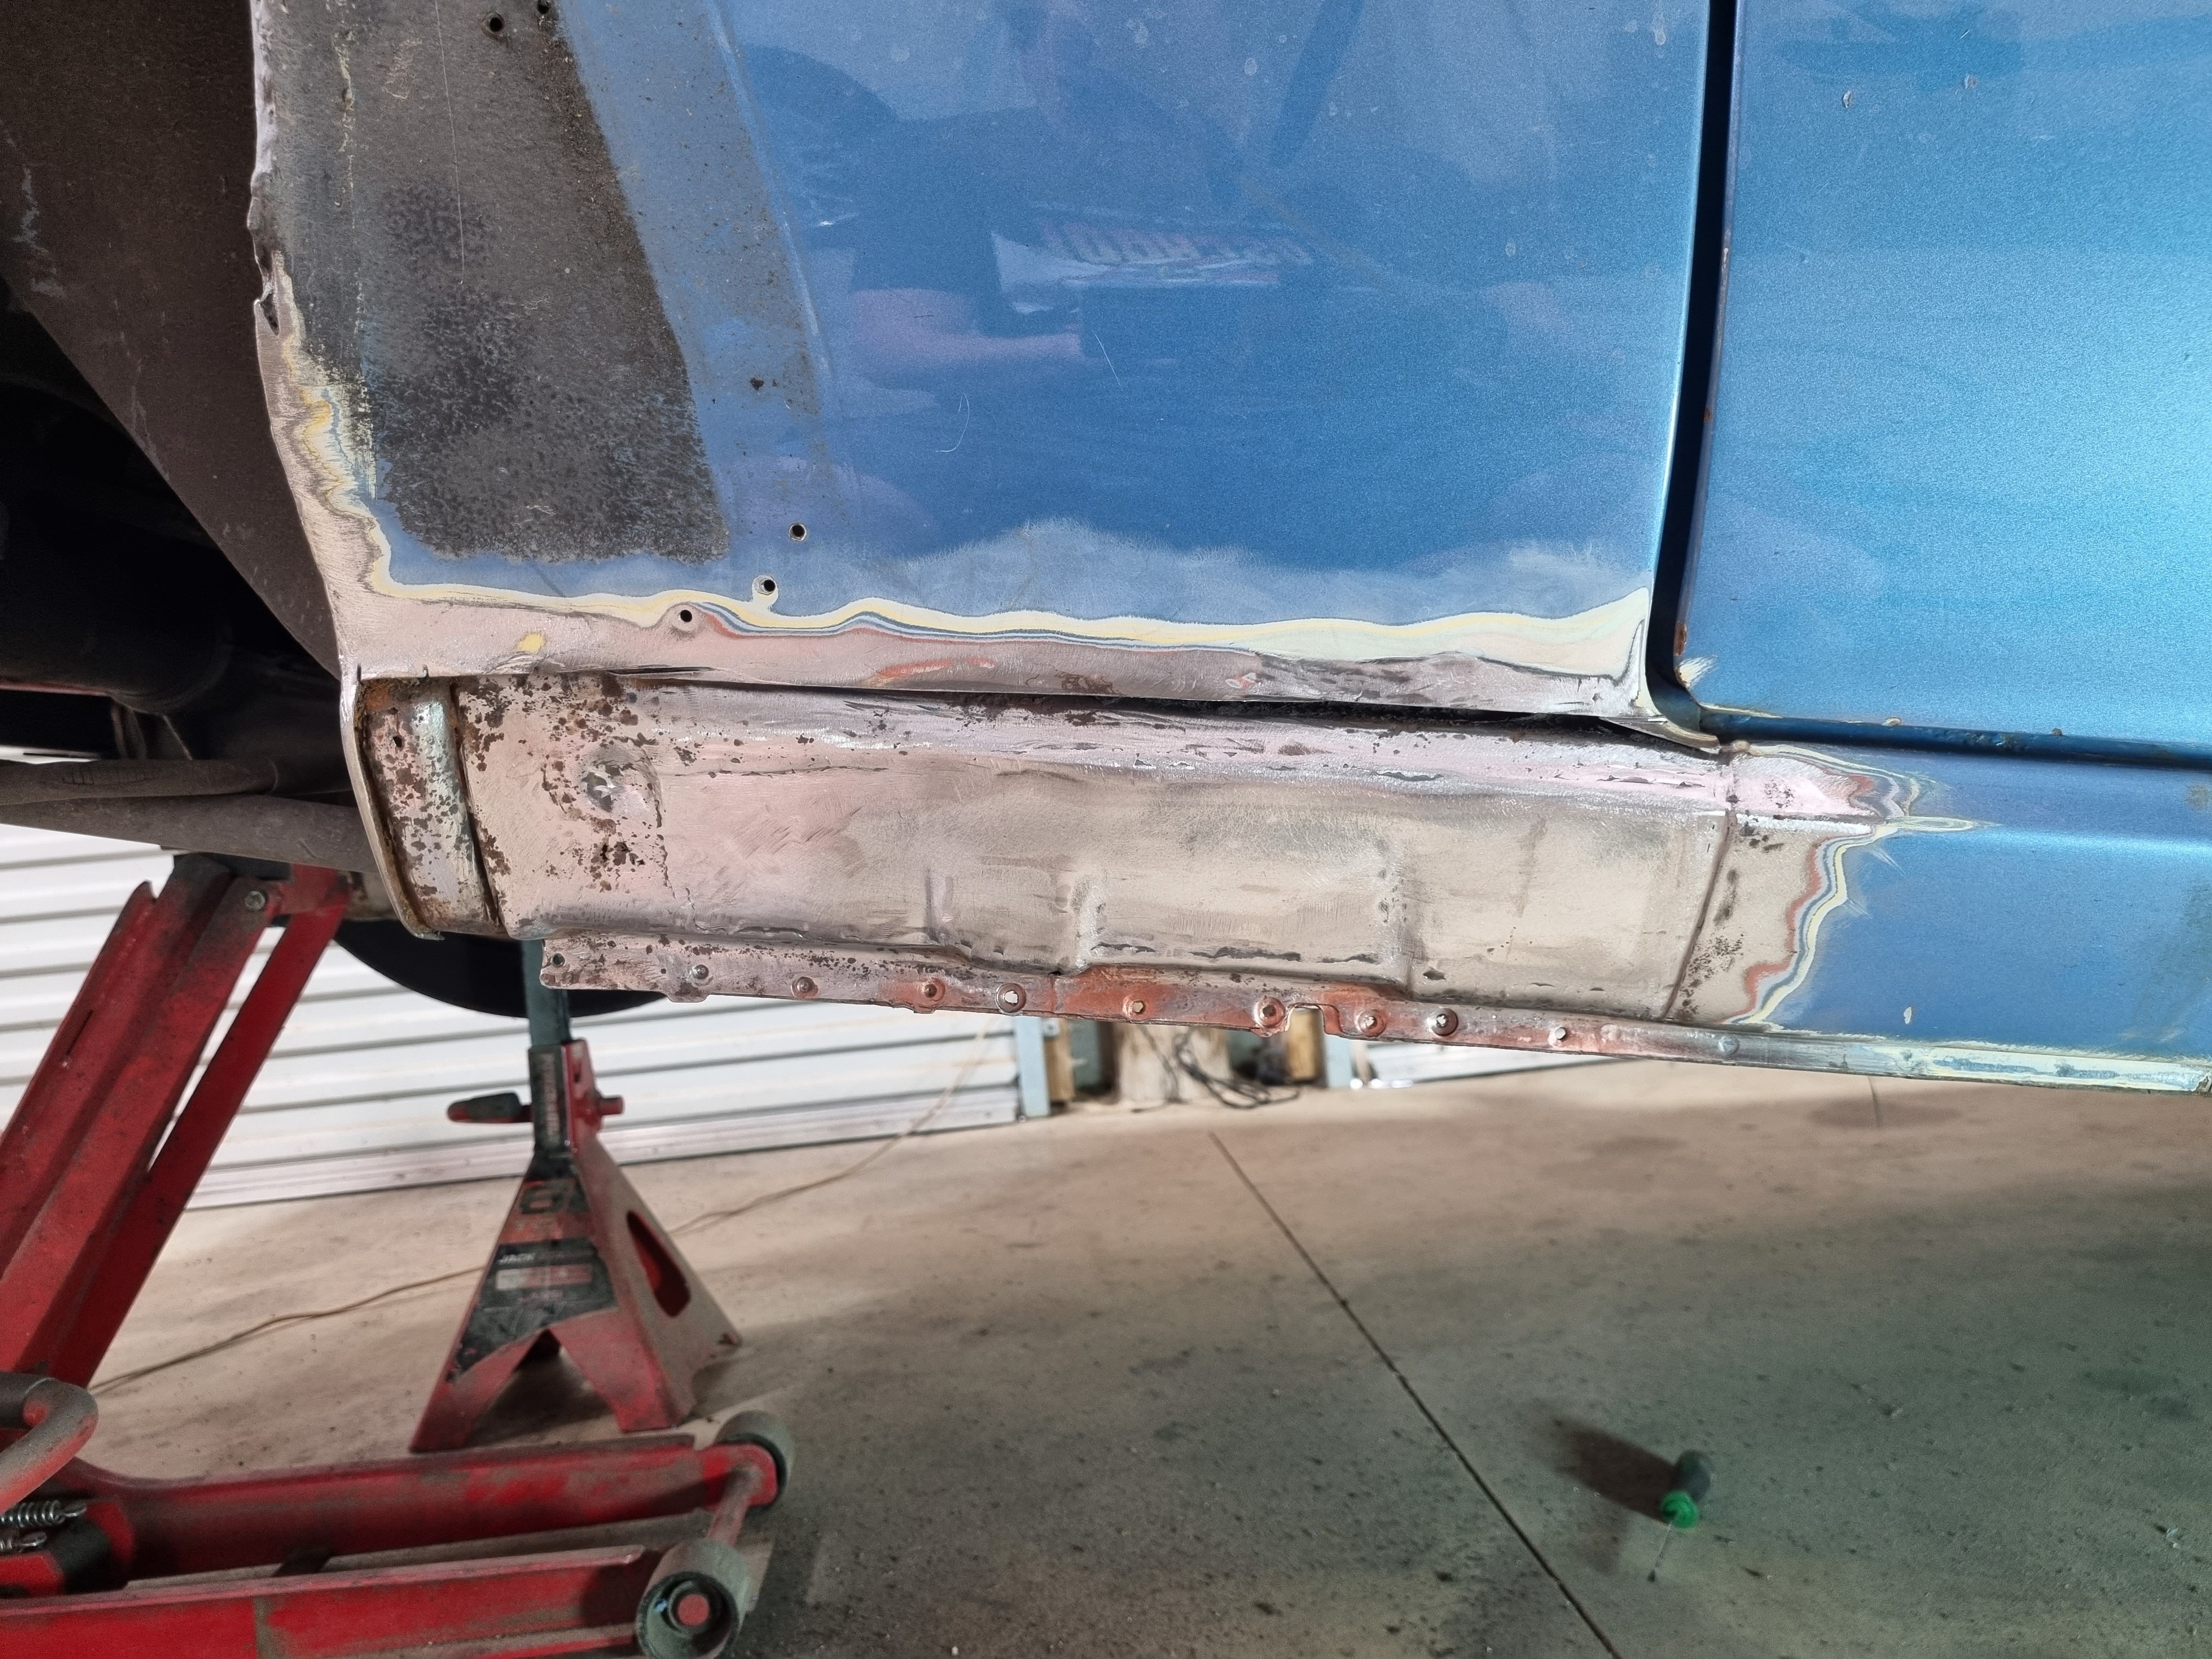
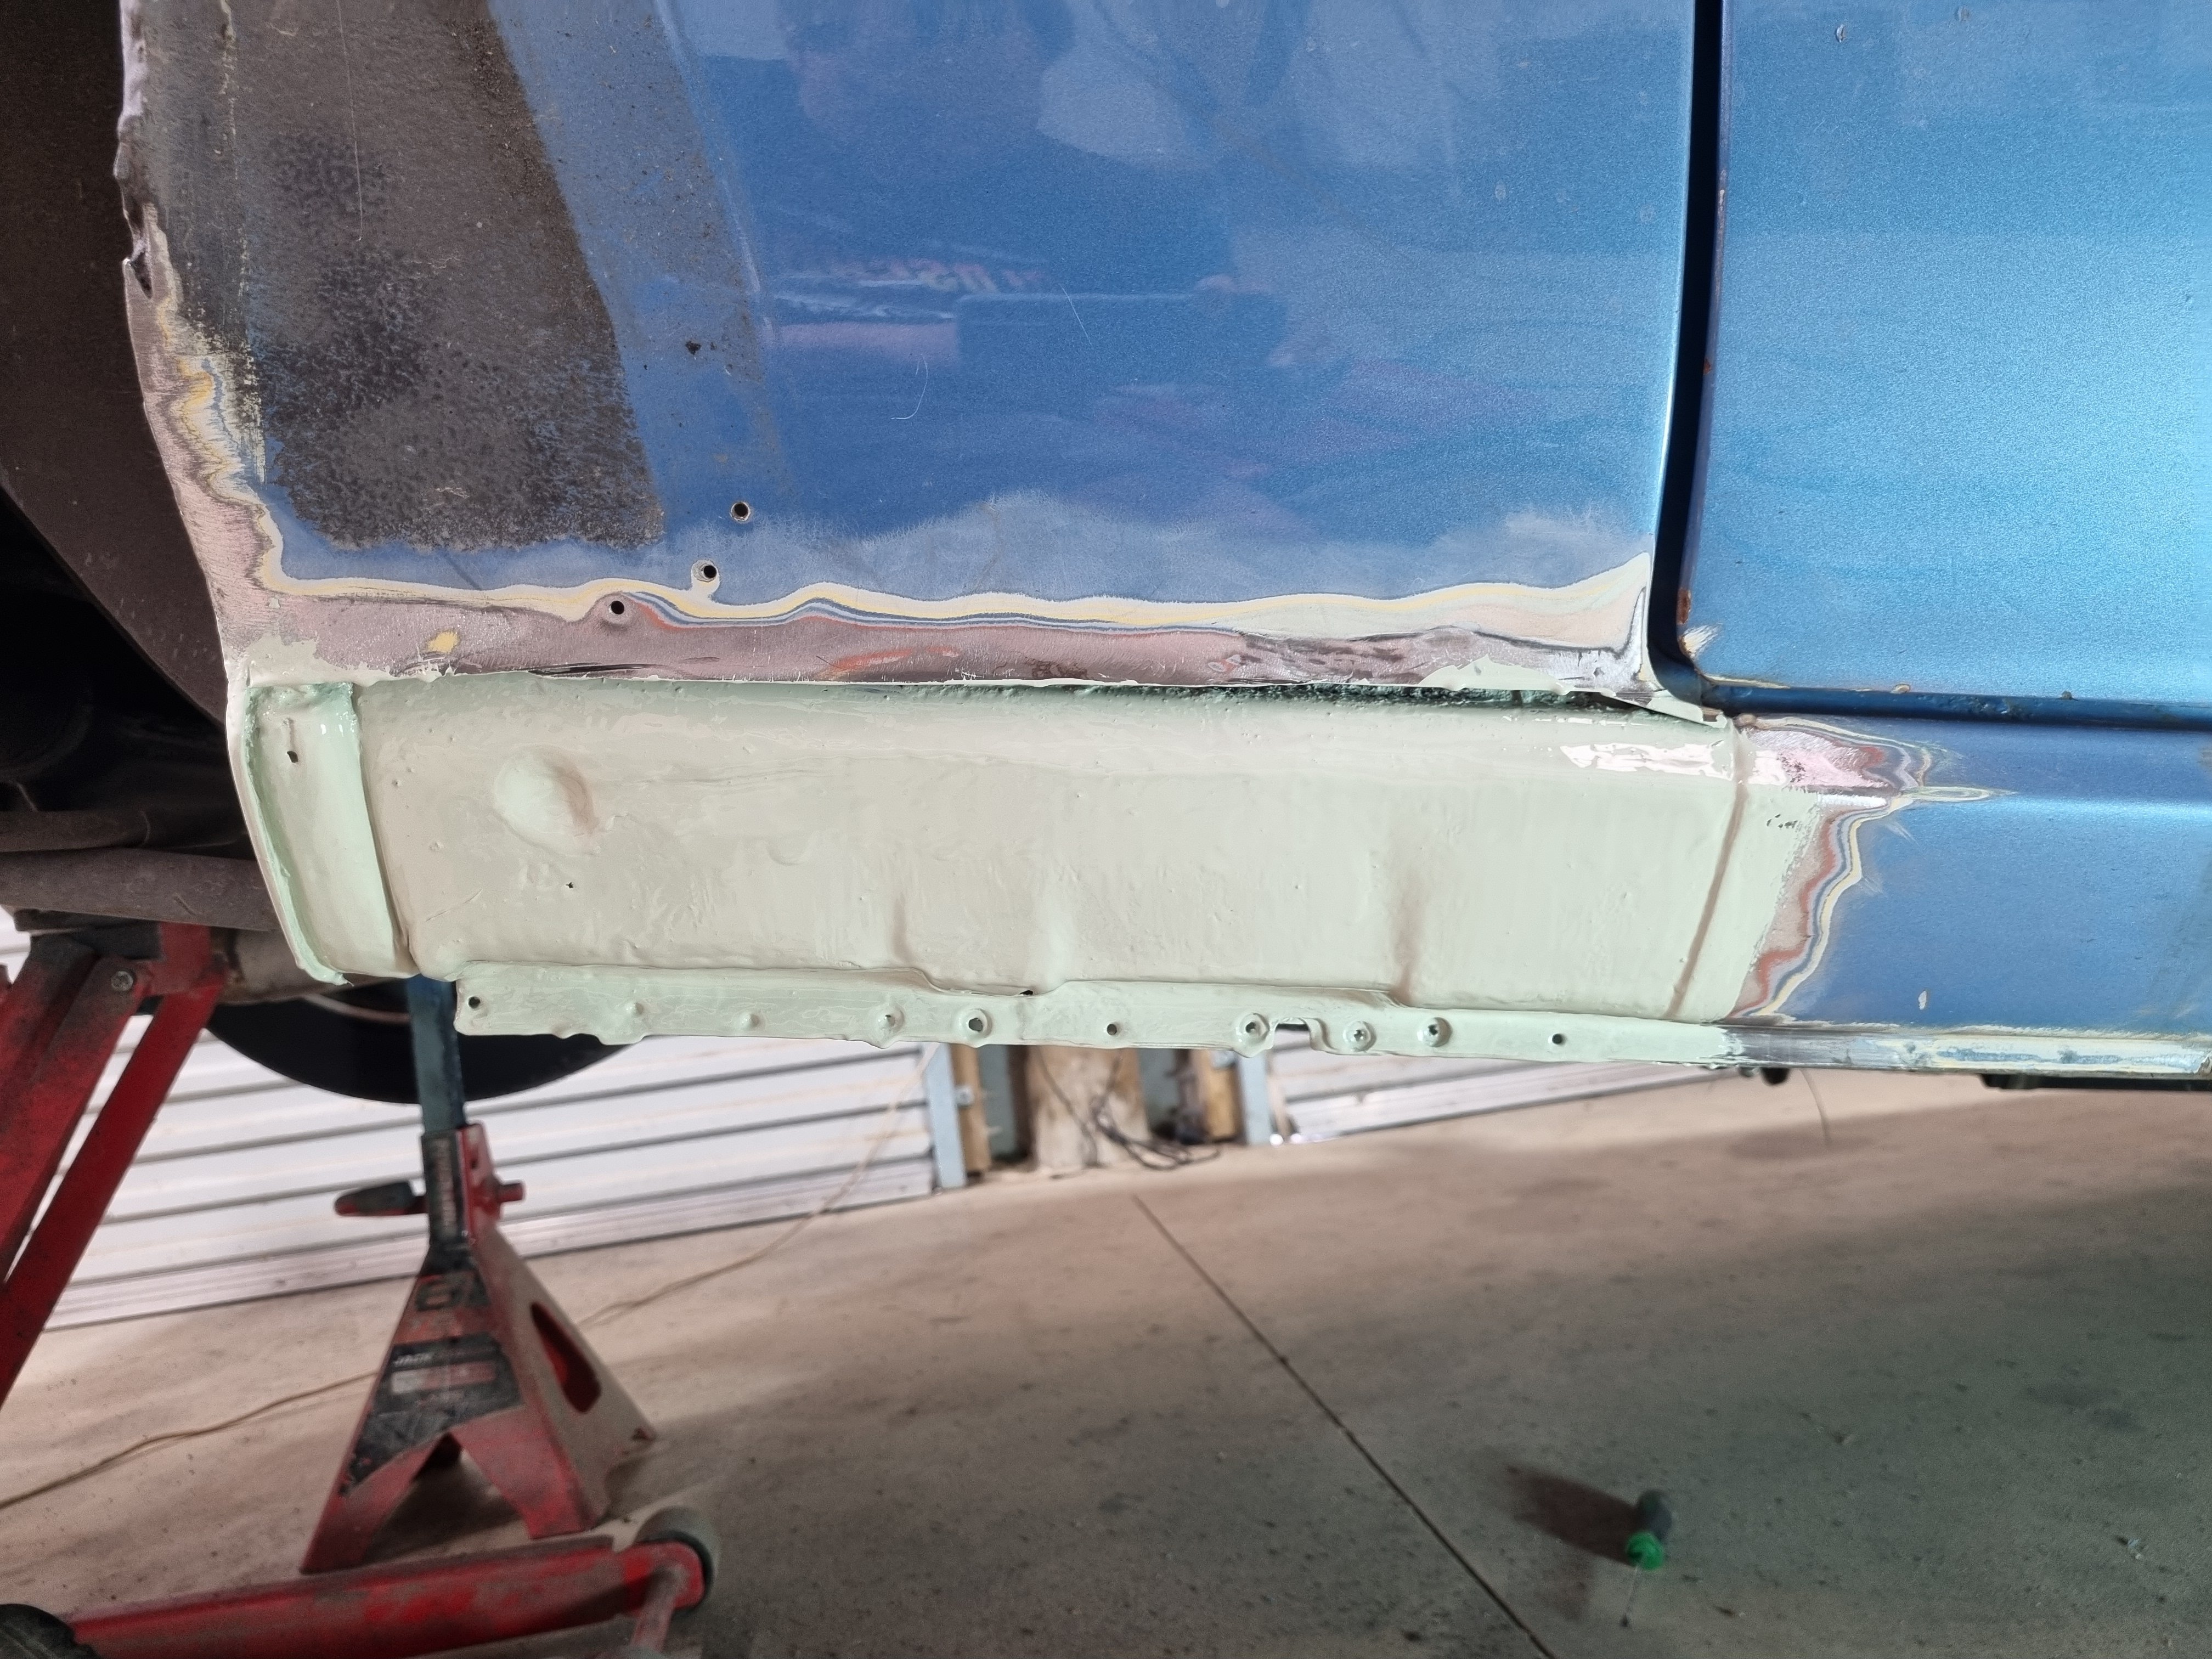
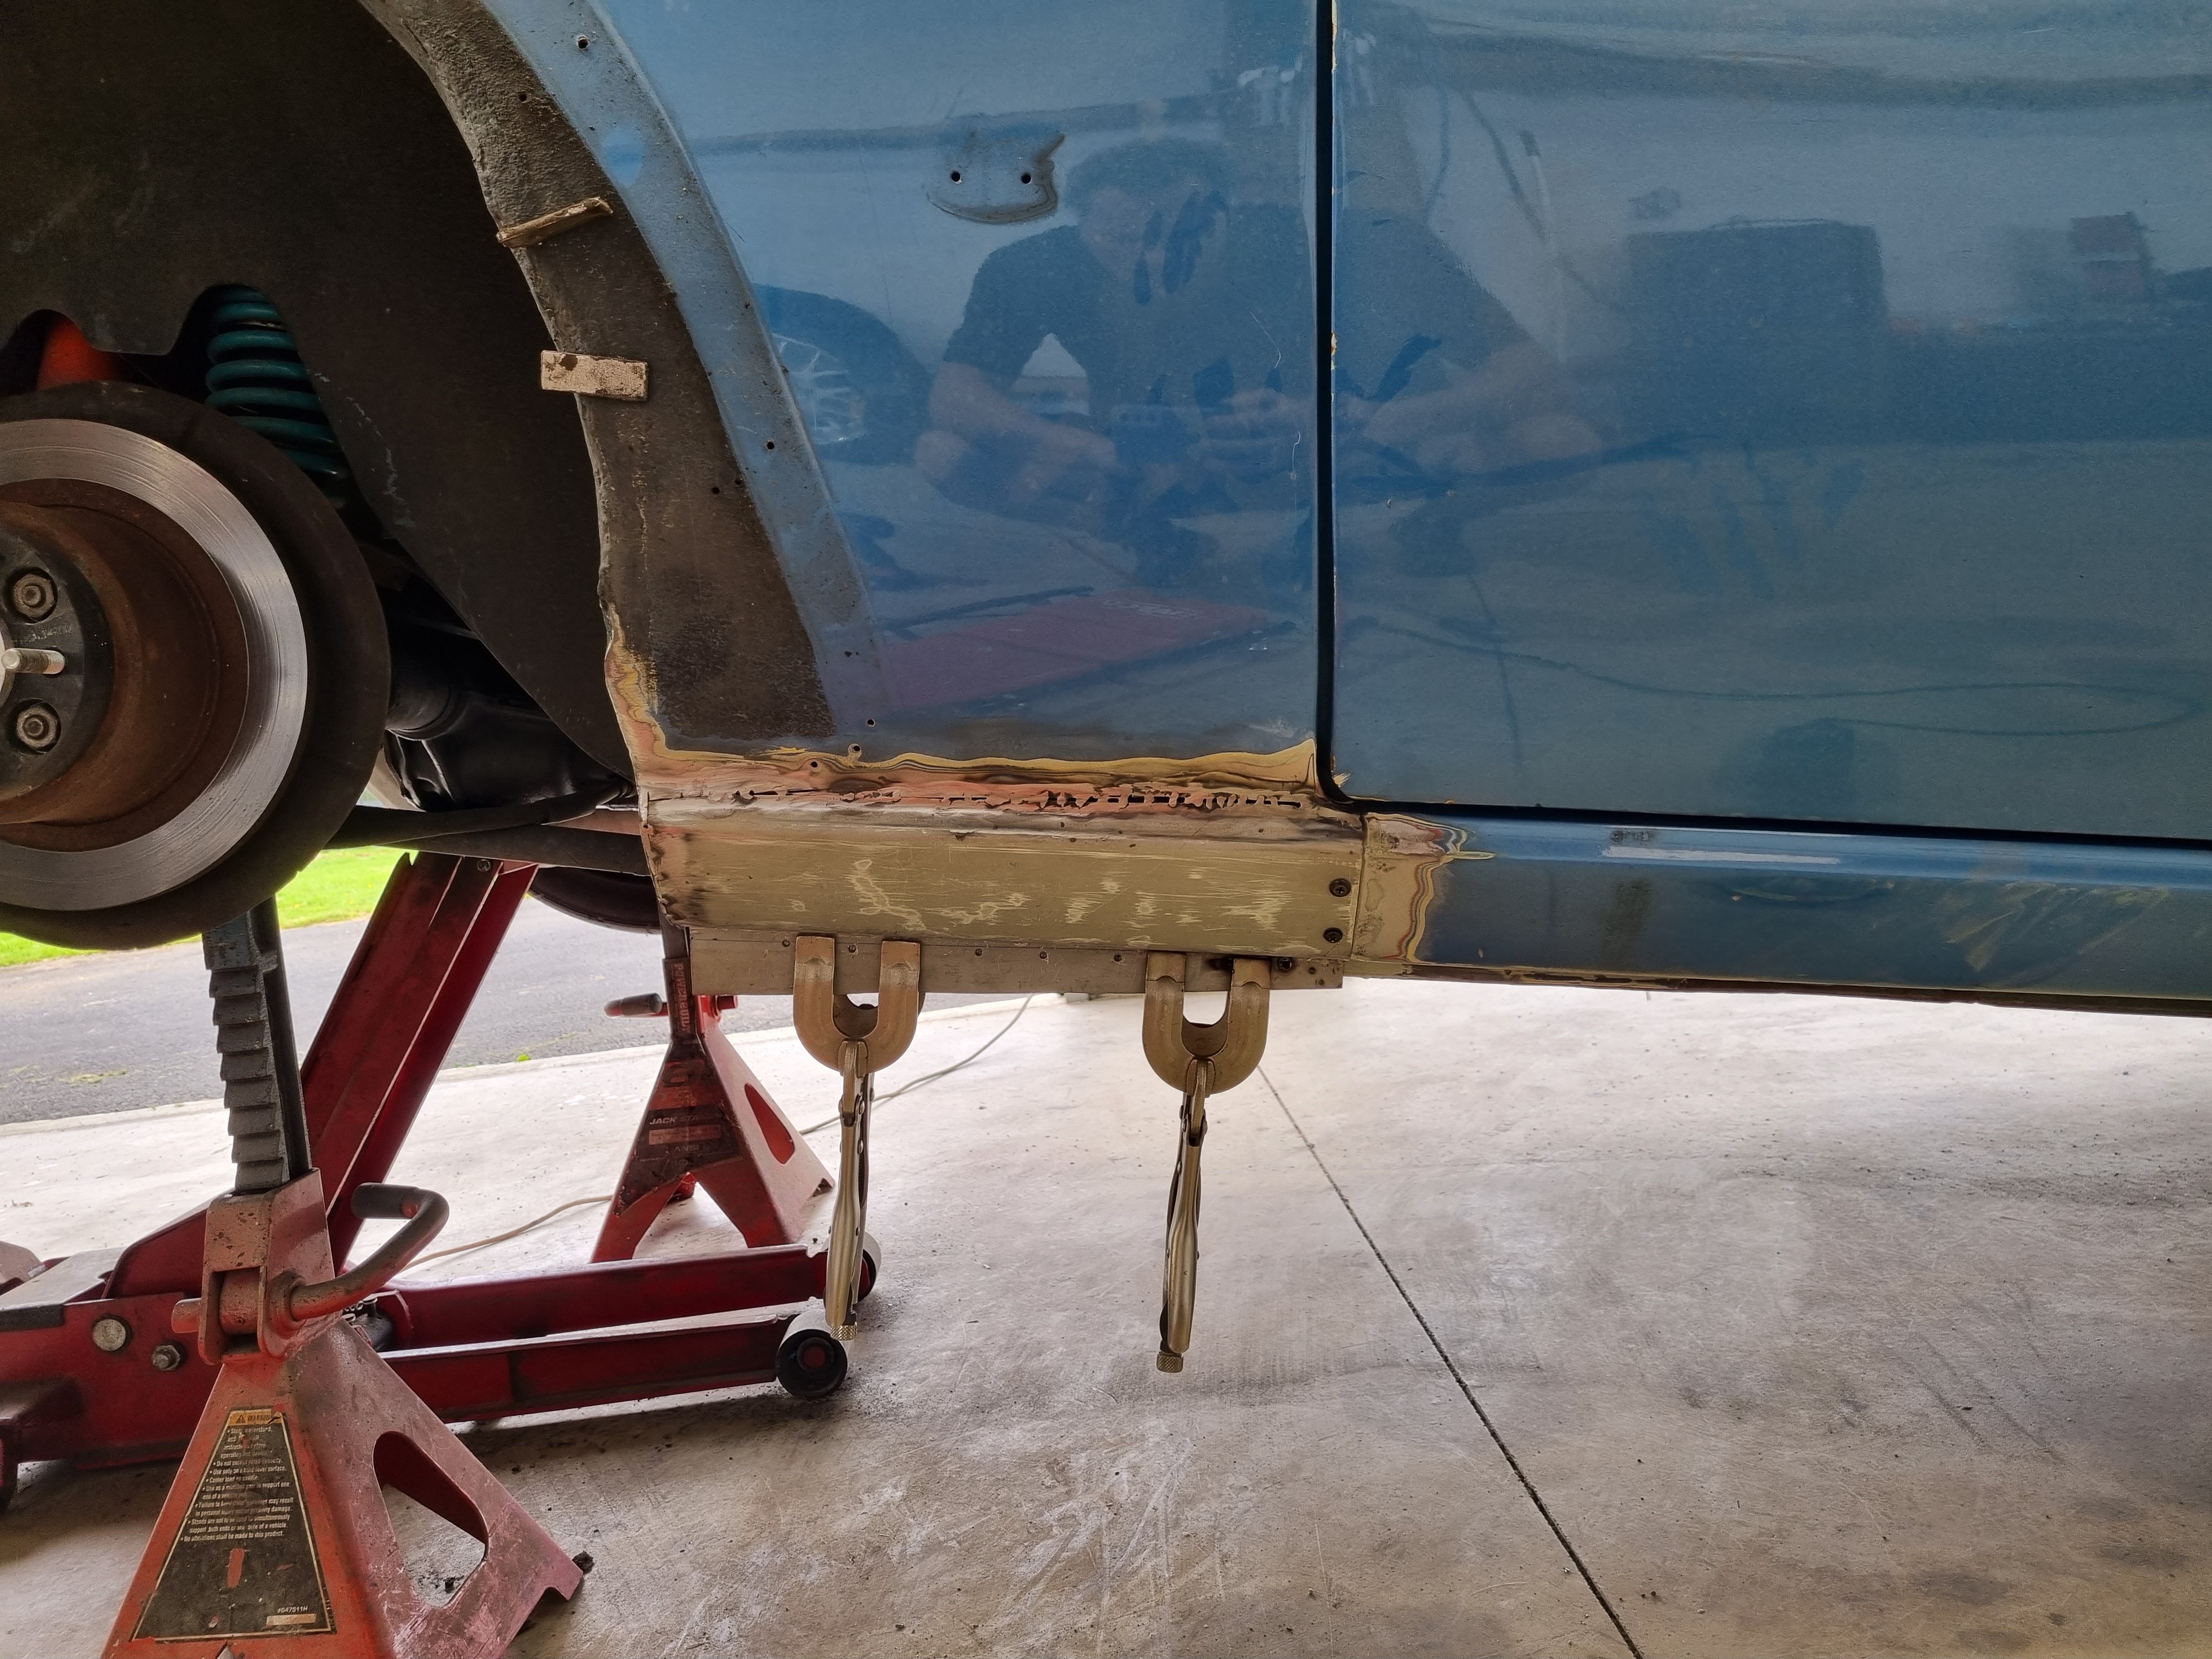
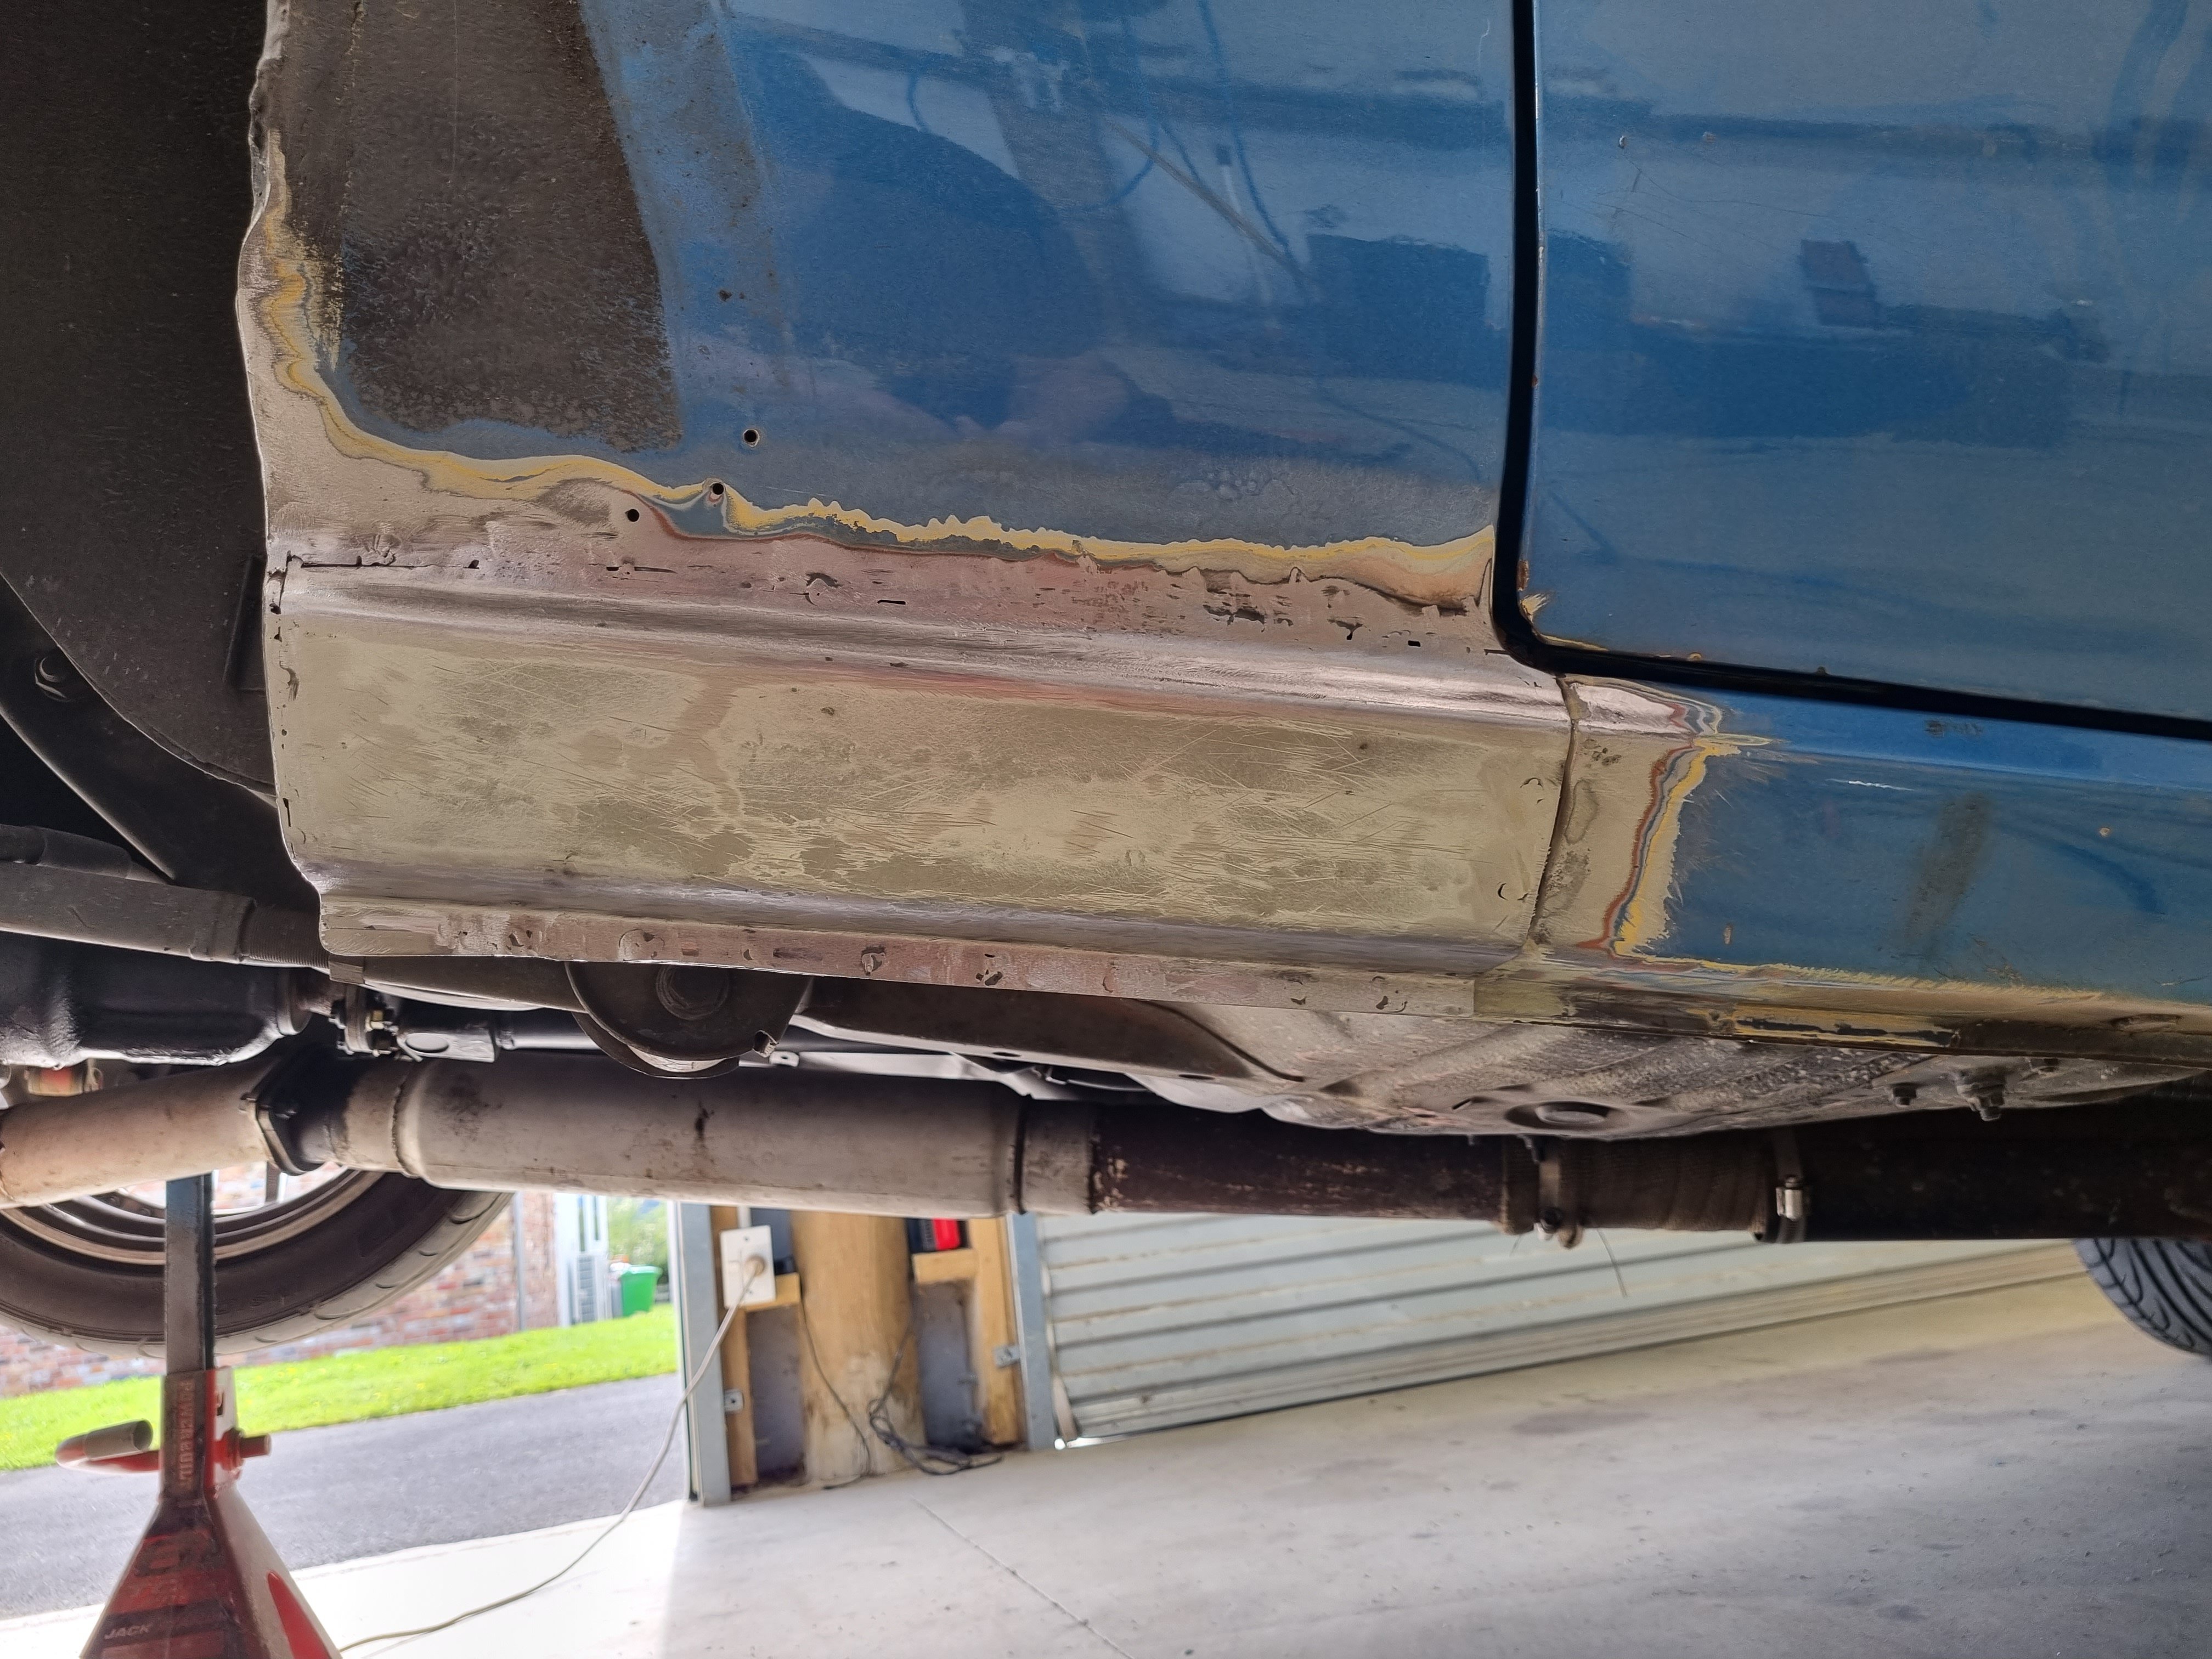
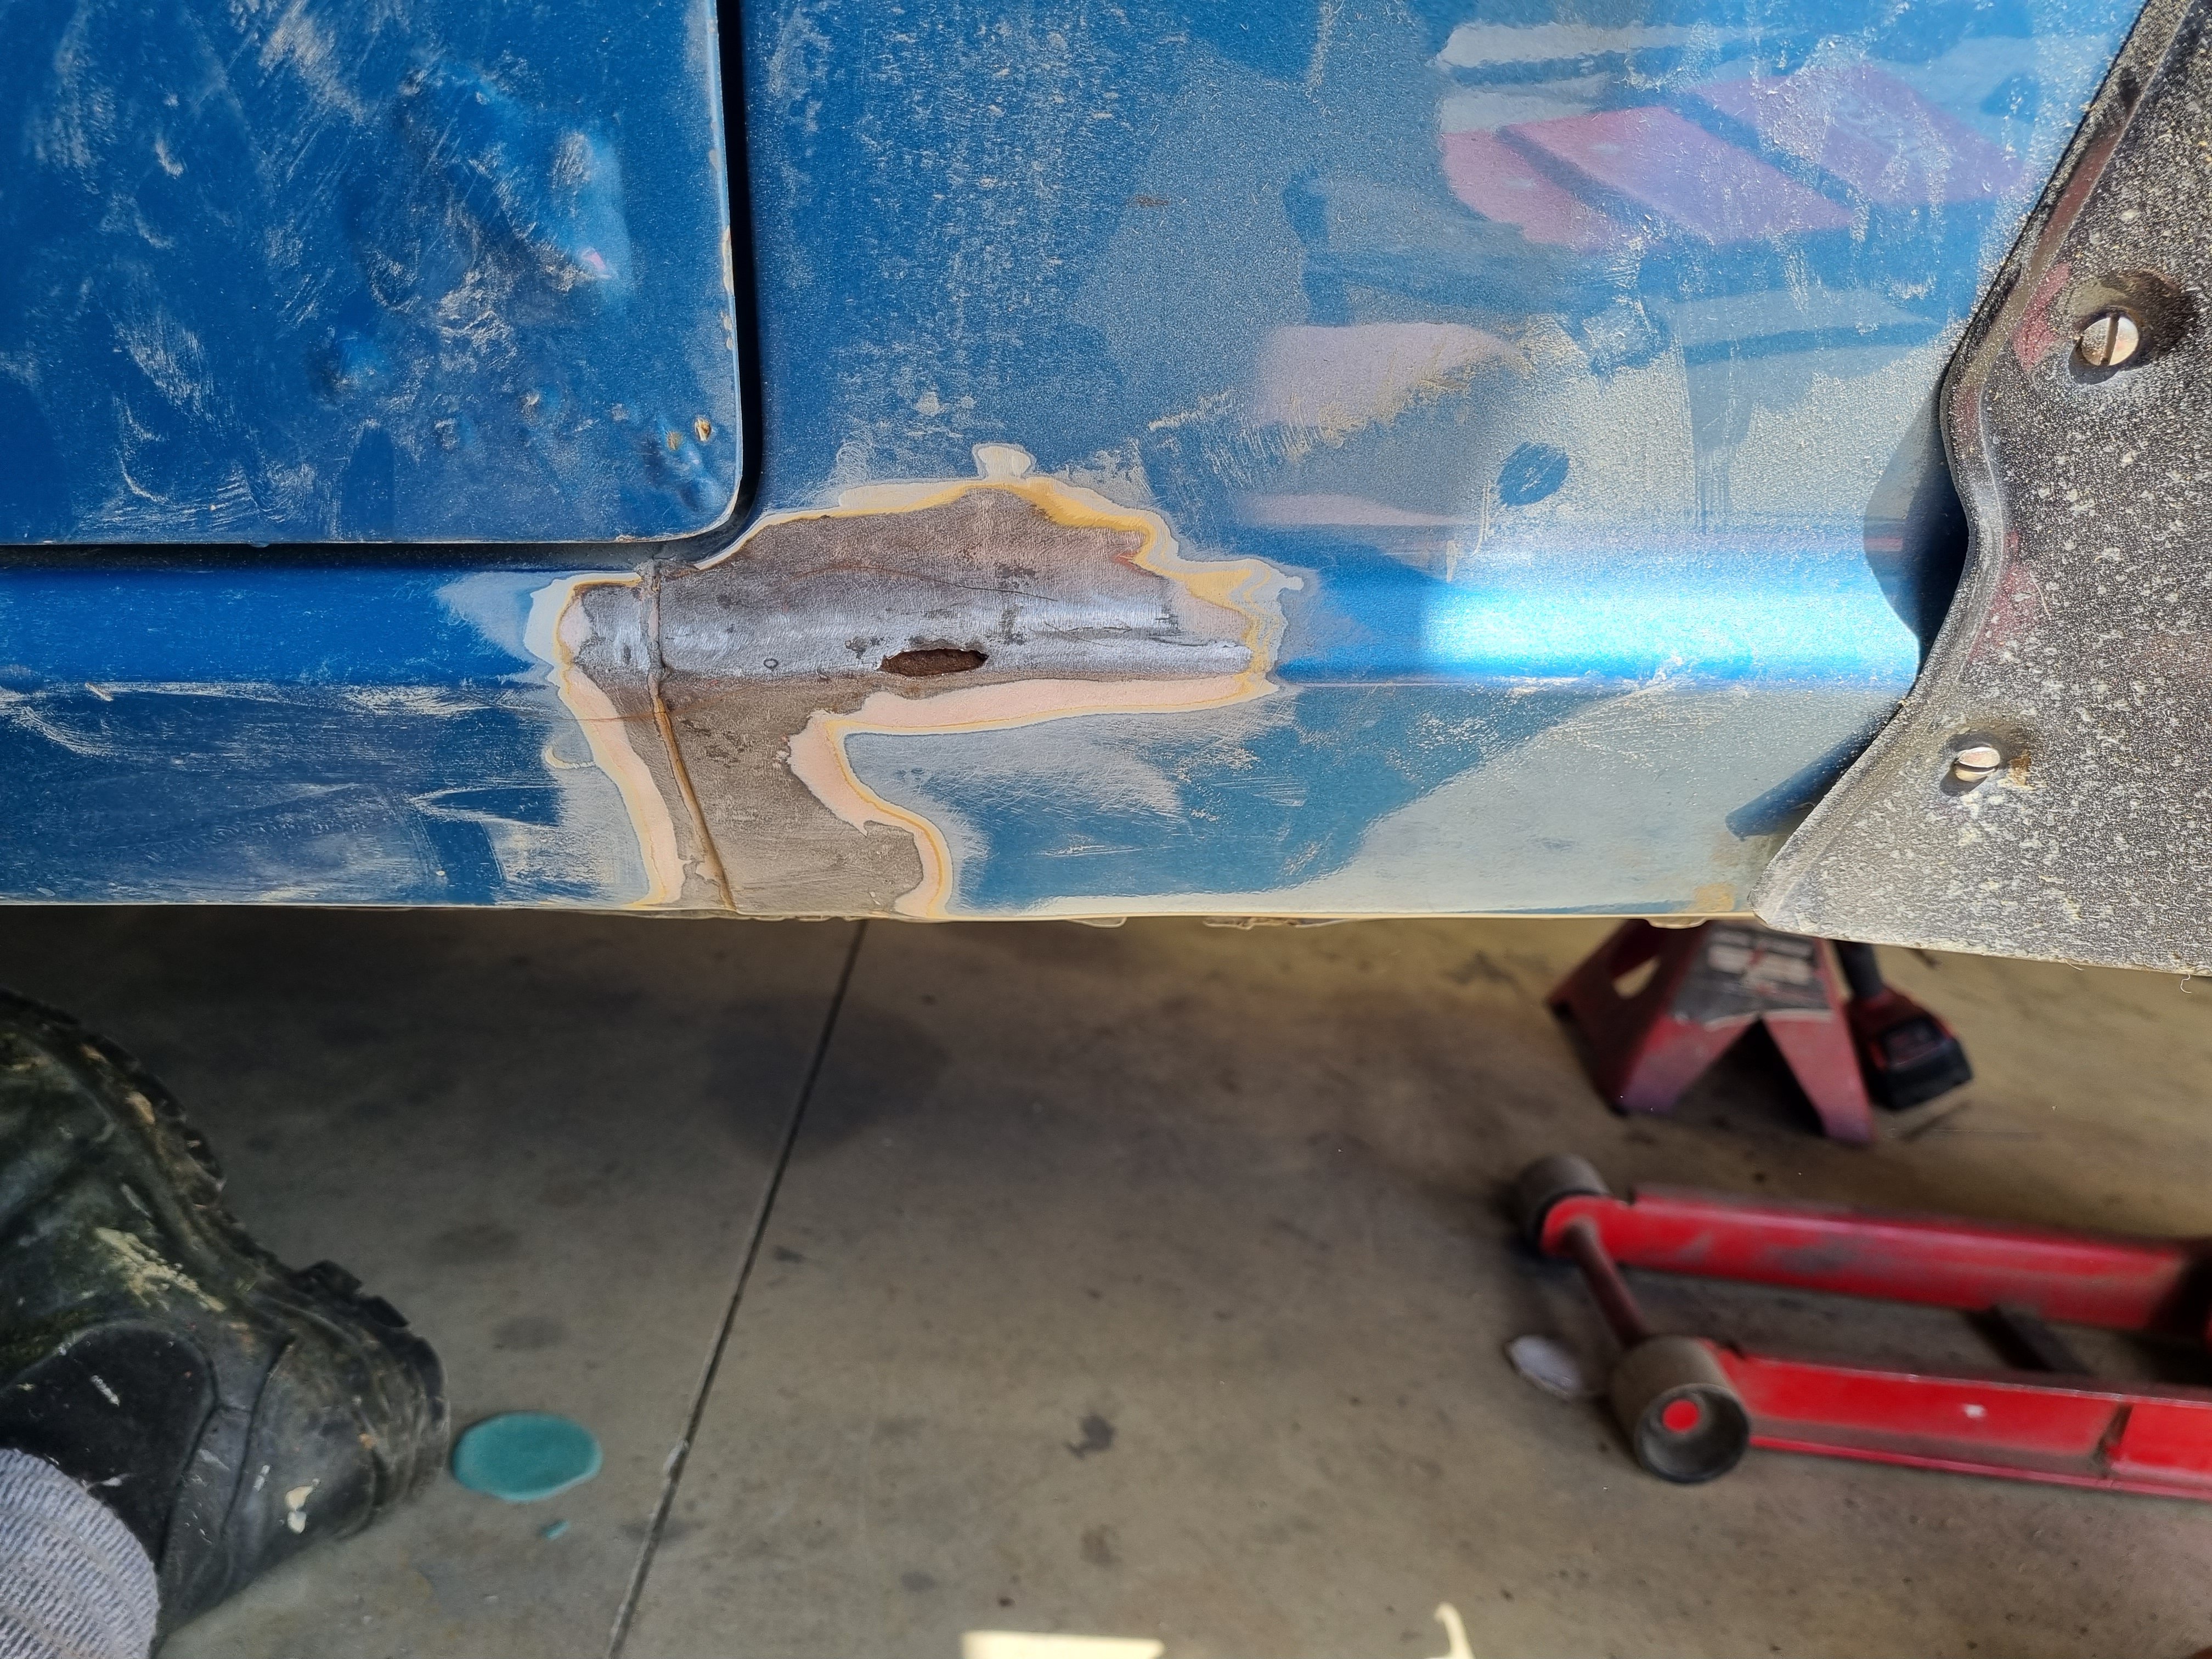
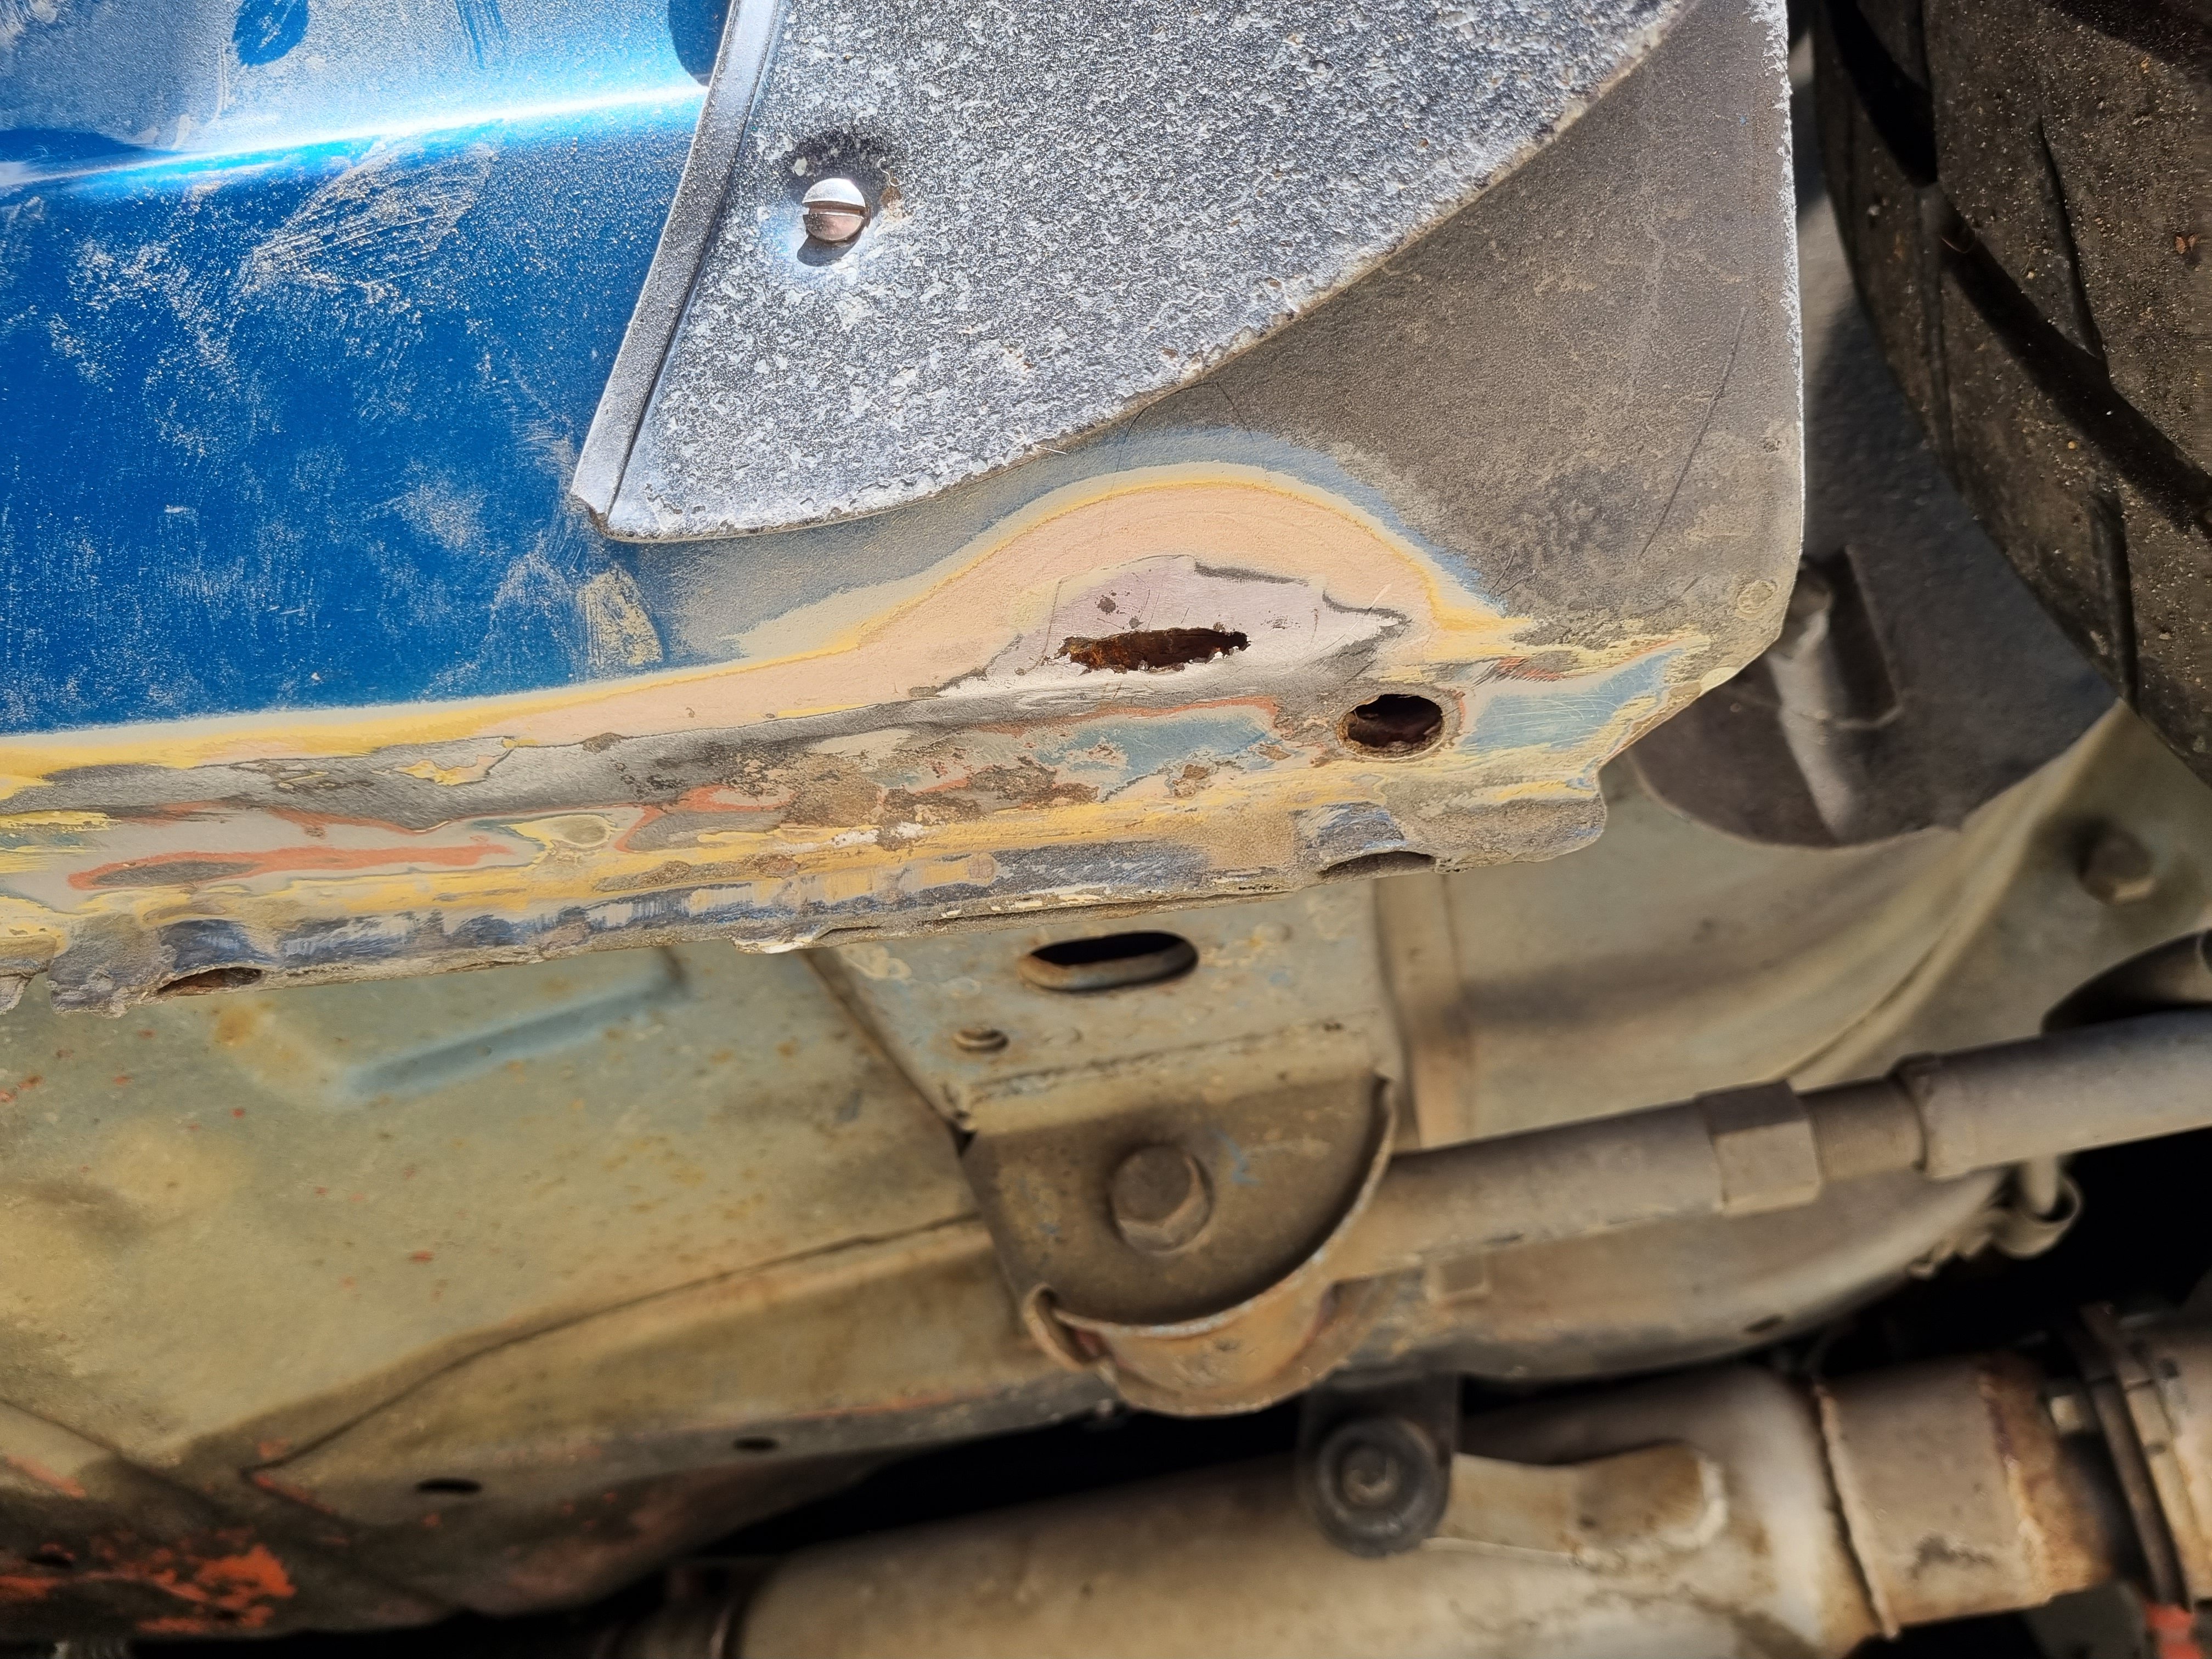
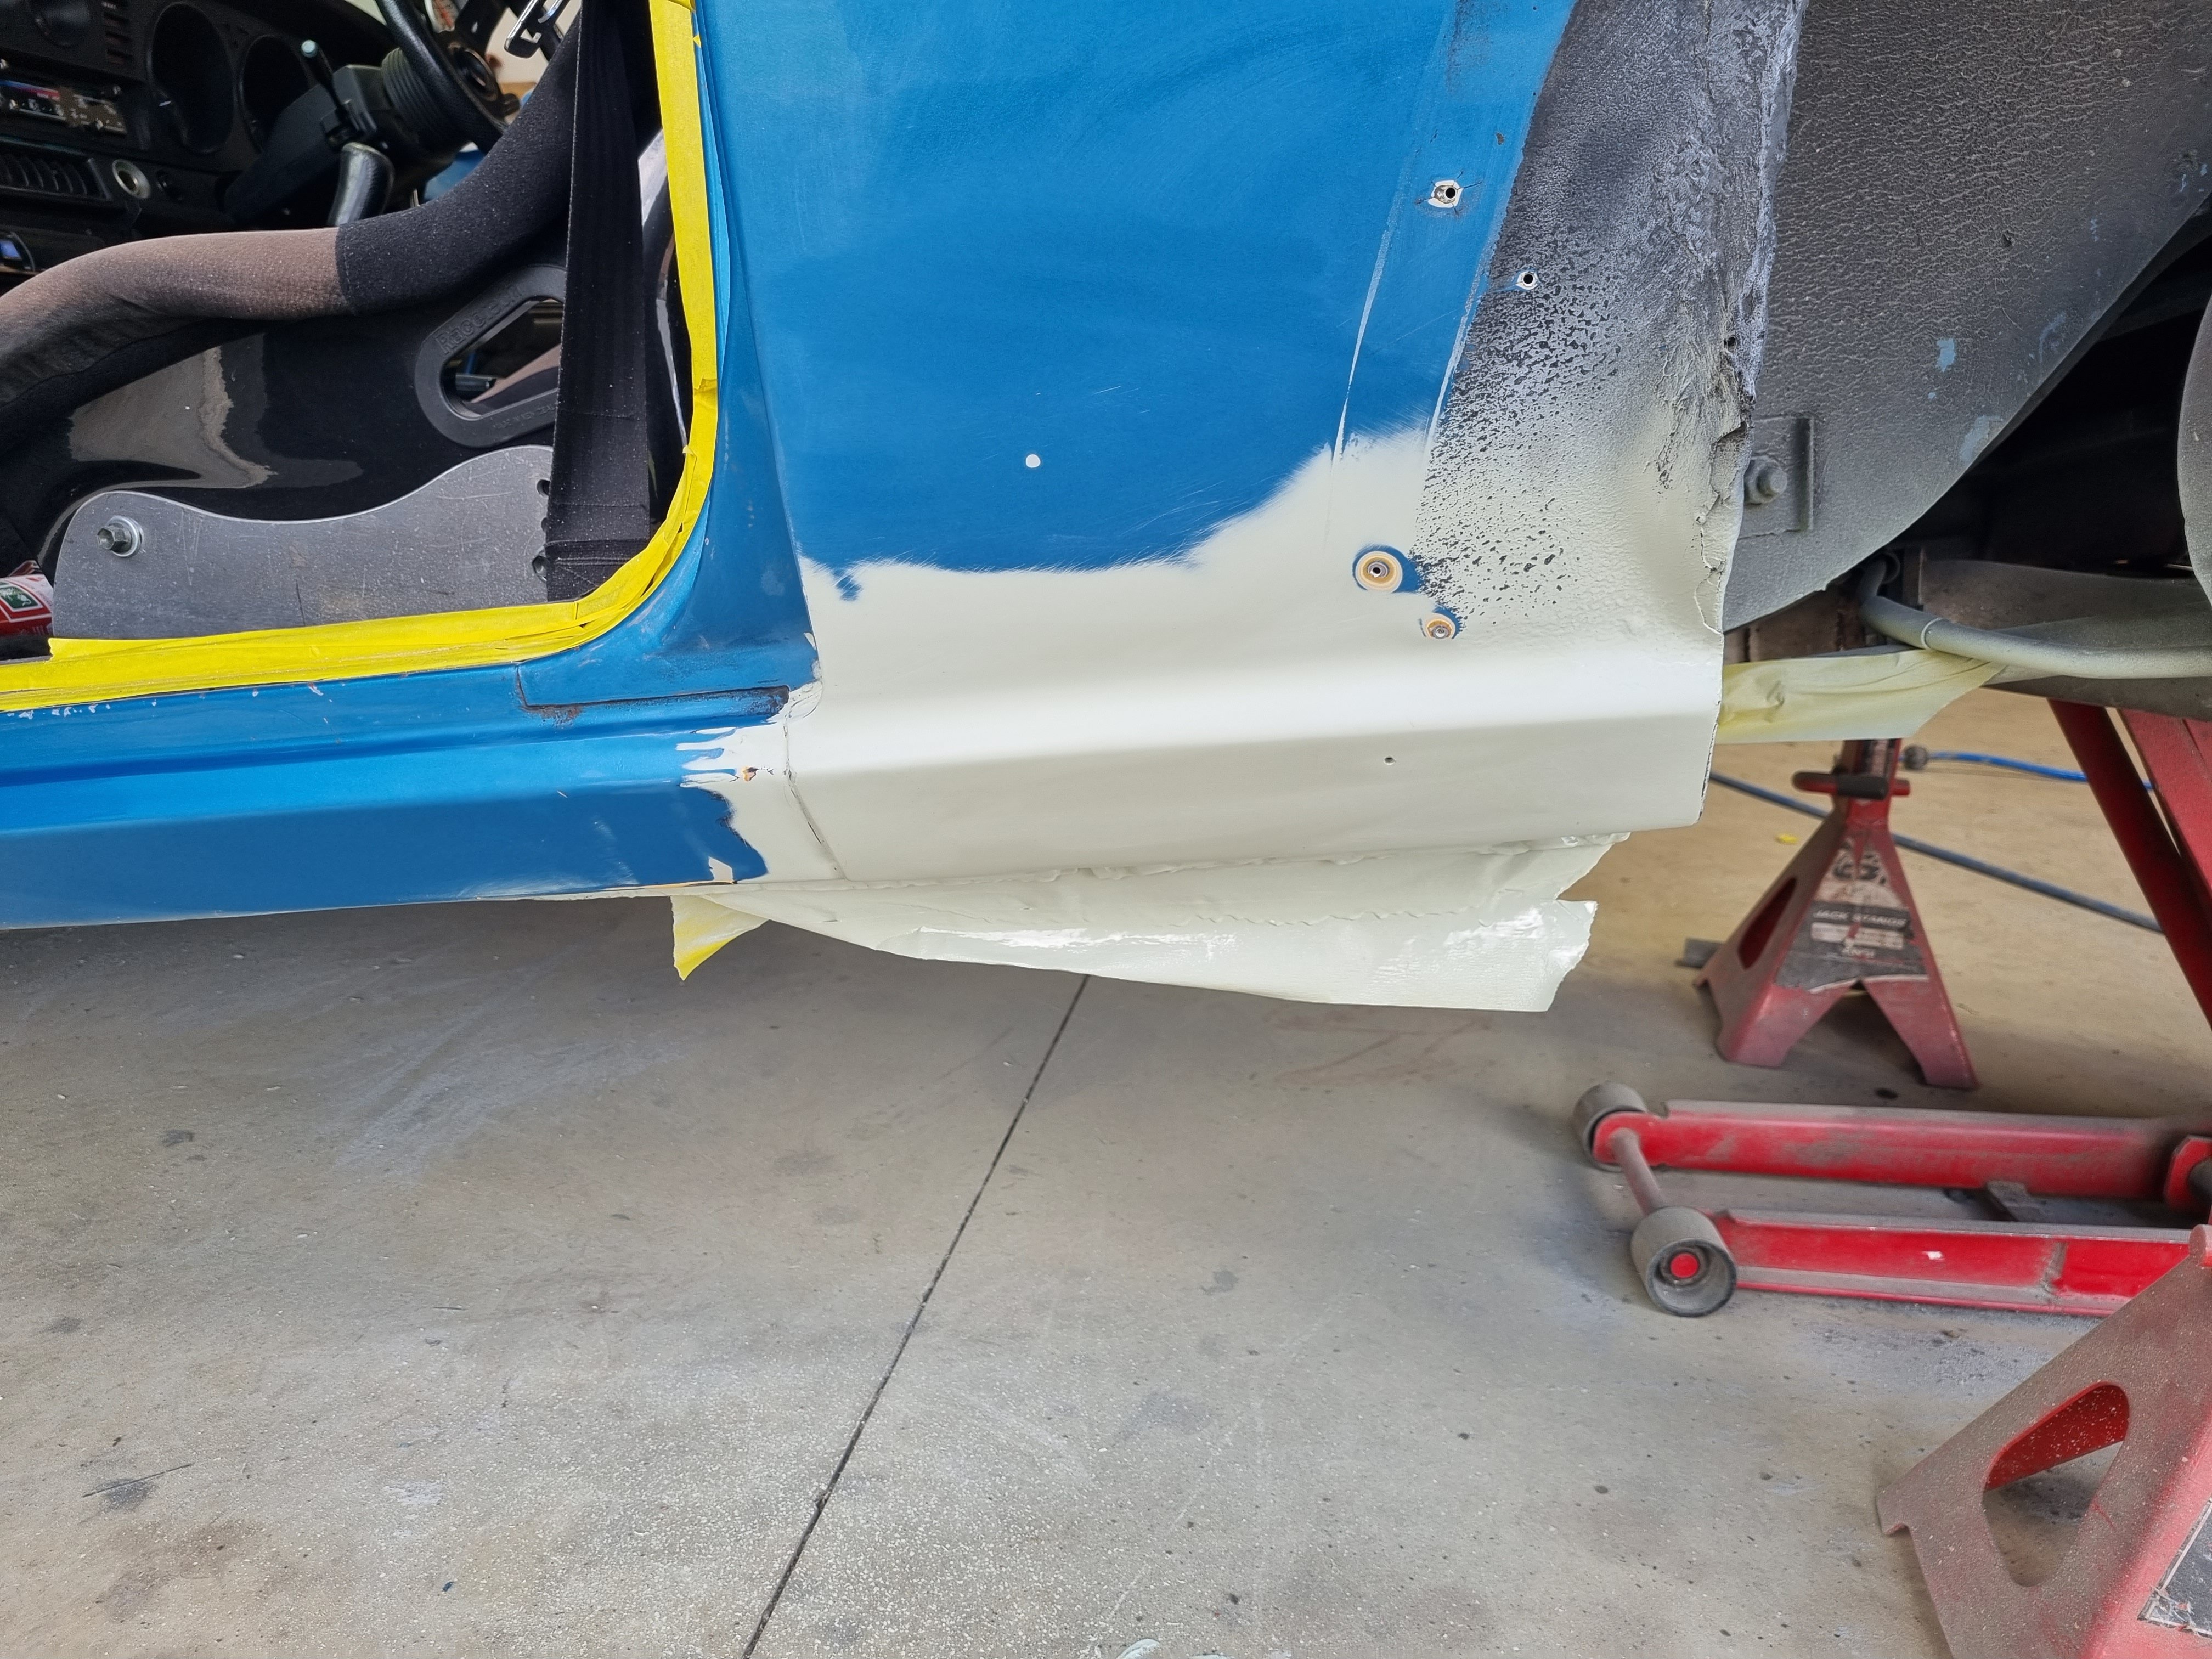
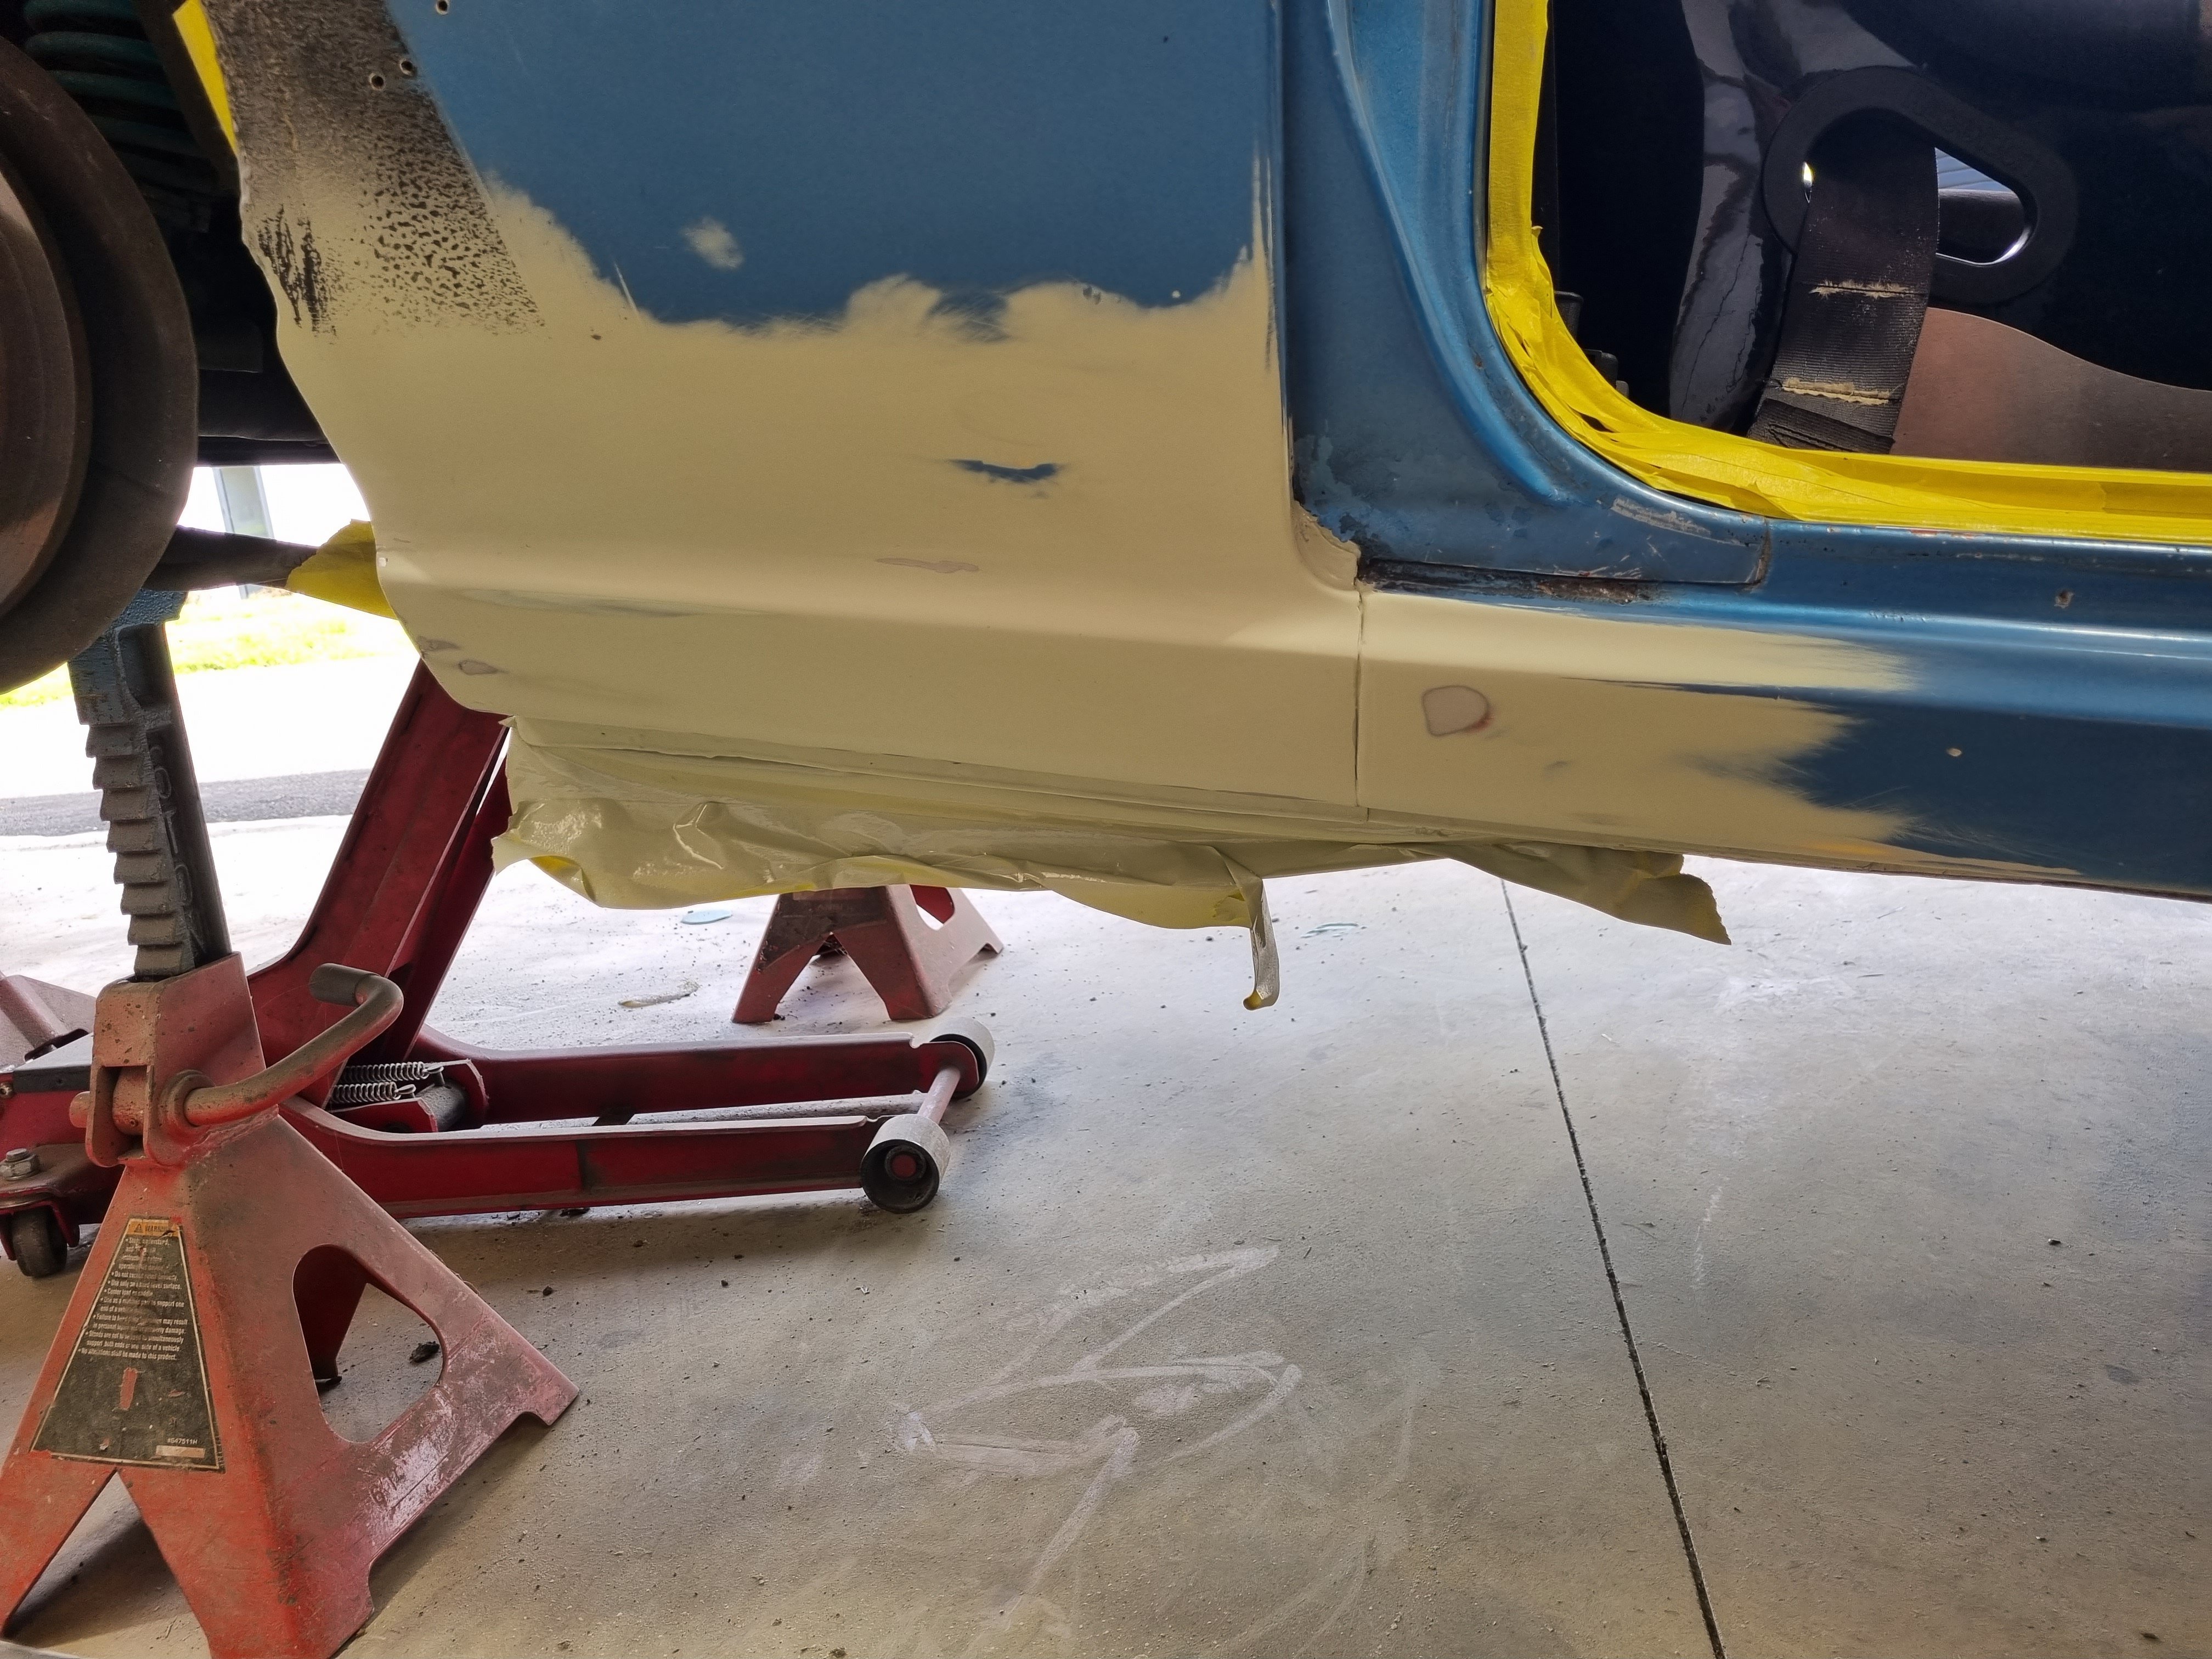
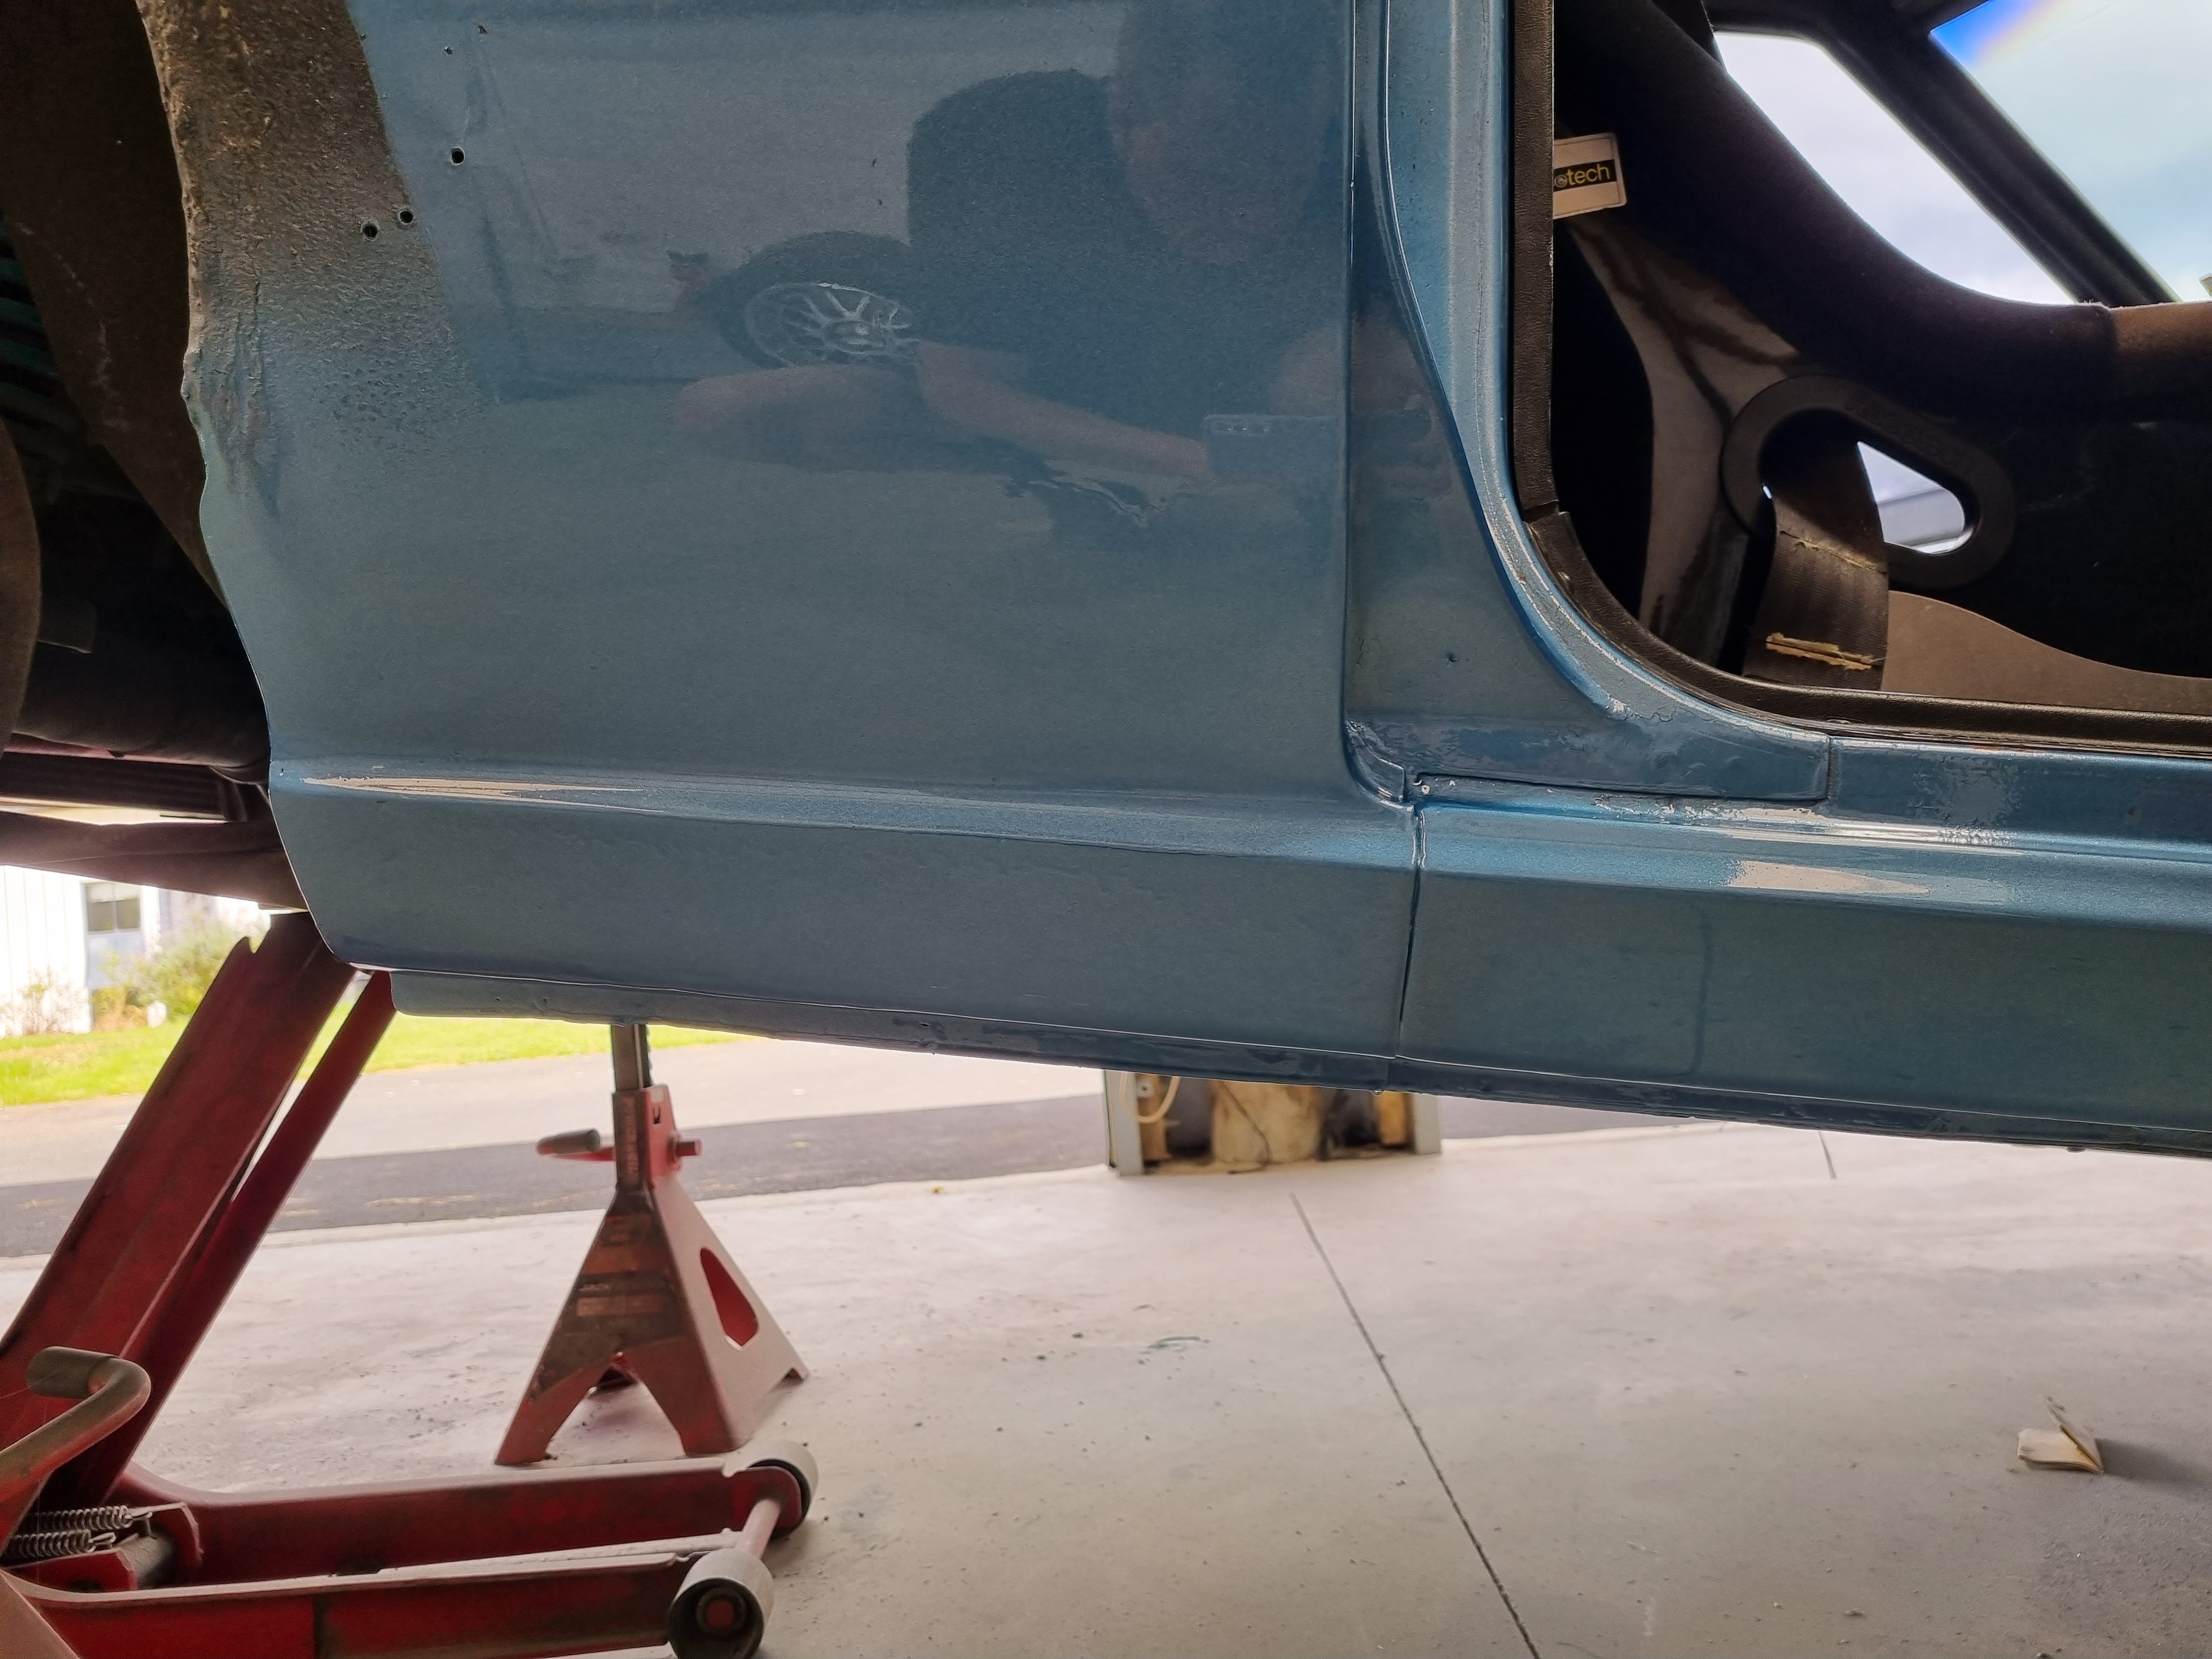
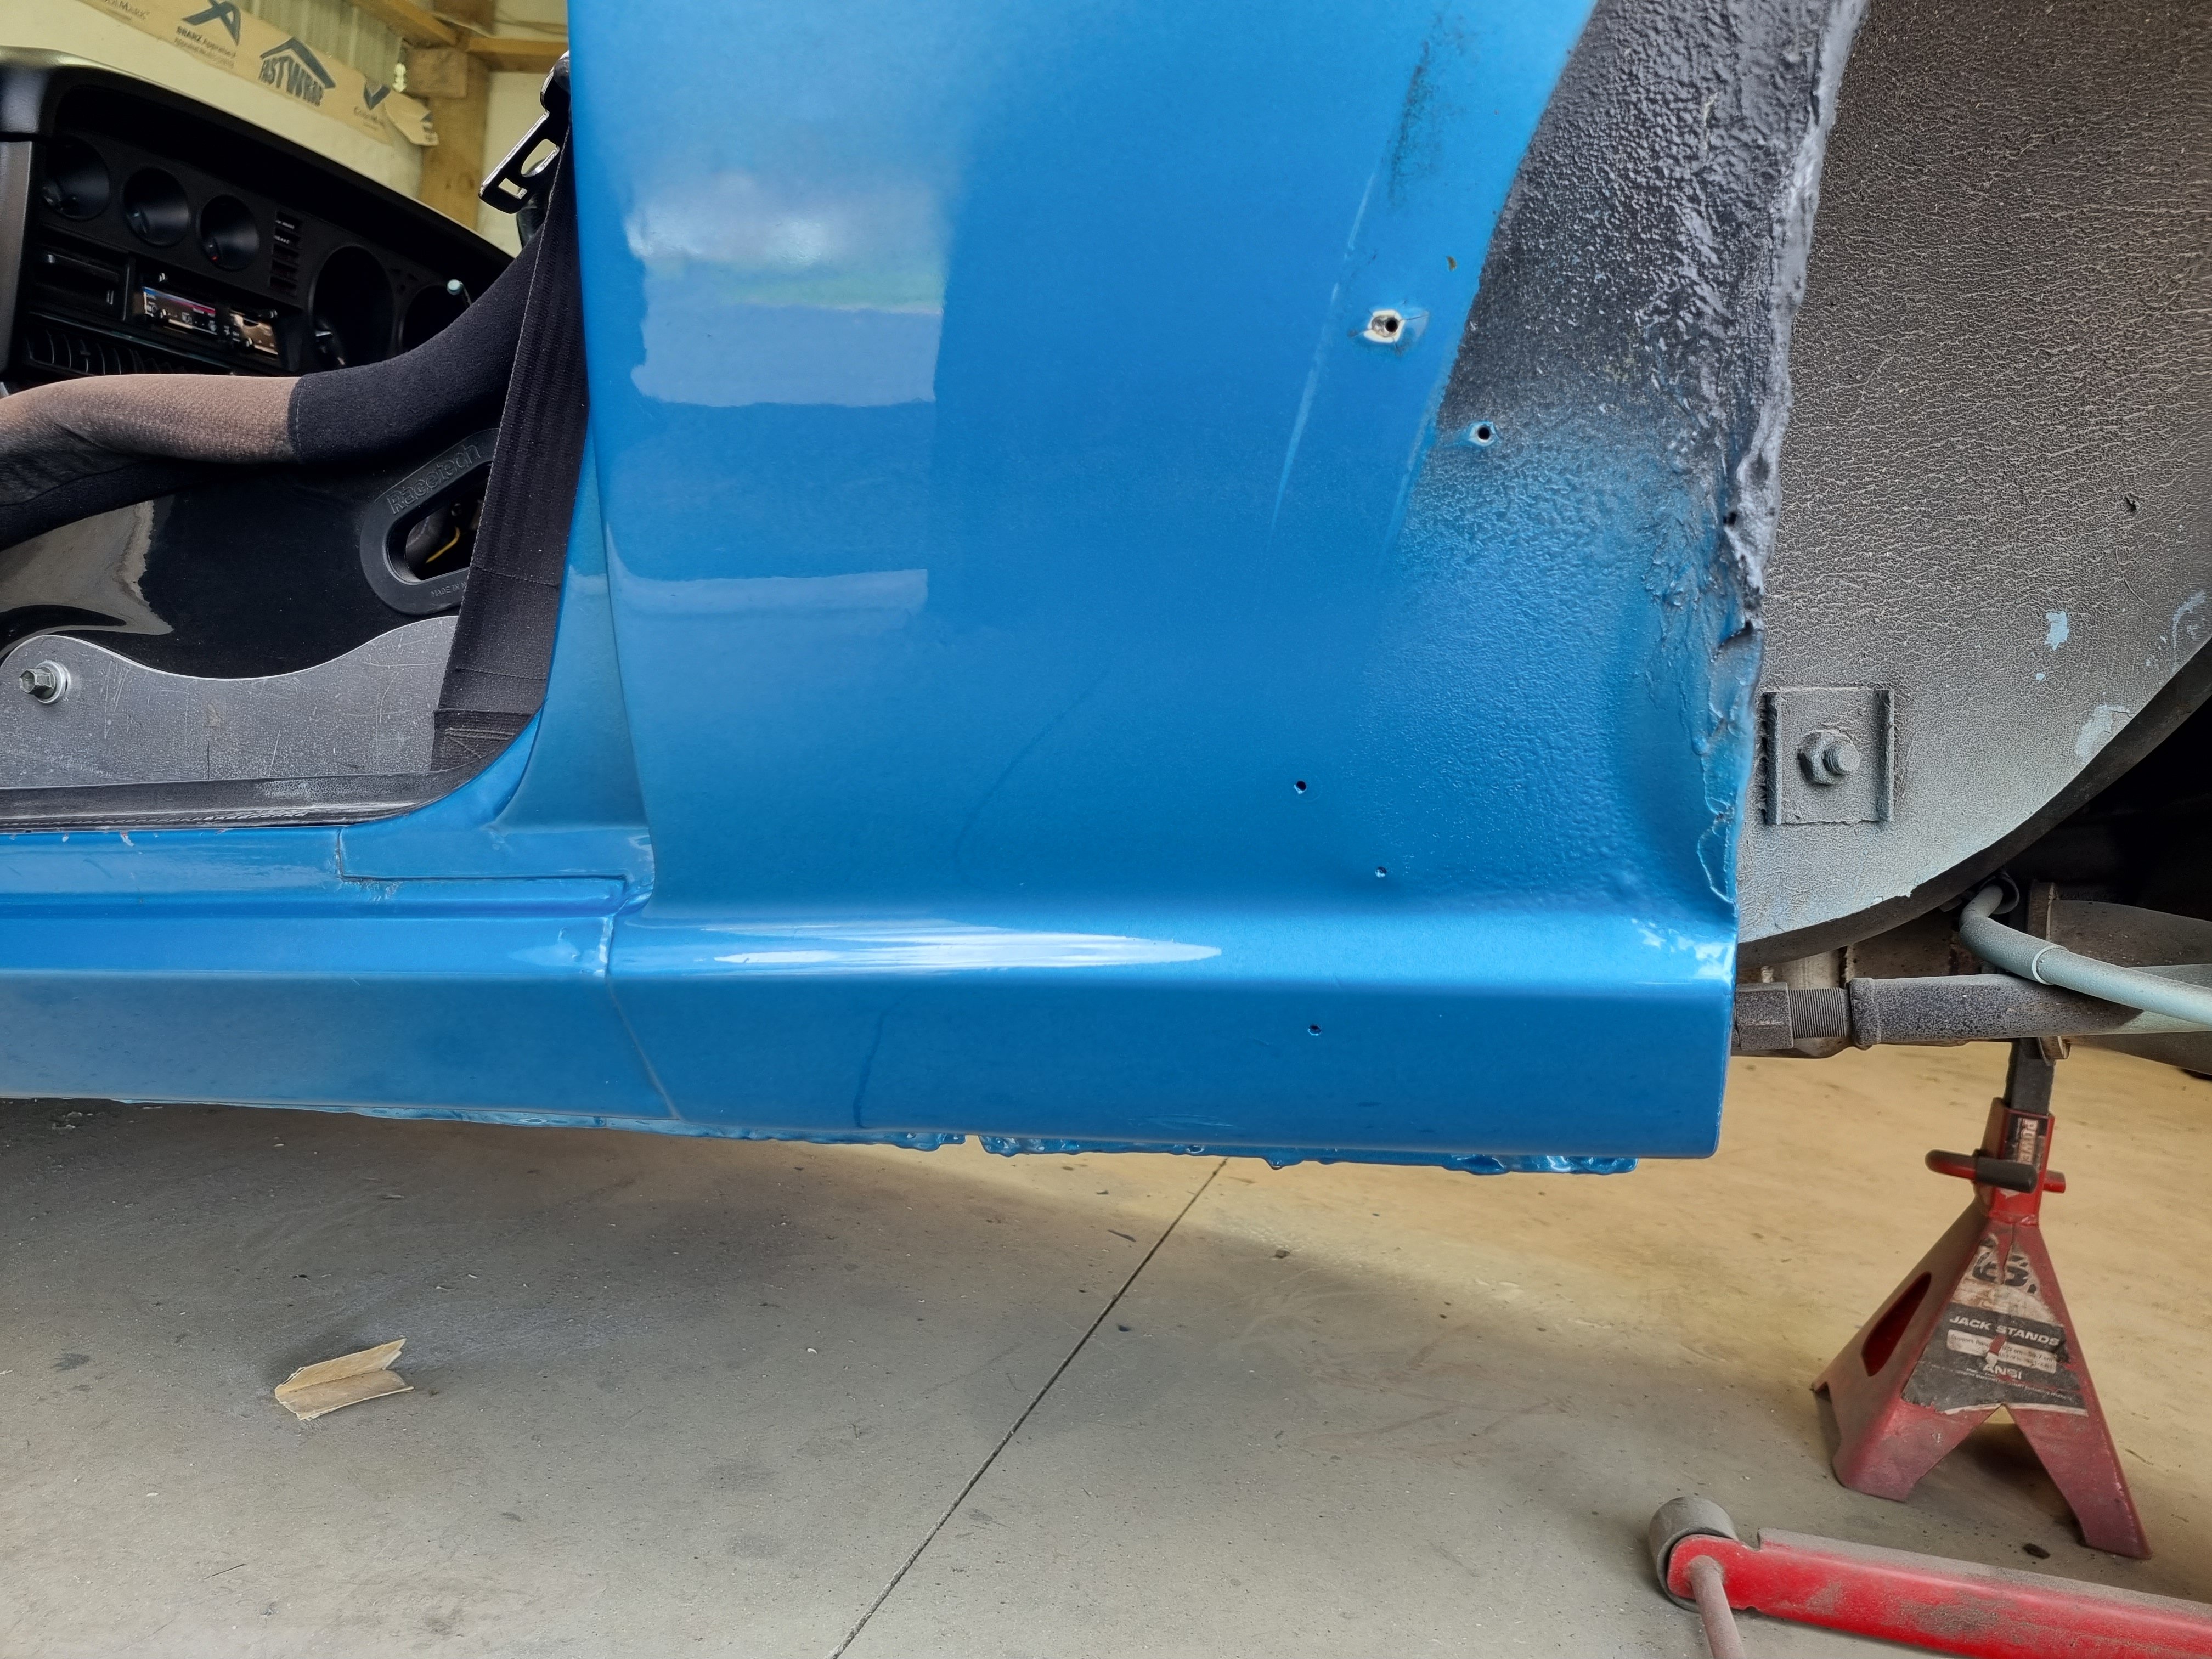
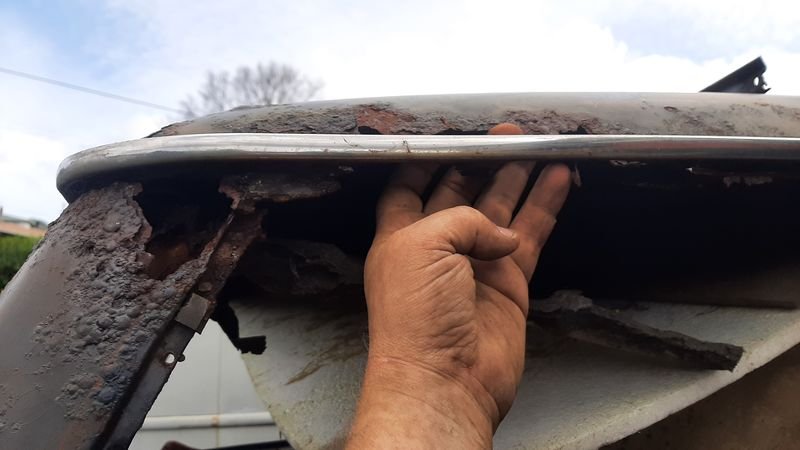
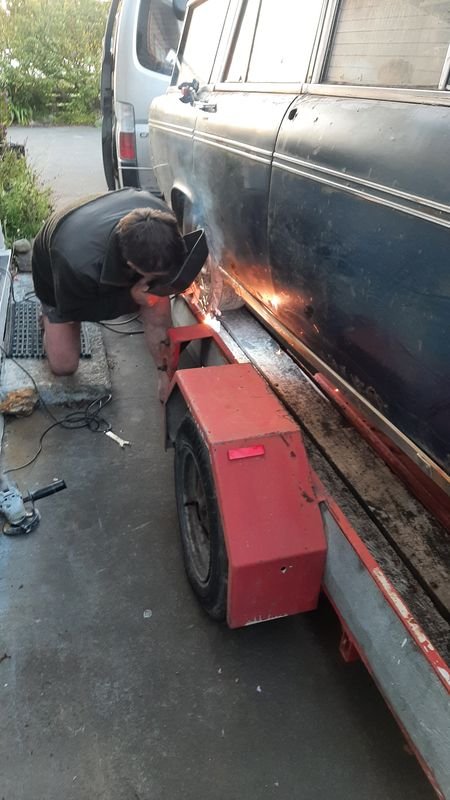
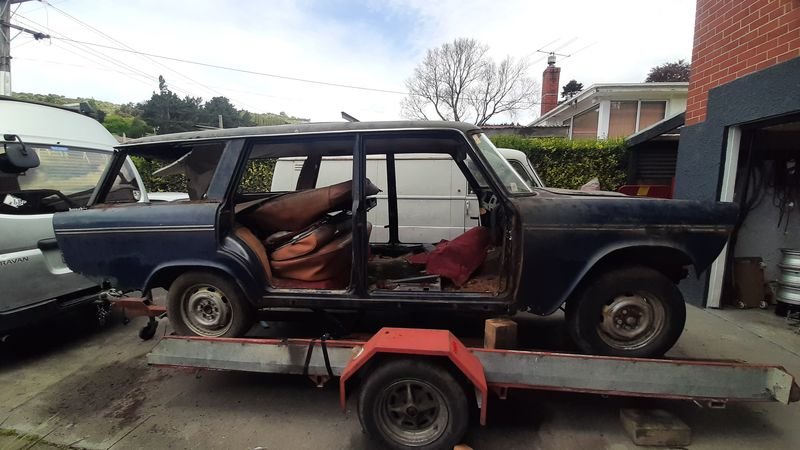
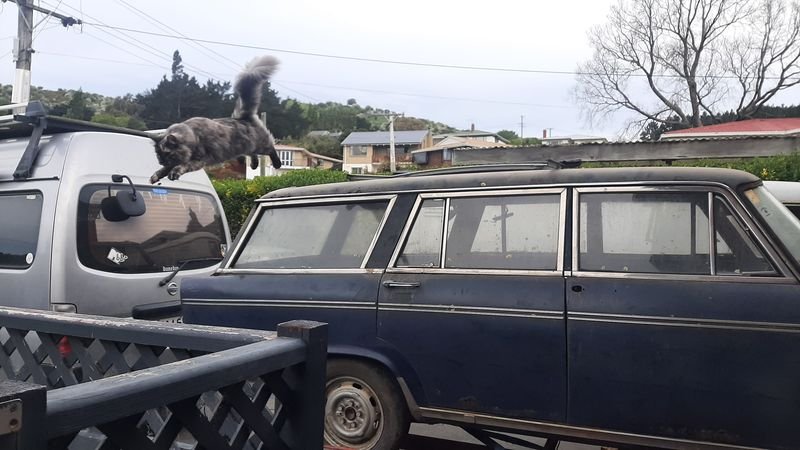
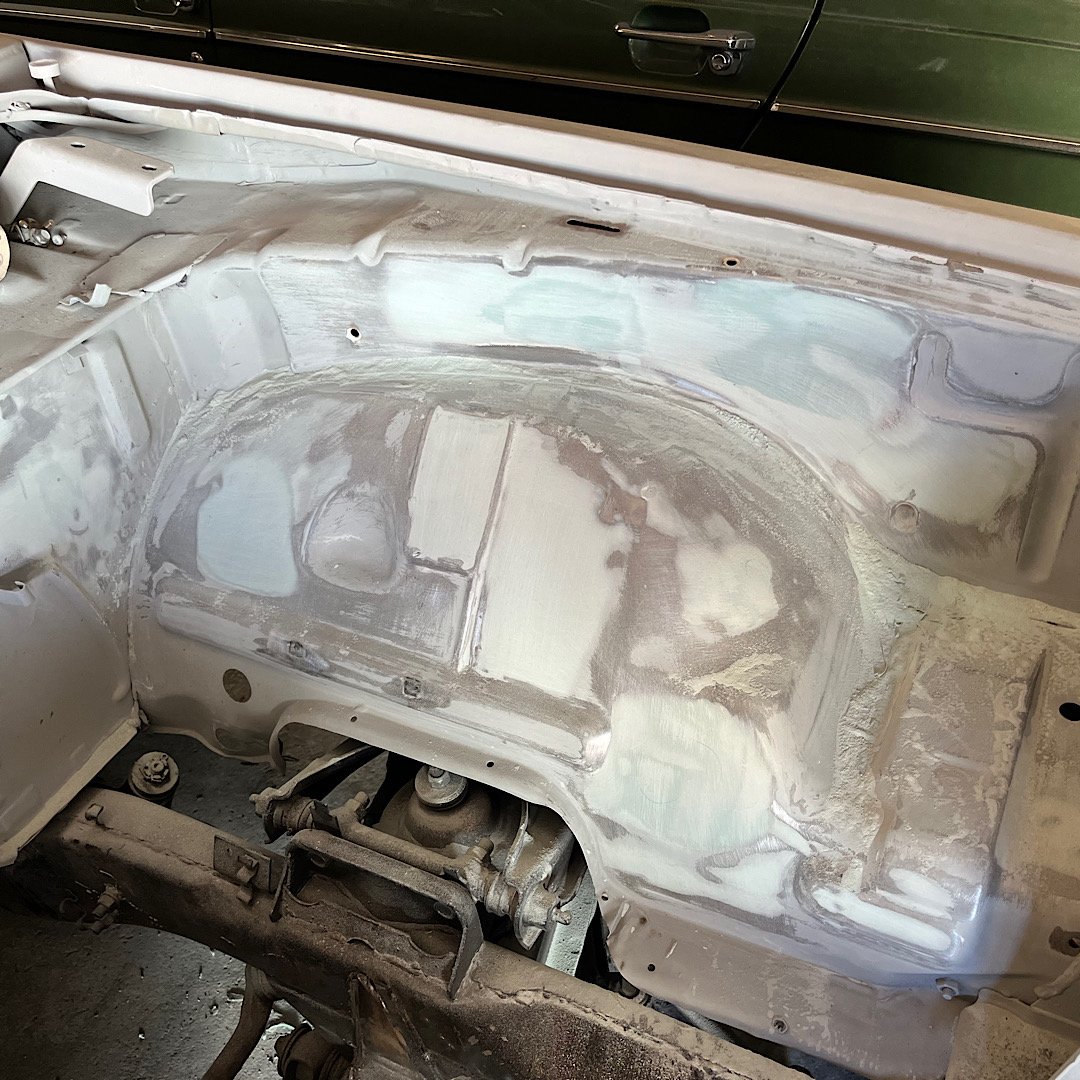
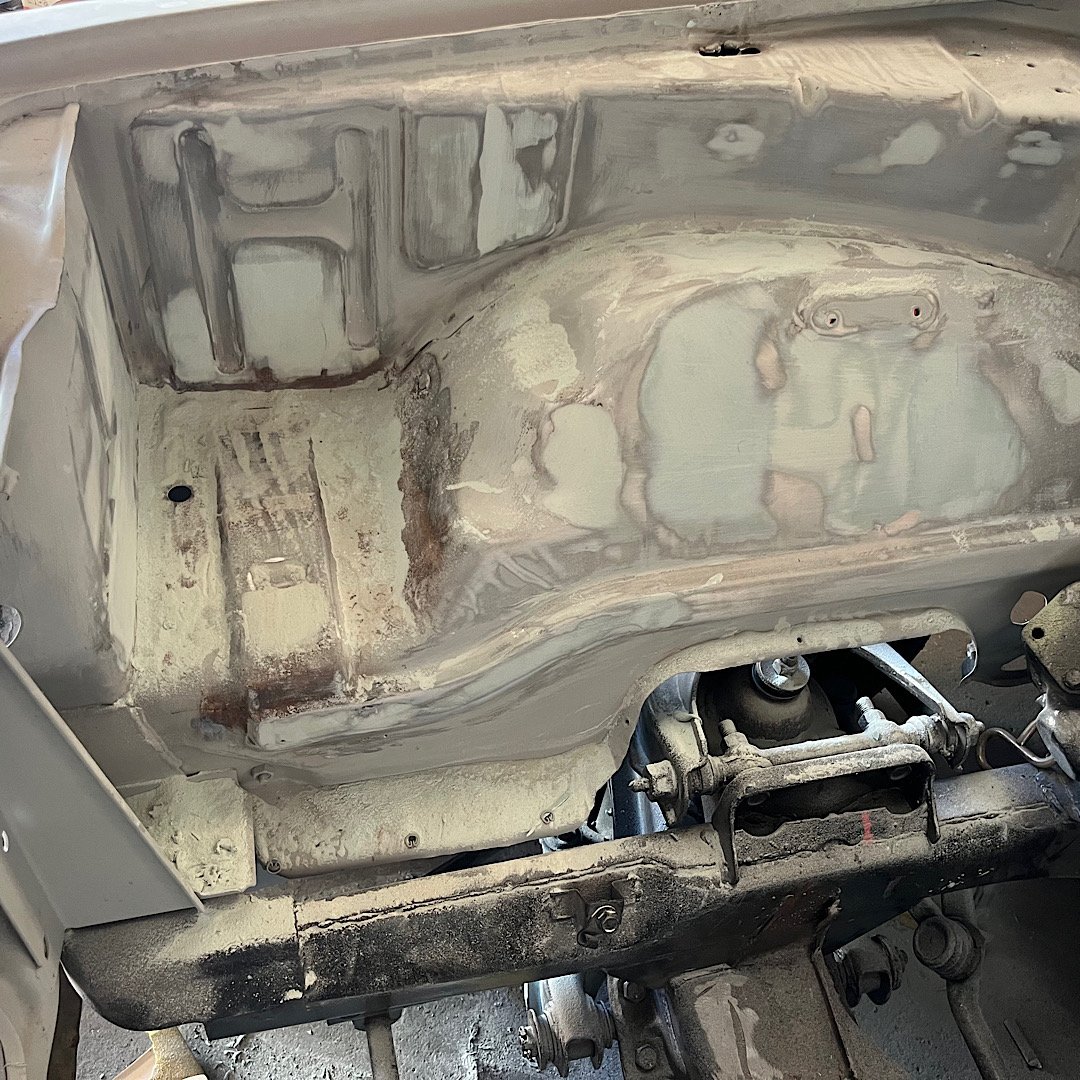
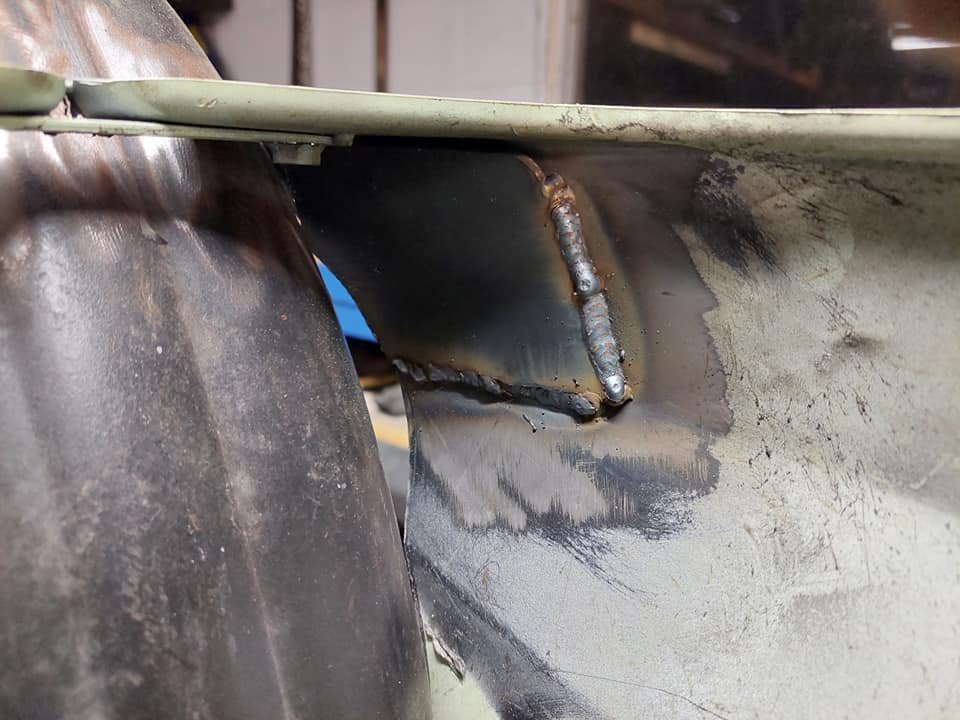
Had to do some rust repairs for wof. Didn't realise how bad it had got, both sills behind the doors needed work. Is a common rust area for celicas, side window dumps shit down the quarter and it's sort of double skinned at the bottom. Anywho, drivers side needed a whole new inner and outer sill made and passenger just had two small holes so I welded them up. Side note, I thought I had already been in to the sill in the past but it turns out it was all original. So it had lasted 47 years which isn't to bad. I fucked up the clear on the drivers side and got some runs in it but you can't really see it. Also I did a pretty good job of flicking in the new colour over the top of the old. She's pretty hard to fade metallics but this time I did alright.
 23 points
 -
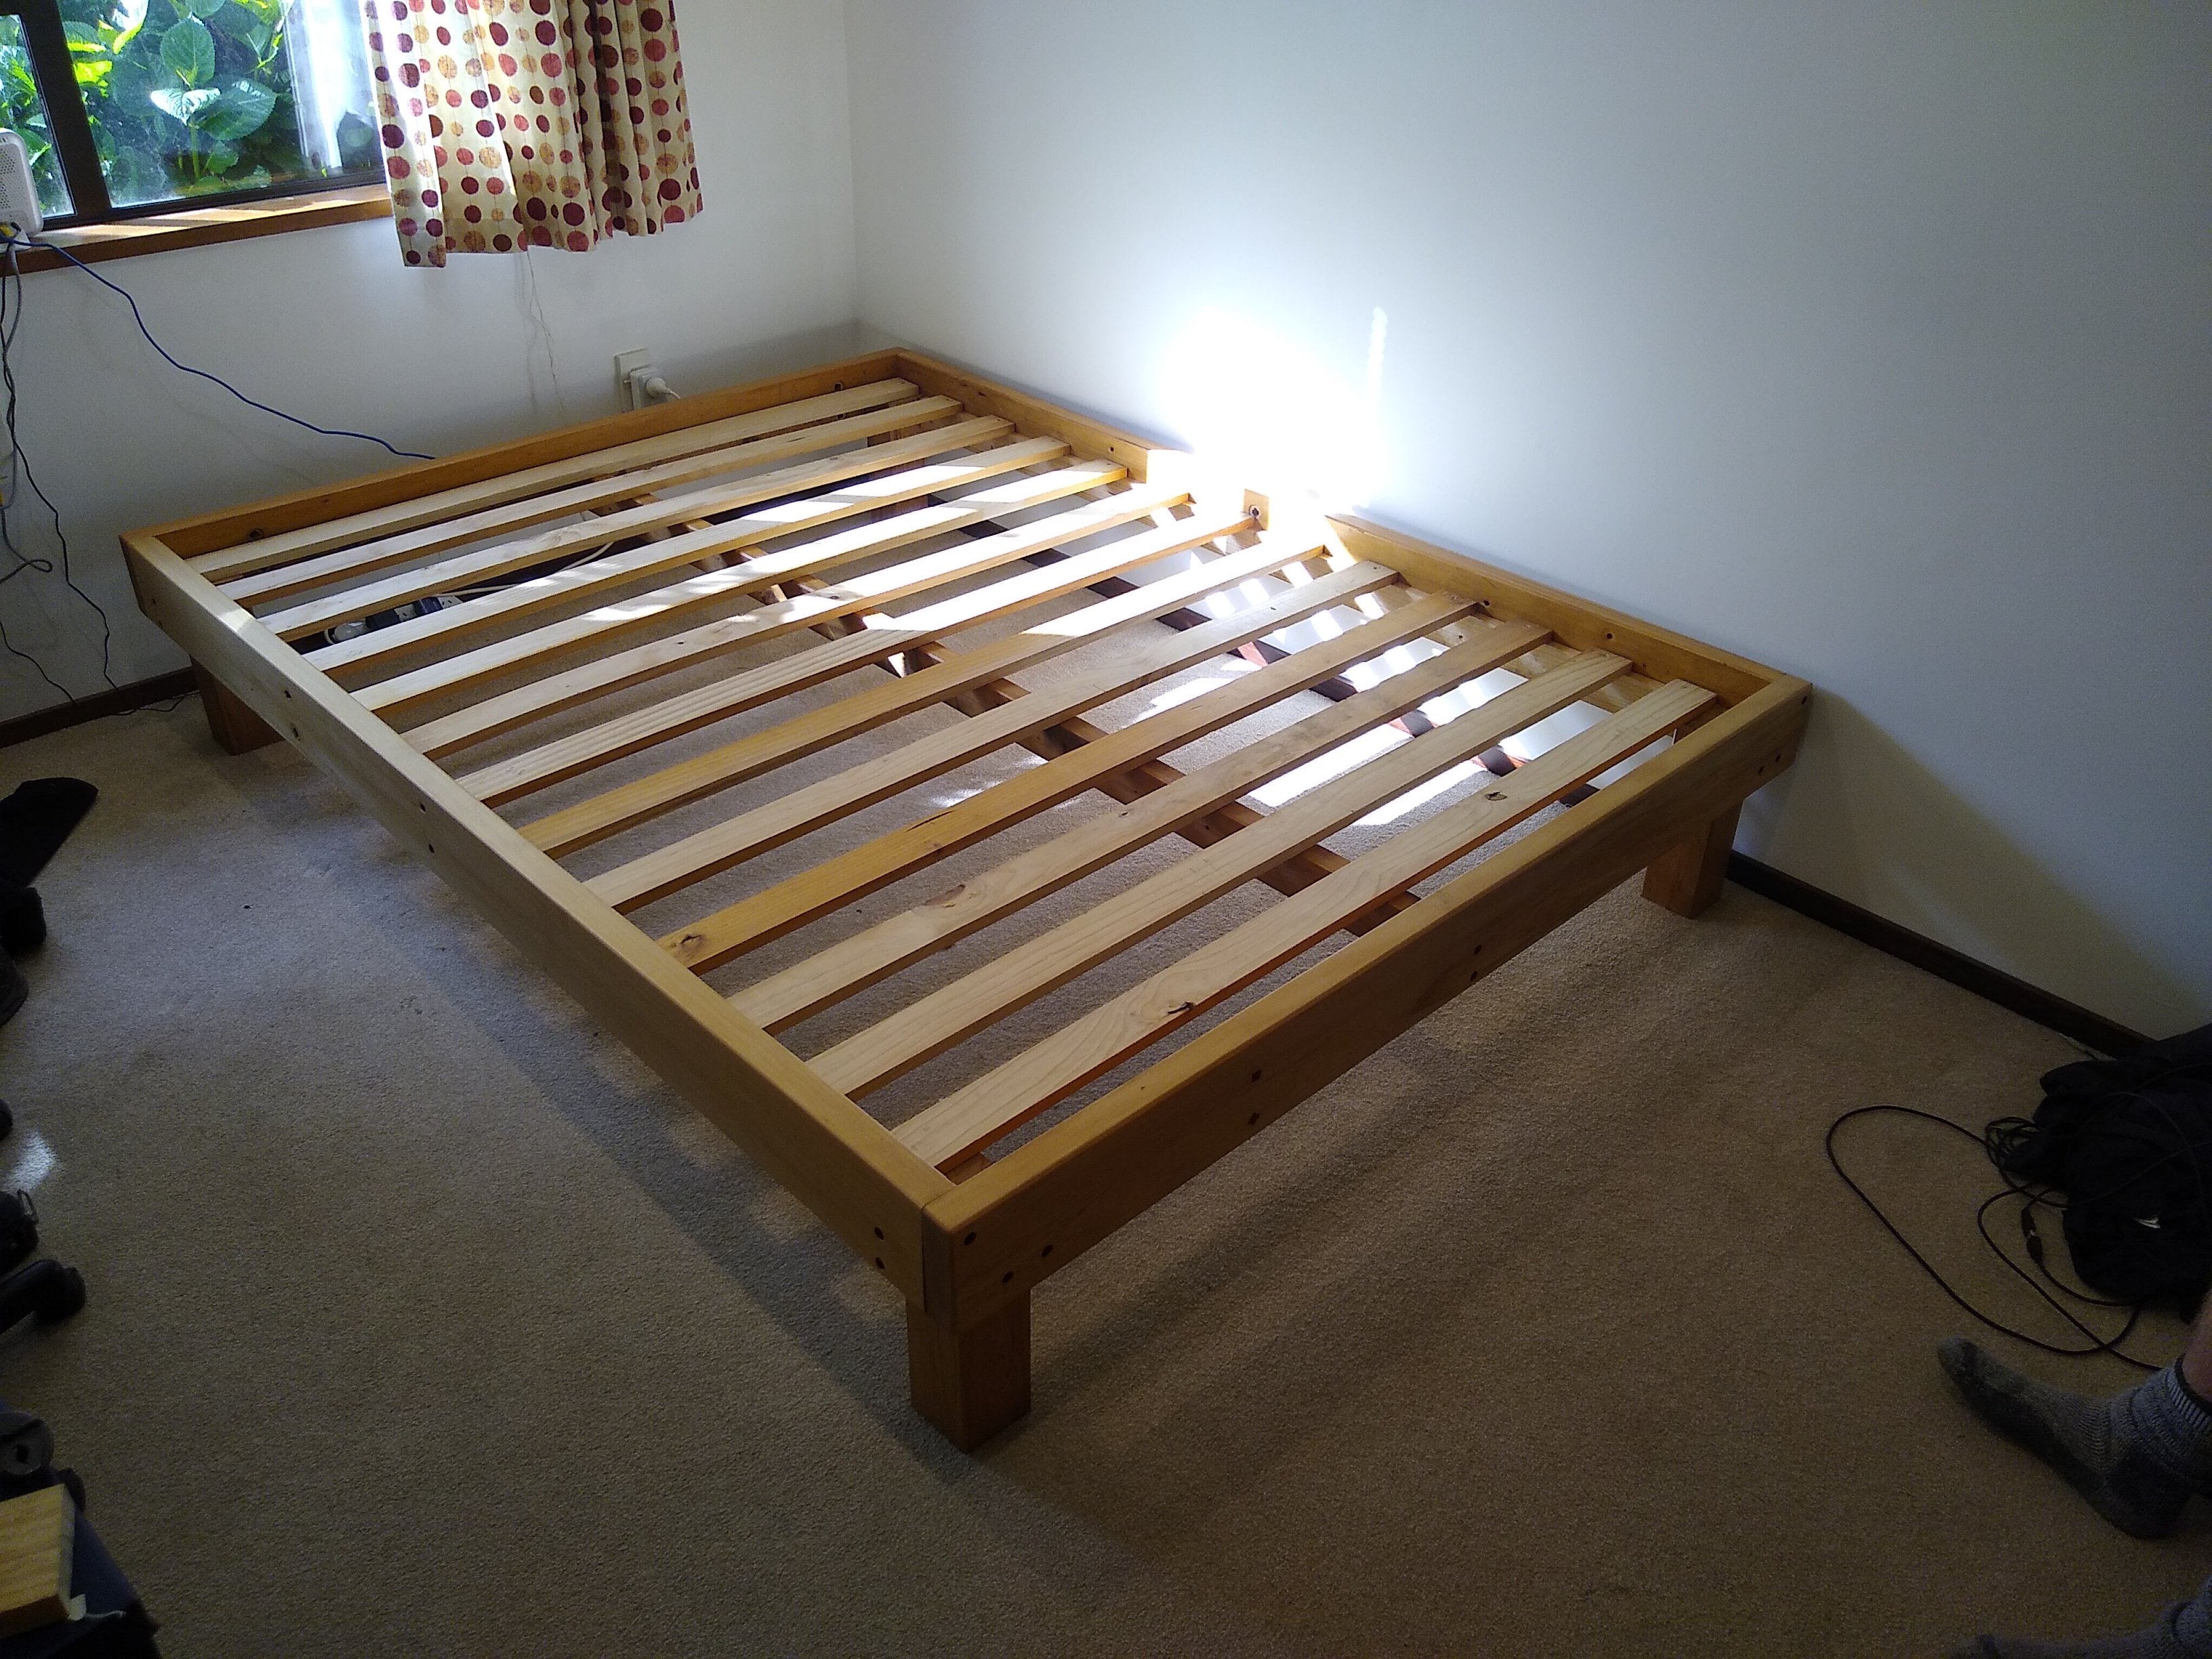
Spent a few hours turning some scrappy Rimu into a bed frame for the spare room. Now need to find a mattress from somewhere. Also eventually need to make a head board to suit the holes from the wood's previous life
8 points
-
I've been stripping But enough about money, I got sick of being in the doldrums about body work so decided to take a quick breather and get this fuel situation sorted. My relined tank has been sitting under the bench for a while so I dragged it out and went hunting for all the bits and pieces. Found the electroplated pickup/return pipe and my NOS filter. And my MKS-sourced fillter pipe replacement - the goal is to try avoiding old rubber. But the new neck was too long. I used a variety of tools to get it down to size, strangely a dremel with cut off disk (and ventilation) worked the best without any proper pipe-cutting tools at hand. We wanted to check out the level sender from the red starion - and use it as a visual guide as well - so we drained its tank and dropped it. The sender was no better. But both senders look like they'd be totally functional - all the electrical bits and contacts haven't corroded, it's just the mild steel structures, and even then they still hold their shape. I've been wondering about how to best tackle this problem. I know someone in the states is making new ones but last I checked they were quite spenny. I know that there are some cheap aliexpress pickups for the mighty max which apparently have all the right bits, just the wrong cap - I could get something fashioned from that. But for now what I've done is just wire wheel the heck out of the original black starion's sender and put that in, if only to plug the hole. There's a little inline fuel filter that sits at the mouth of the pump which is extinct, so I either need to re-use it or fashion a new solution. I opted to try the former. The mesh is intact and it just had a bunch of funk at the end that I was able to extract with isoprope, gentle compressed air and some copper wire. The pump was working fine when we last used it. We have an aftermarket spare but it means hacking up the wires and why do that if it works okay? It's also very accessible on the car if I need to replace it in the future so decided to just keep it. It was sitting on rubber vibration-isolating feet that had absolutely disintegrated on both cars. Fortunately the part number is the exact same as the vibration isolators for mounting the pump bracket to the tank, and these had all survived just fine on both cars, so I stole some from red. I also wrapped the pump in some closed cell foam to further help dampen it as whatever was previously there had disintegrated. I might come back and trim it a bit though to avoid overheating. Finally, because this is a high-vibration area and I can't torque the bolts that have nothing but rubber on the other side, I used the evil loctite to make sure nothing wiggles free. This time around I used new nuts and bolts instead of restoring the old ones as I had returned the loaner sandblaster I was using to my mate. And after finding out how easy it is to get new ones and how cheap they are, fuck, I really should have just been doing this from the start. The electroplating kit is great (when it works) and will continue to be great for unique parts that need restoring, but hardware is fiddly and frustrating/repetitive to prep. And there we go... The fuel ventilation/breather lines were doing well for their age but there was evidence of perishing in a couple of them. Not to mention that we already know that two of the high pressure lines had already become sieves by the time we got the car. So, new hose. I intended to use the old clips as I was able to salvage enough reasonable ones from both cars, however the new hose is thicker, so I had to source some new ones. I think the red looks nice. The only hose I reused is the pickup hose going into the pump. It's a unique shape and the last time I looked it seemed like it was going to be a PITA to find the correct diameter as well. It seems to be in good shape on both cars. And now,6 points
-
Pretty excited for this one fellas, I'll be riding my fresh build a bloody angry postie, should be fun My monkey is also ready to go happy to bring it and chuck it on the support trailer as a backup for anyone that needs it if thats something people want, I rode a backup CT a couple years ago, figured I could return the favor Either way looking forward to an epic few days!
5 points
-
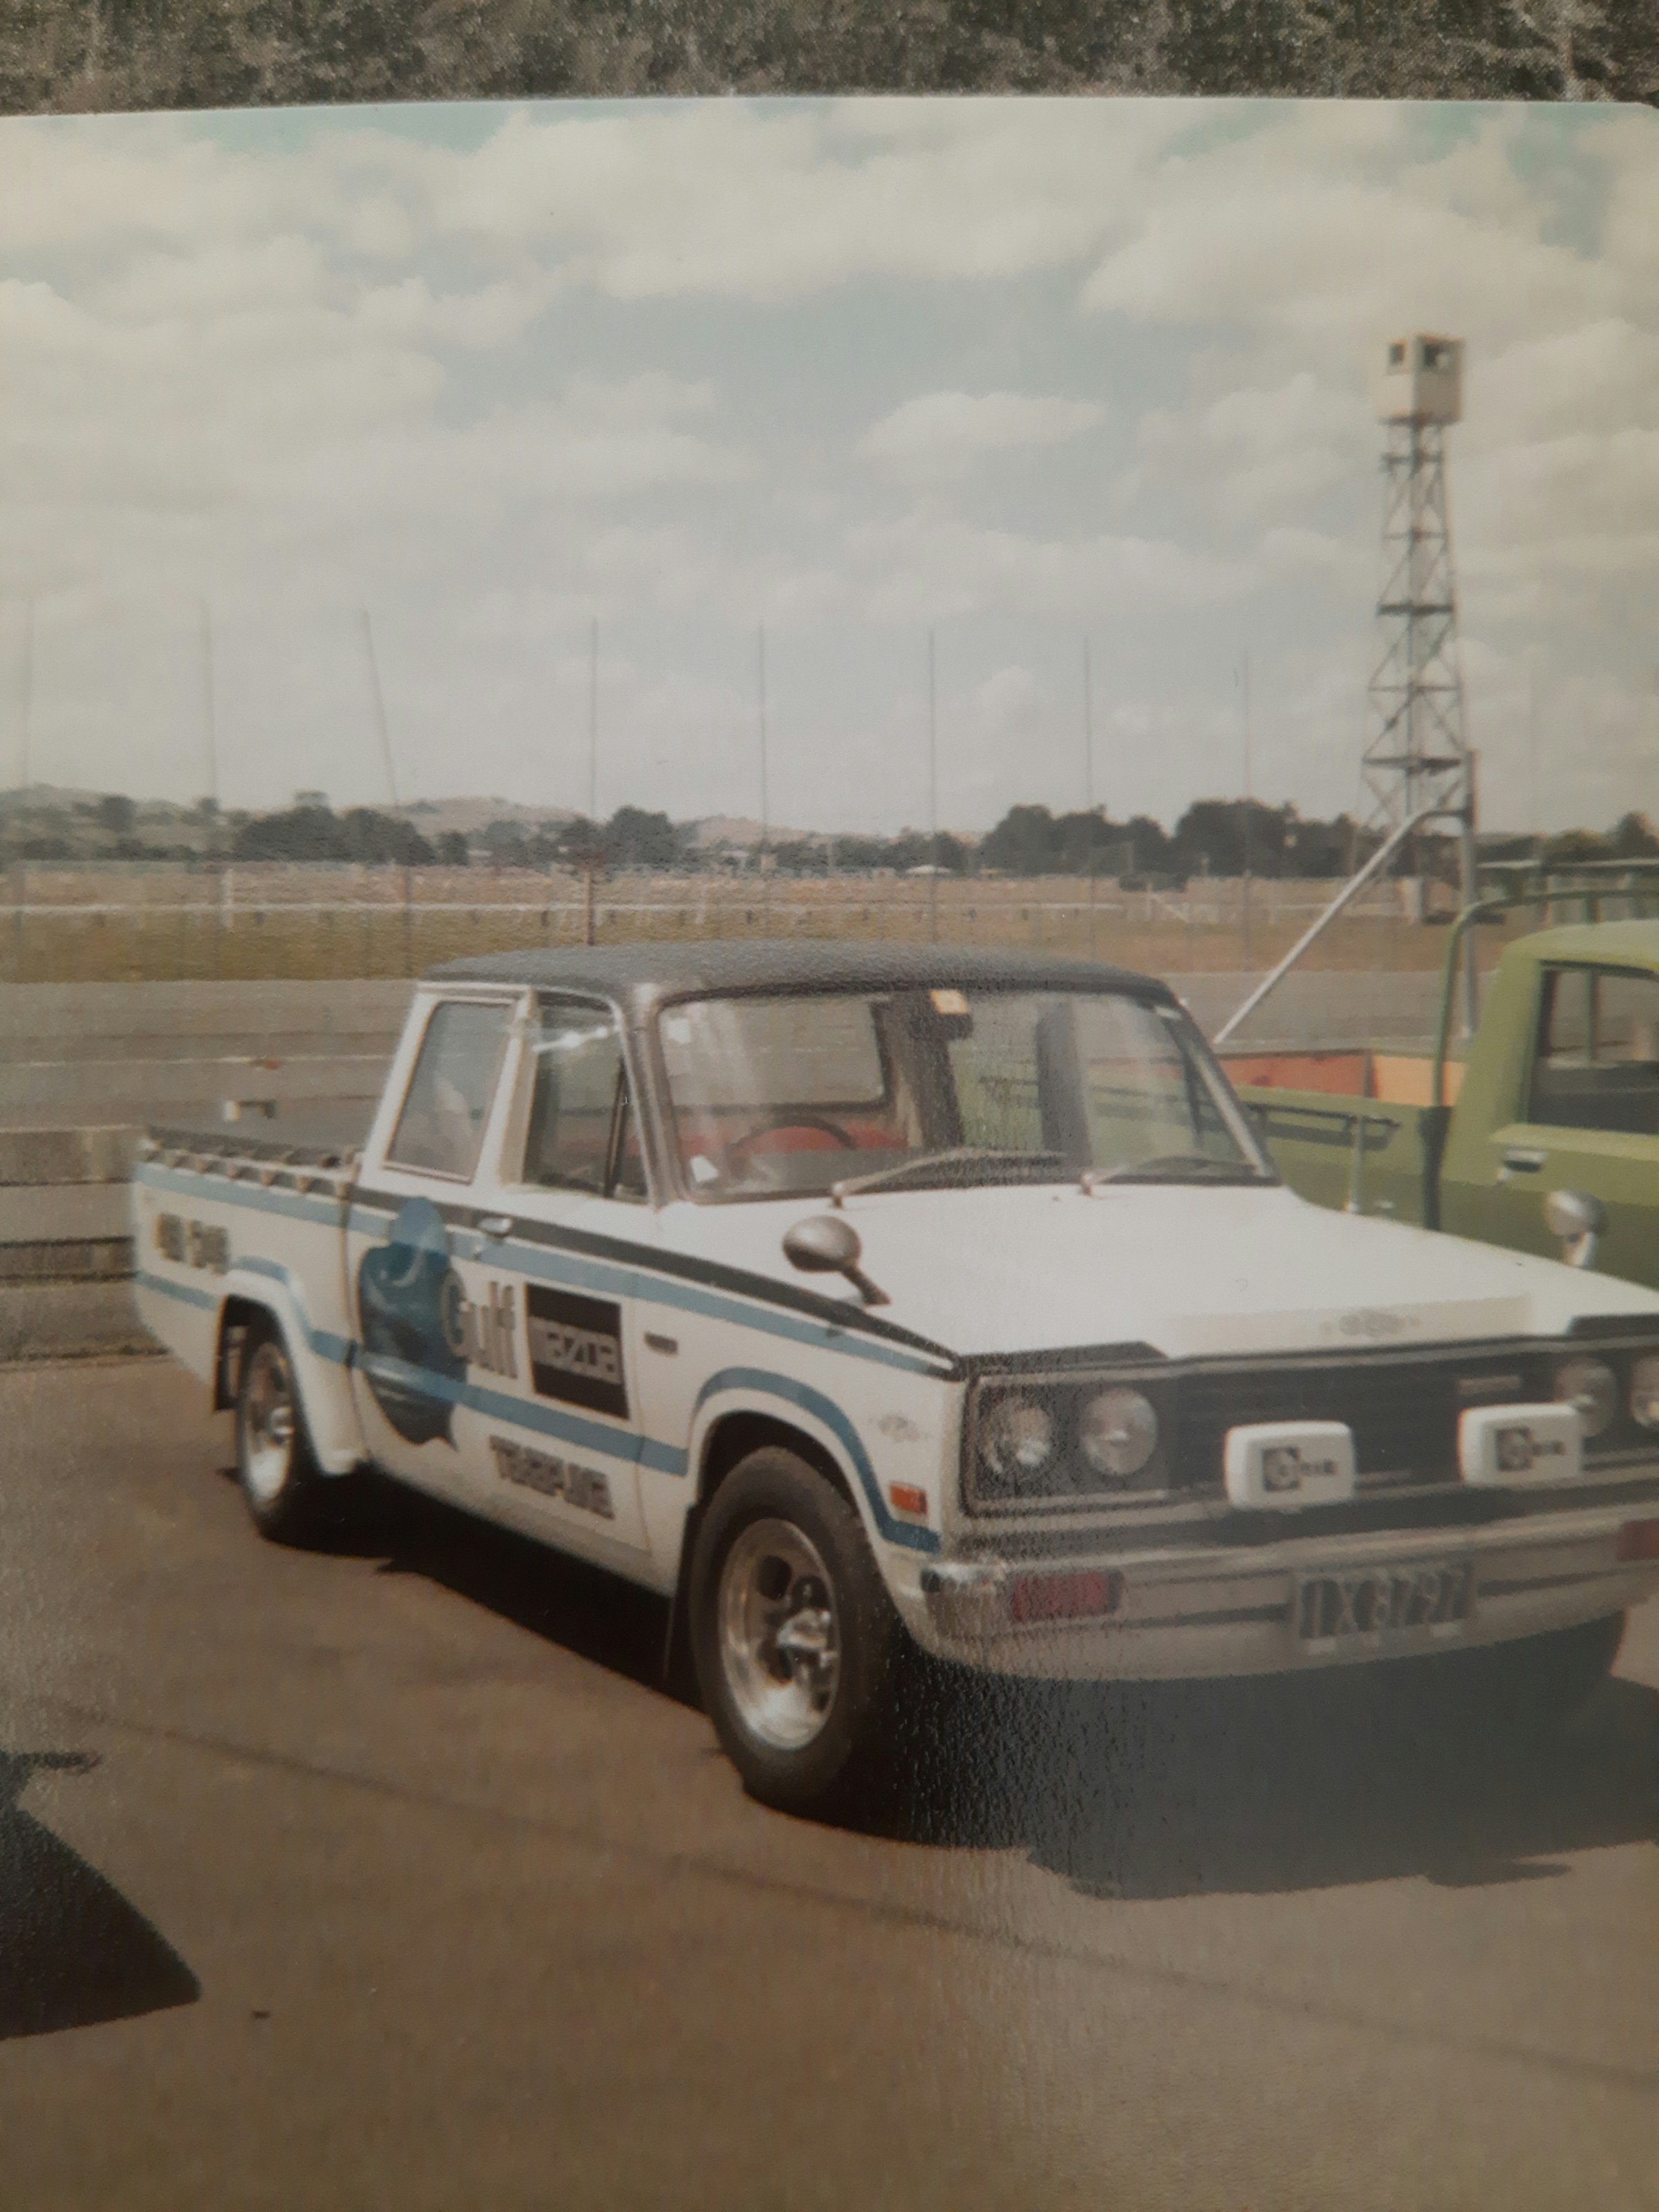
Also this version from Gulf Mazda, note the early version of a double cab
3 points
-
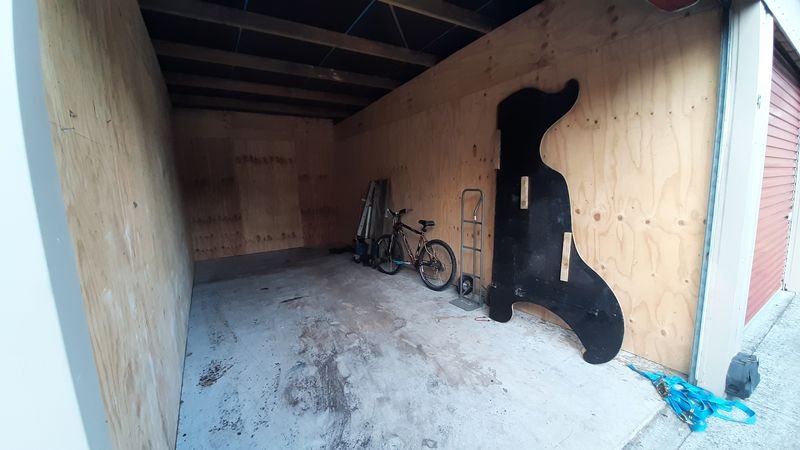
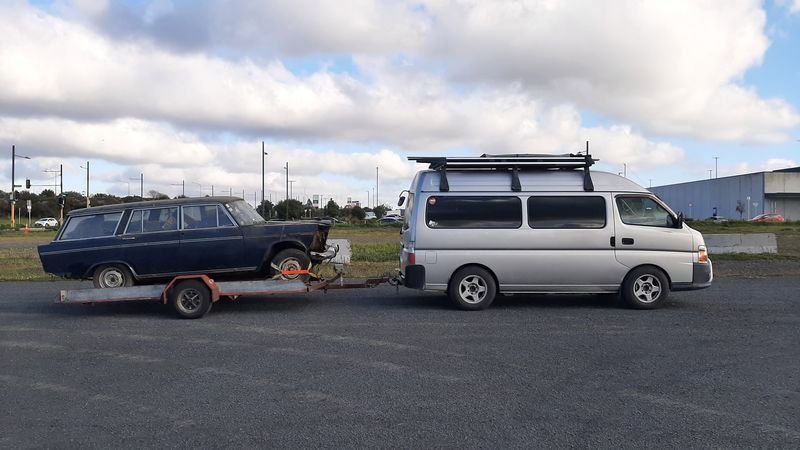
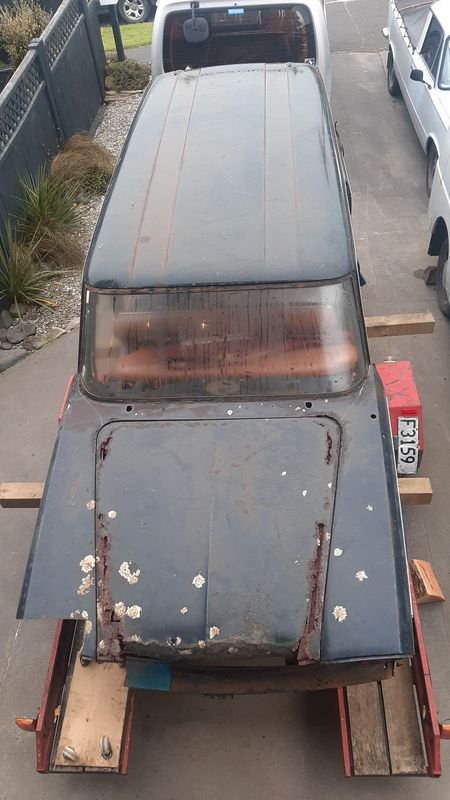
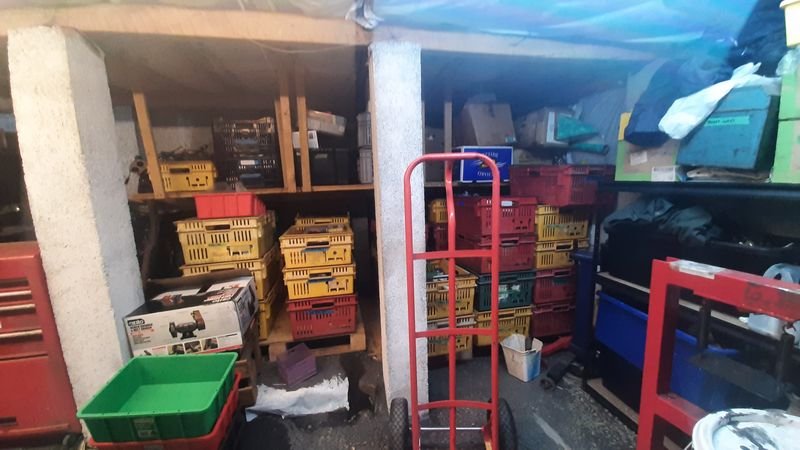
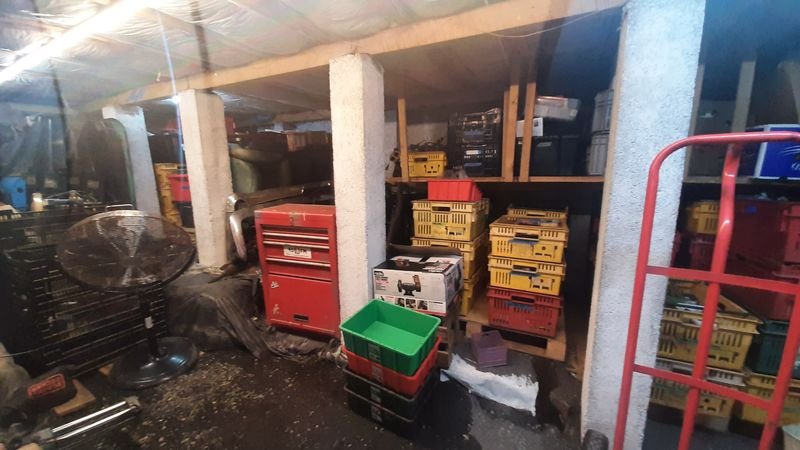
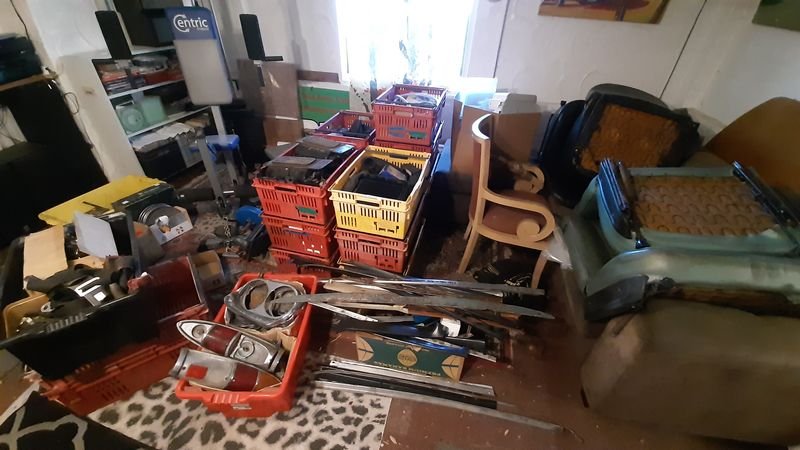
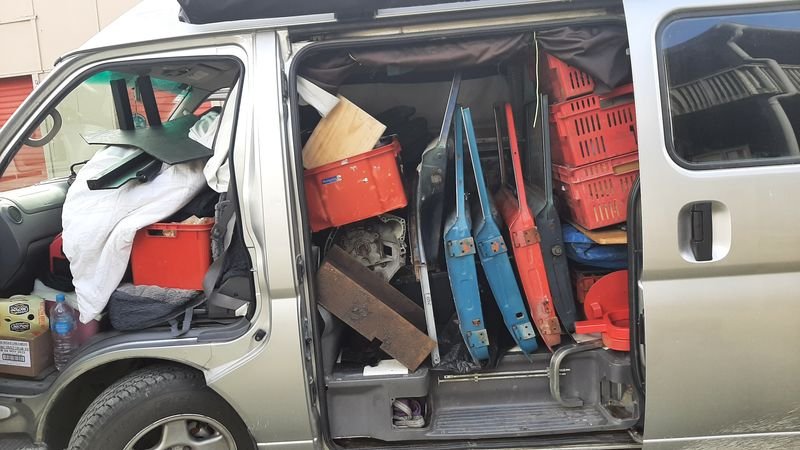
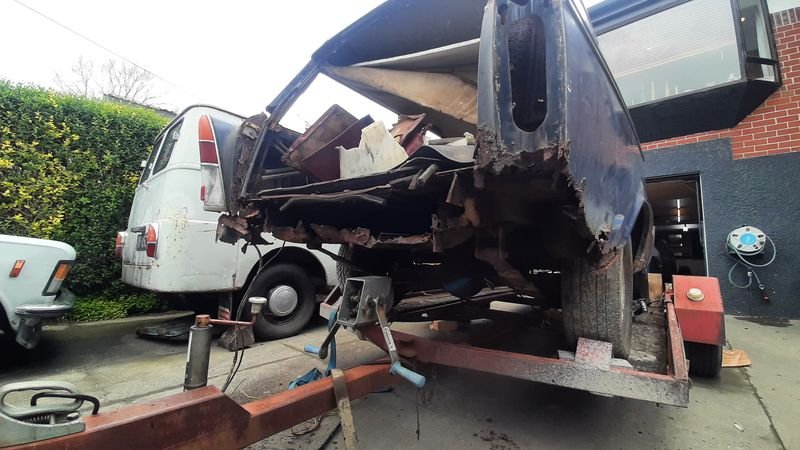
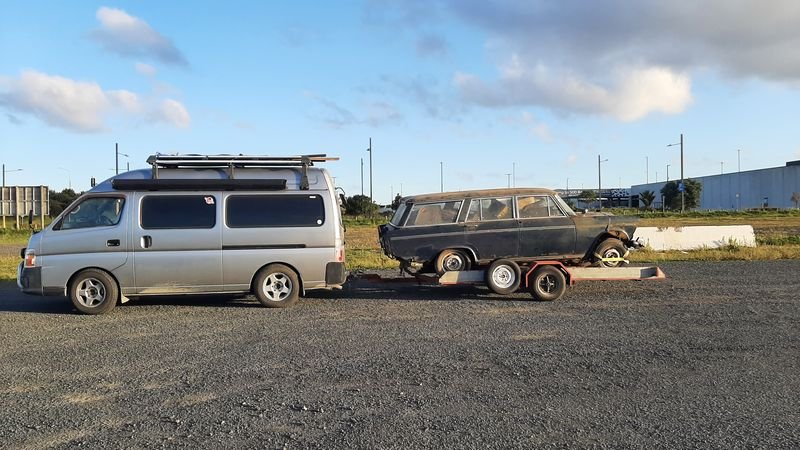
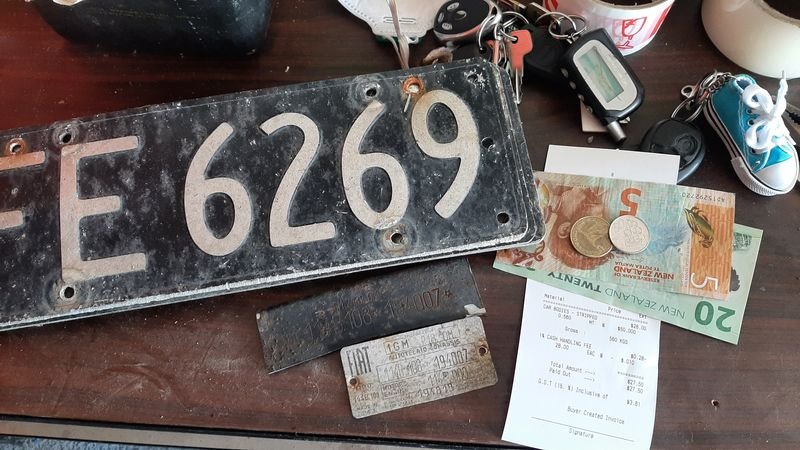
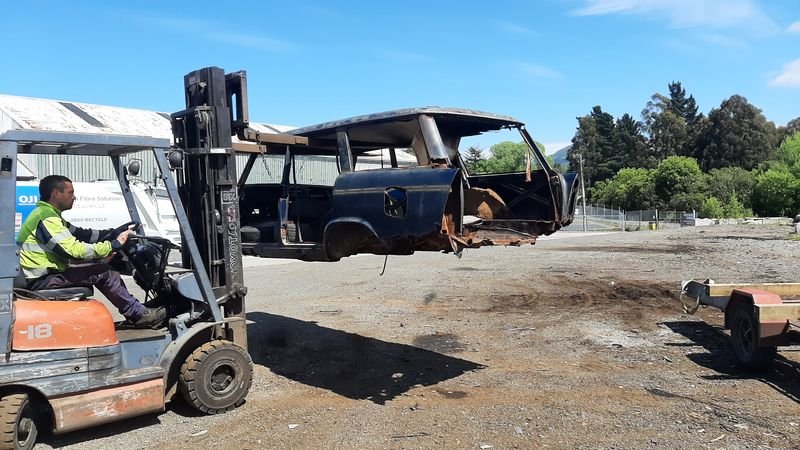
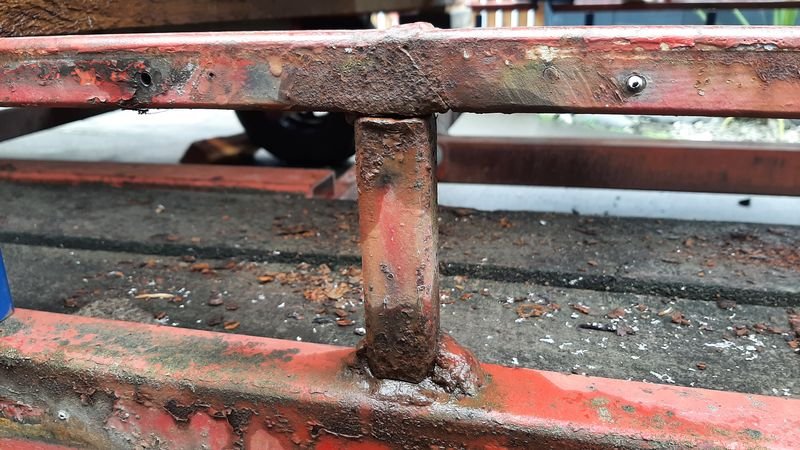
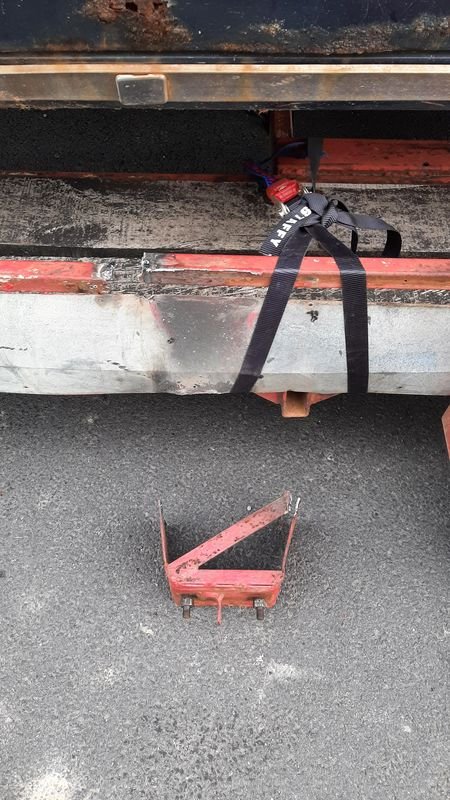
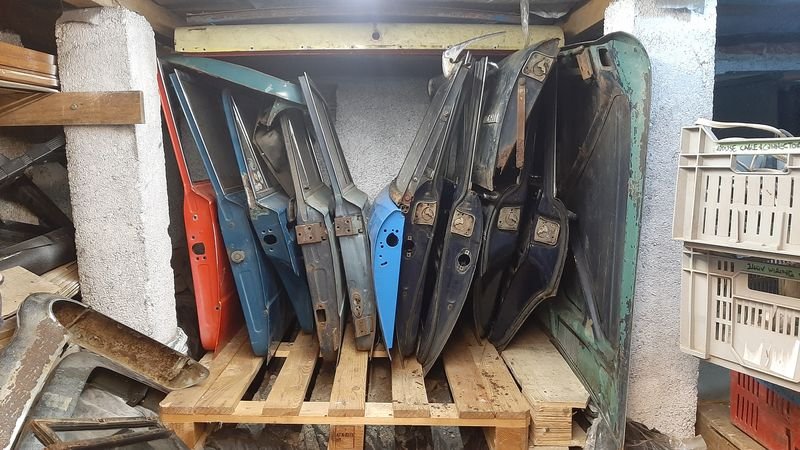
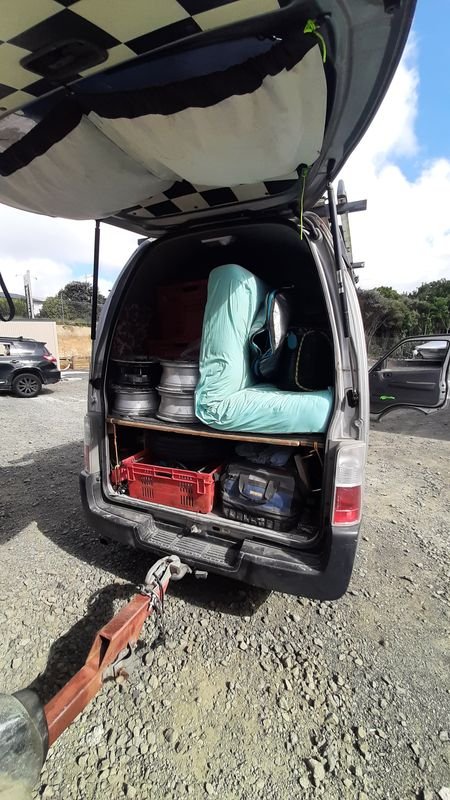
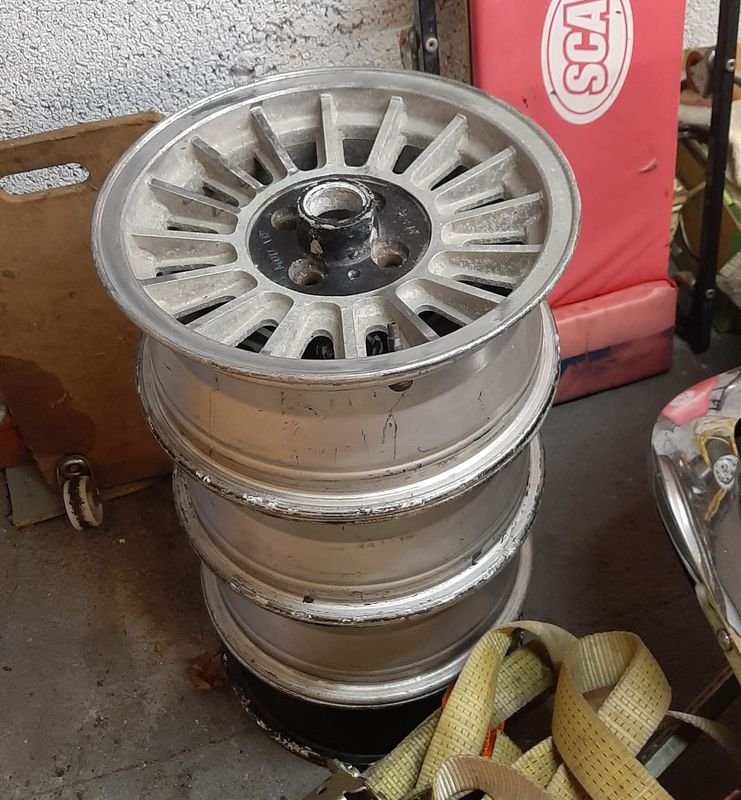
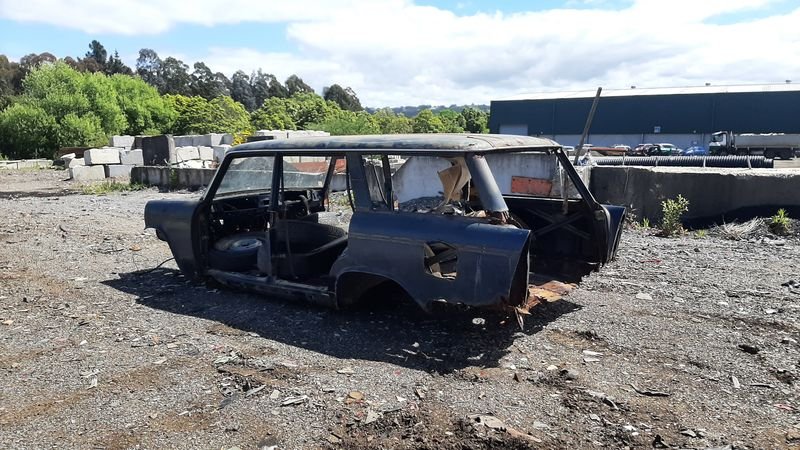
As mentioned in the show us your mancave thread, ive recently been trying to make a bit more room to shoe horn more stuff into my 'deep store' I have some freshly levelled and inspected pallets just begging for some worthless junk to be piled upon them The stuff in question is what remains in my storage unit in Helensville, which is mostly junk, including a 2300 wagon parts car. Getting cleared out is loooong overdue (we moved to Dunedin nearly 4 years ago!) and the monthly is much more expensive now post covid than it was. Im not going to do the math on how much ive spent to store this shite vs what it would have cost me to buy now off ebay with shipping from the most expensive seller if i ever needed it. Nor will i consider the time cost of the carry on described in this post retrieving said stuff. Anyway, plan hatched to drive my van up, surf in Kaikoura, visit the FIL in Fielding, hang with the cuzzys in Rotorua and Maketu, pick up @vivaspeed trailer in Tauranga, drive to Auckland, and over a week of also working in person in the City and visiting family and Muriwai friends, sort out and pack up the storage unit, and drag the wagon back to Dunhole, cut it up and drop the trailer back to Geoff in Oamaru. Whole think too 16 days and took me a week to get over. Trip up SI was nice, Dud to Kaikoura in one hit, then wake up to this day of fun uncrowded waves at Mungamaunu before the 2am ferry Then early morning pick up some OS freight in Welly, Fielding for a cuppa with the FIL then to Rotorua to stay with my cuz. Maketu the next day to hang with my other cuz on the beach, then to Tauranga to pick up Geoffs trailer, made it as far as Bowentown for the night. Next day thought Auckland to Helensville to drop off the trailer and have a peek into the void. Sigh. The next week was work in the city and visting. Also picked up some vege crates to stack everything into. 3 loads to the dump (the move to Dunedin happened very quickly and a lot of stuff just got thown in there, on top of the excess of rusty car parts) Finally on the last day it looks like this Van looks like this Wee hidey hole int eh back - i could still sleep in there, like a frankfurter in a hotdog bun First leg fully loaded was a bit sketchy. Tail wagging the dog, despite the van having the heavy stuff (incl 2 gearboxes and 3 engines) The main issue was the heavy end of the wagon is the wrong way round on the trailer (no engine + a load of (light) stuff in the rear), and the trailer and van tyres were underinflated as well swapped ends at westgate and it was much better and even better after pumping all the tyres up, and when I moved the wagon back a bit in Mercer and it was even better. No dramas after that.... I pulled over just out of Mangaweka cause the spare on the trailer looked wobbly - i thought the wheel nuts ight have come loose, but they were tight - it was the carrier was wiggling itself off. Strapped it up and when i got to the FILs in Fielding, ol' mate Colin from next door dug out his old stick welder (made a few hotrods with it back in the day) and blasted it back together with his safety stubbies and jandals on 7am ferry back to Picton meant on the road by 4.30am, but a cabin for a snooze on the trip over. Home in Dunedin by 10.30pm, strait to bed! Van went well, averaged 10.5l/100km on the way up more or less empty, 12.5l/100km on the way back, fully stacked. Next few days spent sorting though the stuff i collected and chopping up the wagon Crates of stuff, 3 sets of seats, set of rims, spare 2300 interior bits, 2300 parts, 3 engines, two gearboxes... a set of 14x6 'MOD VIP' in 4by98 stud pattern that look sort of like a rare factory option on 131 that i might try out on the ute. Cant find out much about them but they are light and straight and 4x98, soo... And a shitty old car to cut up Doors off, glass out, starting to fill the car back up with stuff i wont be keeping Might look ok, but shes pretty crusty up close. Unfortunately i didnt get as many rust cuts as i thought, but i did get the main bit i needed which is the front valance which will come in handy soon 125 and 2300 panels all of which came down in this run. Thanks to @nzstato for the borrow of the plasma cutter, much quicker and quieter the the grinder! Crates stacked And all put away. There is a bit of a system now, but more sorting to be done too. Next job, fixing up Geoffs trailer (the stick welding didnt hold and i ripped the spare mount off again in Rolleston). I think it was a combination of being a fair bit heavier and front heavy than the race Vivas it usually carries, the effects of rust, and some less than perfect welding 40 years ago, but I wasnt going to give back a borrowed trailer in a worse state than i borrowed it! Front half much more solid now! One last job for the trailer, taking $27.50 worth of 'car bodies, stripped' to the recyclers Thanks FE 6269. last Wof was a clean sheet in 1995 at 75,765km Anyway, thank fuck thats all done, looking forwards to not moving stuff for a good while
3 points
-
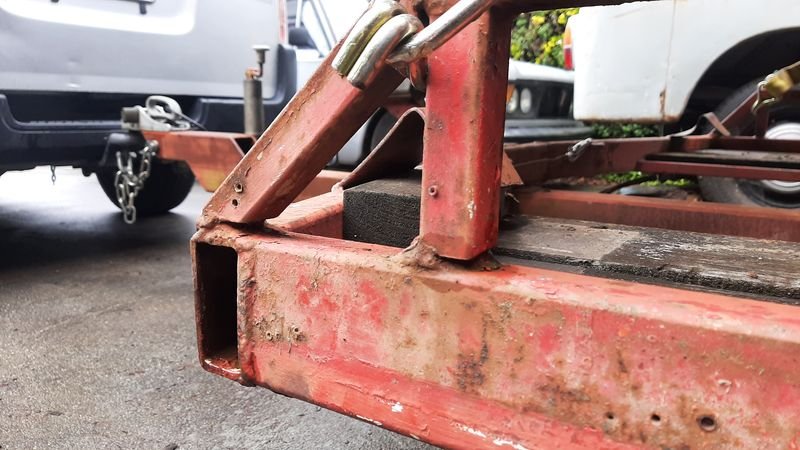
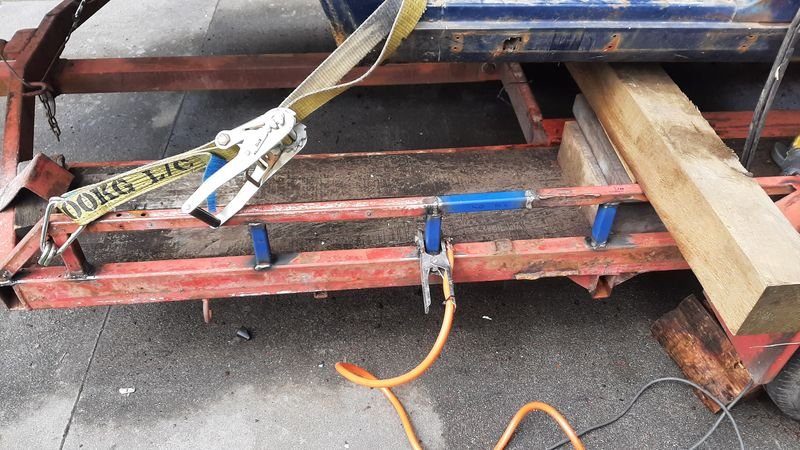
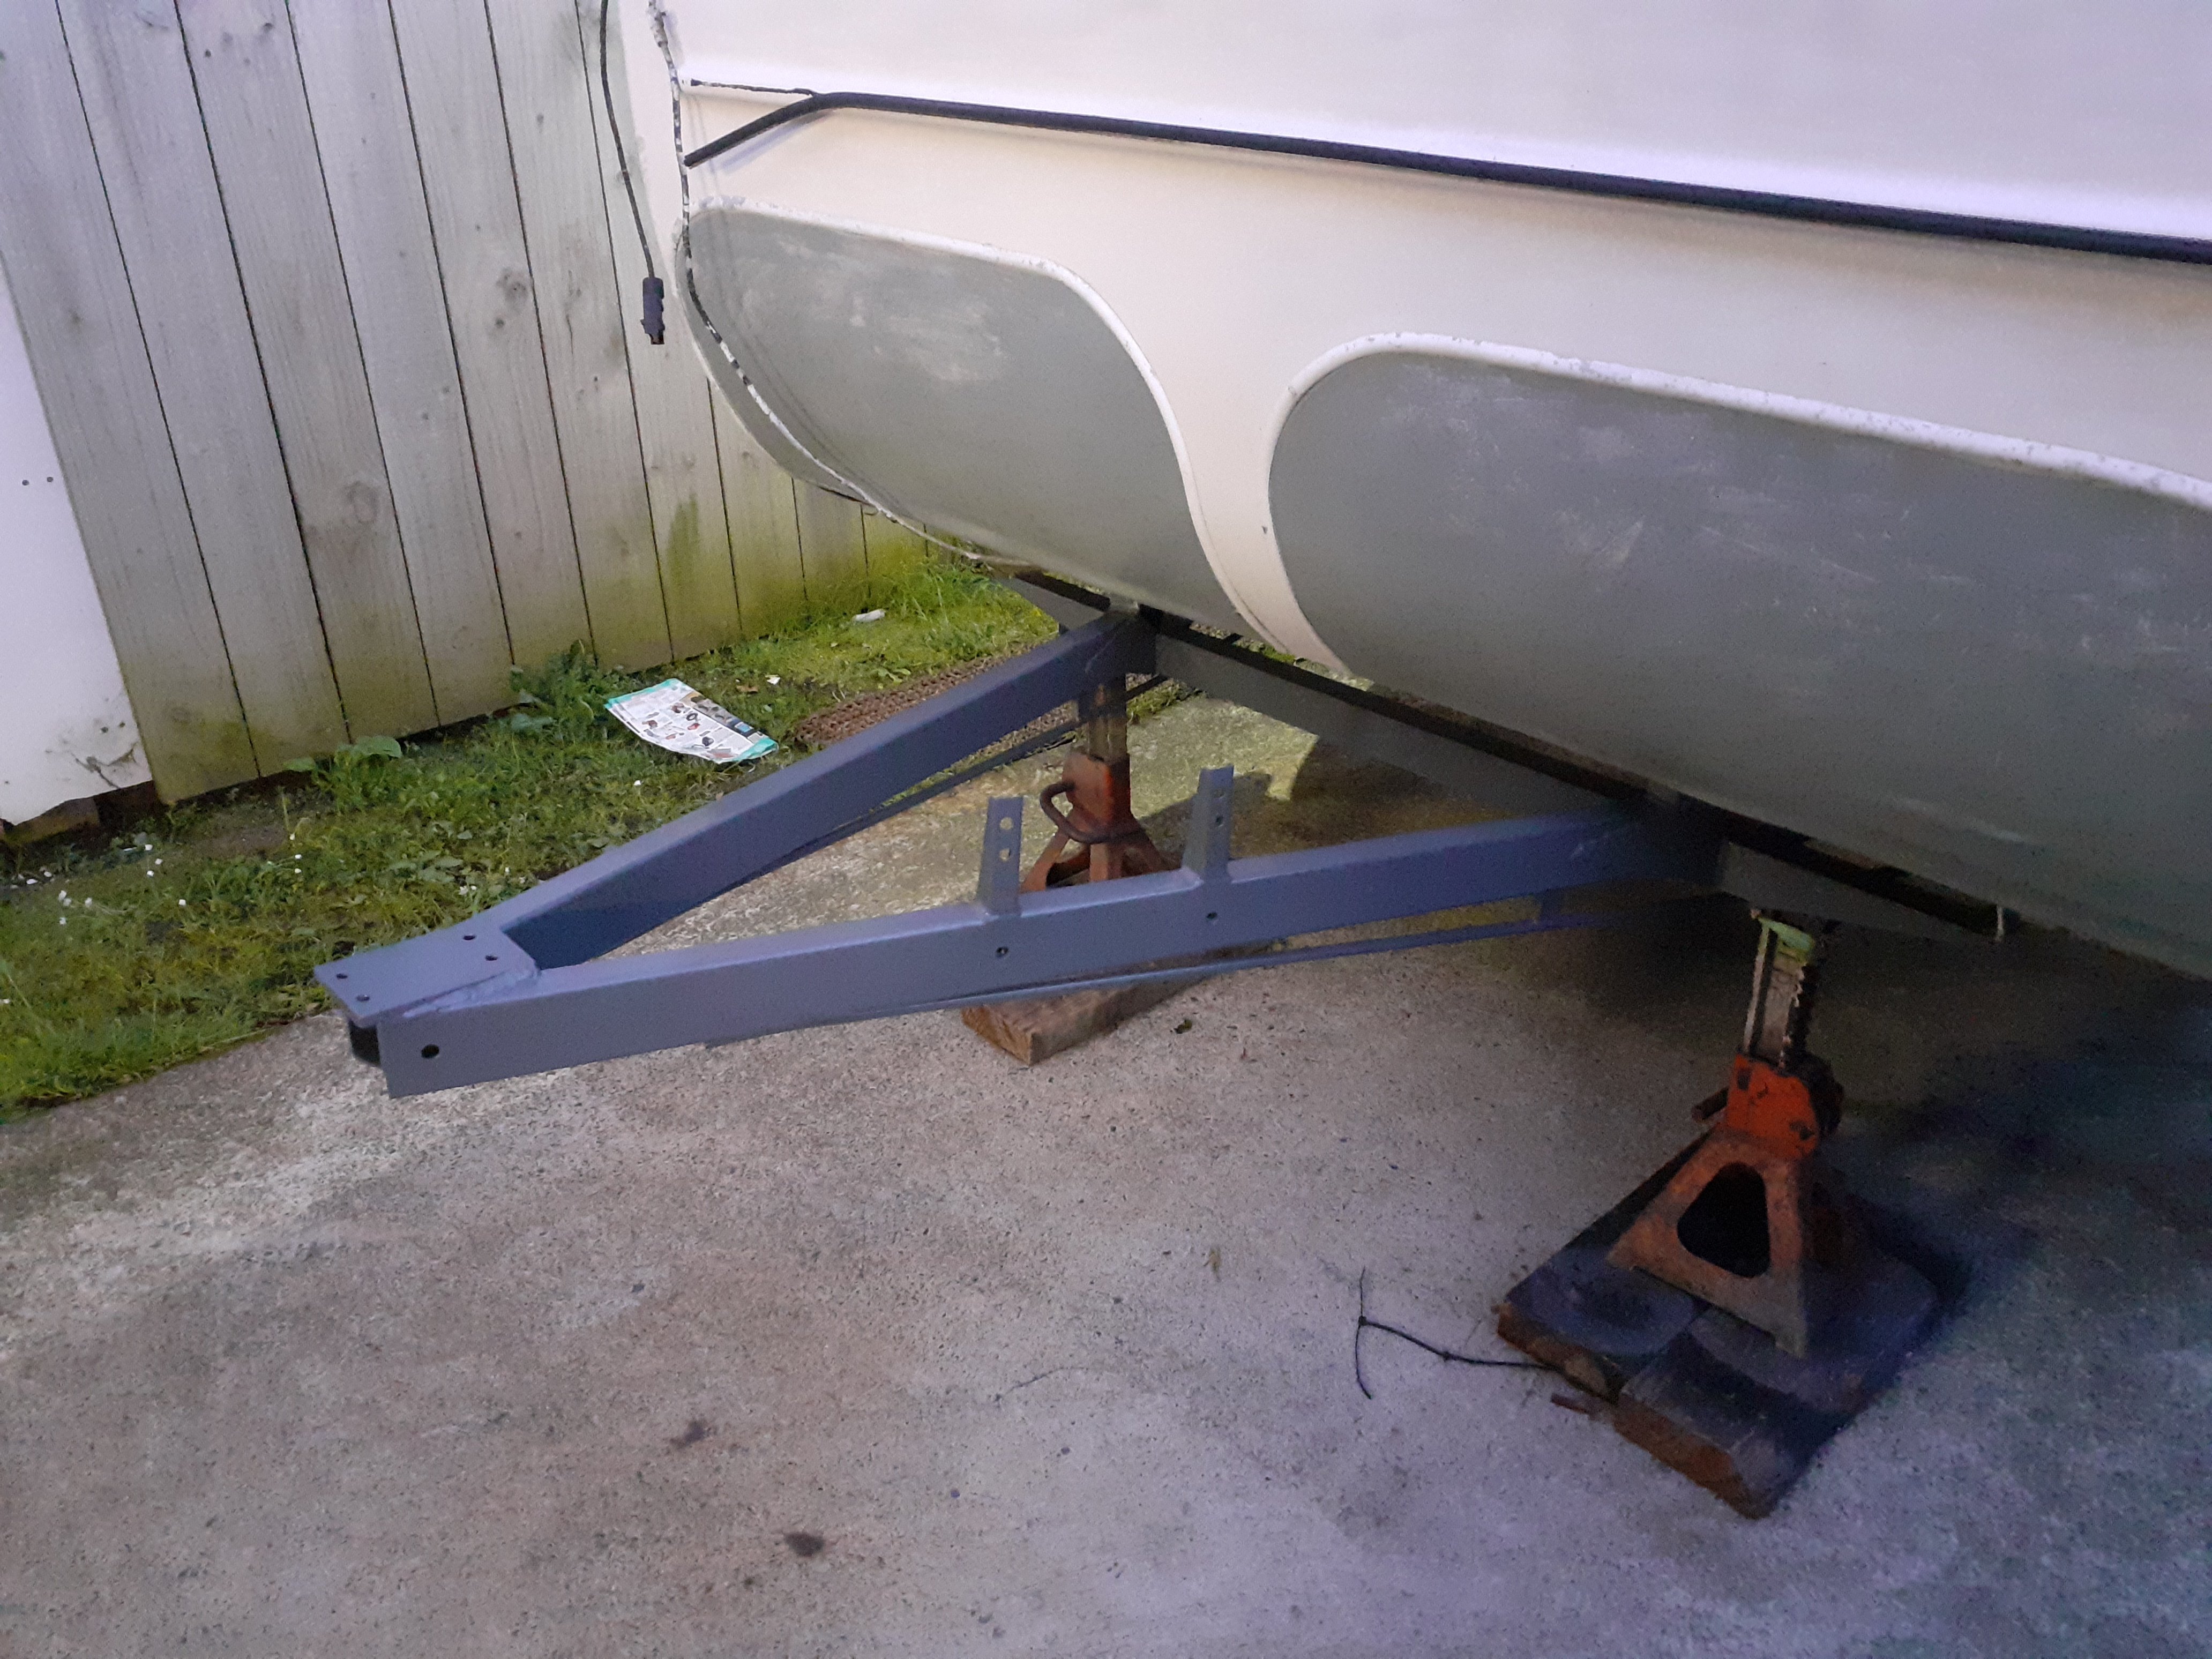
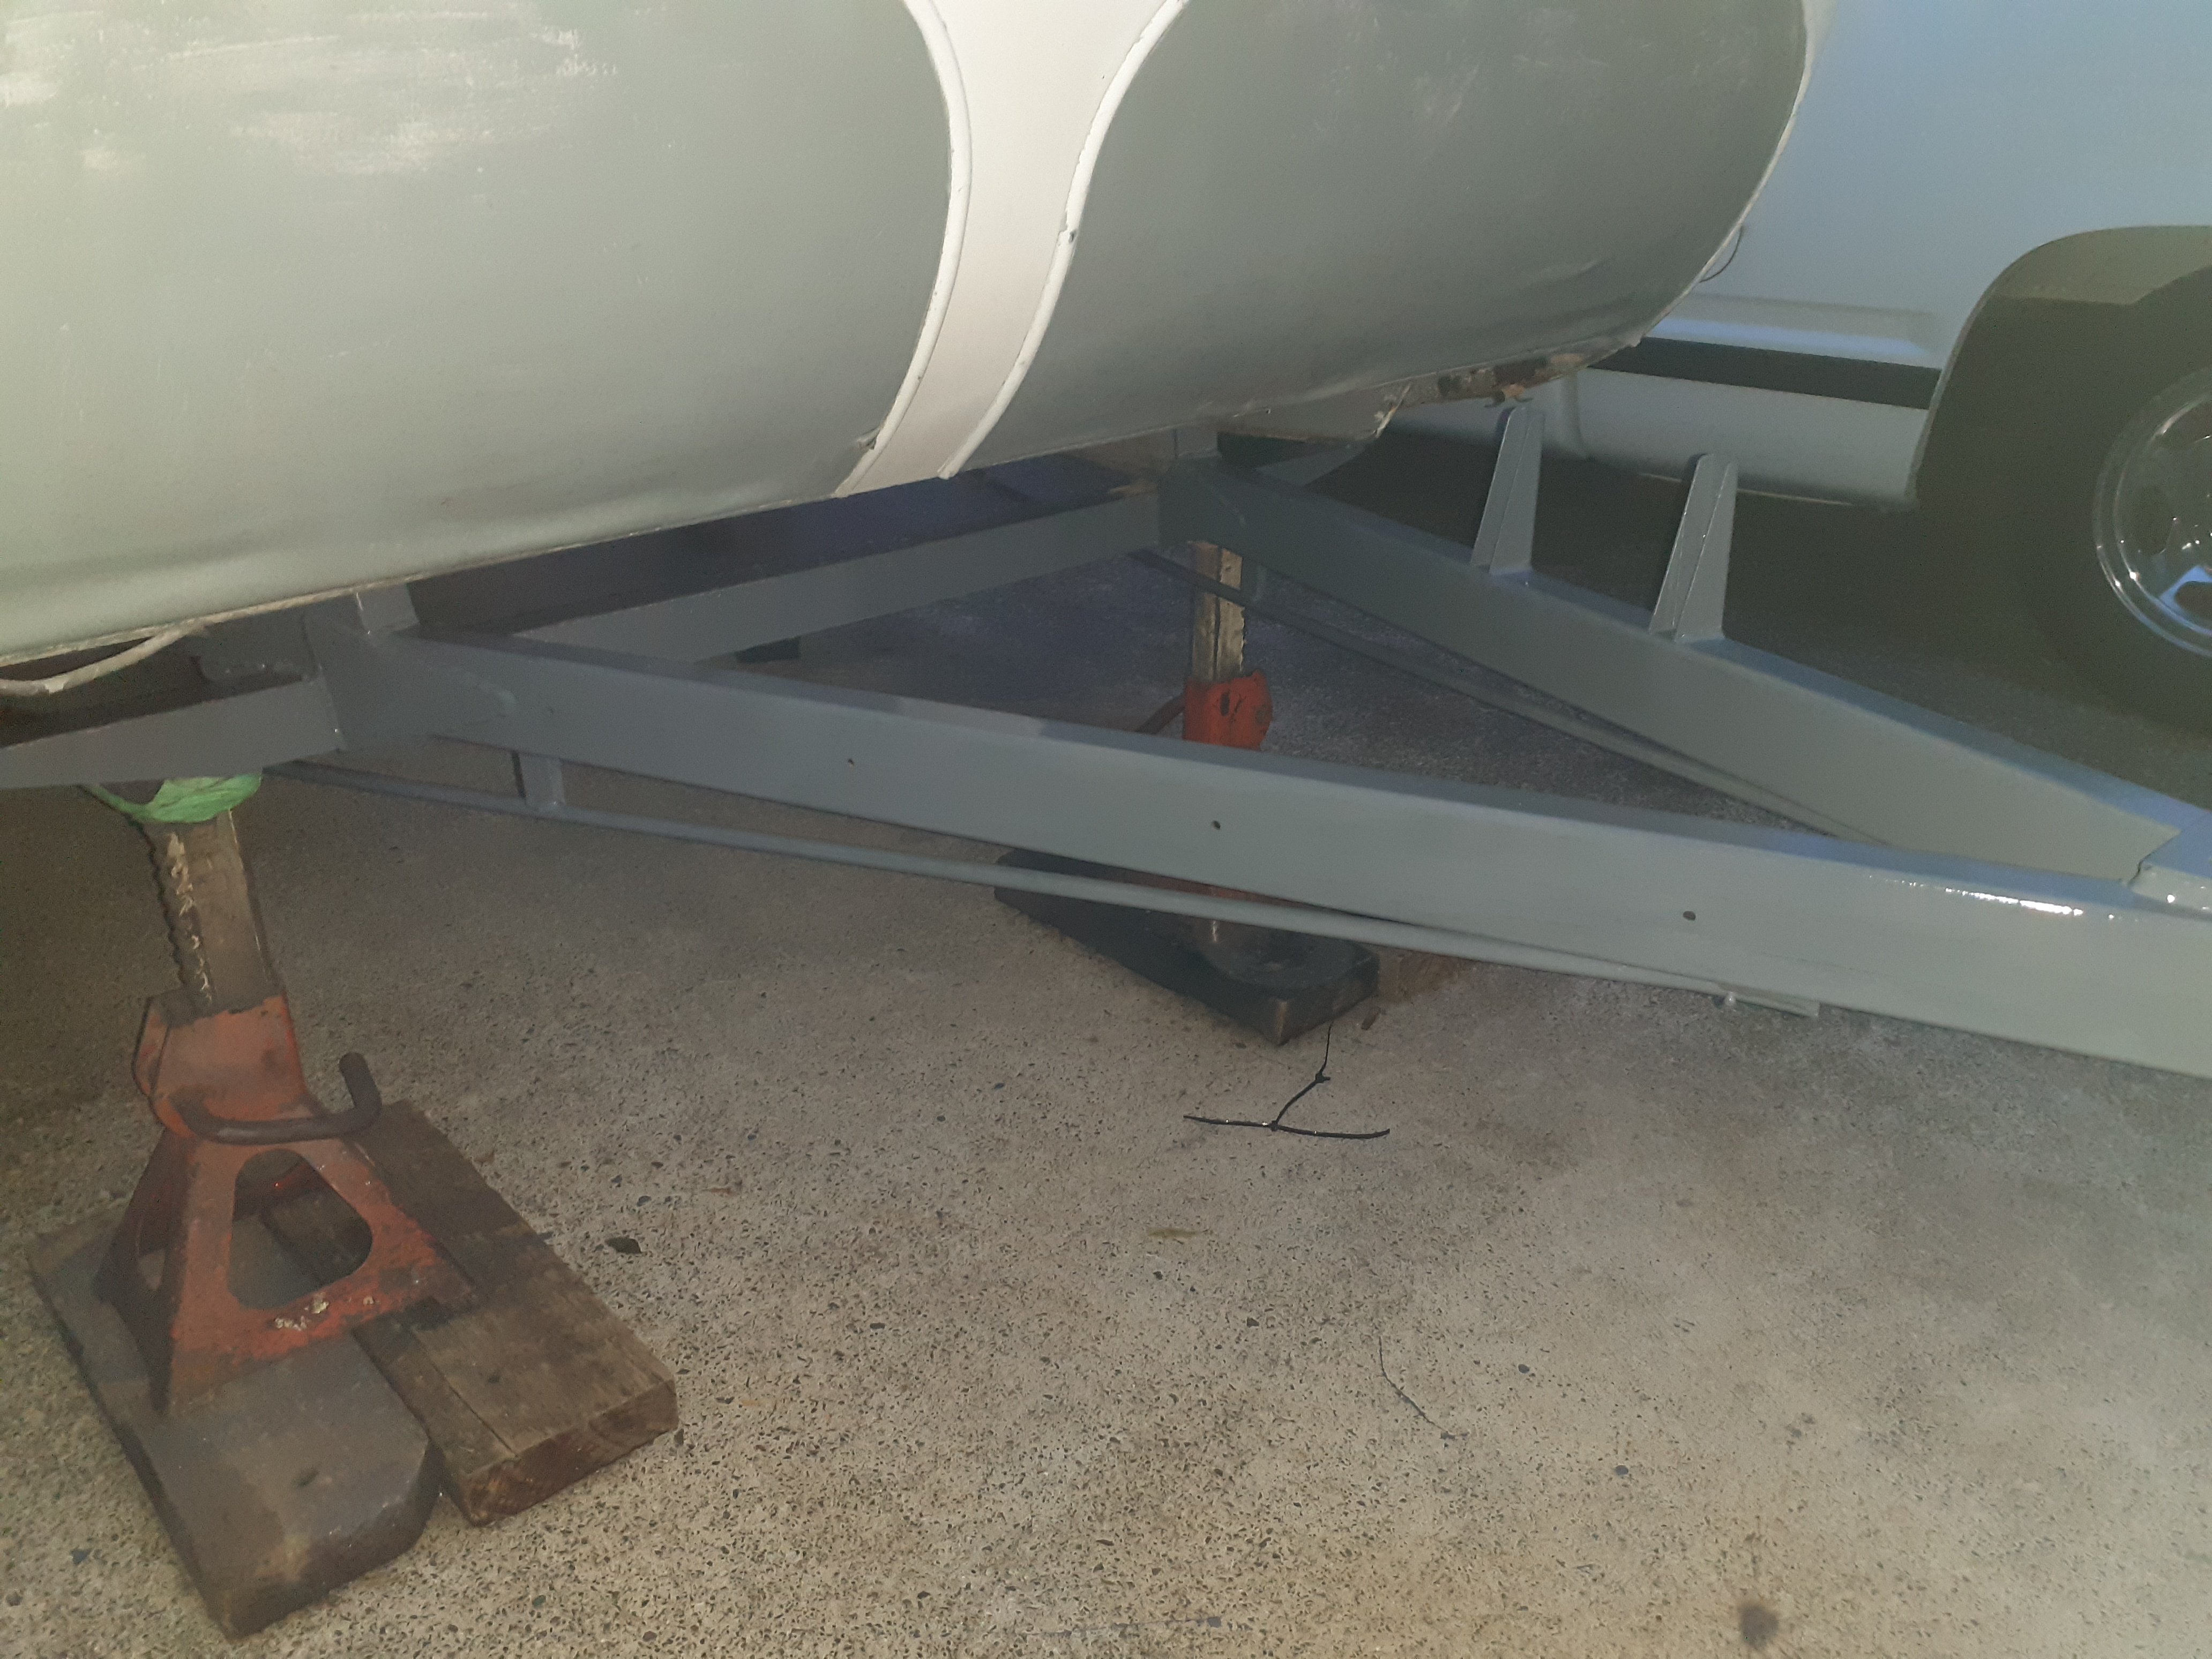
Drawbar finished. Just needs another coat of grey
3 points
-
The wof to do list has now become pretty trivial, starts, runs and stops just as good as I remember, for added benefit all mechanicals and electrics operate as intended too. Paranoia was weighing hard during the quick run up our street but the only issue of note is some guard rub that will be an easy trim to fix Still quite a few jobs to get it how I want it, but i've gained most of my shed space back With f-all mechanical jobs left and the wof stuck waiting on the postie for window seals, I hooked into the cosmetics...... Cos i'm no painter there was a bit of orange peel to deal to, started wet sanding the car today and made an absolute mess, thankfully youtube came to the rescue and after adjusting my technique moved through to 2000grit before polishing up the last bit. While i could go further, i'm really happy with the finish, not gleaming show car perfection but a finish as you'd expect from a car of the 70s. Just the roof took a few hours today so looks like it will be a few days before the whole car is done.
2 points
-
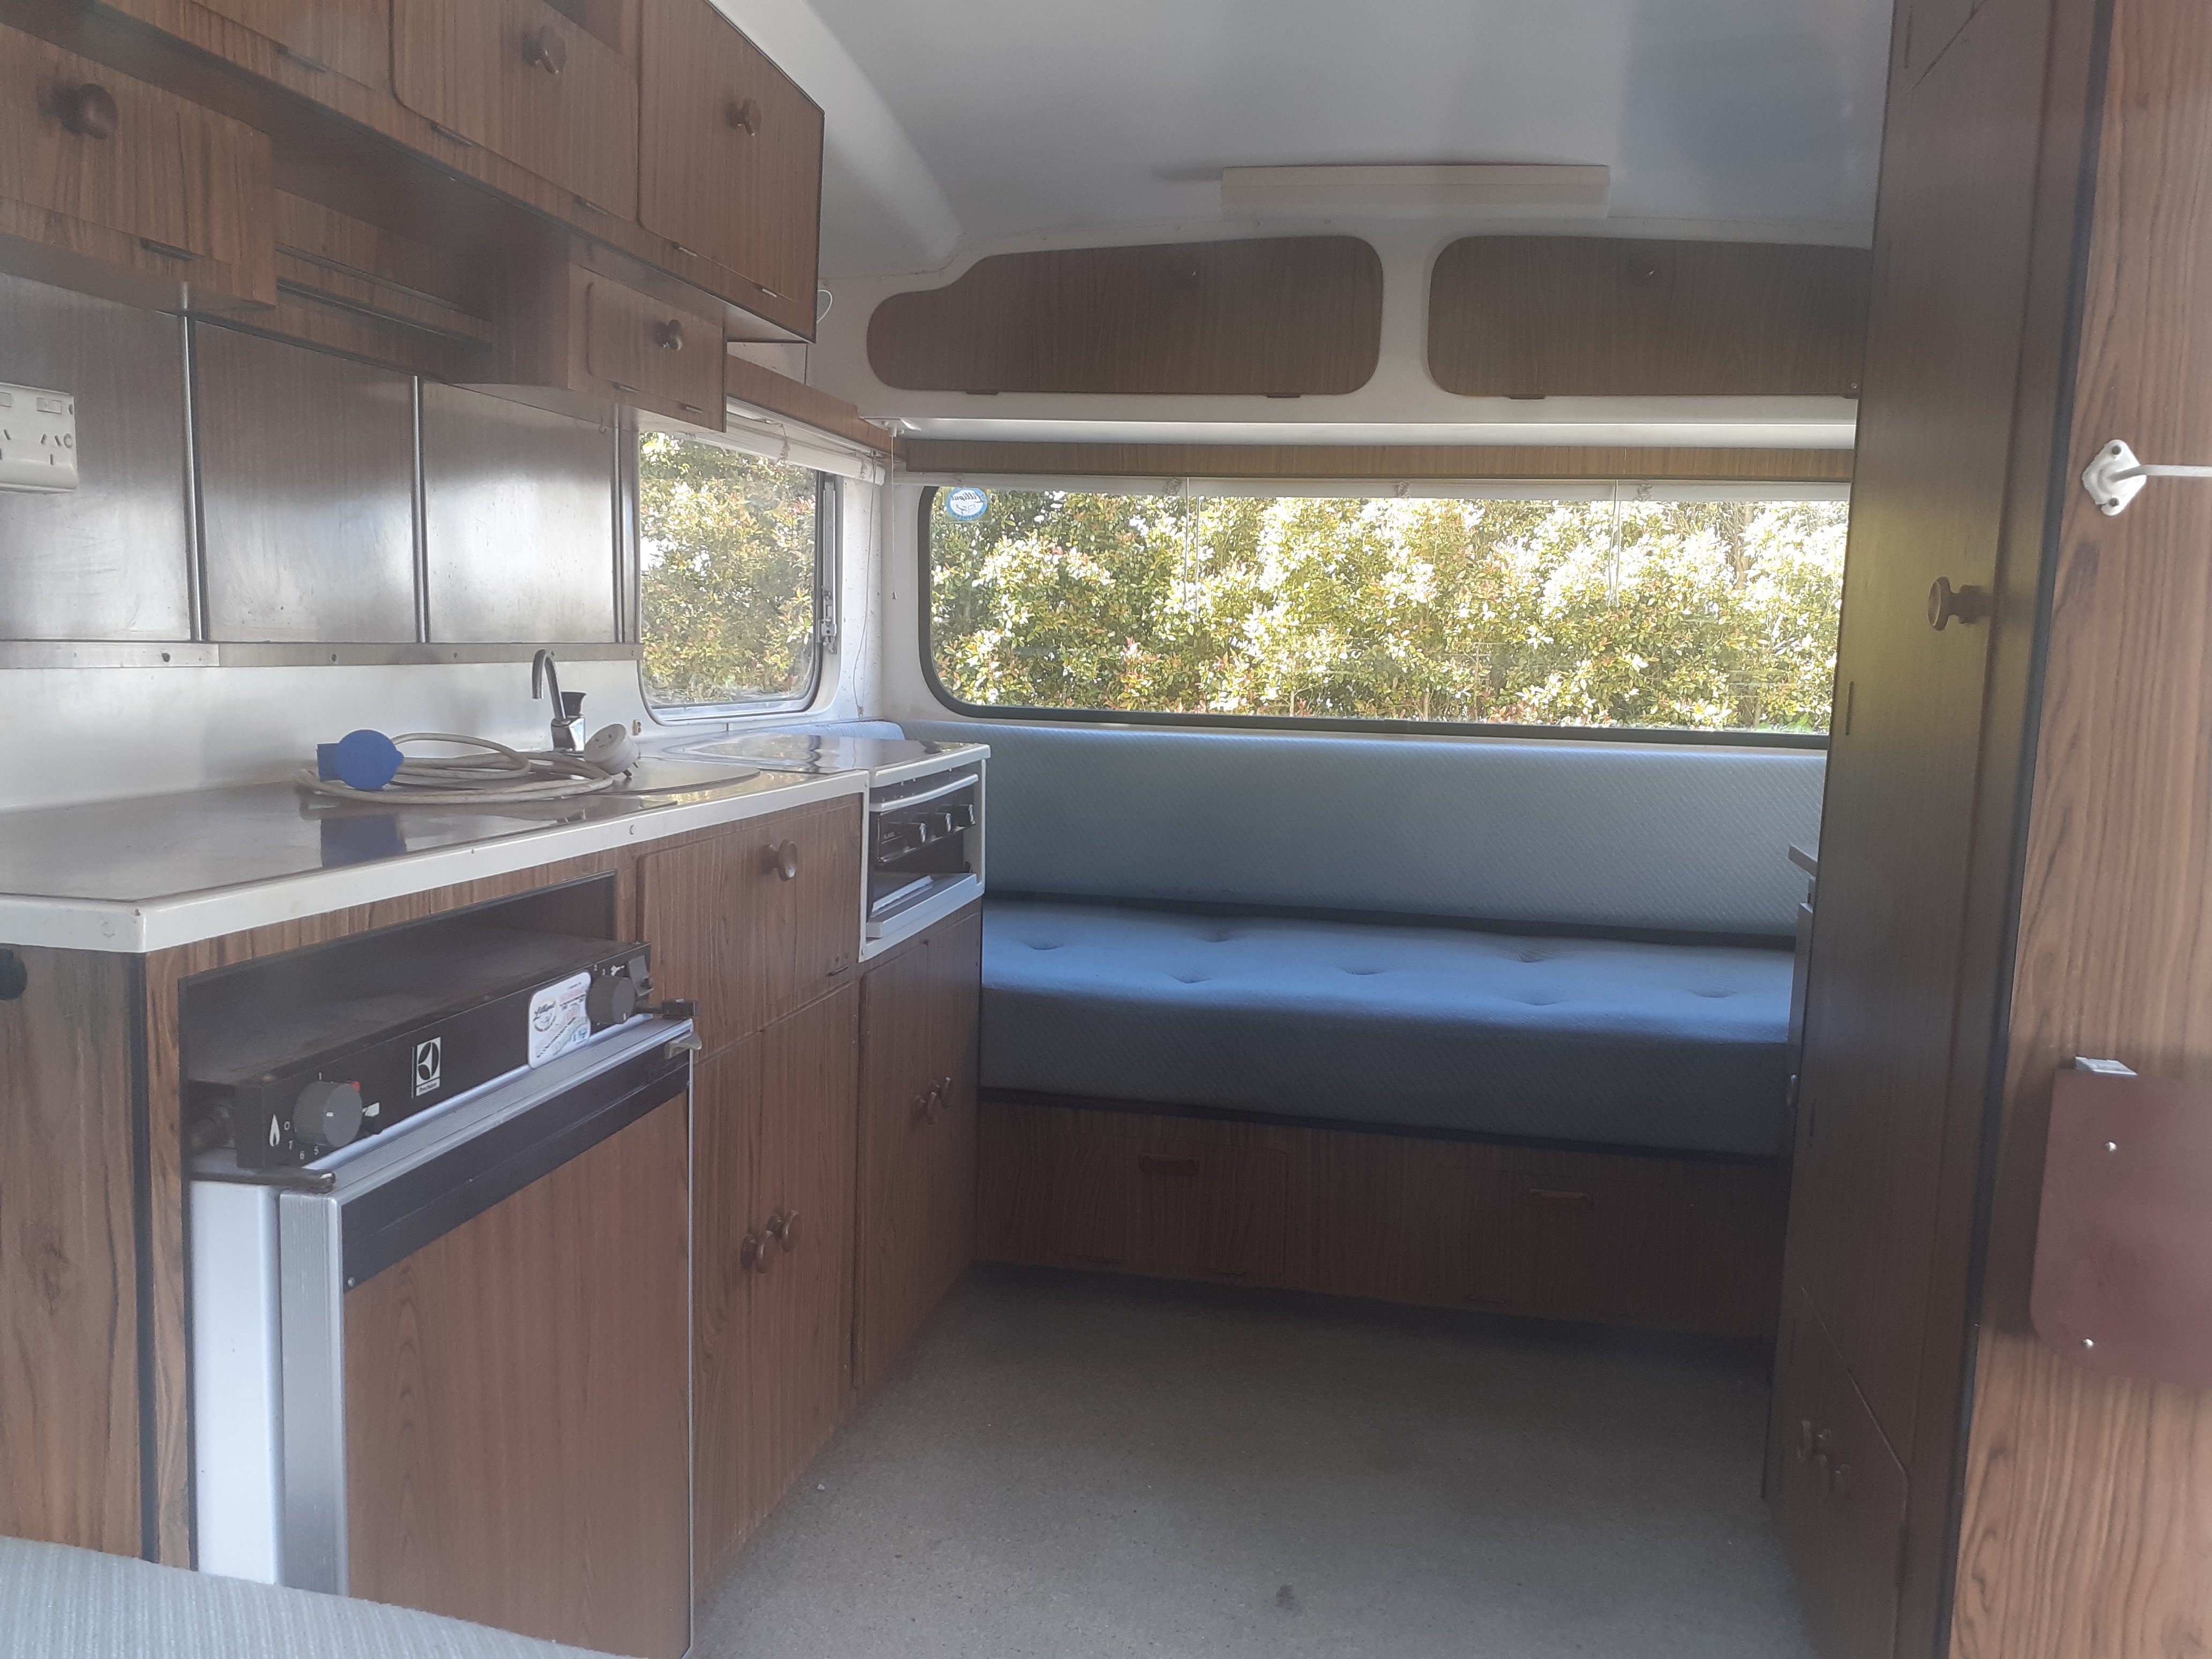
Can’t have carpet that doesn’t match the drapes2 points
-
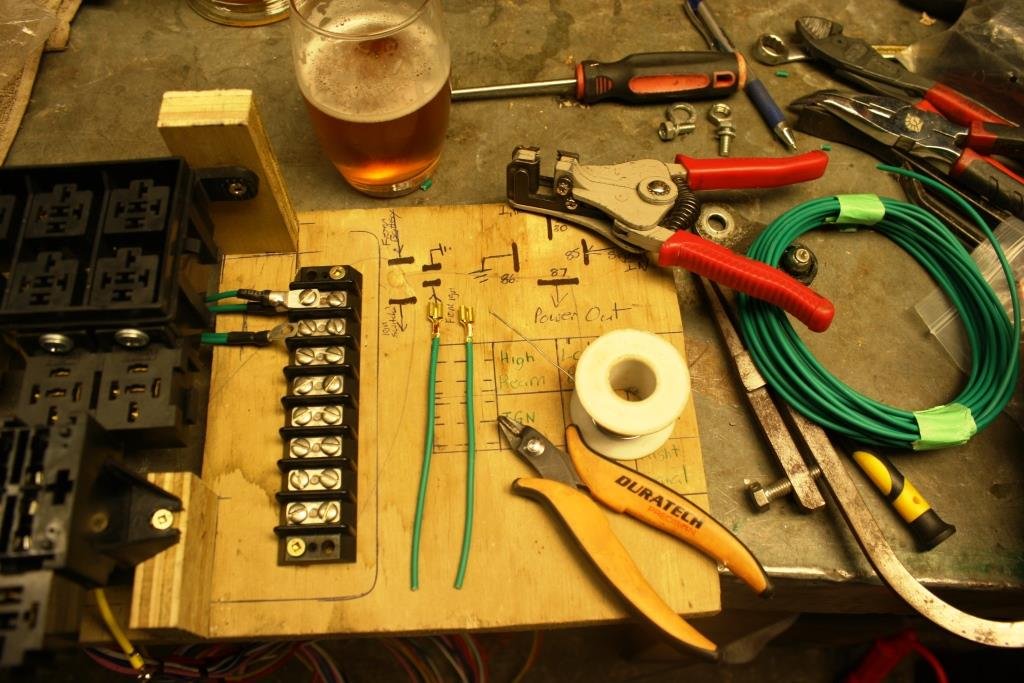
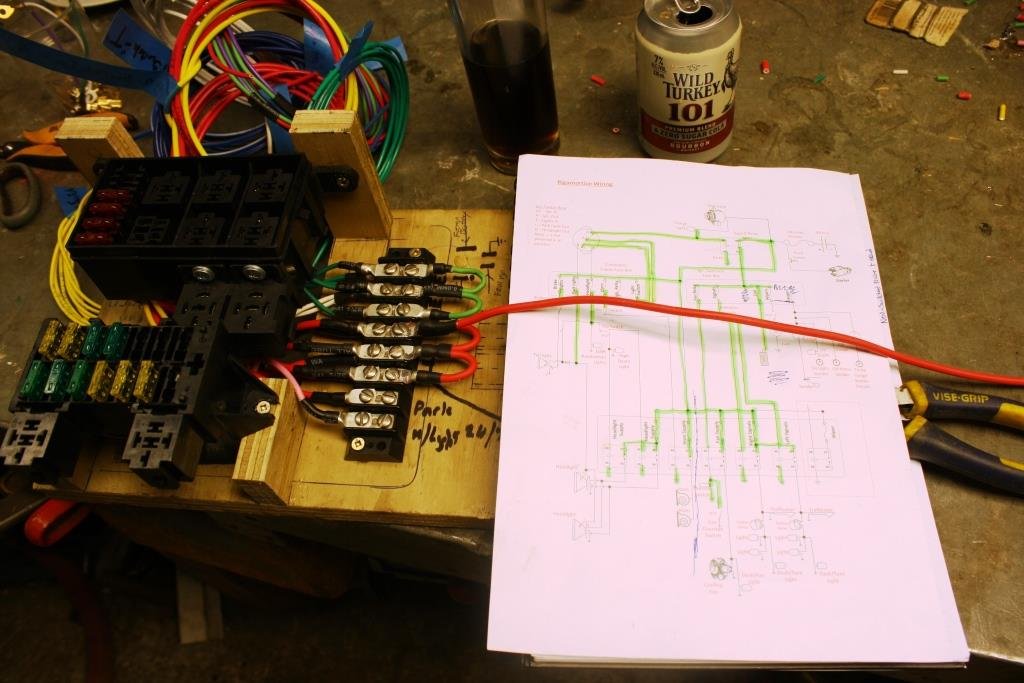
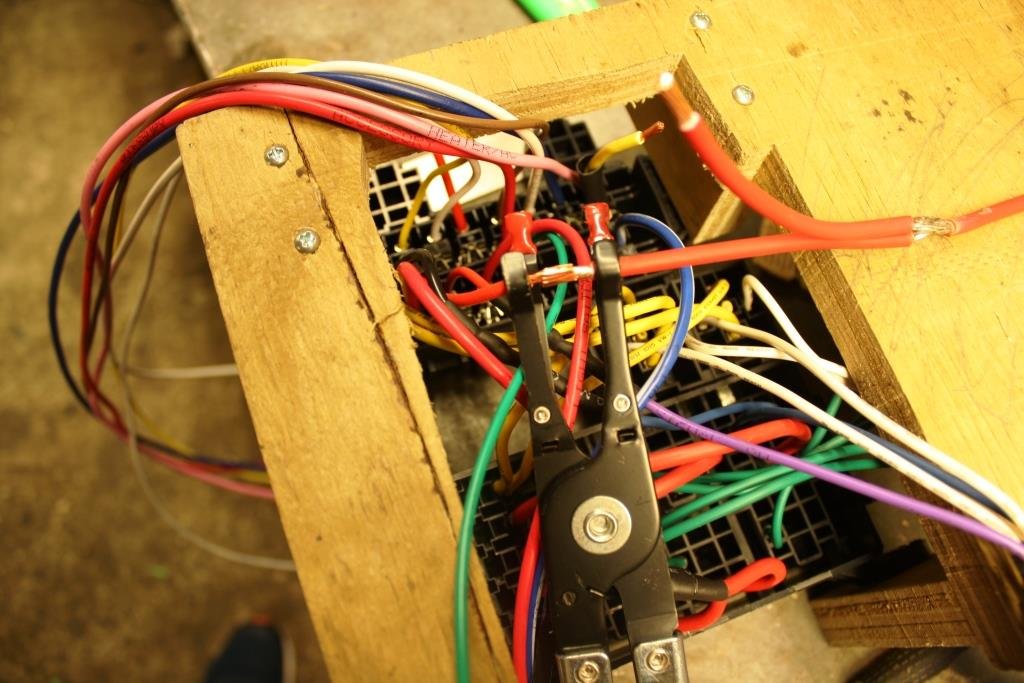
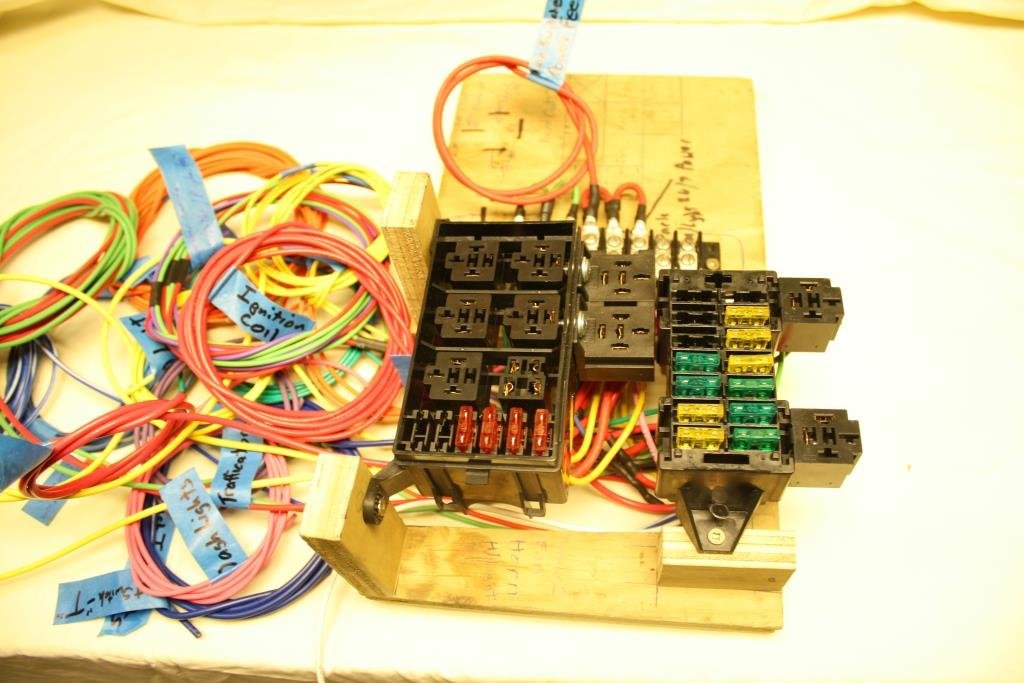
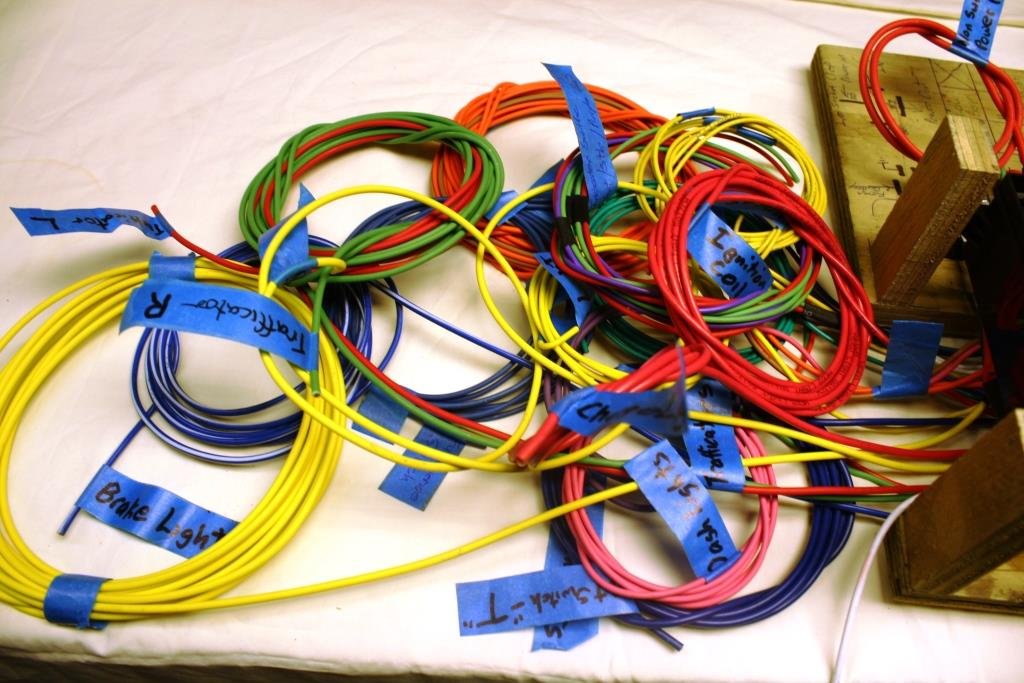
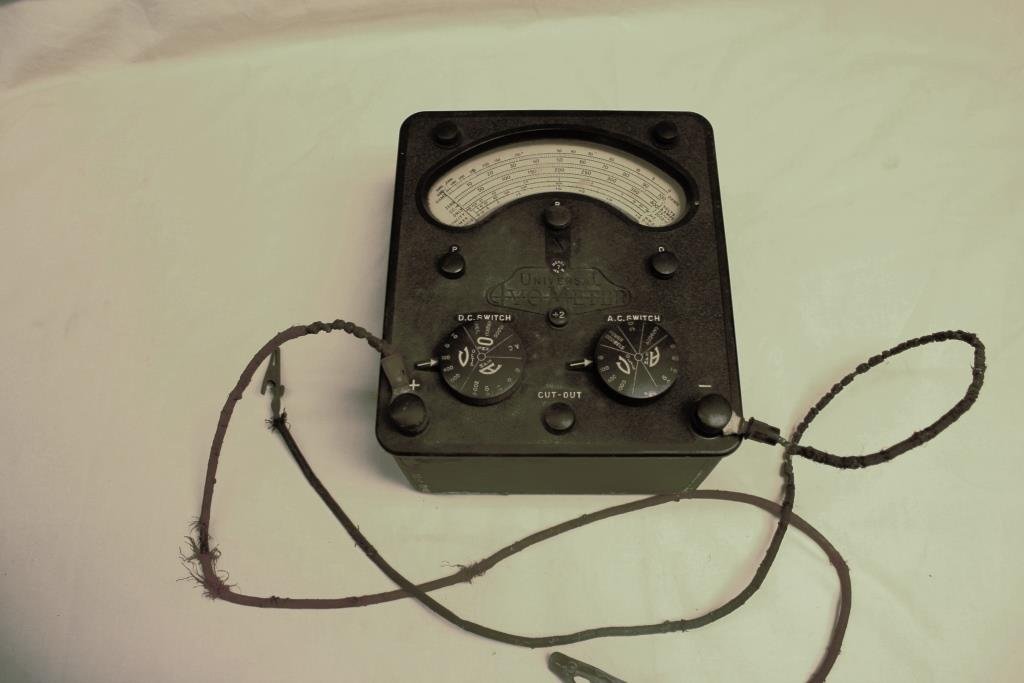
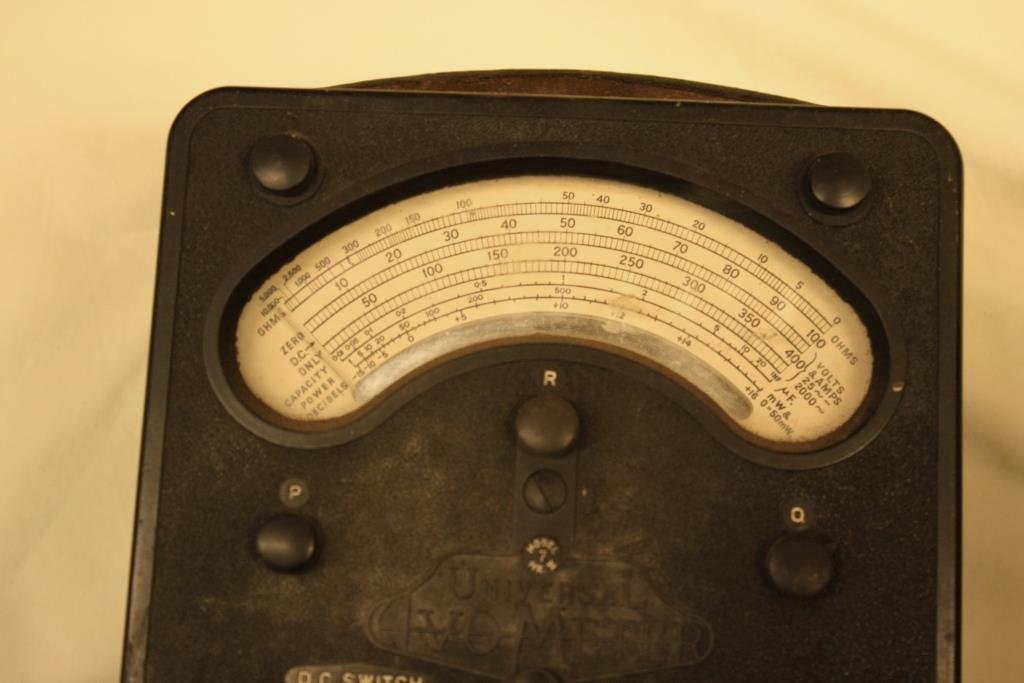
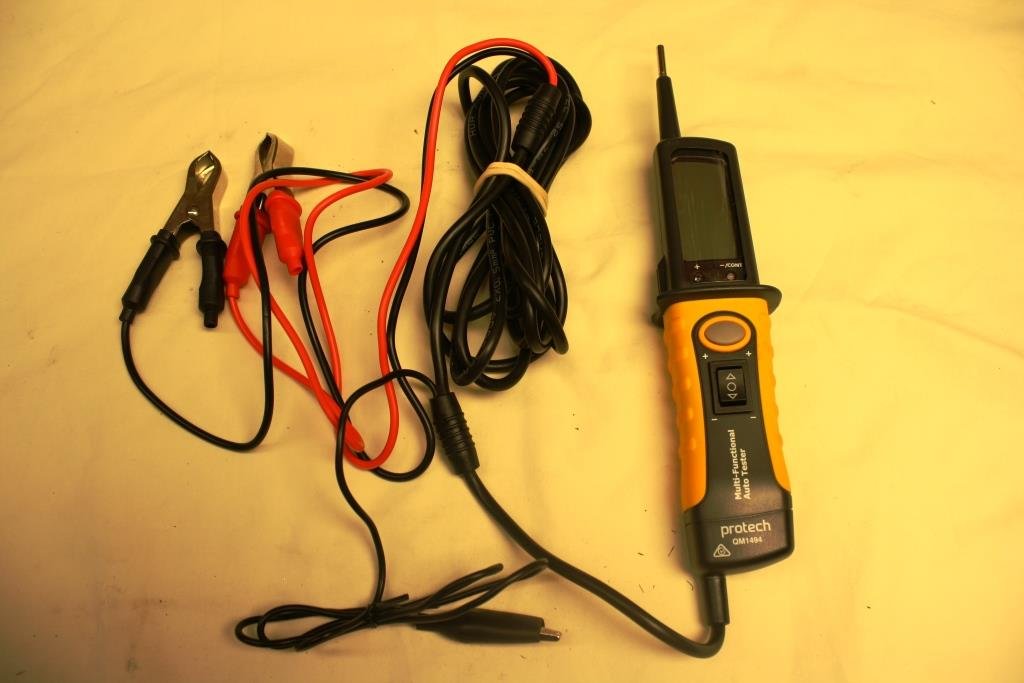
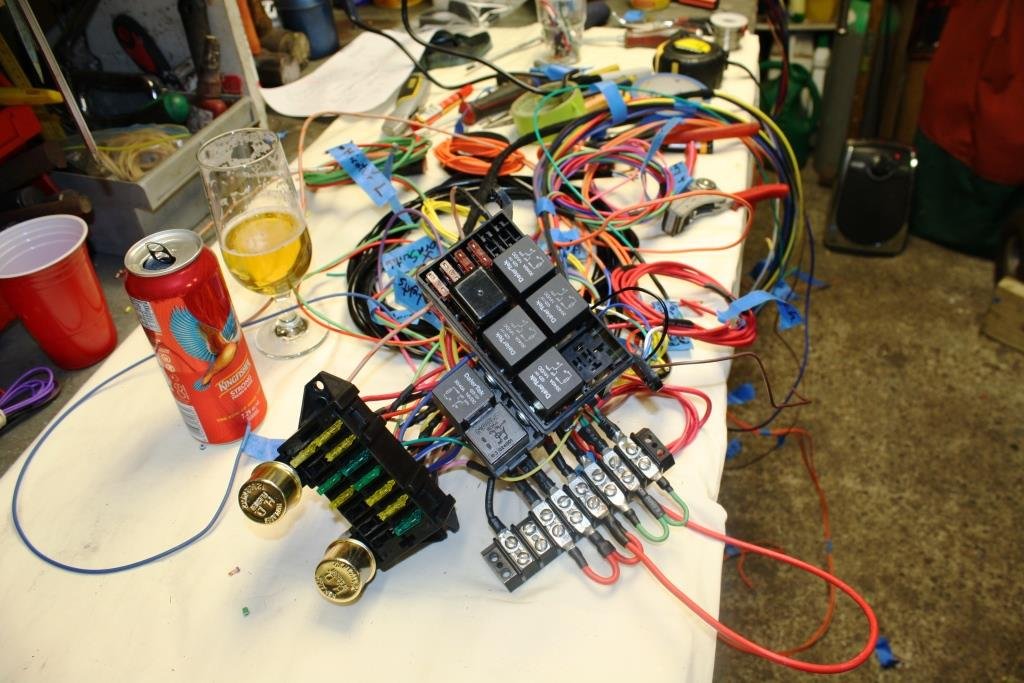
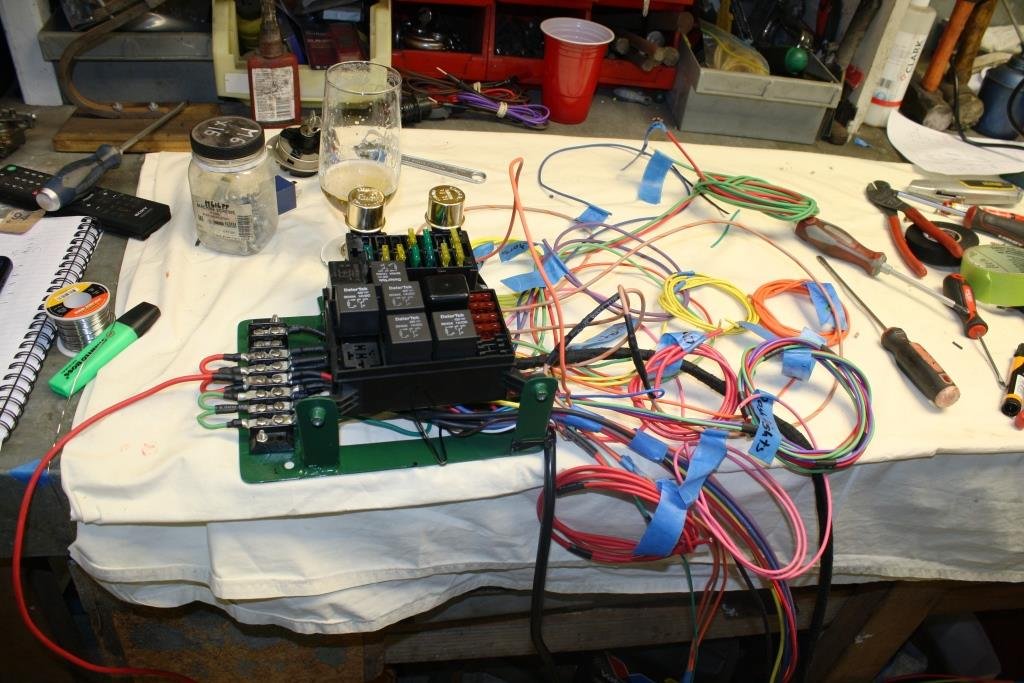
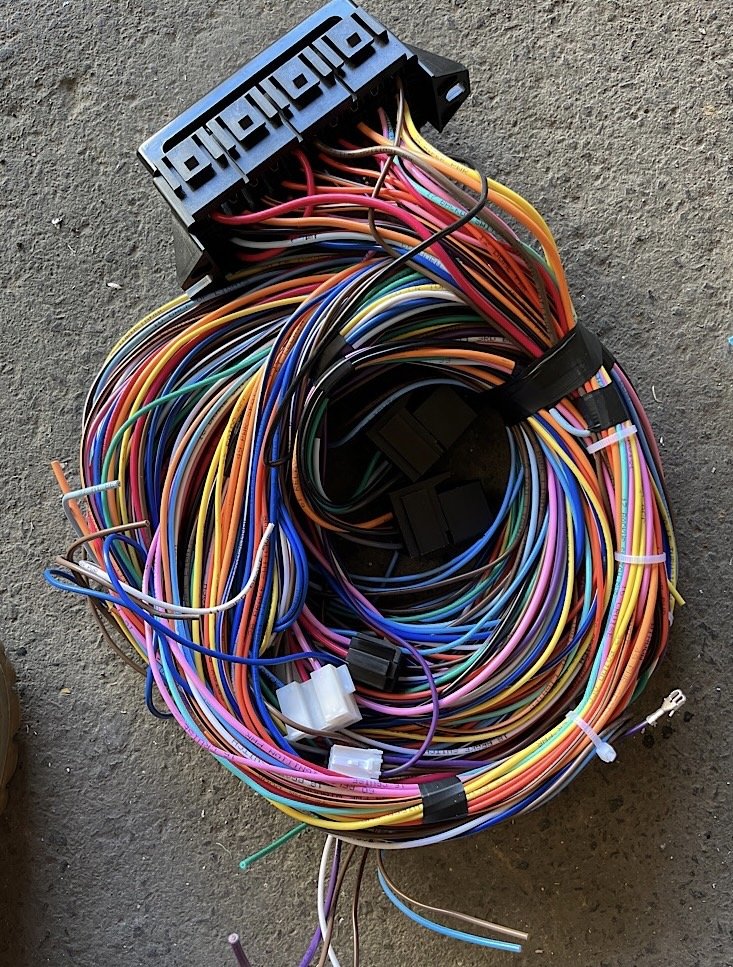
One thing I learnt about wiring years ago is that it always takes a lot longer than you’d think and most importantly liquid self-medication ensures a steady hand on the soldering iron. Started working my way through the circuit diagram making sure I was using the correct length and gauge wire while labelling everything. Making great use of my $15 EBay wire holder when soldering, it’s rubbish quality but works surprisingly well. I’m not a fan of crimping so everything is soldered and covered with glue lined heat shrink. Next step was to power it all up and test with my trusty old Universal Avometer Model 7 Mk2 multi-meter……. Crazy as it sounds the Avometer still works as well as the day it was made (it’s even older than me!) but to be honest my go to tool for car electronics has to be my new Multi-Function Auto Tester, they do everything including powering relays - I can’t recommend them highly enough. Removed a mess of wires, fuses & relays from the wooden jig……… …and mounted it on the freshly painted fuse/relay chassis.
2 points
-
2 points
-
Will probably retrim the cushions as well at some point
2 points
-
So ages ago I got an old mobility scooter, with the intention of convert it into a mini Willy's jeep that my kids can blast around in. The donor vehicle was this beauty, in working condition but with no batts. I borrowed some old batteries from my BIL, but they were well past it, so had to invest in a good set, not sure on the range yet, but it will be decent with a couple of 50ah's in there. I then half assedly rearranged it to have a steering wheel from a ride on, and lowered the seat so the kids could drive it. I also fitted a foot pedal accelerator. It was like this for more than a year or so I guess. Then recently I decided I better actually work on making it into the jeep it was meant to be, before the kids get too old. So I did quite a bit of chassis modification to get the batteries back a bit (mainly so there's room for my feet to fit in) I also fitted new black tyres, as the old fronts were rooted. I then widened the front track 80mm to match the rear, not sure why they made the front skinnier to begin with tbh. Then I started work on repositioning the steering to one side. I used bearings and pressed steel housing I already had, and got a couple of sprockets to reduce the steering speed by half, to make it a bit easier to turn with the smaller steering wheel. The center hub slides to tension the chain. The shitty pressed steel housings didn't like having the leverage of the long steering shaft on them, and bent, so I machined up a hub to replace them, it's mint as now. I then whipped up a crappy temporary floor and seat (not finished in pic) so the kids can drive it while I build the body, which is the next mission. Regards, VG.1 point
-
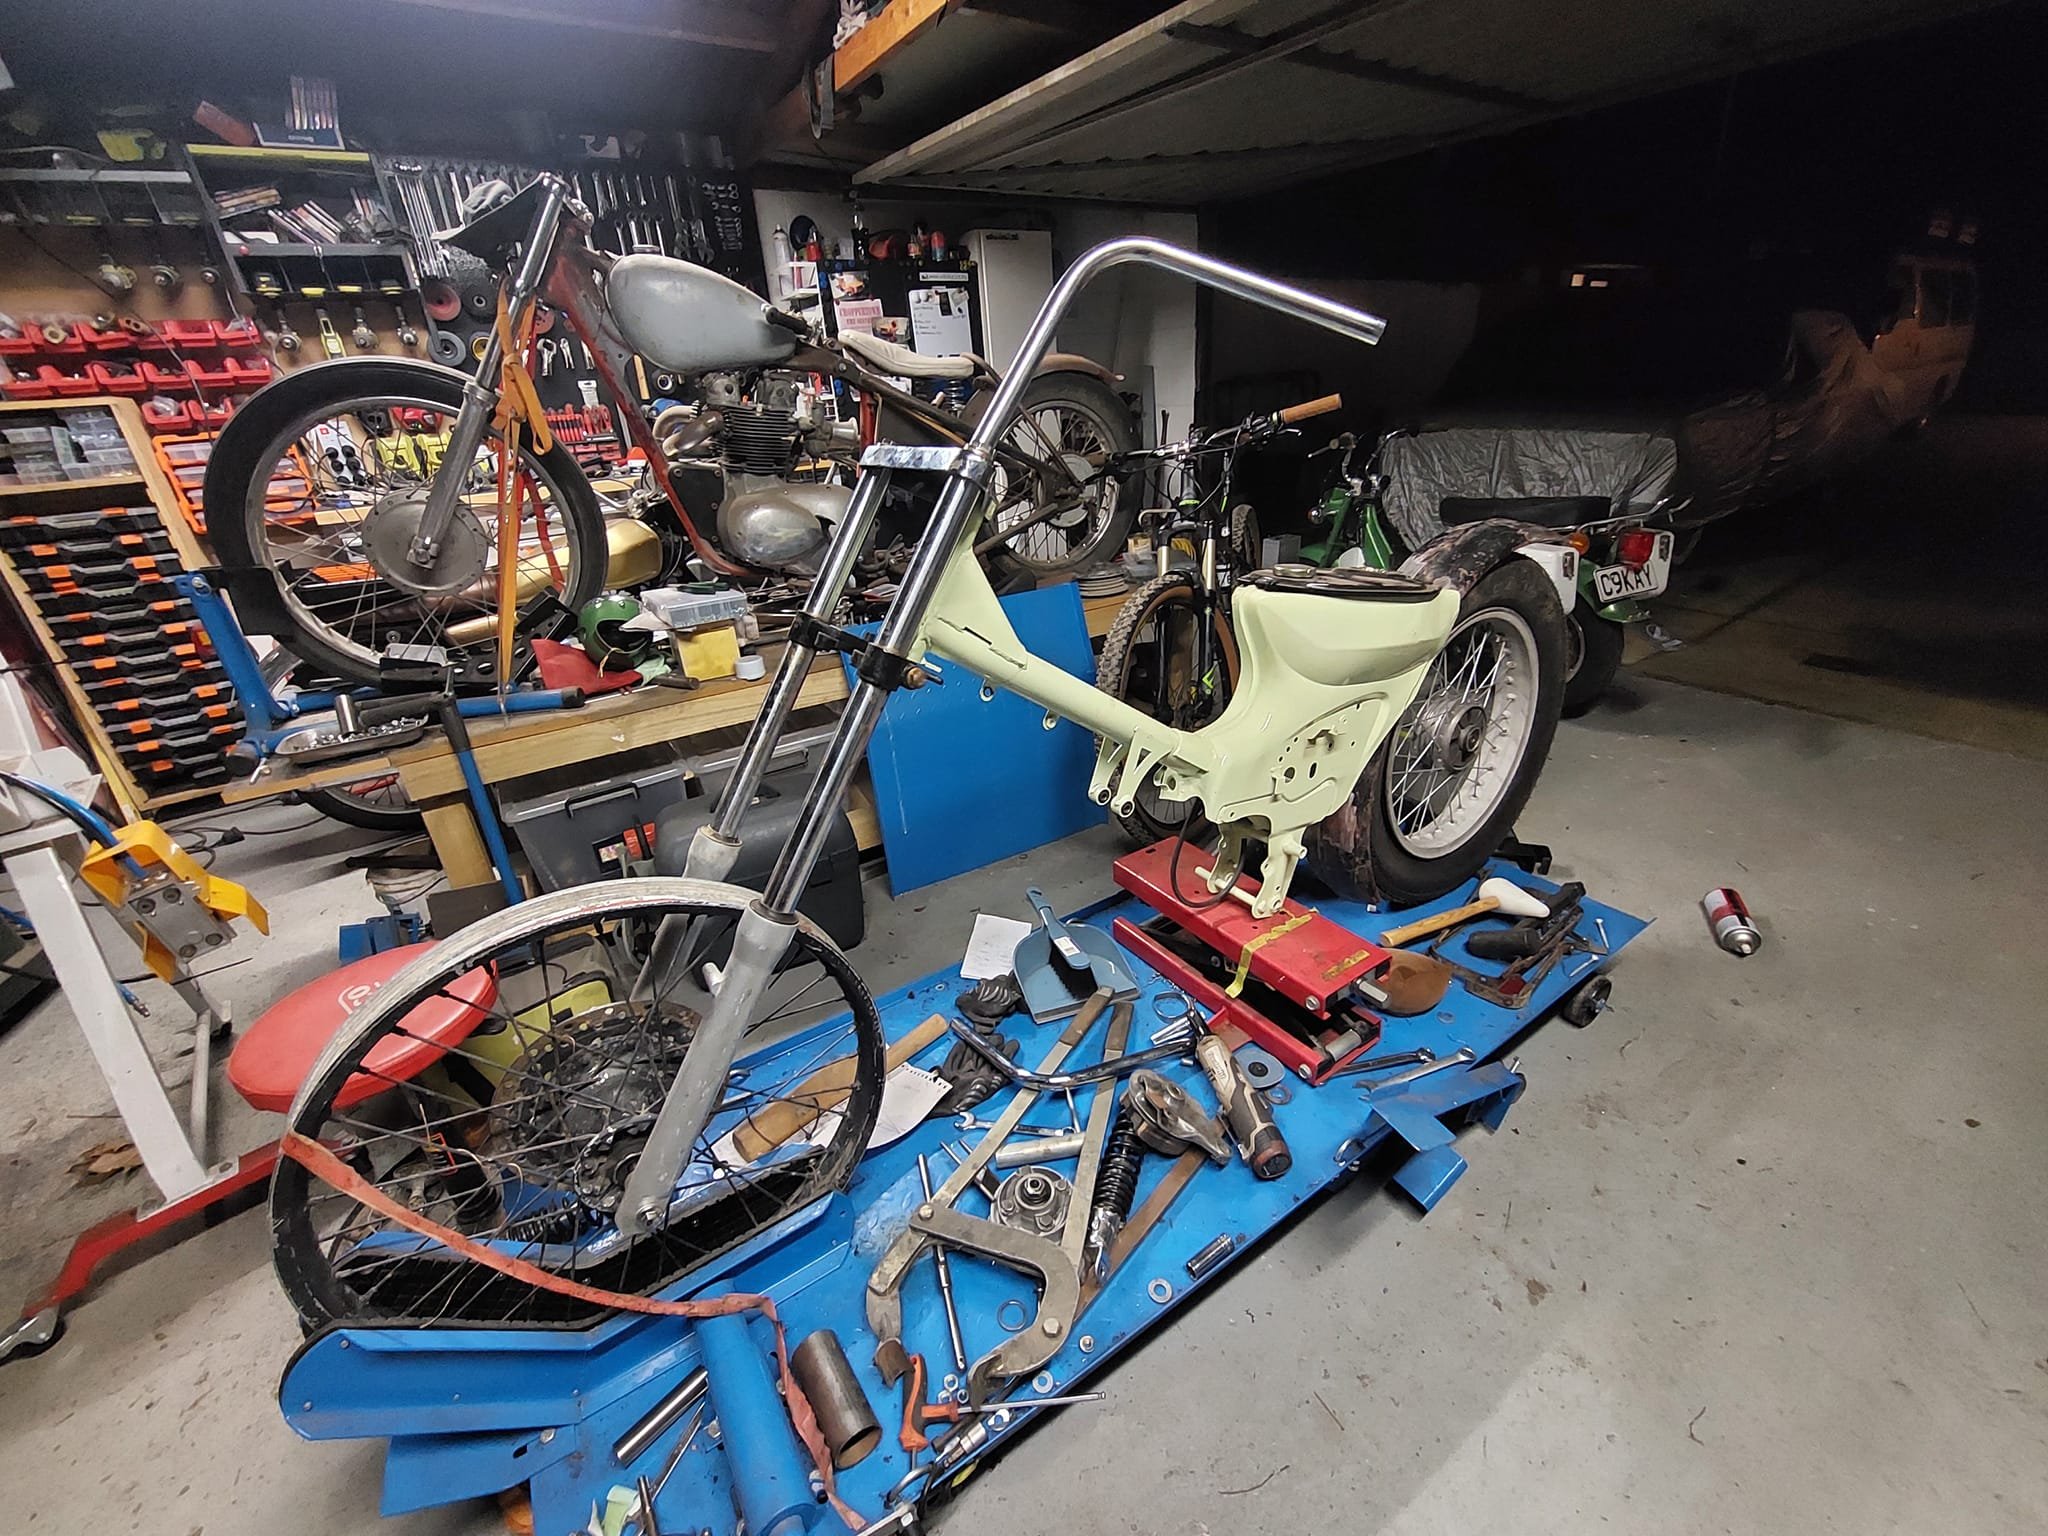
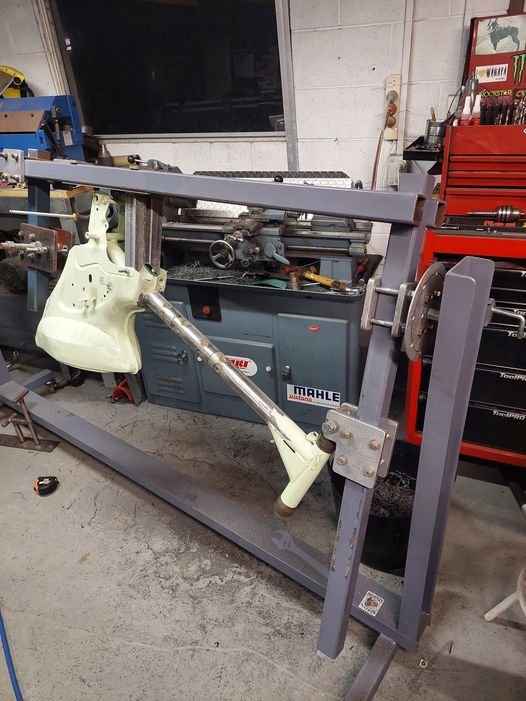
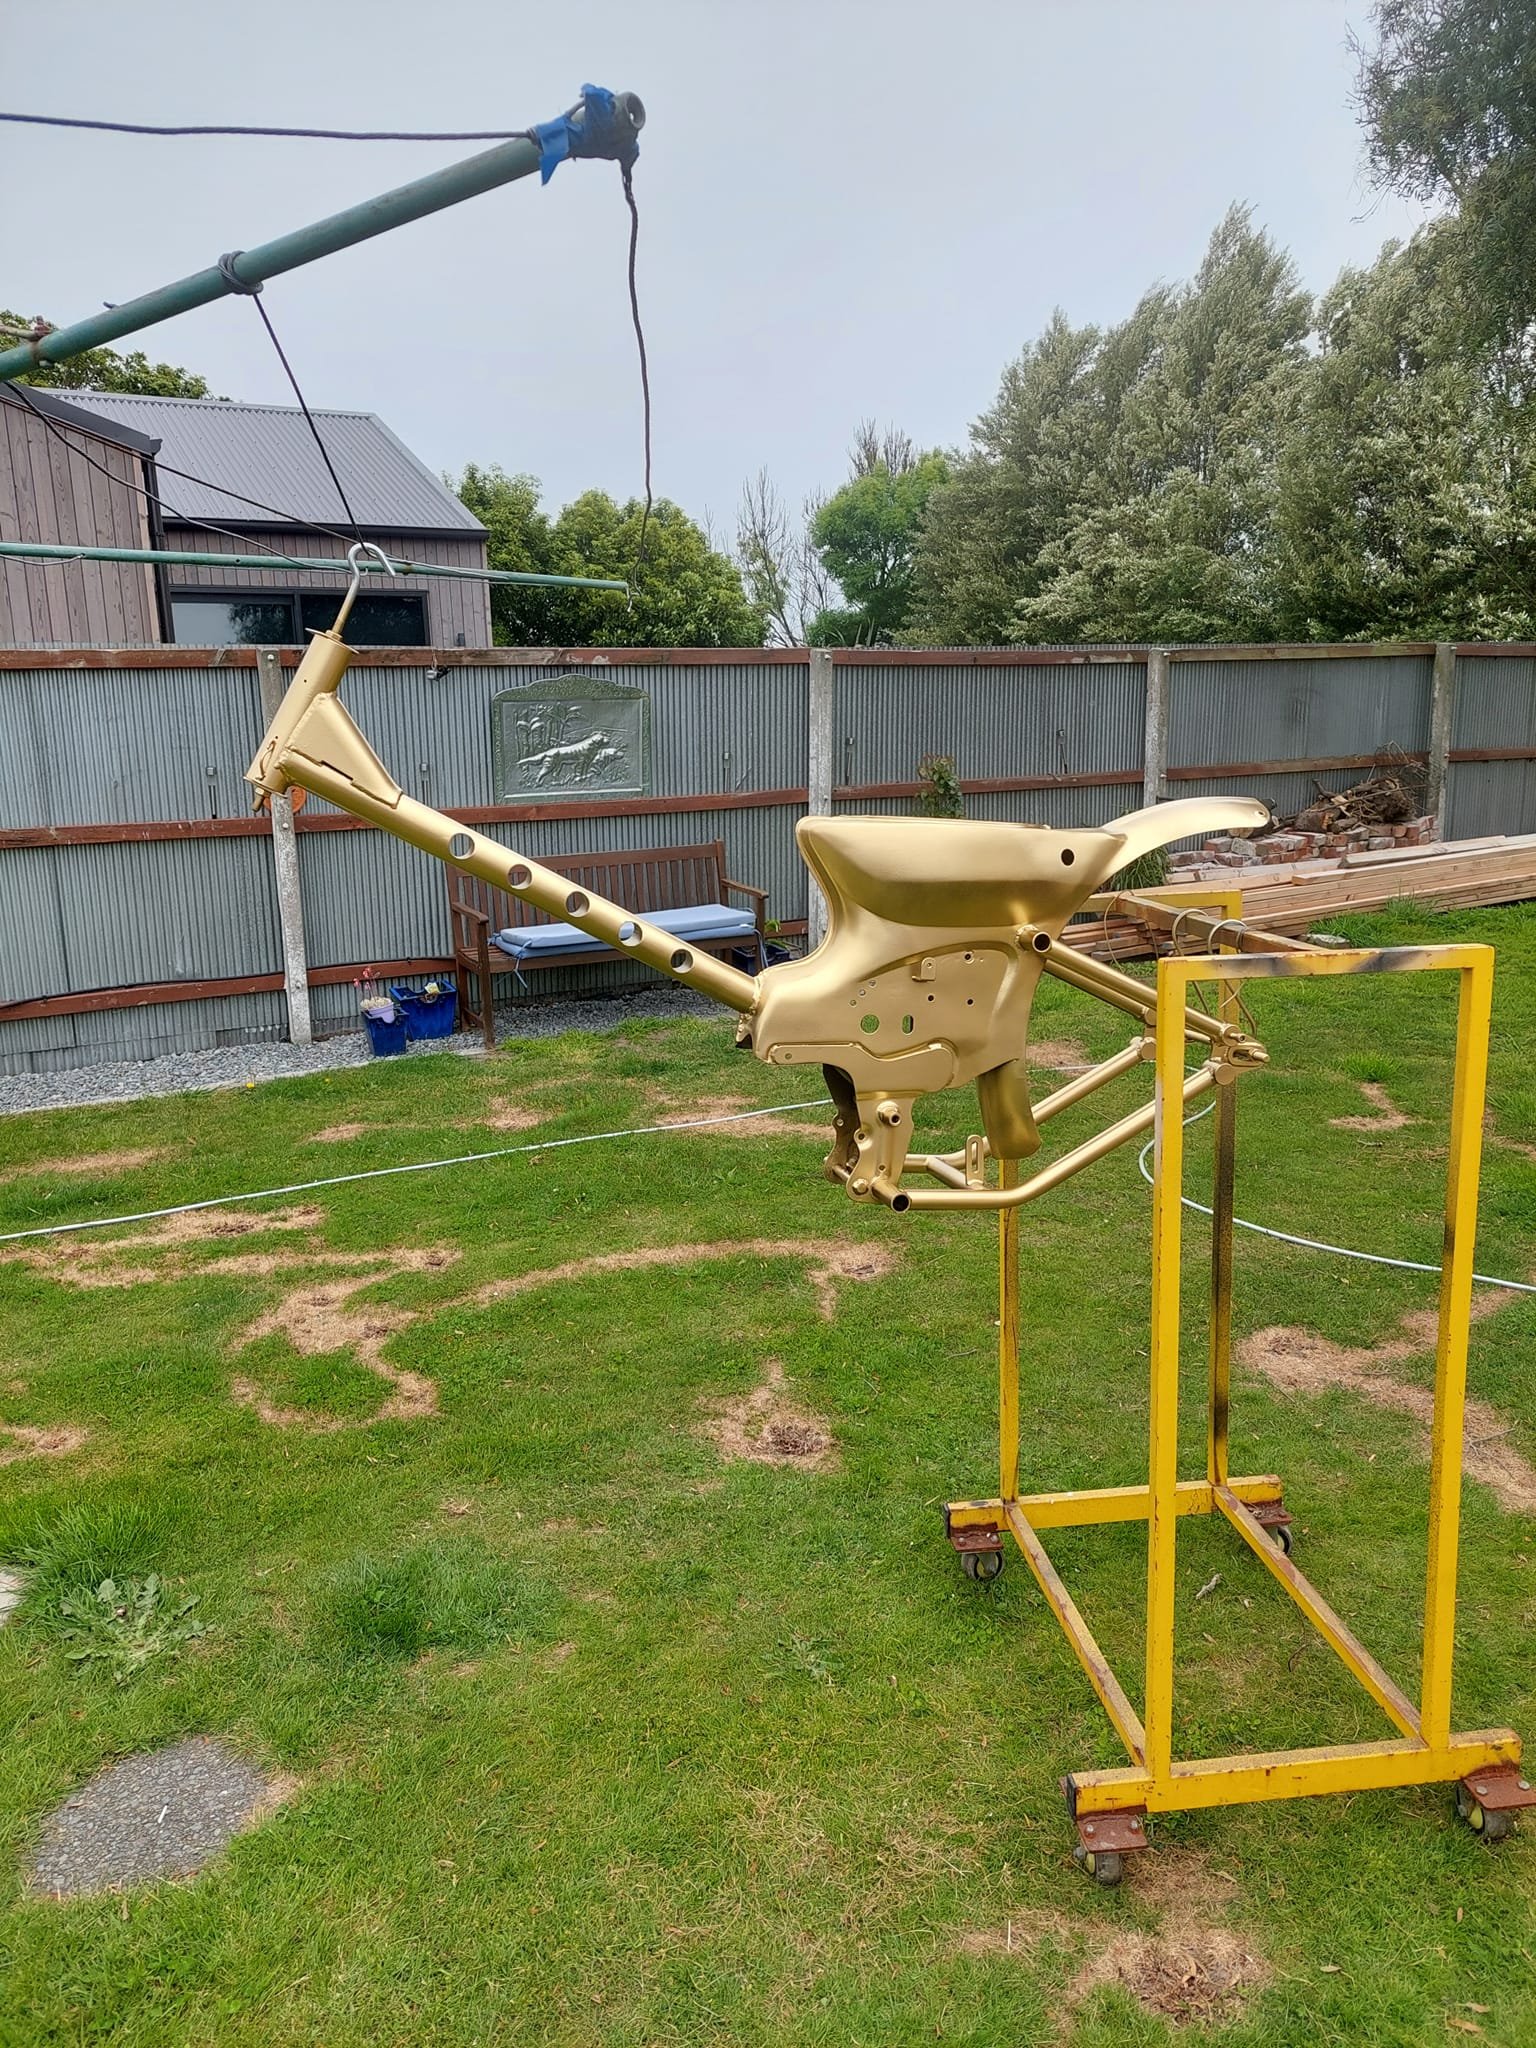
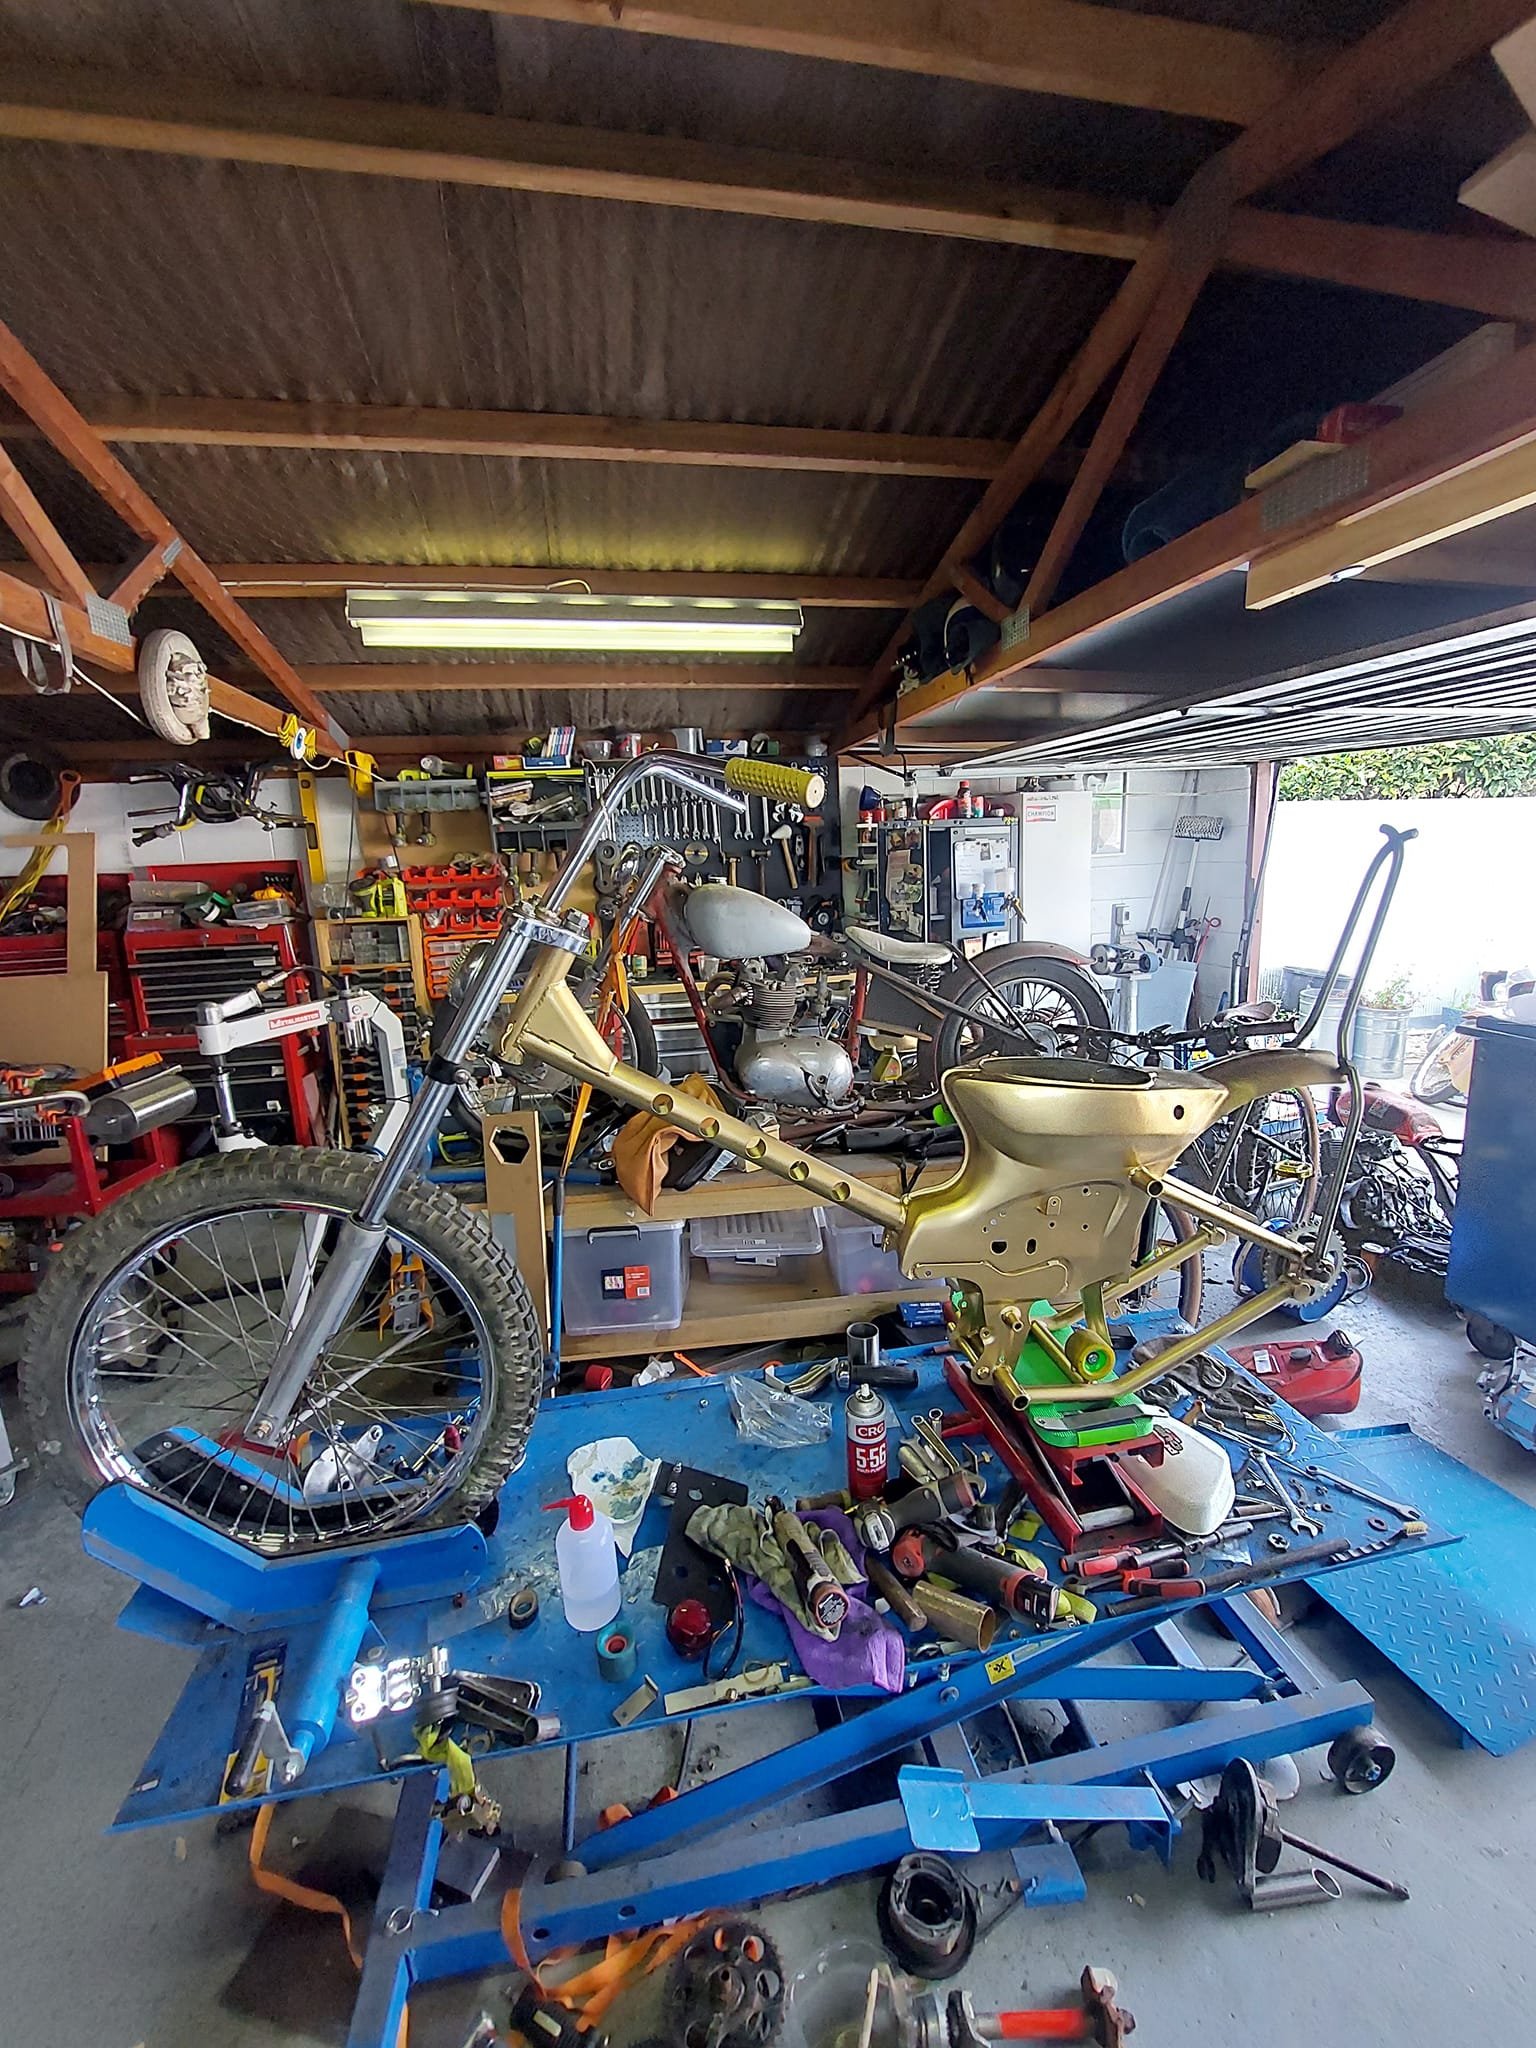
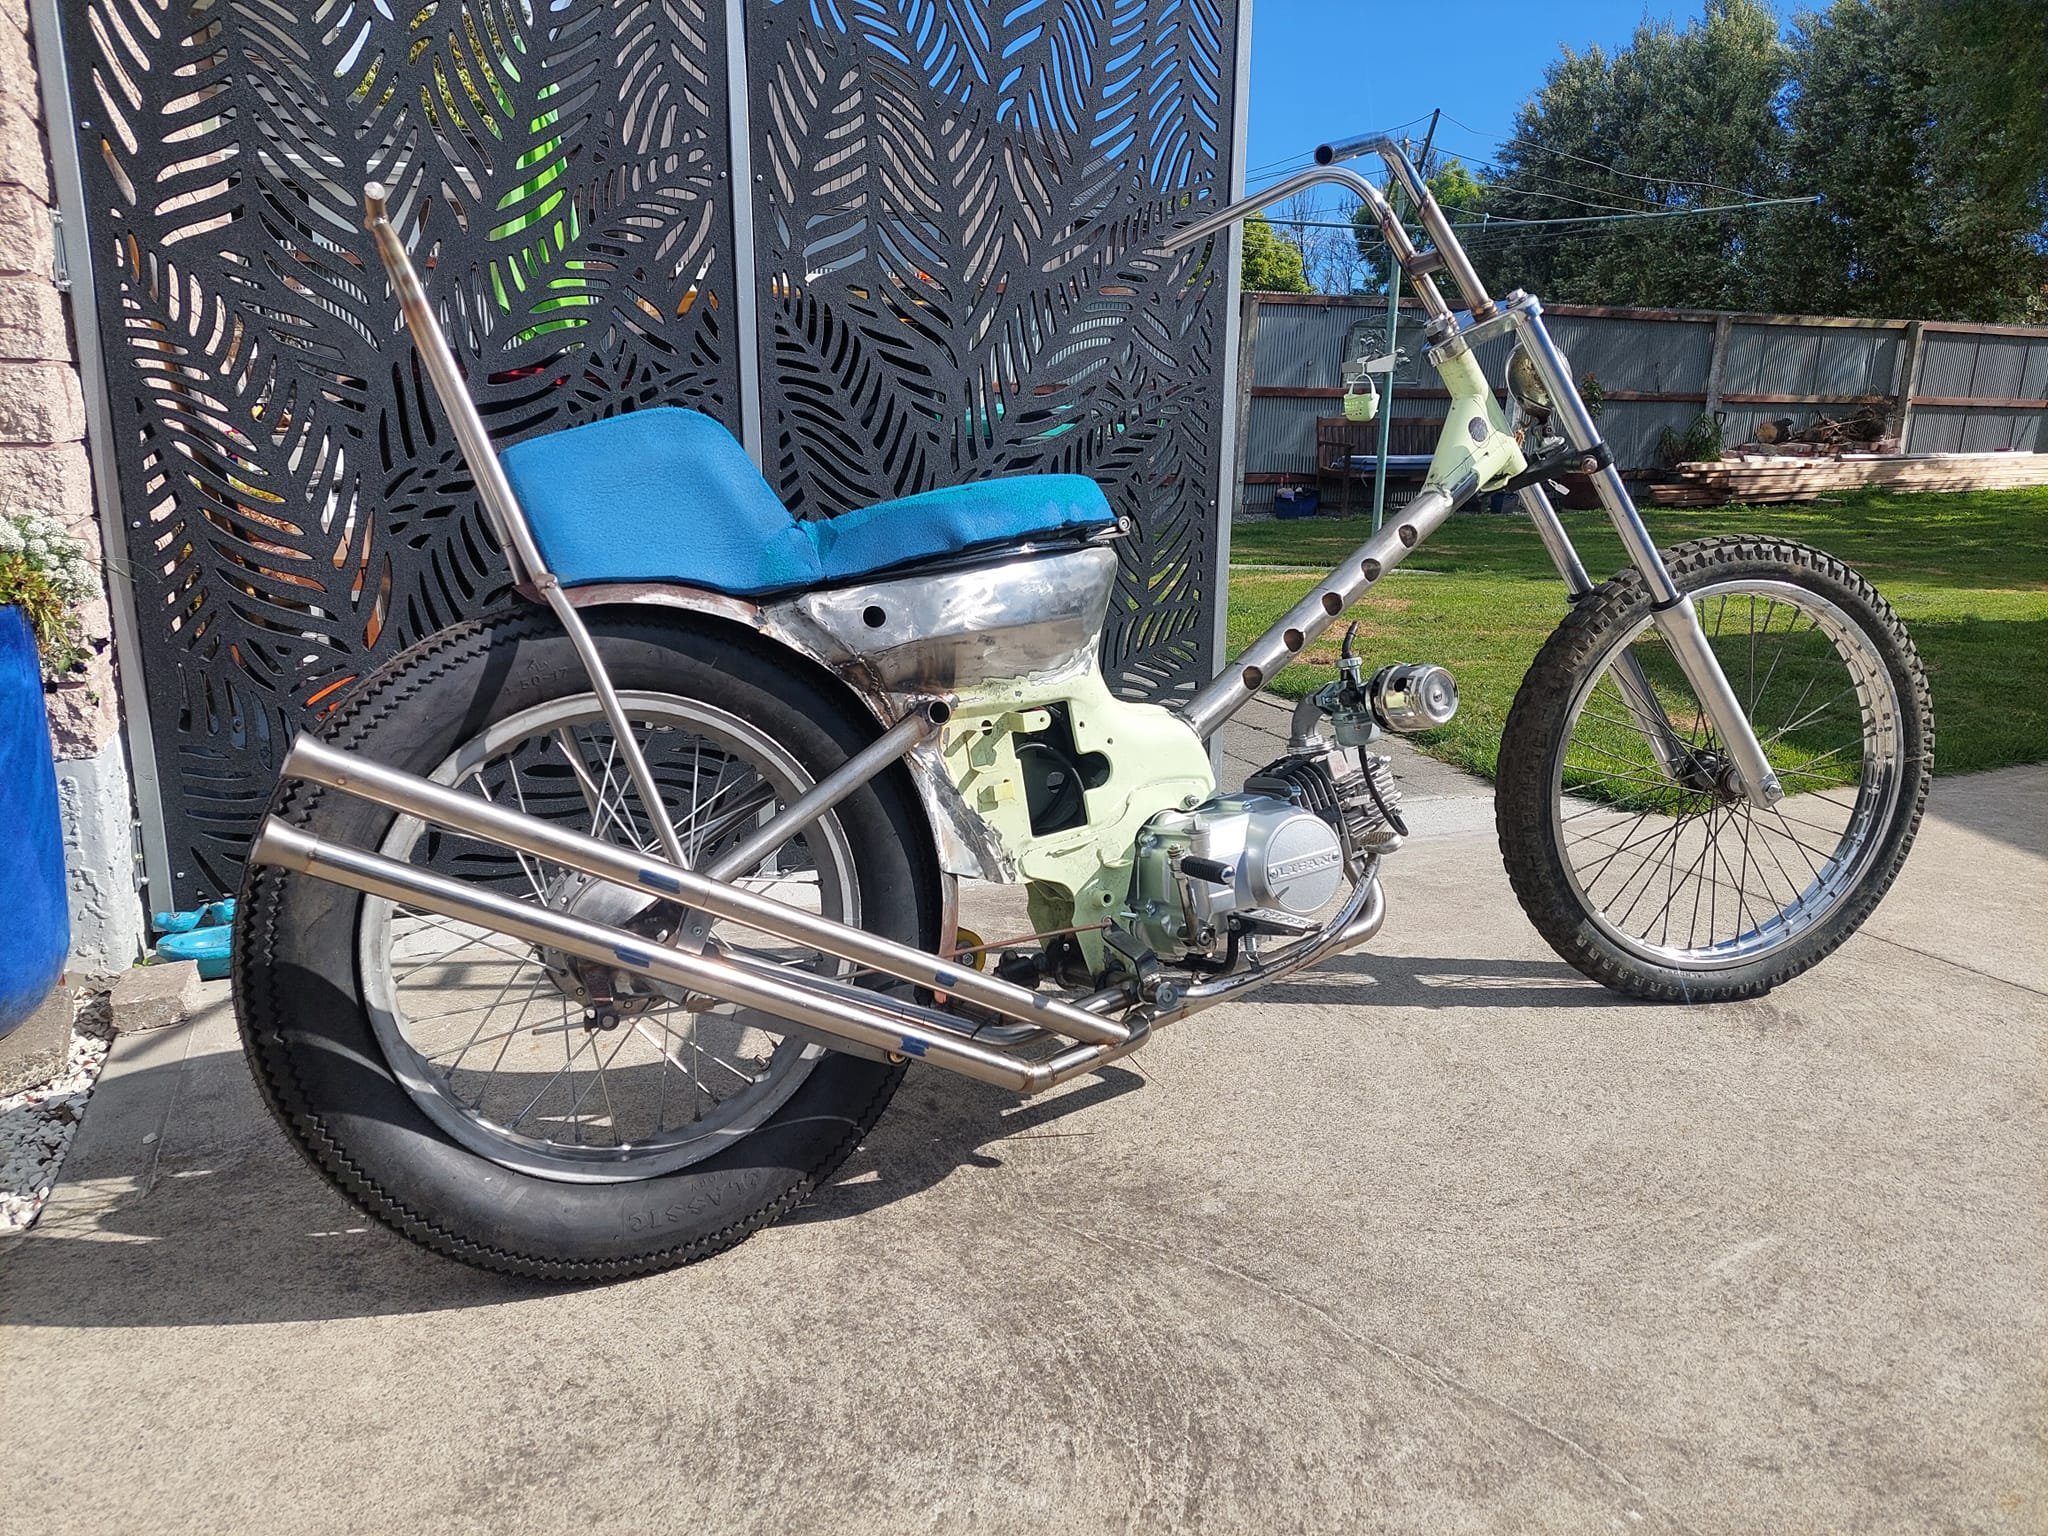
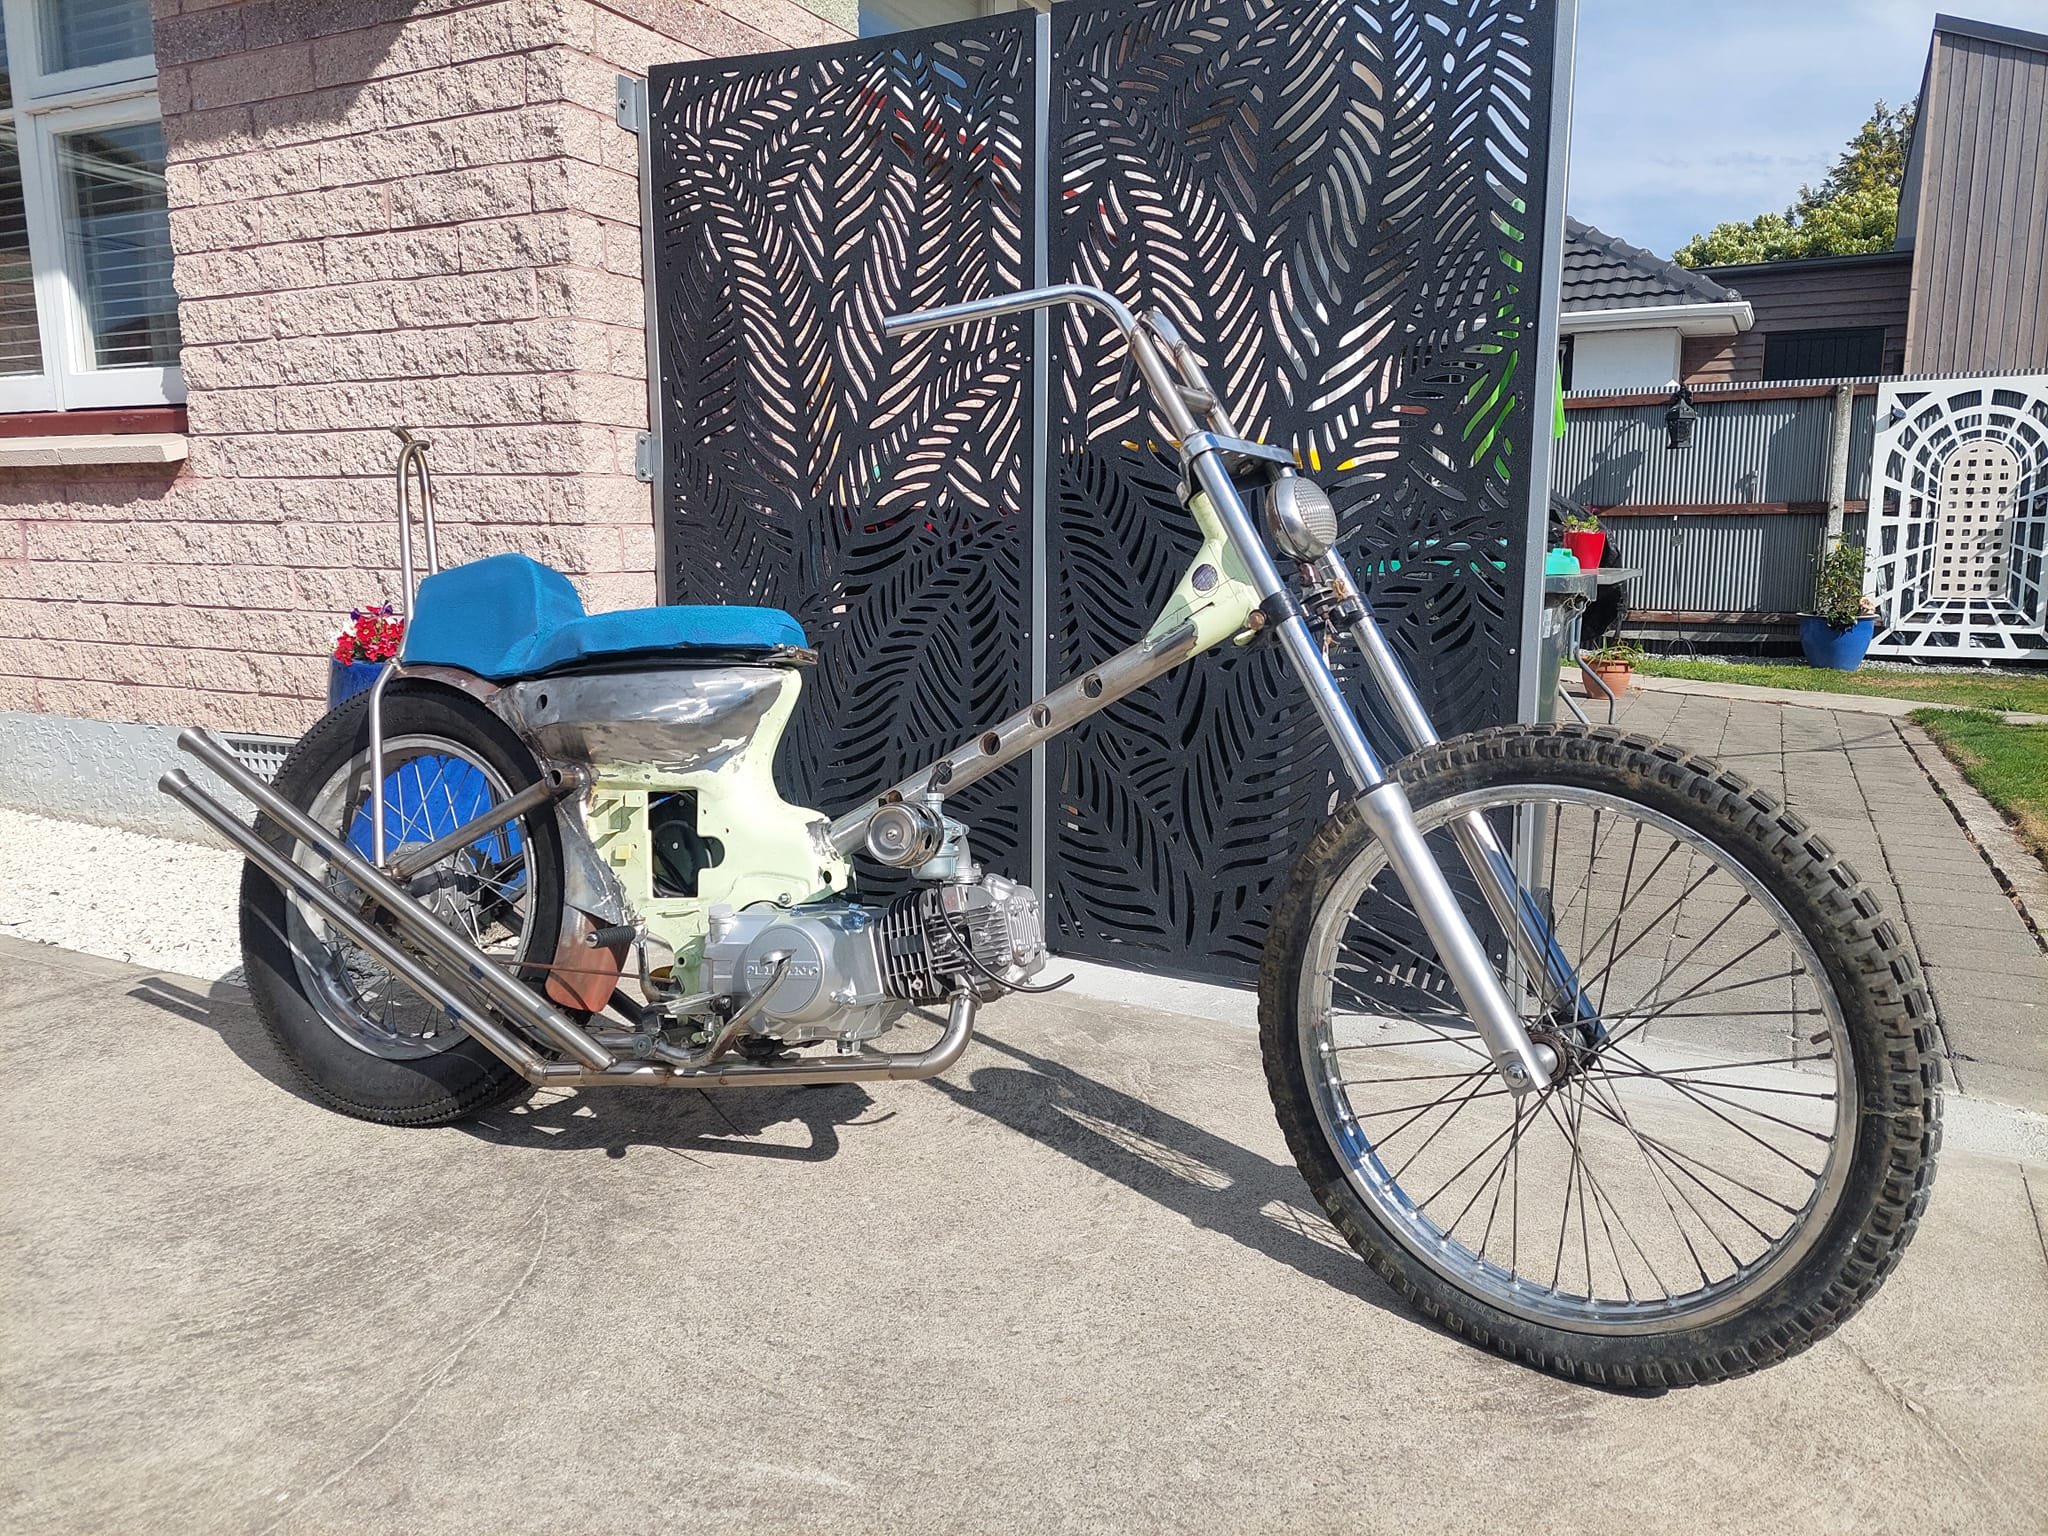
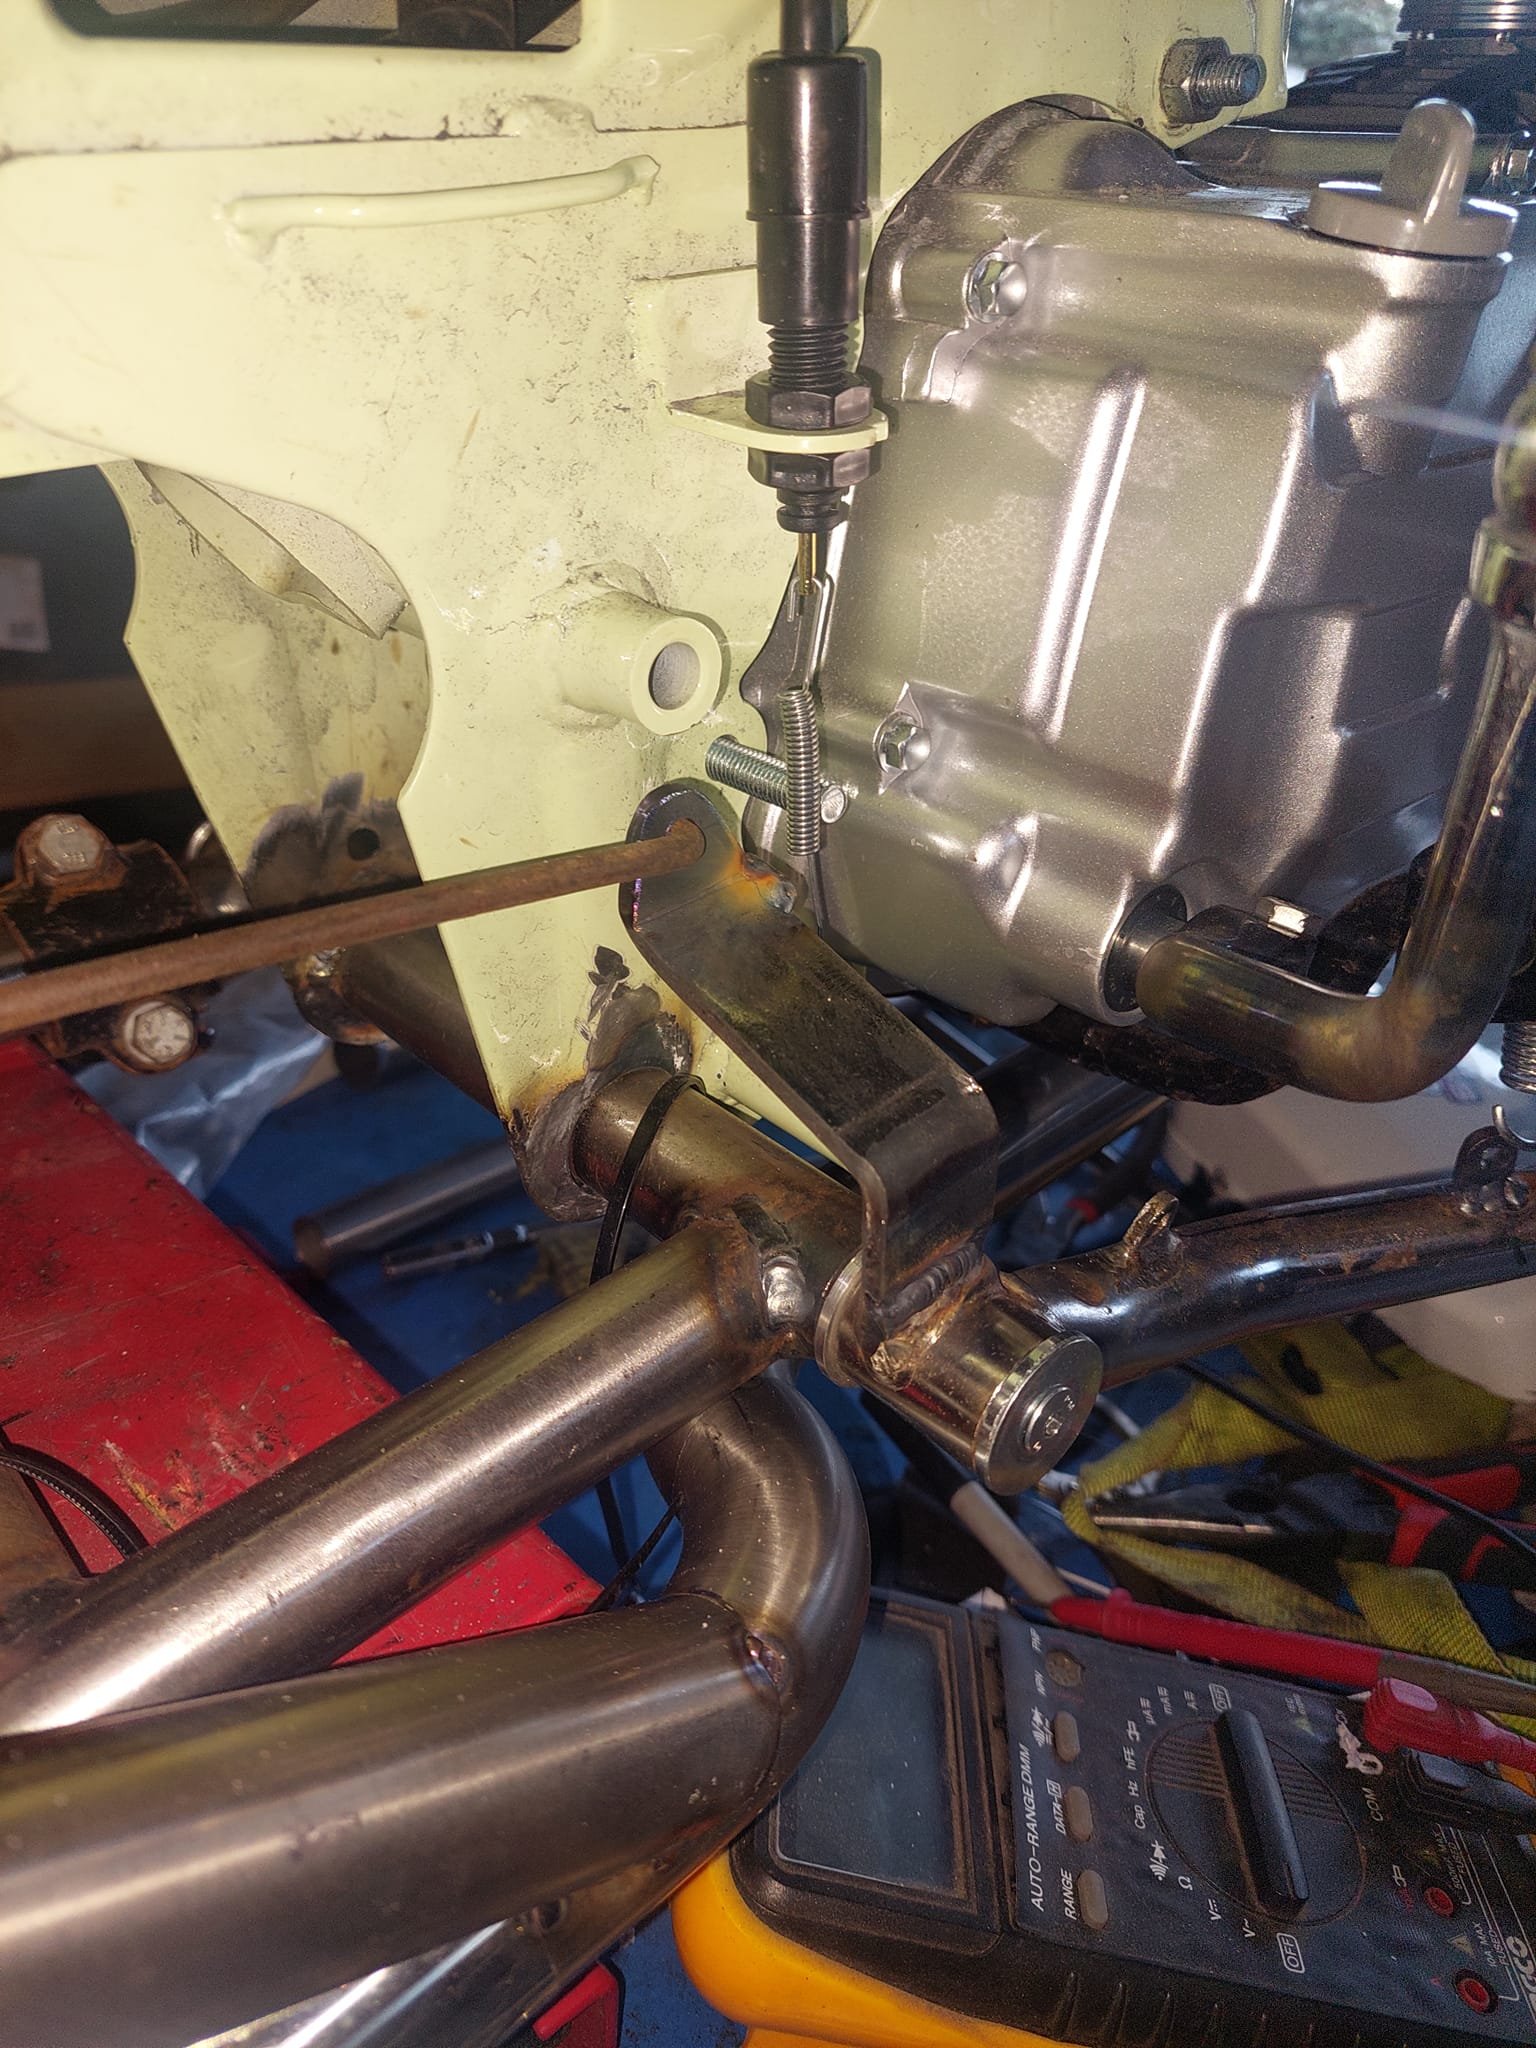
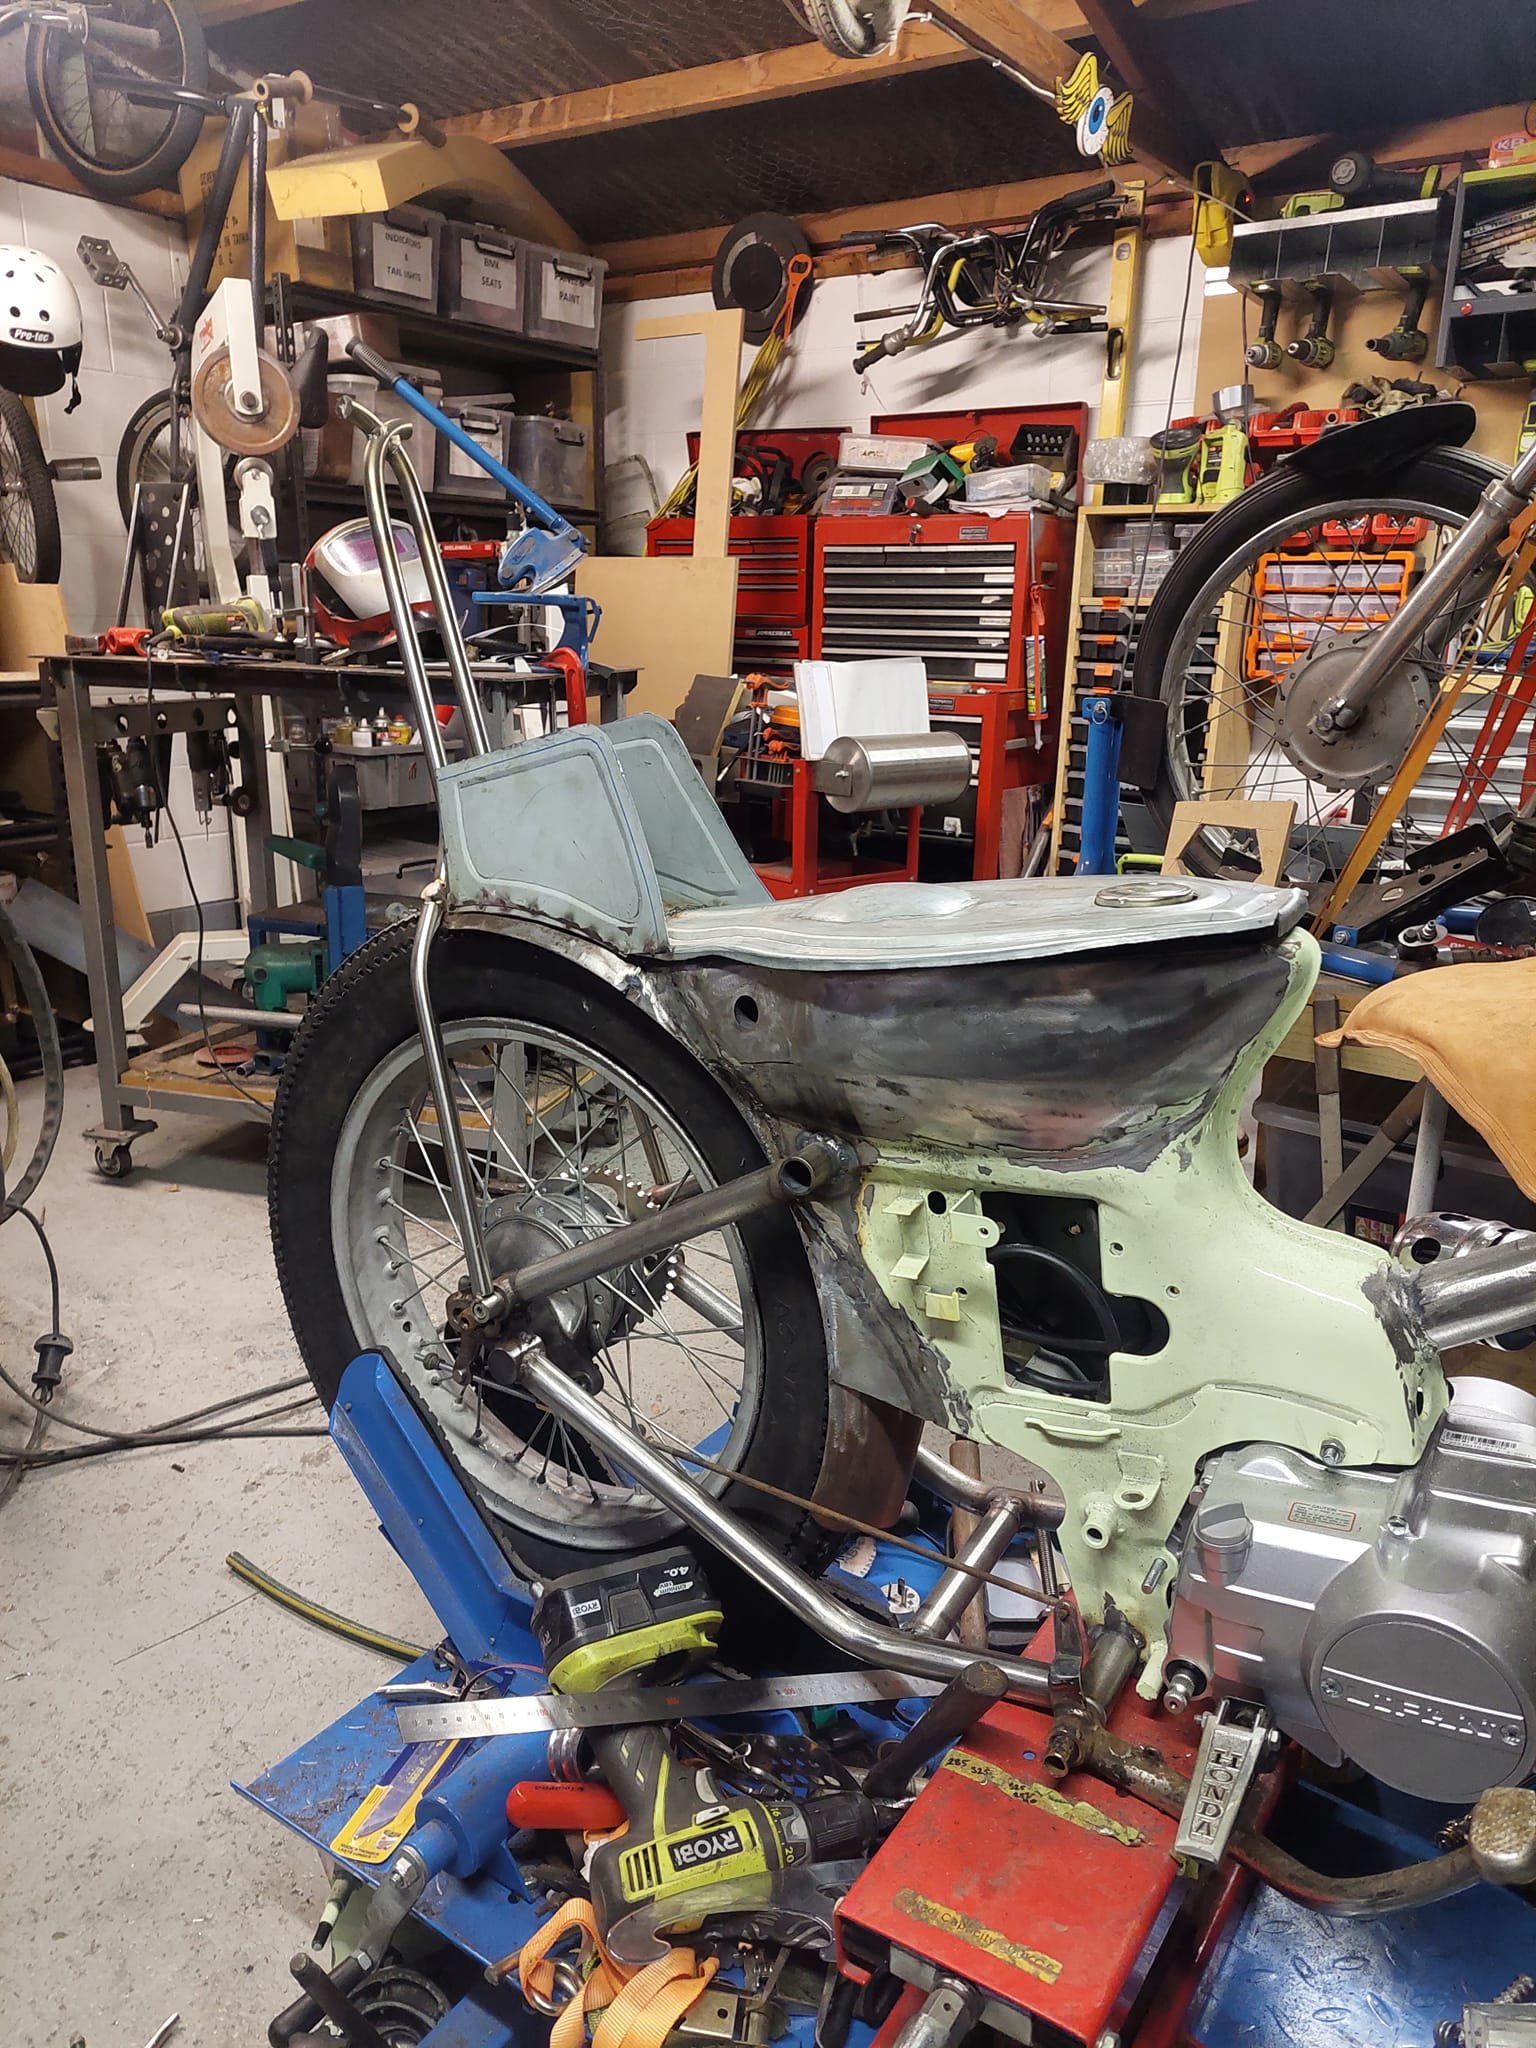
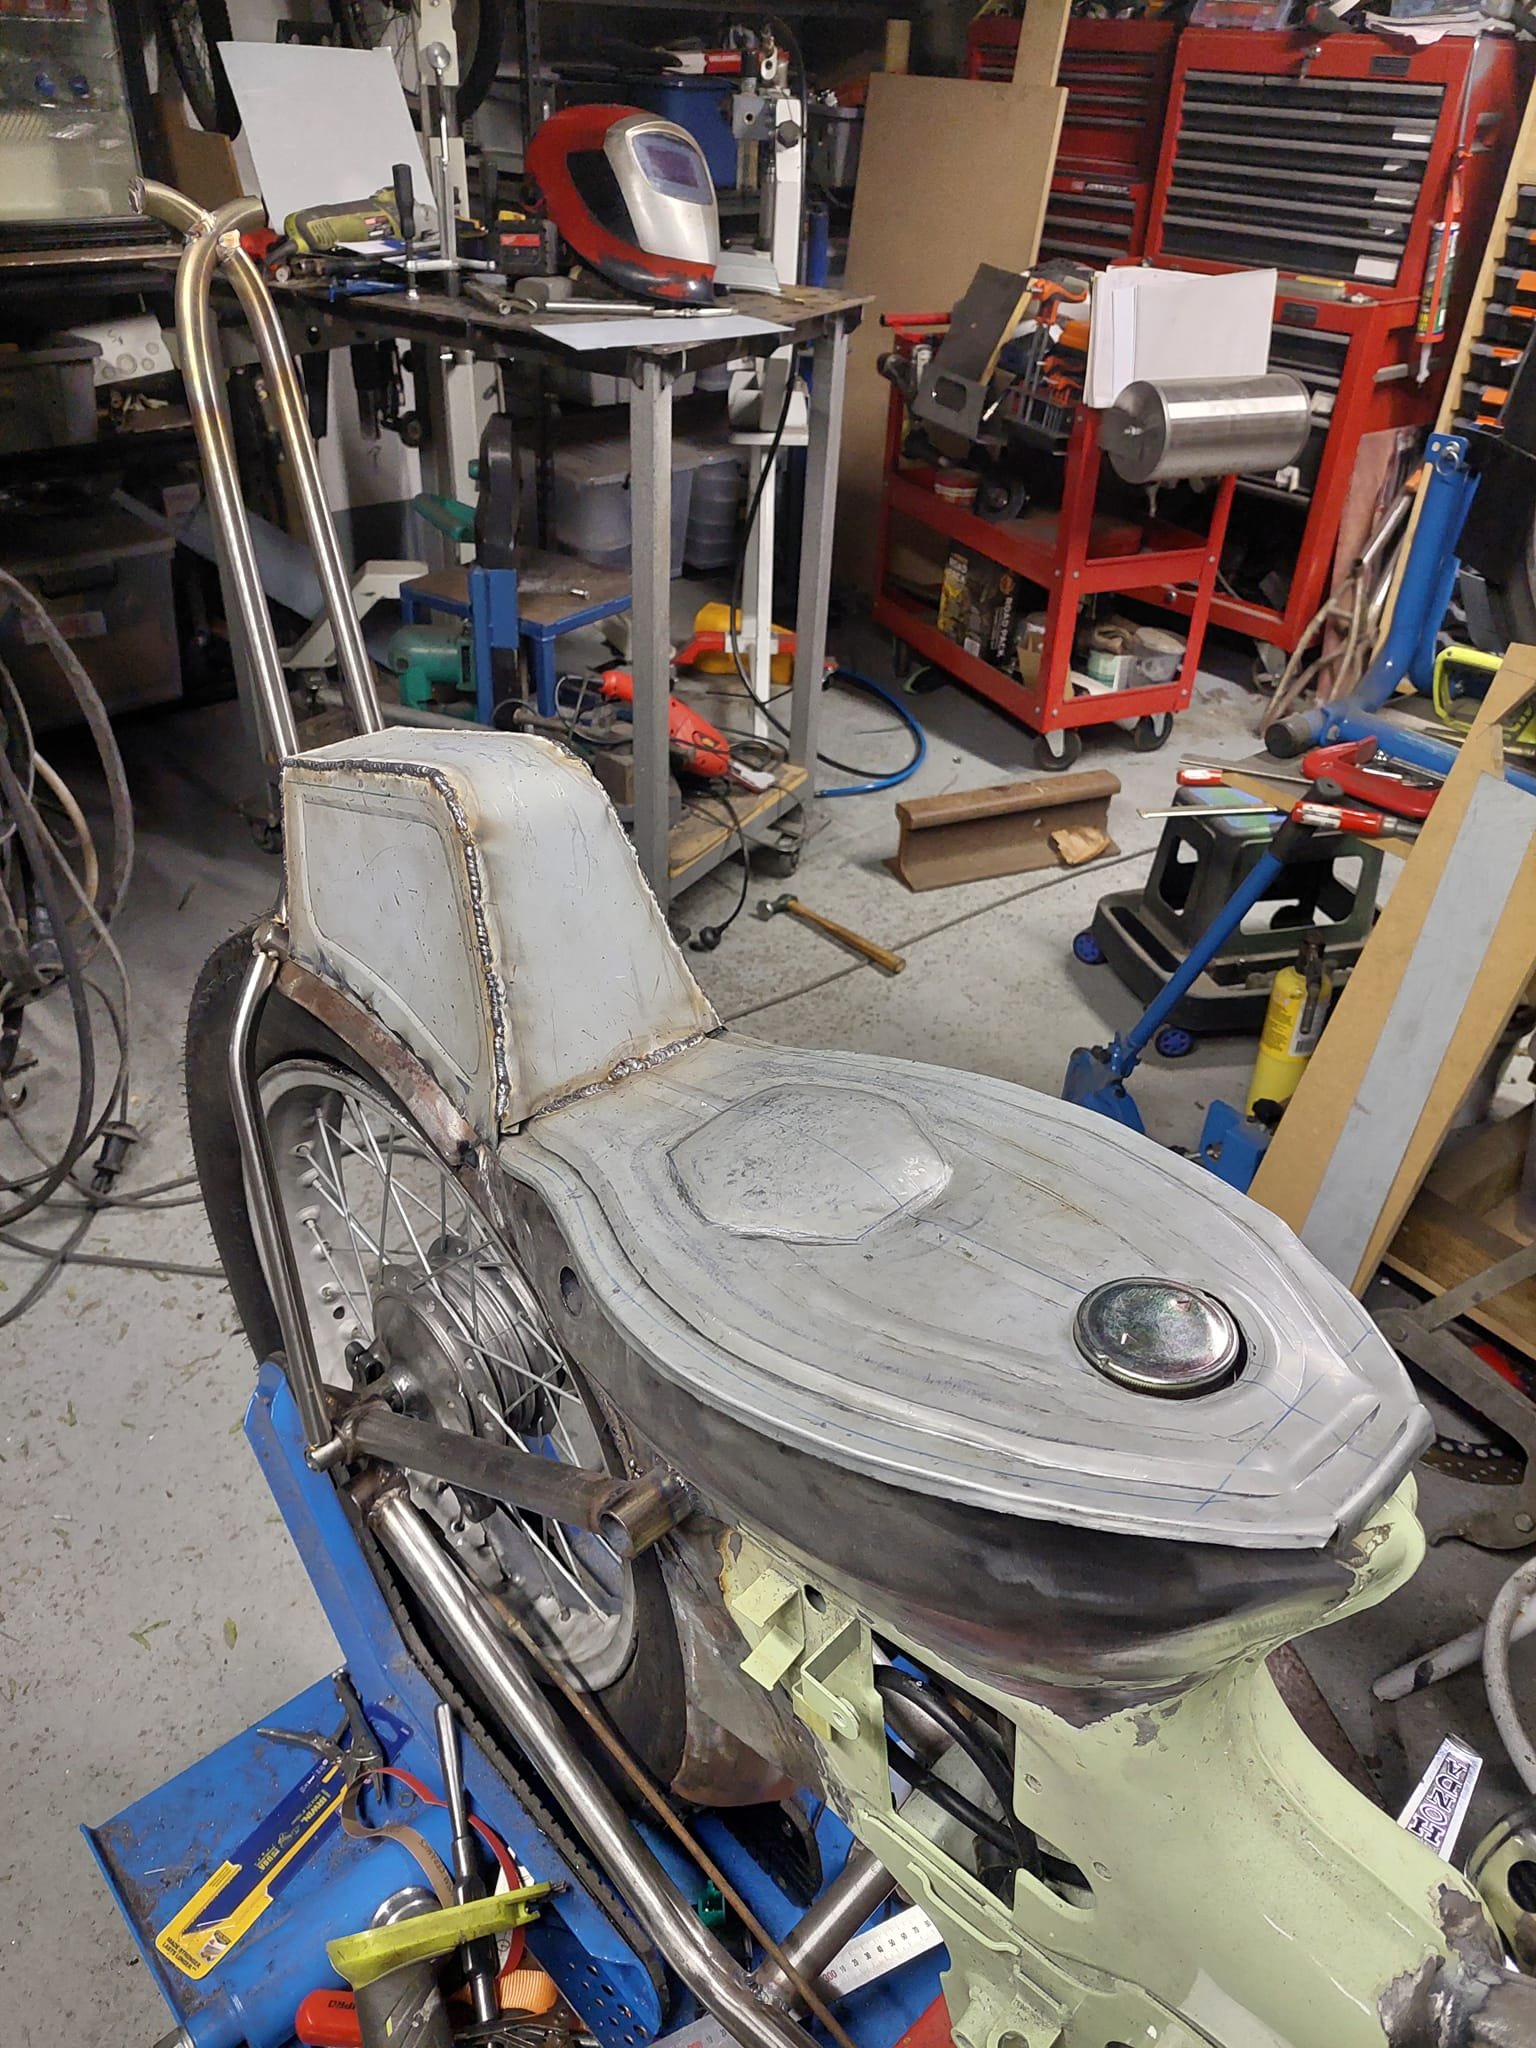
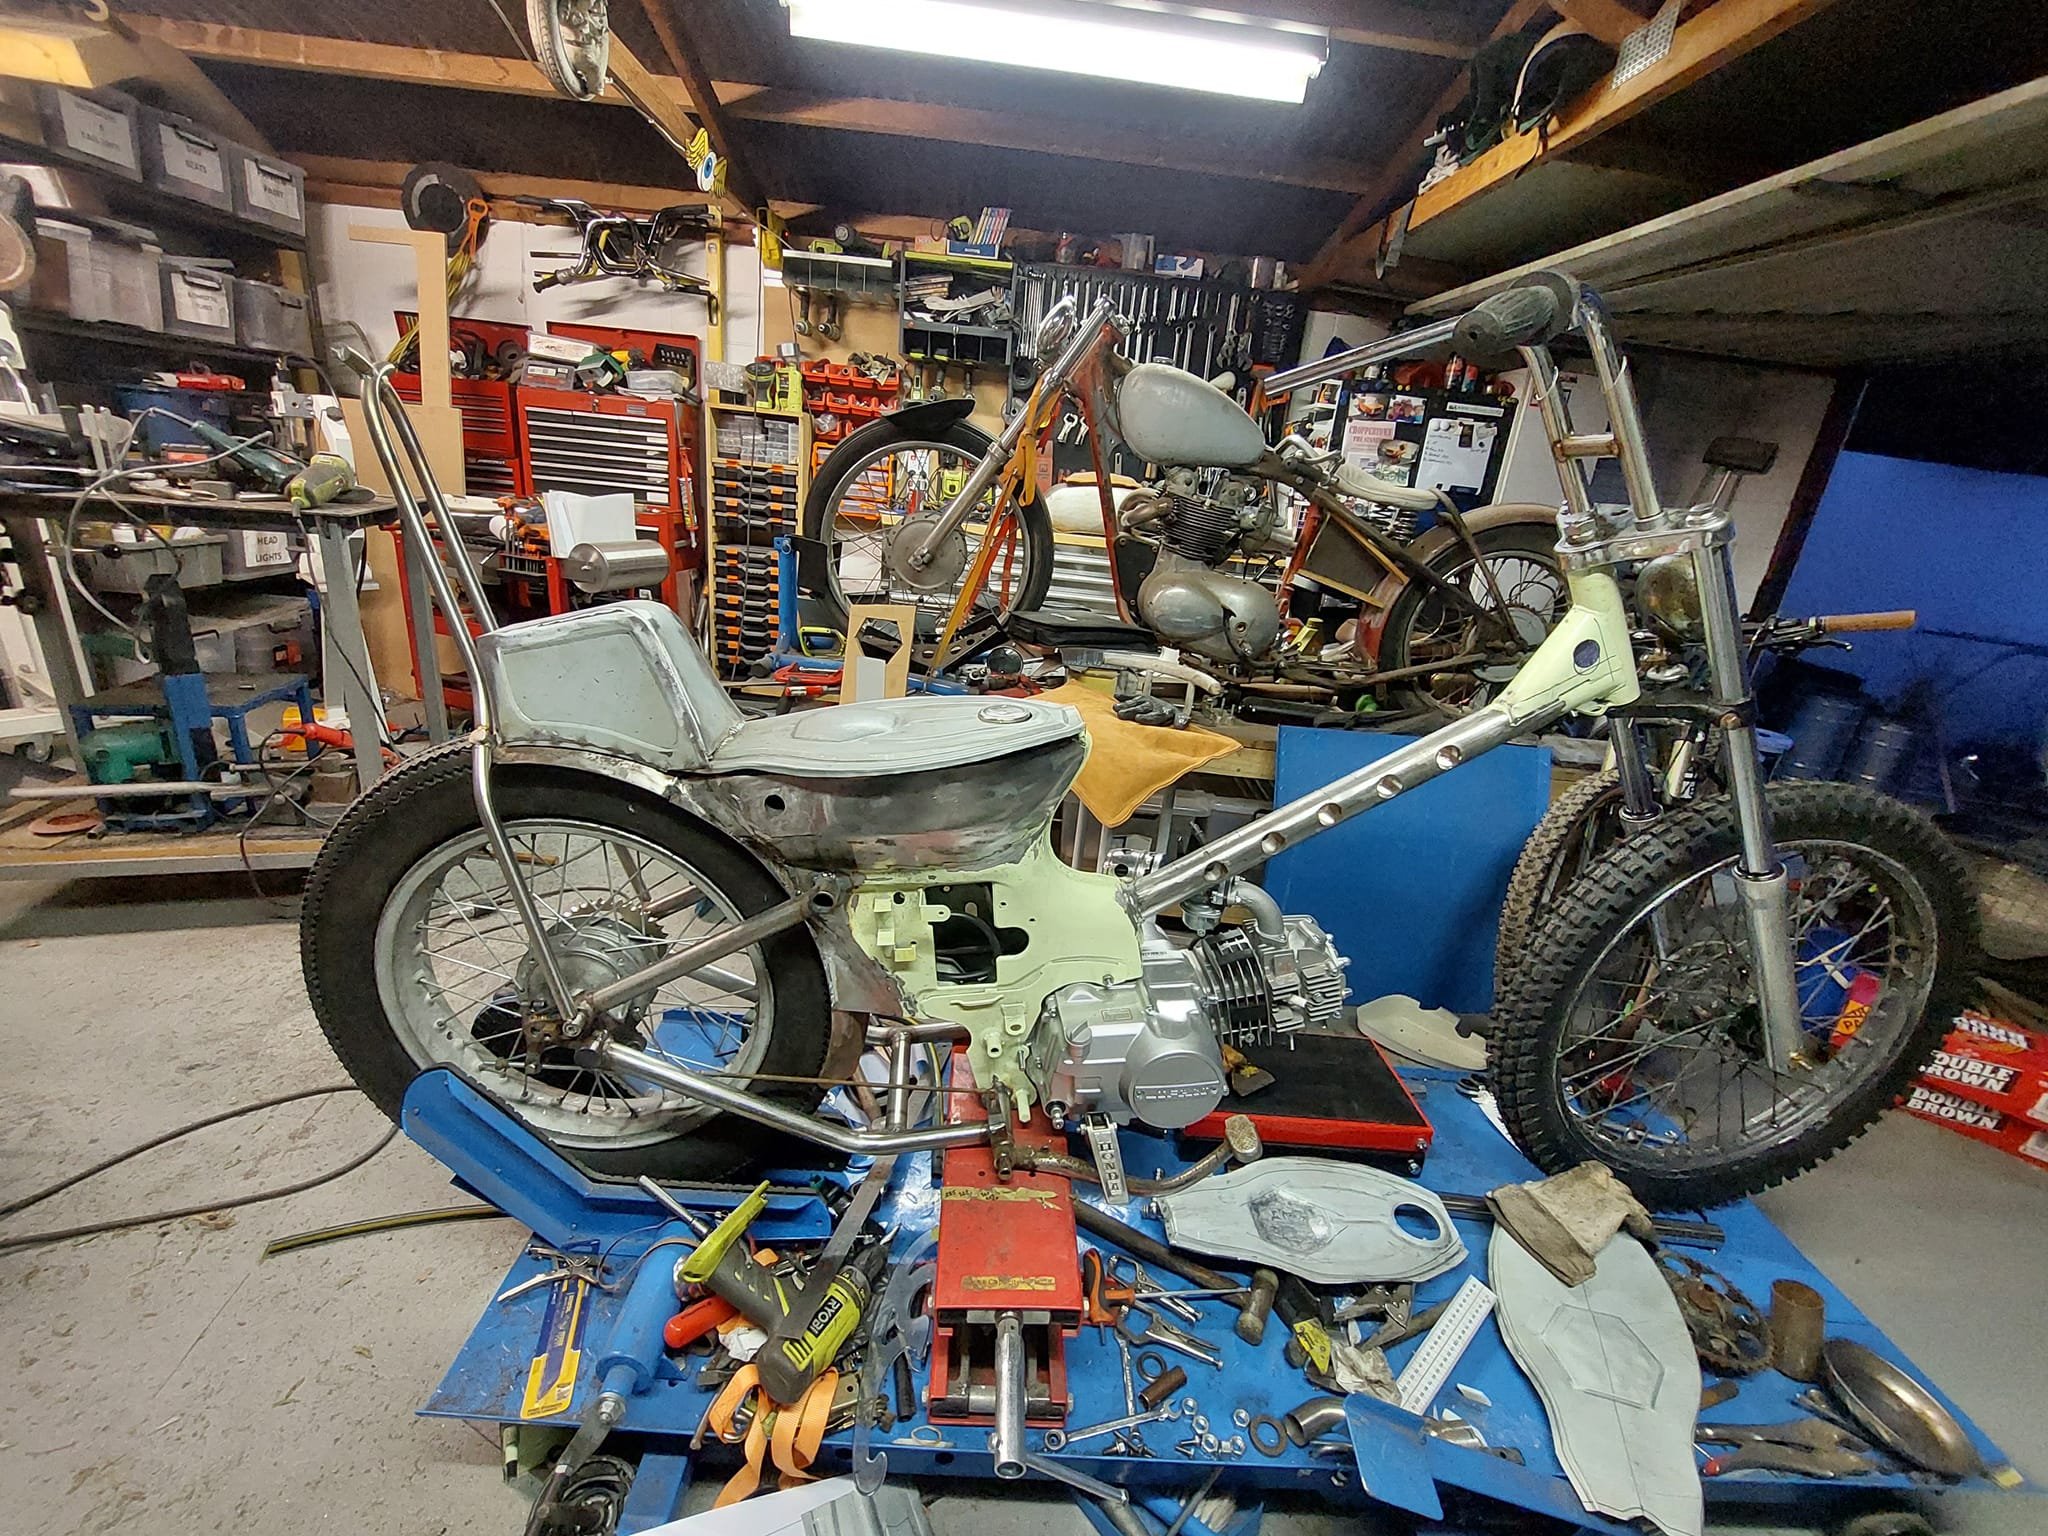
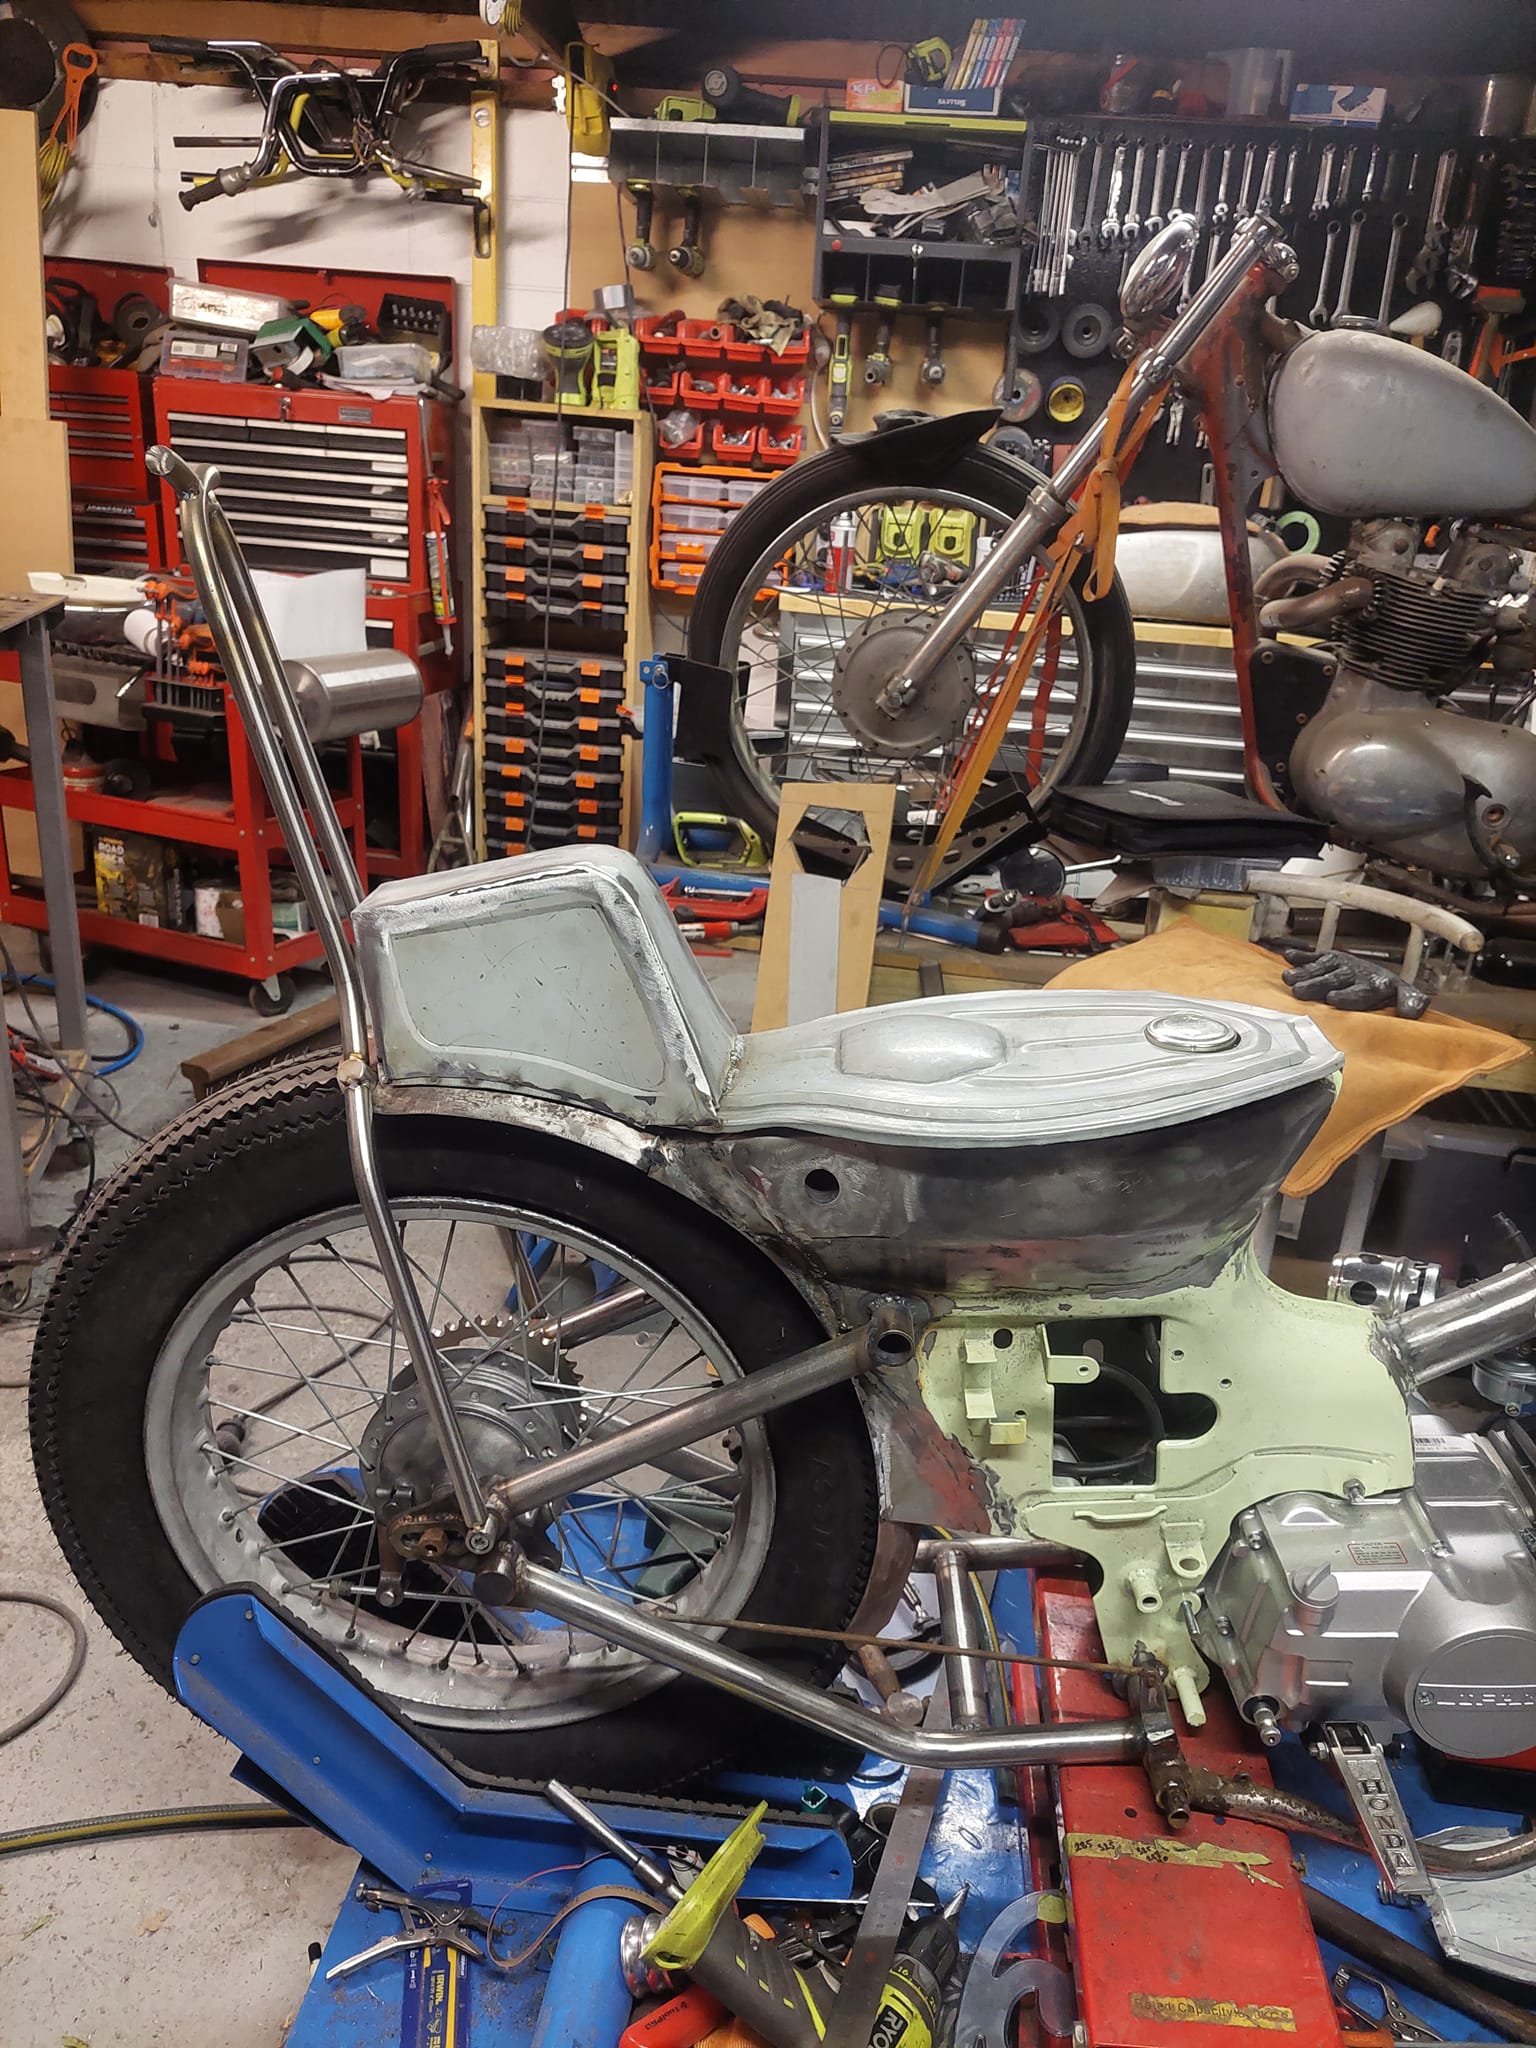
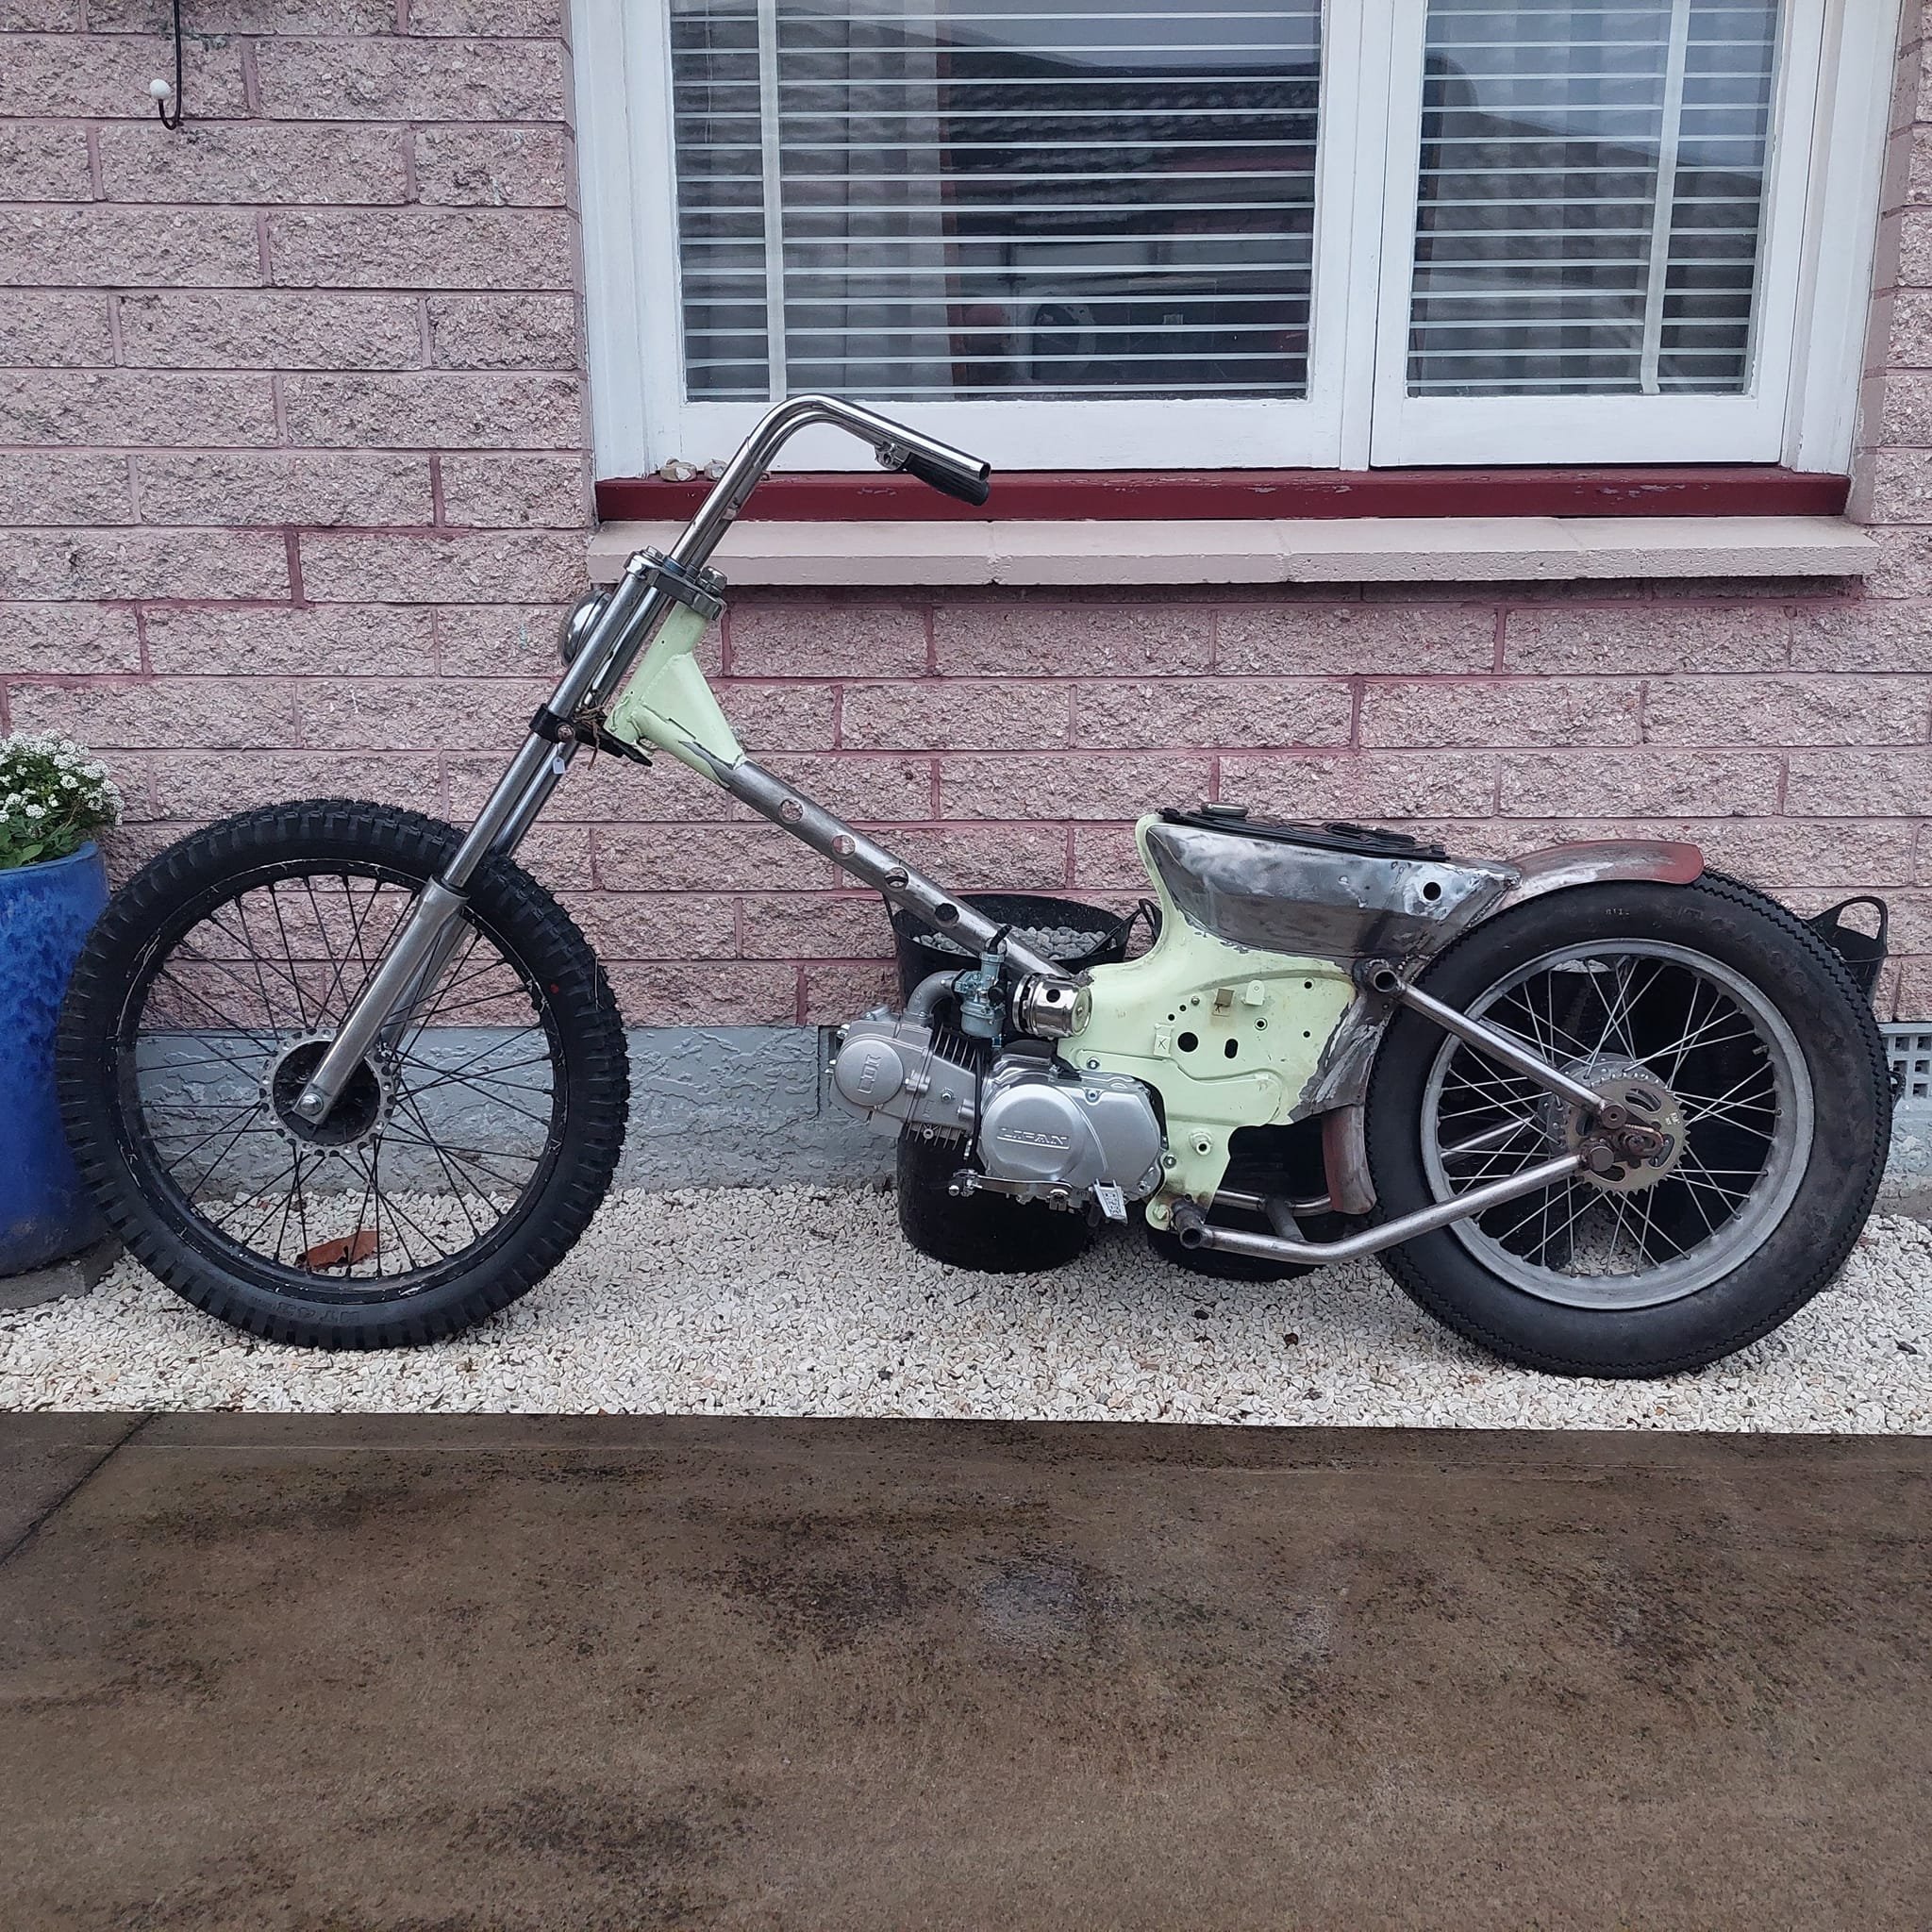
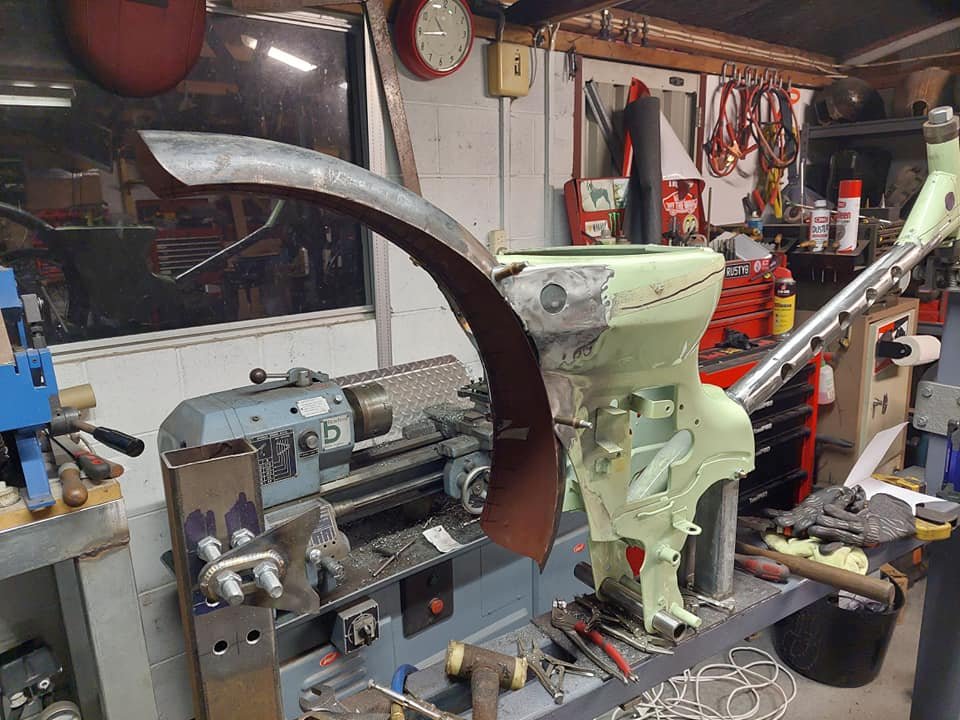
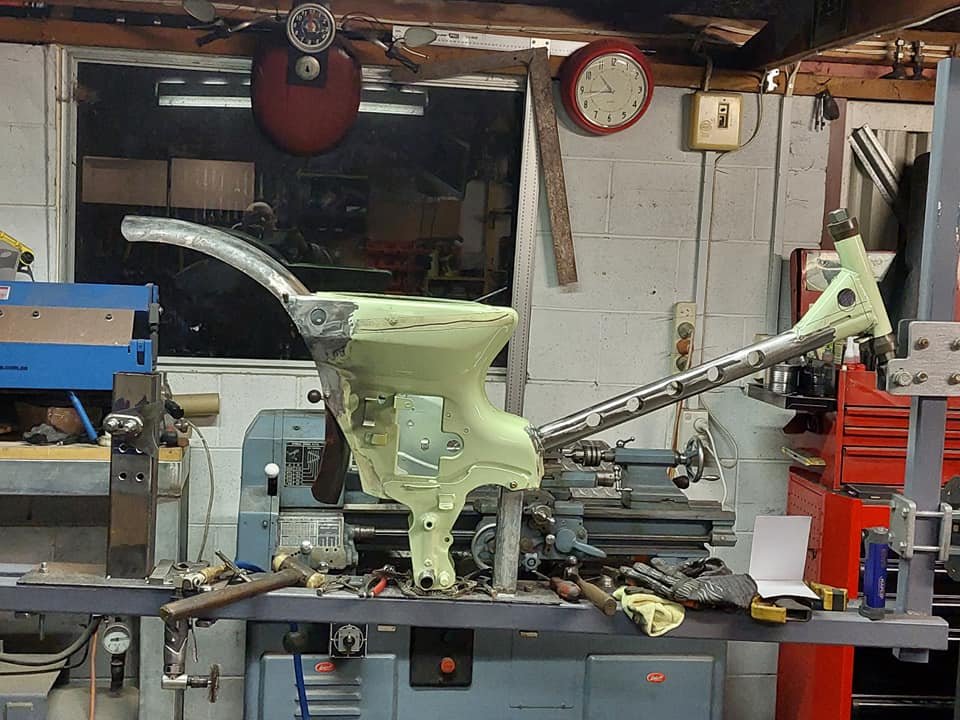
So I picked up another project cos it was a great deal and came with all the right parts for the base of a new build. A mate of mine was selling as a bundle and threw in some more parts for extra $$. Its an mBike chonda deluxe frame thats already been cut by my mate. The style I'm going for is the Indonesian choppy cub I'll be hardtailing the rear and stretching the front by 150mm. Luckily for me the downtube is the same OD as some steam pipe i have, so I'll make some slugs and splice the frame and steam pipe together. But before that I thought I'd mock up some parts to get the overall look of the bike. I knew I wanted rabbit ear bars for the bike so I took a pair of really ugly bars with quite a tall rise and cut them just before the bend at the bottom where they clamp and then sleeved and braced them with some 1 inch stainless tube. the 7/8 part is left loose until I figure out the position I like. I then mounted the frame in my jig and cut the frame and inserted the 150mm extension and slugs. Its held in place with plug welds until I get it fully welded up. Having a frame jig that rotates makes life so much easier!
1 point
-
Multimeter time to check where there is electrons and where there isn't at the charger port?1 point
-
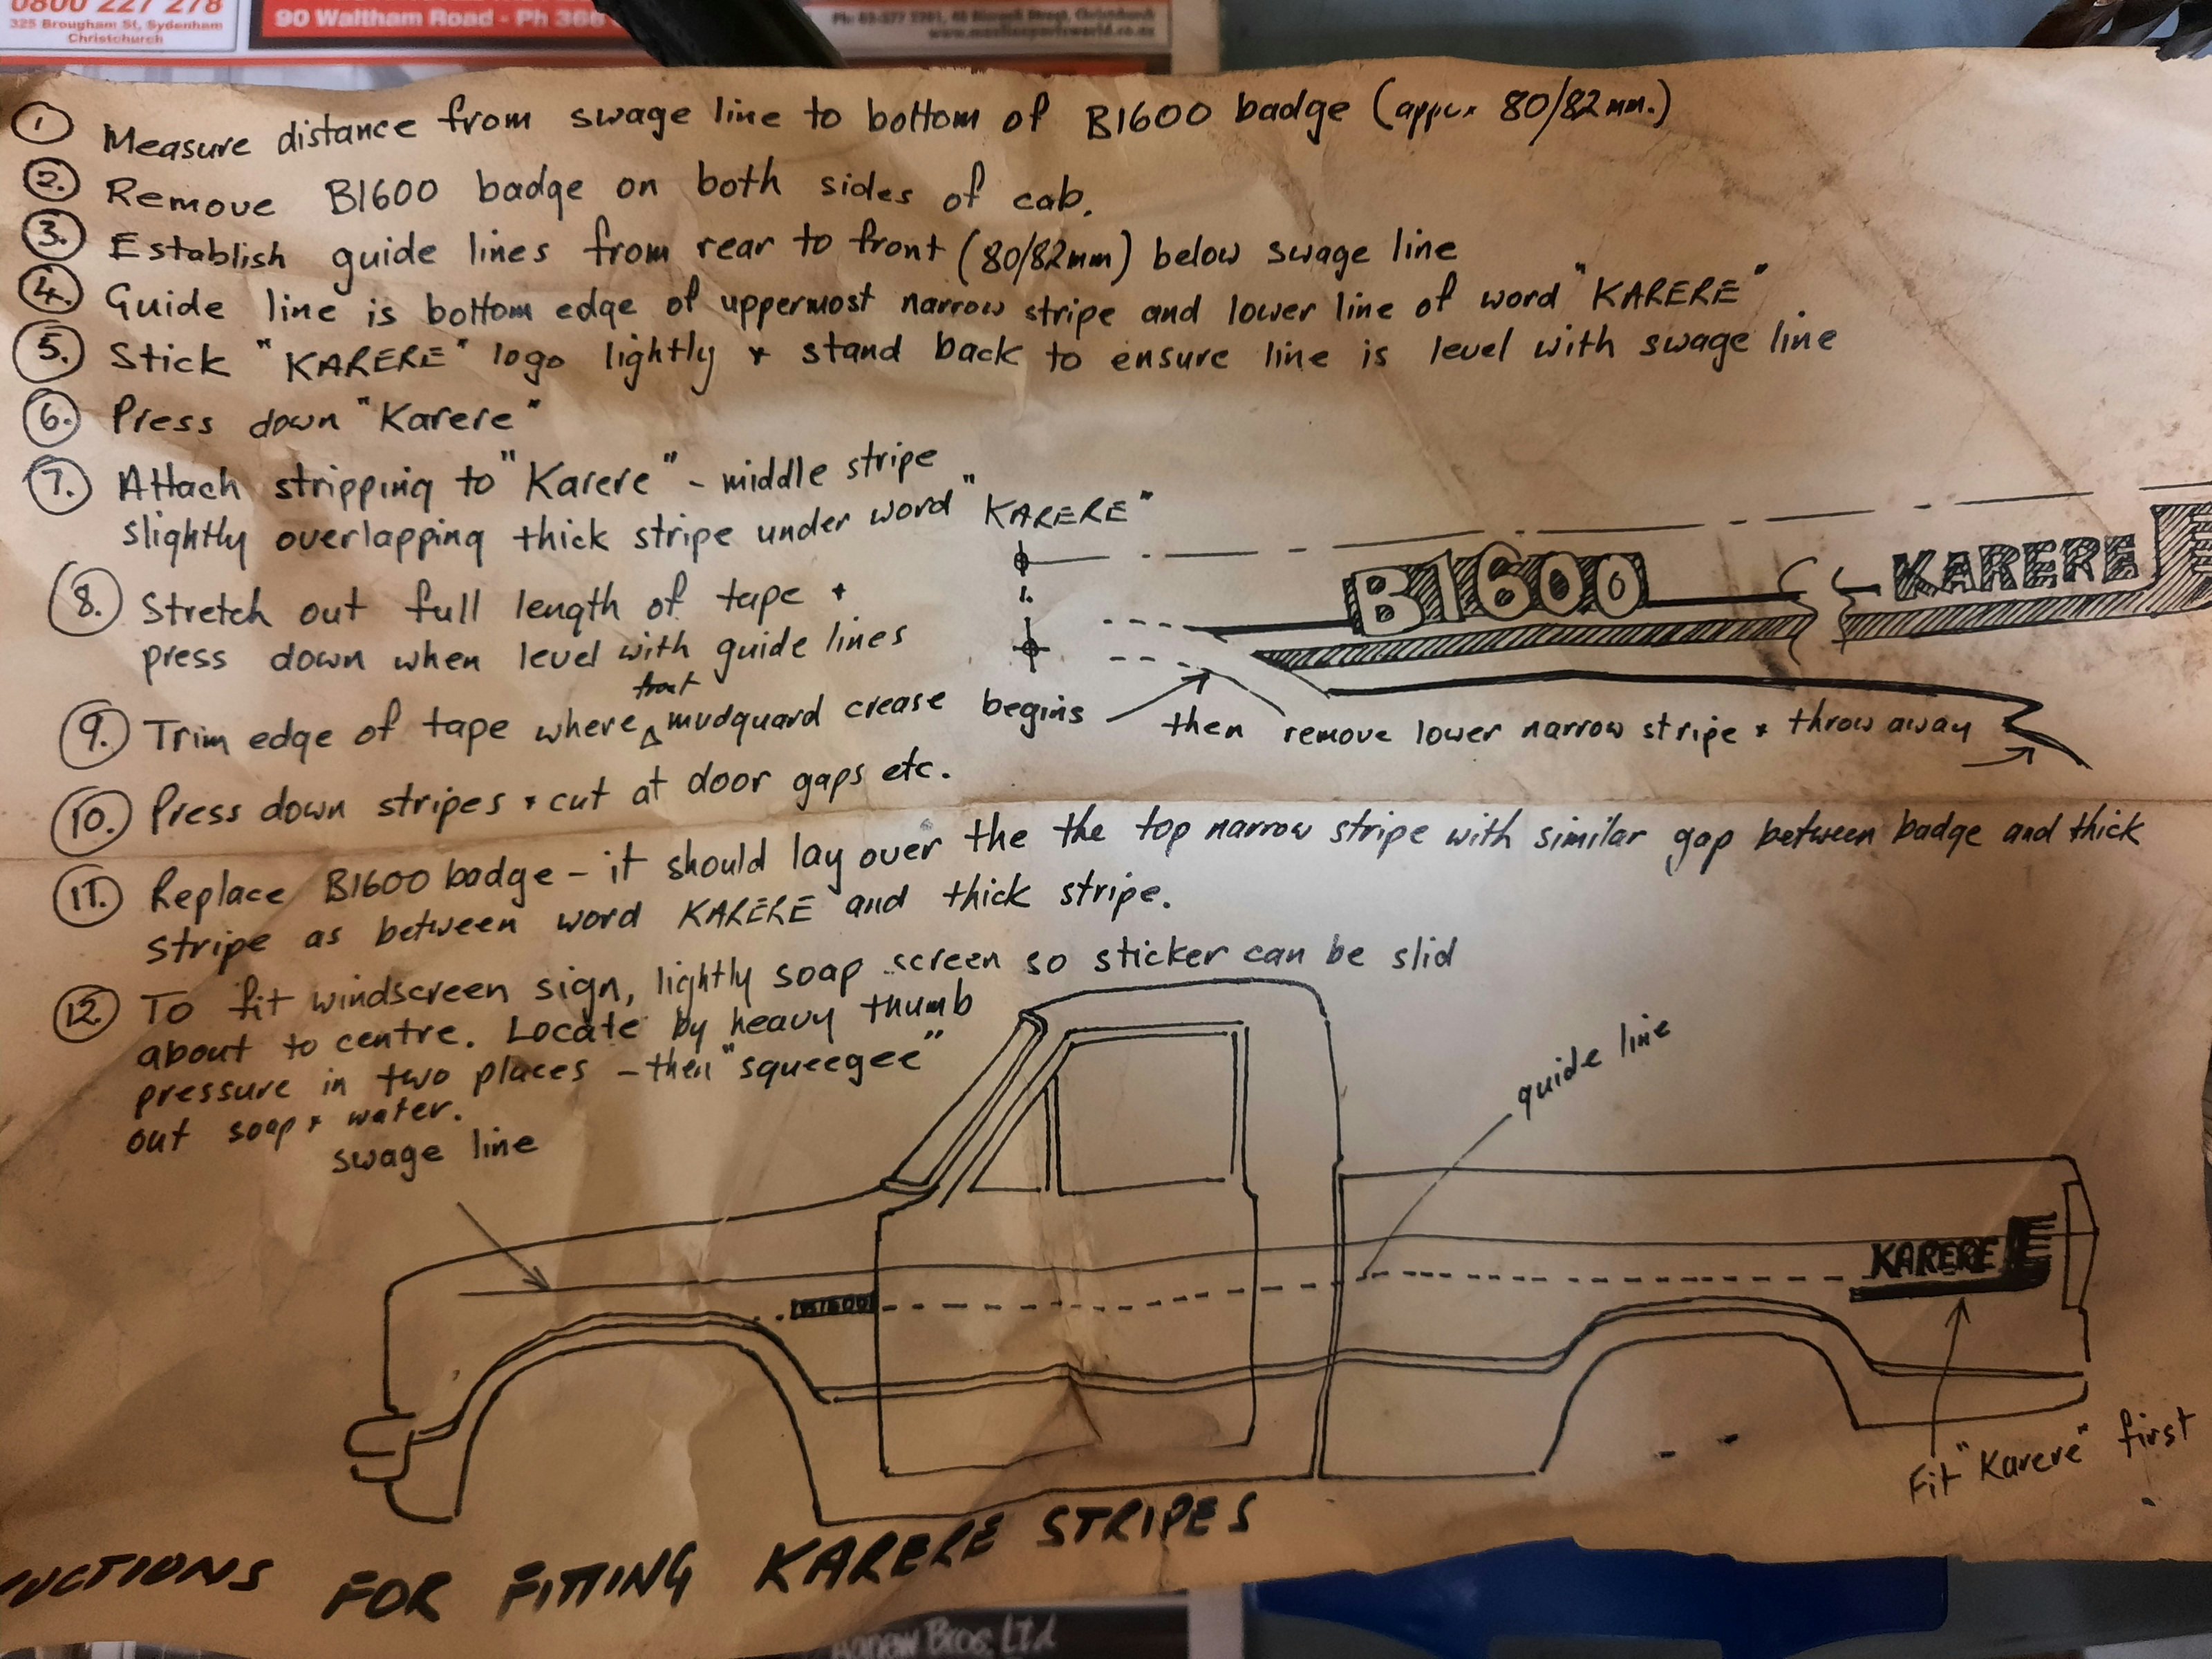
You could always add in the Karere stripes, this was the factory supplied diagram on how to apply them, from memory they also rolled white steel rims
1 point
-
Giz the chrome Modgies for my B1600!1 point
-
It's an excuse to use my tiny bit set which will be fun.1 point
-
It's not uncommon for the solder joints to break on the mobo, so worth opening it up for a looksie @Willdat?1 point
-
Scrubbing up nicely!1 point
-
Loud pipes save lives.1 point
-
Have you ordered a yellow flip top helmet?1 point
-
Not quite that bold. could be keen to run lake pipes though, imagine a rowdy J port blowing the eardrums out1 point
-
And it made a huge difference, cranked into life almost immediately, and idled ok. A quick trip round the section showed the clutch needed sorting, re-adjusted it (a little more screwed in) and it acted far better, no more 'creeping' in gear. Still terrible of course by normal standards, but tolerable... So I took her for a ride... Spluttered a bit on a back road but flicking petcock to reserve fixed that, I'll fettle the lights and try to get her in for a WOF next week to make things legal'ish...1 point
-
Went ahead and installed the T3 wing, again not overly happy with how they have gaps. But turned out better than I thought. What I dont like is that they sit back from the hinged area of the boot, i get why, because otherwise they hit the roof. And I dont like they have gaps on the corner sides, but every single one I've seen installed looks like this. Few more screws to be installed but overall, not terrible.
1 point
-
1 week to go! I may have pulled my bike apart last night...
1 point
-
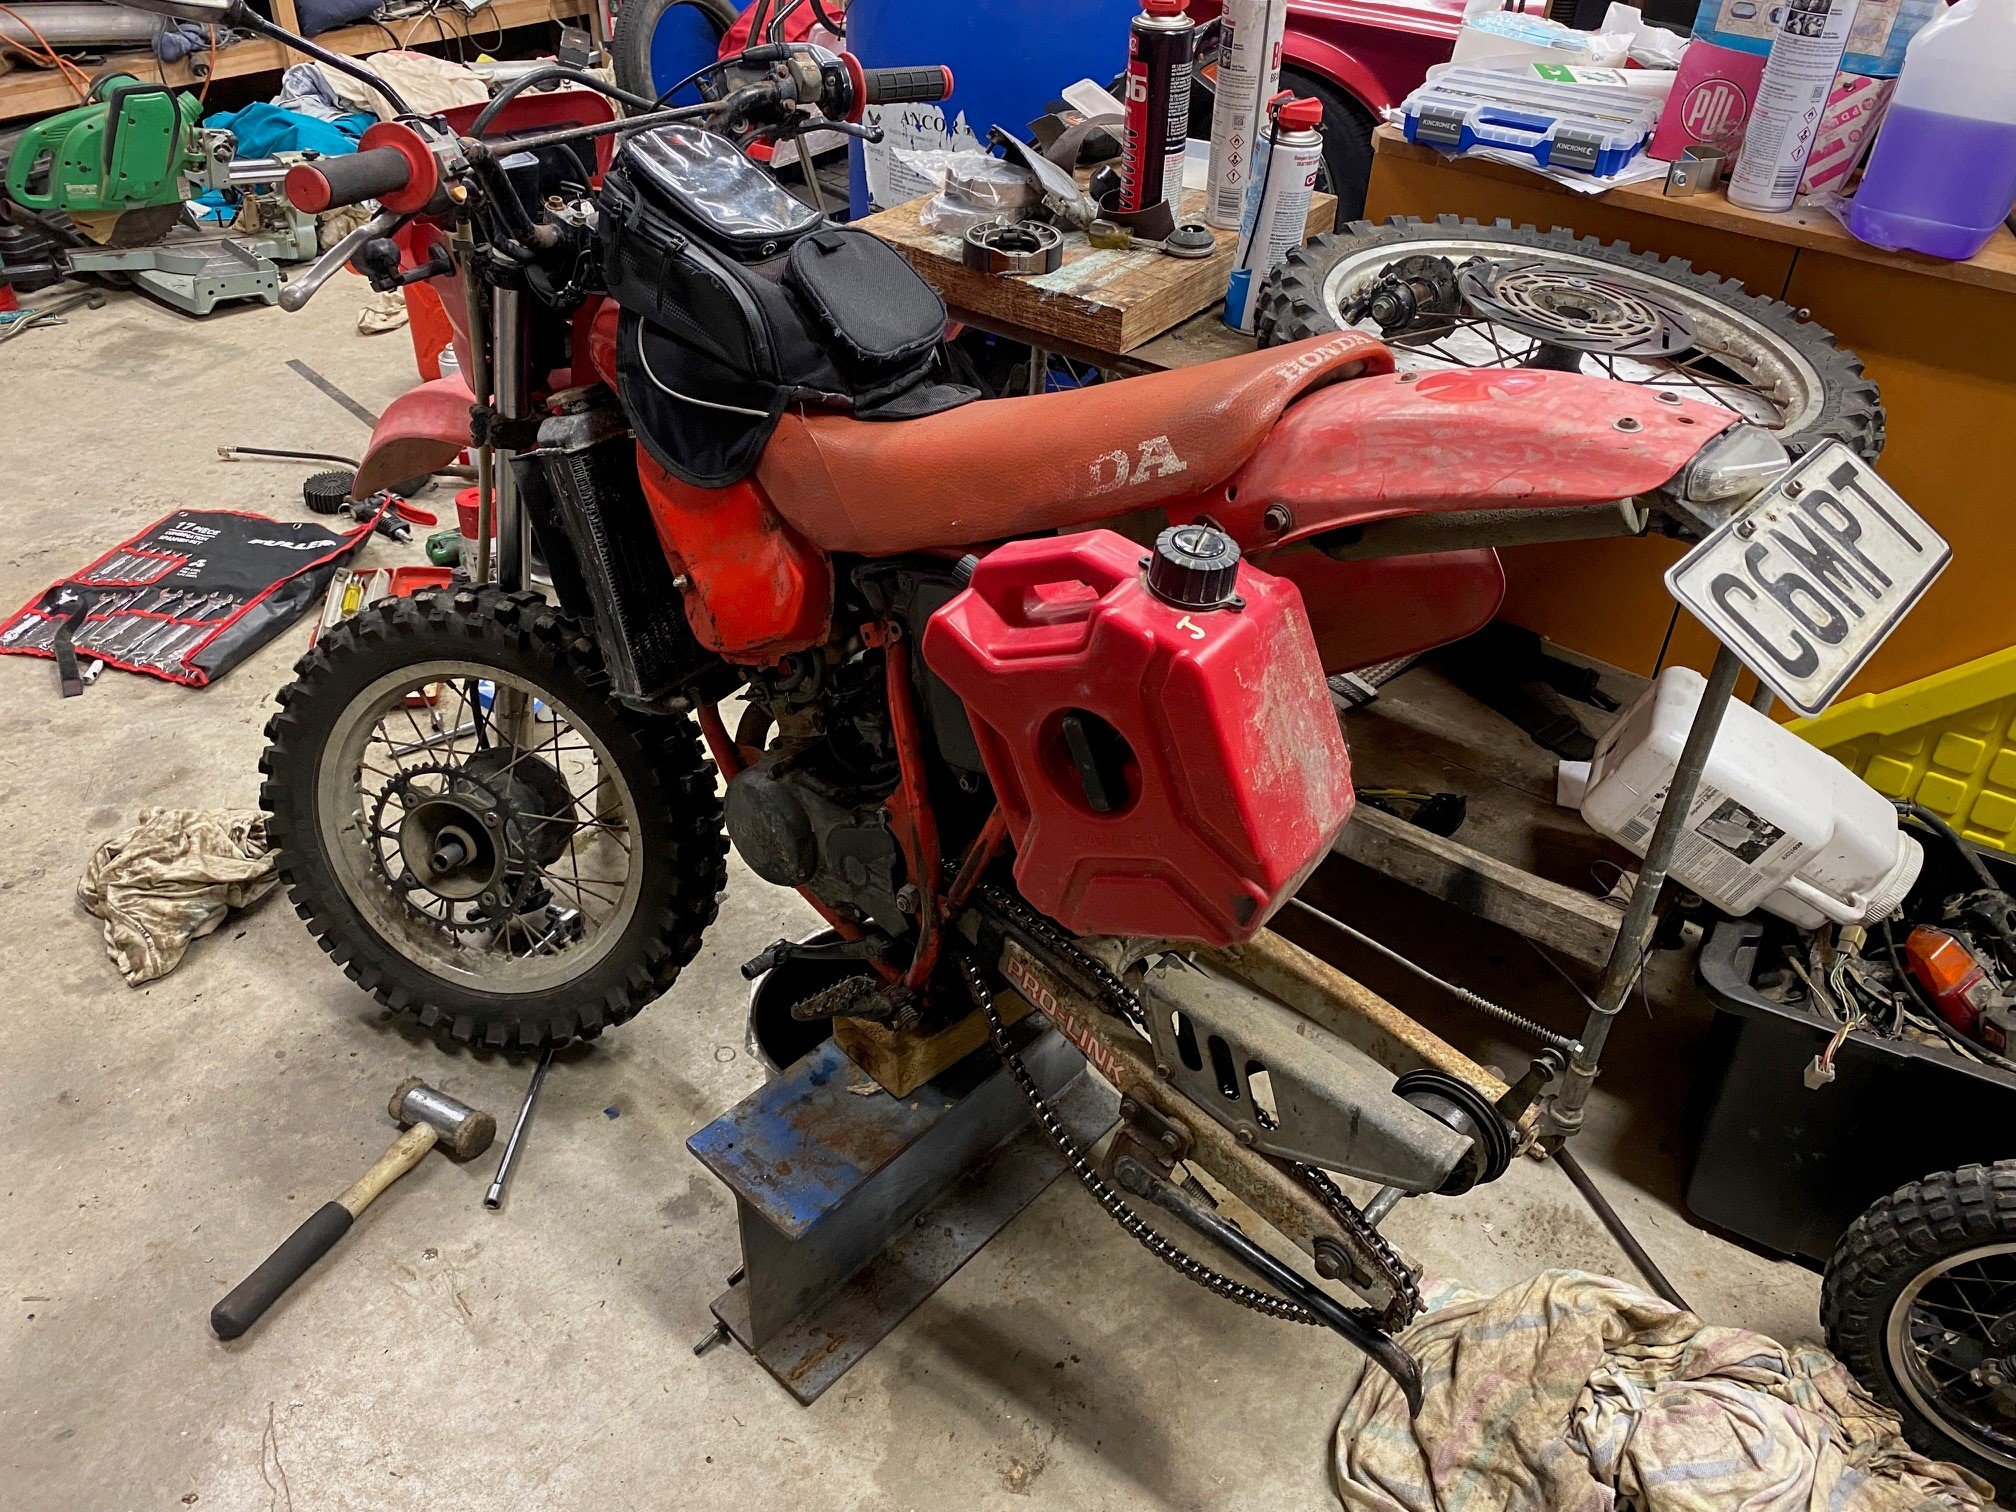
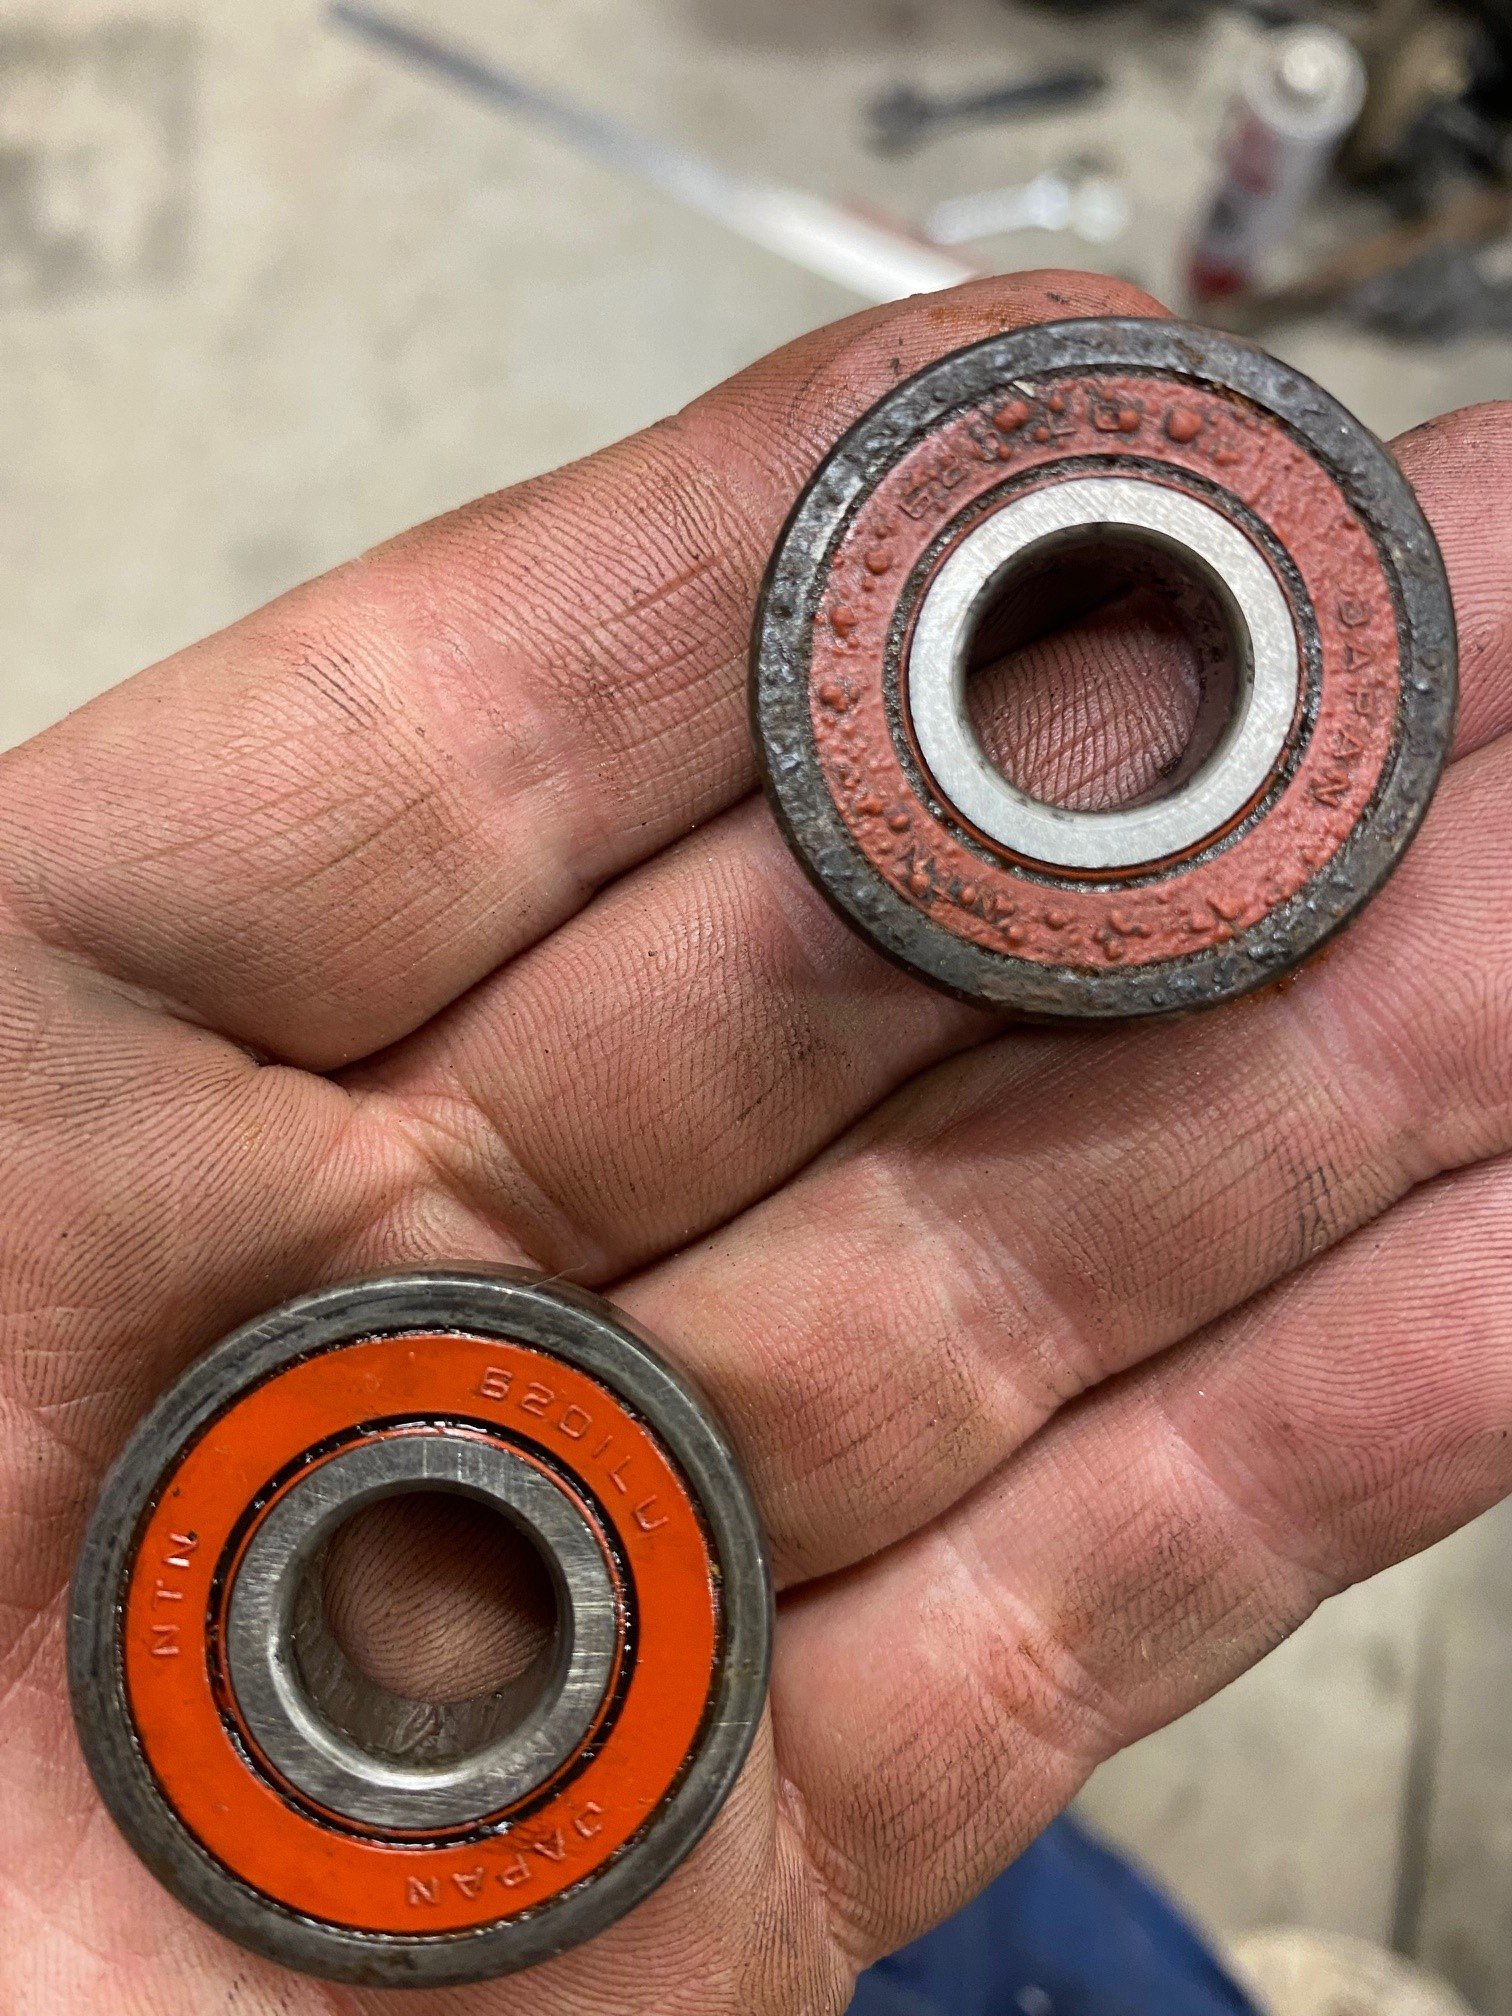
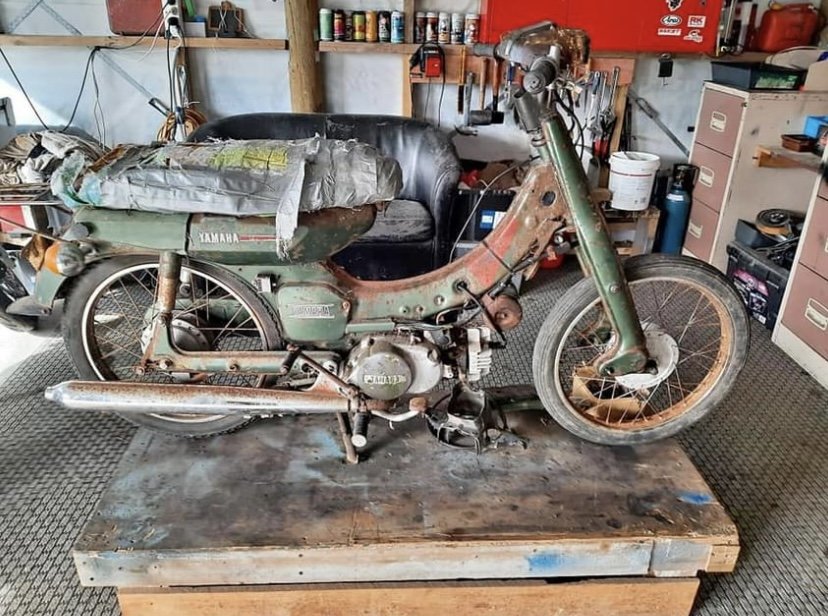
So with the V50, it turned up at home and I had a go at starting it. There were no signs of life at all. It needs some piecing together, its missing a couple of cables, and a foot peg, and the brake lever. So it just sat in the shed for a few weeks as a climbing gym for my 2yo daughter. Then one day I was looking at all the things missing, and noticed the choke cable, so I pulled it the choke on, and a handful of kicks and it fired into life. Sweet! I've been wanting to get into my ST90 though, so moved the V50 into storage and made a start on the little Honda. Replacing a few cables that are munted, fixing the headlight, fork seals etc. I'm waiting on a new seal for the speedo drive so that I can fit new brake shoes at the moment. This year for the King Country Crusade I'll be riding the CRM again, so I decided last night to do some maintenance. I ordered a fork seal kit ages ago, which turns out only does one leg, so I fixed the leaking one last night. While it was apart I found all the wheel bearings pretty much fuckd, one of the fronts has been so hot its blistered the seal. So now a week out from the ride my "its ready to go" bike is scattered all over the shed floor. But I have done some maintenance, fork seals, oil change, now the bearings etc. so it should be all sweet tonight! Oh and I've brought another ST90 frame and pile of parts...
1 point
-
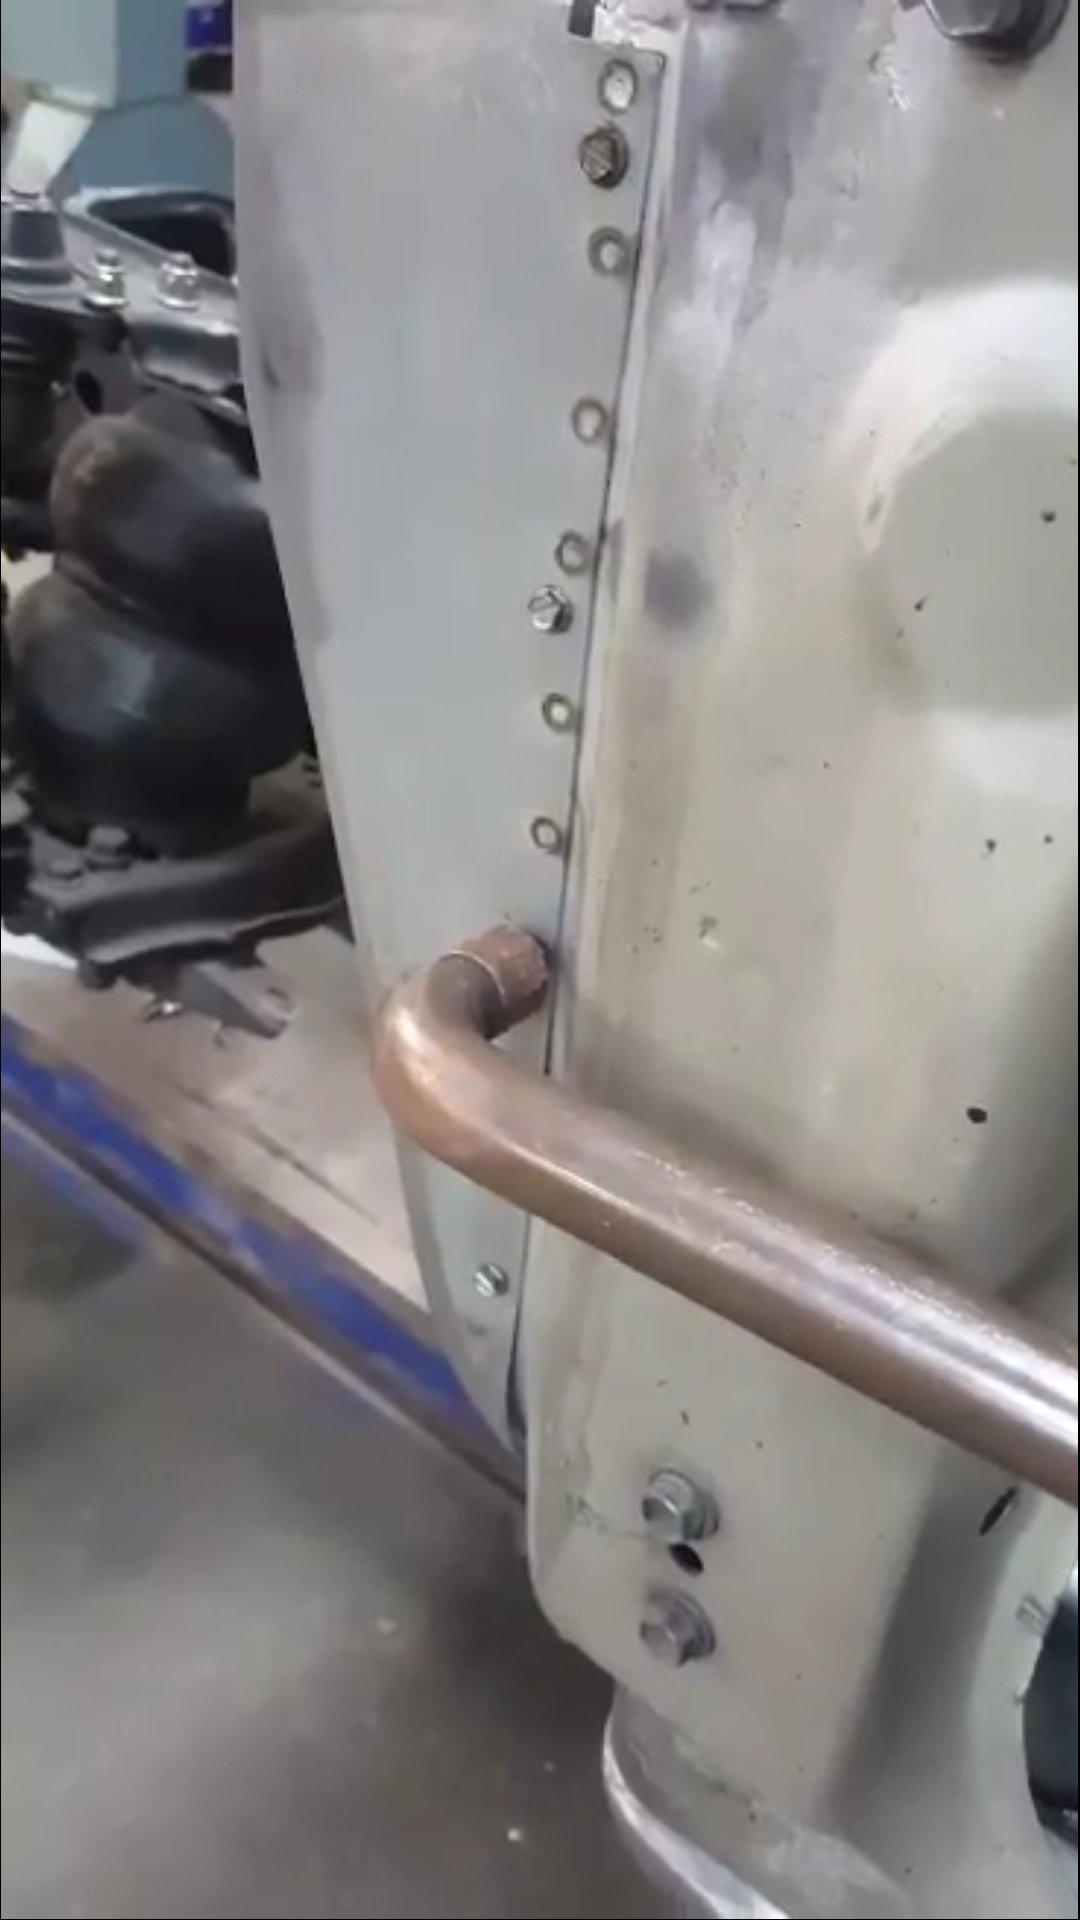
Tonight's mish was to try finish off the cradle. I made some braces for the engine mount box sections, as recommended by someone here. Good call, looks more appropriate. Ran out of Tig gas, and was hoping to have the water pipes mounted too, but after finishing my alternator mount I think I need to throw motor back in to double check my intentions as it's all a bit tight trying to route bottom rad hose to water pump. Progress.
1 point
-
Heres a drawing i did the other day ive been home with health issues why not waste time with some pencils
1 point
-
Ordered a loom kit so I can rewire the new ute. 40 year old looms are a disaster and not fun to work with. so my 20 circuit loom arrived yesterday. massive spaghetti nightmare. Now I need to figure out all the connection for the switches etc, great. in other news, I spent a couple of hours plugging a few holes that weren’t finished off in the engine bay. Then high filled it all and sanded it. not going for a glassy finish, just tidier than a pin cushion. im not sure what colour to paint this one would love to hear some solid options
1 point
-
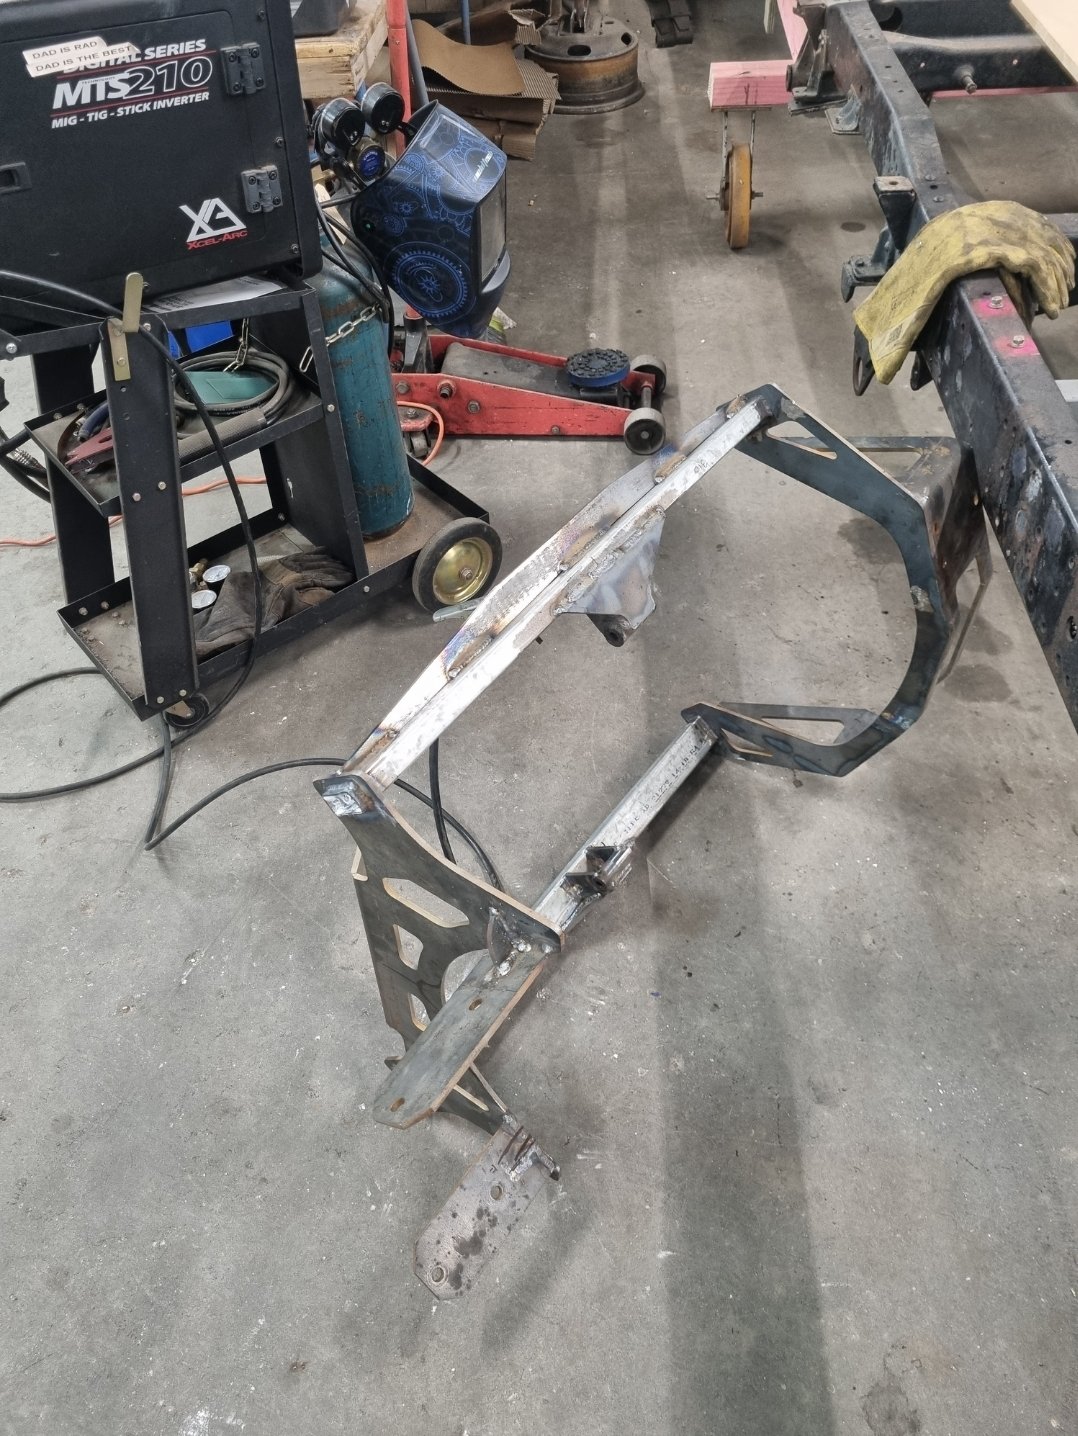
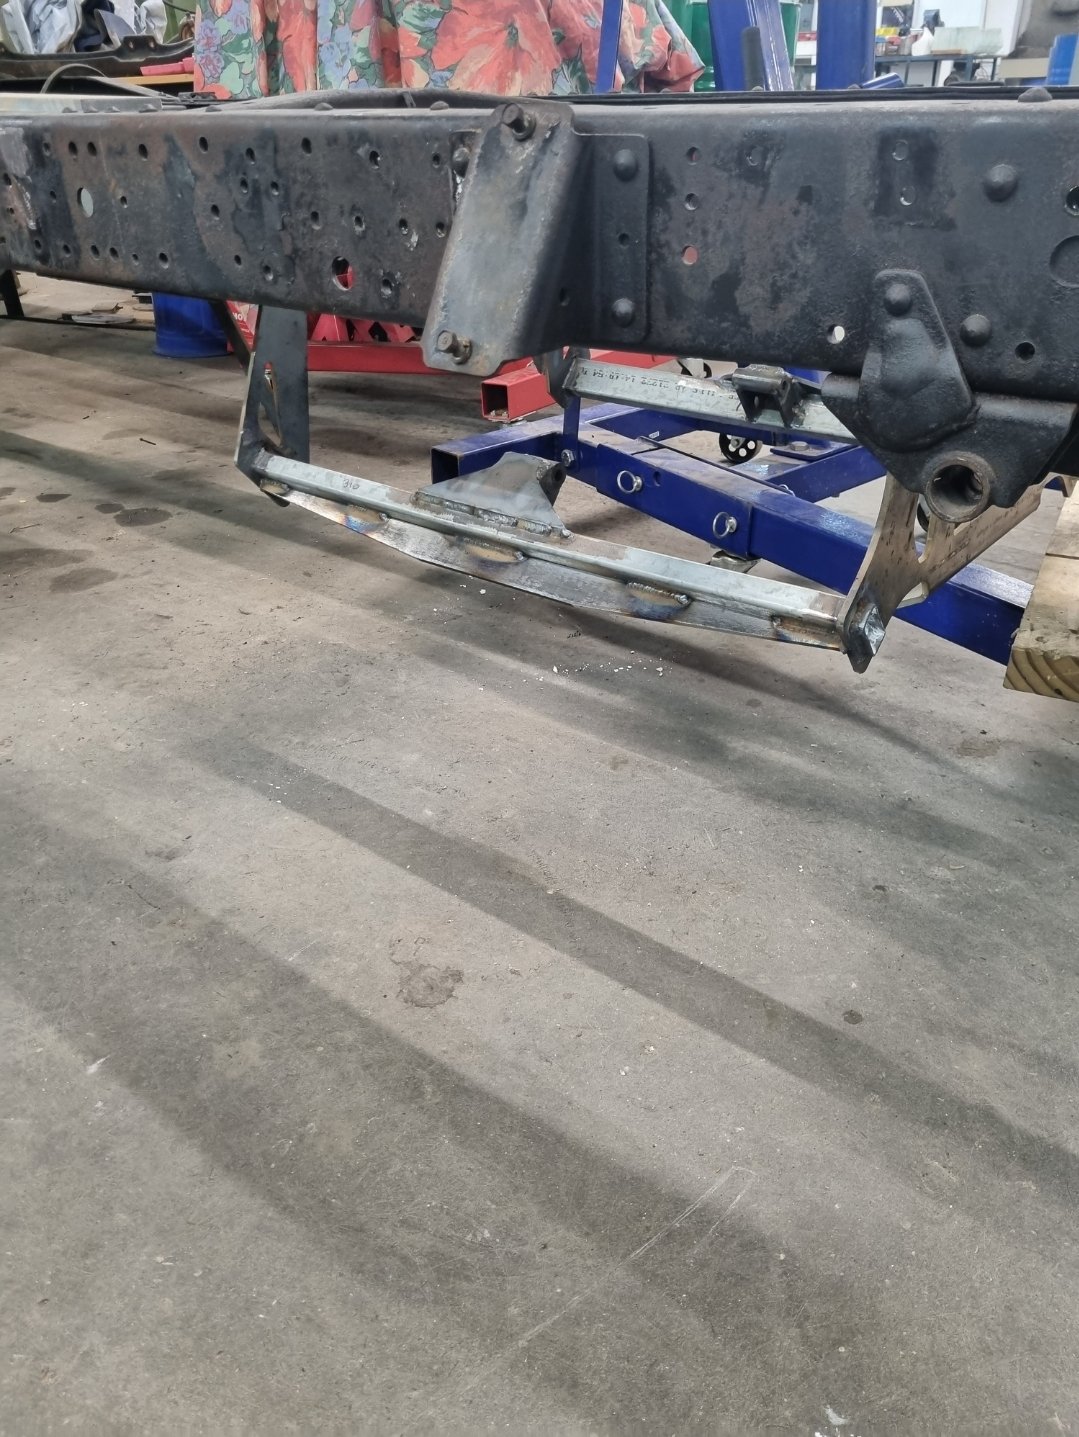
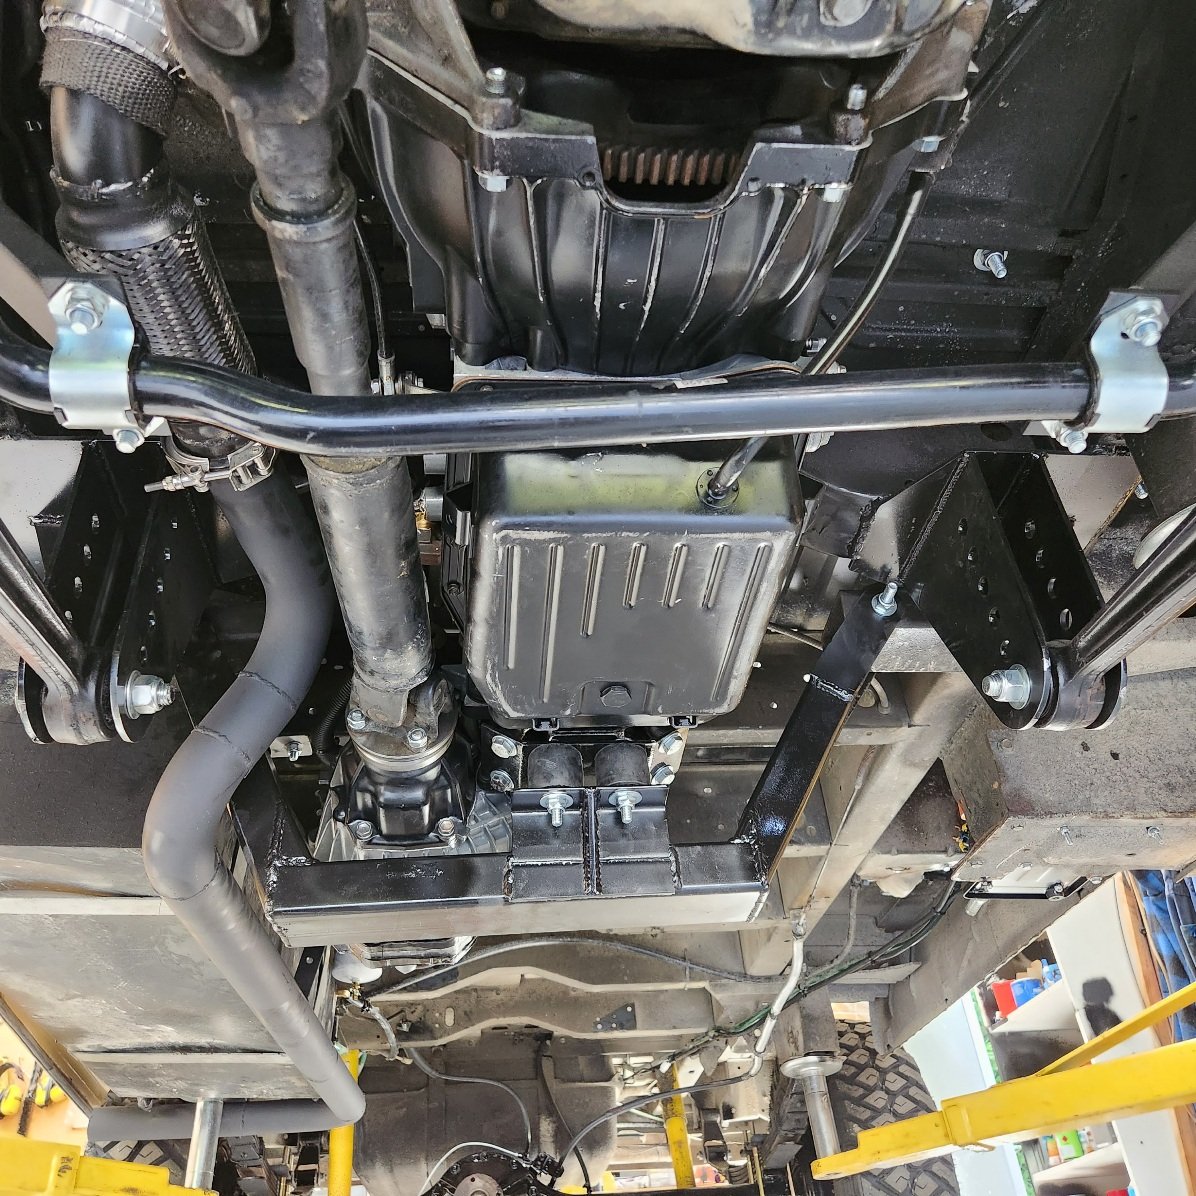
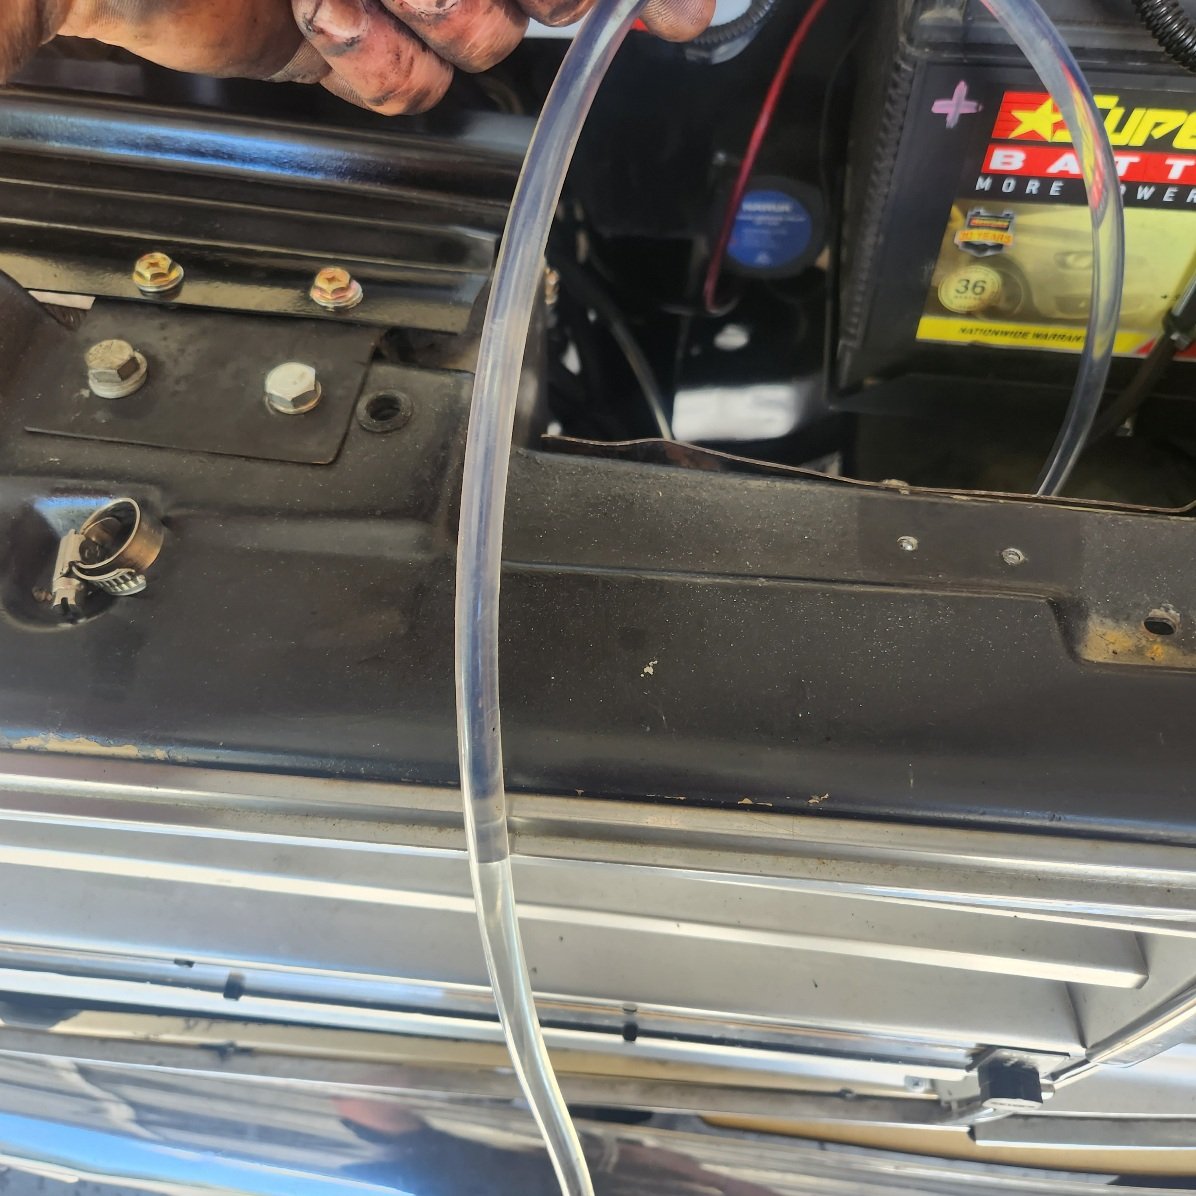
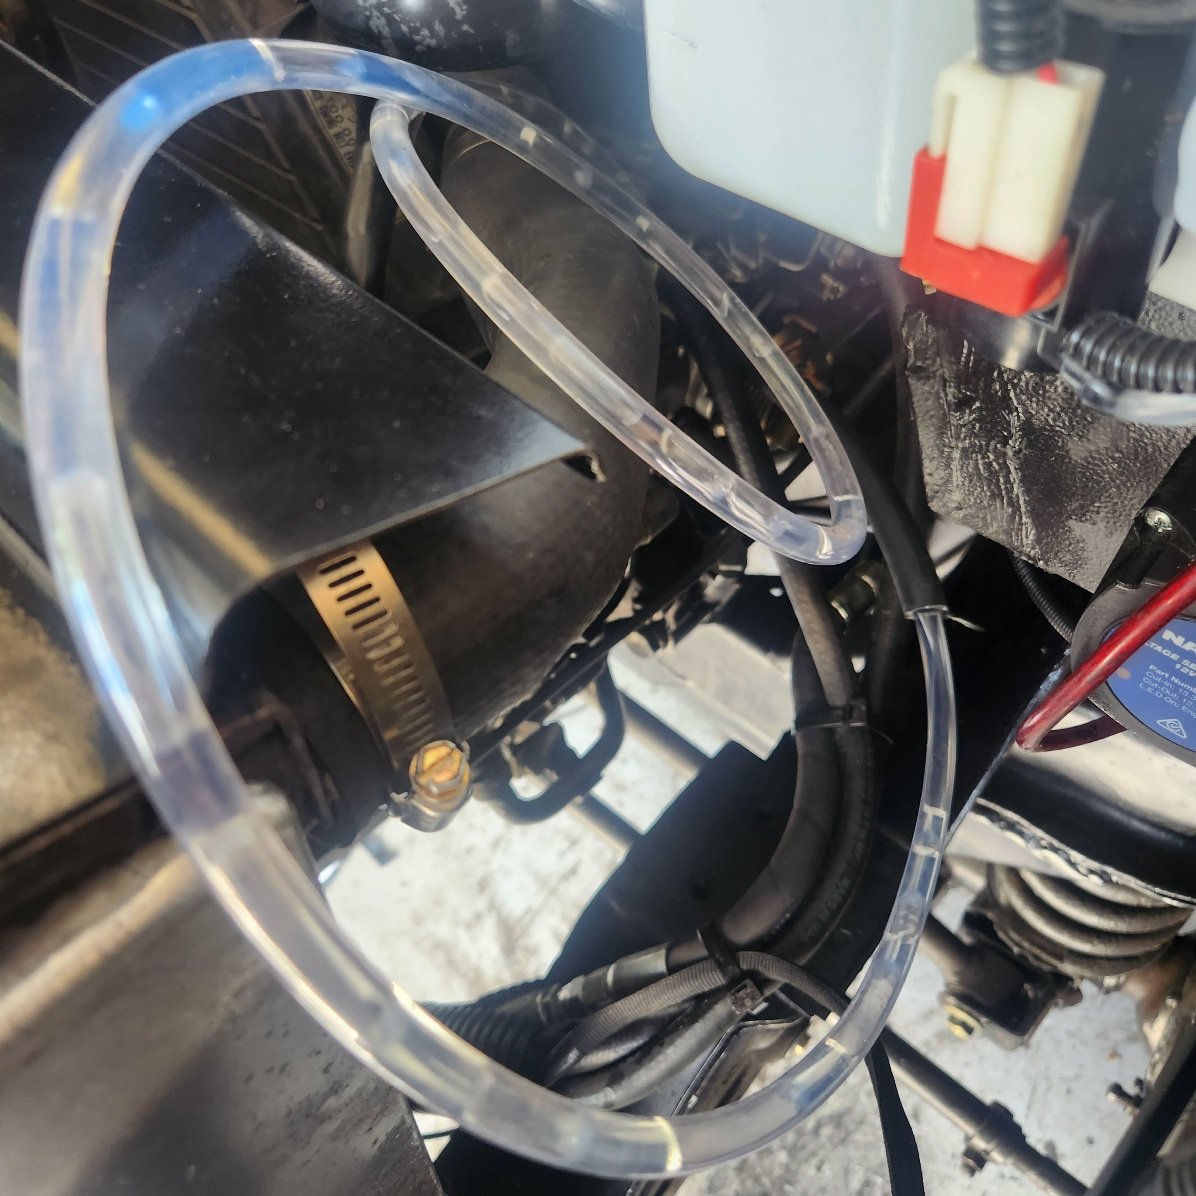
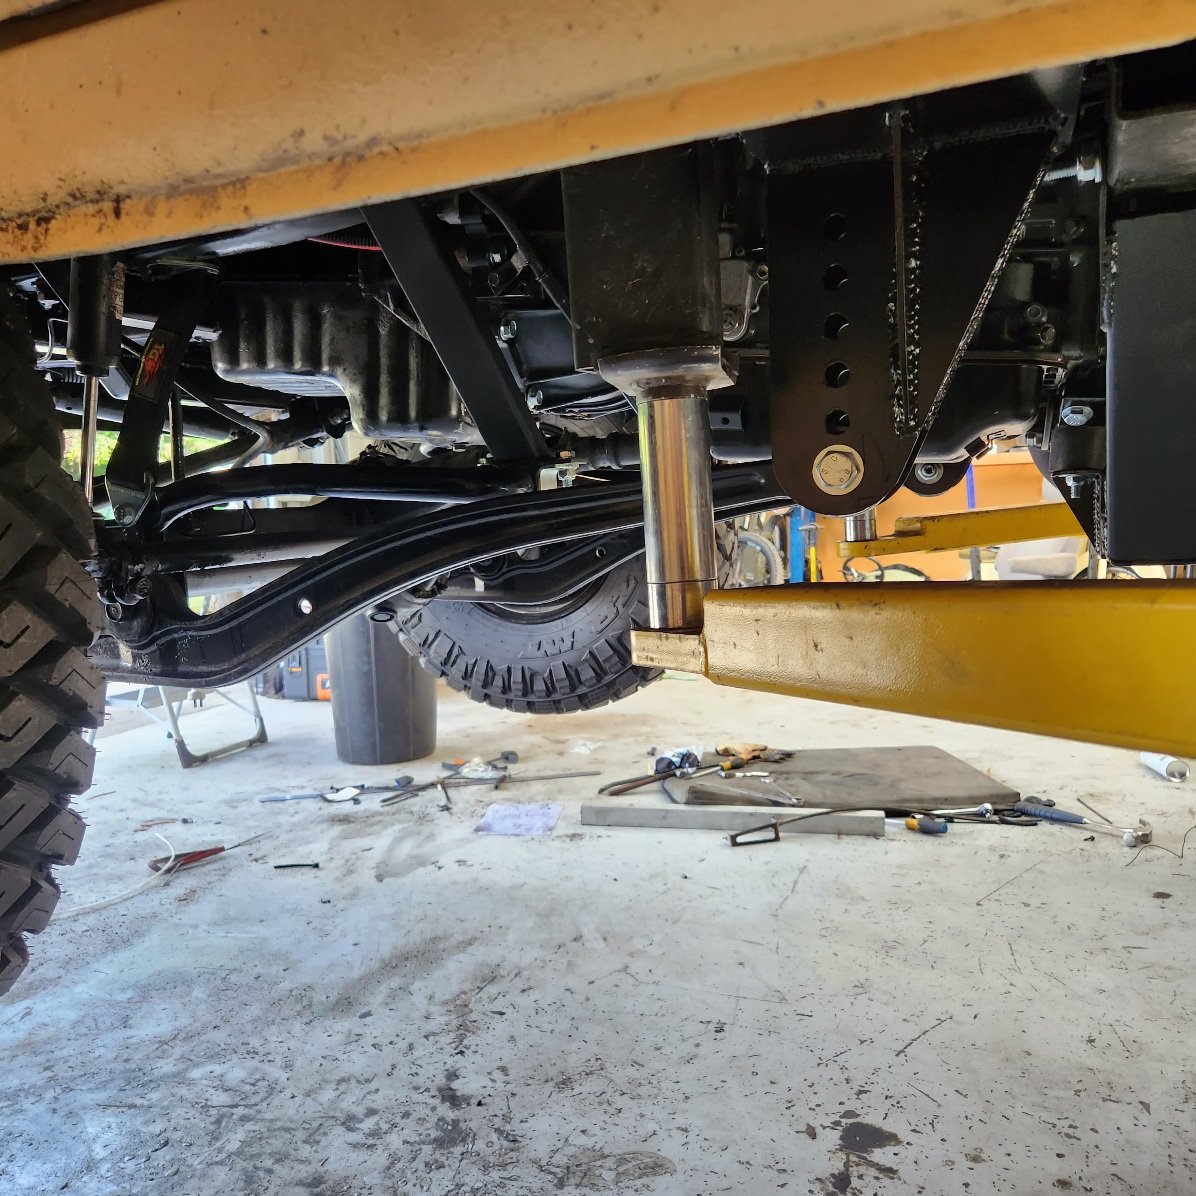
Few more odds and sods this week, the starting issue ended up being a fuel / air leak, these don't run lift pumps so lines are normally in vacuum. I stole an idea from some clever sausage and used clear tube to watch fuel flow Before ; After ( sans bubble ) : I got the trans crossmember done, ordered 2 mounts, neither showed So I just used a couple of big bobbin mounts for now It hangs below the transfer case and seems to work good Also got sway bar mounts made, they are on chunks of 50x25 and pivot point is level with radius arms mounts so hopefully it doesn't move forward and back enough to snap them, I cycled it a few times and it seems ok So here she is, just waiting on back driveshaft which should be here tomorrow avo, I might still get away in it on weekend if I can get some miles on it Thursday / Friday Close to concept I think
1 point
-
Bitter sweet moment Lookn awesome with the white tyres but sadly the original black tyres with white letters poped on me today. They were super dry rotted. But now thats outta the way my daughter can have some turns didnt want to pop on her
1 point
-
Not my thing but I can sure appreciate the time, thought, and skill that goes into creating these artworks.1 point
-
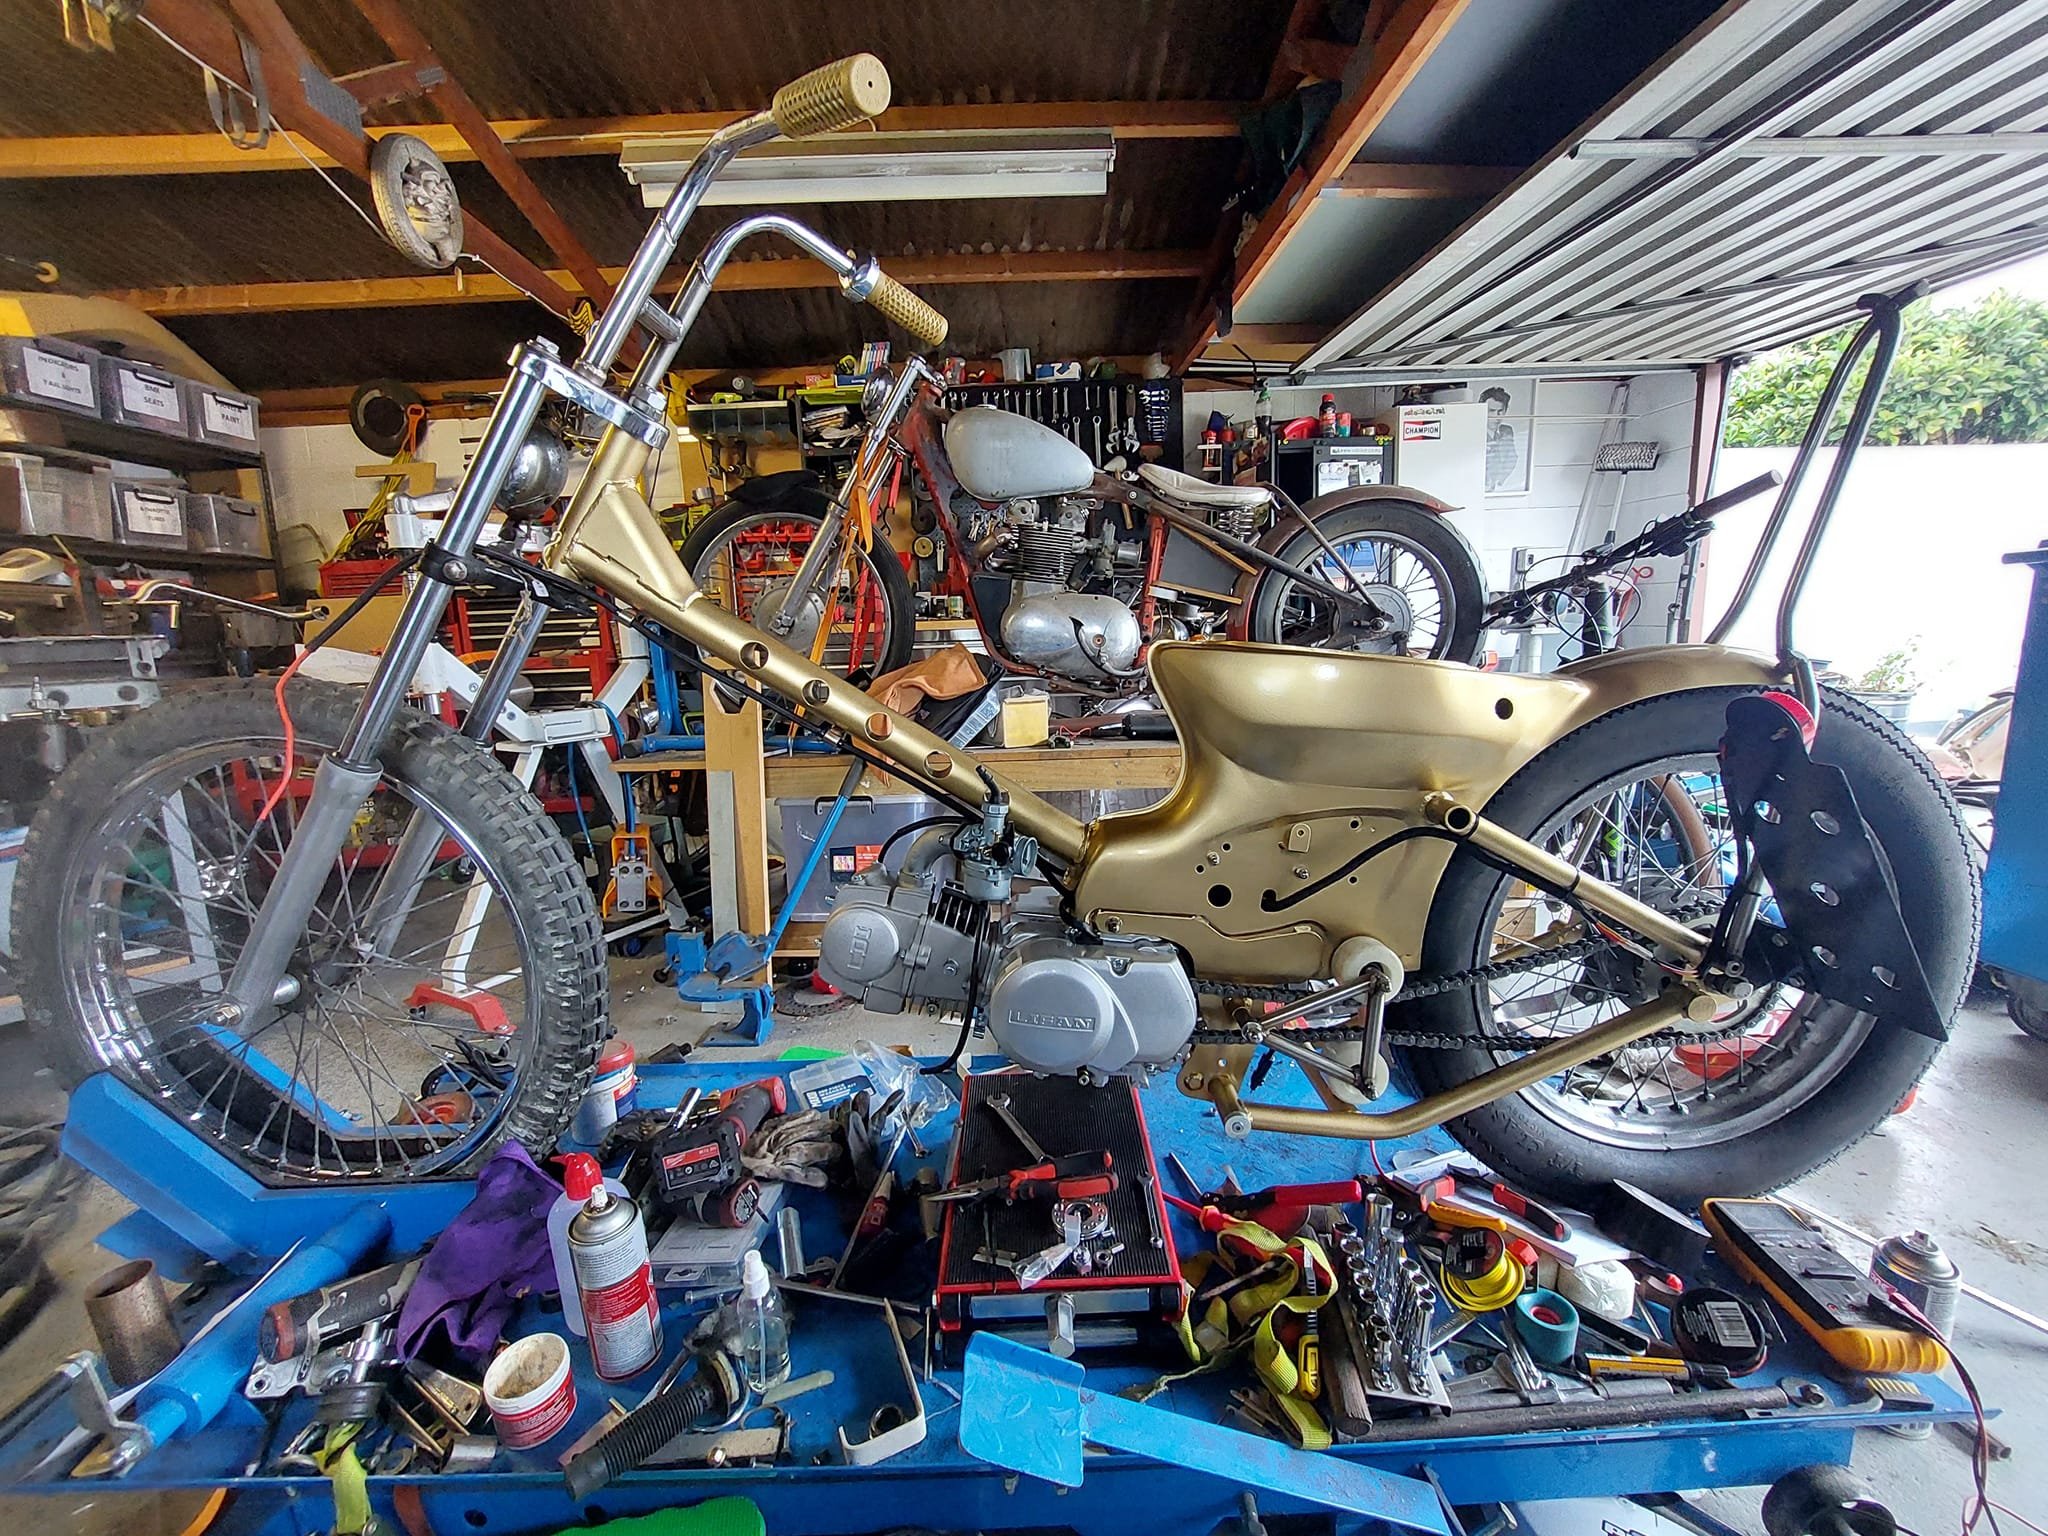
I was gonna get the frame blasted (I wish I had) but due to time restraints I stripped it myself with the combination of a strip it disc and stripper. Some filler, black primer, paint and a clothes line later.... I carried on with the assembly that I could and came into a problem with the chain, which should have been resolved during the mock up but I thought the notching of the mudguard would have solved that. I t didnt so I came up with the solution of using 2 skateboard wheels instead of just the one. So I made a bracket which located on the original tensioning wheel and the swingarm mount ( which I originally was going to cut off ) I poured some fuel in and it started 1st kick. Im waiting on a throttle cable being delivered then I can tune it properly
1 point
-
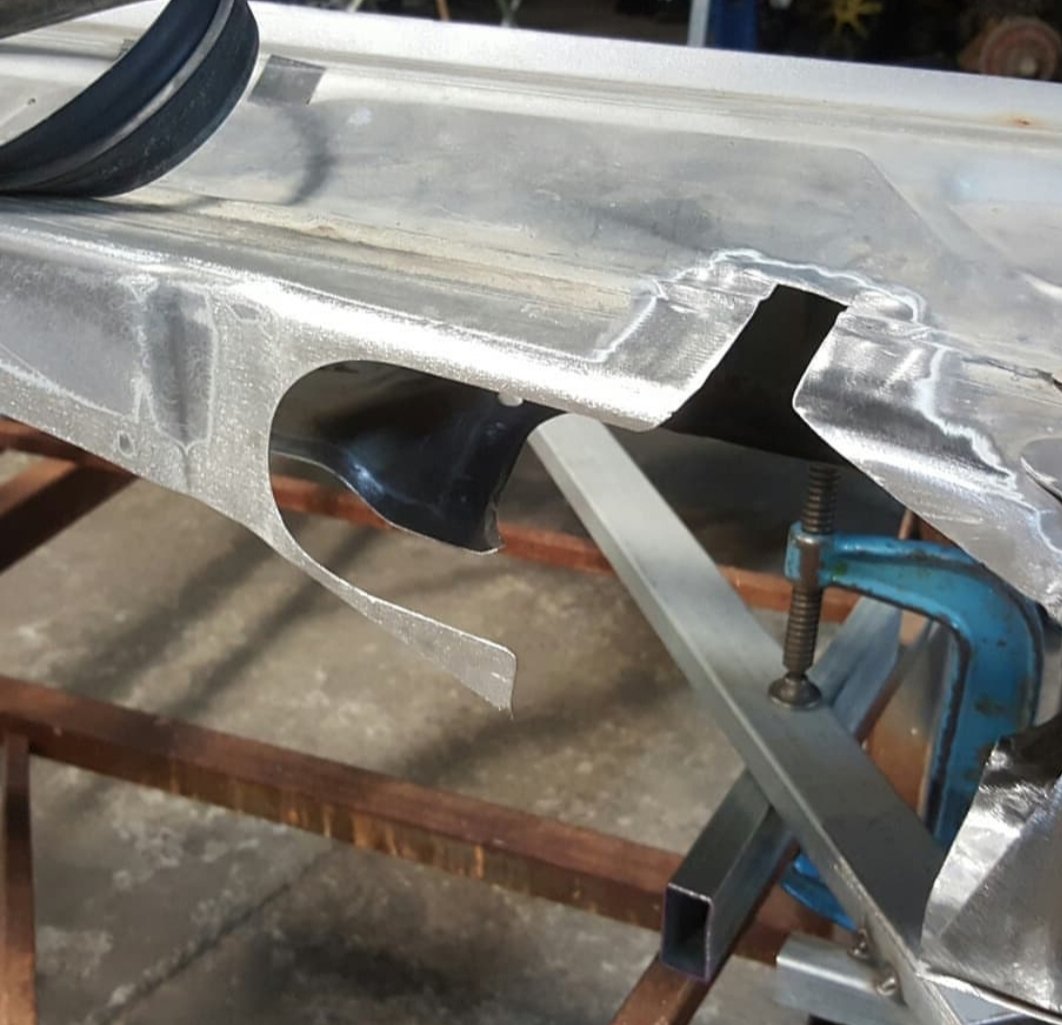
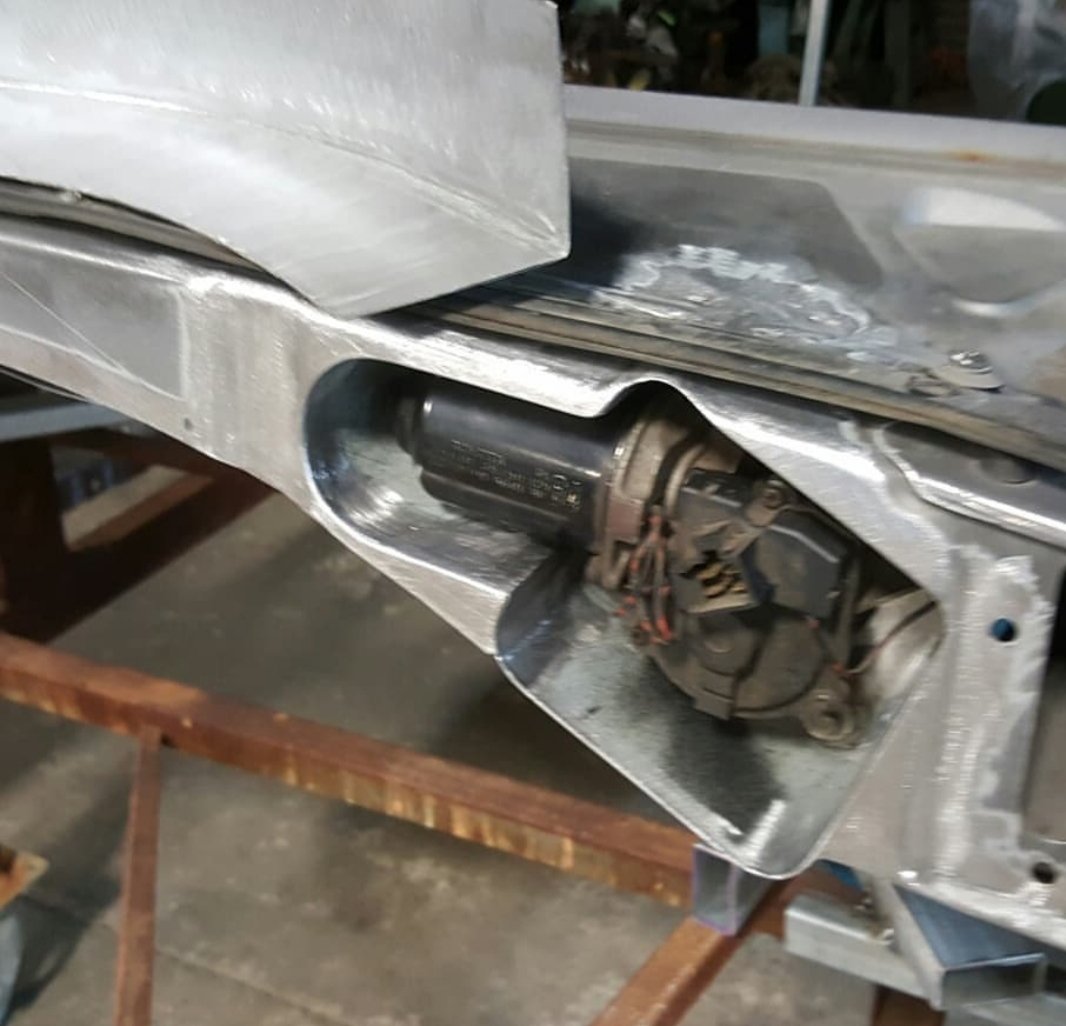
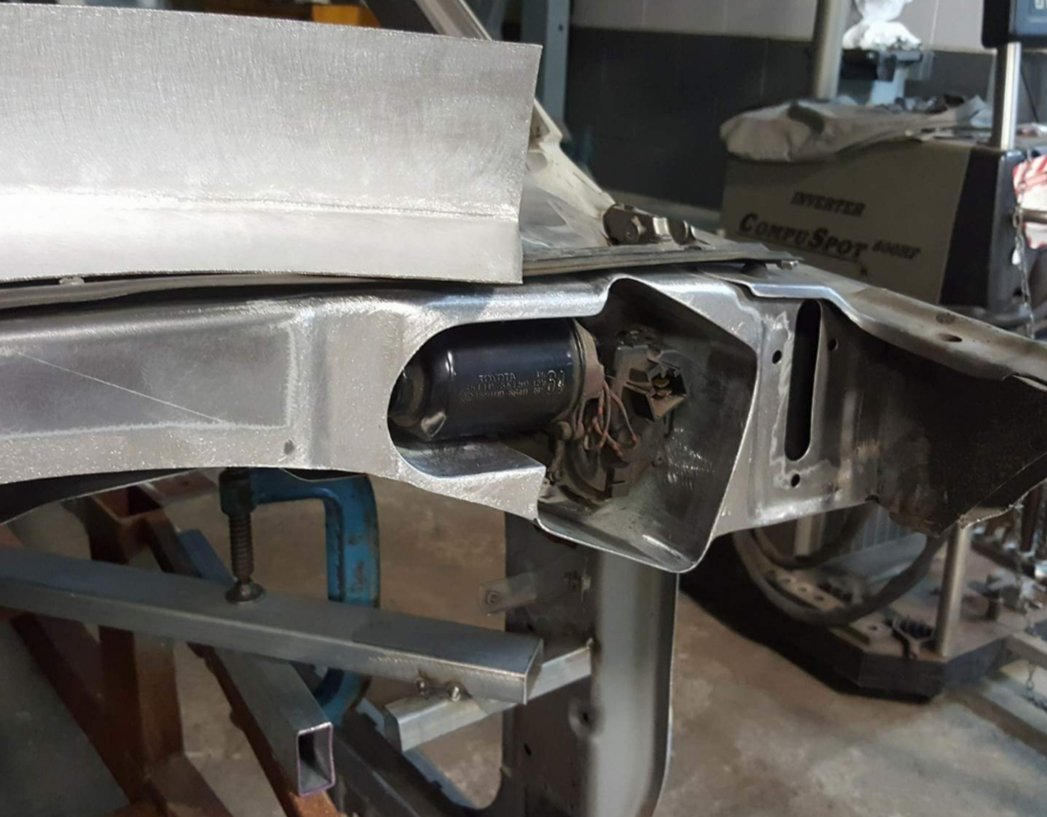
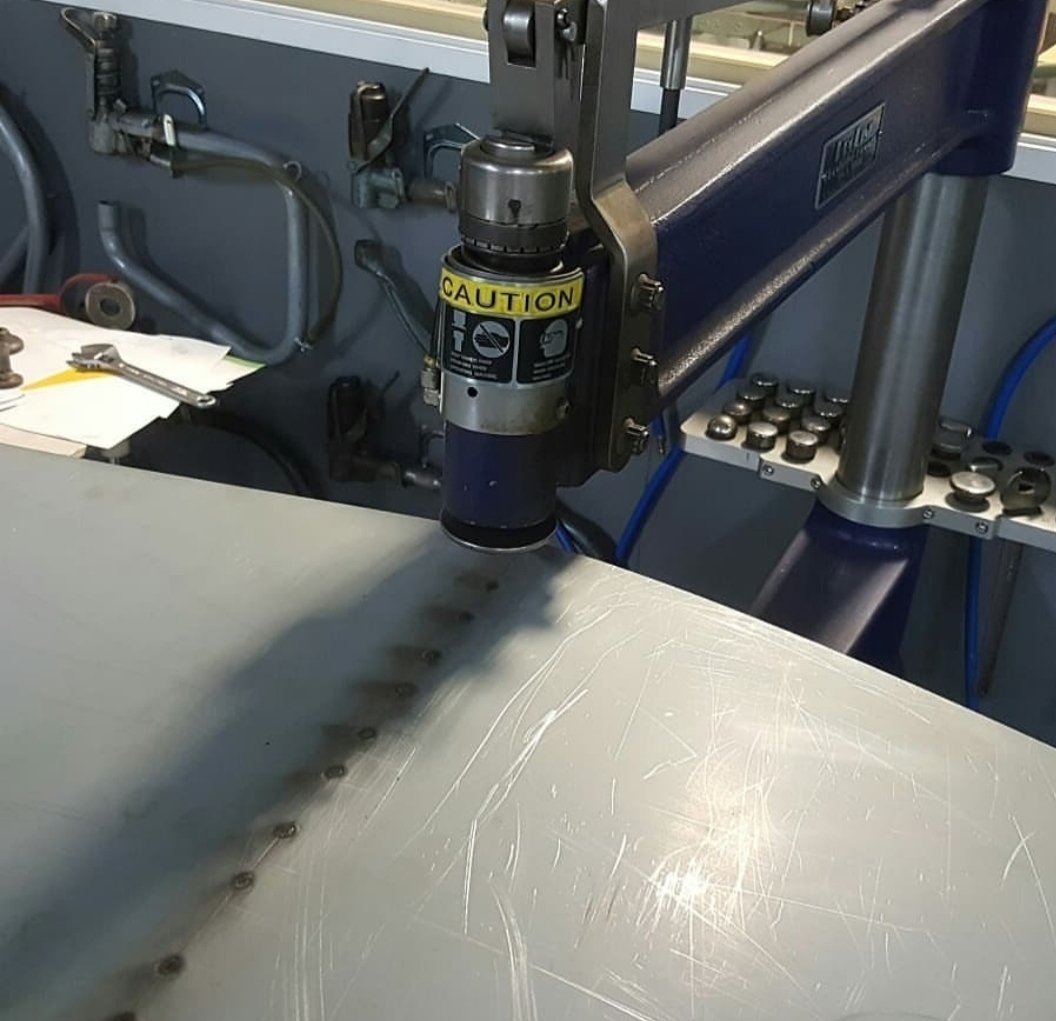
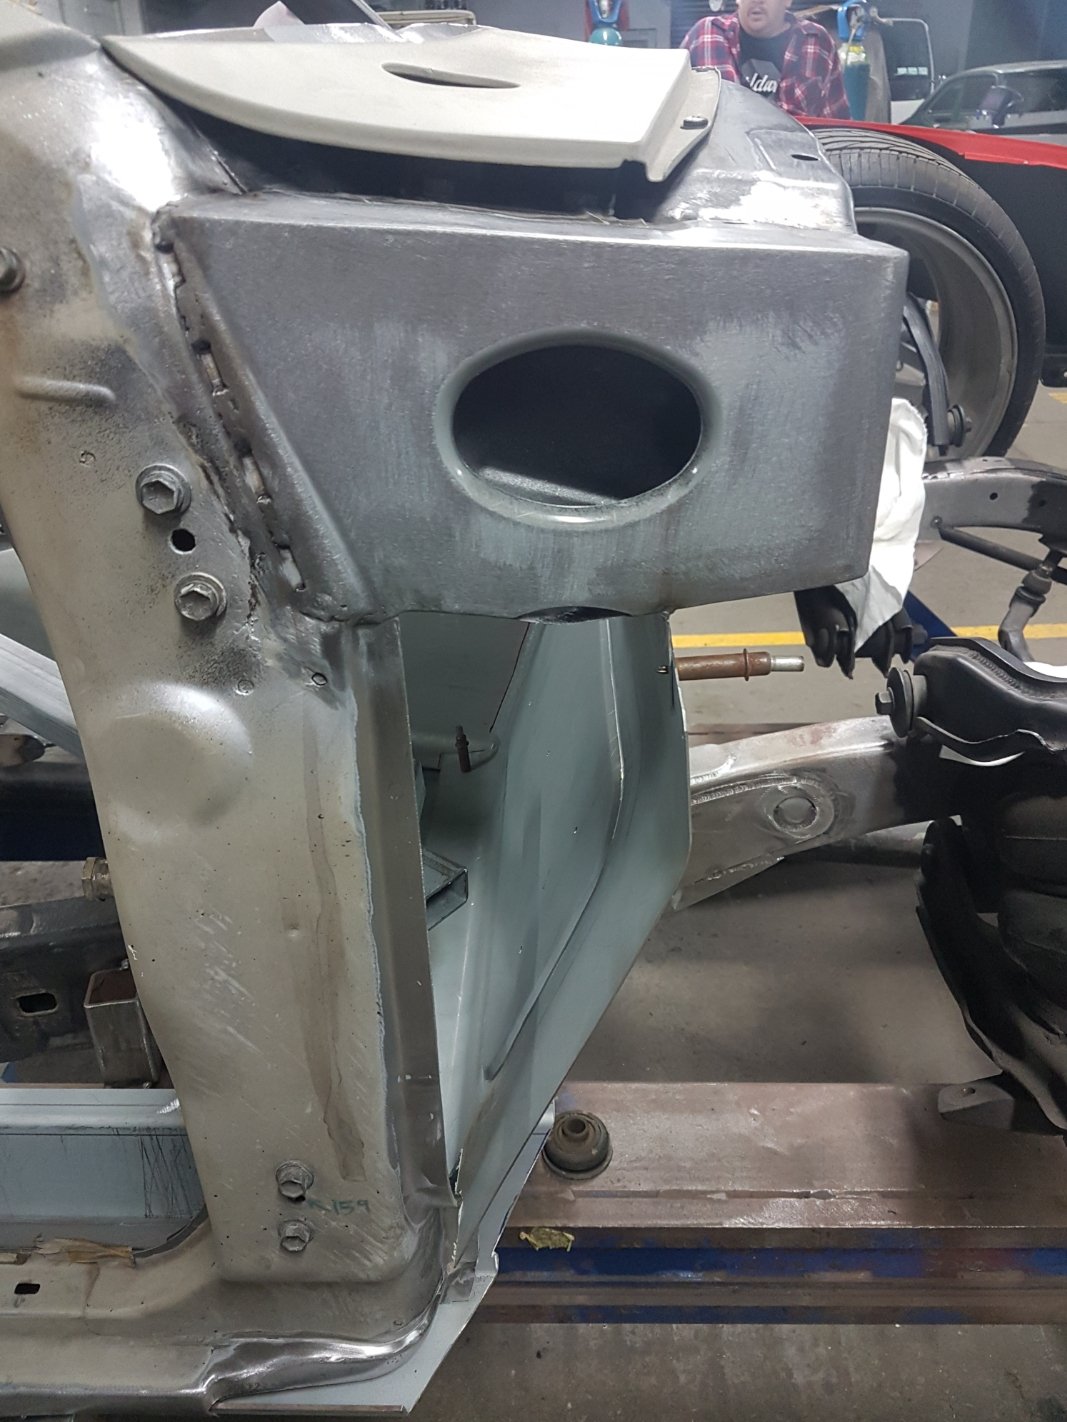
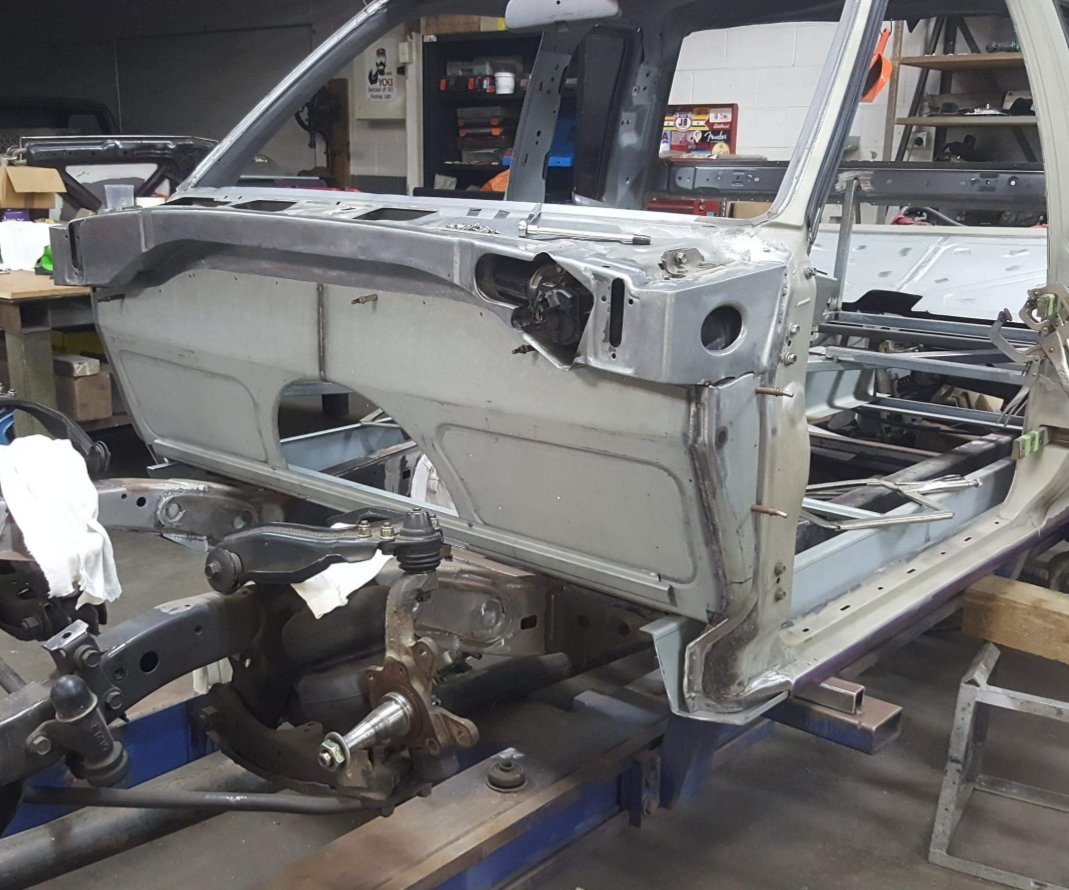
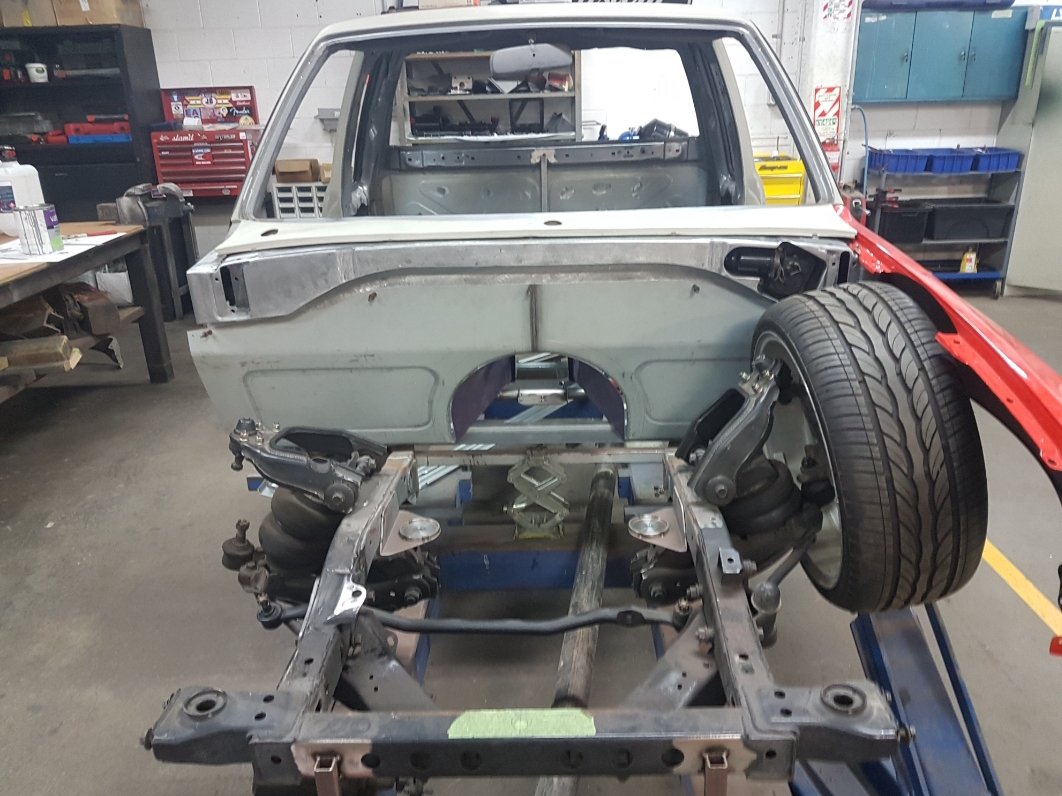
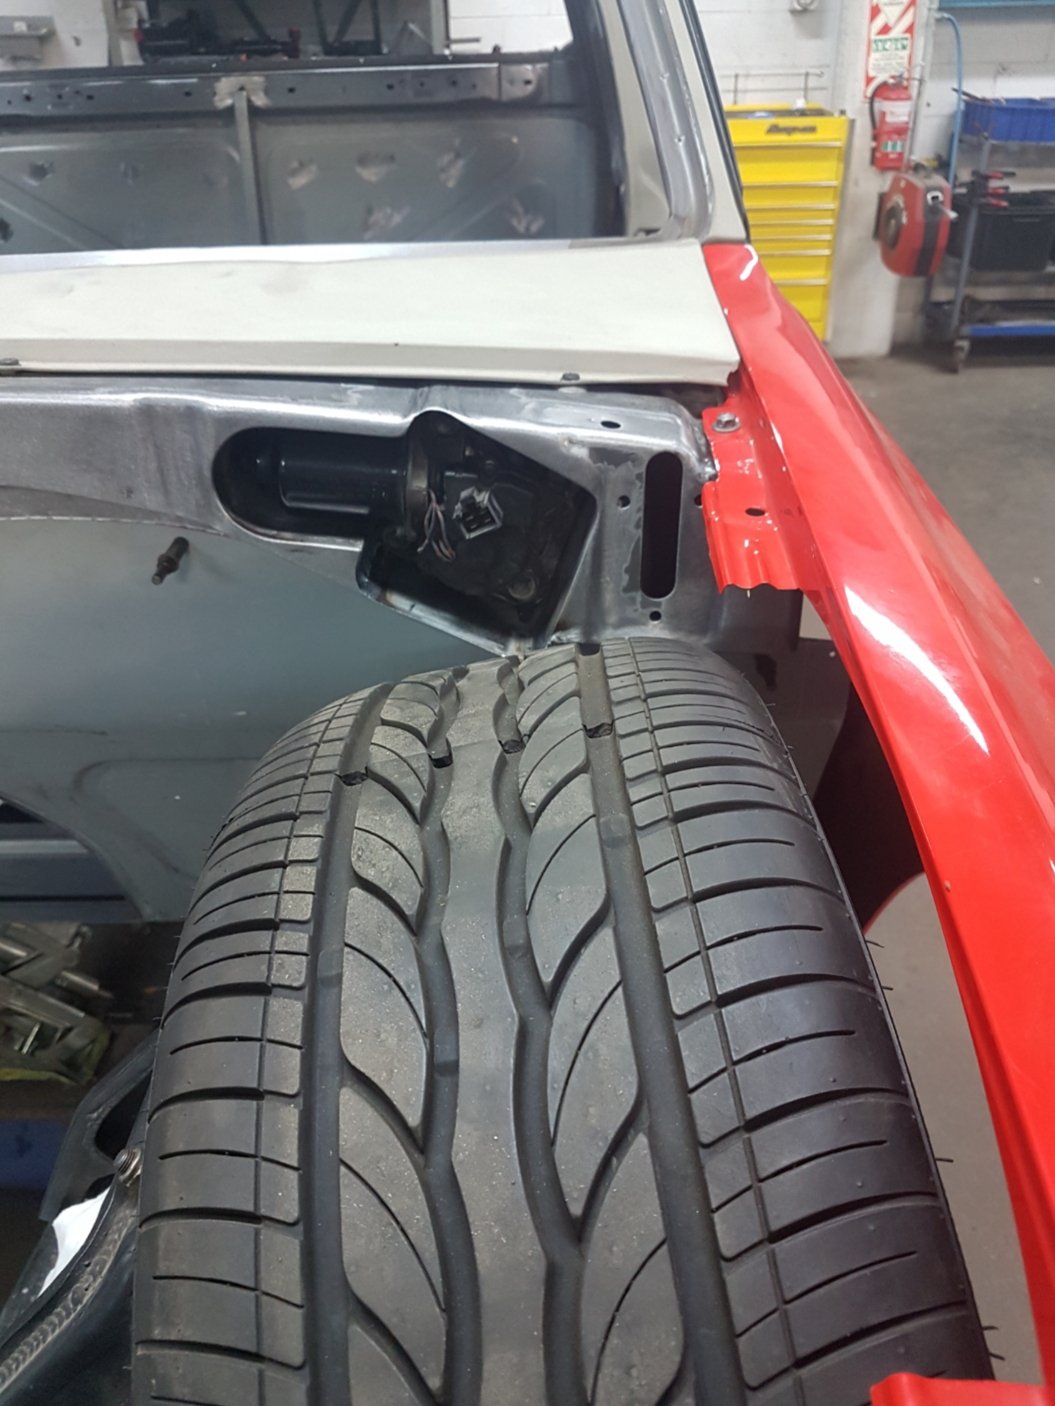
Here's the process of forming the front firewall..... All the correct tooling has been used, such as the planishing hammer, to spot welding it in. You could call it a c10 style firewall, it's all going to be exposed with no wheel tubs. Check out the 'frenched' in wiper motor, I've never seen this done before and I was blown away when Matt surprised me with this! Wayyy cool. Also with the body drop, the steering has to be reconfigured, this is now ticked off the list
1 point
-
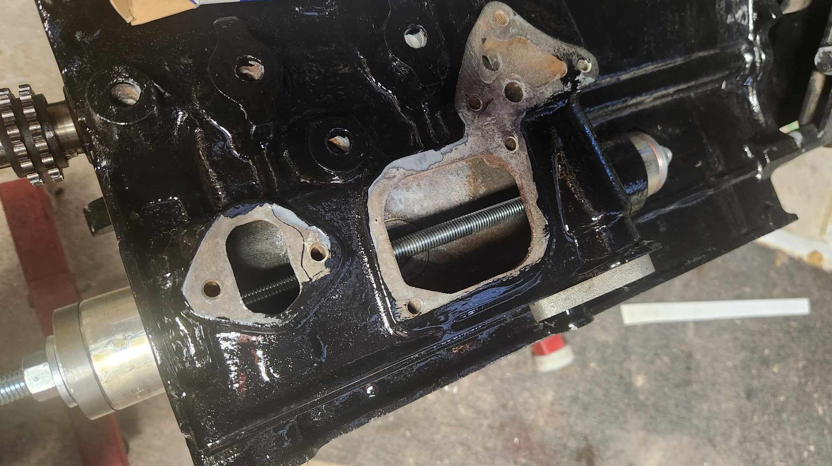
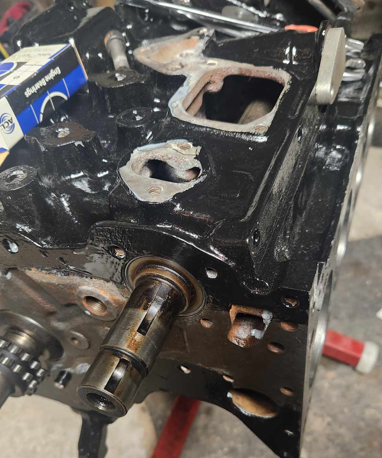
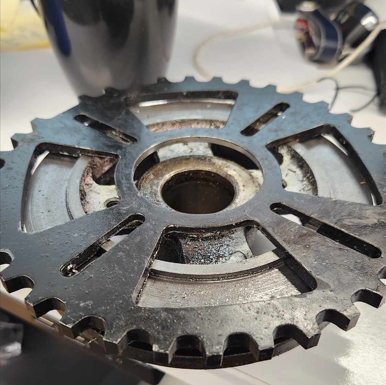
a bunch more progress on the engine build. mostly related to preparing the various parts i've collected and making them fit where they sometimes wern't meant to. First up, have the 20r pistons machined to accommodate the valves. ill find out this weekend if they are correct. The still need the fresh edges broken but i am very happy with the job done by Proturn Engineering here in Christchurch. Then i set about fitting the auxilary bearings, turned up a couple of press tools to pull them into place. took my time but went trouble free. Shaft dummy fitted and smooth as butter the crank too. Still need tidy up the edges on the painted parts. Then, now that the bottom end is all but ready, and i'm going to have the whole lot balanced, i needed to finally fit up the trigger wheel i made like 4 years ago. I parted off the unused front pulley and turned a spigot from its remains. with a matching cut on the trigger. once i look up if position is important ill tap mounting threads in the meat under the remaining pulley. Ill need to think about making a cam angle sensor because i want to run proper sequential fuel and ignition, i think ill just cut up a dizzy and make something nice and low profile. Getting close to actually assembling for good which is very exciting.
1 point
-
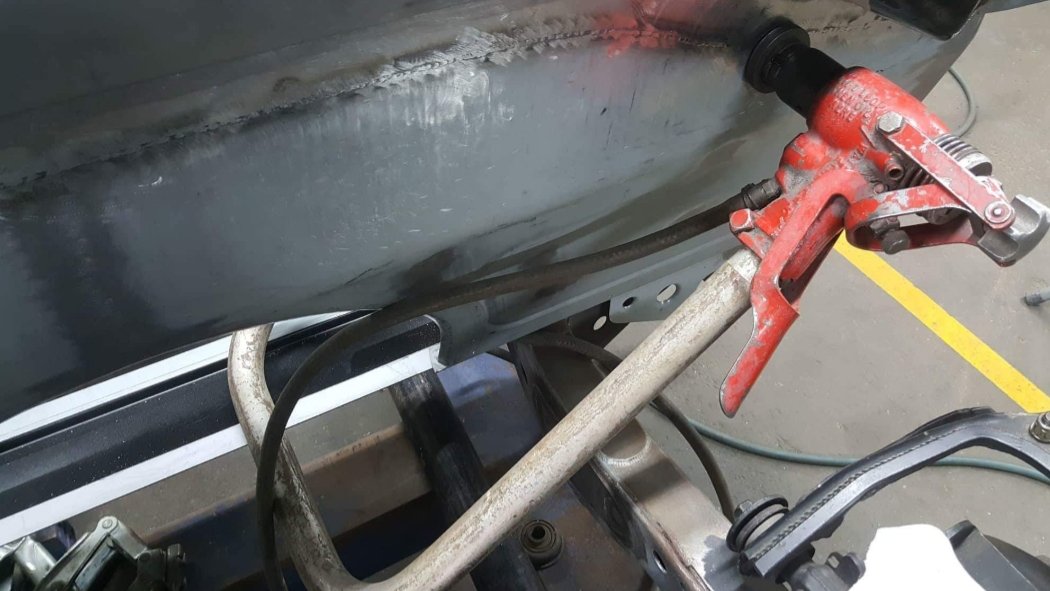
Exhaust was the last of the major fab work to do so I thought I'd at least get it all mocked up and tacked together I also had to extend the bracket that the brake rod attaches too also
1 point
-
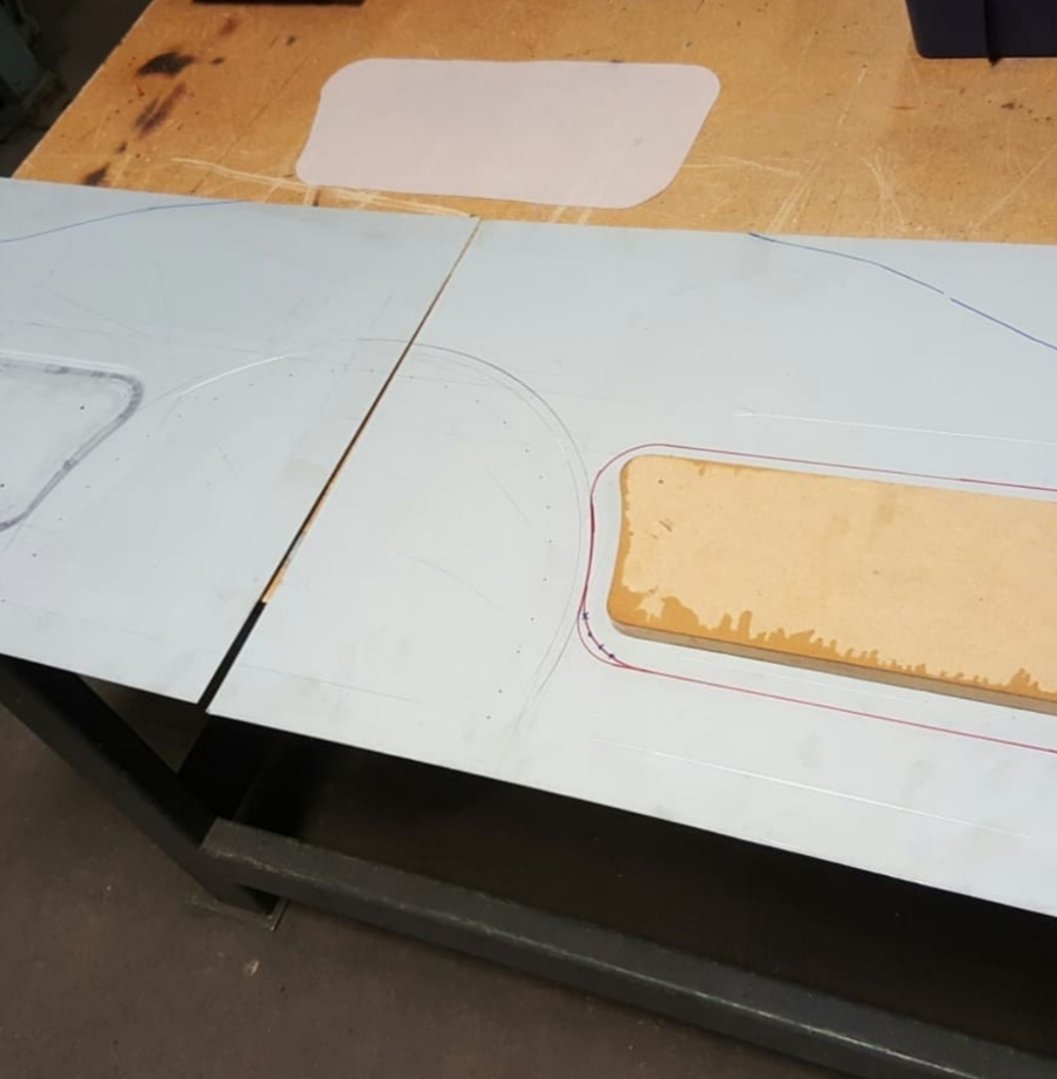
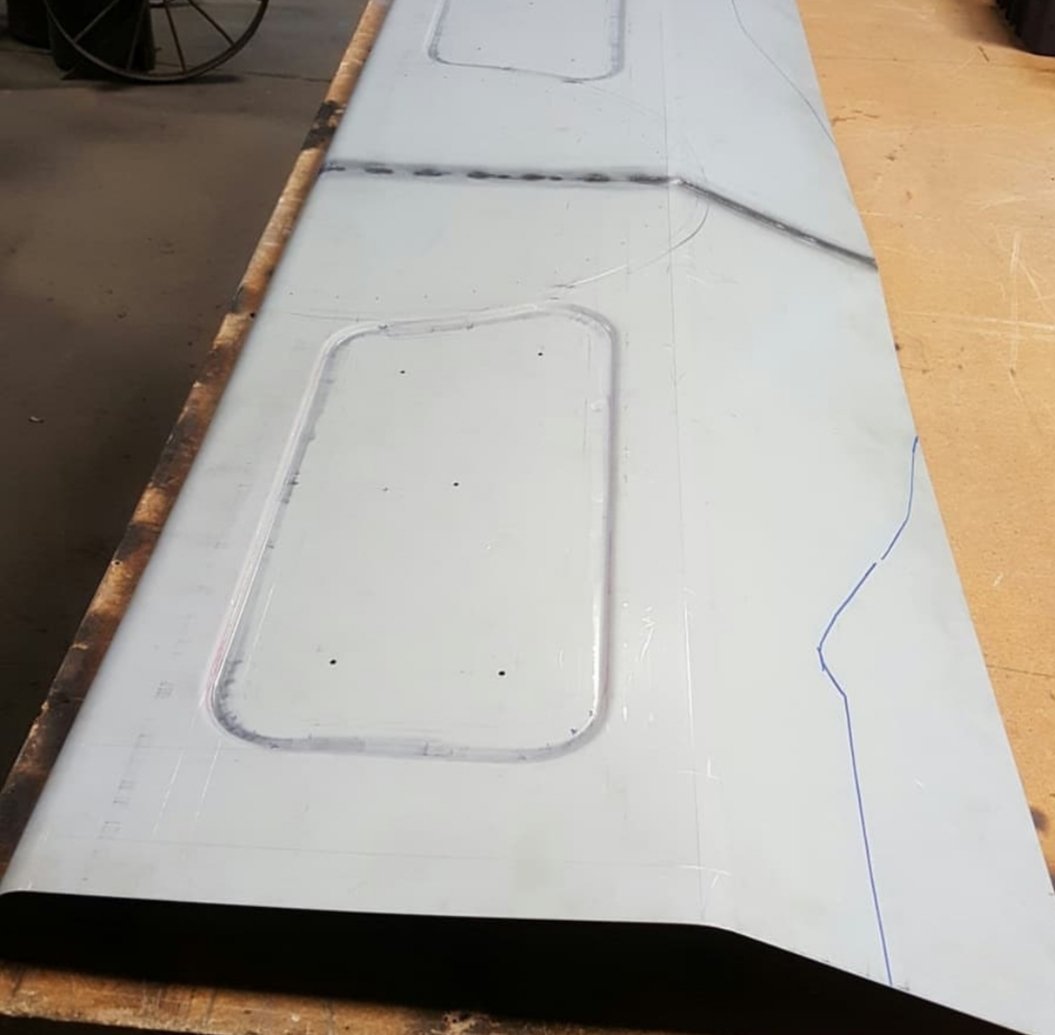
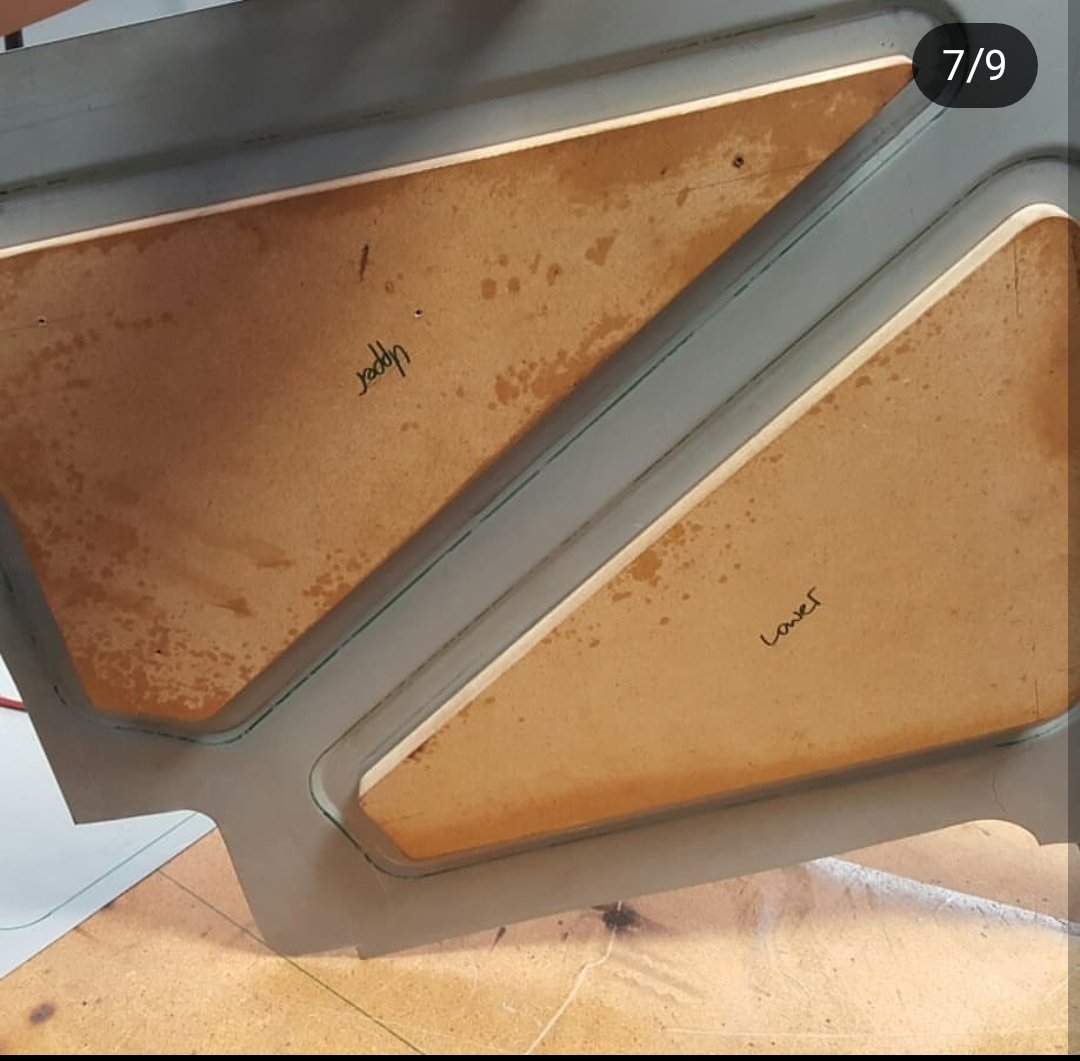
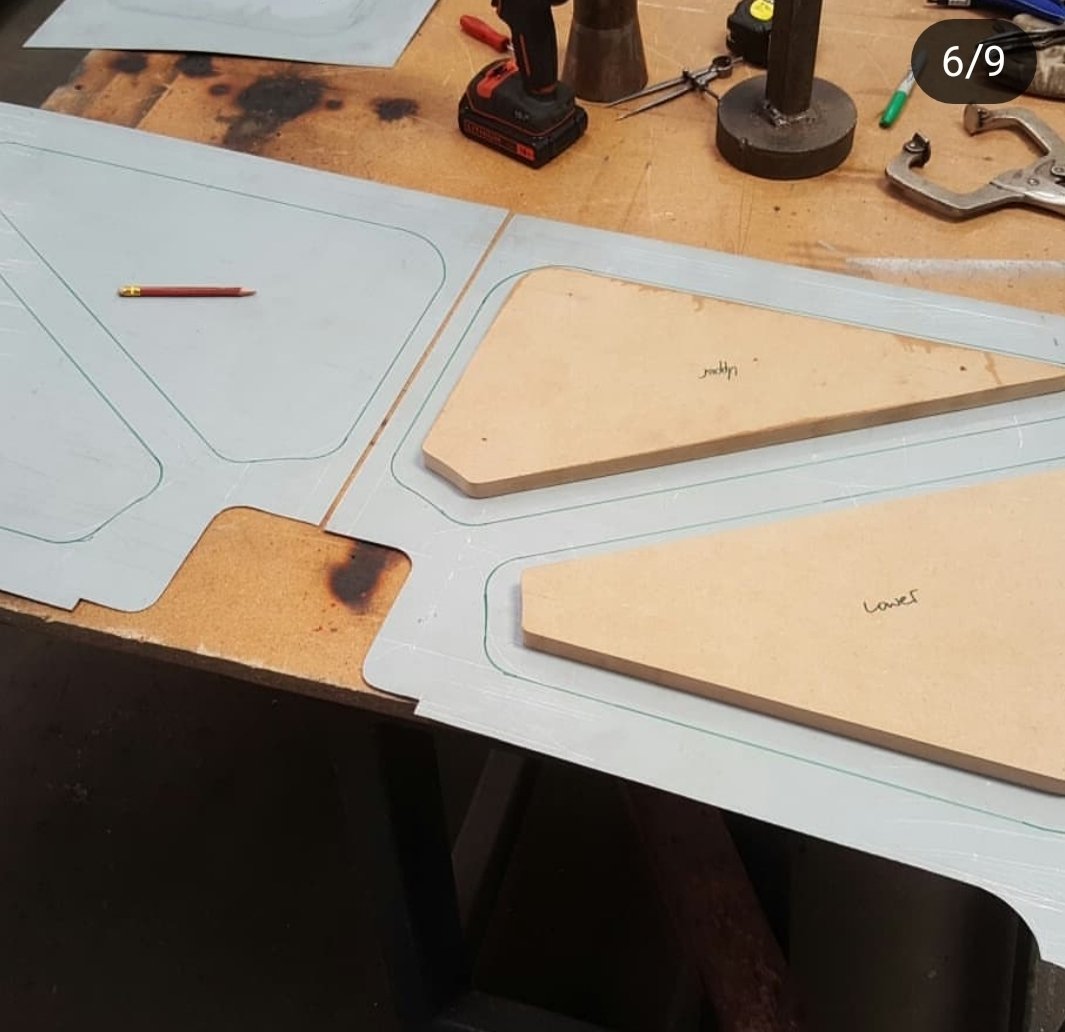
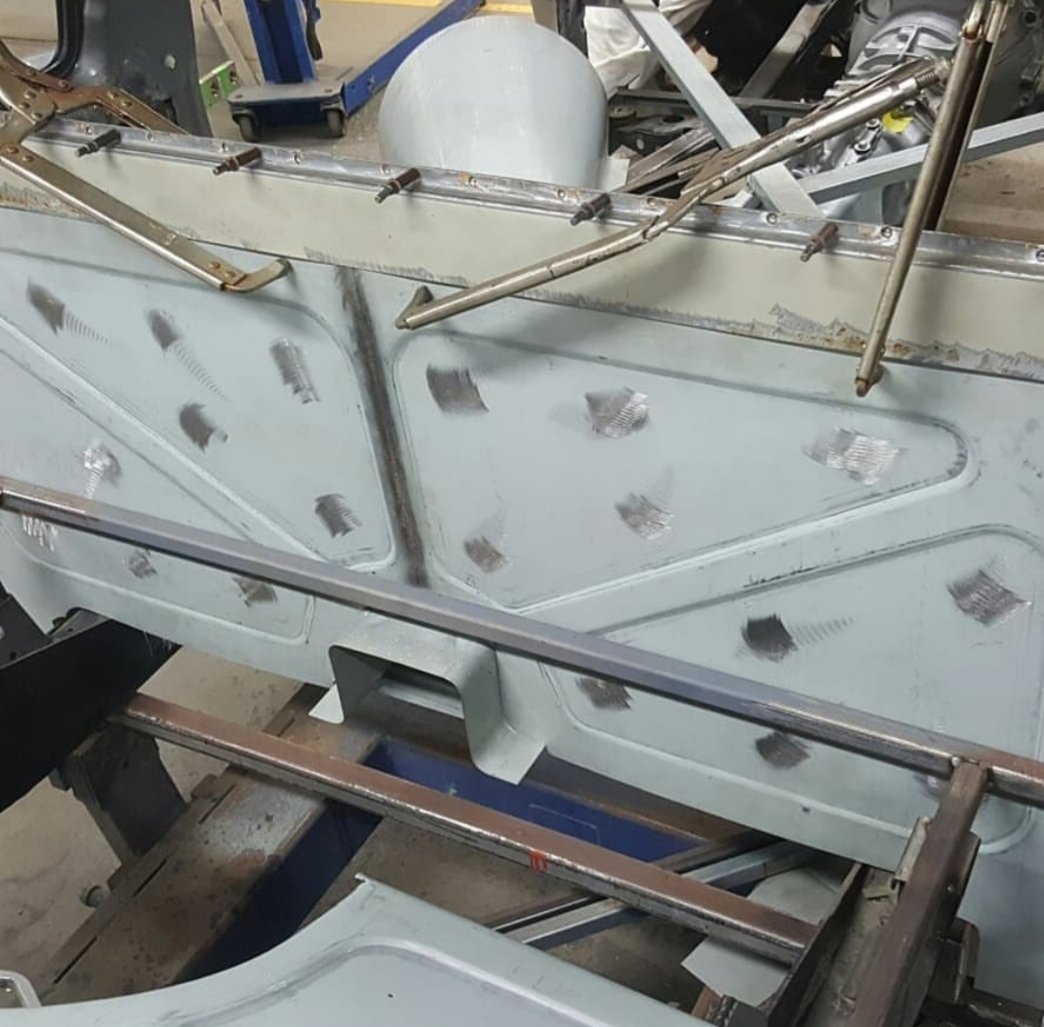
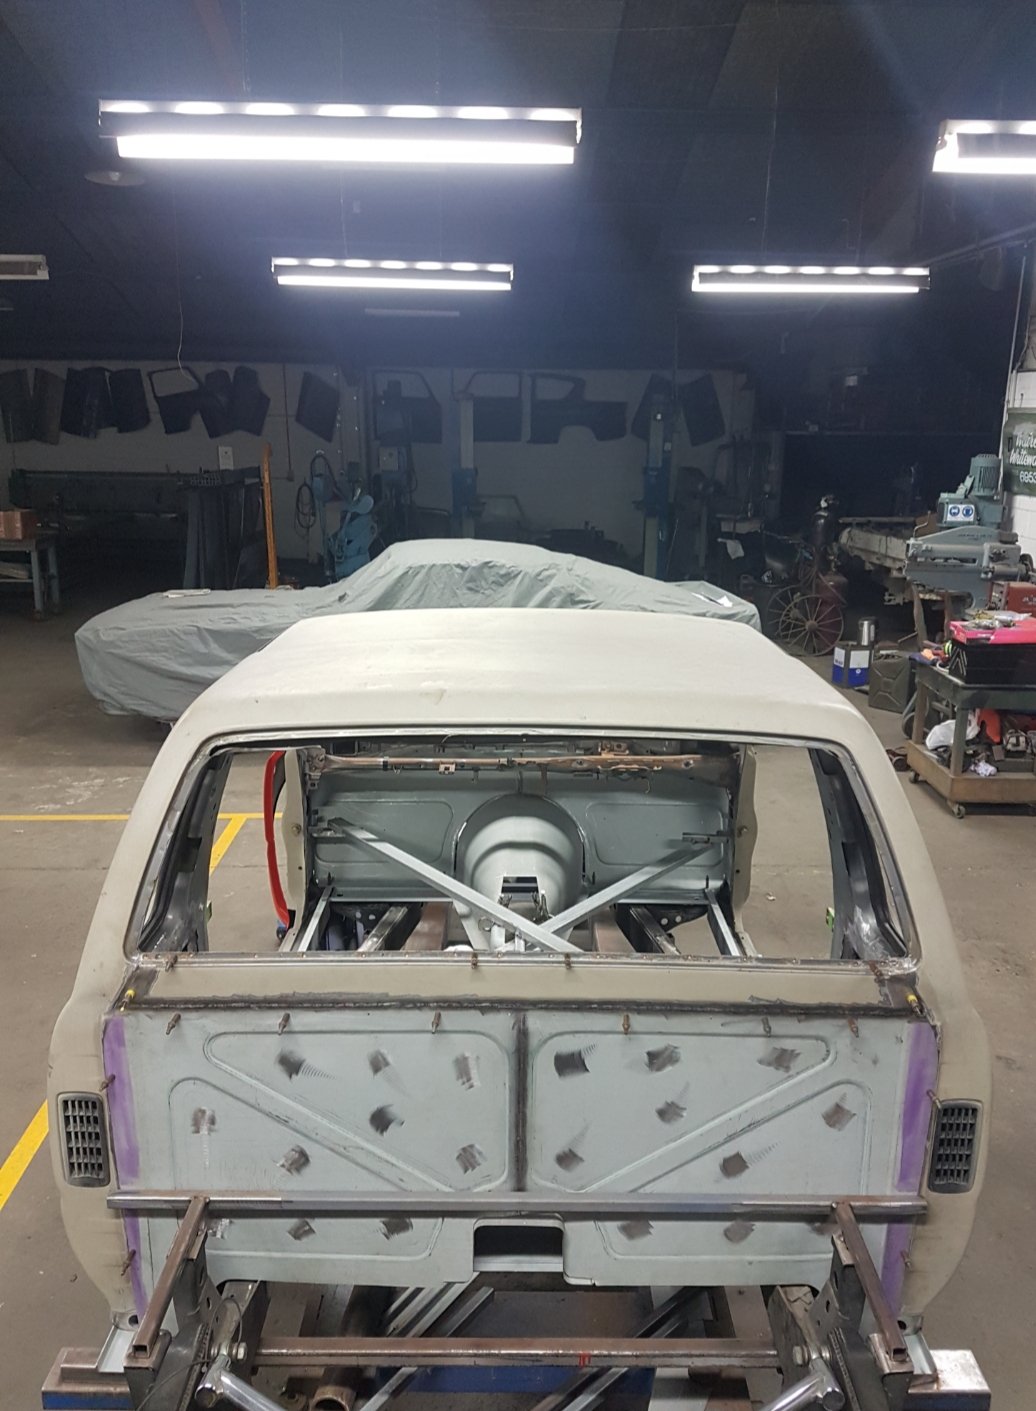
Rear firewall design and fabrication
1 point
-
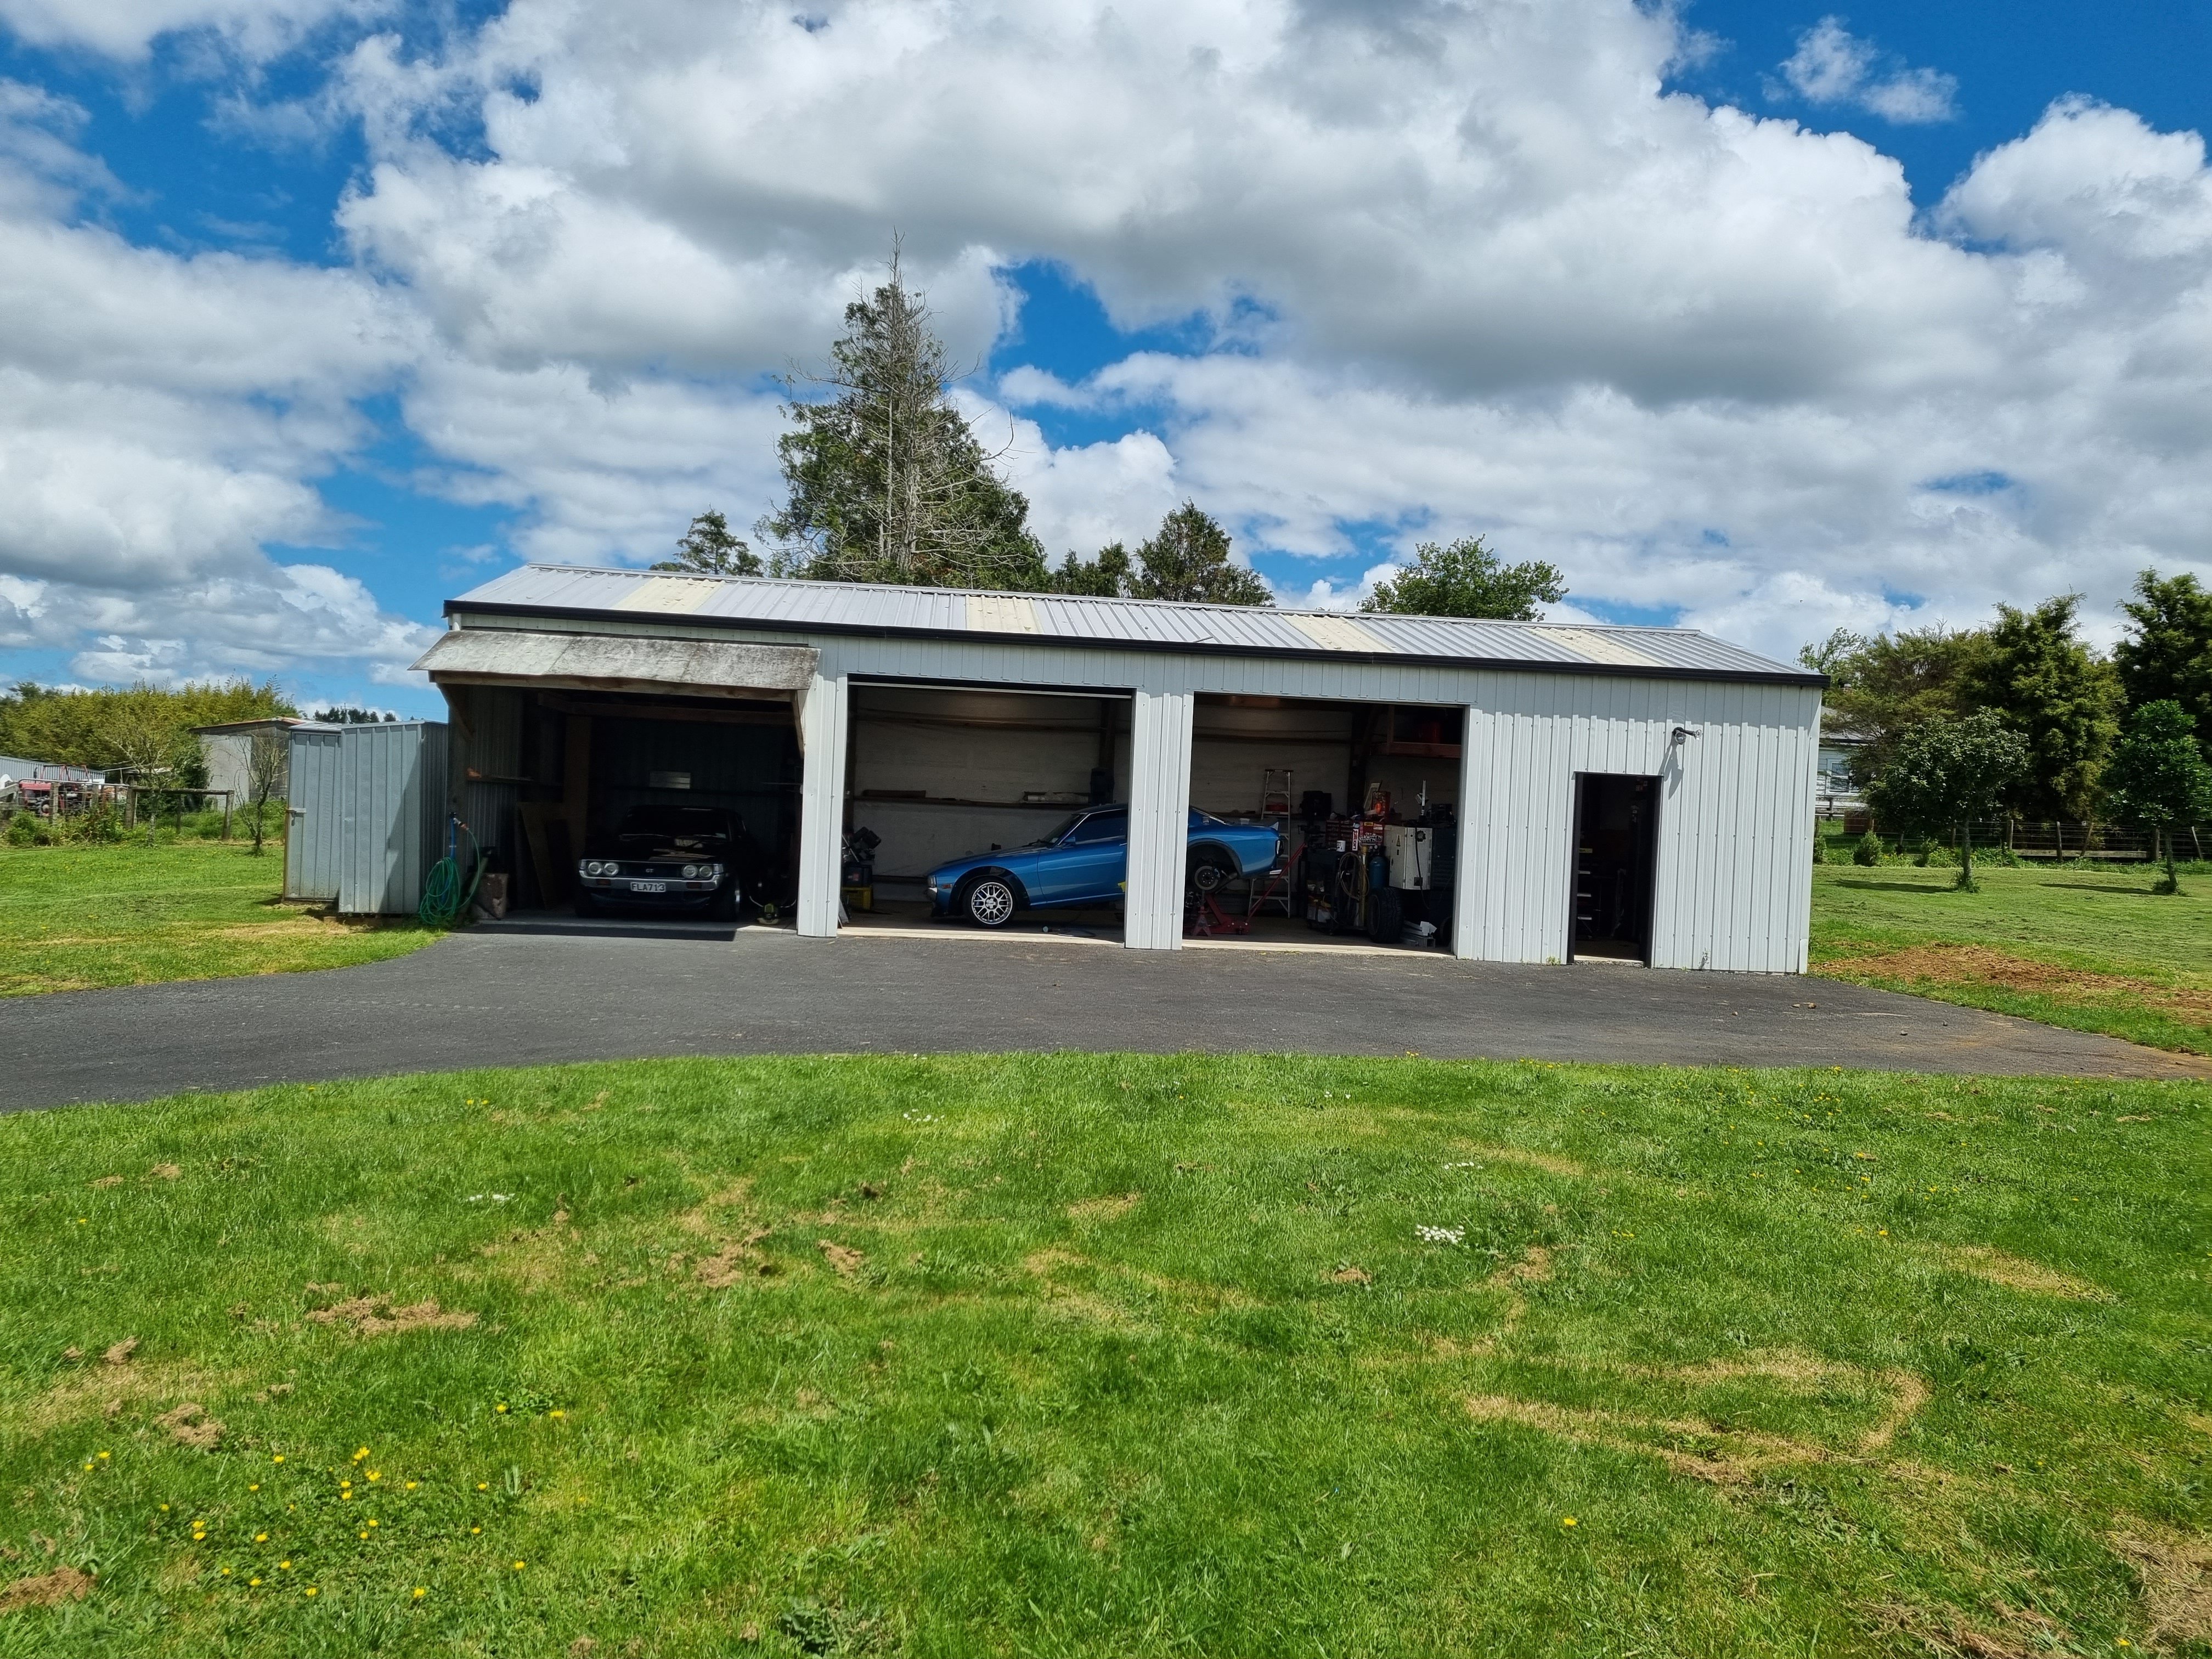
Its not everyday i manage to get everything outside Fora big shed clean. Feeling good everything is rideable too bring on summer
1 point
-
Thanks! Gave it a once over with the waterblaster this afternoon, looks a lot better
1 point
-
I wasnt really happy with the seat base I made so I learned from my mistakes and made another one. I'm happier with the fitment of this one too and also made the ''queen'' part of the seat. I'll get a few rolls of sleeping mat from the warehouse and start adding the foam. I need to make the hinge for the front too.
1 point
-
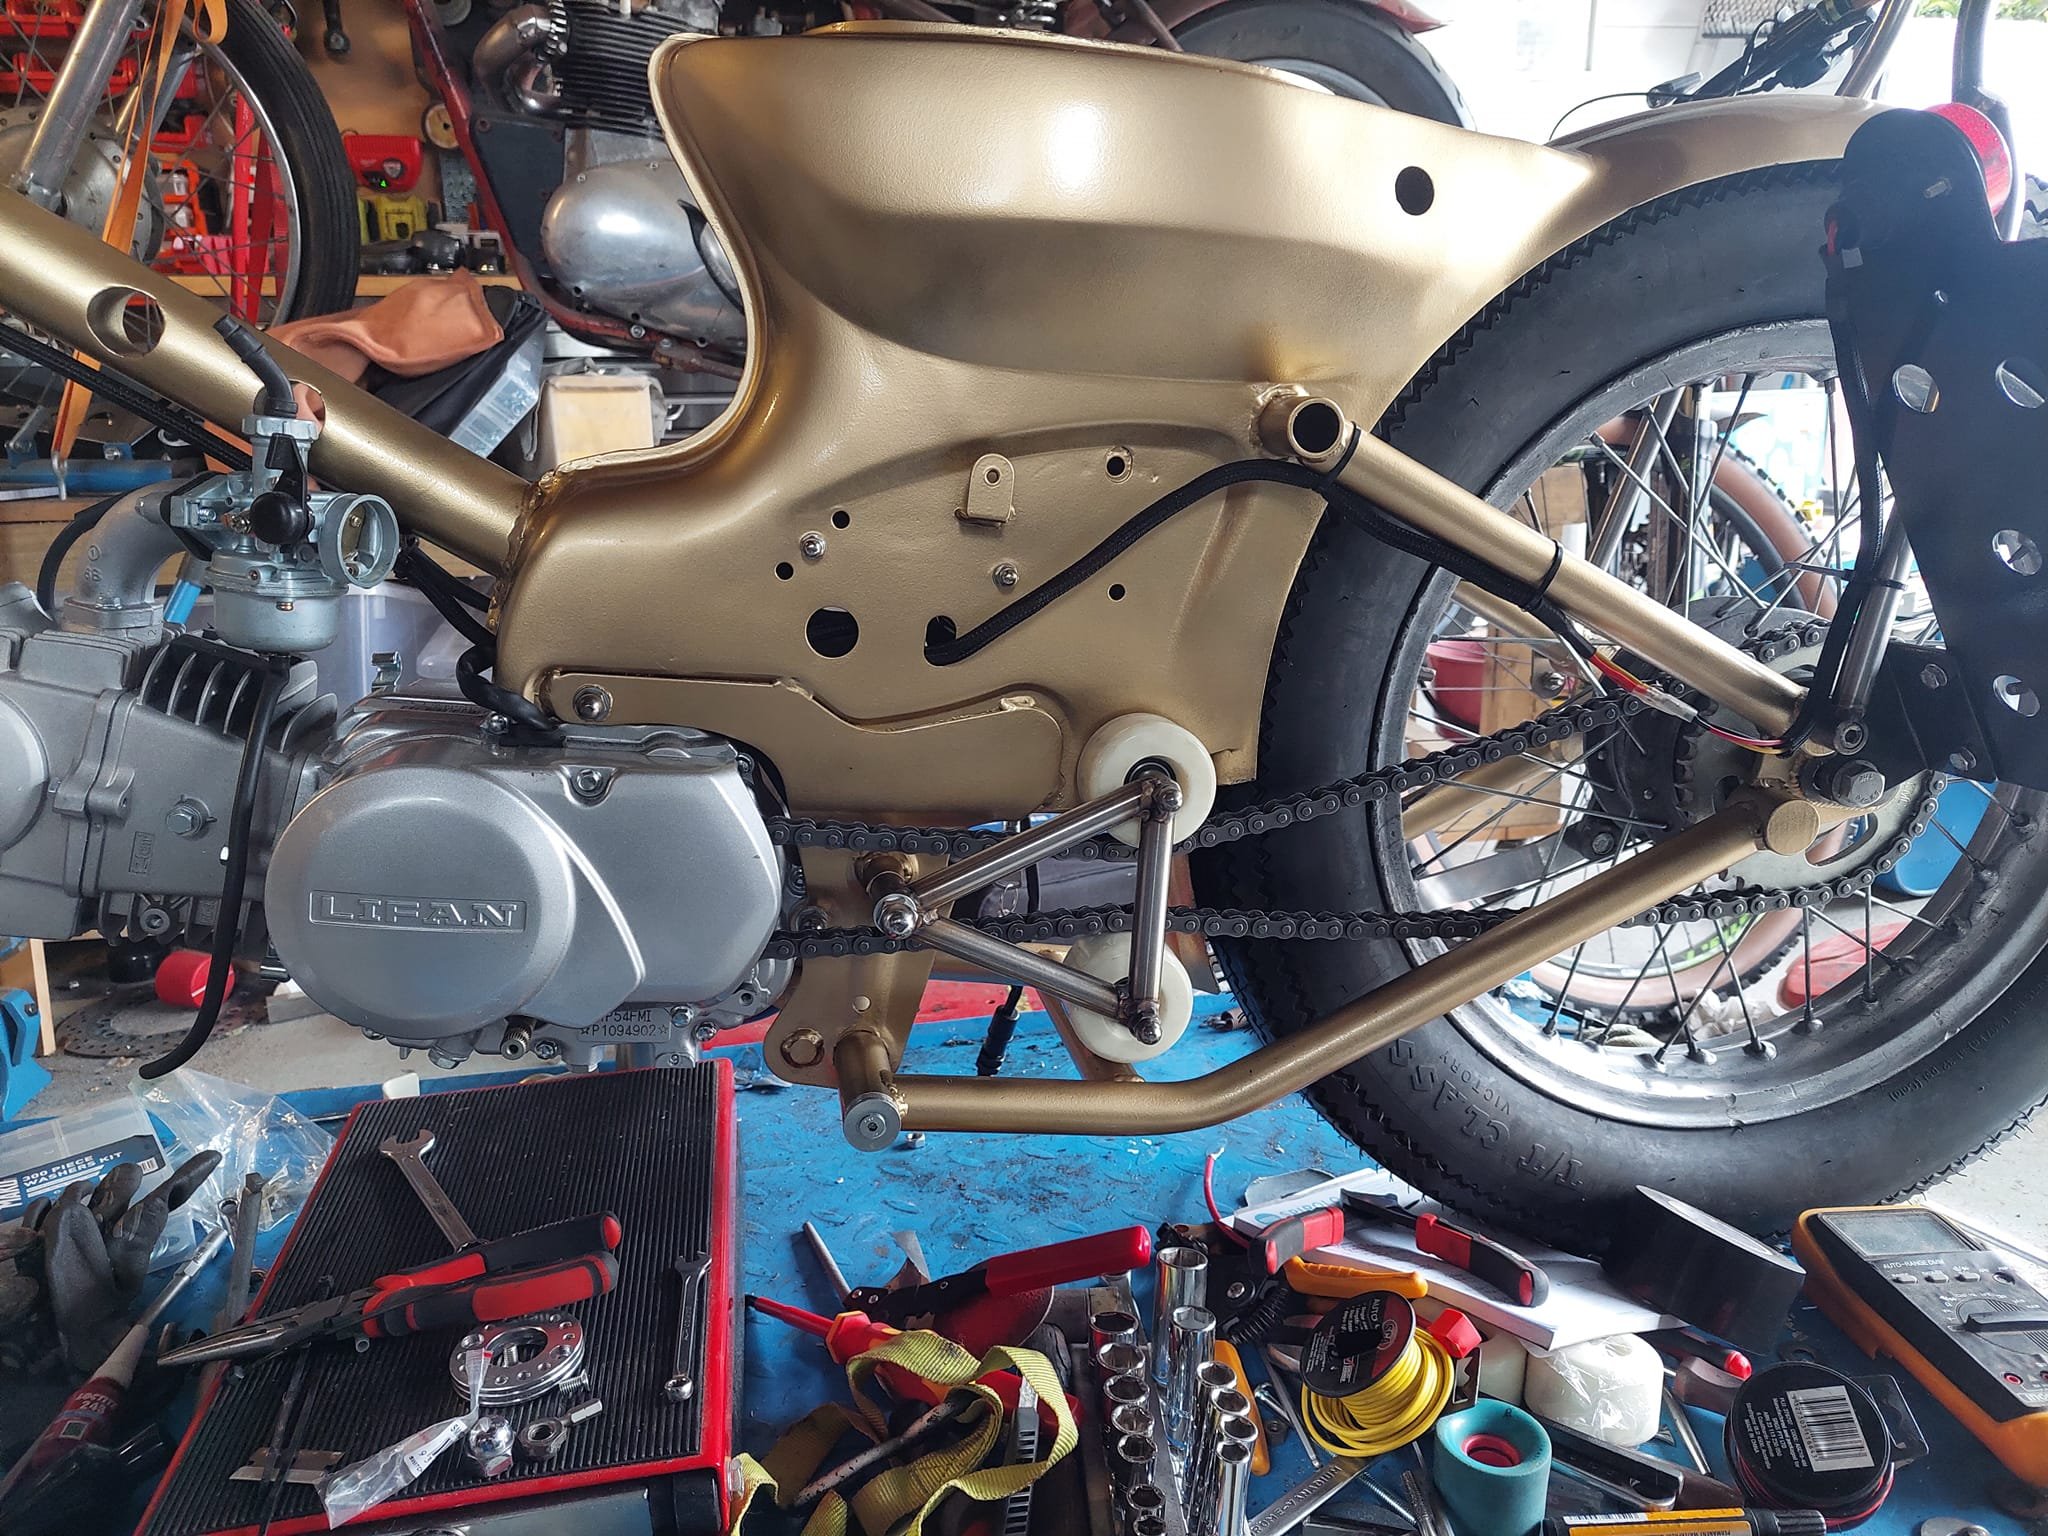
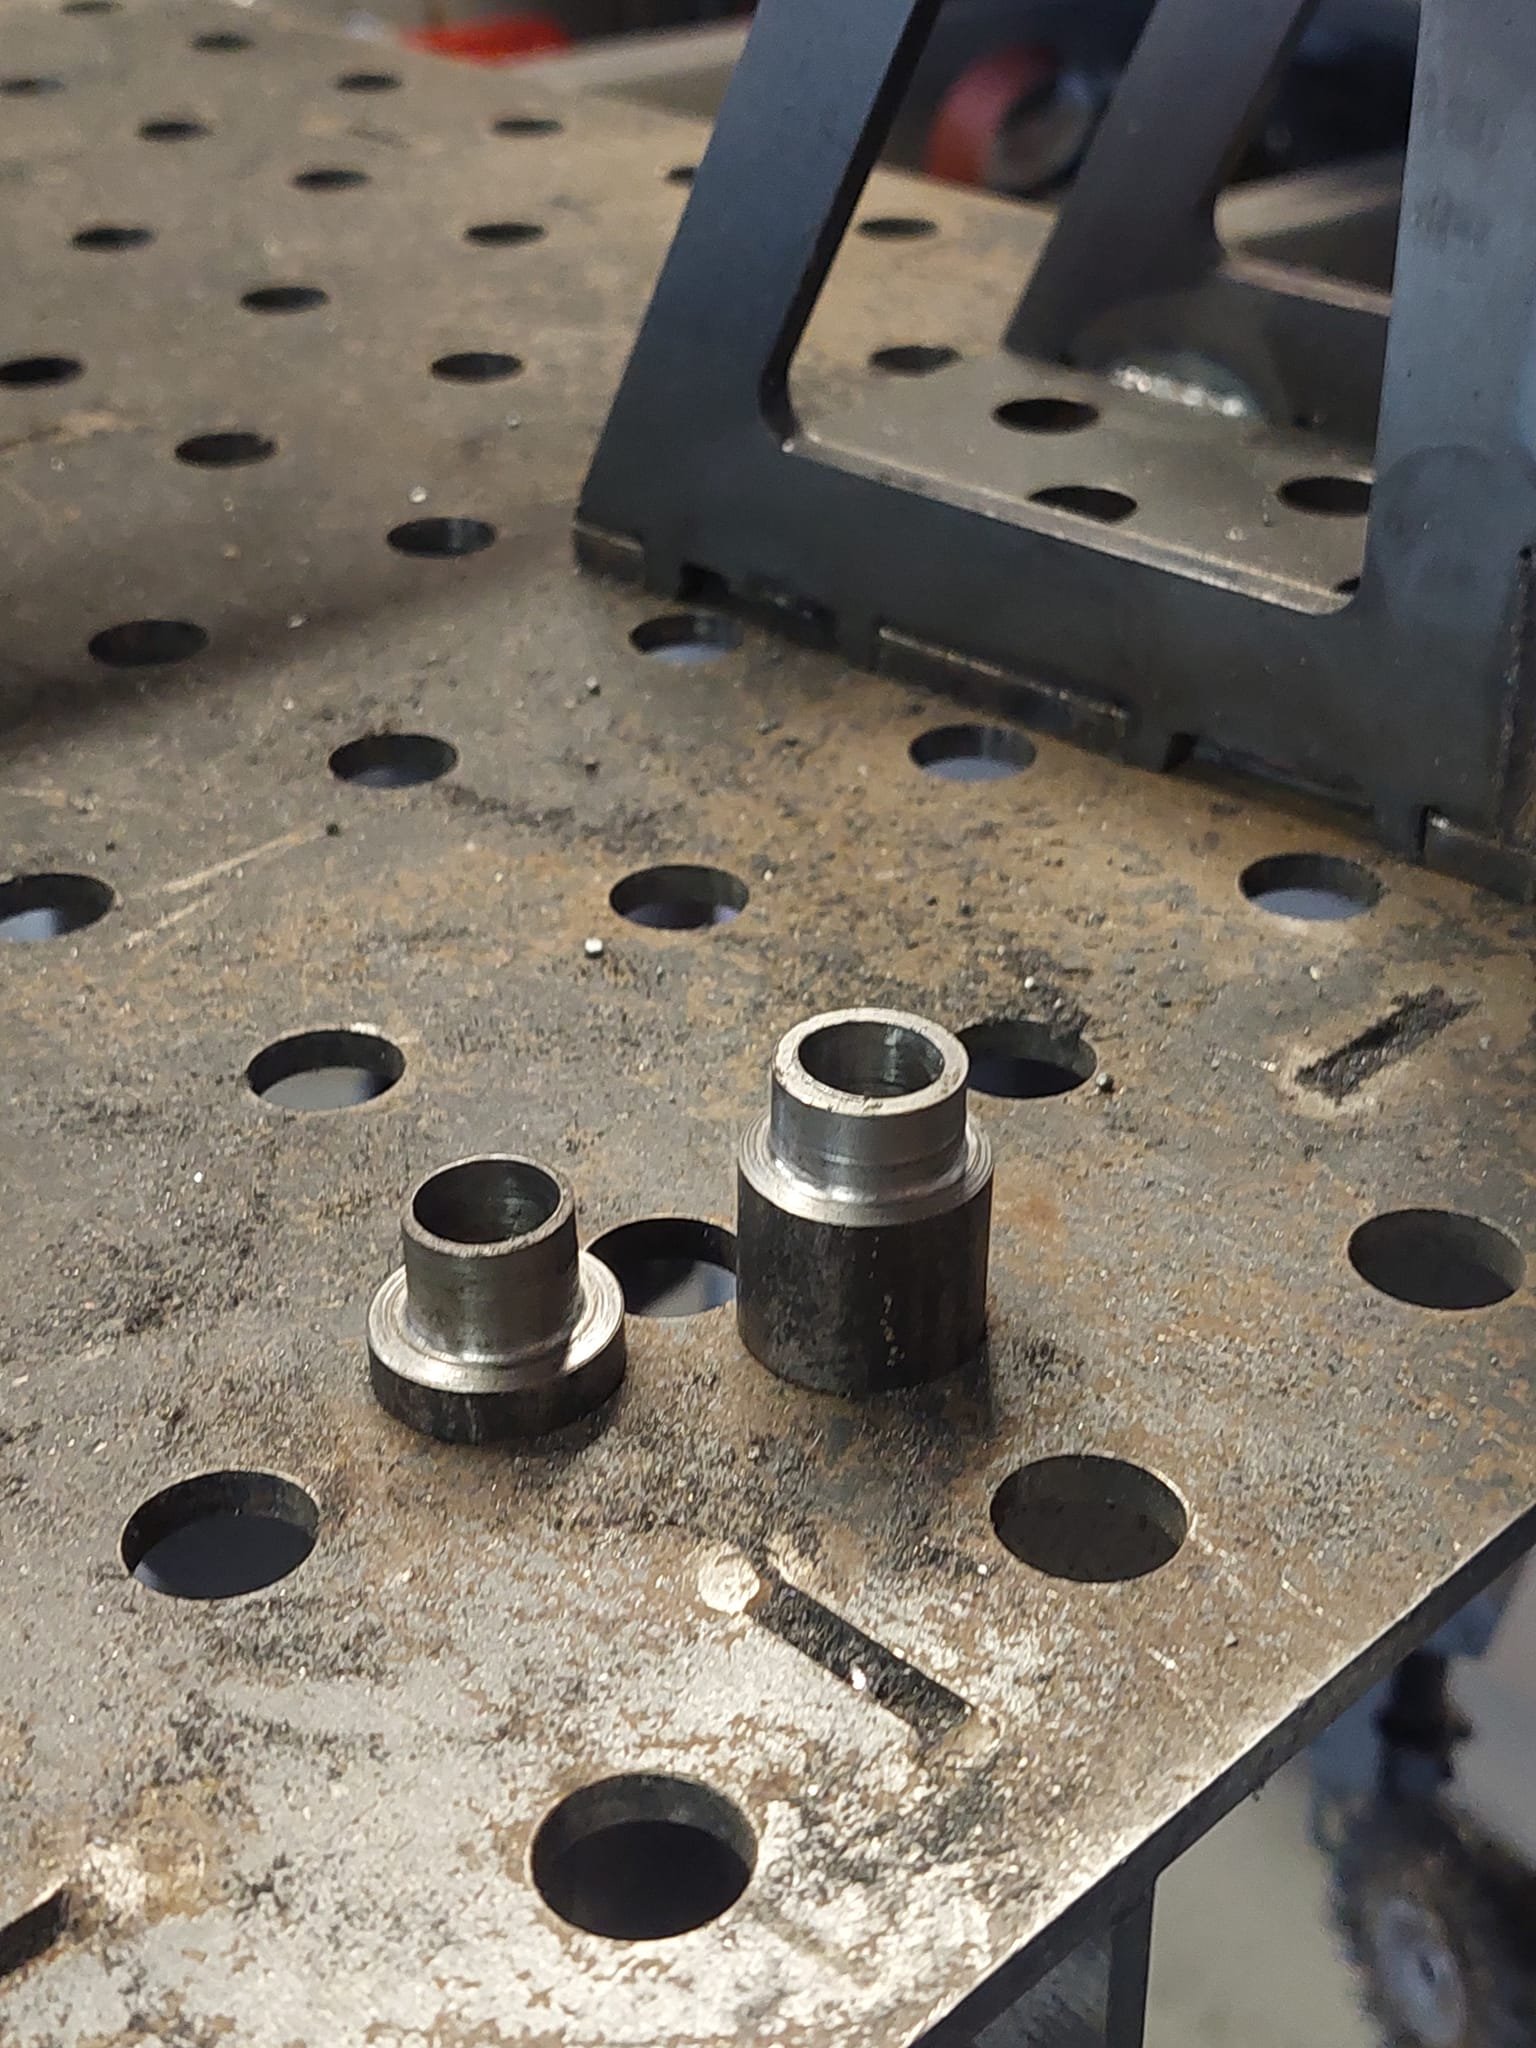
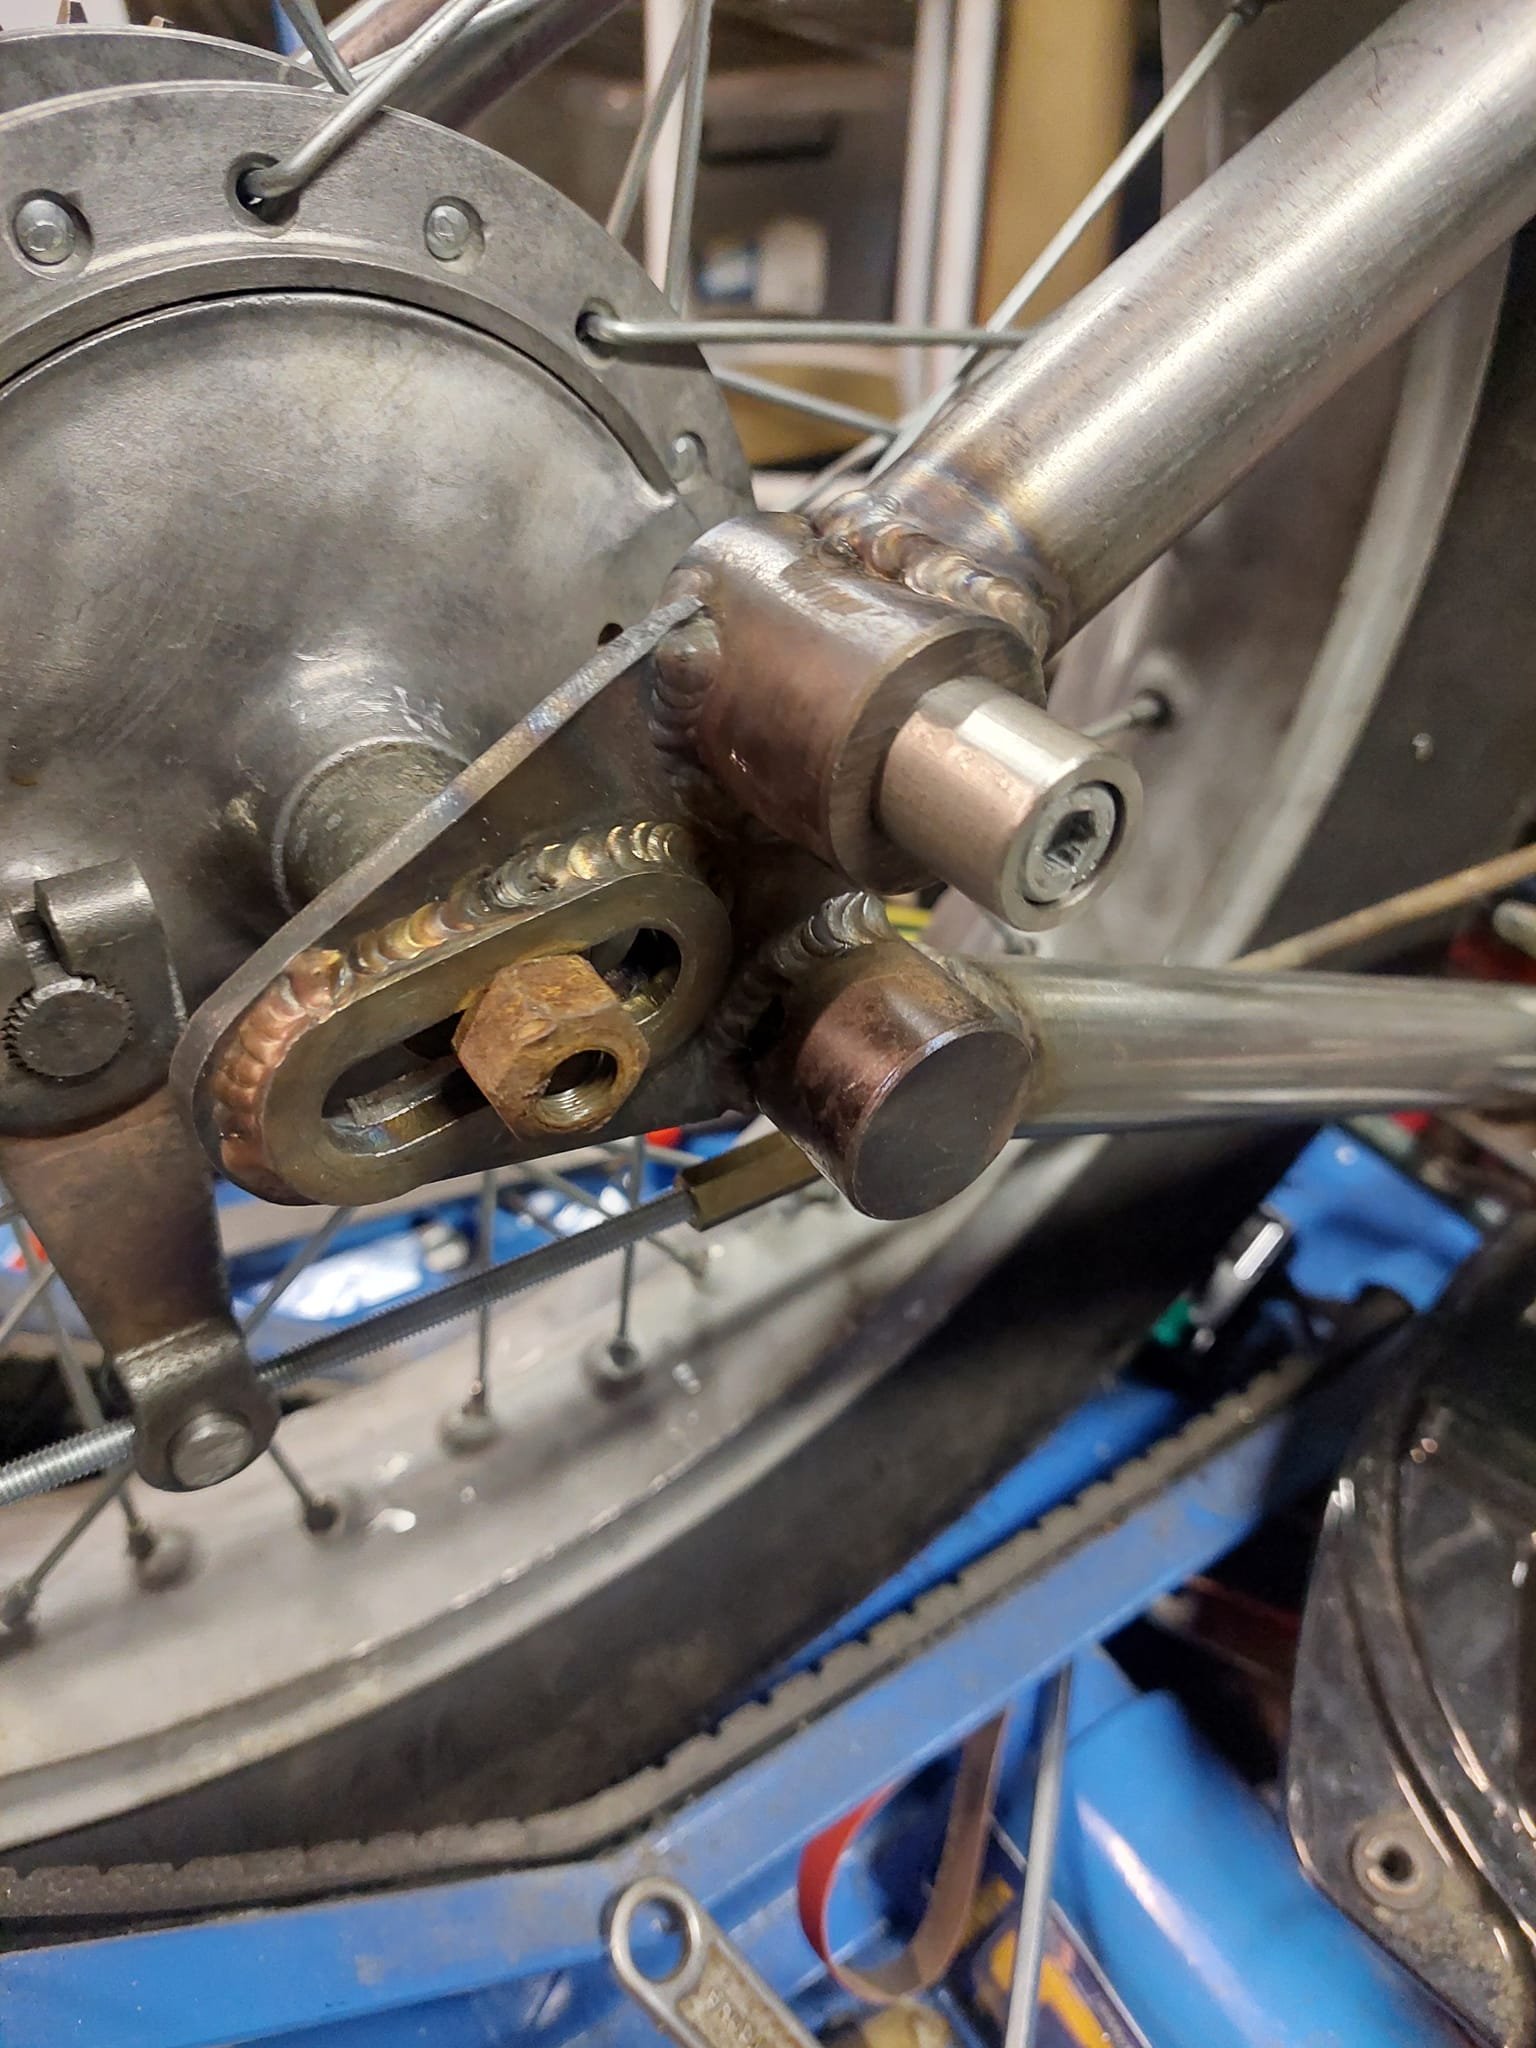
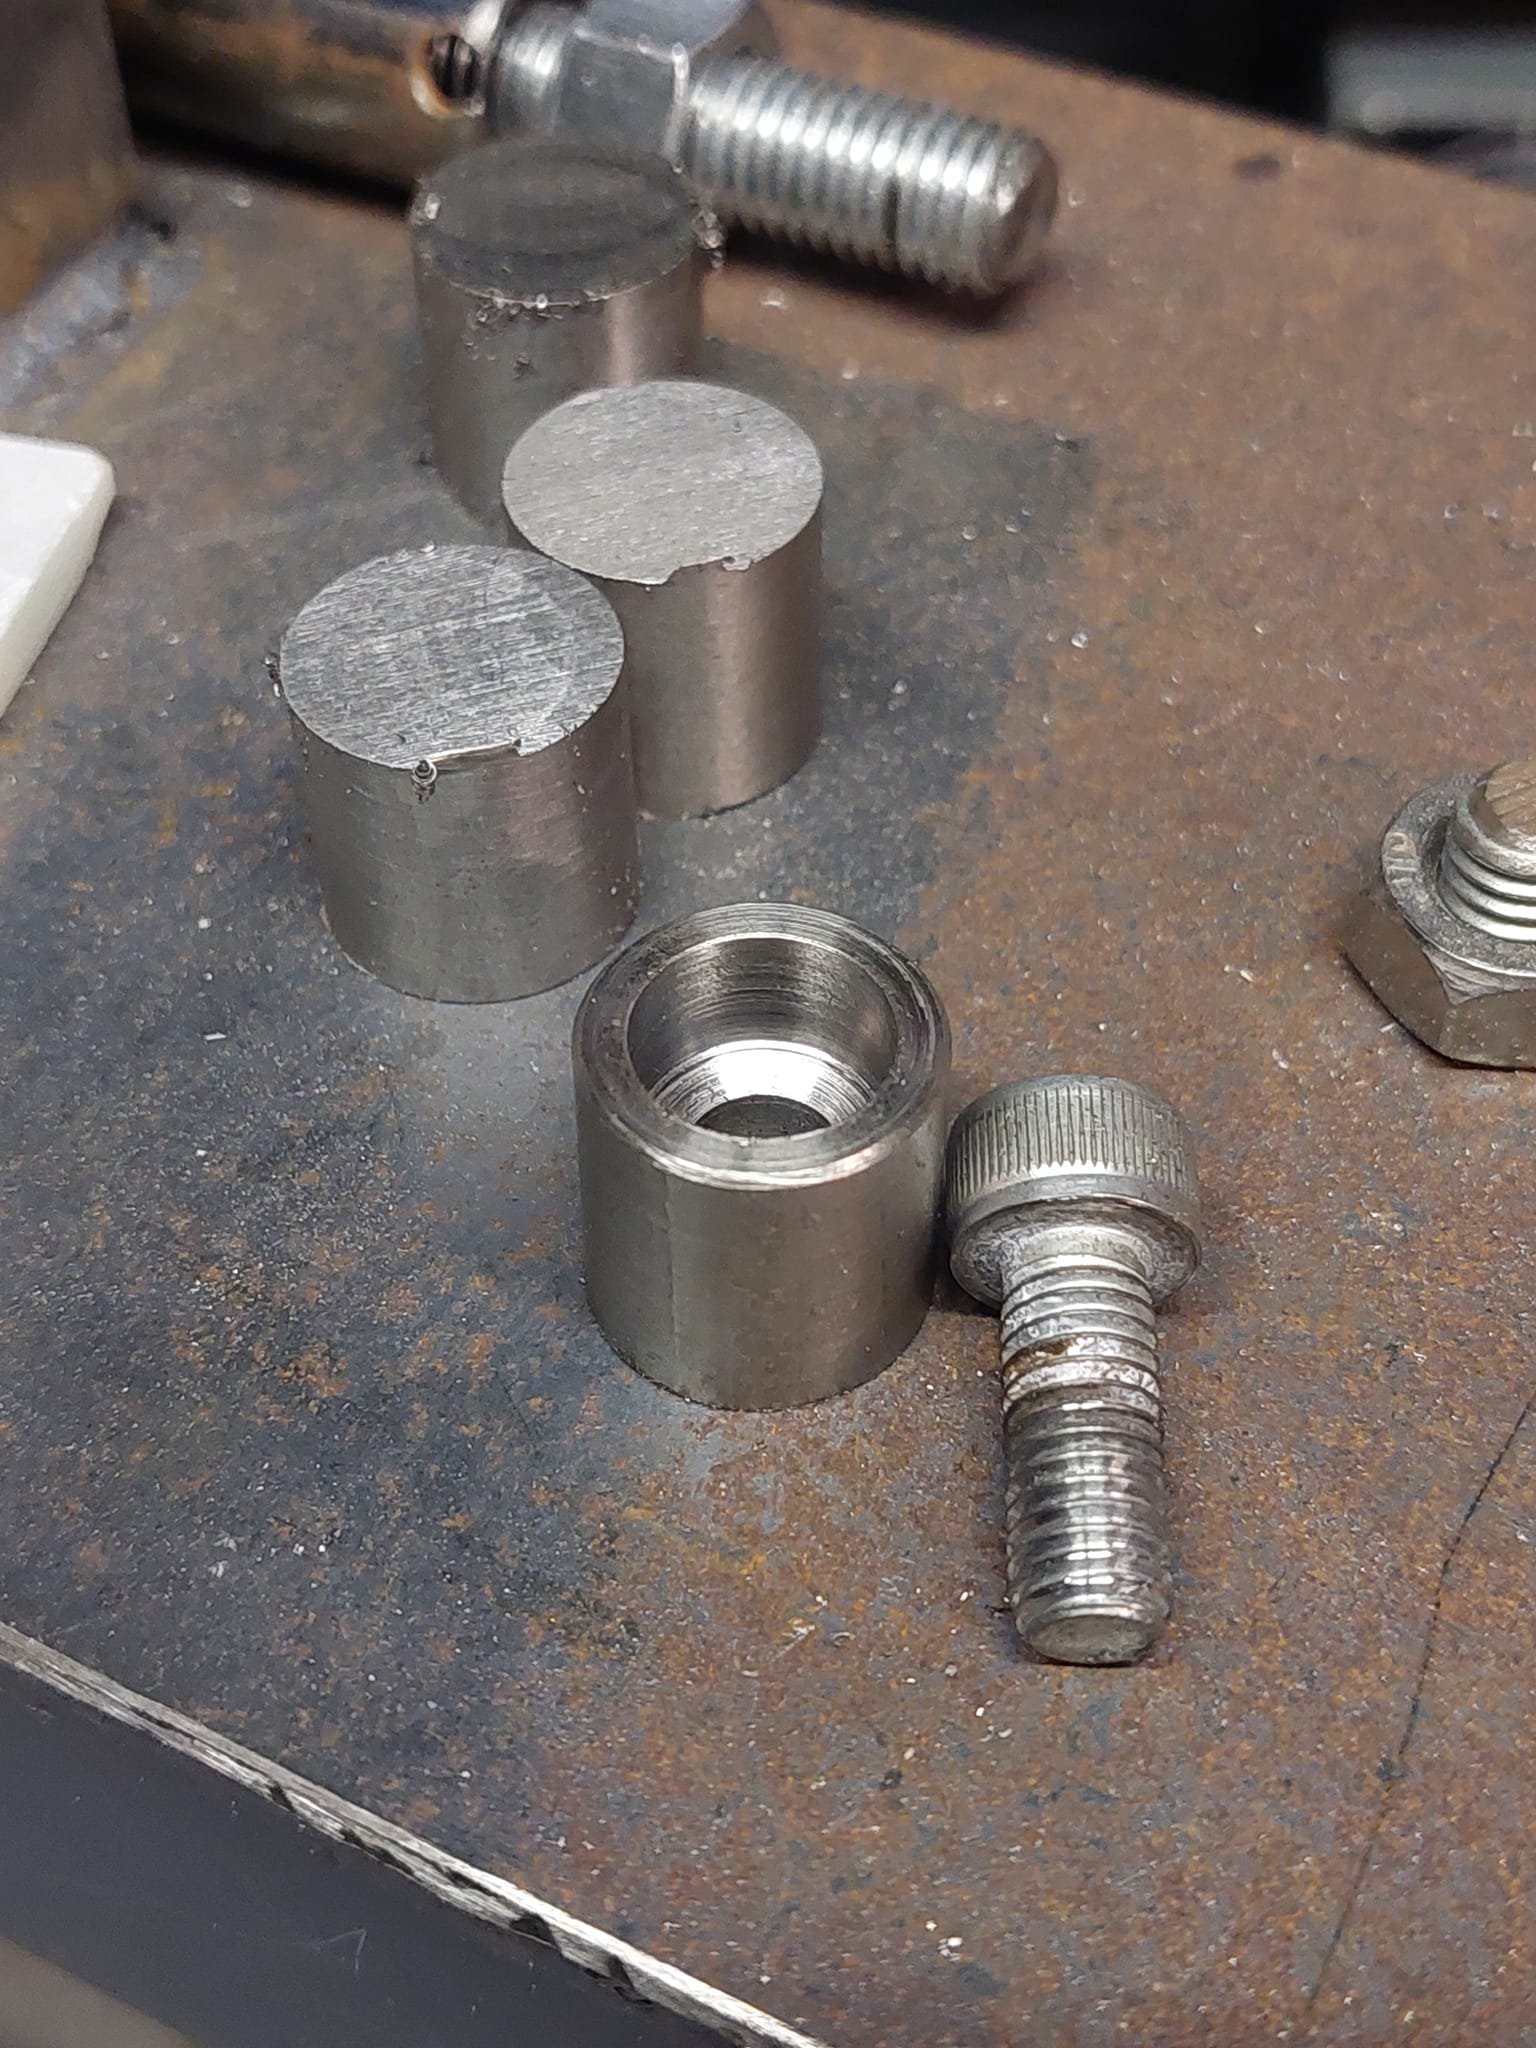
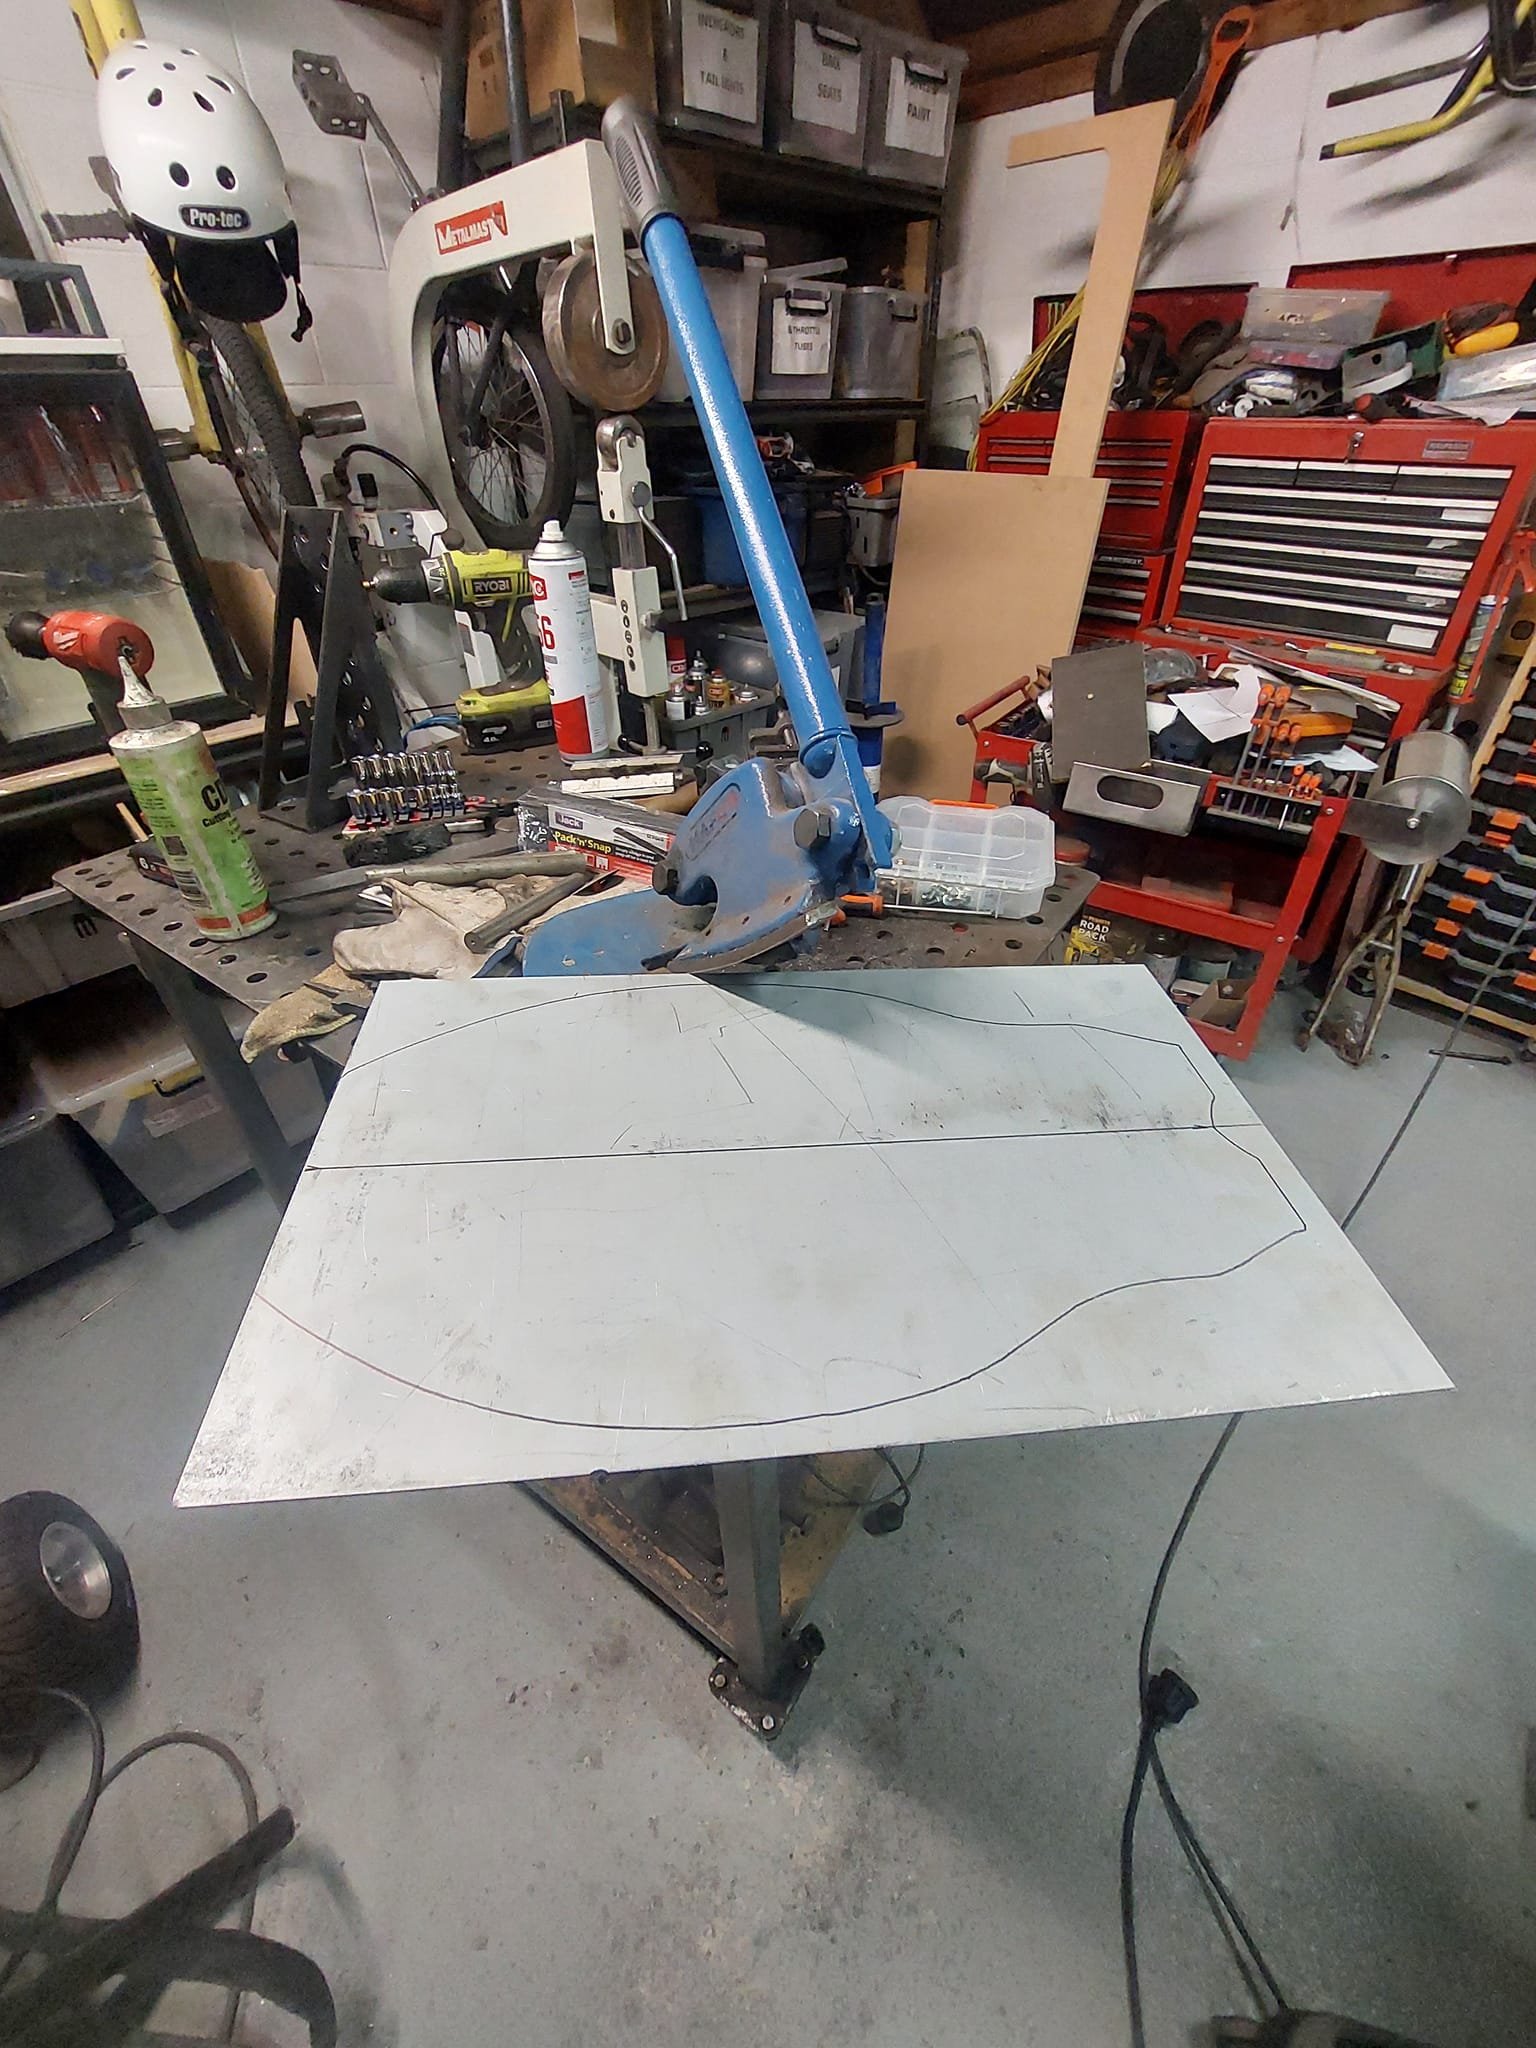
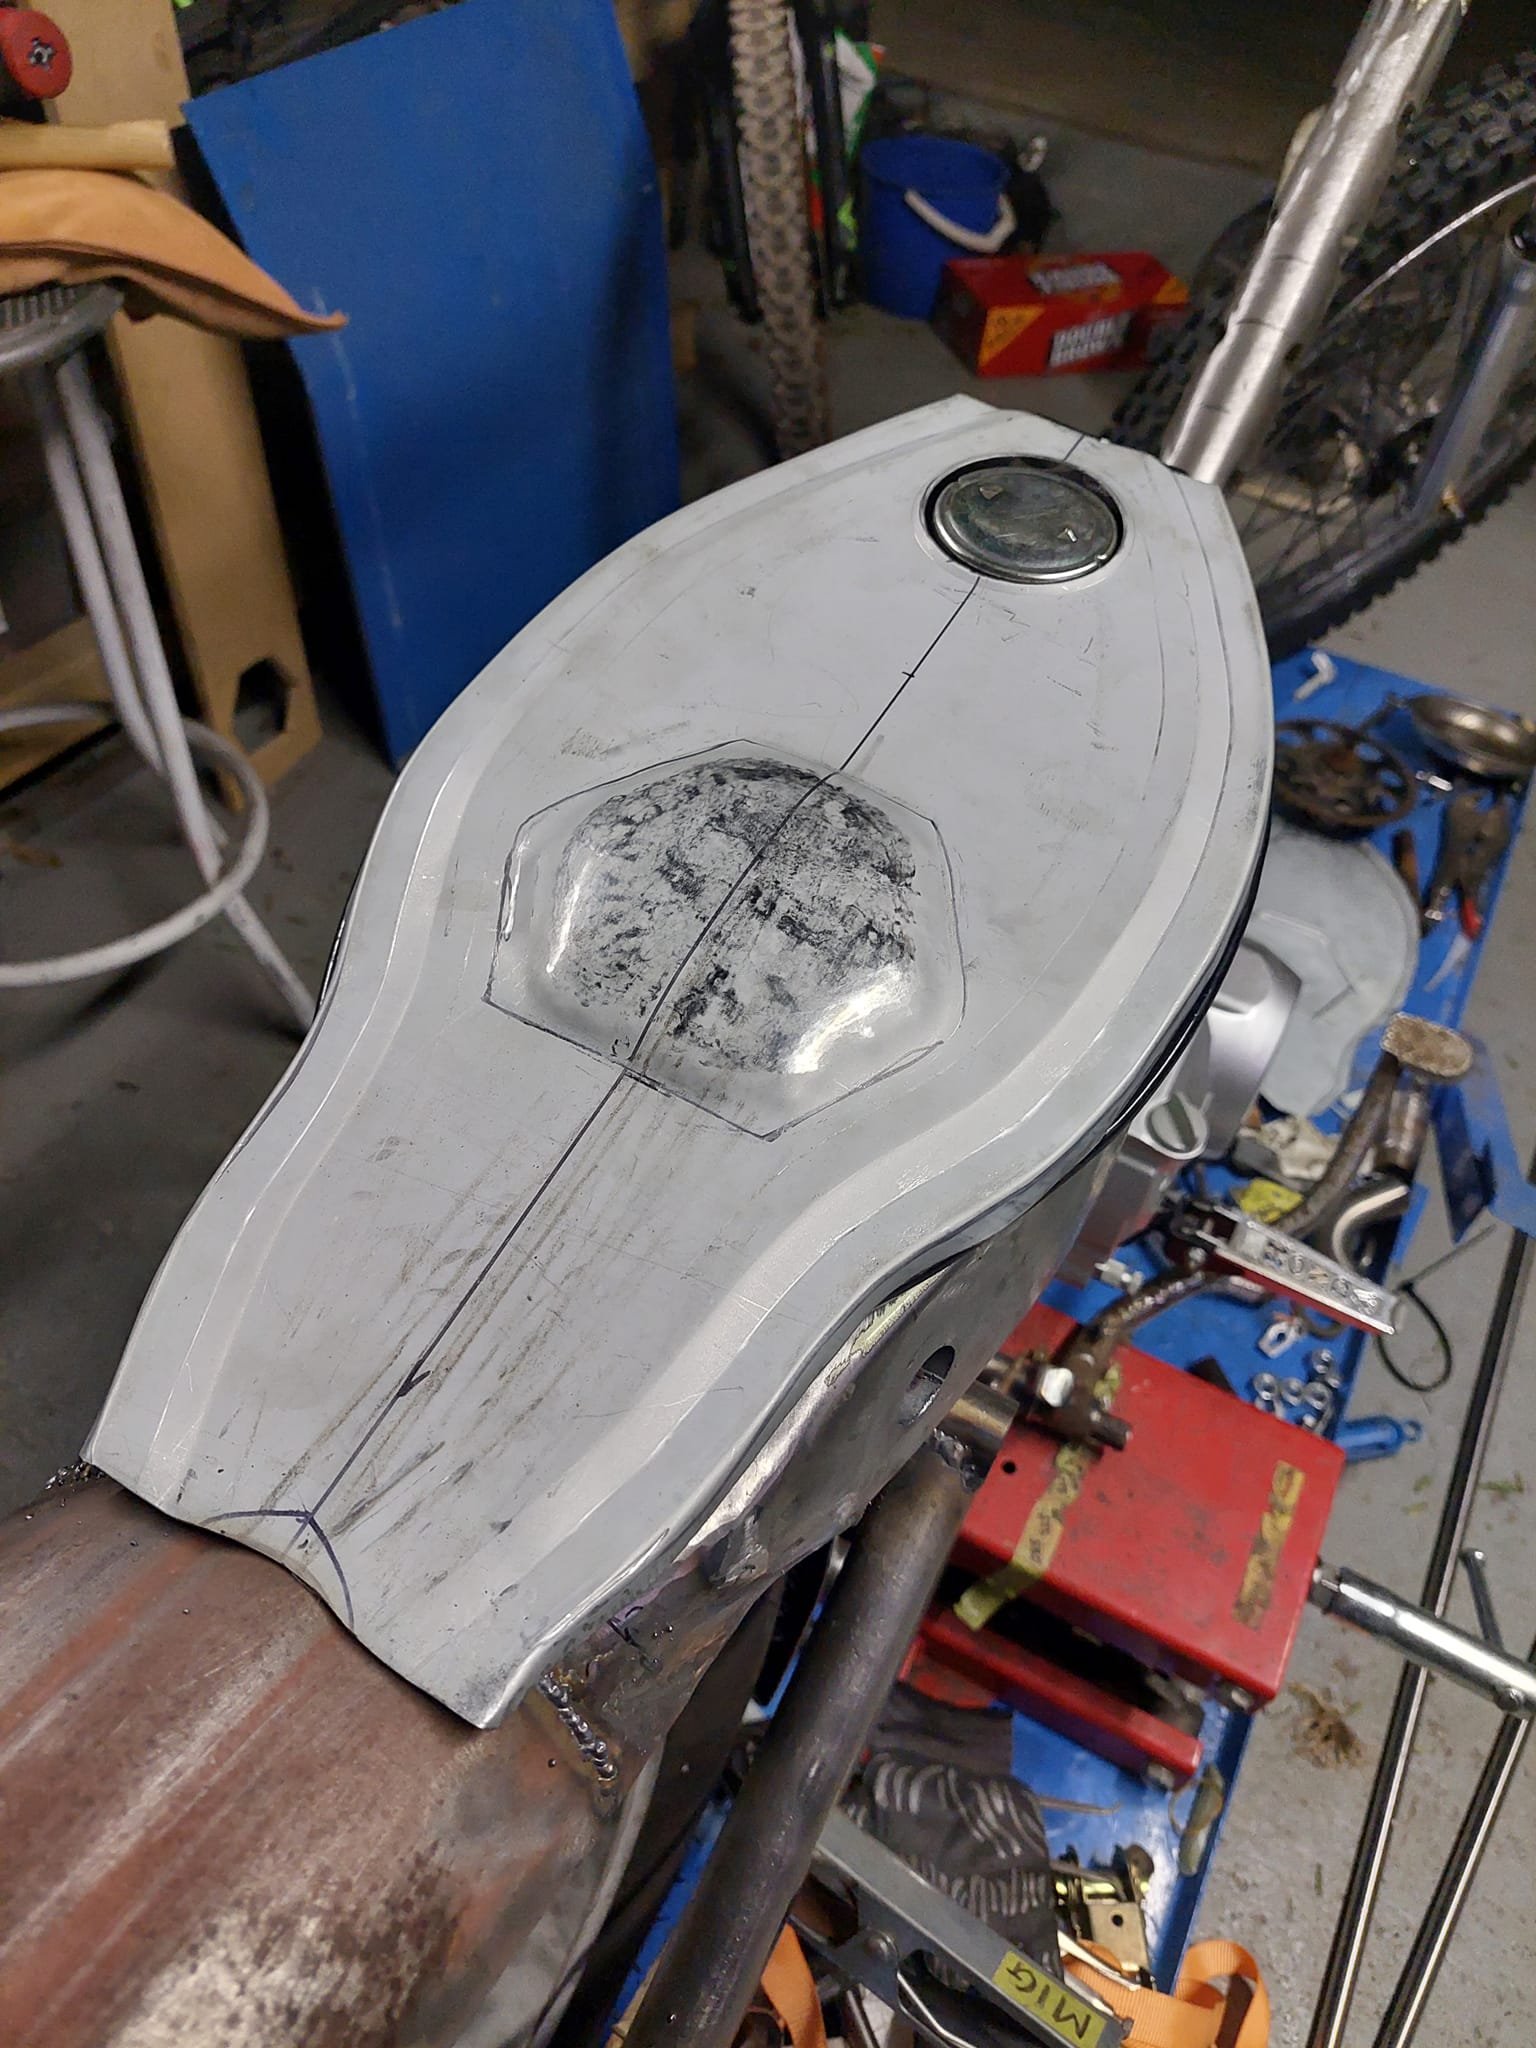
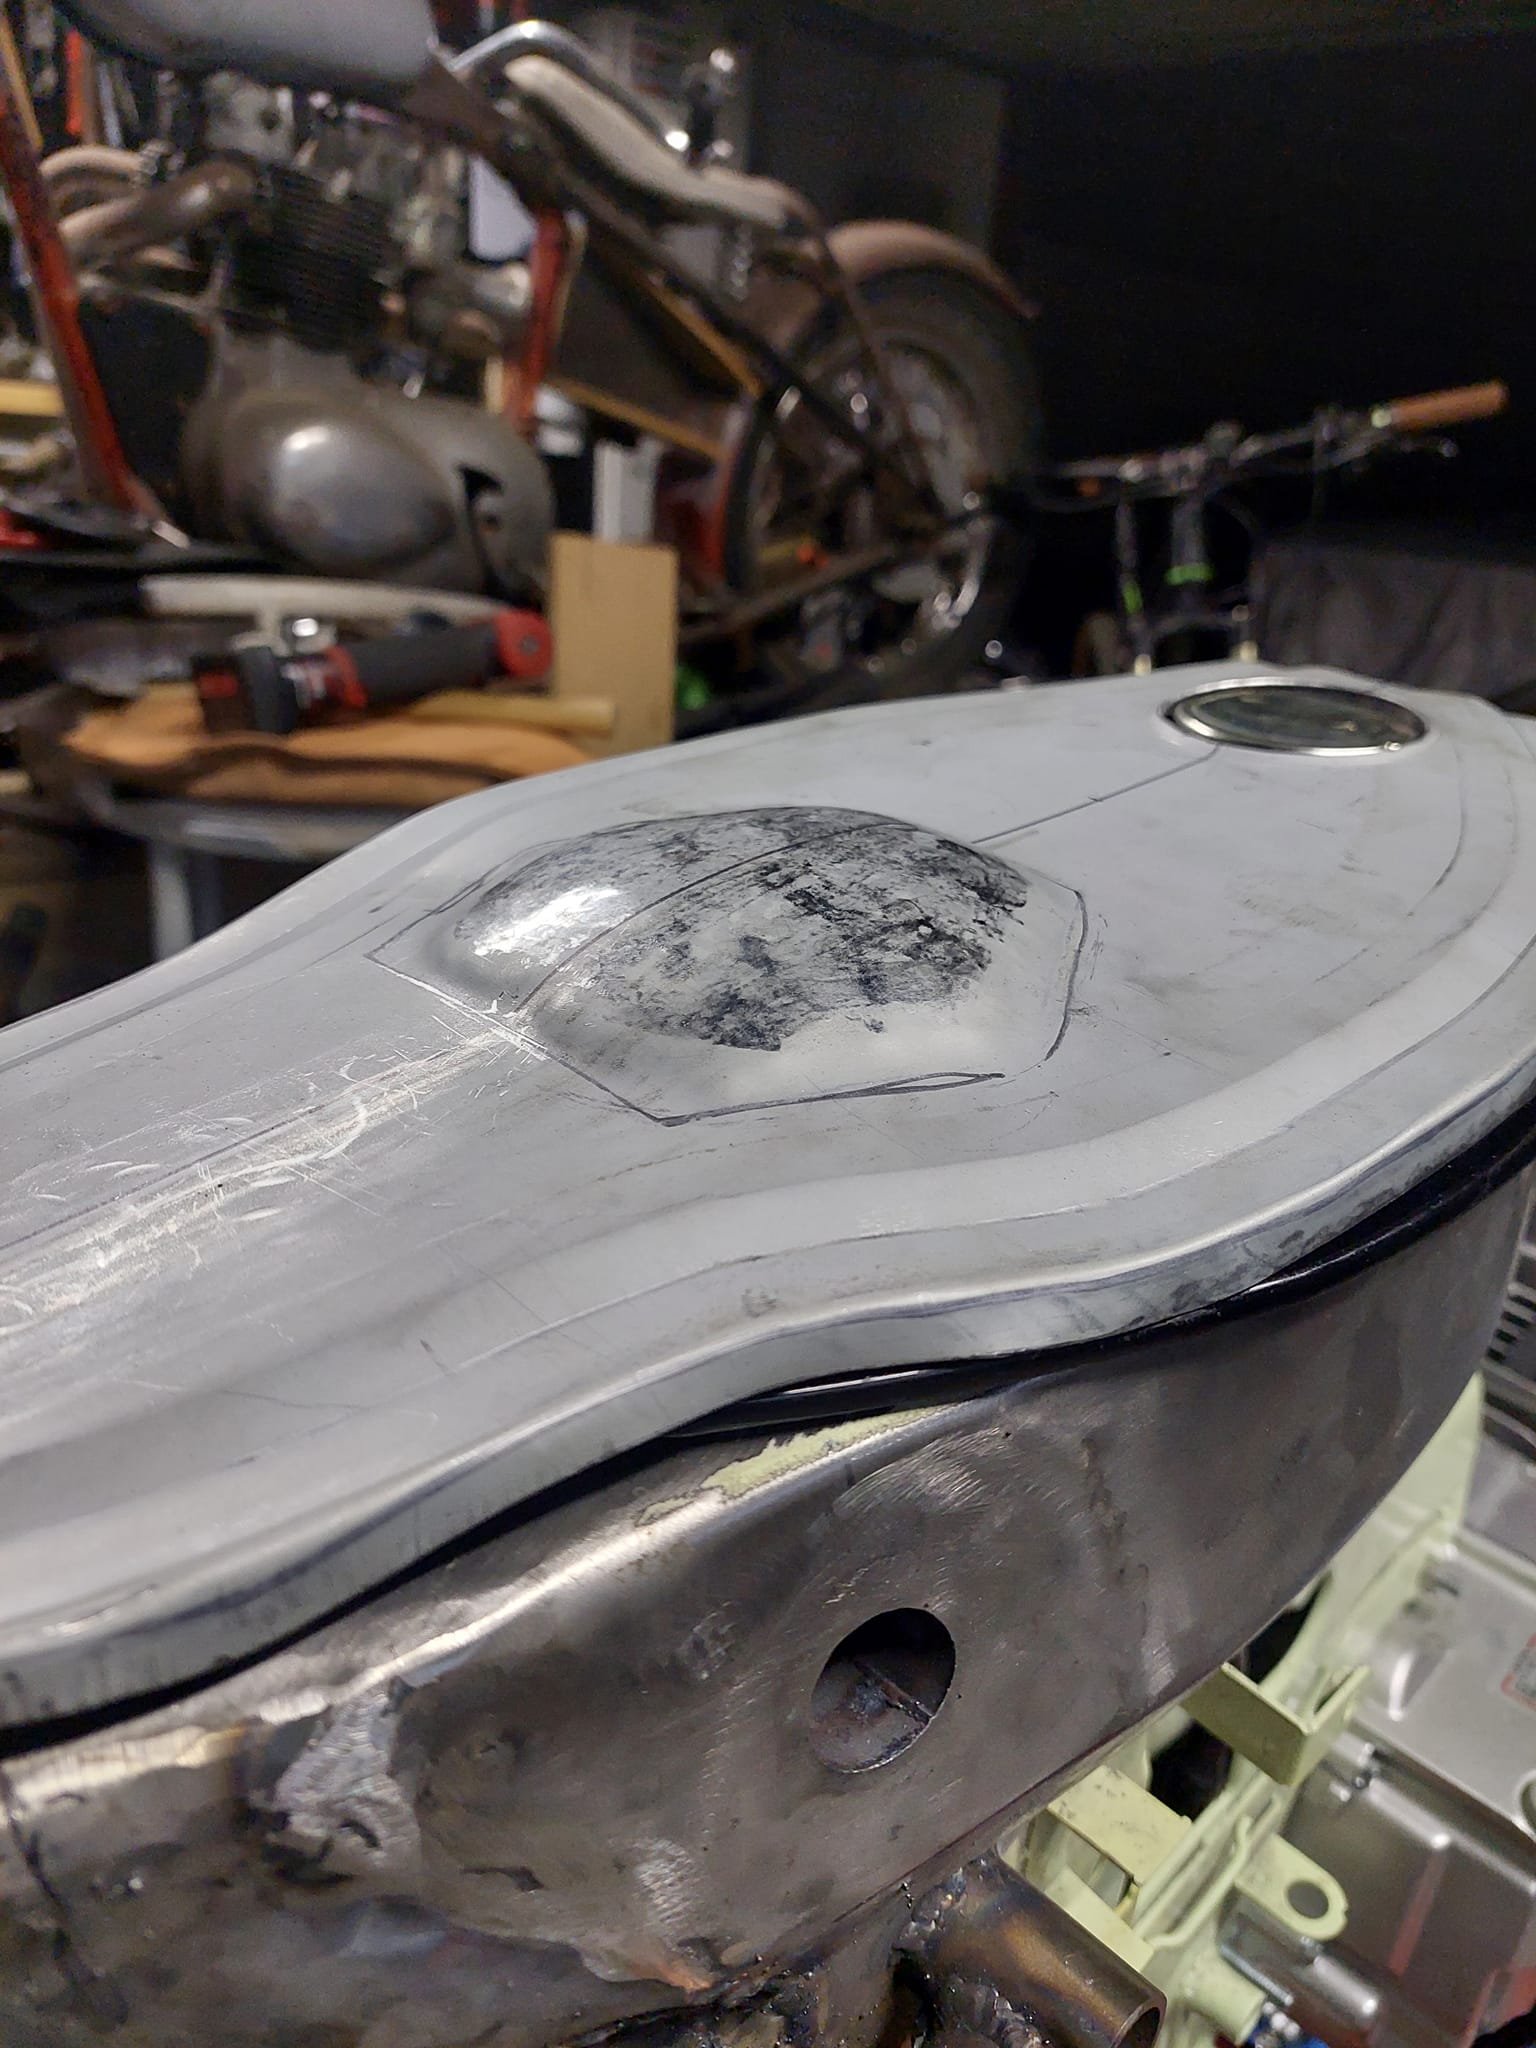
To get the front wheel rolling in a straight line I had to make some reducing spacers as the forks and axle are 12mm and the wheel bearings were 17mm one side and 15mm the other. It would have been easier to buy new bearings with the same od as the old ones and the same id as the axle. But I had some round bar and I have a lathe... I took it off the lift to get a good look at it from a distance, I'm pretty happy with it This bikes gonna have a sissy bar so I got some 16mm stainless round bar to make the sissy bar and some 19mm round bar to make the bungs. Before i go too far I need to figure out the seat pan and how far it goes back to meet the sissy bar. So I started making the base. I want it to fit as low as it can go so I had to accommodate the fuel gauge and the the fuel cap.
1 point
-
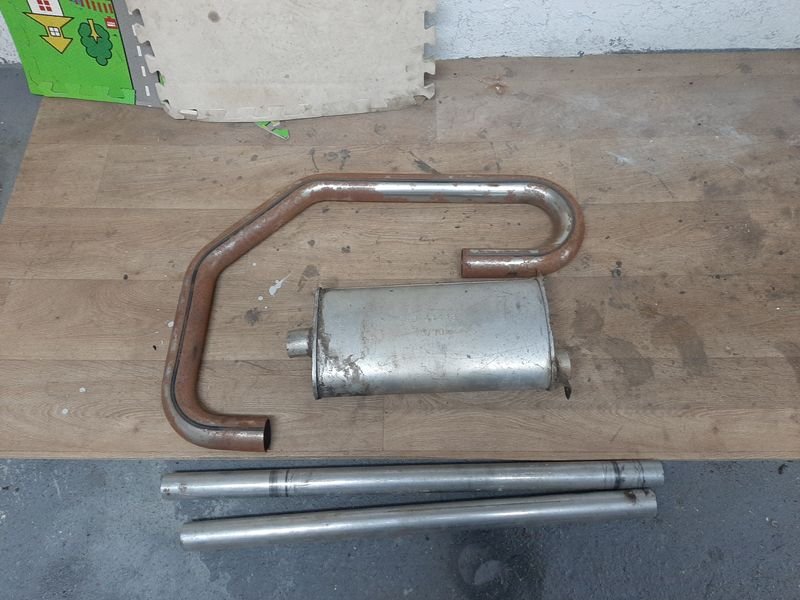
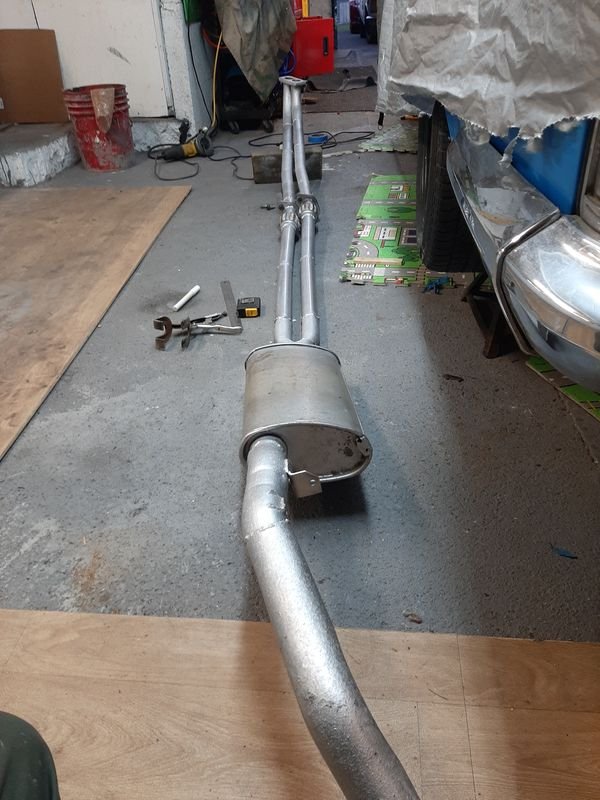
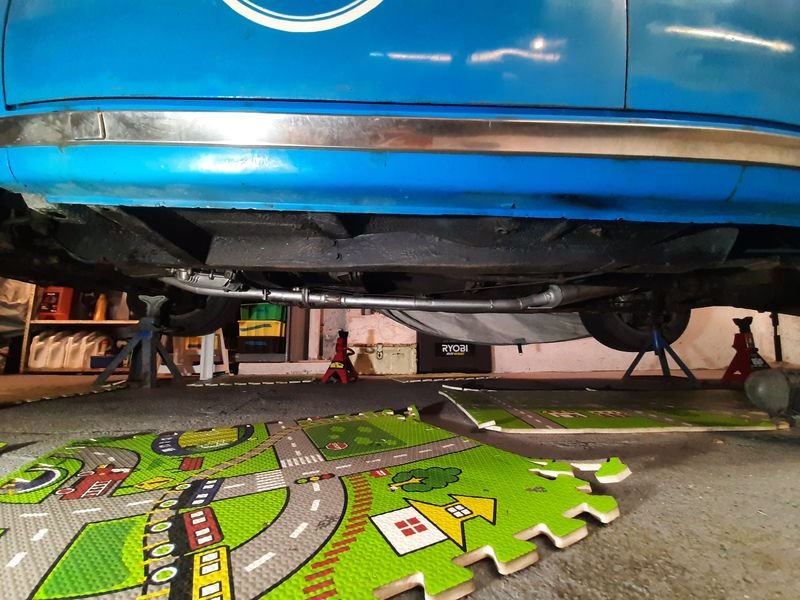
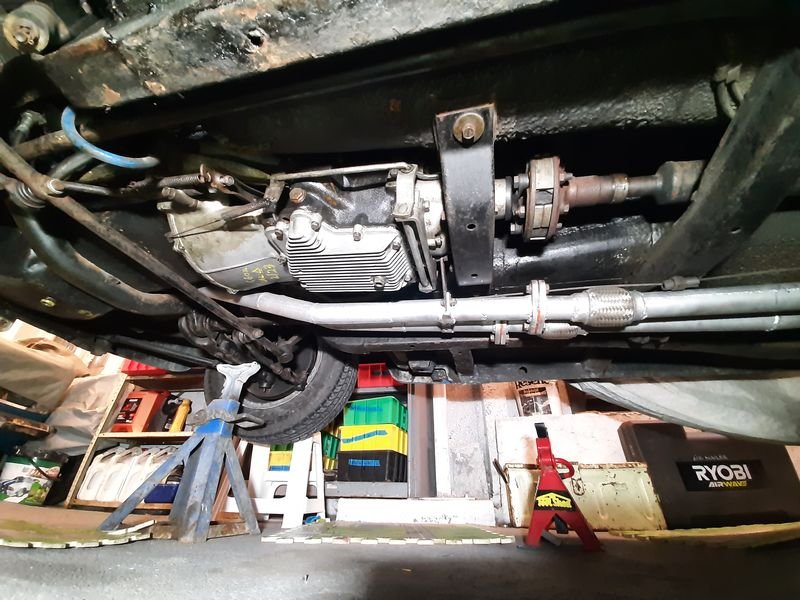
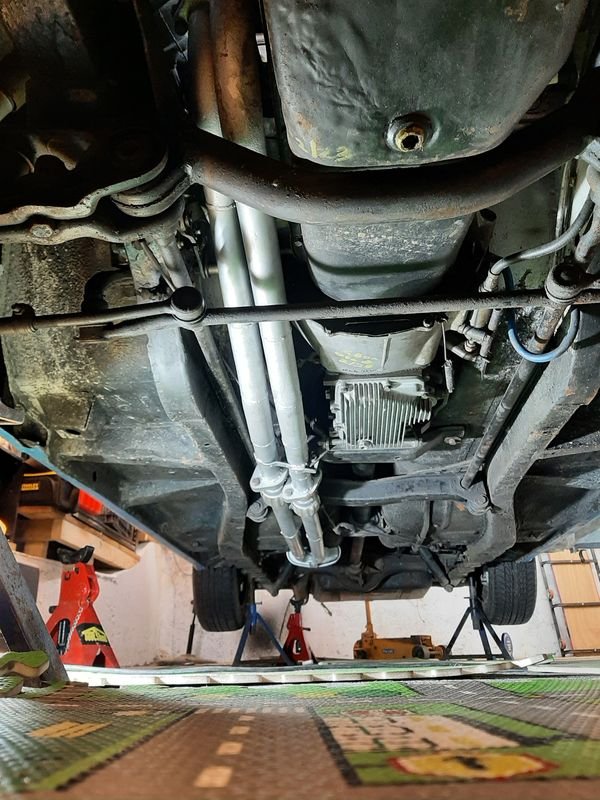
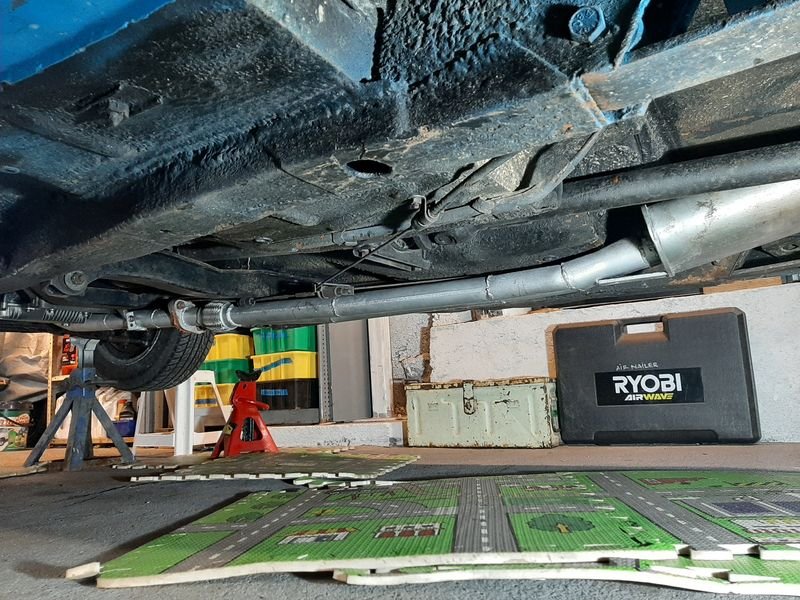
Post nats i made some lists of fixing and getting . First job, swapping the other front wheel bearing that i didnt swap before nats that surprise! had started grumbling pretty bad on the homeward leg - wasnt getting hot just noisier, i had it on board, but CBF changing it on the side of the road if i didnt have too Another original factory fitted RIV bearing and seal on this side, swapped out. Thatll do it! Probably started with small rust pits from when it was sitting all those years, and after about 5000km on a kerosene clean and a regrease finally punched though Then i put GIB on the front half of the garage ceiling/kitchen floor and some new lights. Way better! Exhaust - way too low, also, to loud (what?) The old girl sits pretty low, and we had pretty bad exhaust scraping issues around Maharau and anywhere with judder bars really. The constant battering made it bend mounts and droop, and leak and fume out the interior and i had to fix it a couple times at Nats. LOW LIFE This before shot shows why - when i first built this i put the flange at the easiest spot to do up, but its also at the lowest point, right between the wheels. It sounded pretty good , with long 1 1/2" secondary's to 2 1/4" just before the diff, into just one straight though muffler but was also pretty droney, esp @ 2k and 4k rpm, and so the drones was nearing peak about highway speed (100 is ~3.5k rpm in 4th) . Ill move the flanges and flexis in front of the torsion bar mount/x member so all that can be both flatter against the floor and loose the 10-15mm extra diameter forward to a less scrapey location Looking towards the diff - will put the muffler somewhere between the merge and the diff Also Ms Azzurro was getting headaches, and declared she wouldn't ride in it again untill it was sorted out. So thats that then. Basically need to tuck it up a bit more though the middle, by moving the flanges towards the engine, and stick in another muffler Had these bits in the stash, some left over 2 1/4 and 1 3/4 pipe and a 2 1/4 muffler ex my 125 After much faffing this is the new rear section, new muffler before the diff, and flanges moved about 500mm forward and staggered Shiny and chrome Still lower than the aluminum finned gearbox bottom plate with a dangly drain plug, but thats good. Would like to build a sump guard/skid plate one day, but for now it remains to the exhaust to protect it Loooong secondaries, but a few 100mm shorter, so be interesting to hear what that does to the harmonics - definitely had a noise peak at 2k and 4k before Nice and tucked up and flat though here, the old exhaust had lots of scraping here so hopefully that small skid plate will stop the lower edge of the muffler getting hooked on a curb and ripping the whole lot off Gained at least 10s of mms! Thats good! Fired it up once the RTV set, exhaust sounds smoooothh, much lower volume, but has lost its race car bark. Sounds like a modern car quiet. thats good to, i guess? (I must be getting old)
1 point
-
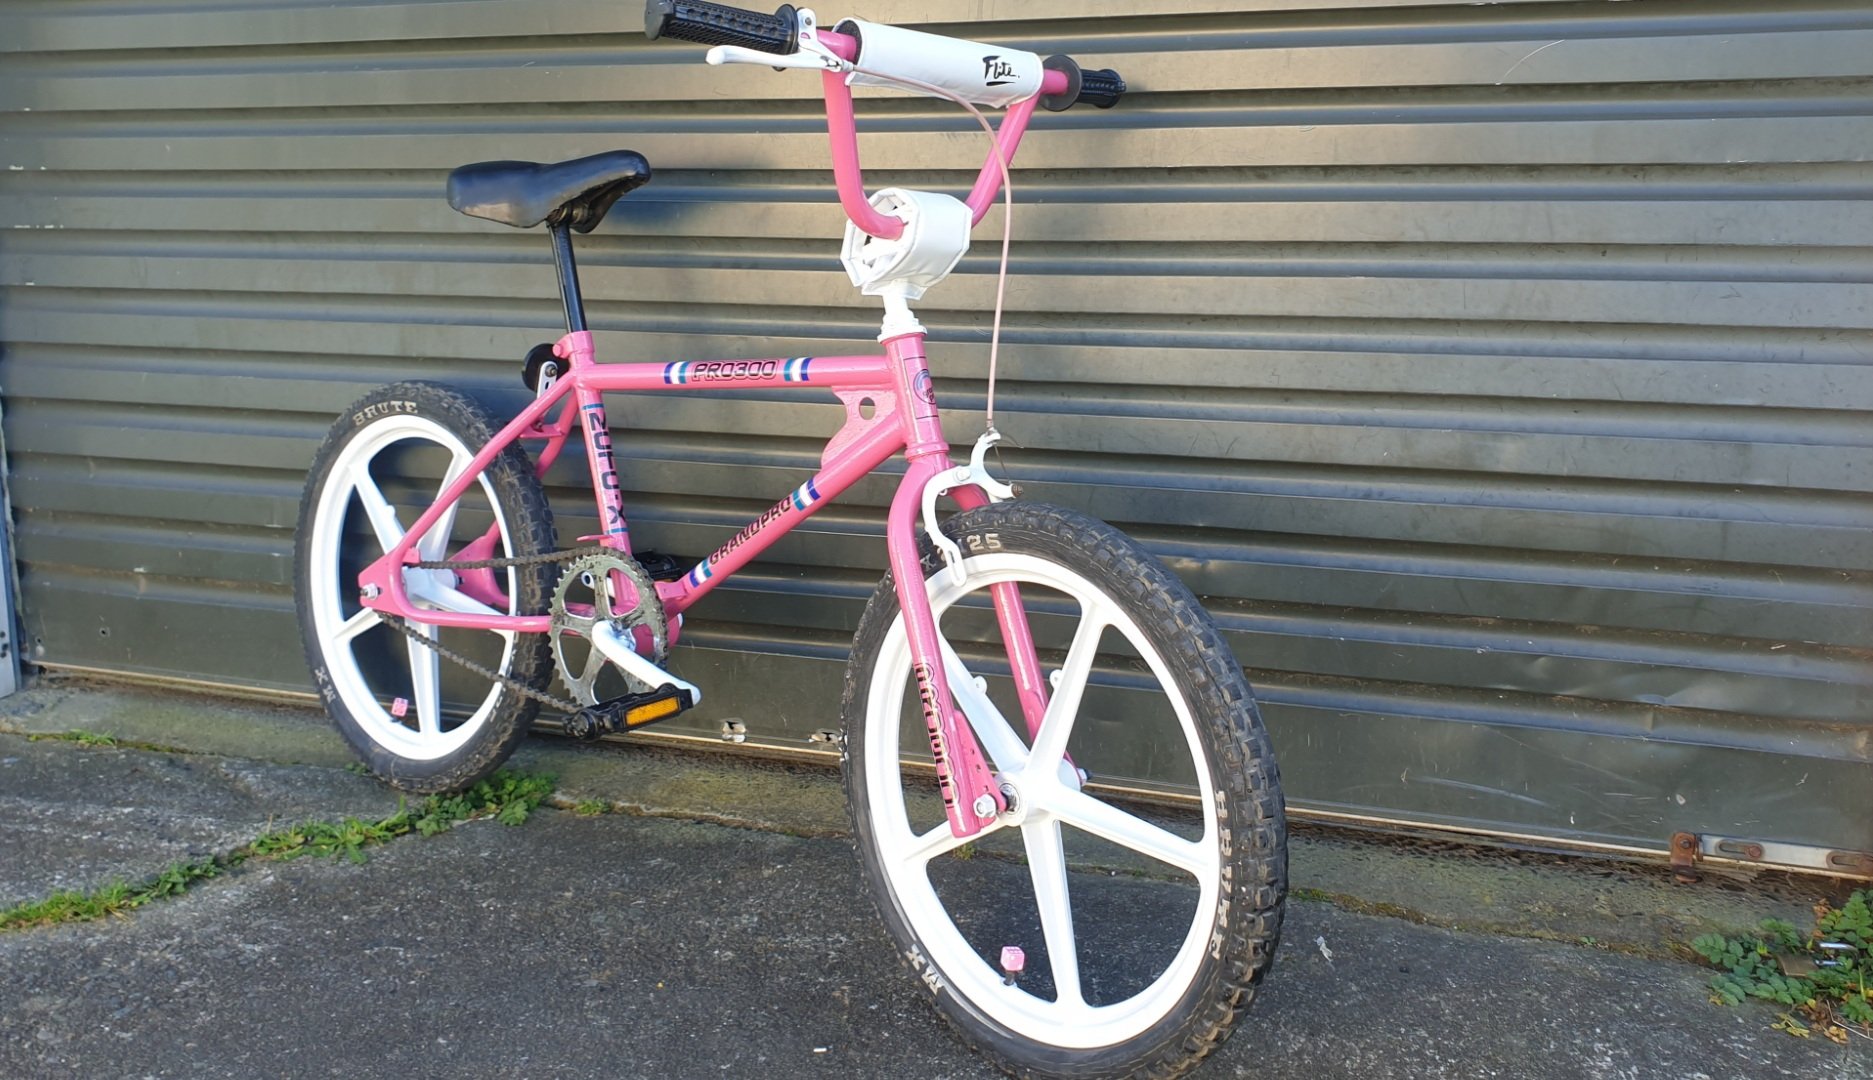
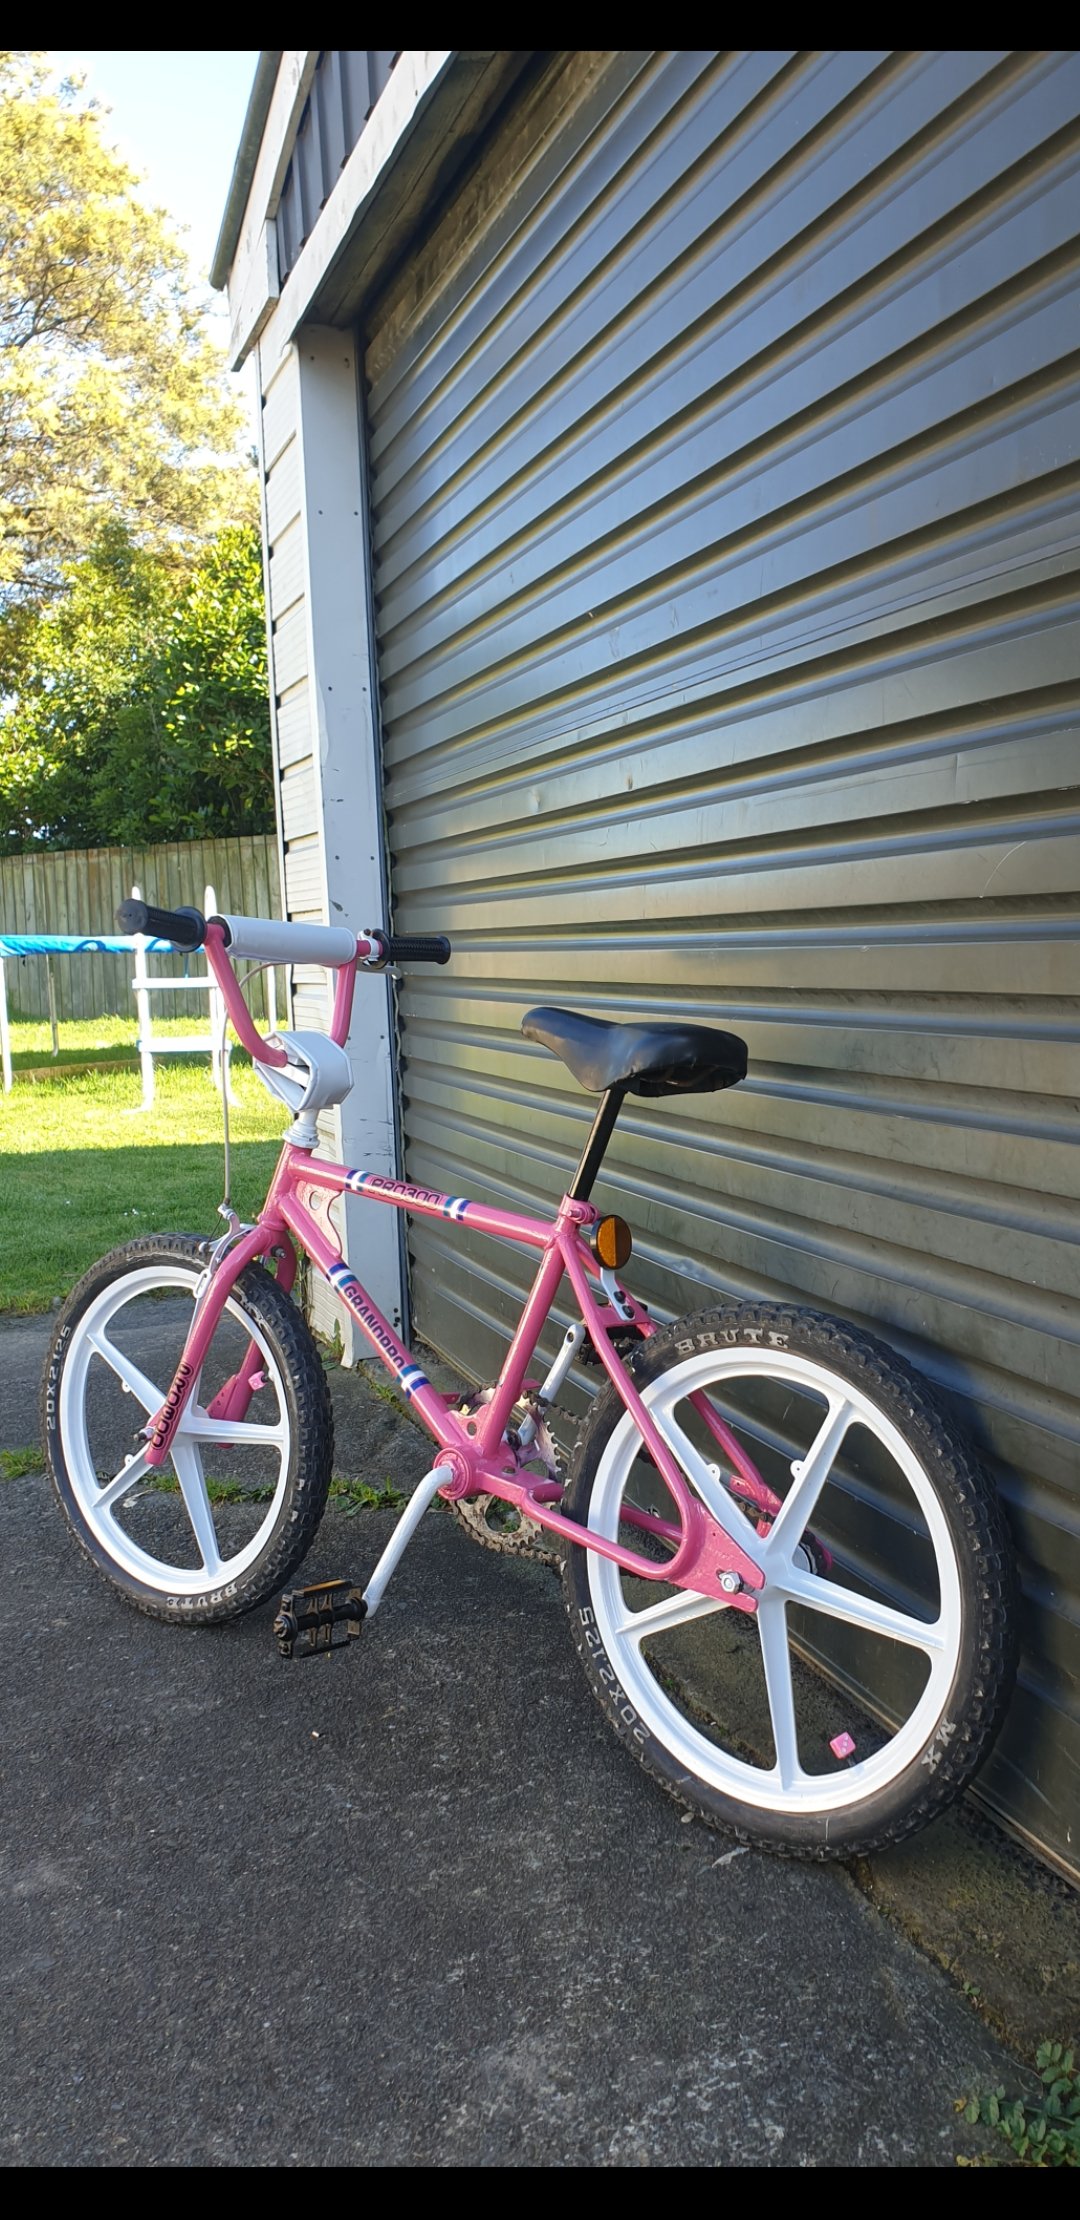
My flite pads finally r hea. Have the big pad for tube aswell but looks better asis. Just took for a good ride she rides really well prety happy. Got some white skyway pads on way for breaks then shes finished
1 point
-
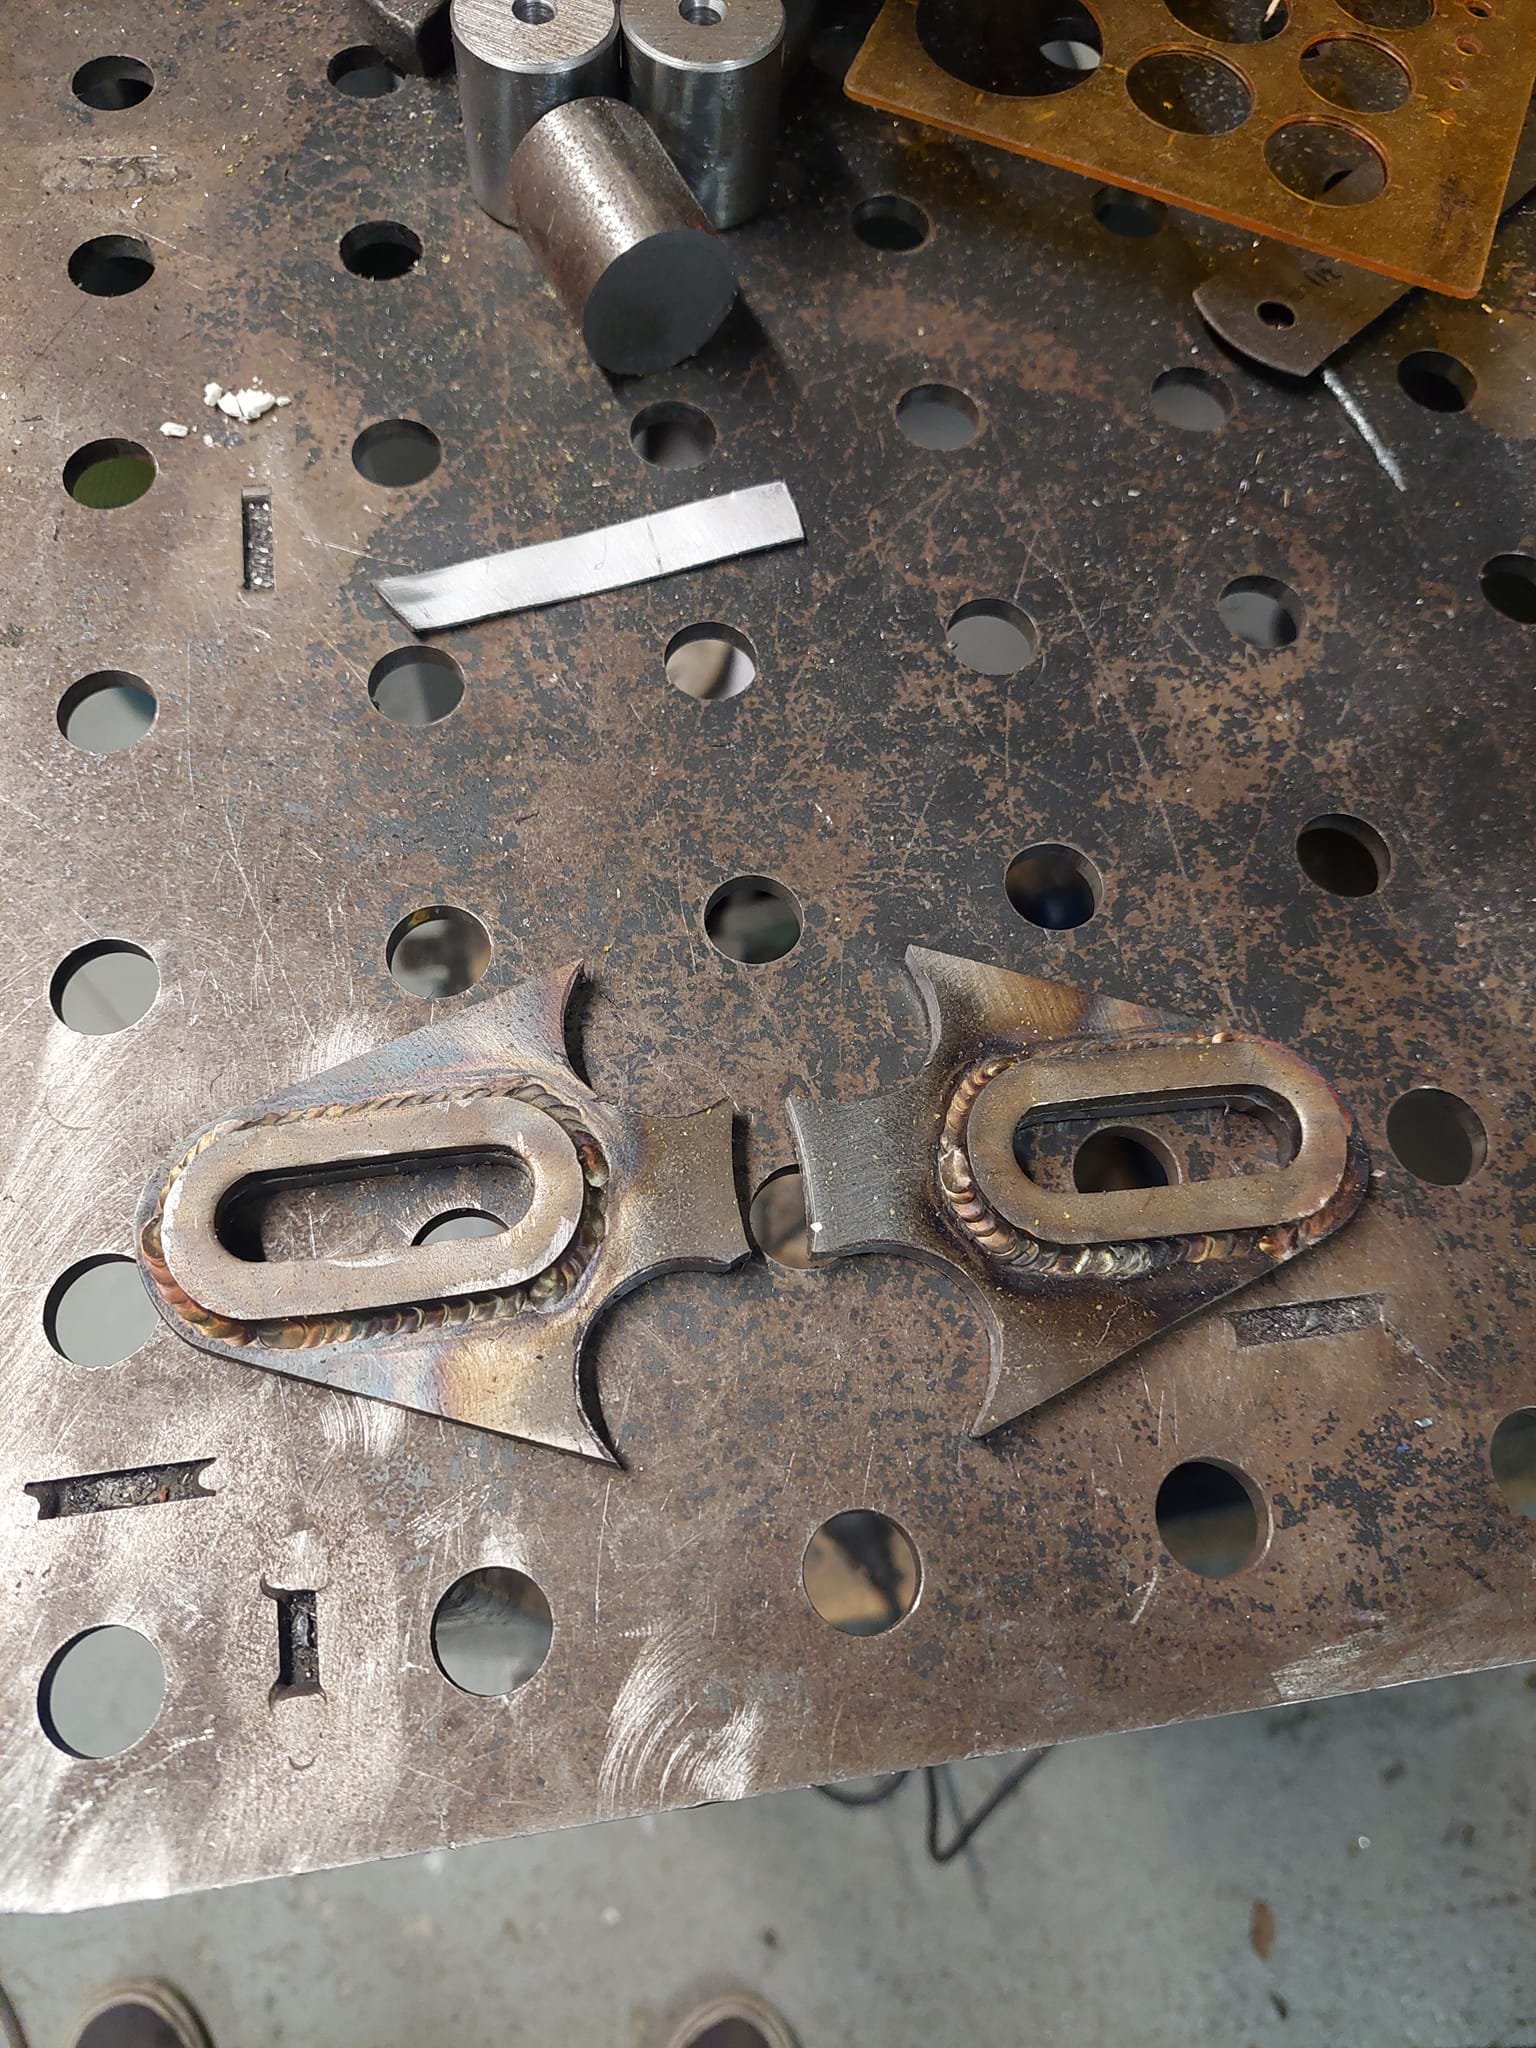
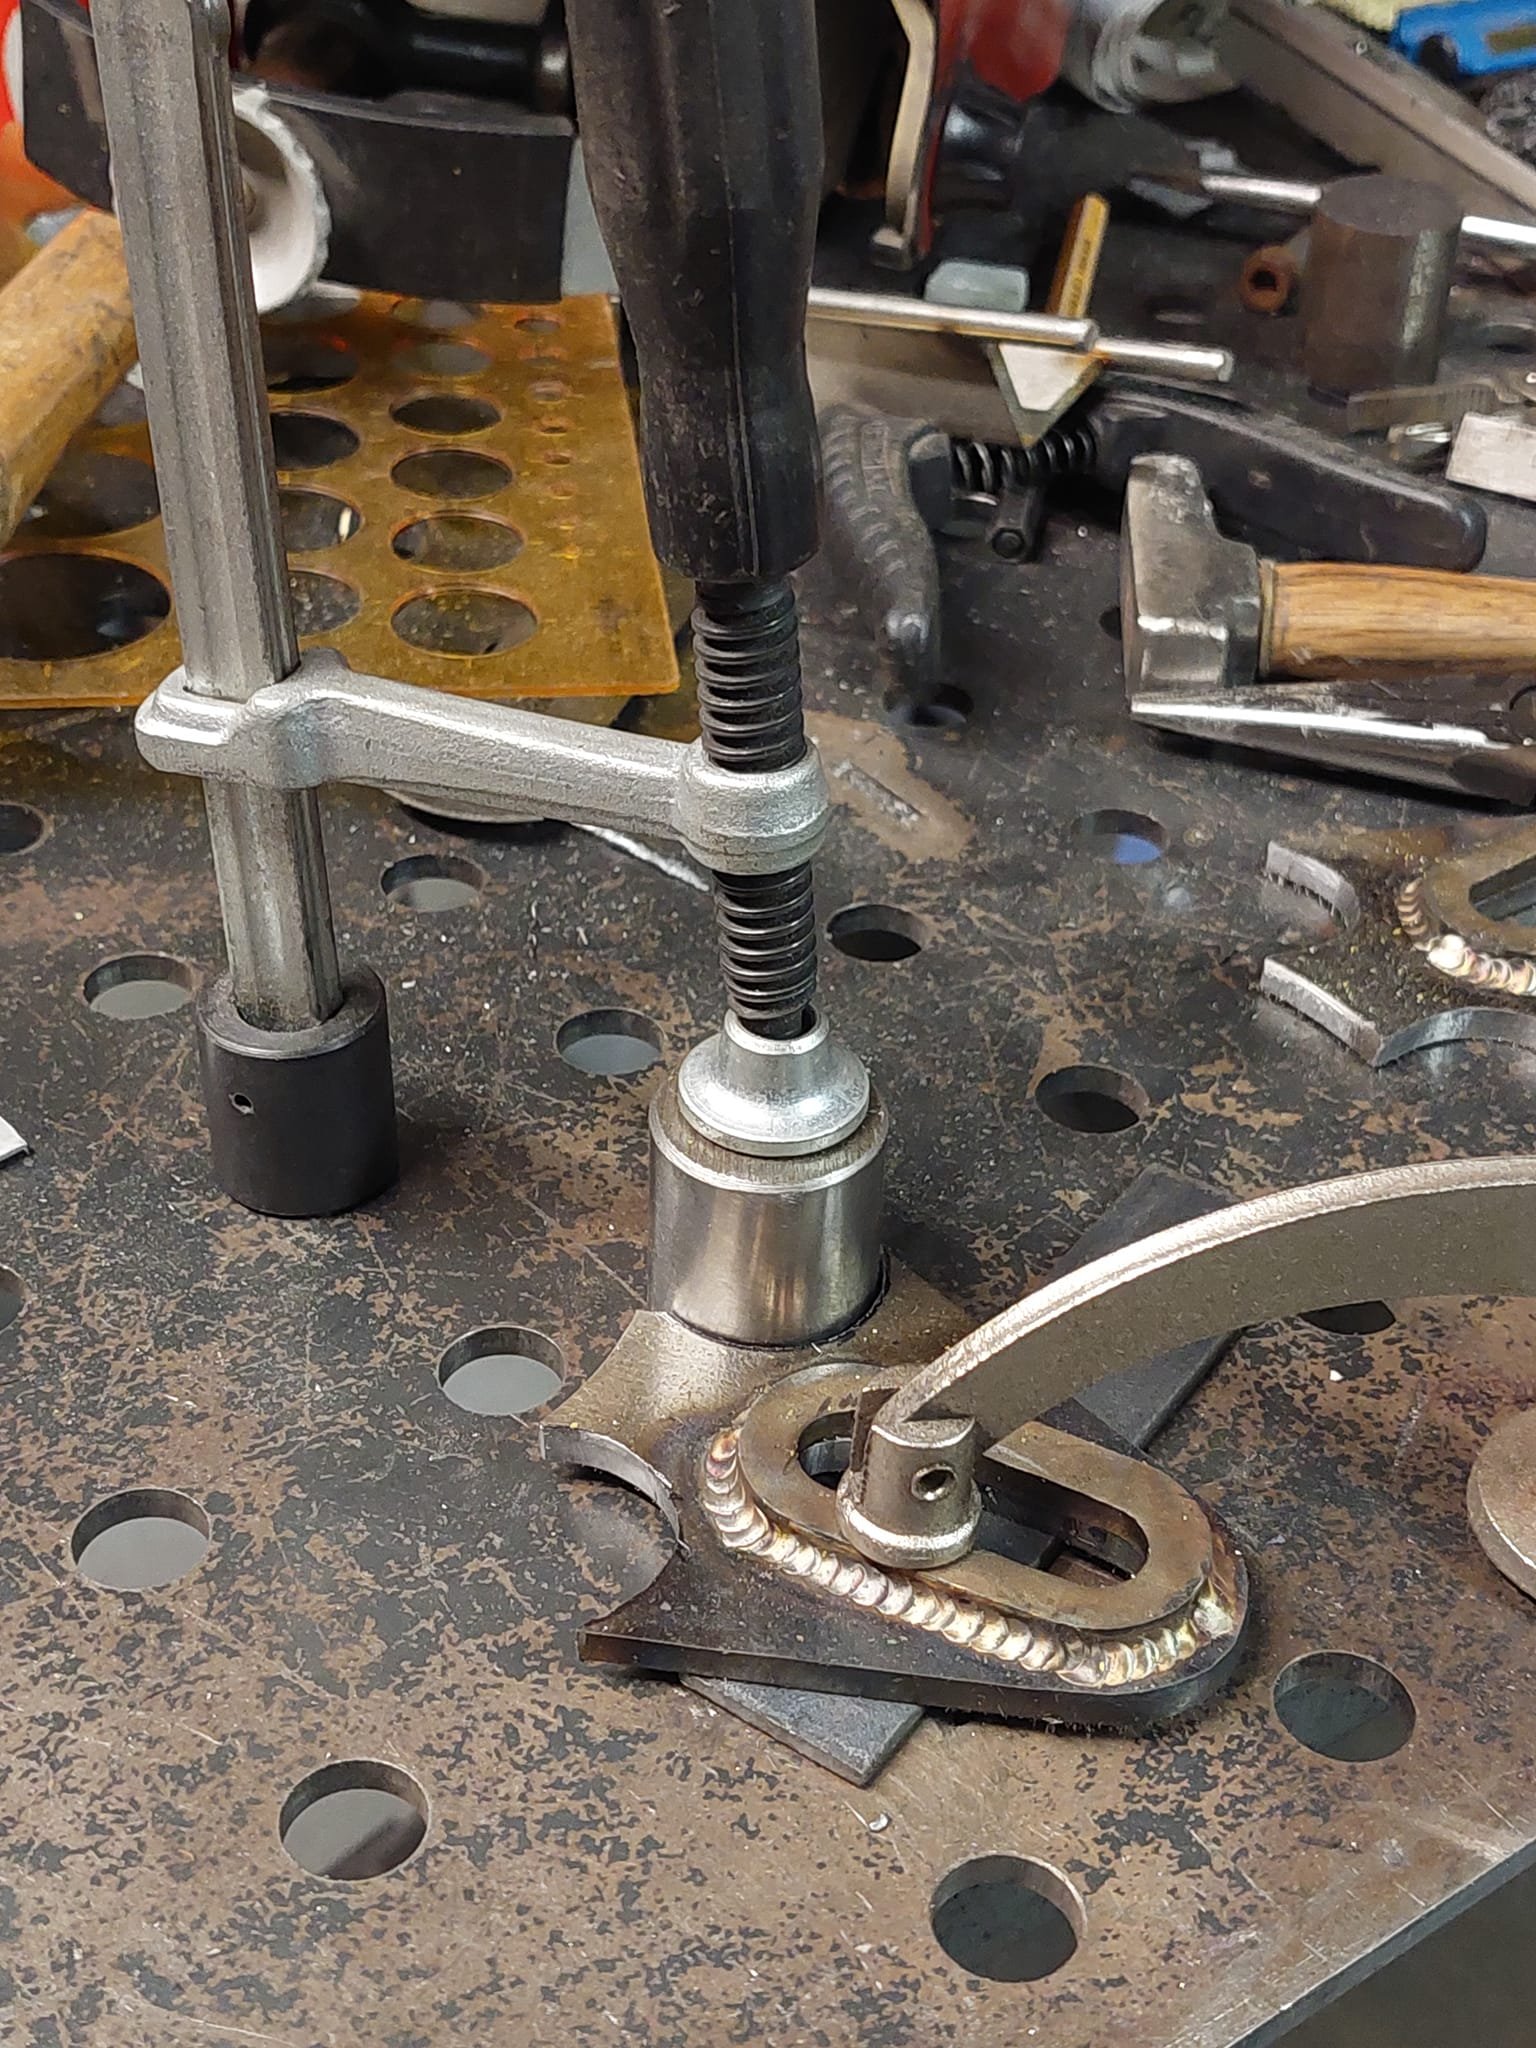
I modified the rear axle plate to accommodate the mounts for the seat and chainstay tubes. Theyre basically some 30mm round bar with one of them with a drilled and tapped hole so I can mount a sissy bar to them. Working away some more on the tube mounts I drilled out the holes that the rear brake pedal goes through to accept some tube that the front part of the chainstay will be welded to For the seatstay mounts Ive added some 3mm plate to the inside of the frame so I can drill some holes to pass through some more tube like the front chainstay mounting point. Then I offered up the mudguard in place and cleco it in place. Once I've got all of the hardtail tubes welded in place I'll be able to fully weld the mudguard in place which will add heaps of strength to the frame and stop my dickies and flannel shirt from getting all dirty.
1 point
-
oopsie daisies. I’ve gone and brought a V50.
1 point
-
Without it though, how will they know you are the Plazma Man?1 point


.thumb.jpeg.384ff72c8d2b0ee0d34a7bdedb55bdcf.jpeg)


.jpg.beece1a28e1b2829fa6b1b2f55e19e06.jpg)
.jpg.04c290231729054304460053f46c72a0.jpg)


This leaderboard is set to Auckland/GMT+12:00