
Leaderboard


Popular Content
Showing content with the highest reputation on 02/09/23 in all areas
-
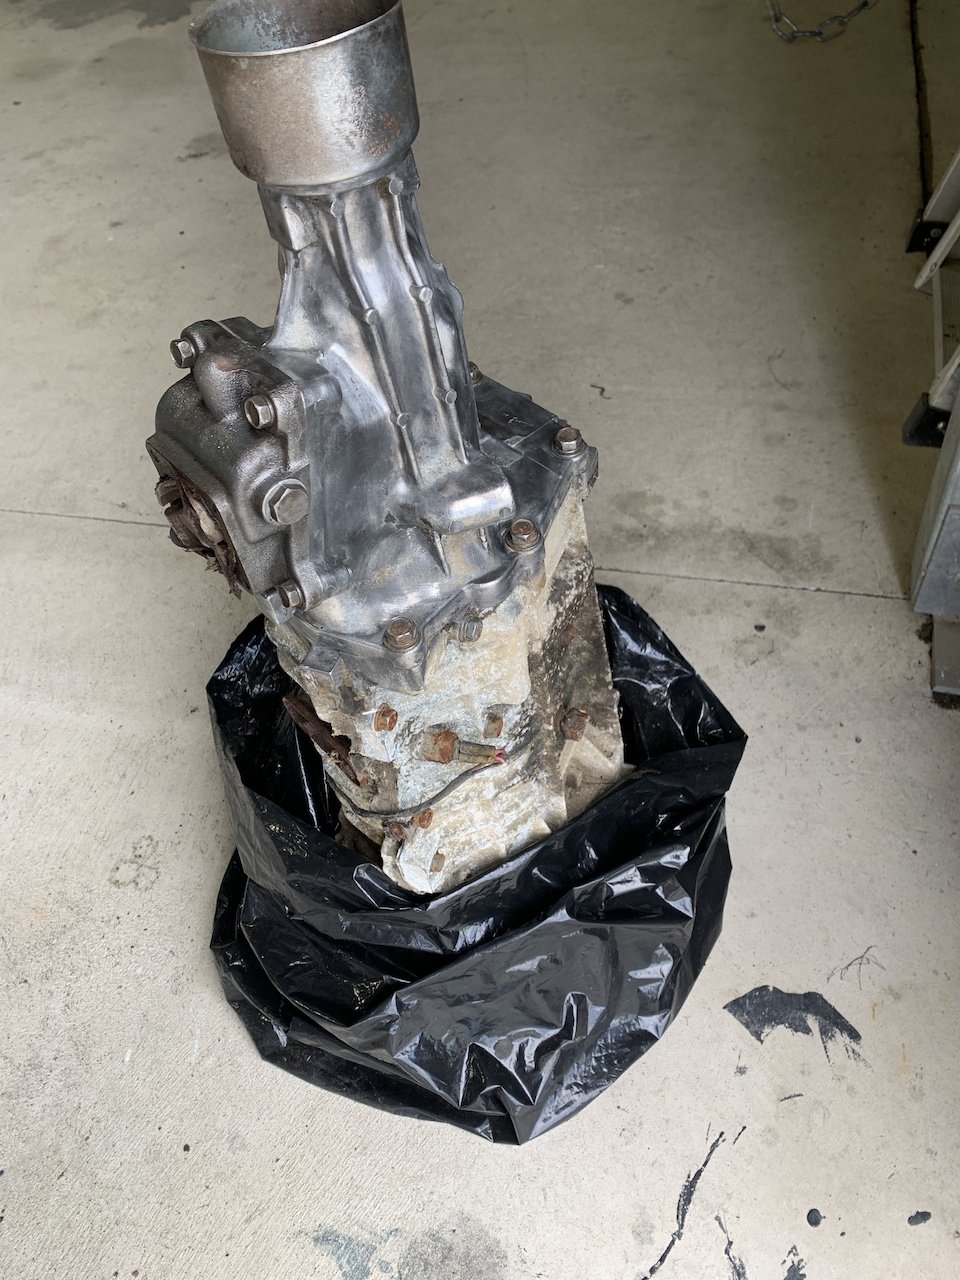
IMG_20230208_173416 by John Bell, on Flickr IMG_20230208_173432 by John Bell, on Flickr Facebook marketplace provides, yet to confirm how crusty diff is, but its a complete turd that has been dicked with comprehensively, hoping to harvest it for Footpegs Taillights Front brake cable Gear lever & shaft (non welded) Diff housing and/or guts misc detritus
 6 points
 -
Did a thing and drove it home today. off for an alignment tomorrow, drives straight as already. definitely need to address the exhaust height, it’s low, too damn low now that I dropped it another 10mm or so.
5 points
-
I think horizontal shaft motors spin slower and more steady like because any faster and the long canvas belt will pop off and then necessitate Barry to have to put is mug of tea down, clamber out from his $10 fold up chair and urgently wobble over to shut that damn thing down before the display is ruined.3 points
-
More random one off parts All good practice on the mill. I used the DRO 1/2 functions to find centre/s and it did the maths for me.
3 points
-
Is there a minimum distance required between my fuel tank and the exhaust? I'm about an inch presently. I'm hoping a shield is the solution here, rather than moving shit...jump on my discussion thread with your opining.
3 points
-
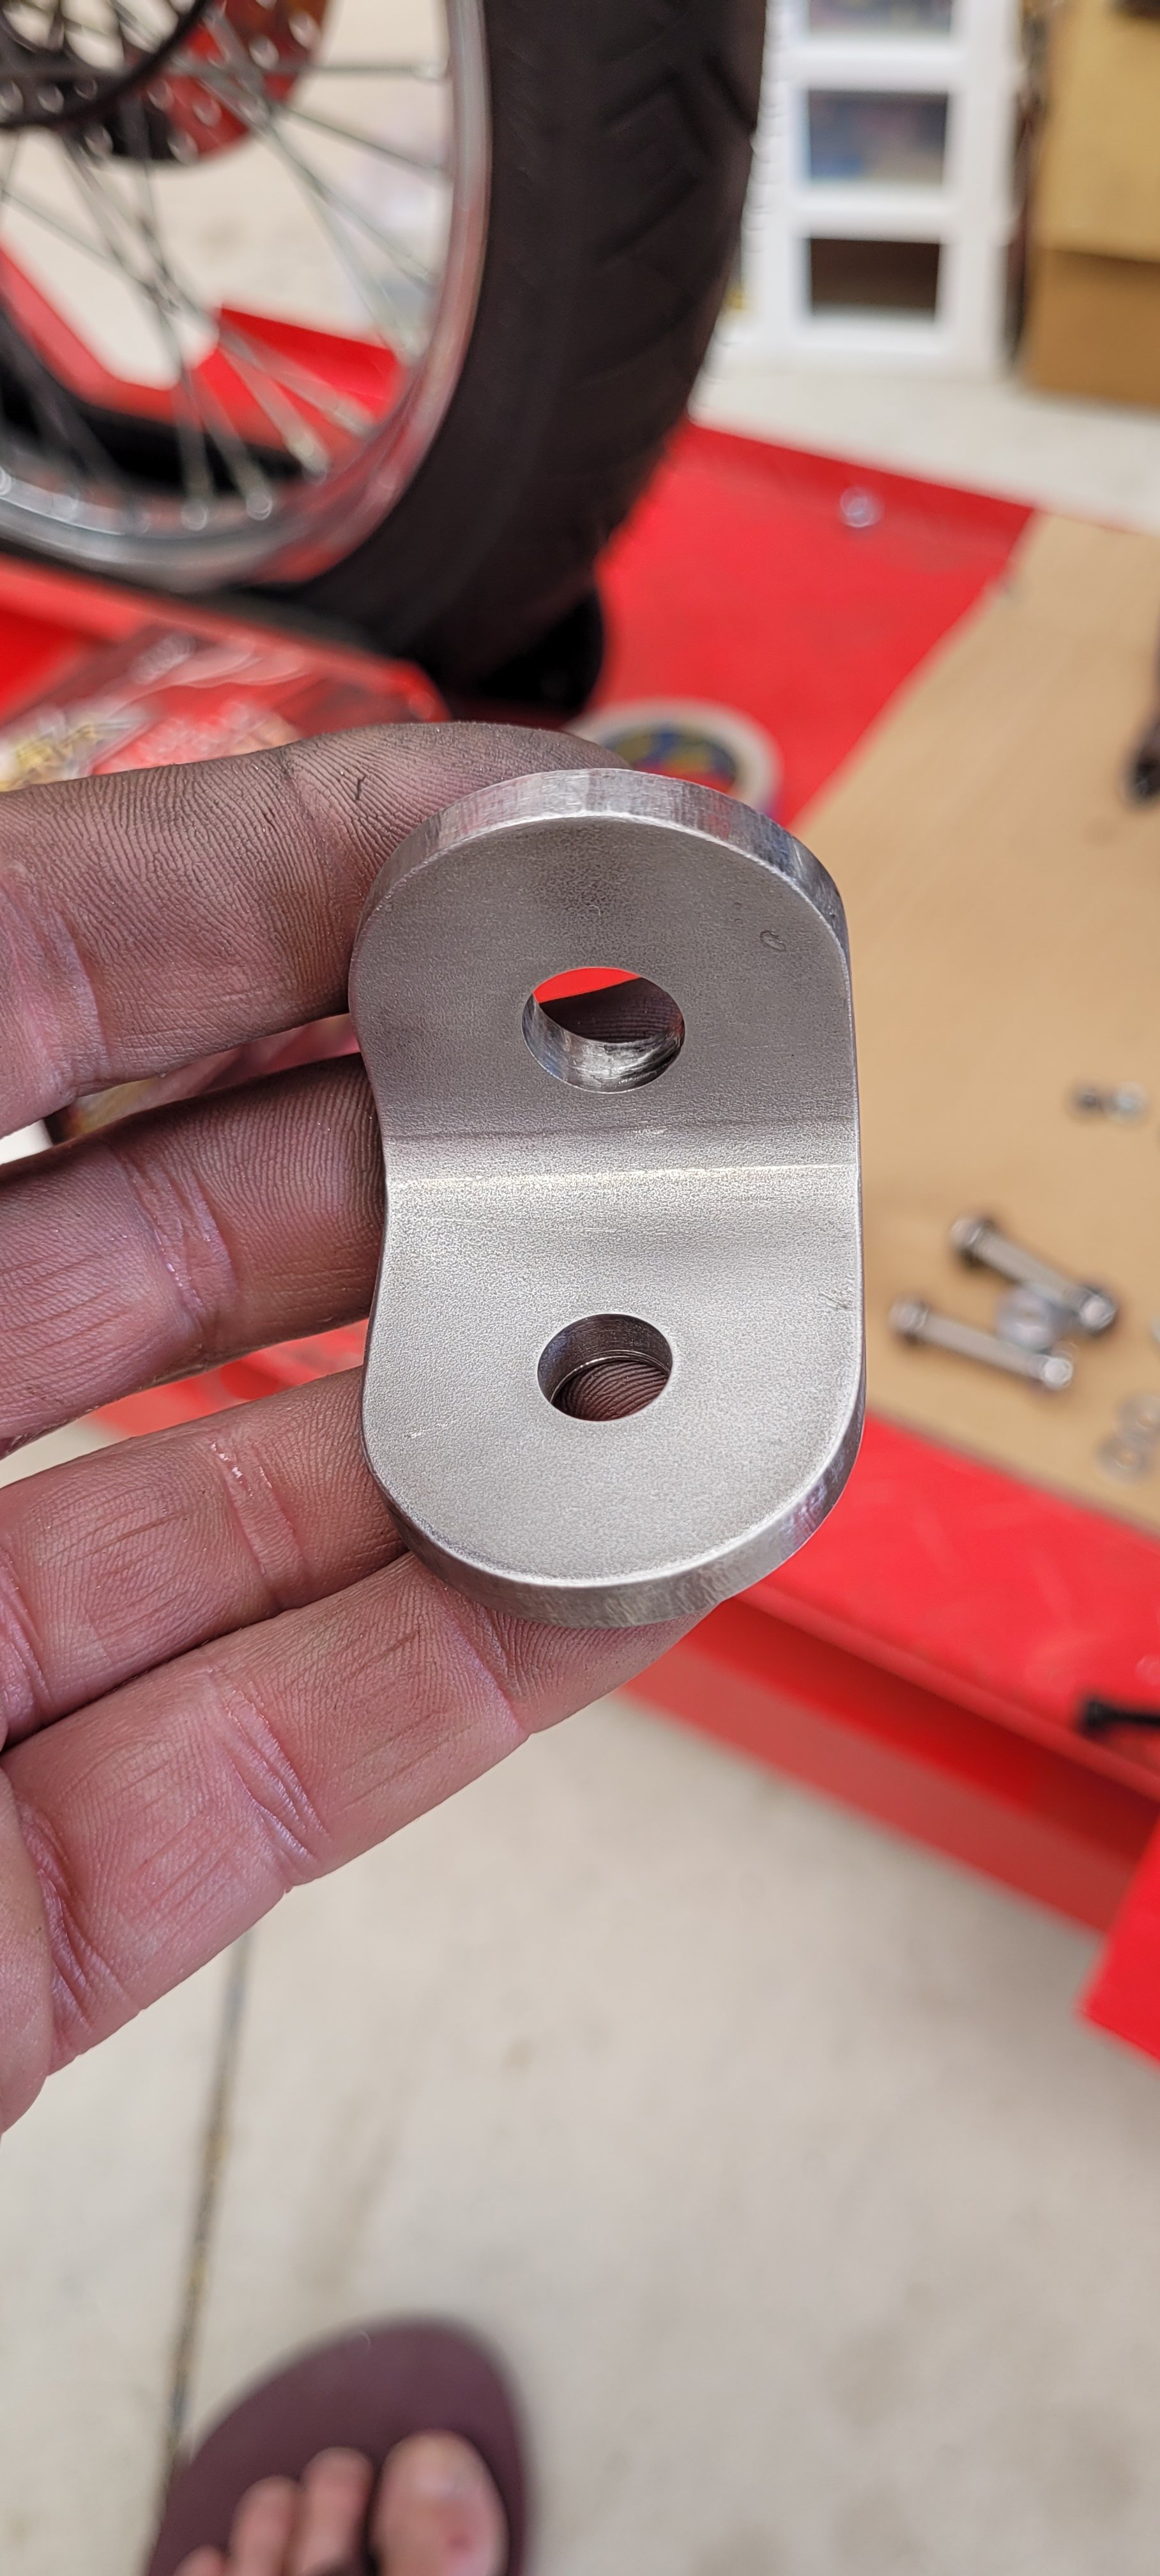
More one off parts made. Pressed out of 6mm stainless plate, then milled on the rotary table. Came out pretty mint given how cunty stainless is to work with and my cheap hobby tools. This took a bit of figuring out, but a cheeky reach around was all it needed to solve the problem.
2 points
-
The best example of incorrect Caster is the front wheel of a shopping trolley. At speed with too much negative caster the wheel becomes way less 'stable' and you will have trouble keeping the vehicle in a straight line..... but turn in is easy and turn grip can be improved. However - I suspect you've introduced too much positive caster (and I jumped the gun with my tracking comment) which will probably just give you heavy steering and a bit less corner grip.... but straight line tracking will be OK. My experiences are with a race Mk1 Cortina - so basically identical suspension and weights as your Escort2 points
-
8 inch wide wheels are pretty big for an escort, too much on the out side which is why they hit the guard. What size tires do you have?2 points
-
Just get wheels that fit with the car without needing to mess with the alignment? 15x8 down to 13" mags is one extreme to the other, i'm sure you can find middle ground. If it's stock otherwise then 13's probably look good on it.2 points
-
Welcome to the GM X frame family my guy....... Keen to watch the progress and see this out and about soon, I'm sure you'll do it justice. 58-64 GM full size ftw2 points
-
Aramid/Kevlar is used for toughness (impact resistance) and only when really needed or the engineer is a dick cos its a pain to work with.2 points
-
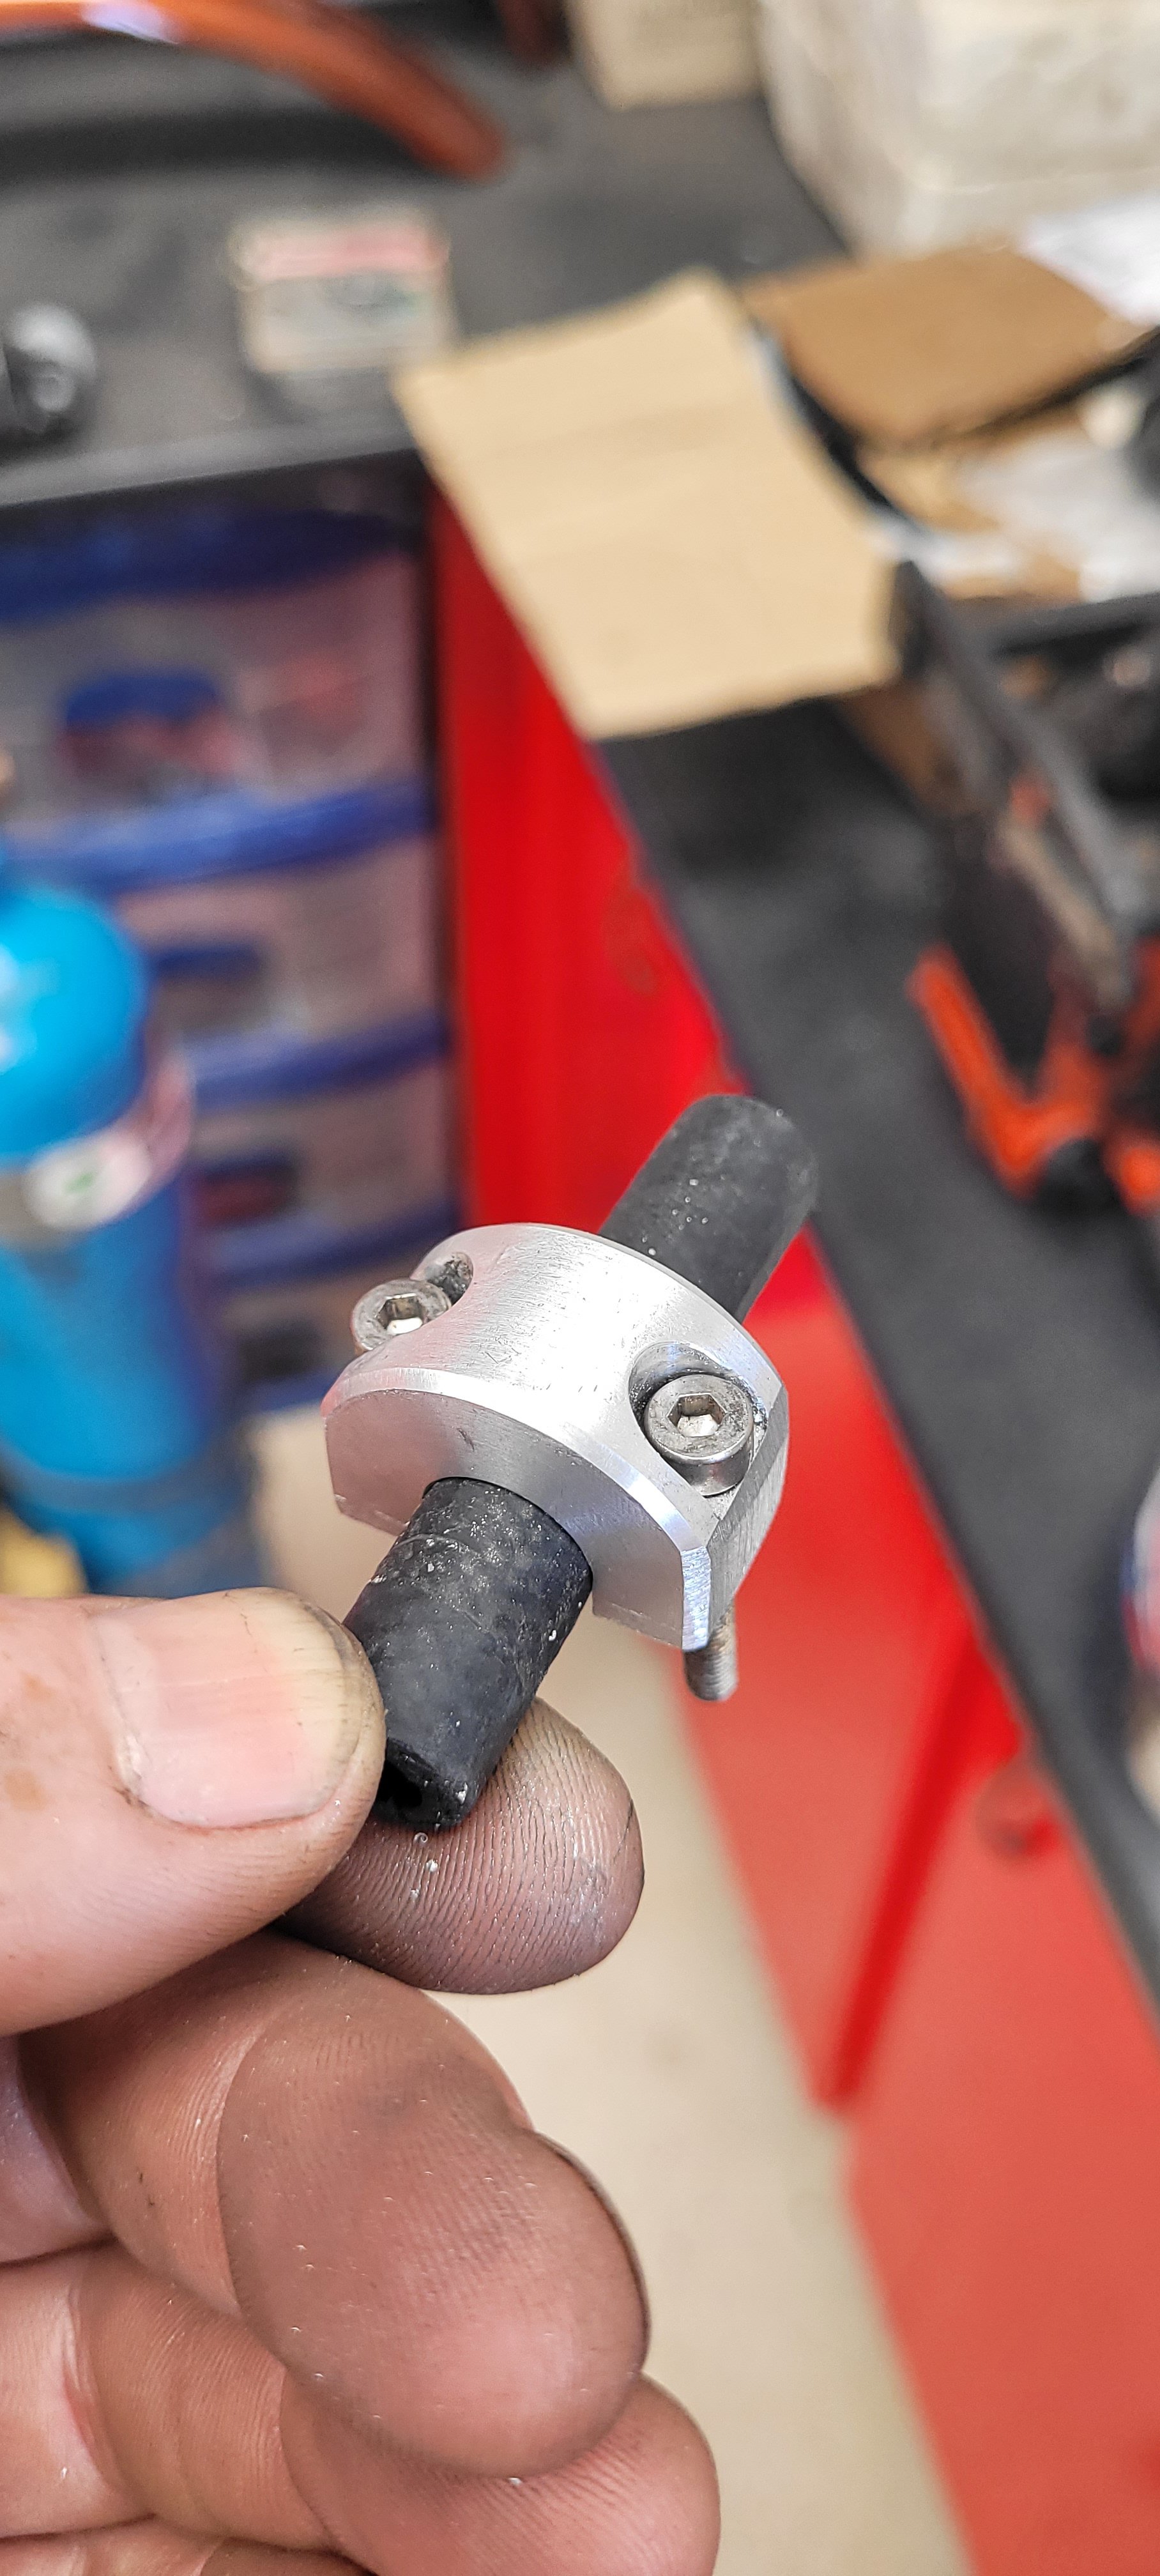
Went through my stash and found some thin spacer washers and had a measure up. The kit washer came in at 0.008" on my damaged vernier (was raining so couldn't be bothered getting he micrometer out of the other shed)... Found a washer slightly thicker, at 0.025"... And buttoned things up, can see the shim now, and with everything snug but not tight I bent the tab on the lockwasher... And had a delivery in the mail, got the spacer that was holding things up... I'd cut down some allen head countersunk screws, so cleaned them up and fitted the ratchet with Loctite 263. Debated adding a small weld to them but supposedly 263 is a permanent threadlocker, so should be ok... And slid on the sprockets and new chain... At this point I couldn't find the large nut for the clutch, so spent an hr or so searching my parts and even the rubbish bins in case I'd discarded it. Eventually found it behind the engine on the bench, which was a relief, but I stopped here so I could read up on the correct way to tighten things up...2 points
-
The very obvious path forward is solid mounting of the engine. 3d print some mount stuffers.2 points
-
Made good progress today, but I'm short a few bolts in critical places...so thats all I can do until I get more hardware.
2 points
-
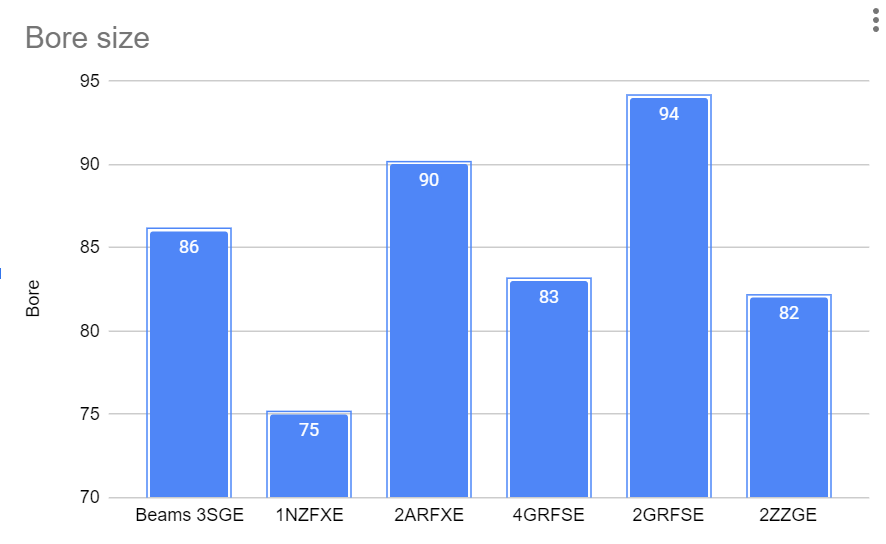
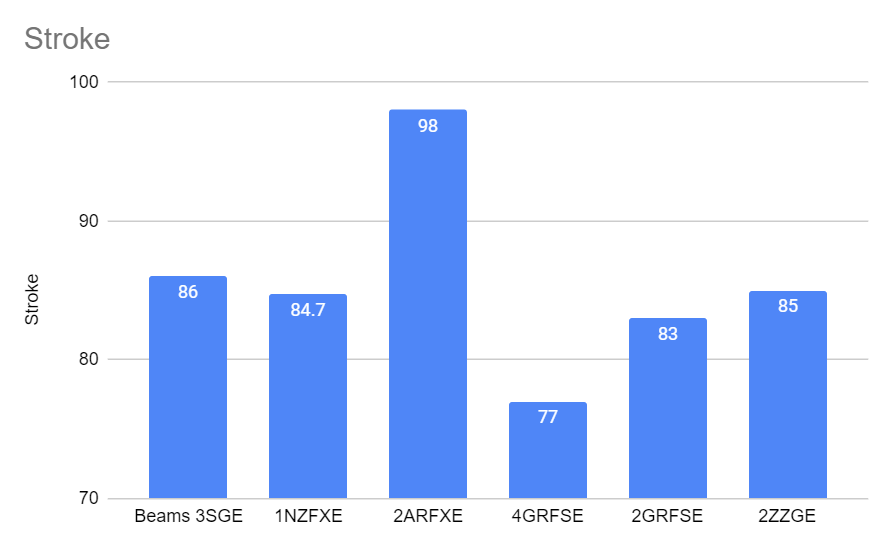
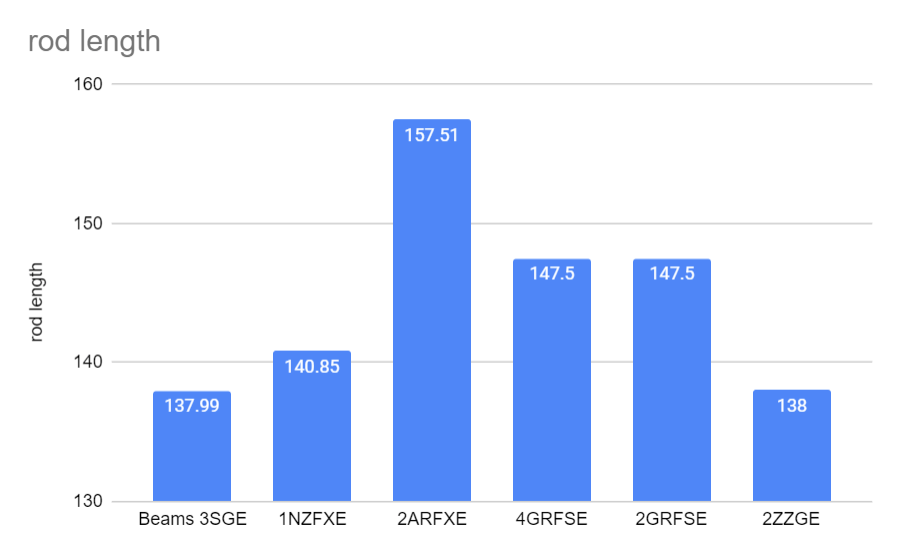
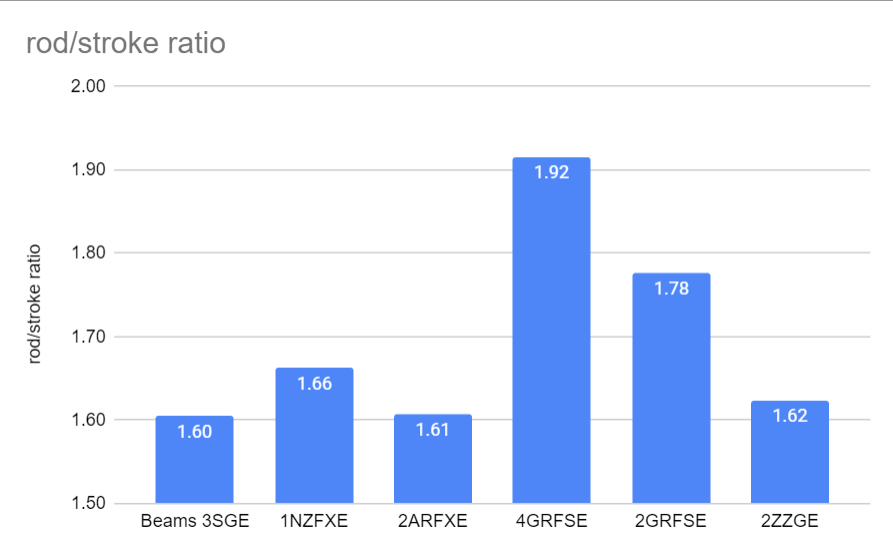
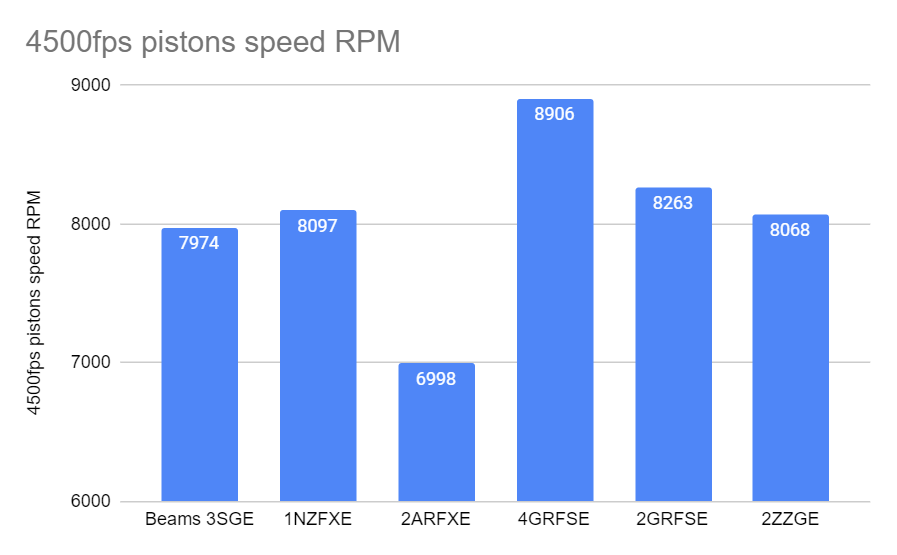
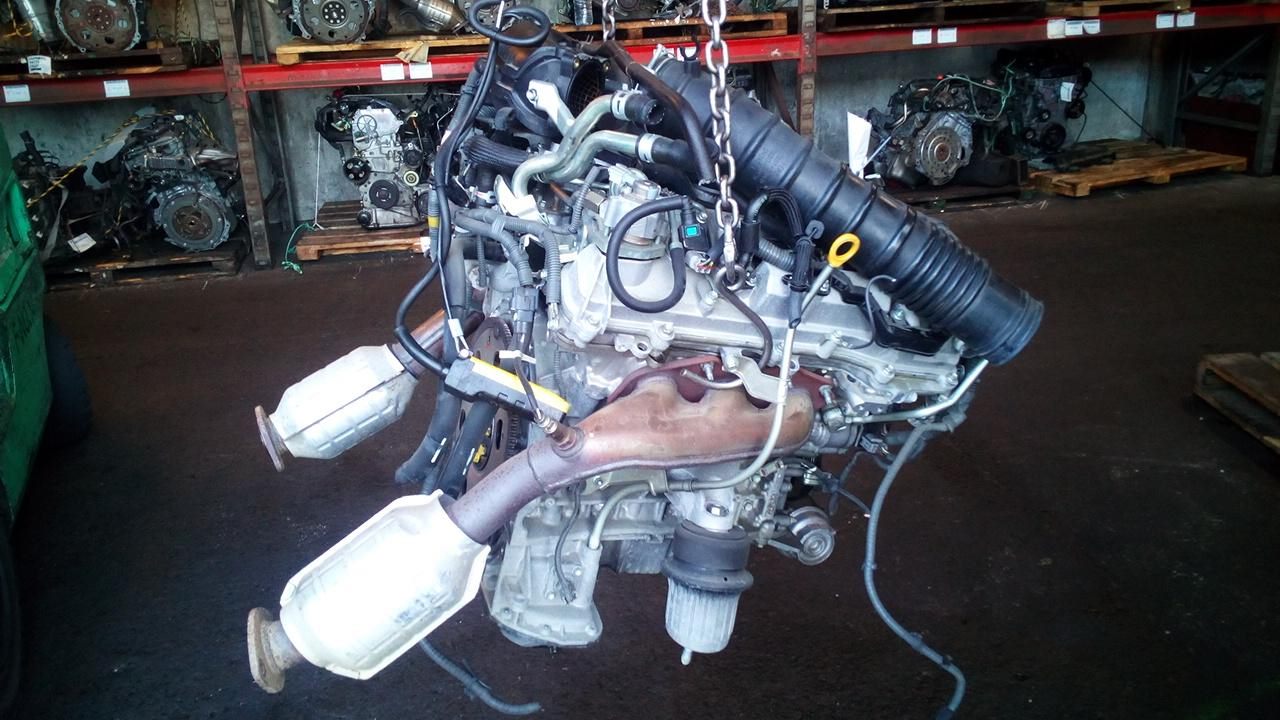
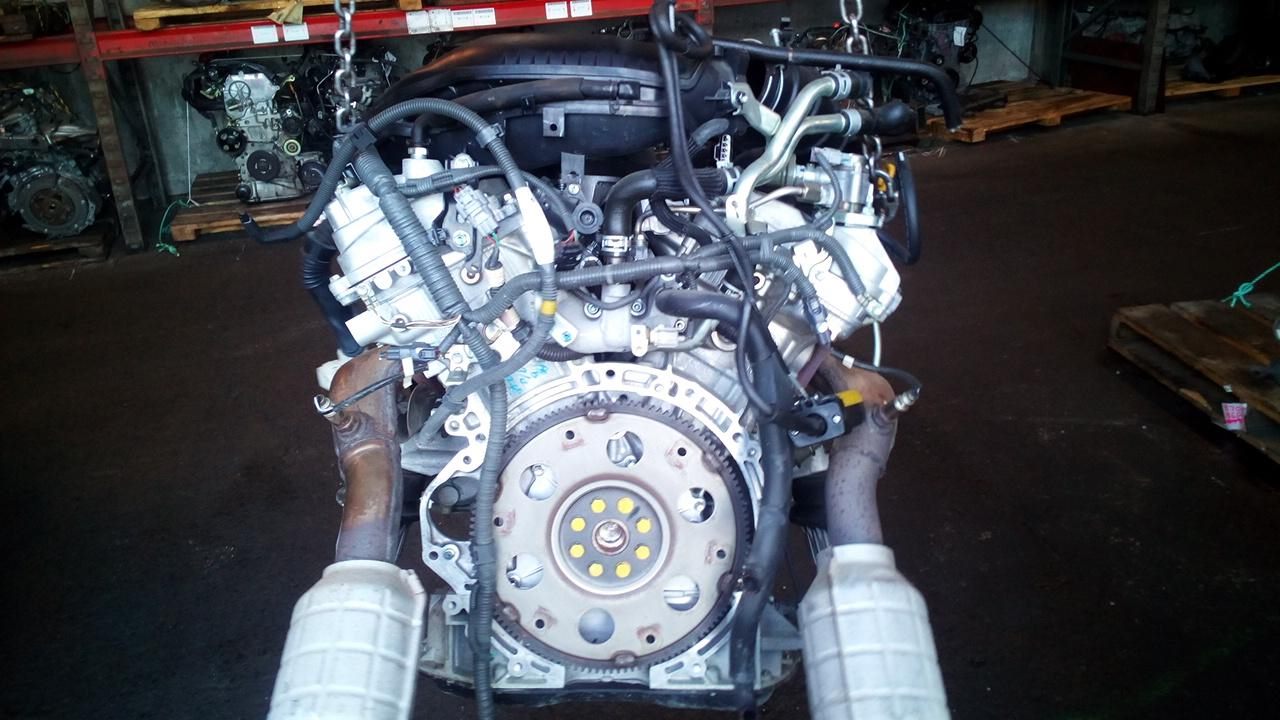
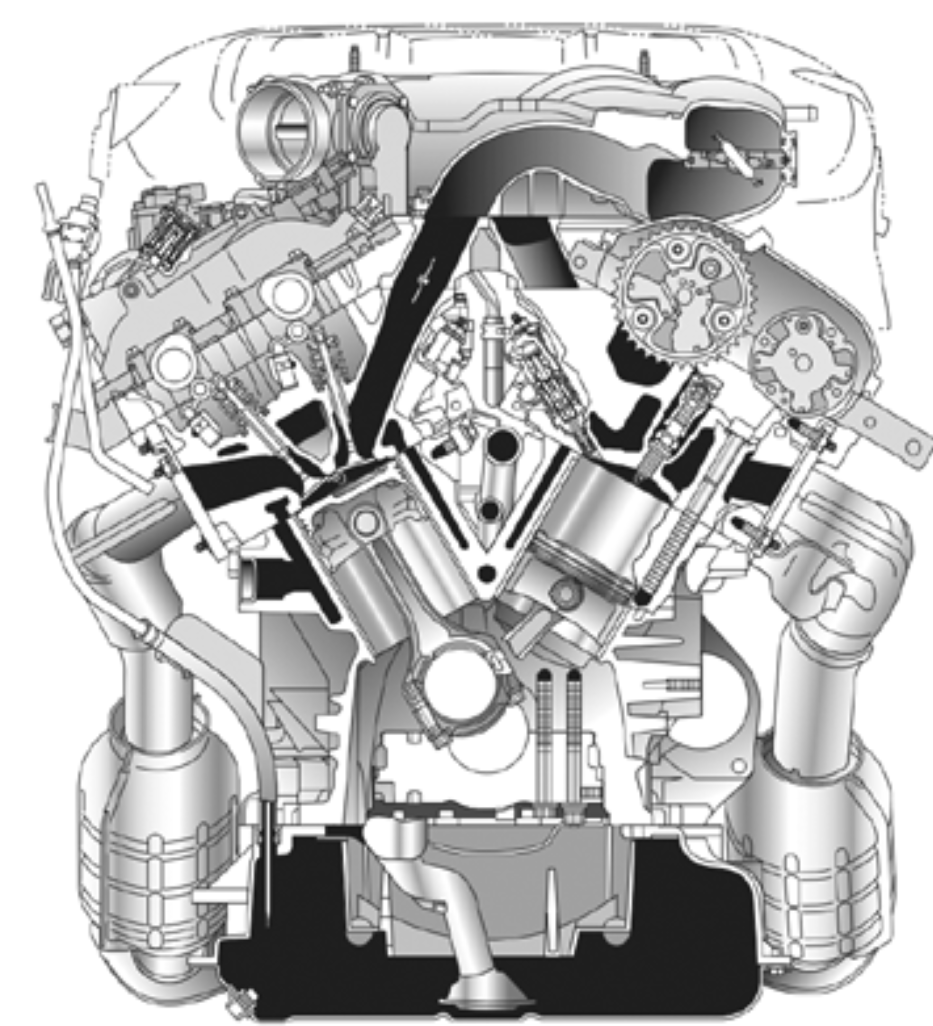
Long time no post. Two years doing sweet fuck all on the Carina haha. I've spent at least the last year mulling over new motor options. Probably should have just finished getting beams motor going, but oh well. However I've got some renewed enthusiasm at the moment. New motor Criteria: -Capable of big rpm -less weight than beams motor -newer motor / alloy block -Be nice if it bolts to a J160 without adapter These are some of the engine options I've been going back and forth between: 1NZFXE NA Probably a bit too slow for a ~950kg rwd car... But maybe alright with a diff ratio change. Would definitely be the lightest option. Lots of room for activities with intake etc! 1NZFE+turbo This would be great because it would achieve nearly everything I want (lots of rpm, a power increase, less weight) However I do prefer NA motors for ease of working on but also tuning is more fun I think. This wont bolt up to a J160 directly, so that's a headache not present with some other options. Also the exhaust runs down the drivers side which is a bit annoying. Bike motor I am keen to do a bike motor project, but, I think this isnt the right car for it. Too big/heavy. But how cool are bike motors? Built with amazing ports, mega rpm, and sequential box that can shift near instantly. Bloody good. It just really excites me to buy a 10 second bike and turn it into a 14 second car haha. Have you considered a 2ZZ Yes, yes I have. Pluses to this are that it's lighter than a beams motor, VTEC! and built from the ground up for lots of rpm. Good power potential. Downsides - motors are hard to find, that arent either clapped out from high km, or needing to buy a whole car to get an engine. Needs a bellhousing adapter, exhaust runs down the drivers side (steering column/brake master cyl annoyances) Niteparts is currently working on fitting a 2ZZ to AE86, really excited to see how it turns out. 2ARFXE or 2ARFE This is a big late model 2.5 litre 4cyl motor that's gaining popularity for modding. The FXE version uses the same tricks as the Echo motor, however, the factory cams have some pretty decent lift and duration unlike the 1NZ. So it looks like the popular cheapish option is to use a second intake cam in the exhaust side, then you've got 270deg cams with 11mm lift. Pretty sweet. Downsides? It's a tall bugger. I'm definitely not wanting to do anything that requires cutting the bonnet. Might not fit. Also, it would be weight neutral rather than losing any weight from front of the car which was one of the goals. Since it has quite a long stroke, it probably cant rev as high as I'd like. I'm more concerned about engine sound/feel/revvyness rather than outright power. It's a good option, especially if it can bolt to a 3S bellhousing - but being rpm limited to 7500 or something. Blargh! So, yeah. Those were the options I've been considering and trying to decide between. However while browsing through Dodson's trademe site for cheap big block 4 cyl FXE engines I spotted something interesting that I'd not considered... A new challenger appears! 4GRFSE Now this is a bit of a WTF option but hear me out. The 4GR's big brother, the 2GR. Is a 3.5 litre V6 that is commonly swapped into MR2s etc, because can bolt up to a 3S bellhousing. However most of the 3.5 litre versions suit having the motor tipped over for east/west config. I think you need to buy a lexus motor to get the RWD config motor, and uhhh yeah. Lexus tax. The 4GR is the 2.5 litre direct injection V6 from a Toyota Mark X, which is setup for FR config. It's got a rear mounted sump, which by eyeball should easily fit behind Carina crossmember. Also, they're cheap and readily available as Mark X are a fairly common car. Why not 2GR for an extra litre of displacement? Well, the 2GR makes good power but it's got a big bore, big stroke, and will be rpm limited on factory pistons to less RPM than I'm willing to settle for. The short stroke and smaller bore of the 4GR motor means pistons/rods are lighter and the mean piston speed is considerably lower at a given rpm. To be honest I've never really consided a V6 because I think a 4 cyl motor is more in keeping with the spirit of the car. But when you look at the numbers, there's no way to get an off the shelf 4cyl motor that has a big enough bore and short enough stroke for mega rpm. Even the tiny 1NZ has rpm disadvanges compared to it. Another interesting aspect, is that since this motor is DI only from factory. It doesnt have any injectors in the ports, which usually seem to result in more angle on the port. In this case the DI injectors are mounted below the intake ports, so it's got STEEP intake ports. Another good sign for high rpm. The downside is that as per every DI only engine, the intake ports clog up with shit. Solved by converting back to regular injection. Still thinking "why a V6?" (boooo) I think it's going to be possible to get a semi reliable 10k rpm from this motor. Honestly how many engines are capable of running to 10k? How good is that. If these numbers stacked up the same way with a 4cyl motor, I'd use that. But they dont. Also to remove any doubt of this motors absolute peak performance potential this son of a bitch has a modern day TVIS equivalent. shit a brick. I've come to realize from the echo that revving the absolute bejesus out of something puts a smile on your face for longer than outright power does. This motor, the bottom end at least, should be 10k rpm capable with considerably less stress on the motor than any other option from the Toyota stable that I can see. Here's some graphs, because, well, it's my thread and thats how it goes. Bore size 4GR is about middle of the range for bore size, which is a good indicator of piston weight. Keeping in mind that piston area goes up non linear to diameter, so only a few mm more can mean a considerably heavier piston. pistons will definitely be a a fair chunk lighter than 2AR or 2GR options. Stroke length 4GR has got by FAR the shortest stroke out of options. Nearly 8mm shorter stroke than a 1NZ. Considerably shorter stroke than a 2ZZ, which is a pretty good benchmark for a high rpm capable engine. God damn delicious! Compression ratio Lower than some of the options, nothing beats the 1NZ! However 12:1 is still awesome, the fact it's a non hybrid factory engine with CR that high is great. Rod length (Thats what she said) 2AR has the longest rod, but it's also got the longest stroke. Apparently the 2GR and 4GR have the same rod length, which would mean the 4GR block must be more compact. Good news for keeping the engine height down a little. Nearly 10mm longer rod than a 2ZZ. Rod/stroke ratio The highest the rod/stroke ratio number is, the straighter the rod stays when travelling up and down the bore. So less side loading on the bore. This is generally considered a good thing for high rpm, and it also changes how long the piston dwells at TDC and BDC. (higher number favorable for more rpm) An S2000 has a rod ratio of 1.82:1 Having a 1.92 rod ratio is god damn glorious for high rpm from a factory engine. Mean piston speed Rather than picking an RPM and listing the mean piston speeds, I've chosen a mean piston speed (4500 feet per second) then shown how high each motor can rev when reaching this number. The 4GR does wees over everything else. Keep in mind that I'm revving 1NZ to 9k currently, which would be same piston speed as nearly 10k with the 4GR. (4GR will have a heavier piston though to be fair) Sooooo yeah. I think a 9500-10,000rpm motor should be doable, as there are big cams available. If so, it will be friggen wild. Well, there are big cam and stiff valve spring options available for the 2GR - but I'm not yet sure if these will fit the 4GR. Looking at pictures of the head gaskets, it looks like the 4GR has the same bore spacing but just bigger gaps between cyls. I've bought a motor to test fit everything initially. It's not much of a gamble as they're reasonably cheap. I'm hoping things will all work out, but there could be some issues yet. Good thing I got some practice using a hand drill to modify engine blocks with the 1NZ. Might need these skills. Here's a few pics of the next modern Toyota FE motor I'm planning to turd polish into oblivion. I'm super excited about this! There's still a zillion reasons why it might not work out, or something doesnt fit, or blah blah blah. But if it all works how I'm hoping, it's going to be cool as hell.
1 point
-
A bit of extra positive caster, and increase in wheelbase is a good thing, so long as tilting the upright isn't hurting steering arm angle which can cause bump steer. (caster makes you faster) It helps self centre the steering wheel and will also help the car camber the wheel in when turning so less scrub on the outside edge of your tyres. Within reason with a power steer assisted race car you can't have too much caster.. There will be a bunch of race escorts out there with a bunch of different solutions, but would some swaybar brackets that allow the bar to be mounted slightly further back might work with maybe some minor clearancing up front, or as others have said maybe a well with less offset would help.( And also reduce scrub radius)1 point
-
Had similar problem with early corollas, we always use to bash the inner gaurd seam flat (fold it over) but not sure it this would be legal in this day and age... altho id still do it on my own personal whip.1 point
-
It'll track like a drunken naked meth head on a hot unicycle with the caster that far out. Last time I messed around with similar suspension I bought some big flat washers and cut them into 'horse shoe' shapes. I used those washers to tune the strut position in relation to the anti-sway bar.... which of course adjusted caster. IIRC the adjustment was limited by the available thread.1 point
-
I think you and I may have the same addiction !1 point
-
Don't tell anyone, but I have been reusing the same GN125 headgasket for several times. Just clean it off with thinners and smear on some hylomar blue. It's just a single layer metal one1 point
-
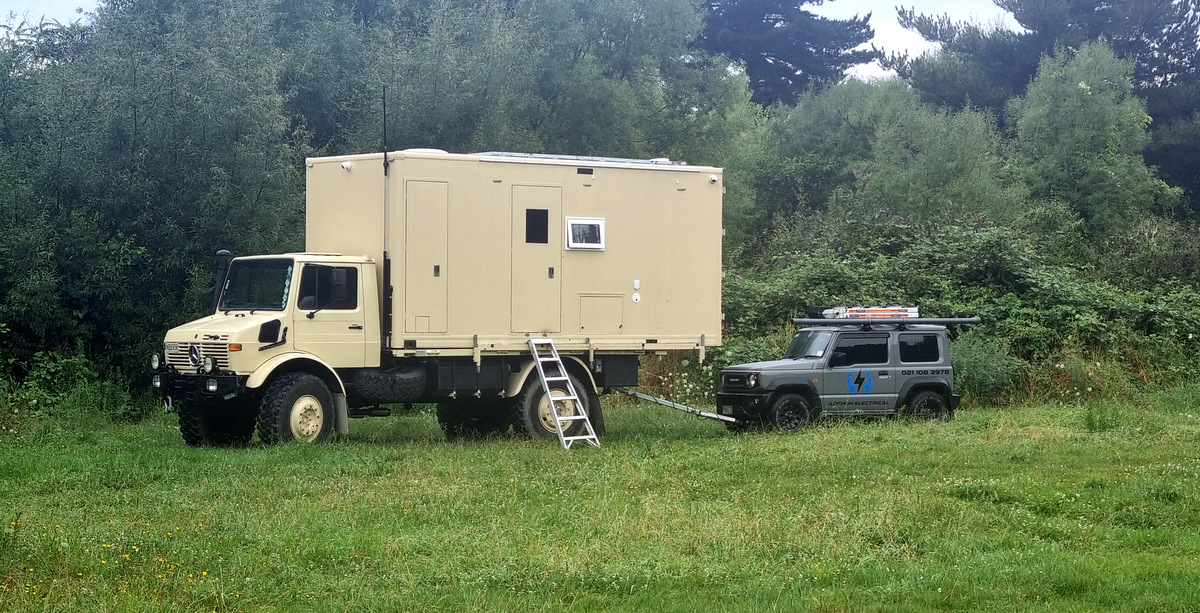
Seen at Vinegar Hill. Populated by a bloke who reportedly took a cat for a walk on a leash, and a lady with purple hair. They spent some time under the hood doing something with the drive belts before leaving on Saturday
1 point
-
So I happened to snap a lot of pictures of the intakes on the old touring cars at Scope Classic on the weekend. If you like seeing endless dollars spent on fancy carbon you can view them here... https://photos.app.goo.gl/vXC7axnsmoXEaNXw51 point
-
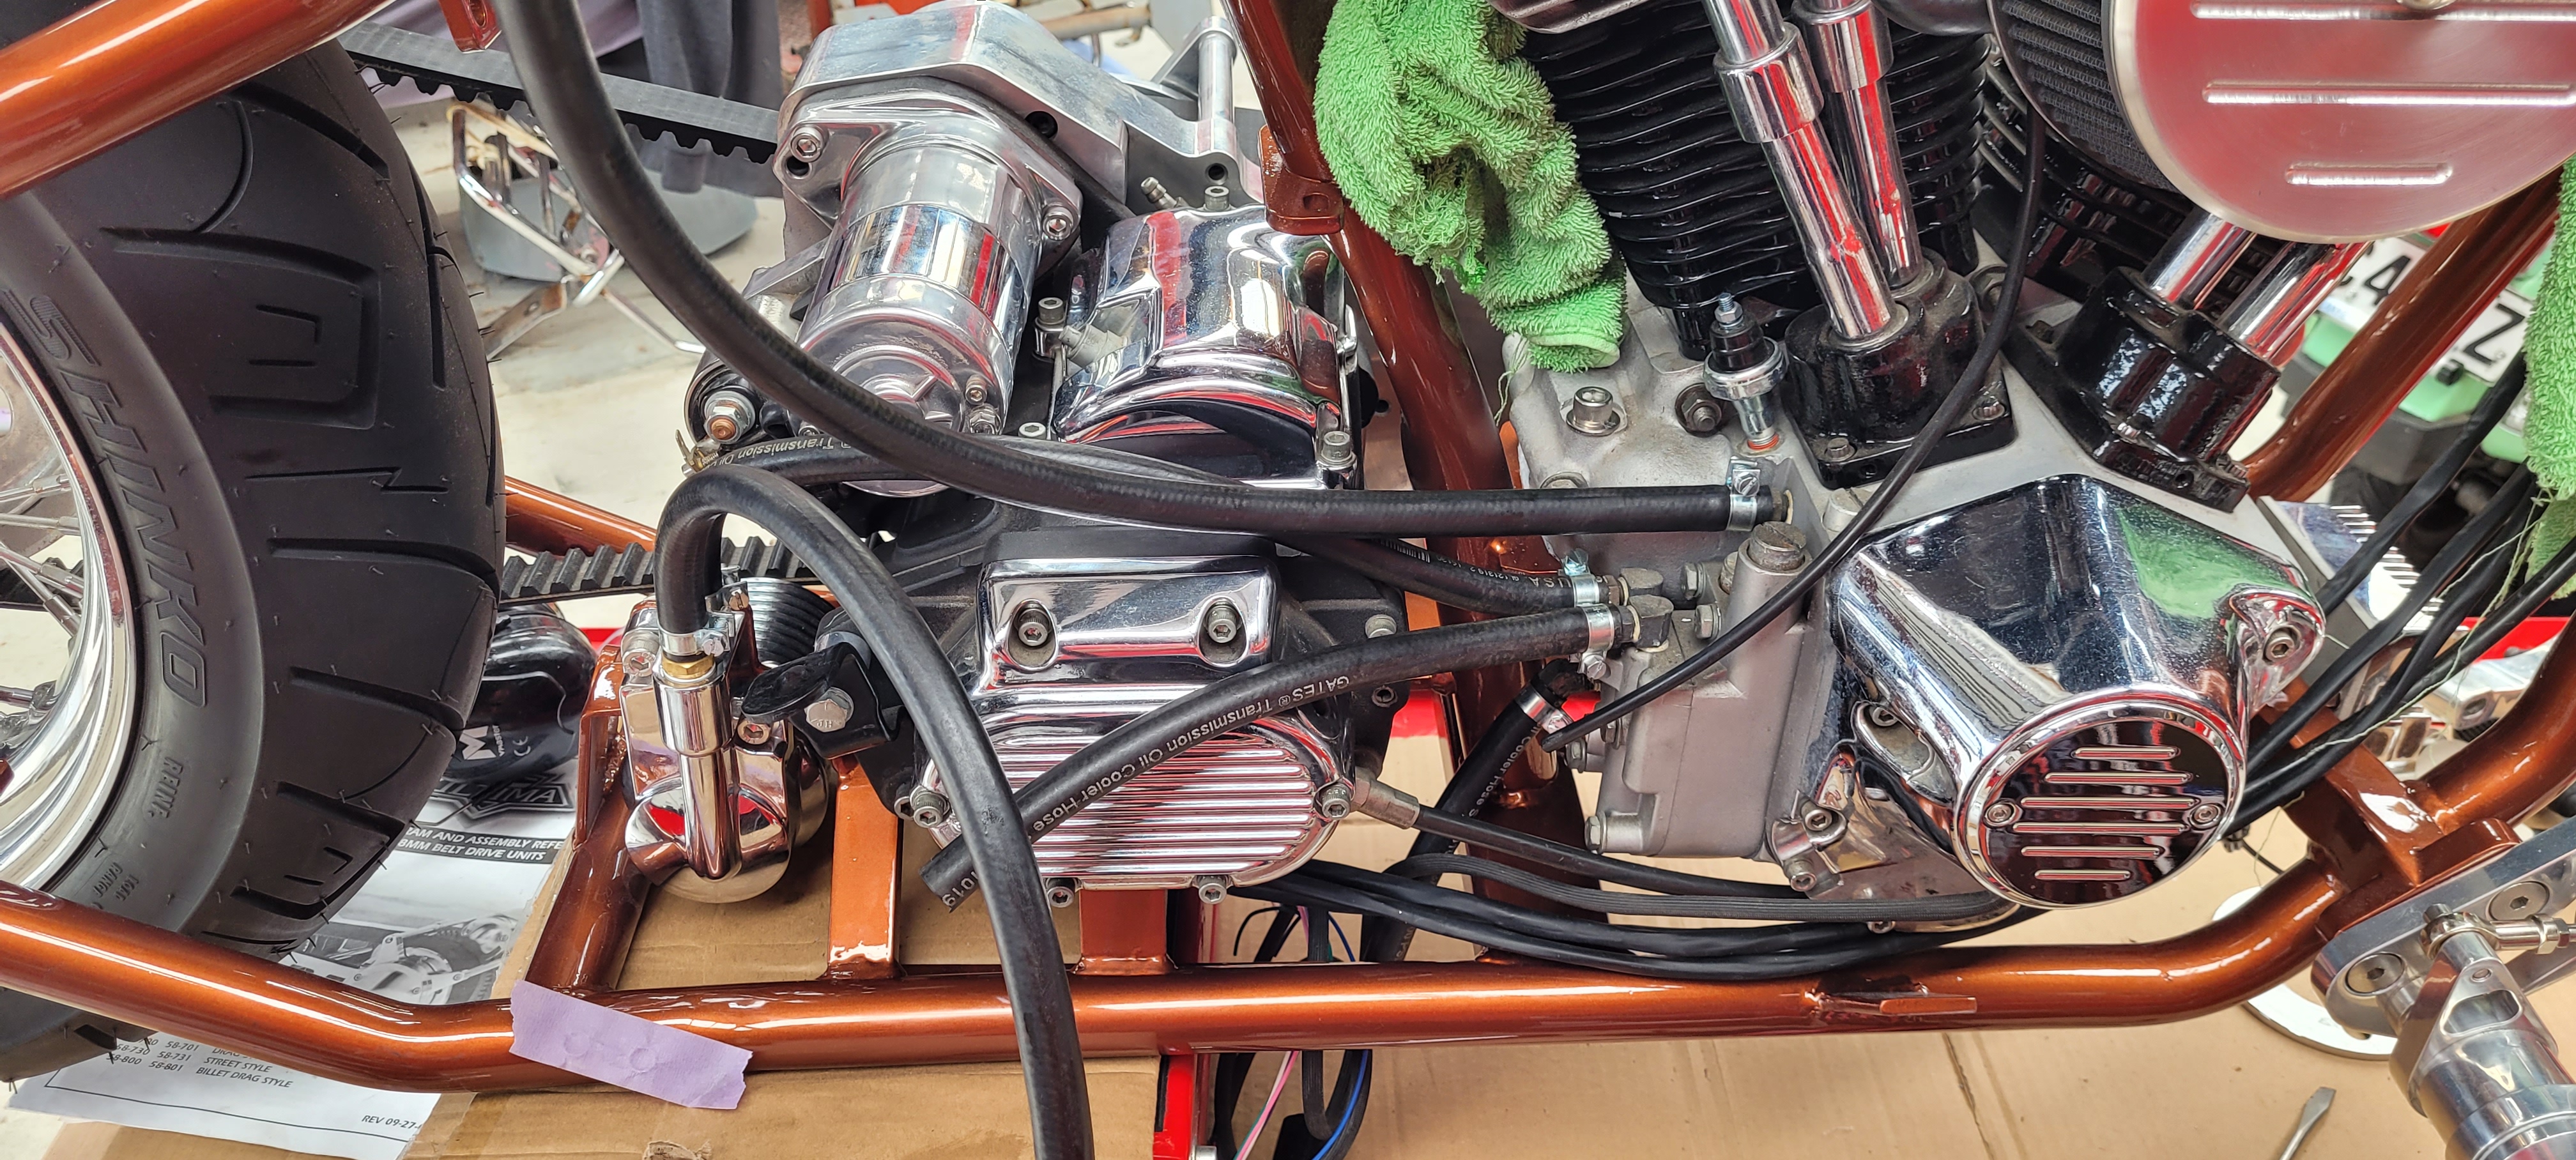
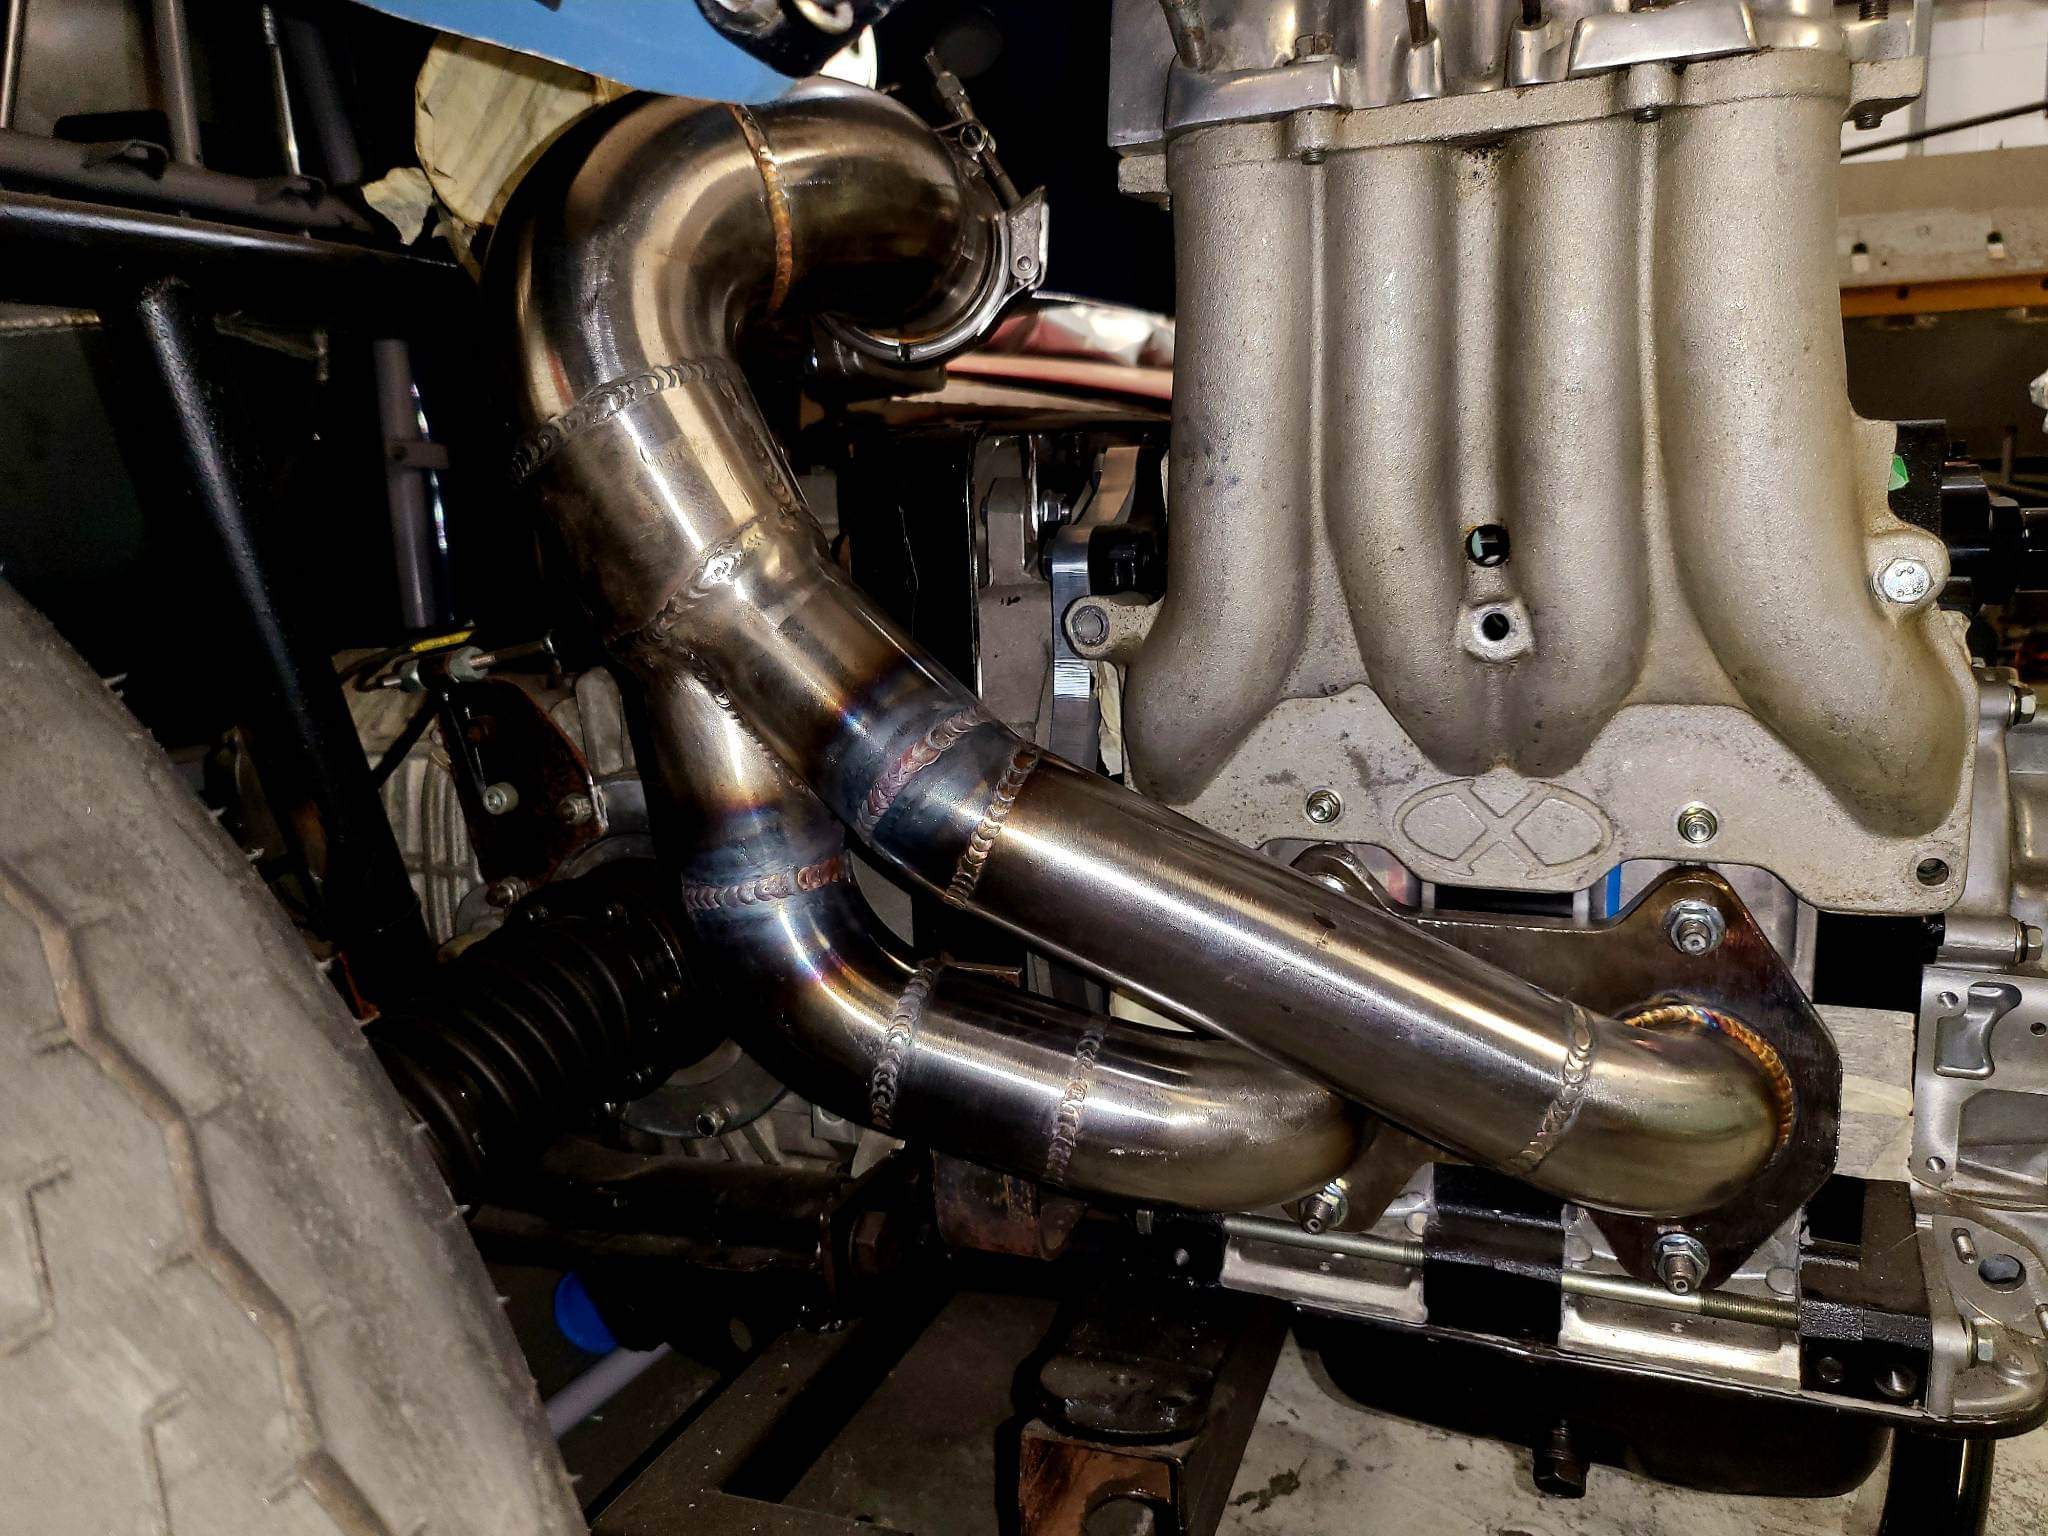
Oil lines and heaps of shitty little things sorted. I spent 3x 12hr days in the shed this weekend and I struggle to see where the time went. But lots of small custum parts machined up to solve problems. The simpler it looks, the more work it takes to make it look that way.
1 point
-
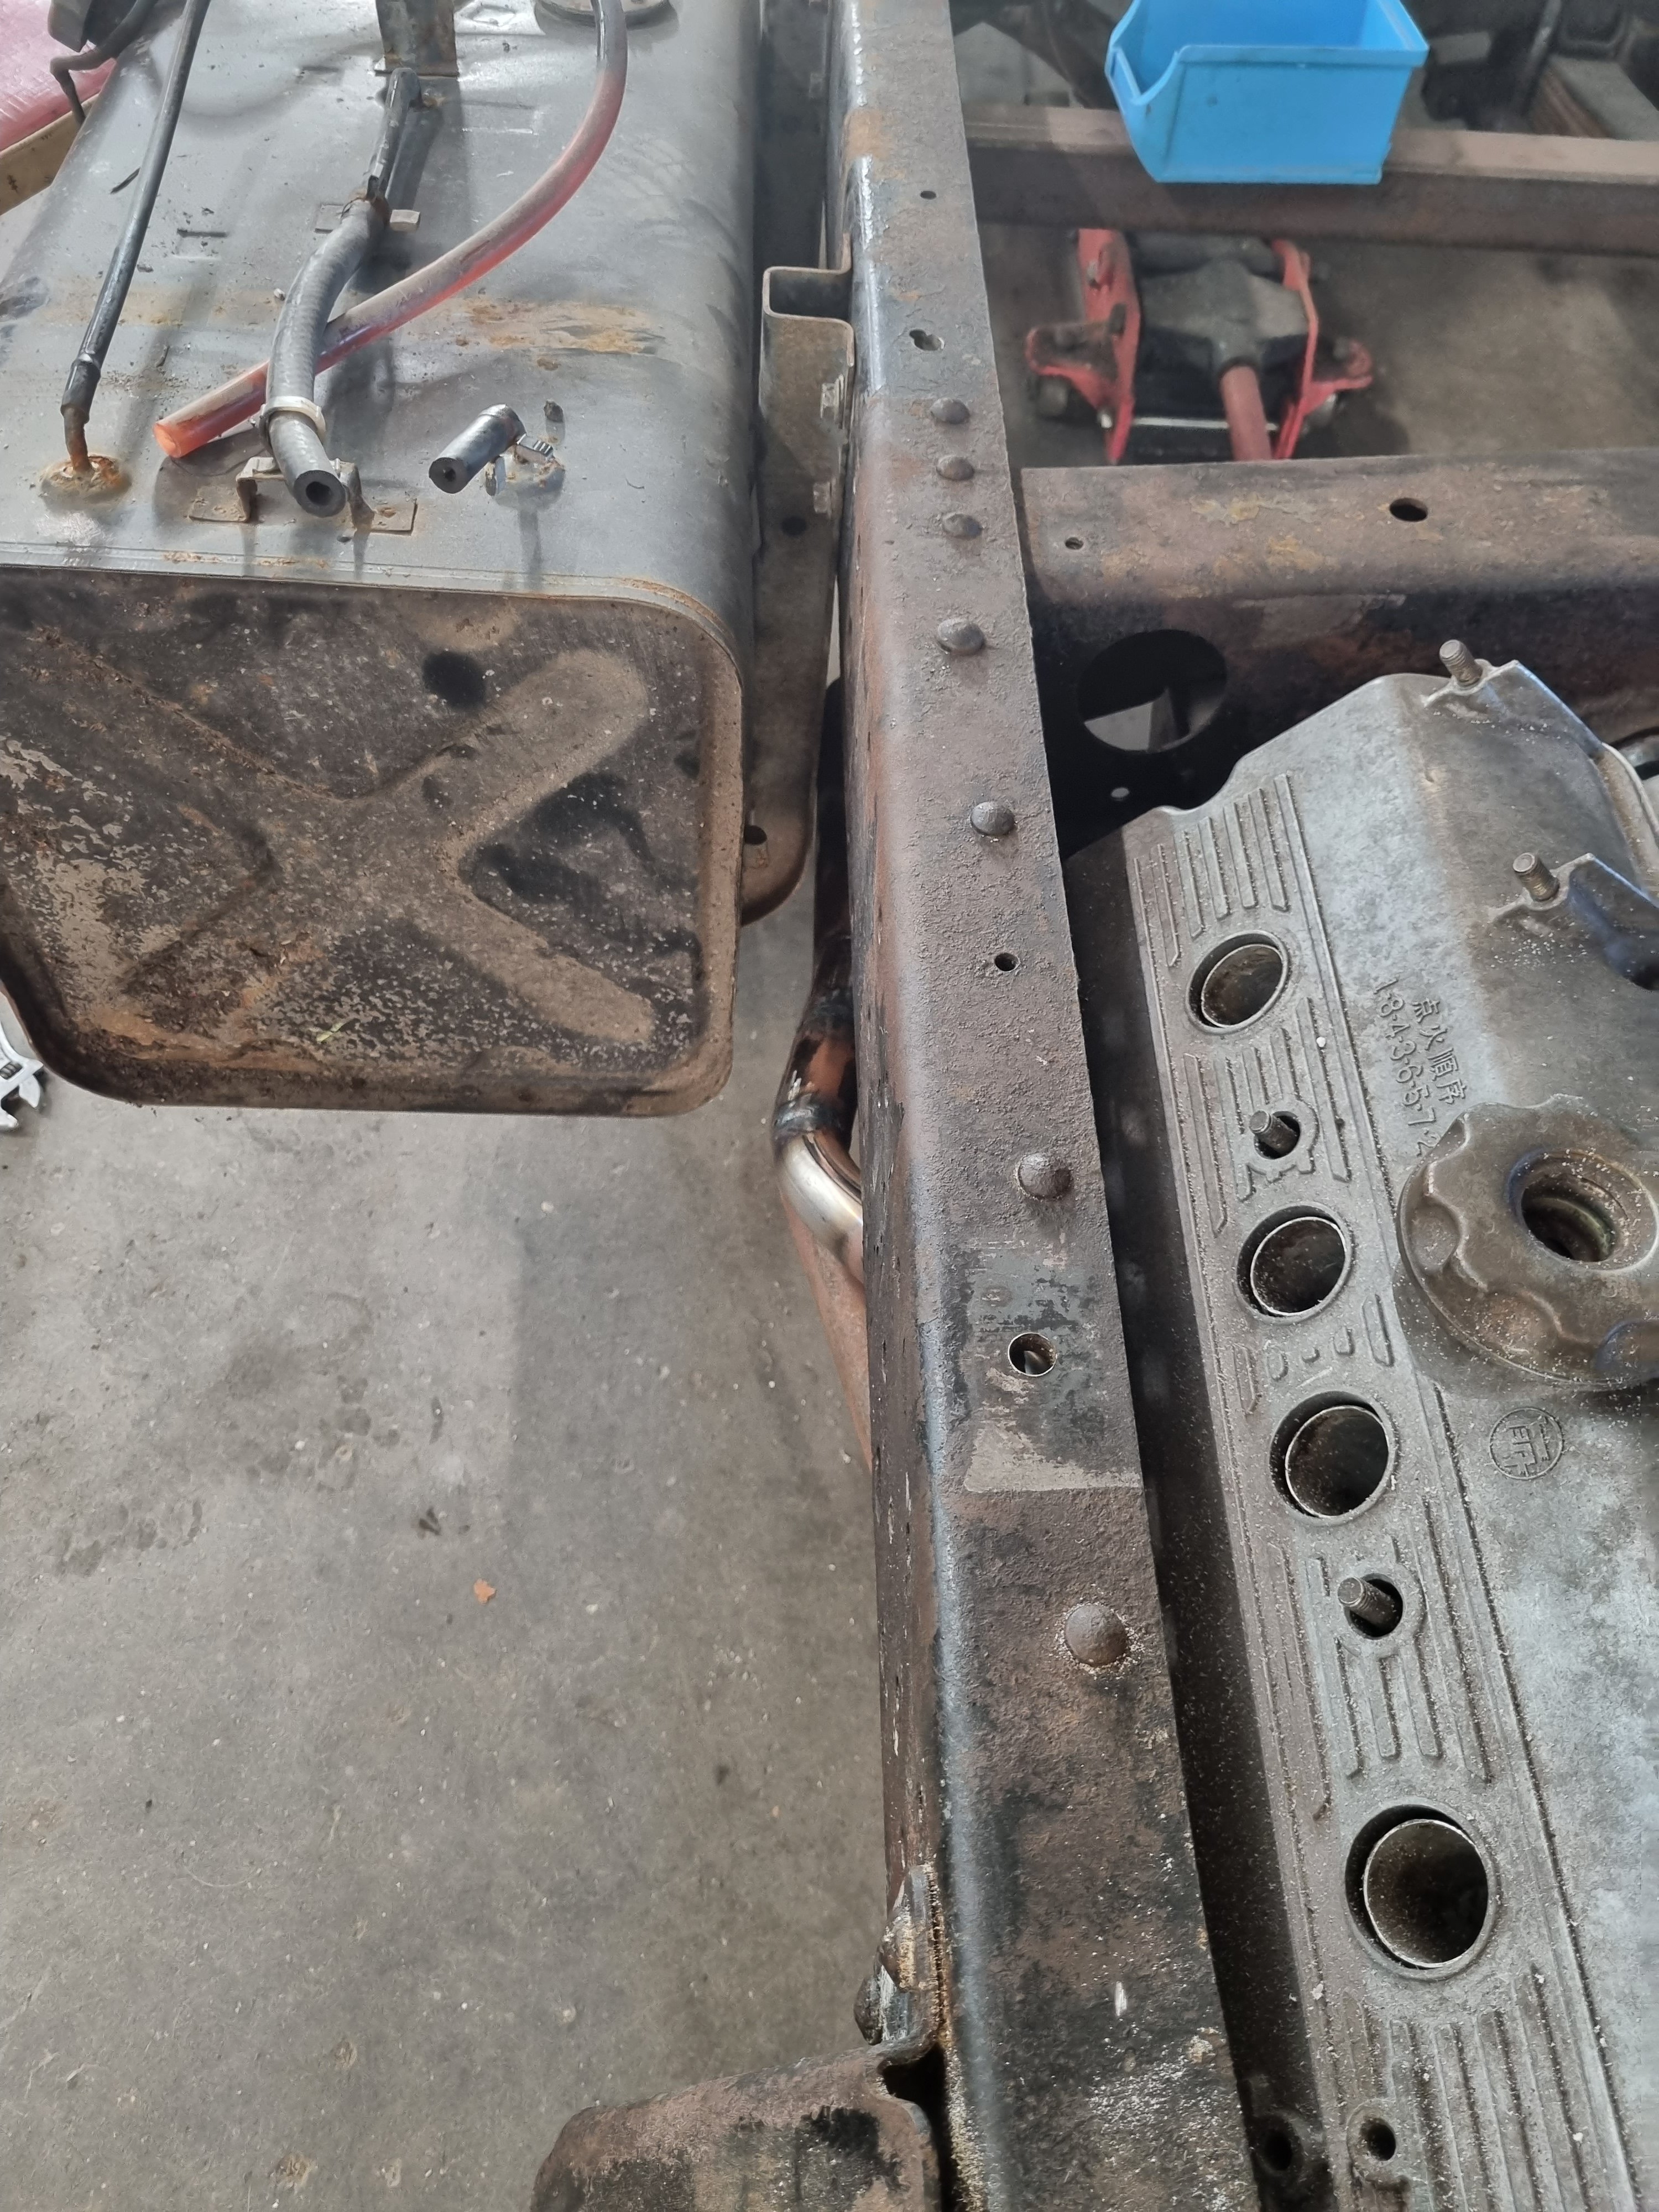
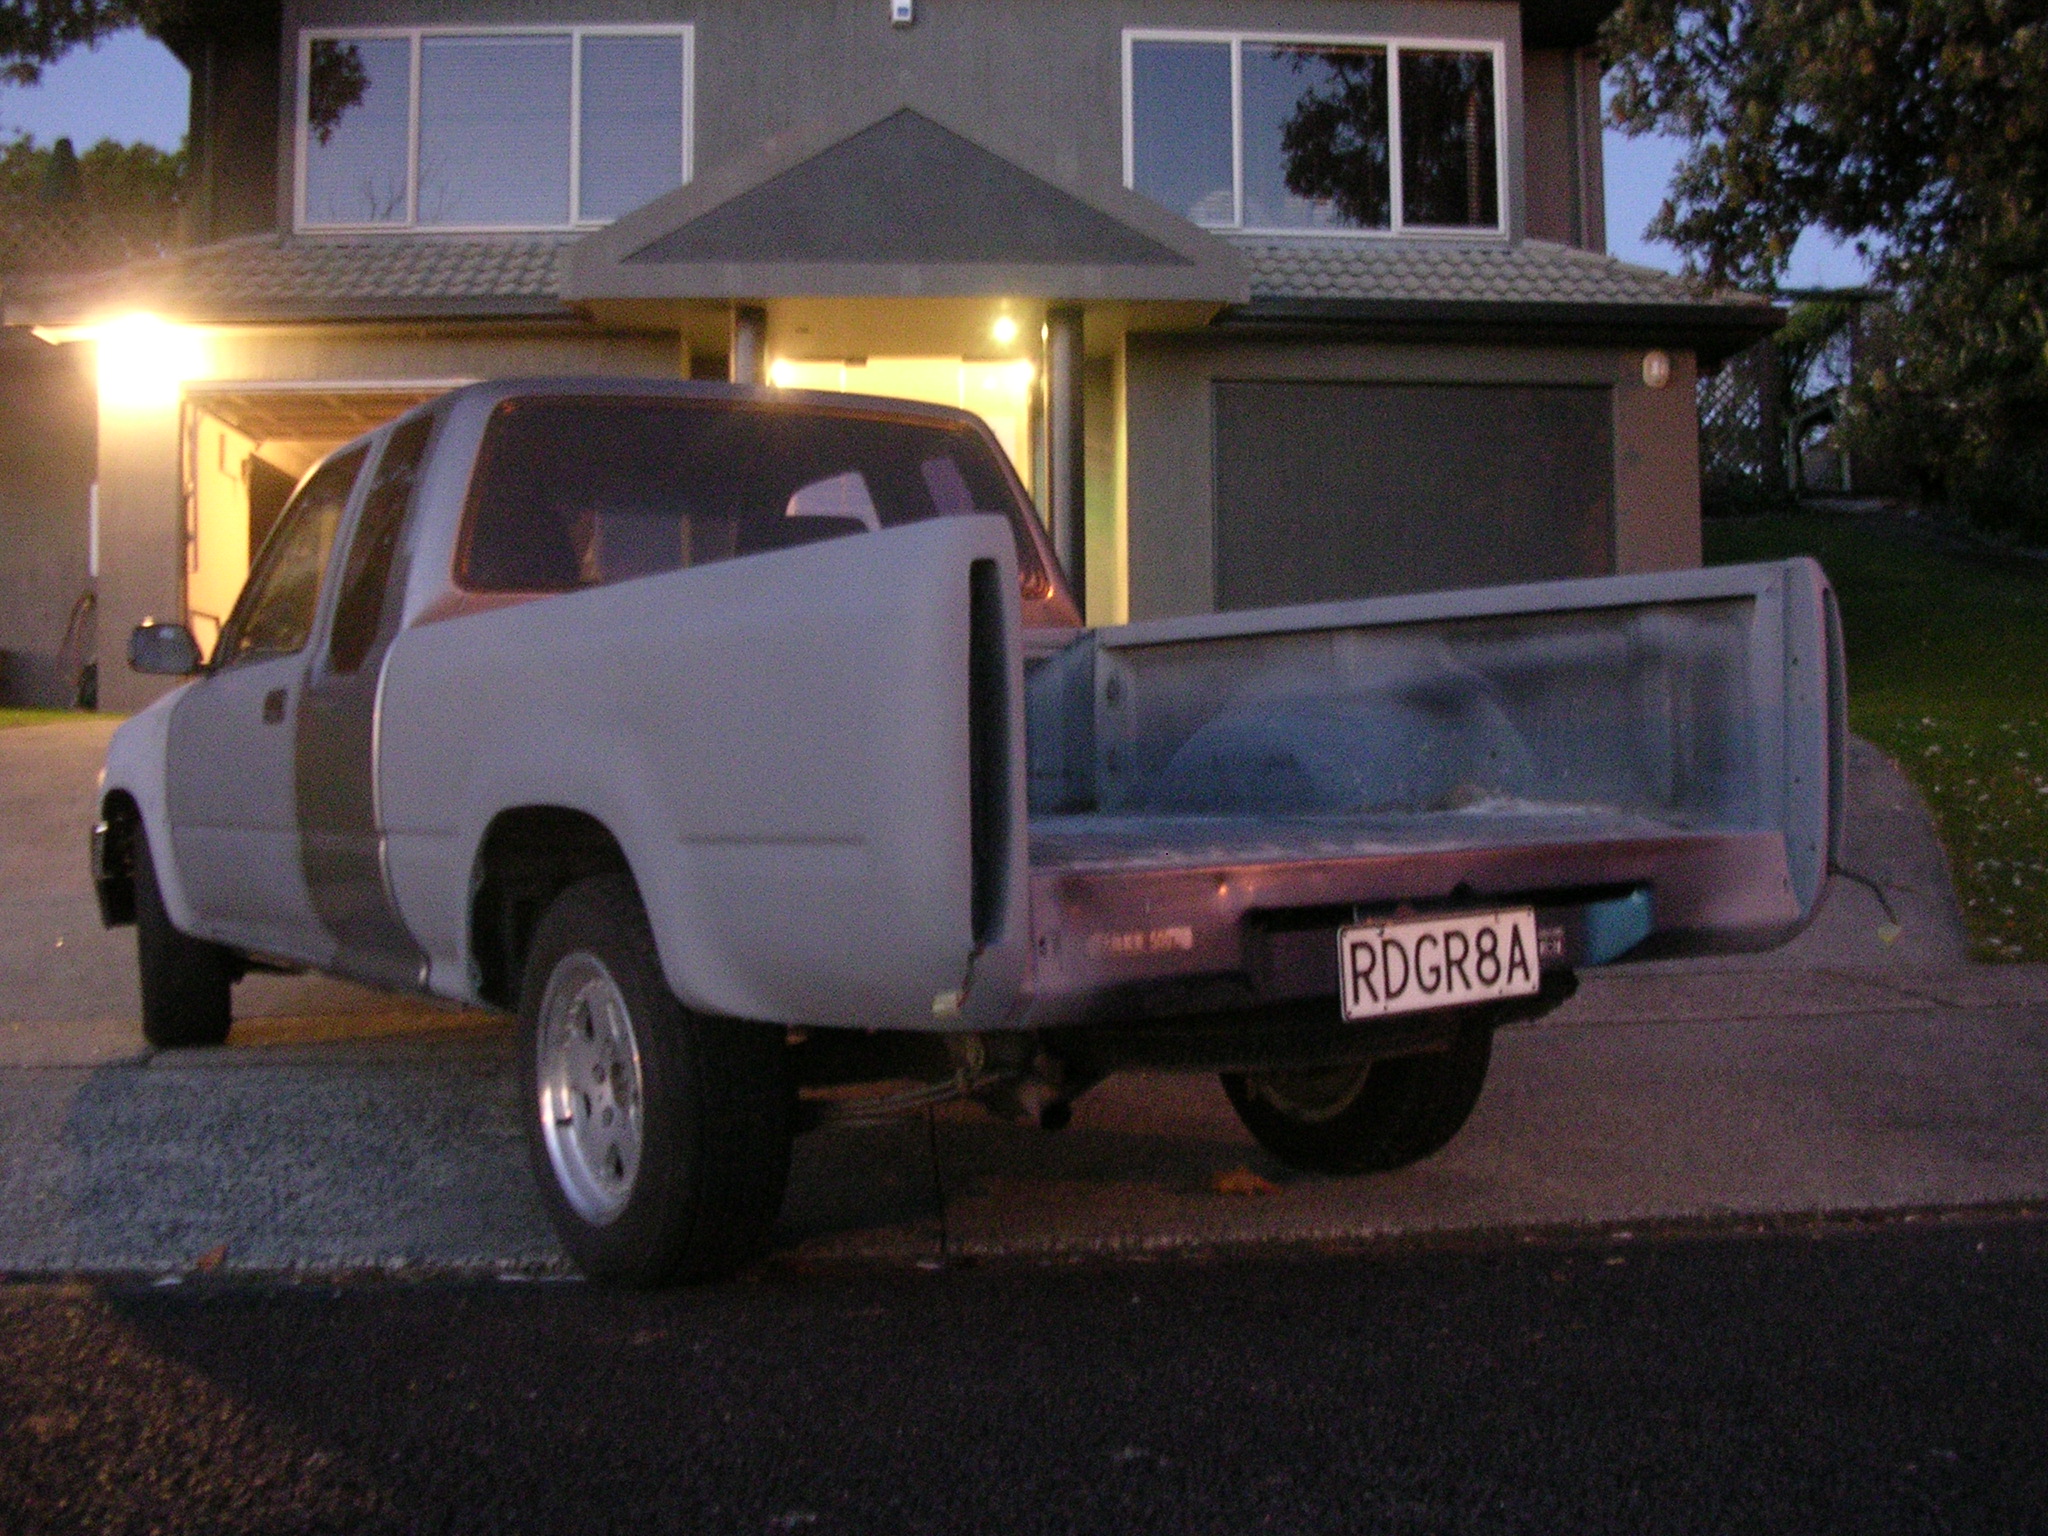
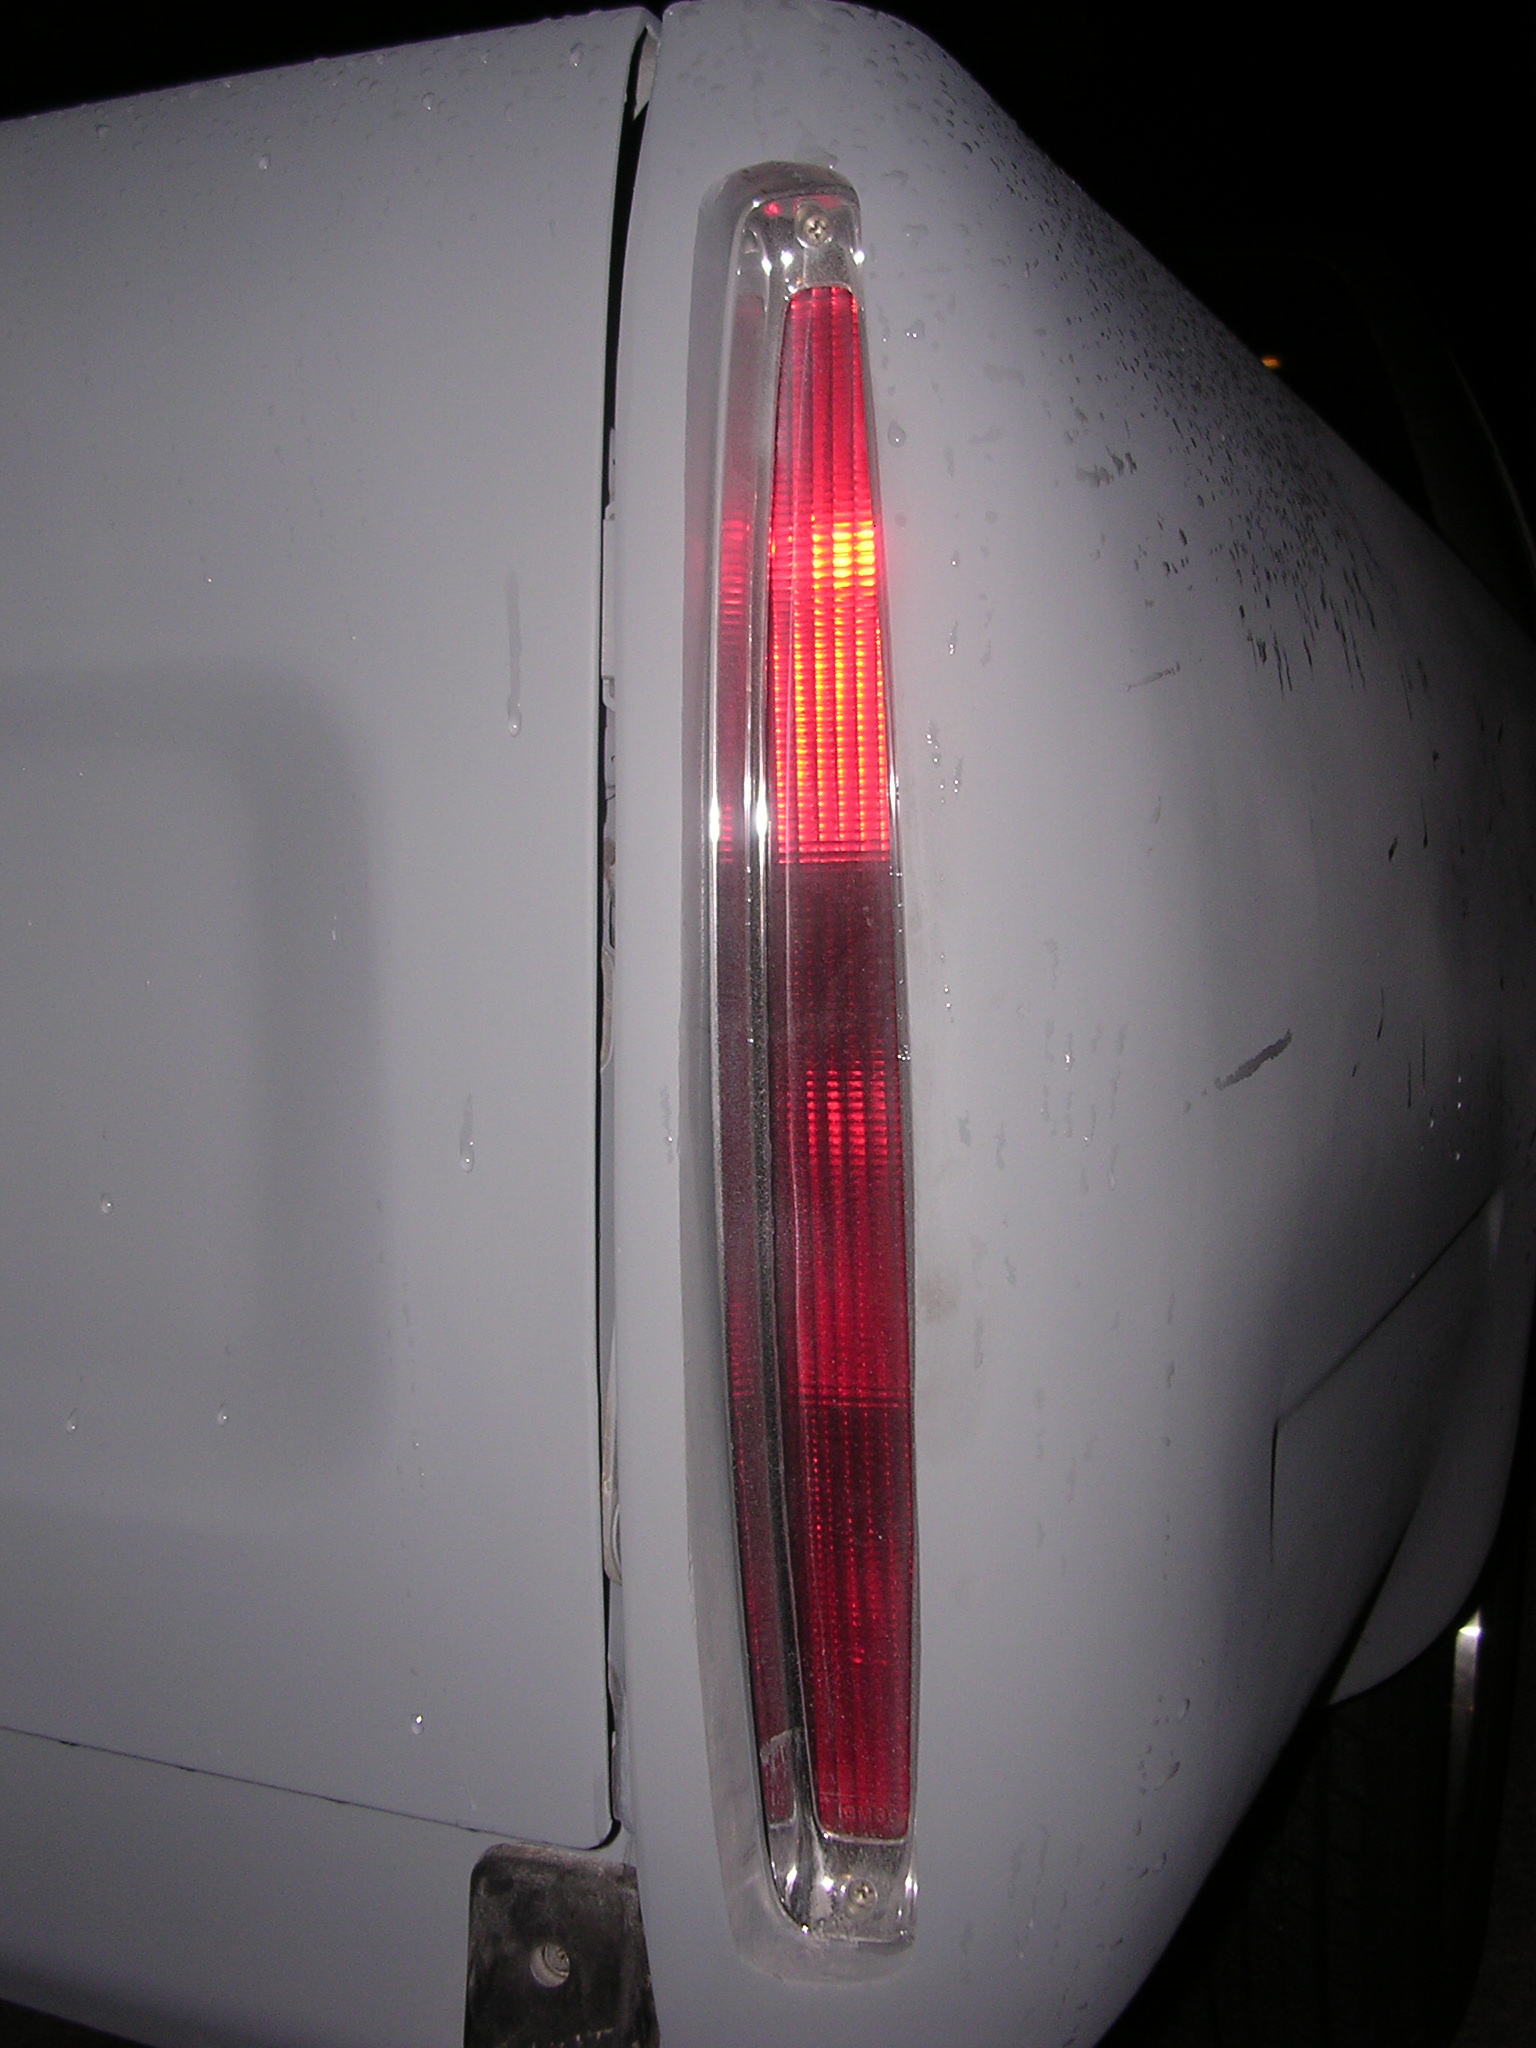
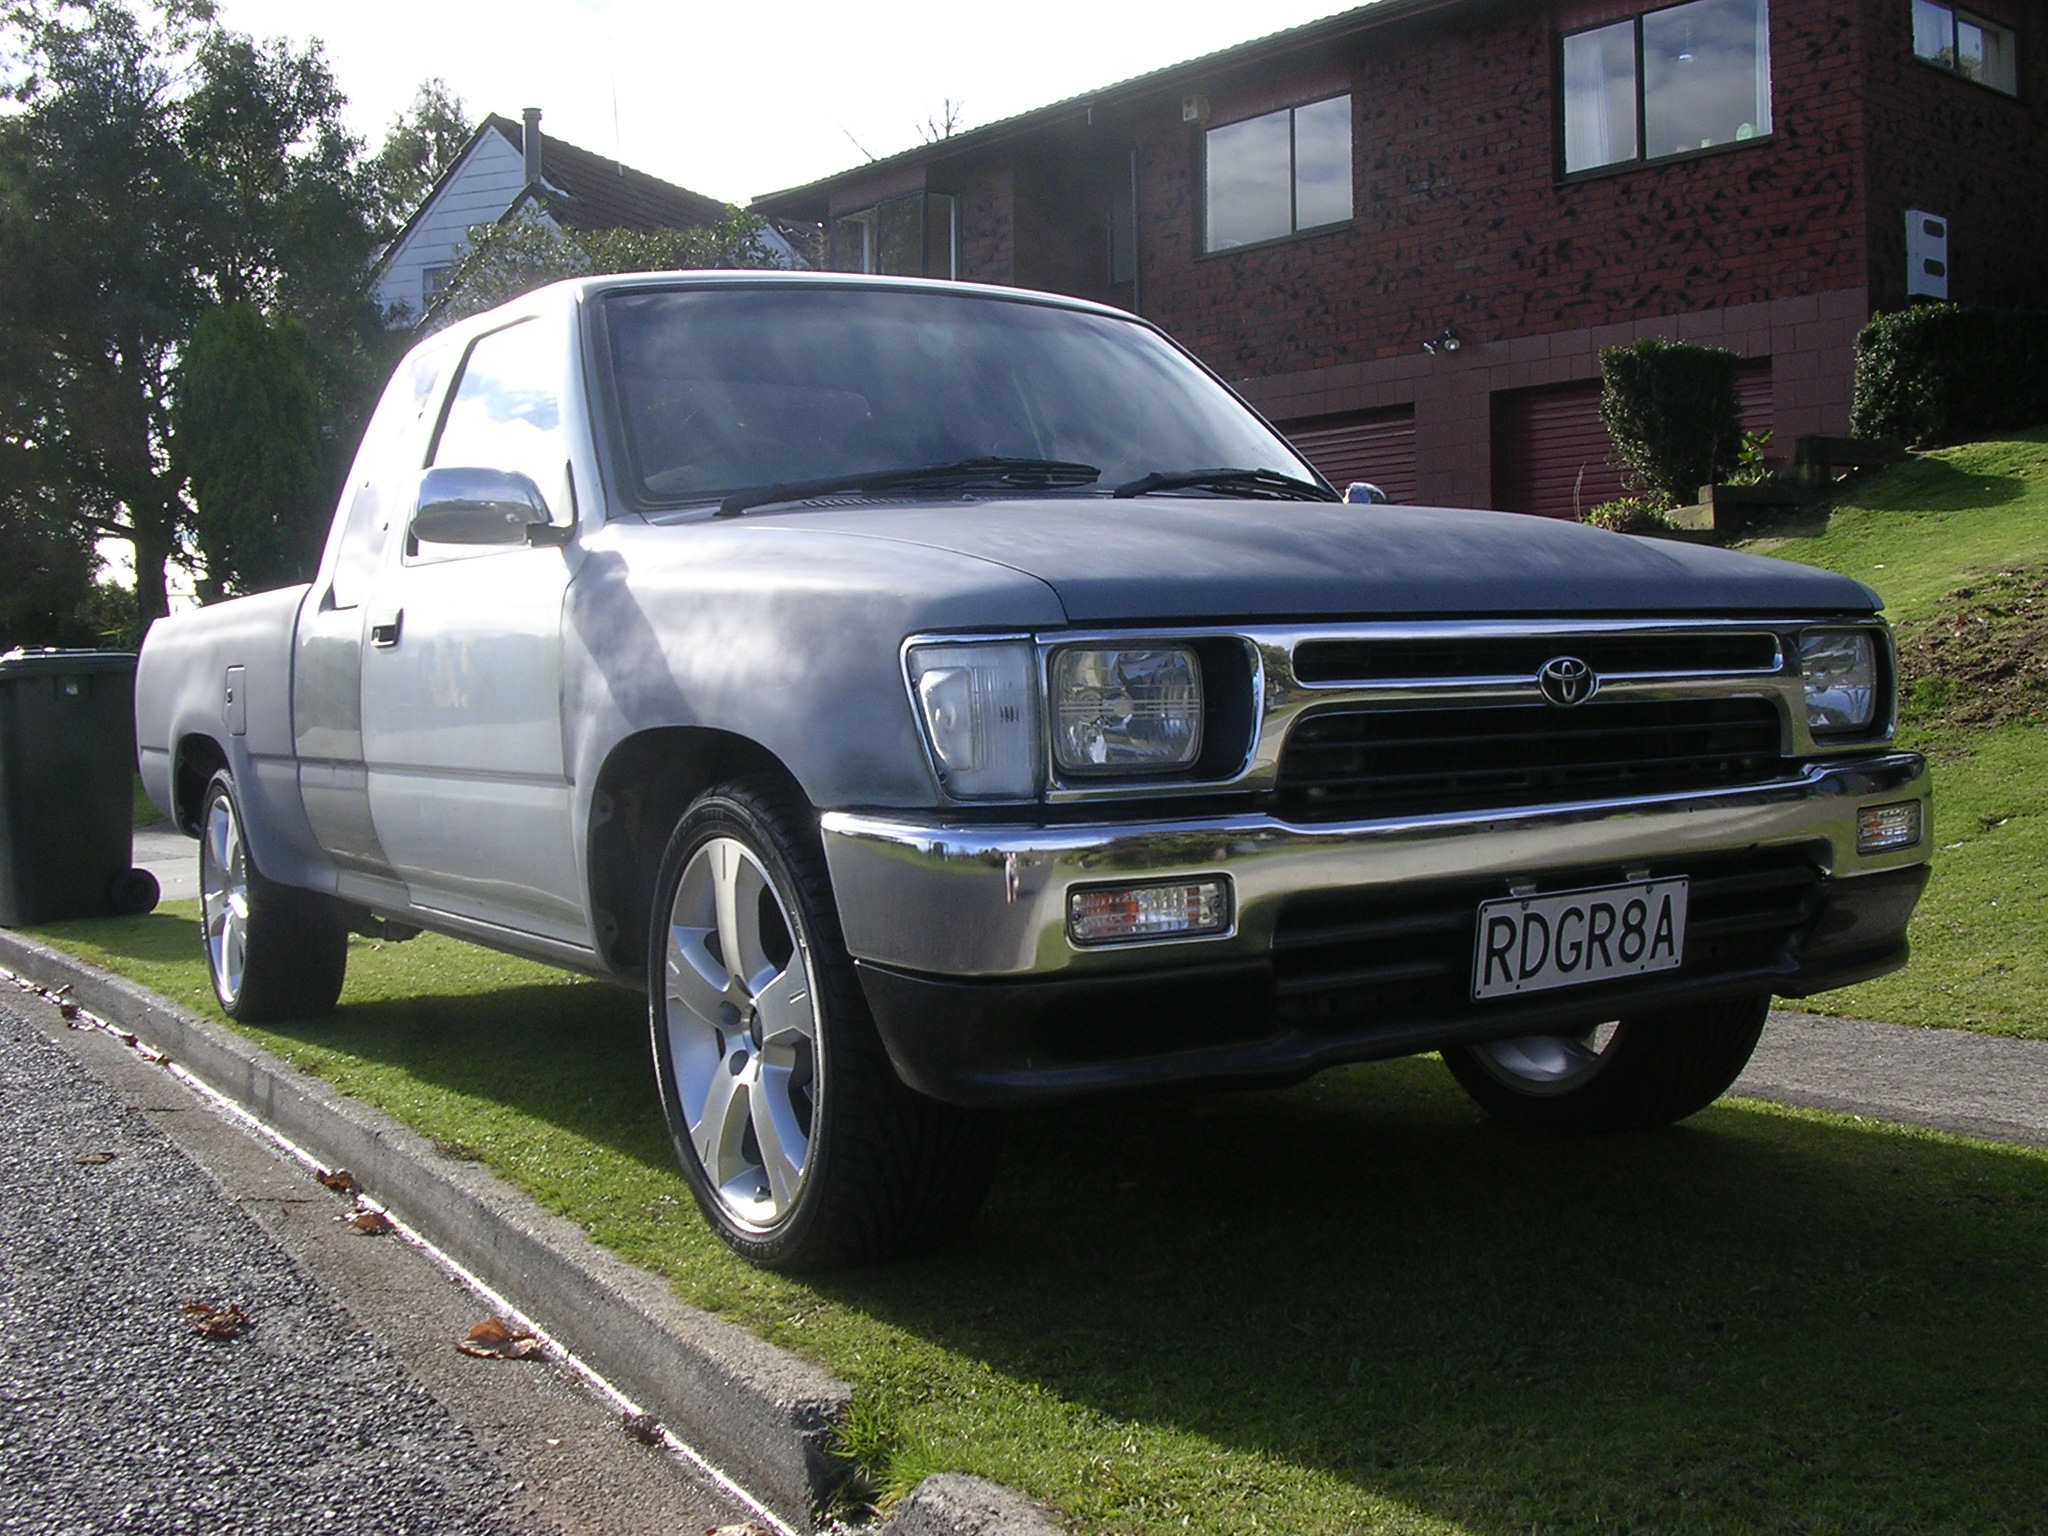
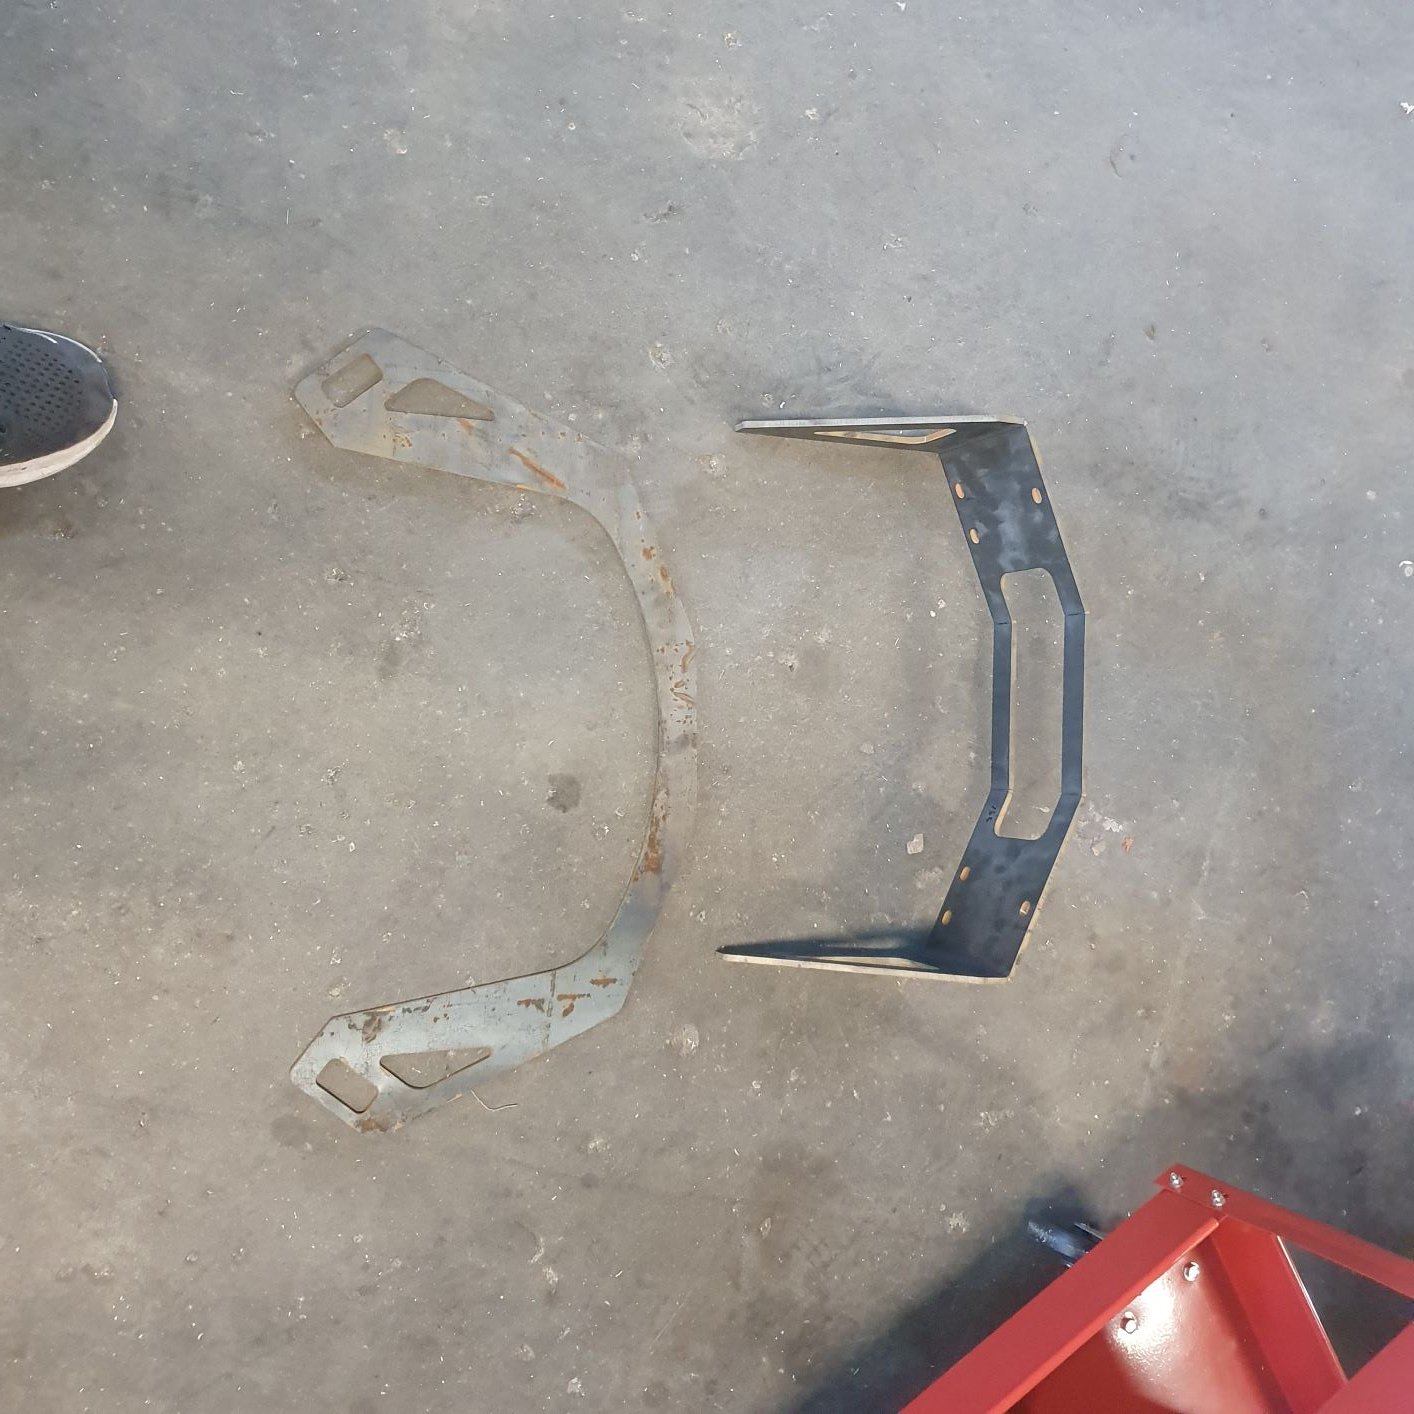
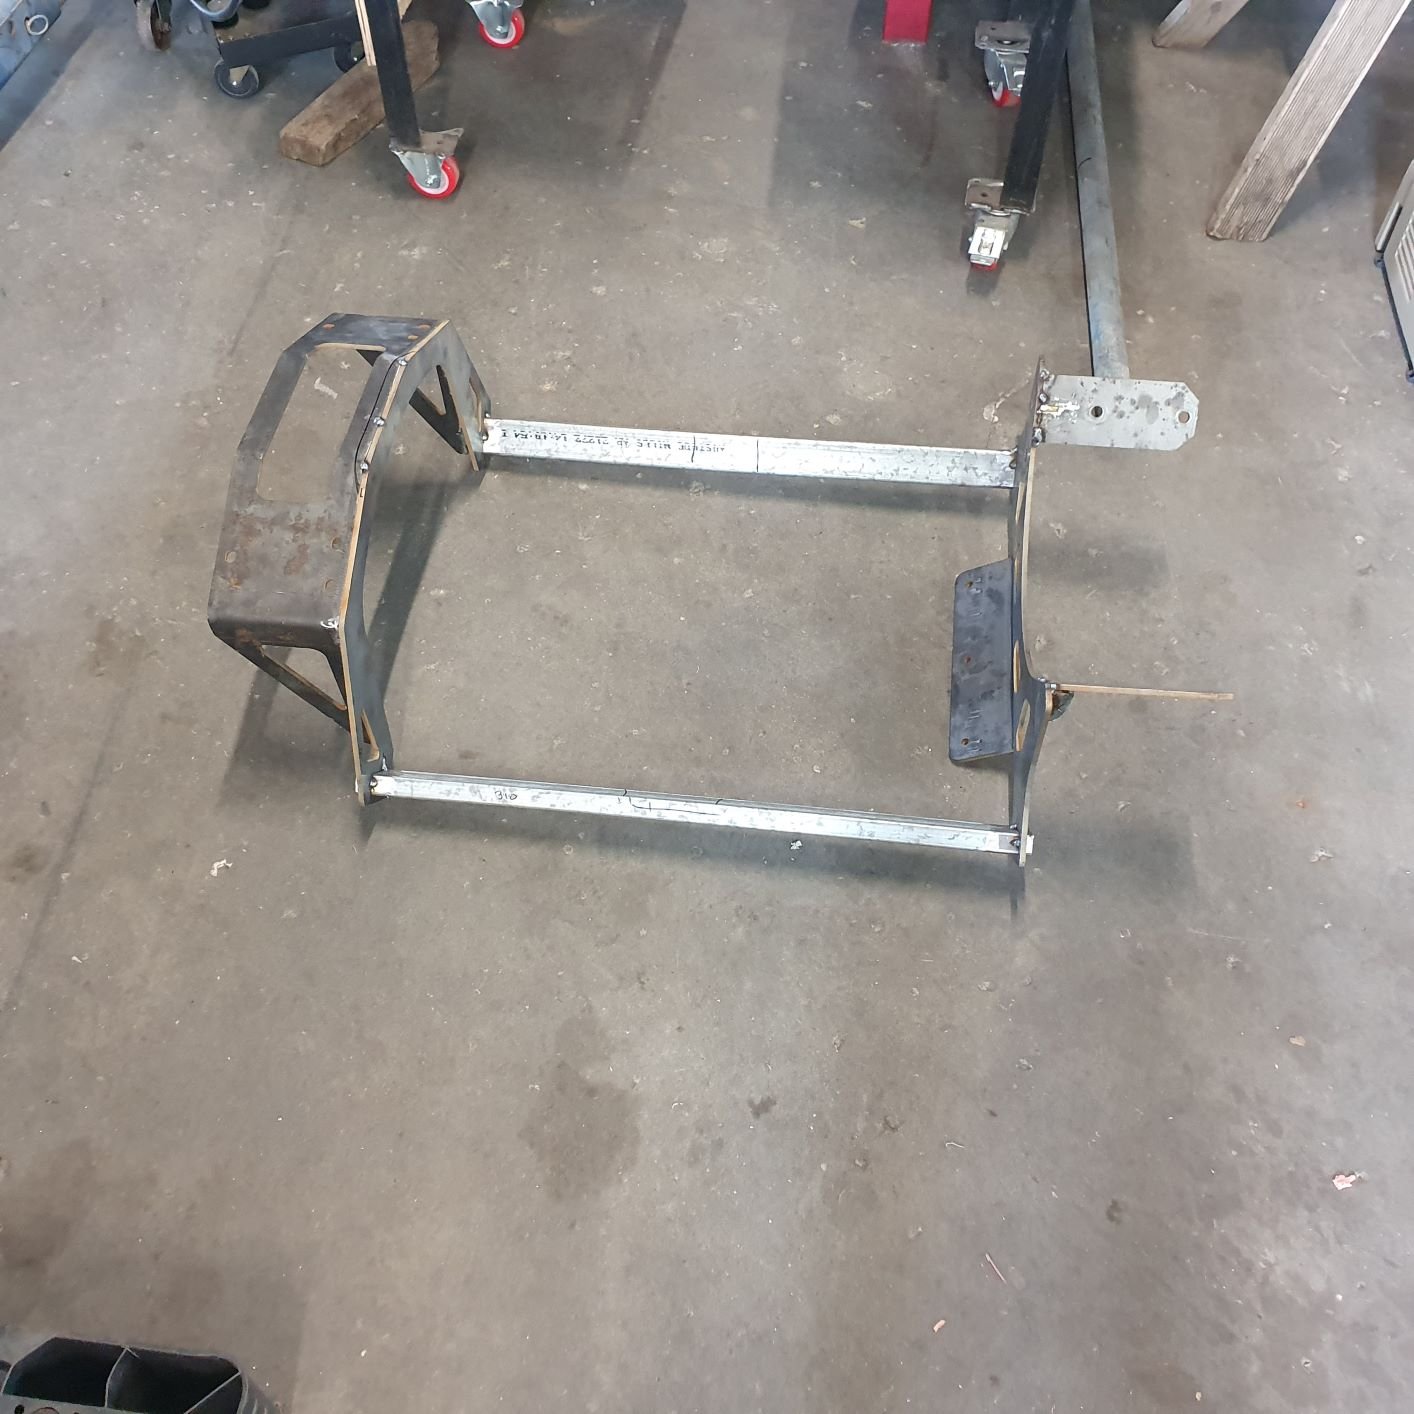
.......A quick back story on the above wellside. But if any of you from the BOP region recall a local commercial wrecker got stung for stealing Hiluxs to part off and sell back in the early 2000s. Well this came from him, I purchased it direct from his property at the time and he met me wearing one of those fancy ankle bracelet's. I later regretted this decision and it cost me financially in the end, but karma perhaps? I later cut my losses and scrapped it, I kept one side for a bit of shed art and Matt kept the other side for his shop art You may laugh at the ride height, but believe it or not I never "lowered" the truck before the next phase of the build which was the air ride conversion. More on that on a further update.
1 point
-
Be forewarned, this rabbit hole is a lot deeper and wider that you can possibly imagine............1 point
-
Welcome to being a small bike pest Alex! ONE OF US! ONE OF US! ONE OF US! ONE OF US! ONE OF US!1 point
-
You do some very very nice work! Looks awesome!1 point
-
Few more steps in the right direction...
1 point
-
Large order of RockAuto parts arrived. New balljoints, front and rear bushes, swaybar links, and tierod ends. Bought some personalized plates for it. Never really a big fan of personalized plates but these look rather factory being 3 numbers and 3 letters. They don't fit the rear and the fuel filler is behind them so rather not run bent or cut plates. I hate the thick lettering they have compared to the OG black plates too, so bought some american style ones yet to arrive (not the horrendous kiwiplates ones lol). "60 4door hardtop" for those that couldn't figure it out haha.1 point
-
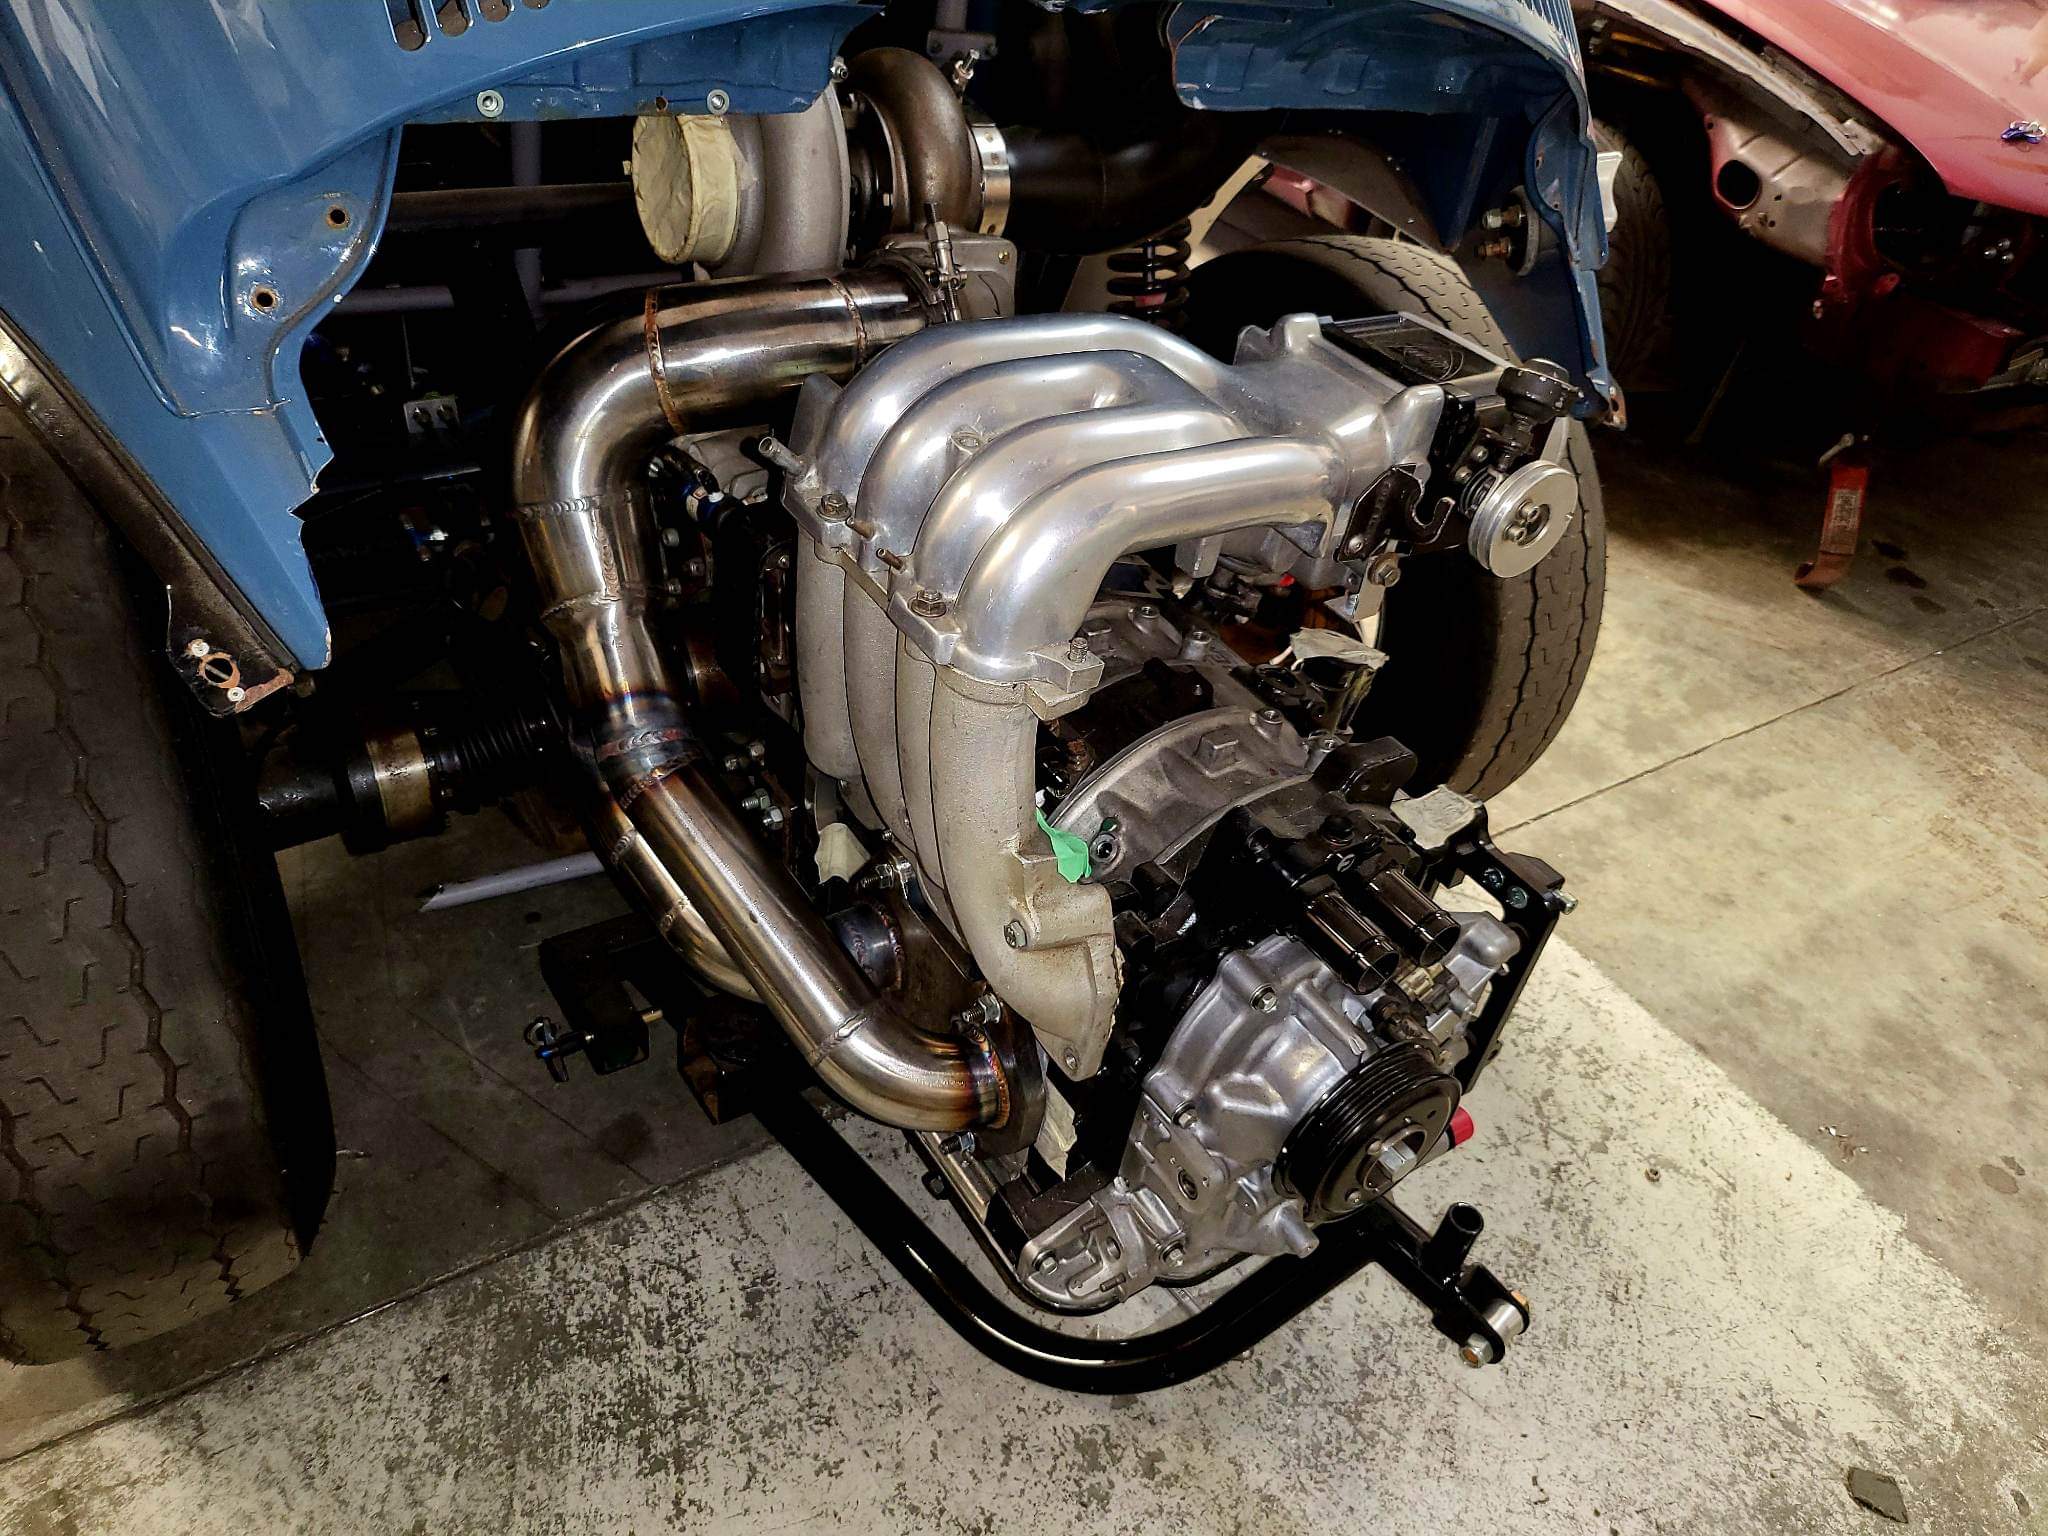
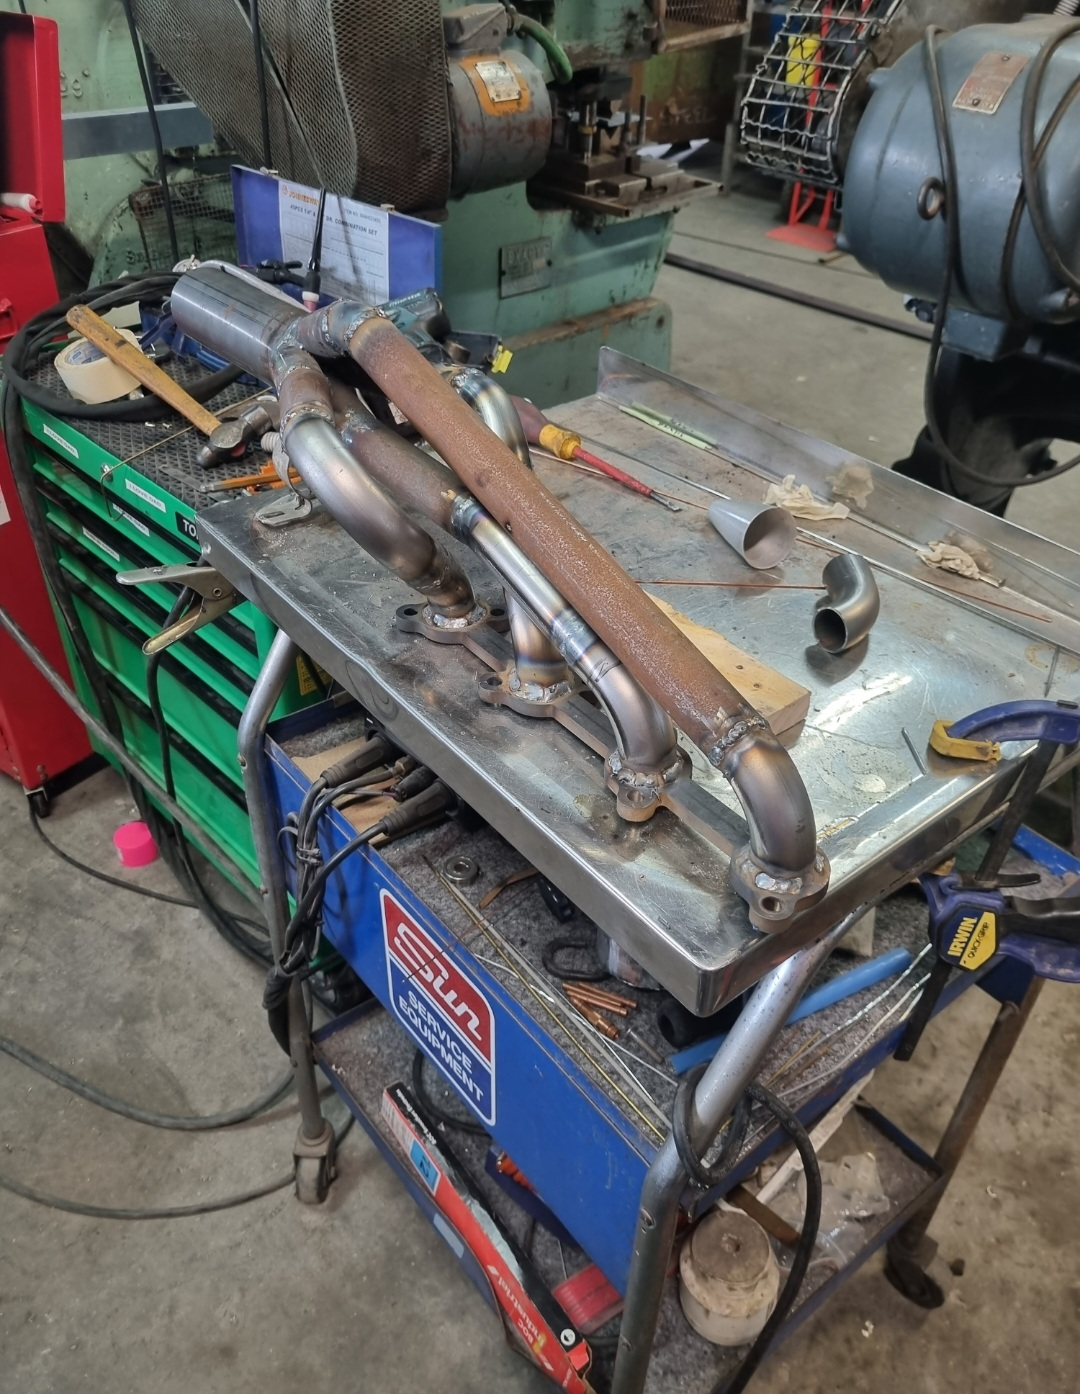
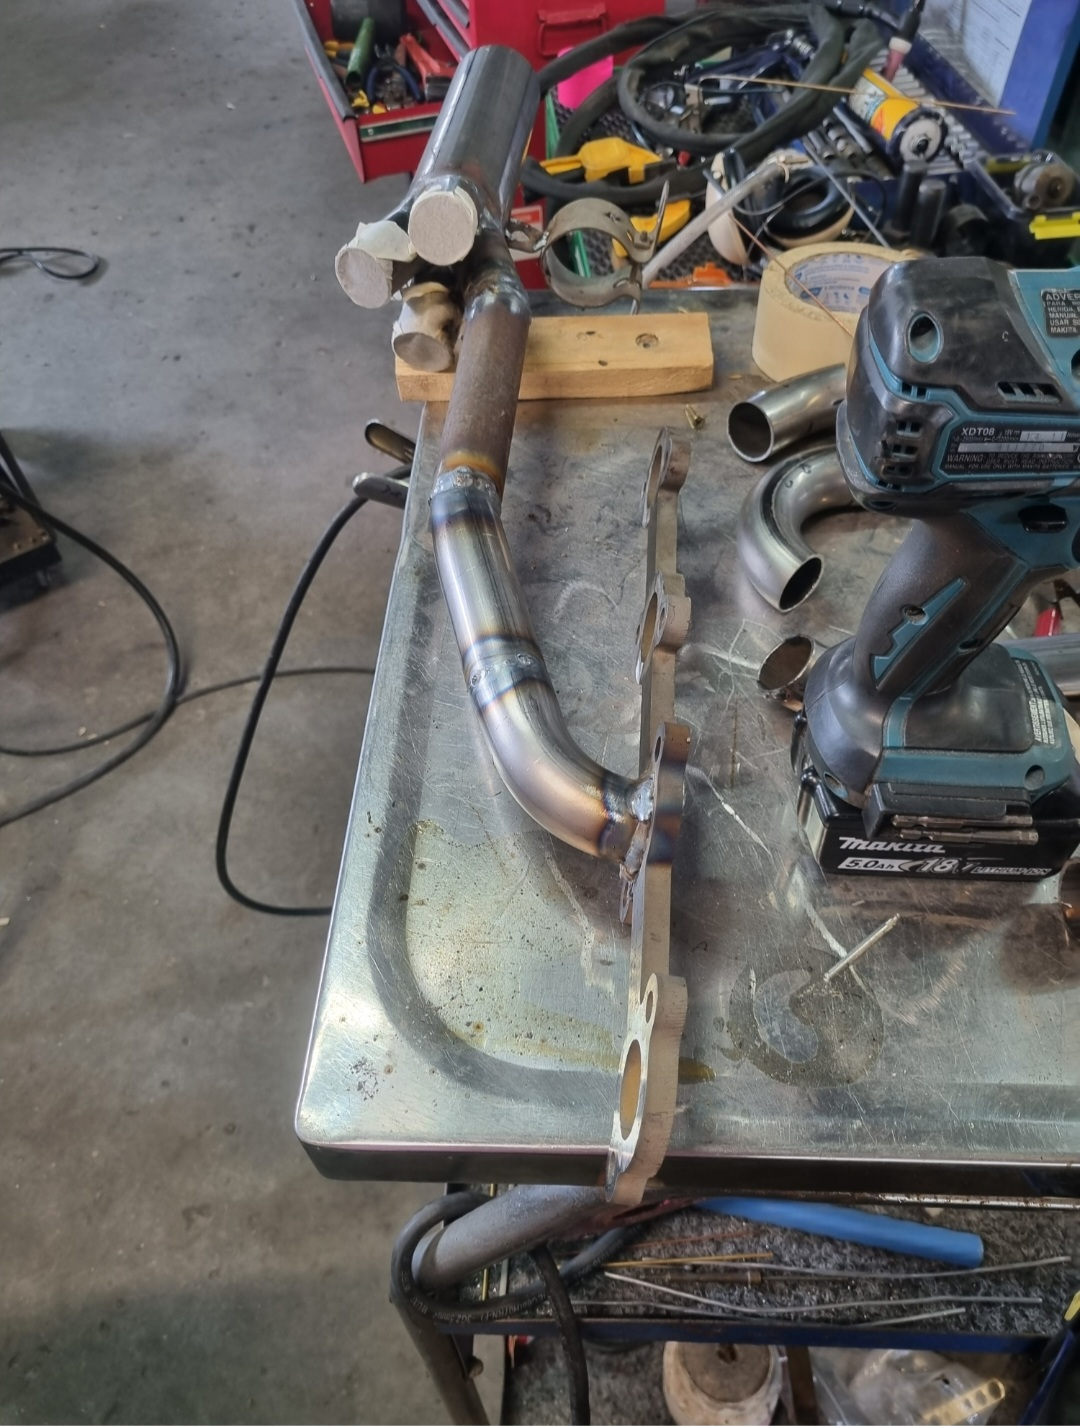
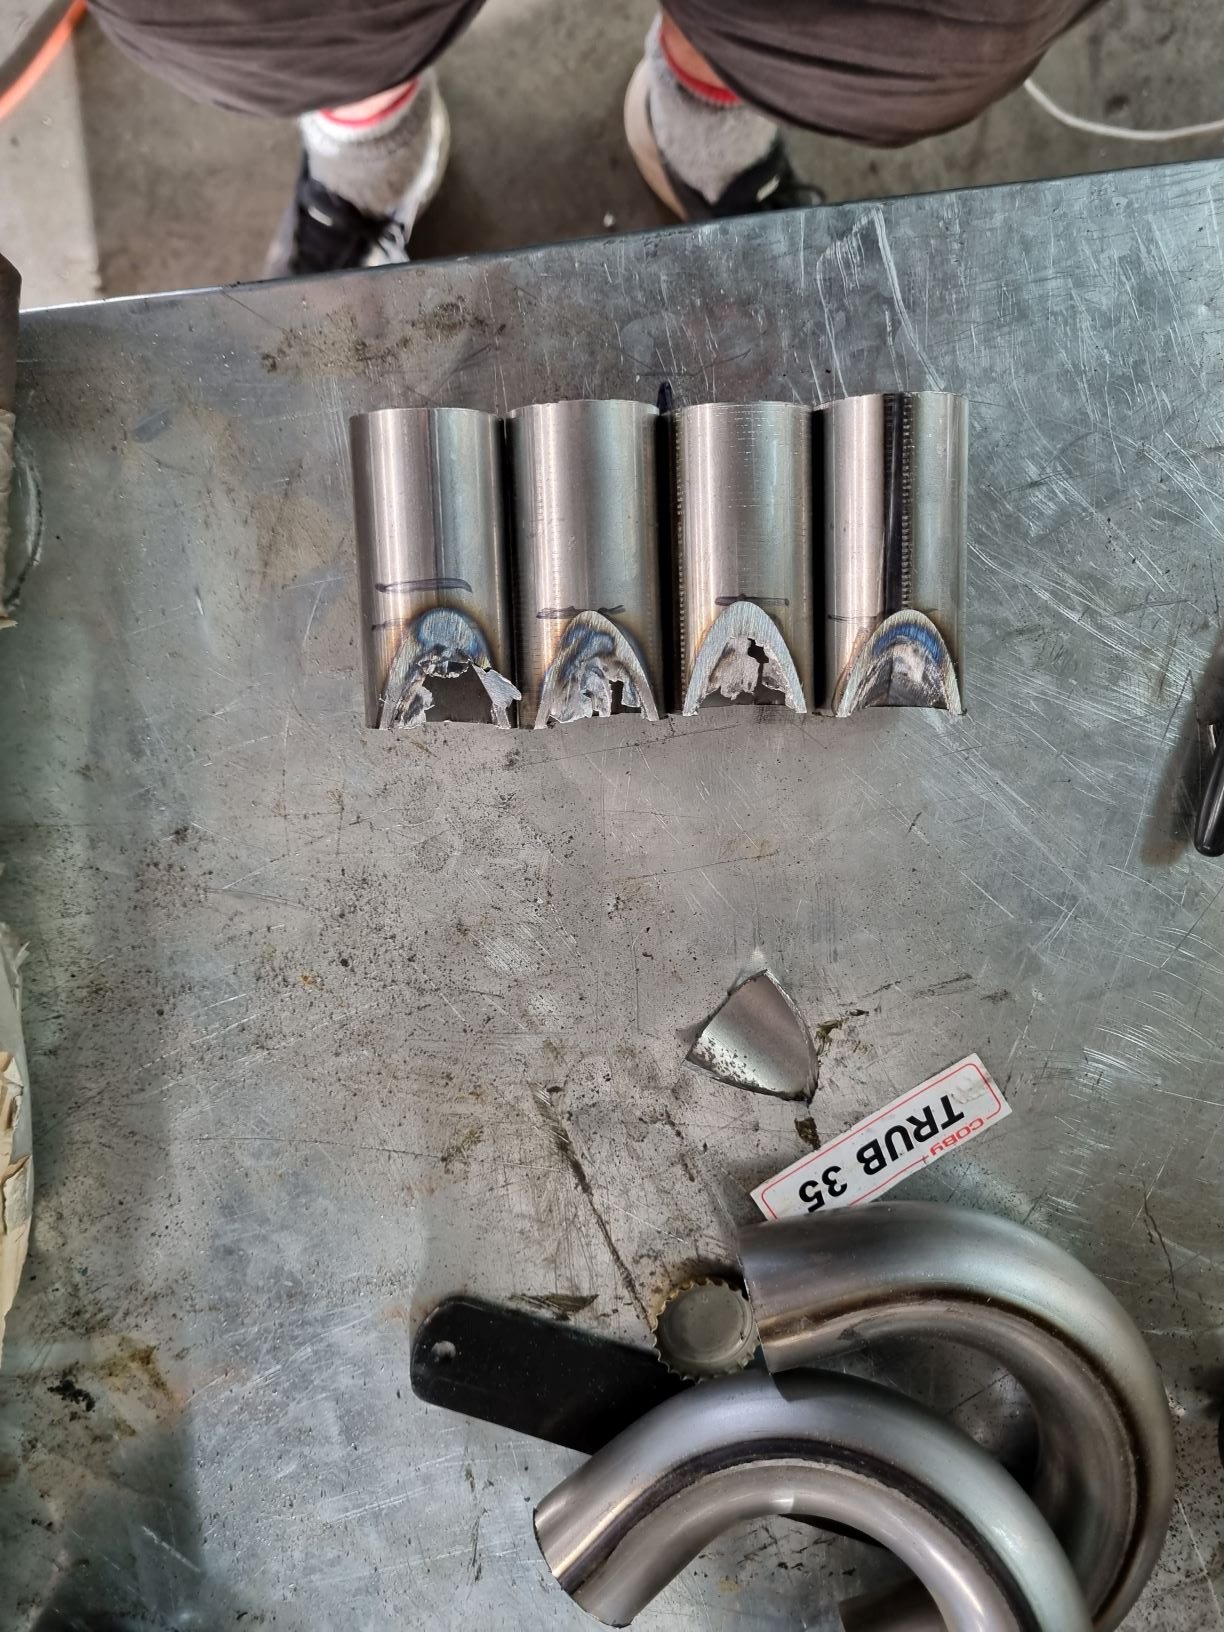
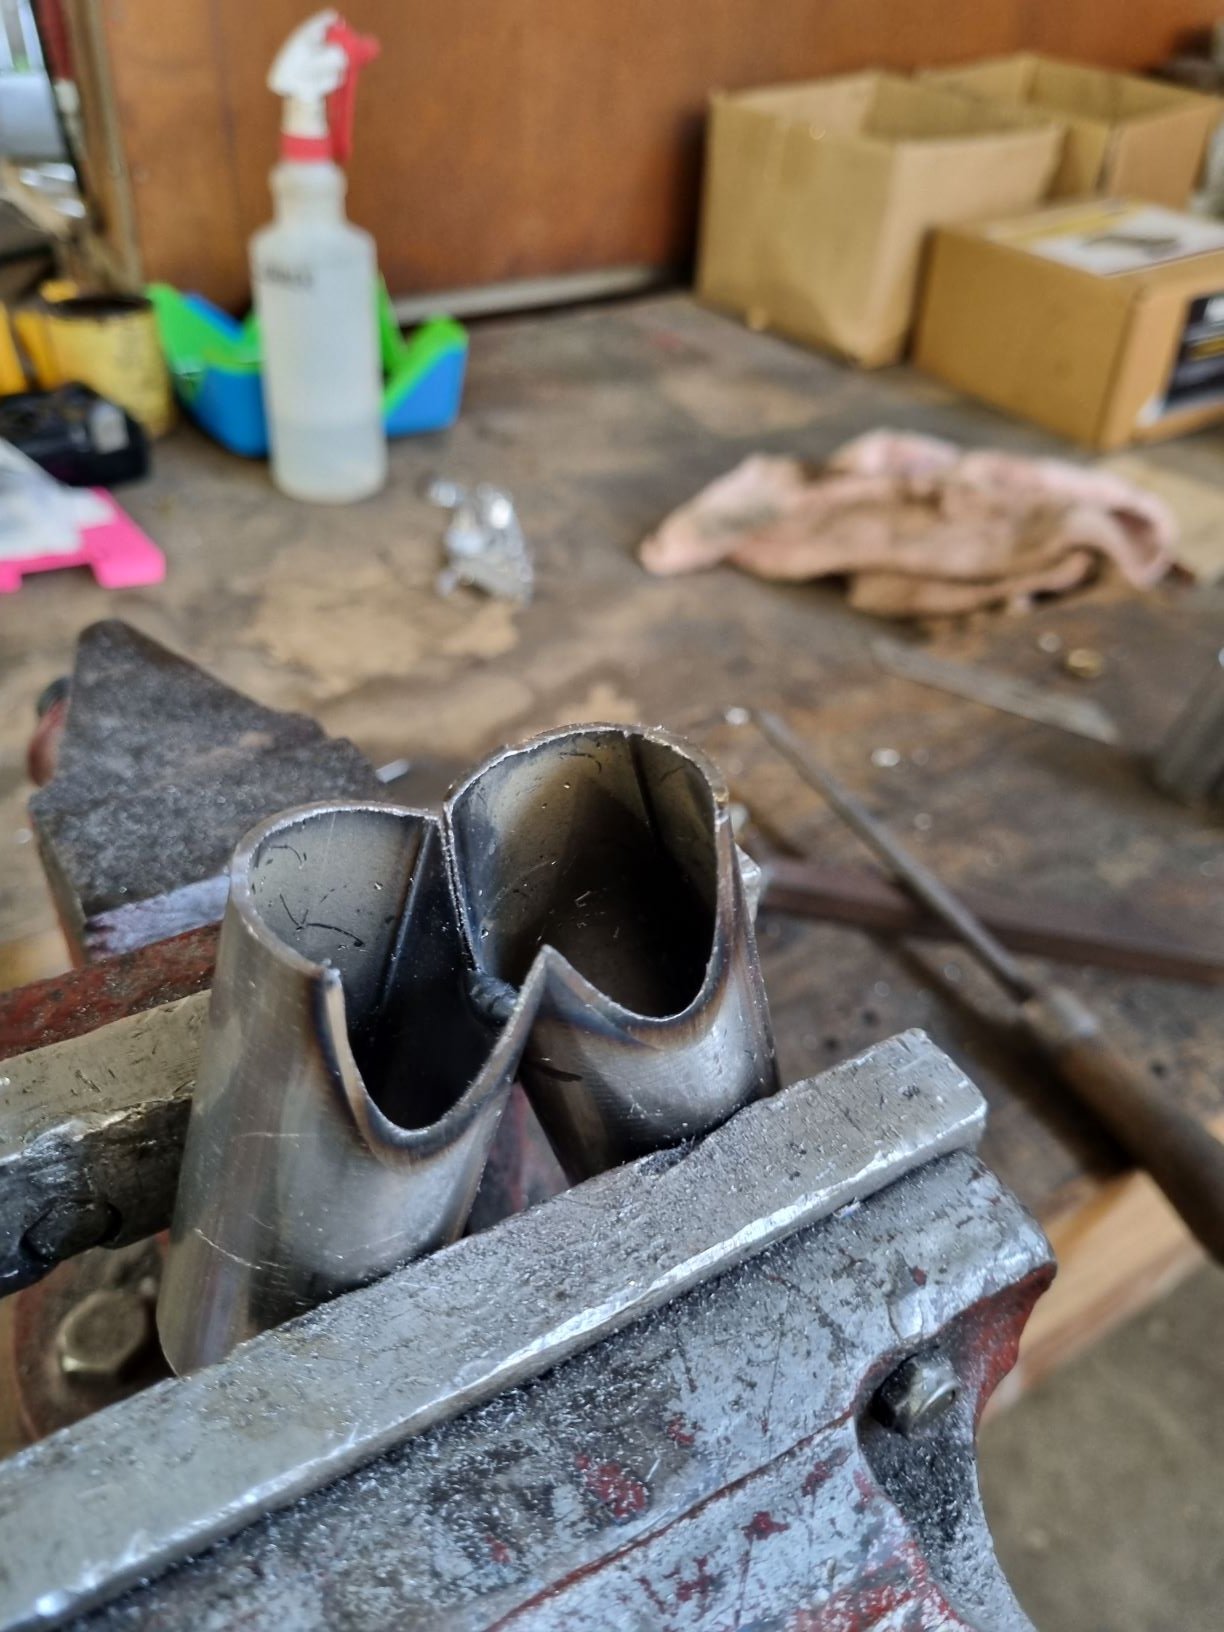
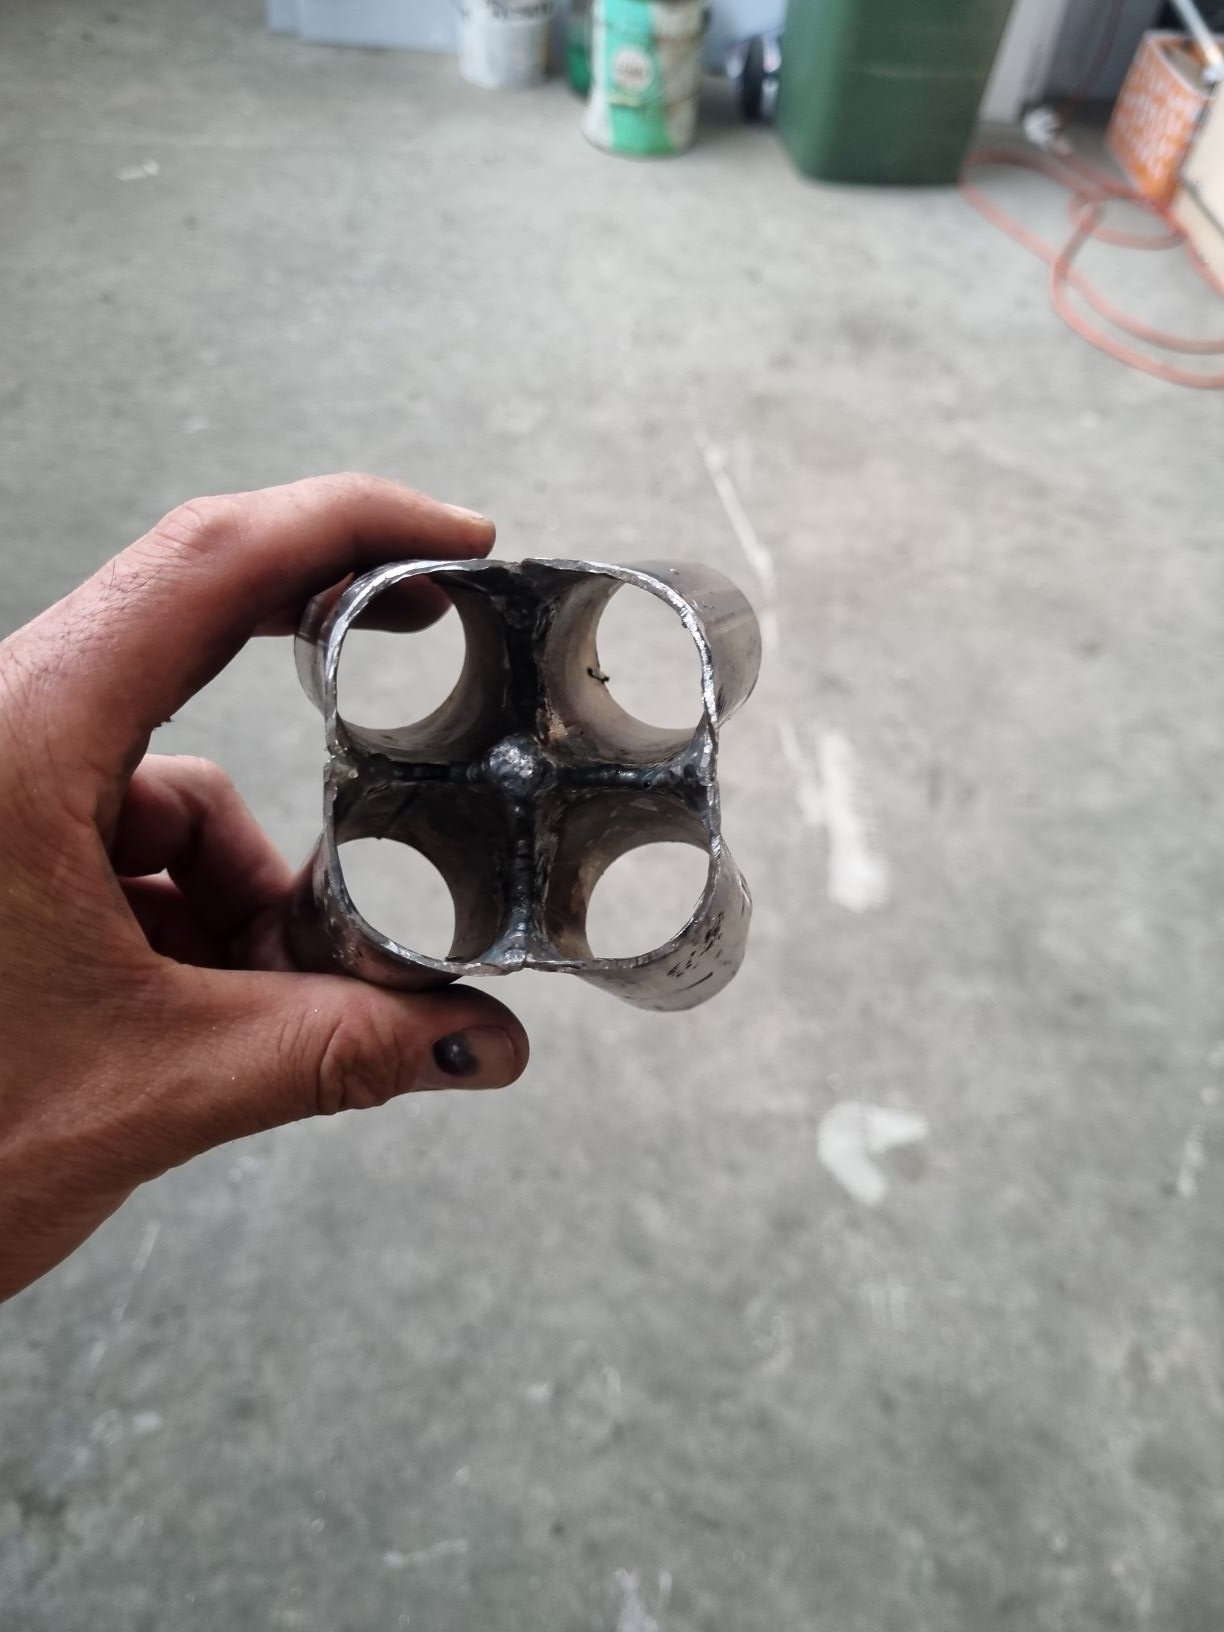
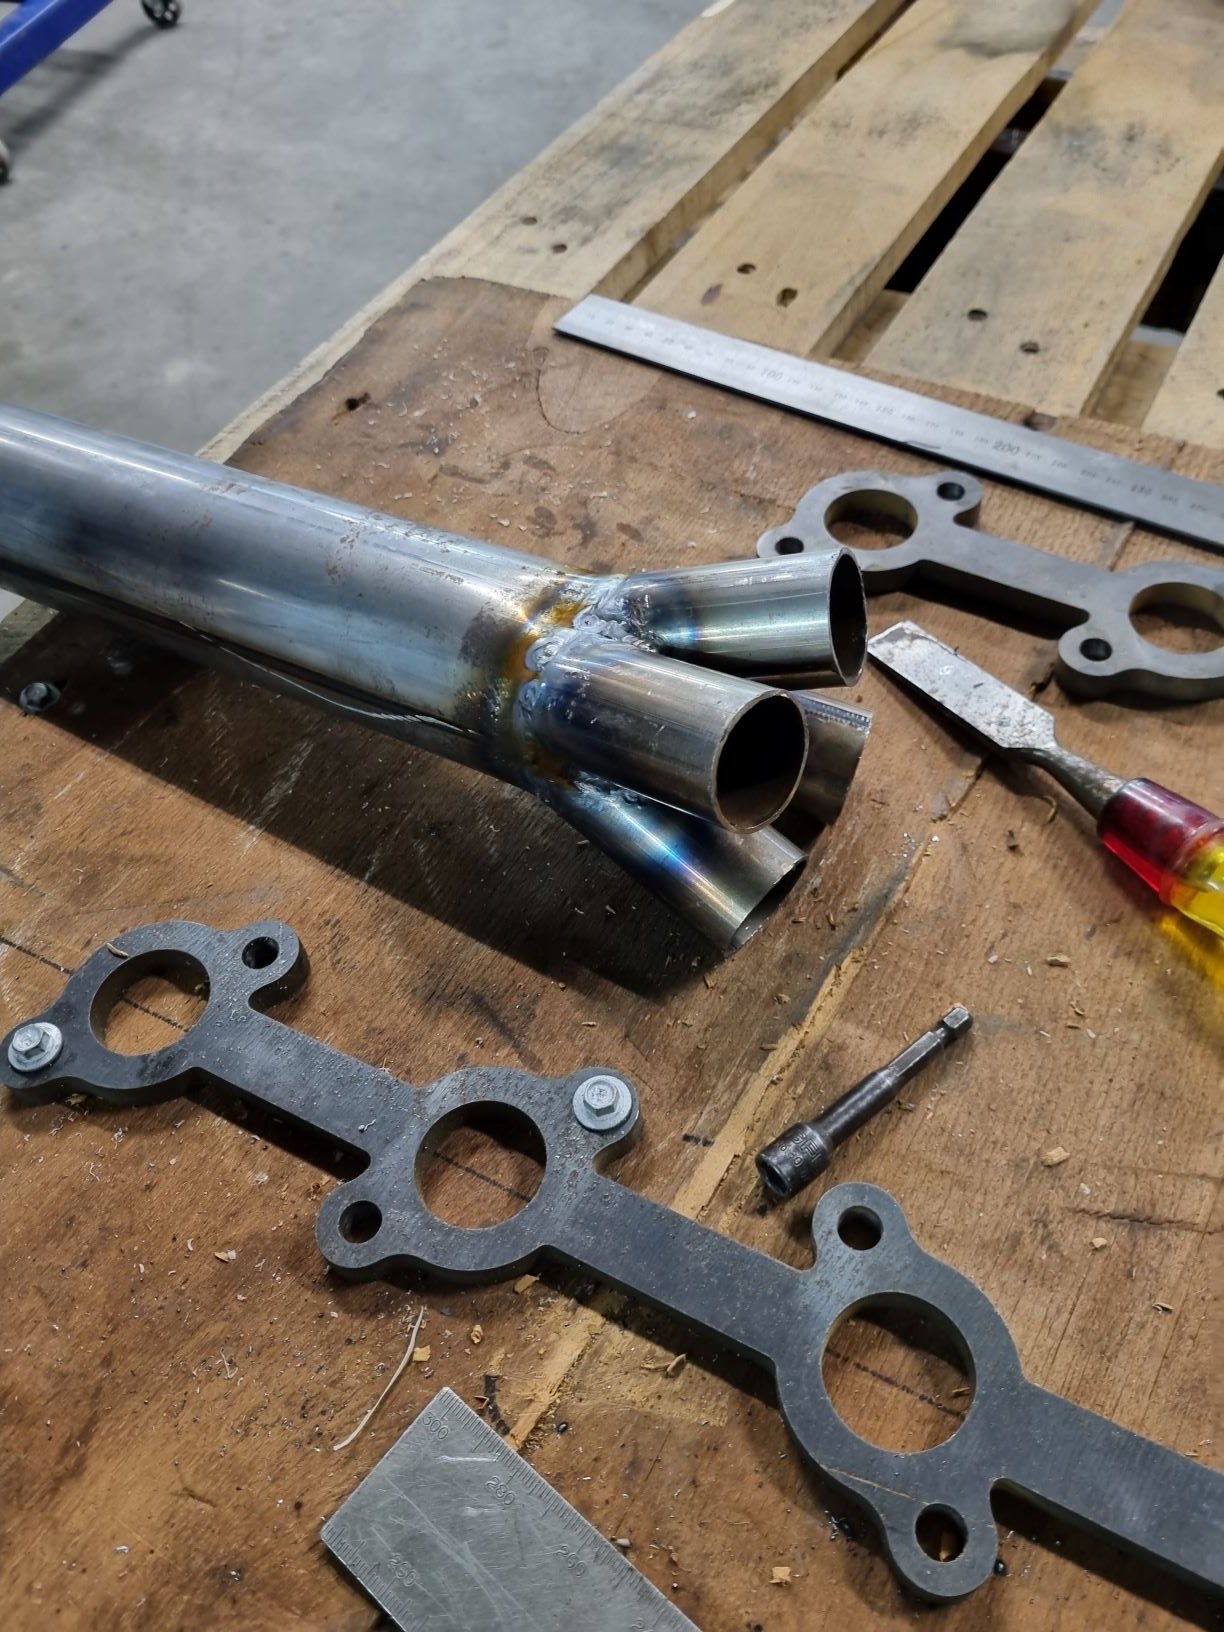
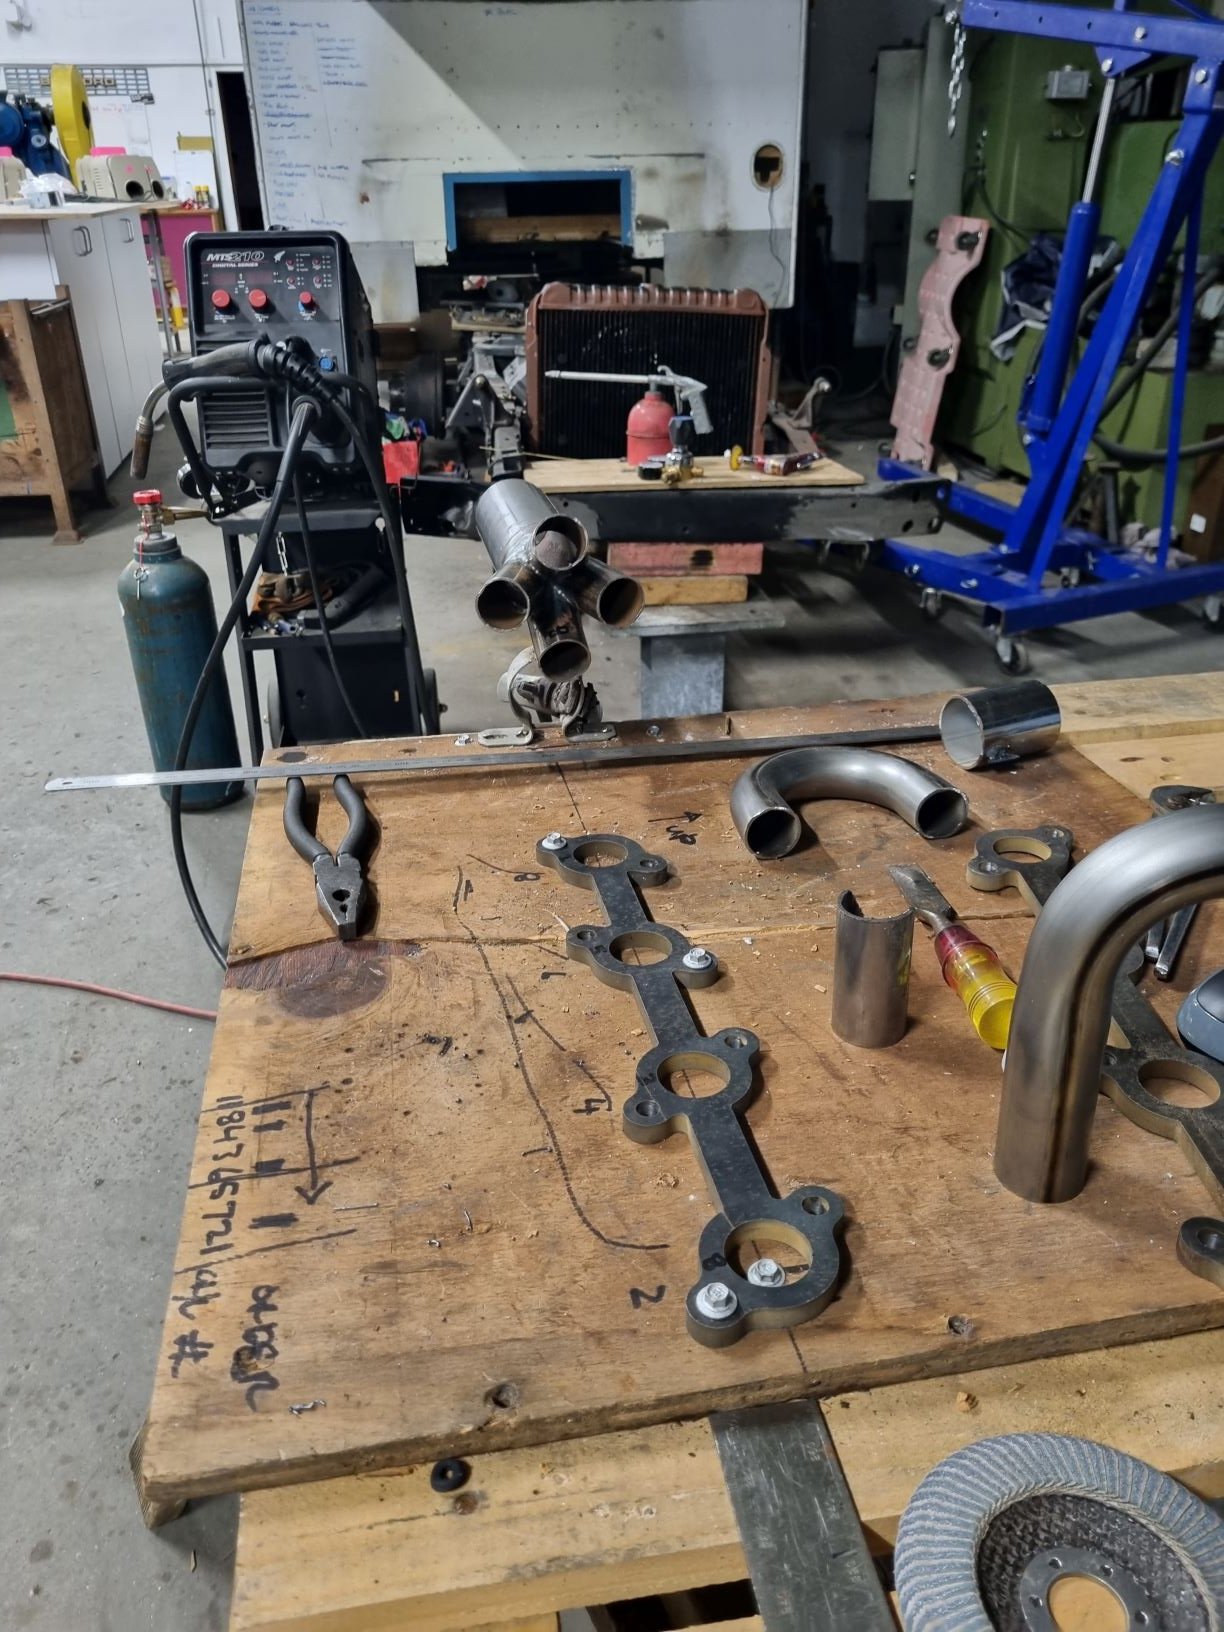
And exhaust pics, not my work, using shores nz to do fab work on this thing, mostly because I can stick metal together, but my finish work is crap... Header is all in sch 40, dump pipe from turbo is a 4" drain pipe. Chute mount is on.. I guess thats progress ! I am making a run at this thing and the Chev, mostly because i have a 1 way ticket out of here in late April and wont be back for 6 months. I would love to have this thing and the chev running and all together before I go. Wont make it anywhere near a track, but a hoon down the road is in order. Ive owned the car for 10 years, its overdue...
1 point
-
I'll be dipped. Bone dry oil system! Have never seen that in all my 2 stroke shenanigans. You can hold the oil pump WOT to get it to prime the lines faster while the bike is just idling.1 point
-
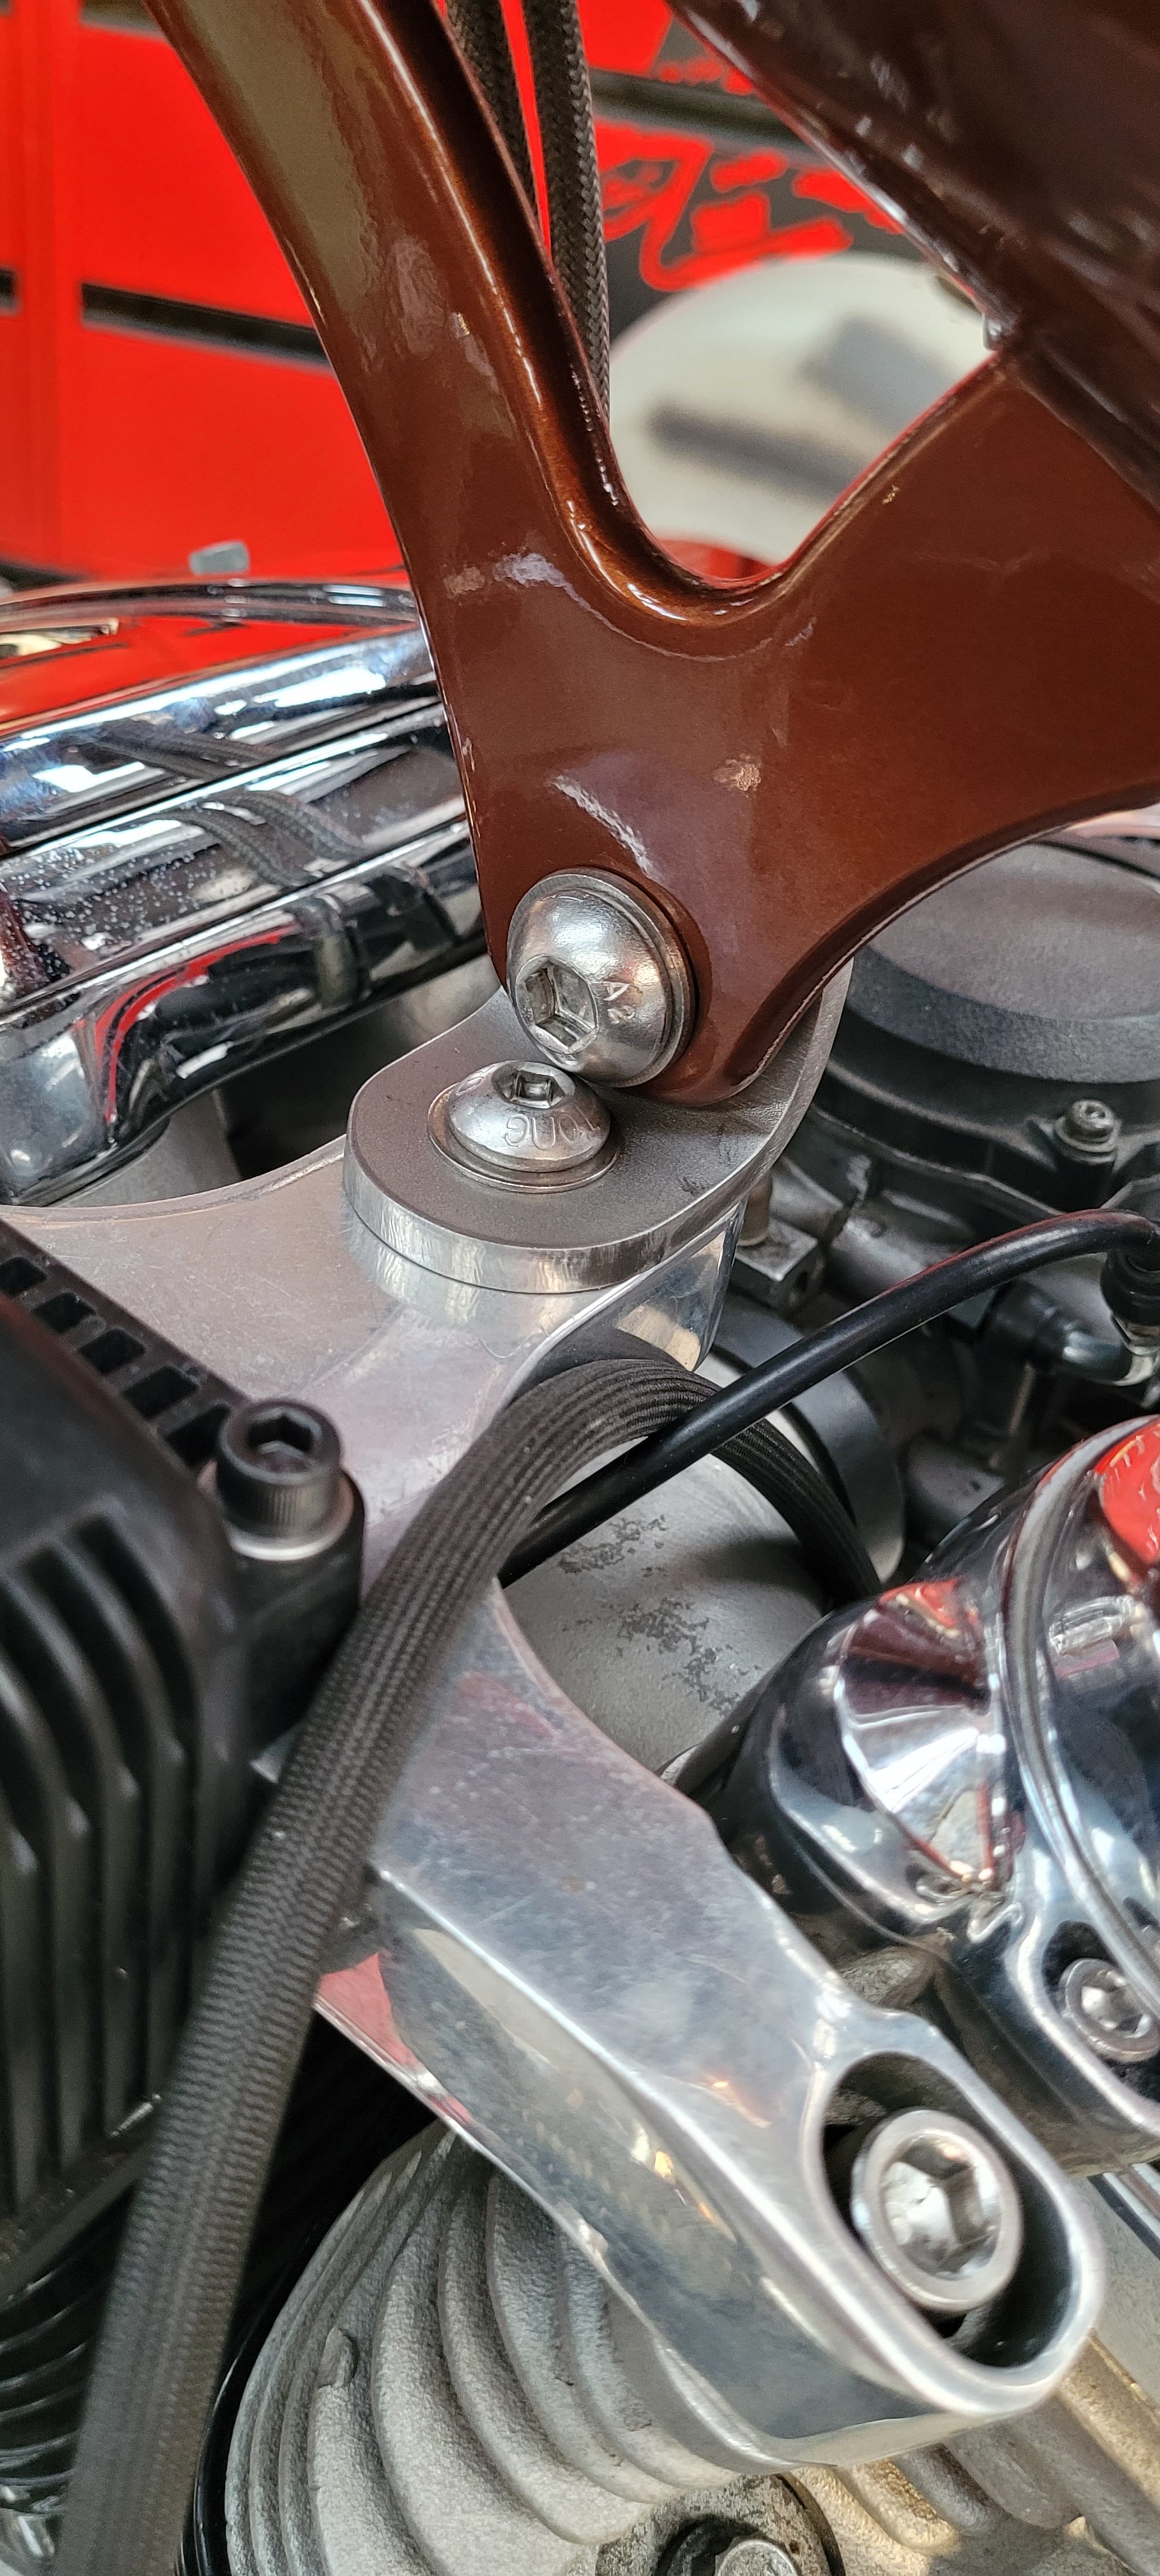
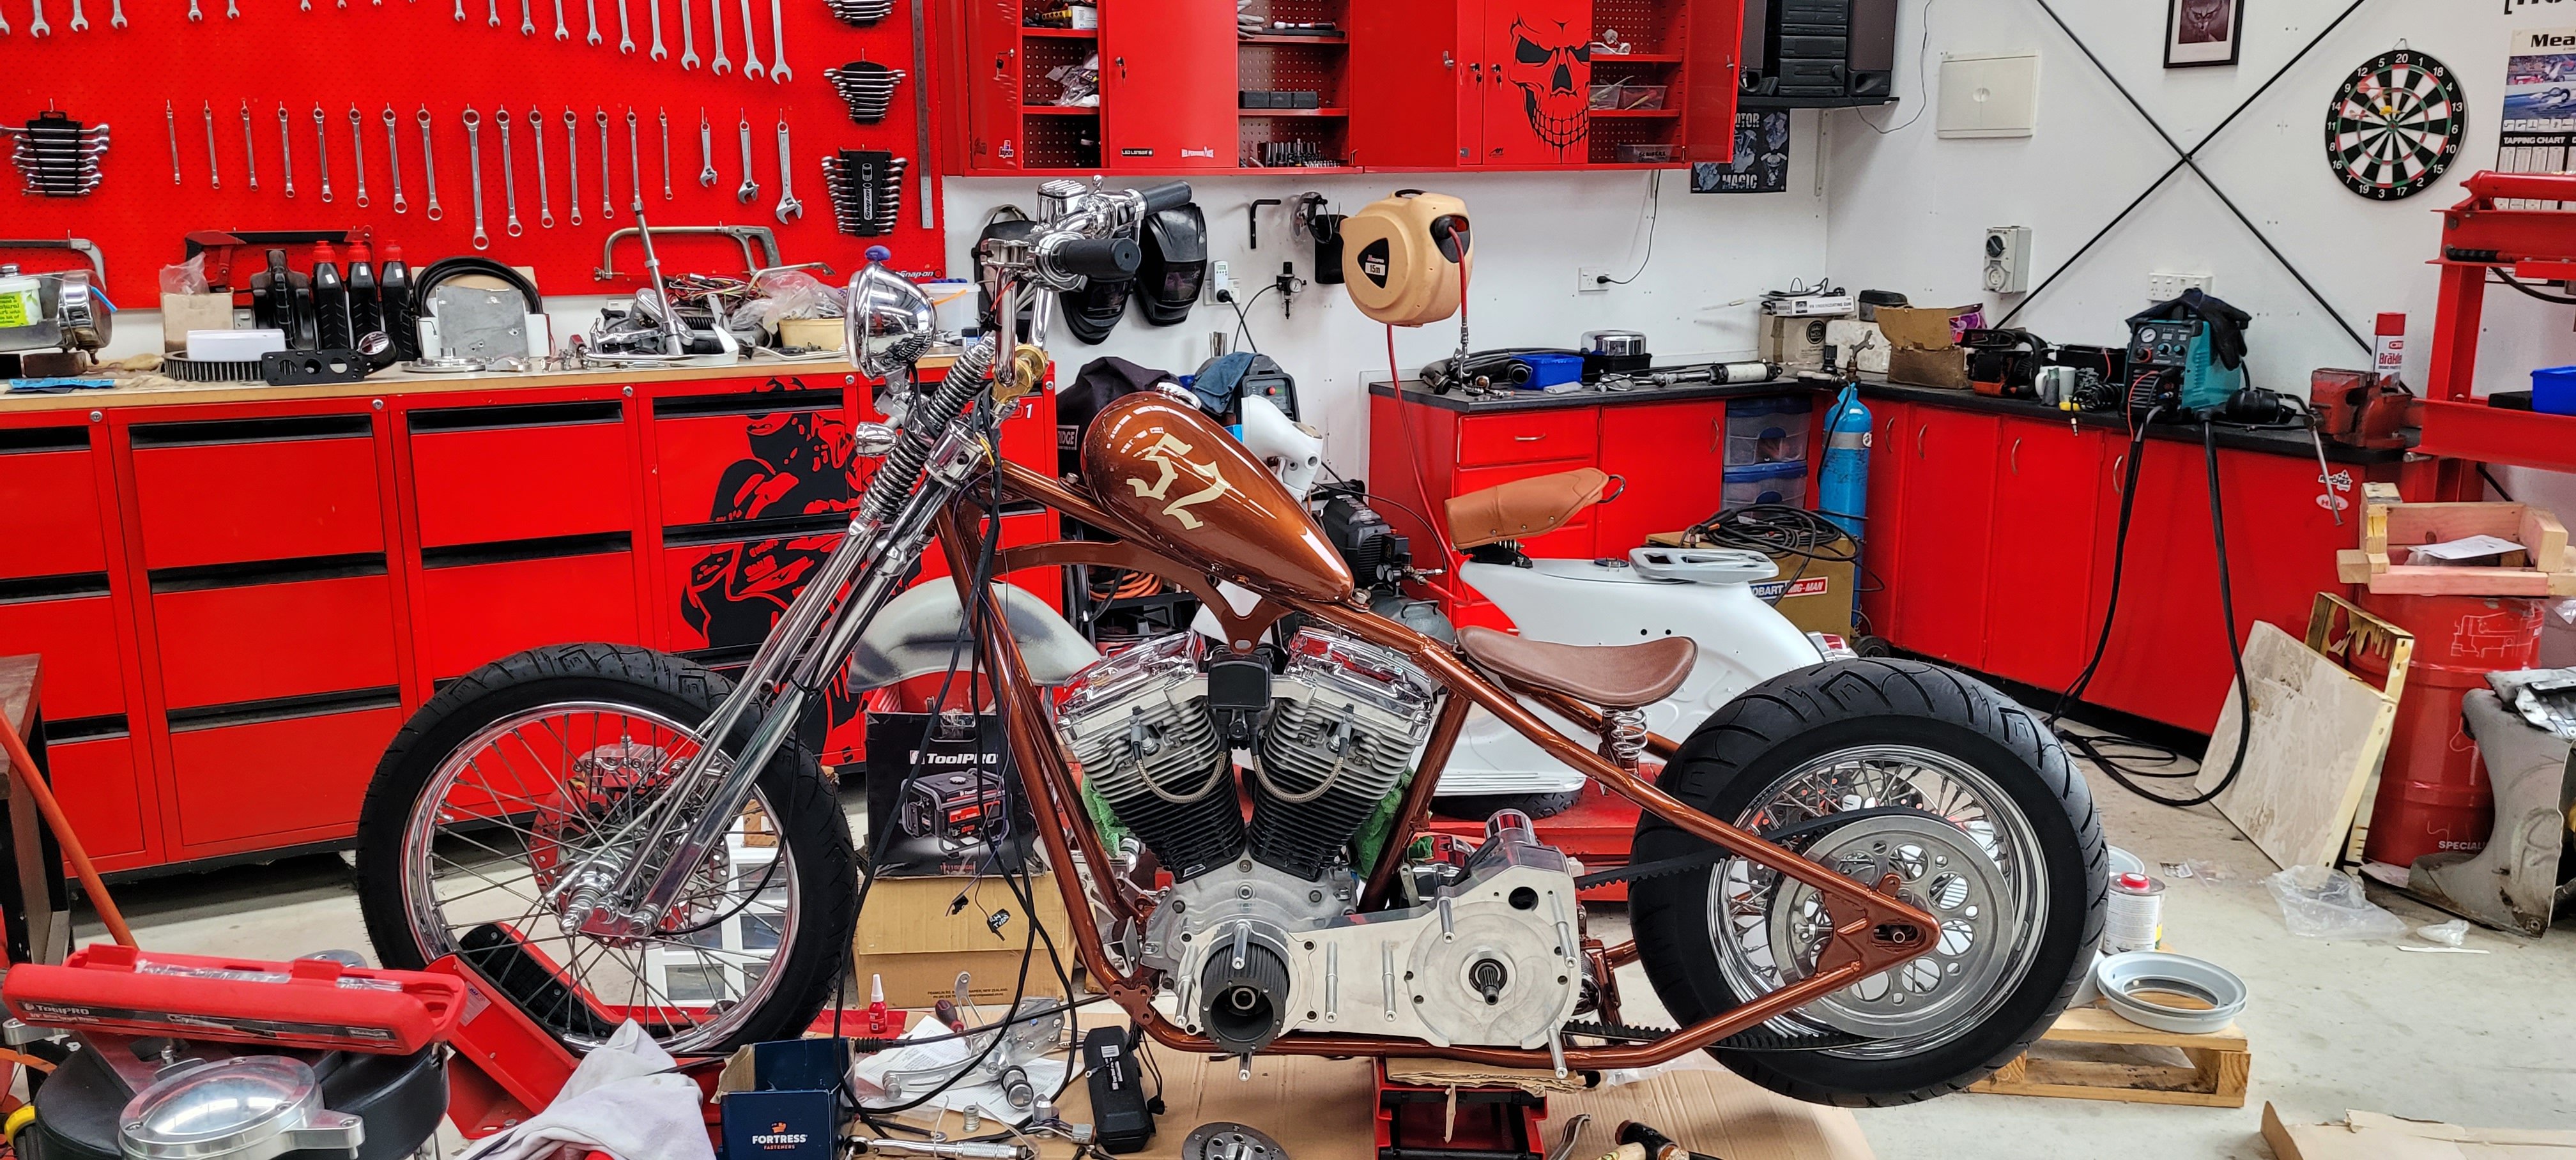
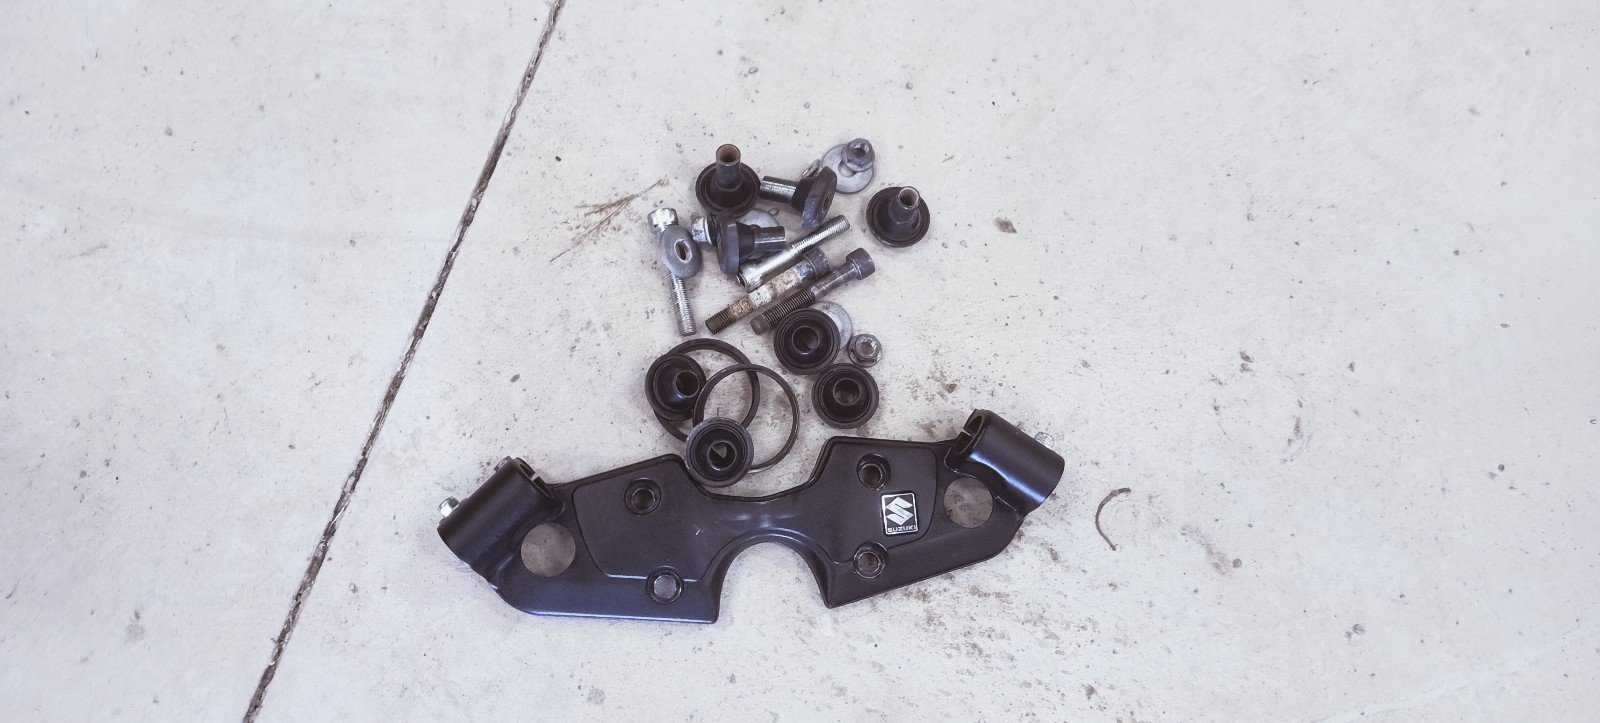
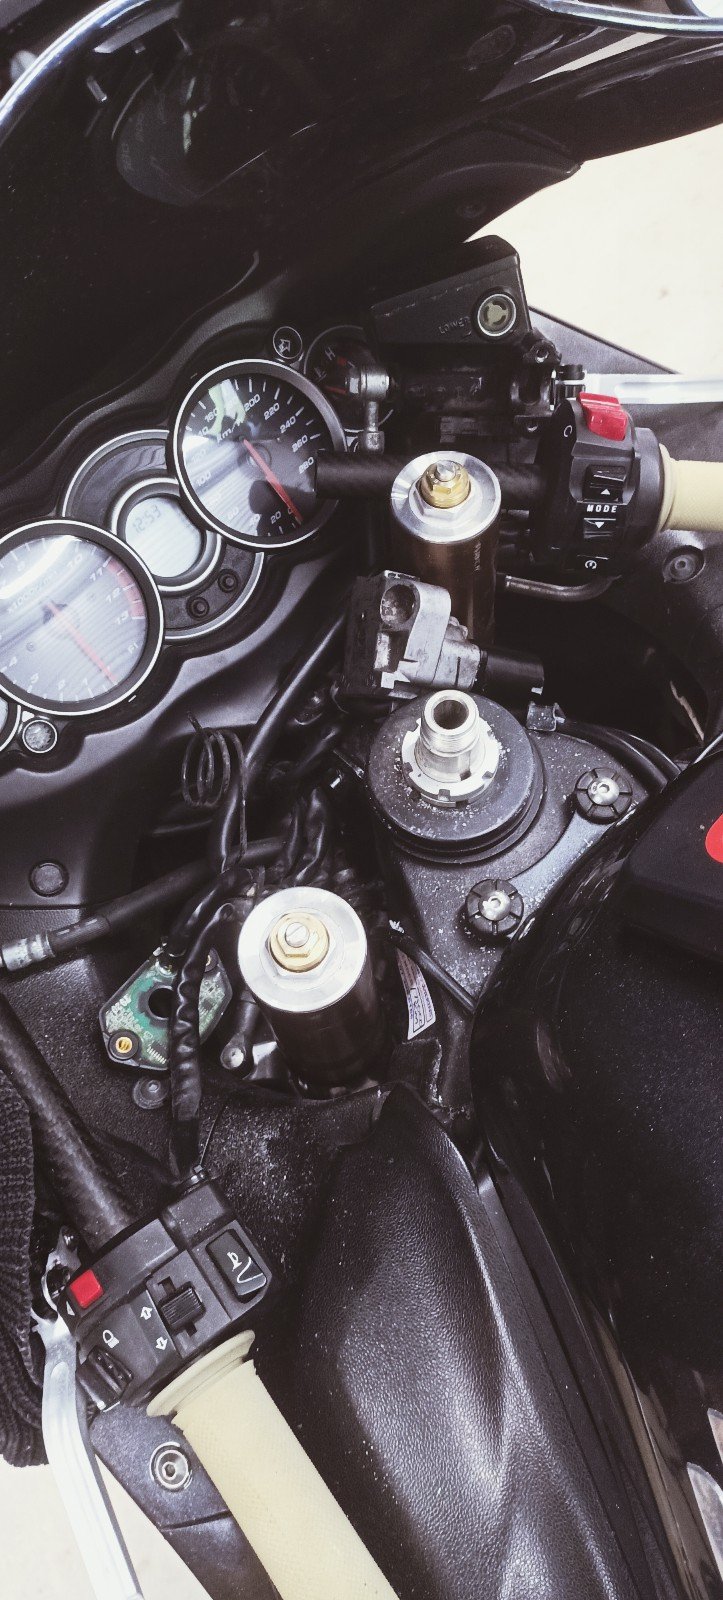
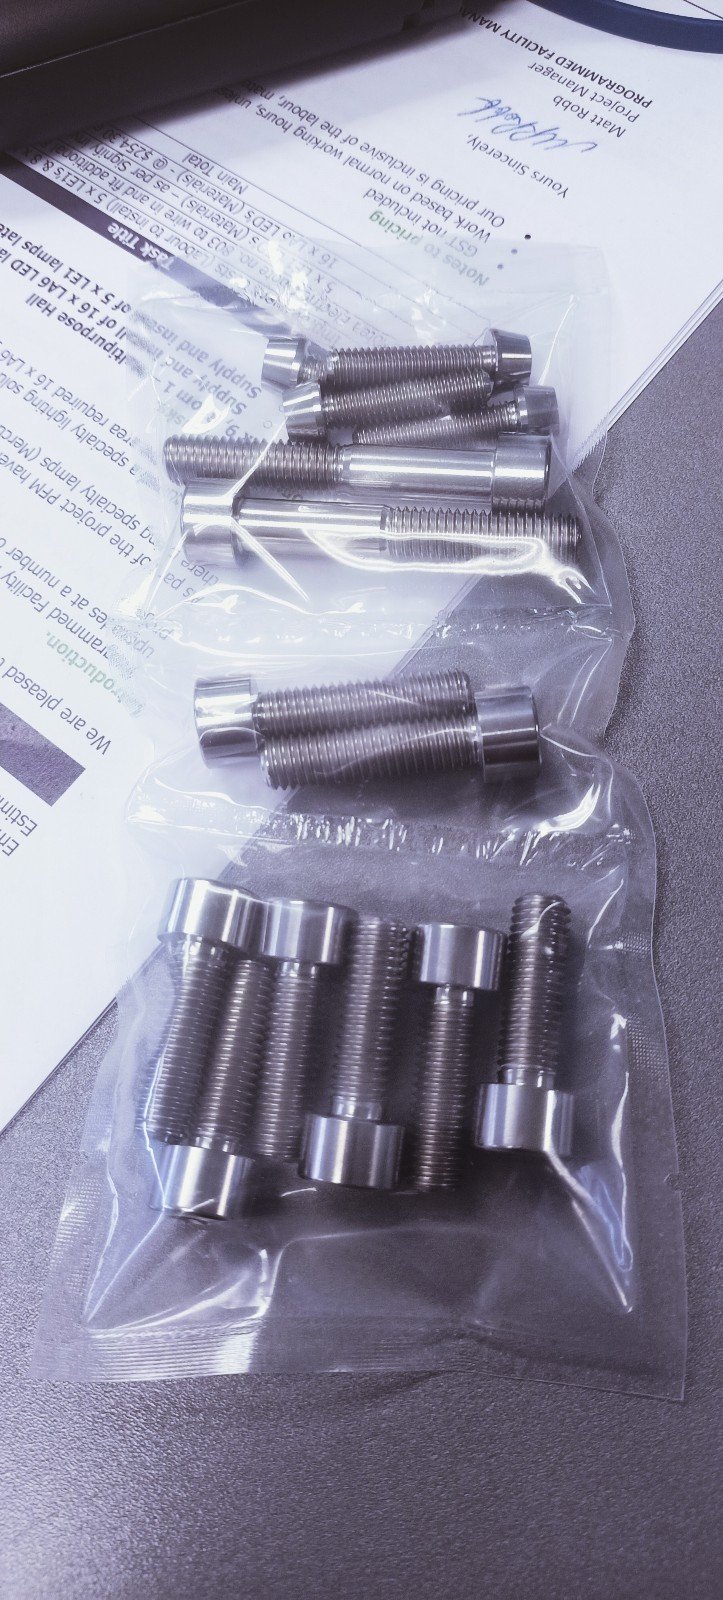
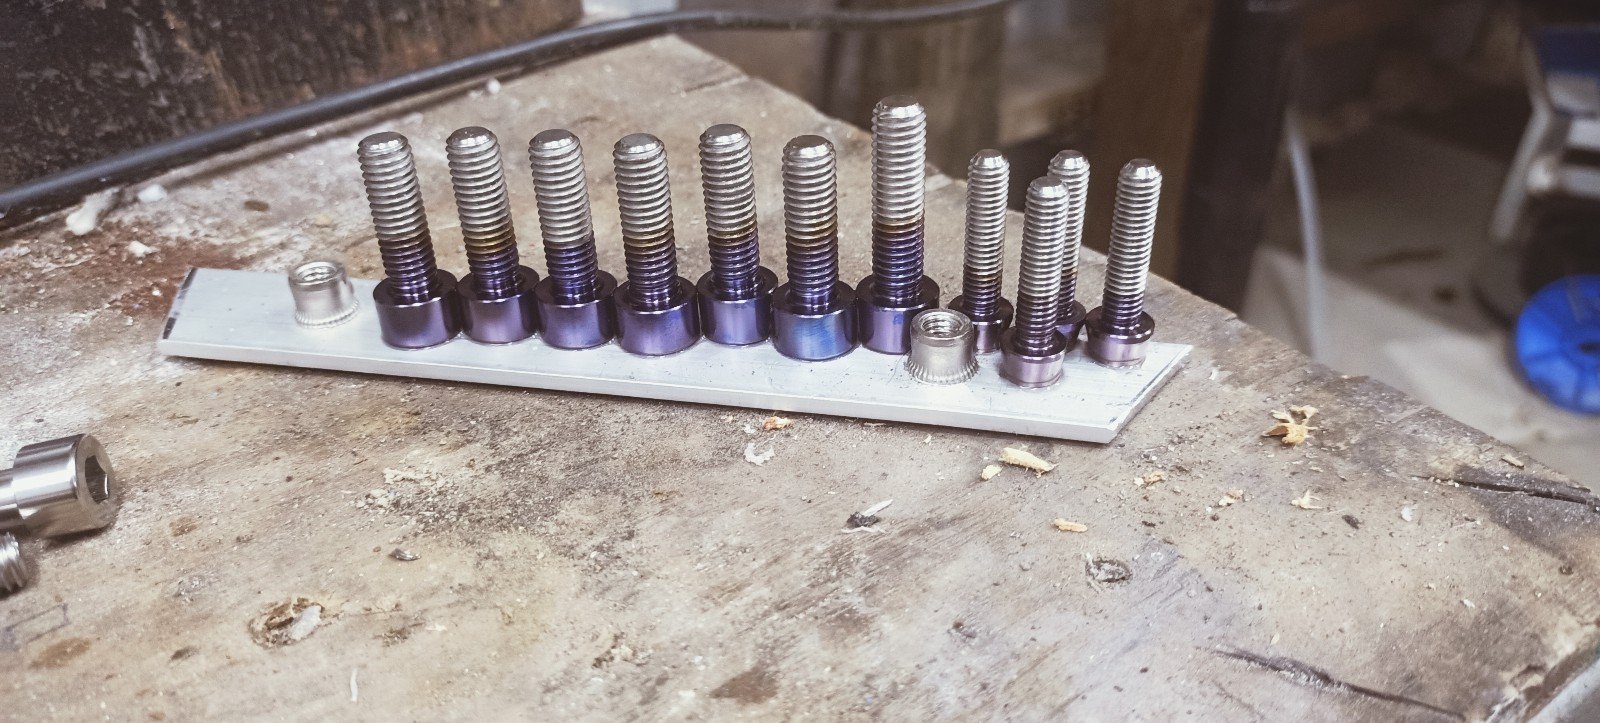
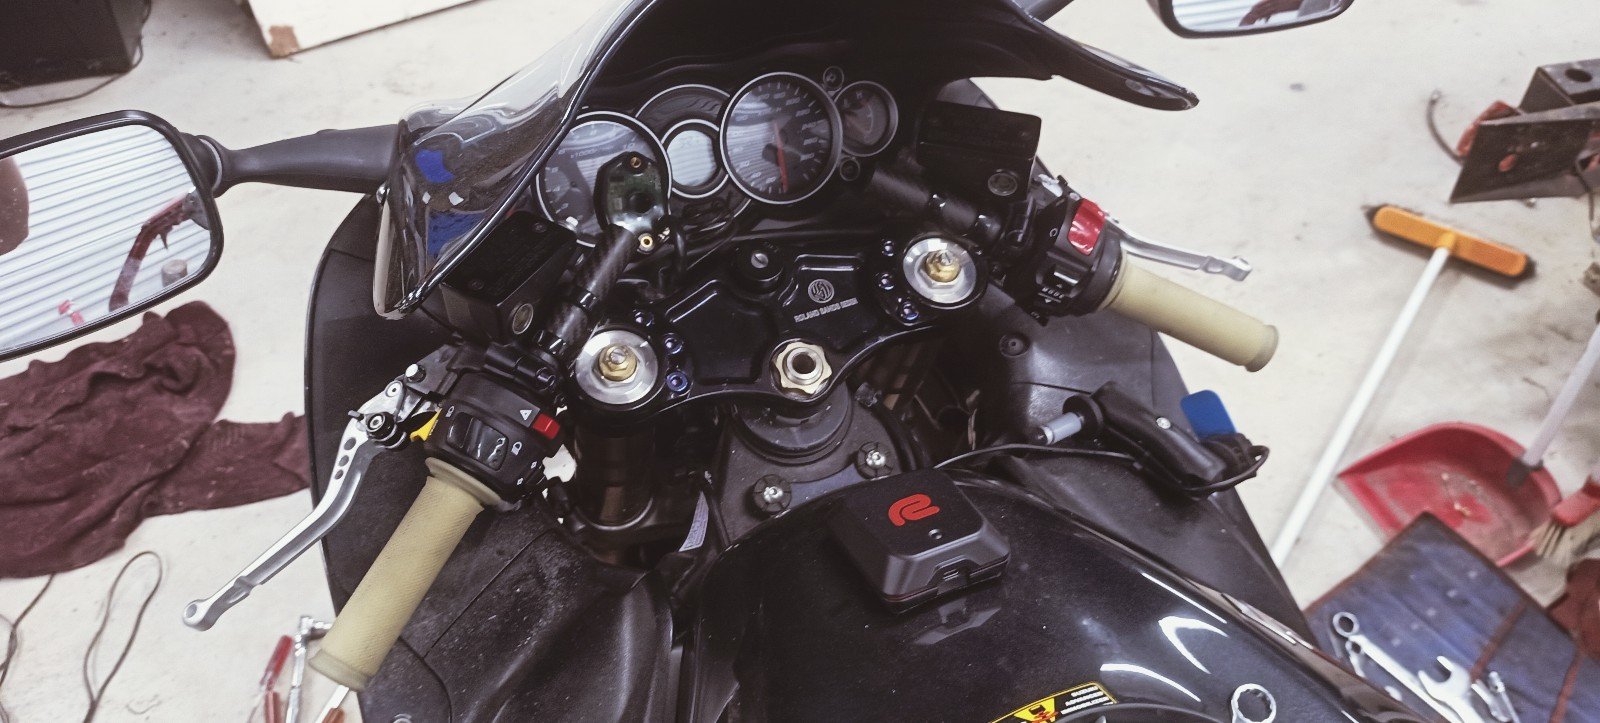
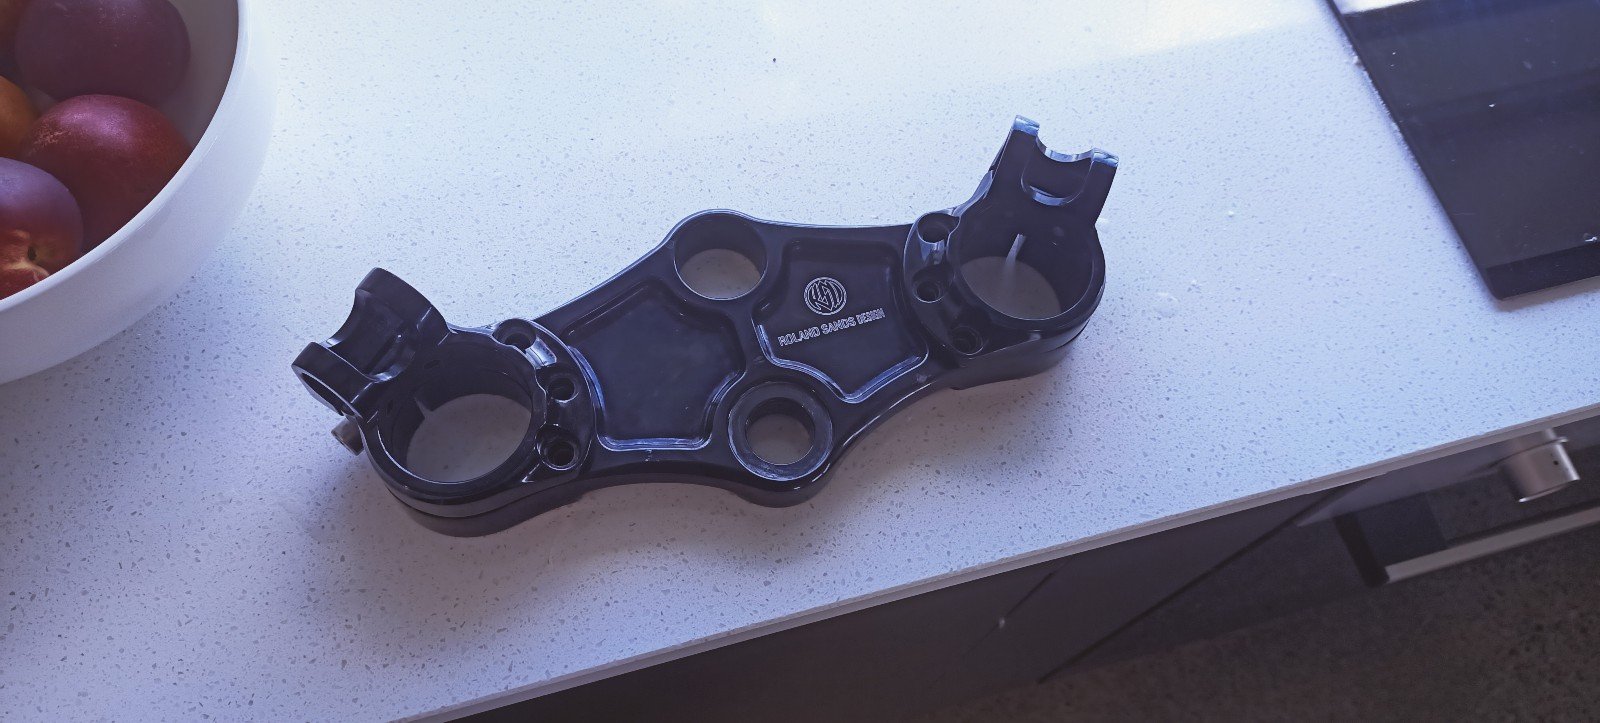
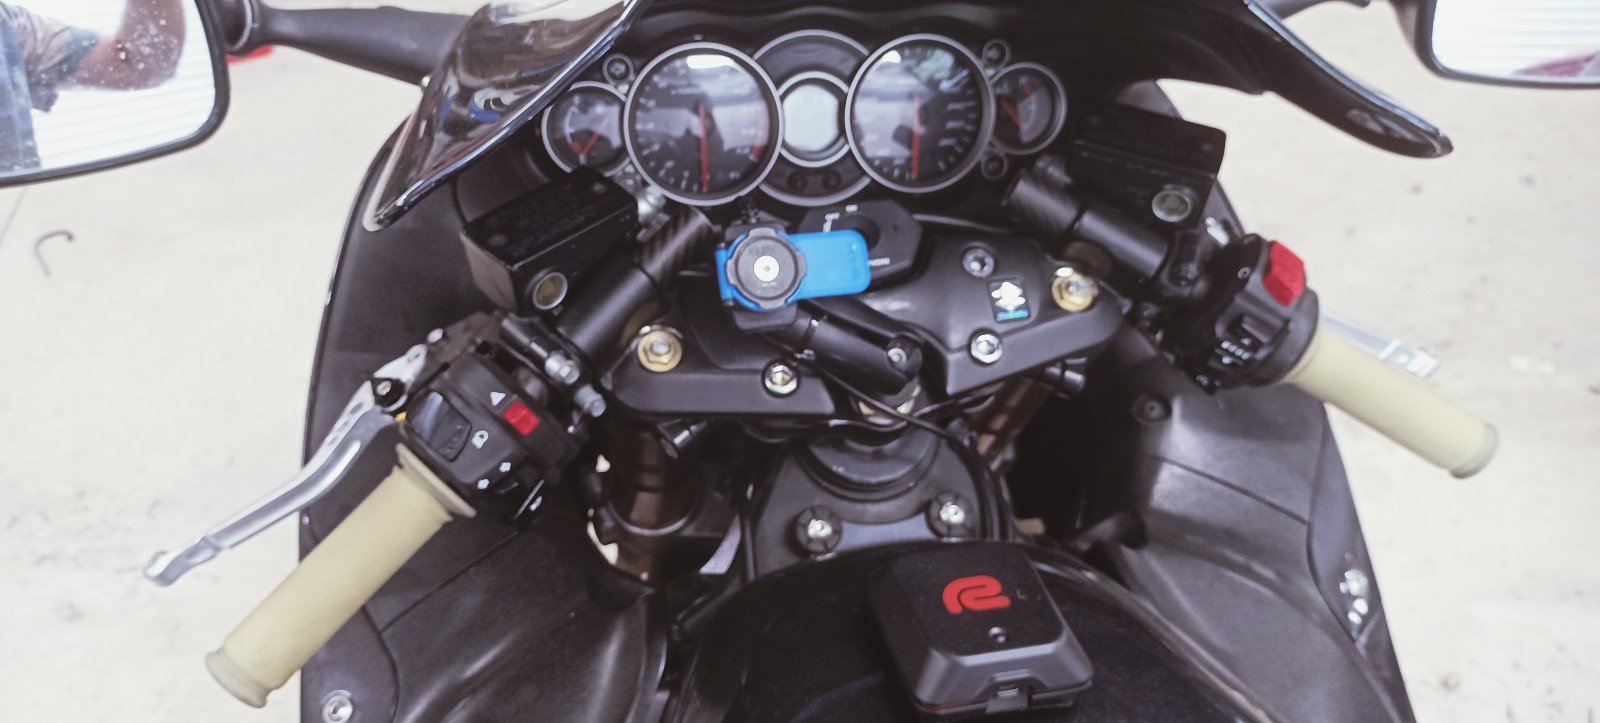
She ain't no custom bobber, but I still get a bit of satisfaction out of this. Another KG saved off the front end. The factory top yoke is a two piece unit with a bottom plate that ties the forks together and then a top plate that holds the handlebars. The two items are bolted together with big bolts and isolation bushes (I don't seem to have pics of the bottom plate) So that's now been replaced with the new billet aluminium item which is one piece so saves just over 1kg and looks cool too. That's well over 2kg saved off the front when you include the CF bars. The new top yoke also has another benefit. The factory setup does not allow any lowering of the bike by sliding the tubes upwards. The new yoke has relocated bar mounts and holes right through, so to increase steering response I have lowered the front of the bike 7mm. This moves weight to the front and steepens the fork angle. Some guys lift the rear 1 or 2 inches to do the same thing, but I'd hate to increase the seat height and make it harder to handle with legs down. Also fitted a hydraulic brake switch banjo bolt on the rear as I had no switch since doing the rearsets.
1 point
-
Couldn't be happier with it...exactly what I was thinking.
1 point
-
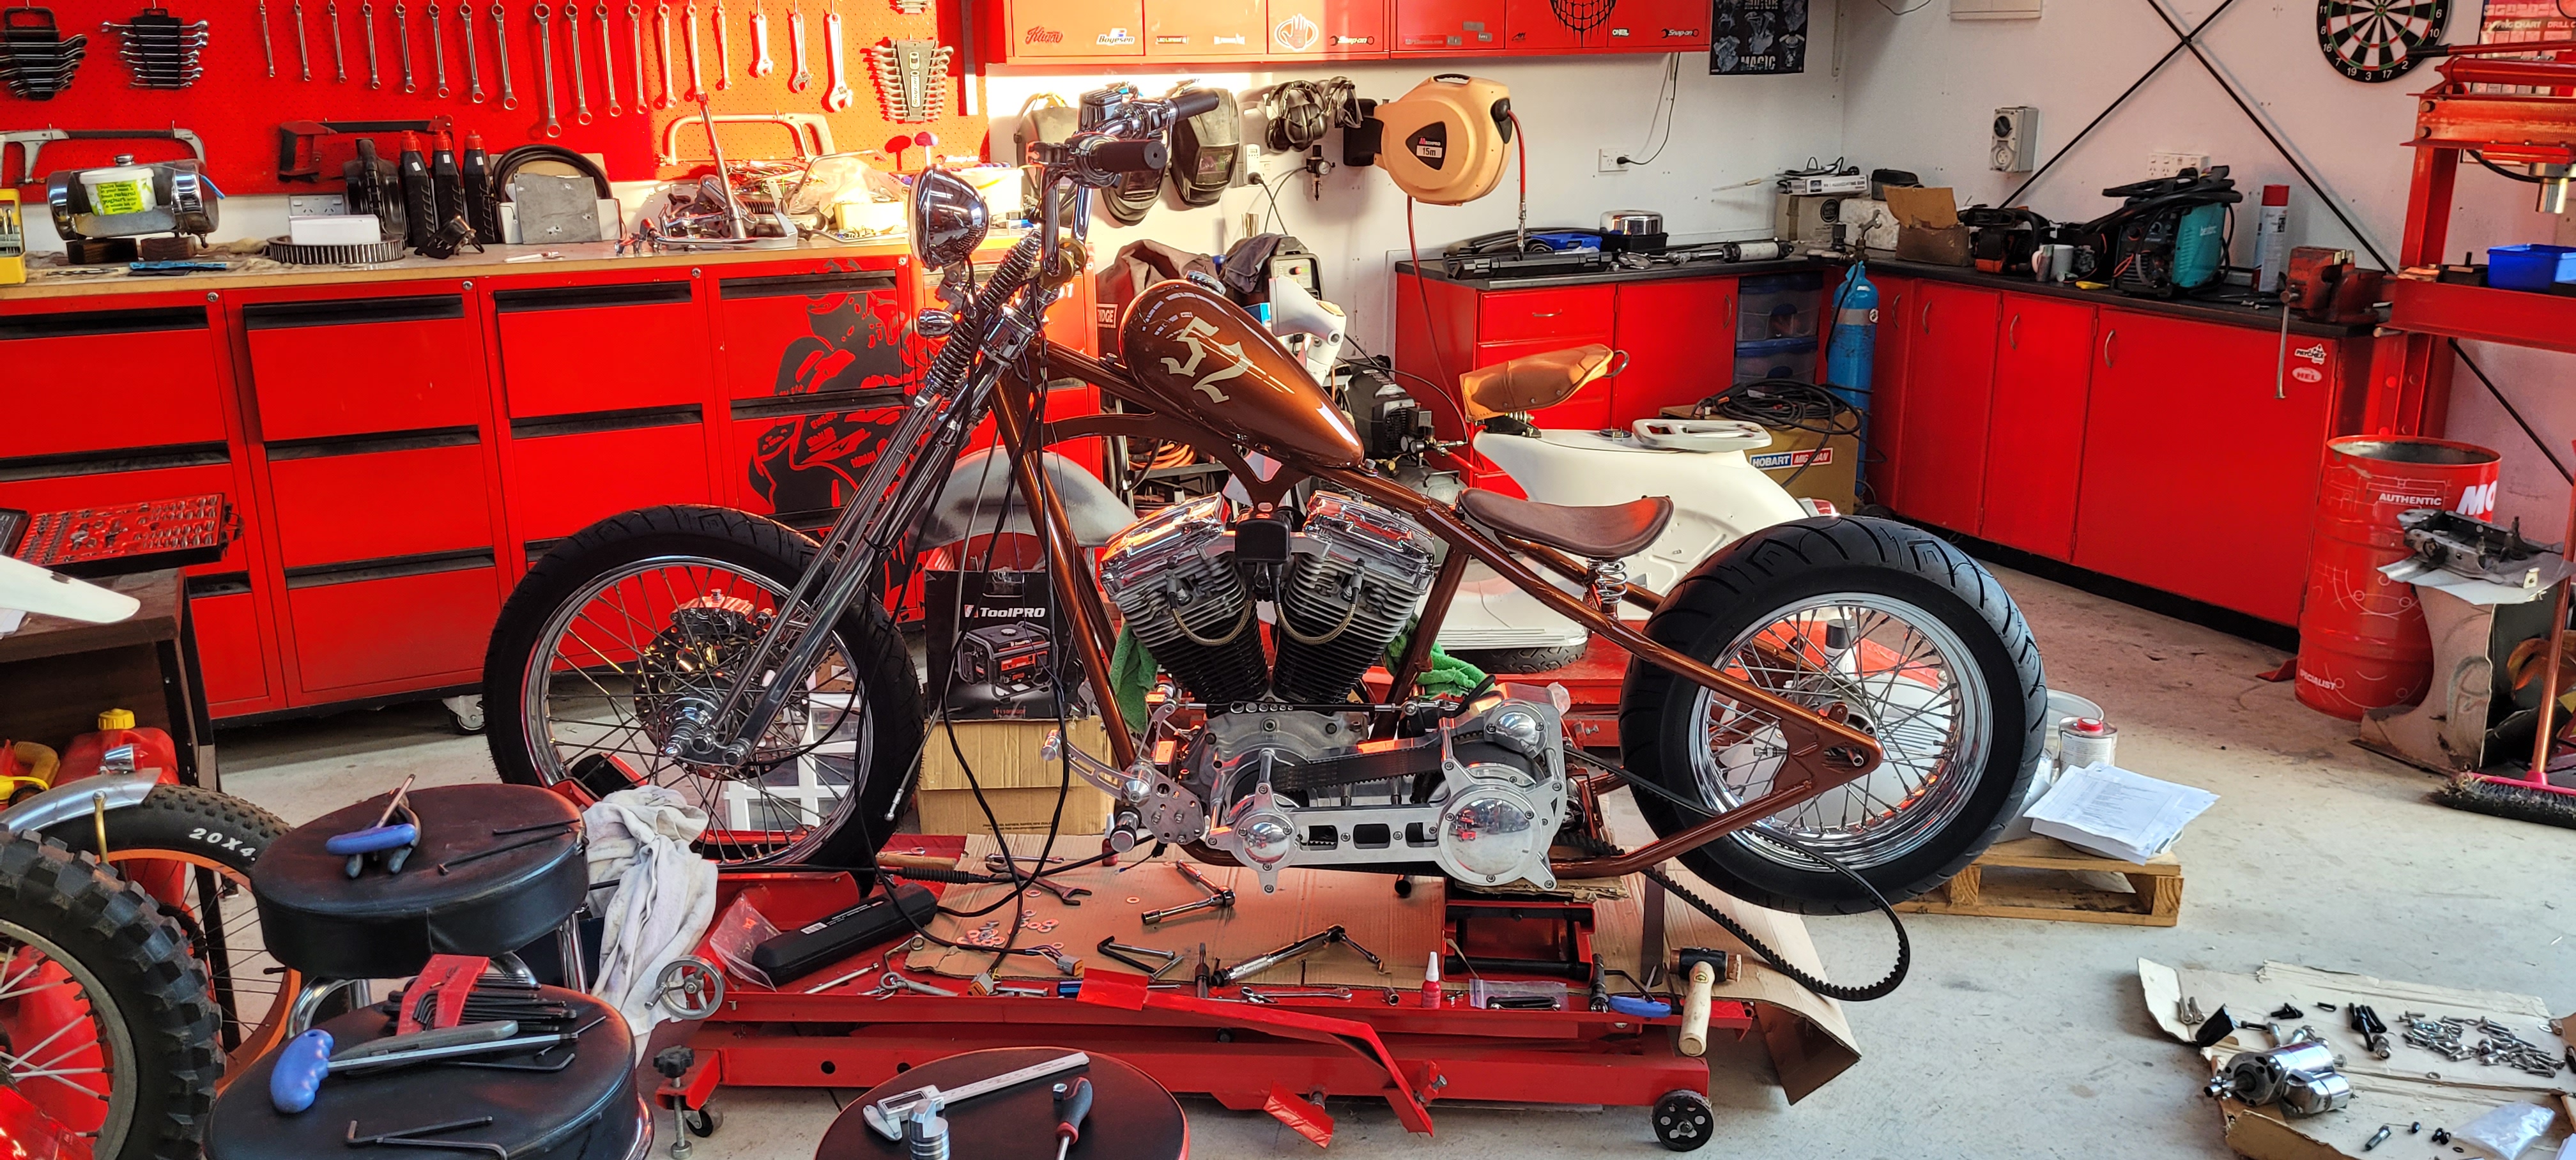
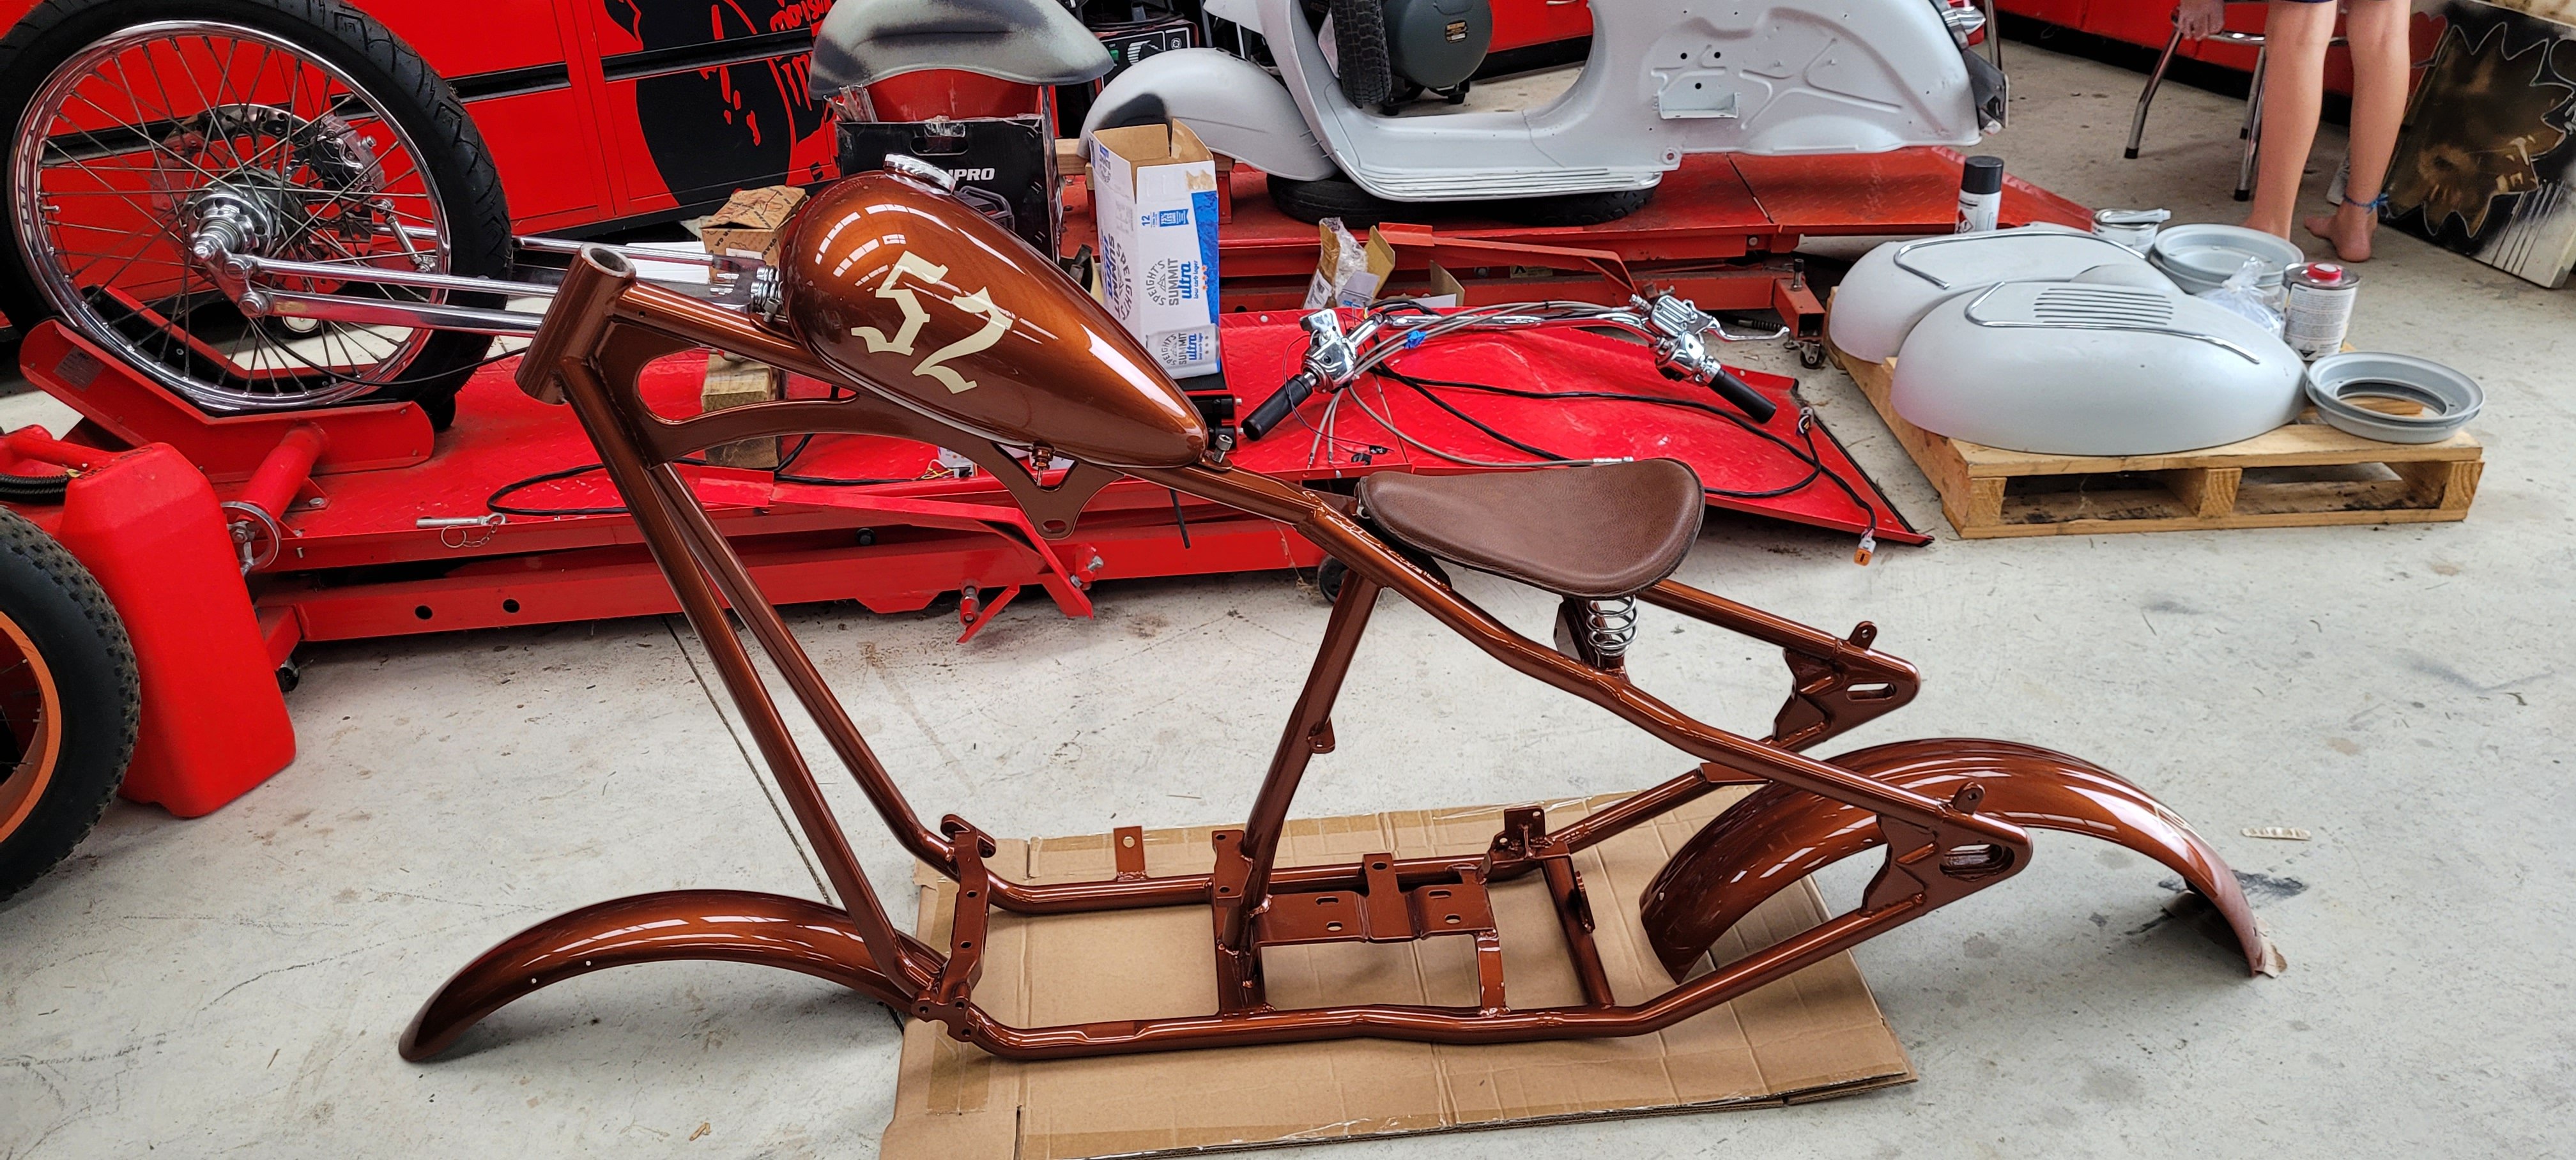
Fuck yes!! paint came out epic in rootbeer with dark cream pinstripes and numbers...fucking stoked!!
1 point
-
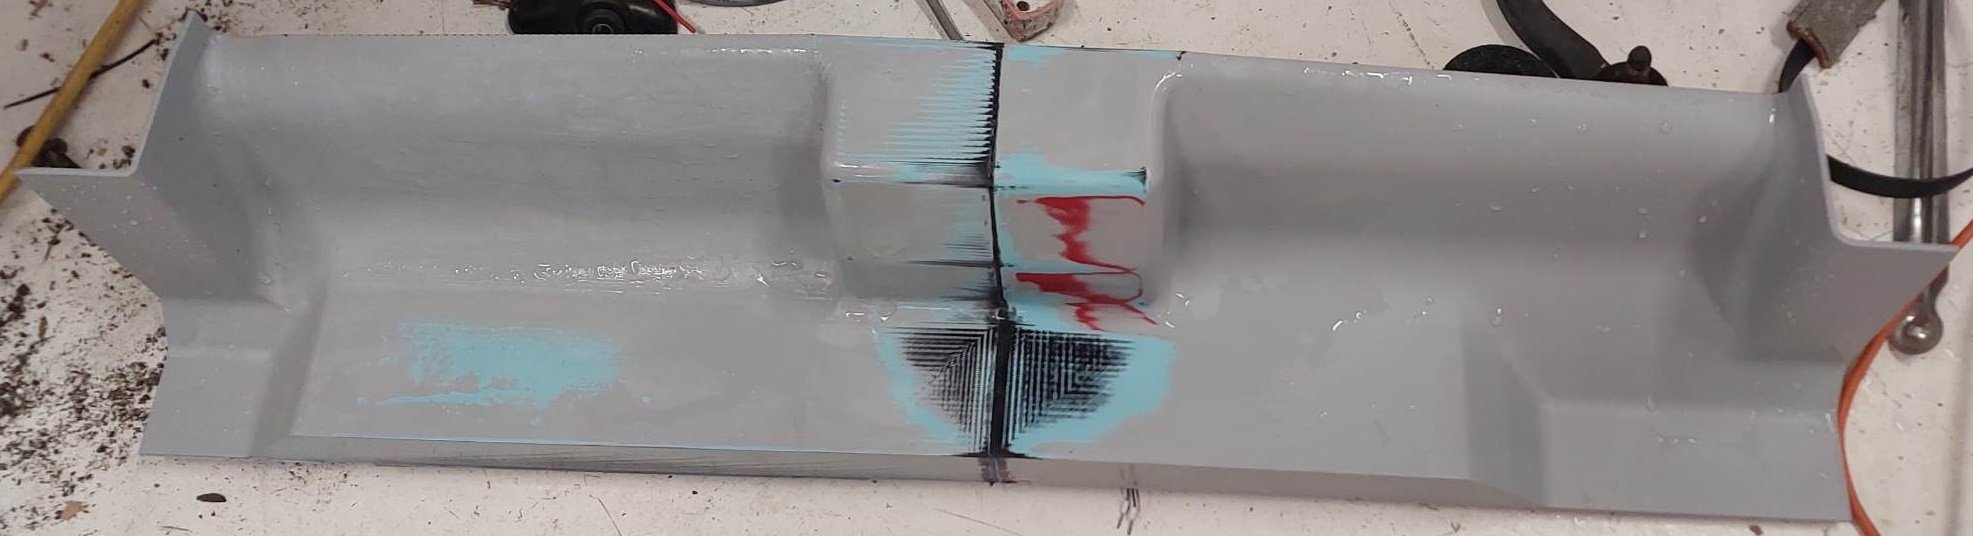
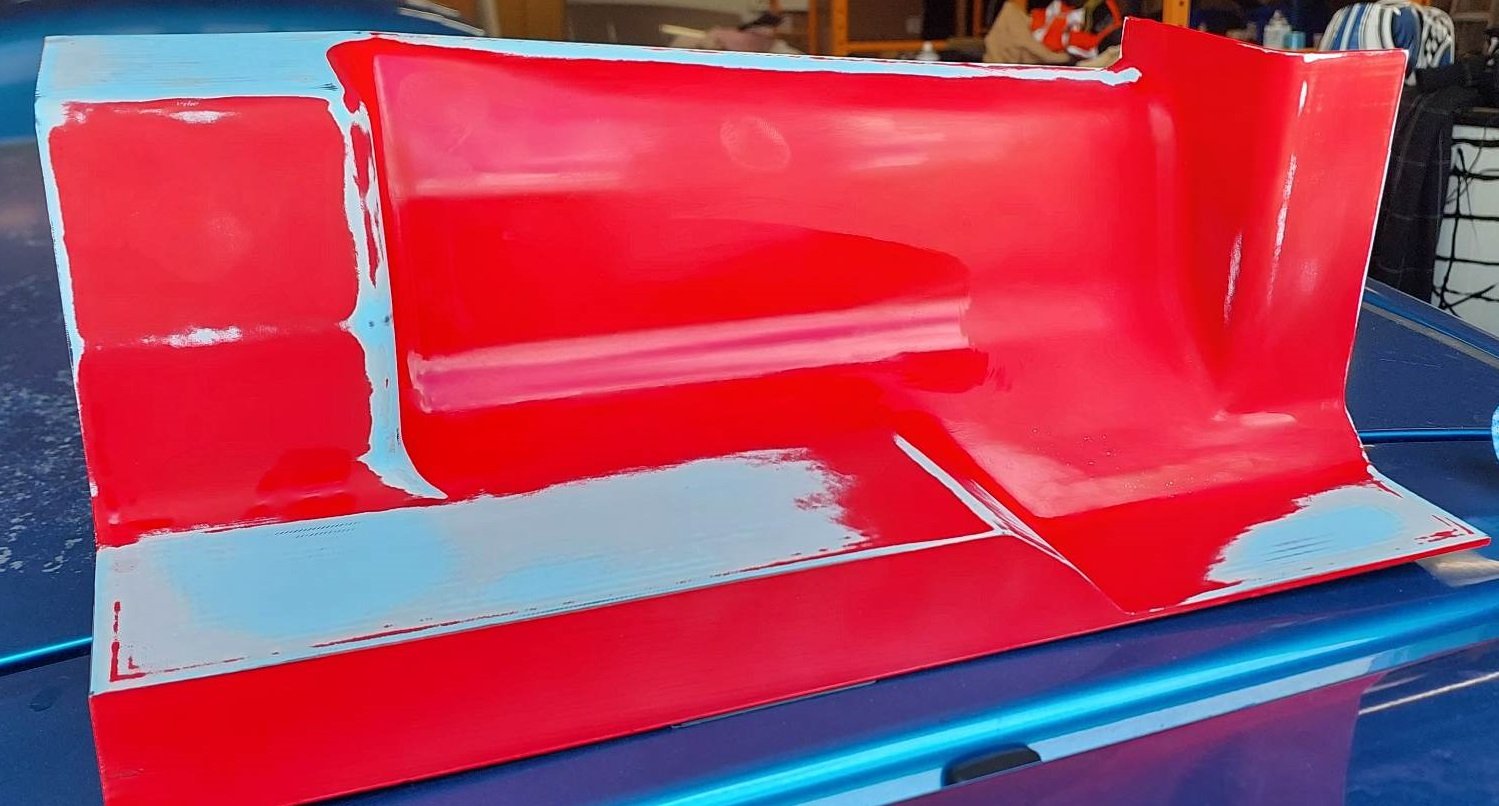
Yeah I don't think you are waxing quite enough, and pva is a huge safety net. It's biggest pro is that it dissolves in water so I'd your wax ain't good enough and your parts still stuck- you just soak the whole lot in water till it pops free.1 point
-
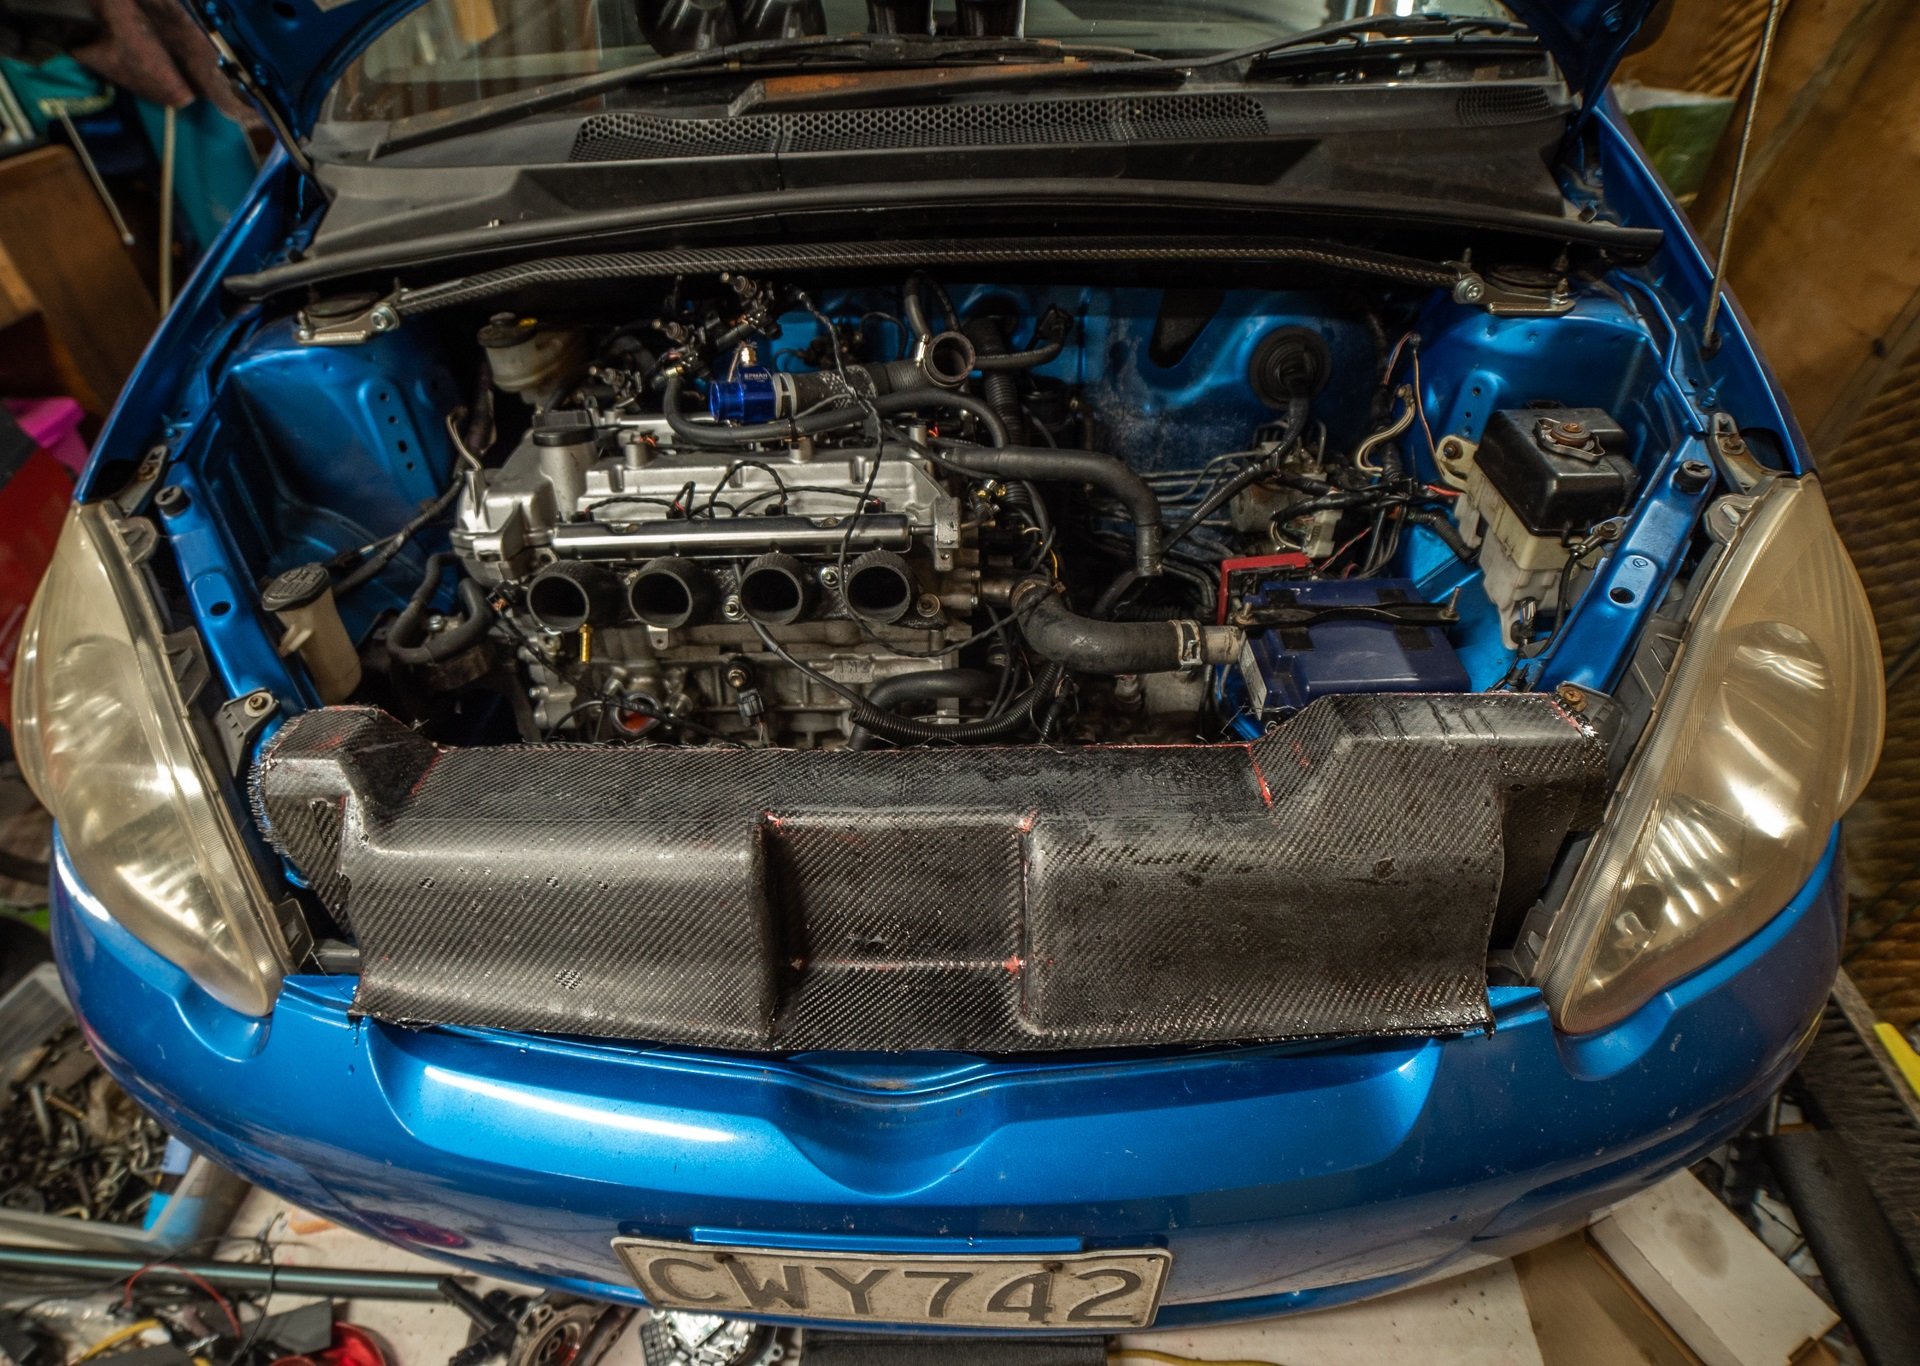
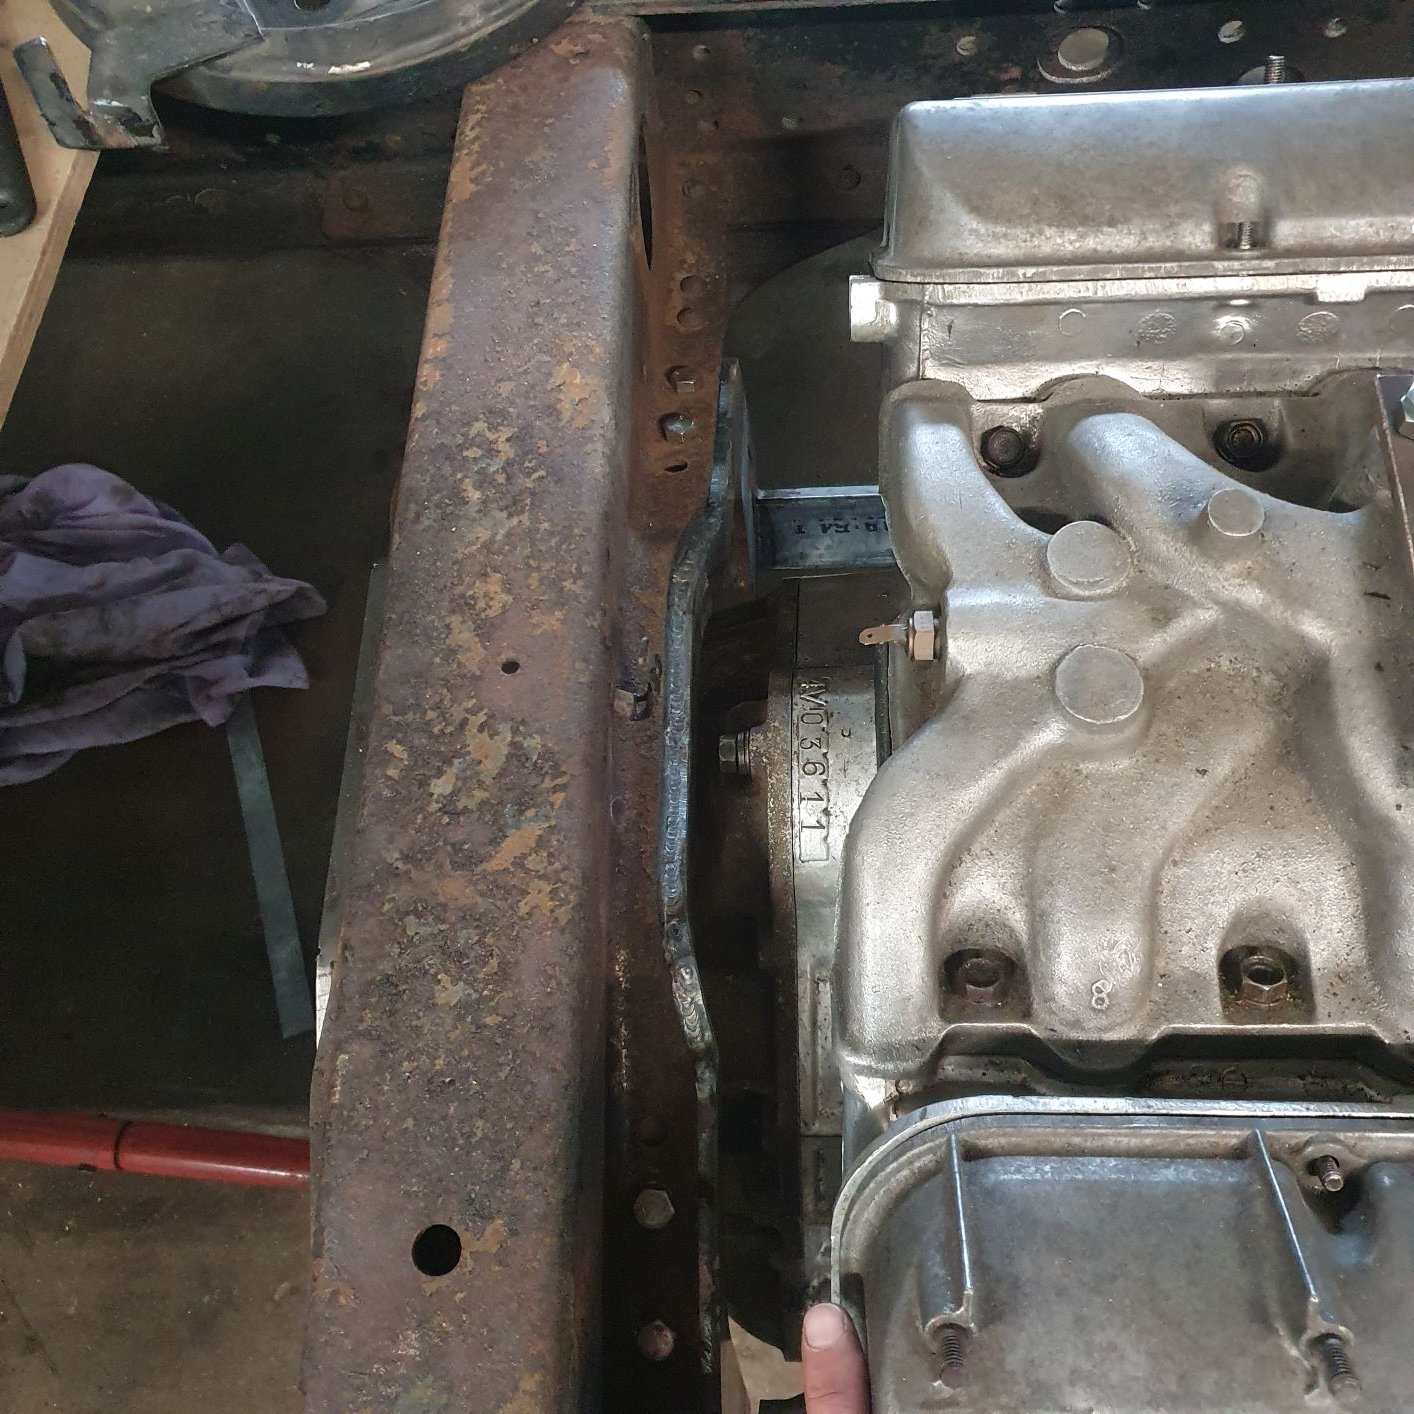
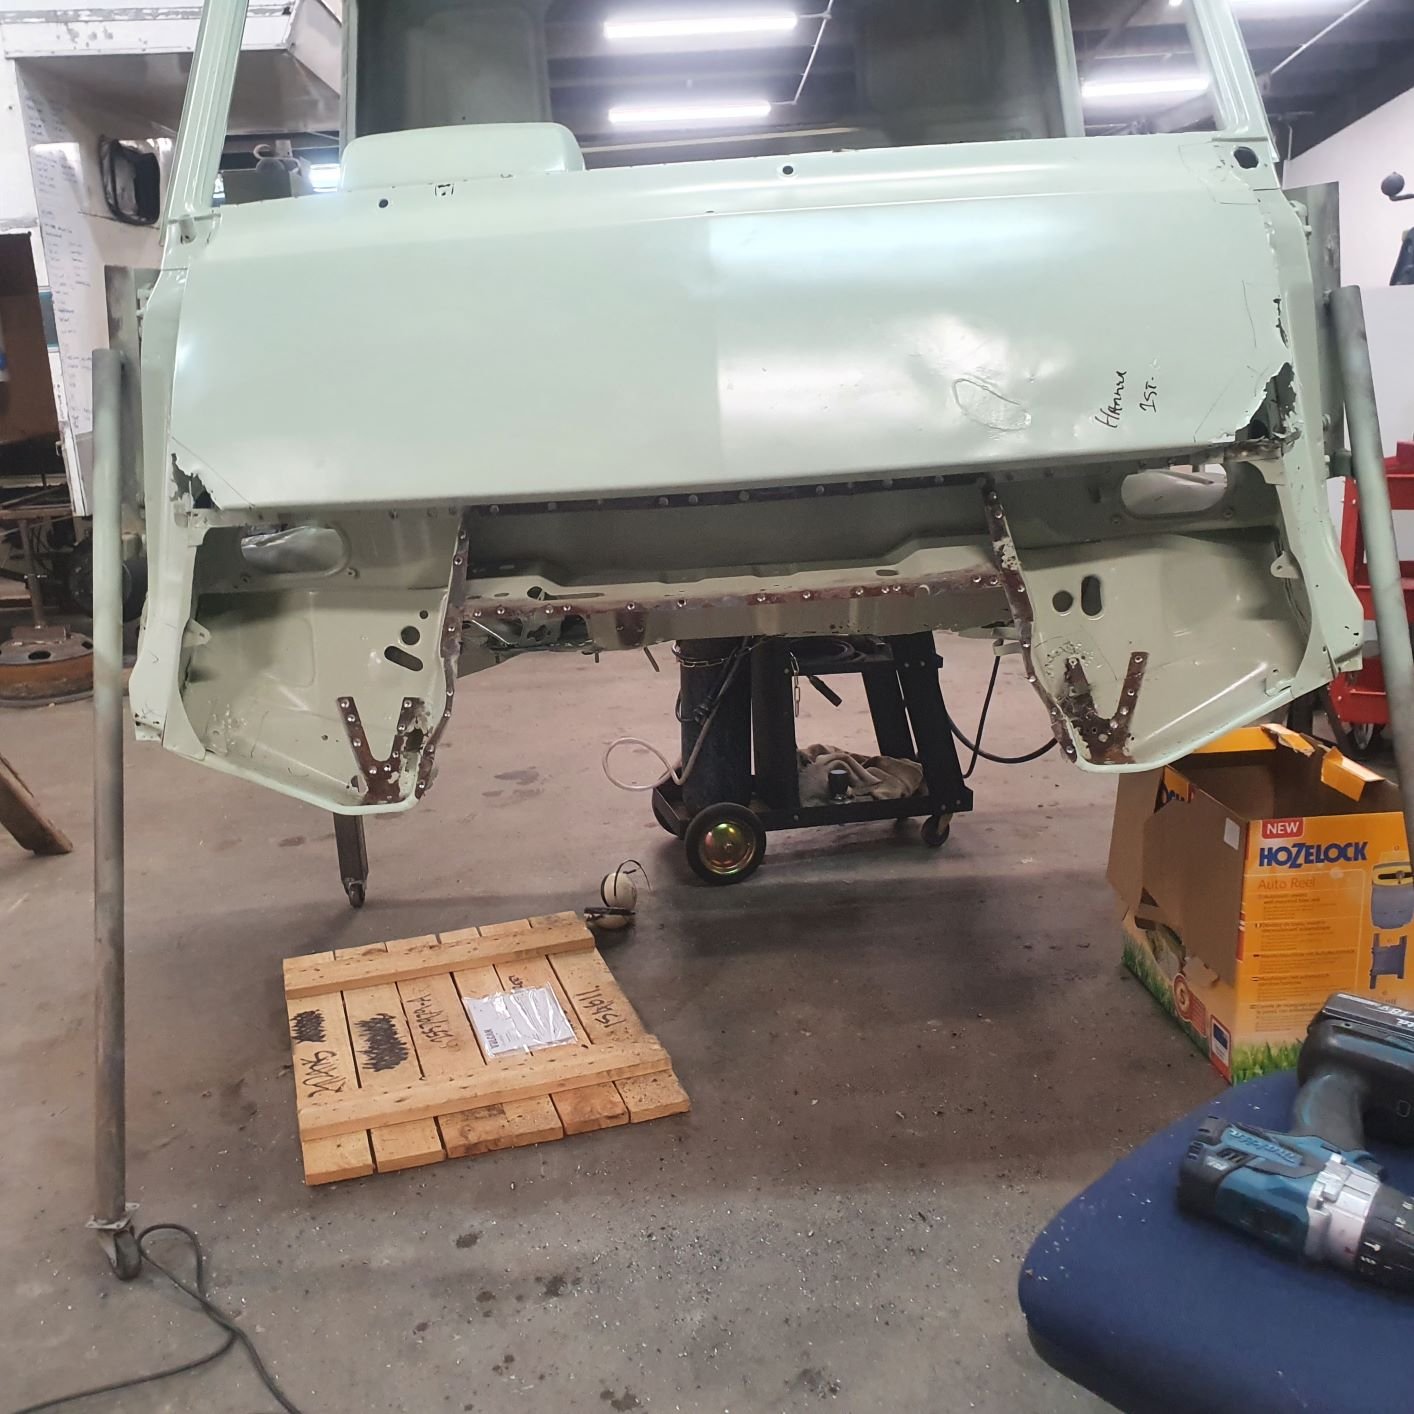
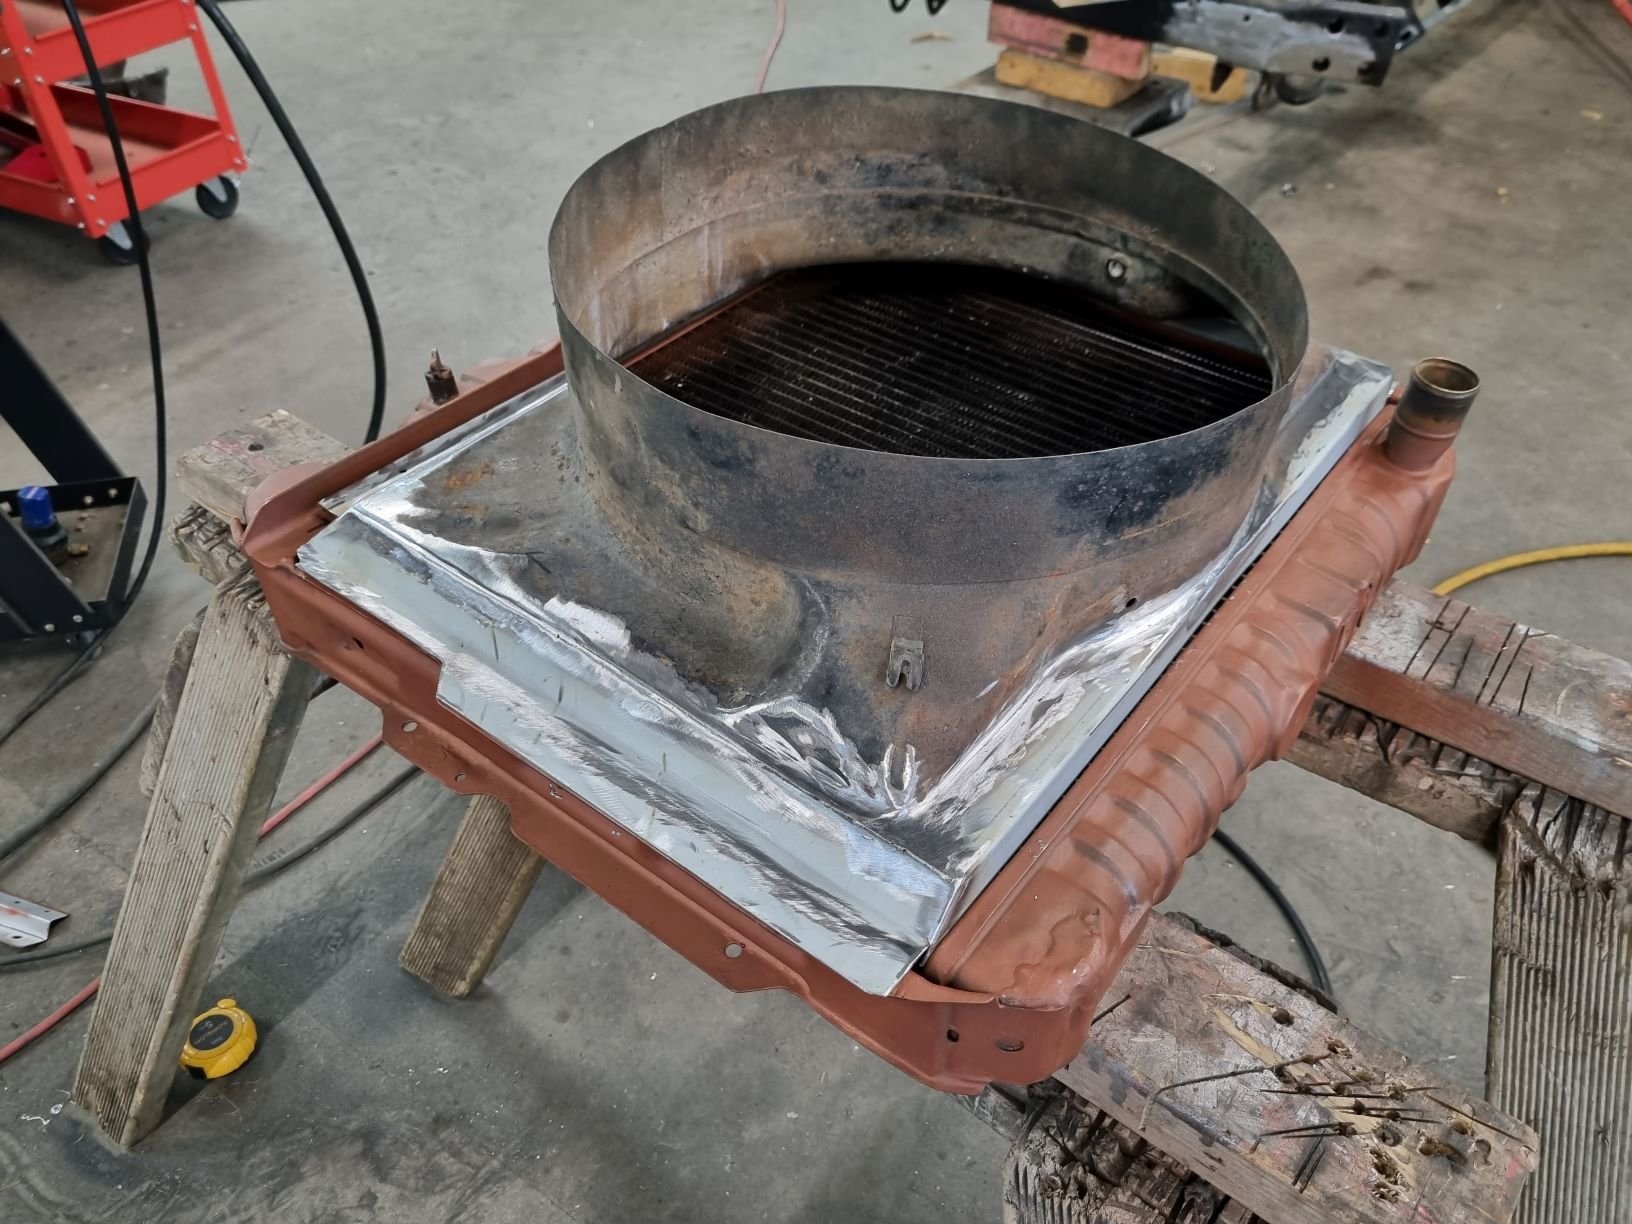
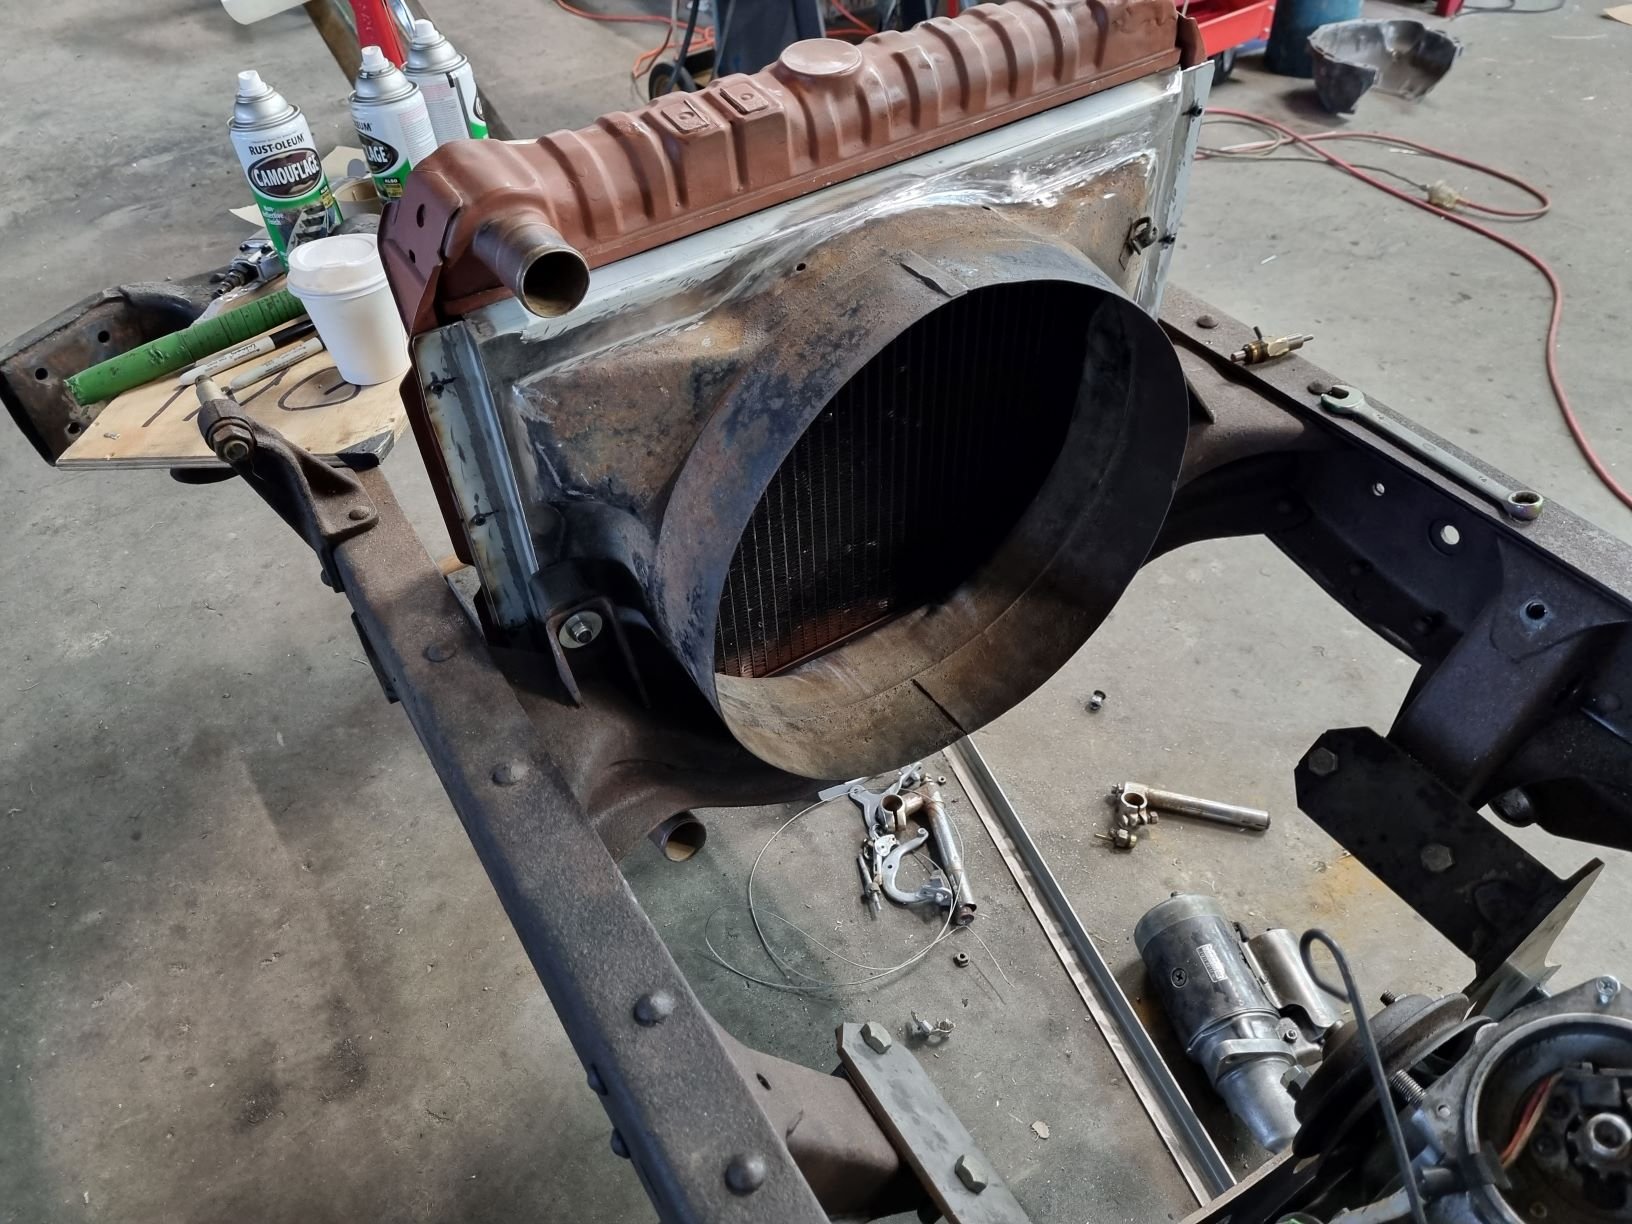
I've had some stuff out of the engine bay because of waterpump situation. My radiator crossmember, when it's got the 3d printed bits on it... Bit heavy. Scales say nearly 3kg. Now considering that doing something stupidly major like losing the power steering or fitting mega light wheels can only make that much difference. Figure I should try do something a bit lighter. The aluminium part isnt that heavy, but my plastic shrouds are a fair bit of the weight. (Thanks again @Stu ) So I thought maybe I should just redo the shroud parts in carbon. But then ahhh what the hell, try make the whole thing. So drew up an inverse model of the radiator panel, this was a mission because it hated nearly all of the geometry so needed to redraw. Then printed in halves as total length was about 850mm. I've found that its a waste of effort trying to sand out layer lines, just build up with filler primer instead. Then sanding smoothing etc etc Stick halves together paint A few layers of release wax and then get some layers on. I used mostly one continous sheet on the front side, so should hopefully look okay once it's sanded etc. Then used up some scrappy bits on the back. Then much to my surprise, many hours later it actually came back off the mould. I still need to trim up the edges, then give it a sand etc, drill some holes etc etc. But pretty happy with it, it's real strong. I was originally thinking of painting it blue but it might actually be good enough to keep as carbon finish after some sanding and a clear coat. See how it goes.
1 point
-
Motor in no tranz yet this week sometime , seat back in too, moved it 50 mm back, makes a massive difference to driving position!!! Just wiring tranz doors and a bunch of small stuff to go … 2 weeks
1 point
-
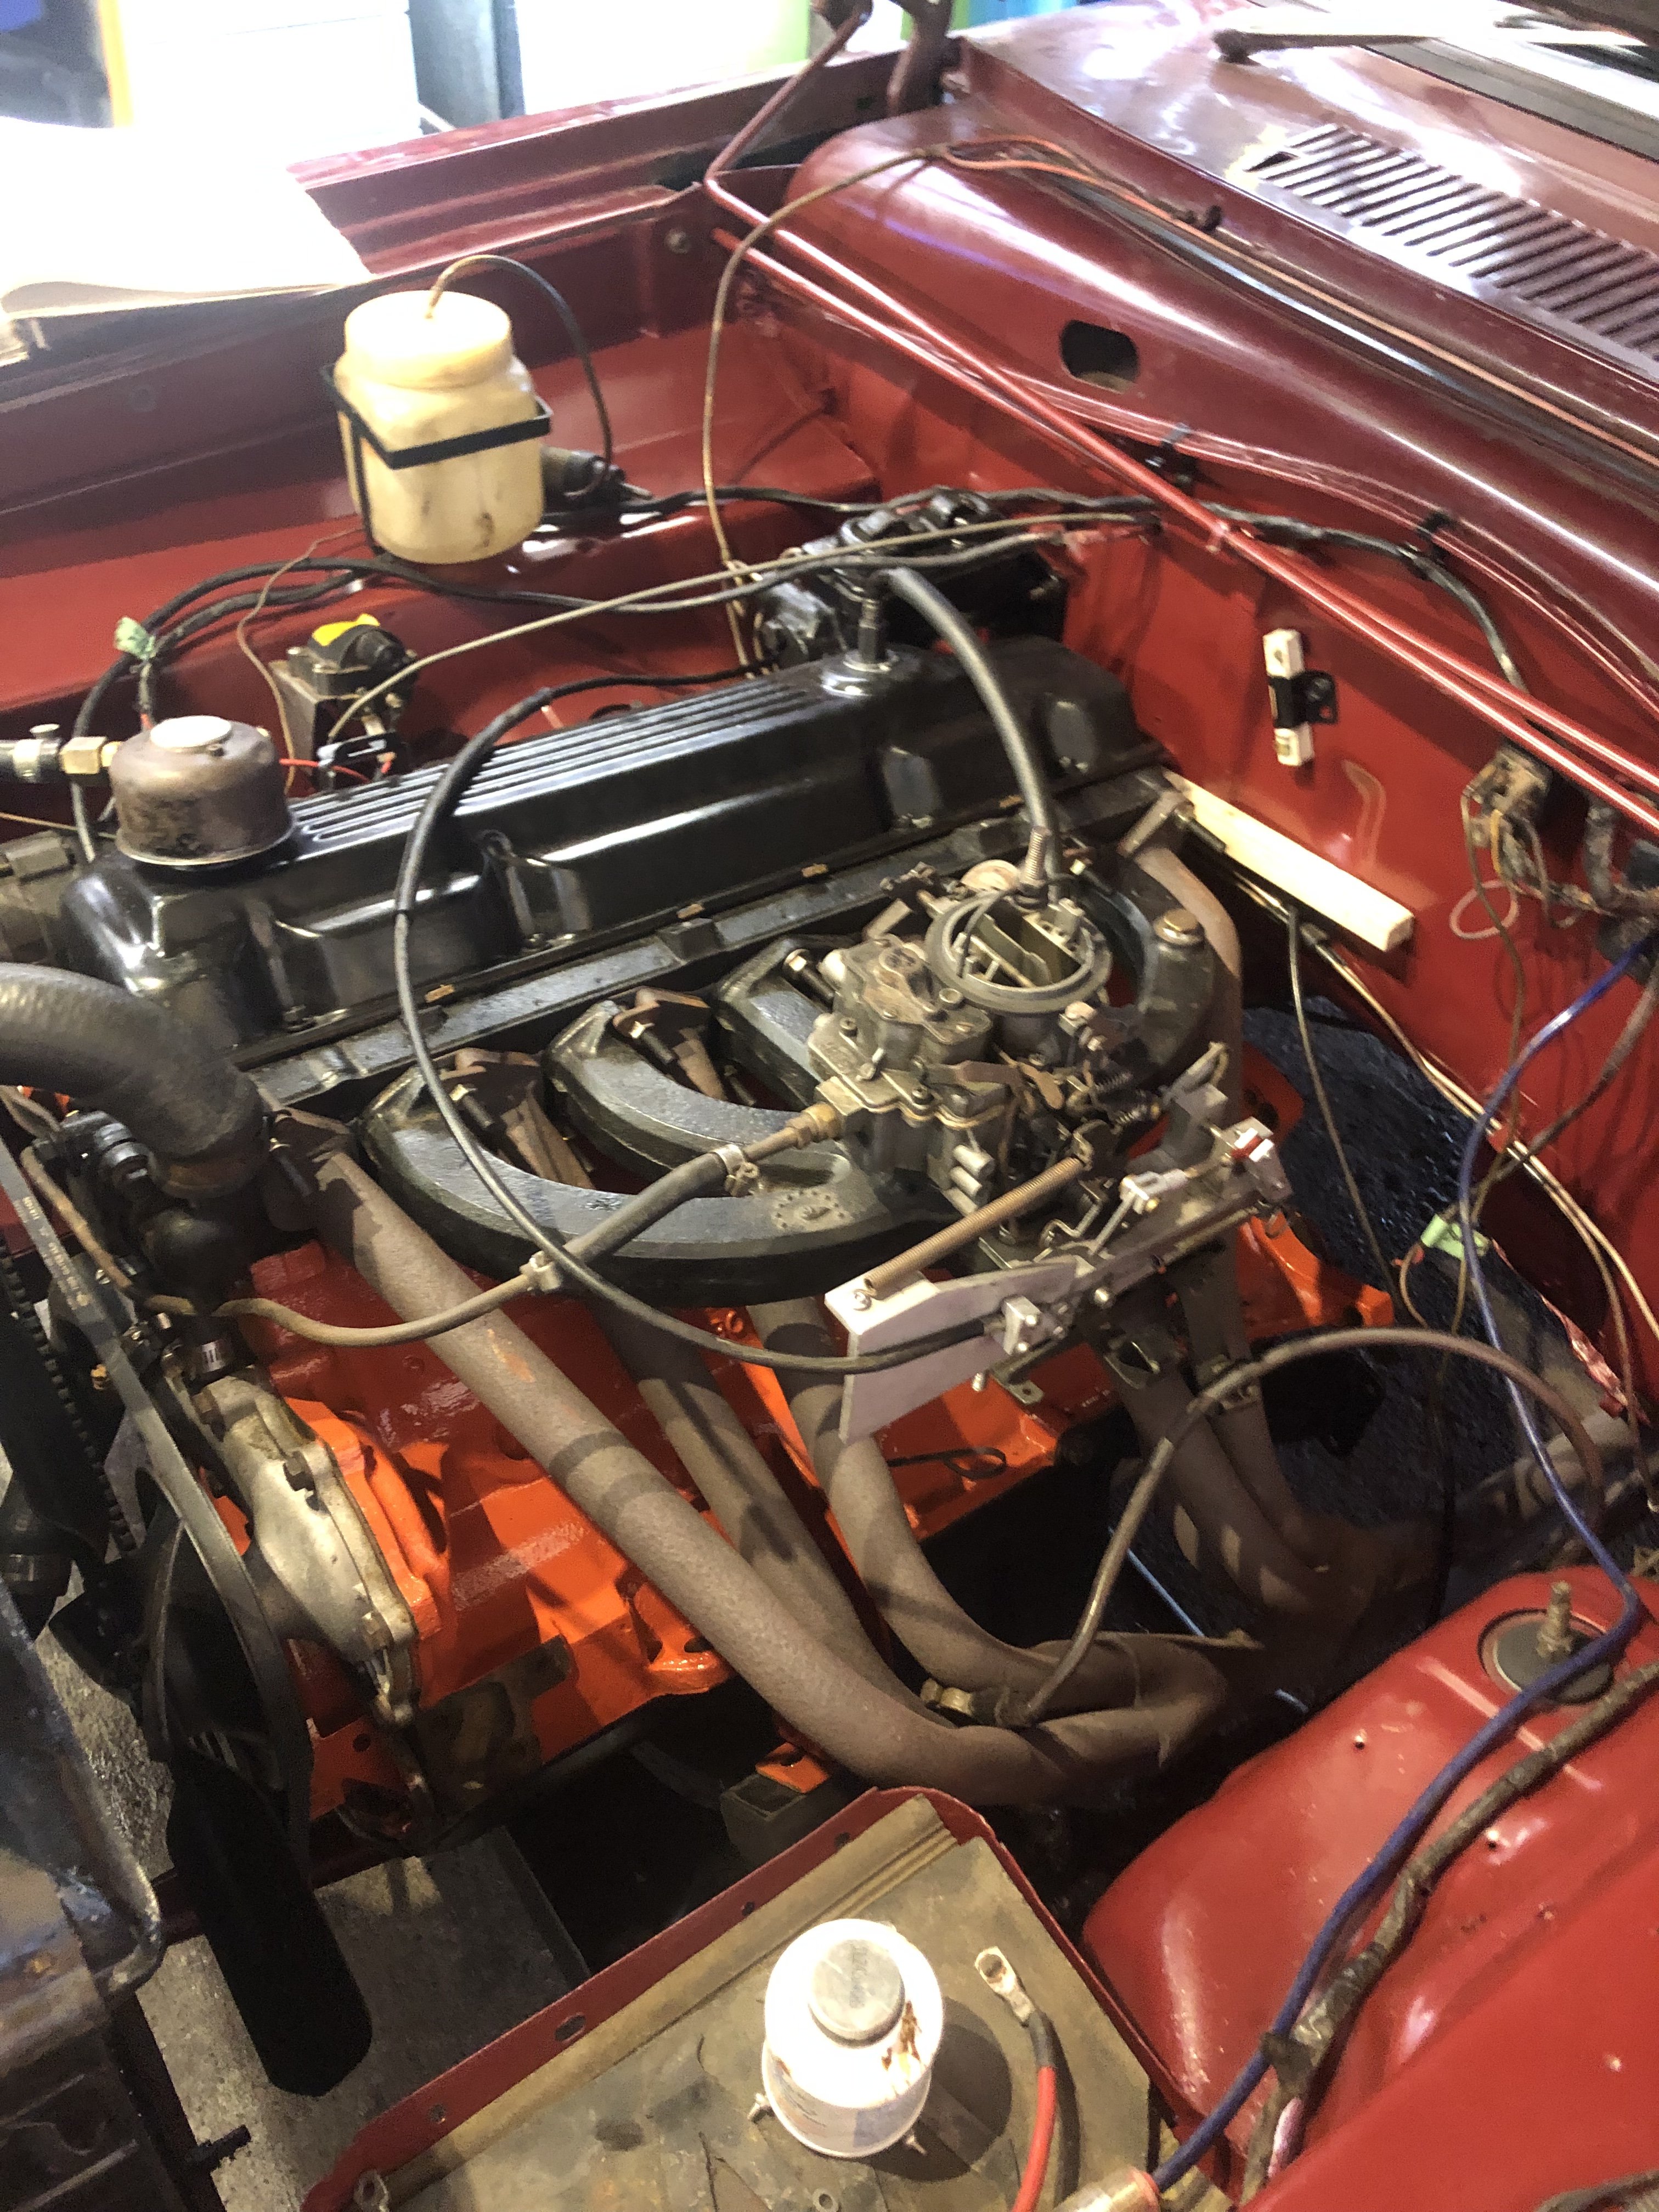
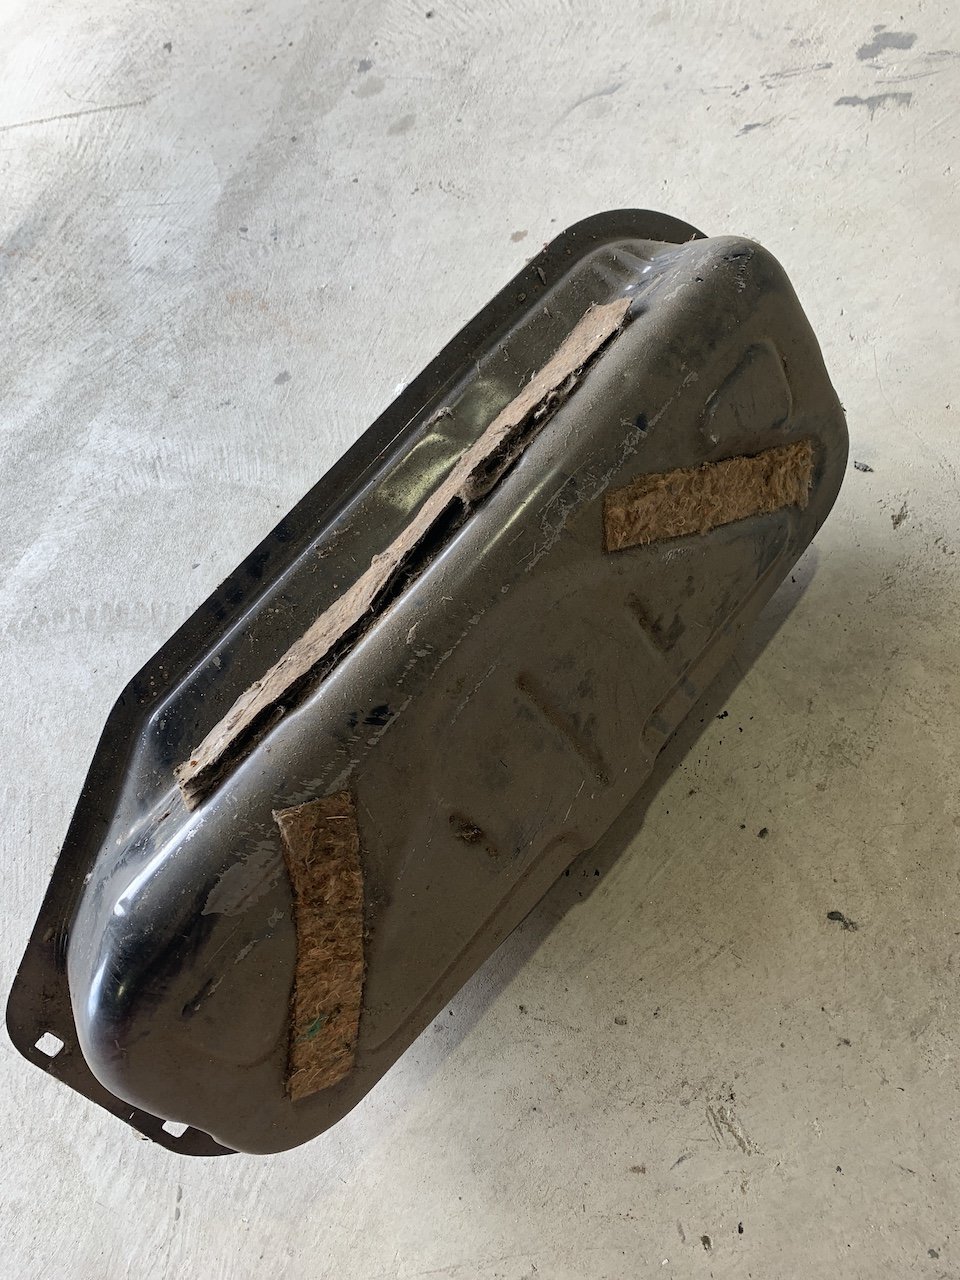
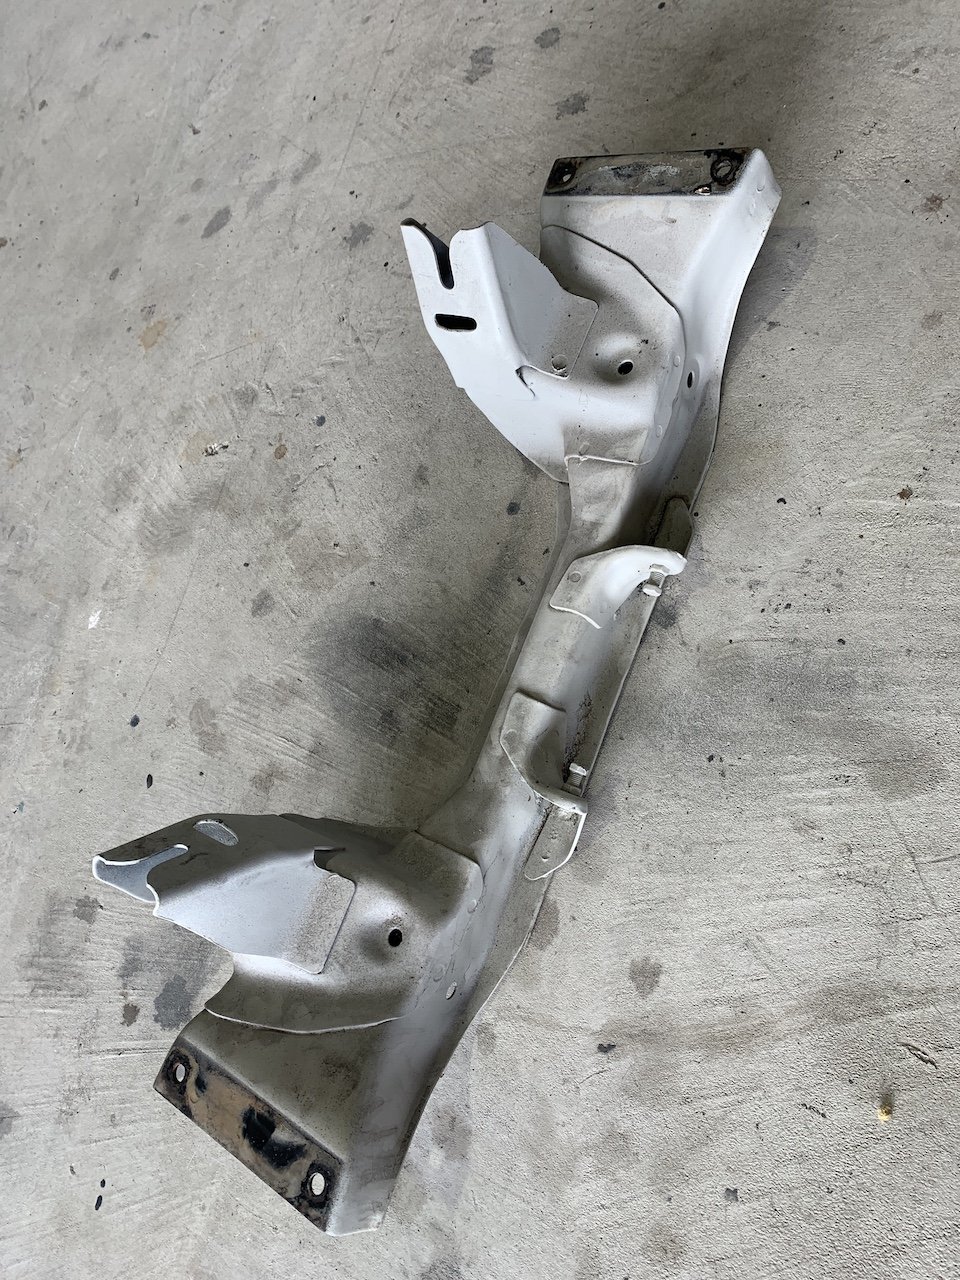
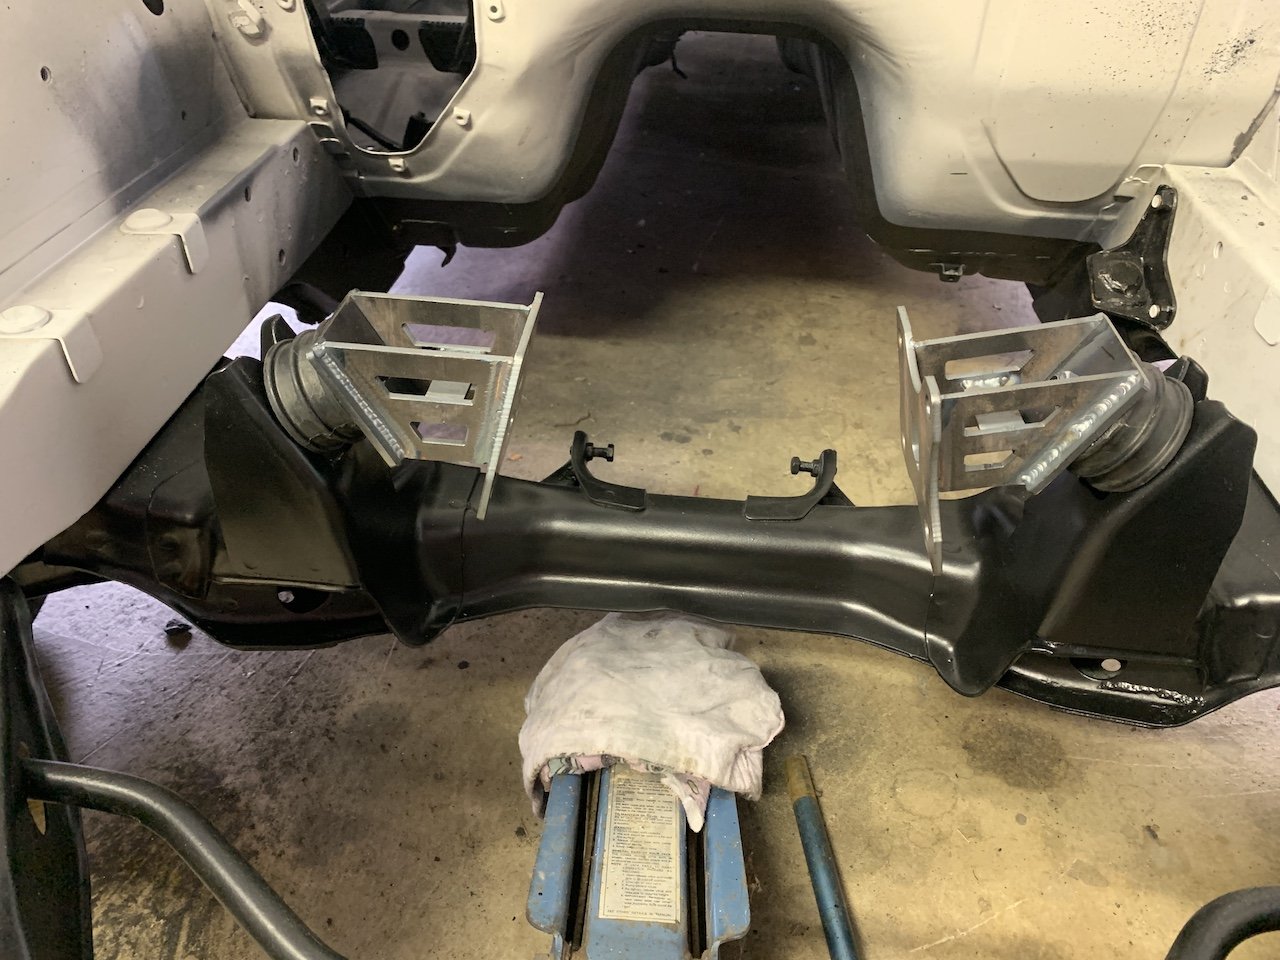
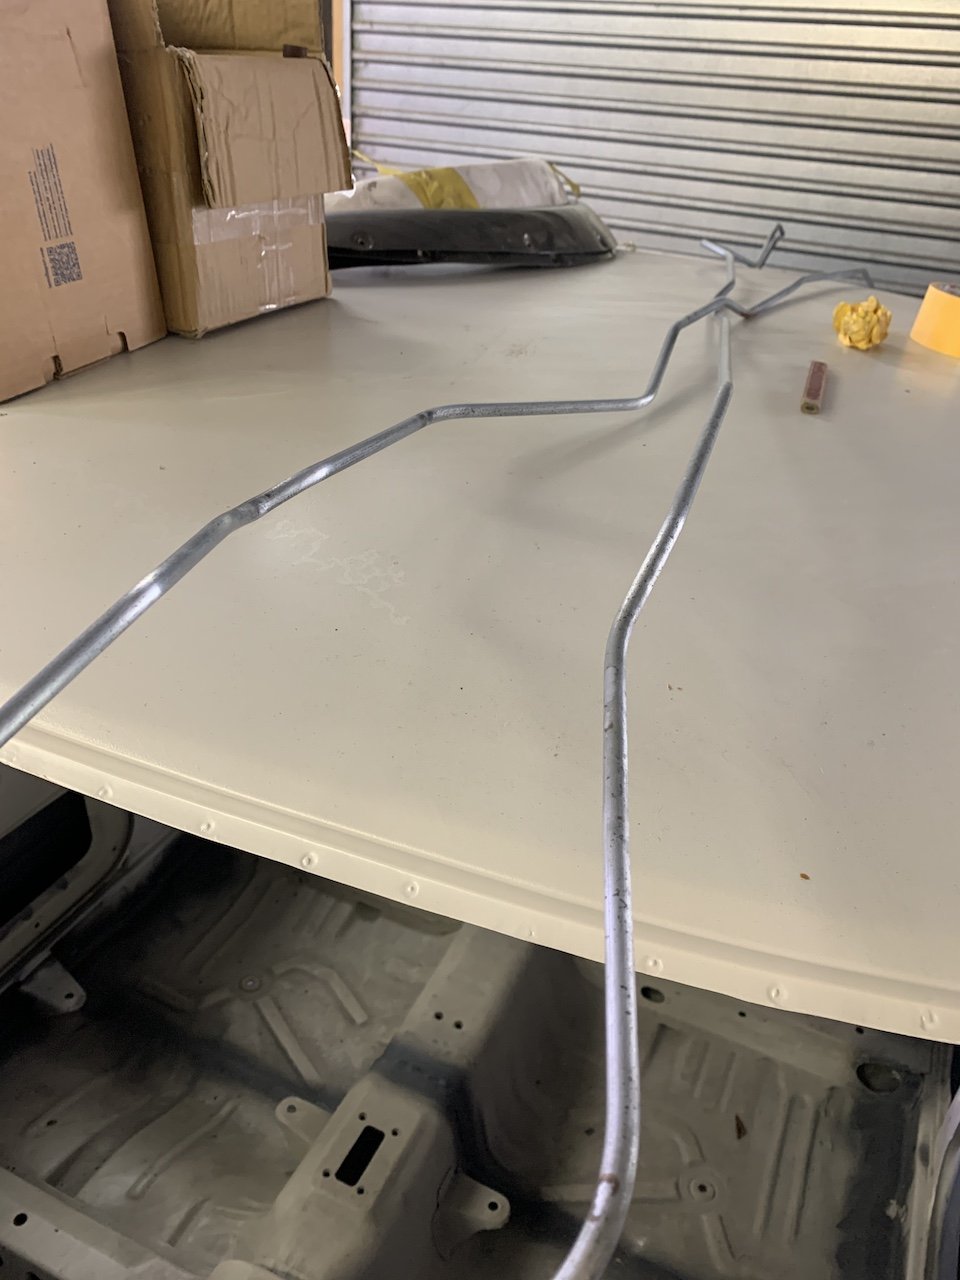
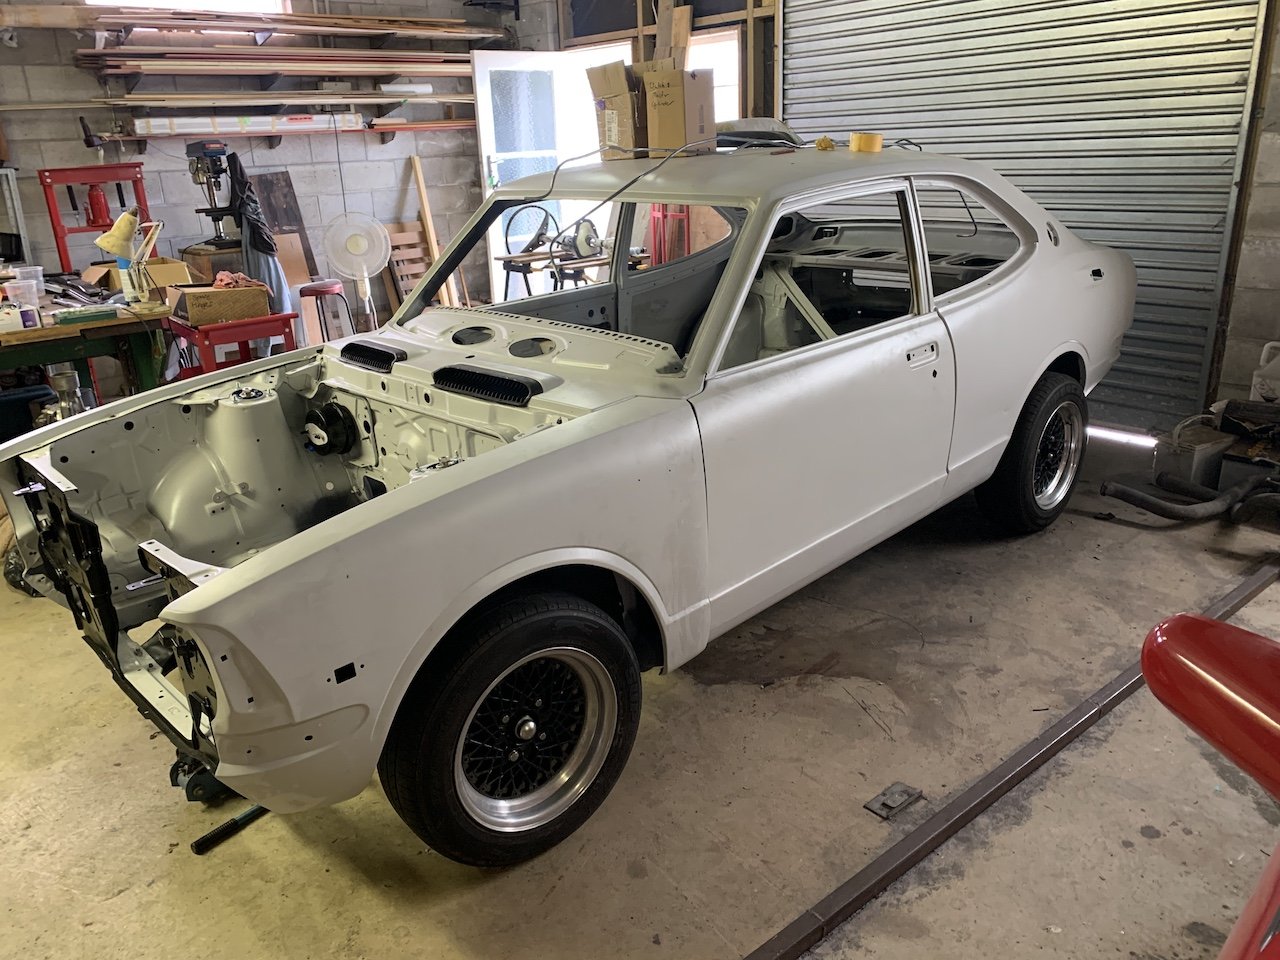
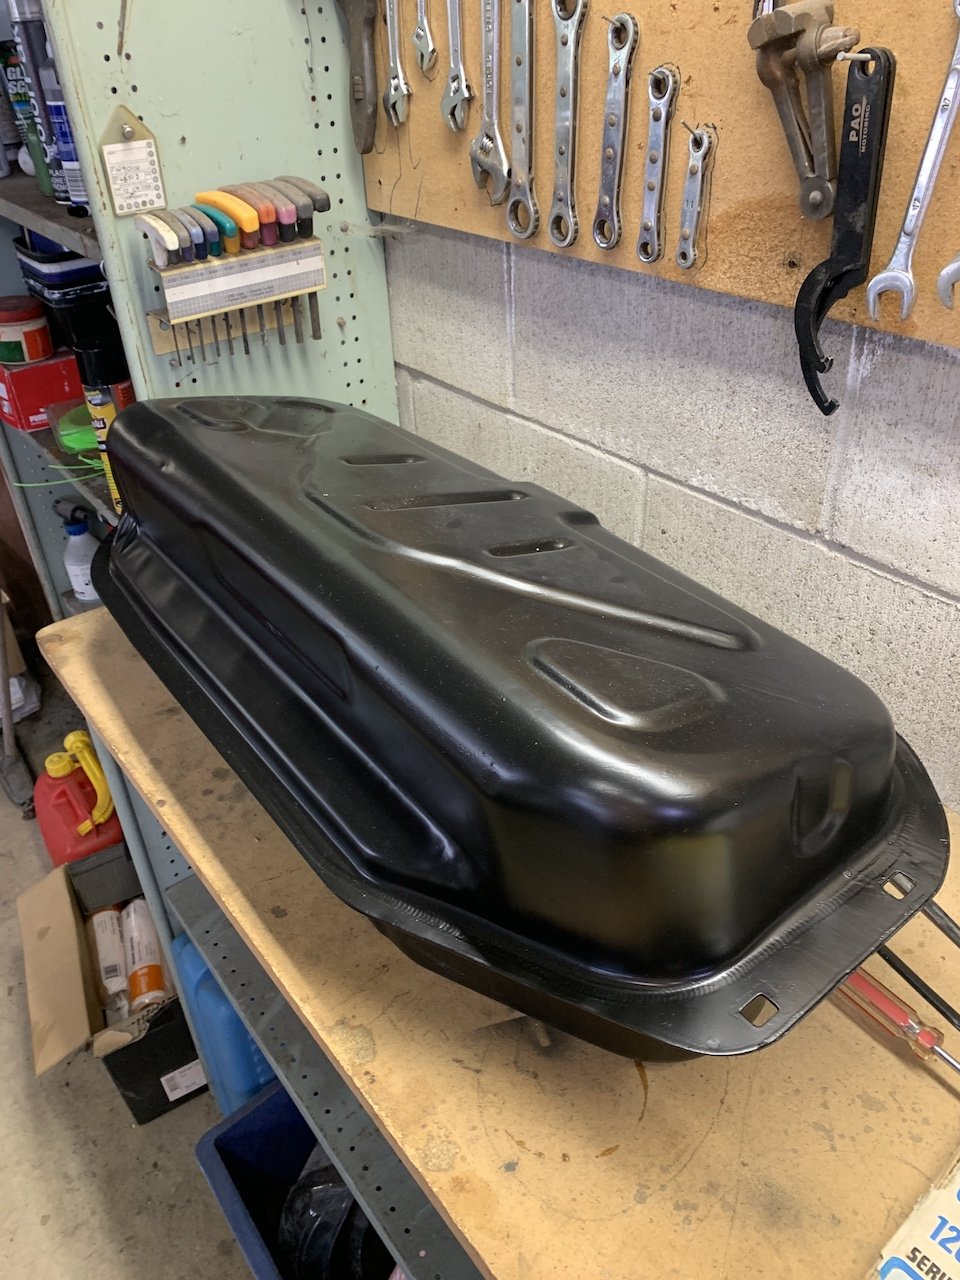
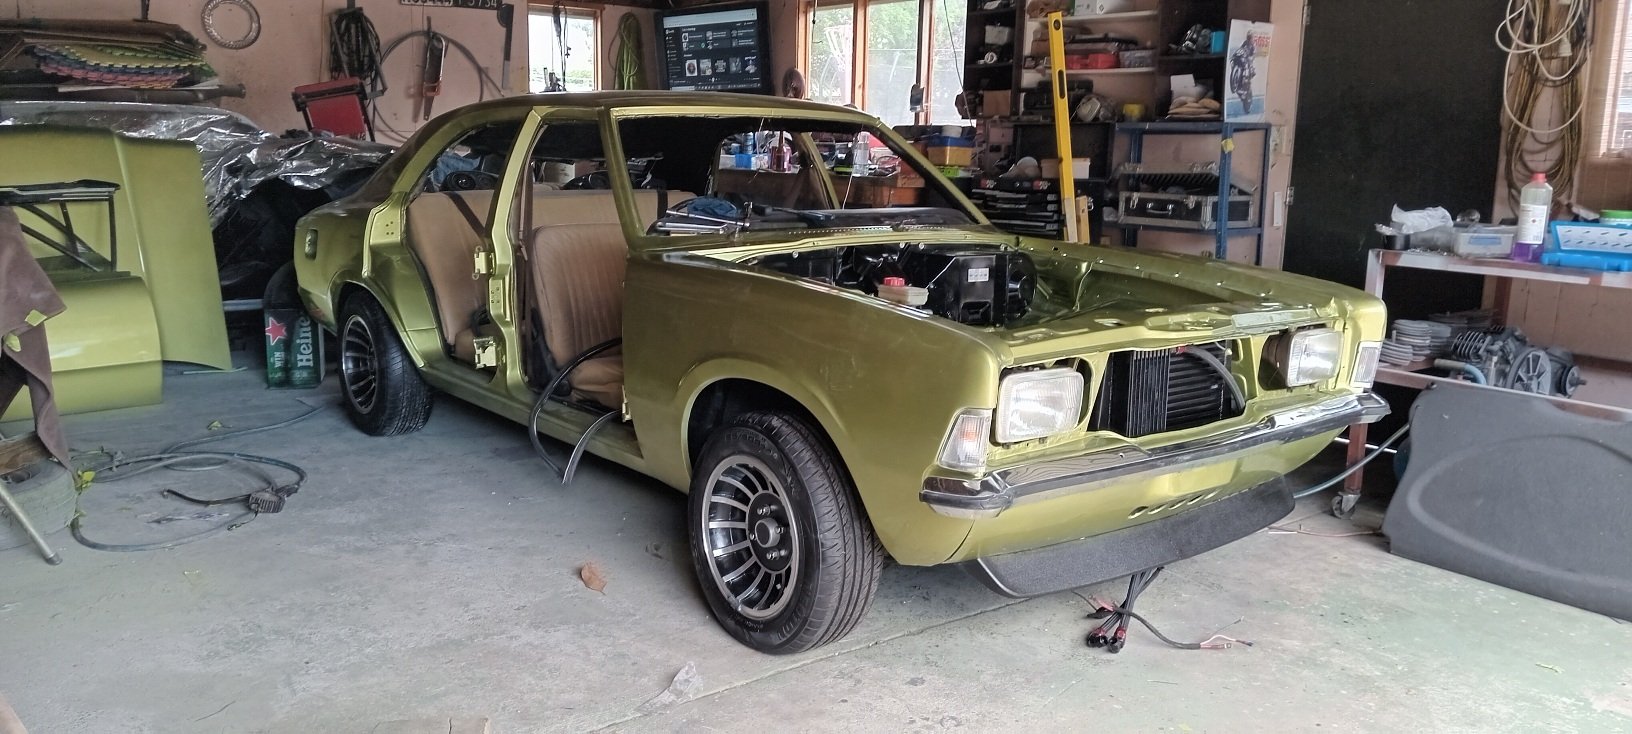
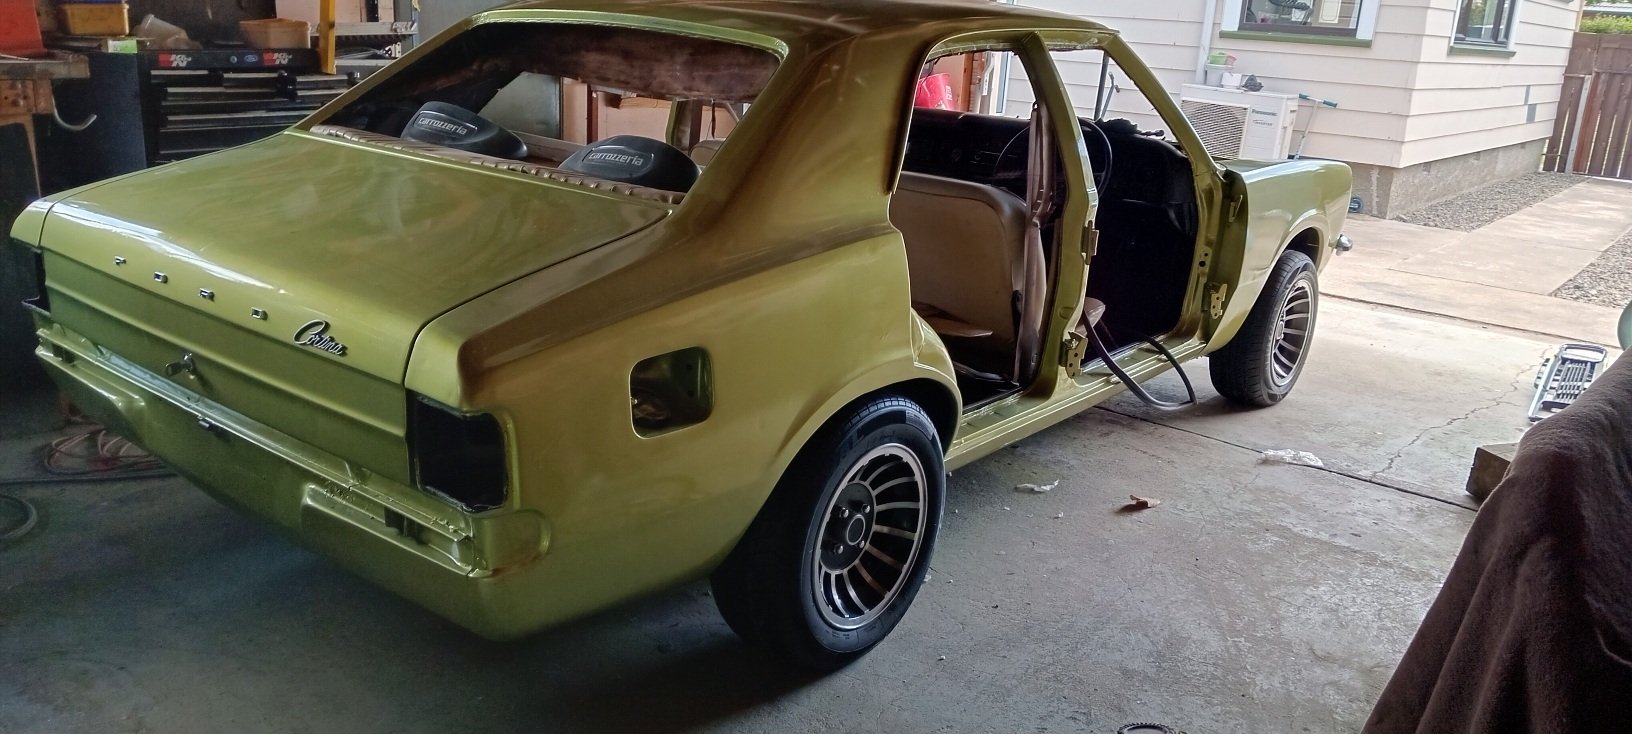
Now to list ALL the things I have done to this in the last 6 months......not much. I've struggled for motivation due to many things, but am starting again with a little by little approach. I've wasted too much time trying to figure out the perfect plan and what to do next, then second guess myself and think "oh this needs to happen before I can do that, but then I'll actually need to do this first" and so on and so on around in circles. I've avoided doing stuff because I don't want to do things twice, or keep taking bits on and off, but today I just said stuff it - just do some stuff, little by little and get moving. Today I simply fitted my doors and fenders and made a plan for a few other things. over the last few months I have achieved this: 1) Turns out the crossmember I purchased years ago with the modified mounts for a 4age were actually completely wrong! My reconditioned AE86 engine mounts and brand new cusco mounts will now be up for sale....so I cleaned up a factory crossmember I had and fitted it with the KE Conversions kit. 2) tyres kept going flat, fitted some inner tubes 3) cleaned up and primed the inside of my doors 4) bought a parts gearbox to swap the tail section onto my T50 - this is to maintain my factory shifter position and centre console. 5) cleaned up and painted a petrol tank 6) cleaned up some fuel lines next, I'll order my flares, get my steering box rebuilt and then start fitting the dummy engine etc to see what firewall holes/brackets are needing modified deleted etc.
1 point
-
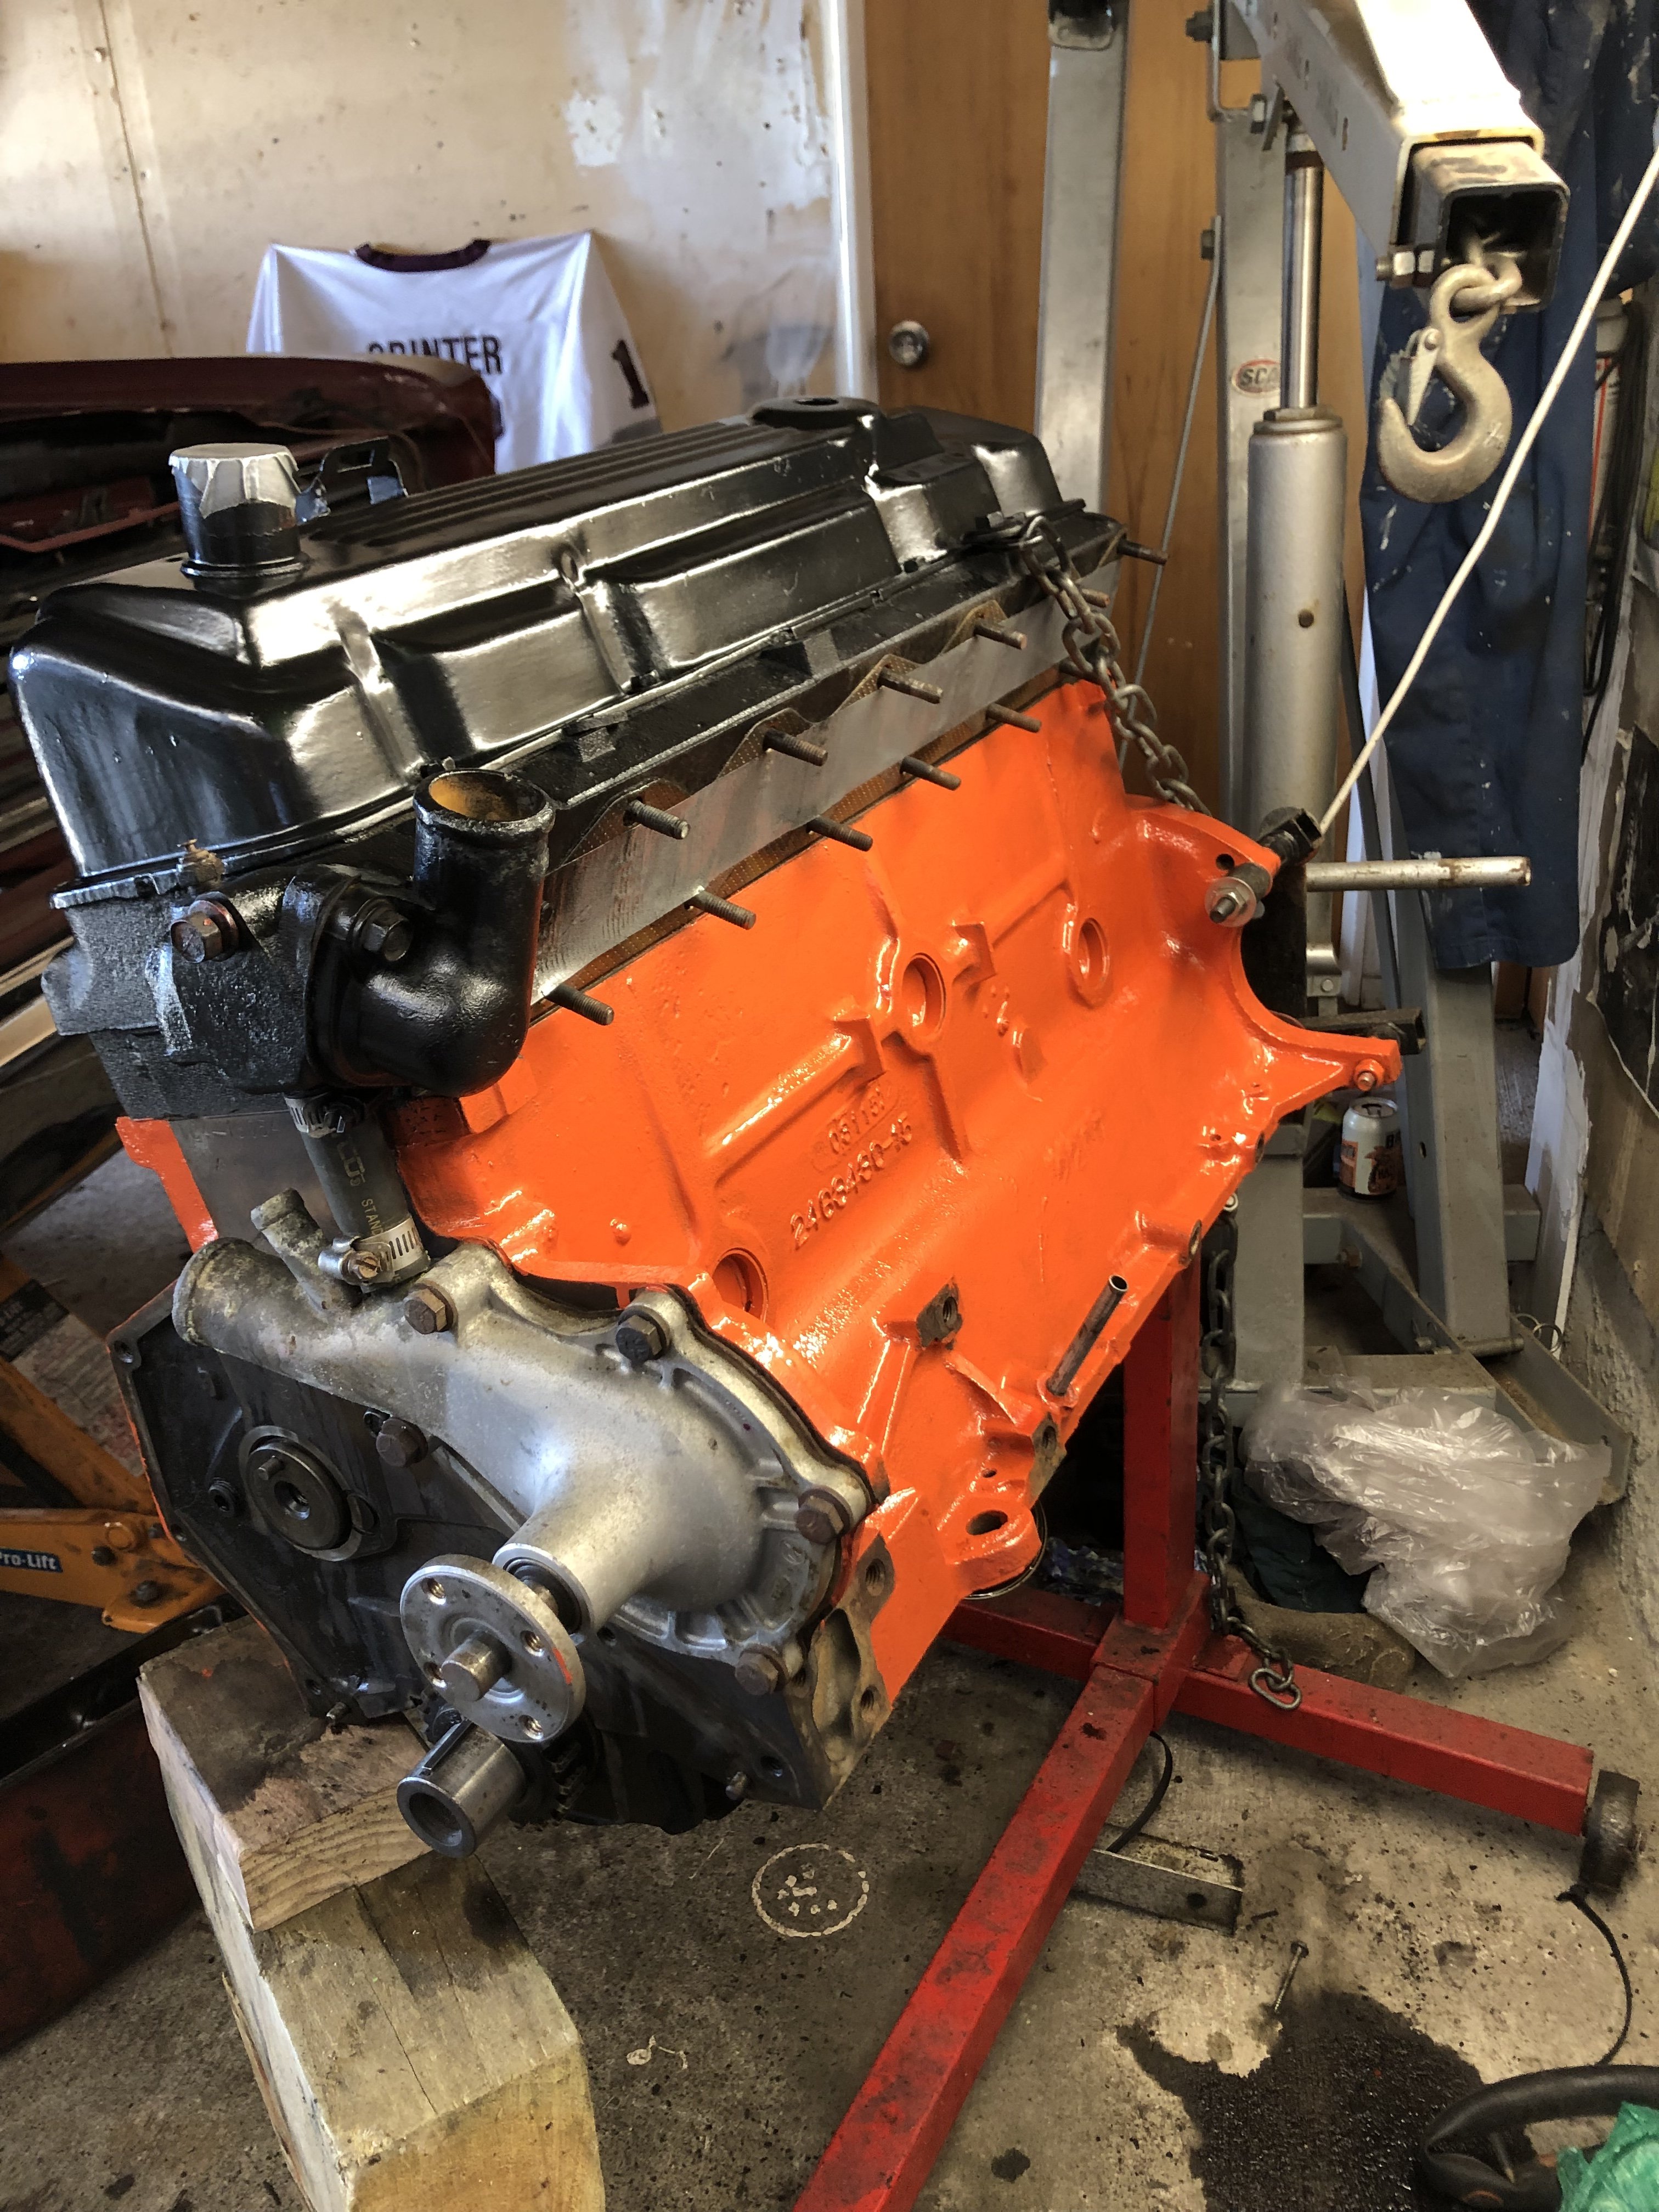
Hemi orange , think they were mostly red from factory until the later ones .. mine was weird orange before I painted it
1 point
-
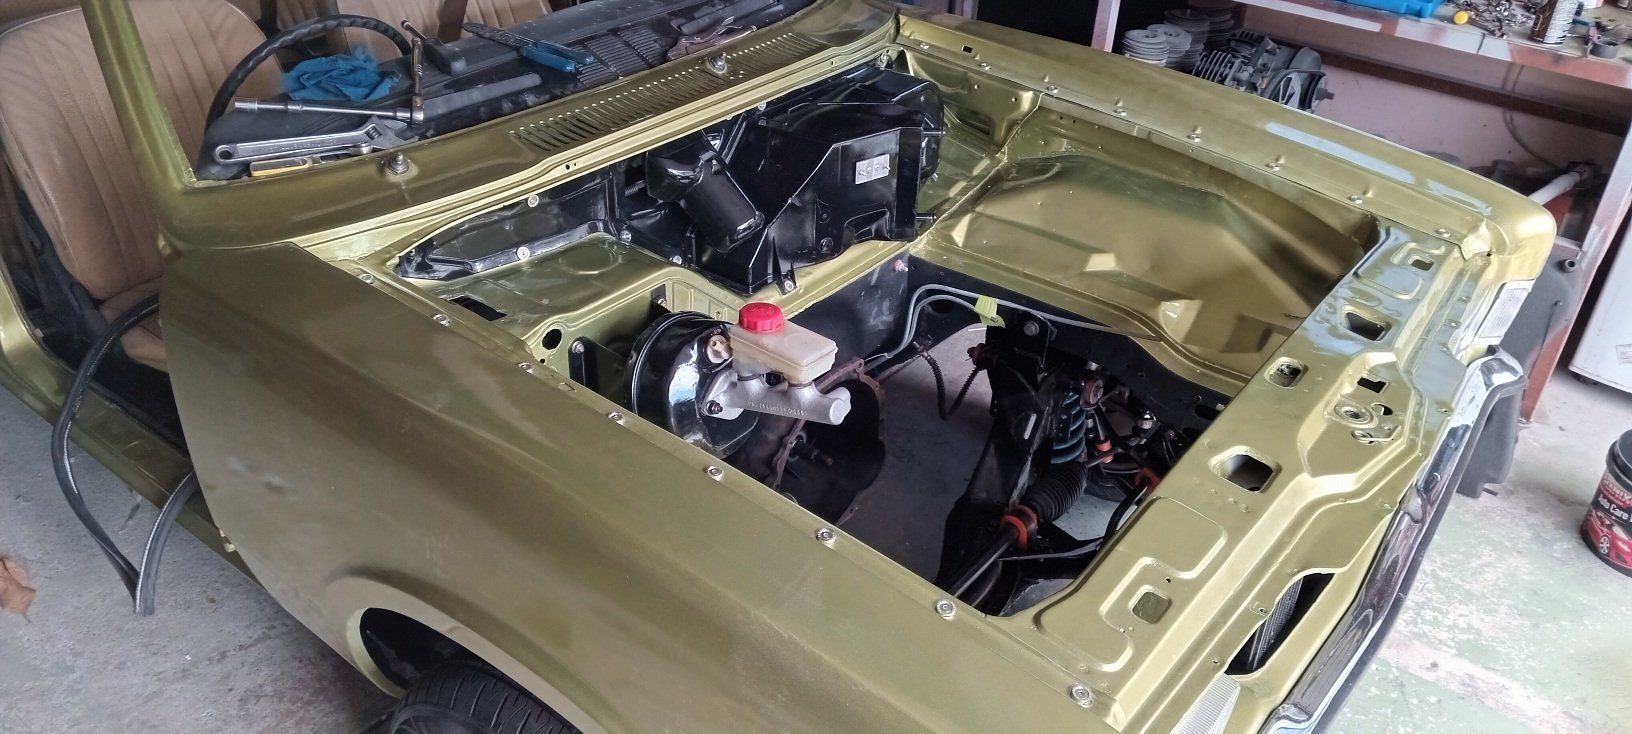
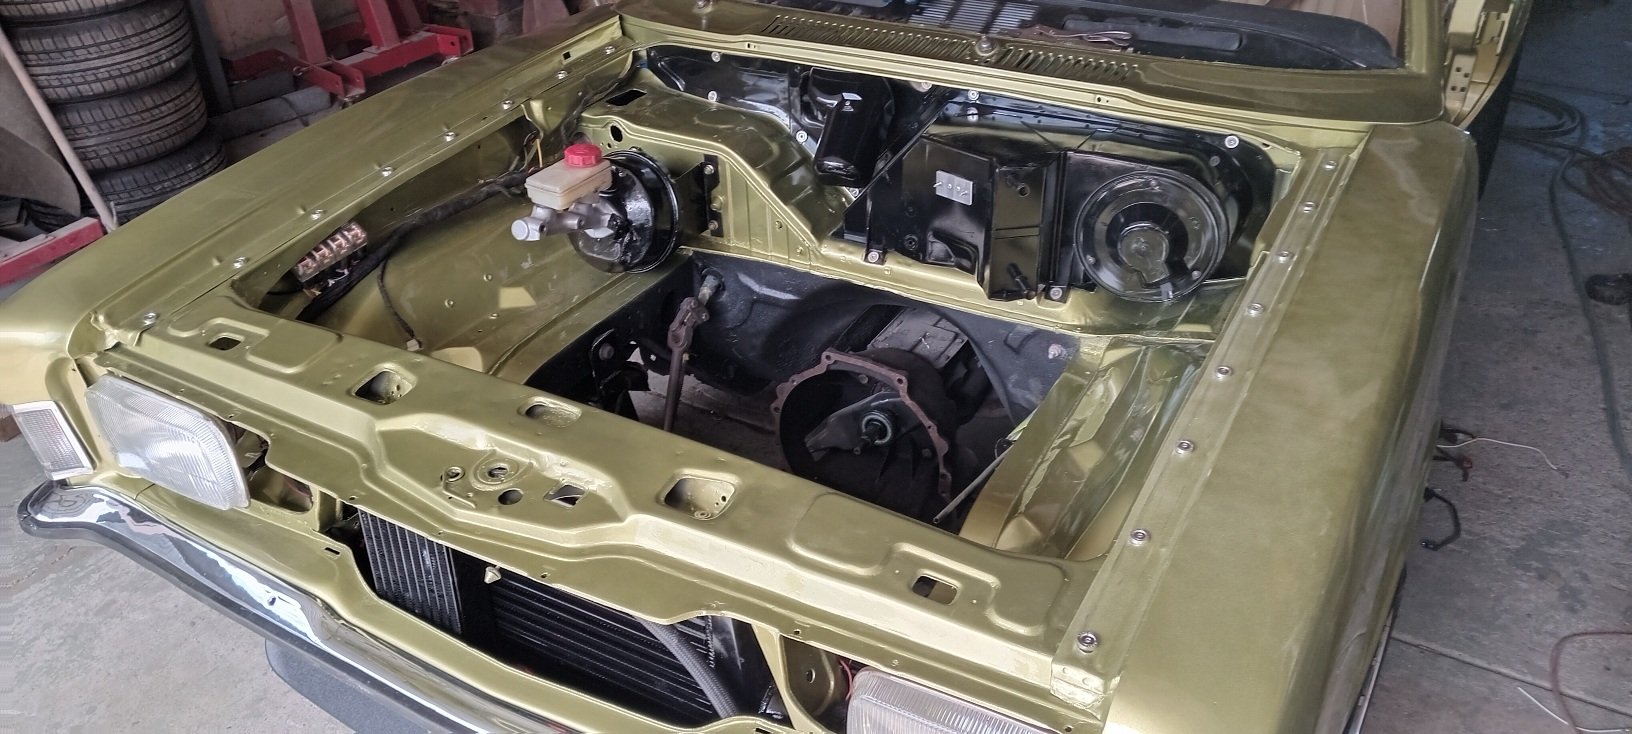
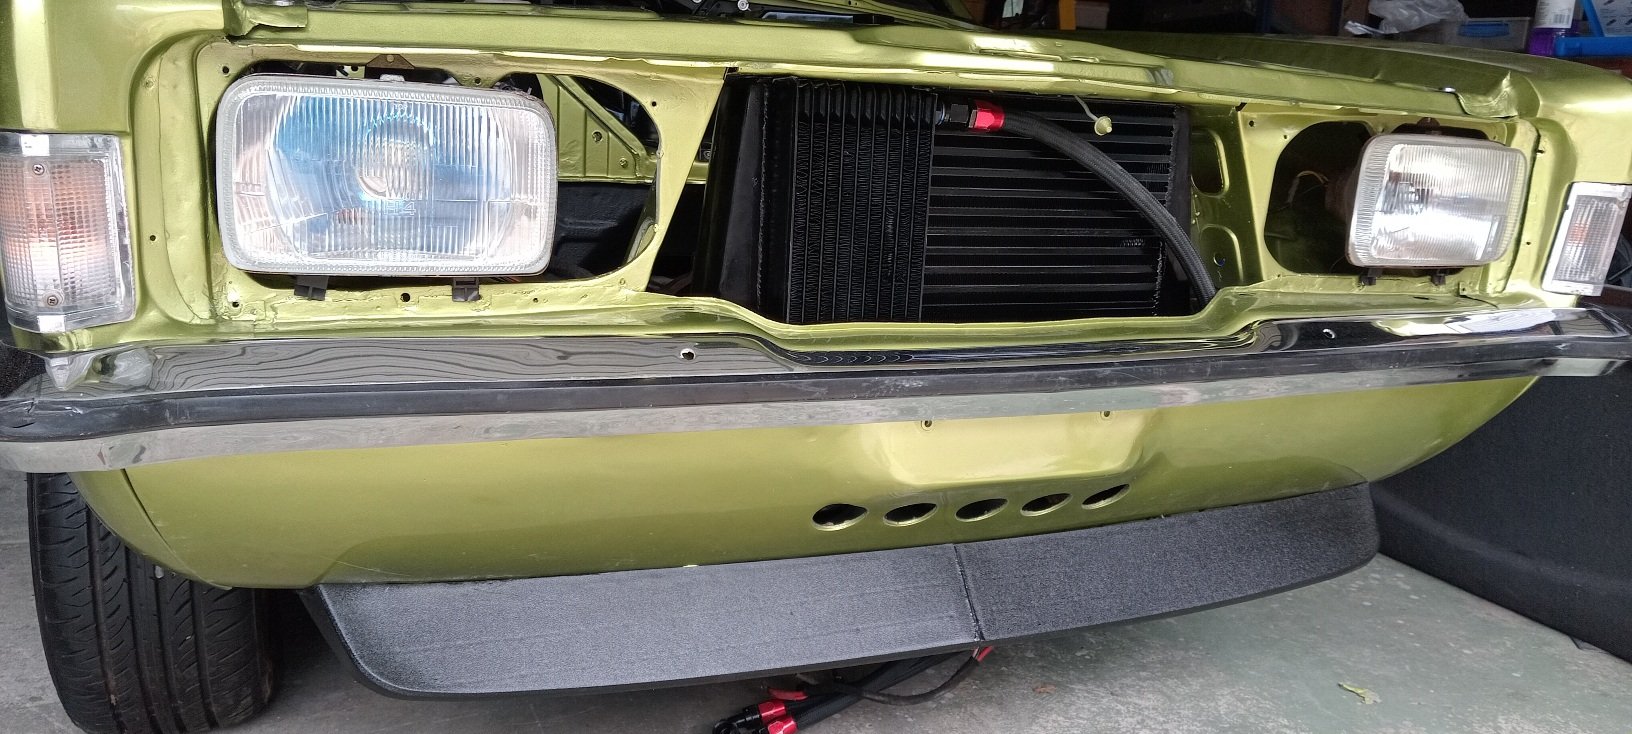
A $600 paint job ,a rattle can of gloss black ,some wanky screws I've had on the shelf for ever and some elbow grease... and the quick clean up job I wanted looks shit loads better than I thought it would. wheels cleaned ,panted and polished. oil cooler in ,intercooler in,heater In, wipers in,engine bay panels in, booster and master cylinder in most of the loom back in.... and boot on
1 point
-
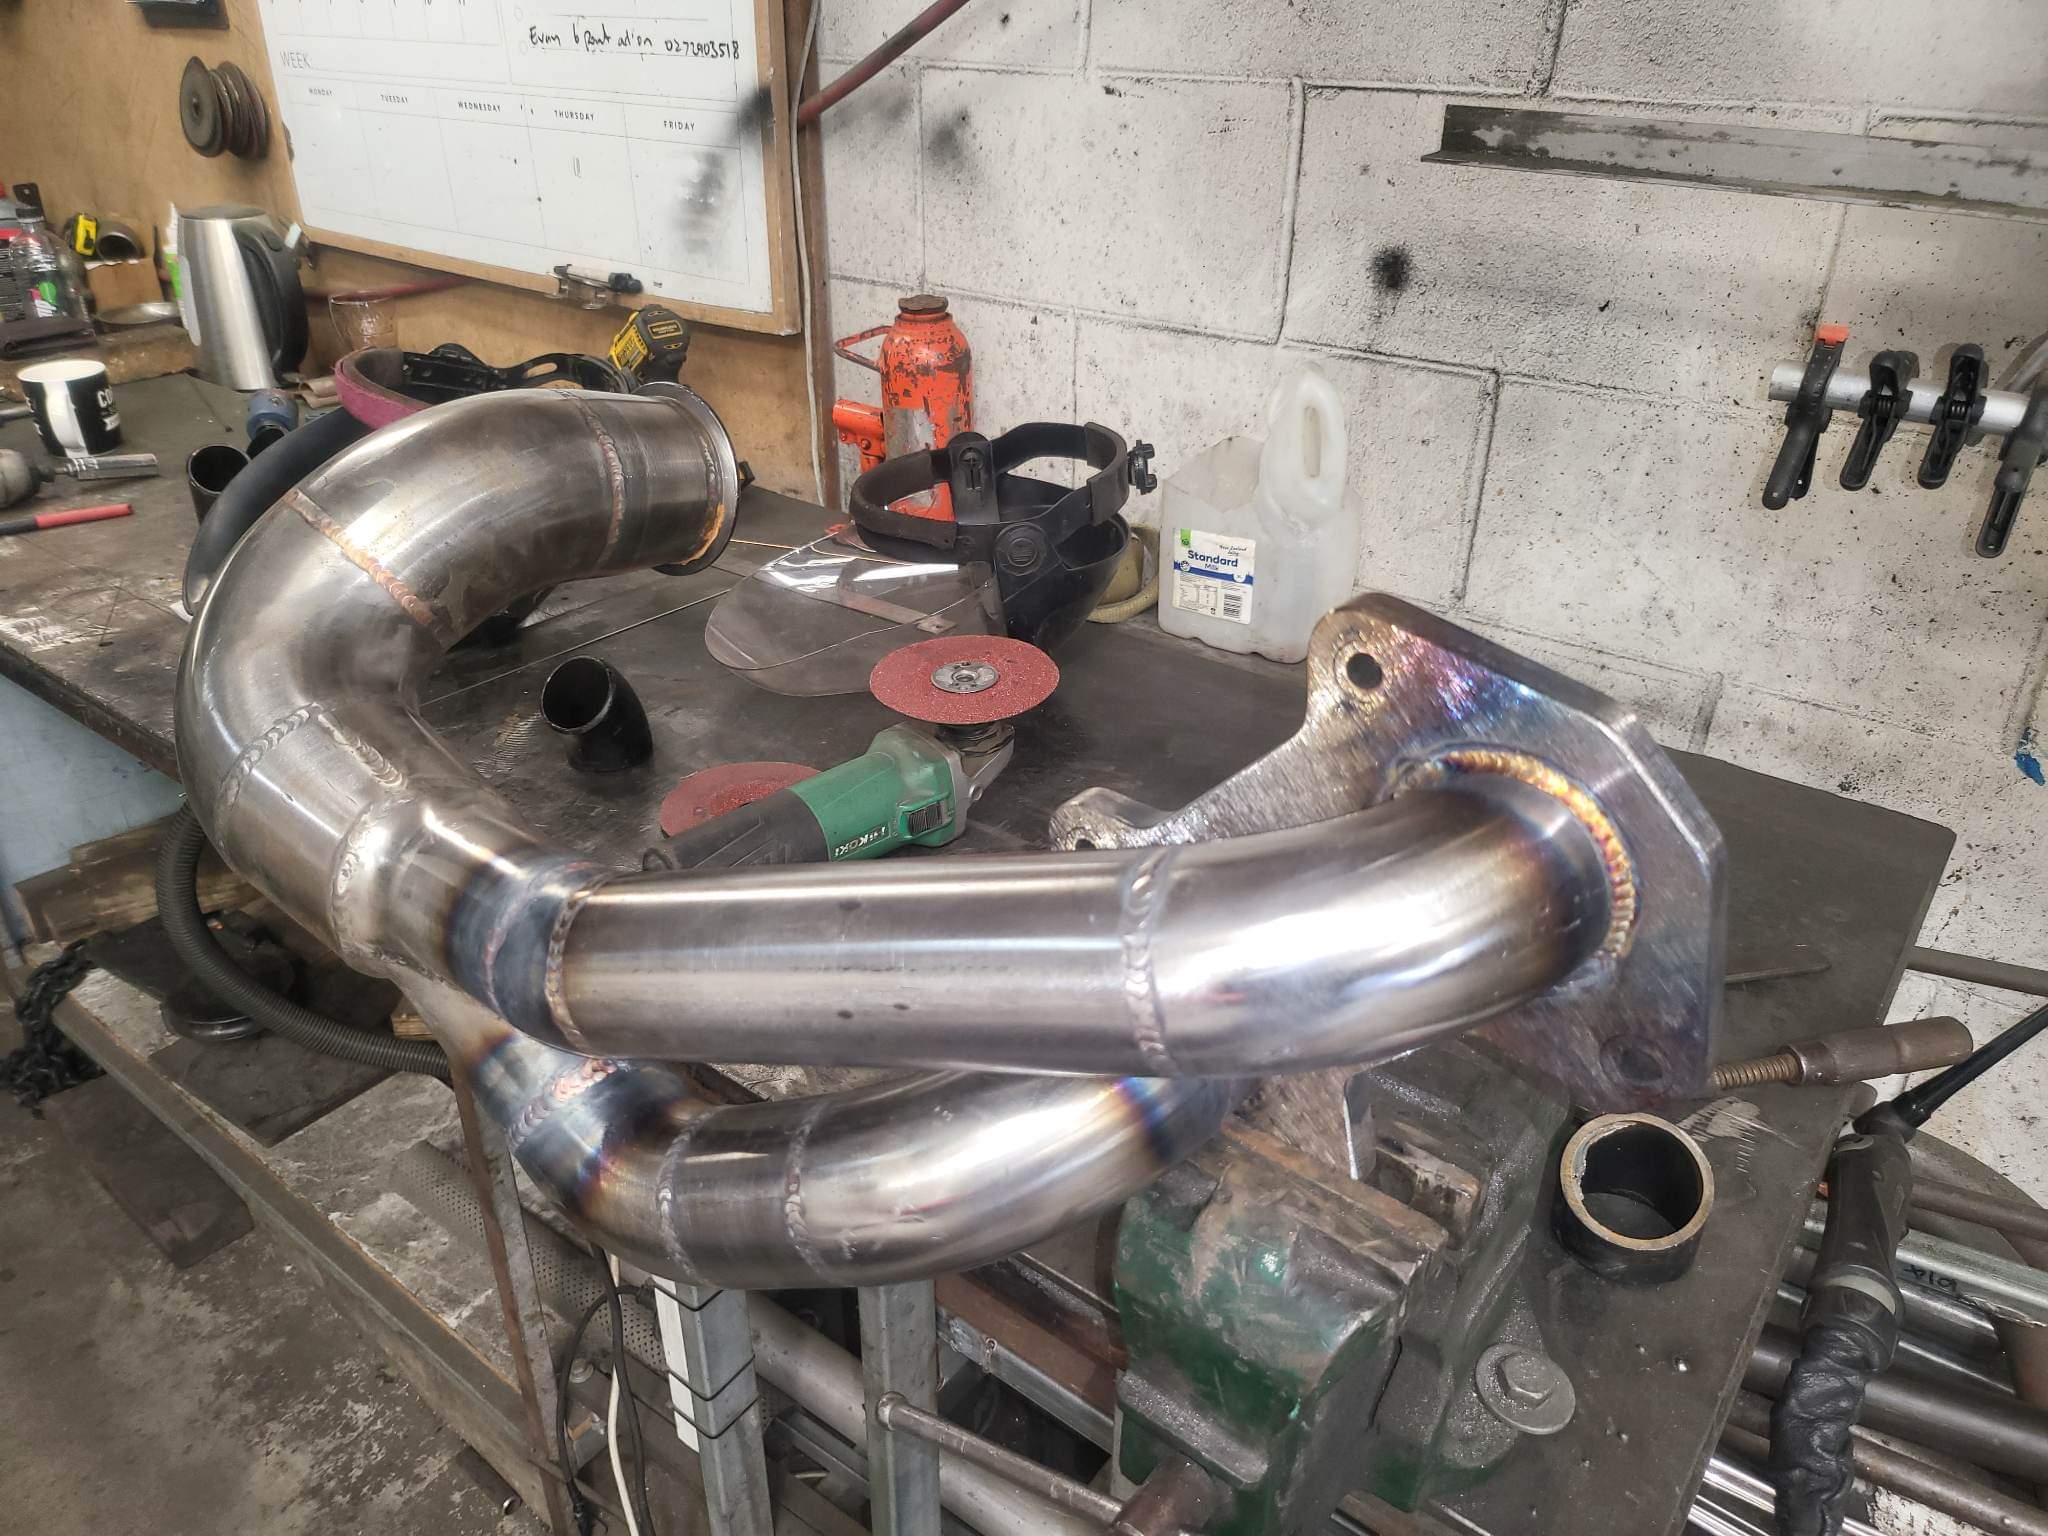
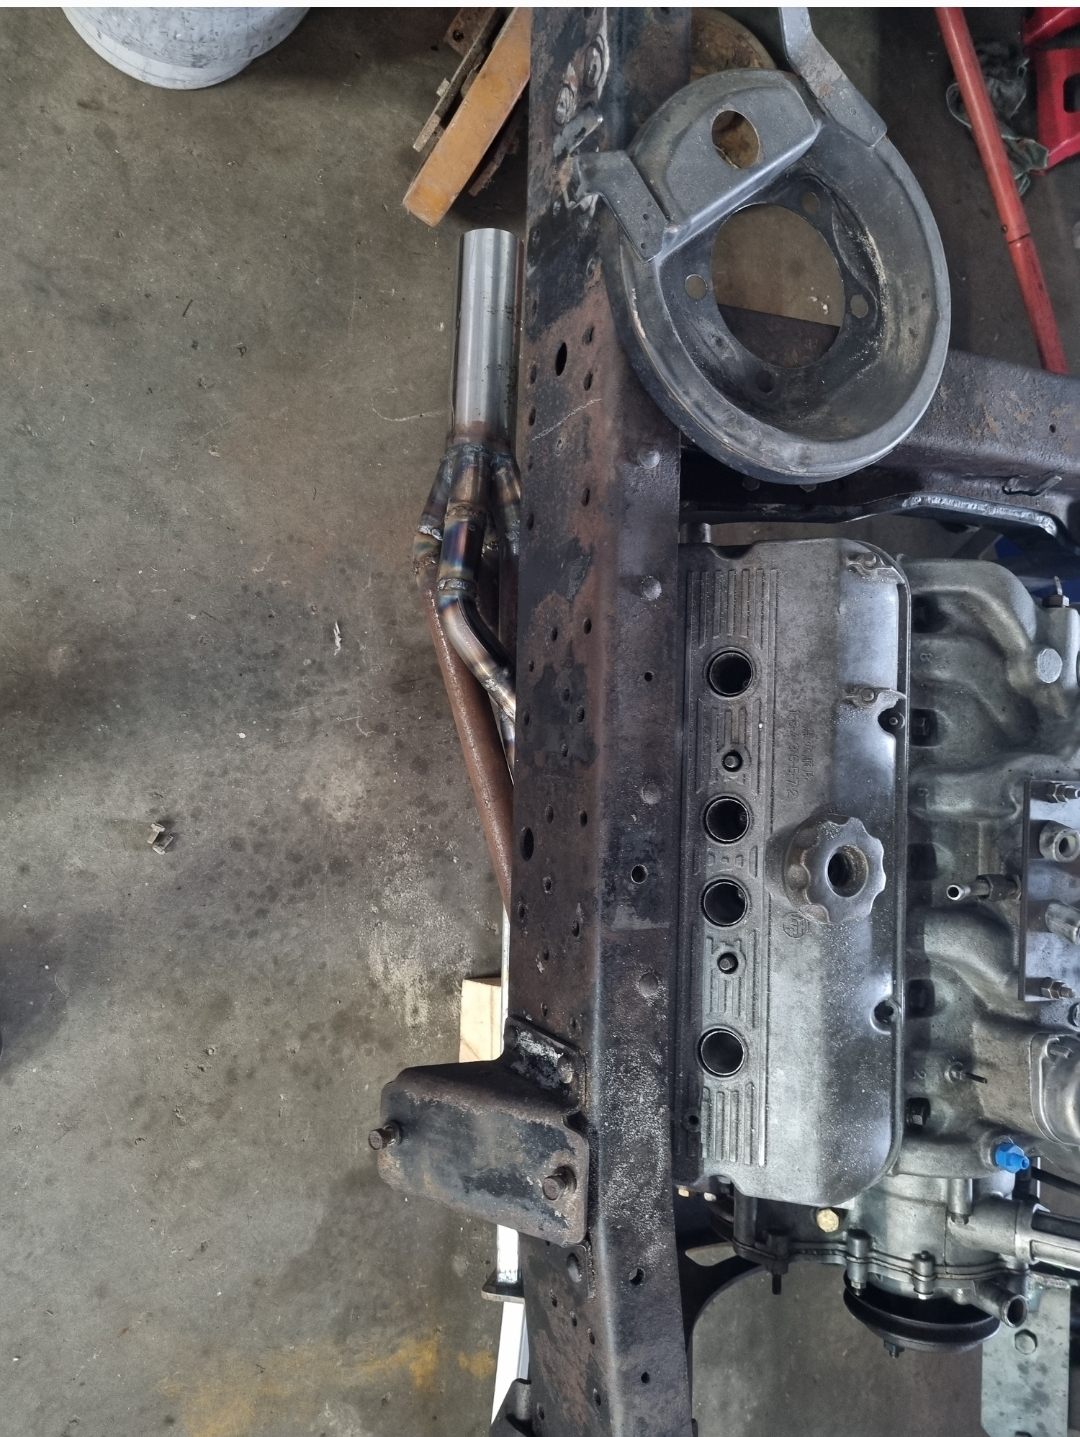
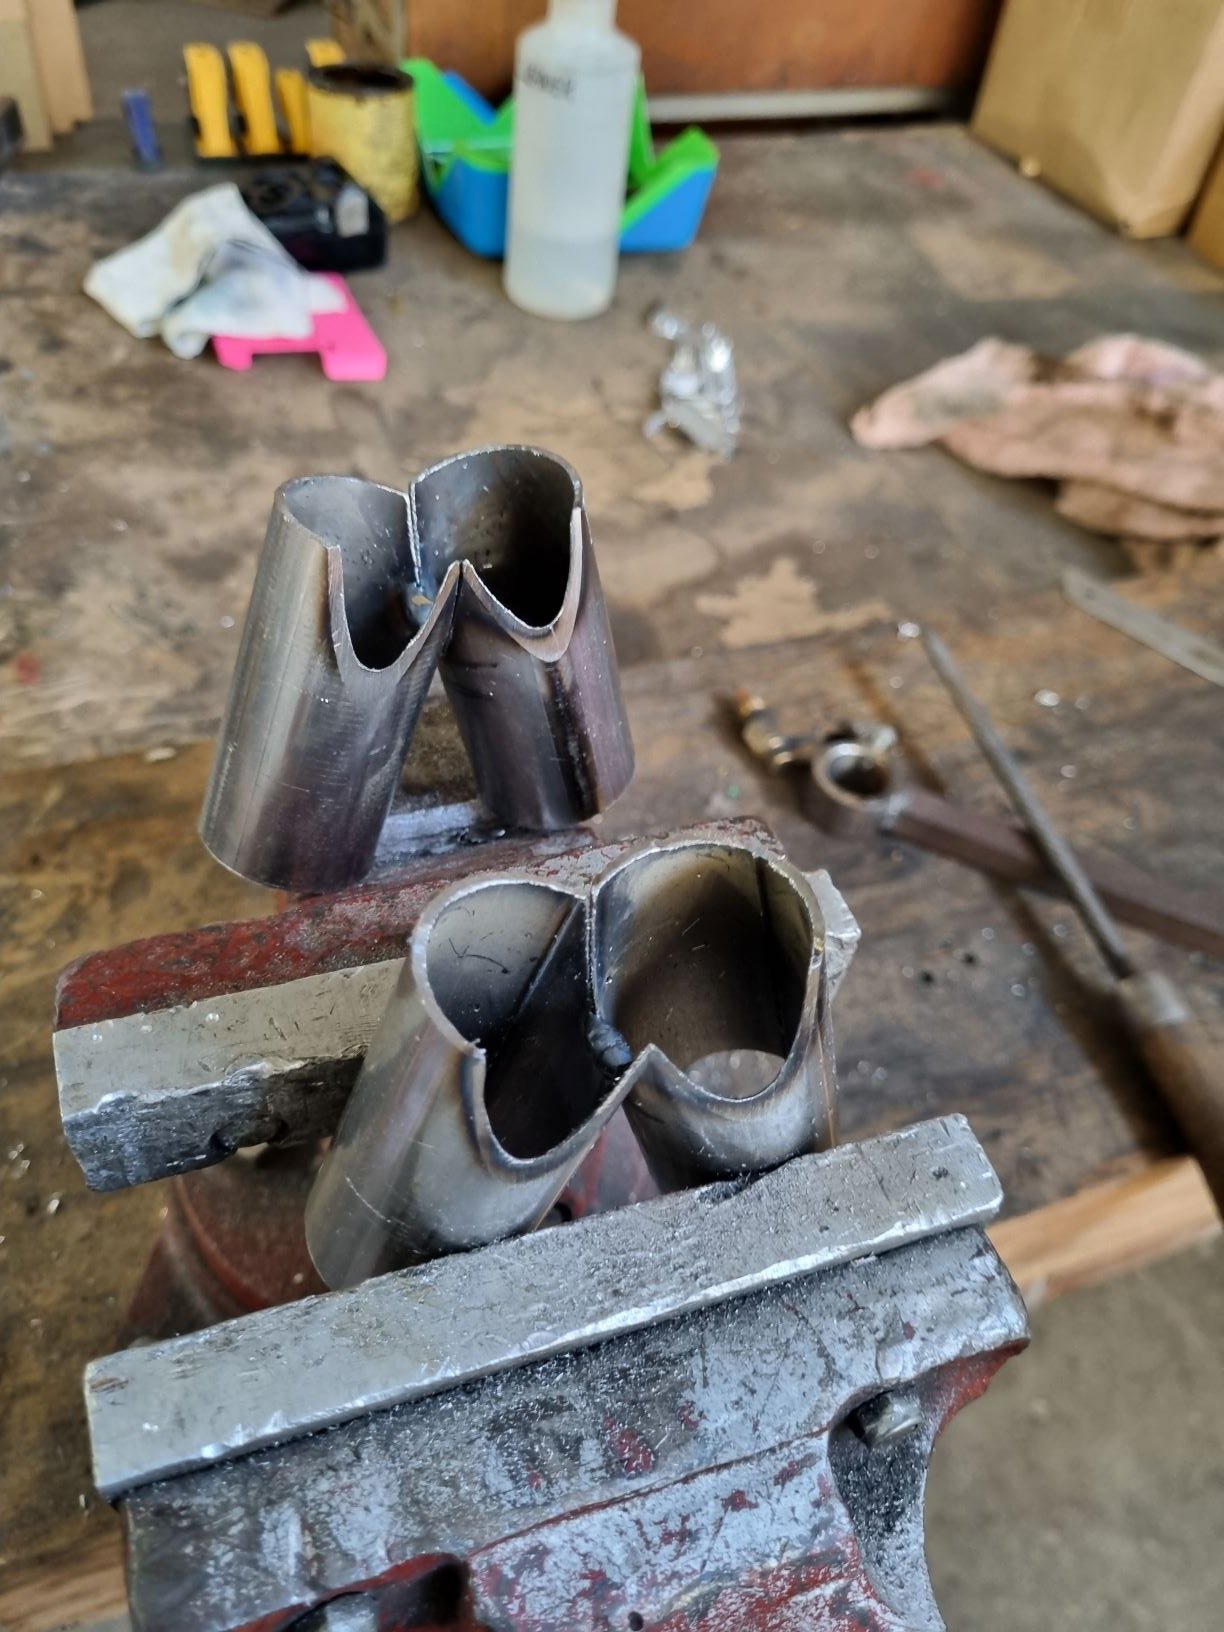
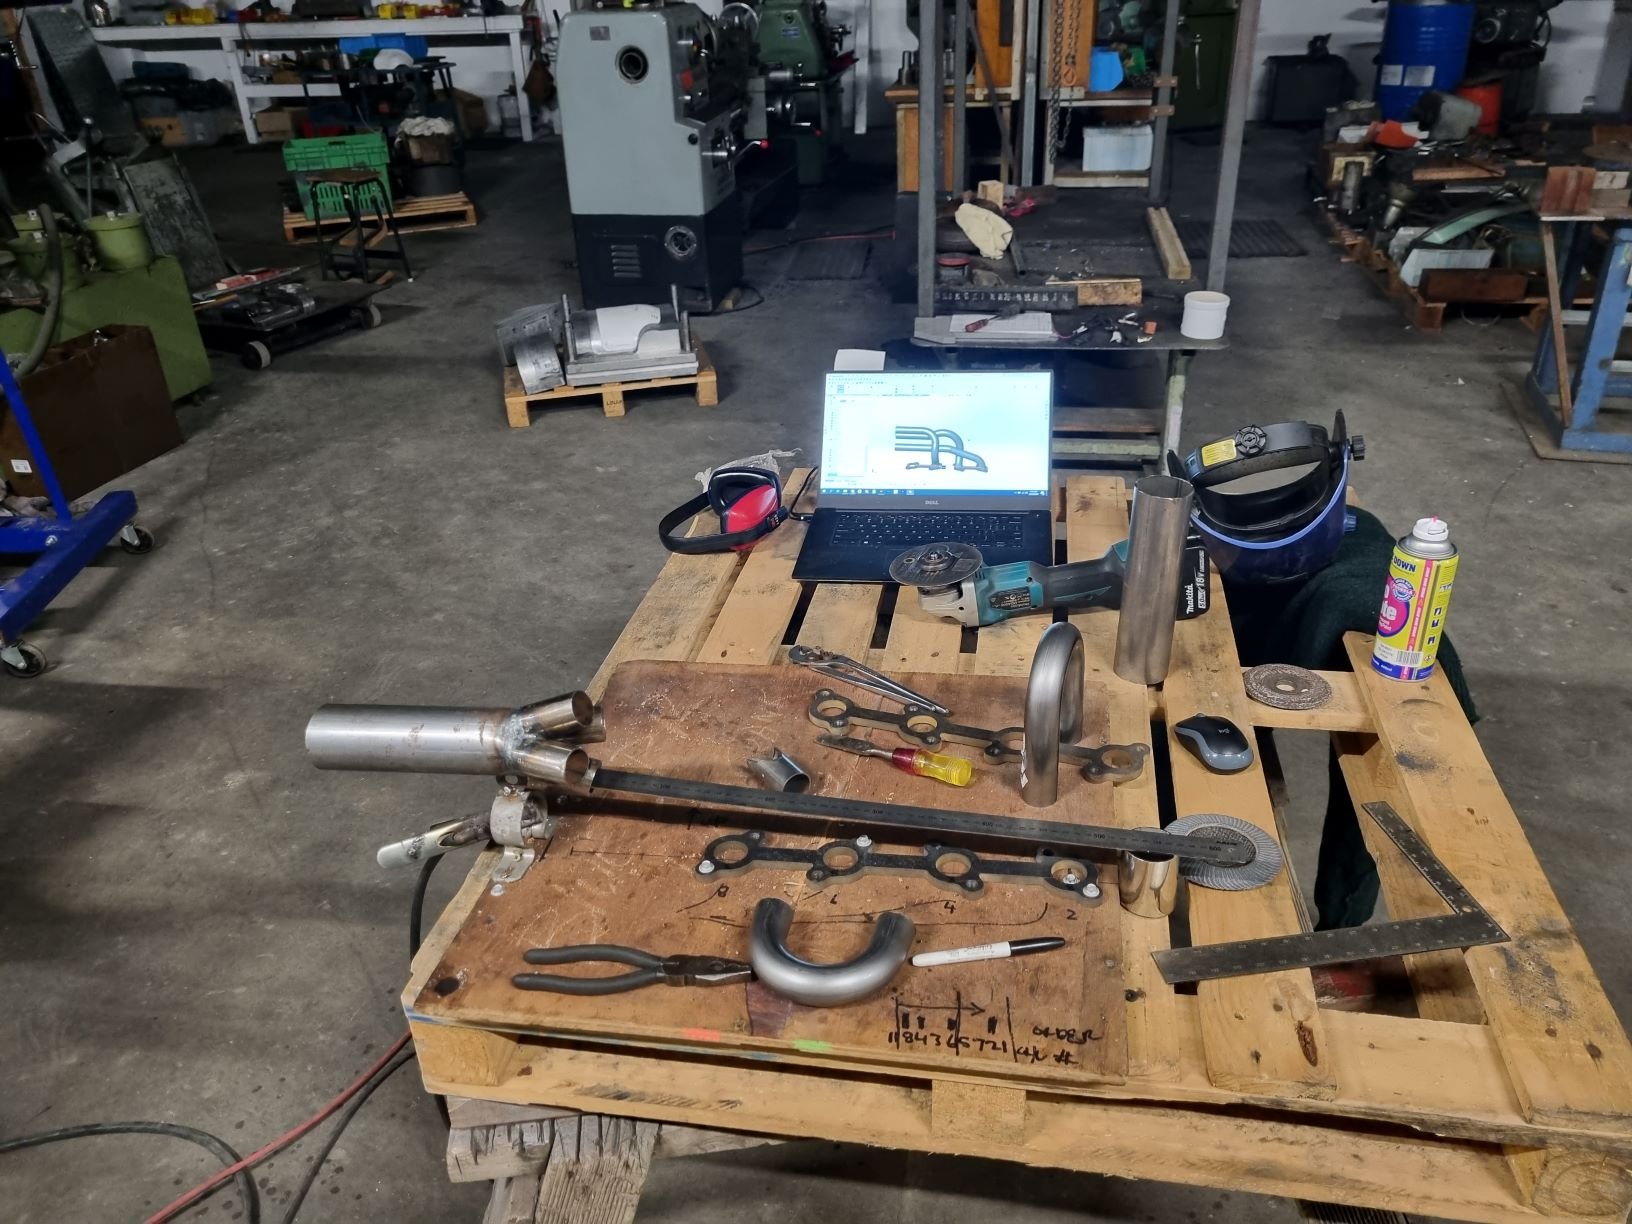
Finished a header today
1 point
-
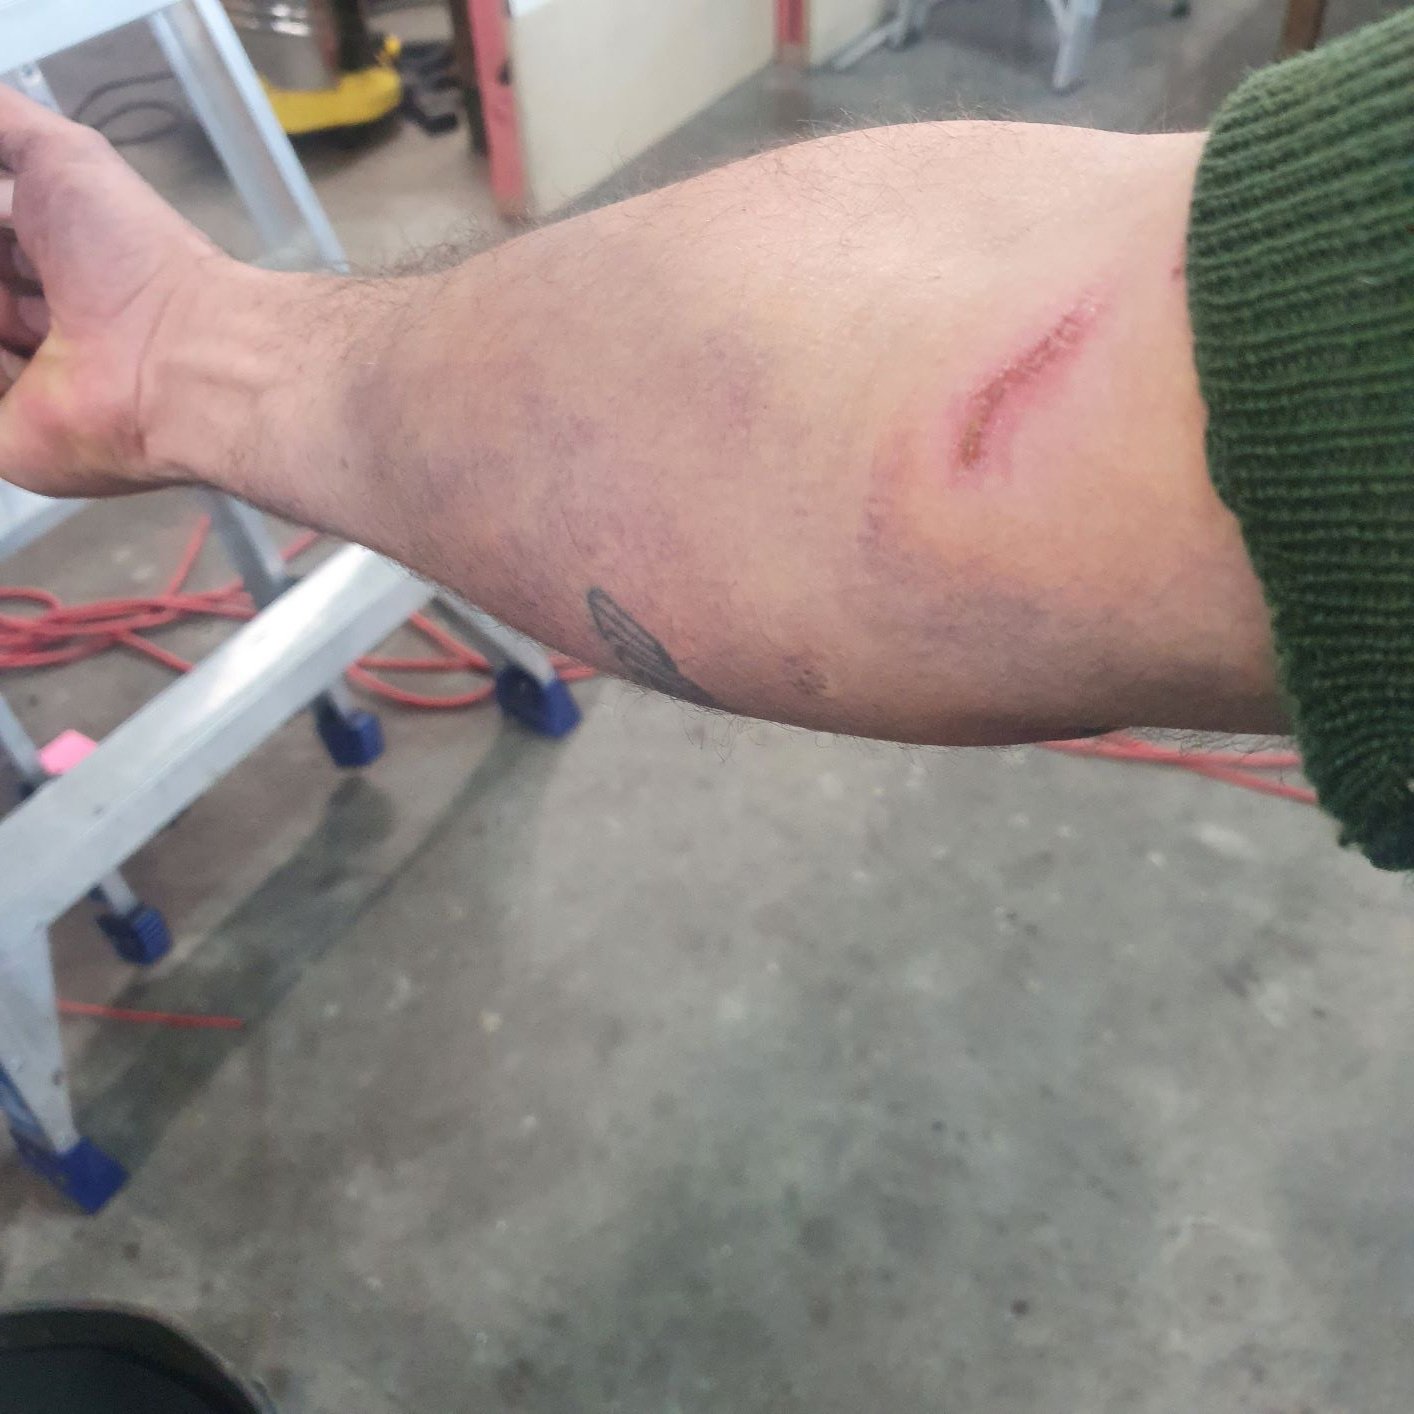
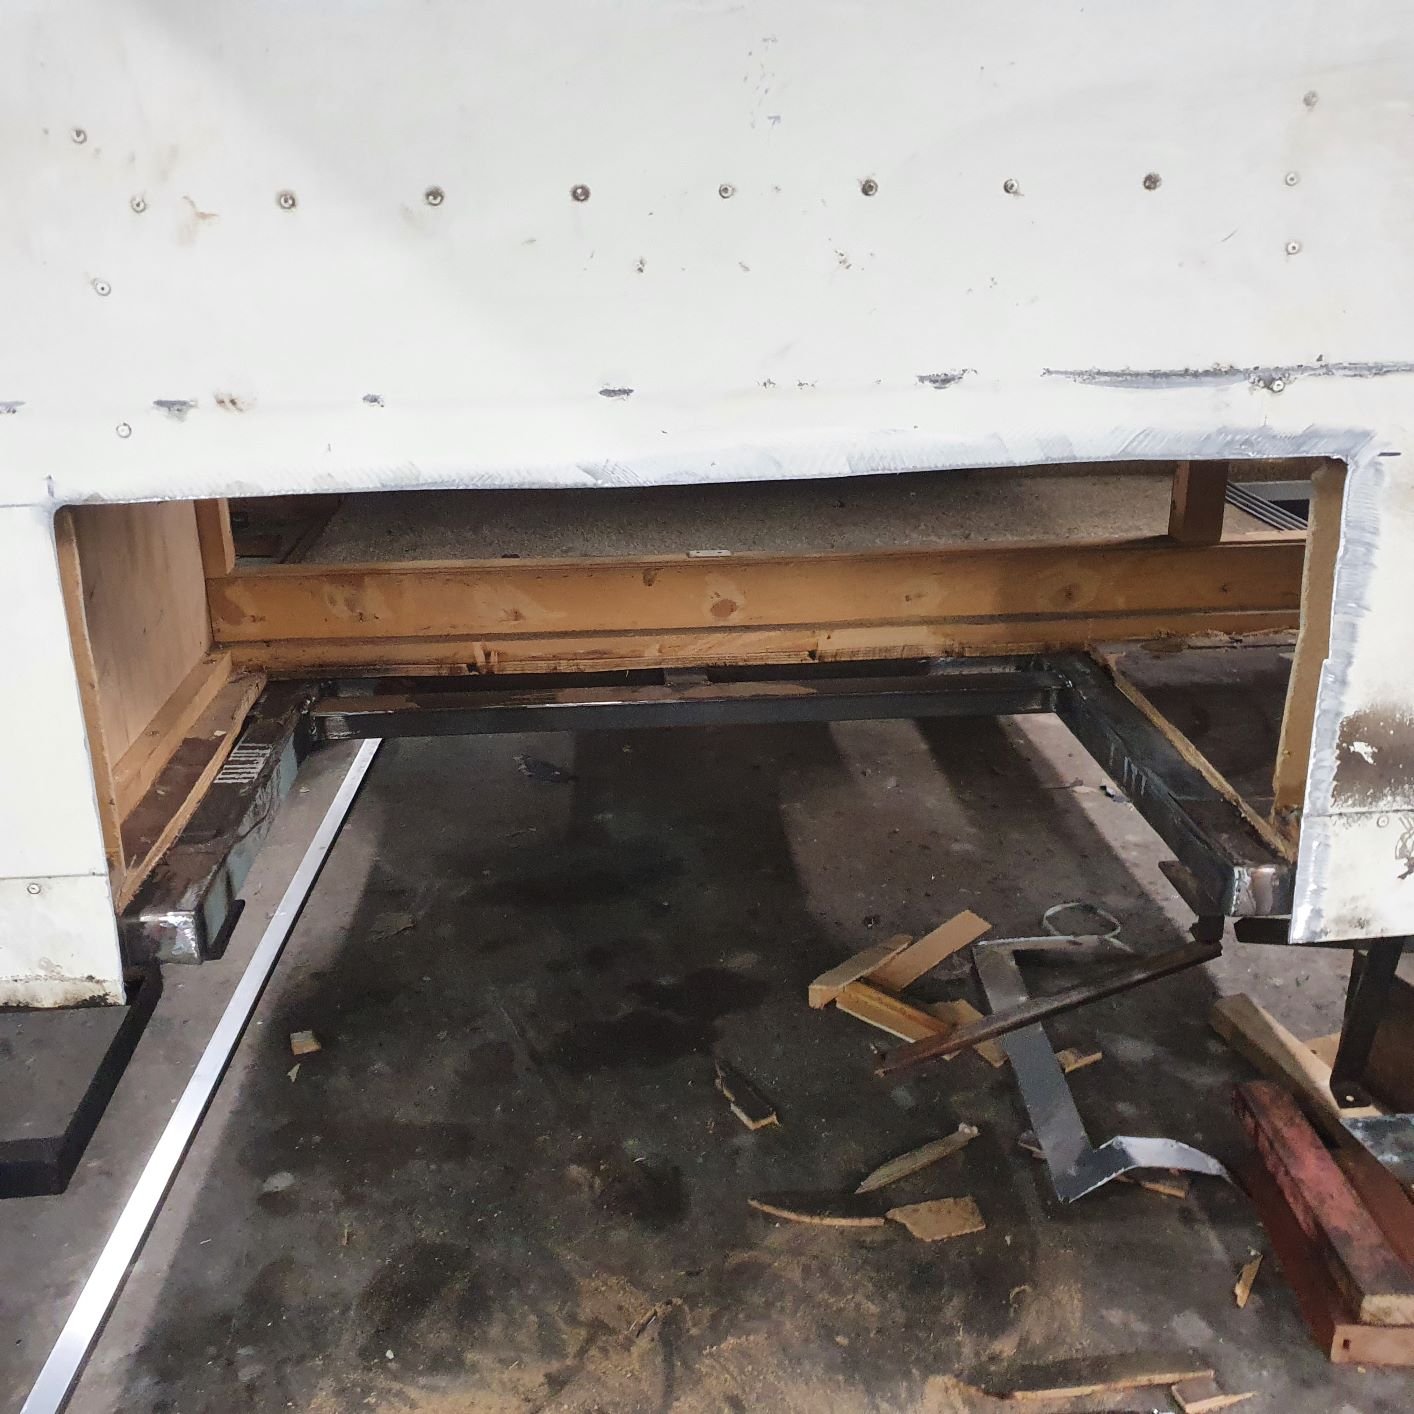
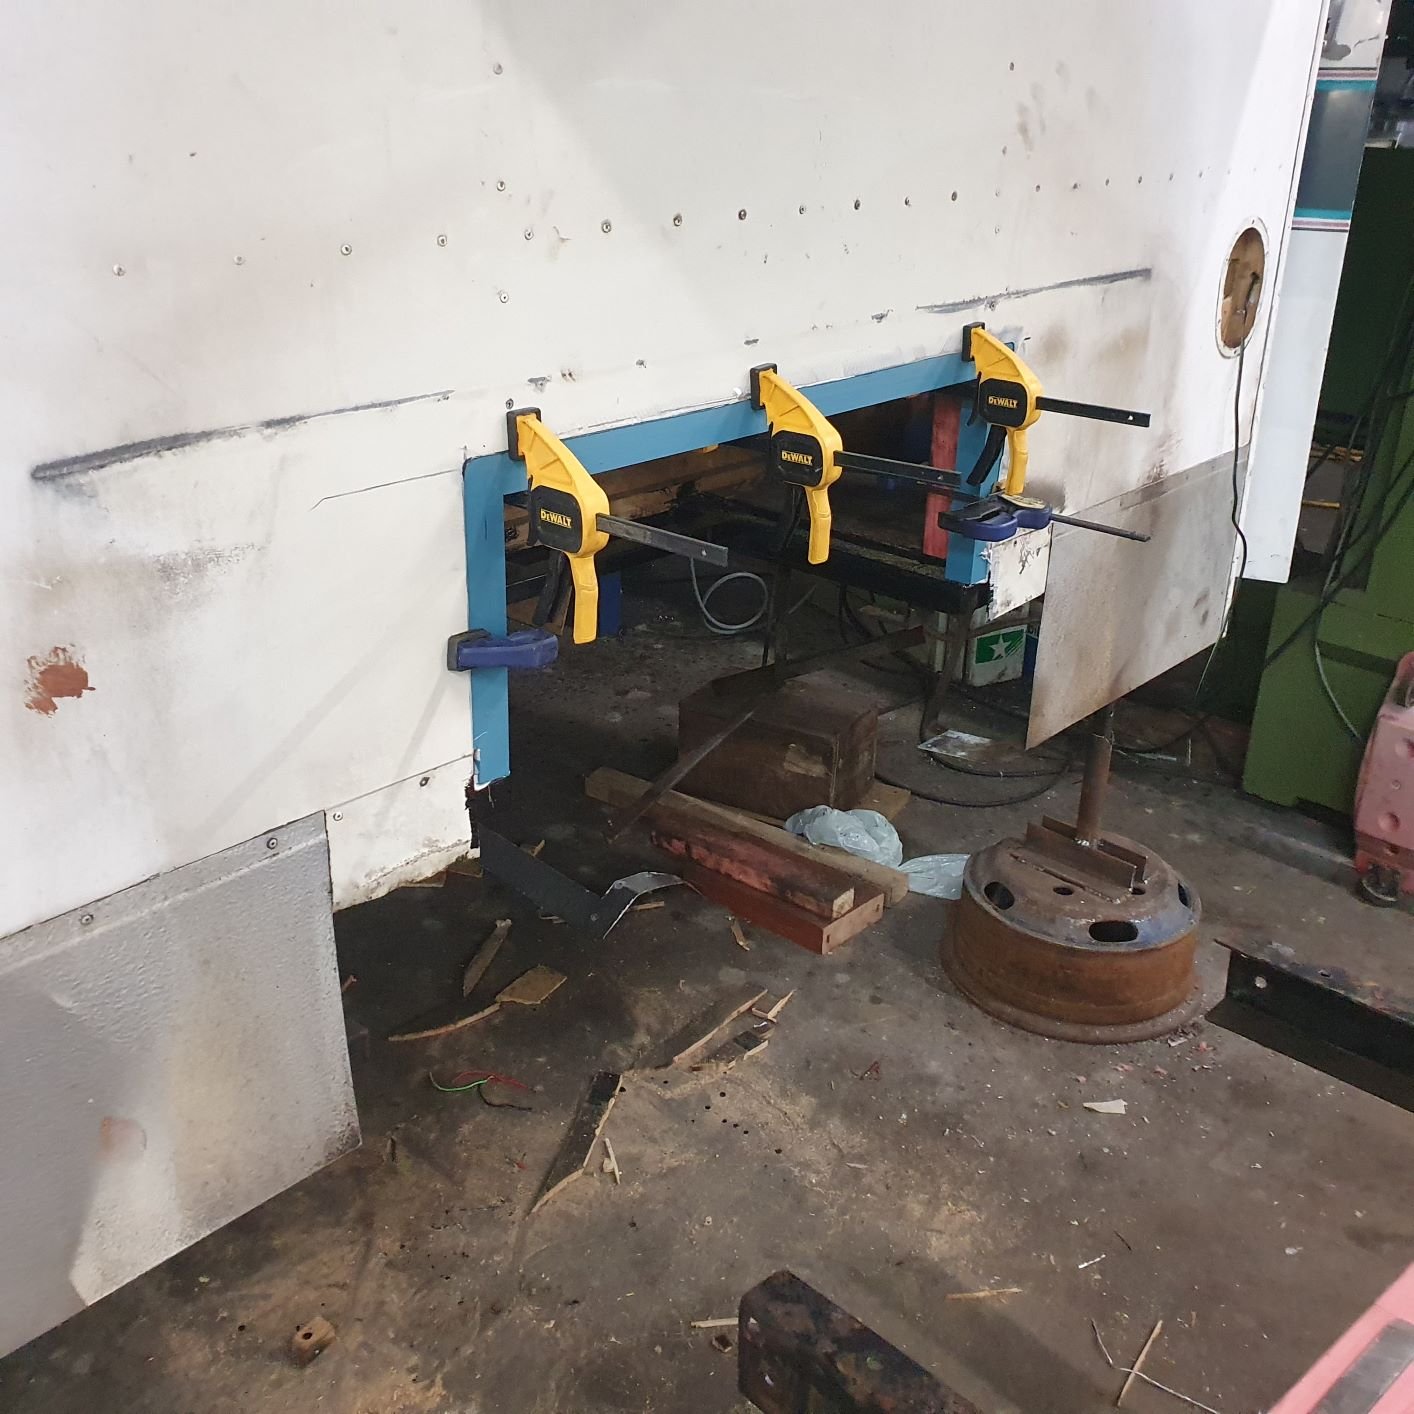
my grinder bit and swung around and fully slapped my arm. It took 3 weeks for the purple to go away. Note to self, pay attention... most of the framing mods on the body complete, a little more steel required around the top then will make engine cover accordingly. Probably way later on though. There are some horrible shit traps under the camper body, places where stones and shit just collects en-masse. It actually is corroding the ally from the inside - galvanic shit. I reckon I dug/blew about 5kg of shit out. This will all get painted, then soft-seal, then Ill bend up some ally flashing and glue in place to stop it happening any more.
1 point
-
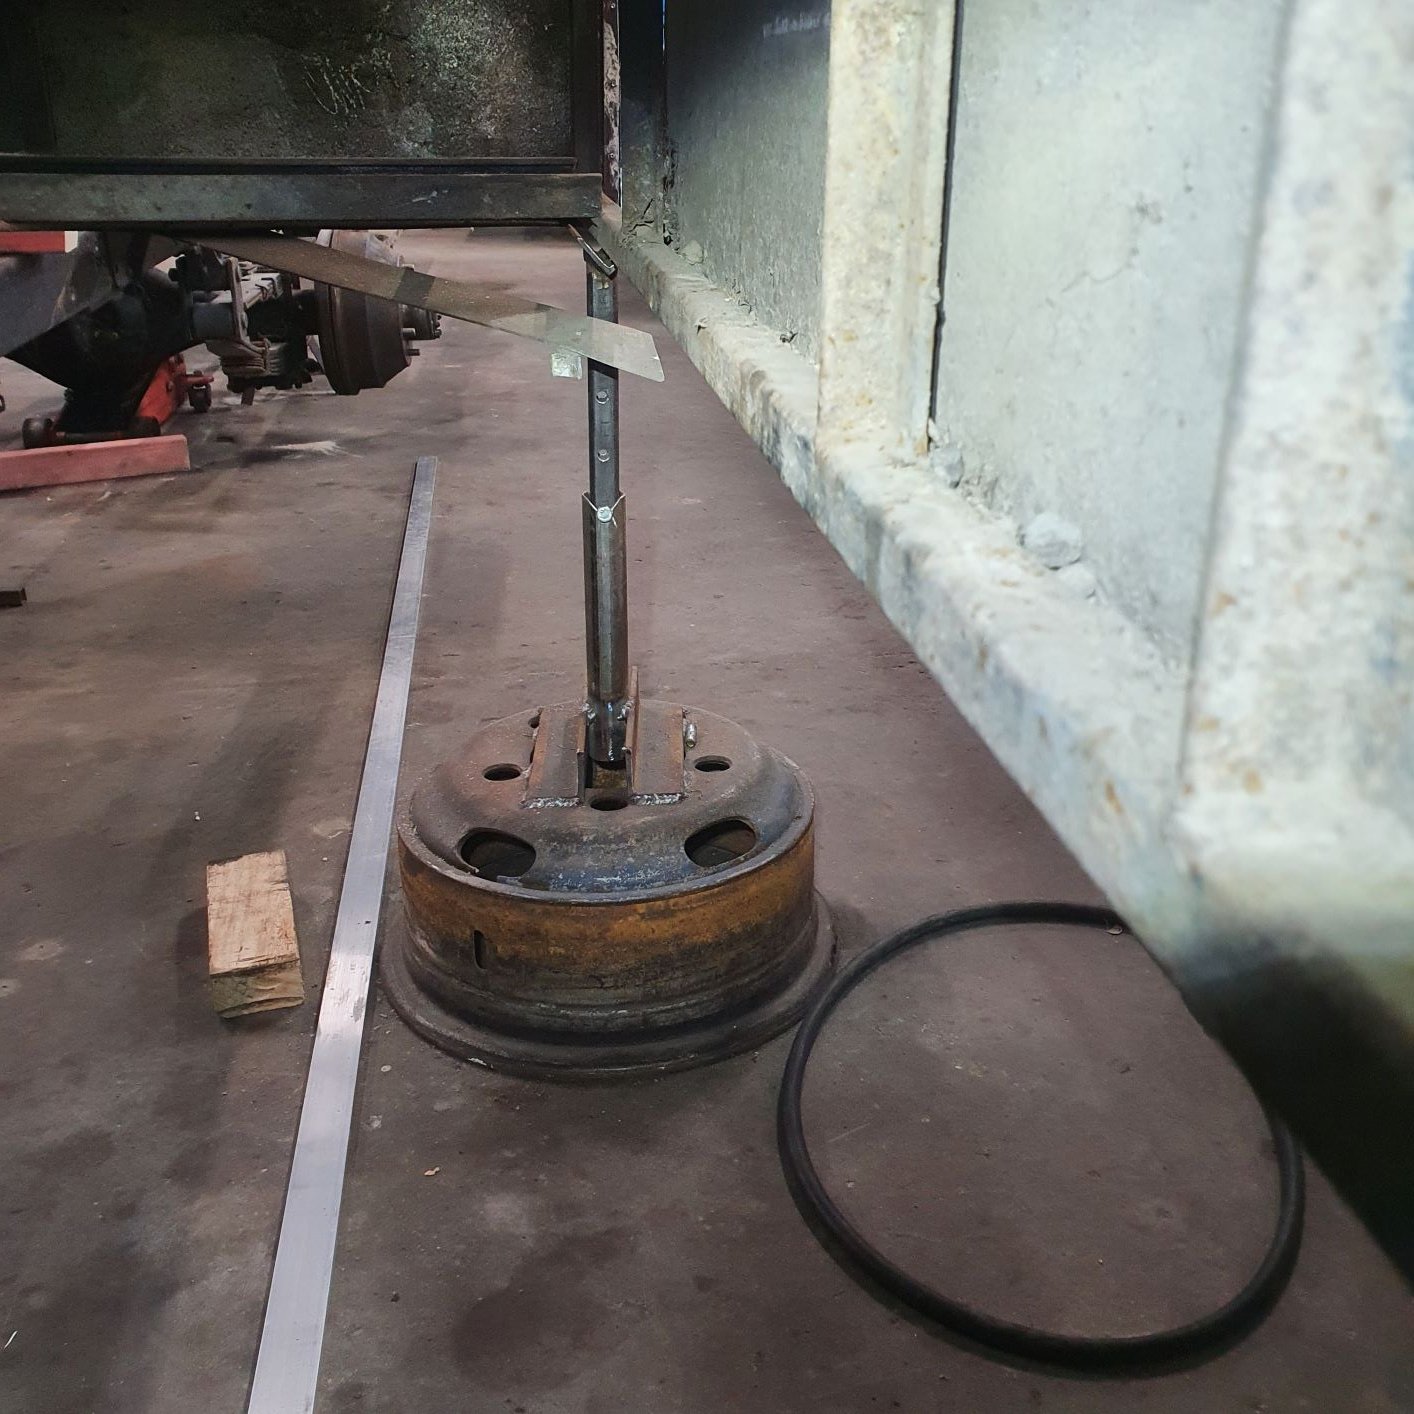
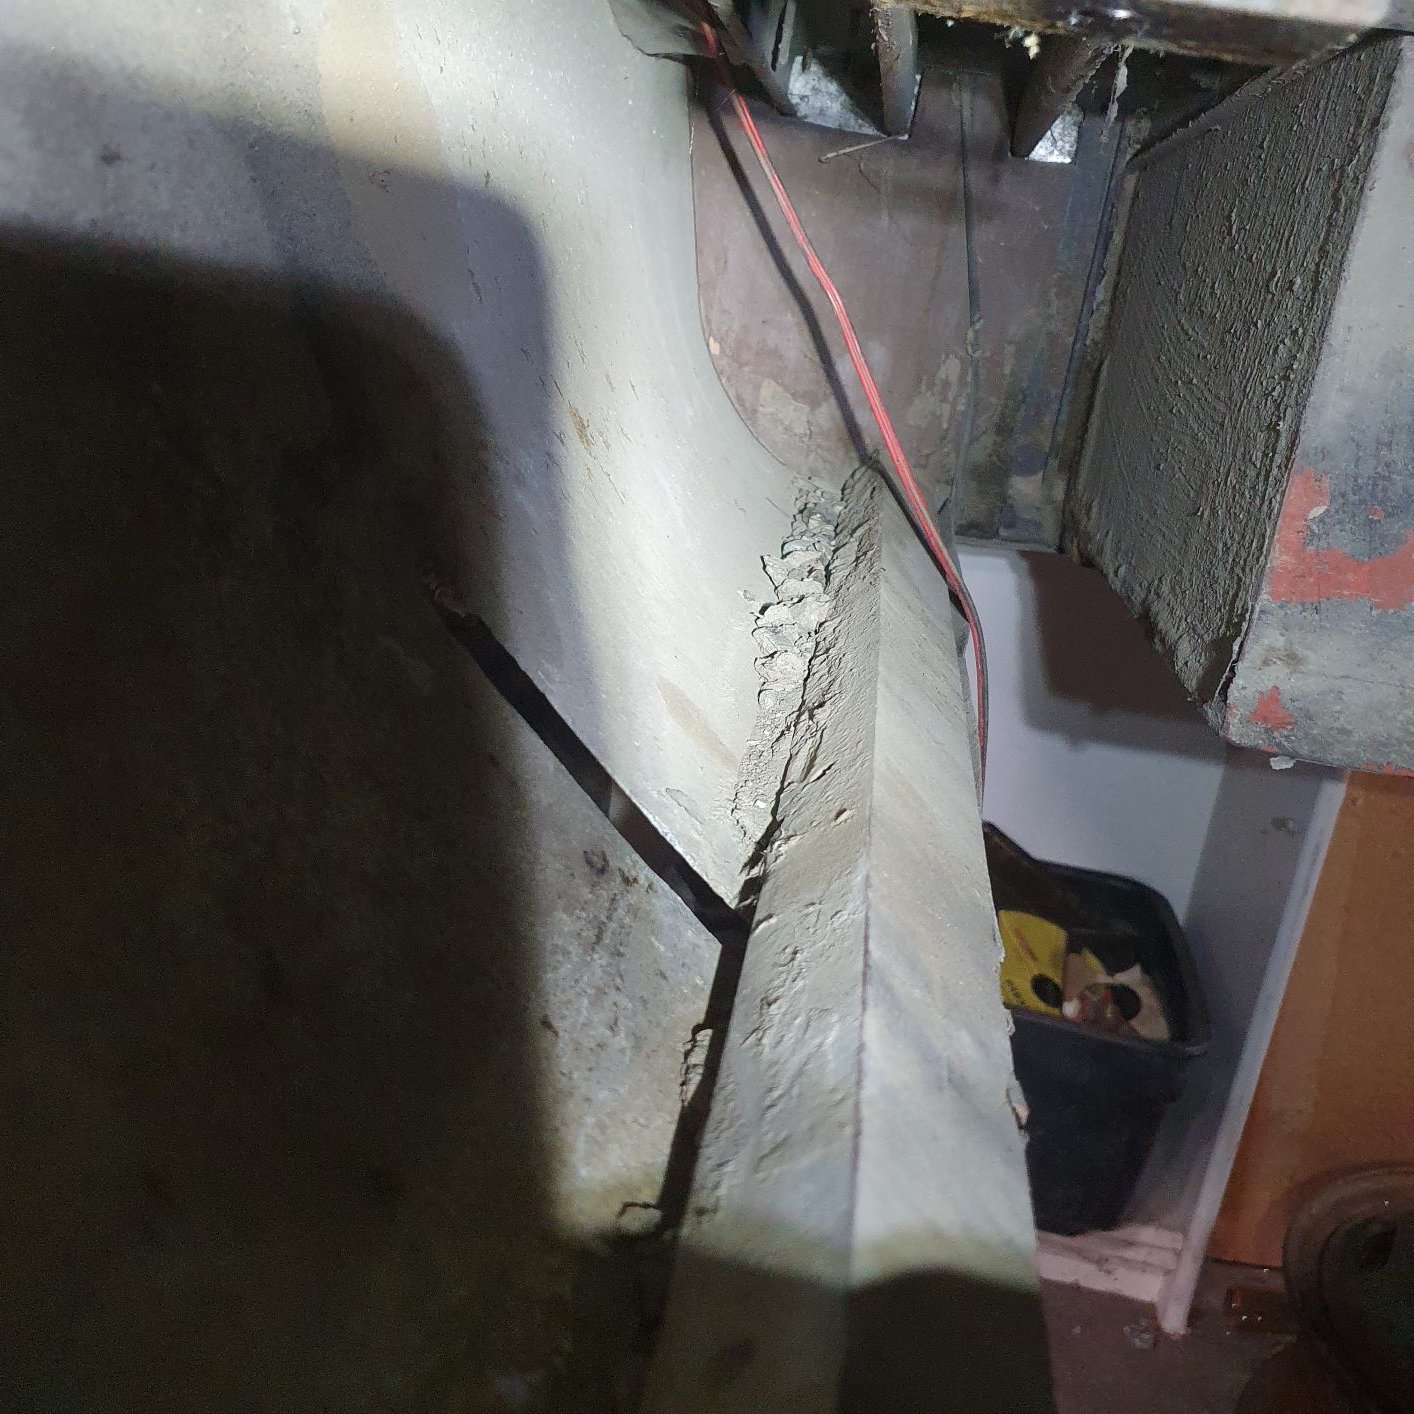
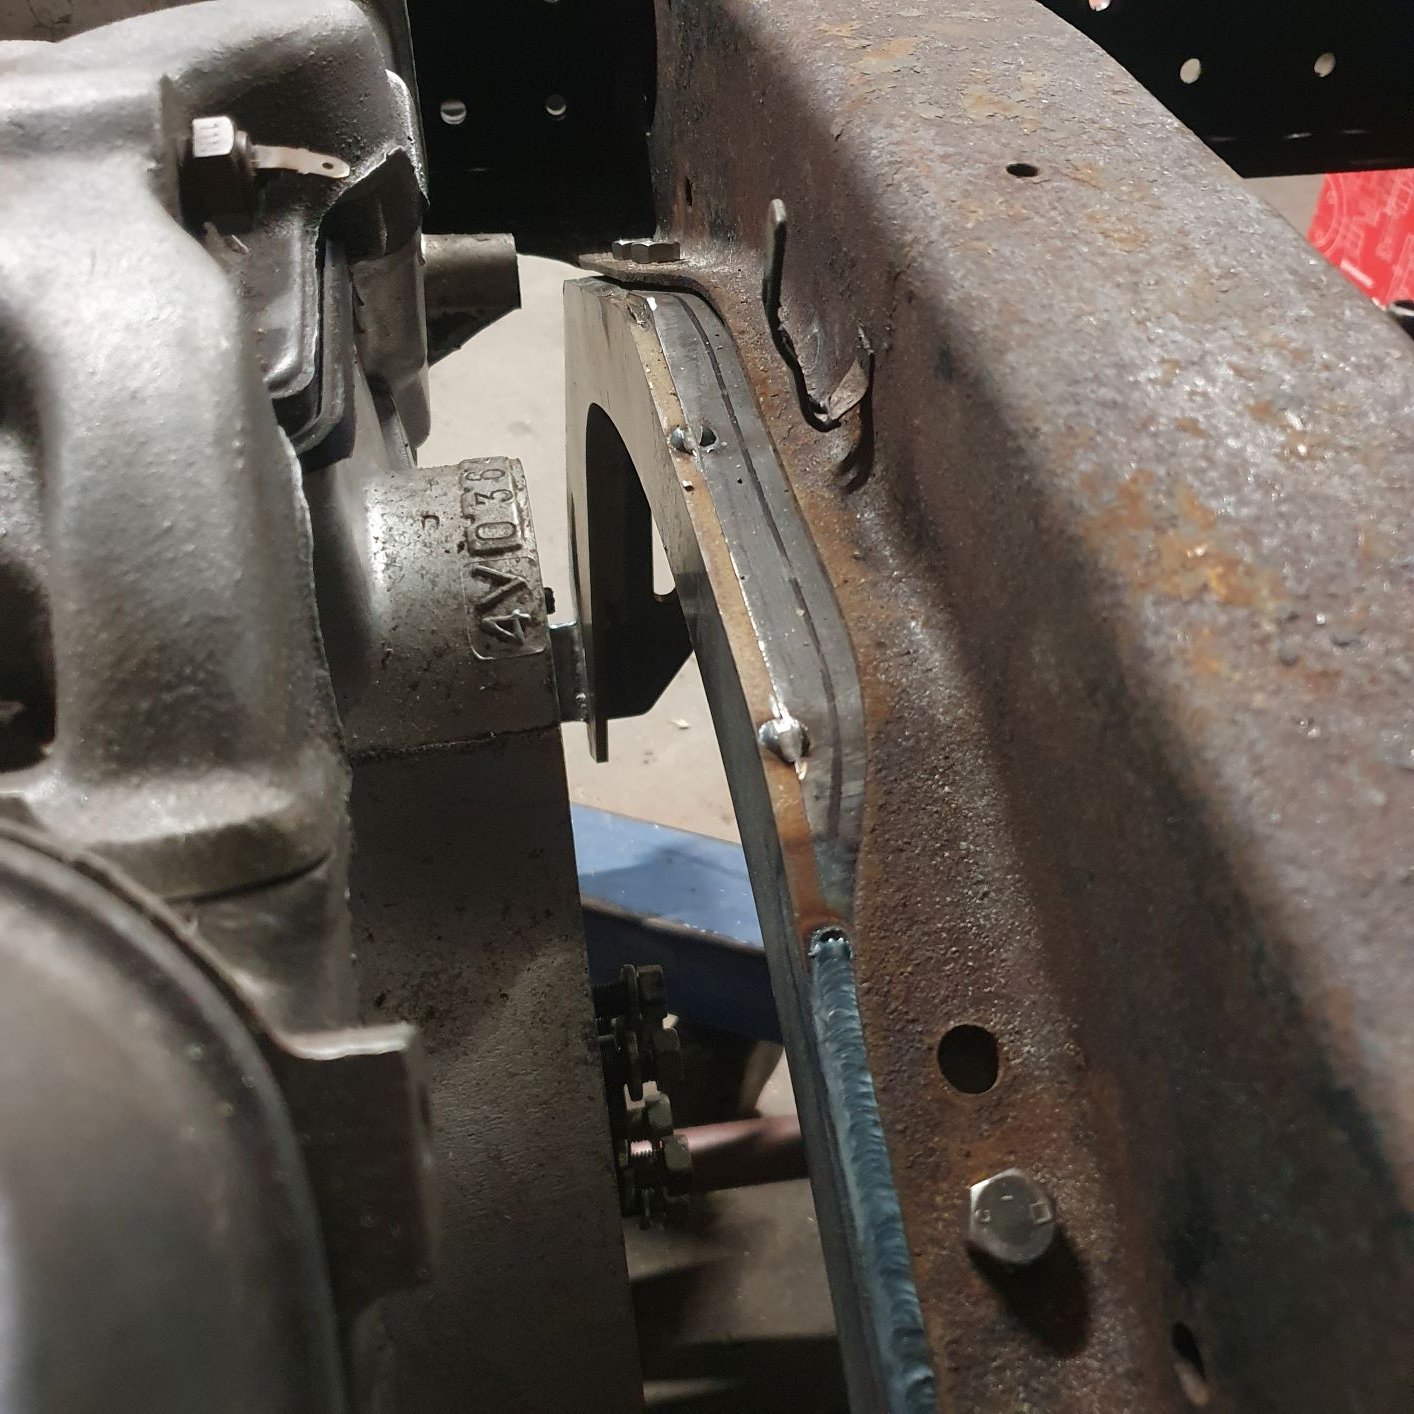
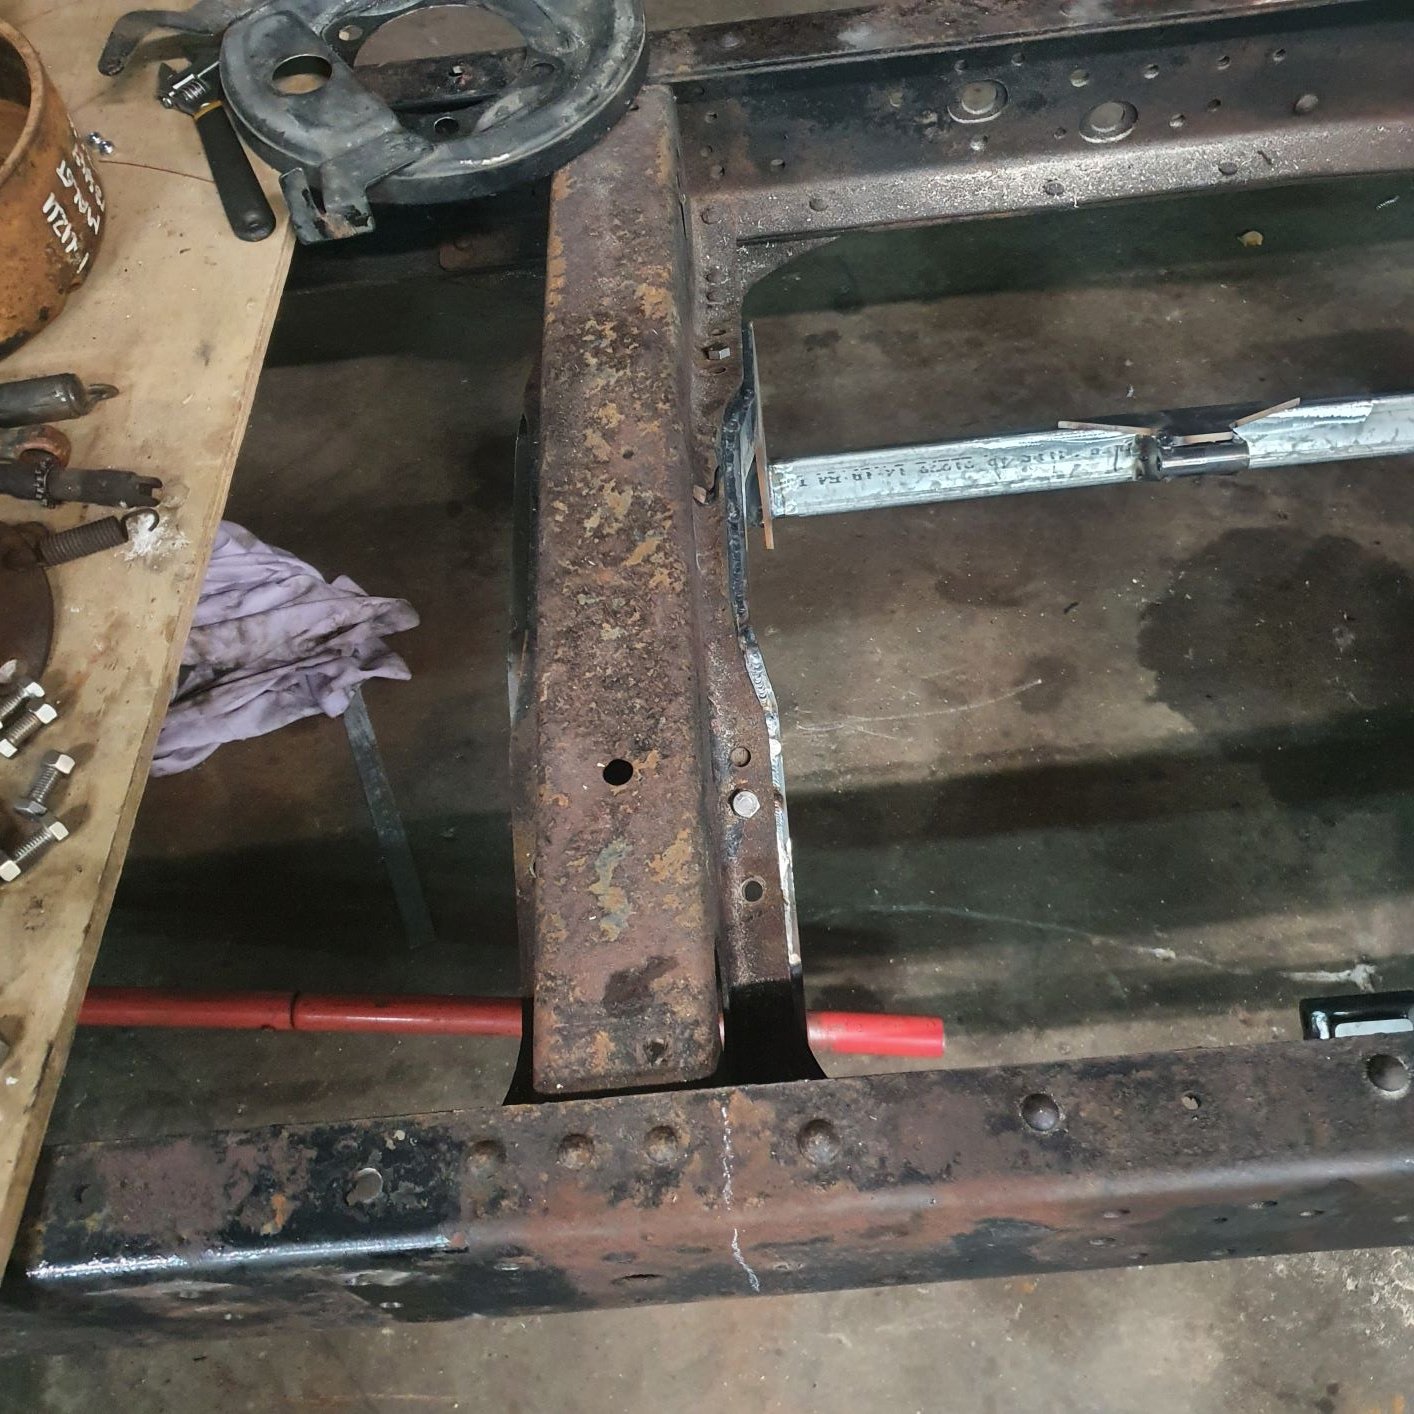
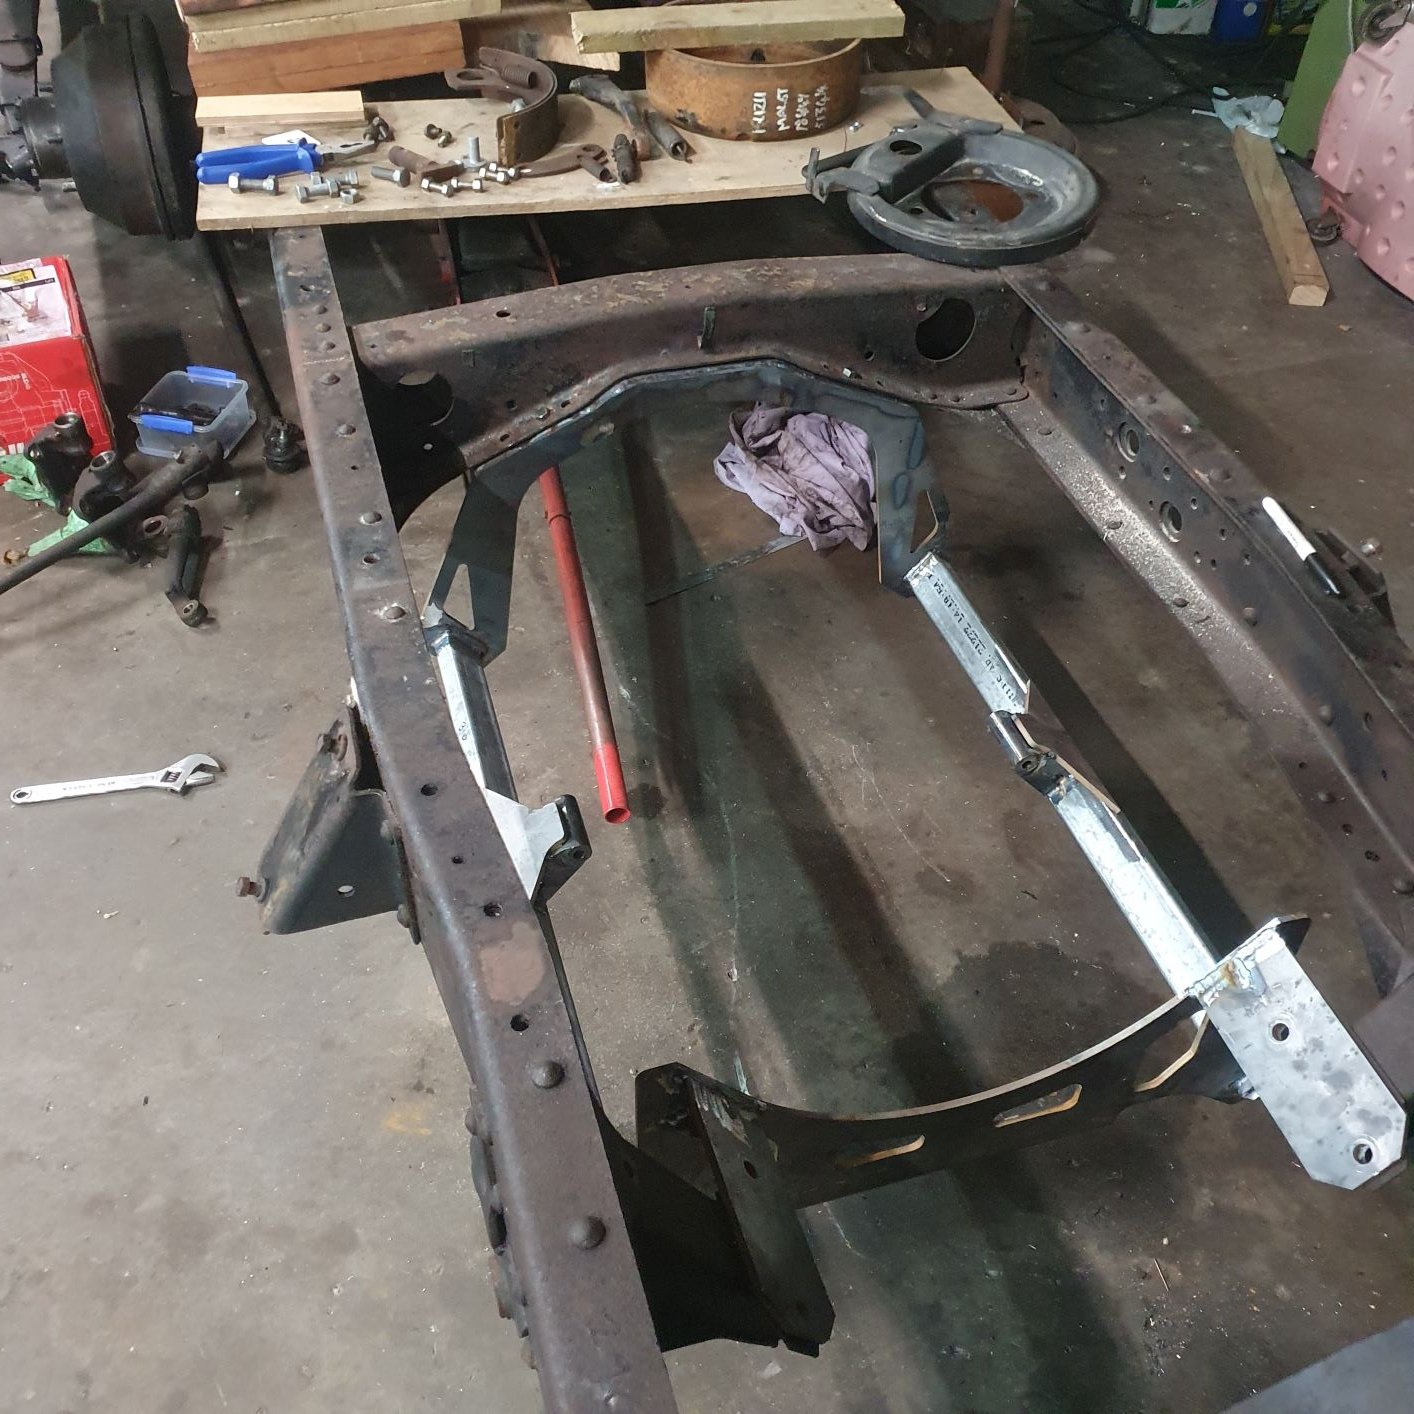
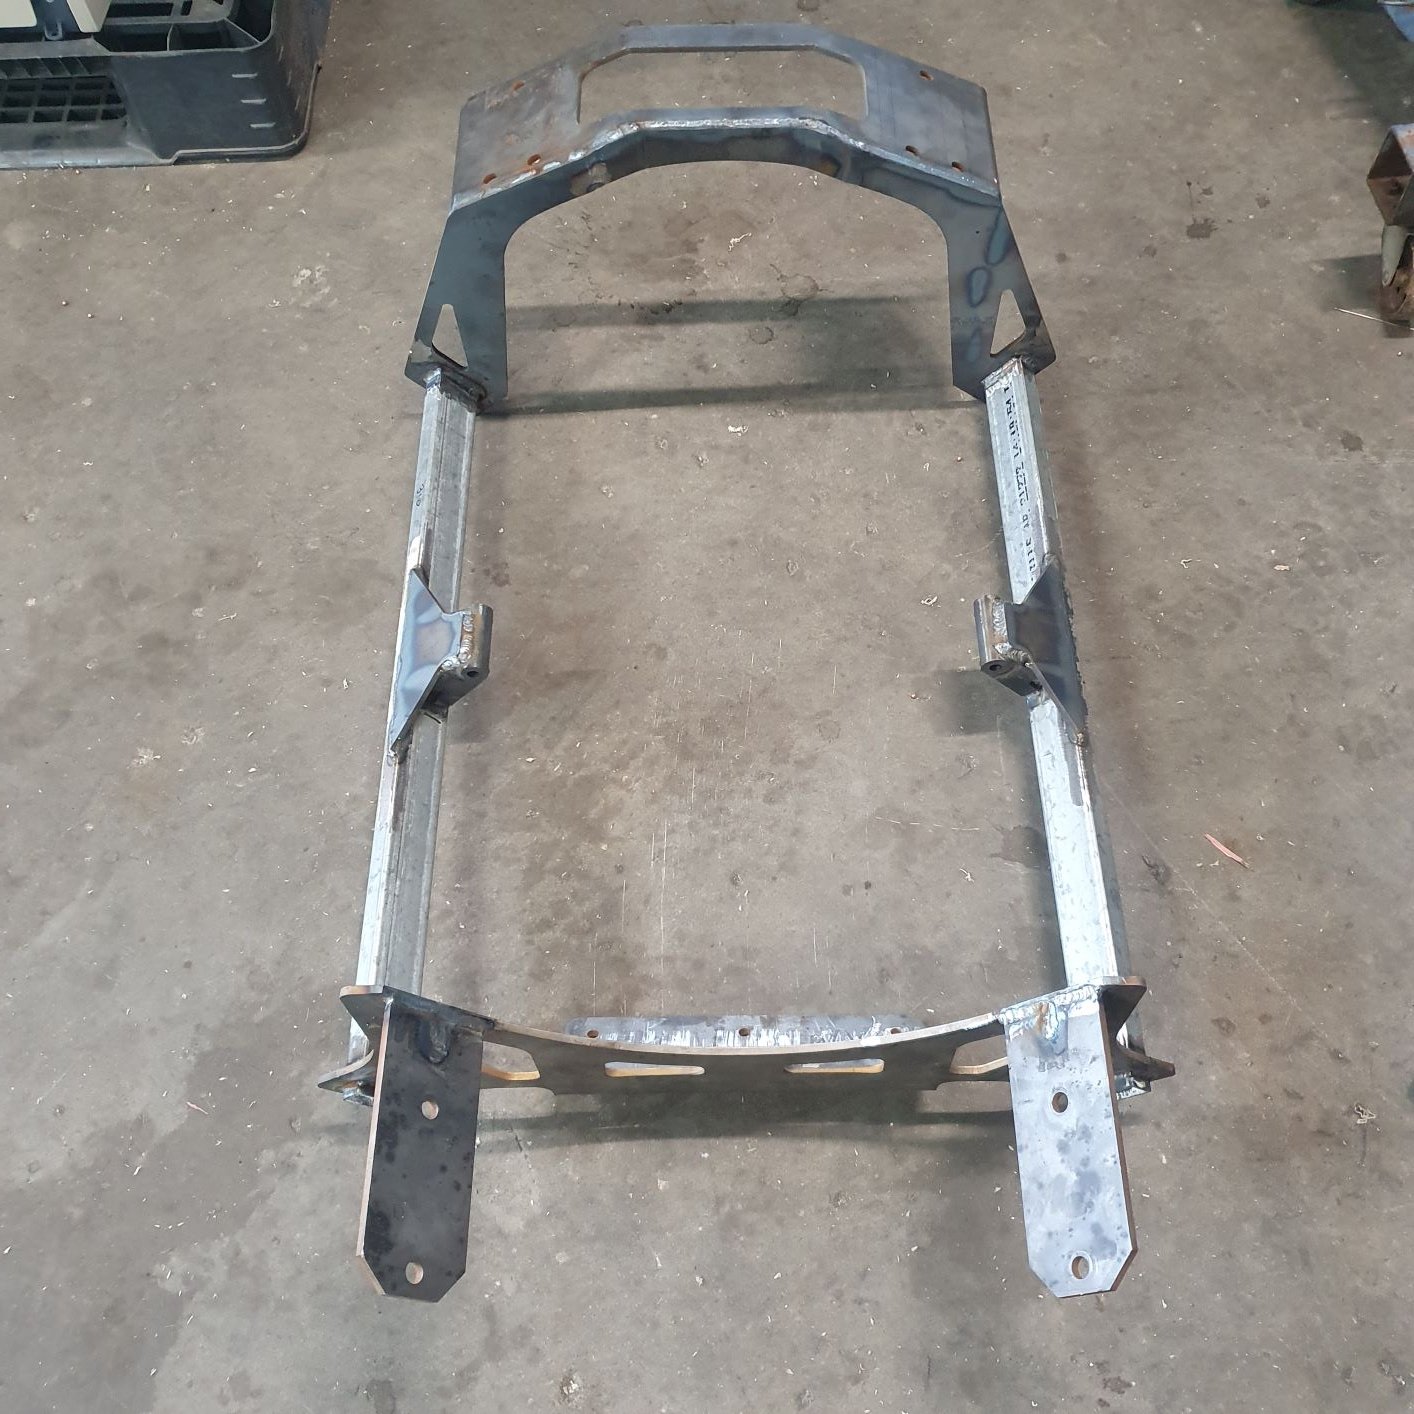
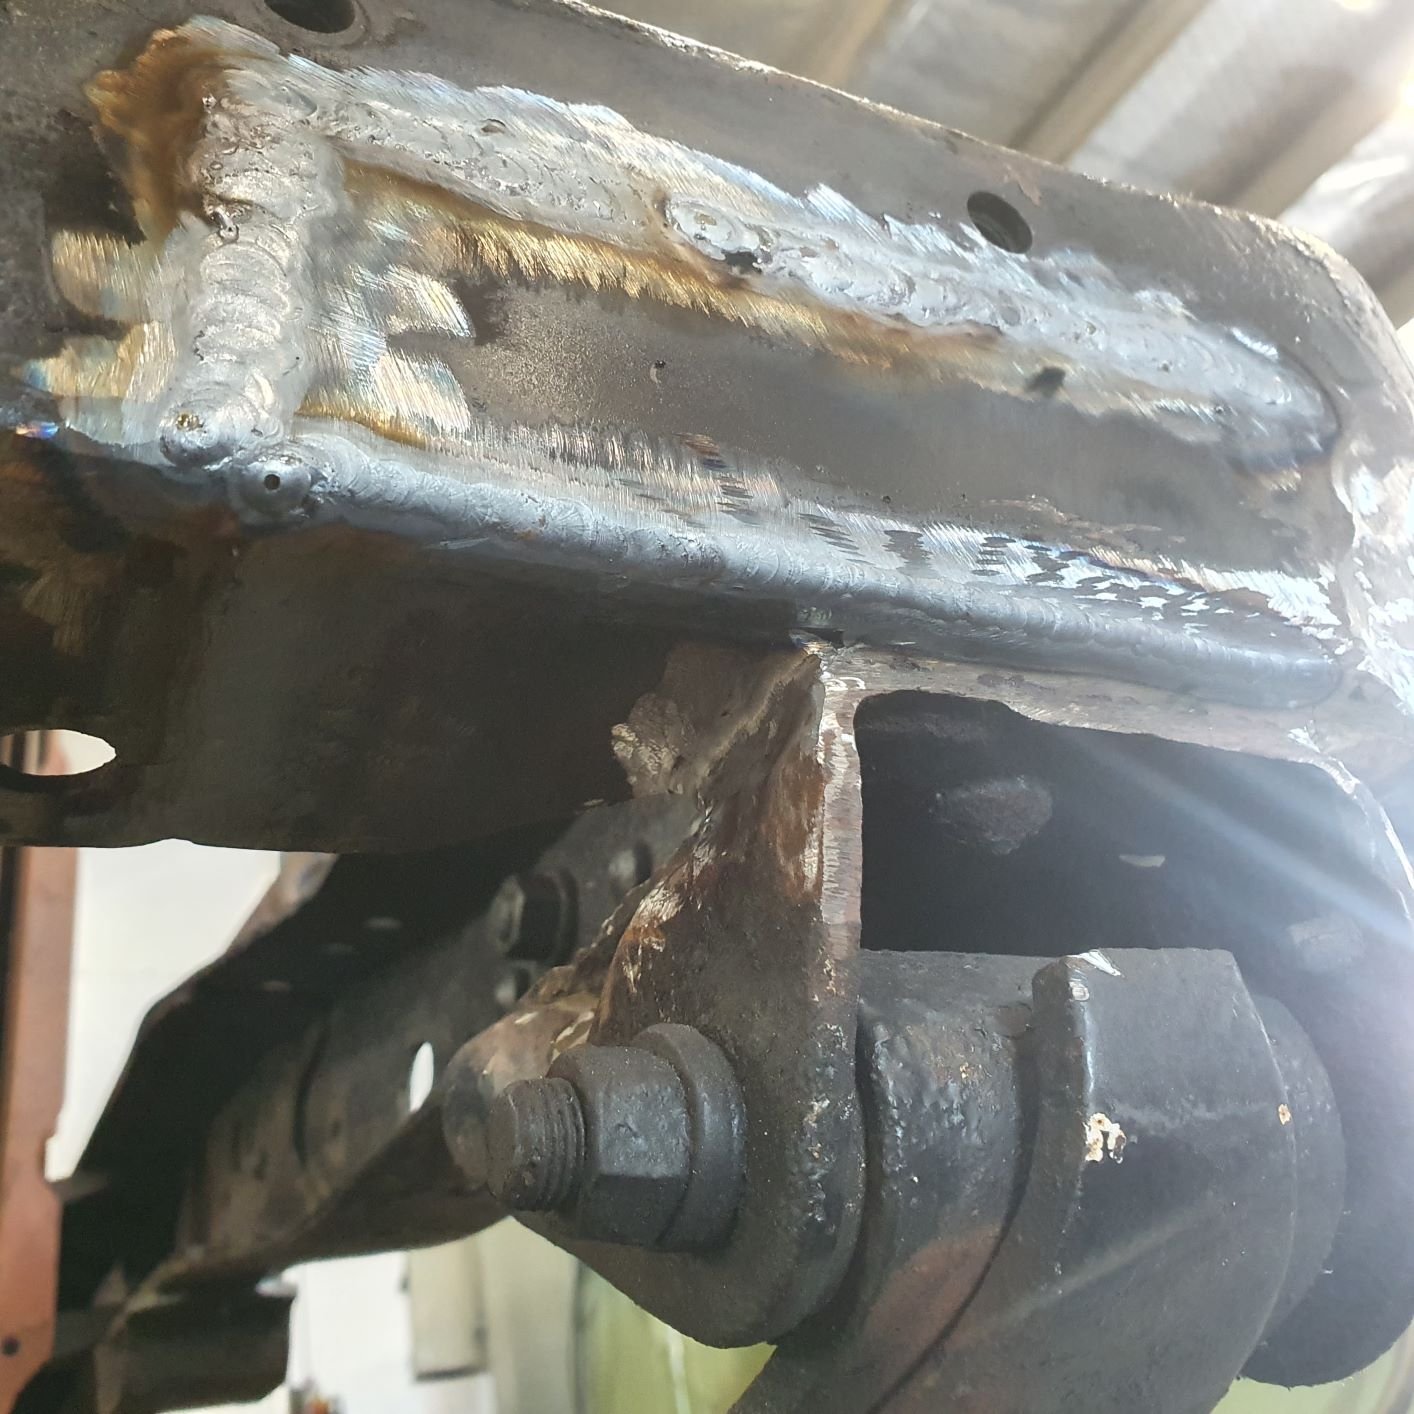
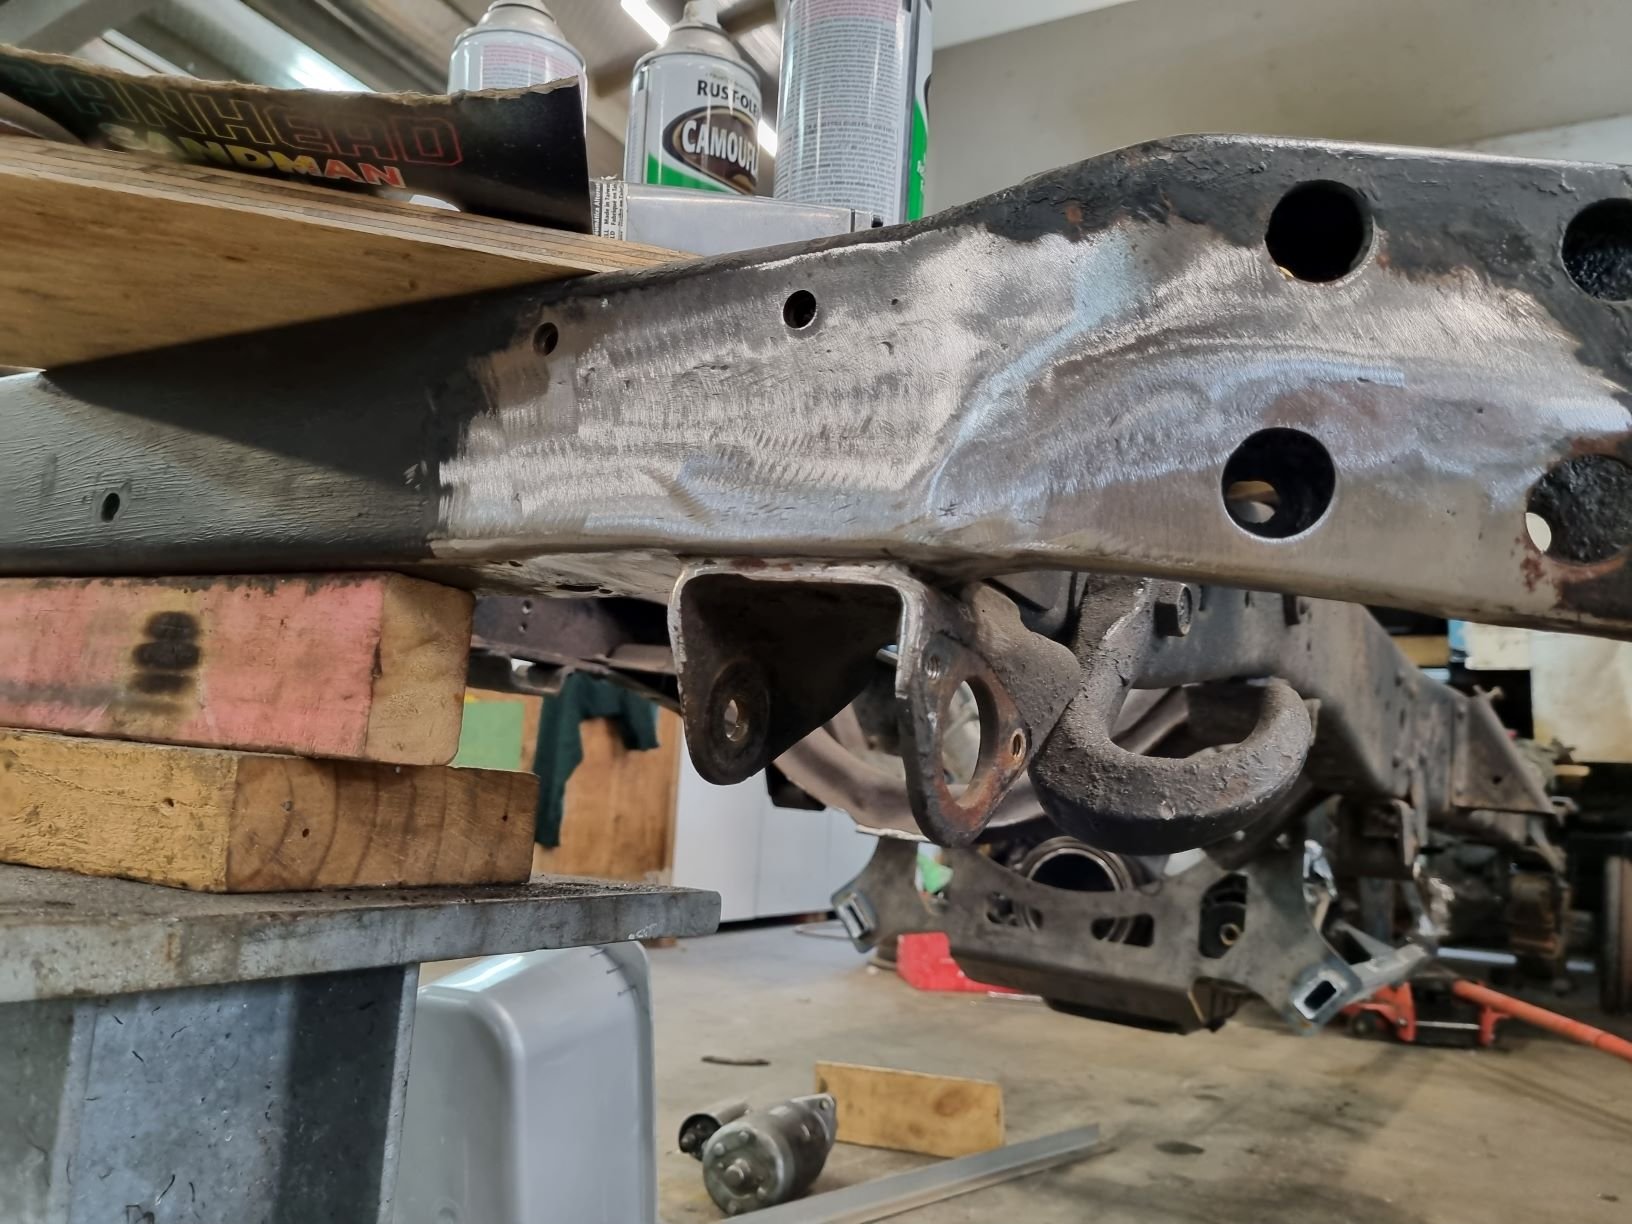
Someone had had a go at repairing the chassis. It was technically sound enough but I dont think the authorities would have liked it. I ended up re miging it then grinding it back then fuse tiging it to ensure a fully penetrated weld from both sides. As good as new in my opinion. This was made entirely from scrap. Its nice to have quality scrap lying about.
1 point
-
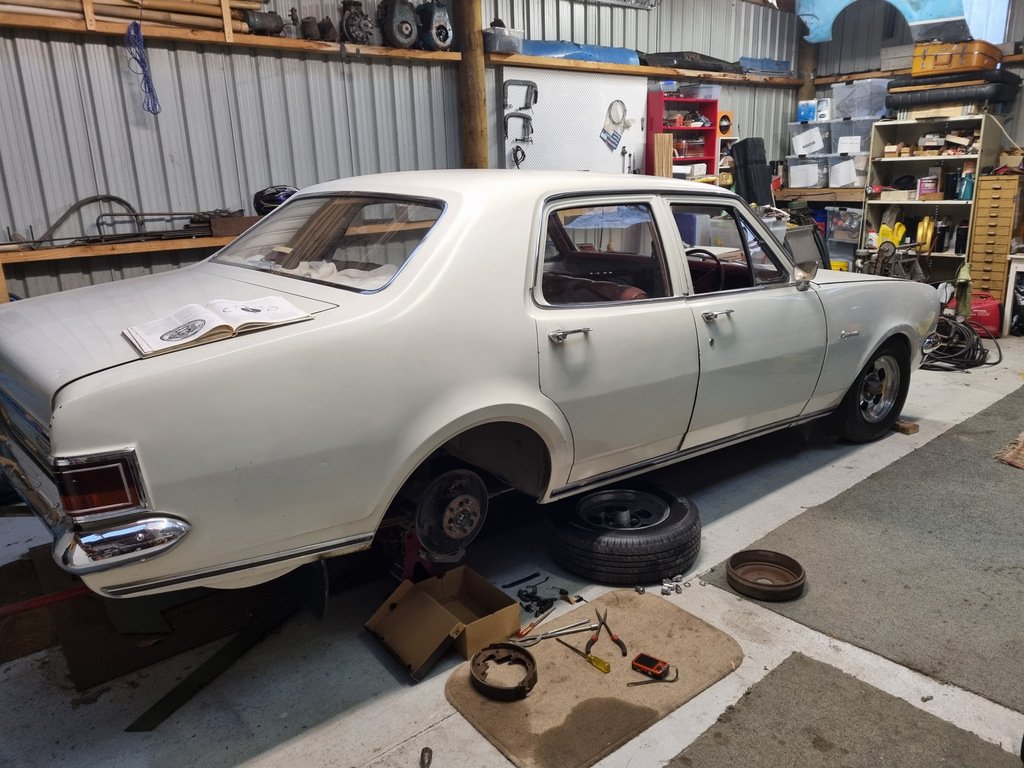
Got it back today, they didn't take it apart but used an inspection camera to locate the reaction disc and winkle it back into place. Pushrod now taped in so won't fall out easily. I probably won't get to installing it until after the weekend. Have to set up the clearance correctly too. It was my parents car, bought new in 1971, so I've been riding/driving it for ever.
1 point
-
^ You forget you're on oldschool, the home of polishing turds1 point
-
In the scheme of things its cost neutral to buy a standard motor to get it going. Because you sell it again when you swap the good motor in. Biting off more than you can chew is the #1 reason why projects fail.1 point
-
I'm giving like a low enthusiasm old man responses but as you are doing basically a full resto you have your hands full with the body. Doing all that stuff in your list could buy you a spare blacktop 4age to sit in the corner of the shed. Save all the money and do some basic maintenance on the current motor like seals and cambelt, they will rev to 8k+ all day long with high km's they just use some oil usually. Buy that aftermarket ECU and learn to tune the stock engine when you get that far it will be the best bang for buck for learning and making the conversion easier. Slotting in a built motor down the track is fuck all, getting it going the easiest and economical way possible should be goal one, get that cert and re-evaluate once you actually drive the thing. I know pondering all this engine shit is the best part of a build but you need to channel this energy into panel work haha Unless you have like $30k put away for this build then ignore me and go nuts.1 point
-
Best value for money on this conversion is probably aftermarket ECU,I would forget working the motor for now NA is expensive. Just build a nice big airtbox for the ITB's, exhaust and headers and tune and drive it. It will be a blast like this.1 point


This leaderboard is set to Auckland/GMT+12:00