
Leaderboard


Popular Content
Showing content with the highest reputation on 07/17/22 in all areas
-
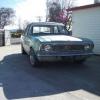
Since the last update we made some signs for the garage. Took a while to decide what to write and longer to actually take some time off other jobs and paint the things. Sketched out the main centre board first which hannah then painted - like a big colouring in book I downloaded various images of car badges and the sketched them out for hannah to paint over. They look good but a bit 'new' so hopefully they'll fade soon enough and start looking old. We'd sort of finished the signs a couple of weeks ago but finally got around to putting them up on Friday. They still need the capping fitting. I snapped some pics that evening. I'll get some pics soon of the kitchen which, but for fitting a built in oven and a couple of bits of trim, is pretty much finished.26 points
-
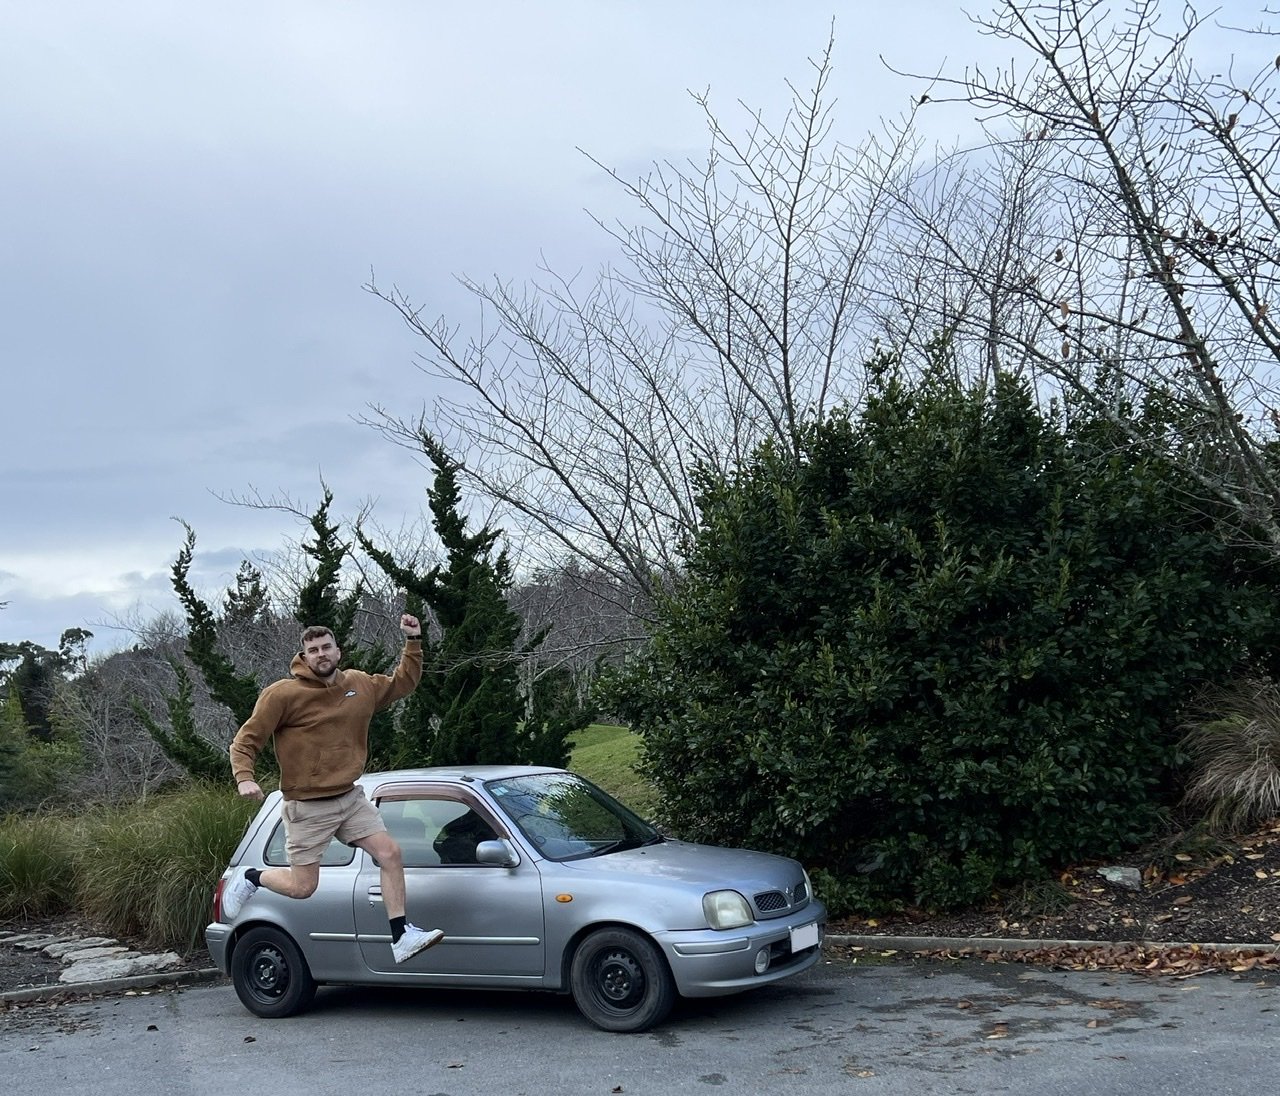
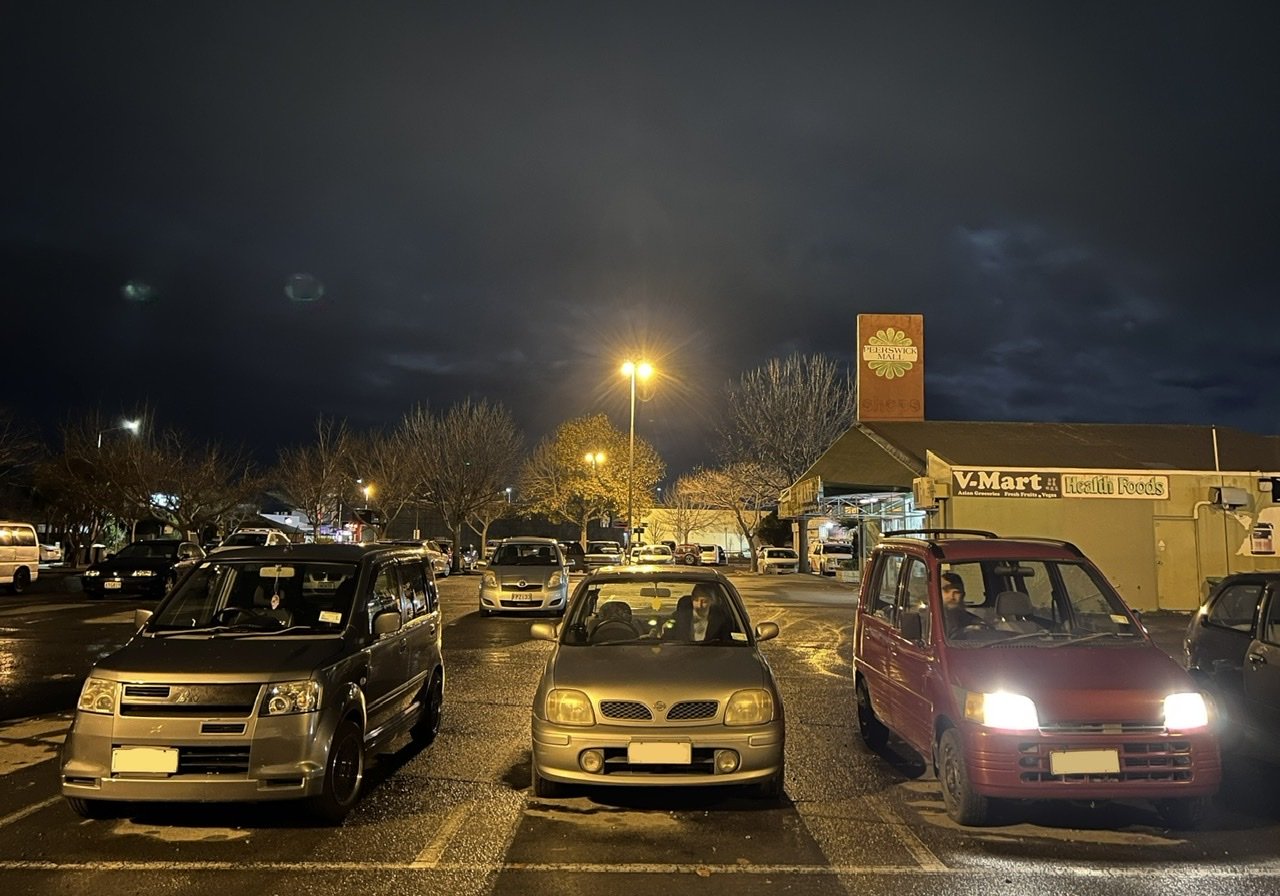
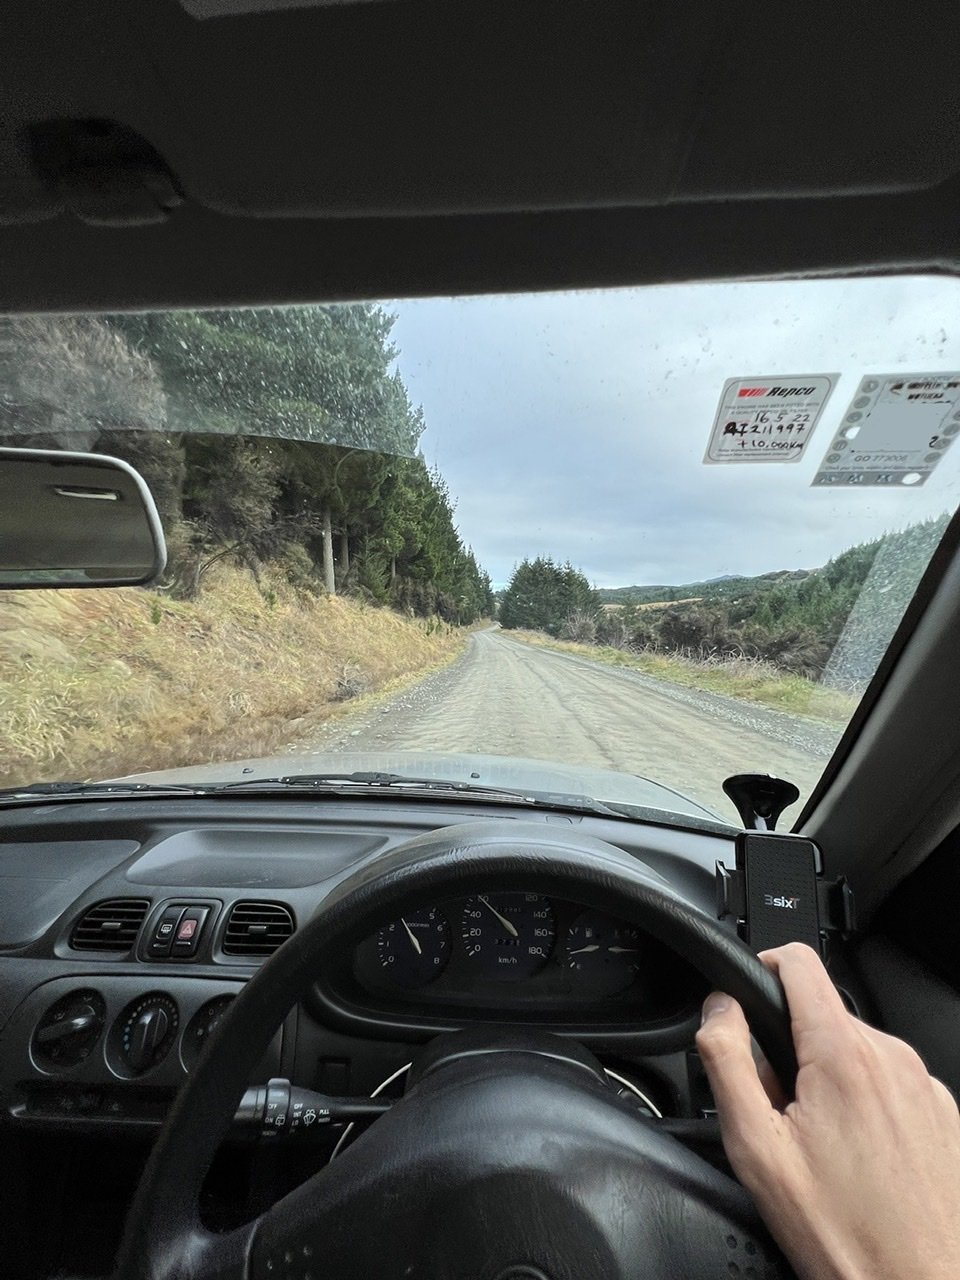
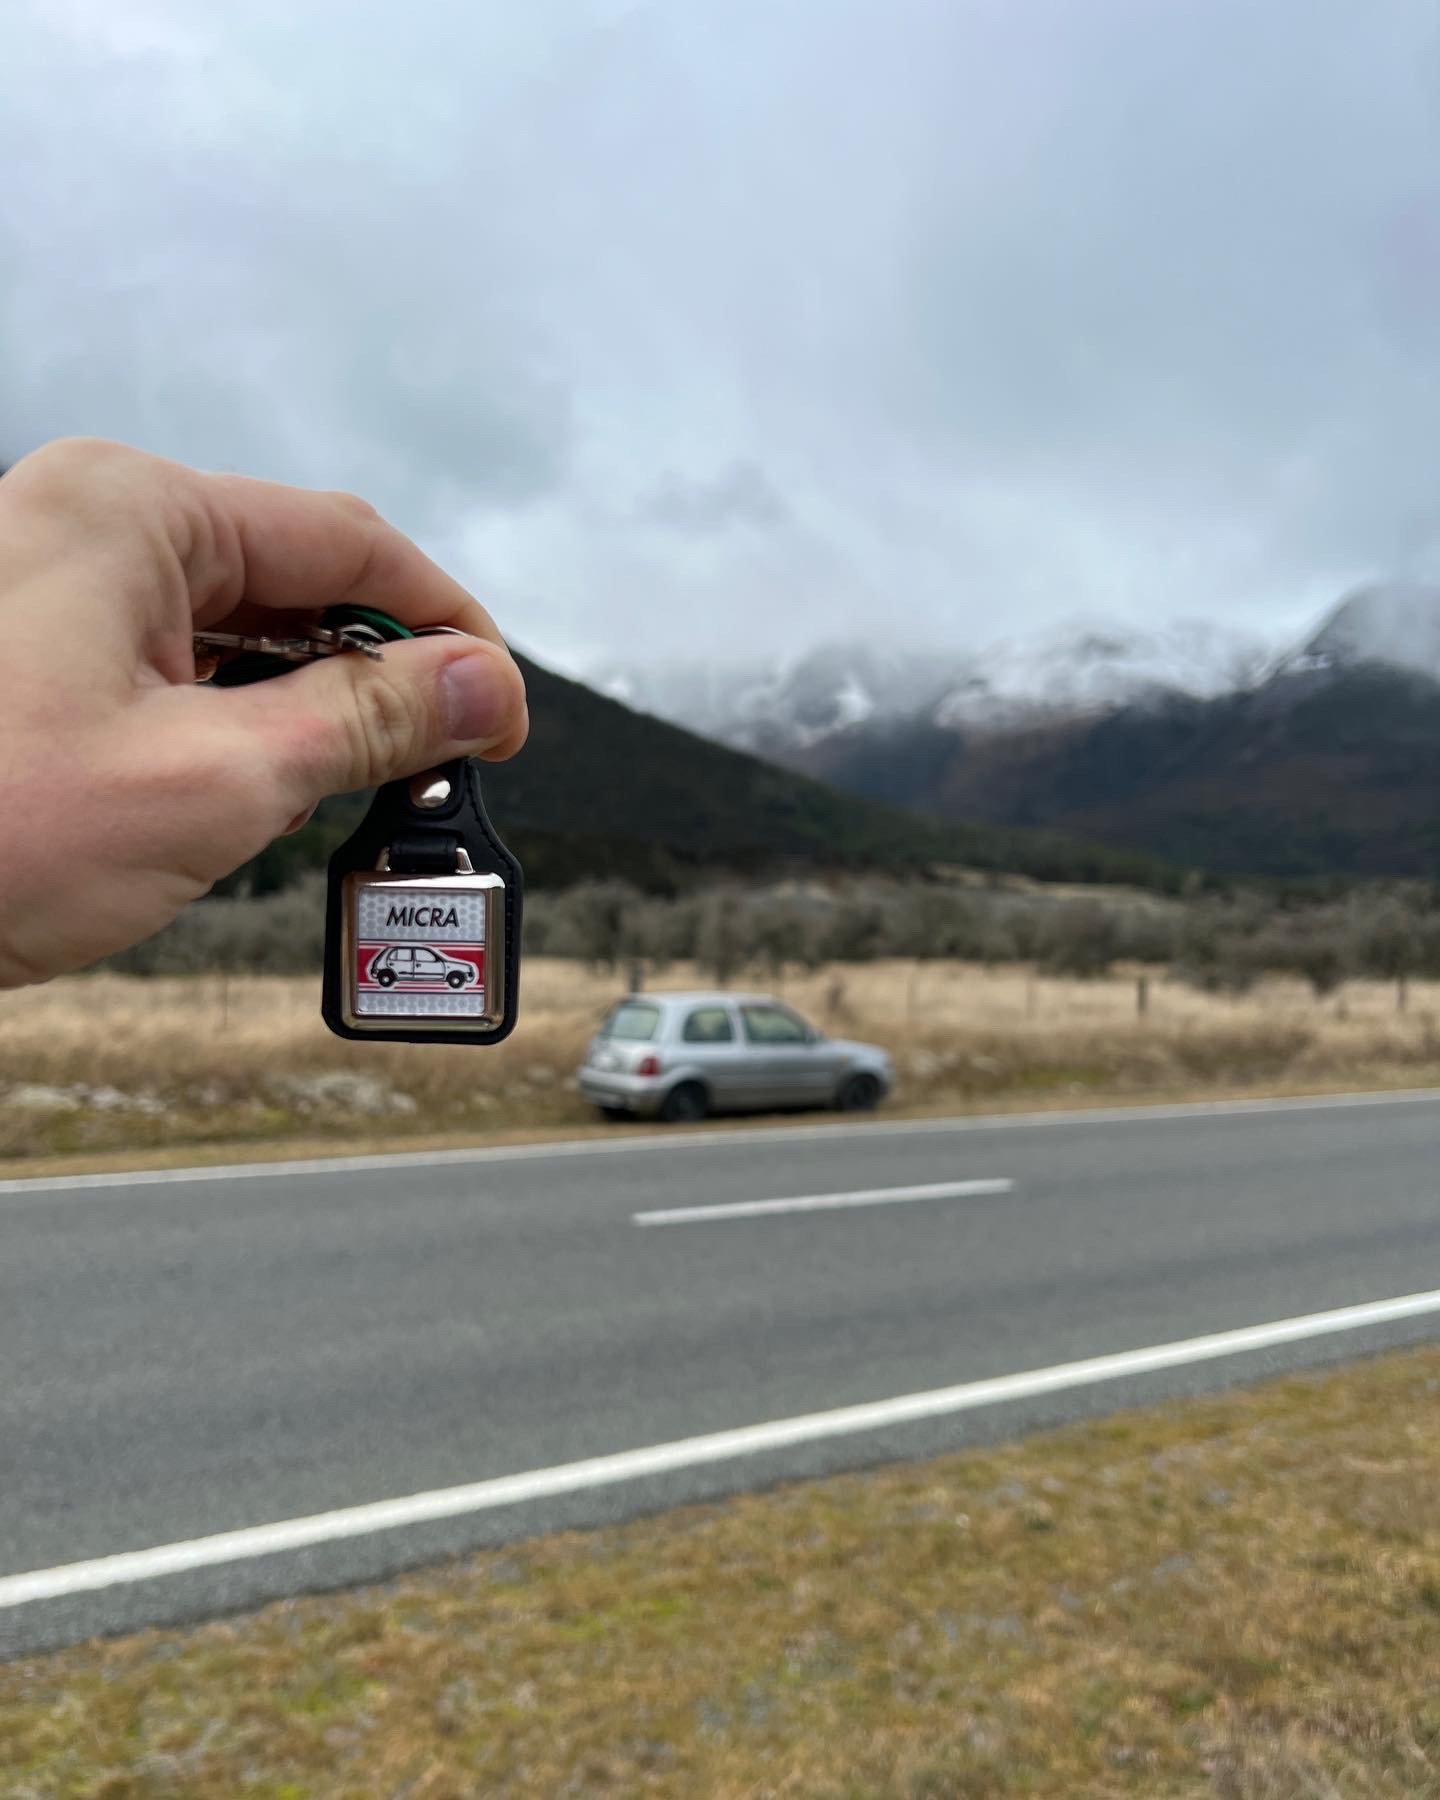
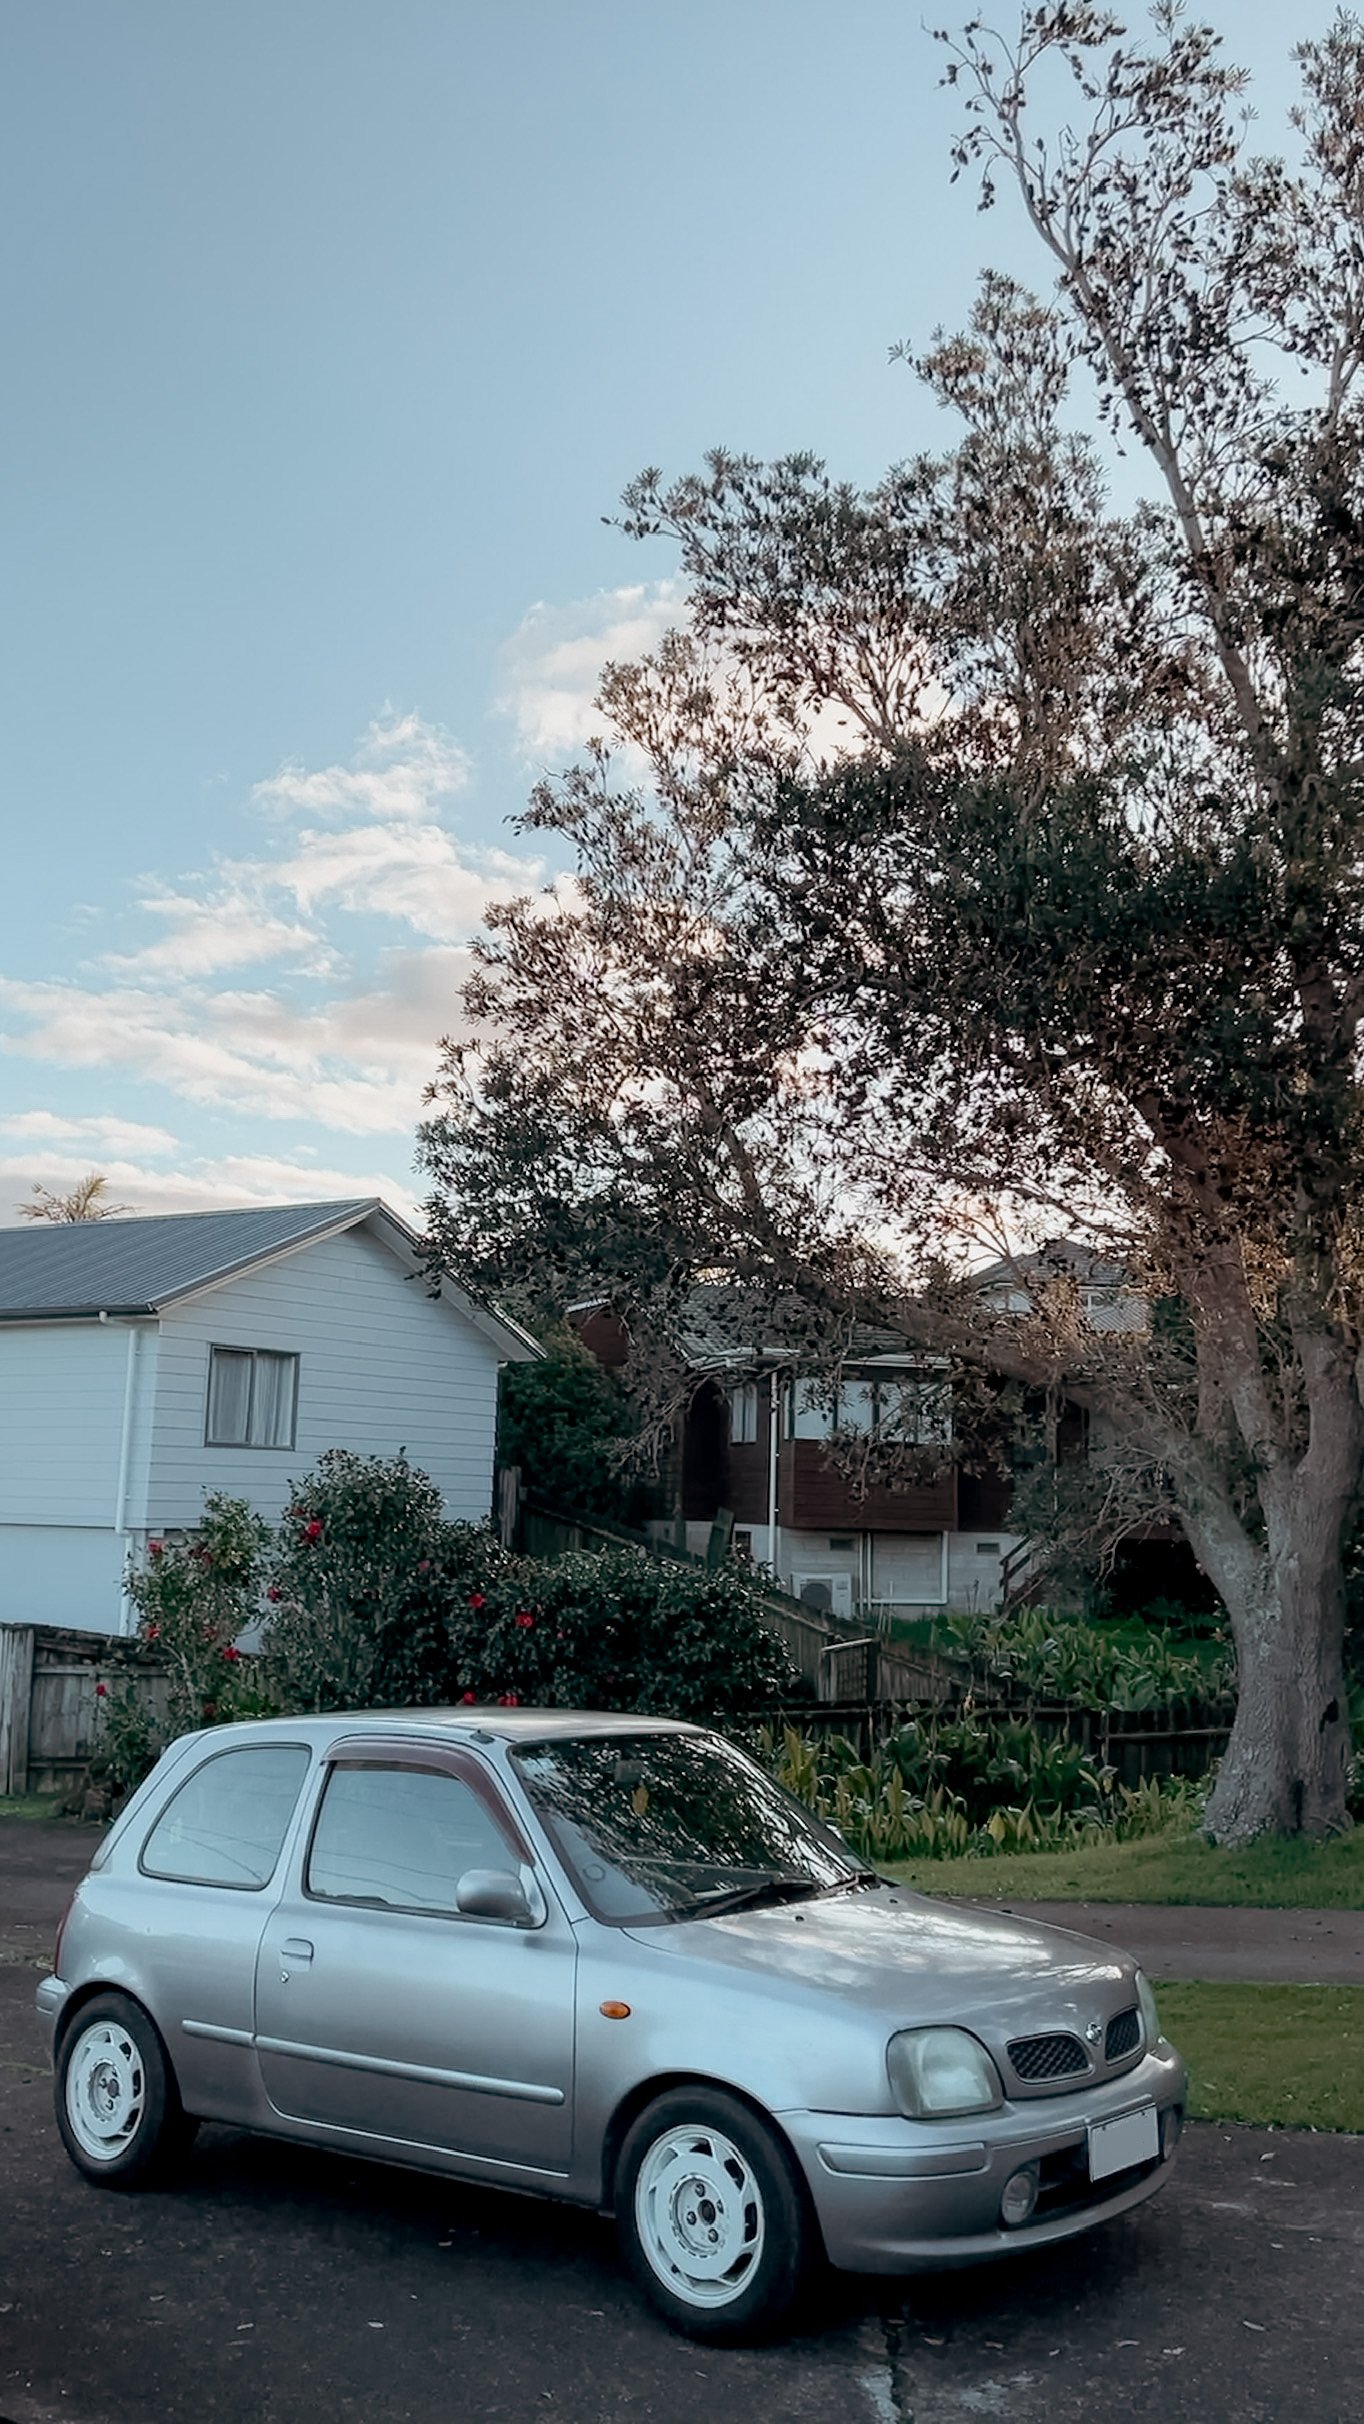
A message to @yoeddynz to find out what drivetrain the K11 cabriolet he had picked up contained resulted in a swift yuck when informed it had a CVT, He then informed me that he had a car with the far superior 5 speed manual gearbox mated to a 1300cc motor packaged in a highly desirable 2 door body shell that he was wanting to see go to a good home. With a bit of umming, arring, and some sweet talking to my wife, a deal was struck via FaceTime. Flights were booked to Nelson,@yoeddynz and Hannah were kind enough to provide us with a luxury airport collection in the form of a pair of K11s. We parked Minky and Martha next to each other and went for a coffee while they said their goodbyes. Alex, Hannah, Kate and I had a great yarn over a coffee and some slices inside and after we followed them out of the carpark and at the split in the road, we went our seperate ways. Kate and I had a explore around Nelson (as much as you can do on a Sunday afternoon). My first thoughts on jumping in and taking off is man these little things are actually pretty zippy and have great visibility. Here’s me jumping with excitement over joining the K11 owners club.
 20 points
 -
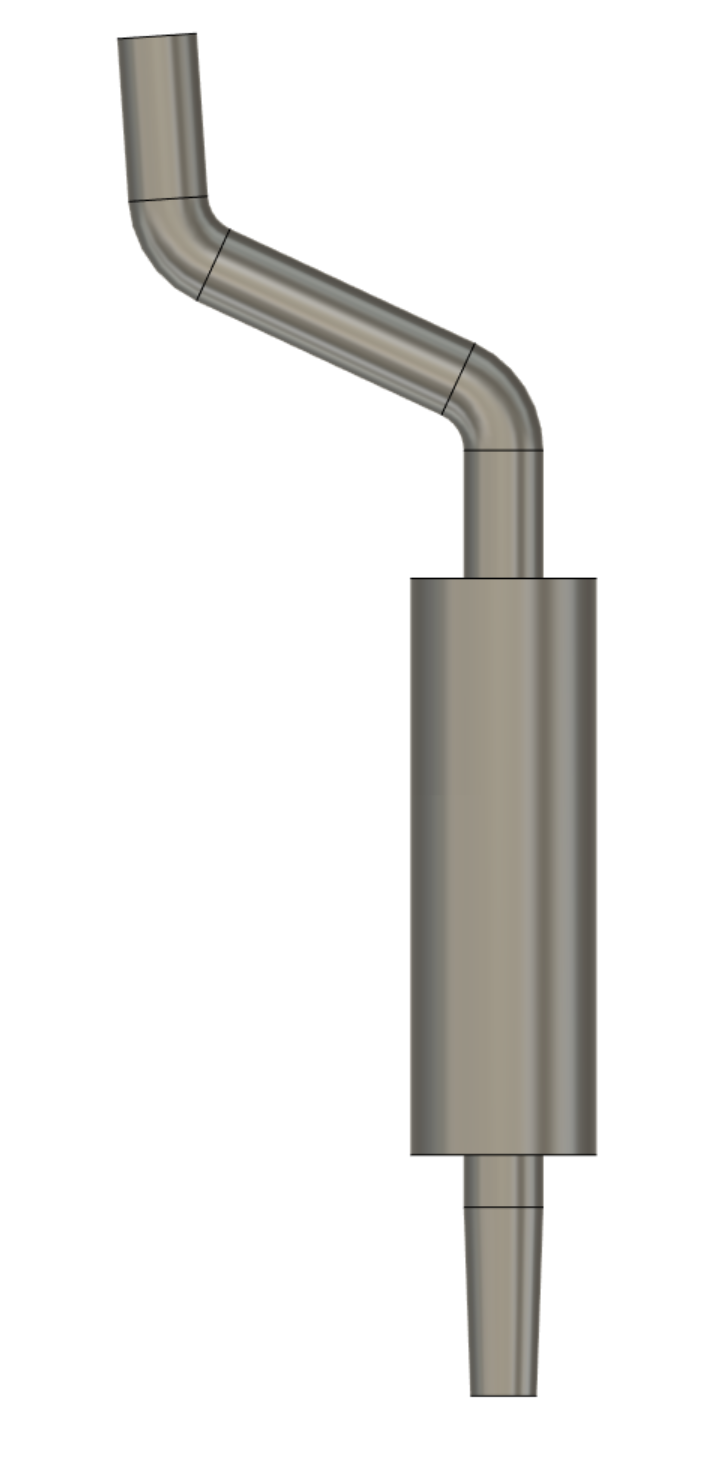
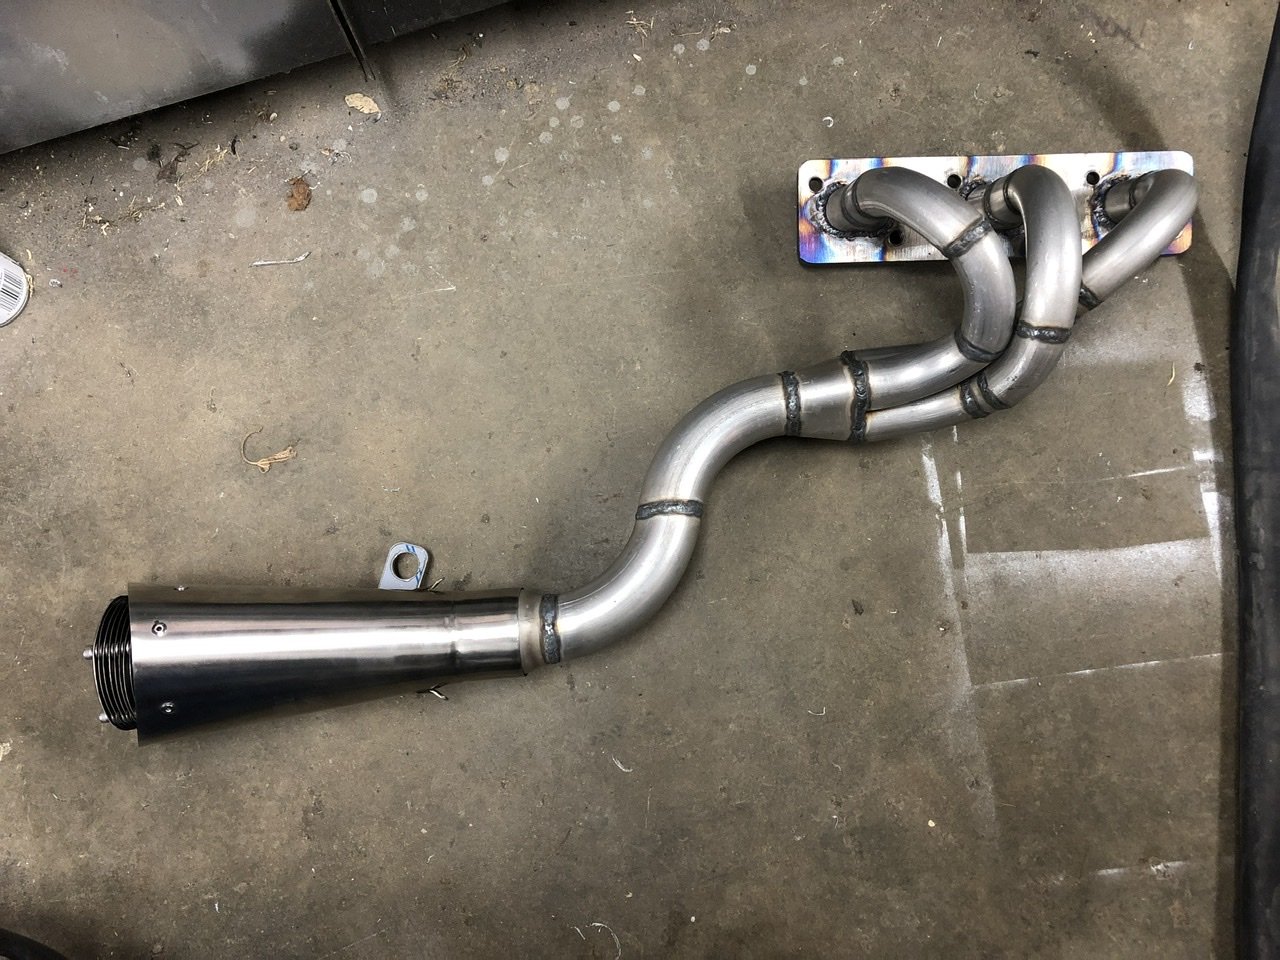
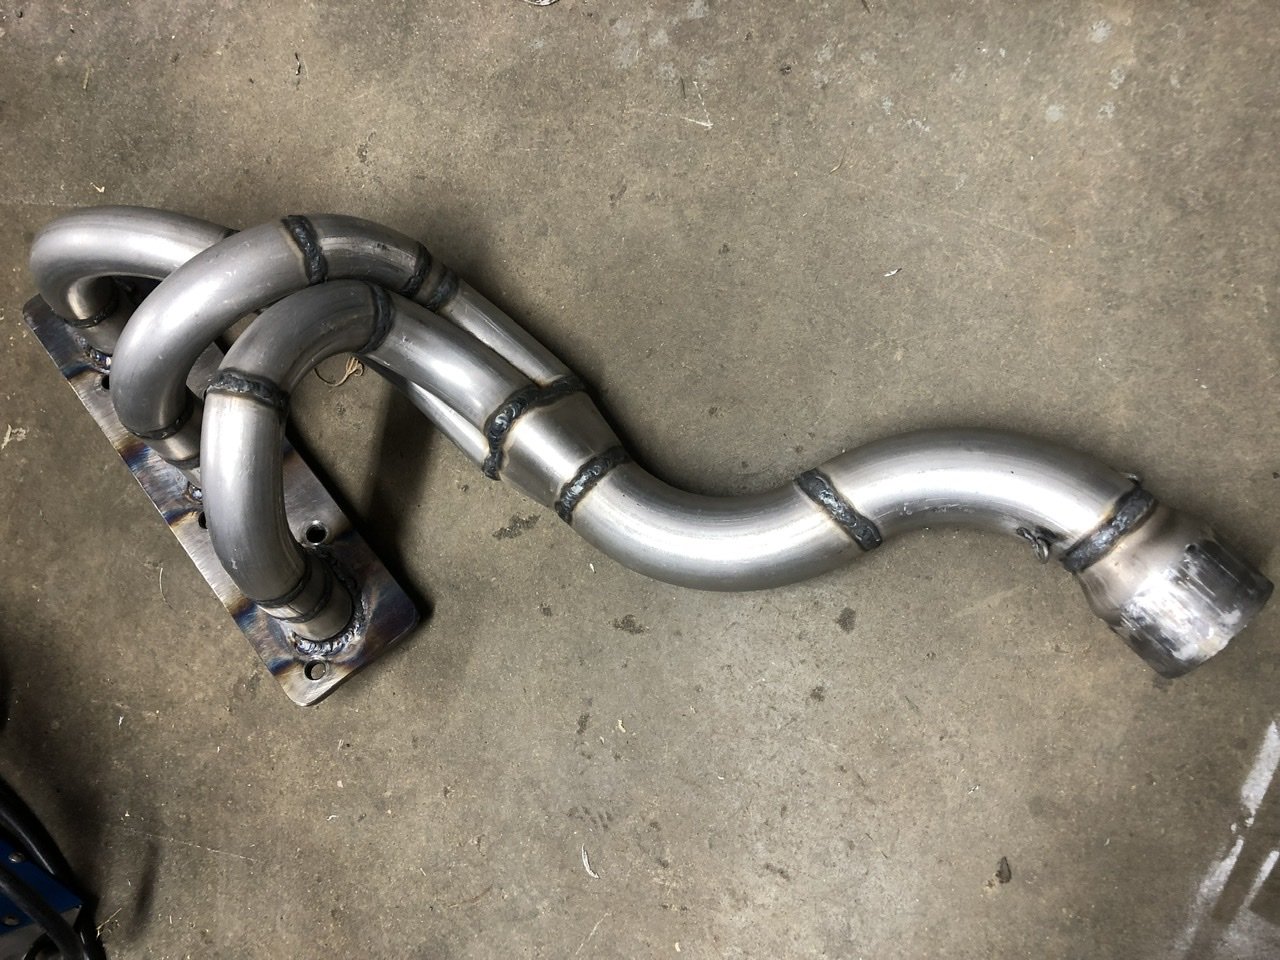
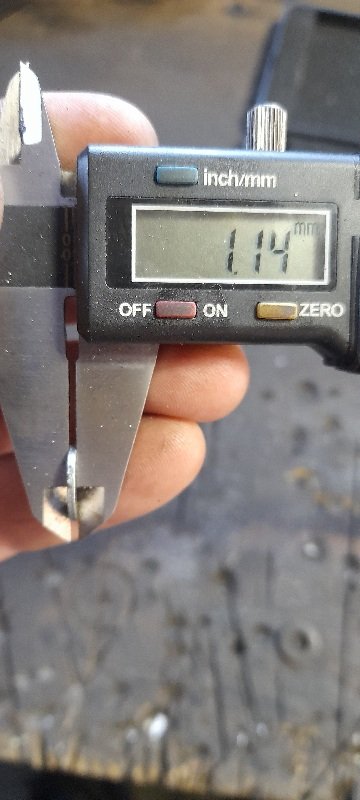
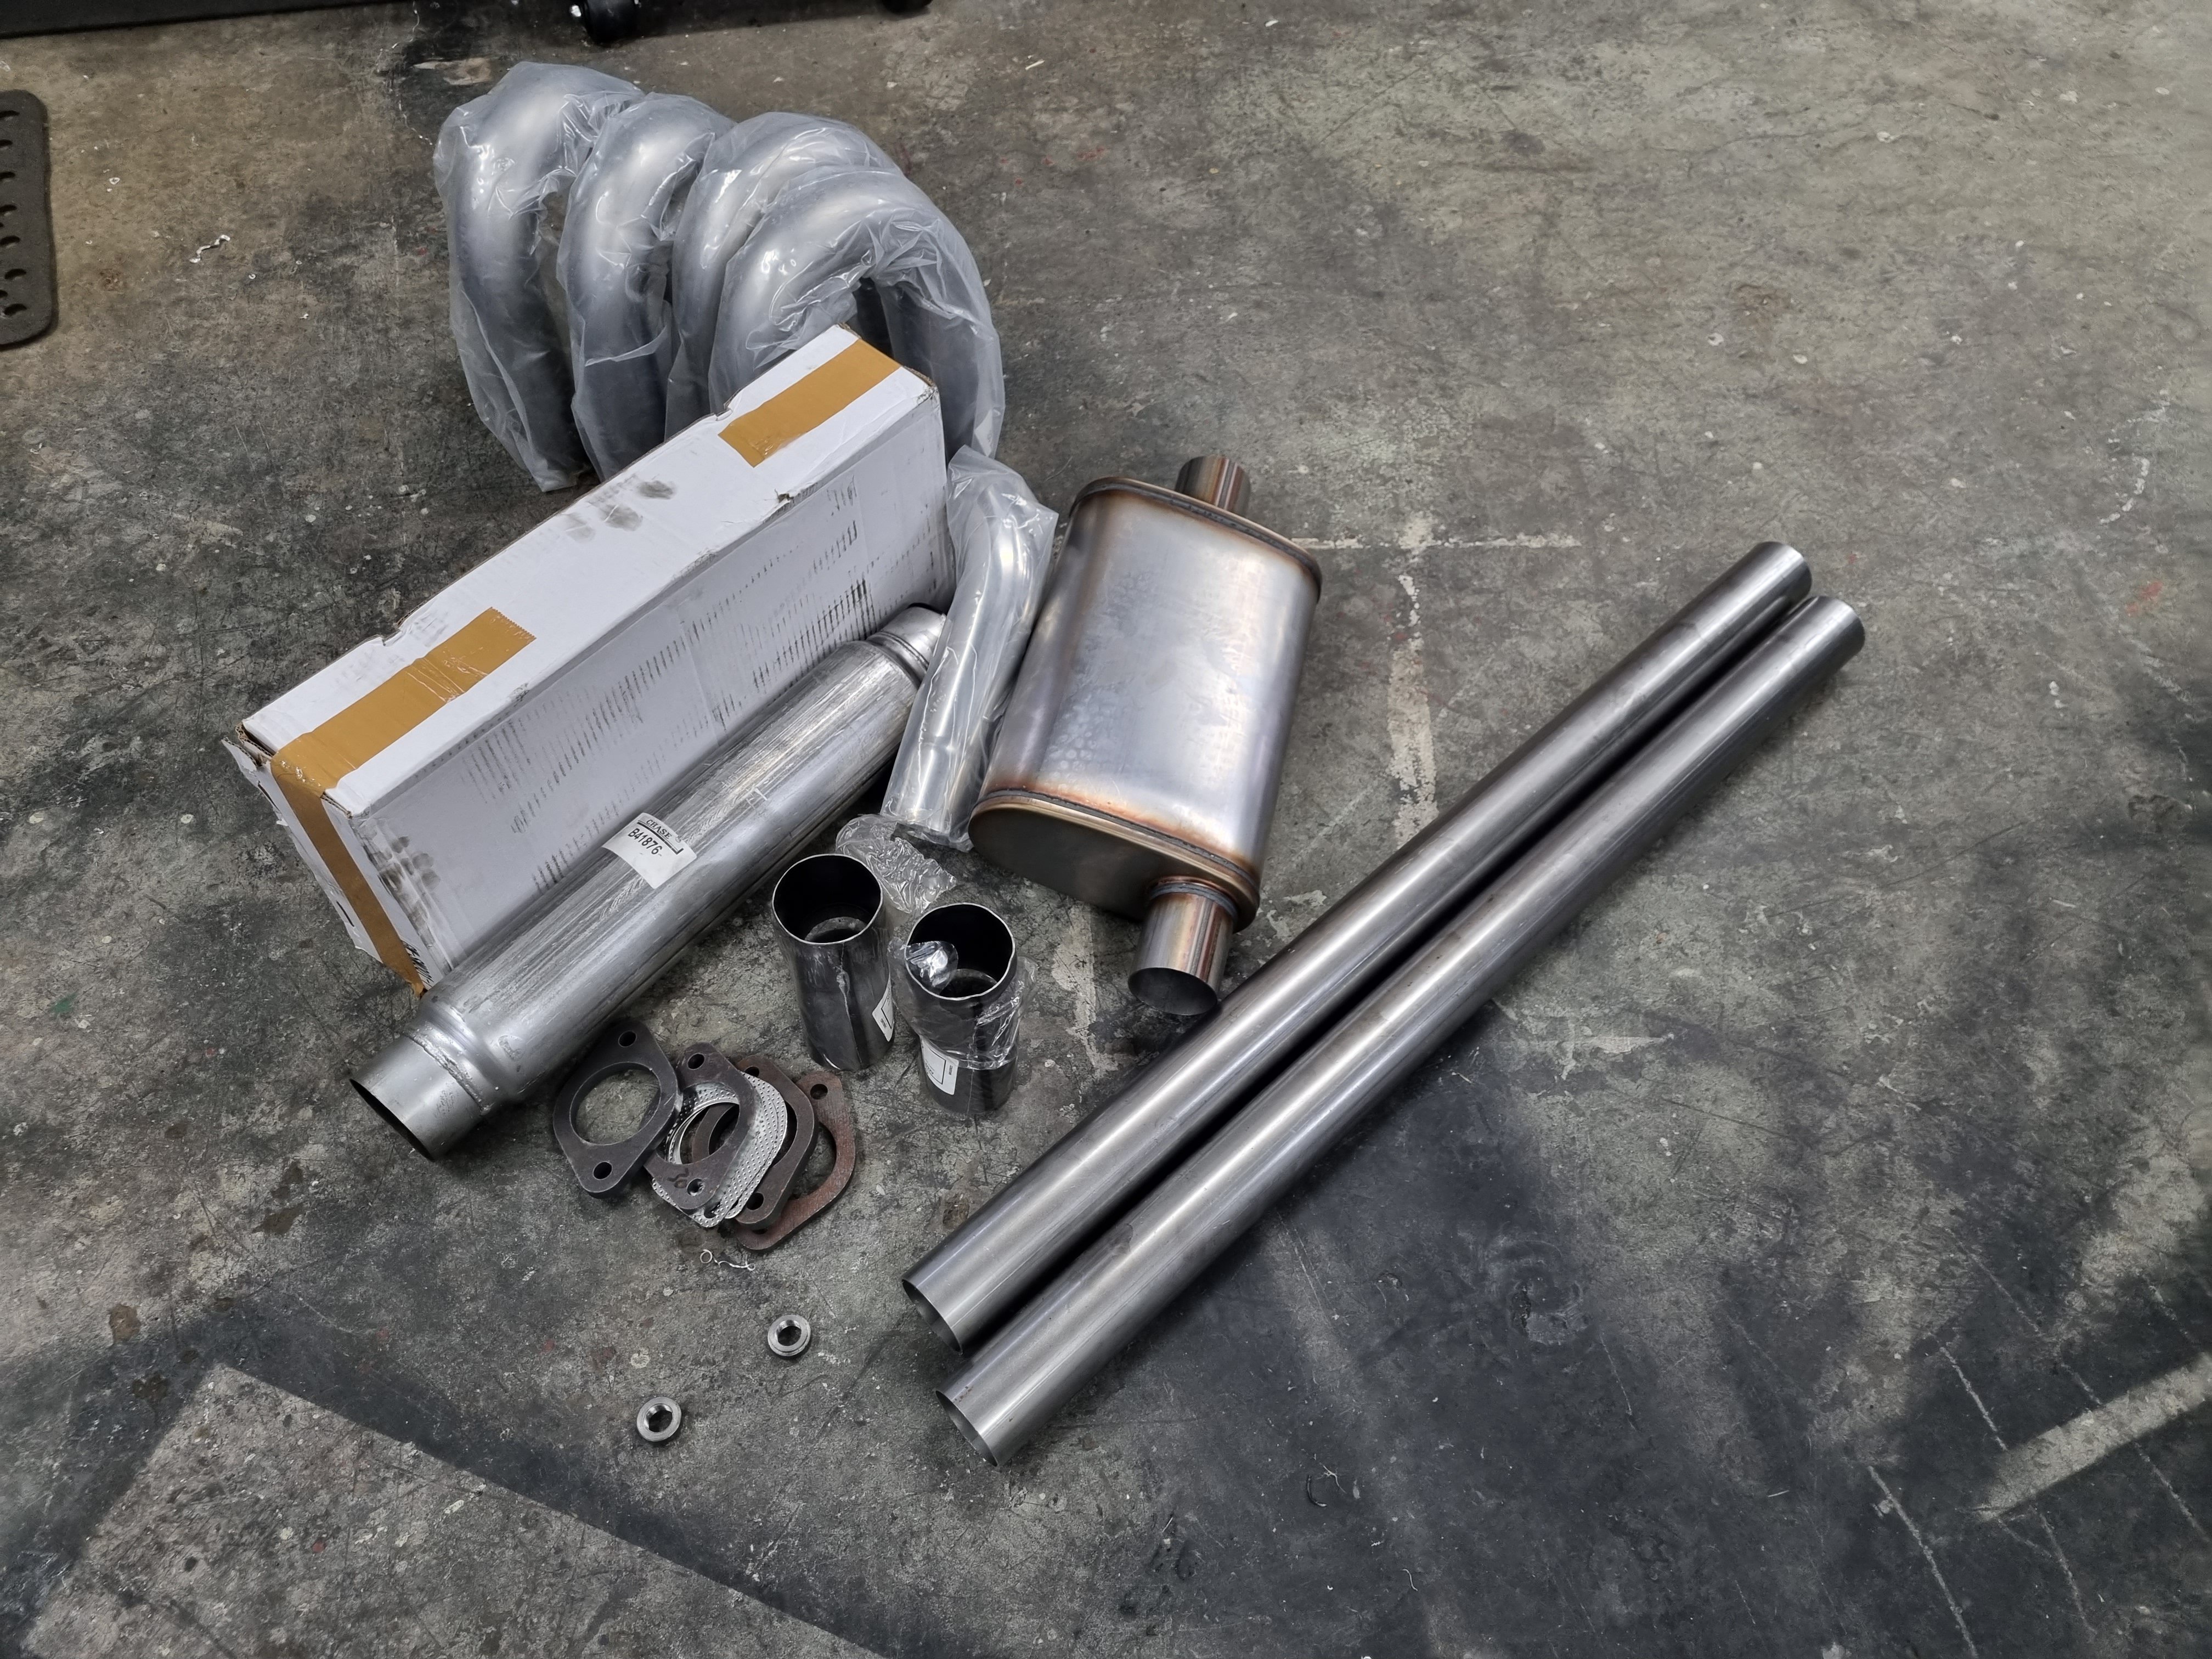
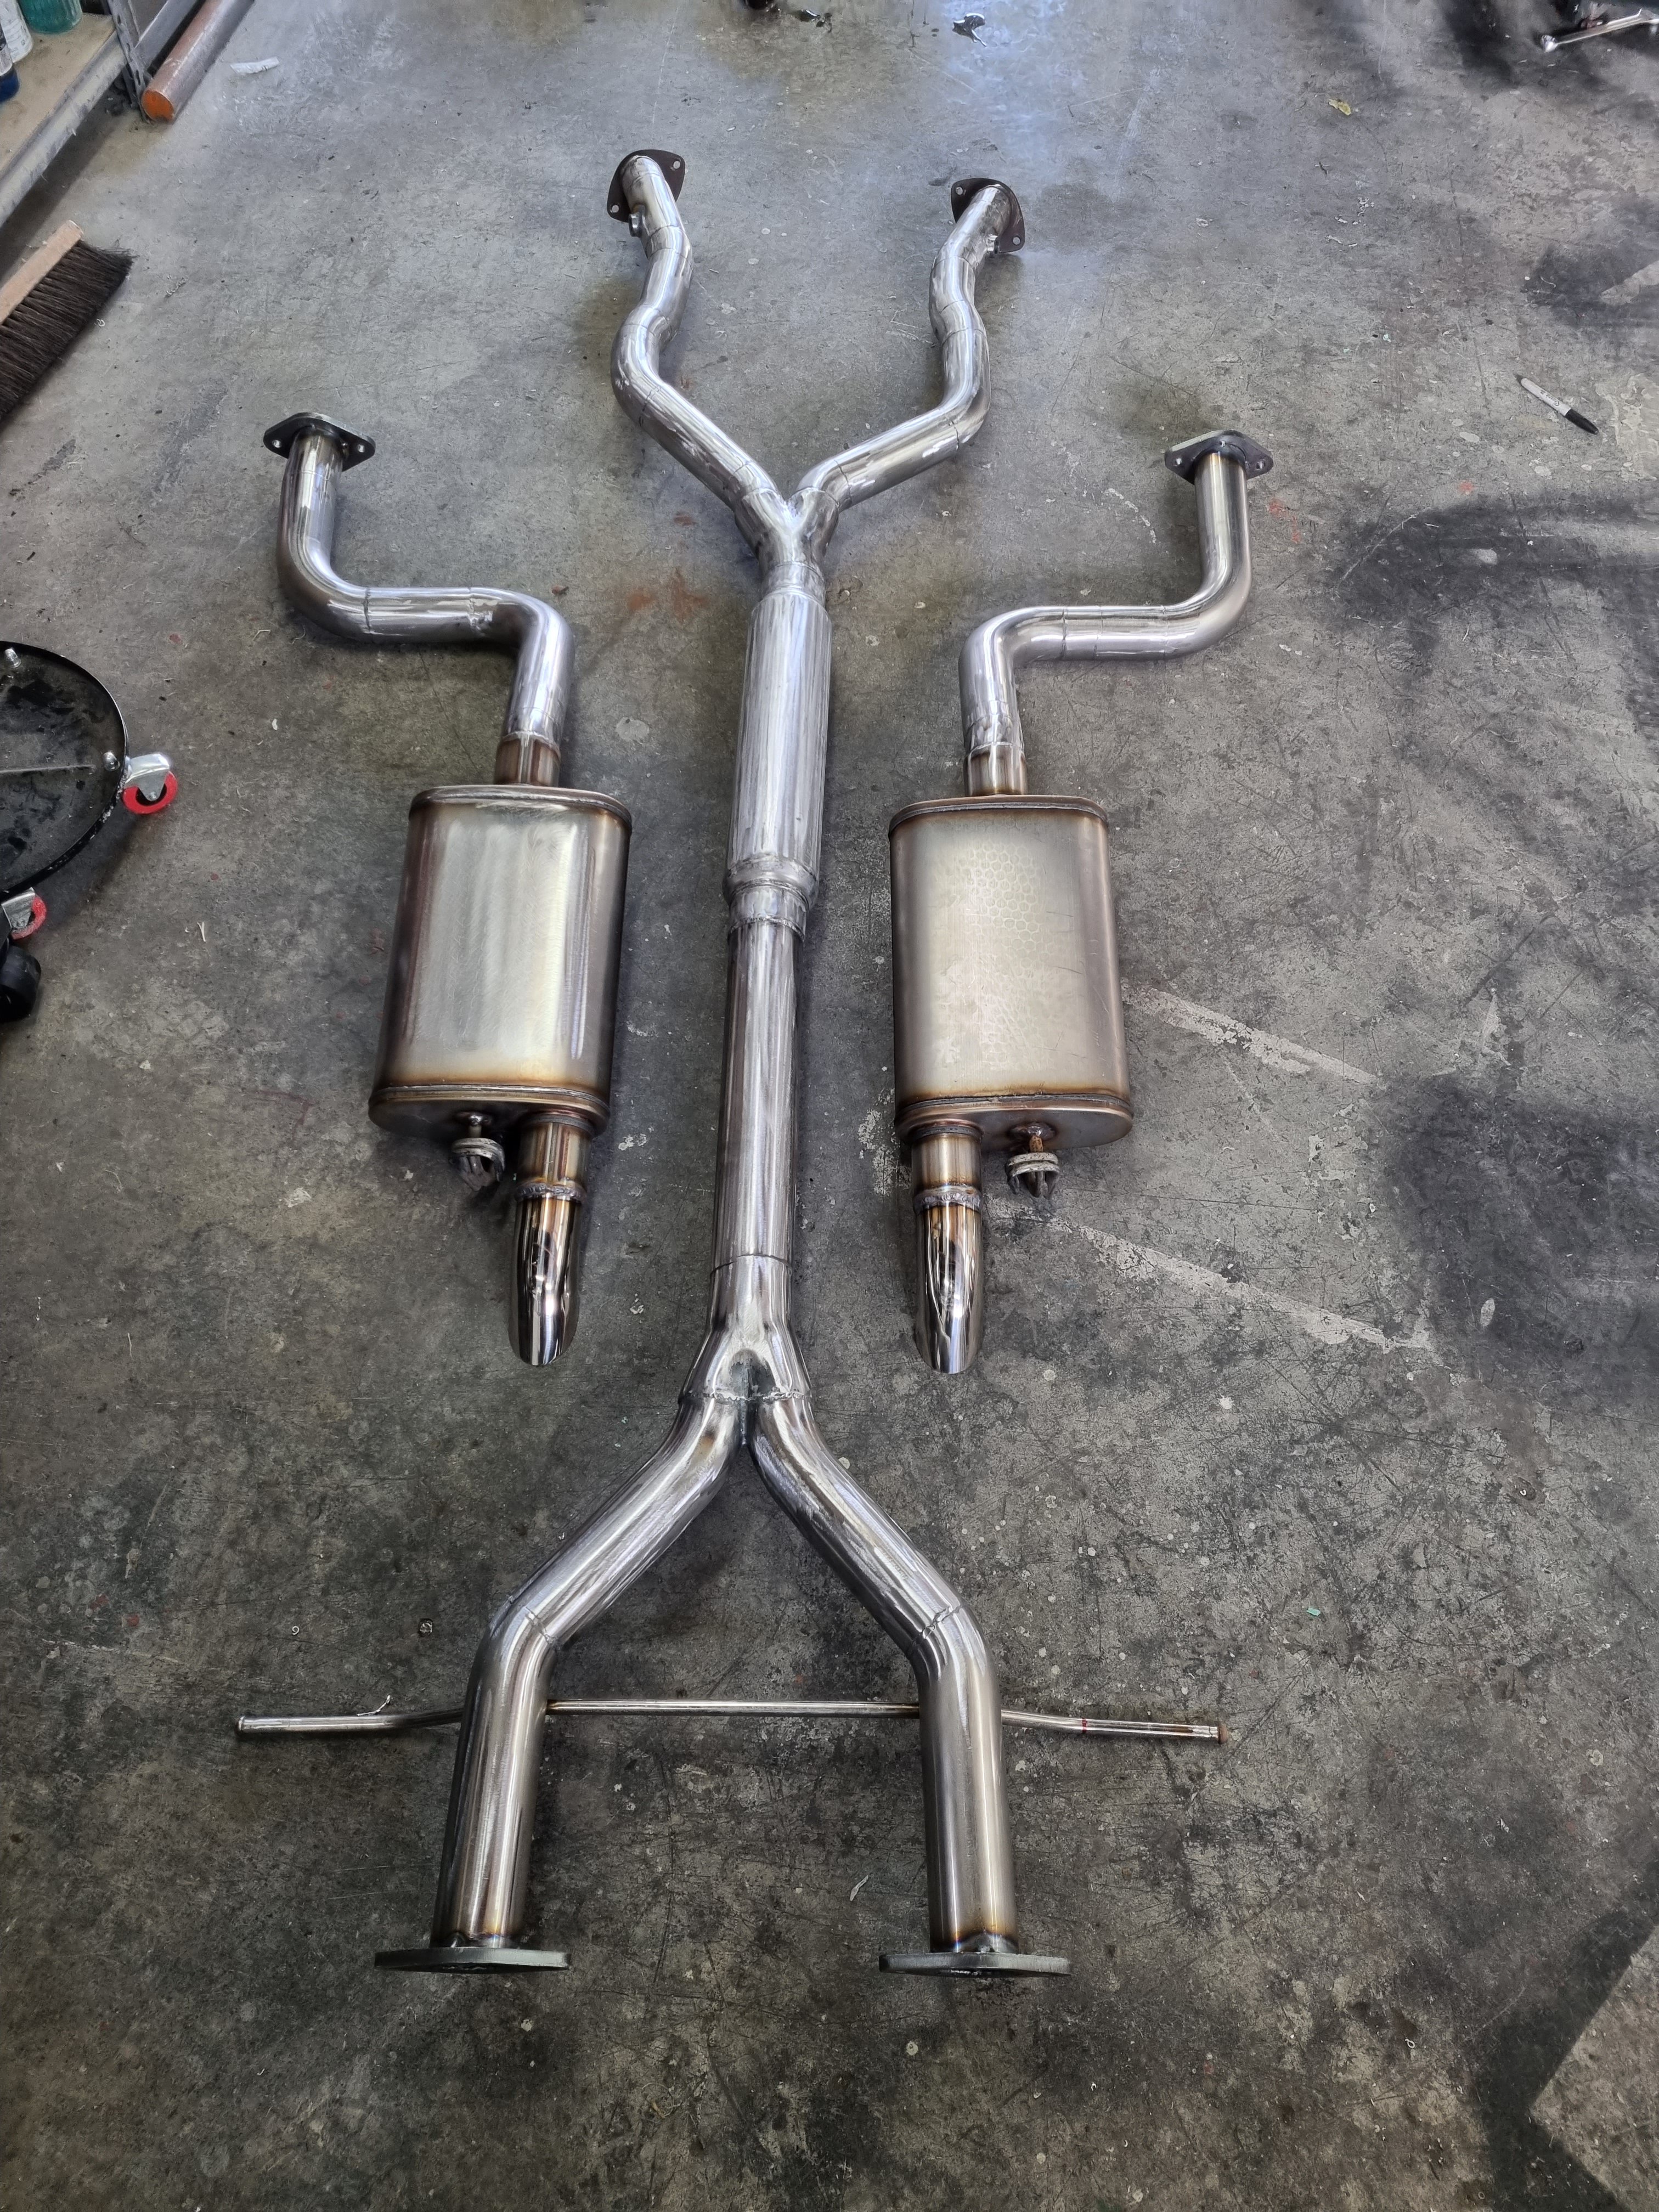
Exhaust investigation. I think this really is one of those scenarios where, if you want a big exhaust that flows good and doesnt make your ears bleed. There's just no way around it. You have to spend the money. I've been tempted to bitch out and just put a 2.5" exhaust on it, or smaller. As smaller pipe is a bit cheaper and it will help keep it quieter. But I think this would be a real disservice to the amazing work KPR has done on the manifold, and others who've contributed to see this project progress! I'd also always be wondering "what if" and I'd hate to save a tiny bit of money and then potentially leave some power on the table. Even if it's not much. Also, this car has an absolutely gigantic amount of room and a super easy exhaust path. So if any of my cars will ever be capable of it, this is it. haha. So, first things first I had a Toyota flexible flange ball joint thingy welded to the 2.5" part of the end of the manifold. All fits up great. (Thanks Rhys) The other half of the flange that I need to weld to the remaining section of the manifold. This was still on the exhaust on the Carina. So I yanked that out, and figured I may as well jam the whole thing on and see how loud it is with a long pipe and a single resonator on it. Answer: still way too loud, haha. I wont be getting invited to any Christmas parties at this rate. This is a fairly flogged out Chase muffler that I've repacked once because all of the innards flew out. So not exactly the pinnacle of muffler performance. However it's also worth noting that it basically sounds the same, but quieter. If it can end up quieter but still sound like this, it's gonna be cool as! So I think the only way I'll manage to get away with anything decent will be to use good mufflers. Adrenalin R seems the option of choice for everyone that ever has trouble keeping the noise down. They are expensive, but so is buying cheaper stuff then having to redo it. So my current plan is to buy the longest straight through muffler, and mount it not far after the extractors. Then see how obnoxious it is. If it's awful, then I can still put another muffler on the back. Even if it's a cheap/shitty/restrictive twin loop one or something. However this leaves the option of being able to easily fit a side pipe for drags and so on, if I put a second flange in a good place. I measured how much space I've got after the extractors, and thankfully I'll easily fit a 550mm long muffler in there. I'll double check that a 7" diameter barrel will fit though, once I've got the taller engine block back in. 8" or 6" diameter barrels are also optional sizes . It would be good if I could fit 8", I'm guessing it would keep the noise down a bit better. The next steps are to get the second half of the flange mounted to the expansion cone, then weld some amount of 3" pipe onto the back of that. Then order a muffler, and get that welded in place. Then work on the next section. Might take a while this way, but will get there. I'm not quite sure what radius the 3" bends will be, but it looks like there's still plenty of allowance anyway. I quickly sketched up the dimensions of everything. Should be sweet. I might actually be able to sneak a second short muffler in that intermediate bend part too, depending on radius of the bends.
19 points
-
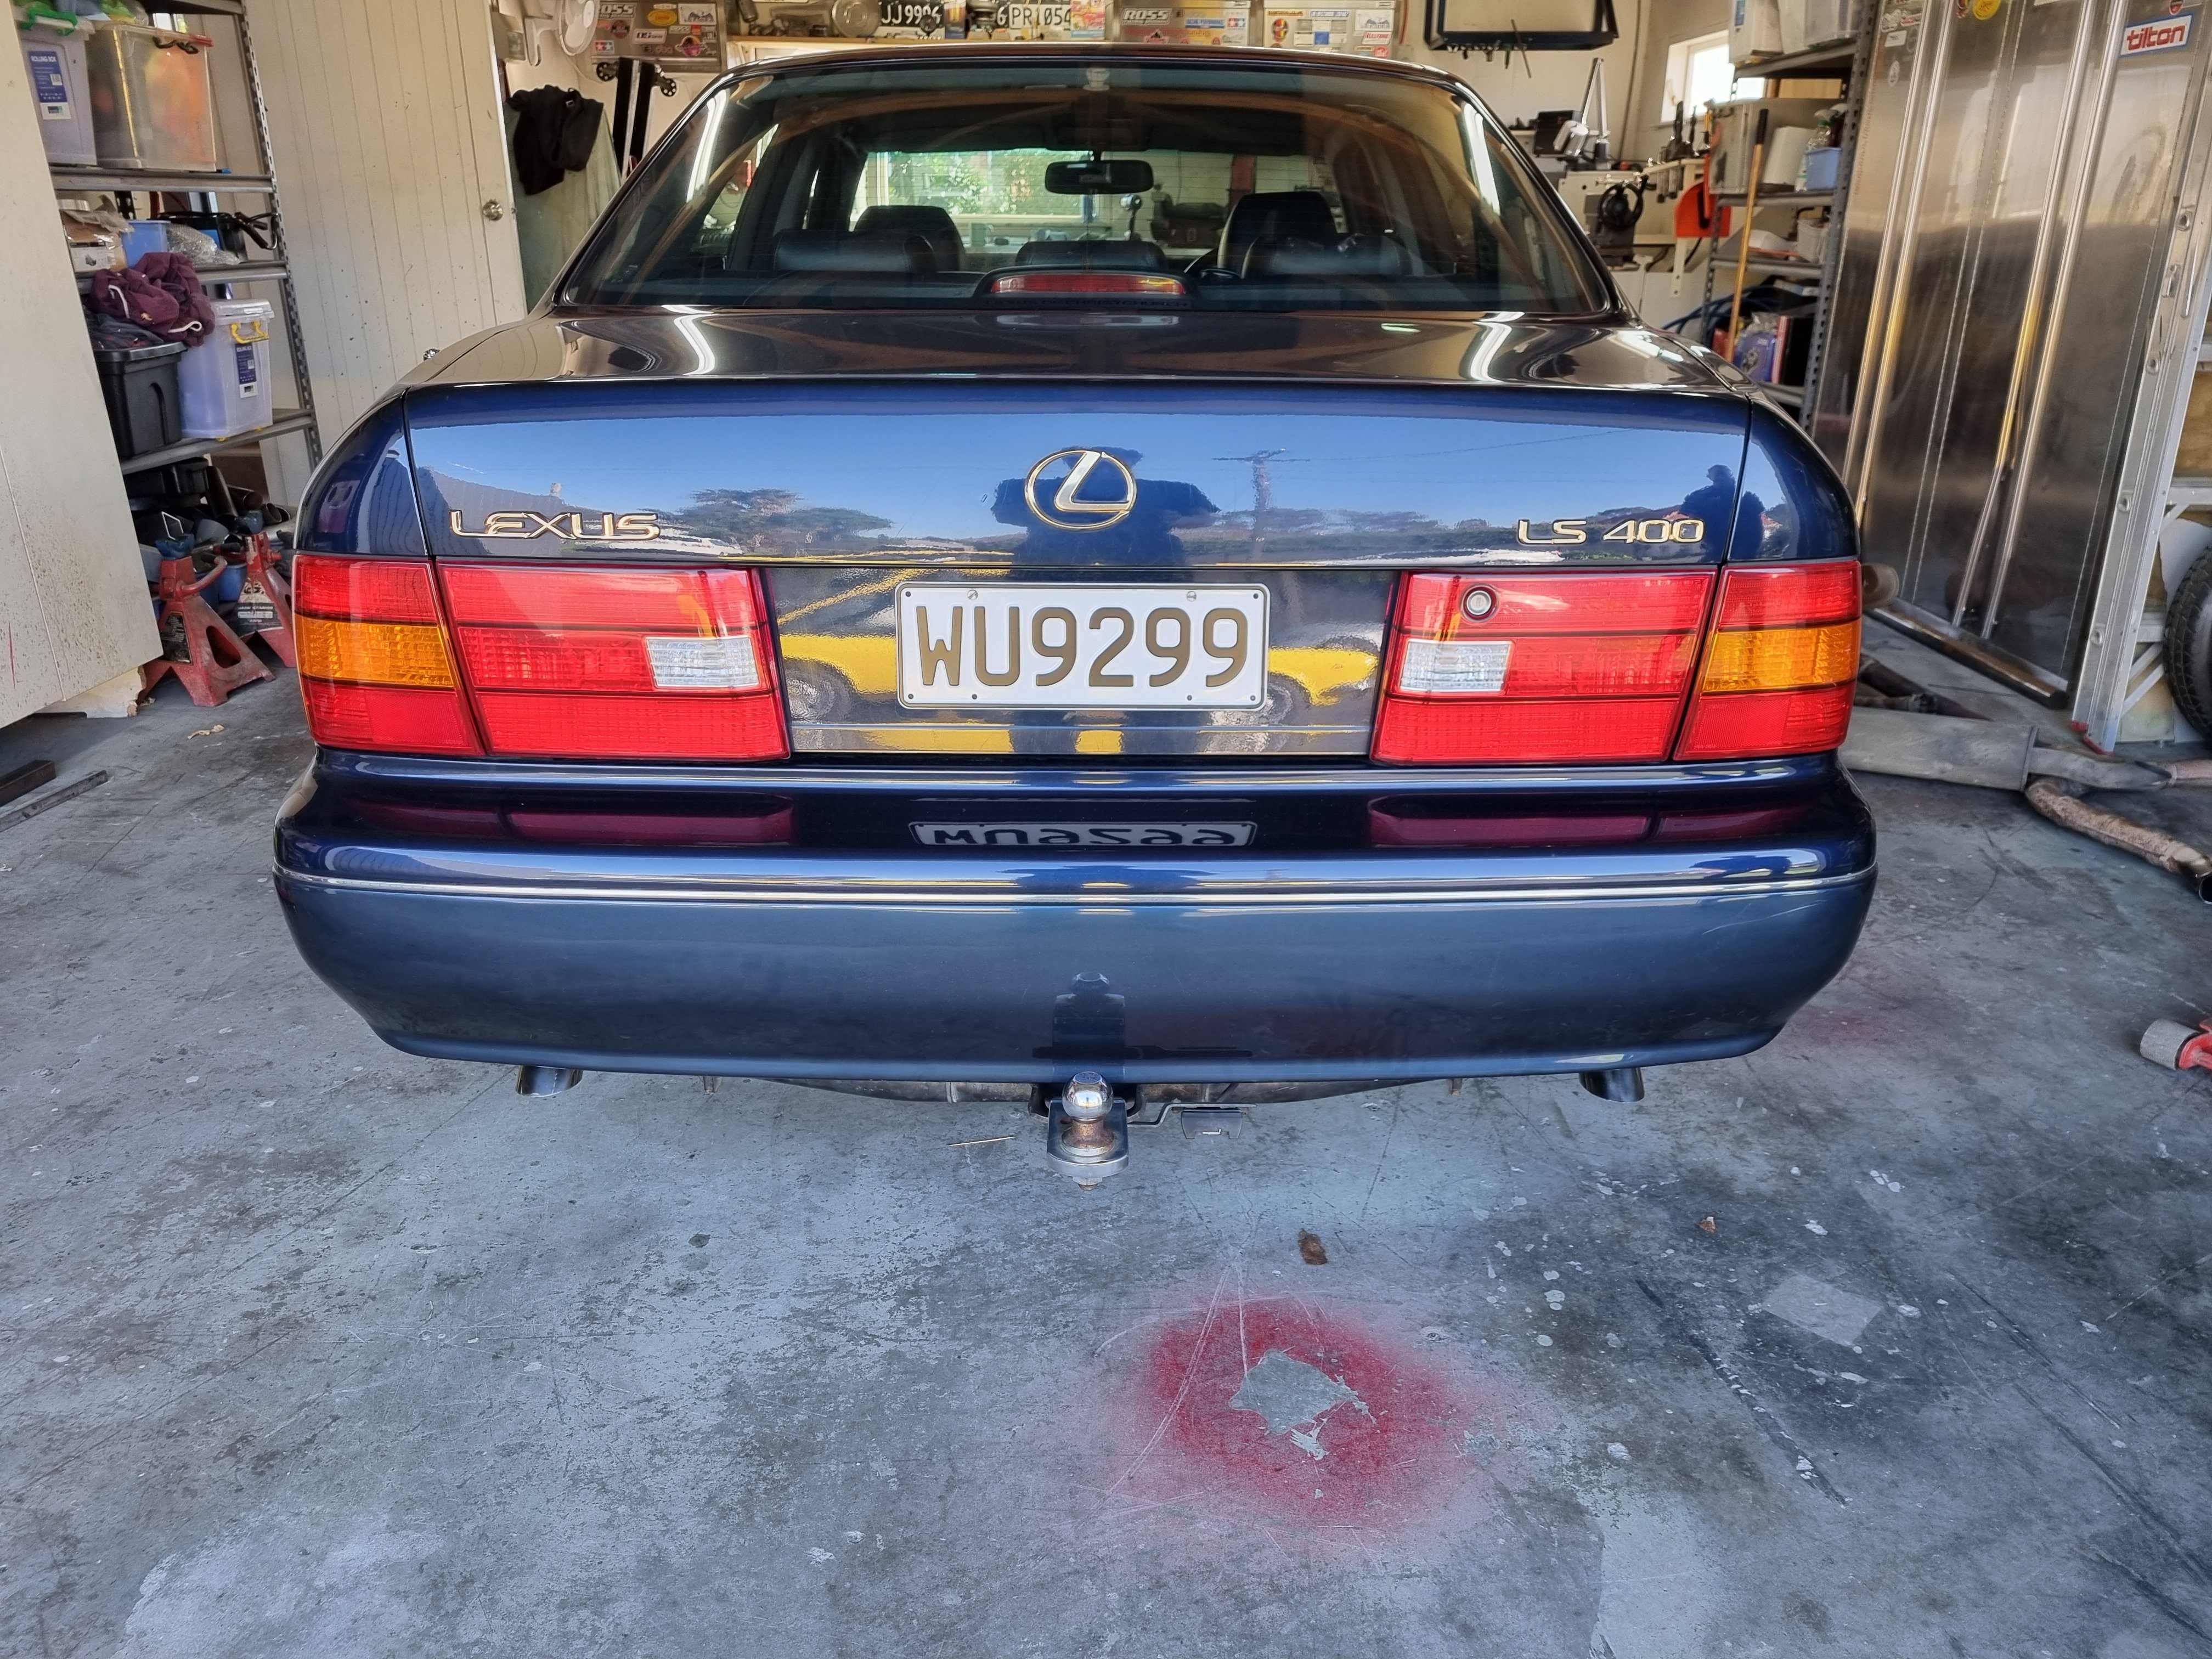
So is all installed and is fucking perfect. Nice v8 burble at idle, makes awesome V8 noises when you give it the jandles but silent when just cruzing. Stoked.
18 points
-
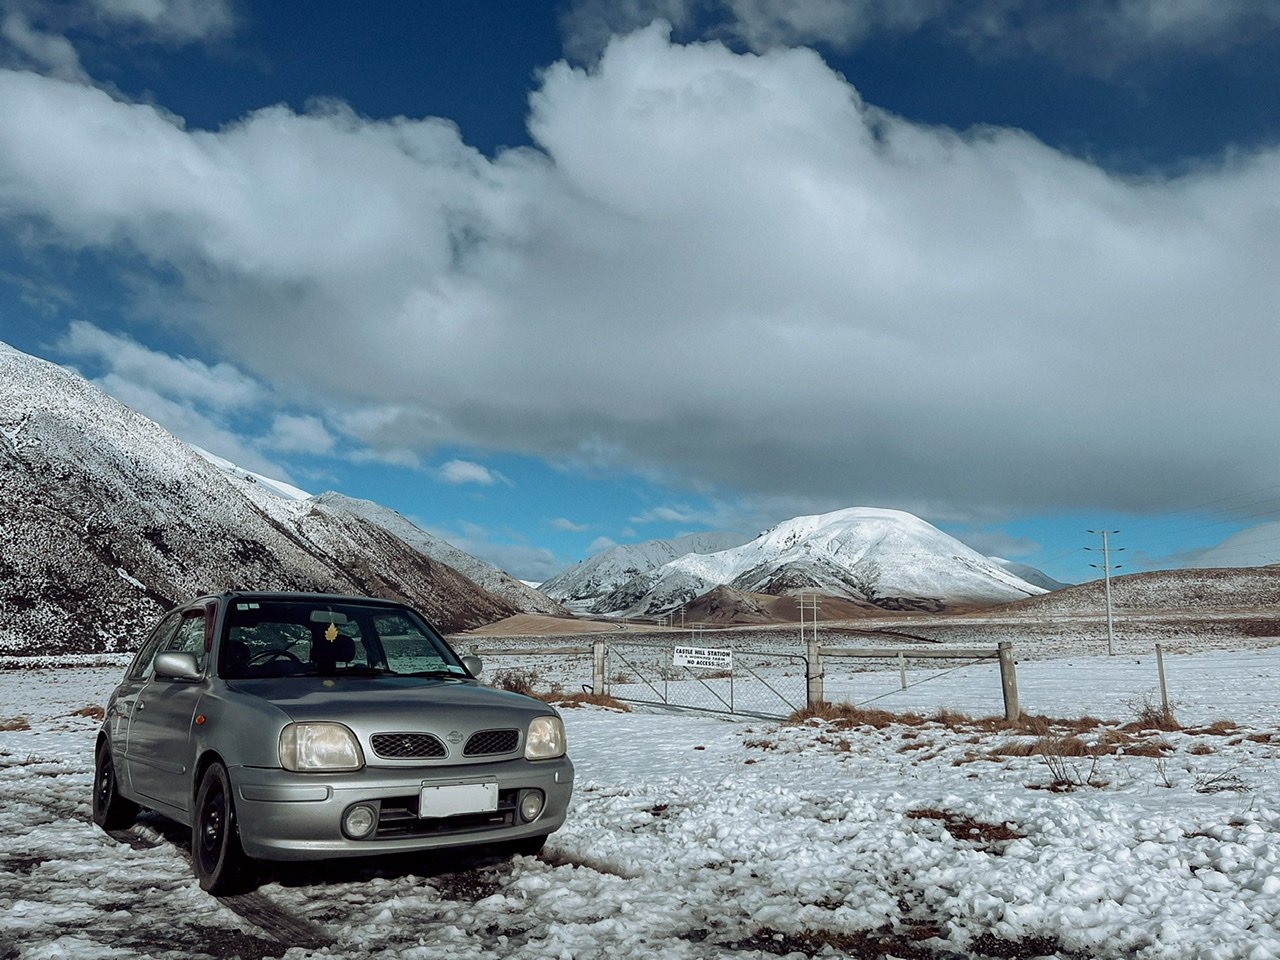
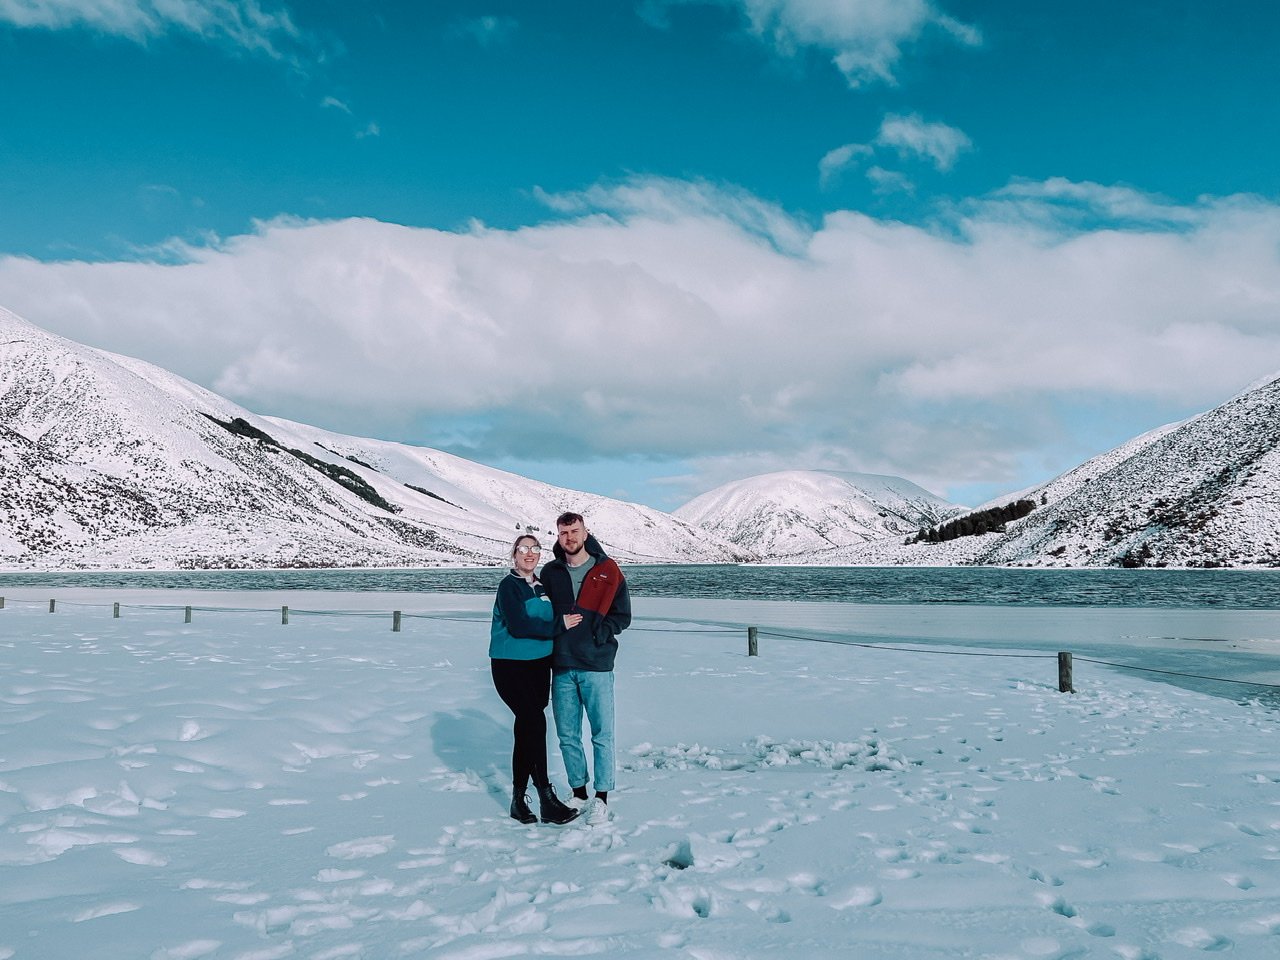
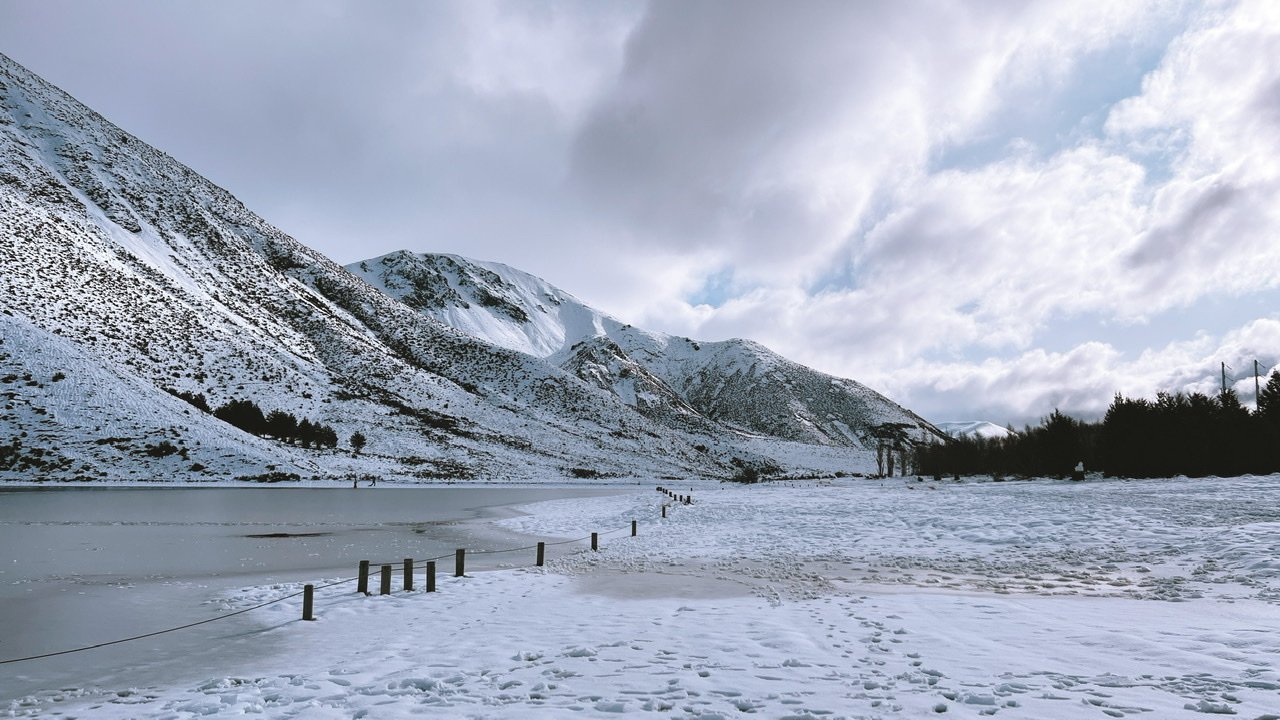
We woke up the next morning to a beautifully clear sky, After breakfast we decided to venture up Arthur’s pass to look at the snow on the mountians. We came across something better than seeing snow on the mountains, We found snow on the side of the road and Lake Lyndon was covered in snow/ partially frozen. We were very stoked as this was the first time we had seen the South Island like this and Kates first time in proper snow. Very different to the scenery we saw back in March/April. B E A U T I F U L.
14 points
-
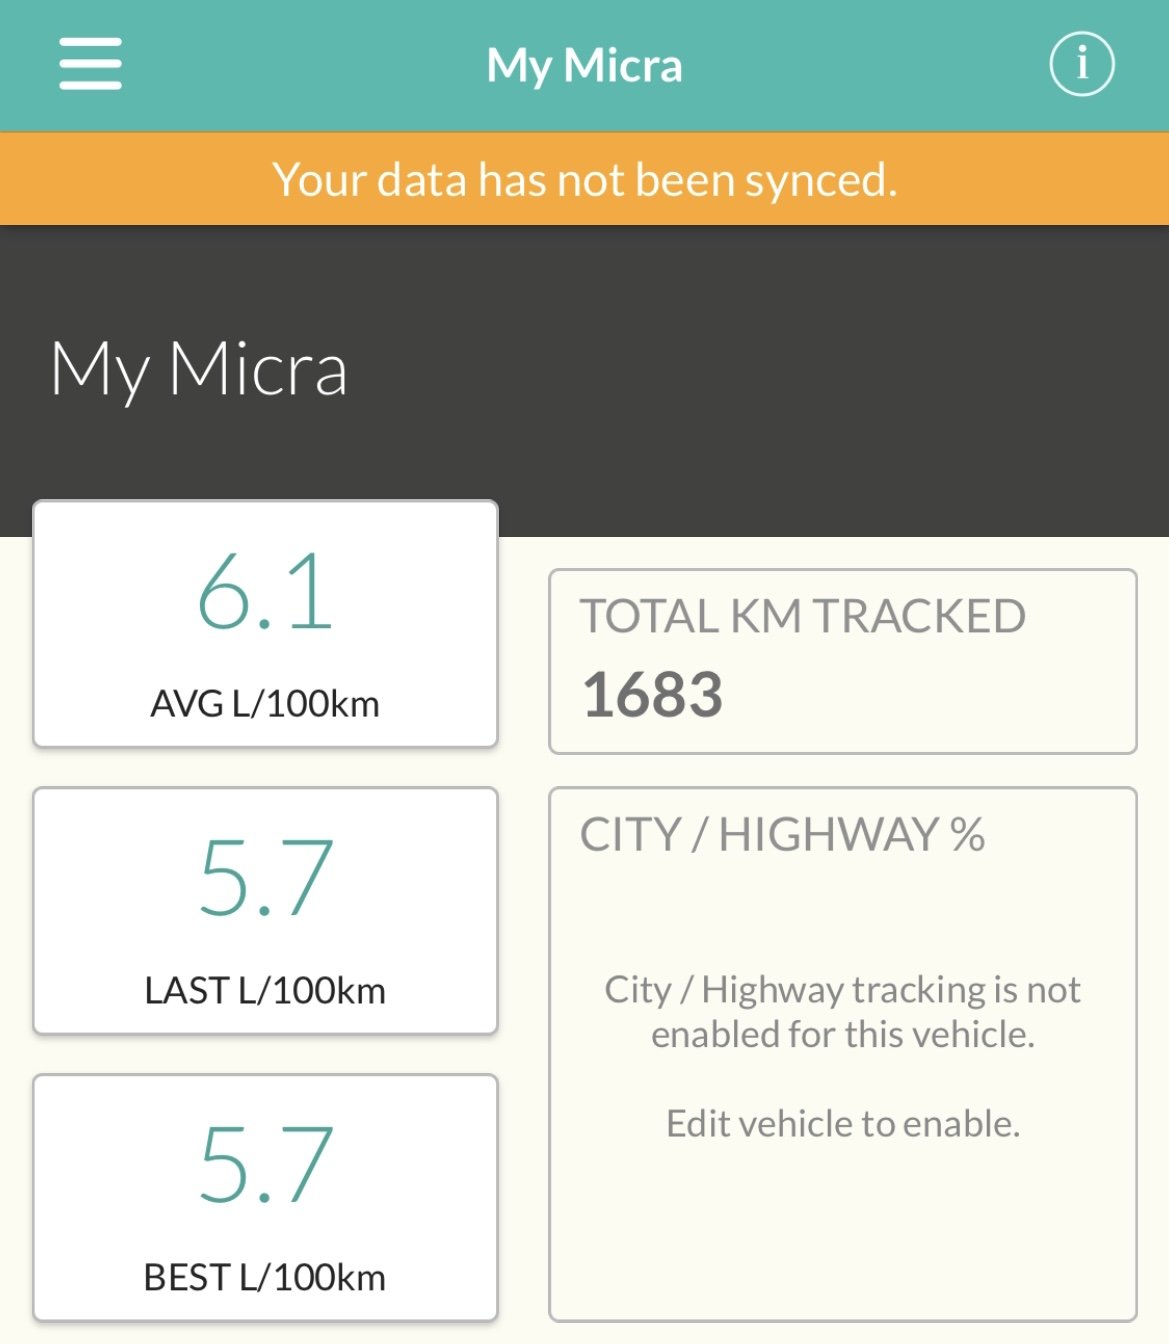
After driving just shy of 1700km over 5 days, I think I’m ready to review a K11. Im well impressed with this small car, It’s got ample interior space, great visibility with the glasshouse top half, the driving position is comfortable with all controls being well positioned and laid out within reach including a left foot rest and good legroom. The seats support you well even when on them for many hours. It’s really easy to drive, and doesn’t fatigue you on longer trips. I’m really looking forward to city driving in this compared to my 4wd ute. One of the aspects I’m impressed with is how much easier it maintains open road speeds (even when faced with an incline) than I was expecting. The steering has good feel and it handles like a little go kart in the corners. This car being a G# version has front and rear swaybars. I’m also not sure what’s going on with the suspension, but it’s very firm and corners fairly flat. Has similar ride qualities to the coilovers I had in my corolla. And what Im most impressed with is the fuel economy. I made it from Spring Creek to the top of the Bombays (620km) on a tank of gas. This was achieved 2 up, amongst some spirited driving with a boot full of luggage, snacks and something I carted from Christchurch that I’ll save for tomorrow…
12 points
-
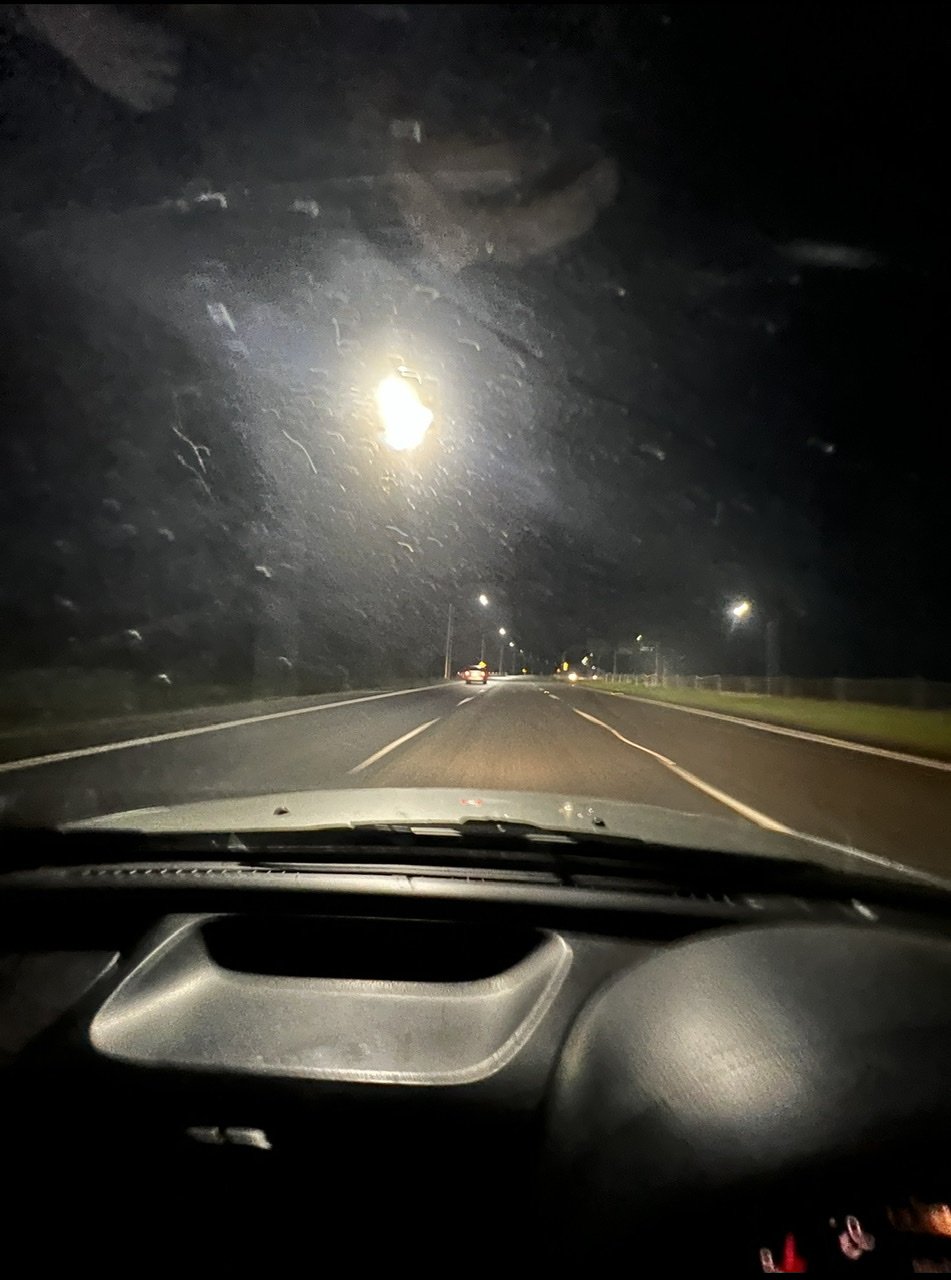
Met up with some of the Chch crew for a small car Ramen meet. Even though the K11 is packing double the CCS of both of the Kei cars, for some reason it looks smaller… The next day we packed up and started heading back north taking the scenic route home. Jumped on the ferry Friday morning. Shot back up the North Island, stopped for dinner in Taupo to see some friends and then kept driving back to Auckland. It was this stretch that the K11 first started to feel like a small car. Coming through really thick fog that you can barely see past the bonnet in the pitch black with convoys of trucks coming the other way really made you aware of the size of a K11. We arrived home just before 1am on the Saturday morning and went straight to sleep.
12 points
-
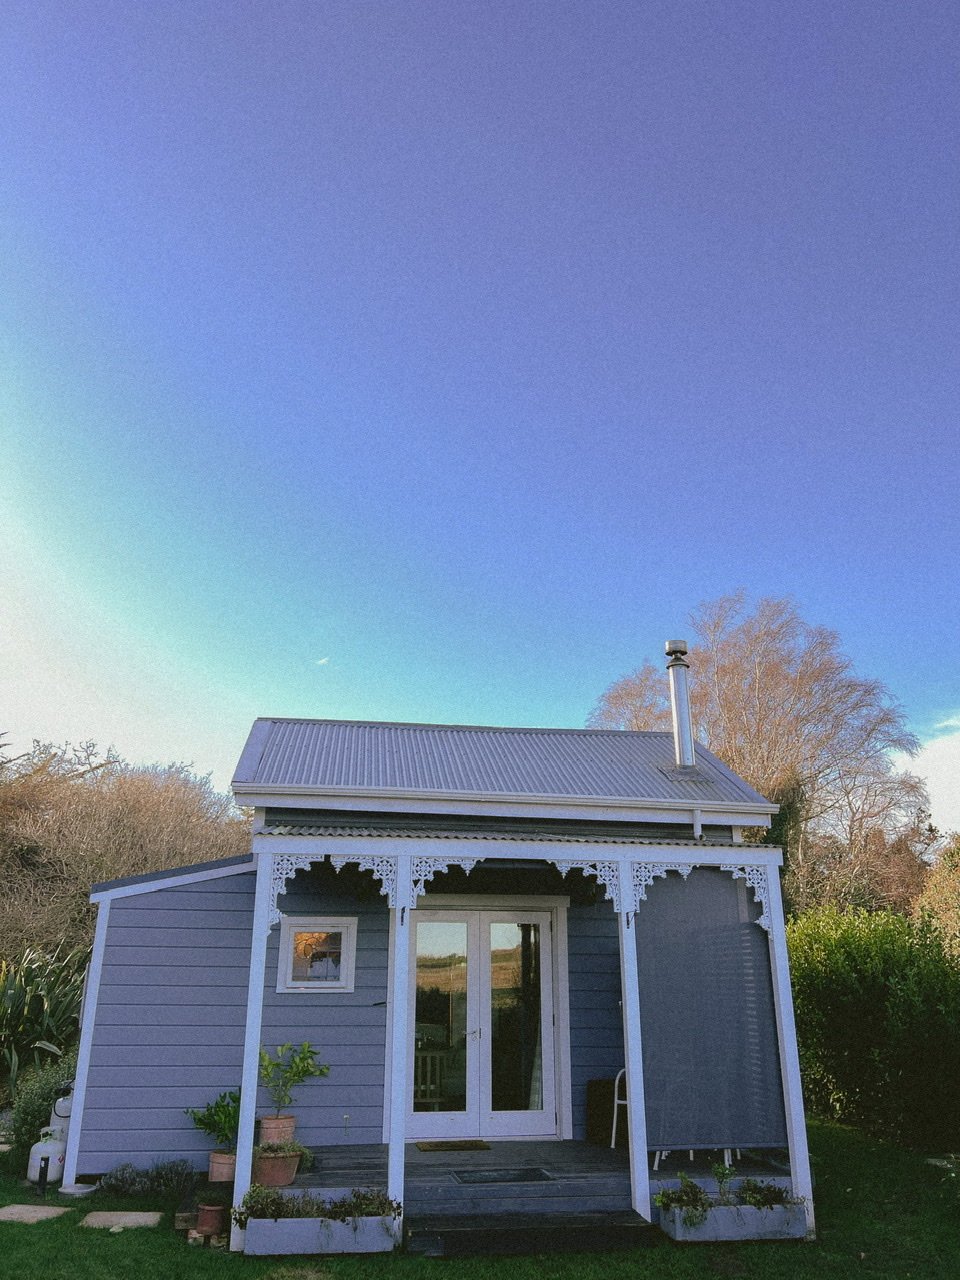
We made it to Christchurch amongst all the rain, -luckily decided to buy a new set of wipers in Nelson. Had a nights accomodation booked at this tiny house 30 minutes out of town. We spent the evening with a bottle of wine next to the fireplace watching the rain outside.
12 points
-
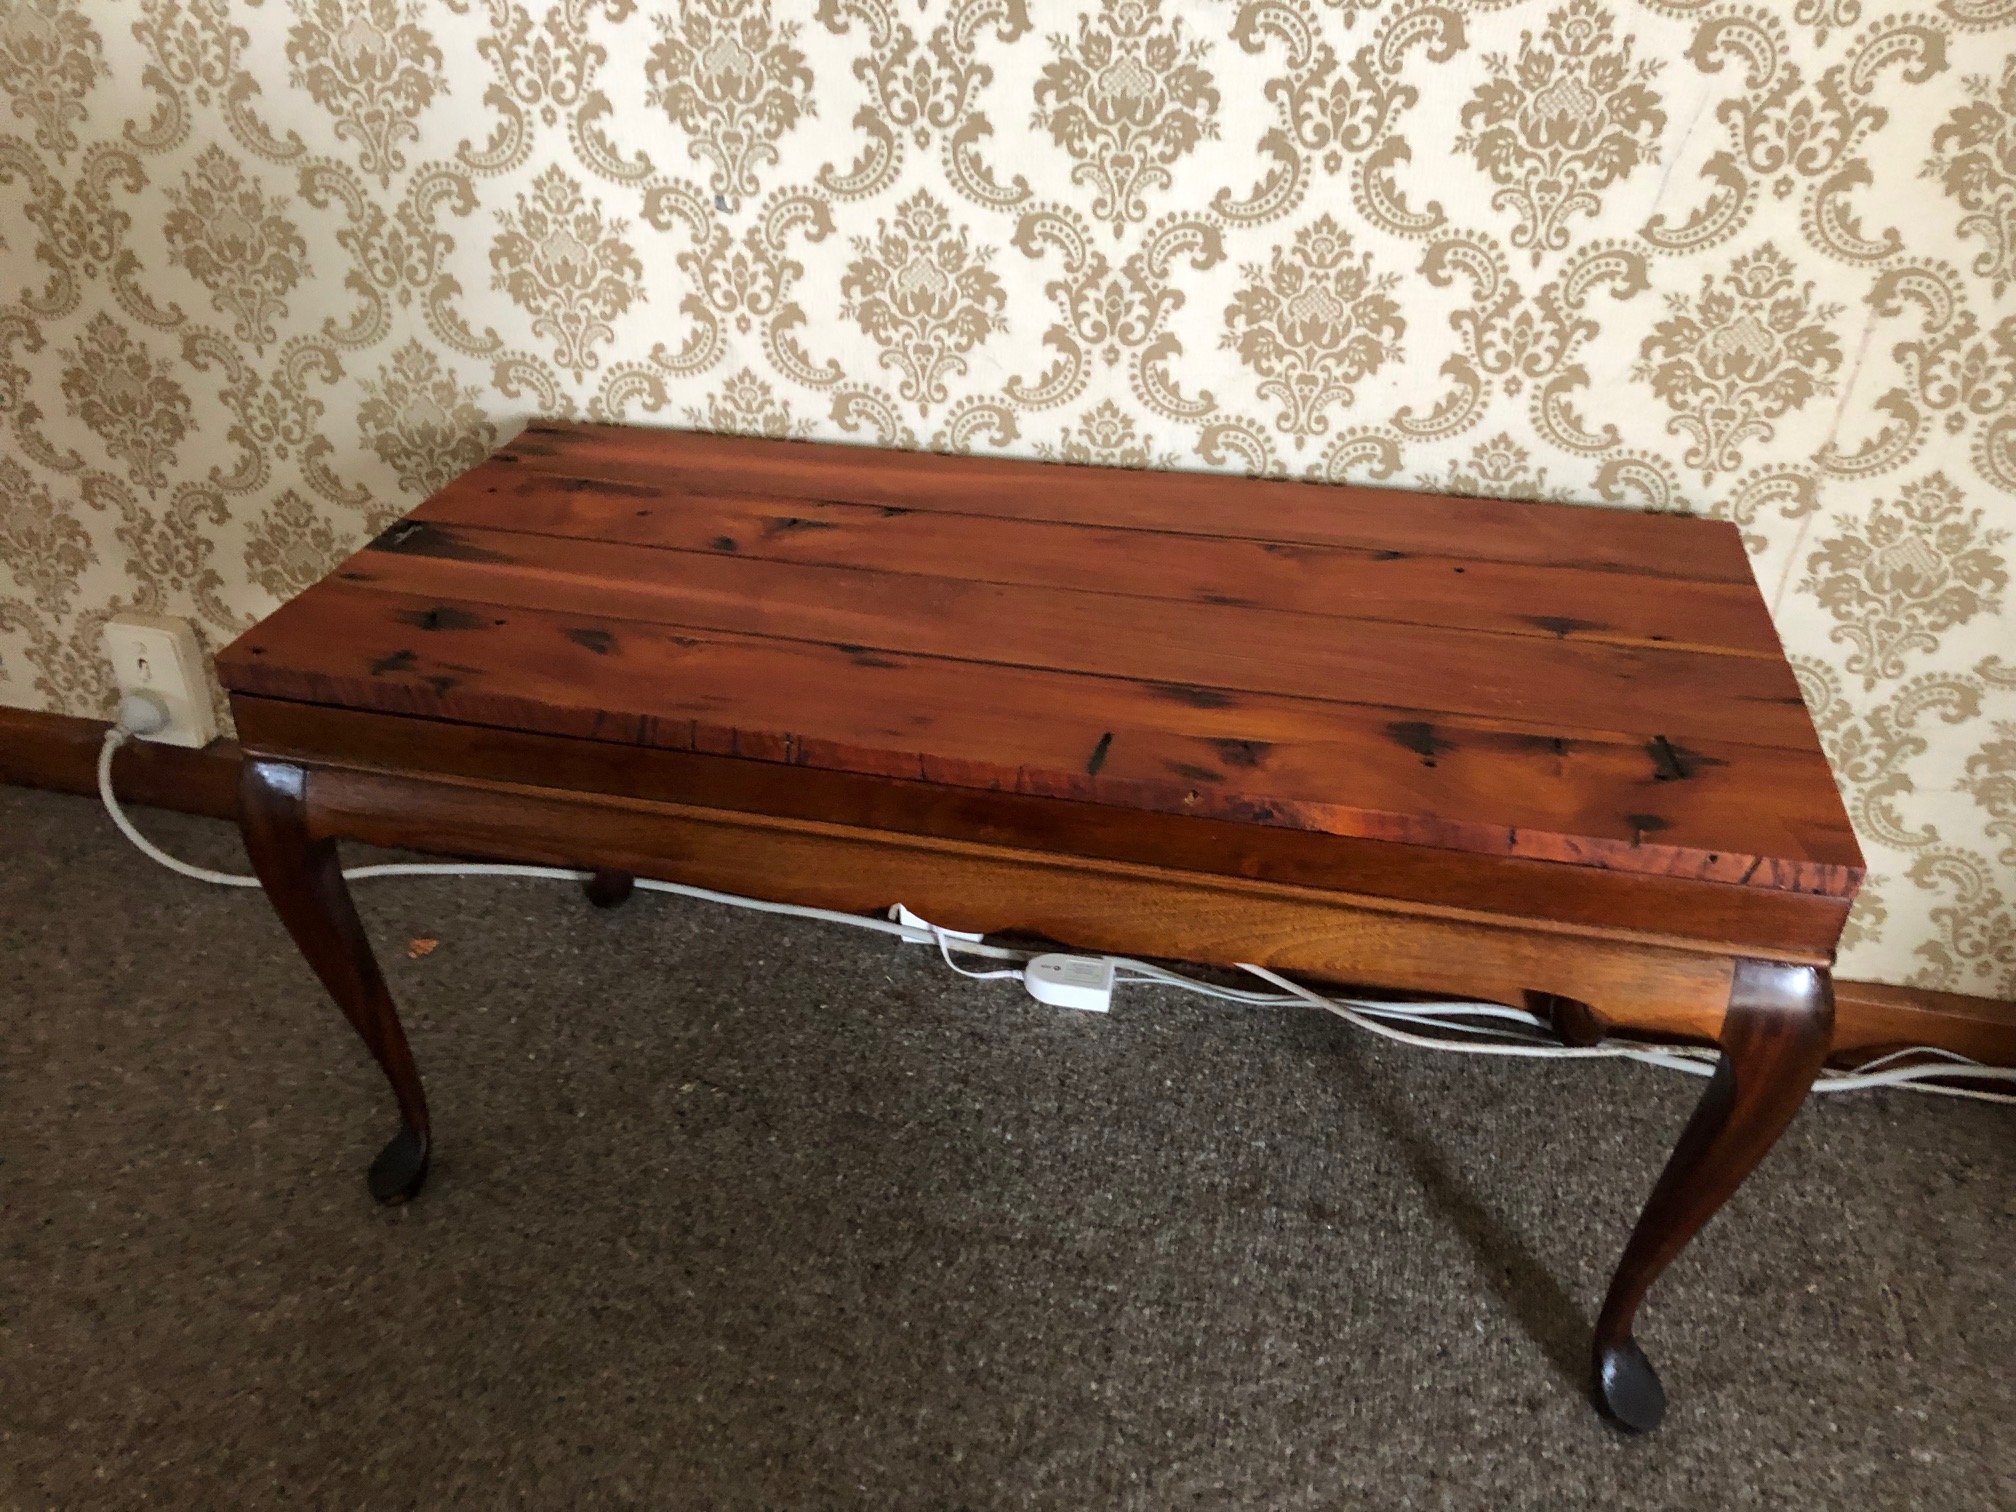
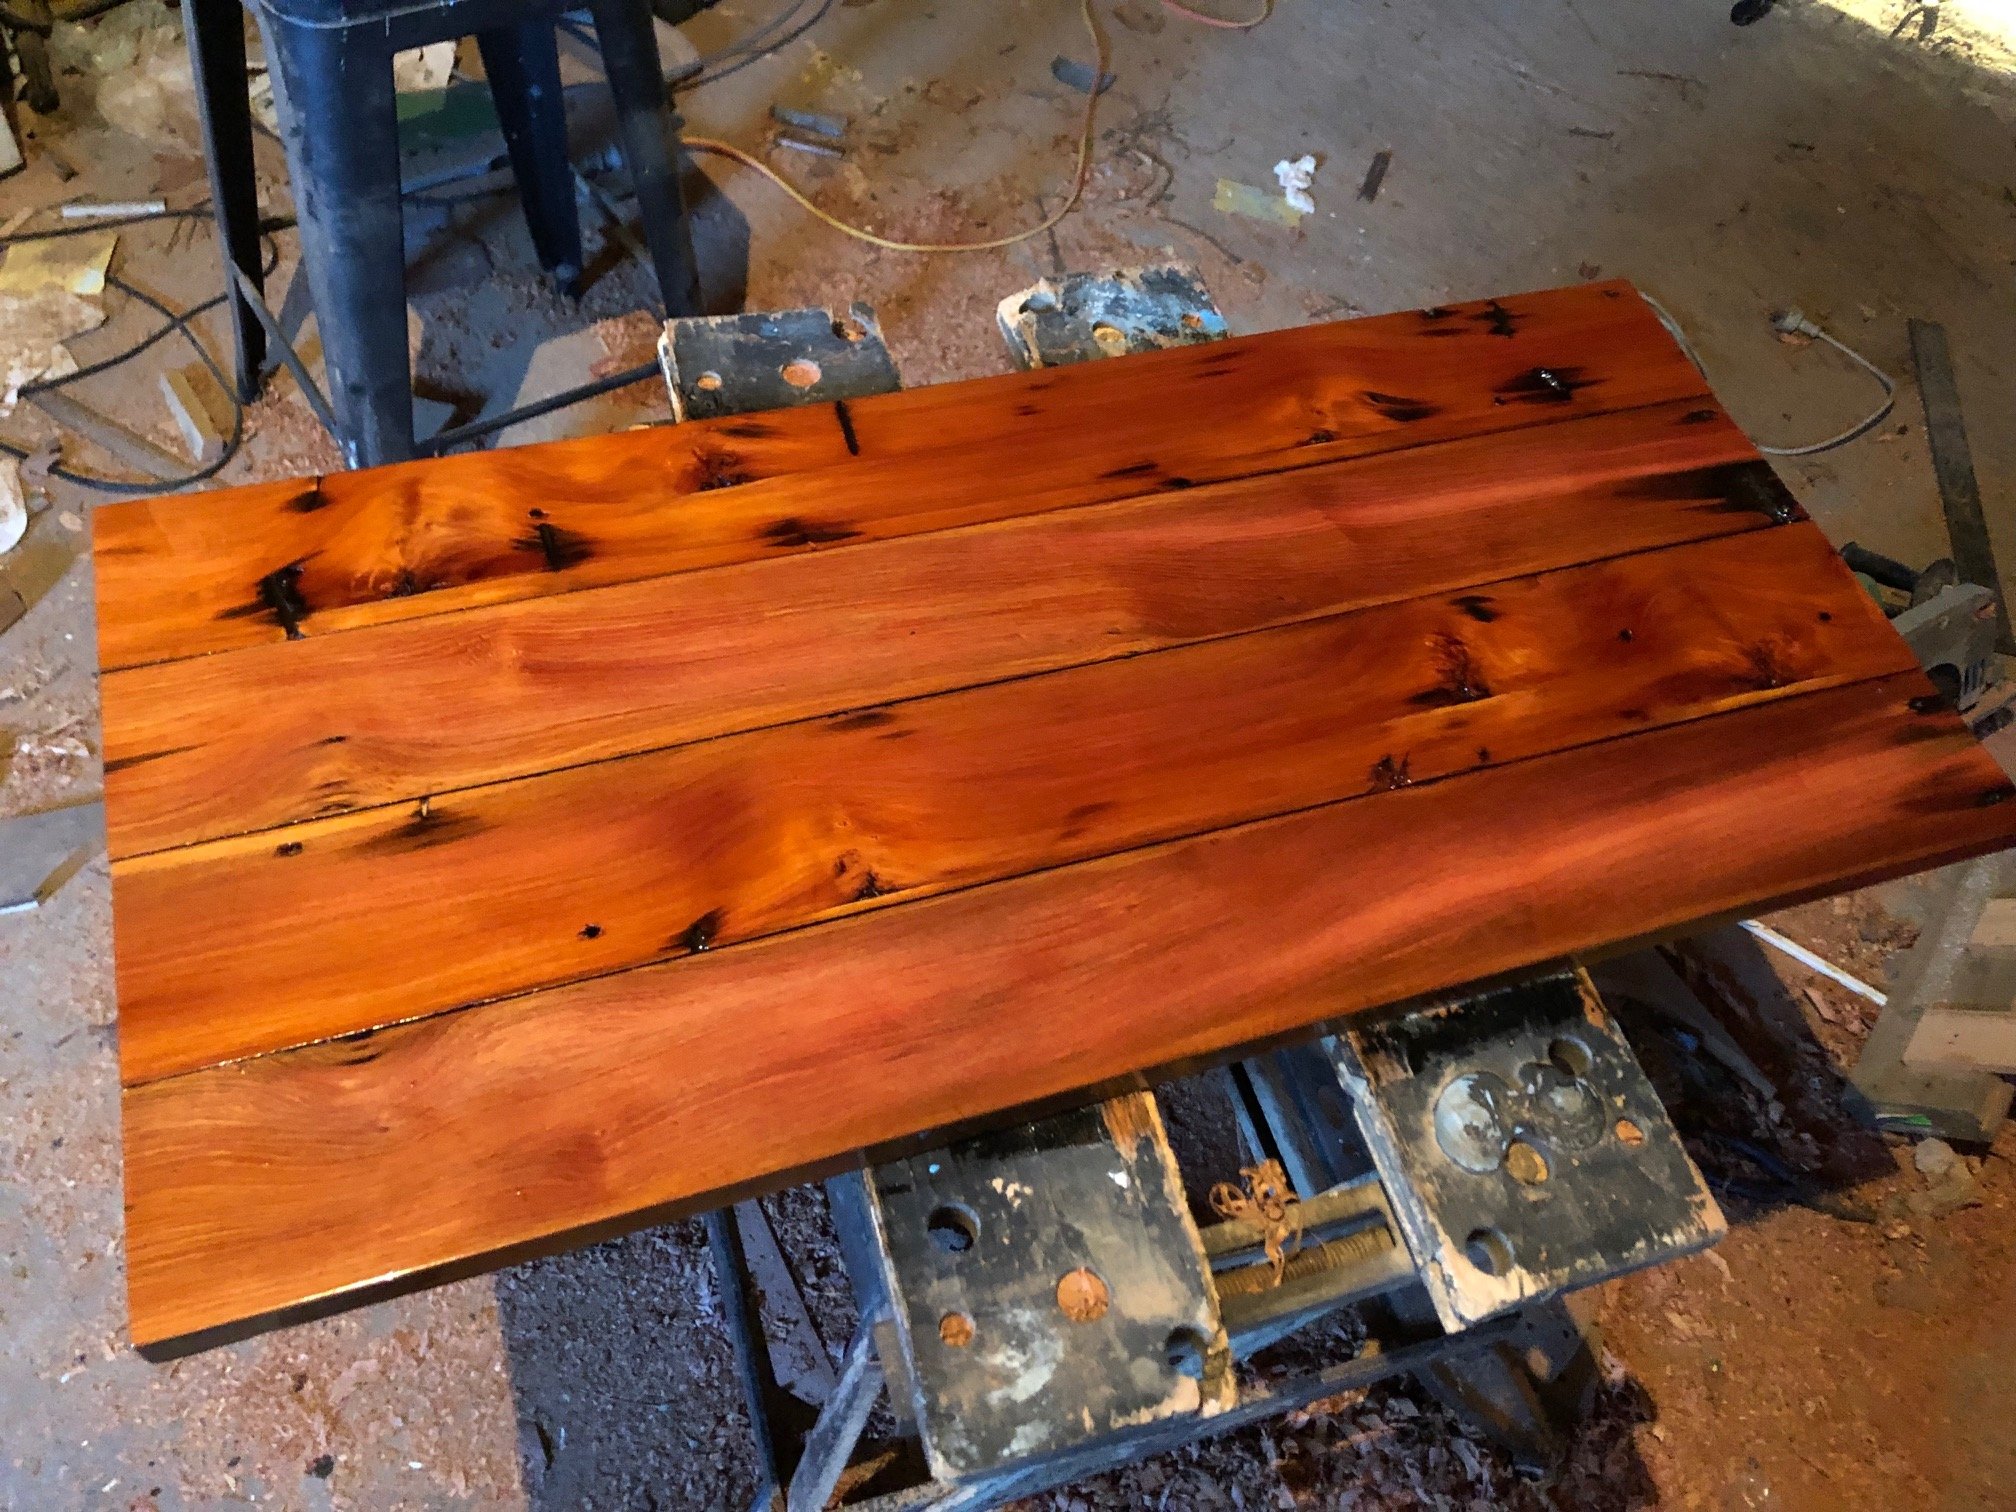
Saturday’s project was to make a table top for this old table base I picked up from the dump and fixed up a while back and has just been sitting in the corner of the shed, this was made by cutting down old 2x4 from the old renovated Te Aroha West Hall. Just about everything I have been making is from the old native timber from the hall, and I hope you guys are enjoying these little projects as I do them as much as I am. Thanks for looking.
11 points
-
A quick stop the next morning to check the prowess of a K11 in a supermarket carpark resulted in nothing less than satisfaction. The steering is light, but has great road feedback and a excellent turning circle which excells in getting into parking spots easily and quickly. Although there wasn’t much competition in Nelson supermarket car parks. We stocked up on snacks and got on the road to start our journey, however before we went back up country we had planned to go down a little further. We shot out of Nelson and headed down Lewis Pass stopping to check out one of the camp spots from our honeymoon.
10 points
-
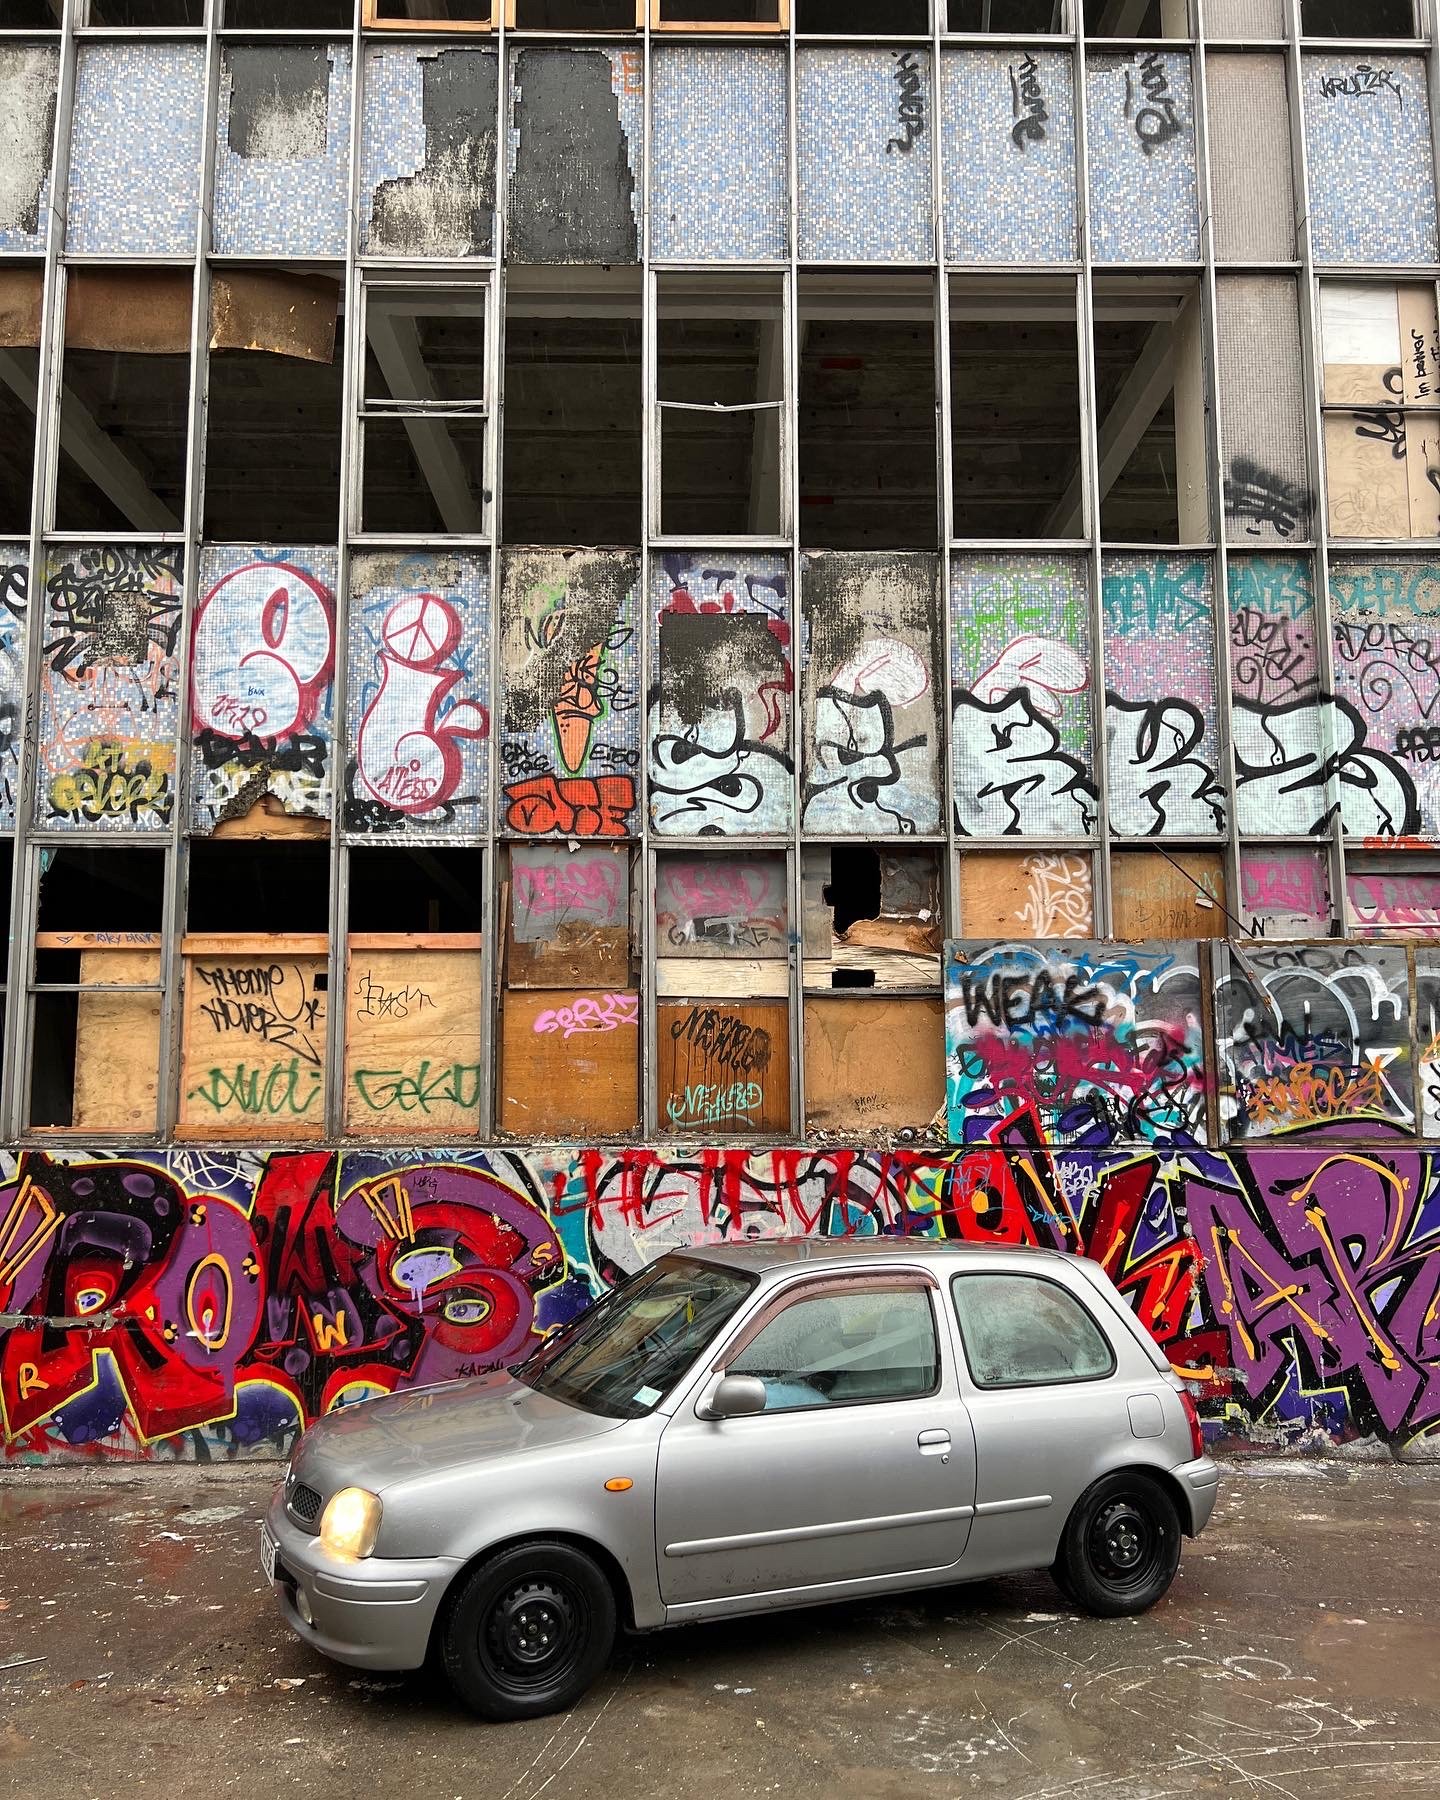
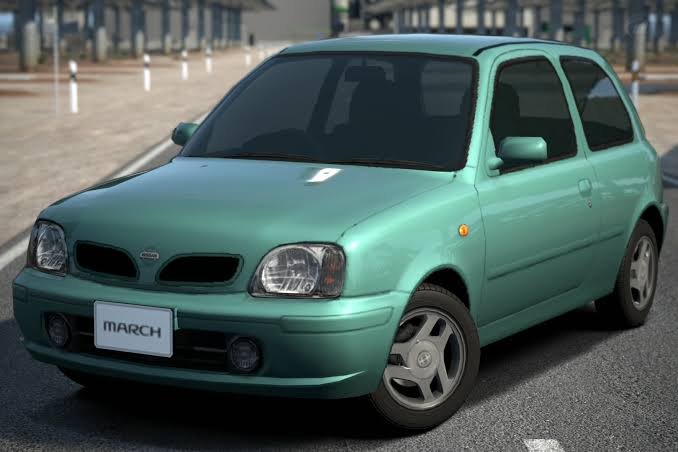
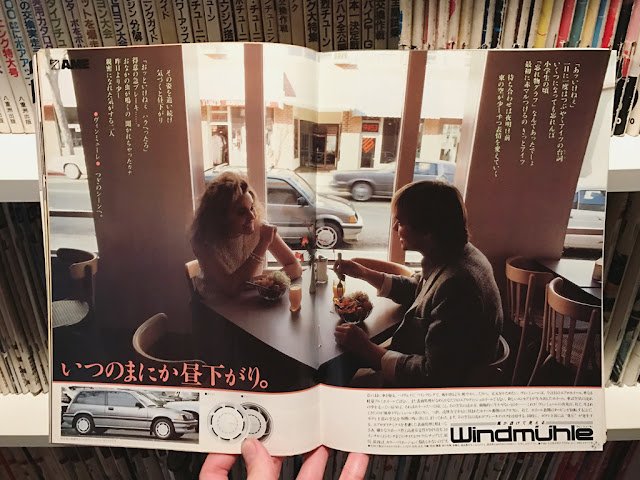
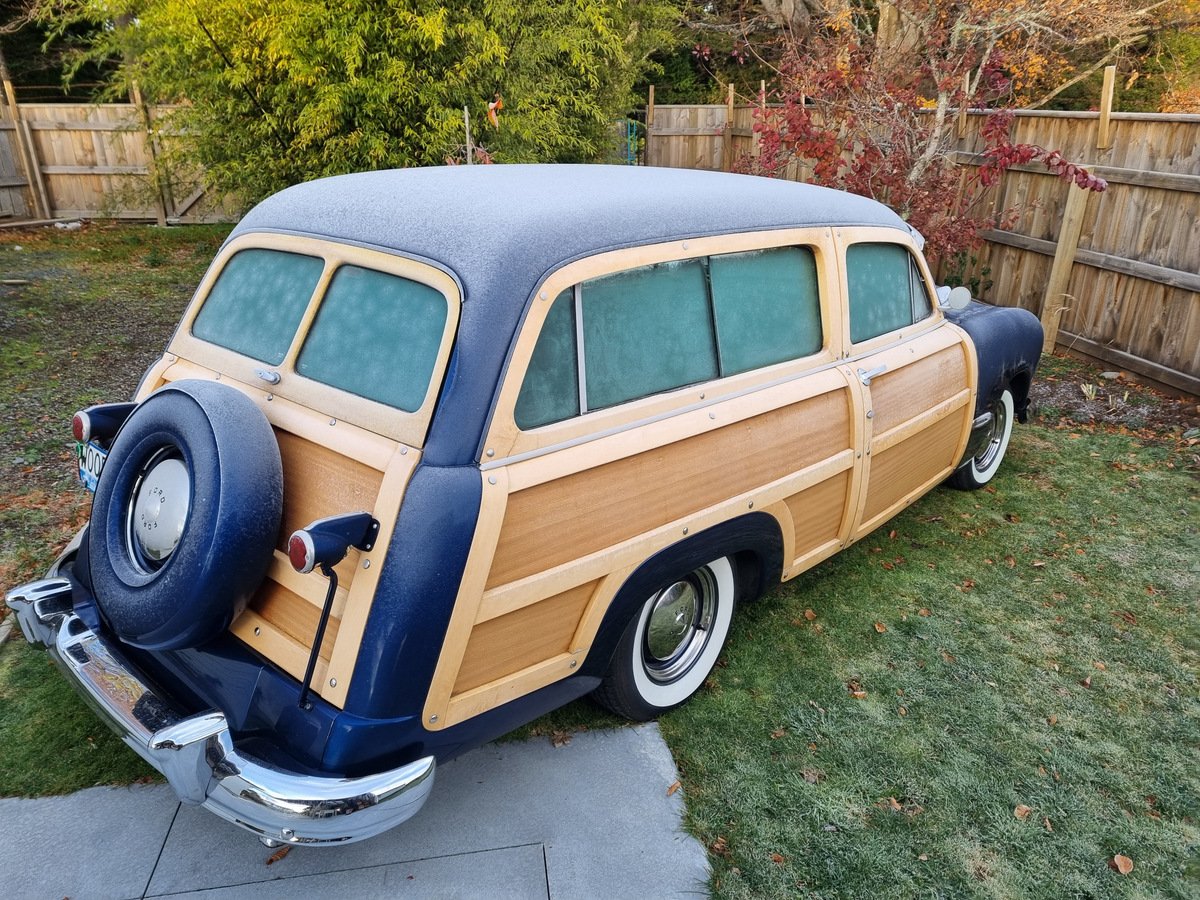
One of Nissan's most popular and successful compact cars was the March. It made its debut in 1982, then underwent a full model change in 1992. The revived March surpassed the original in every way, and became the first Japanese car ever to win the coveted European Car of the Year award. So what made this car so appealing? The answer lies in the details. Nissan adopted a rounder shape for the exterior body, and improved the car's overall packaging. Although the car measured 1.5 inches shorter than the original model, there was more space in the cabin. Under the hood were two newly developed engines, a 1.0-liter DOHC inline-4. The former only produced 57 HP, making it fit for the driver with basic needs, but the latter, with its 78 HP was the choice for enthusiasts. Both engines came mated to a 5-speed gearbox, and with the 1.0-liter powerplant, there was the option to upgrade to a 3-speed automatic. With the 1.3-liter, one had the choice of a continuously-variable N-CVT transmission. The sportiest car in the March lineup was the G# (pronounced G Sharp), which designated the 3 door body powered by the 1.3-liter engine. It featured a tauter suspension, aluminium wheels, and fat sport tires. Although it didn't have the knockout performance of the first edition's Super turbo, it still got the job done when called upon…
9 points
-
I’d also snapped up a little present for Martha that turned up 2 days before we flew down.
9 points
-
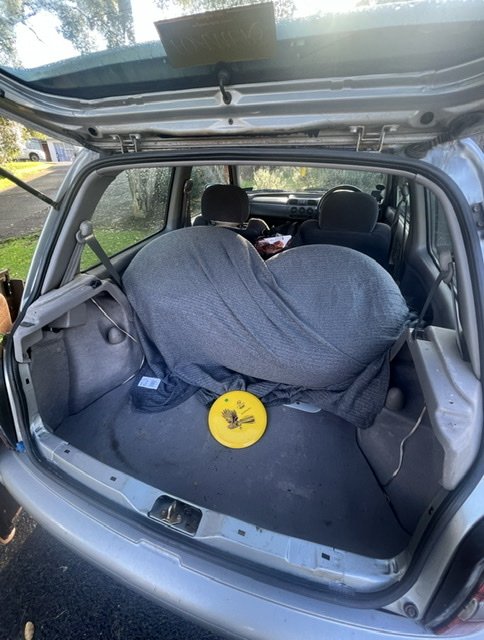
I was gonna save these for tomorrow, but I’ve posted them on Instagram already.. My favourite styles of wheels especially on cars with small brakes are full faced wheels, I tend to gravitate towards aero wheels or mesh faced wheels. The dream has always been to own a set of OZ rally or TOMS racing dish wheels but they are getting unobtainable. I scored a set of Racing Hart Superlative D for my S14 So when I found these, I had to snap them up. I had a mate in Christchurch collect them for me and store them for a short time period. They made there way back up country on the back seat of the K11. Yet another fine feature of this small vehicle - 205l of cargo space with a max of 960l with the seats folded down! The wheels are a set of directional AME Windmuhles in 14x6 et35 specifications. I think they complement the factory aero the G# editions come with -front bumper and spoiler. Hopefully the aerodynamic properties of them assist in improving the 5.7l/100km fuel consumption figures.
7 points
-
Exhaust system finished.
7 points
-
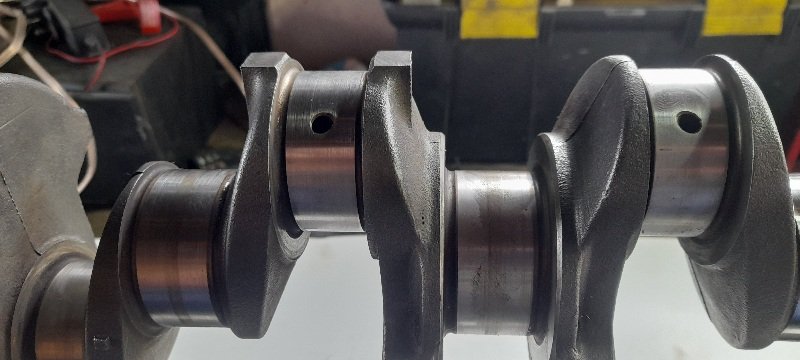
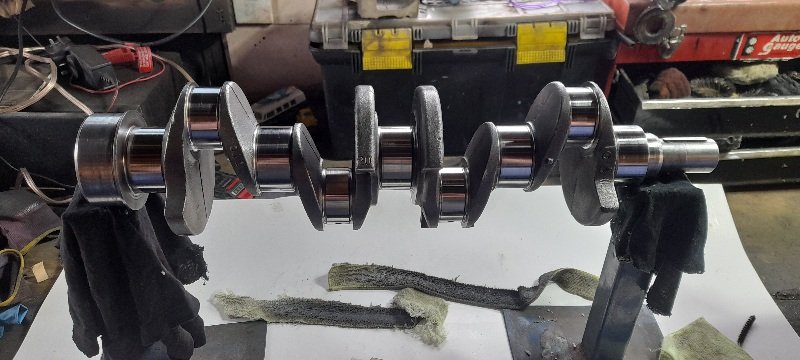
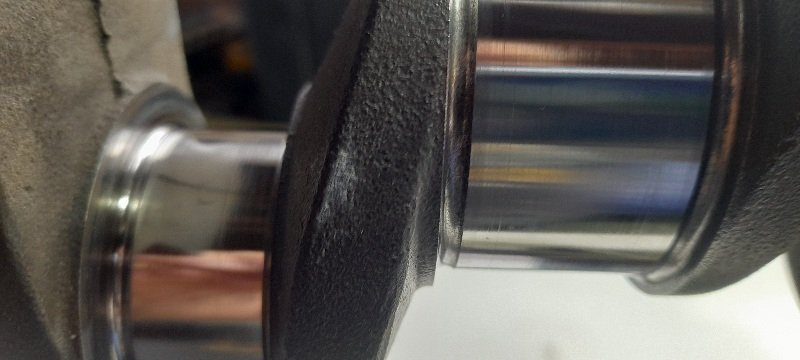
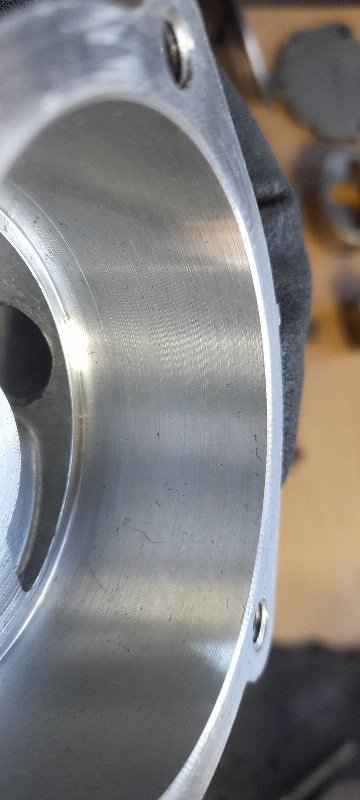
cleaned up the crank it was pretty dirty and had a clear stain from the center of the bearings on mains and bug ends. but it cleaned up very well and I'm more than happy with it
5 points
-
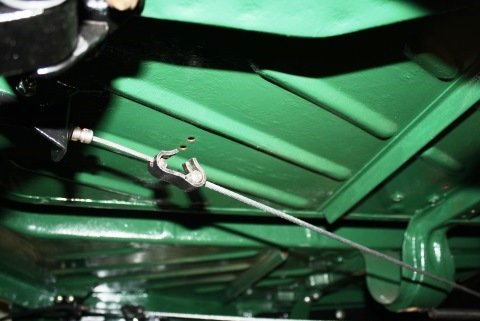
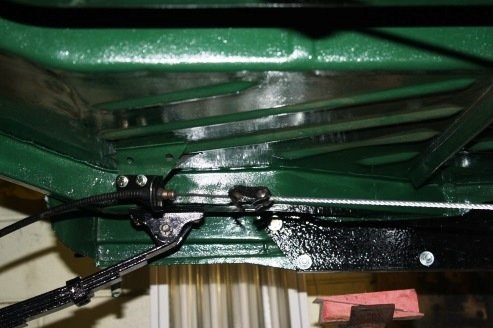
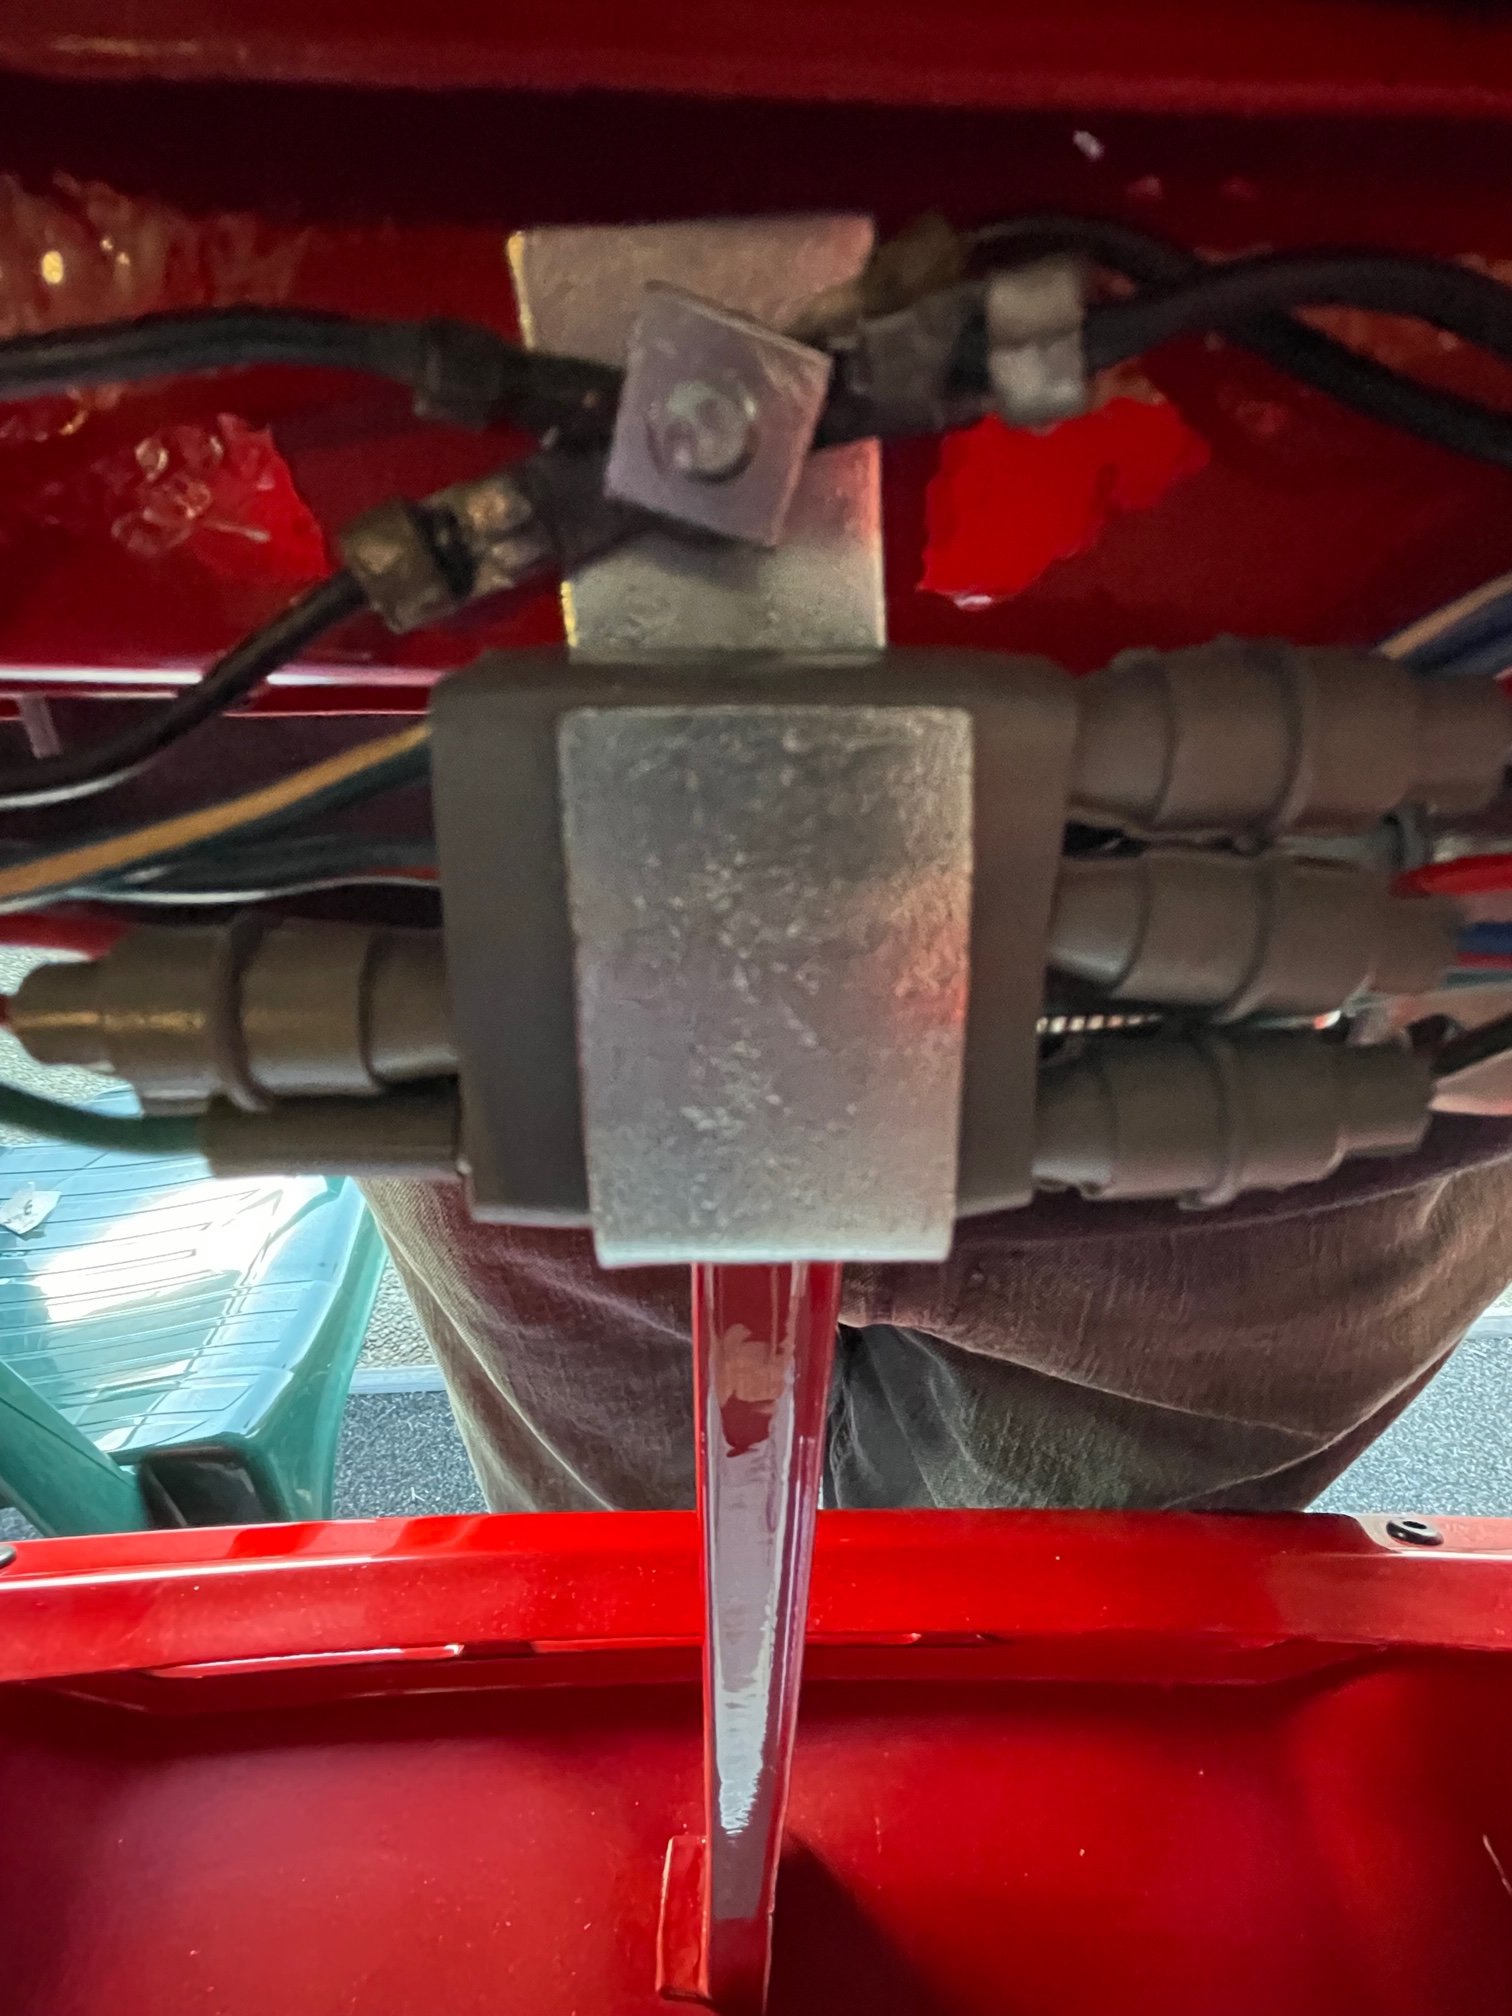
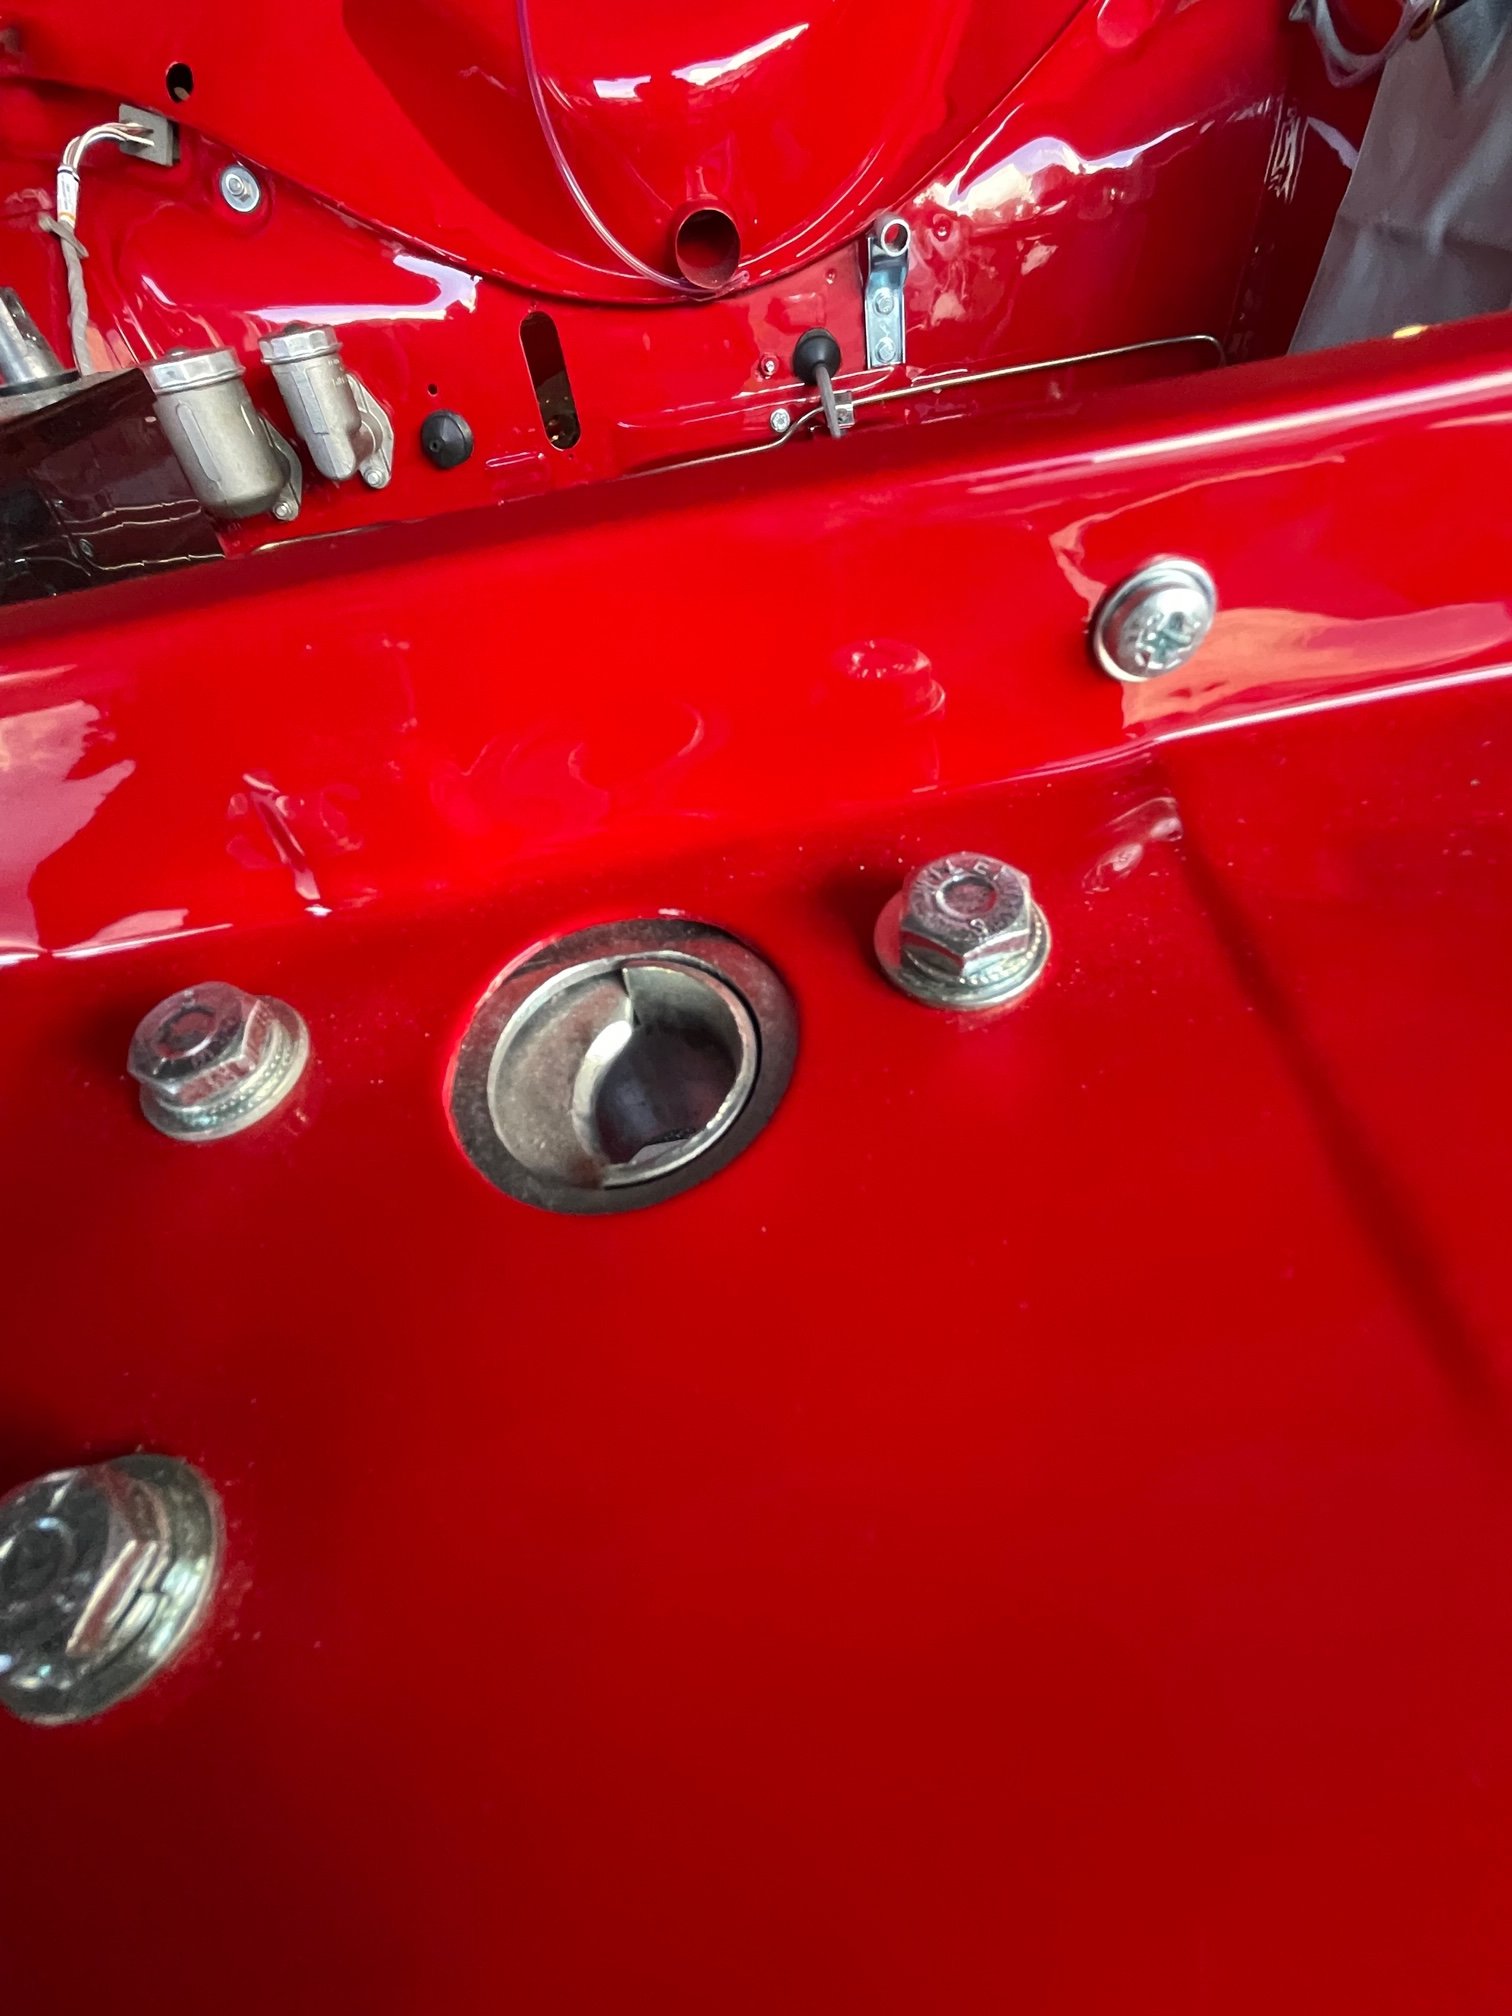
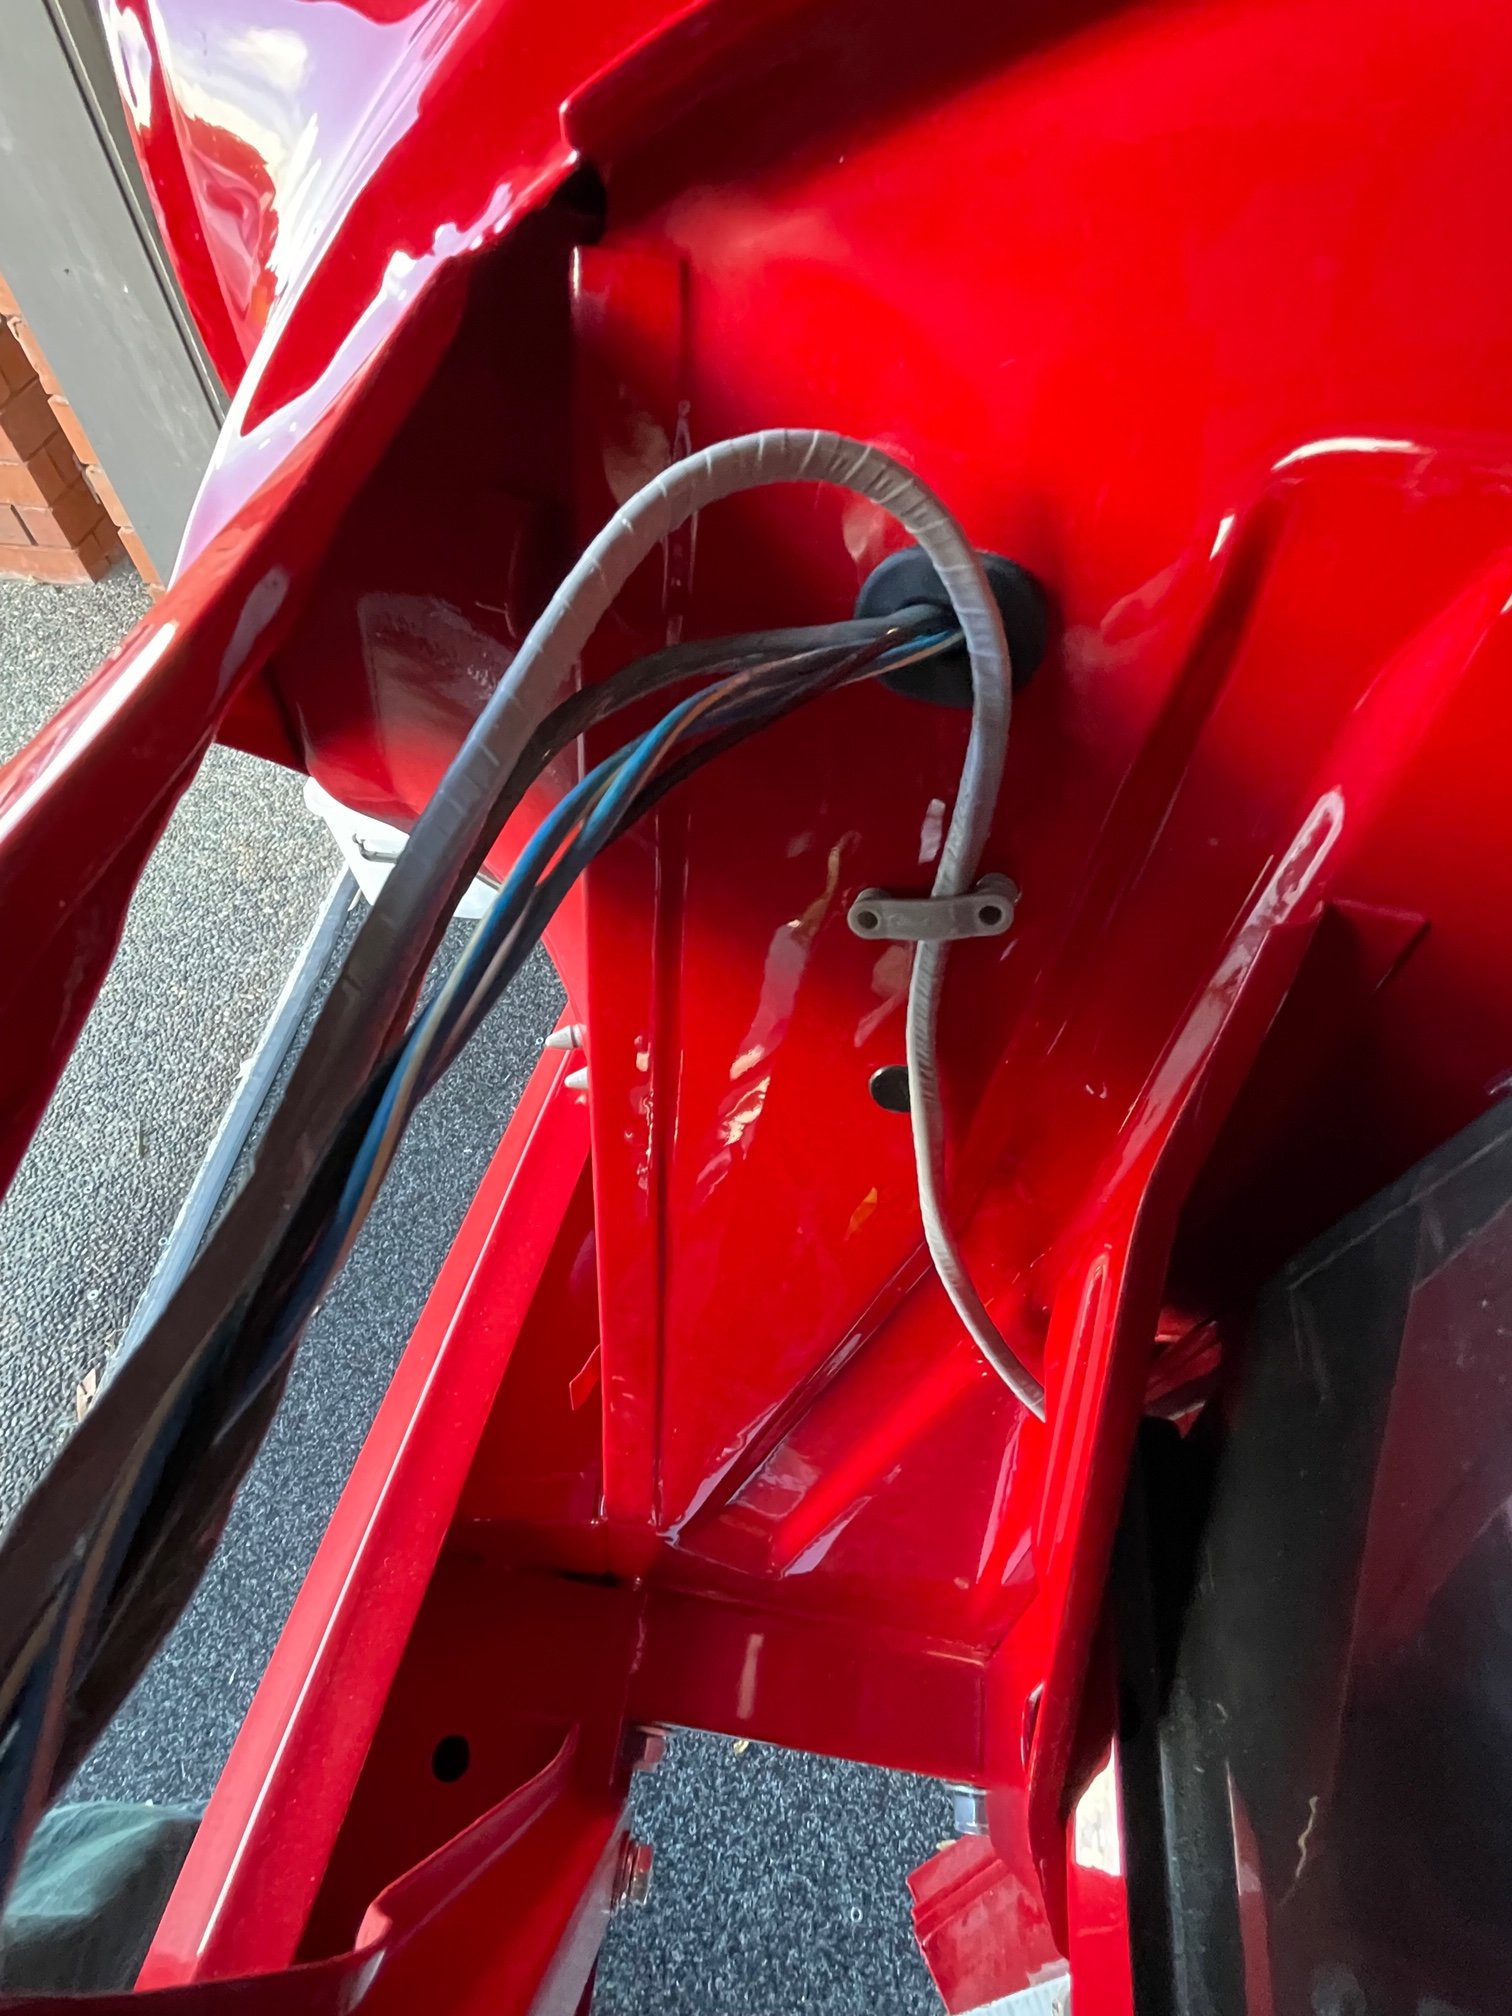
Some pictures of the under car hand brake assembly. The piece of bailing wire is holding one end of the return spring – I’ll make up something a little more elegant in the future.
5 points
-
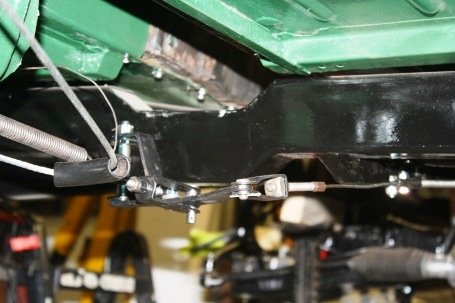
Couple more
4 points
-
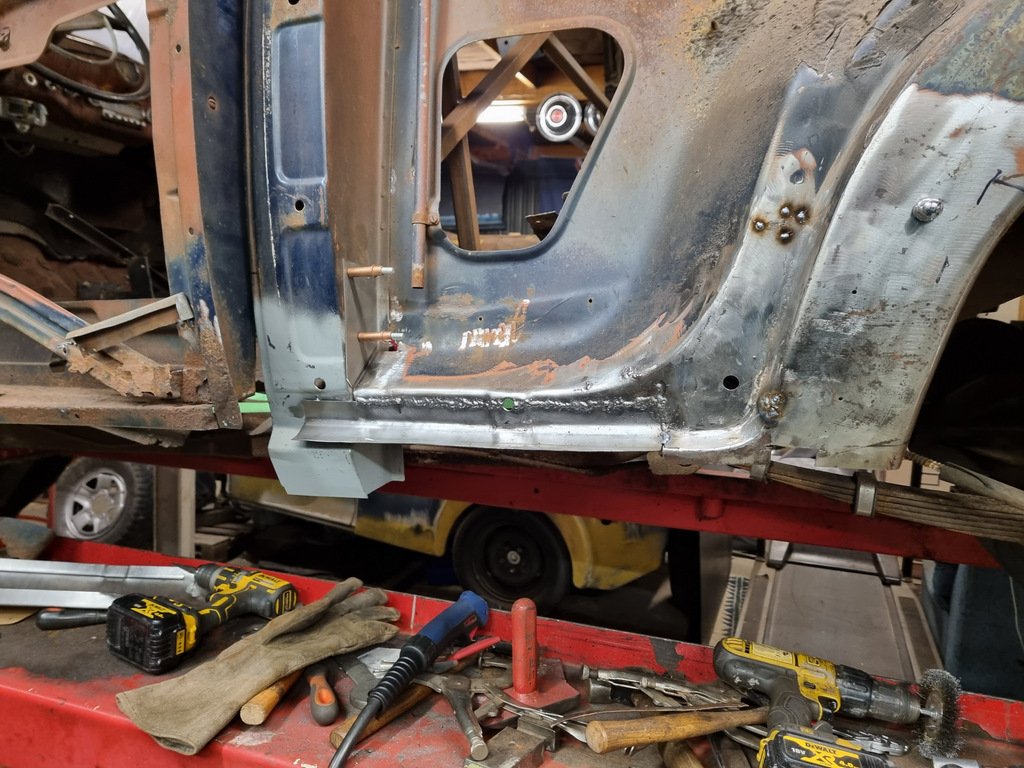
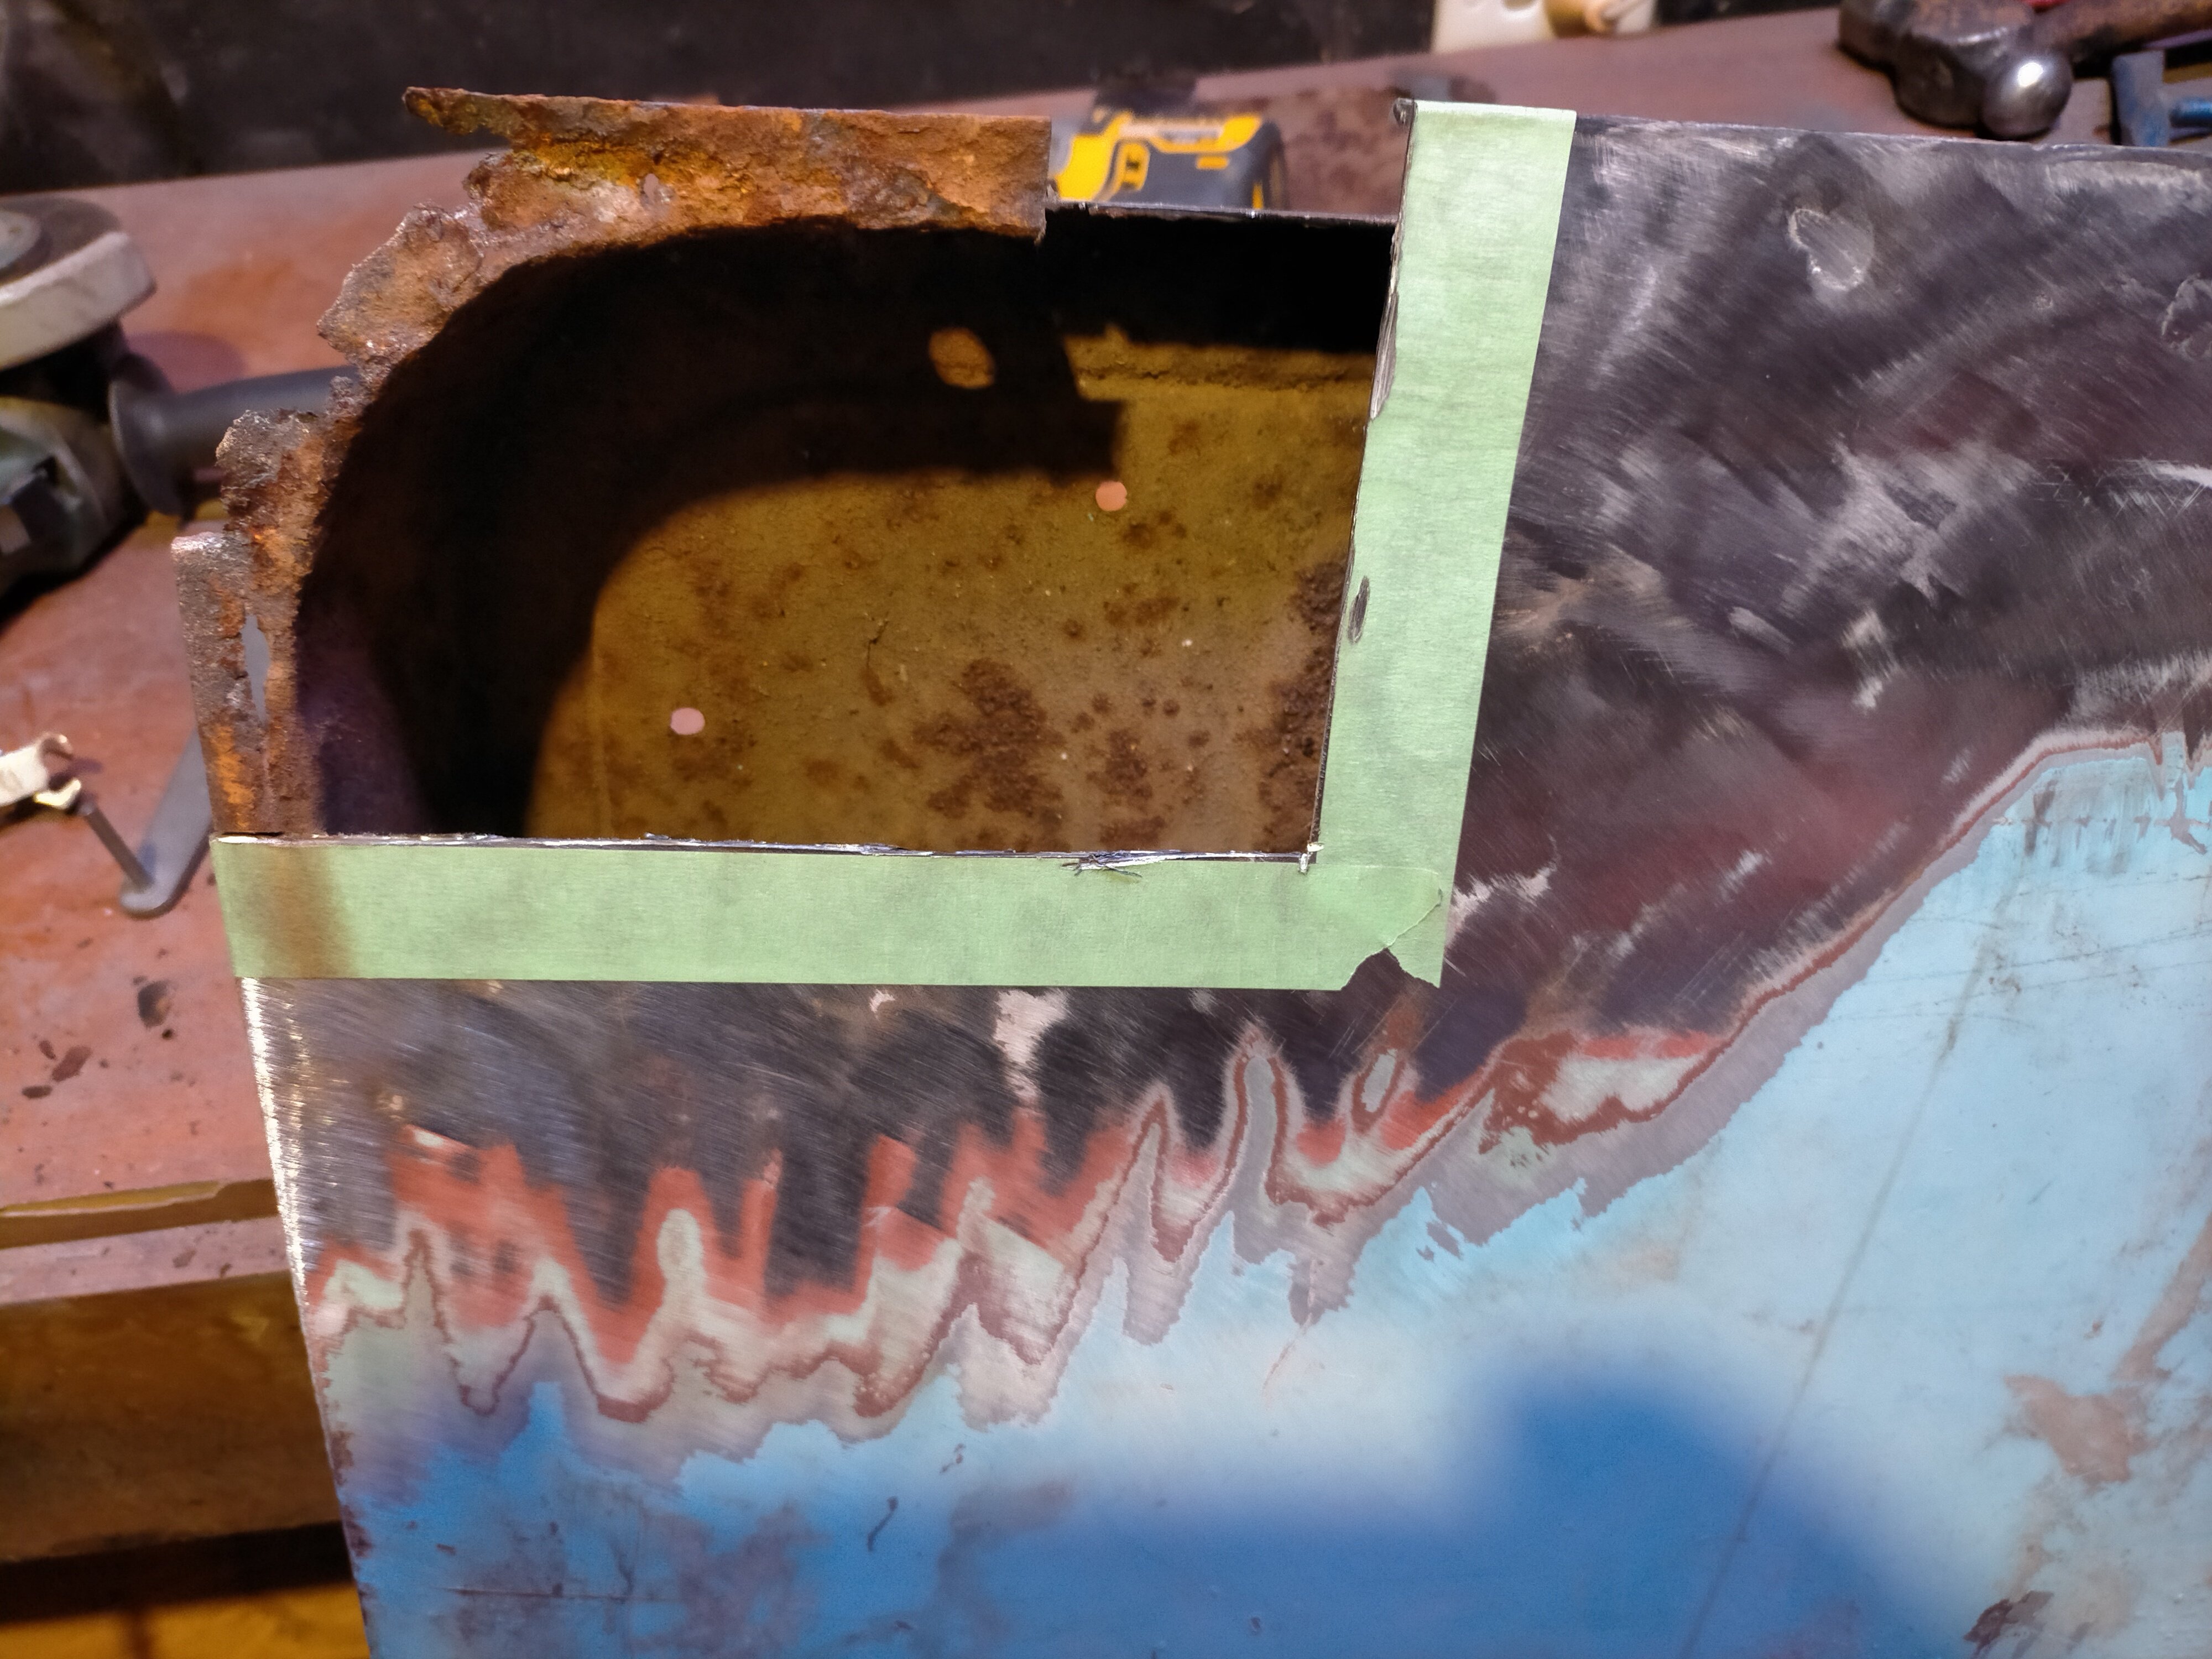
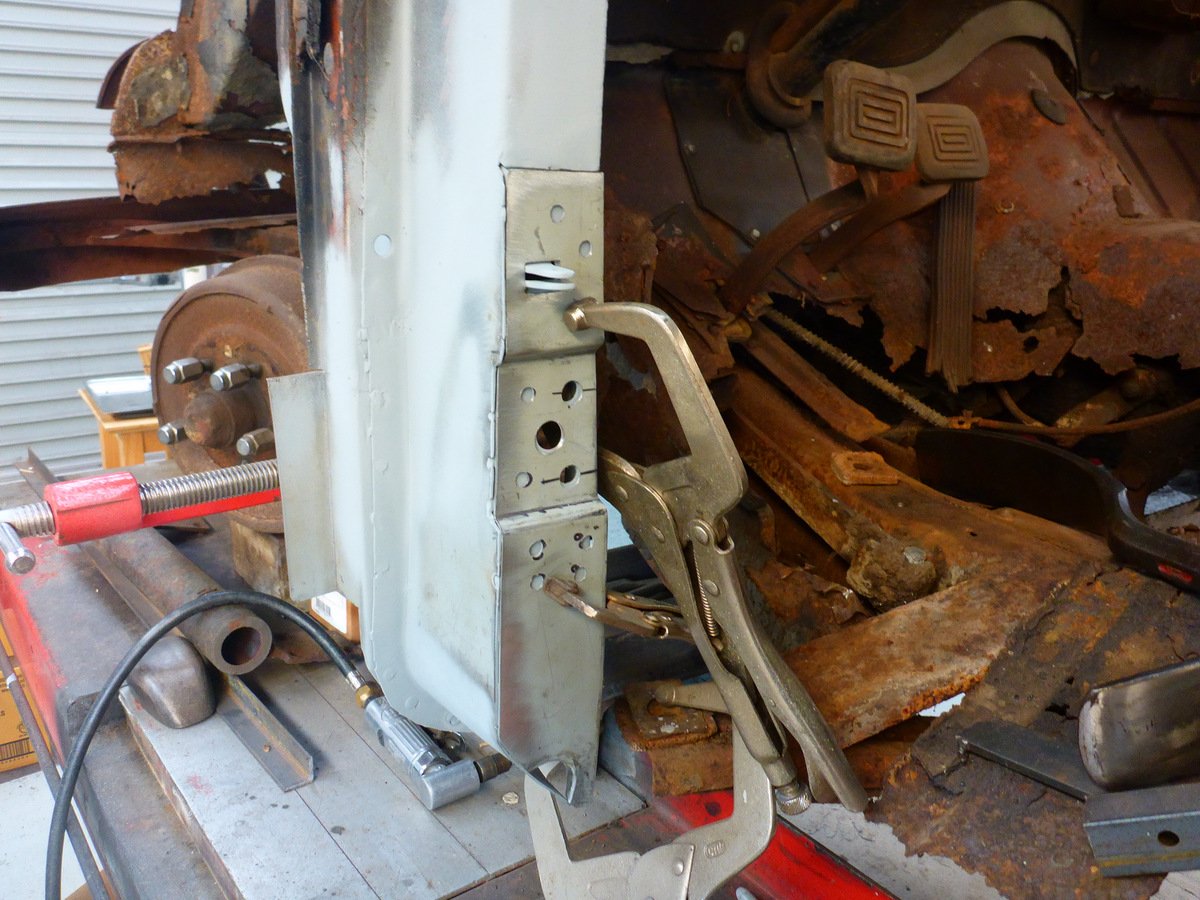
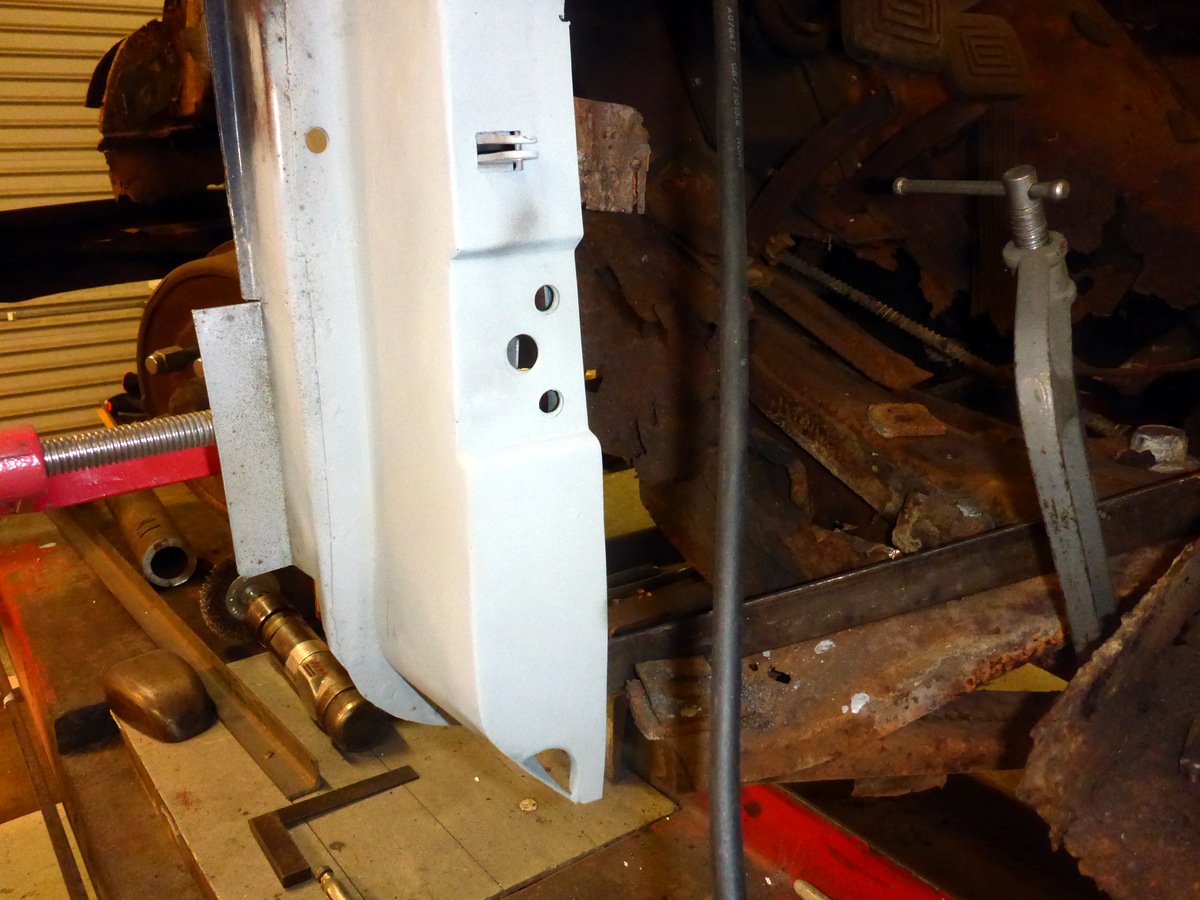
Oh hello again, it's been a while. No one likes sagging, so let's fix it. No, it's not work that anyone would have expected as my first update in months, but it's something I needed to do, especially whilst the car is in this orientation and I have good access (the car will soon be turned around to do the sill). Since I got the car it has suffered from the very common saggy door issue, where the hinge pins wear out and cause excessive movement. This mainly shows itself as a door that is hard to open or close, and thumps up and down when lifted. This will not pass a WOF. The easiest way to fix this is to find a good pair of hinges without wear and swap them in, and stick to regularly lubricating them. This will last a good while but it's getting harder to find good hinges as it was such a common issue. Fixing the issue in the first place is the better option, and in this instance, I've done it to one hinge, out of necessity rather than choice. There are two ways to fix it. One, is to get a steel tube that has a slightly larger internal diameter than the outside diameter of the pin and weld it between the two ears on the bracket, like so, I didn't have a tube handy, so went with the other, easier option; weld two nuts to the ears. Thanks to the relevant Marina Club members for the above photos, and the inspiration to fix instead of bin. Before I could get onto the welding bit, I had to get the hinges off the car, which meant removing the door. Thankfully it's on the side that has no door card, so that was easy. Three nuts to remove on each hinge (as well as a washer on each stud and a spreader plate), and the door shell can be removed. I used a jack to support the back of the door until all the nuts were removed. Much room for activities. Yes, there is still a hole in the floor; I'll get to that at some point. Hopefully during the next burst of motivation. The bottom hinge was easy to remove from the A pillar, as all three nuts are visible, so off that came. The upper hinge was proving to be a real pain though. I couldn't see it until I removed it, but the studs were slightly longer which meant my socket was blocked from completely sliding on the nuts, thus they were rounding when I tried to remove them. In the end, I grabbed a drill and drilled the heads off the studs and used a punch to push them into the car, nuts and all. Thankfully the forward nut came off easily, so I only had to do the rearward two. To get a clear shot at those I disassembled the hinge on the car, by hammering the pin out The top hinge was the worst one as this takes most of the weight of the door, and clearly had not been lubricated since it left the factory. The pin should be a snug fit in the hole And that's before you even get to the wear on the actual pin Thankfully I had sourced a good top hinge, in the correct colour, so all I needed to do, after freeing the seized hinge, was to thoroughly lubricate it and fit it. The lower hinge wasn't so lucky. I did get a replacement but for some reason, it's completely different (two bolts instead of three and a completely different design). This forced my hand into fixing the hinge I had. I knocked out the pin to separate the halves There is some wear on the pin, but it's minor The holes were slightly slogged out. This was nowhere near as bad as the upper hinge, but still had enough play that I couldn't just refit it. I found a couple of nuts that were just slightly too small to fit over the pin and drilled the hole out a little bigger, until they slipped on the pin with minimal play. I cleaned the surface up with a flap disc on the grinder and then zapped the nuts into place with the welder turned to 11. It's not pretty, but it ain't going anywhere A quick coat of black zinc should protect it for a while Once mostly dry, the nuts were packed with grease and reassembled. The pin was rotated backwards to how it was previously fitted, so the wear was on the opposite side of the pin. The nuts have two functions here. First, they support the pin along a larger surface area, instead of just the small area that wears away, which should hopefully mean the pin lasts longer and the current wear no longer matters. Secondly, it centers the pin again and stops it from moving in the worn-out holes. The tube would do the same thing, just along a longer surface. This fix works for both hinges as they are of similar construction, the only difference is that the upper hinge has the detent roller and spring to get in the way. With the hinge reassembled it was time to refit the hinges. They were easy enough to refit, trying to line them up with the existing dirt/witness marks. Interestingly, there are no gaskets to stop water from coming in behind the hinges, just hopes and dreams. If the doors come off again in the future I will make some gaskets, but in the meantime, I used heavy grease behind the hinges as a water repellent (and to reduce the chances of rust buildup behind the hinges; it was clean behind them with minor surface rust, but little to no paint). Refitting the door was about as hard as removing it, just remembering to support the back end of the door with the jack and wiggling it onto the hinges far enough to get the spreader plates on and start a couple of nuts. Aligning the door took a few tries, and it's probably still not perfect, but it is a BL product after all... The difference with the new hinges was obvious immediately. The door swings so much easier now, and the detent works correctly; it previously sagged so much that the detent roller didn't touch the spring. The door also opens and closes easier now too. It doesn't need a slam to close and doesn't thump into place before catching. There is zero play in the hinges. It's not amazing progress; it's still not finishing the rust work that I keep putting off, but it's progress nonetheless. Hopefully another burst of motivation will hit me soon and more will happen.4 points
-
4 points
-
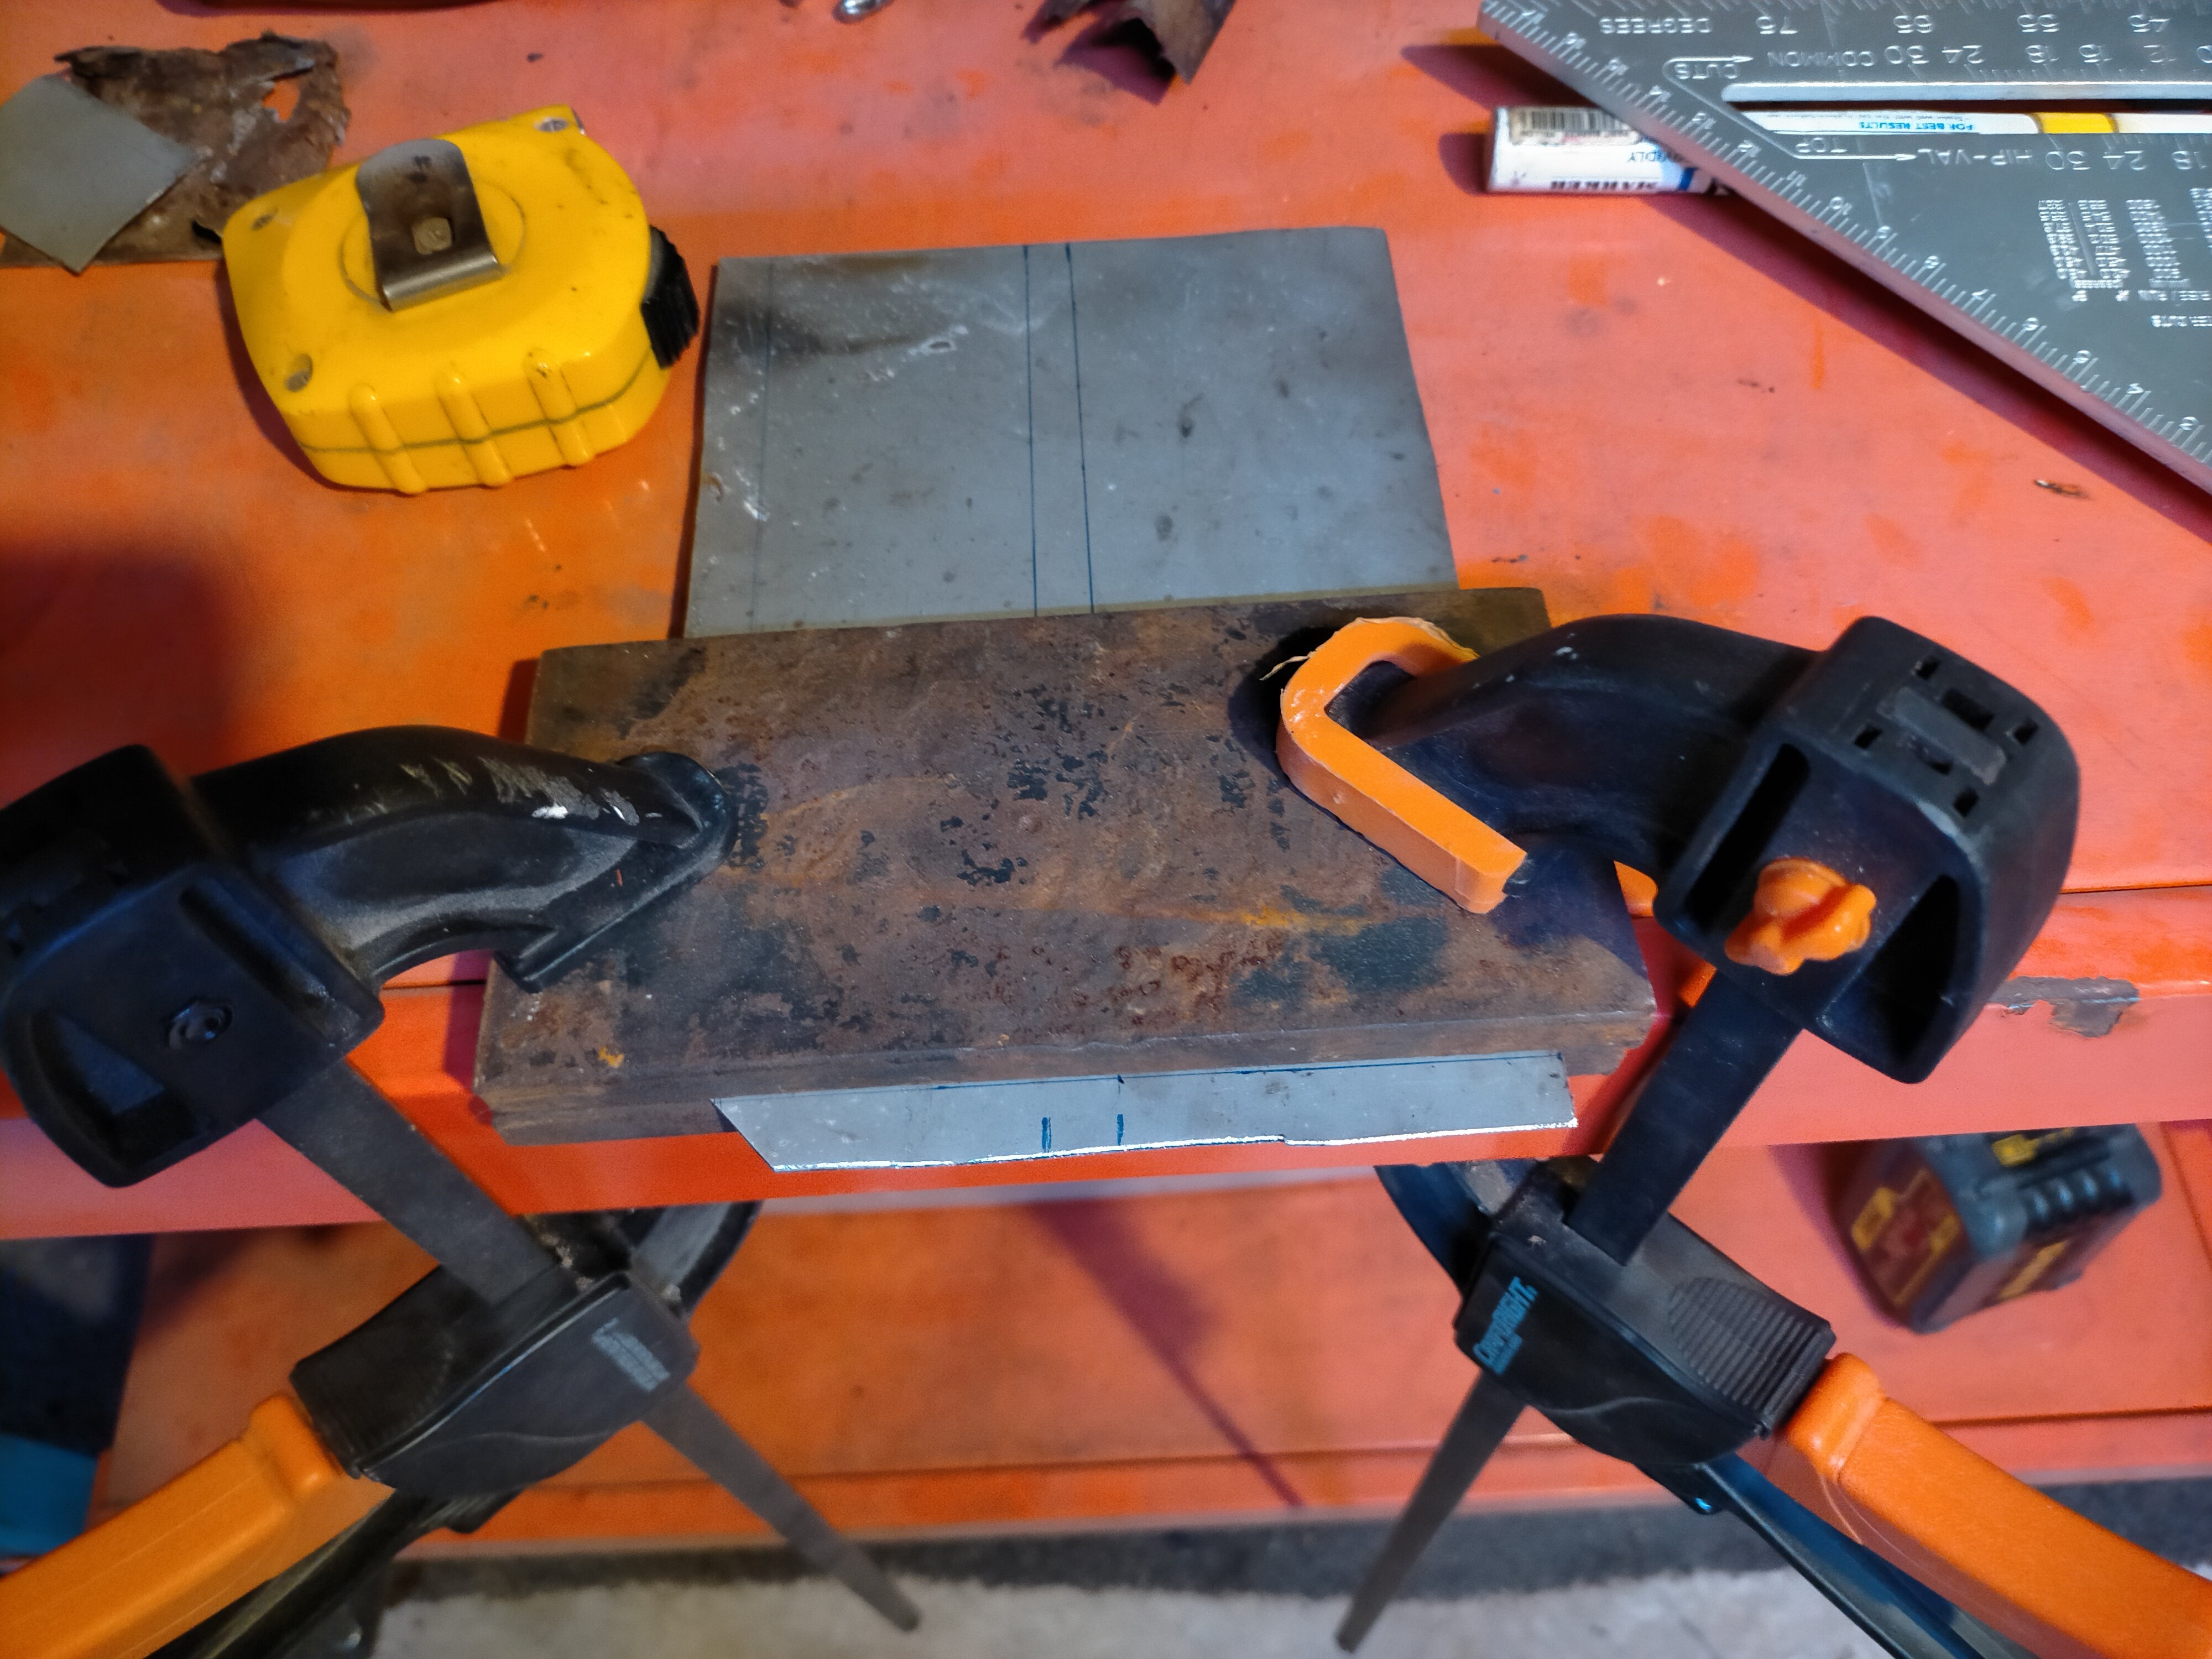
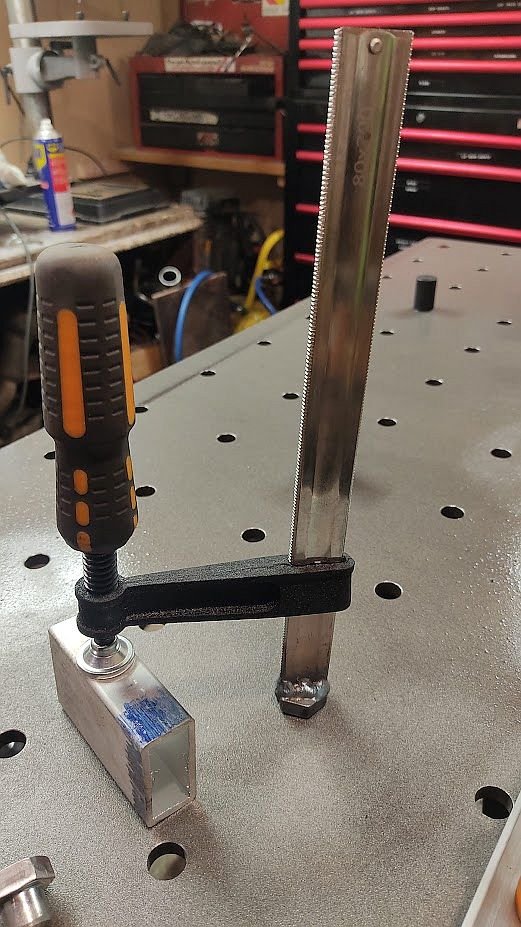
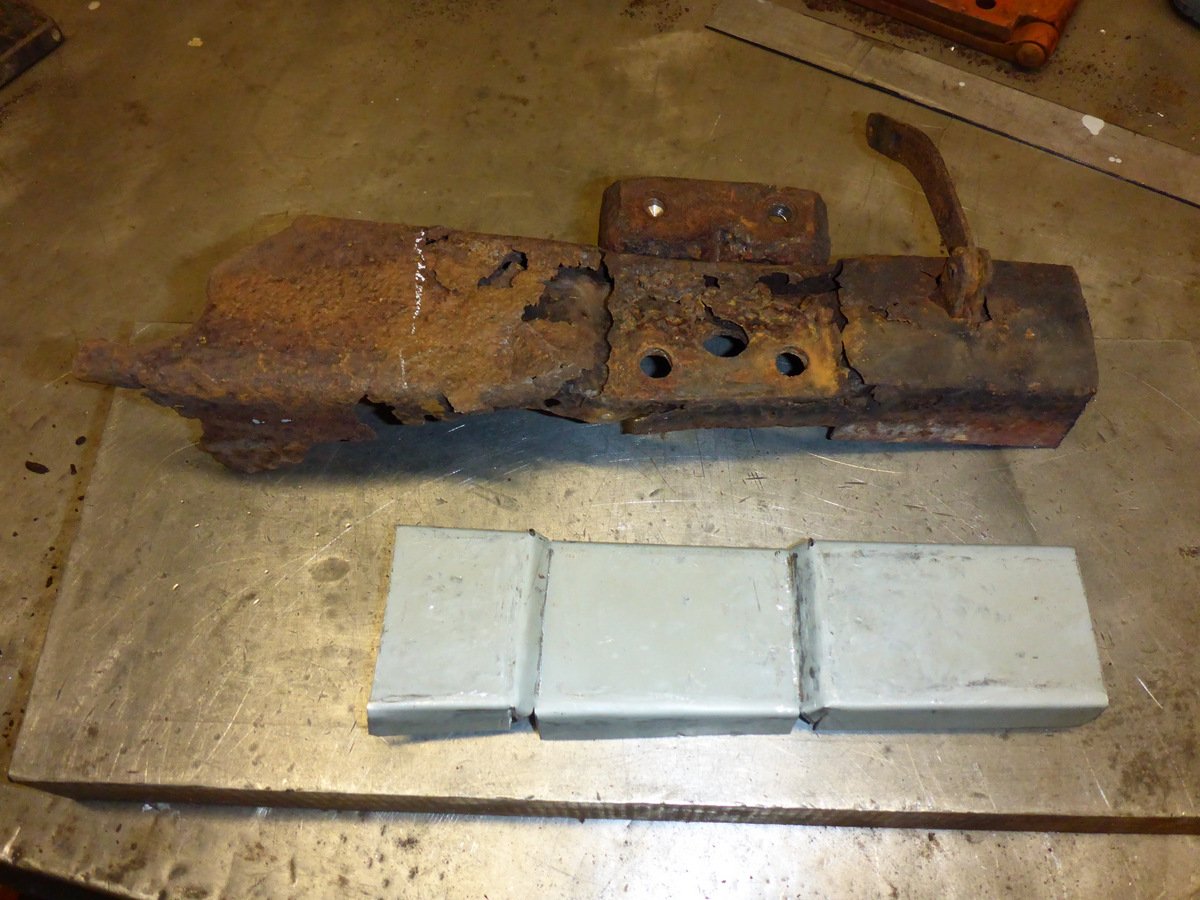
There is down side to owning multiple homes, things that you want can be at the other house when you want them. So I own a panel folder but have to improvise like I used to.
4 points
-
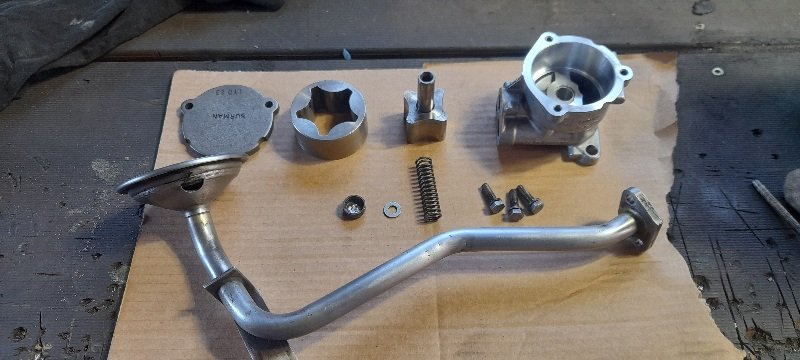
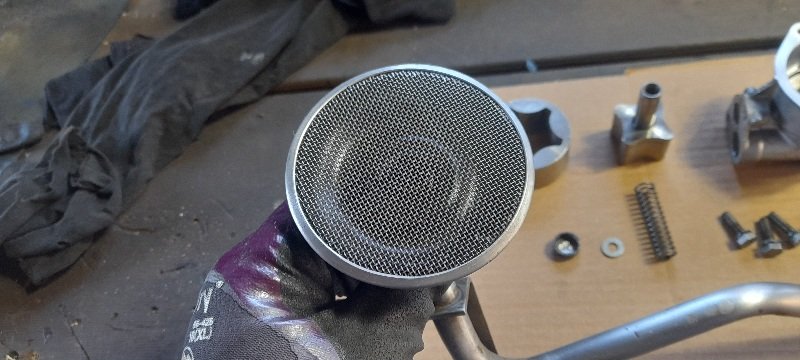
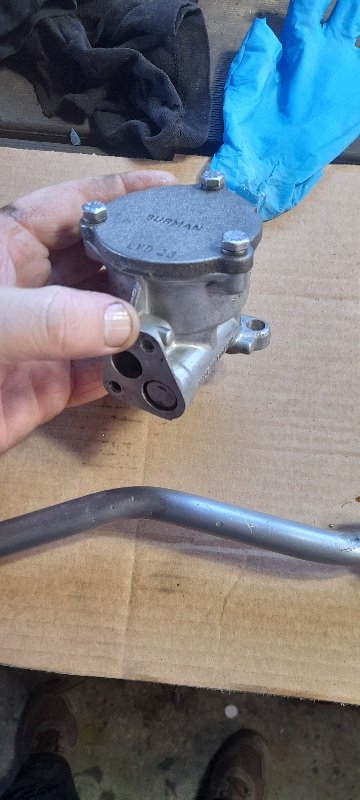
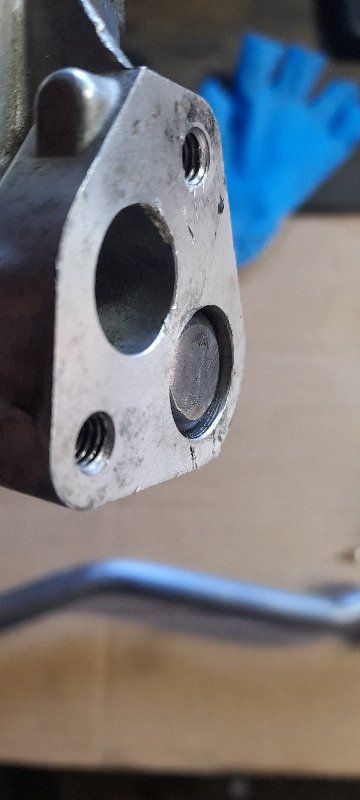
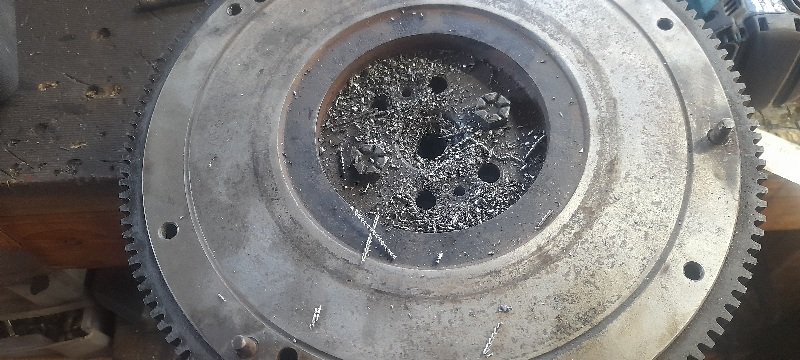
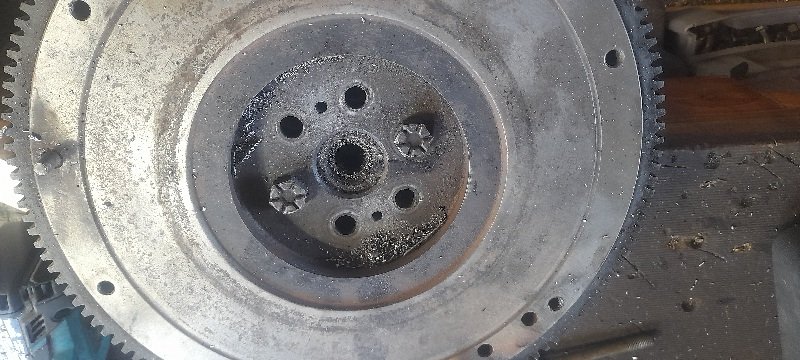
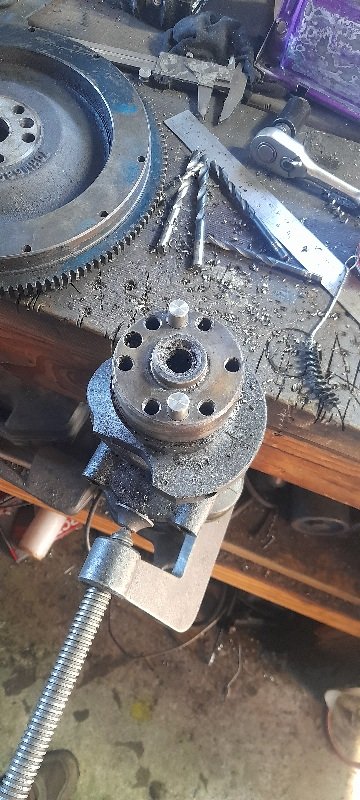
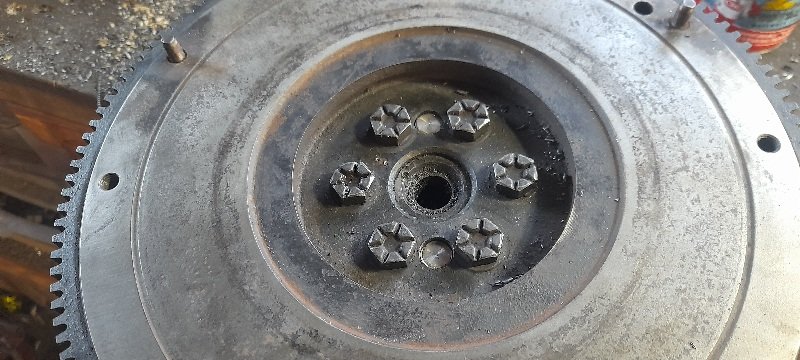
couple of other jobs done. turns out the best condition oil pump I have is the one off the motor I'm rebuilding.. pulled it apart to inspect it and there's no scoring in the housing or lid at all. I have done a lot of research into the oil pump situation and the standard pump seems to be the best bet and just up the pressure for the fact uts feeding a rural and oil squirters.. so I drilled a hole in the pressure spring cap and popped it out and then welded the hole back up. it seem to be the go to put 2mm -3.5mm washer under the cap to put a bit more pressure on the spring.... 3.5mm is more for people wanting to race them and rev out to 8000+rpm. so I found a washer just under 1.2mm to go under the cap and will then add another 1mm to the out side of the cap. all stripped and cleaned... I then added some assembly lube and rebuild it . I pushed the pressure spring in as far as I could and this is where I'll add another 1mm washer (once I get a gasket set and put the pick up pipe back on). other job was to put some dowels in the flywheel for peace of mind. marked out and drilled some pilot holes then drilled them out to just under 10mm and tapped for 10mm high tensile lugs in that should do the job
4 points
-
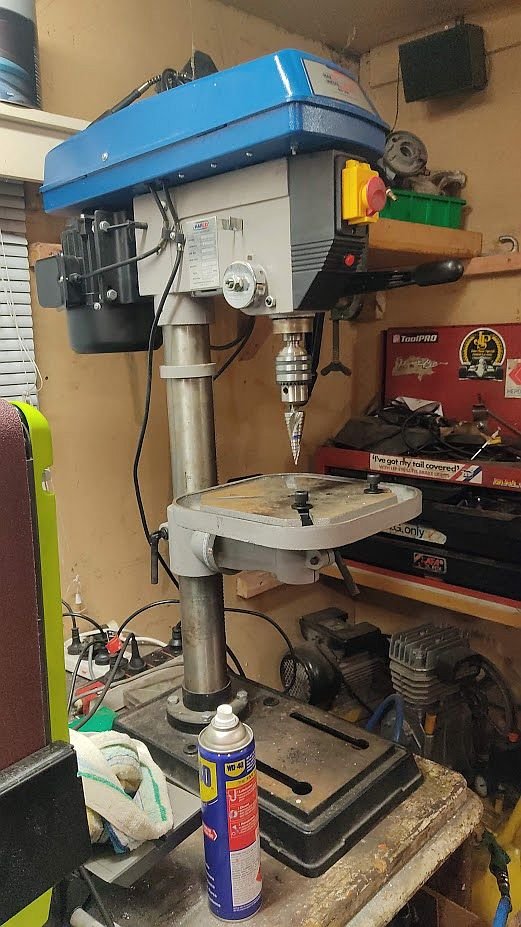
Somewhat related to welder buying... For the last few years my welding "table" was a small piece of 12mm plate with a section of angle zapped on the back by a seagull with metallic diarrhea, the angle got clamped in my vice to give a surface as well as tie up my vice to prevent it being used for anything else etc. Well that's changed! Managed to sell my old DC TIG and my last .22lr for more or less the exact amount needed for the table, got to Machinery house on Friday and it turns out they have a sale starting today so they gave us the sale price and then a further $50 off with their "mates club" deal. It's no certiflat but fuck I am over the moon with it!! Modded some M16 bolts in the lathe, welded on Bunnings F clamps *Don't look too close, I'm still figuring out MIG* Oh and much less related, ol' @Geophy had a mate selling a drill press last month and it's found it's way to my shed too.
4 points
-
I run a D bottle on my little home mig, ezyswap argoshield 90/10. Just had to swap for a full one last week. 170 bucks. Best thing about ezyswap is if you have a couple of years with doing f all welding the bottle doesnt cost anything extra. Think when i bought mine it worked out to 3 years rental or thereabouts, had it for nearly 6 years now, filled 3 times but built some trailers n shit too in that time.3 points
-
Easy fix3 points
-
Hello Joe, what you have there is a fucked armature. Kind regards, Simon.3 points
-
MIGgas from Bunnings/other Coregas supplier imo.3 points
-
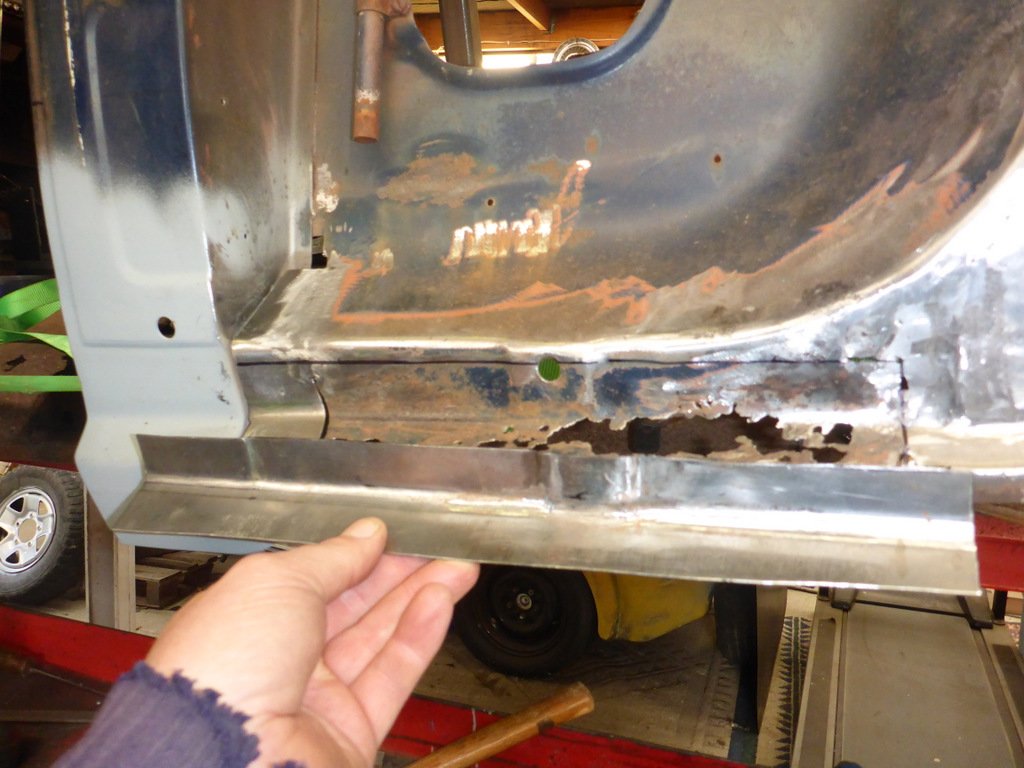
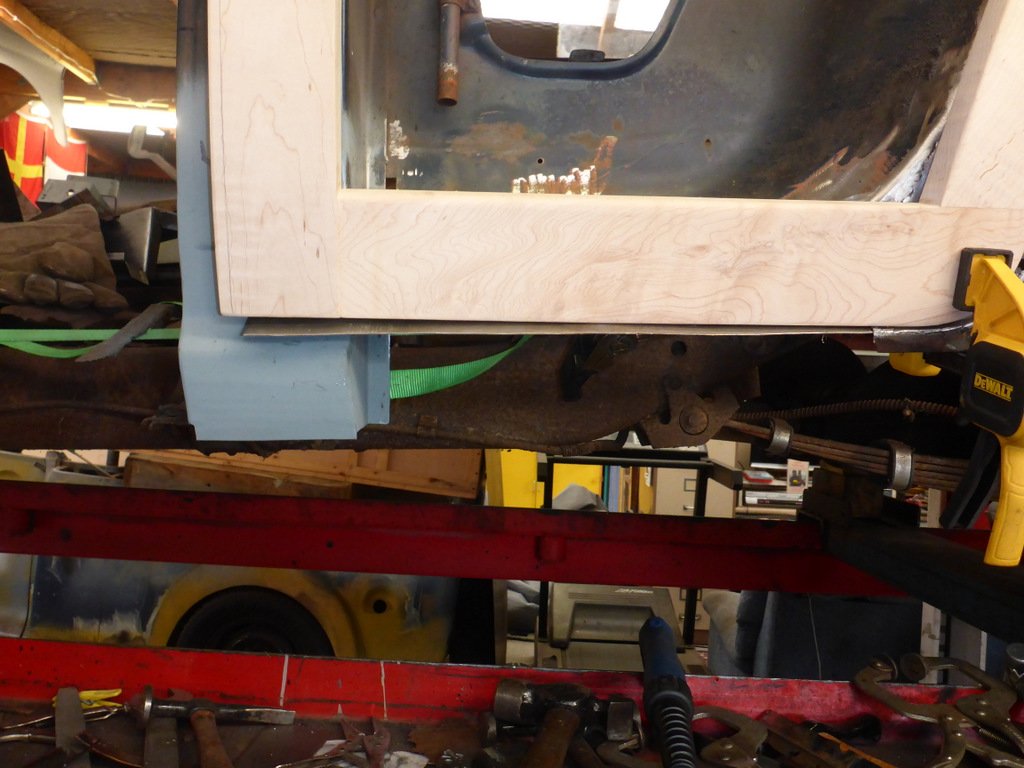
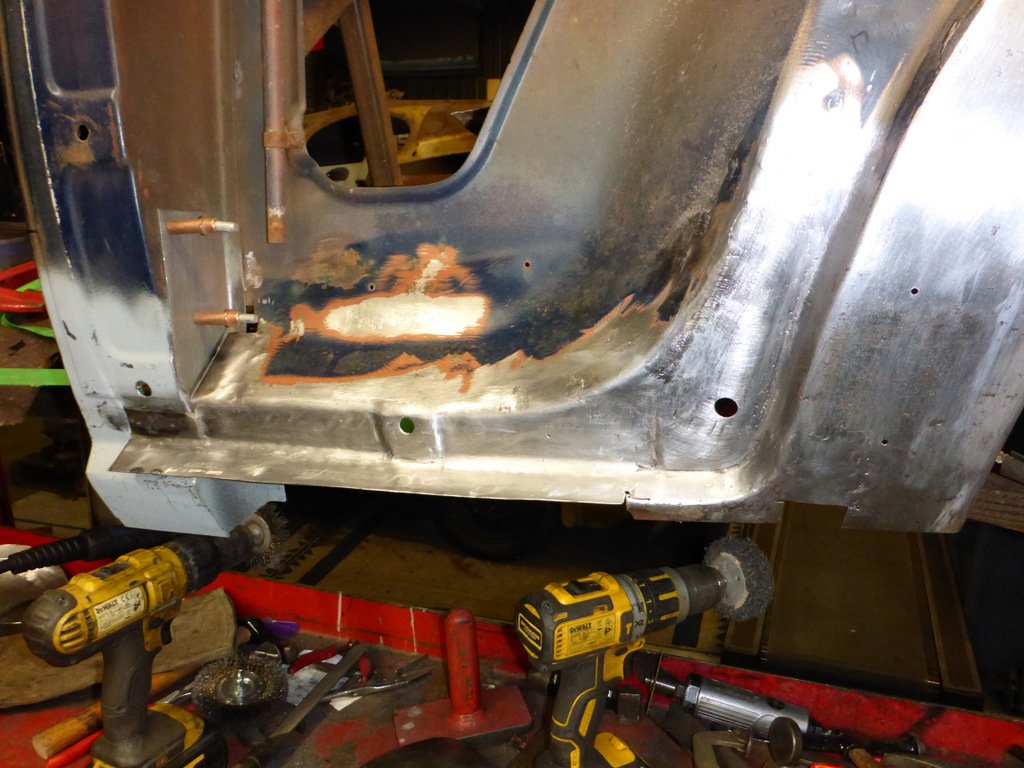
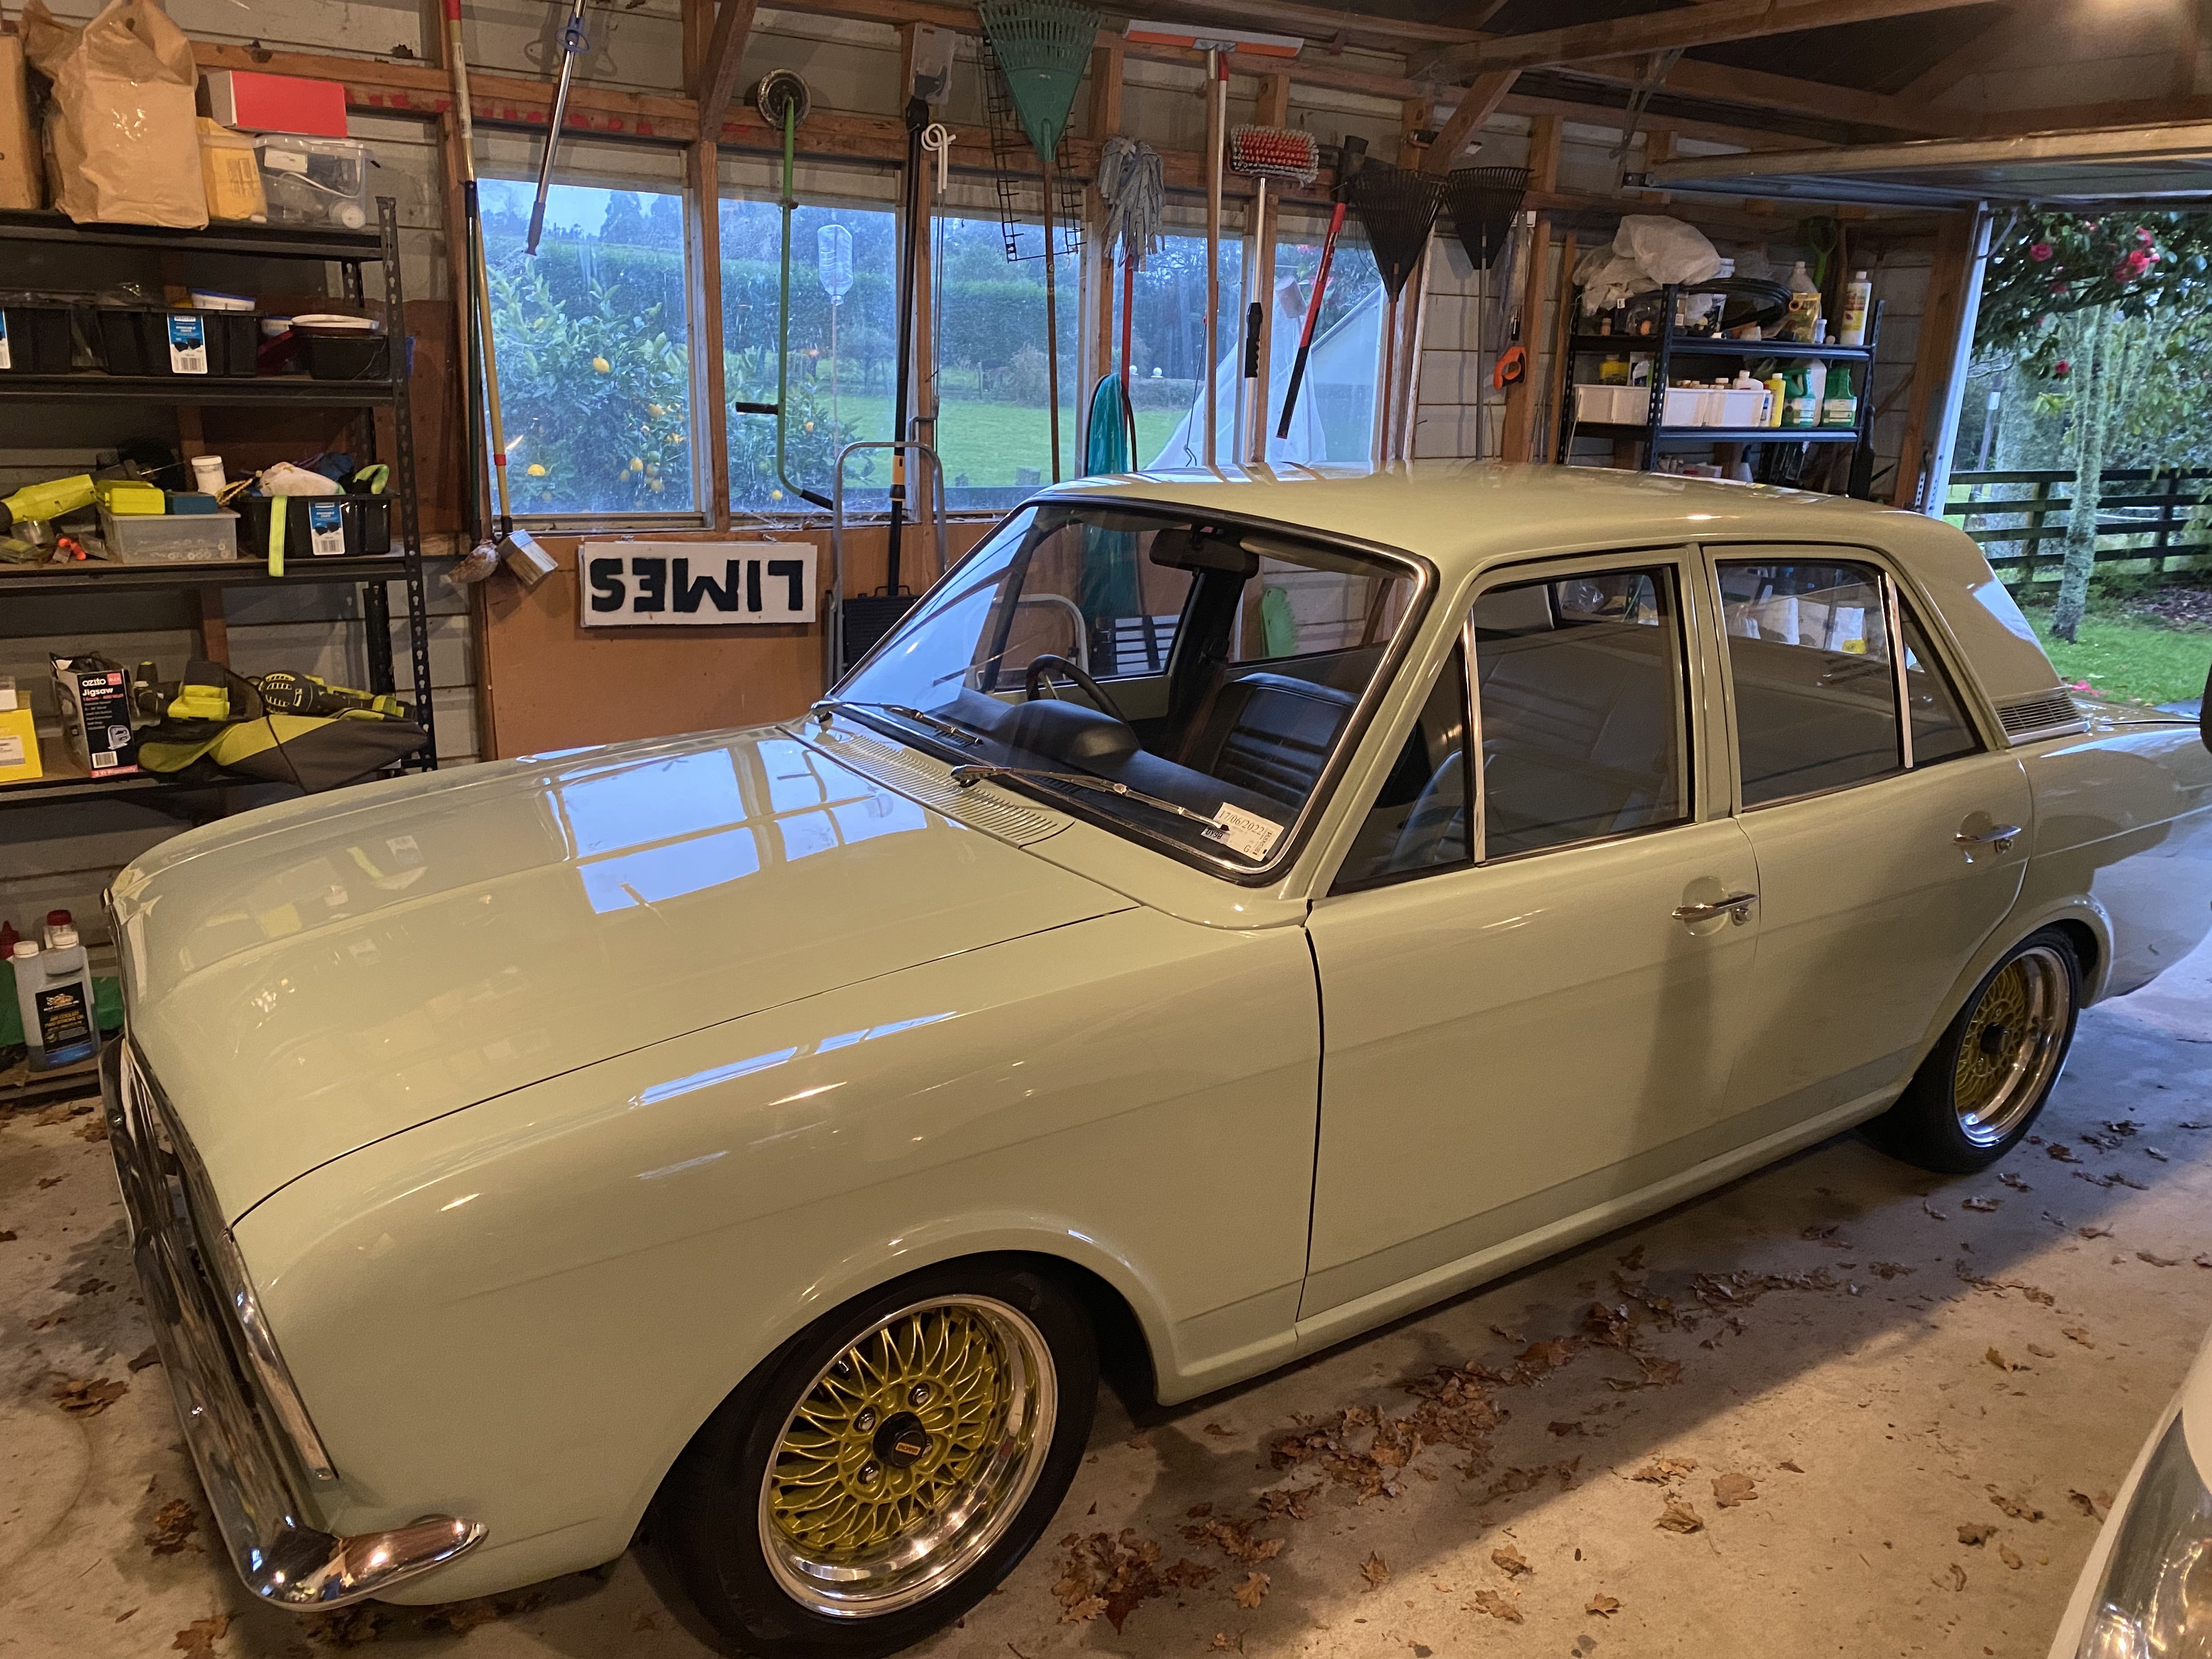
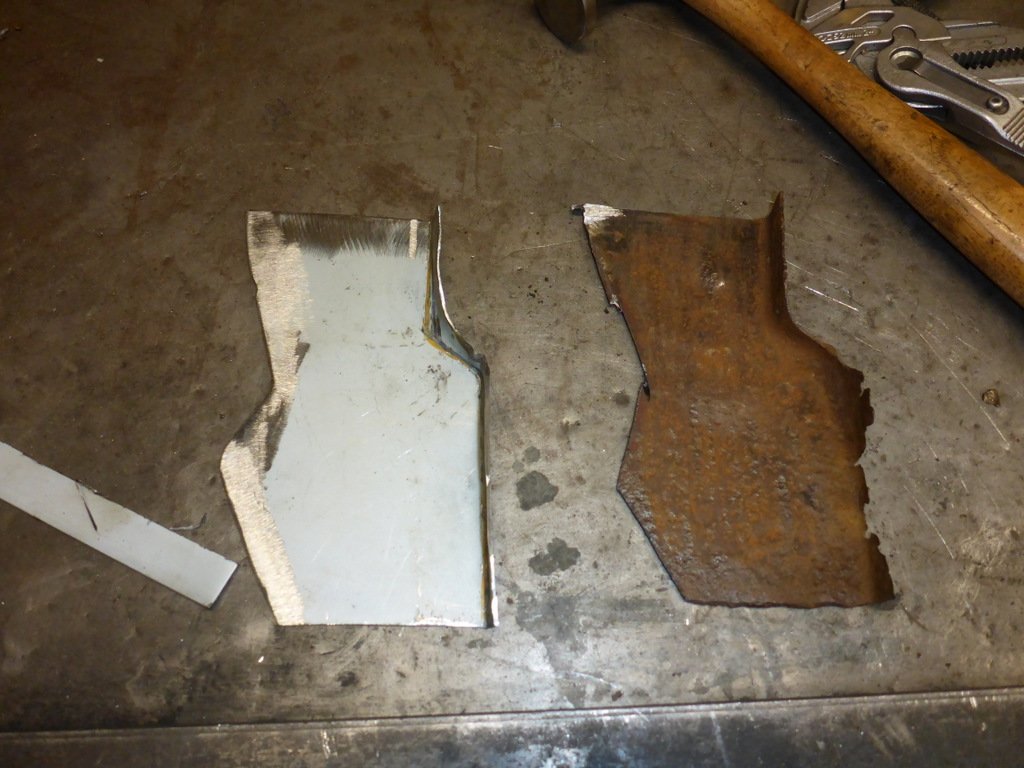
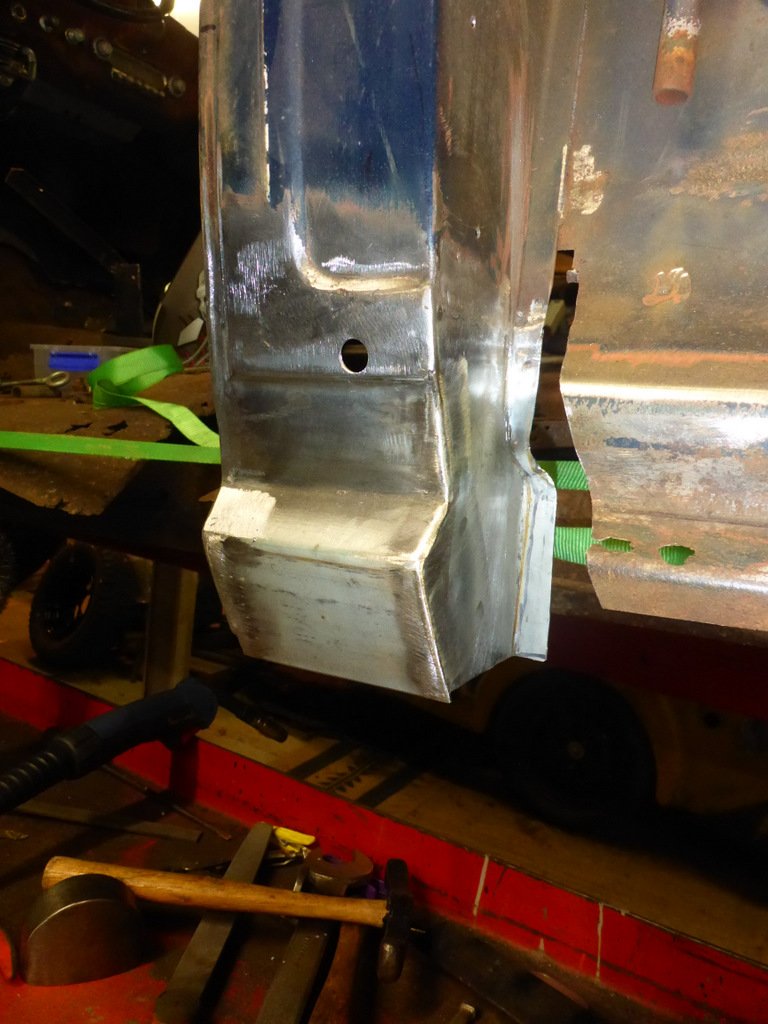
Right, next piece on the rear lower quarter. I'm doing this in smaller pieces so I don't mess up the shape too much. Got the wood piece out of the box again to check the positioning of the patch, needed some adjustment. Poo welding - I really need to try the tig on this sort of thing. Grind, sand, etc. Bit of zinc spray for now. The sill replacement is piece I bought and came in the boxes with the wood. I'll leave it off for now until the inner sill is sorted.
3 points
-
In the time I was doing exhaust certs, I only ever had 2 ported rotaries pass with a fully legit exhaust (ie no silencer bung things or restrictor plates) and one of them was all adrenalin r mufflers , 4 resonators and a big one at the back I've got one on my green car and it seems to work really well for a single 3.5"2 points
-
More pics
2 points
-
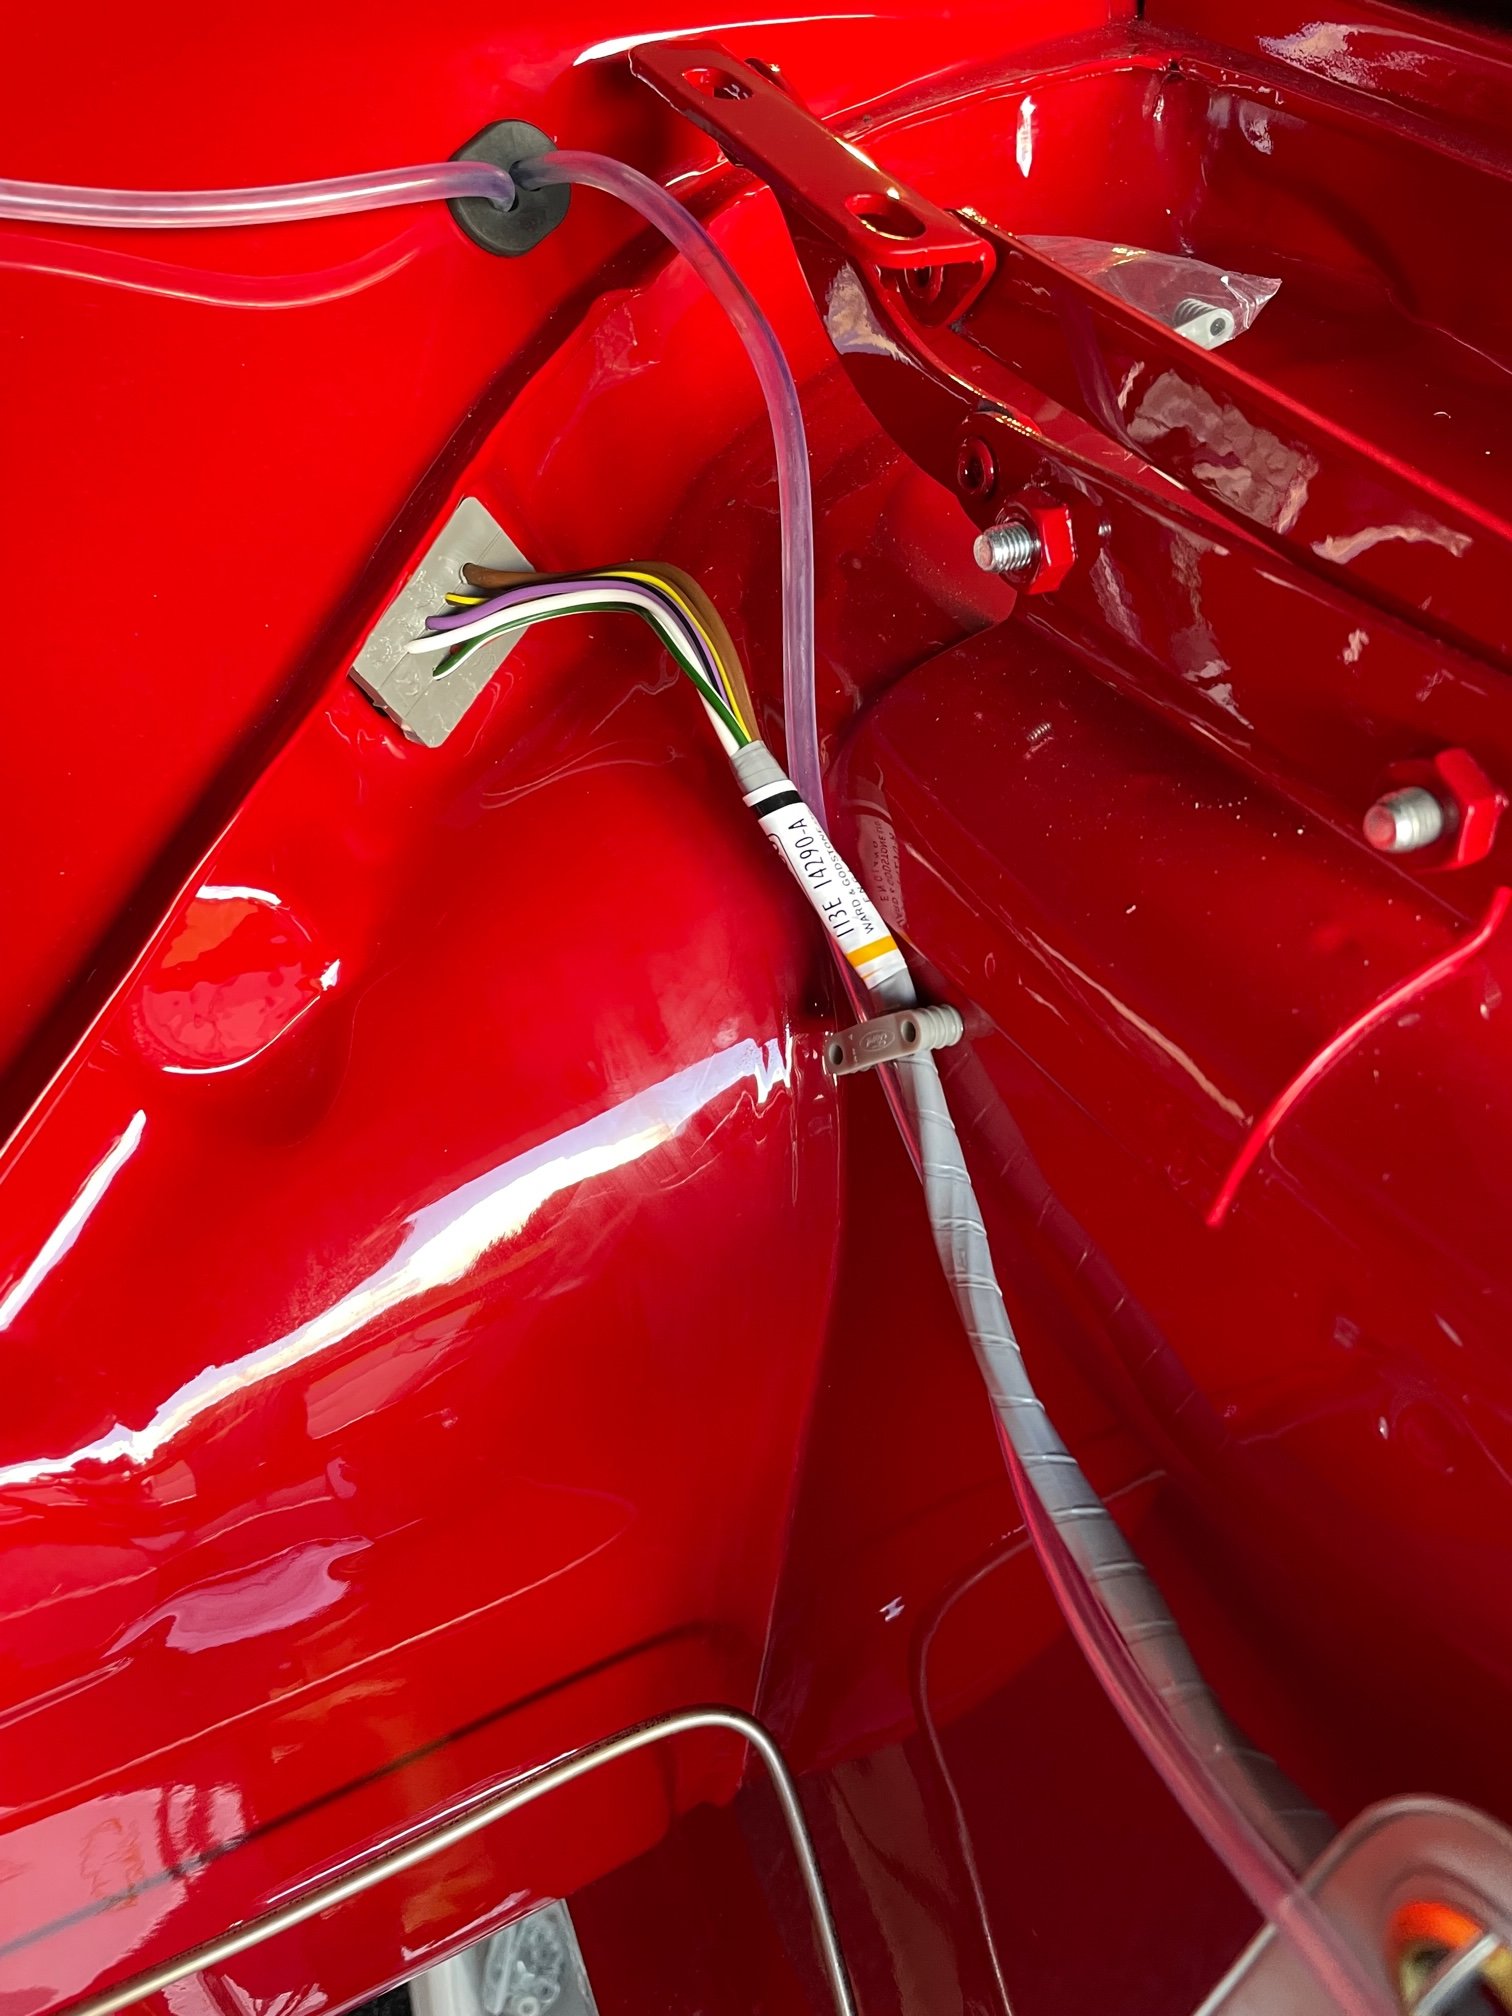
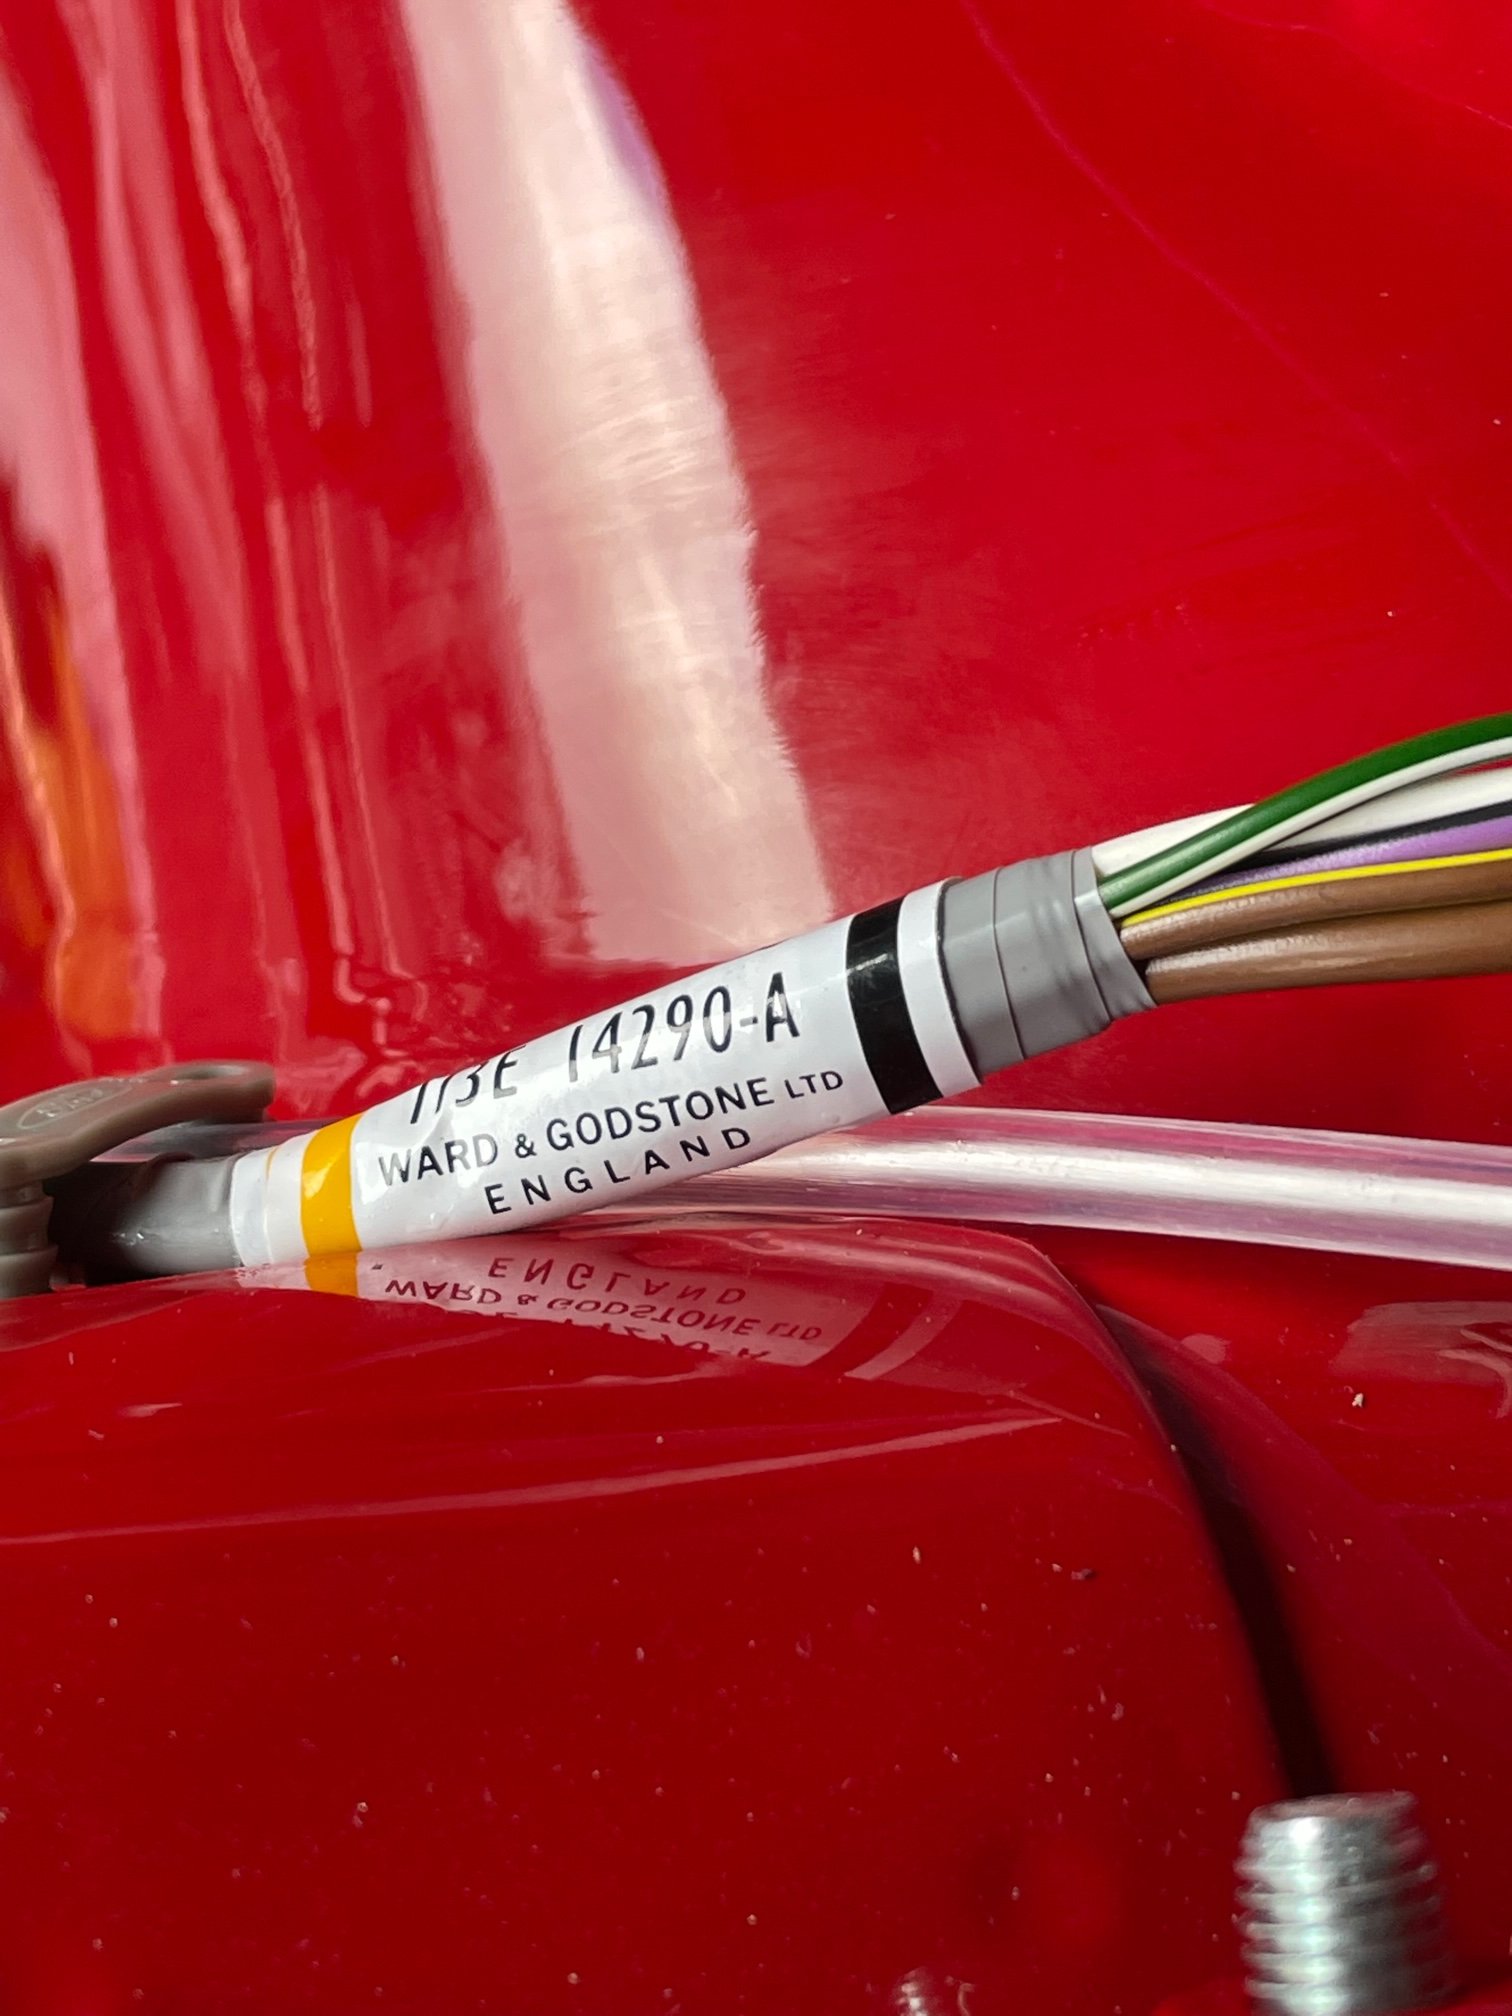
Been doing a bit more. Wiring loom turned up finally
2 points
-
Fantastic road test review. I think I'm going to have to buy one. BTW-you look good in a skirt..
2 points
-
Bunnings gas wasn't a thing when I first started bird shitting on things so I have my own cylinder. Last time it needed a test it was ~$100 including a CO2 fill. Have got bits and pieces from these guys before and they sell cylinders. https://weldplus.co.nz/5kg-co2-ownership-cylinder-filled-s-n/ Mine will probably be due a test again by the time I go through the 6.8KG of gas. Good to have no rental costs though. Bunnings deal could be worth looking into as I think it was better than BOC. Plus BOC can get fucked as they sure seemed to charge a lot when there was no competition in the DIY market.2 points
-
Bonus with Bunnings is if you ever run out of gas on a weekend etc they are open. Also $118 for a D with trade card, $126 retail. I was with BOC on the D plan ages back, but if you don't use your 2 full bottles in 12 months you've still got to pay the full year payment etc.2 points
-
am on Home D with BOC $180/PA with 1 free refill.......... which is a good thing when one forgets to turn the gas bottle off !!2 points
-
How much gas do you think you'll use? Bunnings argoshield / mig gas was popular here, personally I run a 5kg owner bottle co2 for mig, and an F size ezyswap argon on my TIG ..2 points
-
Biggest ride done on the fr50 Cant compain went well actually goes prety well. Was over las couple weeks having lil problem with it running outta gas outta the carb. Though this was strange as carb was miiiiiint new fuel filter full tank of gas too. After someone saying they had same problem turns out was my fule cap not venting. Took cap off never did it. So if you ride longer than 20mins pull over take cap off rev good to go again haha. Thats just too much confusion for this bogan so one must find new fuel cap.2 points
-
2 points
-
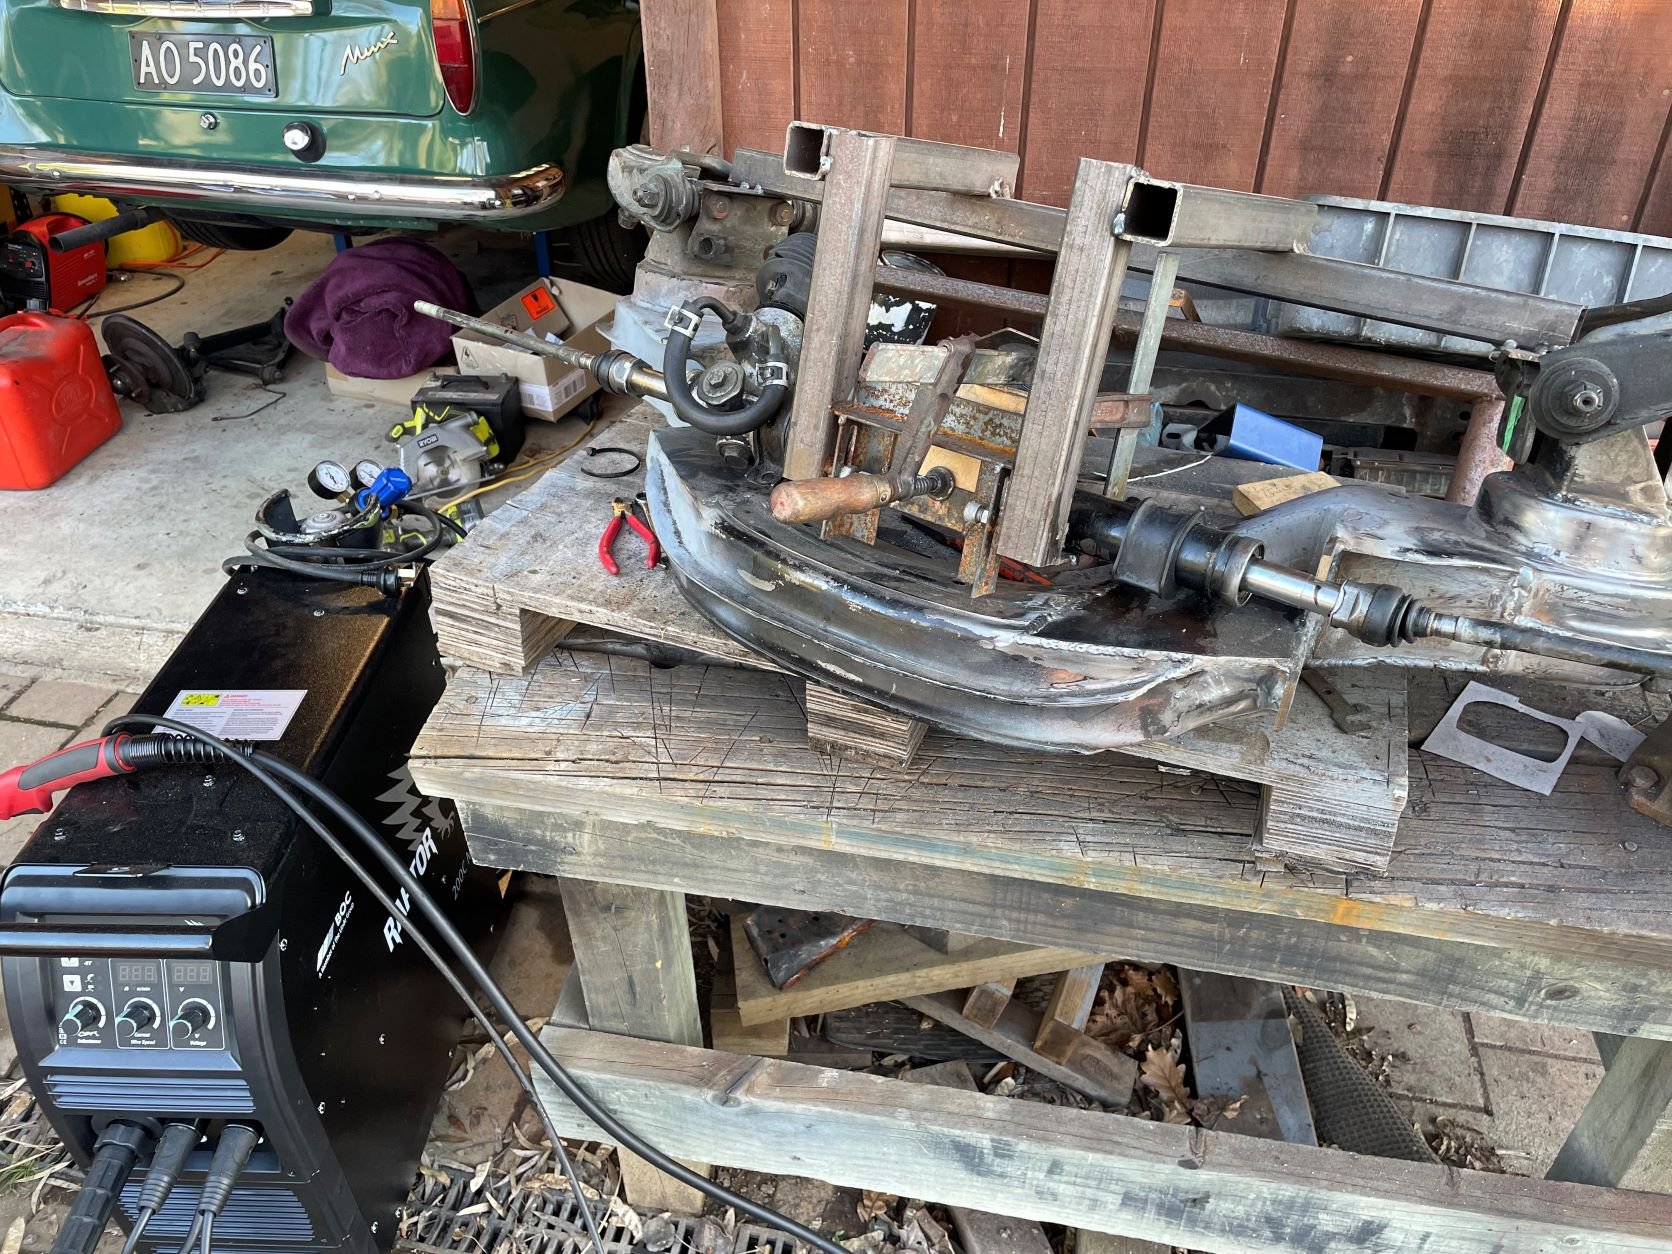
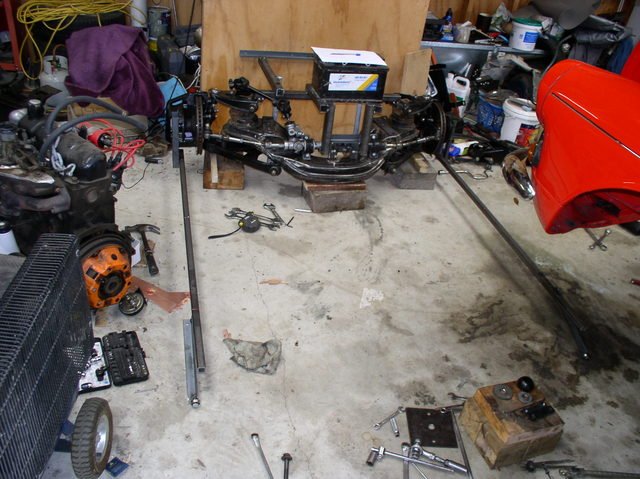
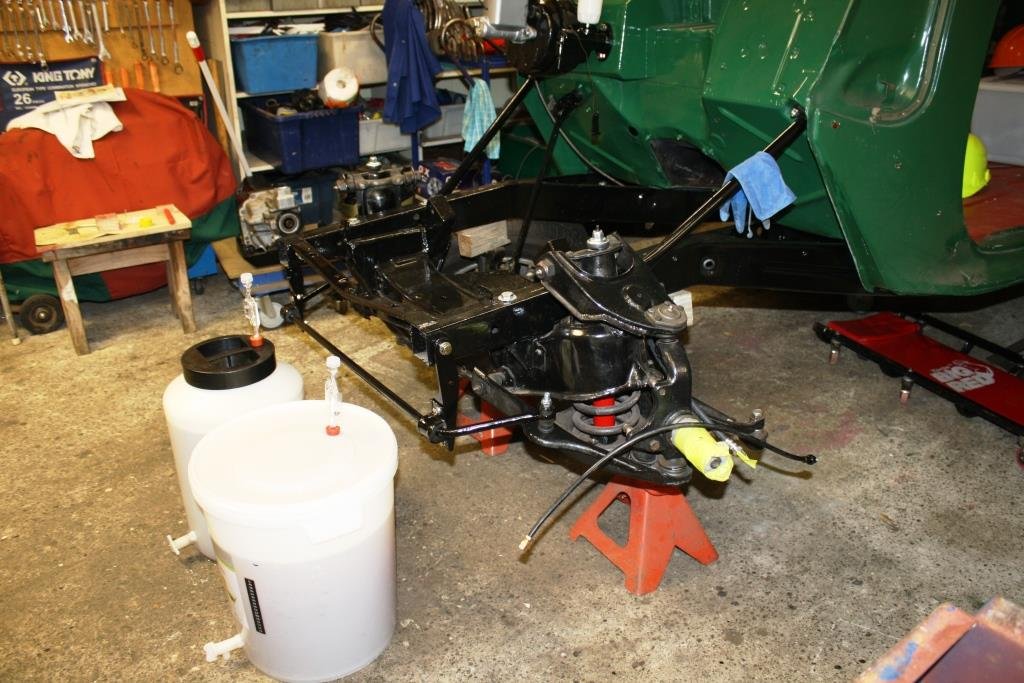
I have been working on the front x member setting up the steering rack. The jig i am using I used to set a mx5 rack on my Tiger which uses the same X member. I managed to get the bump steer down to 3mm on a bump steer check so I should be close or the same here. Not the best pic but I will add more in the future. Bought a new welder as the BOC 175 was nearly 20 years old. The new welder is another BOC, but upgraded to a Raptor 200 which welds much better than the 175. So happy with the upgrade. Second pic is measuring the bump steer on the Tiger upgrade.
2 points
-
Get ready for a surprise, Scarles are a useless pack of cunts. My coilovers which were supposed to be here last Wednesday didn't actually get ordered by the great folks at scarles so I've got to wait another 4 weeks. I'm fucking stoked as you could Imagine. So I moved on to doing something else. I made a new zorst for it. Stock zorst is pretty restrictive and super quiet, and we can't have that. So is now 63mm from the cats back where if goes into a single 75mm hotdog, then splits back into twin 63mm pipes all the way to the back with two 63mm offset straight through glass pack SS mufflers. I started it with just the 75mm hotdog and nothing behind it and it wasn't actually that loud. Should sound good. I'll let the print dry tonight then I'll chuck it back in the car tomorrow.
2 points
-
Returning home (after a short break) to the sanctuary of the “ever famous in the Southern Hemisphere sr2 man-cave” I was dismayed to discover that Rigamortice was once again up to her usual treacherous climate changing antics. Much to my horror her depth of moral decay had sunk to the production of 50 liters of the evil Co2 emitting brew. I felt shocked and defiled. How I could I ever look our dear equine faced leader, (the PC goddess of fertility, transparent government and cultural sensitivity) in the face again! The only practical solution has to be an open invitation to all local Oldschoolers to assist the destruction (via ingestion) of this evil concoction in about 3 months, (good things take time).
2 points
-
Took the working one away to Ohakune. Went well even after the frost so took a spin up to Whakapapa. Annoyingly left the petrol cap at National Park g.a.s and it wasn't there when I went back 90 minutes later so who knows what happened to it. Managed to find a substitute at Horopito Motors after sneaking entry on a Sunday when they were sort-of closed.
2 points
-
Good point, hadn't considered that but would be worthwhile.1 point
-
The high resistance through the armature would drop the output for sure. If it's 20x what the book says I'd start there1 point
-
Couple small things today. Fixed the door card fabric that's been flapping pretty much the while time I've owned the car Mounted the ecu Factory trim even fits back on Next on the list is to cut out a bit of metal to fill in the gap where the crv shifter boot doesn't quite match the orthia surround. Stock civic/orthia shift boots will be too short to fit and share a similar size hole to the auto shifter Just need to make some brackets for the headers to help support them and clean/drive it and see what else comes up.1 point
-
1 point
-
So I failed at the first hurdle - has a bit more bump steer than the alignment man is happy with- it’s not terrible but border line passable. The rack conversion I have is meant to be zero bump steep but it seems the only bit I supplied is the issue - the mk1 Capri struts. Turns out there a multiple versions of bolt on steering arms for Capri/RS2000 and the version I have is the flattest/least drop.I did track down some tarmac steering arms online that look to be what I’m after but the left hand side is out of stock until next year. So instead of faffing around trying to get hold of second hand steering arms that might work the alignment man has decided to make a start on sorting out rose jointed ends so he can dial out all bump steer- he’s got the tidiest mk1 Escort I’ve seen in a long time so I can’t really argue! Have still been driving her a little bit, went to the Rotorua swap meet/mud fest this morning and picked up a neat mint rear boot badge. Got carried away on cleaning afterward, washed, clay barred, polished and waxed. Not a bed way to spend a rainy afternoon- should invest in a DA rather than doing it by hand though. Hopefully not too far off getting the steering sorted and the on to cert.
1 point
-
I brought one home
1 point
-
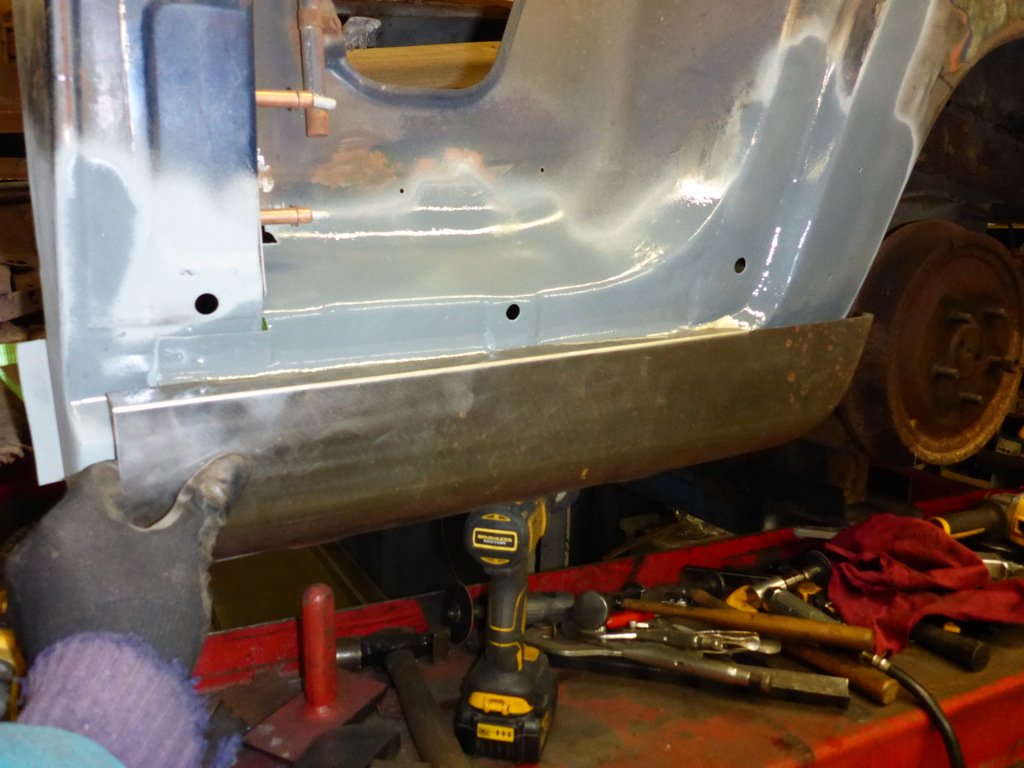
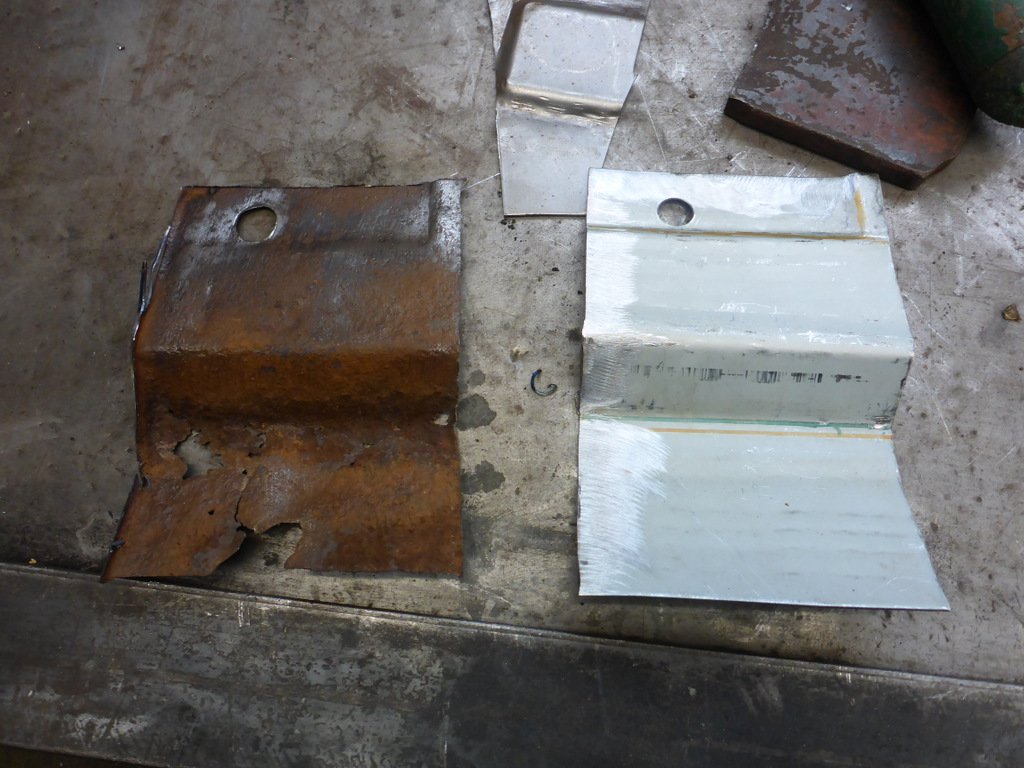
The continuing process of remaking the bottom of the B-pillar. I've been doing it in smaller pieces to keep the shape references. This area is almost all hidden when the wood and sills go on anyway.
1 point
-
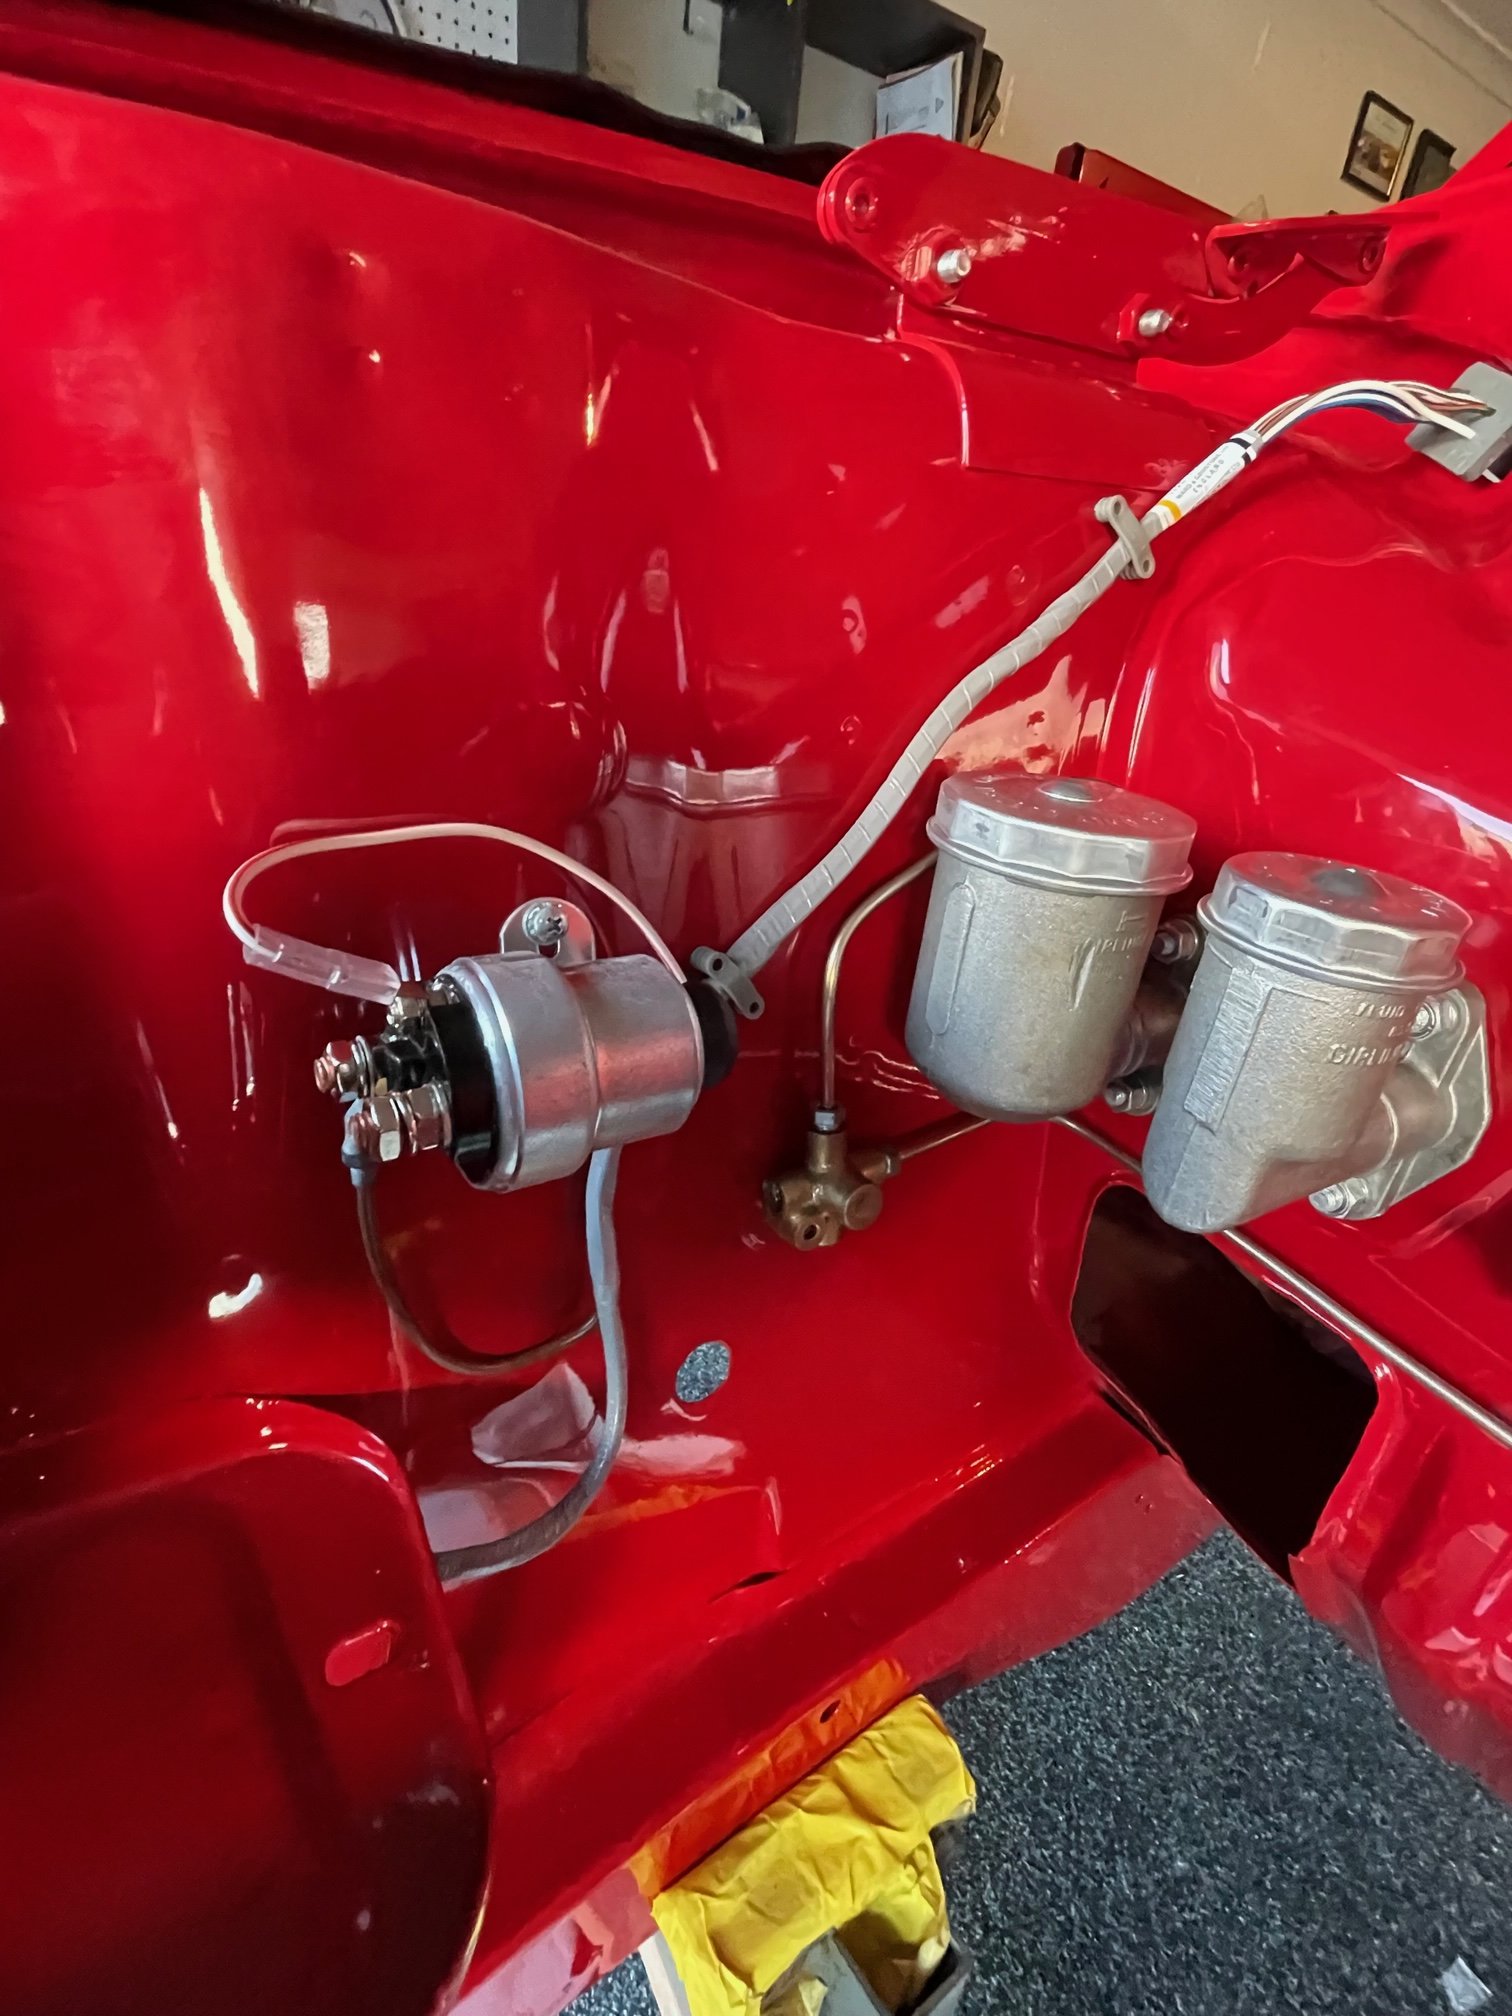
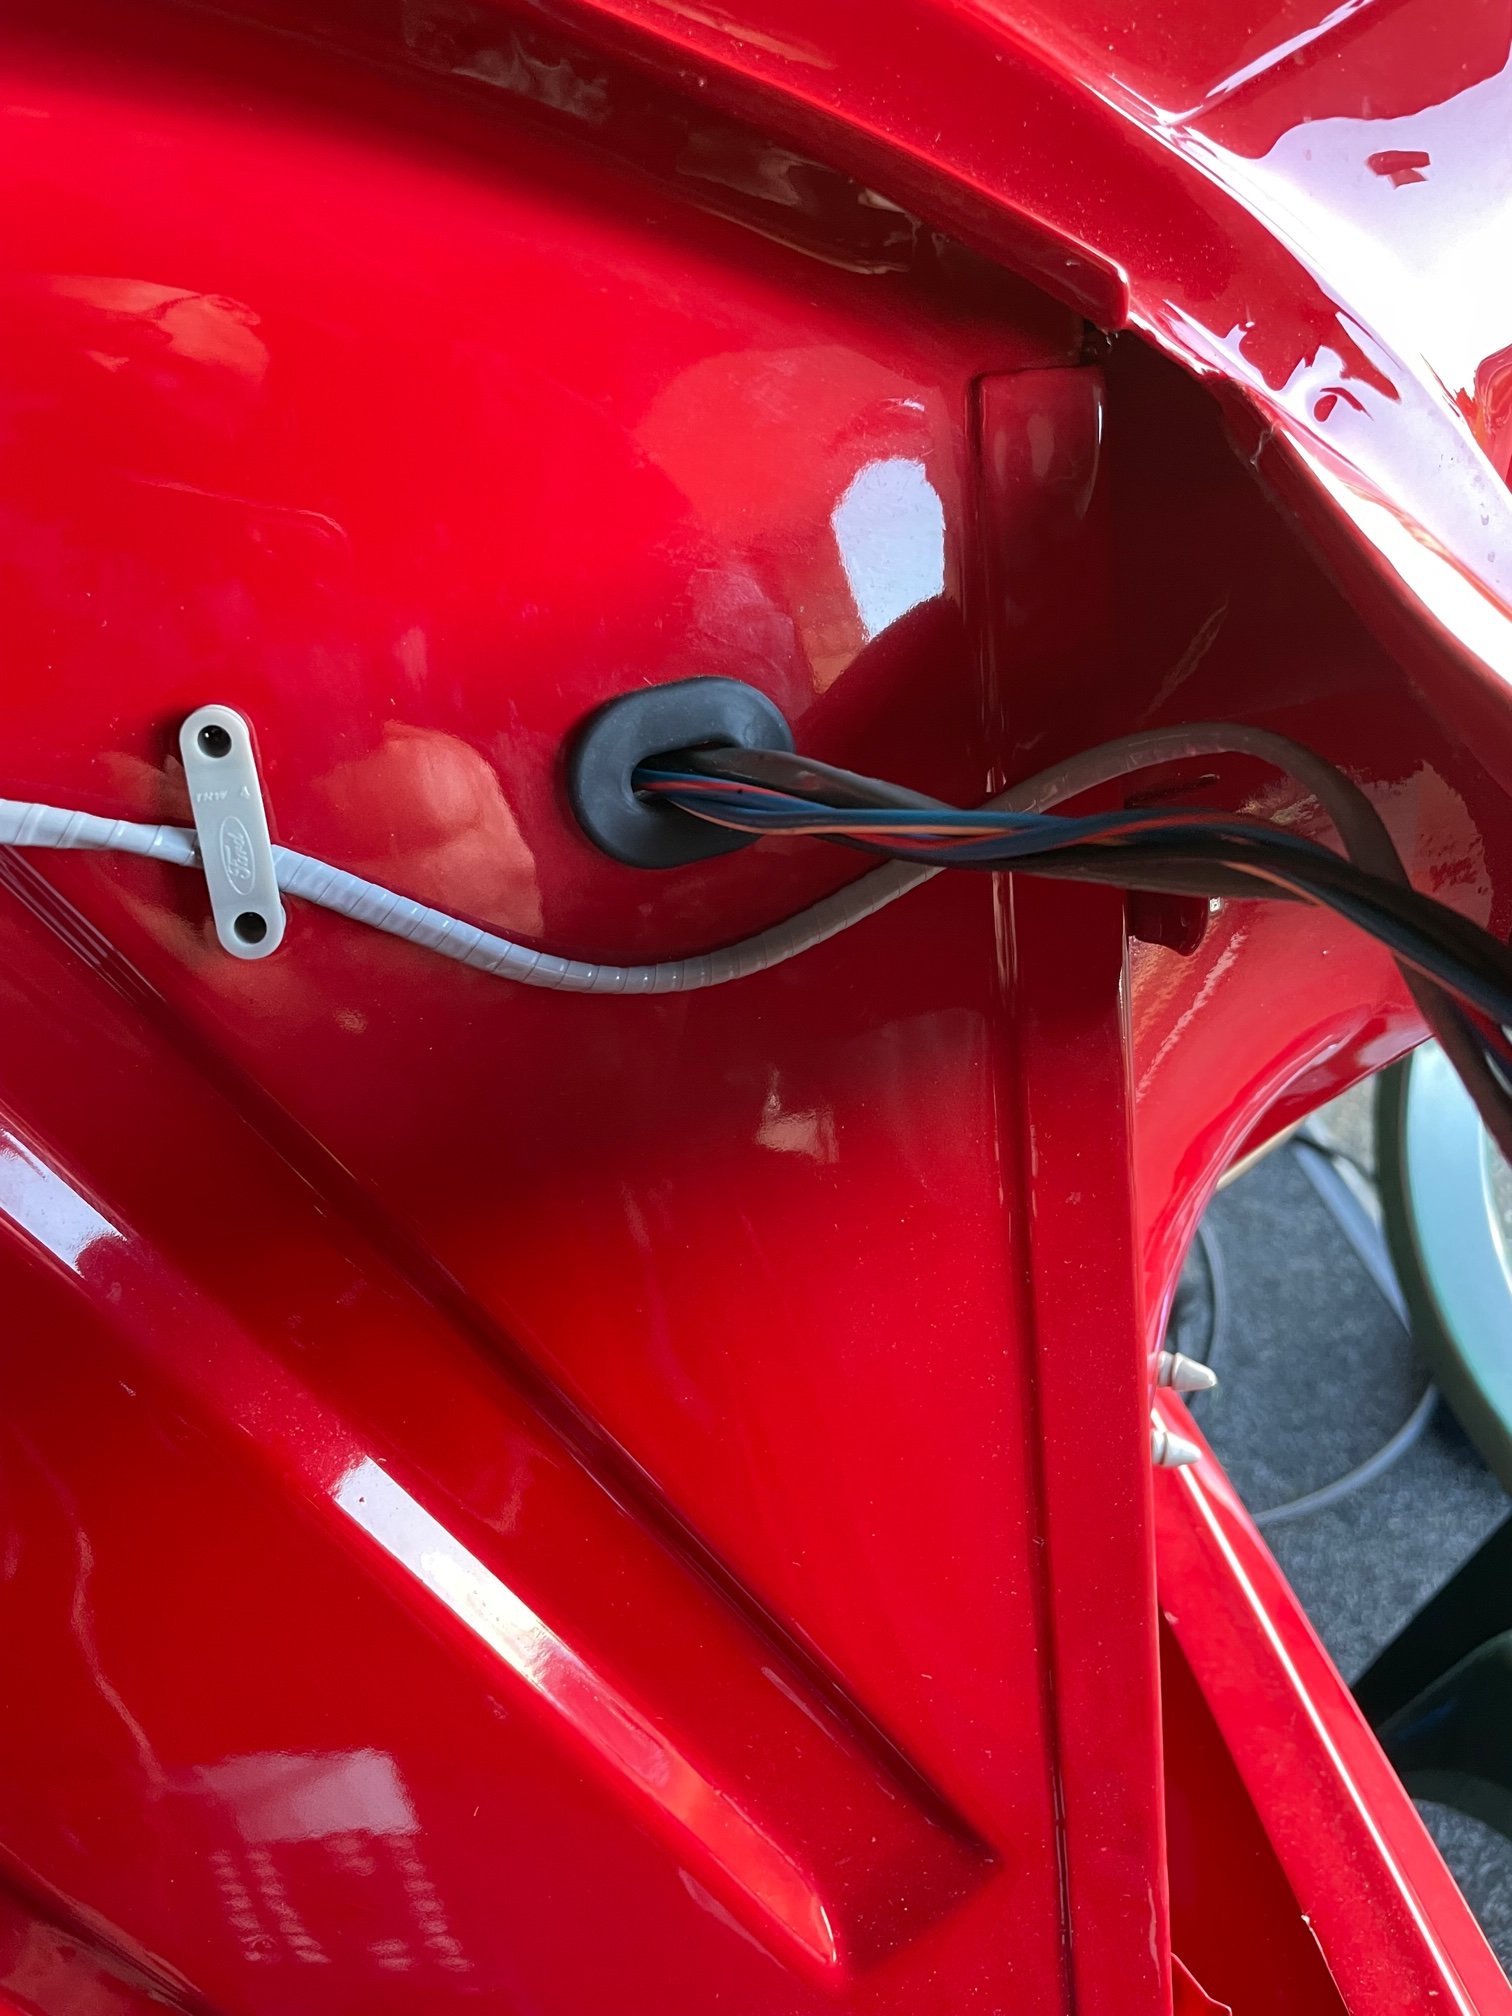
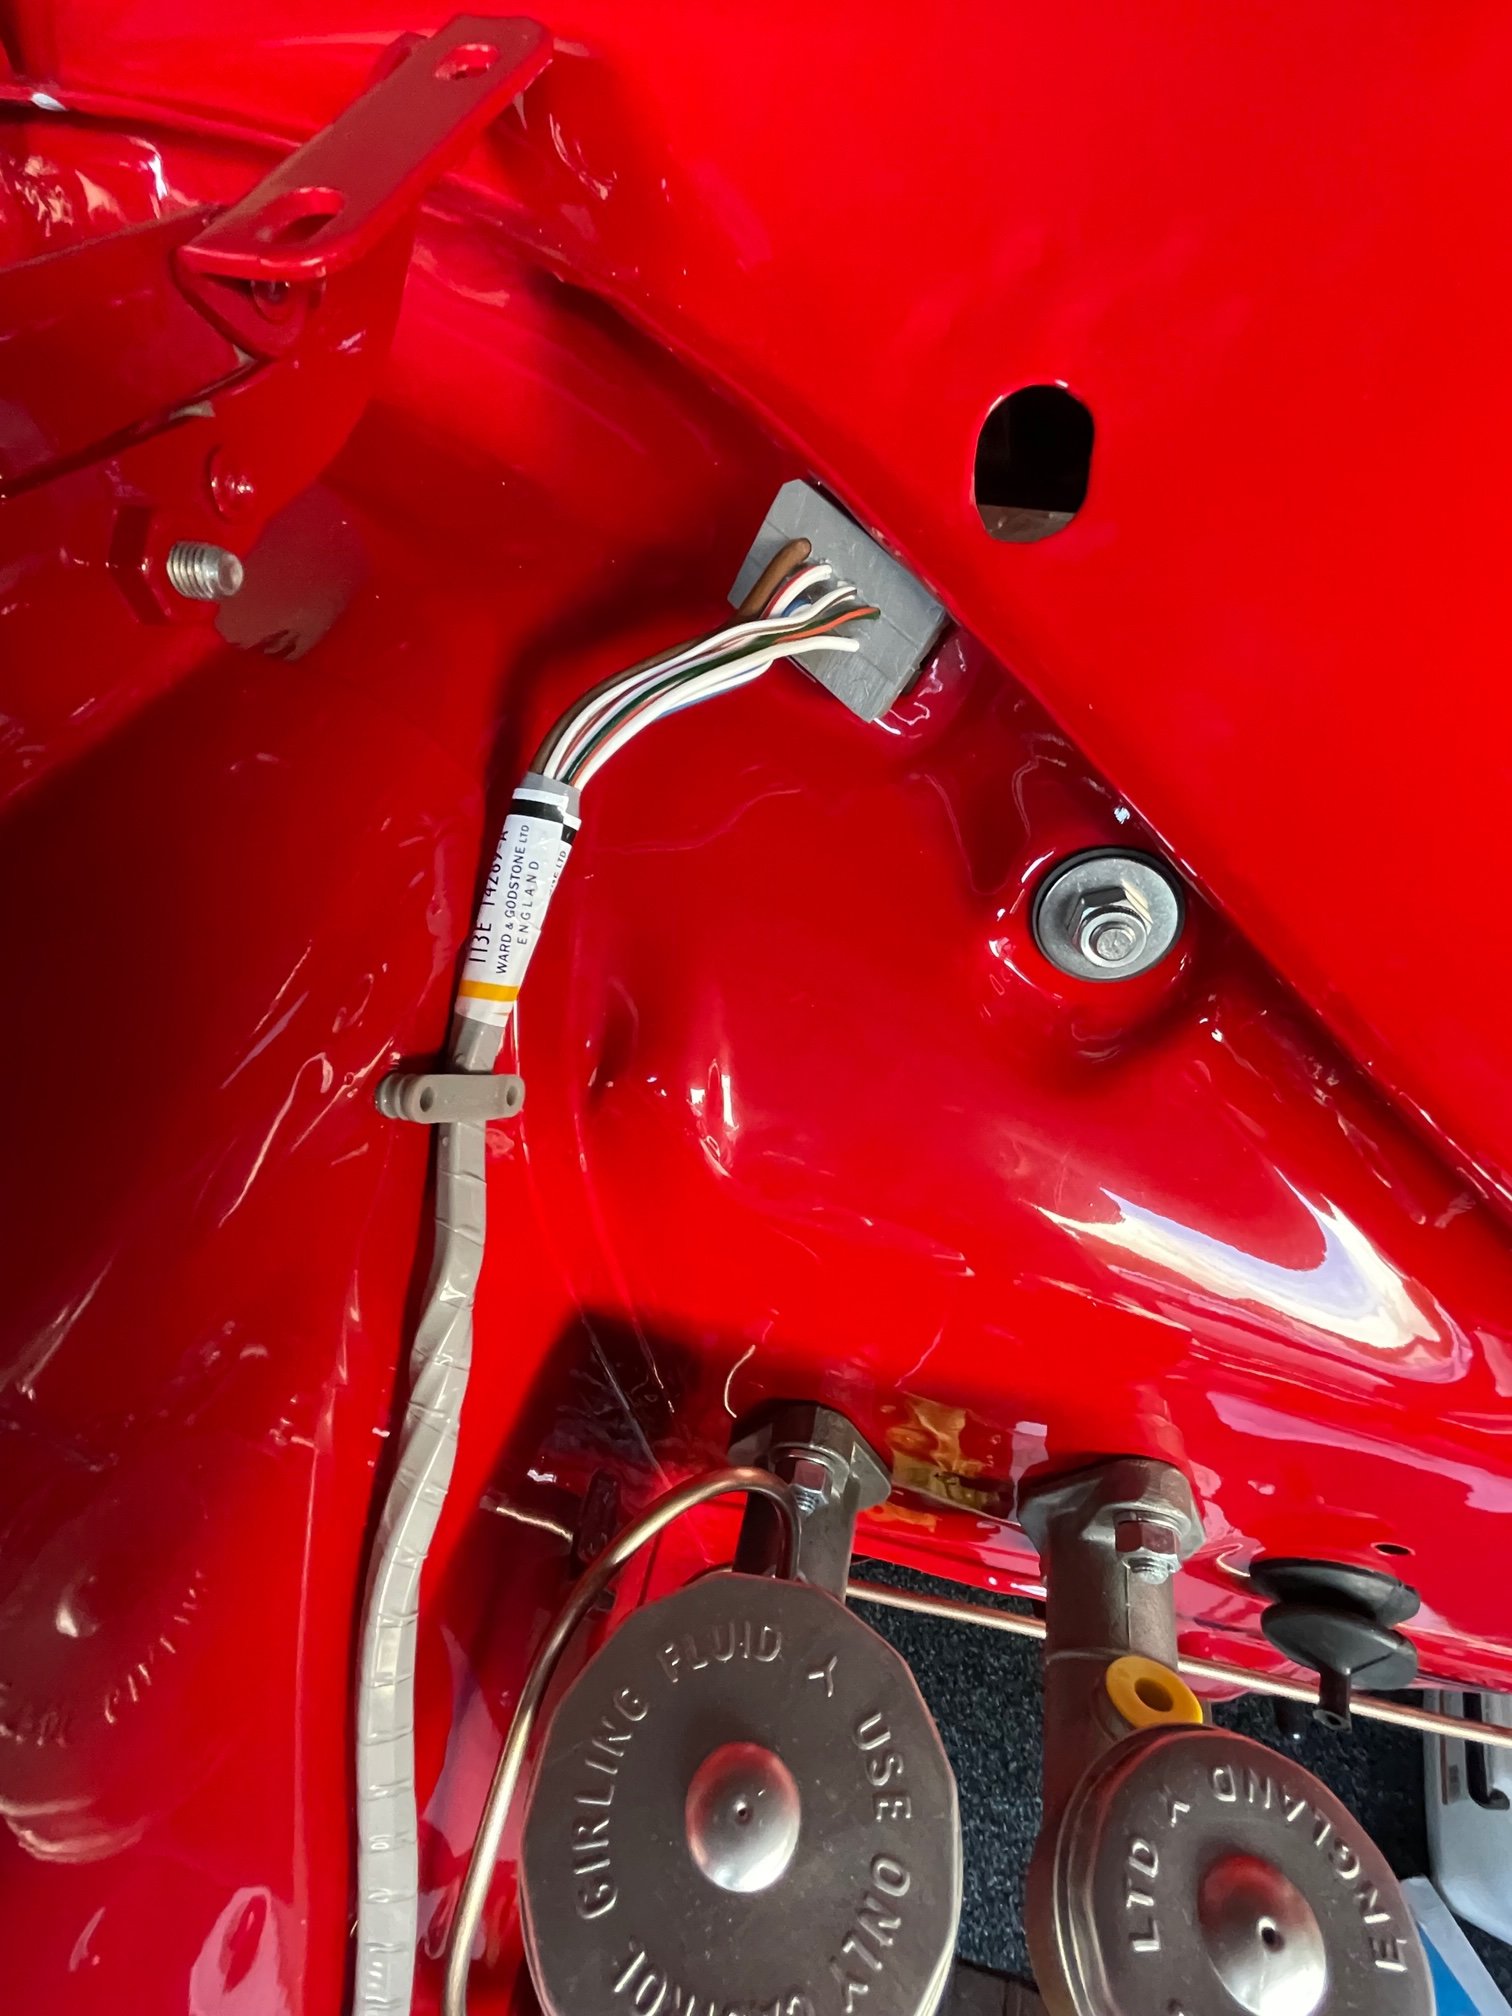
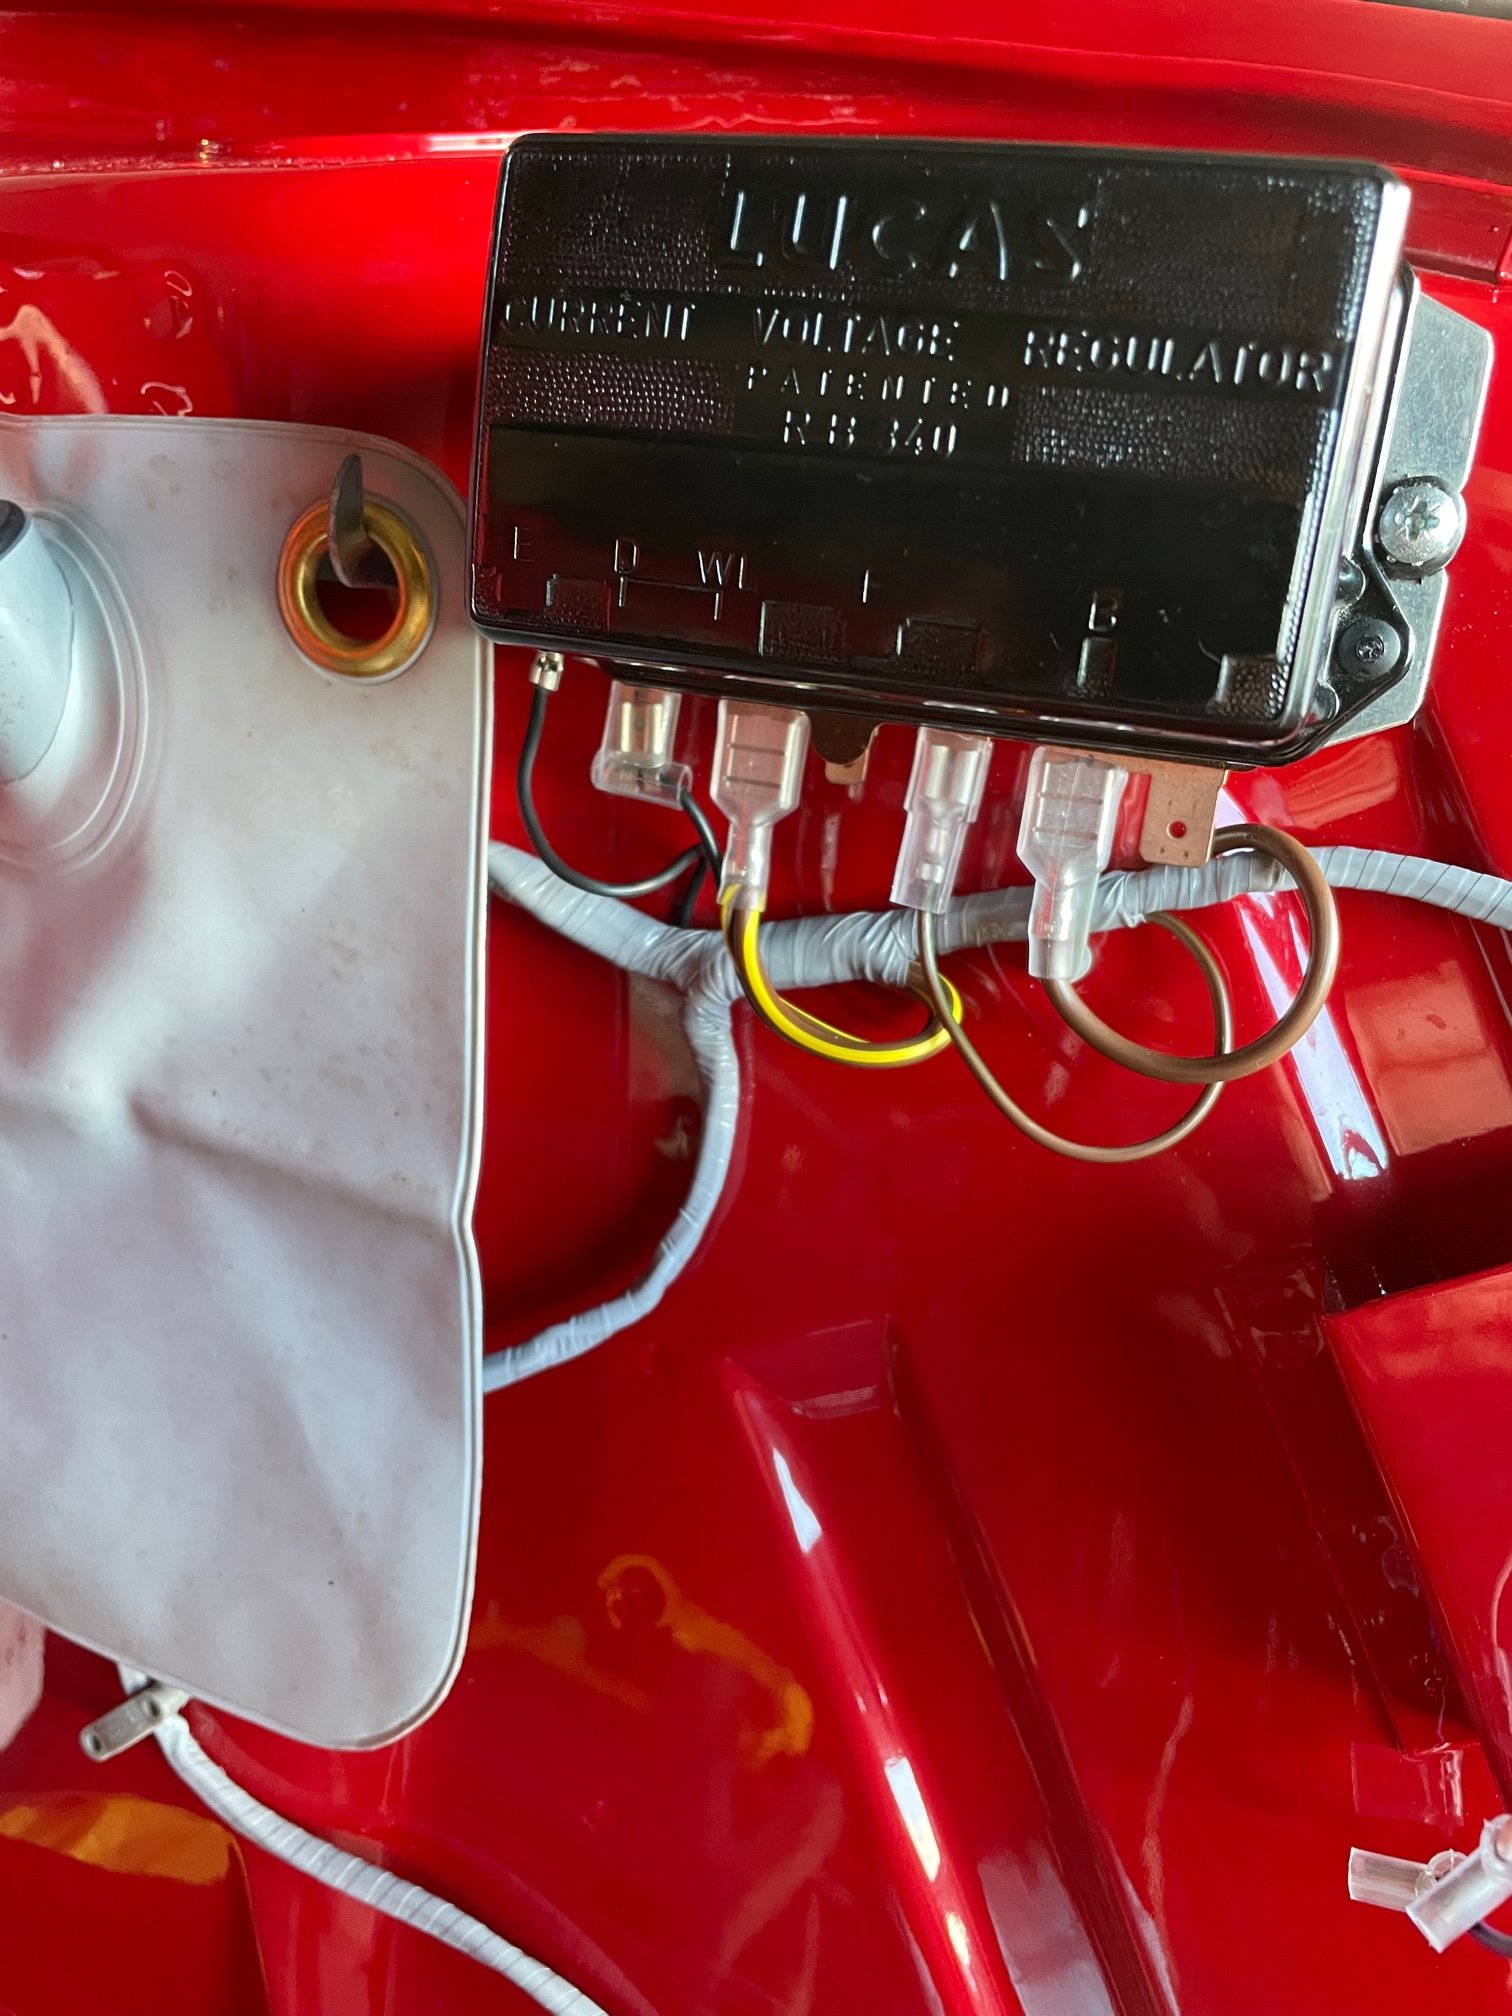
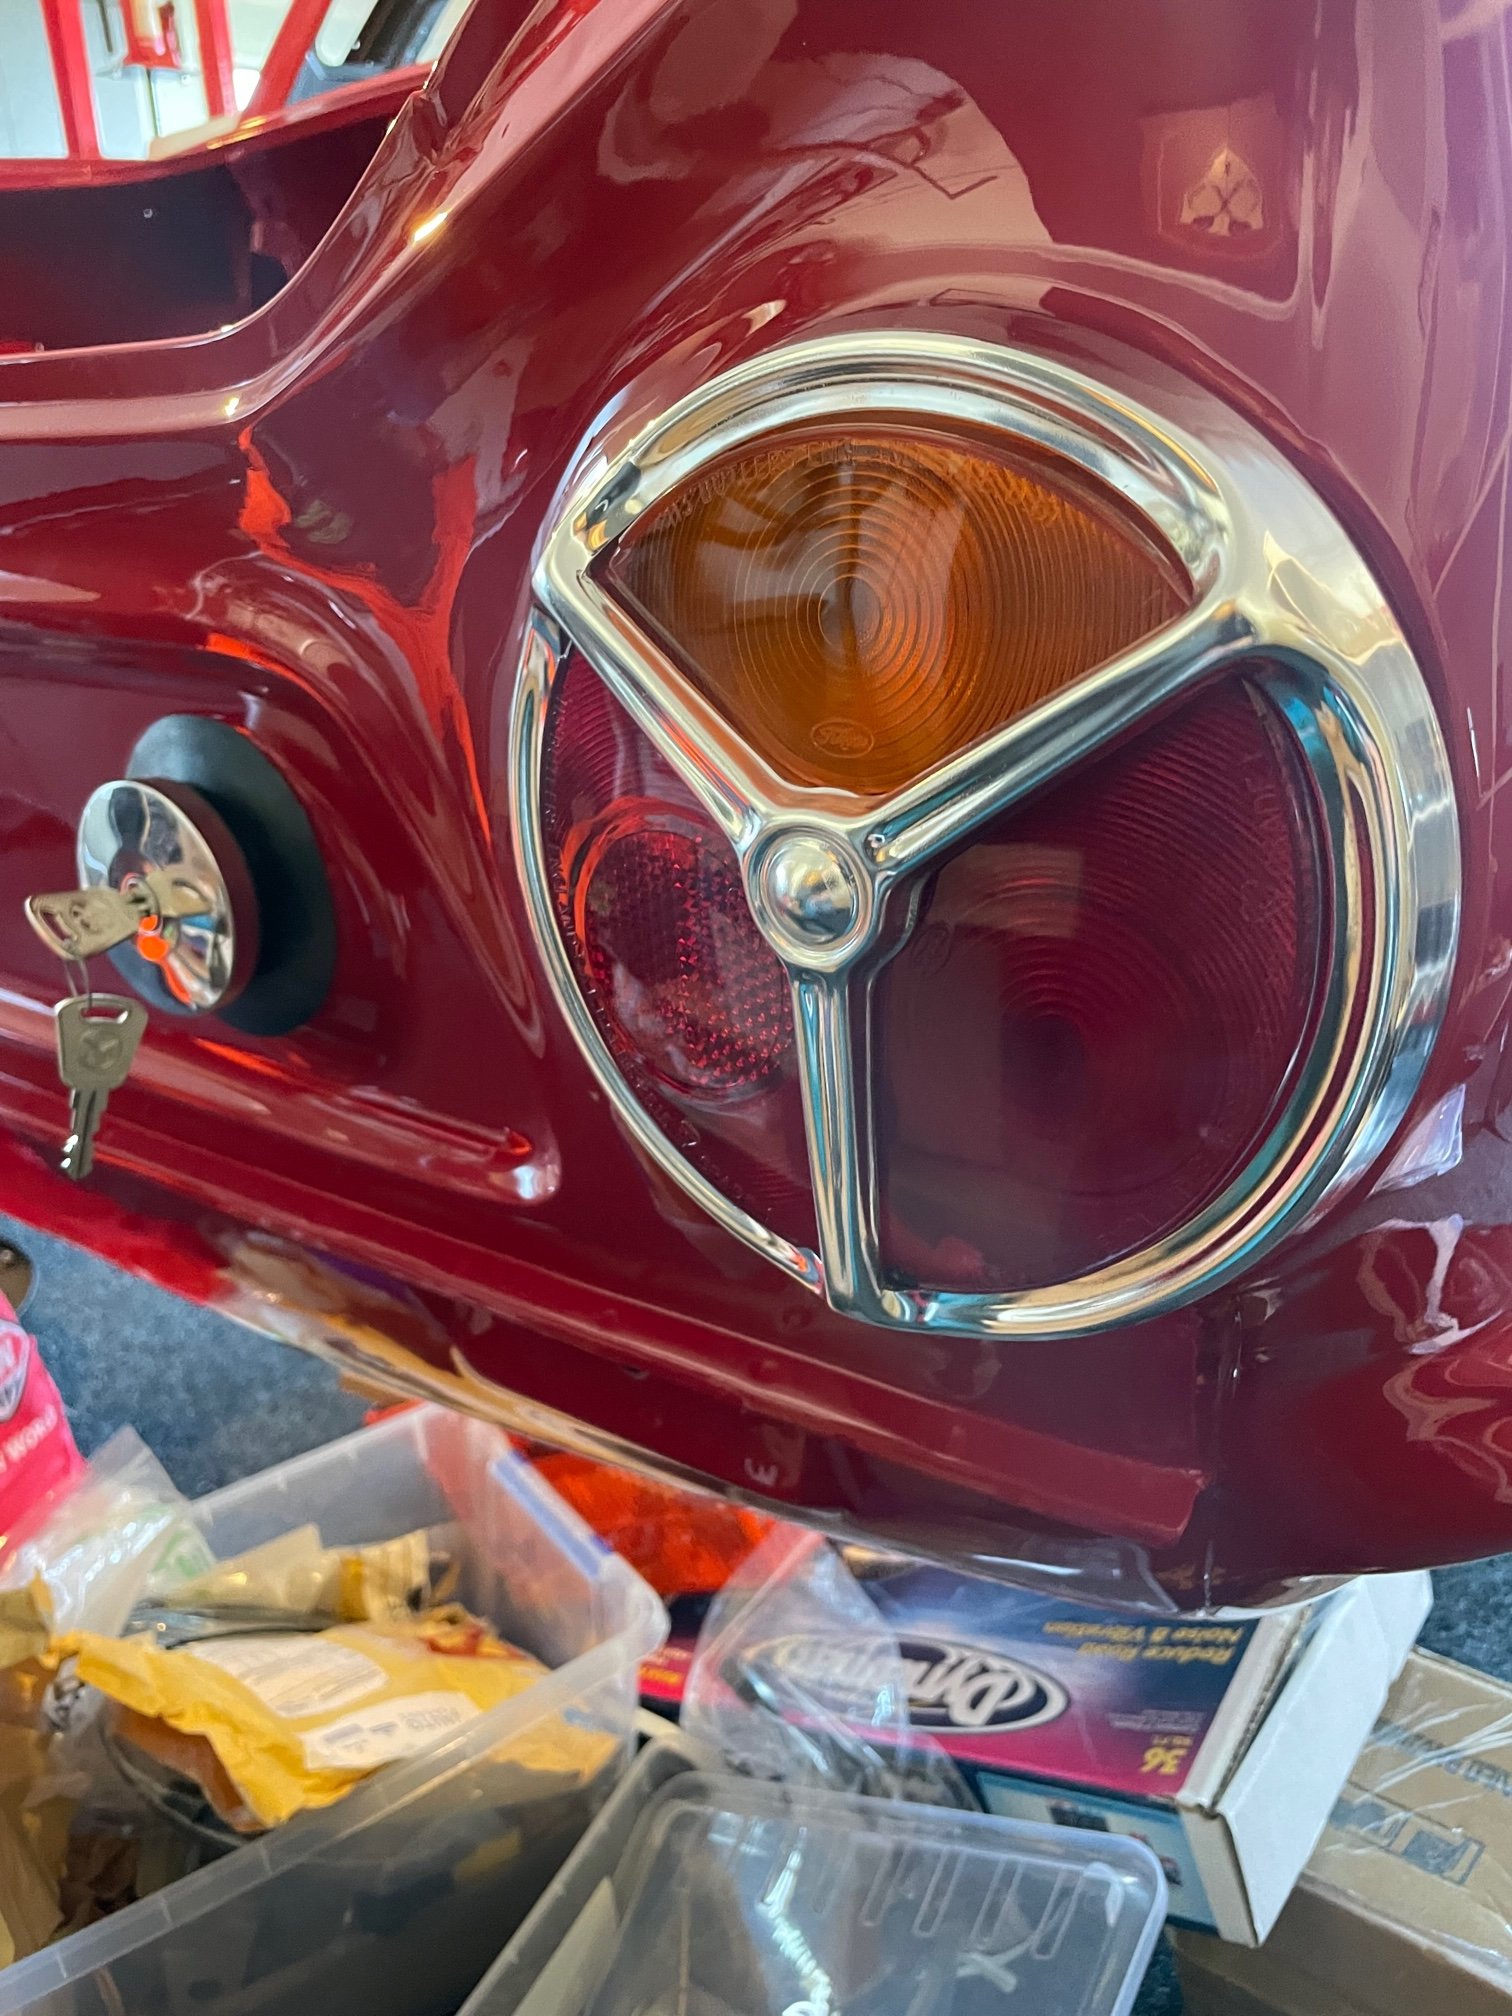
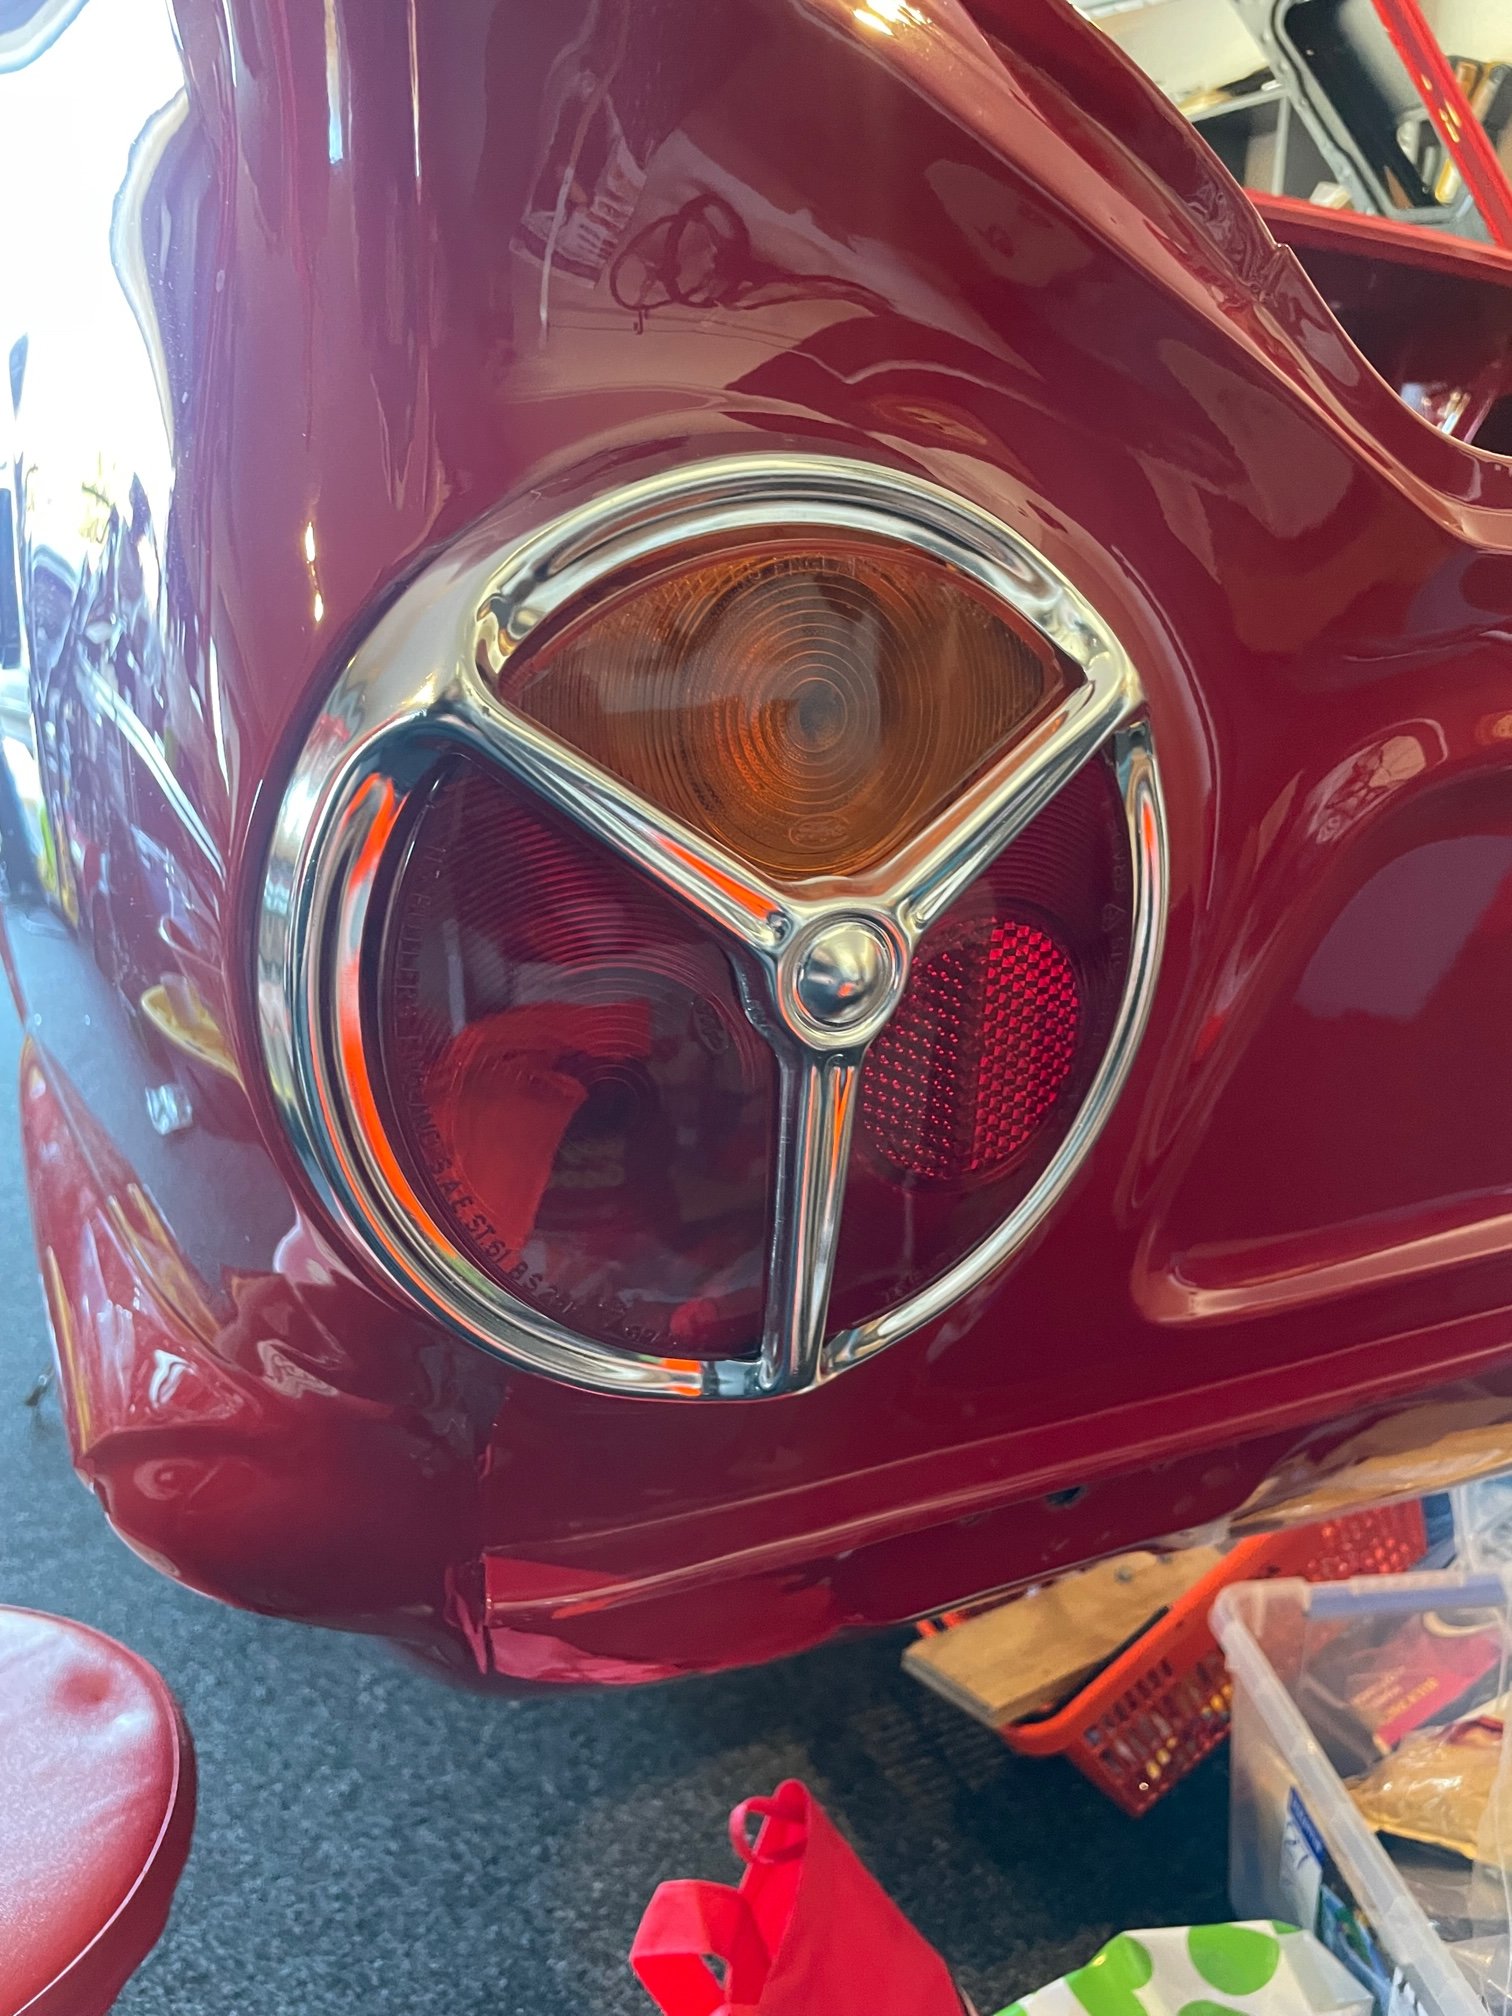
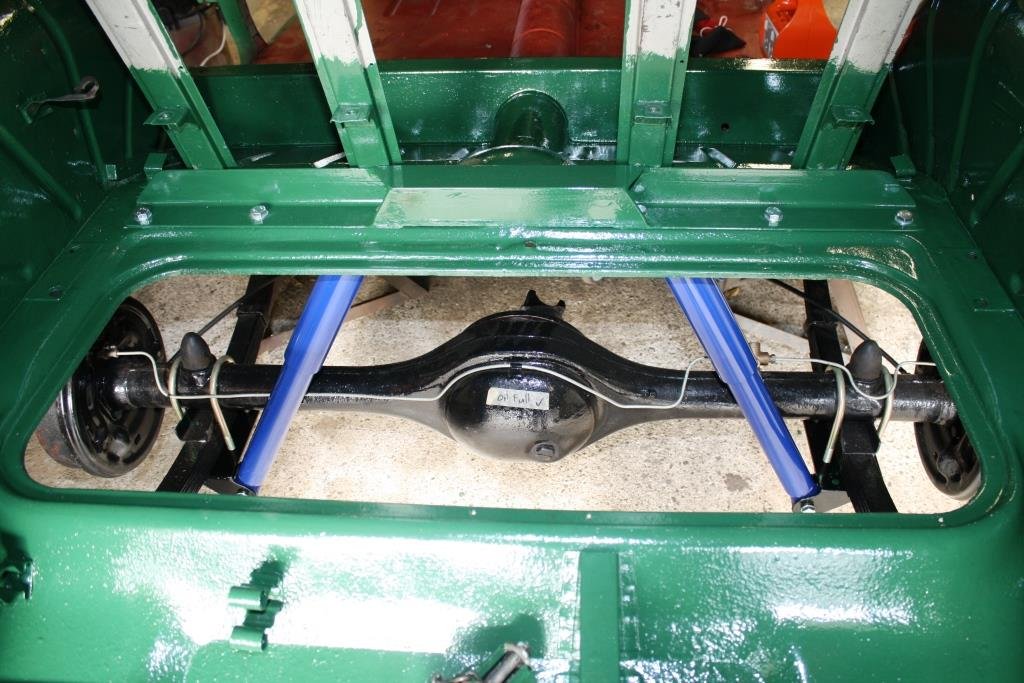
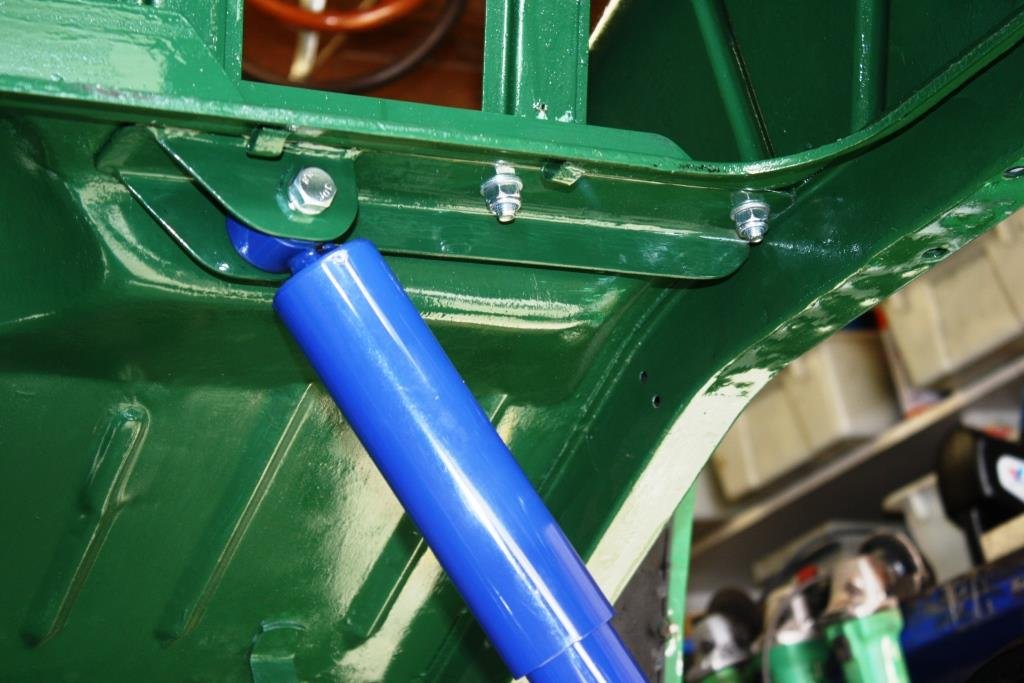
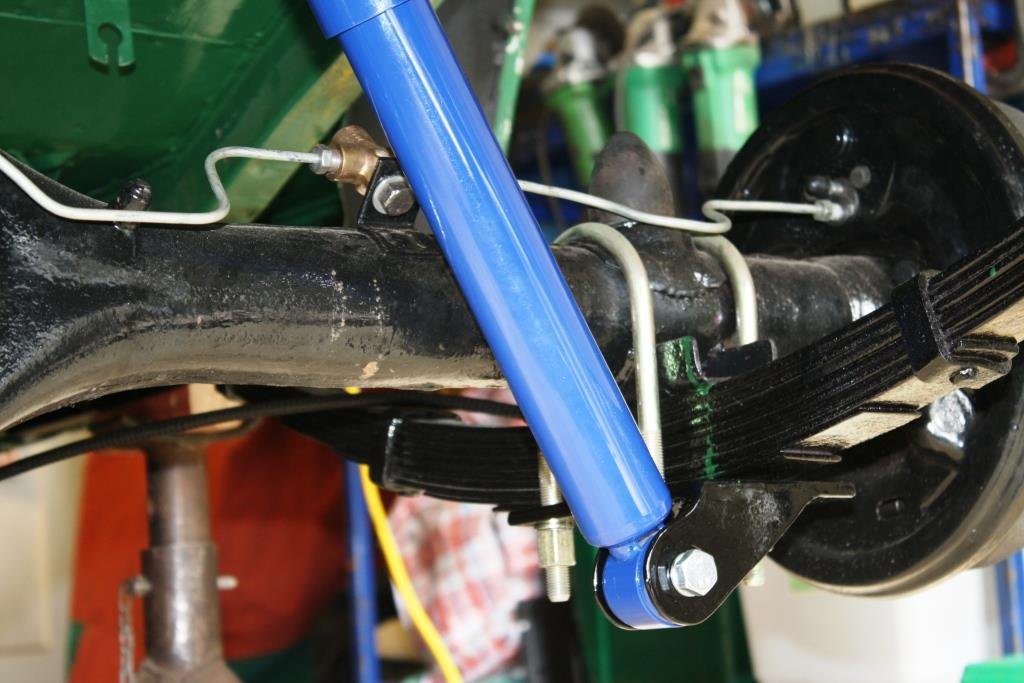
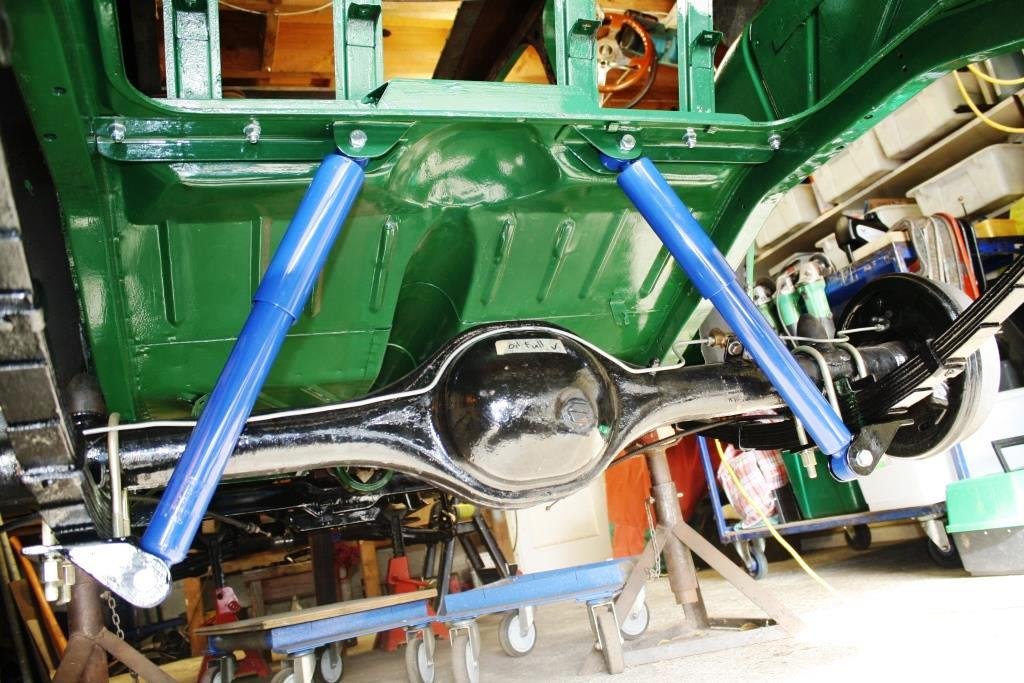
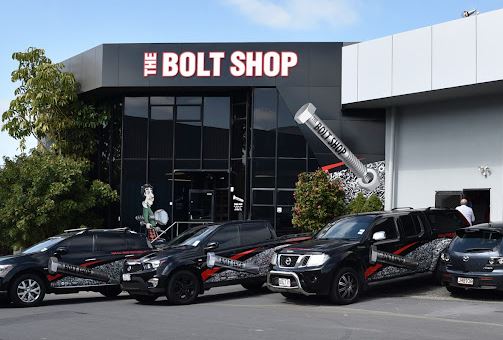
Nothing feels better than assembling newly painted parts. Time for some more unadulterated, rear-end porn….! Have to put a huge shout out here for the The Bolt Shop in Glenfield. All the way through this rebuild having you guys just up the road with your expertise and huge stock of fasteners has helped me out of many a jam!
1 point
-
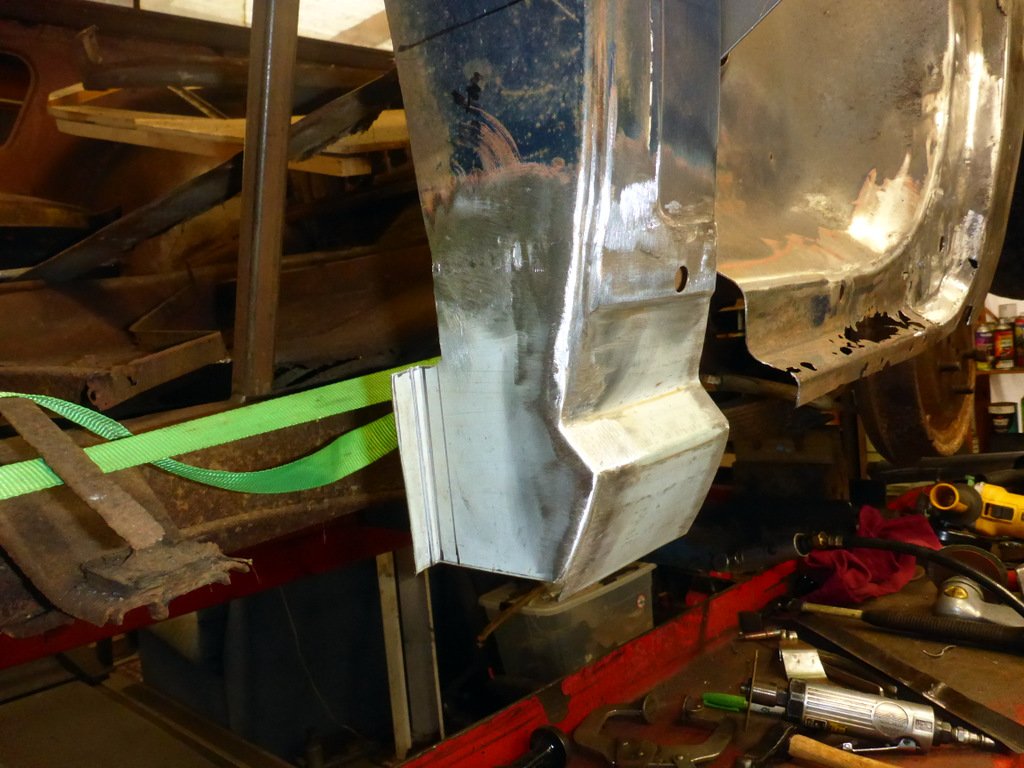
Lower hinge area is a double skinned piece Inner reinforcing section first Then the outer part
1 point


.thumb.jpg.570970b401ac8d26ce9af7c1bf2bd8cd.jpg)


This leaderboard is set to Auckland/GMT+12:00