
Leaderboard


Popular Content
Showing content with the highest reputation on 11/18/21 in all areas
-
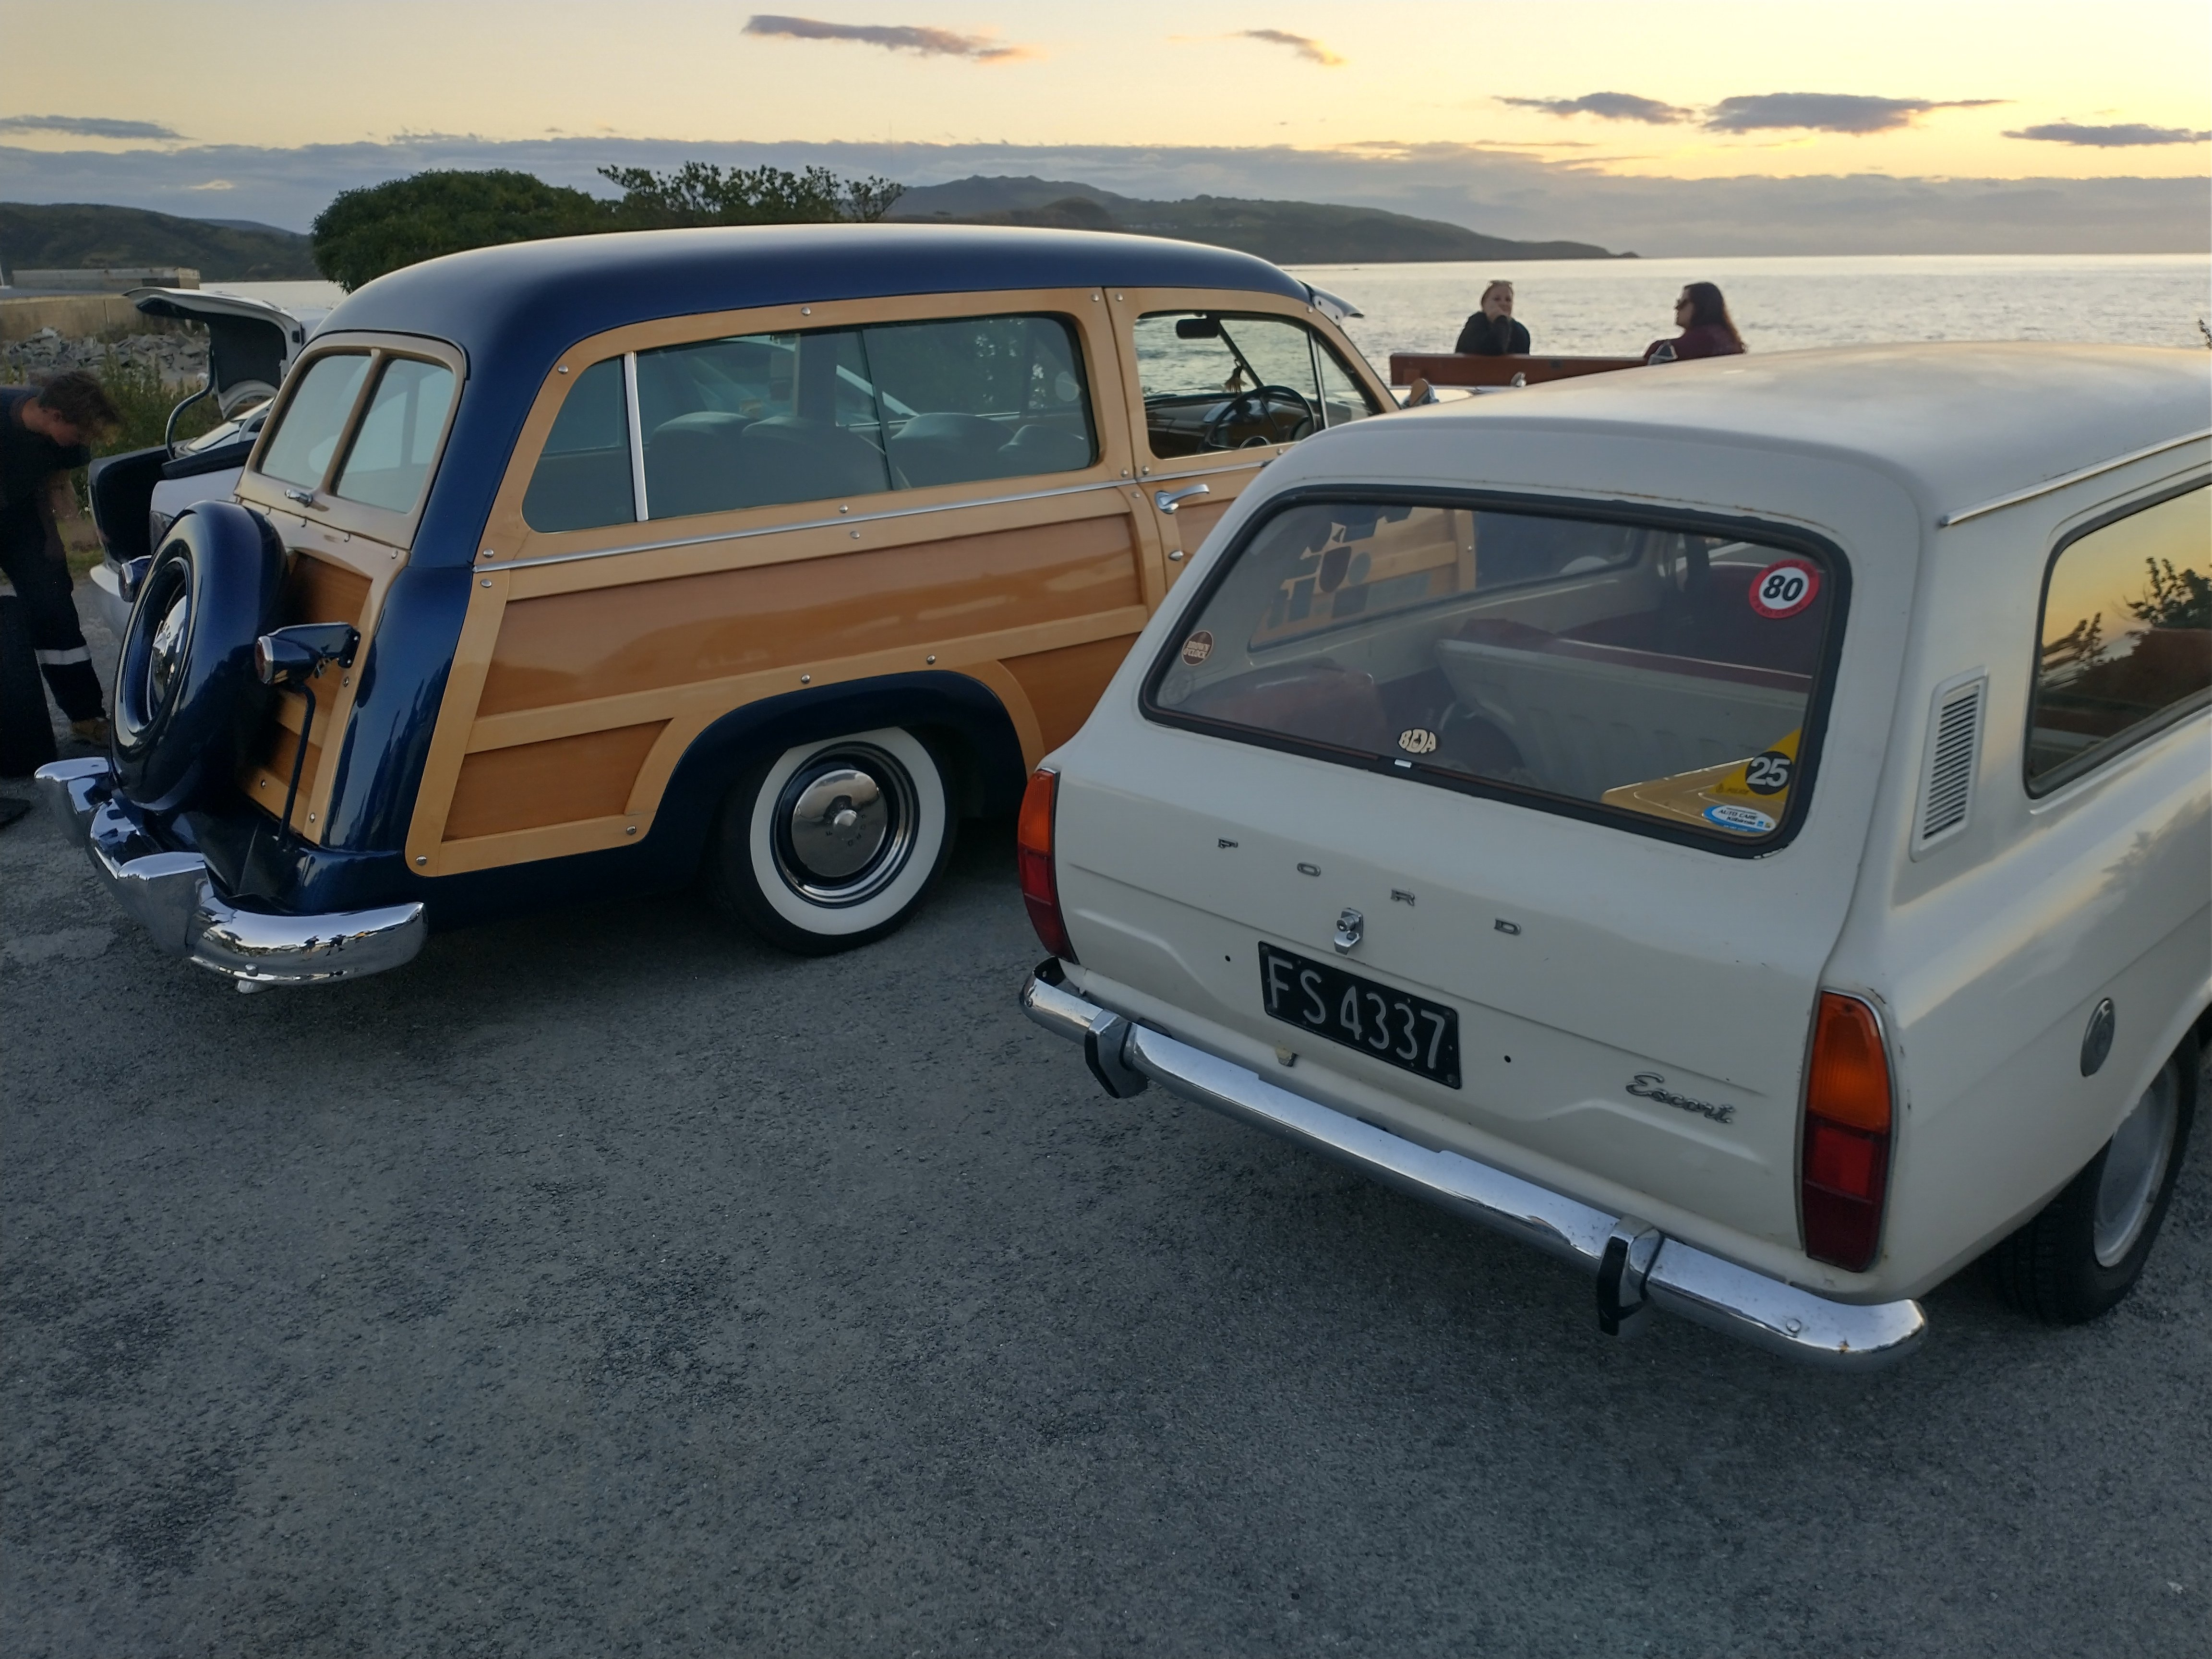
Cert achieved! Next step is to make the exhaust a little quieter and then get a wof
 26 points
 -
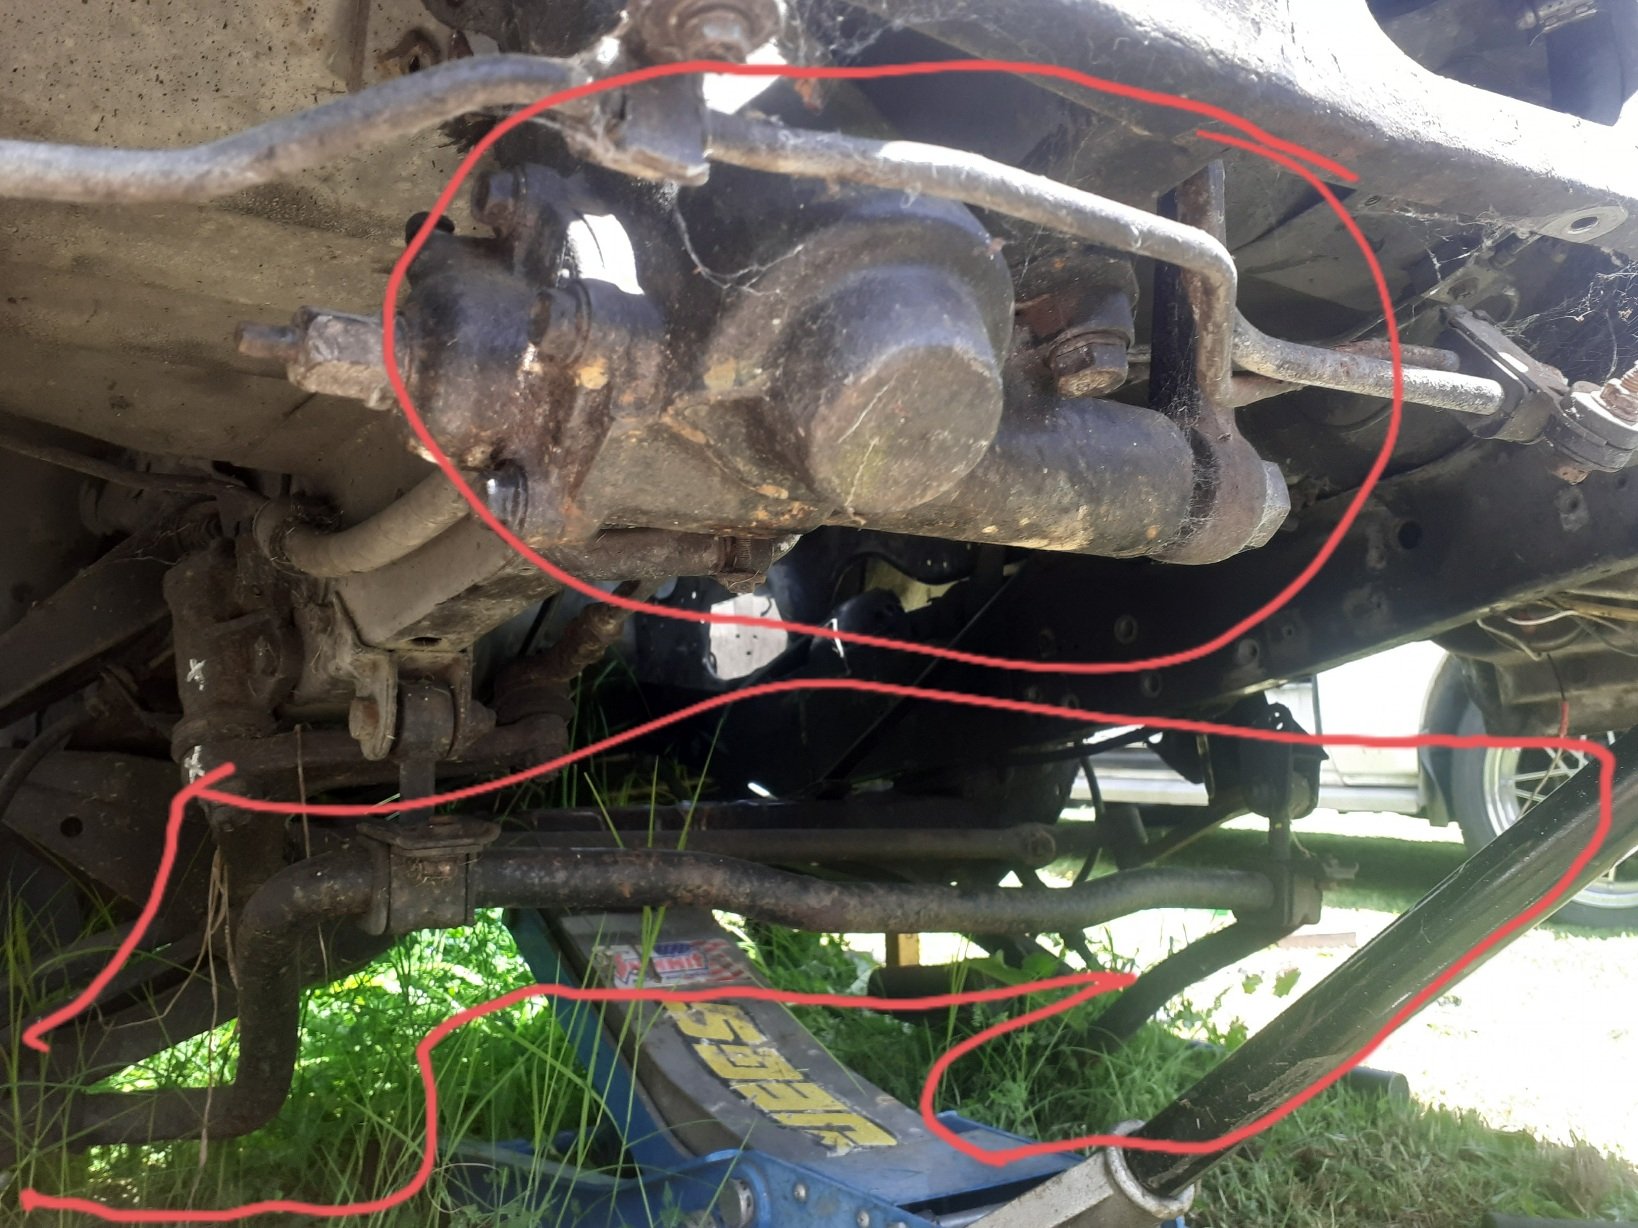
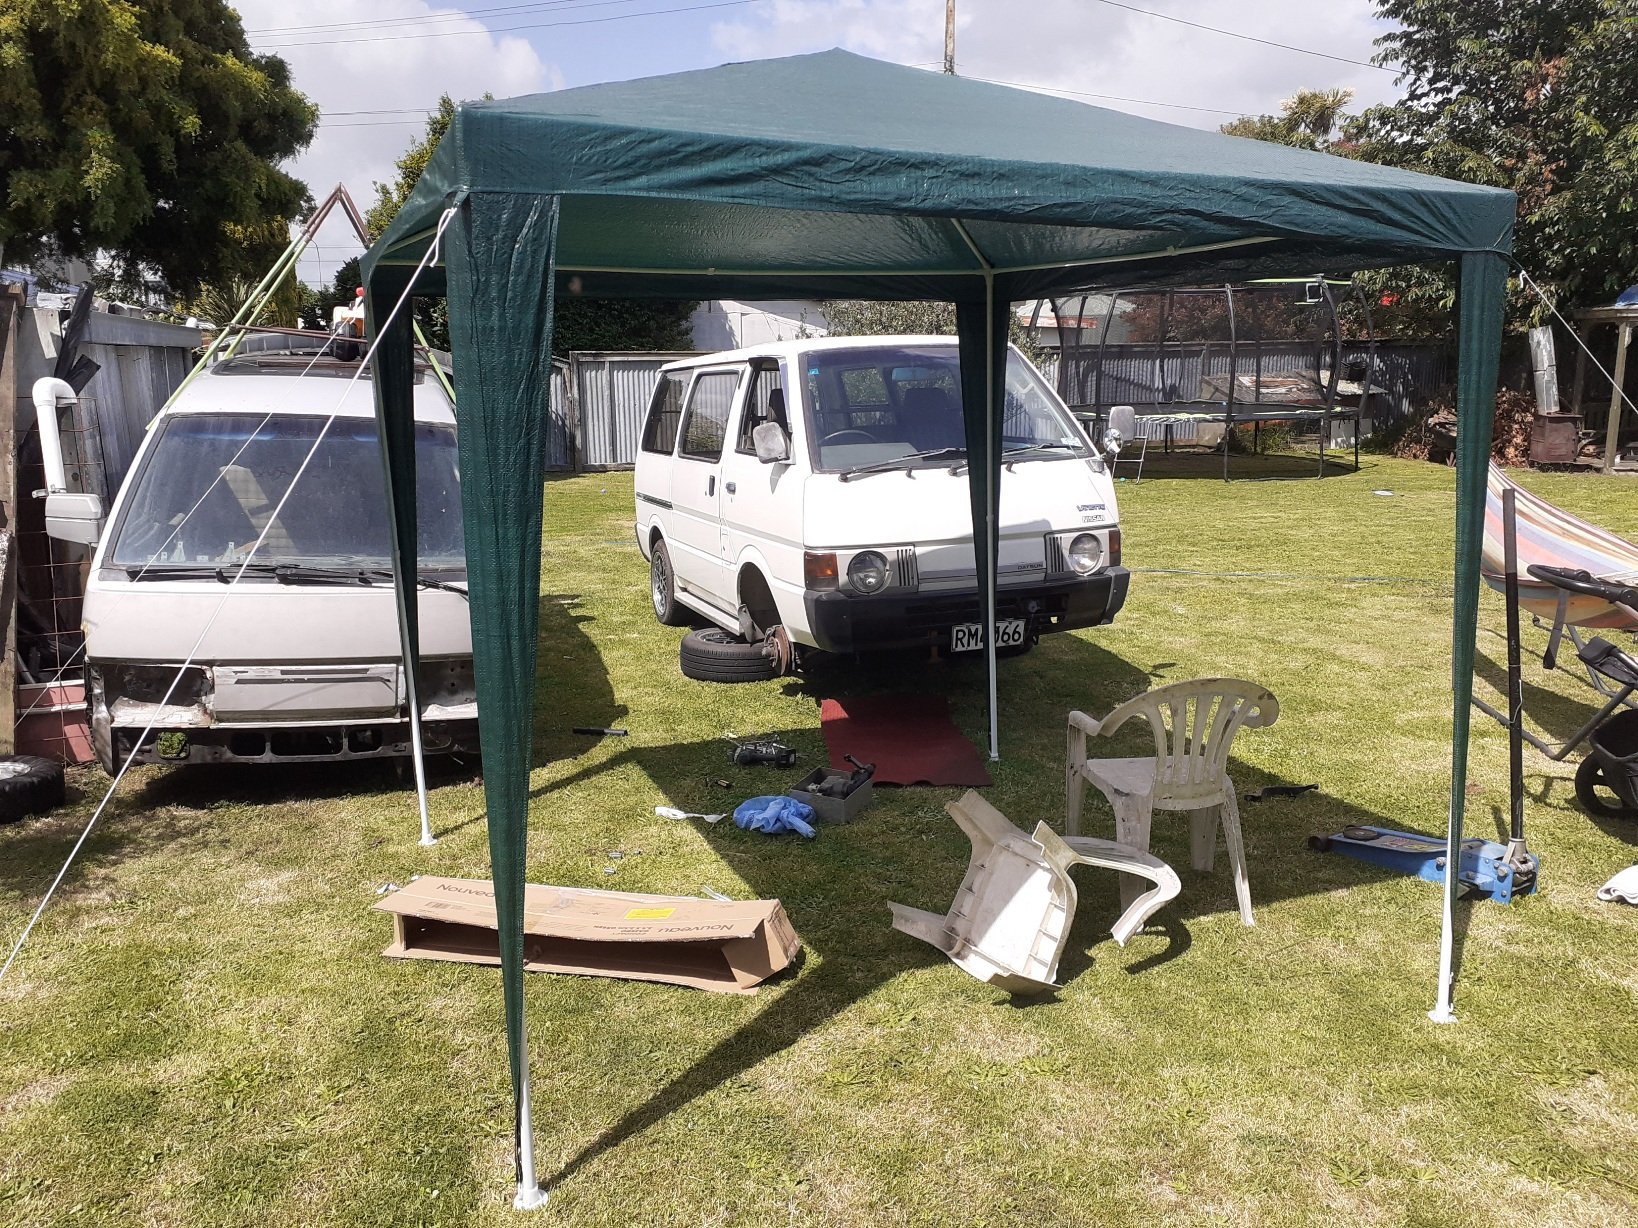
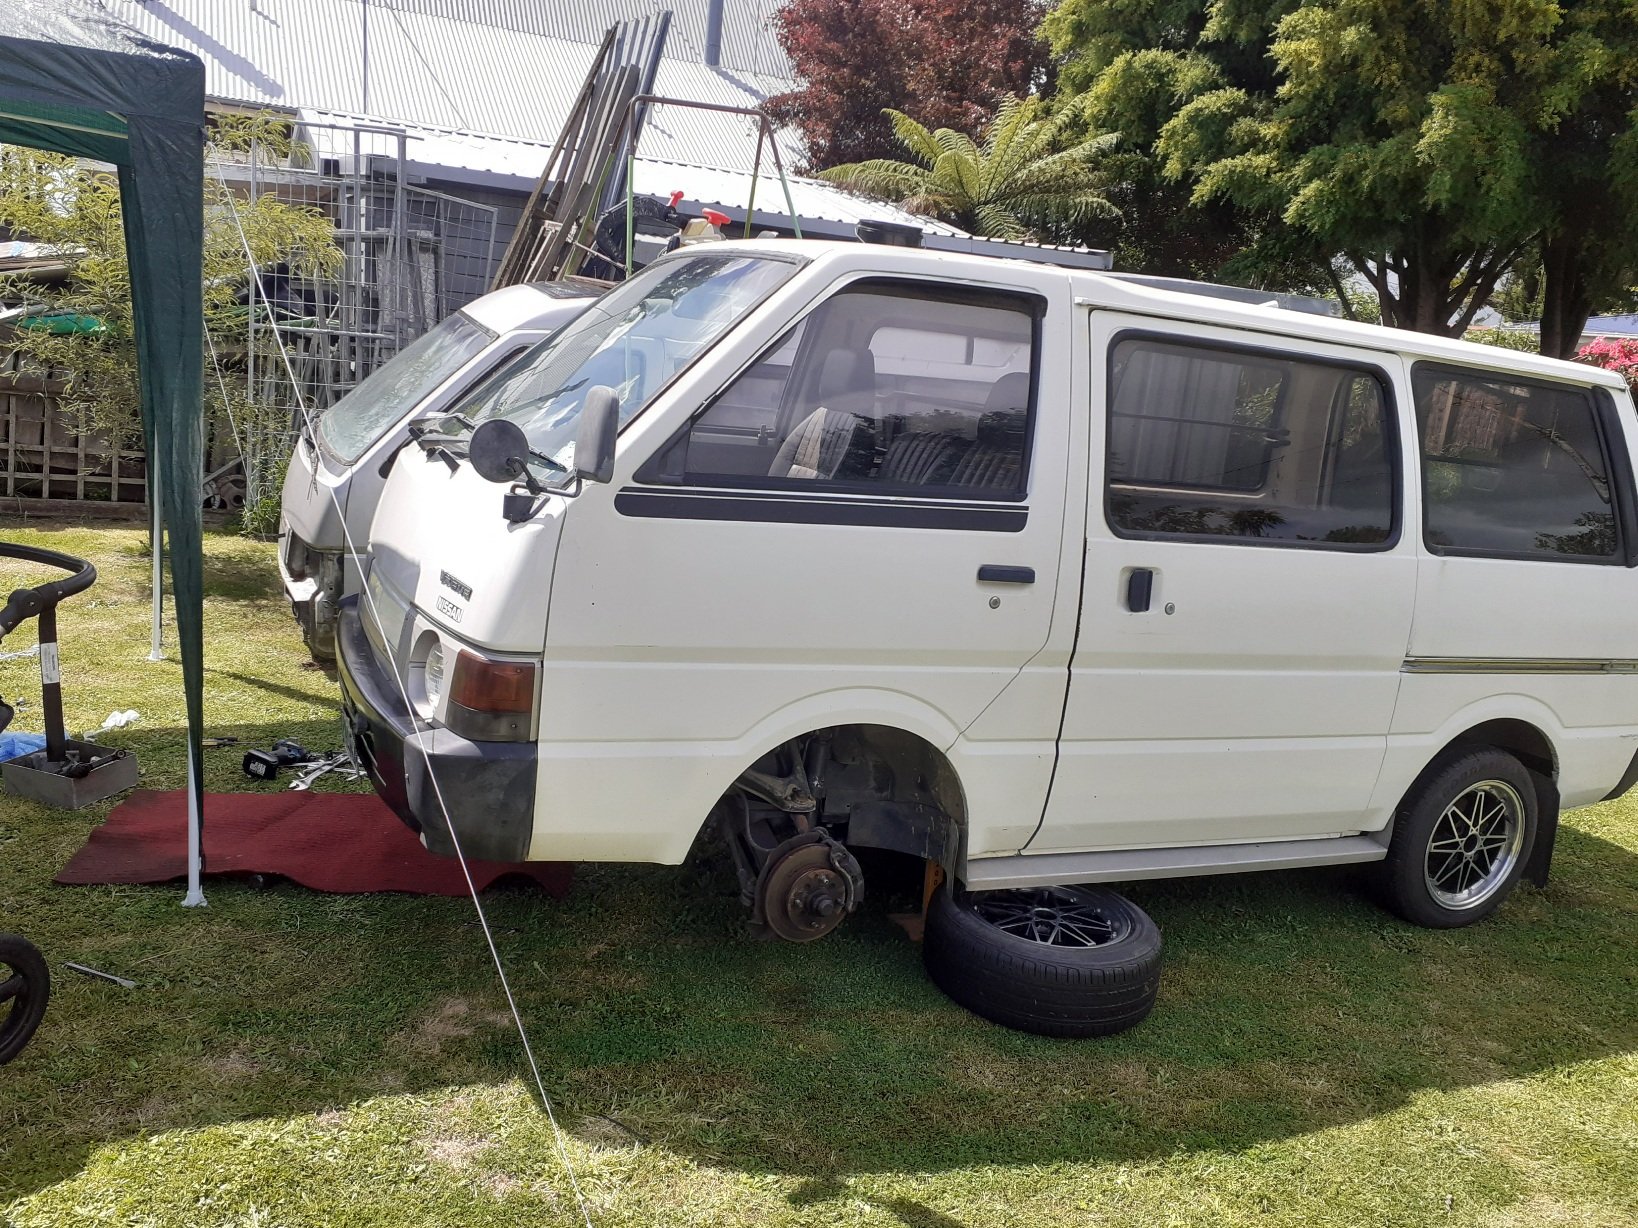
Havent done seat yet, as i drove on a test drive to see if my radiator fan worked and a general test, fan works, but noticed the steering was heavy even when driving at 100k, found it was binding on at least one ball joint .... Sooo instead of buying some ball joints..... I had the great idea to swap alll the powersteering from 'luxury' van, as well as gain a sway bar, ajustable steering wheel angle, to make it handle ..... better. Got set up..
10 points
-
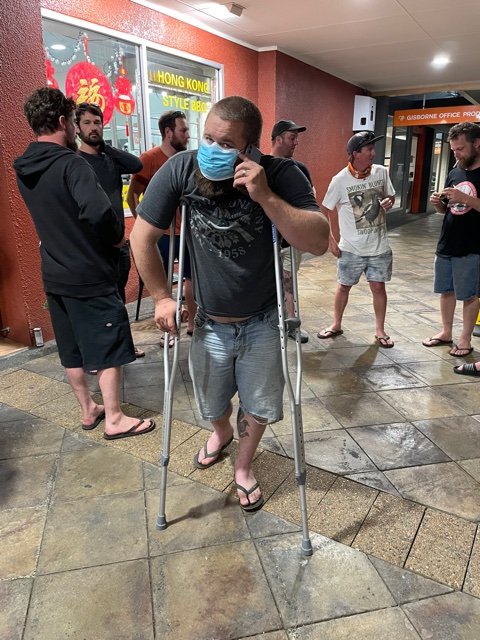
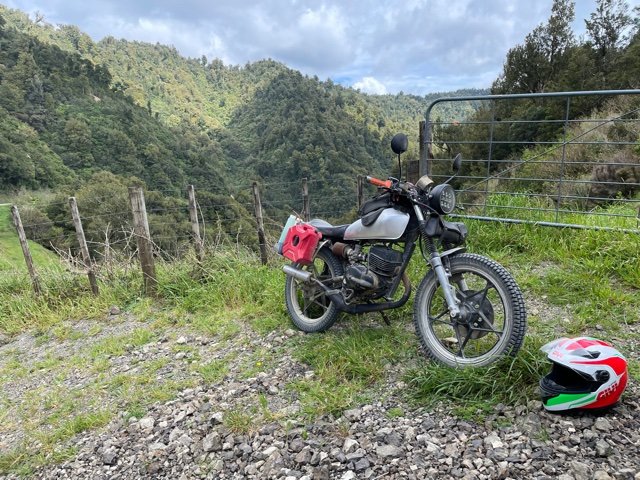
Wow, cherry popped, but I will definitely trade again! Pink pussies were as good as the hype! Big thanks to @johnnyfive and the support crew. Medium bike was a bit too much for me on the trip up through Waikaremoana. Enjoy!9 points
-
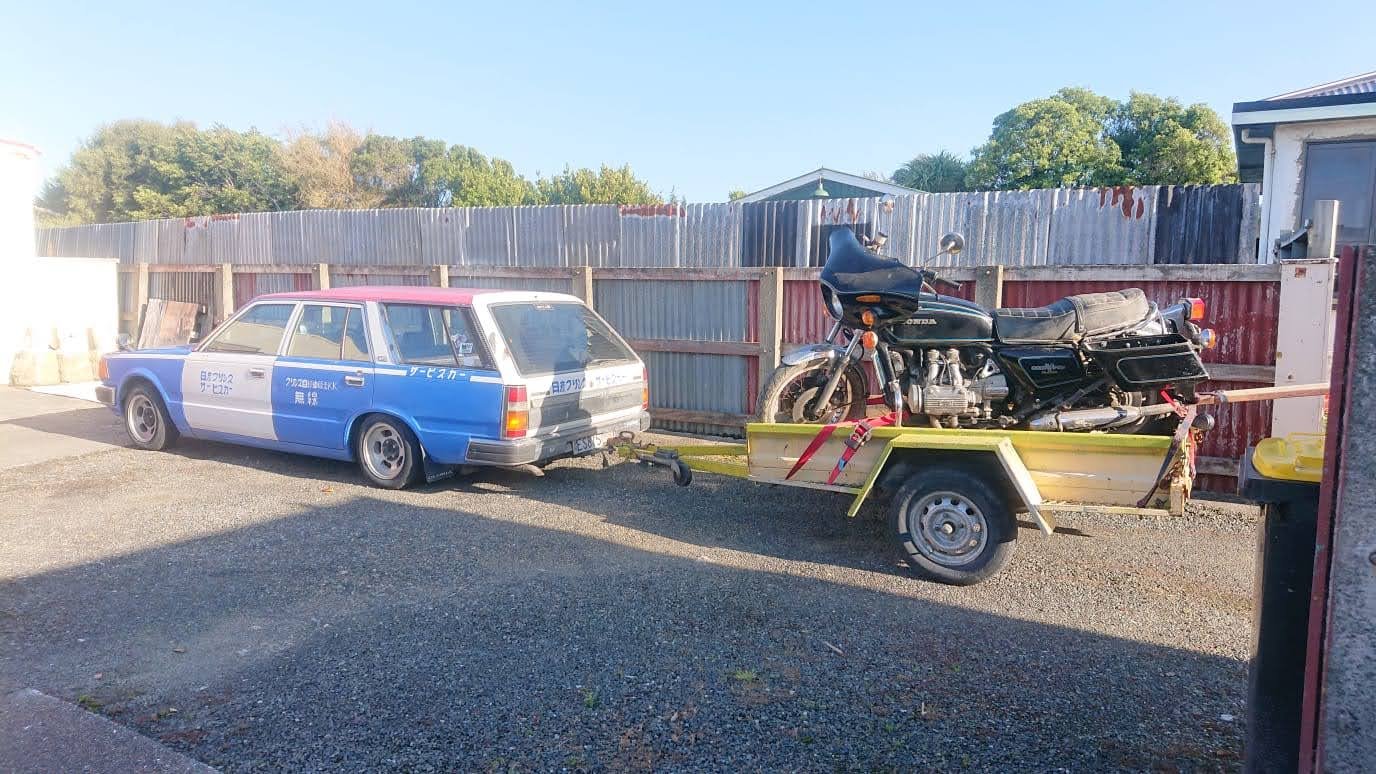
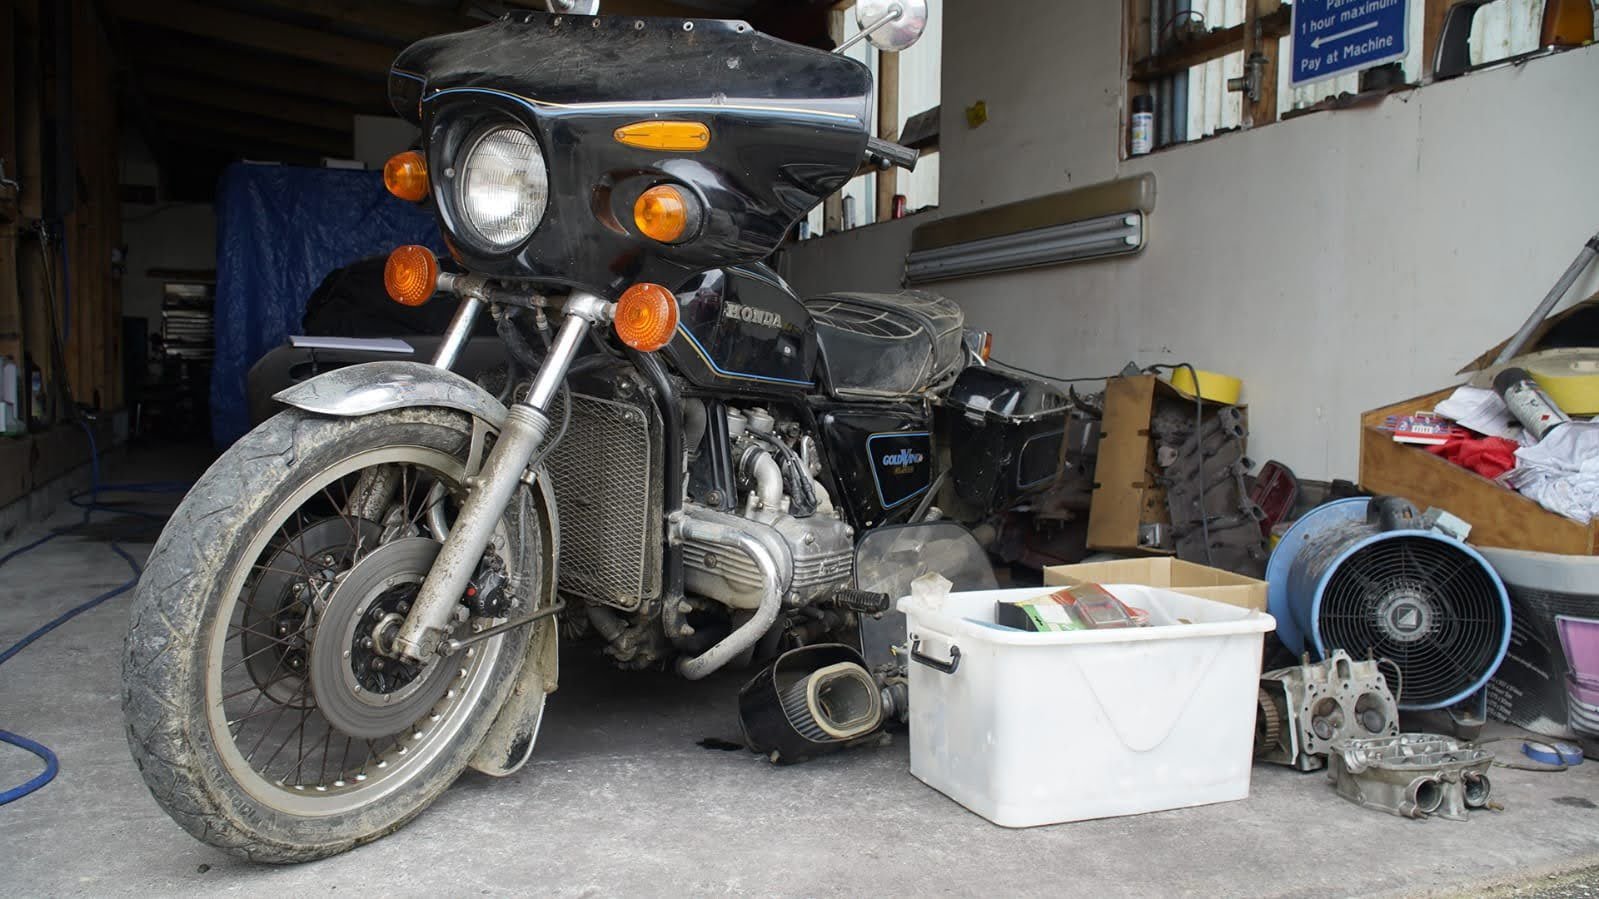
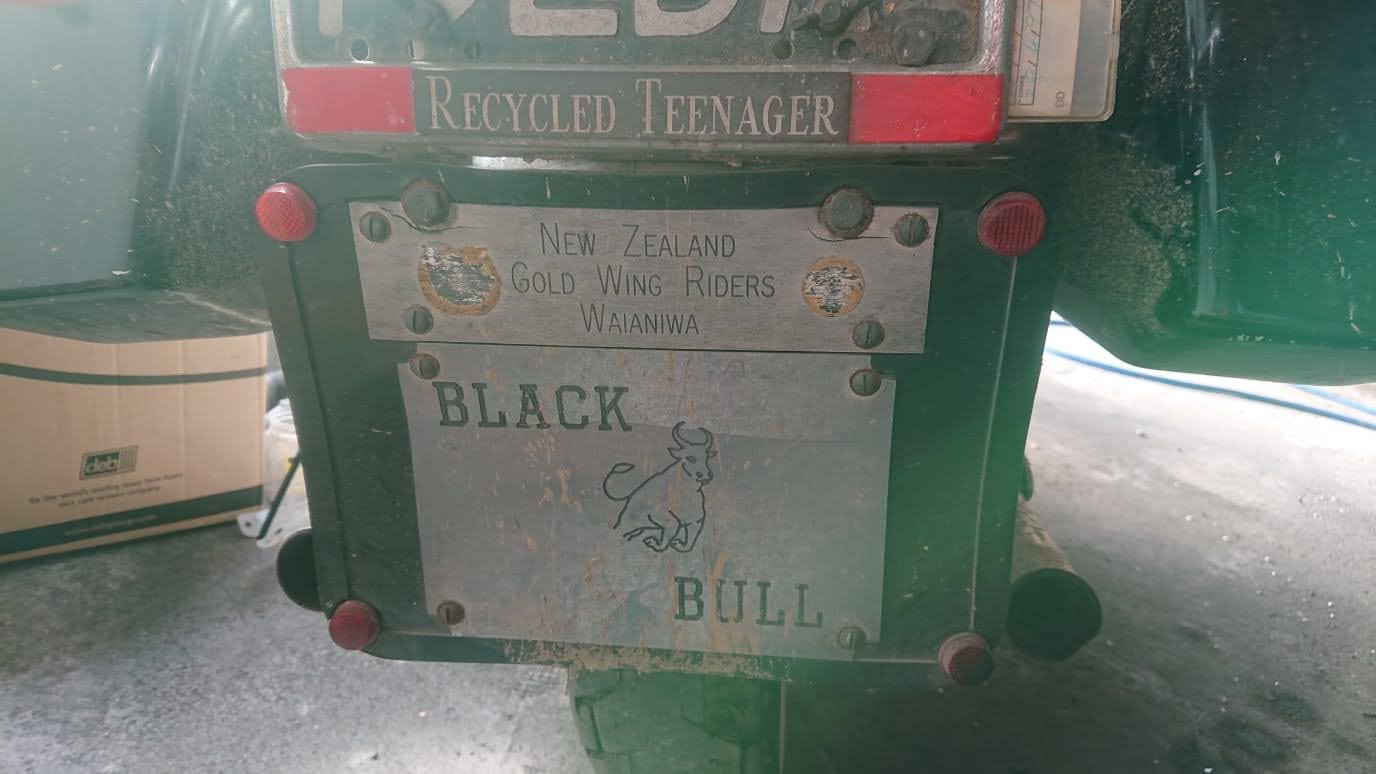
At the start of this year, I got caught in the moment, and purchased, sight unseen, a naked Goldwing that hadn't run in 20 years. Oh, and it was as far away from me as one could get. Great. I've always liked the 1st gen, spoked wheel GL1000s. They're kind of endearing in their ugliness. They're a fucking unit, weighing in at almost 290kg in full trim. Despite that, their quarter mile time is only half a second slower than the kawasaki z900 superbike at the time. Anyway, I just so happen to sometimes hang out with some guy in Invercargill @kyteler, so he jumped at the opportunity to go and acquire more rubbish on my behalf. What a GC. It turned out he recognized the bike, and upon chatting with the owner, it turned out it used to belong to Michaels neighbor when he was growing up. Though the sums don't quite add up, as i'm sure KY was a kid in the late 1800s, well before this bike was sold new. Anyway, Its almost been a year, and the bike is still in Invercargill. I plan to do a mish down and collect in the near future. So have some big plans.
8 points
-
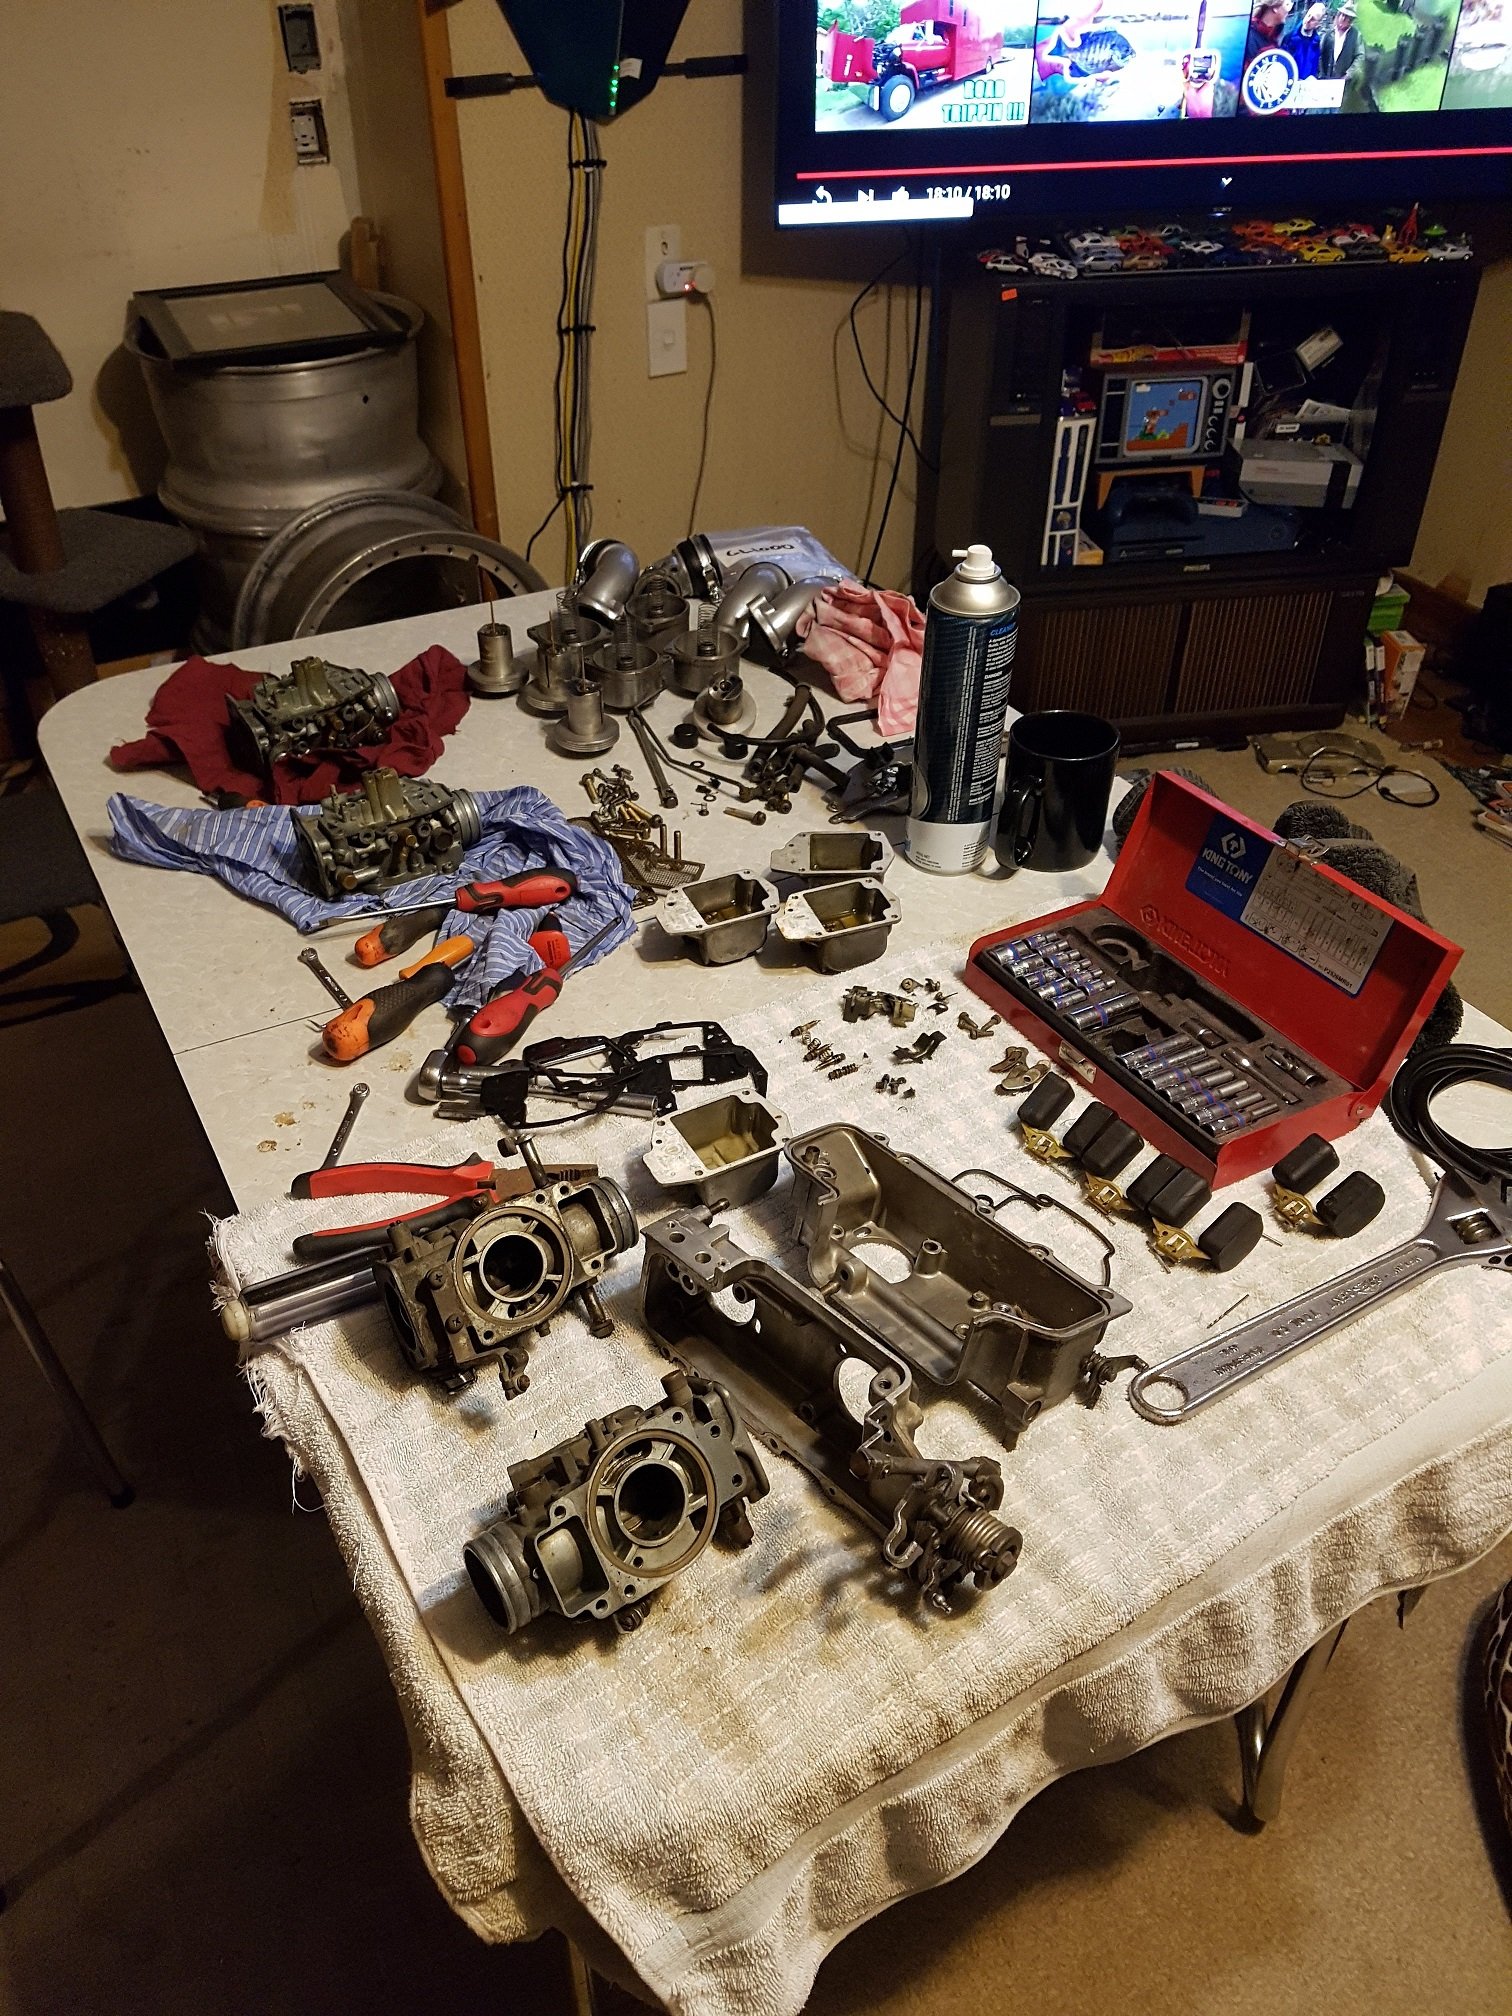
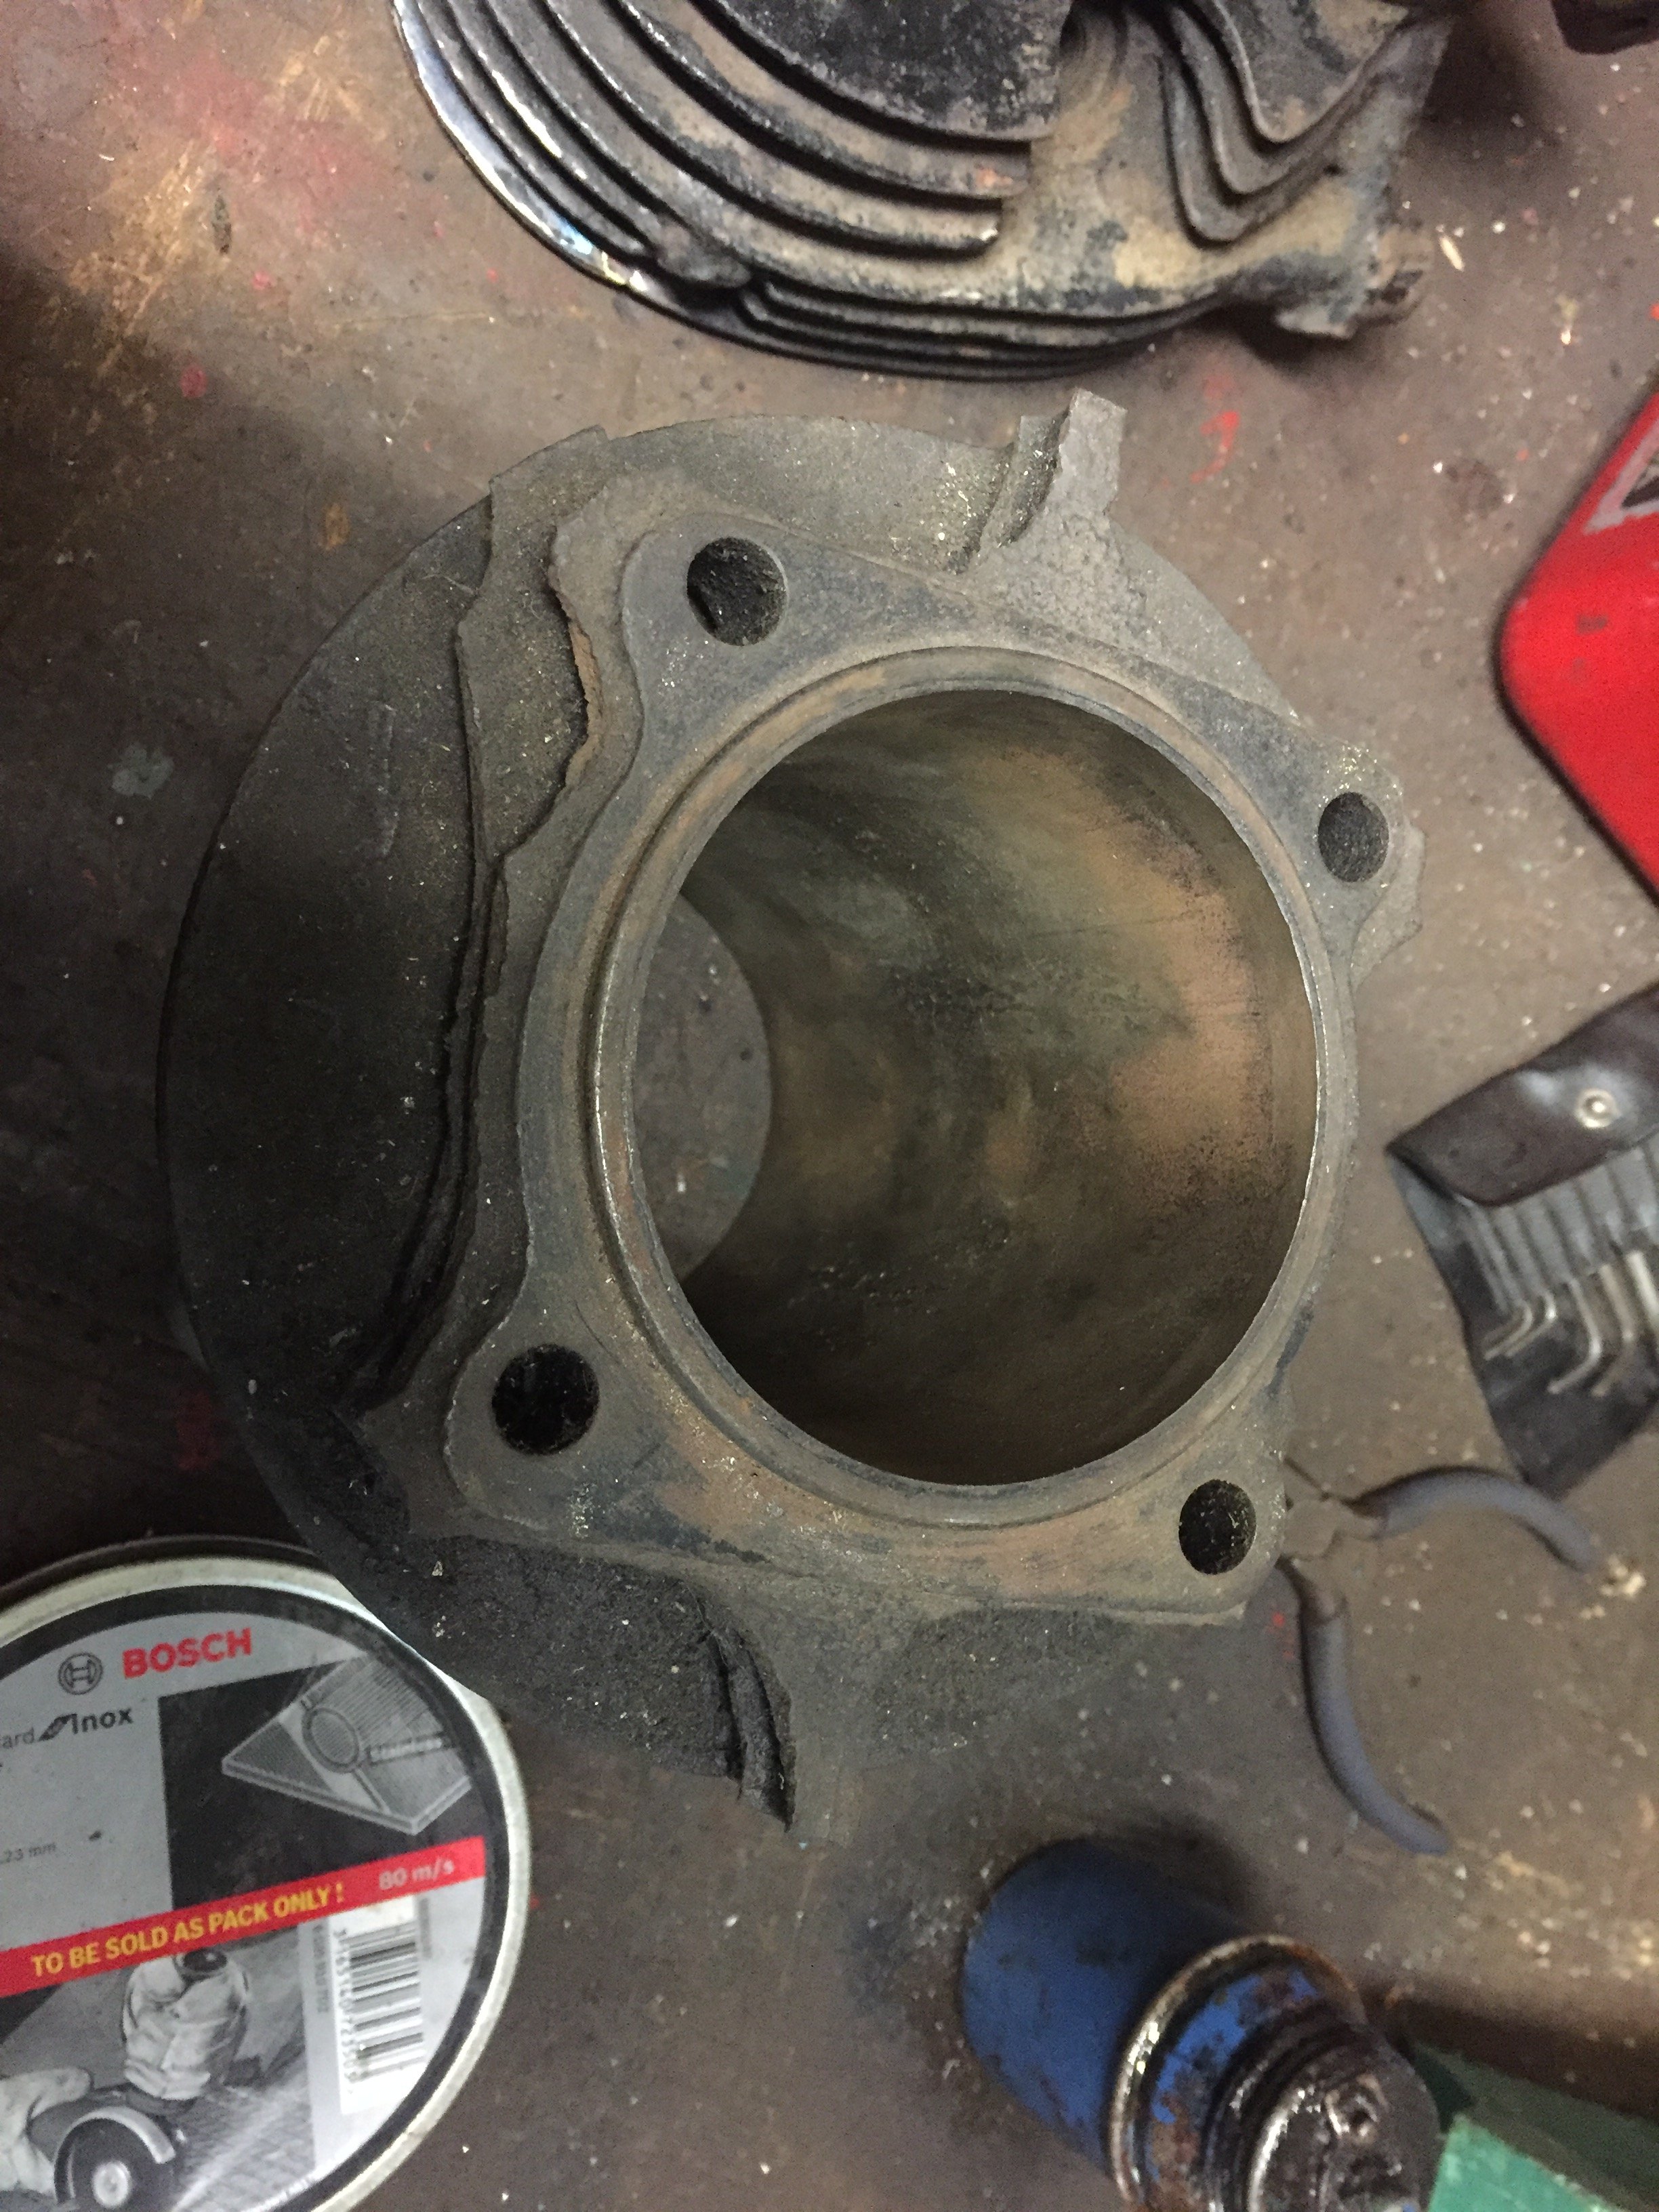
I did fly down mid winter to hang out with Michael and spend a long weekend getting this running and giving it a go over. The plan was to get it to wof condition (its reg on hold, with original plates) then return and ride it back to Wellington. Nothing ever goes to plan. It was way rougher than I thought it was (i should have known!). Gave it a full mechanical service, but rust on the stanchions, munted rear shocks and a chooched starter meant that is dreams of a wof were still a while away. Fully rebuilt the carbs, fuel lines, petcock, front and rear brakes, new braided brake lines, starter rebuild (twice, and still didn't work, apparently common for these), oil, coolant, rear drive oil, new tyres and tubes. Was so close, but yeah, the suspension and starter kinda rained on the parade. I had new fork seals, but forks were too far gone. Only thing that wasn't working was the neutral light. I don't have many pictures of this mission, as we just smashed it out over 3 days. But was good fun hanging with Michael and getting this running. Kick start only was a bit of fun, but getting it barking off, first kick from stone cold on an invercargil morning was pretty magic. Only pics i have is starting to strip it down: And some comfy, warm lounge room carb rebuilds while watching gamer streams on youchoob: Plan is to strip it back to bare minimum, All of the gross fairings, saddle bags are going. And a respray in the factory turquoise. As the black really does nothing for the bike. I've got a whole bunch of new goodies with me in wellington, so once I get it up here, should only need a weekend then it will be wof ready. Quite excited tbh irl.
7 points
-
since last time: Attached the bee to the rear garnish Sprayed the inner ridge of the grilles and touched up the wee slats between the ridge and the edge with black again attached NOS bee to hood Not much else really, still waiting in the queue for repair cert.6 points
-
Welding fins on is easy, I mist have done 100s of them.
5 points
-
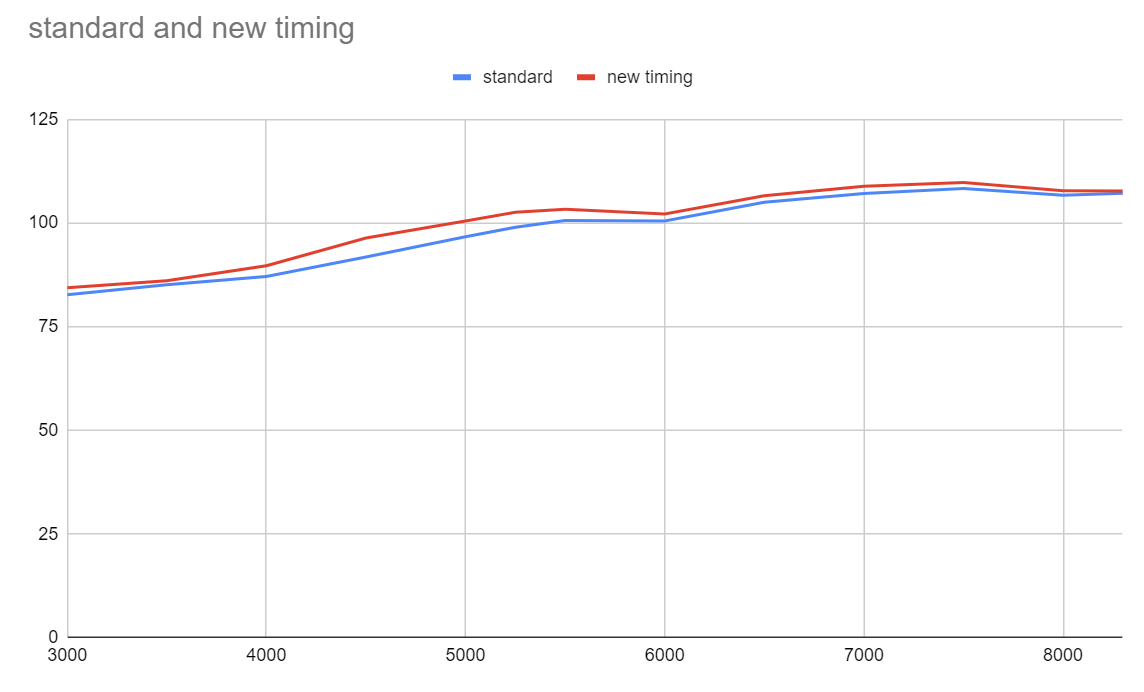
First results! So at zero degrees advance now, it's real smooth to drive and idles real nice but it totally eats shit at full throttle haha. At cruising speed/rpm it's pulling 25% fuel out! Further investigation needed, but I think this is gonna mean I've unlocked some prius spec economy when the cams in that position. (Reduced pumping losses / dethrottling will actually work for once) So at full throttle, usual test of incrementing the cam. No MAF this time, so just looking at lambda results to see if it runs leaner (more air, so needs more fuel) Results are distinct! Approximately the 30 degree line (Yellow line) is the previous home position of the cam. Now with 45 degrees advance (red line) its gained shitloads. So it looks like some amount of gains right up to 8k rpm which is awesome! And I might have filled in that big hole in the fuel map around 4500rpm. Will do some more finer tuning around the 25-45ish range, but pretty stoked!
4 points
-
I just tried to do an OIA for police interest in a vehicle. They came back saying they don't give out that info... Why is every process so inconsistent. Its really frustrating...3 points
-
I just spoke to an unhelpful mole on the end of the toll free number in this link. She was taking like it's going to be closed until April. When it closes anyway.......... I need to do further research into the matter. THEY CANT STOP US ALL!3 points
-
Yeah, its super quirky, not something to re-start the bike at the traffic lights if it stalls.... Feels alot more disconnected from the engine than other kickstarters too, and its like it only rotate the engine 1/4 of a turn. But it works... Edit: For those of you that don't know, the kickstarter is stored in the fuel tank....3 points
-
Basically it wants to be pinged to max advance right until nearly redline, which at first I thought was cool but then makes me realize it just wants even more advance but cant have it. So still no way around needing those other pistons. But still, really happy with this for a "Free" stopgap fix! This is a before and after VE map (fuel table adjustment) from adjusting to best cam position.
3 points
-
Manifold is welded - now to Fab down pipe, then fit external and its plumb back
3 points
-
So I've been pining some wheels for a long time now, I found a set in America that had some on s a pre order. covid delayed shipping etc etc. Shop never replied to any communications (lucky I never gave them any money. I found another set on aliexpress but couldn't justify the freight. Nearly gave up on the pine then they popped up on trademe. Mrs Chrisr said I wouldn't shut the fuck up about them so I should get them. So I did3 points
-
You the real mvp
2 points
-
Rode the xr125 on this.2 points
-
Not much new to show, it's mostly the same right now but a bit quieter with the airbox on. Need some events to go to!2 points
-
looks like you need about 10k rpm2 points
-
Exhaust is very quiet and I'm not a big fan of twin muffs up high , I'll probably change it to a single side muff. It does sound cool though, it's got a bit of a lope at idle which should sound good with the volume up a bit Adult video story was just to add to my yarn, but based on real life events There used to be an adult video shop in east tamaki that was on my way home, a fun game was to drive past and if there was someone going in or out, toot and wave like you knew them2 points
-
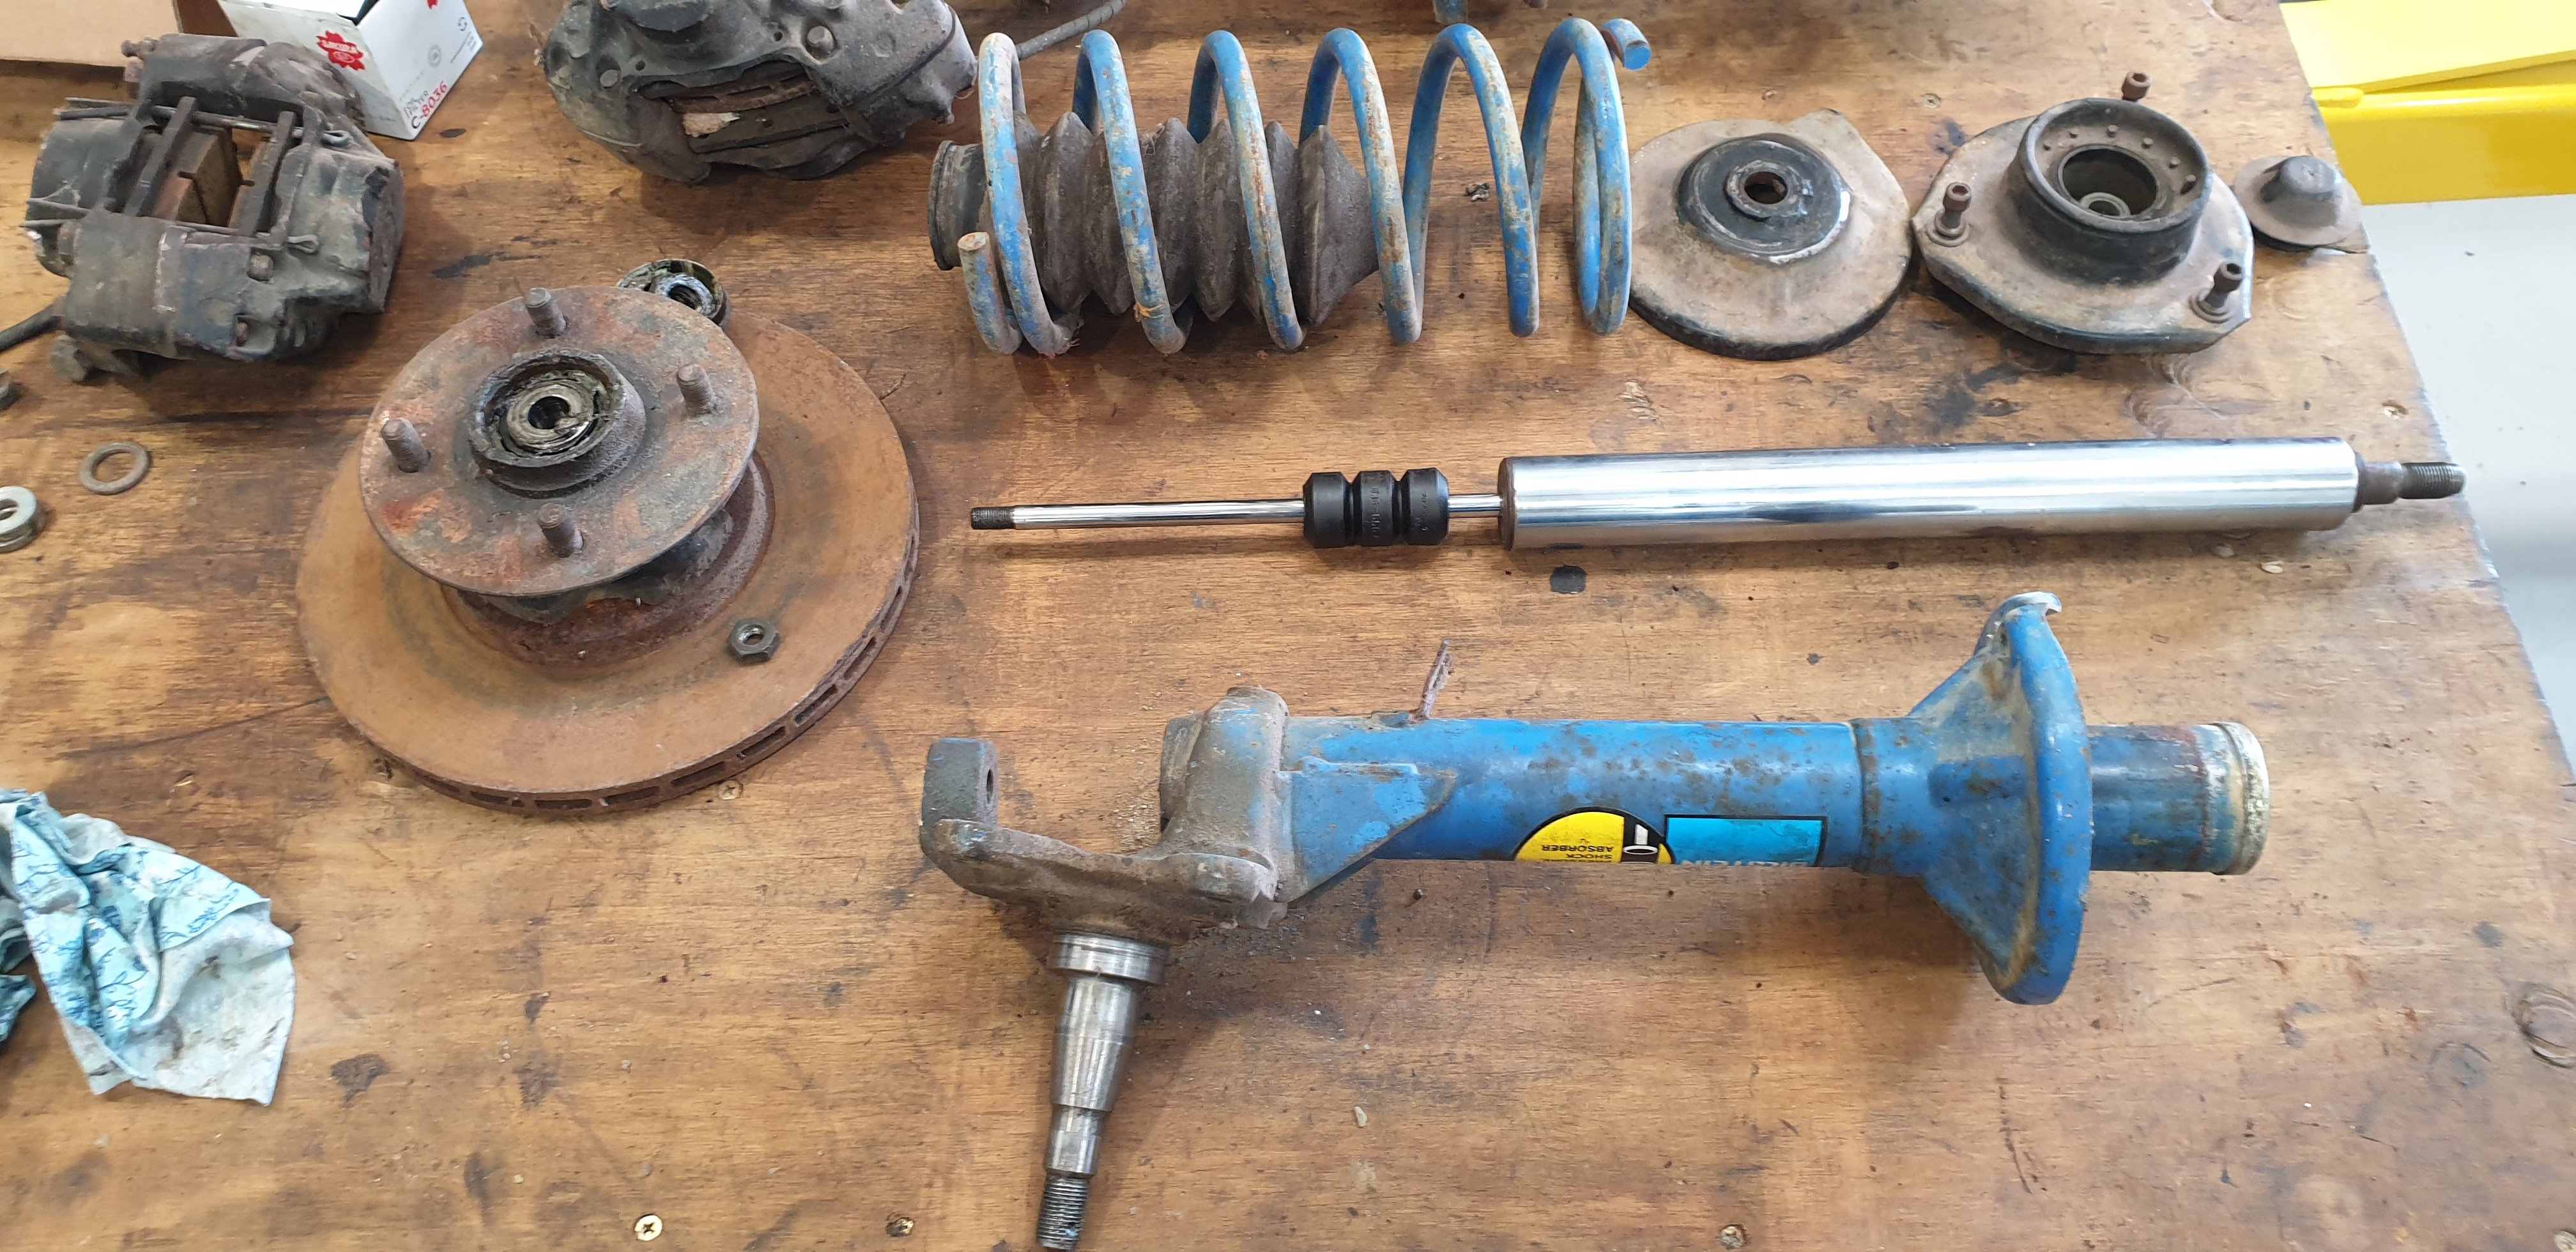
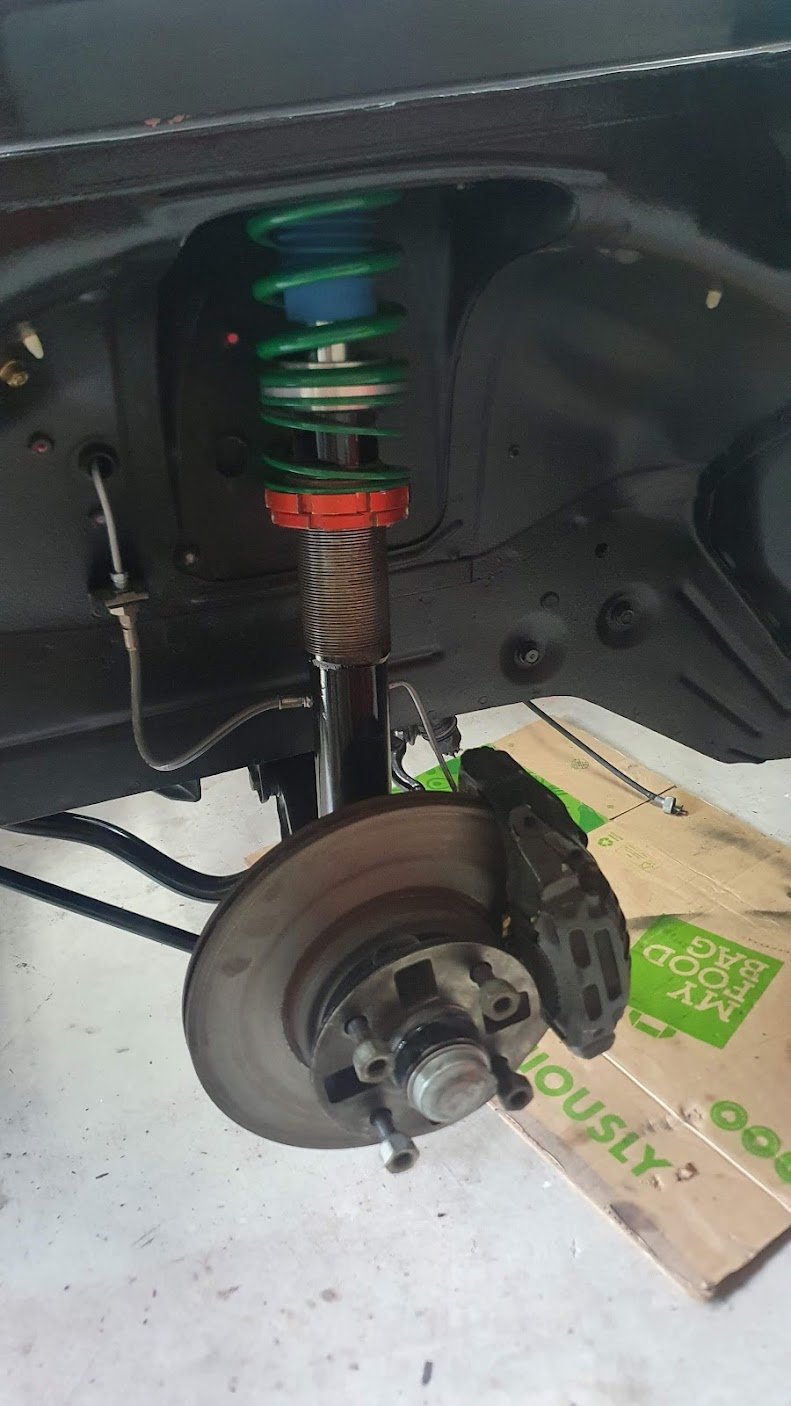
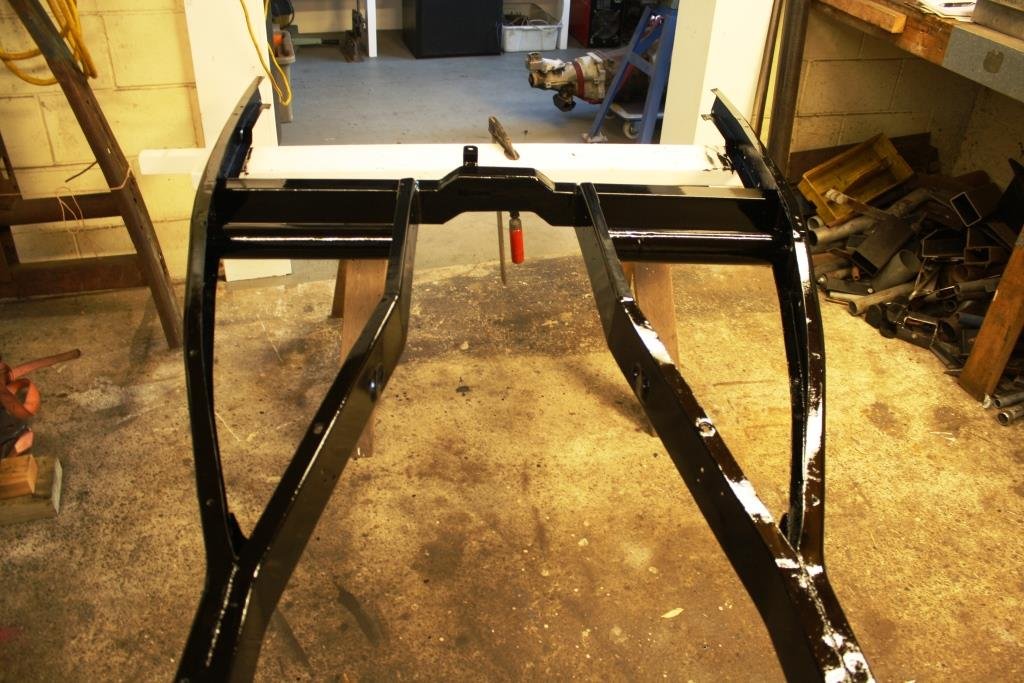
Morning peeps. Have got the front struts out of storage and will start on rebuilding them. They are genuine Bilstein / Ford units that you could buy from Ford Motorsport dealers. Complete with roller top mounts, vented discs and standard M16 calipers with spacer kits.
2 points
-
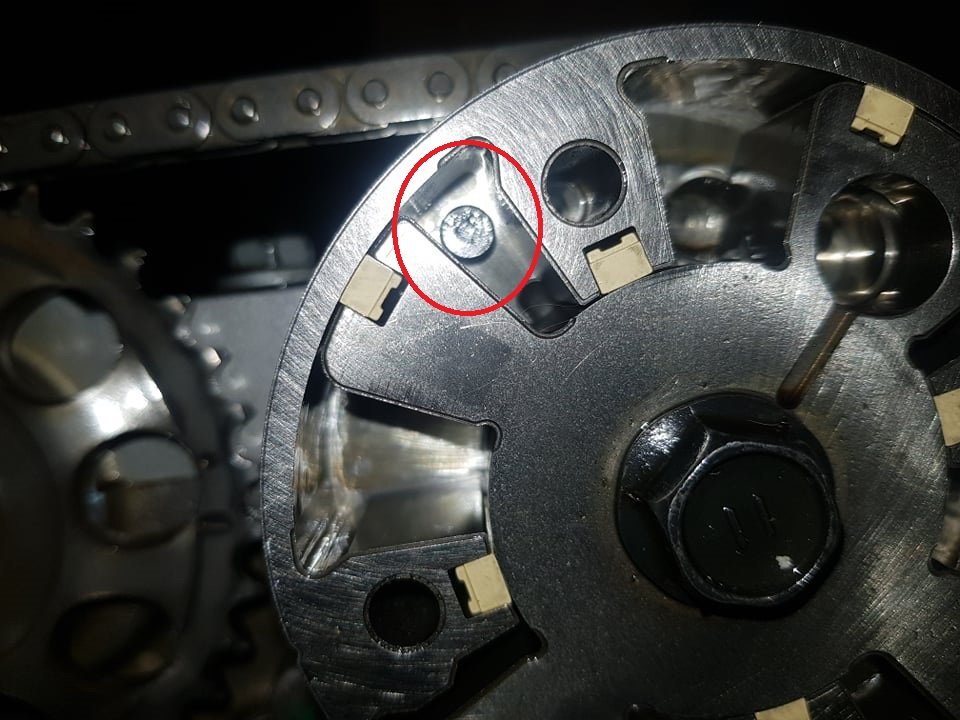
Ahh yeah so this cam has a locking pin that holds the cam at base position until there's oil pressure that can fill the gear. Otherwise the came rocks back and forth as the spring tension acts on the lobe. So I retarded the cam 3 teeth, and much to my frustration it still didnt reach full travel. This didnt make any sense because if I put it back 4 teeth, I'd be back to where it starts at home position. So I pulled the chain back off, and testing it loose - the cam doesnt move the full way anyway! So looking in more detail. It turns out there's a stopper pin that limits its advance. Like so: (This is at maximum advance) So this is great news, it meant I might not need a whole 3 teeth of cam retard. I tried it with only 2 teeth reaches the stopper pin with no piston to valve issues! Awesome. So now just got to finish chucking it all back together and do some testing. Hopefully see something useful from it. Will be interesting to see how it idles and drives with weird home cam position.
2 points
-
Yeah just try a small bit, it will become obvious whether its working or not. Those rods go mean on the tig just scrape the flux off and wire wheel the rod. Use as your filler rod for all the dodgy repairs. Used them recently to weld up some holes between the vanes on a triumph 2000 water pump for old barry mate. Apparantly its still going mint, he refuses to replace it as reckons its a long term repair. Was quite a good repair to do as was the gunkiest place to repair, super grot super shit casting but still welded good.2 points
-
This is pretty much the finished car. I took it to Clint for a cert. It didn't fail on too much, just some additional fuel line clips needed, a smidge of camber to be wound in, heat sleeving on a brake line on the diff, some nyloc nuts for the seat bolts, and a couple of other very minor things. Anyway here's finally, some proper camera photos of it. 1981 Toyota Starlet KP61 4AGE (369)-Edit by Richard Opie, on Flickr 1981 Toyota Starlet KP61 4AGE (383)-Edit by Richard Opie, on Flickr 1981 Toyota Starlet KP61 4AGE (327)-Edit by Richard Opie, on Flickr 1981 Toyota Starlet KP61 4AGE (350) by Richard Opie, on Flickr 1981 Toyota Starlet KP61 4AGE (356)-Edit by Richard Opie, on Flickr 1981 Toyota Starlet KP61 4AGE (311)-Edit by Richard Opie, on Flickr 1981 Toyota Starlet KP61 4AGE (294)-Edit by Richard Opie, on Flickr 1981 Toyota Starlet KP61 4AGE (403)-Edit by Richard Opie, on Flickr 1981 Toyota Starlet KP61 4AGE (58)-Edit by Richard Opie, on Flickr 1981 Toyota Starlet KP61 4AGE (66)-Edit by Richard Opie, on Flickr 1981 Toyota Starlet KP61 4AGE (83)-Edit by Richard Opie, on Flickr 1981 Toyota Starlet KP61 4AGE (48)-Edit by Richard Opie, on Flickr 1981 Toyota Starlet KP61 4AGE (160)-Edit by Richard Opie, on Flickr 1981 Toyota Starlet KP61 4AGE (175)-Edit by Richard Opie, on Flickr 1981 Toyota Starlet KP61 4AGE (238)-Edit by Richard Opie, on Flickr 1981 Toyota Starlet KP61 4AGE (263)-Edit by Richard Opie, on Flickr 1981 Toyota Starlet KP61 4AGE (440)-Edit by Richard Opie, on Flickr 1981 Toyota Starlet KP61 4AGE (408)-Edit by Richard Opie, on Flickr 1981 Toyota Starlet KP61 4AGE (306)-Edit by Richard Opie, on Flickr 1981 Toyota Starlet KP61 4AGE (494)-Edit by Richard Opie, on Flickr Thanks for looking, for the past 15 years or so.2 points
-
https://www.police.govt.nz/can-you-help-us/stolen-vehicles?nondesktop1 point
-
I've done quite a bit of repair brazing on CI. Replacing broken fins, broken flanges on cylinders and similar. There's a specialised flux available for this work - and it works. I've used Manganese Bronze rod and Nickel Bronze - no noticeable difference. If you've got the gas welding gear, a pot of the flux is worth getting.1 point
-
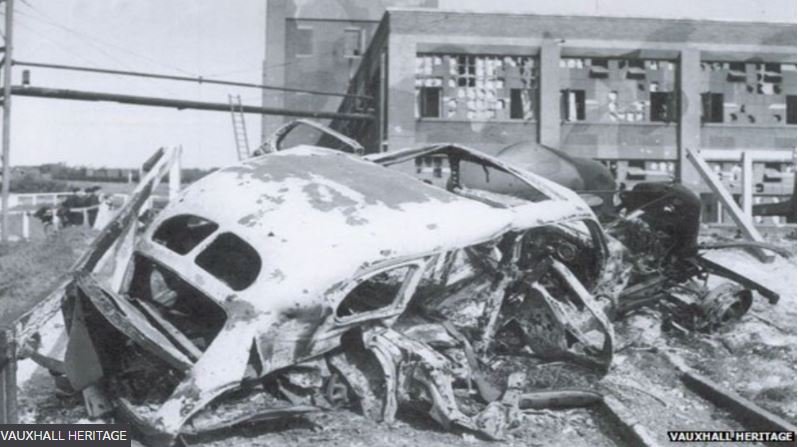
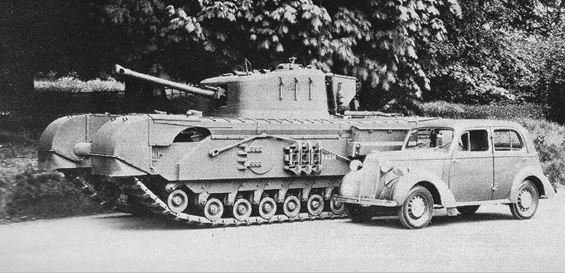
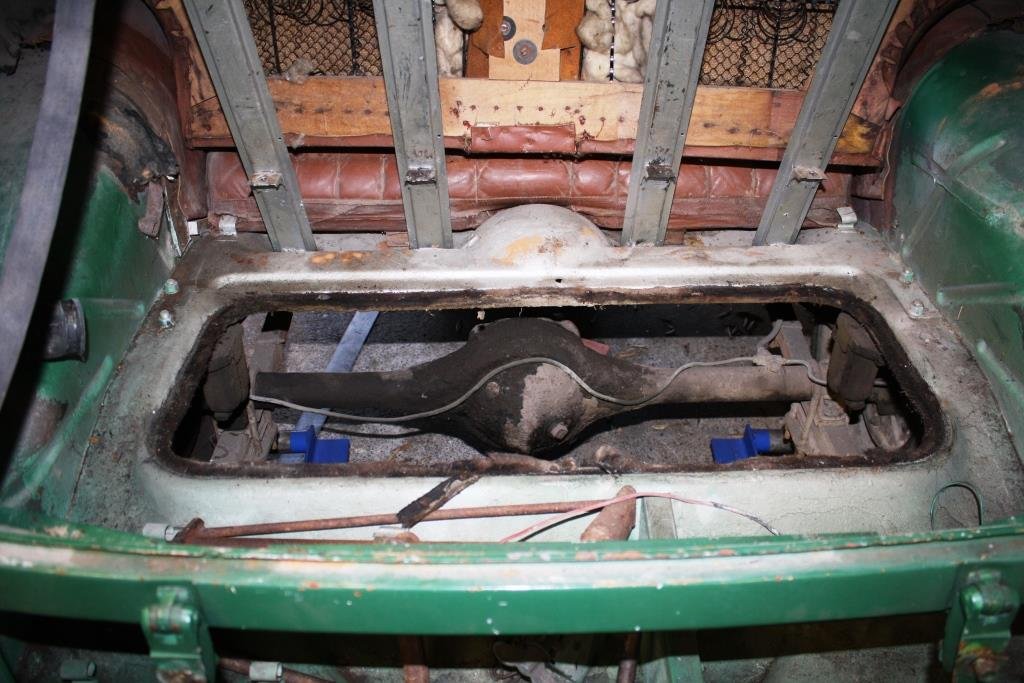
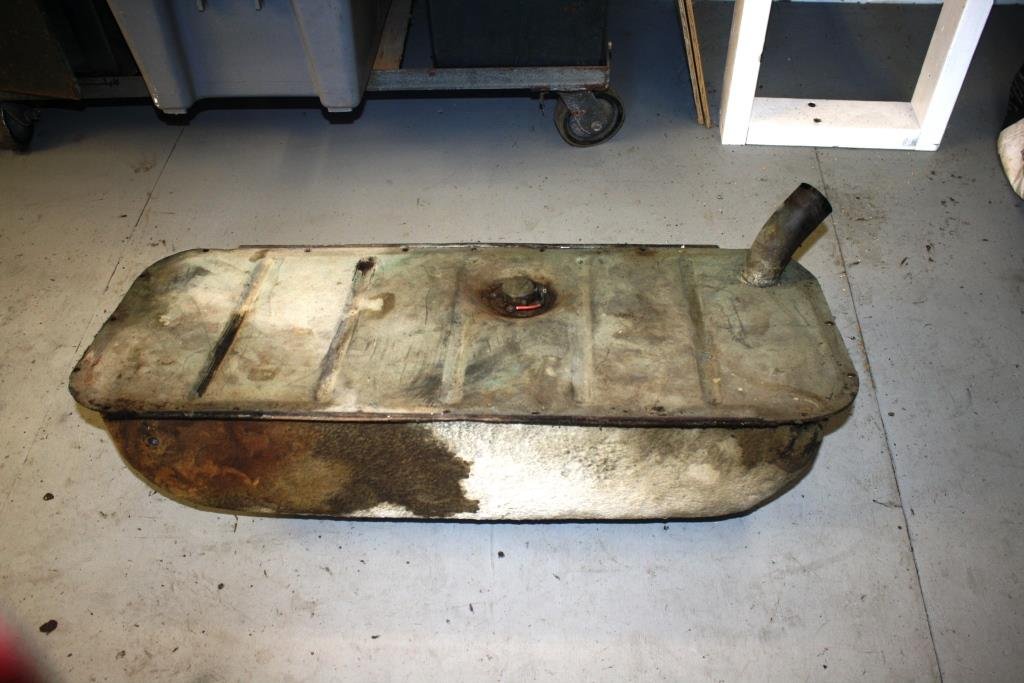
I have to jump in here with a little history; the Vauxhall factory in Luton simply had the living shit bombed out of it by the Luftwaffe on multiple occasions during the war. (From The BBC) On the 75th anniversary of the World War Two bombing of Luton's Vauxhall factory, a Norfolk man has told the BBC about watching the attack as a boy. Fred Morrad, 83, lived in Luton during the war, where his father was an aircraft inspector at the Percival Aircraft Company, based at the airport. On 30 August 1940 at 16:50 BST, 51 bombs fell on the Vauxhall factory in about one minute, killing 39 people.Mr Morrad recalled how a friend's father died in the attack. "My school friend Barry Pitkin lived about 300 yards along the road from me. His father worked at Vauxhall Motors which had been bombed. His father didn't come home," said Mr Morrad. "It was during the school holidays, so when we went back nobody mentioned Barry's father's death. Young children then grew up very quickly." Recalling the night of the attack, he said: "My mother and I, as we looked up, could see a formation of about 12 planes high in the sky. I suppose they were about two miles away, and 10,000ft or so up in the sky. I climbed on the coal bunker to watch. "The aeroplanes kept steadily on although I remember one plane coming down as there were some fighters around them. "When my father came across he told us he had been coming out of one of the hangars as a stick of bombs was dropped across the airfield close to him. He was blown back into the hangar by the blast." Vauxhall archivist Andrew Duerden said: "The victims were aged between 15 and 71, including one woman, and 50 more were injured. "The main area hit was the gasometer, which contained gas used in the heat treatment. Although the factory was back up and running in six days - the gasometer was out of action for weeks. "Although Vauxhall was secondary to the Luftwaffe, if anything it was the other way round - the factory was very important to the war effort, building Bedford trucks, Churchill tanks and also did some fairly high engineering including development work on Sir Frank Whittle's jet engines." Vauxhall Motors World War Two Production Statistics: Churchill A22 Infantry Tank - A portion 5,640 Churchill Tanks with 2,000 spare engines. After the loss of most its equipment at Dunkirk in May-June 1940, the British Army only had 100 tanks remaining. Vauxhall was given the task of designing and producing the A22 within a year. The pilot model was ready by November 1940, and the first fourteen production models came off the assembly line in June 1941. Production of the Churchill A22 was shared with Vauxhall by ten other companies. Vauxhall produced the majority of the parts which were then assembled by Vauxhall and the other companies under Vauxhall's guidance. It is unknown the number of actual A22s produced by Vauxhall or the other companies. Other: 5 million sheet metal sides for jerrycans, four million rocket venturi tubes, 6-pounder armor piercing shells, and 750,000 steel helmets. Vauxhall was instrumental in the building of the first 12 jet engines built in Britain. The Luton factory did 95% of the work on these first 12 engines. Vauxhall also designed inflatable decoy trucks and string and canvas decoy aircraft. It also made tooling for the Hercules aircraft engine, and assisted in the development of the Mosquito, Lancaster, and Halifax aircraft. The GM subsidiary on mines, torpedoes, radiolocation equipment and bombs. Bedford Subsidiary World War Two Production Statistics: (5,995) MW 1-1/2-ton 4x2 trucks, (52,247) QL 3-ton 4x4 lorries, 73,385 OY 3-ton 4x4 lorries, and 24,429 OX 3-ton 4x4 lorries Back to 2021-finally got the gas tank out after lots of prying, wriggling and the indiscriminate use of some rather vulgar language . The smell of the gas left in the tank is akin to the aromas emitted from a rope sandal worn by an Arab swineherd who has been roaming the desert for the last year or two! It doesn’t look too bad but any suggestions on how to clean and treat the inside would be much appreciated. https://oldschool.co.nz/index.php?/topic/49843-sr2%E2%80%99s-1947-vauxhall-%E2%80%9Crigamortice%E2%80%9D-discussion-thread/
1 point
-
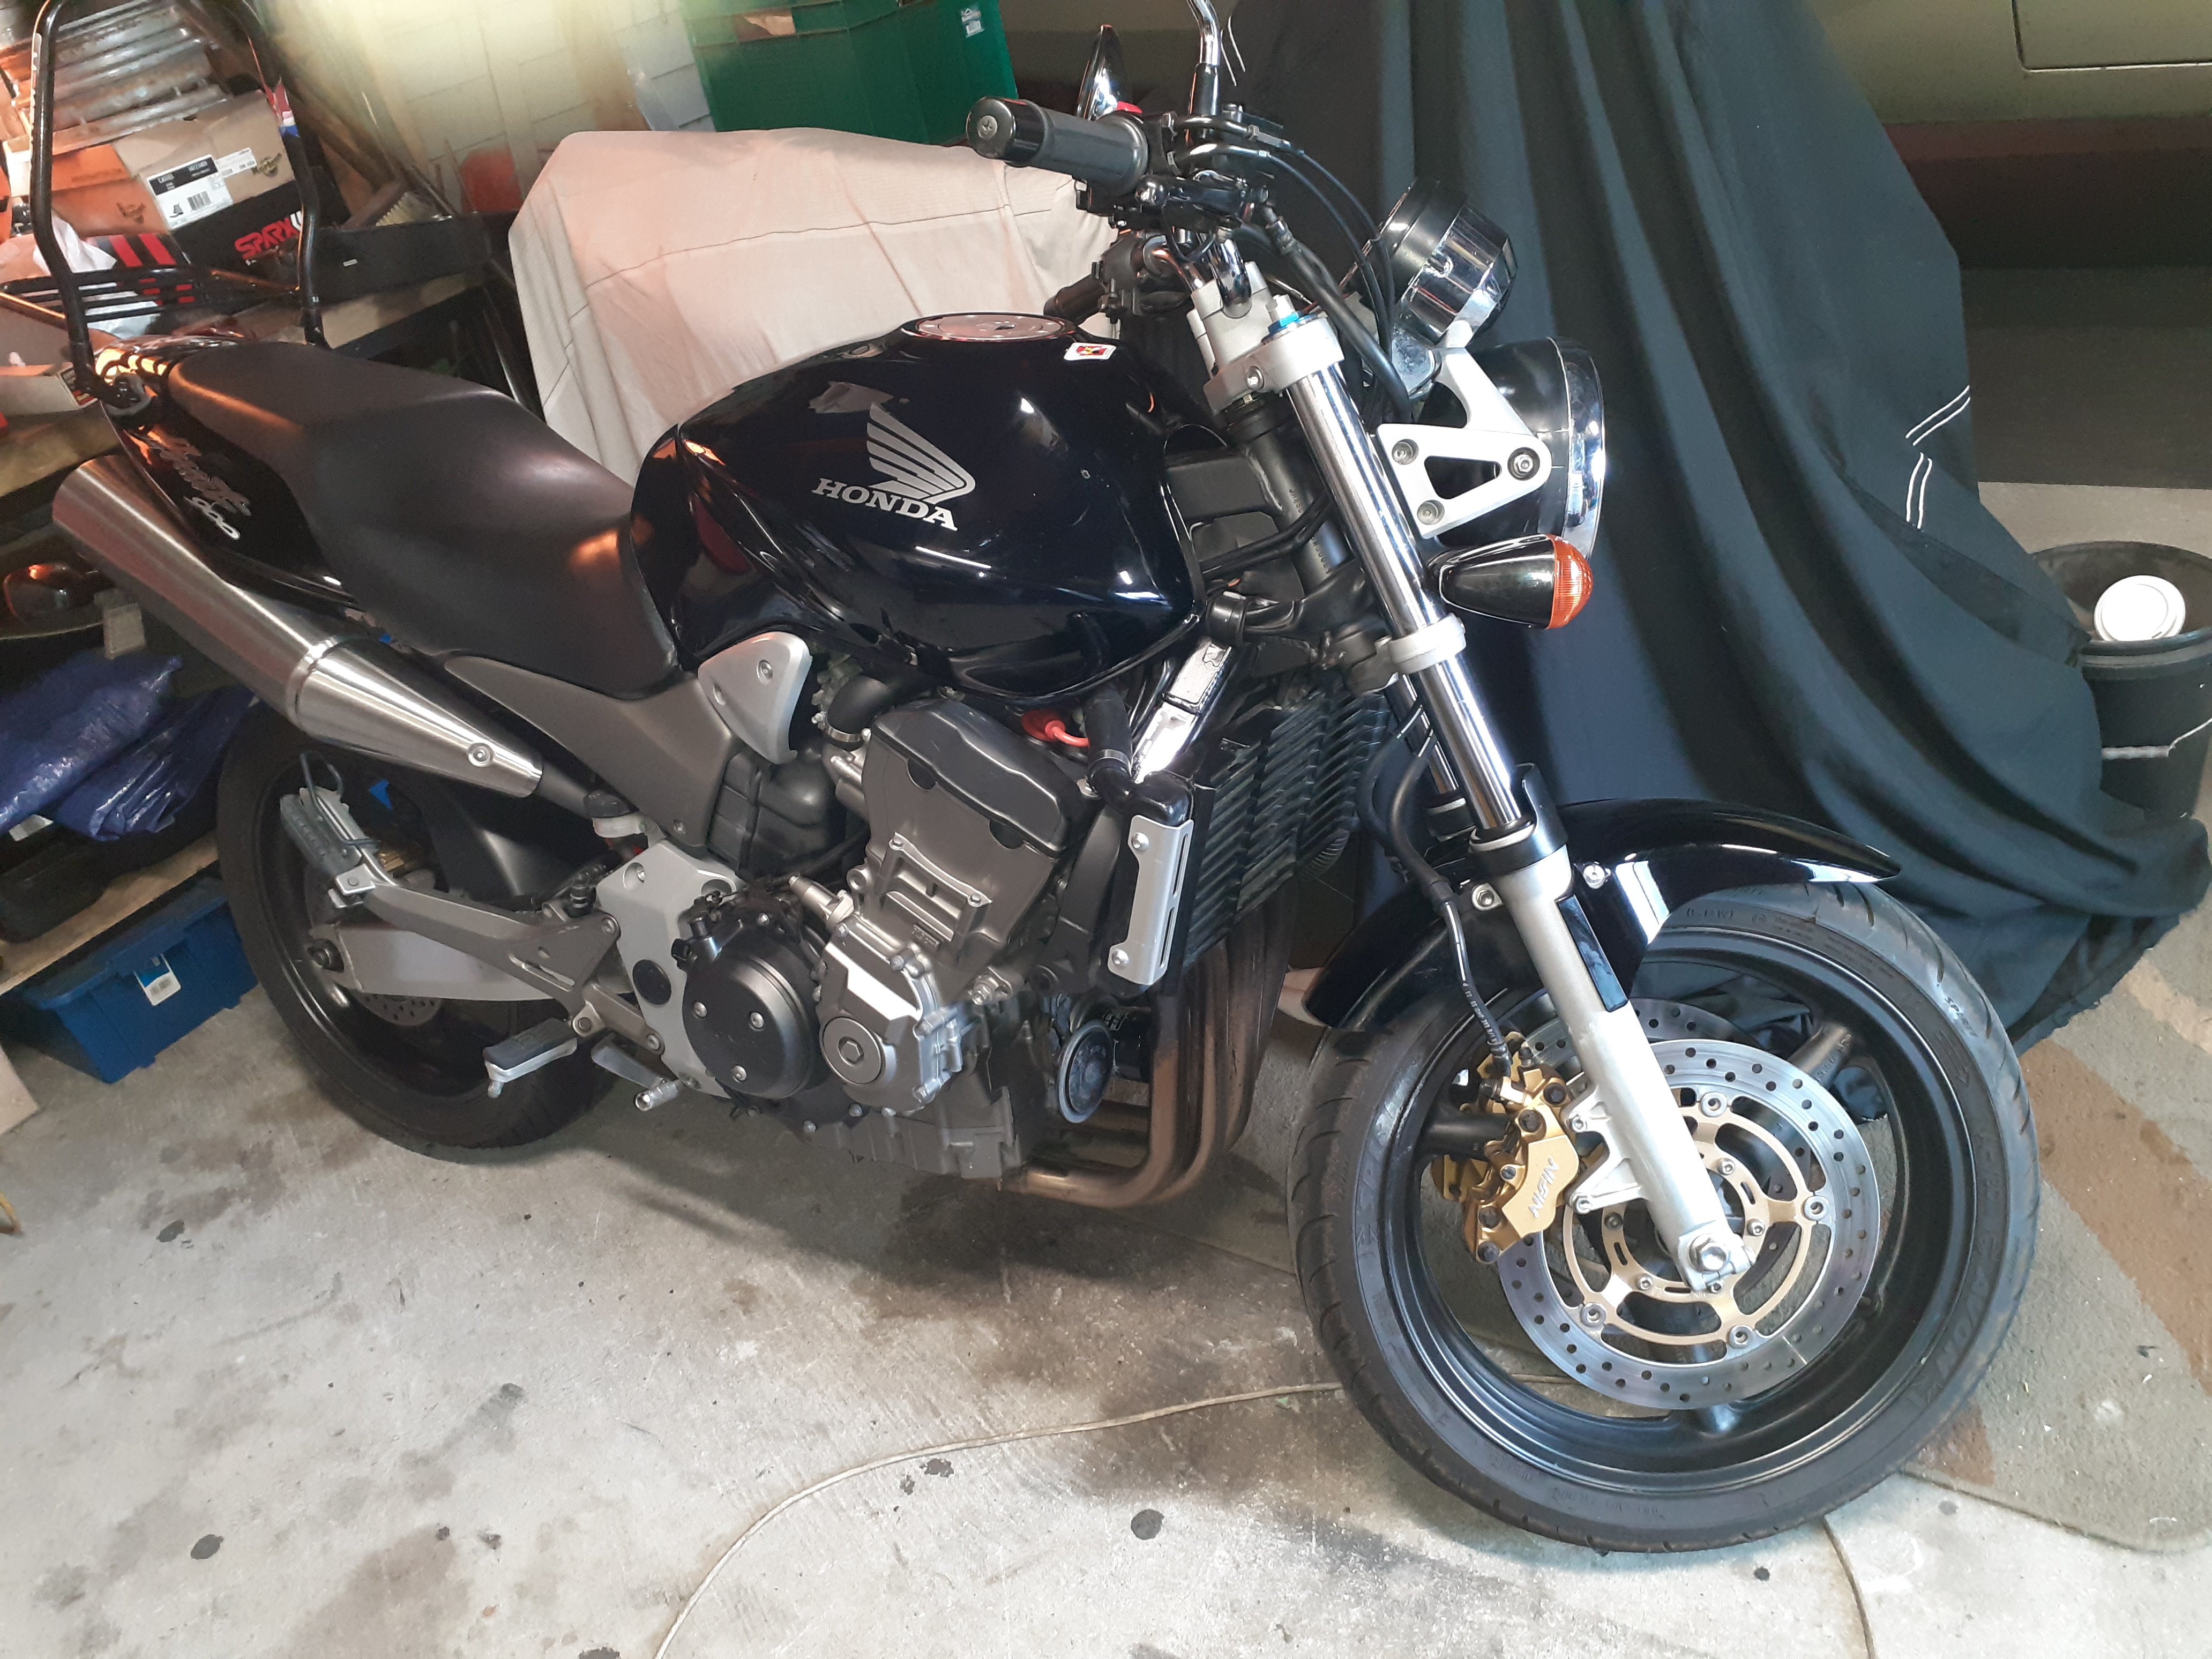
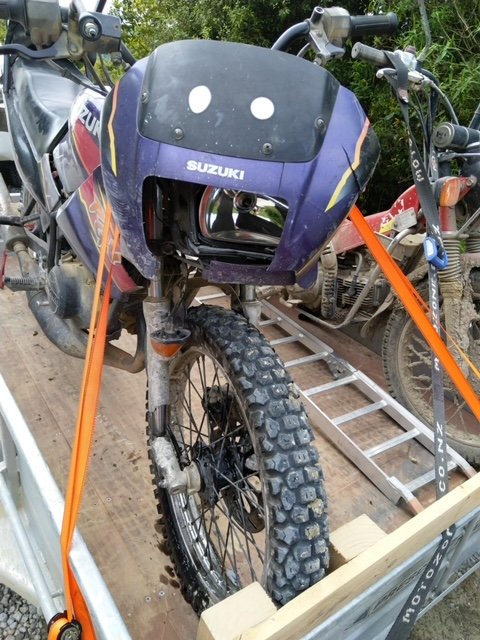
I decided I wanted a bigger bike, I'd been going over all sorts of different options for ages but ended up leaning towards something japanese and reliable I went into a harley dealer once but felt weird, like when your aunty sees you walk out of an adult video store Thanks to @MACKAZ for having a look at it for me , it was in whangarei so I got biketranz to deliver it Pretty happy with it, I always find it interesting to see how the type of vehicle it is, influences how you ride/drive it. I thought a big bike may encourage riding like a diddle and going 1 million kph everywhere but this is the opposite, because it's so smooth and torquey it's quite happy bumbling around at the speed limit, whereas DRZ kind of ends up brappp everywhere because it's not very smooth at lower rpm It's about as exciting to look at as a mid 00s camry though so I'll do some cosmetic stuff so it doesn't look like I'm on my way to a Ulysses club run
1 point
-
I'll ring them tomorrow and ask when their end date is. The ride is a full 6 weeks after their return 5o work date.1 point
-
Just got sent this. Sums up the ride perfectly.
1 point
-
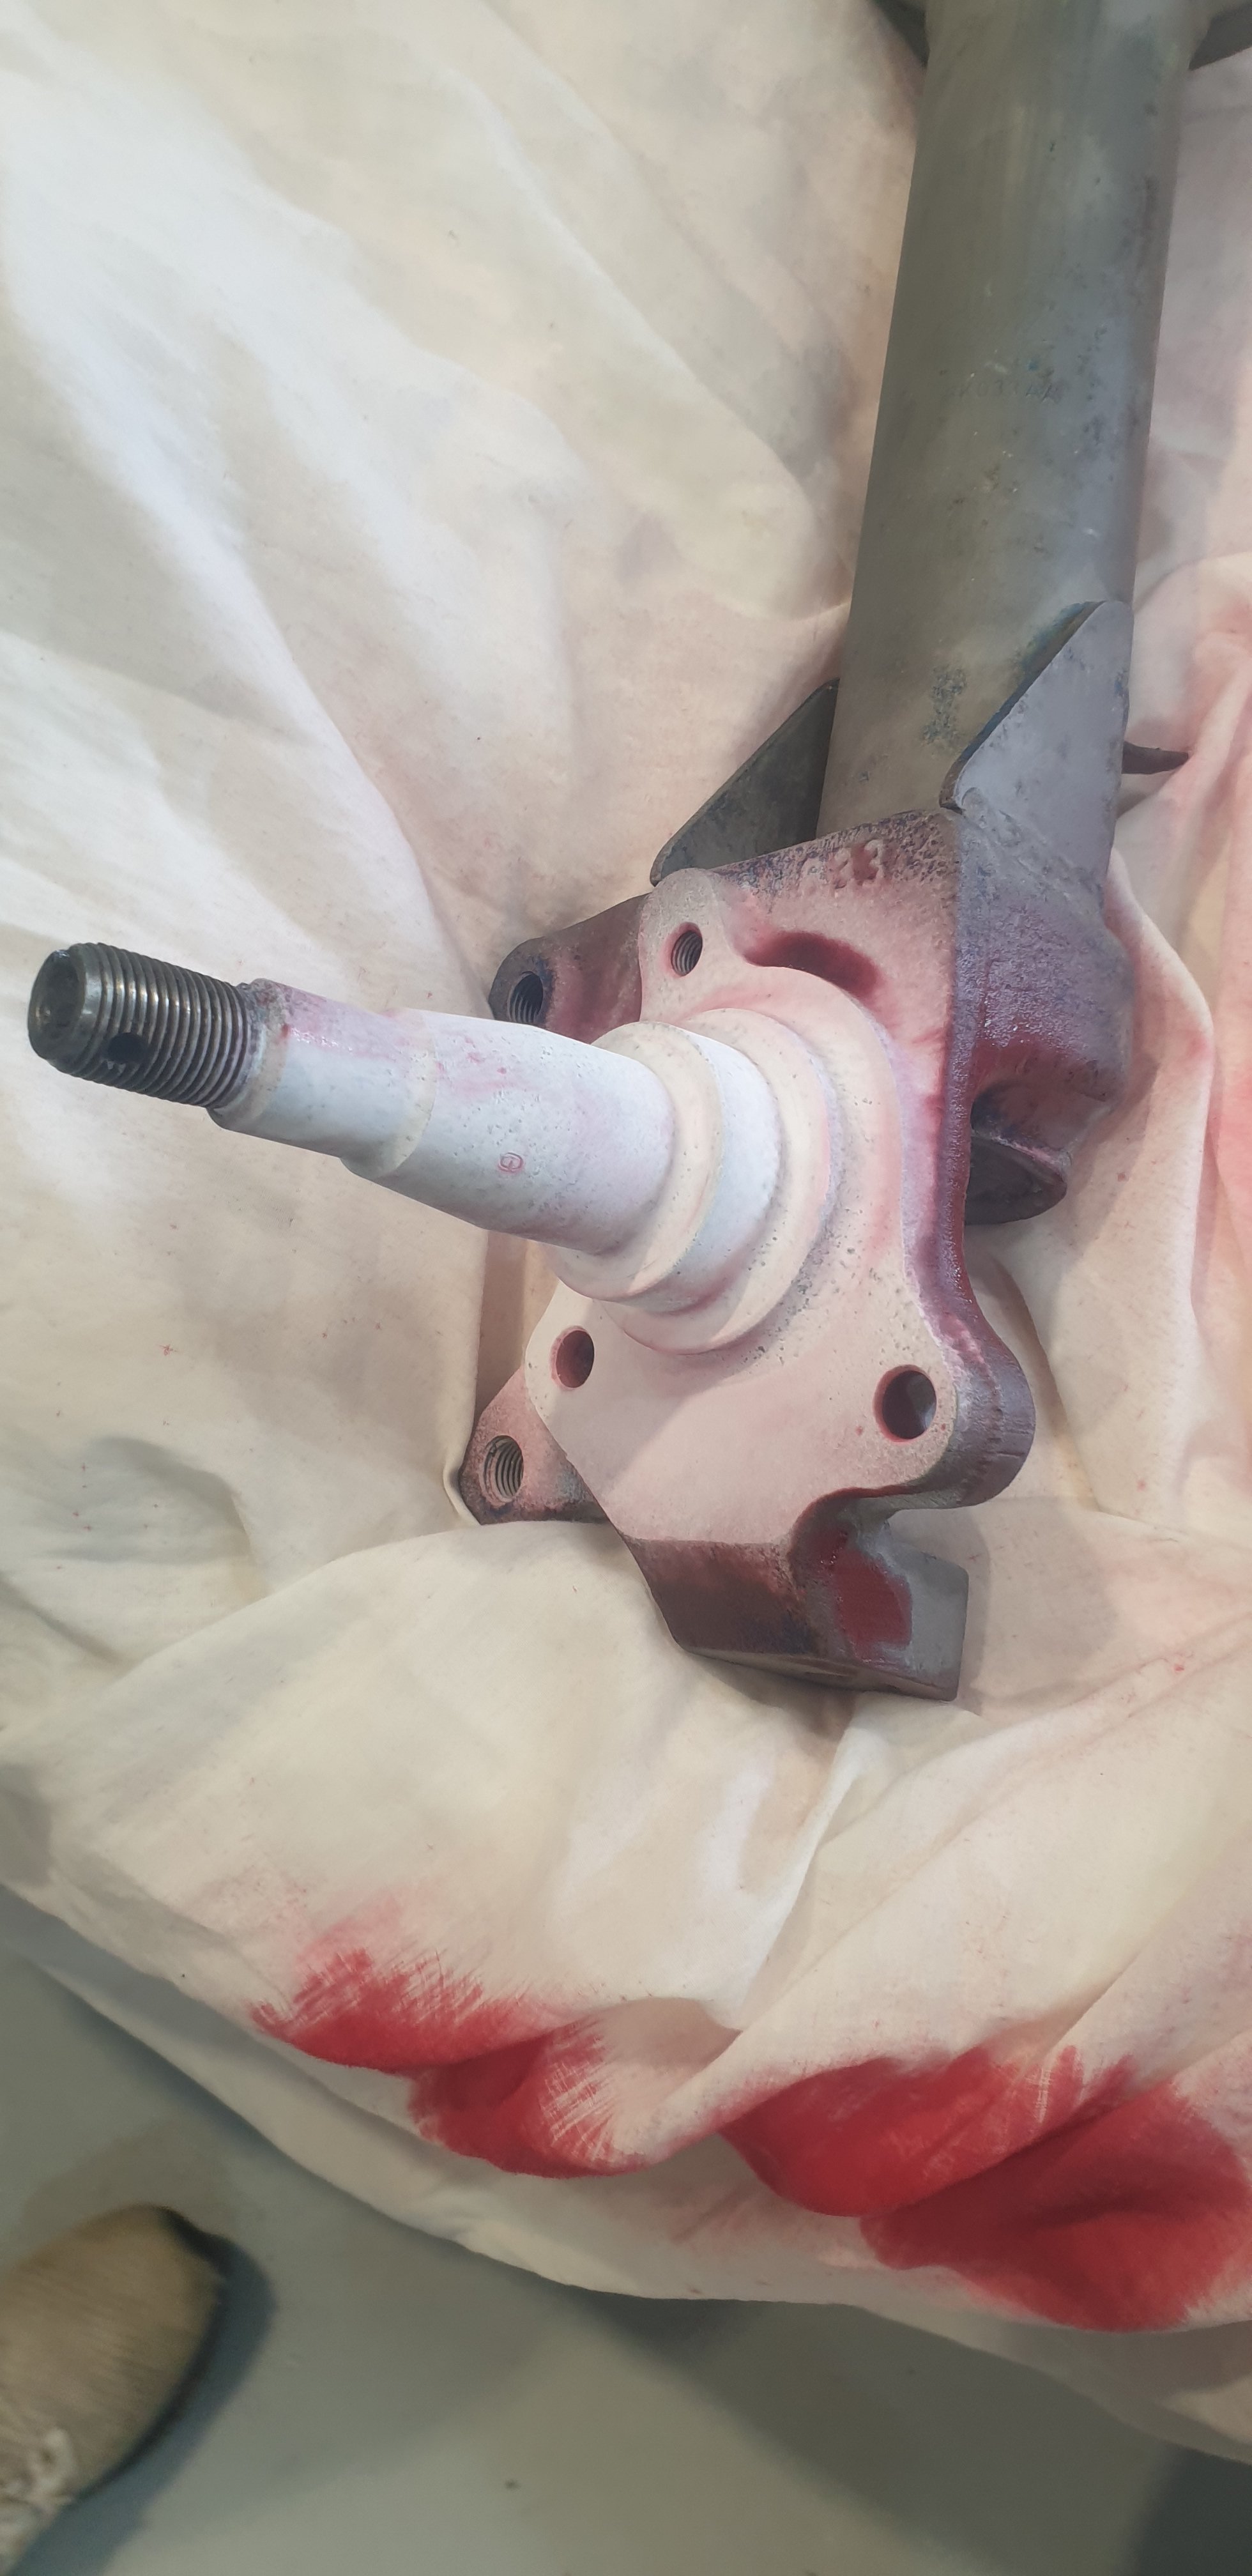
Stripped and sandblasted the strut.
1 point
-
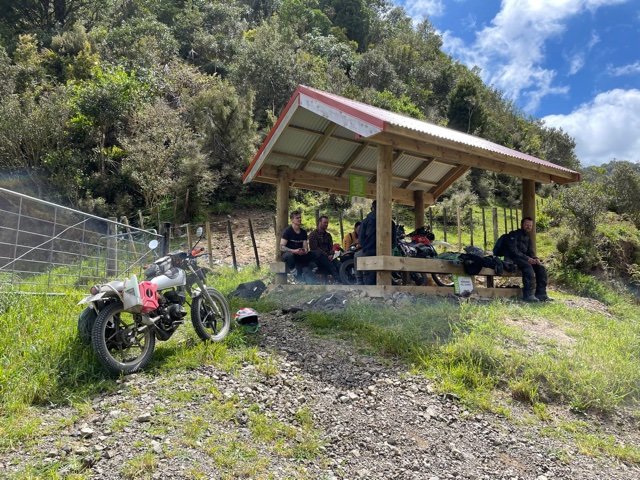
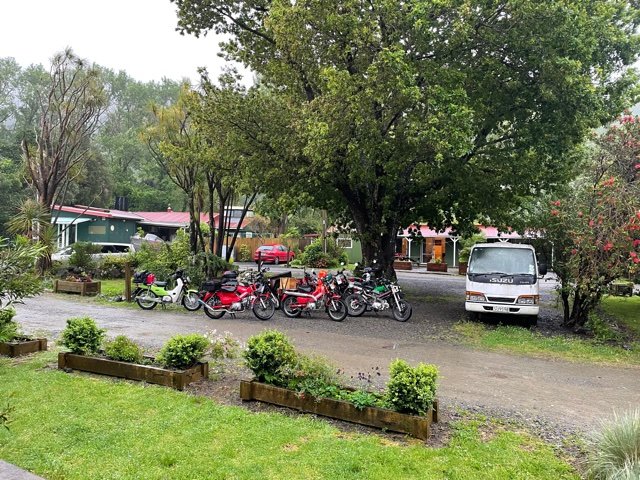
Ohope turned it on for us on Thursday Motu: @Itchybear was lucky enough to find the only Hilux in gizzy that didn’t have a bull bar on it. Te Araroa: That’s the highlights package off my phone. @MopedNZ I’ll get my GoPro back today and start seeing if I got anything remotely decent for you. I definitely didn’t get as much as other years, but I think I got you have some good moments haha
1 point
-
Yes it is. Its all totally gone to plan and I'm glad its not turned into just another fucking project..1 point
-
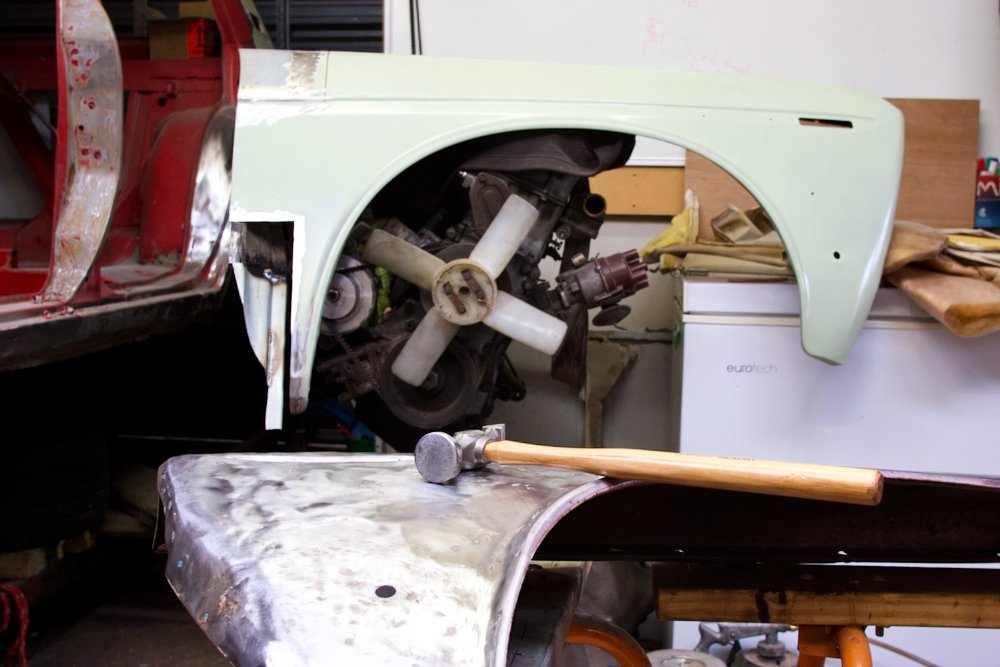
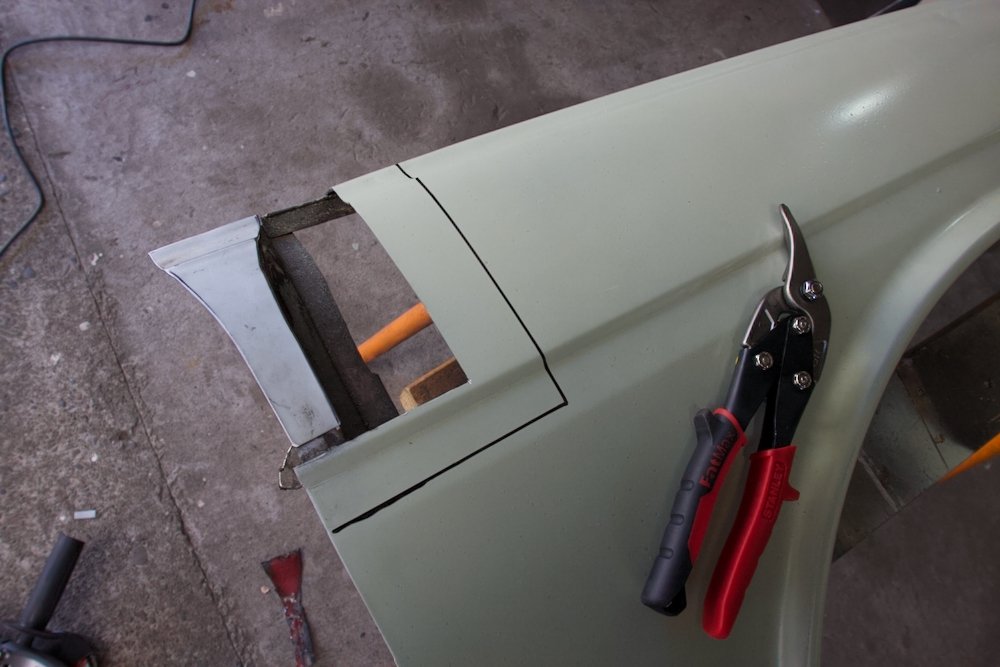
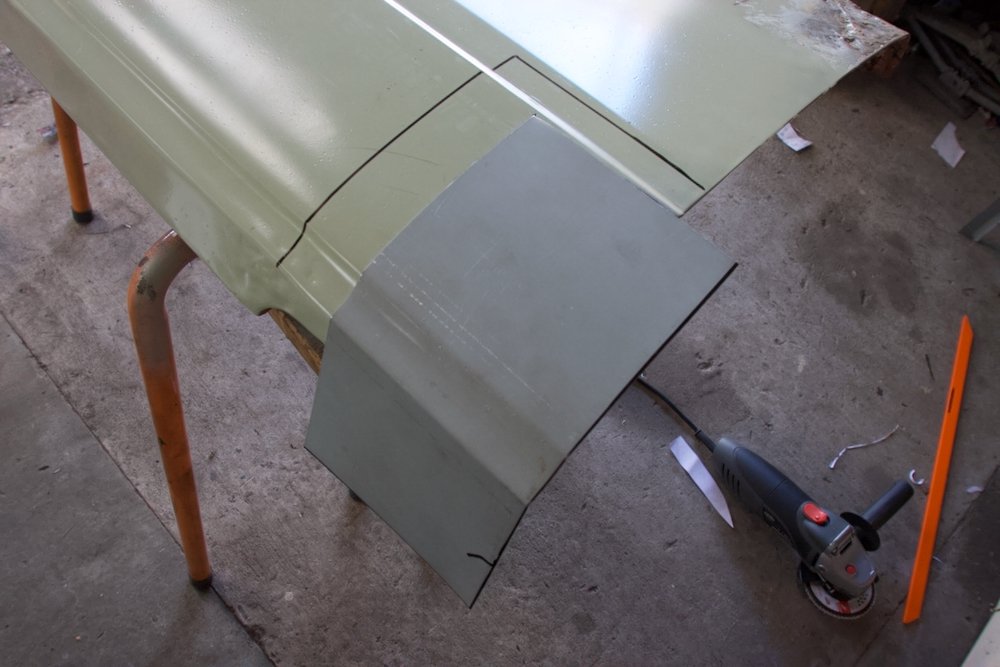
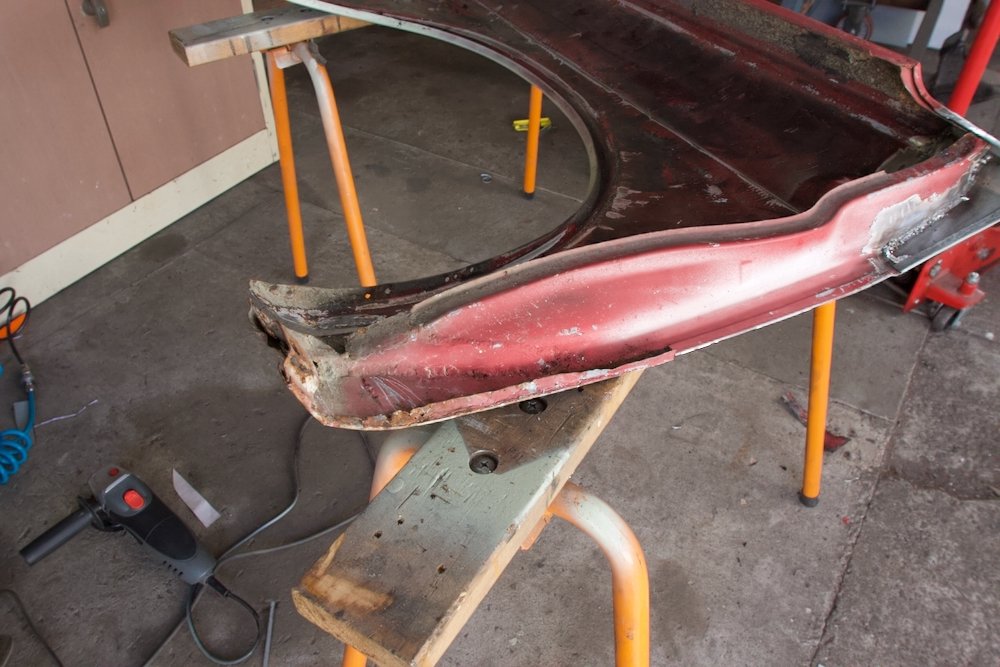
Find rust, cut, make patch, check fit, trim, check, trim, check, trim, check, weld Thats pretty much how the last few sessions have gone, props to @mof for hooking me up with some argon, that got the boot floor into place legend! Gave up searching for 0.8mm offcuts and just went a brought a sheet, that allowed for visible panel repairs to kick off, starting with the drivers front guard The trailing edge had significant rust repairs, what appears to have been the strategy was cut out the rot and where the frame/stiffener is, just weld direct to that and fill with bog. Of course this made my job fun, I had to give up on like for like replacement going with judgement and dry fitting to the car. First of all replaced the rotted section of frame: Then shape the contour into a fresh piece Never got a weld pic, but its now securely attached. Then work on the lower, this got nasty, can just make out the multiple weld lines from donor patches and is pretty rusty/bent to work out where it should be. Reproduced the lower frame and glued that in after many dry fits to the car Also see the back edge of the upper patch fixed in place, managed to replicate the folded edge too, very chuffed. A quick inspection of the passenger guard showed it to be in much better health until I started digging... While it is relatively rust free, it had the best part of 5mm bog over the whole thing, its been very bent at some stage, beaten about right then filled (with much enthusiasm!) Full clean up showed quite a mission ahead Using the better guard as a guide, I sat down with the hammers and various dollys I've got much better shape now with the larger dents out, but will give it more time, it will need bog but hoping I can learn a few tricks to minimise the amount. New repro guards are near $500 give or take with freight extra so i'll be avoiding that bill as much as possible! Thats the notable work to date, many more smaller patches here and there in the sills and boot and two more large areas to tackle, most challenging is the rear guard lip, thinking a shrinker/stretcher combo would be helpful here, anyone have experience with them and able to offer advice? The vice mounted Machinery house ones look pretty good value, any reason to double down and go to larger stand mounted ones?
1 point
-
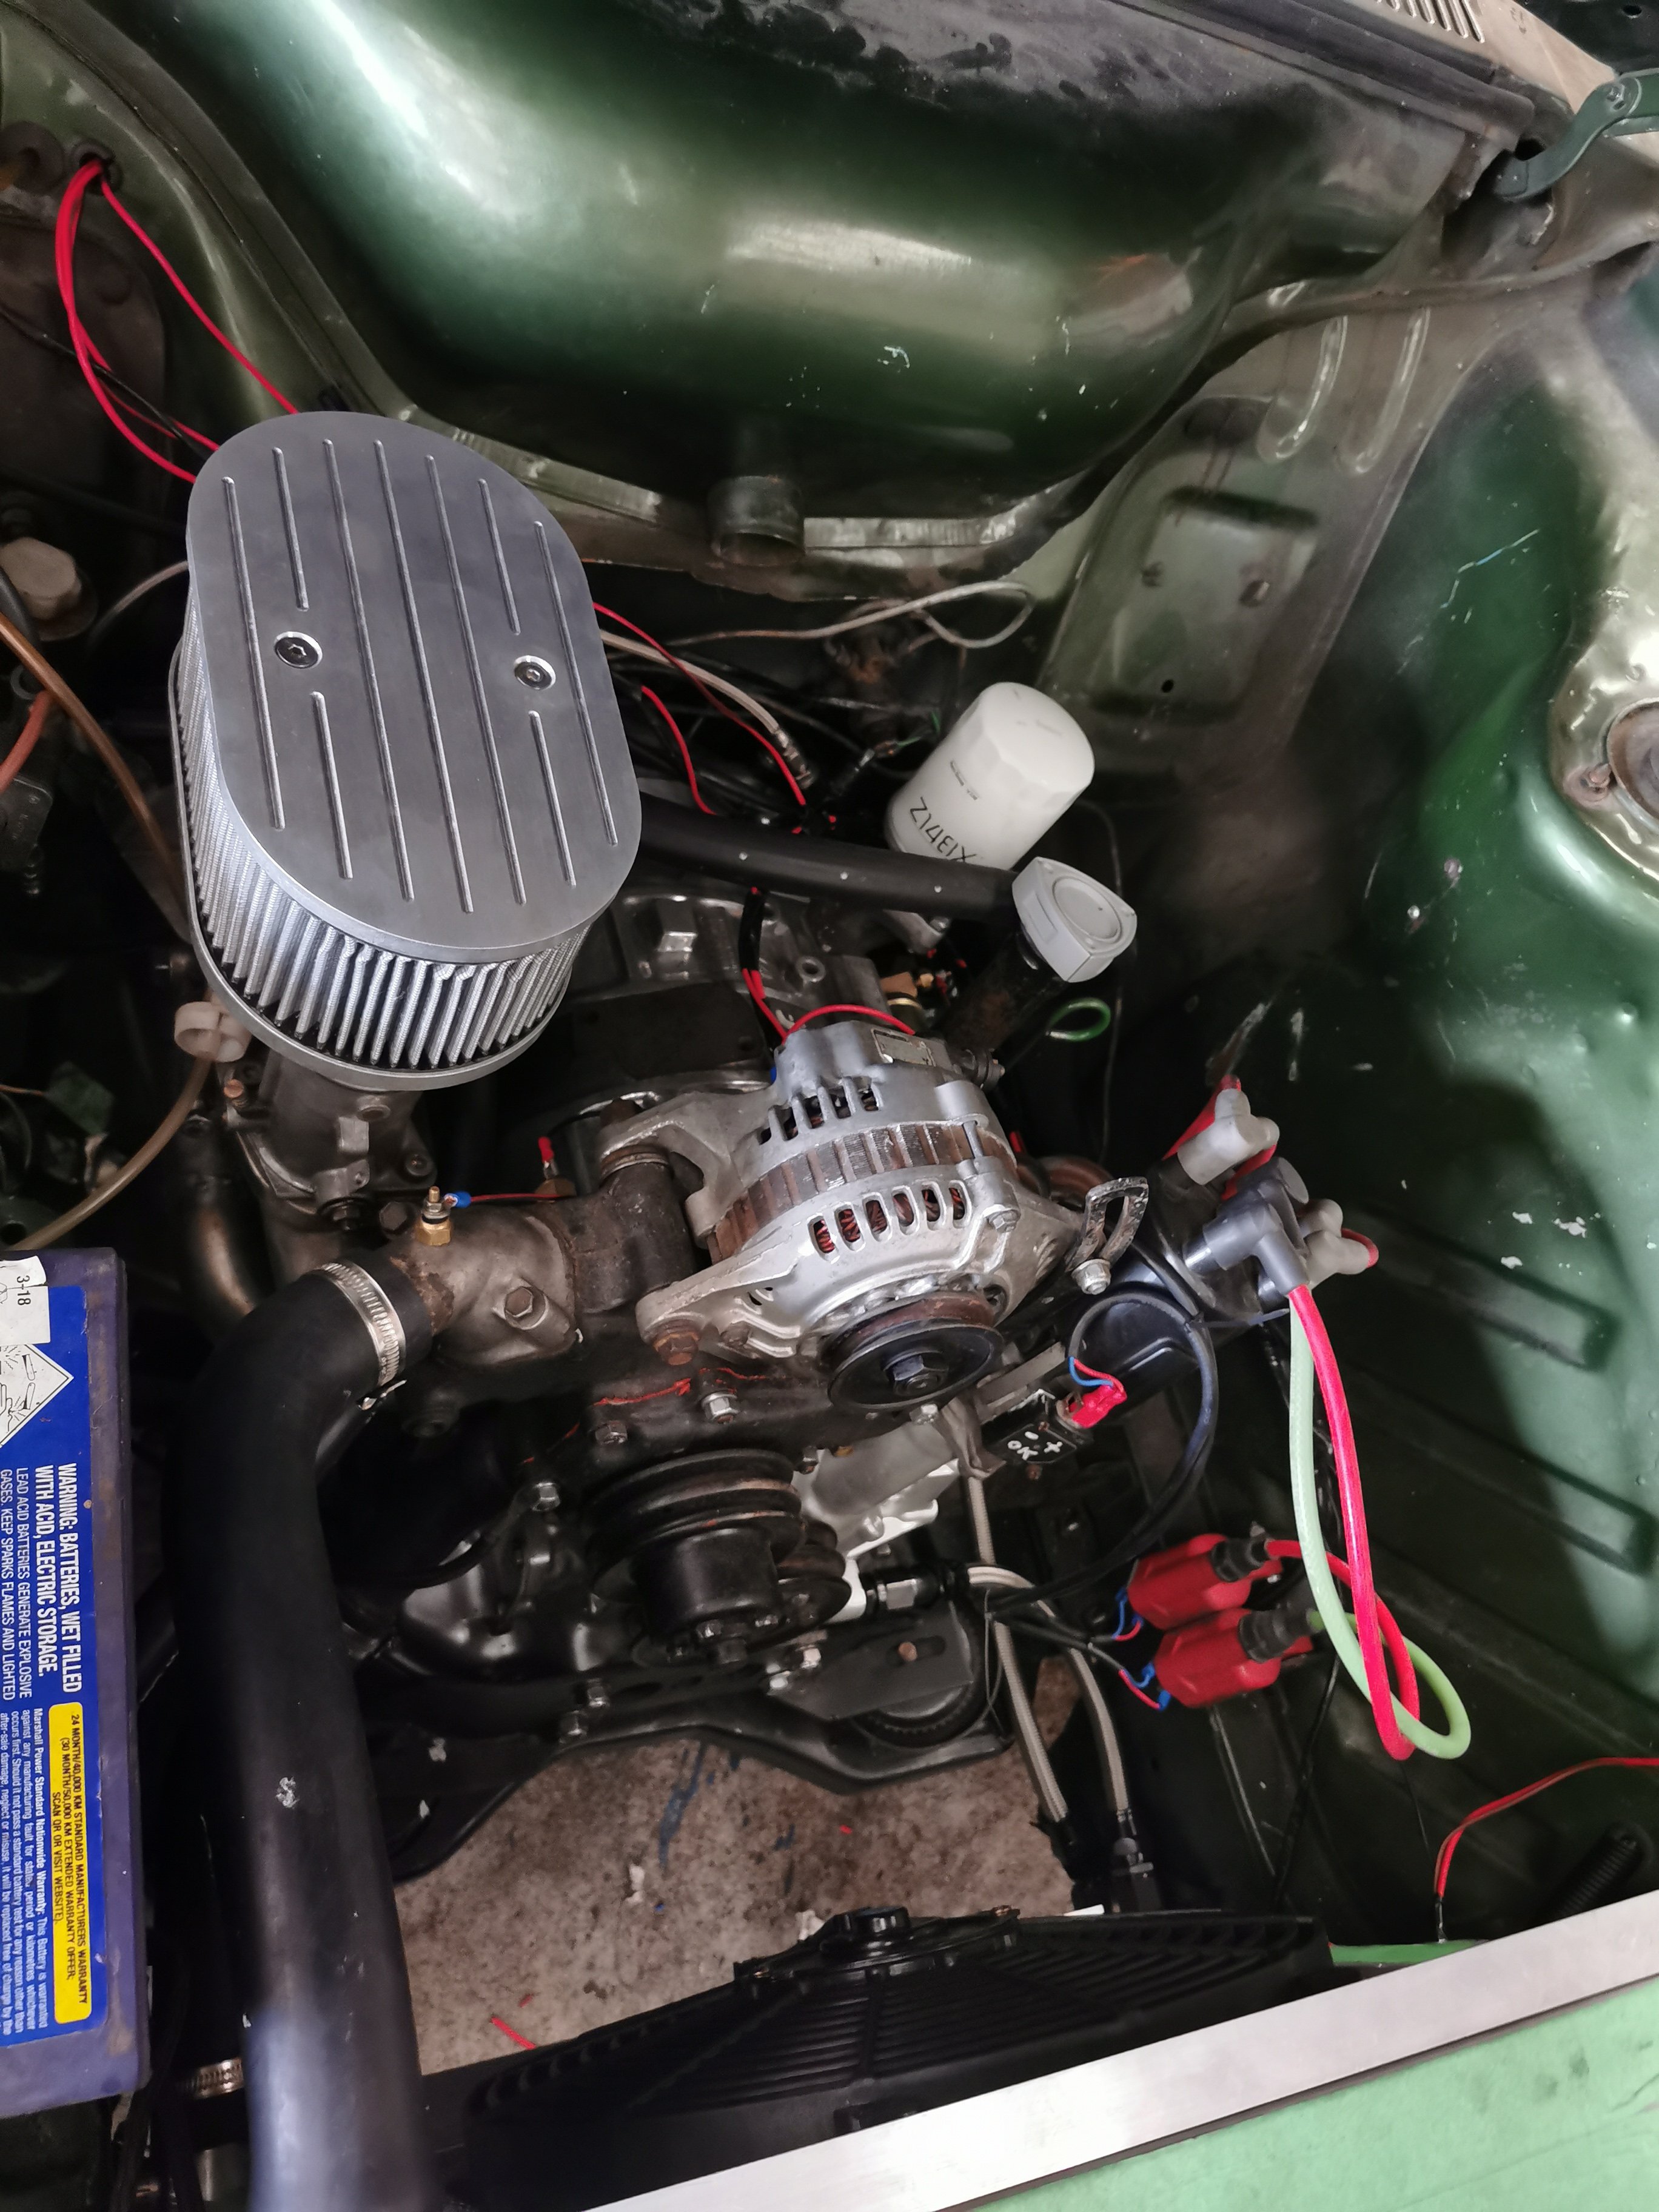
Porn, swanky wanky filter unit... Not cheap, but it does do the job. Just need some k&n spray for it
1 point
-
Car has been running great. Just frustrating that all of the events to attend are getting shut down. Since it's been running good with no problems, obviously the thing to do is pull it apart again. As I want to investigate how much VVTI movement I can get with the current situation. From memory the valves clanged into the pistons at around 18 degrees advance. Counting the teeth on the cam gear, it's got 36 teeth so 10 degree divisions. So I cant quite use 2 teeth worth of advance, which is a pity. So I'd need to retard the cam gear by 3 teeth, and use only 10 deg advance over the current position. But then I gain 3 teeth worth of cam retard too, over just a fixed position. So at home position the cam would be open for quite a long period during compression stroke - Doing what the standard prius motor does. Hah. So I might get some better fuel economy out of it. Since the valve angle is quite steep I dont think there's any possibility of clanging intake valves into exhaust valves, but I will check on my spare head. I wonder if this will act weird with ITB setup. As there's less room to push the gas back into the intake. It's a wanker to do all this because, of stupid chain drive and sealed front cover. As well as that I've nanged on the front pulley with about 50 litres of loctite. Hopefully the starter motor can get it off. At TDC-ish It can advance about this far before it hits1 point
-
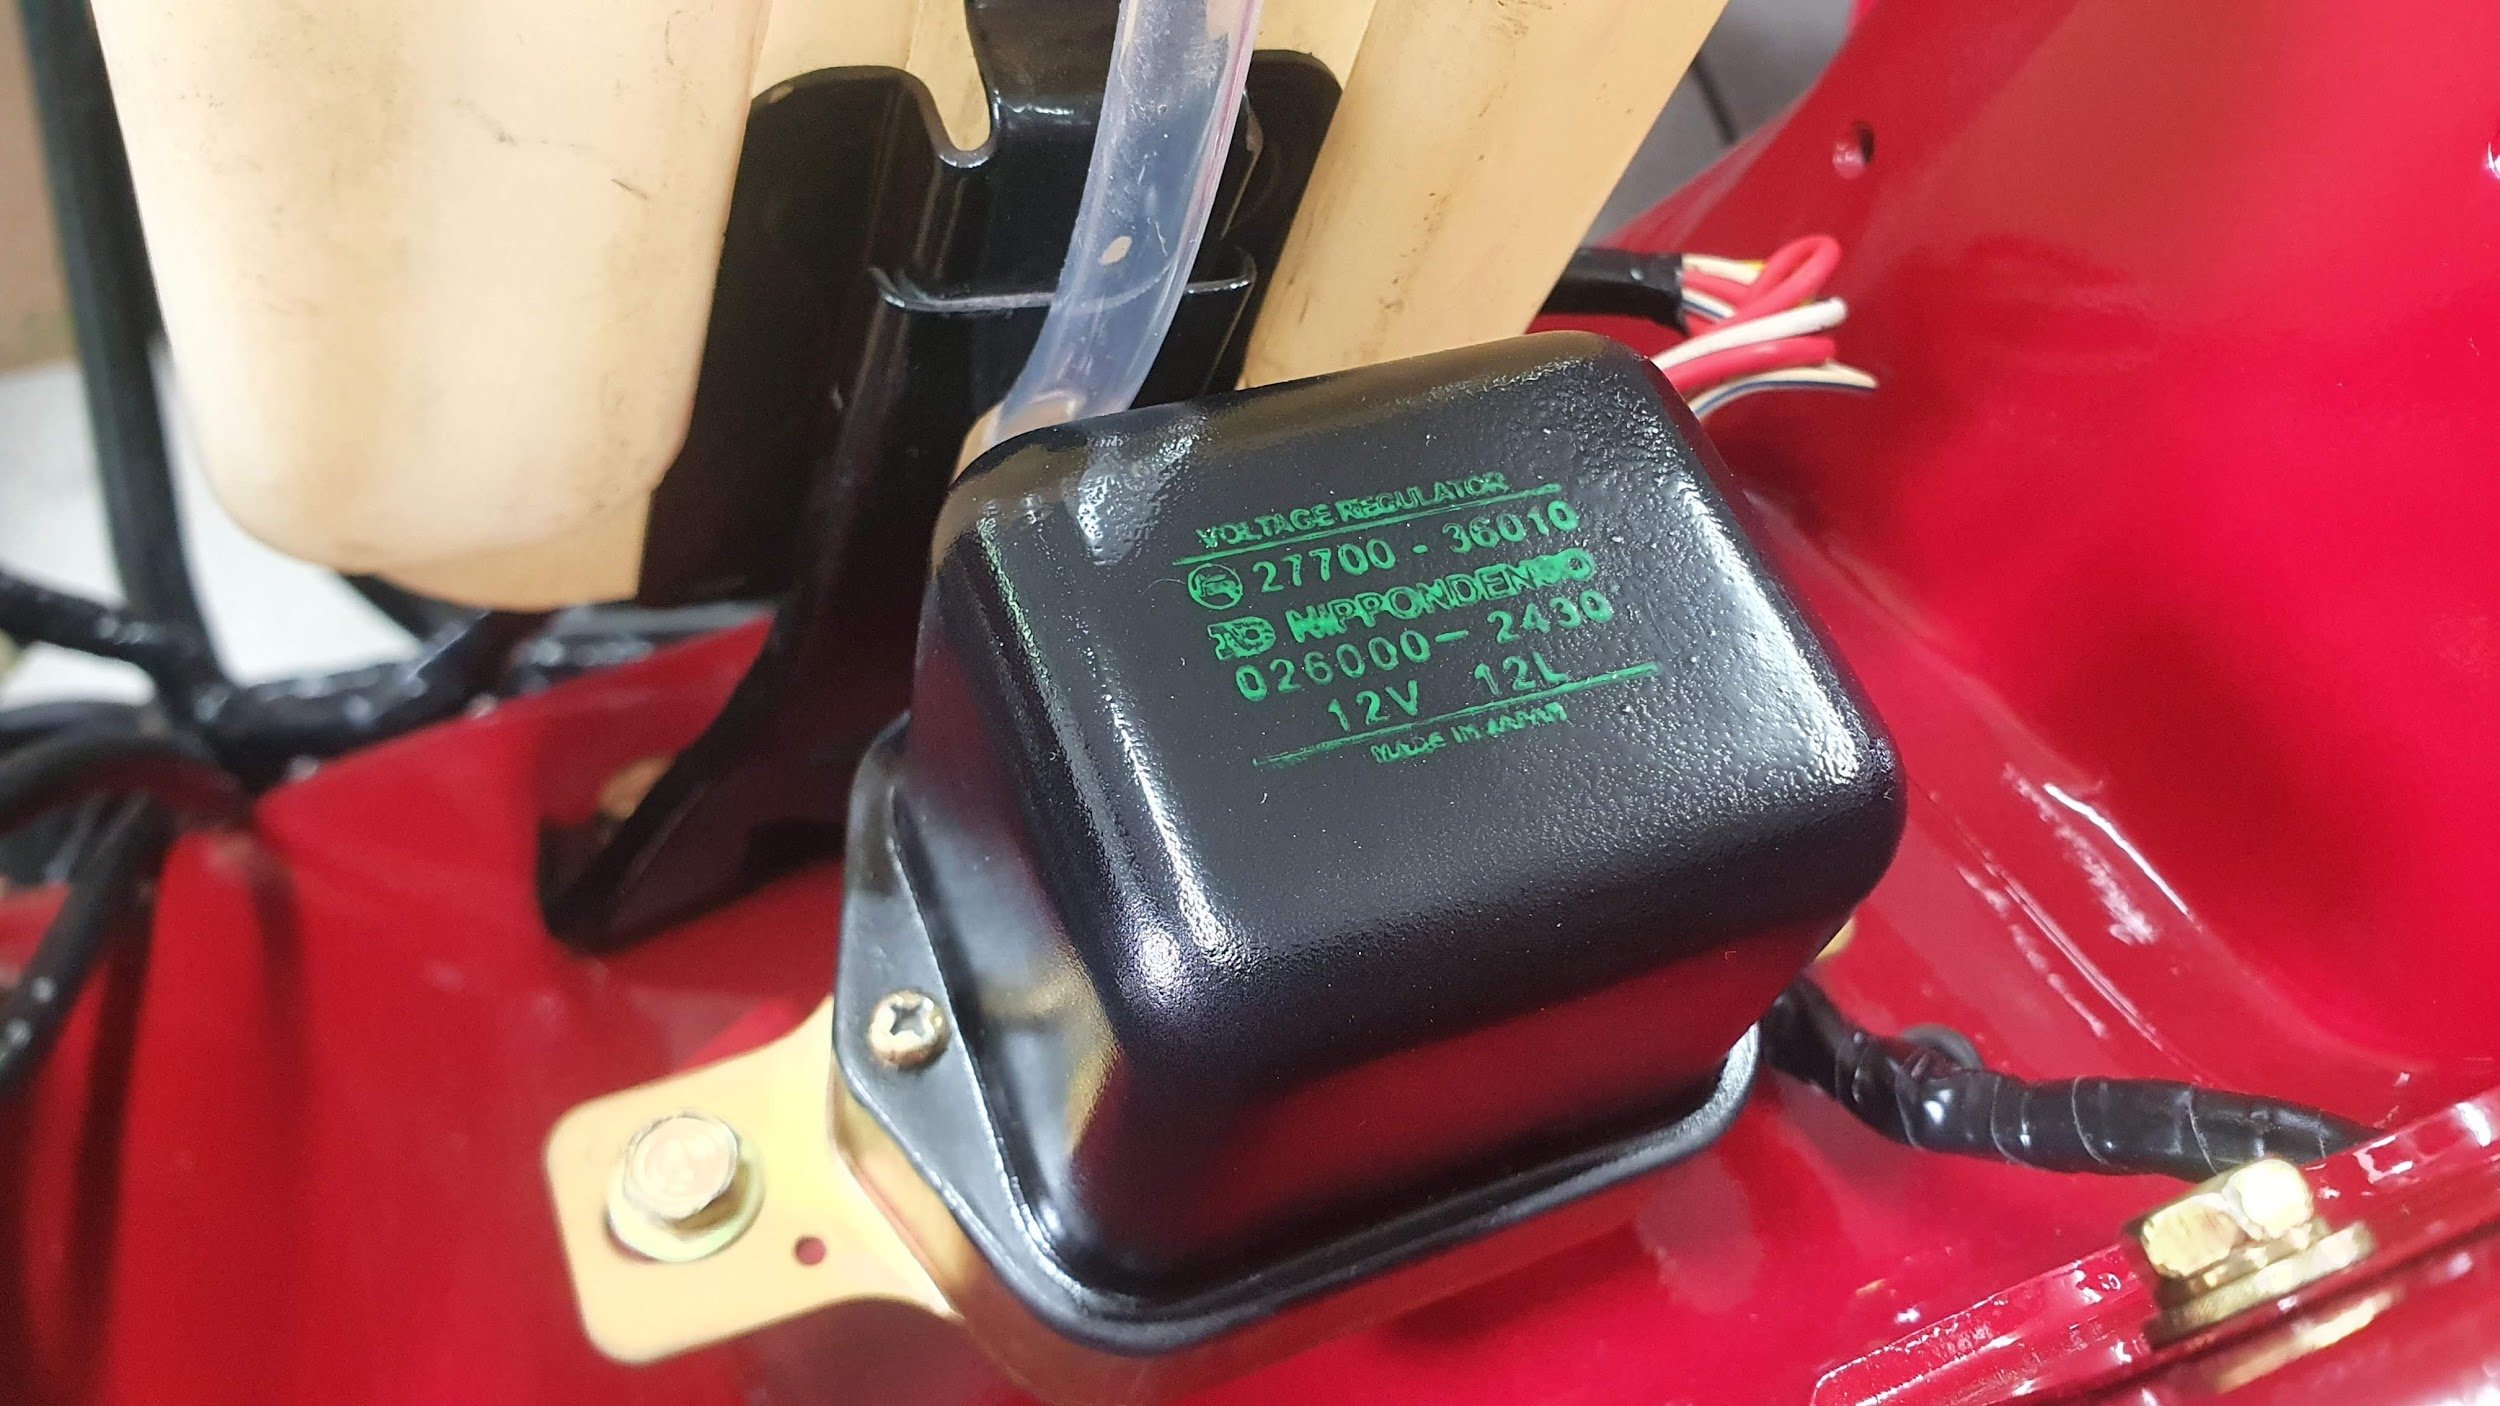
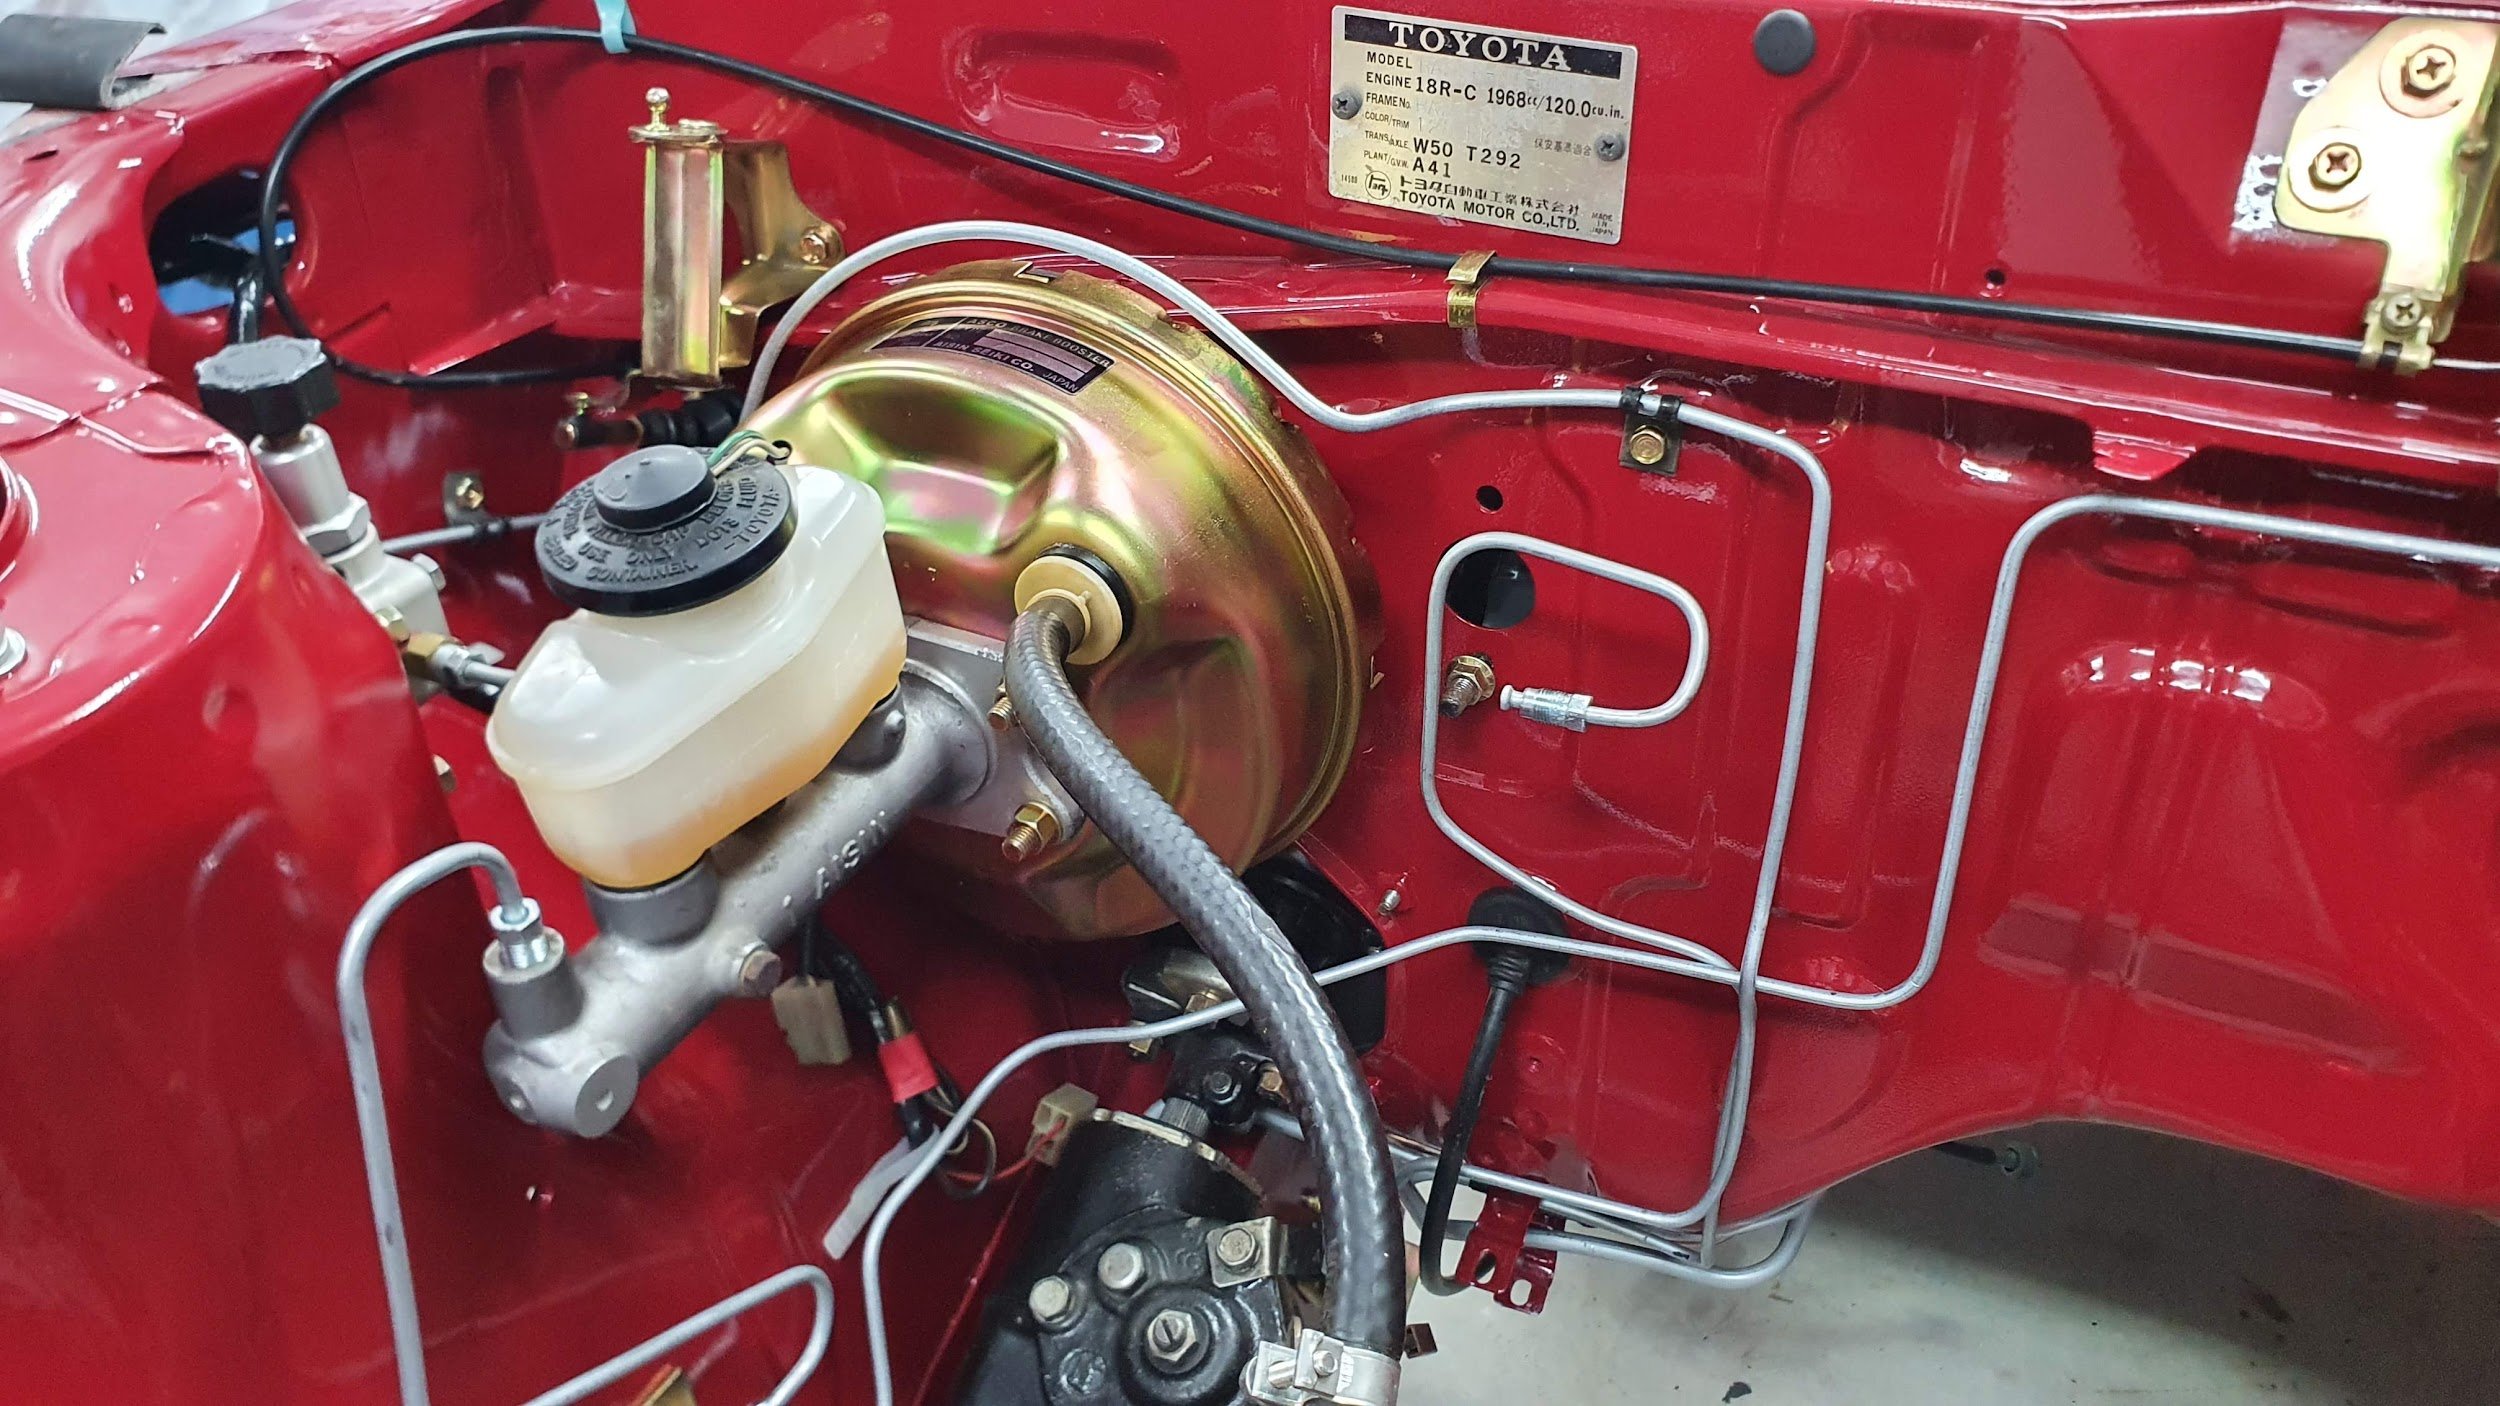
Booster and brake plumbing all done - I previously deleted the bias valve and replaced it with a wilwood adjustable, and upgraded the master to a bigger MA70 one Brakes all round means the front steering and suspension is all in too I previously disliked the wiring and relay/fuse for the electric fan As the alternator is internally regulated now - I figured up-cycle the old regulator housing to sneak the fan gubbins in... Next mission is to test fit the bigger W55 gearbox and apply clearance to any parts, and run a return fuel line that also clears it. Then onto checking the engine and see what needs freshening on it.
1 point
-
https://www.globalweldingsupplies.co.nz/range-page.php?sku=R_WEIP2KG They are very expensive but seem to stick shit together, i dont know about nice looking welds. Brazing would work.1 point
-
Its welded now, had to pre heat and post heat, it was a hard horrible dirty job and it was impossible to get nice welds, it welded best when it was over heating1 point
-
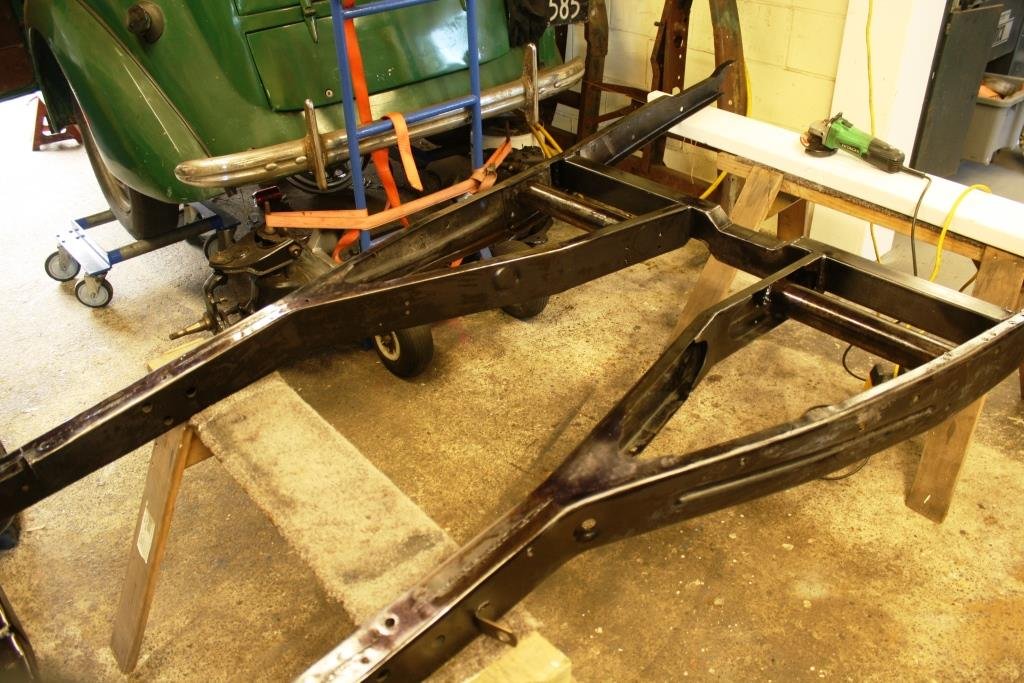
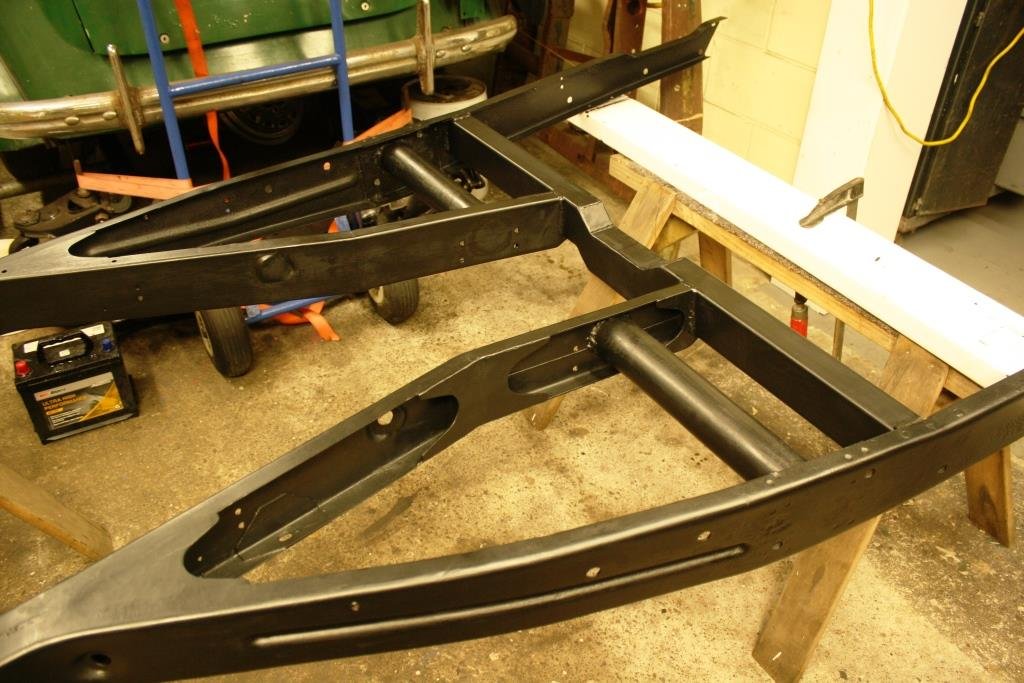
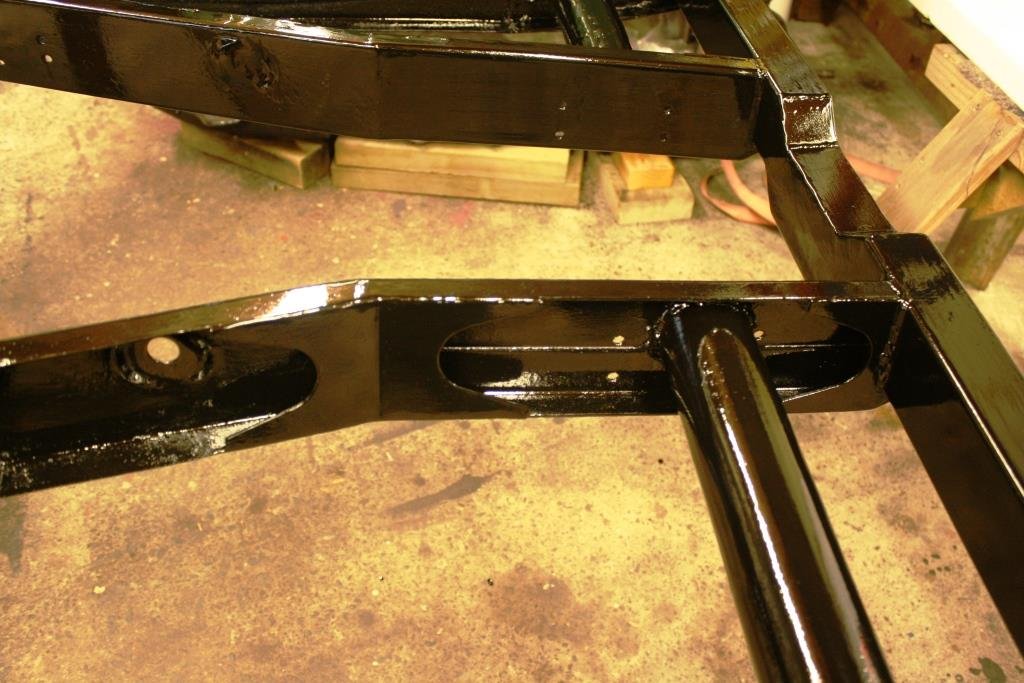
After a noisy afternoon with a wire a wire buff and a flappy wheel Rigamortice’s chassis got a couple of coats of CRC rust converter. Followed by a coat of Wattyl etch primer; jeeze the fumes knock you over… And two coats of Wattyl Killrust epoxy enamel.
1 point
-
i went back to the dyno with the new intercooler and well, sometimes it doesn't go your way. had many small issues throughout the day, in the end the fuel pressure started doing strange things right at the top end so we had to pull the pin. so at the end of the day i had a semi broken car and i was two grand lighter in the pocket which always make a bad day at the dyno even better. took the fuel system apart and couldn't really find anything obvious so i threw LOTS of money at it in the hope that it will be fixed. both pumps are new, two new larger fuel filters, much larger surge tank, new FPR and new injectors. the other thing im going to do is move the oil cooler because it had trouble getting rid of coolant temp. the oil temp and inlet air temps were perfect but the water was getting hot and it took a long time to come back down. 2021-11-12_07-03-34 by sheepers, on Flickr1 point
-
Yep, they will fill the back up nicely.. just need to get the tyres flipped1 point
-
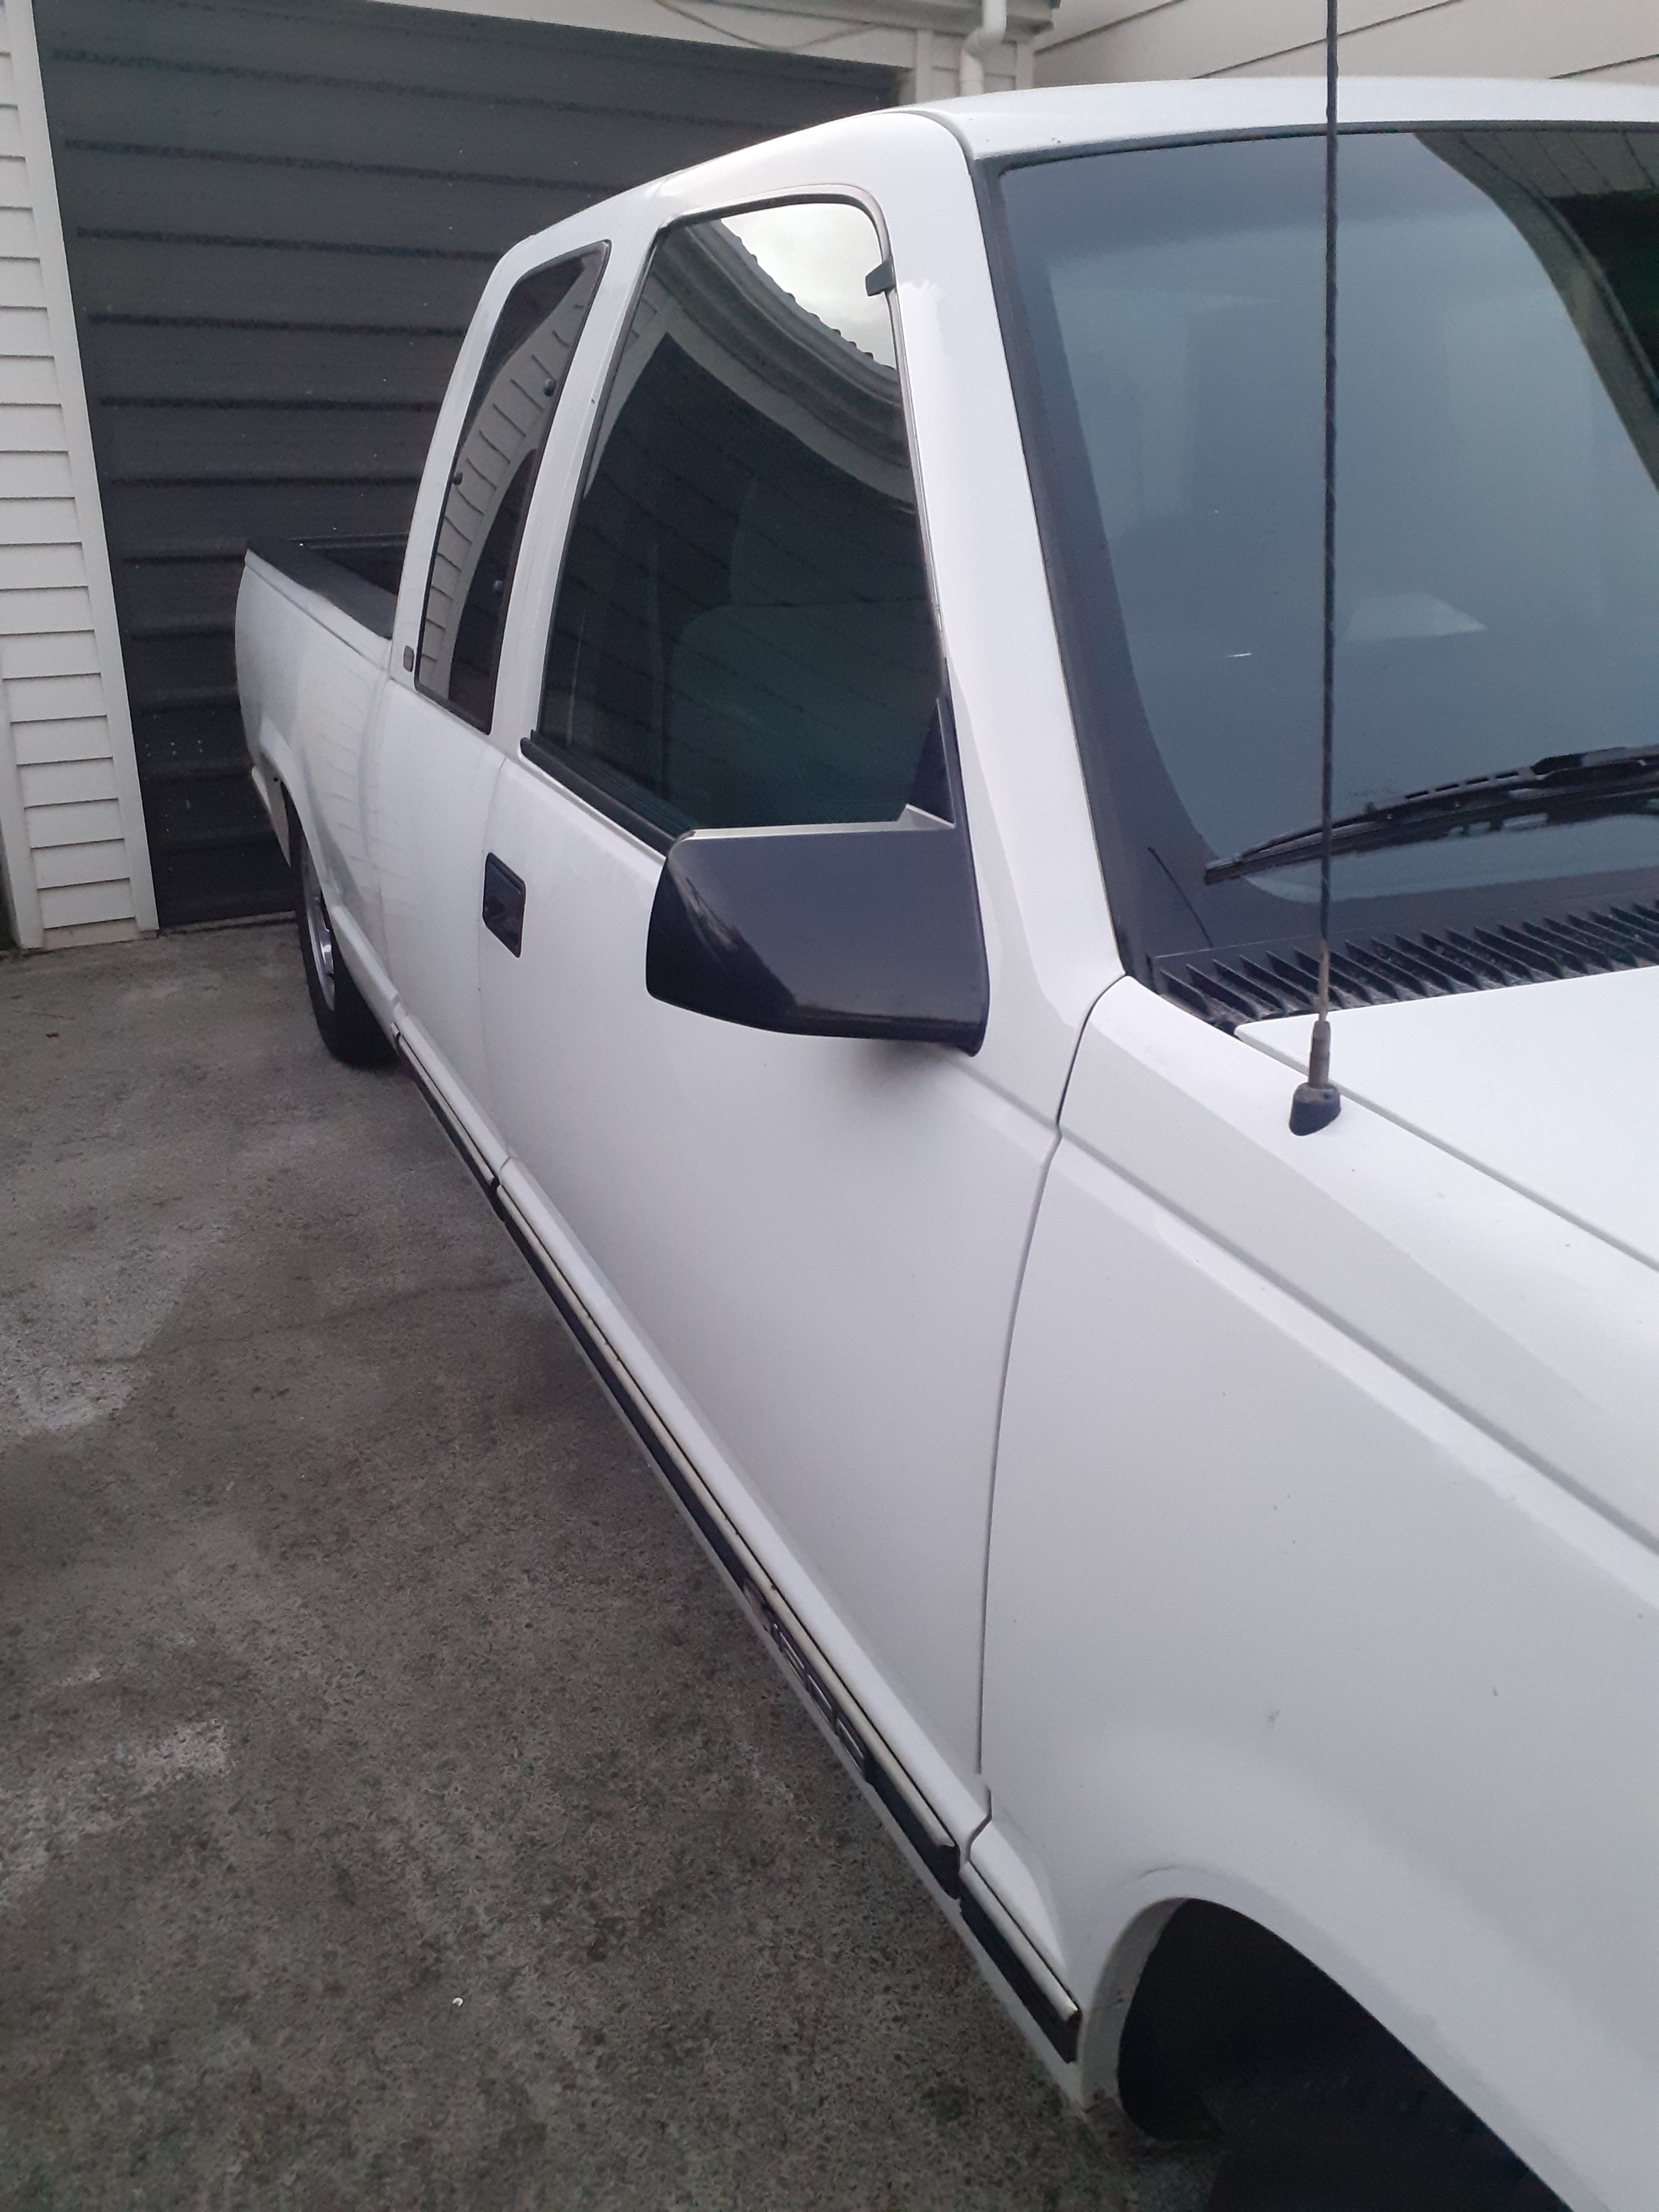
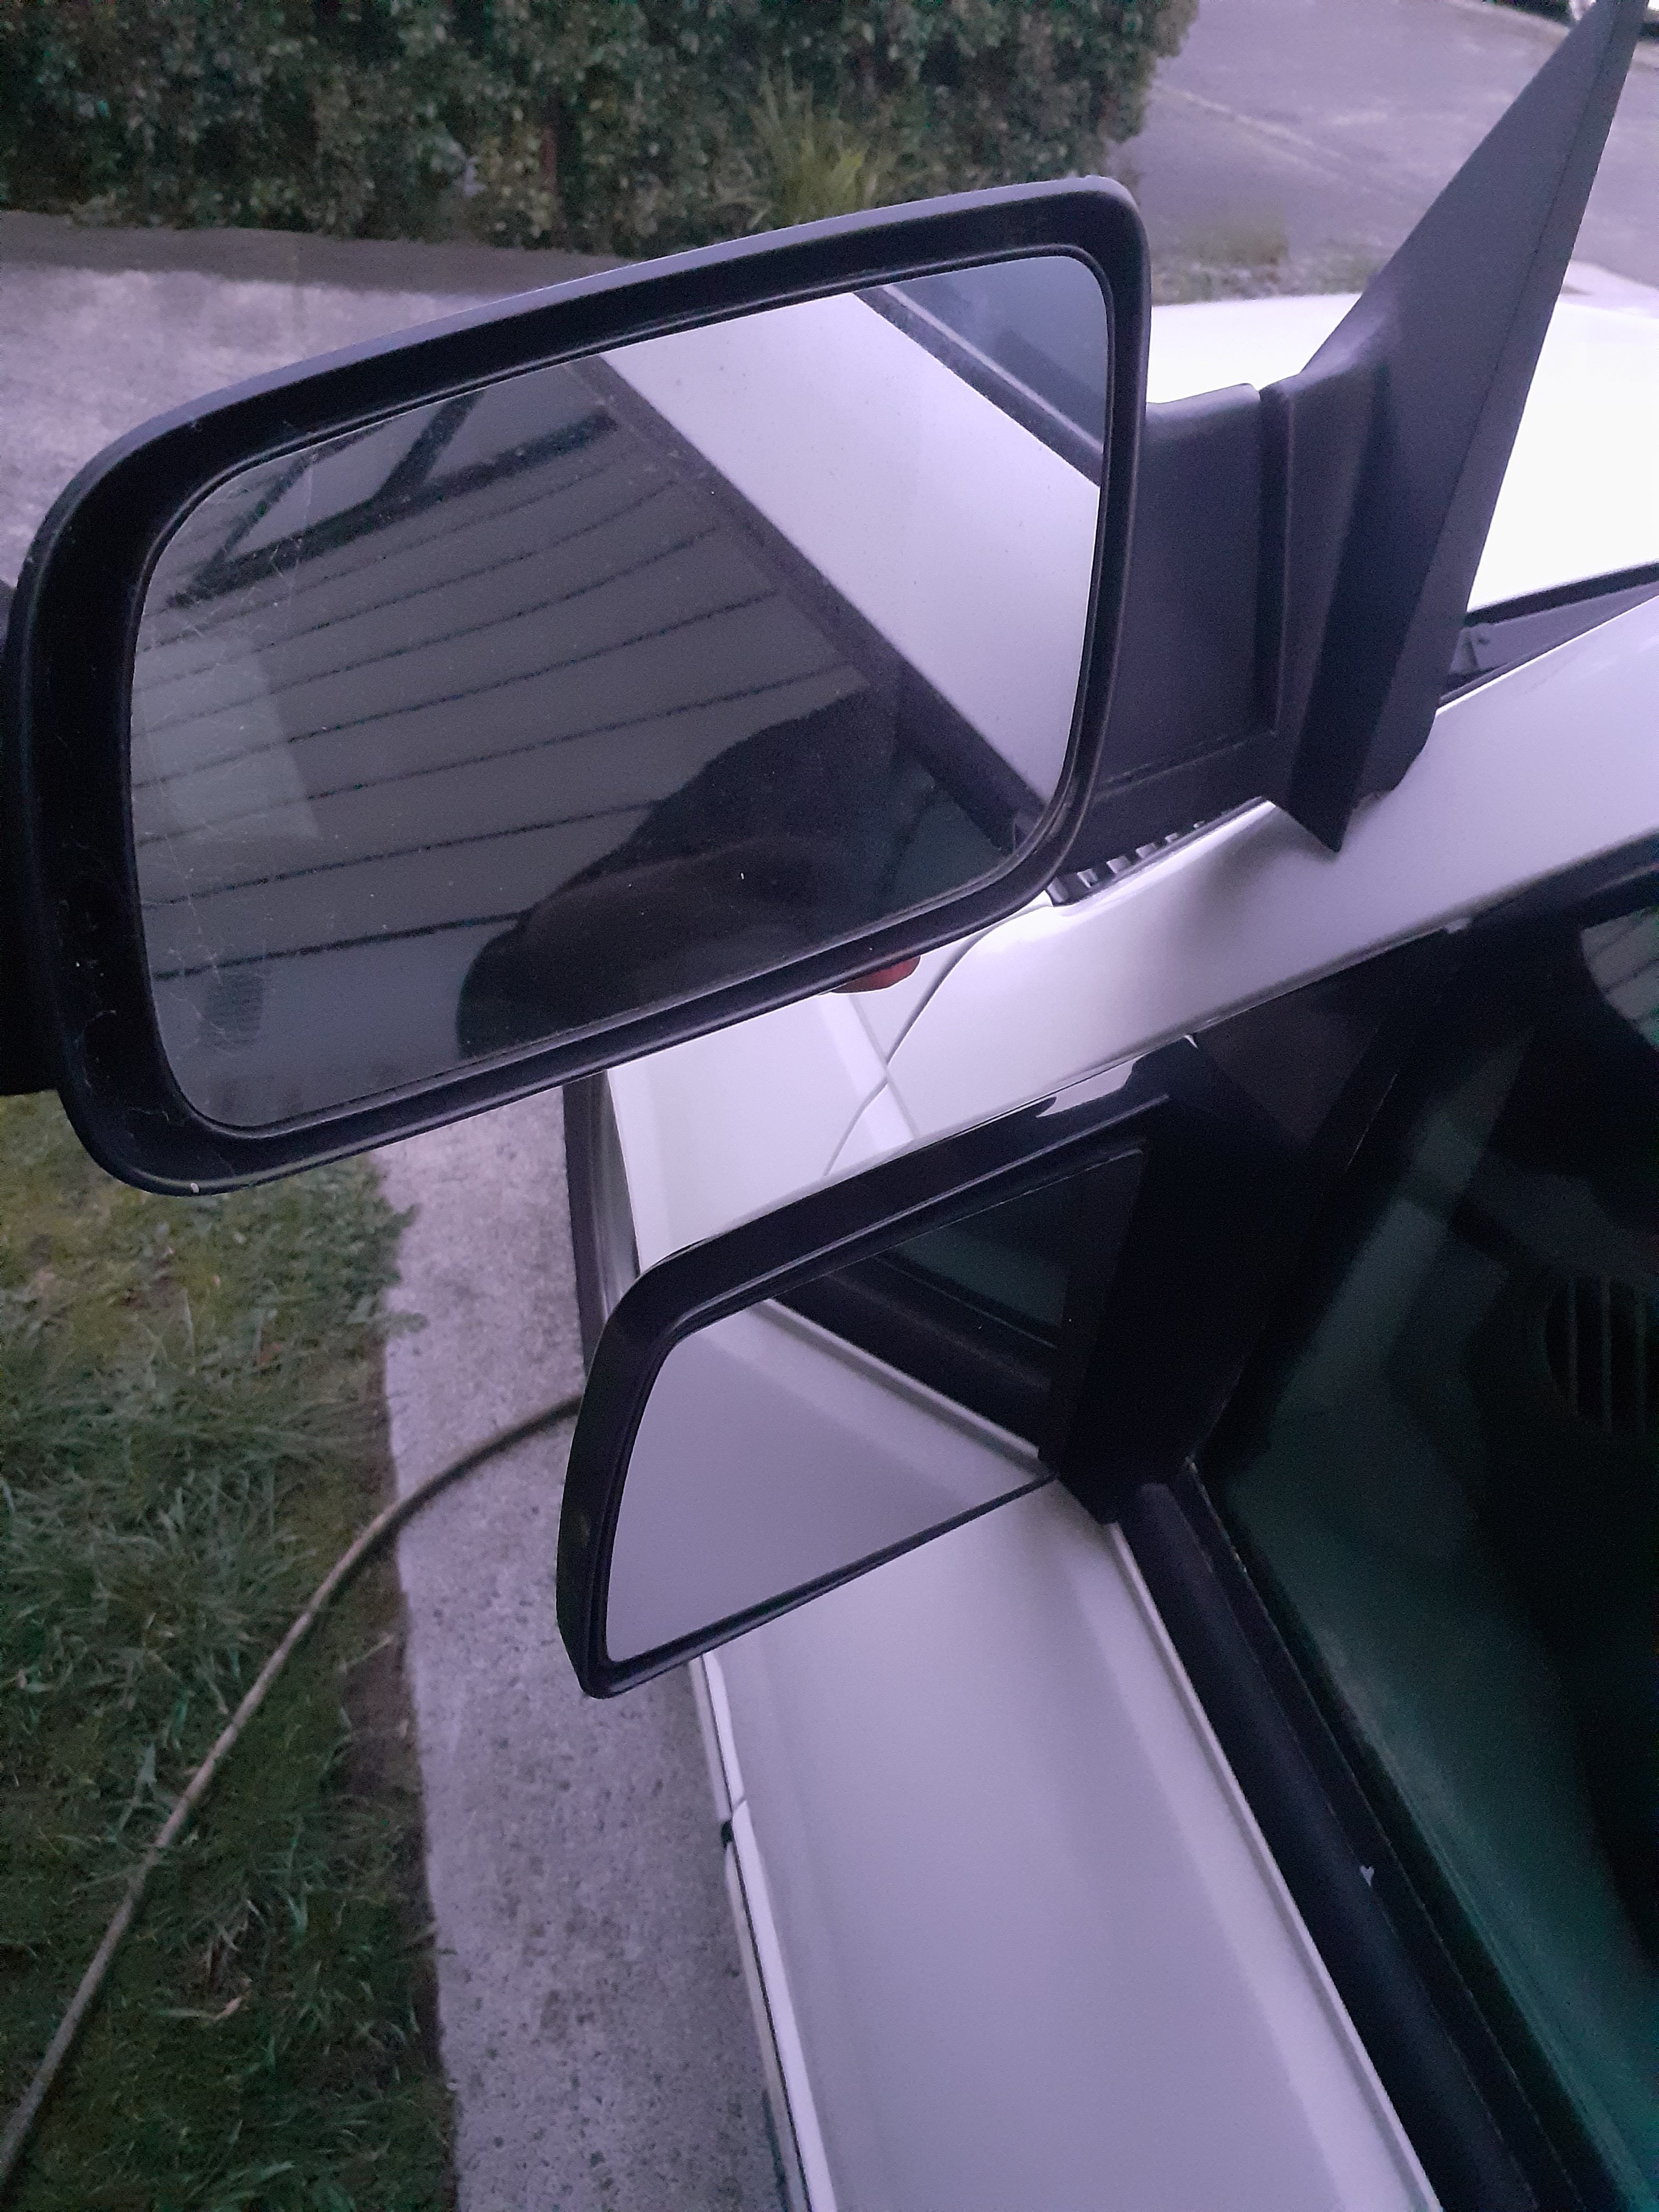
I got some different mirrors. These are "sport" mirrors. They were standard on 454SS trucks , with the powerful bathurst winning two hundred and thirty horsepower 7.4 litre engine coupled to a 3 speed automatic transmission. These were well known as being extremely fuel efficient, Toyota copied the fuel injection system for the first gen prius and were not able to get the same economy on petrol as the SS I have a theory that the SS's incredibly low fuel consumption is because of the small mirrors so I'm expecting to get a result where my 350 actually makes petrol go back into the tank. Also now I can't see behind me as good but I don't care because I'm not living in the past maaaaan
1 point
-
Well then, I've been tinkering away. The car was booked in for a WOF check on 19/08, and cert inspection on 27/08. As we all know, everything got fucked up again cos of the Cov, so none of that even happened. What I did do prior, was get the engine bay in a state ready to cert. Basically, LVVTA rules require the crankcase vent to be routed back into the intake, and my catch can setup/open trumpets was not going to work I'd always intended to run my big ITG filter over top of the trumpets, and the cert man confirmed it was OK to run a cam cover vent straight into the filter backing plate. I have spare cam covers to allow for this, and the net result was as below. Unfortunately, some bad measuring on my part meant the filter won't fit around the trumpets in situ - meaning I either need to put 50mm trumpets in, or just run without. For the cert purpose I chose to just run without. 20210918_105417-Edit by Richard Opie, on Flickr Anyway, I never got a cert, or a check, or fucking anything because diseases and shit. I'm still at home, not working, not earning, not happy. But I went and got the car anyway, and made some changes with a view to heading out and finally taking some proper photos with my real camera instead of the phone. First thing I did was install the Pioneer tape deck with the mounting kit. This thing is wonderful, it's hands down the rarest, weirdest most interesting 'off the shelf' part this car has on it, in my view. Everything fit perfectly, clipped and bolted in to where it needed to. 20210918_131215-Edit by Richard Opie, on Flickr For the most aesthetic photos, I figured it was best with the blue cam covers, open trumpets and catch can lines reinstated. I'd ordered some TecArts trumpets way back in March, these finally arrived in June from Japan and I took the opportunity to fit them up. 20210918_164209-Edit by Richard Opie, on Flickr 20210918_165815-Edit by Richard Opie, on Flickr 20210918_165822-Edit by Richard Opie, on Flickr These are 100mm long vs the 75mm we tuned on, have that great looking 'merged' bellmouth look to them. I'm smitten. It's also louder. Gave the interior a bit of a spruce up. Painted the kick panels and some other plastic trim, using an SEM product specifically designed for refinishing plastics. Custom matched by Carcolors on the shore. It's epic stuff! Overall the interior has come up well, it's a really nice light, airy place to be, kind of the vibe I wanted it to have. Black interiors are dime a dozen - it's nice to choose something different and actually have it come together. 20210918_170929-Edit by Richard Opie, on Flickr 20210918_170940 by Richard Opie, on Flickr 20210918_171300-Edit by Richard Opie, on Flickr Final wipe down, and it was ready to tuck under its cover for the night. Nice to just have a cold drink and stare at it for a bit. 20210918_175516-Edit by Richard Opie, on Flickr1 point
-
Well, we haven't managed to realise the promise of the previous post, but here's the state of play regardless. First up, gearbox. The remainder of my spiffy new internals showed up from the motherland, and I trundled up to the sunny Hibiscus Coast to finish assembly under the watchful eye and guiding hands of Mr. McFarlane the T50 whisperer. This is what we ended up with. 20210515_113825-01 by Richard Opie, on Flickr All shiny and clean and new! The only things NOT new in this, are the gearsets, main shaft and shifter rods. 20210515_113843-01 by Richard Opie, on Flickr Pretty neat learning exactly how this all works in a practical sense. Otherwise the gearsets are all in pretty good order, given the hiding this thing appears to have taken over its life. 20210515_113836-01 by Richard Opie, on Flickr Little bit of a close up of the nice new shift forks and shifter hub/sleeve things Then we tackled the head. Well, Alan at Harris Performance did. For those that don't know, Harris Performance is what was formerly Lynn Rogers and Alan knows his way around a 4AG head a bit. Pics of head below for perusal. 20210511_115253-01 by Richard Opie, on Flickr Chambers tidied up, valves deshrouded. 20210511_115249-01 by Richard Opie, on Flickr 20210511_115244-01 by Richard Opie, on Flickr Inlets all looking a bit spiffy! 20210511_153023-01 by Richard Opie, on Flickr This is the transition from the T3 ITB manifold to the head. Out of the box, it was super shithouse. Now it isn't, plus the manifold/head have been doweled so it's always fitted up in the right place. Not even sausage hands Richy can fuck this one up (too much, anyway). 20210513_124014-01 by Richard Opie, on Flickr 20210513_124023-01 by Richard Opie, on Flickr Cams and supertech valvetrain all installed. We ended up going 1mm oversized valves, as the ones in the head were past their best before and the extra cost wasn't going to be a big deal over replacing them with stock sized ones. It's in the final stages now, prior to head assembly I dropped the long block off, and Alan measured the valve to piston clearances to ensure nothing was going to clash and end in tears. Will have a number on CR shortly (expect it'll be around 12:1 or slightly more) and the head will rejoin the block. Next update, we should have a built long block and I'll be putting all the ancillaries back on it, prepping to put it back in the car hopefully for the last time for the forseeable. Tell me how it's a fuck up and it's going to explode, here;1 point
-
Some updates. Waikumete upholsteres made a carpet for me. 2 pieces, like original, and we found a loop pile in maroon! Which was brilliant, as I really wanted a loop pile for that more premium appearance. 20210321_161234 by Richard Opie, on Flickr 20210321_165710 by Richard Opie, on Flickr I think it turned out pretty well! Did the boot also, but I haven't got a pic of that for some reason. 20210408_210246 by Richard Opie, on Flickr Engine and gearbox came out again. This is minutes before it all lifted out. Very easy. 20210417_114901 by Richard Opie, on Flickr Pulled apart the gearbox with great guidance from Earle McFarlane. 20210417_121227 by Richard Opie, on Flickr Measured all the clearances, then pulled it apart. Selector hubs are a bit pwnt, there is excessive wear in the shift forks, bearings seem all right but they're all being replaced anyway with all those parts in the post above. So now the mainshaft has been assembled (in my absence) and we are just waiting on the forks to come in from Japanland so we can reassemble. 20210330_125040 by Richard Opie, on Flickr Since the motor was coming out anyway I thought it'd be a good time to get the top end sorted, as it's only ever been a stock head and cams, despite the bottom end being built/hi comp. This is a spare smallport head that I spent a while scrubbing in the shed to get clean. 20210330_125016 by Richard Opie, on Flickr I then thought I'd try cold jet/dry ice blasting as a bit of a test case on the cam boxes to remove the baked on sludge and scum. This is the result. Pretty awesome! I'm going to be using this process to clean some of the undercarriage parts in situ on the Honda. 20210331_084622 by Richard Opie, on Flickr I stripped the head myself, once I learned how to remove the collets from the retainers it was all pretty simple. Here's the head, with all the bits catalogued and in containers, with the Kelford 193B cams and Supertech retainers/springs I bought ages ago for it. It's in with Alan Harris at Harris Performance Engineering (previous Lynn Rogers) for porting, some tickles on the combustion chamber and a port match of the ITB manifold. I then got to thinking about what audio this car is going to have, even if you can't hear anything inside it really. Initially, I was going to run a modern Bluetooth head unit in the glovebox, and got as far as buying this pretty rad Sony unit that has 50wrms per channel - from a head deck!!! Enough to power anything, speaker wise. But then Ed sent me a link to a Yahoo auction that changed things. 20210422_172330-01 by Richard Opie, on Flickr 20210422_172308-01 by Richard Opie, on Flickr This is an AD-189T fitting kit/adapter produced by Pioneer in the early 80s. It fits a 'B' type head unit, which is conveniently what the 'component' systems of the early/mid 1980s are. Before the standard DIN size we all know and love today. It replaces an entire middle panel on the dash, replicating the OEM fit where normally there would be a spindle mount head unit (as is the case on my factory dash). I had never, ever seen even a picture of one of these kits before, let alone a NOS one on Yahoo. So I bid on it, because who doesn't love period accessories. And I won it. So then I thought I'd probably better find a head unit to fit. 20210422_172407-01 by Richard Opie, on Flickr I ended up with this Pioneer KP-717G tape deck. Note - it's a tape deck only, there is no AM/FM radio or anything with this, as was the style of the component systems of the time. This one was listed with a clean bill of health, and some remedial work done to ensure it was operational. The auction was backed up with a video to prove it. It's one of the higher end units in this range, with Dolby NR, adjustable tone controls, all the fruit. It doesn't have an amp on board - luckily Ed has one of the Pioneer GM-4 amps for this to plug into, that will find it's way into my car. 20210422_172454-01 by Richard Opie, on Flickr This is how it should look when installed in the car, using the AD-189T kit. Fuckin. Awesome. I reckon. 20210422_172612-01 by Richard Opie, on Flickr 20210422_172638-01 by Richard Opie, on Flickr And this is essentially what the initial system I run will be. Later on I may add some fronts - I have some NOS Pioneer TS167 coaxials, and also dual cones whose code escapes me right now. These TS-X9 are incredible though - I had them wired up to my amp in the house and they produce enough bass you can actually feel it through the floor. How they achieve it, I do not know. Sure it's not sub levels, but it's a beautifully balanced sound that I hope will be loud enough to listen to while pootling along at slow speeds or stuck in traffic. Thank you for coming to my TED talk. Hopefully, next updates will include a rowdy cylinder head, a slick shifting T50 and some Phil Collins tapes in the KP-717G.1 point
-
SOme more things have been done, including all-new loop pile carpet and a nice alloy sealed battery box in the boot but that's not even important. What is important, is the gearbox, which sucks. Downshifting is impossible without a big ol' rev match and double clutch to get it from 4th to 3rd, then from 3rd to 2nd. As the car makes a little bit of a racket, it's quite obnoxious. So I sat down with Earle McFarlane (he's had many many experience with T50s and rebuilding them) and ordered a whole load of parts from Japan. They came in this box. This struck me as odd. Amayama orders are sent to an NZ warehouse then dispatched from there, so I'm guessing this happened locally. 20210325_180028 by Richard Opie, on Flickr And this is what's in it. 20210325_175701 by Richard Opie, on Flickr We have; Synchros for all gears New selector hub sleeves Gasket/seal set Selector hub shift keys Clippy springy things for above Bearings a go-go (all bearings I could possibly get, we need to get the 2 countershaft bearings locally) Some good low km selector hub centers are en route from South Island. Next, I will rebuild the gearbox - well, Earle will rebuild it and instruct me to do some of the easy bits. Then I can finally aim for some twisties and give it a good drive, assuming it all plays the game. Looking forward to pissing around with brake bias, making all that stuff work etc.1 point
-
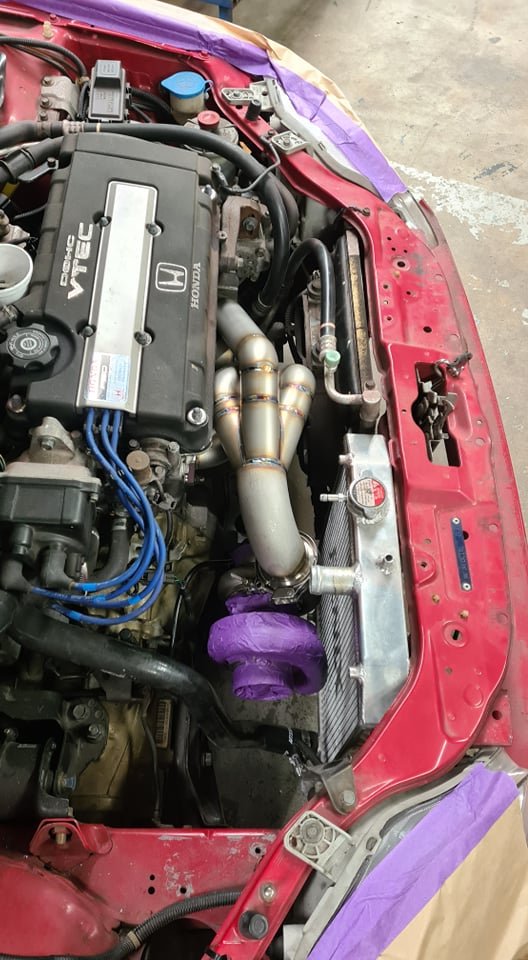
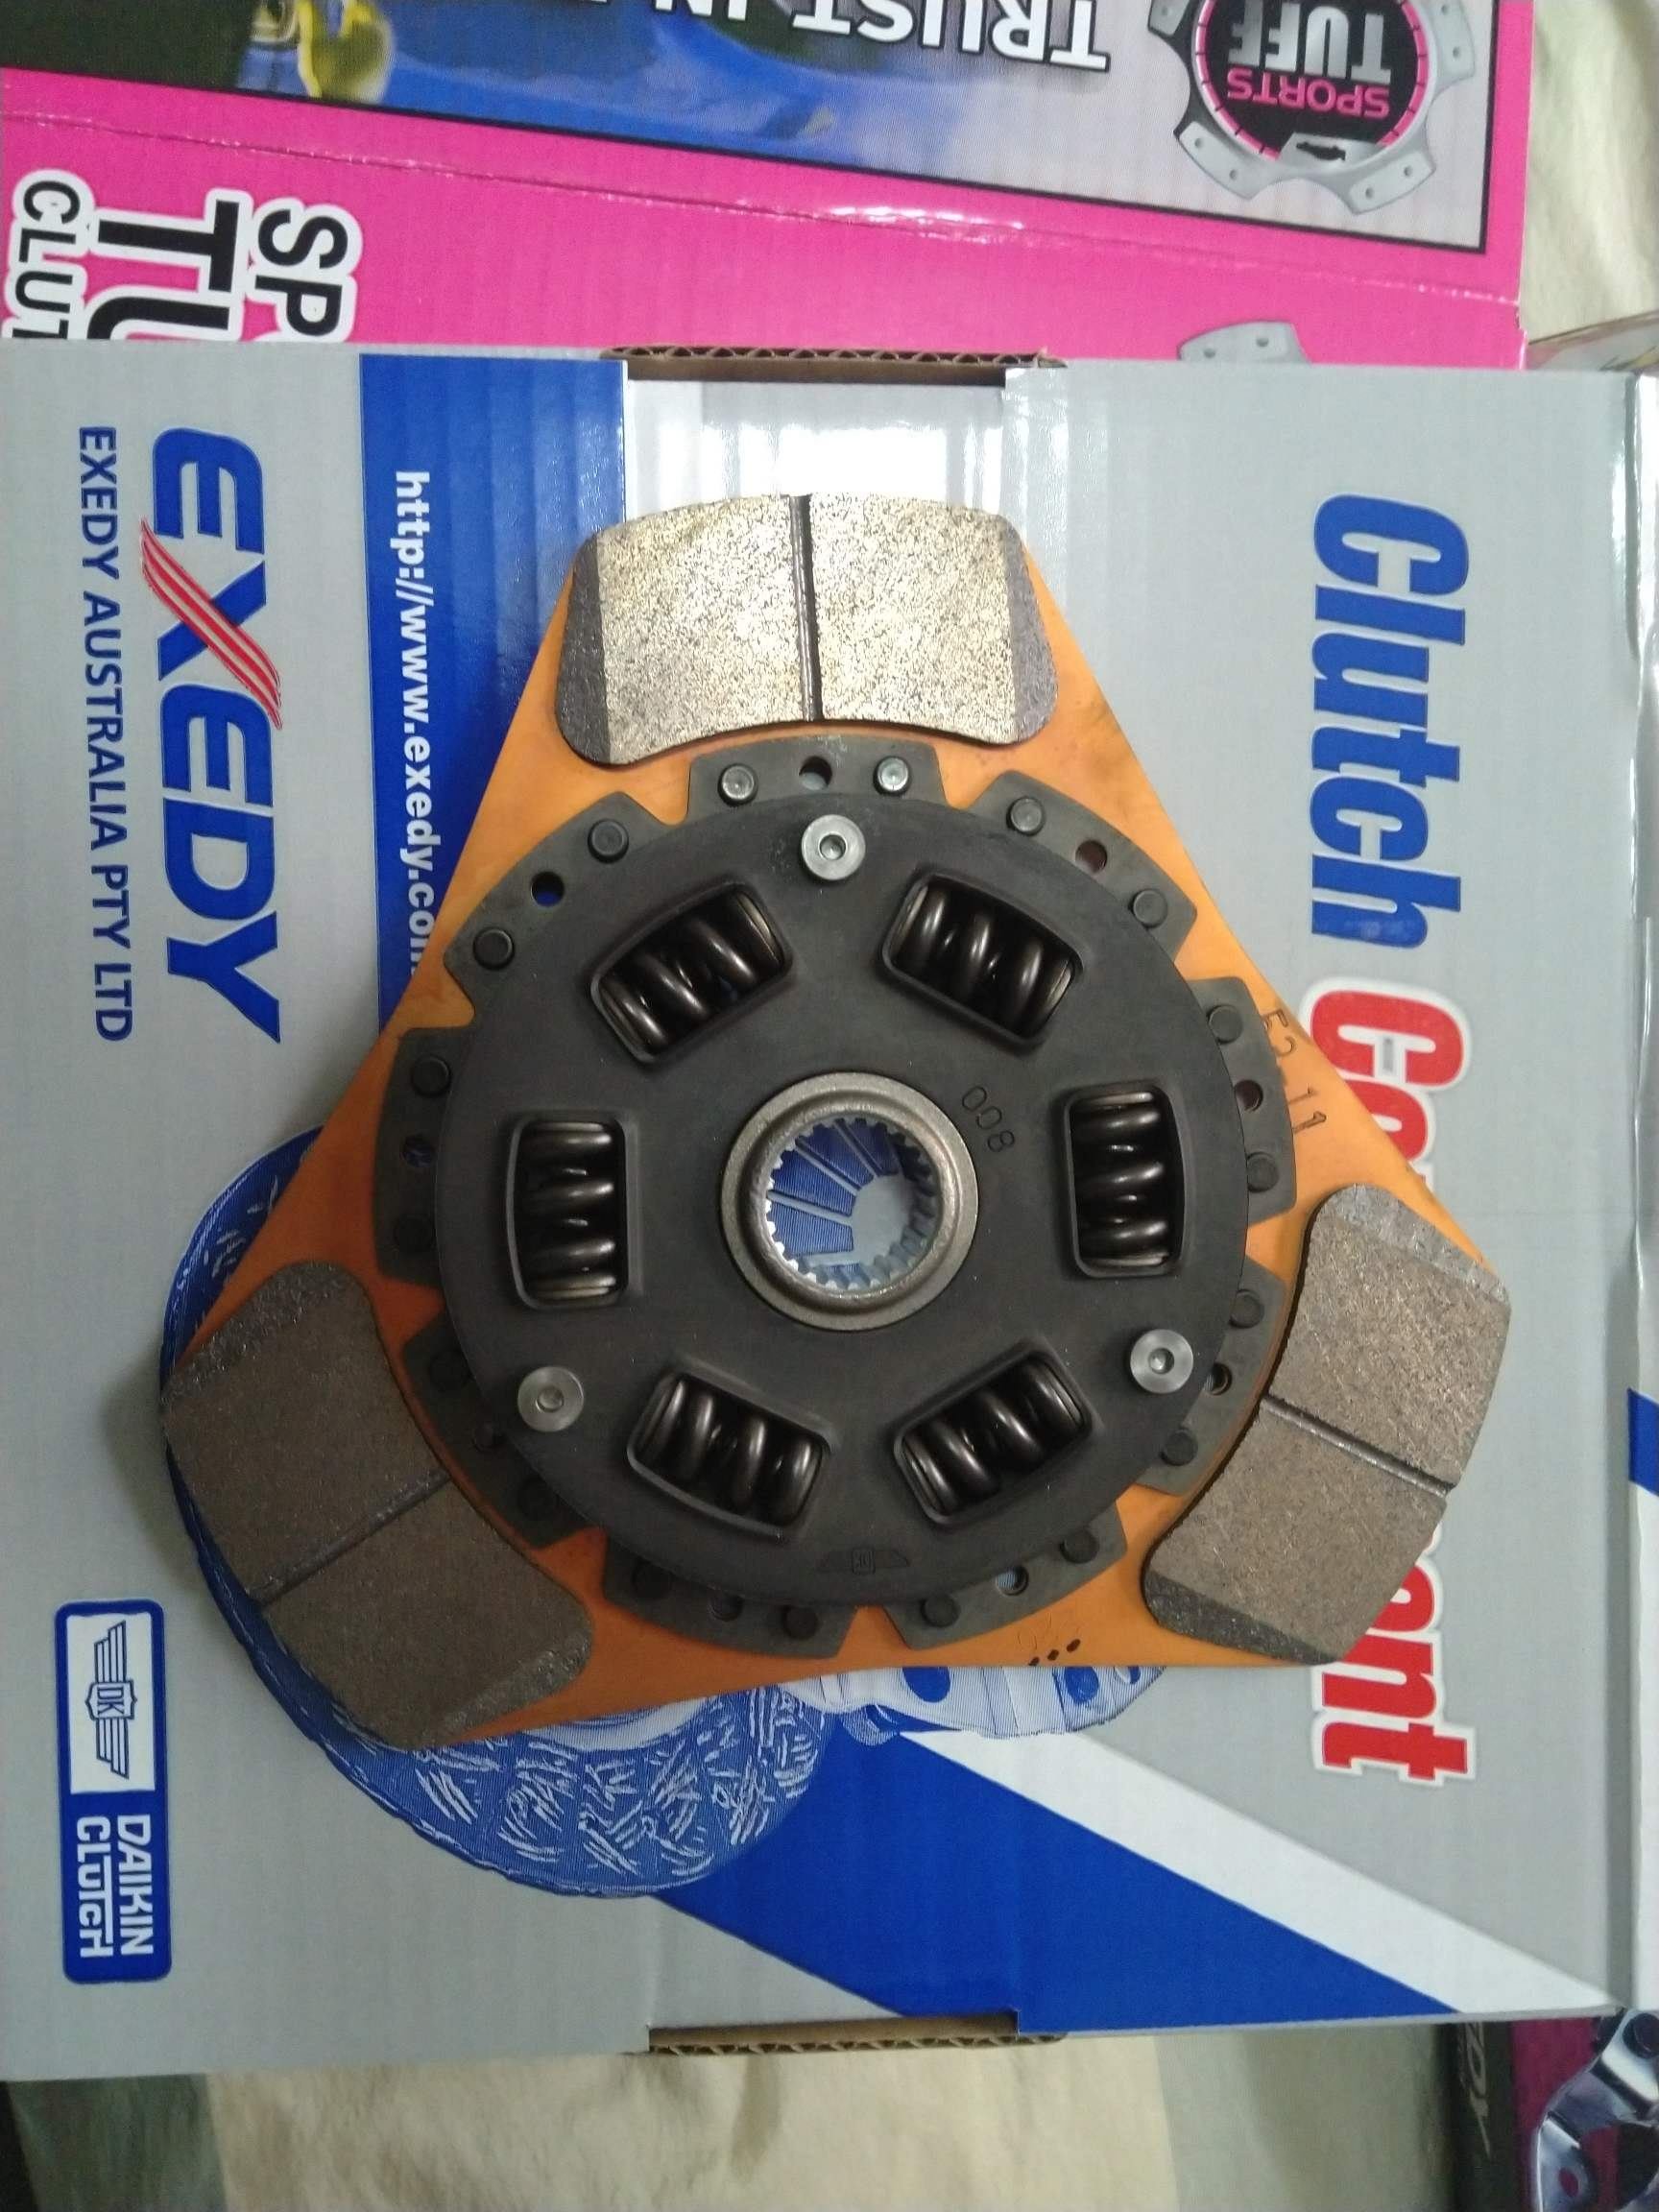
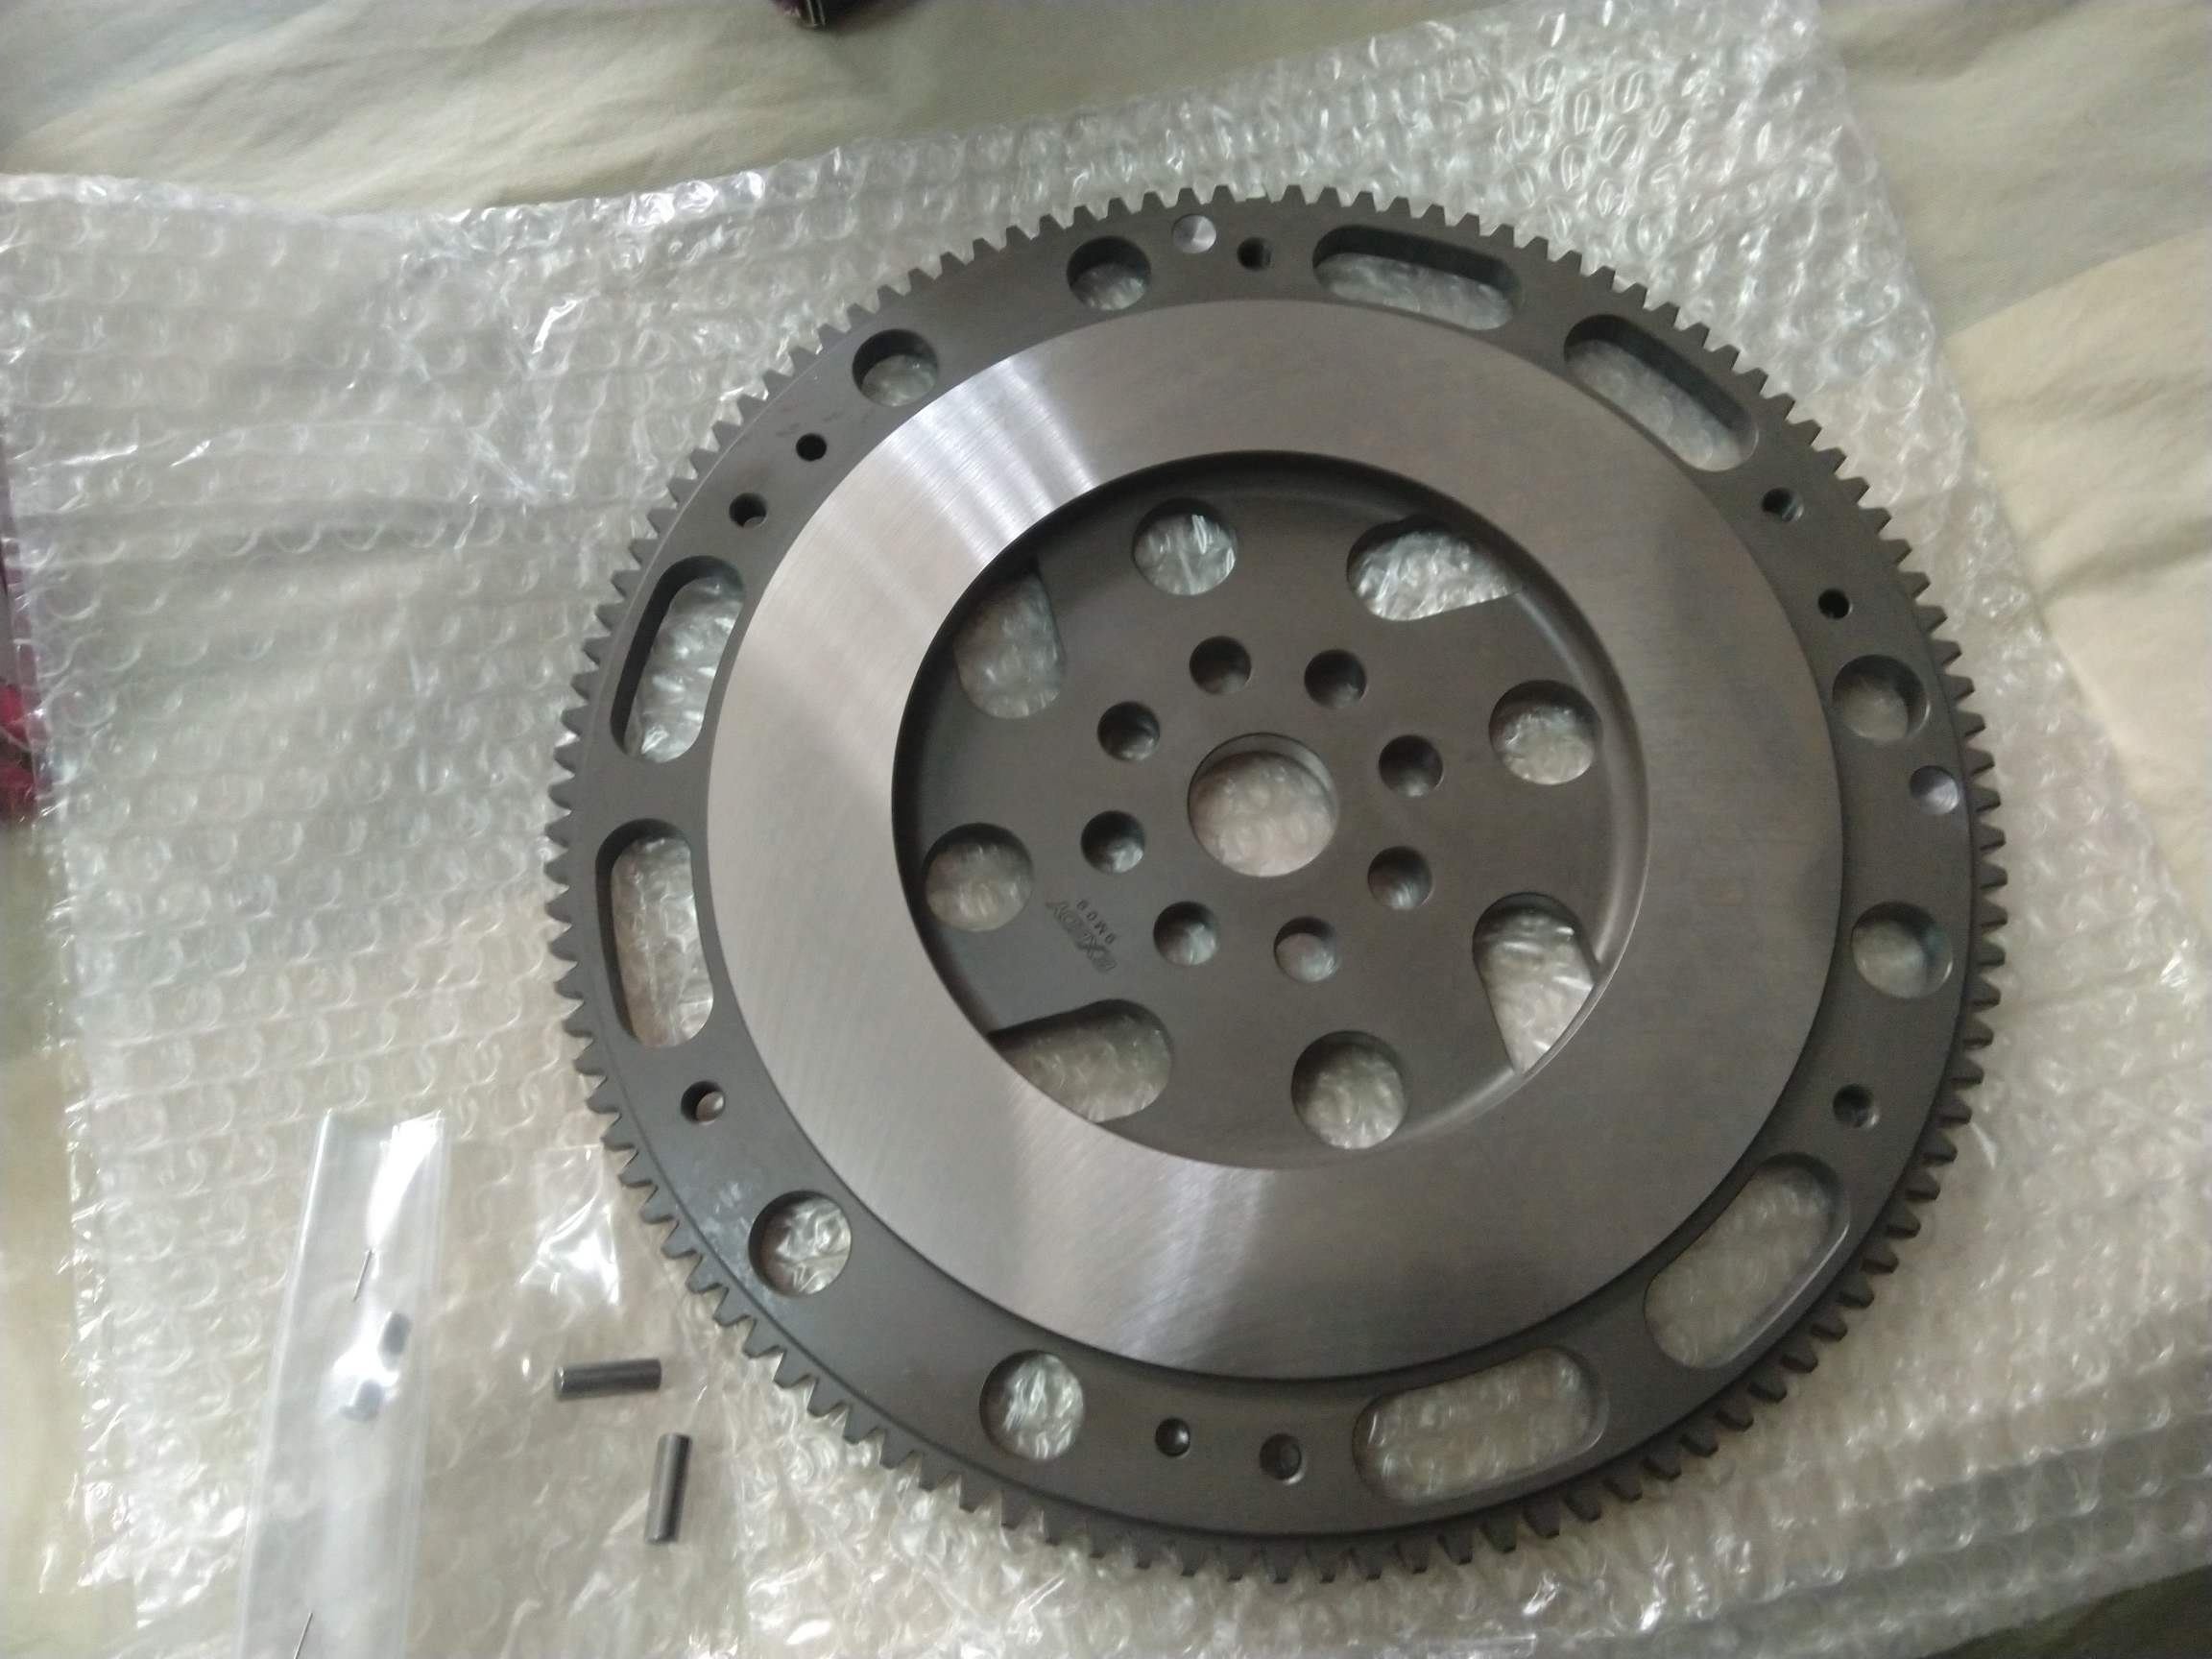
Clutch & Flywheel acquired - will get the gearbox rebuilt and these fitted late Jan / early Feb Also purchased a 66mil throttle body should make thing easier with future pipe work Cars getting repainted over Christmas / New Years back to Milano Red from Milano Pink
1 point


.jpeg.af1e6e0d05eaf3b92c89f594f37a027c.jpeg)
.jpeg.9bbfc2e64566dda9b080611b006d5947.jpeg)
.jpeg.cd63114ccc911a77ddc4d0057135cc19.jpeg)
.jpeg.77d0f7ff858570342d4f8a42ac96b177.jpeg)


This leaderboard is set to Auckland/GMT+12:00