
Leaderboard


Popular Content
Showing content with the highest reputation on 08/02/21 in all areas
-
Time to have another go Got almost a ton of sand, new resin system and a new insulating spray for the moulds (meant to help big thin castings). Planning to use a concrete mixer to do larger batches. Doing some repairs to the damaged patterns. Drilled holes in the print and injected concrete epoxy. Also adding a few bond on thread plates to hopefully get a slide hammer on.16 points
-
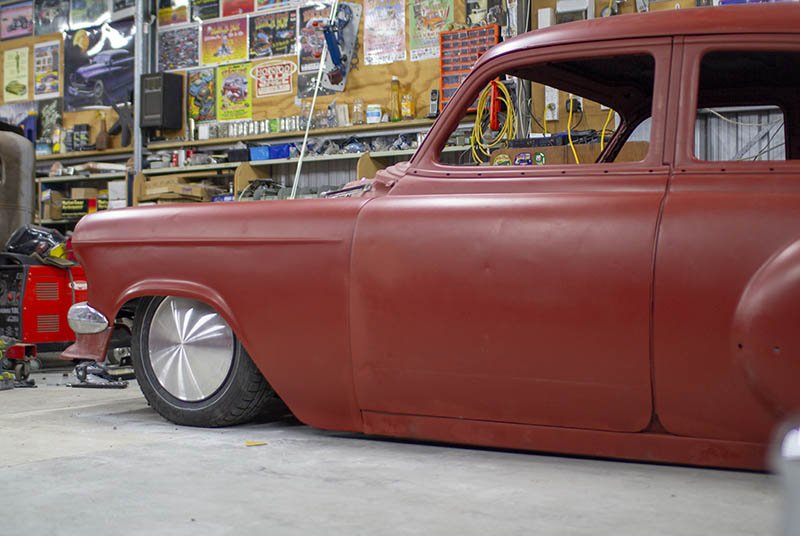
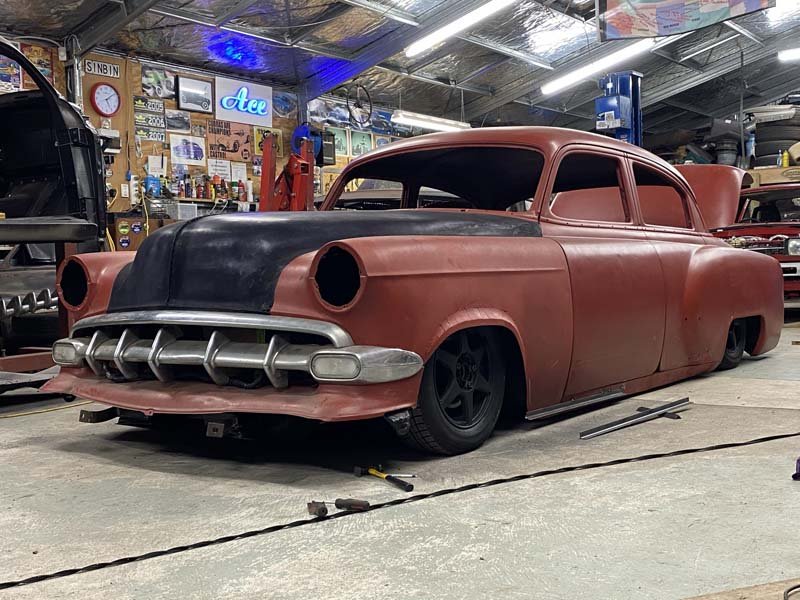
Made a start on the rear quarter/rear arch - the arch has had me nervous for a while, pleased with how it's come out so far.
 13 points
 -
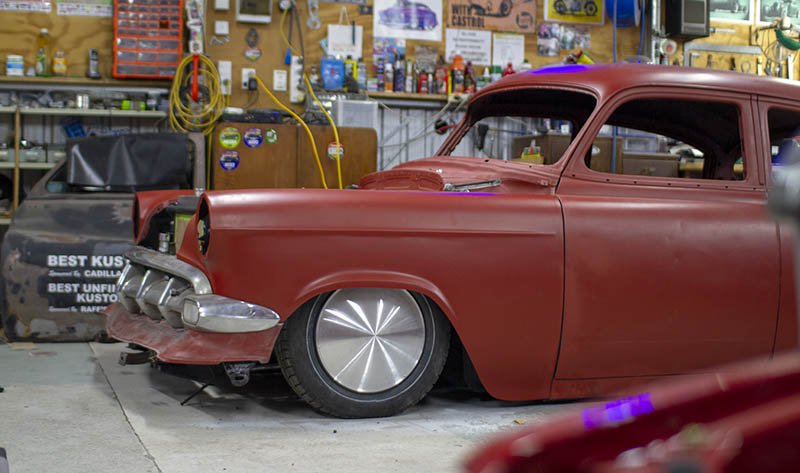
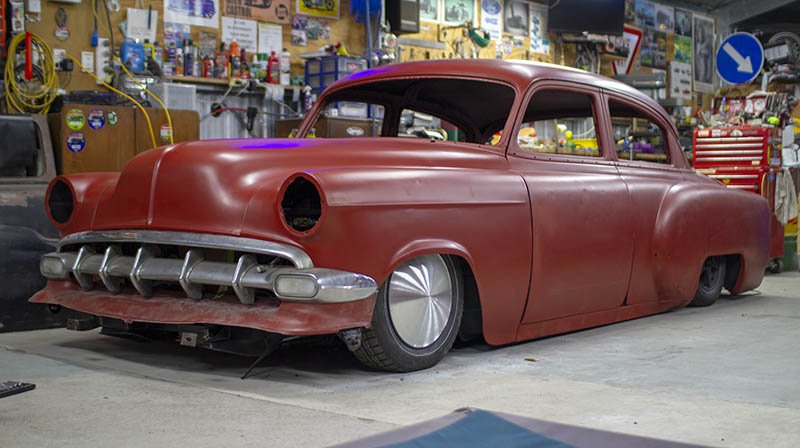
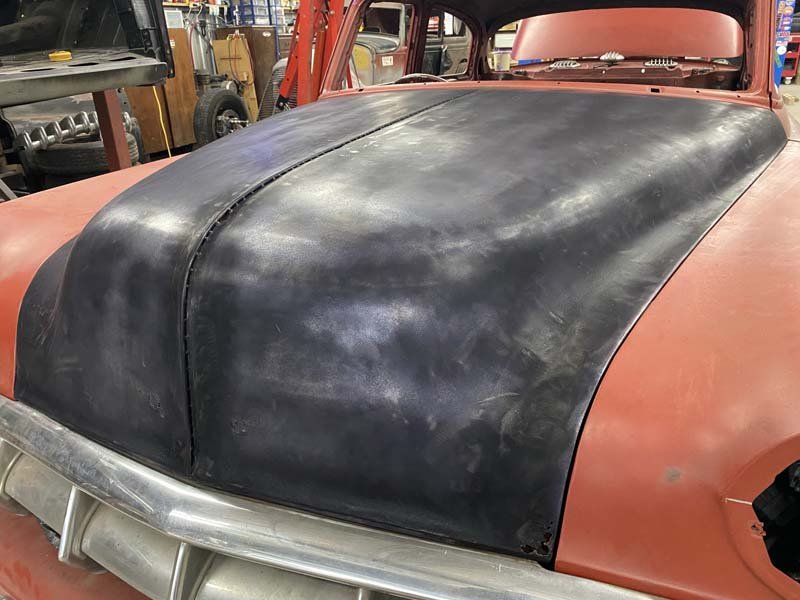
Fenders Painted and Fitted Up. Fitted up a moon disc to the alloy wheel too. And the Painted peaked bonnet.
11 points
-
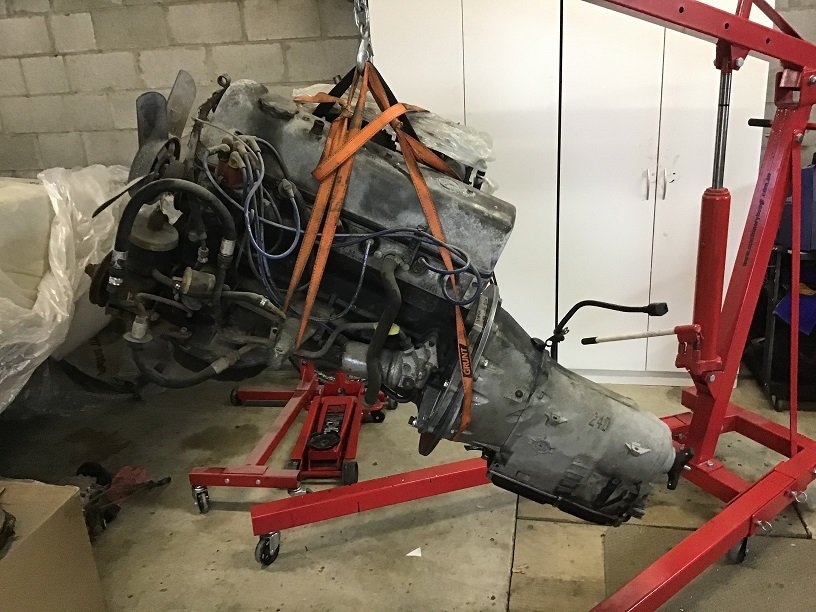
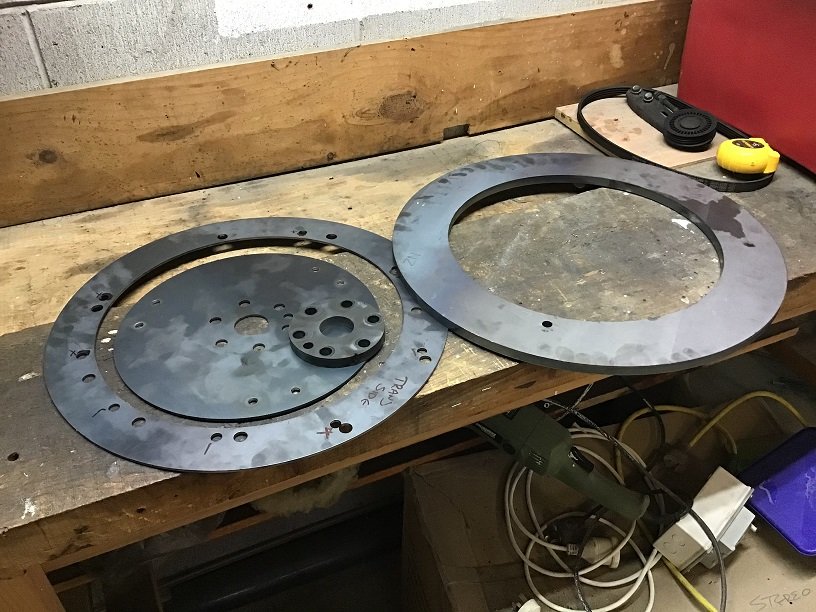
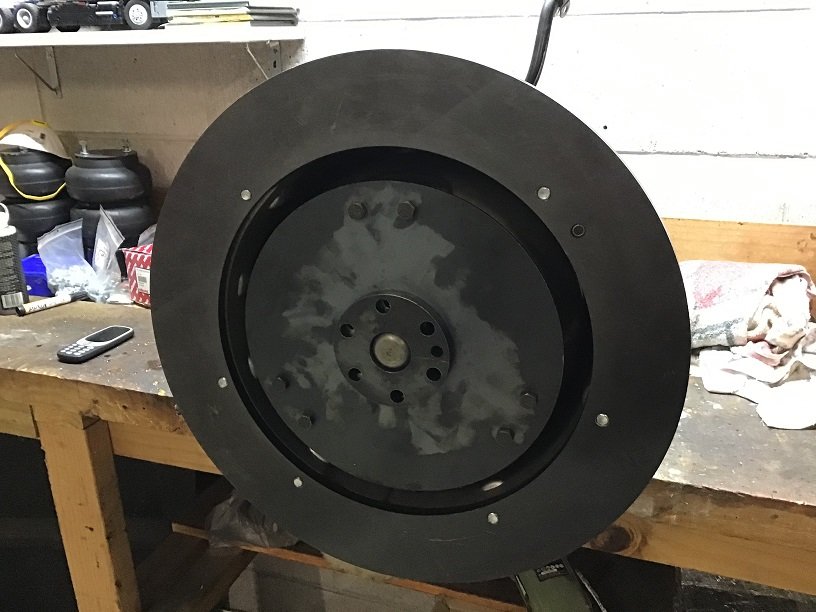
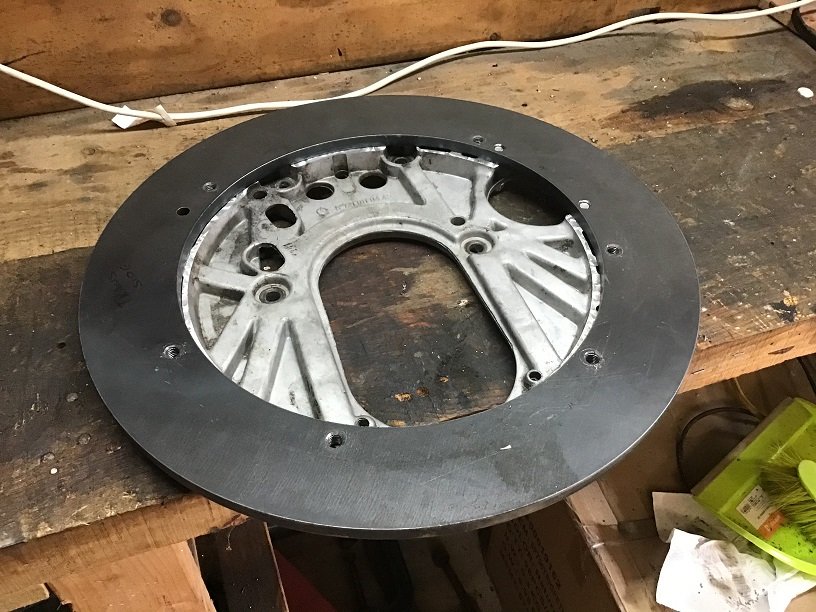
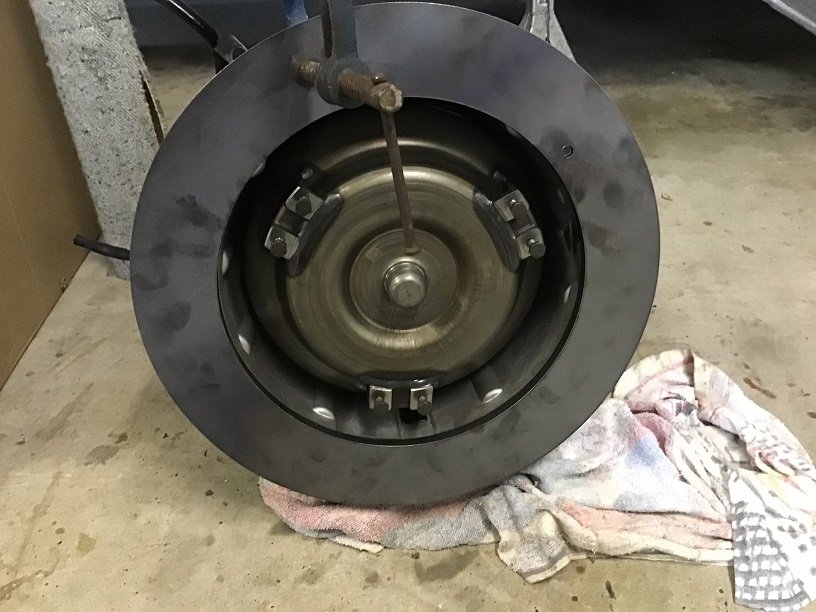
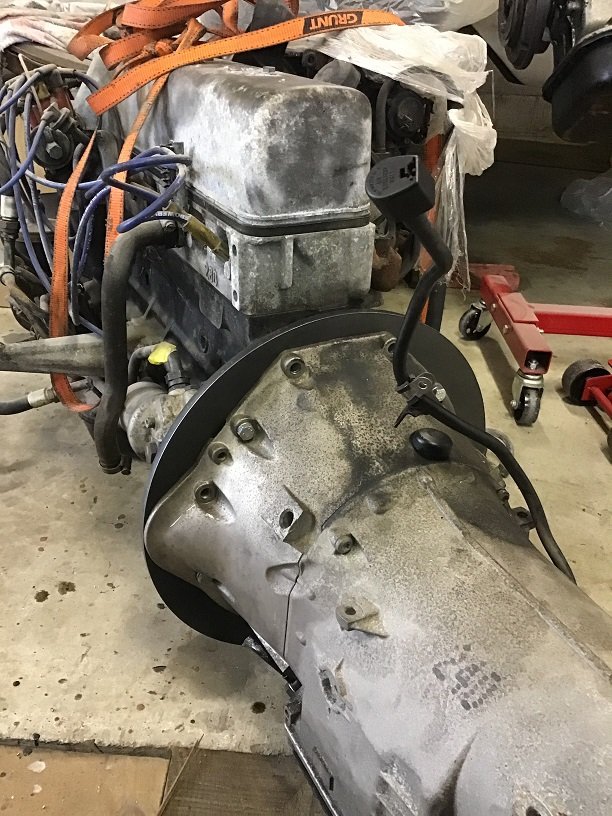
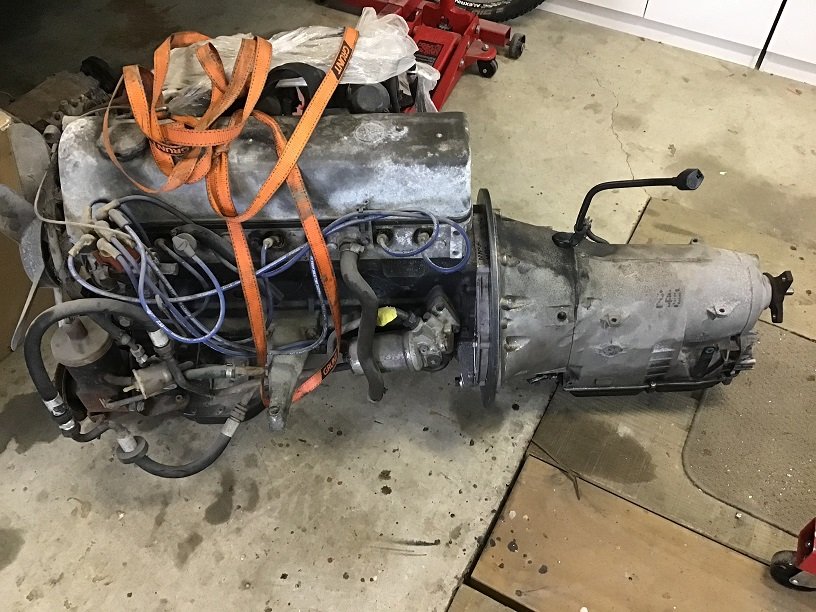
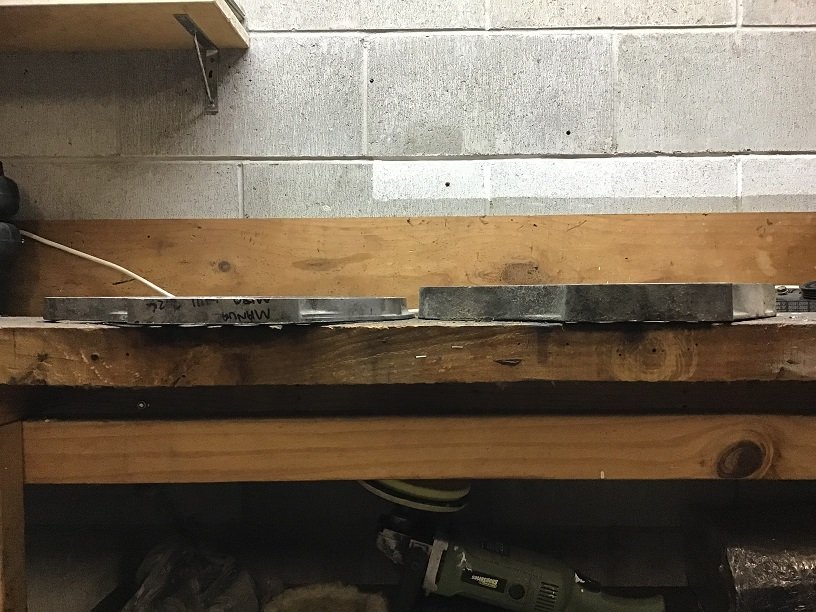
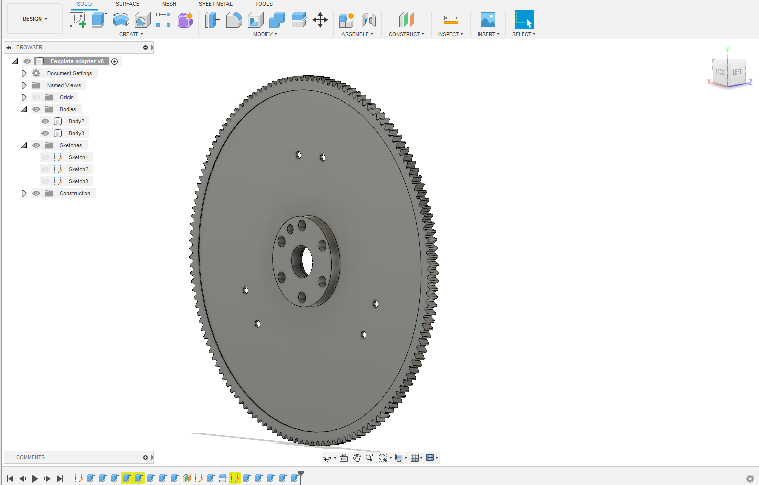
Trans adapter time. As mentioned earlier the 722.6 doesn't bolt up to a M180/M127/M129/M130 engine even through the bolt patterns look very similar (with the inline engine version of a 722.6 bellhousing at least). So I had a conundrum on how to go about this, taking into consideration things like starter location, ring gear location, keeping things concentric, making sure the torque convertor is seated once its all together etc. There's several things that ended up providing the answer for me. Firstly the starter; On the M130 the starter is on the right hand side of the engine, the factory sandwich plate that sits between the engine and gearbox has a provision for the starter. however on the 722.6 trans the starter clearance bulge is on the the left hand side. So which side of the motor do you want your starter? if you scroll up a post of two you'll see the oil filter housing sits on the left hand side of the motor, right where the starter would be, so you can't make use of the 722.6s starter mount. In which case you're now using the engines OG starter, which means you'll want to keep the ring gear in the original location... So I yoinked the manual trans off that engine and too some measurements and drew some circles in Fusion360 Then realized I'd mucked up the overall diameter of the thing, luckily this was prior to sending away files to the laser cutters. Sent some files off and they sent back some lumps of metal Have a 12mm spacer for the end of the crank, and a 3mm thick flexplate, plan is to scavenge one of the ring gears off the manual flywheels I have and weld that to the flexplate. I spent a rainy Sunday attempting to measure the bolt pattern for both the engine and the trans and had a test piece cut out of 3mm plate at the same time (the disc on the left) if my measurements were right I was going to get a thicker one cut and run that but you can see from the ticks and crosses on it only about a 1/3 of the holes lined up. Ended up getting a 12mm thick piece laser cut (the disc on the right) that utilized one of the factory dowel pins on the trans, that was to be my starting point. clamped precariously in place, the OD was large enough to blank off the now unneeded starter bulge on the left hand side Went around and marked out the holes I'd be using that didn't clash with any of the holes I would need on the sandwich plate, tapped one of them using the shitty tap set I had before buying a Volkel tap set based on someone on heres recommendation, holy moley did that improve my outlook on life. Whoever made that recommendation deserves an ice cream. Ended up here: Jealous of my phone? Whilst doing that the torque convertor was sitting on the bench next to the trans, at some point I moved the trans and knocked the converter onto the floor which caused a drama for later on but we won't talk about that. Did some maths at this point. Decided if I wanted to run a 12mm thick adapter plate I'd need to reduce the thickness of the sandwich plate by ~11mm, a buddy came through and was able to do that for me, I have a spare plate if this doesn't work out, comparing the two post surgery: That's the relatively easy side done, next step was to join that to the engine whilst keeping the trans concentric to the crank (well as much as I could anyway). There's a small win here in that the OD of the pilot on the torque convertor is the same as the ID on the end of that crank where the pilot bearing would normally go for the original manual trans (35mm). I carried this measurement over to the ID of the crank spacer so the Torque convertor could locate on it, the spacer picks up the OG dowel pin on the end of the crank so based on that assumption of it being a straight line I bolted the spacer up to the crank and slid the trans up to it, docking the torque convertor pilot in the hole. Took a brave pill and wiggled it so the trans looked straight up and down against the engine, rather than tipped to one side, and marked out the two holes for the starter then drilled and tapped those. Bolted everything back together, so far everything is lining up. took the trans off, leaving the adapter bolted to the sandwich plate on the engine, removed these two as one: Was then able to flip it over, mark out some holes and drill and tap those. Then the moment of truth, putting it all together... Booyah! that shit is attached. Had to do a bit of fettling but was bugger all. I need to change the blade on my vertical bandsaw so I can trim the excess off the OD of the adapter. Current issue is that its too tight between the flexplate and the converter, they rotate as one without being bolted together. We didn't get exactly 11mm off the plate when we machined it down, it ended up being about 11.2mm which I think is part of where the problem is, it's bringing the trans and engine too close together, in hindsight I probably should have aimed for 10mm. I think to get around this I might skim a bit off the end of the converter so it can sit further inside the bellhousing when seated, but I'm not sure how much clearance the input shaft of the trans should have inside the converter before it bottoms out, surely 1mm less isn't the end of the world? Anyone got any insight?
8 points
-
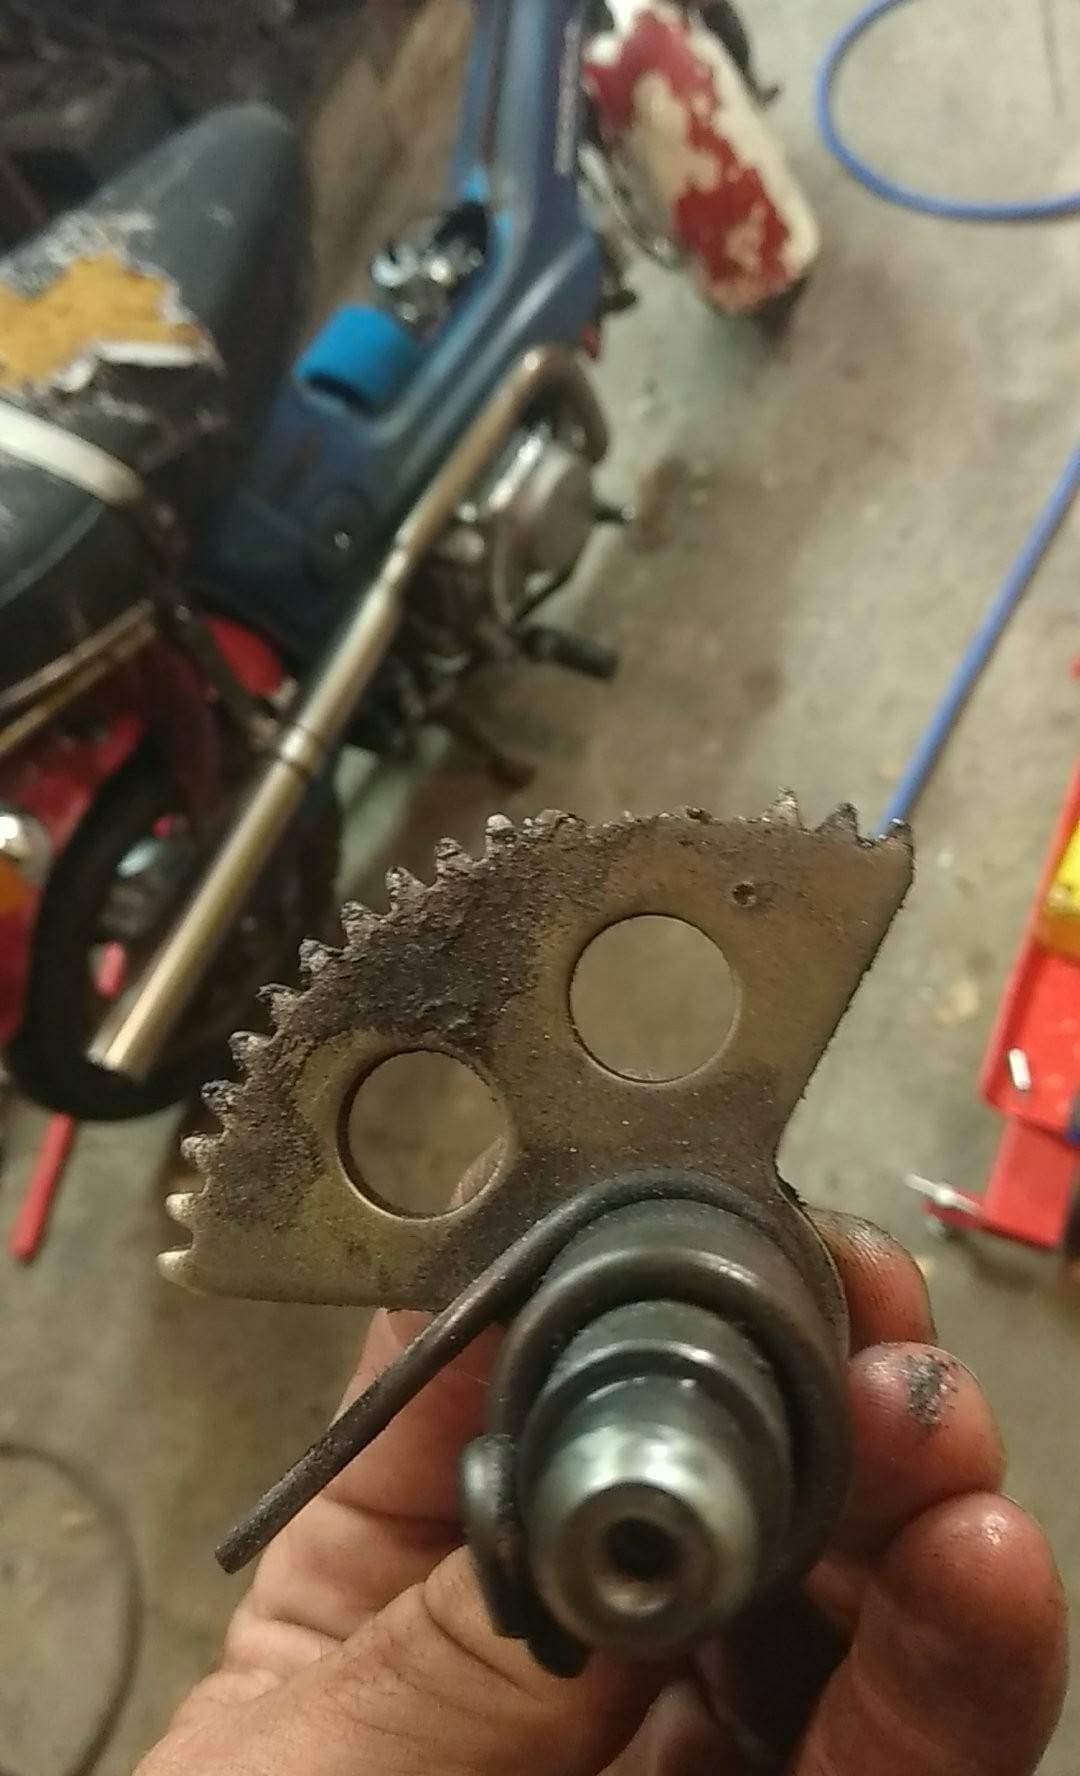
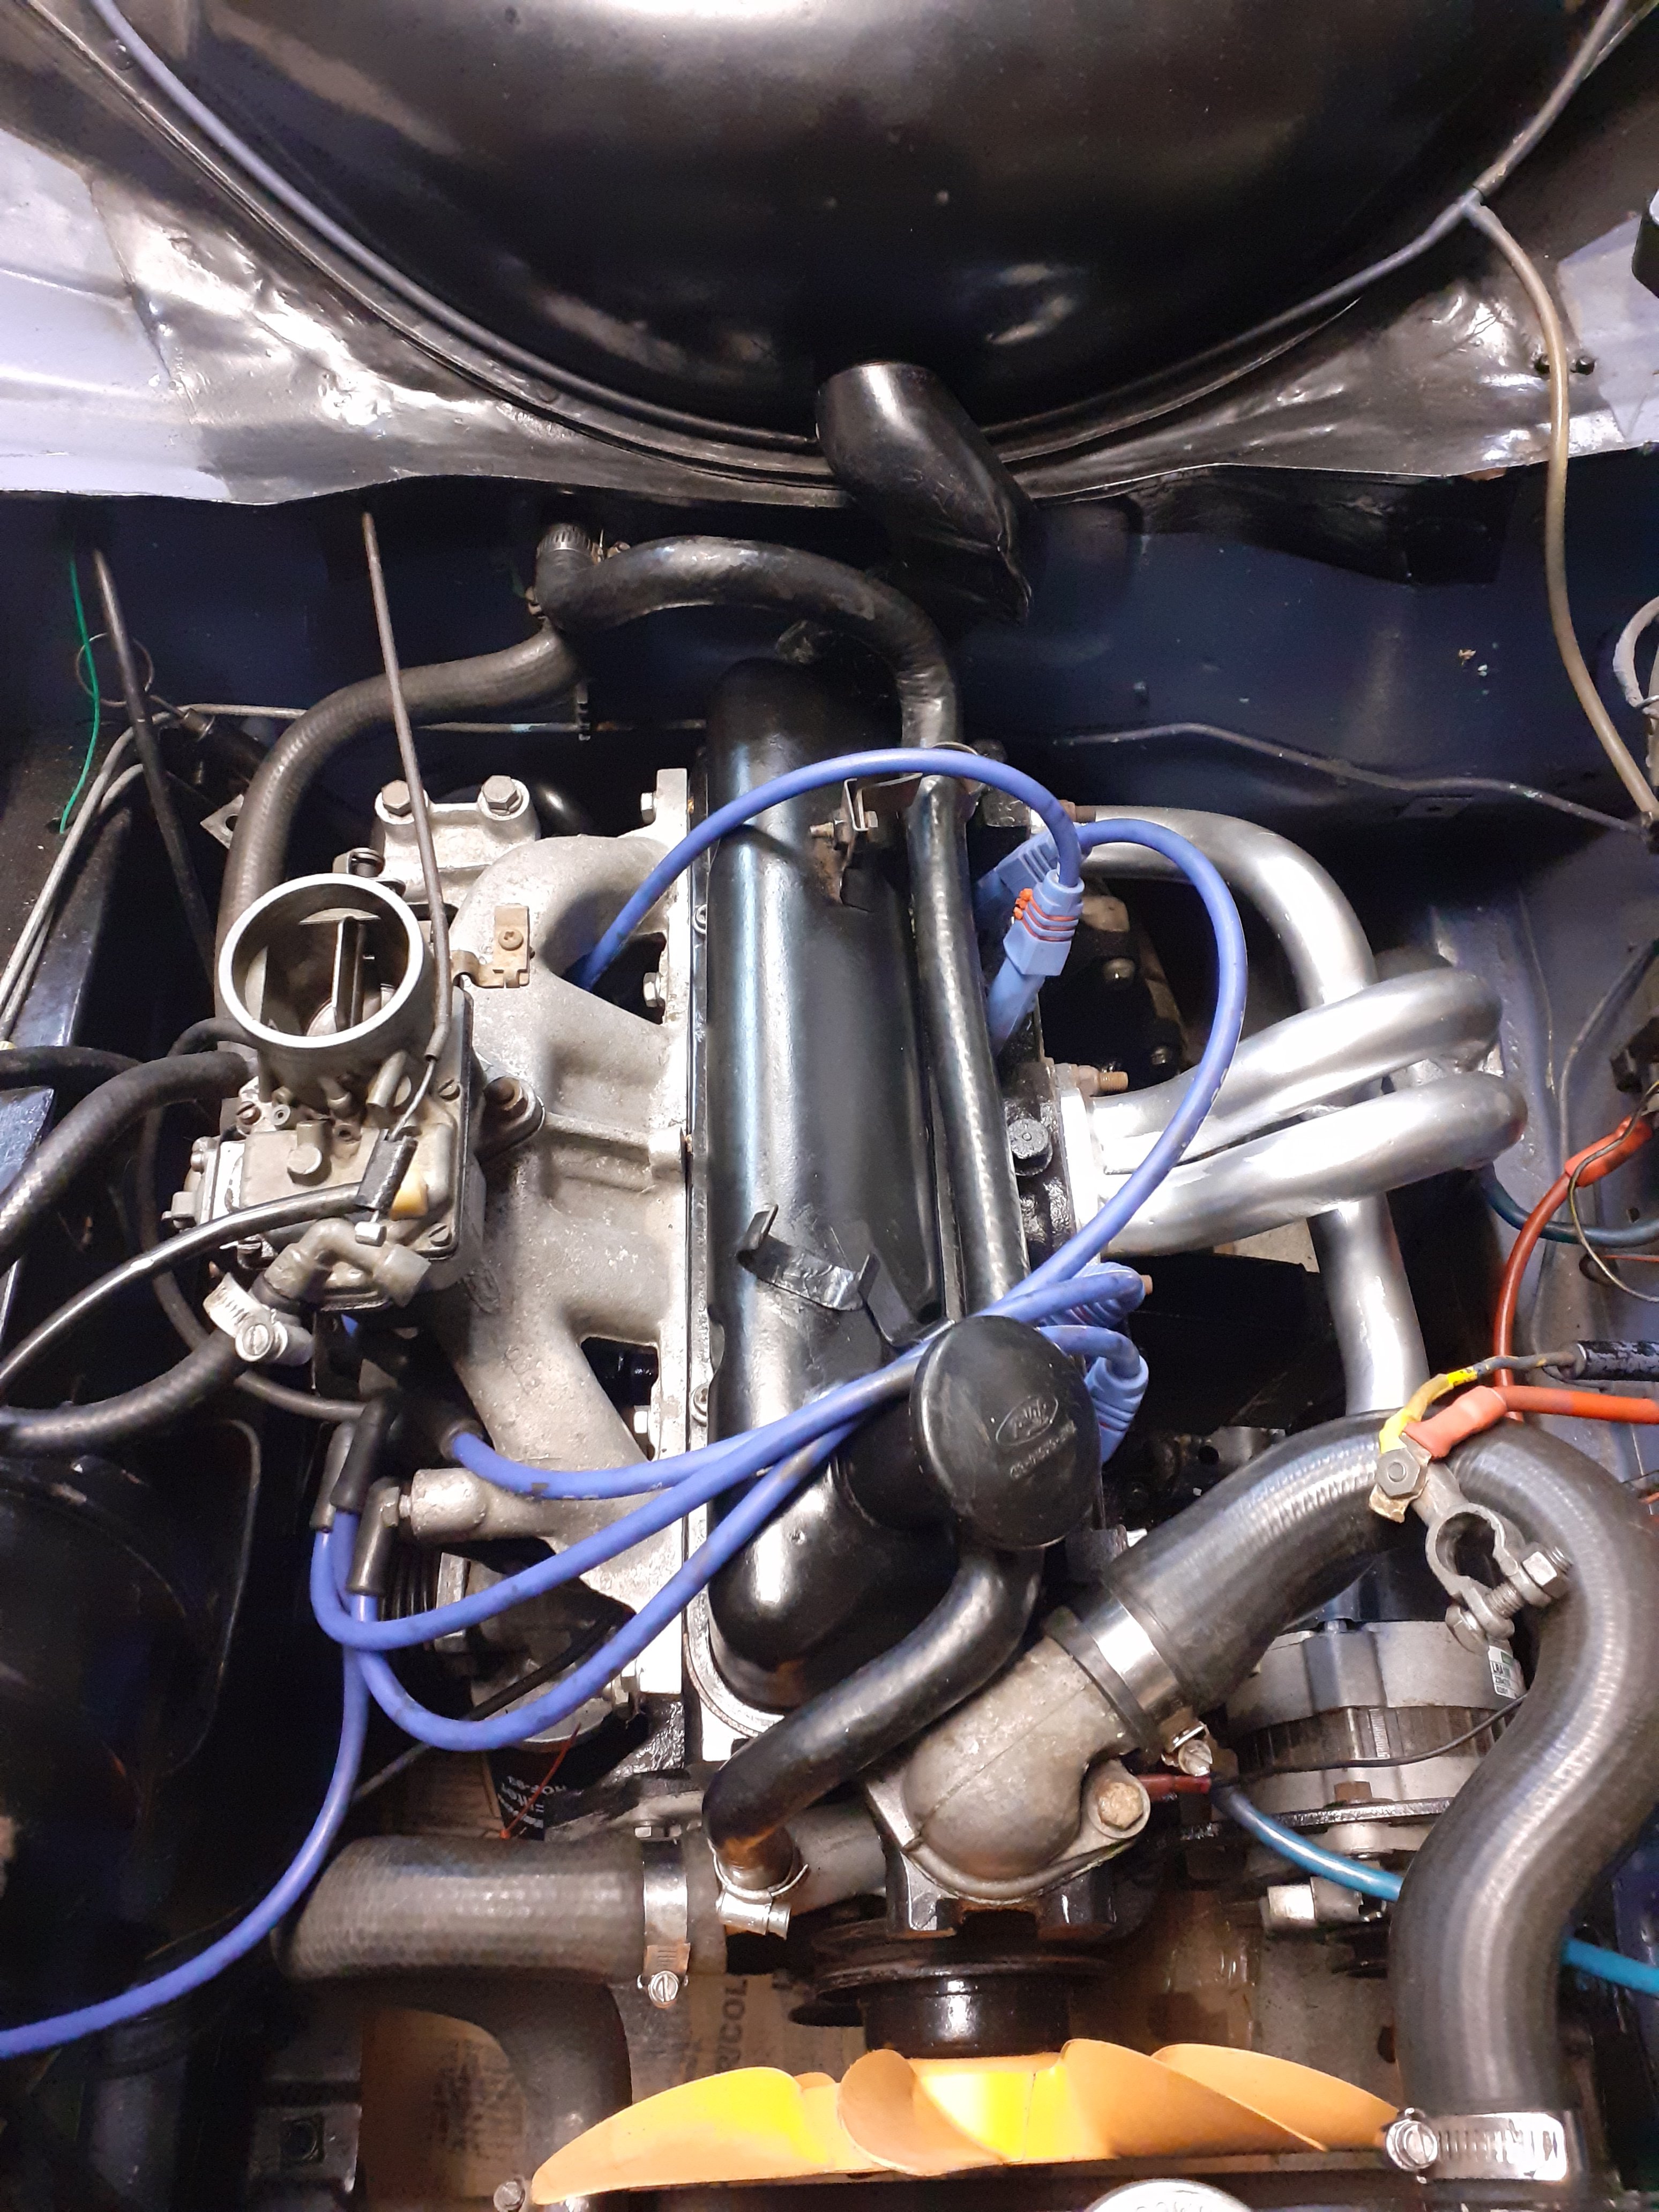
Got the local exhaust shop to bend some pipe for me so I could replace the crusty exhaust. Couldn't find a ball & socket joint to match the manifolds so decided to just weld the new pipes directly to the manifolds. One less flange to leak is a good thing. Pulled the manifolds off to weld everything up after tacking it in place and discovered one spark plug was mega loose. I unscrewed it and saw this.... Now those plugs were new.... maybe 10 hours of running. I'm not 100% sure if I blew it to bits by running mega lean with those crappy injectors or if there's other things going on here. Had a look at the piston which seemed to be ok. Did a compression test to make sure there were no bits missing and all the other cylinders were around 190-200psi. This one was down to 100. Put the leak-down tester onto it and sure enough, the valves weren't sealing very well at all. So I think I've either burned up a valve seat or since the back side of the exhaust valve is pretty crusty, perhaps this one has been sat open the last few months and got some crap on it. After careful consideration, the plan is to reassemble everything and carry out another compression check once it's been run for a while. Then I can decide if it's worth fitting my spare head.5 points
-
This is what $150 ish gets you in old xplod gear It's not entirely period correct, but that's fine. Because I'm retarded I spent extra to not only get a 10cd stacker, but then extra to get a head unit with a proper input for said CD stacker, tho I think I could have hacked a lesser head-unit to run one easy enough. But this one has front and rear L/R outputs too 1000w amp 1300w sub I have no idea where any of this will fit without taking up folding flat boot space, I may have to make some rear quarter pods, put the stacker in the glove box, and the amp under a seat or something. Current sound system is some after market head unit, factory 6x9s in the D pillars and I'd guess factory 4-6" in the front door panels. Probably just upgrade the front speakers and bridge the rear to the sub. But still...... I want flashing lights and a fibreglass pod that takes up the whole back
5 points
-
its all coming together nicely. i had a fault with the idle speed controller which turned out to be a short in the loom so i fixed that. i needed more travel in the clutch to fully disengage it so i changed the master to a 13/16 bore and its perfect now. honestly the clutch is like your driving a corolla, its that good. so i have been doing some Ks in it to bed the clutch before the dyno on Friday and everything is working perfectly, im super stoked with it all. i cant really give it any stick because the tune is wrong for this turbo and it might shit itself so im being gentle. which sucks. the other thing i did was make a tool to aid adjusting the cams during the dyno session on firday. its really hard to see what your doing and its hard to accurately adjust them so im hoping this tool will make life easier. 2021-08-01_04-21-50 by sheepers, on Flickr 2021-08-01_04-21-42 by sheepers, on Flickr 2021-08-01_04-21-26 by sheepers, on Flickr 2021-08-01_04-21-33 by sheepers, on Flickr5 points
-
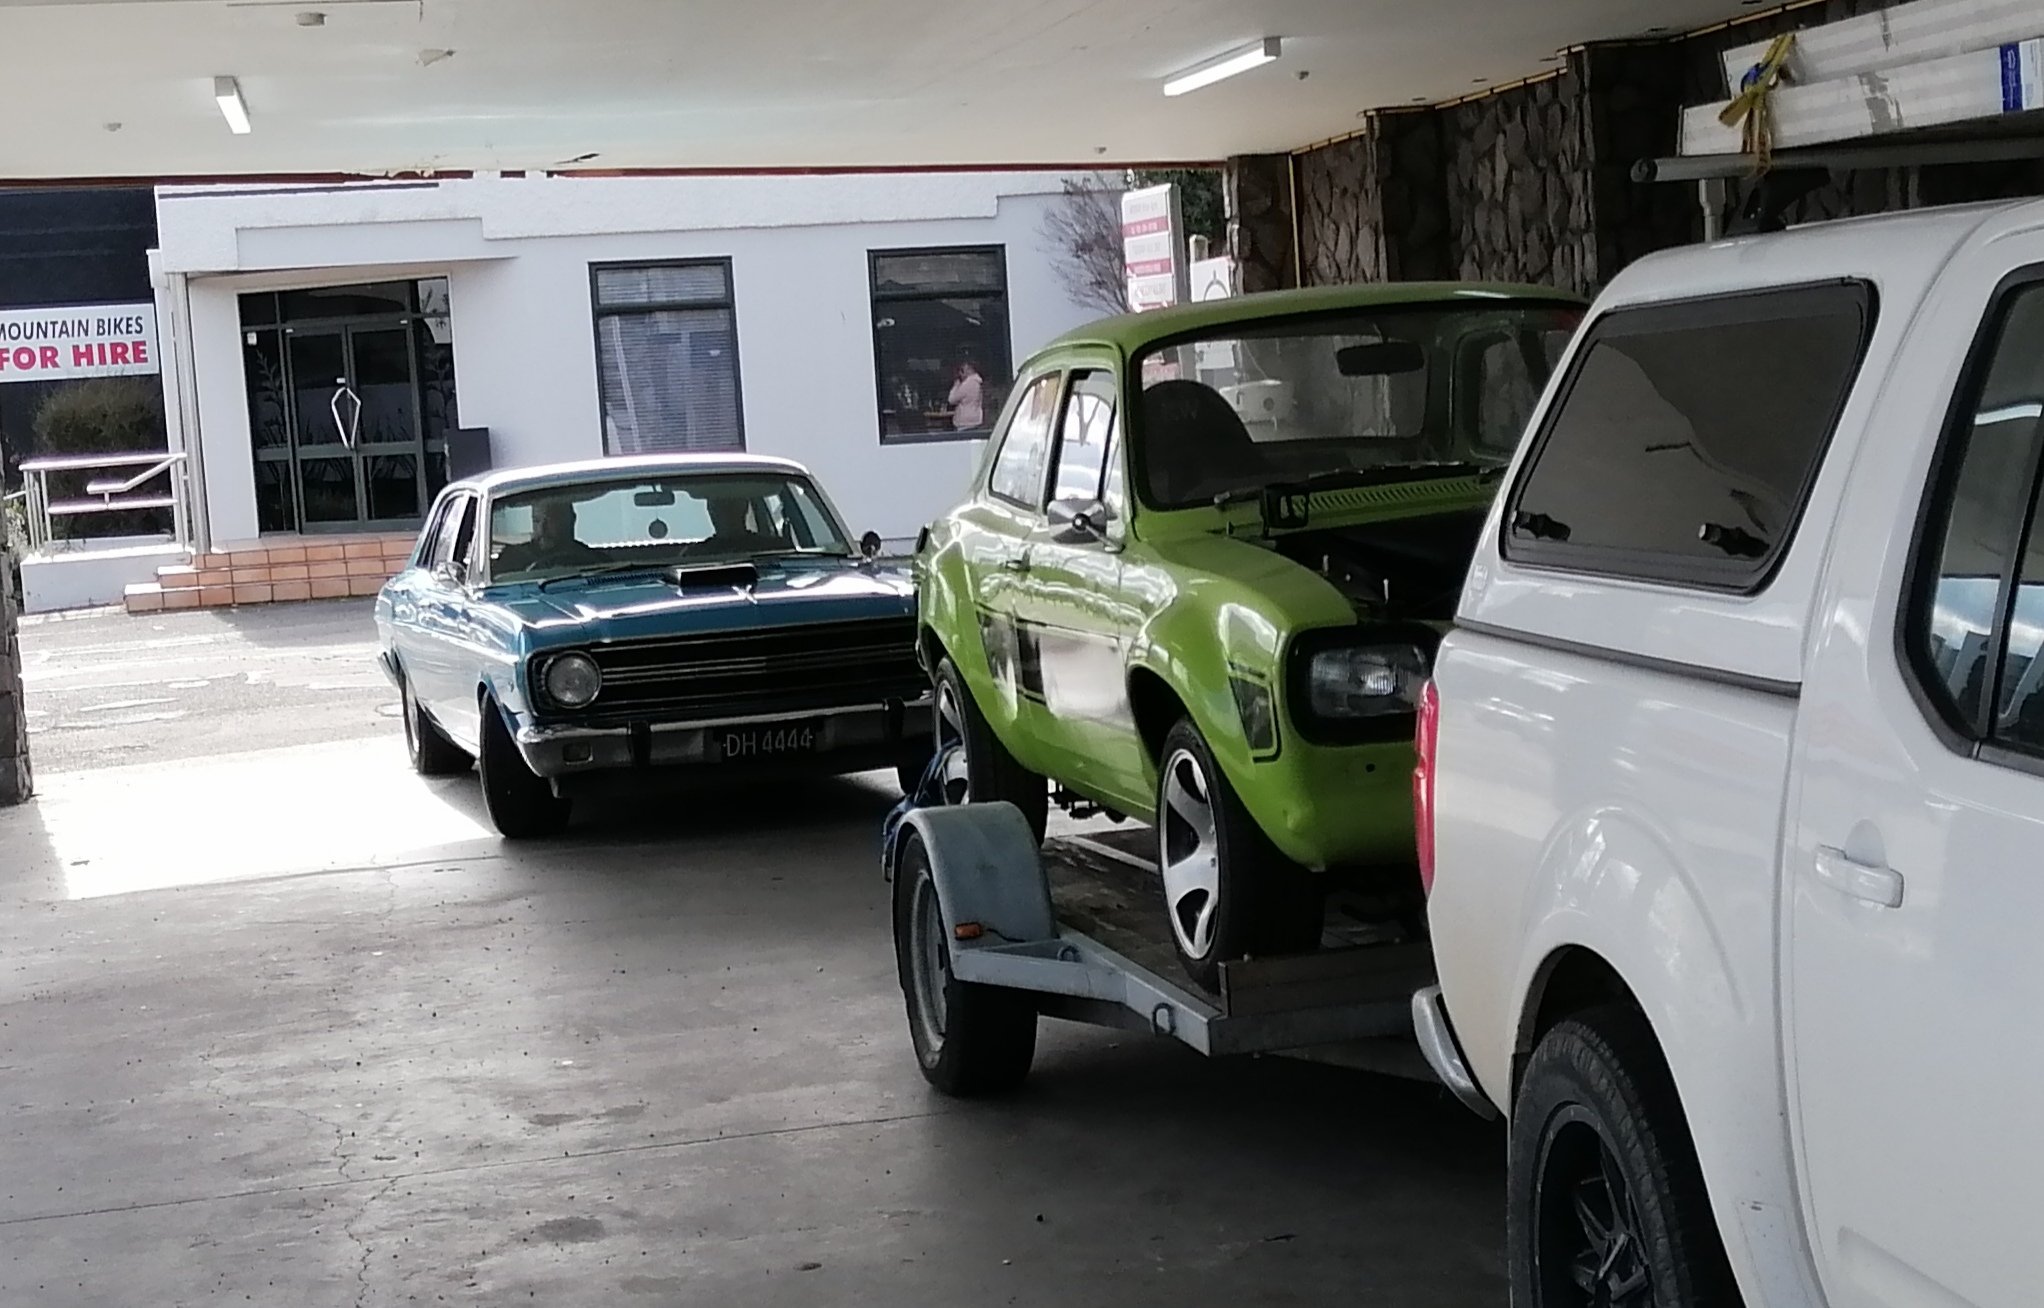
Taking Felicity out to get a drink from the local liquor shop and an angry sounding beautiful XT pulled in behind. Couldn't resist a photo. Much excited as time for exhaust and sundry bits of fabrication!
4 points
-
Got the floor sorted and the seat mounts are nearly done. To make the new ECU enclosure fit nicely, I decided to move the firewall forward by a couple of inches. This also gives me room to get a drive belt on the engine in place. To accommodate the larger engine bay, I was trying to think of a good way to make the engine cover 2 inches longer. I tried showing it photos of the queen but when that didn't work, the only solution was to make a new cover. I measured the width at 1200mm which was super convenient being the width of a standard sheet of ply. So I popped down to Bunnings and got them to cut a sheet in half so it would fit in the car easier. Later at home, I popped the new sheet of ply into place and discovered the engine cover isn't square and is only 1200 at one end. The other being closer to 1240. So now I had 2 completely useless 1200 square sheets of ply. Back to Bunnings for another and this time cut it a bit bigger.2 points
-
You've got a nice knob though.2 points
-
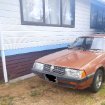
Your car is a mess. Just saying2 points
-
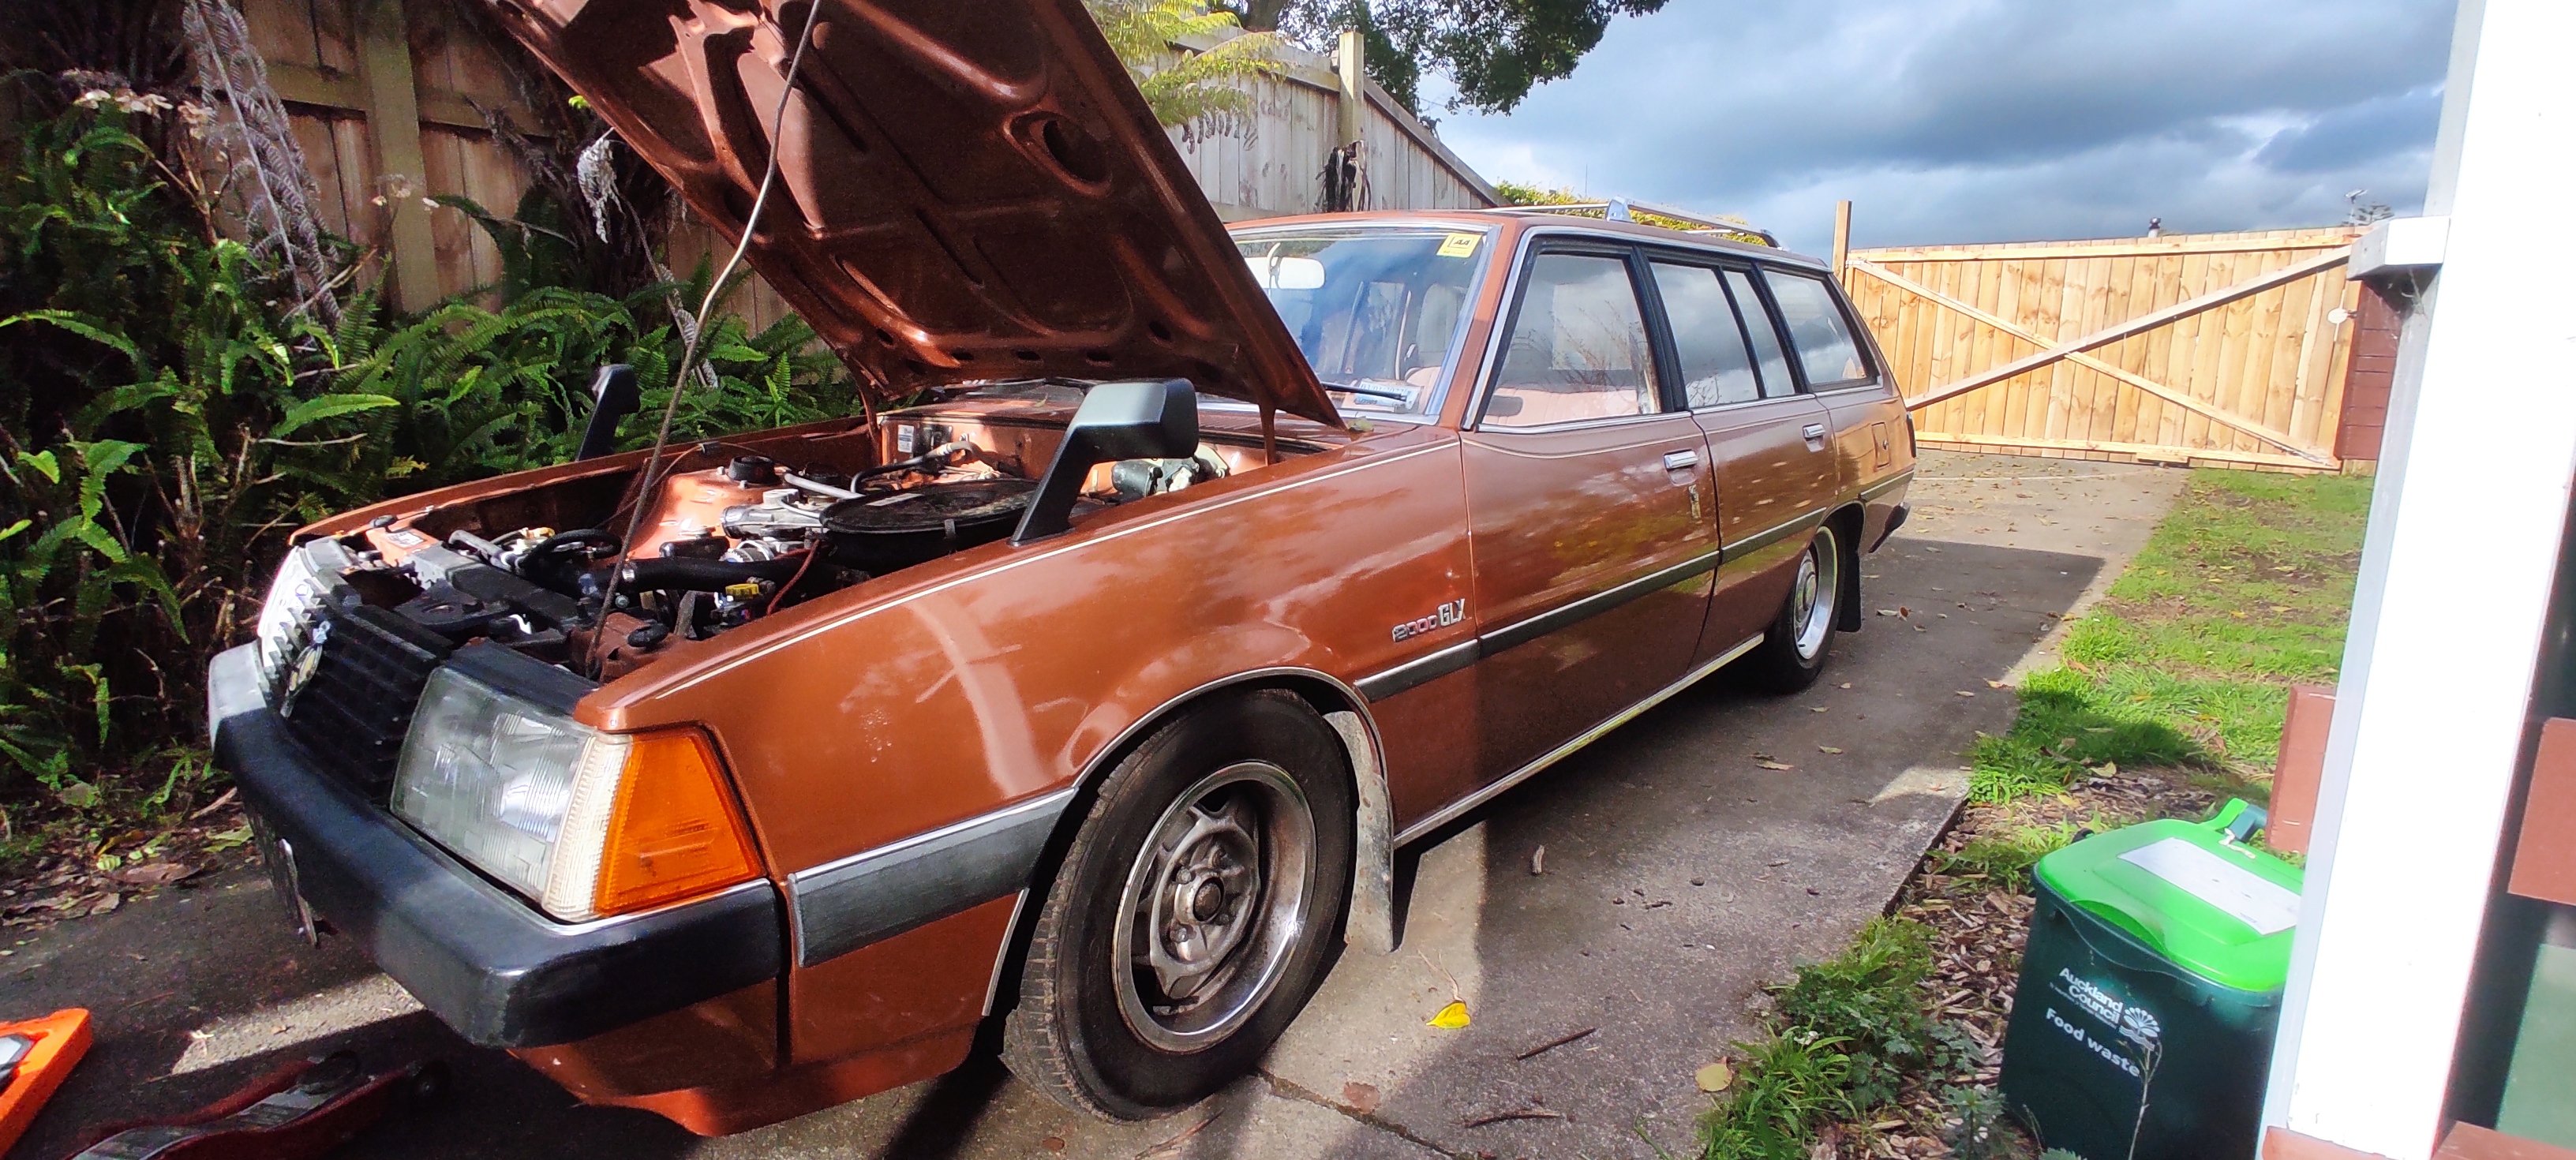
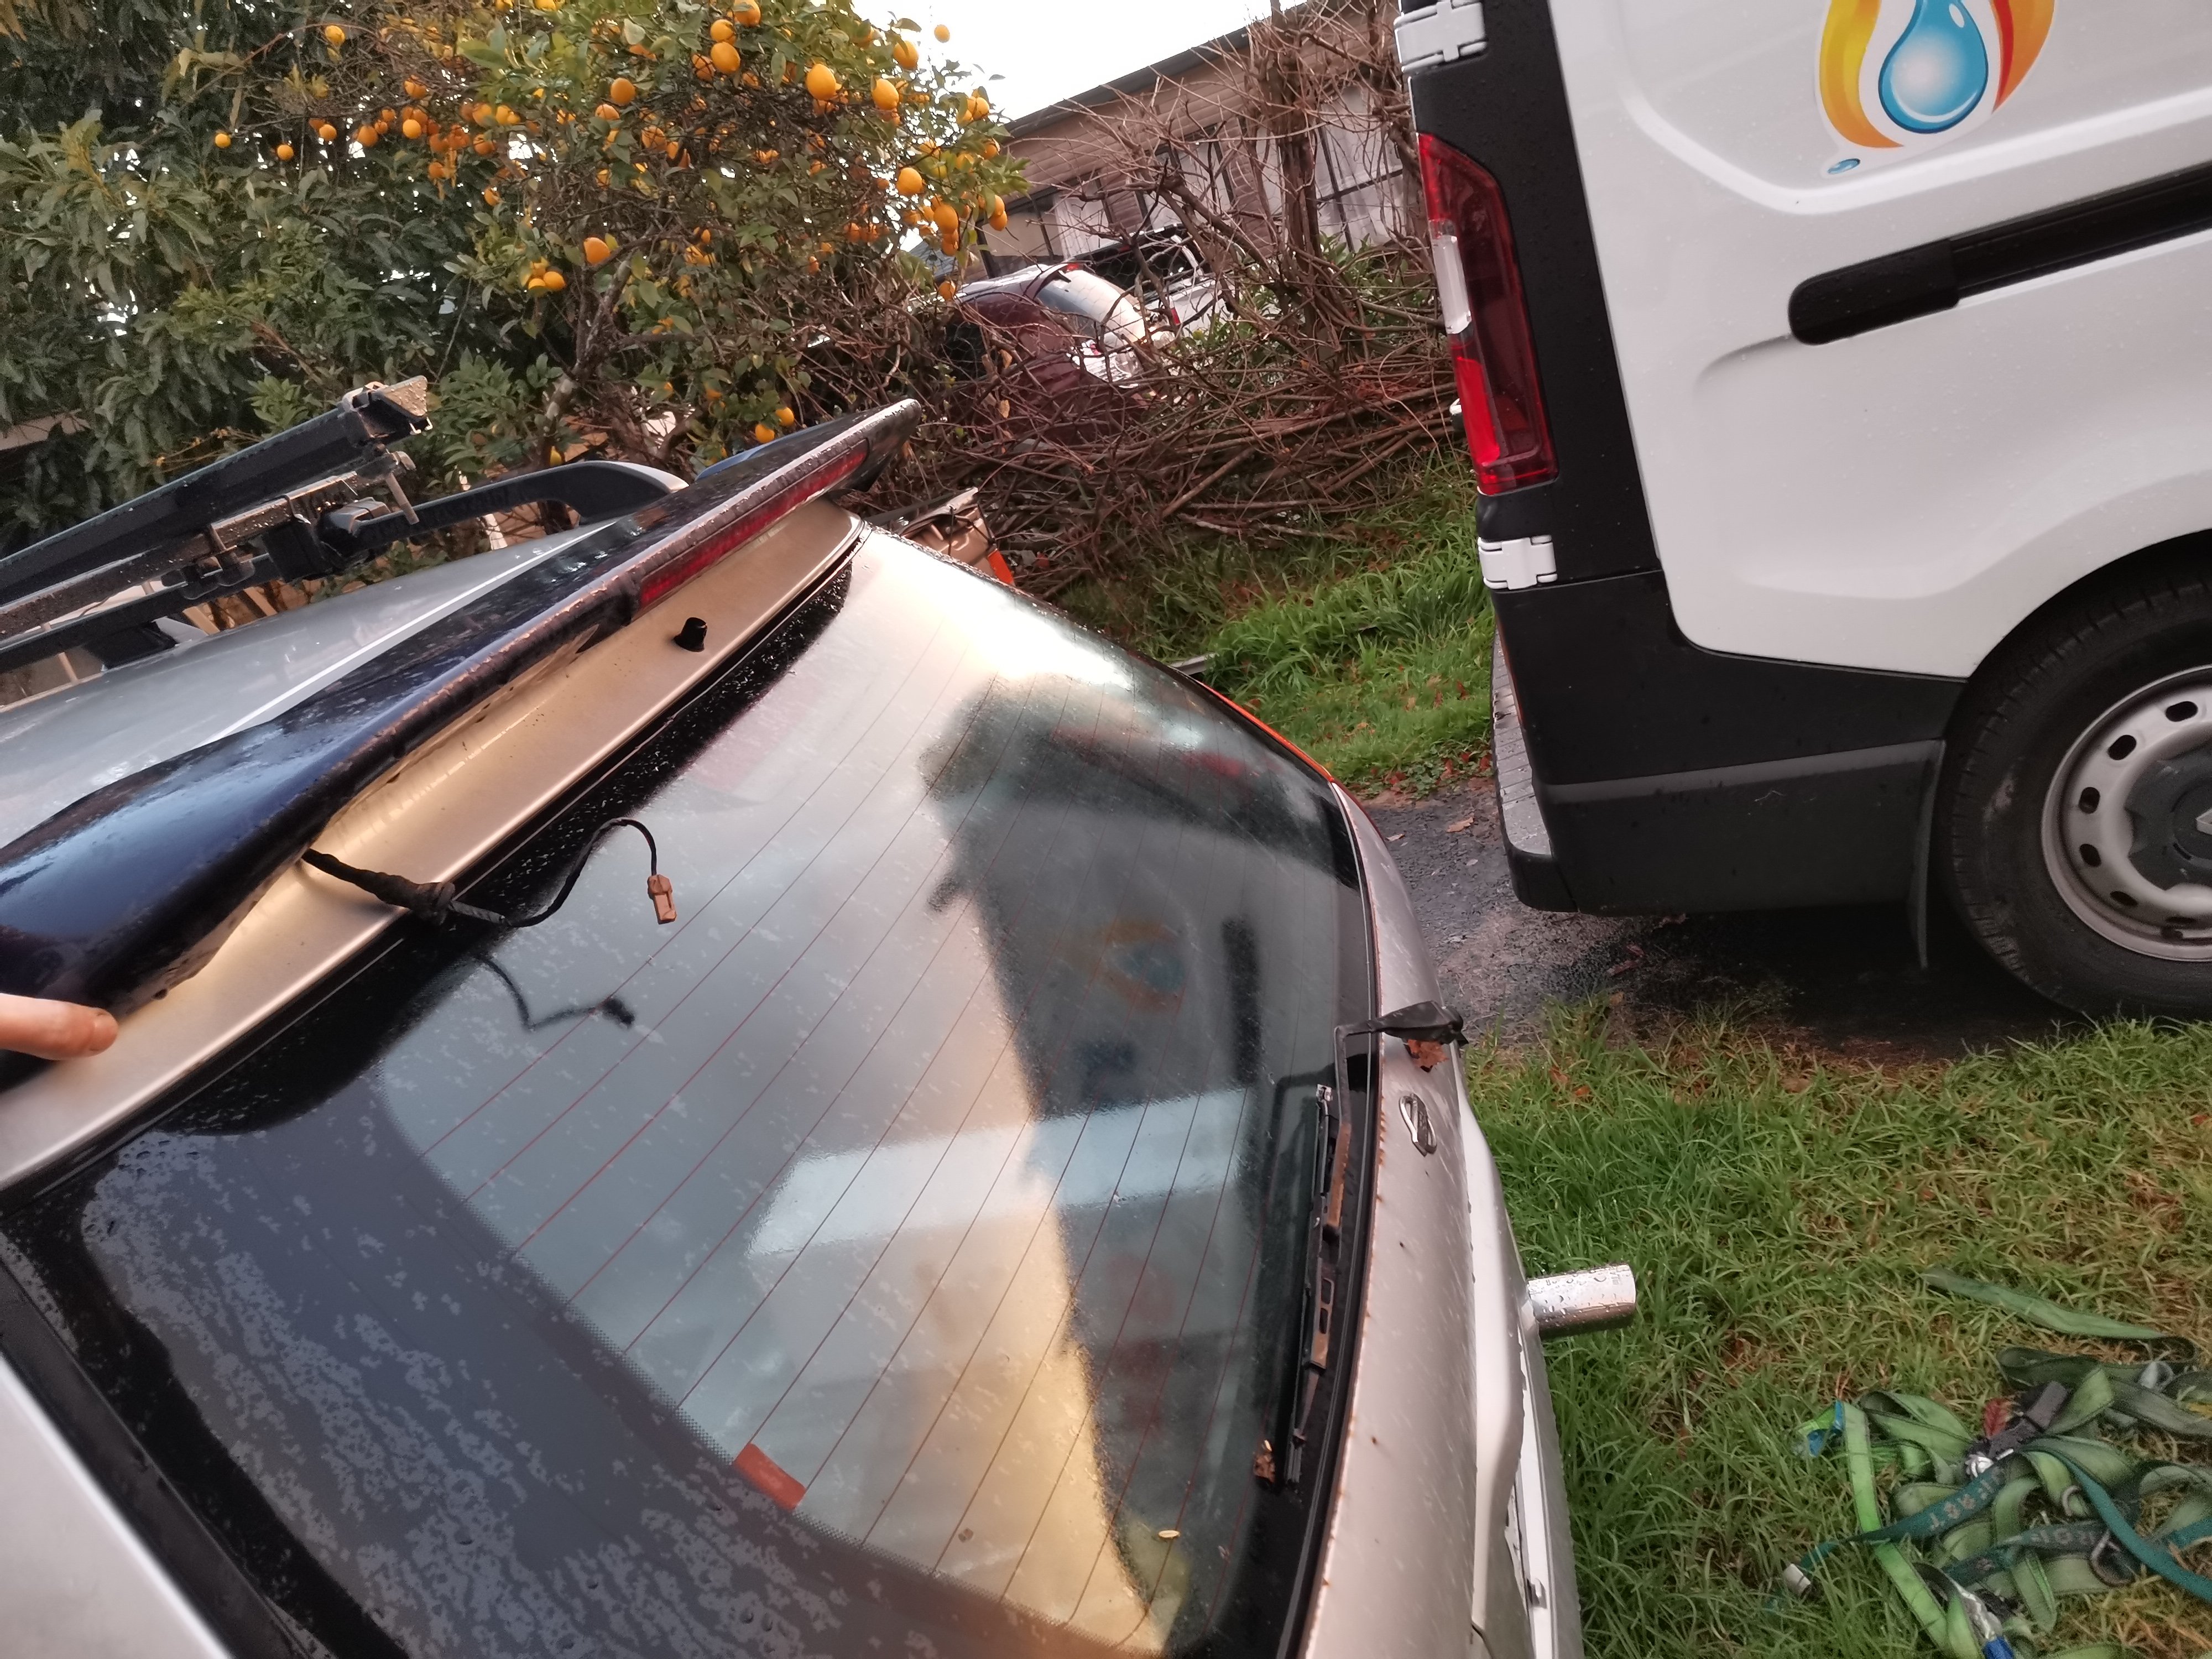
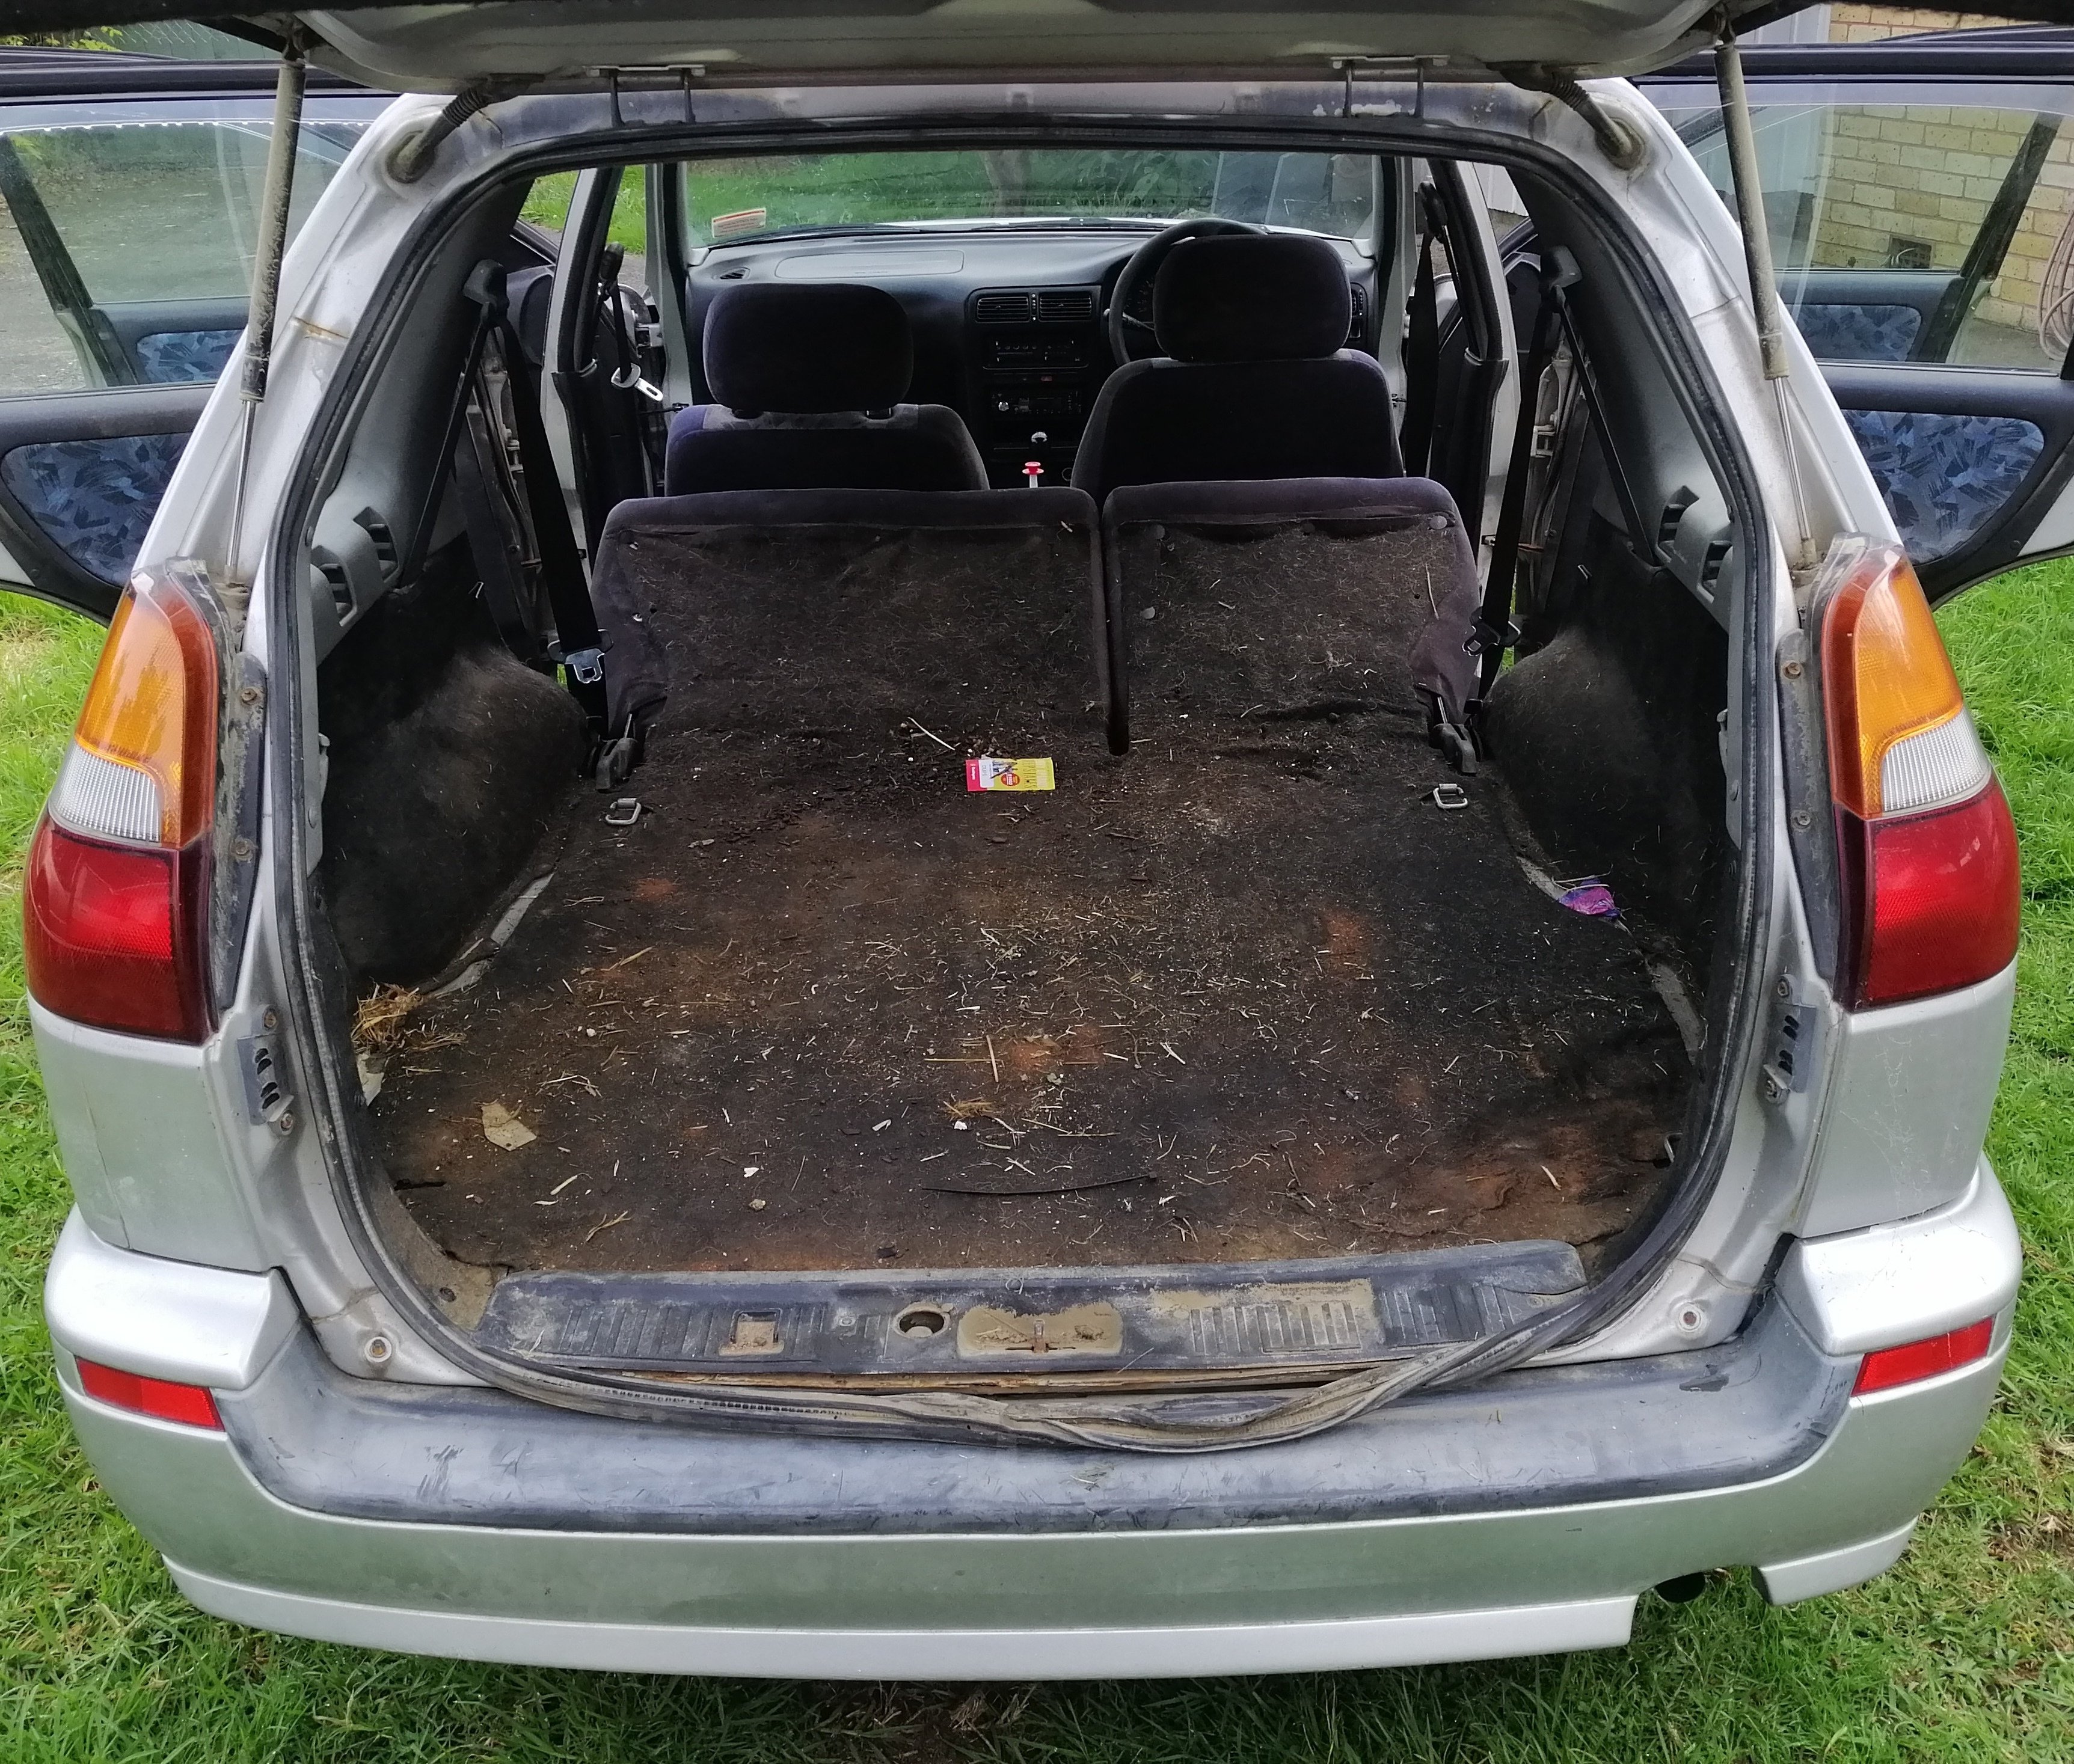
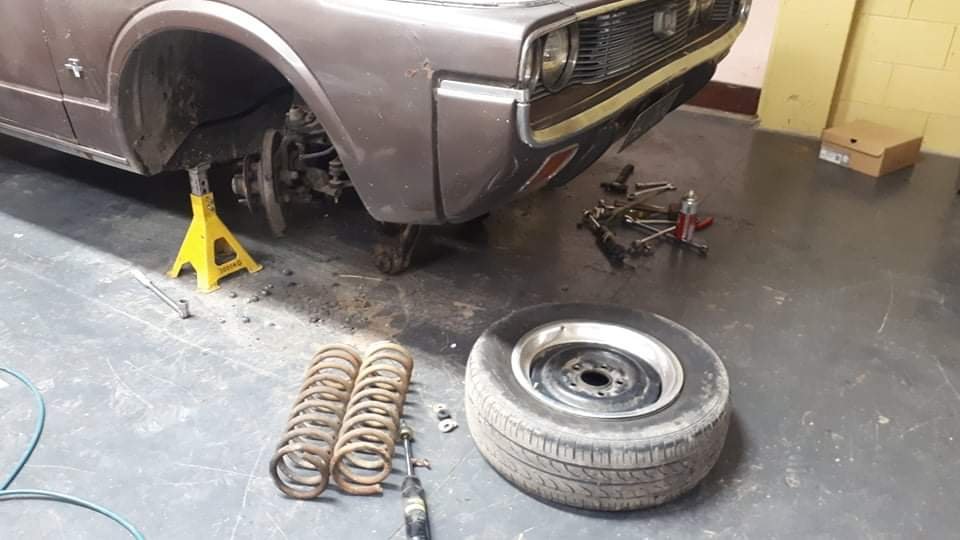
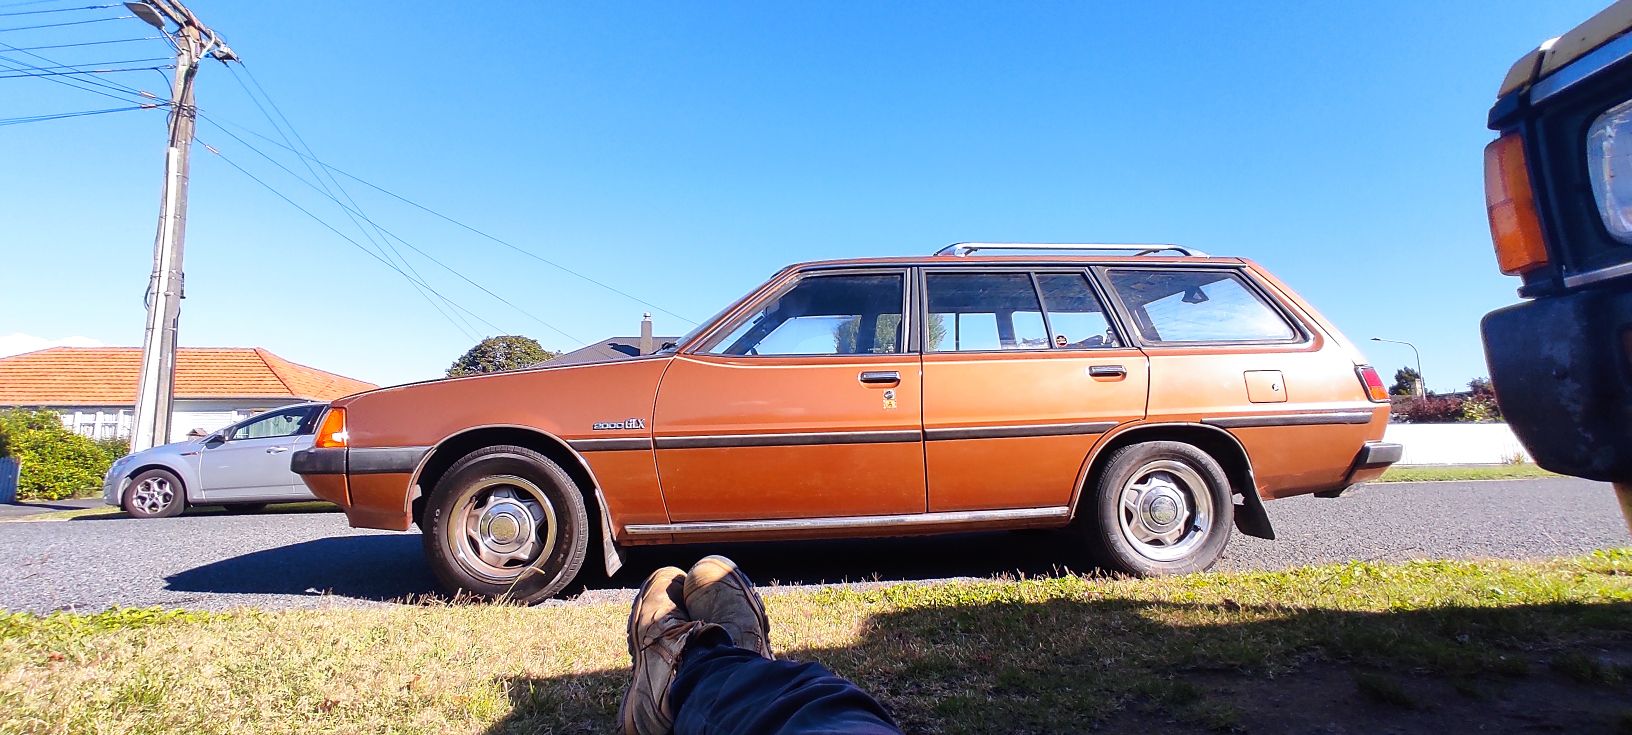
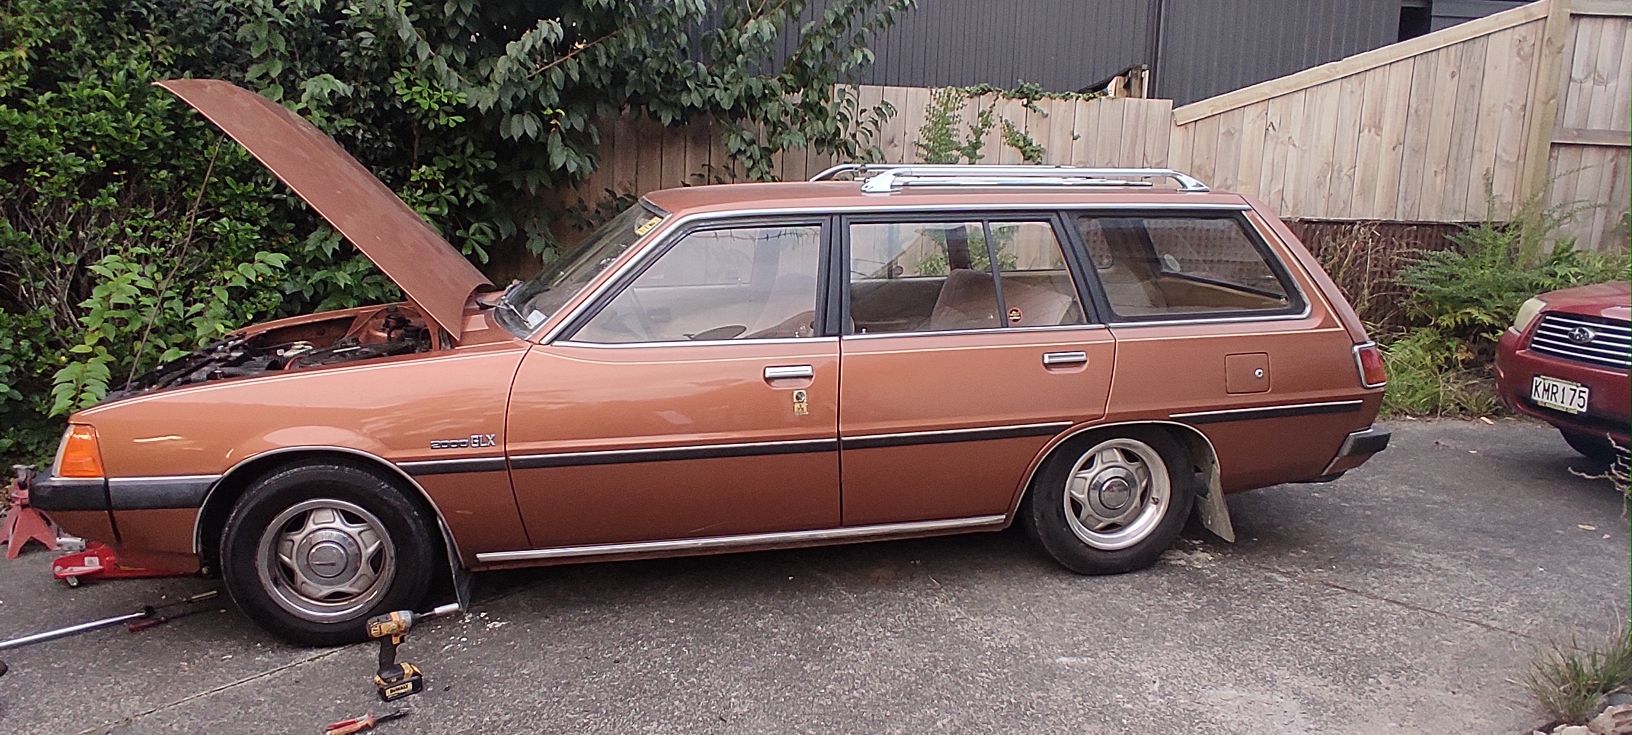
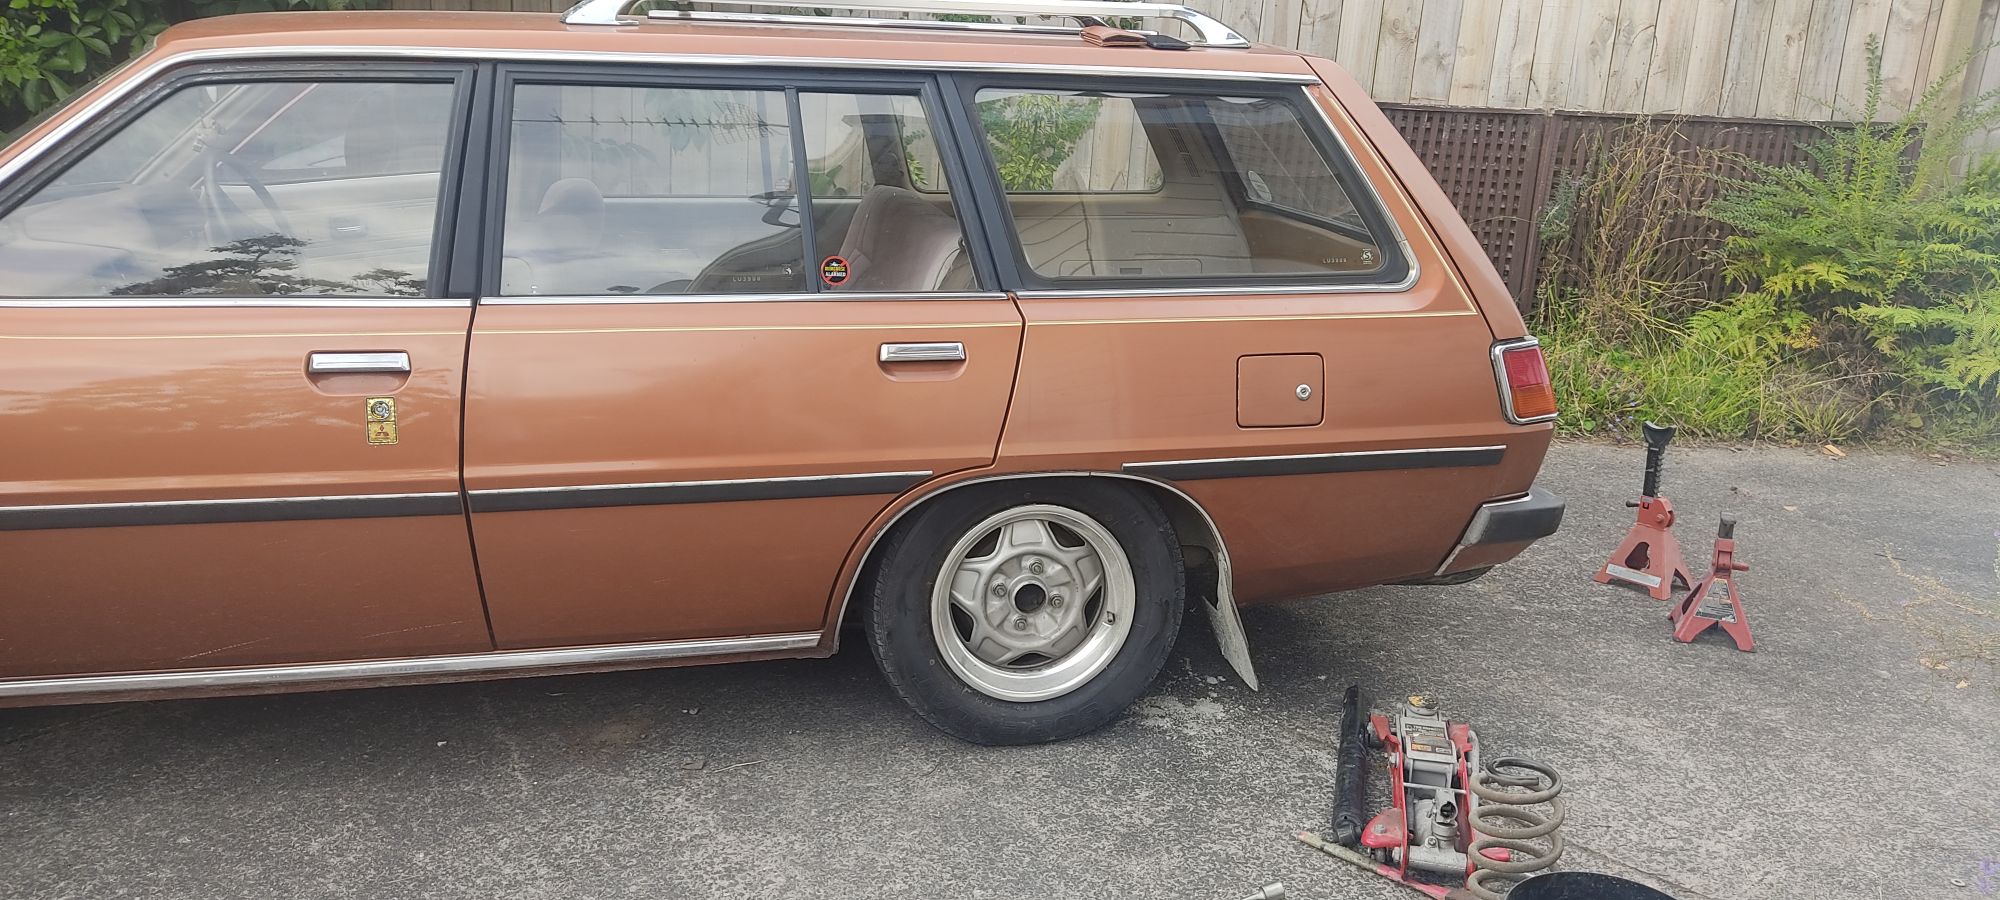
Had a look at the rear brakes on the wagon - handbrake had all the travel and didn't work. Ordered pads/parking brake shoes as they were both a bit sad. Trying my luck with local rotors - rock are 111 landed for a pair. The "Those tires are super noisy and sound like buggered bearings but aren't" were actually rumbling wheel bearings after all. A quick poke around amayama and the legend or acura RL rear bearings are the same as the wagon - Thanks honda lego. Ordered a set off rock too. Hopefully that's everything parts wise2 points
-
@RUNAMUCK +1 for comac. We use them at work. Almost always have what we need. No human interaction is a bonus2 points
-
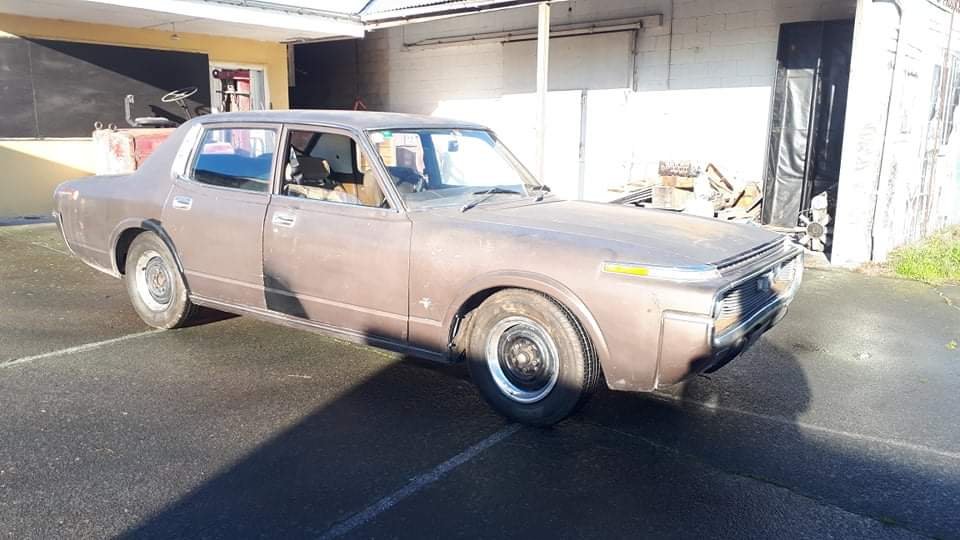
Got some more things fixed she's getting better I got an entire manual conversion but keeping her auto for now. Today is fixing small things like alarm made it hard to start sometimes must be a loose connection then door lock was jamming locked and suspension knock which was wheel bearings
2 points
-
So this was sitting forgotten about for months, but 4:30 yesterday I randomly thought stuff it lets pull it out and go to @64vauxhall's open day. Plan was to just pull it out, swap a charged battery in and load it in the van and have an early night. Well as fate would have it the one seal VG couldn't supply when I built the engine had let most of a litre of 2t oil fill the crankcase, in the process of attempting to clear it I managed to both strip the kick start and absolutely fry the starter motor... Luckily I had a spare, but it killed any chance of an early night! Found a friend to park up with
2 points
-
I think I may be owed an icecream. A photo will be sufficient.1 point
-
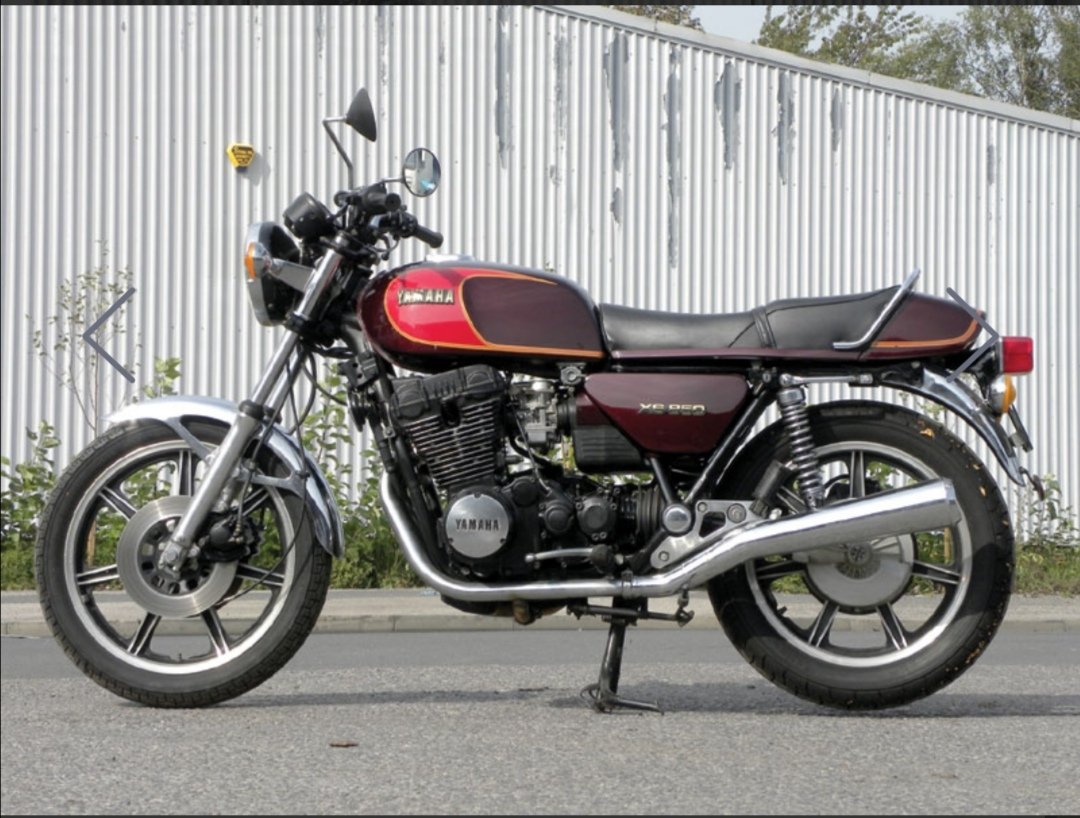
Just to add a pic this is what a 1980 XS850 standard looks like. This is not my bike, but in 1994 this is very close to what it looked like 825cc, 3 cylinder dohc shaft drive. I now have an original seat, mine is stock standard apart from replacement mufflers and carb setup. I am looking at going back to the 3 carbs, if I can find someone to sell me some.
1 point
-
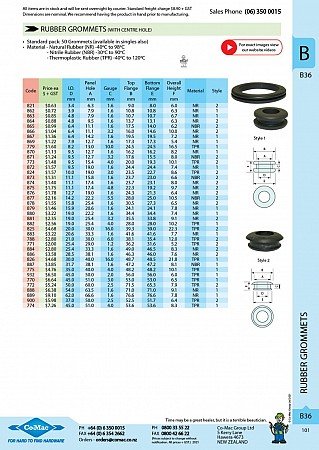
@RUNAMUCK My go to for lots of things is comac, zero human interaction and stuff just turns up on the courier etc https://www.comac.co.nz/rubber-grommets
1 point
-
I have been picking away at the cabin of an evening, which got me thinking about camping trips and spare wheels. So I thought I had better make provision for one, and later, two; It's a bit flexi, which it probably needs as it is bolted to both the cab and deck, but it might bang on the roof if I hit a bump. I'll go for a run and see how it goes, I'll probably wedge some padding underneath, it's pretty close. Even though you can't tell the cabin is now covered with 3 diffey thicknesses of three different types of material, ie a $100 sheet of 2mm ACM, $20 sheets of 3mm foamed PVC, and free sheets of 4mm foamed fuck knows what packaging material. It looks way better in the pics than it actually is. Nevertheless I ordered a few hundred dollars worth of hardware from Comac today, this will give me lift struts and locking doors and allow me to clamp it to the deck, yay. That's all for now.1 point
-
1 point
-
After triple checking my timing and putting the standard carb back on, it still wouldn't fire up. I checked the tappet clearances and noticed the exhaust was very tight at tdc and therefore 'open'. I checked and had to adjust all the exhaust tappets. Turns out none of the exhaust tappets were ever fully closing and therefore I never had a sealed chamber at tdc! Next pop it started up and idled great. I picked this up as a runner, but no idea how that could have been. I'll recheck the tappets another day when its warmed up and do a compression check. Oh well. Proved it wasnt the bike carbs, so they'll go back on tomorrow.
1 point
-
I'm currently cleaning up the crankcase halves and decided to do a potentially unnecessary job but one that is super easy to do at this point. KX/KDX's of this era have the potential to leak from where the steel crank bearing seat ties into the crankcase, as per the arrows. A bit of JB Weld sorts it out Also picked up the rebuilt crank, the wombled bearing seat was just within spec. And finished off the expansion chamber and gave it some high heat paint that'll probably just burn off anyway as it was quite rusty on the header pipe section.1 point
-
May as well add the new addition to the fleet here. Picked up a 06 accord wagon for cheap off fb. Was a trade in deal and was cheap as it needed a set of tyres engine mounts and lca bushes for a wof according to the seller Because I'm a scumbag I grabbed a couple of mounts and the lcas off a car at zebra. Got lucky and someone had already taken the mounts out for me. There was a set of mudflaps I've been wanting for my daily accord which was a nice surprise. The reason it was traded in was made apparent when I was stuck in traffic It didn't get any hotter than that. It needed a litre of water and the cap was looking suspect so zebras finest cap to the rescue and I'll test it again1 point
-
Got to save some grams in bolts to make up for the kilos of sound deadening that's going to be installed Titanium dizzy cap bolts arrived on the courier along with the fuel rail fitting1 point
-
IMG_20210720_081438_1 by John Bell, on Flickr So yeah because the side panels had in coloured segments sanded and painted by a previous owner, I thought I'd whack some coloured vinyl on there and the new headlight to get it all matchy matchy. Had to try colour match to the slightly incorrect coloured tank bag. @Archetype was kind enough to send some off cut vinyl for me to simply stick on and trim out. Except I'm a talentless hack, and where the side panels have been sanded, it shows, and I struggled with creases and getting the shape cut tidily. So like most of what I touch it looks good from a far, but far from good. Good enough though. But yeah, did a trail ride a few weekends ago and enjoyed myself thoroughly. Bike out performs me, even had a very amateurish jam on their MX track and managed to stay on the bike, and even clear one or two jumps (and absolutely ruin myself on the rest)1 point
-
right so, its all back together. but first, new clutch. its a niteparts designed unit which holds heaps of torque but drives like a normal car. this thing is huge. check out the friction plate on top of the Giken twin plate unit! 20210713_184945 by sheepers, on Flickr 20210713_184938 by sheepers, on Flickr 2021-07-21_08-44-05 by sheepers, on Flickr 20210713_183646 by sheepers, on Flickr right so then i put the motor back in the car. had to mod the turbo dump pipe. also had to mod the intercooler piping by the throttle body to include a new larger blow off valve. other things done include all new pipe work to and from the turbo and all new hoses for the wastegate. im waiting on a new intercooler which should be here in a couple of weeks too. and tonight i took it for a drive round the block, so far so good. noo doortz though as it needs to be tuned with the new turbo. its booked on the dyno on the 6th of August. 2021-07-21_08-32-36 by sheepers, on Flickr 2021-07-21_08-32-14 by sheepers, on Flickr 2021-07-21_08-32-24 by sheepers, on Flickr1 point
-
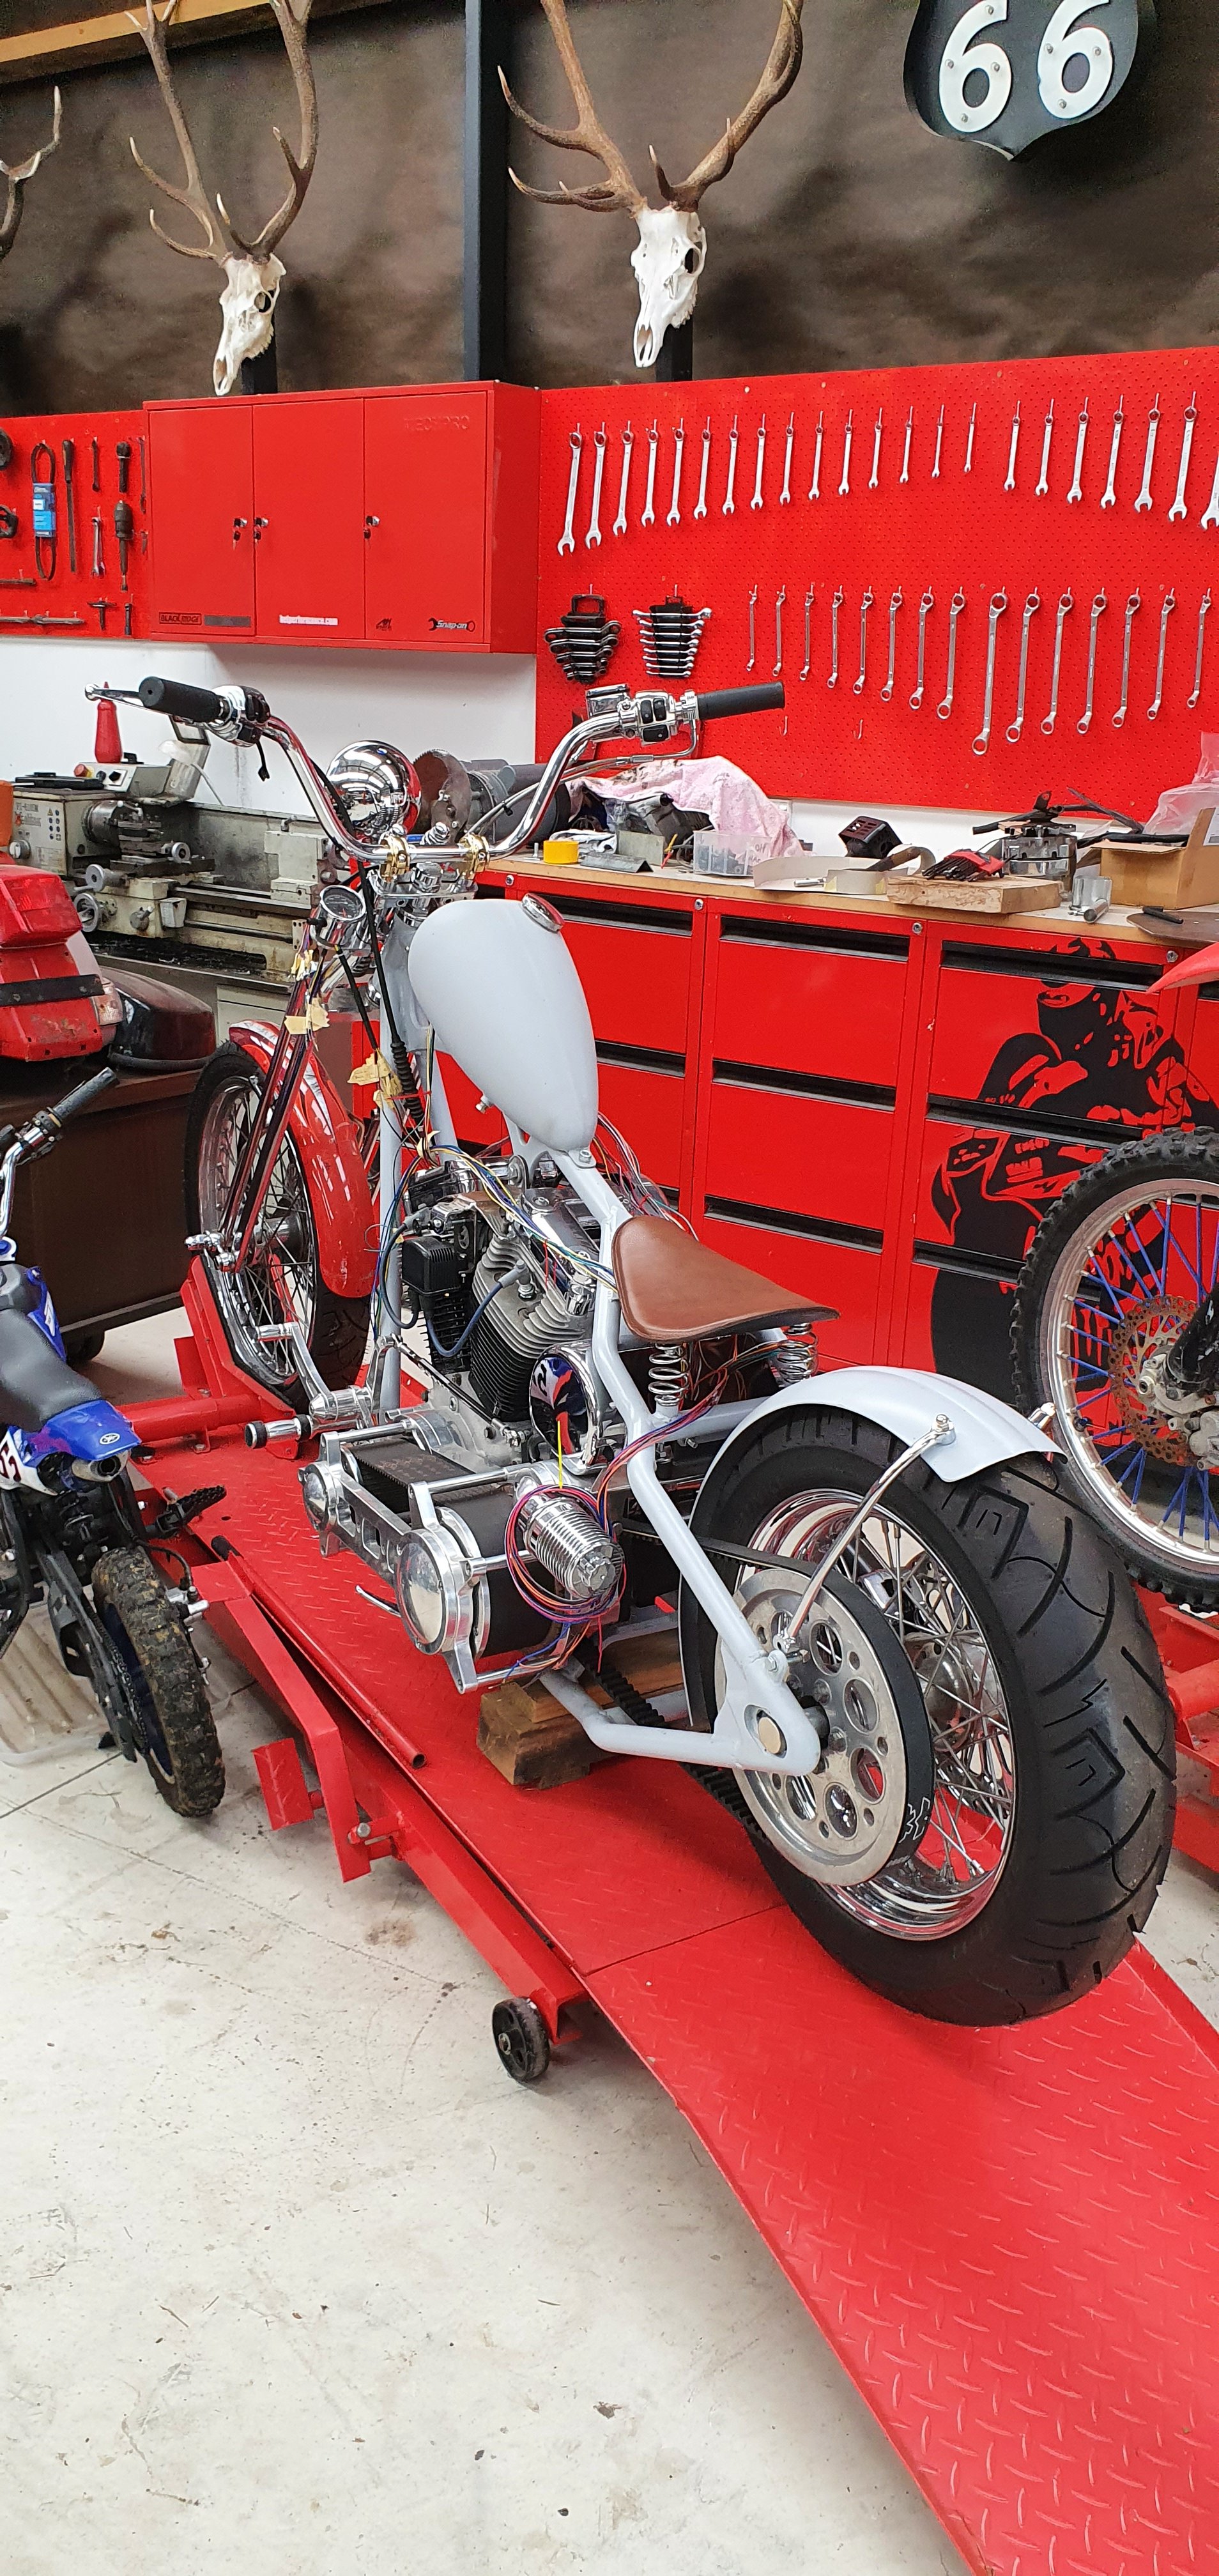
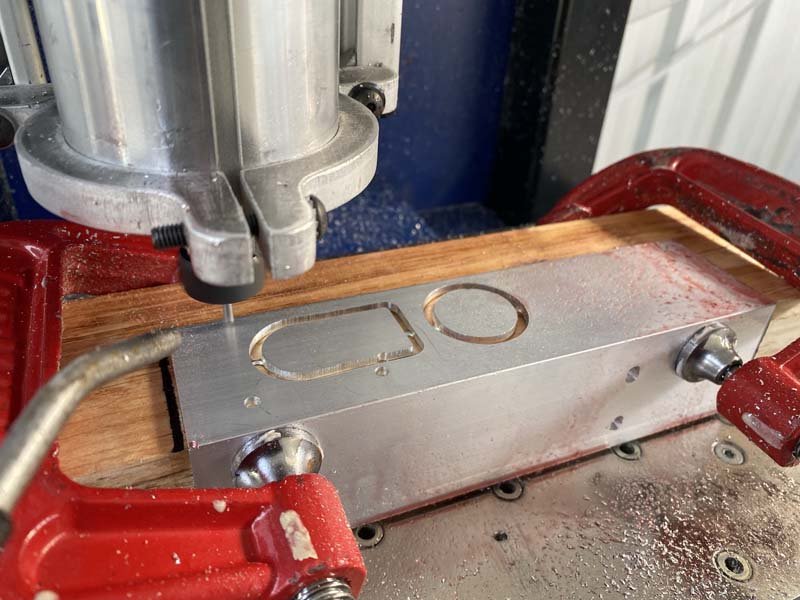
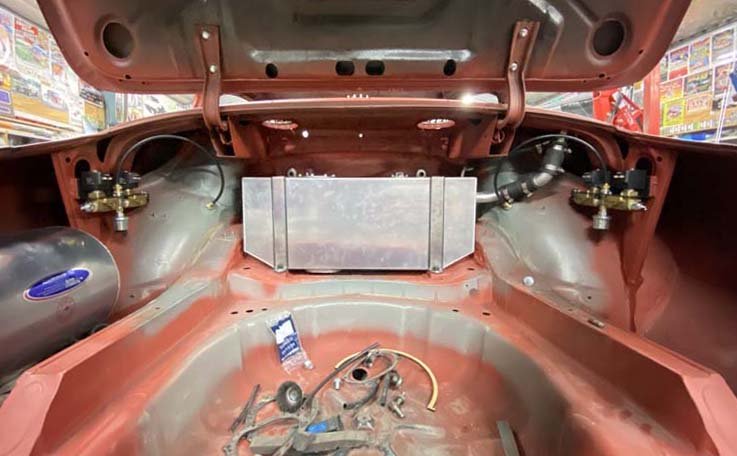
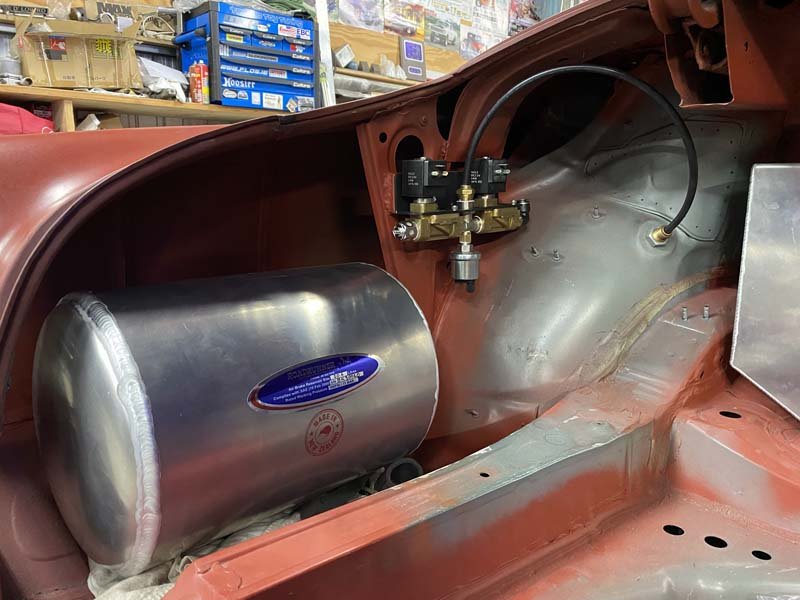
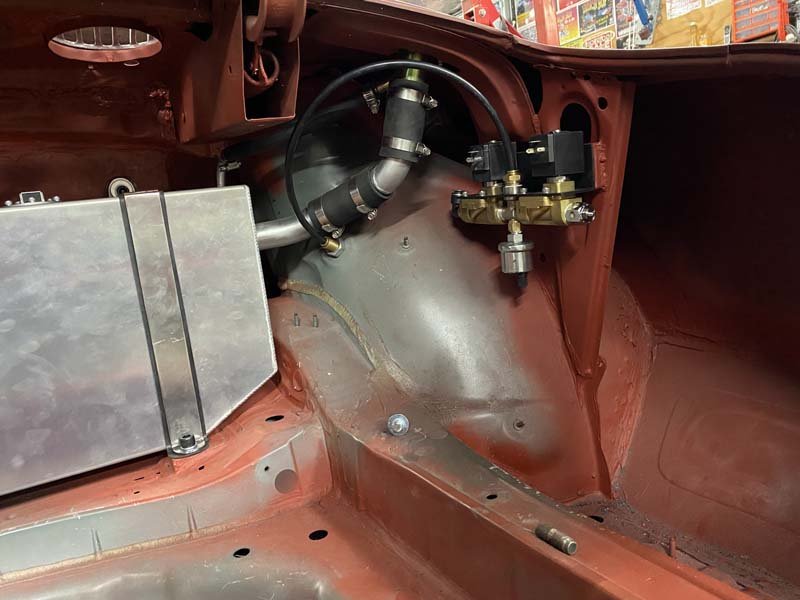
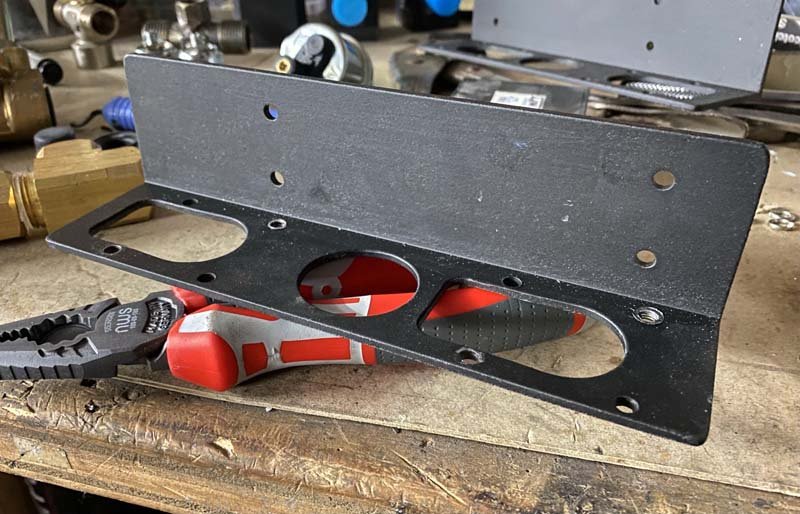
Rebuilt the old cnc router. Runs heaps more reliably now. Brought some 50x50x3 aluminium extrusion at put it to work on some brackets. Finished and painted. With the Valves and sensor fitted. Mounted into the trunk.
1 point
-
And then cos I have a scoop, I need a wing The aero spec ones have a huge late 90s/2000s wing on them, which is a bit much, and I won't have a body kit, so I got this one off another mid spec wngroad
1 point
-
Decided it needed a hood scoop, so I got a cheap subaru copy after all the wreckers ones get taken almost immediately These have a yuck combined throttle body map sensor that faces upwards right under the scoop, so I might make a subaru gravel sport type air intake right there, I got a cheap k&n panel filter that would work
1 point
-
With the interior now mostly out I could address a few issues 1. The clutch felt a bit harsh. The pedal had simply snapped off at the firewall, so I got another from a y10 sentra at pickapart They all crack at the front door frames, every one I have looked at has this Im not overly concerned, the metal here is surprisingly thin, so i think it was marginal from new and 23 years of use, the last 5 being on gravel roads took its toll. Crawled all over and under the car and dont see any further fatigue, so i just welded it upand then stitch welded the lower door frame because race car i guess
1 point
-
I spent 3 hours on the weekend with my kid sorting out the hinge pin on the driver's door. Even took the guard off to tweak the hinges. Yelled at him when he called it a fender. Good weekend tbh.1 point
-
i cleaned the things. then i put the motor back together. the cam gears have a slot in them for the dowel that is too big. the slot in the cam gear is 5.4 whilst the pin is 5mm. doesn't sound like much but its a good 5 degrees of play when you set up the cam timing. so to fix it i made some stepped dowels out of a 5.4mm drill bit. once id done that i re-dialed the cams to get them right. 2021-07-04_04-14-42 by sheepers, on Flickr 2021-07-04_04-14-49 by sheepers, on Flickr 2021-07-04_04-14-56 by sheepers, on Flickr 2021-07-04_04-15-02 by sheepers, on Flickr1 point
-
This thread is an abortion. Needs a clean up. Since half the pics dont work Anyways. This got a wof last week. Then i cut 1.5 coils out. Needs more tbh Also fitted some 205/70/14 to the factory steelies One day i might paint it. But not today
1 point
-
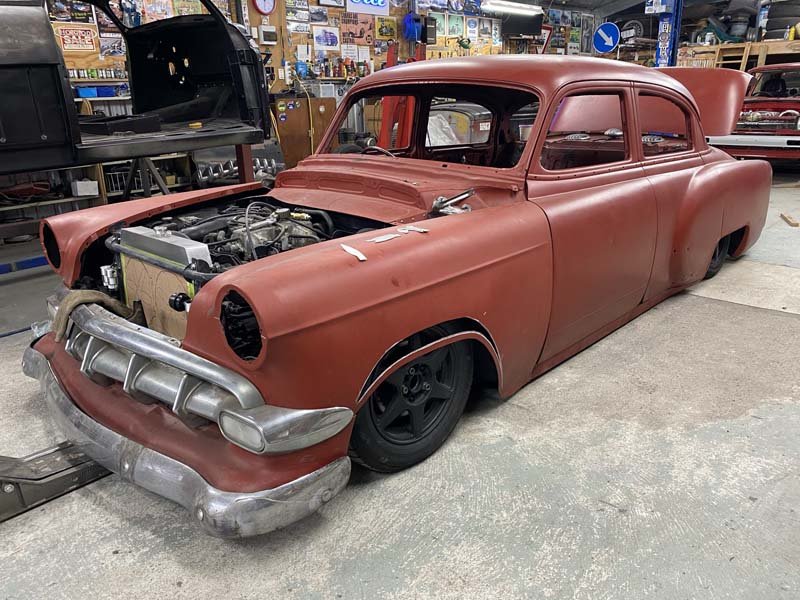
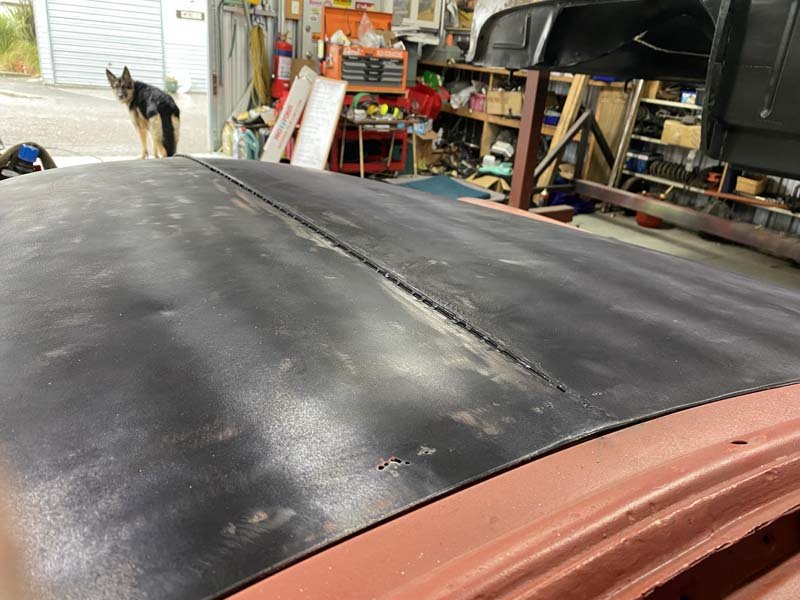
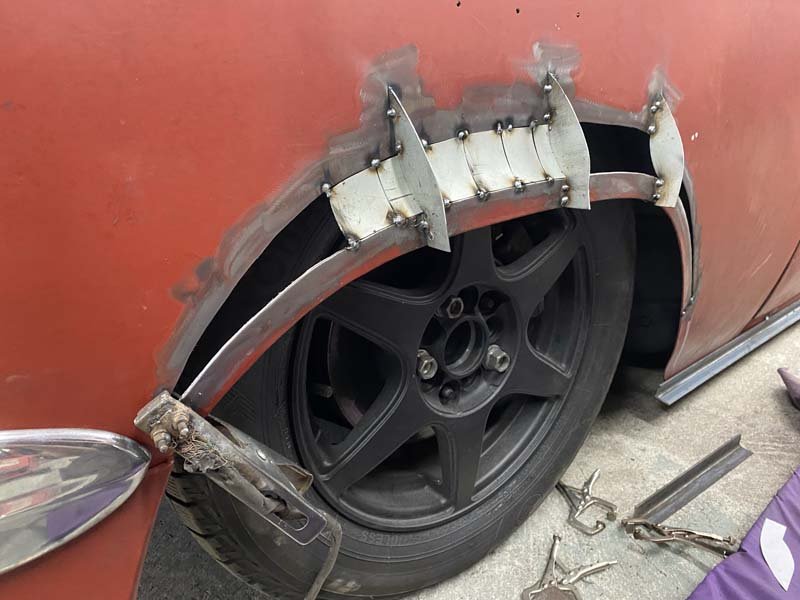
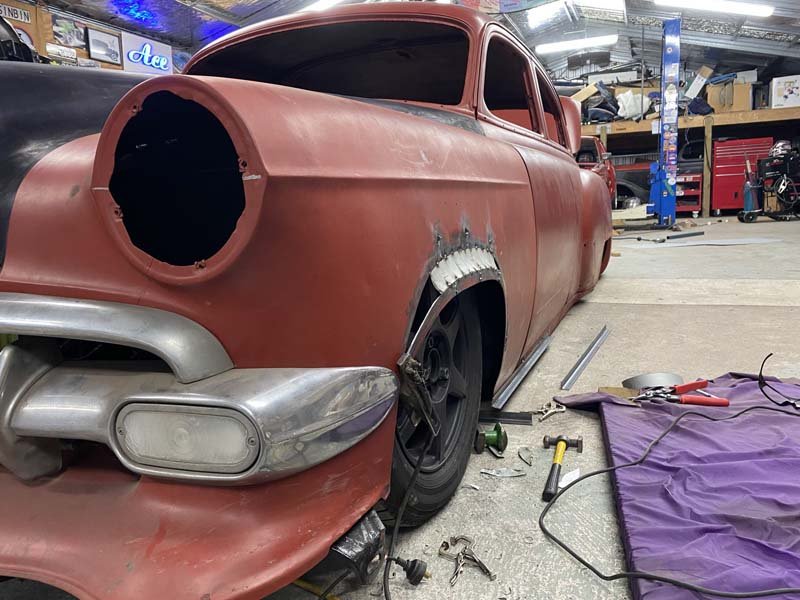
Used some 1/4 inch rod to make a start on a basic hood peak. After stripping it of primer again. The black is CRC aerosol rust kill. Its so easy to use and seems to work really well. Bit the bullet and put the sabre saw through the fender, to try and create some more wheel clearance. After some pondering I bluffed my way through filling it in. Sprayed some primer over it, temporarily to see how it went. And pretty happy with the result. Its not perfect. Like the rest of the car. But its not terrible.
1 point
-
we're all familiar with the term "project scope creep" aren't we. well, im still waiting for my clutch to arrive and while ive been waiting ive been thinking how easy it is to work on the motor while its out of the car. so i bought a new turbo. 2021-06-27_04-04-44 by sheepers, on Flickr 2021-06-27_04-04-56 by sheepers, on Fickr New turbo is a Garrett G30-770 with a 0.83A/R exhaust housing. im looking for a fatter torque curve and this should provide it. along with more power but thats beside the point. the old turbo has been spewing oil into the inlet tract and everything is filthy. 2021-06-27_04-03-45 by sheepers, on Flickr so i got to wondering if the pistons and valves were covered in burnt yuck carbon oil mess. so i found out, 2021-06-27_04-03-33 by sheepers, on Flickr 2021-06-27_04-03-26 by sheepers, on Flickr so yea its pretty clean on the whole so ill chuck a new gasket in it and put it back together. still waiting on my clutch and now ive ordered a new intercooler as well.1 point
-
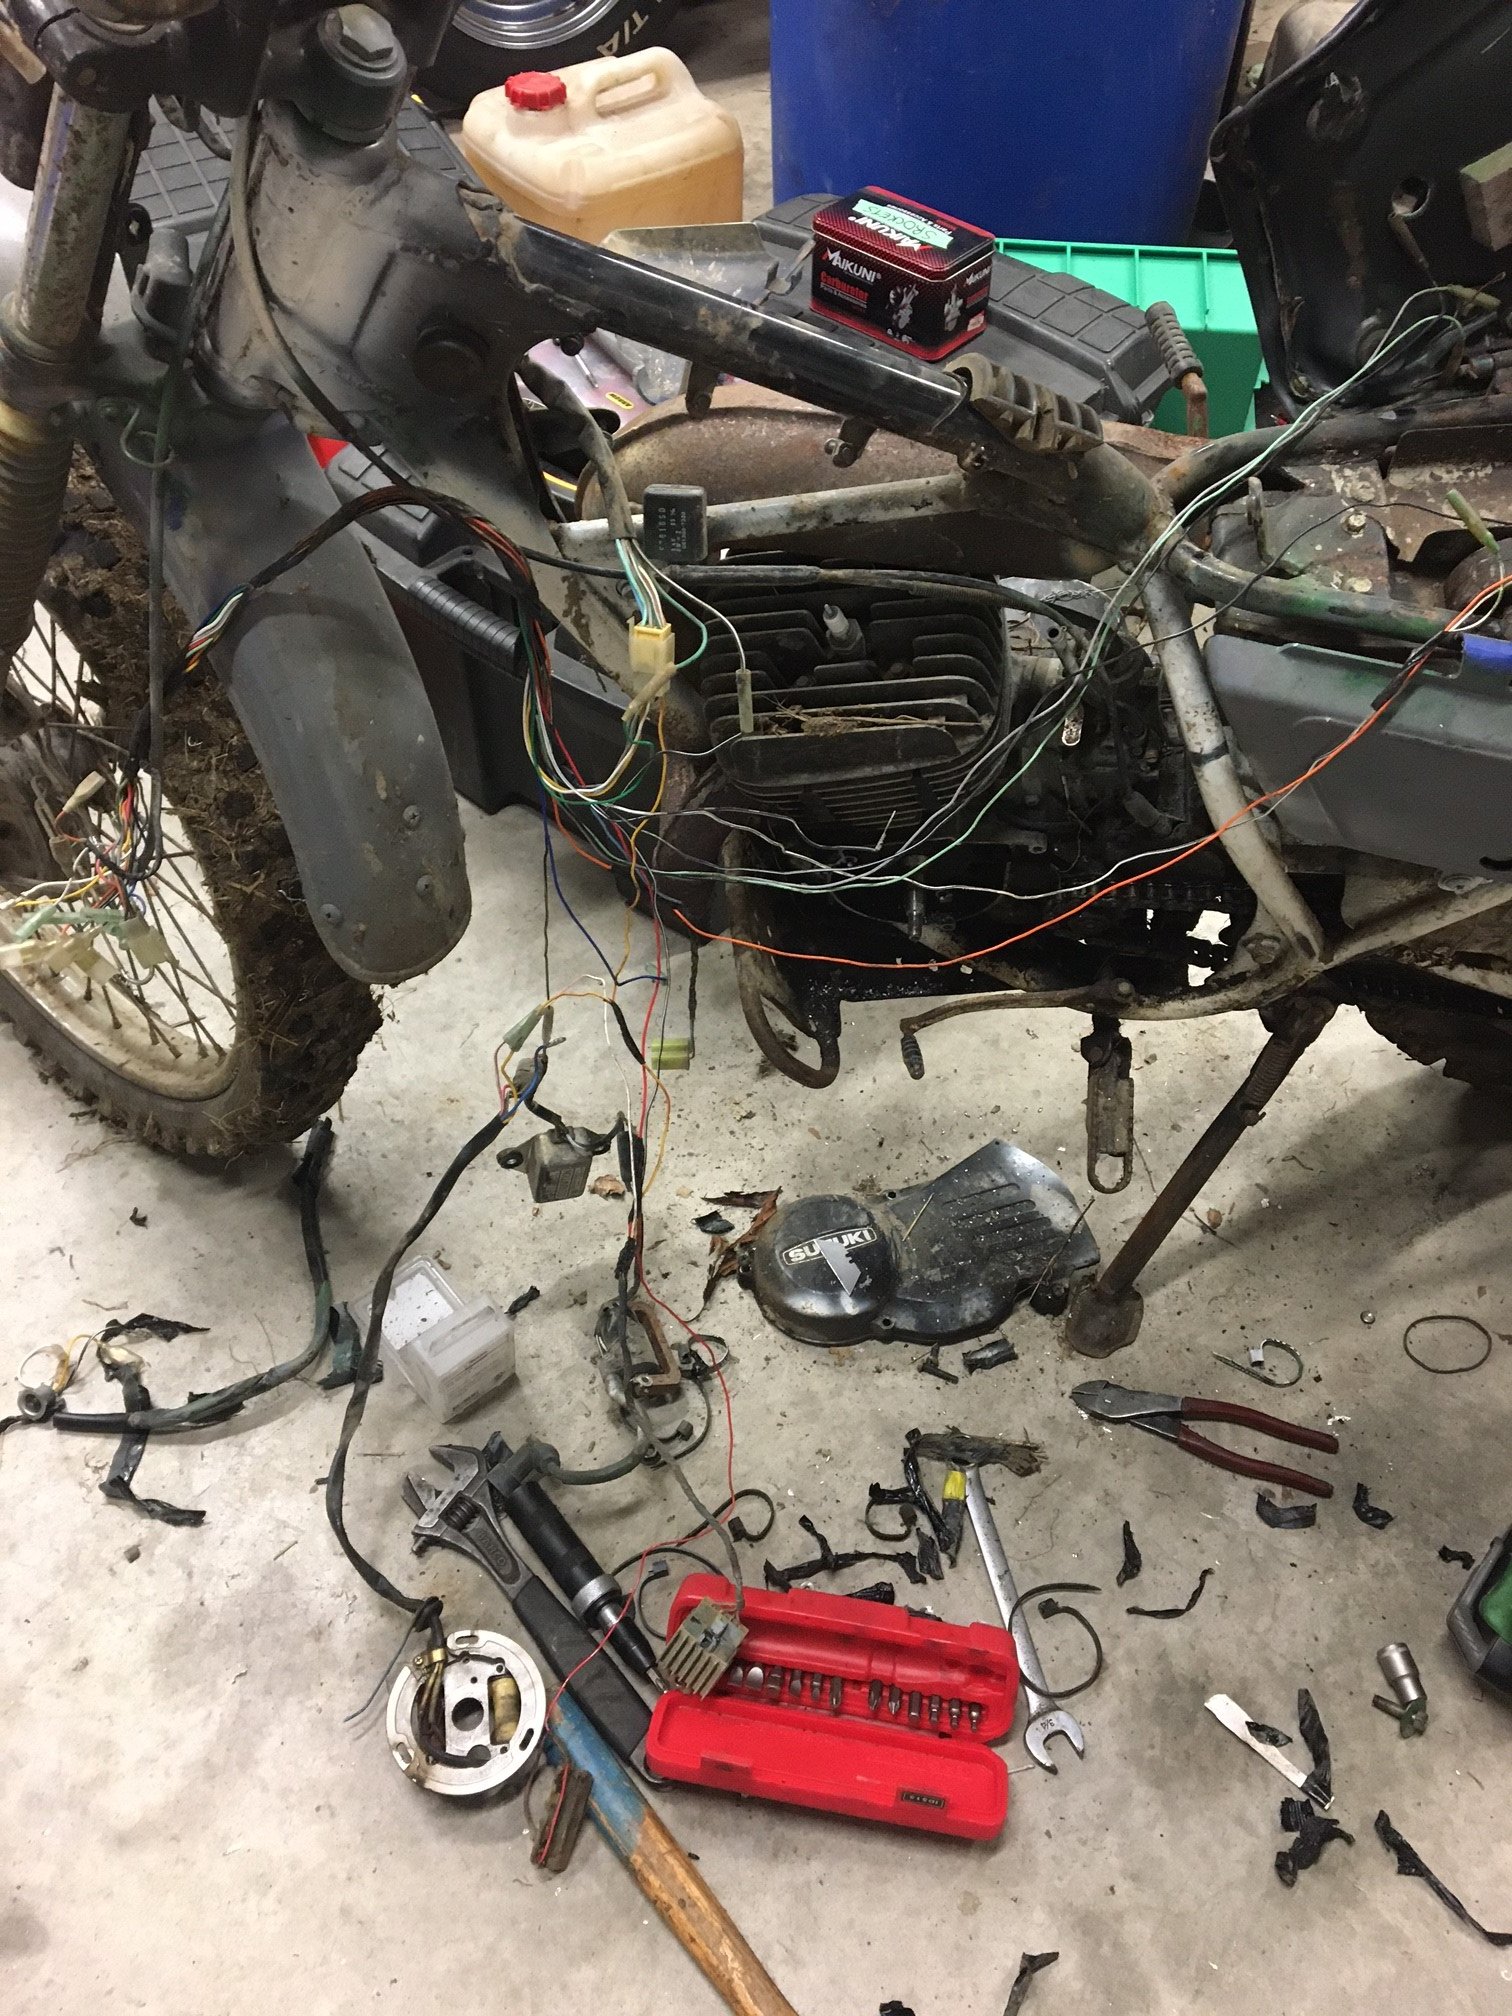
So the lights on this have not really been working well, and the battery not charging. The charging voltage reads at 2.2V. Which is a poor percentage of 6V battery voltage for charging. The 6V coil on the stator seems to be toast, although not hot, so just bread... Its dead. "No worries" I thought. "I've got plenty of mud bug parts, surely I've got a spare stator". Wrong... The TS100 has a points ignition, and all the mud-bug stuff I have are CDI. So definitely not a plug and play change. Last night I decided that my farm bike was never going to run again (Needed filling up with gas) so I stripped out the loom of everything I need to make some upgrades to the GT50. Next update should be installation of a CDI ignition. Flash as bro. Anyone need some mud-bug parts?
1 point
-
Got a few bits and pieces on the XR100 the other day. Still need to try repair the OE handguards, fit an engine bolt, fork boots, wheel bearings, tubes, should probably do tyres too, check valves and basic tune up shit. Genuine Honda fuel hose out of seal packet sent from Japan. ZING IMG_20210523_170413 by John Bell, on Flickr Happy enough with how its looking though. IMG_20210524_164259_1 by John Bell, on Flickr1 point
-
A few minutes with the strip disc and flap wheel turned this... Into this: Amusingly that's not even the side that was leaking. This one is. You can see the peeled off 'patch' and the offending hole that let all of the river go for a spin through the bilge pump. Today's mission is to head down to the metal recyclers and obtain some replacement metal to hot glue in there.1 point
-
Well it didnt 100% work. But it could definitely be fixed with a welder! It didnt fill fast enough and there wasnt enough pressure. So they had to frantically fill from one of the riser holes to try save it. In doing that there is a big section of cold lap and a big hole! So the changes would be to have 2 filling sprues in the middle of the casting. Then increase the head pressure a little bit. The bowl I had in the sprue was way too big and reduced the head pressure. For the most part it looks pretty good. All the finer details are there. No cores collapsed or shifted, no shrinking of any areas so I dont need to worry about chill blocks. El Camino for scale. Going to have to figure out an easier way to do this in the shed. Was way too much work!1 point
-
Finished and loaded up. Probably the most expensive and elaborate way to lower an El Camino! Looks like we'll see how good these bump stops are!1 point
-
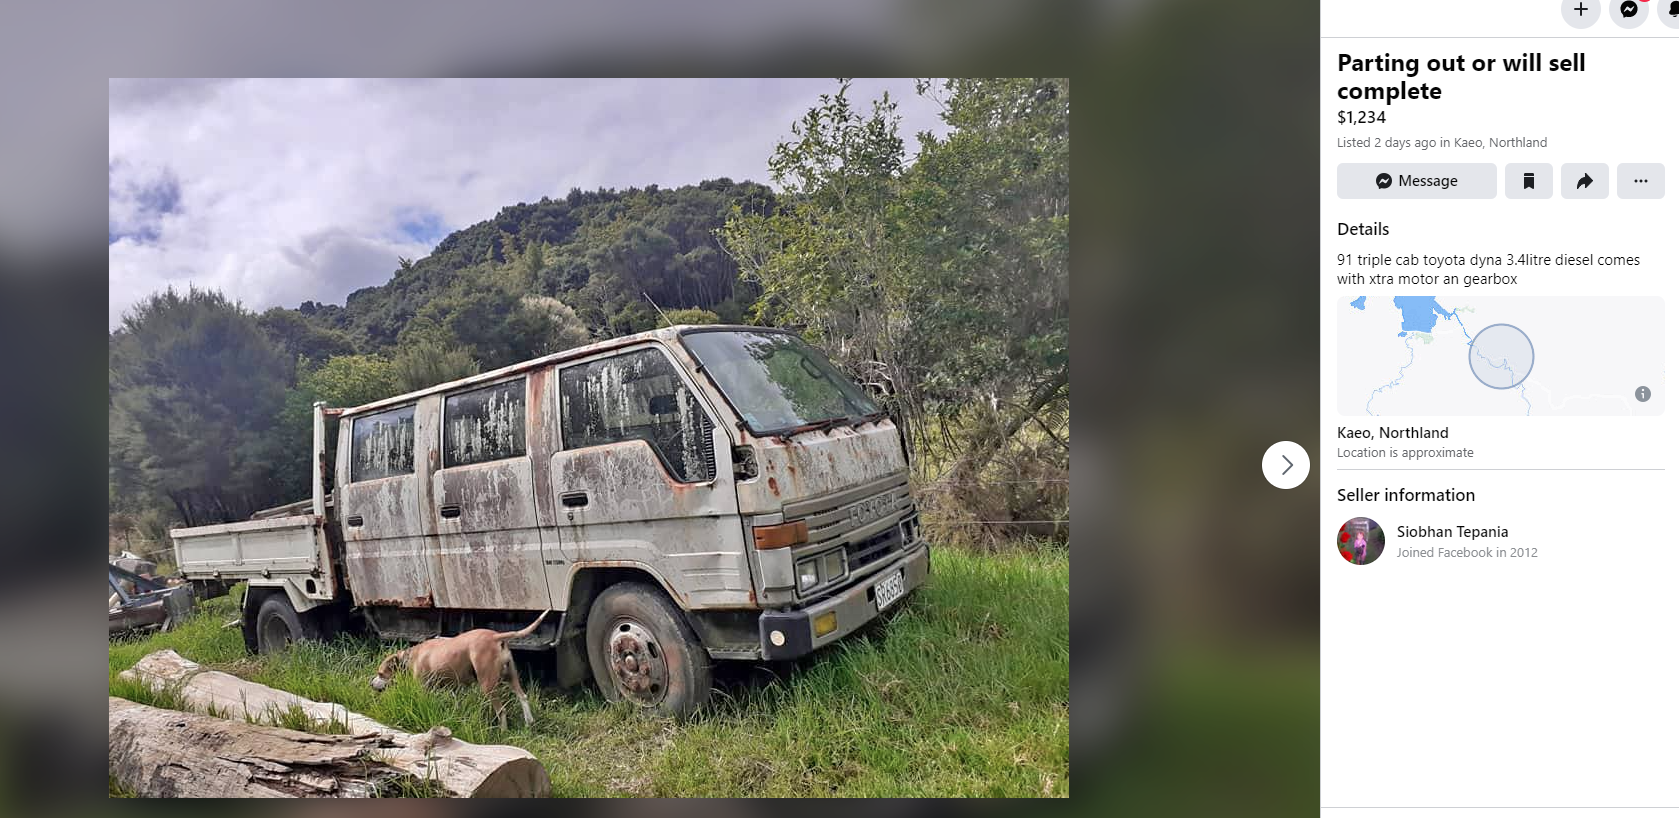
I don't want to hi-jack your thread mate, but here it is anyway. I don't know the details apart from that it was a 6 cylinder Patrol/Safari and he went mental
1 point
-
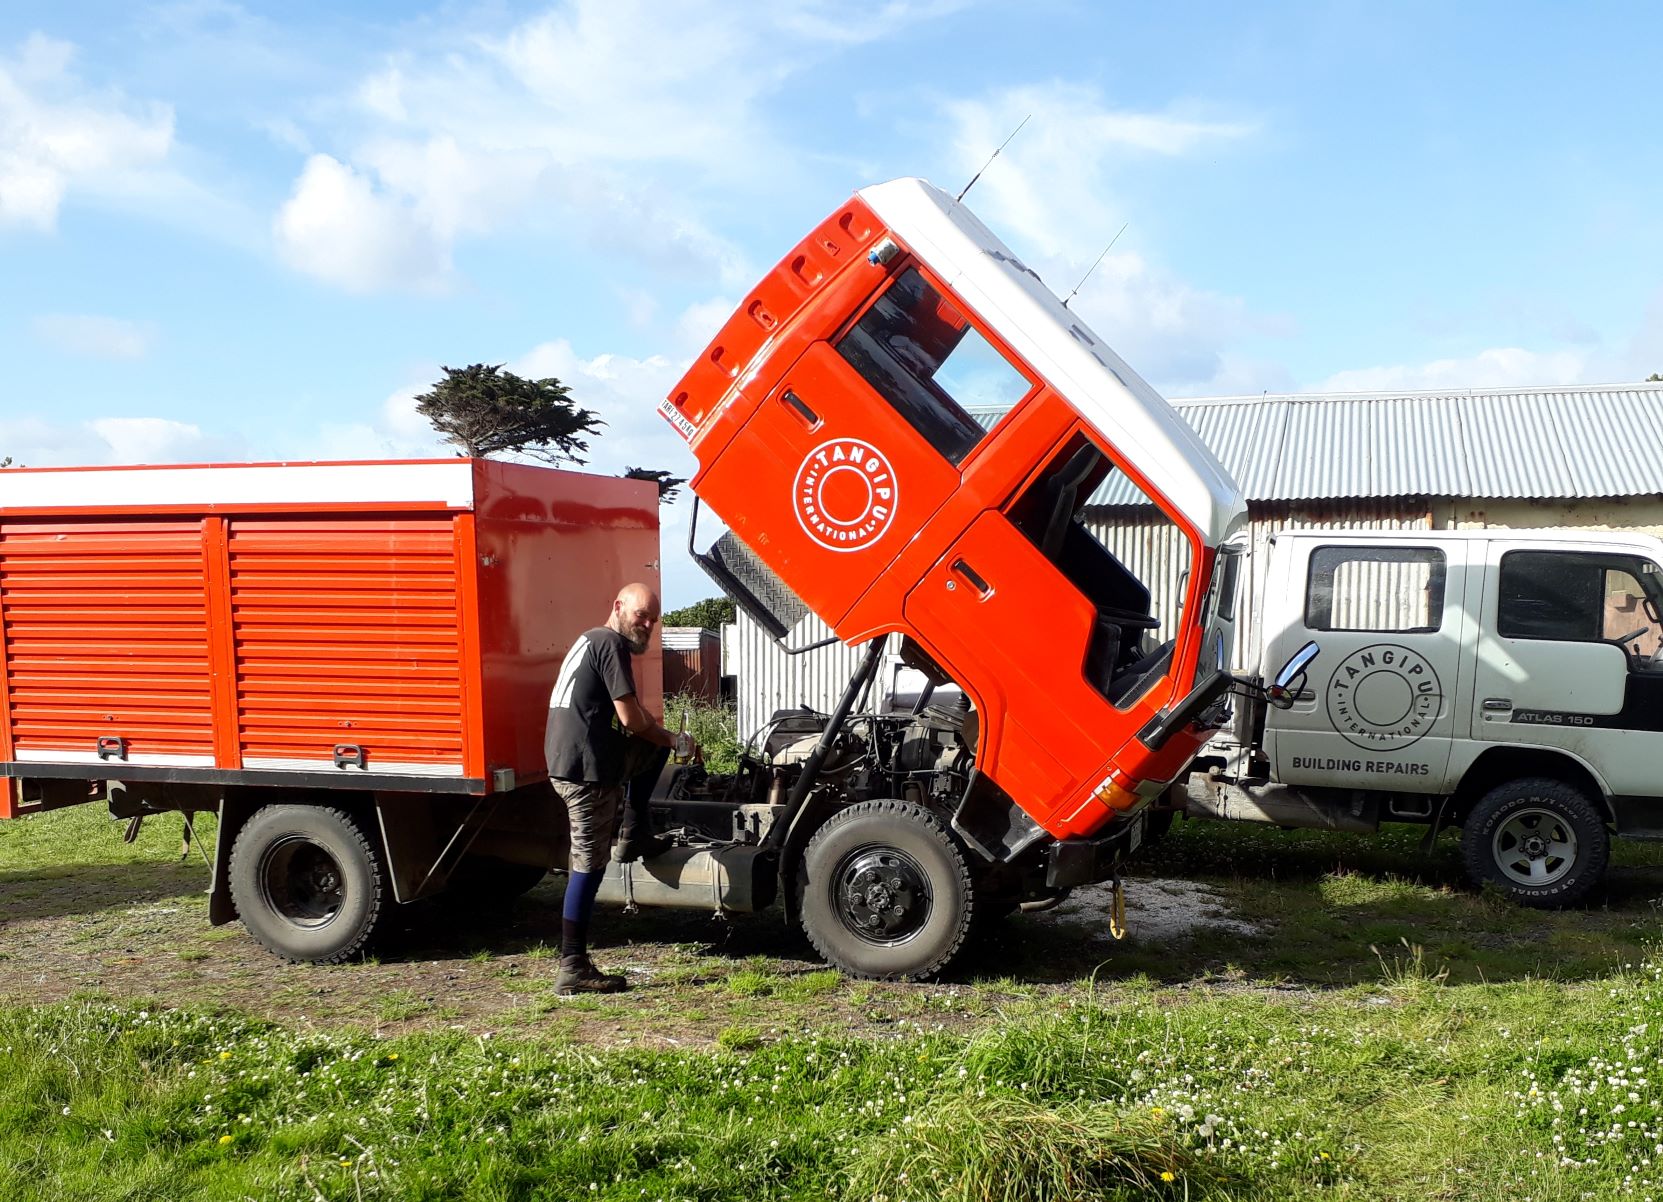
I'm off Island for ten days so only have a couple of pics handy, but here you go.. What you've built is EPIC. It'd be perfect for Chatham and wouldn't need to be legal to be used on Island. I am very impressed MrPog. My little brother has recently put a Chev cab and wellside on a Patrol chassis... but he got a bit carried away and made it 6x6 My Dyna needs new (lifted) springs... but that's hard to arrange from a distant Island. I love the truck as it's incredibly strongly built, has virtually no electronics and is easy to work on.. but the ride is shit. New springs will hopefully help if I can ever take it off the road for long enough to get that done
1 point
-
The only stretch will be my arsehole as you ease your enormous member into it.1 point
-
Have you considered making an extra LWB version?
1 point
-
And now it's a project custom springs in the rear and front although front isn't captive at all atm
1 point
-
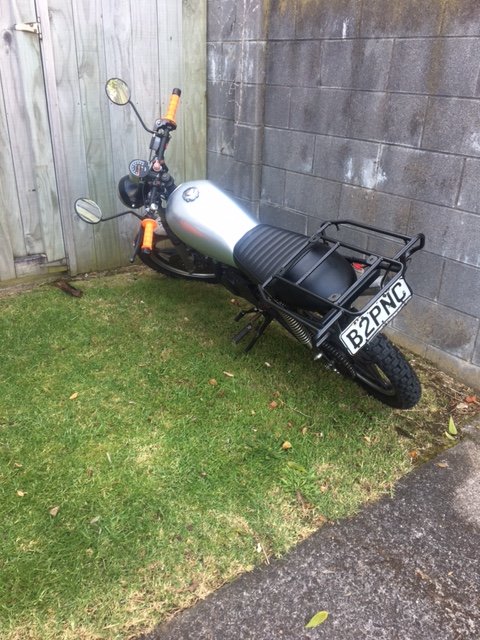
I rode it to work today. It couldn’t get into power band in top gear so it was just struggling away topping out at about 80-85km/h. shot up to dads this afternoon to try some different gearing. original was 14-46. 13-46 didn’t work as the chain length didn’t work for the big SR244 tyres. so 12-46 it is!! it’s great now. Absolutely runs out of puff at about 105km/h, which it couldn’t get to before. Cruises comfortably at 90. I’ve also extended the stand so it stands nicer. (After this photo)
1 point


(Medium).JPG.992df379a52e1f5f30aa2ccc26abe60a.JPG)
(Medium).jpg.b604398c38c6d513076d555fd93b9e33.jpg)
(Medium).jpg.d0ef0f2be6ec49b0a9a58c99ac6c92af.jpg)
.thumb.jpeg.e0a4bff61111e0c8c7396950fcc94da1.jpeg)


.jpg.3412dd98cefda862b7aaf97d5755427c.jpg)
This leaderboard is set to Auckland/GMT+12:00