
Leaderboard


.thumb.jpeg.384ff72c8d2b0ee0d34a7bdedb55bdcf.jpeg)
Popular Content
Showing content with the highest reputation on 01/05/21 in Posts
-
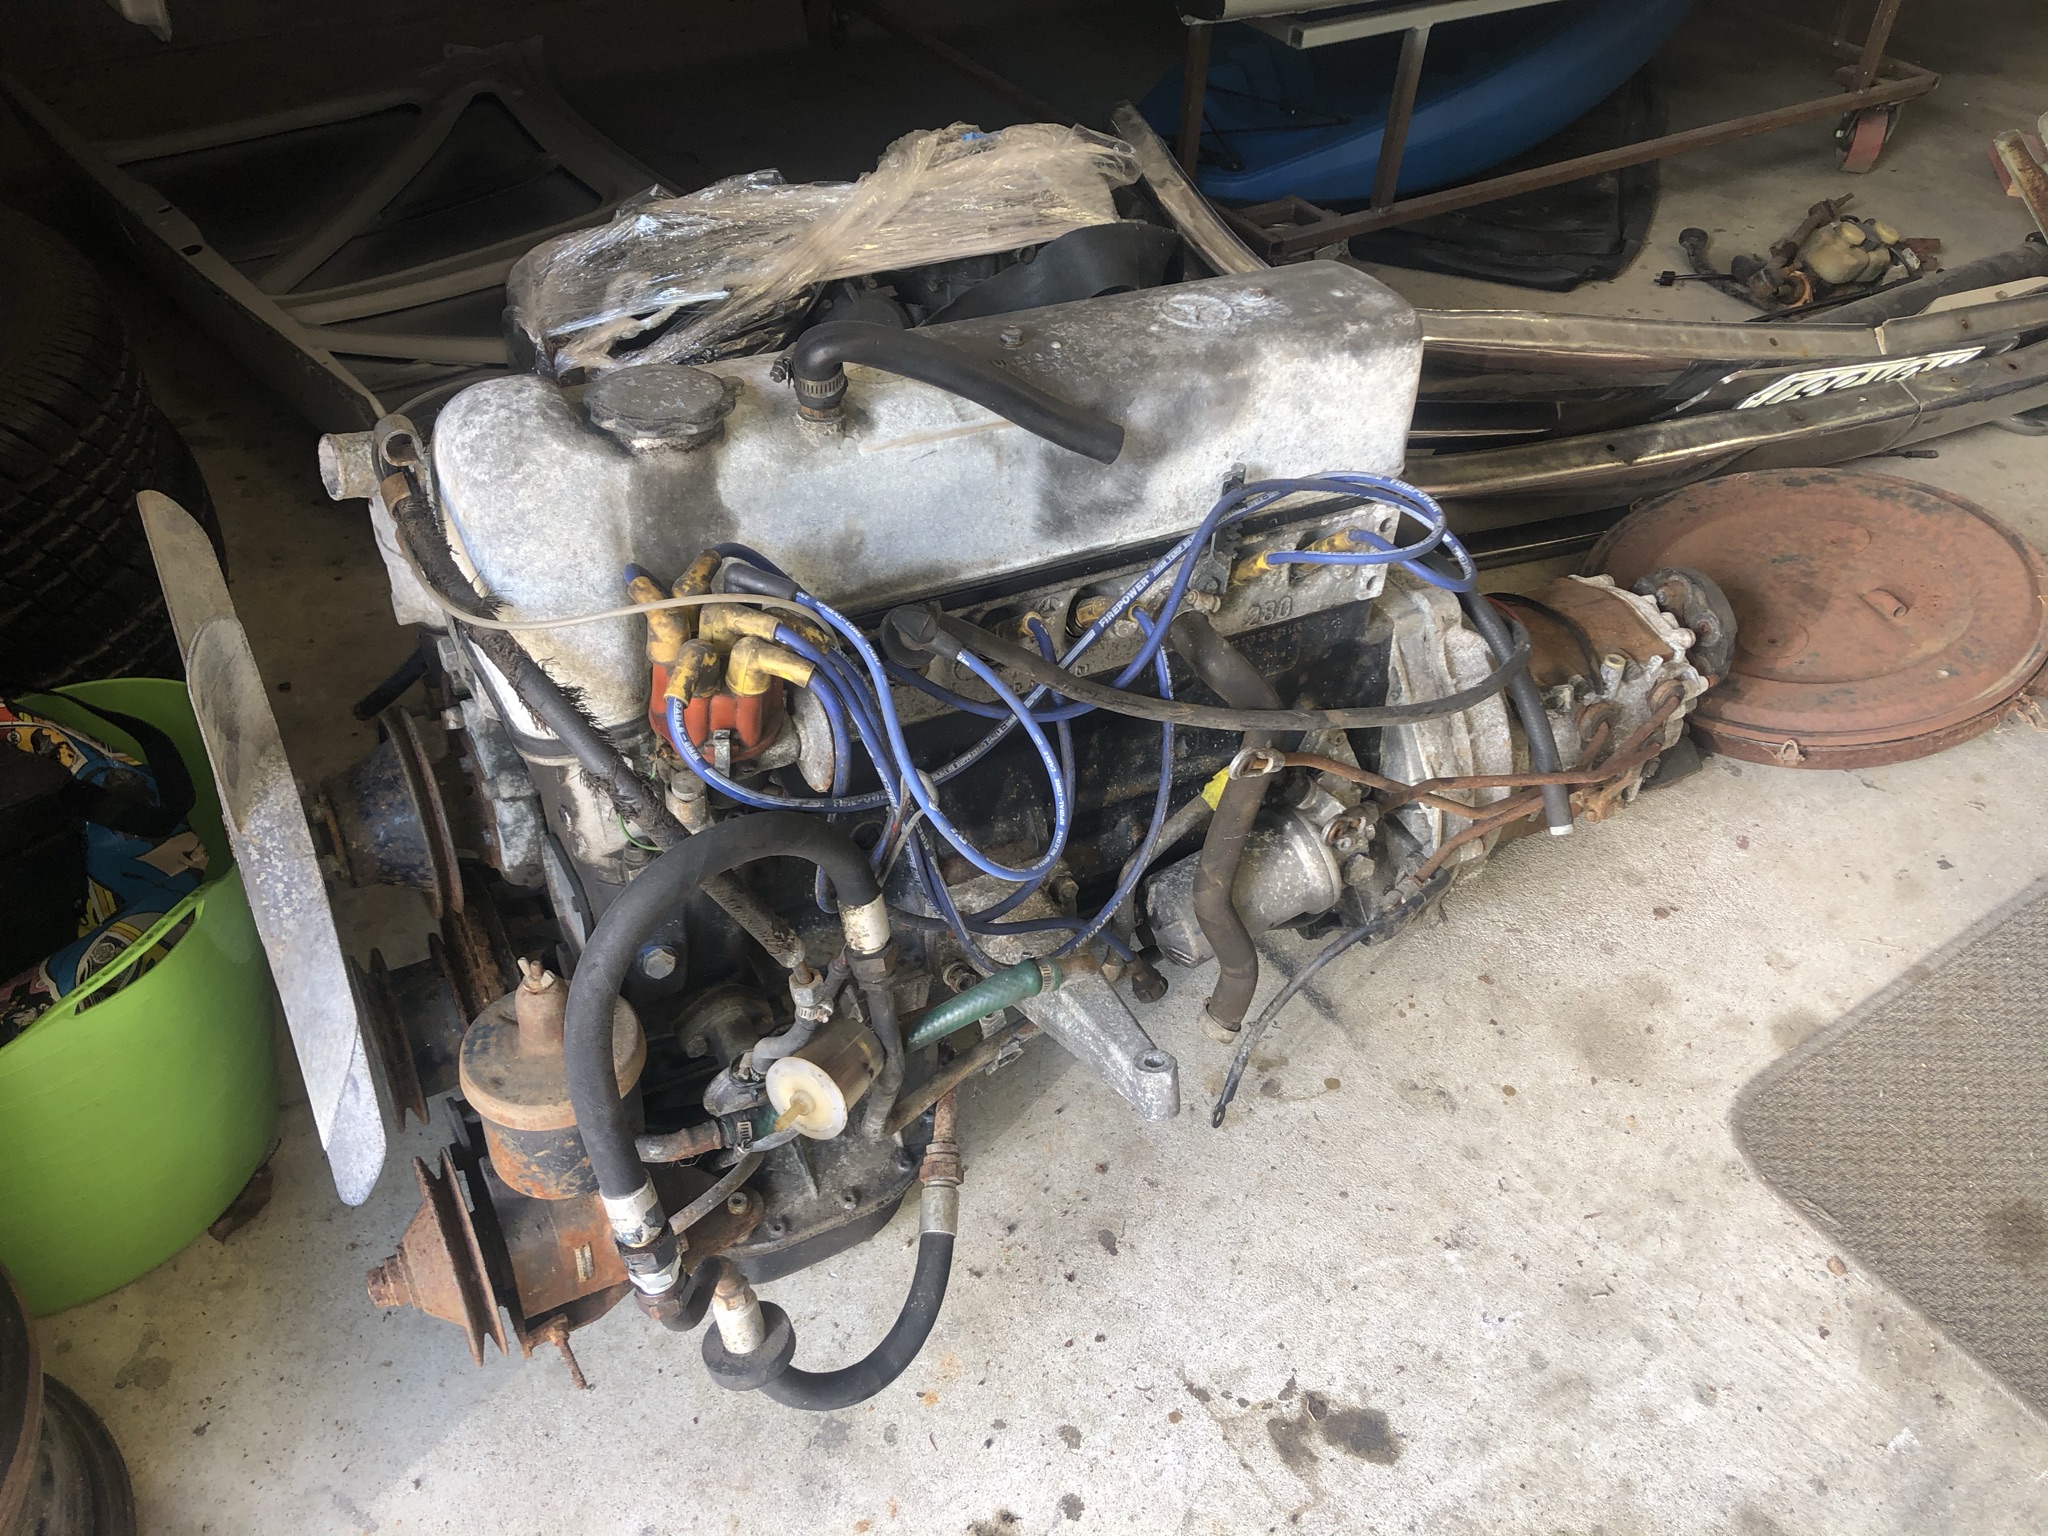
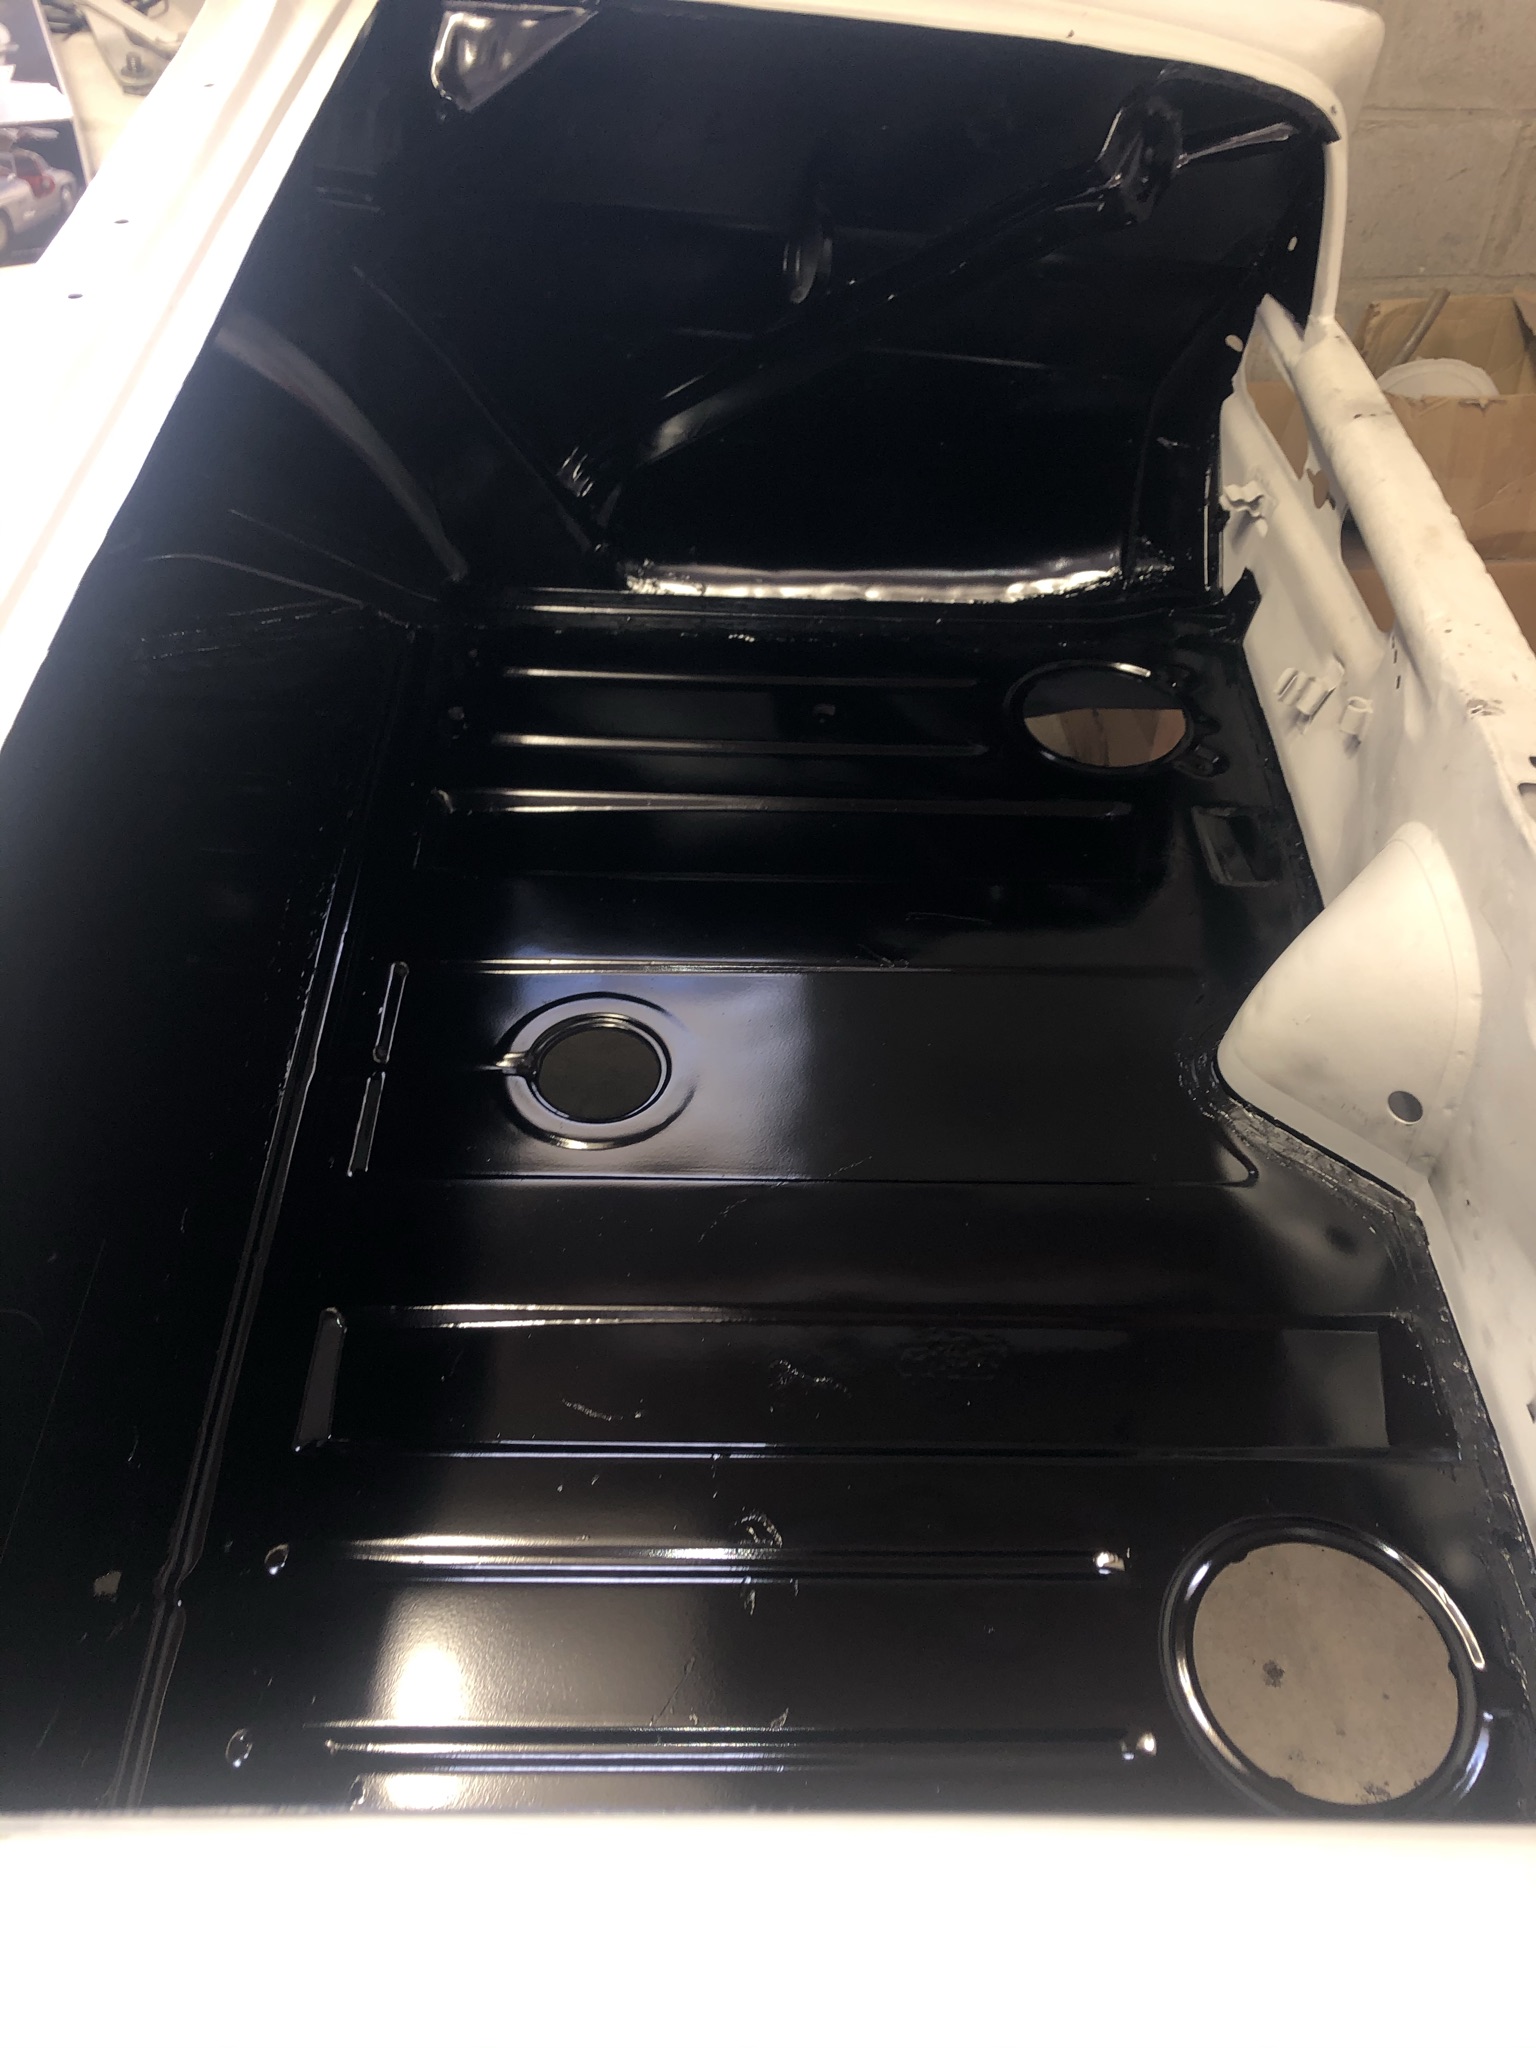
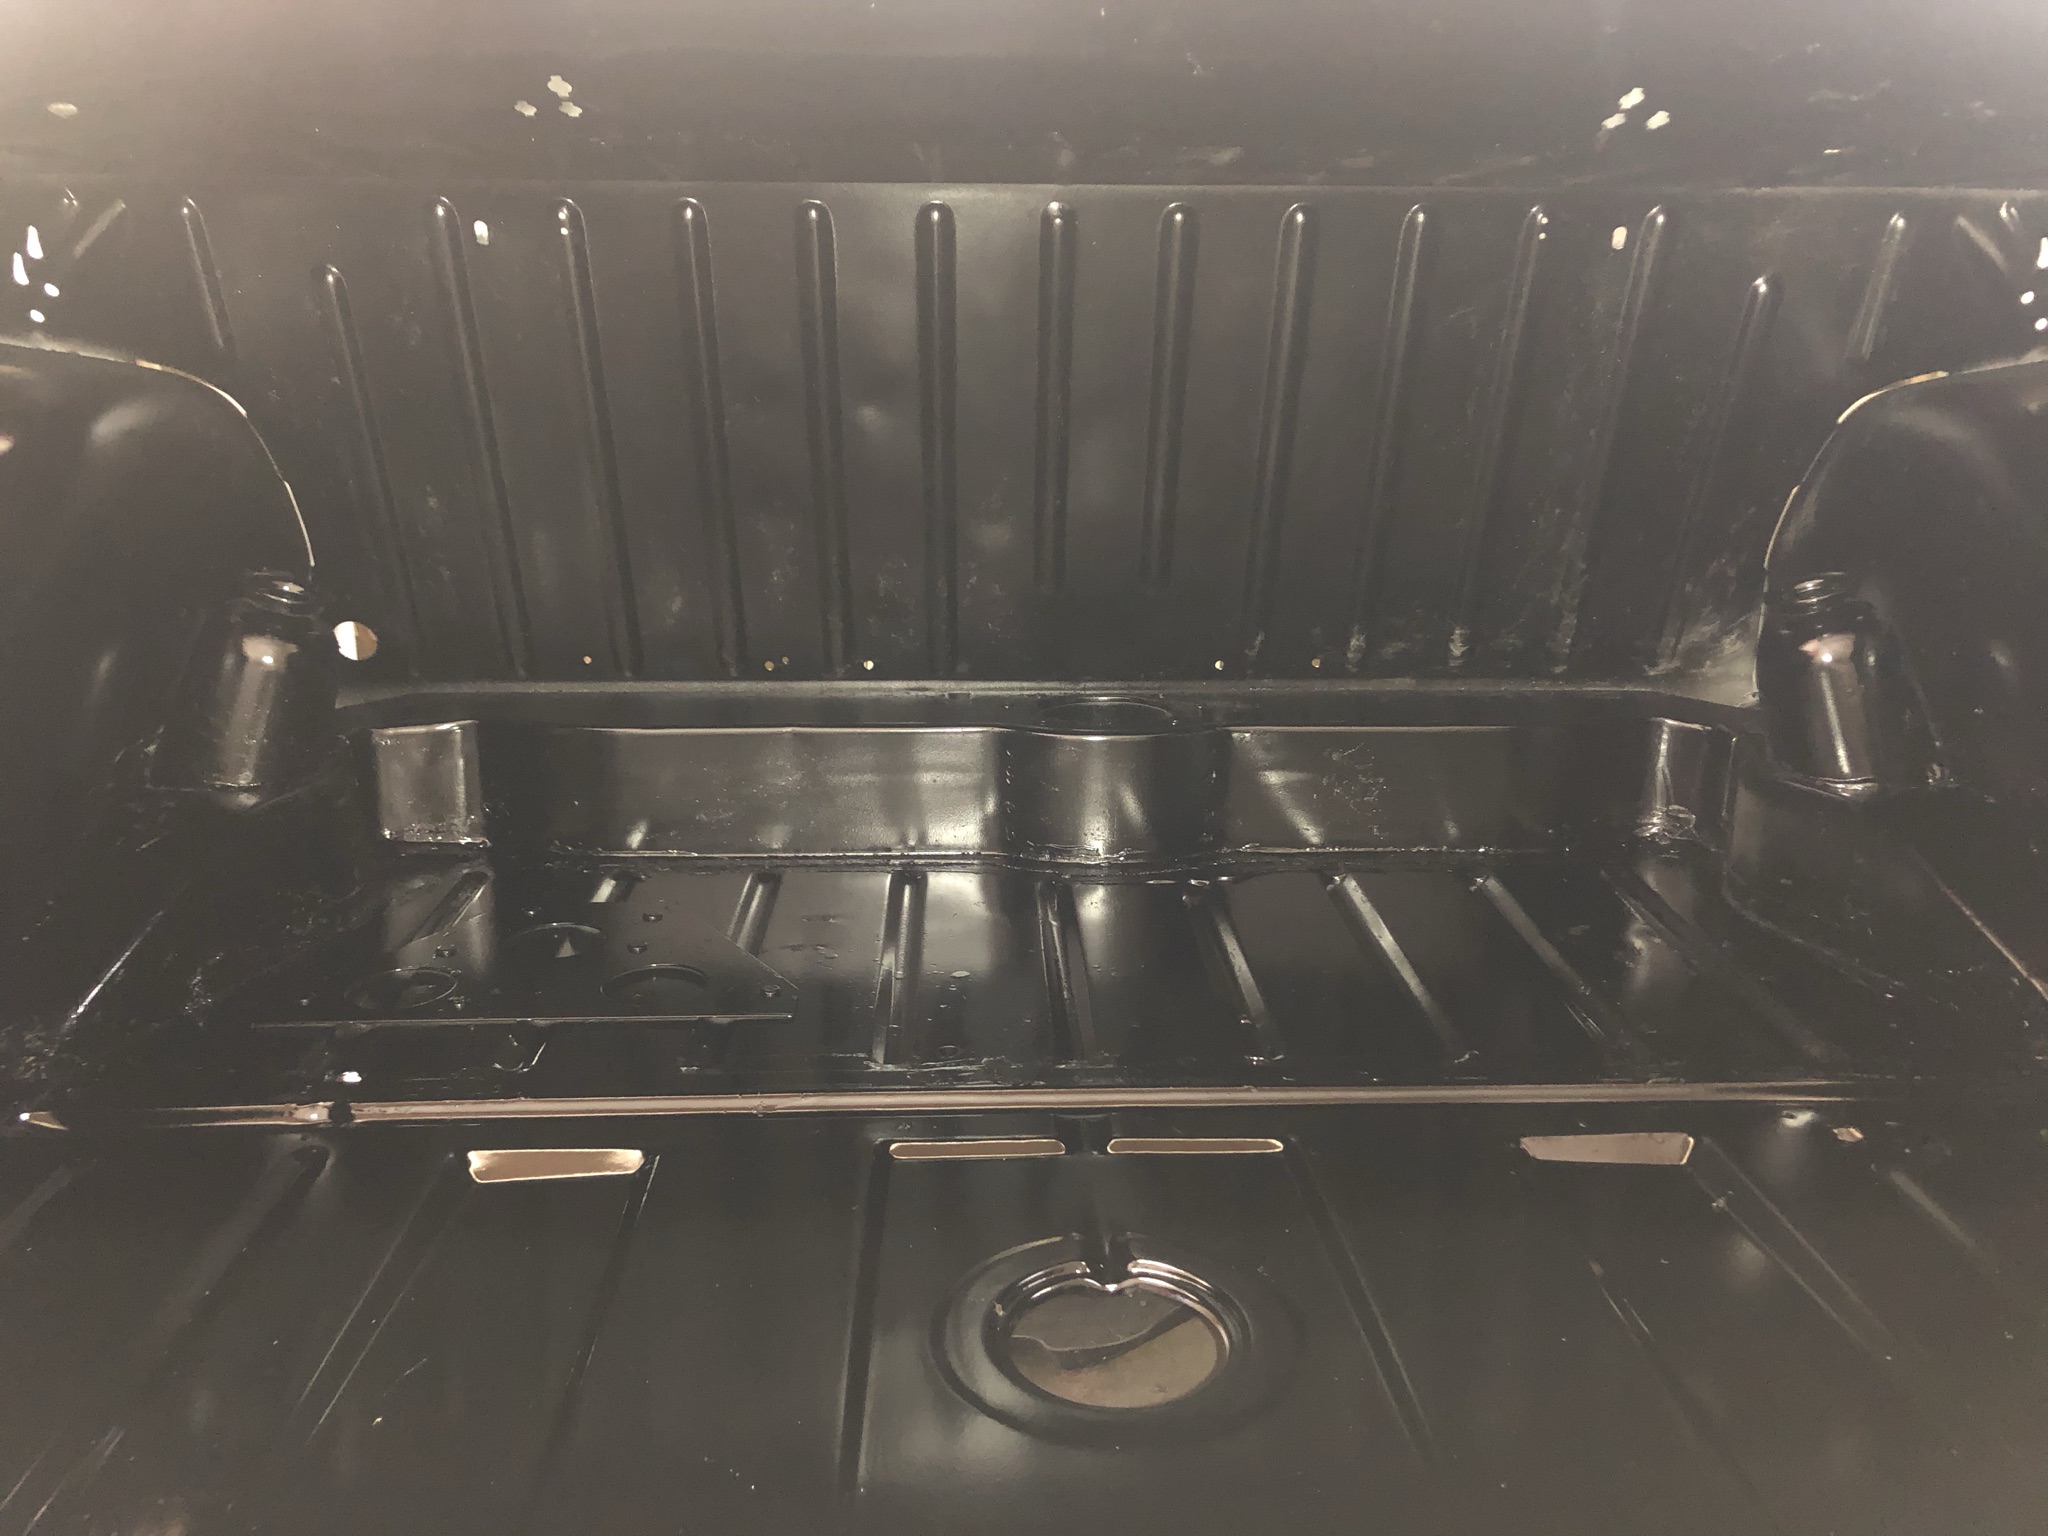
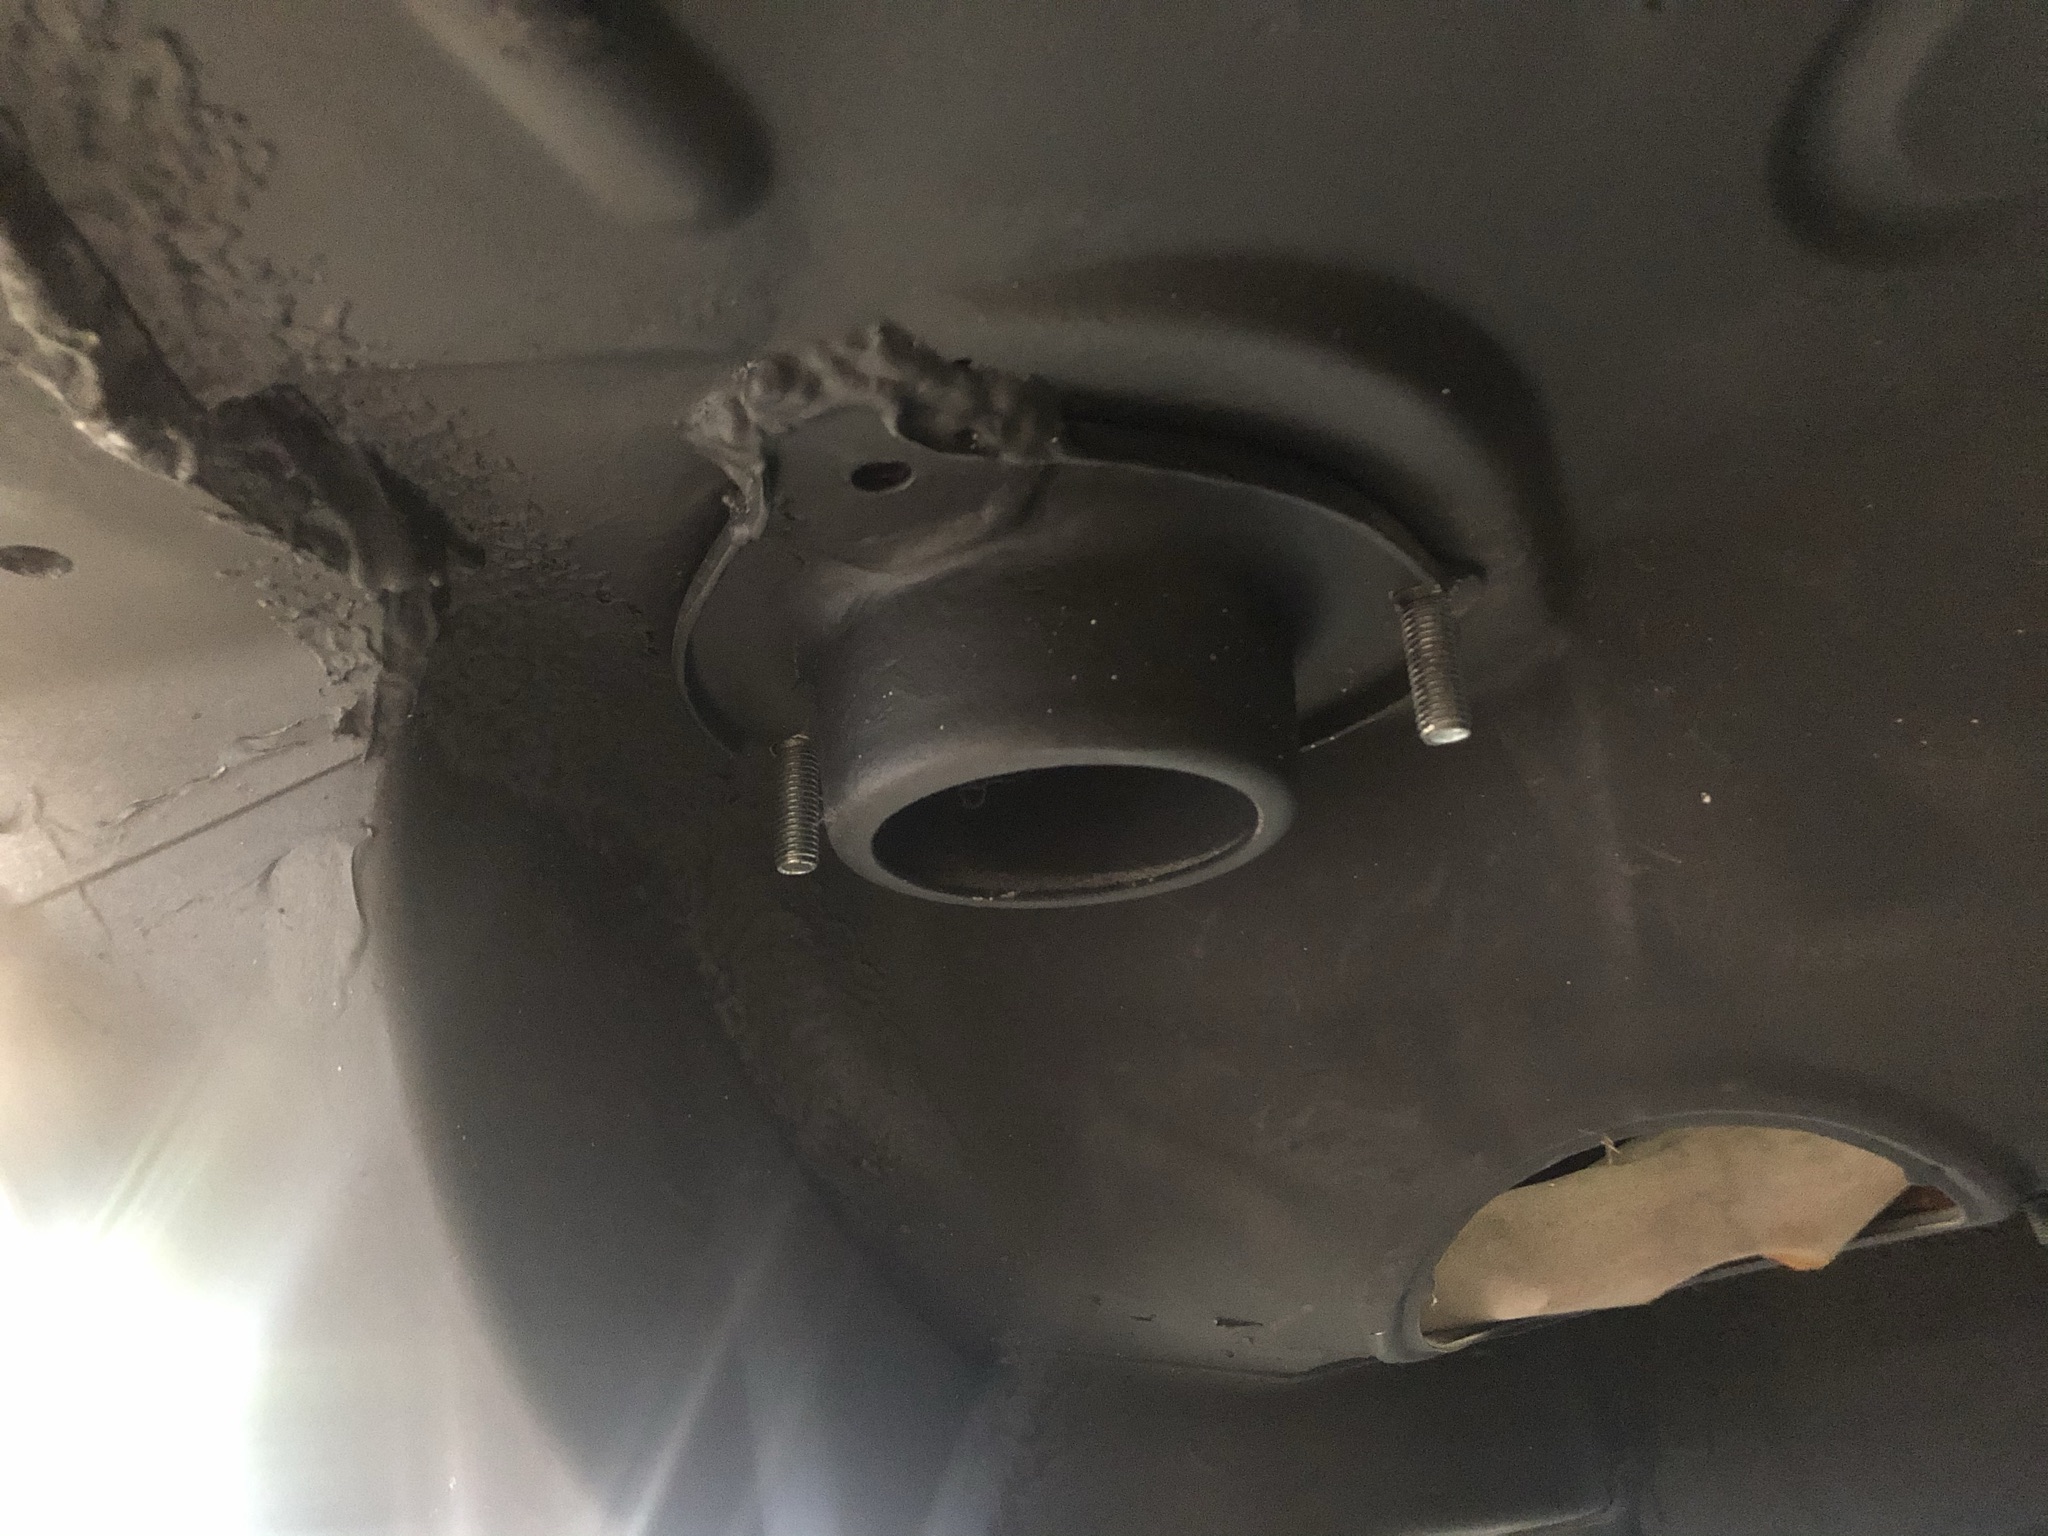
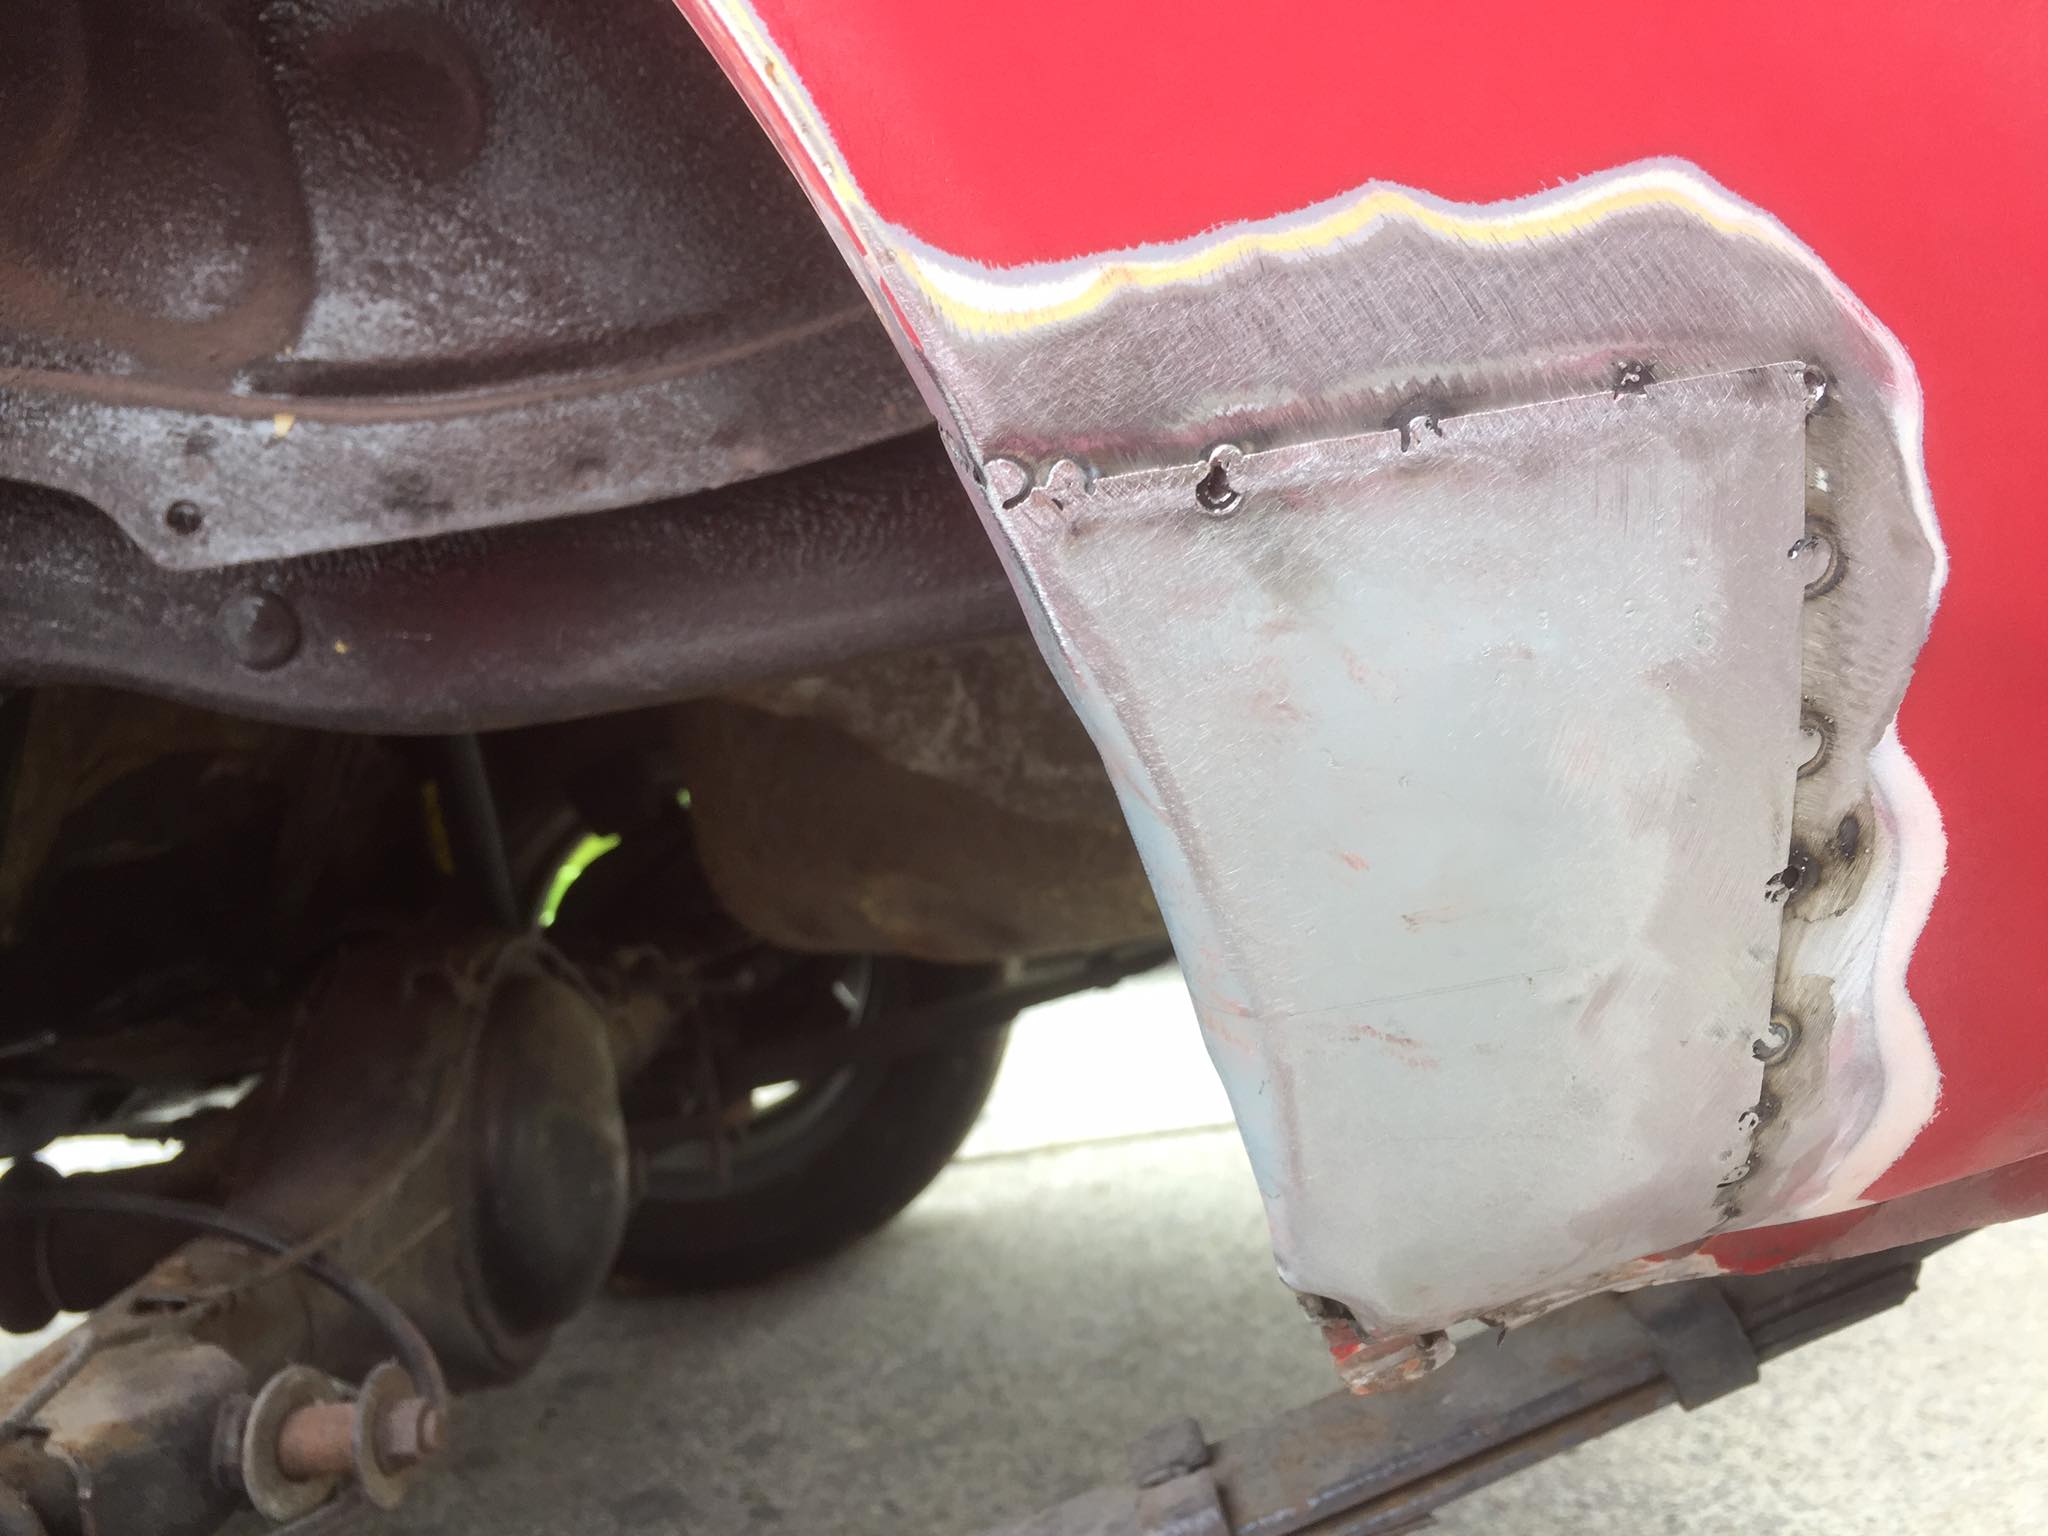
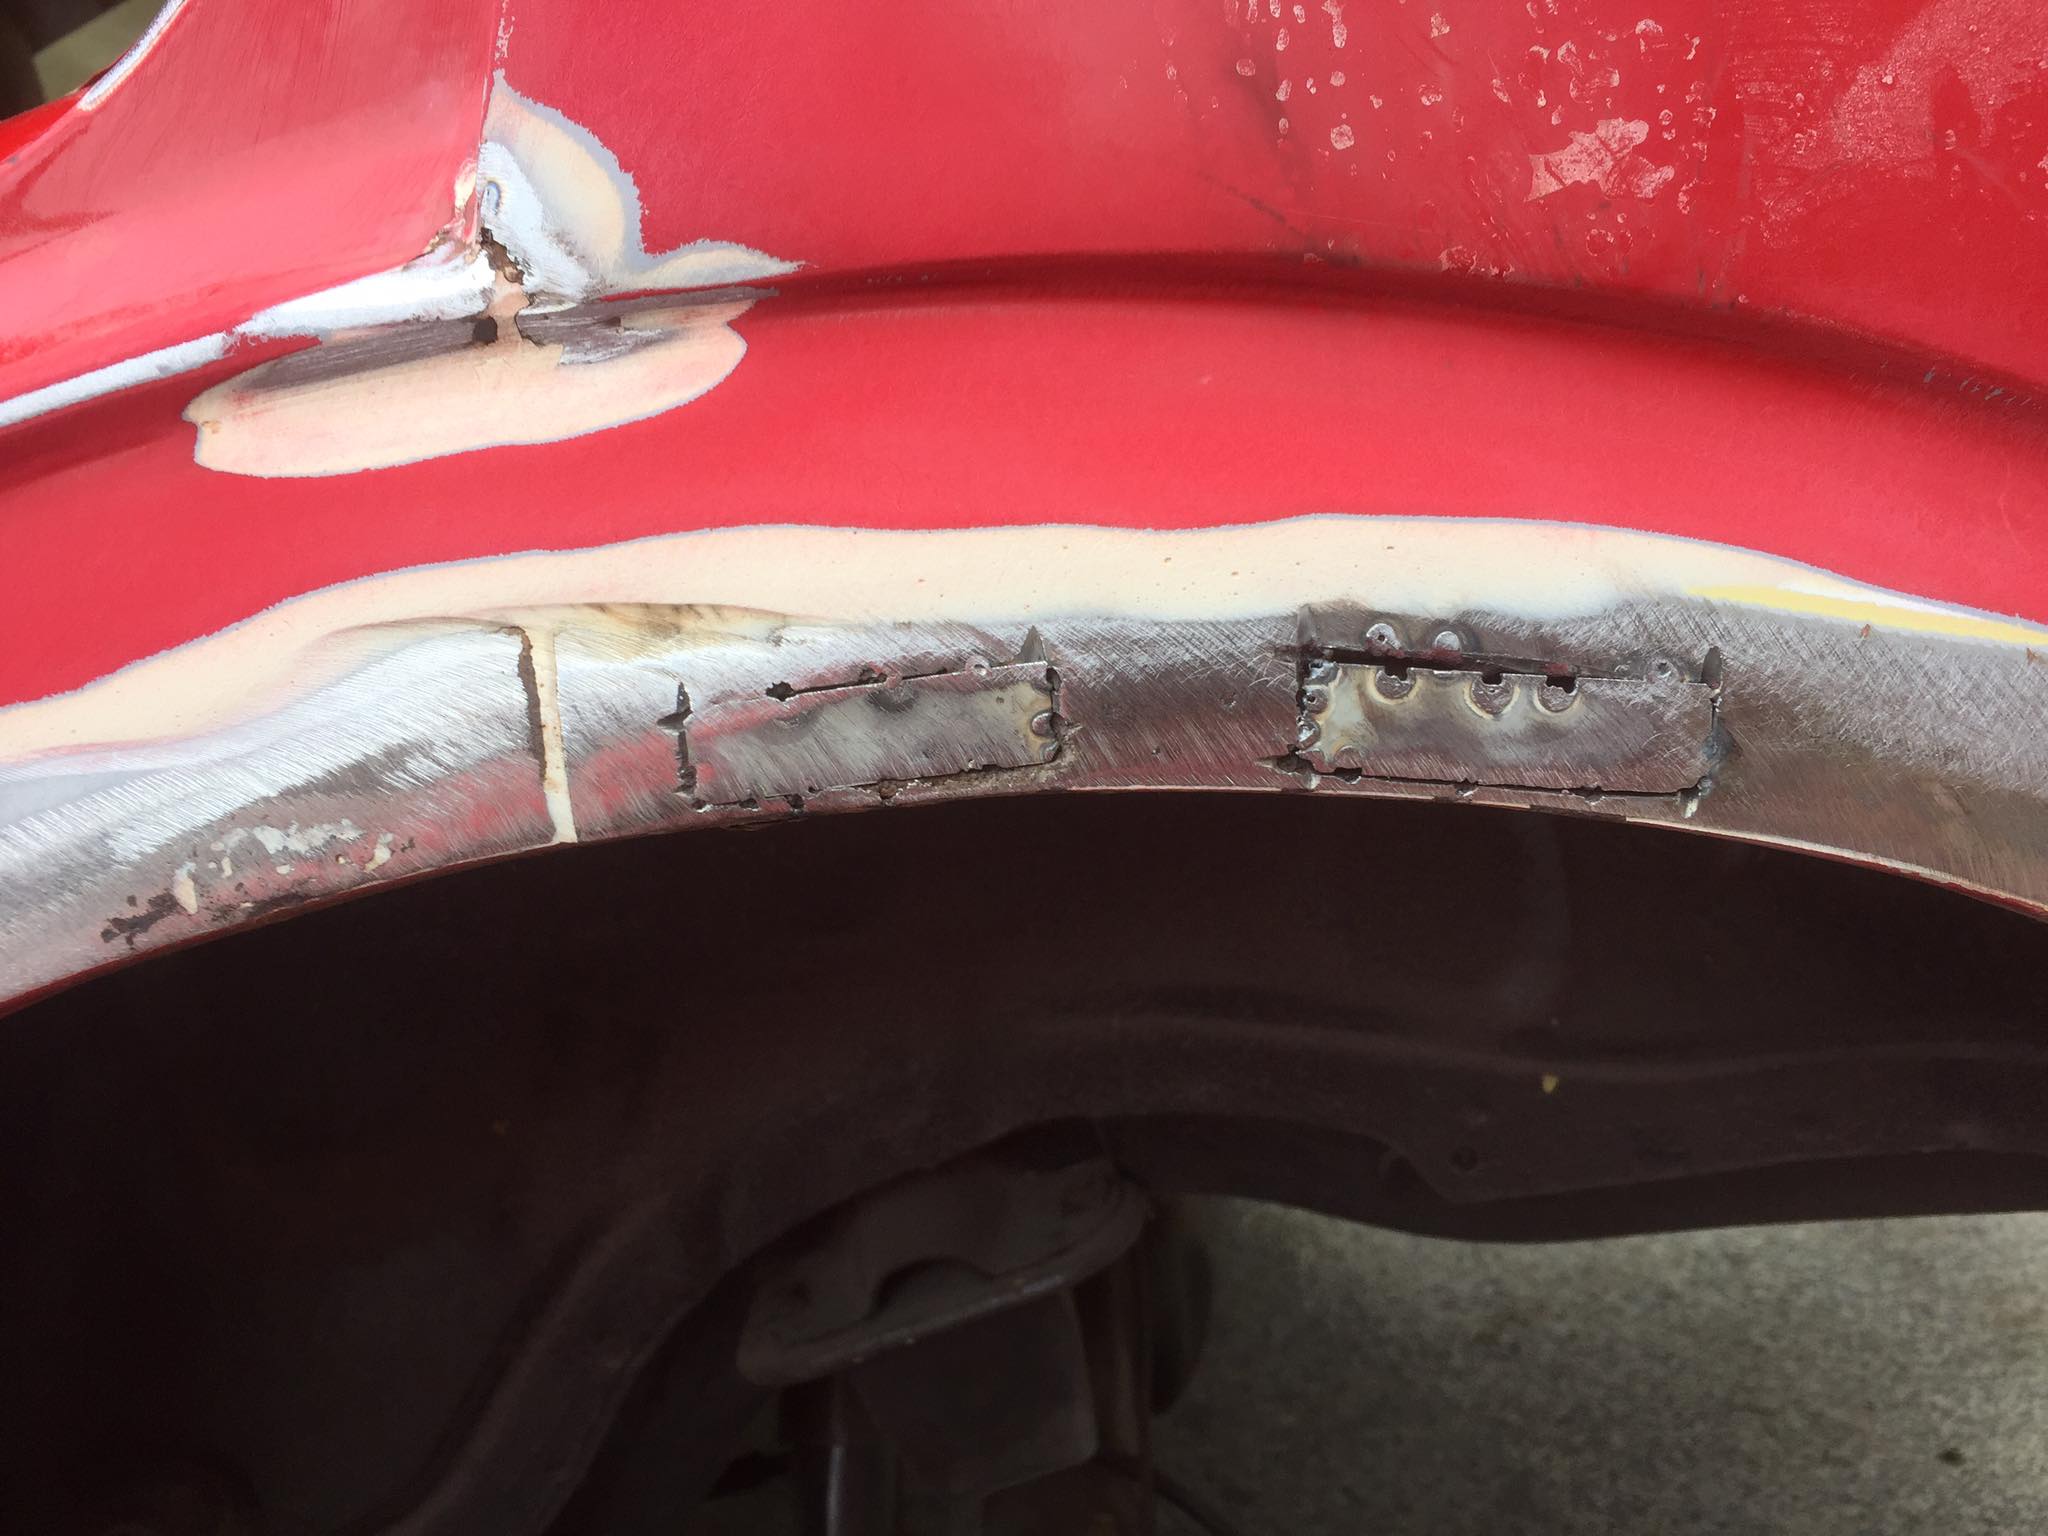
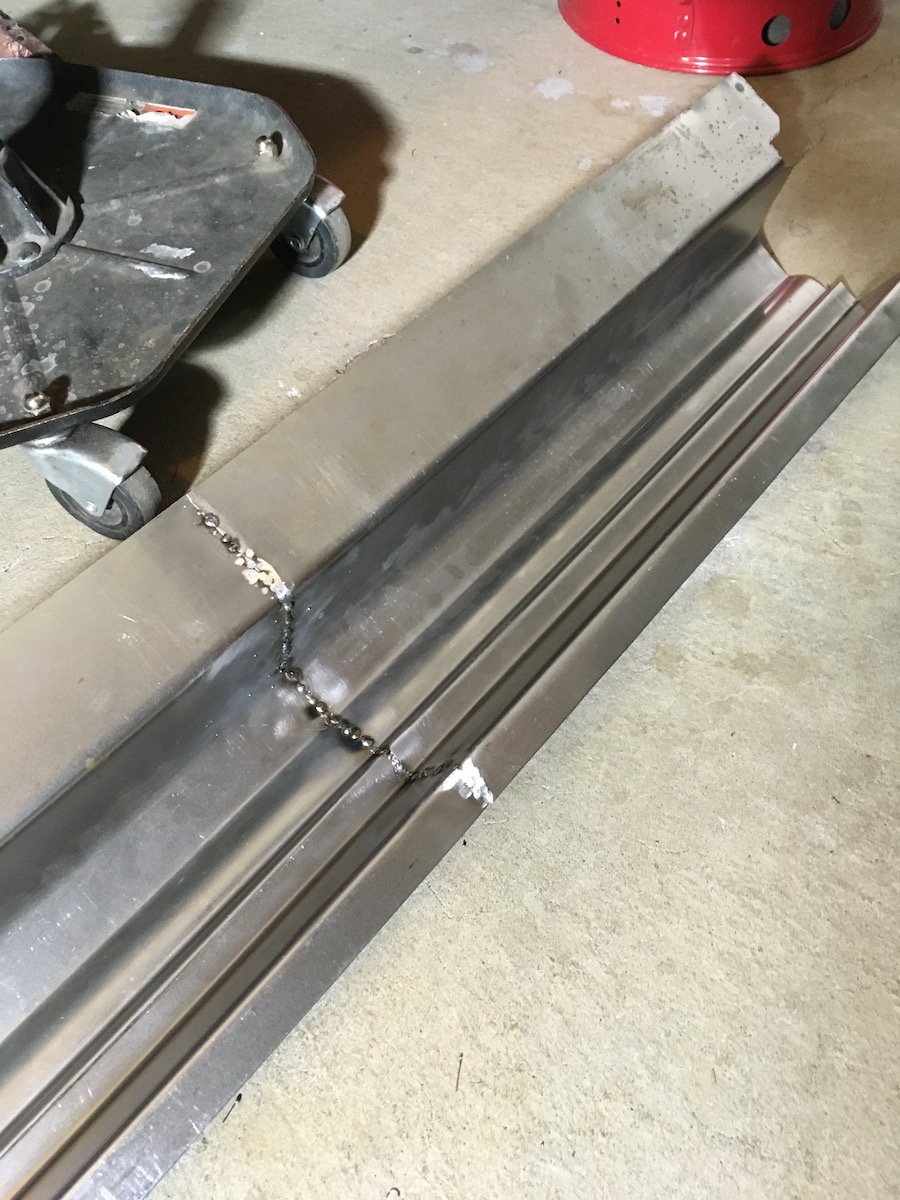
Howdy, been awhile. Life got in the way there for a bit; moved out of Auckland (subsequently moved house a couple of times with the Merc spending a bit of time in storage), had a baby etc. but Xmas holiday period has allowed me to make some progress. I wasn’t happy with the tabs I had welded on the upper rear airbag mounts, so ages ago I drew up some flange things and had them laser cut, finally got around to cutting the old tabs off and welding on the new flanges so thats all much tidier. Drilled some holes in the car so the aforementioned mounts have some way of attaching to the car, front two bolts come through from underneath the rear seat; the rearmost hole had a captive nut welded on the topside as it’s inside an enclosed box section of the car (welding upside down can suck a pineapple) Gave it a prime and a paint to match the rest of the underside The engine I mentioned is in no hurry to rotate, I spent some time trying to free it up with various liquids and heat but nah, Piston 1 isn’t budging. Was scrolling Facebook marketplace one evening looking for a transmission and stumbled across a guy selling another engine for cheap approx 800m from Sentra Daves place in sunny Onehunga so bought that. This motor is an M130 out of a W108, the last variation of the M180 engine family. Displaces 2.8 litres (vs 2.2l), make 160ish hp when new with improvements including larger valves in the head and 7 main bearings vs 4 in the smaller displacement versions. This one runs (although the cam has seen better days). An added bonus was that it came with a power steering pump attached and the power steering box from the W108 it came from - which bolts into a W111 as they’re the same chassis, So I need to source a shorter steering column from a W108 to suit and then I’ll gain power steering. (KY if you see this I still want that V8 so don’t panic) Spent the last couple of months leading up to Xmas buying various supplies to put some paint on things, including a couple of spray guns based on YouTube recommendations. Got a chance to give the boot floor a sand up then smooched some seam sealer around the place and waited for it to stop raining. Got a chance to mask it up, wipe it down and blow over a fresh layer of epoxy primer followed by some 2k satin black For my first foray into spraying paint it came up not bad.jpeg, couple of rookie balls ups mainly consisting of me dropping the air hose on the boot floor whilst trying to reach under the parcel shelf etc which has left a couple marks but it’ll all end up hidden under a rubber mat/carpet so I’m happy as with it. Rear tail light panel will end up body colour (which isn’t black). I’ll probably need to go back and brush on a couple bits that I couldn’t get the gun too. Progress feels good though.
 11 points
 -
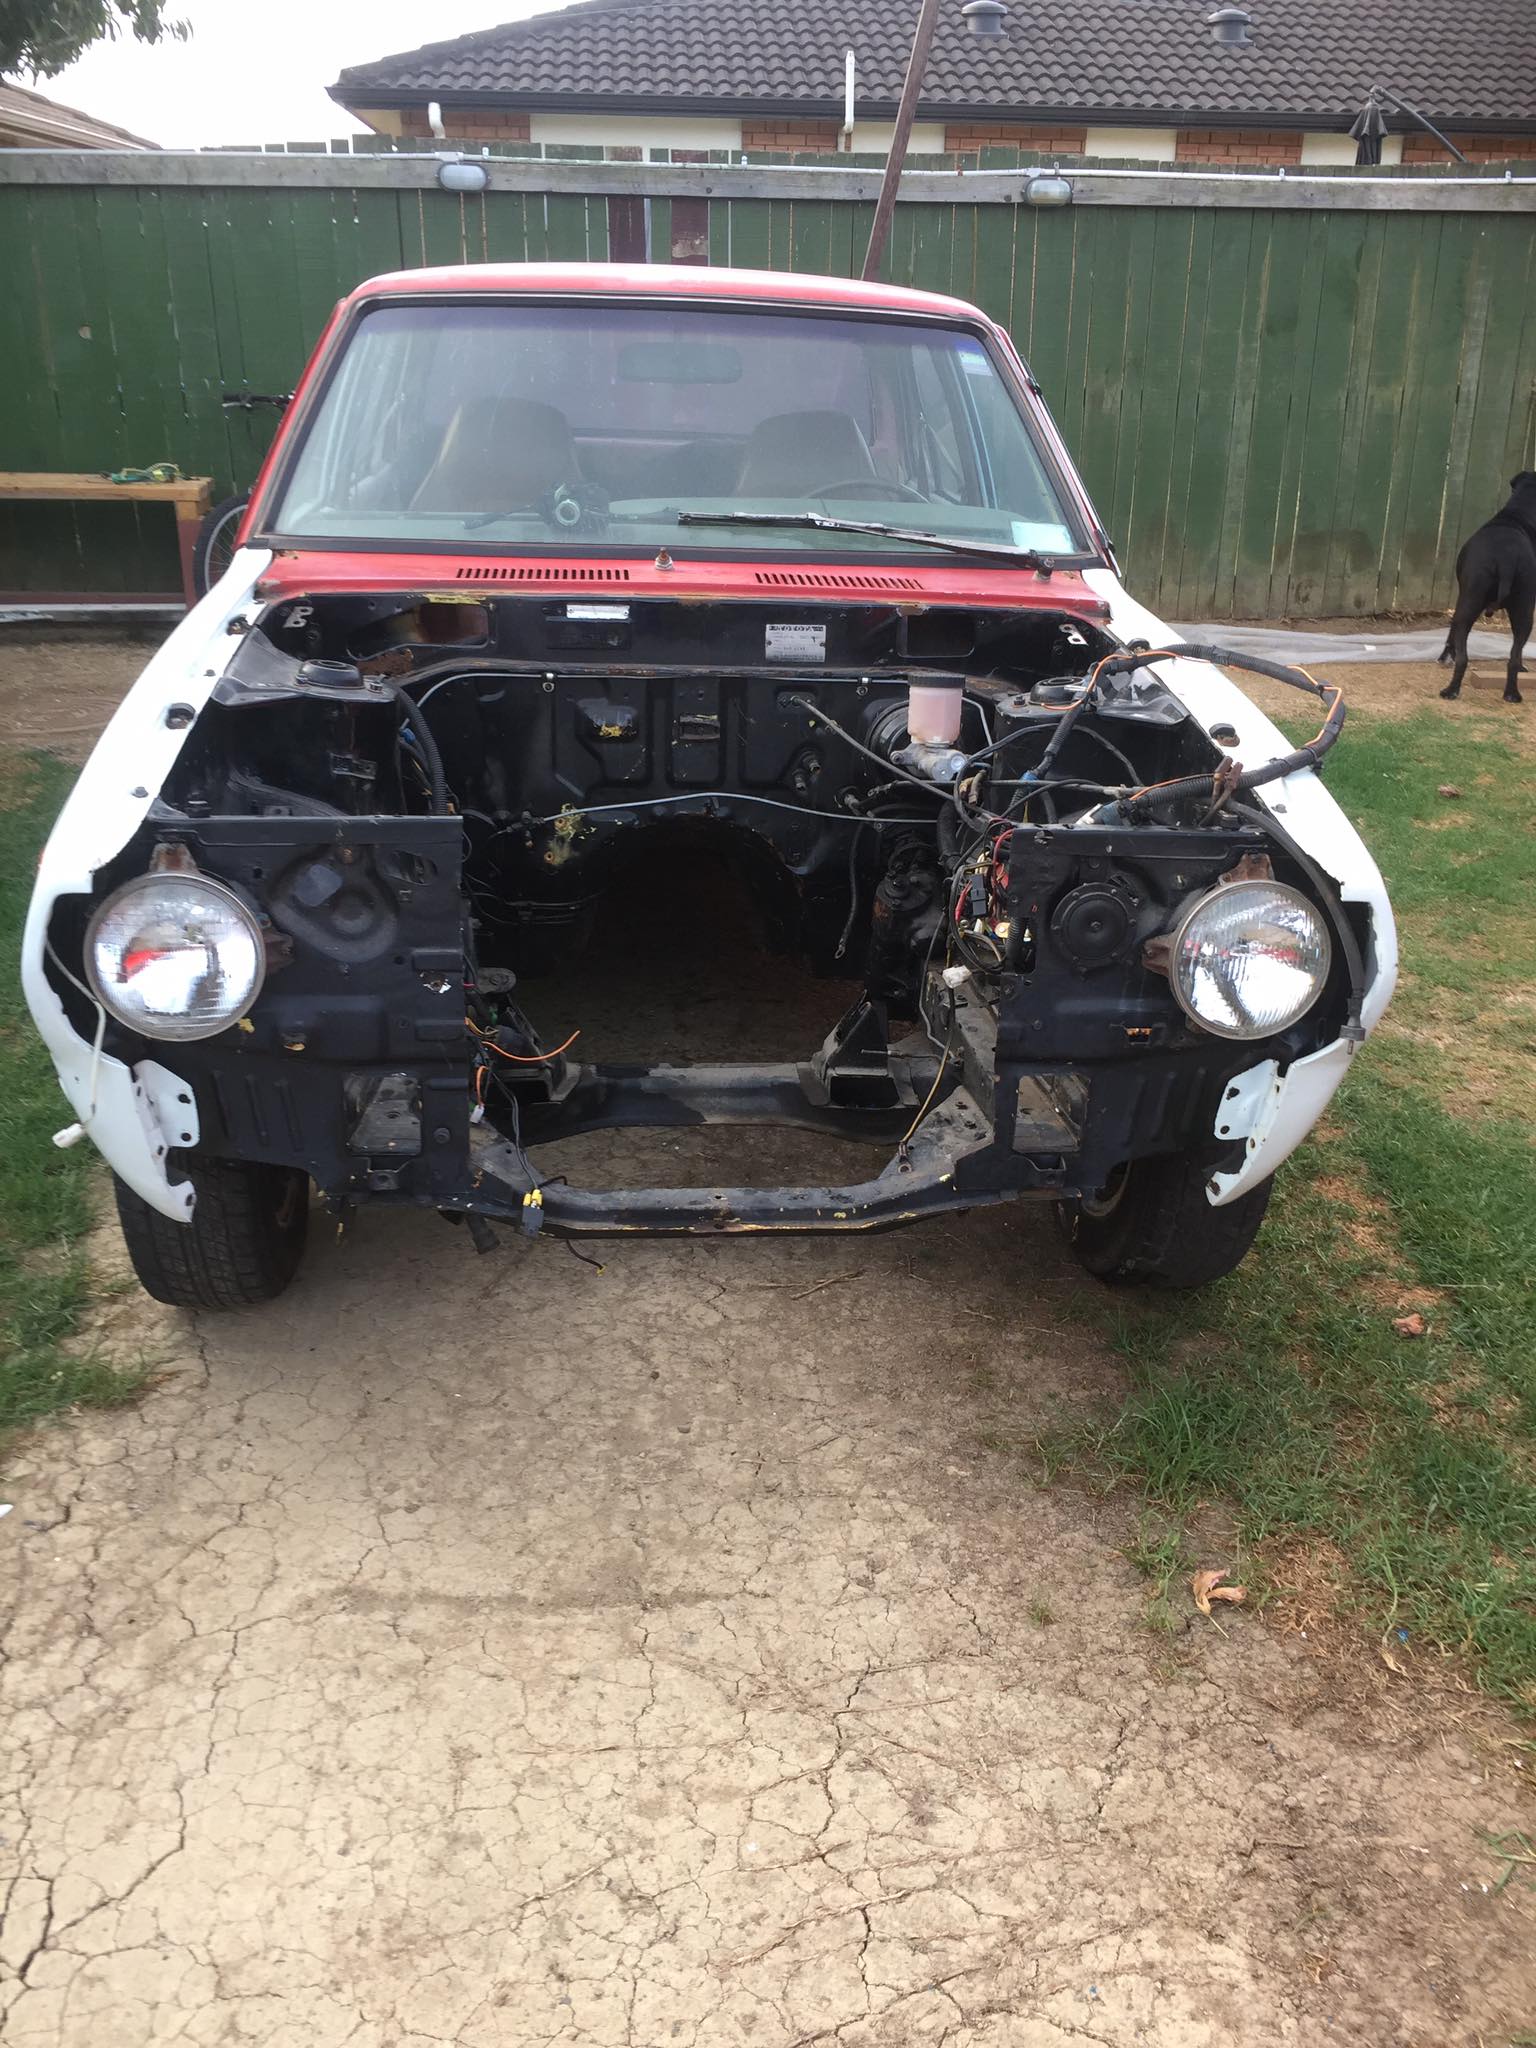
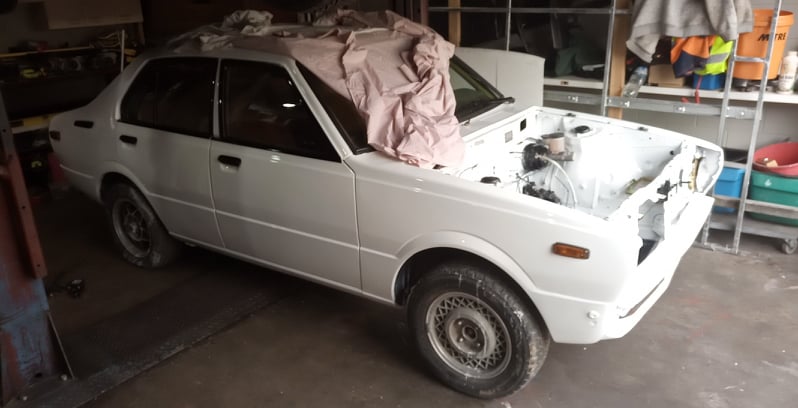
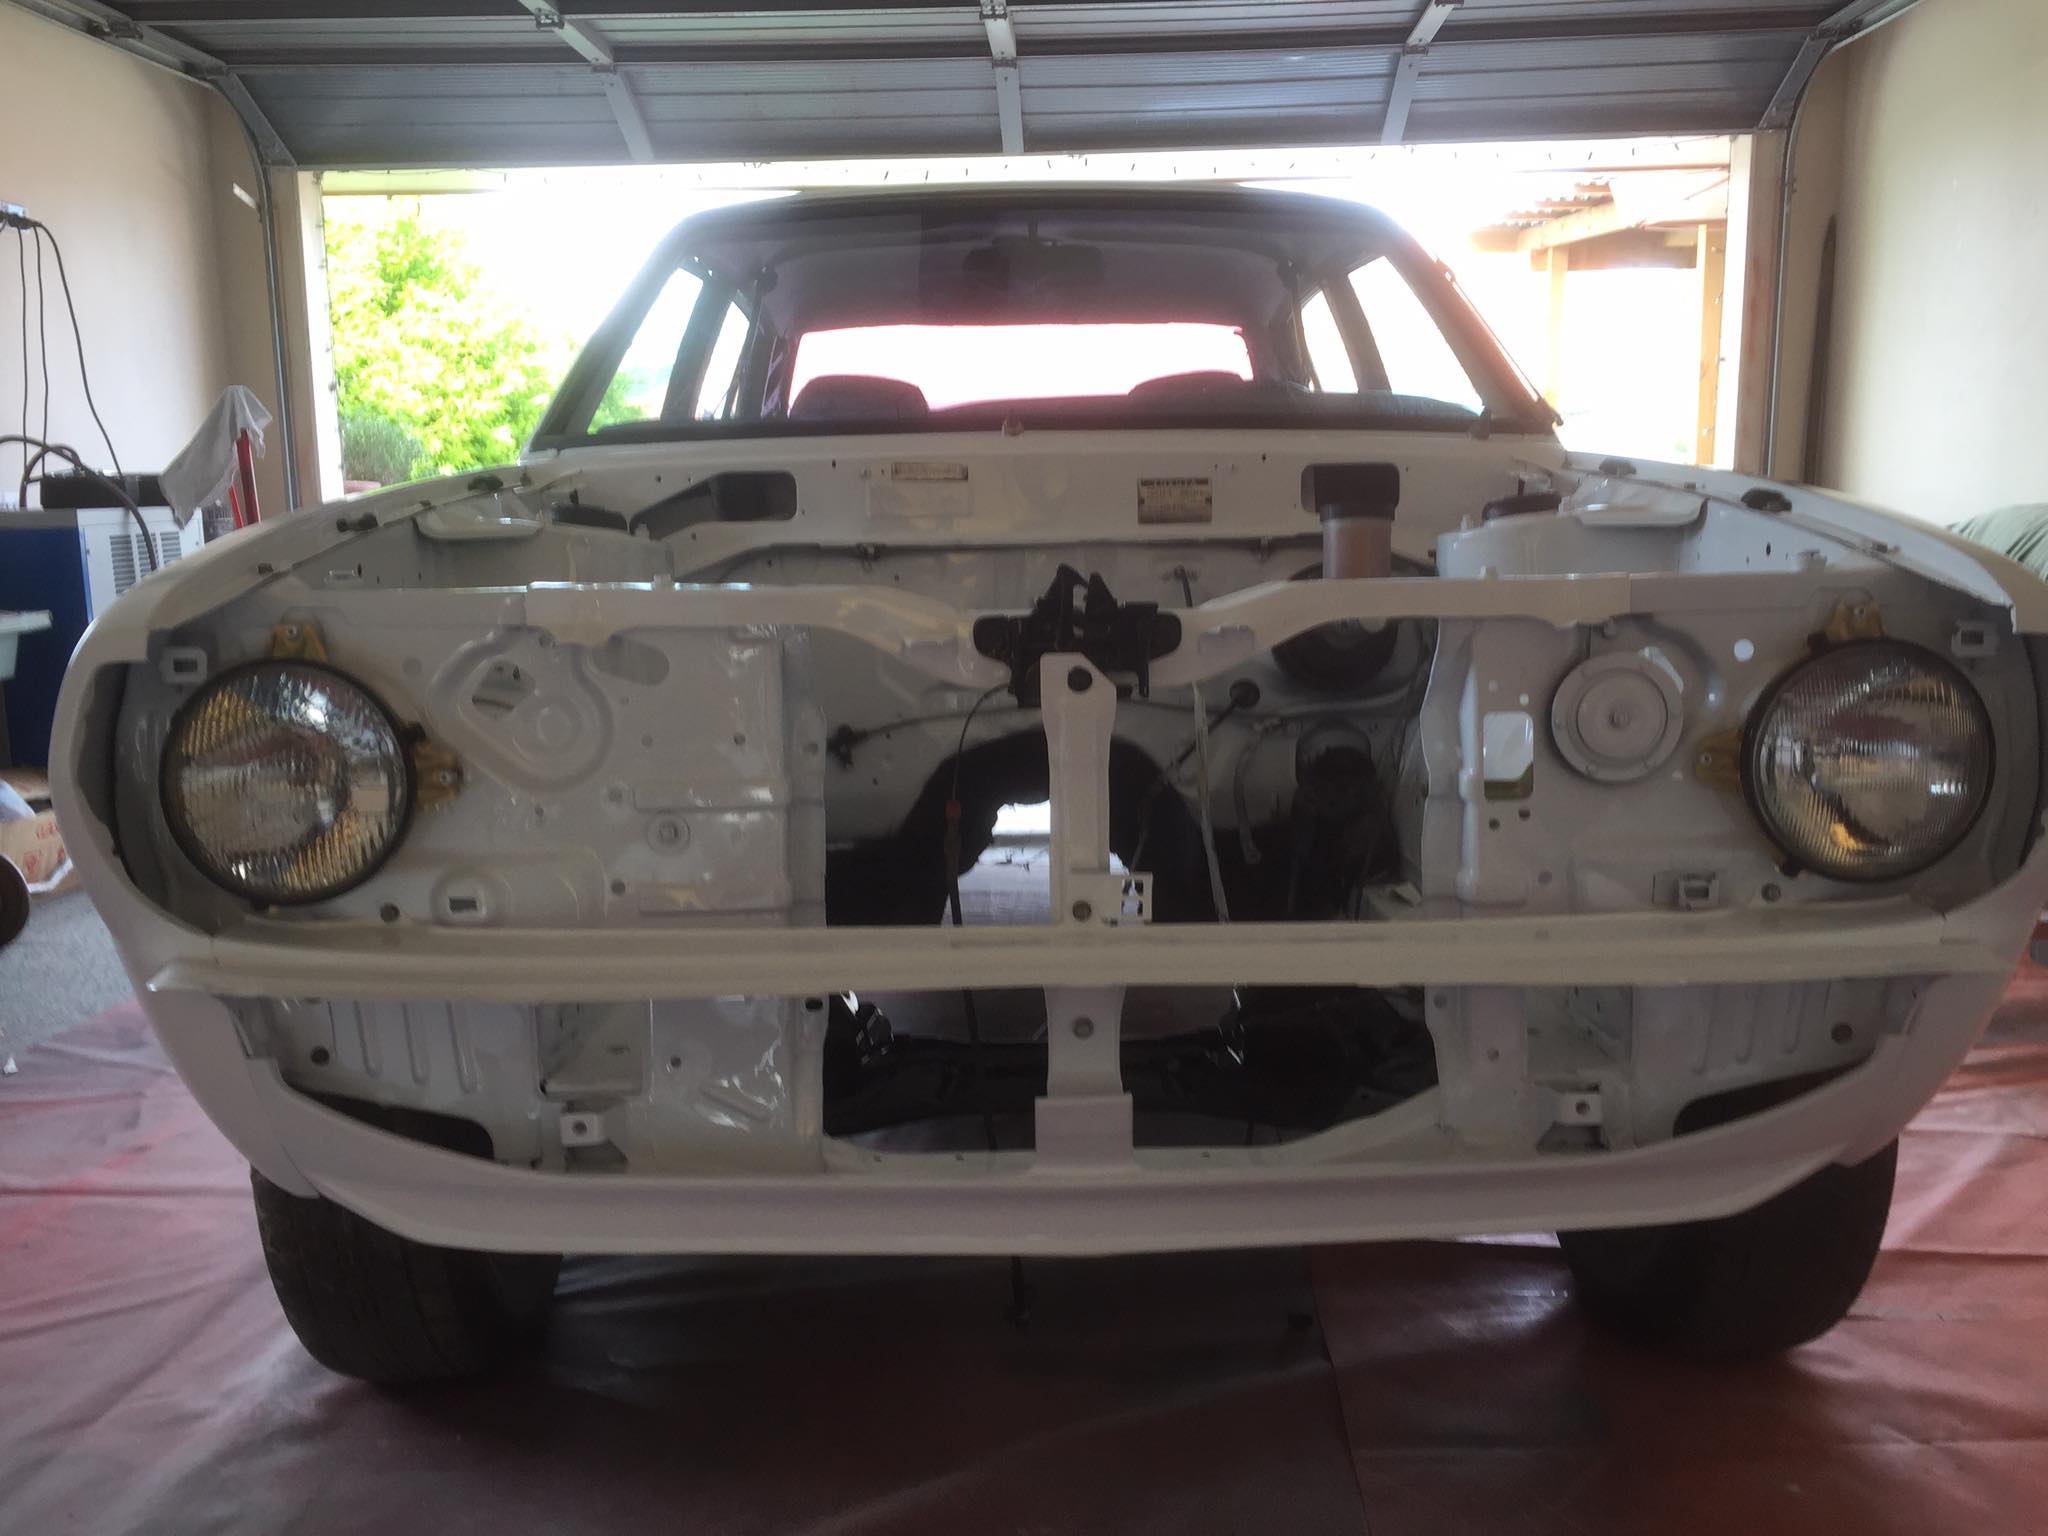
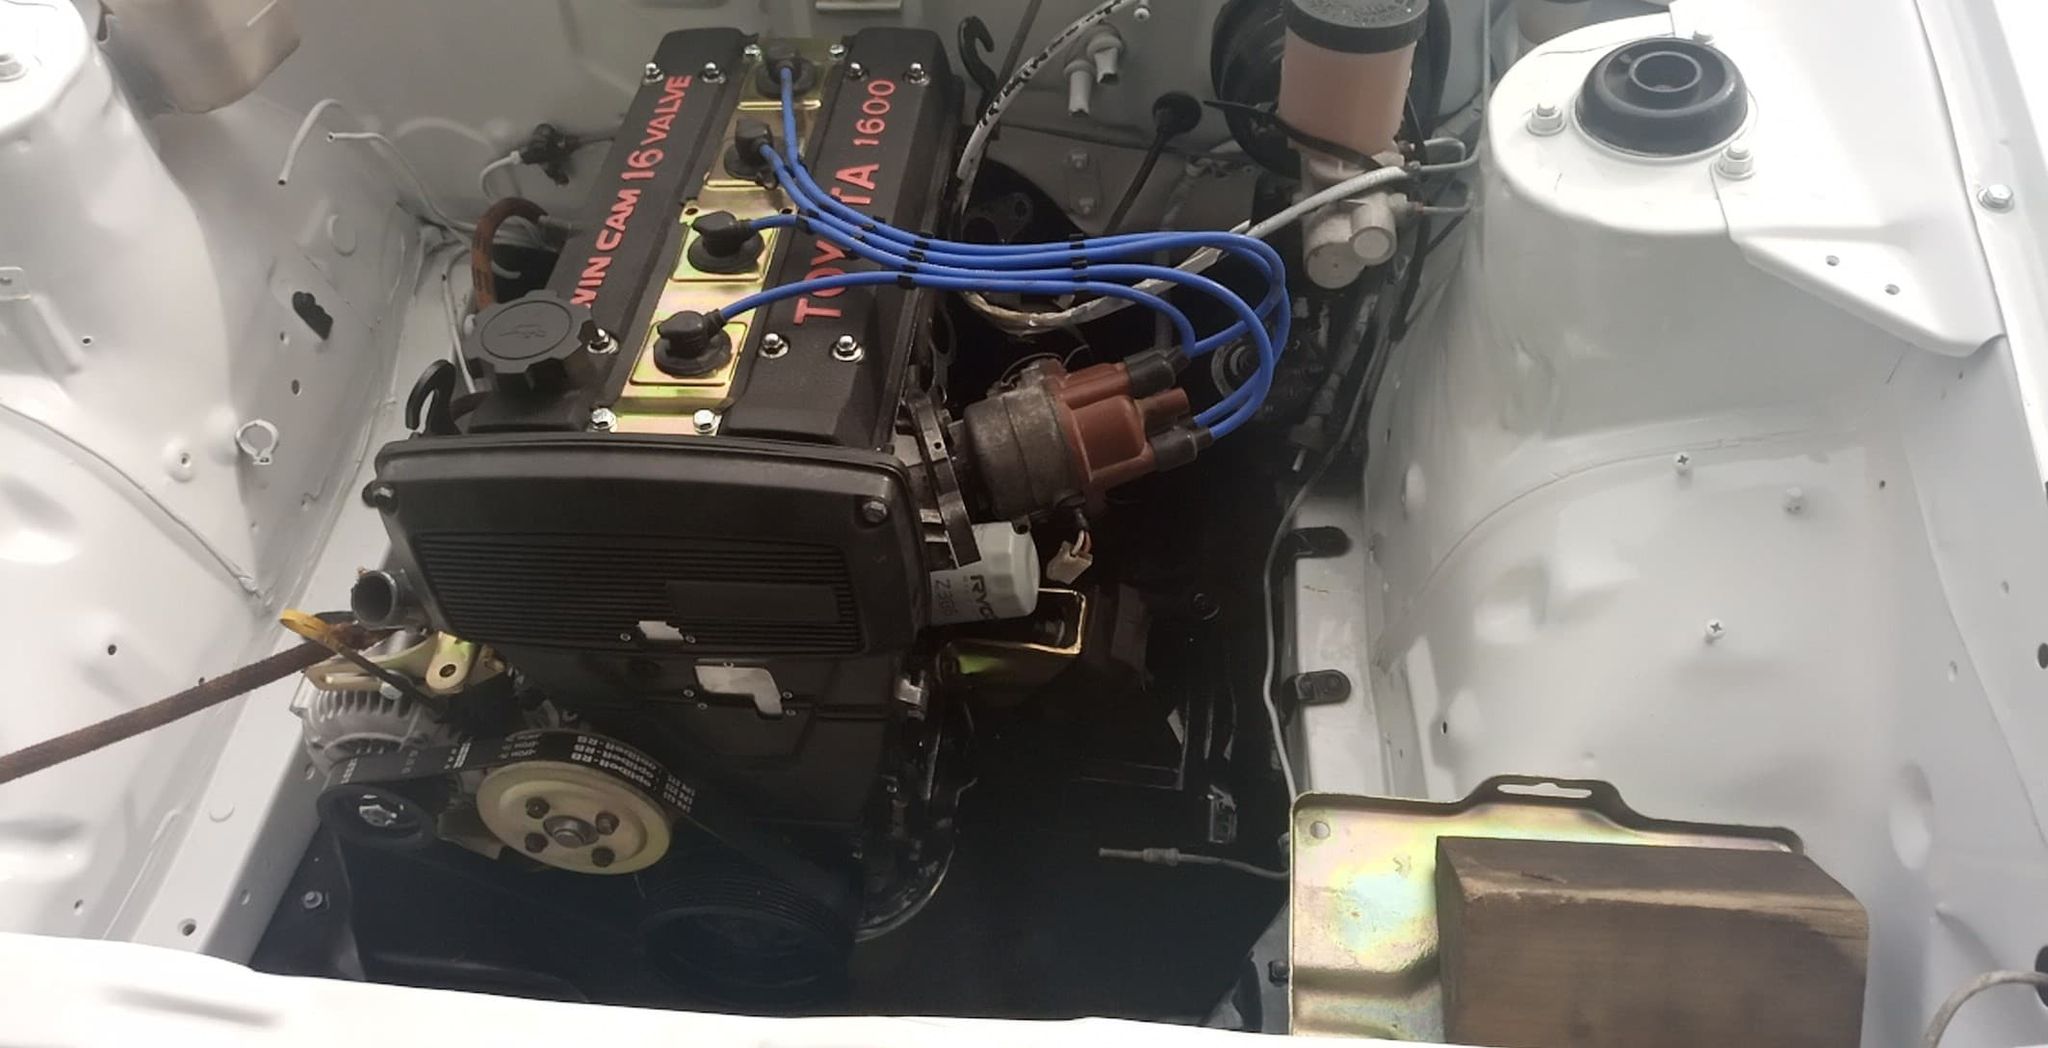
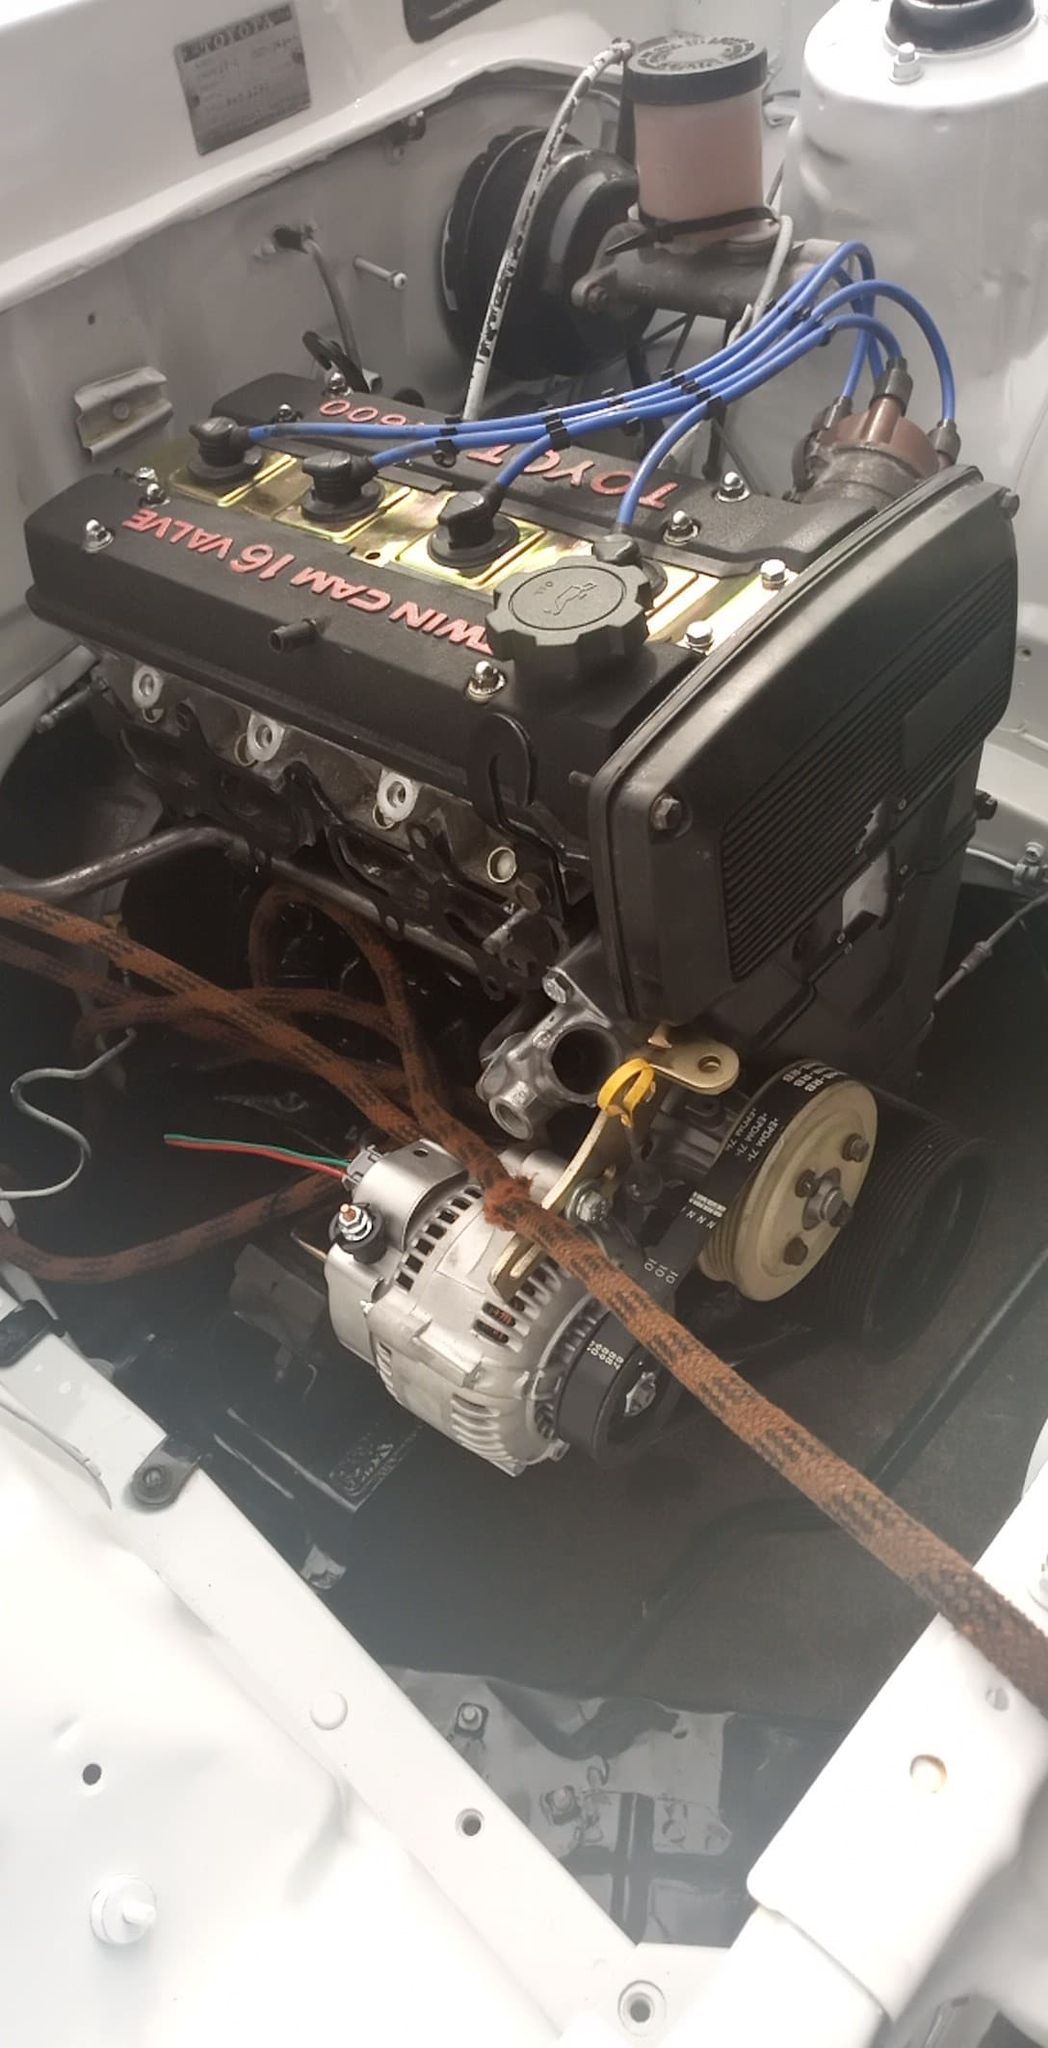
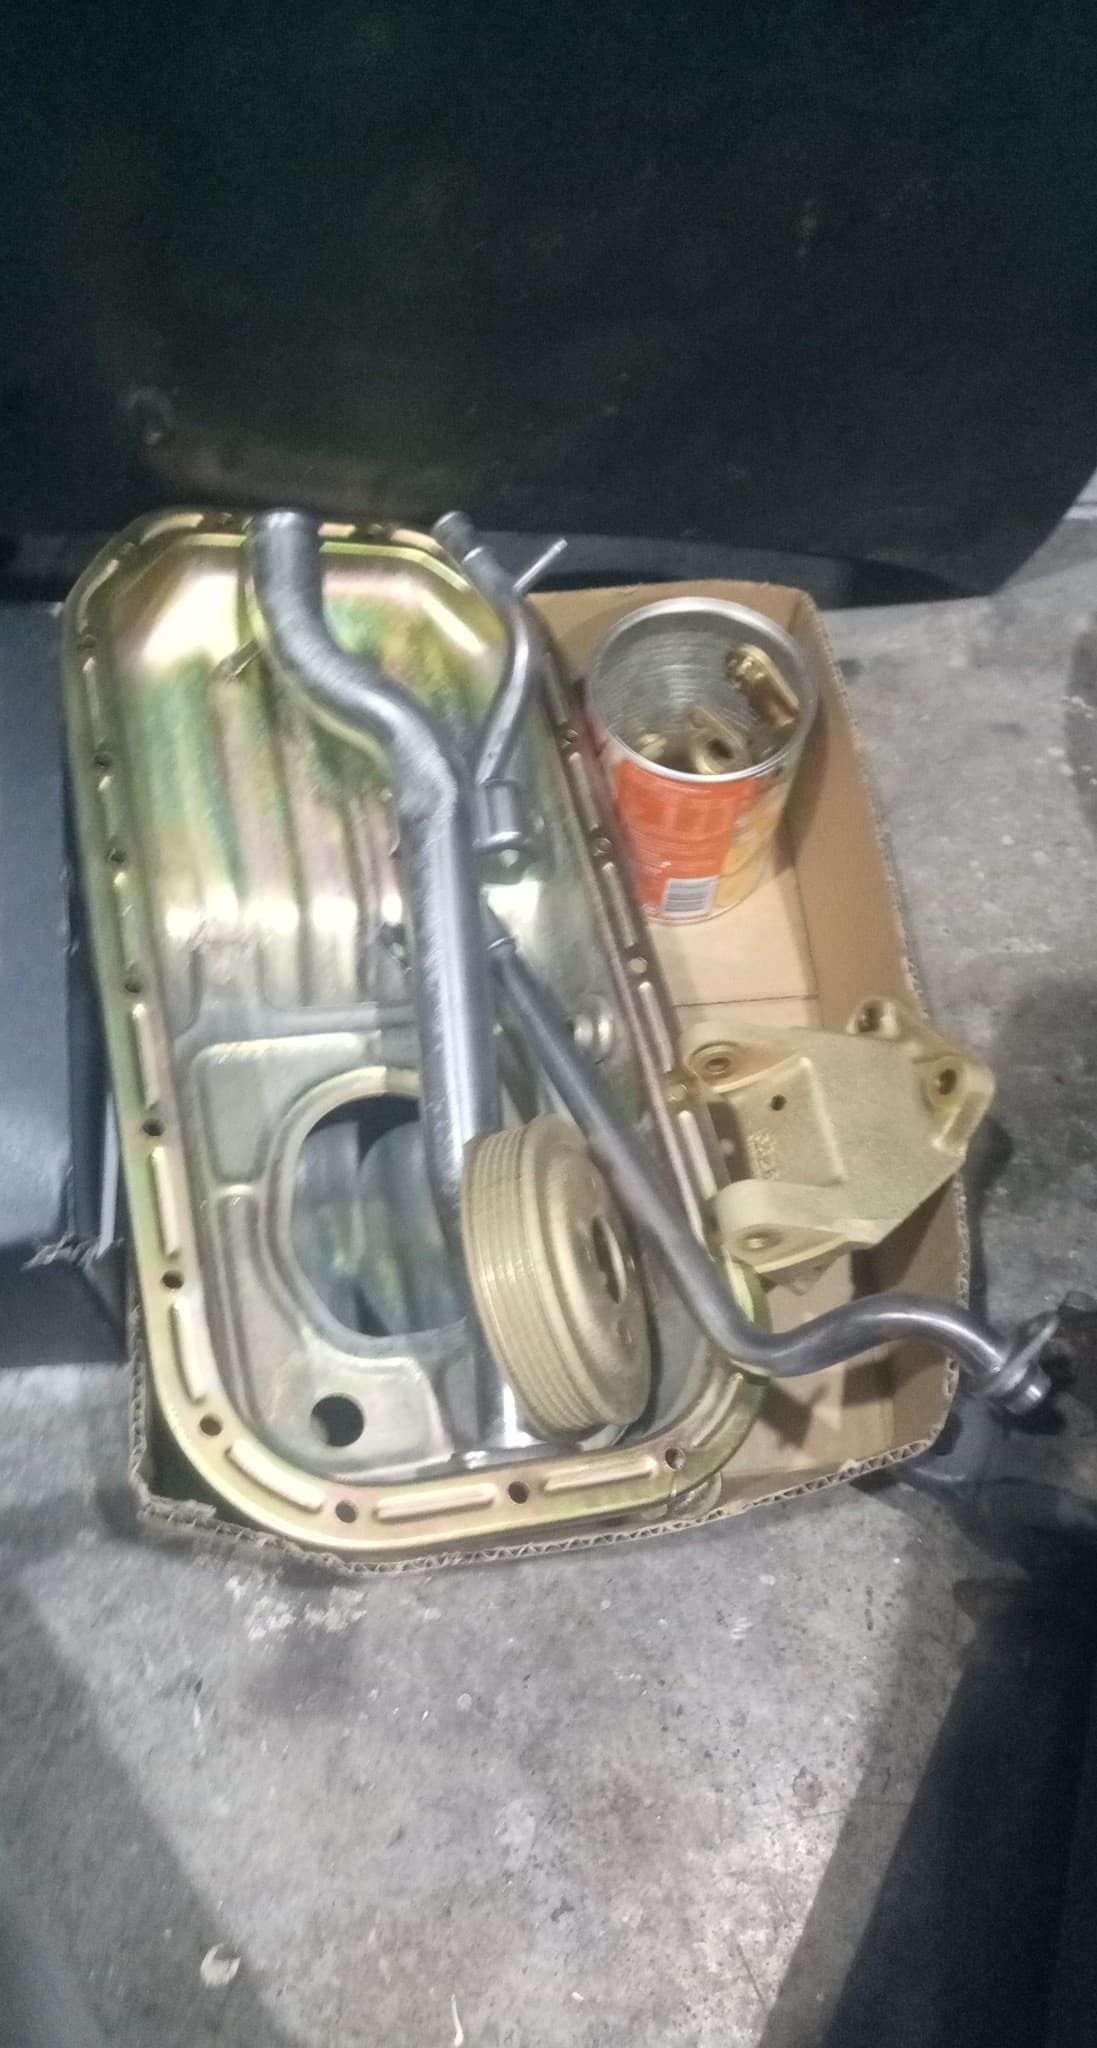
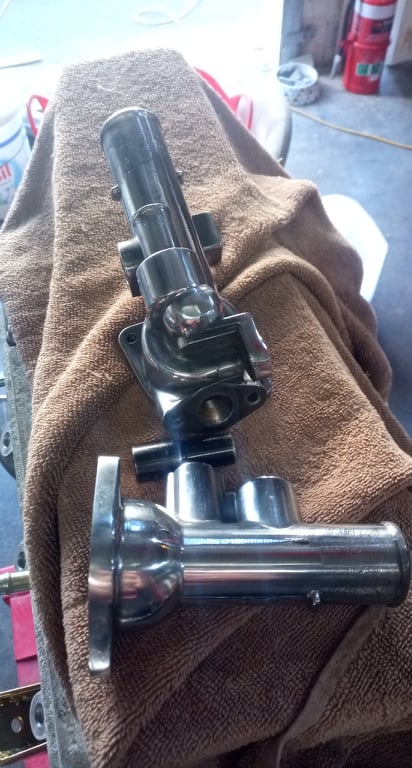
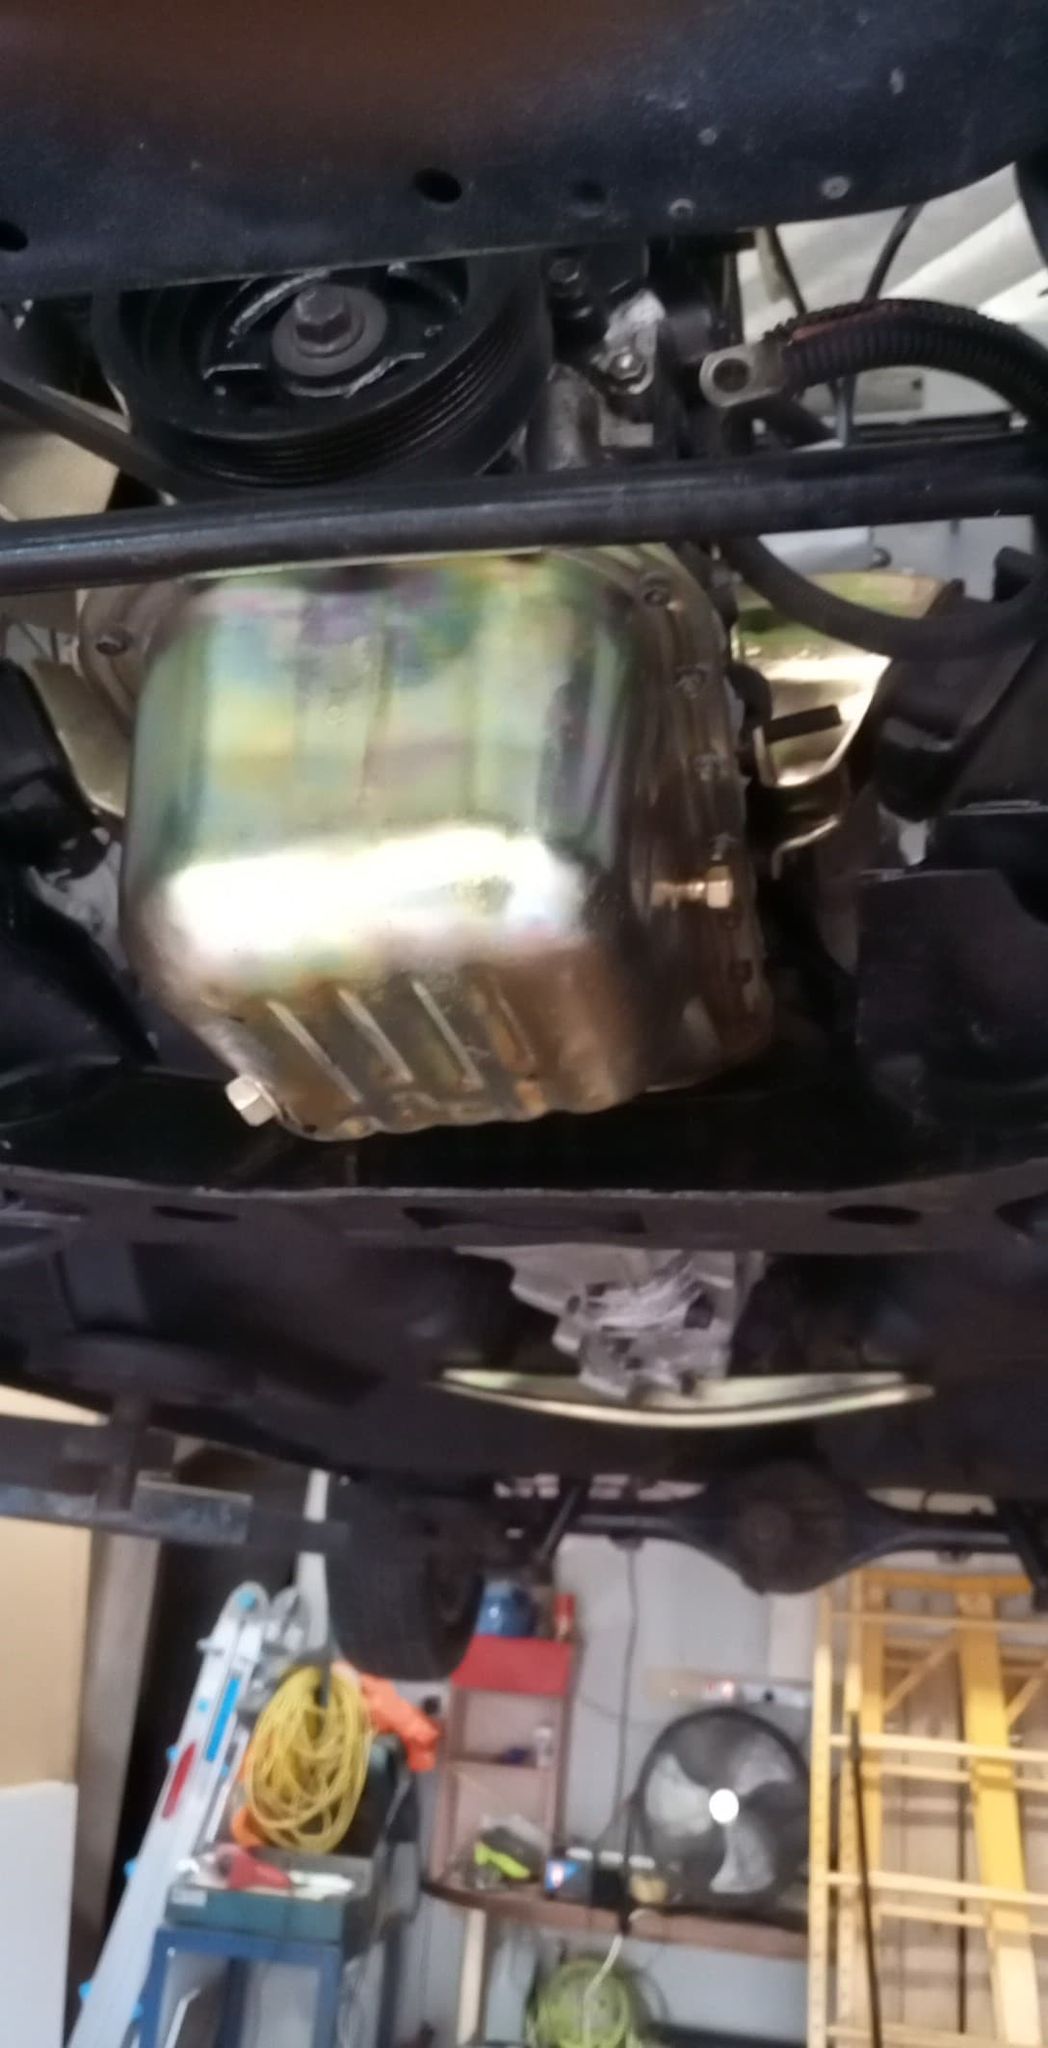
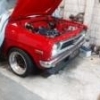
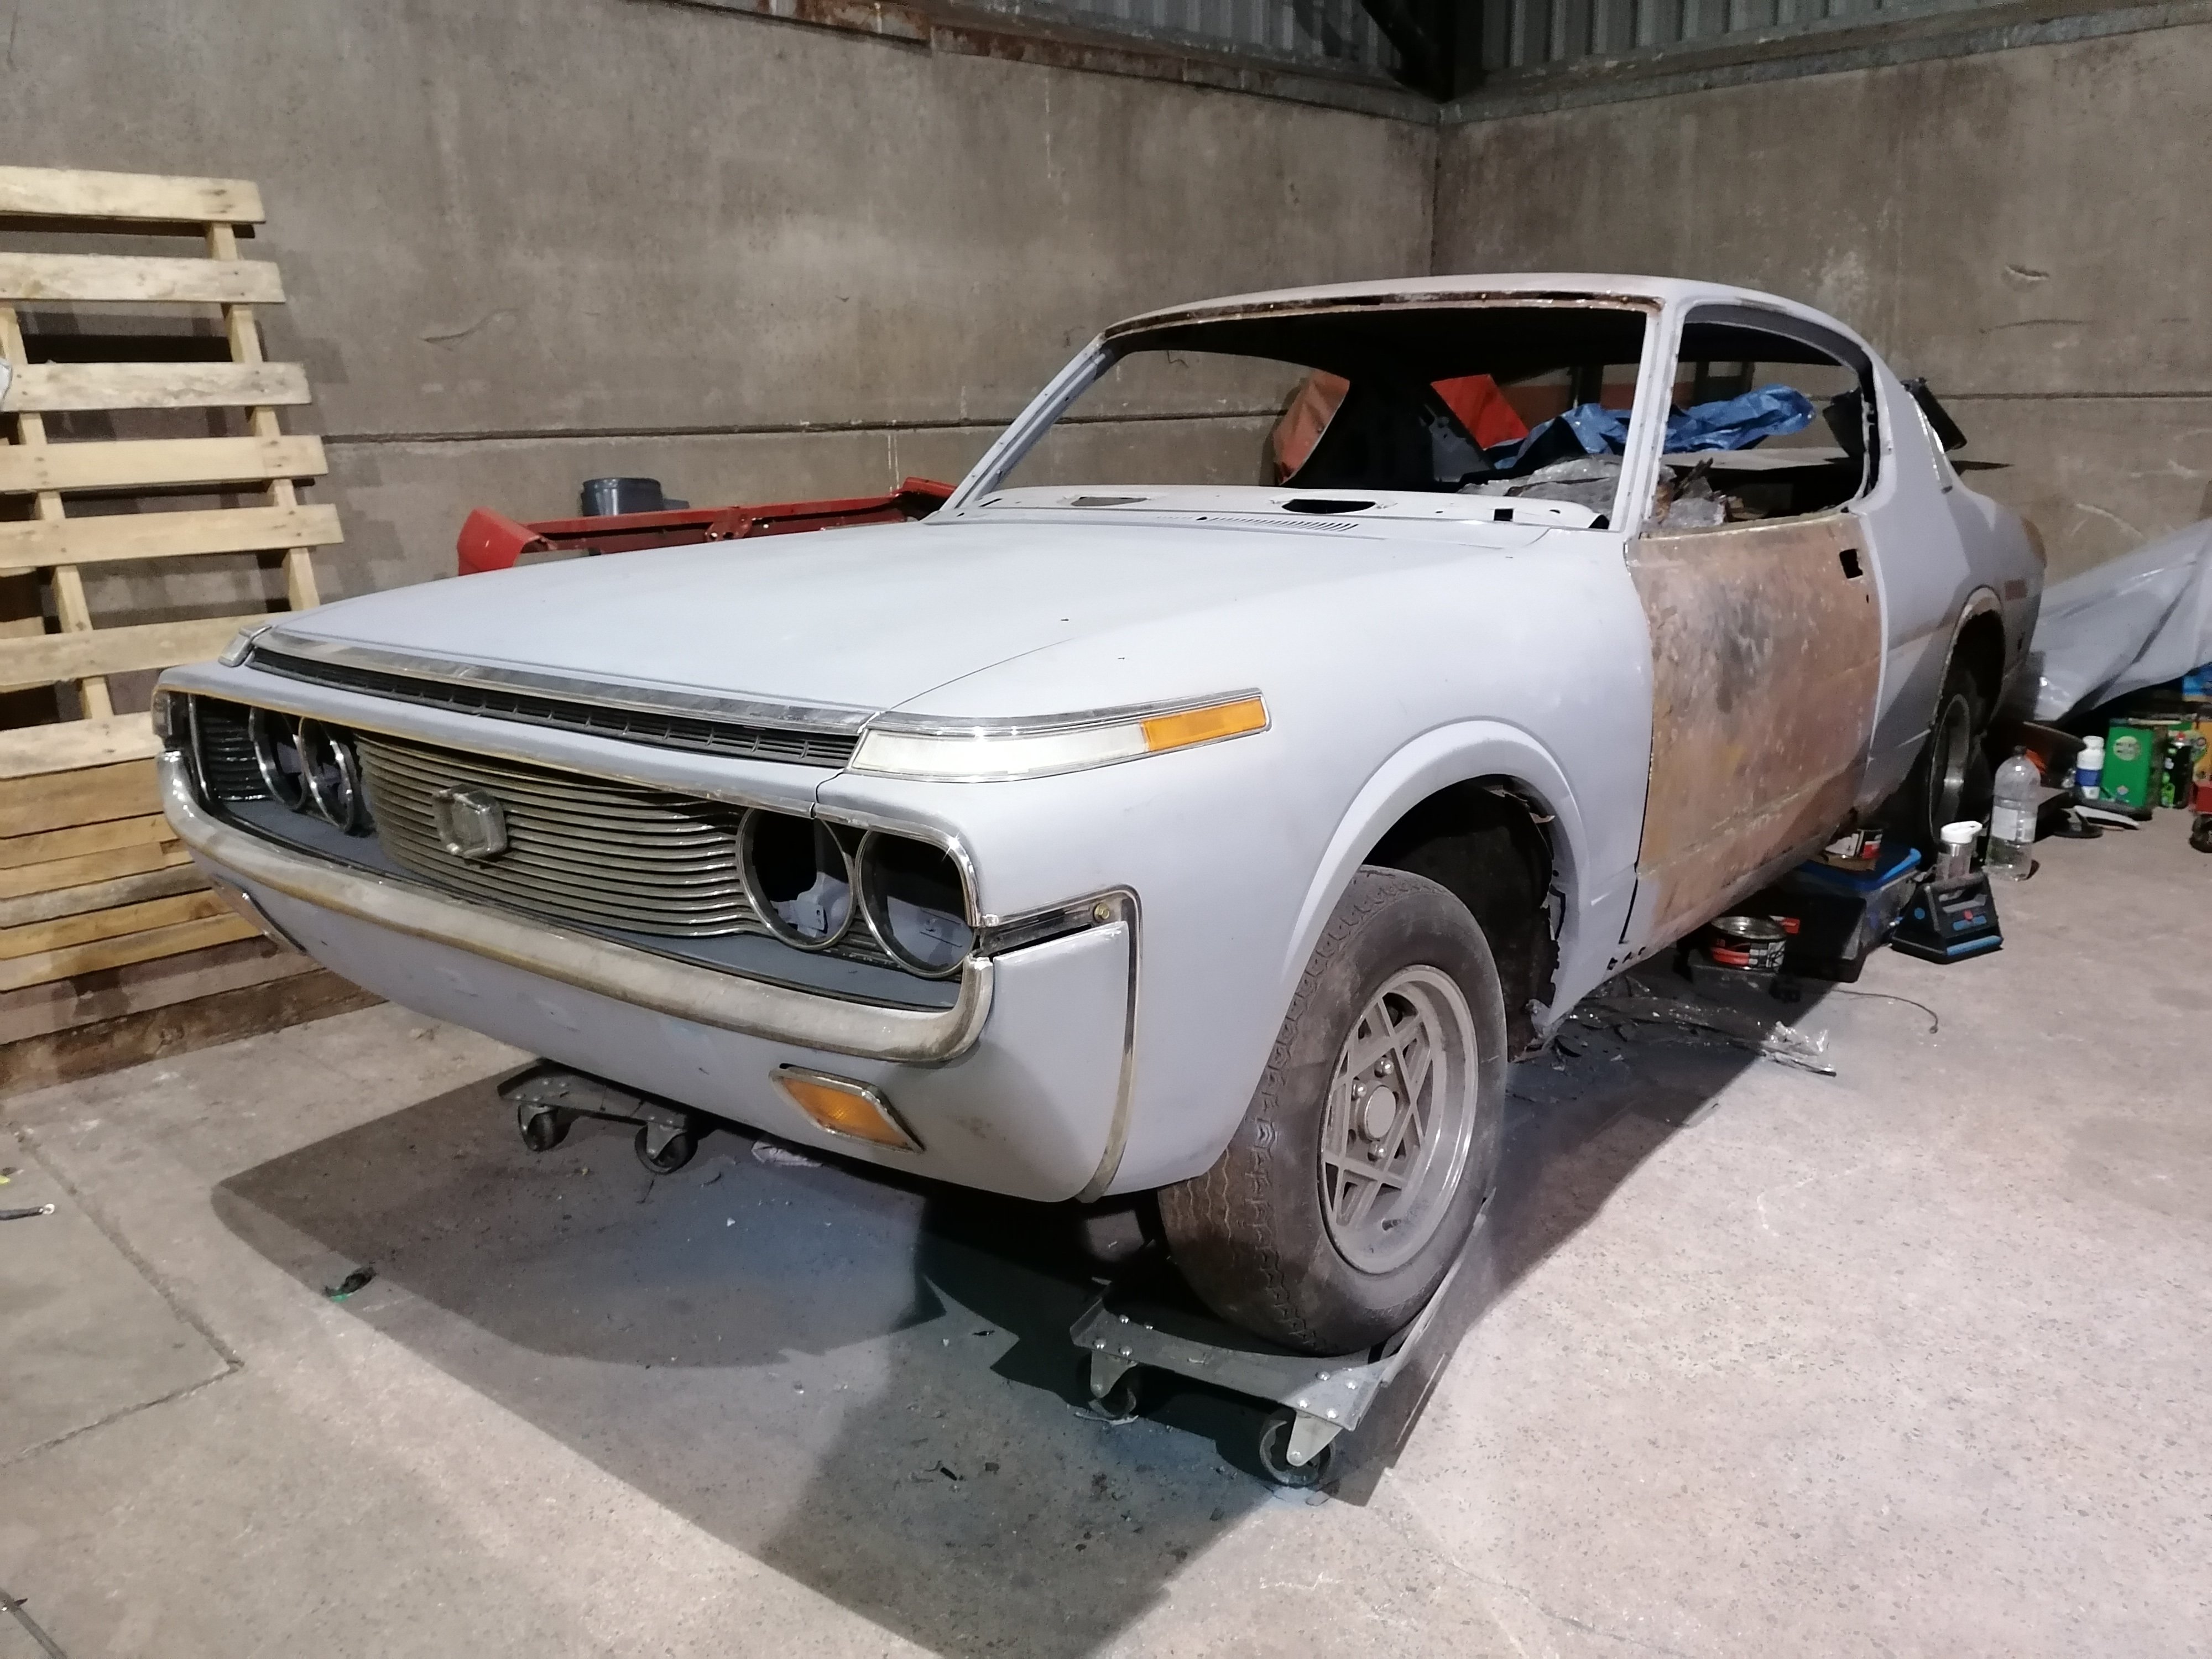
Holy Hell. Its been a long time, and car has had some different things happen to it. Went and had all the rust cut out ( sat outside for like 6 years and completely rusted out the doors / around screens / guards etc. ) I put a 4AGE in this, one of out my old SR coupe, found a T series disc brake rear end for this one, got it running yadda yadda. Then stripped it to get panel and painted. Its now white, with all the chrome / bits and pieces done in black. Also went and got the sump on my new bigport dipped and plated, alternator bracket, water pump pulley, spark plug cover etc all done ( gearbox crossmember too with new mount ) plus some light surrounds and random bits and pieces to make it look a tad nicer, excuse the old pics, have chucked in new bolts everywhere. Brand new door rubbers Brand new door cards New alternator New high torque starter Have just wrapped the exhaust and chucked that in tonight First time in 7+ years the car has BOTH window wipers and a wiper motor now. Got some Bathurst Globes for it which i'll sand up and chuck on. Hoping to have running by the 17th for the japanese meet, and then cert and sell...
9 points
-
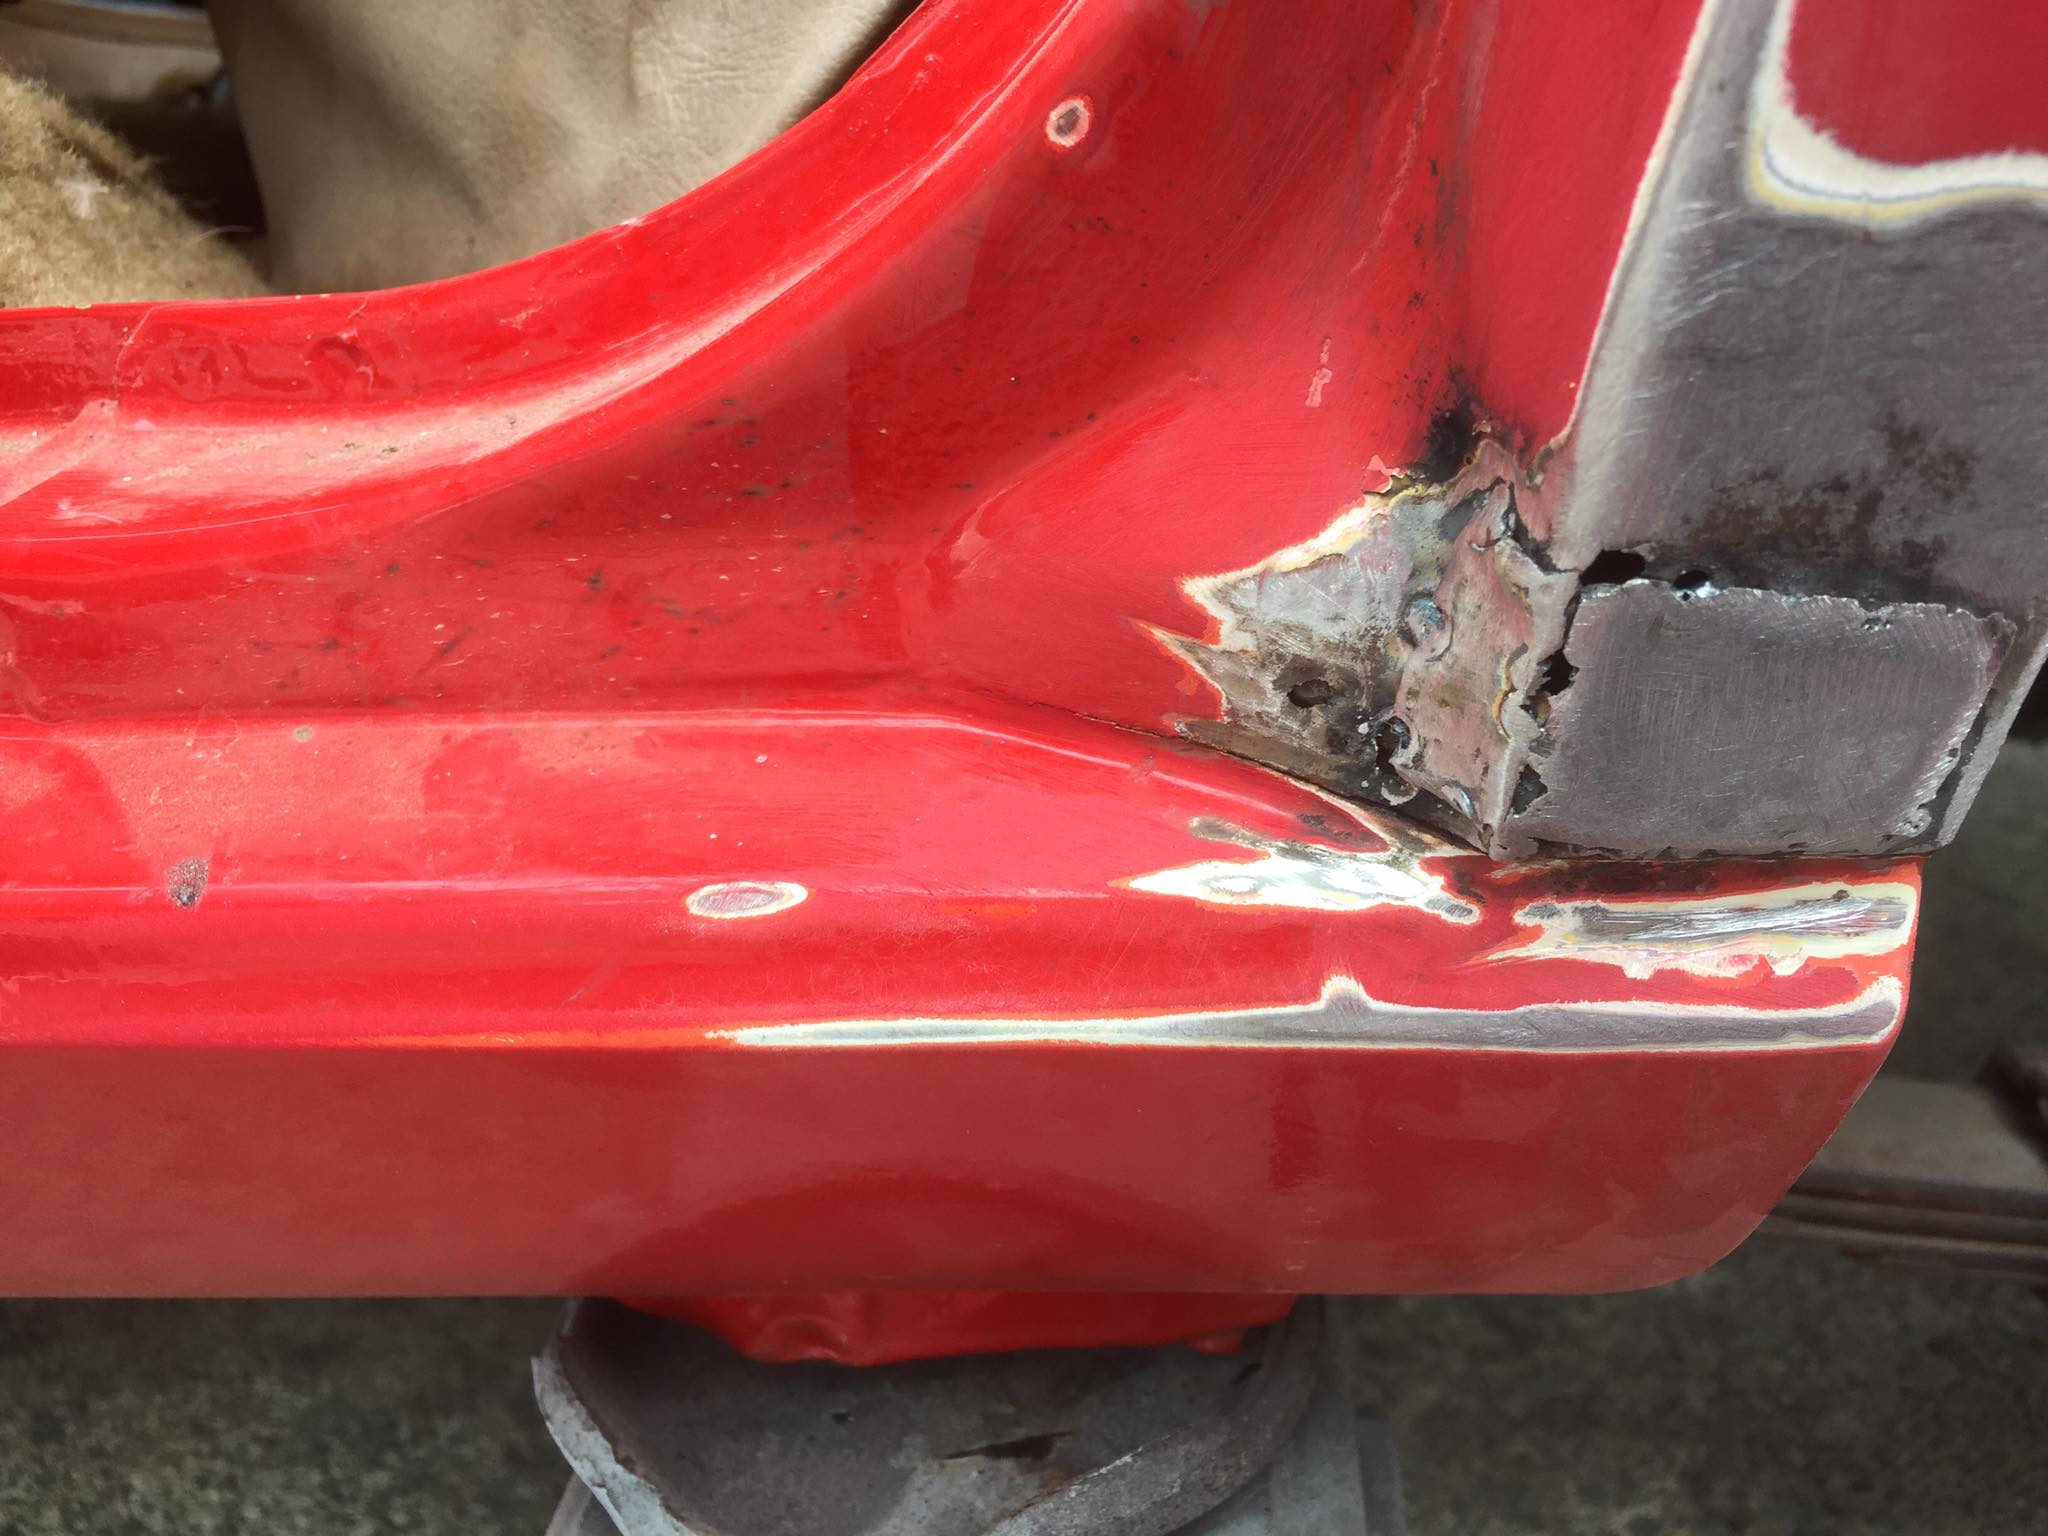
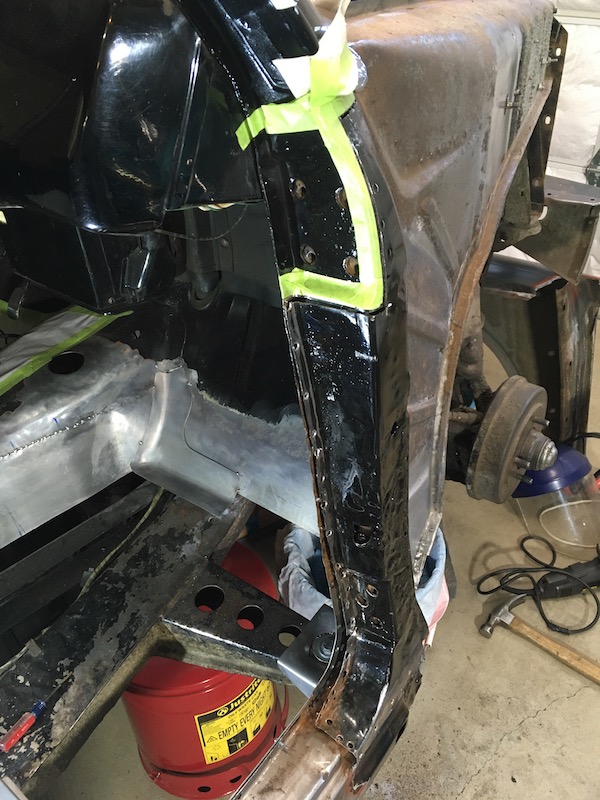
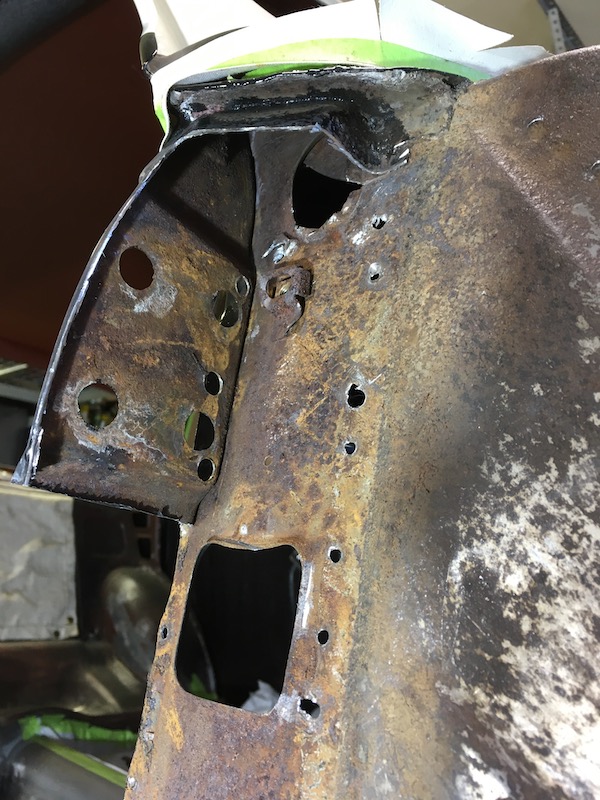
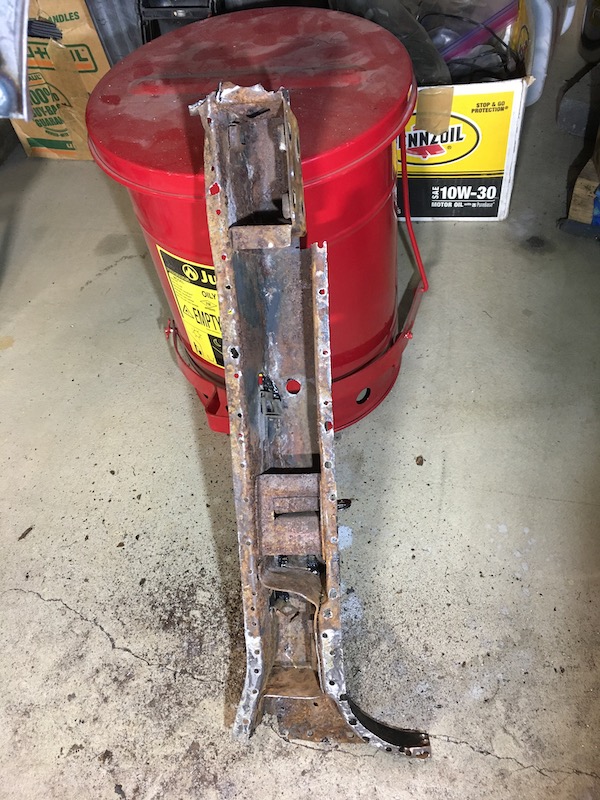
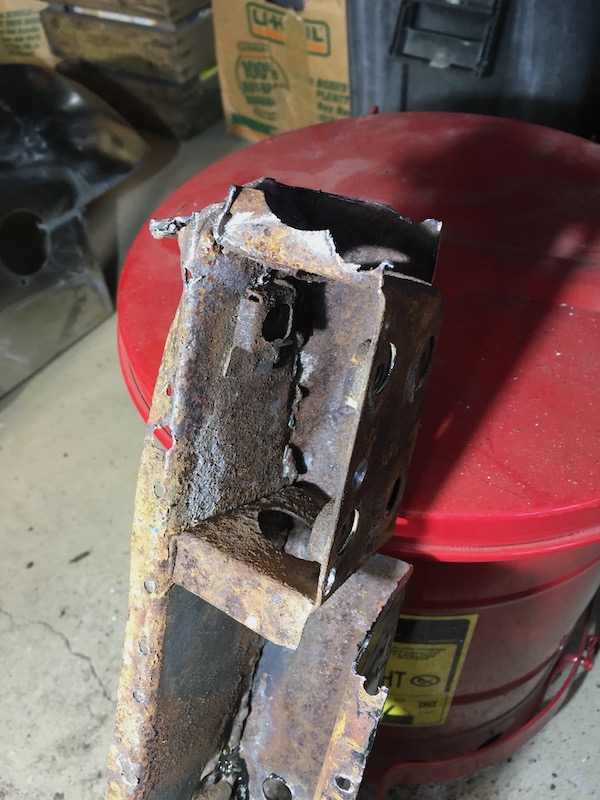
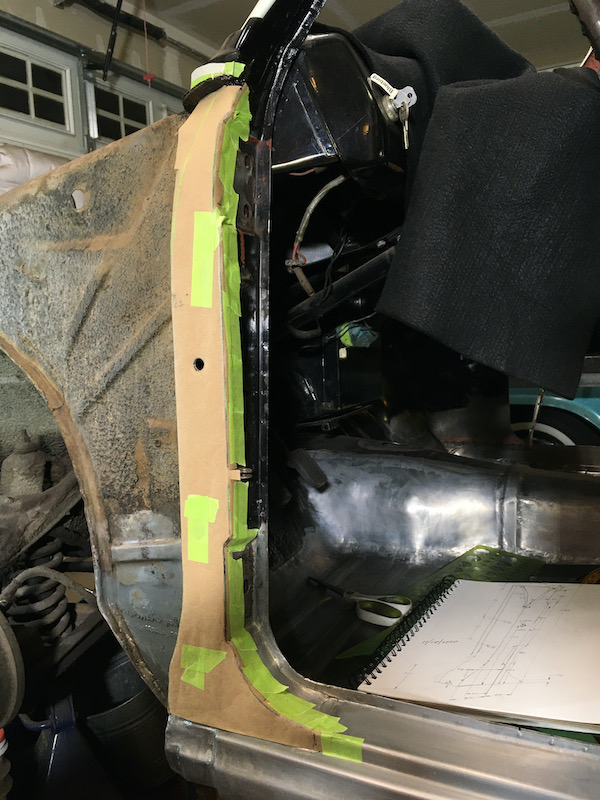
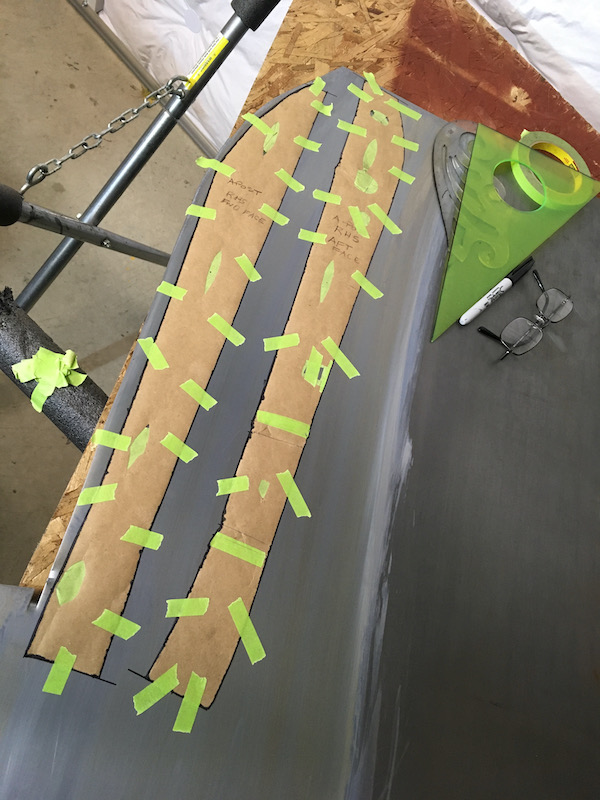
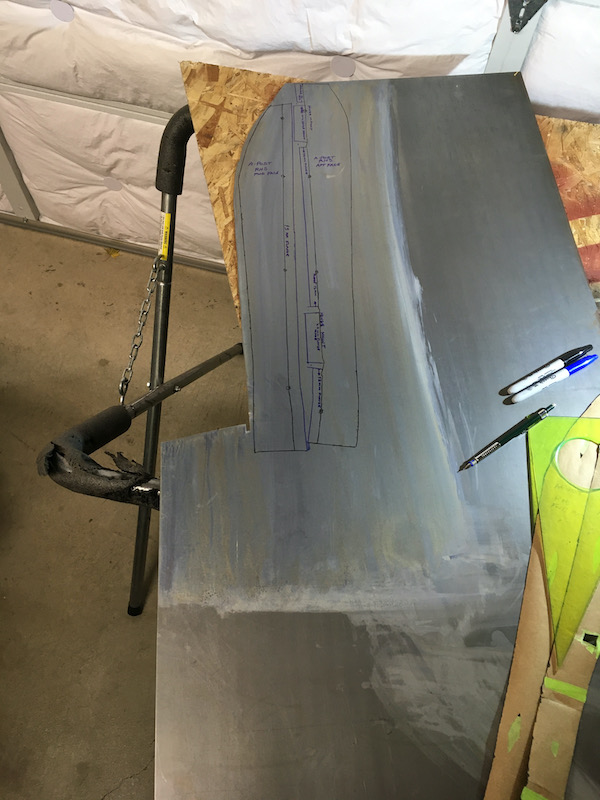
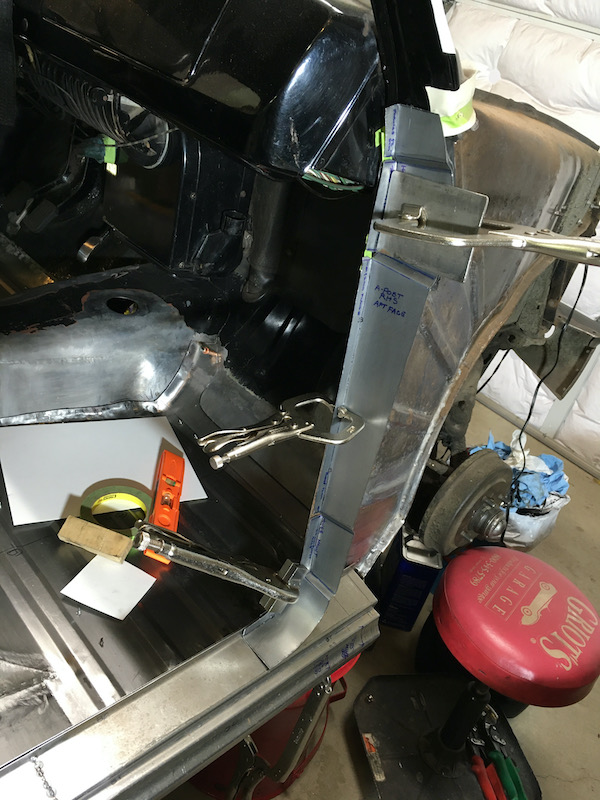
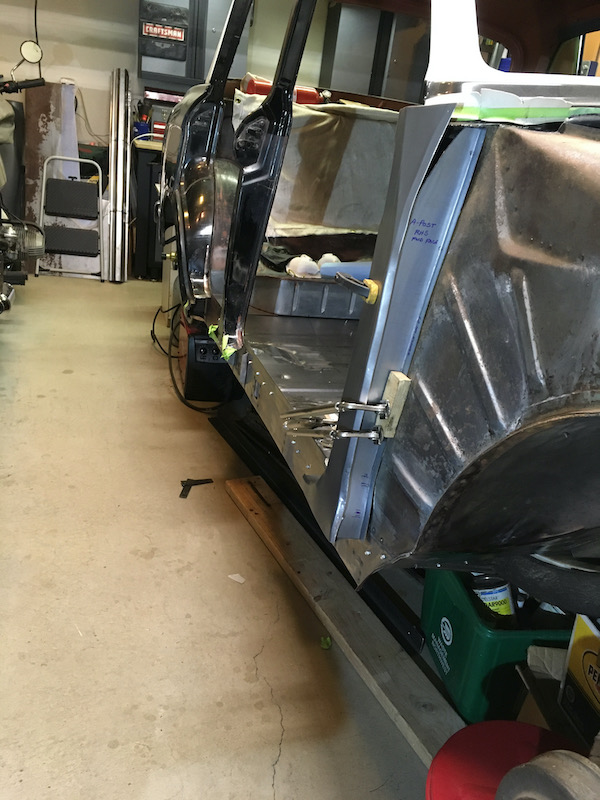
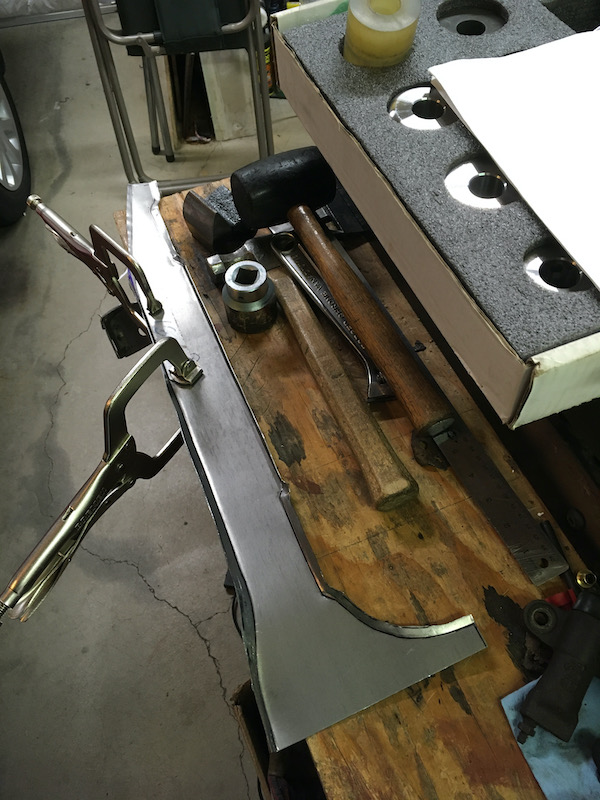
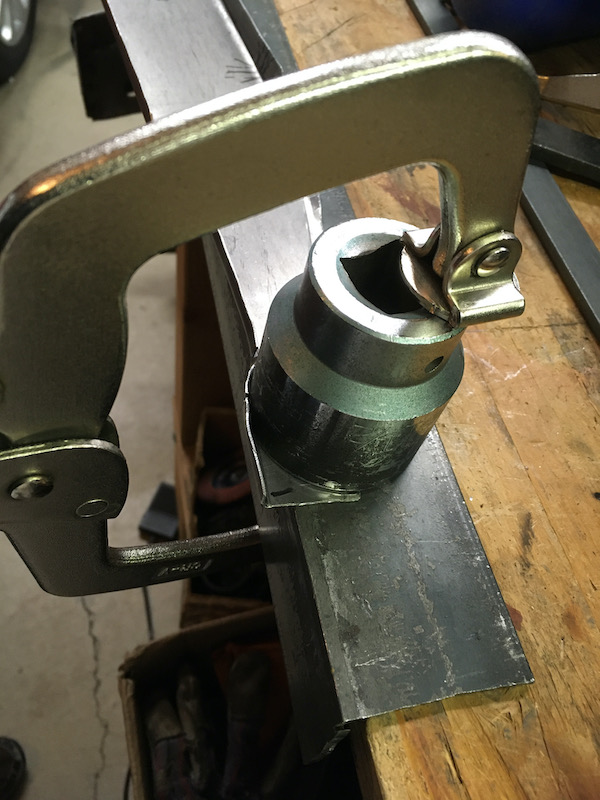
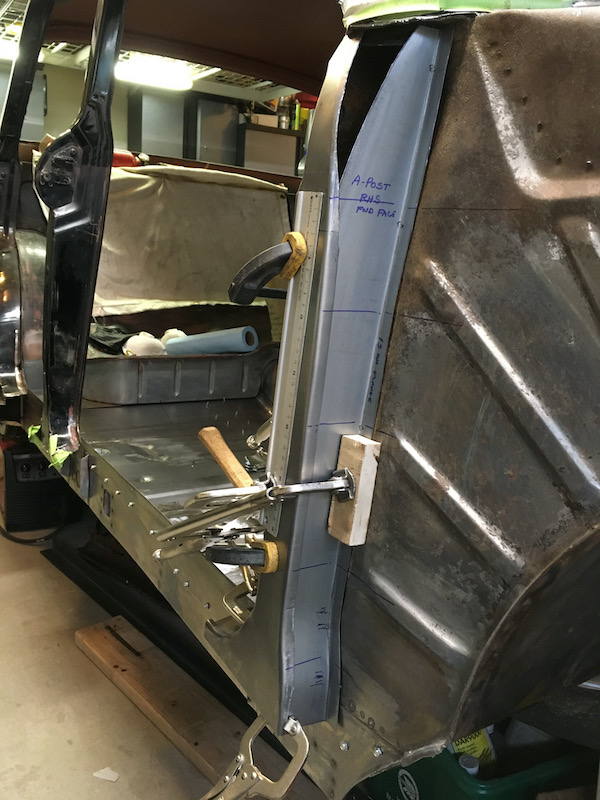
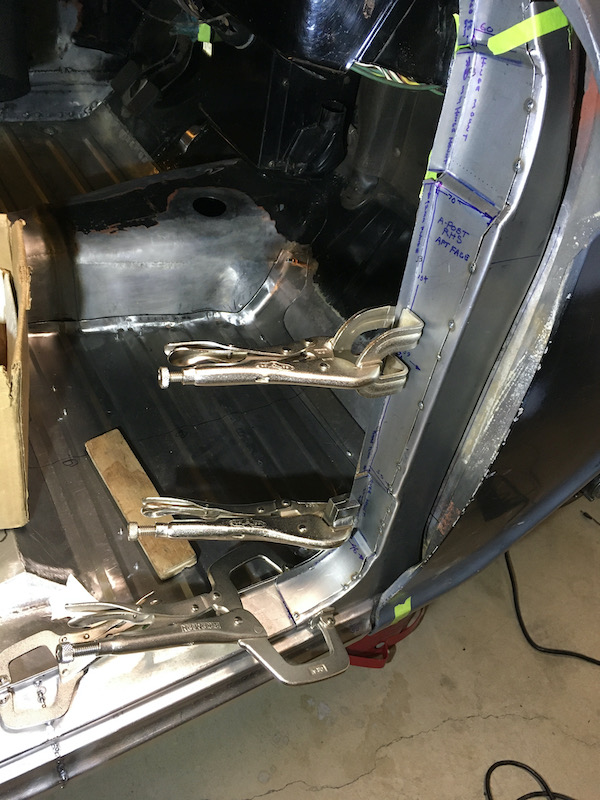
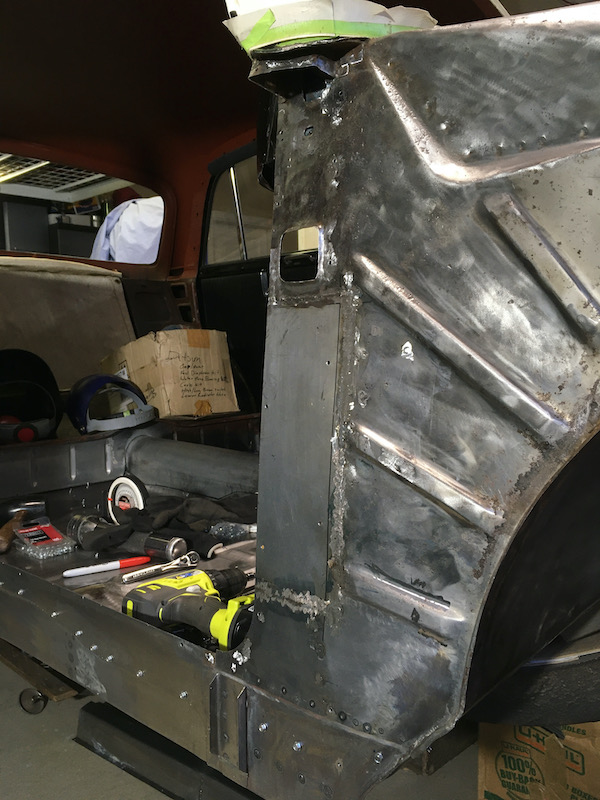
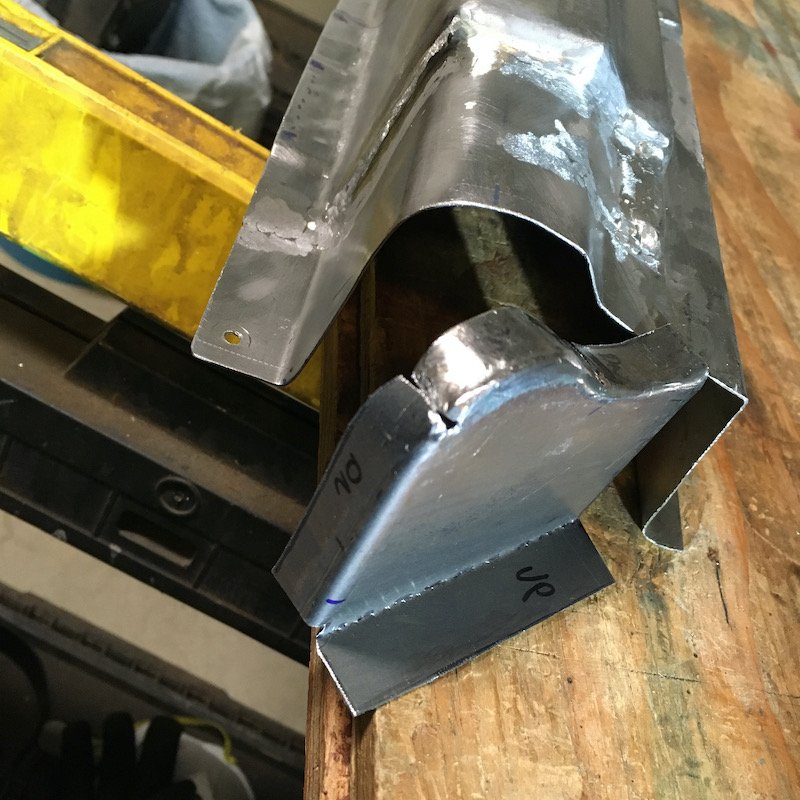
Building the 1961 Datsun 310 Bluebird - RHS ‘A’ - Post Scratch Build. Original A post was not salvageable due to multiple accidents (t-bone, roll-over, etc.) and ham fisted "repairs" with large hammers and cutting torches. Drilled out the spot welds and cut it off but left the upper hinge mount temporarily as a datum. Marked for cutting. I began to be concerned. I did a bit of a hack job cutting it loose at the top. This is a serious piece of structure removal and the metal underneath doesn't look so great either. Will the Bluebird ever be made whole again? I'd never attempted anything like this so took it slowly and methodically reverse engineered it based on the LHS A post. it turned out quite well.The fitment with respect to location on the body was the only minor issue. i had to install it several times with Teks until getting an okay fit with the the hinges, latches, door gaps and all the other adjoining metal work mocked up. Finally resorting to a floor jack under the door to "fine tune" it. Original after removal showing the attached internal bits. Patterns taken off the LHS A-post. Then cut out the outboard face with an extra margin for bending over just past the fore and aft edges. Fore and aft patterns set up for metal cutting. I intended to make it out of just three pieces but that didn't work out. So later on I made the little triangle section at the top separately. I ran each piece through a bead roller tipping die at the bend lines and followed with hammer and dolly to beat the flanges over. Early checks of the individual pieces on the car looked promising. Aft facing piece shown. The early outboard face piece shows the attempt to include the upper triangle. As mentioned, that was the intent but didn't work out. Forming the tipped edges with various panel beating tools. Further on-car refinement which permitted making scribe trim lines into the fore and aft faces. Leading to tack welding it together. Back on the car, it's beginning to resemble an A-post! Fits quite well so far. With a bit of hinge bolt hole drilling, and cleaned up inside bits salvaged from the original A-post, I carefully worked on fitting the tacked assembly to mate up with the rebuilt door hinges. Oh yeah, regards the hinge pin replacements, I used an 8mm hinge and bushing kit that I believe was for a Toyota Hilux. Normally this is a routine repair job but not in this case. The old hinge pins were a terrible job to remove because of each pin being previously broken internally into three pieces. If pushed on, the inner bits just kicked over and jammed or mushroomed up. No amount of force was going to make them move at all. I had to extract the splined pin end by TIG welding a plate to it and using a large slide hammer meant for axle pulling. And even then I had to drill some of the remaining stuck bits out. That was not fun. The door catch/stop bit was tacked in later (not shown in above pic). Then did multiple fit check iterations on car until frustration set in and finally doing this in below pic. More new metal on the inner body and a slight "adjustment" for optimum gap with the outer sill. And yes, the upper sheet metal is still a bit sketchy. I fear catching the car on fire! For fire safety, I'll eventually have to remove the instrument panel, wire harness and nearby insulation and only then fix the upper sheet metal since it's got rust craters and other significant surface damage. The new A-post assembly weld to the remaining post/front glass pillar will be via lap joints. The door fits good all around and latches perfectly. Leaving the RHS A-post as is for now until all the RHS metal fab and fitments are done, only then will the assembly be fully welded. More later, currently focused on the RHS B-post. Discussion: Build: https://oldschool.co.nz/index.php?/topic/60264-marts-pl310-61-datsun-bluebird-sedan/
6 points
-
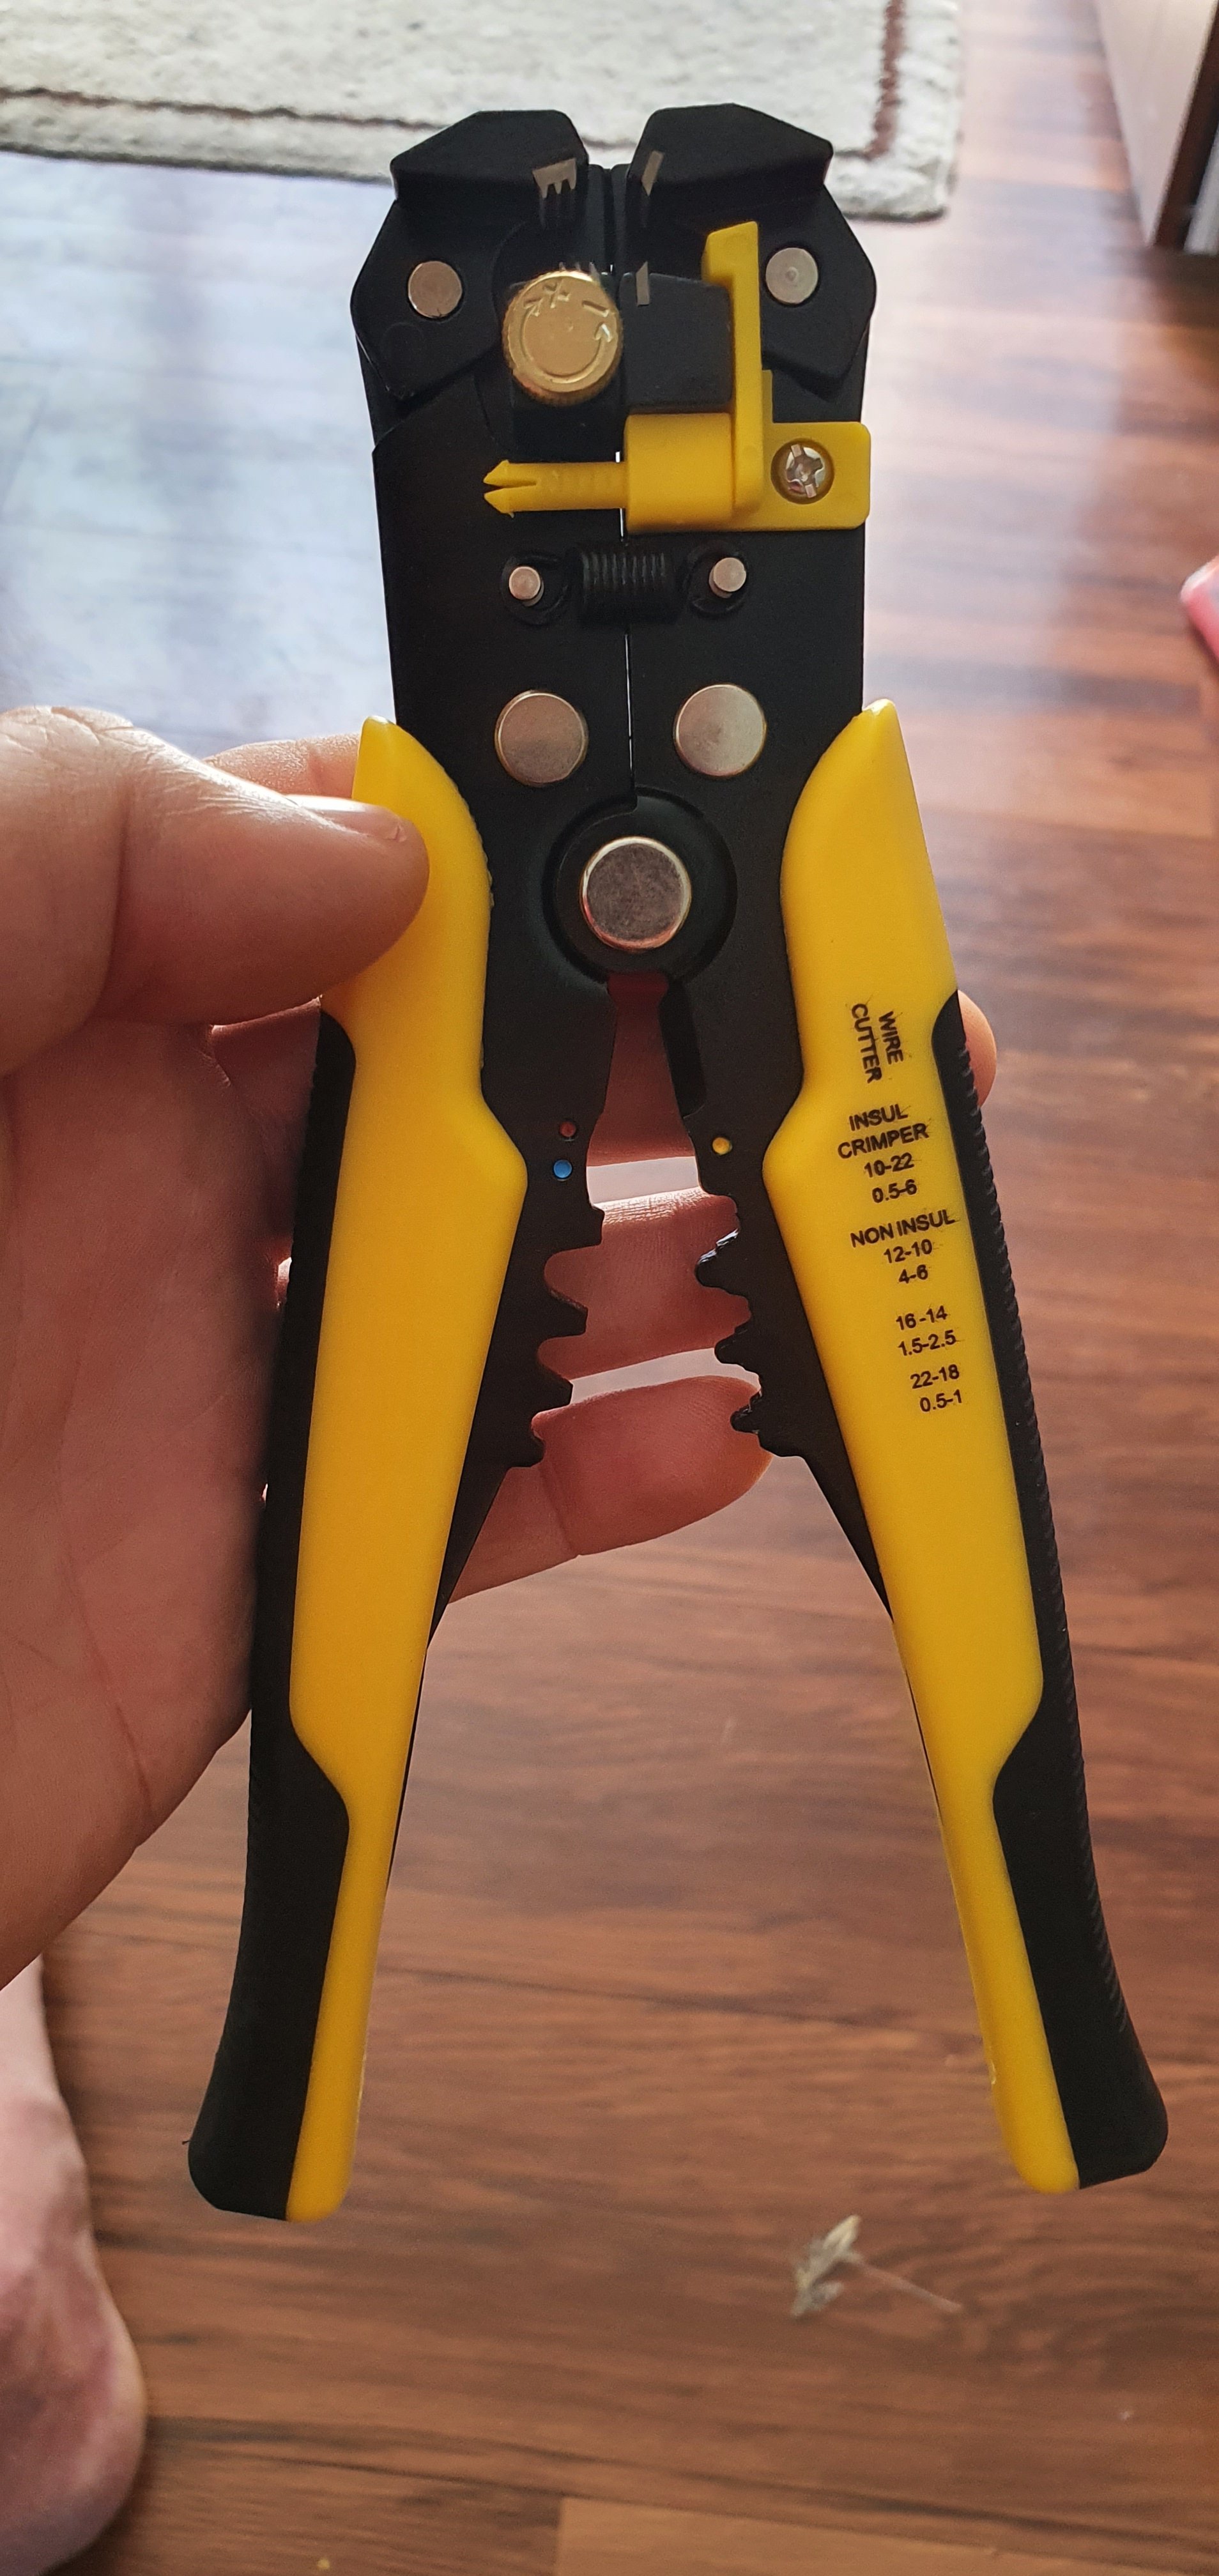
Ordered 2 of these kits. Should get it done. Works out much cheaper than paying $30 a fitting at jaycar or repco etc.
5 points
-
Got a new ignition, I think I will grind out the rivets that hold the old ignition and mag switch in and mount it it’s place? I might move the amp gauge upto where the ford one is but I need to open the hole up, I am going to fit two temp gauges in the bezel below, one for each cylinder head as they are basically two separate cooling systems, Ford used 2 senders and one gauge somehow.5 points
-
im just here to see the eventual end of the great oldschool.co.nz 2.0L Pinto build off4 points
-
fuck me what a bigport barry, this thread is bad for my health3 points
-
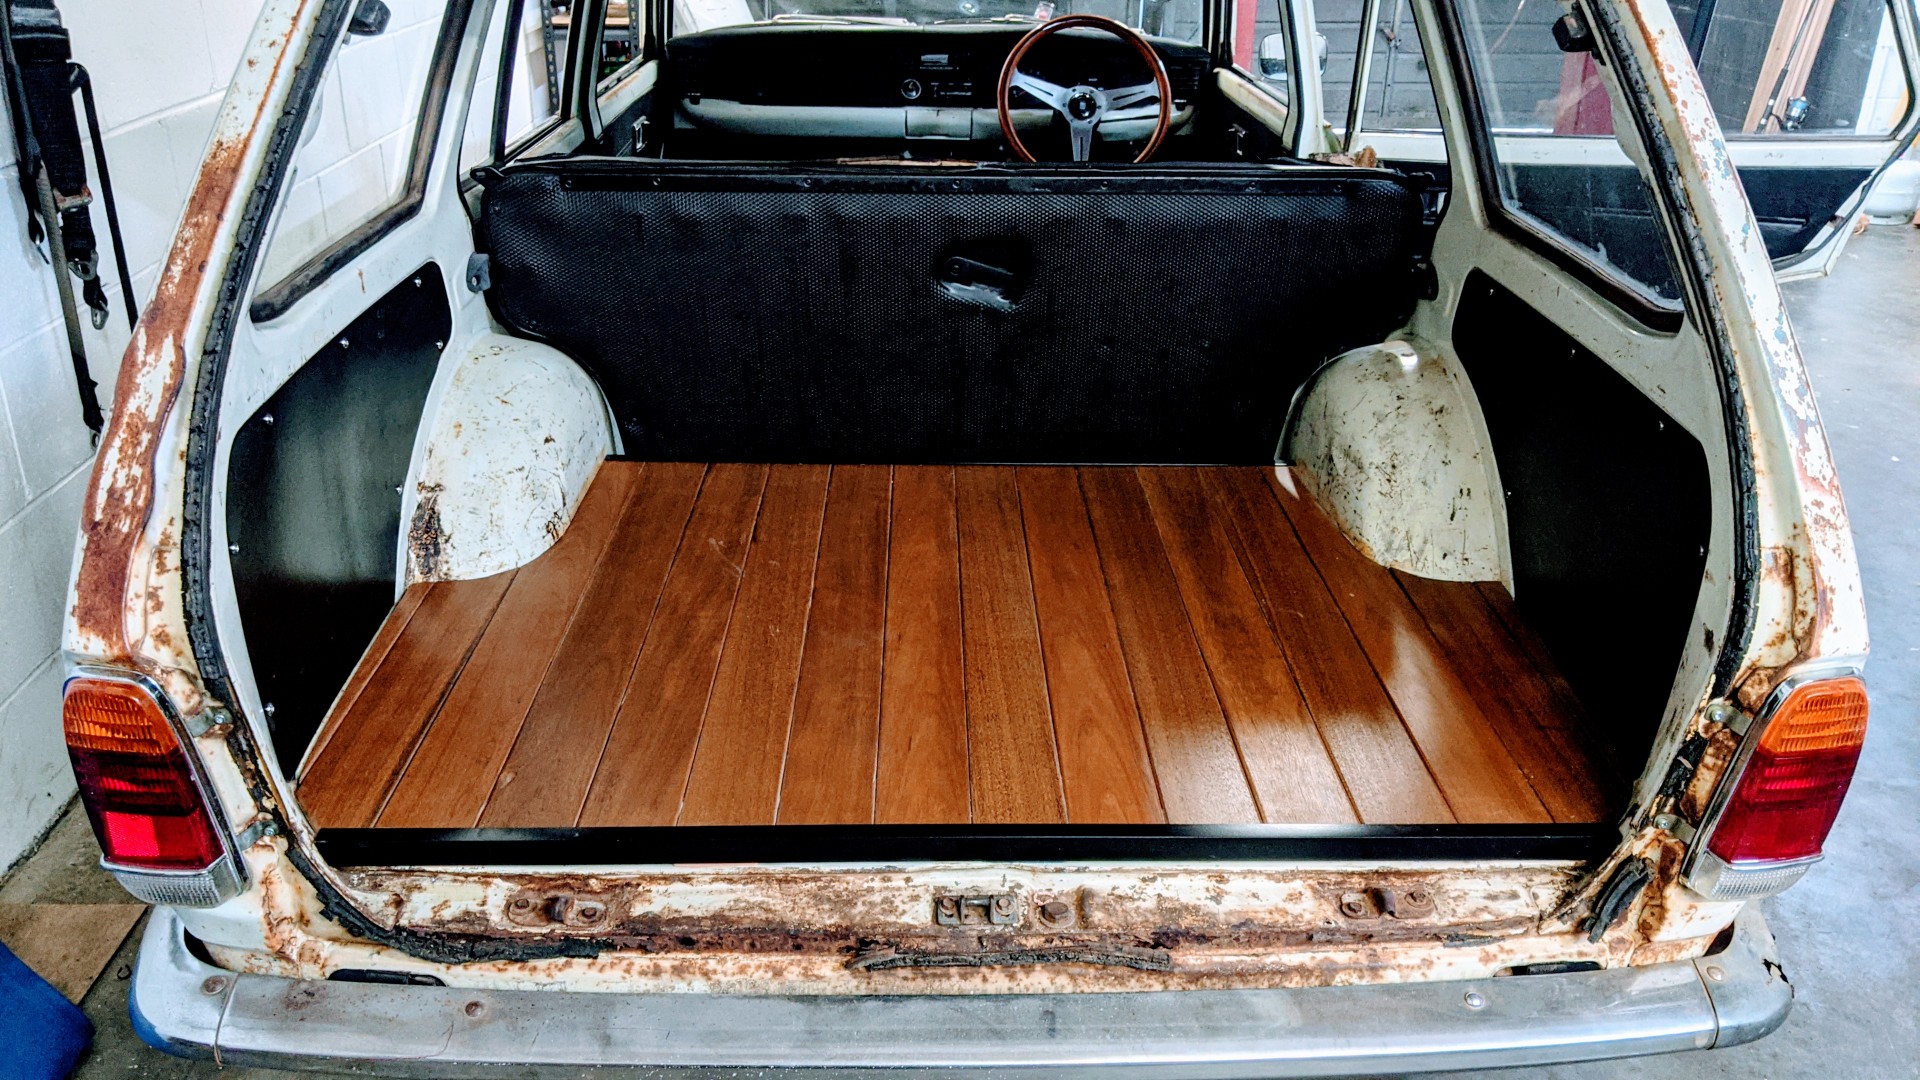
Finally finished the boot this past weekend. Won't be everyone's cup of tea, but decided to do a spotted gum floor.
3 points
-
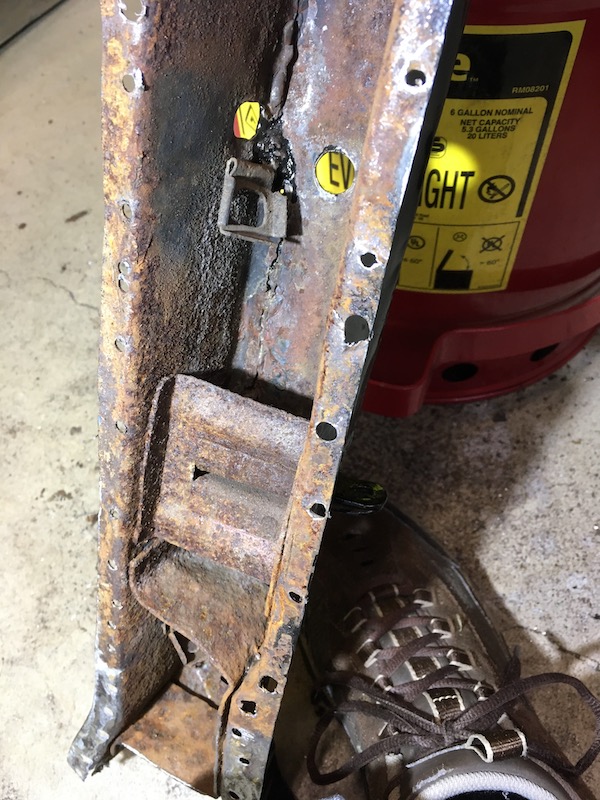
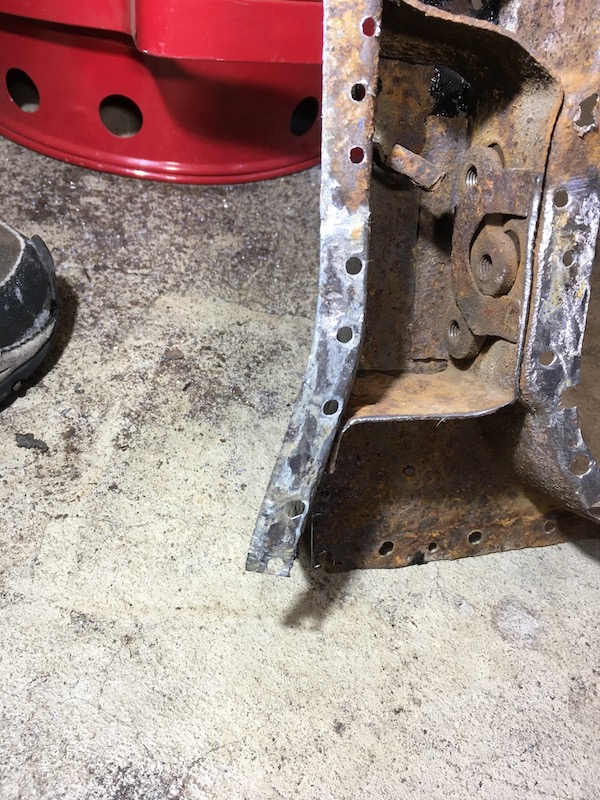
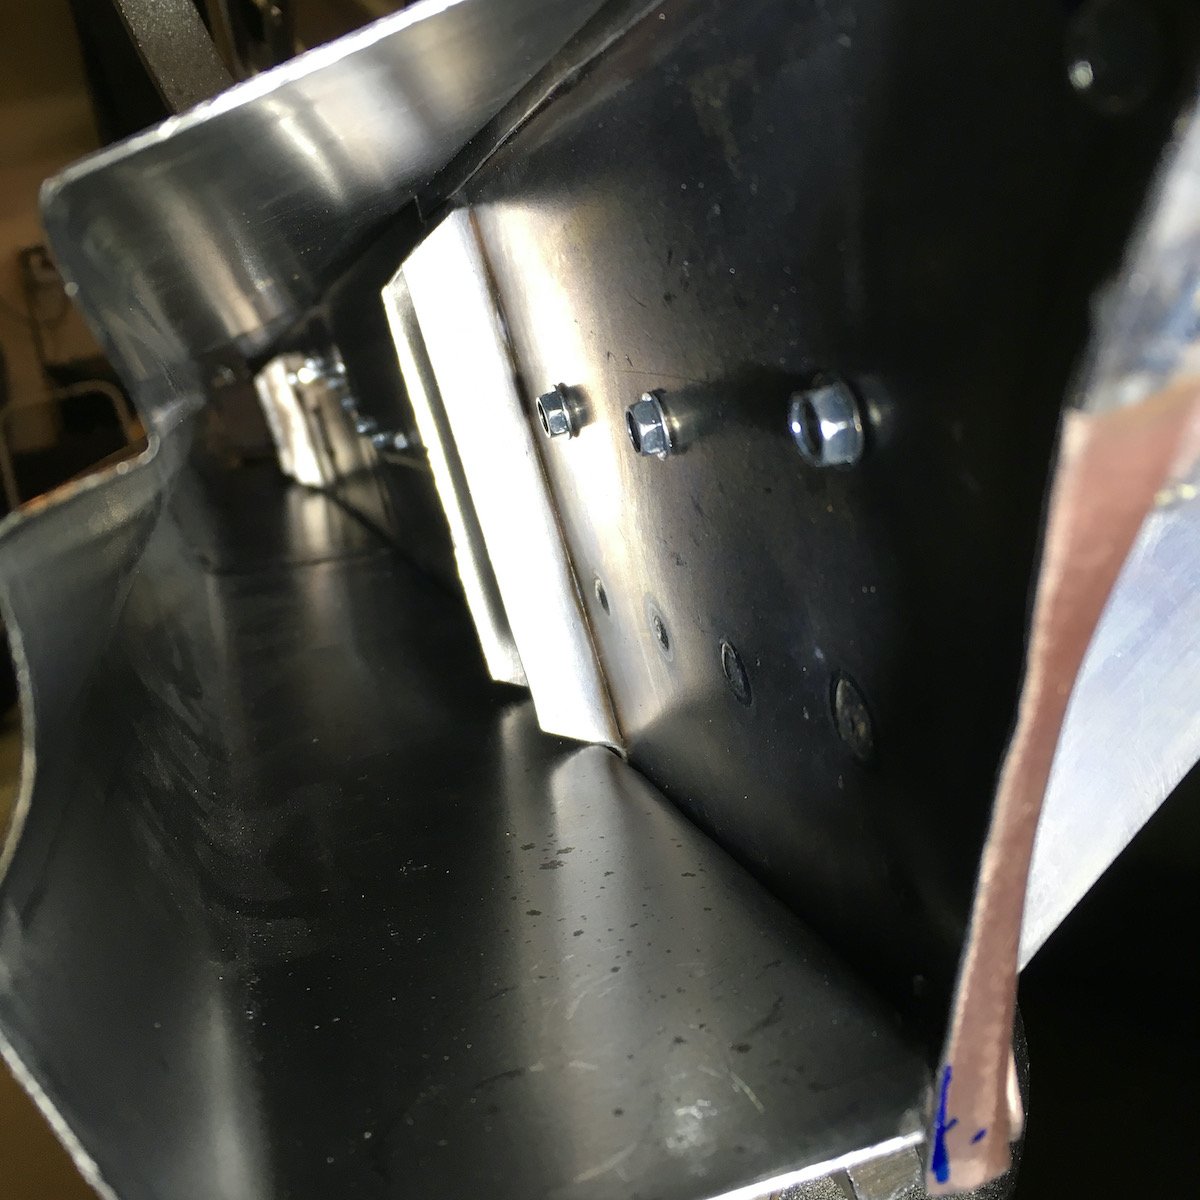
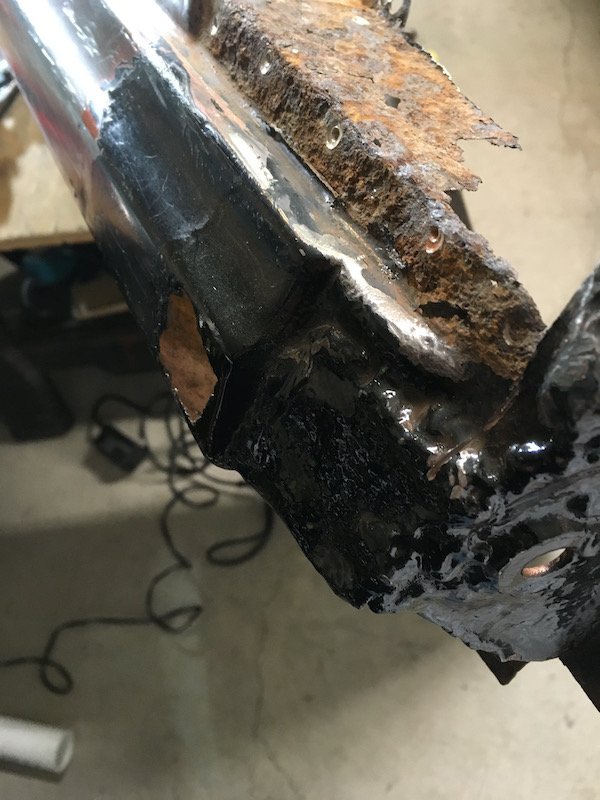
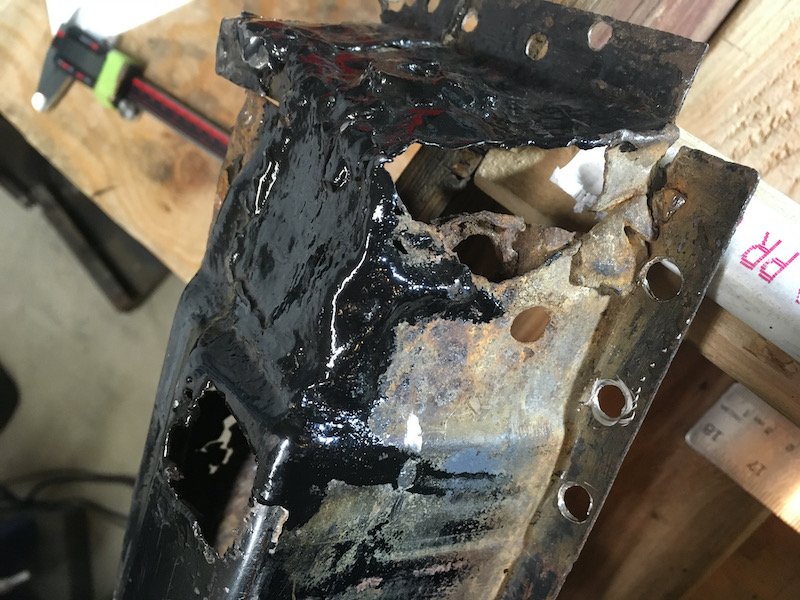
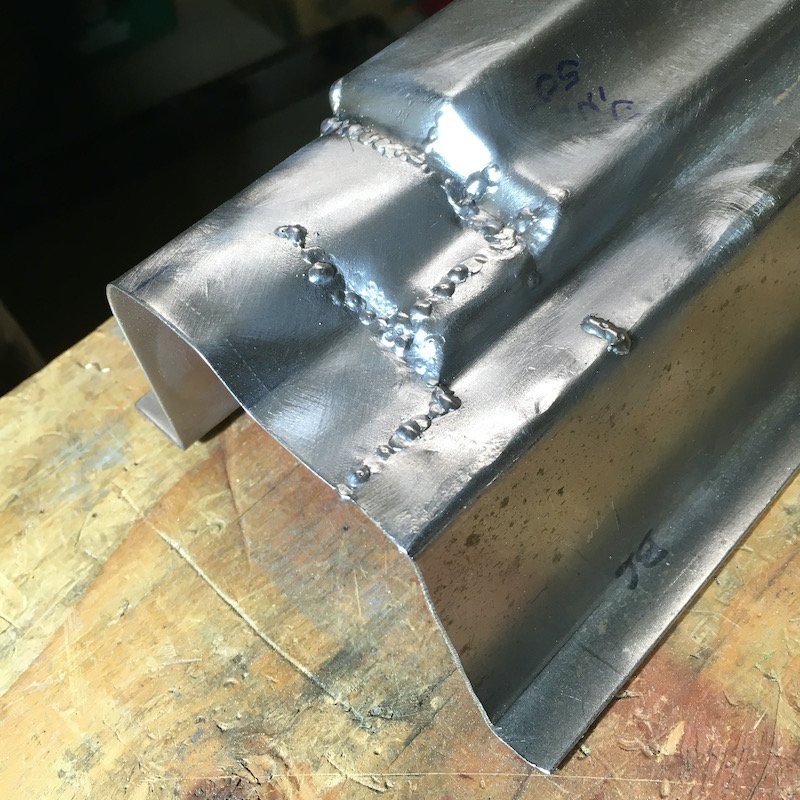
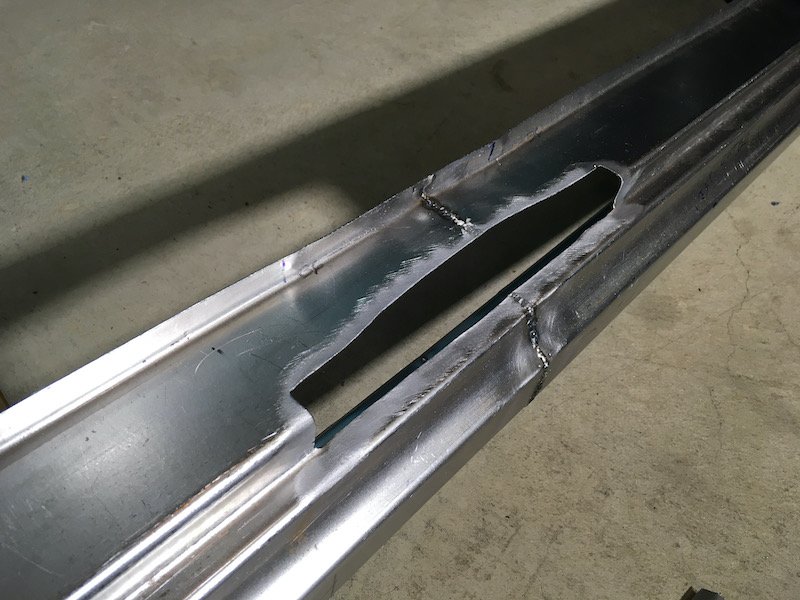
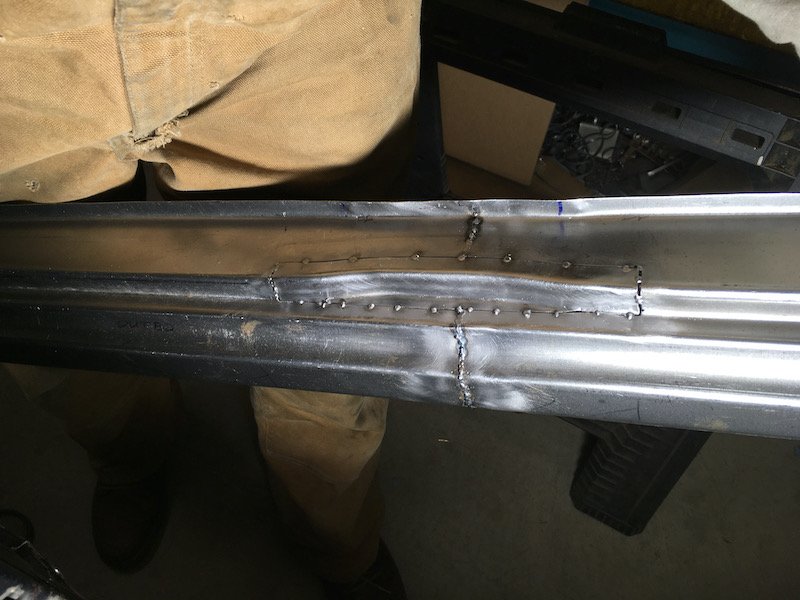
Building the 1961 Datsun 310 Bluebird - RHS Outer Sill Weld Together and Details. Time for an update reporting progress on the RHS build. Outer sill segments are welded together, including most details; end stub, end stub cap and inward joggle at B-post base. Lower A-post below the belt line and down to the sill (about 2 feet w/hinge mount points) is fabricated, tack welded together and temporarily fitted (mock up installed with Teks). The Inner body skin behind the A-post is repaired with another patch. The RHS front door hinges are rebuilt. Both RHS doors were dragged out of the backyard shed, temporarily installed and checked for fitment with the other repairs and all is well. The lower half B-post repairs are underway and nearly complete. Posting the outer sill progress/pics. Other stuff noted above to follow later. The three RHS outer sill segments welded together. Fully welded on both sides since outer is to be sanded flush. Trimmed and fit checked. Kept the weld heat under control by alternating tacks between the different joints and sides and it all came out exceptionally straight. It could have easily warped and created a nightmare. I don't recommend this approach but with a cheap 18 inch metal folder it was the only way to make it. Looks good enough now to proceed with the forward end stub. Next, making the RHS outer sill forward end stub. What follows is the detail required to allow the sill to have clearance with and tuck under the inner front fender support structure. I had no reliable original stub to copy from and just made my best guess to reverse engineer this new stub from the mutilated mess of the original as shown in the pics below. I got lucky and it does test fit snugly with the inner fender structure with just a millimeter or two of clearance. Then, after dressing the stub welds, I made a forward end cap to fit it based on best guesstimate. Stuck it together using a resistance spot welder from Harbor Freight. First time use where I may have been holding the dwell a bit too long. It's permanently stuck on at any rate. In preparing for future repairs and fitment work on the B-post, I made a cutout about mid-length down the outer sill to fit the base, same as on the original. Then filled it in with a custom small inward joggle piece that, though small, took several hours to build. Tacked it in and left it that way for now until the B-post is complete and fit is assured. Made several other minor joggles along the pinch weld flanges to accommodate overlap of bracket flanges and such. Not worthy of pics. That's it for this post on the RHS outer sill. As mentioned in the beginning of the post, hopefully more to follow soon. Discussion: https://oldschool.co.nz/index.php?/topic/60267-marts-pl310-61-datsun-bluebird-sedan/ Build: https://oldschool.co.nz/index.php?/topic/60264-marts-pl310-61-datsun-bluebird-sedan/
3 points
-
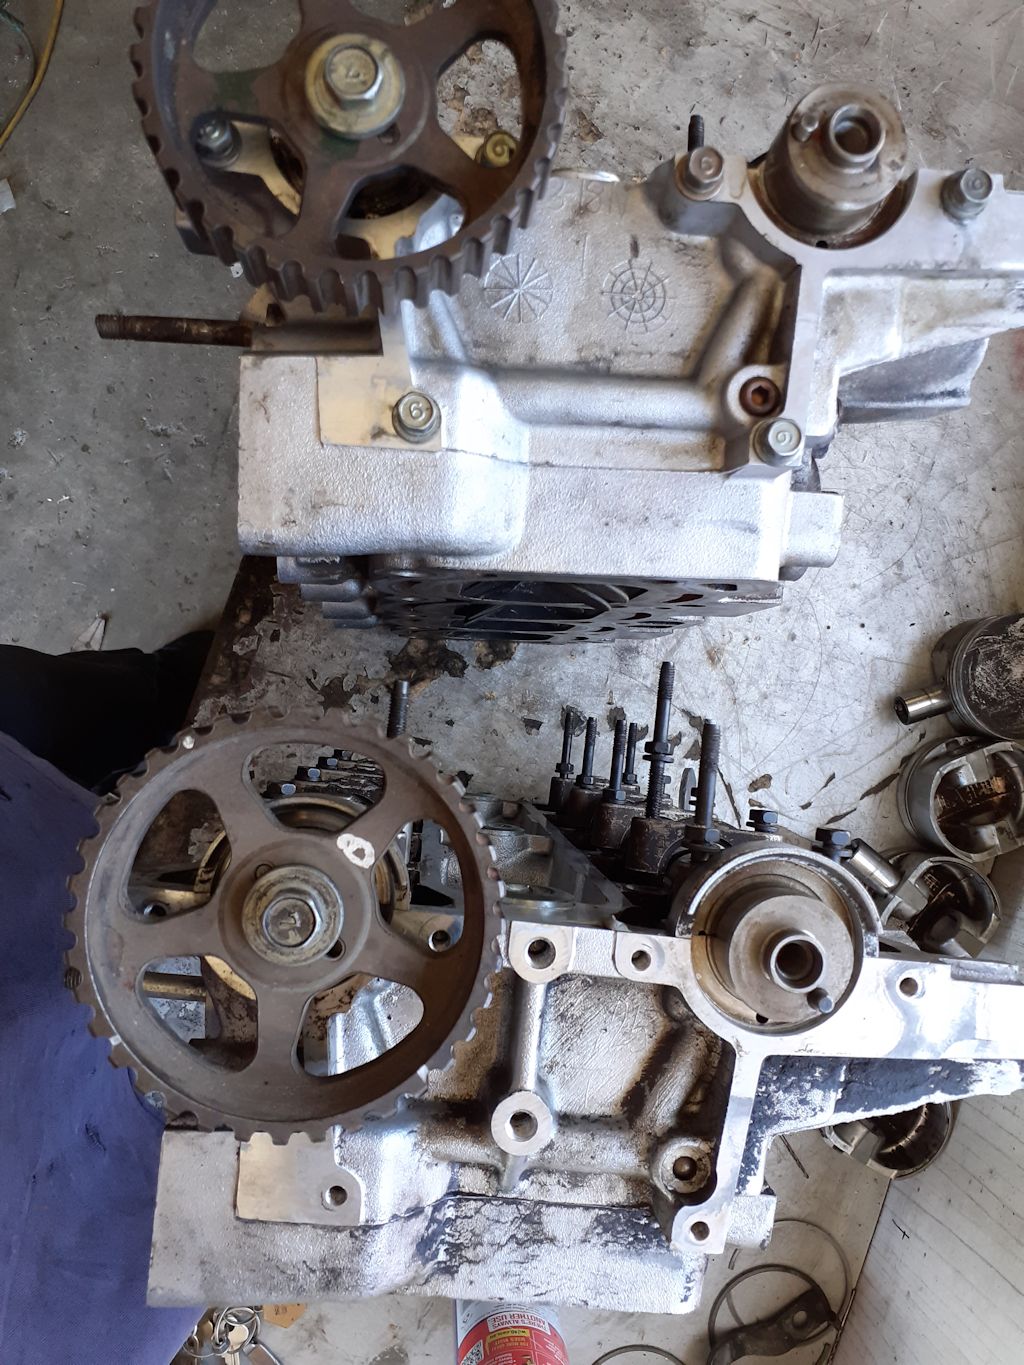
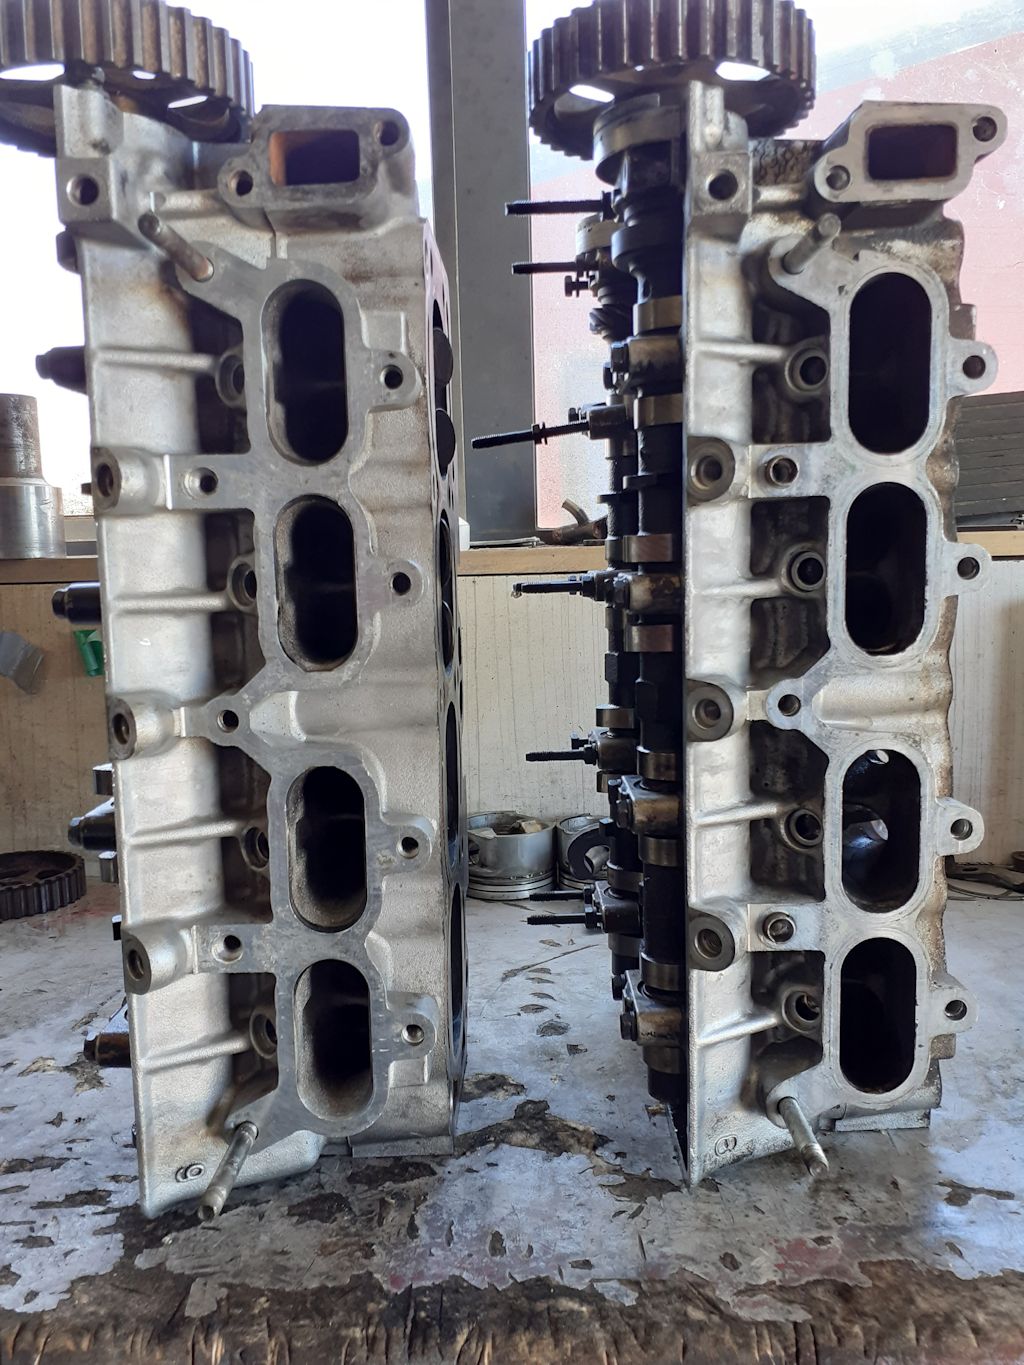
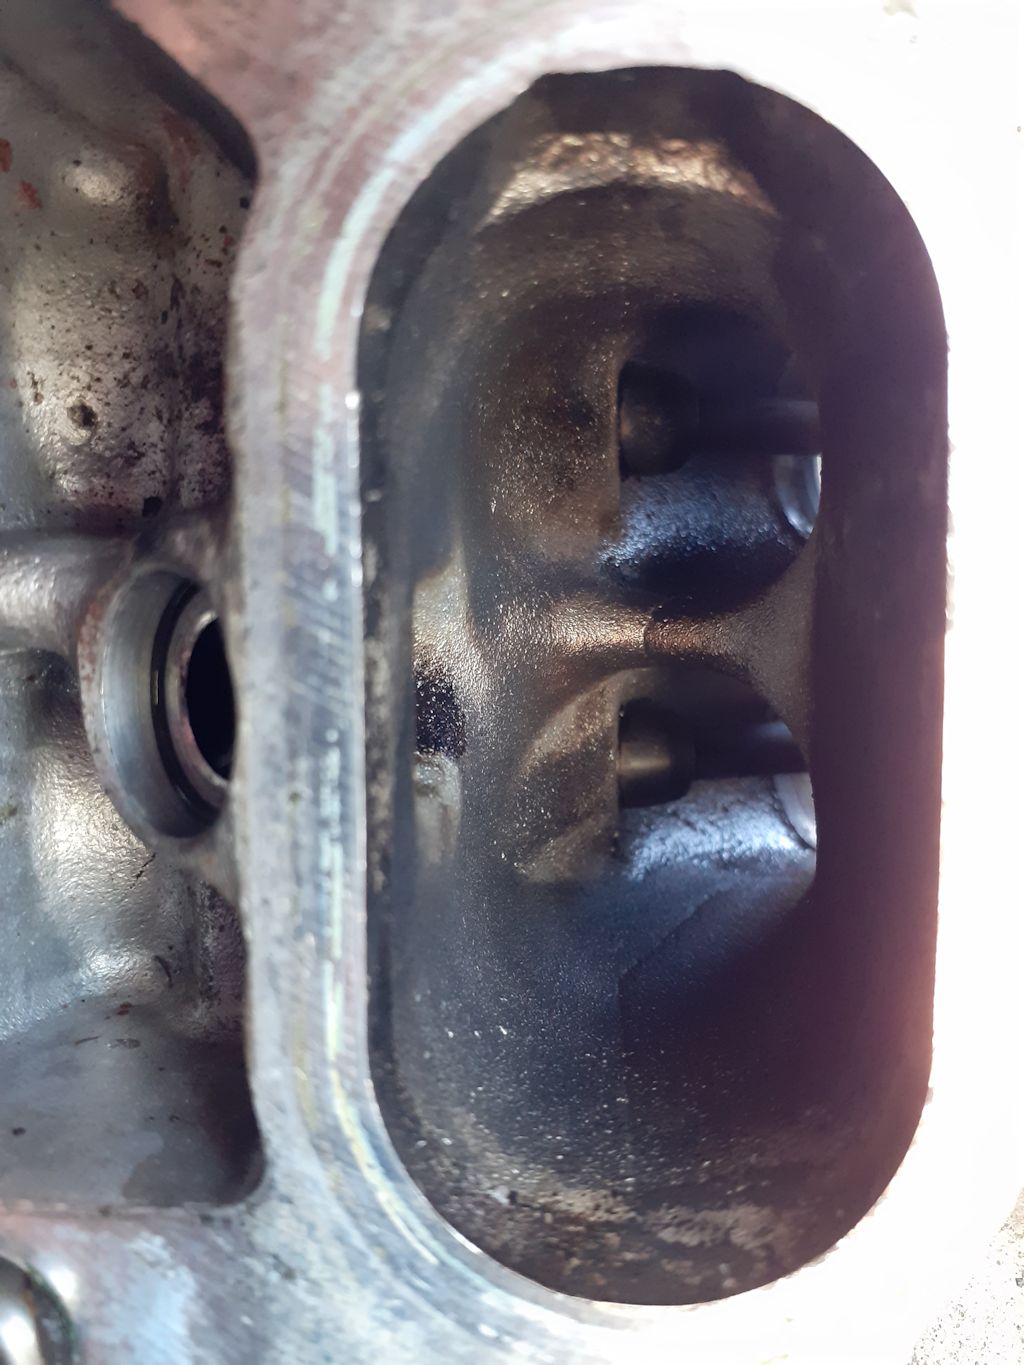
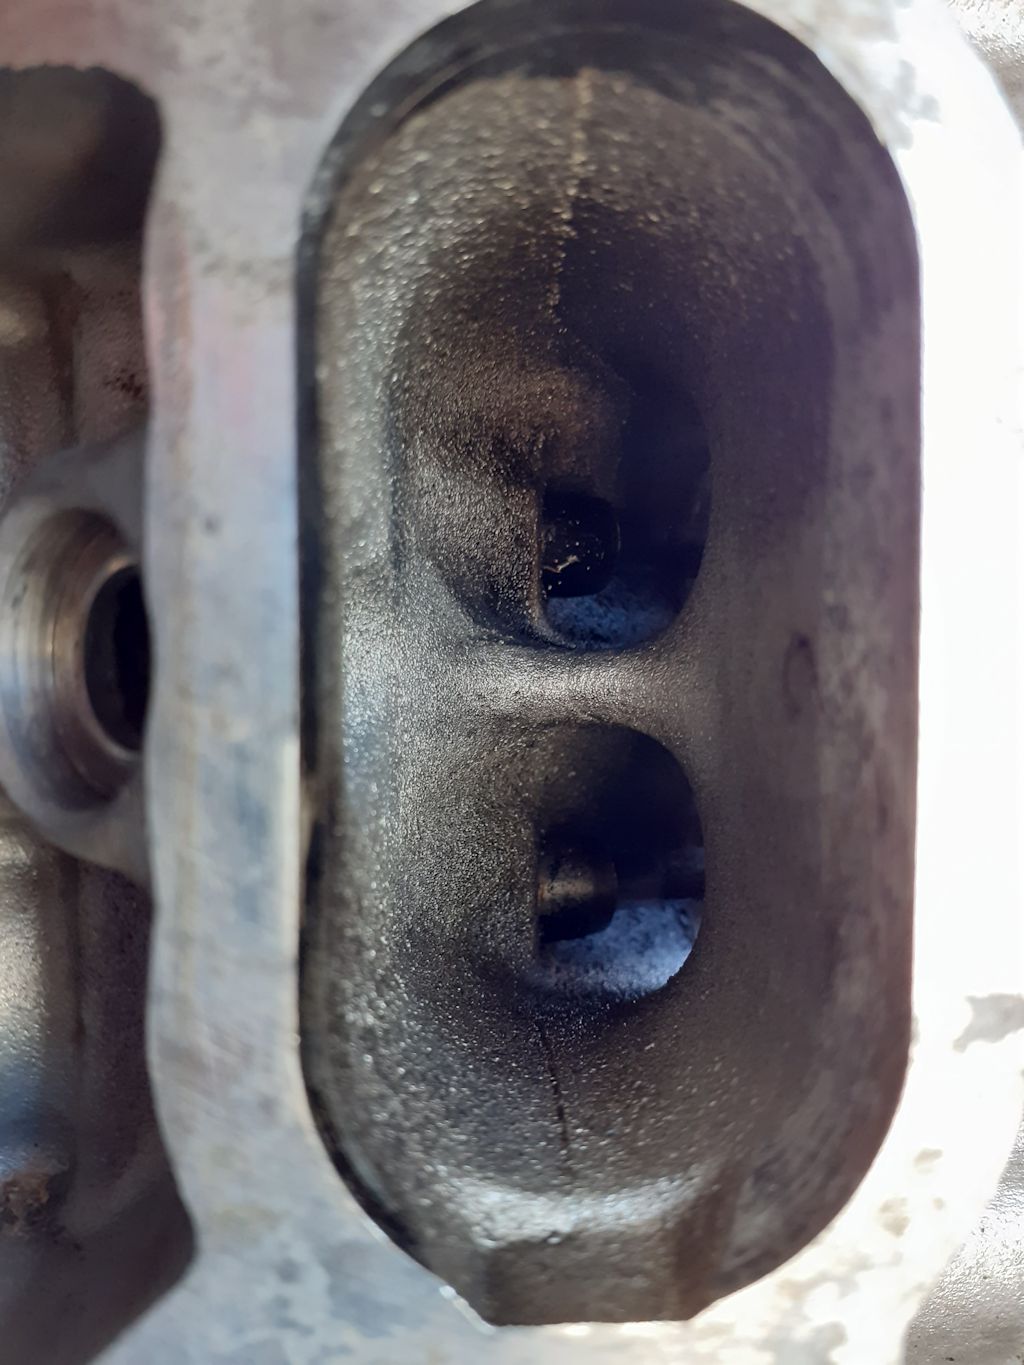
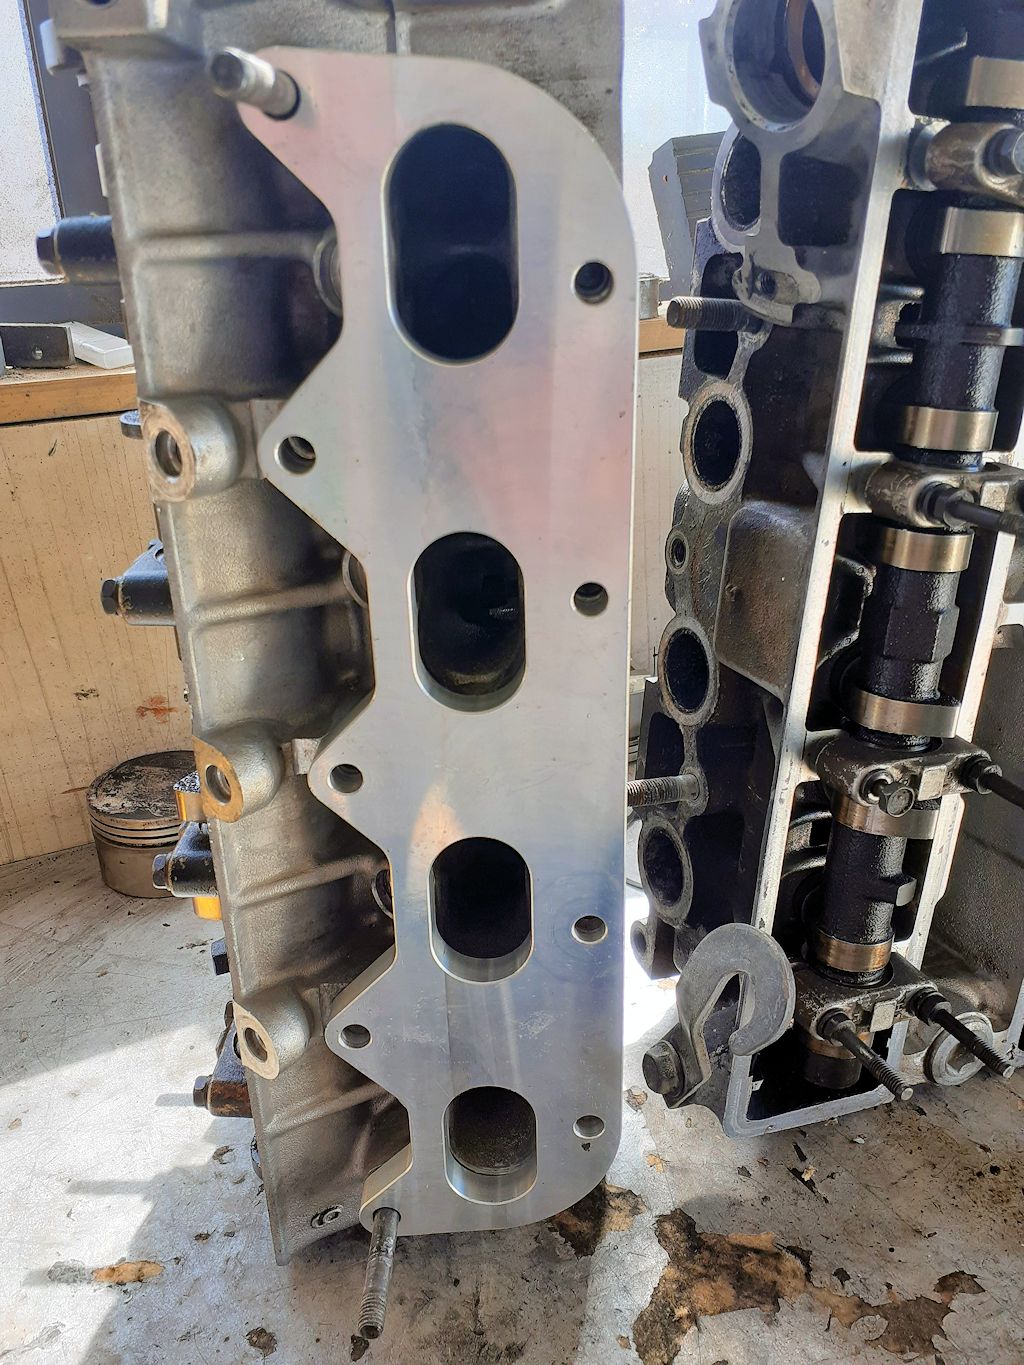
So Ive always turned my nose up at anything that isn't a smallport 4age. But since everyone jumped on the smallport wagon. I thought i would attempt to make bigport great again @kyteler the gc sent me some horrible bigport stuff along with an ae82 bluetop head. I also had a bigport head thats been hanging around forever that i dug out. so... soon as i put the 2 together, it seems all bigport heads weren't created the same. first difference; the top one is obviously a rwd one and bottom fwd. as the top head doesn't have the fwd mount cast into it head on left is the "rwd head" the port entry is slightly smaller, but not a lot different further down the port are where things change a lot "rwd head" below Ae82 head. the port is much bigger most of the extra area is made up by having a lower port floor. but this also make it have a shittier short turn radius So, questions i have Are all rwd heads like this. or did they go to the bigger casting when fwd/mr2 4age became a thing? Bluetop cams. do they actually exist ? has anyone personally measured some up? the cams out of the ae82 head measured the same as smallport cams. so either its not a bluetop head. or only rwd bluetops got bigger cams. or said cams dont exist, and that billzilla guy tricked the whole internet. although they do have a different part number I haven't decided which head sucks less as is. I cant really be assed dyno testing both of them, but might have to happen. the rwd item is my pick to modify If you dont have any answers to my questions. At least entertain me with some sweet sharns of yesteryear how hard your bluetop kicked with tvis
2 points
-
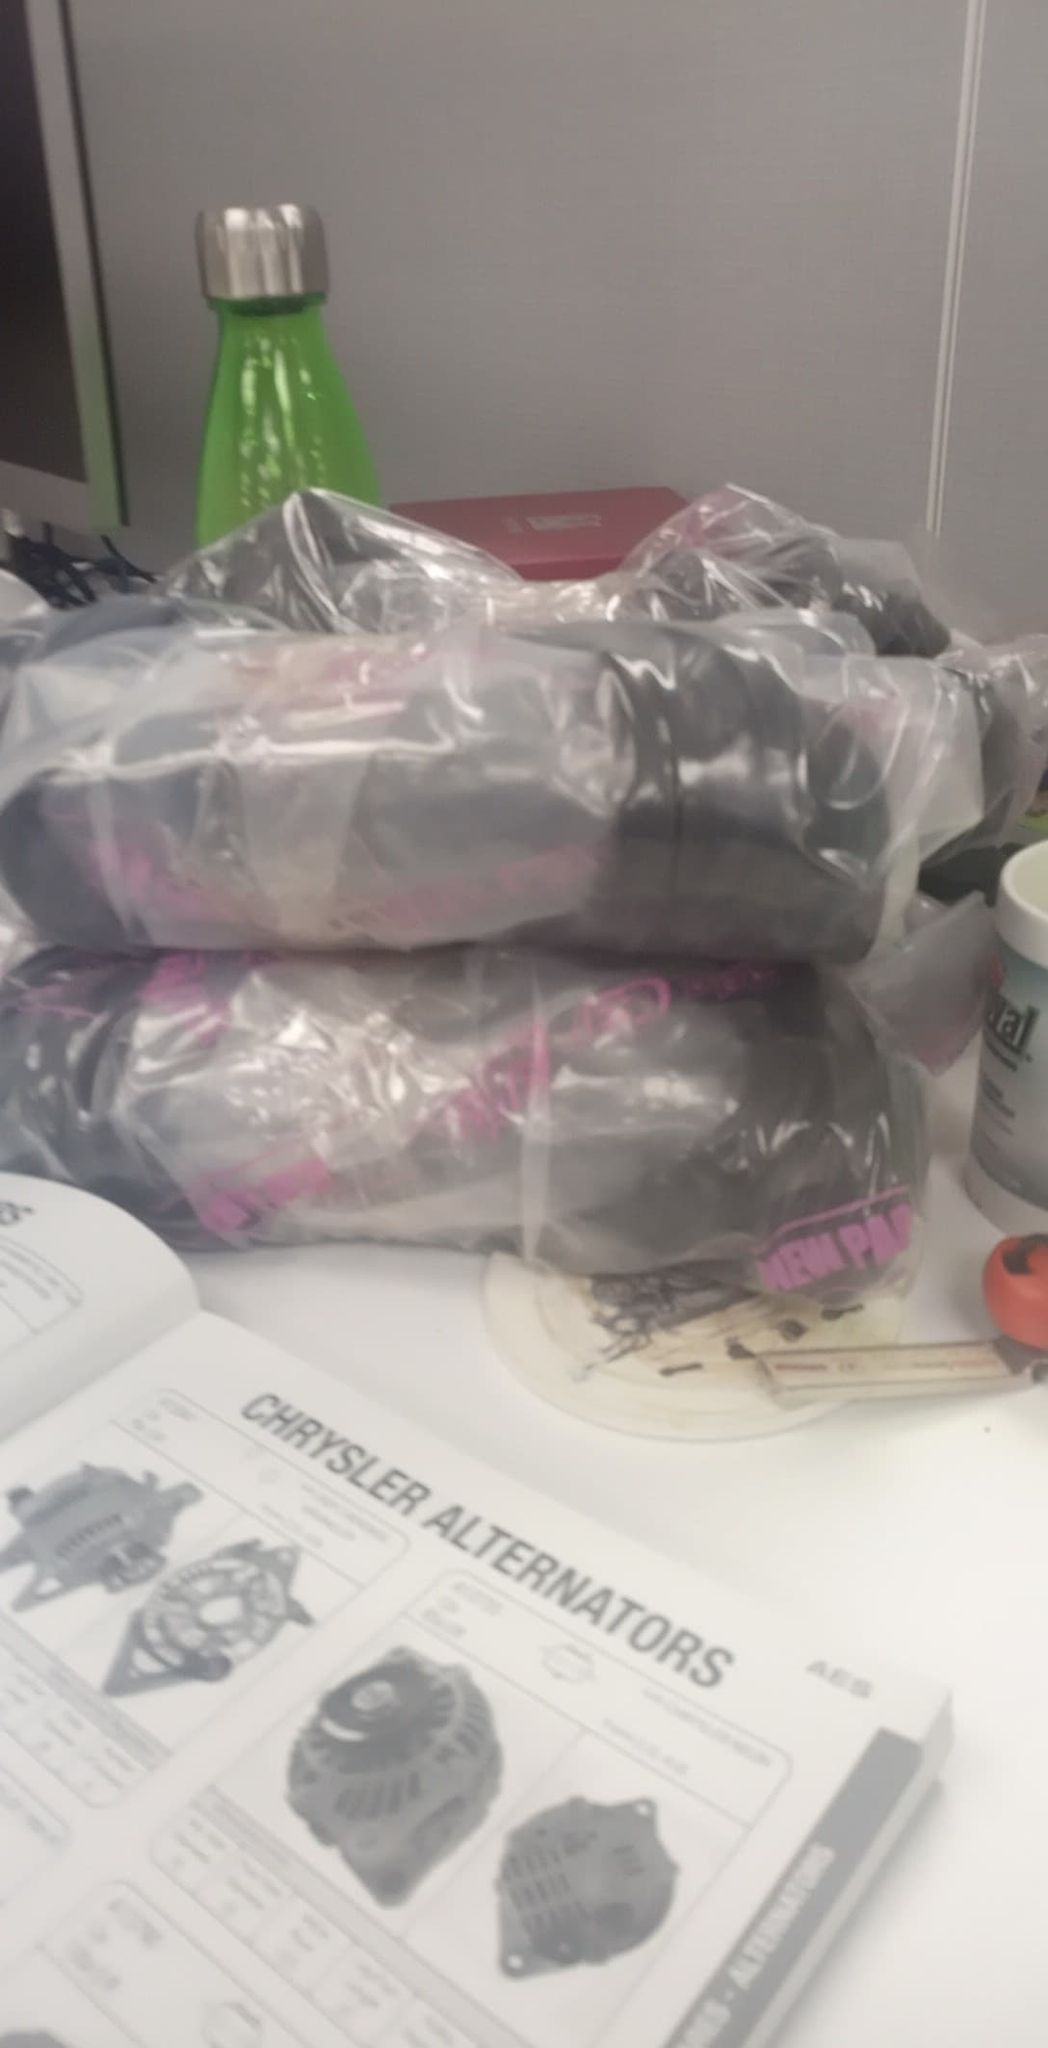
Okay, neither maths nor English are my strongest attributes. However there are 48 wires that need a connection block, required to make this wiring loom work. There's an additional half dozen that need an eye terminal for things like battery, coils, starter motor, horn etc. So when you buy a "complete kit" that has in excess of 50 wires and that kit only has enough connectors to do 22 wires, it leaves you scratching your head wondering if the difference between American English and the Queens English we use in NZ is really that far apart? FFS this kit has 50+ wires, but only 22 connectors!!! WTF. This is a carburetored engine, no ECU or injectors, sensors to consider, its as basic as it gets. A handful of their shitty connectors would have gone a long way towards finishing this today. So off to jaycar with my crippled arse I go again.
2 points
-
Mail arrived, so my list of excuses is fast running out! Strangely satisfying click sound and accompanying mechanical movements...hypnotic...
2 points
-
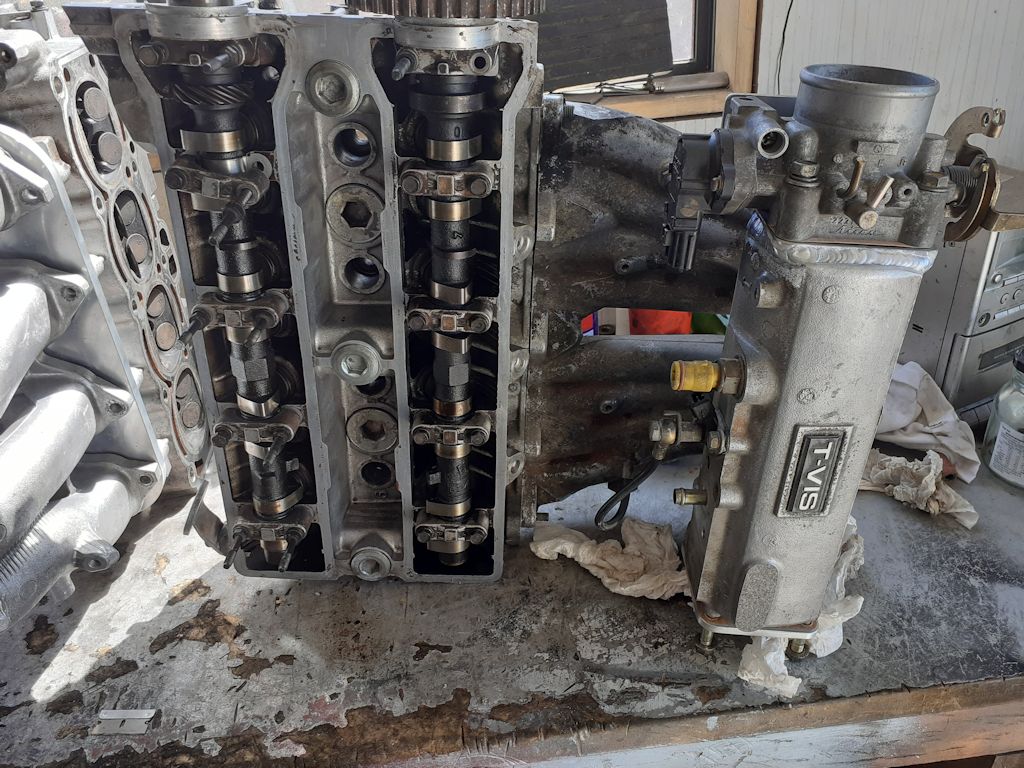
Did someone say tvis was nice of toyota to keep the bolt pattern the same on smallport
2 points
-
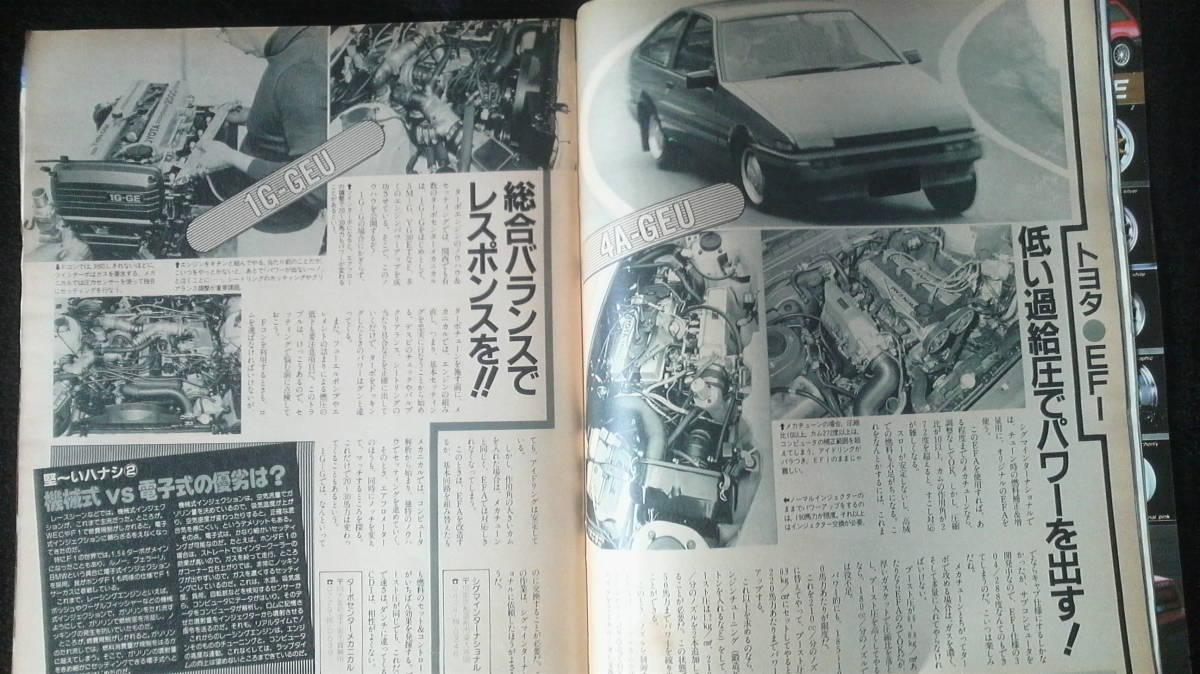
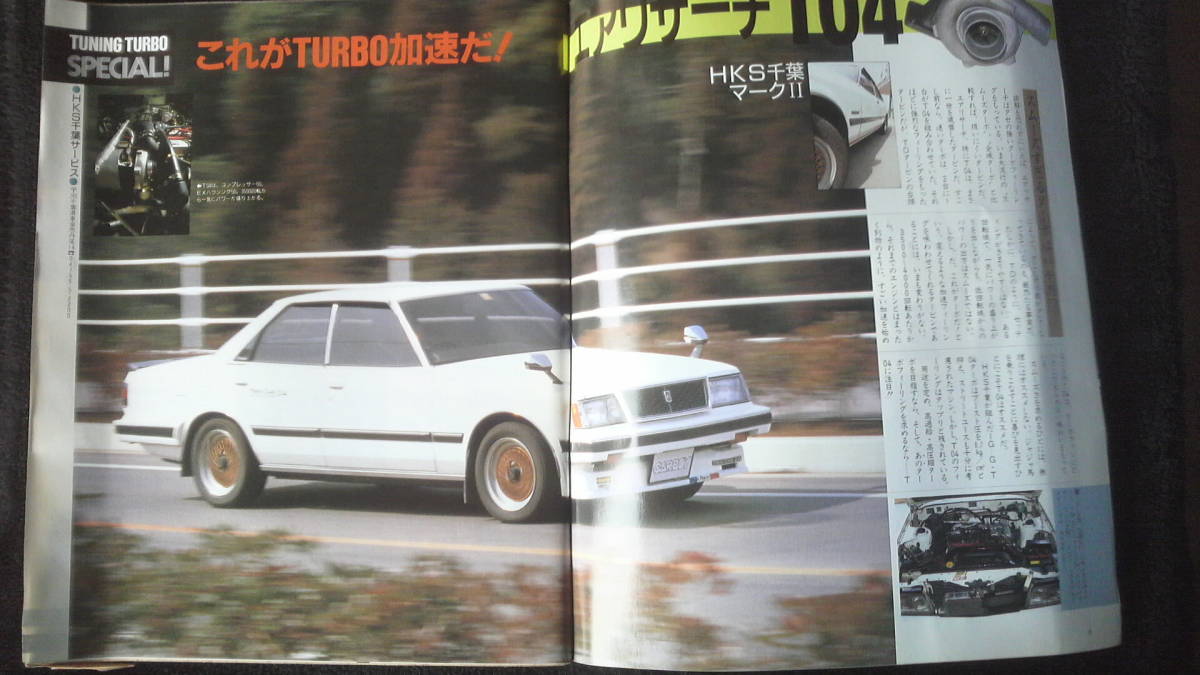
@Barnz.NZ had a batch of leather shifter boots made up, much nicer than the poorly fitting rubber accordion that's been in place for 2 years Have been driving this every chance I get, still doesn't feel real being able to its been that long. Planning to find another 1gge long block to assemble the supercharger on a stand to set everything up 100%. Have been trawling Google to find any more photos or specs or anything for the kit, have ordered a couple of Japanese 'Carboy' magazines from YAJ that have a few gems inside. There is temptation to twin charge with the hks single turbo manifold that often pop up (currently a NOS one being sold locally) Must refrain.
2 points
-
I am hoping to have car running by then, just did the heat wrap on headers, and sat there struggling trying to fit them into stupid TE31 for a couple hours. Mark ( AE25 ) is also running his japanese annual meet on the 17th Jan, so might be of an interest to you lot? If i don't come in my TE31 ( will be its second outing in maaaaany years ) i'll come in porsche for a burger haha.2 points
-
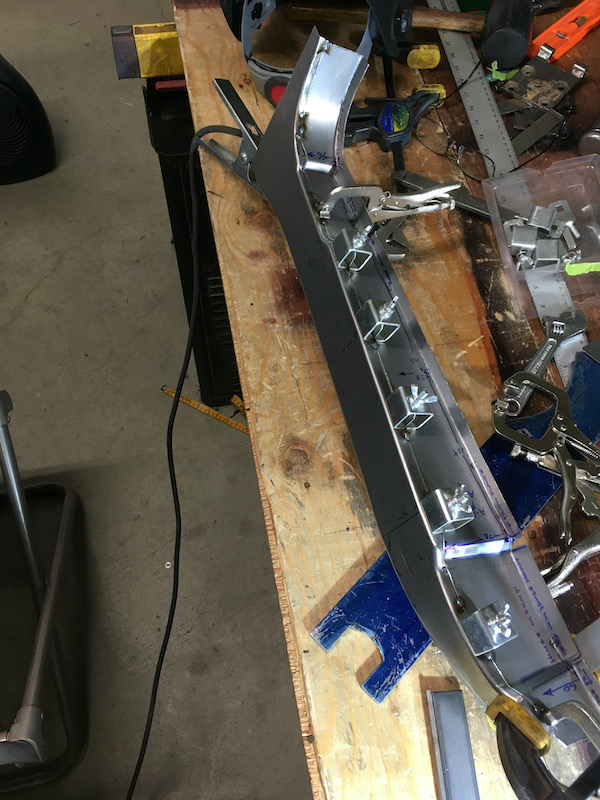
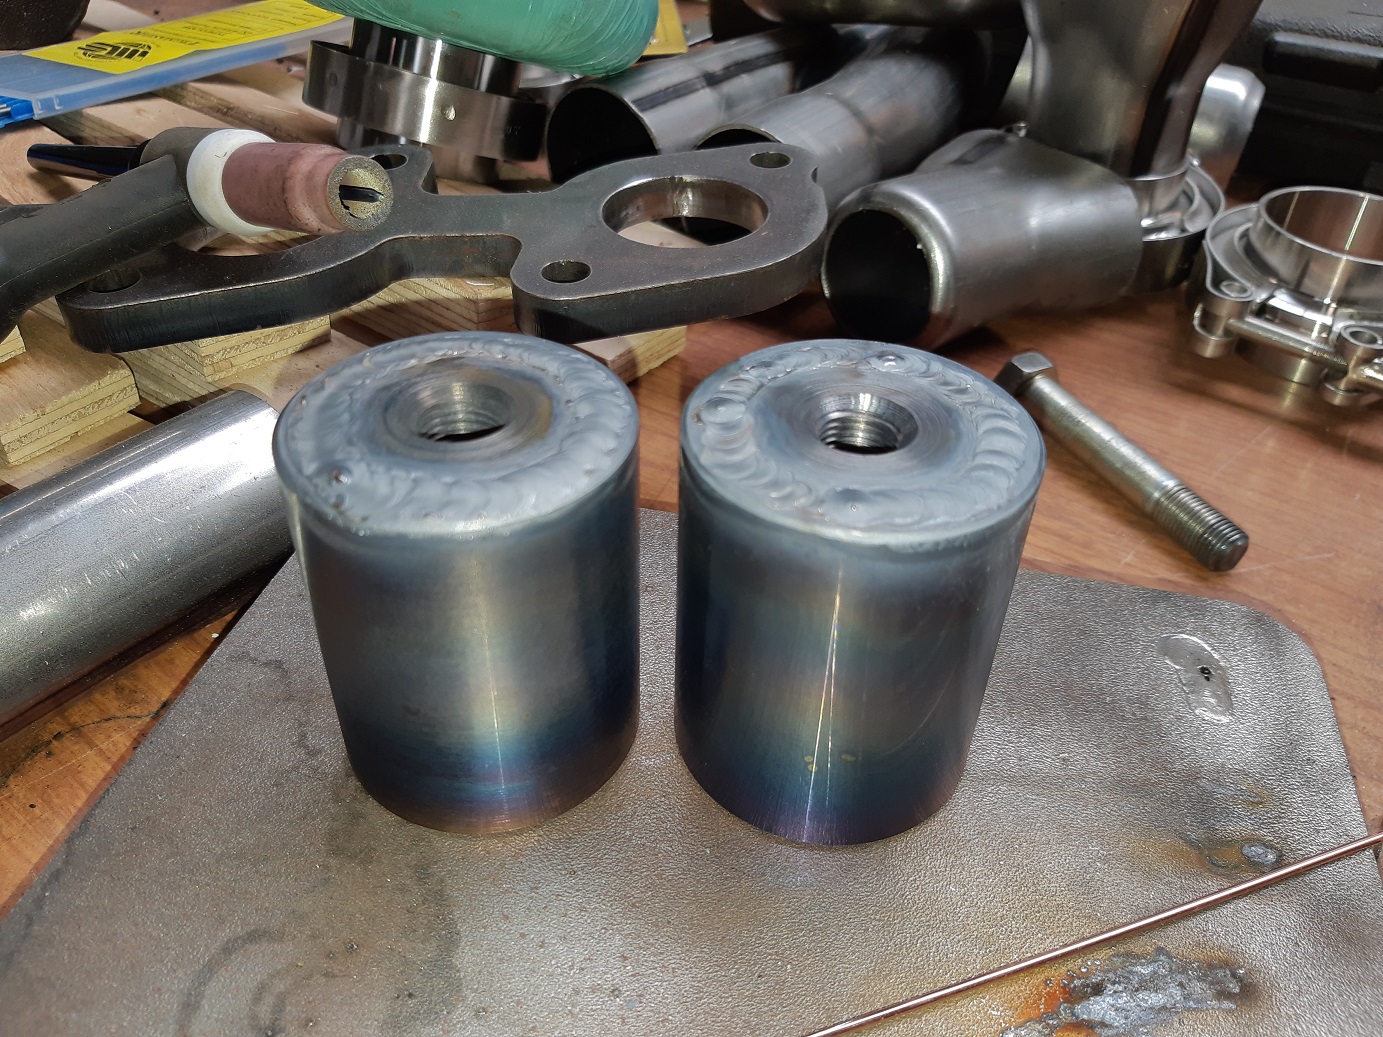
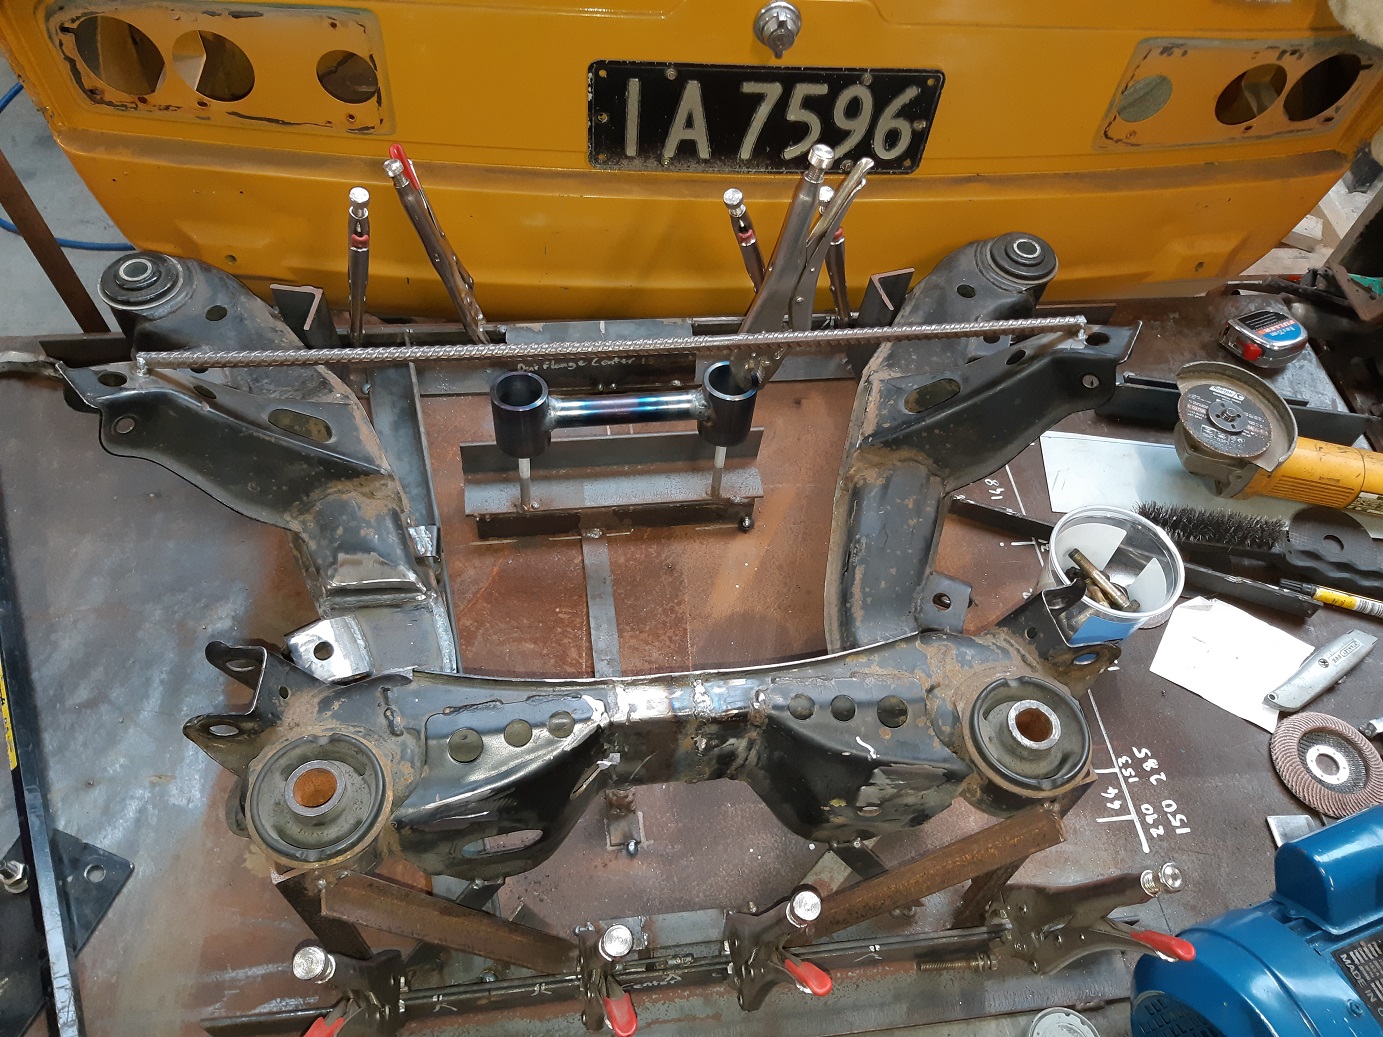
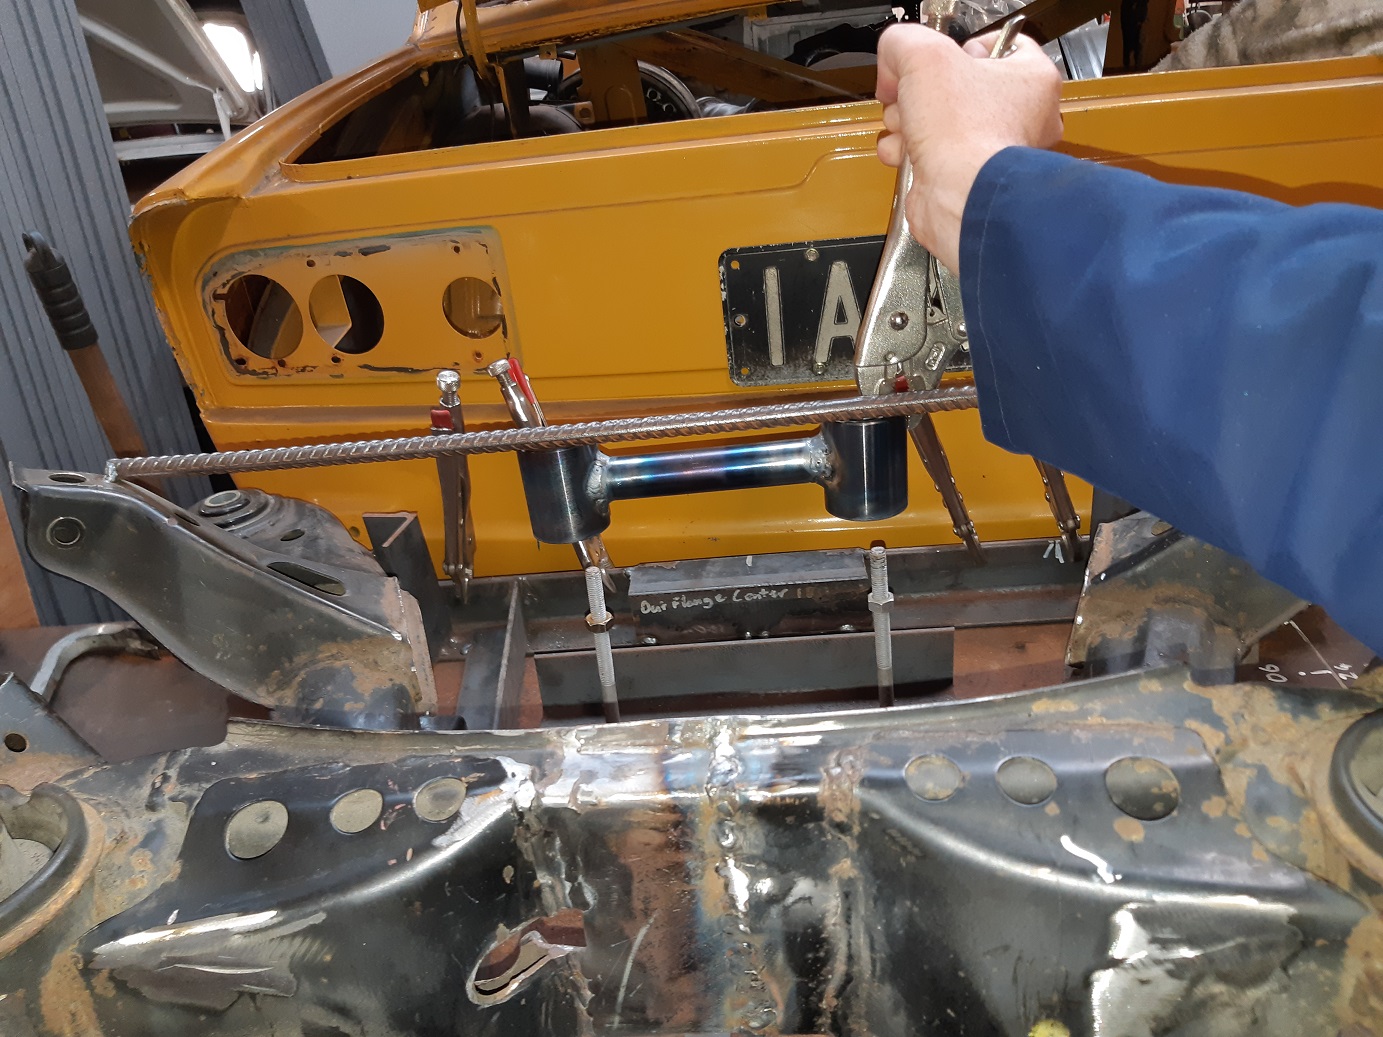
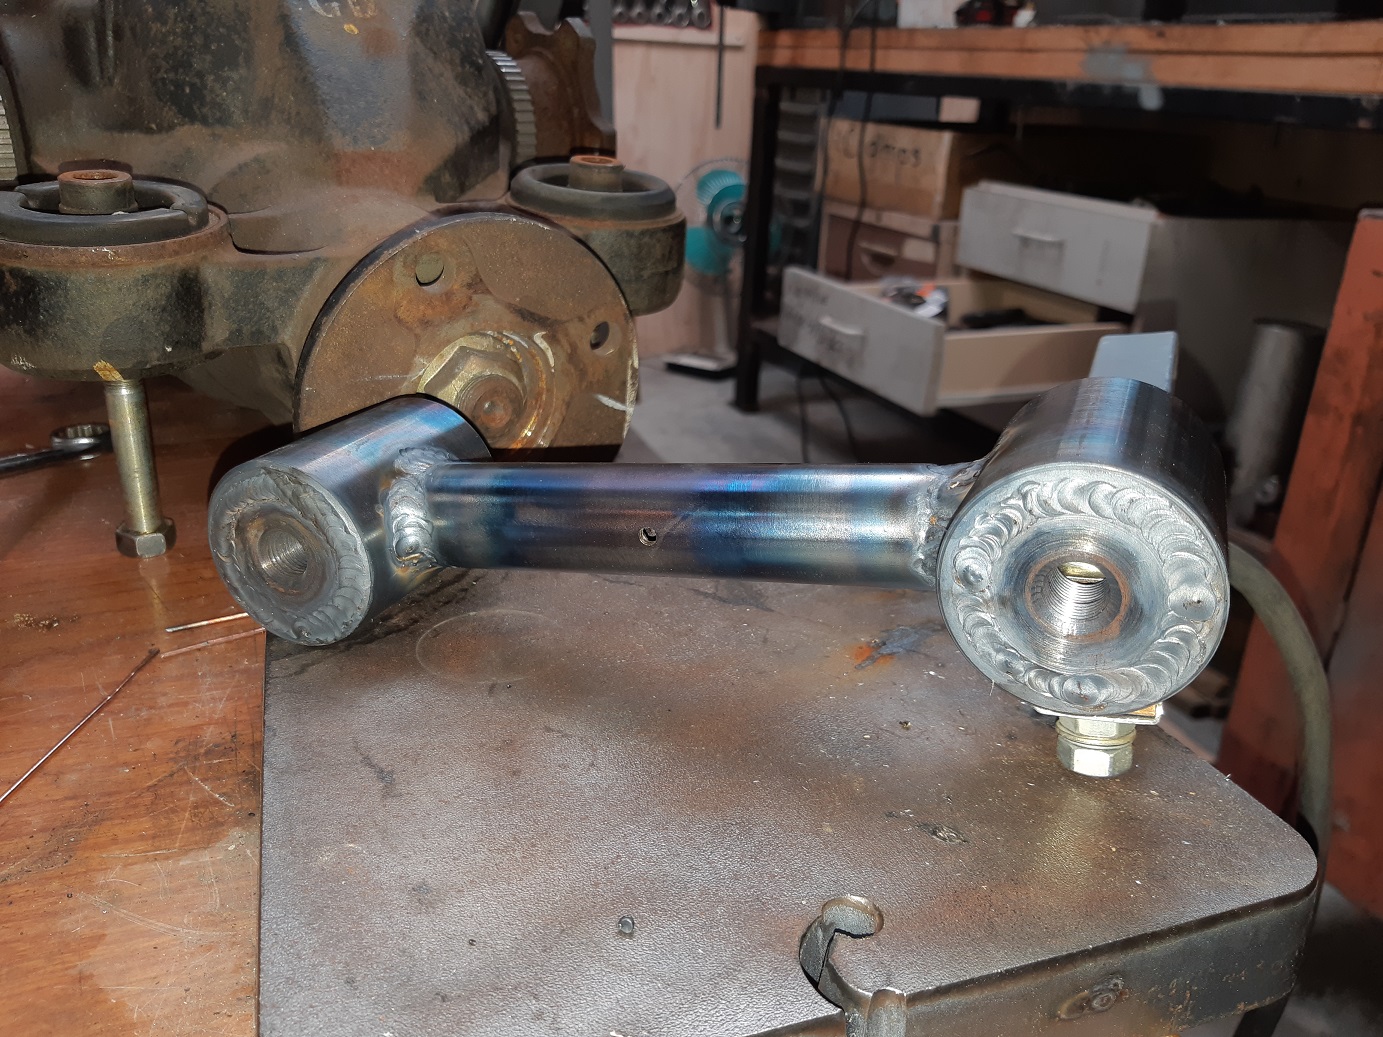
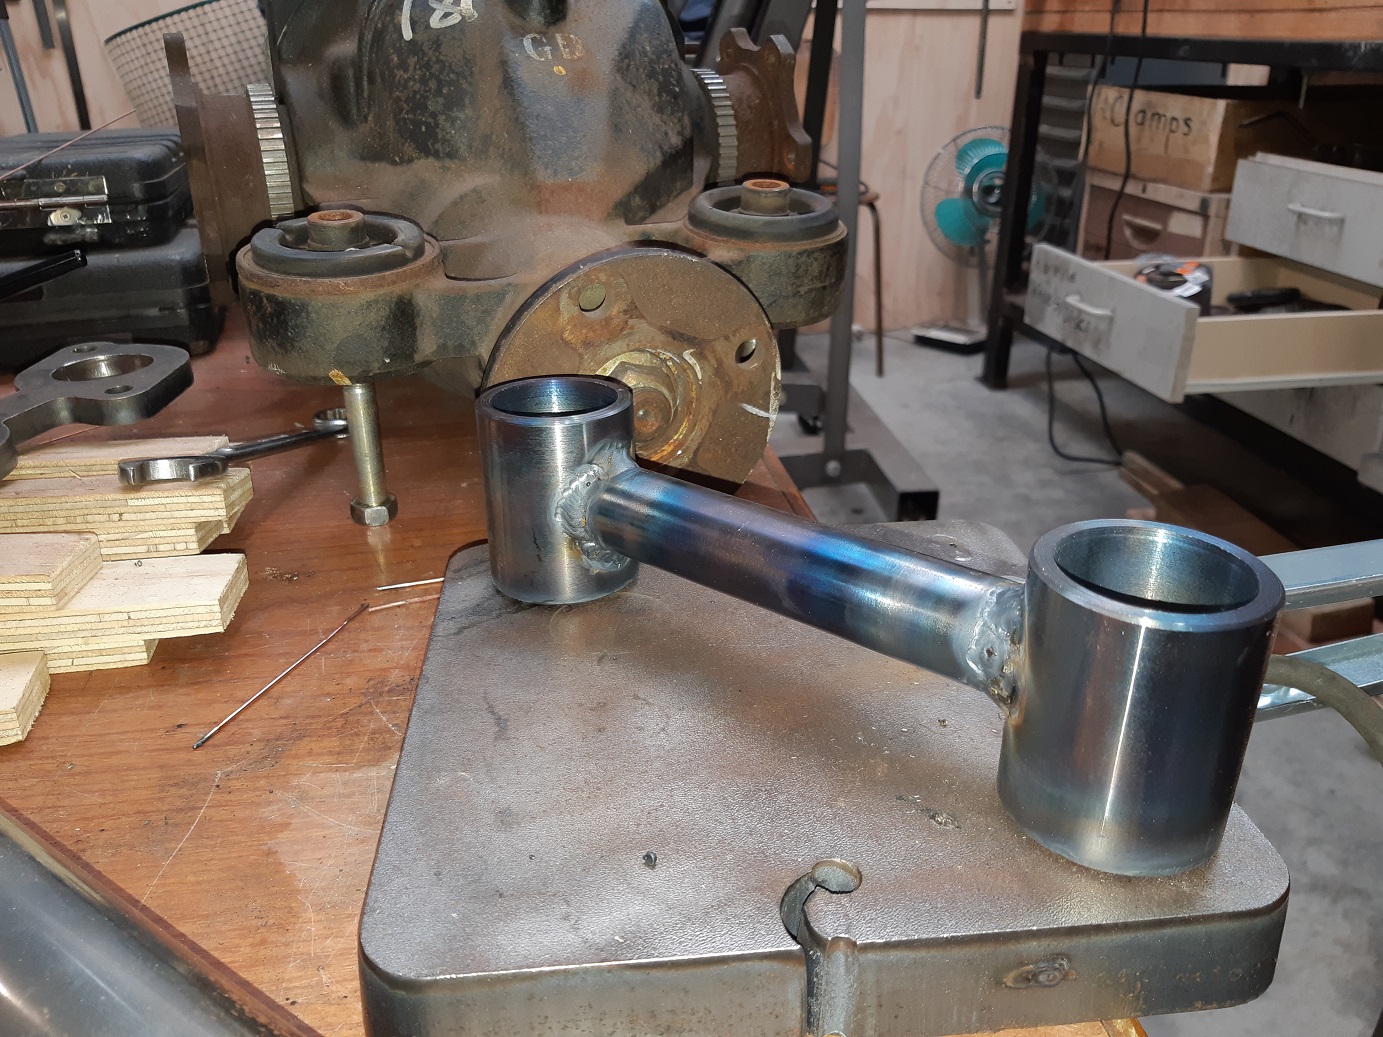
I made some round things with holes in them. Then made different round things with threaded holes in them. Then zip zapped them together. Then I joined them together with a more different round thing with holes in it. It is the start of the diff.... cradle? thing which will be about here. It's currently still thermonuclear, hence the holding aid. I worked out that I needed to narrow the subframe a further 50mm if I wanted to actually fit tires on my wheels. Which I do... I think I've narrowed it a total of 250mm. Because the diff sits off center, I needed to make some clearance for the inner CV flange, just on one side. Damn thing really wants to become a pretzel from all the welding, one corner of the frame has lifted 5mm off the table, but I can flatten it out just by standing on it. So It's got ALL the clamps. Hopefully once the diff cradle is done, it will brace it enough to keep it flat.
2 points
-
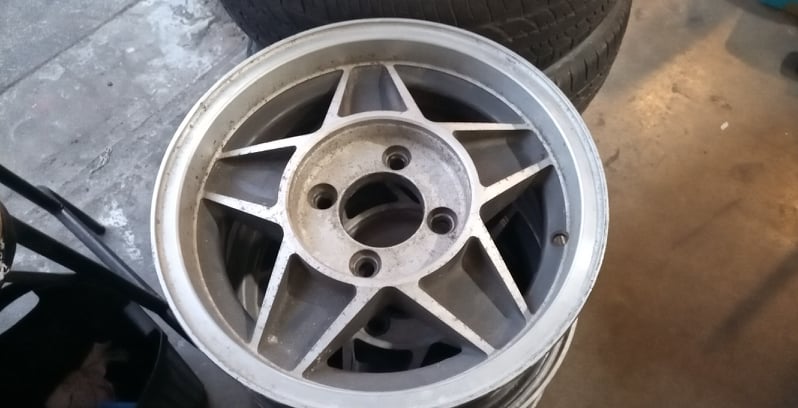
For some reason I was avoiding buying new wheel nuts for the front as I thought they would be expensive but it was $12 for a set of 10, and now I can ditch the 3 different shapes and sizes of nuts I had on before, got the new tires put on, finding tubes was a little tricky and I had to drive a lot to get them, tire shops look at me funny when I want cross ply tires fitted.
2 points
-
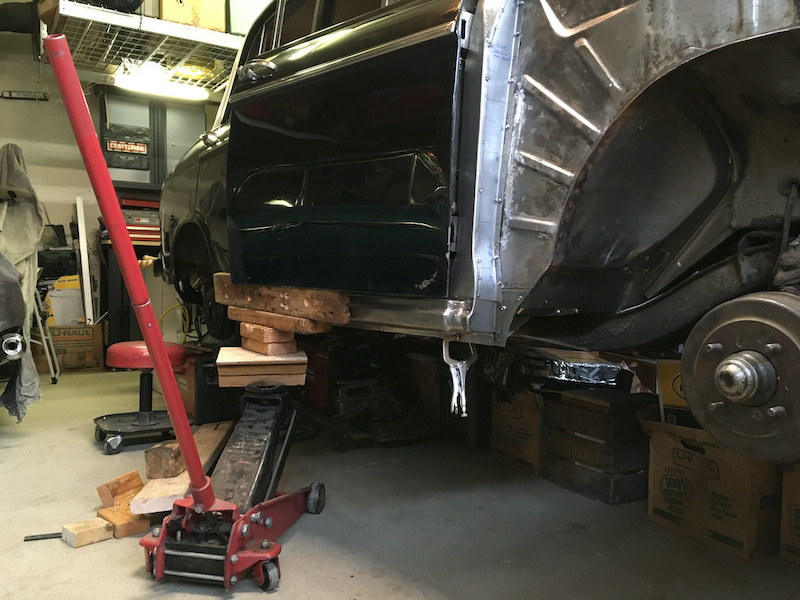
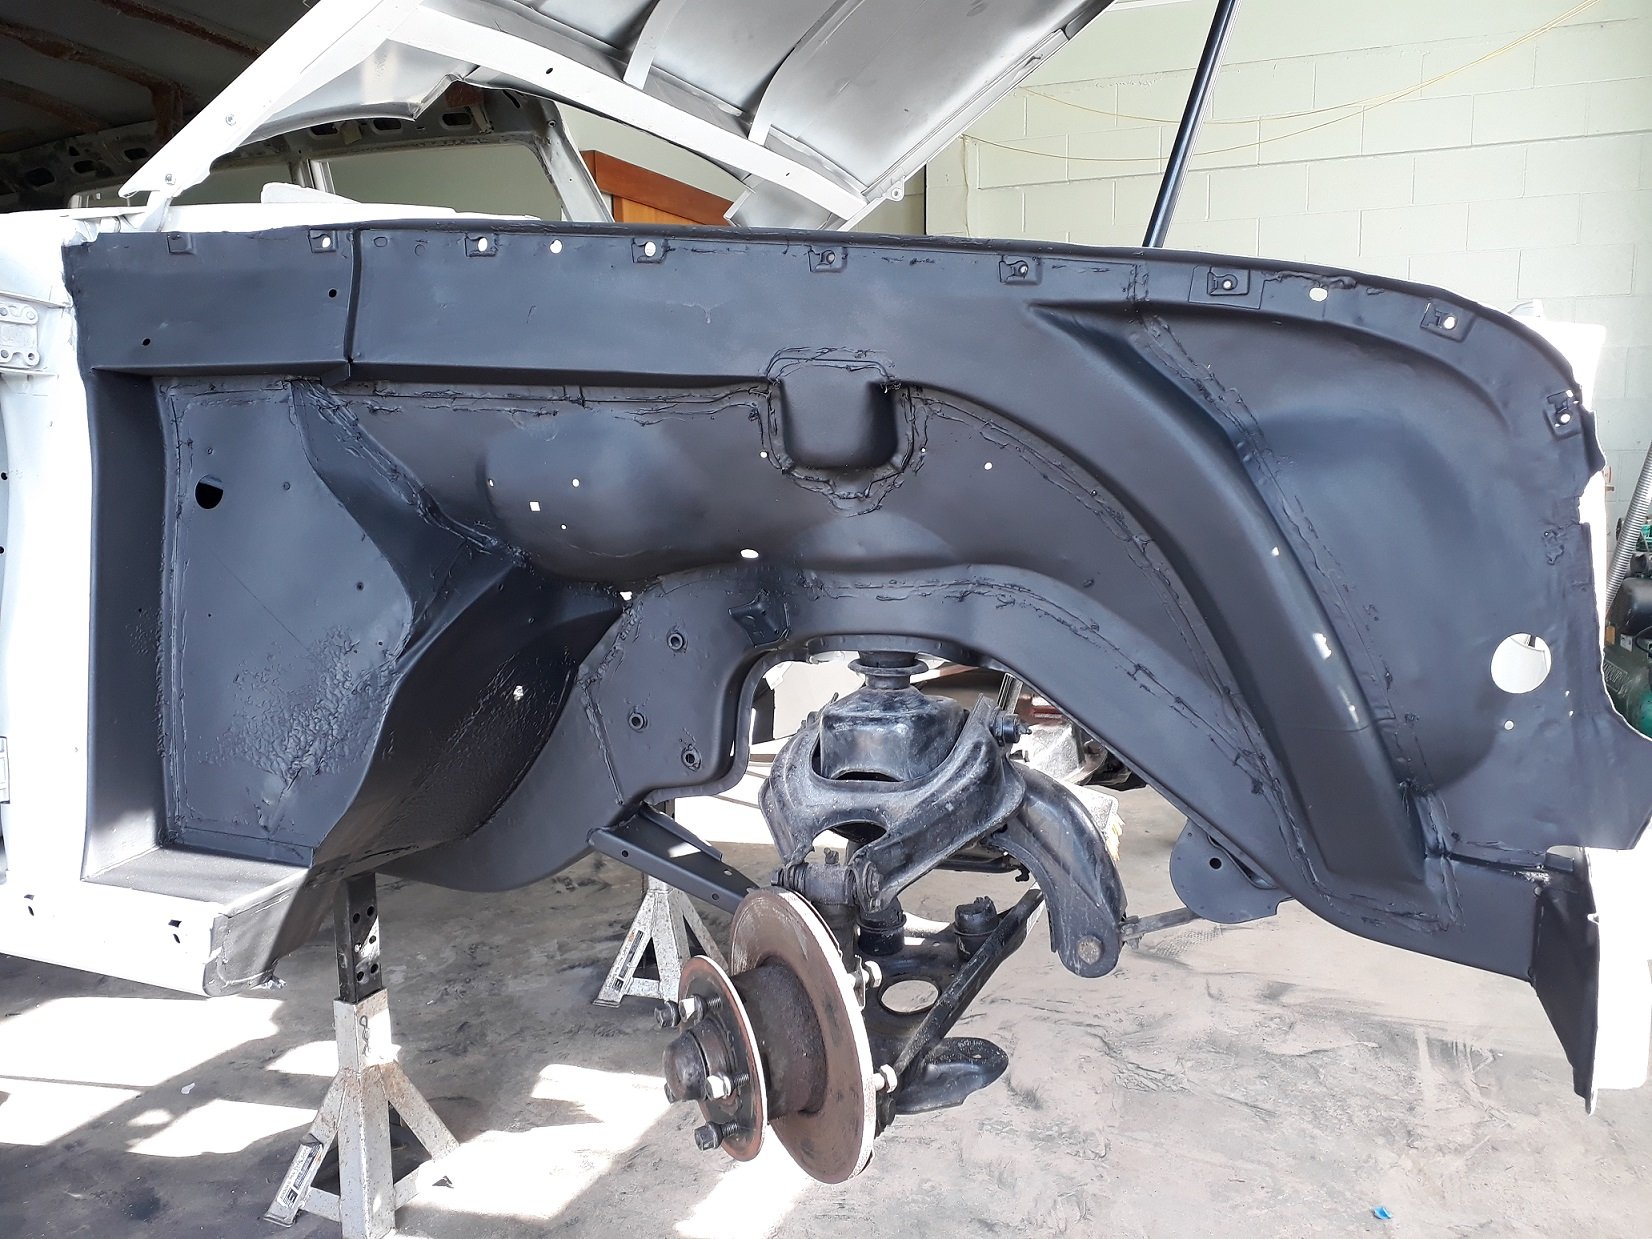
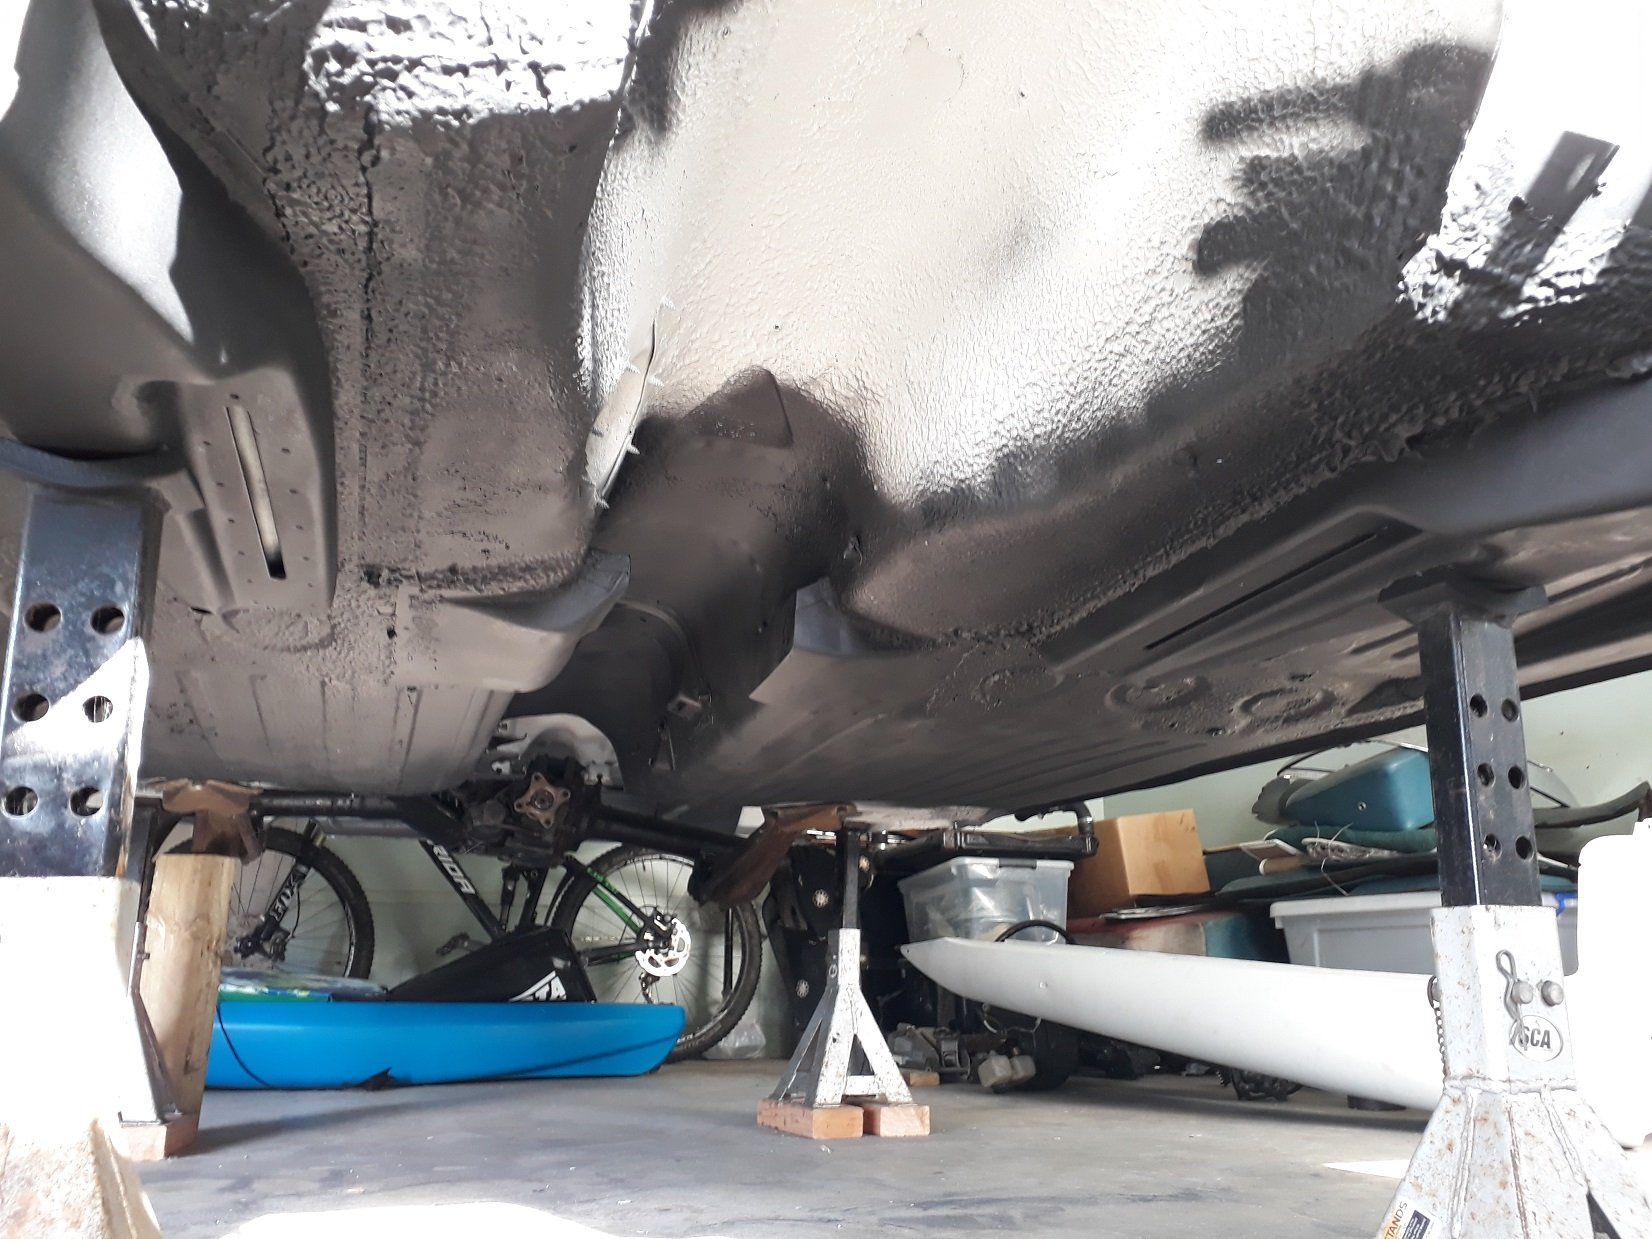
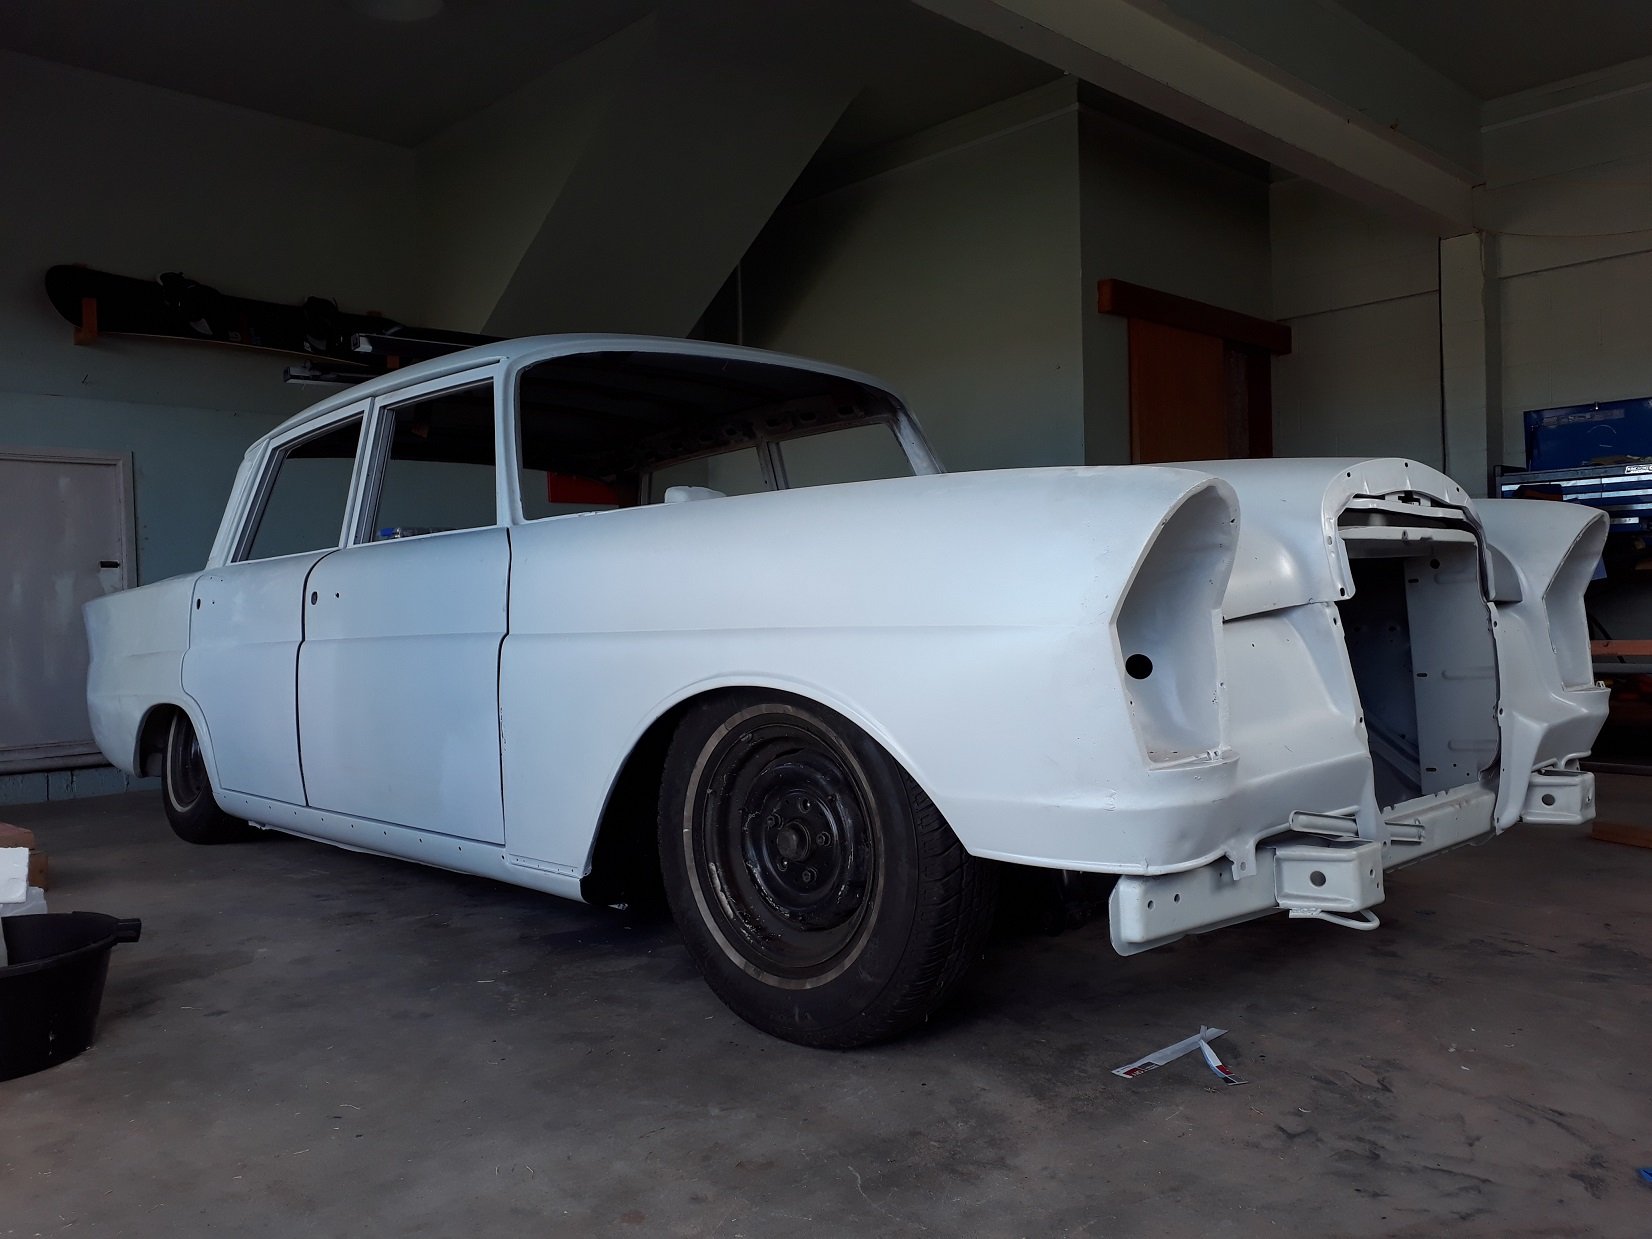
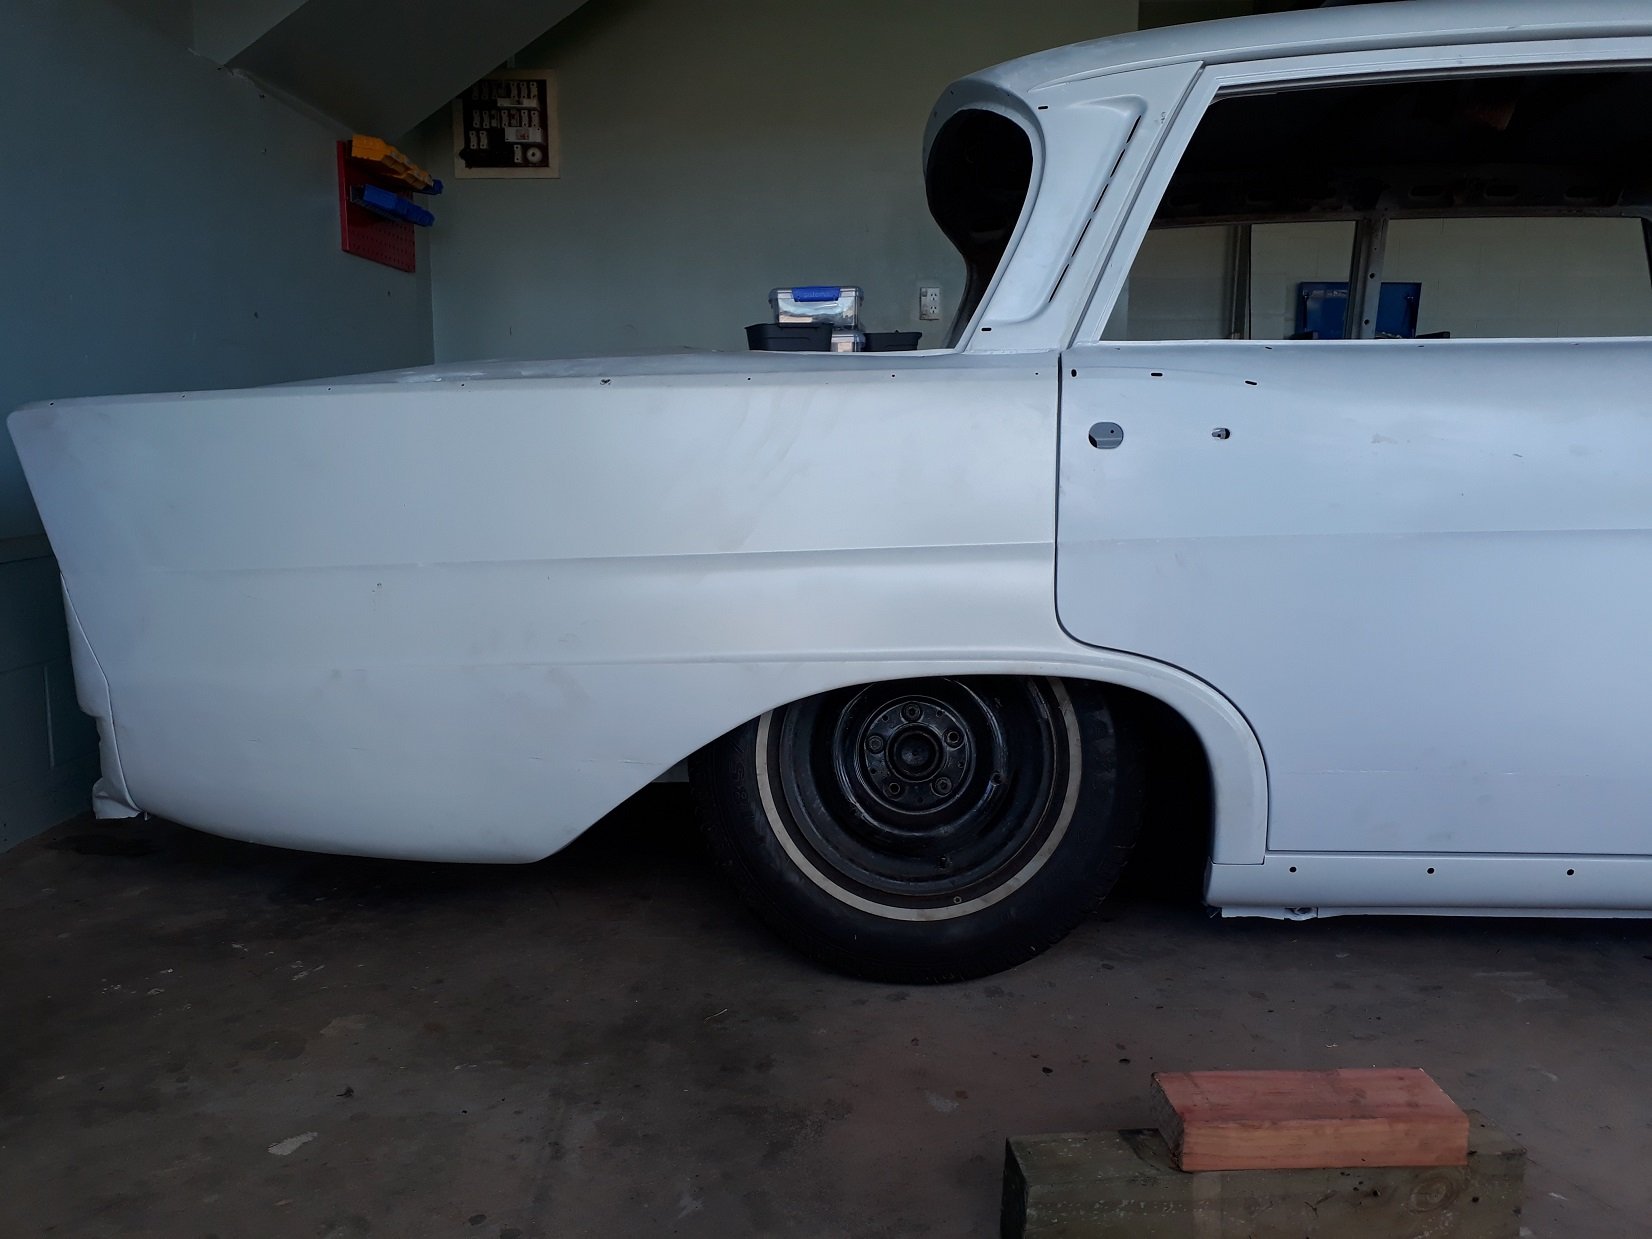
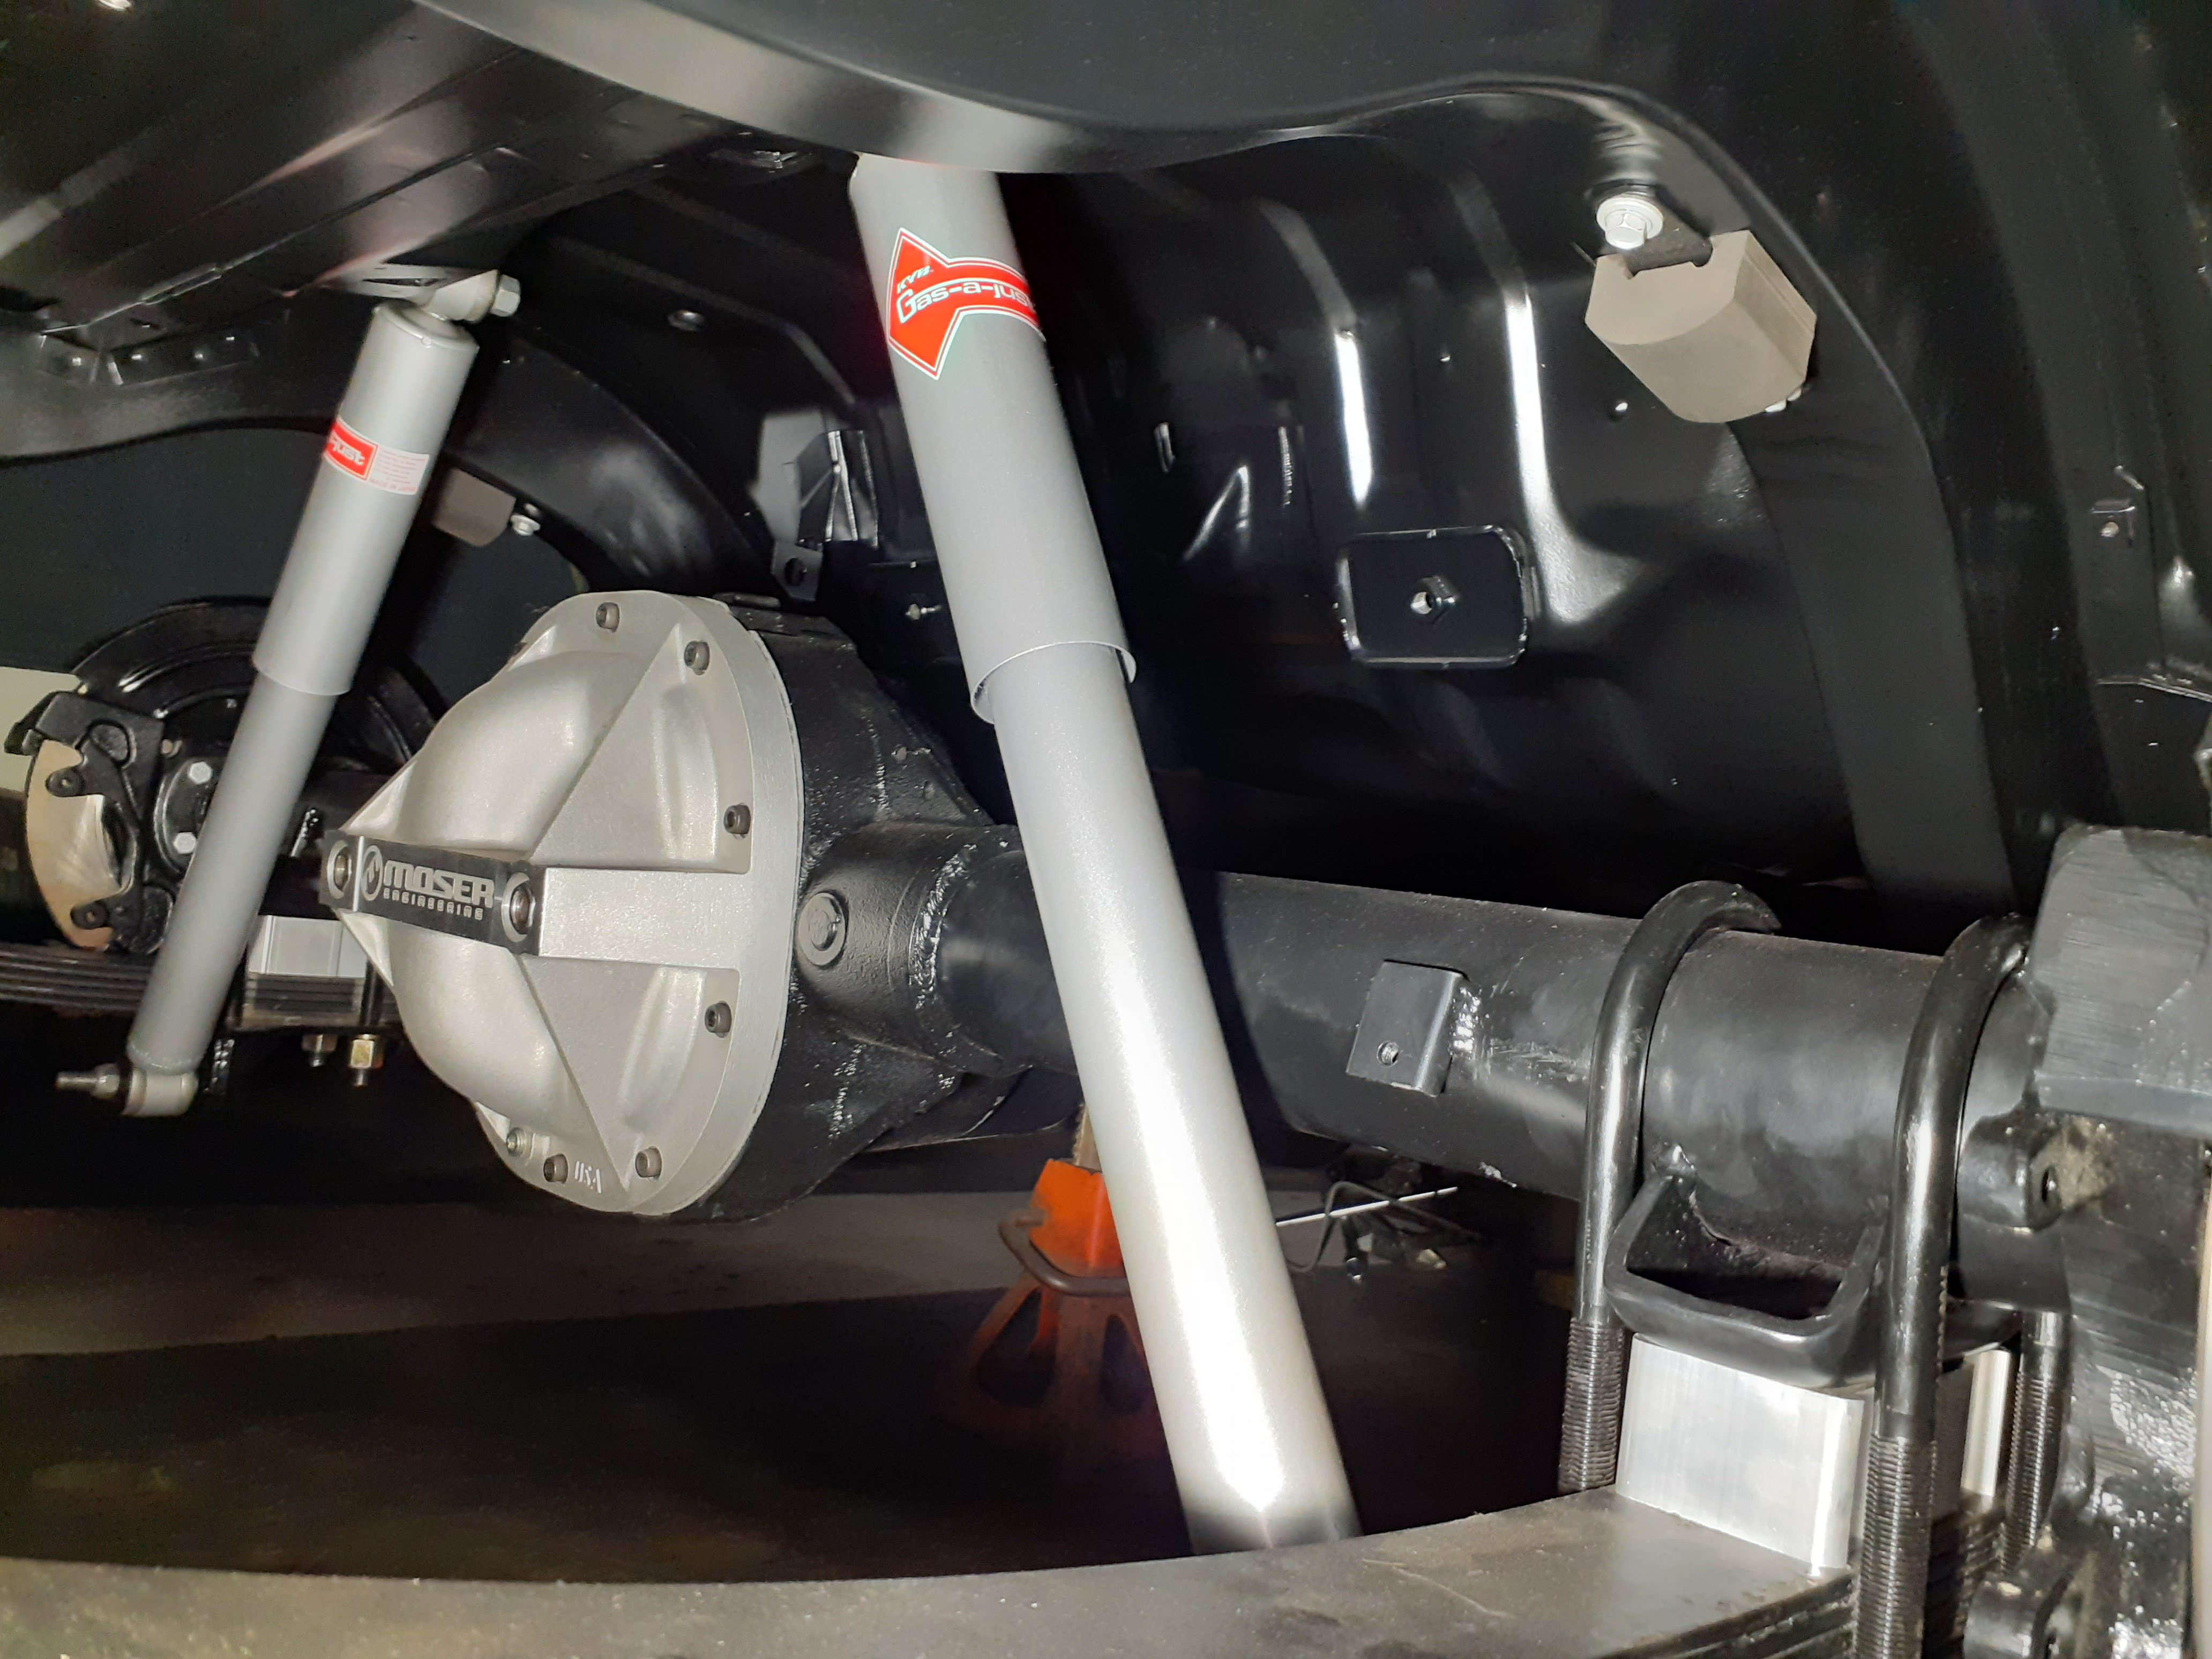
Masked up and sprayed the other side and the underside of the floors as far back as the rear seats (note all the OG underseal the blaster couldn't get off), left the trans tunnel in case it needs some clearancing for the trans I want to run (Mercedes 722.6) I need to drop the rear diff to do the underside of the boot, but before doing that I thought I should really install the bags and some wheels and put it on the ground to see how it looks, so I did. Managed to unlock the next level of sketch city in the process with mystery blocks of wood used in precarious manners to get it down off the axles stands. That's as low as you'll get one of these without taking an angle grinder to the body which I am unkeen to do, I also don't think the rear diff would enjoy any more articulation. sills are about 100mm, front cross member about 70mm and rear diff about 50mm from the ground respectfully. Now have the classic problem of the jack not fitting under it.
2 points
-
your gonna need one of the MSEL style crimp tools for those, the jaycar ones dont crimp the wire enough and over crimp the seal, results in wire falls out and seal breaks off1 point
-
These will seal 100 times better to. Prob smaller footprint to.1 point
-
That is the hardest balance to find, and I've never once managed to pin it down. Now I just enjoy the process. (That's 'bullshit' for 'incapable of finishing anything').1 point
-
Awesome, good advice thanks. Its not like I'll take it out in the rain, so I could pretty much twist the wires together and wrap in tape and it'd be fine hahaha1 point
-
I've used those plugs on a few scooters, they work well! Just don't over squish the crimps1 point
-
The MR2 early ZE had the bigger bottom end which leads to confusion? The worst engine for sure is the second gen bigport in early AE92's, I would guess that is what we are seeing above? Anyway we can all agree that the AE82 FXGT is the best config 4AGE that existed. Lightest chassis and those early big port revs all day (until you run big ends) you need a fresh one though, I have driven a bunch and some go way harderer than others. /ling1 point
-
Hey, Its a left hand drive TE31, with a 1UZ Sitting in it. Was bought in from the states and lived in Invercargil for a wee while. Was originally running a 2TC when it was road legal here. How I got it: *TE31. Full mint interior. Currently has the shitty interior in it. *Hilux diff, drum brakes. Hubs turned down to suit 13 inch modgies *1UZ-FE import with auto box, all mounts made up. *Driveshaft made up *Wiring started *Standard front struts with SW20 calipers on vented Nissan disc? *Starting of exhaust made up. *13x7 Modgies Has cool little things on it like red indicators behind the rear doors, different license plate lights, and some fancy lights/ switches in the car. http://i.imgur.com/gHVwILBh.jpg Also has original radio too, which is pretty choice. Plans: *S14 Rear brake upgrade. Have got a SEMI bolt on kit which doesn't really fit at all... *Put factory mint interior back in *Finish wiring for 1UZ *Eventually W58 + Link ECU *14X7 Gallop Racing Mesh wheels. Flipped. *Slightly flared guards - metal not fibreglass *Tow bar - to tow my fun car around. *CERT, WOF AND REGO BEFORE UNI STARTS BACK IN 2014. Trying to keep it as standard as looking, however we adjusted the 1UZ today, to the center of the engine bay. Was out towards the left side by 30mm, as we had a massive clearance problem from the exhaust bolts sitting on the steering box and there being no room for the Brake booster/ cylinders. Now the bonnet doesn't shut, and by the looks of it, going to have it cut out the center and put a scoop or something on it. Discuss //oldschool.co.nz/index.php?/topic/41666-fiends-left-hook-e3/1 point
-
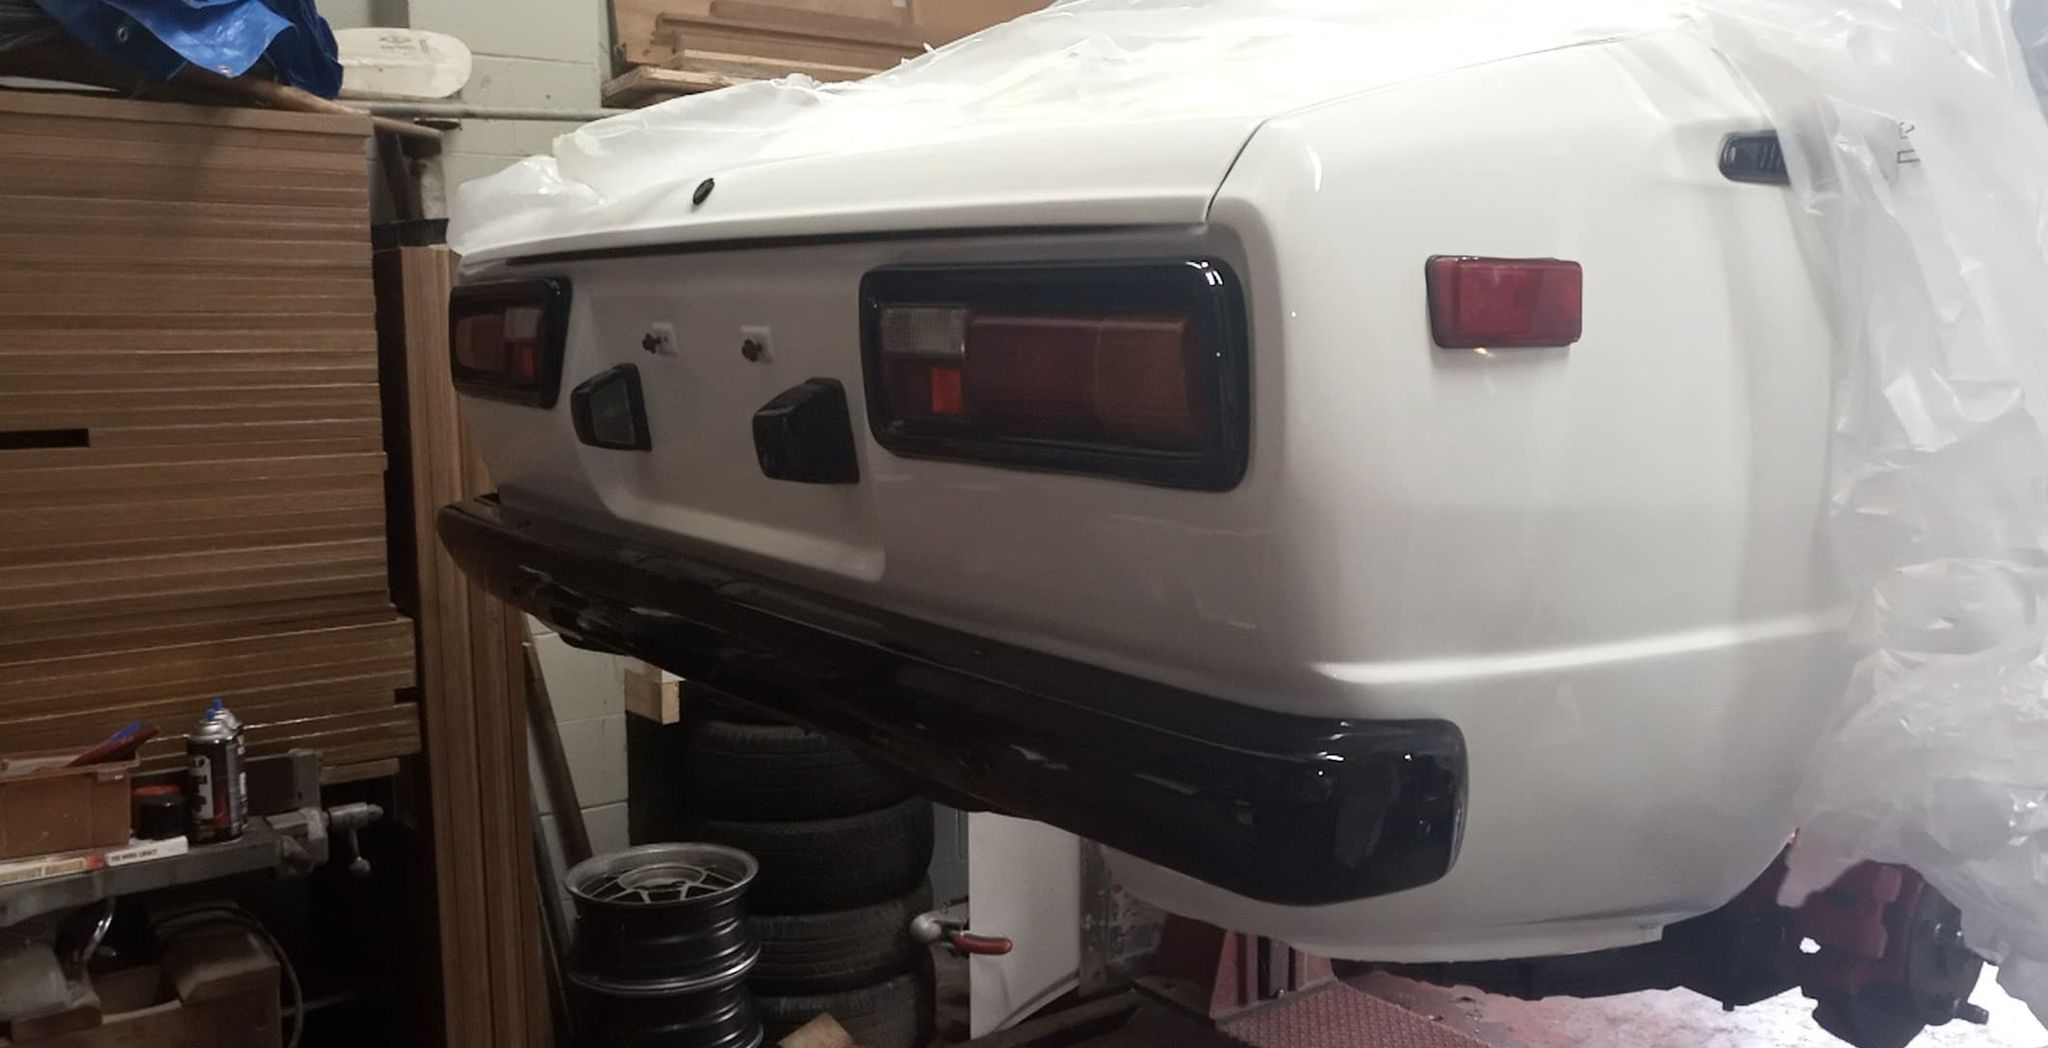
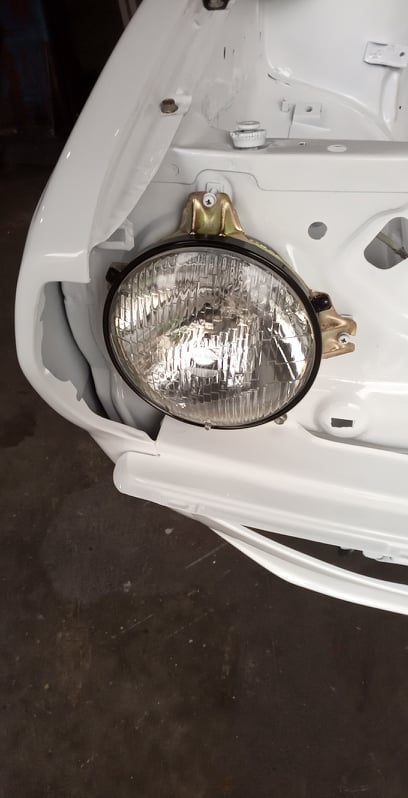
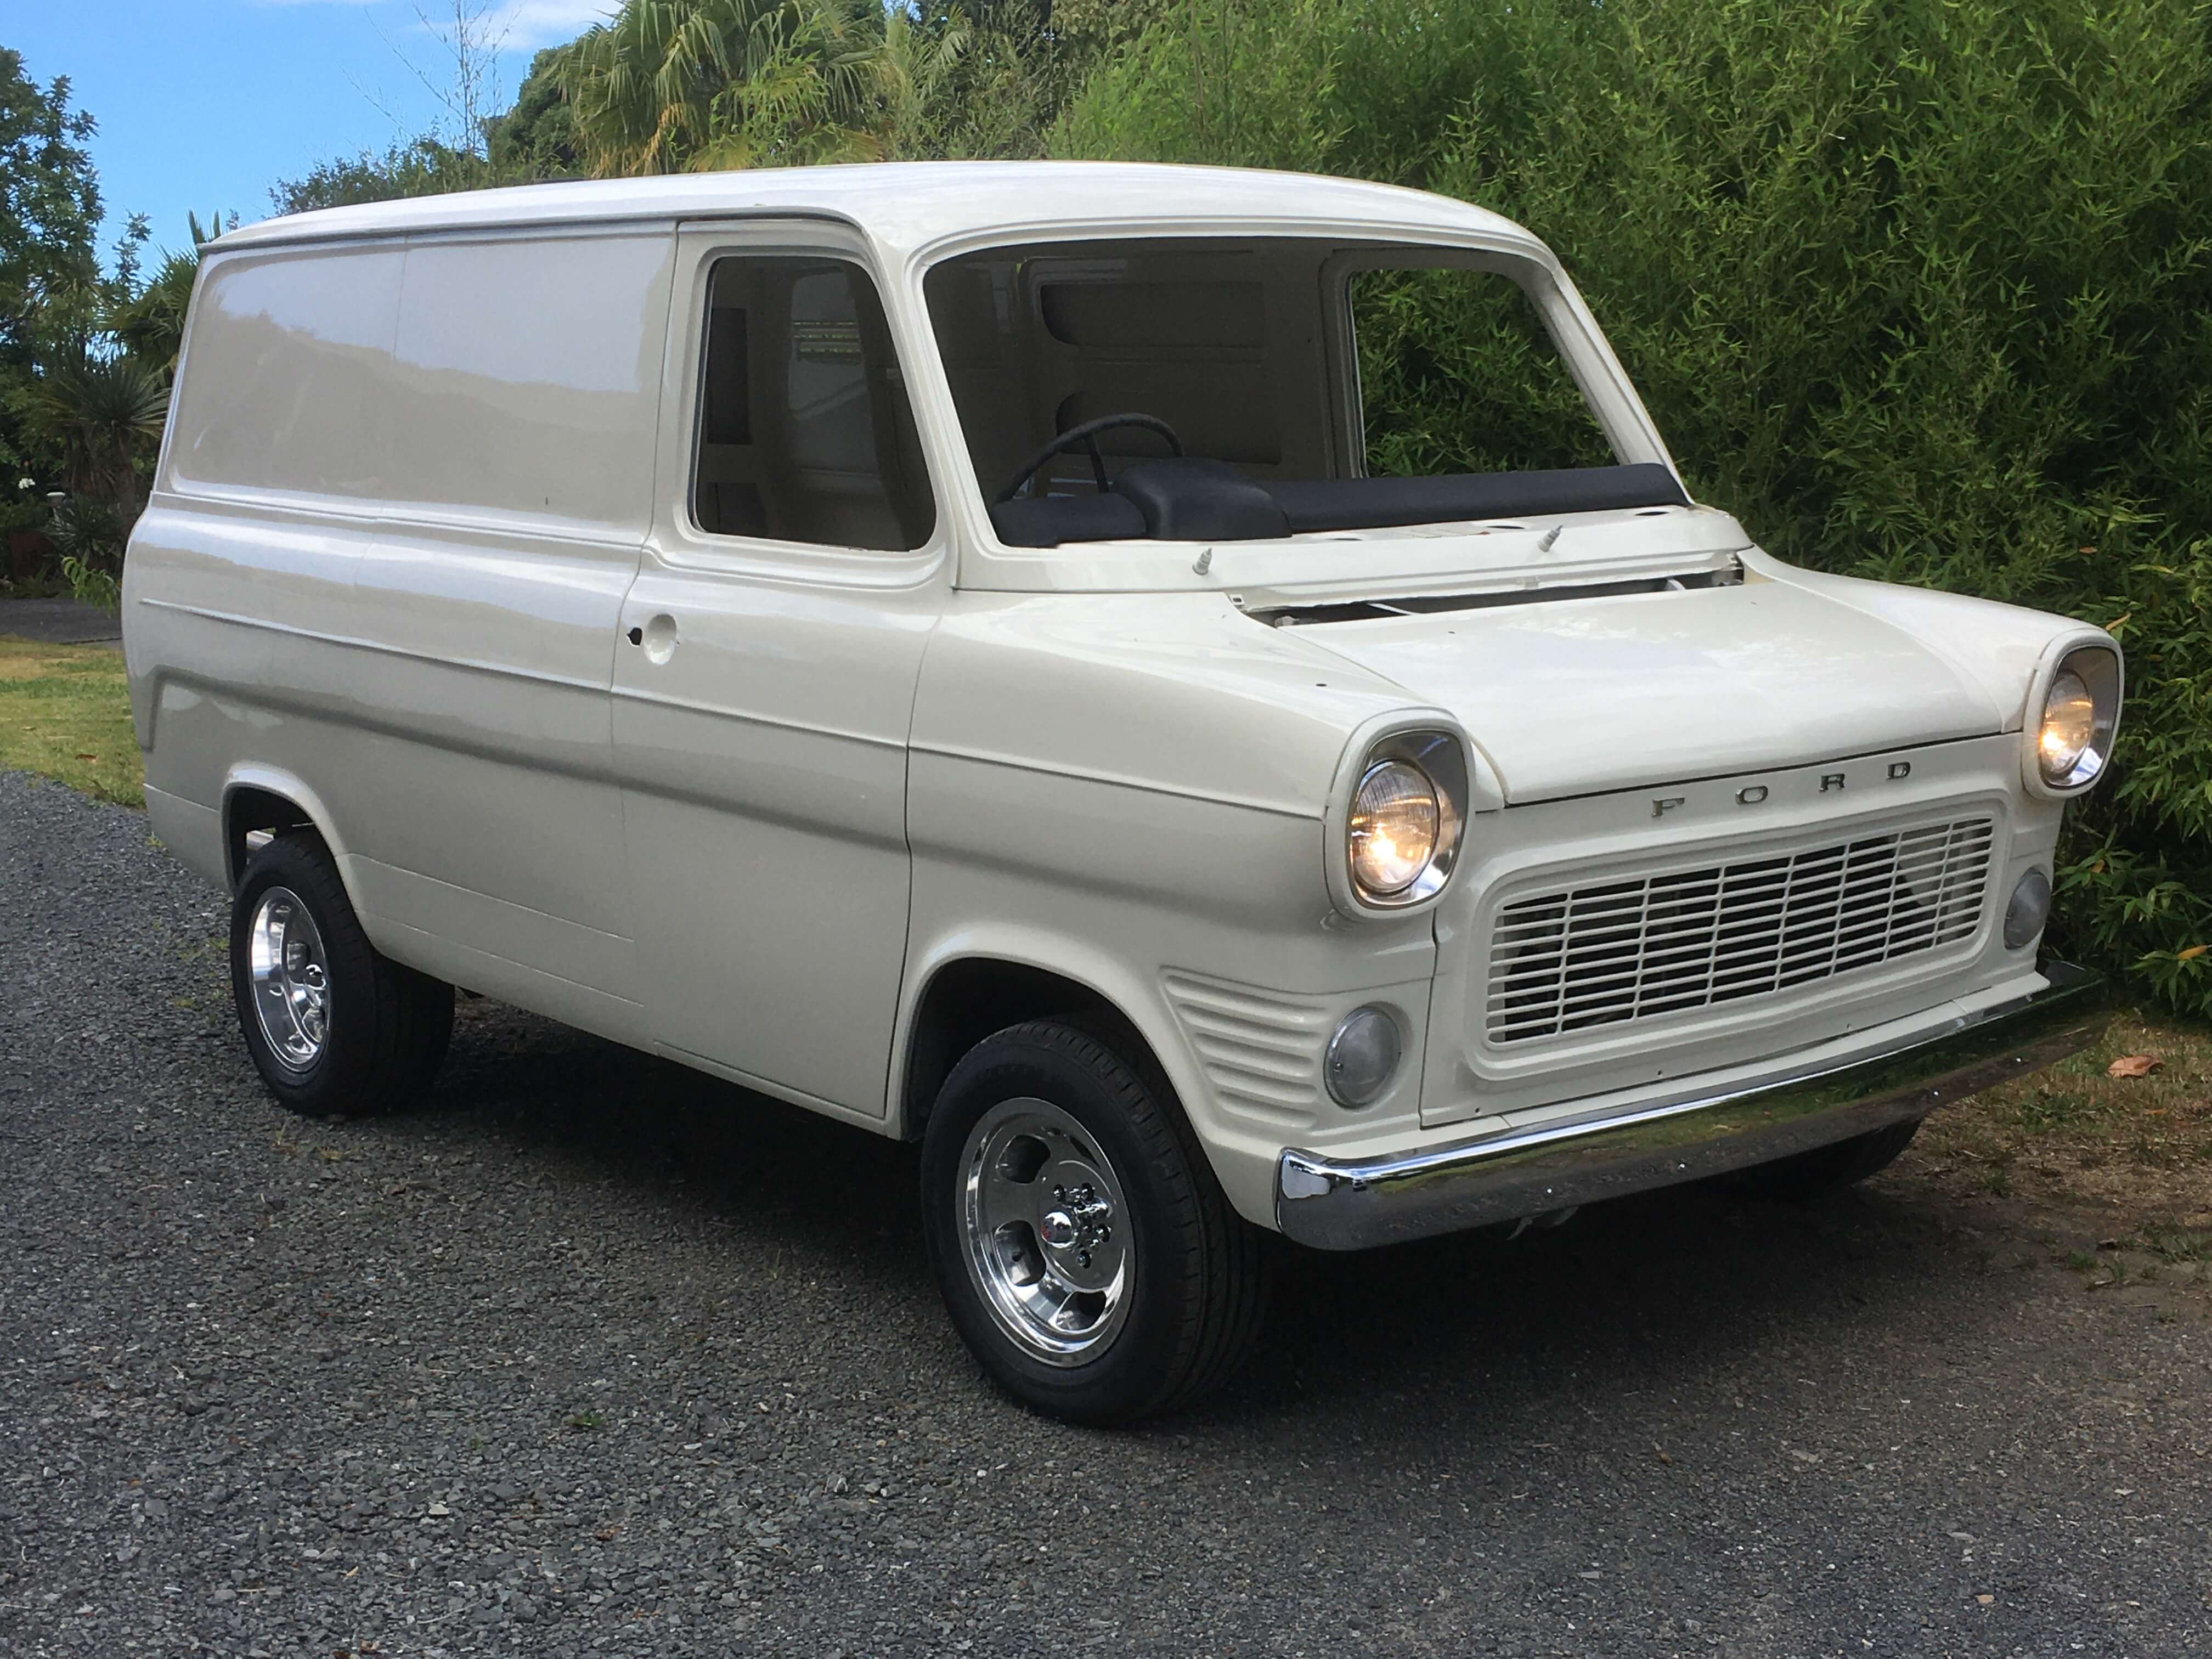
I spent a few hours today bolting on some parts; lots of NOS parts which I have been collecting for this project. Headlights temporarily fitted, new bezels, bumpers, clear front indicators, tail lights and rear reflectors. The headlights I bought a few years ago are an interesting thing for trainspotters like myself; a pair of Cibie Biodes. Invented in the late 1960's, before the H4 dual filament halogen bulb was invented, they take 2x H1 halogen bulbs. There is a separate reflector in the lower part of the headlight (which you can see) that is the high beam, and the upper bulb, which has a shroud and is not visible is the low beam. These were the choice of works rally teams in the late 1960's and early 1970's such as Ford Escort, Porsche 911 and Mini Coopers. Although very old technology, they are still give off an extremely good light output, even by todays standards. I was quite lucky to find these, they are extremely rare and sell for ridiculous money on Ebay.
1 point
-
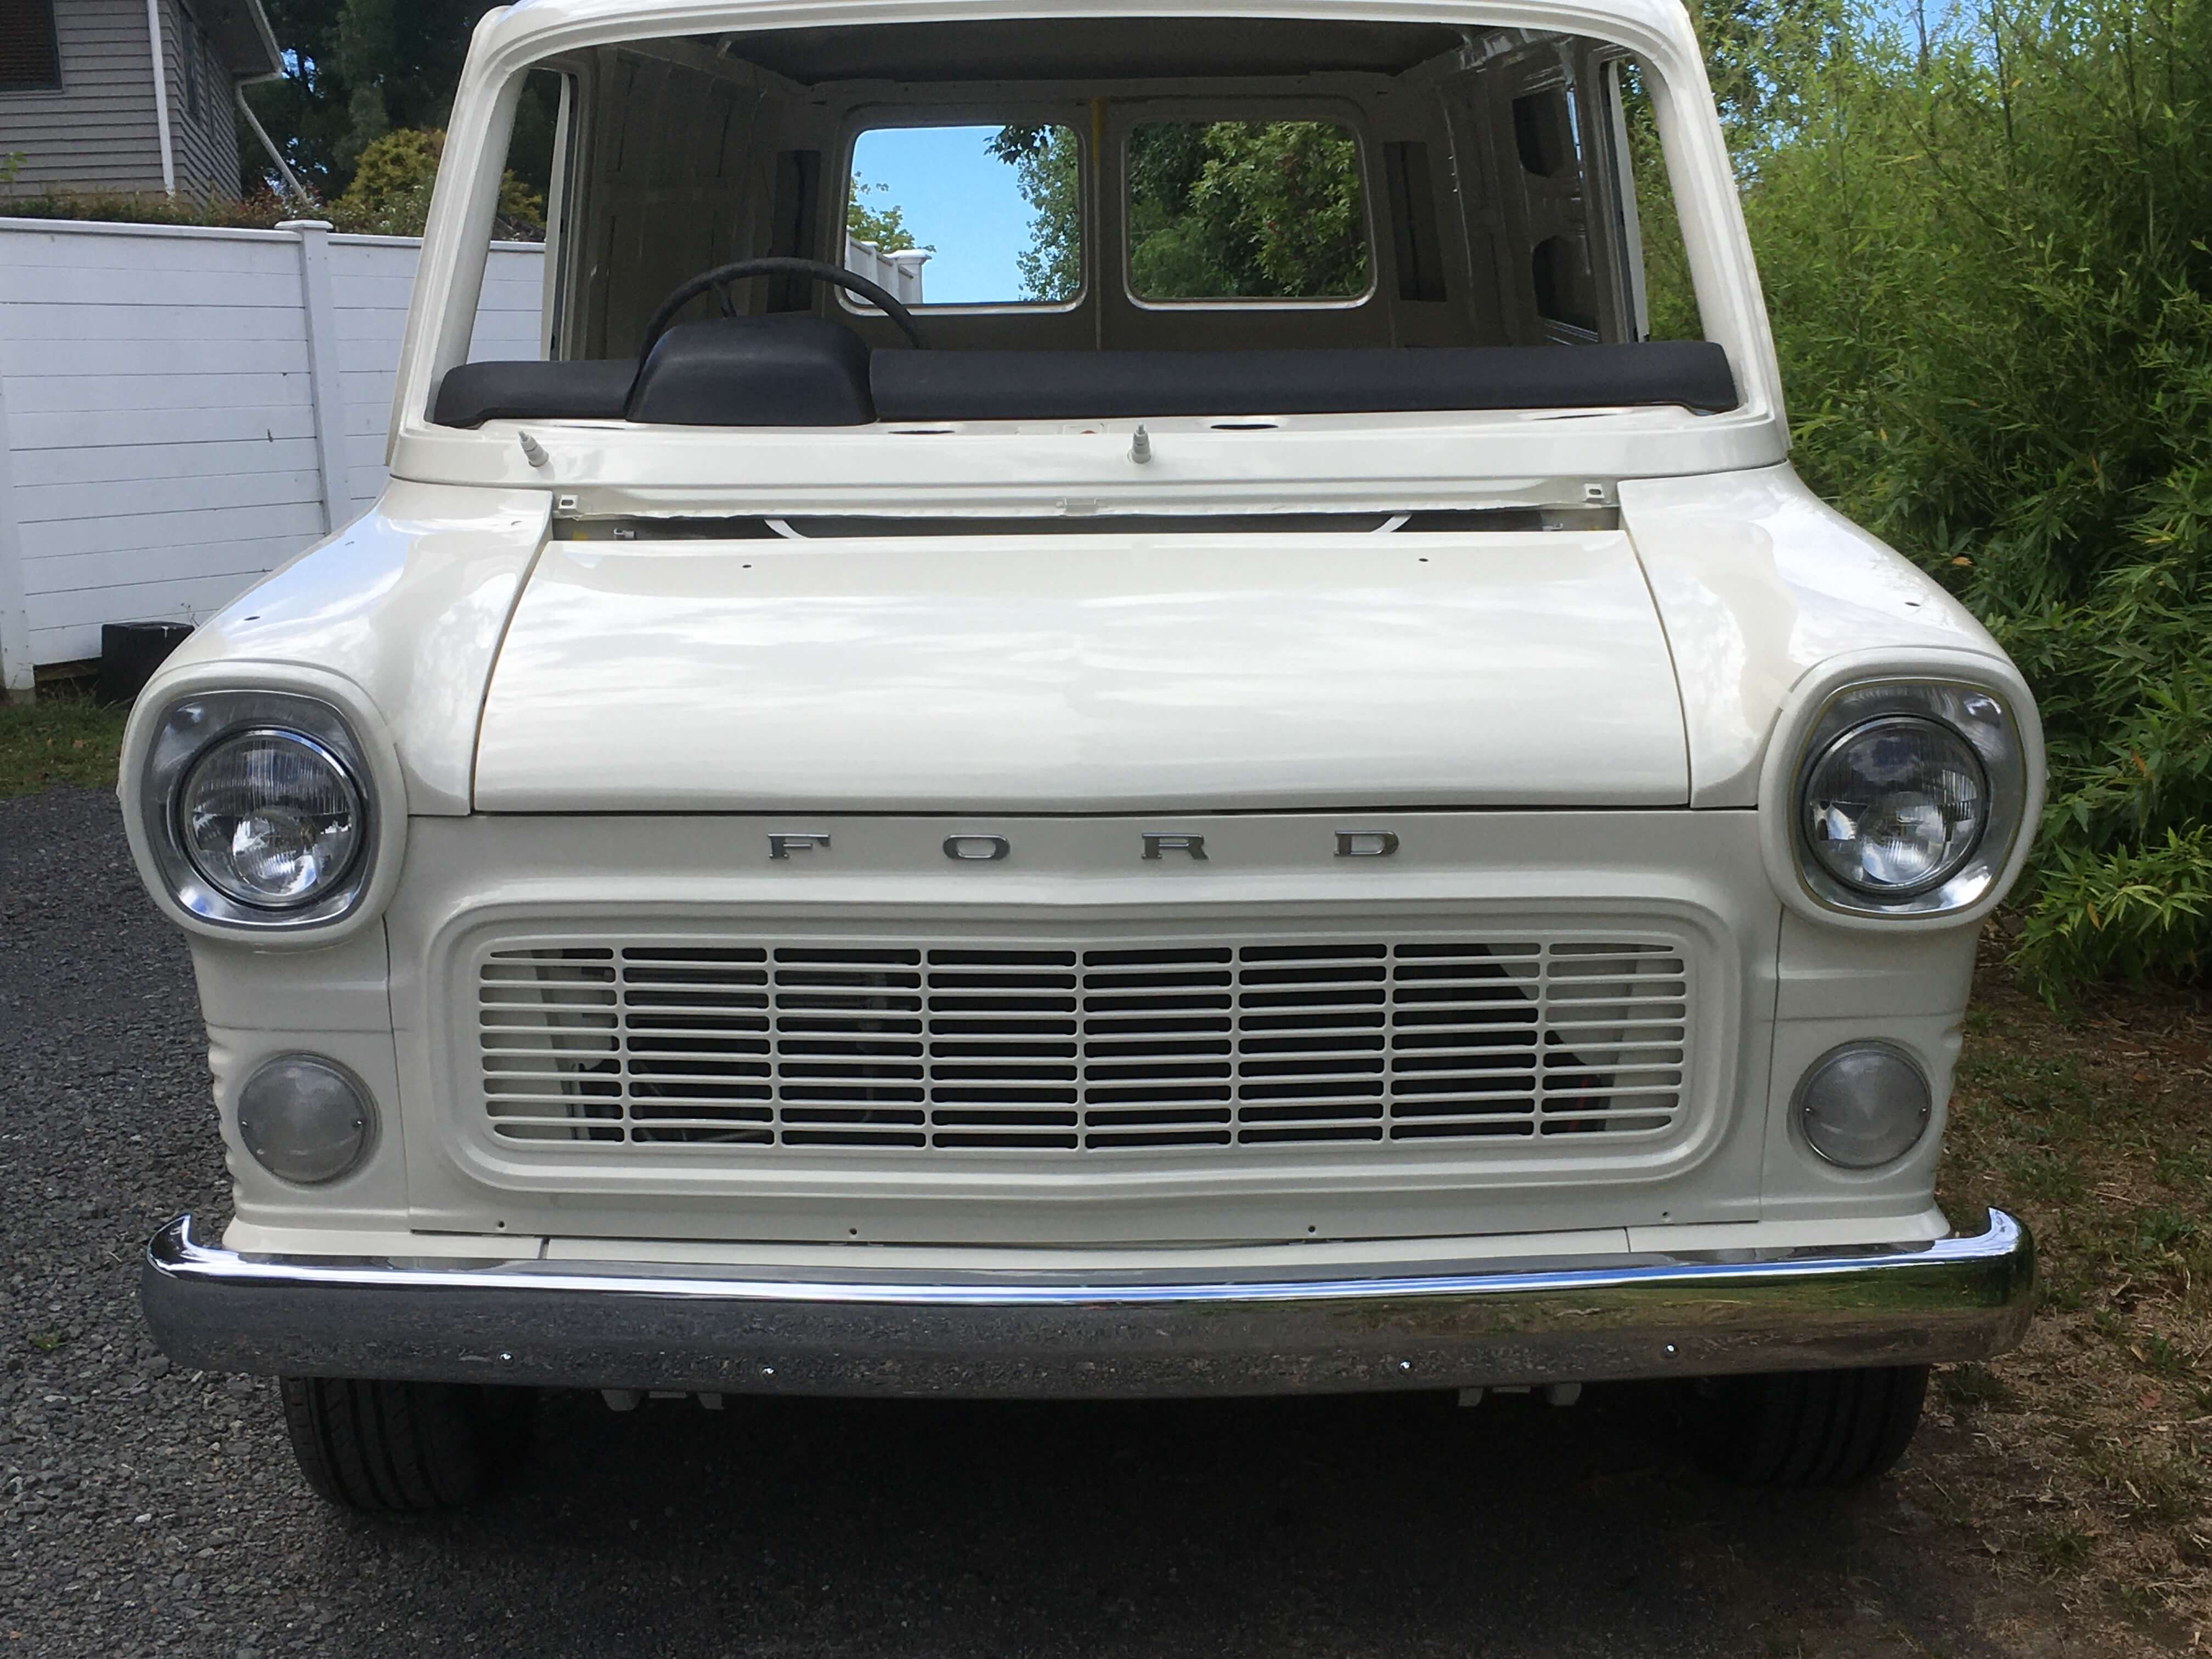
Really taking shape now - the bumper, grille & bonnet chrome are only mock fitted, next jobs are to finalise them, along with welding to the drivers side wing & a pillar.
1 point
-
Damn that looks gooooooood.1 point
-
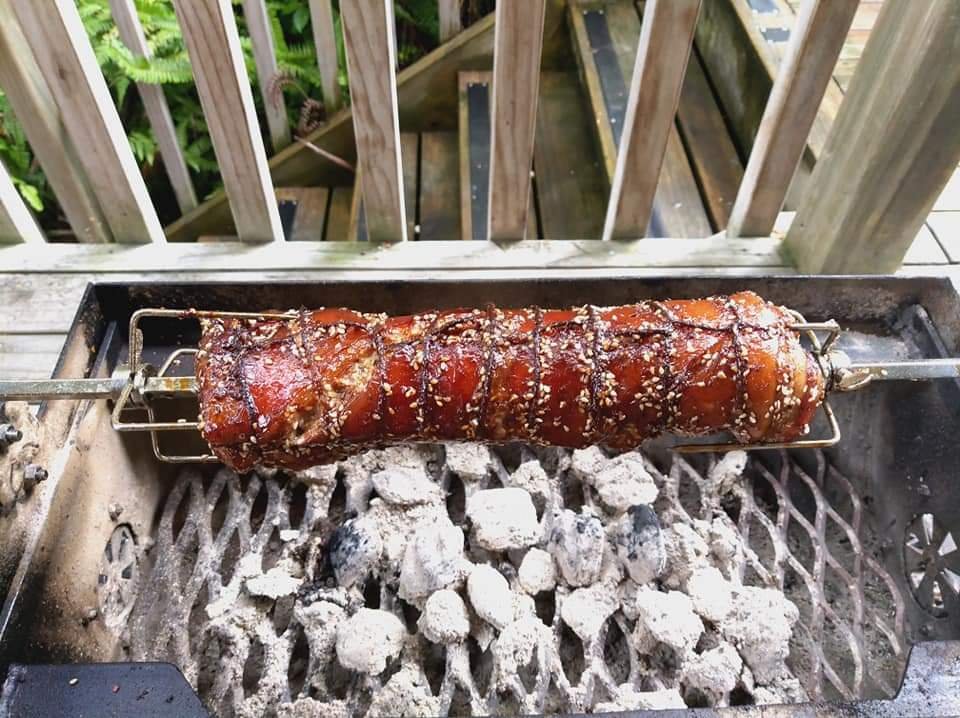
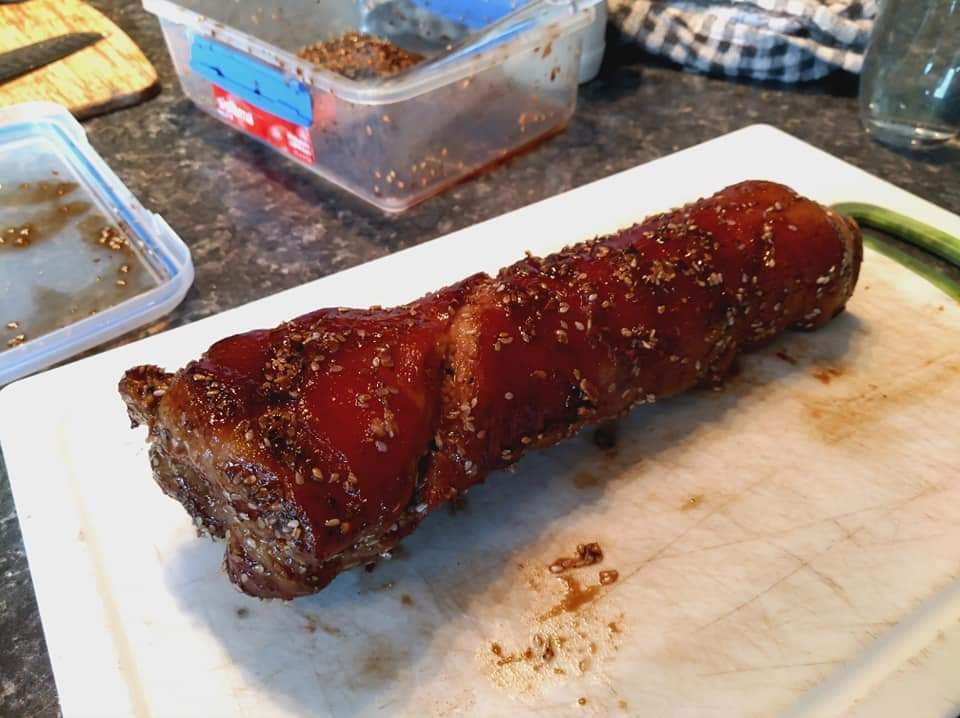
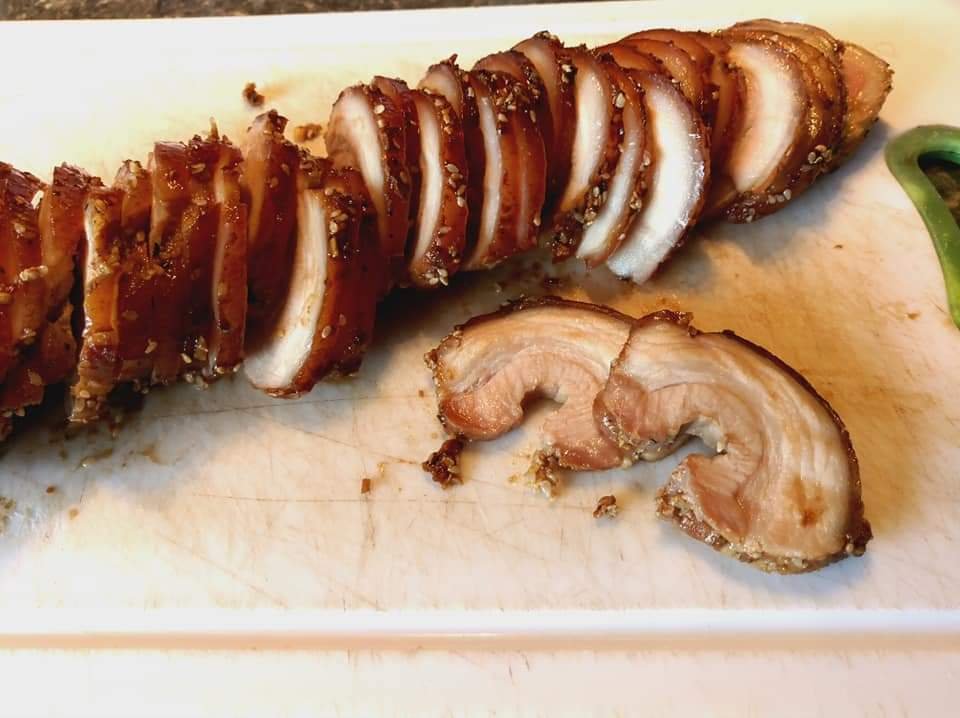
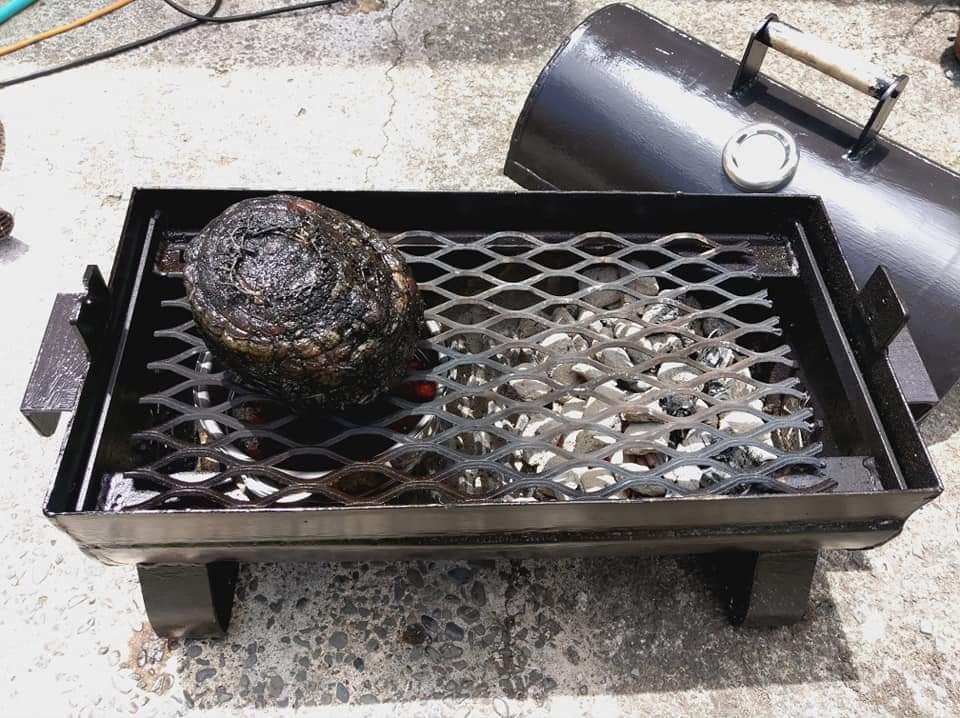
After 2 hours on the rotisserie and the internal temp to just over 60 I took it off, wrapped it and let it rest for about 20mins. Removed the string and cut it up and damn, not too bad. Juicy and tasty as, sticky on the outside. Made a quick sandwich for a snack and will be using it in noodles tonight. Probably freeze some of it for future ramen.
1 point
-
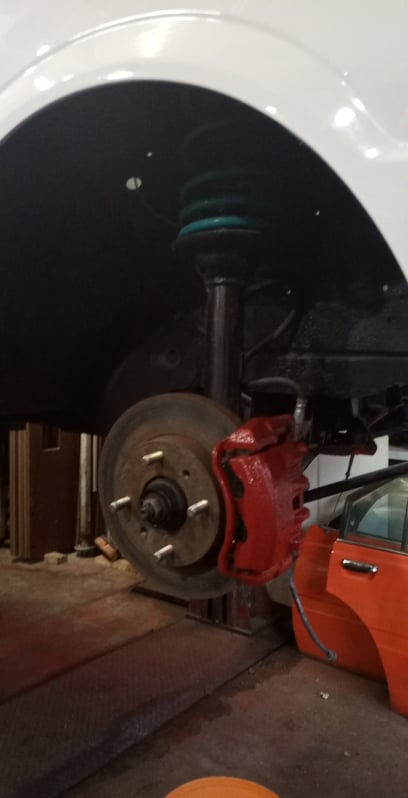
Made some more progress today, gave it an eyed up wheel alignment, fitted up the new booster and master cylinder, repinned all the door hinges, refitted the cert plate and cut off the old exhaust ends. Also pulled out the pedal box to give that a small birthday while it was easy to get to it. Back on its own 4 wheels for the first time in 9 months.1 point
-
Waiting on a couple of seals and a number plate light, but this is about ready to get inspected1 point
-
Yip, thats how I was feeling as I figured out that a lot the wires are spliced and share common power/earths etc. But by testing the resistance (ohms) through each circuit using a multimeter, i got there in the end. Pretty common shit I guess...but for an electrically retarded person like myself, self teaching as I go along, its a lot of condensed learning to fit into my already closed mind. That said, I'm there now. Each wire labeled and each corresponding circuit tested and working via its switch. so I'm now ready to buy expensive tools to strip and crimp the wires and then try installing OEM style connectors, yet another thing I've never done...but will soon have to figure out quick smart If I want it to work.
1 point
-
Short vid clip of some playing in Lake Waihola with the family. Spot where I ended up coming in a bit hot and ended up on the beach. Was difficult to restart a few times when hot, need to revisit the start map and maybe add a few ms back in the injection timing. Up in Wanaka in a few weeks so planning to push it a bit more up the braids.1 point
-
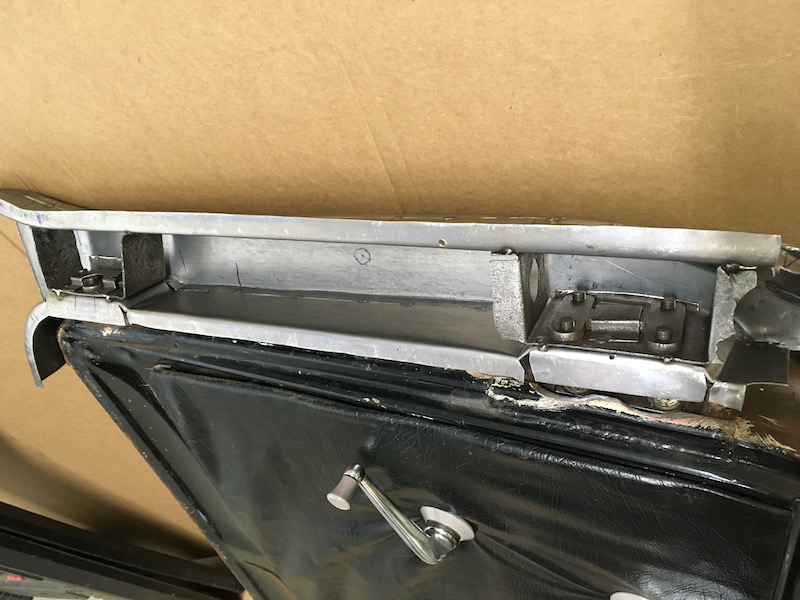
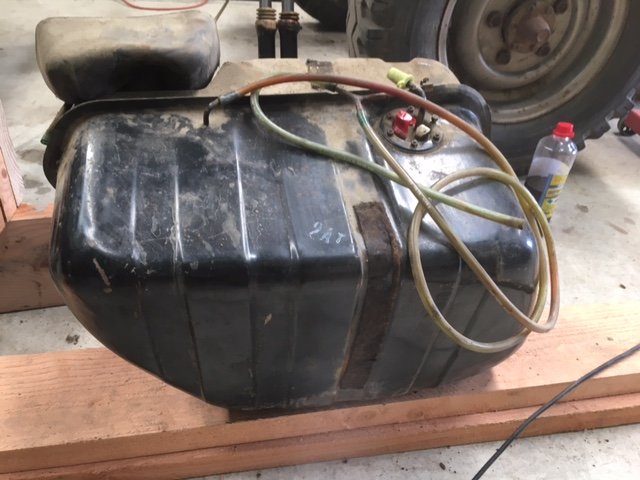
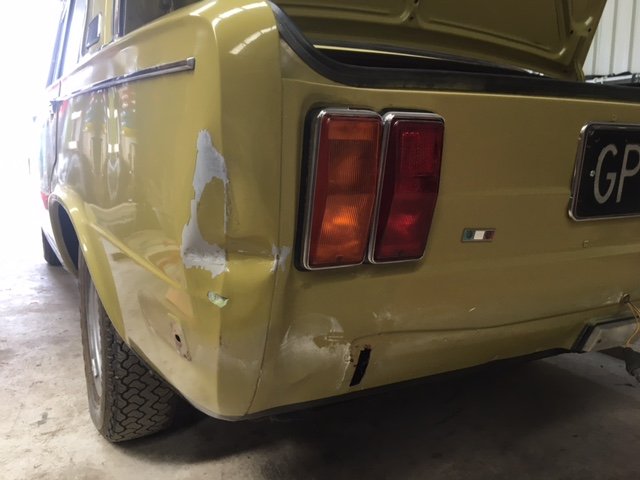
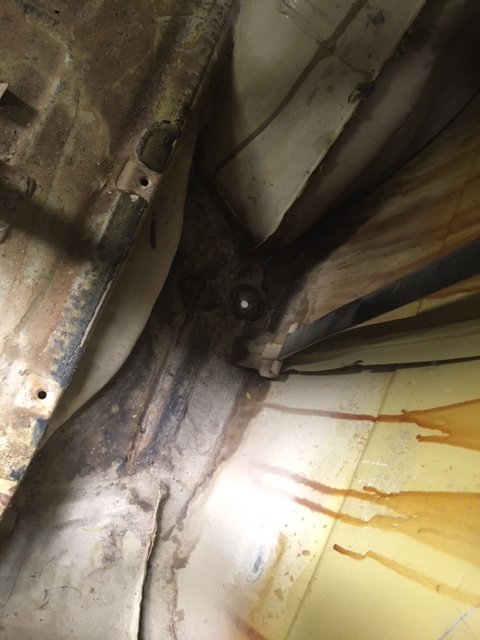
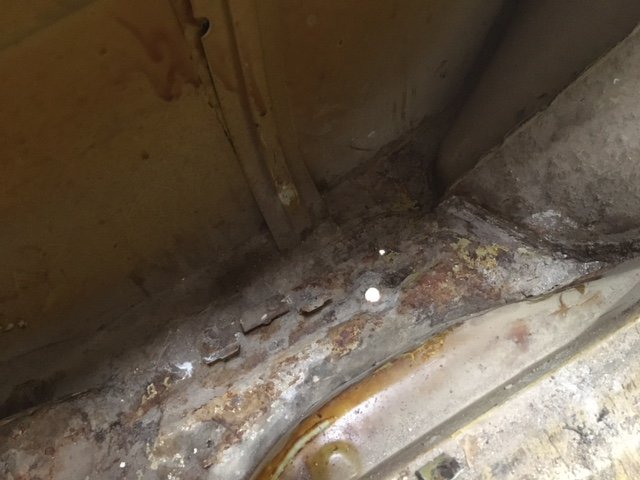
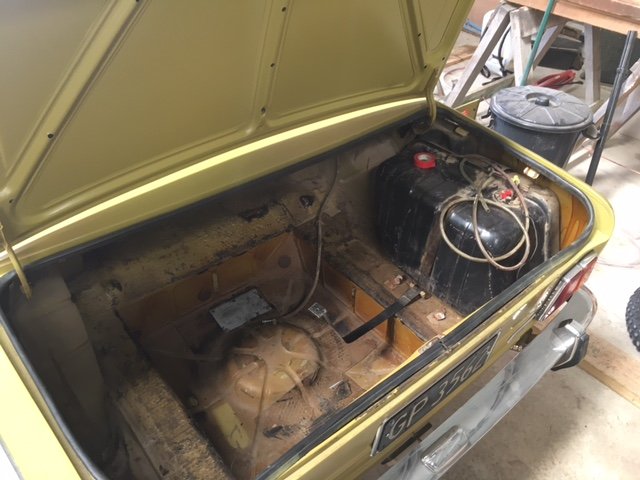
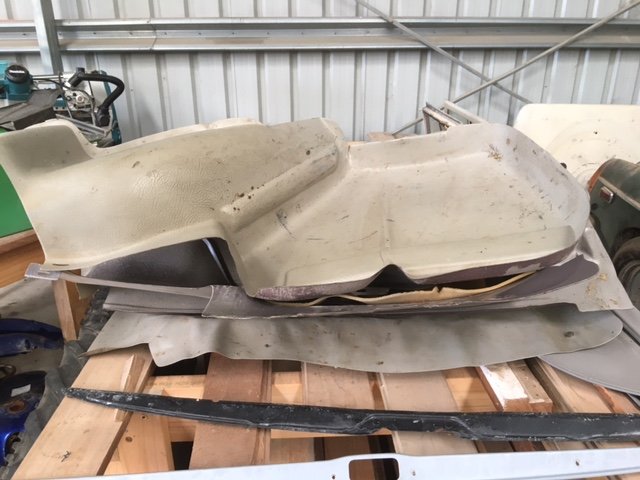
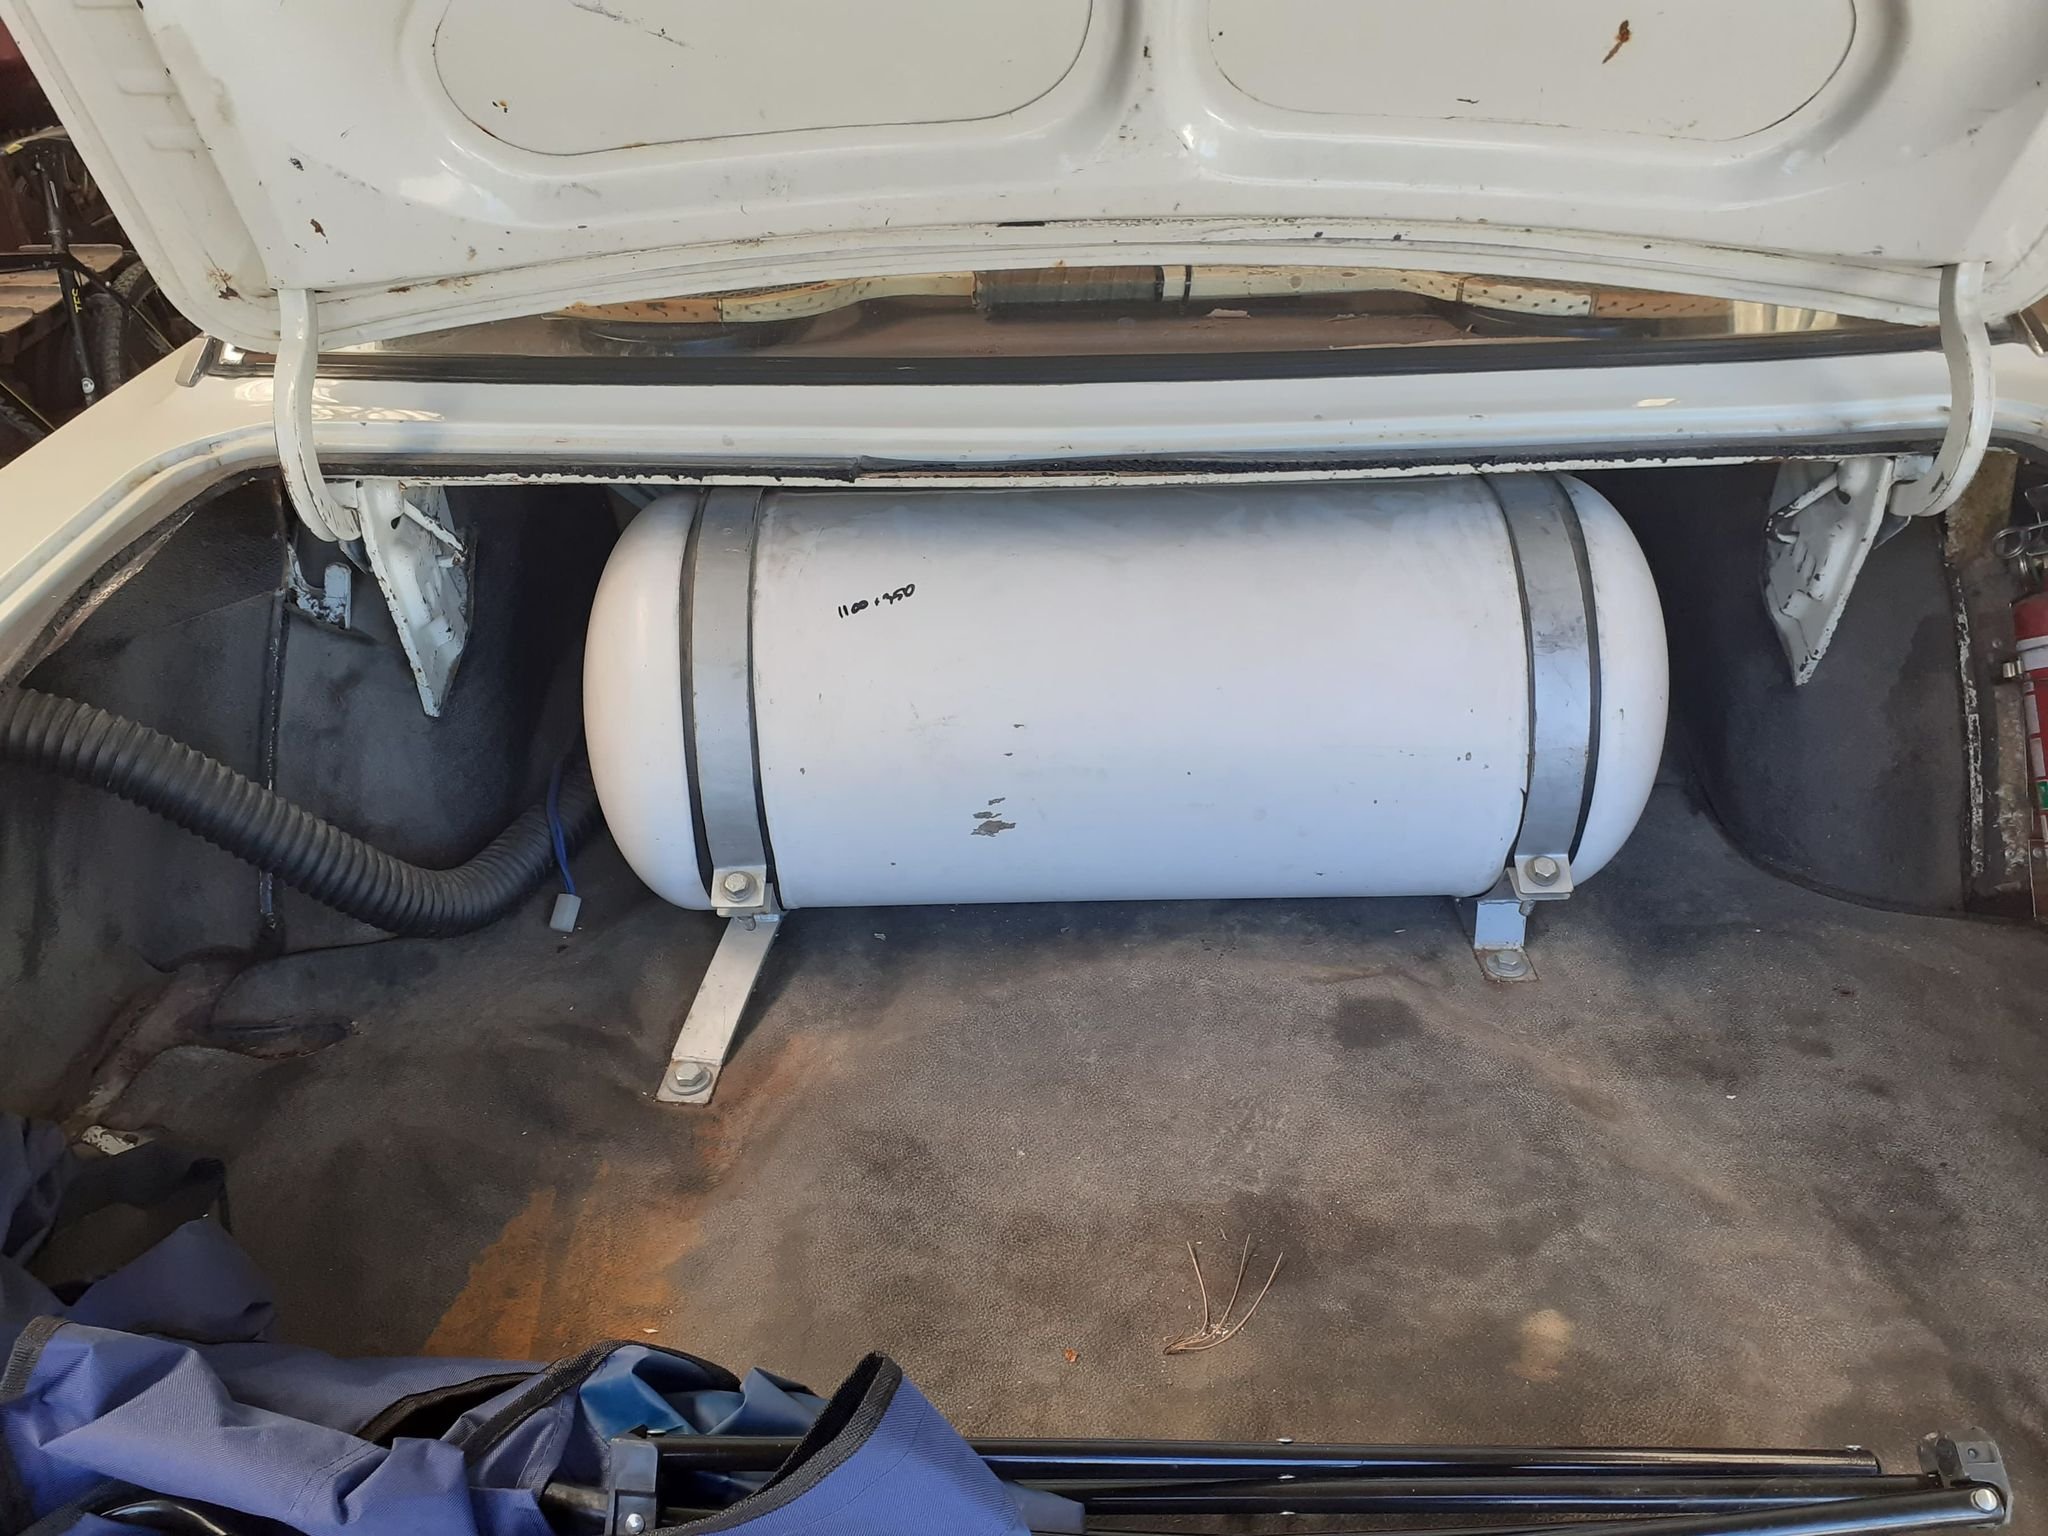
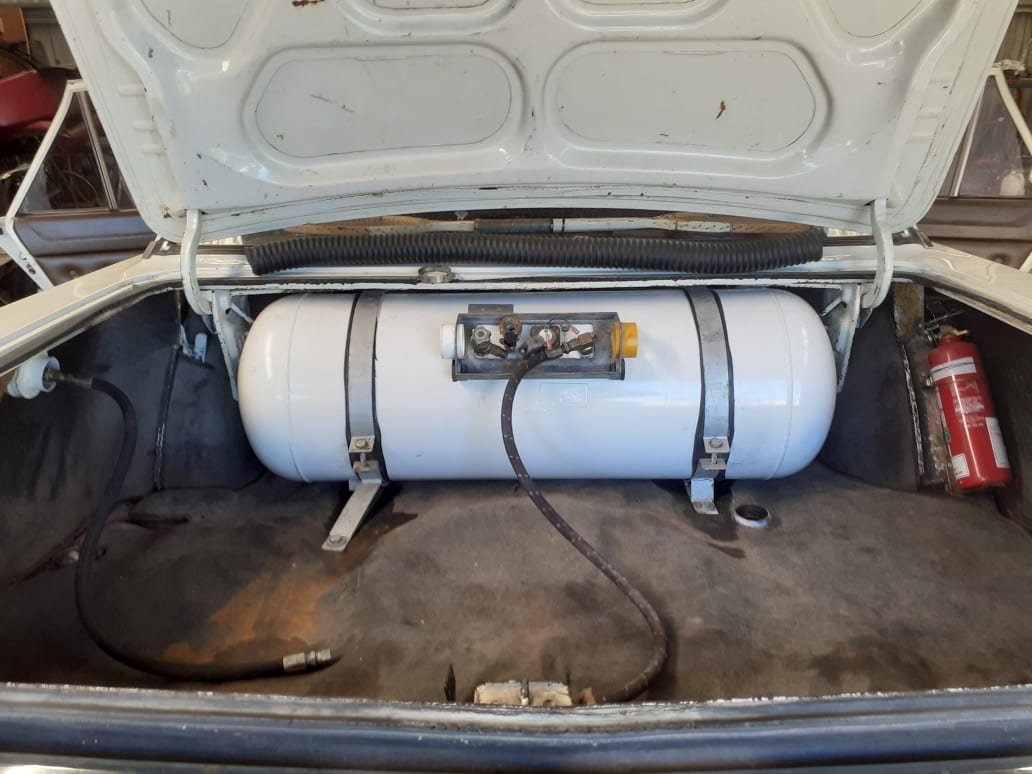
Happy new year. 2021 shall be the year of the Fiat. A strategy has been mapped out with the ministry of finance to get this thing back on the road. I have lined up a semi retired panel beater who happens to actually like cars to fix this thing for me. No, I do not feel like a failure... In preparation I needed to remove the rear bumper which necessitates removal of the boot lining and fuel tank. The boot lining is not too bad except for the left side panel which is wedged in quite tight. I can see why it’s cracked, somebody has had it out before me to graft in a high stop light, daisy chained from the left brake light. If I ever feel inclined, the cracks should be an easy enough fix with some fibreglass. Inside the boot isn’t bad. I vacuumed out all the crud and there is just a small rust hole in the left side, bottom of the rear guard. Wheel well is all good. There is a lot of cavity wax inside it, which I’m not sure is factory, but certainly beneficial. Tank out is easy, then the bumper is even easier, and there we have it, bare bum. Bonus, tank looks pretty mint too, although starting to smell a bit stale with the bulk of the remaining petrol in there being upwards of 5 years old.. Bring it on! Can’t wait.
1 point
-
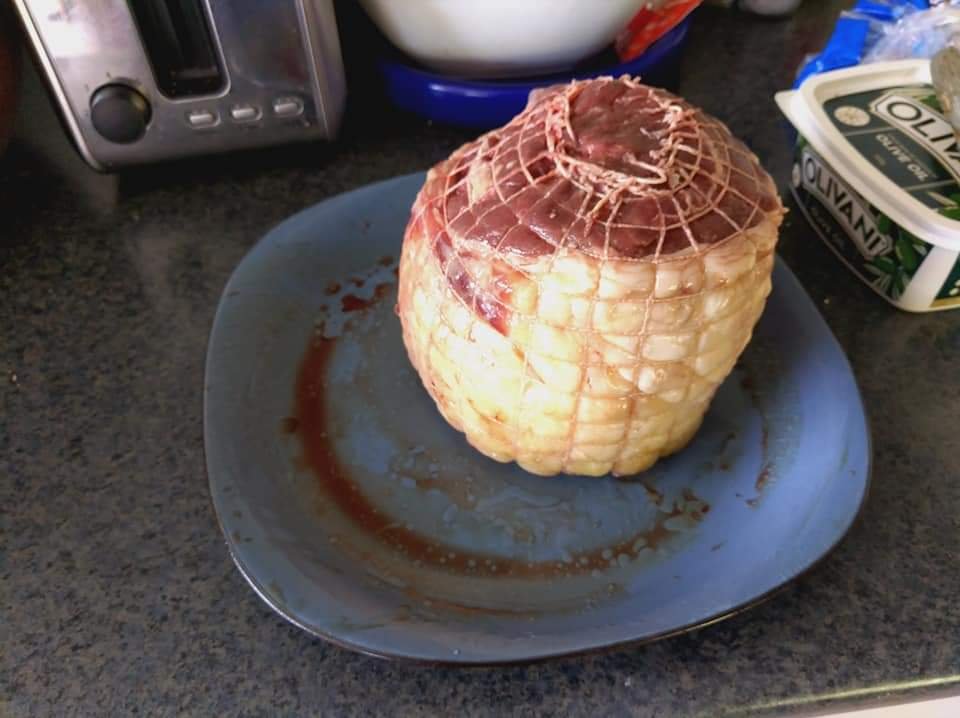
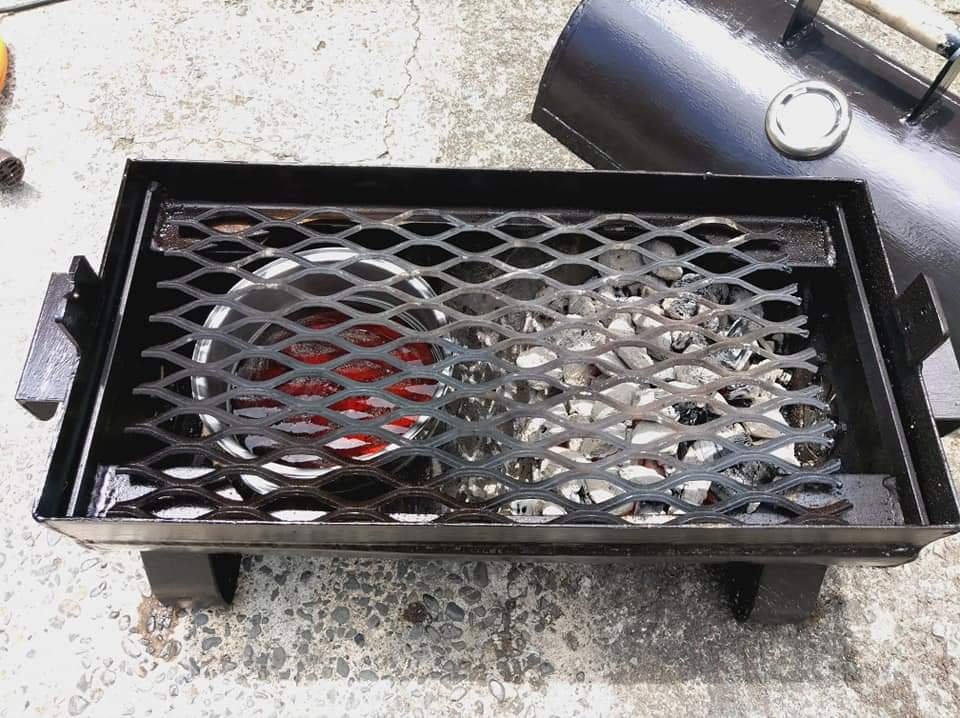
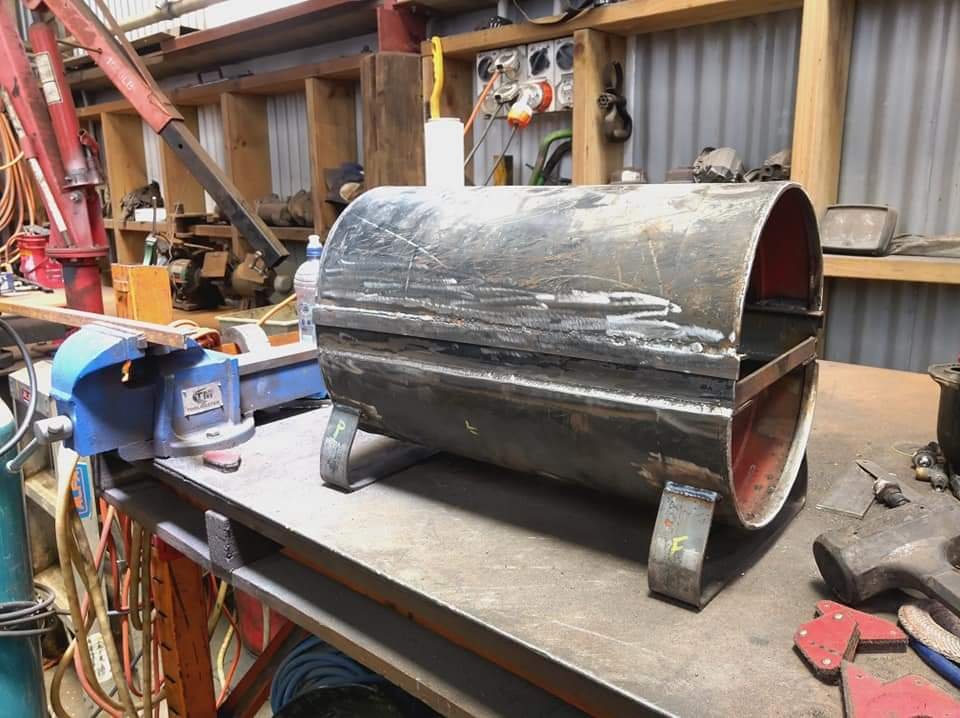
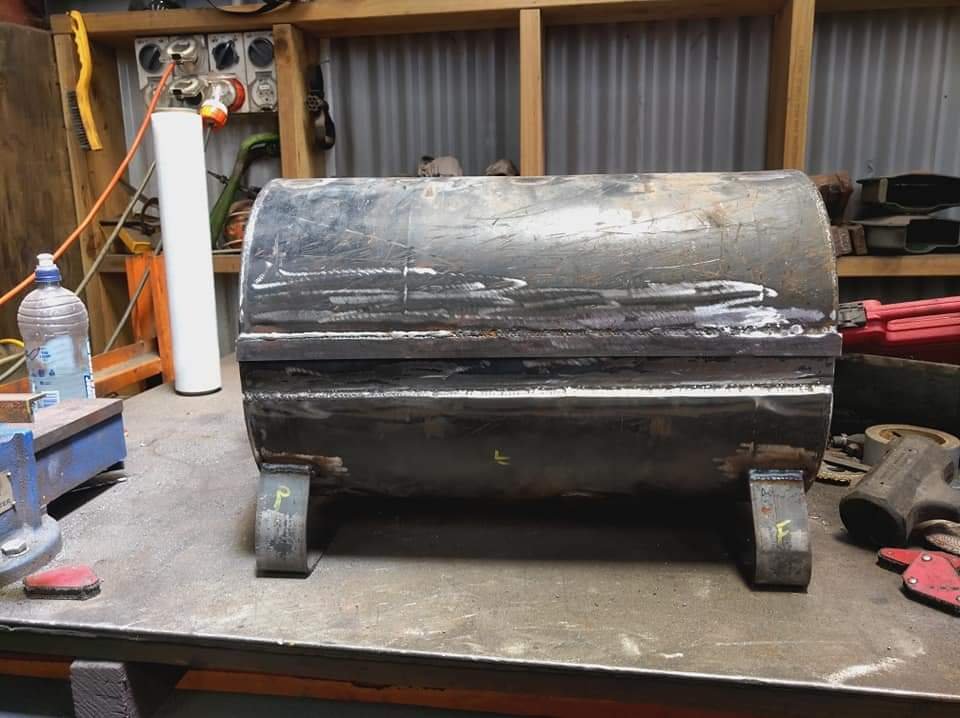
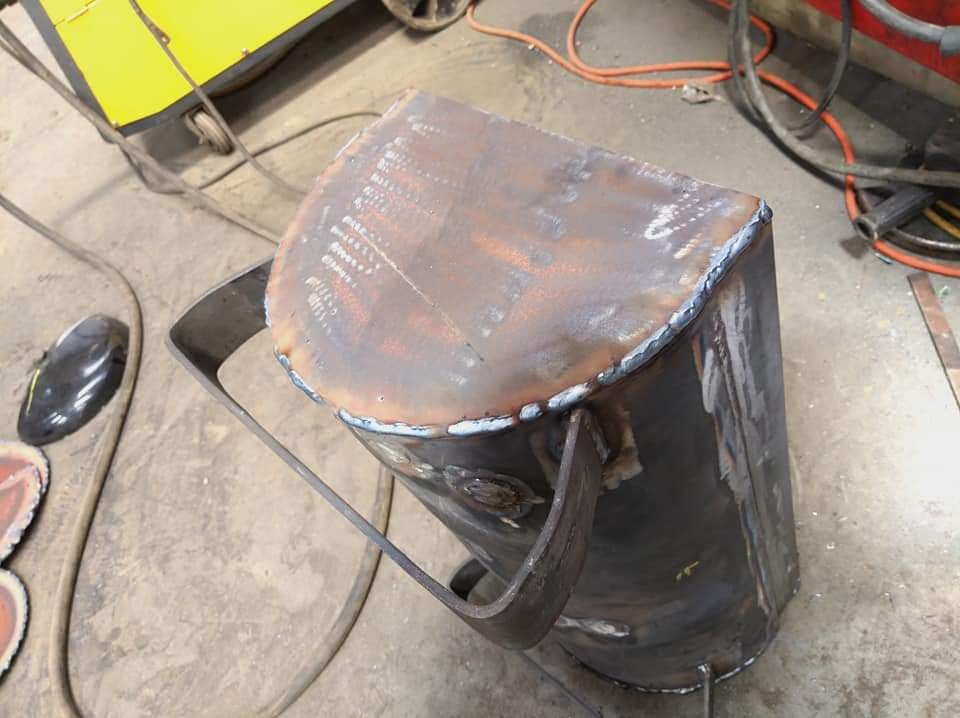
We had people coming over for a late lunch so we had to get cranking asap. Let the paint sit for 10 minutes then quickly fitted the vents and assembled it for another burn off. Only had about 2 hours to burn it off and cure the paint before I needed to get some food on. Got it up to about 500f for about an hour and a half the tried to drop it off in preparation for cooking. Random home kill rolled beef roast I found in the freezer. Approx 3kg gave it a blackout rub. Really wanted to get it on the rotisserie but it was too bloody hot to fit it up haha. Got the temp down to 350f and threw it in, couldn't really wait for it to drop anymore. Ran it at about 350f for 2.5hours indirect with stout in the driptray. Combination of Kingsford briquettes, applewood and some Manuka we had lying around. This is absolutely winged and rushed, for the first cook and I had no probe for internal temp. Let it sit for about 20mins wrapped in foil, when served it was about medium, slightly rarer in the middle so not too bad considering (forgot to take pics). Held temp well, I think if I start off with less coals (i.e not doing a burn off) I'll be able to get the temp right where I want it and also vent/damper controls will work a treat. I'll look at cutting the cooking grille so it's 2 piece for access loading up coals. Chur
1 point
-
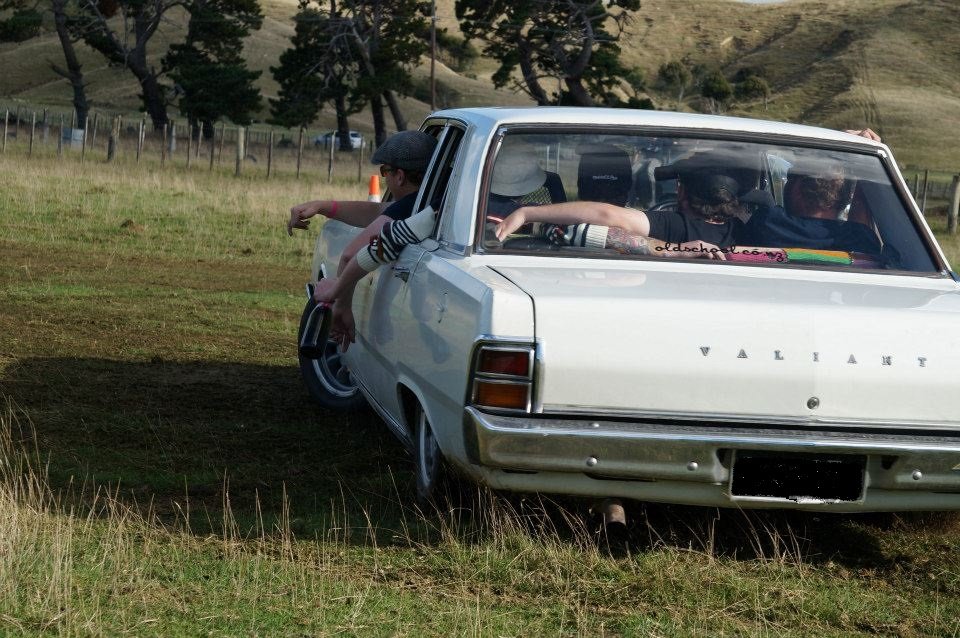
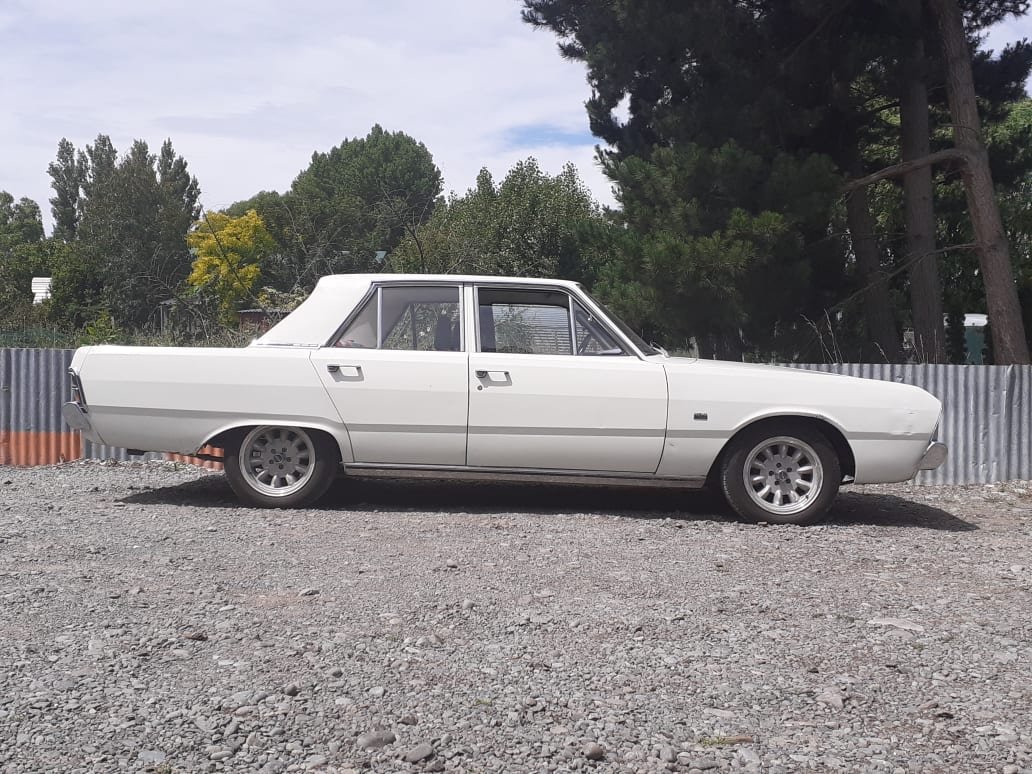
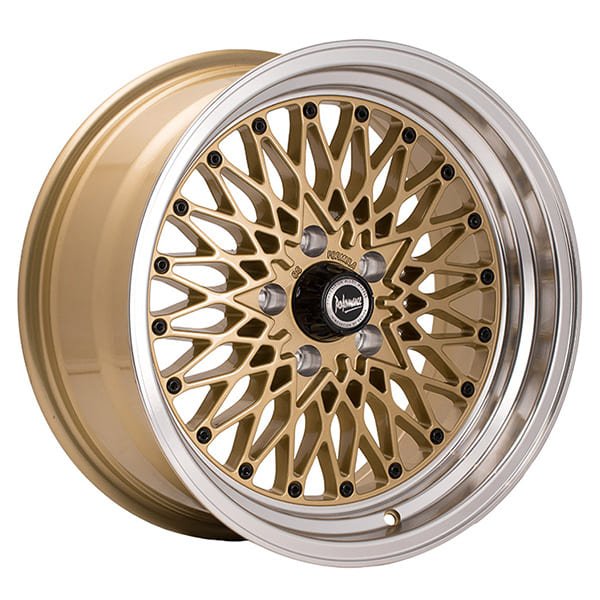
Bushes replaced and the Valiant drives nicely again. One of my boys finished year 8 schooling, they have a formal and parents etc are invited to drop their kids off at in front of the school hall pre formal. The valiant beached quite loudly as I was turning onto the field which my son thought was fantastic. Good boy! He was very keen on some school field paddock work. I exercised the utmost restraint and no circles were done. Here's a pic of some previous grass silliness. I put the Superlites on for the school run. Then decided I didn't like them and took them off the next day. I'd quite like a set of these modernized Cheviot Quattro's but the budget won't stretch that far at the moment. anyway that's enough sharnes. I have done some productive stuff too. I got my big fuel tank re tested, blasted and painted. It's slightly larger in diameter and considerably longer than the old one. My calculations suggest it will hold about 20 Liters more fuel than previous which equates to about %30 more. Luckily I managed to fit it into the old tank straps which was a bonus and saved much fucking about. Old. New. I Need to sort out some new ducting as the tank has is designed for 60mm as opposed to 2 inch as before and I'll be ready to run. This tank has a little magnetic gauge sender unit that is miles different resistances to what the factory sender had. It looks fairly simple and I'd like to see about getting it changed so I can use my factory gauge. Has any one in ChCh delt with E Parrot and Sons since it has changed hands? Are Robinson instruments still around? Suggestions please.
1 point
-
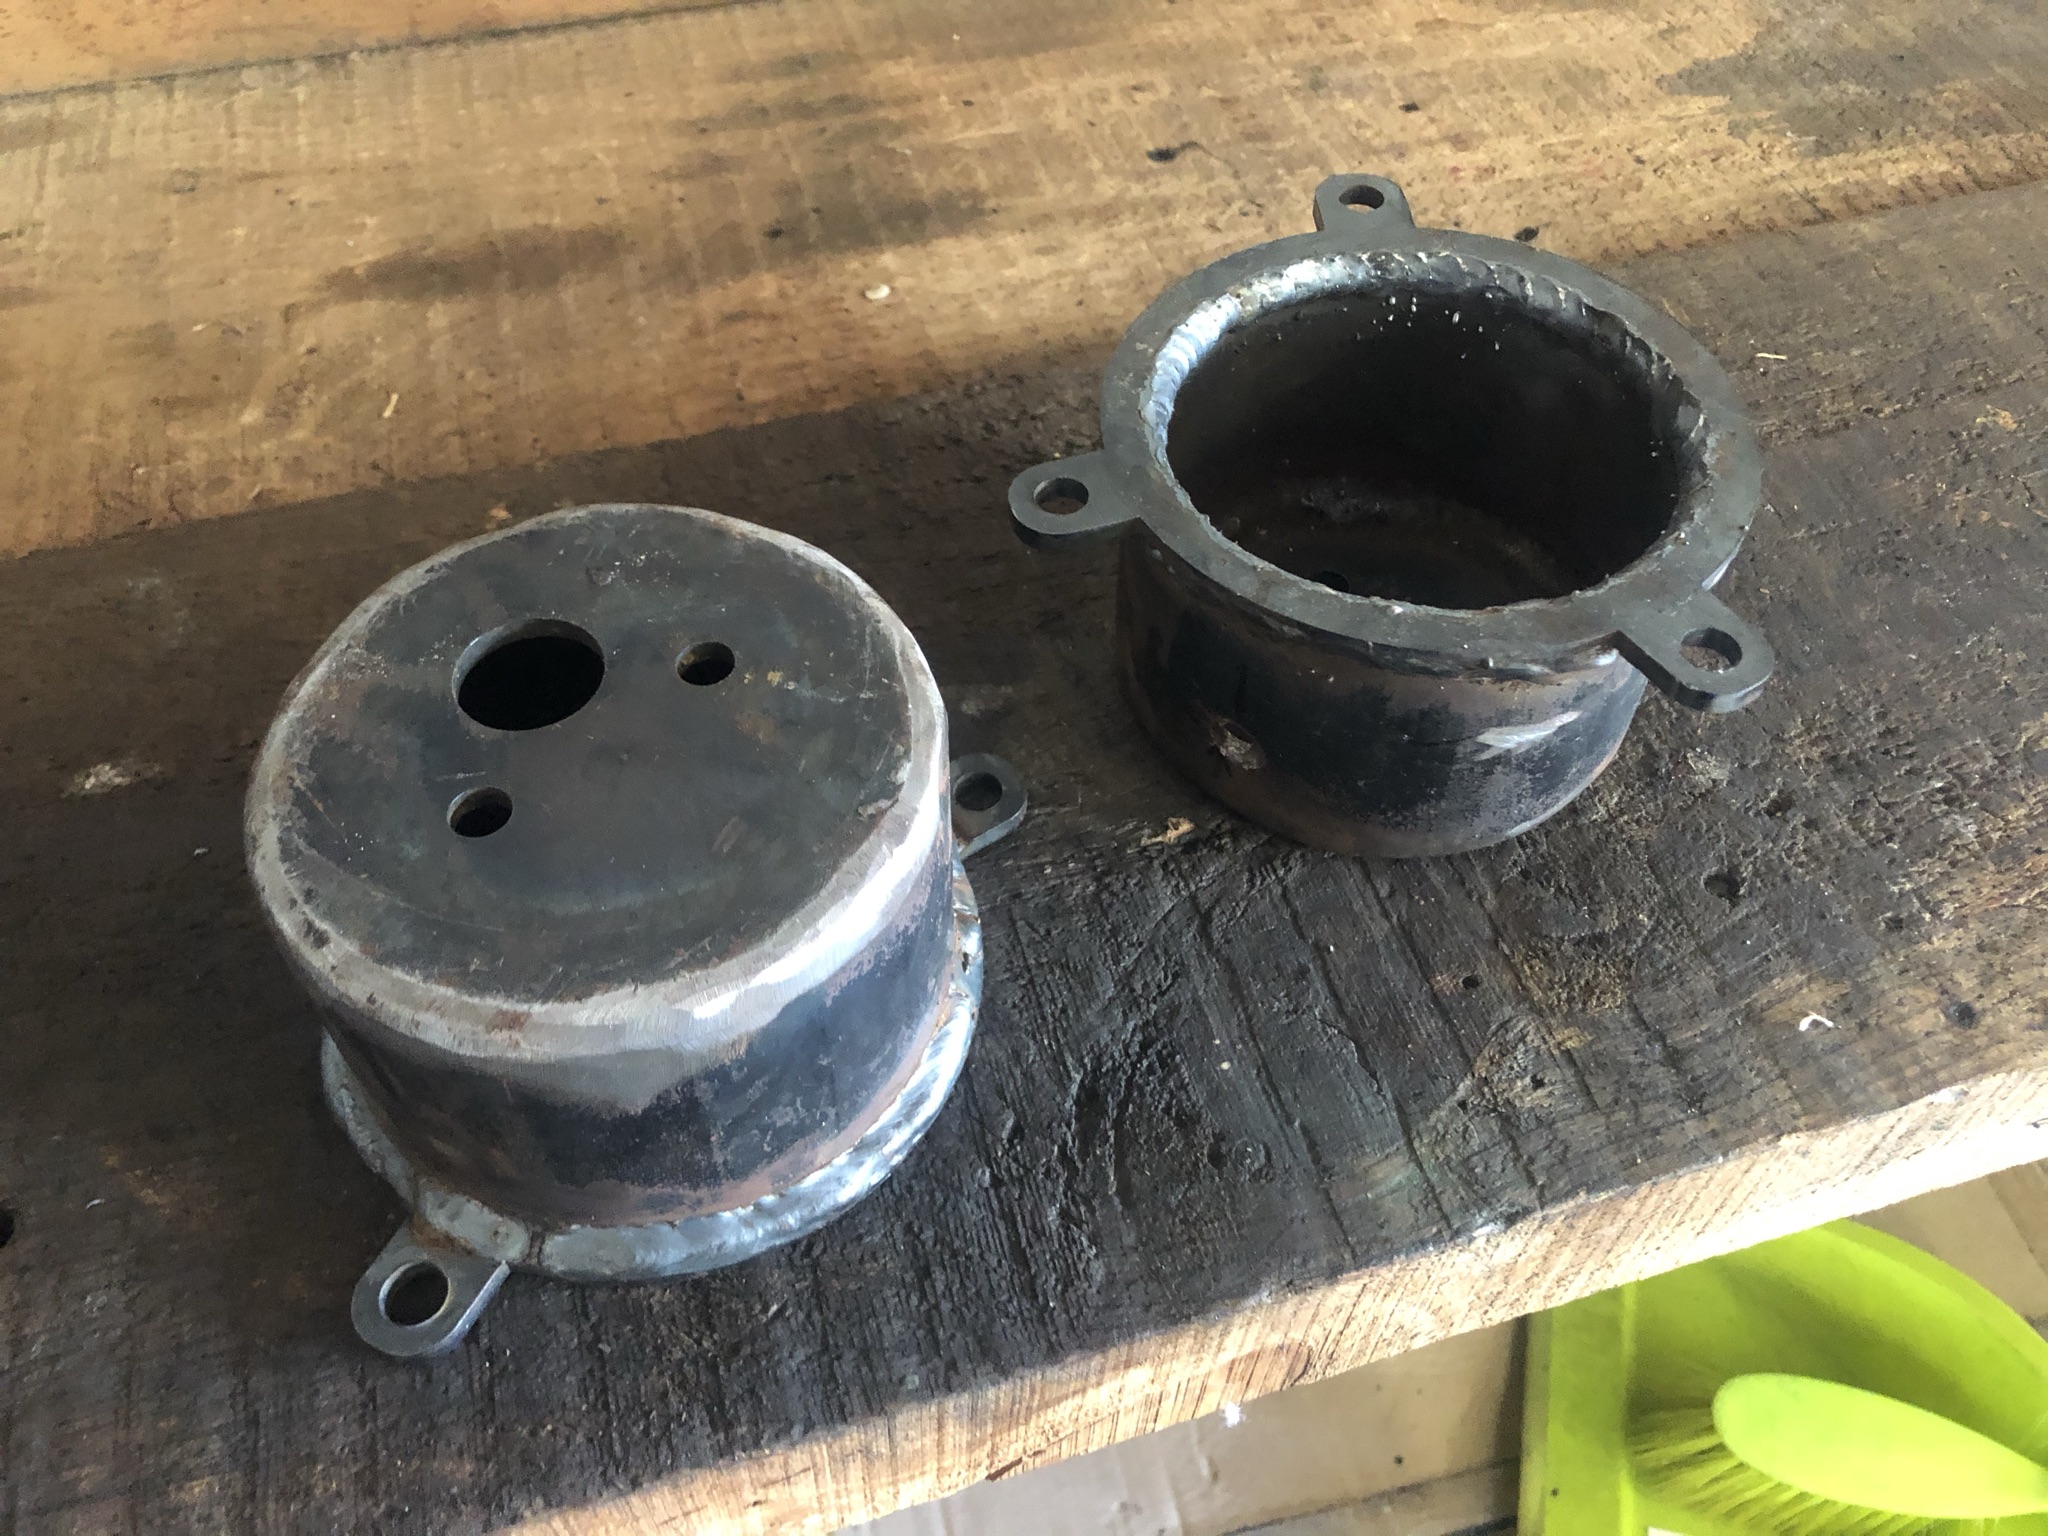
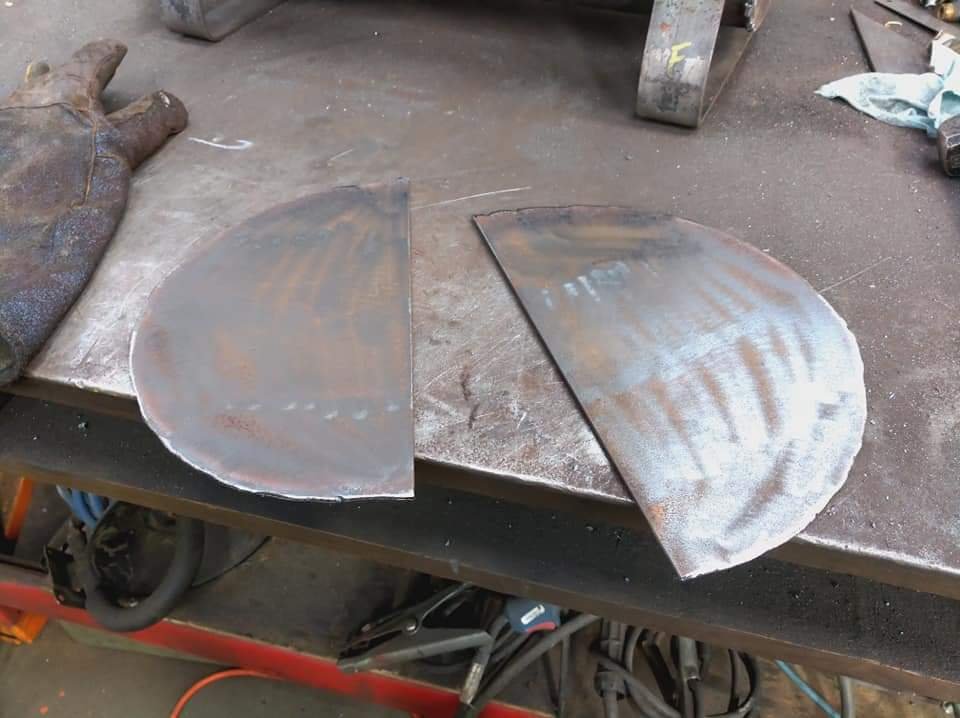
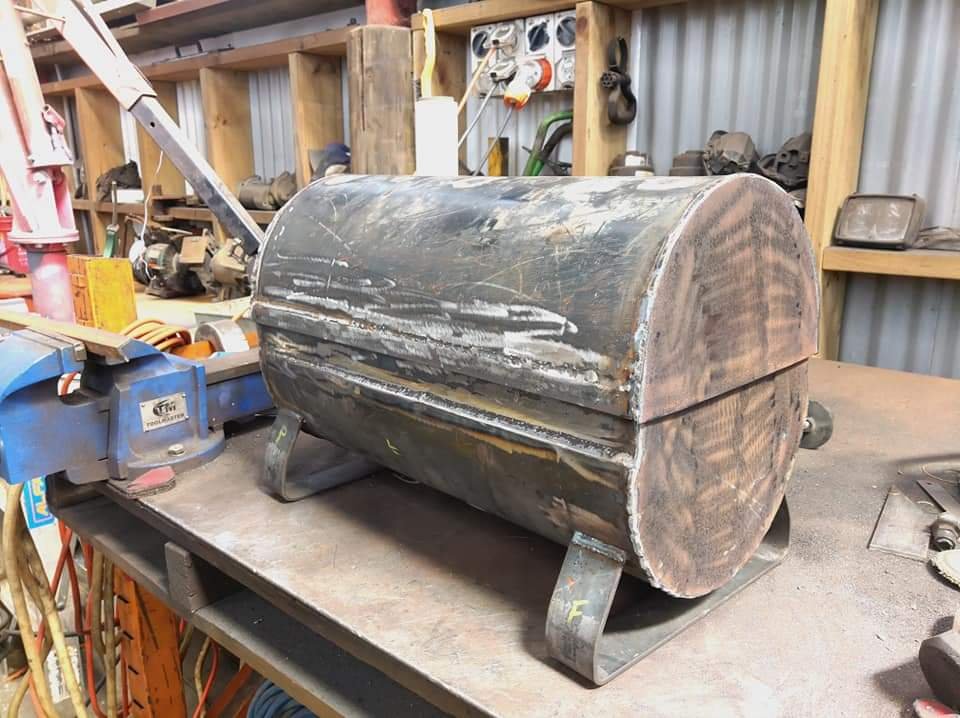
Cut some 25x5 flat bar and 50x5 angle for a grill mount and act as a bit of a riser. Welded it up then mocked it up and did some mad gap filler welding onto the bottom half to try get it levelish... Gas cut some ends from 3mm plate, welded them on. And here's a shot of the grill mount.
1 point
-
Yea had this 10 years ago, wound the idle speed up and continued on with life.1 point
-
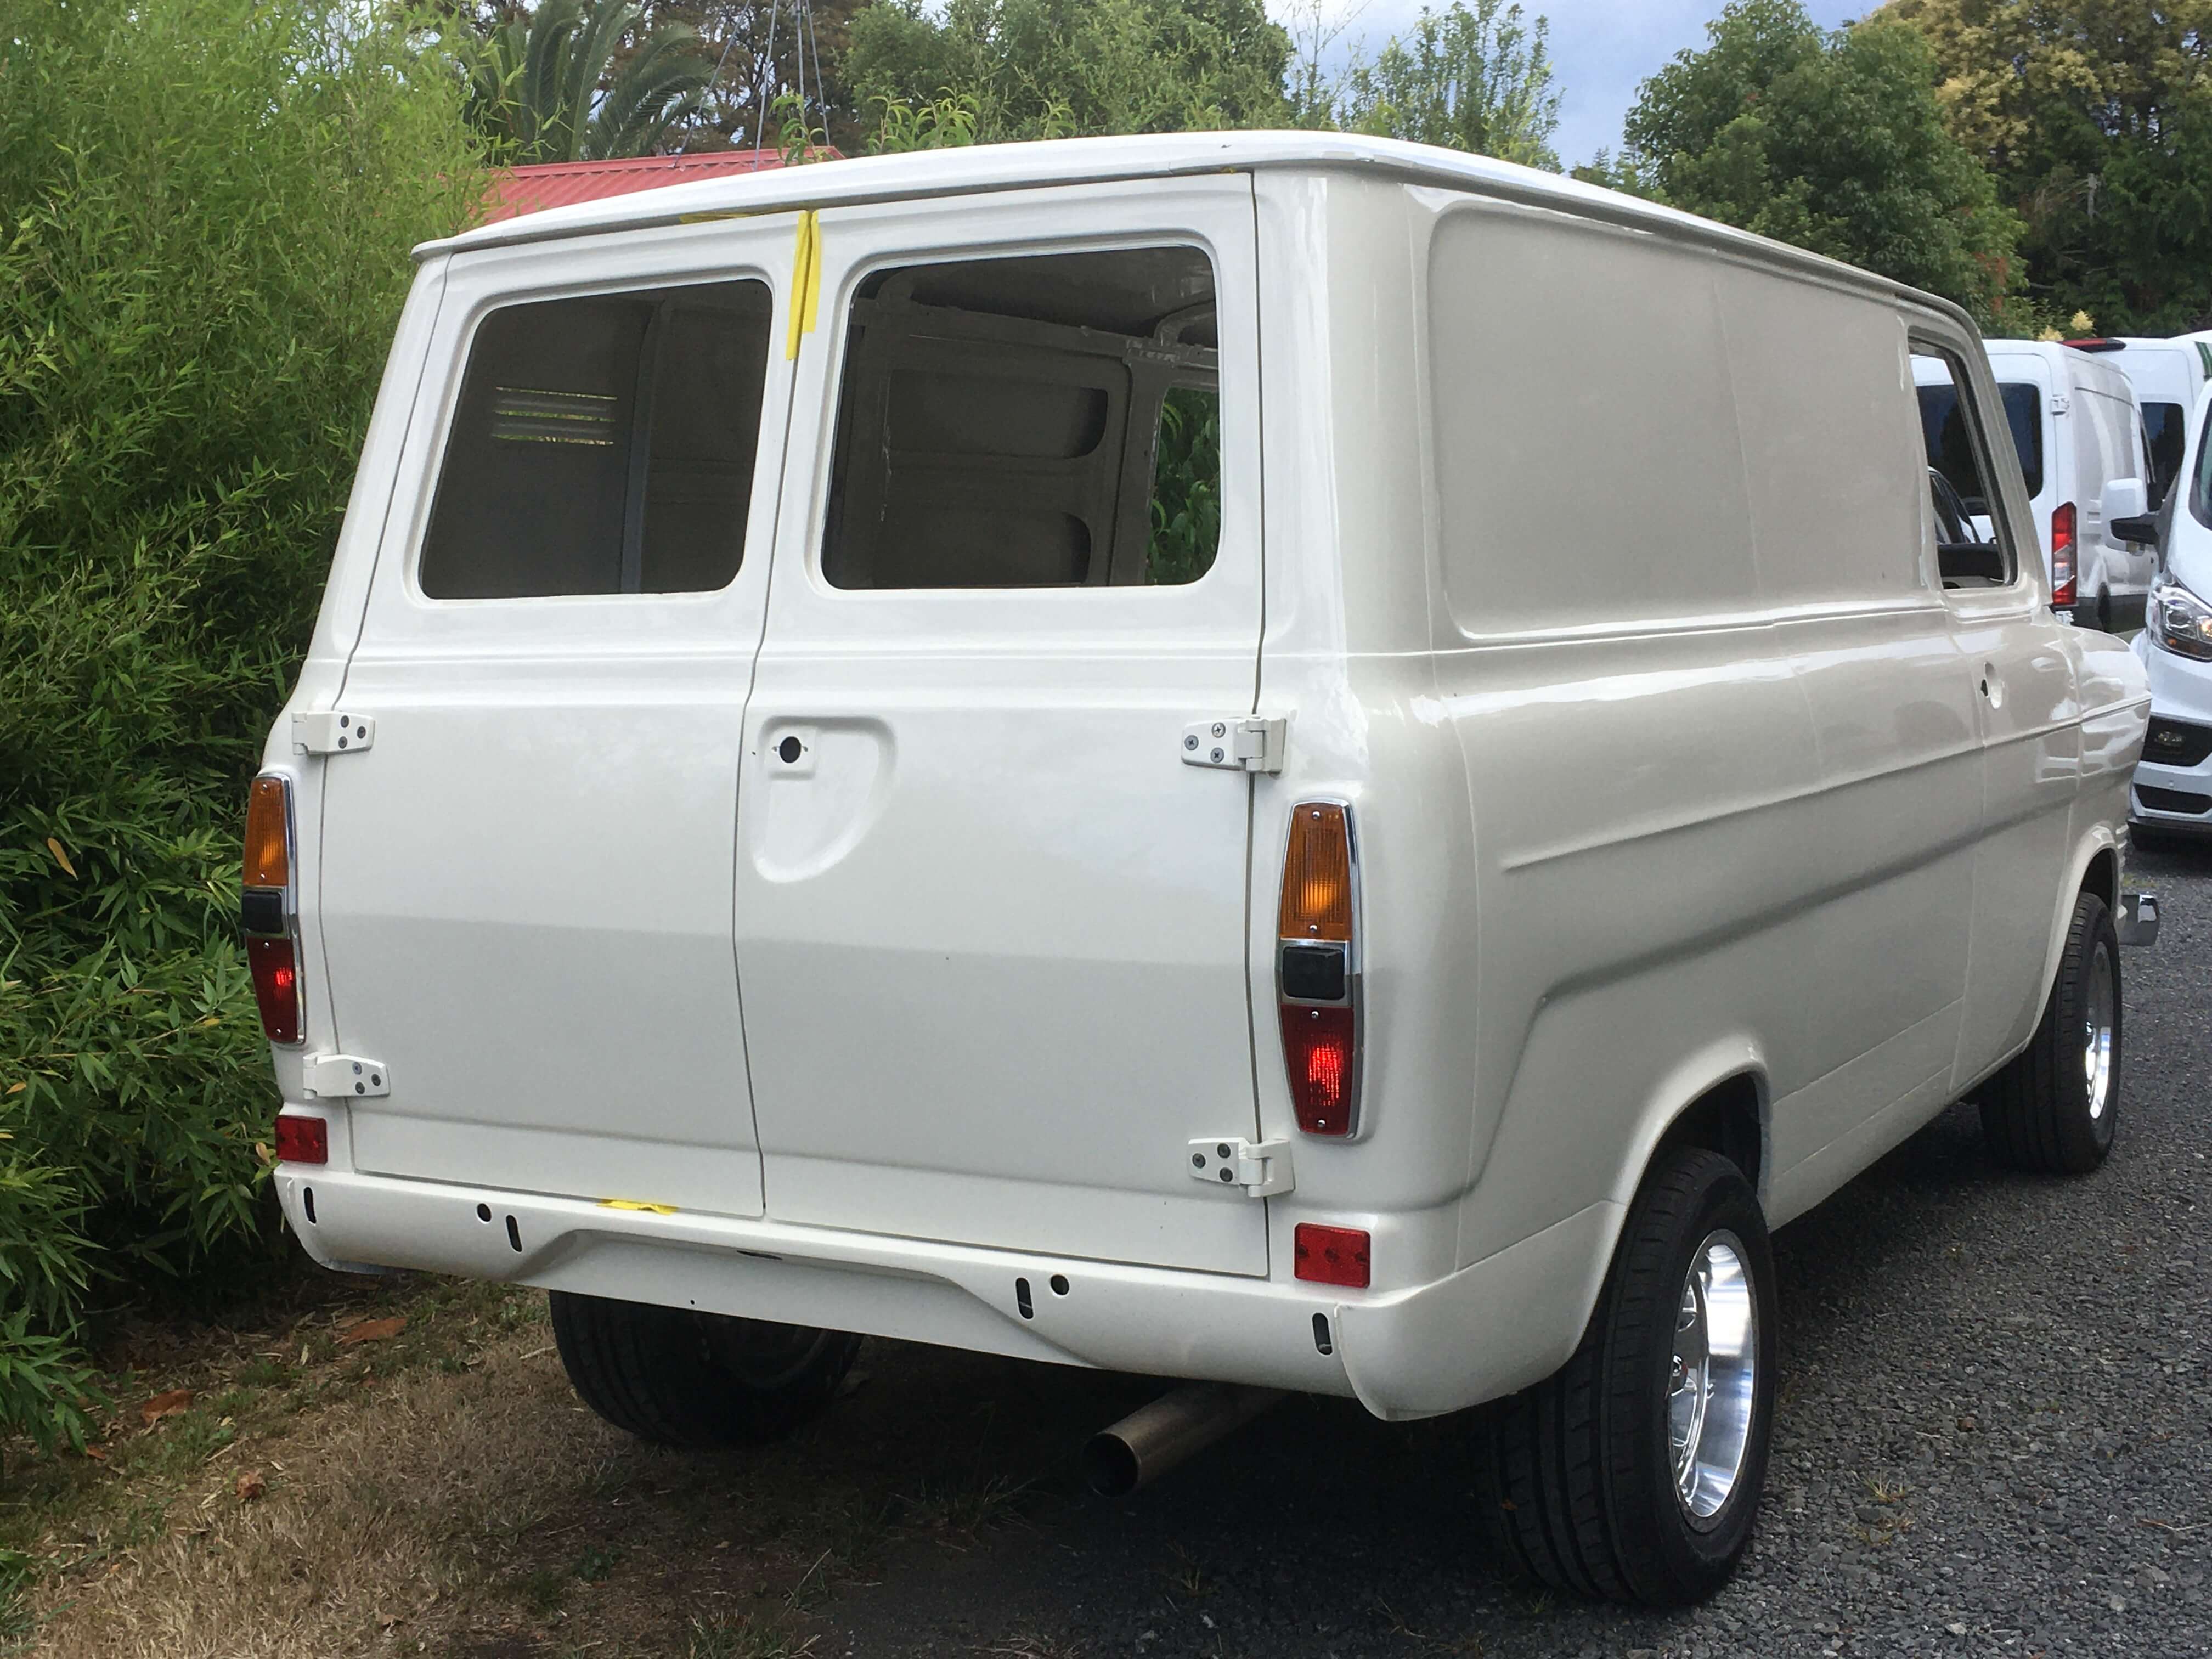
Big bum fitted
1 point
-
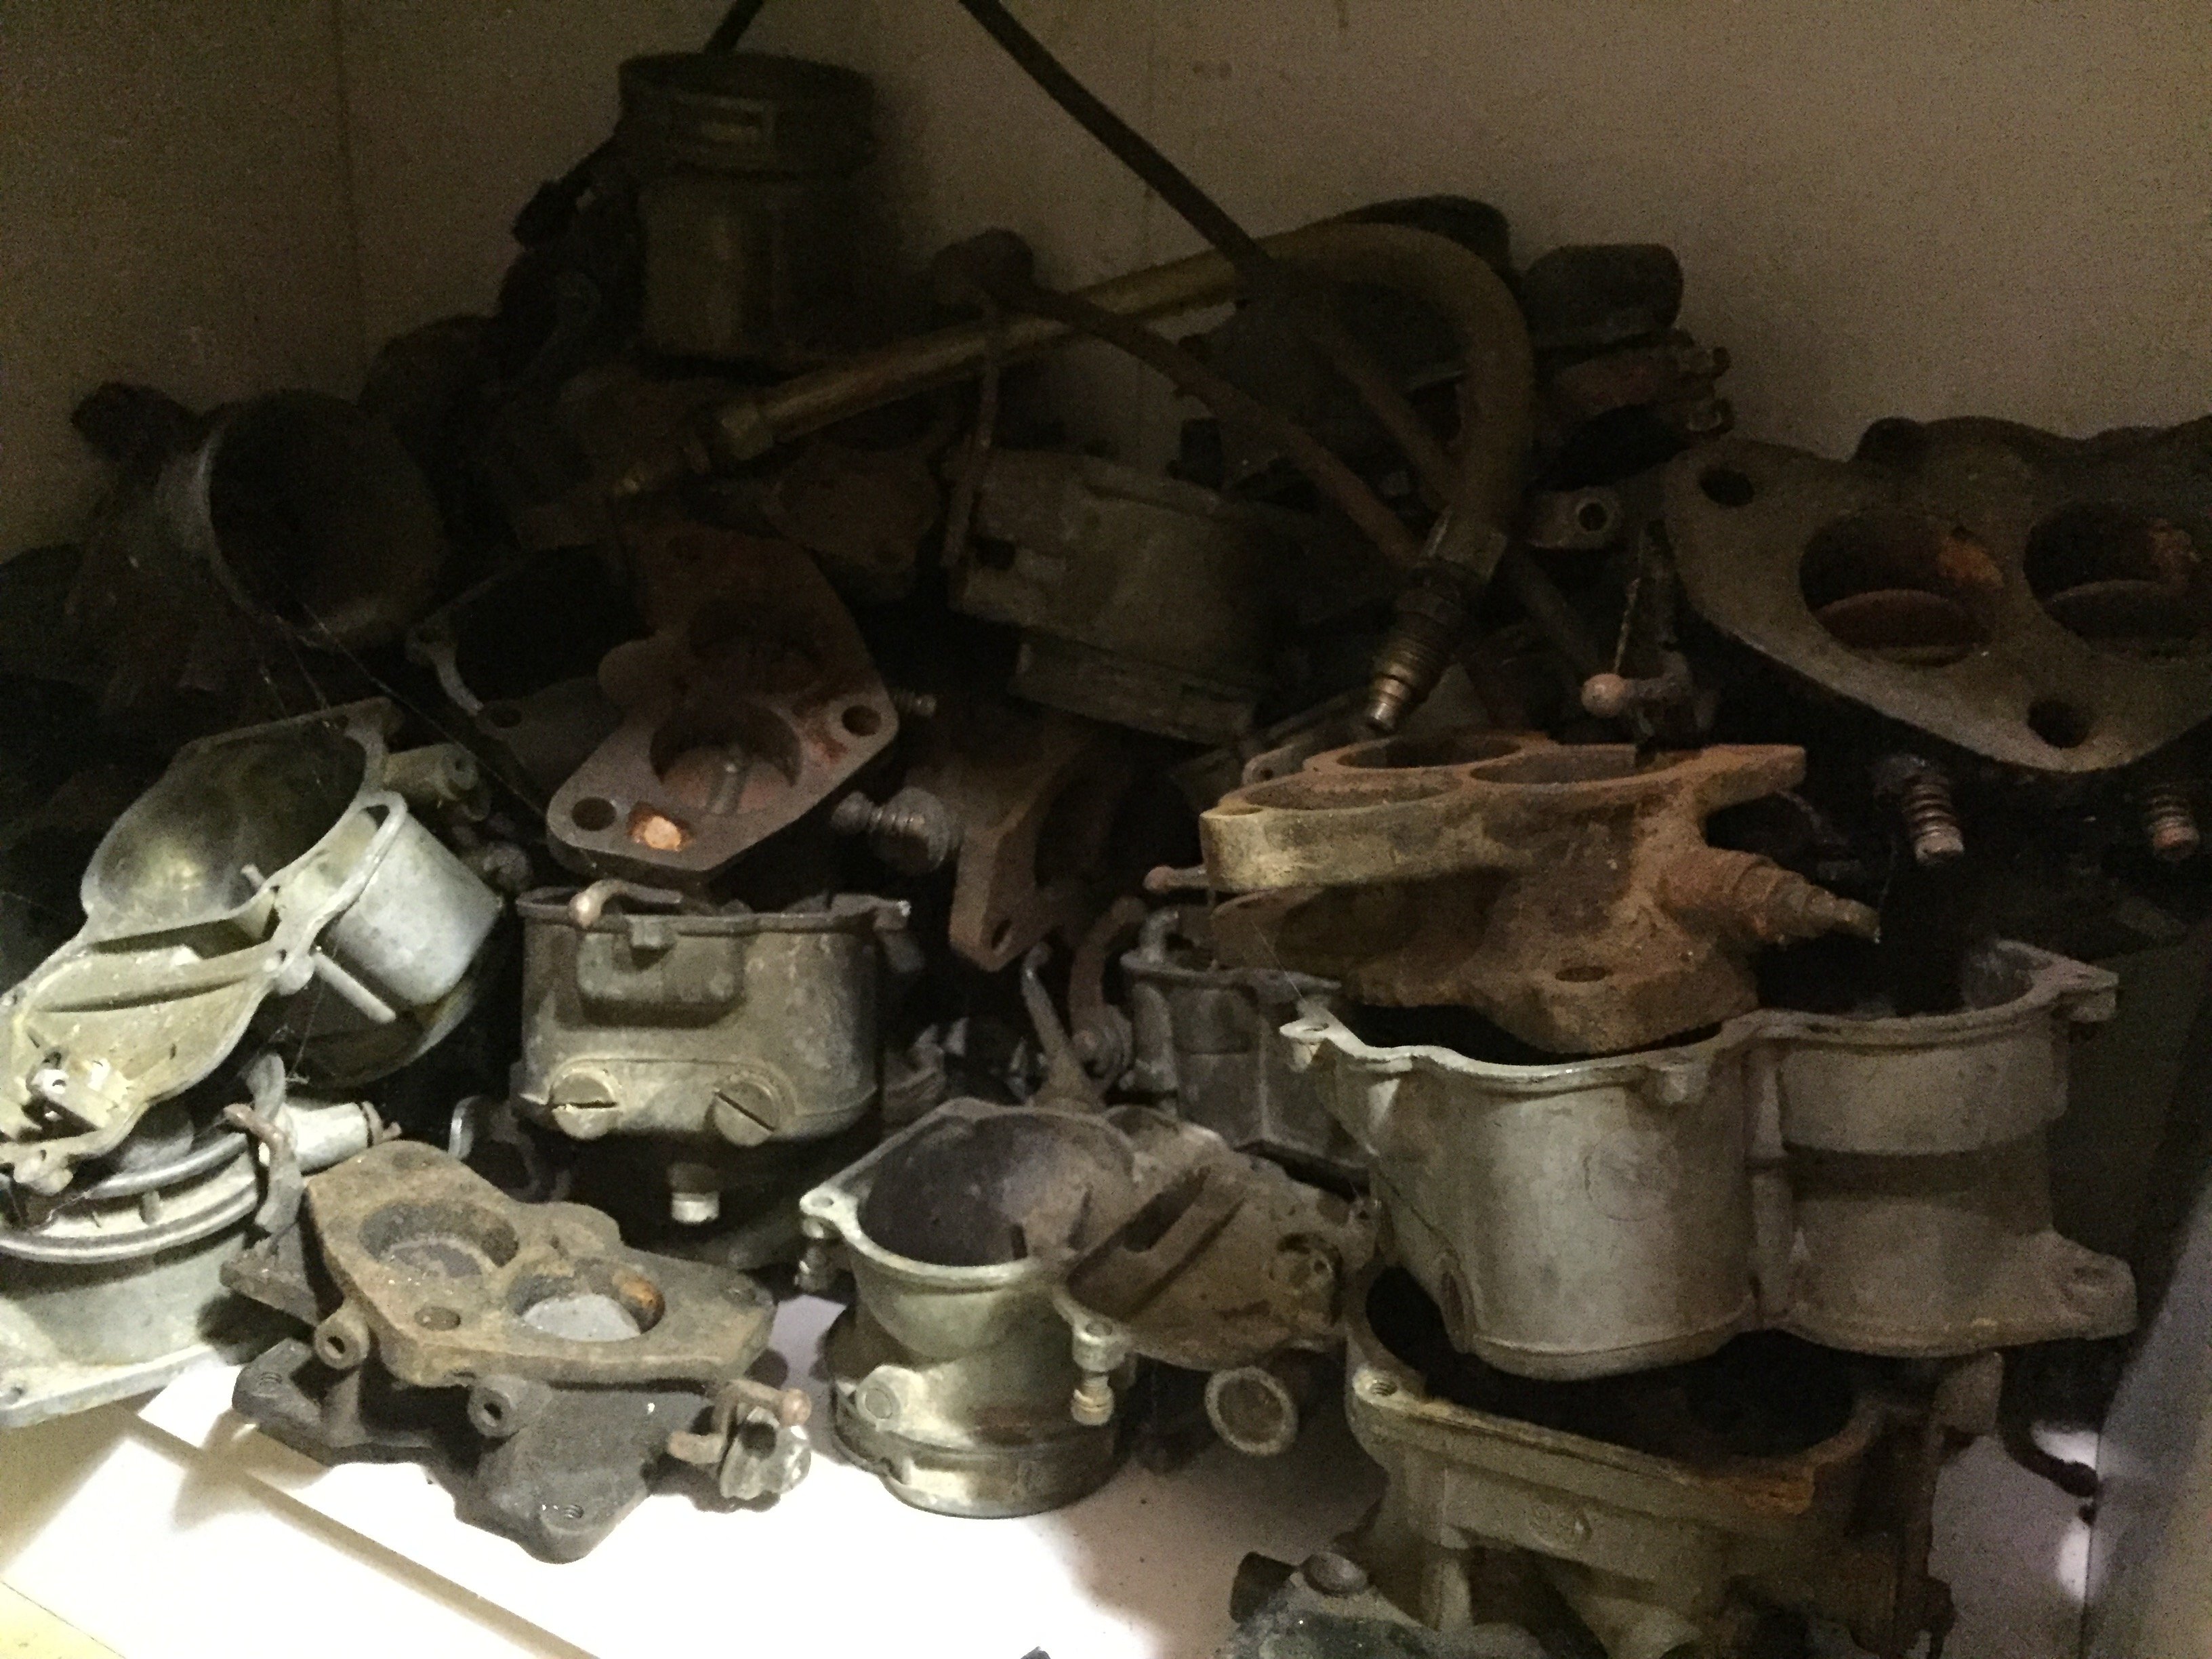
For a side project I am going to build as meany 2bbl holly carbs as I can.
1 point
-
Decided to install a neutral light and high beam light. Was going to put some lenses in the original dash cluster but have to destroy it it seems to get into it, and it's in pretty rough condition. So I wired in the idiot lamp cluster from the steel tank DR, robbed the neutral switch off that. Made a new bit of loom, and installed it all on the 85. Need to make a bracket to hold it all, will make something out of panel steel probably. Also got all the brake switches hooked up. Just need to make a tail light set up now (And swap the swingarms and do the front brake) Edit* i just bought another ign/dash unit (with my luck its already got all the other lamps in it too lol) so will set this up to loog stock. mint
1 point
-
1 point
-
Who knows where i might find a bike without an engine in it, would be cool if i found one where a dr200 basically bolts right in and doubles the hp. But as far as i know none such exists. Will have to keep looking1 point
-
Pulled the carb out looks like its a Mikuni TM33 (is the throat measured different than just the diameter? its like 29mm across internally but i couldnt see anything that looked identical to it. All the other measurements match a tm33) Float was set at about 14mm, conflicting info online with some even saying 17mm. i set it at about 15mm and now its all good with no leaks. fired it up. wants the cables adjusted i think, i also dont know anything about double cable throttles, but i assume this ones got too much play (after i took it off probably so not surprising) radical1 point
-
def. the swing arm on yellow bike doesnt have any mounts for a chain guard (but i think only a requirement if have a passenger? dunno, why argue it i guess) eitherway i needed a 2nd swing arm to end up with 2 bikes. might end up with the idiot lights off that one too, as yellow bike only has the indicator lamp on it (The other ones are just black plastic stamped like a lens. wierd man, not even see through, why not have a high beam light in there) Plus i need some oil on the floor to keep the dust down eh1 point
-
lol no, cdi all day man but i believe the dr250 was 6v and the stator was wired different apples and gala apples man * also based on the gn250 engine/400 engine so totally different family of engines. just cos its a suzuki and a DR doesnt mean its related apparently lol GN400s had shit cdis too1 point
-
yeah mate they always had disc front and FULL FLOATER rear suspension that i always lol at i assume you mean next year cos i dont see any events for december. old mate was gona ride it in VMX i believe. DRs get a slow pos rap, but with a decent carb and exhaust they are pretty alright. might put my big cam in it for lols/ fuck yo valves so friggan rad dude1 point
-
So I ended up with 1 complete 1985 DR200 with a vin tag and lots of new parts and dodgy brakes a leaking carb 1 85% 2007 DR200 with no brakes and a leaking carb 4 additional 80s frames And enough parts to make one of those frames into another complete trail bike, minus brakes Plan so far is Put some lights ect on the 1985 and register it again. Strip the 2007 and put some parts from that into a 1987 frame and end up with an identical blue and yellow trail bike to what the 85 is now, less vin. Keep the kick/electric start 200cc engine for some other bike, who knows where I'd find one with no engine tho. Sell off the remains to farmers nation wide and PROFIT.
1 point
-
Fresh 035 white paint. Just been peeling the shitty old tape off side moldings before they go back on.
1 point


.jpeg.f51a899fbb62ee27267b4ca377d73c80.jpeg)
.jpeg.7db9077b86fe69e11960d3ceae544c3e.jpeg)


This leaderboard is set to Auckland/GMT+12:00