
Leaderboard


Popular Content
Showing content with the highest reputation on 04/06/20 in Posts
-
i put the front bumper back together and put it back on and it looks ace, i did however forget to take a picture so yea.... anywho i did some other stuff. the rear muffler was too big, hit the ground a lot and made the car way to quiet so i fitted a smaller one. it doesn't hit the ground and the car is louder which is good. old muffler with custom flat bottom, 2020-04-06_05-10-26 by sheepers, on Flickr new muffler. 2020-04-06_05-10-17 by sheepers, on Flickr so the next thing i wanted to do was make new bits for the tops of the rear bumper. the ones i had were fucked so i made some new ones out of 8mm aluminium plate. ill let the photos do the talking but some points to note, the only file i used for this whole process is the one pictured which is called a dreadnought file if you've never seen one before. there is no better file for working with aluminium, you can get a great surface finish with these files if you know how to use them and they will remove heaps of material very fast too. things they dont like however include filing steel, that will fuck them. the other thing is that i used my 60mm DA sander/polisher to go from file finish to polished because DA sanders are the best thing in the world, get some. 2020-04-06_05-10-09 by sheepers, on Flickr 2020-04-06_05-10-00 by sheepers, on Flickr 2020-04-06_05-09-29 by sheepers, on Flickr 2020-04-06_05-09-46 by sheepers, on Flickr 2020-04-06_05-09-38 by sheepers, on Flickr 2020-04-06_05-09-20 by sheepers, on Flickr 2020-04-06_05-09-06 by sheepers, on Flickr 2020-04-06_05-08-56 by sheepers, on Flickr 2020-04-06_05-08-46 by sheepers, on Flickr 2020-04-06_05-08-35 by sheepers, on Flickr 2020-04-06_05-08-25 by sheepers, on Flickr 2020-04-06_05-08-15 by sheepers, on Flickr 2020-04-06_05-08-06 by sheepers, on Flickr 2020-04-06_05-07-48 by sheepers, on Flickr 2020-04-06_05-07-39 by sheepers, on Flickr 2020-04-06_05-07-31 by sheepers, on Flickr 2020-04-06_05-07-22 by sheepers, on Flickr 2020-04-06_05-07-12 by sheepers, on Flickr 2020-04-06_05-06-55 by sheepers, on Flickr 2020-04-06_05-06-45 by sheepers, on Flickr35 points
-
Well I must say I do love the new Recaro seats. They are so comfy and hold you in place soooo much better in the corners. I had still been using it heaps through summer. Got a shot of it next to an I8. Huge cars!!!... What else? We took the Imp over to Blenheim for the big classic car show they have there. Its getting bigger every year and I have kept missing it each time. Not this time though! The weather was a perfect Med like blue sky day and the cars that turned up for the show were a really nice mix of everything. My parents came along too. My dad is 87 and not too fast on his feet having pretty bad lungs now. I was worried he would struggle but I kid you not- he seemed to perk up more every minute and flitted about all the old cars really quite animated. It was great to see and I'm so happy he made it along. Mum loved it too and we met some great people. Pics.. The show.. Dad pondering if he could have fitted a V10 into his Moris traveller he once had, or maybe the 120y wagon they had... Hannah's favourite car of the show (and her dream car)... Some sweet old boats there... Me next to dad, holding a 8 month old Kelpie puppy(my favourite brand of dog, we used to have one).. The Imp (wtf the Toyota Pius was doing there we don't know..)... There was actually a car there that made the Imp look huge... The Imp was popular, being bright blue and the only one there. Lots of people checking it out all morning. I printed off some photos of the restoration onto a4 sheets and stuck them in a plastic binder with a quick note for each. People I spotted seemed to enjoy the read and I imagine it made for more admiration for the little car that was rescued from a field. The trip to and from Blenheim was fun and uneventful. The Datsun engine impressed again with its thriftyness by managing 44.8mpg and that was with some spirited motoring too Drove some nice roads near my old home town. Very very dry over there and sadly they still have not had much rain. But fantastic grape season if that's your thing. Once back home I decided to put the car up on the hoist and deal to a couple of jobs I have been putting off. Those of you with a good memory may well remember the state of the ring gear. It was worn badly in two locations, 180 degrees apart. This meant that it had a 2 in 4 chance of stopping roughly near one of those spots. It seems that sods law dictated a sliding scale of when it would stop and this scale was linked to how many people are around when I would go to start the engine. Worse if those people were probably of the type that think 'oh that a nice old car but they are very unreliable'. When the time was right the starter would ignore my want for turning over the engine and instead may a horrible loud racket as it wore the ring gear worse. I would have to then sit the car in 4th gear, put my foot out the door and rock the car- so moving the flywheel around just a bit. Then start the car and drive away red faced as the people now watching tut tutted... Never did it do this on our property btw... The other thing was that the rear main seal was leaking badly. Bad enough that the clutch was playing up and I'd have to think carefully about where I was to park the car when going to the country club* for fear of meeting those same people again and only going to reinforce their misguided opinions about old cars. I had the chance to replace the seal when I took the engine out way back at the beginning. But remember who I am - a tight wad who likes to save money and $25 seemed like an awful lot for a seal that 'looked ok' Silly me. So out with the engine then. Made easier by using my special custom made bespoke 'Datsun A12 engine cradle' Here's the worn ring gear. I drilled it and broke it off. Removed the old seal. It was indeed very hard and not very sealy. More like a ceramic ring then a seal.. The oil had coated the clutch disc.. Luckily that cleaned up sweet with a load of brake cleaner and was deemed good to use (please refer to note above about tight wad..) Went to my old workplace, Autofocus in Nelson and used the gas set there to remove the good ring gear from another flywheel that came on the A15 engine I had bought. I then dropped it onto the A12 flywheel... With that done the engine was given a quick clean whilst out and slung back in place. Oh but not before making using the opportunity of an empty engine bay to size up a different engine. That however is secret squirrel and will be announced later in the year The Datsun was all plumbed and wired back up. It started straight away and after bleeding the coolant system I took it for a hoon. Clutch feels great and no horrible starter noise roulette... However..... the bloody speedo gave up and decided that the needle should reside at around 90 mph. It had been getting ever so more optimistic over the last few months and I had read that the springs can weaken. It doesn't affect the odometer which is mechanically linked to the speedo cable, just the speed reading. Now though, having just fixed some other issues my 'unreliable old car' decided to throw another at me. When I returned home from said hoon the needle decided it would resolutely remain at around 60 mph even when the wee car was stationary. So this happened... I'm so glad that I had added plugs to the wiring birds nest that resides behind the instruments because it made removal much quicker and easier. I took the speedo apart and found this... It seems that the sponge sealing which fits between the telltale warning lamps and the speedo face had broken down and crumbled into the speedos magnetic disc area so creating drag. I'm not sure but it was messy in there with lots of friction. Rather then muck about trying to clean it all out I instead pulled the spare speedo head from my stash of Imp parts and fitted that instead. I removed all traces of the old foam, opened my little alladins drawer of various foas and double sided tapes and stuck on some new stuff... This lot will be binned in the future as I fully intend to replace the whole cluster with nicer modern gauges (but with a classic style to them) including moving over to an electronic speedo head. Speedo cables and all their wobbles can leave by the back door thank you please. So since the world has gone a bit weird and we all have extra time I decided that instead of refitting the dash into the car in the poor evening light I would instead do an update. I'll refit it tomorrow. One other job to look at is a rattle from the steering rack. I think I know what it is and I have already stripped and inspected a good spare that I might swap in. Other than that I'll just get back to using the Imp, obviously only for shopping purposes at this point in time. I now have plenty of other tinkering jobs to do and hopefully in the next update there will be some very exciting news * I don't actually belong to a country club. But I do like a spot of lawn bowls....16 points
-
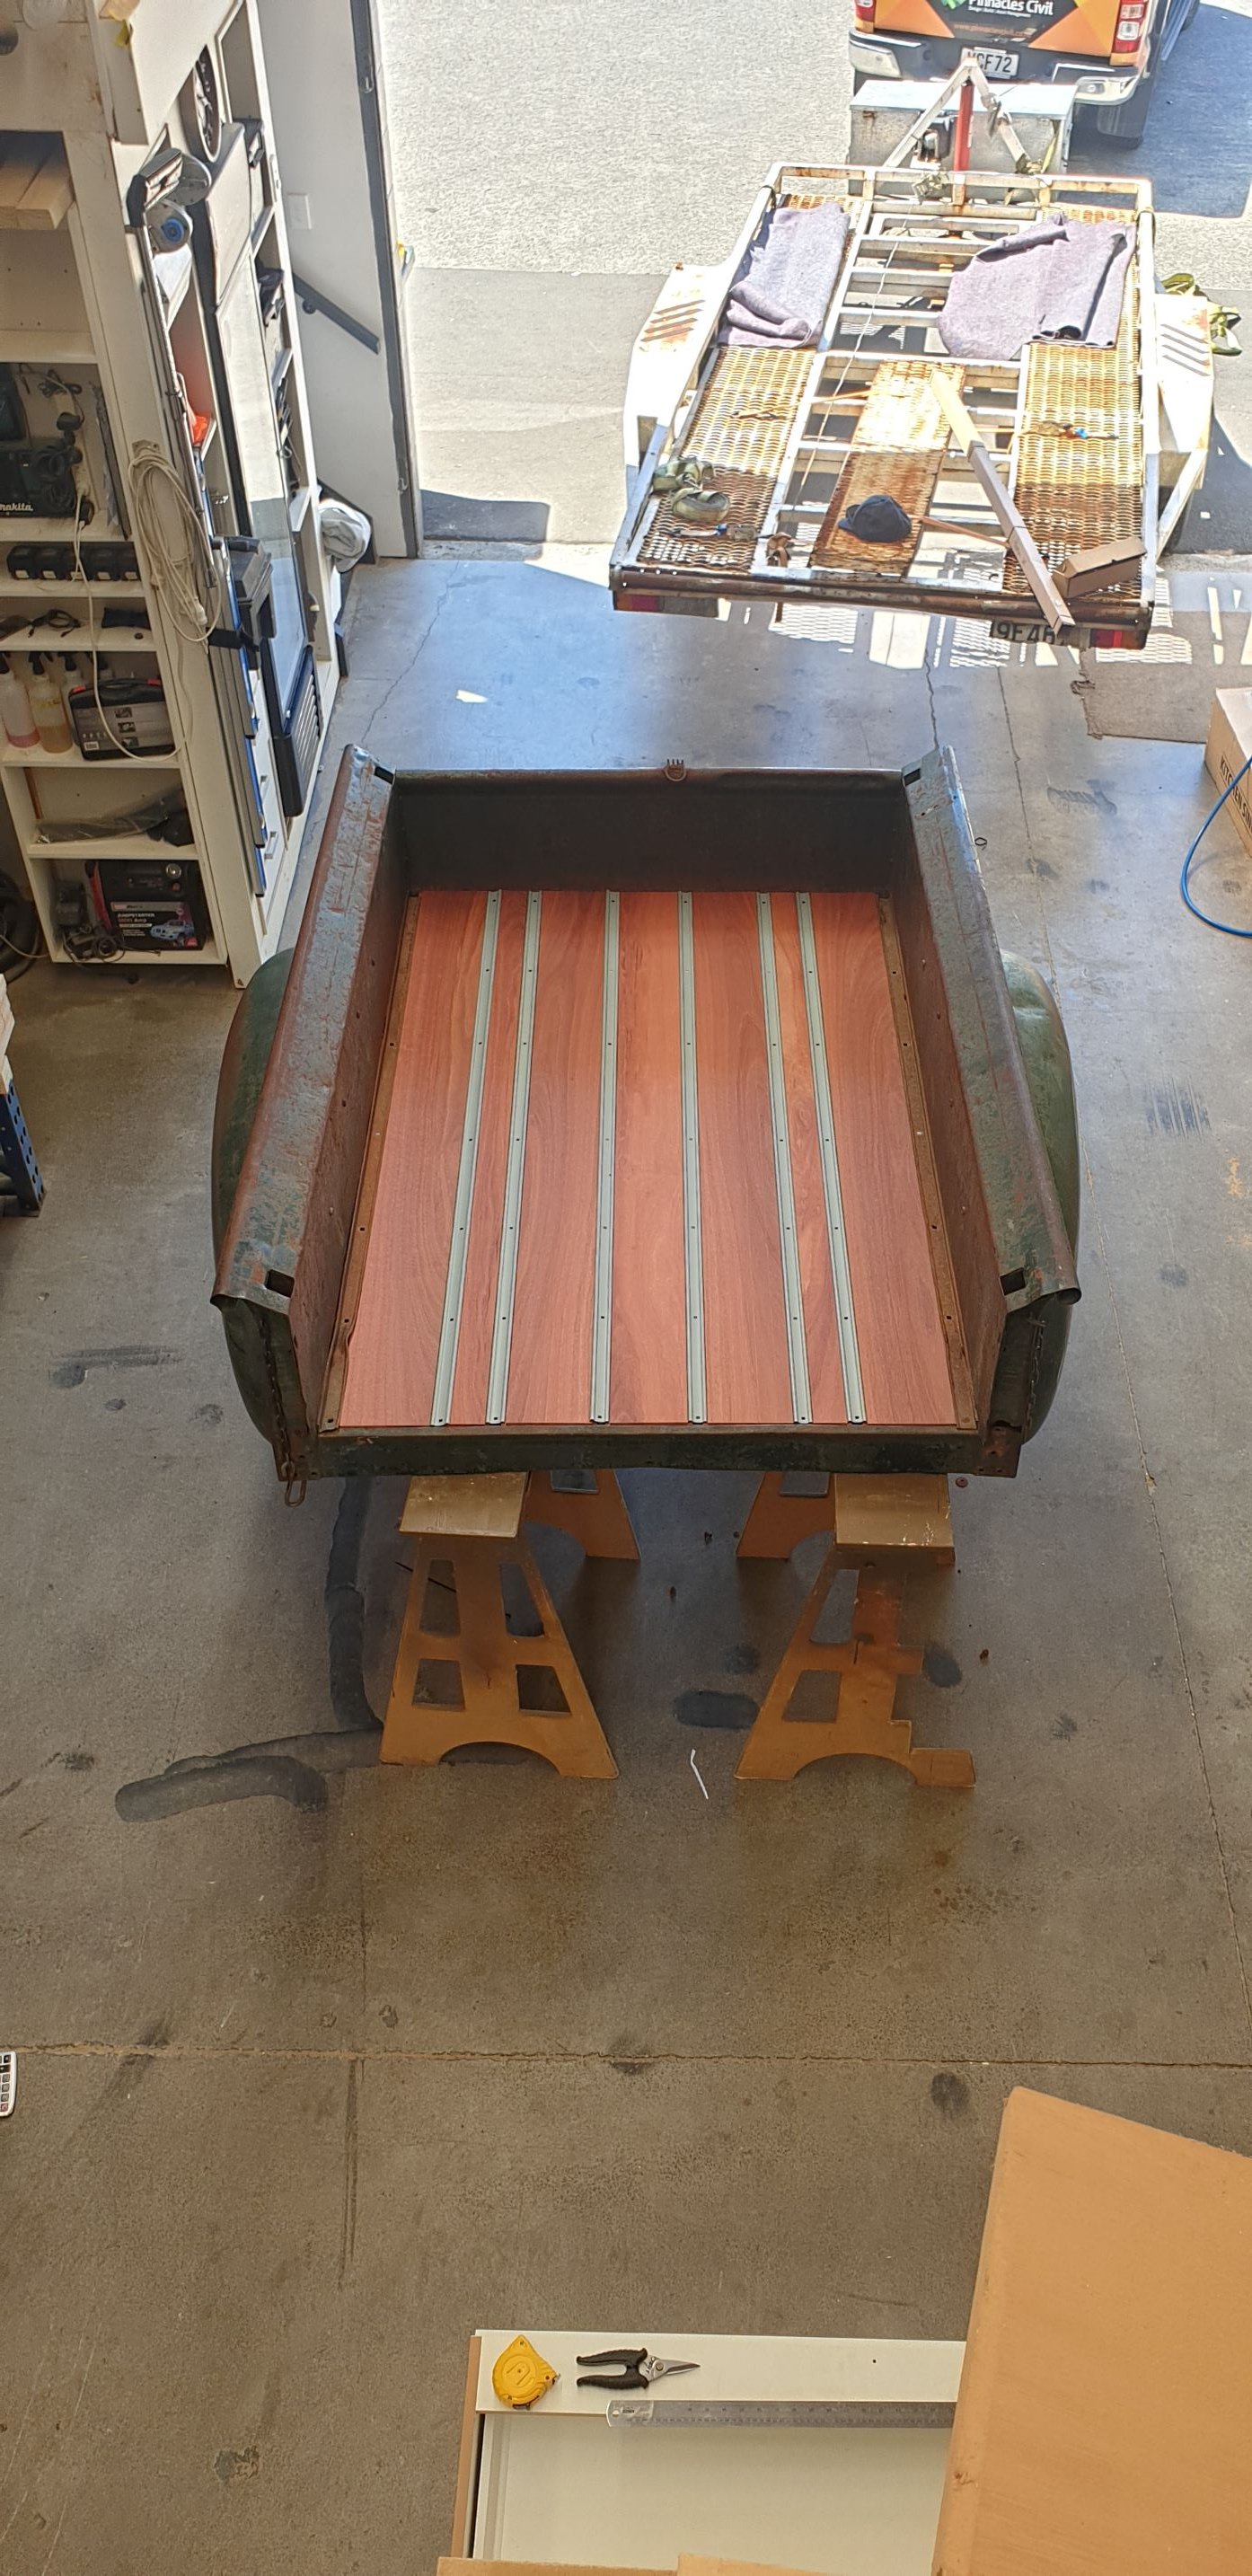
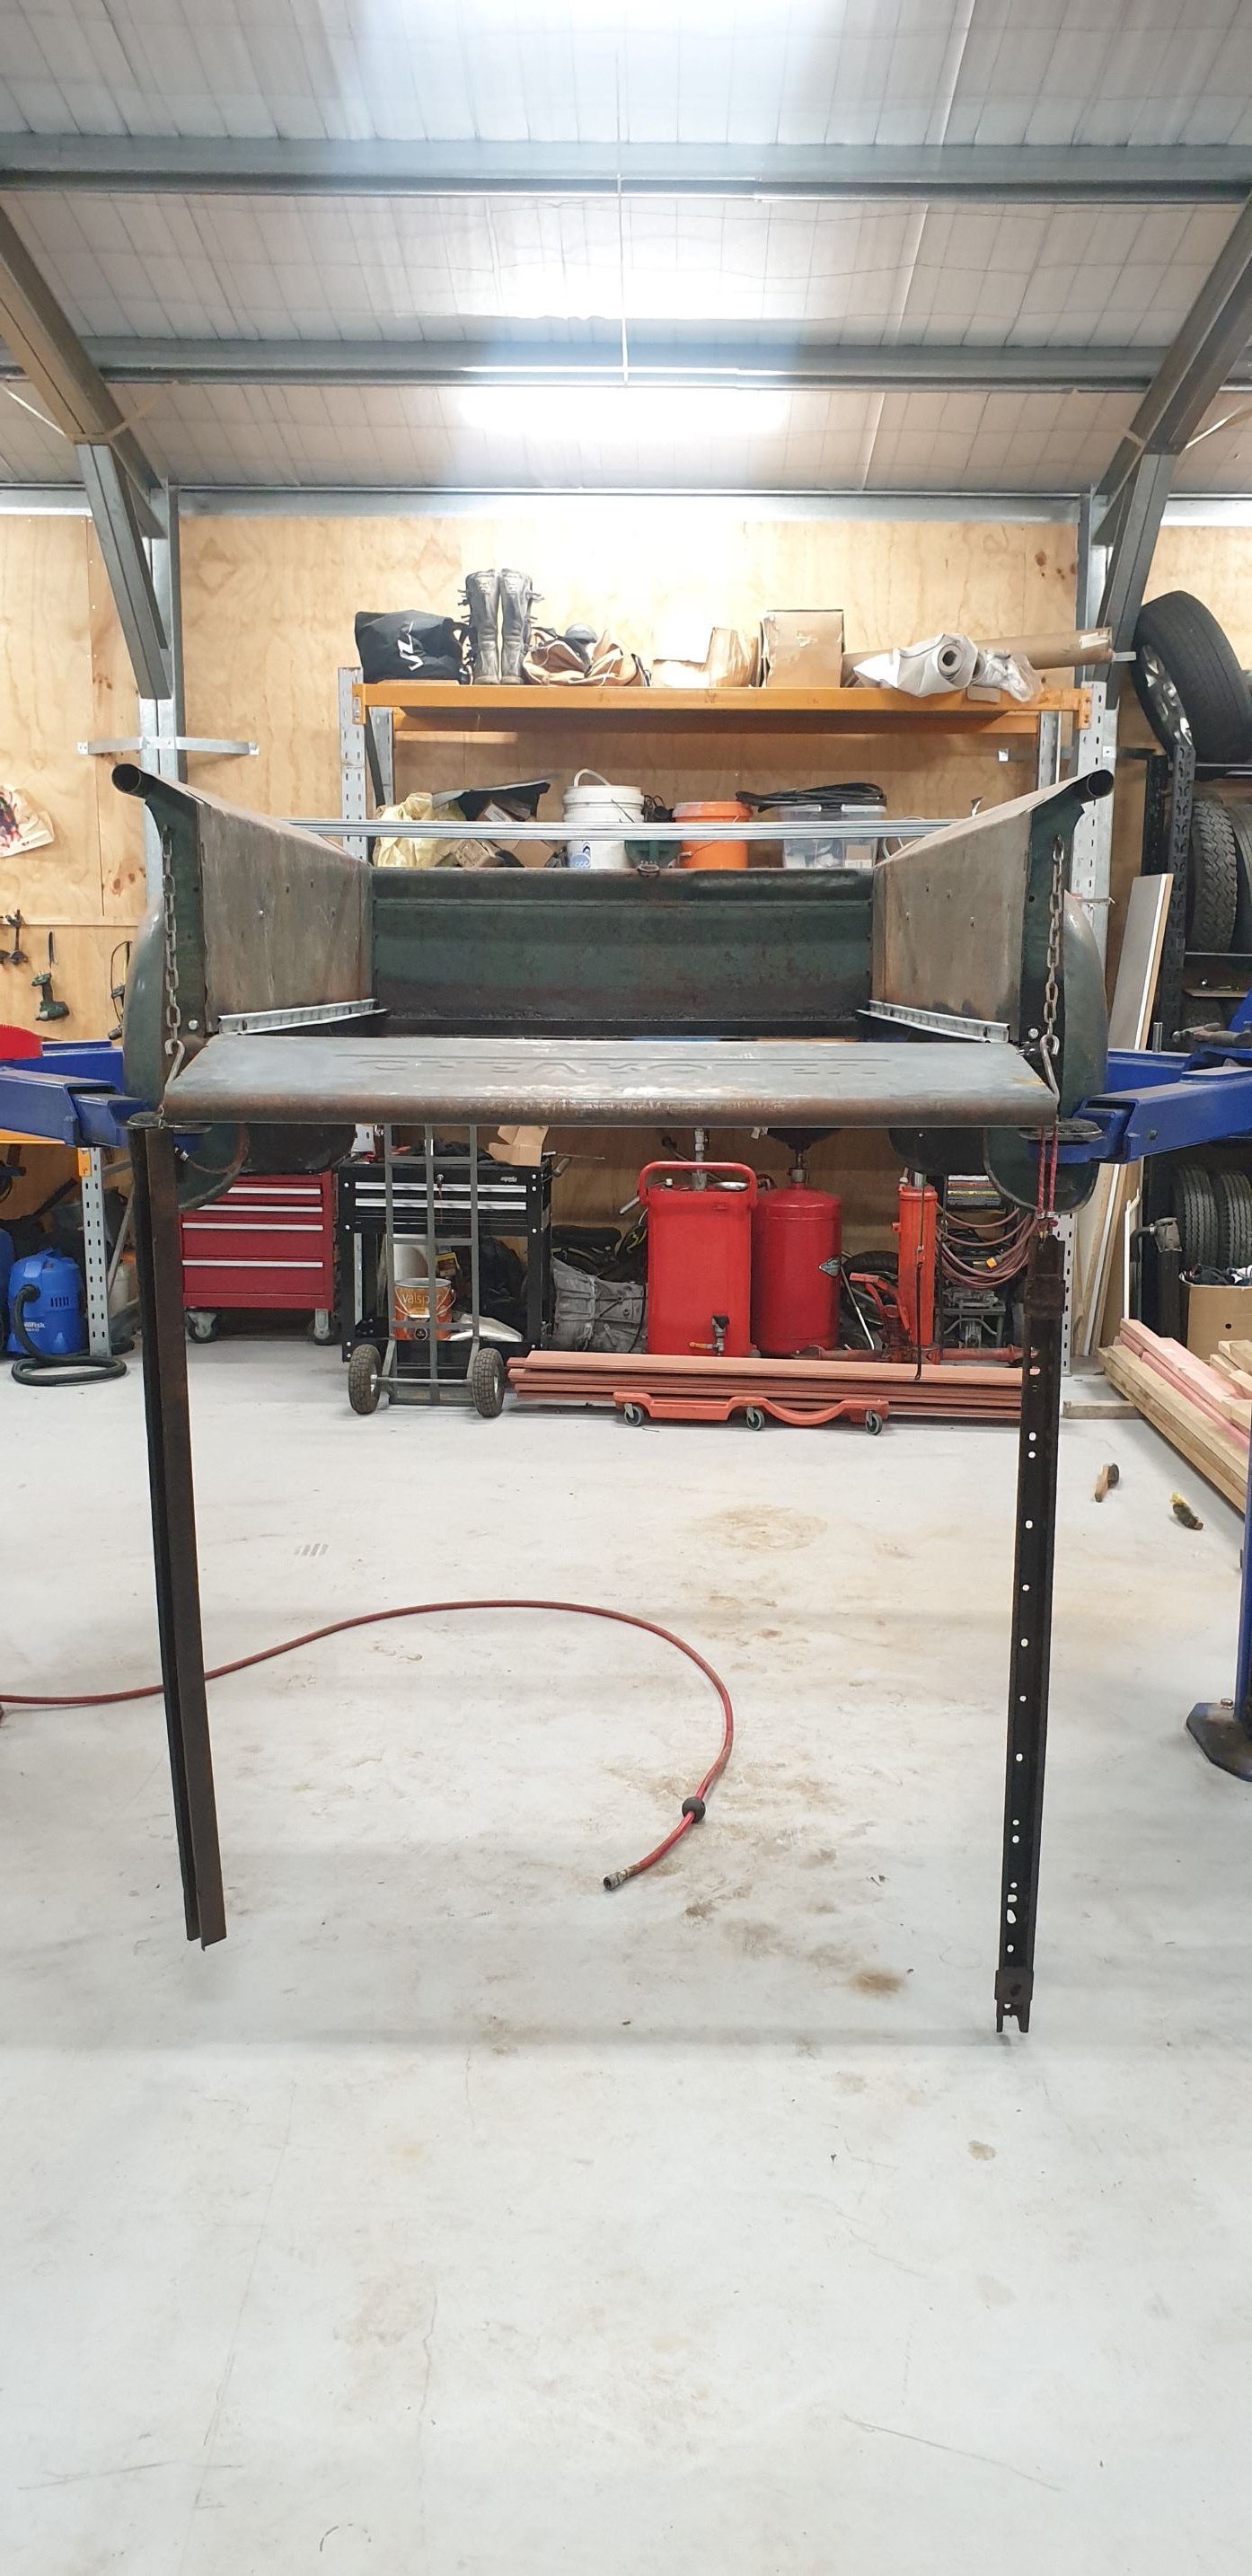
Got the timber deck put together on the weekend. Jarrah timber deck with new deck strips all painted up. Stoked with how its come out. One step closer to going for a VIN.
 14 points
 -
8 points
-
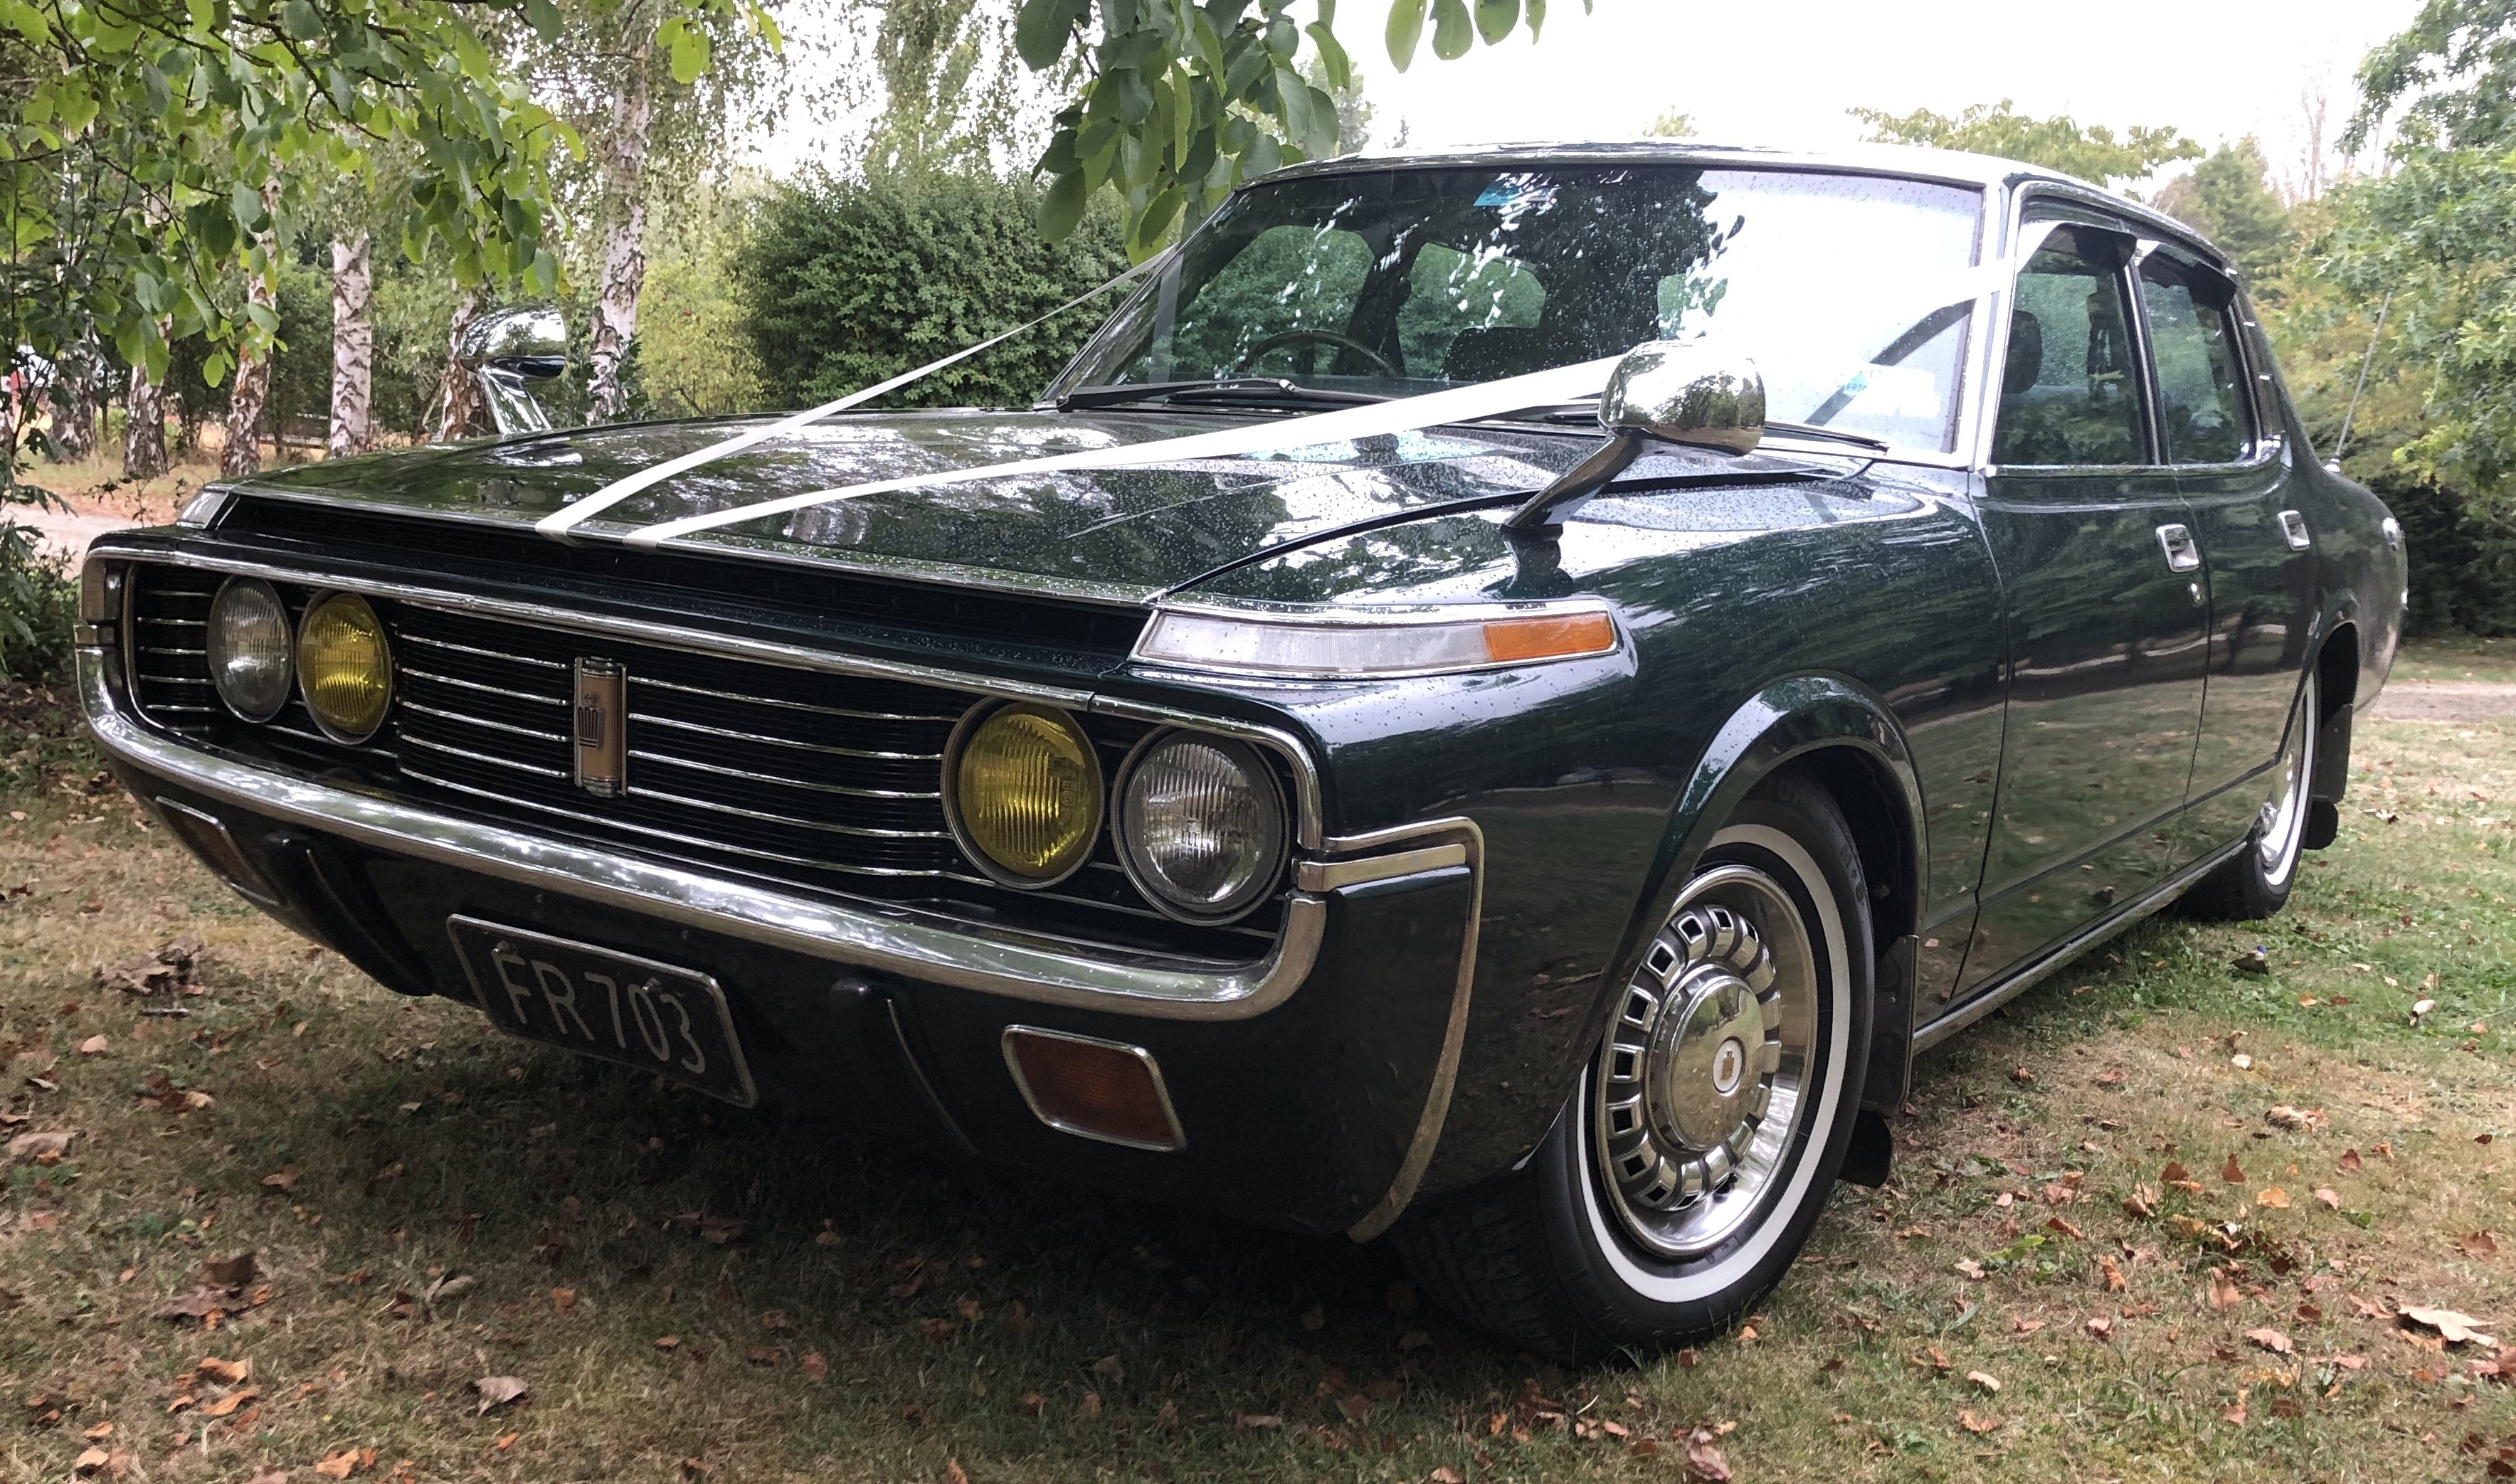
I got to use the crown for my wedding, ran perfectly for the big day . still not legal......
8 points
-
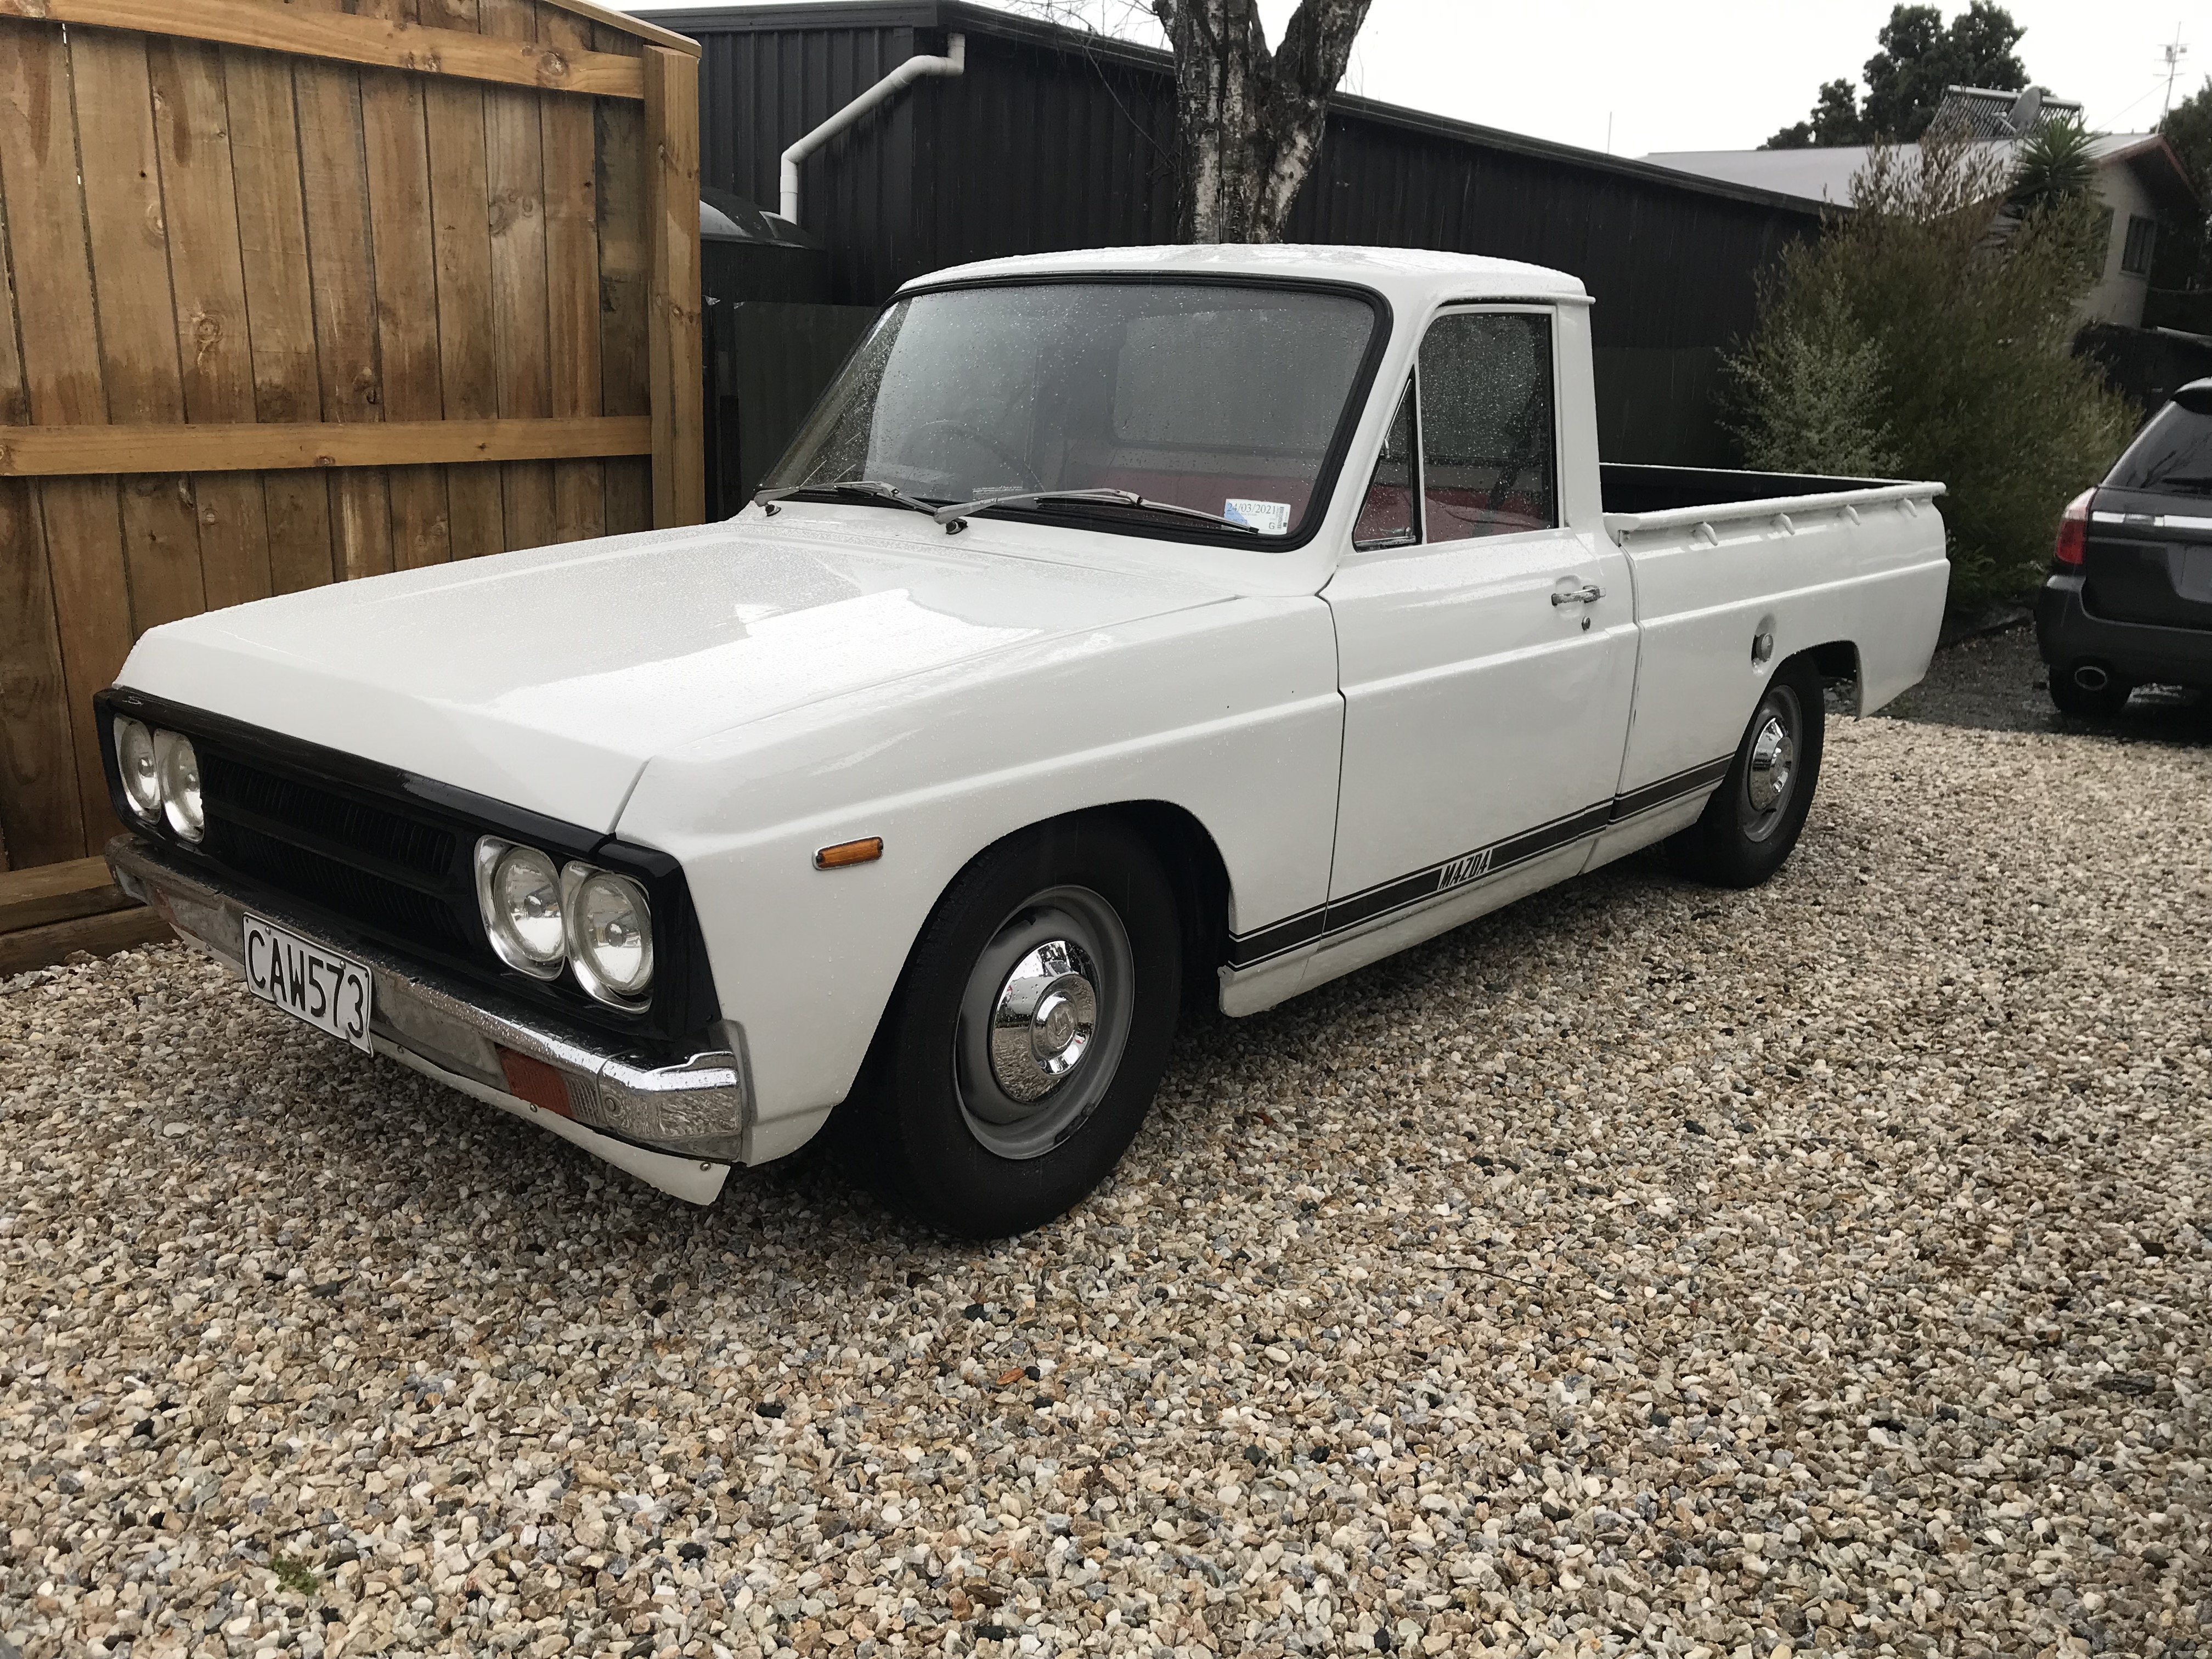
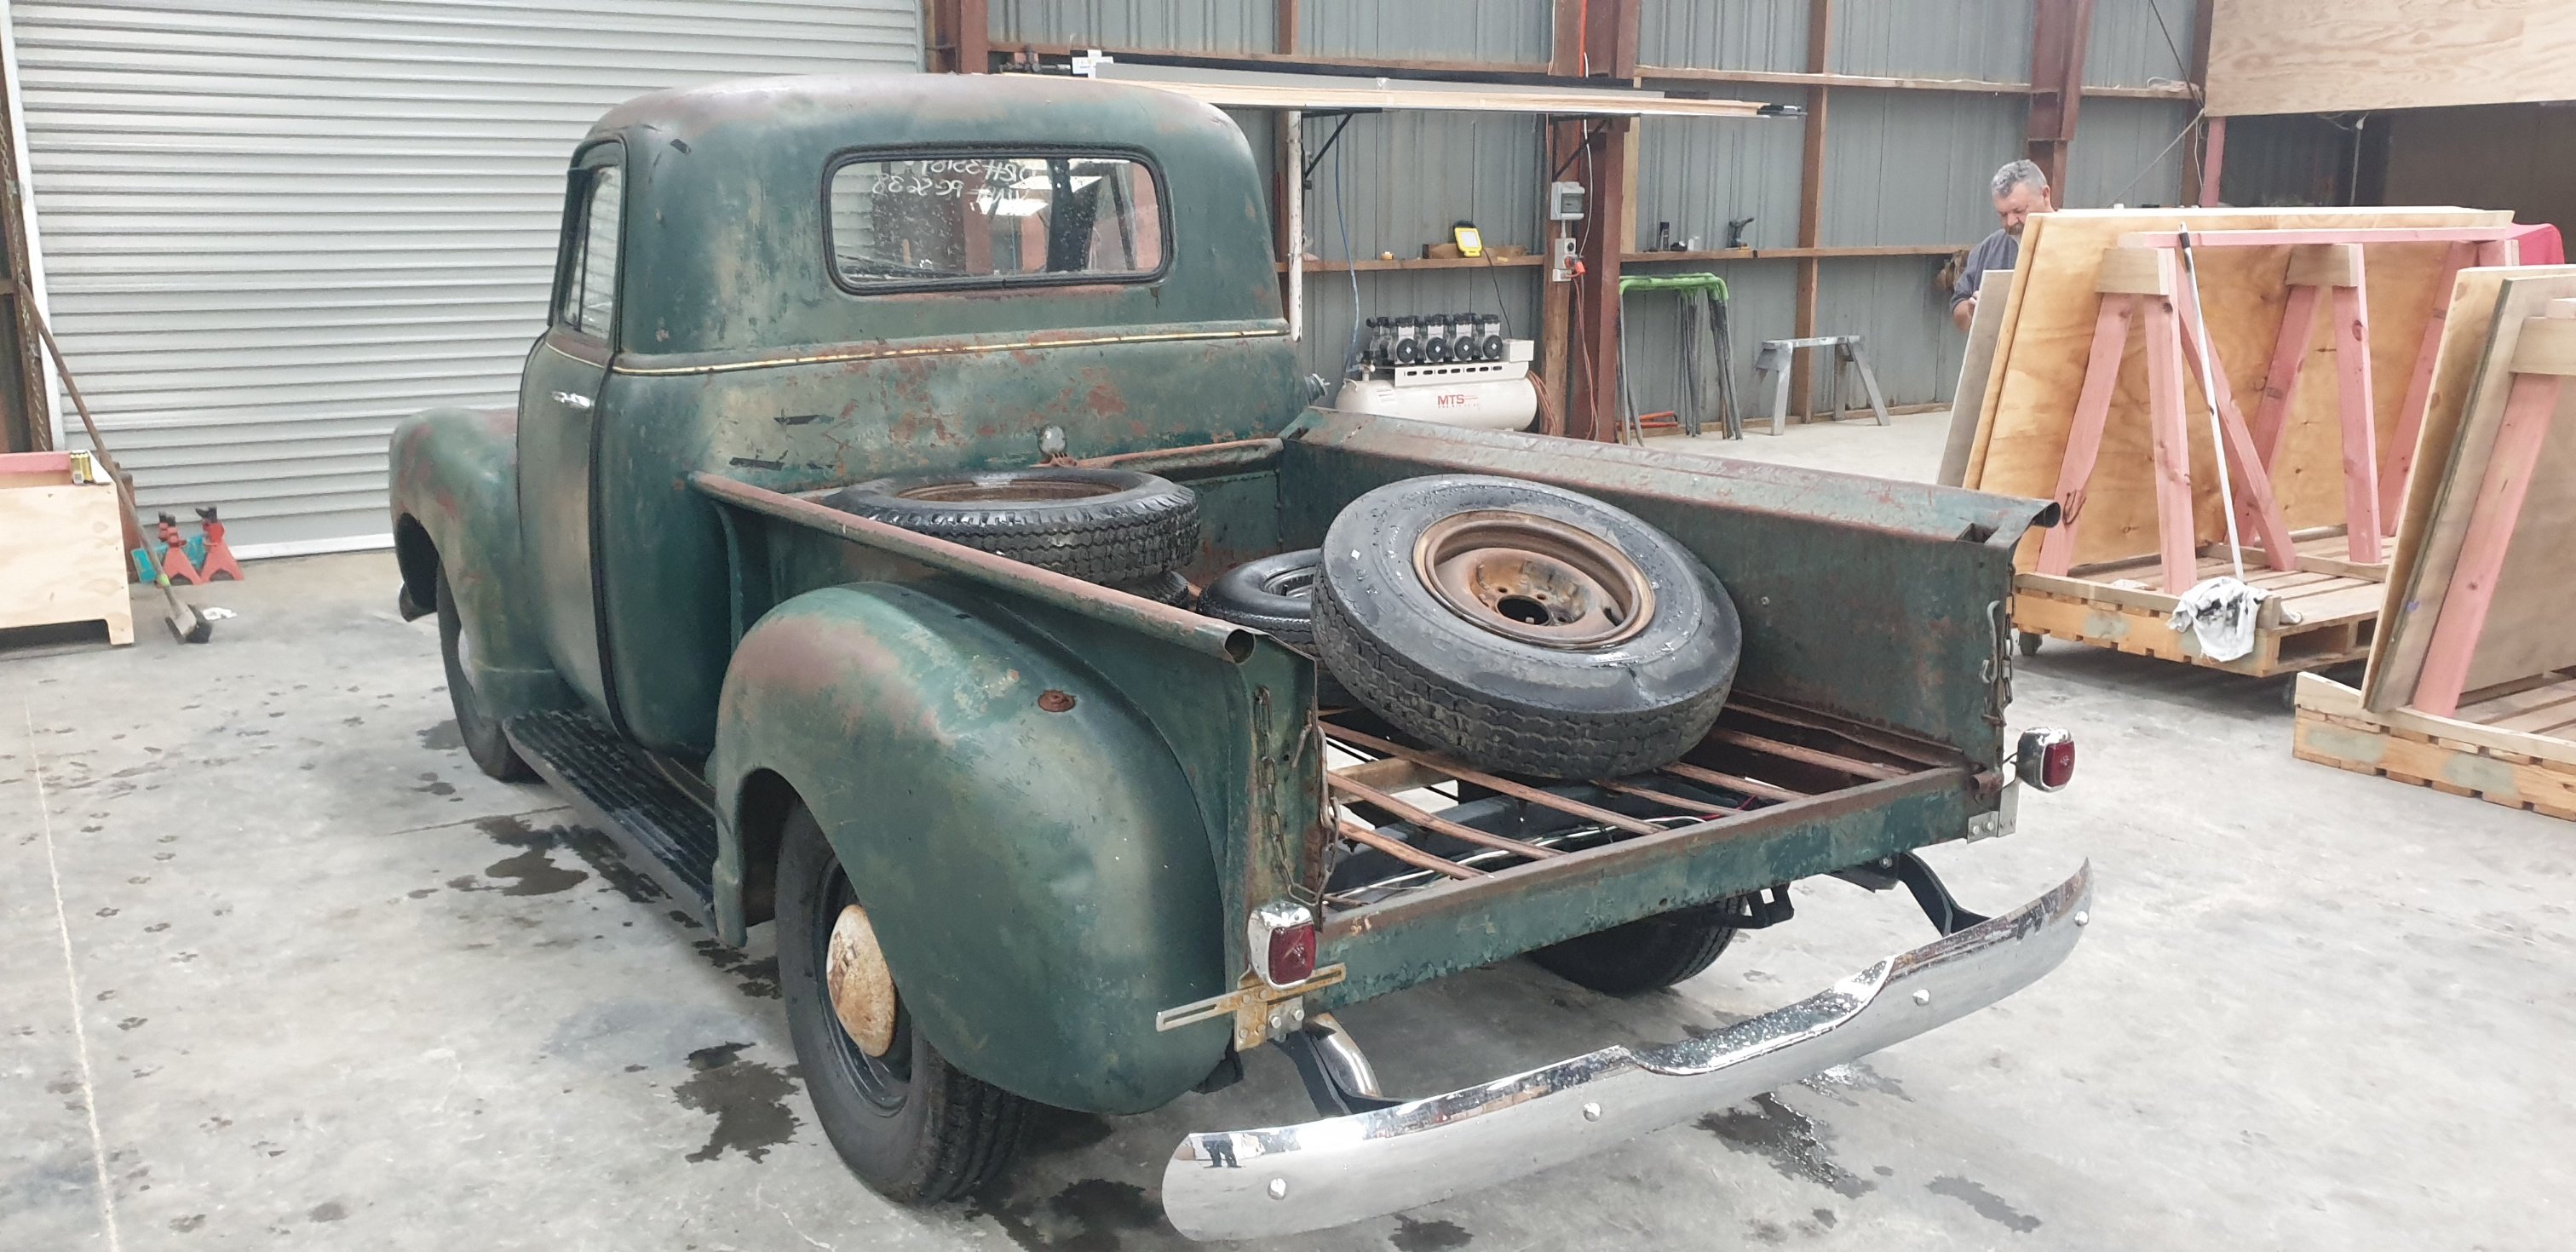
All done, spare tyre carrier next.8 points
-
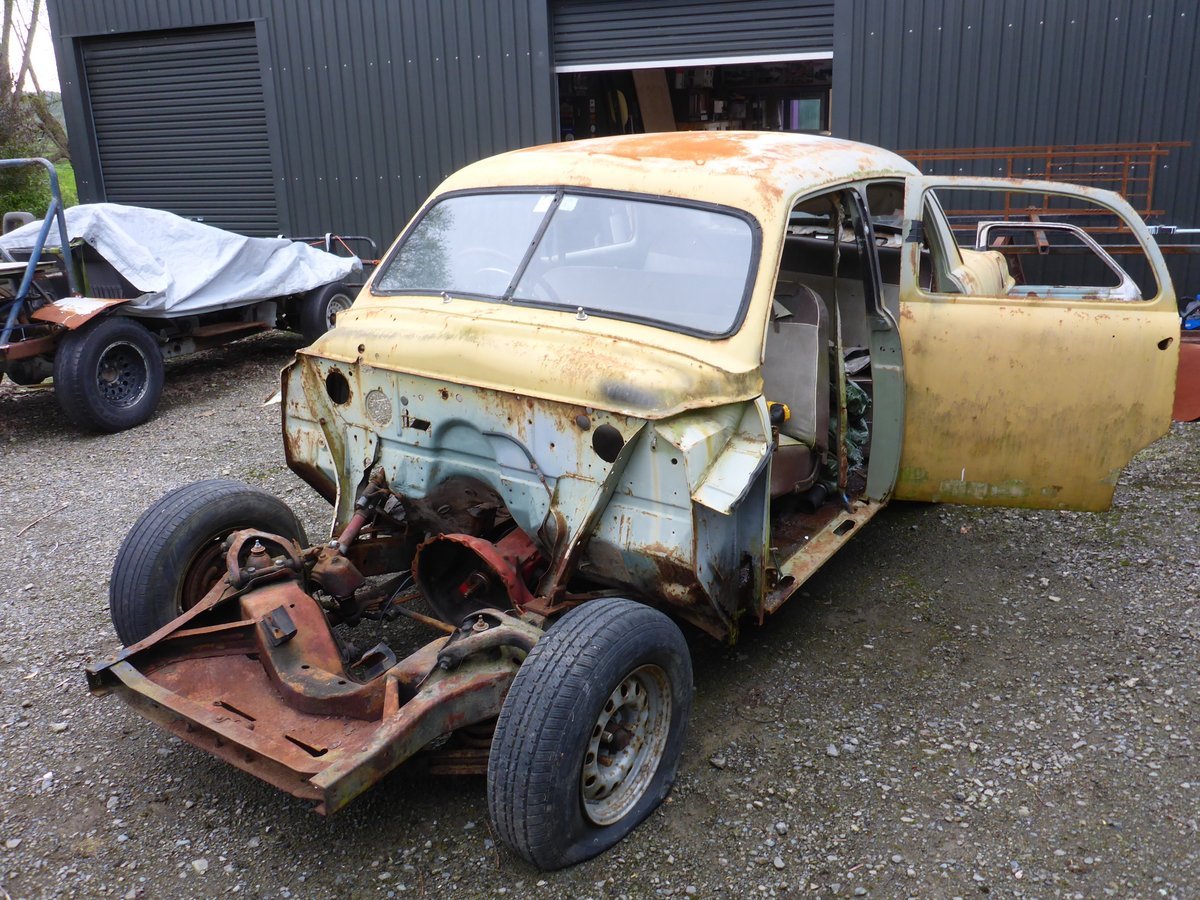
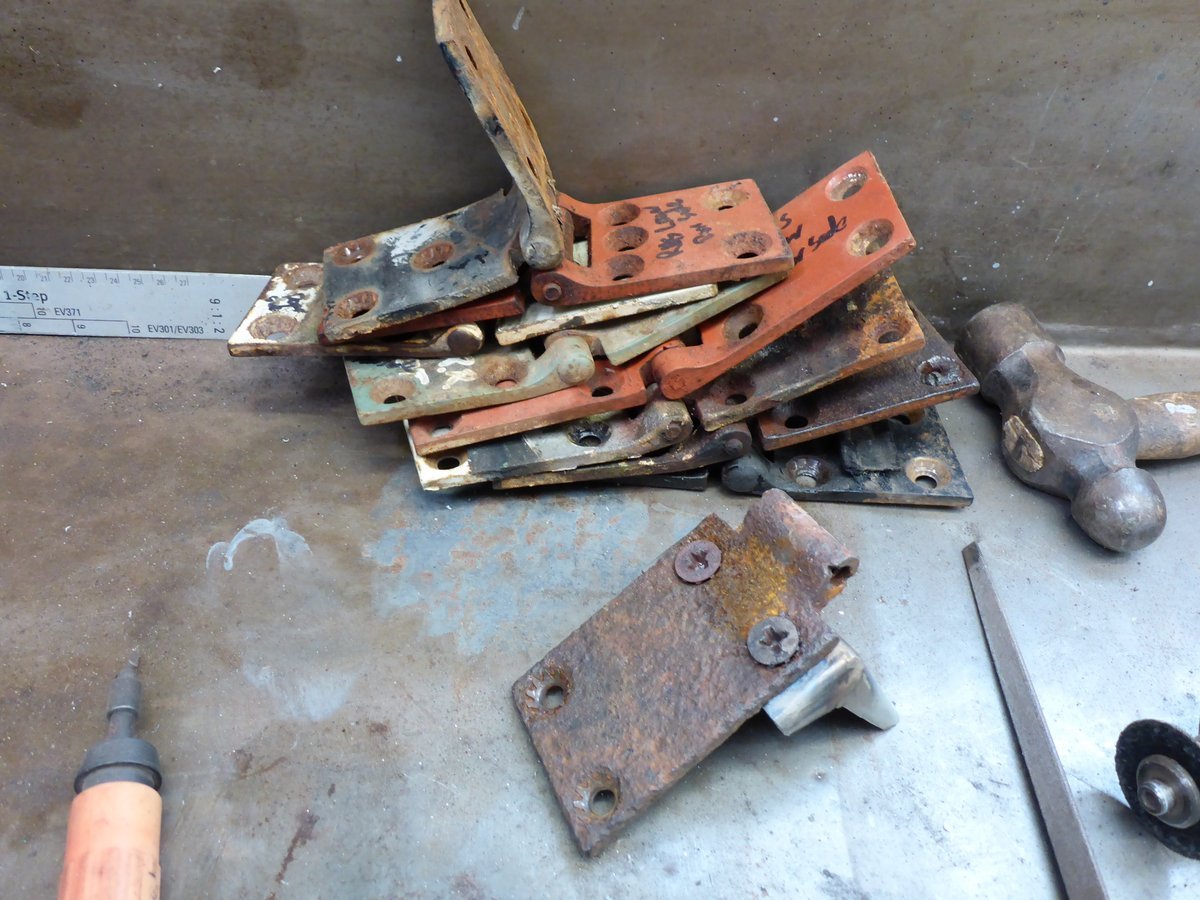
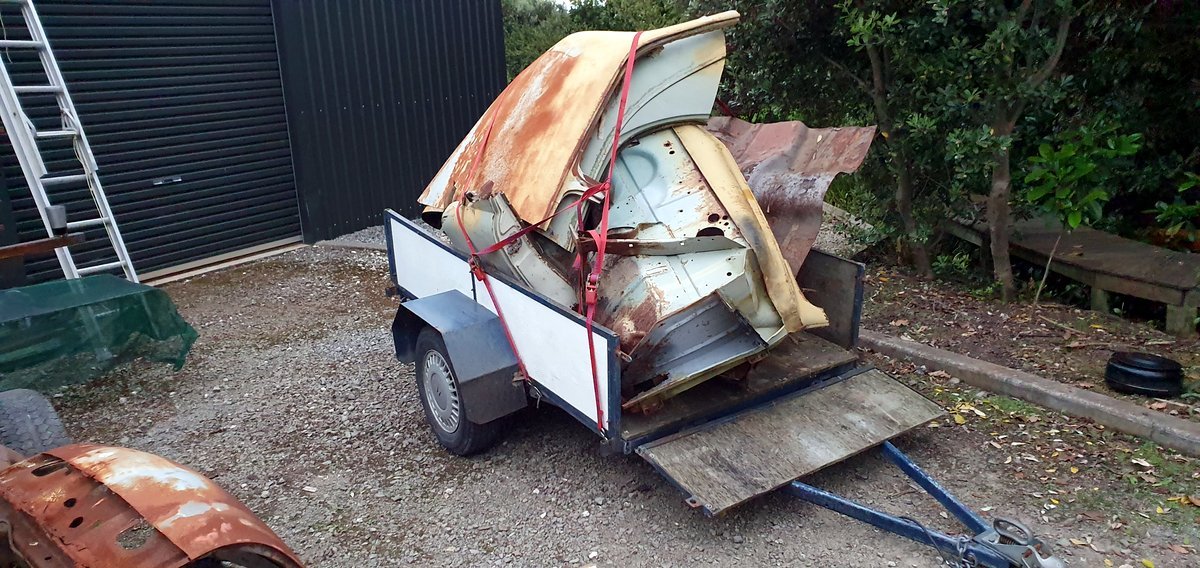
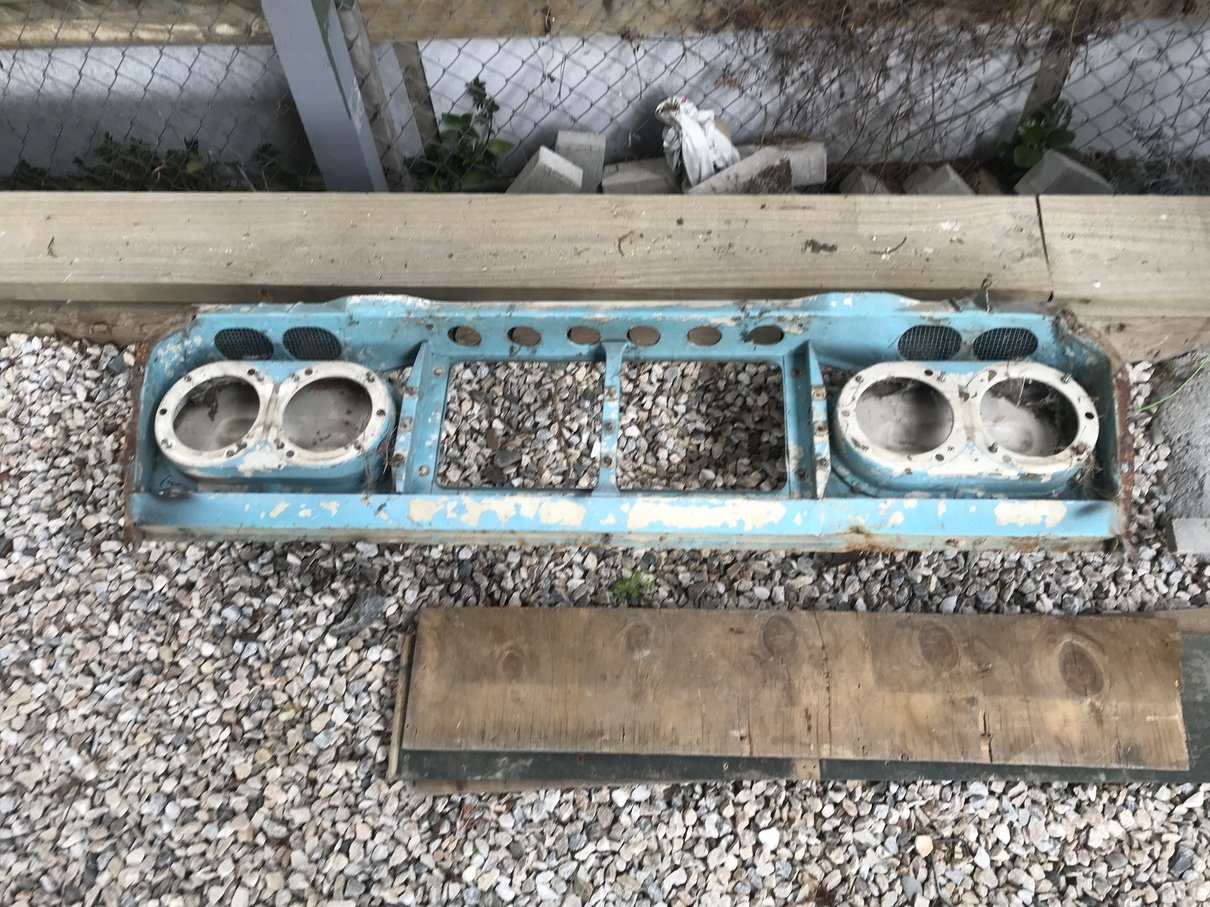
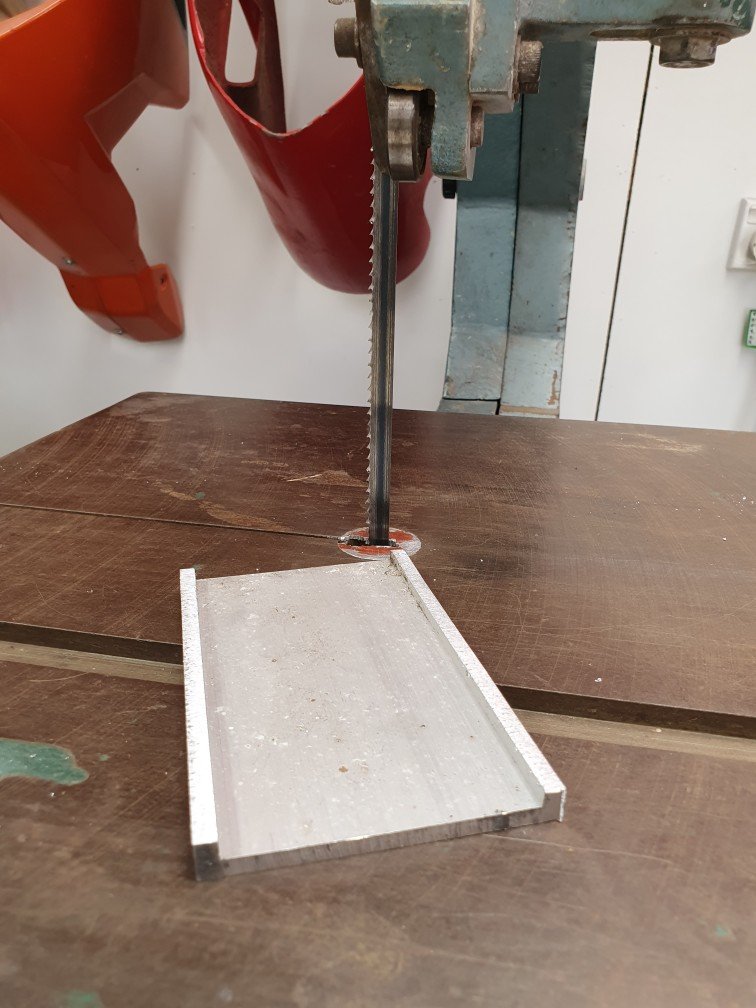
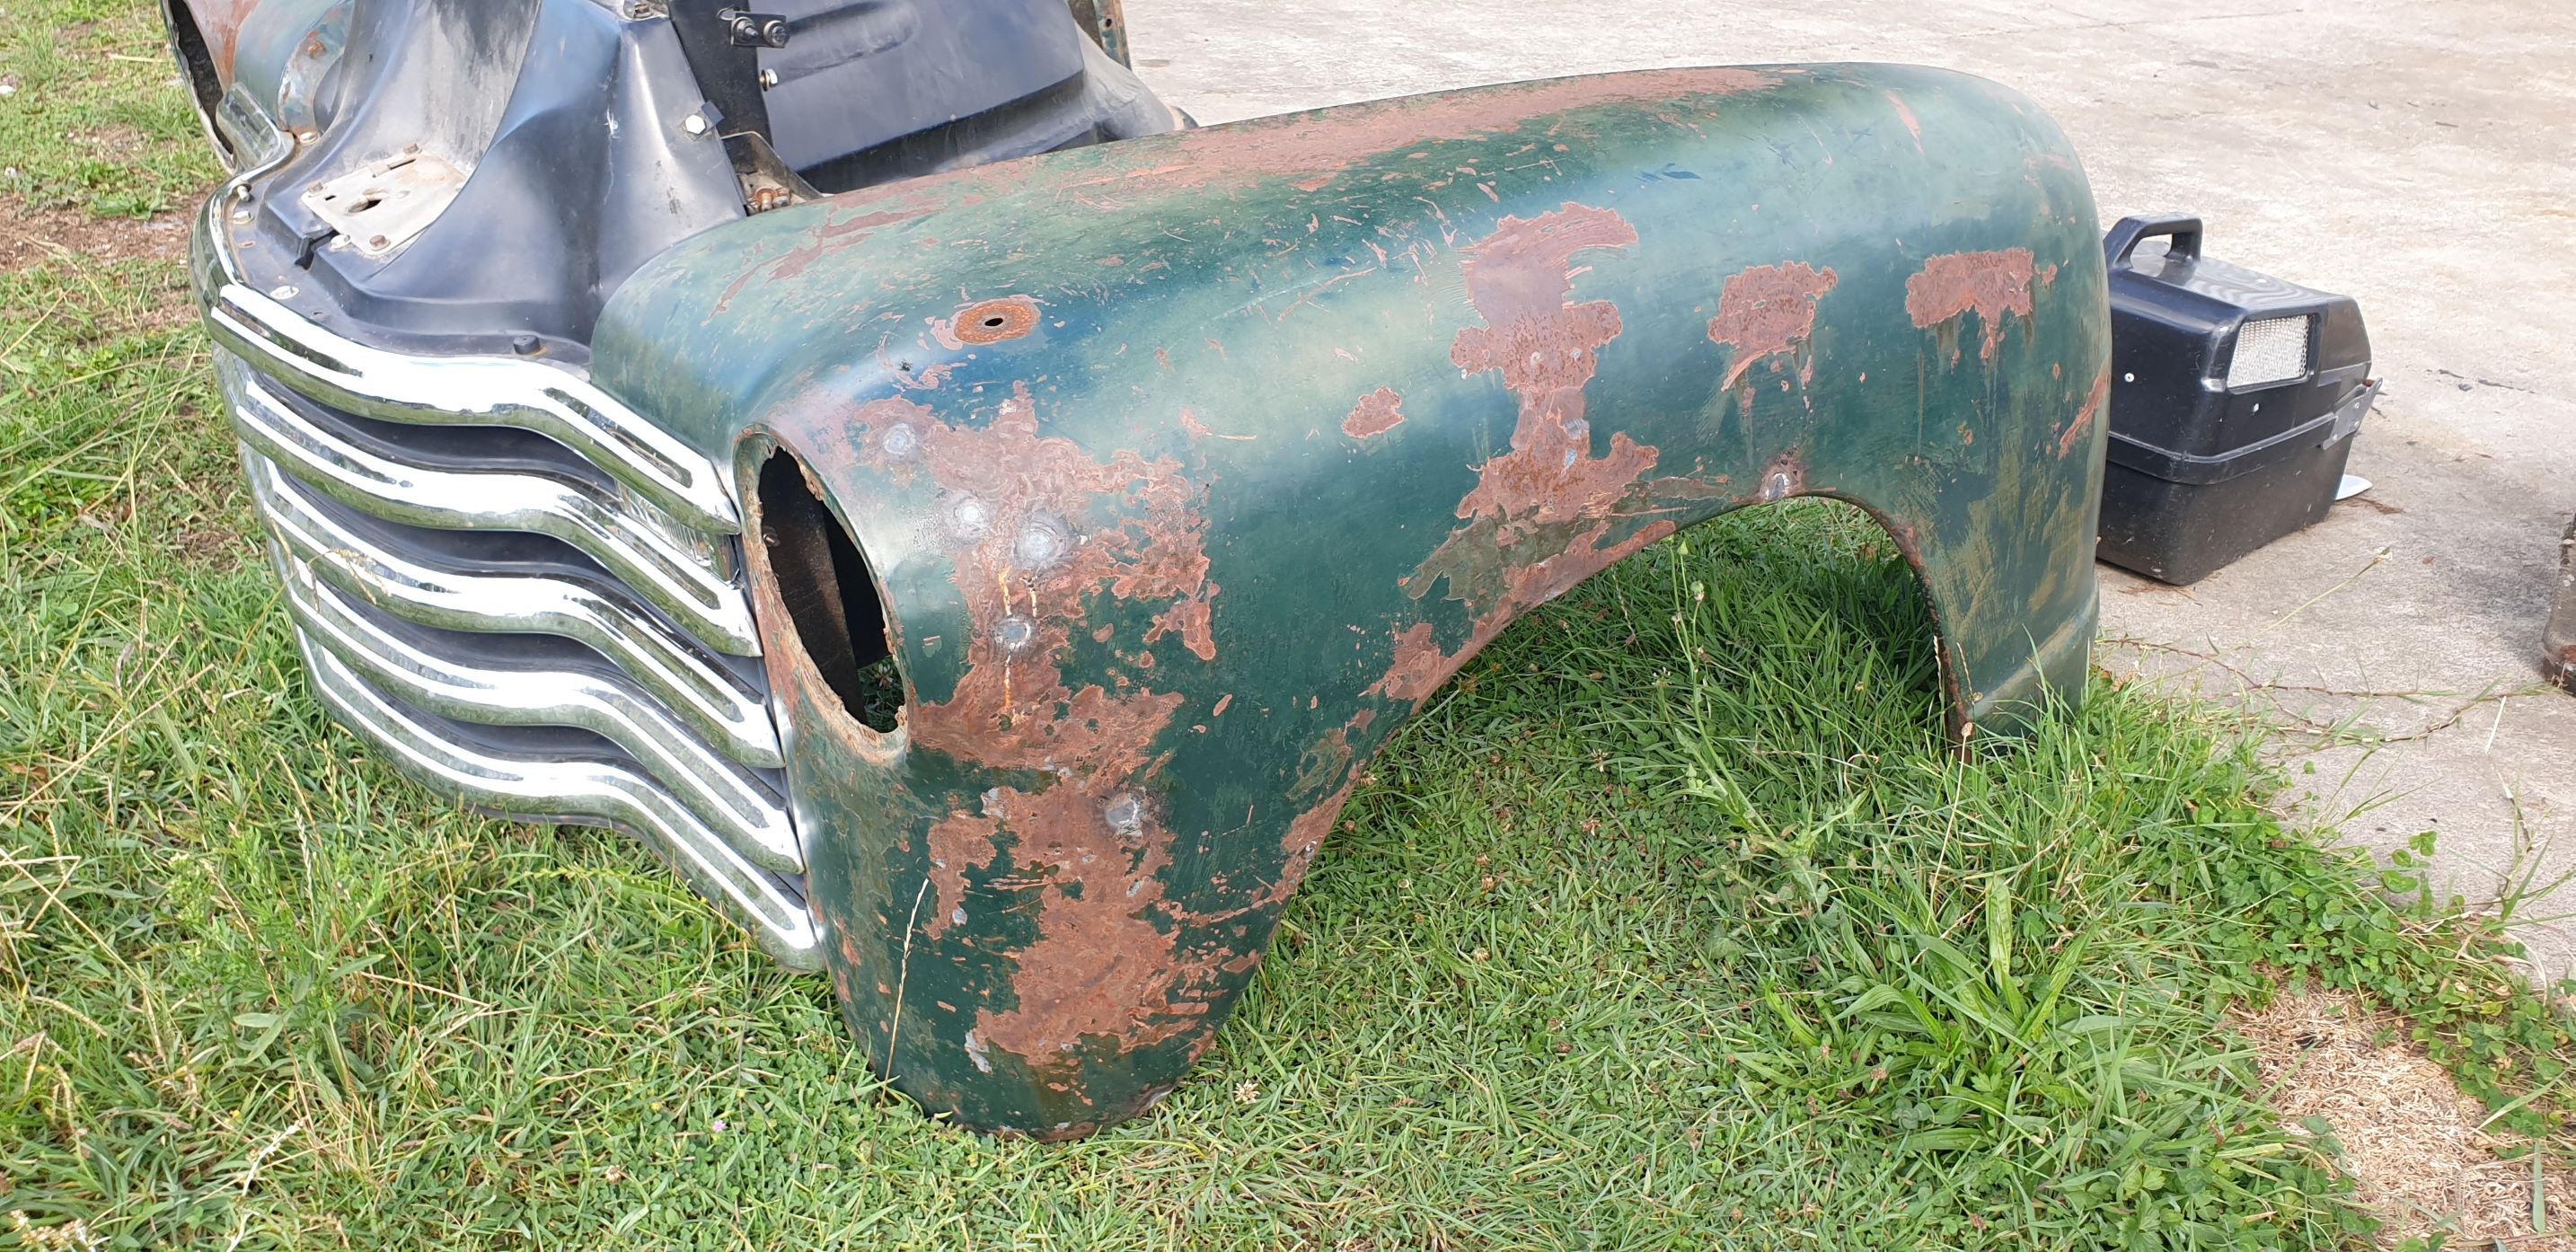
I got offered a 1951 Ford body shell for 'free' if I removed it from the rolling chassis. I was in pretty haggard shape, and past any restoration. Unfortunately the front panel were long gone. Apparently it had been in a field near Levin for quite a while. Anyway, paid some $$ to have it delivered from Levin. And attacked it with a sabre saw.... Main things collected where a much better set of door hinges, the rusty one in front is from the woodies and is pretty rooted. And this RHS A-pillar cut. I plan to graft this into the woodie shell as the existing one is pretty much missing.
7 points
-
I had reacted and commented on this photo a long time ago. And at the time I'm sure I saved it. Well after some hunting via stalking my own moves on Facebook on a lot of vw groups I found it. So I'm going to leave this here so I cant loose it again. Perfect.
7 points
-
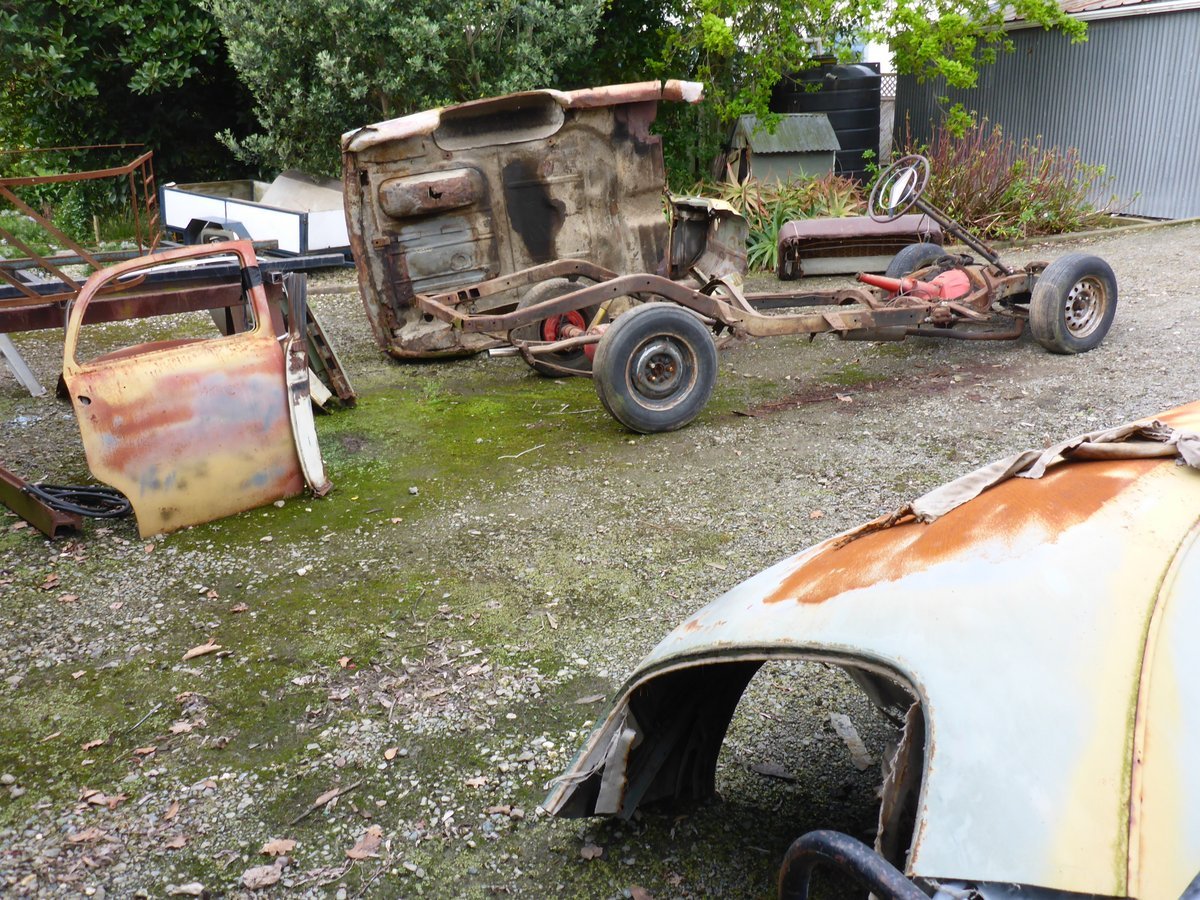
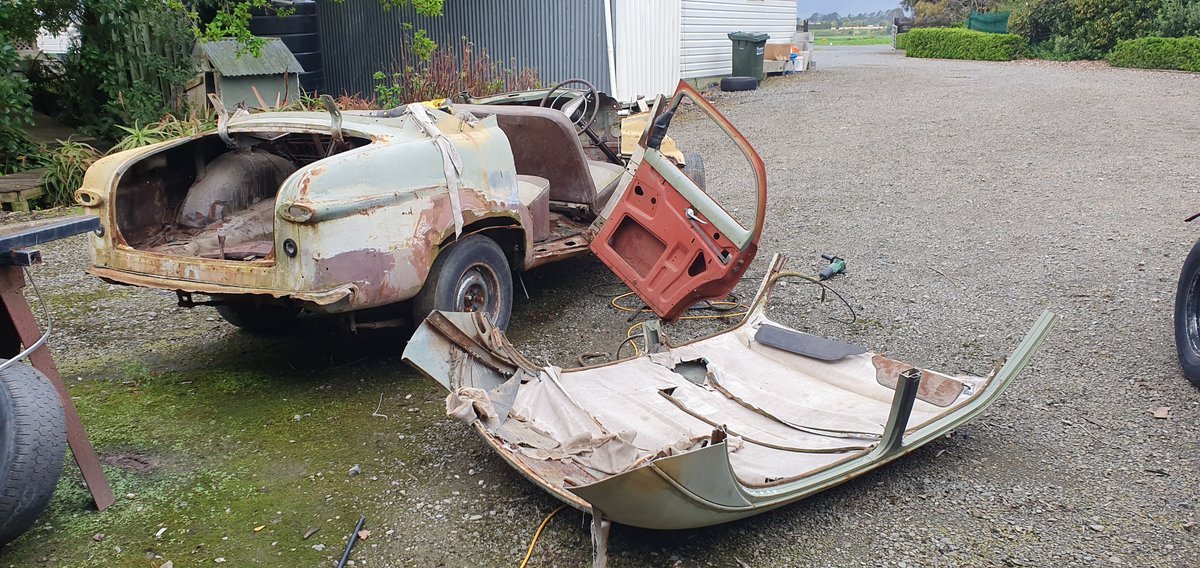
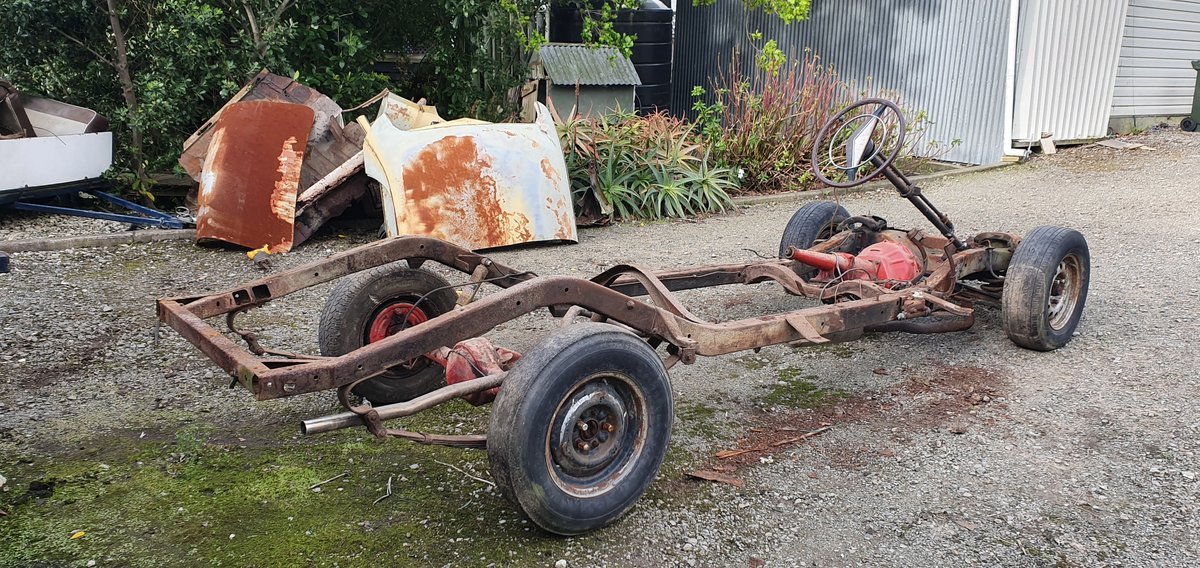
I was going to keep this rear section for a 'one day' (/never) couch build but after advertising the seats on FB, @Cbomb came down and took most of the 4-door parts away. The rest of the shell went to scrap, although I heard later that some local whanau cherry picked some bits to be used in an art project of some sort. Also, the owner of the chassis needed some cash after buying too many motorcycles, so I ended up buying it so it's still sitting in the driveway. It's RHD, but might be useful for some parts or to use as a temporary body support (although I suspect the woodie chassis may be different in some way)
6 points
-
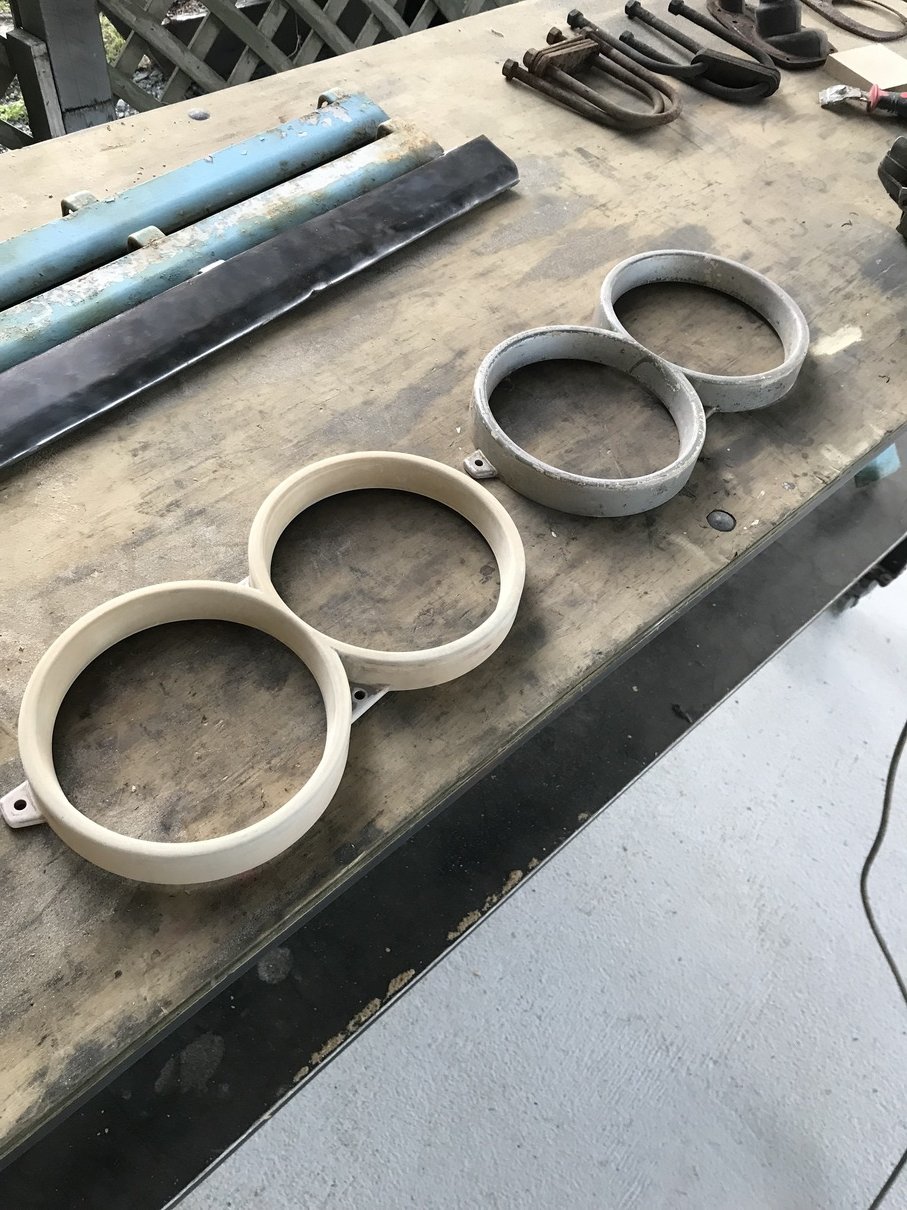
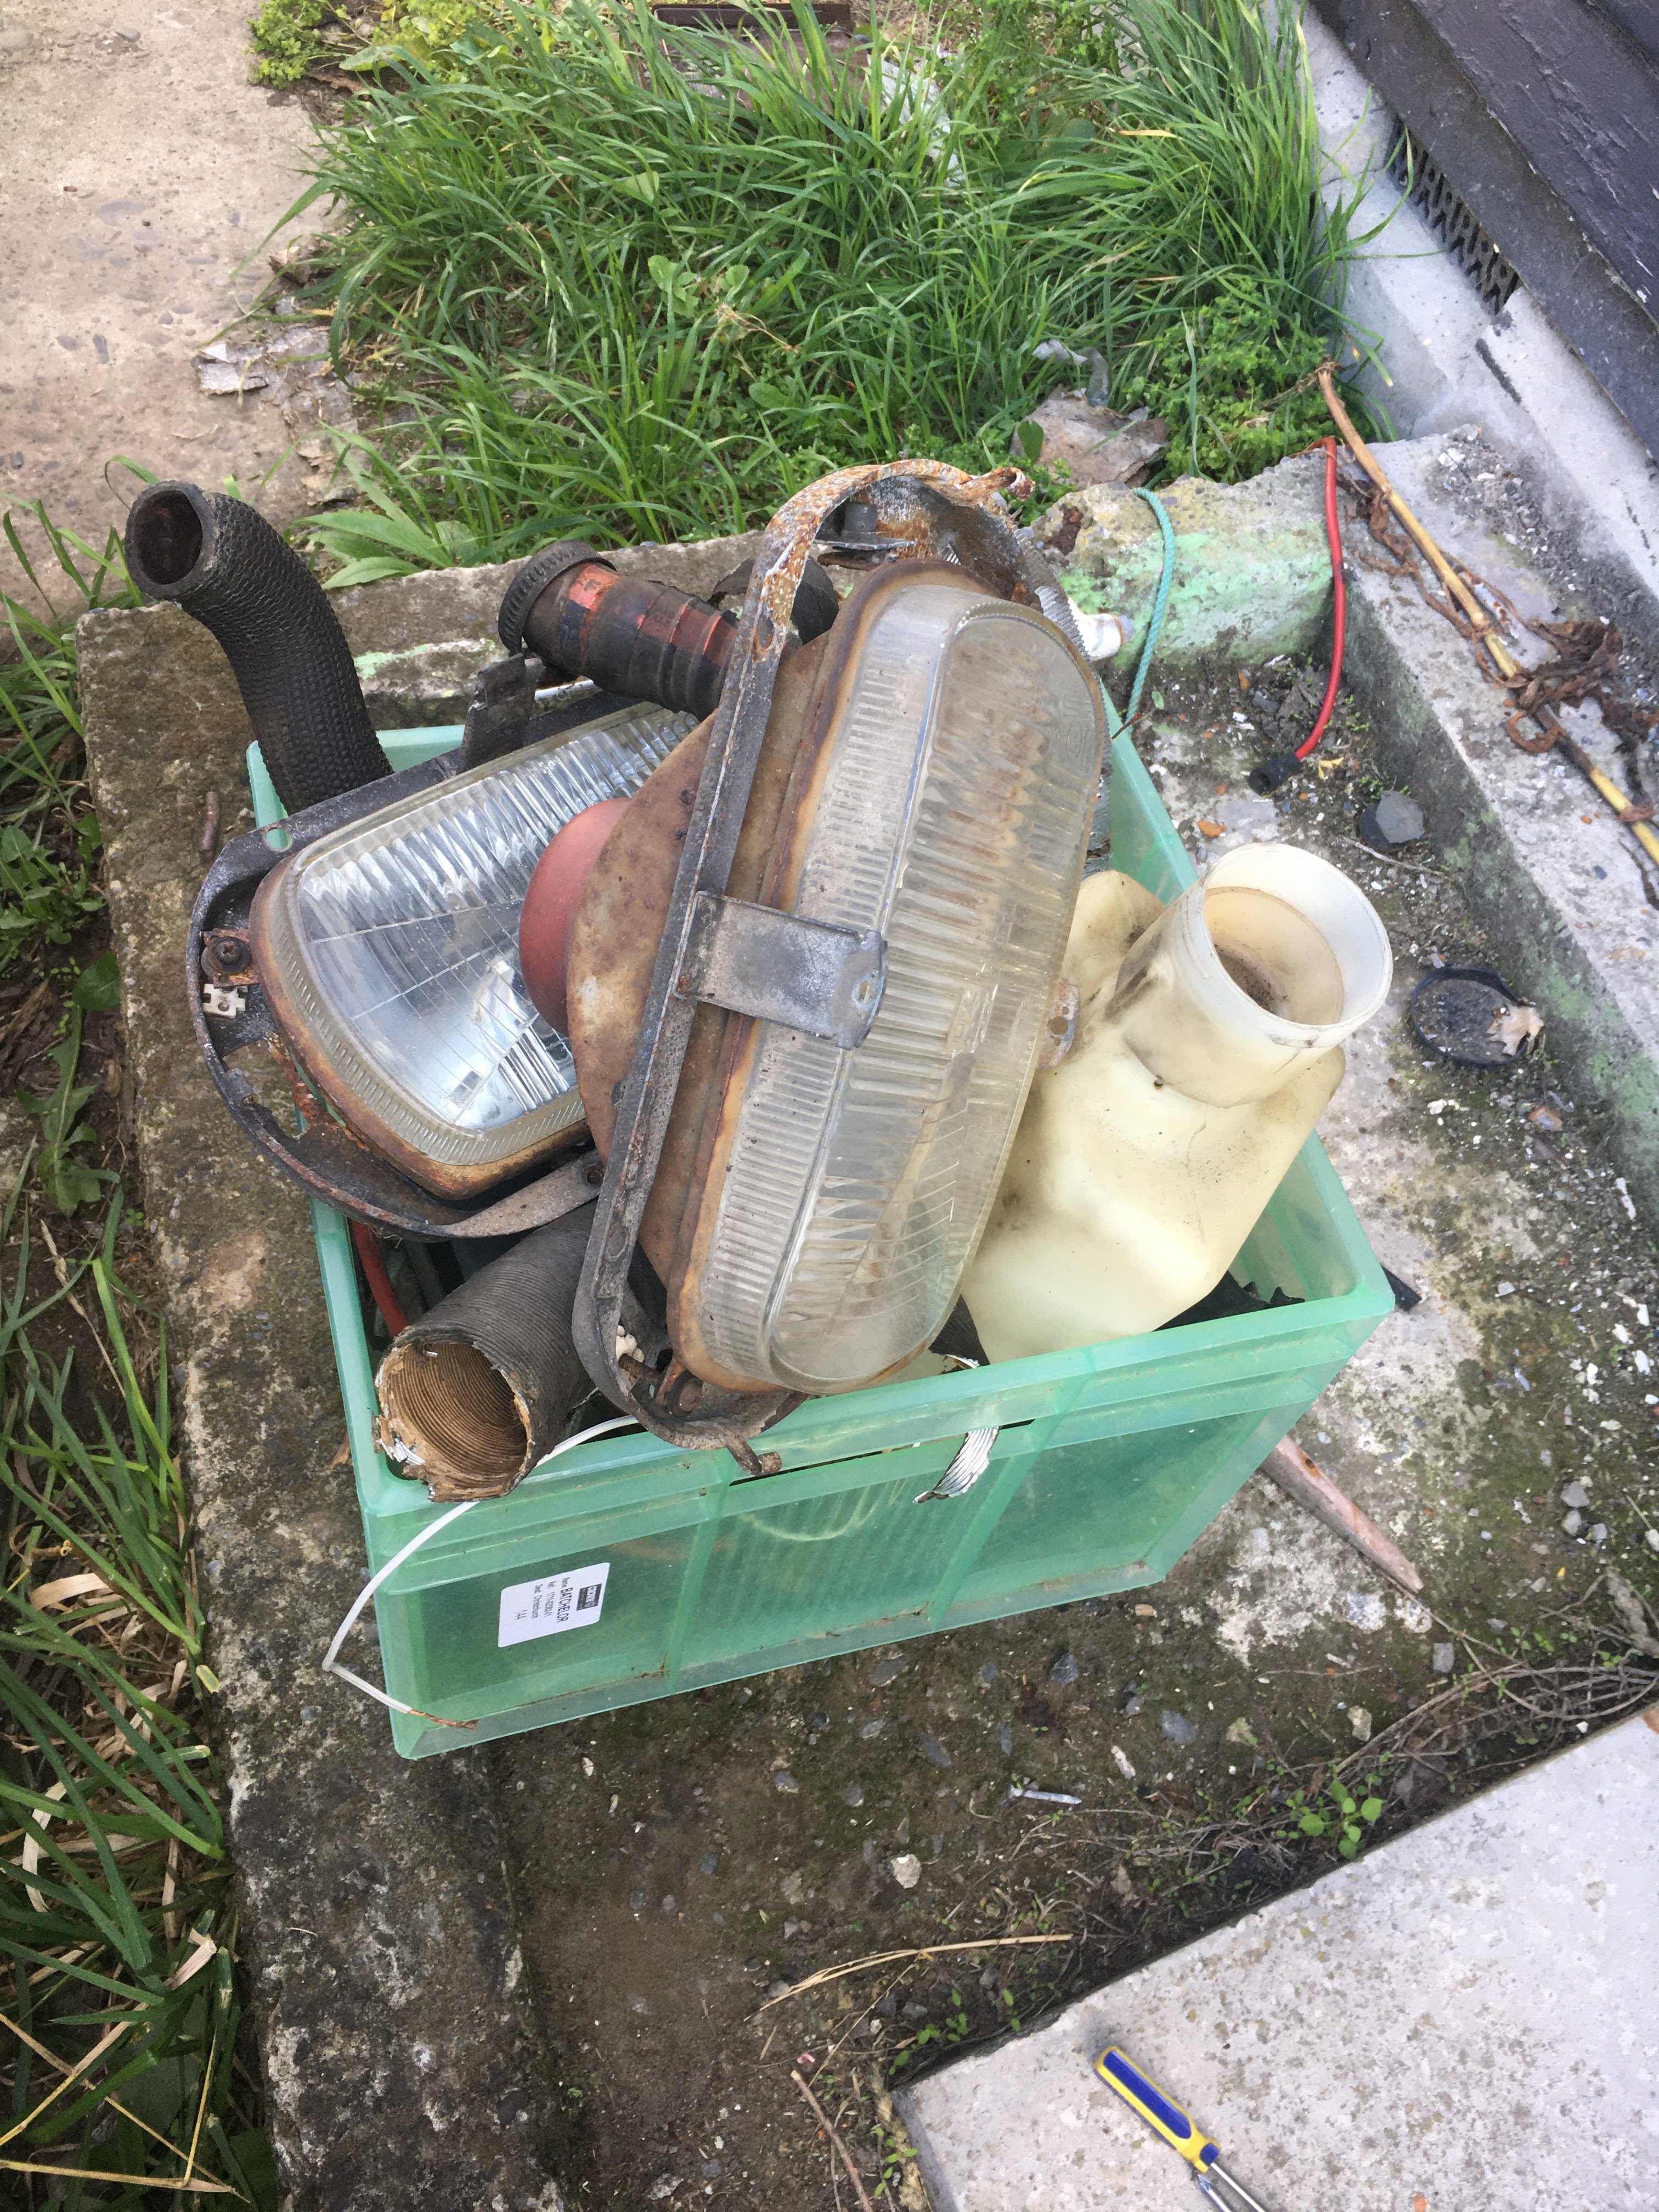
slowly making a start on getting all the B1500 front ready to swap over in-between doing jobs around the house, starting to clean up the headlight surrounds and grill pieces ready to paint. Will need to take some measurements of where the headlight bucket mounts and grill mounts are before removing them to clean up, also need to drag out the b1500 front guards and compare them to see if I can modify the b1600 ones to work with the indicators and headlight brow otherwise it won't be happening for awhile if need to use the other guards and paint them to match. also cleaned up a spare steering column rubber thats in really good nick, will make a plug where the column shift shaft went, going to start trying to seal up the cabin and put grommets where needed before sound deaden the cab
6 points
-
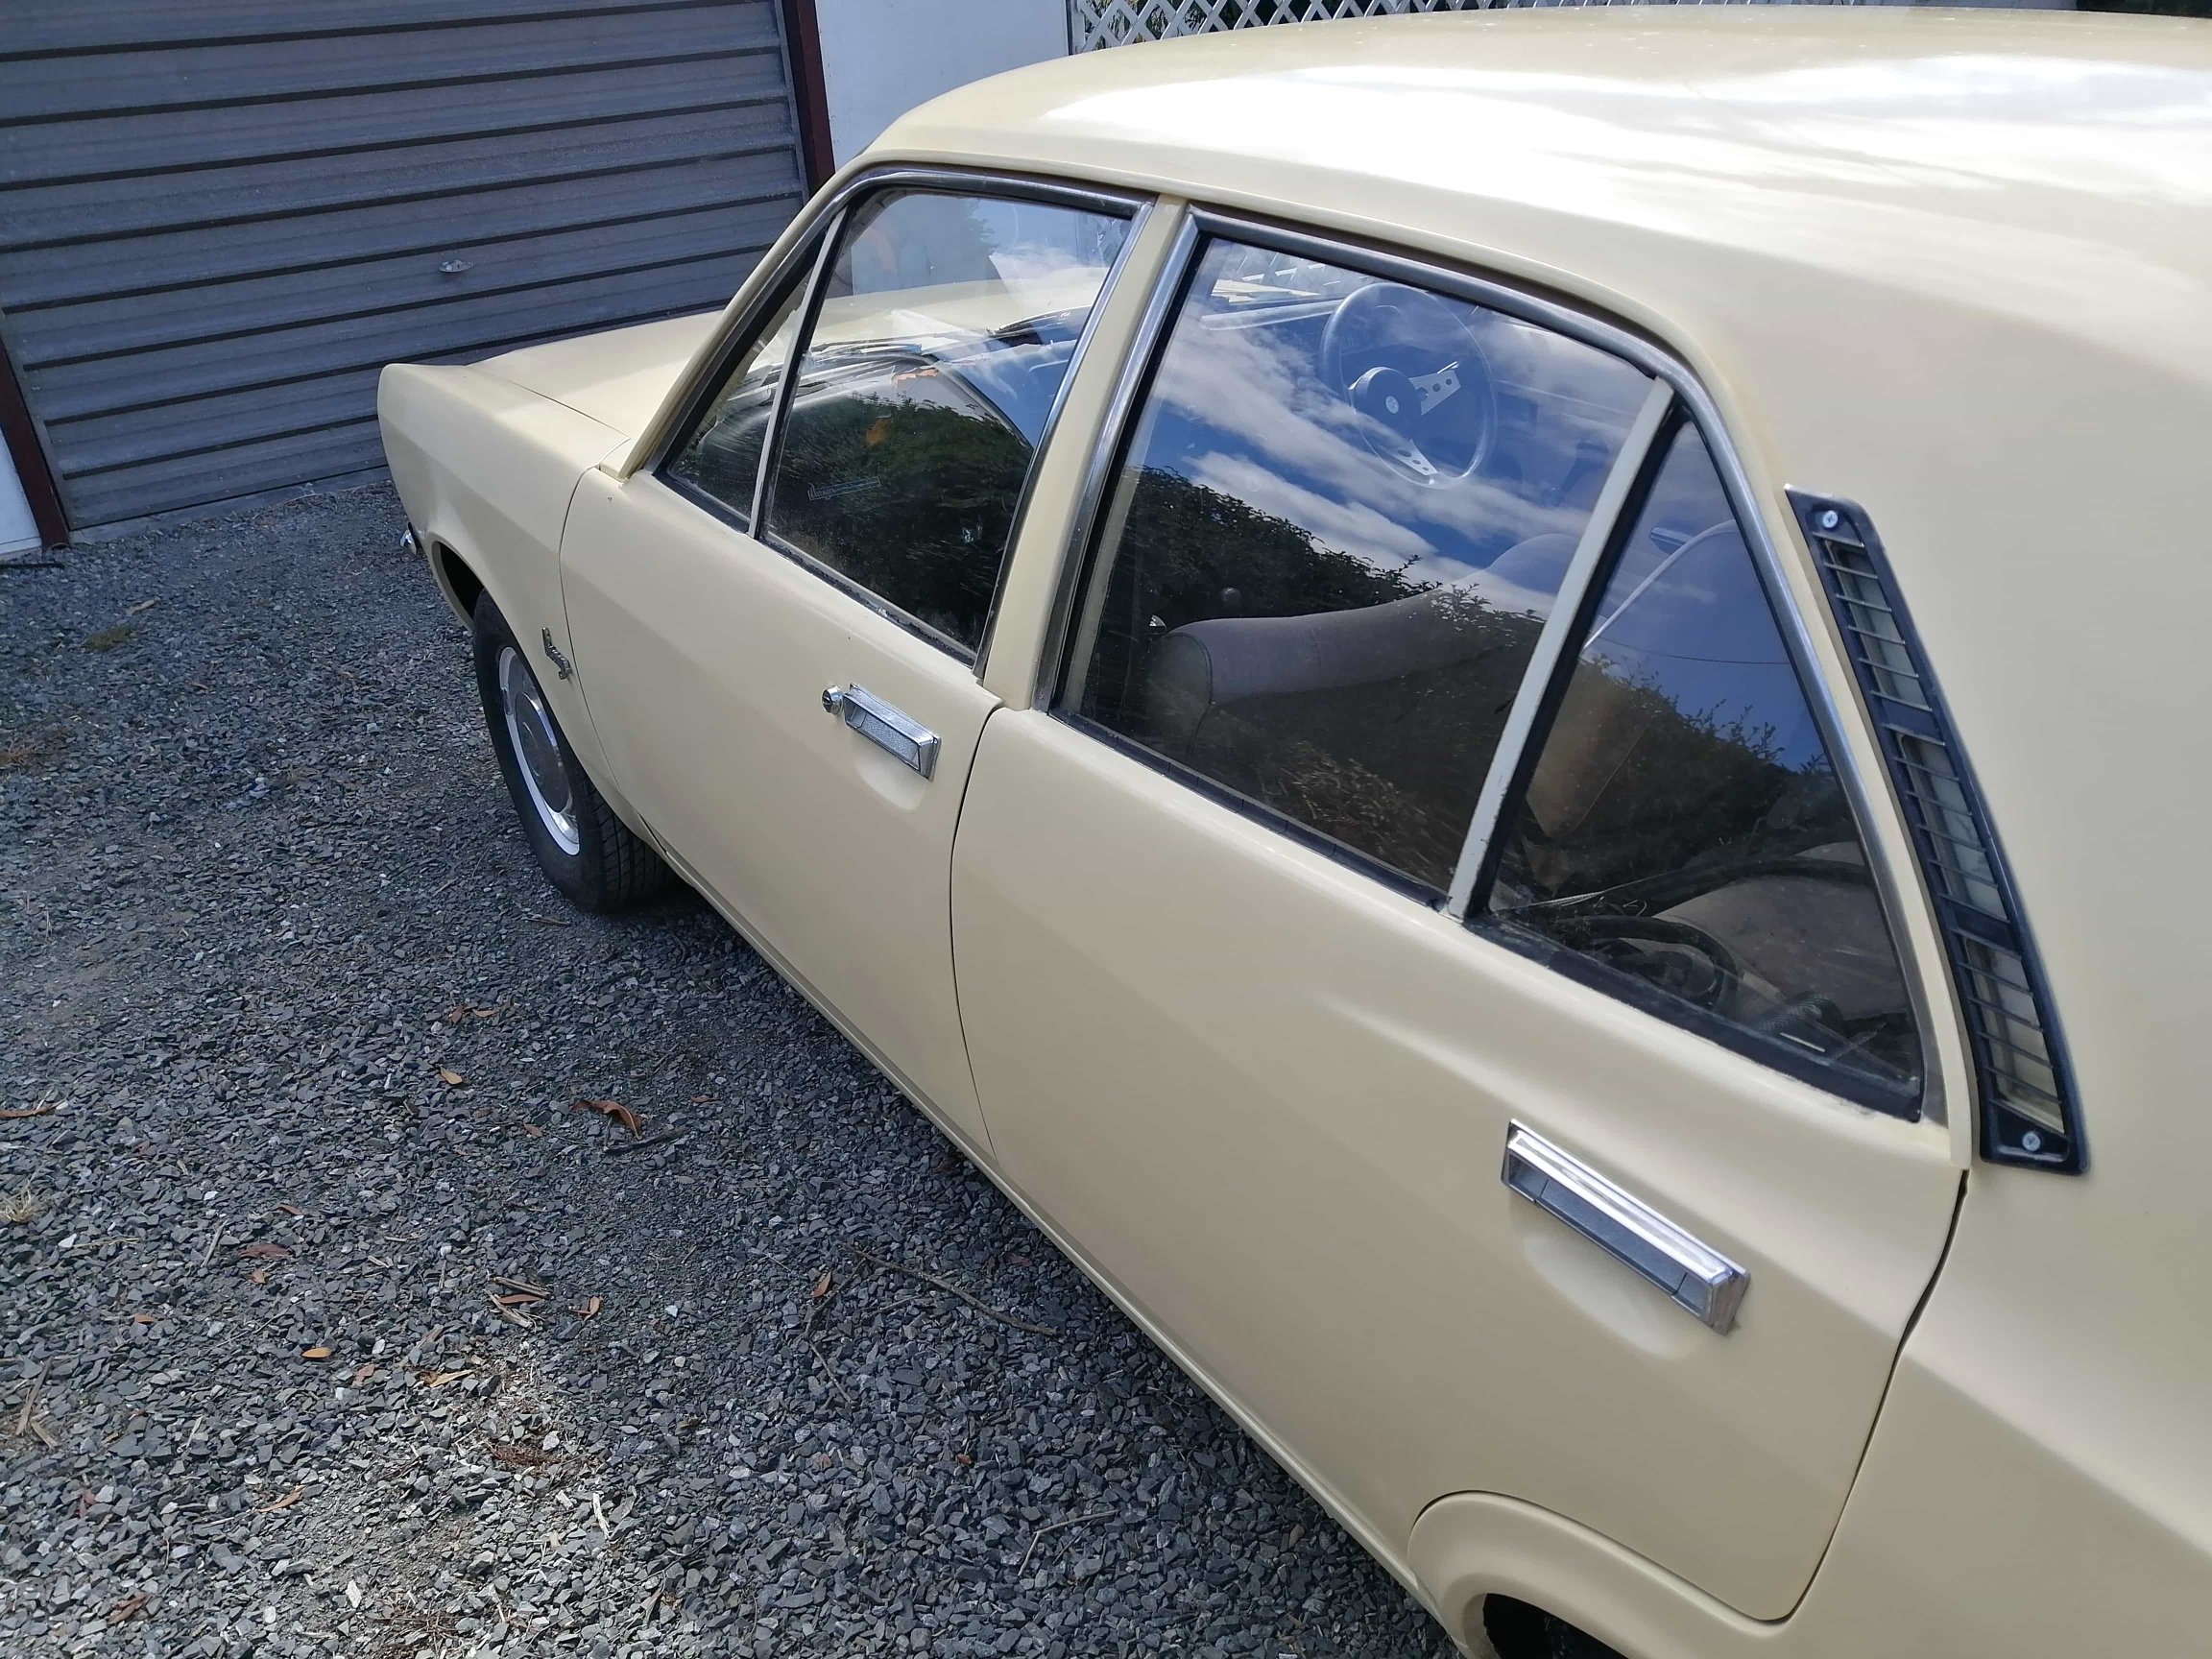
Weaselled my way into a few weeks in the sunshine, have rudely awakened the slumbering British cars. Just about finished tarting up the avenger- have ordered an essential buffing machine. Am now thinking of getting better seats - the dash is rekt, wonder how much of a c*nt swapping it would be - would transform the car
5 points
-
man she has been some time since the last post..... I think old mate @Geophy ended up getting some steel and i asked him to get me some right angle in the end. Welded that on and then it really started to get in the way at the shop. Invited old mate Geophy over again and got him on the grinder he went over allllllll my welds and made them flat for me. Making it easier to stick the cladding on when i am ready/have the money. the main reason was so i could get it painted and get it out of the work shop. we had been planning on moving the shop and it was not going to be able to fit in the new shop. I had re upholstered a chair for a mate and he owed me a favor so i hit him up seeing if he could paint the caravan before i had to leave it sitting out side. boom! Not the best of paint jobs but we have paint so its now sitting at my mums place out in the weather as we move places and sort our own lives out again. I would really like to get back into it and get it covered in for at lest winter. so i think thats the next goal. By cladding and material for the floor.5 points
-
Got the tray panelbeated, the one bit of rust on it fixed and the new bed strips welded in. Then took it to a mate whos a cabinet maker and we spent the day making new timber for the deck.
5 points
-
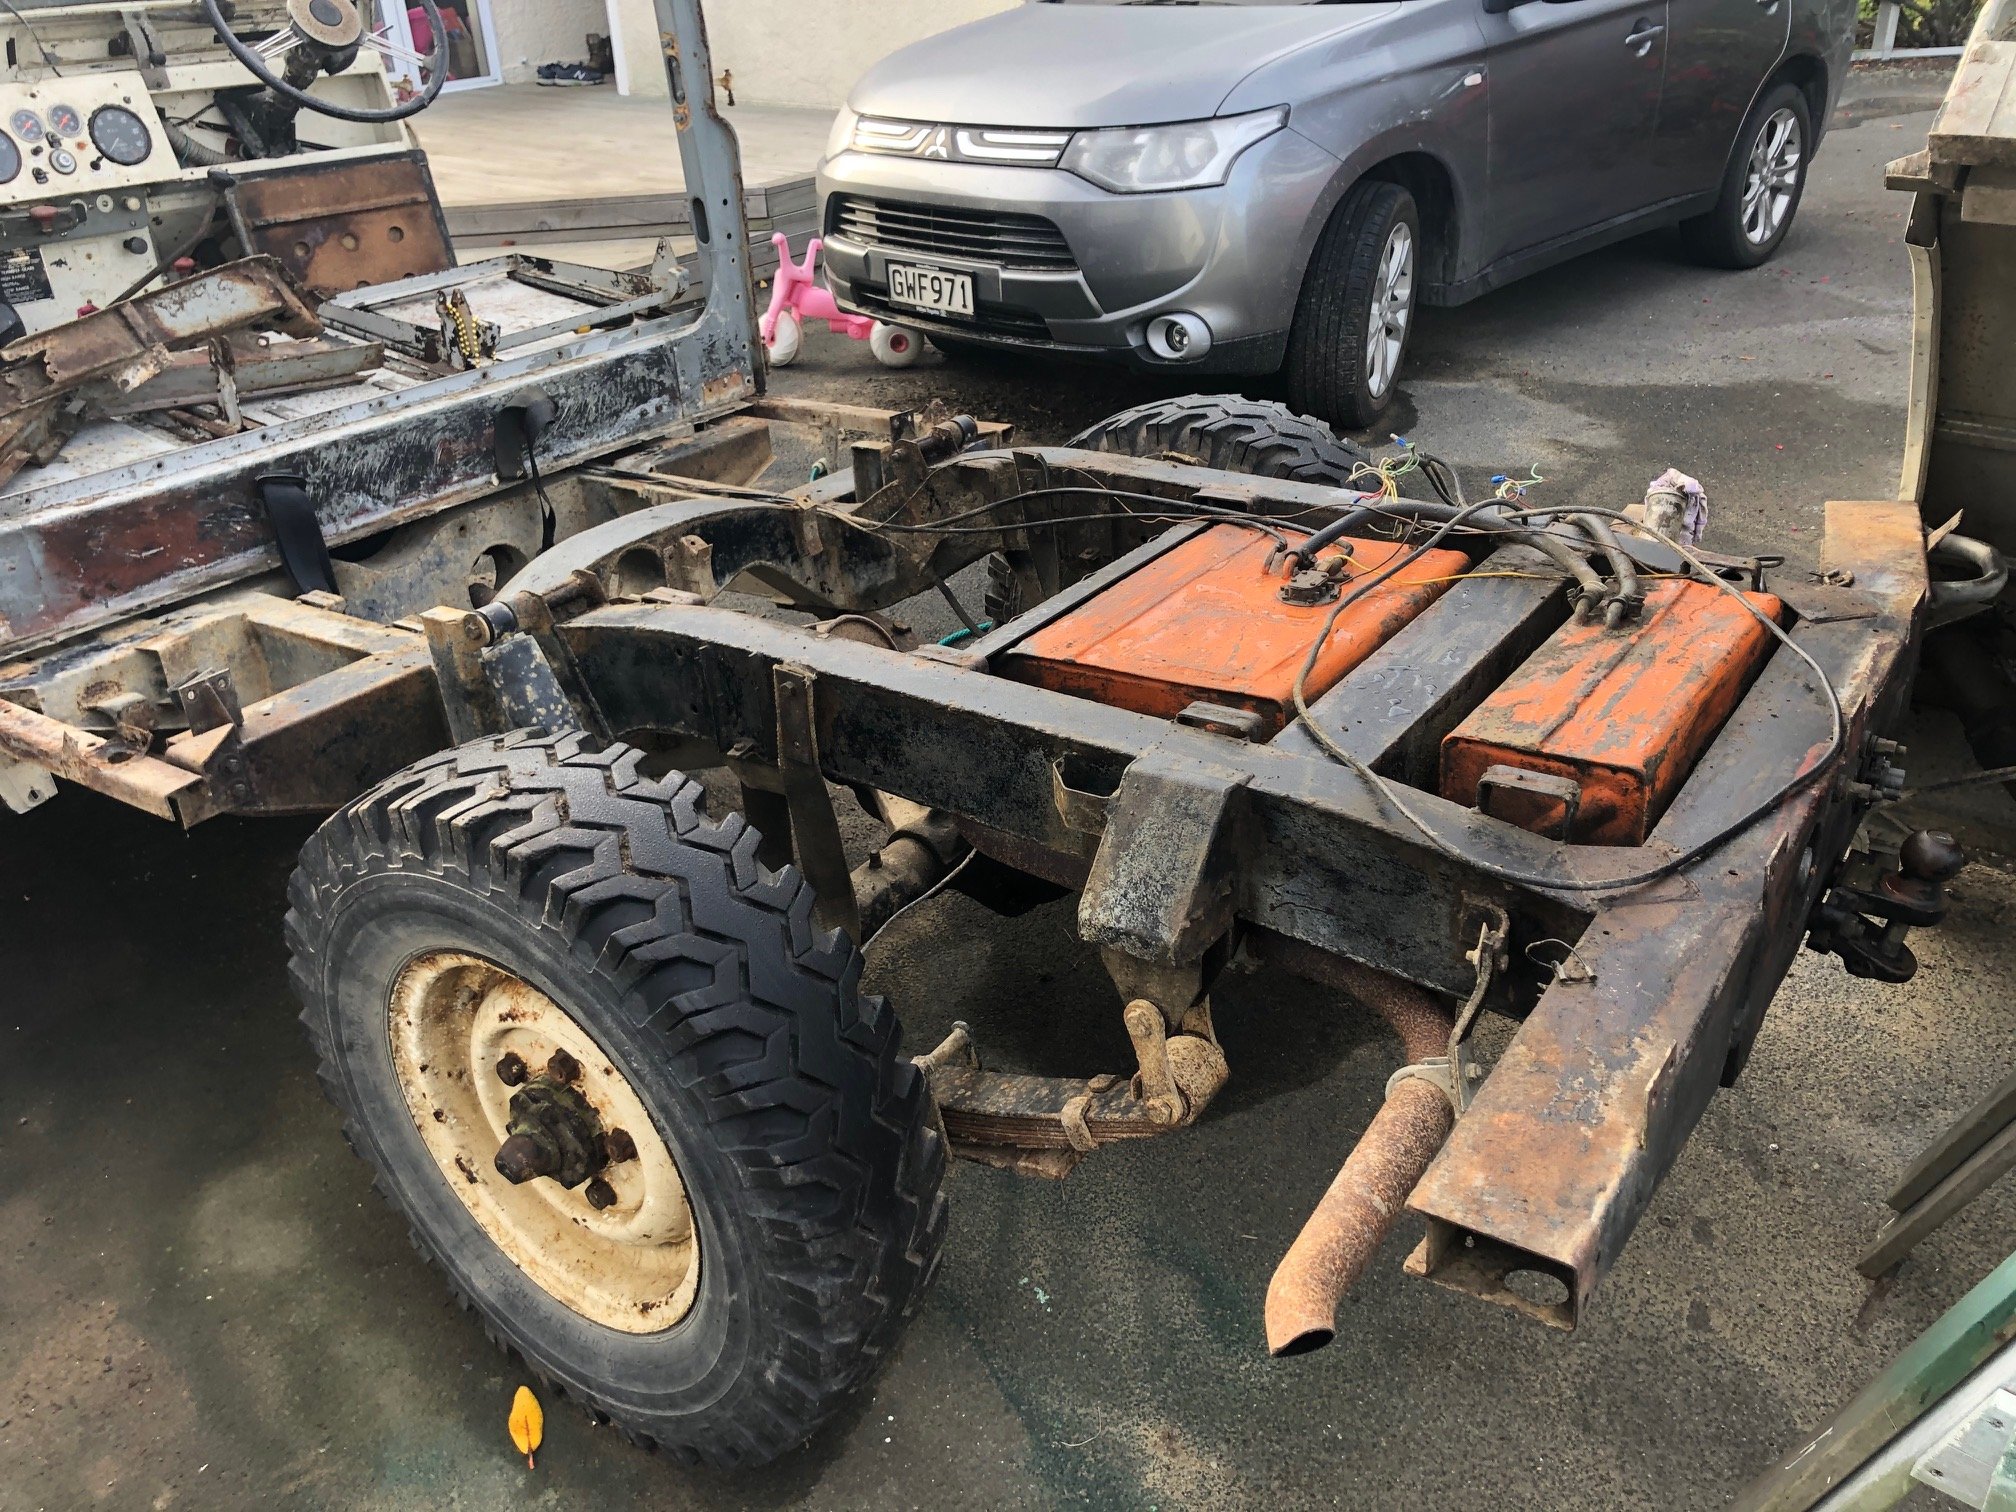
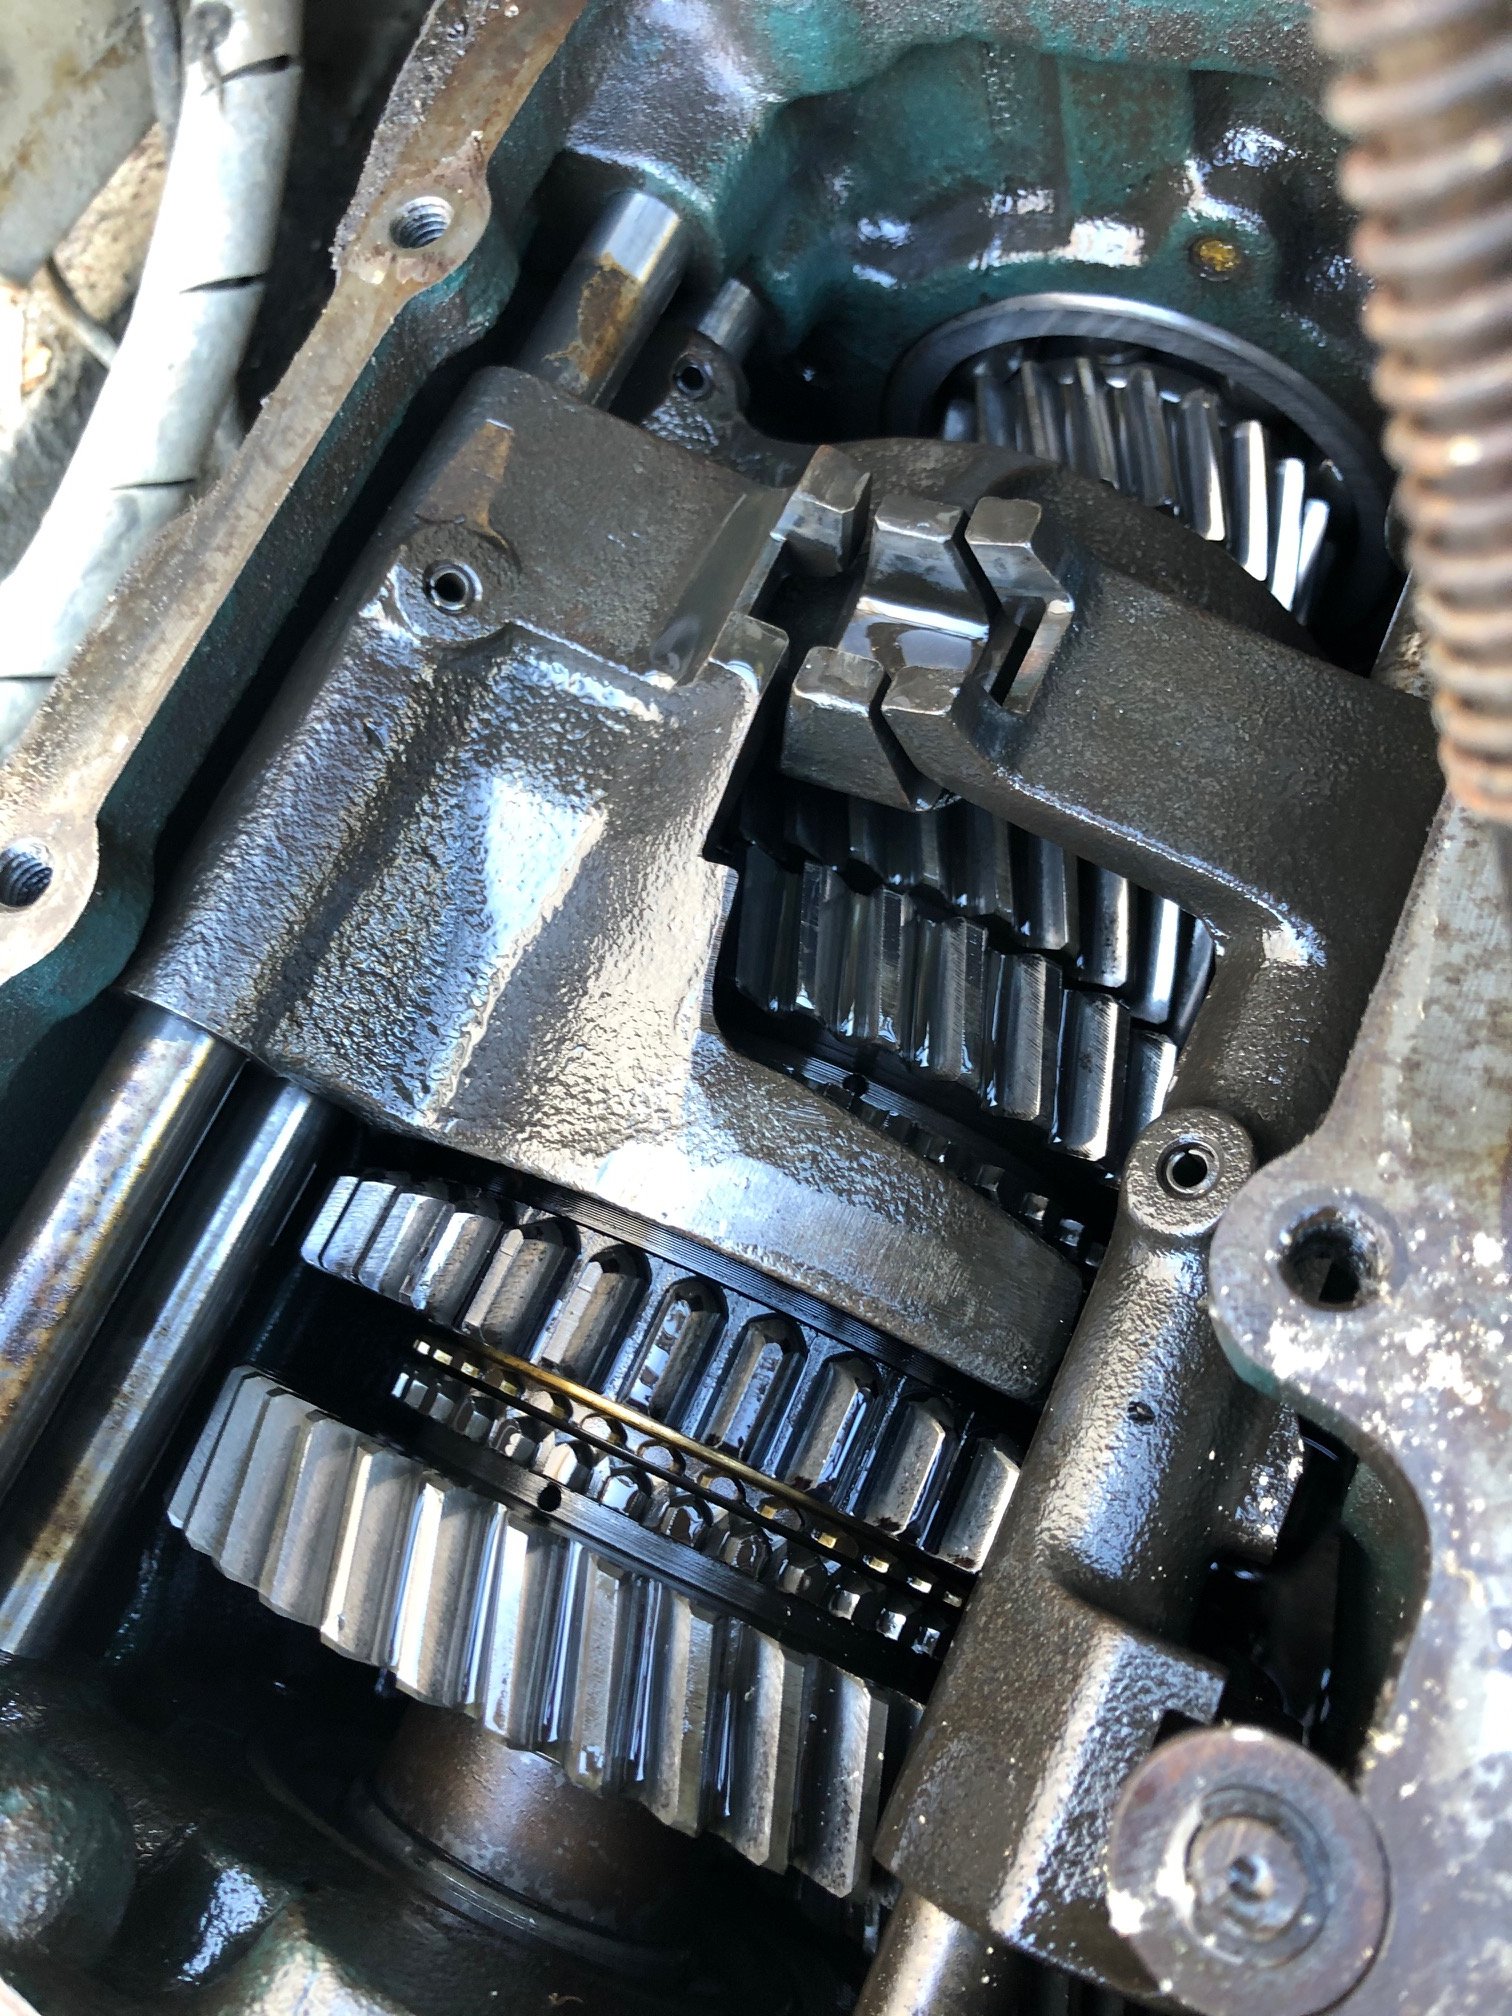
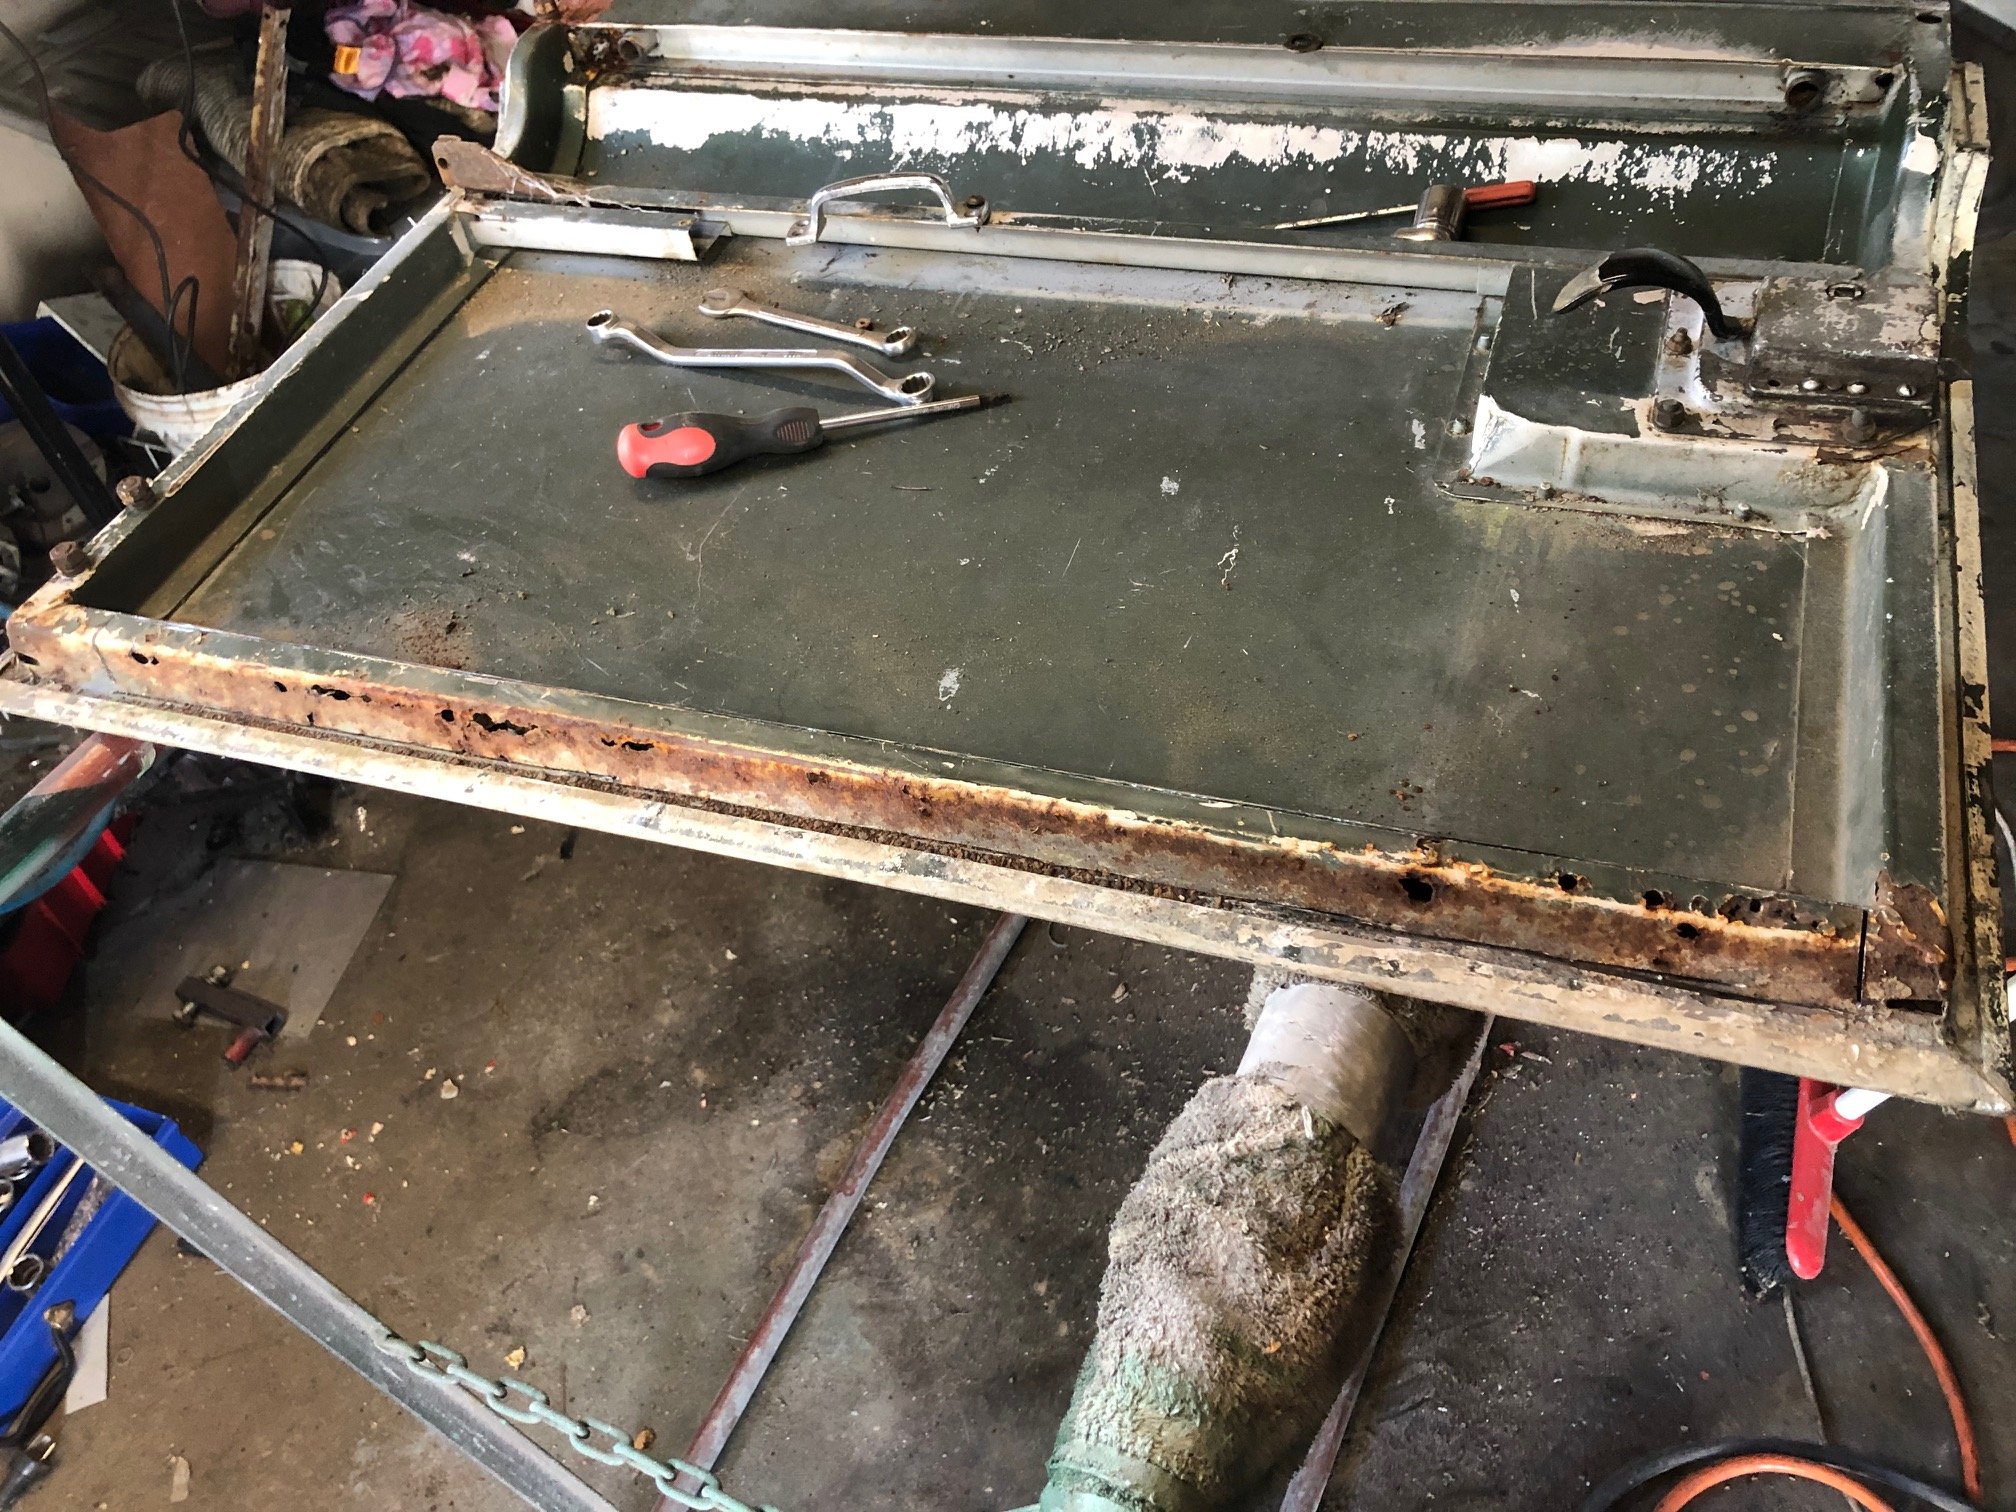
Did a a bit more... Hosed most of the crud off. Pulled the diff/spring assembly off and lowered the tank out. Noticed that it has a hole in the corner that someone has tried to goo up so that will have to get fixed... Also pulled the top cover of the gearbox (I still have no idea what model it is) and was quite pleased, considering the work this thing has probably done its in good nick. The shifter assembly is a custom job so I have some ideas to make the whole thing work alot better. LR transfer box has all of the seals leaking (no surprises) so will end up pulling it for a basic refurb. Onto some more of the fun stuff... Steel frames in all of the doors need work. I'd make this in one section if my folder was wide enough. Thinking about not going through the hassle to filler/prime the body and just metal finish as good as I can and go epoxy/colour...
4 points
-
some time later... So much for a new roof being decent. about the time I went to filler prime the roof around a hot day, my spray gun fucked out. Borrowed another and off we went. I primed my mrs enginebay too. then today I see the next few days weather is a bit pooze for this sort of thing so I pushed on and then primed in 2K black primer. I had a spare tin and needed cheering up, hence black. Pretty happy with it, still some repairs to go however4 points
-
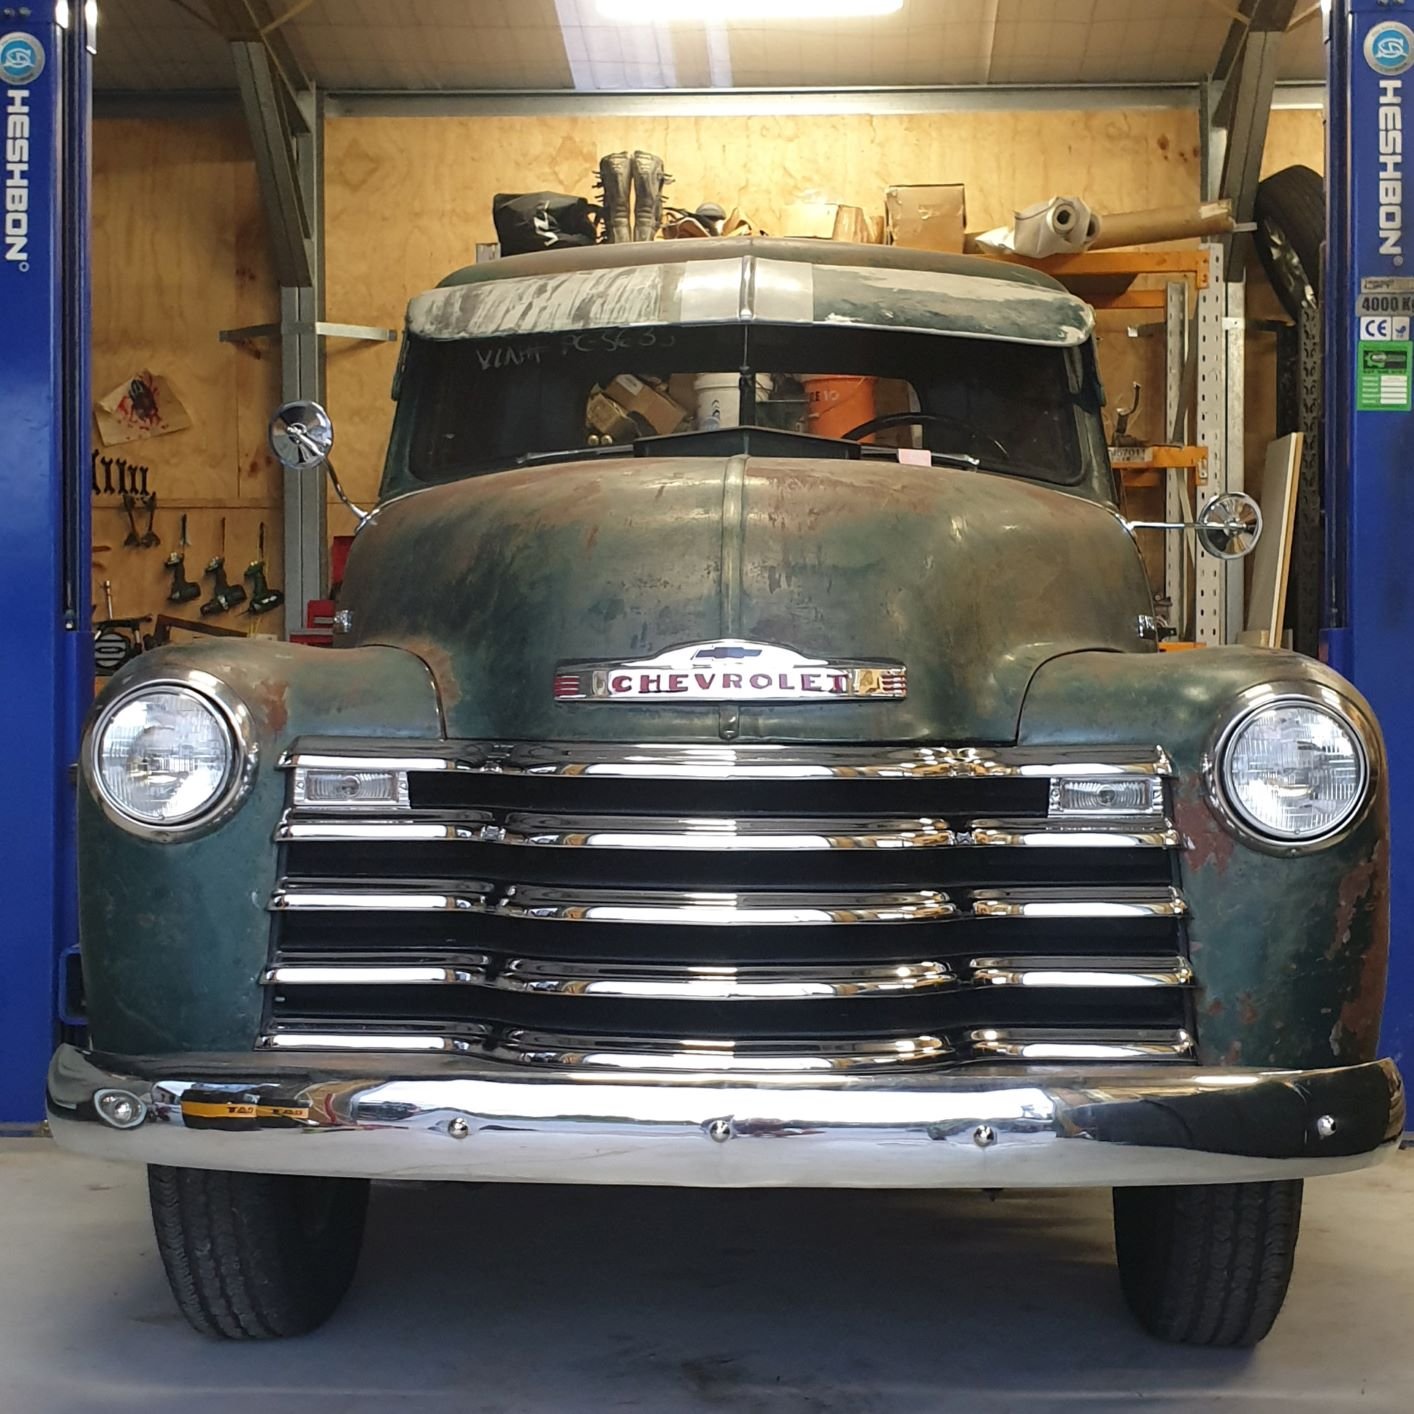
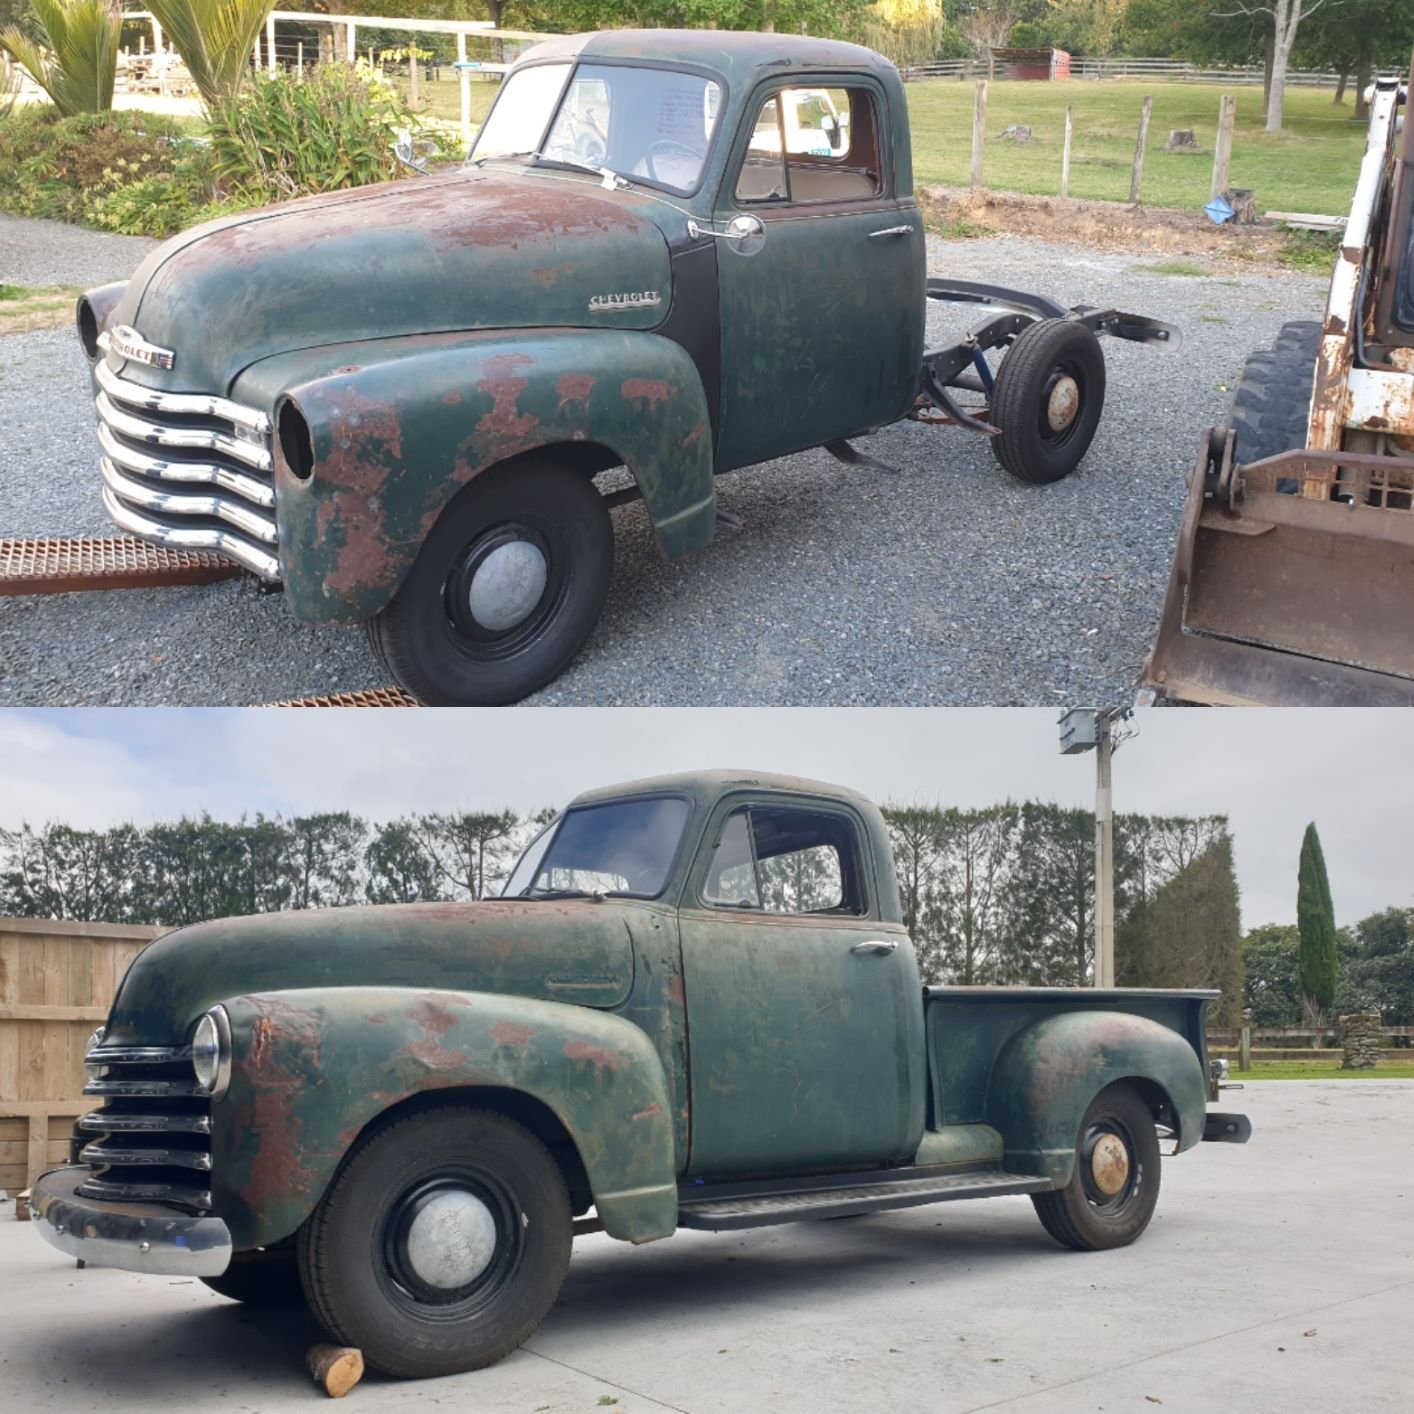
Now we upto date at last night. Got the bumper back on and the front end together with the lights on. Found a Fulton Visor from the states which was already green/patinad so matches the truck quite well i think! Got that on test fitted. Thats all the updates for now But with lockdown for the next month im planning on getting it all back together and to a stage i can take it for a VIN once we are allowed out of the house.
4 points
-
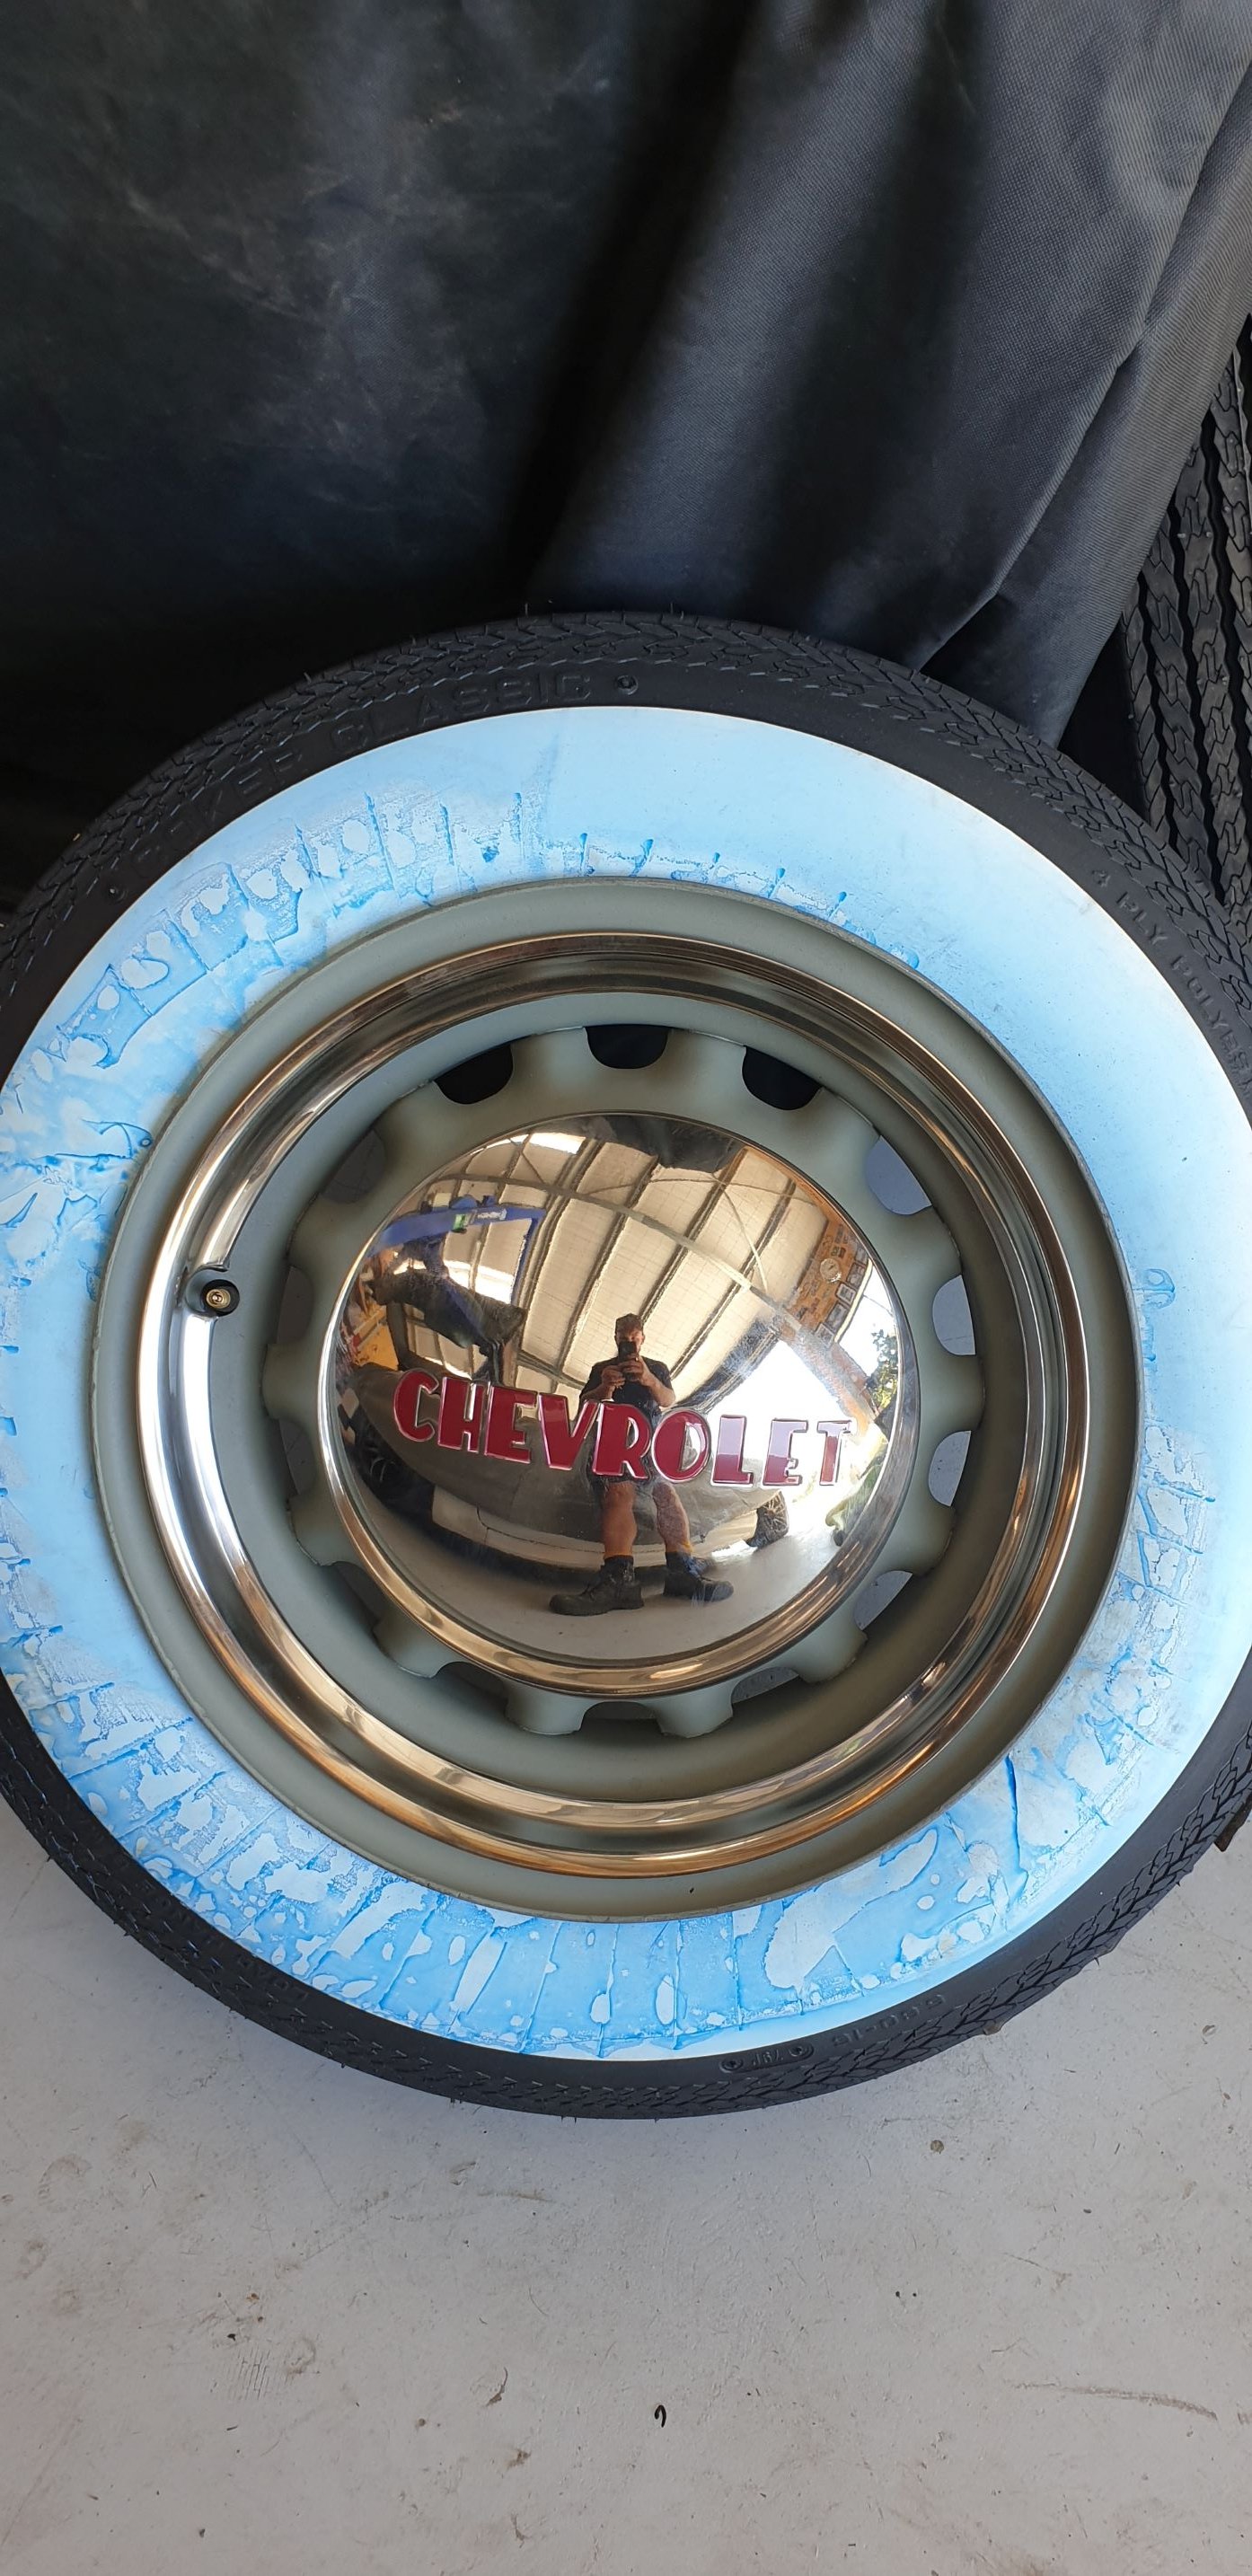
Had a mate come round one night and we cleaned up and unsealed the underneath of the tray and cab, inner guards etc. Painted the bed strips satin black ready to put the timber in for the final time. Also got some tyres test fit on the artilleries with the new hub caps and whitewalls. Looking forward to getting these on!
4 points
-
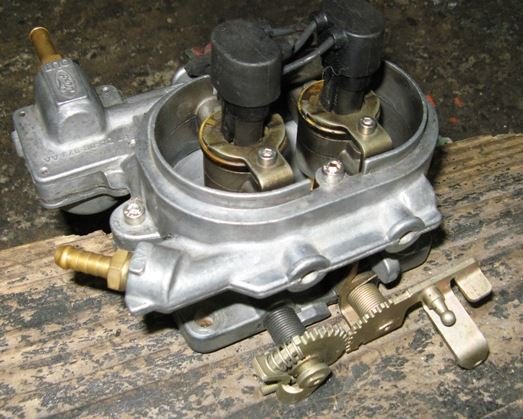
Hi mate - just had a big hunt through the HS6 spares bin. I’ve got 3 brand new ‘old stock’ that are waiting for a Holden Red 6 project (see and another rather worn out 3 that are waiting for me to buy a decent single phase mill for the legendary sr2 man cave; the intention is to convert the worn out HS6’s into ‘stealth injected’ throttle bodies (i.e. hidden fuel rails, injectors,…etc.) so I can eventually inject my favourite Red six while retaining the ‘sucky noise’ and the sexy visuals of 3x 1¾ “ SU’s).I do however have enough 2nd hand bits to put together a carb for you; no expense mate, full respect for your project – I’m a sucker for clever and innovative solutions for problems that never existed in the first place! We’ll just have to wait for this damn level 4 lockdown to be over. One proviso however is that it will be a mismatched collection of bits with flogged out throttle spindle bushes (the Achilles heel of the SU), they are expensive to refurbish. Out of the square all I can think of is injection, injection, injection,… A few years back I got roped into helping with a carb to TBI conversion on a Holden Red powered, (there’s a familiar ring here) & seriously out there Series 2? Landy bush- truck. The idea was to fit an EA single point injection with a Link ERCU calling the shots. (I mentioned this in another thread so apologies if I repeat myself). The Achilles heel of the EA single point injection was the archaic Denso ECU, the actual throttle body setup wasn't bad at all. I fitted one a few years back to a Holden Red powered Landrover bush truck with an early Link (fuel only). I did however have access to someone familiar with Link ECU’s who provided a wiring diagram and did the tune (I did all the plumbing, wiring and fabrication). The EA TBI comes with a built in fuel pressure regulator and throttle position sensor and from memory all we used was a map sensor, lambda, inlet temp and a simple rpm feed from the distributor. The improvement in power, cold starting, idling & economy were hard to ignore. I got the idea from a 13 year old post about fitting a similar setup (with a Megasquirt ECU) to a petrol powered landcruiser. The beauty of the EA single point injection throttle body is that you can run it downdraft, sidedraft or even updraft and it won’t know the difference! http://www.mq-patrol.com/wiki/engine-p40/efi-conversion/ The big thing you’d have access to is the experts on the Oldschool ‘DIY Fuel injection thread’, I sure those guys could help?
3 points
-
3 points
-
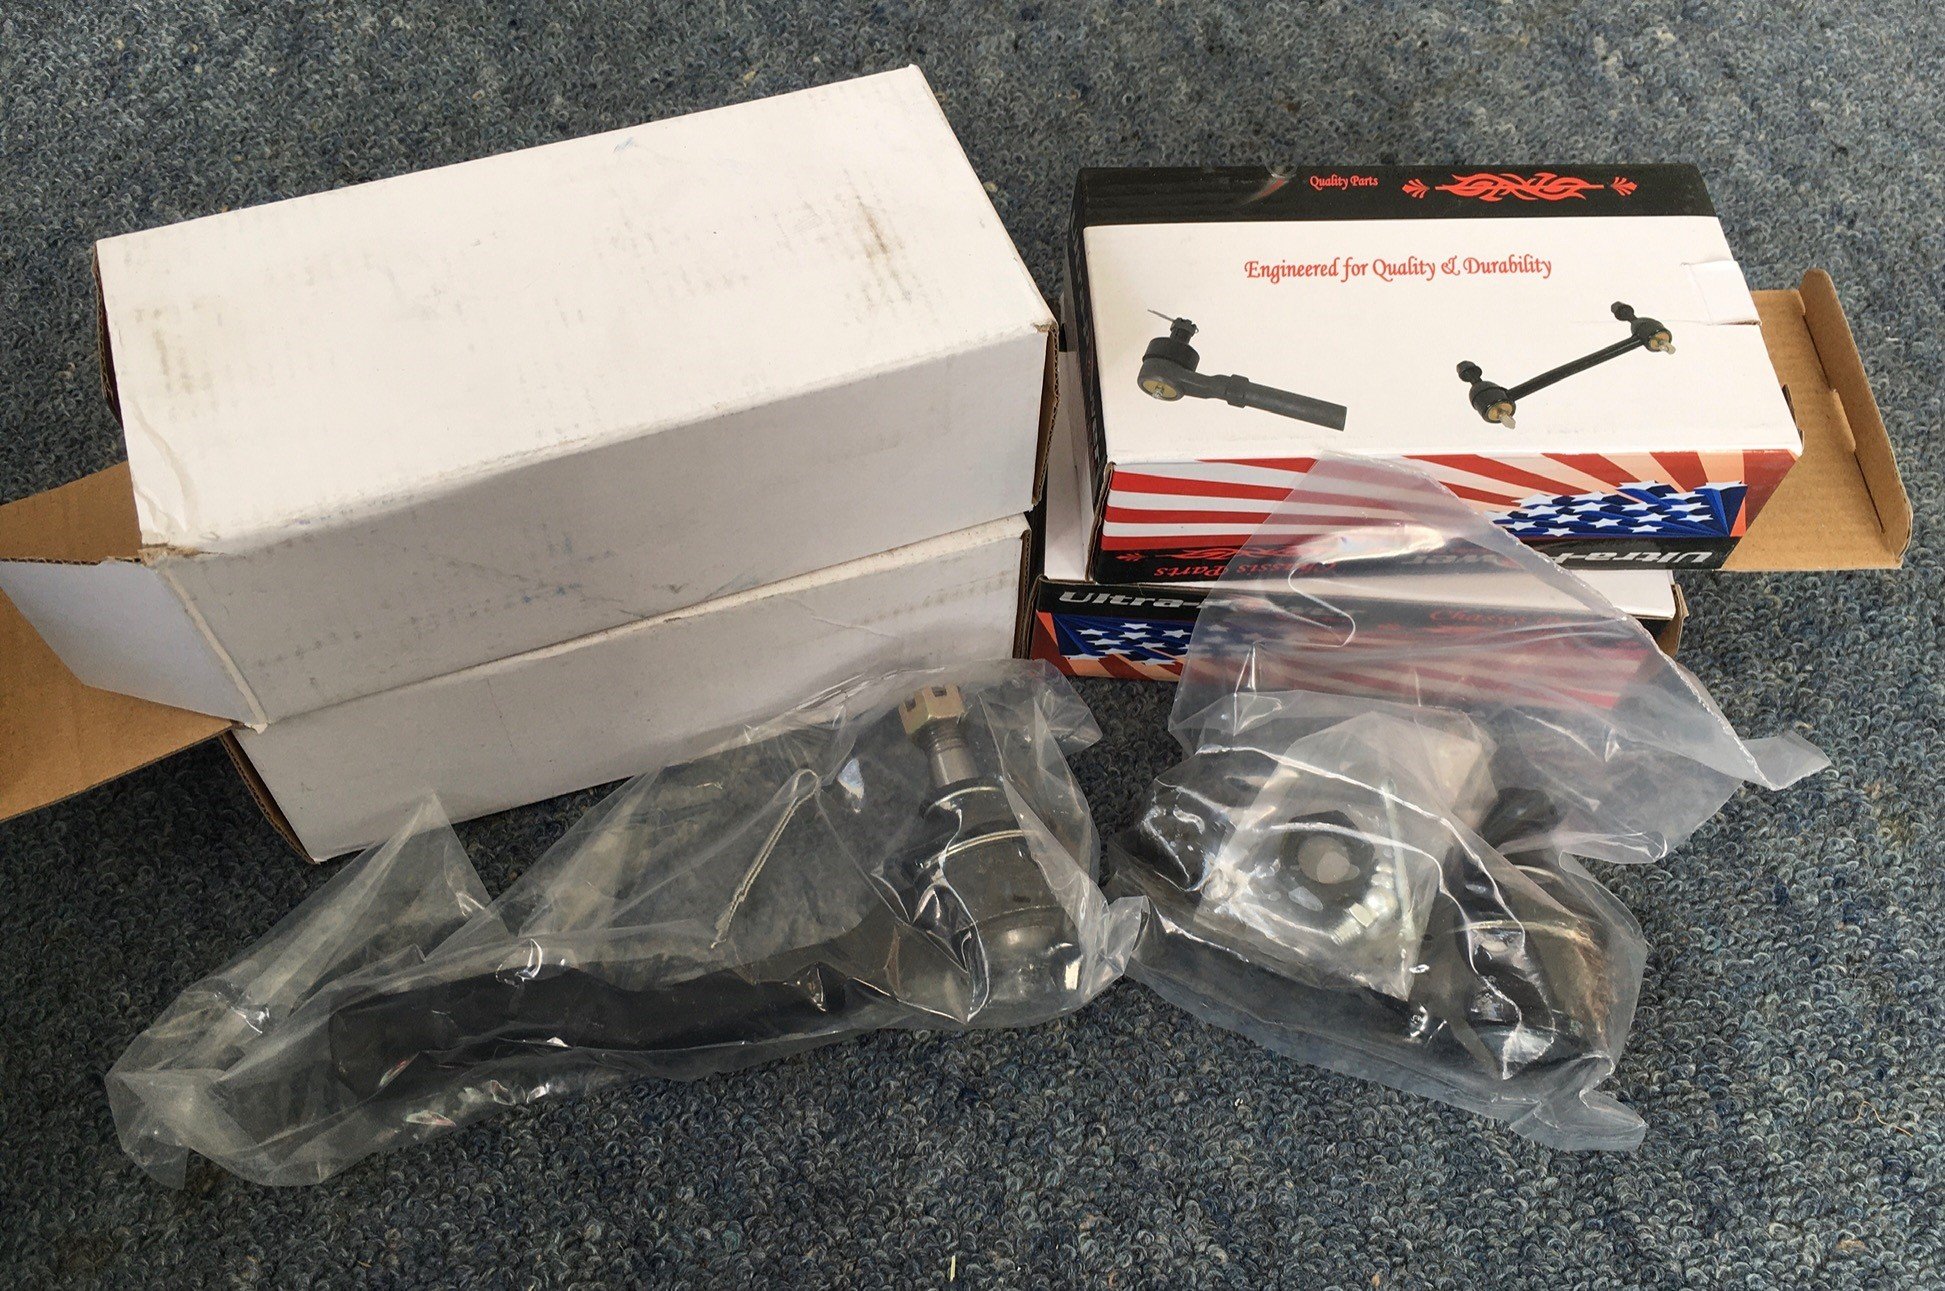
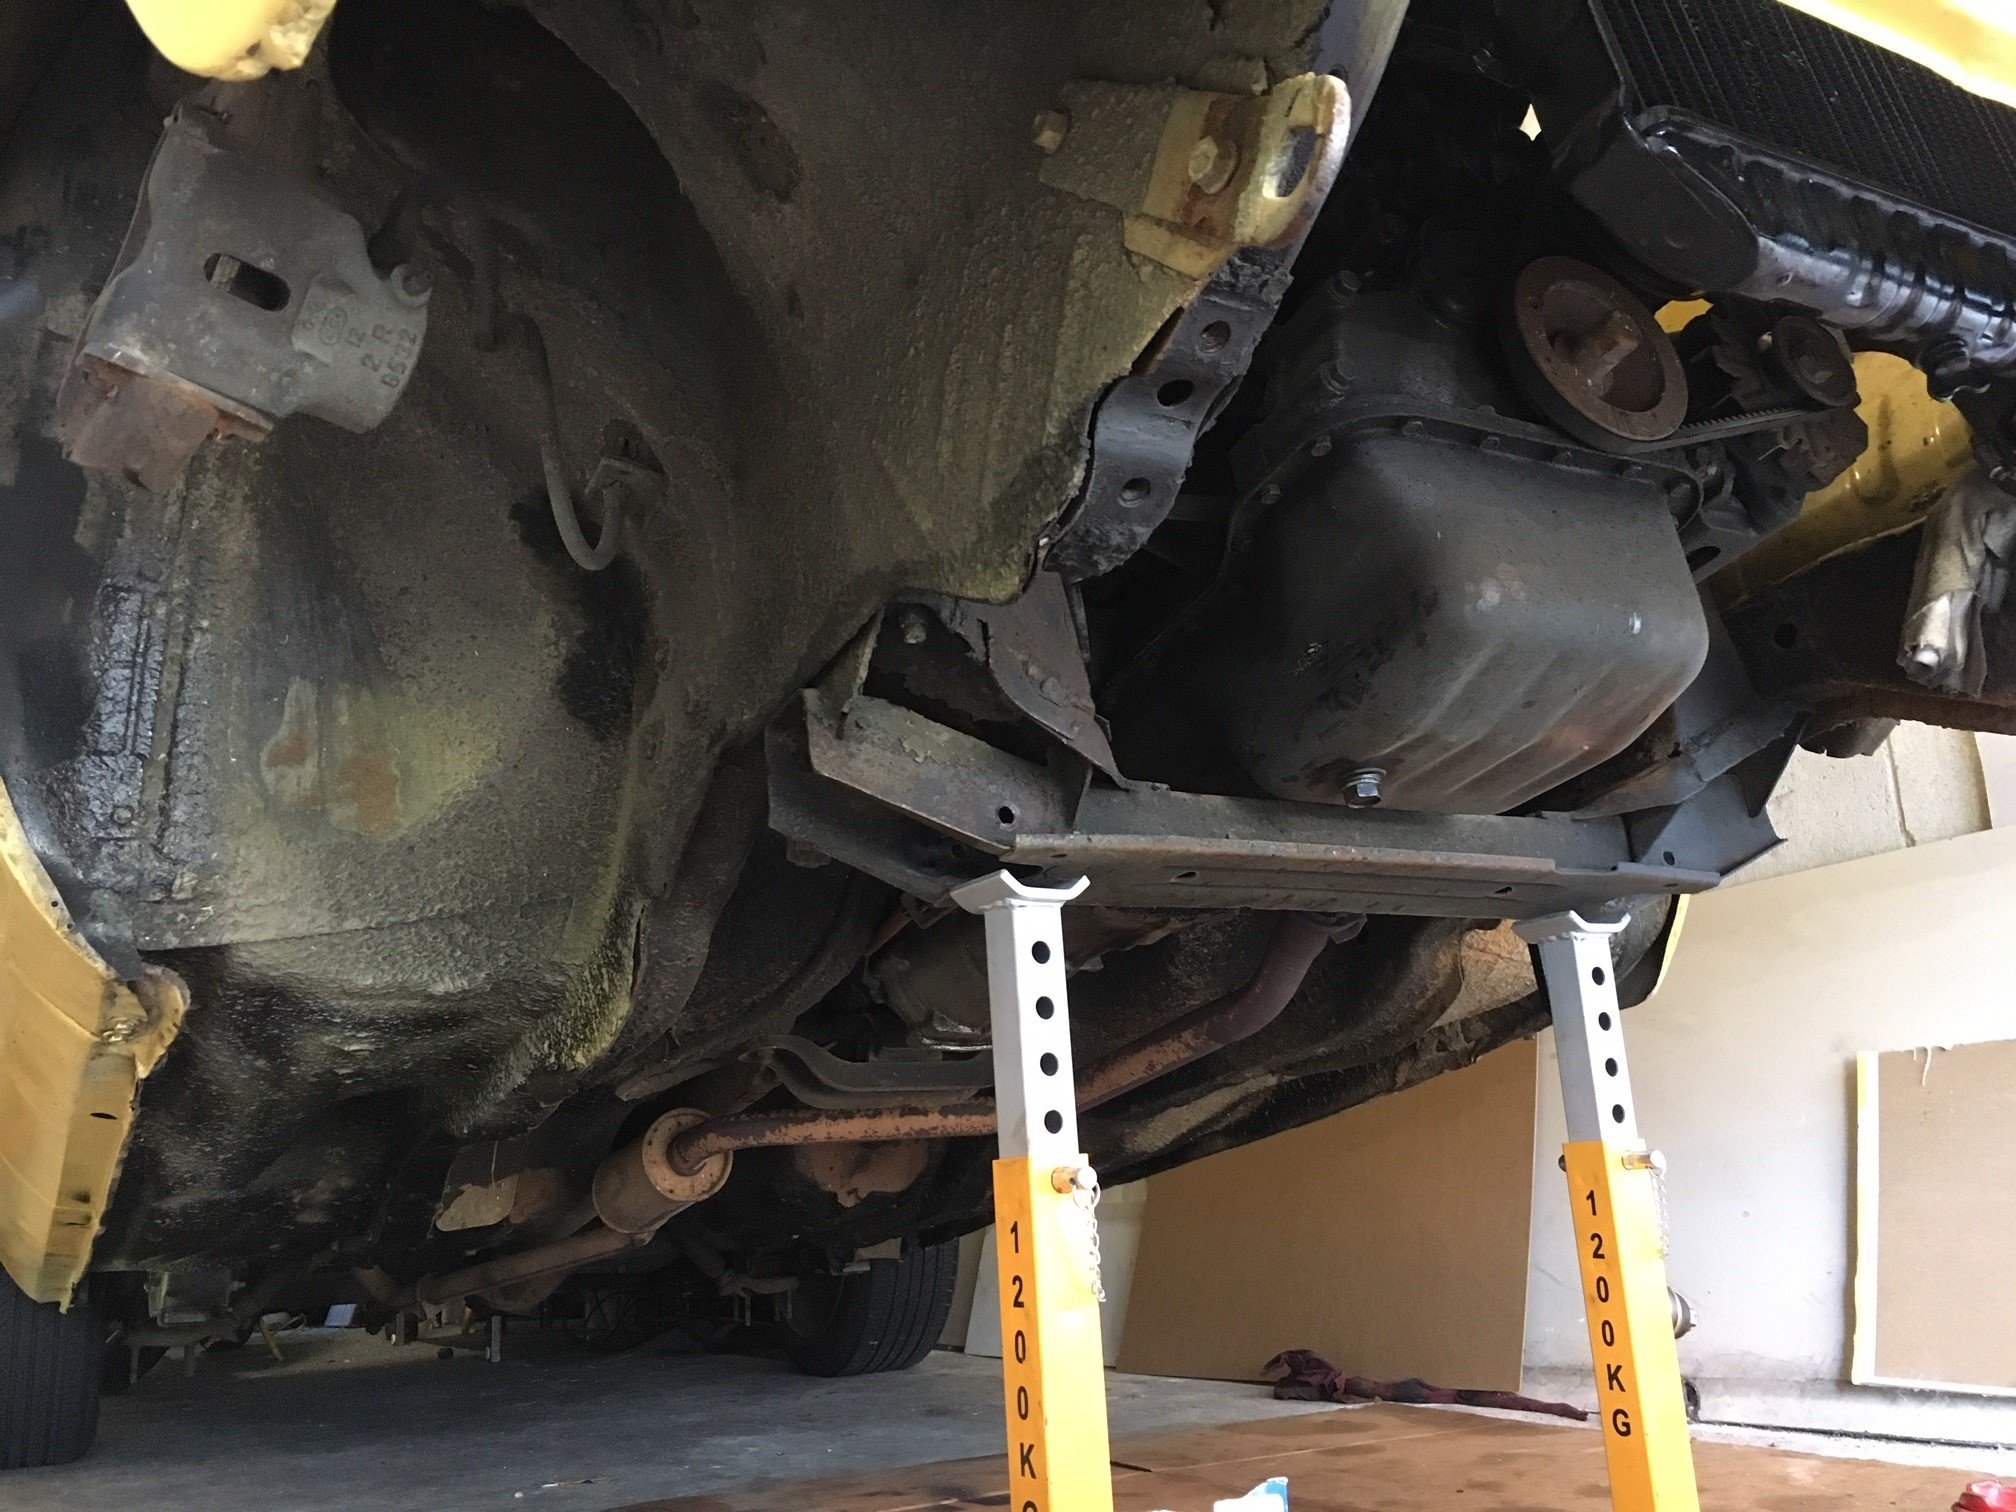
The grill and headlight surrounds had a few scratches and paint was chipped in a few spots. Had a 1/2 can of 'r32 skyline grey' left over that I'd used to paint the 929 grill with, so figured having a matching colour for the light surrounds and grill would be good. Quick sand and mask up then paint. Can't really tell the difference between the grey and the black it used to be unless you were looking for something different. Also ripped out the front end suspension and have been replacing the tie rod ends, balljoints and a few bushes. 3rd old mazda I've bloody done this on in the last few years, but always good to replace all the split boots and cracked bushes under the front end. Will give a few bits a clean and paint while I'm under there too. Should have it back together in the next few evenings.
3 points
-
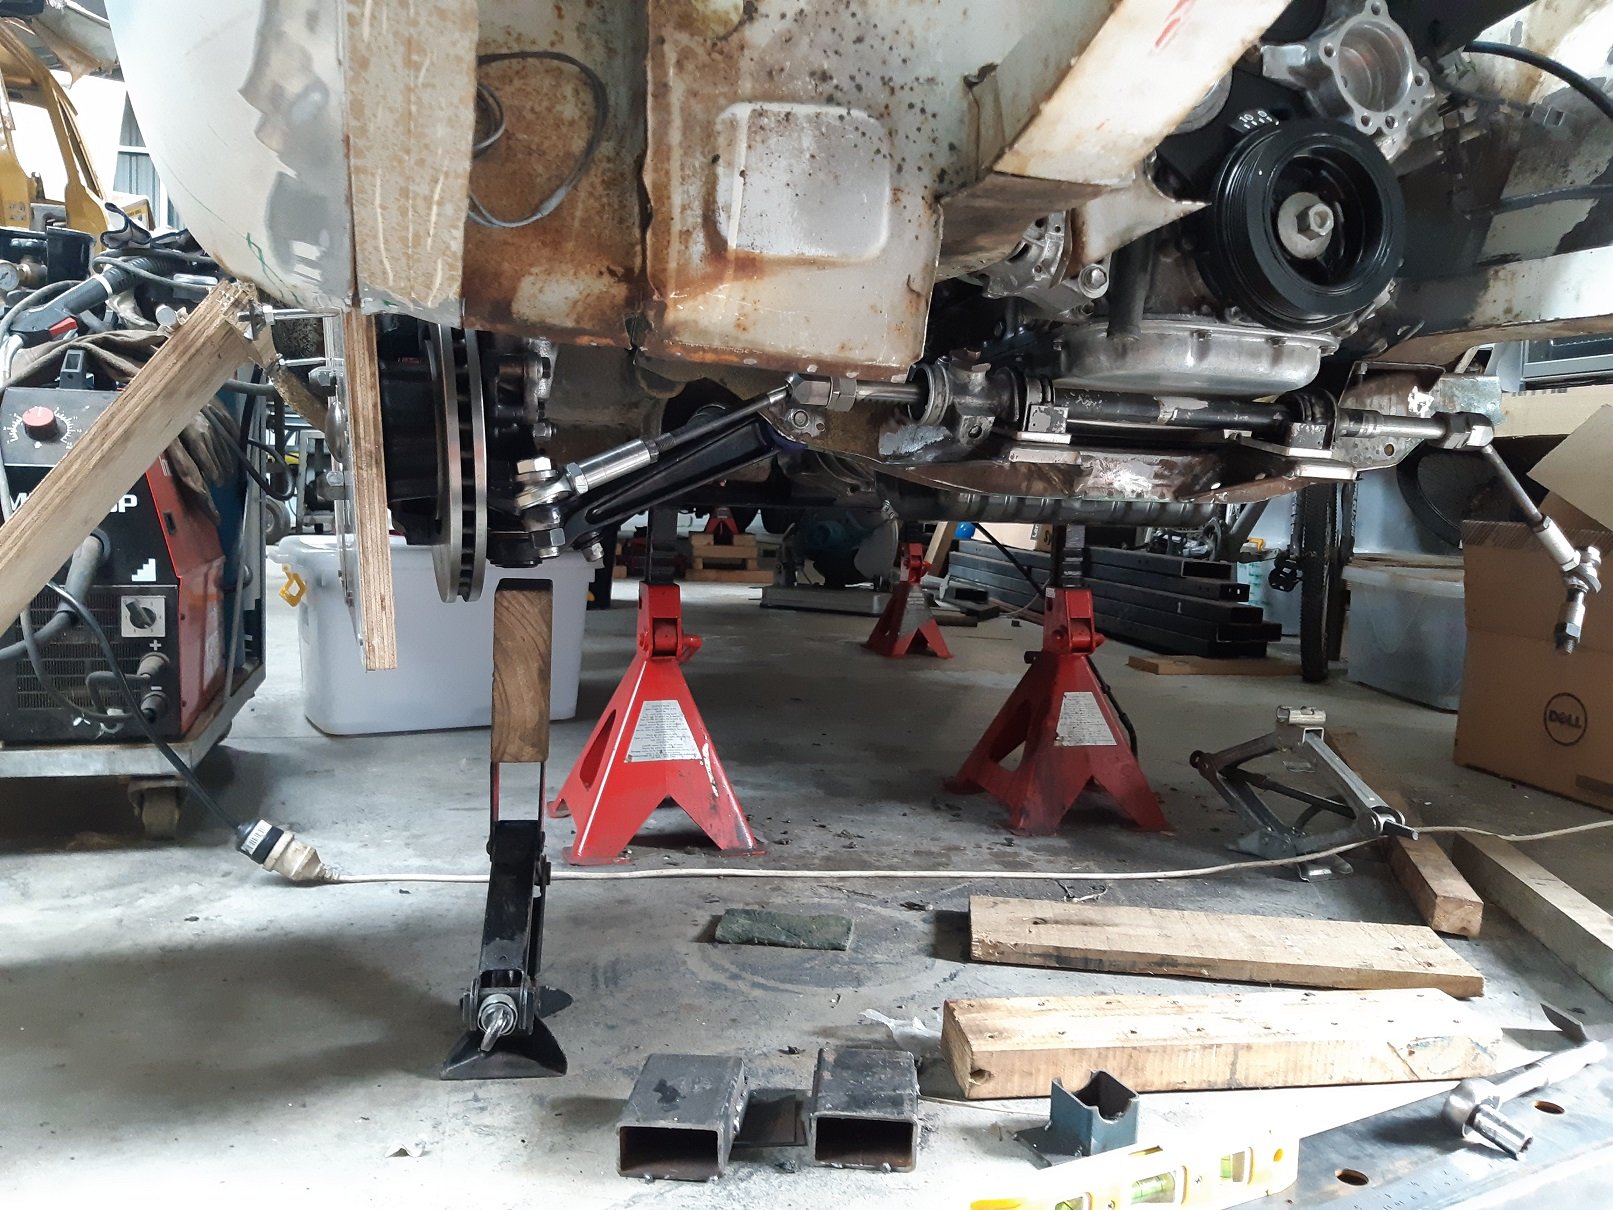
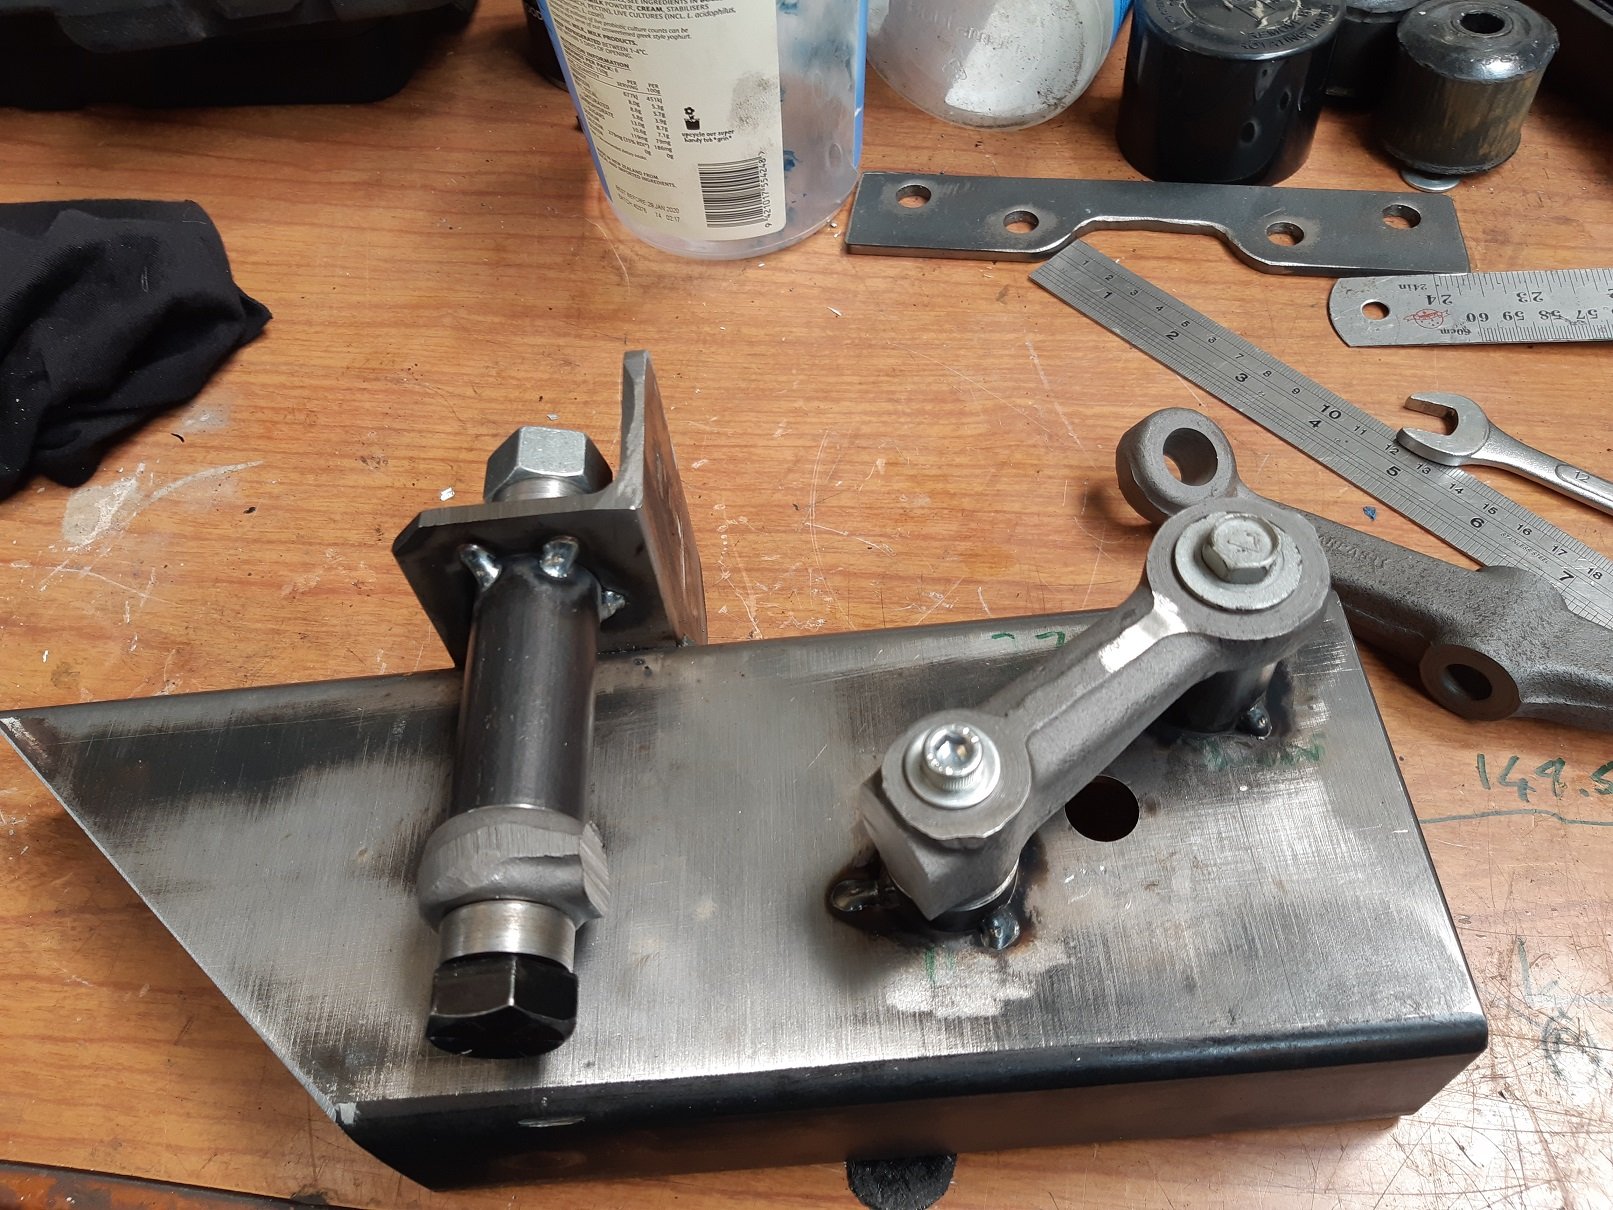
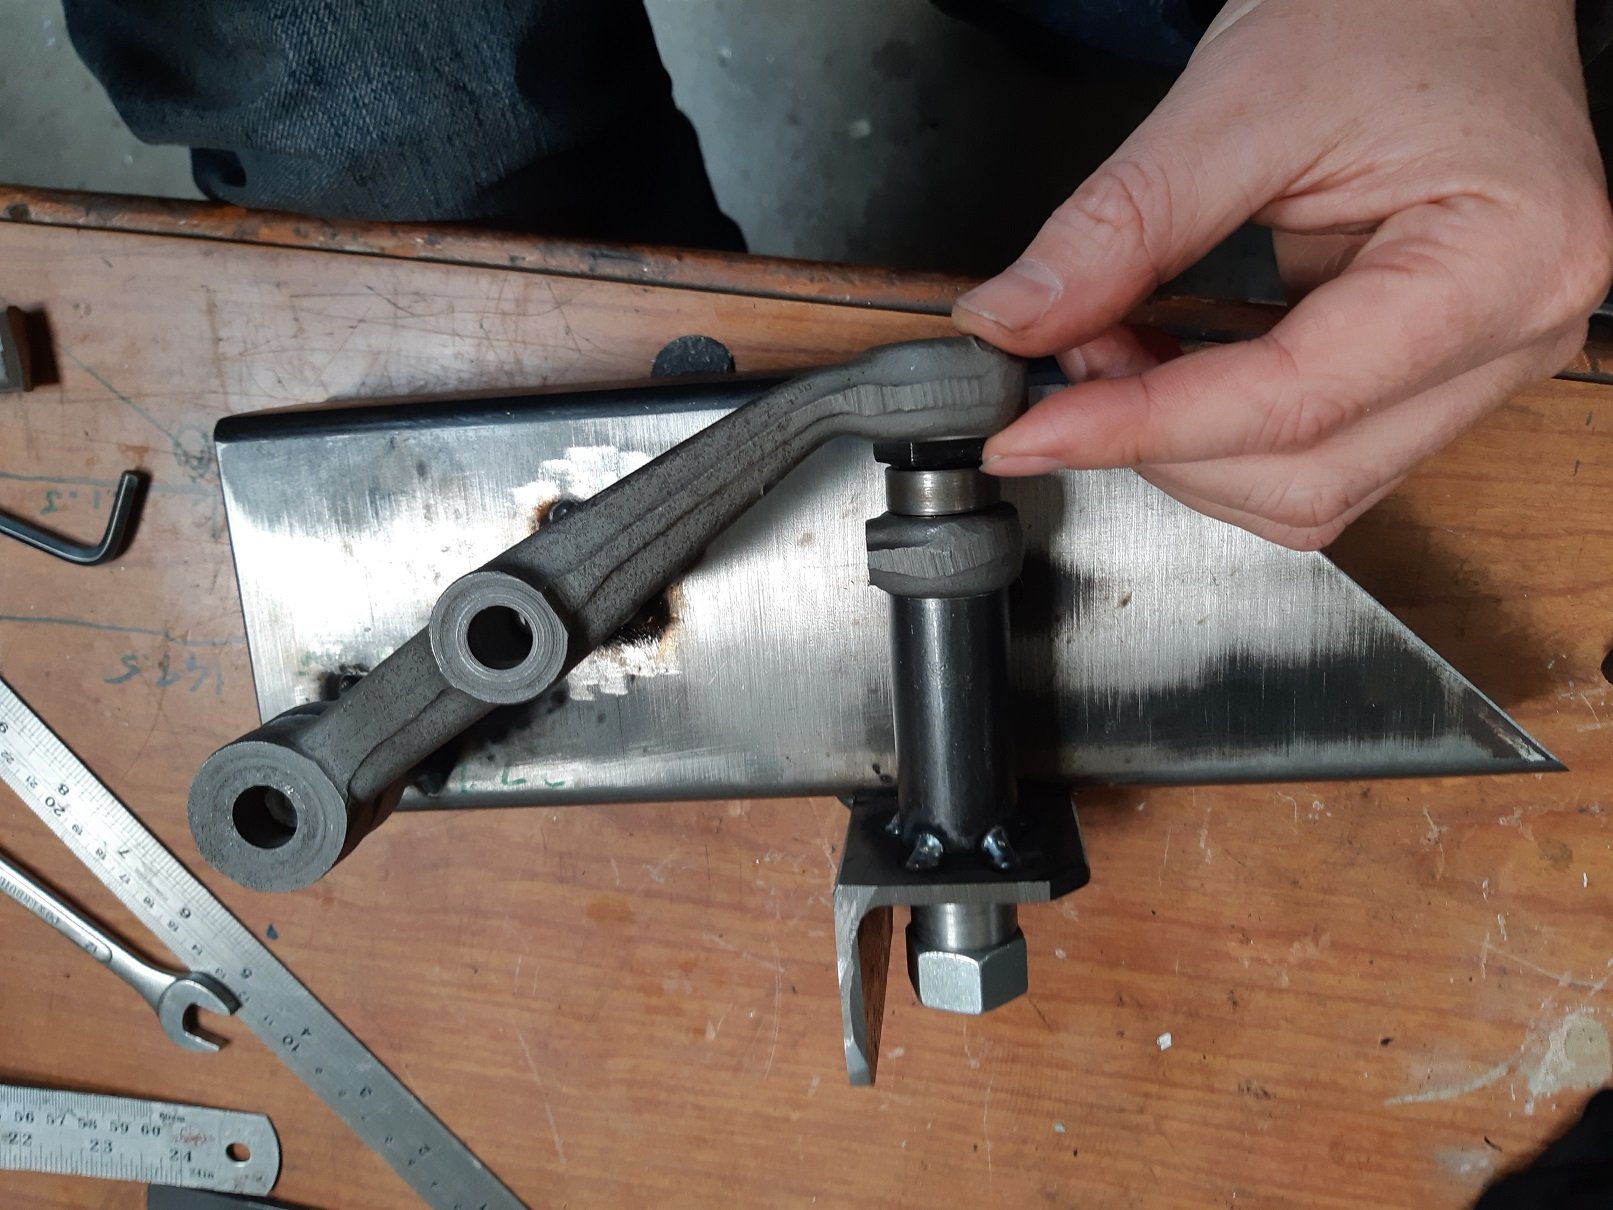
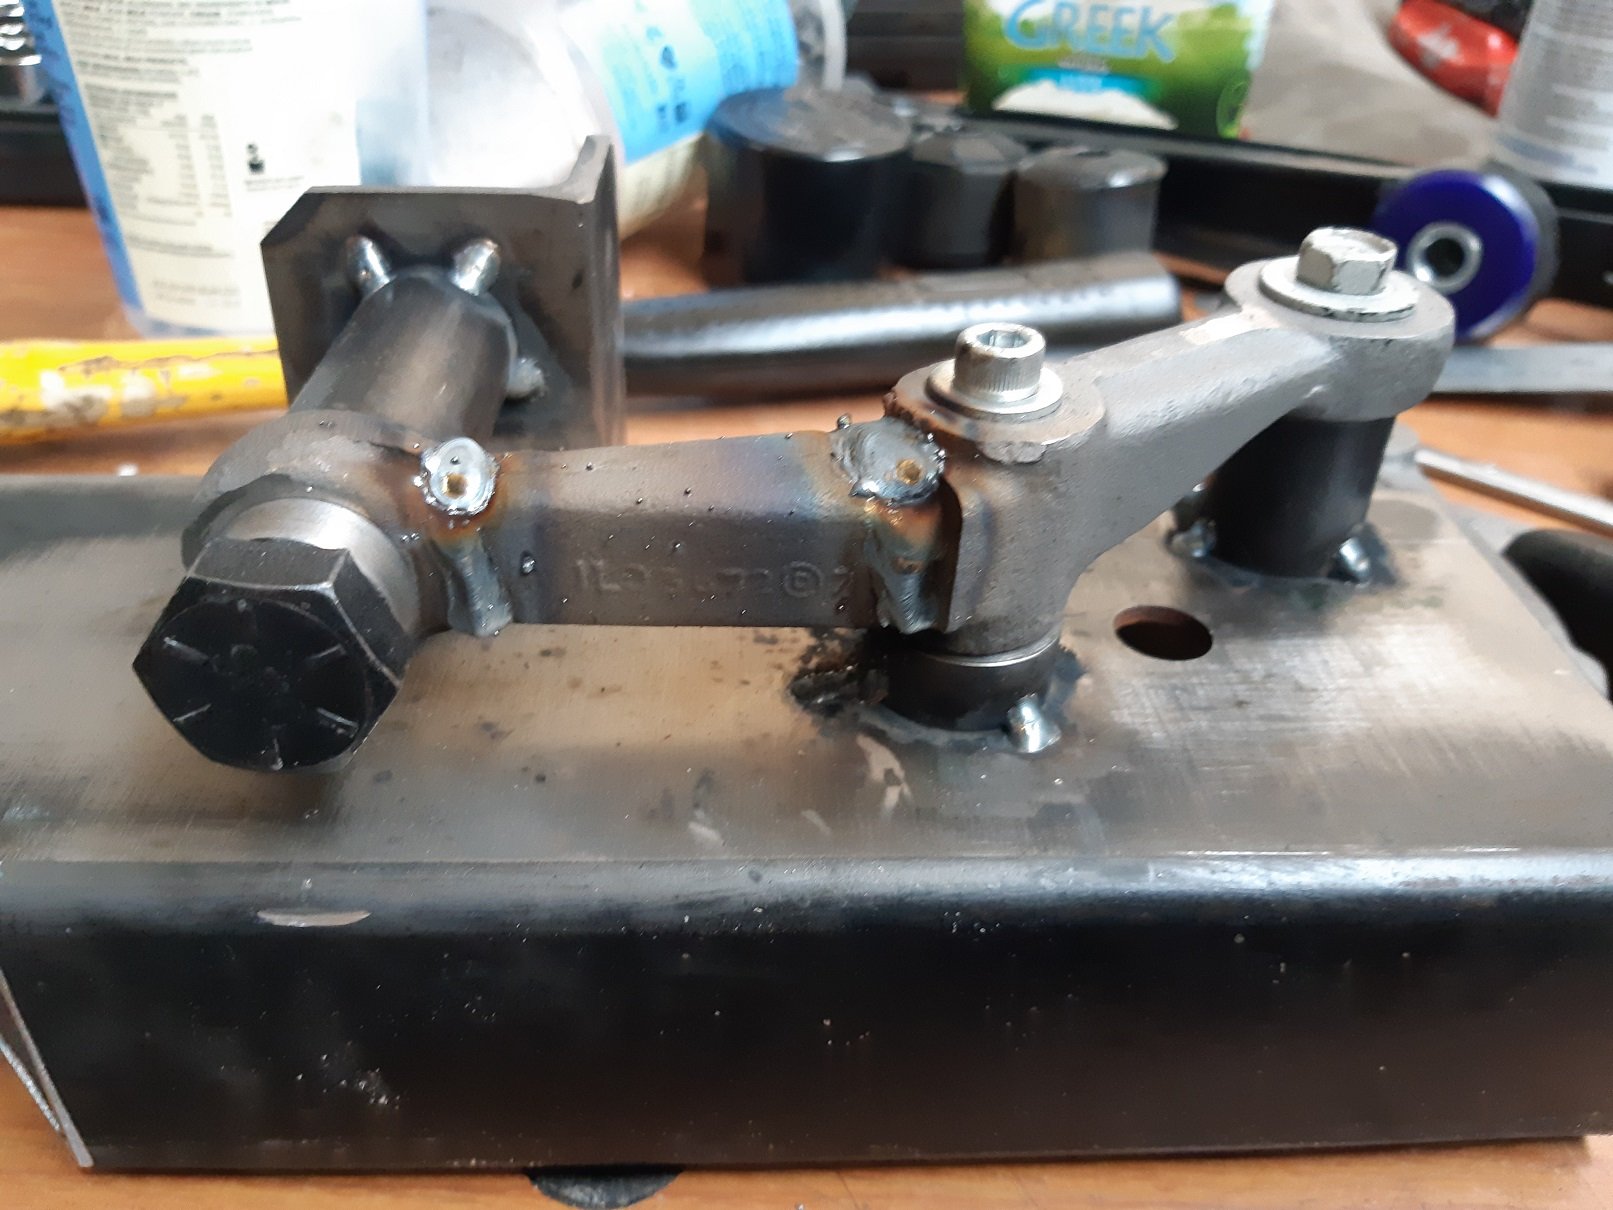
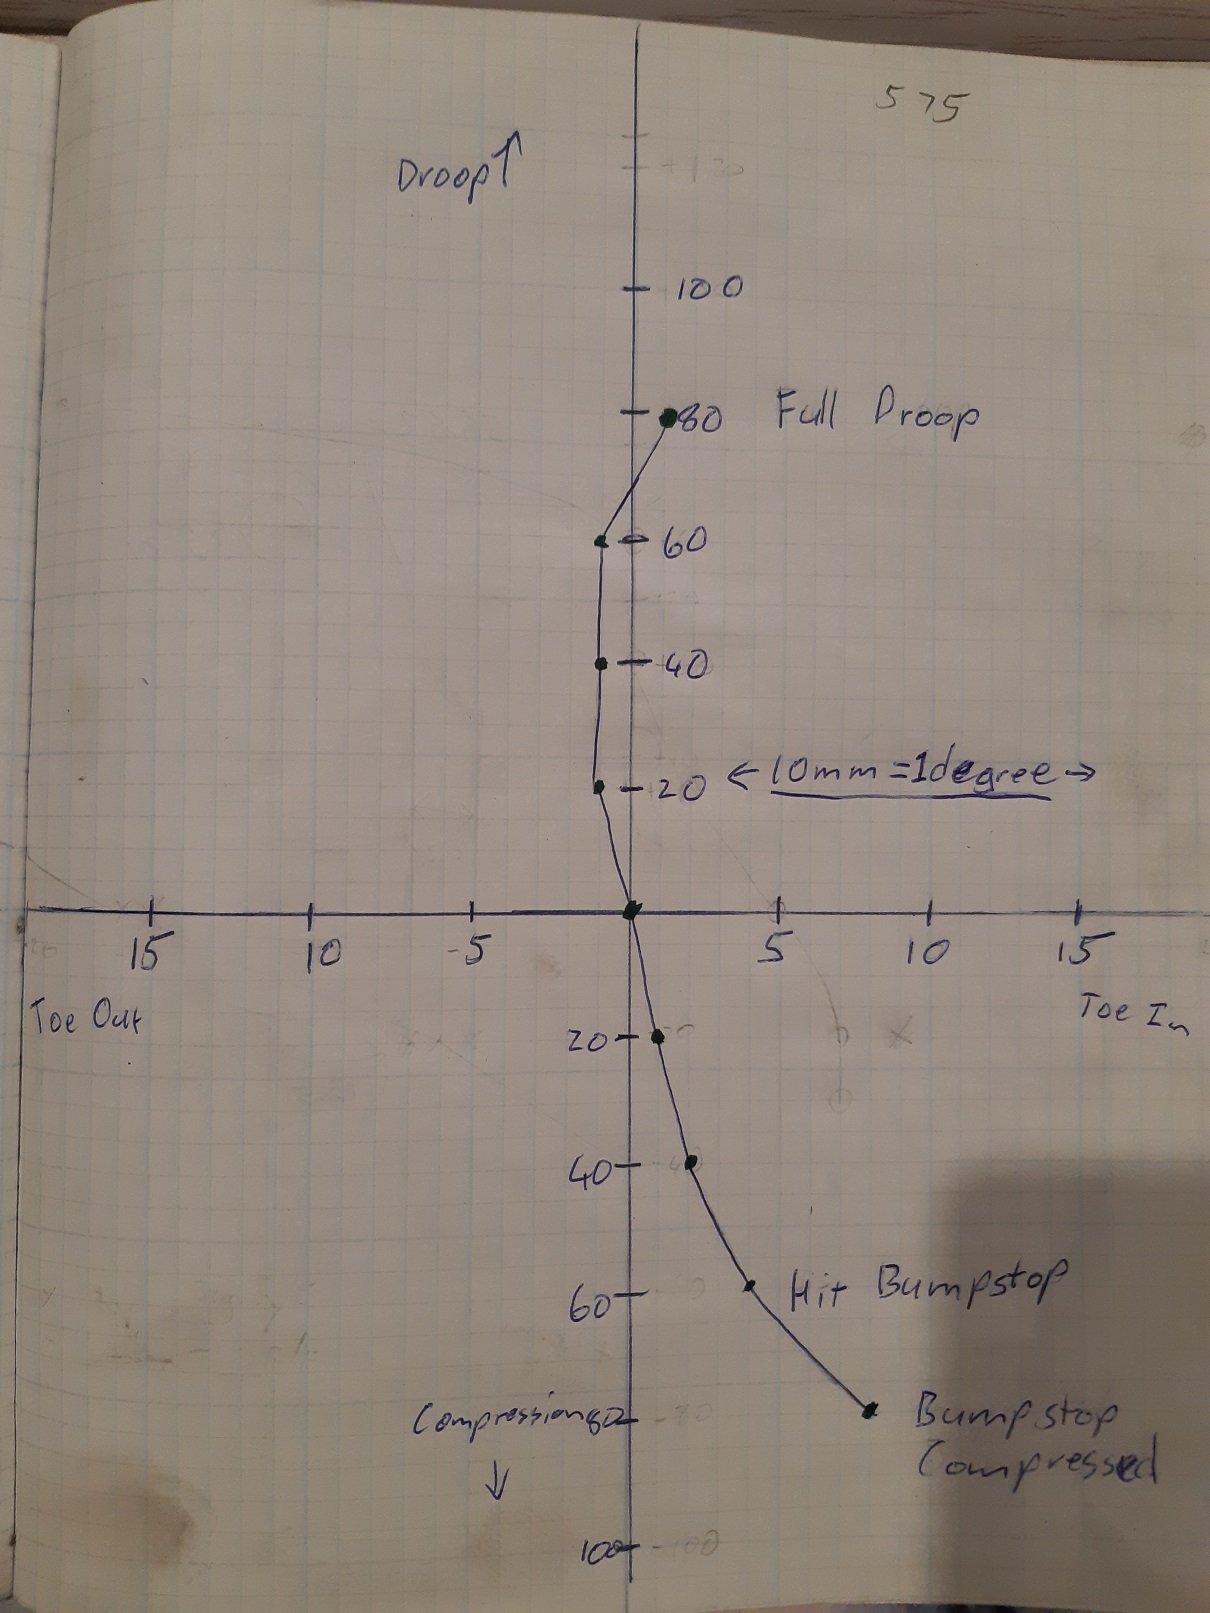
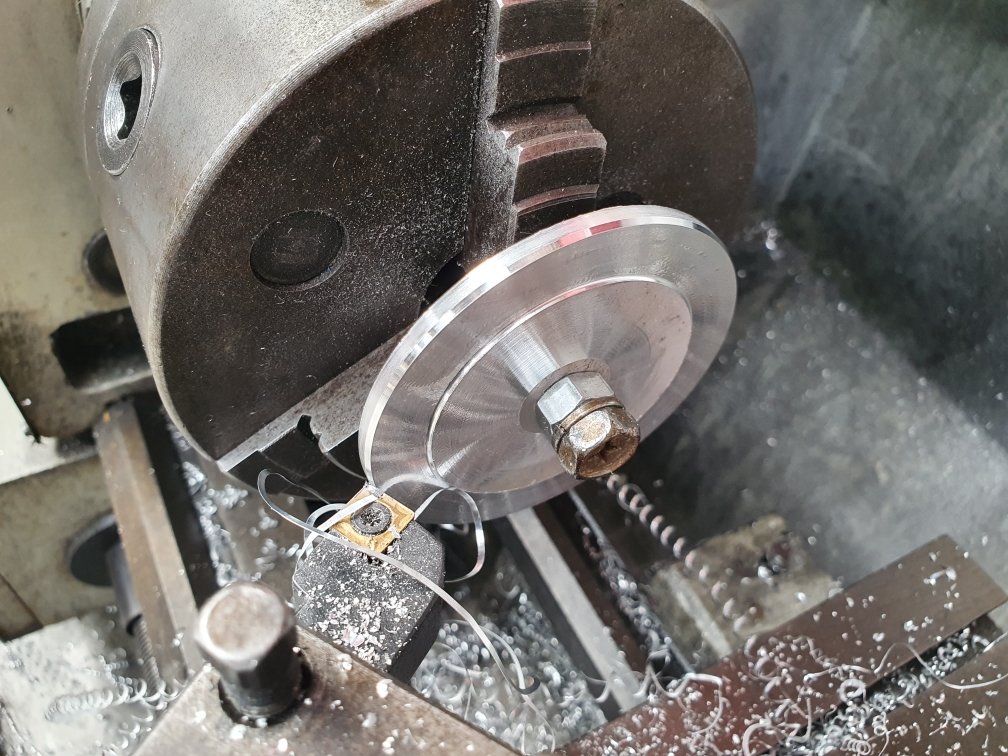
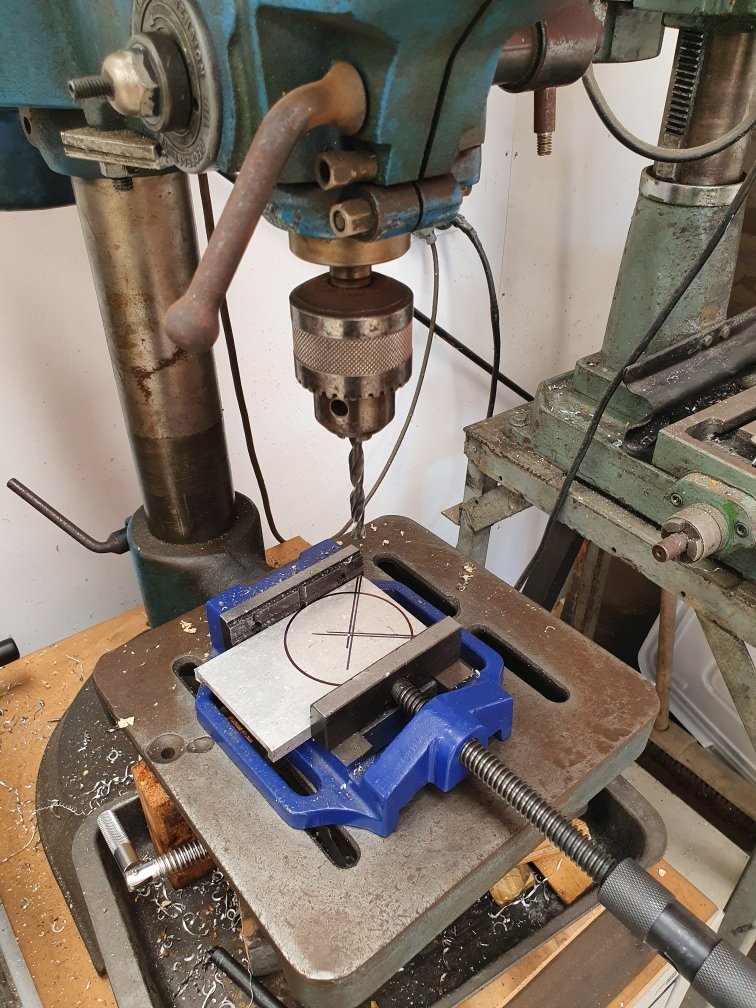
Using my bumpsteer measuring thingamadoodah and fucking around with spacing the tie rod end and rack mounts I found that the tie rod end and the steering arm needed to exist in the same space. So I sacrificed a spare one to modify so I can continue mocking up. I made a jig to hold the end in the right place for welding. Here is the one from the other side to see how far it's moved up. . And totally legit welding. safe as. This is just for mocking up. Once I get the height right for minimal bump steer, I'll mill the final ones out of a block of mild steel and have tapered holes so I can use the factory tie-rod end and not fuck around with rose joints, bolts and spacers. I've been using the LVVTA bumpsteer pdf thing. https://www.lvvta.org.nz/documents/infosheets/LVVTA_Info_04-2010_Bump-steer_Measurement_Background_Information.pdf My measuring thingamadoodah has the points 575mm apart, so each mm of toe is 0.1 degrees. With my hacked steering arm, the tie rod end is mounted below it. This is with a 3mm spacer, it's the best I've got it so far. If I remove the spacer and move the tie-rod end up, the line on the graph indicates the tie rod end is too high. If I have two 3mm spacers, the line says it's too low. I'll have to make some 1mm spacers to see if I can fine tune it further. To flatten out that curve I think the whole tie rod has to be longer, but then I'd need a shorter steering rack.
3 points
-
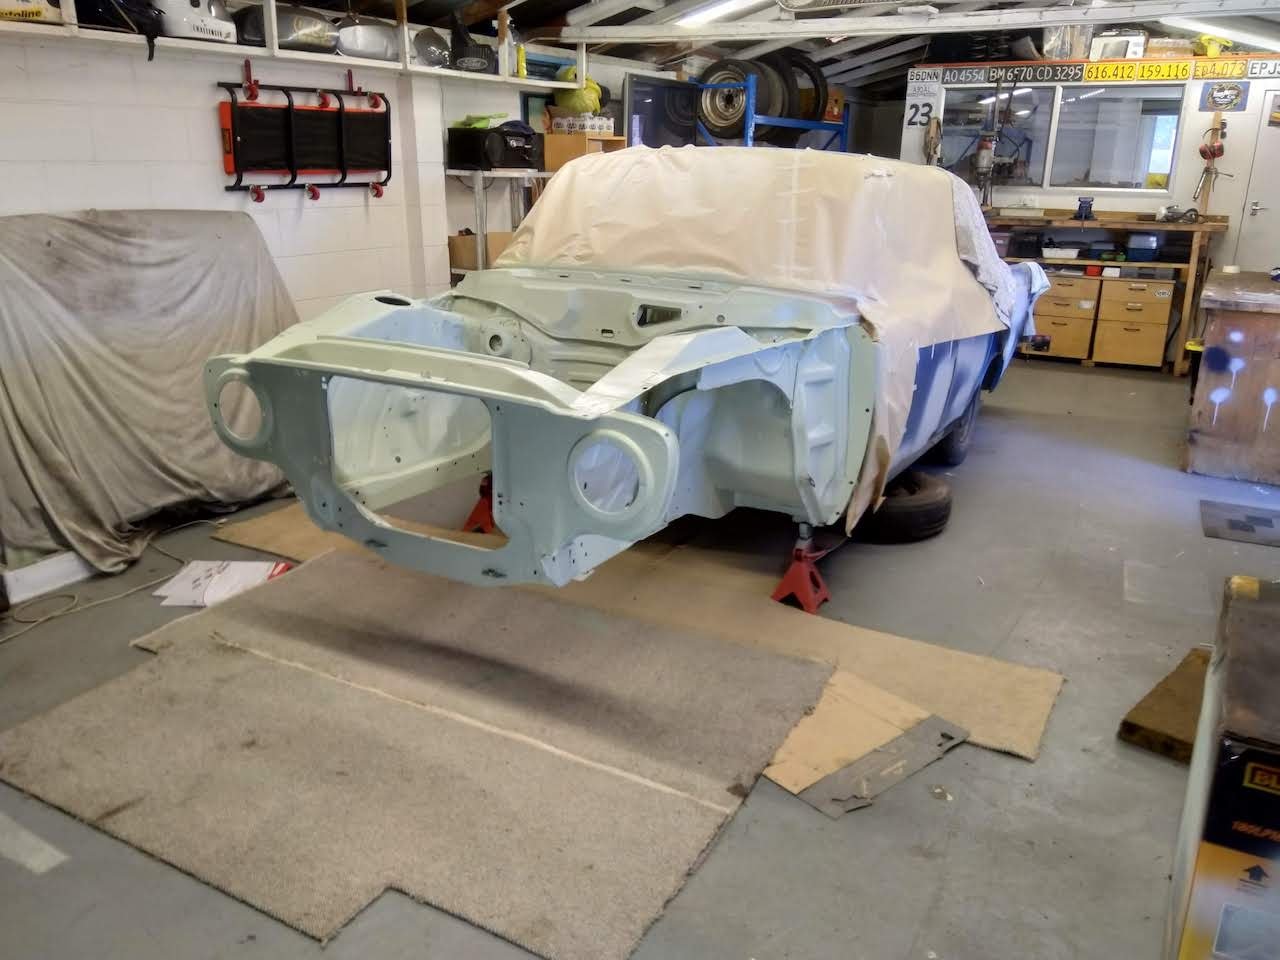
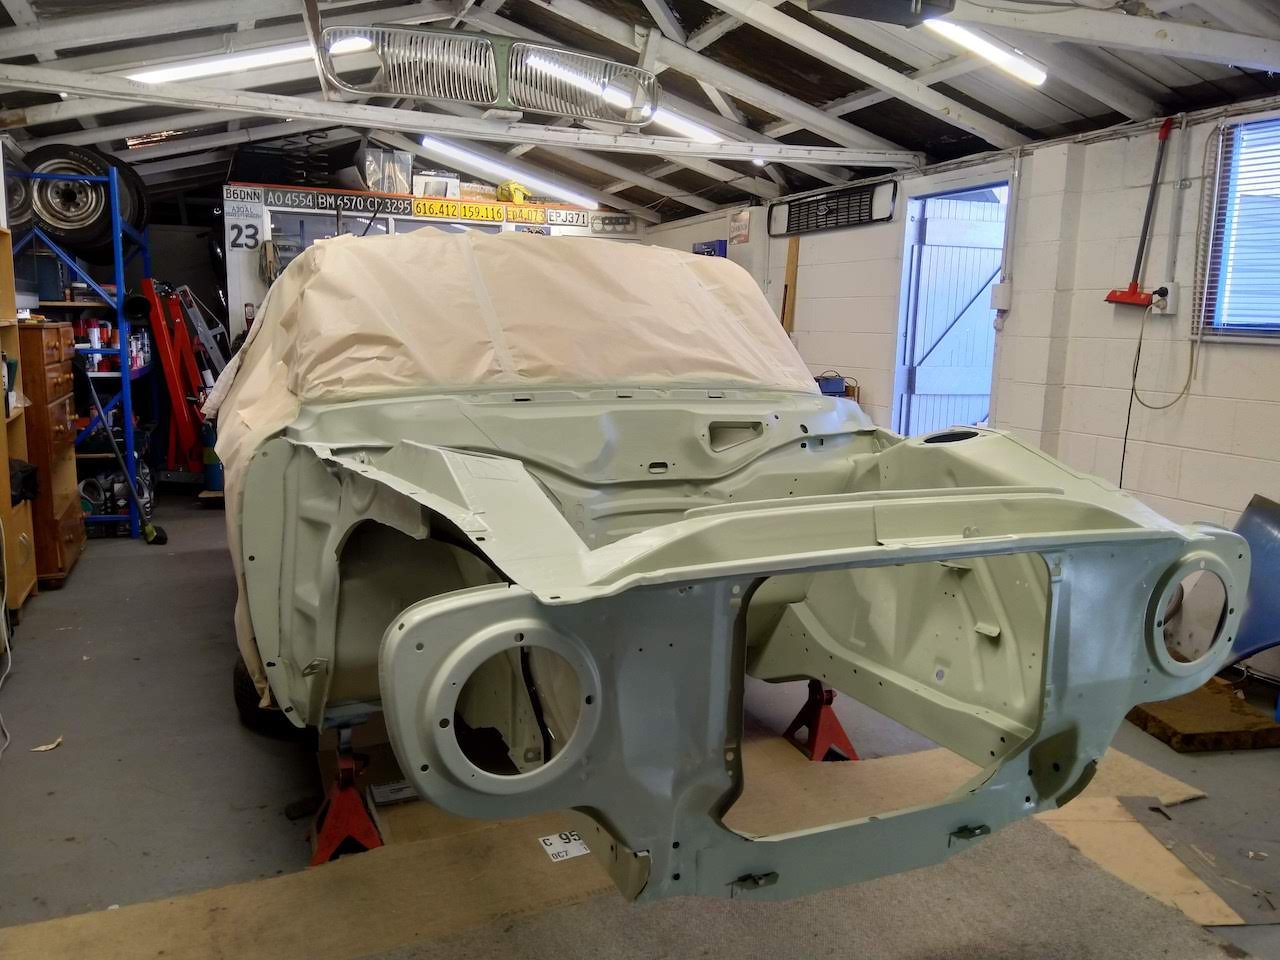
Slowly but surely making some progress on this. Got the engine bay stripped and into epoxy primer. I've removed the dash and the first bit of sound deadening. Bit of rust under the sound deadening, but nothing major so far. Found a small hole around the size of a 10c coin but that should be easy to sort. Planning on cleaning floor back with a wire wheel and treating with Brunox, before overcoating. Probably will just brush it on, doesn't need to look pretty.
3 points
-
Did the other side, but I don't think it really needed doing...gaskets looked okay. But at least that's one thing to not worry about eh?
3 points
-
Don't drop it, you'll break the sink3 points
-
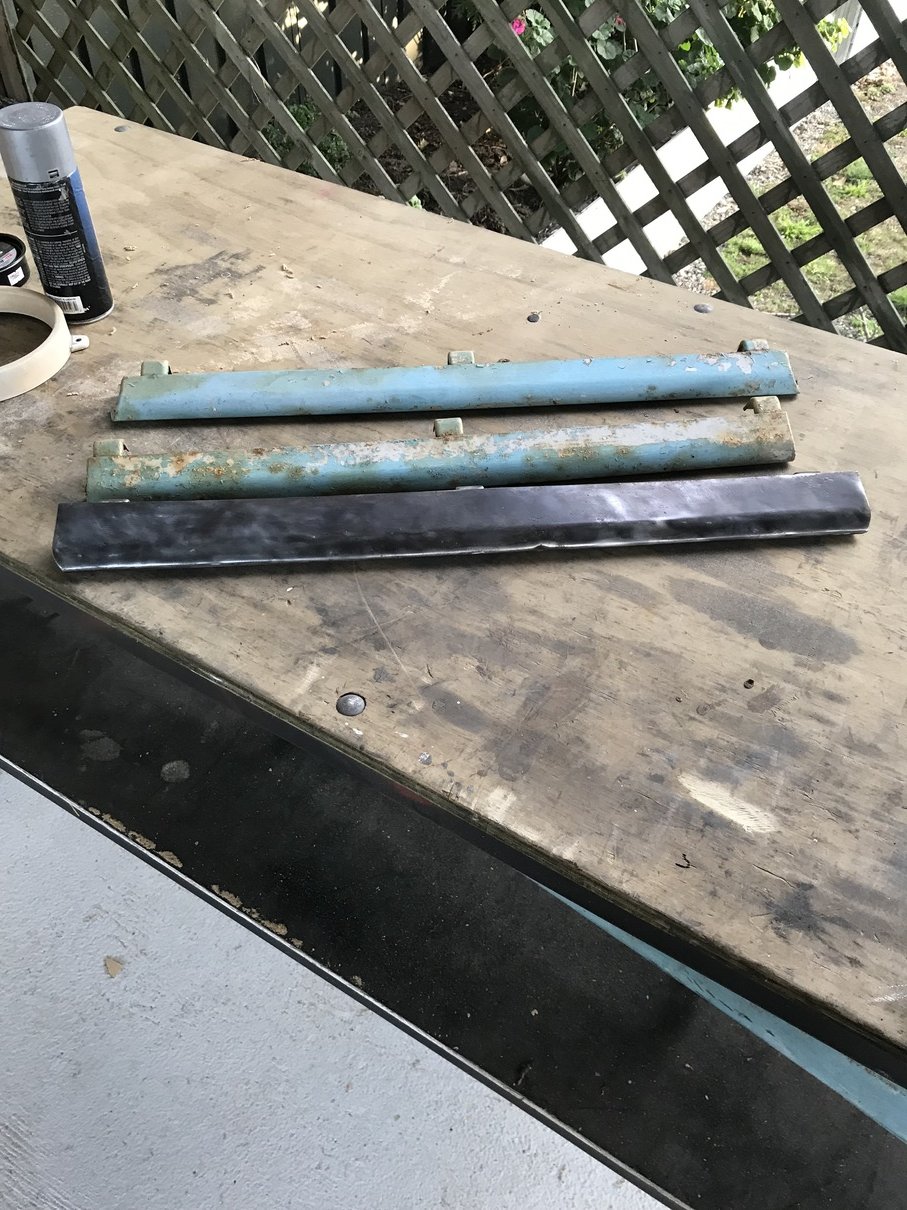
Evening. Another lovely day in the old U of K. Skimmed and painted the B-pillar repair, needs a bit of stopper before paint but it's good enough for a country job. Even looks passable up close Push bar next, fabricated a jig for accurate cutting and aligning /screwed it roughly to a plank. Mocked up. Decided to lose the clamps in the end. "essential" trip to get it welded at Steves Then back home to paint it and nail it on. Yeah, right. Had to take the front everything off to fit it properly. Ran out of light and being bothered in the end. Not really a problem, I've got a few spare weeks....3 points
-
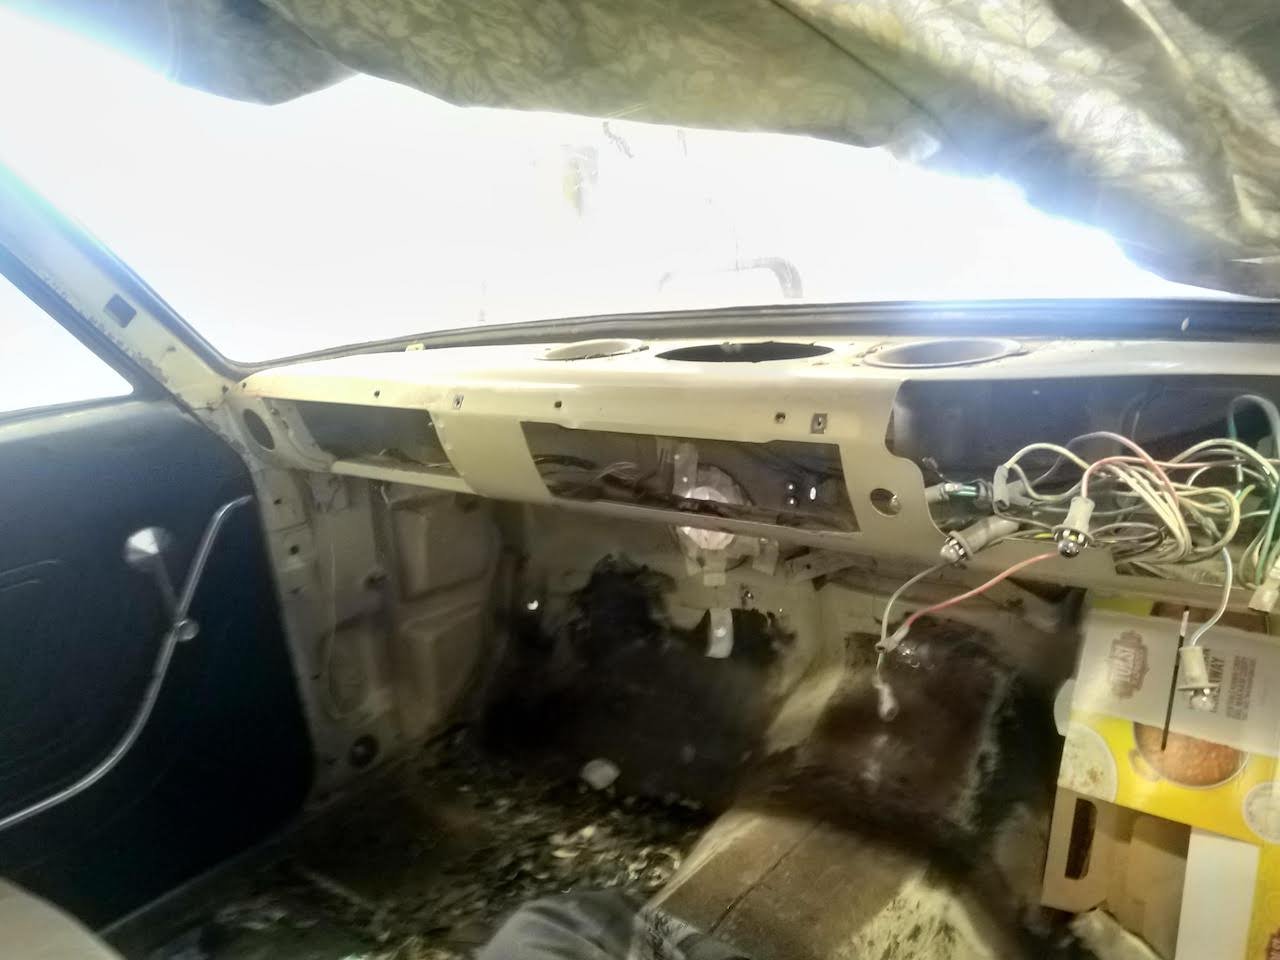
re do on the dash today
2 points
-
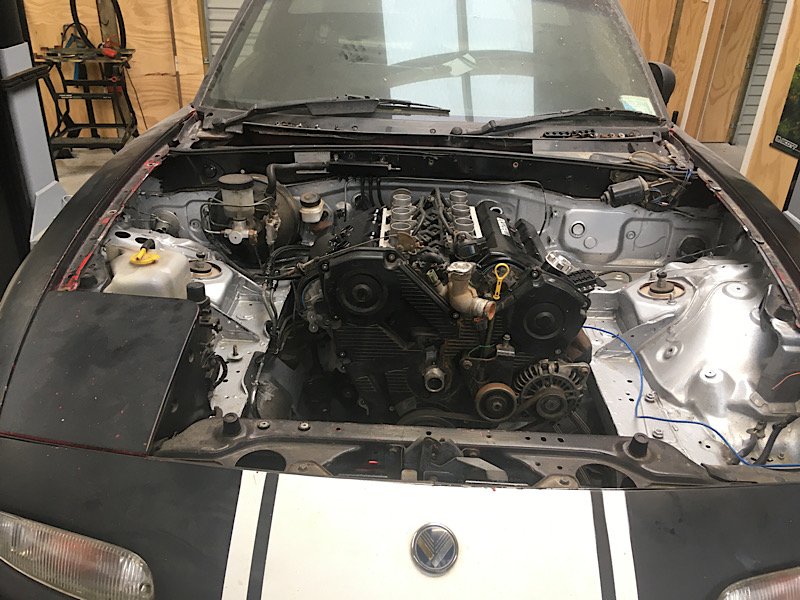
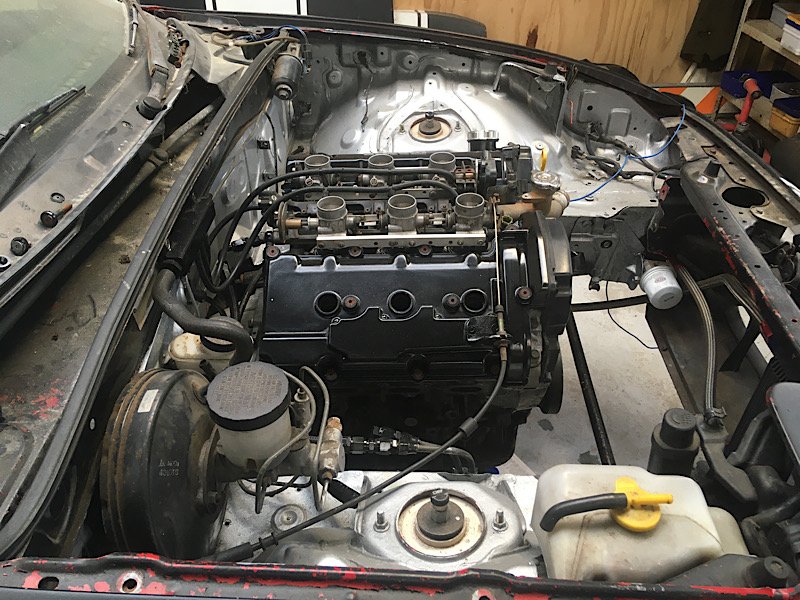
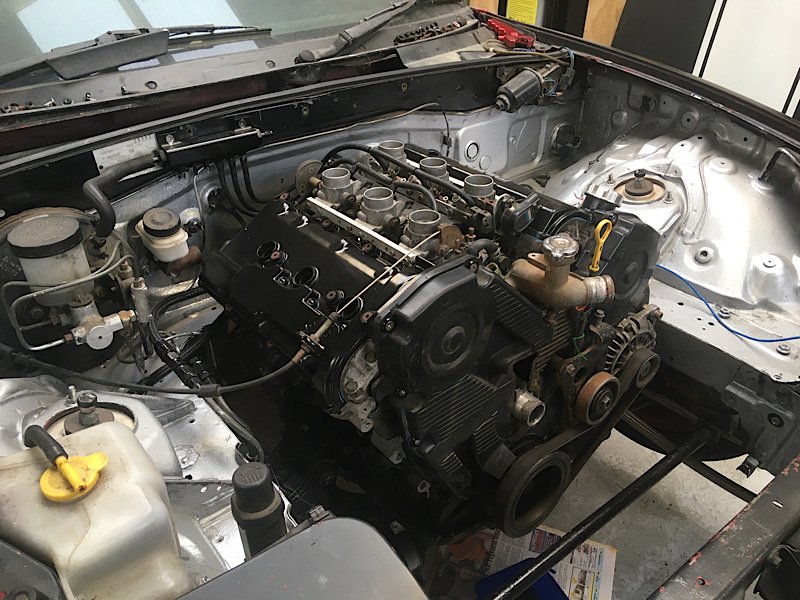
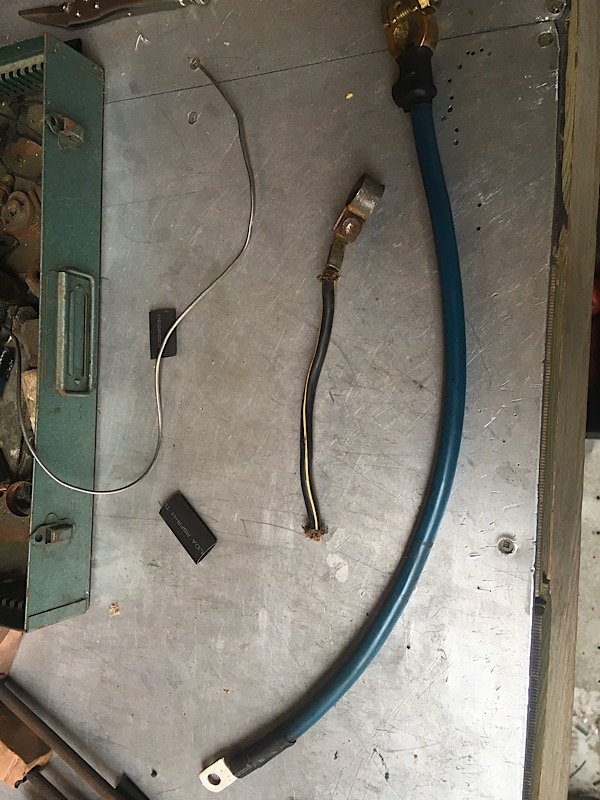
Long overdue update now with added shed hoist and coronavirus bought a new mig and spoolgun and attacked welding a new mount for starter onto bellhoising - seemed to work ok used 10mm alloy plate and there are 2 bolts that capture it right thru to the block - no photos but it looks factory - starter mounted and engagement checked many times threw motor and box back in again - love this put engine on crane and then just lift car on hoist under it got very bored during lockdown even working some days so small steps one wire at a time - made a big fat new earth wire for battery - and better terminal on positive lead and reattached lead along the pppf frame to the starter new wire from starter positive to alternator output and new wire from there off to start of new fuse box clipped a wire onto starter solenoid filled engine with oil and removed spark plugs that were sitting in loose and turned it over with socket on the crank pulley for a bit touch starter wire to positive fuse terminal and we have turnover yay was not sure if I was gonna have to prime oil pump after sitting so long with no sump on and being upside down and stood on its nose quite a bit but had a gusher from my oil filter adaptor right away stopped attached hose for filter and oil cooler then turned it over till solid oil out of the return hose then reattached that if I can make and fit 1 wire per day it’s progress Blah blah wall of text - photos
2 points
-
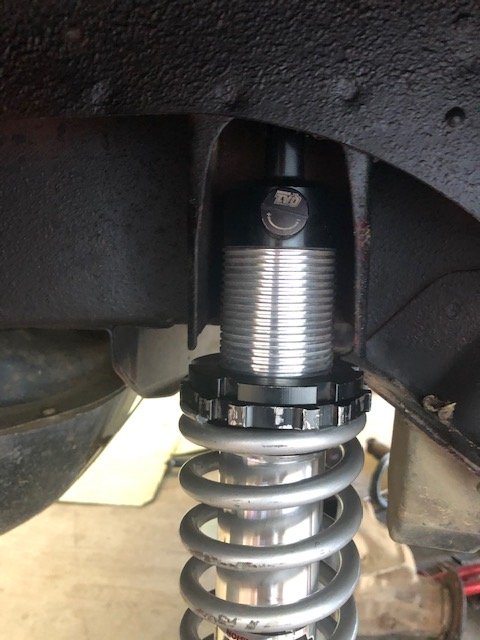
So with the shock upside down, it fits with no mods... what effect will that have, if any as opposed to the normal orientation?? has anyone done this before and was it successful??
2 points
-
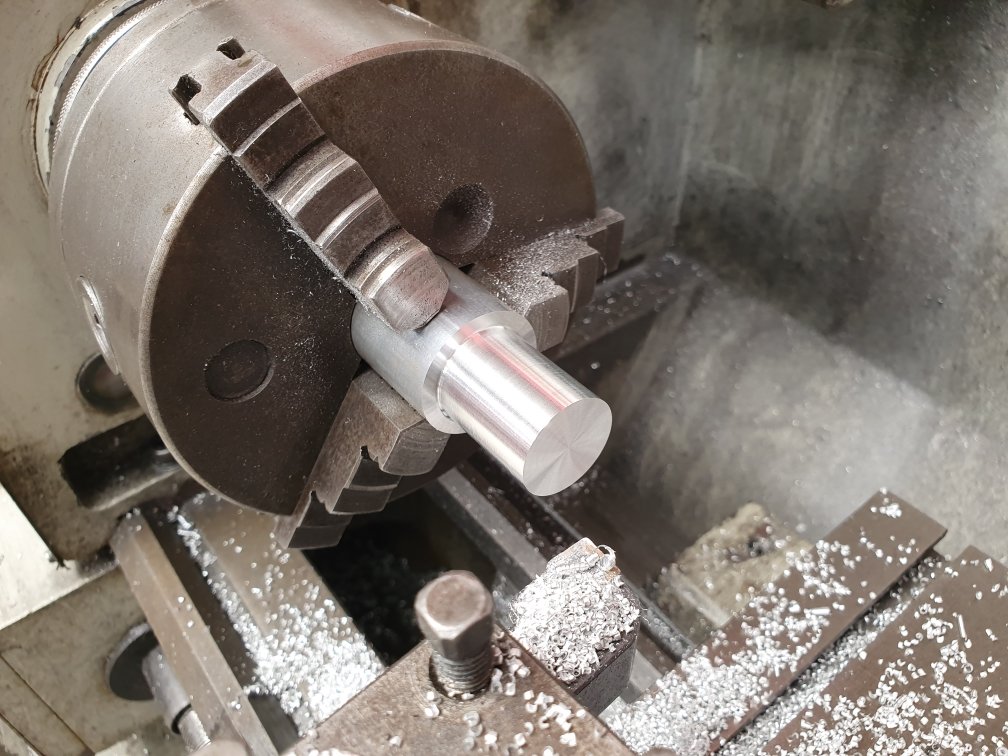
Well it's been the better part of eight months since the last installment. There's obviously not been nearly as rapid progress, however, I feel that enough has happened to finally make it worthy of a post. To begin, I finally moved into a new place in Auckland with access to a closed in double garage. I do have to share it with a flatmate's car but I'm very glad to finally have the car back. However, ever since I've been working pretty much constantly so haven't had a lot of time to work on it. That said, I found a nice sturdy bench on marketplace, got given a vice from the old man, and started to get myself established. I'd been holding off on buying a grinder and panel beating tools until I could find a really good deal. In the meantime, I started drawing stuff and making plans. The first being what to do for my air filter. I went through lots of designs in my head before finally getting this down on paper. The original design took all the right mathematical ratios into consideration from this document: http://www.nsxprime.com/w/images/9/9e/(Blair_and_Cahoon)_Design_of_an_intake_bellmouth_Sept._2006.pdf It had the right trumpet length and radius and all the bells and whistles. It's designed to slip over the end of the throttle bodies with a snug fit and a pair of grub screws top and bottom to secure it. It was a pretty good looking design in my opinion. But as the saying goes, no plan ever survives fist contact with the enemy. When I went to check the available space on the car, I realised I had about half the height space I would have needed, hence the reduced trumpet height and the filter being sunk down over the top of the bell mouths themselves. It's designed to use a K&N E-3515 filter which is basically the biggest one I could fit. At this point I planned to make it from aluminium and teach myself to weld it up properly. Since I don't have an AC TIG, I was going to make a weekend trip back up to Whangarei and use my dad's lathe to make the trumpets and his welder to stick everything together. That was until people started getting sick. My partner and I booked time off months in advance to go on a fake Easter weekend with her family back up north. It's been a bit of a tradition for the last few years and lets us get away without having to deal with huge crowds of people on real Easter. That was booked for the 20th through to the 23rd of March. The weather wasn't great so we came back to Whangarei from camping on the Sunday to reports of the COVID situation getting worse. I figured it would be a bit shit to be stuck inside for a month with no tools to work on the car so I finally bit the bullet and bought a grinder, drill, regulator, TIG rods and tungstens, and borrowed some panel hammers and dollys from dad again. No sooner had I got back from shopping to where we were staying in Whangarei, the news of the lock down was announced and my partner decided that there was no way we were going to head back down to Auckland to be by ourselves, when she could be with her family up here the whole time. So here I am with all the gear and no car. Stellar. Eventually, I got bored enough to start thinking again. I started making a cardboard mock up of the intake to check its feasibility, especially how difficult it would be to make from flat sheet materials. To start, I did the maths and divided up the trumpet shapes into 16 segments which I could cut out of cardboard. This was a good proof of concept. I was gearing up to make the other two when my father in law suggested that I could make the whole setup from carbon fibre. He makes his own telescopes at home, including a seven odd foot tall one with something like a 14" mirror, all handmade. He has done a bit with carbon fibre and suggested I use his lathe to make a mould and lay the whole lot up instead of struggling with a welder. Well, hanging off a lathe for a day or two was a lot more appealing to me than playing arts and crafts so I swiftly pivoted and started to make it happen. Starting by printing out the profile of the trumpet and transferring it to some scrap flat bar, I made a profile tool for the lathe. It's only mild steel but it's still harder than the MDF I plan to use. Then I stacked up said MDF and screwed four layers together to get the height I'd need. Finally, I threw it in the chuck and began pecking away at it. It didn't leave the nicest finish but I wasn't too worried because I was about to encase everything in resin. The wood makes for a good scaffold but the resin should give me the smooth finish I'll need for a good release. I mixed up the epoxy and poured it on, only to realise that although I was assured the mix ratio was 4:1, it does pay to confirm for one's self. This is what happens when it's actually supposed to be a 5:1 ratio. It was off gassing like a mother and started to rise like one of those baking soda and vinegar volcanoes you make as a kid. When I did peel the tape off, it was so full of bubbles and voids, there was nothing for it but to take it all off and start again. Skipping a few steps because I'm out of practice with taking photos of everything I do, this is the result of re-machining the resin. There is also a few layers of primer on top, as well as a couple layers of clear coat. Now would be when I would put some mould release compound on there and start the lay up process. I say would because I don't have any carbon fibre yet so I'll have so I'll have to wait until the restrictions ease. I plan to attempt to make the mould for the other parts of the design as well so I'll update that as it happens. In the meantime, I'd appreciate any feedback on the design and process on the discussion thread in my signature. Cheers.2 points
-
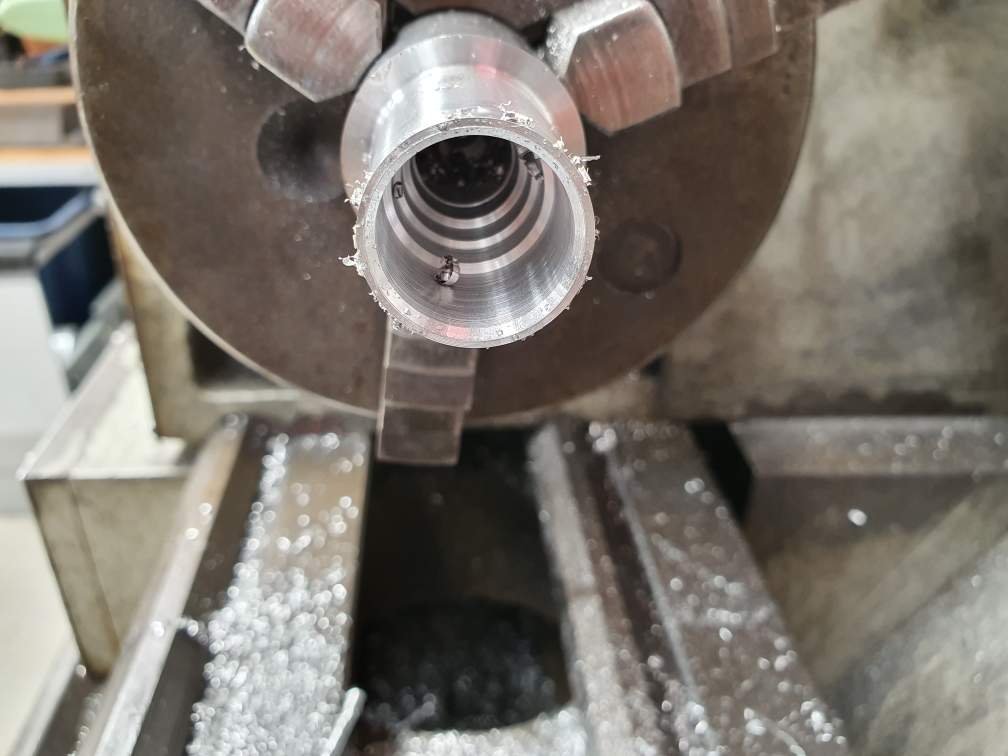
I have this coffee mug from 1944. It is the only one I use due to its perfection of size, finish and history. Like a twat I dropped in in the sink and it has developed a crack; So today I decided to make a double skinned stainless one that will be difficult to break; I started with so 80mm pipe, put it in the lathe and applied some heat, this allowed me to flare the top edge a bit; Then I got so into it I forgot to take anymore pics like a legend, so this is the finished result. It appears to work ok. I should probably find some better pipe sizes and do it again later but better. The outer skin I had to make from some sheet and the butt joint is skanky. But it'll do for now... Edit; coffee doesn't leak out and it stays warm. It also weighs really quite a lot.2 points
-
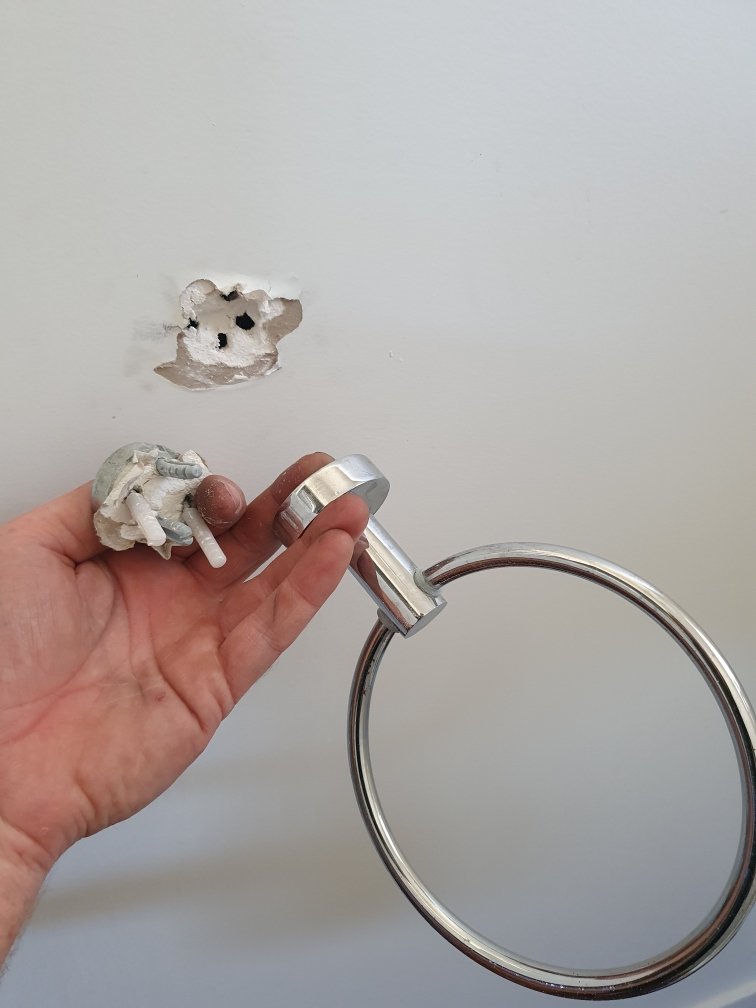
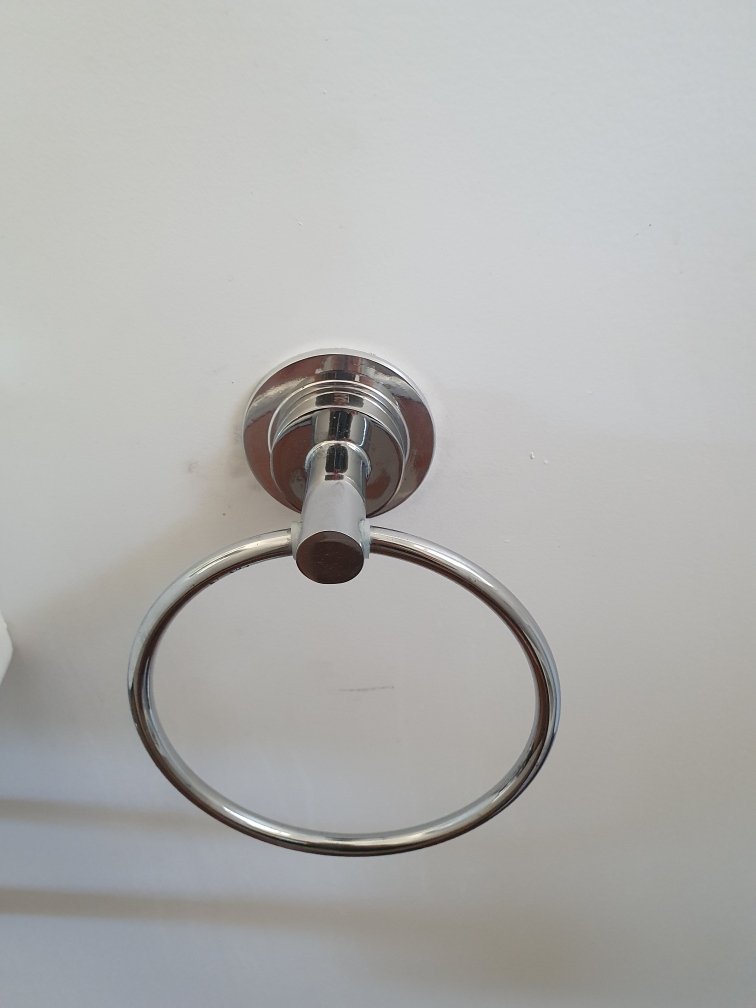
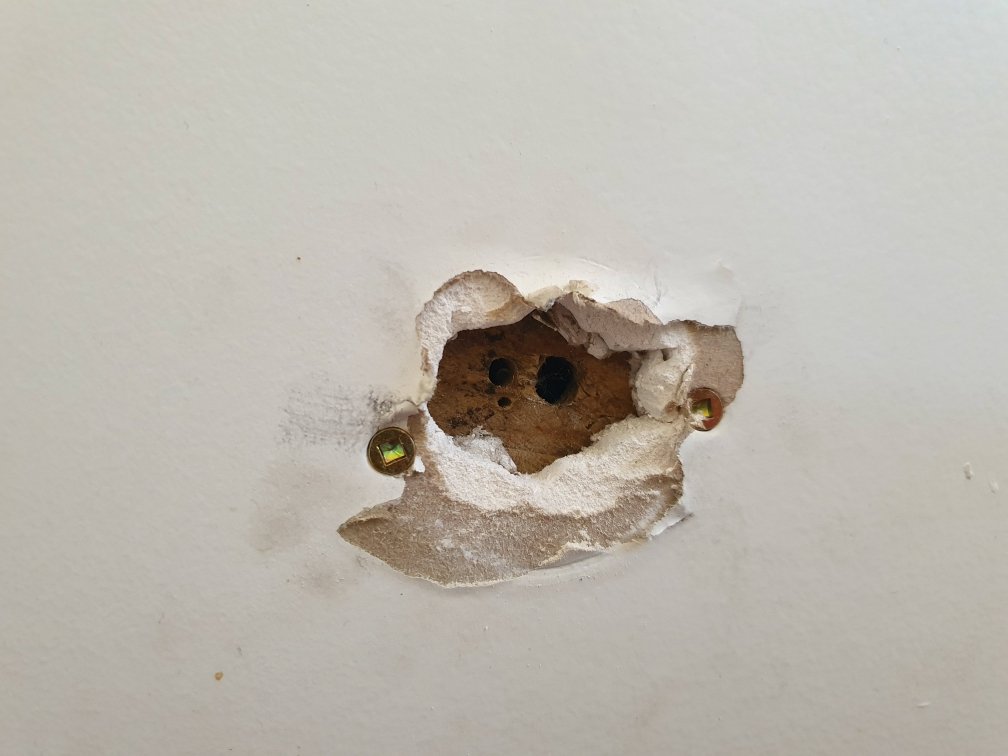
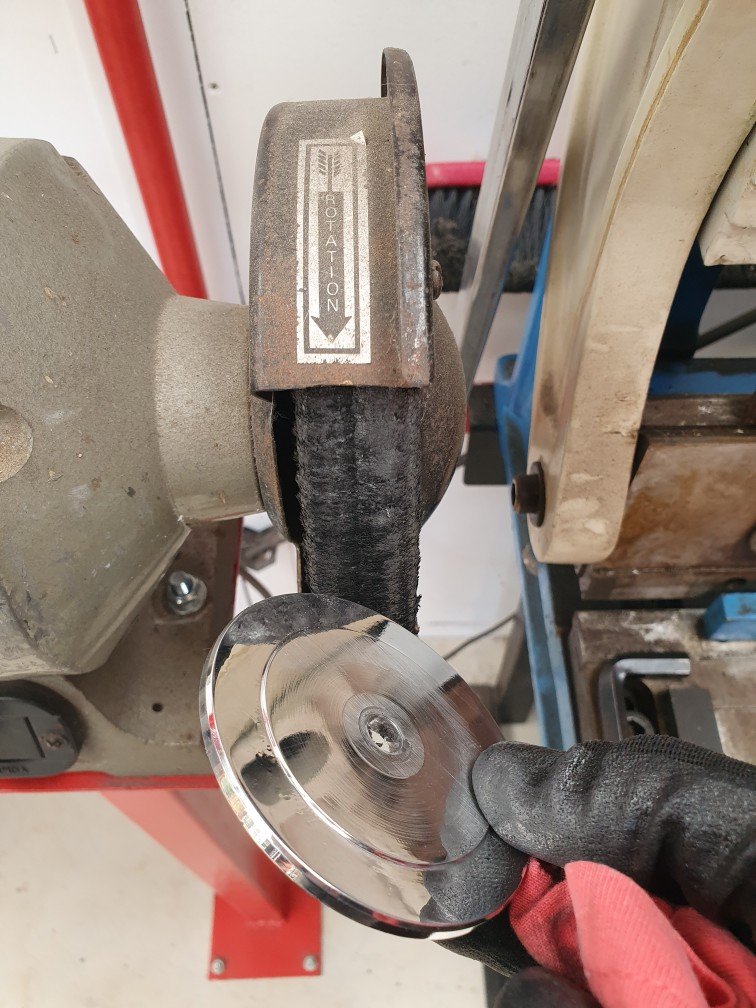
Anyone with kids will appreciate that half your life is spent cleaning or fixing the path of destruction they leave in their wake. Apparently the towel holder isn't rated for climbing on...go figure eh!!! Nothing some serious over engineering can't fix though. And finally
2 points
-
This mornings haul.... This afternoons mission is to pull out the Haynes to find out where the screws are to unmount the Blower and the Braking system. This entire car seems to be built with self tapping Philips head screws, I've been able to do it all without changing screwdrivers.
2 points
-
So with controller flipped, I discovered I could get around 30km/h on the flat, and GPS mapping showed this was pretty accurate. I was keen to test endurance so just hooned round the block, a bloody hoot not pedalling. Still have to sort cable routes etc but effectively still in prototype stage... Was hot and I was feeling chuffed, so grabbed a stubbie... Which gave me an idea, a 4km circuit round the block, with some gentle hills, almost the perfect distance to chop a stubbie each lap, game on... So merrily hooned around, passing lycra cyclists, waving to kids and tipping my stubbie to dads working in their yards, grabbing a fresh one each lap. (daughter was taking these pics)... Then suffered a puncture the furthest I could get from home (rear is dead flat). Think I felt it happen on a fast corner I was attempting to take at full noise, knee down style... So endurance test canned, but bloody happy how it went. Exceeded my estimates, going for over an hour at full noise with very little pedalling. Although time is misleading as it doesn't account for stubbie pit-stops (7). But over 30kms is bloody brilliant. Measured voltage after walk home and was 33.3V. Think controller cuts out at 30... So still have a bit to do (brakes, gears, sort cables etc) but it met my calculated speed and distance expectations, and got a lot of smiles from people I passed (although they may have been chuckling at the happy looking Barry day-drinking on his contraption). Wife even had a go... So a bit to fettle, and I still have the bonus 48V motor I was sent in error, plus I bought a spot welder so can make up a more compact battery for the next one.2 points
-
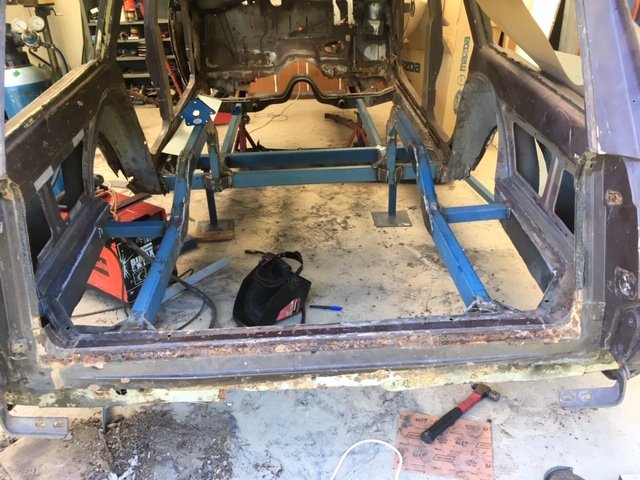
Finished the other side 4-link mount. Bought some more wheels too. 13x6.5j SSR MKII's. Gave them all a beadblast and polish, still need some paint at some stage. Bought some new screws for the headlight trim, gave the trim and headlights a polish and assembled them. Made some new chassis rails out of some 50x50x2.5mm box section. It nearly perfectly slid over the existing chassis rails, which was ideal for plug welding it. The front of the rails/foot well section has gained 25mm of ground clearance now, which makes the sills and chassis pretty much flush, before the chassis was quite a bit lower. Also extended the rails to go all the way through the rear seat foot well and up to the rear chassis section. Should be way more rigid now! Cut out the floor that was hanging lower than the chassis rails and made some new panels and welded them in. The other side is a bit more work, as it will have an exhaust tunnel going through there as well. I should hopefully be able to tuck the exhaust right up above the lowest point. Once that's done the sills and chassis rails will be the lowest point in the centre section of the car. Might need to look at whether I raise the front crossmember or not.2 points
-
well then this covid-19 kicked in and beach hop was no longer happening and i didn't have any idea when i was going to be moving into the new shop. so i mentioned to a few people that i was going to try lower the kombi, had a few things to bolt in and hopefully lower it. @Beaver @bobby1930 and @Geophy popped over and well bolts didn't want to come off which wasn't really an issue just meant the kombi would be in the middle of the shop till i sorted it. no real drama didn't know when i was moving. i had mentioned to a mate a while back With beach hop on the way i really wanted to mix the kombi up a bit and add something a bit different to it. other than it been a white box. I had mentioned this style to a mate a couple of times in passing and he said shit i draw that up for you. wasn't to much longer he popped passed work and traced the wheel arch/door and said it'll cost _ _ _ _ _ _ _ amount. i said hell yeah go ahead which i wasnt really fused about happening any time soon now that beach hop was off. but then covi-19 really kicked in. 2 nights out he turns up and slaps this on the side. and now the kombi is stuck in the old shop with new graphics on it and no wheels or suspensions till lock down is off or till i can lest get over there to bring it to the new location.2 points
-
Gave it a good wash after sitting around so long, might try raise it 40ish mm in the front to get it sitting level and have a bit more travel before the bump stops.
2 points
-
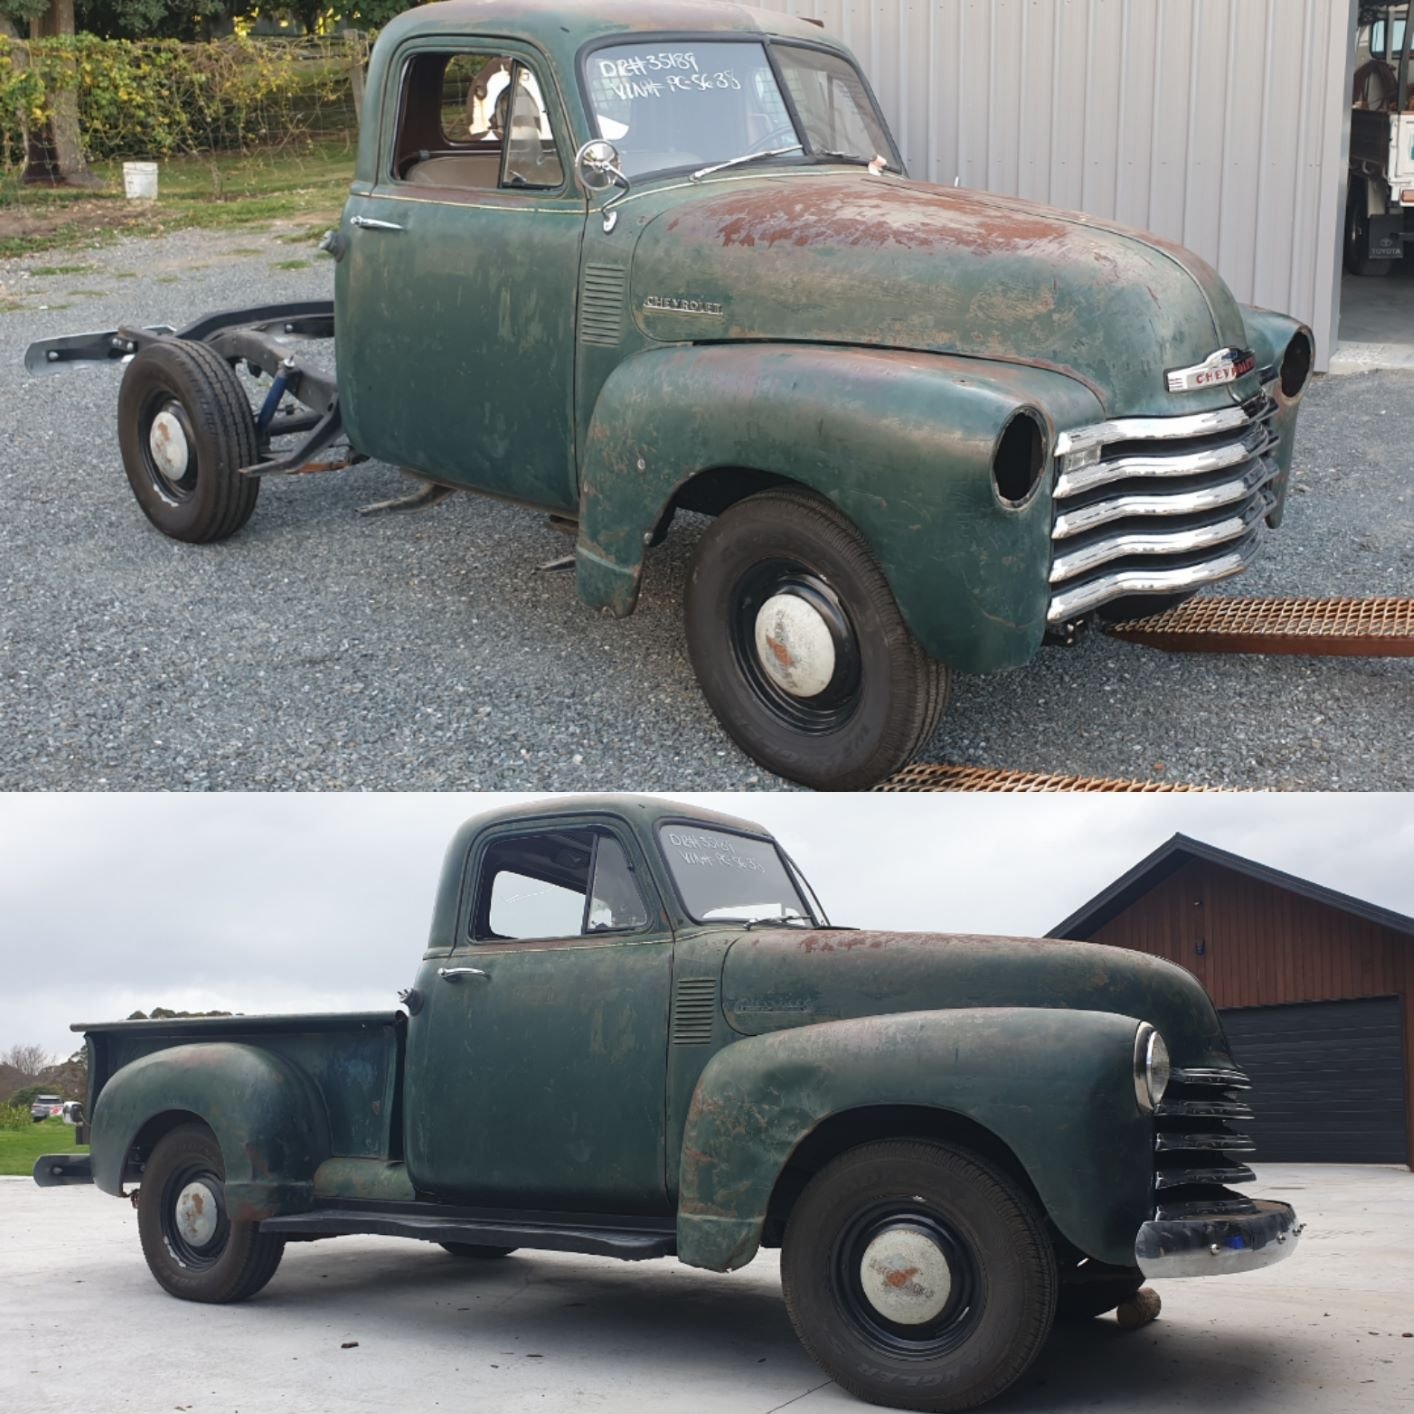
Next up picked up the cab and chassis and took it over to EZE Auto Electrics in Tga who did my Impala. Tidied up what wiring was needing to be replaced, wired up front indicators, horn, lights to RHD spec, finished the 12V conversion , wired up the old siren etc. Got ignition hooked up (was on a switch) so its running and starting off the key and ready for a VIN. While the panelbeater continued on the tray. Couple of before and afters showing how much straighter the cab and front end is now!
2 points
-
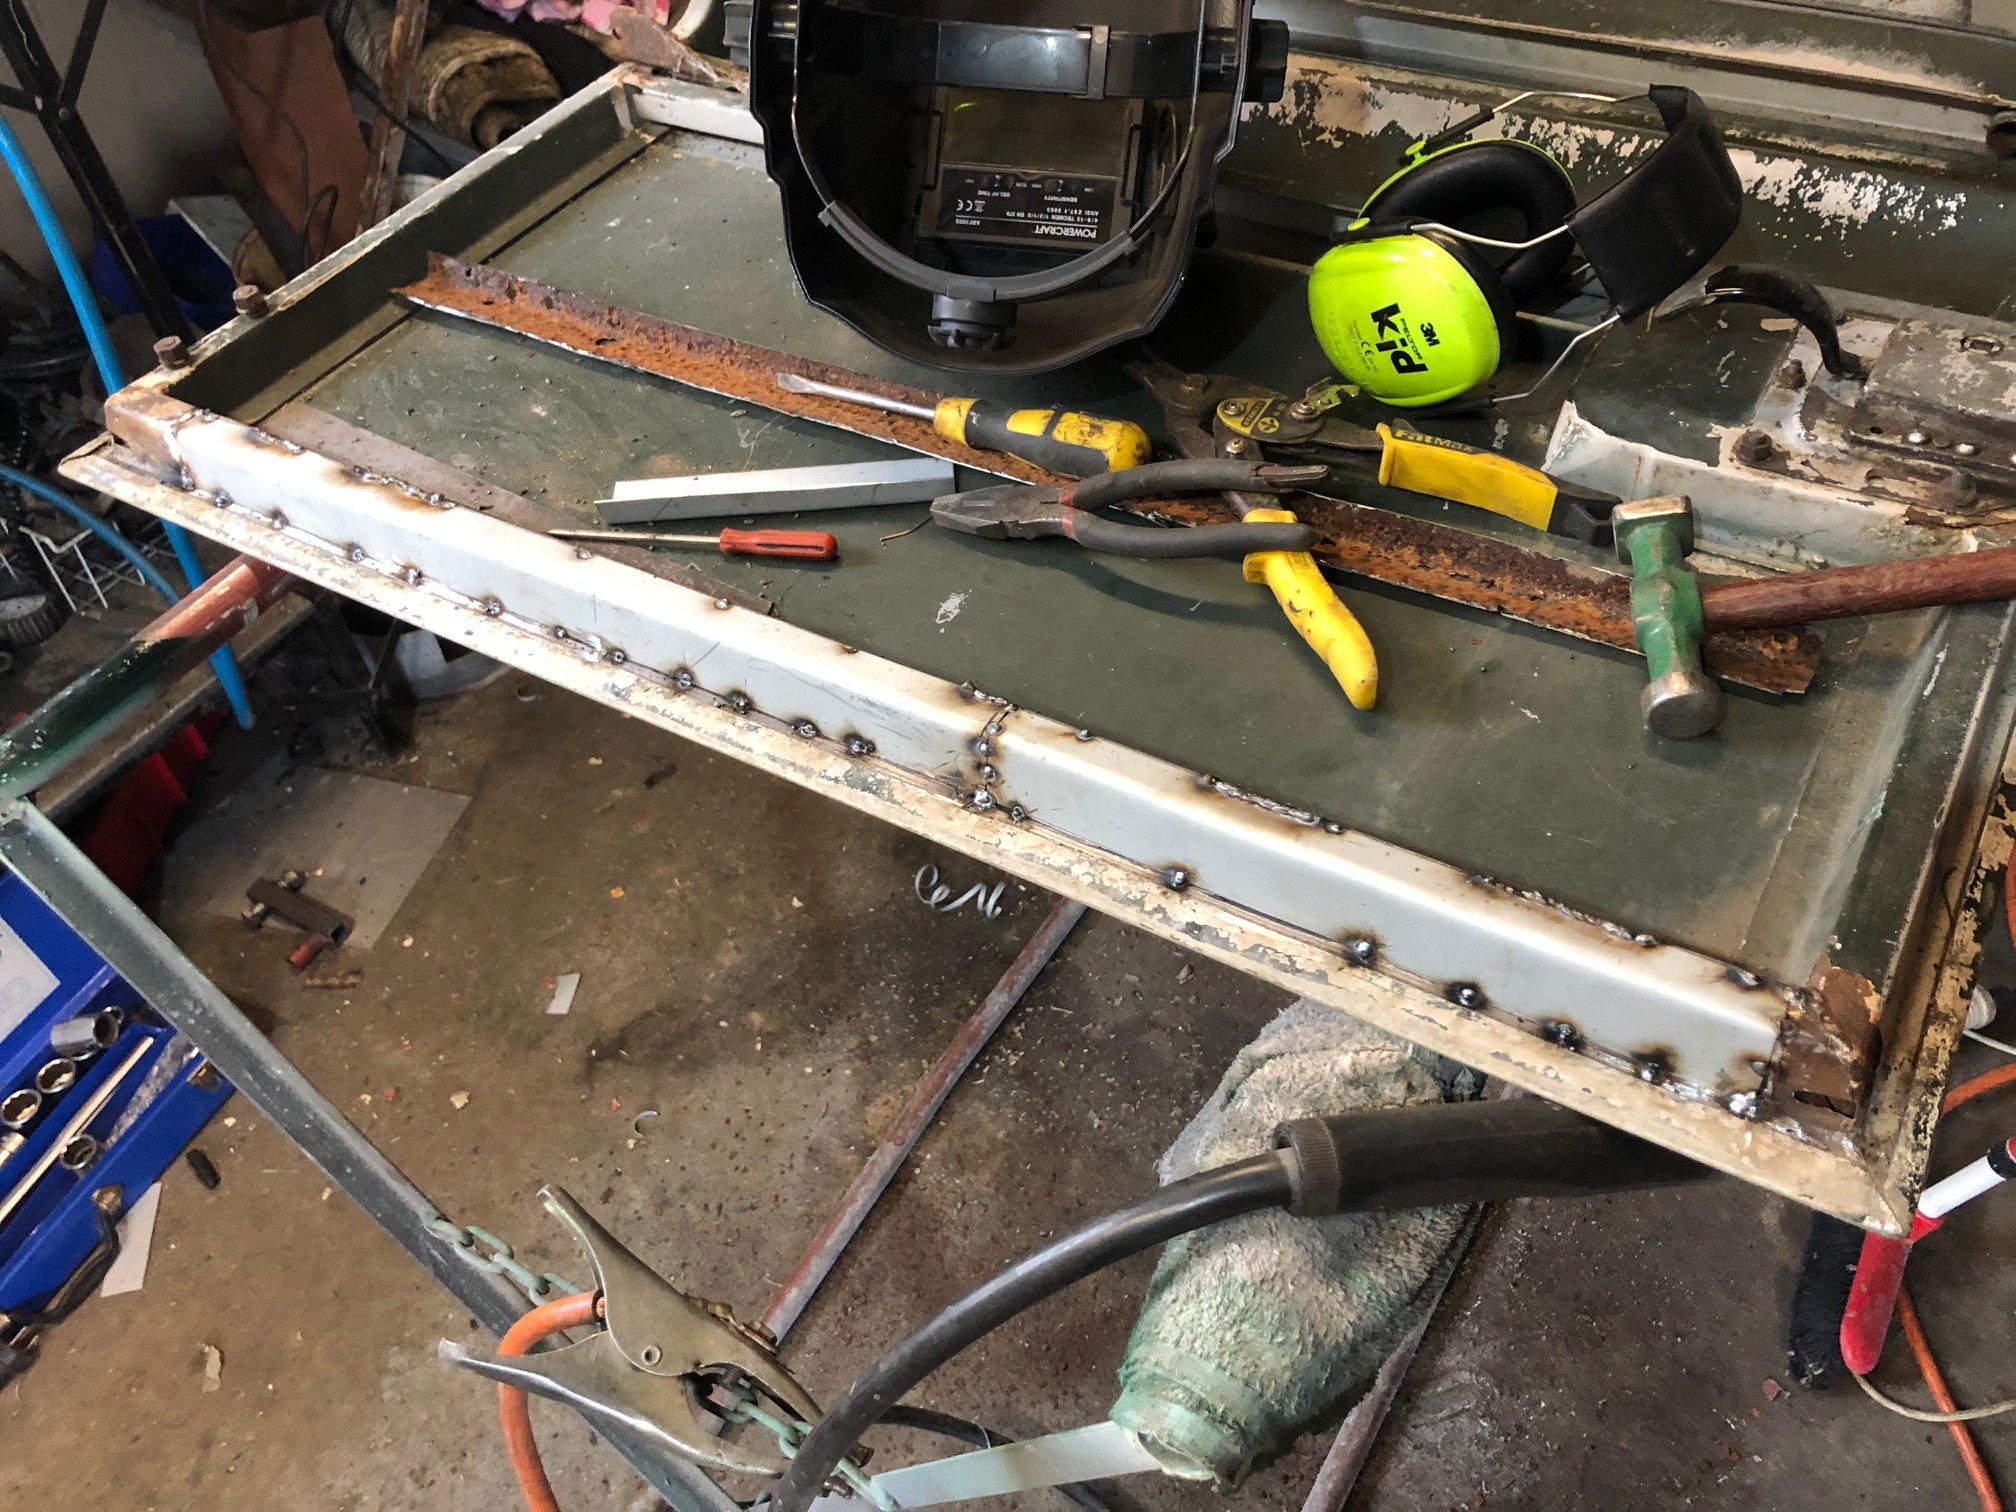
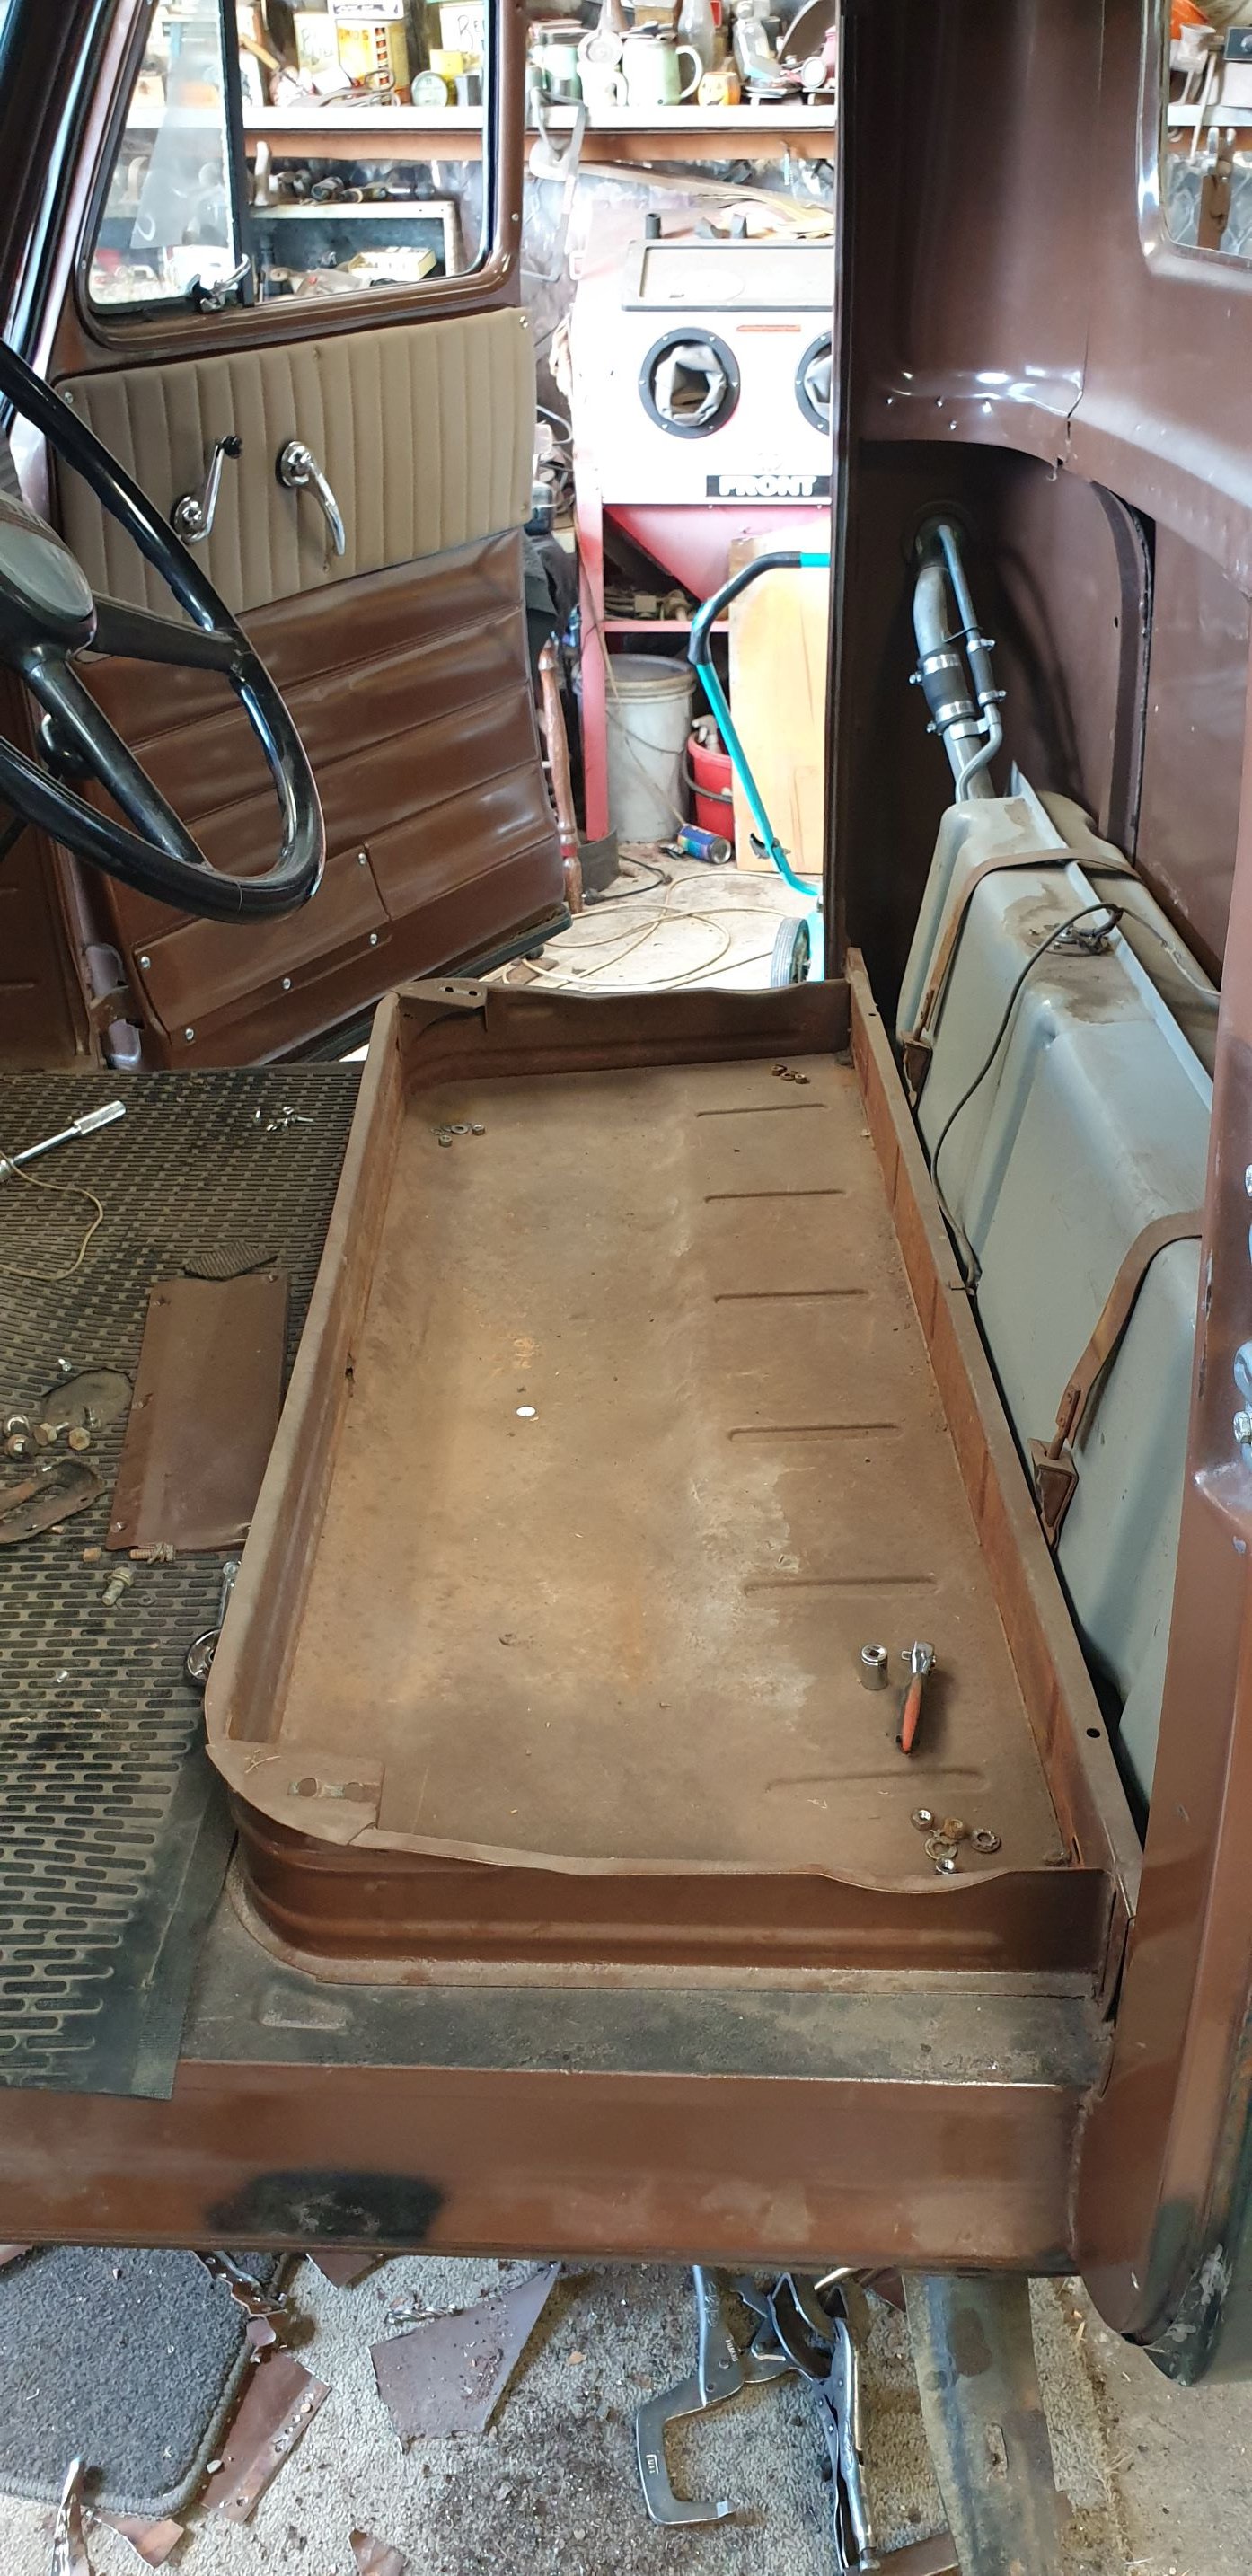
Seat wouldnt move backwards and forwards so pulled that out and cleaned up all the sliders and got that working again. Also spot welded new bed angle strips on the side of the tray as the old ones were rusted out. Gave the panels a good bang with a hammer and dolly and straightened them out a heap! Gas welded up any splits or breaks in them as well.
2 points
-
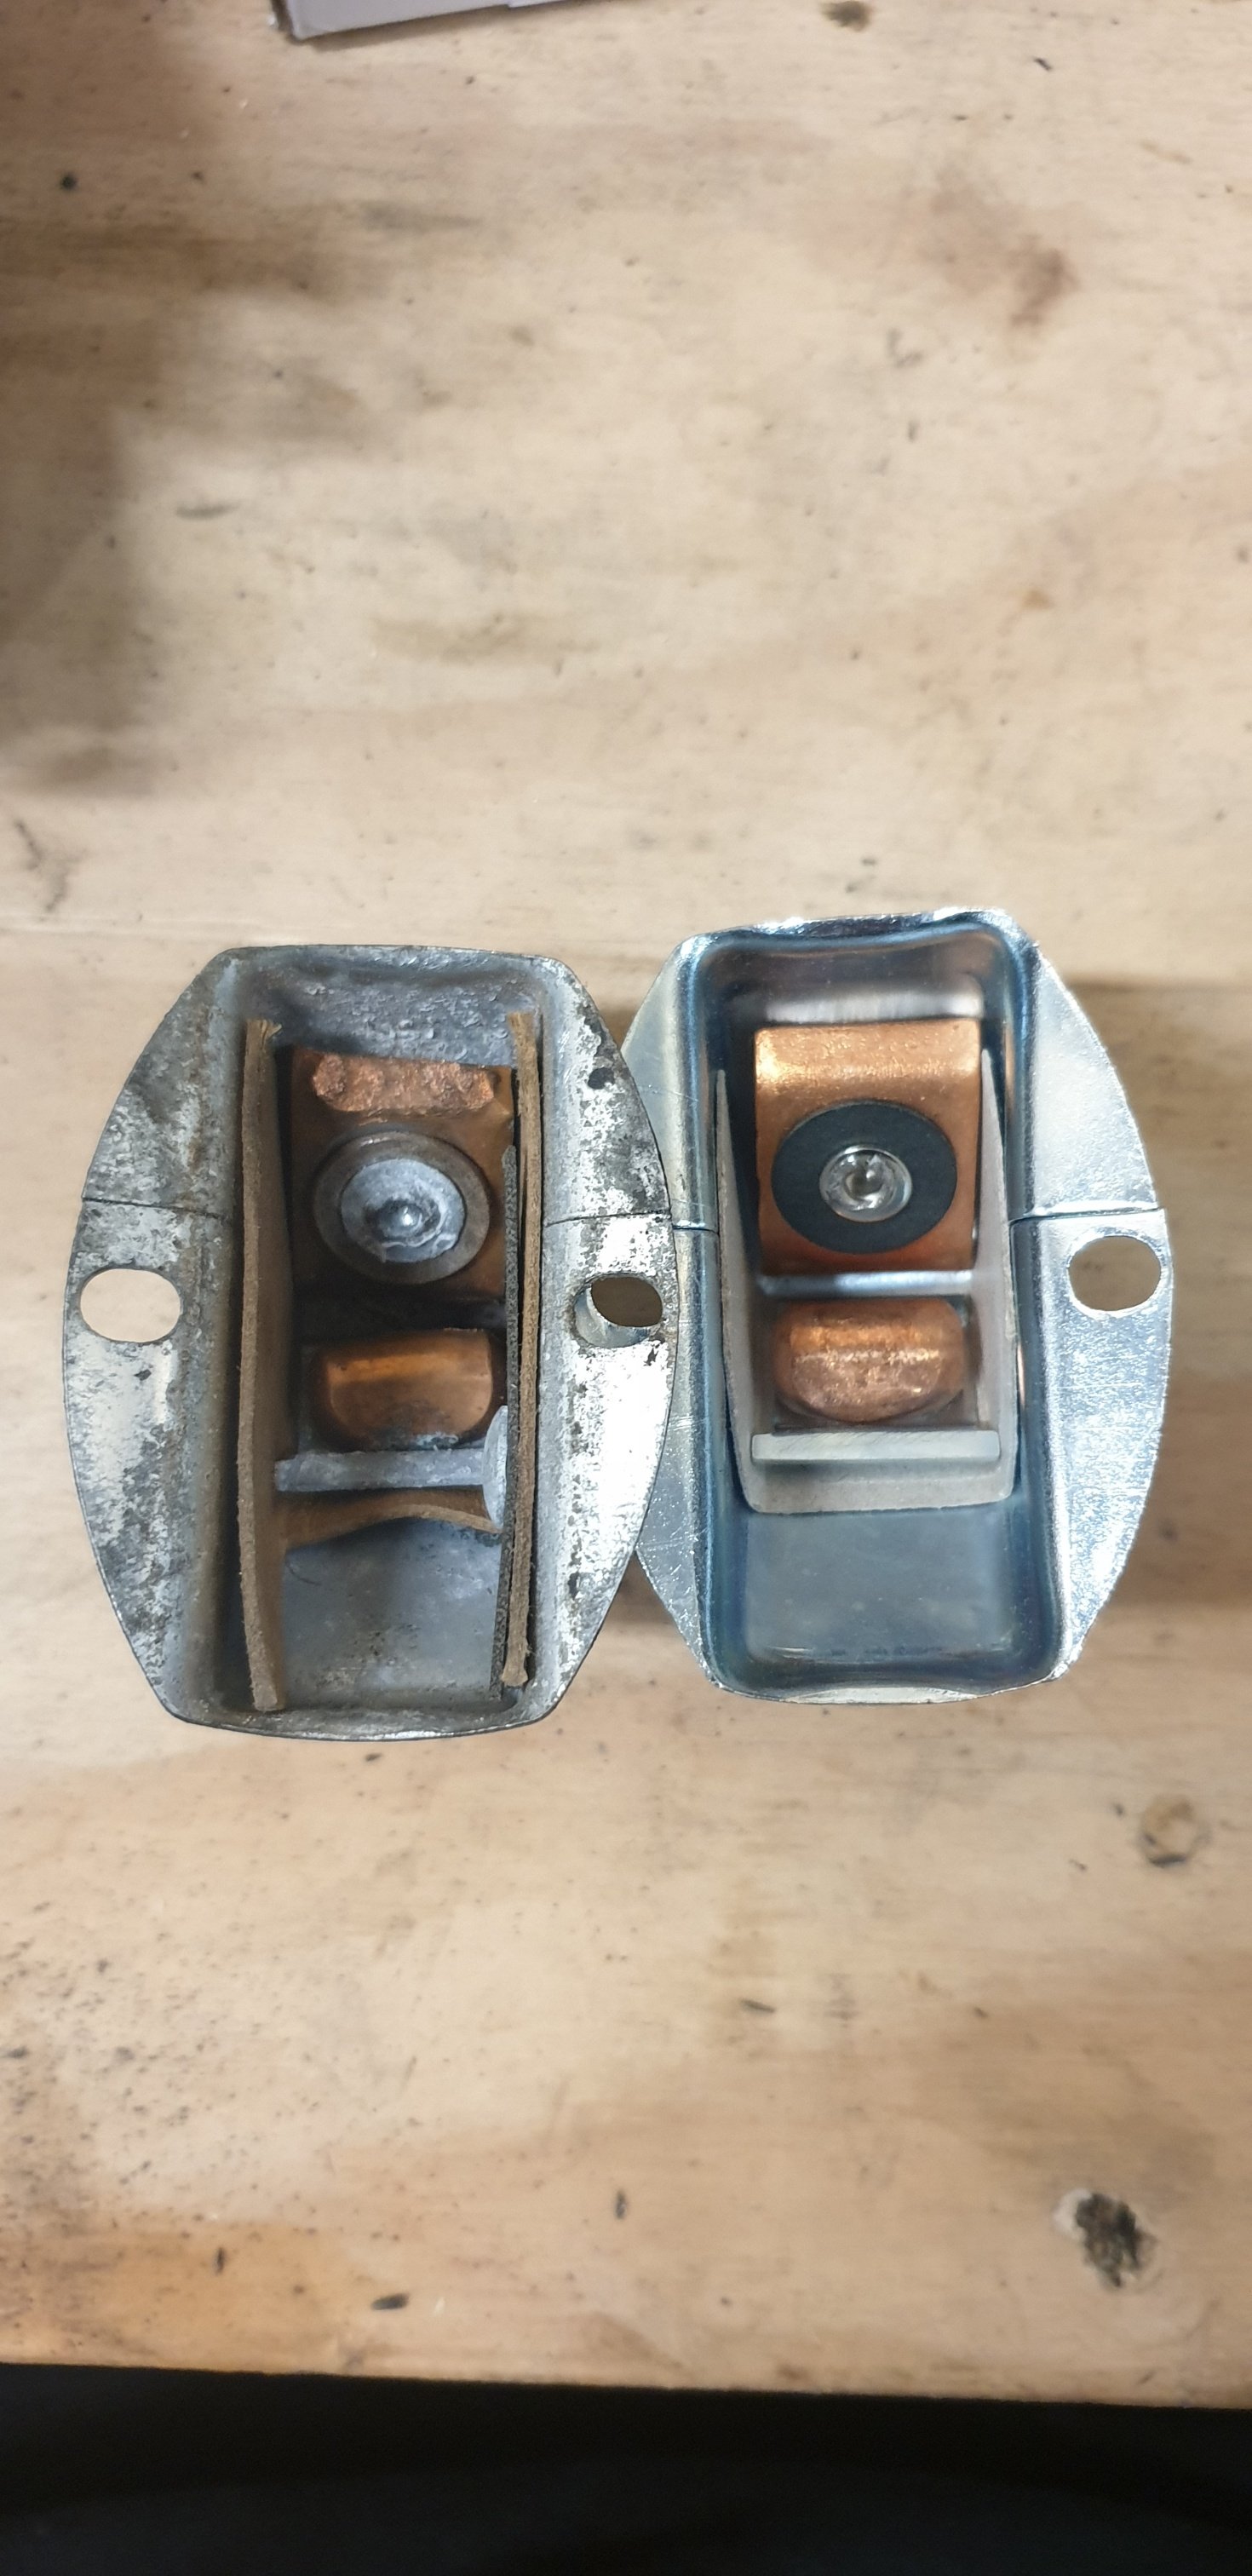
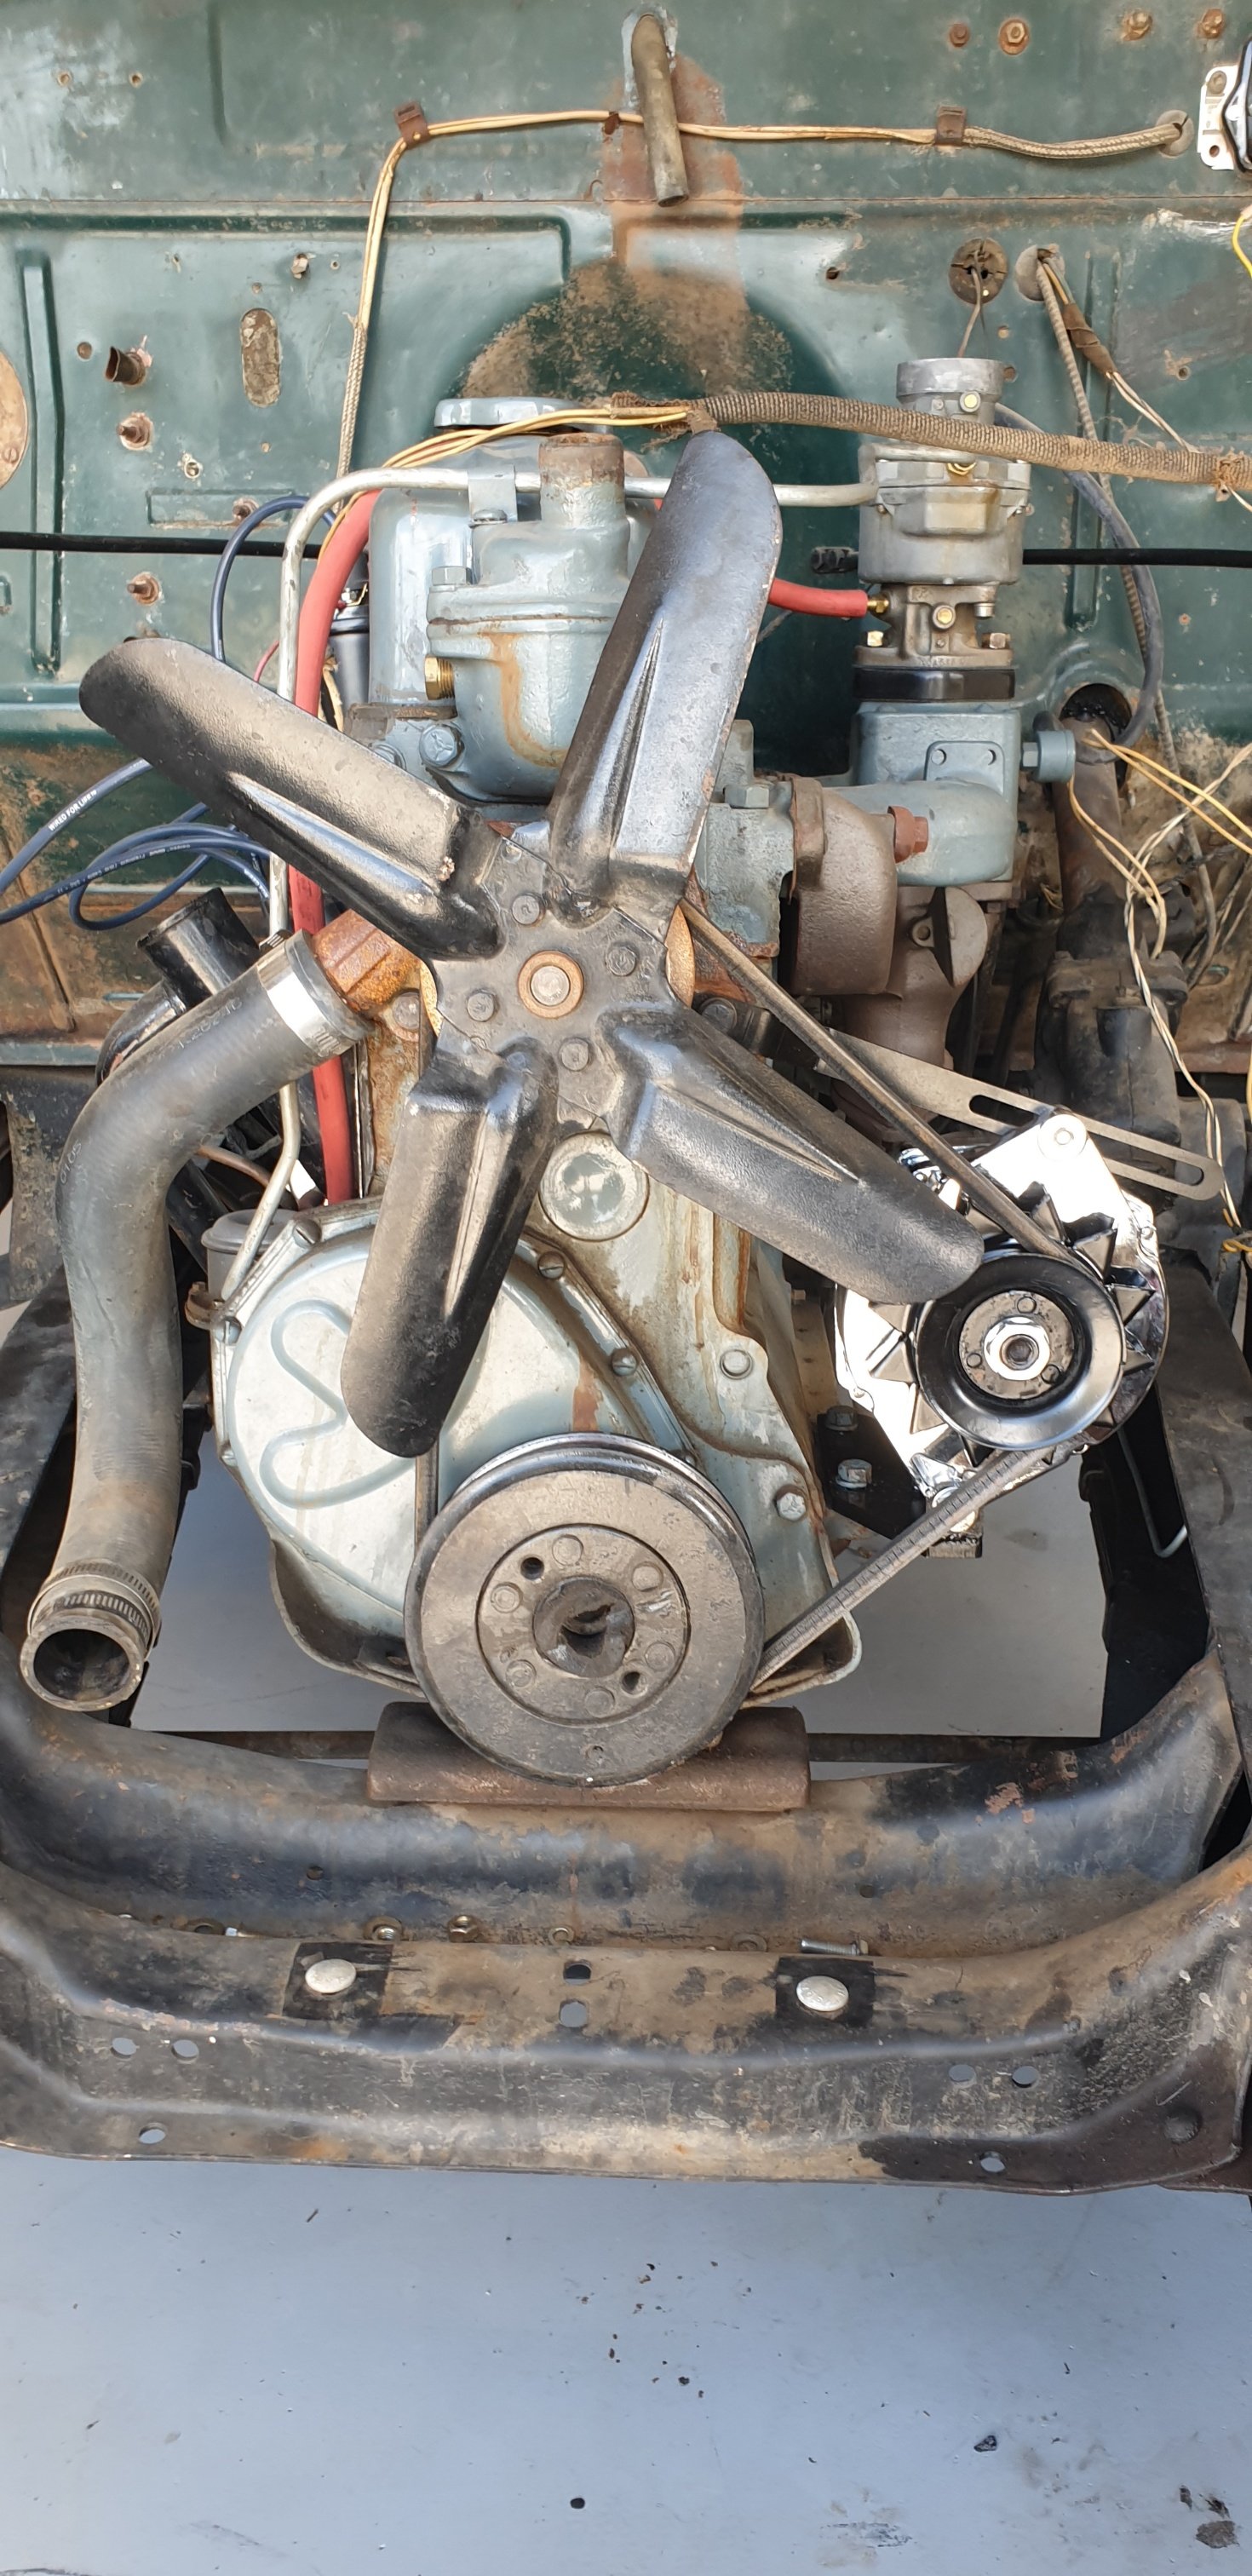
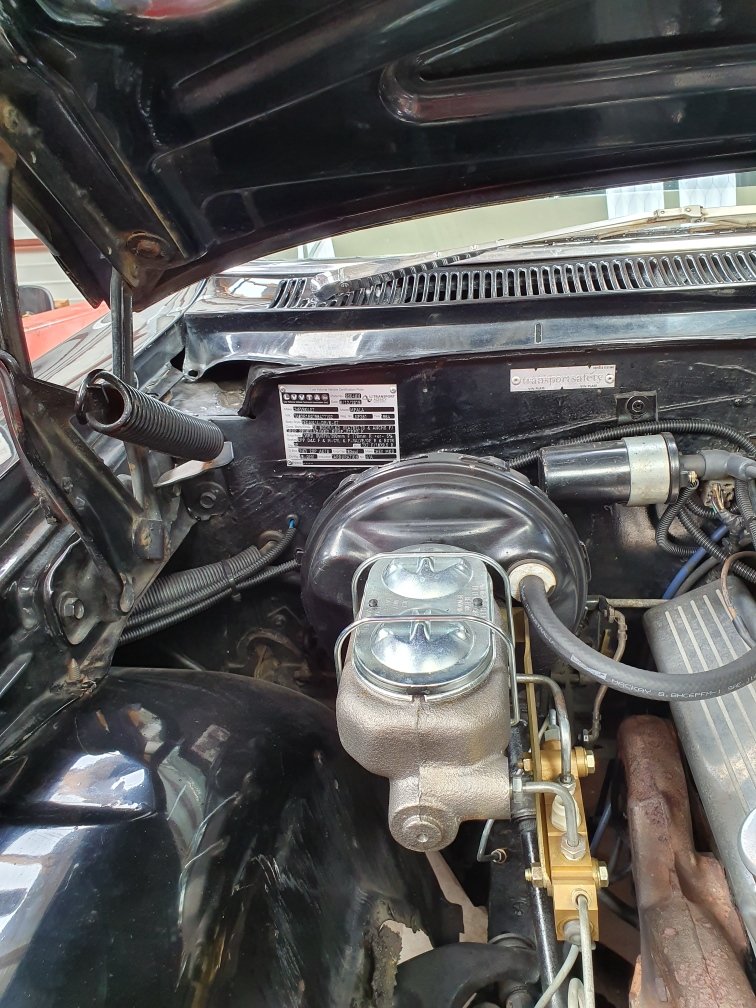
Starter wouldnt work when we got it, turns out the solenoid thingymebob for the pedal start was worn asf! Started doing the 12V conversion, fitted new alternator
2 points
-
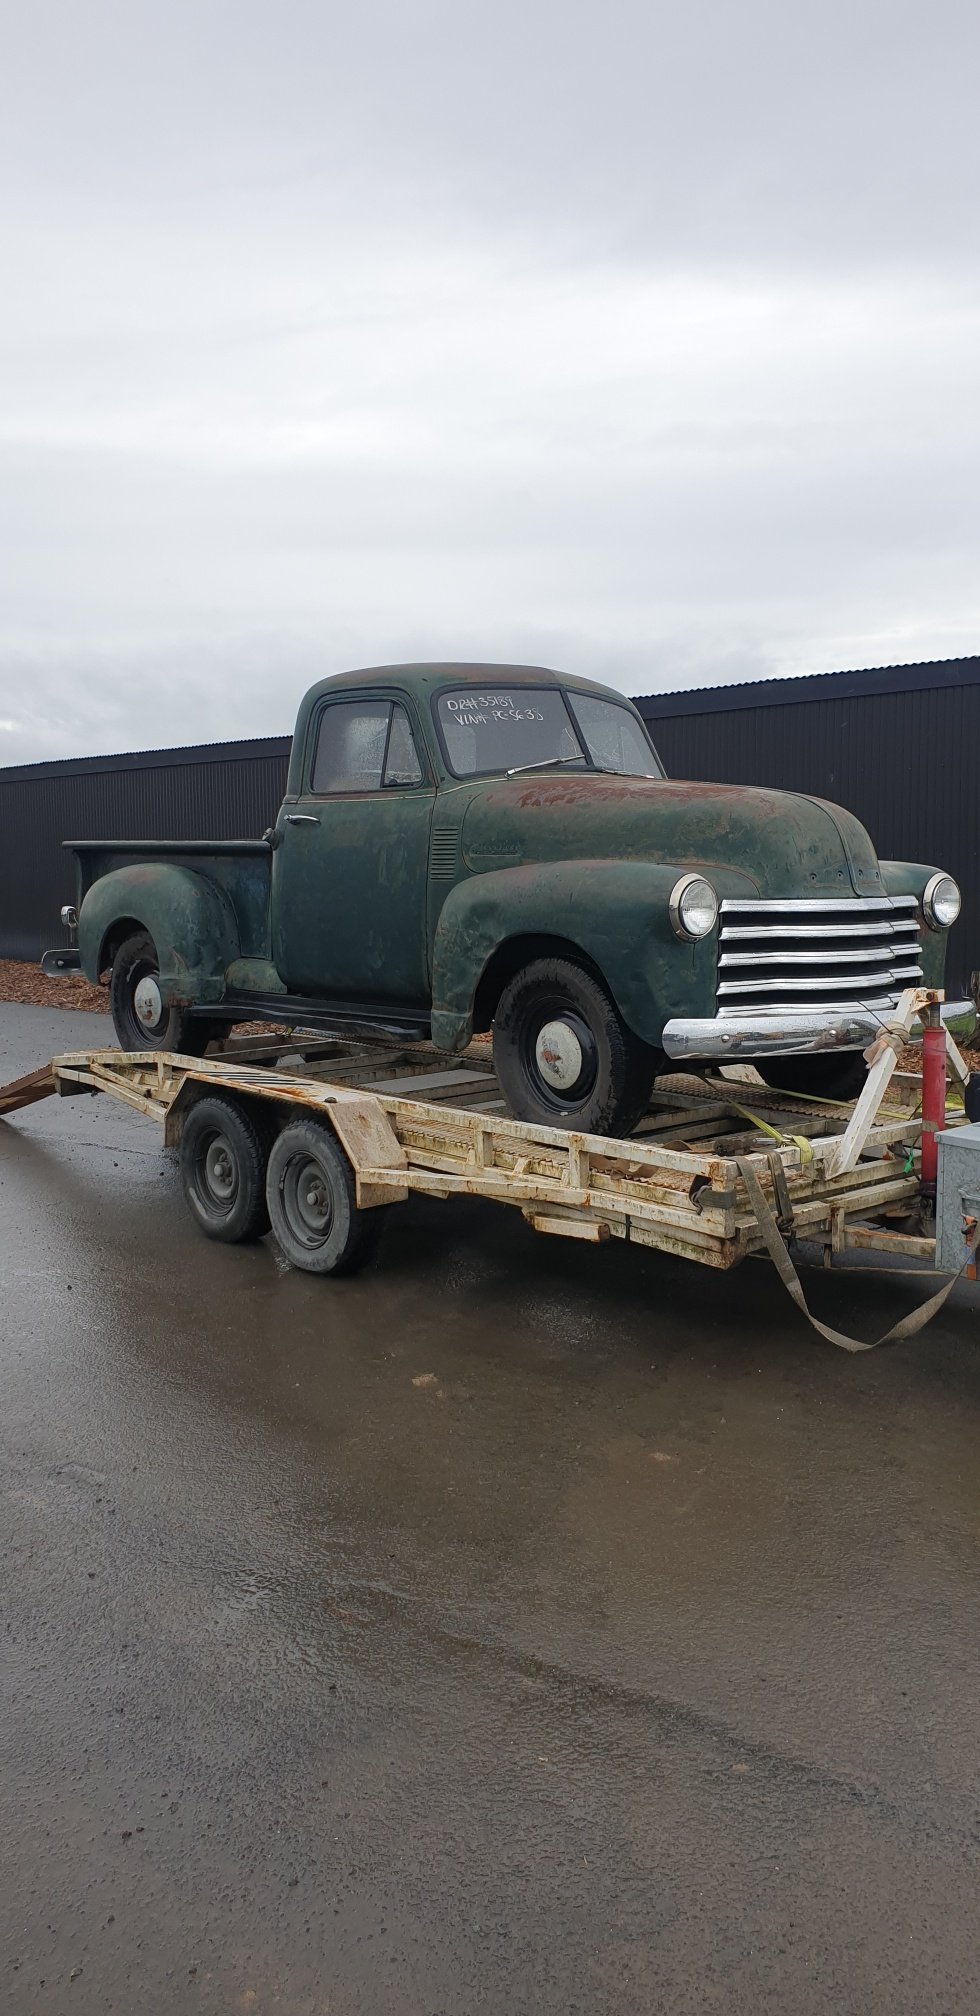
Couple more pics of whe n we bought it. Managed to drive it on the trailer which was ideal after a push start. Got it home and test fit the tailgate.
2 points
-
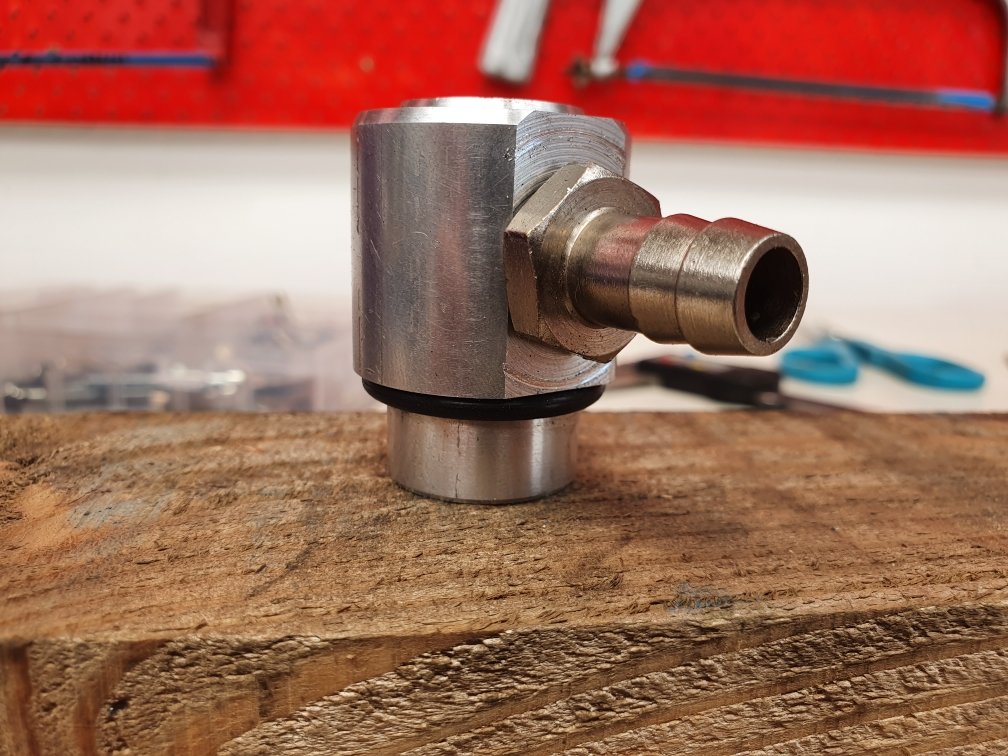
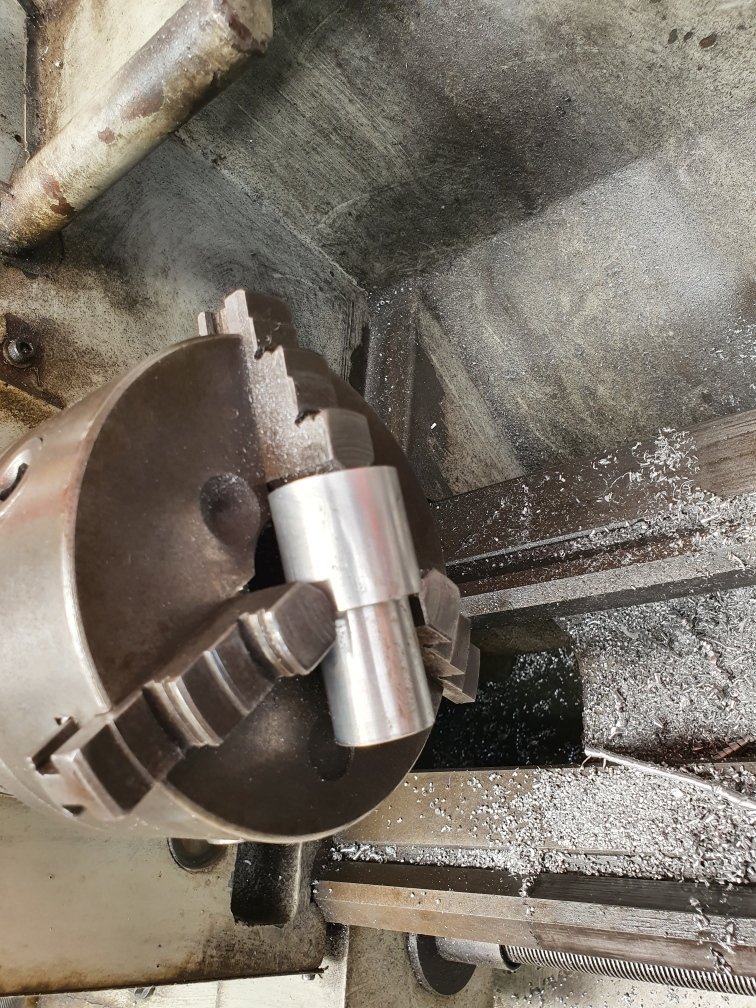
Machining. More machining.. WTF??? You crazy cunt, it's in sideways!!! Oh, not so crazy after all. Pretty... Mmmmm PCV valve goodness. Just going my part for the environment (like I'd really lose sleep over fake news like man made climate change). I'm just sick of it leaking oil on my shed floor. Just gotta hook up a catch can or route it into my intake vaccum to get rid of my crankcase vapour and problem solved.
2 points
-
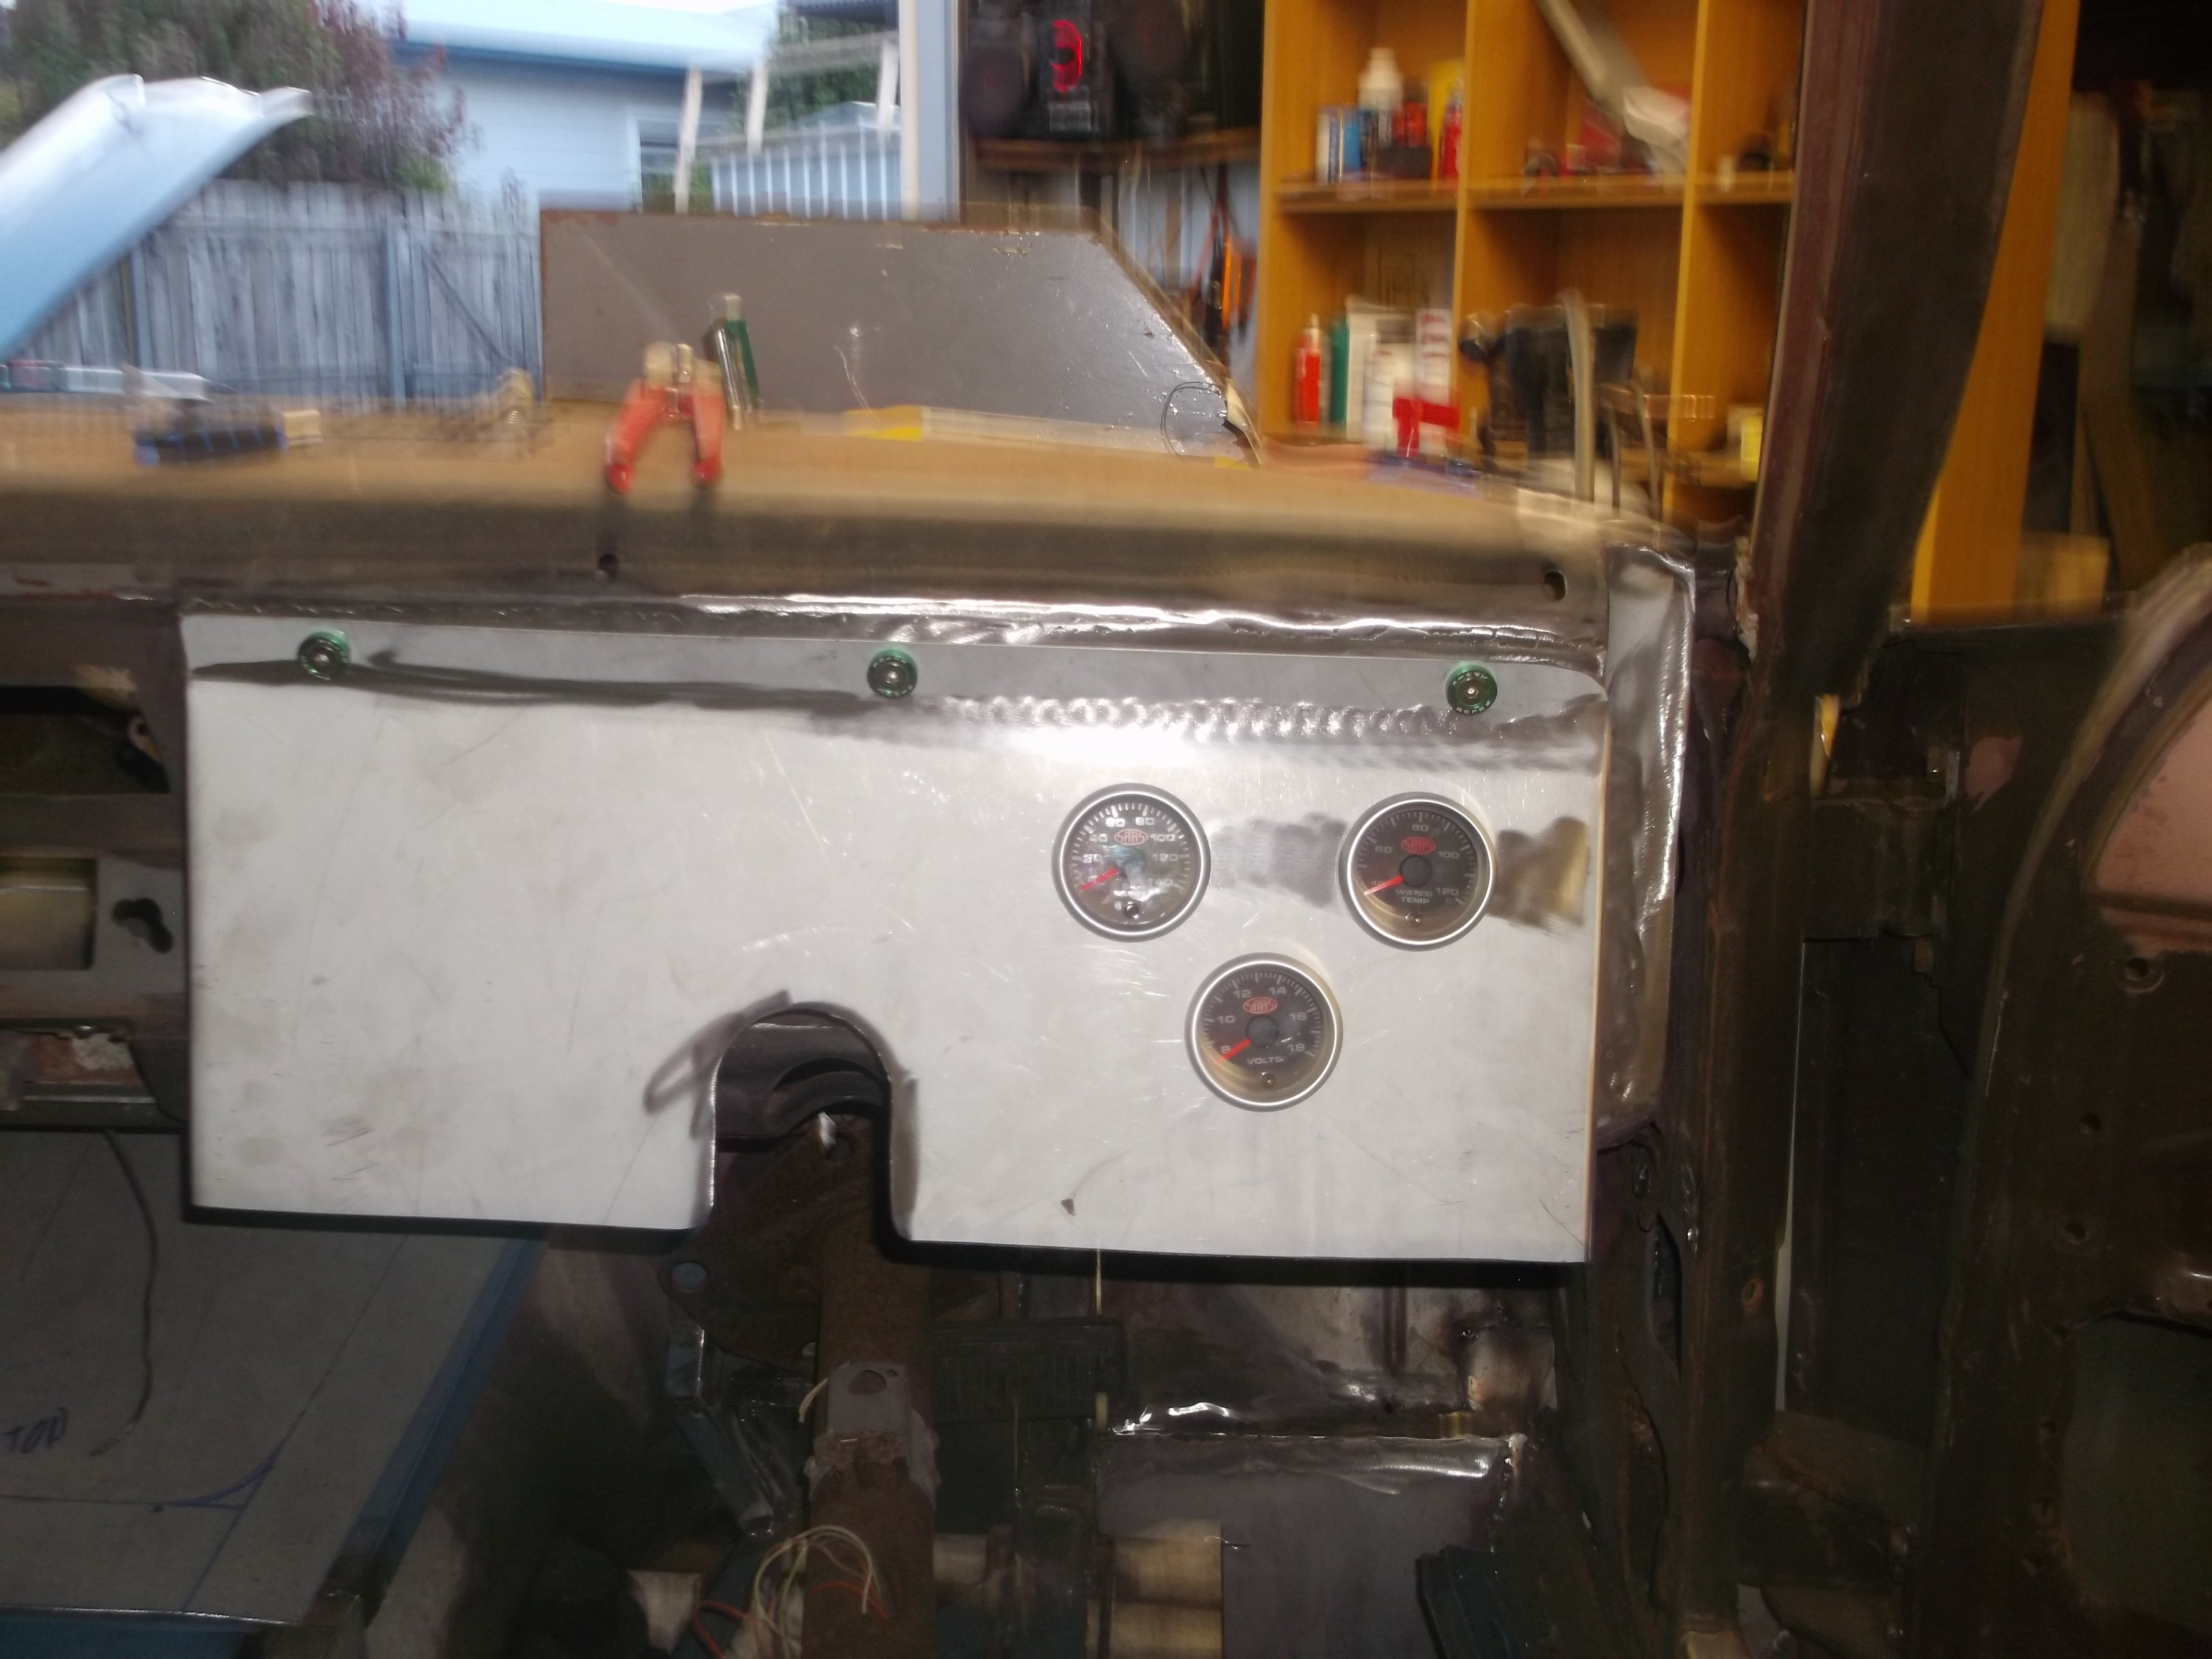
just been working on the drive shaft tunnel and dash
1 point
-
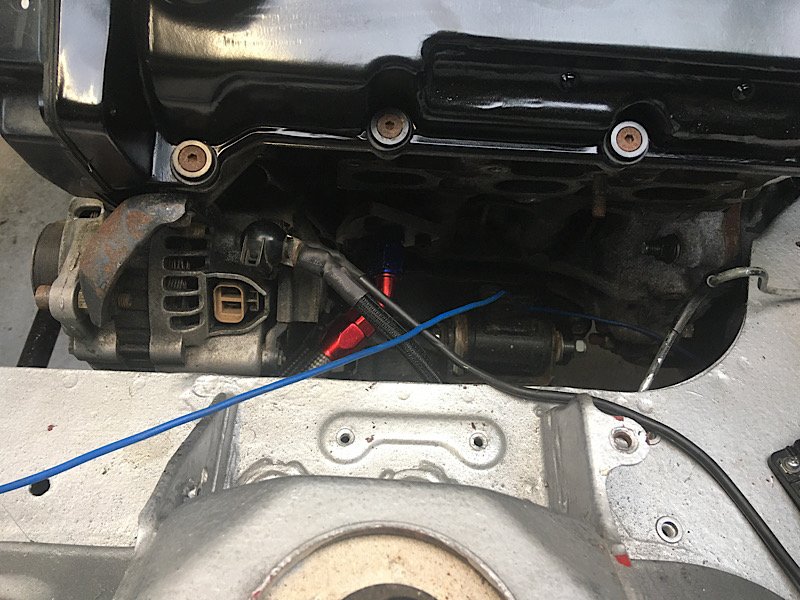
Got the plug out, was a bit worried as thought it was going to be a cunt. Also found some dodgy/damaged wiring for the alternator so pulled that out (need a few bits to repair it). Looks like some suspect oil lines as well (diesel life so vacuum pump on back of alternator) so think I'll replace those. Oil return on turbo is also clearly leaking and making a fucking mess so I'll pull that off as well and will be good to replace a few bits there. Hopefully this will limit the horrid oil leaks this thing has. Obviously can't do much till the world returns to normal, but no drama, will be nice to sort these little things out once and for all.1 point
-
Nice work bro, wish I had the work space and tools etc to work like this.1 point
-
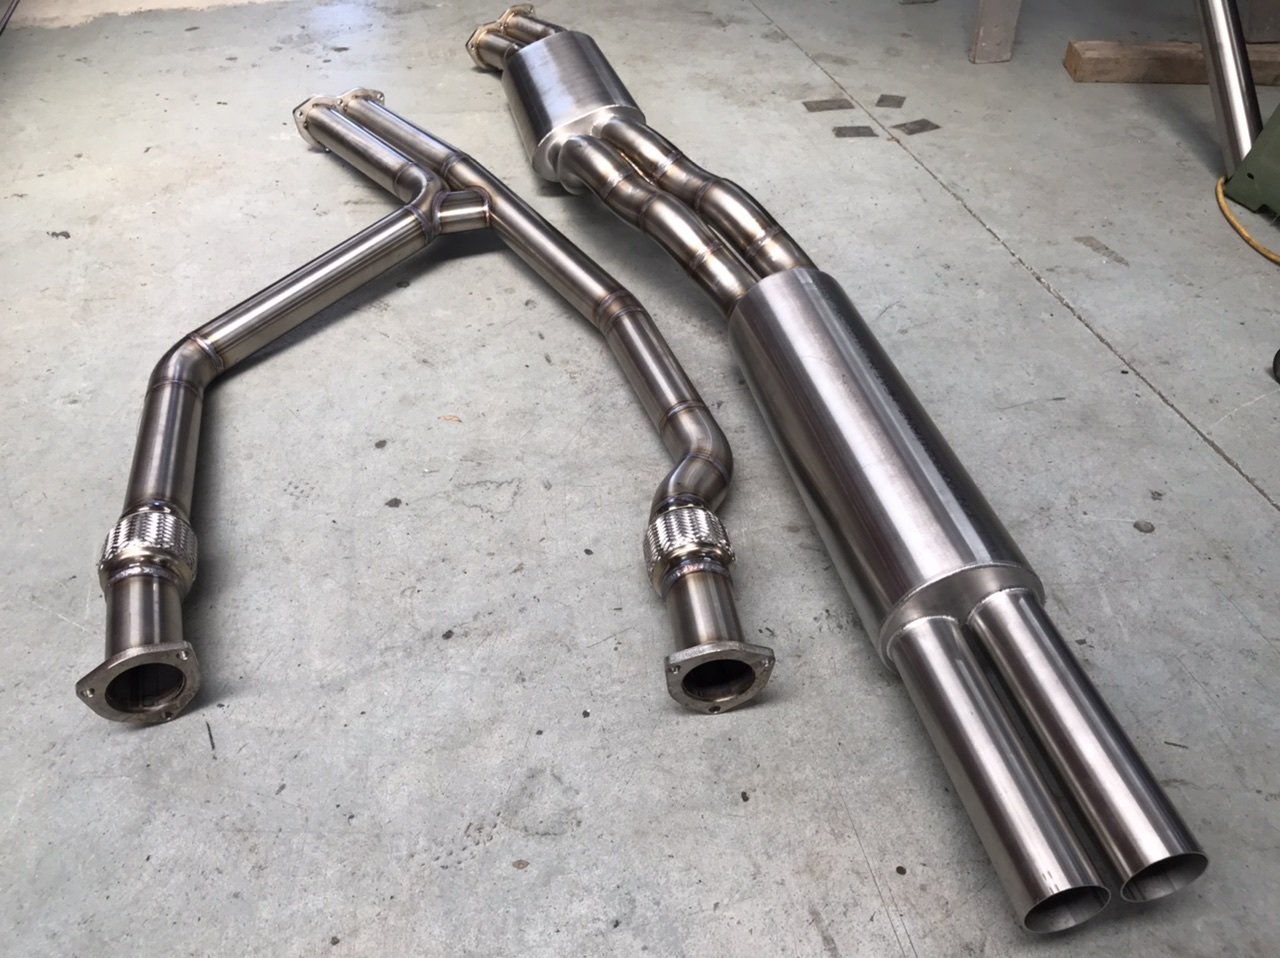
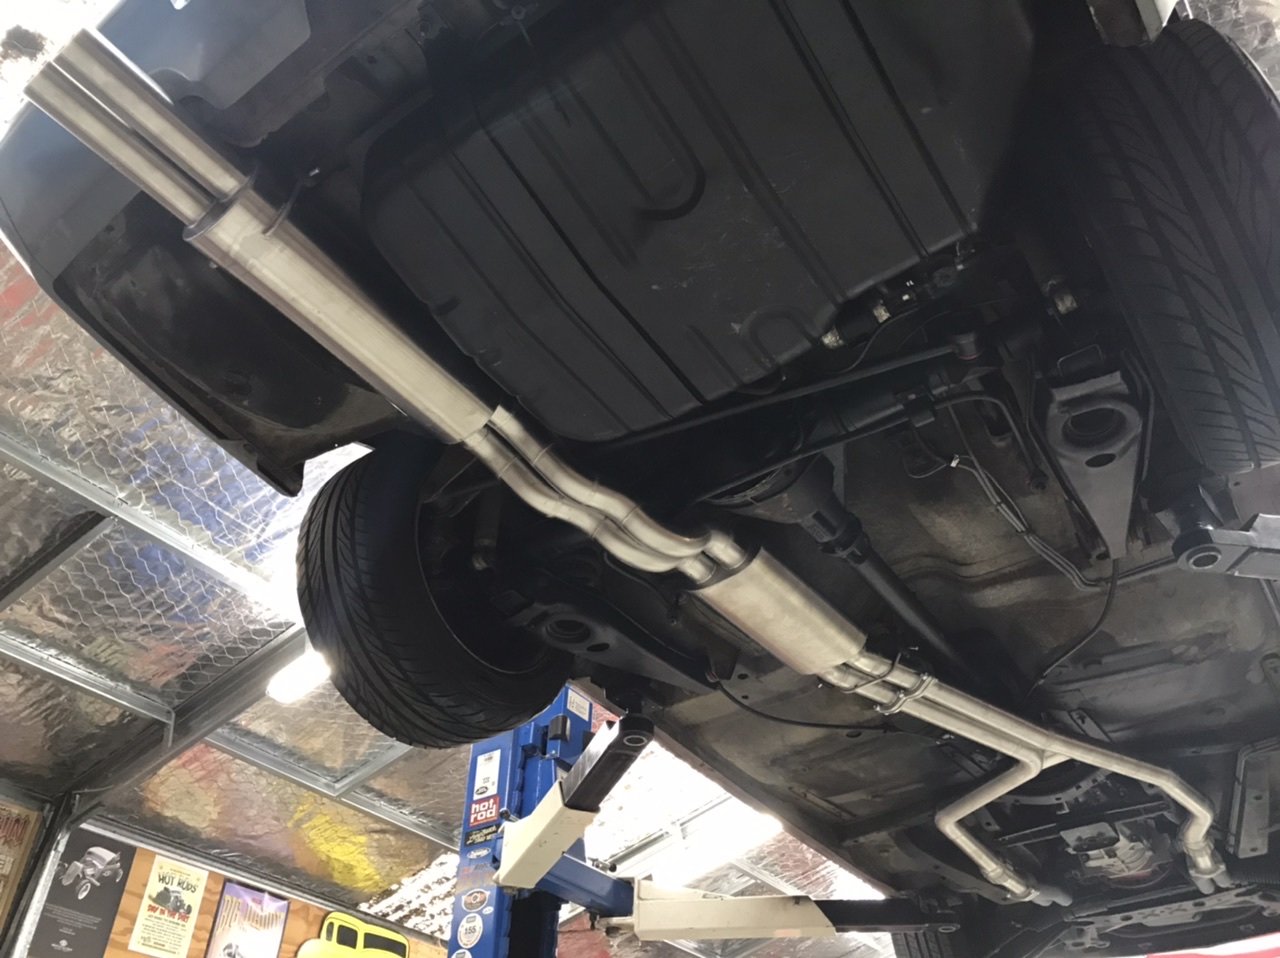
Here’s the last exhaust I made for a VK commodore. Twin 2.5”. Made the mufflers/resonators as straight through louvred type. Sounded really good and not too loud.
1 point
-
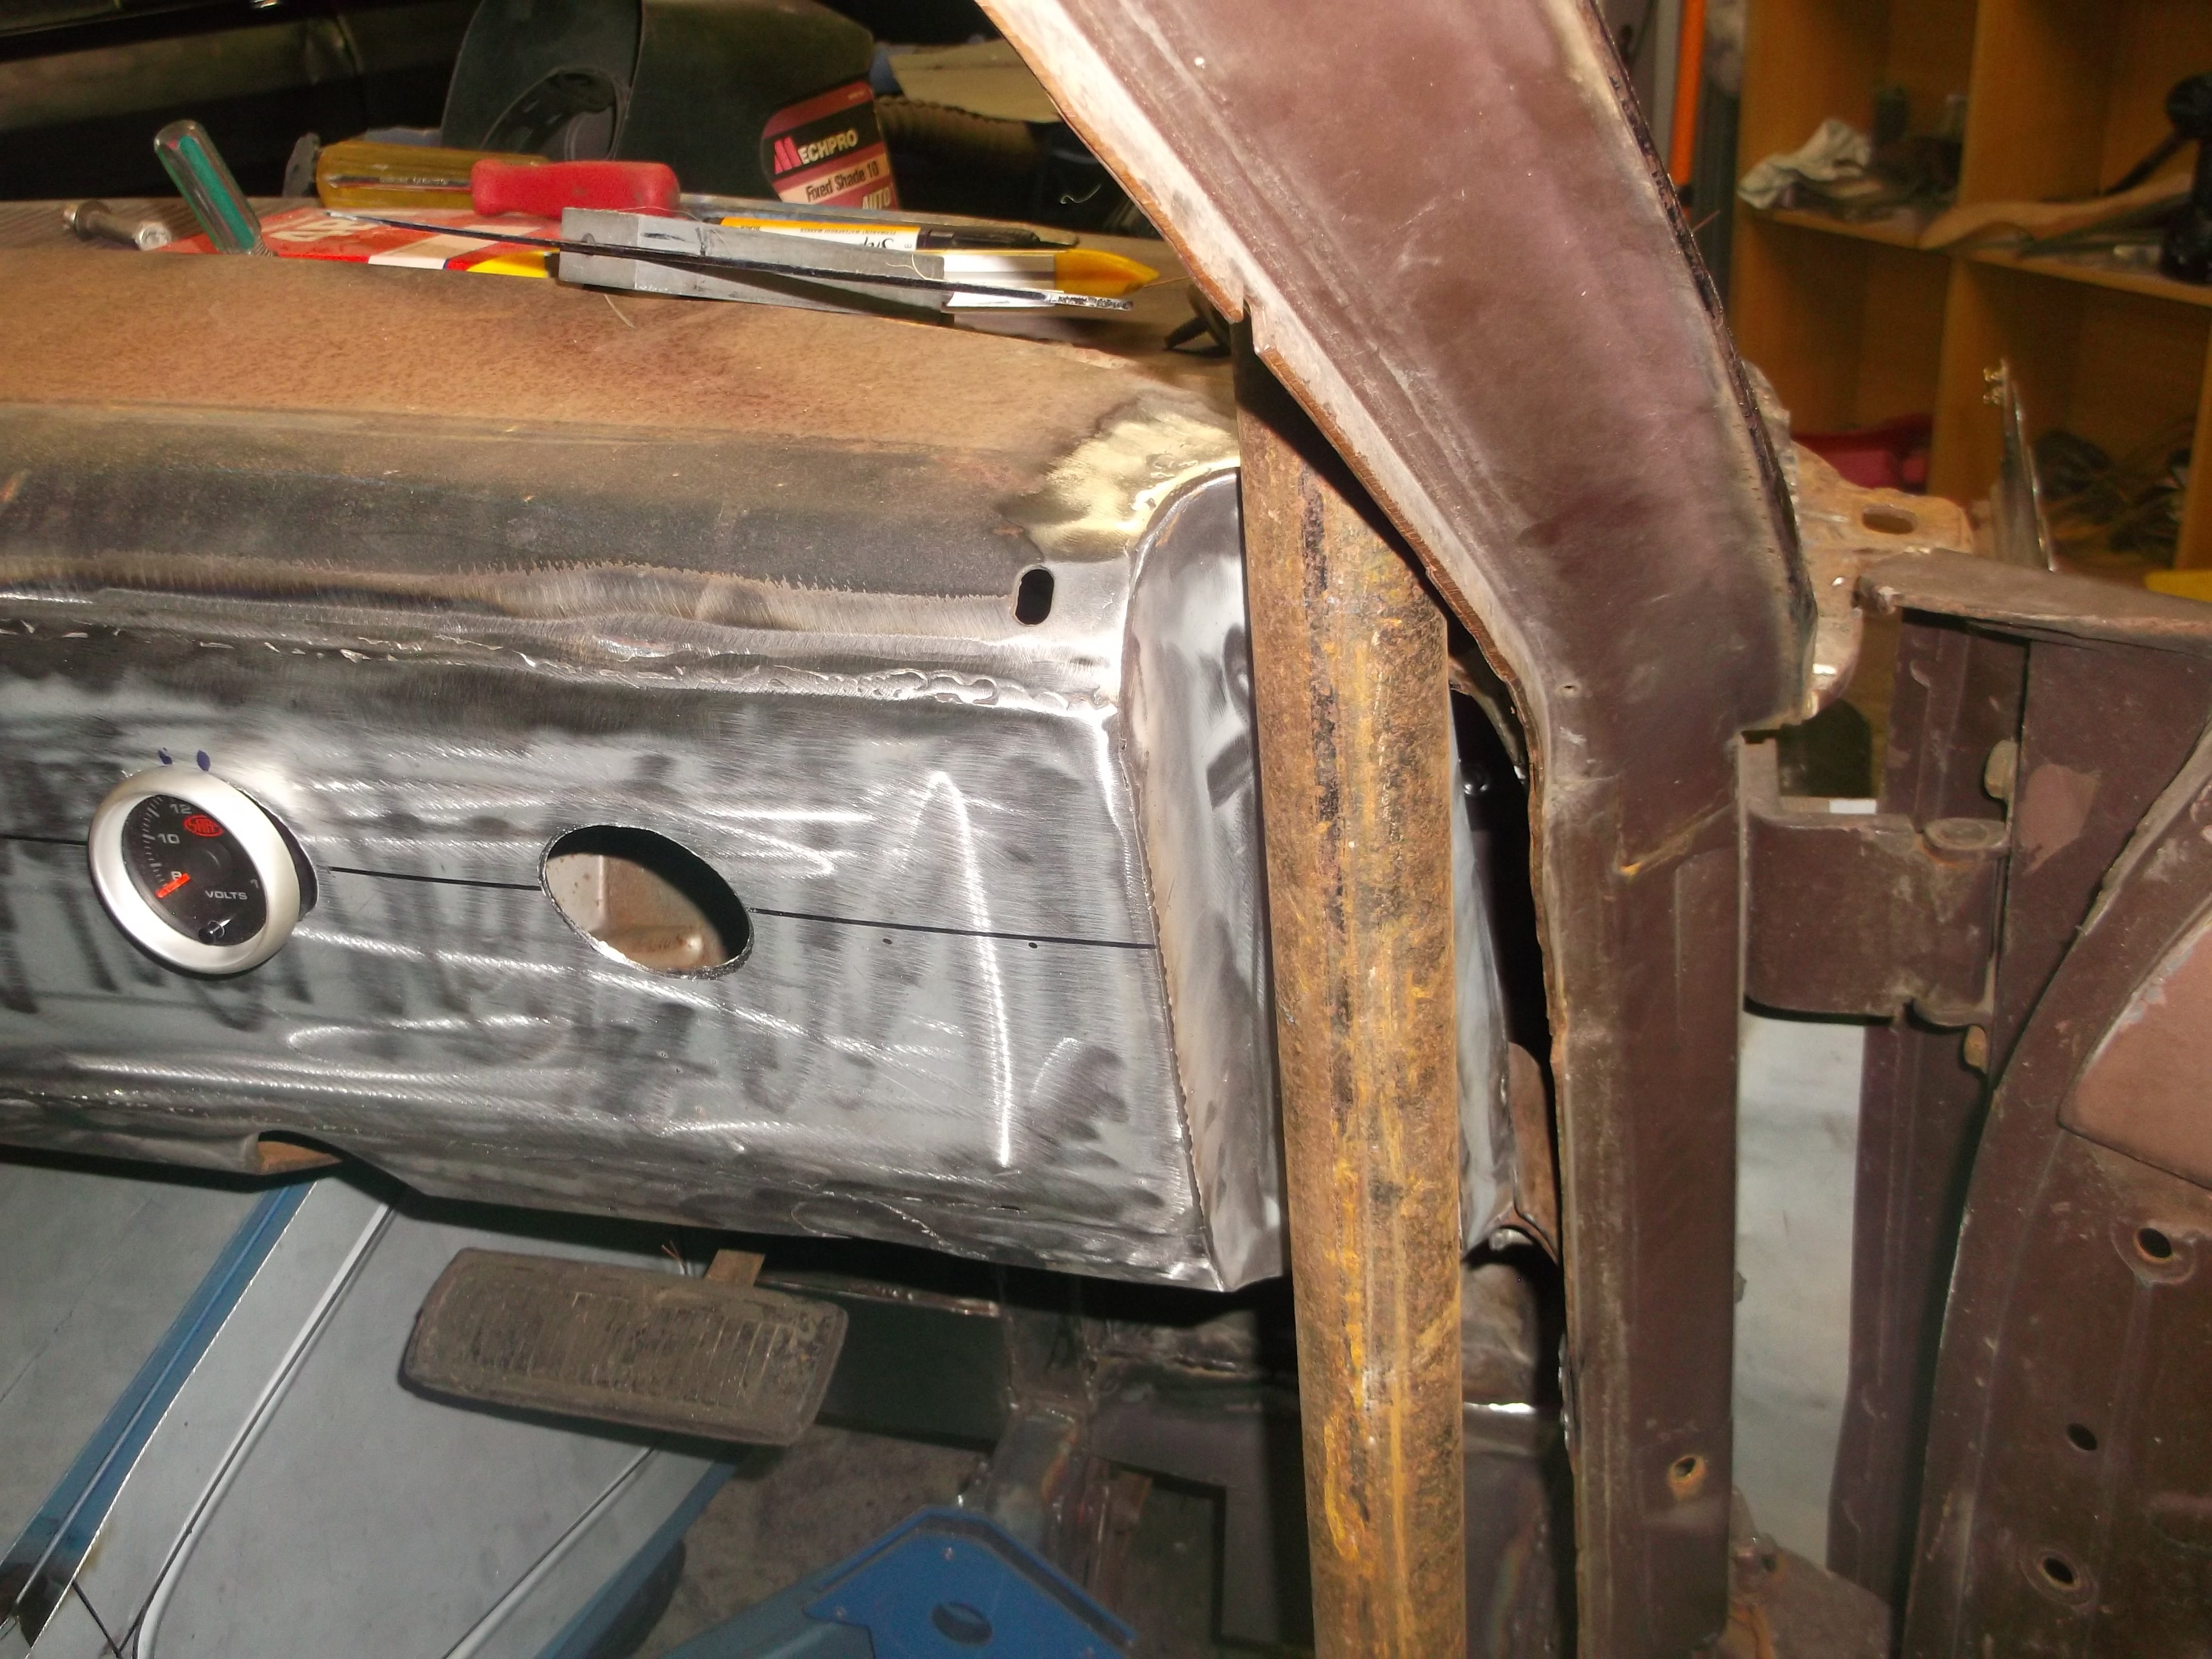
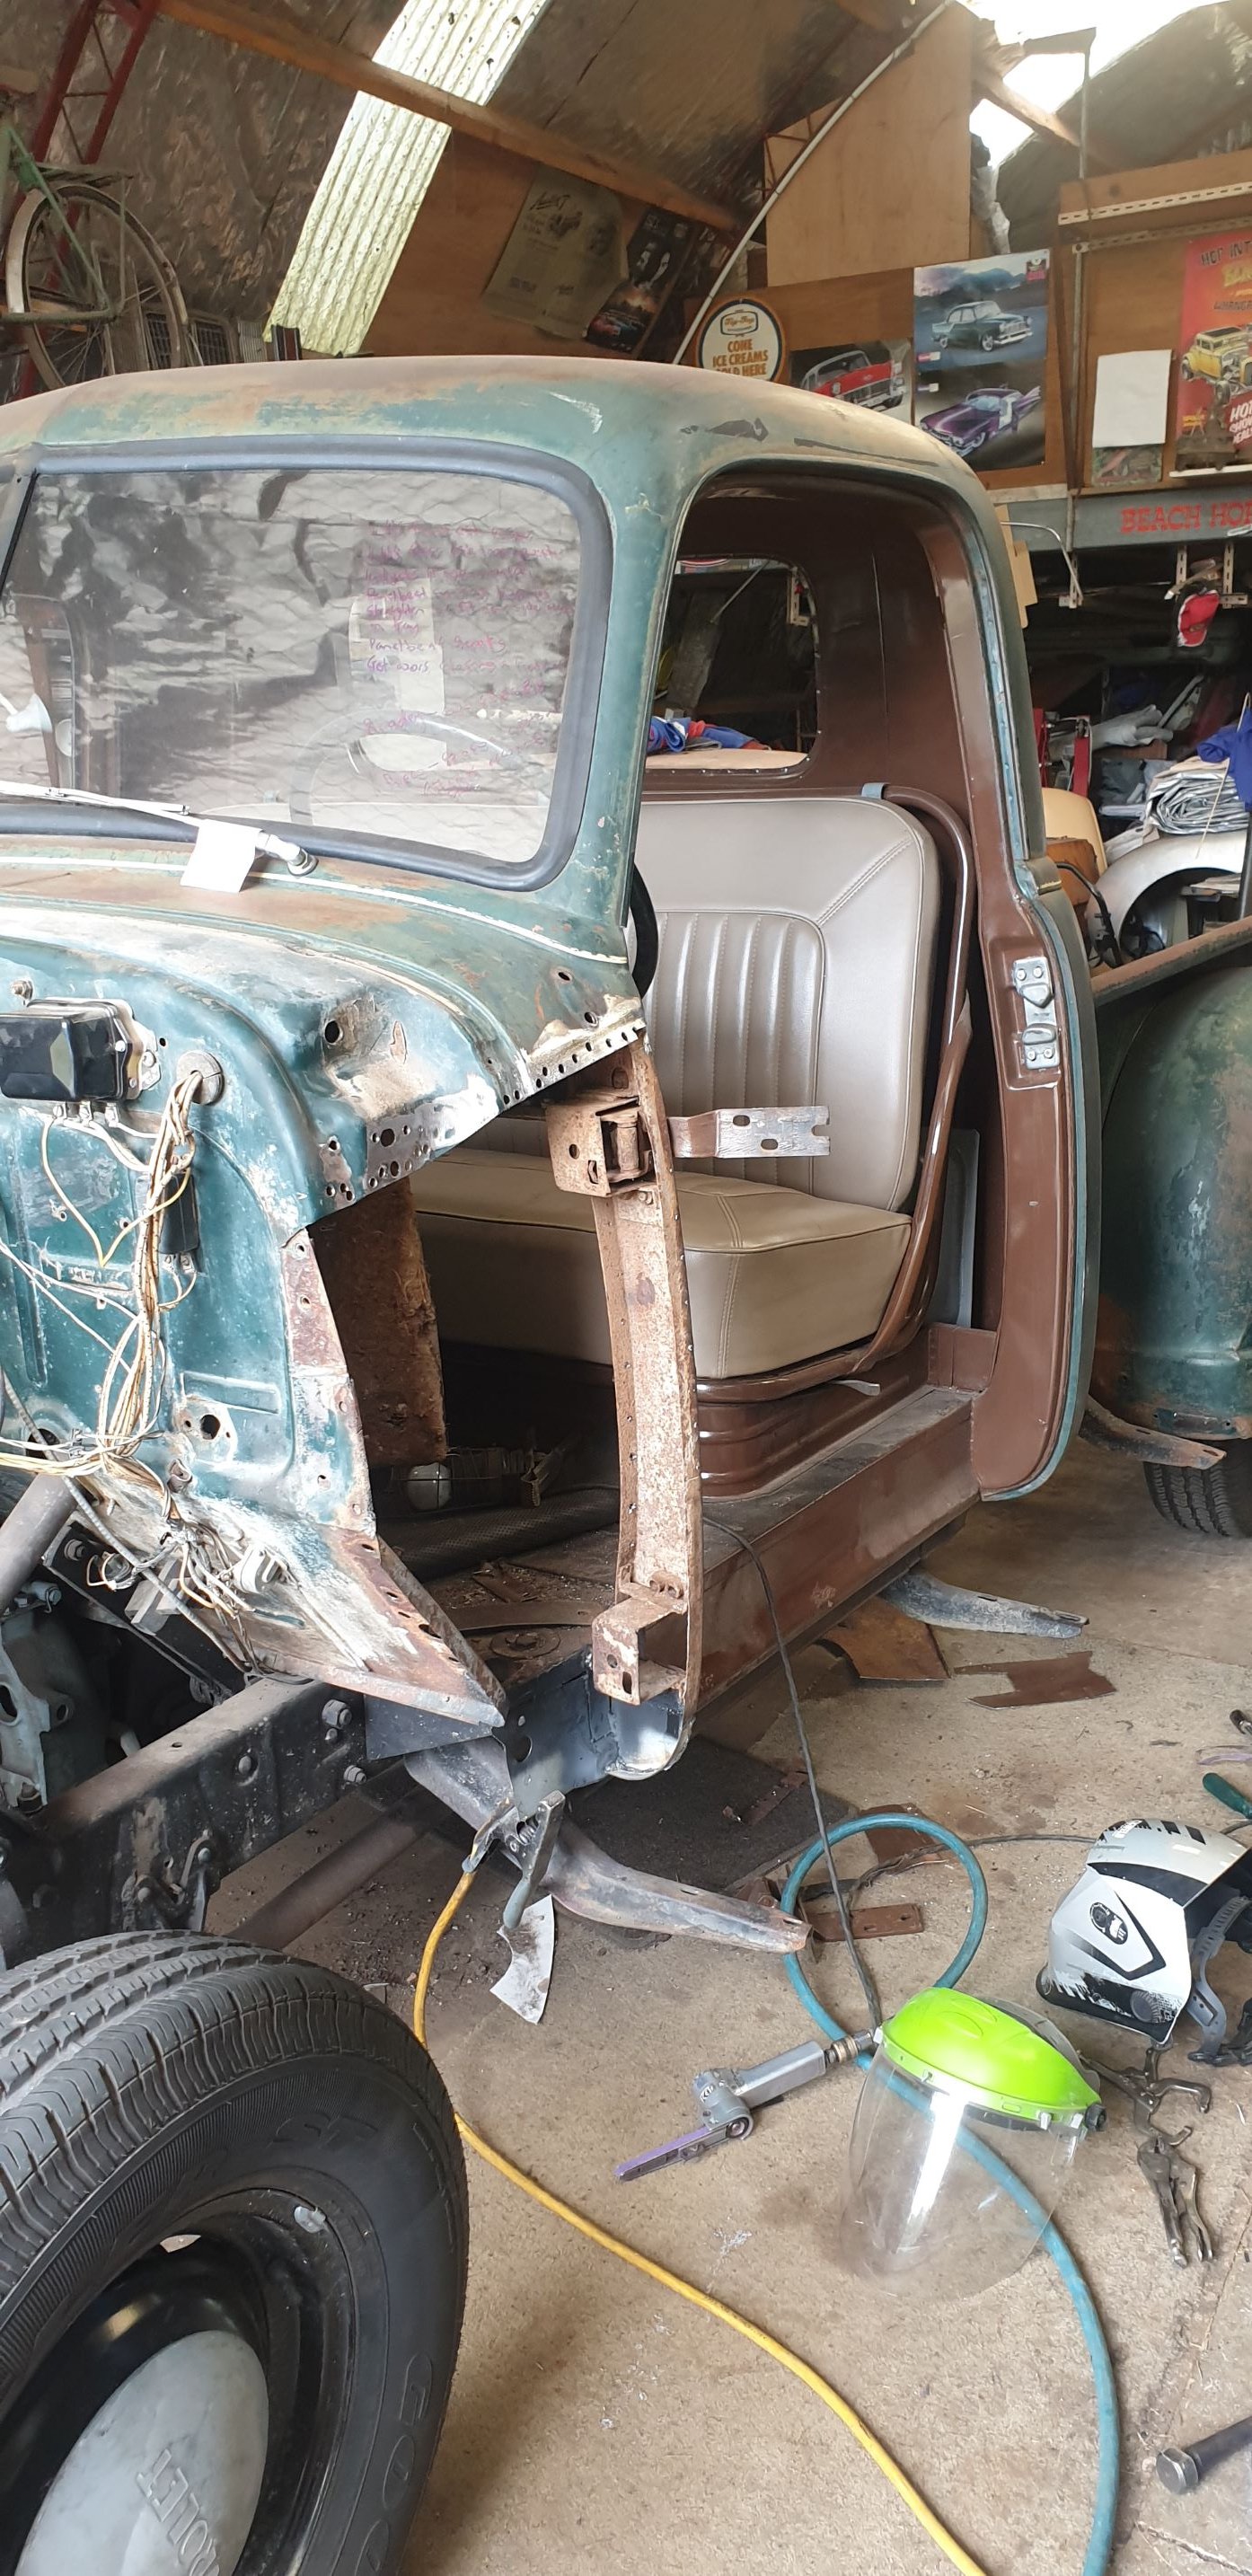
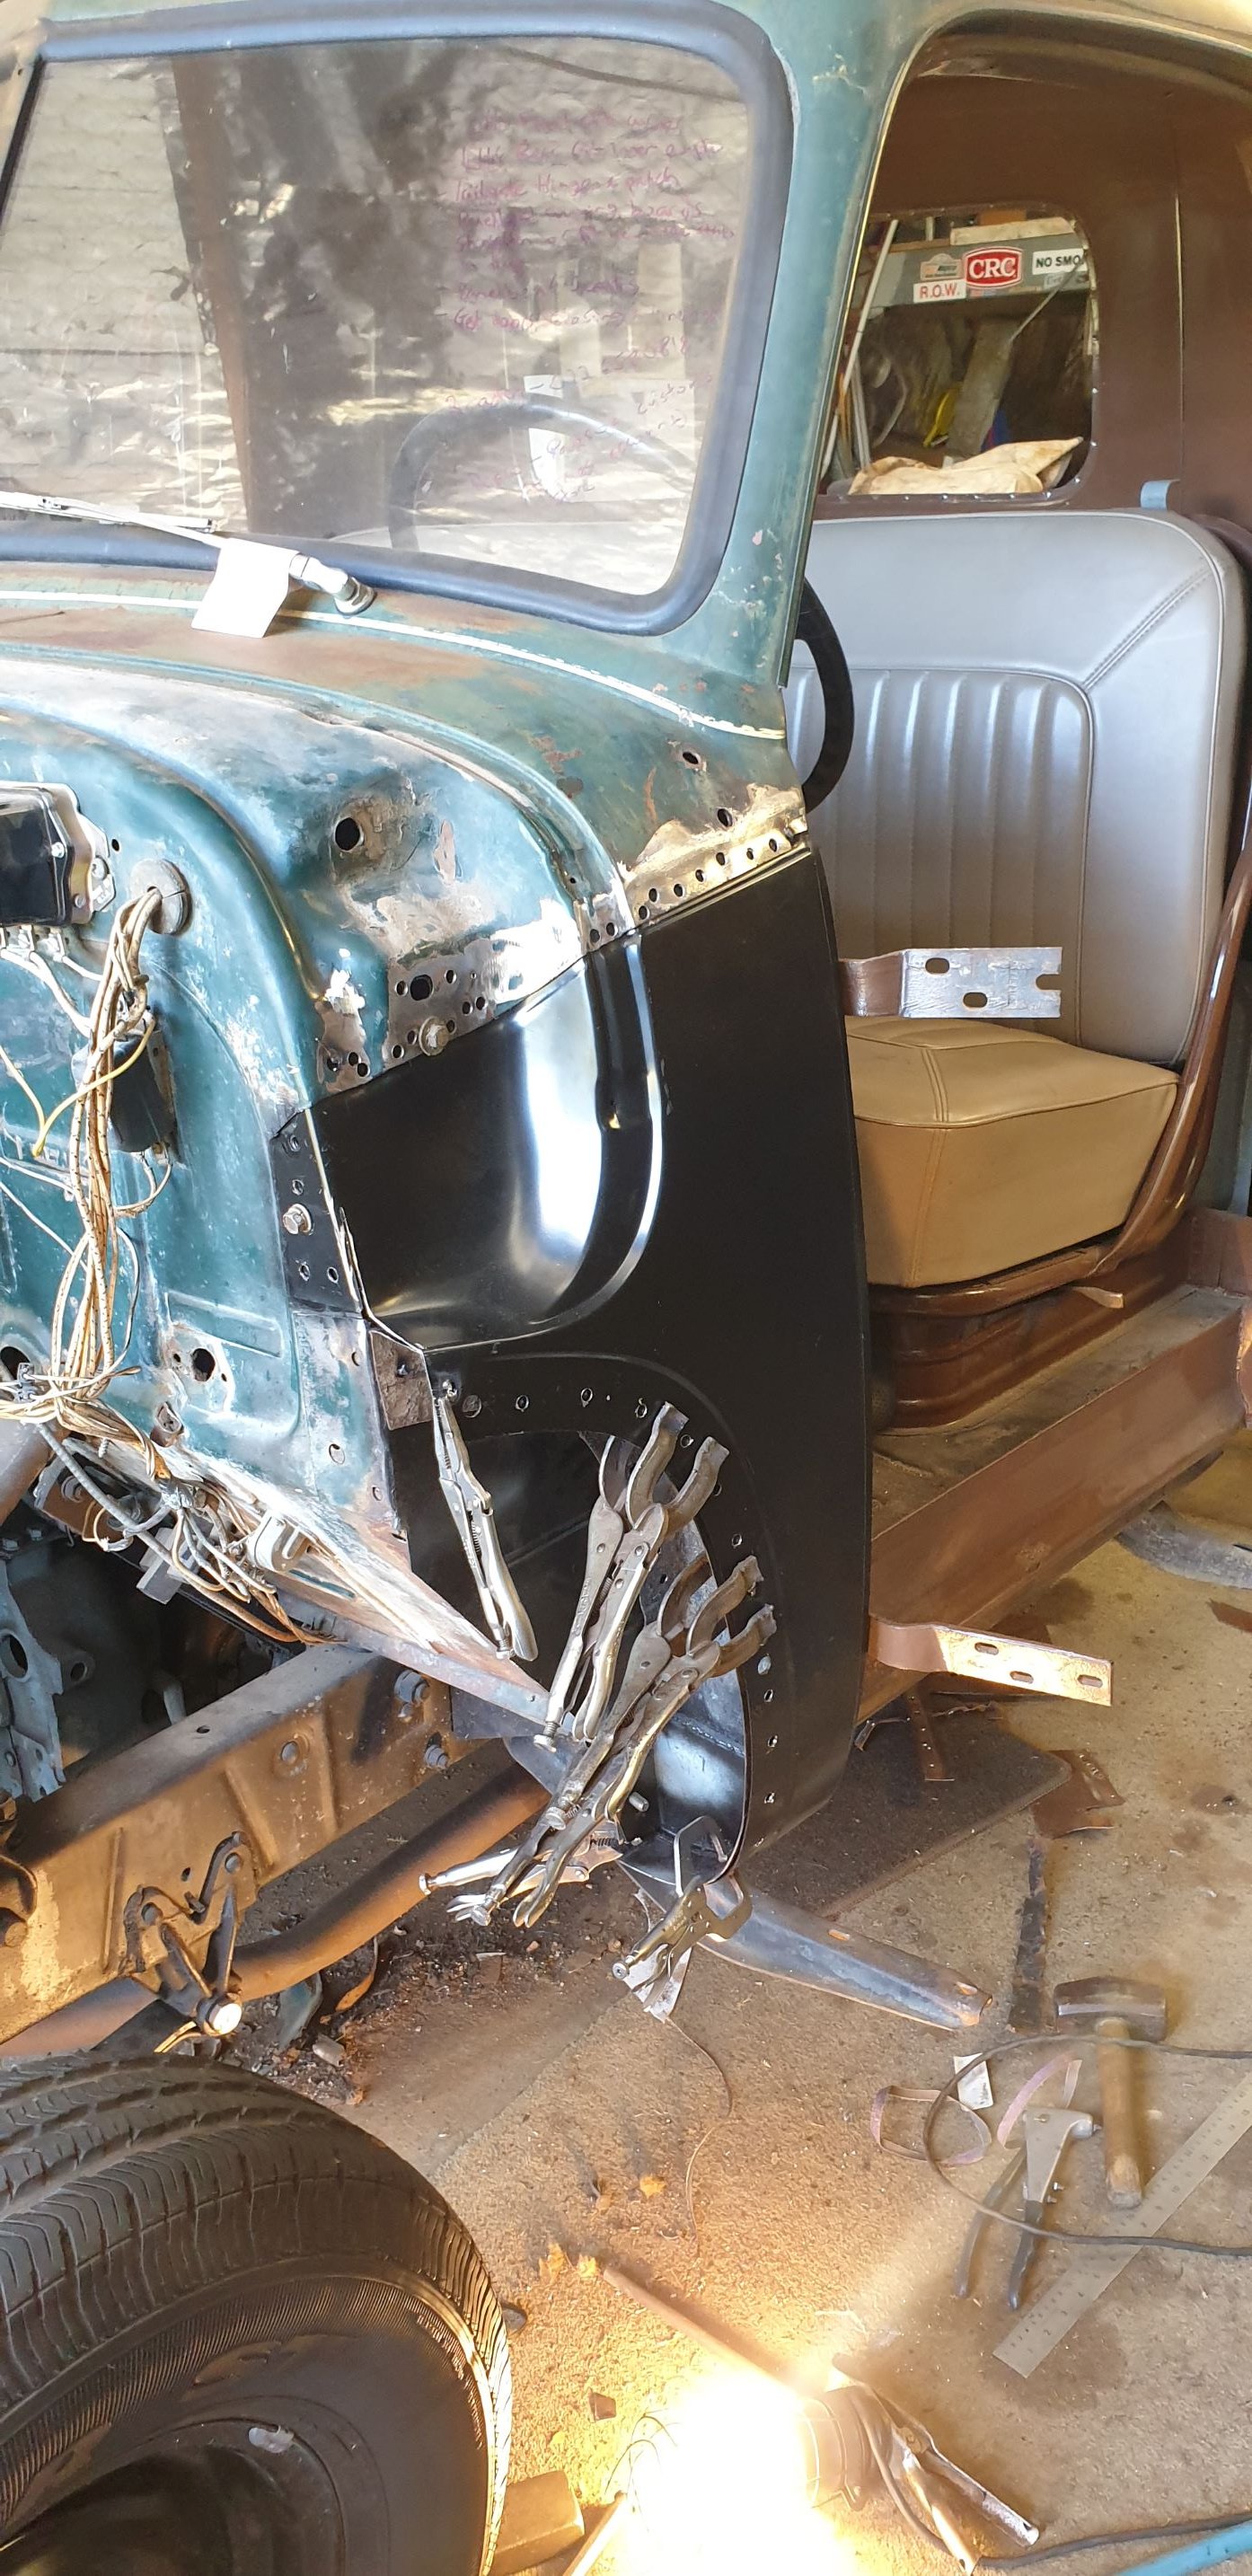
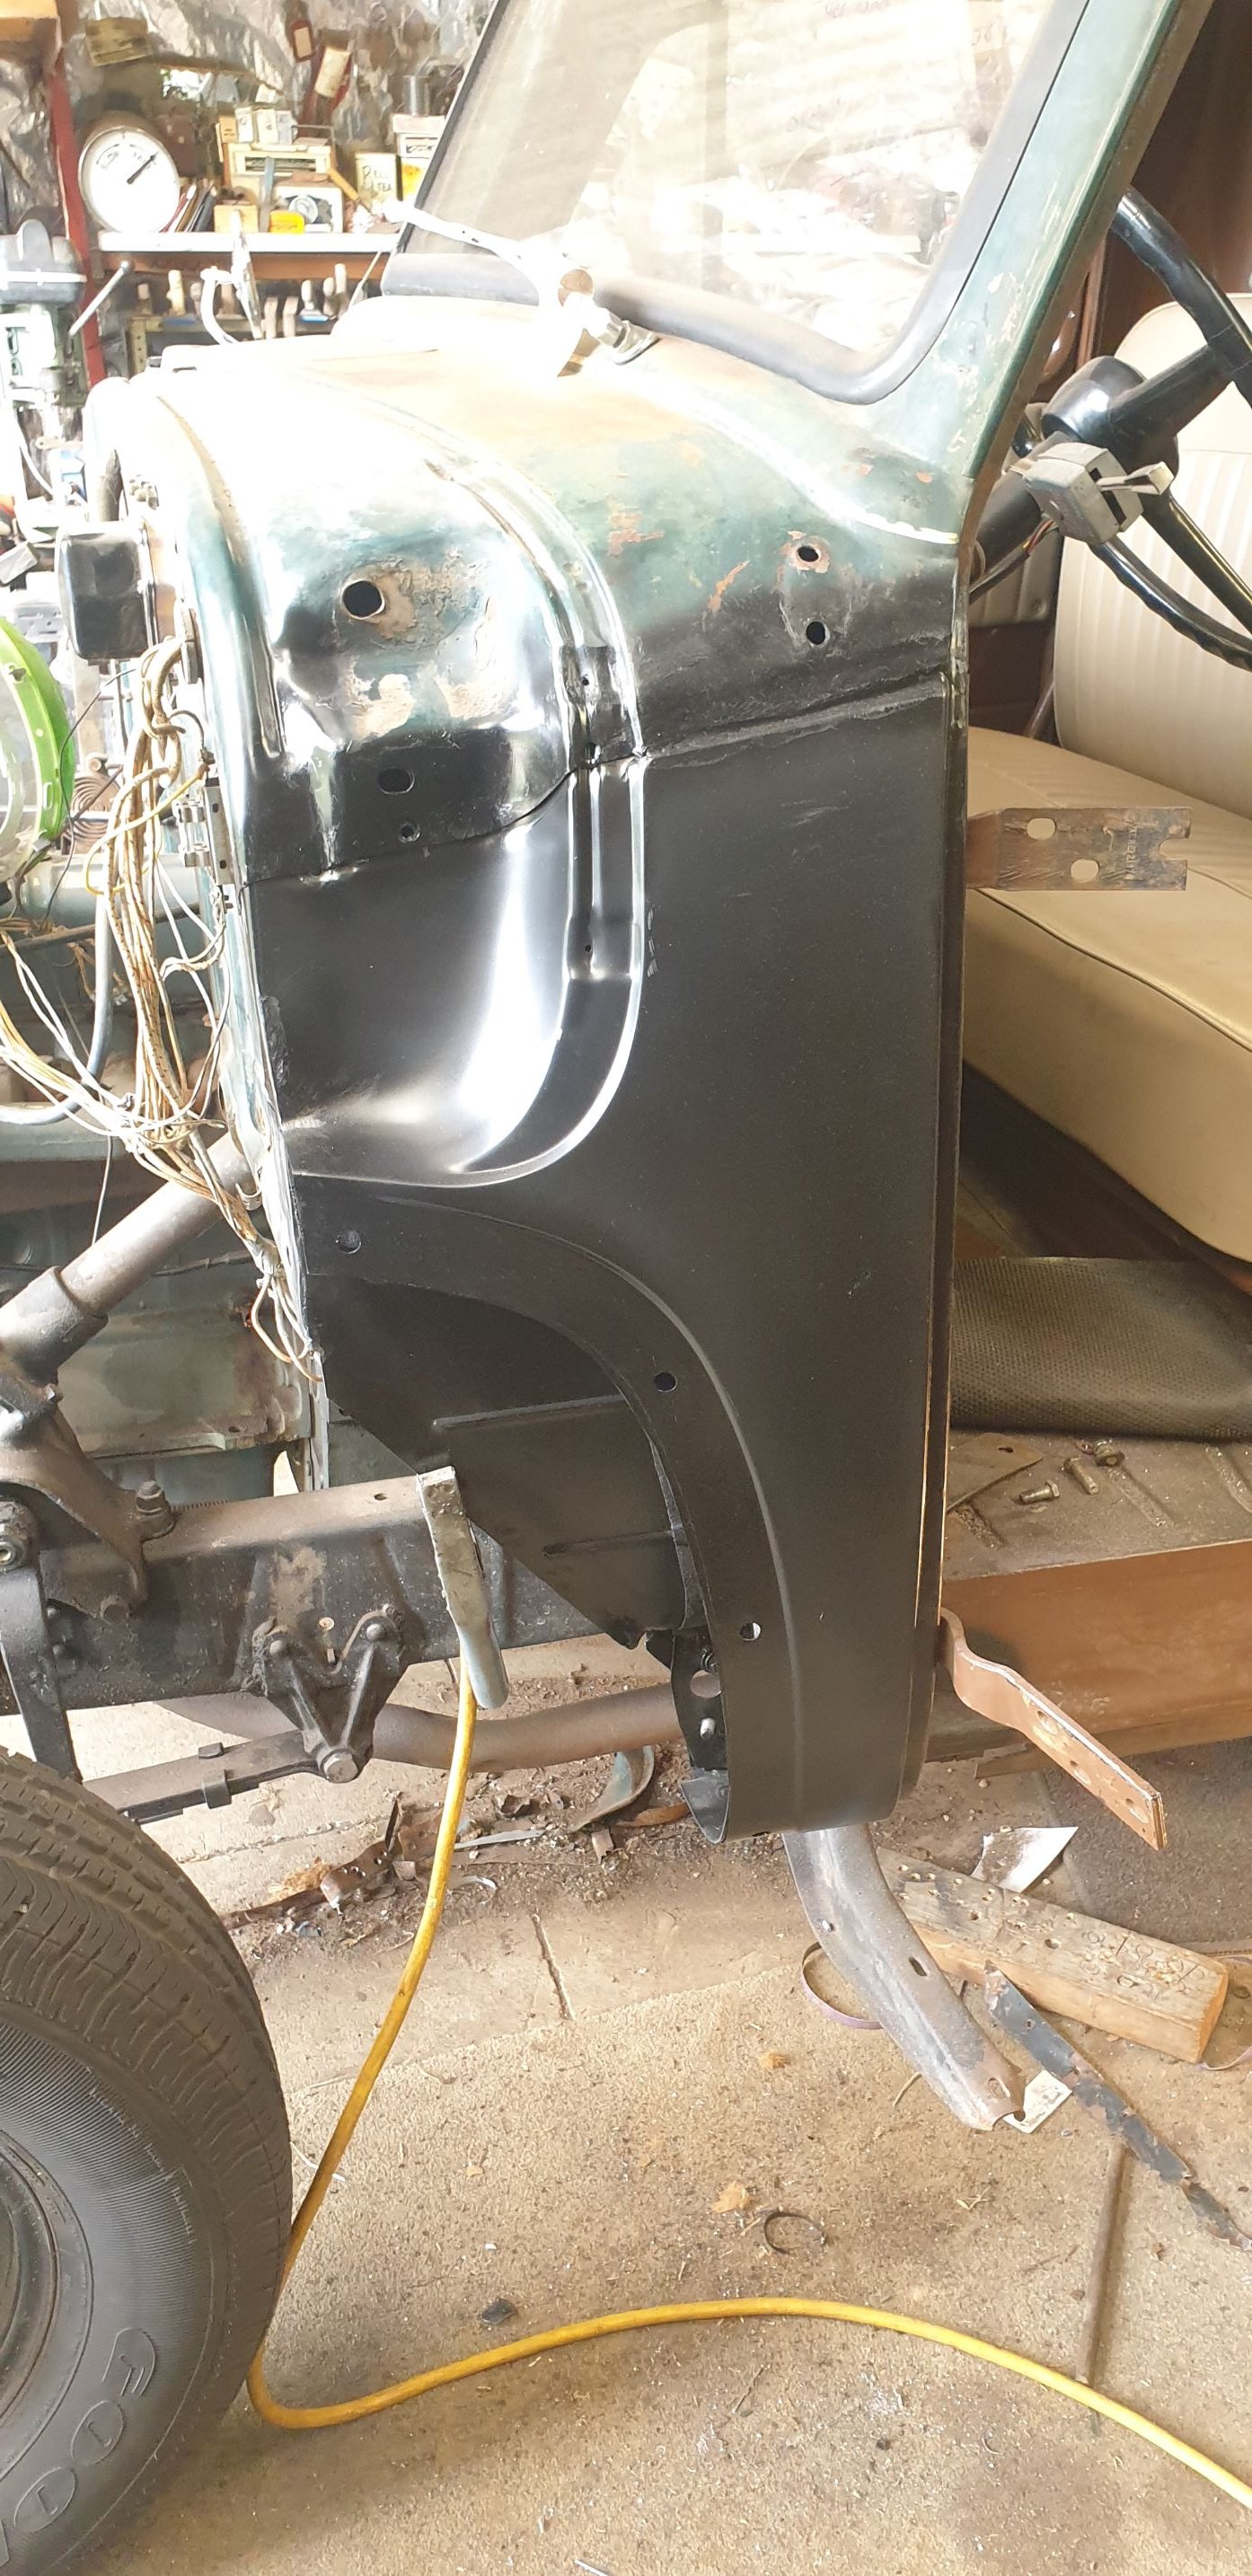
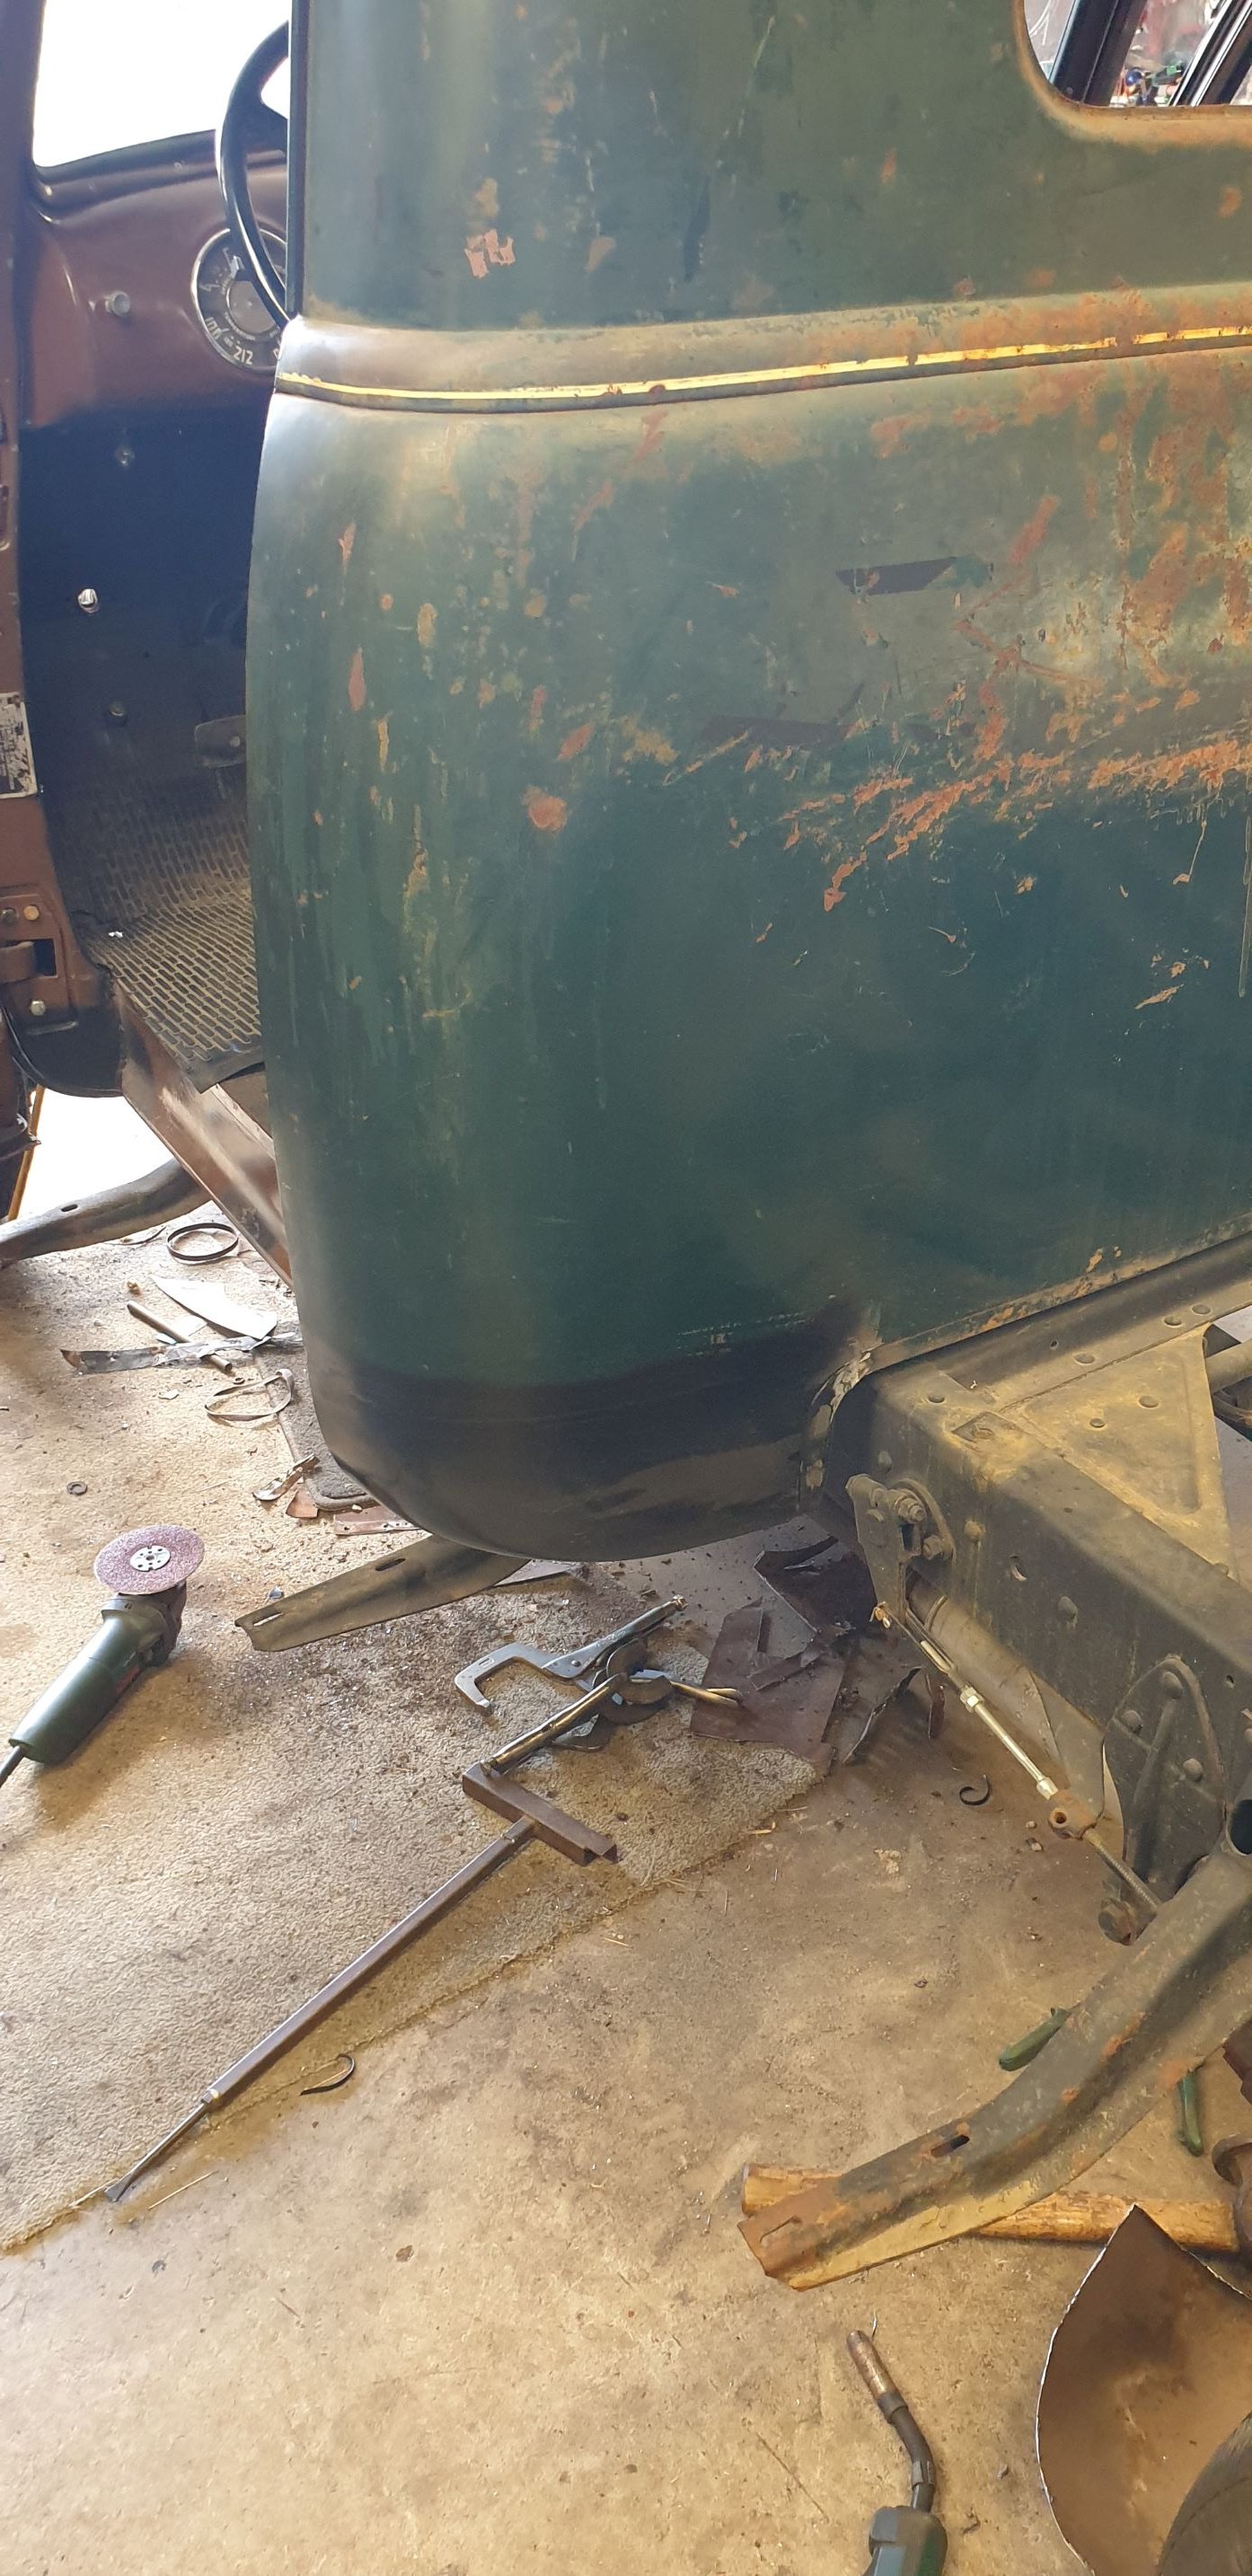
Next up was get stuck into the rust. Managed to find a skilled older tradesman who was keen to tackle it. And also keen to let me come and help him which was awesome. Learnt a heap of new skills and was epic watching him hammer and dolly out the dents. The front drivers side door had swung round and stoved in the corner of the cab as well as bent the door at some point. The yanks must of tried to bang the dent out from behind via piercing holes in the inner guard to put a bar or something through to hammer dent out from the inside (unsuccesfully) it ended up leaving a heap of holes for water to get in which in turn rusted the bottom of the inner and outer cab corner out. The rear cab corner also needed replacing on the same side, outer only. Had a bit of rust around one tail gate hinge to fix as well. Apart from that she was solid as , floors and doors and guards are good as! Next up was get stuck into the rust. Managed to find a skilled older tradesman who was keen to tackle it. And also keen to let me come and help him which was awesome. Learnt a heap of new skills and was epic watching him hammer and dolly out the dents. The front drivers side door had swung round and stoved in the corner of the cab as well as bent the door at some point. The yanks must of tried to bang the dent out from behind via piercing holes in the inner guard to put a bar or something through to hammer dent out from the inside (unsuccesfully) it ended up leaving a heap of holes for water to get in which in turn rusted the bottom of the inner and outer cab corner out. The rear cab corner also needed replacing on the same side, outer only. Had a bit of rust around one tail gate hinge to fix as well. Apart from that she was solid as , floors and doors and guards are good as!
1 point
-
1 point
-
Yes!!!!! No reason why it shouldn't have, but I live with an irrational fear towards all things vehicle related that others have to approve... #wofphobia
1 point


.jpg.9ed8cc8635a79d20ad84cd3cead353e0.jpg)


.jpg.e4f8097e6d9750619b636fd69d8f81ed.jpg)


.jpeg.72143cb0a39a3b39ce8ba5ef56b667f3.jpeg)
.jpeg.b61611690522628d2bf47af8d2d5a688.jpeg)


This leaderboard is set to Auckland/GMT+12:00