
Leaderboard


Popular Content
Showing content with the highest reputation on 06/12/19 in all areas
-
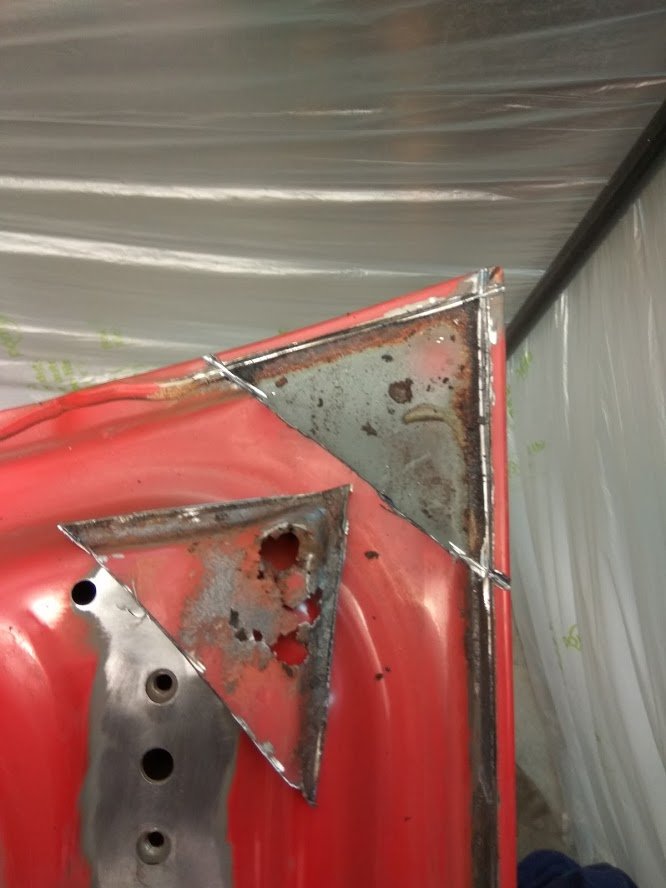
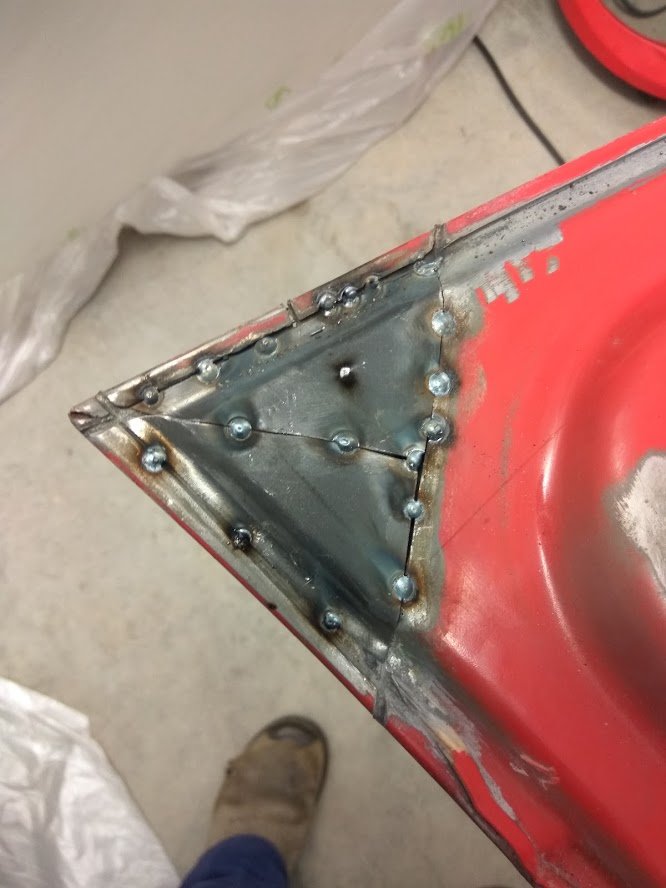
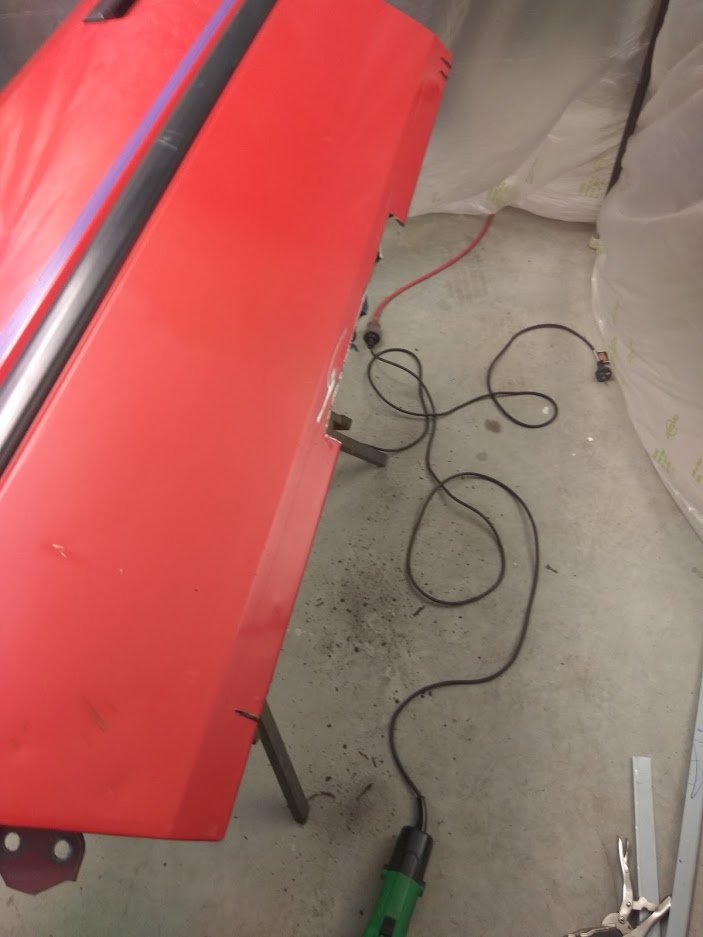
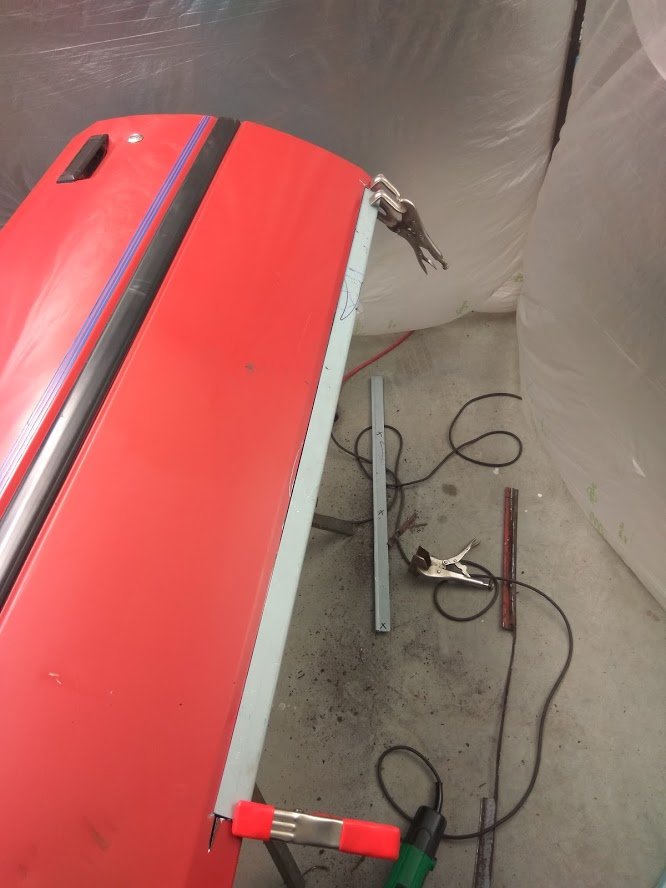
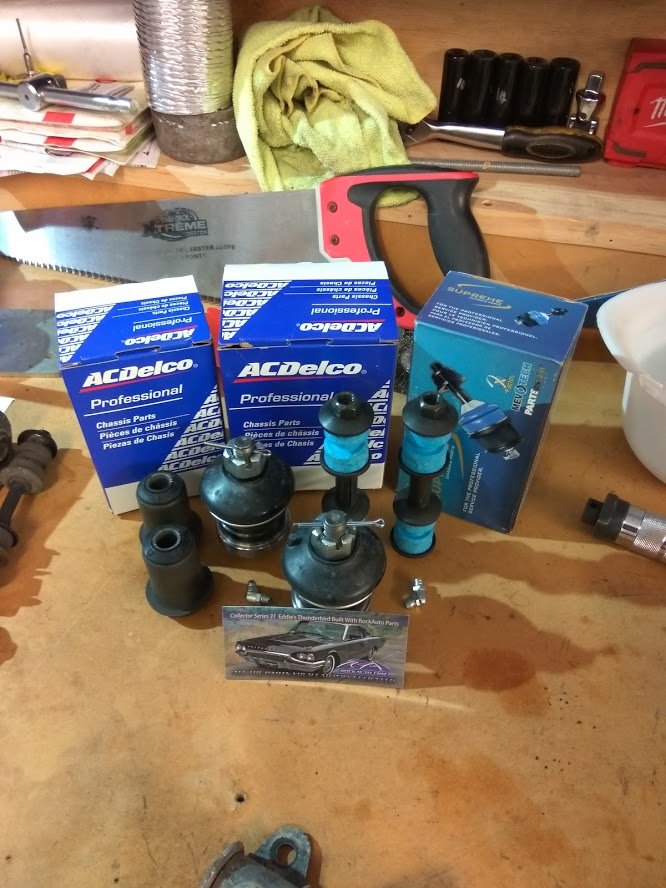
Still fixing rust, waiting to get my CO2 cylinder back before I can continue with that side of things. Enough rust in this thread so will keep that progress to a minimum. Bit of boot rust to sort, one corner example. Tacked up, have since finished this ready for primer/fill/paint. Doors are next, had some sheet folded up to have a nice straight bottom edge on the doors. Was going to patch it in sections, but it would take longer and i'd likely have ended up with an averagely not straight edge. Before: With new section clamped in place, no gas = no metal gluing. Etch primed some bits with Zinc-It, then black Zinc-It on top. It's not as good as epoxy primer and a top coat. But all the parts are sound enough that I just wanted to tidy them up, will last for years anyway. Plus some parts like hub faces, steering knuckles, I don't want thick paint layers on. I don't spray the epoxy, so brushing on doesn't really suit. Bits: I need to knuckle down and get rust sorted by the end of the holiday (funnily enough that's what I said about a year ago...). I have most of the parts needed now, just need to paint the engine cross-member and get that installed back in. Then I can reinstall all of the front end, sway bar, steering rack etc. All bushes up front have been redone. Pressed in new ball joints this week, wheel bearings are next. The brake disc bolts to the rear of the hub, so I need to have the brakes all finished first, as I don't want to take the hub off once bearings are in. Still a huge list of things to do. Snookered myself with the brakes as I can't roll the car on 13's up front anymore with the discs installed. Can't roll it without them either as it will mean the hub is installed with no brakes and will have to come to bits again. On the hunt for a pair of 15's to get me rolling. Wheels aren't finished being polished yet. But if I can get them done by xmas I will hopefully get some tyres thrown on and have it moving again. Anyway, a smaller teaser to finish off 2019.
 14 points
 -
Ha Left it till the last minute before drag day, finally got around to getting some 50 thou shorter pushrods 5 years later. Put them in tonight but a bit late for road testing and waking up all the neighbors, but it did start, and didn't rattle Also rock auto to the rescue again, got a distributor with a vac advance so in another 5 years I might get around to putting it in
10 points
-
Looks like I might finally have the KJet pressures right. Its running and idling much better. First time its idled under 2000rpm.6 points
-
Sigh, It seems like my life is a never-ending cycle of messing with KJet fuel pressures. But hopefully, this will help My quality German made KJetronic pressure testing setup arrived. Huge thanks to MissingParts on eBay, as this is some proper quality gear, and for less than I paid for the other setup. Nicely crimped ends, with quality rubber and fabric braided hoses The seller has a great sense of humour. "For oldtimer cars" I hooked the new setup up, which was a lot easier with the banjo fittings, rather than the generic screw fittings Now it was time to confirm the readings from the old gauge. Previously the cold control pressure was stone dead on the gauge, at near enough zero psi. This gauge, not so much. We want cold pressure here, near the green line (depending on ambient temp), otherwise it's too lean when cold So, what about the system pressure, which wouldn't go over 5bar, no matter how thick of a shim I fitted? Off the gauge; over 6bar And we want that at 5-5.5bar, on this green line. Too high and the control pressure will be too high also. Well damn. No wonder it still wasn't happy. I pulled the two additional shims out, and we dropped to 5bar system pressure. Better, but not perfect. I knocked the adjustment on the WUR to get the control pressure down to the required half bar, but the car wasn't running right. The next step was to step back, reset everything and presume that everything I had done with the old gauge was buggered. Because the system pressure was a tad low I wanted to add my small extra shim and see how that increased pressure (i carefully measured it when I made it, to add 0.5bar). Hah, perfect! I found this amazing step by step guide, which I followed and it worked perfectly. Big thanks to the author of that. The first step was to make my WUR adjustable. This is so that if I knock the pressure adjustment down too far I can use a nut to pull the pin back out, instead of having to remove and disassemble it to tap the pin back out by hand. I drilled and tapped the pin to M5x0.8 and using a screw, nut and washer, made it adjustable. The guide that I used is here. The basics of the mod are that you screw the screw in tight (or Loctite it in so it cant turn) and then tighten the nut down to pull the pin out of the body. To push it back down you wind the nut completely out, against the head of the screw and then use a punch and hammer to tap the screw/pin down again. It would be a lot easier to use if the screw didn't have a flange as there is limited space when mounted on the car, but its what I had on hand. With the WUR apart again I replaced the O-Ring for the diaphragm and flipped the thin metal diaphragm to the other side to even up any wear. Following the guide, I found that my initial pressure with no springs/strip was OK, and the pressure could be increased to the correct level by hand. Good. The next test had me checking the heater works, which when holding it in my hand with power applied, I could confirm it did get warm to the touch. Good. Next was to test the pseudo-warm pressure by reassembling the WUR with the springs, but without the heater/strip. This applies pressure to the mexican hat and diaphram, to emulate the warm pressure. This should be 3.5bar or HIGHER. I had just under 3bar. Not enough. This is where I had to get creative and work out how to adjust this. On other WUR, there is an adjustment screw under a brass cap on the base. You drill through that cap, and there is a hex screw to raise or lower the platform the springs sit on. I tried drilling what I thought was the cap, but turns out the base for my platform is actually a pin pressed into the housing. Its the recessed circle with a hole drilled in it. So, with callipers in hand, I tested/measured to see if I could use a hammer and punch to also adjust that like you do the cold pressure pin. Sure enough, some careful whacks of the adjustment tool, and I had raised the platform, thus increasing pressure on the springs. 4bar is perfect. I fully reassembled the WUR, heater/strip and all, and reinstalled on the car to test/adjust the cold pressure. I got this easily down to a solid 0.7bar (within the margin of error for the ambient temps, I didn't want to mess around too much getting it lower) I connected the heater and watched as the pressure slowly increased. The heater and strip were working perfectly. I got it near the required 2.9bar, but it was still a tad low with the engine running at temp, so I used the one last adjustment available; tapping the main circular unit on the WUR down. This is the part that the two fuel hoses bolt onto. This is also pressed into the body, and like the other two adjustments can be carefully tapped down with a punch. This takes very little to increase the pressure, but be very careful not to punch it down too far or the WUR had to come completely apart again to tap it back out. I alternated tapping the punch on both sides, where the arrows are pointing. This resulted in a nice 2.9bar when warm. Excellent. After some tweaking of the idle and CO screws, the results were immediate and obvious. The car ran and idled better than ever, including idling under 2000rpm for the first time. I set the idle to about 1000rpm, which is higher than factory spec, but it felt happier there than the 800-900rpm recommended. http://youtu.be/3VVylMr5BVI The only thing left to do was to put on my big boy pants and try taking it for a run. The last time it was on the road it constantly tried to die on me and left me blocking intersections. Not ideal, and no wonder I was nervous. This time, it started and was driving perfectly. It was pulling strong and felt good... until the hesitation kicked in again at high RPM under load. The exact same issue as before I rebuilt the Kjet system. I came home with mixed emotion. The car ran and drove well unless I got on the throttle. Kind of a win, but also a fail. Mrs Petrol and I were discussing the issue and she reminded me that her old Alto used to buck and hesitate if the fuel was too low... Surely that's not the issue? Nooooo If you look at the design of the tanks, the feed to the pump is at the front of the tanks, toward the front of the car. It's possible that under acceleration the little fuel in the tanks was sloshing away from the outlet and starving the pump. Maybe. The orange arrow is pointing to the fuel outlet on that tank, the other is on the other tank in the same location. Well, I guess I limp the car to the gas station and chuck some gas in and see what happens. Well, what does happen is that if you don't have both fuel caps open when you try to put any fuel in the tanks it all comes rushing back out and pukes down the side of the car and onto the ground. Oops. I added 20L to each tank, at great expense, and guess what, my Wife was right (like usual), the hesitation is completely gone, and it will happily rev out to redline under WOT. Amazing. The sound and feel of the car is crazy. It's so loud, but makes a great noise. You sit so low, but the car feels big. Even when it's not moving everyone is breaking their necks to see what it is. It's not a car for the shy. It does leave me wondering a little, if I had just filled the tanks when I first got the car, would it all have been OK anyway? The main issue I had before I rebuilt it all was that hesitation issue. In saying that, it's starting, running and driving better than it ever has since I got it, so the work was well worth it regardless. I'm stoked. Still some things to tidy, but it is almost ready to go for a WOF check.5 points
-
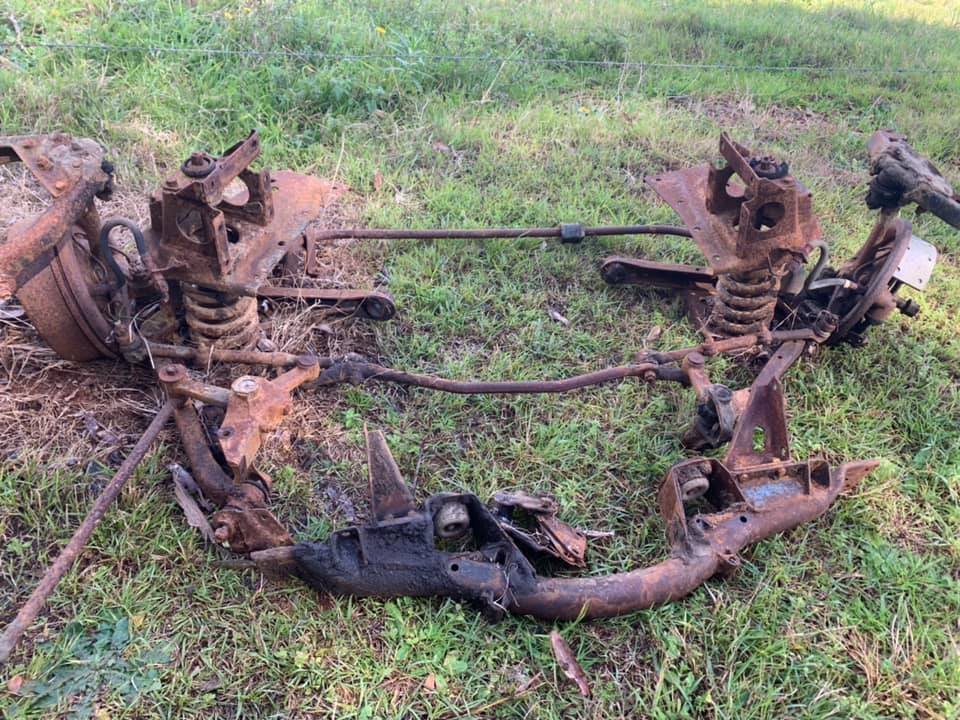
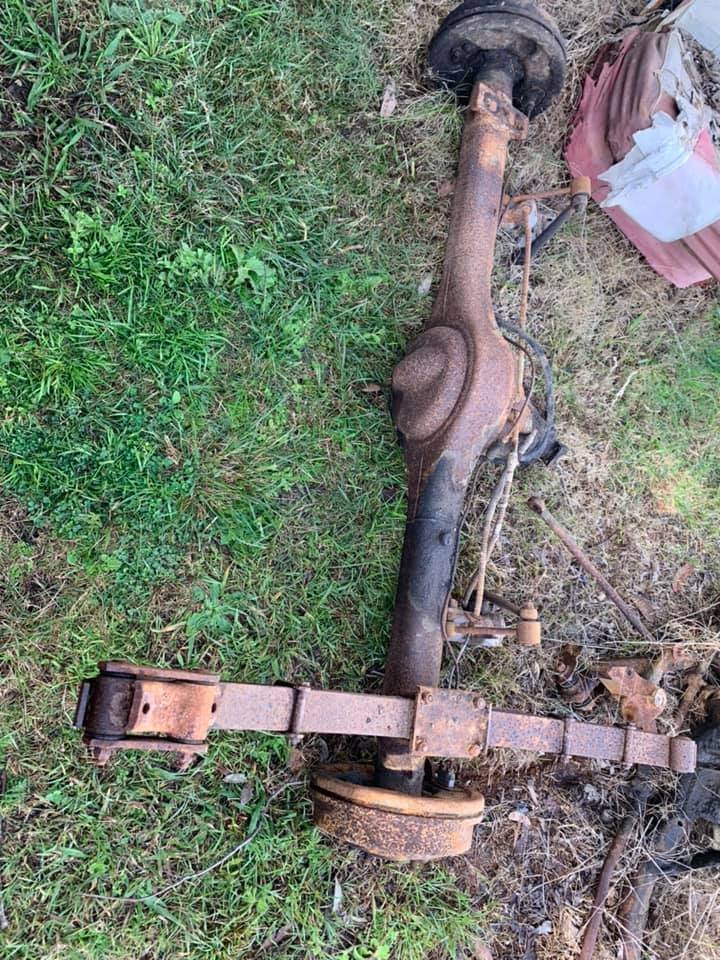
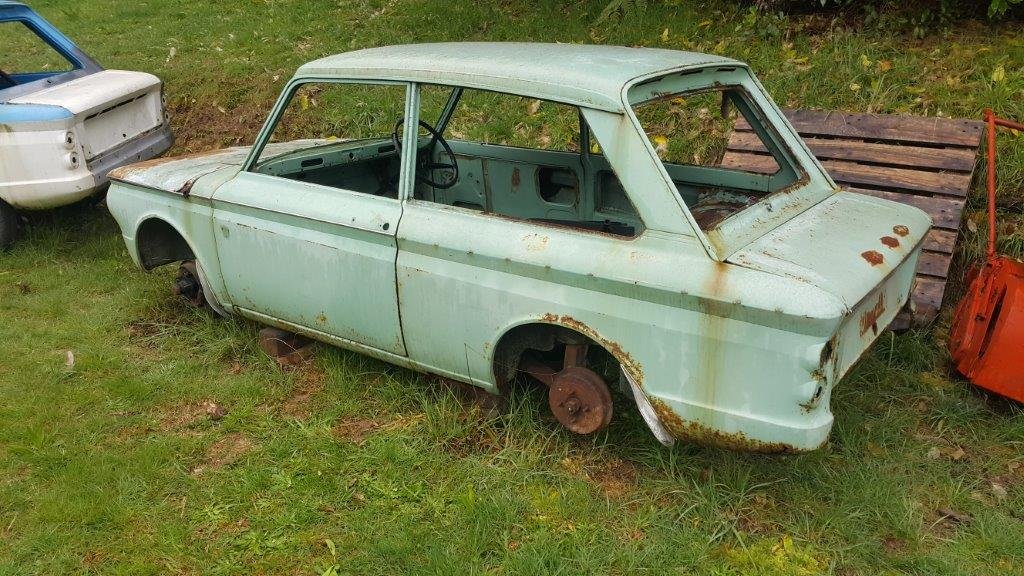
So a few months back a hotrodder on the book of faces had stripped a Thames van that he is turning into a rod and had offered the standard front and rear ends "free to a good home". The van has been sitting in a paddock for a good few years so everything is covered in a good deal of surface rust but otherwise seems fairly solid. Since my current plans are to keep the stock upper and lower wishbones and stub axles I figured it was worth having spares. Only problem was that he was based in New South Wales. Anyway, beggars can't be choosers, so yesterday I completed a 1,200 km round trip and am now the proud owner of a bunch of manky looking Thames bits. Gotta read up a bit on setting up a "pickling bath" so I can start to get things cleaned up, so keen to hear how others have gone about this. Anyway picture time or it didn't happen.
5 points
-
I power washed my GN yesterday. My jacket is pretty well impregnated with dust. Do you think we should box it up and send back? I know how much Tama Iti hates the white man taking his land4 points
-
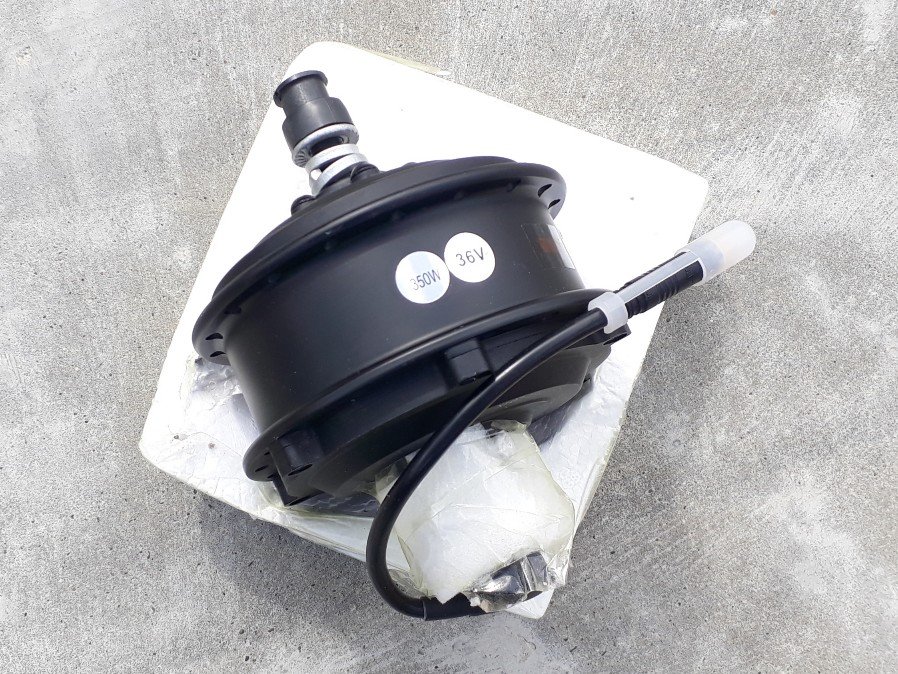
Yay replacement arrived today...
4 points
-
3 points
-
I really was at a loss cutting log without a smartphone.3 points
-
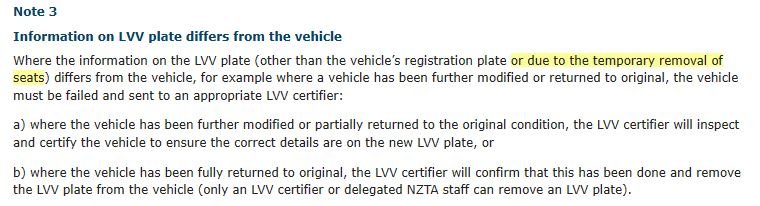
Yup temporary seat removal is the only other thing. Gold star for Terry.
3 points
-
Basically clocked life now.
2 points
-
So I have managed to find an awesome friendly panelbeater to carry out the rust repairs. Any panels I can't buy he is fabricating.
2 points
-
Bart - NAUGHTY Welding cast is an absolute no-no so please ignore Bart cos that is super dumb advice. If you are changing hubs and stubs, why not change suspension arms too and retain the correct ball-joints?2 points
-
It's illegal, but you could have the taper welded up, and reamed to the smaller size. "THOU SHALT NOT MAKE A WELD UPON ANY FORGING WHICH IS EMPLOYED IN SUSPENDING OR STEERING A MOTOR VEHICLE" However, done tidily, it's impossible to prove it's been done. However depending on the metal used, it might go hard as fuck and need to be annealed before it can be reamed. Since you're not a welder be trade @MaxPower please dont do that. ;-P And if you do please use a gasless MIG or damp welding electrodes. (With 5 pairs of sunglasses)2 points
-
I have a timeless log sharn It pertains to my morning dump at Waikerimoana.2 points
-
Hmm..... how can i make this work.
2 points
-
I better rustle up some quality sharns for next year Please select from the following Driving piles with a crane from the 70s and a 3T hammer Thermit welding train tracks Detroit powered jetboats The complexities of driving a shipping tug2 points
-
2 points
-
All footage acquired. Lemme see what magic I can conjure up. Aim to have it out late tomorrow night. But end of the weekend at the latest. Cheeeeeeers people for being amazing.2 points
-
Mesh filters for the carbs arrived yesterday. Should be pretty cool.2 points
-
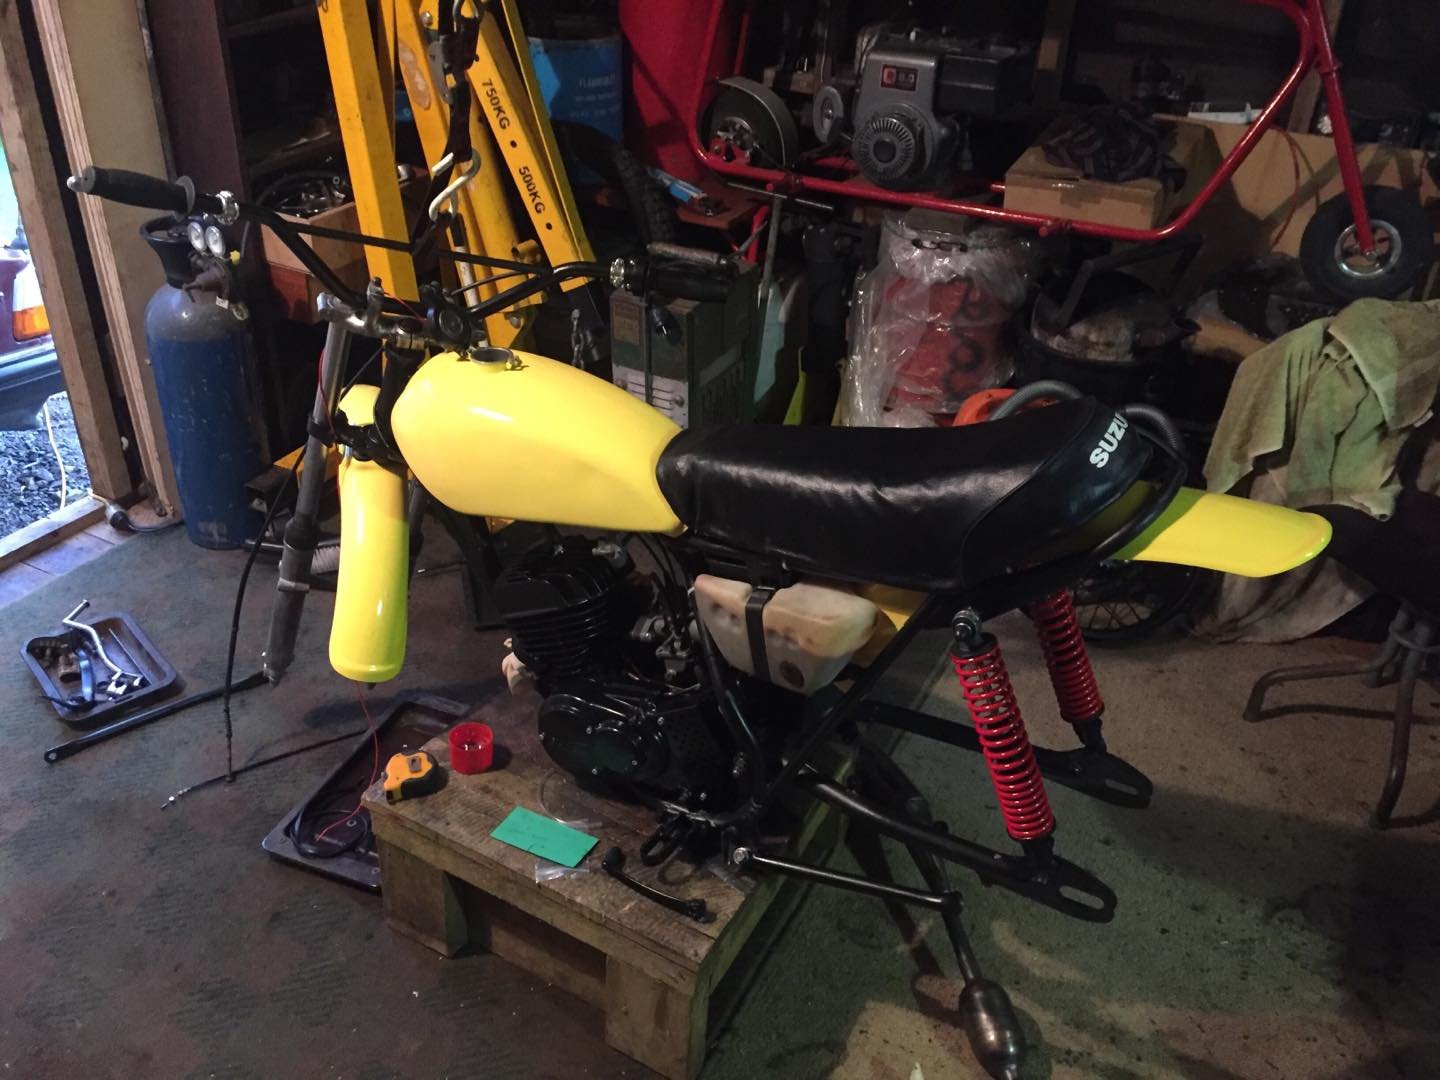
Managed to get acouple of 35mm film photos at DGR too which didn't turn out too bad decided i should check out what was wrong before Te Urewera, pulled the rocker cover off and one of the adjuster grub screws for the rocker arm had worked its way out and had a bit of a party in the top end i dug it out and it looks to have been smashed about by the valve spring, i put a new one in and got it going mint. top end is a little rattly now but it works so im not touching it. Rode the Te Urewera ride weekend just been and had a hell of a time so much fun smashing the bike about, getting confident on the gravel hooning around a corner got thrown off and high sided the bike bending the foot peg and breaking the front leaver off and grassman came to the rescue and had a spare fa50 leaver that worked, front brakes proceeded to lock on randomly after that, thanks to the boys for helping me rebleed the cable discs, managed to rip the rubber intake manifold resulting in 5000rpm idle for the last half of sunday and assisting in trying to throw me off the outside of corners which was fun. Just to finish it off the bike fell over on the trailer on the way home in the dark and we didn't notice, ripped my seat and broke the clutch leaver. the bike is in a sad tate now but will motivate me to finish making my new seat pan and get the seat finished and powedercoat the frame while im at it, Thanks to J5 and the other boys for organising the ride and everyone else for a good time!2 points
-
The cylinder head for this thing is a later 8V one from a Euro Spec Starion. It's a good one because it doesn't have any jet valves which usually lead to cracking issues. I've done some simple port work to this one, just de-shrouded things and decreased the short side radius on the intake port, and smoothed things out. When I did this I didn't have any access to flow-bench gear, so its just common sense stuff with no measurement to back it up. I took it to Kelfords, and they tidied it up further for me, and ground the cam to 272/272 @ 0.1mm (230/230 @ 1mm), 10.5mm net valve lift. Should get me enough air flow for the power I want to make, where I want to make it :-). Another historic Repco purchase was a set of new valves. The original ones could probably have been cleaned up, but these were on clearance, so only a few bucks a valve at the time. They've all lapped in really nicely. I vapor blasted the head at work (its a new piece of gear we've just got, and I had to commission it ), so it's really clean. Currently with a local engine machinist getting a quick skim. Then I can assemble it and get the long block finished.
2 points
-
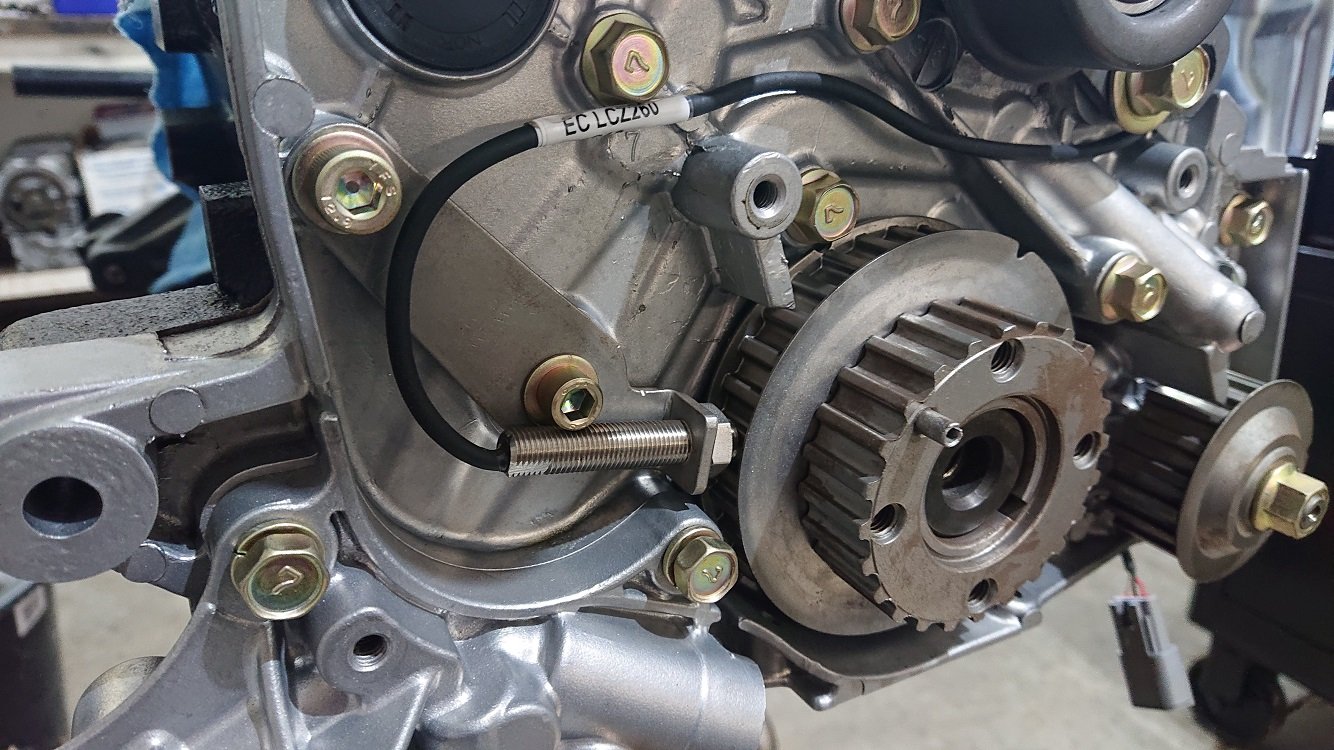
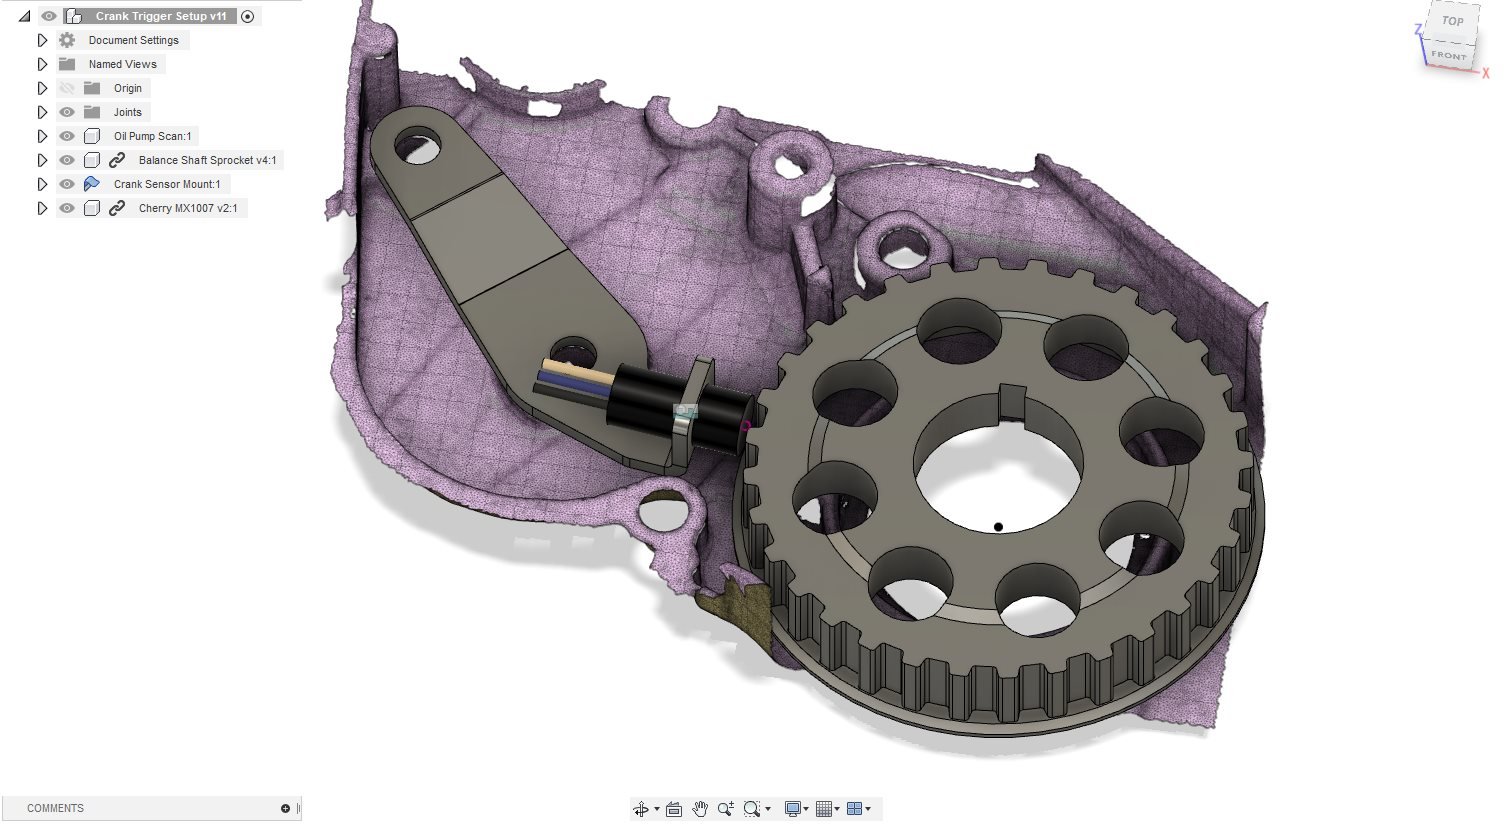
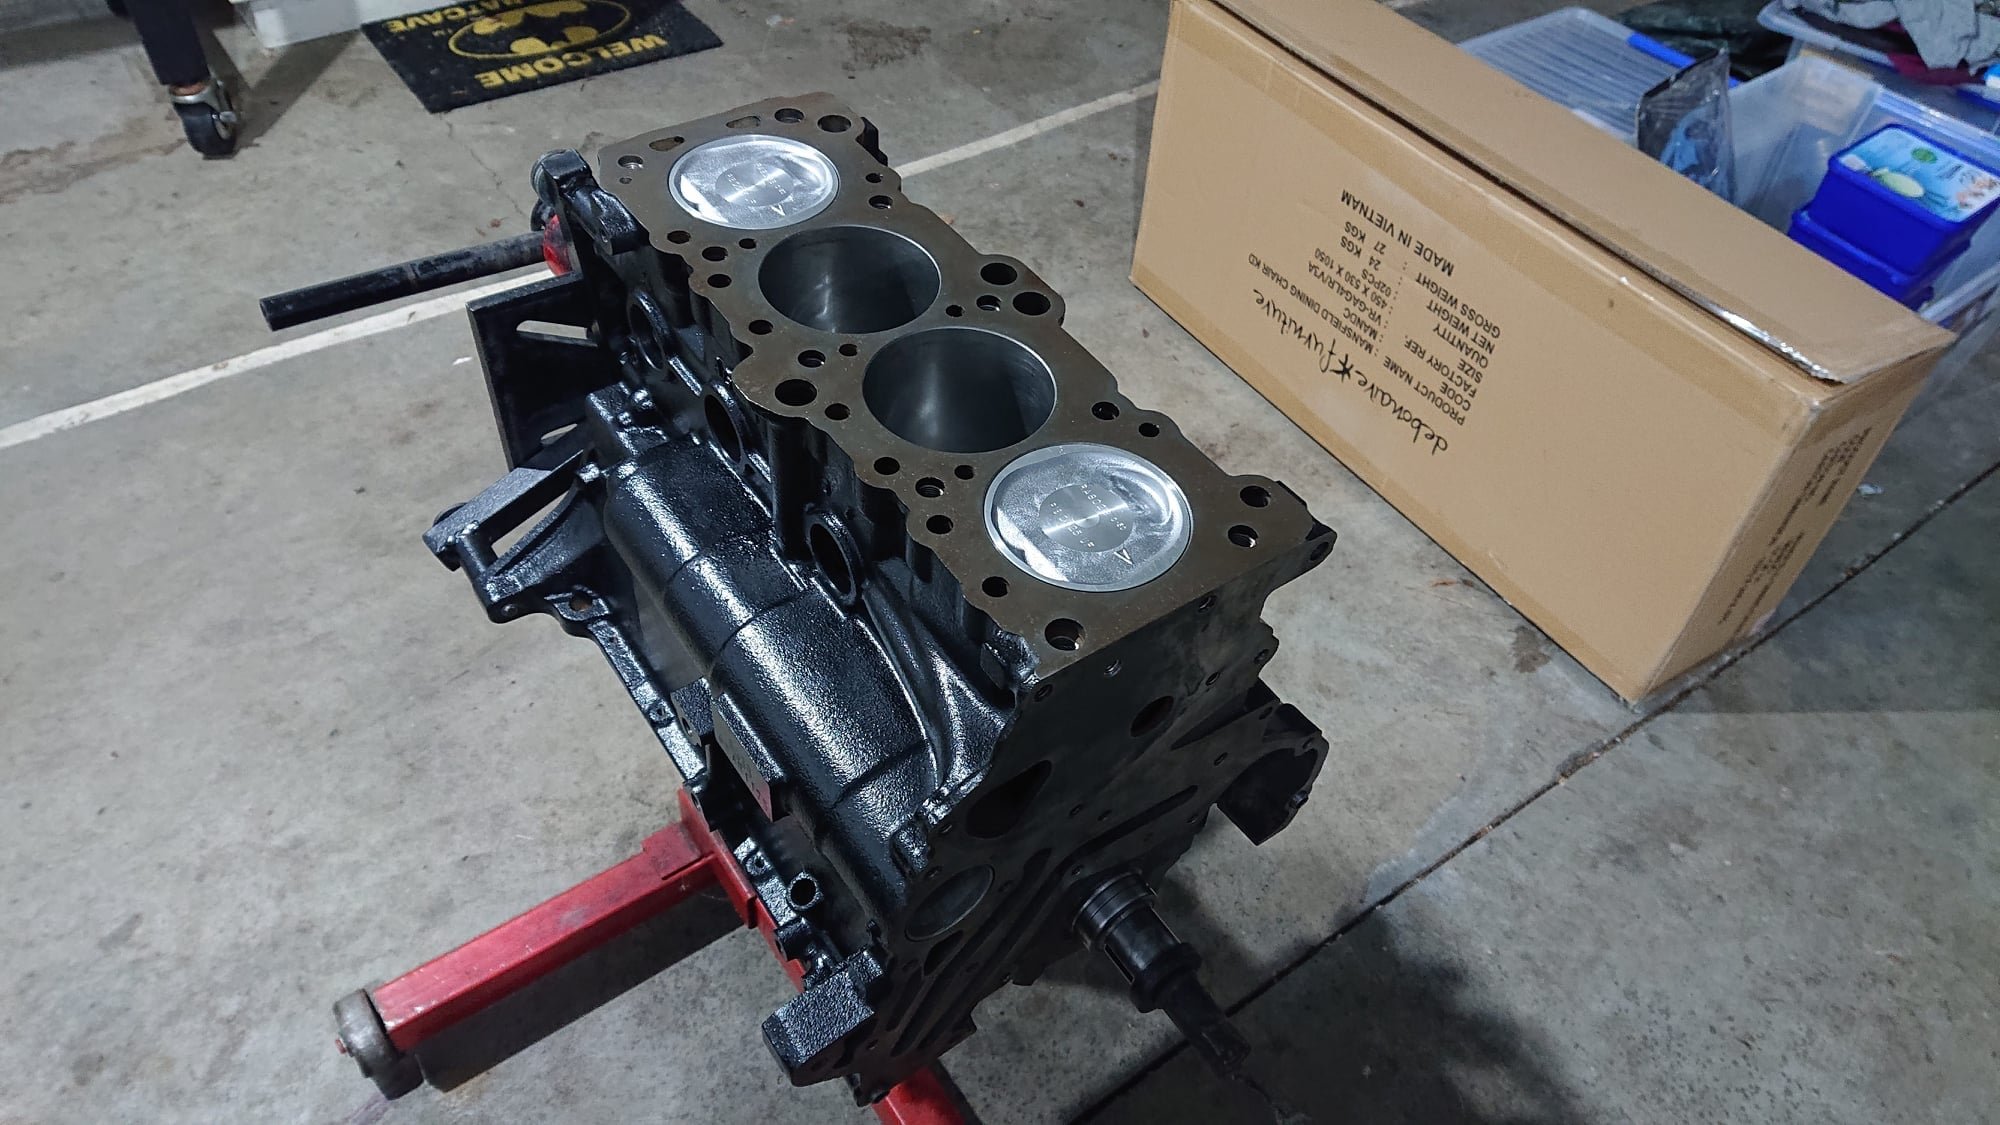
The motor for this thing is a case of using up parts I've had under the bench for many years. Before, and while I was at Uni I was a register biscuit at Repco, and took the opportunity to stock up on bits I knew I'd need one day. Even finding a lot of this stuff can be hard these days, let alone the high price so much of it seems to now command! The block is a really early Starion one, so is stamped G63B and is wideblock. It also has no oil feed for the rear bearing of the upper (RH) balance shaft. This is great, as I'm deleting these anyway for simplicity, so its an oil feed I don't need to block off. They early blocks were tapped M8x1.25 for the timing tensioner stud and clamp bolt. The stud, bolt and tensioner I have are for a later block, so I've drilled and tapped these positions out to m10x1.25. One of the bits I grabbed before leaving Repco was the last set of 4MKRY-8028(050) pistons they had in stock. Moly top ring, 0.5mm oversize and a later model ring design that is a little smaller, giving the pistons stronger ring-lands. They have a 12.3mm bowl, which should land me at around 8.5:1 static compression. Still pretty low, but good for a daily. Better than the stock 7.6:1 the motor originally had! I had MPL in ChCh machine the block for me (also many years ago!), and we went for 0.05mm piston to wall. Its larger than the factory spec for SOHC gear, but on point with the later DOHC turbo specs, and I should be seeing similar amounts of heat. I'll be running fuel injection and coil per plug on this motor, with a Link ECU, so I need to get good engine position information to the ECU. I don't have any distributors for these motor knocking around any more, and I don't like the look of them hanging out the side of the head, only being used for engine position information. Plus, IMO crank position information should be directly measured at the crank, not from a cam driven element via a timing belt that whips around. Although I've deleted the balance shafts, the crank sprocket for the belt is still there as it's also a spacer for the timing belt sprocket. You can remove this and replace it with just a spacer, but it looked like a good spot to take some crank speed information from. I had a couple of gear tooth sensors (Cherry GS1005/7) rattling around in a drawer, and as this isn't a missing tooth measurement, they should work well for this application. They don't work well in missing tooth scenarios because the tooth that ends the gap causes a much larger change in magnetic flux density (which is what the sensor is really measuring), and it stuffs the automatic calibration the sensors have built into their ASIC's. I was chasing this problem for a solid week on a a race motor I was tuning, it sucked to find! I did a temp setup with some blutack and it gave a good signal on the scope, so I went ahead with it We've got some great 3d scanning gear at work, so I took a quick capture of a relevant section of the front timing case / oil pump. A bit of noodling and modelling I came up with a simple sheet metal bracket, made out of 3mm steel. The Cherry sensor had too large of a diameter to get it in the right place, but I found a honeywell sensor with a 3/8-24 thread which has a decent temp and vibration rating and seems to work well. Scope measurements when spinning the sprocket by hand (the crank key is removed) show a nice square pattern, will see how it goes when the engine is actually running! Kiggly racing do a very similar setup, but it's around $400, and I don't really want to part with that ;-). The short block is pretty much assembled, just waiting on the timing cover / oil pump gasket to arrive from amayama. Finding all the right fasteners I had done a very average job of bagging up also took quite a while! I've done a full dry assembly now though, and I should have everything.
2 points
-
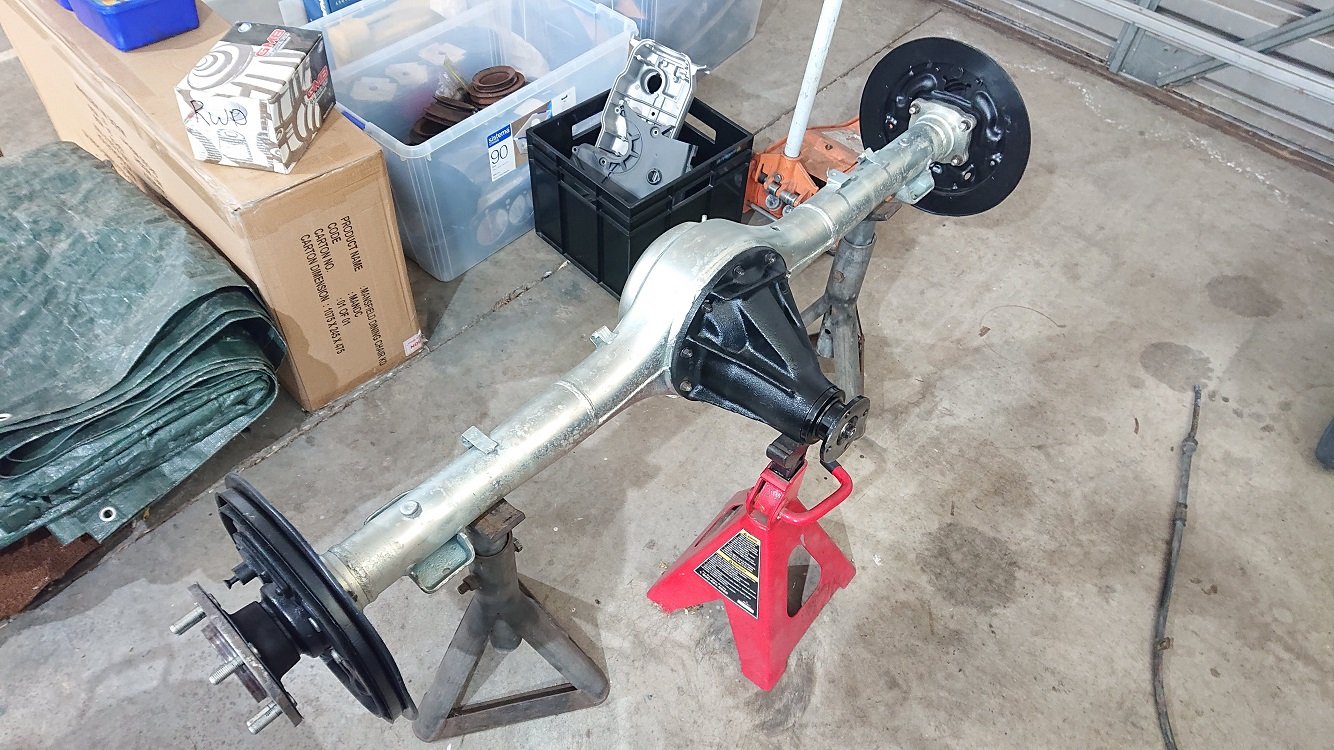
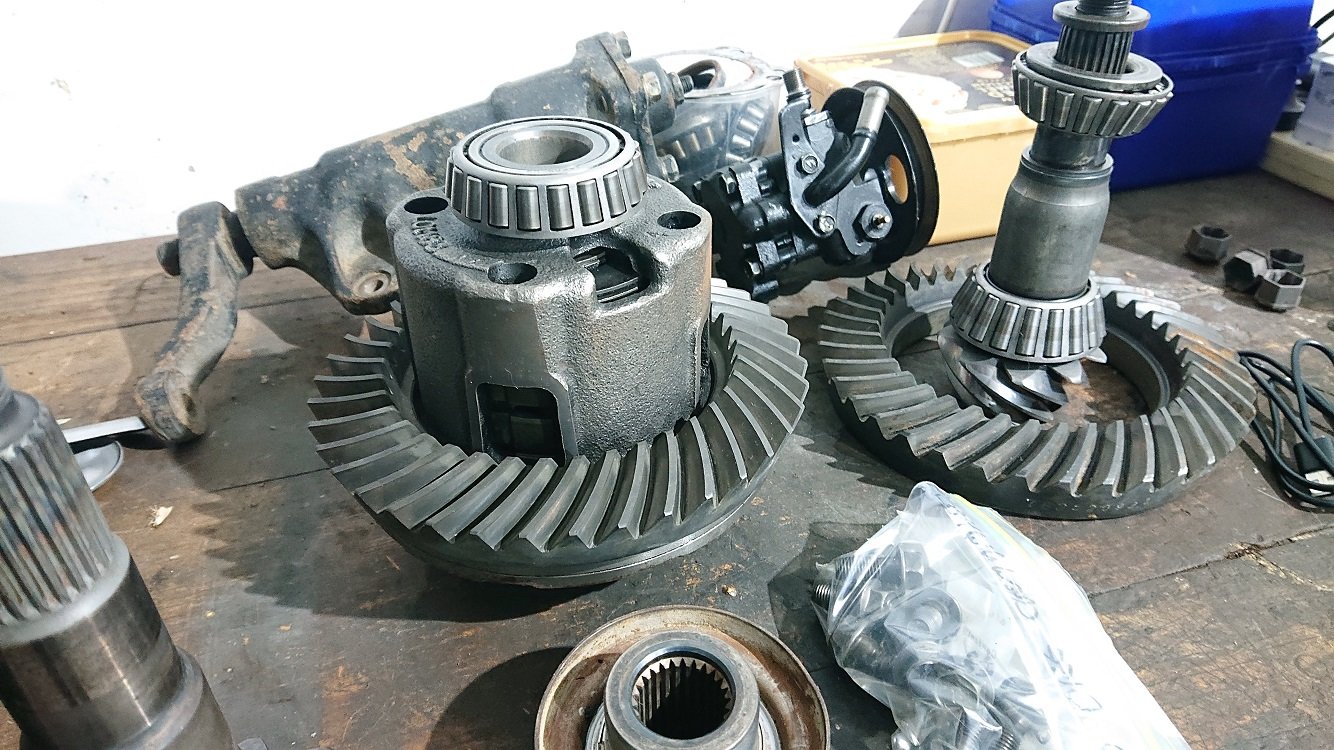
As this is my daily, I'm structuring the modifications to have as little off-road time as possible. This usually means buying the parts I need, doing the modifications, swapping them in, then then on-selling the factory gear. A good example of this is the rear axle. As this is a 'Sport' model with the 2l motor, it has the larger 8" crownwheel diff (often called the mitsy 'big' diff). This is great, as they're really strong, far stronger than I require, but it is also pretty easy to get other gear sets for them. Starions (another long-running vice of mine) also came with the big diff (5 stud models, anyway), and although they're IRS, the gear sets are interchangable (the centers also fit, but most IRS big diff stuff is 25 spline, whereas the solid axle stuff is 28 spline, late widebody starions being the exception to this and also having 28 spline axles). I picked up an '85 l200 diff on trademe a while back, and took it all apart. I found a LOM83 LSD center from a 2nd gen l200 diff, and got some 3.54:1 gears from a late widebody Starion from the states. This all goes together pretty easily, I had 'The Diff Shop' here in ChCh do the final fit for me, as they have the shims and gear to get it all in spec far easier than doing it myself. No crush tubes in these things. It's got all new bearings and seals, so it should be a good unit. I had the axle casing stripped and zinc plated, as it has been sitting up on end in my garden for a year of so and was full of water, and rust. Just at the point of putting the brakes together. I've got all new gear (springs, cylinder, shoes, drums, etc) for it, so it should last a while. Because I've still got the other diff under the rear of my truck I've got a reference of how it goes together too. Bloody drum setups! The original 3.9:1 gears will find their way into a Starion diff I have, but that's a future project.
2 points
-
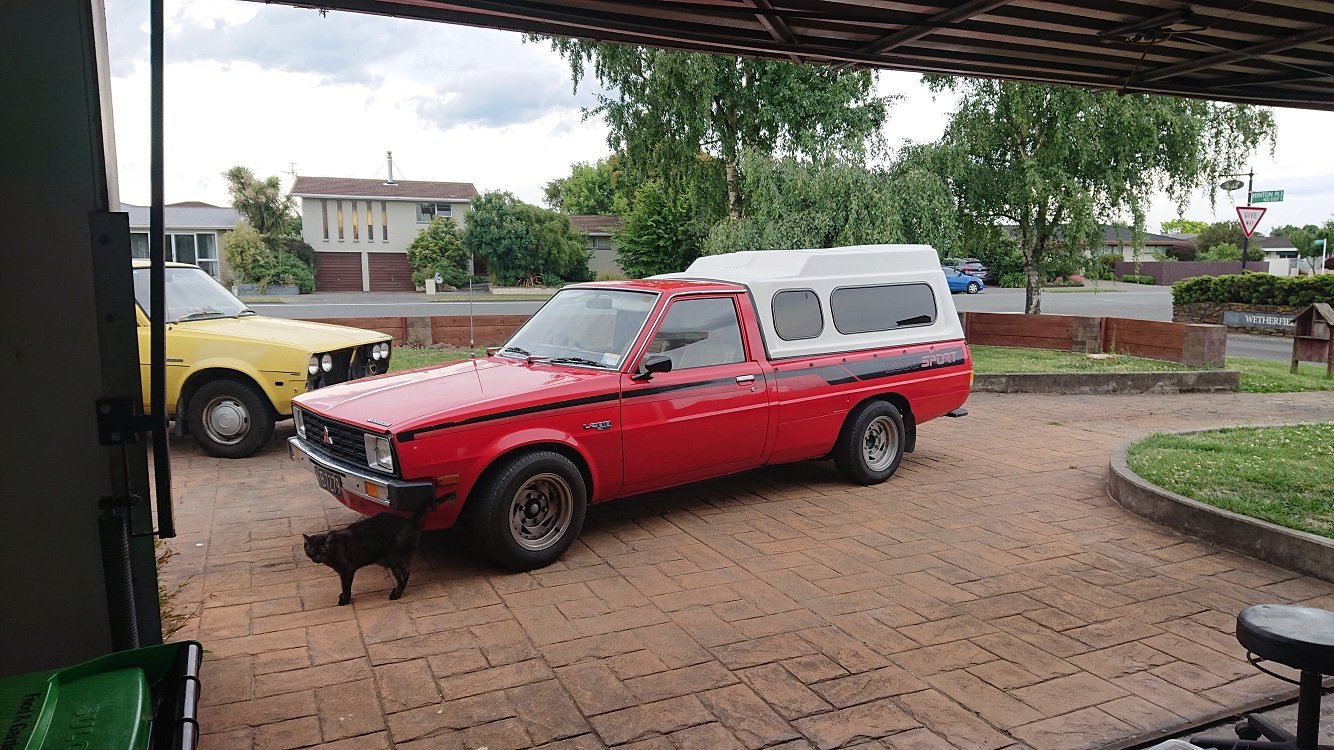
This ute has been a constant fixture in my life for many years now, and its pretty easily my favorite vehicle I've ever owned. It's never let me down, when something does break its so simple you can fix it on the side of the road, and it just gives you 'feel good' vibes when you drive it :-). I bought it from the original owners year ago, and it had never been more than 20k's from Sheffield (where it was sold new) in its life. It's in good nick for one of these, with no major rust issues to speak of. The cab corners are all good, and the wellside is also rust free and pretty much dent free inside too. The canopy has never been off it, and the tray has always had a ply-wood spoil board in place. The interior shows its age though, with dash cracks and worn out bench seat. I've done a bit of work to it over the years. Did a major overhaul of all the suspension and brakes a couple of years ago. Everything under there is brand new or rebuilt. 2" blocks in the back, 2" drop spindles in the front with 2nd gen vented brakes. 1/2 a coil off the front to get it sitting even. Everything poly-bushed, wheels are $50 cheapies from trademe I tidied up. They're probably due another tidy up by now, but I think i'll be changing them out for something else (wider) in the near future. For the first years of owning the truck it was just a weekend vehicle, used for taking the garden waste to the refuse station, helping people move things around, etc. I had euro-diesels as I was commuting big k's each week for work... However at the beginning of 2019 I scored a fantastic job in Christchurch, so I no longer have to spend 12.5 hours a week commuting to and from work. When you add that into your work hours each week, its just too much time being idled away. As of a few months ago the euro-diesels are sold and the truck is performing daily duties. So, its time for the second round of major modifications: 4g63 SOHC 8V. TD05 Big 16G turbo (EVO III). Galant MPI injection. 2nd Gen 5 Speed gearbox (possibly with a Starion gearset, if the ratio's are better). 3.54:1 gears, with and LSD center. Starion seats fitted general interior update. I'm hoping for a good 200 buff horses to the rear wheels. Truck weighs in at around 1250kg's, mostly at the front I assume, so it should make it pretty lively with an LSD and 195's. Should be able to get better economy too, with the 5 speed (currently its a 4 speed) and the taller gears, and better fuel system. Not for the first few months I'm sure, as I'll be deep in the loud pedal a lot I'd say, but after that I'm hoping things improve ;-).
1 point
-
So, no pics then?1 point
-
I thought it was the ride height? /ling1 point
-
Temporary seat removal? BTW, my plate is 4562KK - spooky!1 point
-
One of my favourite images from the ride, a wide eyed, knowledge filled Bort asking beave how hard the power stations go for what they are1 point
-
The most fun i have had on two wheels! A massive thank you to J5/shadow garage crew for organizing the epic ride! Big thanks to @MopedNZ for supplying parts and advice, cheers! I have linked some photos that i took. sorry for the shit/hazy spec pictures my phone has had a rough life. https://imgur.com/a/KL4QYC3 Very pleased with Gemima the GN125 for hauling my ass 581kms. She has done well. Not sure what bike i will get for next year but keen for something different.1 point
-
I definitely have full tuck BORT a few times. Blooooooody epic. Showed the Swedish tourists (male sorry) at work today some of the footage and they were shocked at that many bikes turning up for a ride like this.1 point
-
I think you'll find they were already ruined.1 point
-
While all you hard ppsc cunce were sleeping in the lake us FOAMERS were living it large in our Chalet
1 point
-
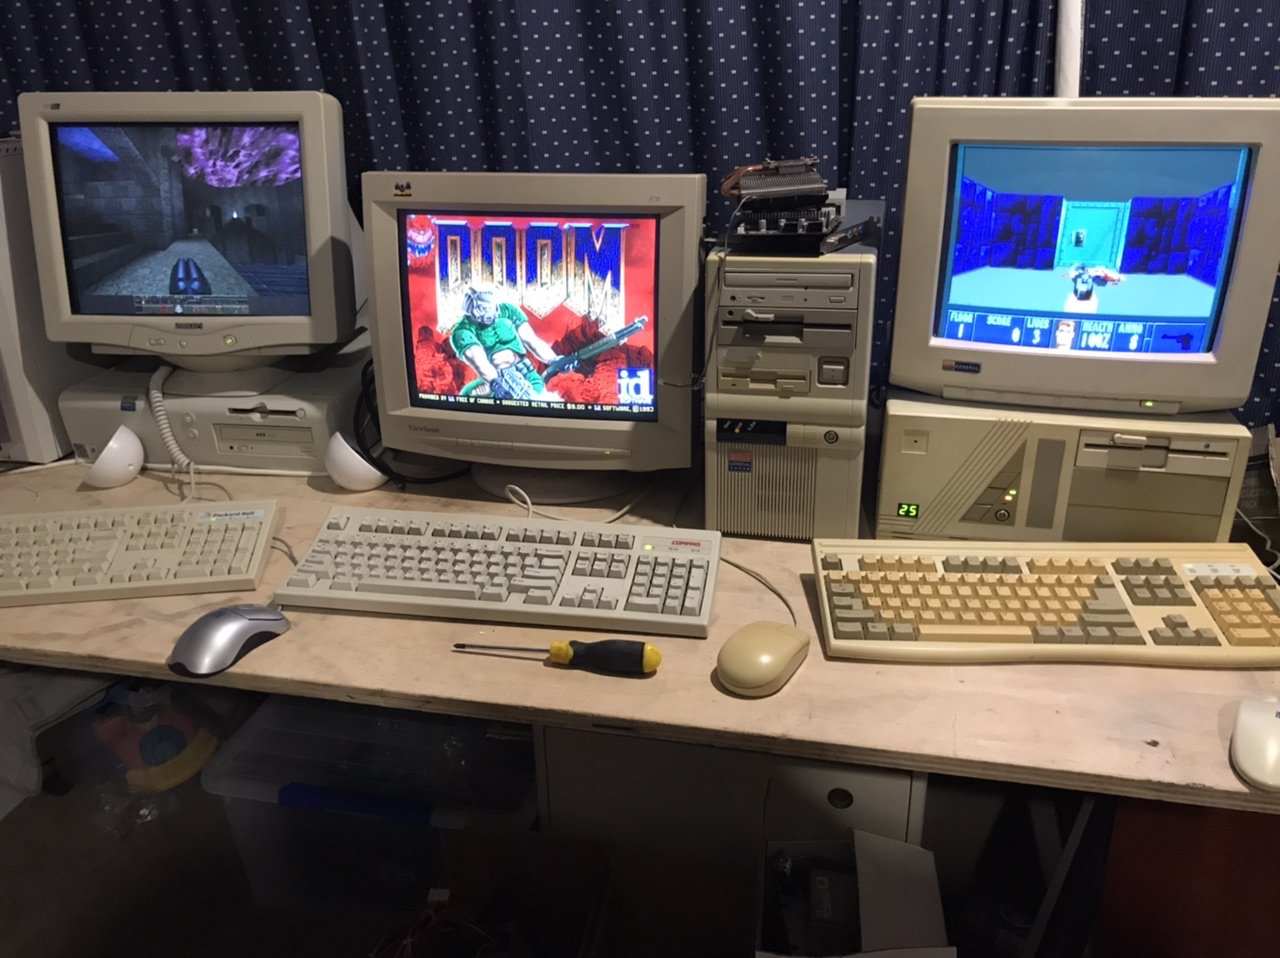
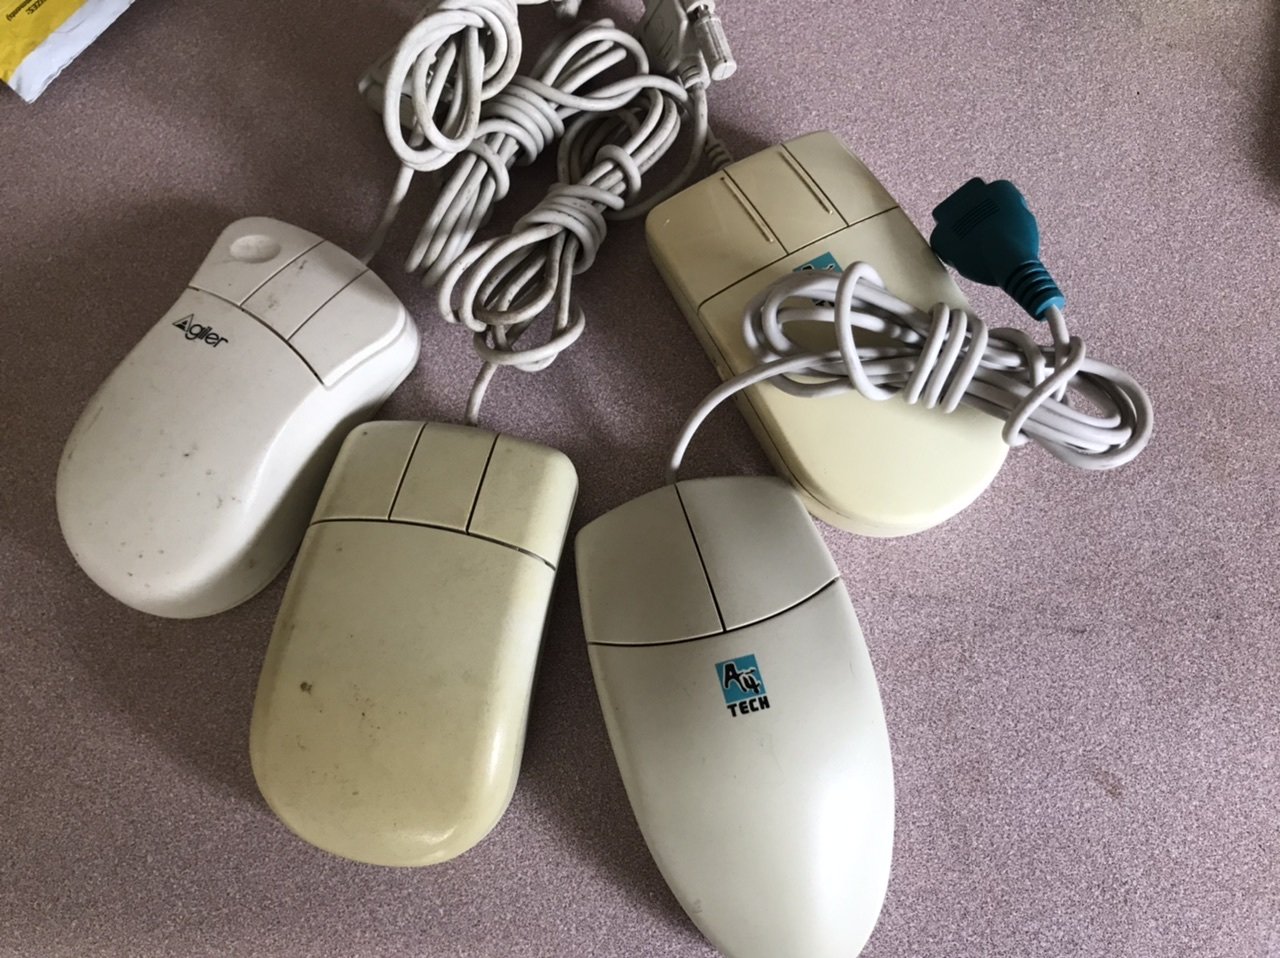
These just arrived, never thought I’d be paying money for shitty old mice.
1 point
-
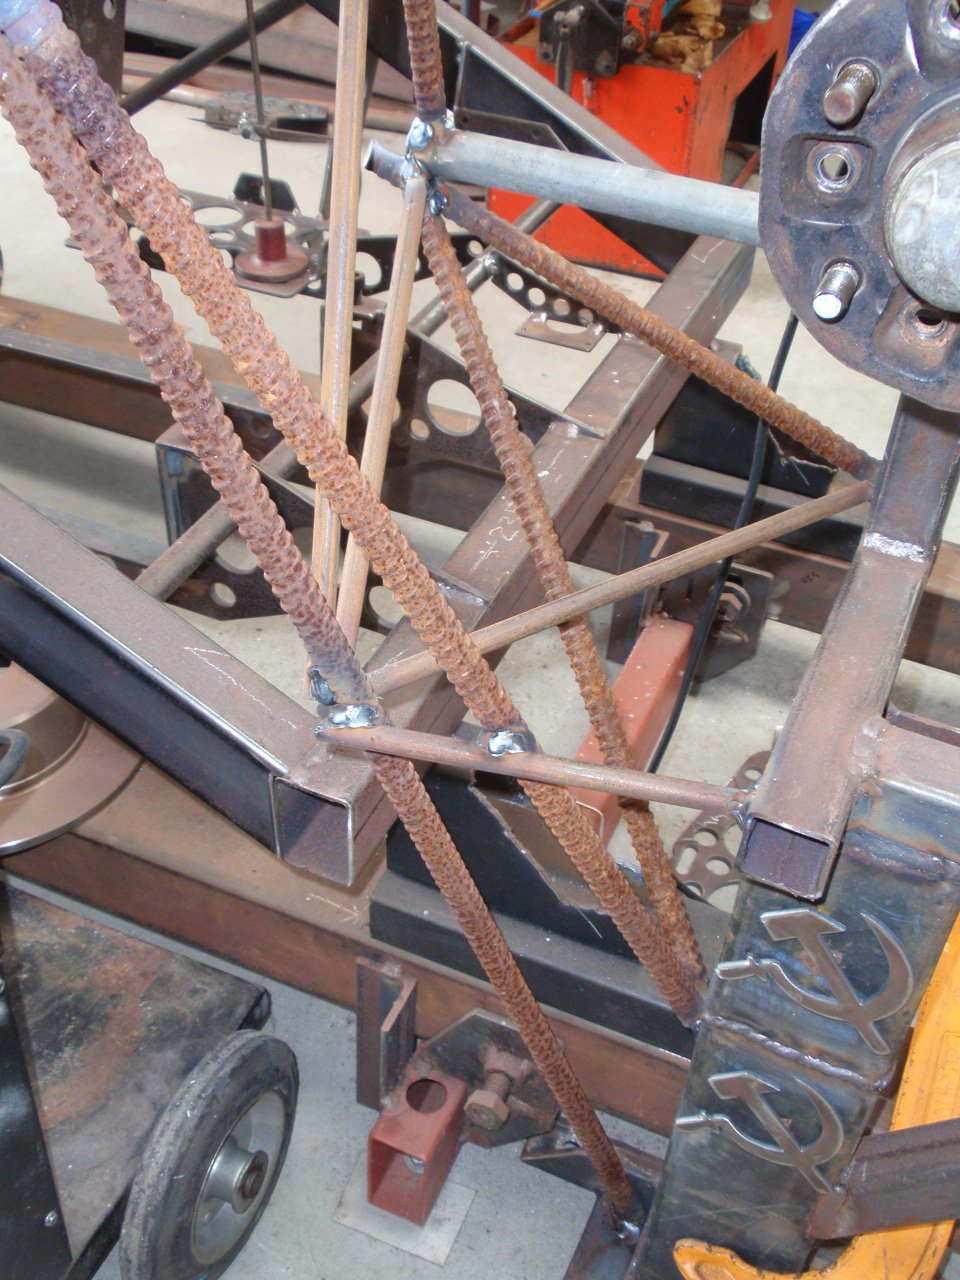
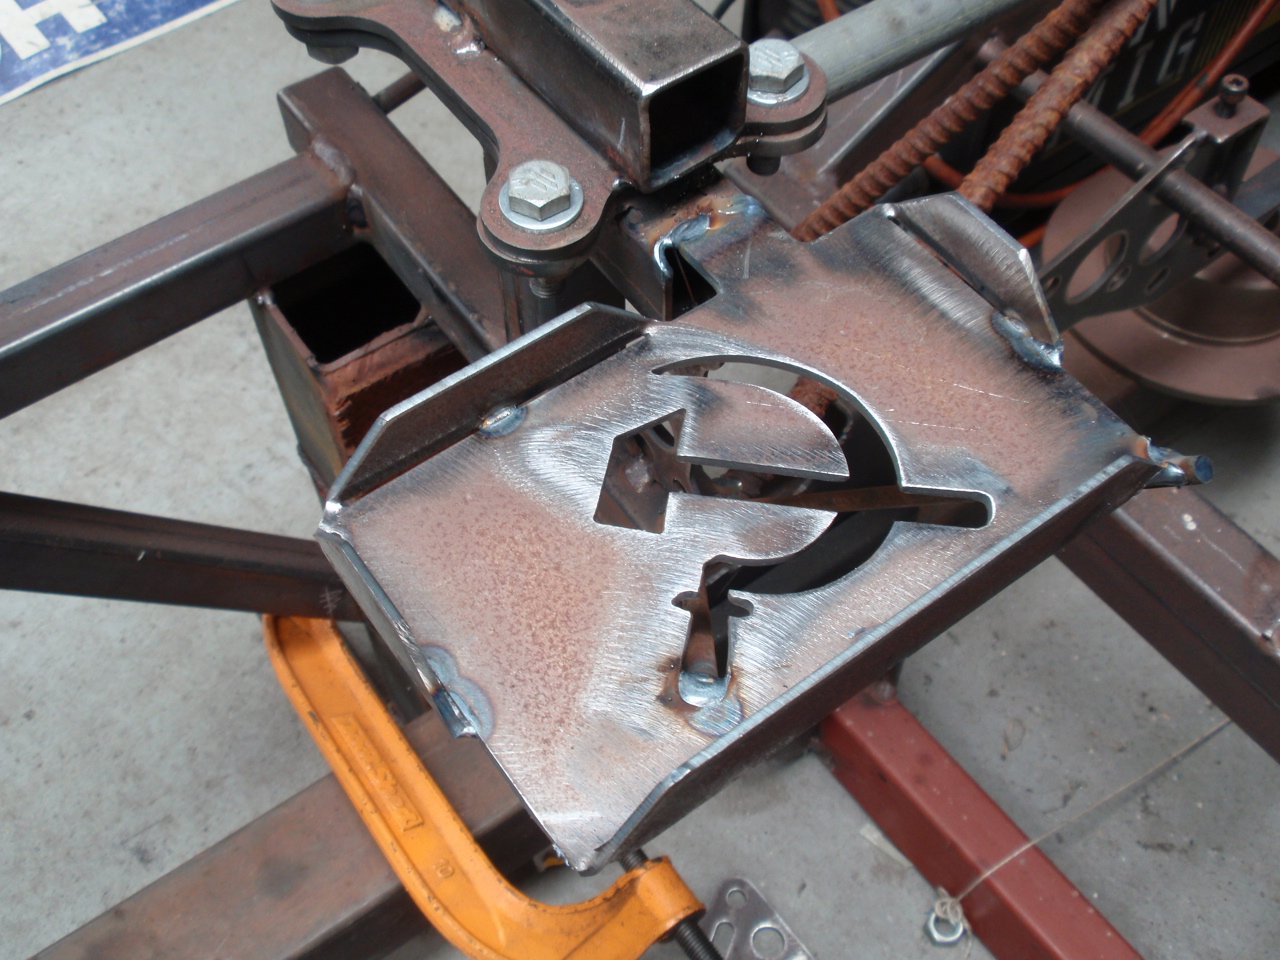
Recycling reo ... recycling anything that will get it done, comrade.
1 point
-
Just because I've been playing with the Saab, doesn't mean the TVR has been neglected. If anything, I've hit the TVR with some renewed vigour this weekend and got a couple more jobs sorted. After having issues with the KJet system from the previous post I've left the poor TVR alone for over a month and just ignored it. Motivation has been very low, and to be honest I got to a point where I loathed seeing the car sitting in the garage. Not a good place to be. This weekend though, I found some motivation. I started by taking the Saab out and grabbing some more fuel to add to the tanks of the TVR, just so I'm ready to take it out on the road and see if it runs OK or not. I didn't get that far today, but I did fire her up and got the engine up to temp. Amazingly even after sitting untouched for over a month, the engine started first turn of the key, before a complete revolution of the engine was completed. A very good cold start indeed. Since I wasn't taking the car out for a run I decided to jump into a couple of other jobs I needed done. First was to install the replacement interior mirror. You don't realise how important one if until you don't have one, even if your rear window is cloudy. The original came with the car, but had been knocked off the windscreen and was badly cracked It looks like it had been glued on with super glue or something I don't know what the original mirror was from. I had been told it was a MK5 Cortina mirror, but the Cortina mirror I purchased isn't the same, although it does work fine (and has dip, which the original mirror doesn't). In future though I'd look for a mirror with curved glass, as the Cortina flat glass doesn't give a very wide field of view (guess its made to view through a 4 door sedan, not a very short 2 door). The mirror I purchased came with a pair of "mirror pads" used to stick the mirror to the screen. They appear to be normal double sided foam tape, but maybe of the VHB (Very High Bond) type. The only instructions on the pack were to make sure both surfaces were warmed thoroughly, with a hairdryer or similar. I used a heat gun to gently heat the mirror base up before sticking the pad to it, and then gently warming the screen up to attach it. Seemed to work, it's still on the screen and seems well enough stuck. Time will tell if it holds up long term. At least this is one less thing on the list to do As you may spot, one other thing I changed was to go back to the leather Momo wheel. As much as I love the Futura, the wood rim is a bit slippery when you only have armstrong steering, and the leather gives much-needed purchase to turn the wheels. The last job for the day was one I had been putting off as it didn't seem like much fun; replacing the weather seal strips around the door and roof openings. The old seals were well buggered, with the D shaped sealing surface being torn from the U shaped mounting section in multiple places. No doubt this was the reason for the car being a swimming pool when I got it, the seals weren't keeping anything out. Someone had tried to use glue under the seal to help hold it in place. It didn't work. They had also tried to supplement to the destroyed seal with other random bits of seal... that too didn't work. I had ordered 10M of the seal from Racetech in the UK. In hindsight, this is a pretty generic sealing strip, and probably could have sourced it locally or from eBay for less, but oh well. Its this profile I started on the rear hoop, as it was the shorter section and easy to access and work with It's as easy as gently pressing the channel into place over the edge, and gently tapping it in with a soft face hammer until you feel/hear it bottom out. The corners are a little fiddly but on the rear hoop its good practice for the harder ones around the screen. There are a few places where it gets a bit tricky. One of them is the back of the door opening. It has a vertical piece, which meets at the bottom with the horizontal piece. I followed what the seal I removed did, and trimmed the ends of the new seals at about 45 degrees, and forced them into place. The seal can be cut/trimmed with a set of decent side cutters. It does have a metal spine which makes it a bit harder to cut. The rest of it is a case of going around and tapping the seal into place. I used one continuous run from the back of the door opening, up and over the screen and down to the opposite side door opening. No joins, no less leaks. Its a time consuming job, especially around the 90 degree turns at the top corners of the windscreen frame, which is a place you need to be very careful of as it can take a bit of extra force to get the seal to seat, but take your time and it should go well. The new seal is much nicer and makes far better contact with the doors, roof panel and windows. It might even keep some water out. I'm not kidding myself though, the seal is a last resort; this is a summer car. From the 10M roll, I have enough left over to do the top and sides of the boot opening, but not enough for the whole thing. Maybe order another 1M if you want to do that too. So today was a good day. A couple more jobs off the list. I'm waiting on a flash new hand made German Kjet tester to arrive, and then I will try to set the pressures again. If I still can't, it'll be back to the drawing board. I'm quickly running out of time to go for a WOF inspection to get the car roadworthy, so I'll need a good solid push over December to get the car ready. In the mean time, everything is closed up, with the roof on, to bed the new seals in. First time the roof panel has been on in ages.1 point
-
So I discovered that the actual gauges in the cluster are driven off 12v, not 24v. But not the lights or voltage gauge. This is potentially quite disappointing as I may have blown those gauges by running them on 24v already. We will see when shit is running, hopefully soon. On this basis I rewired the feed to the cluster which wasn't a big deal. While I was there I installed the EGT gauge and tidied up the wiring to this and the digital clock I bought and mounted. I know the EGT gauge is not sitting correctly, but this is so the relevant portion is visible where I will be sitting. I am a dick like that, the stereo in the townace is upside down so the control knob is closer to me lol. As the deck is now on hopefully permanently I checked all the wiring that I had done still made the correct things shine and blink etc, this was rather pleasingly the case. An air pump also arrived so I finished off the airbag install. The holes in the bottom just happened to be the right size for some M5 rivnuts. Every one of you should own one of these tools, fuck they are great. It has a relief valve so the bags can't get over 30psi and a gauge to check where it is at. This is driven off yet another DC convertor in the back by the batteries, which I will probably use with a series of relays to drop the trailer connection wiring back down to 12v so I don't blow up trailer wiring in the future. This has a conventional air fitting so I can also use it to pump up the tyres etc The body has to come off at least one more time so I can finish off the intake piping and sort a couple of other issues, but it is getting excitingly close to a first run...1 point
-
Making plenty more progress, but this bit feels like a bit of a grind for some reason. Probably cos I keep not quite finishing things because I need something, then getting halfway through something else before stopping cos I need something, then bits turning up so I carry on with the other.... and so on seemingly endlessly. Whatever you whining prick. This is what did get done, finished or not.. An exhaust. The tip is not 100%, I need to get the deck back on to finish this nice and tidy. Added an EGT sensor to the stumpy adaptor thingy so I know exactly when I am about to detonate the engine; Oil feed line to the turbly, probably needs a heat shield going past the manifold; Oil drain pipe from the turbly to the sump. This might get tidied a bit as it gets kindof close to the boost actuator rod; I also got given a boost actuator, some amateur sleuthing involving a tyre pump gauge and compressor tells me it is cracking the seal at about 15psi. I mounted this and discovered my bracket would hit the chassis, so I had to remake the bracket. It's all sorted but I forgot to take pics, maybe later you will be able to admire the simple elegance of this.1 point
-
https://cleantechnica.com/2019/07/16/lowering-the-tesla-model-3-increases-efficiency-an-astounding-7/ "Lowering The Tesla Model 3 Increases Efficiency An Astounding 7%"1 point
-
I'll send you a sticker when you tang and desprang.1 point
-
Fuck that sheep looks maaasssive.1 point
-
Righto bitches. @cletus pointed out the issue with my turbo positioning, ie the drain and the slope and the strong possibility of non draining etc. This caused me to spend considerable time looking for both electric and mechanical scavenger pumps, including a brief talk with Skidfactory's Al about what pumps he uses (which I only mention to give myself the opportunity to let you know that Big Al himself thinks the truck is 'mint'. I know, I am a cunt, but shit its Big Al). Whatever, this all caused me to decide to move the turbo so it can drain properly, it now sits thus; This meant a very stubby adaptor manifold that I forgot to take pics of but you can glimpse in the first pic. You can also see the beginnings of a dump pipe, things looked like they were getting pretty tight for an OEM one so I cracked on with a custom jobbie. Probably not the approved use of a band saw. A long time with the die grinder got me this. I also built an airbox with a prado panel filter; I was going to make a snorkel, but thought it would be a bit wanky. Maybe later. I then made some shit to brace up the rear spring perches as the internet tells me these are weak. I was going to weld some bracing in but I wasnt sure of the airbag situation so thought I had better wait. I have some things going to the powdercoaters tomorrow, I will chuck this in with that so it ends up all pretty like. Lots of other little stuff got done as well, screwing down the decking, running the diff and tranny vents, finishing up some wiring, sorting the heater and vacuum hoses, finding a thermo switch to run the fan etc etc... The list is getting shorter though.1 point
-
And i have just the thing for you then....
1 point
-
Did some churbro related stuff. Turns out the OEM dump pipe heads off into the chassis area which probably wont work, so I need to make a dump pipe. Probably not a bad thing as then I can get the outlet pointing in a good direction and have a pretty straight exhaust. The internet say anything less than 3" all the way is for losers and I despite what my wife says I aint no fukken loser. Two 50mm pipes into each inlet, should be enough to feed the beast. Nuggety wee intercooler, possibly could have gone wider but it would have made the plumbing a bit harder. A freakishly long inlet pipe. Probably need something to scrub the insides out from welding slag, I dont imagine sucking it all into the engine would provide superior results. But it arrives at a convenient place... That outlet from the turbs is a 45mm pipe, the intercooler and everything else is 63mm/2.5". I can flare it out to 63mm if needed as I have a thing suitable but maybe there is a suitable 45 deg joiner/reducer? Fuck knows will have to have a google. Edit; I have never done this before, tell me if you see any dumbfuck.1 point
-
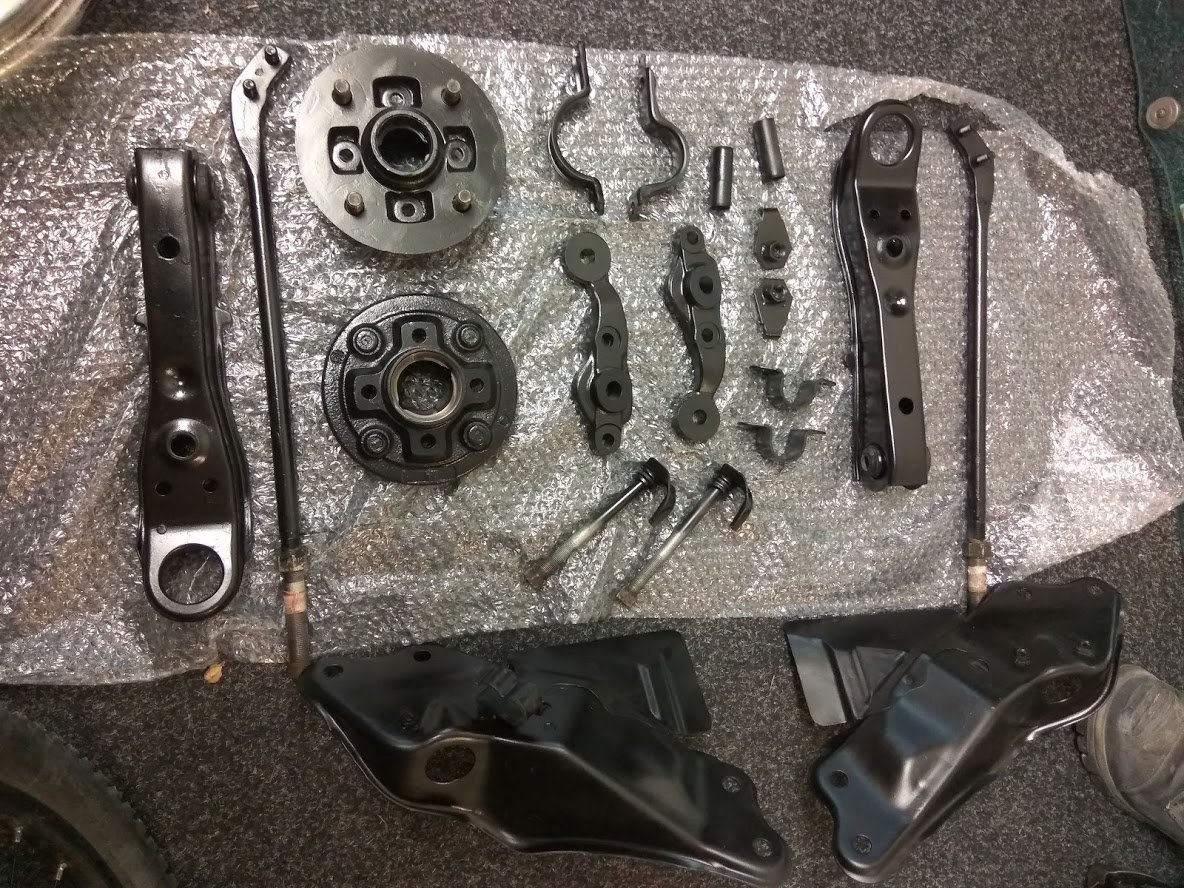
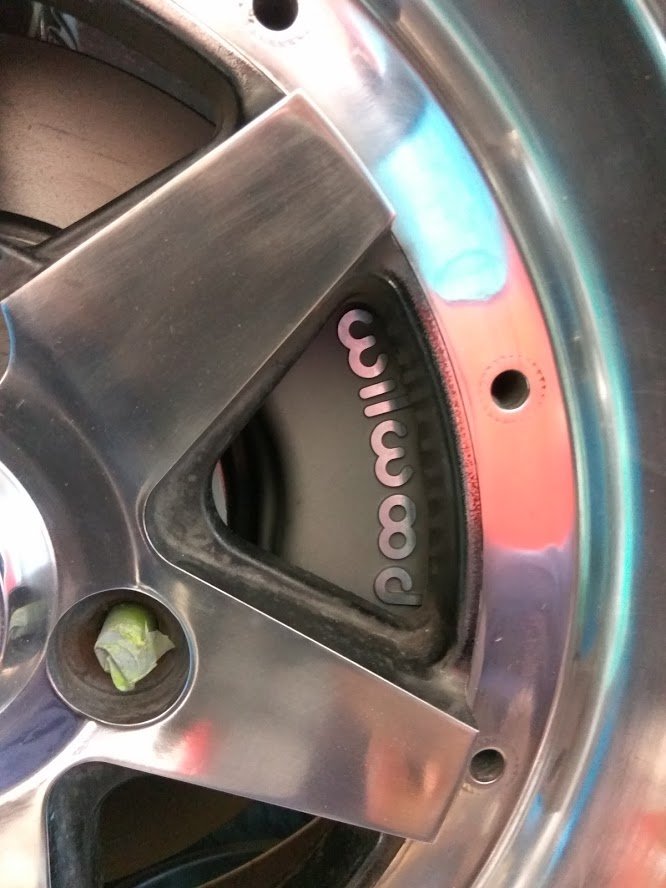
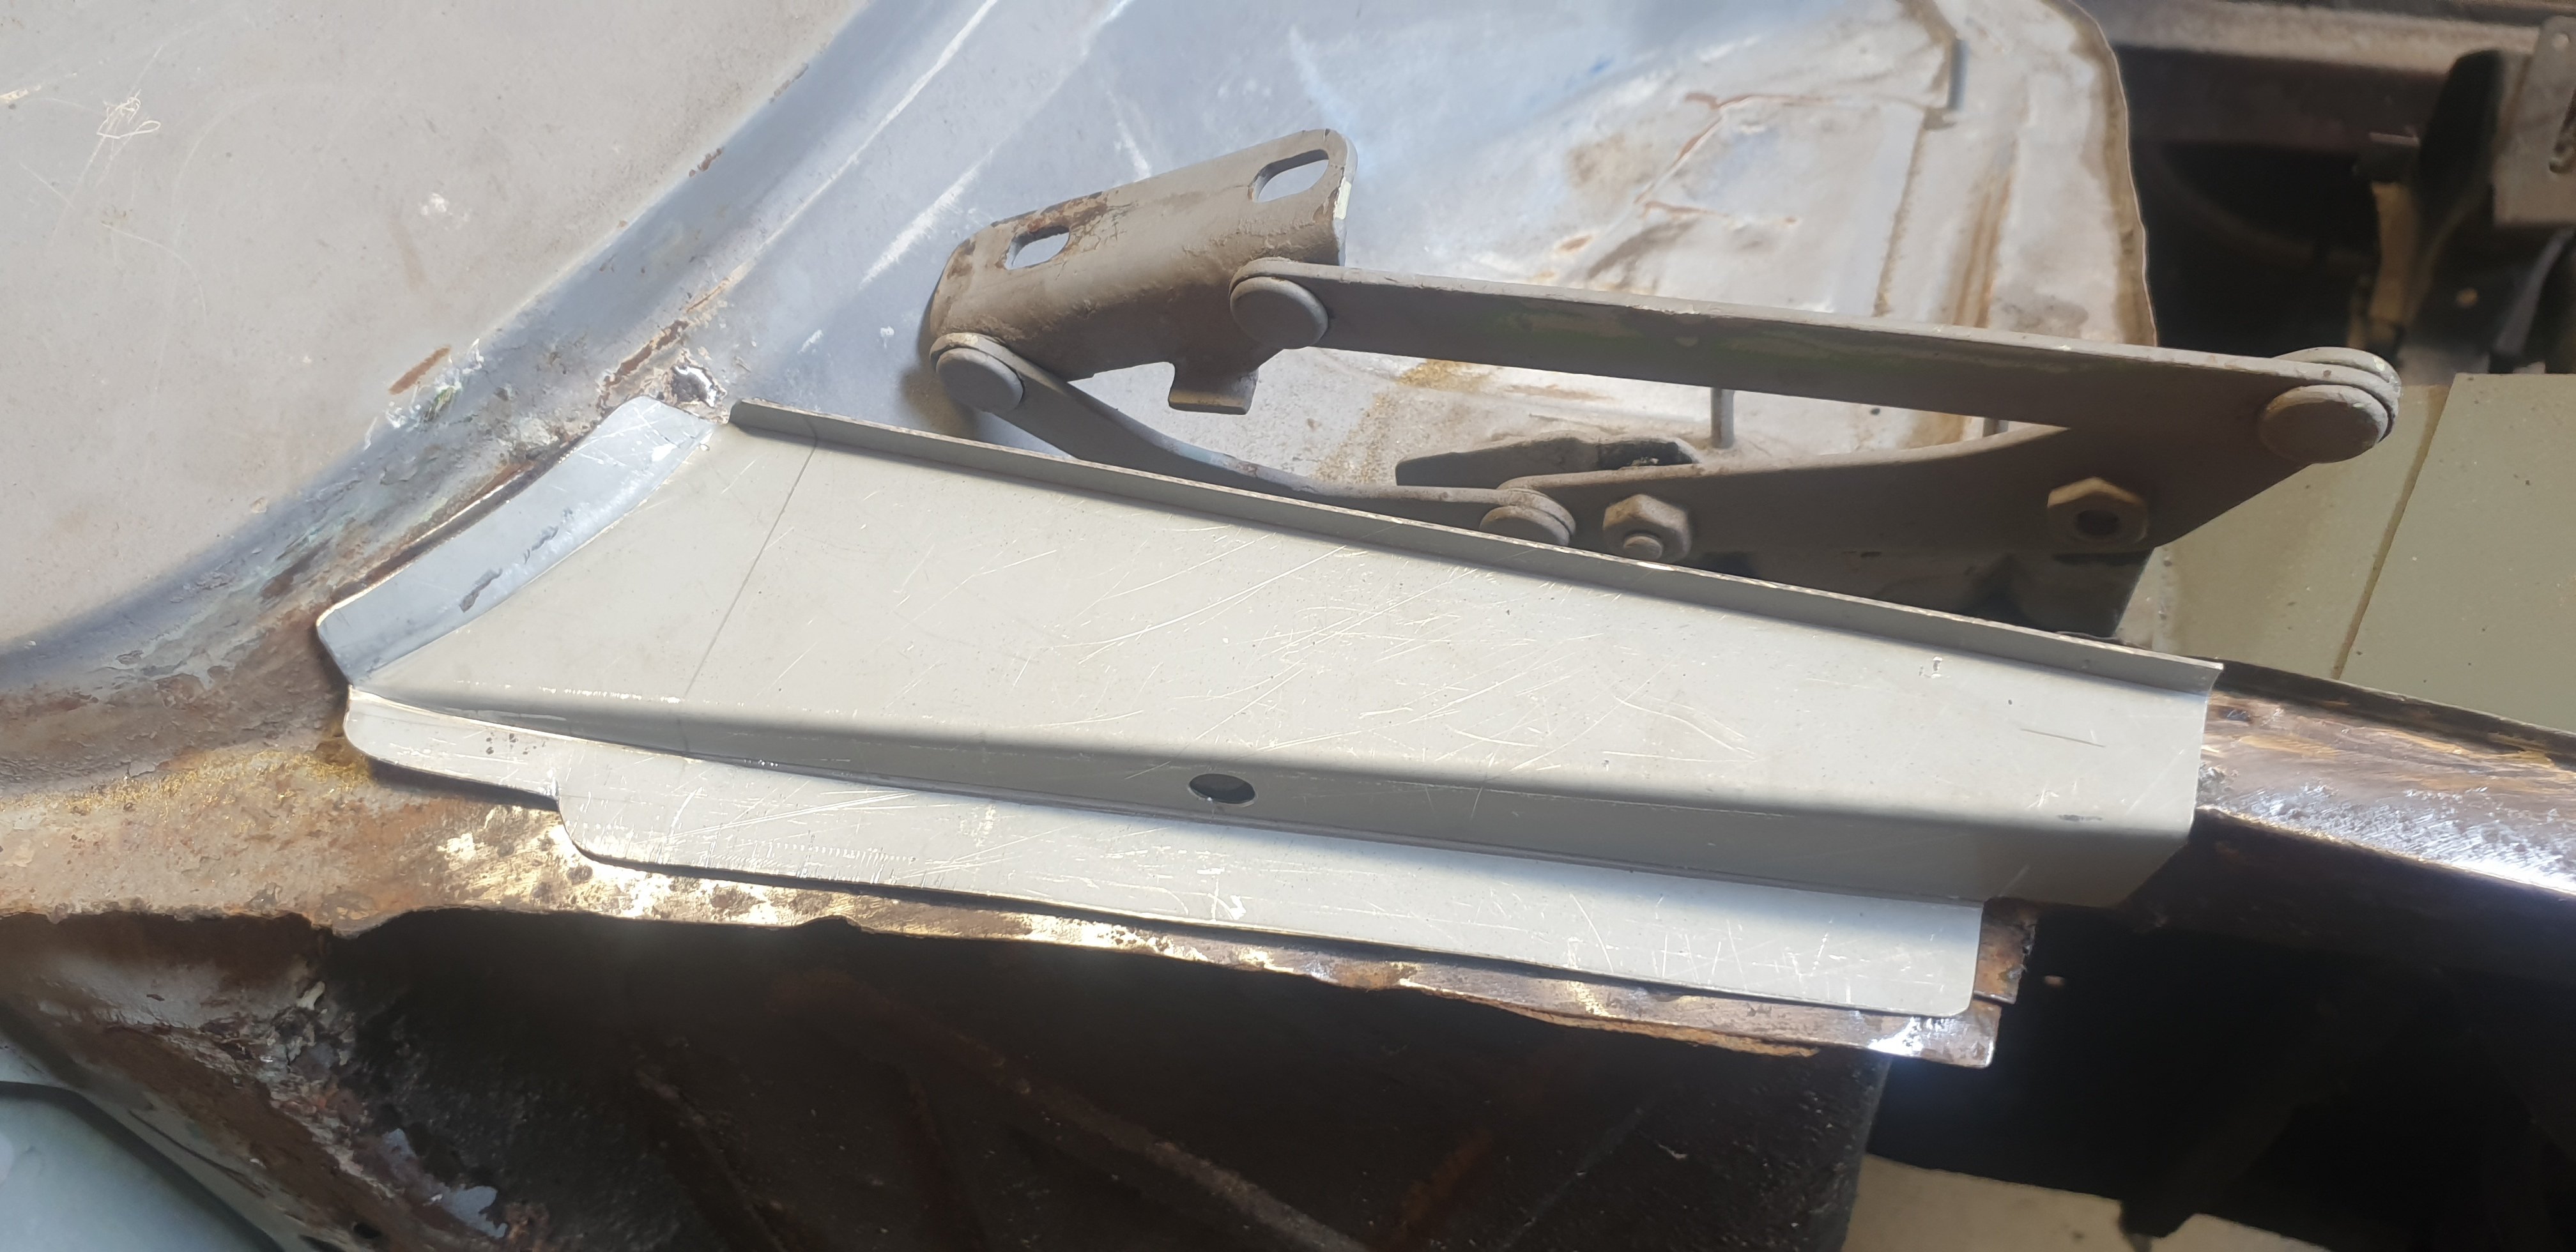
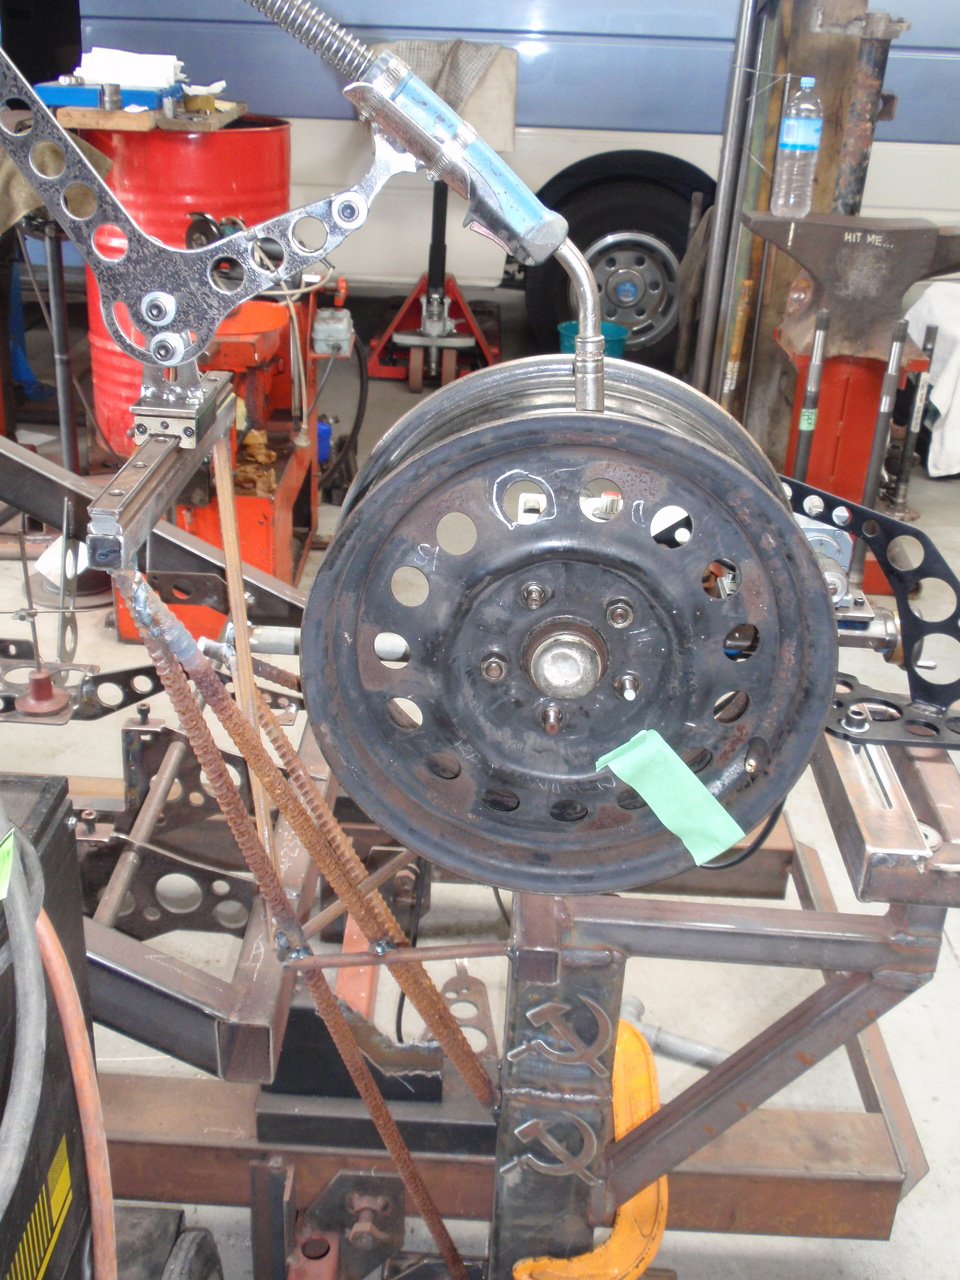
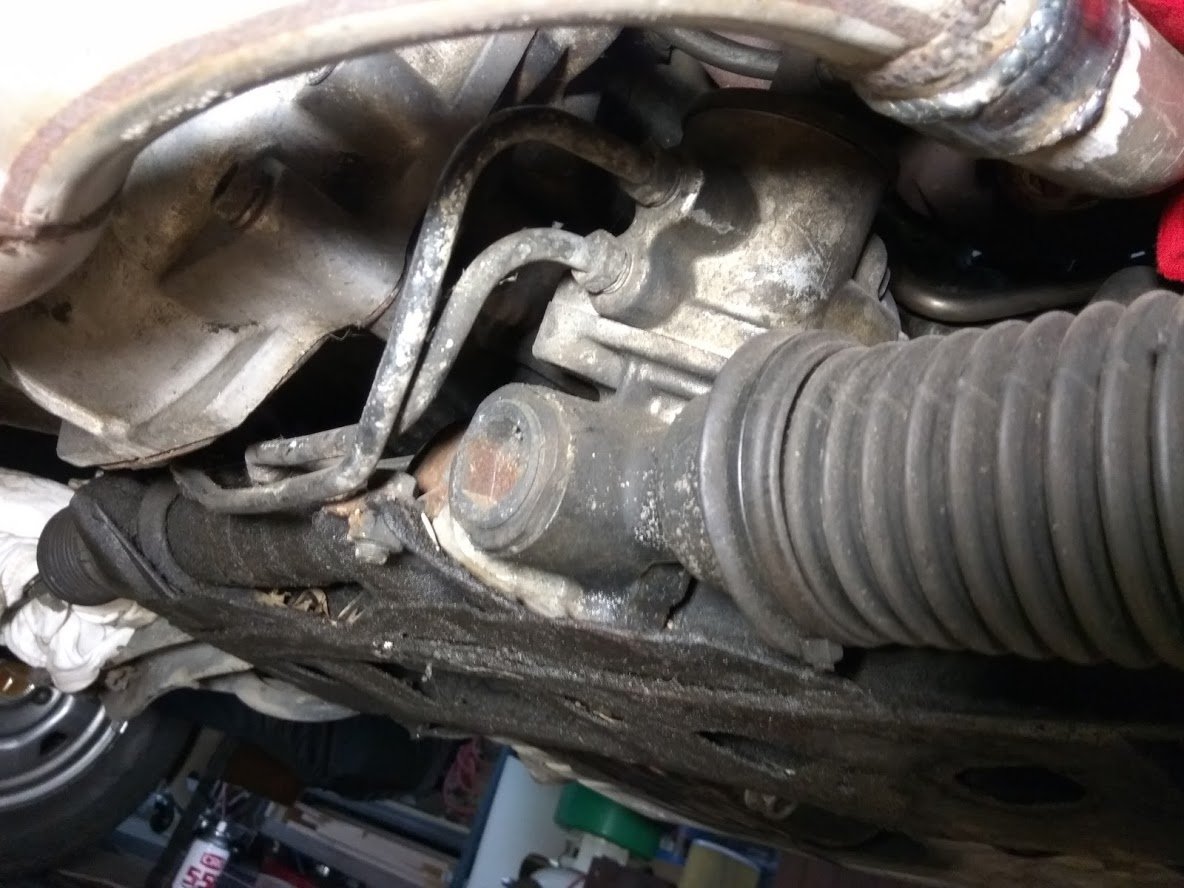
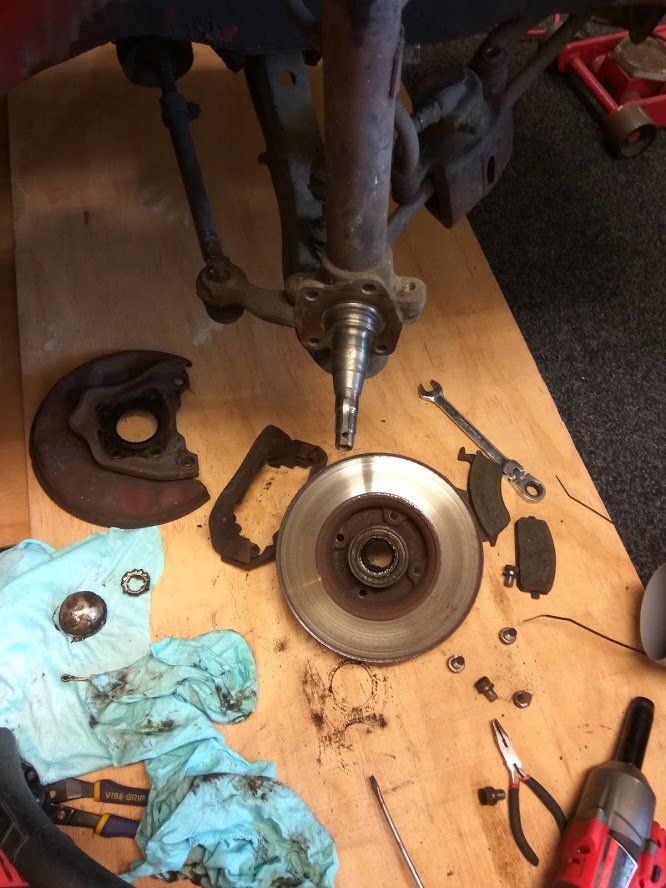
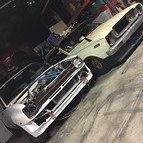
Didn't do much over winter as I can't finish rust work till it's warm enough to park it outside all day to dry. So just a quick update, will try get the next one out a bit quicker. Have been pulling the front end apart to send parts away to be worked on. So figured i'd replace all consumables while I was in there. Out came the steering rack, which had about 5mm of grime on it, along with crossmember. Whipped both those out and left the engine in the bay supported on blocks. Excuse the blur. Rack and cross-member are now clean as a whistle. Replaced the tie rod ends and boots on the rack. Pulled the suspension out, chopped it and sent it off to Barry @ MRP to work his magic. Brakes also came off for a "service". Wasn't till I took the wheels off I realised this car came with the big brake option, 200mm of stopping power. Winding down the windows would likely slow the car faster. The old: New 276mm vs old 200mm, with Wilwood calipers to match (too lazy to find that photo): Bits from RockAuto, three orders so far, filling my cart as I work through the car. Anything consumable is being replaced to save it failing later on. To a point anyway, not made of money. So that's it for now, aiming to have it on the road by the end of summer, pending rust work progress. All of the above bits will hopefully provide some motivation to keep working on it in the meantime. Choice.
1 point
-
Good to see you got there, only a year or so late Nice work though.1 point
-
i havent posted any car ramblings in a rather long time.been here, there and everywhere. but since being home my daily morphed into something rather obscure. its been a long journey to this point with alot yet to come, many good times with much heart ache. one of the earliest photos moving things around when i got home this is the last trip it made with r160 rear end, but did have fc rx7 front end by this point many many axles and 3 gearboxes later i had to do what i do best and go way overboard so changed to a 6 speed box when all this went in and now it should last alot longer. felt reall good on track now it awaits me getting enough spare space for a long enough period of time to get design approval for cert and then have Clint come back and give me a big list to rectify. its been fun but there is a little car that some may remember that needs love again1 point
-
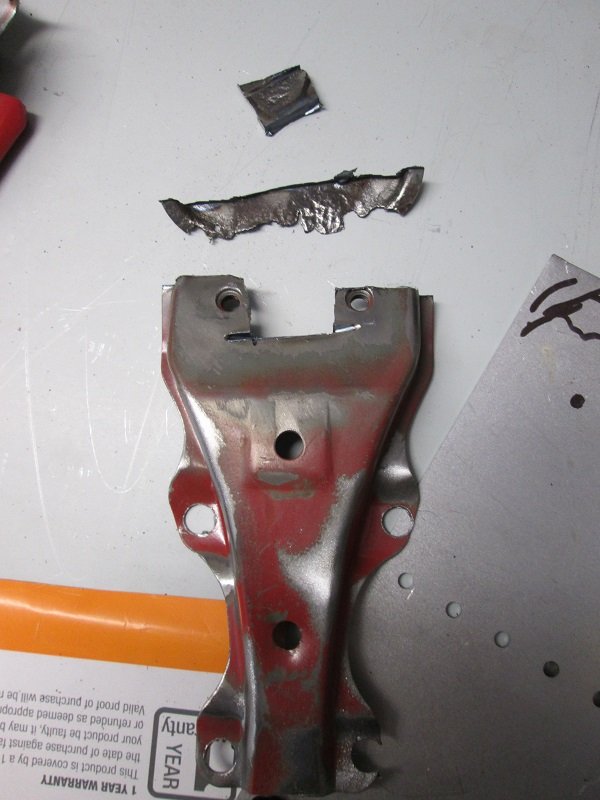
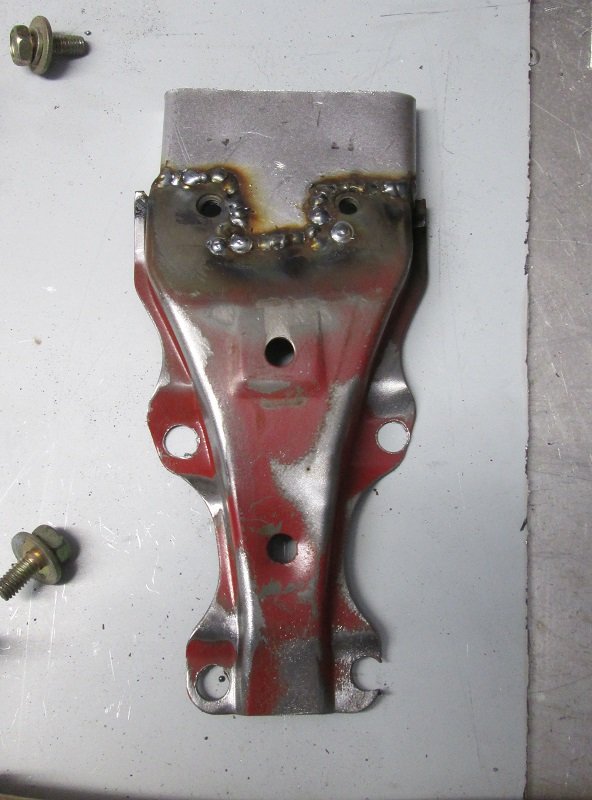
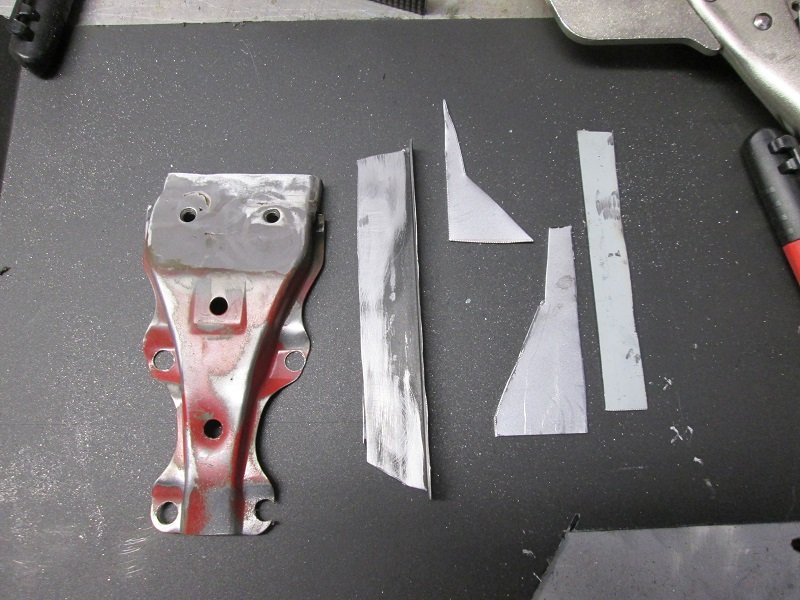
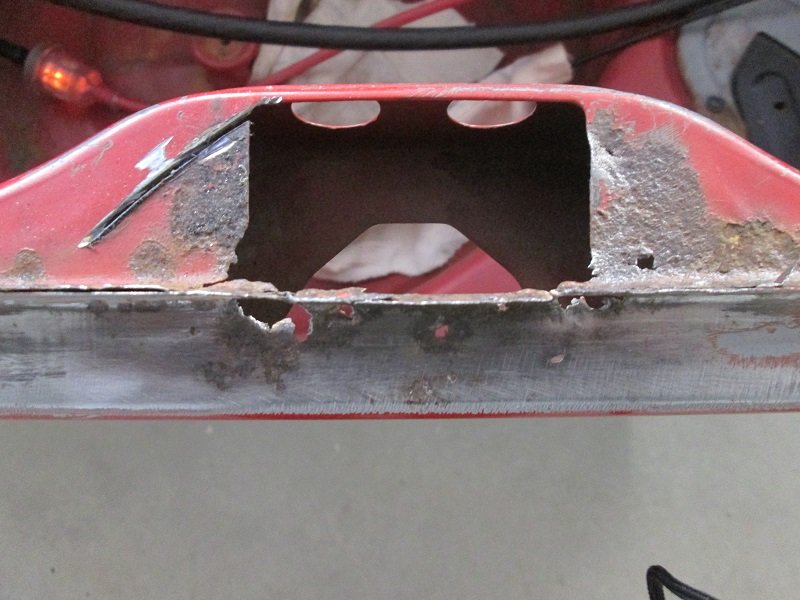
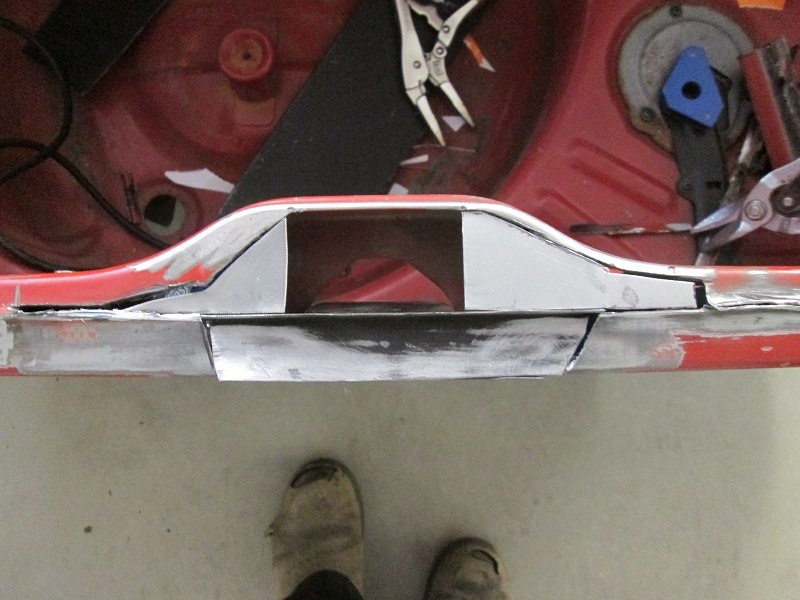
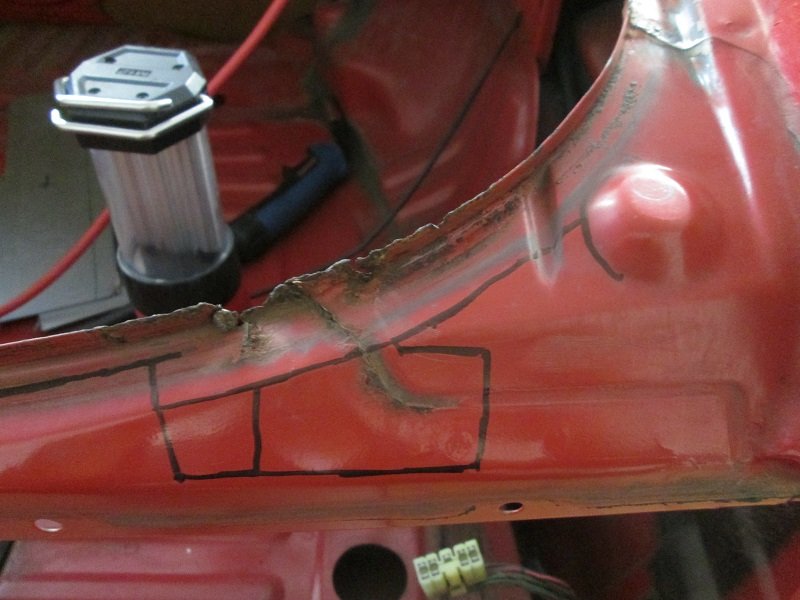
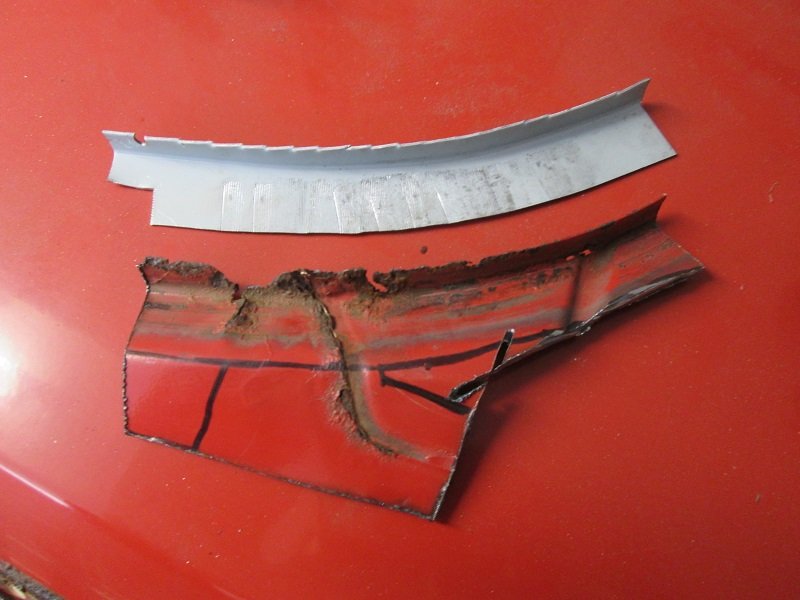
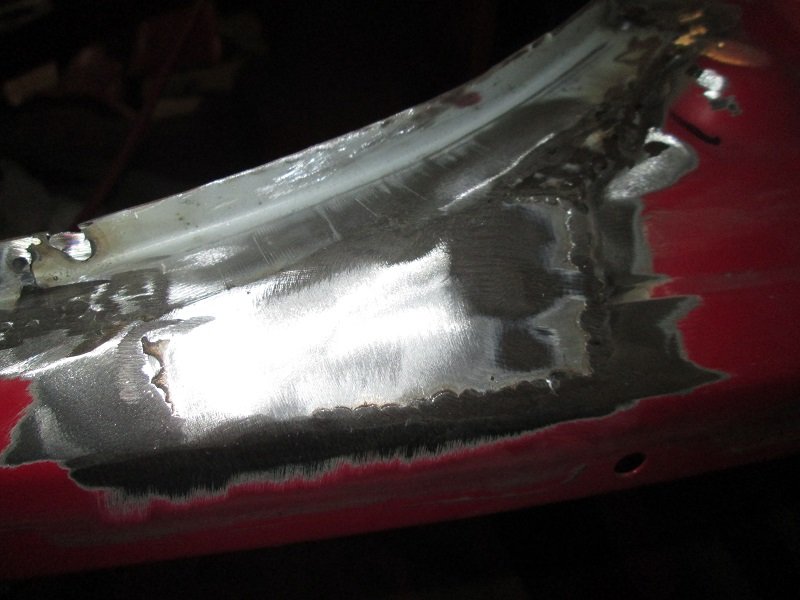
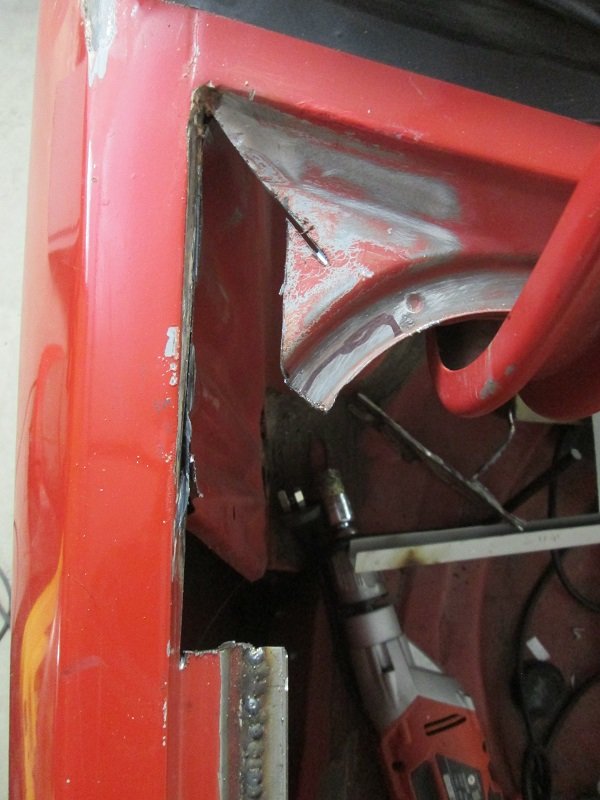
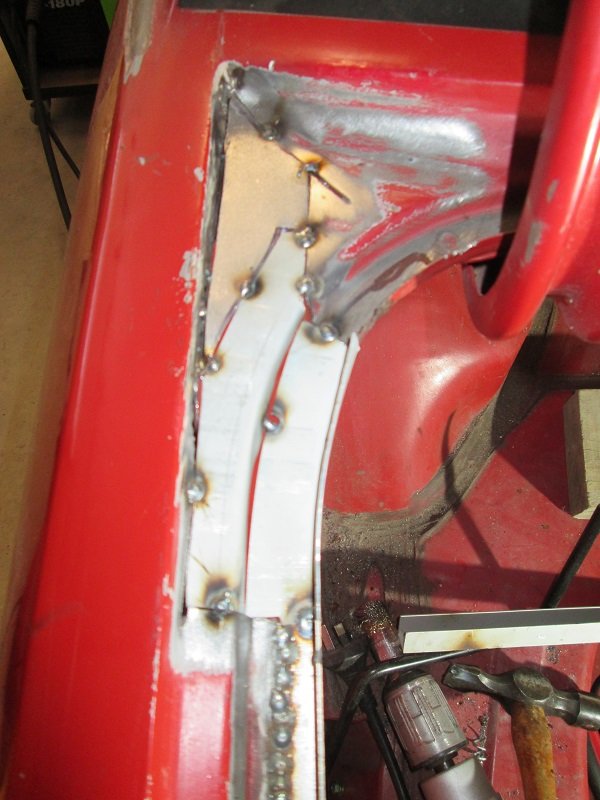
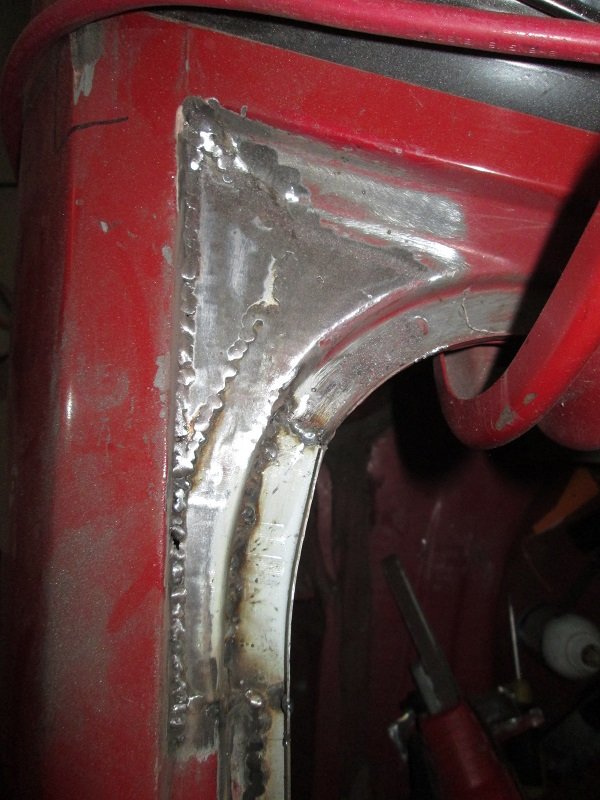
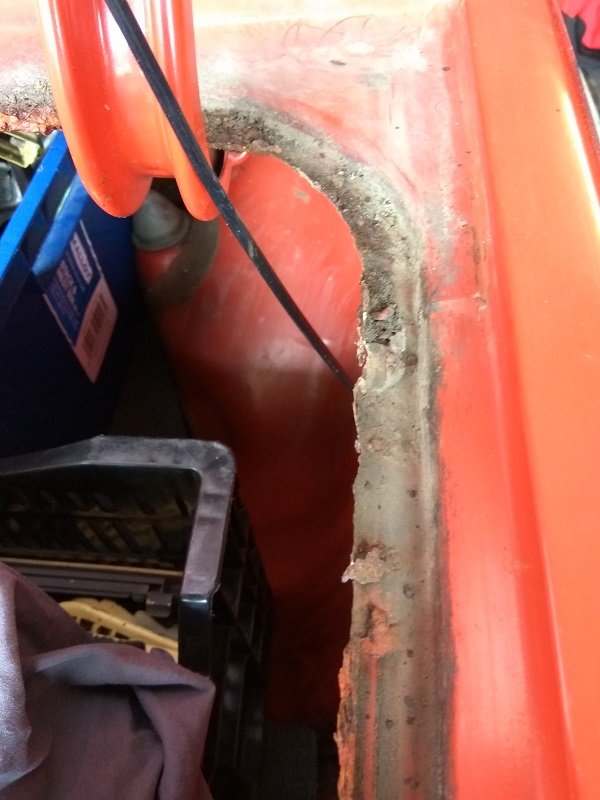
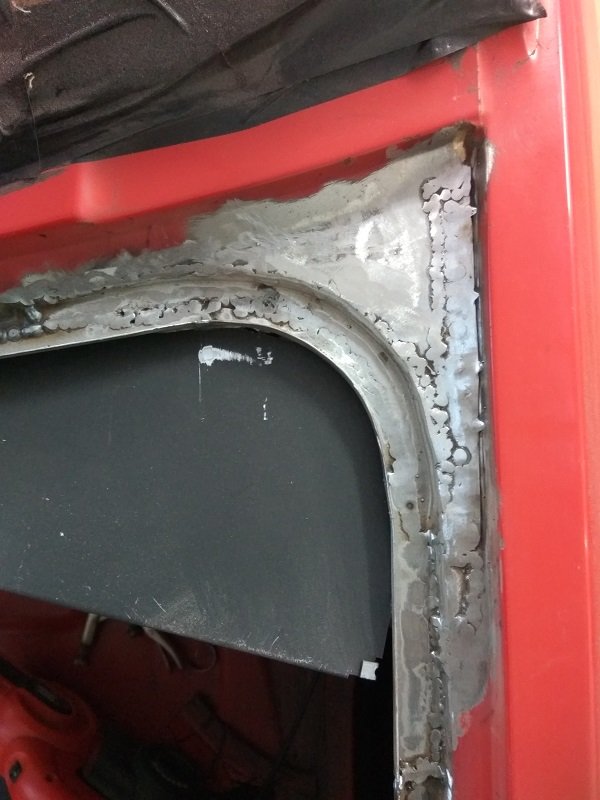
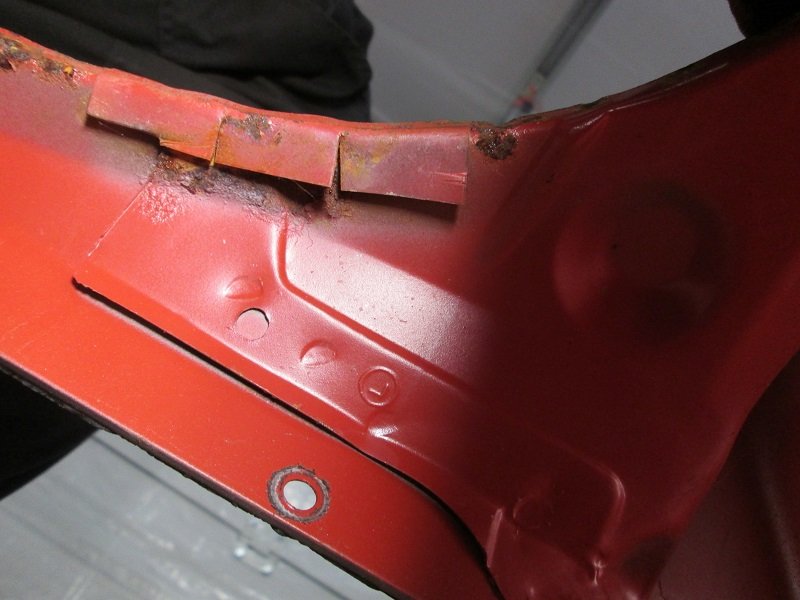
Well Xmas break was a bust, ended up finding more and more rust to fix. Not that I care, I knew it was an 80's Toyota from day one. Just means the goal posts are shifted as to when it will be legal. Hoping to have it sorted for Nats. Have been slowly chipping away at it, slowly filling a container will rusty bits of car. My shrinker / stretcher has been pretty useful, makes creating curved sections much easier. Anyway, some pics of some of the repairs. No point posting the photos of all repairs, as ain't no one got time for that. Still have a many repairs to do, just need to pull finger as paint drying outside is going to be a pain come winter. This update is basically just showing my rust repairs, which is all i've done on the car since last update. Making a new rain gutter section for bottom of A-pillar. Decent surface rust that got 2-3 layers deep in some areas. Replaced with single piece. Boot latch, seal traps water above the latch. Rusted out of my other car too, so out it came. Finished section, with boot frame pieces also cut. Doesn't look pretty, but it's all welded up now, and solid as fuck, so whatever works. Drivers side boot above tail light area, other side had similar repairs. Not much was left original, I just had to replace it a section at a time, to keep the original shape as best I could. Passenger side boot hinge area Drivers side boot hinge area, or at least what was left after removing the "structural" rubber seal. This took a bit of planning, as I had to make a section that didn't exist. Just imagine someone getting frustrated and spending hours on the stretcher/shrinker having not much luck. A lot of this area is 2-3 layers thick and attaches to supports underneath. I'll have to tidy the underside up later. Not many progress pics of this bit, no time for pics when frustrated. Transfer the curve on to paper, then put folded sections into stretcher/shrinker to curve to shape to form half the gutter. And just like that it was done, so simple.... Random repair found above tail light, viewed from boot floor.. Mayte, just tack some sheet on and fold it under, no one will ever see it. There is perhaps 5% of the original boot seal area left, it has all been cut out in sections and replaced. Was just going to replace the worst bits, but the further I got into it, the further I realised the whole lot was beyond a wire wheel and paint job. So that is some of the repairs, but certainly not all of them. Need to tidy up a lot of the welds ready for epoxy primer. So will be doing that over the next month, with the intention of having it all sealed up ready for filler and paint. In between repairs i'm doing my homework on what parts i'll need to get it back on the road. Bit of a boring update, but rust gonna rust.
1 point
-
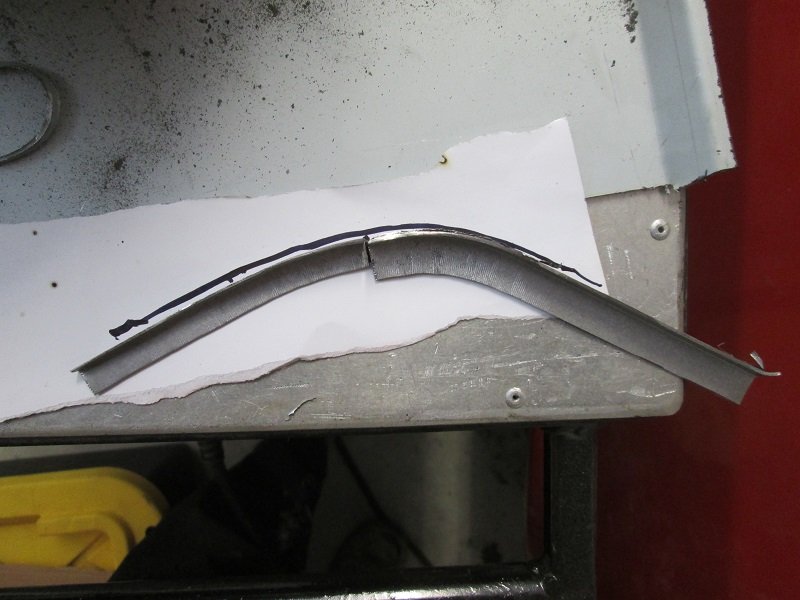
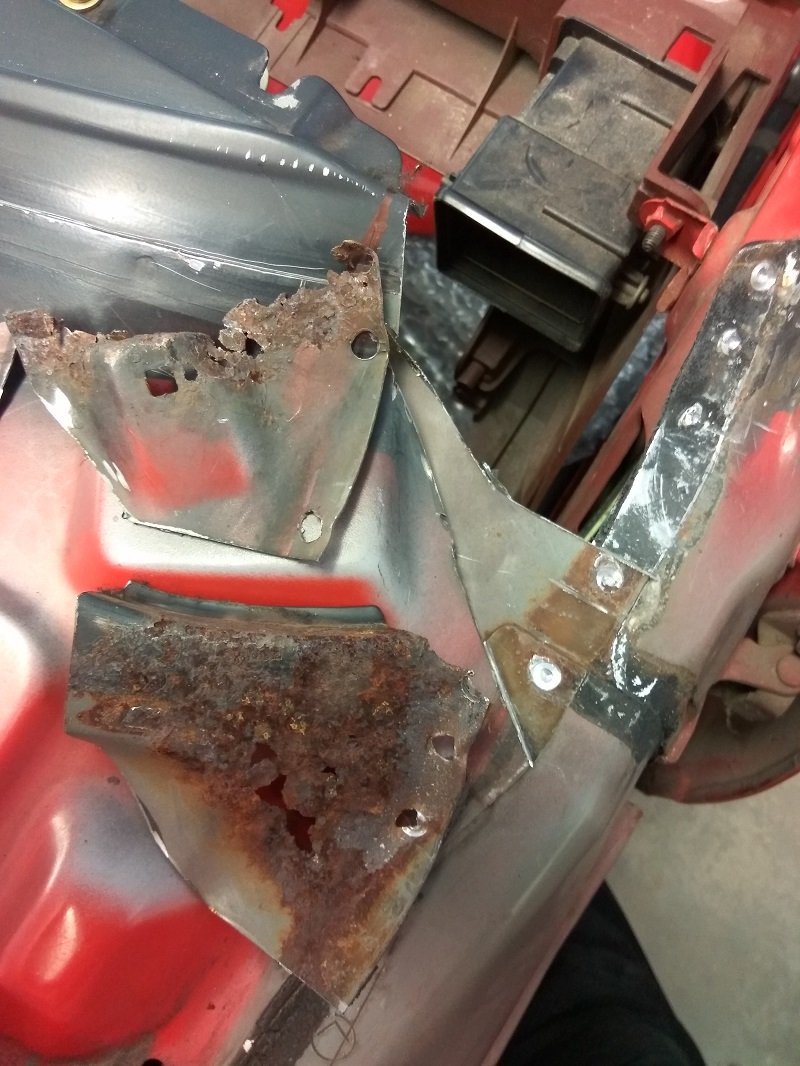
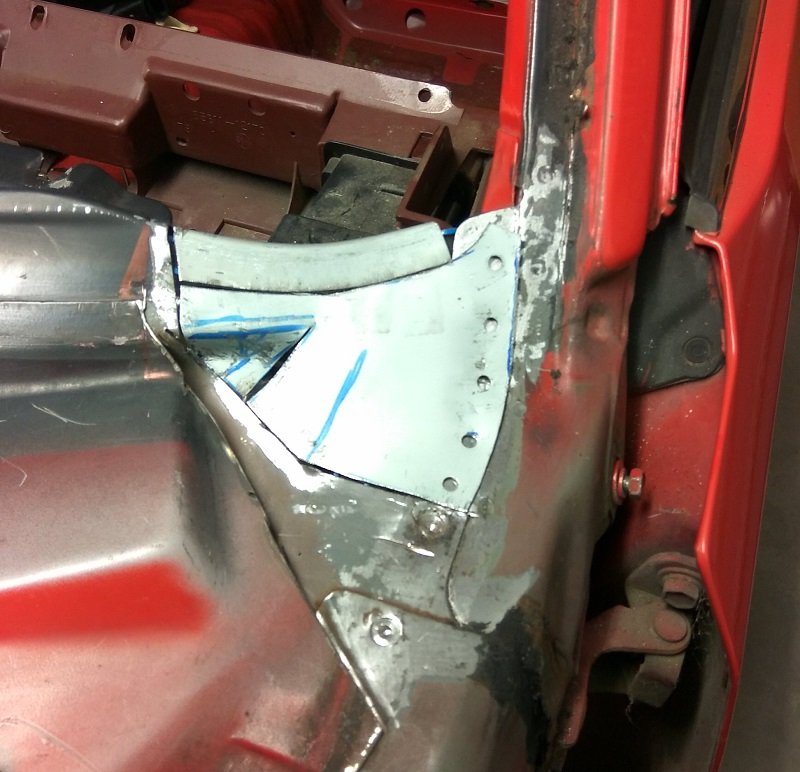
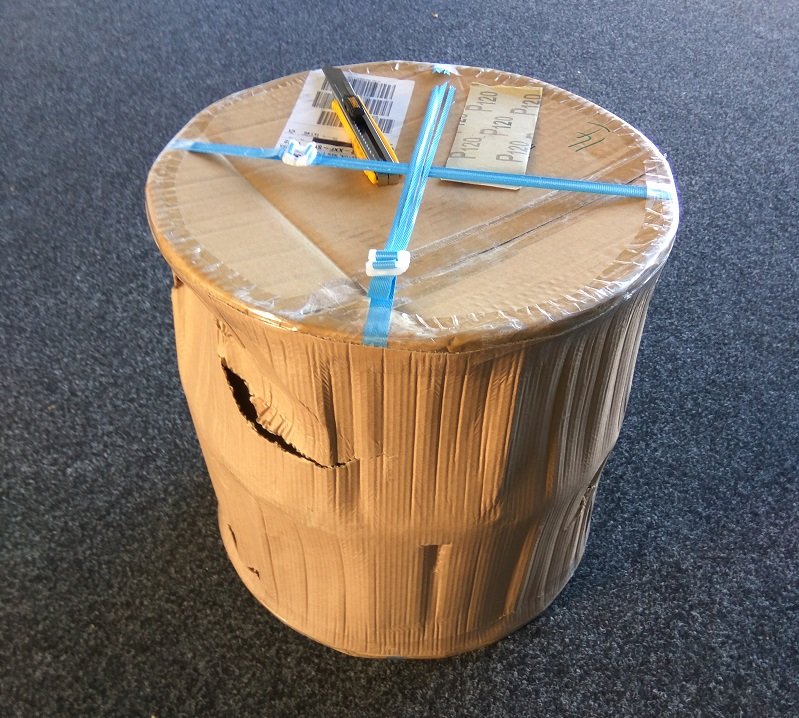
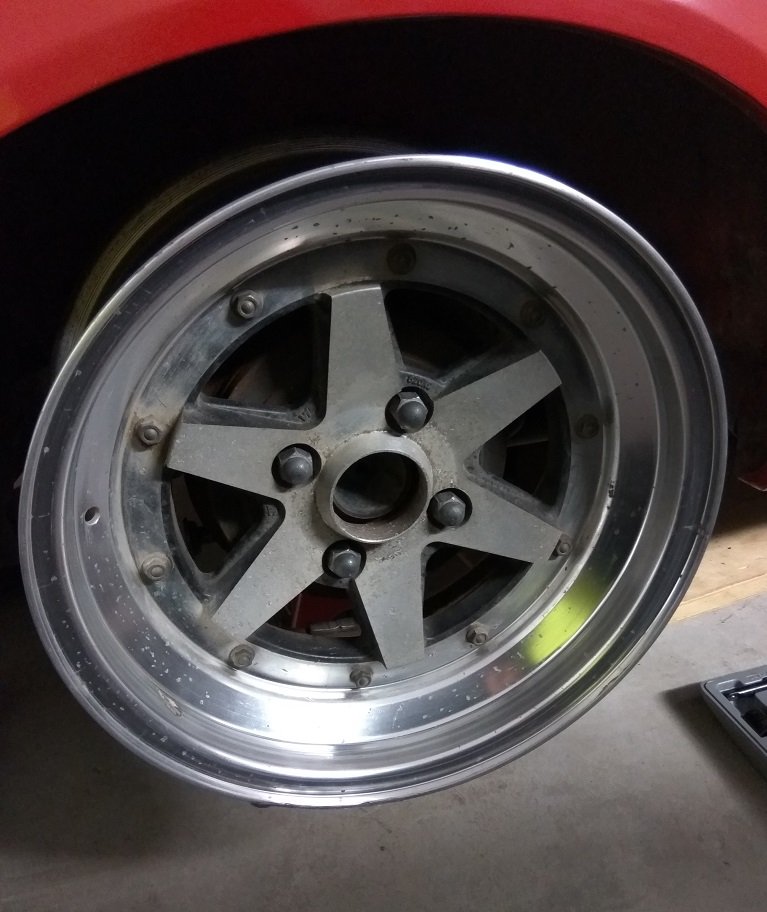
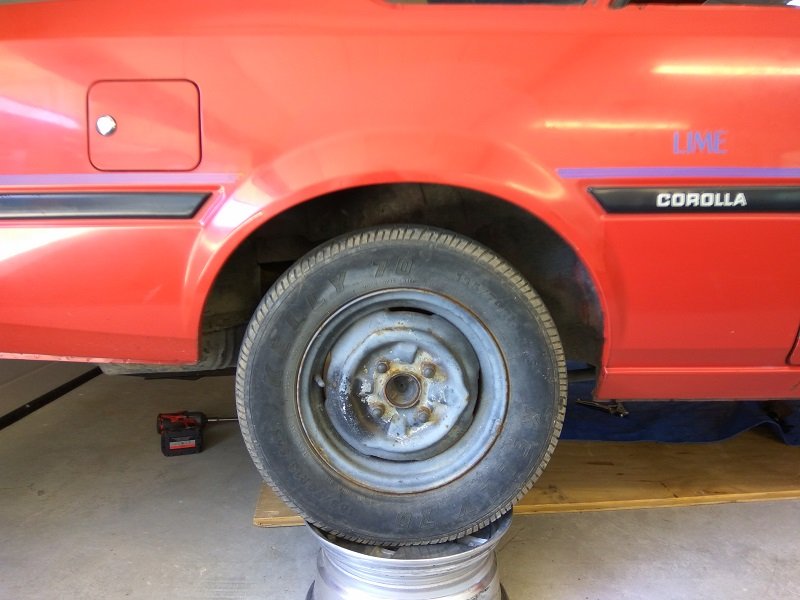
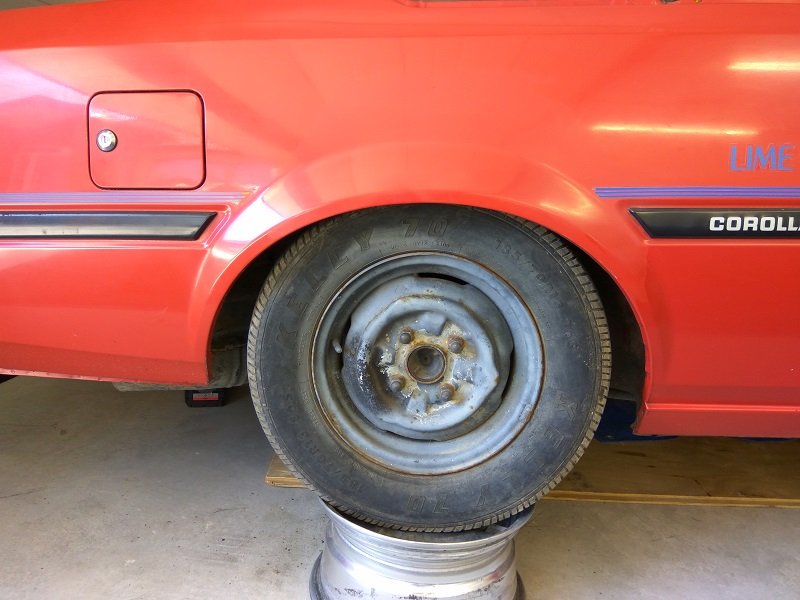
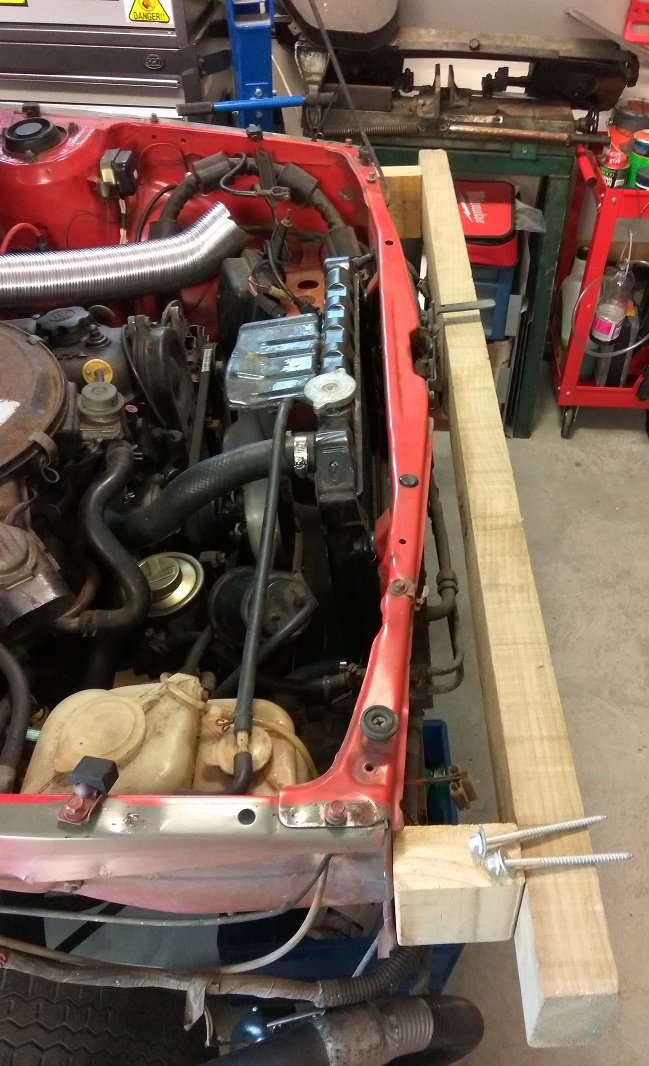
Haven't done bugger all on this recently. Had been trying to source some cert happy 14" wheels, but that didn't happen. Wheels held the build up a little bit as I needed them to start working out other things that will happen later. Anyway, some pics of the limited progress since last update. "Built" a frame to straighten out the headlight area of the front. Didn't take too long with a handful of long tek screws, to get it much closer to the right shape. Happy enough with the results, so that will get a primer / paint later on. Amazingly complicated alignment tool: Previous to that I had removed the rusty A pillar section shown earlier. Before, with the two layers removed. After, with one section made up, i'll make the top section when I have this one welded in and epoxy primered up. Then weld that over the top, epoxy, paint. Meanwhile, this turned up, with a friend another day. And unwrapped Wheel specs: SSR XR-4 Longchamps, 15x7-1(x2) and 15x7+11(x2). Lost count of the hours spent browsing Yahoo to find a set or even a pair that matched the offsets I measured I wanted. Well worth the time in the end, but it did drive me half insane, finally finding some, only to be outbid by twice my budget. Nothing super wide or dished, but they will sit well on the car I feel, and I can wrap them in damn good tyres. Similar dish on the rear to my 14x7.5-1, but with 10 times the number of tyres available, an easy choice in the end. I also removed some unnecessary weight from the rear of the car, to help sort the ride height. Shocks and springs, overrated. Before: After: I will be home alone for the whole Xmas break, so will be aiming to get the car completely back together (for now) with all of the rust cut out and replaced with new steel. Epoxied up and some red spray cans to tidy up the repairs. Then I can start the next stage which will get quite expensive, rather quickly. Until then, let me know what i've done wrong here.
1 point


This leaderboard is set to Auckland/GMT+12:00