
Leaderboard


Popular Content
Showing content with the highest reputation on 31/07/19 in all areas
-
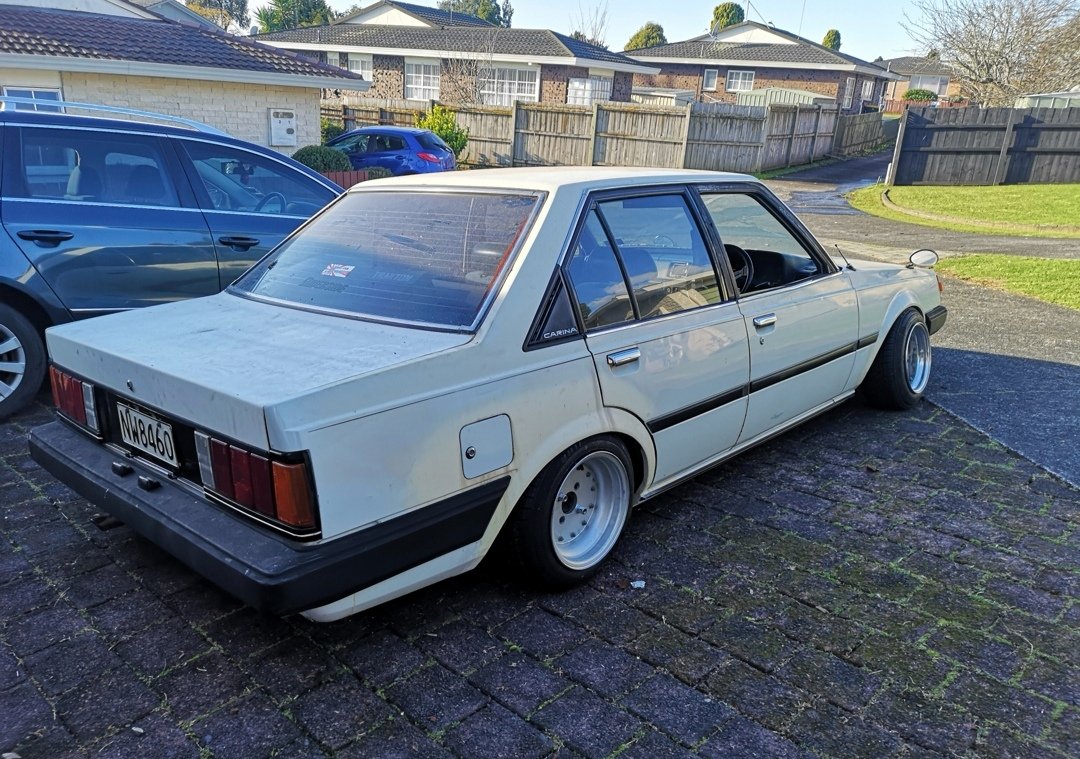
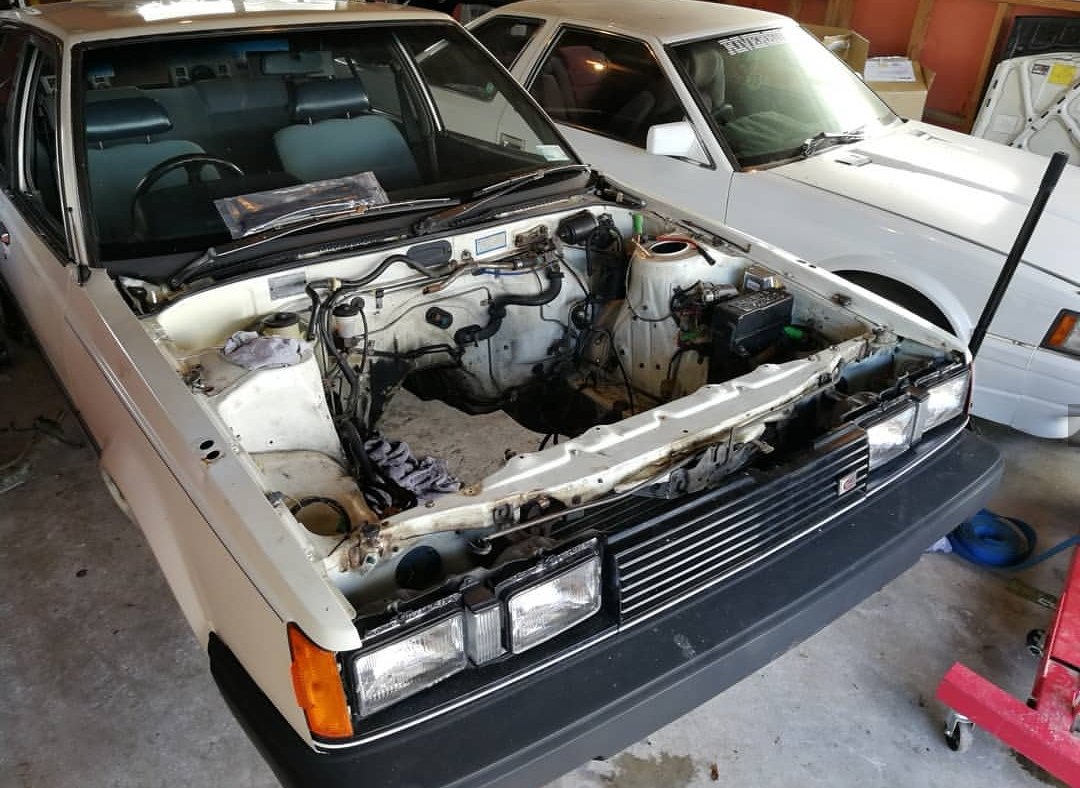
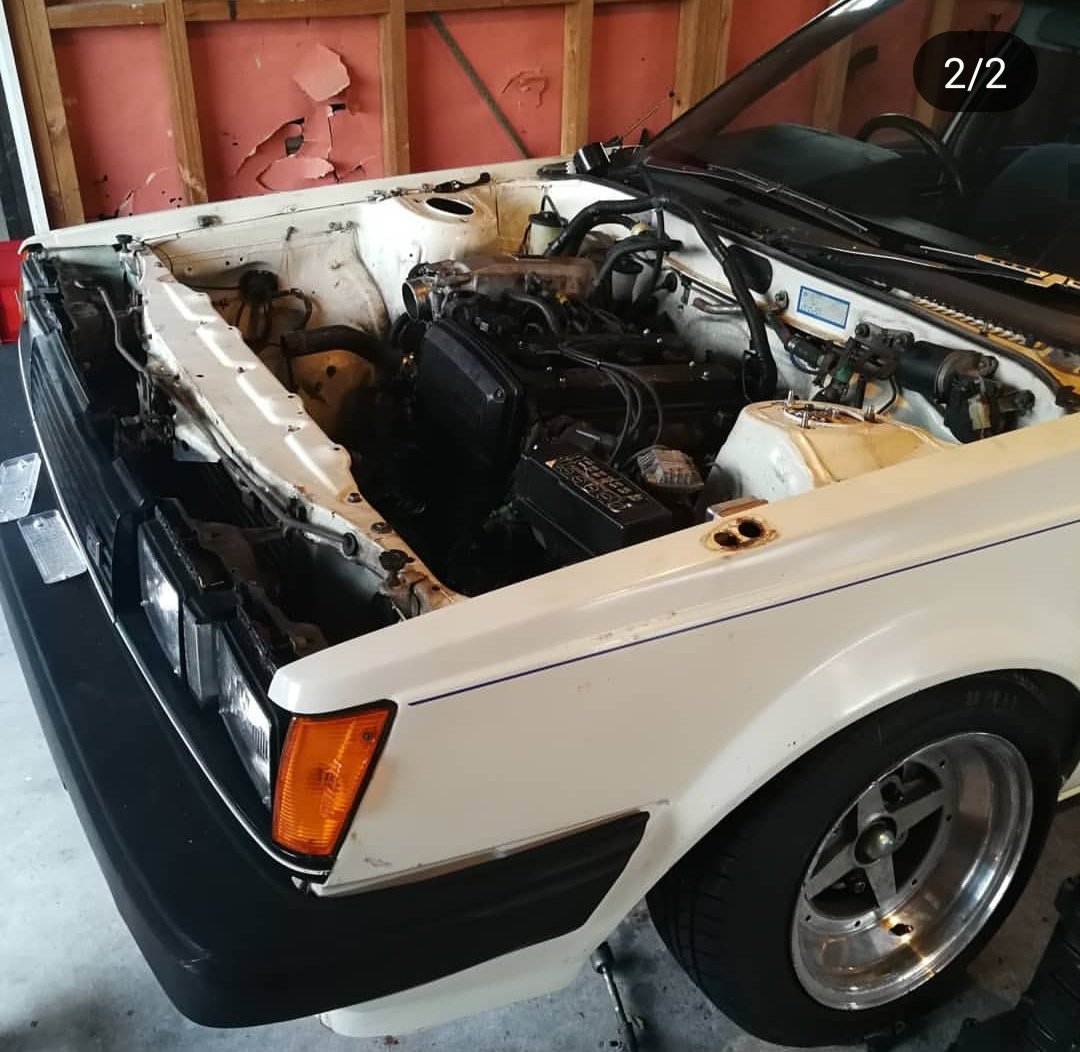
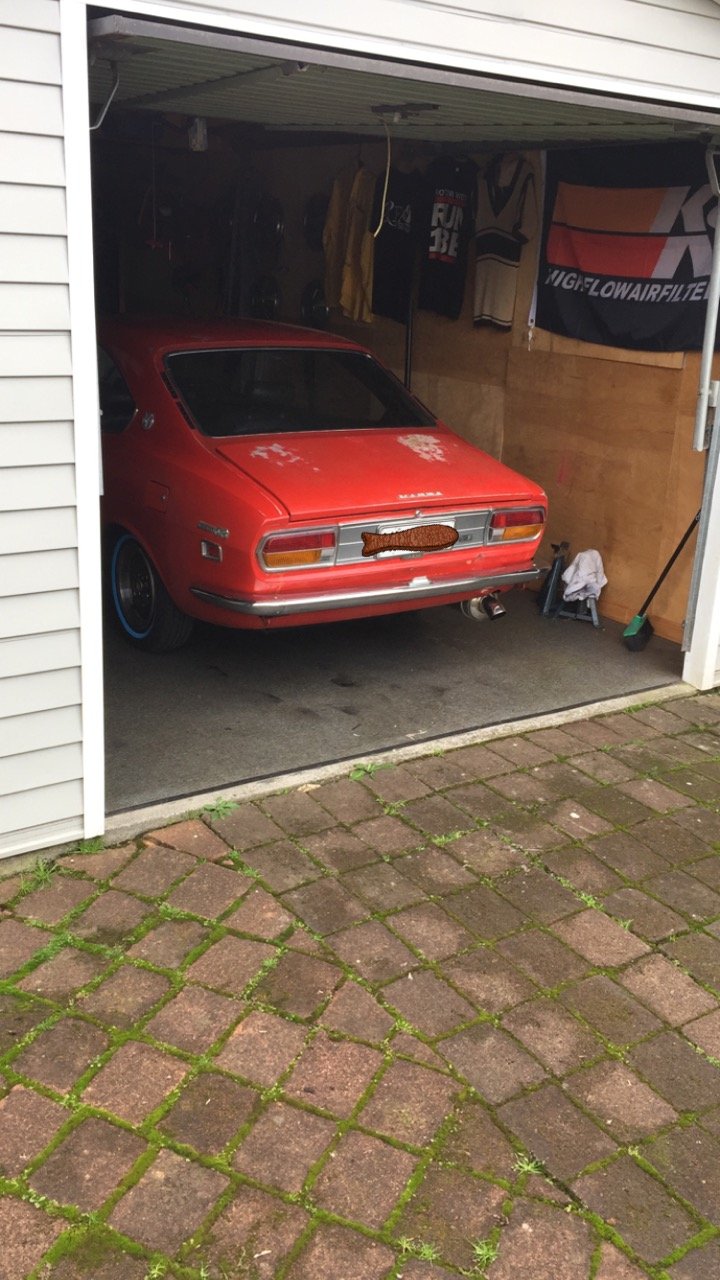
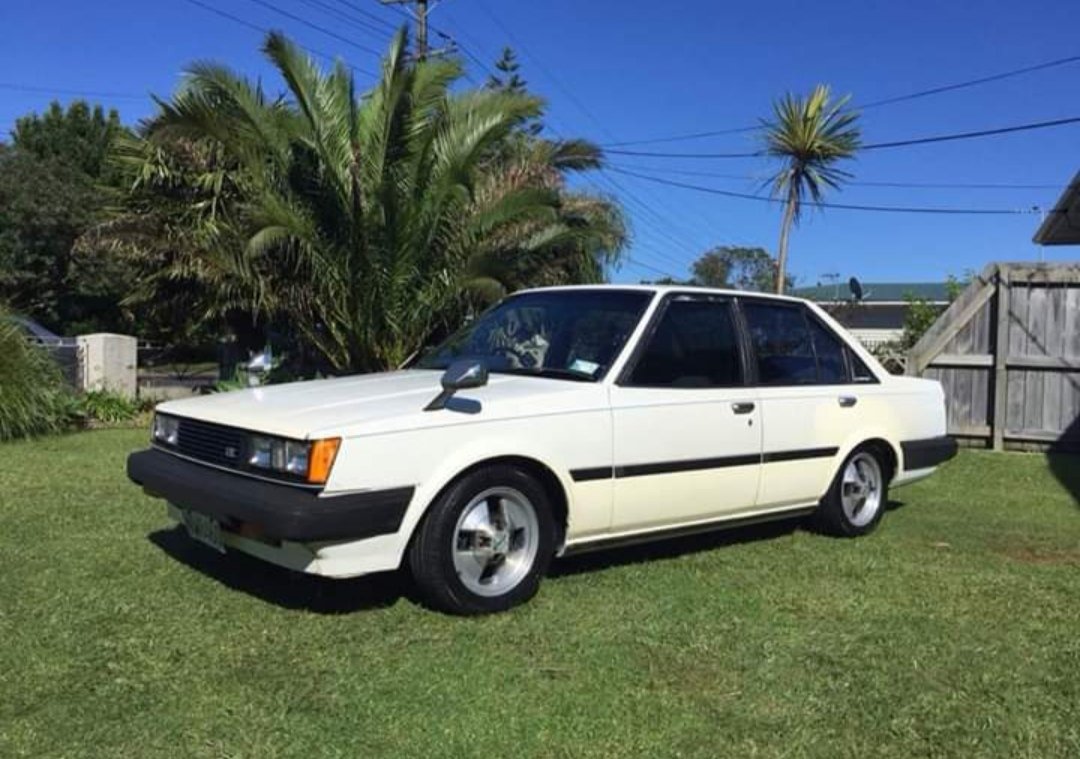
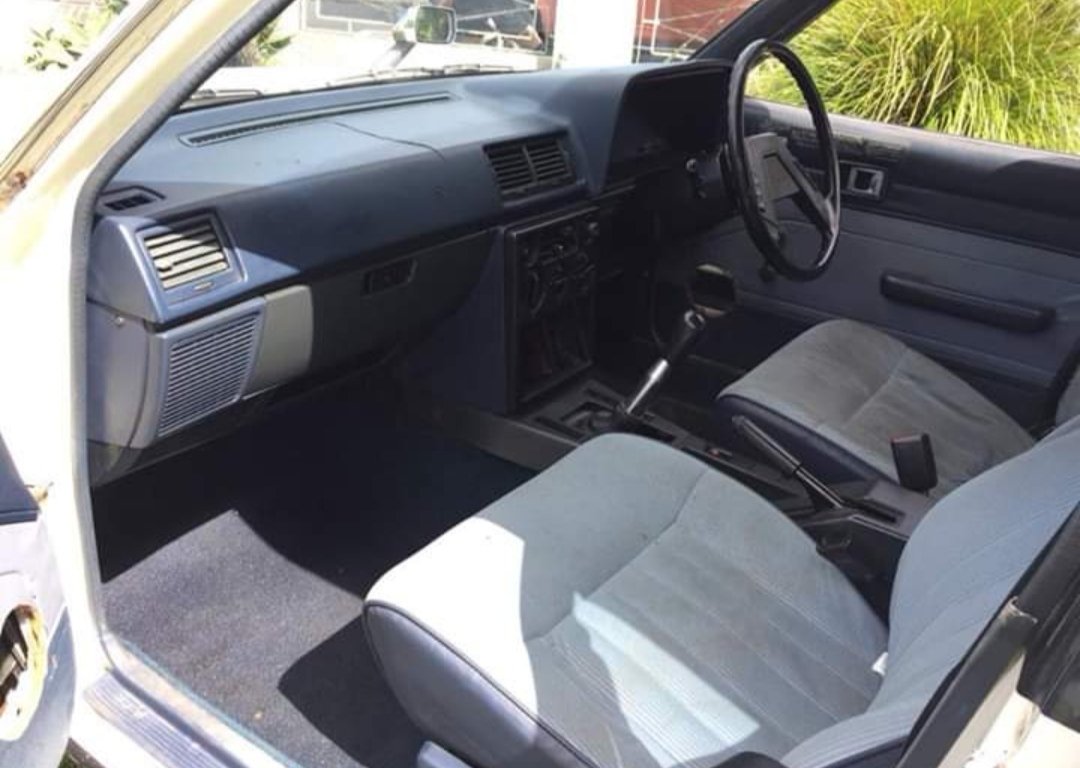
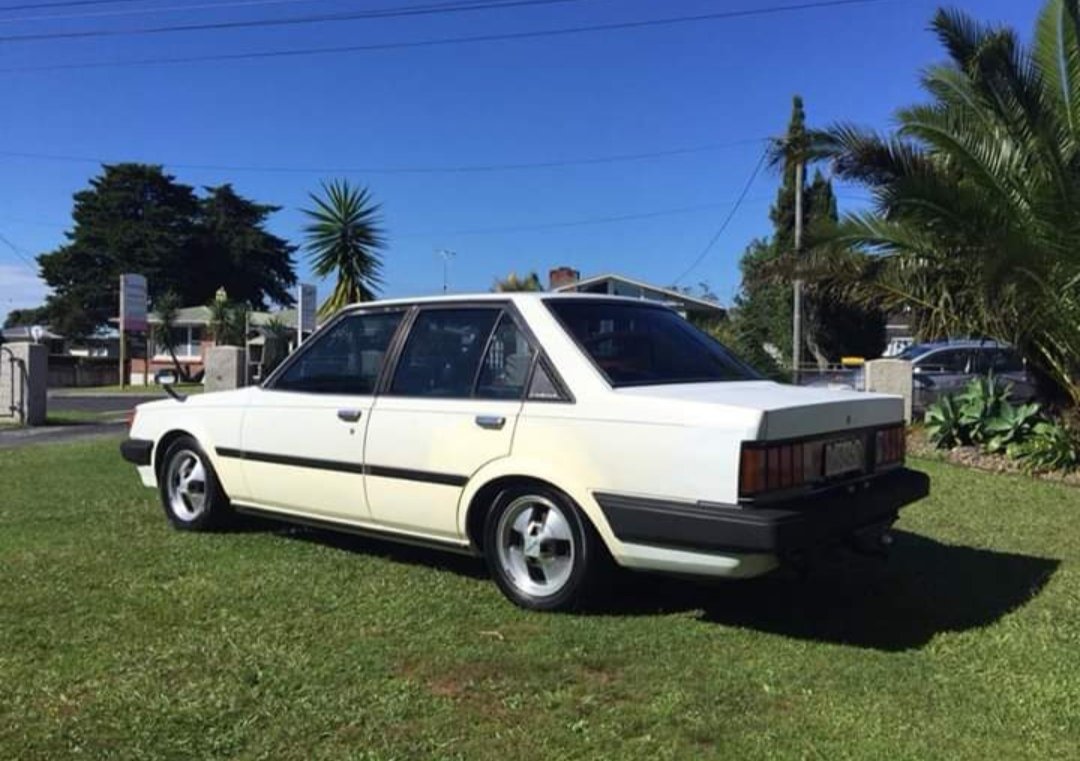
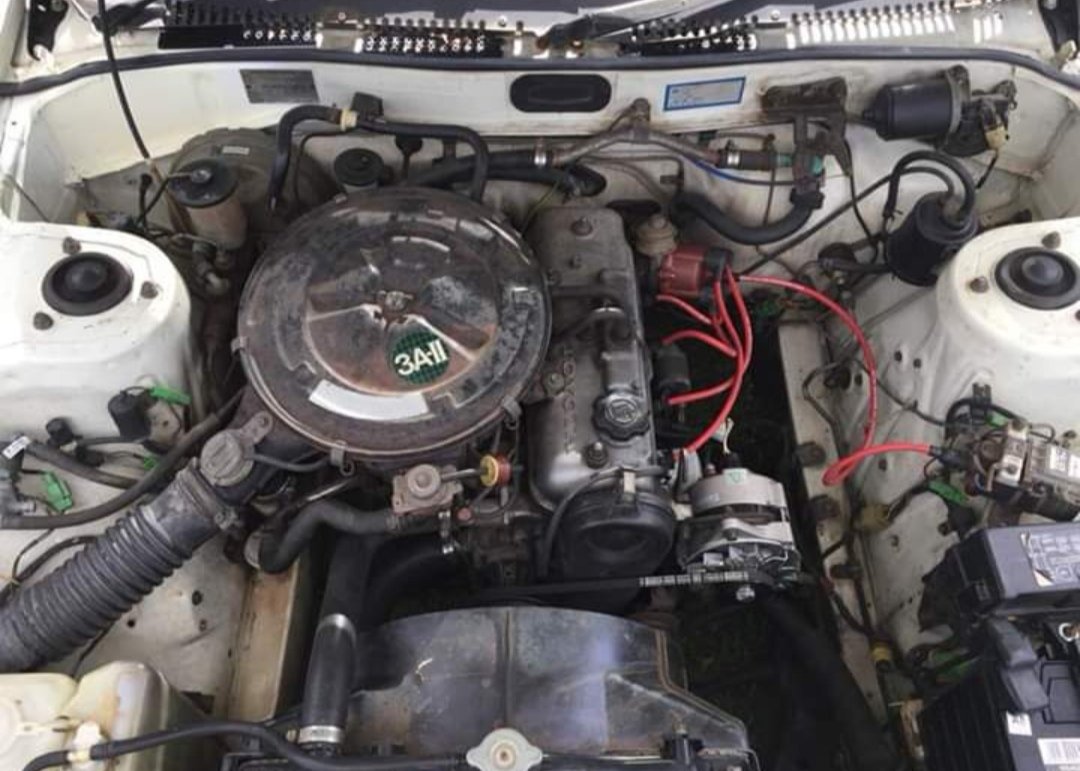
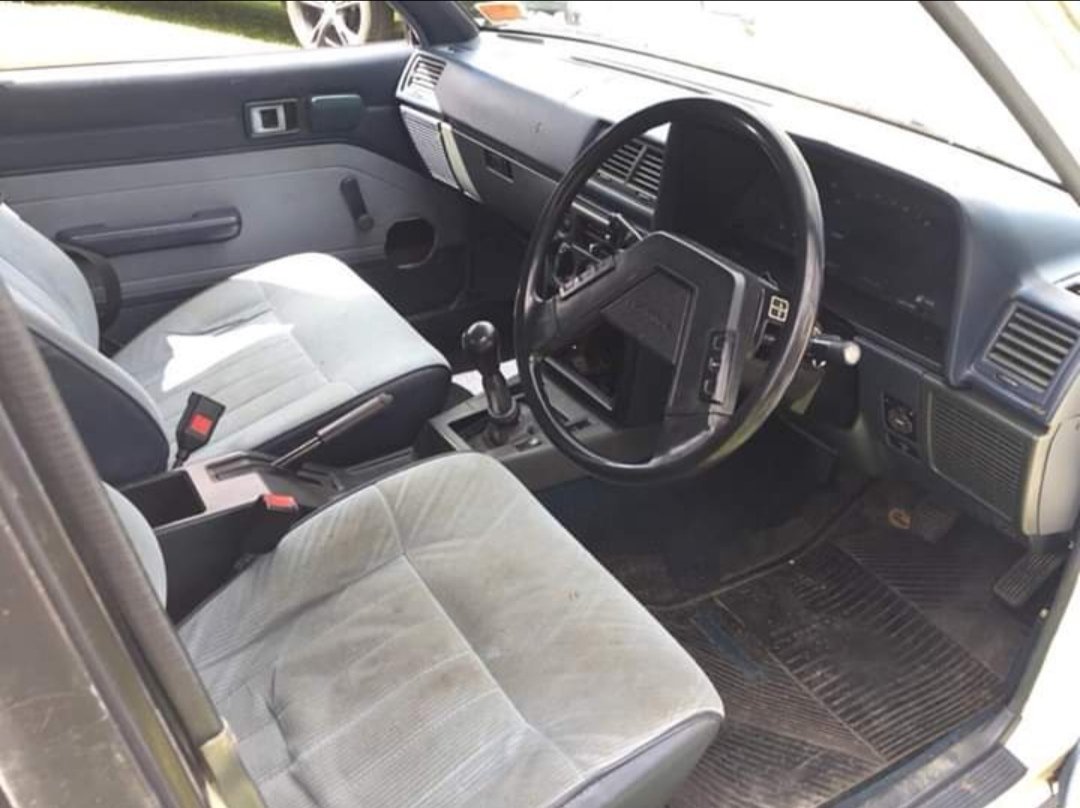
How it looks now. All 50 shades of white. Needs a battery then can take it for its first proper drive.
 14 points
 -
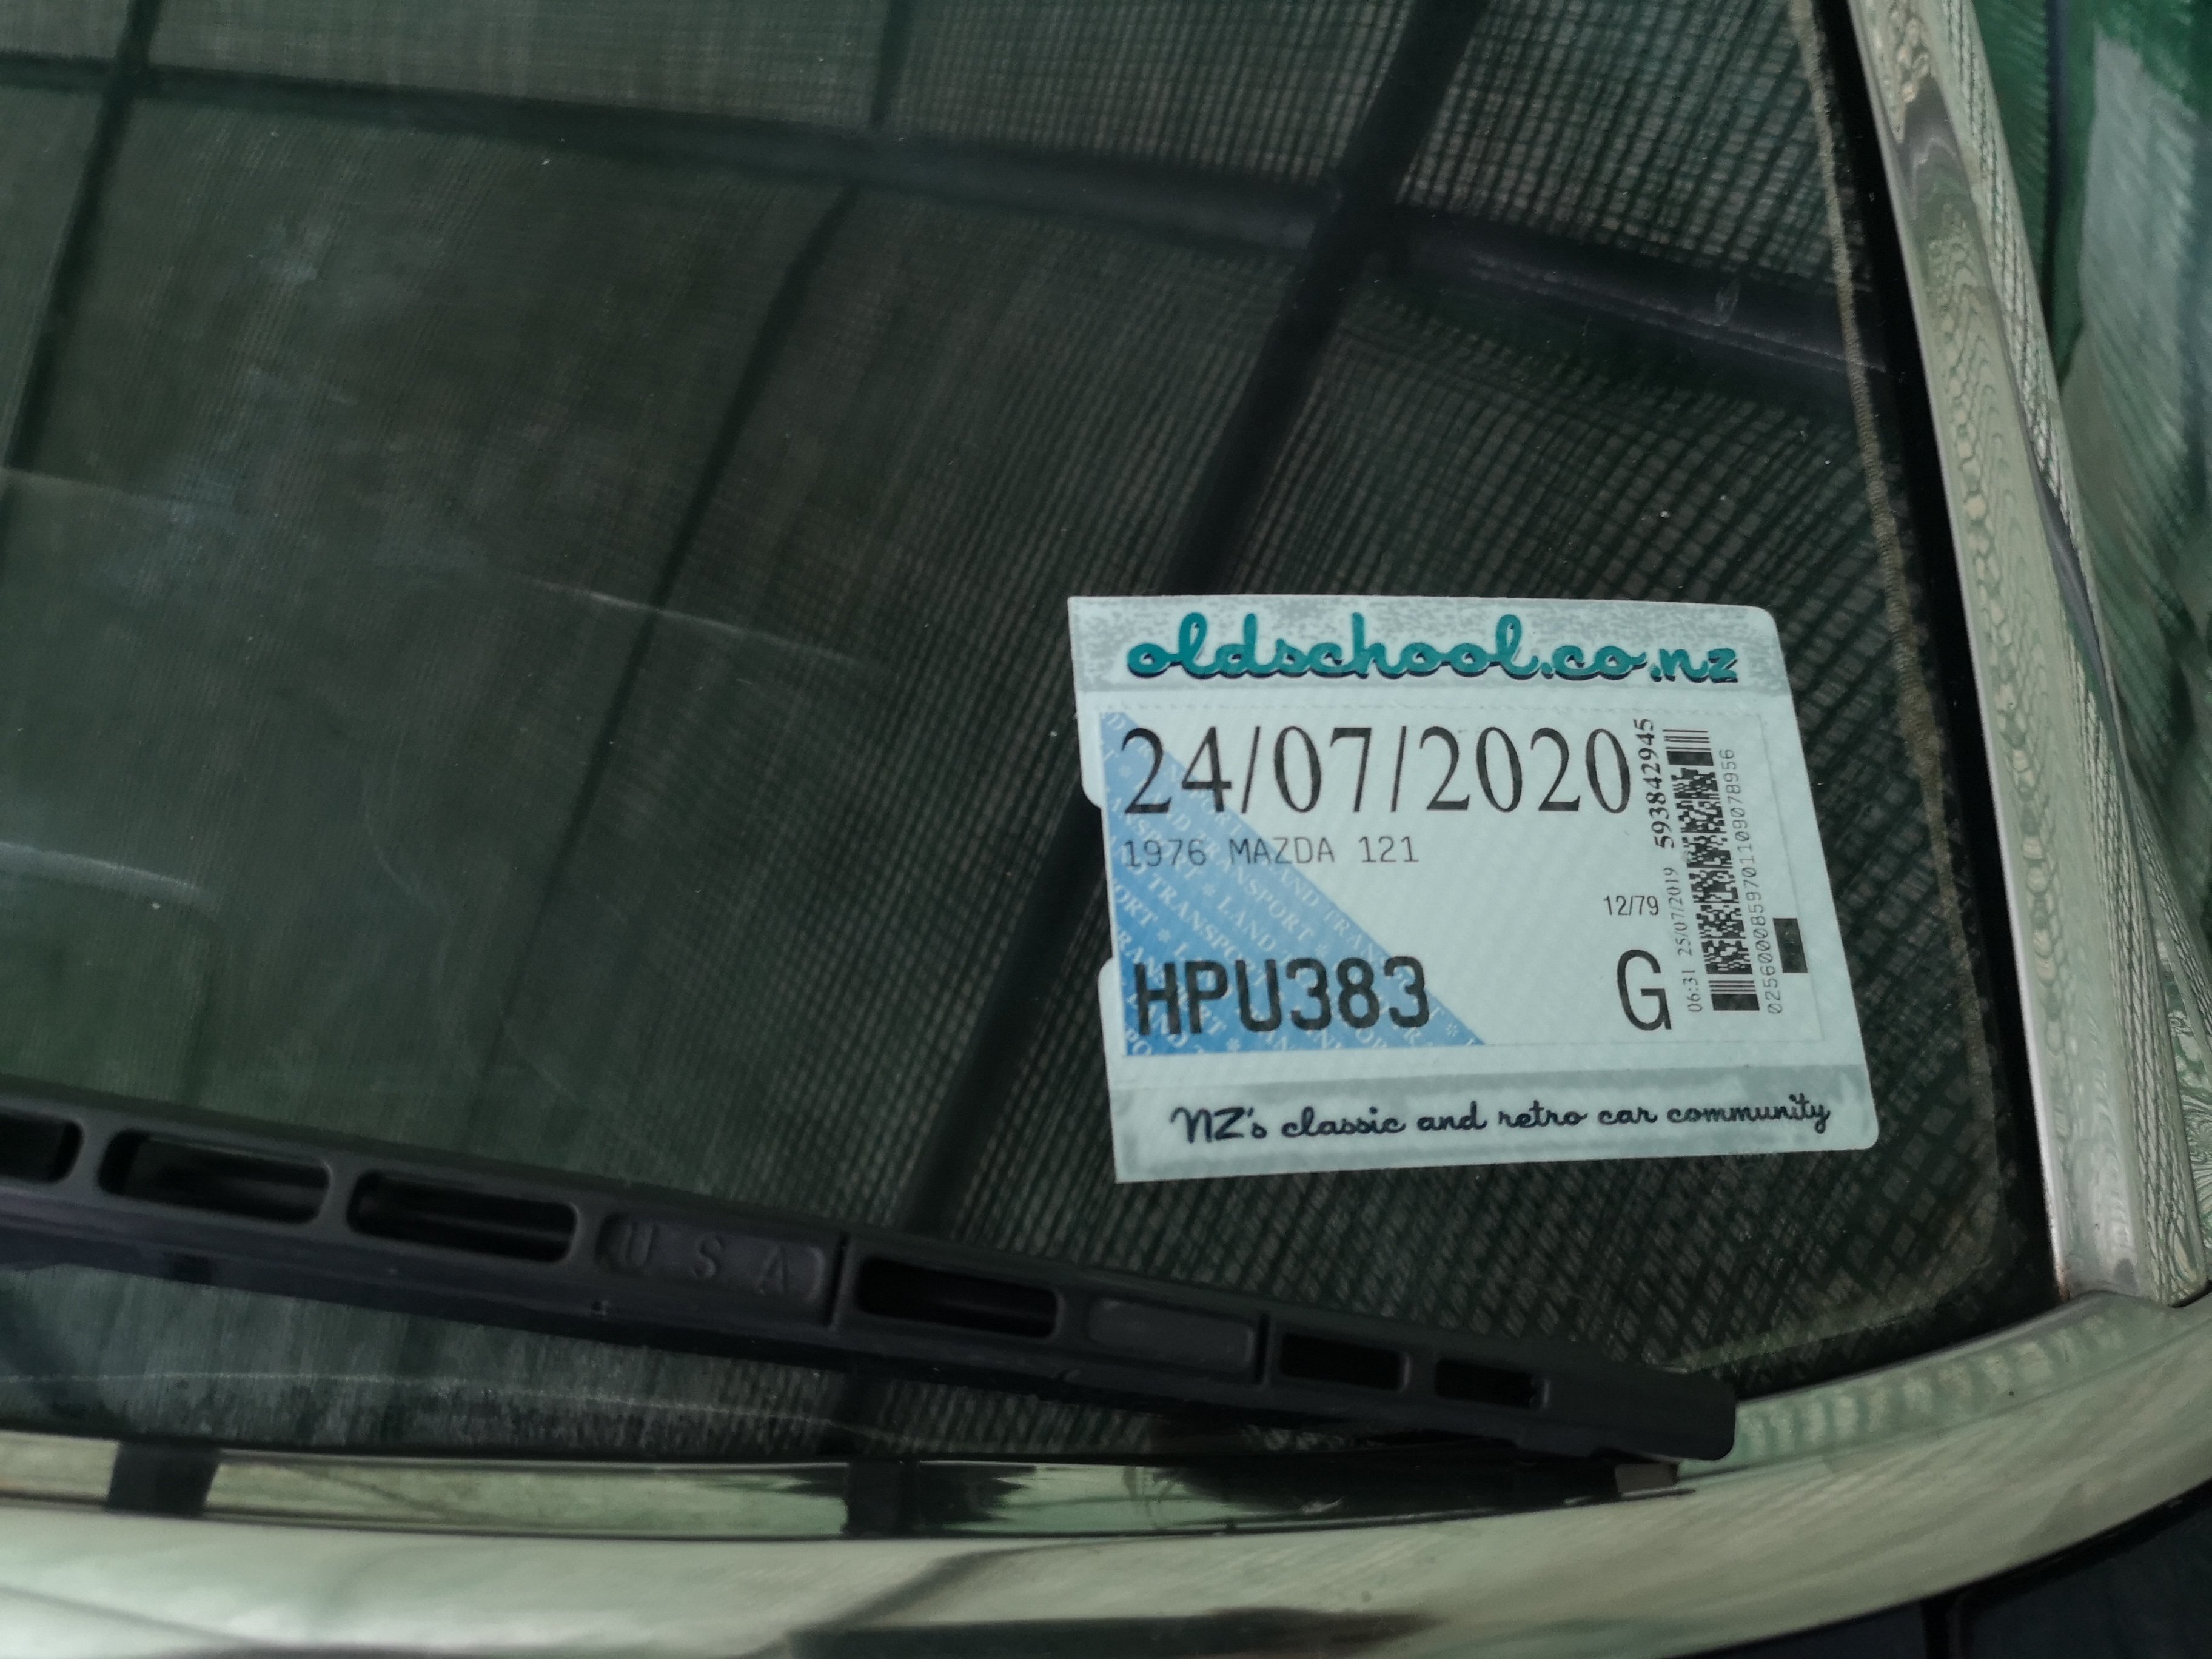
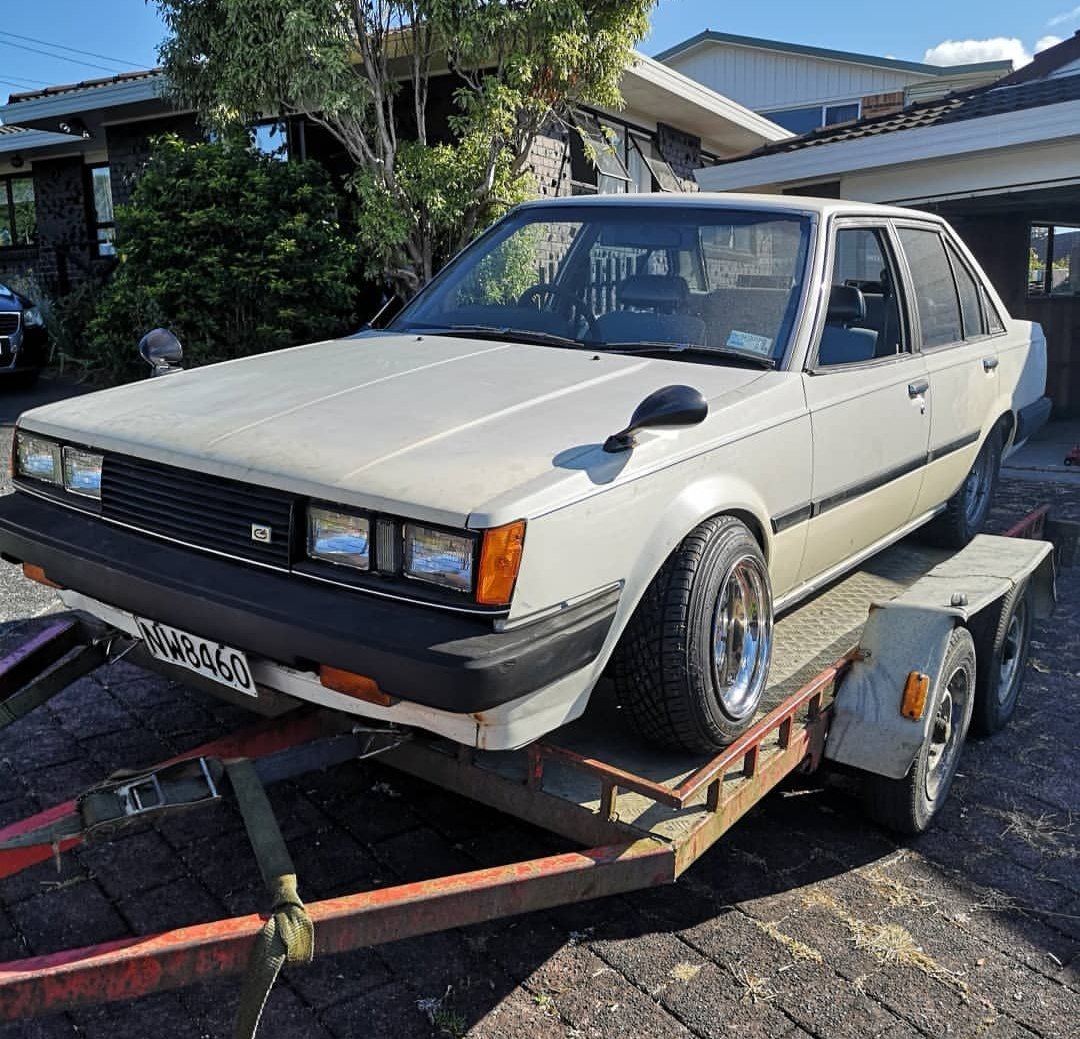
Another year, another wof and year's reg.. Ready for her annual road trip all the way to hamner and back..
10 points
-
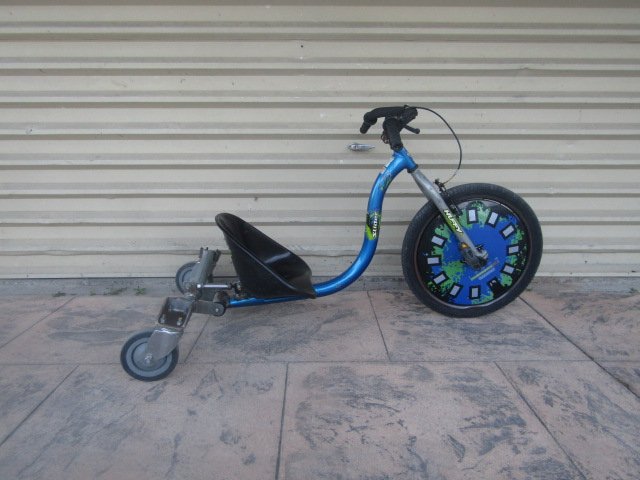
So, I picked this lot up... all water cooled 39cc ~8hp motors. Yes, approximately 8hp! So many parts, enough to make a 4th working bike....and another spare engine for ummm, yeah...maybe, hmmmm???
6 points
-
She’s not used water for 24 hours. So might have delayed the engine rebuild for now. pissing around with stupid little things. Swapped a few things over in the cab. I like the Mazda dash over the ford one.
4 points
-
Swapped the motor and t50 in along with all my suspension from my corolla, PSM coilovers, knuckles etc. Then sent it away to finish off wiring. Came back running with just a few things left to do to be able to take it for a drive which I have now done.
3 points
-
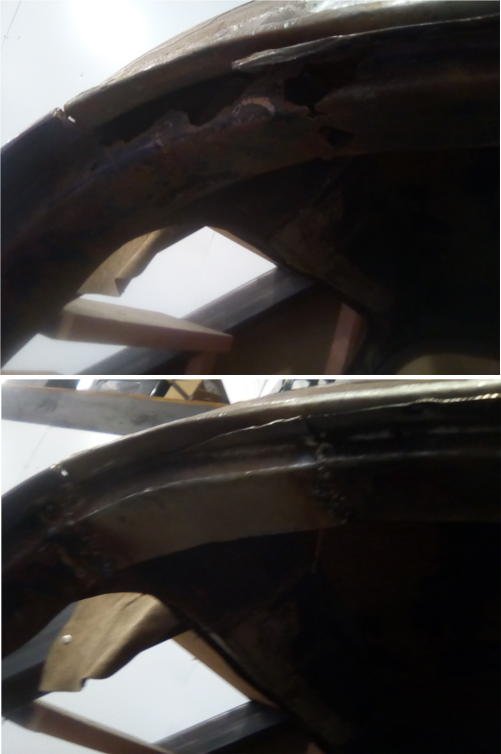
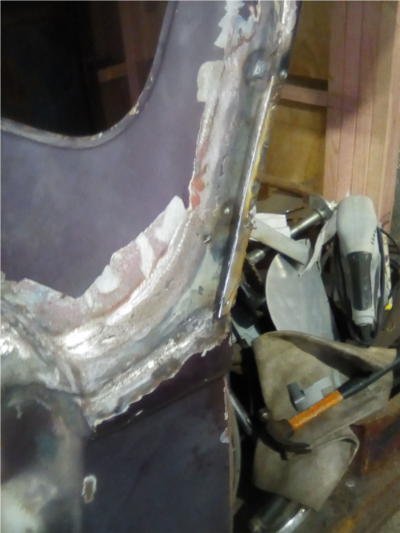
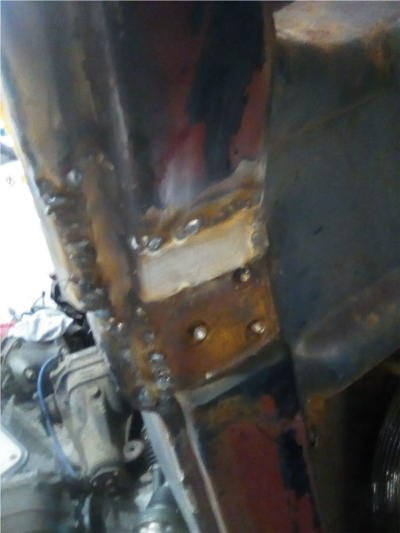
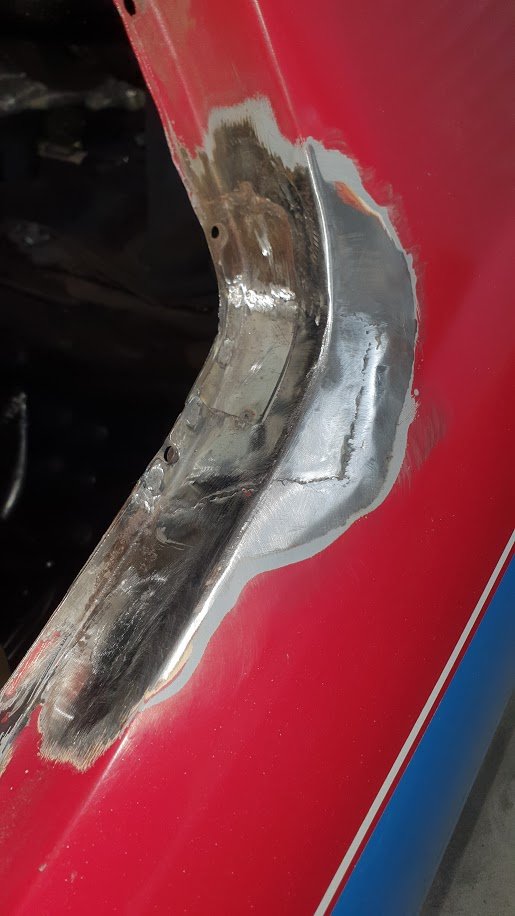
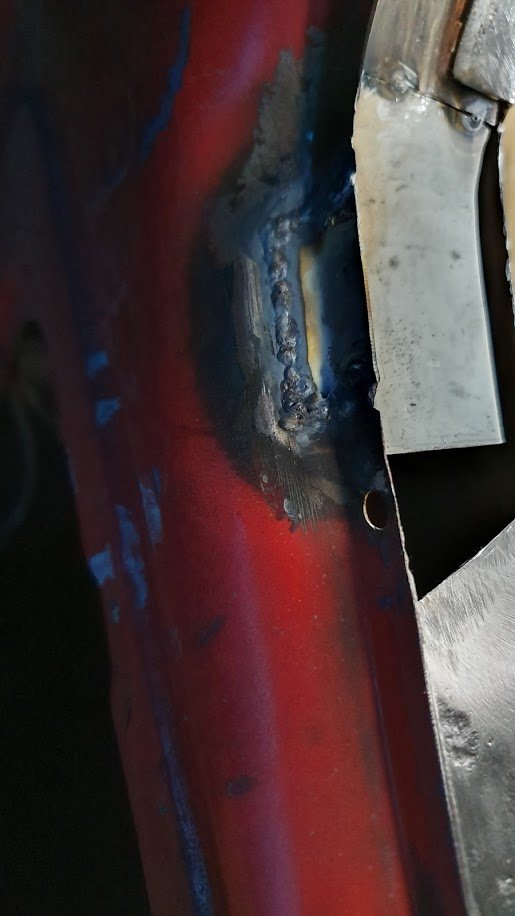
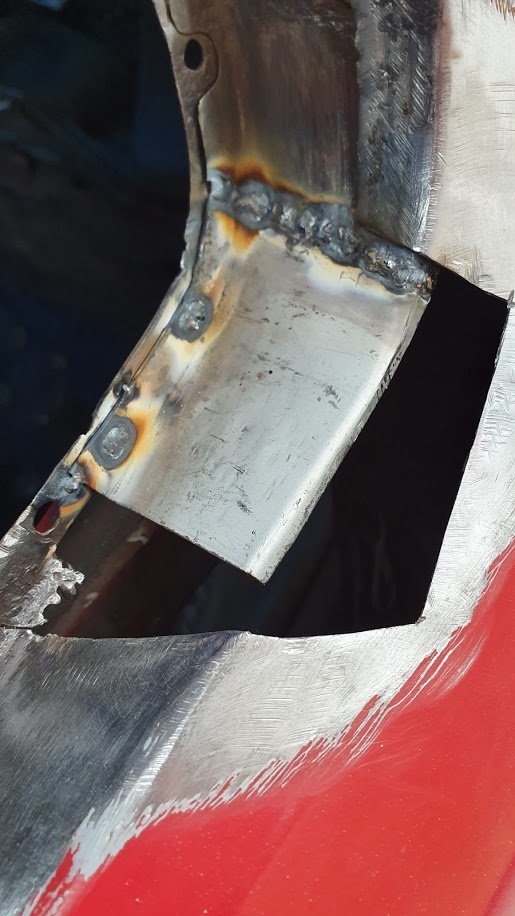
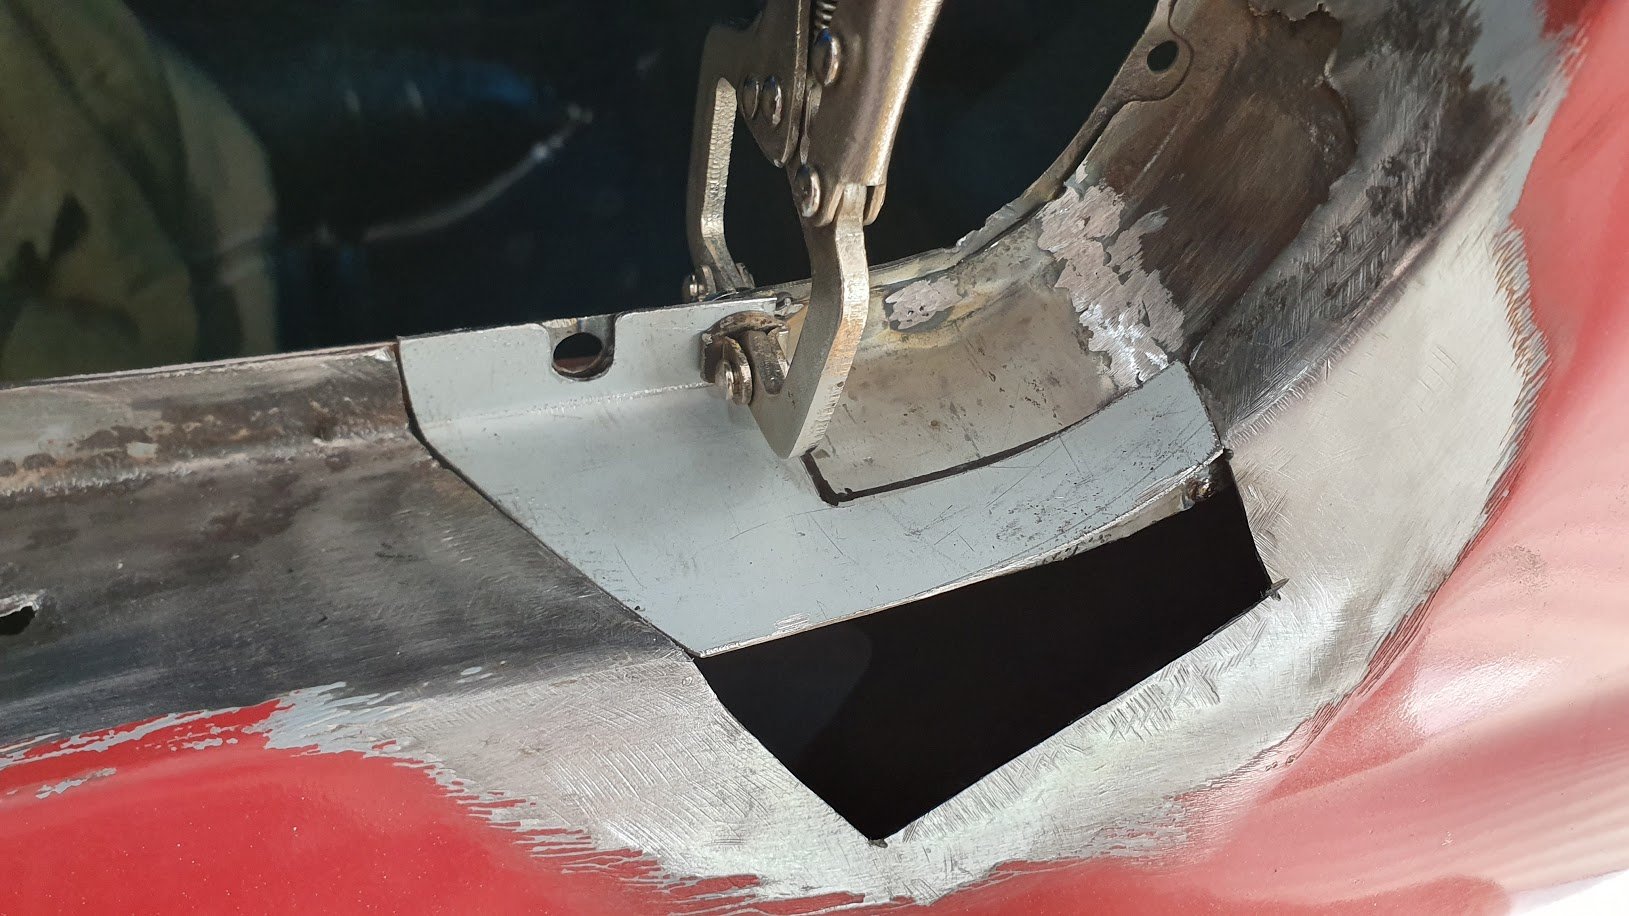
SOHC welded that so if it sucks i blame him. He also welded that strip on the bottom of the gutter. Wasn't expecting that but ok. I'd like to believe this is an improvement. I'd also like to believe its in better shape than the trucks at the farm by the airport. R.I.P. airport trucks and farm.
2 points
-
Possibly old moulds that Italeri have acquired from somewhere. Not car related, but I got my hands on an ancient Frog 1/72 Beaufighter kit a long time ago. The moulds were past their best by the time that kit rolled off the line, and it took a lot of work to bring it up to scratch... Fast forward 5 years and one of the no-name brands that popped up in the mid 2000s released a Beaufighter kit clearly made from the same moulds as the Frog kit had been nearly 50 years earlier - Same flaws in the same places, but magnified further by the extra age.2 points
-
Well today the car passed the compliance recheck and I now have 12 months REG and 6 months WOF. Thanks to those that have helped me during the build. Now it’s time to relax and enjoy the old sled. Beer o’clock for me I will be parked up at chrome this weekend weather permitting. Come say hi.
2 points
-
2 points
-
Long time no update.. Not a lot has happened since "16, been to nats banks peninsula, won the grasskhana and didn't miss a beat the whole trip (not that it was a long way) failed a warrant before hand on no horn which took me a while to figure out, turns out there was no earth strap on the rubber coupler to steering box.. Fuck knows how the horn had been going otherwise, And also the hand brake cable on these is mounted via two of these rubber bobbin mounts, they are in fact one of the things I thought would fail the re-vin on but somehow they made it all the way through 6 wofs.. *edit, also failed on the rear muffler which @RUNAMUCK kindly donated.. Multiple hanmeats, the last of which ended up with a fair distance on a potholed gravel road up the back of Hanmer in the snow and rain, the one bonus of the potholes is that my heater fan randomly started working which was terrific as every time it rains the car fogs up like a bitch.. Problem solved. That was 8 months ago..... Decided I should really give her a clean for the next wof.. My little girl was dead keen and came around the corner holding a trade spec scrubbing brush and a wire brush gagging to help, I let her do the wheels, sans wire brush of course.. In the end I did the wheels while she spayed them and me with the hose.. Came up ok, As per the story of my life nothing else on the turbo/injection front has continued because of a lack of working space and the house.. all good tho I guess, she purrs along and is out of the shit brotown weather so I'll just keep driving her as is for now..2 points
-
Don't remind me1 point
-
Should I design up a board to slap an arduino in that has a 12V reg, inputs and will drive ignition / relays / whatever? (Carduino) Also, many of the cheap Chinese arduino clones use the CH340 usb-serial interface chip. Unfortunately the drivers for this are a bit shit. My main desktop was having power/sleep mode troubles, and ended up rebooting everynight (resetting my workspaces, and long running jobs). Tracked it down to a WeMOS board, so all is well if I unplug it last thing. HTH / H4nd1 point
-
EGT gauges... Overrated.1 point
-
Yarns: Had a ke70 a while back, had 4age, t50, t series rear blah blah in it, but the body as well as wiring needed way too much work than I had time/patience/money to deal with. So when this thing came up for sale I grabbed it. 3au, t40 and t series rear. Wof and reg. Plan was to lower it with my stuff from my ke70, put some wheels on then drive it for a bit before swapping in my 4age and t50. But one day driving it it blew its headgasket. I was moving house at the time so it sat in the naughty corner until life was a bit less hectic. Then had some help and pulled motor and box out and 4age went in.
1 point
-
nice job brutha, a lot of hard work there, giz a hoon1 point
-
Beat life1 point
-
Really really sure that the ignition timing is right and not 180 out?1 point
-
As far as OS goes, this thread is pretty PC1 point
-
That's exactly how I planned it, the kids keep asking me to "Adjust the drift Dad"1 point
-
Another project finished in the weekend.
1 point
-
Slowly slowly getting there1 point
-
yea man for sure. the other big thing that really made it different was how fucked the old steering box was. it had a tight spot exactly on straight ahead so to make a tiny correction to direction on the motorway you would turn a tiny bit and nothing would happen, then turn a bit more and nothing would happen, then it would bet over the tight spot and fuck off across the lane. it sucked. it does not do that now. next big ticket item is to put the 4 stage auto in.1 point
-
Random slightly cool things working together.
1 point
-
This morning, we fanged across to Caffeine and Classics, then rolled straight back home, where I had intentions of mowing lawns and doing general yard work. Anyway I started cleaning something in the engine bay. Next thing you know it was 6:30pm and I'd just finished cleaning up - after giving the whole engine bay a bit of a tickle with some cleaning products and a range of brushes and micro fibre cloths. Shit I used included - diluted Simple Green (beware, some people have had this stain alloy), Armor All Multi-Purpose cleaner (this shit is amazing on damn near anything) and Interflon Foam Cleaner (beyond incredible cleaner, kind to plastics and electronics, also a weapon on upholstery). Brushes ranged from a toothbrush, up to a soft dish brush. Start - this is in the battery tray corner, the general filth on the firewall is indicative of all the painted surfaces in the engine bay when I kicked off. DC2R Phone (18)-Edit by Richard Opie, on Flickr No real in-progress shots. I did snap a wee comparison of the old cam cover and the NEW HOTNESS just prior to fitting it up with new seals/gaskets etc. DC2R Phone (19)-Edit by Richard Opie, on Flickr It looked good before right? But how much is the difference when you line it up against a brand newie! DC2R Phone (21)-Edit by Richard Opie, on Flickr Basically the end result. I am aware I need to remove a few painted brackets etc and get them recoated. I've also put wheels in motion to buy a whole swag of OEM fasteners to replace anything a bit tarnished/rusty etc. Mainly M6x16 factory ones in the grey zinc finish. DC2R Phone (22)-Edit by Richard Opie, on Flickr This thing positively glows. It's a thing of beauty. DC2R Phone (23)-Edit by Richard Opie, on Flickr Even the letters have a shine and crispness beyond anything I've ever seen on a B-series. Machined OEM finish! DC2R Phone (26)-Edit by Richard Opie, on Flickr Likely the most boring photo I've ever snapped. But it illustrates the finish on the firewall/paint at the end of the proceedings. Turned out pretty good. It's not perfect, no, but it's definitely up there as far as 20-year old engine bays go. DC2R Phone (27)-Edit by Richard Opie, on Flickr And a parting shot. Pretty chuffed with it all, will carry on with a few more jobs to sort in the bay, and also clean the underside of the bonnet which is quite grubby. Toodle-oo.1 point
-
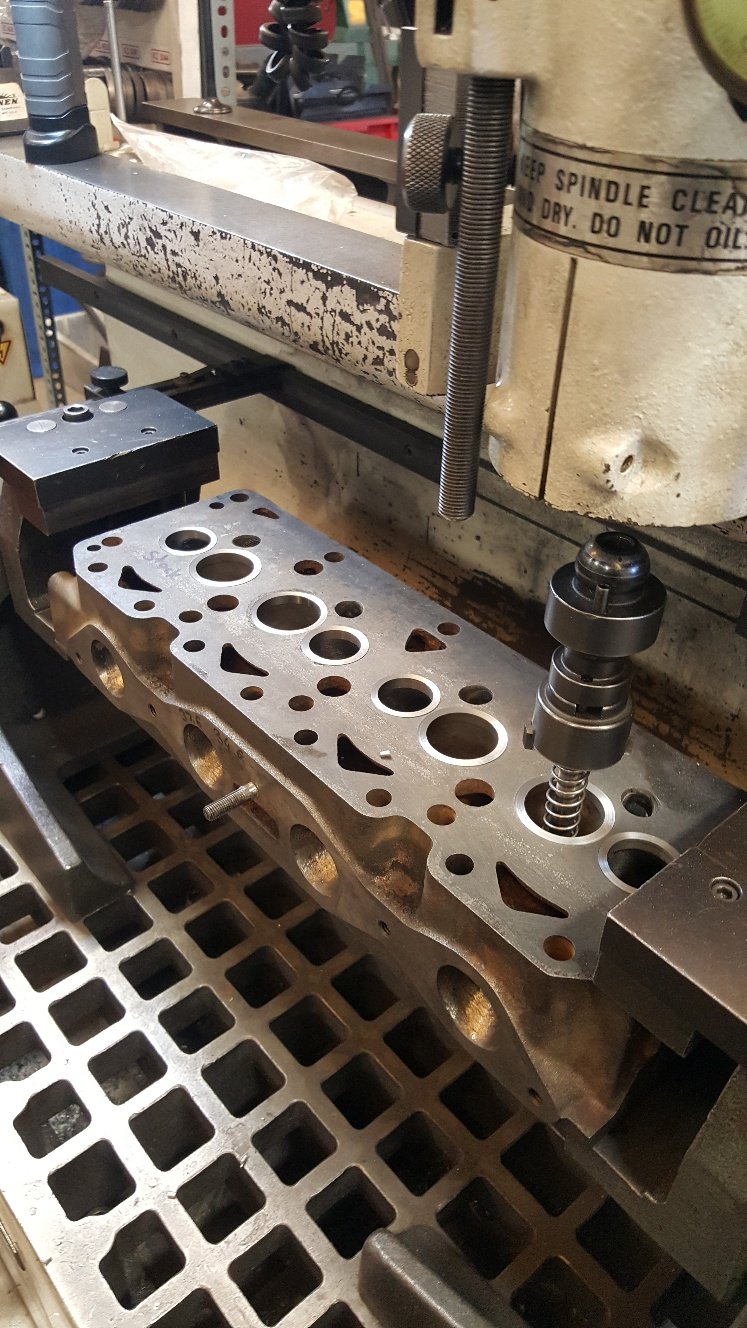
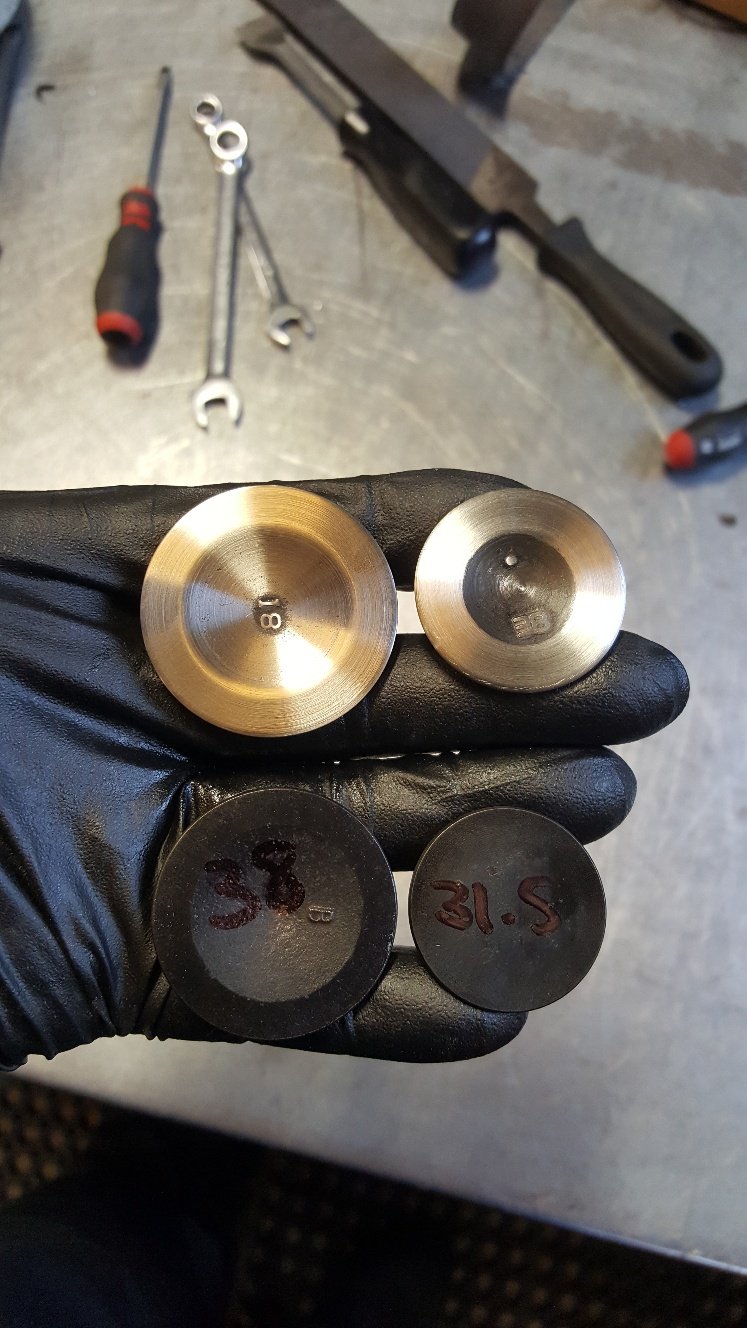
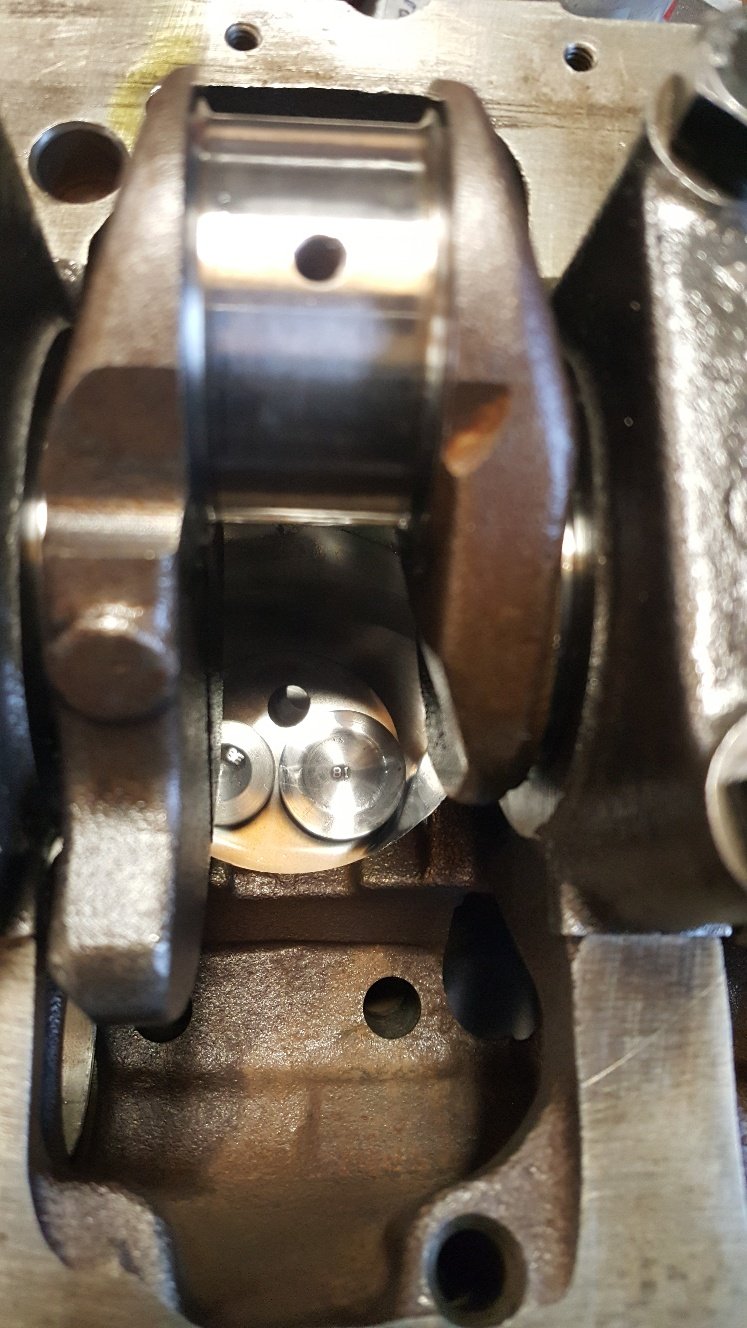
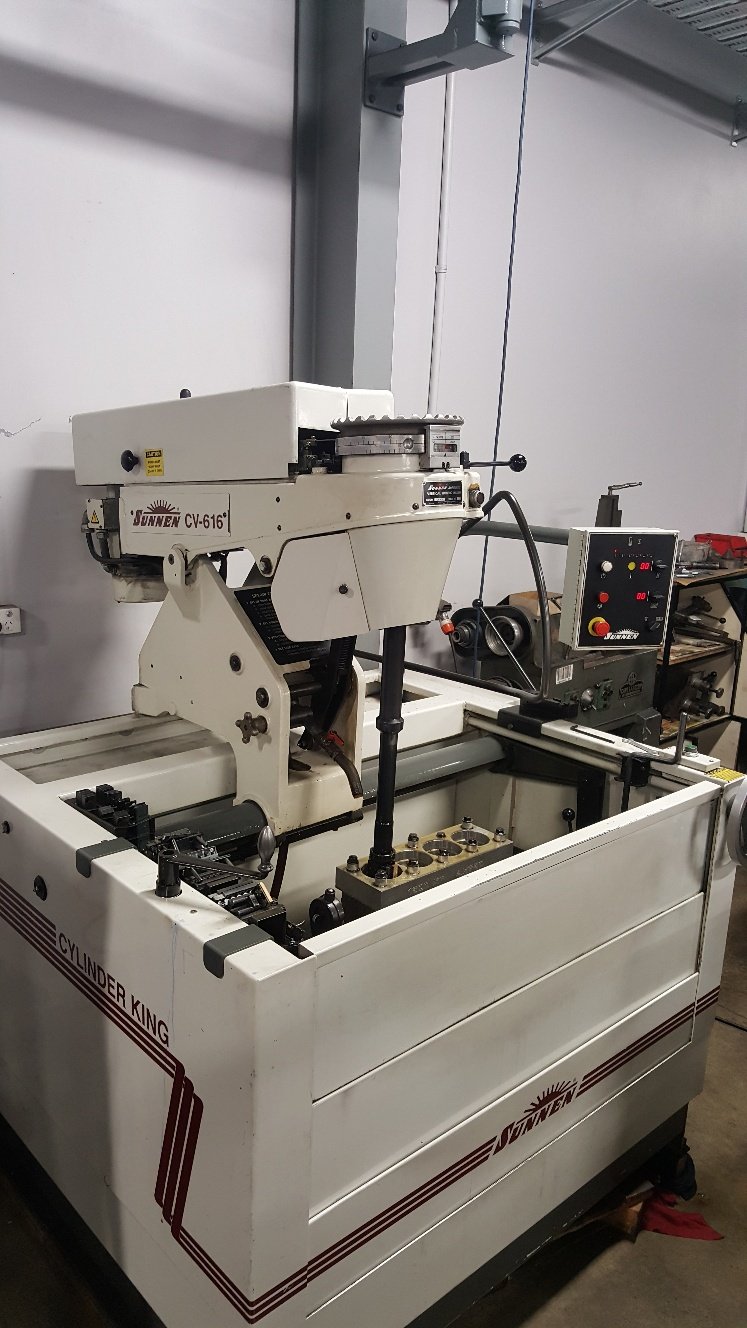
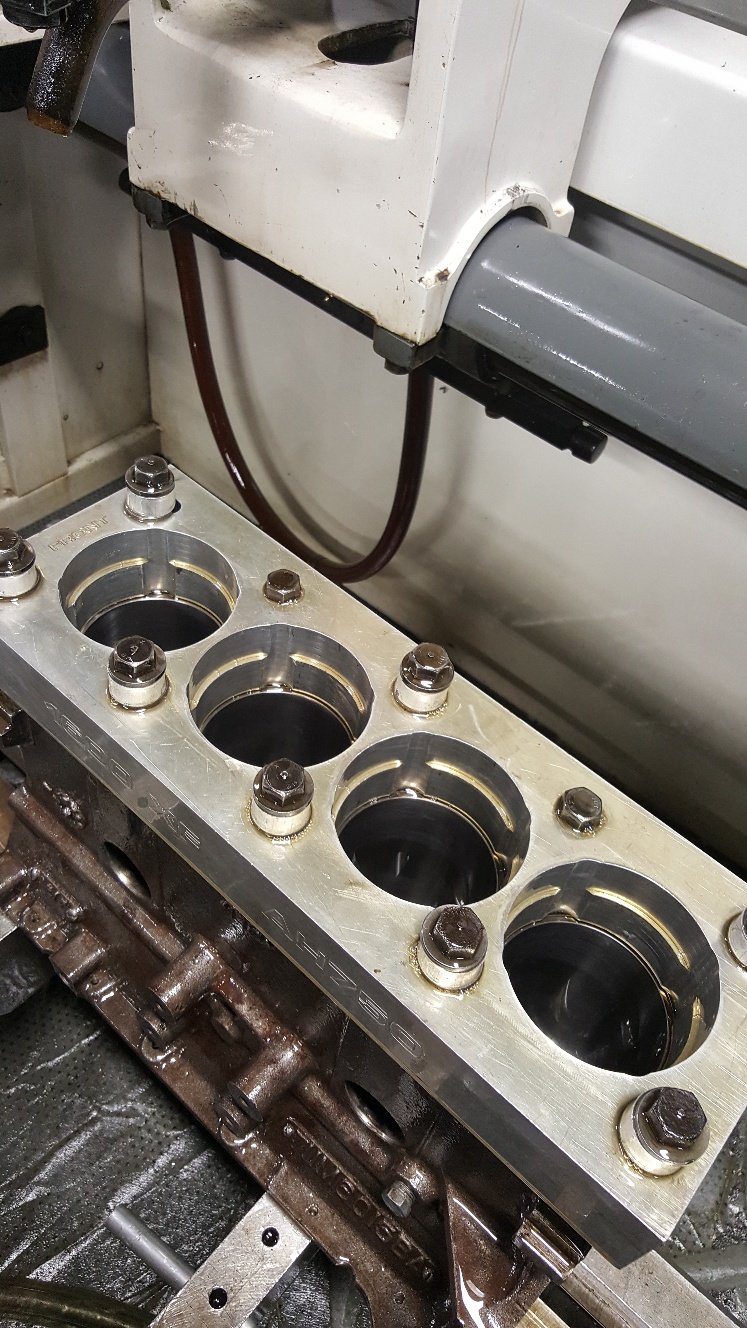
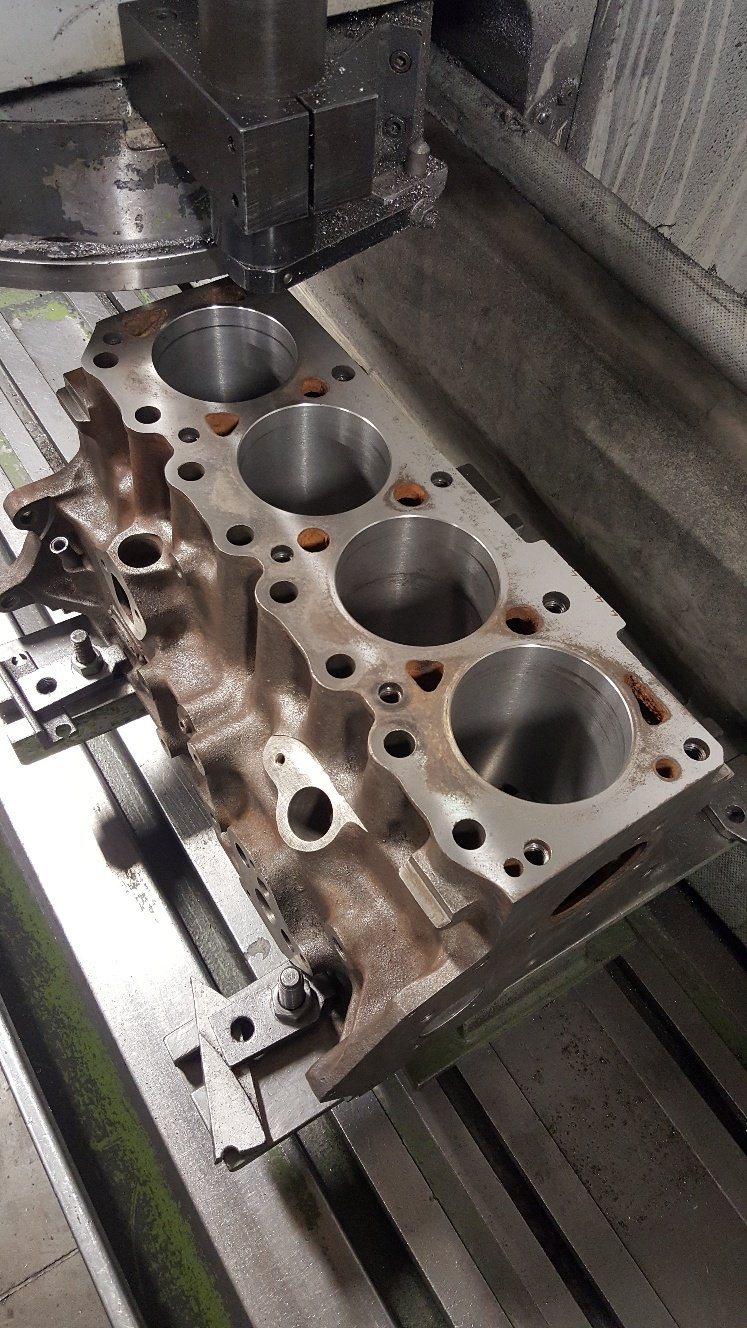
Time to cut some holes for valve seat inserts. We have a Sunnen VGS for all our head work. First picture is setting up the tool cutter to cut the hole. We are looking for between 3-5 tho crush. Once holes are cut just hammer the inserts in. Then turned down a intake valve and a exhaust so had something to check valve spacing and clearance of the side of the bore. I detopped the inserts in the VGS and then surfaced the head. I didn't get a picture of it in the surface grinder as there's pictures of that previously. Here's the valves. And a shot of the head bolted on to the block looking into the bore to see how much clearance the valves have off the side of the bore.
1 point
-
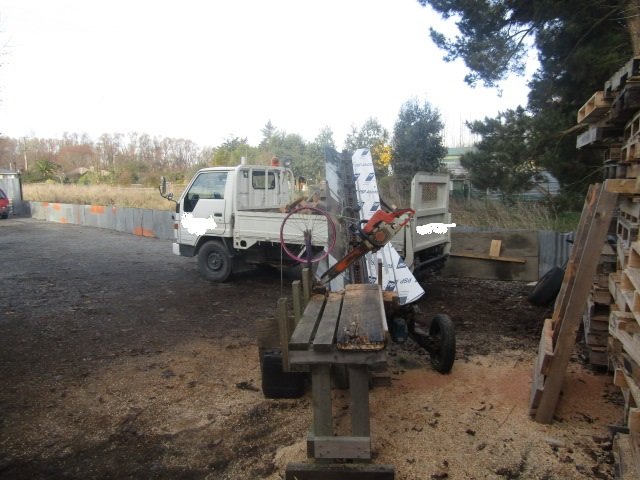
Alrighty bitches, time for the drawers. Real drawer slides are really expensive, the ones I wanted would have set me back $450 ish even at trade prices, so I decided to make some rollers out of bearings and some extrusion from Ullrich. I had already sort of tried to do this with a round rail extrusion and some steel round but this was deeply unsatisfactory. Bearings mounted on a bit of drilled and tapped flat bar, tacked in place for now. Cut out the sides from some checker plate I had lying around, I wasn't too sure about it cos of the generic checker plate wankery that goes on but it looks pretty good. I had stealthily snuck a couple of sheets of 1.2mm electrogalv into the shed on Friday, I made some big patterns for the box and bent them with the finger bender. Then a shit load of weldy weldy, grindy grindy. Then creating the same thing for the other side. During these activities my 5" grinder let out a really considerable amount of smoke and ceased to function. This meant a trip to mitre 10 for a quite expensive replacement. During this I also ran out of gas so dragged out my big tank of co2, I pretty much immediately managed to knock this over onto the concrete and let out quite a lot of gas. This bent my regulator in unfortunate directions. Miraculously it still works so I replaced the snapped outlet and carried on. They are big drawers, 800 wide, 600 in, 350 deep. The extra shelfy bit at the back is for a secondary drawer that will sit on the top and slide away for access to the main box. Should be heaps of room. Here you can also see my modified super sized porta power pump. This now holds enough fluid for my crane to move through its entire possible range. Yay for me. In other news I mounted the fuel filler, this meant moving one of my battery trays, but this worked out ok. This will be covered with a lockable checker plate hatch in the near future. In other other news I made a place for the plate and light. Somehow my deck build calculations failed to take into account the size of the license plate, this meant I had to make a wee mod to the deck. Might buy another of those lights to make it even. Still no word from fucking engine man. @yoeddynz gave me the name of the local safari foamer, he reckoned to open up my engine and have a look to see how fucked it is. If it is at all salvageable I think I will use this. I also got the radiator dude around to check things before getting to carried away with the custom rad, but he was happy so will build it. He will mock it up for me first. This will be super expensive, it will be a 5 row triple pass beast. This is needed as the space is not super wide and I need proper cooling, particularly if I turbo it. Rather pleasingly he said it was the best project he had seen or words to that effect. Yay for me again.1 point
-
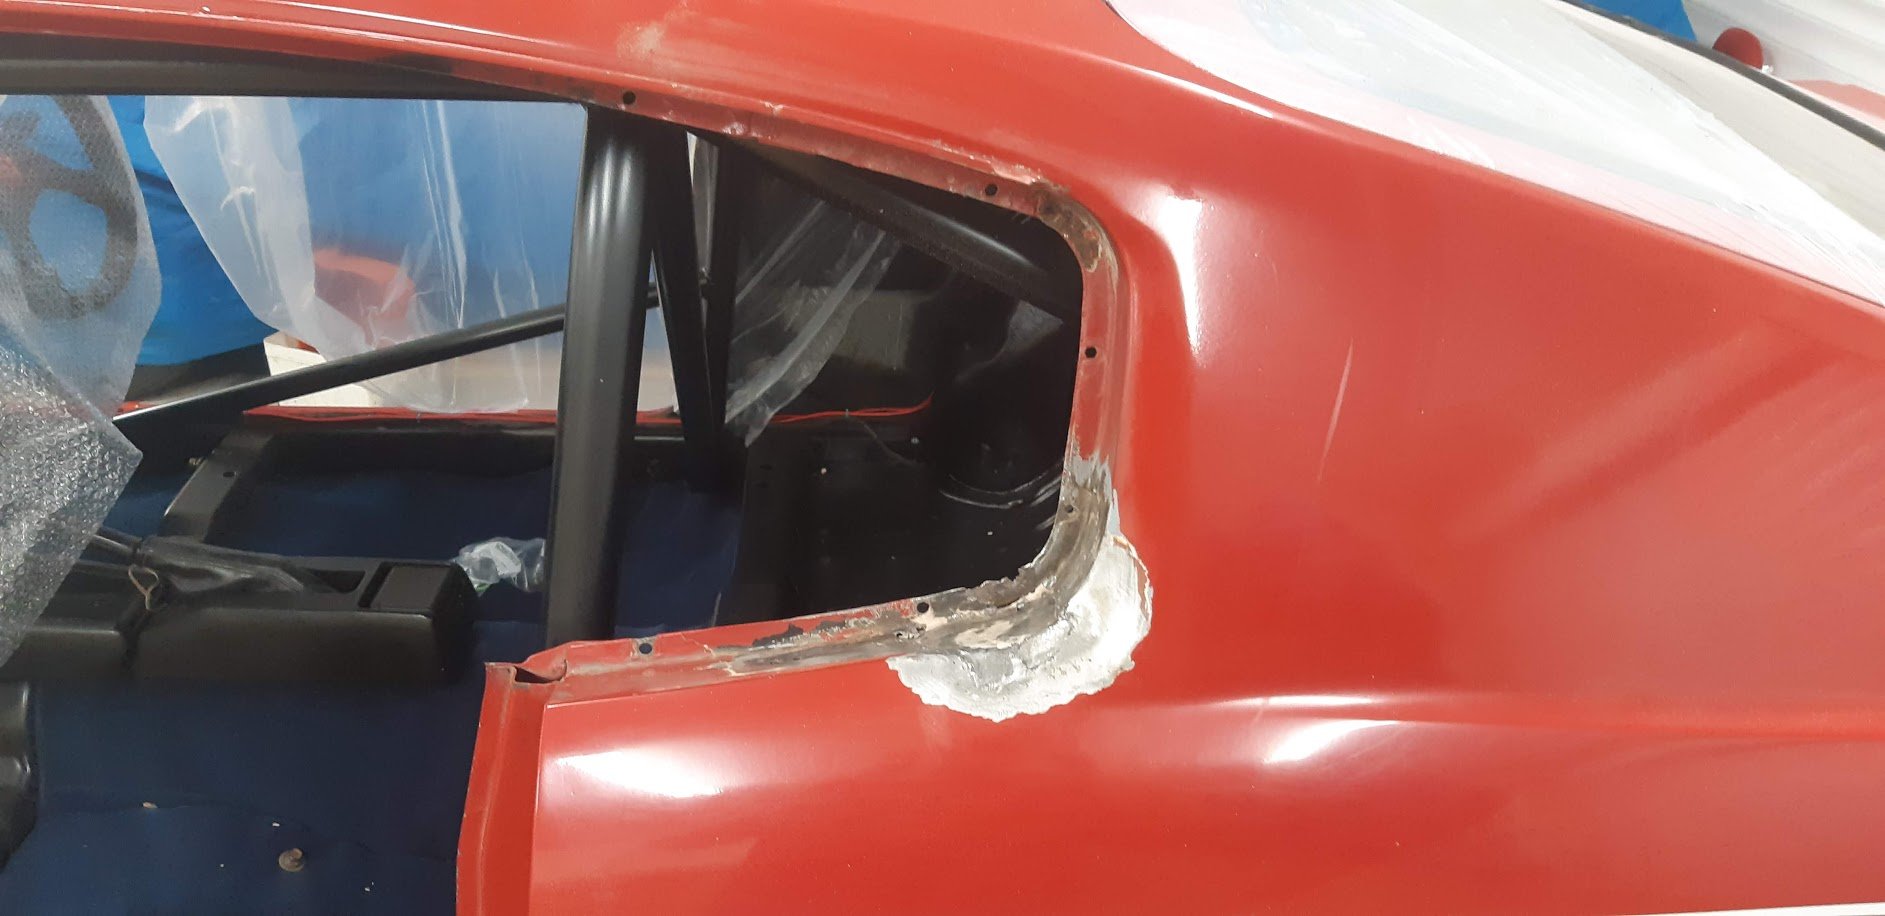
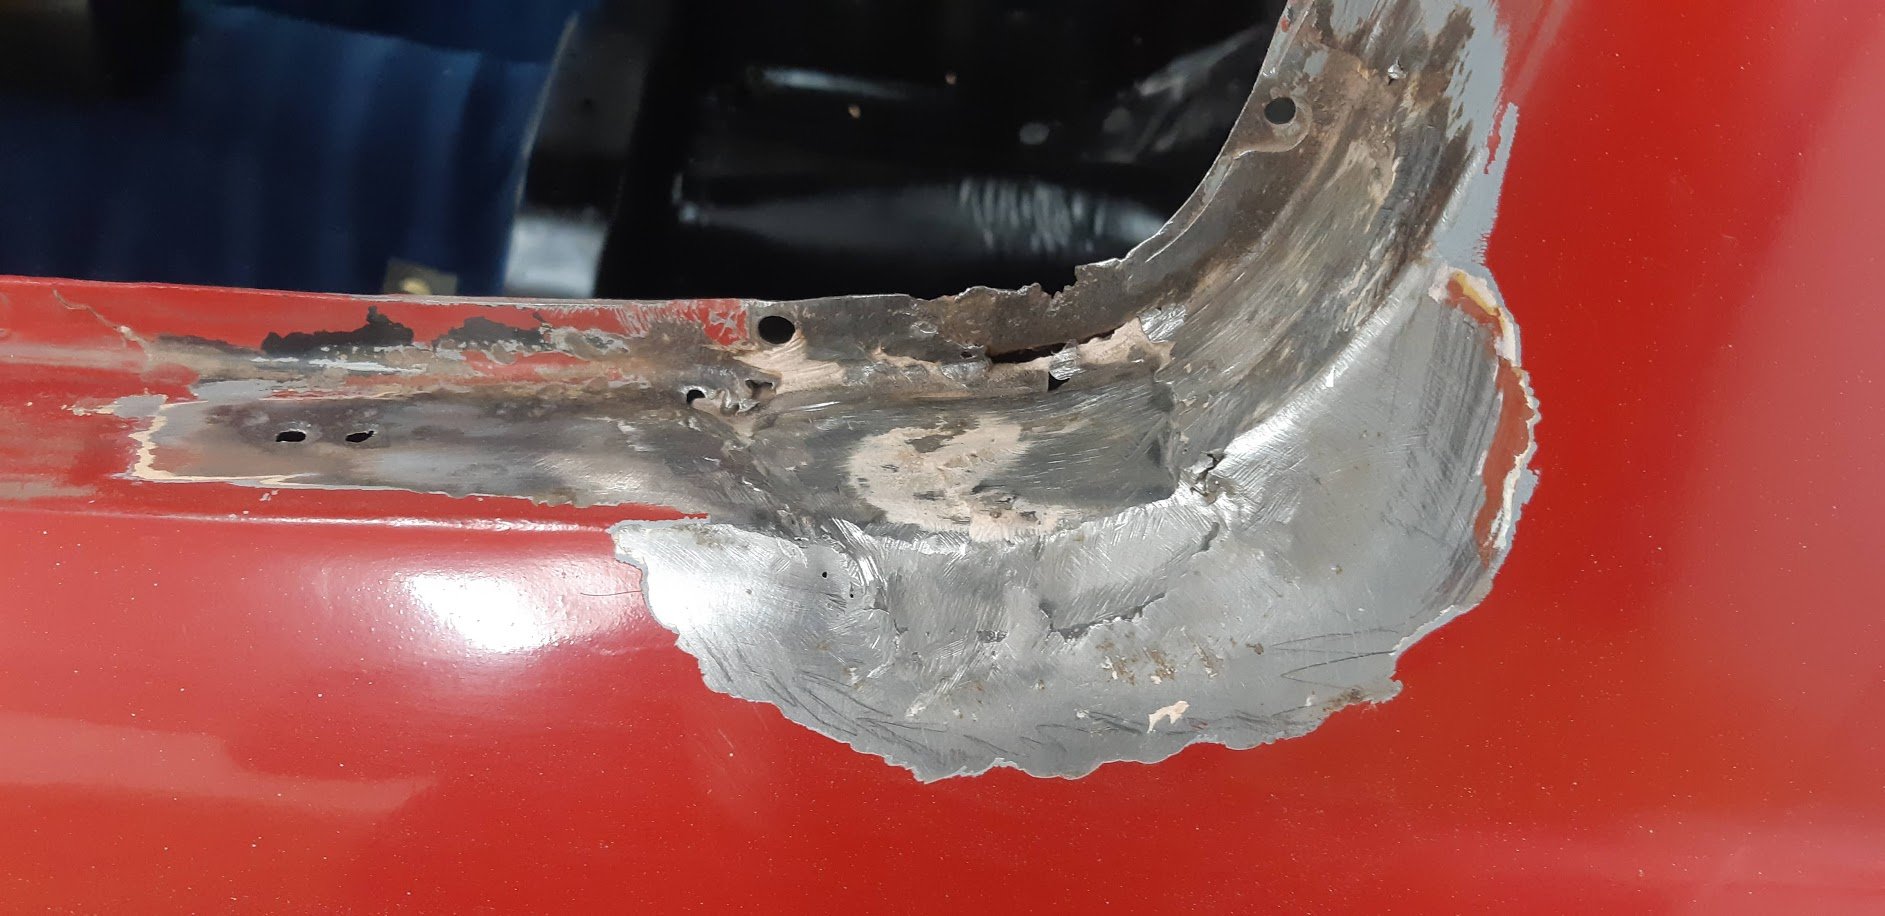
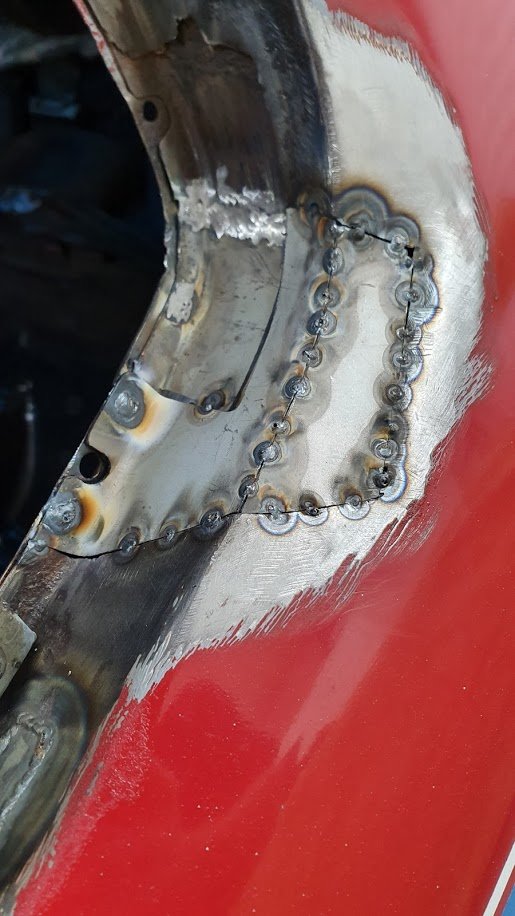
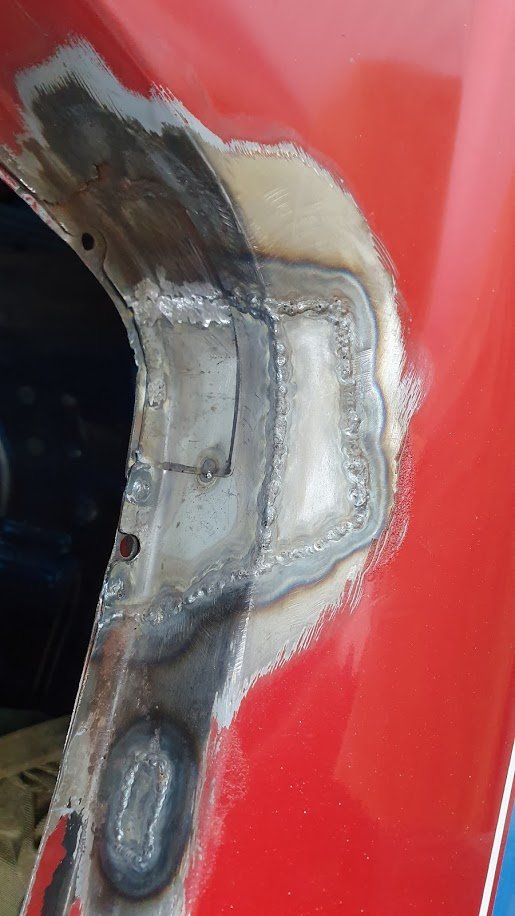
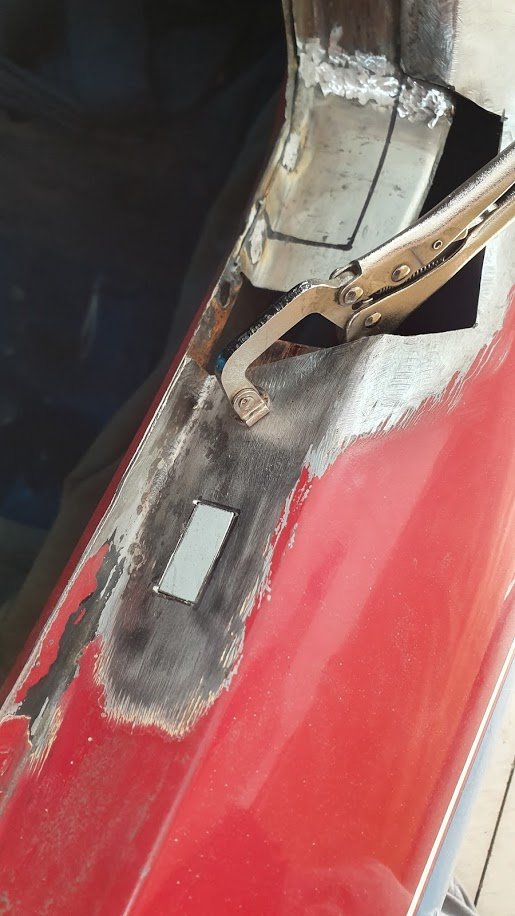
With the welder out for SLEEEK's floor repair, i figured also fixing the other quarter window on the racer was probably long overdue. Some BS repairs from the past that were 90% bog. Repair the inner bit and the reinforcement. Fill other rust holes. Measure and make the outer bits. Glue it up. and 200% betterer...
1 point
-
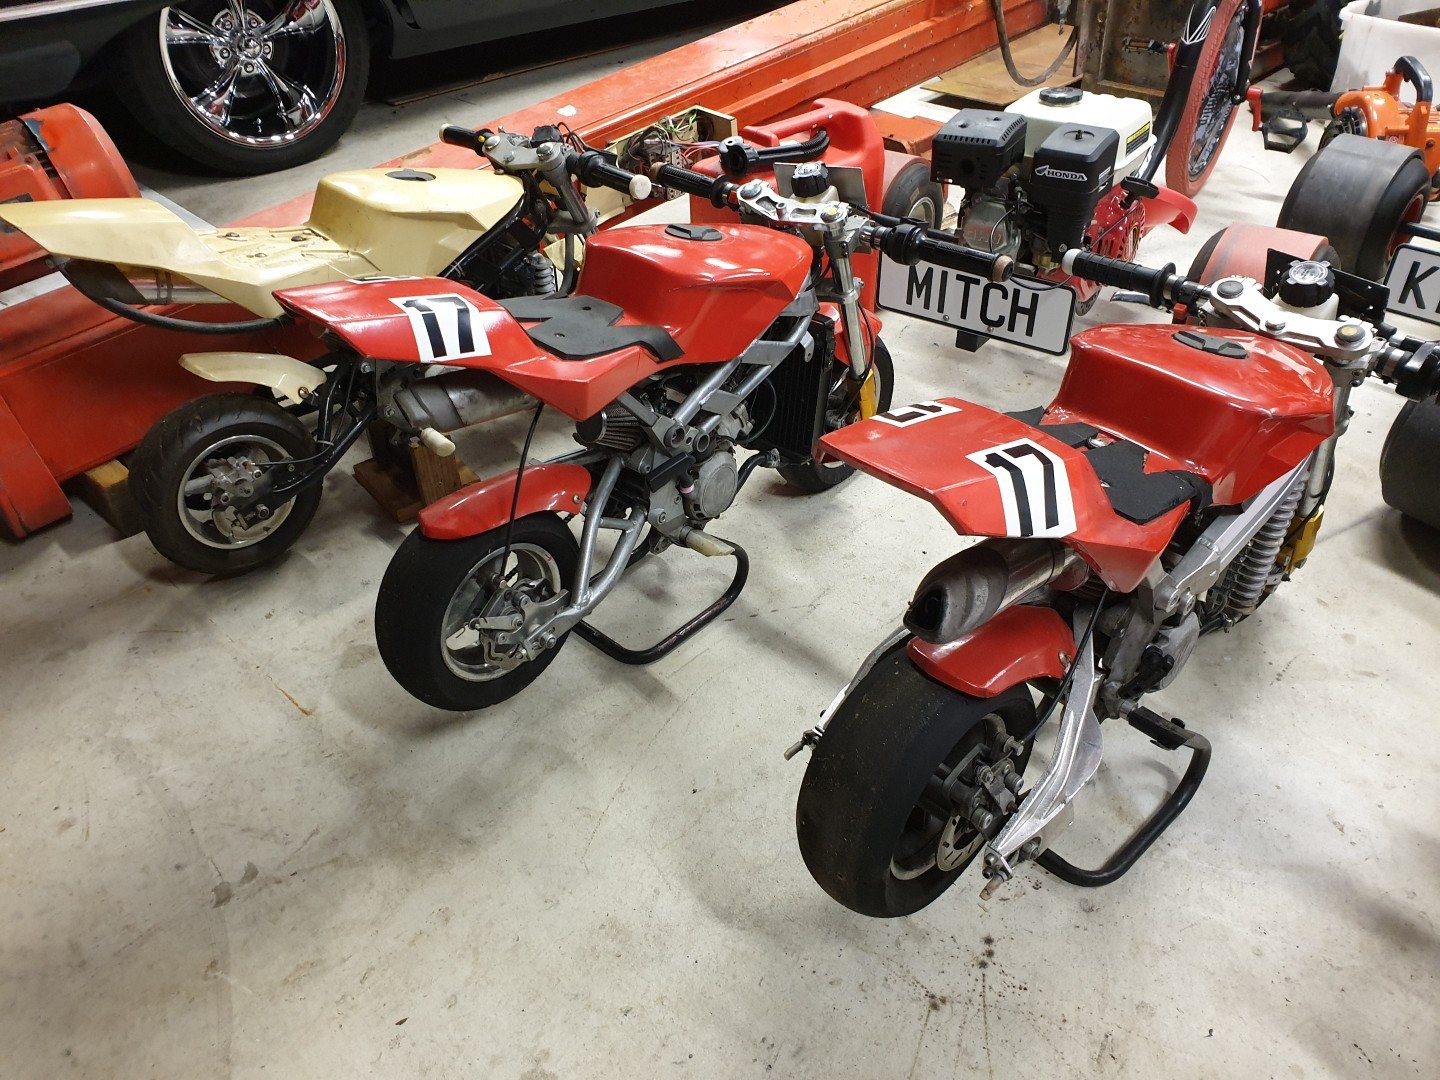
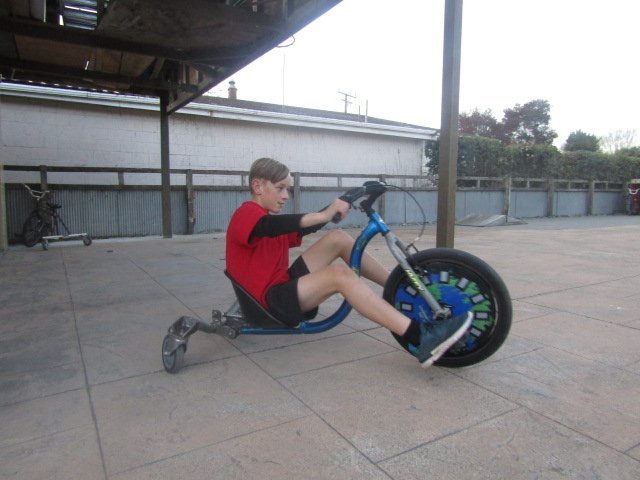
Here's a clip of us fucking around warming the trikes up. For some it's the first time they've ridden one. We then went on to a structured knockout system of elimination. Though towards the end the system went out the window and we just made shit up.1 point
-
Have you considered having all your projects in one thread?1 point
-
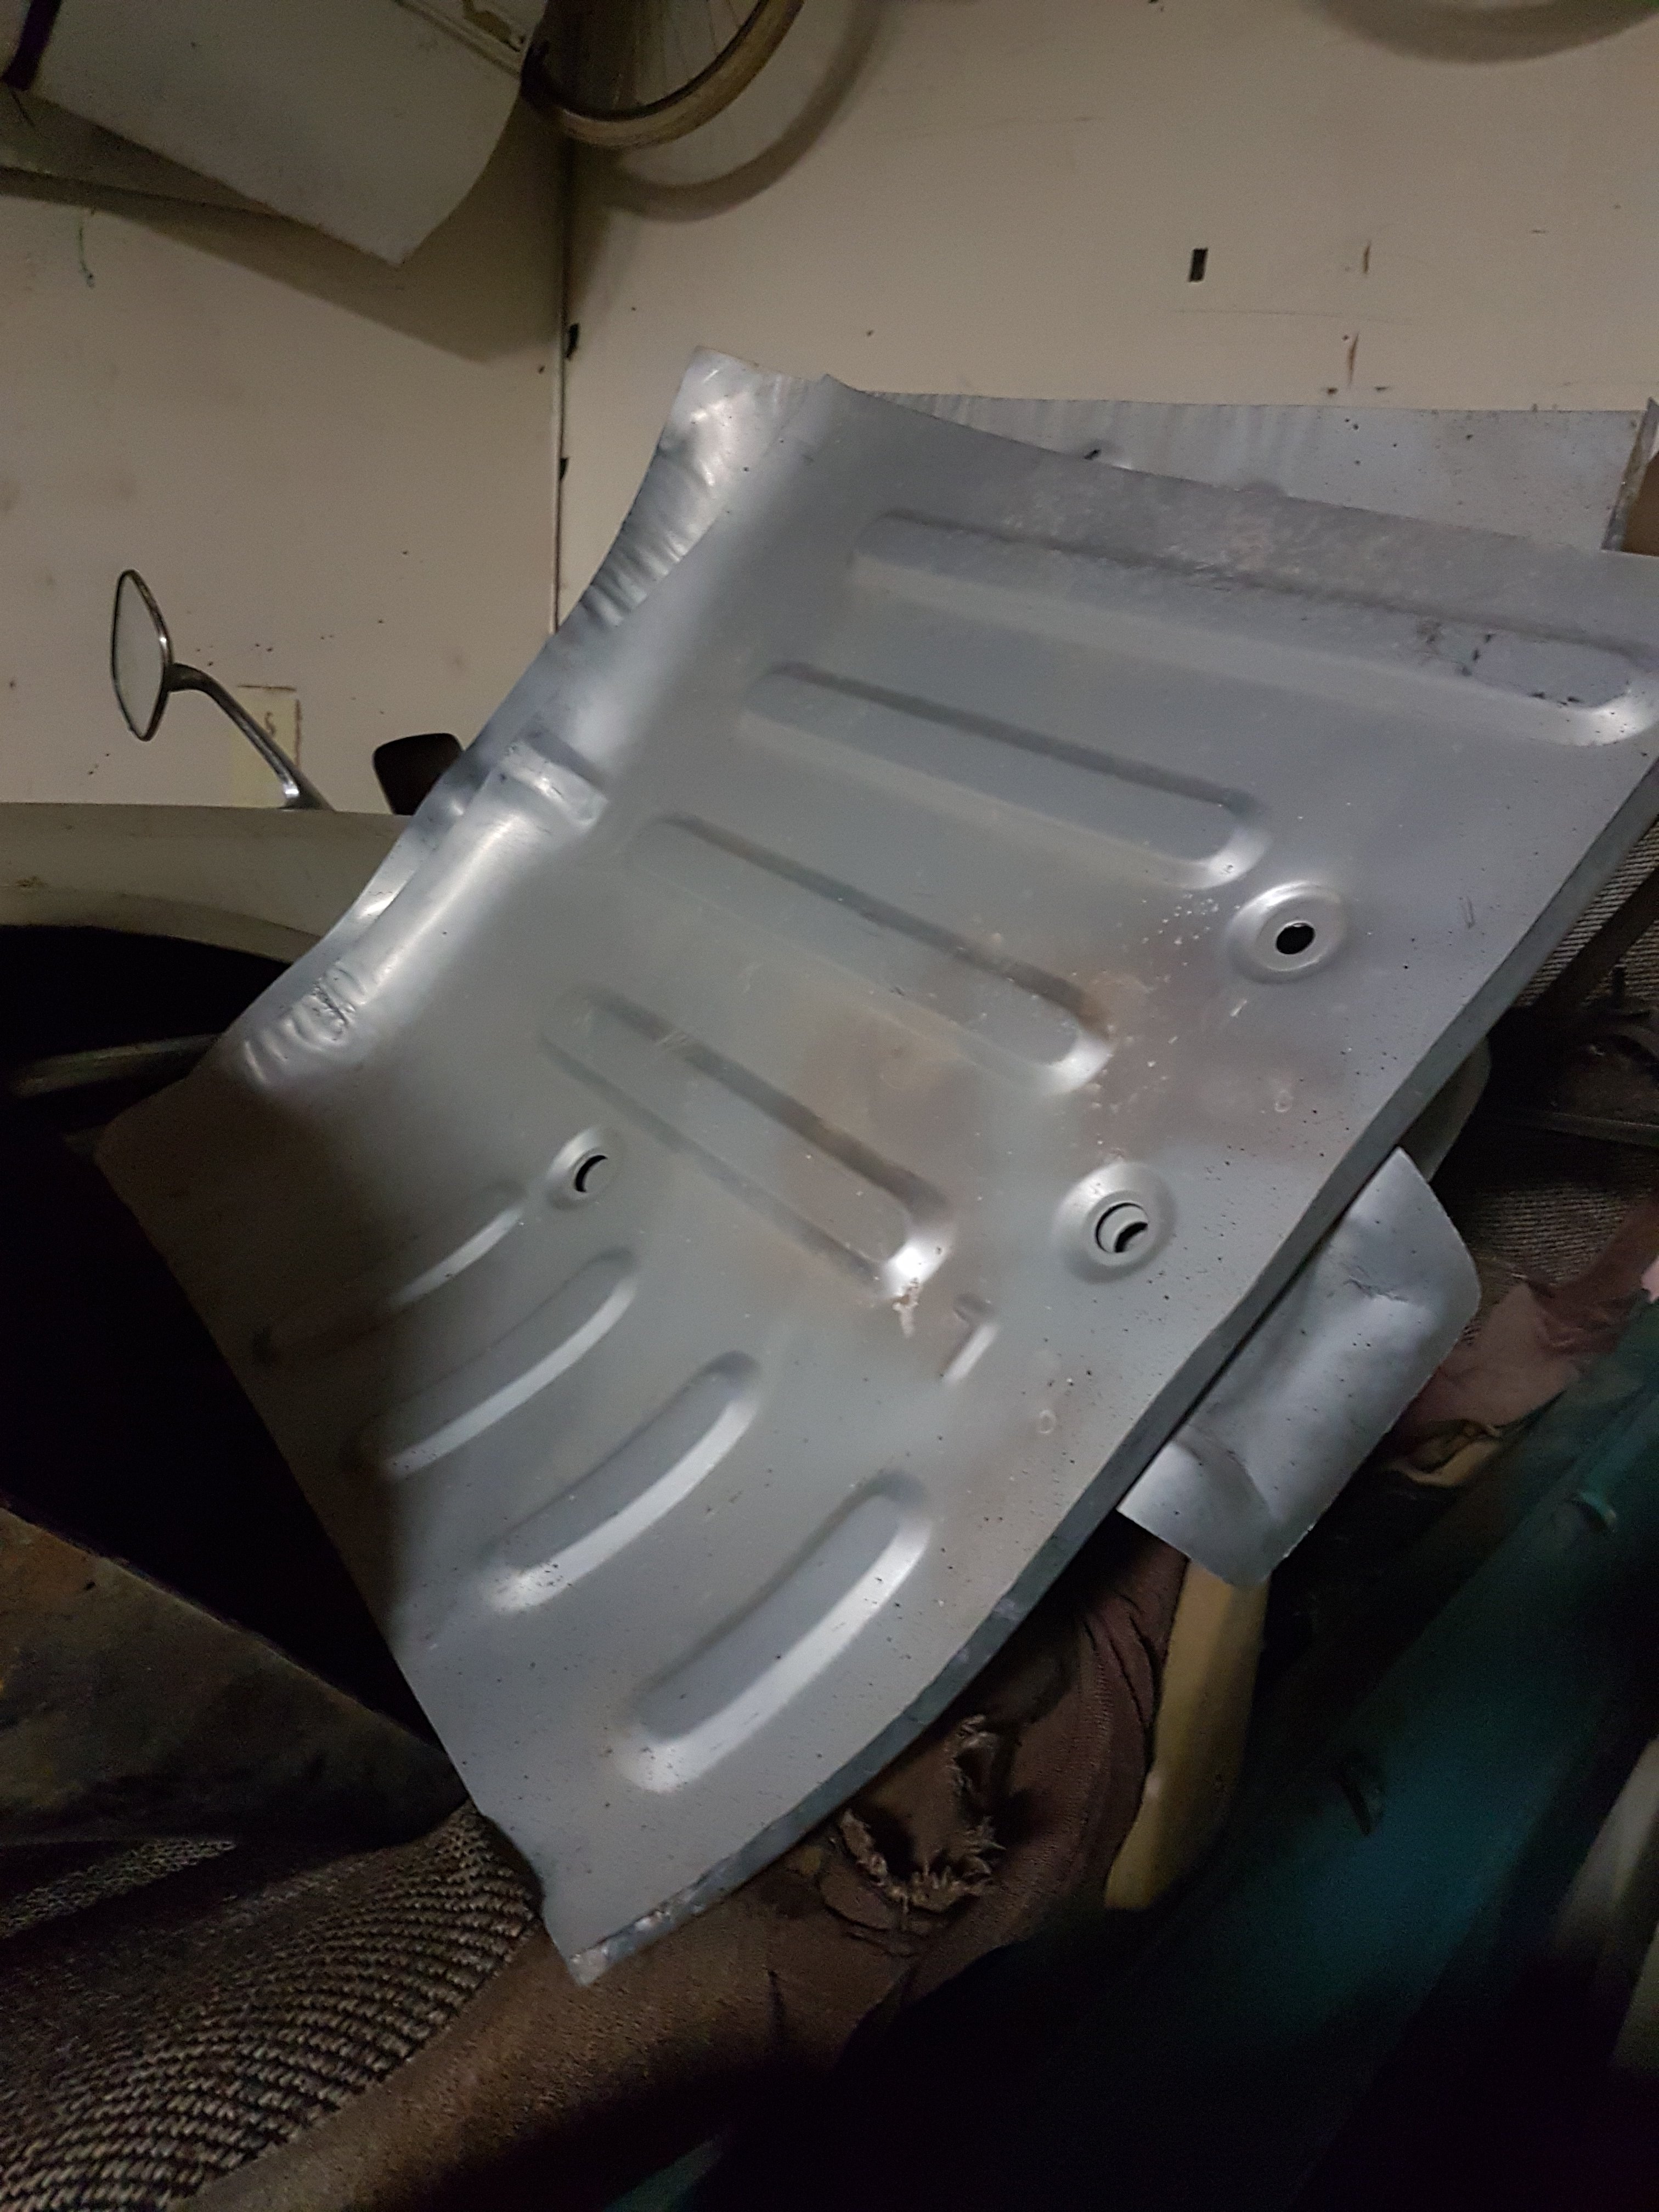
Actually, i did buy some floor pans! Kinda progress..
1 point
-
Update! I never said progress....
1 point
-
10/10 series and production. Any series that can convey nuclear engineering & more principally physics to the public and get people engaged is doing well. The associated podcasts for each episode are a great listen if you haven't already, link below if you want it! Podcast Ep 1 But uhh yes, back to regular programming. I found a useful post by an MS112 owning minkara user who I follow. He 'ported' an MS110 digital dash into his MS112 and reckoned it wasn't hard. No confirmation re: plugs but I assume they aren't the same. If it's anything like my old GX81, plugs will be different (and I'm expecting them to be). No word on fuel senders tho, on my X8 they were different so it could be so in this case.. How good does it look with added green LEDs for that Cherenkov-esque glow hahah1 point
-
Such a great series! Errrr Chernobyl that is. Not M series1 point
-
"What does the meter say?" "95 degrees Sir" "Not great; not terrible." "Sir... thats as far as the needle goes on the dash" "The digidash can read higher. Go get the one from yahoo auctions"1 point
-
"You didn't see coolant on the driveway because it's not there!" "Perhaps you saw water from the AC?" This could go on forever. Parallels between nuclear reactors and M series are too good lmao Side note, I'll be sure to pour sand and boron on my M when it blows up1 point
-
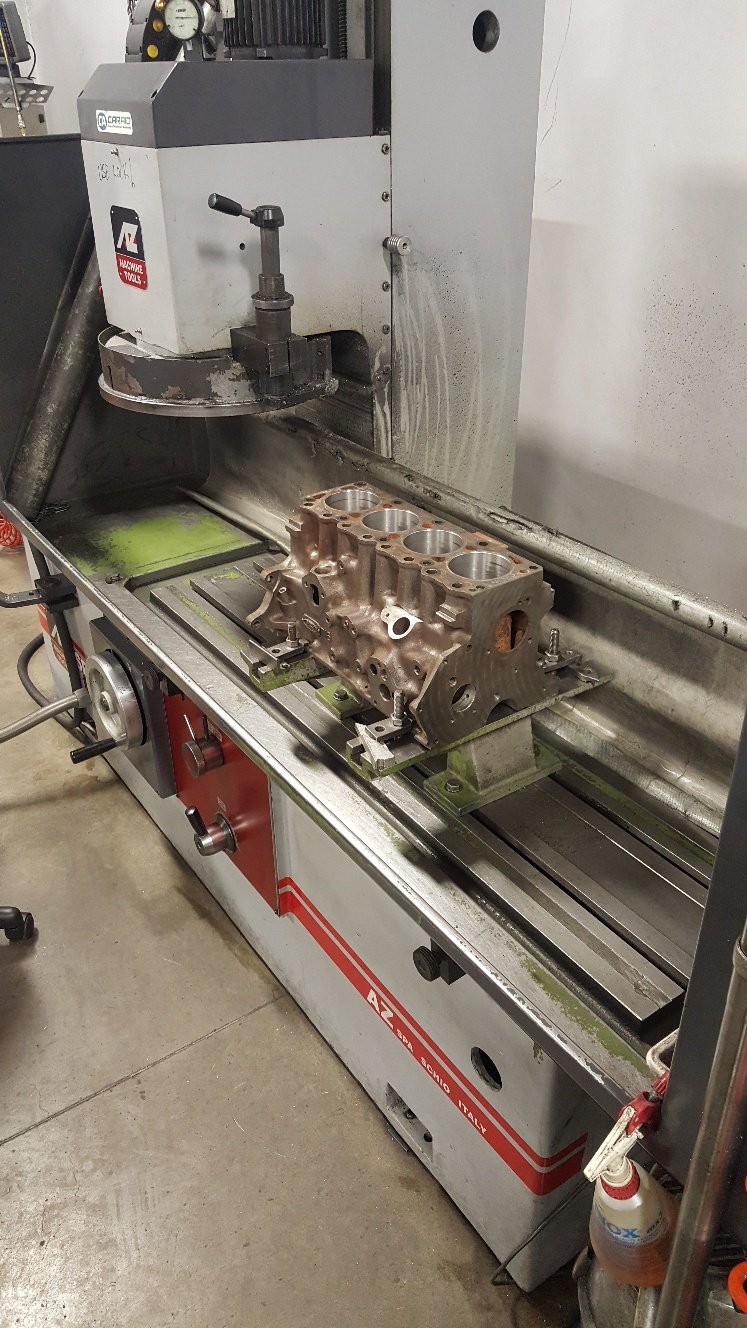
So i fitted the torque plate for the honing process. We only have torque plates for certain engine's. But lucky Ford xflow's are in formula Ford's so the boss saw the need to get one made. The torque plate allows you to simulate the tension of the cylinder being fitted to the block while honing. Some blocks move considerably from the head bolts being torqued up. This can distort the bore, sometimes up to 2 thou on various blocks. So it's like honing them in there assembled running state. I have heard stories of shops honing with hot coolant running through the water jackets to simulate total running conditions. All in the name of perfect ring seal you need a perfectly round and straight cylinder. We leave 4 thou of material to hone out as this gives us a good base to start achieving good rk rvk and there's another value aswell but I can't think of it right now. But we start off honing with a course stone which gives us a deep groves and removes material quickly. Once we've removed 3 thou we change stones to a smoother grit this removes the tops from the course stones while taking more material out. I'm also happy say I have removed all the bore wear marks after removing 2 thou of material. Now we move to a finer stone again same thing applies. Each different grade of stone removes material in different ways. Some stones will take more out of the bottom middle or top of the bore, so you have to measure the bore to make sure you're keeping it straight. The stones also react to load. Theres a round handle onto of the machine that applies load to the stones in the bore. If you wind to much load up it normally takes more material from the middle of the bore as there's no real strength there. Extra load can also create heat which will give you a false reading of size from the material expanding. Once we are at finish size we have what we call plateau stones. These are 800grit they don't really take much material out but smooth the tops off from the previous set of stones. Then we move to our cork stones. Which look nothing like cork. These are really good a removing left over honing material out of the cross hatch. We only give the bore a couple of strokes with these. Once a year we clean the machine out. It normally has about two 20 liter buckets fill of cast iron sludge sitting in the bottom of it. This machine runs 200 liters of honing fluid. Which is great as one of the jobs of the fluid is to keep the block cool as well as wash the honed material away from the honing head while honing. A drum of honing fluid isn't cheap at $2500 Then there's all the stones we burn through. So the honing process has one the highest consumables cost in the workshop per year. From start to finish it can take a hour to two hours to hone a block after a rebore. A deglaze or what we call a rering hone is normally about three quaters to a hour.
1 point
-
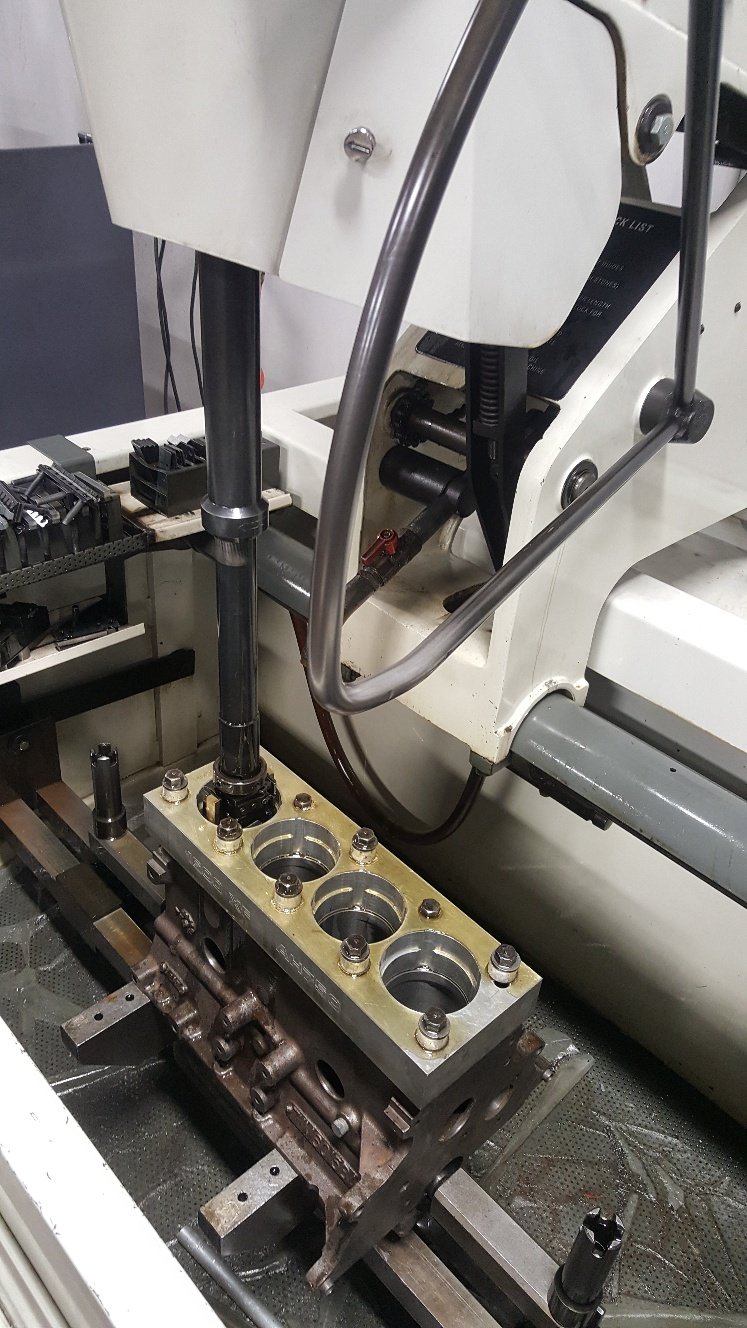
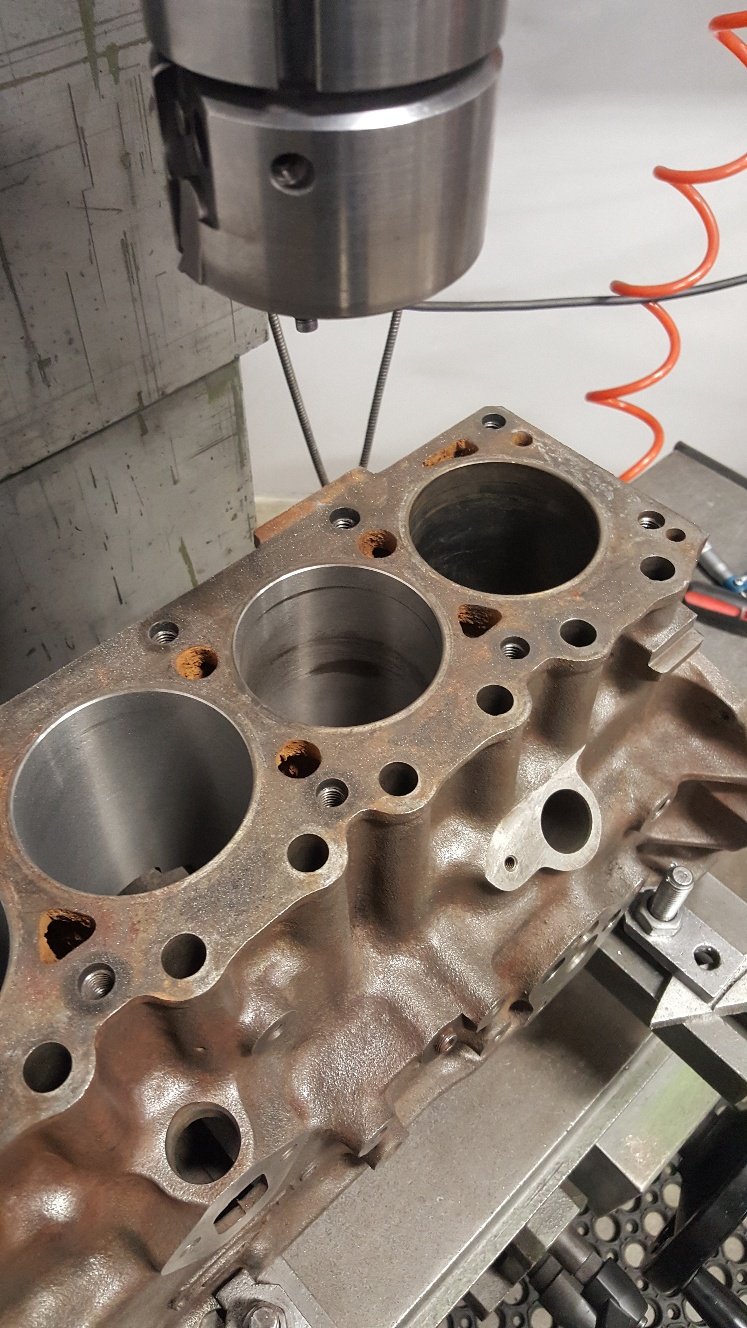
So I got the block into the boring bar. It's pretty straight forward boring a block. Doing a cylinder liner is a bit more involved as far as the boring bar is concerned. This block is at 30thou over or .75mm in metric. I have bought 40thou over or 1.mm pistons. It has a bit of wear. But hopefully it's should clean up once it's honed. This picture is of a test cut. So you dial the boring bar head into the bore. If you have a decent amount of wear it pays to slightly offset the bar towards the wear so you clean all going well at the next oversize. So in this picture you can see the boring bar hasn't totally cleaned with this size cut. I have only set the bar at 81.90mm. So I have .1mm or 4thou to hone out to get to our finished size of 82mm. We generally like to leave this amount to hone to achieve good rk rvk this is the depth of hone pattern. I'll go into that a bit more once we get to honing it. Once we've finished honing we normally go to the surface grinder. The top of the block is a little corroded so I'll probably take a few cuts to clean it up. So I've done a light cut to see how it looks You can see it still needs more off it. In this case it's not a issue to take more off the deck. When you are dealing with a late model diesel or performance engines that have been set up with good tight clearances it pays to watch how much your removing as you may have to detop your pistons as they may start getting to close to the head once assembled. Also valve reliefs can also need deepening. But this is more so a issue in extreme cases. This good old xflow should be fine. But i will be checking all this later once i can dumby the engine up
1 point
-
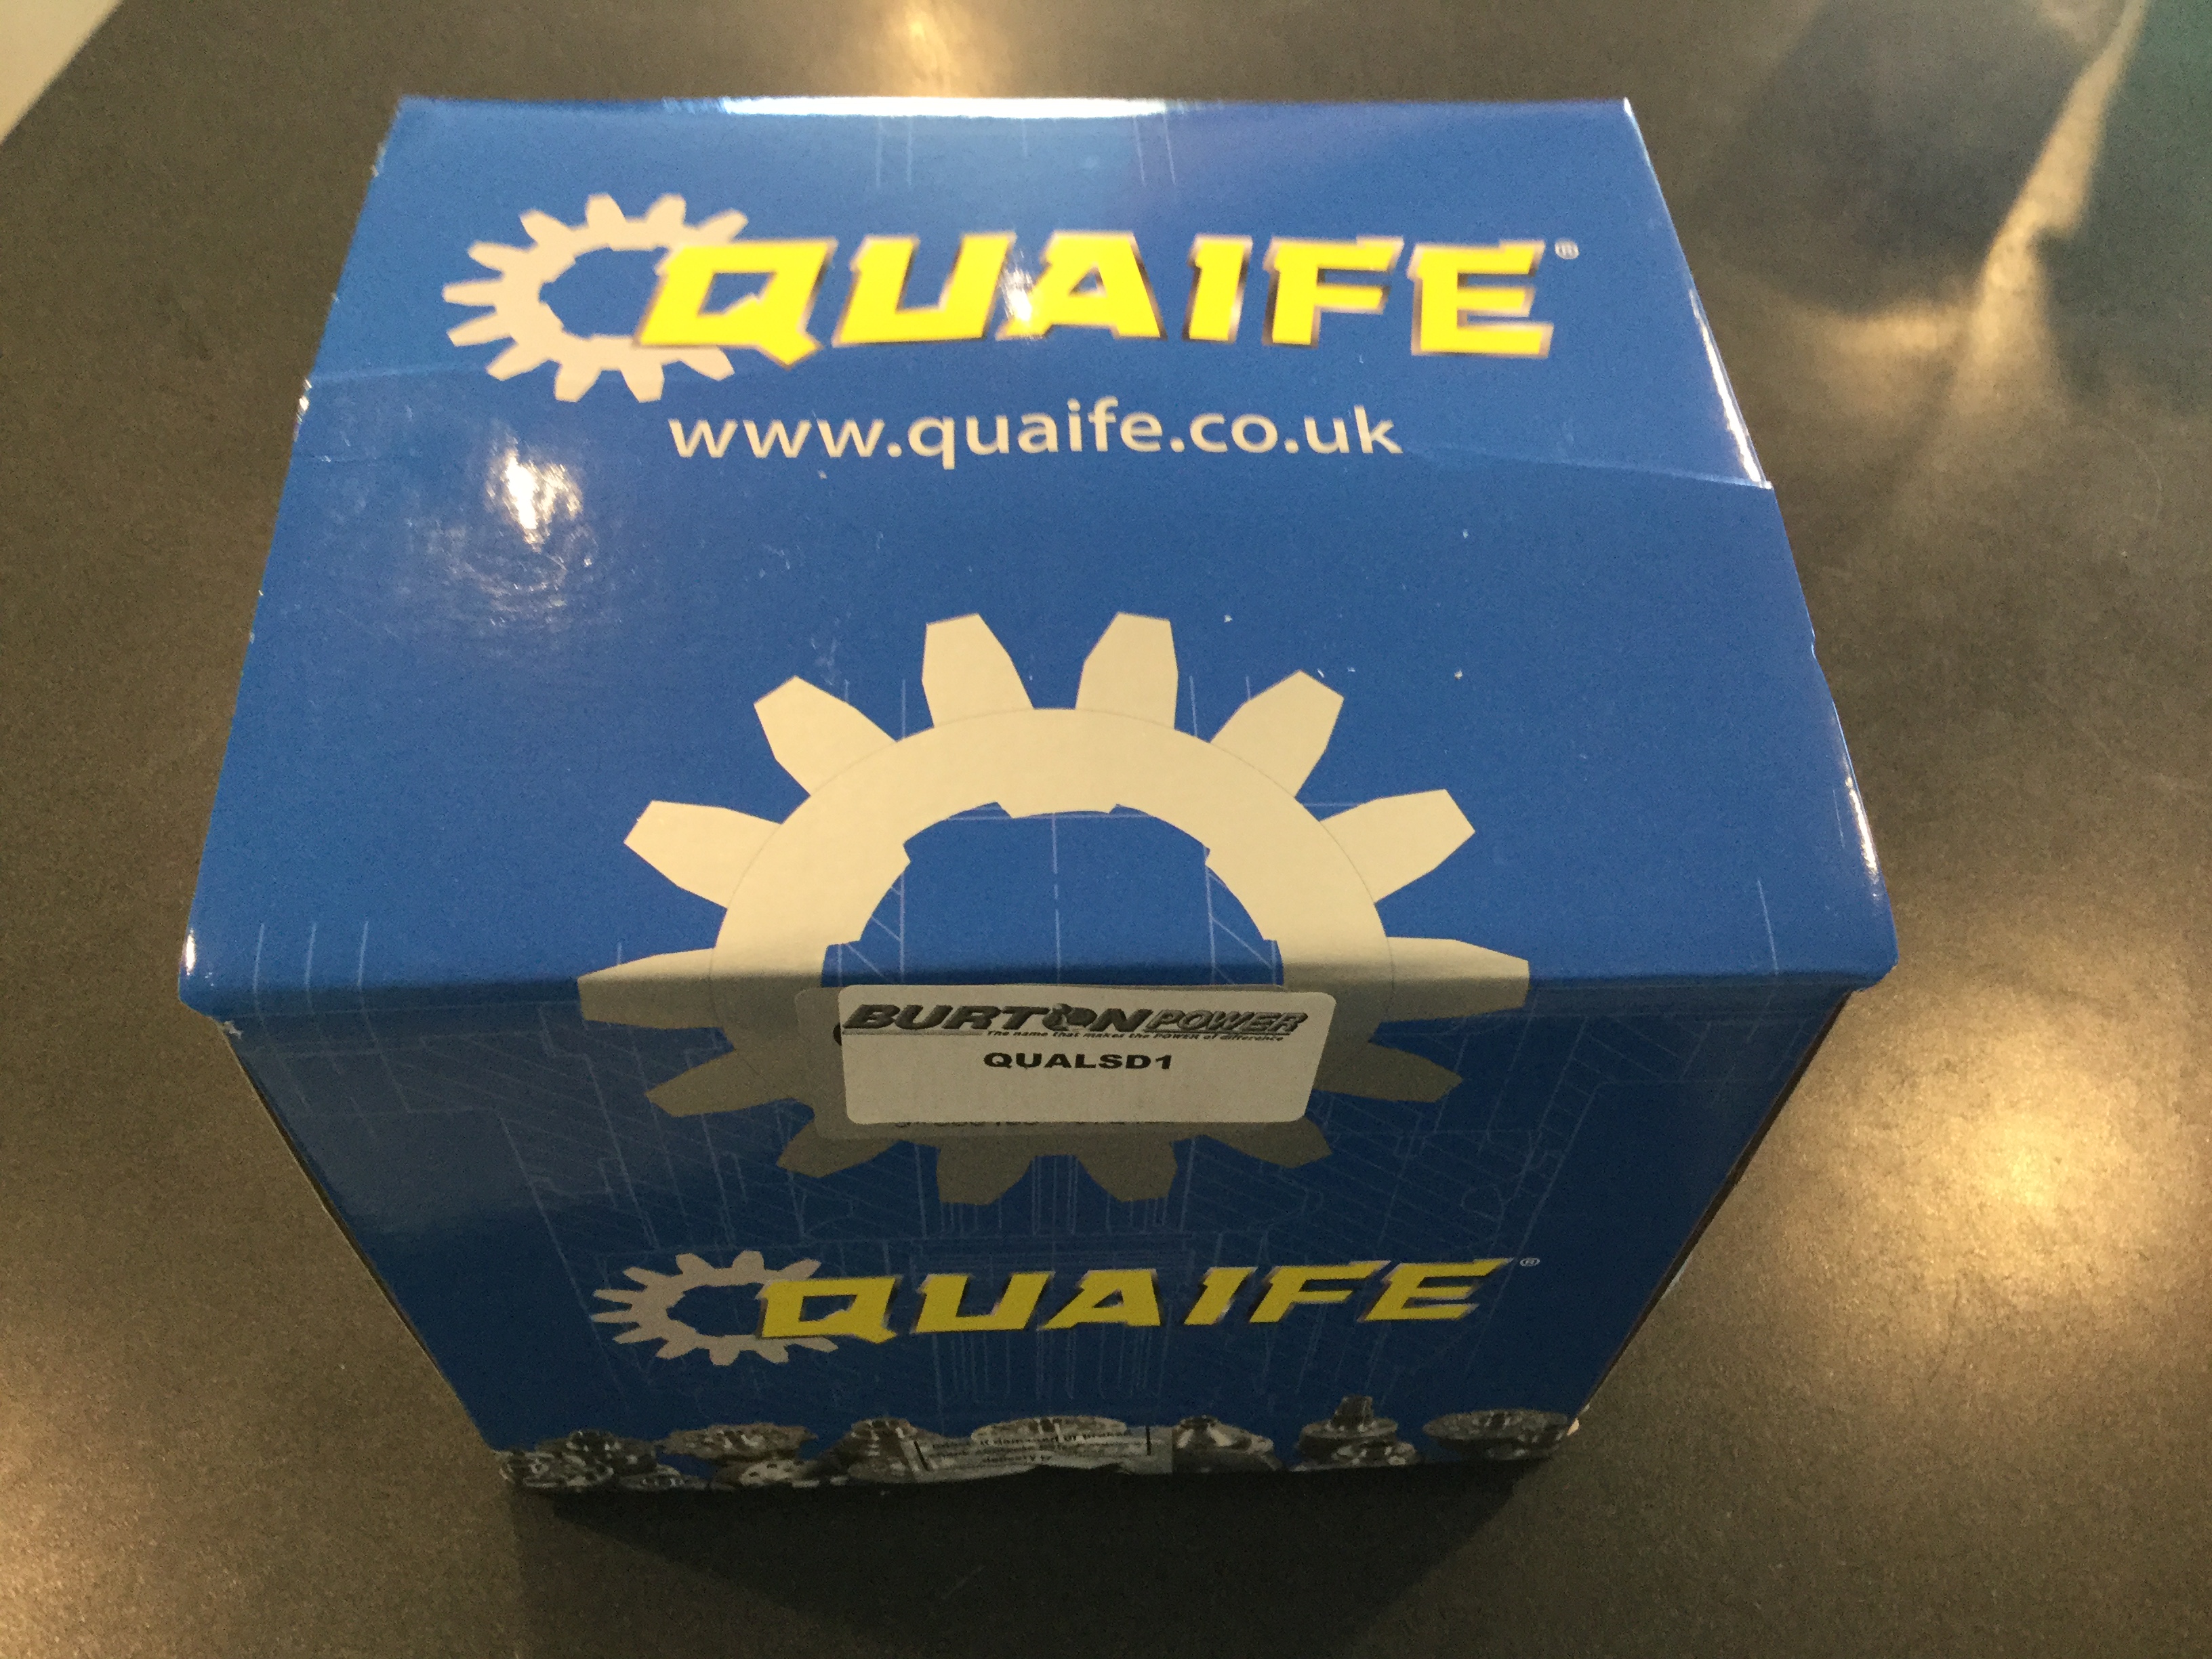
This arrived today. LSD.
1 point
-
well after two months GER finished the head. the one that came off the car was cracked between the two valves in every cylinder, as well as being soft, bent and fucked. so we used the one off the parts car. heres a list of the things that had to be done, head stripped completely and re-hardened head straightend and planed new valve seats and guides new valves new stem seals all the casting plugs leaked so that all had to be re-machined and frost plugged the head bent laterally so the two middle cam journals has to be welded and line bored inlet and exhaust faces re-machined rocker gear disassembled, rocker shafts polished and cleaned, rockers re-bushed and reassembled it cost heaps and its a fucking joke that anyone would be fucking stupid enough to fix a 4M head but i did. also i got a correct gasket out of straya, it was the last one to be found and GER had to do some digging to find it. yea. so ill put it back together at some point. 2018-06-18_05-38-35 by sheepers, on Flickr 2018-06-18_05-38-01 by sheepers, on Flickr 2018-06-18_05-37-35 by sheepers, on Flickr 2018-06-18_05-37-22 by sheepers, on Flickr1 point


.jpg.419fa298e2d0e54da445eec3b78f9c95.jpg)
.jpg.f29fb048178ff1065a621e7eea5277fd.jpg)
.jpg.fad084fe446608465f7c0af112e953ce.jpg)
.jpg.751d99e600c4bd5ff389dbe2554b0cb5.jpg)


This leaderboard is set to Auckland/GMT+12:00