
Leaderboard


Popular Content
Showing content with the highest reputation on 07/03/19 in all areas
-
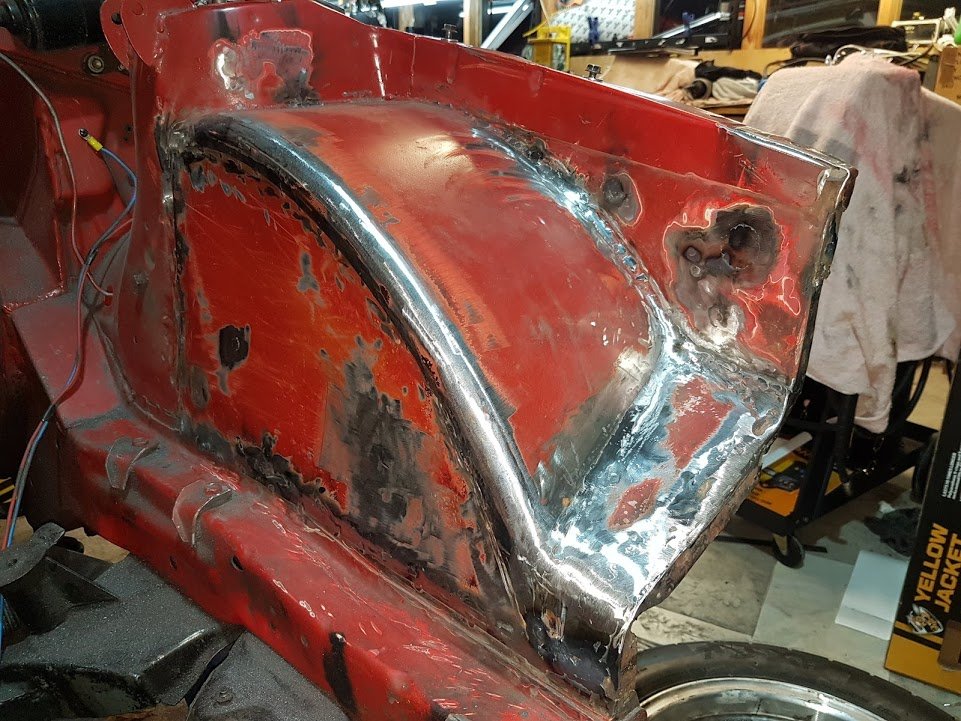
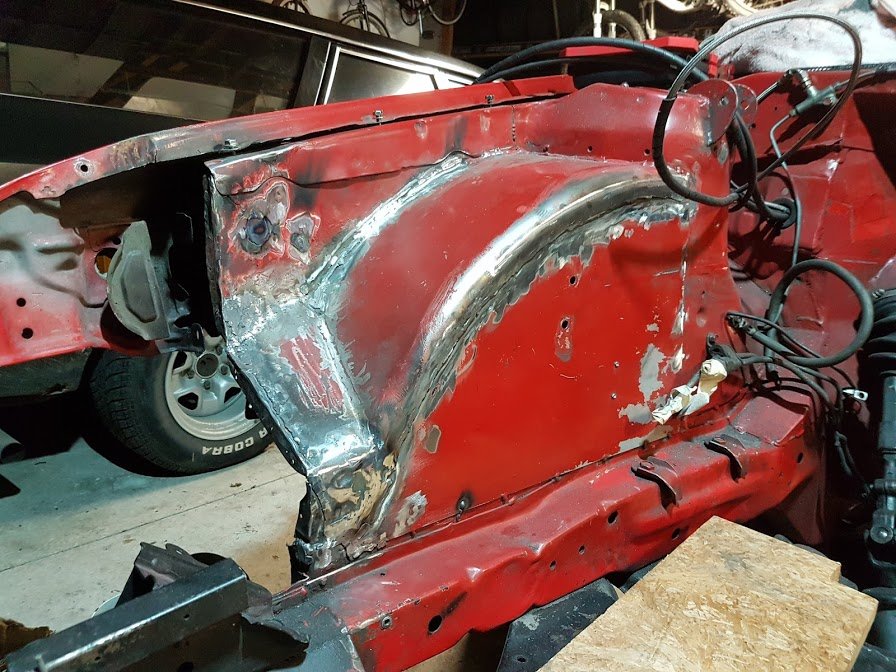
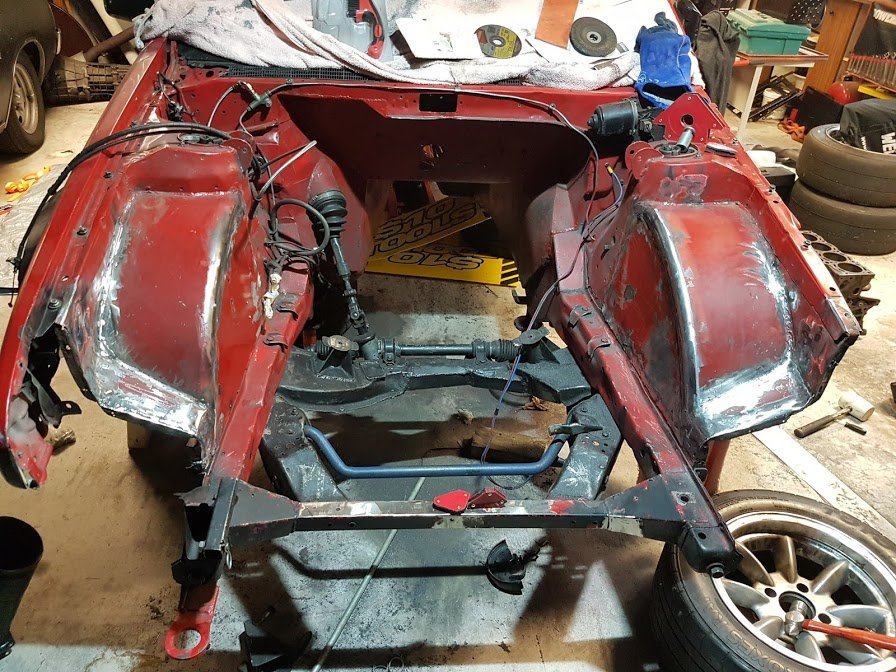
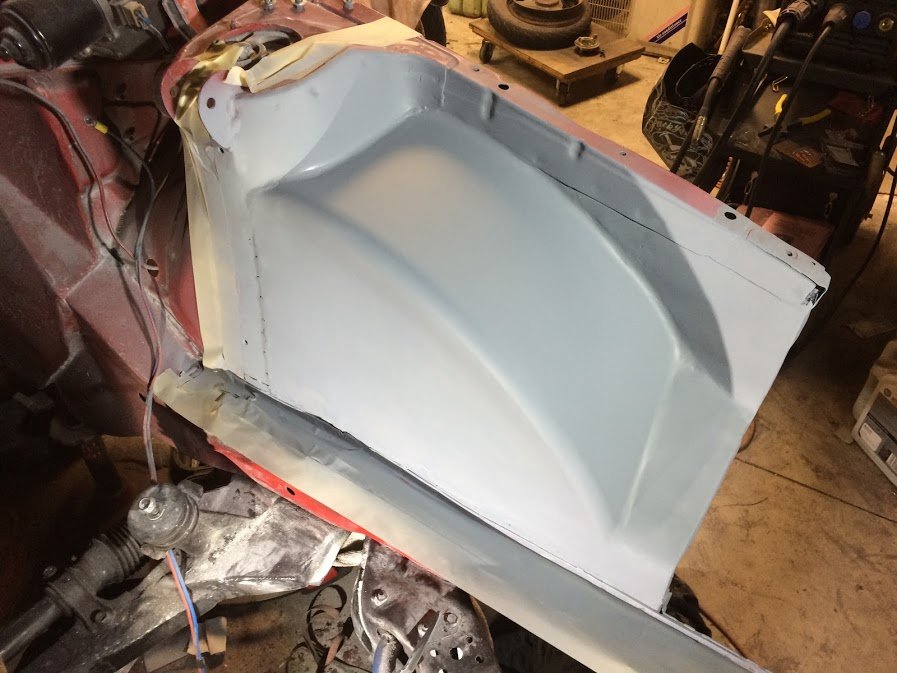
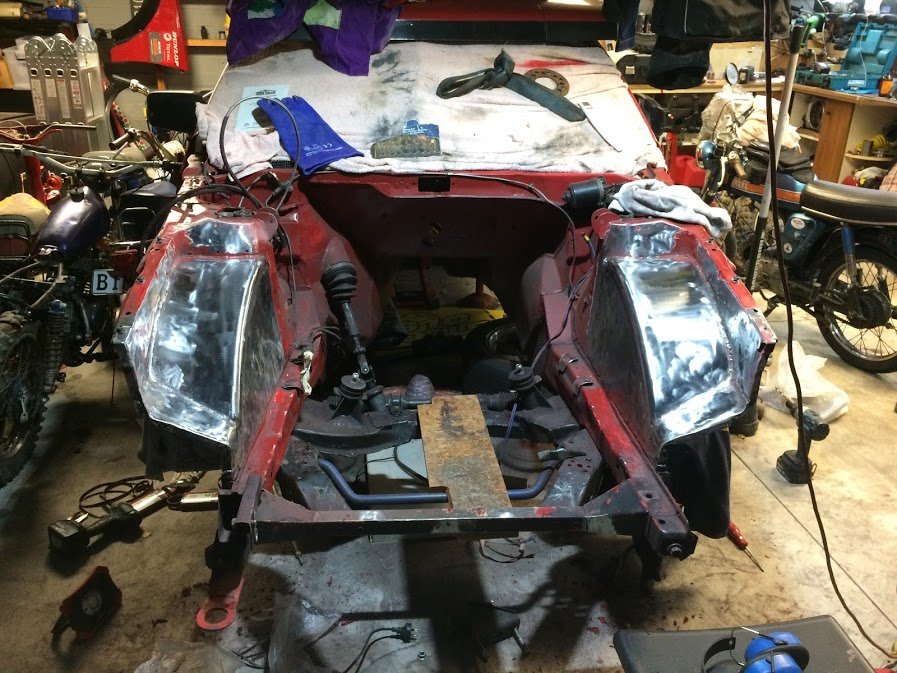
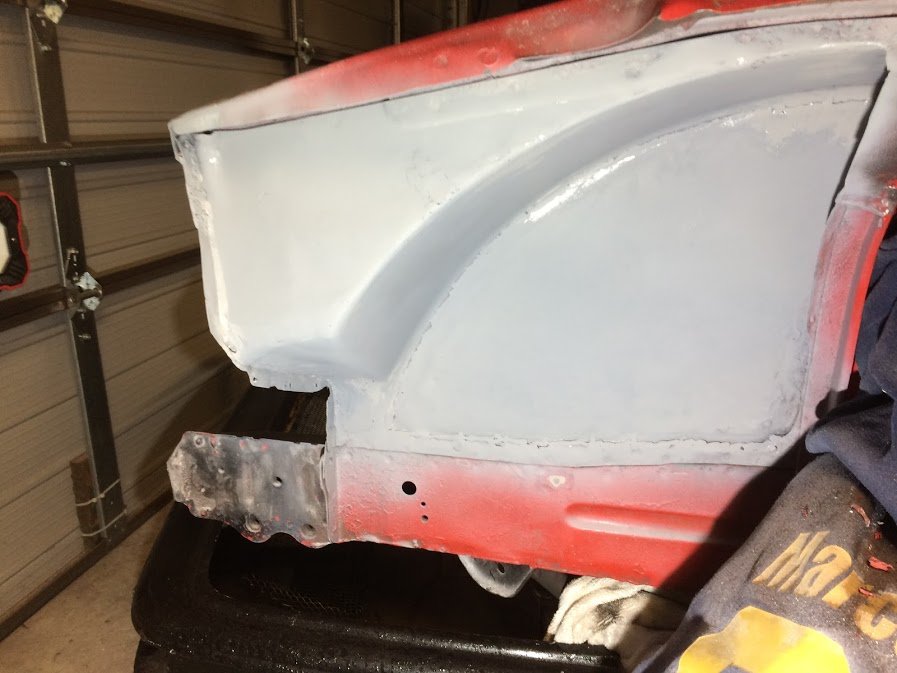
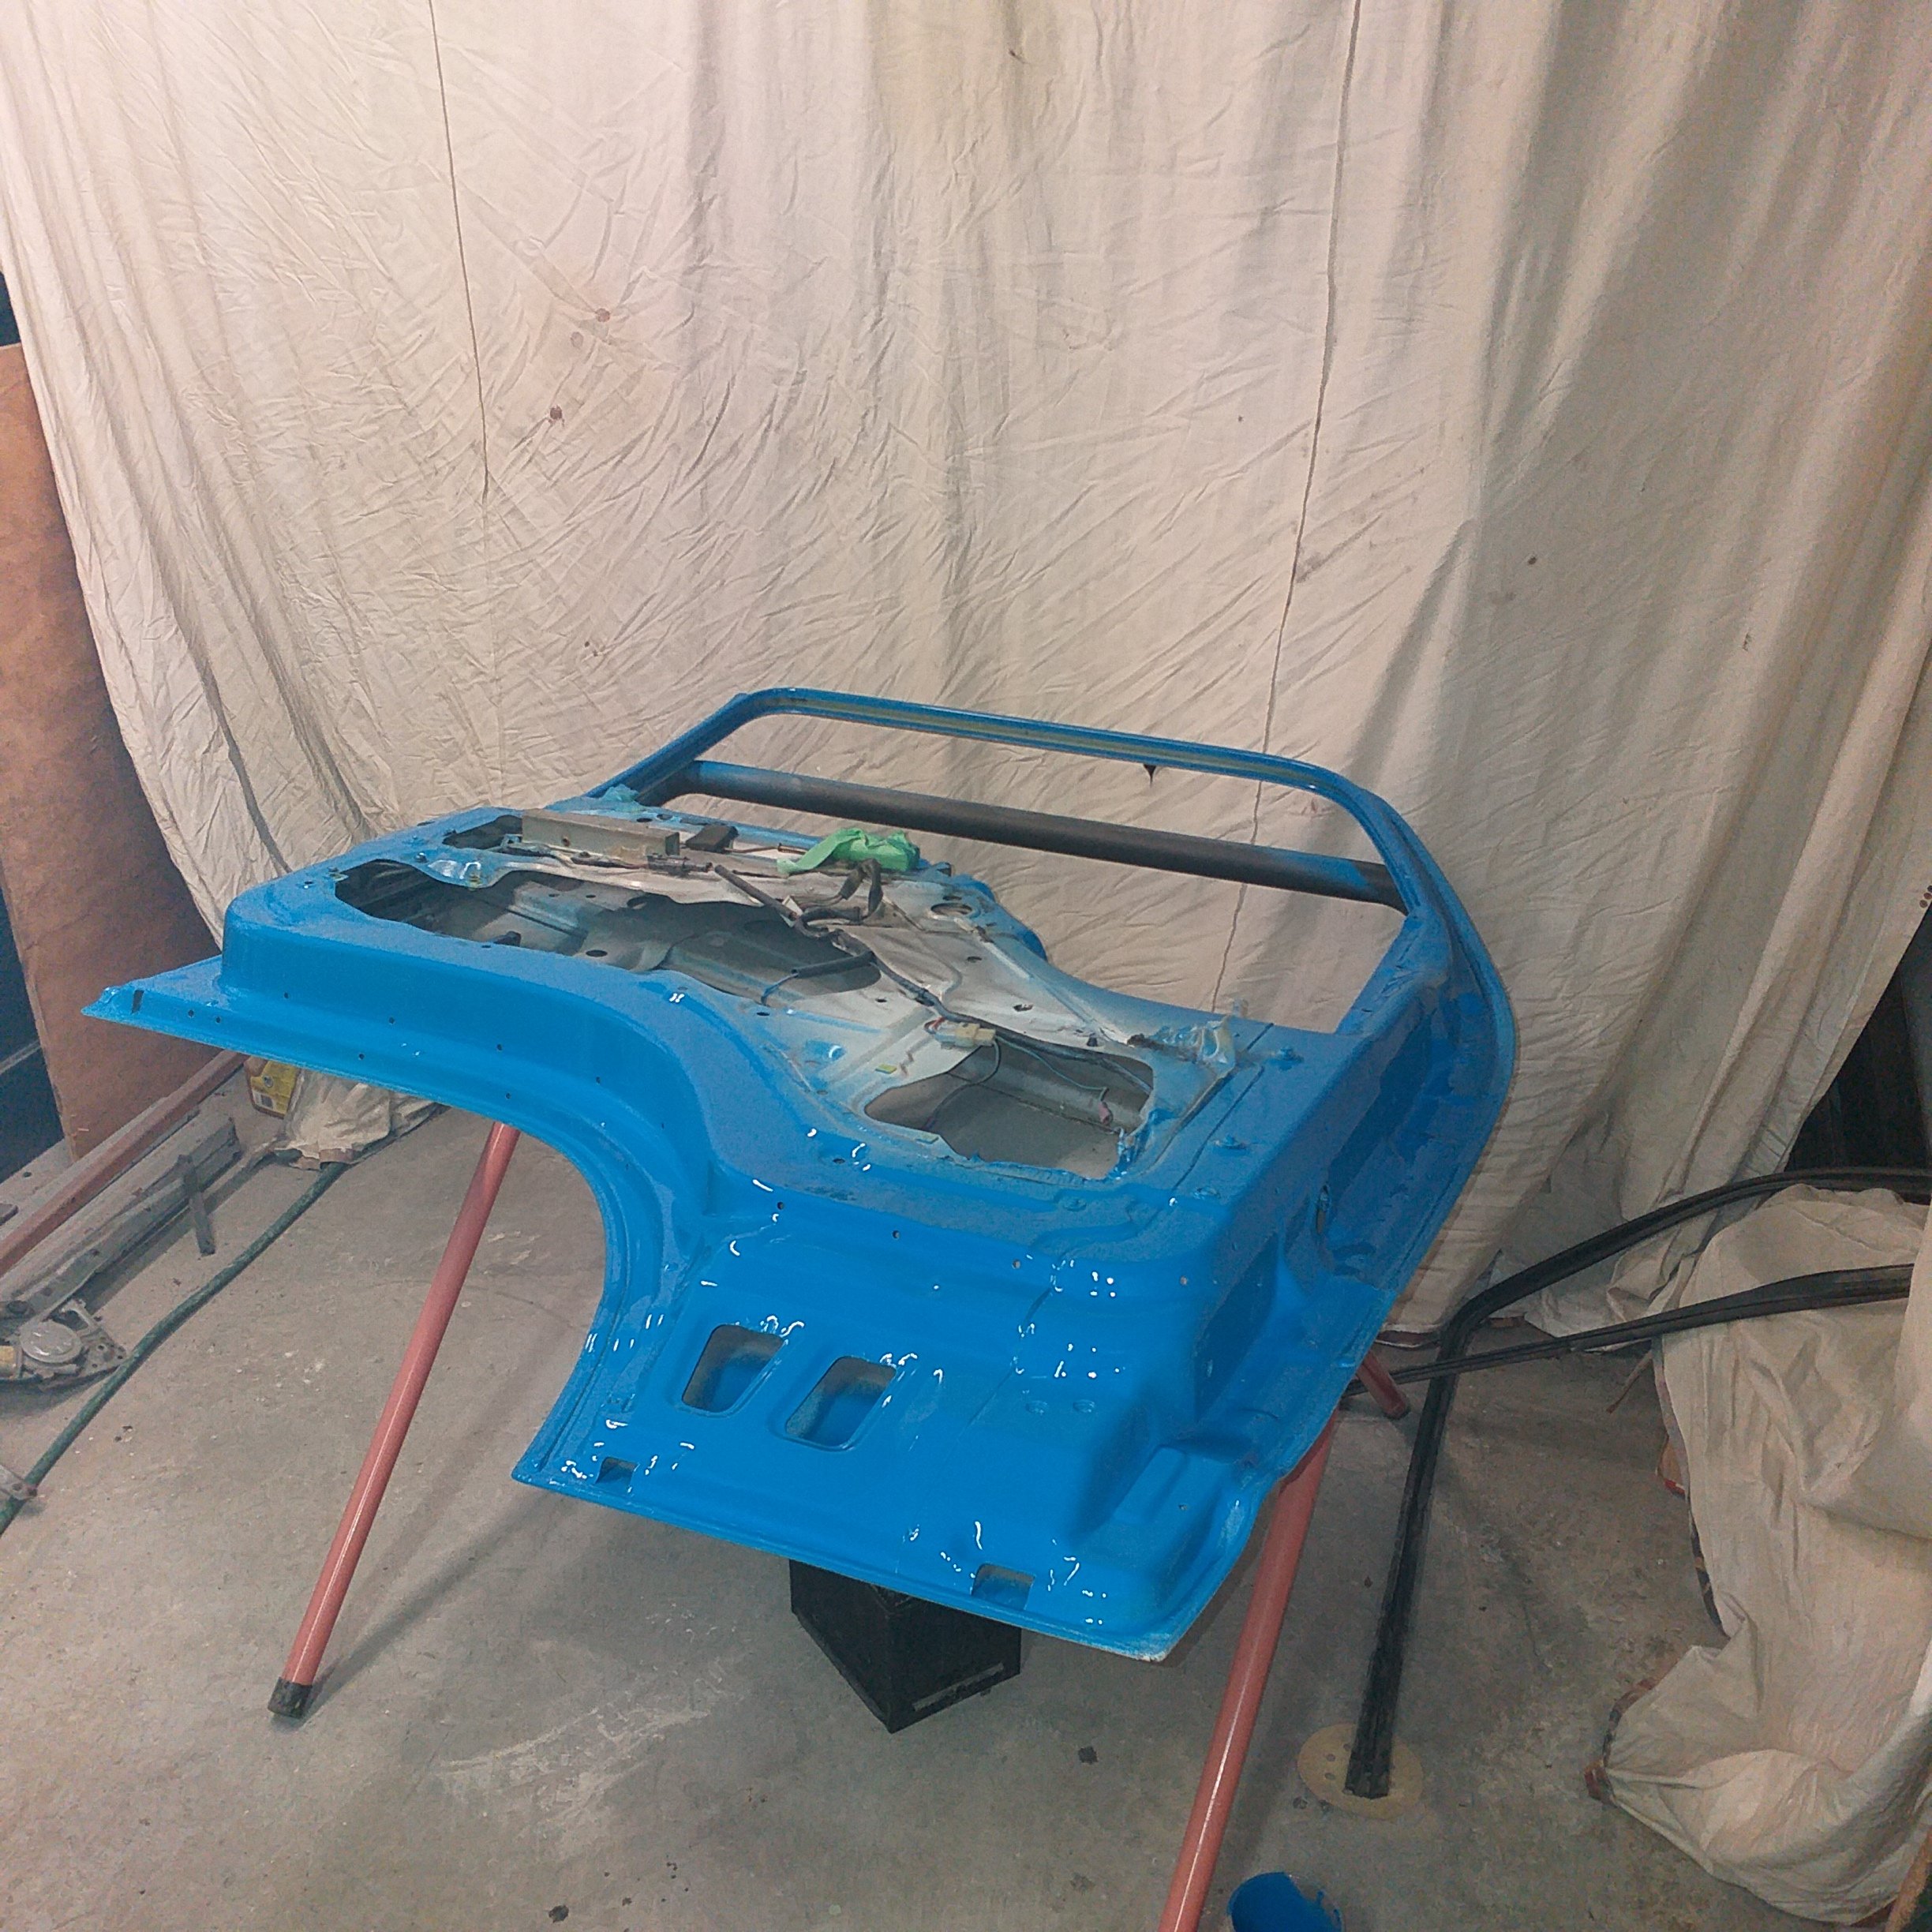
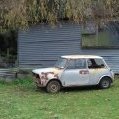
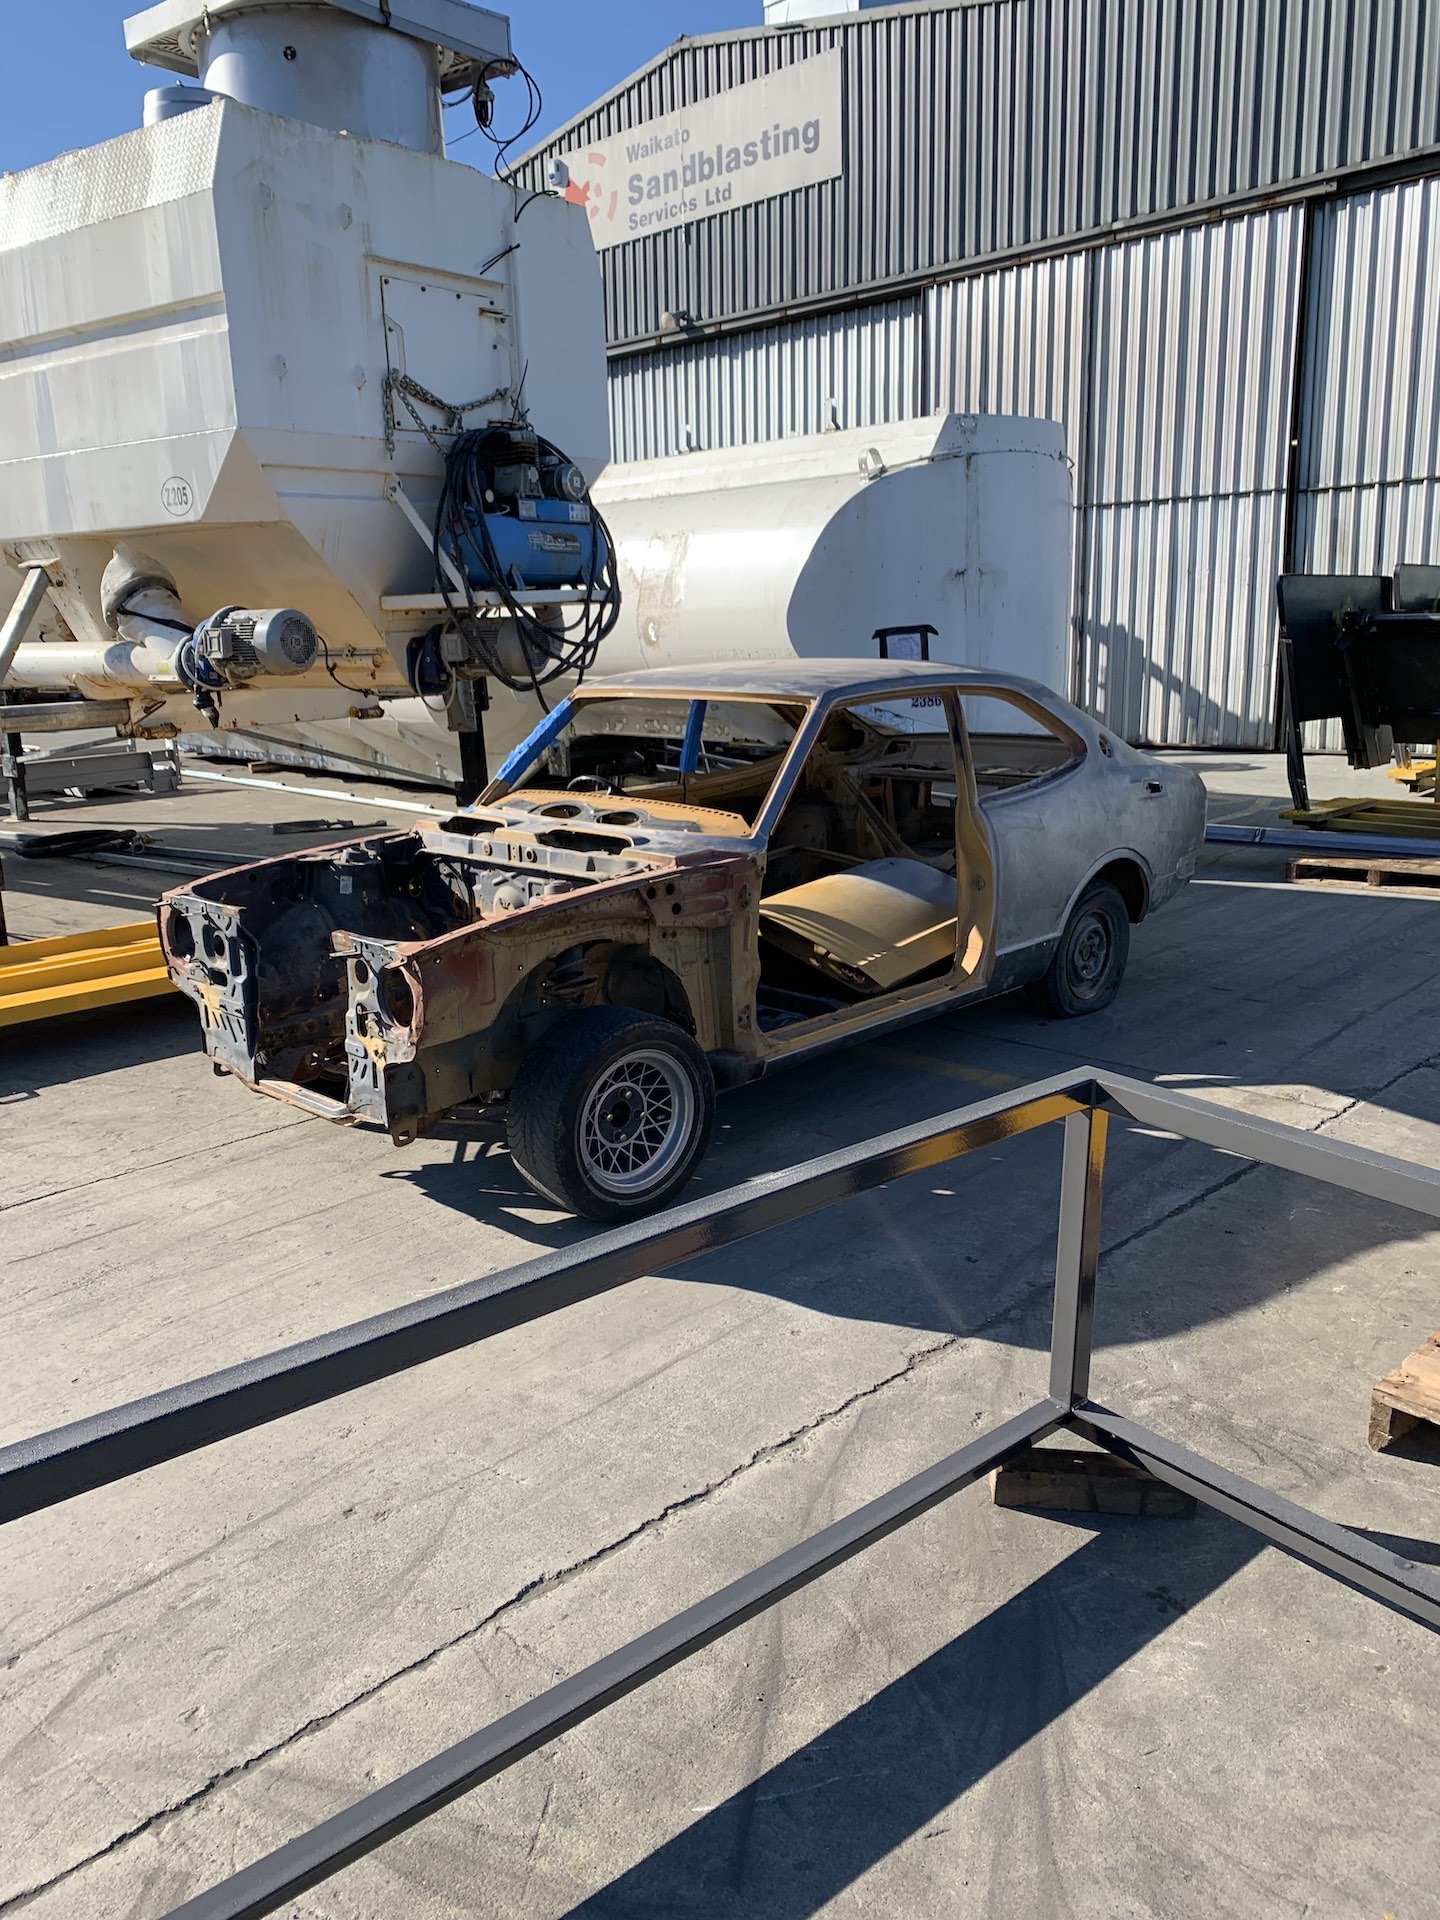
September will be two years since I've driven this car... So I've decided that I should get it going and try to race it at the final round of the Manfeild winter series. I've not done a whole lot since 2017 due to general slackness, but have cleaned up a bunch of welds around the tubs. This was about a year ago: Fast forward to this week and I've started doing things again. More weld removal, a few holes welded up, paint removal etc. A bit of filler and the first coat of etch this evening to see how it looks: The underside is still a bit wrinkly, but it's good enough for an inner arch. Now to get the other side. to this level.. I always forget how long it takes to sand filler! It's a pretty painful job . Once both sides are in primer I can give the rest of the bay a good clean up, sand and start thinking about paint.
 12 points
 -
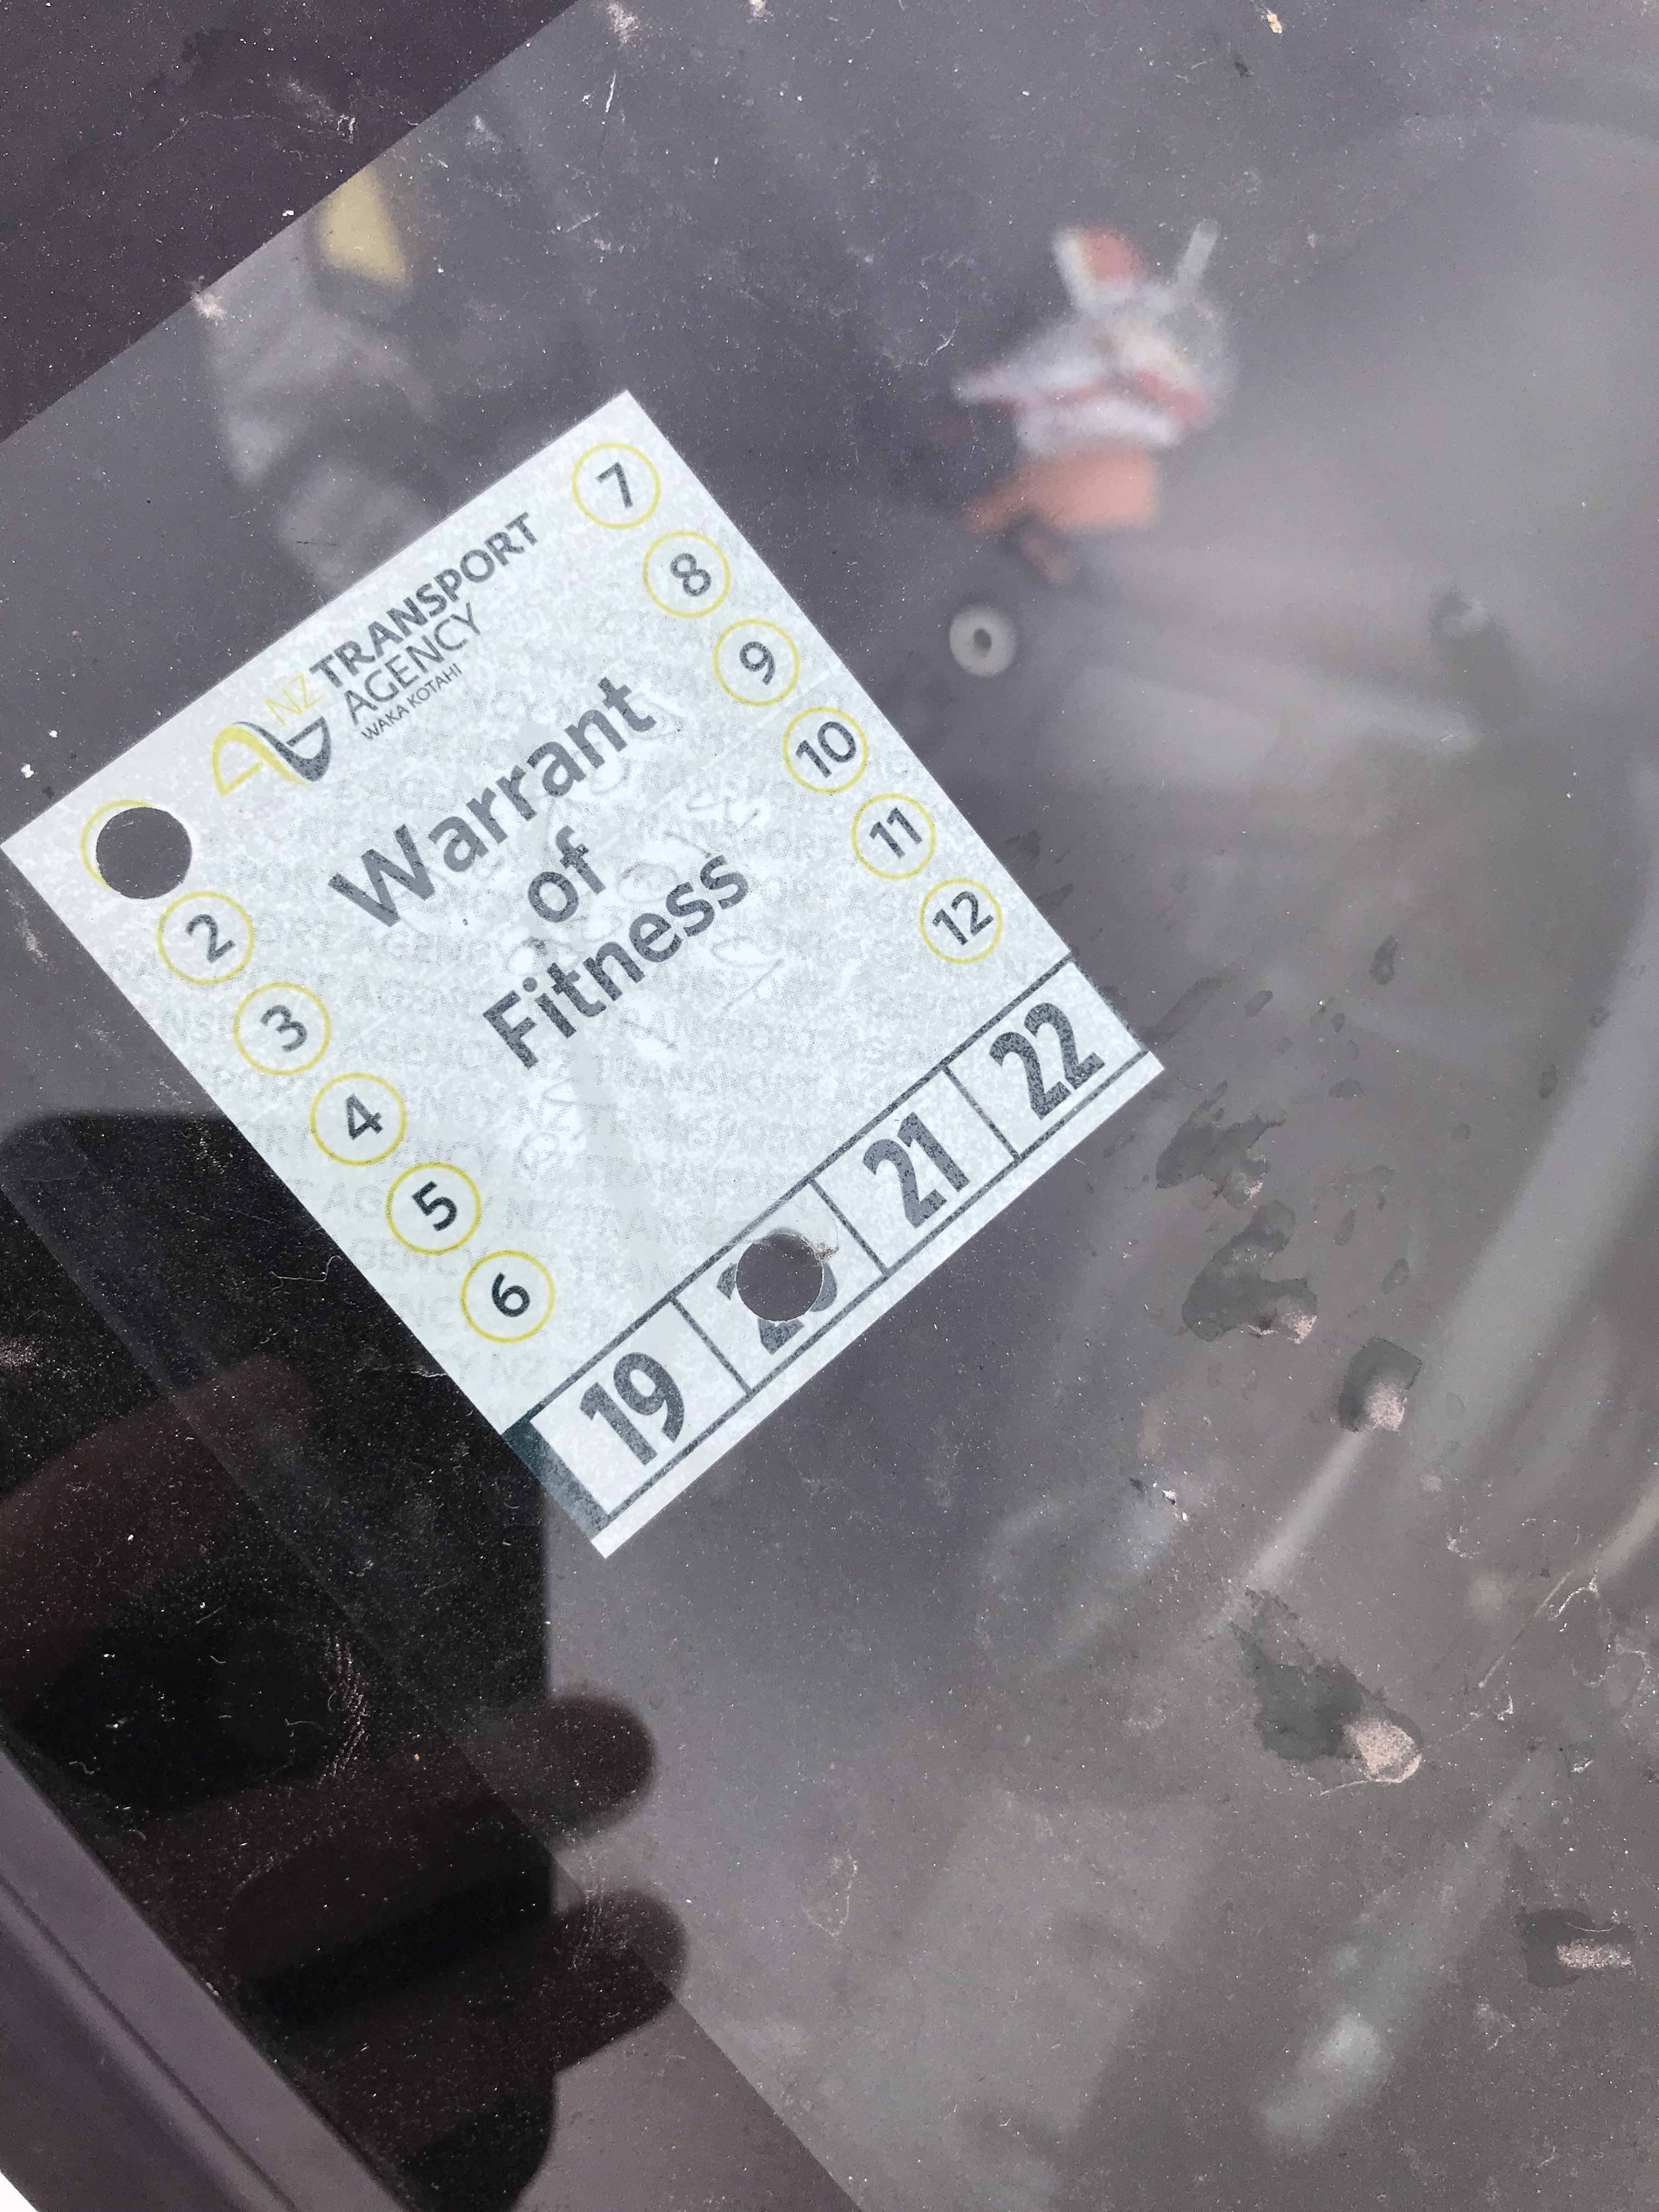
Car passed cert today - awaiting Cert plate. You beauty11 points
-
After 2.5 months and about 3,000kms of Chatham 'roads' the Atlas has seen some adventures. Unfortunately the clutch master cylinder has failed which makes driving a slight challenge, but I ordered a new one a couple of weeks ago and am hopeful it'll get here on the next plane. TBC. The engine's getting tired, and I'd love to fit some auto-locker diffs, but apart from that this truck is absolutely perfect for what I need. I lubs it.
6 points
-
Outer mould patterns finished and ready for printing. 3D printing is good but it also means to have to design the under side! Twice as much work!6 points
-
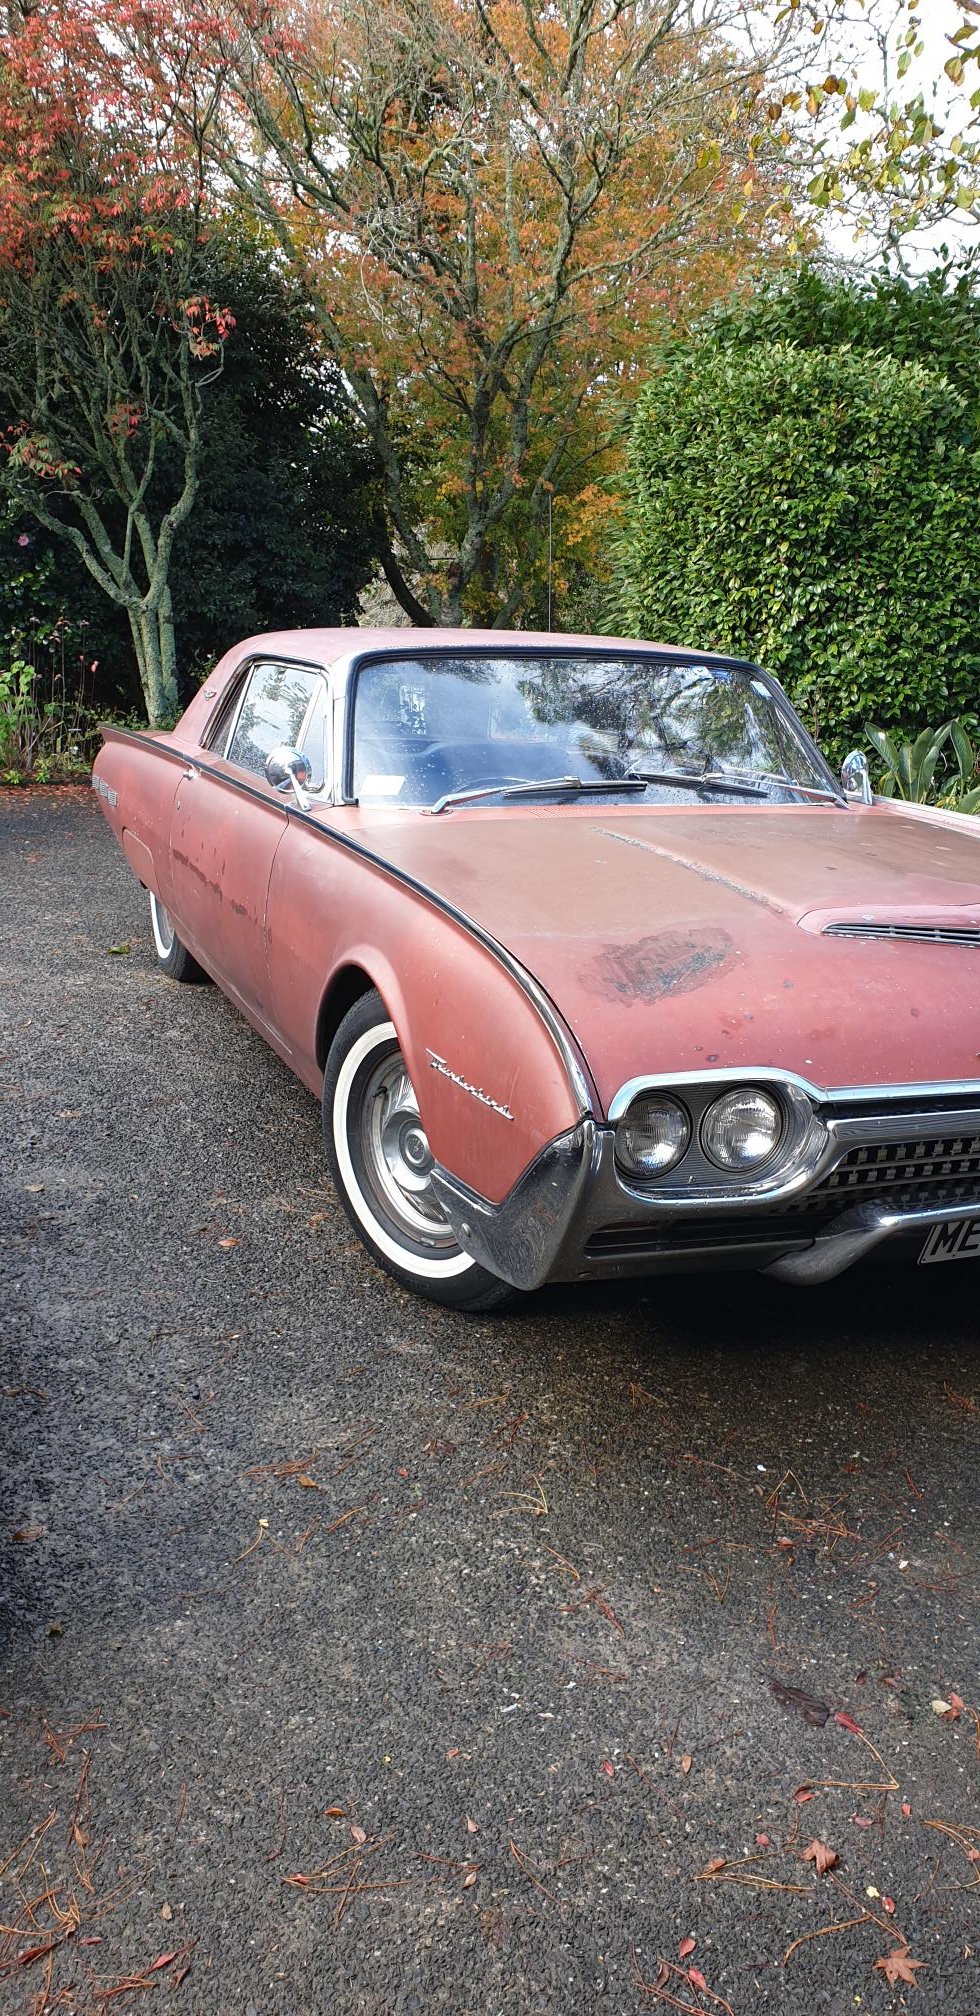
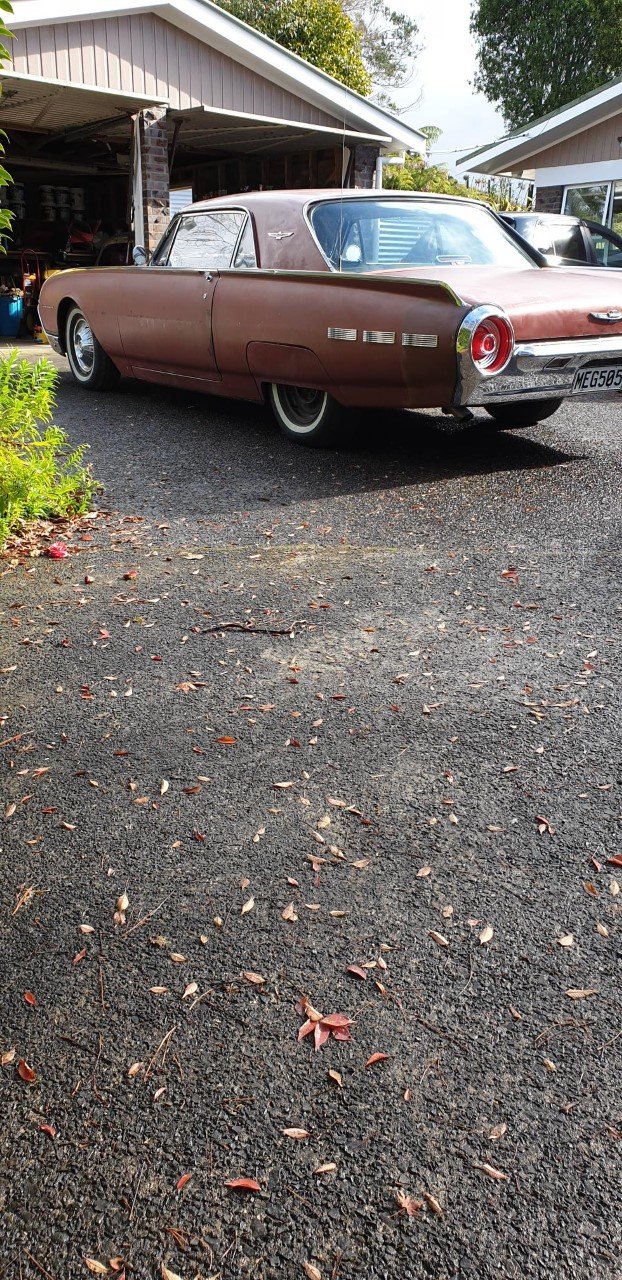
Used to have a 64, sold it to buy a house. Sold the house bought another house bought another Thunderbird because had more space. Has been chopped about 3 inches which makes some annoying but also some cool. Needs quite a bit of a tidy up but its had a disc brake conversion and a bunch of other coin spent by someone else which is cool. for yarns
5 points
-
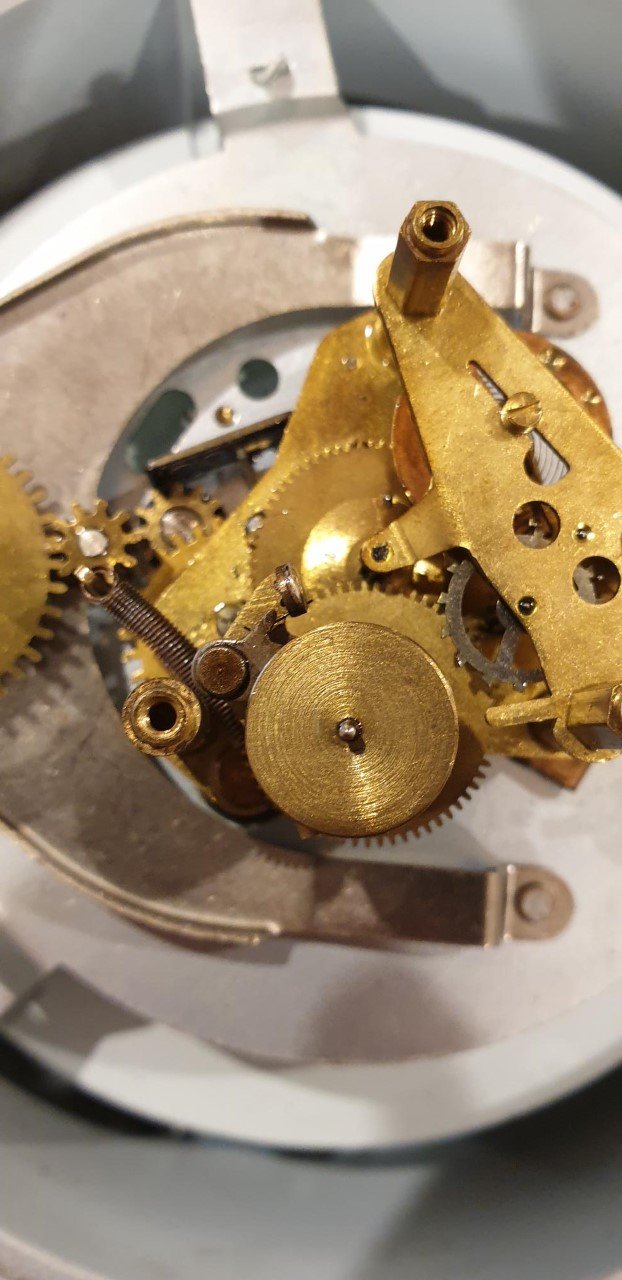
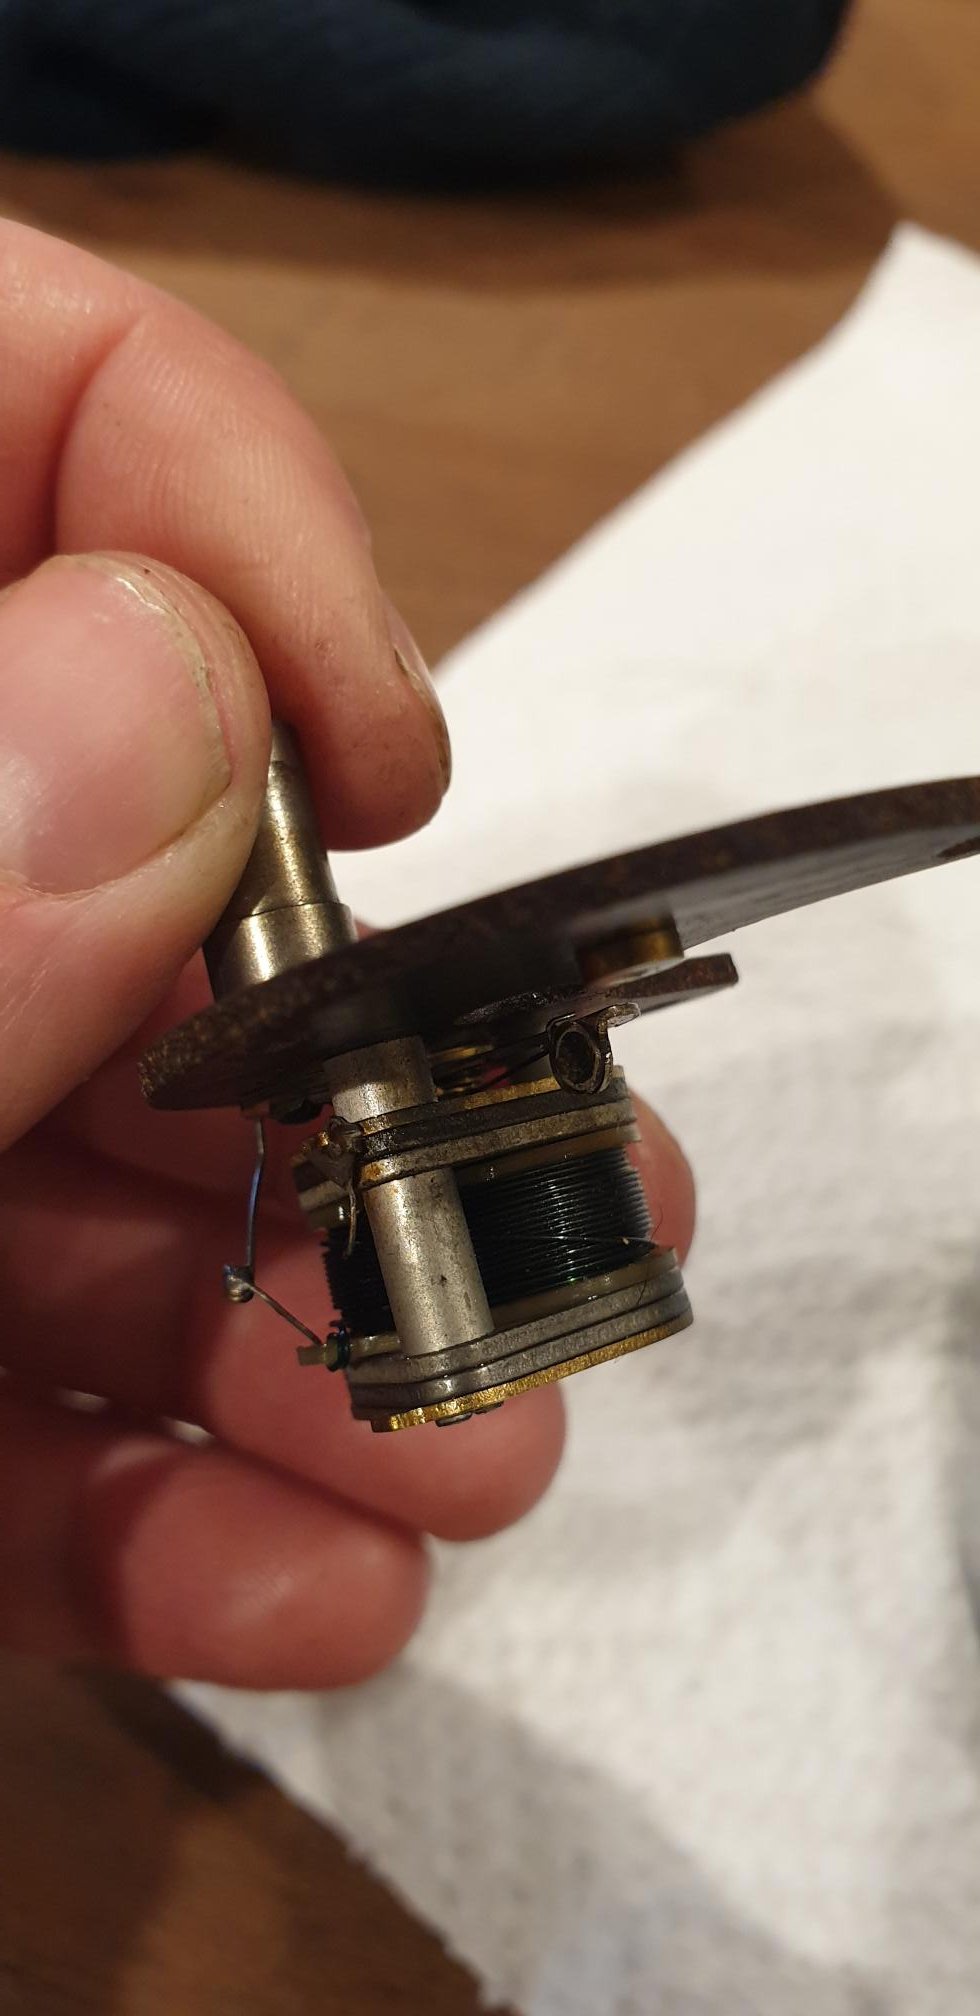
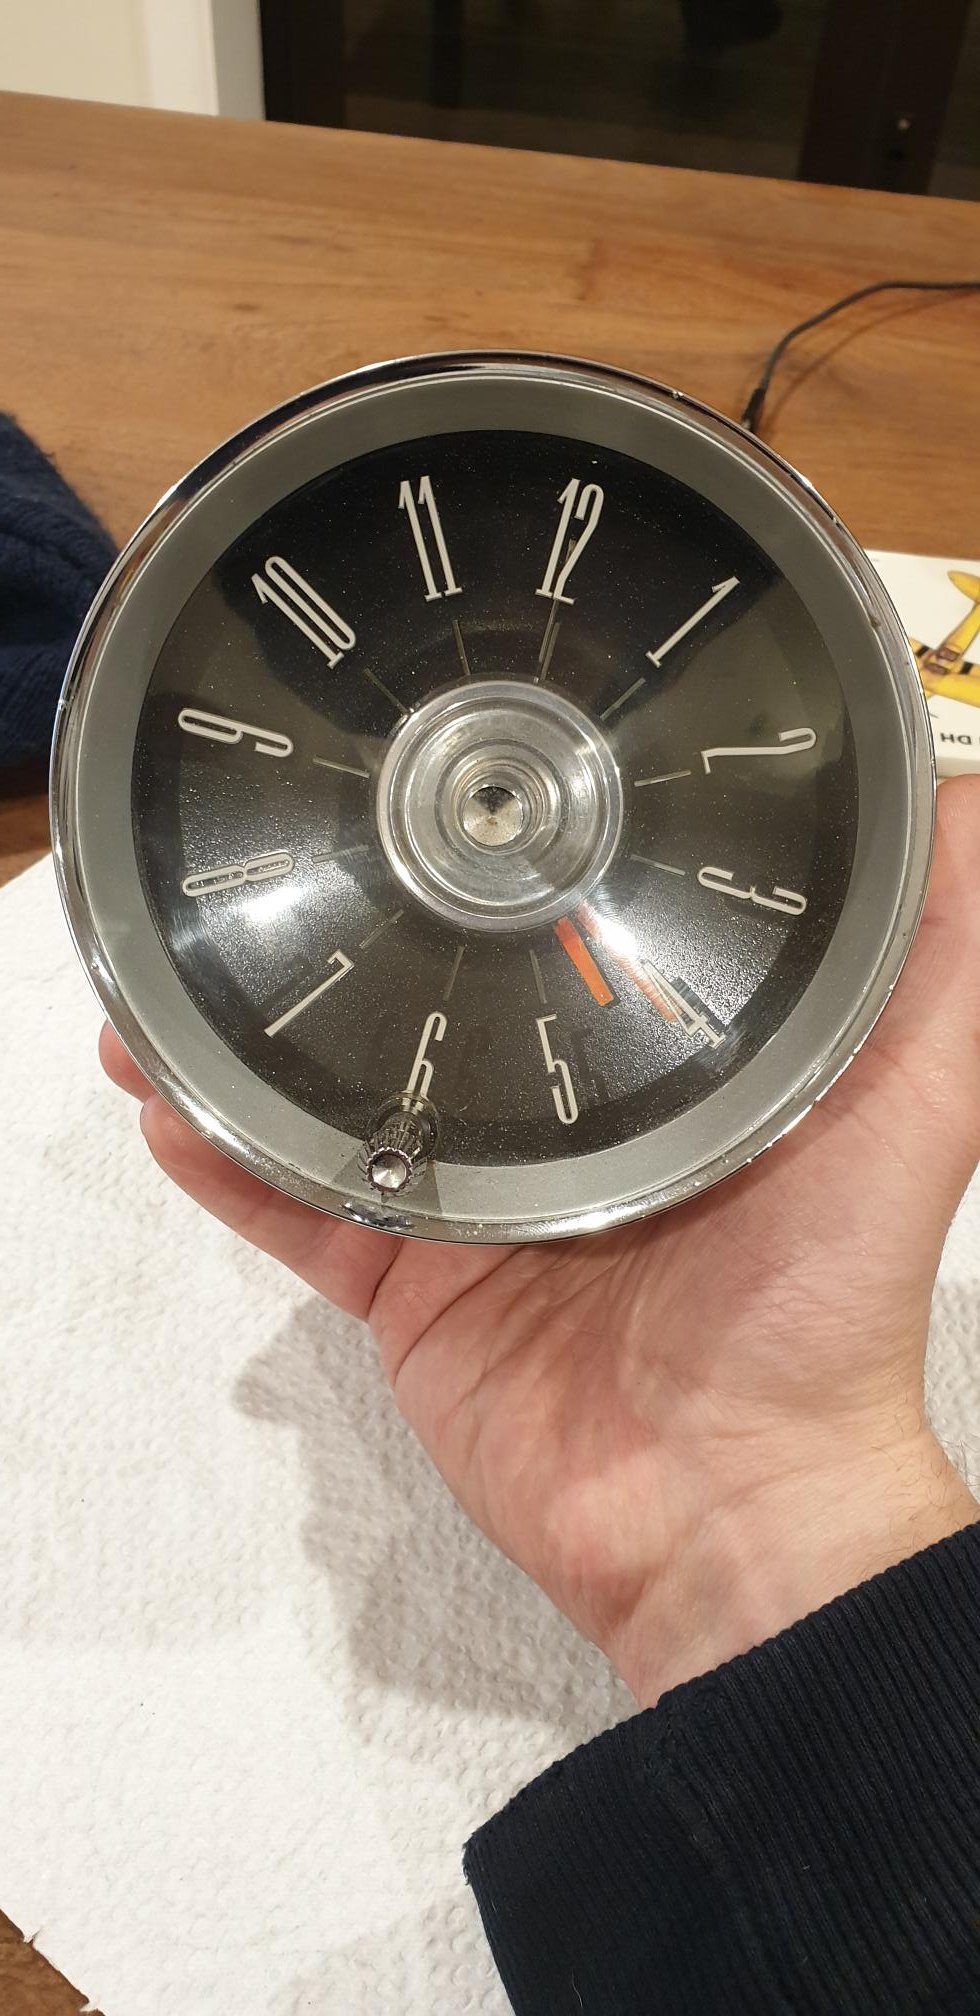
Got the clock going tonight, strange place to start but the clock comes out and the shed is cold... Some pics of inner workings,the solenoid winder and the front of the clock which still needs a polish up.
5 points
-
Yup. I am all that is man.3 points
-
colour went down very nicely.
3 points
-
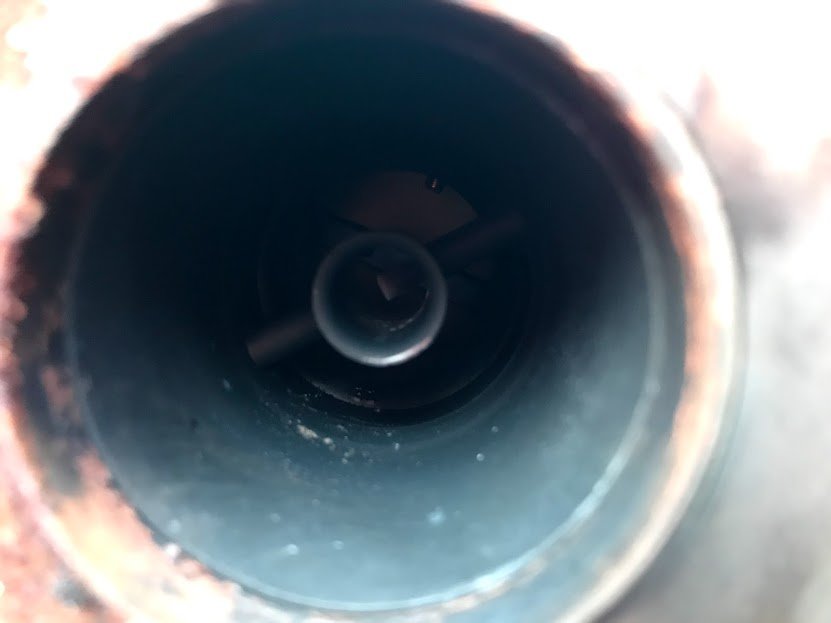
Rust can get going inside a fuel tank that is empty/mostly empty for a long time.3 points
-
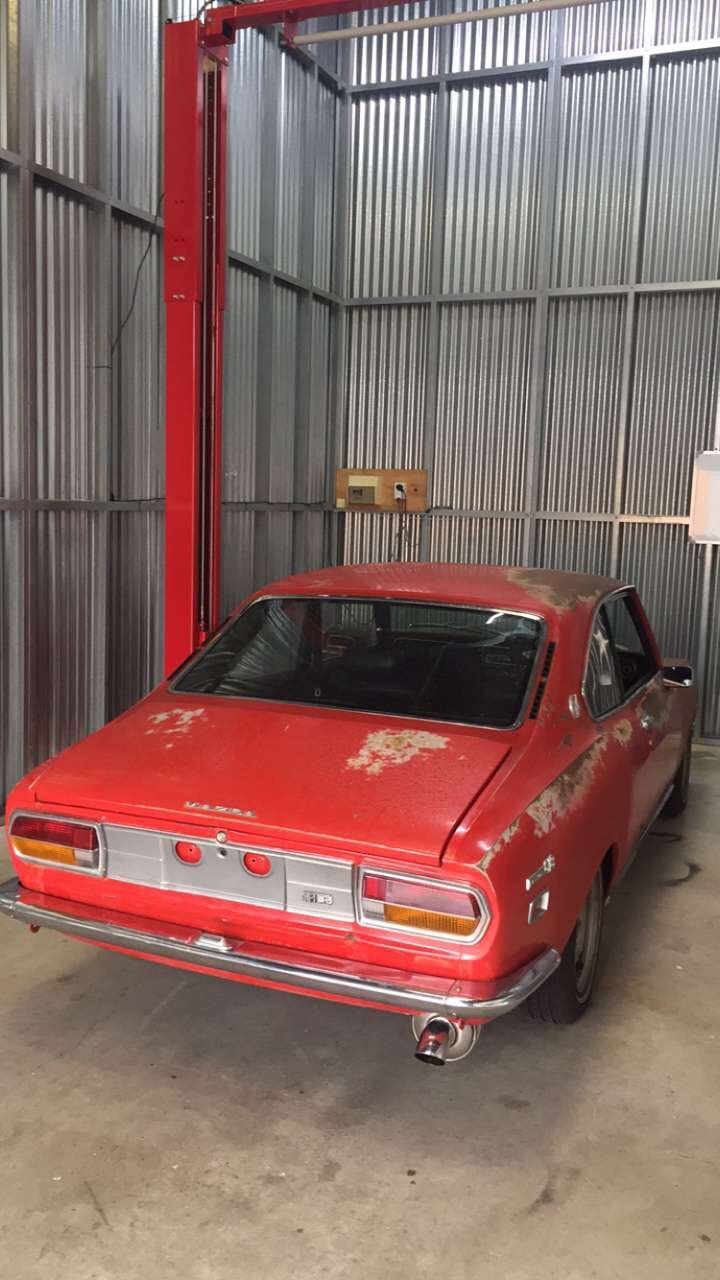
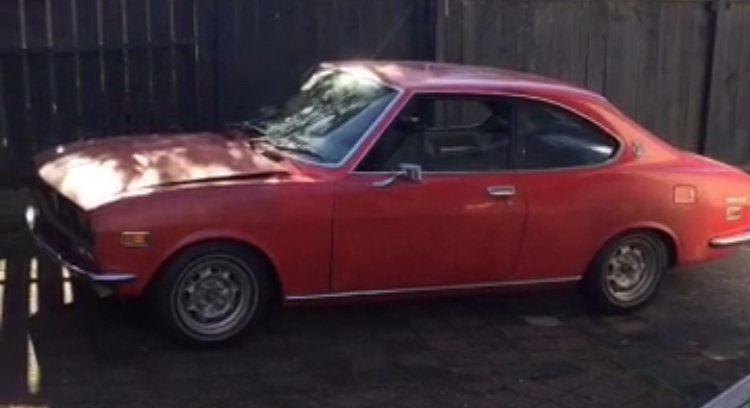
I like RX-3’s. Plan is to convert one of these to an 808 coupe.
3 points
-
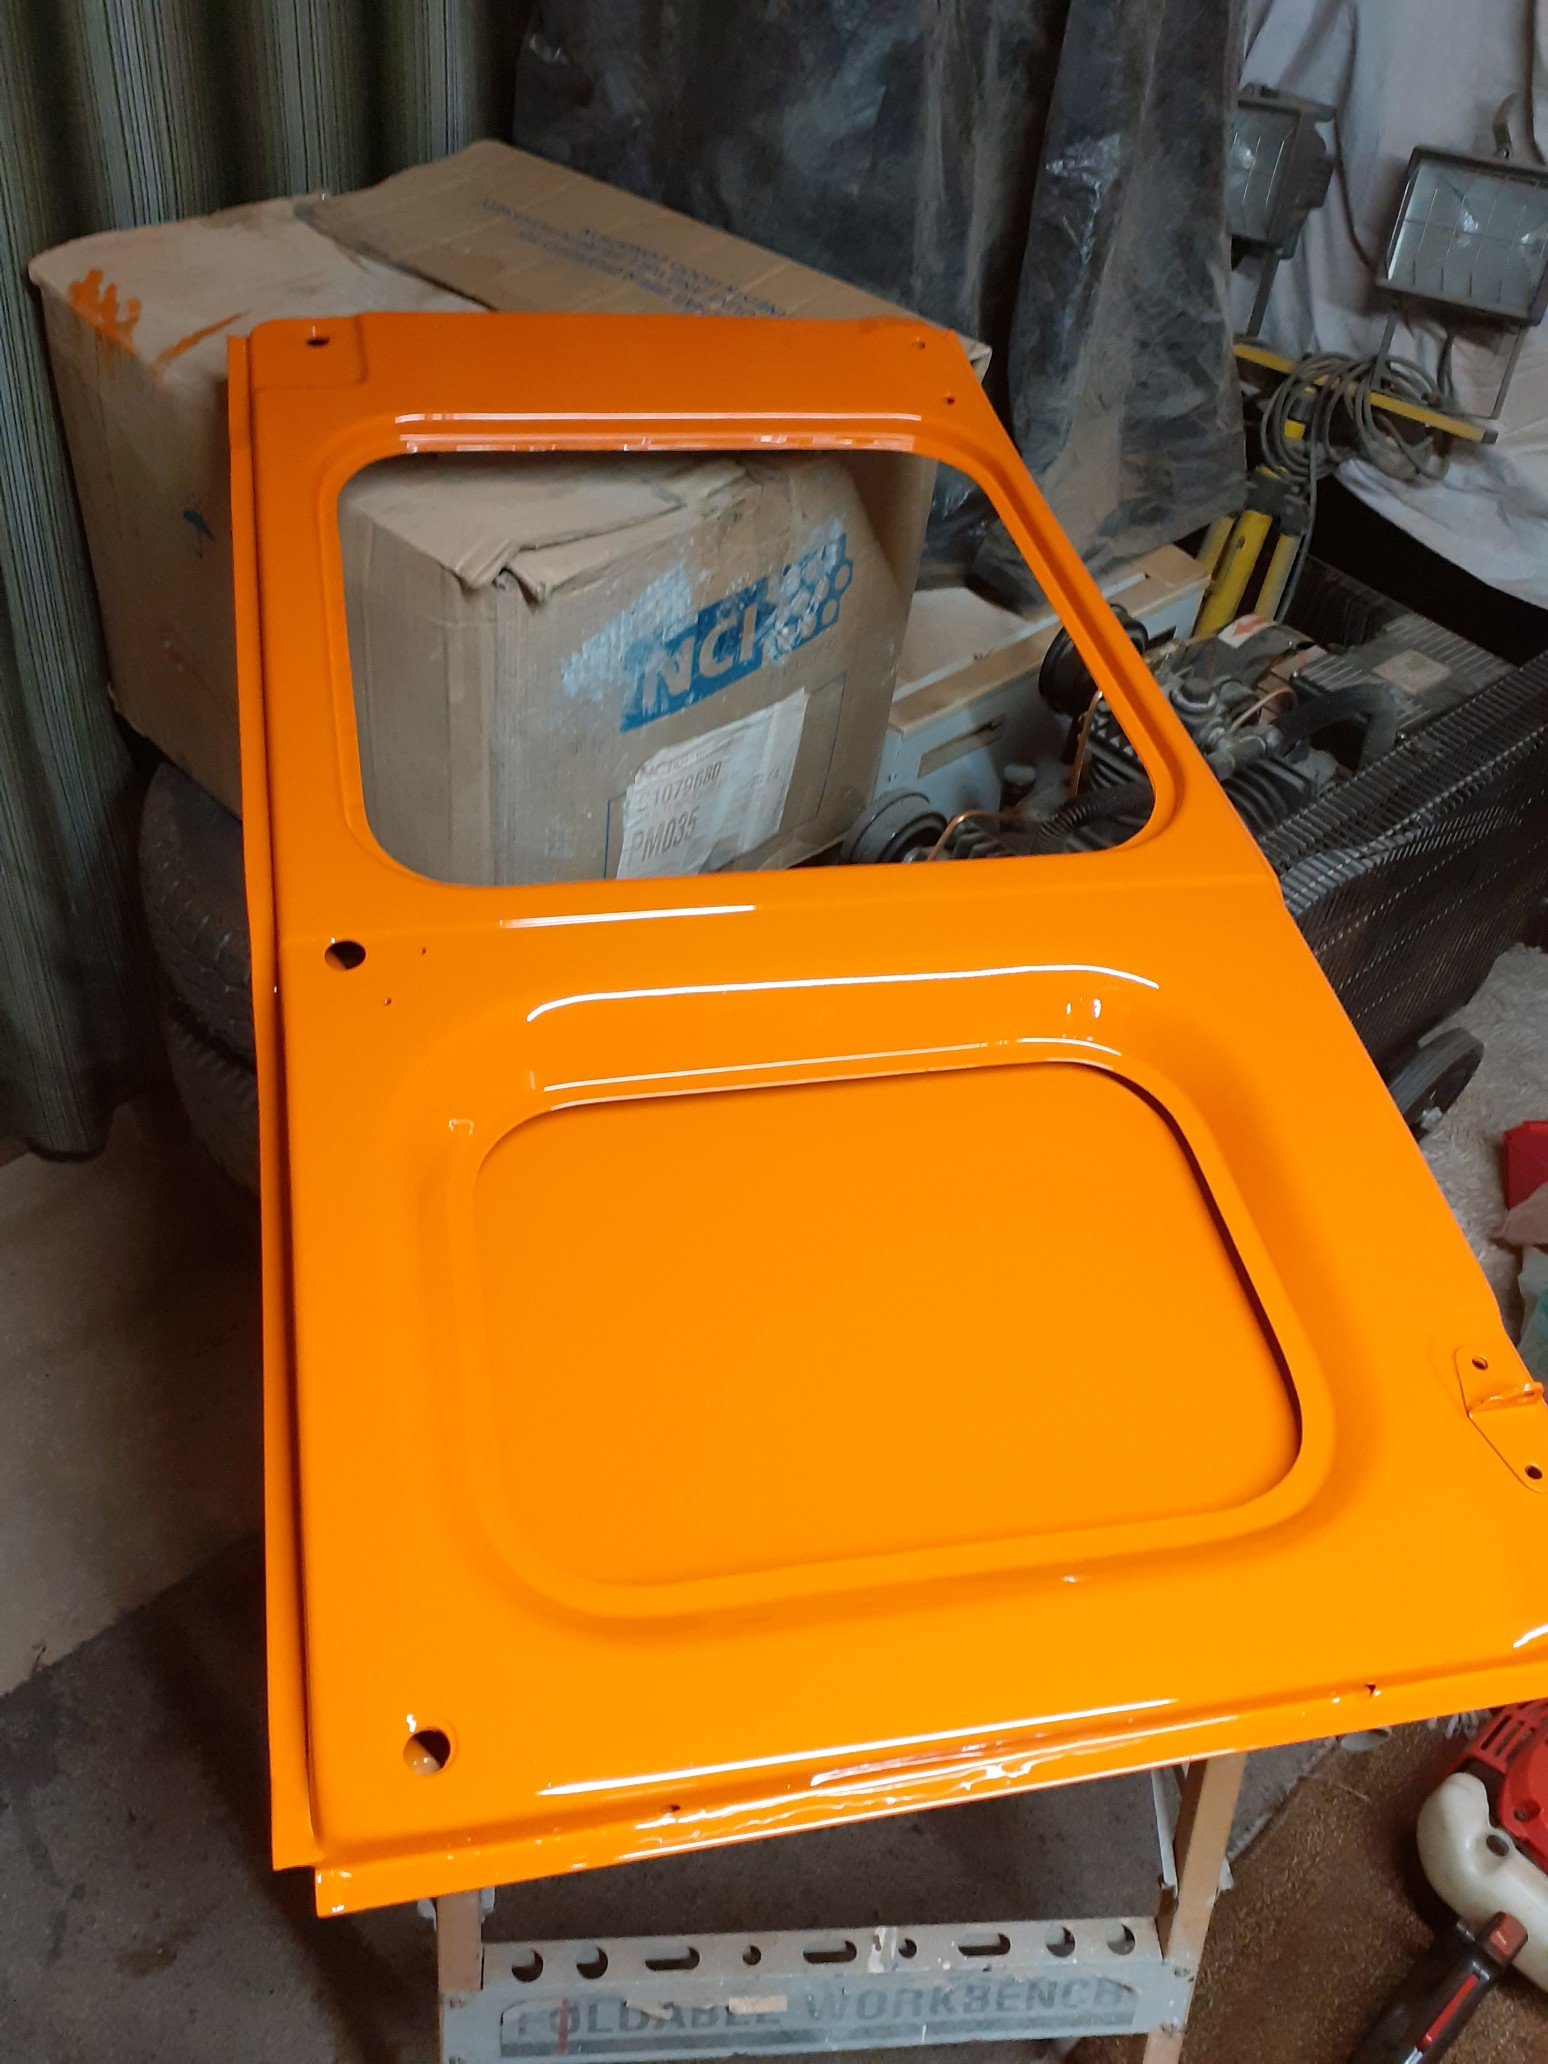
Ended up going with signal orange 79. It's an original color for an escort, but not this van. Sampled a blue and a different signal 77 orange but settled on this. Have been spraying it in sections. Engine bay, interior and inside of the doors. Still a while to go before I can spray the outside but its certainly progress!
3 points
-
Yea 1/24 aoshima and fujimi have the best range of jap classics. But ricks models do a range of resin kits too.. have seen monaros/falcons/rx2 coupe and Anglia 105e but gotta be fast on those ones lol Don't kill me but my first derby car 1993/94 was an 808 and brother in law did genuine tagged rx4 sedan both had piston motor for derby tho2 points
-
awwww yeaaahhh: Wof man even asked me if I wanted to put the sticker on lol. first wof and reg in 12 years! first proper drive and god dam it feels good! Need to do some AFR testing now that I can drive it properly but it seems pretty good already. pushing it a bit in 3rd under boost and it was around 11.5:1 Also have now realised I really need to do some heat management for the exhaust, the floor/tunnel is pretty hot... tldr fuck yeah
2 points
-
Ok it’s back to normal with filter change, need some dry roads to do some testing. Have bought a couple of fuel filters, to swap a few times after some km’s. Love the sound this thing makes.1 point
-
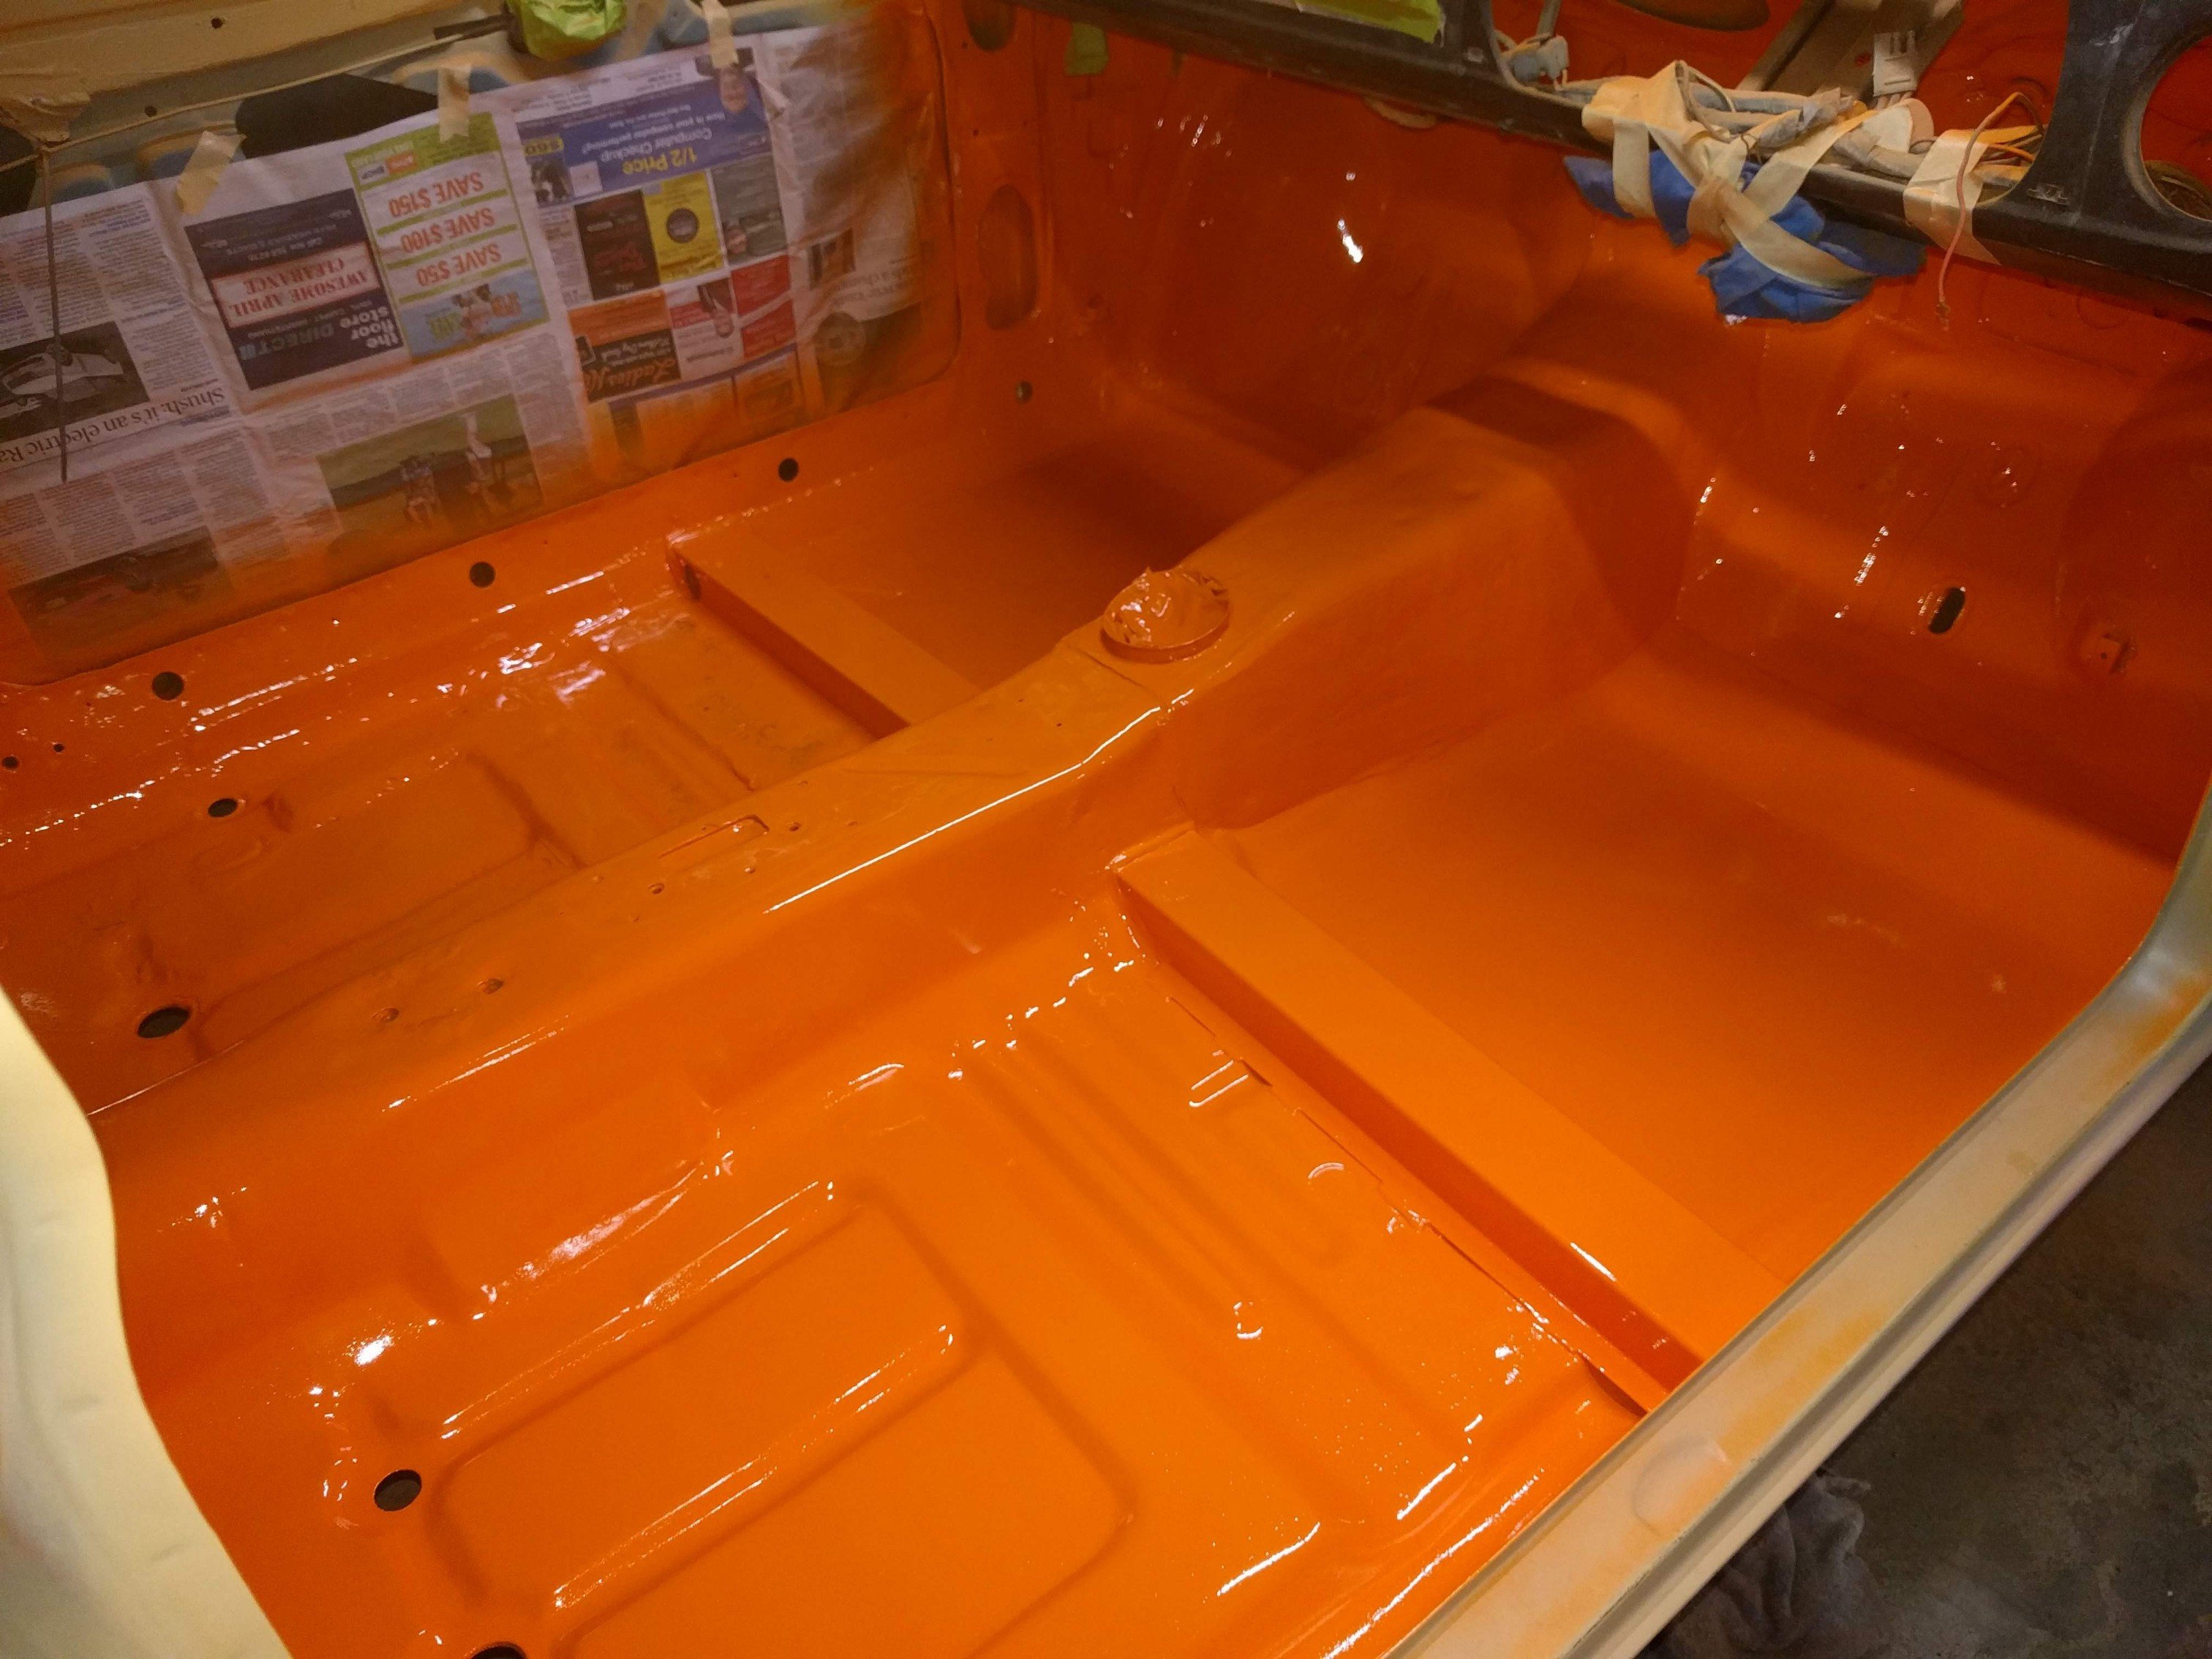
got some primer on the doors and small panels colour will be in before dinner
1 point
-
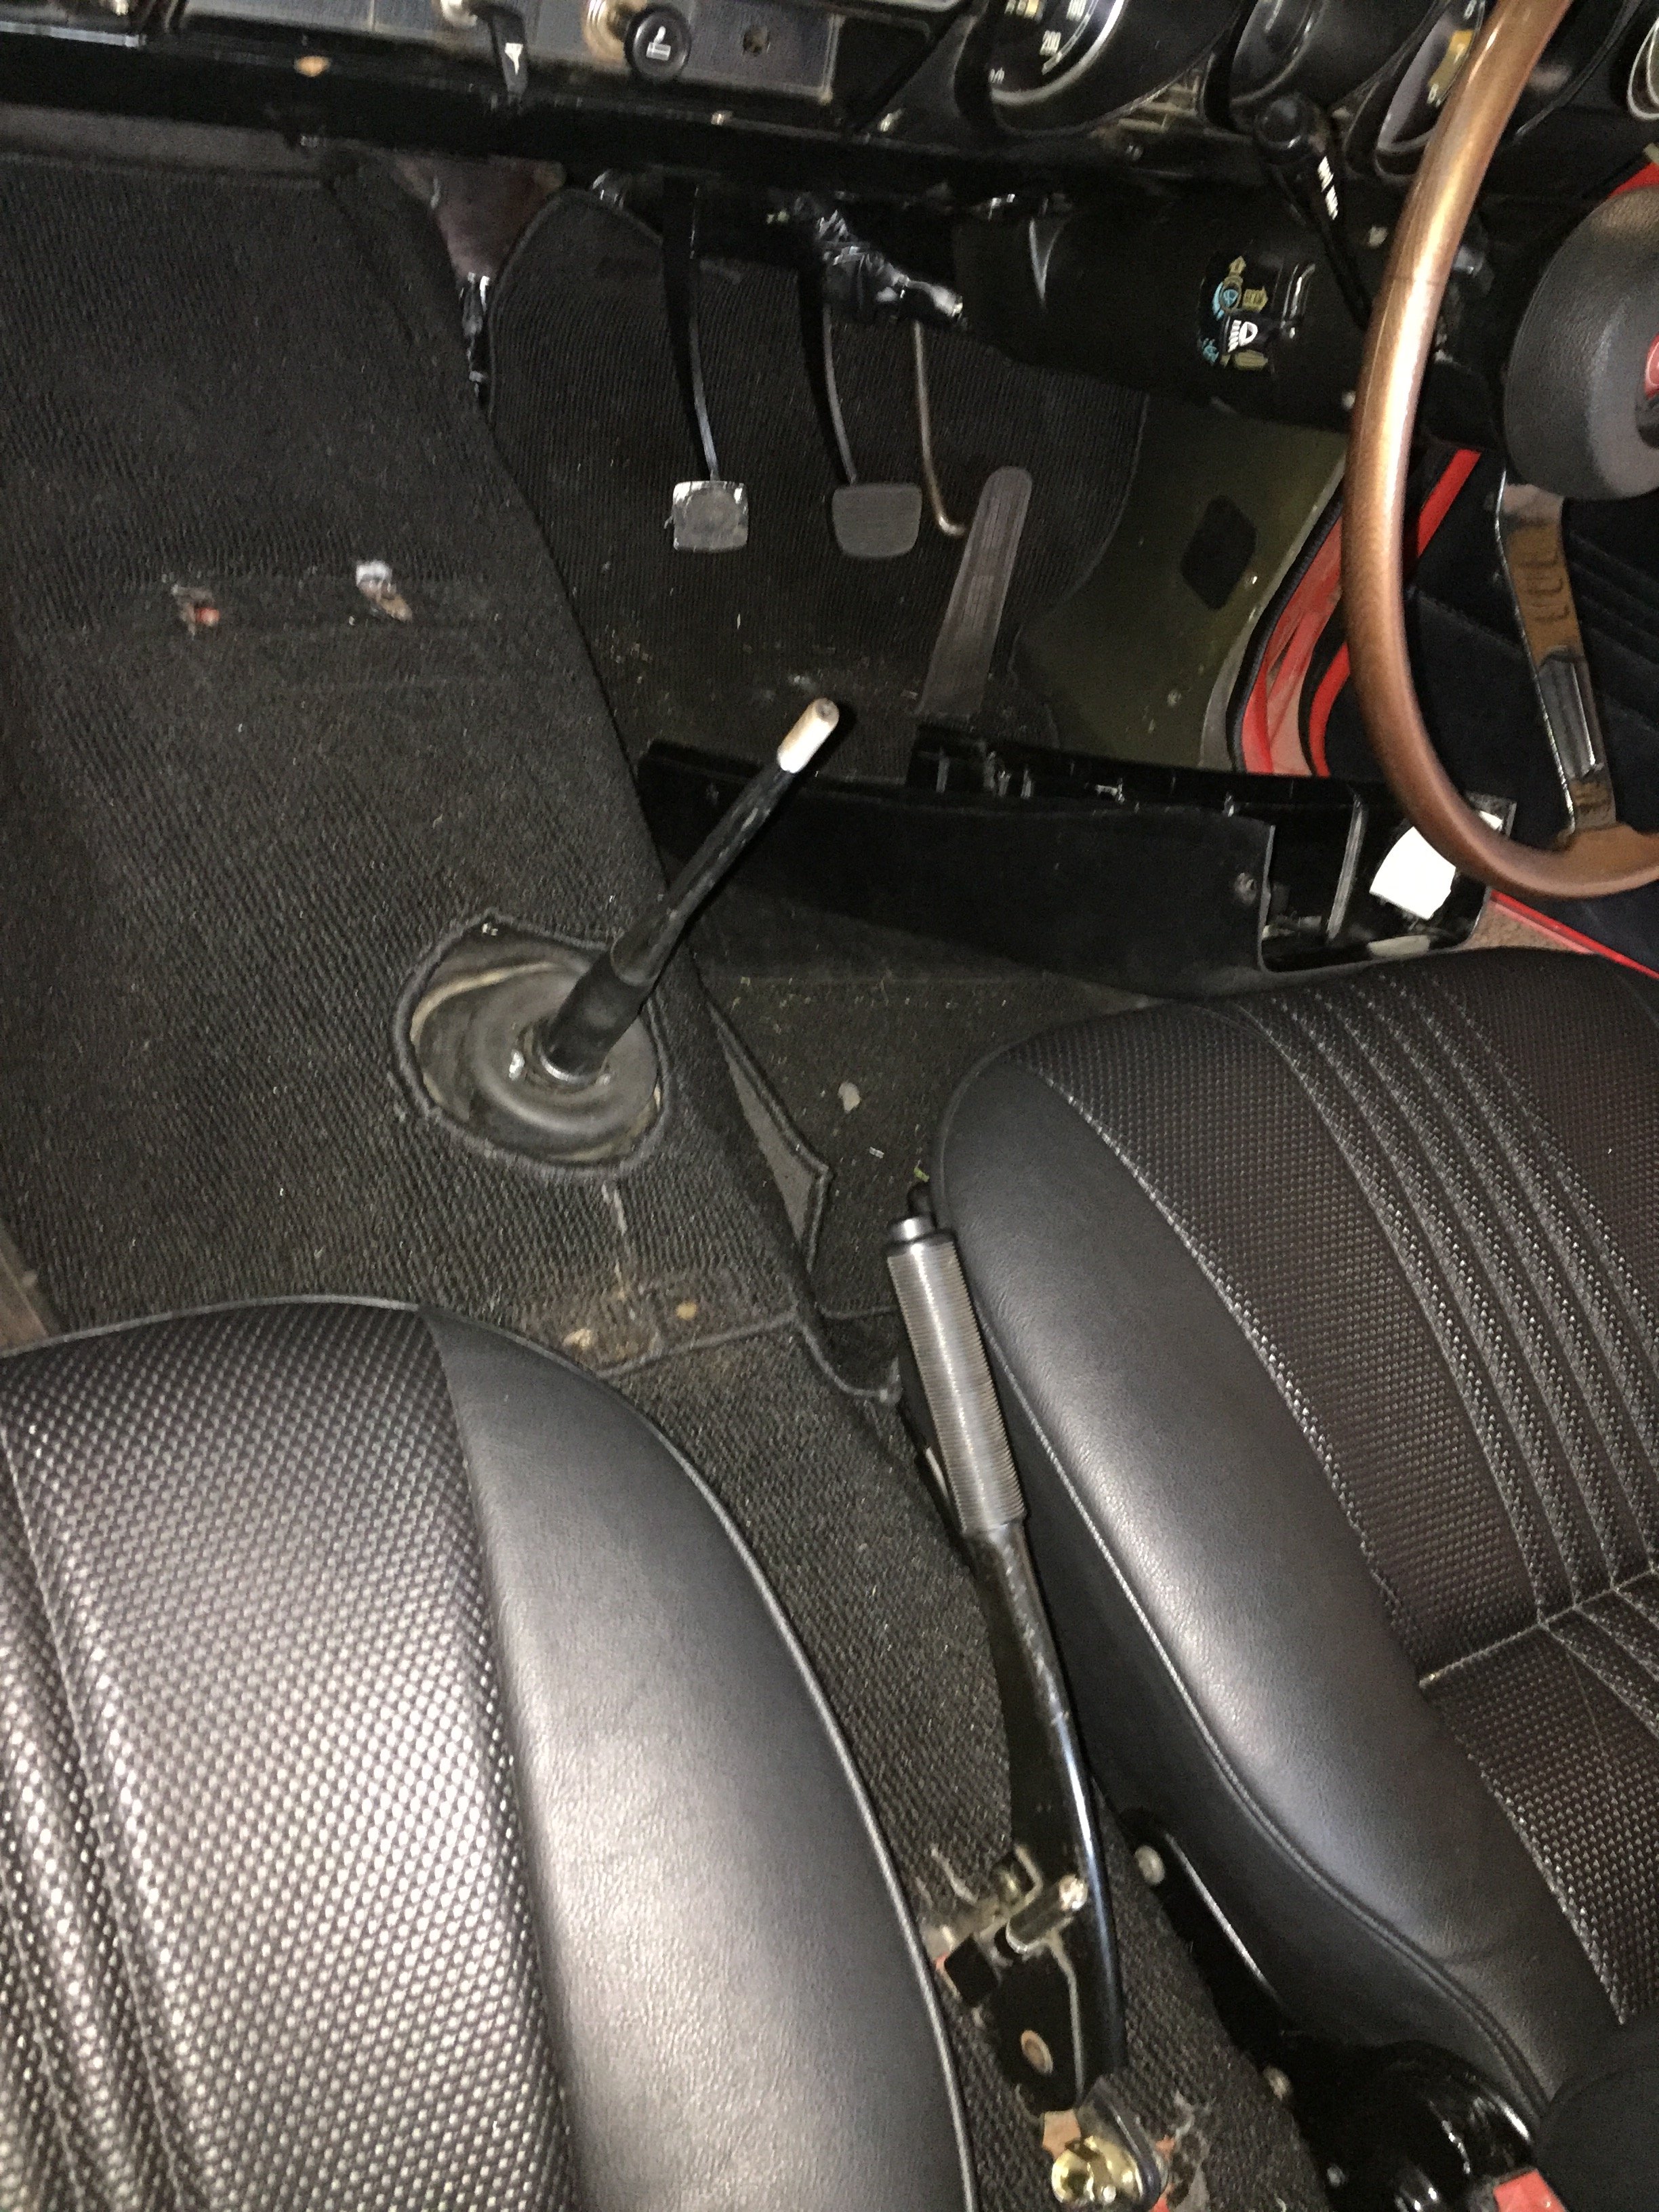
I do love a good nerdy thread and your thread never fails to make me smile. Just wondering though.. have you been tempted at all to just chop out that ugly bulkhead and move the engine even further back? So many positives.. Even better balance, shorter exhaust and driveshaft gives you weight savings you can happily picture as you go to sleep. It will be extra work and I guess a re-cert if you want to be all official about it. But if you're in no major rush it would be a neat extra add on to your evolution of this car. Hand brake might have to move back and I dont know where the gearstick is on these boxes- are they a long box and hence it would end up in a silly place, so making gearshifts awkward? Hmmmmm. Just pondering... Oh and re-reading back through your thread while having my coffee this morning and I wonder why not ditch the brake servo, fit appropriate pedal box (having fun working out leverage, bore diameters and drawing graphs to suit) and create a shit load of room right where you need it for improved trumpets? You do really get used to the increased effort needed with no servo and the extra feel is lovely.1 point
-
Why does everyone keep doing this to my threads ?1 point
-
Yeah all good. I bought a new grunty battery this afternoon and took all the charging circuit apart. Had been completly altered about by pervious owner. New wires everywhere, all the wrong colours, missing plugs, extra plugs. Got to sort that shit out before I even look over the gp system. Oh the joys....1 point
-
I spy with my little eye a 10a RX-3 coupe!1 point
-
Yes mate it's a Morrie panel Van resin body, I try to collect anything relevant to the "kiwi car scene" bettles/combies/bemas/mercs/and anything I can find jap
1 point
-
Also: https://hlj.com/?SID=e8fkosr1v5ootq8k31e8cbe6a51 point
-
awesome man! Fingers crossed it’s legal for the 13th. need to check this beast out!1 point
-
So here is one hell of an update for y’all.... Clint came over for the final cert check this morning and it passed! I’m now awaiting the cert plate (up to 10 working days) then it’s back to compliance for the plates. Hope to be legal for the Burger King meet on the 13th. beer o’clock oh - small update...cut up the original gear stick and welded it to the rude short shift stick. It now shifts a lot smoother. I will cut and rethread it by like 5cm to be at the perfect length.
1 point
-
Acf-50 http://aero-marine.co.nz/service/service-a/1 point
-
Built a 1/24th messerschmitt when I was at school. Would look good next to a kubelwagen...1 point
-
Oh you guys....1 point
-
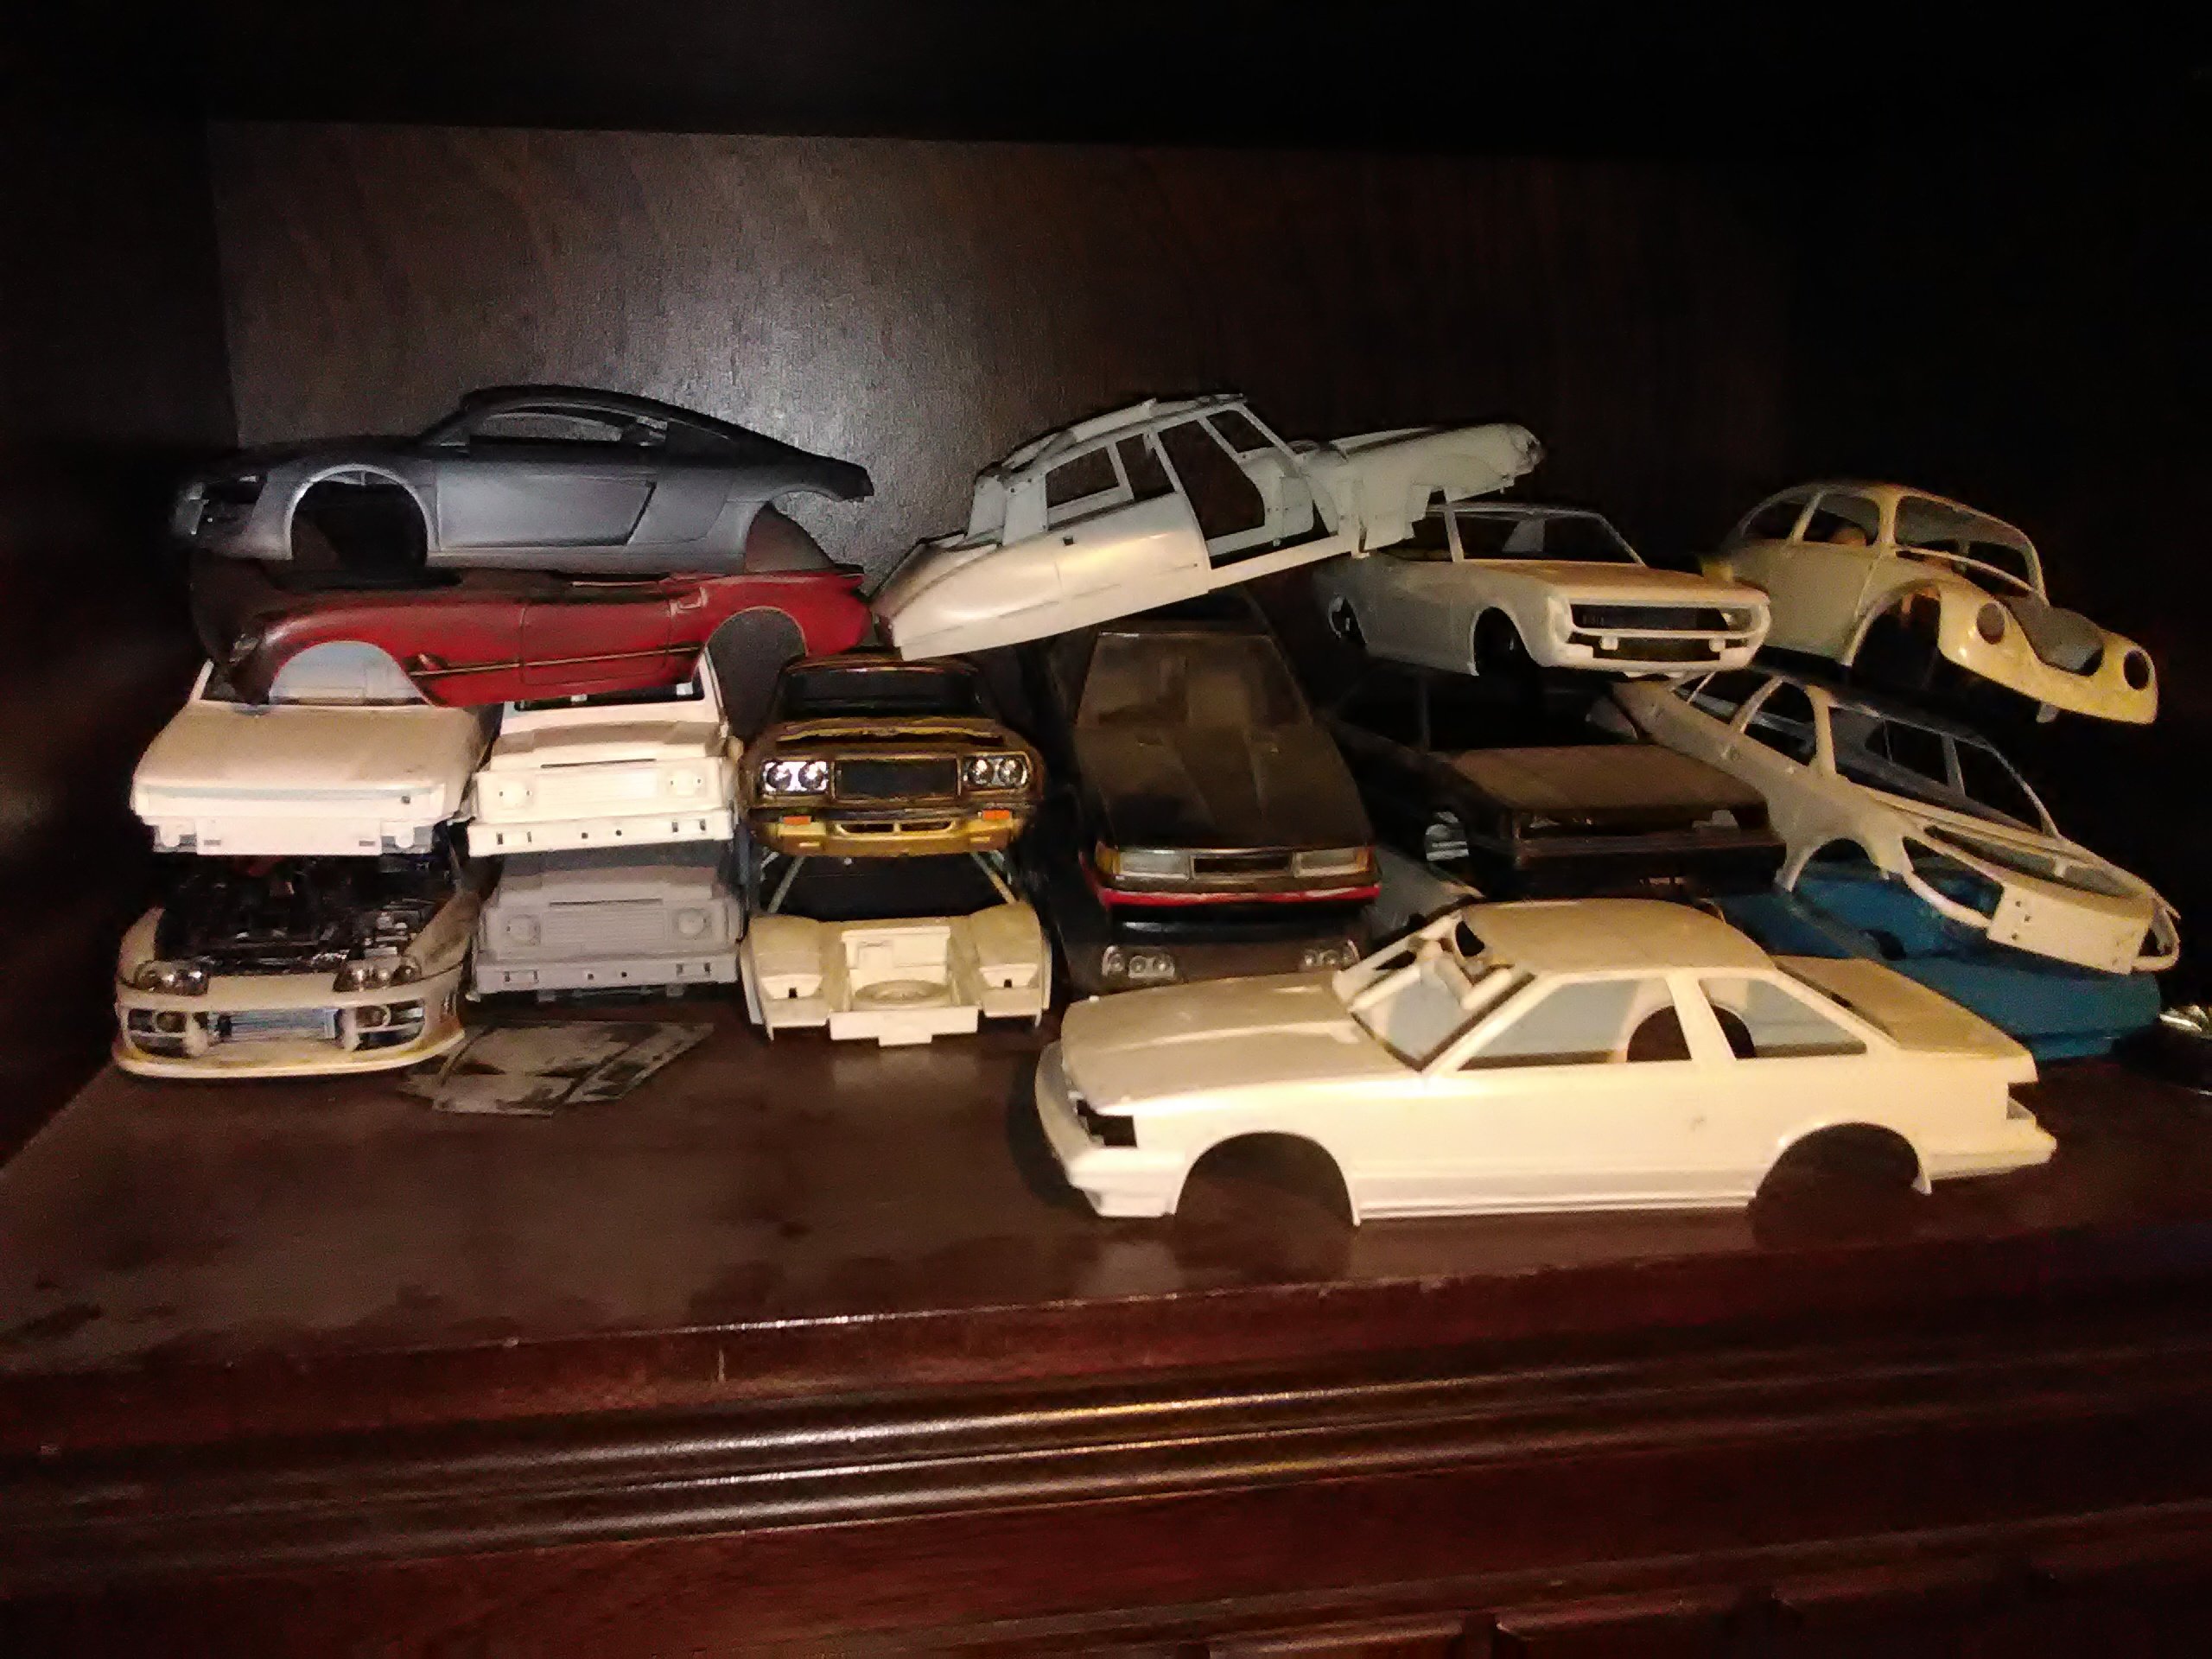
So do I. Some how there is never any time available to do anything with them. Maybe when children move out an area/room can be designated my playroom and I can get back into it. Always found the lack of available kits of "normal" cars an issue in the late '70s/early '80s. Plenty of exotica but almost nothing that you'd see on the road every day. Wish we'd got the full Airfix range of 1/32 stuff here in New Zealand. All the British car goodness.1 point
-
I buy them directly from Japan in bulk mate, heaps cheaper than local and huge variety of those JDM kits.. Look up https://www.1999.co.jp/eng/m/ they have a huge range and deliver to your door1 point
-
Sunday of productivity. Water pump back on, filled & warmed up. No leaky, no squeaky. Messed about with the front brakes but couldn't work out a way of fitting the new calipers without it turning into a fearsome bodge. I'll take the calipers & current flexies into the workshop tomorrow & make up some hard lines and brackets. Rear brakes went well though. Offered the shoes up and they looked good enough for a country job Everything fitted perfectly so I can confirm that 1971 Datsun 510 rear brakes are the the same as Hakos. Do with that information what you will.... Also done a vid. Really to demostrate the tappet rattle for comparison after I've adjusted them but it sounds like the cam's not bolted in. It's really not that bad. So that's about it, hopefully full braking will be restored by the end of tomorrow and then I might even give it a clean. Once I've adjusted the valves I'll give it the beans, I've been staying below 4 grand (mostly) because of the water pump but it really feels like it wants to pick up between 4 and 4,500. Thank you for your continuing interest.1 point
-
Fuel tank access panel. Not perfect but will do the job. Think of the grams saved!
1 point
-
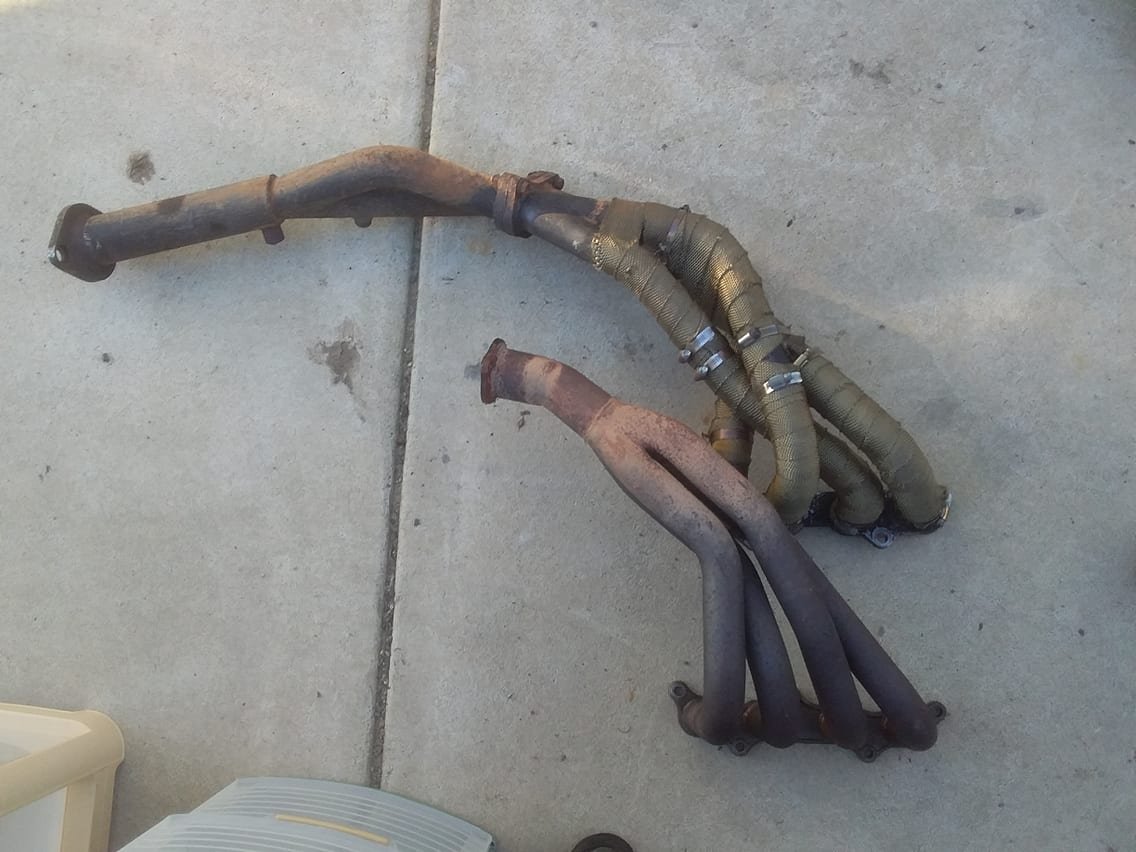
Ramble #3: Since forever, I've always had this exhaust manifold on which is a copy of the HKS 4-2-1. Altezza manifolds sit super bloody low when swapped into different cars, so fitting the likes of the beautiful TRD pipes is problematic. With the HKS pipes, the 4-2 section finishes right down by the firewall, which meant I (by which I mean someone competent, Denham) could cut the 2-1 pipes and reangle them to suit. I've always wanted to see how a 4-1 manifold would respond in comparison but I've always thought there's no chance of making them fit, and it would be difficult to modify. But since I'm currently redoing the engine mounts, I could tip the engine over to suit fitting factory Altezza options, and then I'd have more things to play with. So had a look around and I found a shitty looking second hand FGK 4-1 manifold. The FGK site says that over the factory manifold, dyno back to back swap to standard. It gains 7hp and more torque at a lower rpm. When I went and picked it up, I chortled at how bloody tiny it is! It's only 7kg and has really neat cast flanges which dont have any material where it doenst need to be. Ideal. The HKS 4-2-1 vs the FGK 4-1: The 4-1 isnt even as long as the 4-2 section on the HKS one haha. So I can have a nice transitioning bend to the under the car part, rather than my 2-1 section which has been chopped and angled about 10 degrees maybe, right by the flange. probably not ideal. The weight difference is massive though! I'm going to design my mounts etc so that I can fit both. So I can do some comparative nerding and see whats best. I'm thinking that perhaps with exhaust side VVTI now, some of the downsides of a 4-1 design (narrow high powerband) can be mitigated a little by moving the cam around. It will be interesting to see if any improvements to the powerband from the exhaust, happens because of better cylinder clearing of exhaust gas, or other mechanisms... If it's better clearing residual gas, and allowing more fresh air in, then I'll be able to quantify the differences in powerband from each simply by looking at which gives higher airflow numbers at full throttle, via the MAF sensor. I've never had any changes to the exhaust side while I've had this ECU so it'll be interesting to look at what changes. (or not)
1 point
-
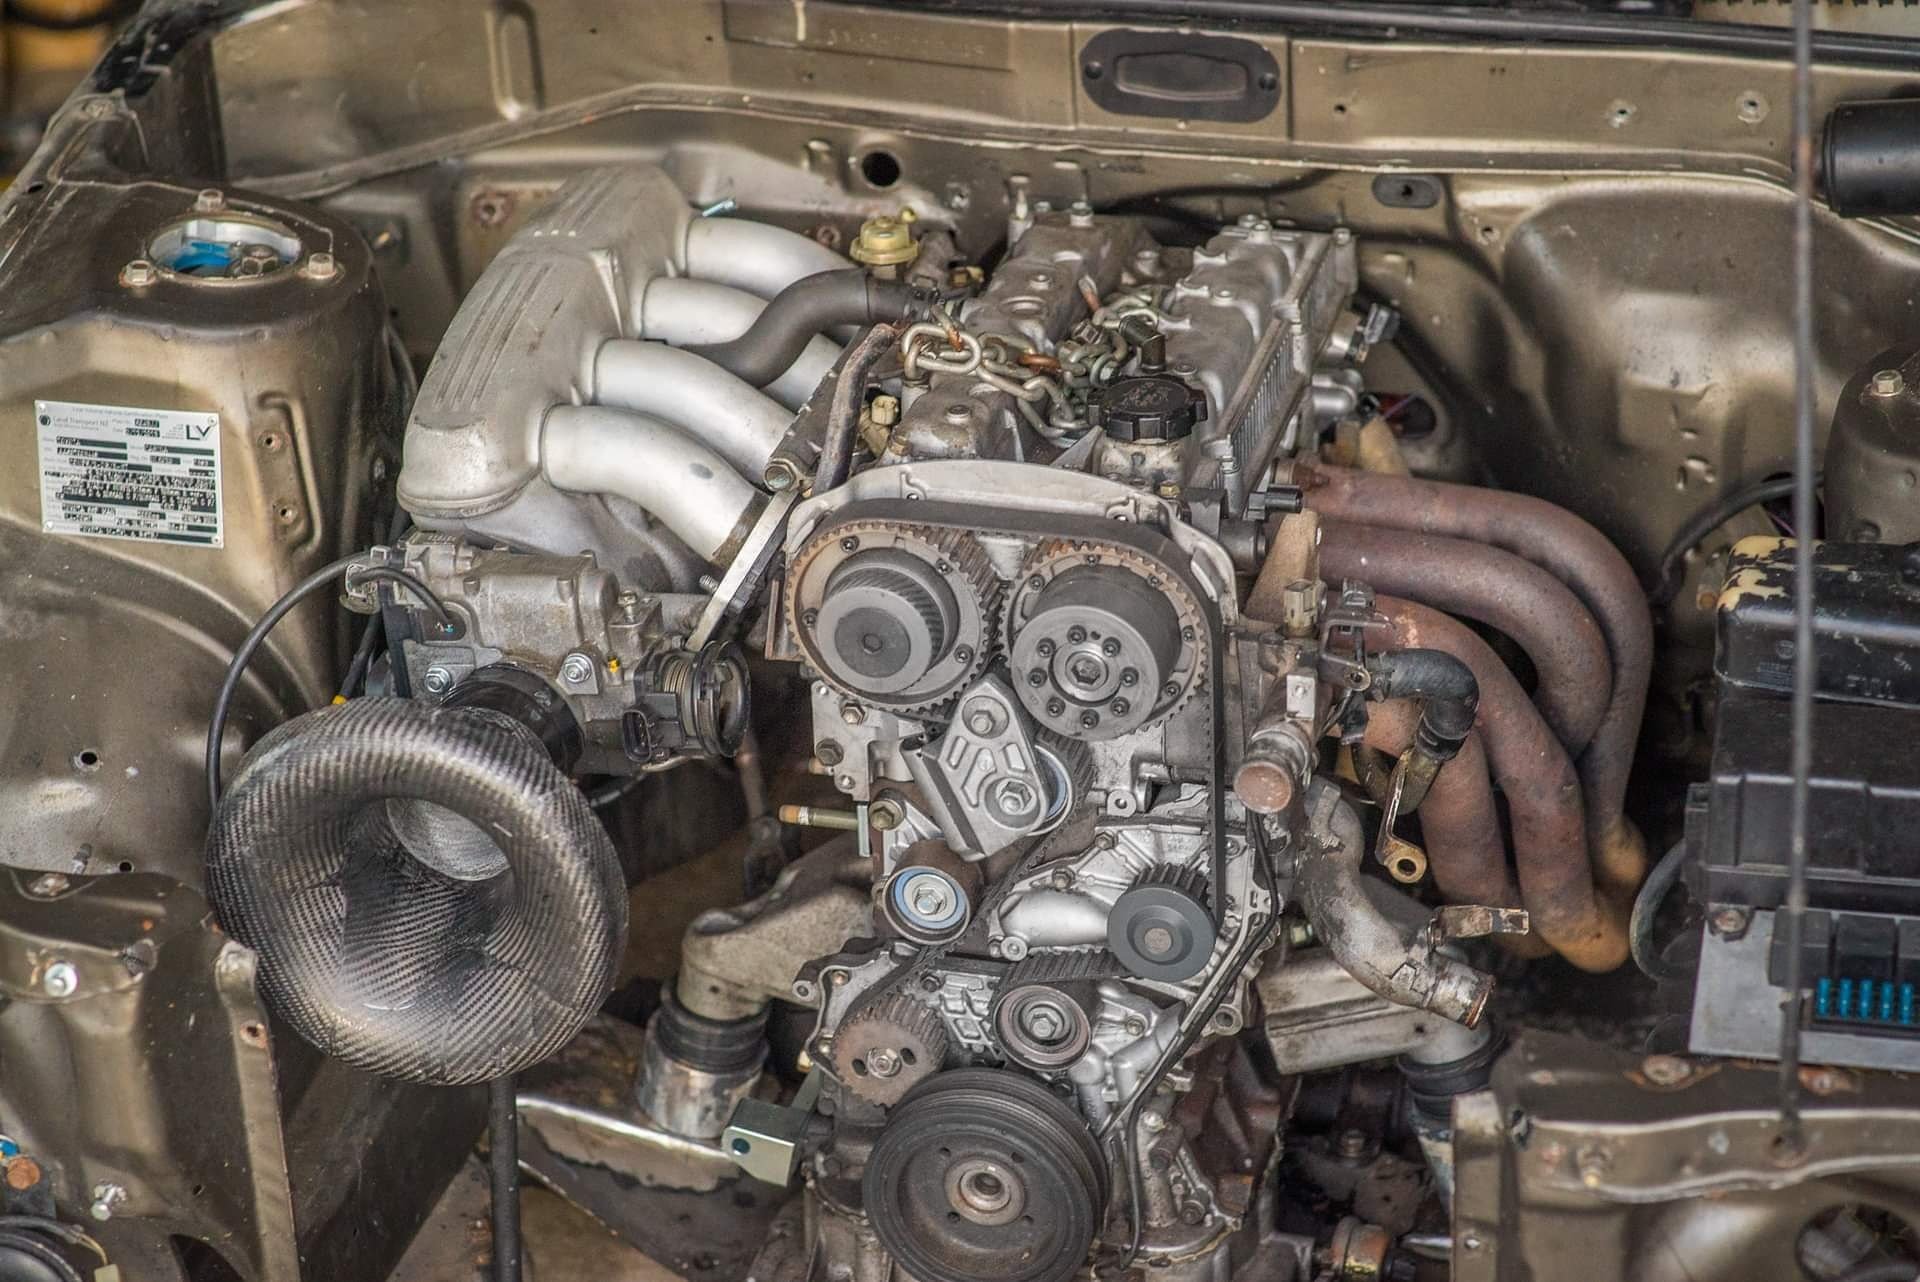
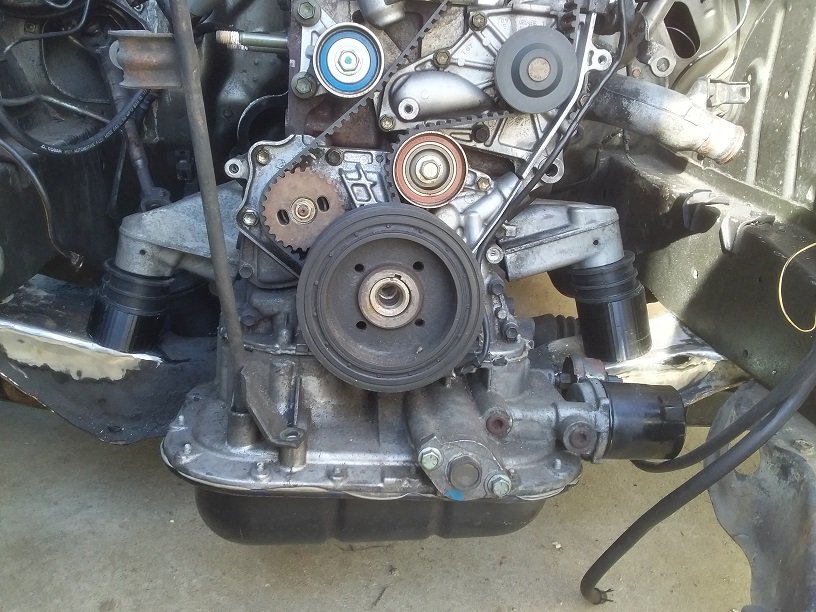
Next thing - My redtop engine has finally started to make an engine rattle that I cant diagnose without taking the head off - and I cant take the head off without taking the cambelt off. I cant take the camblet off, because I've ugga dugga'd the front pulley onto the crank because I stripped the threads on it doing something stupid. So this is all a big enough clusterfuck to warrant switching over to the dual vvti engine that I've had sitting in the corner for a while. Putting this in has a few advantages, that I think I've already blathered on about. It's lighter, more powerful, tidier, and less complicated. win. Redtop engine had sentimental value as it's taken a hammering for a long time but it's earned its retirement! Rather than just doing a basic engine swap and getting the car running with minimal effort, (pfffttt) I've scope creeped this into oblivion by deciding to push the engine back as far as I can in the bay and will remake new engine mounts, gearbox mount, exhaust, driveshaft to suit. This has a bunch of benefits, mostly to do with weight savings: -I can ditch my gigantic heavy swaybar for a normal one, so no big loop around front of the engine. -Oil filter will finally fit properly! This has annoyed me for at least a decade. -Switch to alloy Altezza mounts which save a fair few kg over the utterly shit spec factory 1S mounts. -Switch to a pedal box so I've got space for the intake scheming, and get some better brake balance at trackdays. -Tip the engine slightly to one side, so intake is lower and exhaust is higher. so both fit better. -Engine as far back as is practical without cutting firewall etc. -Less engine rocking with some much better mounts, so clearances can be a little tighter. (Better road clearance to exhaust) -considering using a FWD sump with the motor tipped slightly (say 10-15deg) as this would allow the motor to sit a little lower, and the front part of the pan is much further back. -I could now make a strut brace that's dead flat across the top rather than having to bend up over the engine. -Much better alternator location, and a few kg lighter with the SQ engineering kit to use the Vitz alternator. I'm copying Truenotch by using the Landrover mount rubbers, and for now I've 3d printed some upstands while I fiddle with the engine position to see what I can get away with. Hopefully this weekend get some metal mounts made up, and since I live in the Waikato now (morrinsville) hopefully find someone local-ish who can weld the steel ones in place for me. (Should really learn this for myself one day...) Then work on the gearbox crossmember, then I can finalize dimensions for the driveshaft so I can go get a brand new one made up without having to worry about shitty old UJs breaking. The basics of the car will be largely the same, but just pretty much fixing up shitty things I did 10+ years ago when I had much less patience.
1 point
-
Met a GC who works there and says he has a few spares lying around I could look at from his KE20 sedan.....score Then I got a phone call from another GC who found my wallet after it fell out of my pocket outside the bakery......right when I was looking for it in a panic......PHEW!
1 point
-
Completed the 57sc Sump Model. Moving onto the pattern making designs now. These should be a lot easier than the crankcase! Casting version with machine allowance and shrinkage compensation First cut of roughly what the sand cores would look like.1 point
-
Took this thing for few hoons lately its finally running pretty good again ive gone back to roughly a 50:50 mix of ethanol and petrol the carb just couldn't suck enough fuel through on E85 to let it rev out. Ive also stuck the external carb bits through the ultrasonic cleaner at work which rattled out plenty of chunks of shit (mostly lead) It now starts runs and revs out nice again. I changed the exhaust a bit to a 1 1/2 slash cut end to help it exhale a bit better which has doubled the noise it makes as well.
1 point
-
Haven't heard anything from Stephen Fleming but it's not really a rush and she did say he is very busy. Maybe I'll ring in a week or two. Tried cranking it over with the wifes car running and connected the to battery cables at the front of the Eureka. Touch cut wires of dash and it turns over with the starter (previously had battery jumper leads directly on the starter). Still sluggish, so maybe the starter needs a rebuild. Tested and found no spark, had it turning over with wifes car and spare battery connected to the coil. I'll take the distributor out and see what I find. Having silly thoughts of an all aluminium KLZE 2.5L v6 and ITB's sticking out the bonnet. Or maybe bike carb's on the Kent after getting it running on the DCOE 42. Depends on whether I need to go through a cert or not (what paper work I can get, if any). The V6 just suits the car I reckon. But the kent is 'original'....but heavy and half the power.1 point
-
My sister's triumph had rain sensing wipers. When it rained, they stopped working.1 point
-
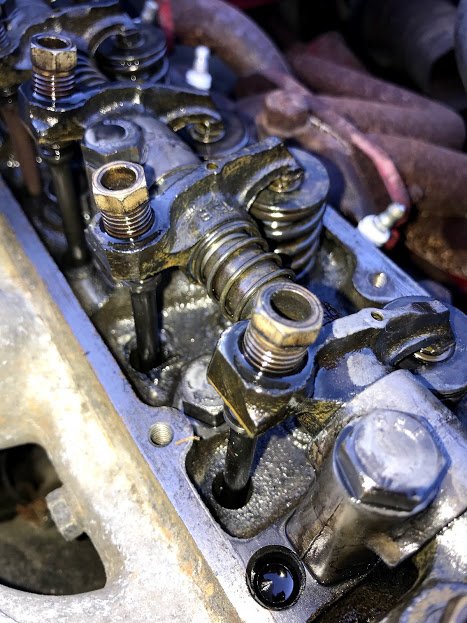
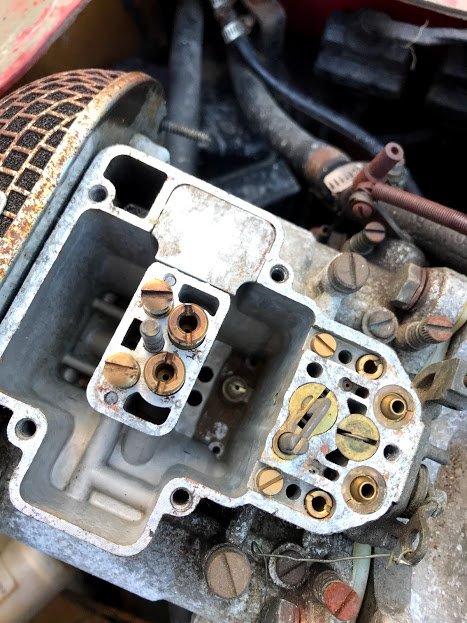
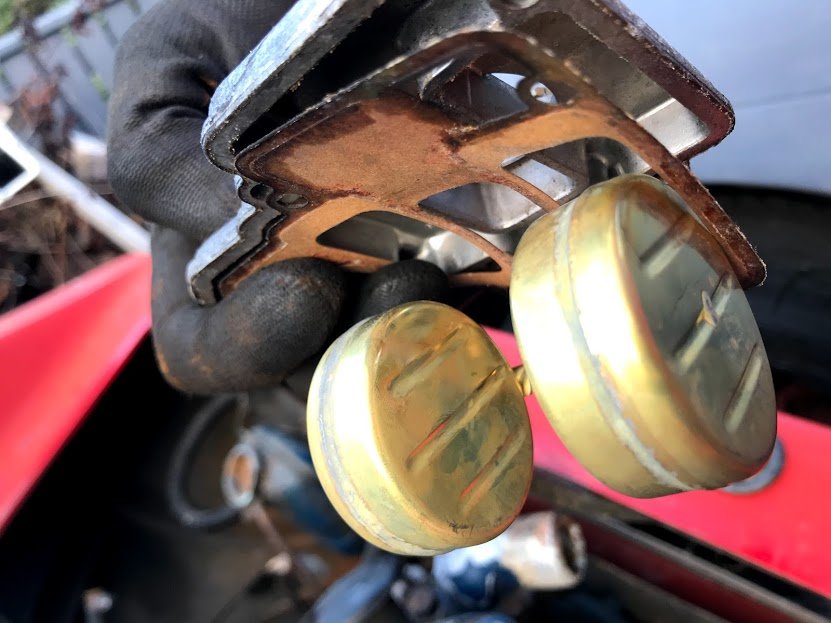
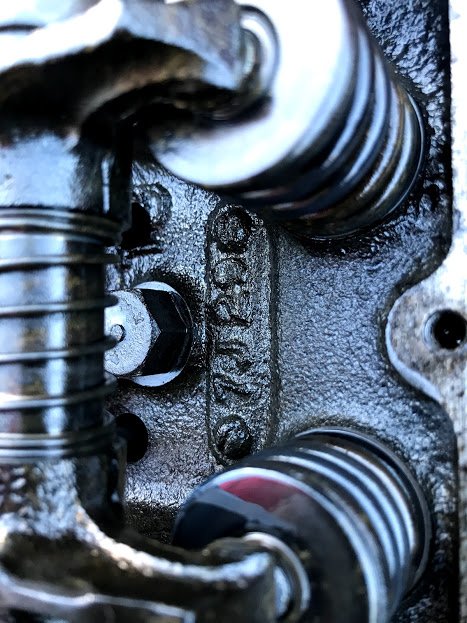
Spent a bit of time checking it over. Under the rocker cover its super clean, no build up at all: Took the weber apart, fully expecting to see disintegrated brass dust and gunked up crap but look at it, it looks barely used! A little bit of dust at the bottom but that vacuumed out easily. The floats look new: Throttle plates move fine, a bit carboned up intake: Under the ramflow element is a bit rusty but nothing major. Definitely needs new foam though. Took the mild steel radiator hose tubes off, the top hose isn't too bad inside but the bottom one is stuffed. I'll make something to replace it. This brass outlet has turned to dust though, looks like it must be for the heater: The inside of the hose is weird...like a solid blockage of brass corrosion dust? Sprayed some more CRC into the spark plug holes again to let it soak while looking at the above then connected a battery straight to the starter and it bloody cranks over smoothly now! And the starter works, its pretty rusty but looks to work fine. The battery I used is a bit weak but it worked, crazy. I then flushed water though the engine block, it came out clean surprisingly. The radiator had some rust-mud in the bottom which looks like the remains of that badly rusted bottom hose. It fckn turns over with the starter! I wonder what the fuel tank looks like inside? ...not expecting it to be good. Anyone know what this number means? I already know/think its a 'sport/GT spec' based on the L3 stamp but not sure what this means.
1 point
-
Cert recheck today Passed the drive test and the 5x 100km brake test too. Let me tell you it was loving the fang today and performed spot on. It was the first time going over 50km haha so I had my beady eyes on the temp gauge The only remaining things to do are: 1) supply the alignment print out (repair cert person has this so will need another copy printed) 2) add 2 rear bump stops - ordering tomorrow from a George Stocks 3) tighten hand brake (this needs to be done for the compliance also) 4) the speedo is out 15-20km. I need to apply custom stickers to the speedo corresponding to the correct speed increments eg 120km is actually 100km Legal cruising is so close I can taste it.
1 point
-
RX4 steelies are on with a little taller white walls of 70 series vs the 65 on my previous steelies. Fouled the plugs this weekend and got brand new plugs. Will put more conservative jets in tomorrow and hopefully stops the plugs fouling. Ive drive It 10km EVER so I’m still feeling it out day by day.
1 point
-
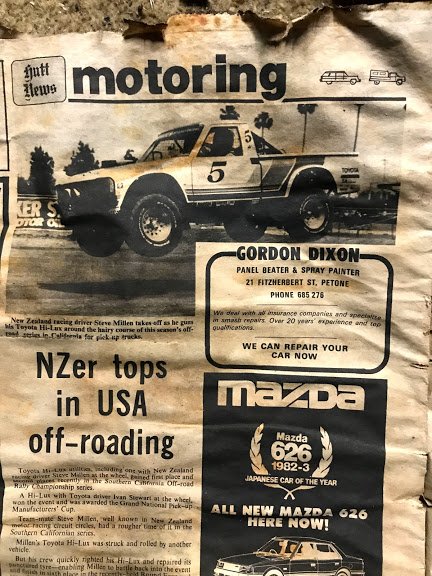
It was wet inside and one thing I found was a brown looking wet newspaper, so I dried it out and found it was from 1983. The windscreen shattered glass is still all through it, so it looks as though it was left for 35 years. I was born 35 years ago. Weird. Look at these NEW Honda's: Steve Millen:
1 point
-
When I was there no one locked anything. My mates mate was drunk and on cardboard. He took someone's car. He got caught. And he got the third degree from everybody. (Not sure if he was the first arrest of the new millenia, or if it was my mates uncle for being drunk in charge of a horse. (I only heard about it days later cos I'd pushed the boat out pretty far myself) My mate told me people will drive their cas to the car dump and leave them there. Keys in the ignition, and still with the battery in. Some good scavenging by the sound. But when shits fucked, it's FUCKED.1 point
-
Runner system prints completed.1 point
-
This gives you an idea of how the moulds/cores from these patterns will go together.1 point
-
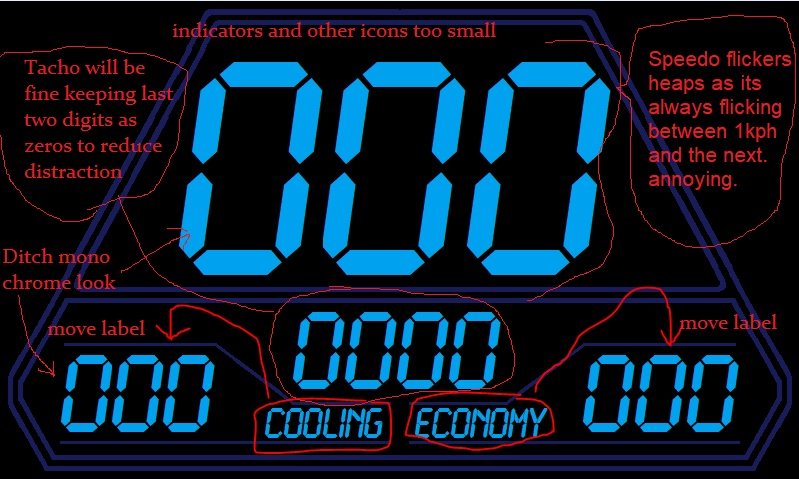
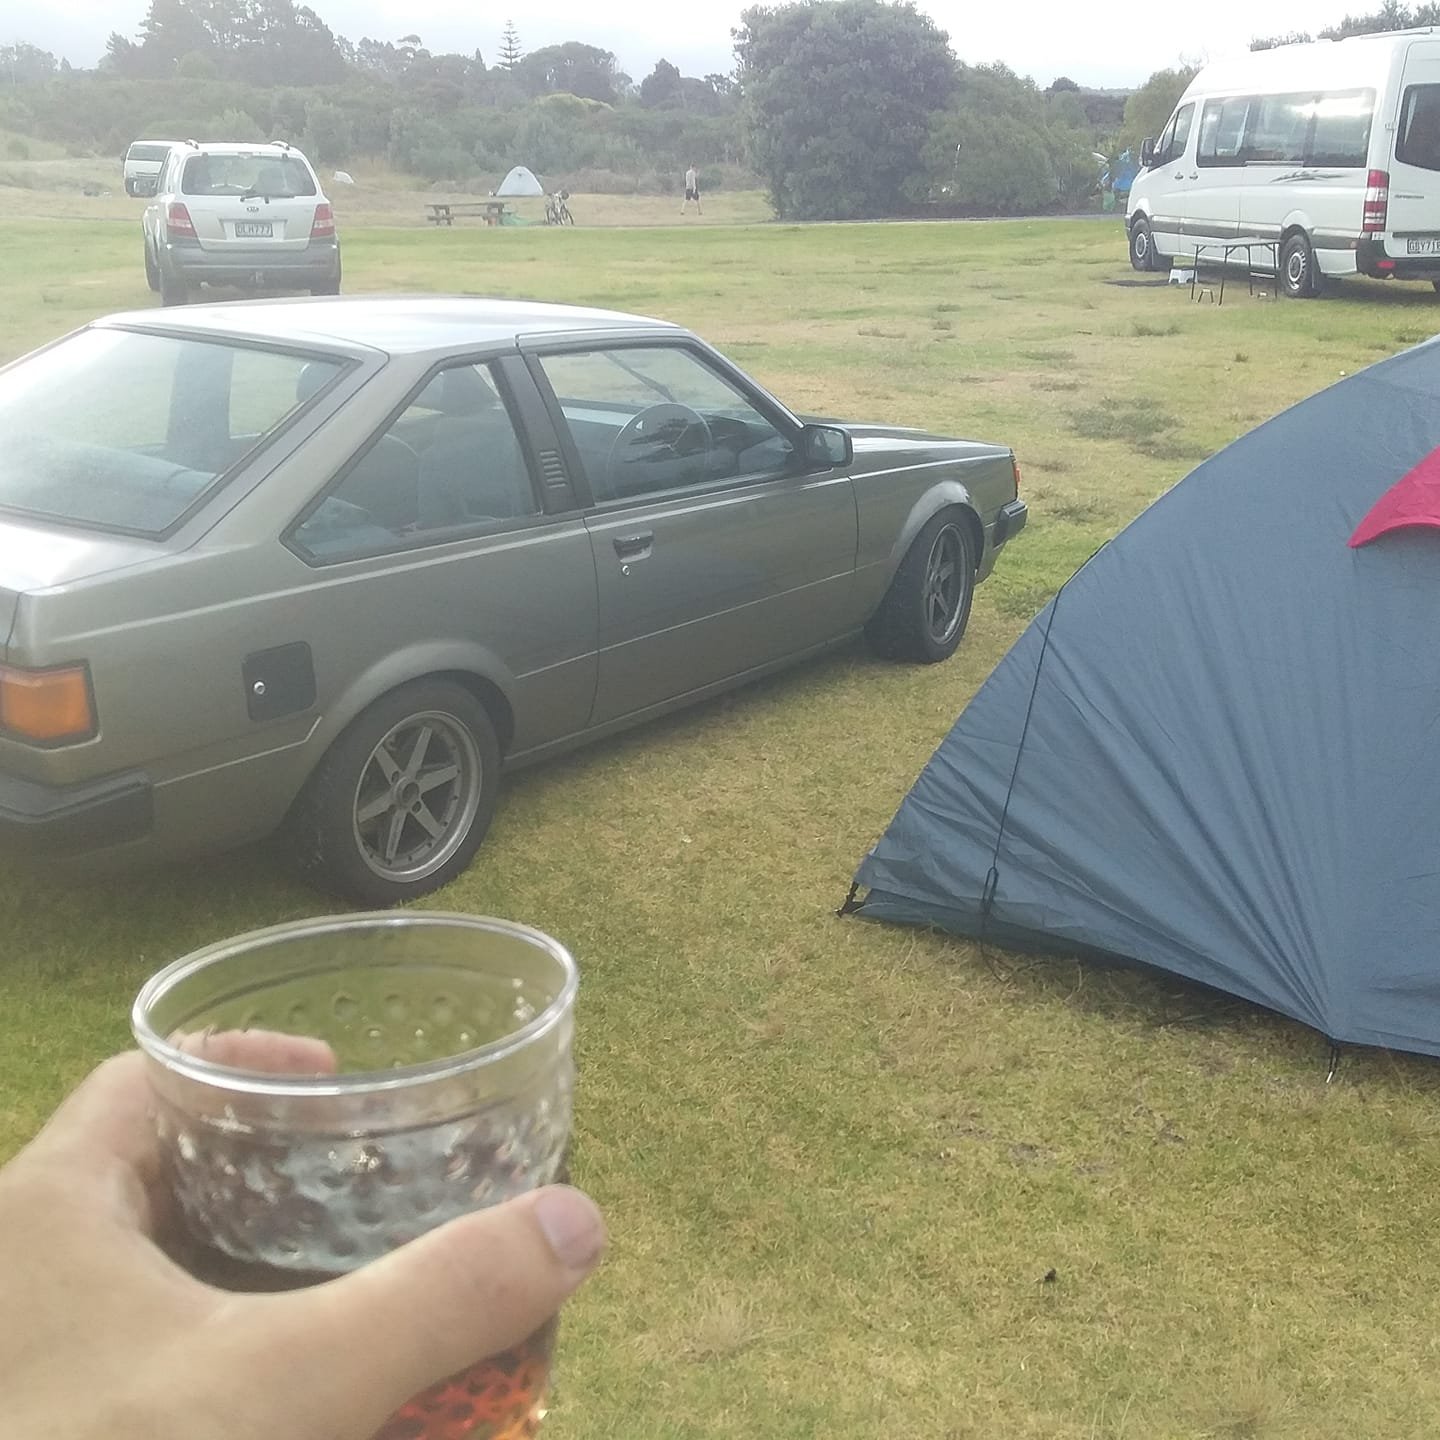
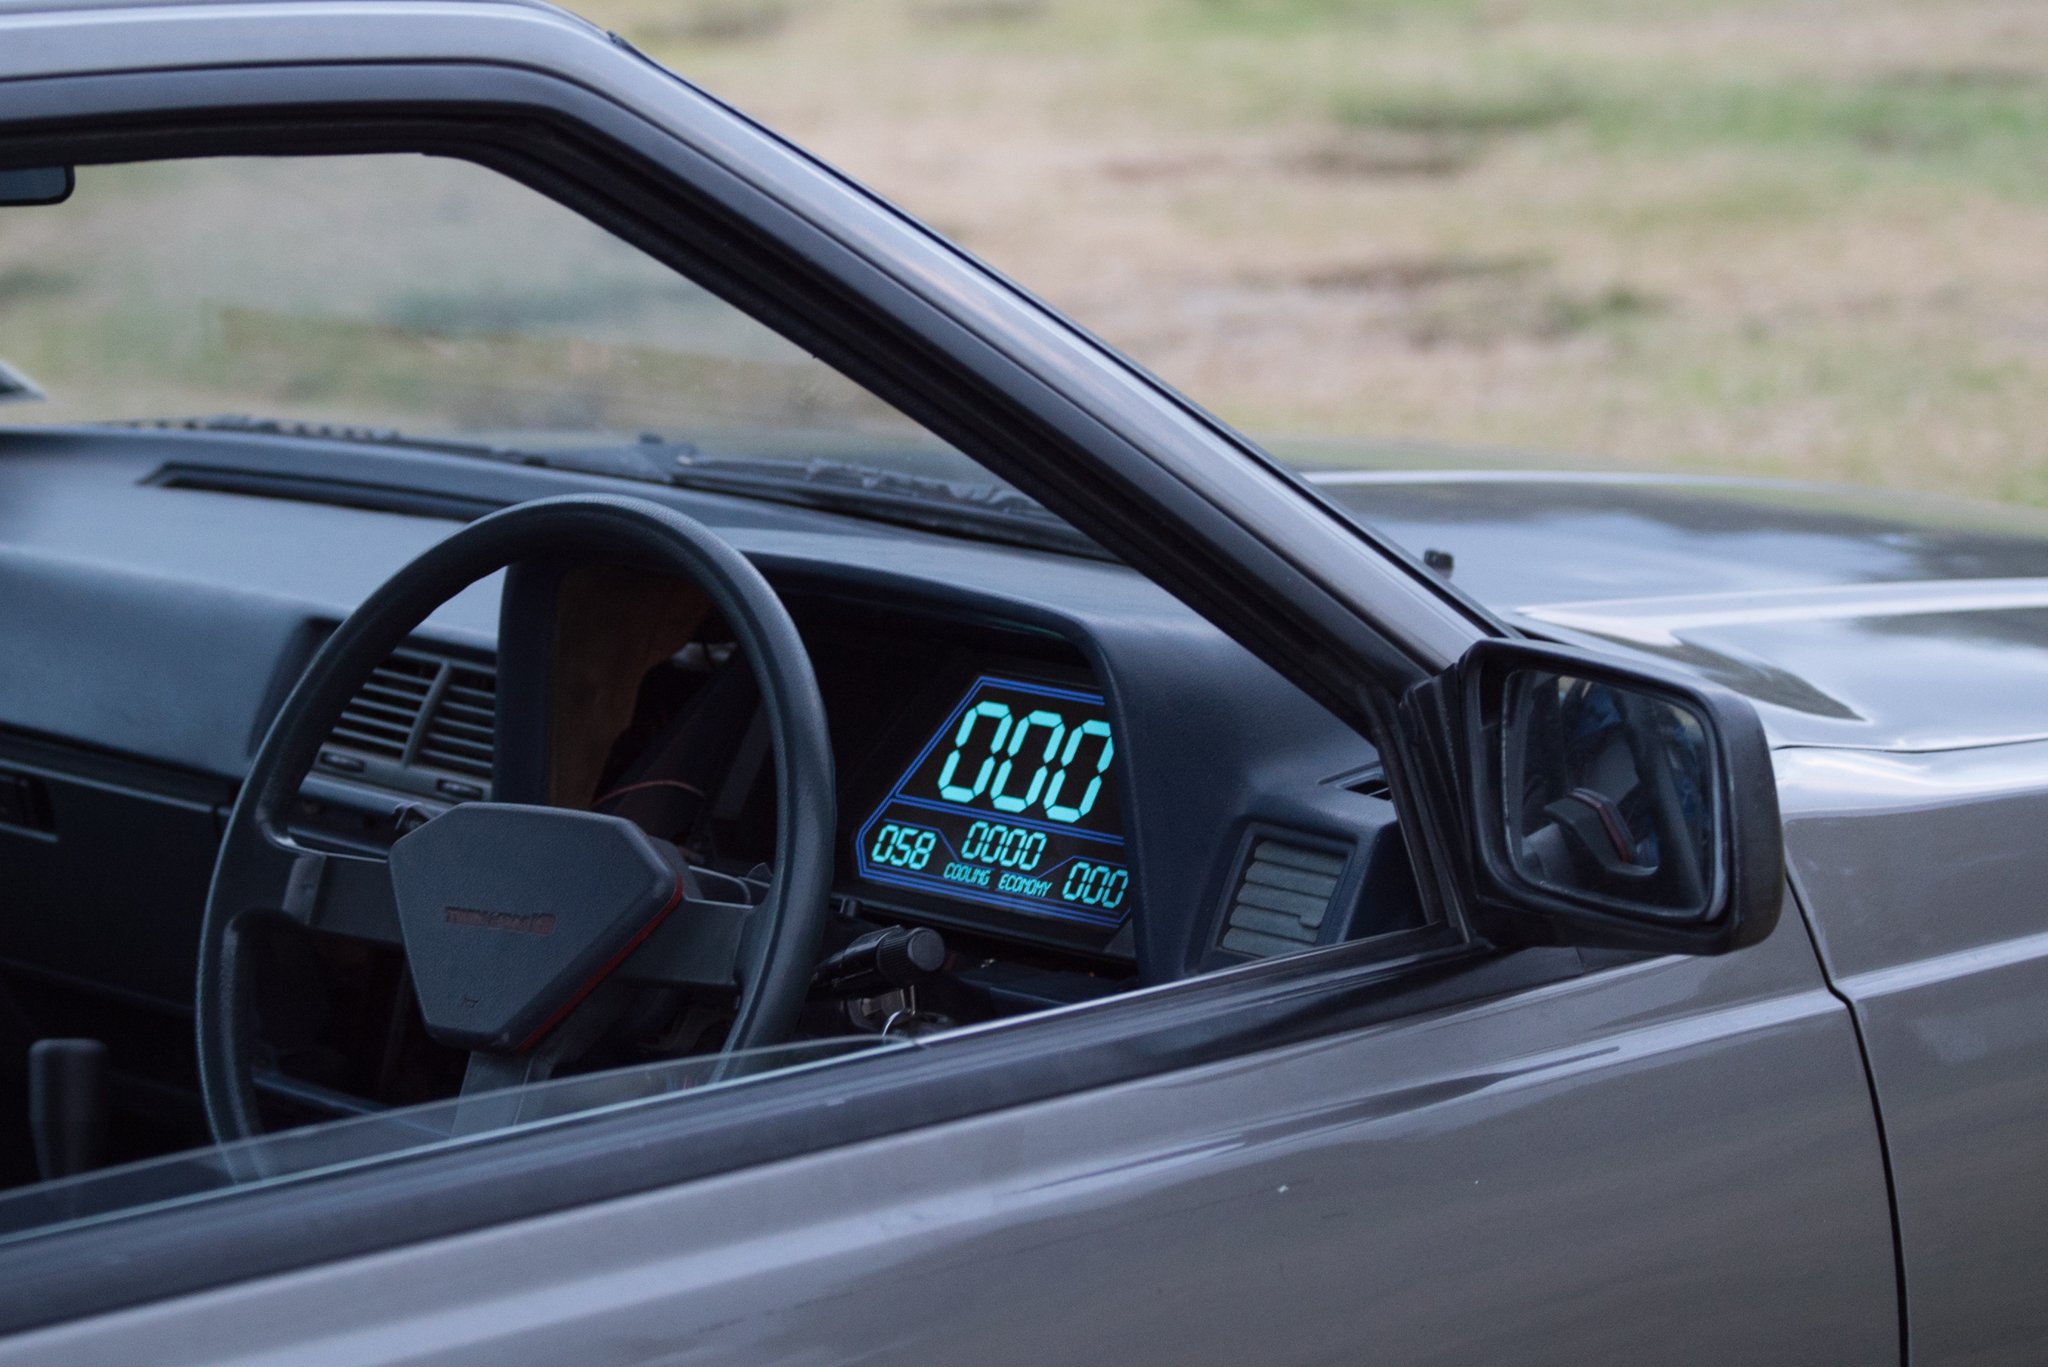
Got a driveshaft sorted until I can get something made up, so went on a roady to test out the dash. Drive up to Uretiti was good! As expected I really need to put some KMs on it and get a feel for what's good or whats annoying or so on. Very quickly a few things became apparent that they are fecken annoying! Also this thread has been severely lacking MSpaint so here we are: So on the plus side, the ~250? Nit screen seemed decent enough even with backlit conditions. I've got a 1000 Nit screen here to try too if I need to burn my eyeballs out! Most of the annoyance came from values flickering. Because you might be hovering on say 89.9kph and then 90.1kph... So it will flicker between 89 and 90. Options here are either that I take a rolling average of the last XYZ amount of speed results and smooth it. Or maybe only change the speedo value if the number goes up or down by 2kph or more. With the tacho, this was annoying for similar reasons in that it can read from the ECU down to a single RPM, so its a constantly moving number which is distracting. I'm thinking that I'll filter it so it only updates the screen in 100rpm increments, so will go 2400rpm, 2500rpm, etc. Because again, does it really matter, do you really need to know that the engine is doing 2451rpm? Not really. Maybe I could make it read in 50rpm increments below 2000rpm or something like that. Also when it was bright you cant actually see any of the outline lines, only the numbers and labels. So will make more sense to move labels closer to the values. I also realised that although a monochrome sort of look is nice. I setup some cruise control displays so that one button goes Red when you've activated CC, and then goes green when CC is turned on. With the colour differentiation you could instantly tell what status the cruise control was in. So I think more colours will make things easier to read. In fairness though this is essentially a low contrast colour scheme that is probably better for night time. Using a white or yellow or whatever text and it's blazingly brigher even with the same backlight settings. I'm also starting to question the merits of having the triangulated sort of face over the screen, when you're driving and it's bright you cant see any of it. Just the values on screen. So may as well just use the extra screen real estate. Good to be making some progress anyway! I'm looking forward to designing some of the more contextually aware screen functions now that the basics are sorted. First on the menu is a secondary screen for when Cruise Control is turned on. Then I'll look at some trackday related stuff and a few diagnostic pages to make life easier. It's cool having all of the standard dash info coming into this, because I can set it so (for example) if you flash the high beams, or push the brake, or whatever, in certain conditions (like while the car is stationary without engine running) you can use those car controls to navigate through menus or switch screens or whatever. Pretty chuffed to have reached that milestone of driving it with a fairly "finished" prototype though.
1 point
-
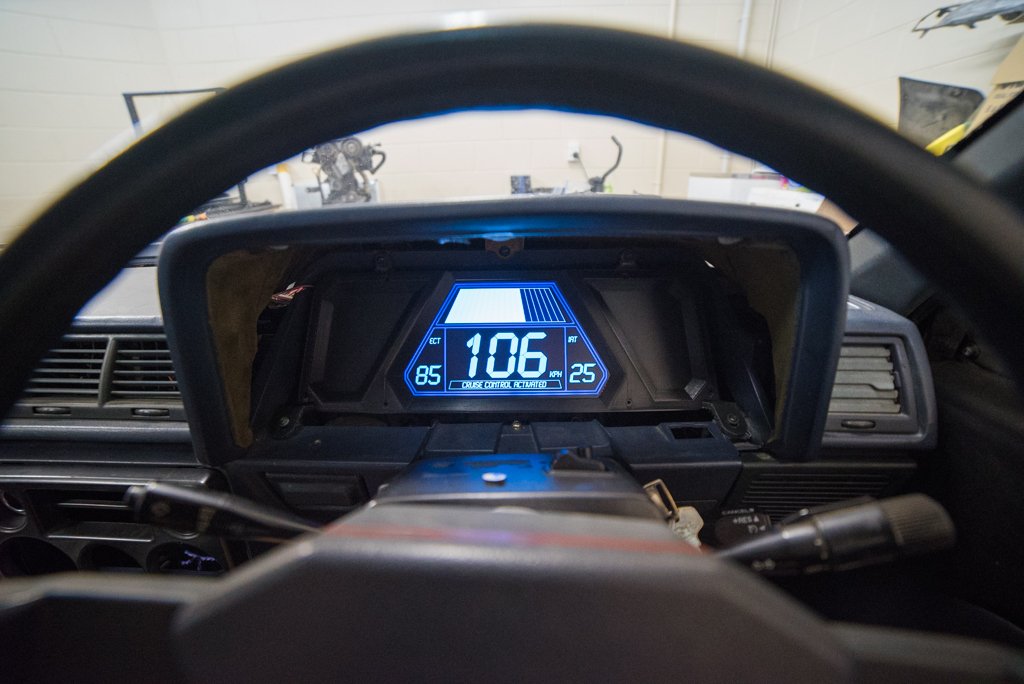
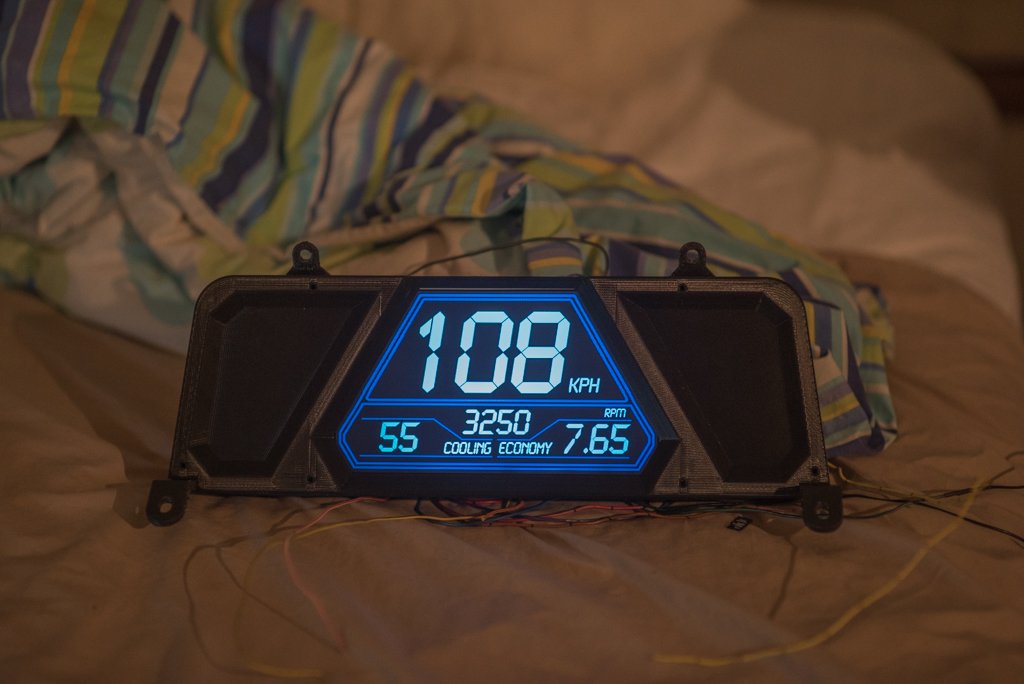
Digidash is coming along slowly too. Just need to figure out what to put on the sides. Waiting on some parts so my circuit board can interface with the 12v stuff from the loom plugs like lights, indicators etc. Still might change the design around a bit but I want to look 80s obnoxious / look like it belongs in the car / still be nice and readable. Currently only receives canbus info from ECU, and has an internal bulb to make the alternator work haha. Getting there but a fair bit of work left to do. Excuse the yuck graphics, work in progress:
1 point
-
.1 point
-
Small update: Box and flywheel are still at the machine shop. Small bit of info in case anyone else gets caught out... It turns out that near the end of the production run Ford changed from a 110 tooth flywheel to a 135 tooth flywheel. Mine happened to be a 135 tooth flywheel, and the Palmside starter motor kits are toothed for the 110 tooth flywheel (The 135 tooth ones are quite uncommon... apparently). This means I had to find an older flywheel to get the ring gear swapped over from since my flywheel had already been re-drilled and doweled for the sierra clutch, and had also been lightened. On the plus side, it means I have a newish engine. So yea, if you are going to buy a pre-engaged starter kit from Palmside, make sure you have the 110 tooth flywheel first1 point
-
More Air-Dam / Guard Molding1 point


_sedan_(23230030334)(1).thumb.jpg.34d765361d66c78db614bae6ea2c156a.jpg)


This leaderboard is set to Auckland/GMT+12:00