
Leaderboard


Popular Content
Showing content with the highest reputation on 06/30/19 in all areas
-
The wiring is pretty much there now bar the speedo cluster, a bit more tidying in the cab and adding some Deutsch connectors in the rear. And a licence plate light. Now I am a difficult bastard at the best of times, and part of this is that I hate car stereos with all their bullshit inputs, eq settings and animated screens, another part is that I have not willingly listened to the radio or watched television for more than two decades, a small and ineffectual rebellion against capitalism. I only listen to talking books over Bluetooth when driving and fucking hate it when I get into a car after someone has been used it (Shane you dick) and has fucked about with the stereo and turned on the radio. So to prevent this occurrence I have bought a top quality Bluetooth mini amp off Ali express for $54, this has two tone knobs and a volume knob, and no display. Perfect. It is a nobsound brand lol, right up my street https://s.click.aliexpress.com/e/u5tcaeM In other news I have had some front driveshaft adaptors made so I will be sorting that out shortly. I will hopefully have enough cash for a radiator in the next few days as well. In the realm of actual work I have mounted the rear seats. Not masses of legroom but they work well and pack away nice and tidy; It will be tight for the engine cover but do able.11 points
-
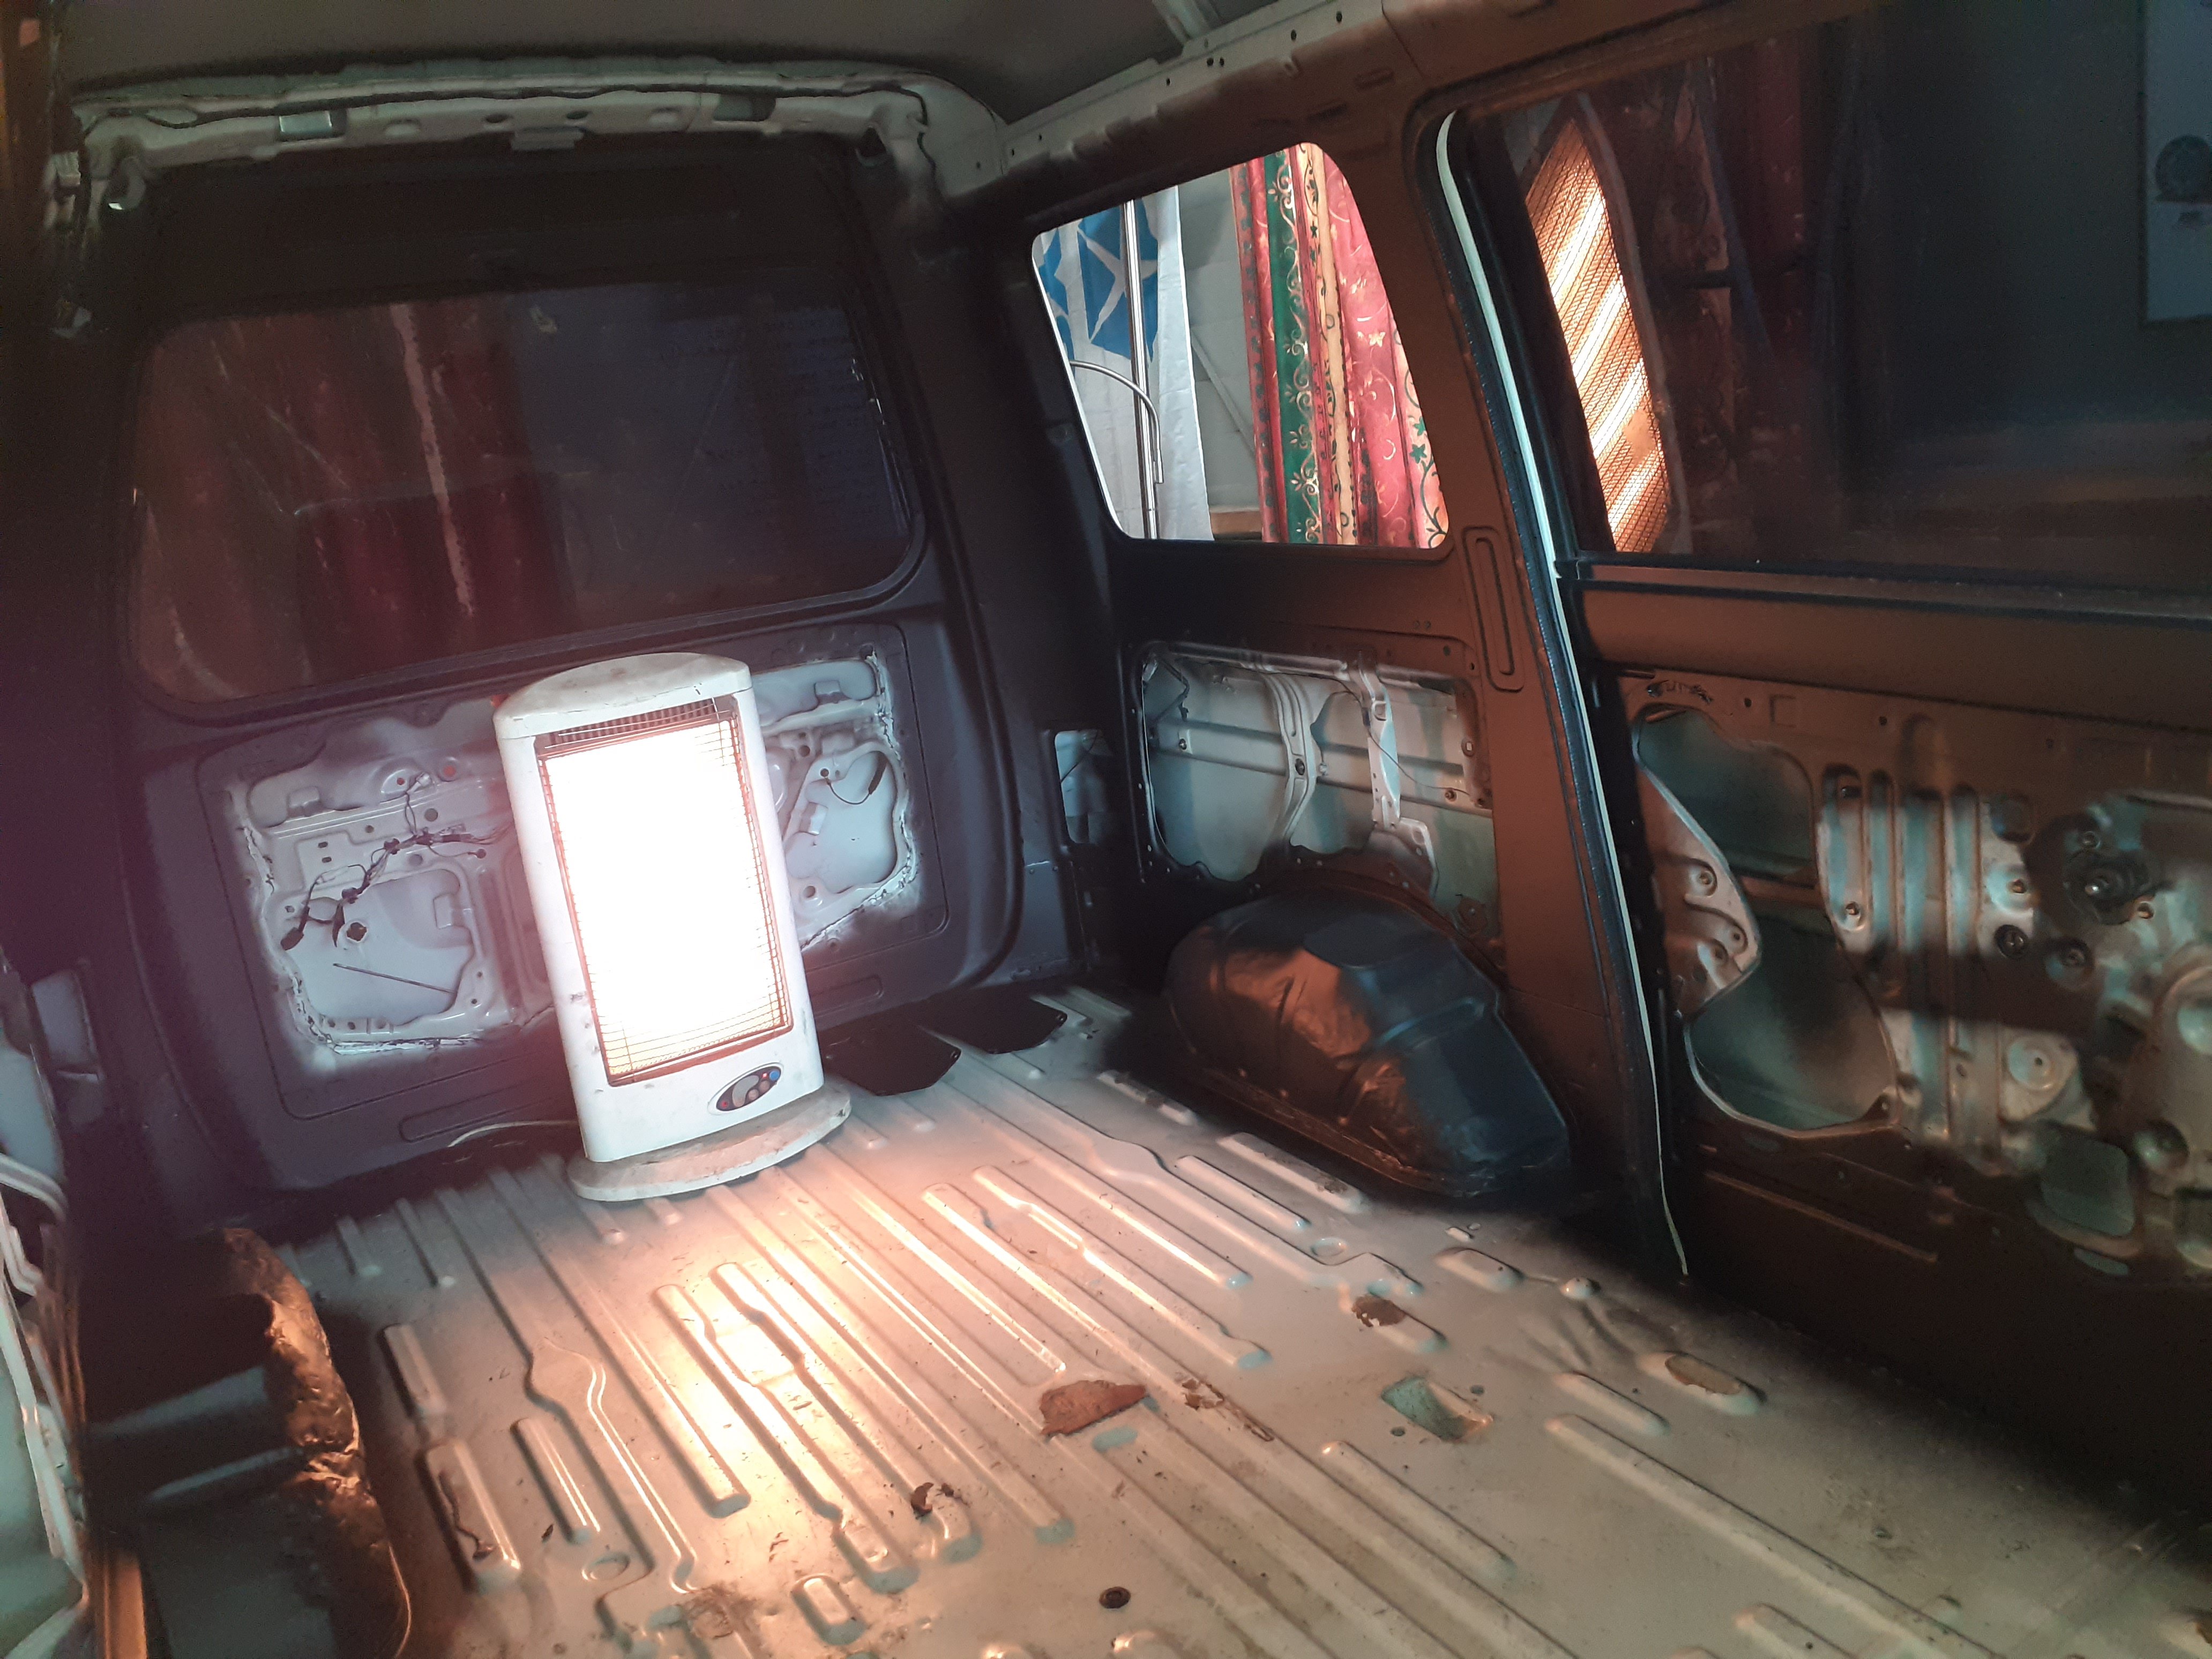
Yuck to not so yuck, sugar soap and a water blast . And dungeon spec interior
 11 points
 -
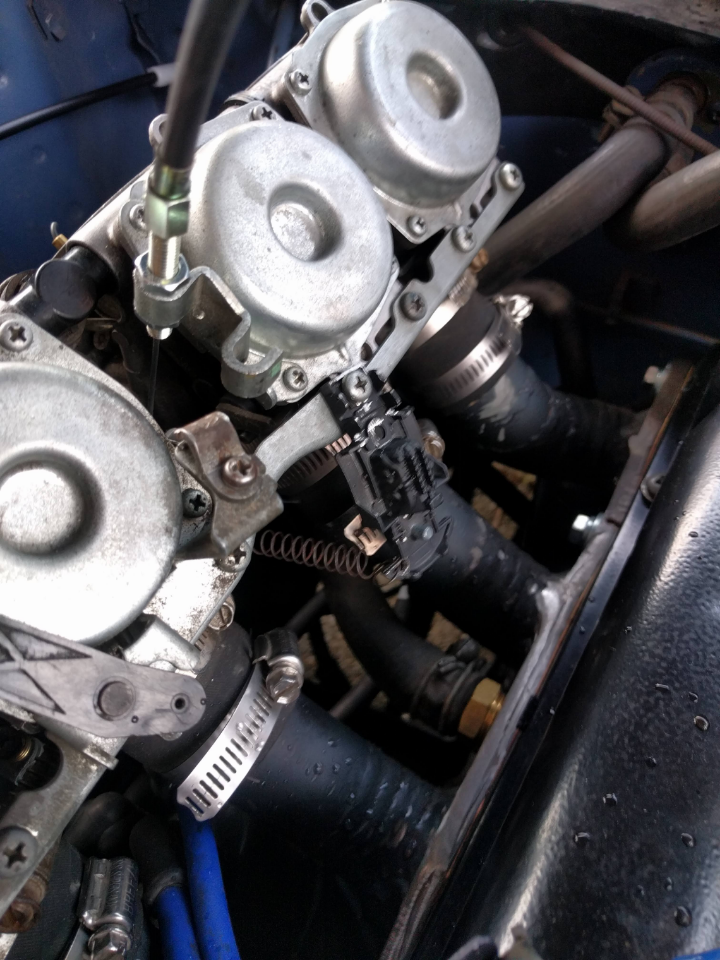
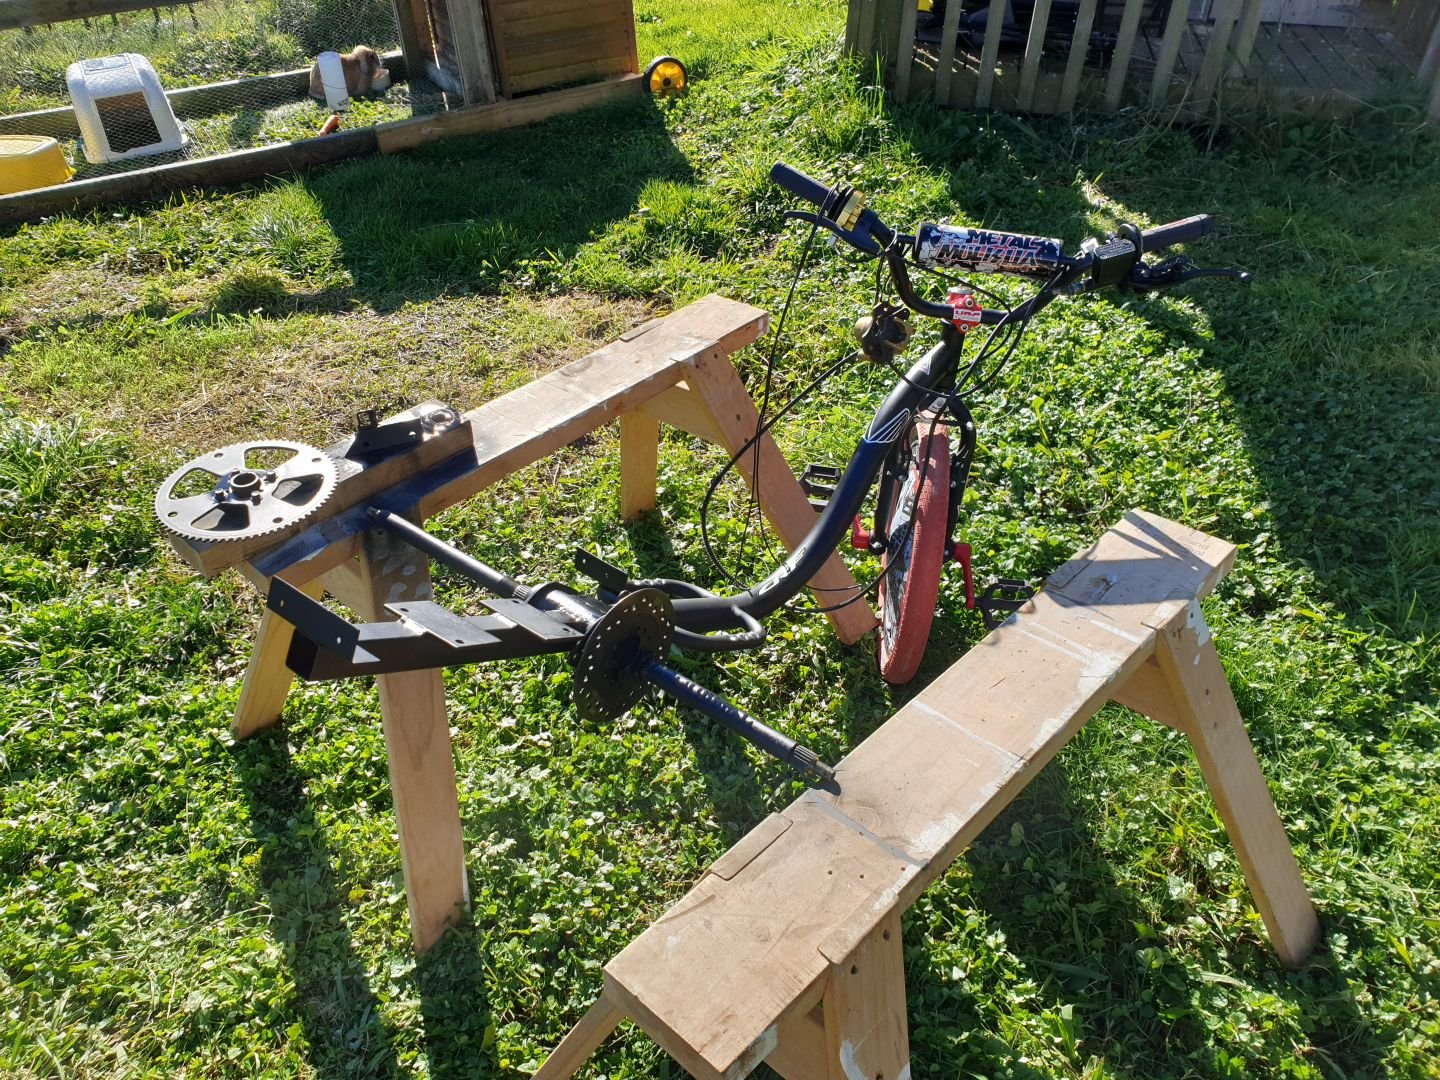
Wired in an electric bike fuel pump which fixed the over fueling issues. Tuned them with a vaccum gauge but had trouble so resorted to a hose to my ear. Threw a colortune at it and it was running rich all through the range. Wound in the pilot jet all the way and it was still rich at idle. Have ordered some jets from aliexpress and will play with them. Have driven it around the block a few times and it certainly comes on song. I had to horey up a return spring, ended up using an old matchbox chassis. Have yet to rectify this.
10 points
-
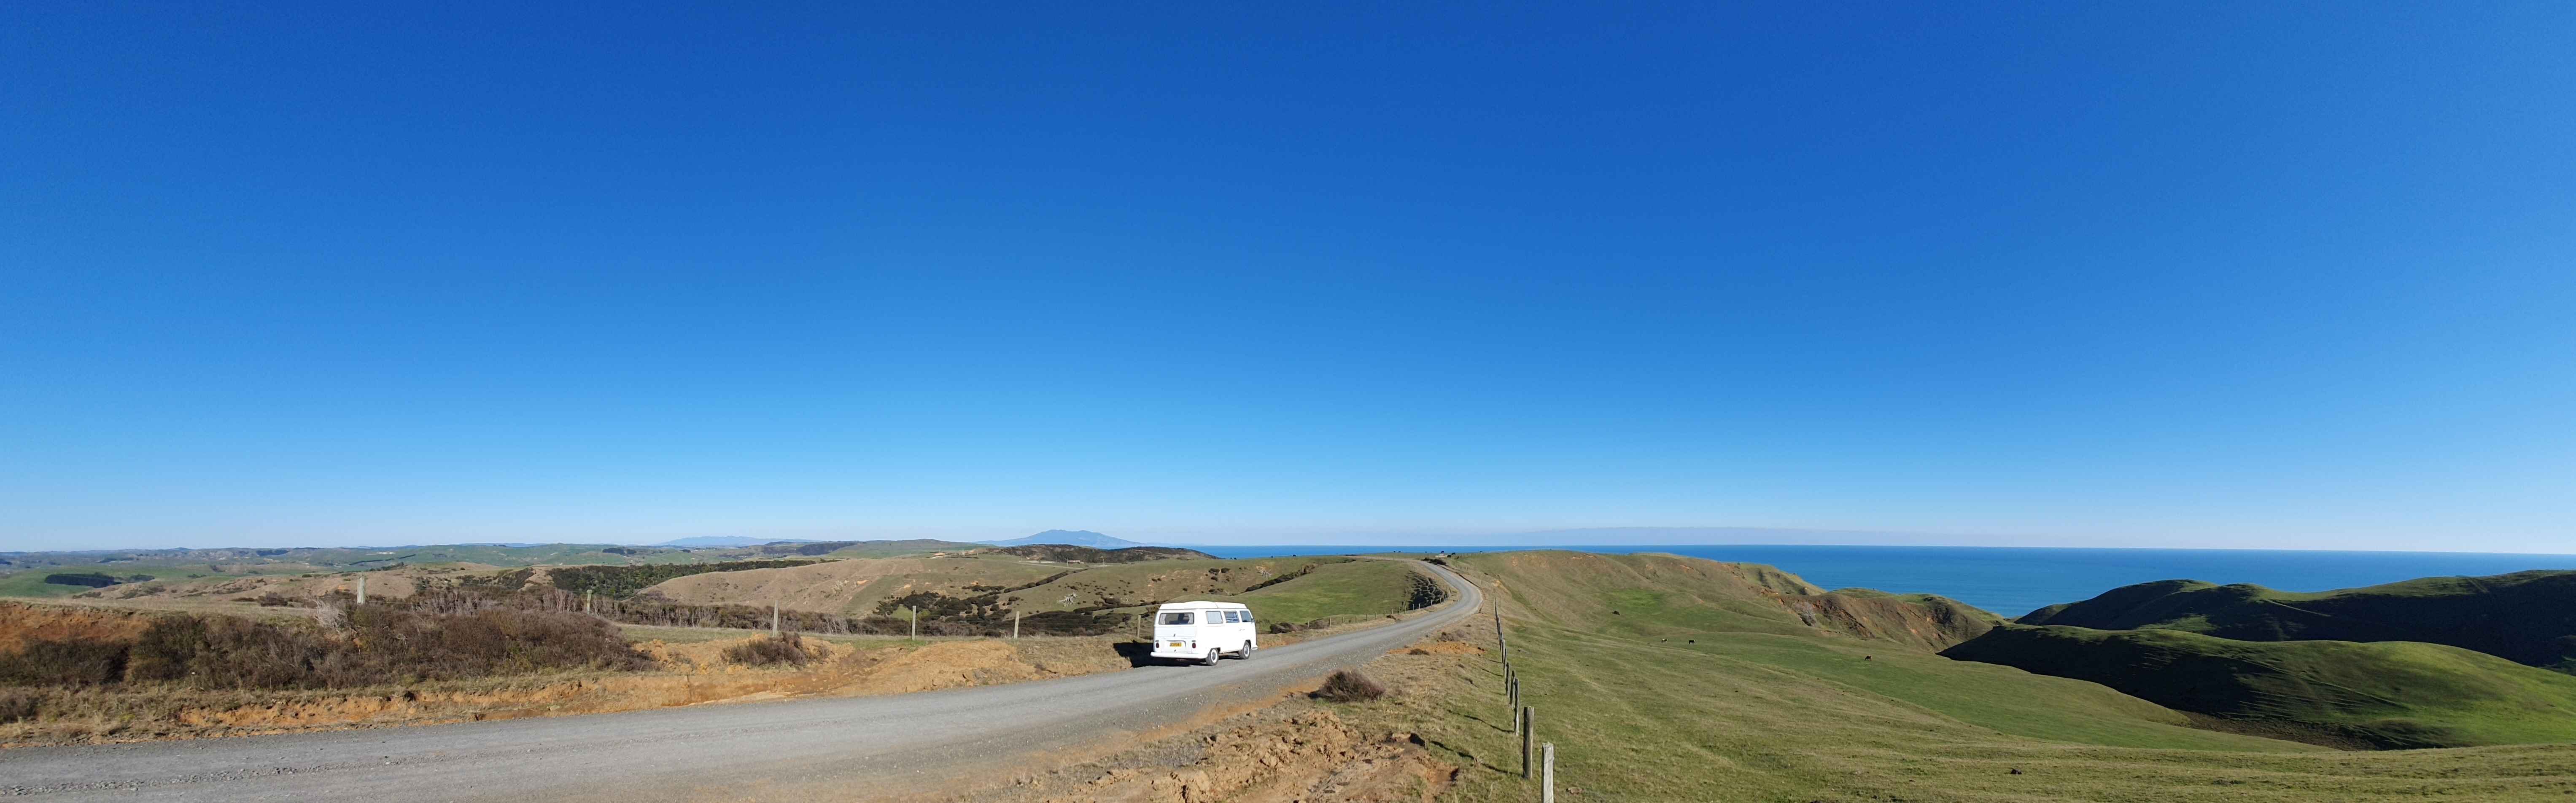
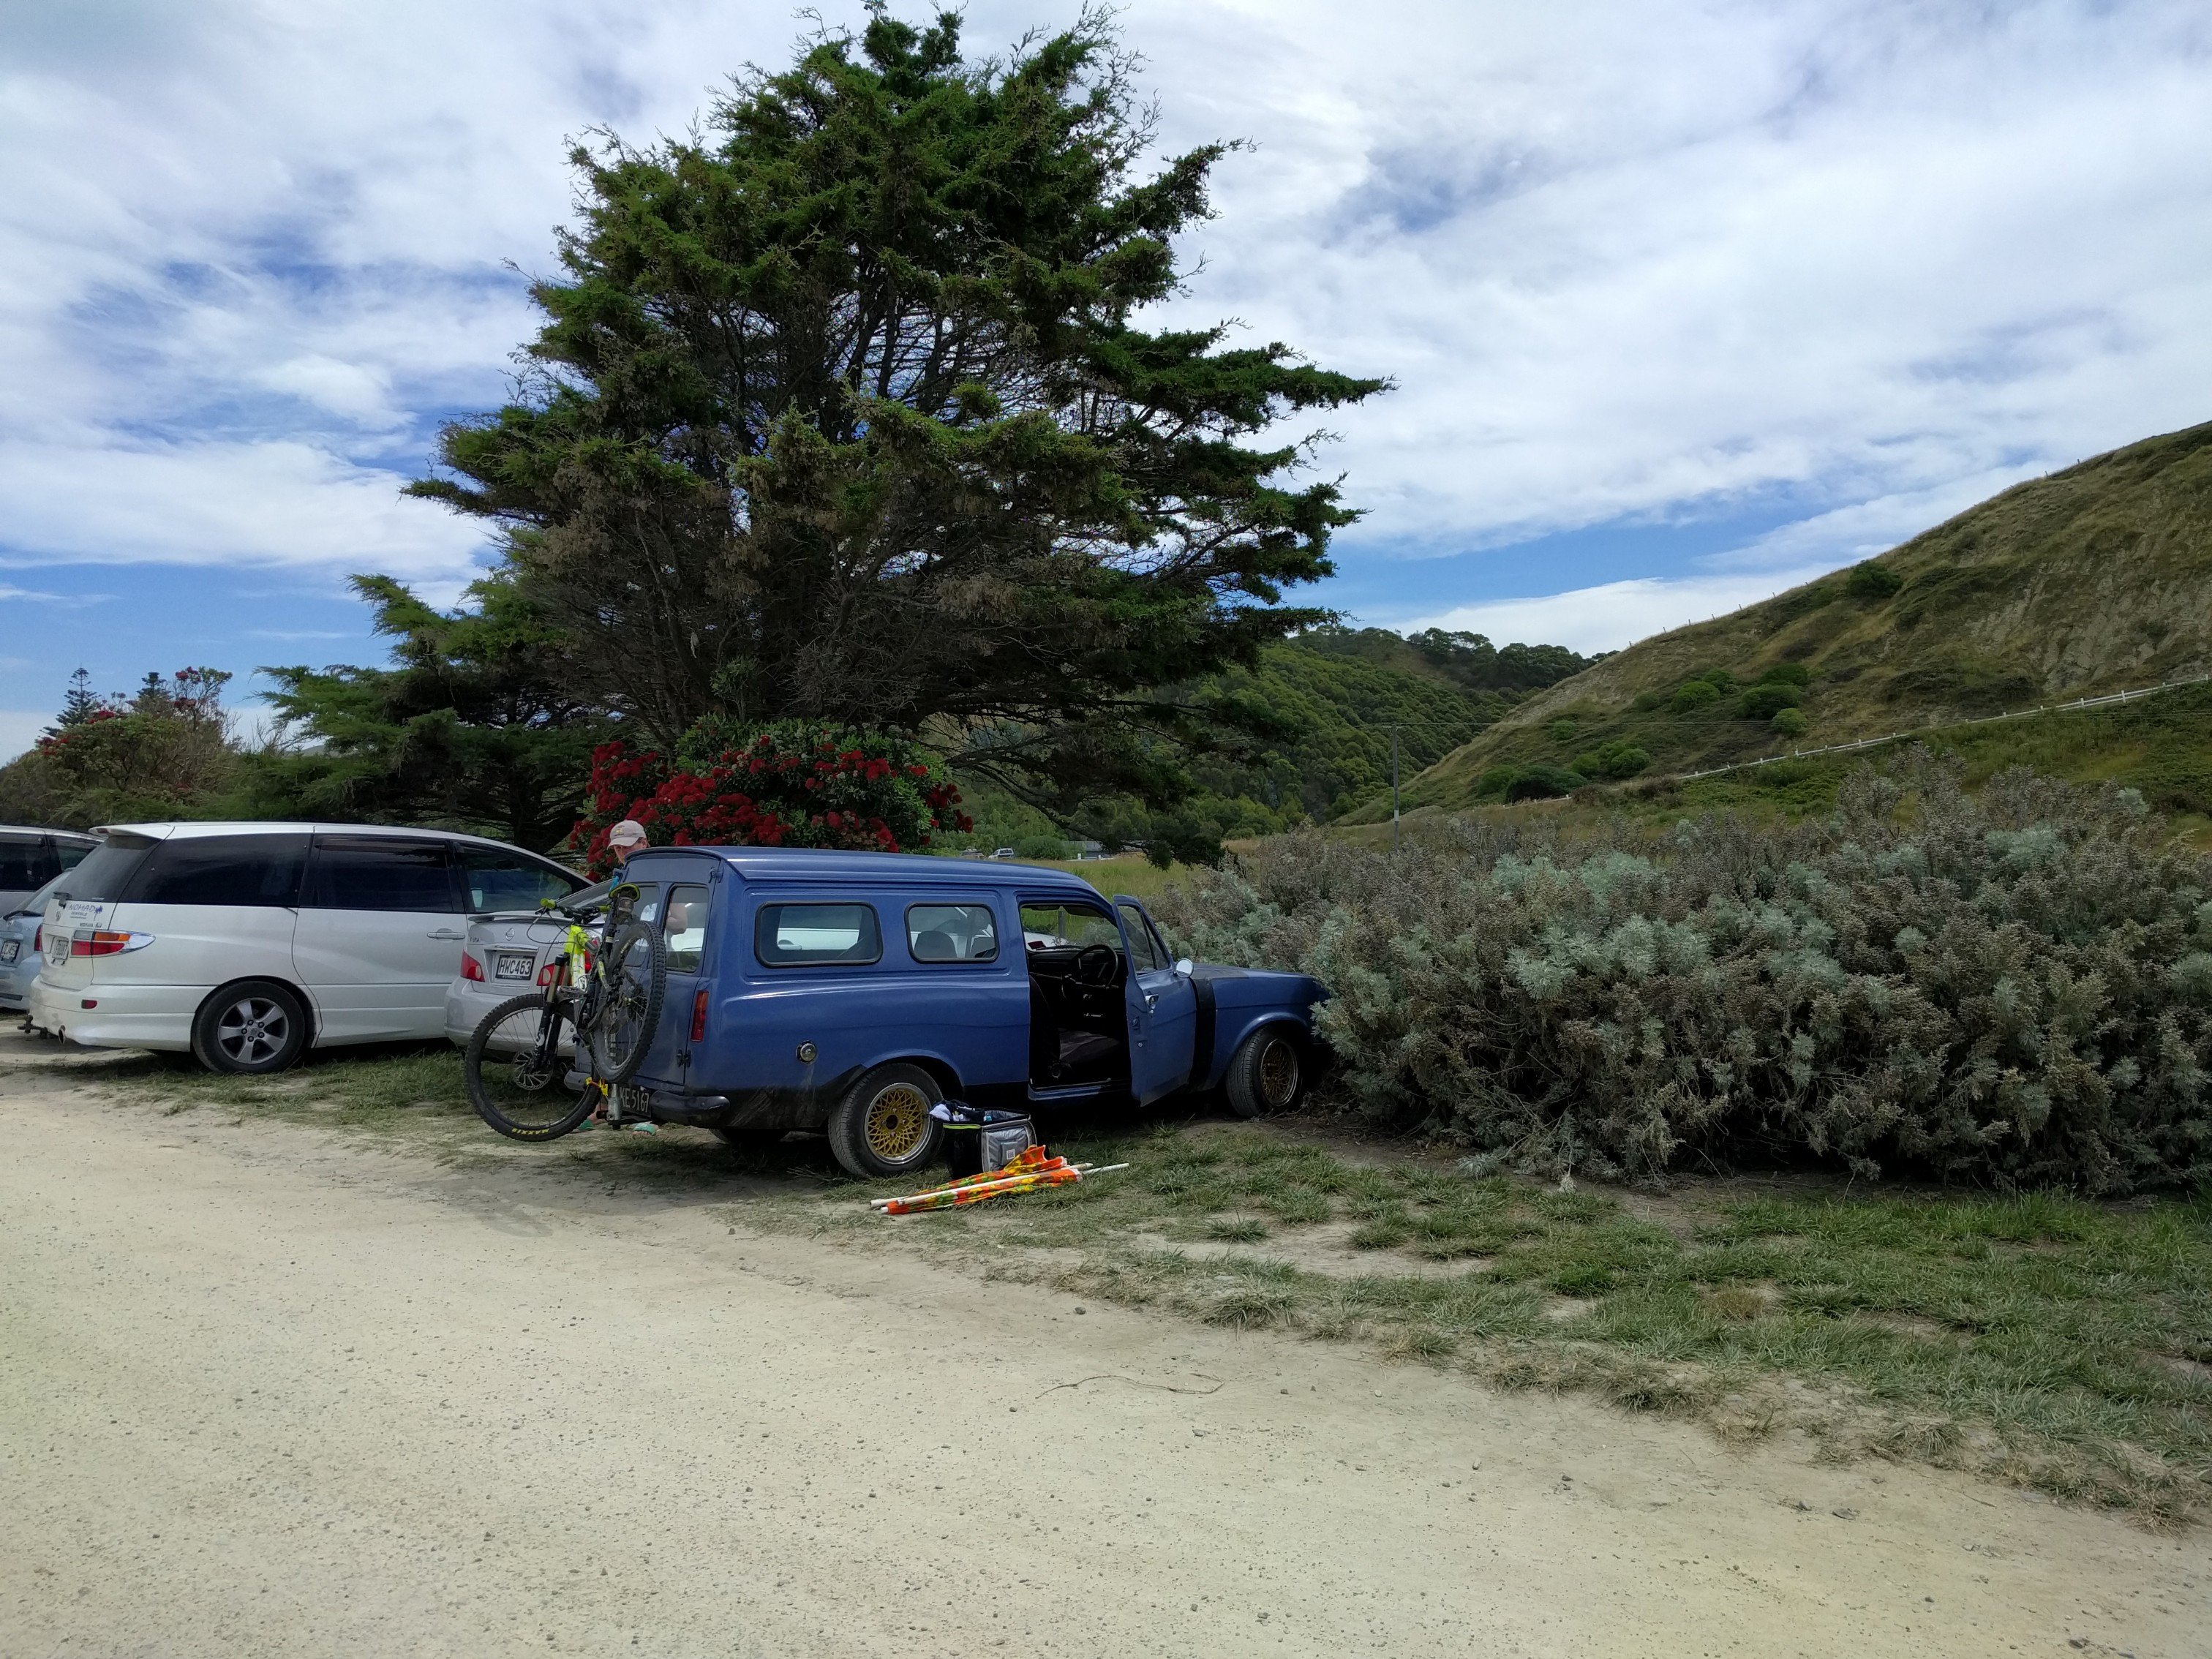
We went for a drive today. Started with heading to caffeine and gasoline. Had a look around at a few cars. Then headed to pukekohe to visit a few mates while we were up that way. No one was home so we heading to port waikato and then continued our way down the coast. Clocked up just over 120miles. I visited this spot while on the vespa and pretty much done the same trip just in reverse. Such a stella day and kombi went really well. 10/10 nice roads and great scenery, much wow. Also done a oil change on Saturday. Will post those photos tomorrow.
9 points
-
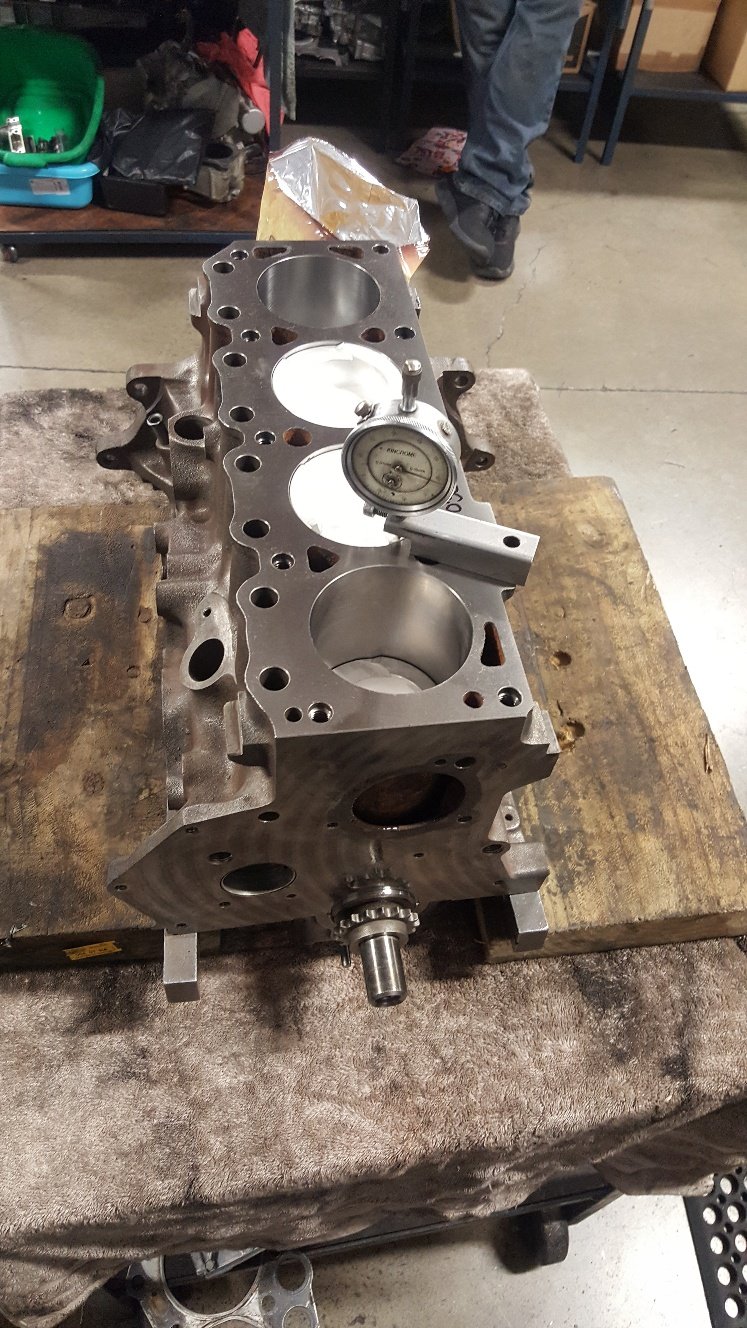
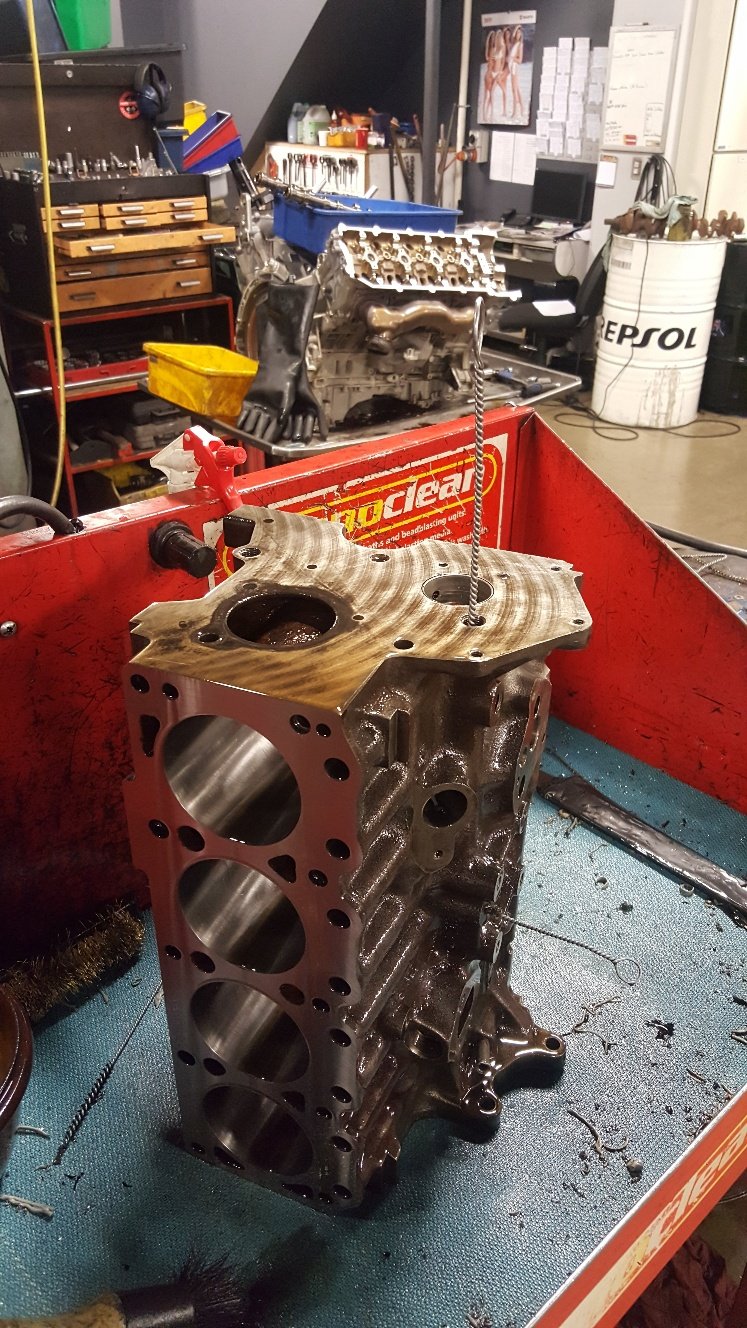
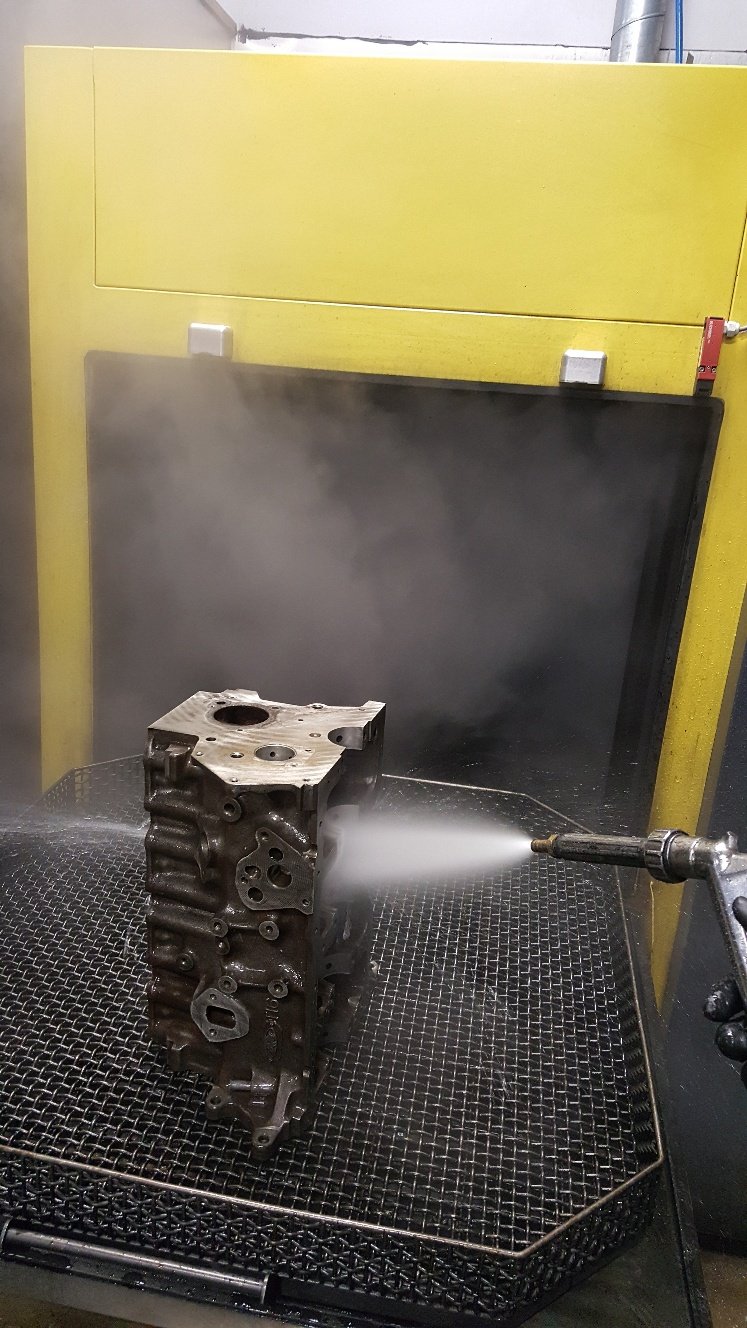
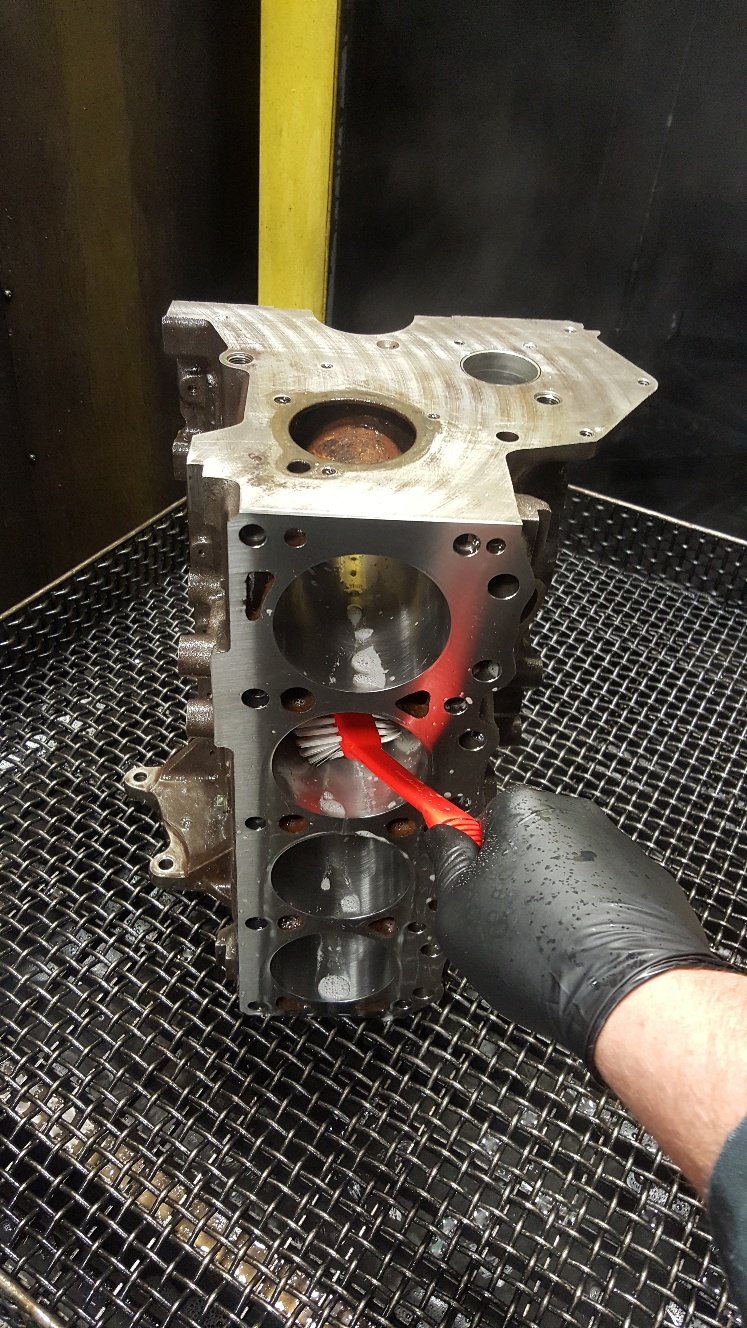
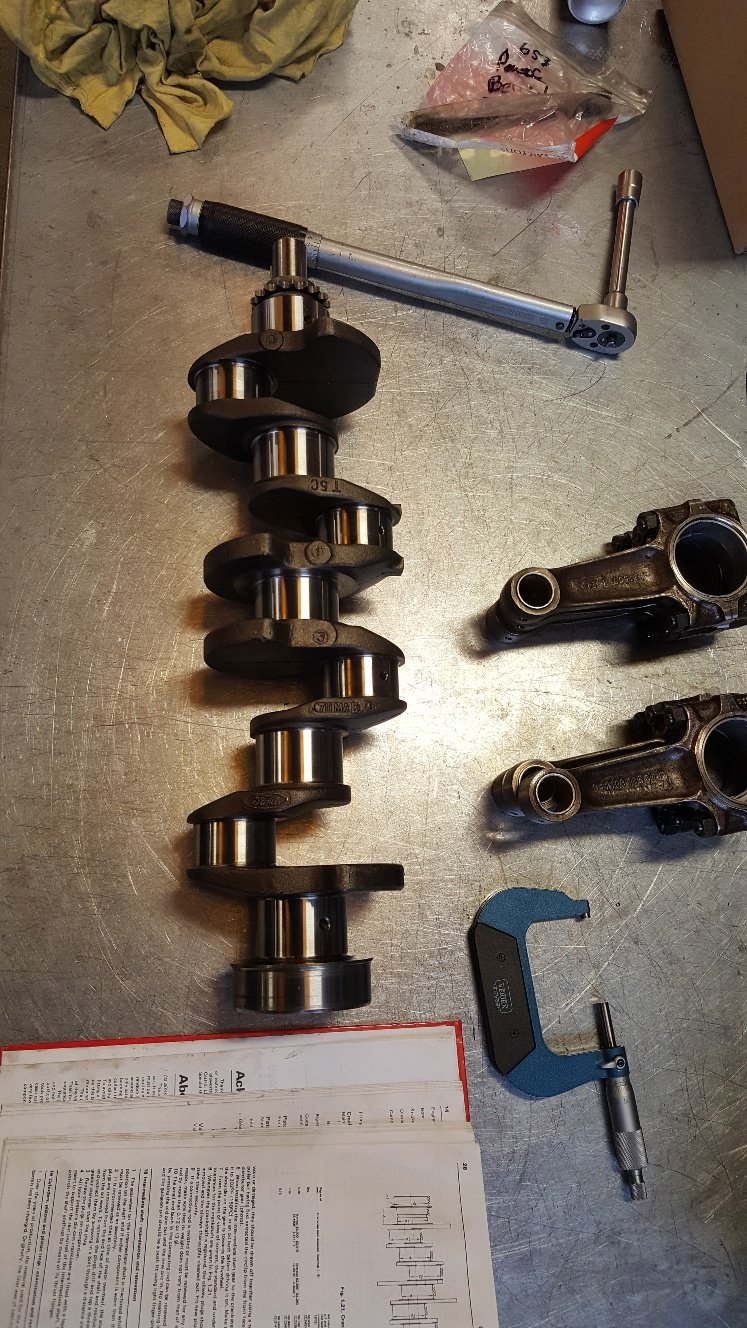
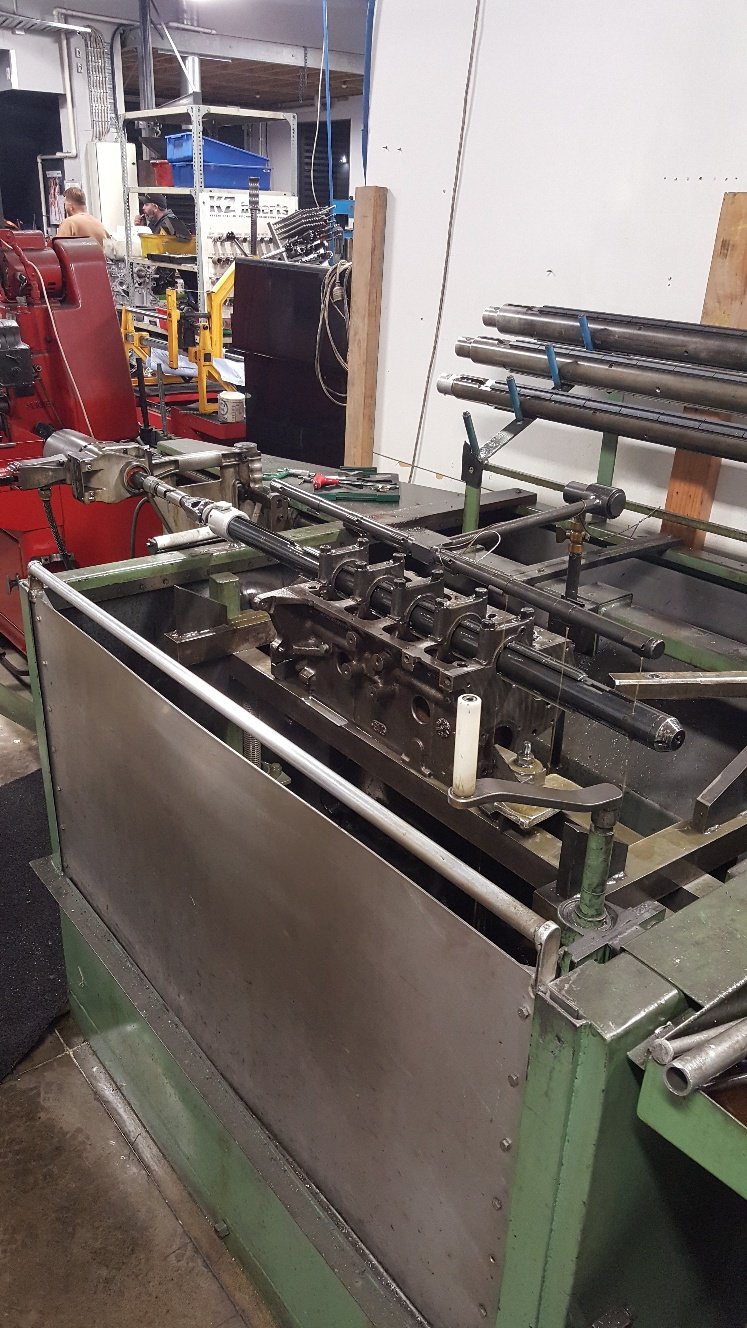
So assembled the short block to check piston heights. Normally old engines have heaps of piston to head clearance. I found the pistons are below the deck surface 20 thou or half a mm. My head gasket 52 thou thick. So ideally i won't the piston above the deck 10 thou to get my 40 thou piston to head clearance for good squish. So it was back to the surface grinder to remove 30 thou. While i was there i sat the block in the surface grinder on it's deck surface and run a dti through the main tunnel to check how true the tunnel is to the deck and i was surprised to find it was within 1.5 thou. I haven't put a pic of it being surfaced as there's already one earlier on. So I gave it a wash. I went through all the galleries with gallery brushes. Then put it in our Bupi wash. This is pretty much just a big dish washer. Made in Germany and it's one of the more handy things in the workshop. Then we just give them a good going over with soapy water. Normally just dish washing liquid and hot water to brake down any left over honing oil. And really get all the machining swarf out of the oil galleries and other spots in the block.
9 points
-
Fuel tank access panel. Not perfect but will do the job. Think of the grams saved!
8 points
-
On today's adventure Greg discovered the best feature of the kombi. Chip/snack holder for the driver.
7 points
-
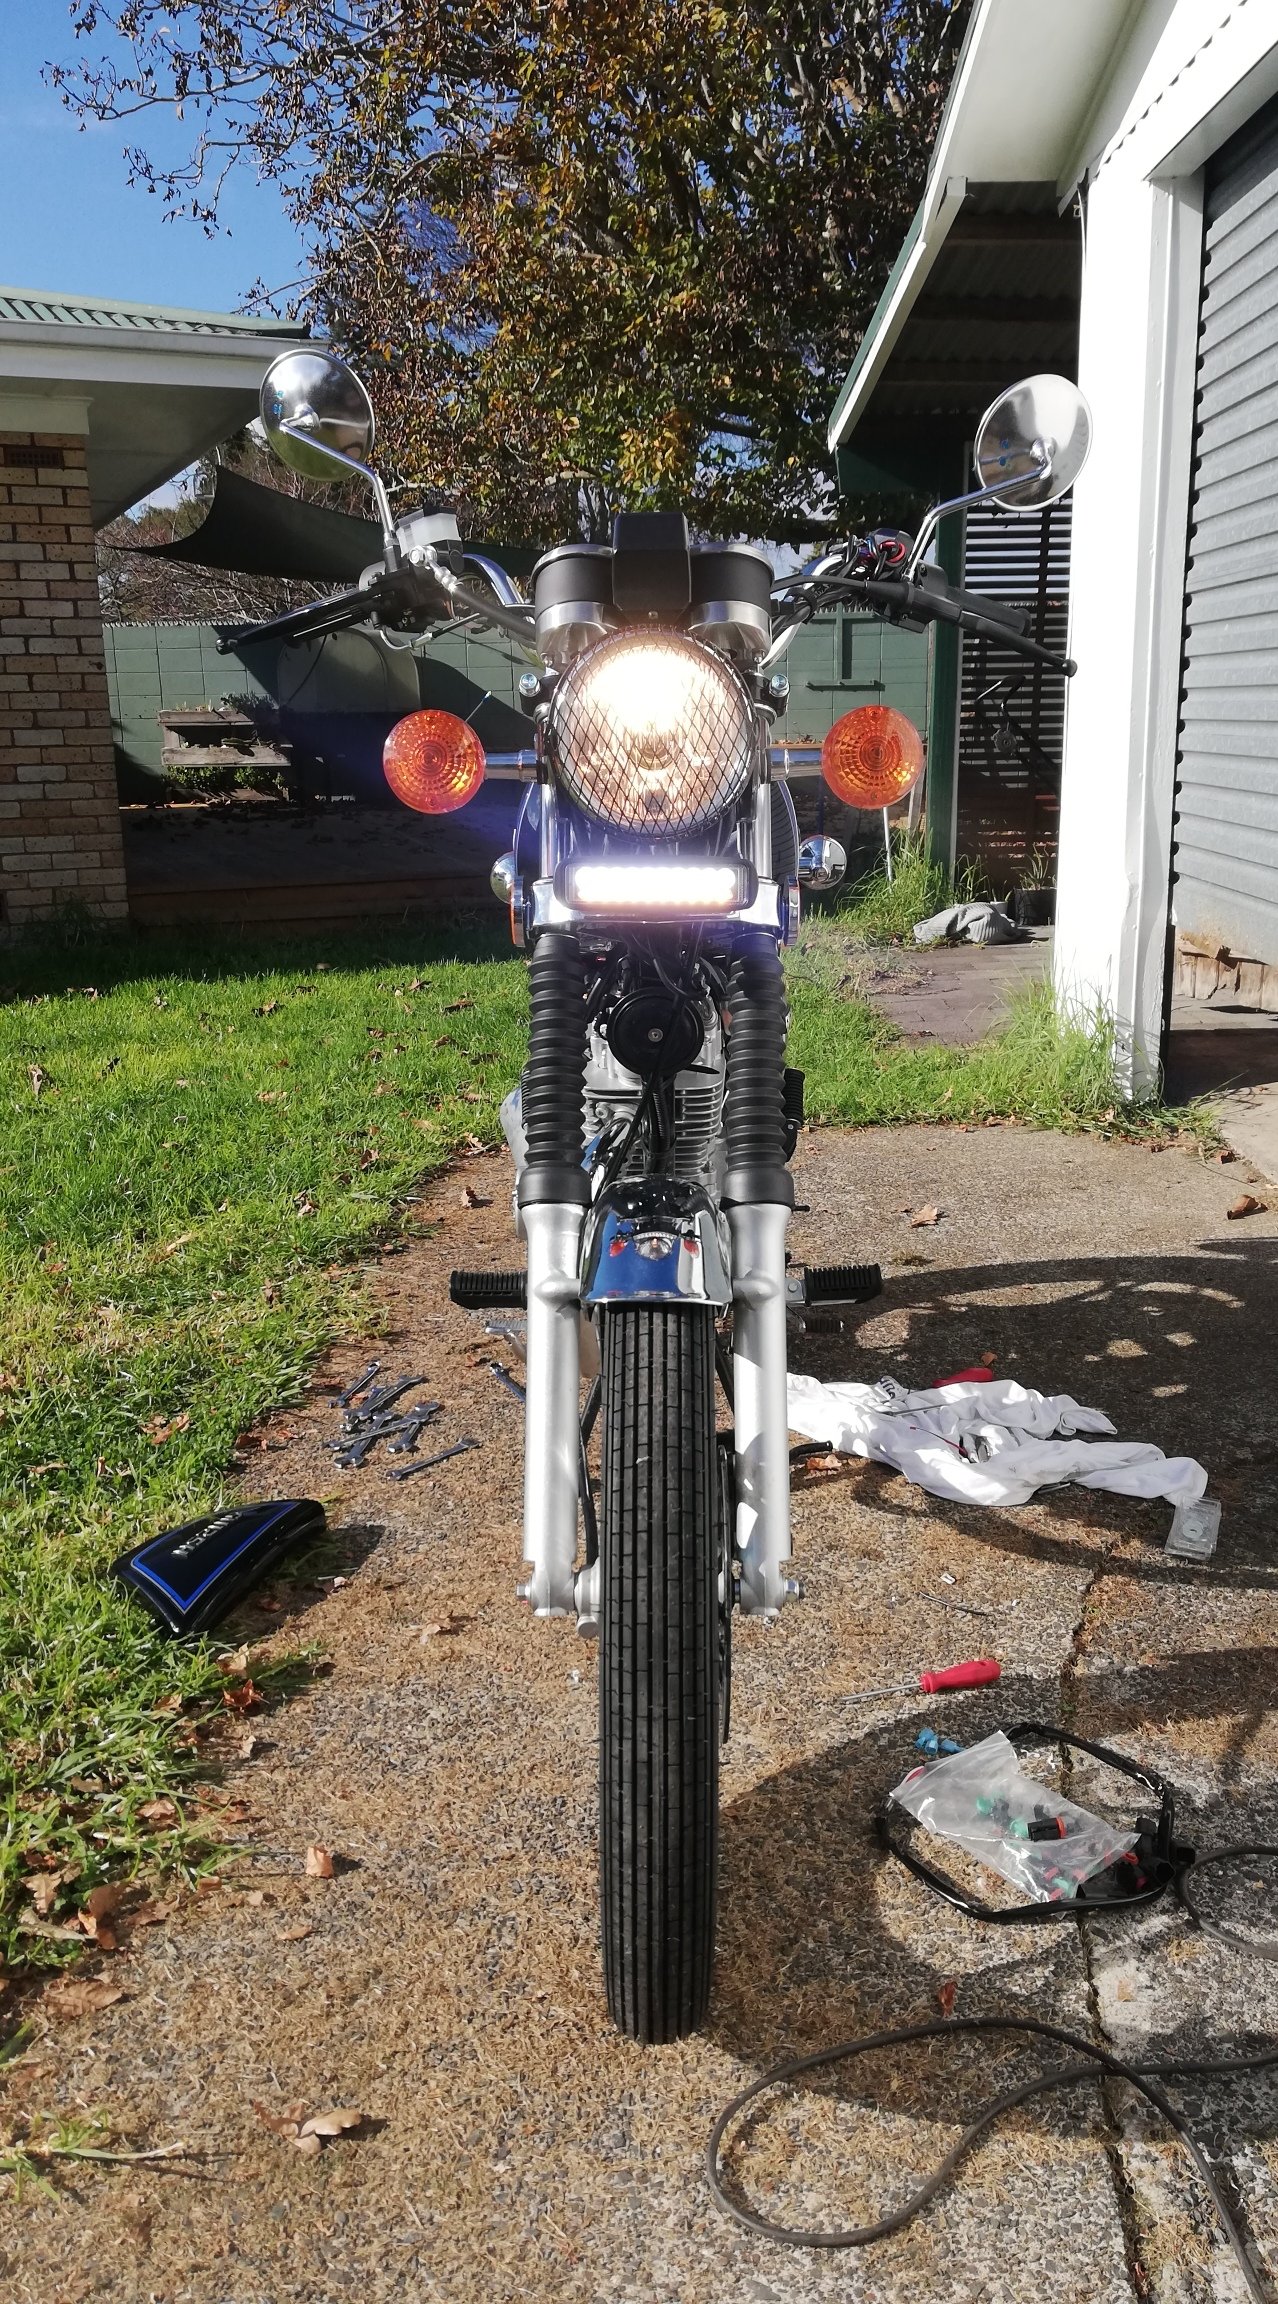
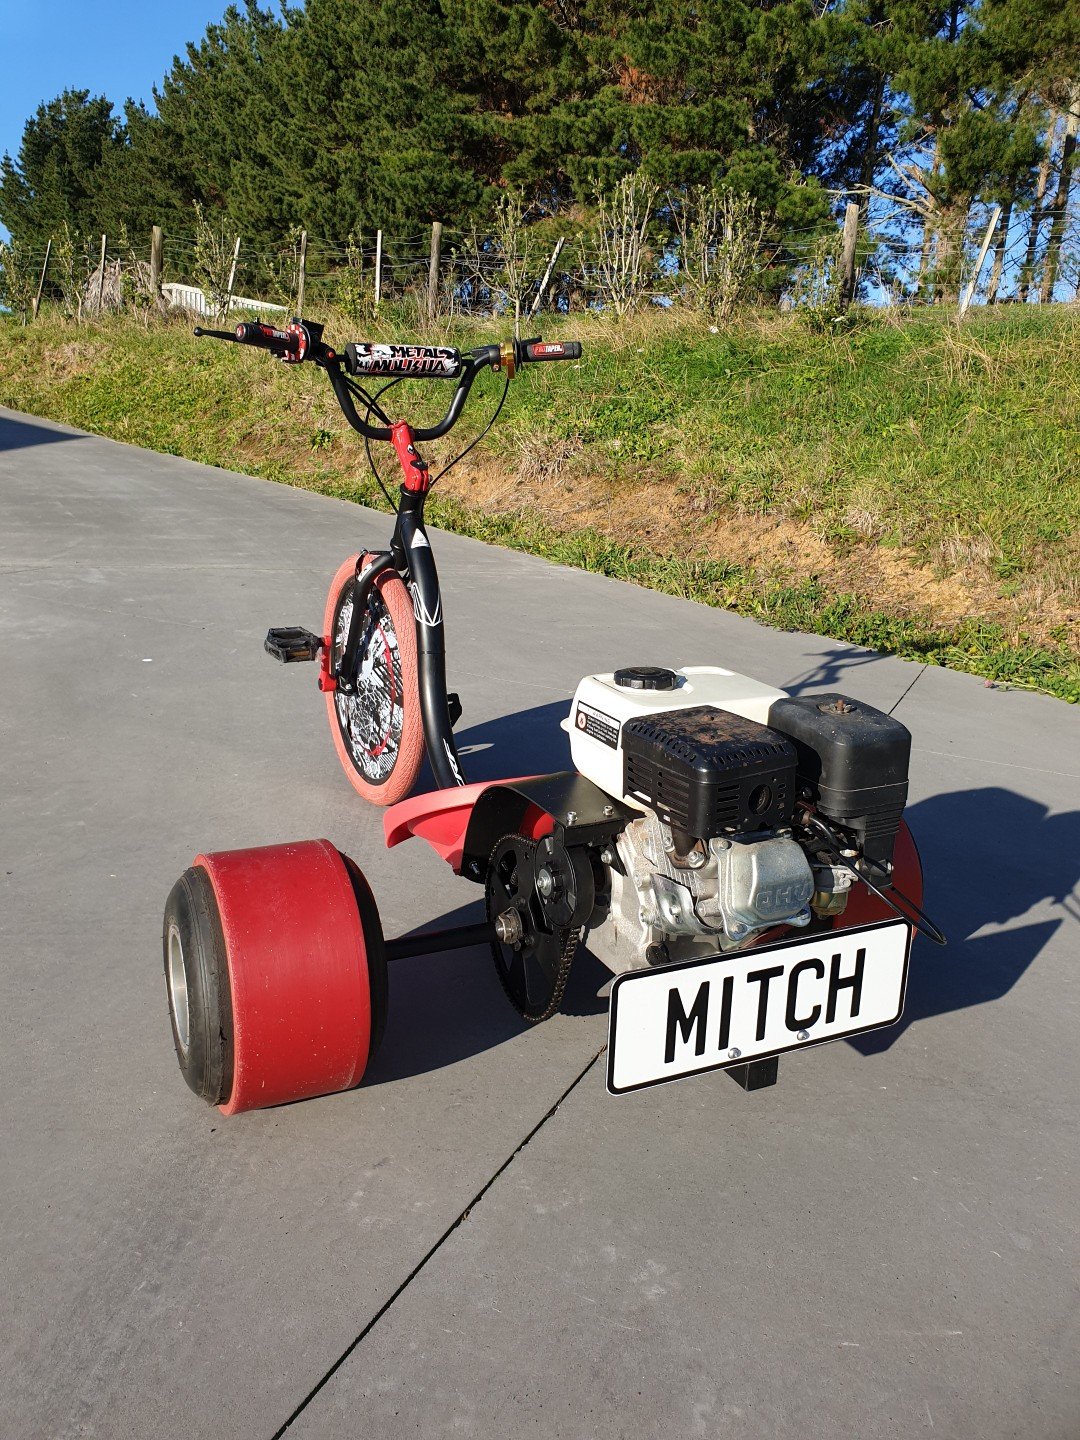
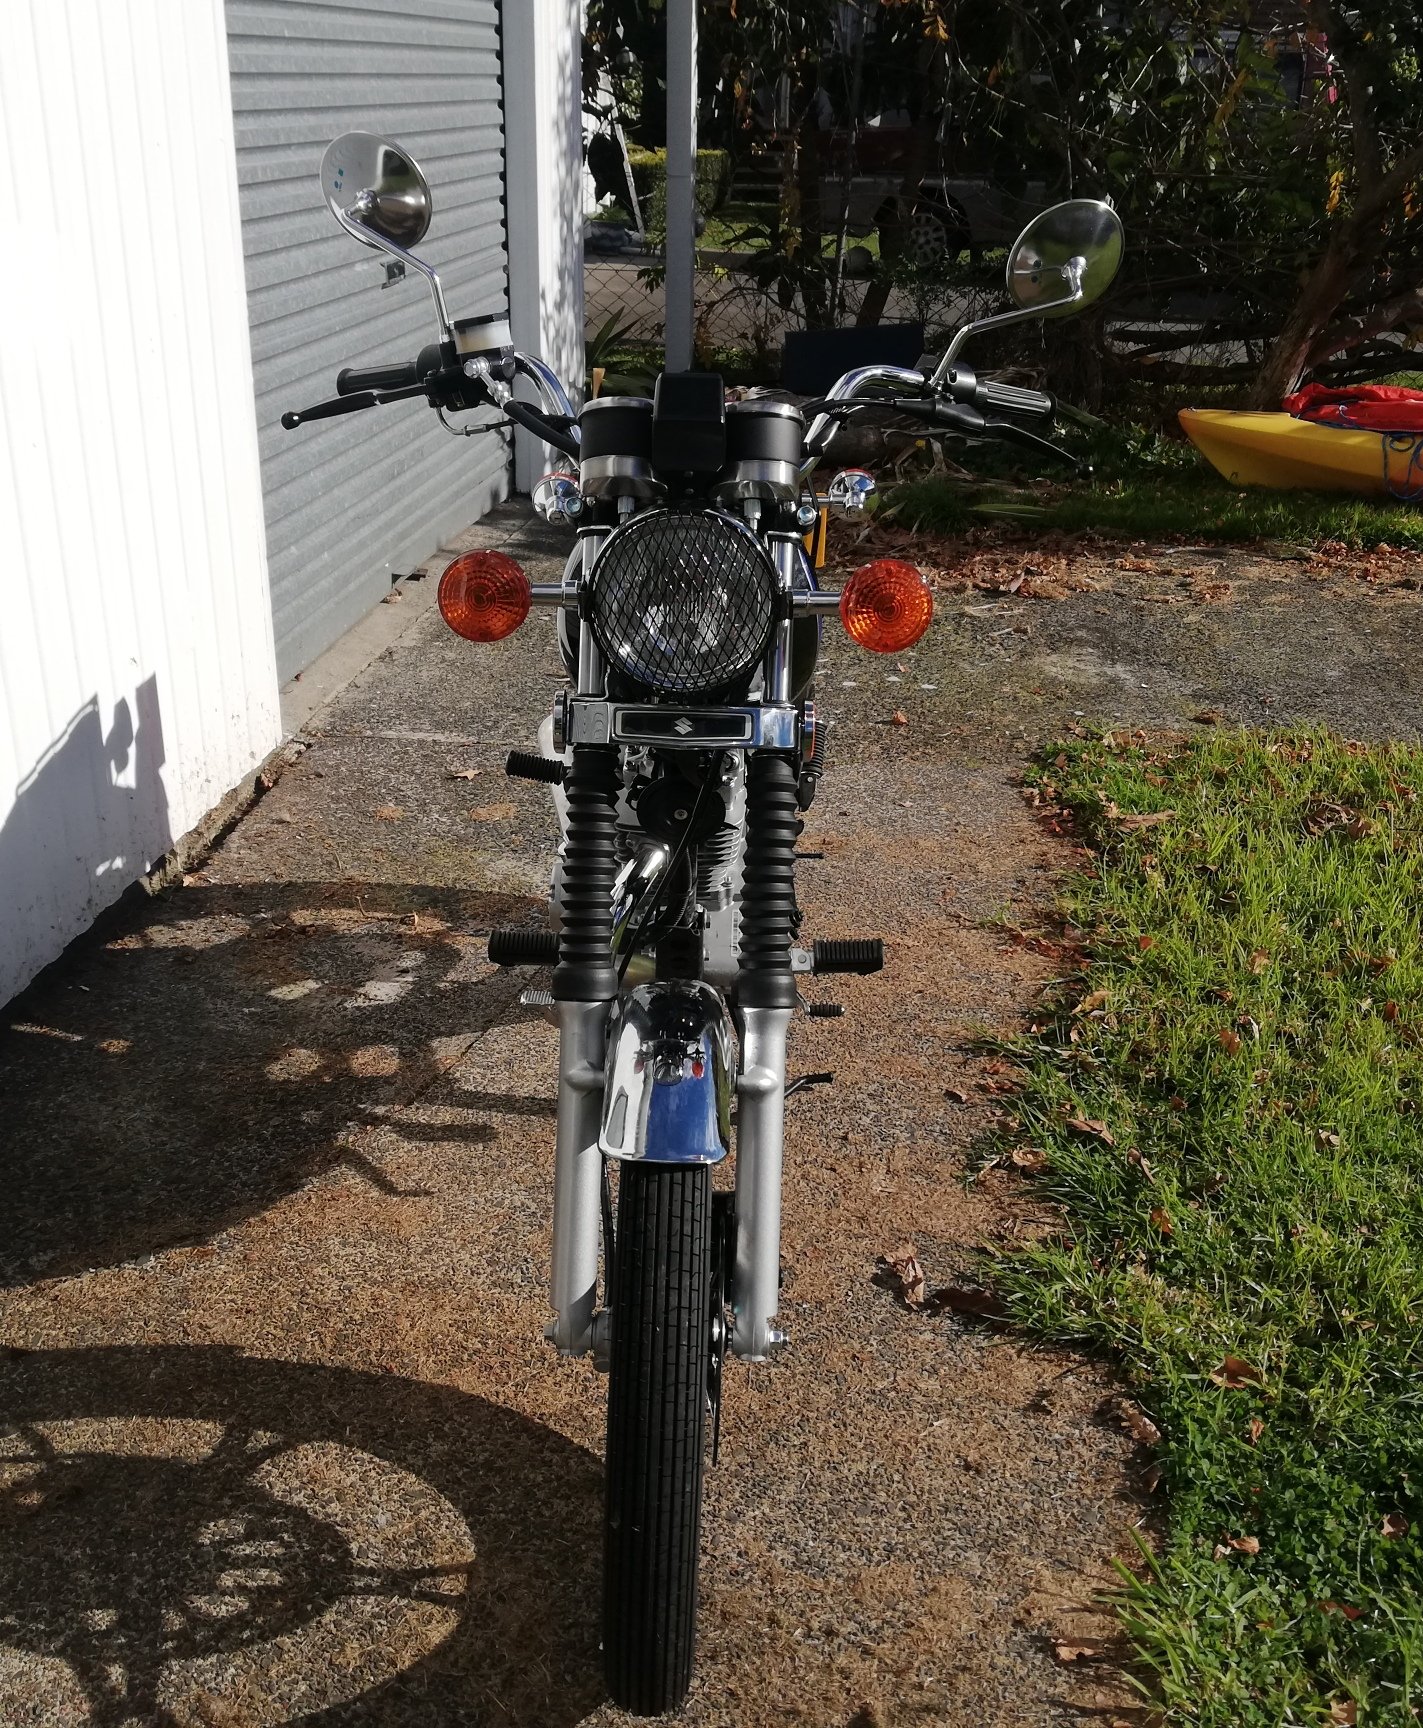
Ordered an off-on switch instead of an on-off-on. So that's on its way now. Installed the rest anyways two toggles ziptied to the handle bar should be alright for now. Run off a relay from the battery rather than the key, but I don't think il forget to turn it off. White flood and amber fog led light bar. Ready for some #adventureGN
7 points
-
That's when you dereg every government vehicle in the country. The system will change5 points
-
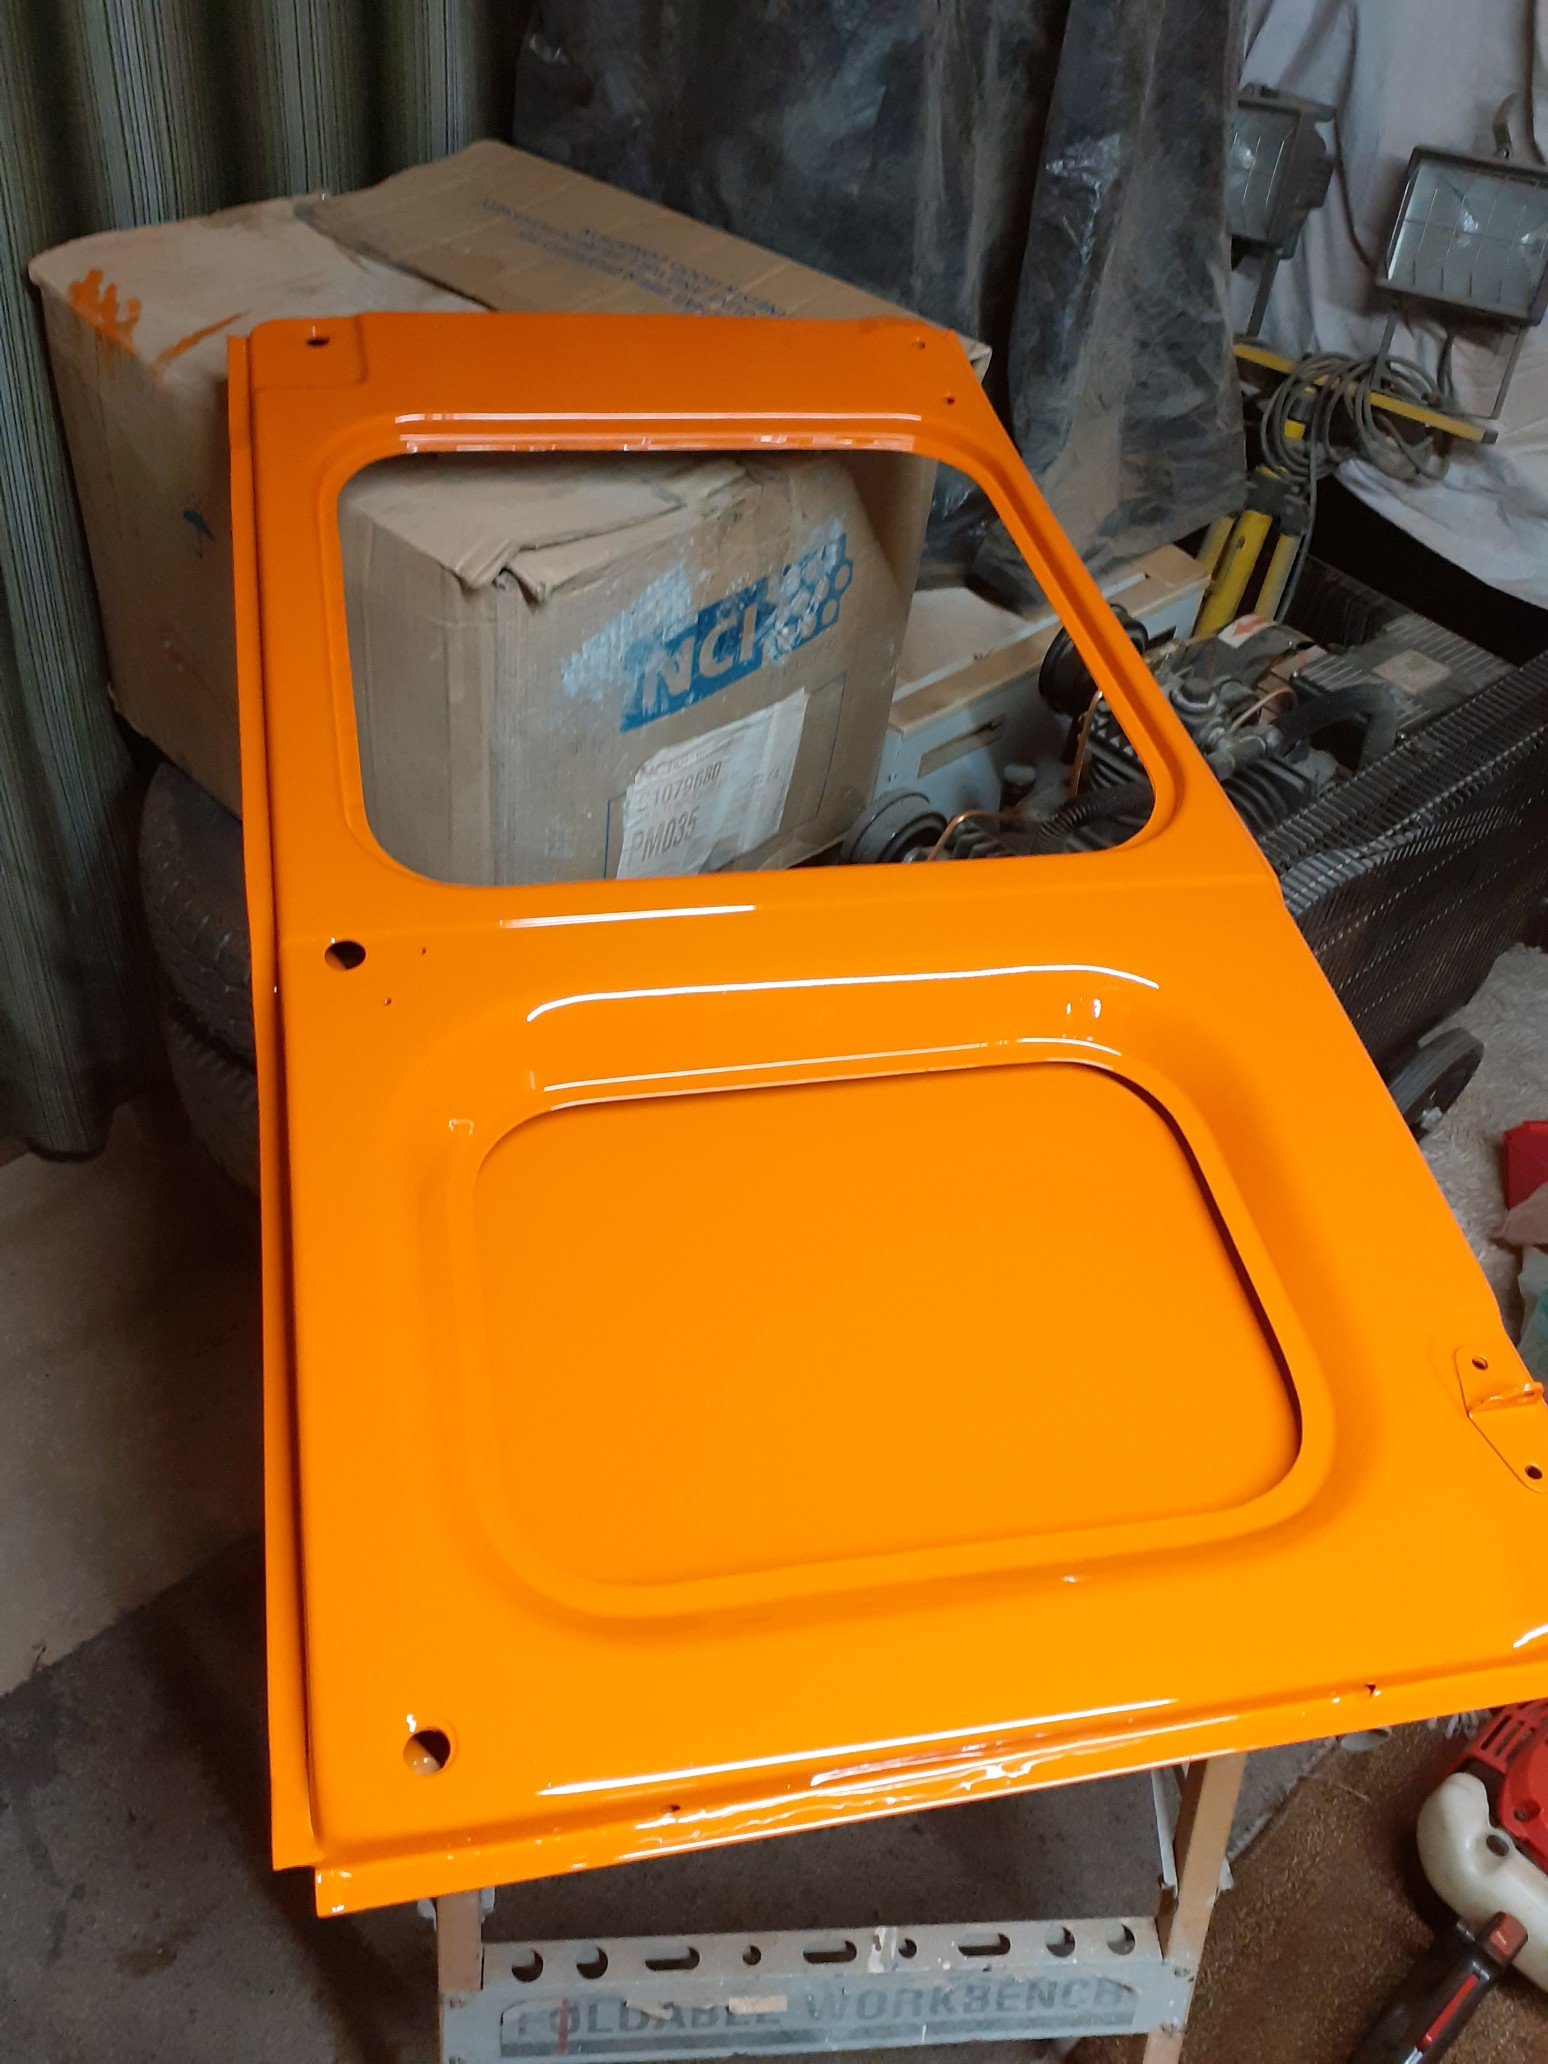
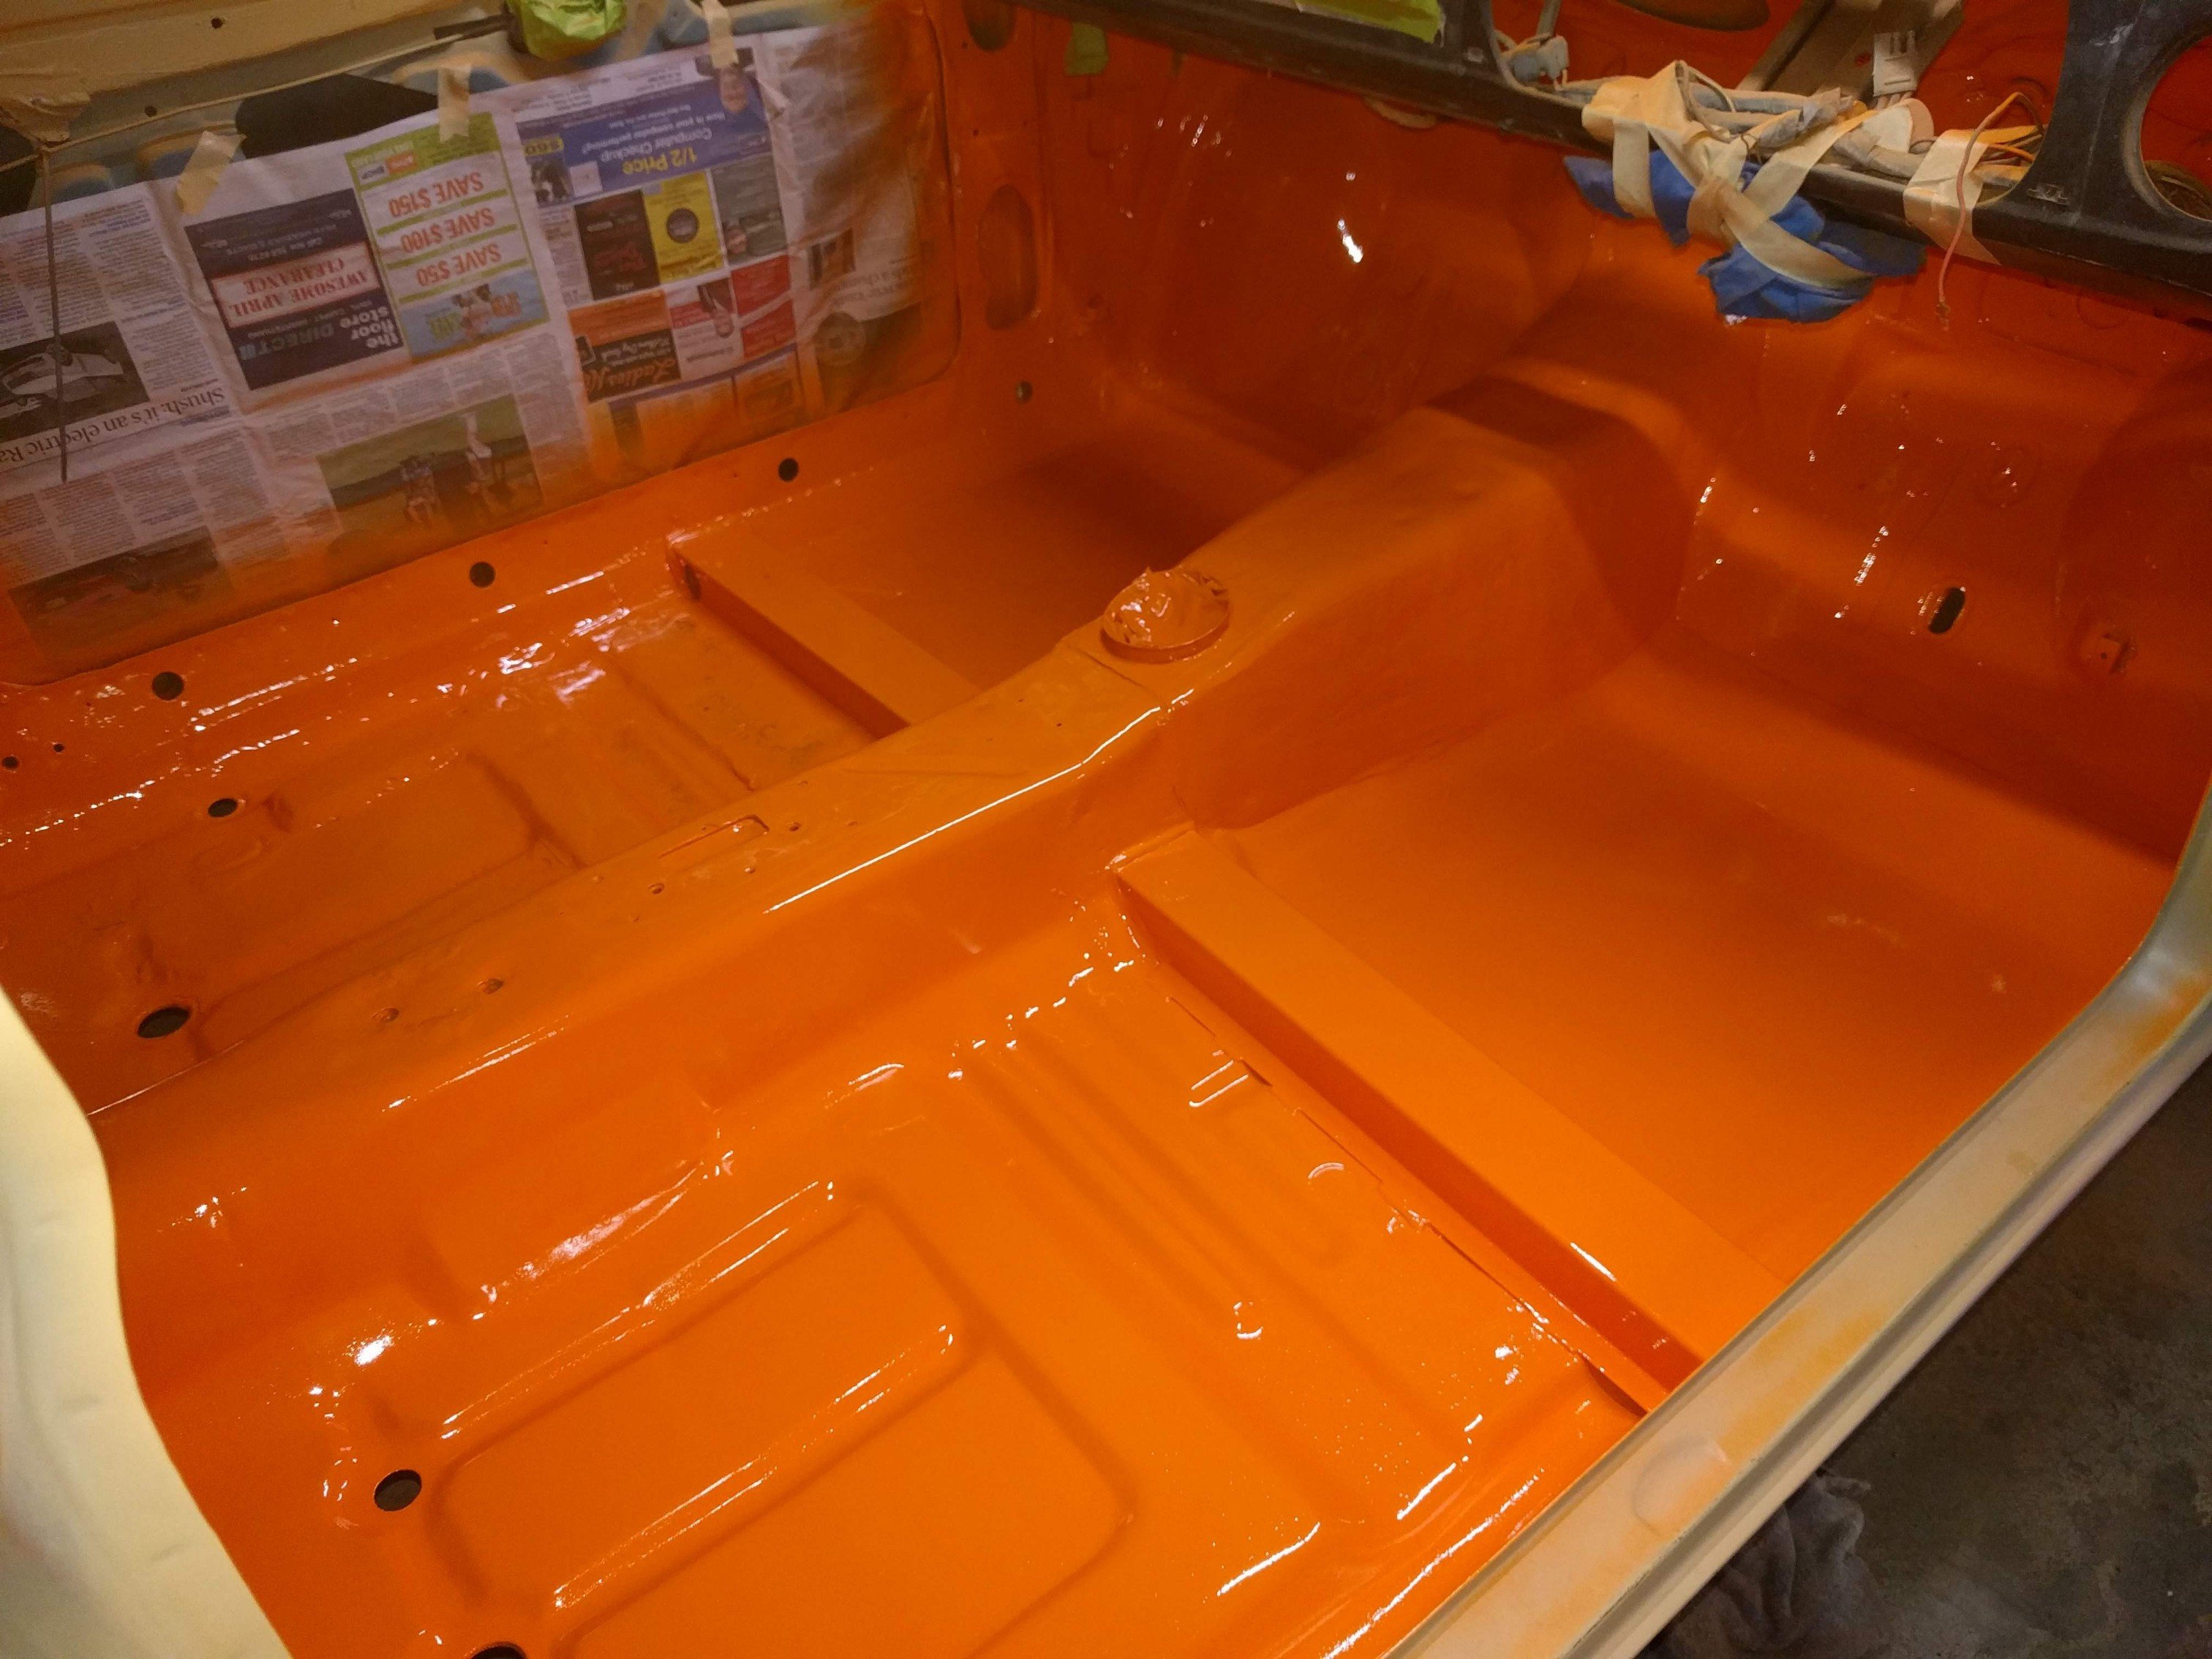
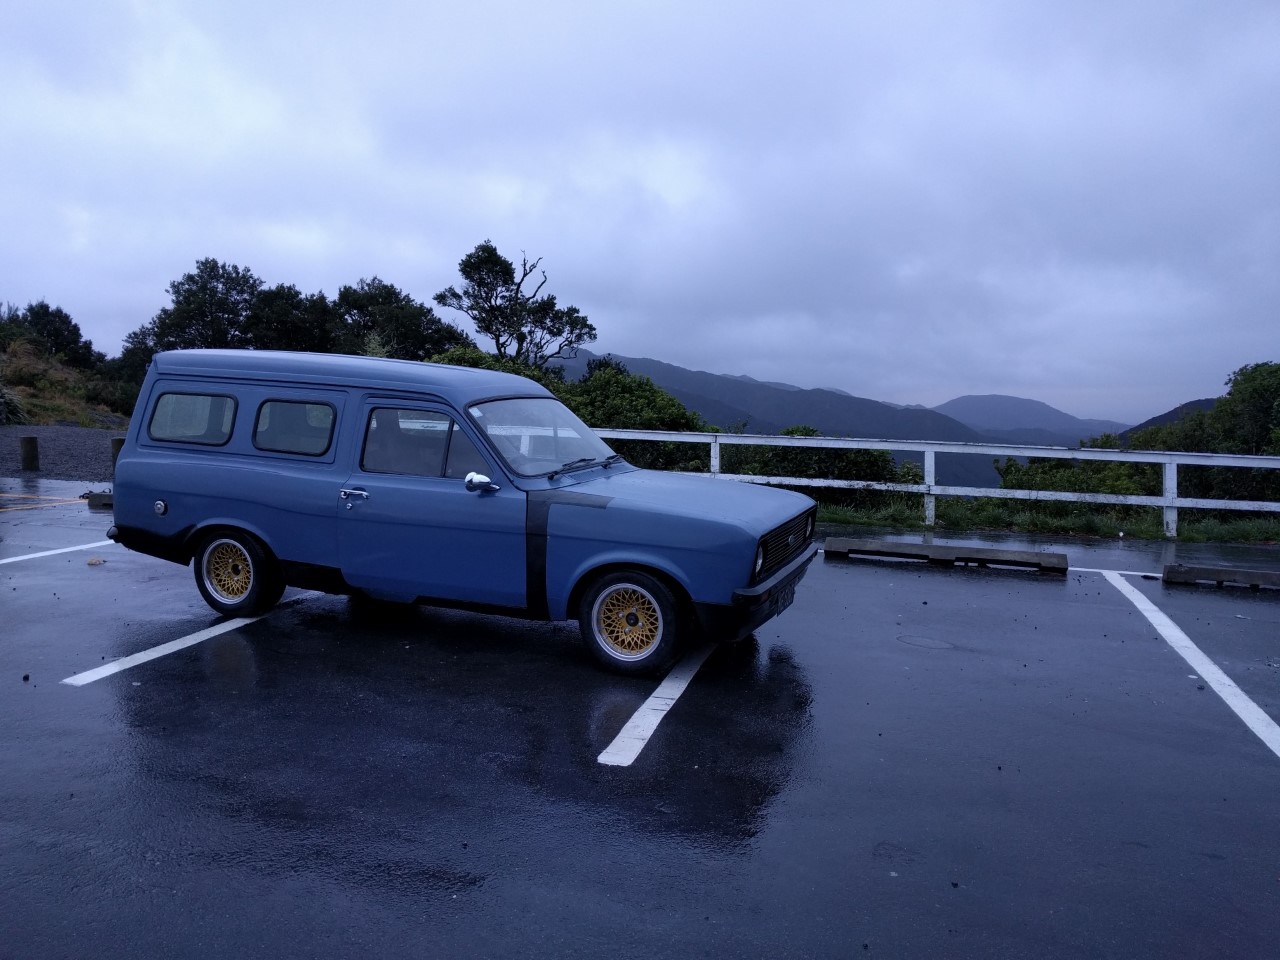
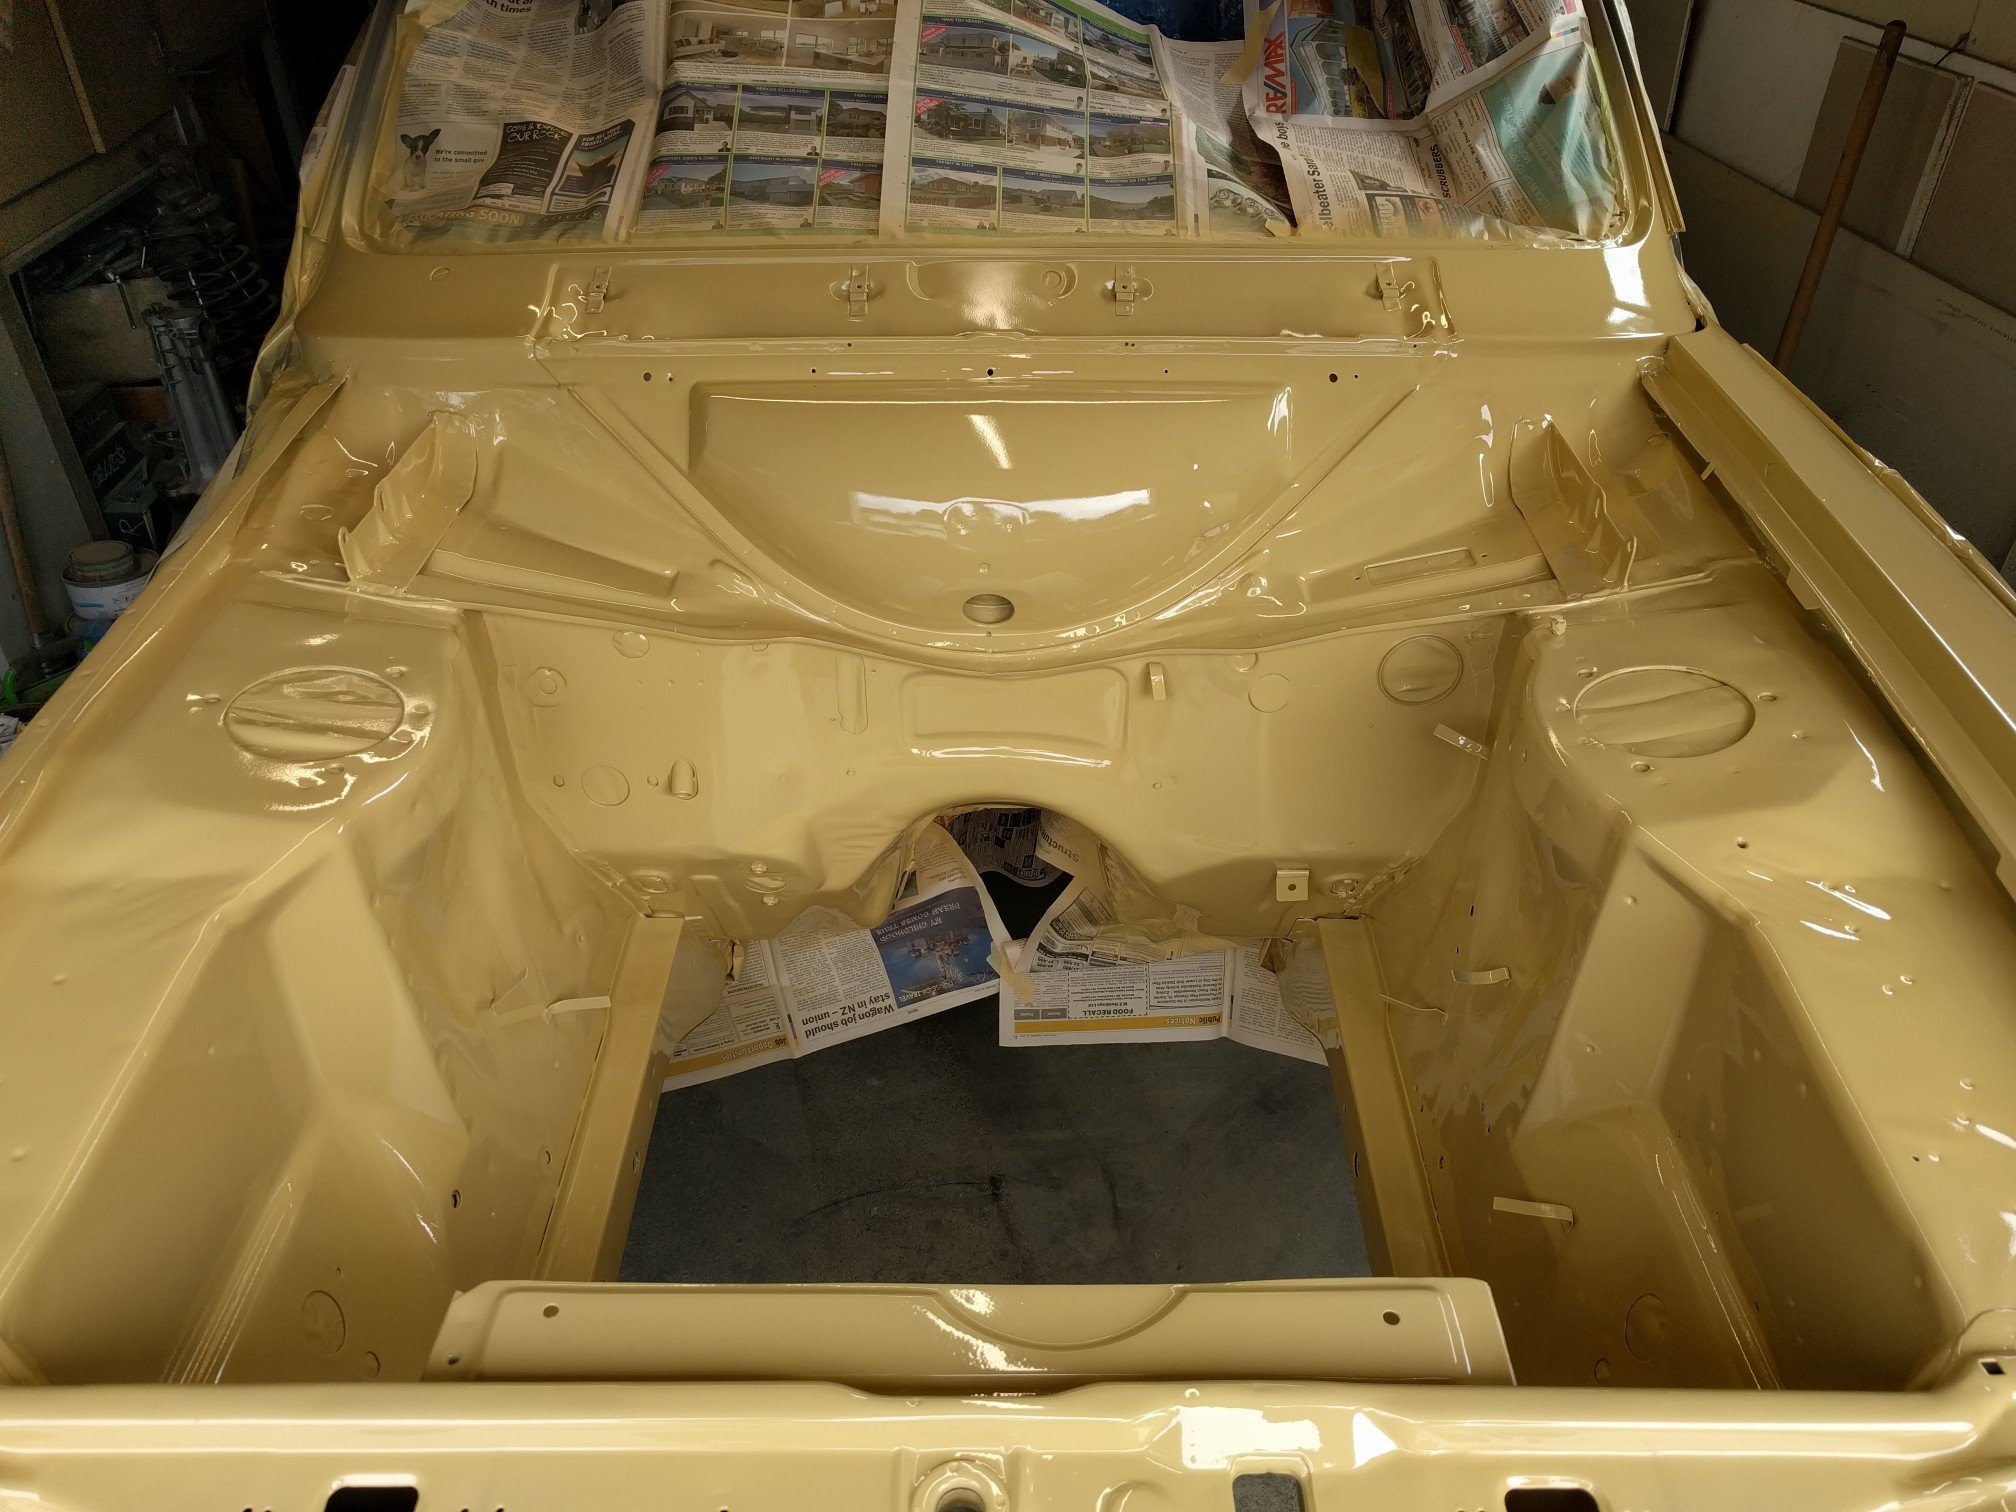
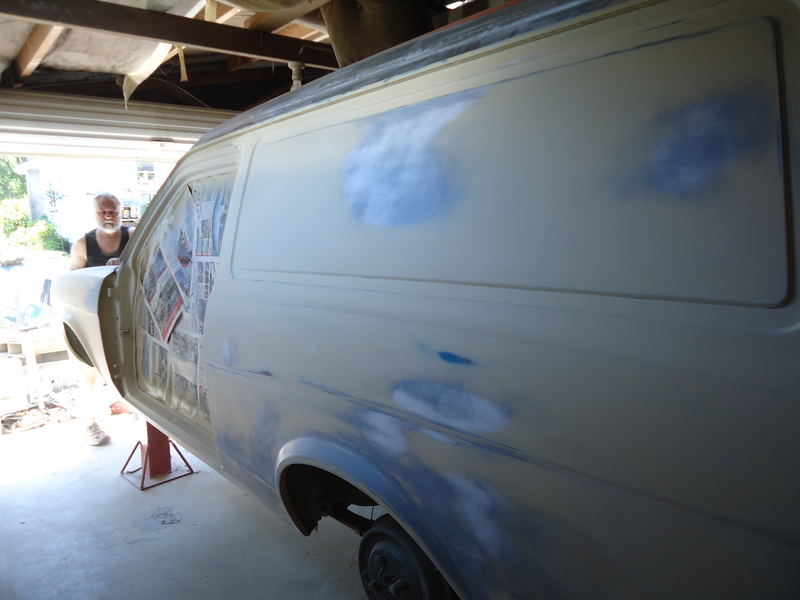
Ended up going with signal orange 79. It's an original color for an escort, but not this van. Sampled a blue and a different signal 77 orange but settled on this. Have been spraying it in sections. Engine bay, interior and inside of the doors. Still a while to go before I can spray the outside but its certainly progress!
5 points
-
so @Mrs 64valiant sent me more photos to use in the post above so here are some of us putting the upholstery in. me sitting at our table beth laying on the bed for scale me, beth & boobs now on the bed. we went to raglan and had fush and chups for our 1st meal in the kombi. ft potato cam yeah cool story bro. I plan on taking a week and a weekend off for my 30th and driving it around the north of the north island so the goal is legal and 85% of its problems sorted by then.5 points
-
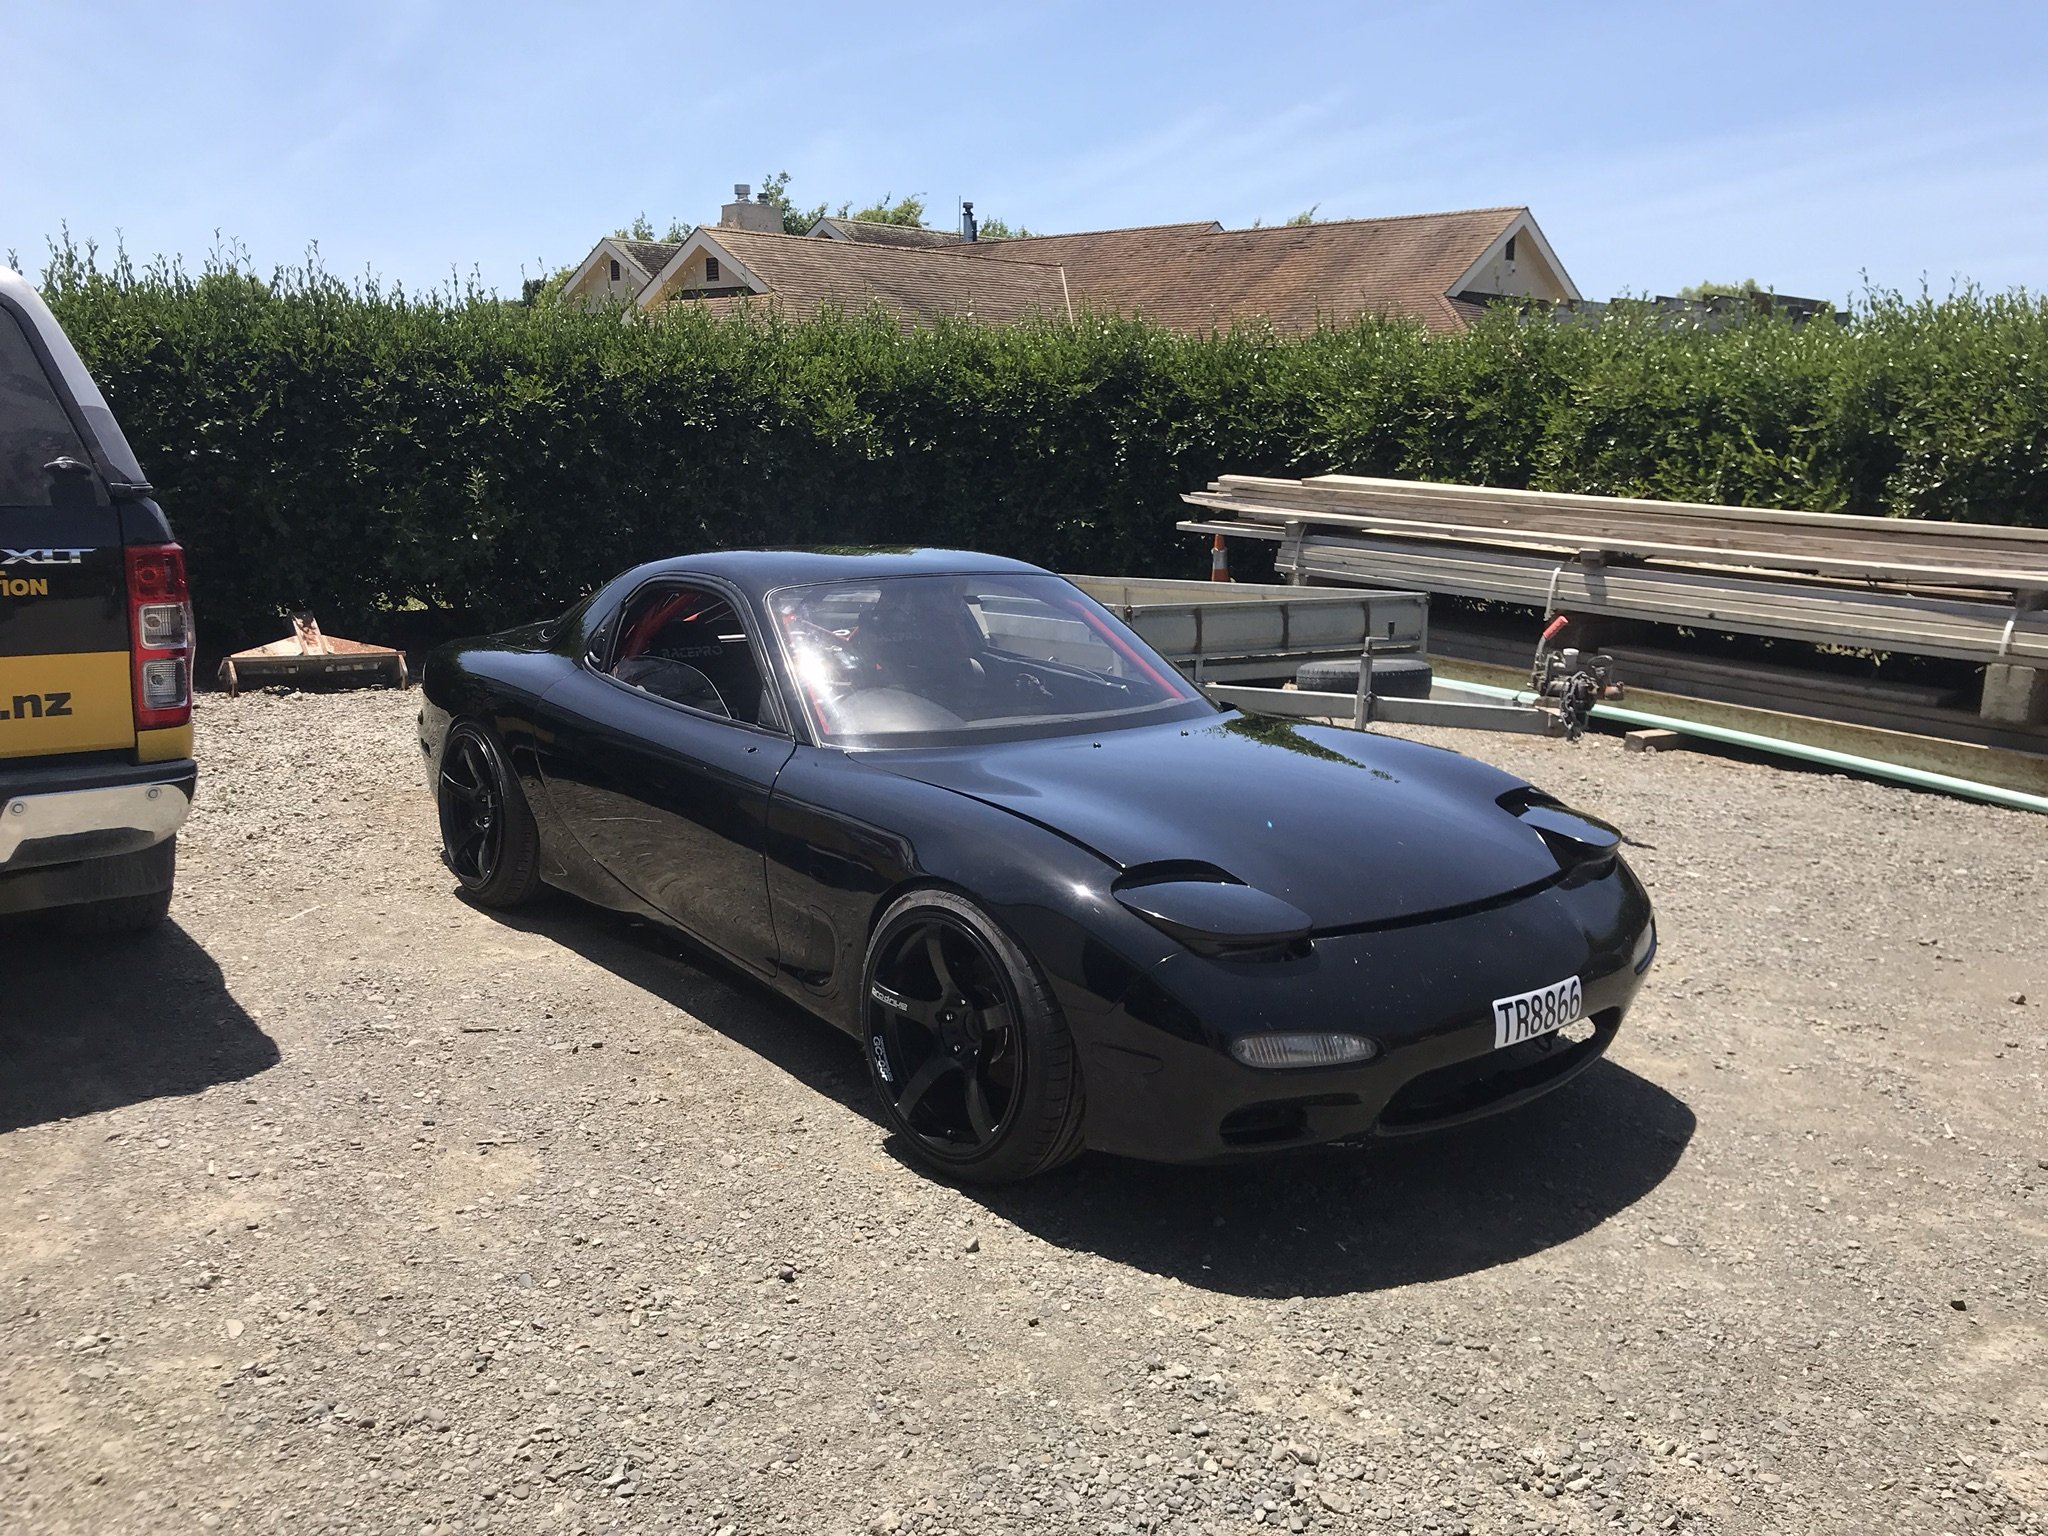
Ones for the brothers FD. We are going exactly the same spec so that we can have a fair race at some point!
4 points
-
so we had a few problems. the engine in wasn't a straight in job. 1st we had the wrong thrust bearing, so back to the vw shop sorted out that the other one didnt go over the cone. rather annoying. now we can chuck the engine in. hold up why isnt this sliding on the last 5-10mm!!! ahh right back to the vw shop grab another clutch set up. at this point this is far more annoying than the wrong thrust bearing. so my kombi is one of those cars that is a silly year of cross over. nice ah even better this one doesnt have a clutch alignment tool, some tape on something that came off a sewing machine later and wabam tadaaaaaa on. this thing slid in with no issues at all now Now that thats in i had to make a few more little things work so we could make it run. Fuel, spark & something to make the batter keep charging while running it. had that all done and then we moved it a few times now that its running i wanted to bleed all the breaks now that we have vacuum on the booster as well. Well fuck me, tried bleeding it several time and having no luck, @flyingbrick was been a huge douche and a smart ass and trying to troll ( i ended up offering him to fuck off or ill punch him in the face ) he chose neither surprise surprise. out some the cylinder and i dropped it off for Paul to have a look at. He tried to bleed it and shit was fucked so pulled it apart put new seals in it and again, back it went and we then bleed the system up. Perfect breaks are now working!!!!!! working that good they are staying on. FUCK Right. priced up some that would suite drop spindles and fell off my chair. so apart they came. top one in this photo is cleaned new seals and pistons and in she went. and then we had breaks that were still staying on. this time due to this little spring missing and the piston not fully returning. and this one is still wrong but i modified it to work. left and drive bus problem in a right hand drive world. any who i needed to put the number plate on it so thought id drill the hole out for that. lol ill just tap that bog out shull i number plate on and i also put the headlights in as well as put the surrounds on the front. holly shit the headlights work. wonder if they tail lights work shit even the number plate light does. now lets put some upholstery back in it. door cards 1st. Underlay in before them to deaden the sound and cold factor Before after and now the door card now the wooden floor. it was resting up on a seat mount. so yeah fixed that issue rough and ready drill holes around and then jump on it. FIXED! (ps i don't care i have a kombi and i wanted it driving and carpet in it fast. i didn't want to try fuck a spider) also this ply was already cut and came with the kombi from purchase. at this point i wonder what i have under the bench for carpet turns out i have some black carpet at this point @Mrs 64valiant turned up and we put the rest of the upholstery in the back she had buggered off by this time of me sitting here having a drink to myself just been so chuffed that i was finally sitting in the back of our own kombi, Life clocked the next day i was going to @mark105 place to have a few drinks and probably not be able to drive home..... Beth was also not going to be in town, so guess what. well i had this small cut out where the spare wheel goes for my bed and well that was going to be uncomfy so lucky i know a guy who does upholstery right? found a peace of foam i had laying around and cut it to shape hey presto proceeded to a party were i slept well even more happy. so at this stage i had been driving around and this was my key haha not dodgy at all. even had a guy at the bakery see me use and said "you fully stole that didn't you" my exhaust also was pumping straight into my back bumper and was getting a bit black, so i needed to make a tip for it, i was hoping super cheap had them but yeah i dont think the love heart one was going to work. so i had this pipe i got from @Fuckedifiknow cut it a bit more and welded it and then put a nice taper on it. cleaned it up welded it on same day i done my roof racks in the 2nd half of the pop top. started with a walk over to bunnings to grab some timber slats walked back with a pool fence and some door stops? the door stops are to hold it off the roof and act as spacers. the pool fence? squash the ends this is going to work so well man this is brilliant while that was off i also changed the shitty screw holes to riv nuts lets see what else have i done lights work really well i got hub caps I had to steel this ignition out of this kombi and then u put the key part mechanism in mine as i broke mine to 100 peace's and then put a key in mine i actually needed the key part to see what barrel i needed for the wiring, one it plastic and one is steel. the one i needed was plastic. replaced the lock and handle in the sliding door as i didn't have a key and it was a prick to lock from the inside have been driving it and testing it which has been really good, beth is actually sitting in the bus in this photo also dropped off the old bus yeah. I went to drive it to work been a Friday and the battery is dead flat?! so it has something draining the battery which is great. and that is my story for now. Peace dudes & dudettes4 points
-
Turns out it was actually quite easy. It looked like id need to remove the exhaust but we didnt3 points
-
Wof rules for mirrors. pre 2000 you must have interior OR right mirror. post 2000 you must have both. If you have tints you need both side mirrors. https://vehicleinspection.nzta.govt.nz/virms/in-service-wof-and-cof/general/vision/rear-view-mirrors https://vehicleinspection.nzta.govt.nz/virms/in-service-wof-and-cof/general/vision/glazing see tables and images3 points
-
Gotta dereg if you cut your springs m9
3 points
-
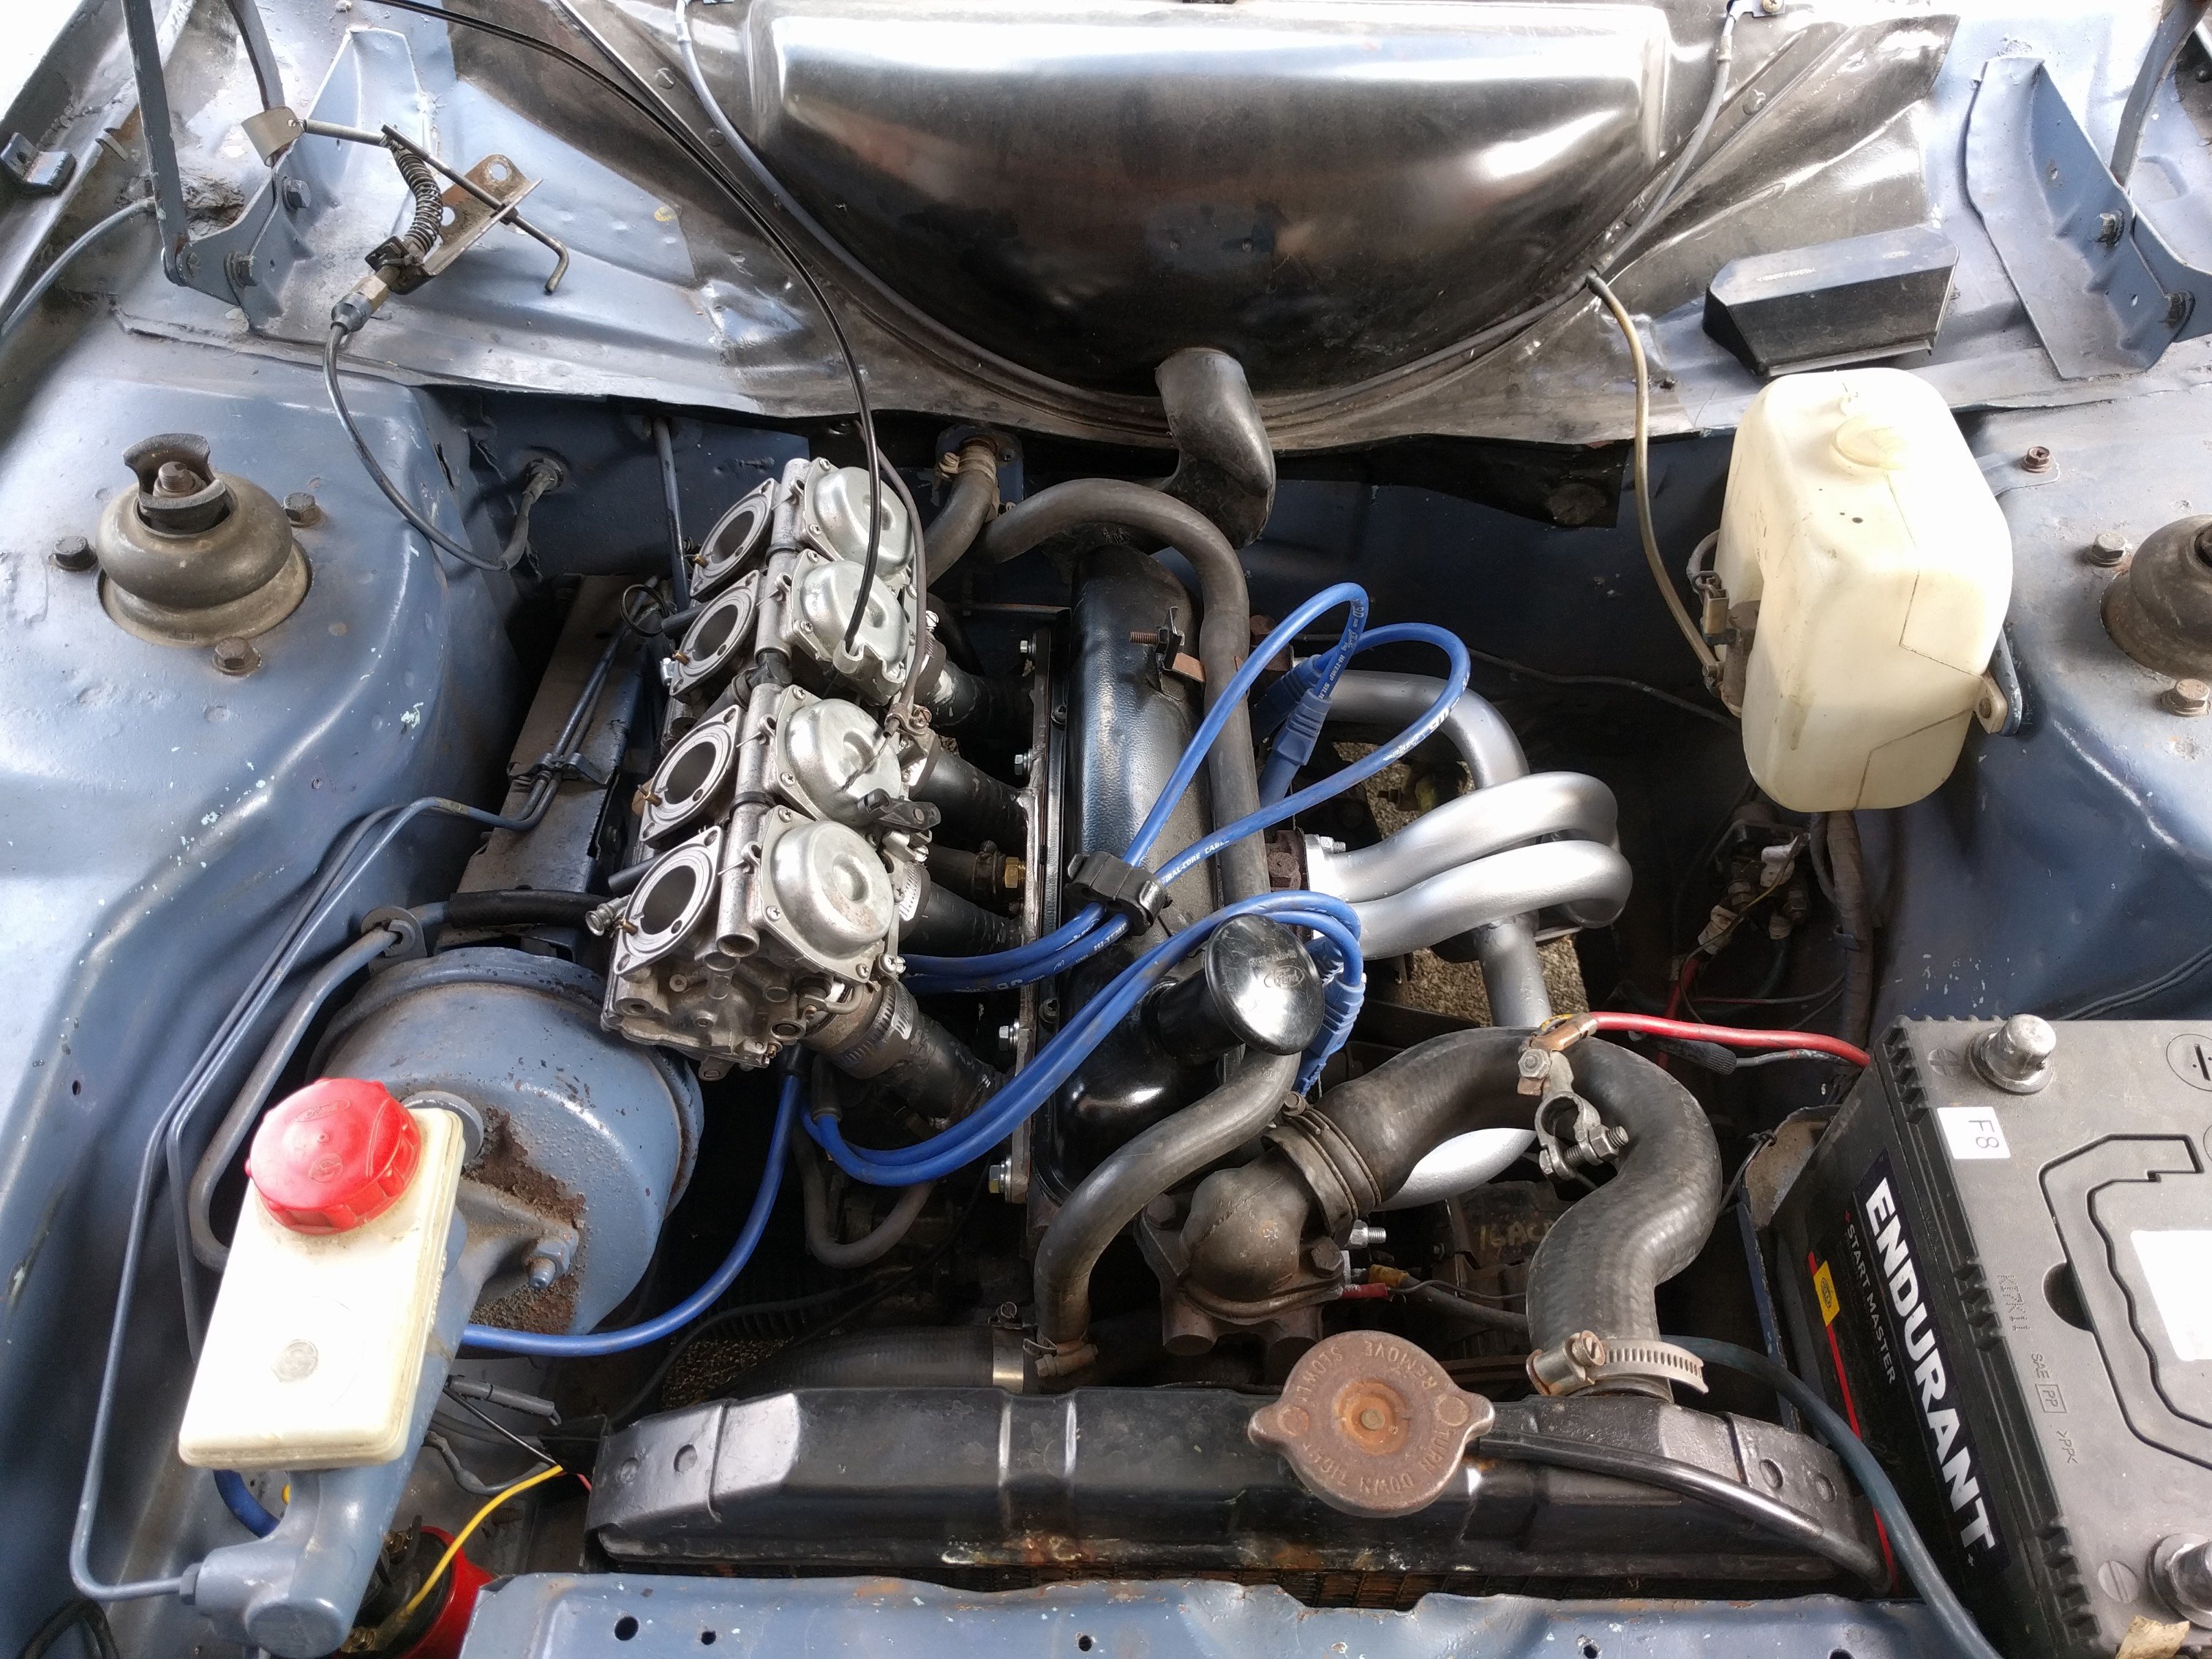
So I've been driving this around as normal. Failed the latest wof on an exhaust leak and a driveshaft uj. I ended up replacing most of the exhaust with extractors and a copy resonator. Pulled the gearbox, replaced the rear seal, changed the clutch plate and release bearing. Replaced the driveshaft with a spare . With that done I took it up to Napier over New year's. Got a bit warm on the way up,l. On the way home it developed a vacuum leak which I couldn't find. Wouldn't idle and would only run at high revs. Made for some frustrating driving. After a few hours of this it miraculously fixed itself. Still not sure what that was about. With it running so well I decided to do this.. ... Cbr600 carbs. I made up a manifold last year and this weekend thought I'd man up and actually have a go at installing it. Got all my vacuum, water and fuel lines sorted. Drilled mains to 1.3mm and blocked off the air correctors. Took vaccum lines off all four runners that run to a common line and go to the dizzy and brake booster. Running a mechanical fuel pump and currently have the pcv valve venting to the atmosphere, will fix this later. Got it installed this evening, crossed my fingers and turned the key. Once the fuel came through, it started and idled. Immediately fuel starting pissing out of a few places of the carbs, so I turned it off before I could give it some revs. I'm thinking a seal kit through the carbs. My other thought are the float bowls aren't sitting quite horizontal so I'll need to look at adjusting the float, or the other obvious fault could be non regulated fuel pressure. Will take the carbs of this week and see what's what before trying again.
3 points
-
1 and 3 are probably in here: https://www.nzta.govt.nz/resources/rules/vehicle-lighting-2004/ 2. My Starlet hasn't had any side mirrors for years. Hasn't been mentioned in two certs and numerous WOFs. It's kind of annoying not having one when changing lanes.2 points
-
2+ years might be a stretch though.2 points
-
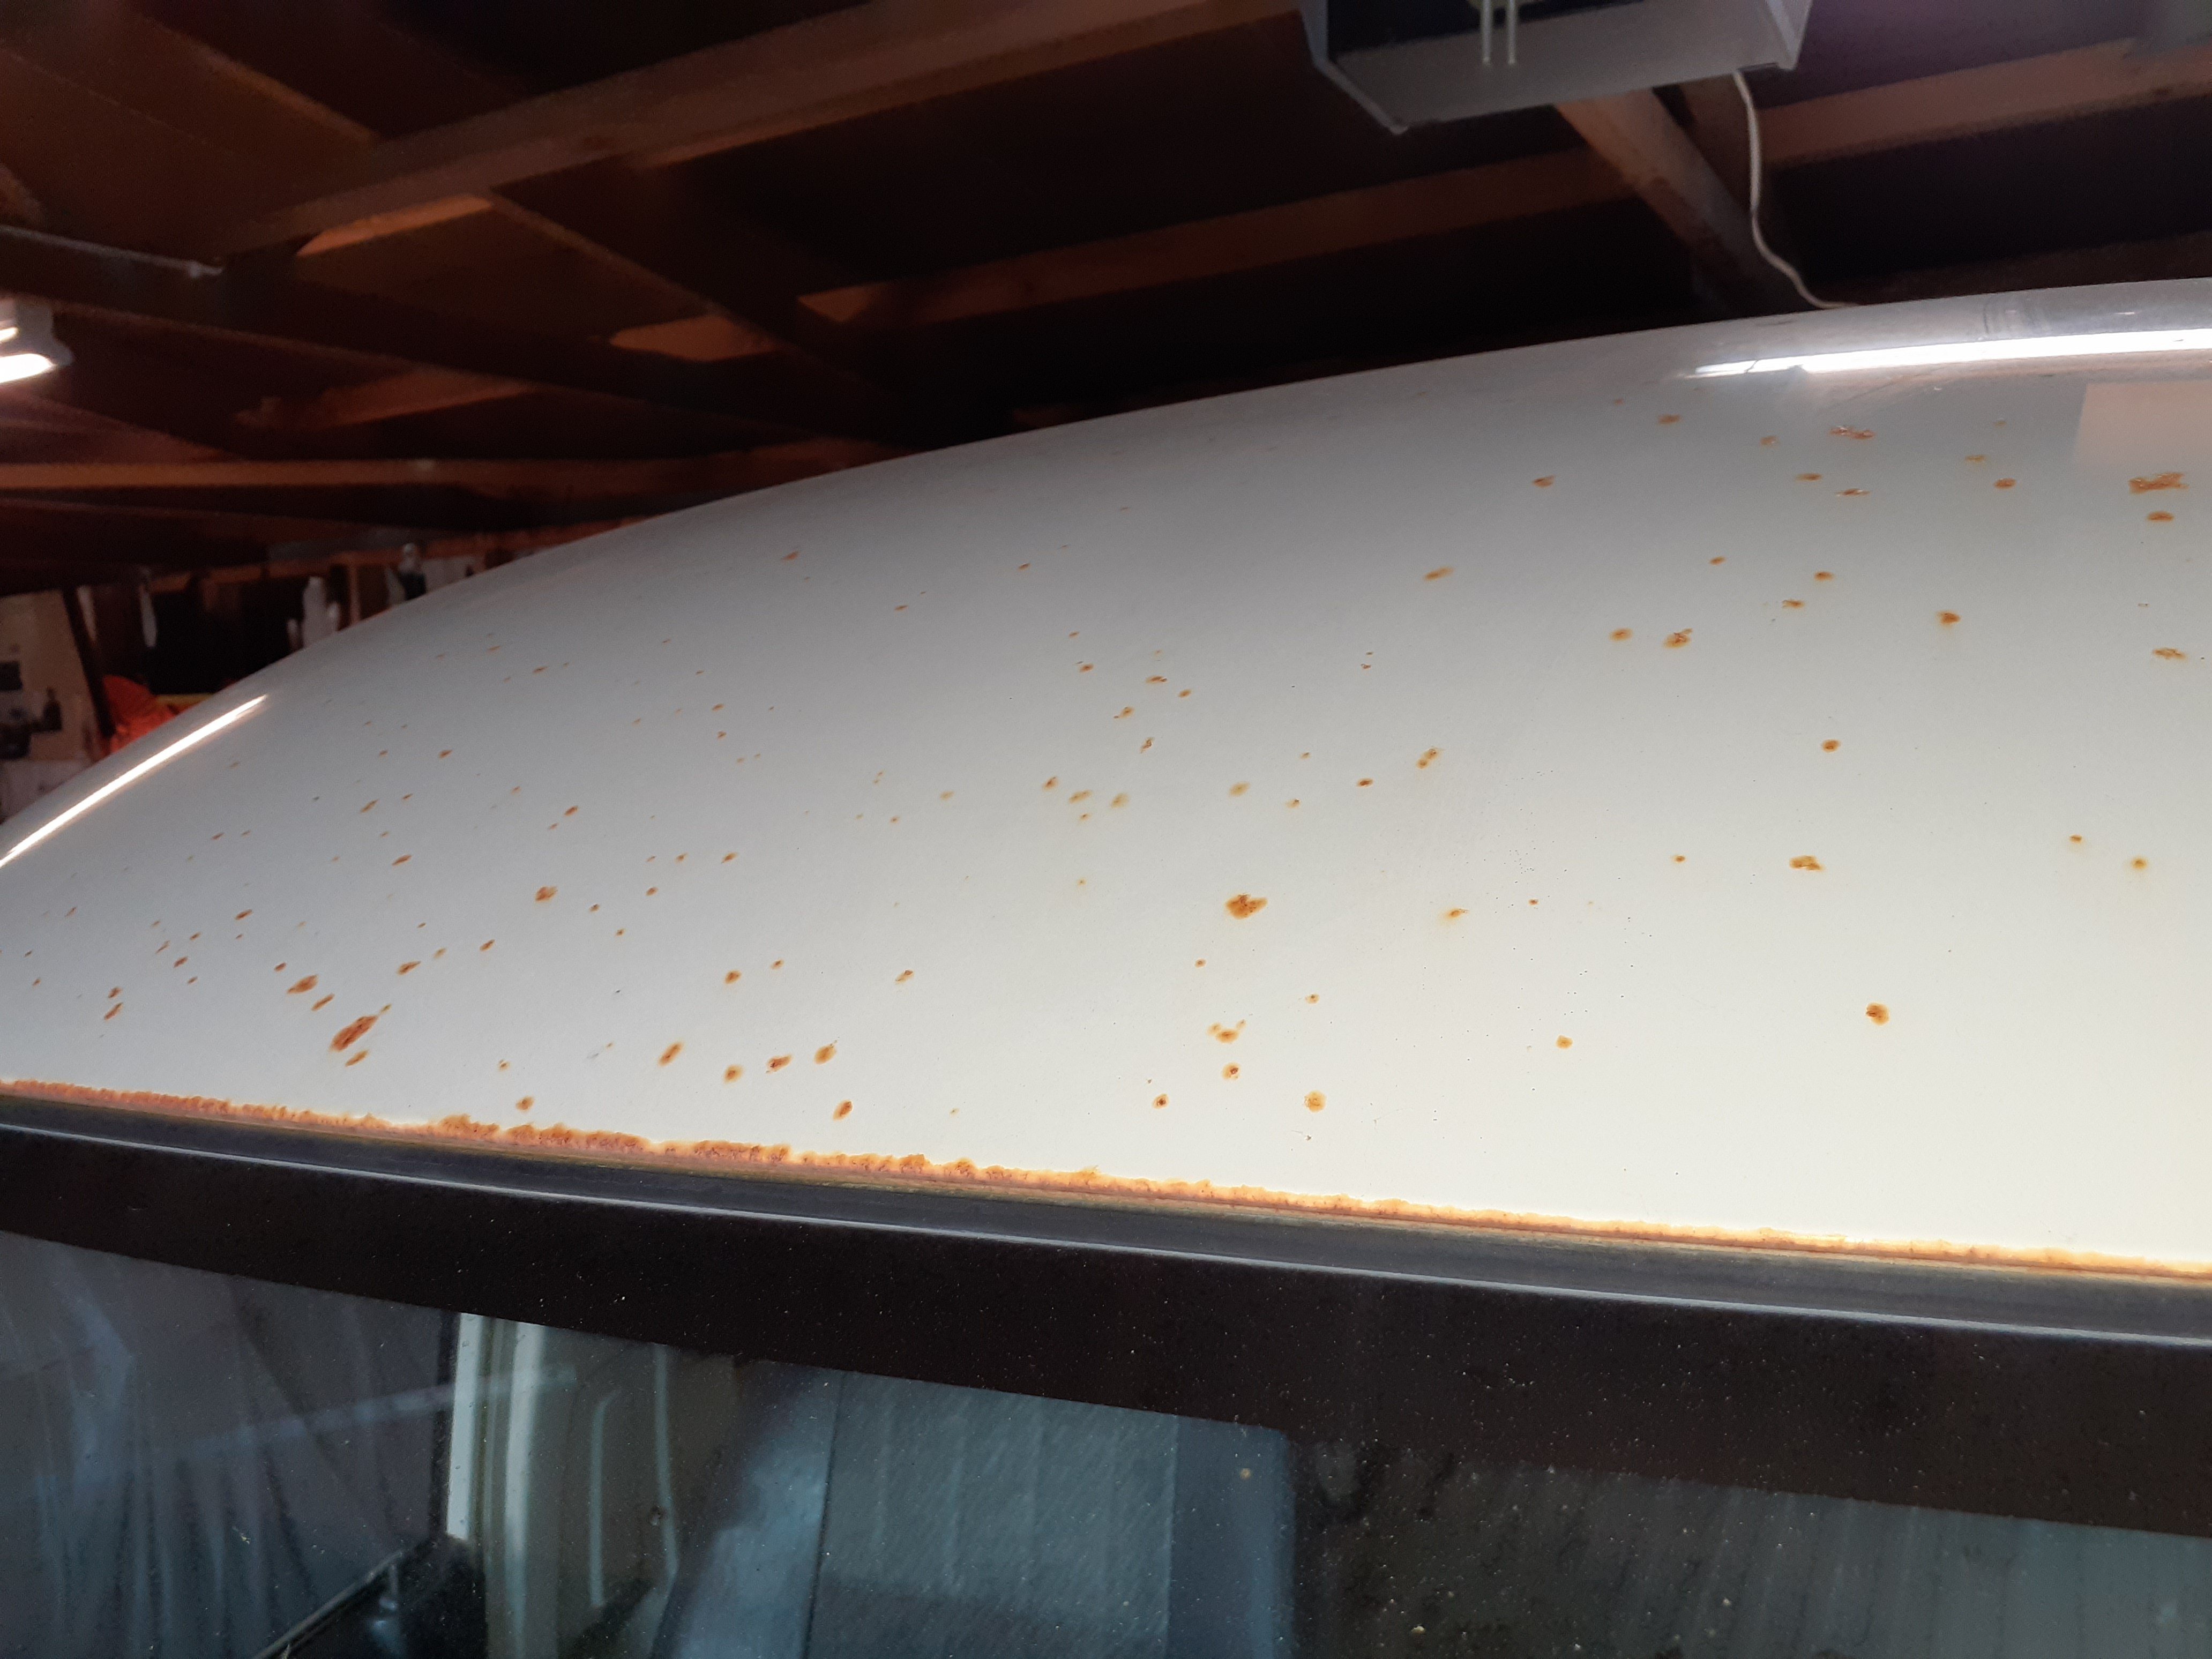
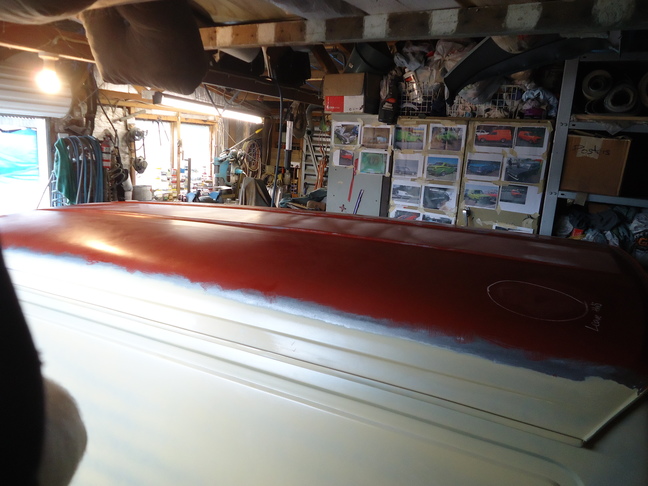
It has some shitty surface rust along the front edge of the roof and a lot of rusty stone chips on the roof, that was the main reason for painting it to stop all that getting bad The rest is not too bad but every panel has some small issue so want to tidy it all up
2 points
-
This is how people start fires at govt agencies2 points
-
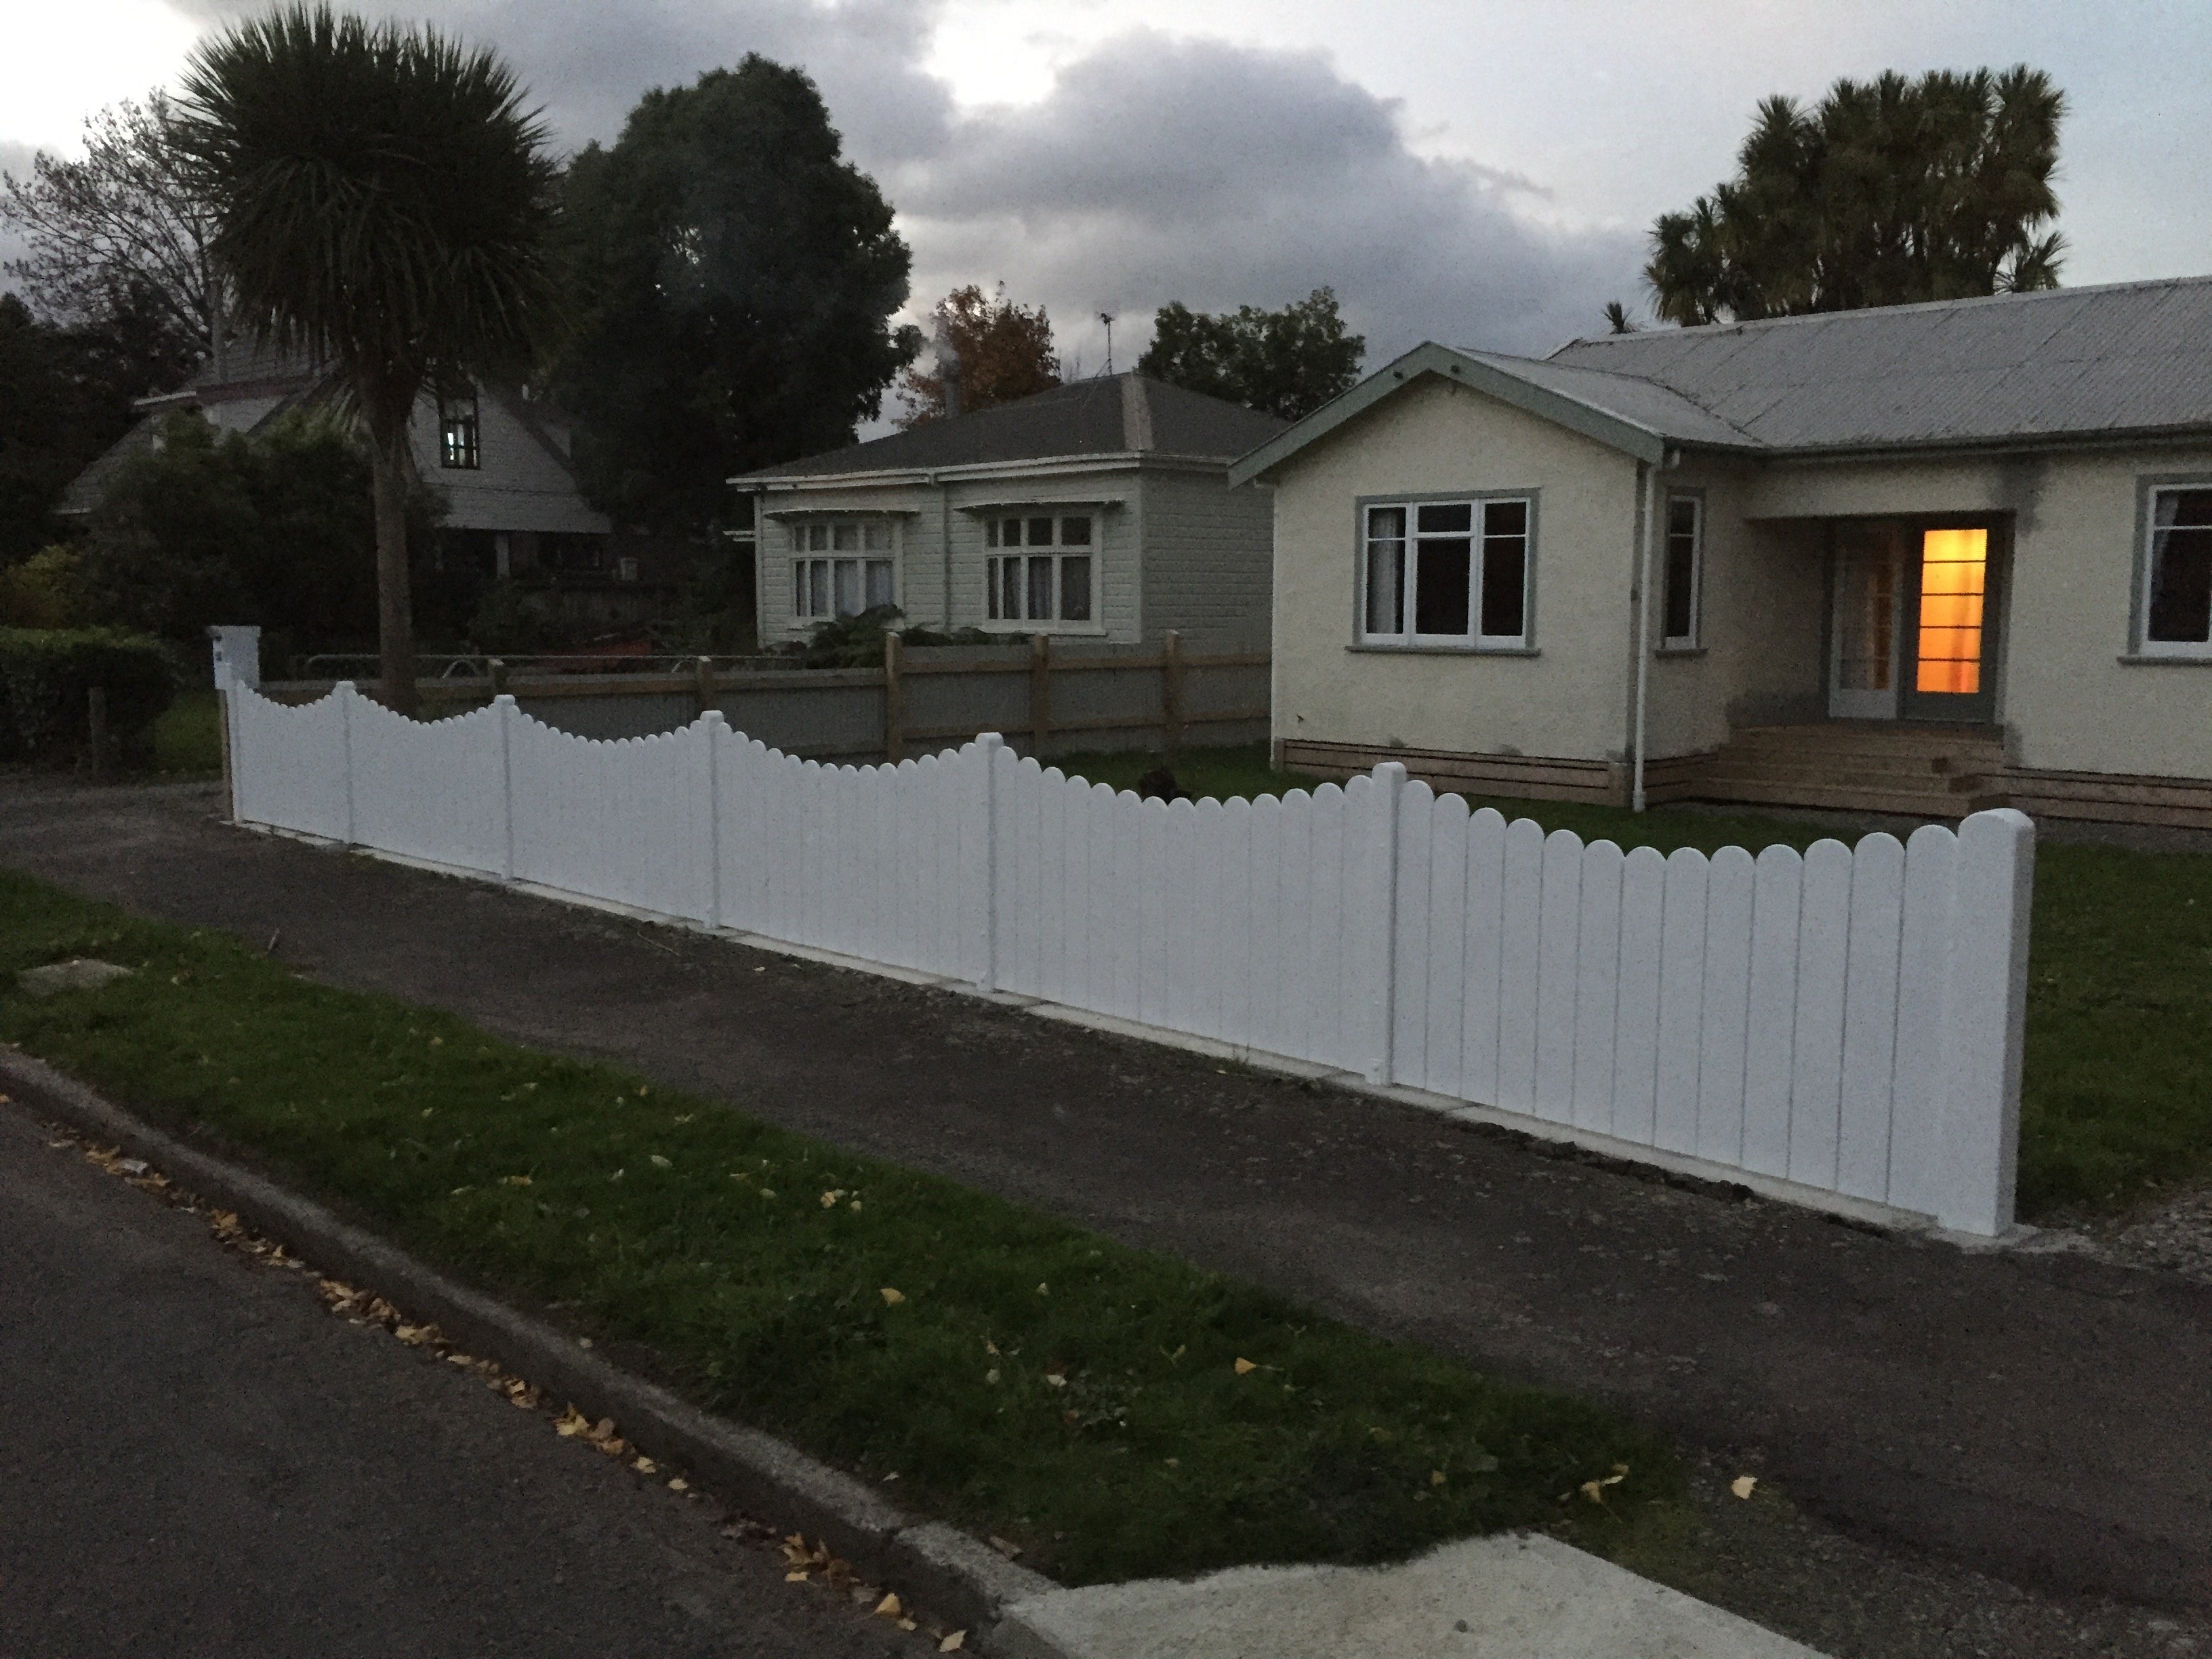
Gah I hate painting cars Got the inside done, remembered how much I despise sanding and bogging and sanding and paint fumes and the paint not drying cause it's too cold and getting paint boogers So I'm going to send it to someone else to get the outside done white again .
2 points
-
Boom!!! And double boom!!! Triple boom?
2 points
-
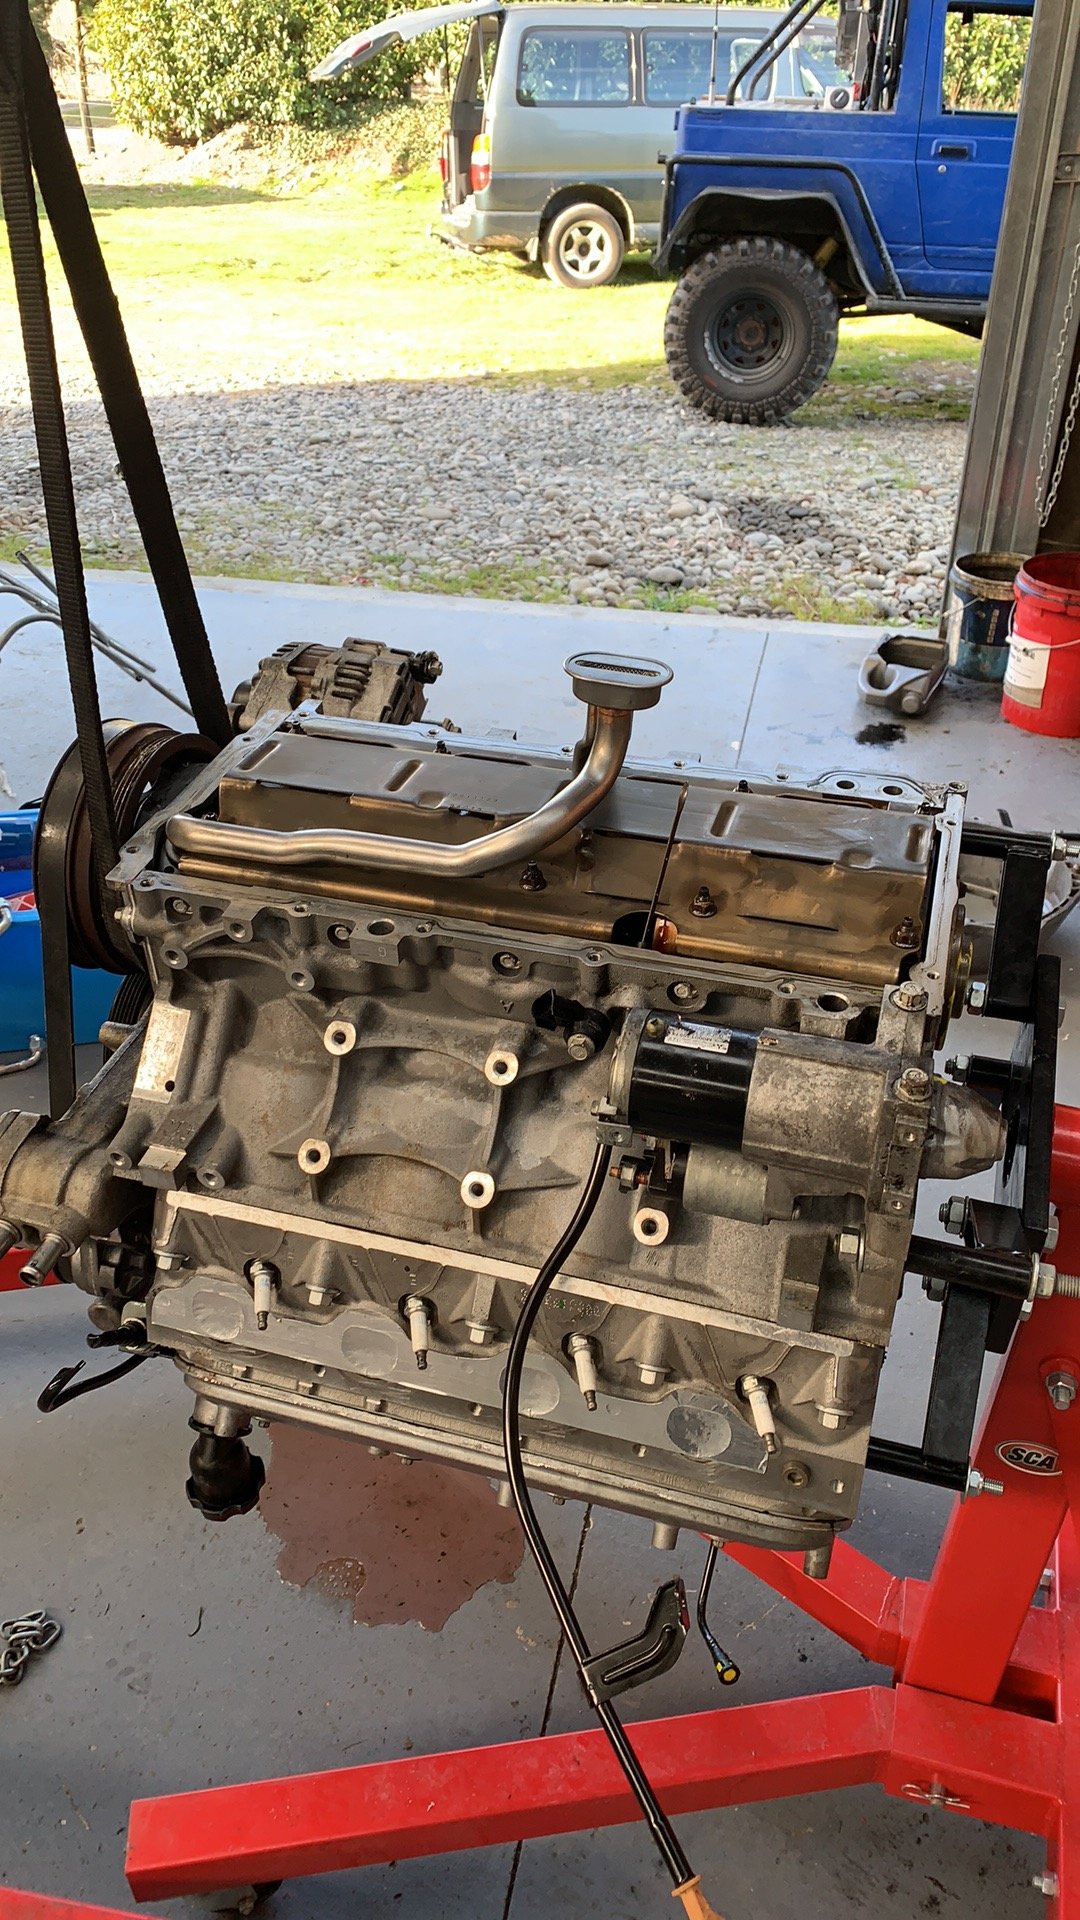
What were you driving? Cheers for the pic! Sorry for driving like a 15yo. Me and a mate swapped cars for a bit and I broke his 500+hp evo! Crank pulley exploded and let the belts go. Overheated it. Considering it’s a 2.4 stroker that’s quite new I really hope I didn’t kill it. Slapping engine together at the moment for the TYRBBQ. So far it’s been a bit of a cluster but nothing too major. The oil pickup tube fouled the plate that sits under the crank, so the die grinder sorted that out. Frustrated that the fucking pickup tube hits the sump though so will need to be modified. I bought them all off the shelf from Sikky and I would expect it to just work! Also the engine guy wrecked the water jacket bung by cross threading it. What a munter, I’m gonna have to go and find an m28x1 tap to clean it up. Got really hammered last night so progress is slow.
2 points
-
Gravel and dust don't agree with fork chrome and seals. Neither does city road grit. #adventureGN Spending is getting out of control. I think I'm over the $20 mark now. Have a few more items, but I'm over worked and ordered a wrong part, which needs to go on before the rest. So another weekend. Currently costs $0.05 per km in fuel. Over 5 times cheaper than ute
2 points
-
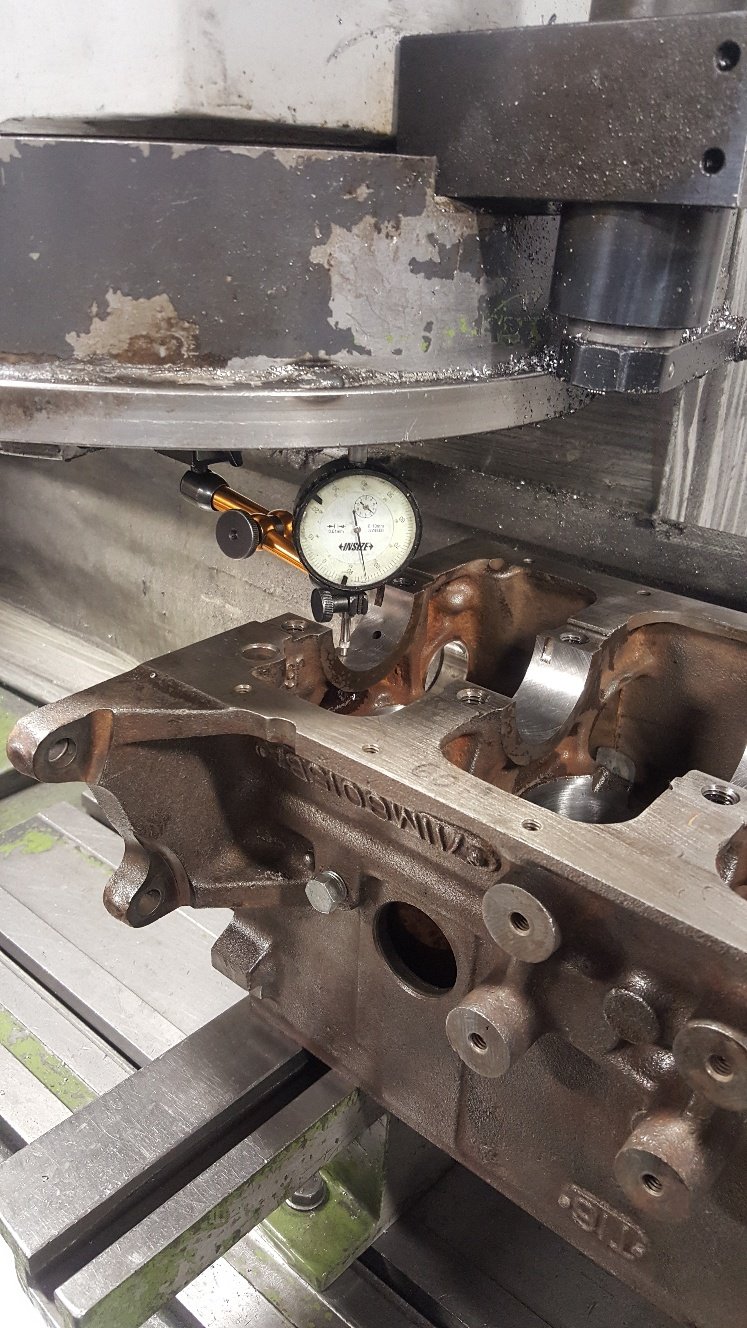
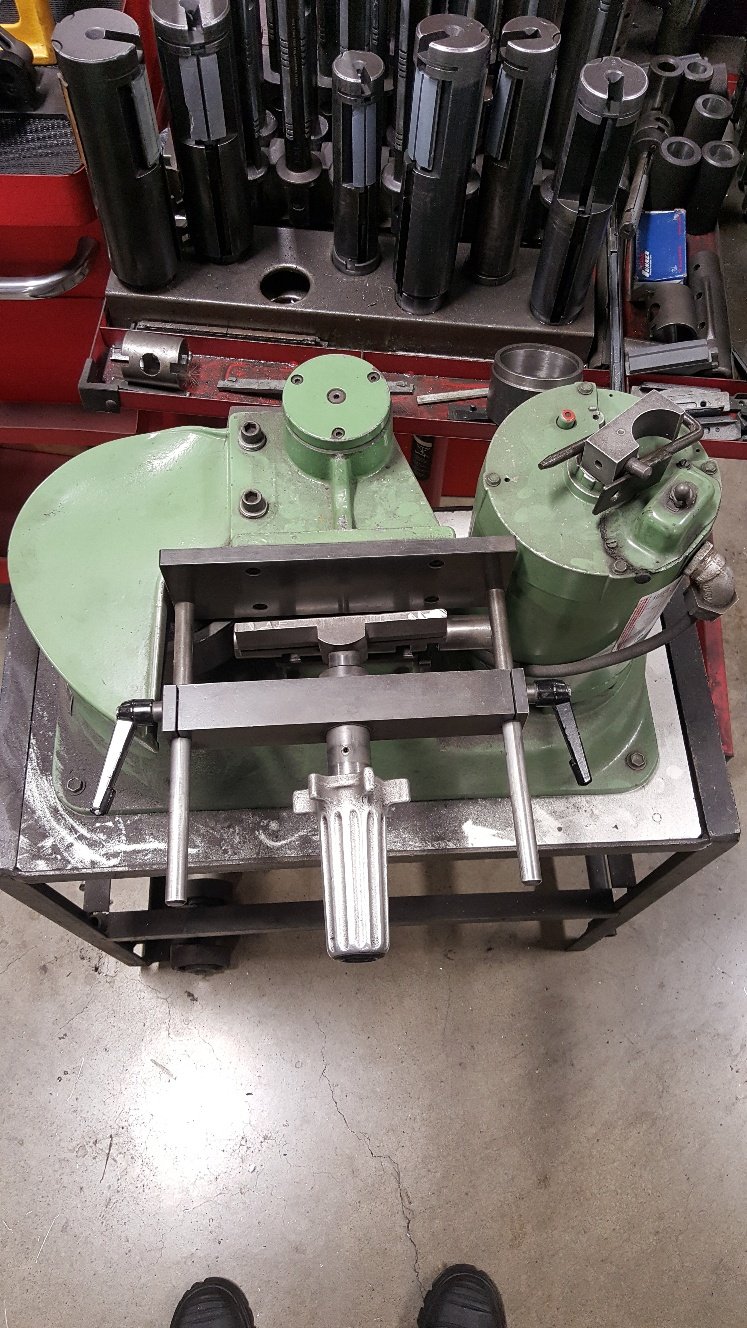
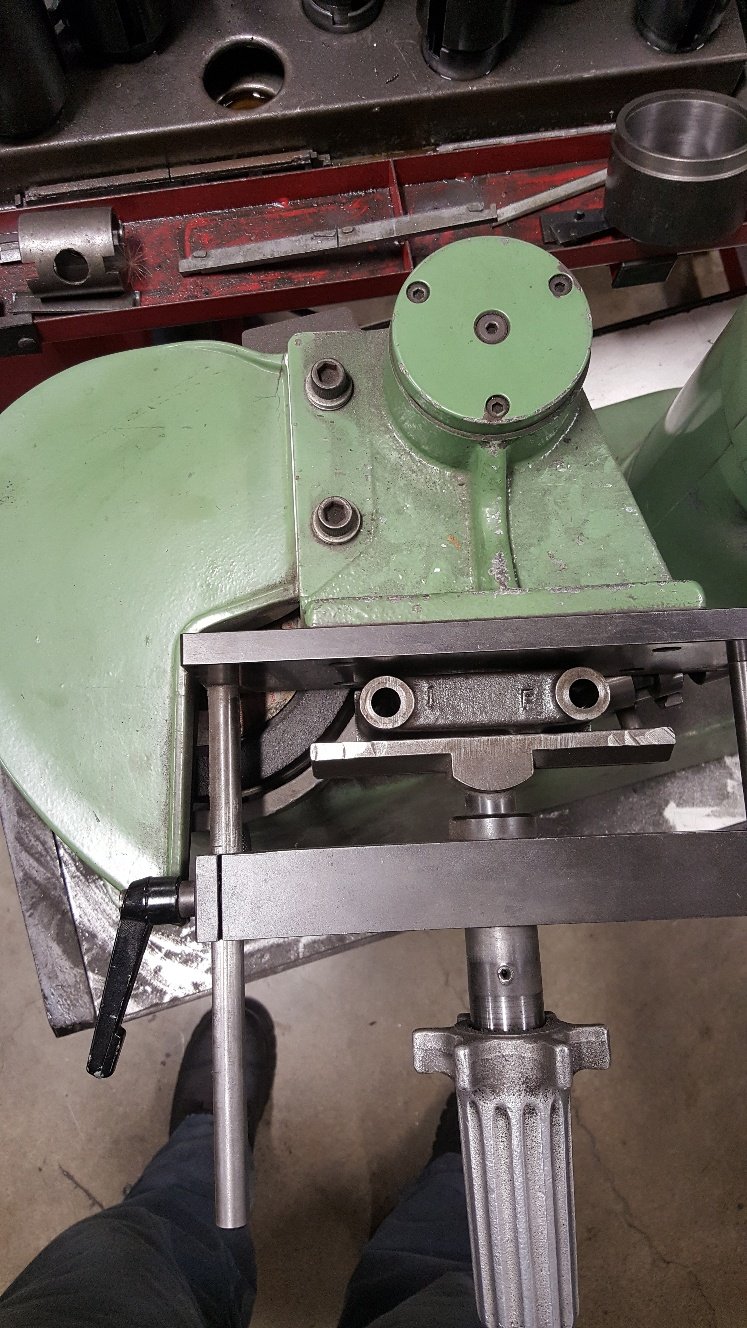
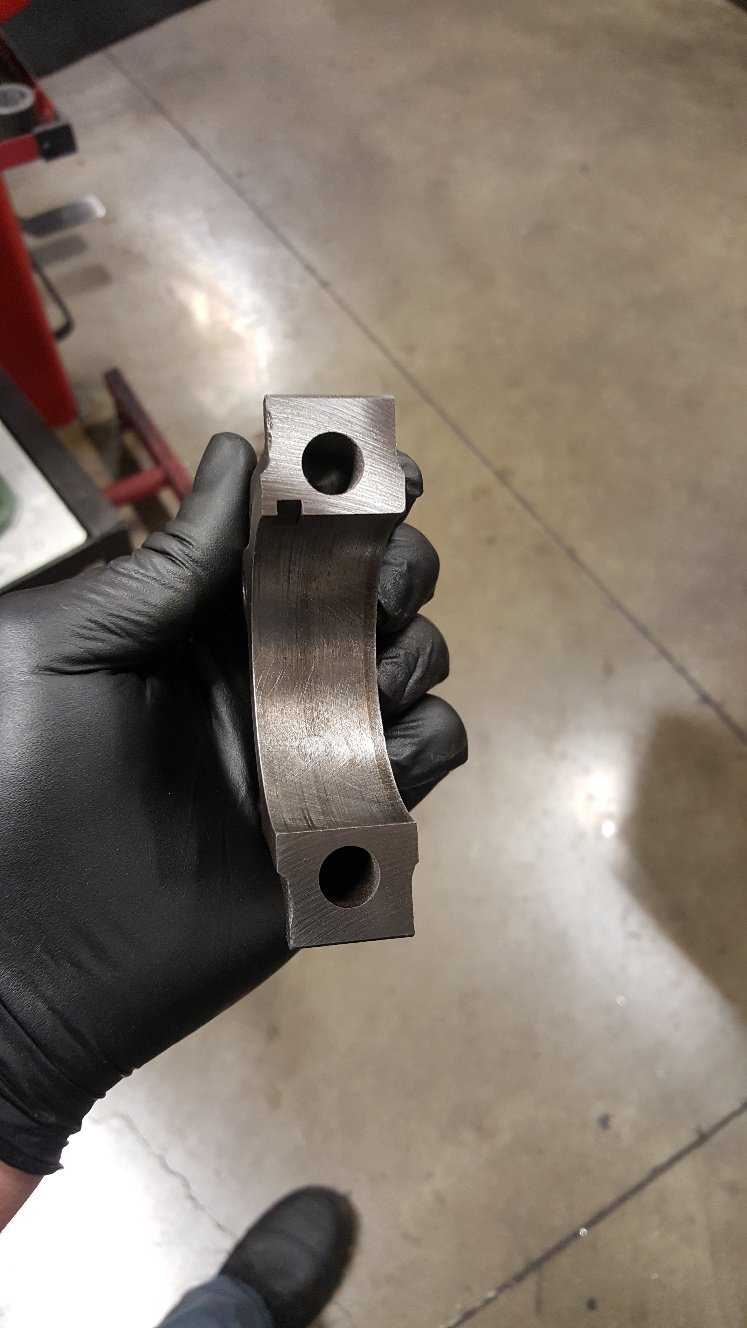
So I have the crank ground and ready to go. So I got started on the Align hone. This block didn't necessary need align honing It was within book spec in the mains. I haven't fitted aftermarket studs which is another reason for a tunnel hone, the studs normally tighten the tunnel up due to the extra torque you can apply to the stud giving better clamping load. Another reason is if you have run the main bearings this can also put the tunnel out of round and or put a bend through the tunnel. Here's a picture of the cap dresser. I used this to resize the rods earlier on. This is the main cap in it. It ground about 3 thou off each cap. First picture is the cap ground and ready to be torque up back onto the block. The next picture is with the block in the Sunnen Align hone. Sunnen is one of the industry leaders in honing. Our block hone is also a Sunnen Cv 616. So I just refitted the main bearings to check clearance. I've got 2 thou vertical oil clearance in the tunnel. Its nice and straight now. This isn't something we do to every block as some don't need any attention. But most old blocks either weren't that great from the start or have had a hard life.
2 points
-
right i am meant to be cleaning the work shop right now but i kinda cant be assed and i feel there are a few people that would like to see the details on what its taken to get the bus driving. we left the detailed post at i was off to get my flywheel skimmed up. there was a lip on the other side but for some reason it seemed to have been a sleeve on it or something and i had planned on having to take that to old mate geofphy to get cleaned up but it kinda just fell off when i picked it up. job done. Paul was busy on the phone again but it was sweet i still had jobs i could do, so i proceeded with putting the head studs in want to know why there are three different sizes? well in this photo there are four but dont look to close the longer 8 are for the bottom four on each side, we then have two short short ones for the middle on each side at the top, and then we have two medium size ones for the right hand side of the motor and now we have left is one long and one short for the left hand out side. here is why we have a long one. the casing nut is really far in the block so this is why we need the long one. i went over a few of these with a tap as some were a little funny but most of these were finger tight. and that's a photo of the finished result i ended up lock tightening this bad boy as it was pretty much finger tight and was very lose he holds on the fuel pump btw looks some what like this, thanks to google you'll see this in photos to come. next was the pistons, now on the top of the pistons you will see an arrow, that arrow goes to the fly wheel, and well if you are rebuilding an engine you might not be able to see the arrow so on the bottom of this you will see the little bulge on the piston, that is the equivalent of the arrow. and always place out your circlips with your pistons so if you lose one, you should be able to tell now, top tip. don't do this drunk cause things will go wrong and you'll have to do this again tomorrow. Pauls friends learnt this the hard way you can kinda see the little bulge on the right hand side piston where the vivid mark is now if your clever you put the inside circlip in so you slide the gudgeon pin in with out having to go through the head studs. i guess you'll do it a few times before realizing how much of a retard you are and figuring this out. i probably would have done this tbh. we also put the oil pump in and torqued that up, also put goo in it to oil doesn't come dripping from it. i got told off for been to efficient and maybe putting the studs in a tad to far for these bolts to go on. but hey they worked right..... perfect if you ask me. next day now, time to clean the heads. and what do you know bloody norm (parts lady) has packed the wrong heads so i go back and yell at paul, who yells at norm and i yell at norm and well then norm gets the other heads which she got told to grab to begin with. lets see if my new barrels fit in this lot huh. hey hey we have a winner. time to clean these. and then back to the hot water so it can evaporate even thought they wont rust. it was at this stage i got shown this cool two peace crank hows that for cool........ it even drove broken. just made a funny sound. ok time to get back to the engine. time to put all the studs in the heads for the exhaust, intake and the rockers. all done. before i knew it Paul had slid the barrels on and i was over here putting the new oil cooler together now this isn't a factory oil cooler for a standard fan shroud which you would see on most beetles and early kombis. this is what they call a dog house. a dog house fan shroud works a little different and instead of the oil cooler been in the middle and the heat from the oil getting pumped onto the left hand side cylinders it gets air pumped out the back and the air just disappear not heating up those cylinders. here is a photo of one in the shop that paul used and showed me. note the oil cooler there out the back. and here is a photo off google showing you with the extra tin wear on how it works now i asked Paul should i have one of these. he answer was yes. but not cause i said yes, yes cause..... and then explained what i just explained. it was a pretty no brainier why we should be putting one on the engine. i just come across this image as well you might find it help with my bad explaining here is a standard one and the oil cooler usually goes between the letters a and b pretty much and the heat from your oil just gets spun around and onto your cylinders ok so i also had to change the oil cooler bolt. from a standard one to what we are now usuing. doesn't it look so cute. the one on the left is the old guy. we went to see if my windage pus rod tubes would fit next fuck me i just wrote this next section out twice now and hit ctrl z to go back one steep and lost it all fuck me i'm not doing this again or i'm not going to have a fucken computer come tomorrow!! FUCK back to my windage tubes. this is the difference between standard and windage tubes well yeah the next photo is of mine cut down to standard lenght haha this isnt that funny after writing it the 3rd time now ok so now that they are done time for the heads to go on now. and my next job was to do some more cleaning, im getting pretty good at this cleaning stuff now. so cleaned they were and paul chuck the rods in and bolted the rockers up and checked the tolerance and put them at 6 thou while i was off next door doing something else. i asked oh nice were are your feeler gauges, he point at his tool box and said some where in that thing if you want to find them and check. i ended up asking how on earth did you work out what 6 thou is with out using them. his response was when you have cars driving from hours away to your shop and you burn your god dam fingers from checking tolerances you sure as hell learn quick how much 6 thou is and its _____ amount of turn from touching. ok so yeah i didn't check this guy knows whats what. next is the rocker cover and gasket, now what we do here is we smear a little grease on the asked both sides and then slap the covers on. want to why we put grease on the gasket? well the detergent in the grease eats the cork gasket and glues it together so they dont suck in or fall out of place. wish i knew this when i had my 1st bug after it happening so many god dam times on my way to and from leadfoot. old @Archetype will be able to tell you about this experience as well. was not good. so the engine now looks like this as you can see we now have the alternator stand on, yup an alternator not a generator, those can go in the fucken trash. one less thing to fuck out, these things are self regulating as well. next is the tin wear. that wont be hard its all brand new and will just screw right on i laugh so hard!!!! this is what people must think when they but kit set upholstery haha. yup had to modify these peaces to fit. i think it was a total of 5 peaces i cut or modded to fit. and then i took this photo for the Instagram people i really like it. and it was also the end of that day. another day now. next on the list was making the intake bolt up and work. but firstly this bus has vacuum operated boosted breaks. and the vacuum comes from the intake. these intakes come with a little hole in them that we plugged up as its to small and kinda in the way once you try and put everything else there. so we have to drill a new one and find something to make it work as these hoses are huge. drill said hole here. you can also see the black grub screw that was filled. time to dig around in this and we came up with this tapped the hole and put some cement around the fitting before we put it in. call that job done. its at this point its fucken great that Paul has a shop like this with all these little things laying around and taps all different sizes. shits pretty legit now yeah that didnt fit as well, the runners on the intake on the left hand side was a little long, so Paul used and hack saw which would have been as sharp and a bread knife to cut it down to begin with and well yeah had to be cut down some more, i used a grinder with a cutting disk on it i proceeded to ask if he wanted it cut straight or on the piss like he did, got told to shut up smart ass and cut it, and cut it straight! haha bolted it all up and put the carb on as well. time to slap the exhuast on. 1st job 1st j pipes. but wait a min. lets cut some more tin wear haha. these are j pipes btw. they go from the rear of the engine under the block and out the front to meat the other half of the exhaust, factory ones of these have big fins on them and a box around them which heats up and that's were you usually get the heat from for a beetle or a bus in side the car. here is an example of what factory ones look like now the moustache bar. now i know your asking what on earth is that? well this bolts to the engine and acts and the engine mount to the body of the bus. looks like a moustache doesnt it? now for the front half of the exhaust. these usually have heat risers on the top. The heat riser forms two important functions. It prevents ice forming under the carburetor (caused by the fuel evaporating and cooling the inlet air below freezing - icing will eventually block the manifold and stop the engine. (straight cut and paste from google here) but mine were blocked off. they do serve a good purpose. me and my friend grinder sorted this out also Paul put the alternator on at the same point i was doing this. he asked me if i wanted the flash nut or the standard nut, i said whats cheaper, well standard nut it was...... only until he found i had a flash nut for my main crank pulley, but he put a crap nut in there to match my cheap ugly bolt up the top. we now had to put an oil filler neck on this. these come straight for difficulty or bent for a bit easier. guess what guys, the straight one comes black and the nice shiny looking one comes in bent..... well fuck me ok put the bent one on but if ya god dam doing that put the shiny bolts on, so old crapy bolts off and shiny ones back on. this is what im talking about here. these go on the alternator stand this is the straight one and black well now thats on lets put some oil in it time to put it on the engine stand shull we. and that's the night we started it. ( i also just copied all this and put it into a word document in case it didn't save and i was going to be pissssssssed off )2 points
-
So last Saturday i headed out to the v-dub shoppe to make a start on my engine. Paul was kind enough to work late and help me out. This is my engine and everything that is ment to go with it. inc the two boxes on the floor. I get all the bitch type jobs, clean this, clean that, and yeah clean that as well. so start with cleaning the crank. a little scotch in the cleaning tub and then we rinse it off with hot water. want to know why we use hot water? well hot water evaporates and doesn't leave any residue and wont rust. unlike cold water. now that that's done onto the casing. his has been machined out to fit the larger barrels and pistons to make it a 1776 so yeah lets crack it open see how many peaces of raw material i can find. oh hello. this stuff has gone everywhere. see if you can spot the peace tucked away here. that little peace of silver on the oil pick up is what you are looking for, well now that they are all cleaned up out side to wash these down with cold water. cause these are not steel and they wont rust away. hey presto we looking good now. 1st things 1st. dizzy gear in. i didn't snap a photo of this but here is one off the net. with that lubed up and in place the dizzy goes in over top. while i was putting that in Paul was putting the bearings in and making sure they lined up and marking them to make our life easier for when the crank slides in. i have also slid on 6 little rubber gaskets over the main bolts. bearing 1st. cam gear next, with some heat slid on over and sitting in place with its key way in next is distributor drive gear. my key way was a little lose, luckily we were in the right place and a few steps to the left was a container with a bunch of them in, found one that fitted better. some heat on this and on it went. bearings for the rods and on they go now. no photo of this stage my hands fill and doing other things but lets drop that on in in she goes and lined up Pauls pink dots and dropped the cam in as well.so far the only things out of the old engine are the gear peaces on the crank and the dizzy, even the dizzy drive was in a pile of other parts to the left of me that Paul just pulled out of old stuff. The rods and cam are from another purchase of parts i ended up with including the bearings and all the gaskets.Next Paul swears at his employees for leaving his gasket goo with out a lid and we put some goo on the casing and he drops the other side of the block on. finds some nuts that should come with the casing and he torques them up. its bloody handy having a store room the size he has, off i went find myself some lock nuts, re stock the draw in the engine build section. they get thrown at the engine and torqued up but to a smaller amount. sump on and well bake to the store room to find some dome nuts for the sump plug and the mesh for in side that, and a stud kit for the fuel pump, oil pump and a few other things. actually here is a photo of the kit, thanks google ahh while this was up side down we also dropped these in. which i learnt the other day is a duel pressure relief, vw casings come out duel and single, only early ones come out single. ended up watching a YouTube video of how it works and where they are. if you want to learn here is the video i watched it was a pretty good Saturday learning and building the new engine. last night i headed in and done some more work. removed all the head studs while Paul was on the phone and cleaned them up, he then came down and gave me some shit about how i didn't get the fly wheel and shims ready for him, few seconds later he had them, he worked out the end float and put some shims in allowing some small amount of thou. he was also trying to calculate out loud and man that shit was confusing as fuck to me. with that all sorted i now have the fly wheel and we are off to get skimmed and it has a really nasty lip where the rear main seal would usually sit so ill take that to geophfey and get him to take the lip off that. all in all shes been a great few days so far.2 points
-
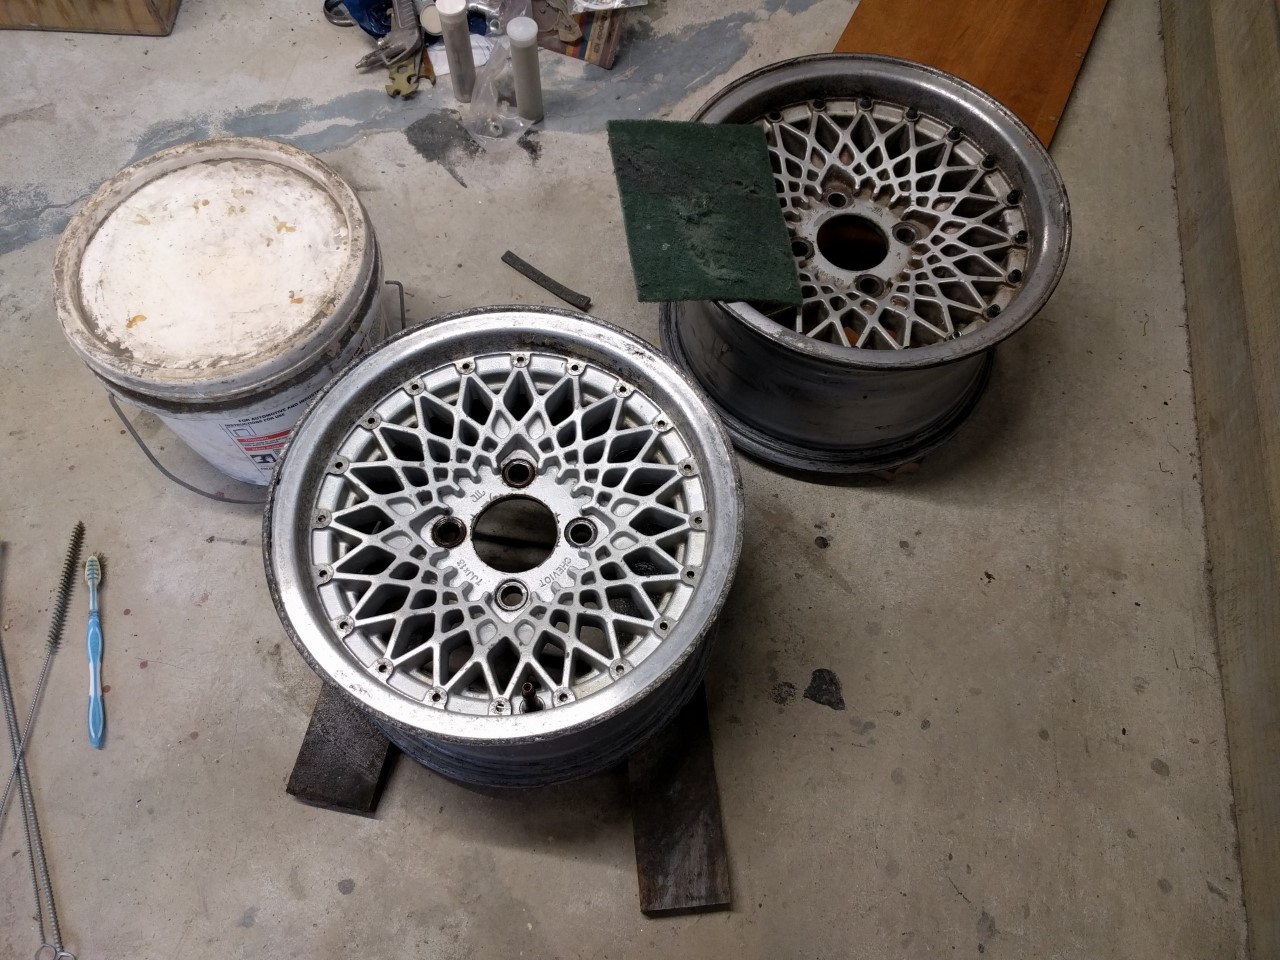
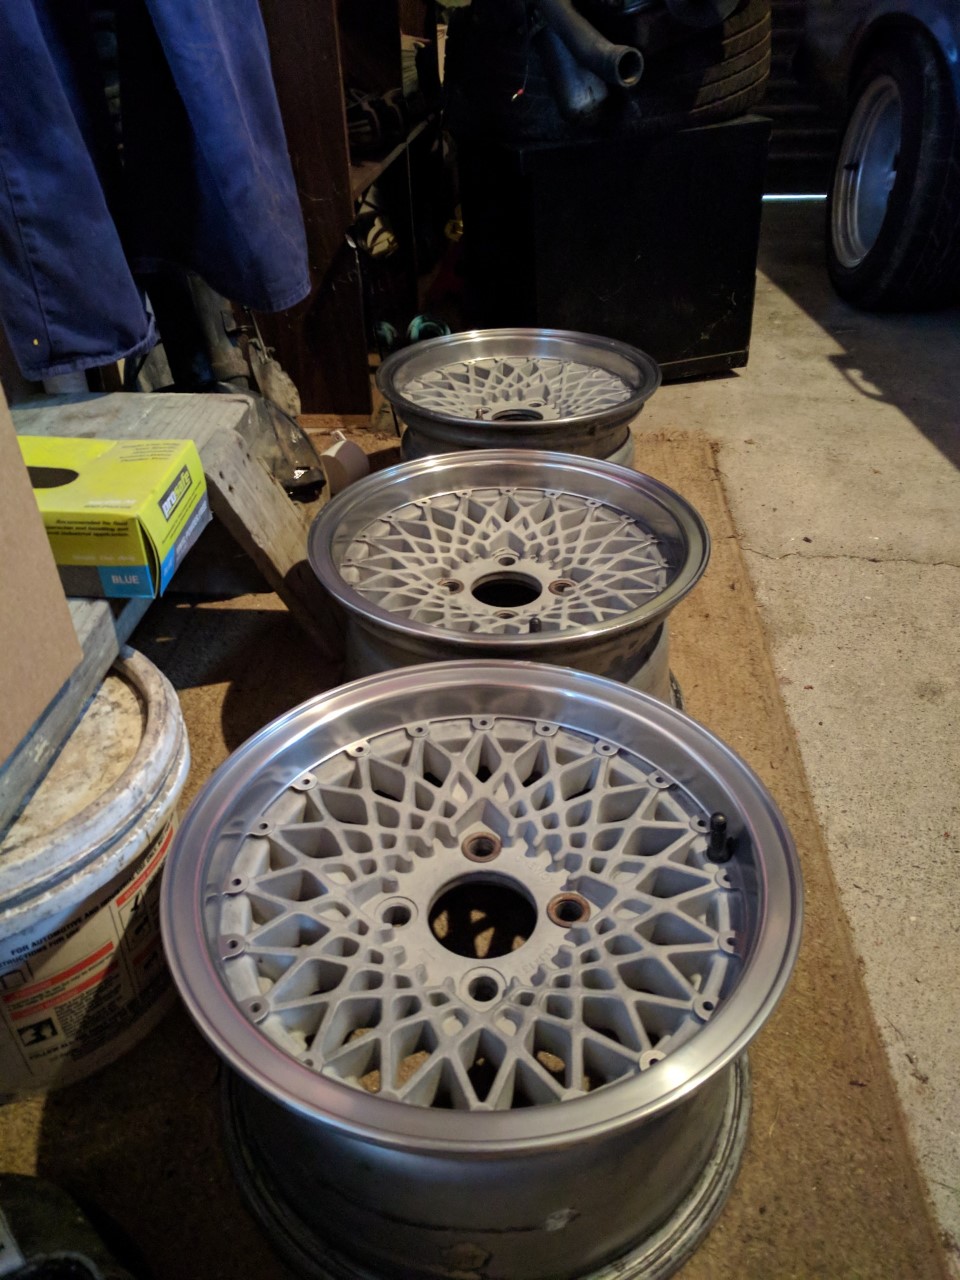
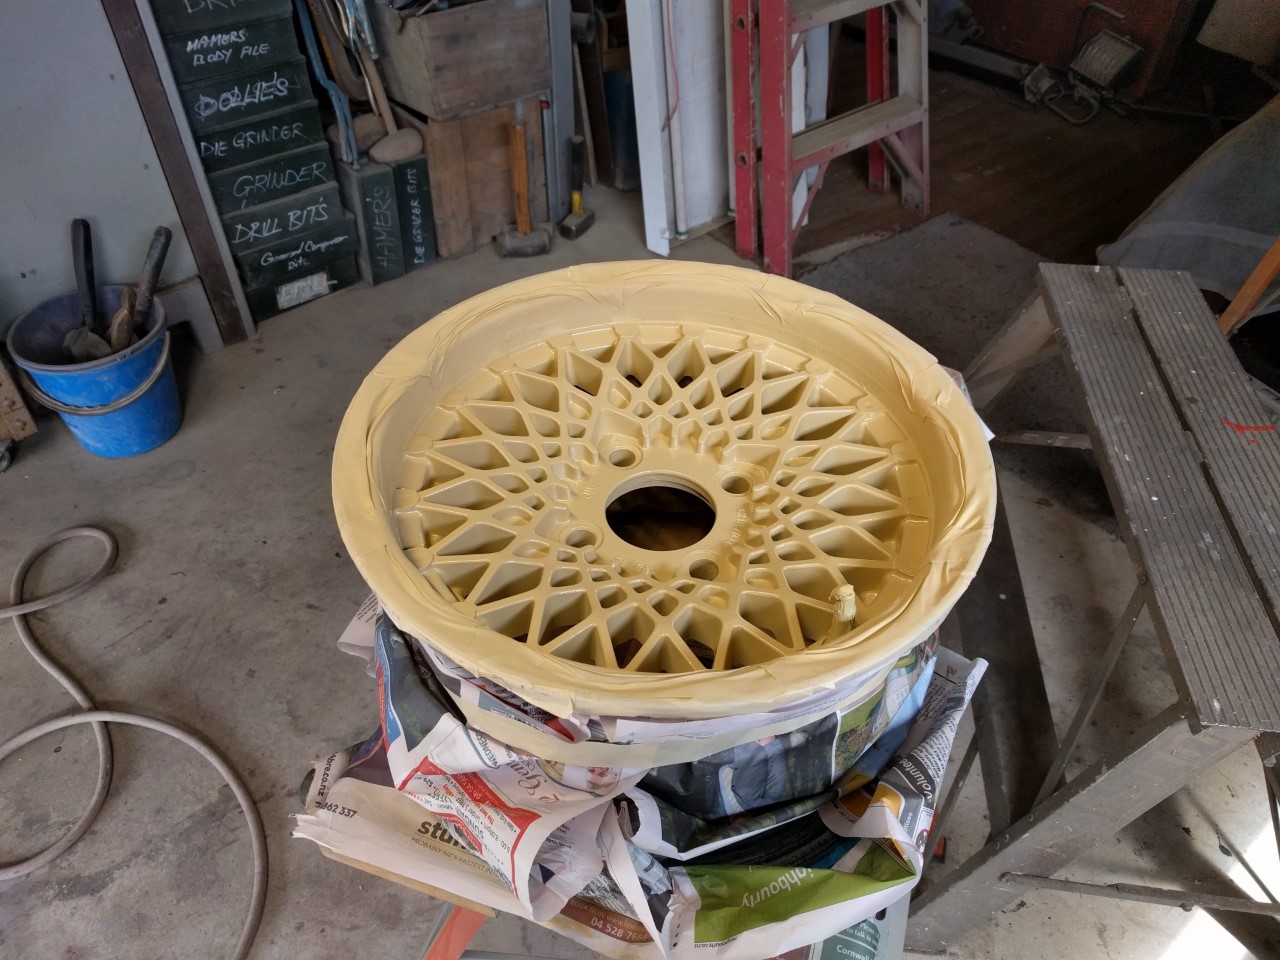
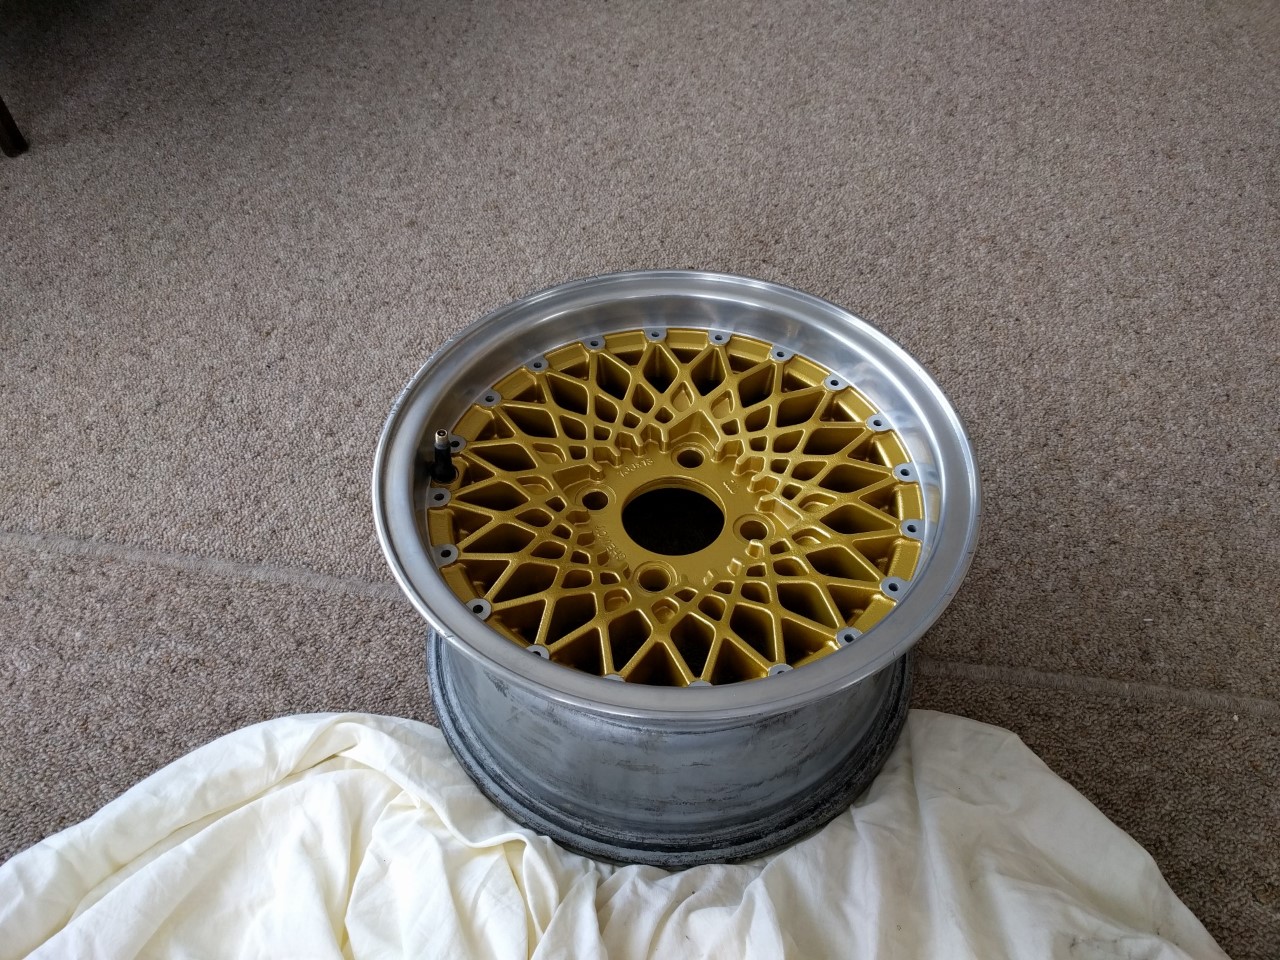
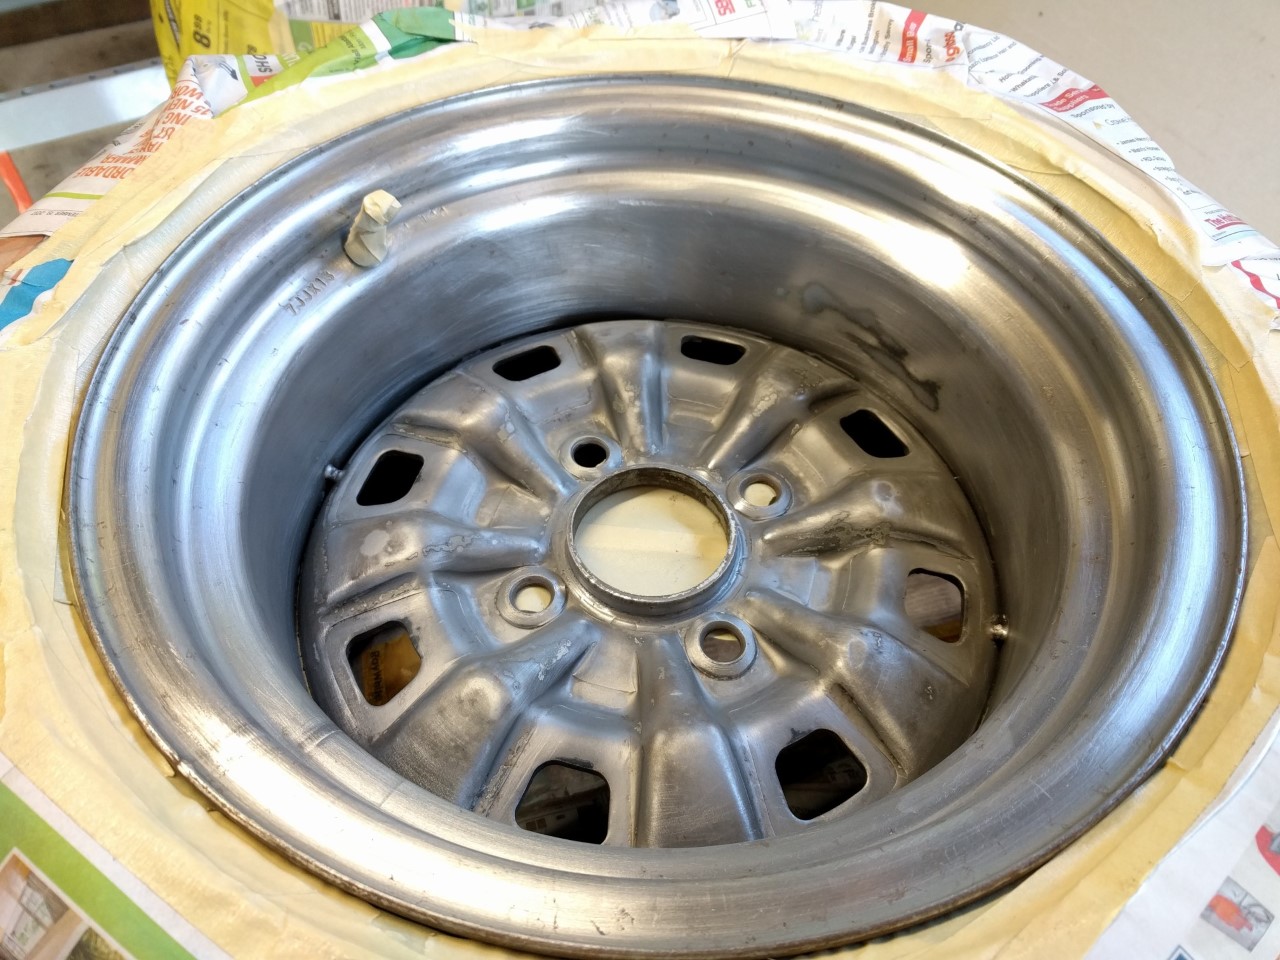
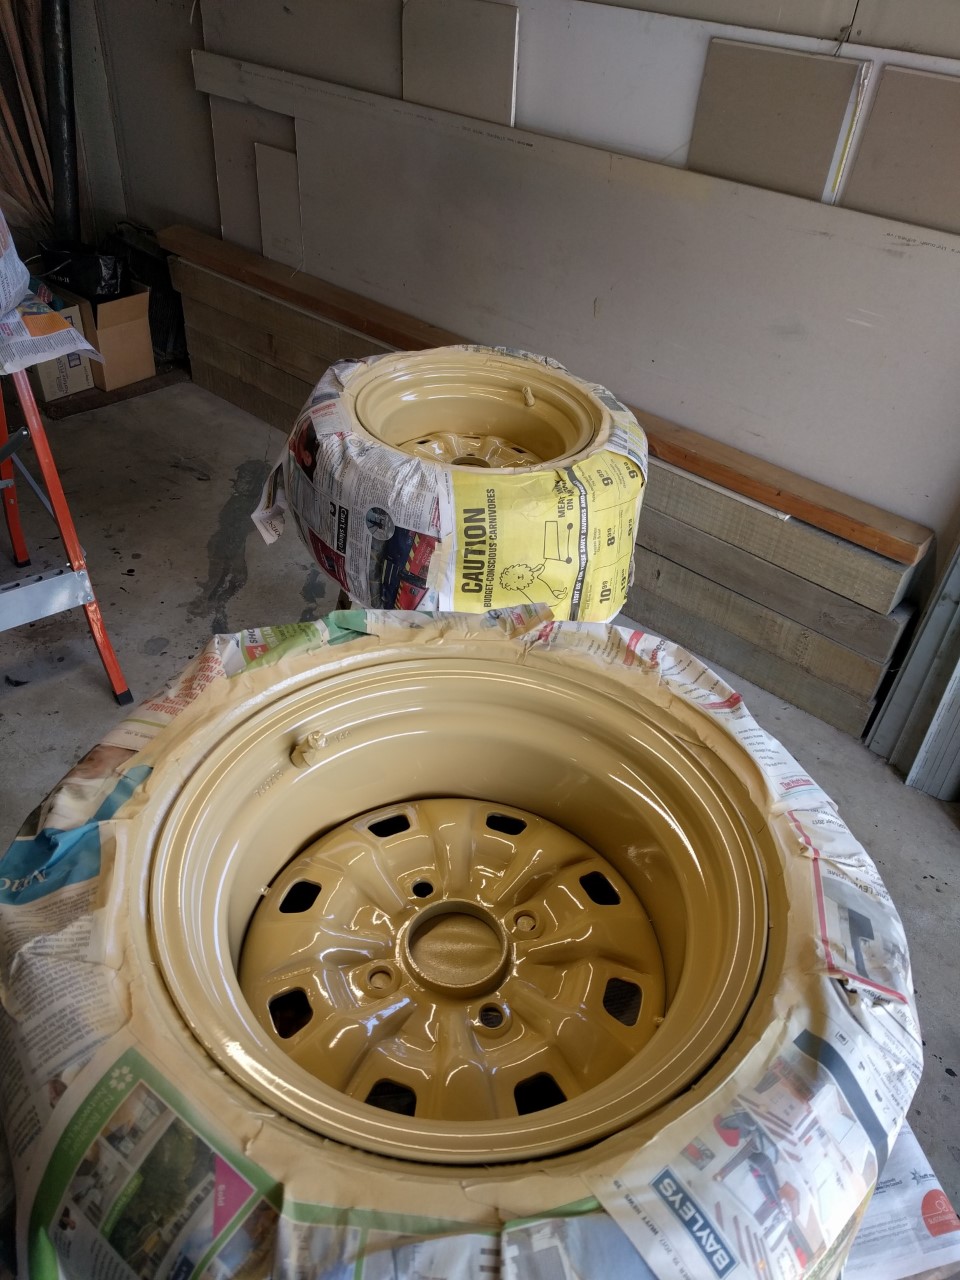
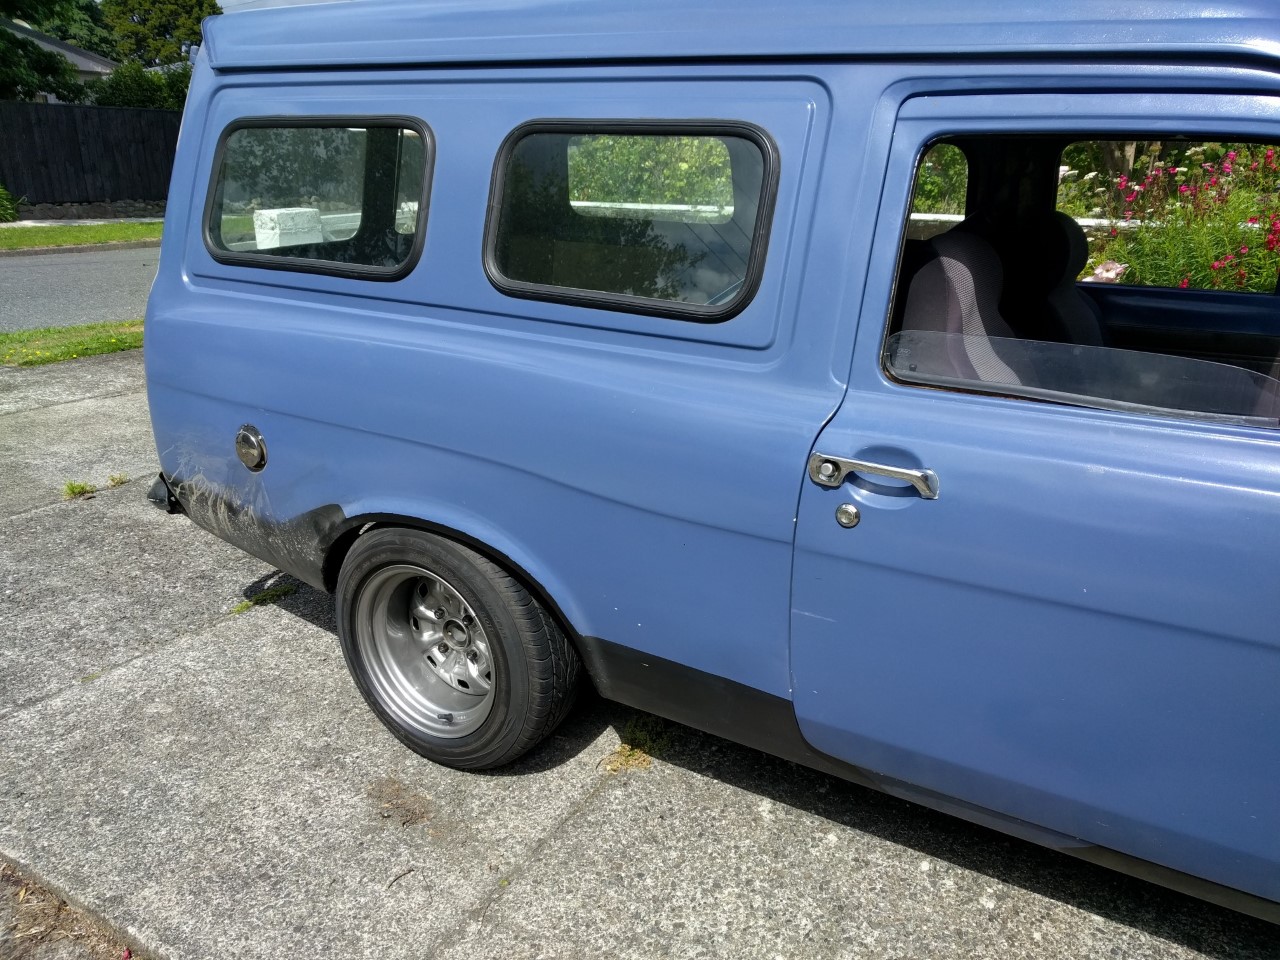
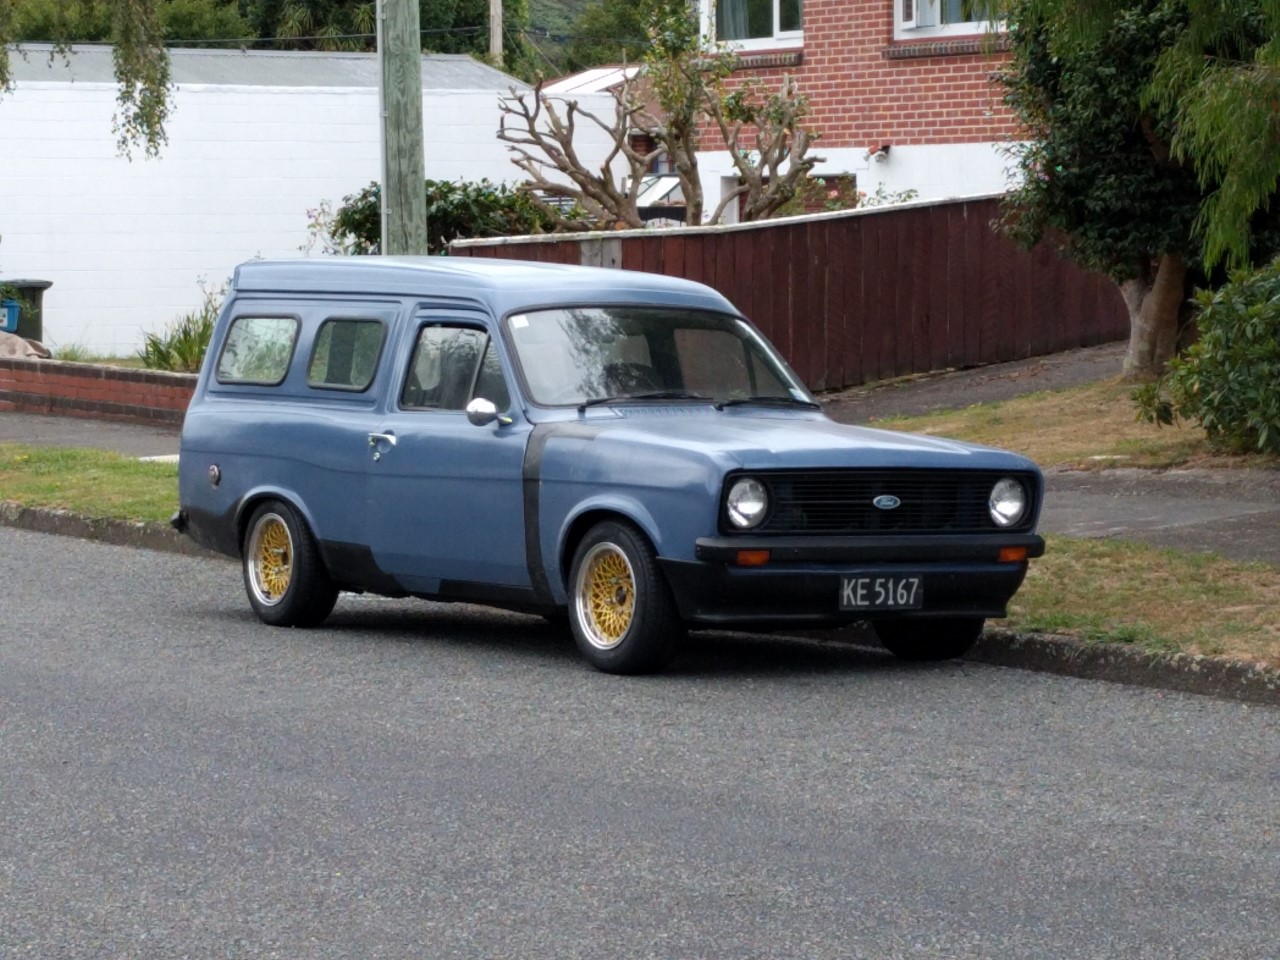
11months later... I cleaned up the wheels above and went with the usual gold centers and polished lip. They were pretty hacked up beforehand but a bit of elbow grease went along way. I hand filed the lip down to take out most of the hacks, sand blasted the centres and sanded/polished the lips. They came up surprisingly clean. Painting these types of wheels with all the spokes was a very tedious task. Wheels ended up getting etch, 2k, base and clear. Pretty happy with the end result. I think they would look better if the van a sweet paint job to match. In the middle of my wheel obsession I also purchased and cleaned up a set of Cheviot hustlers. Have always like the classic 4 spoke. At this stage I had one rolling car, little space and 5 sets of wheels so the hustlers were sold on. Whilst i was in the the mood I sandblasted the wide steelies and sprayed them in a metallic grey. They were looking a bit crusty and I didn't want the rust to take over. I quite like them. They are now put away in a safe corner for the other van. I also got sick of having no interior in the rear of the van. They came out factory with nothing protecting the sides from getting knocked. I spent a bit of time making up some panels from some cheap plywood. Just the other night I finished covering the panels with a woolen blanket from the local 2nd store. Cost me $18 plus a can of Ados. Other small things include a new center consul, stereo, electronic ignition, sound deadening and a battery. Rechecked the timing and tappets as well. Runs a shit ton better then before! I ran it to mangatainoka , over to palmy and back home a few weeks ago with zero issues. Stoked. Lastest WOF was a clean sheet with the comments "oil leaks from engine, gearbox and diff". Guess thats the next job.
2 points
-
All my friends and family say I've got problems...a sickness.....anglianitis smalfordanism, oh well, It doesn't worry me one little bit. FUCK-EM-ALL I SAY I think we oldschoolers do the world a service, old cars are works of art and we few restore and preserve things of beauty and style, if we didn't, the world would only be full of boring bits of plastic with wheels......keep it up people. Just my 2 cents as I'm about to go nainais, pretty deep, click submit before I think the better of it and delete post.................*CLICK* Hope mine looks like this when it's done.
2 points
-
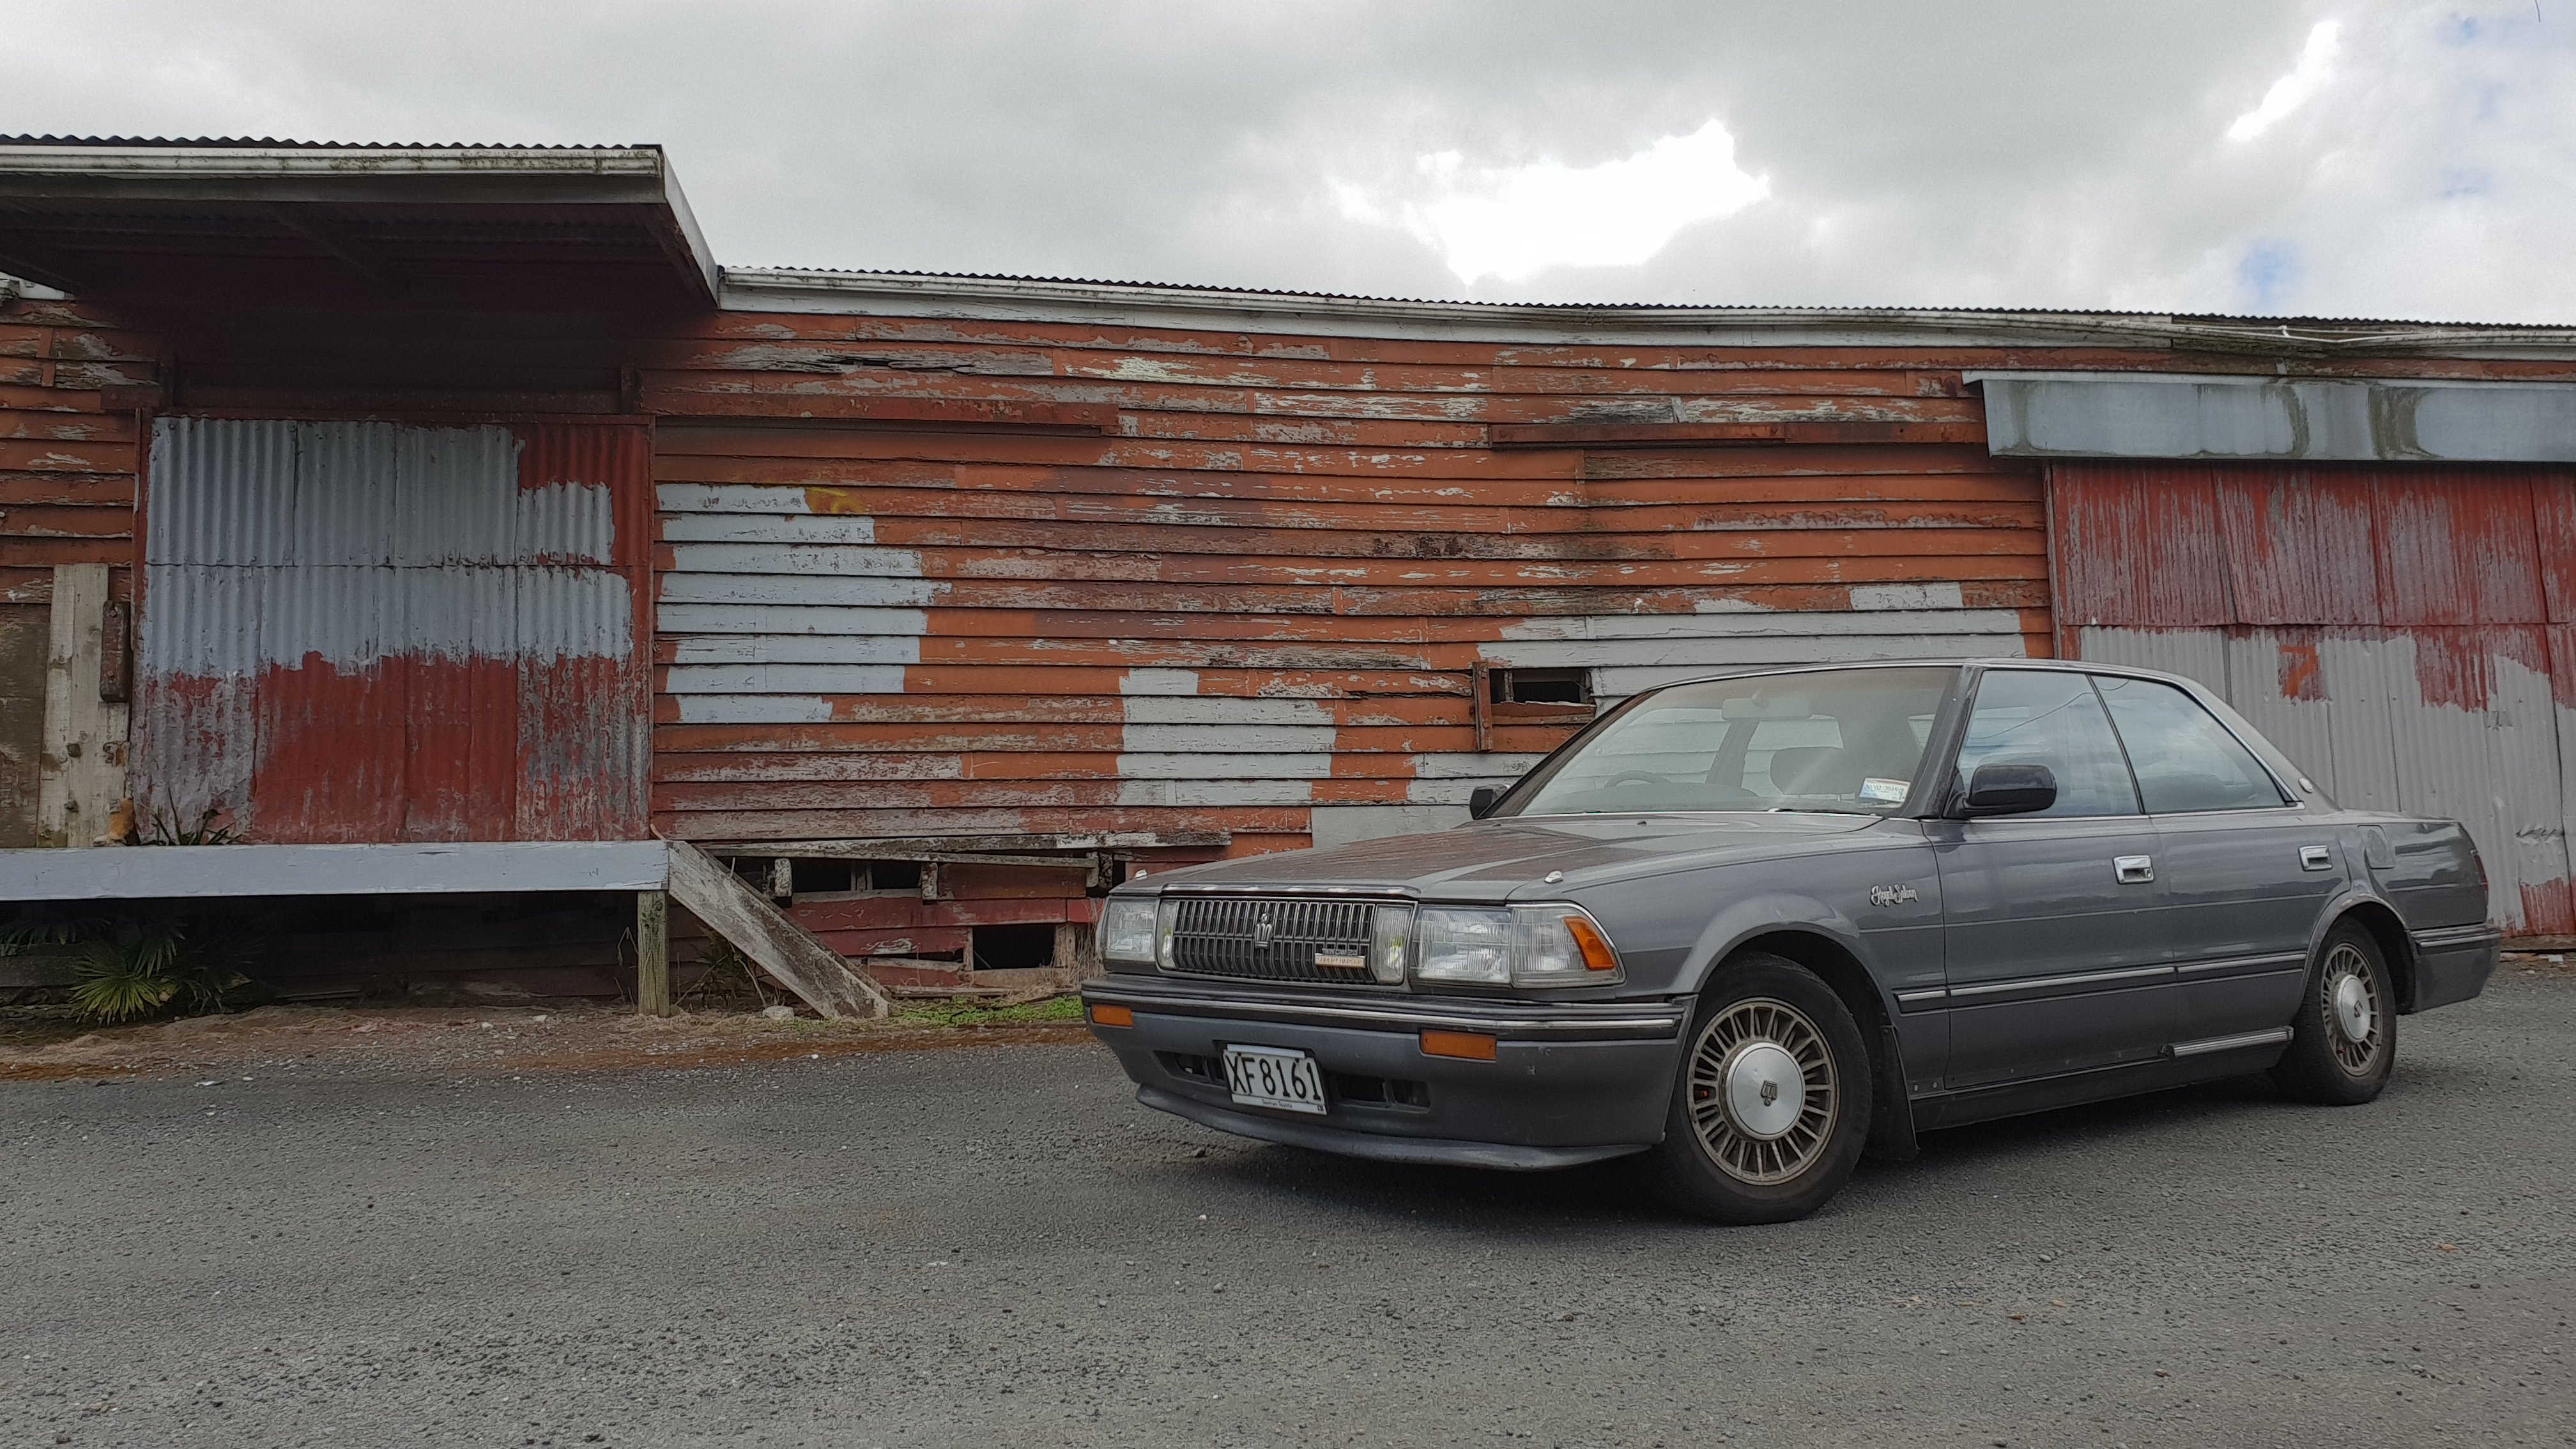
Currently enjoying a beer in kapiti, half way home with my new small project/daily. 1988 Toyota Crown TC24 Supercharger.
1 point
-
Feel like a career change? https://toyota.qjumpers.co.nz/jobs/ad/automotive-technician/55333/1 point
-
It's possible under certain circumstances - a friend of mine took her Civic Shuttle in for a WOF only to find it had been de-registered for a few months. Turns out someone had deregistered there car somewhere else in the country but accidentally put her plate number down. Of course, no checks were done and they de-registered the wrong car. At first NZTA told her she had to eat the costs and hassle to re-register, and would lose the cool black plates. I think it was after calling up numerous times and crying over the phone that they eventually were convinced to reverse the process.1 point
-
Fuck yeah Spanners.1 point
-
Given its been 10 years since the last update I figured I would add another one. The initial inability to use the original plates has been overcome and after a succession of emails back and forth to Tania Taite and reuseofplates@nzta.govt.nz, I have been given the all clear to reuse its 1963 issued plates. Interestingly, in none of my correspondence with the NZTA was there any mention of a Gloria (as the car is a Prince and the registration papers simply say Prince Saloon) however she came back to me saying it was registered as a Gloria at some point, only one of my documents mentions Gloria so I knew the mistake existed but it also means that despite this being deregd since before digitization, they obviously do have records of it (even though previously I had been told there was nothing and the only chance of getting the plates would be personalisation). Interdasting. Anyway. I also bought this for it (thanks to @RUNAMUCK and @vivaspeed) Stay tuned ten years down the track for the next update. Disco link because it's been ten years and it was broken1 point
-
Had a company track day today, took the crown for a couple of laps, 100% just for a Photo Op. holy shit its terrible on track! cant corner at speed to save itself, might need a wheel alignment, but im pretty sure its just the chinese tires and nearly 2 ton weight! it did pull a (GPS indicated) touch under 170 km/h down the main straight which i thought was pretty epic for a 2ton brick with a soggy automatic. that little supercharged 1g can really pull! if it didnt over heat the brakes after two laps and wore a better set of tires, there would be more in it, but its unlikely to ever see track work again. especially once the mopar miata is running.1 point
-
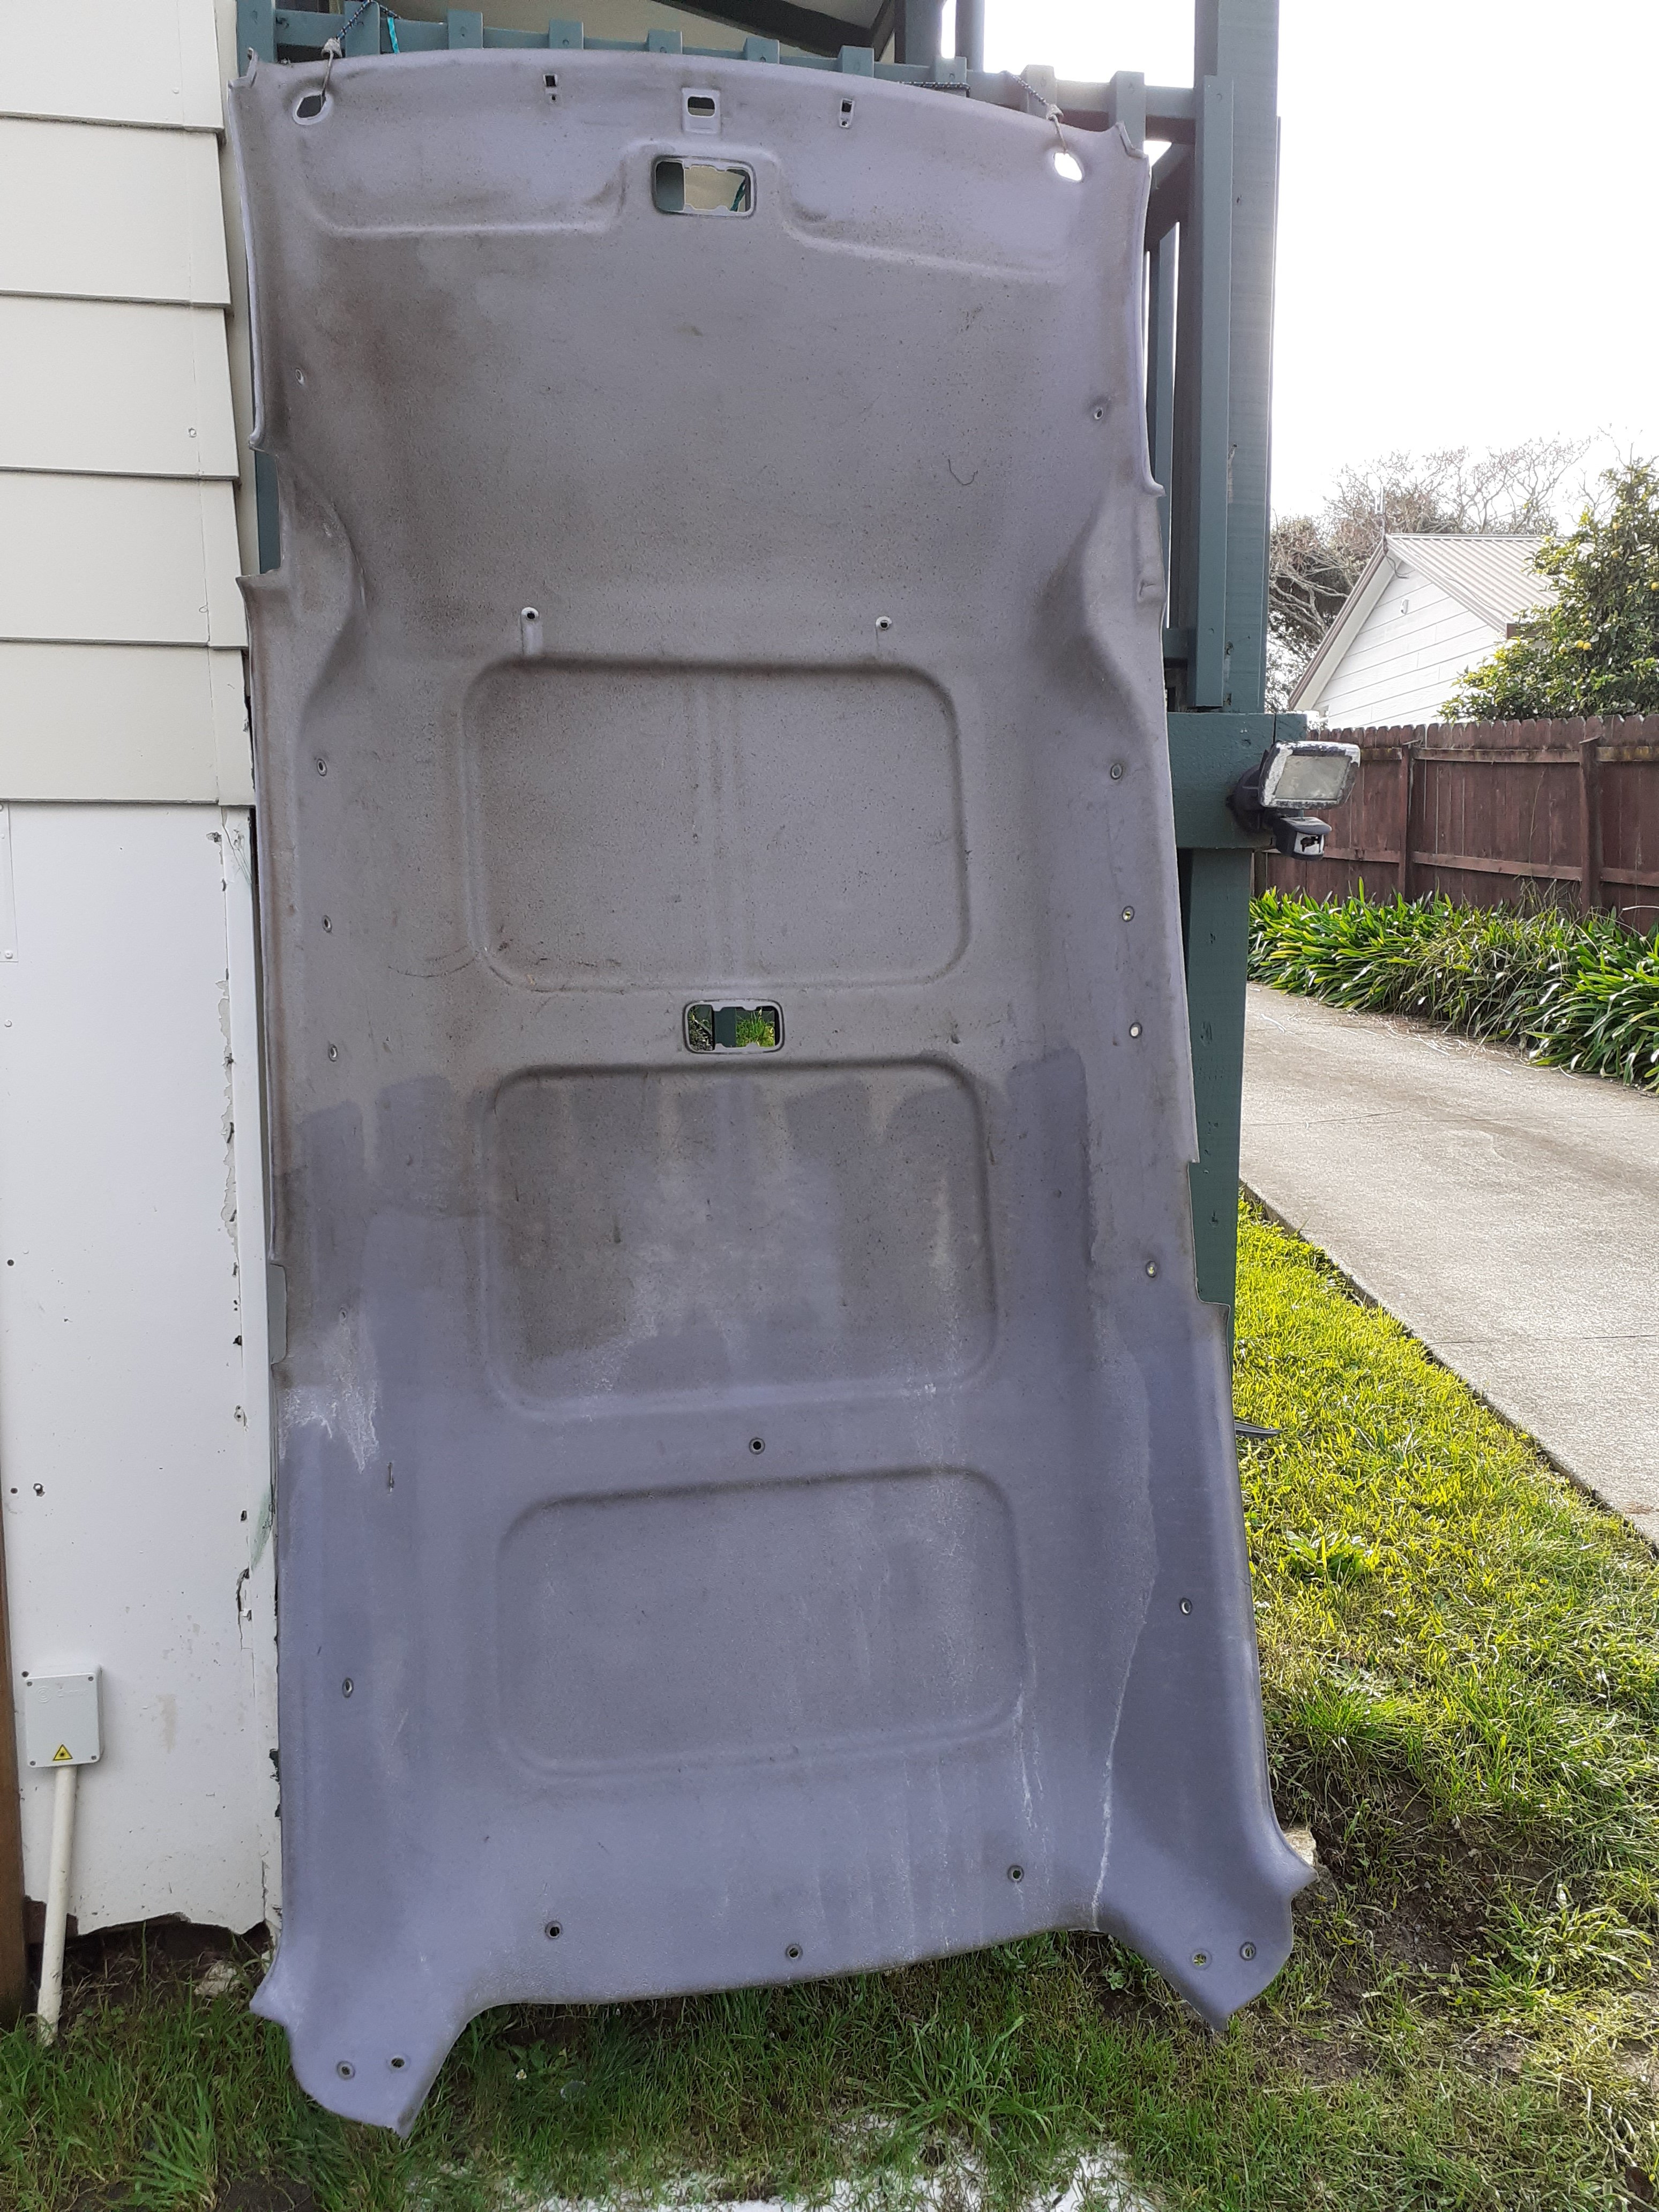
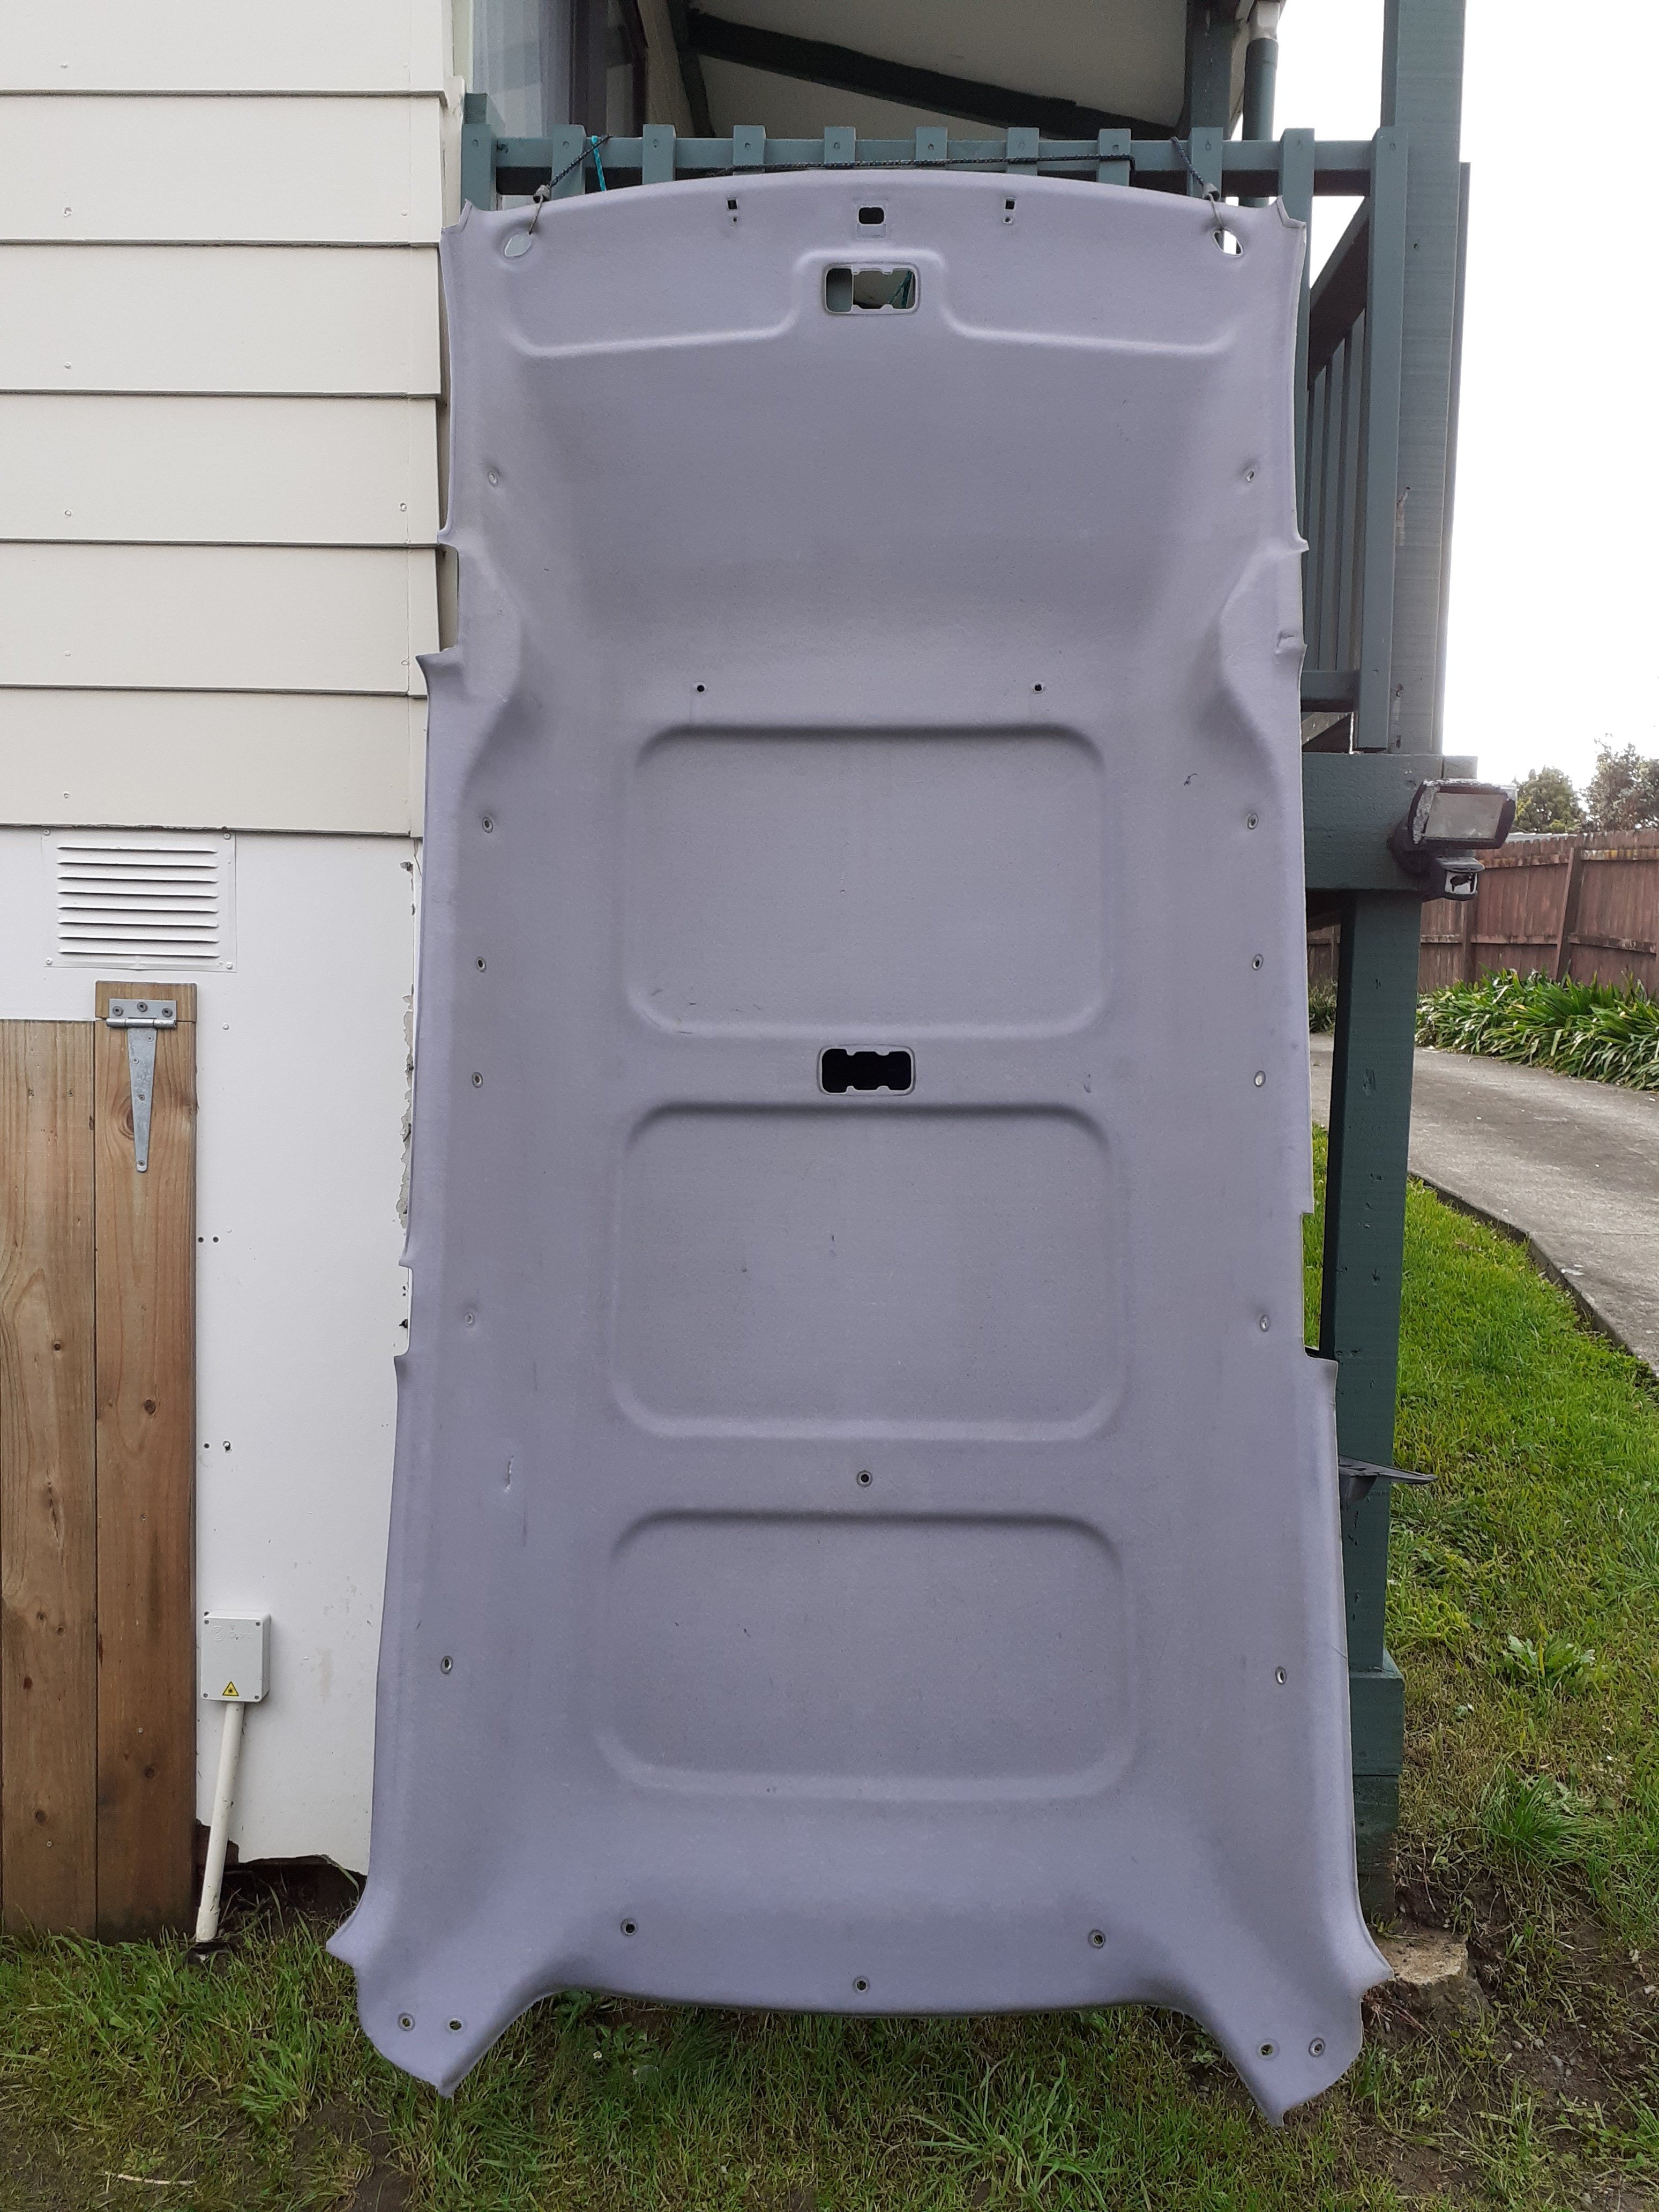
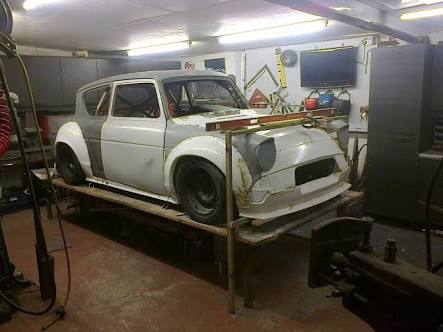
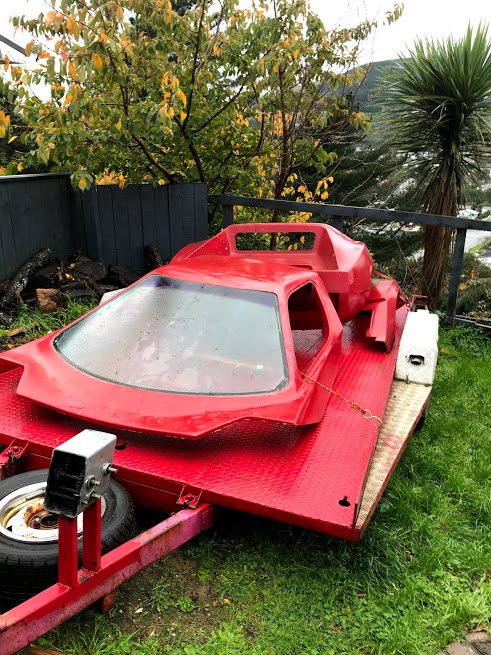
Got some very useful bits. The roof is a life saver, the glass is cracked but I knew that already. Also got a front lower section, rear lower section, the top front and rear which is supposed to be one piece but that bit has been cut in half and missing big parts. It was going to be lengthened and put on a ladder chassis but that project didn't go ahead. I mainly need the roof and the bonnet. But the other parts can be used as a mold to fix my front section. Also got a new bonnet and rear engine cover. Looks like the vw engine type cover.
1 point
-
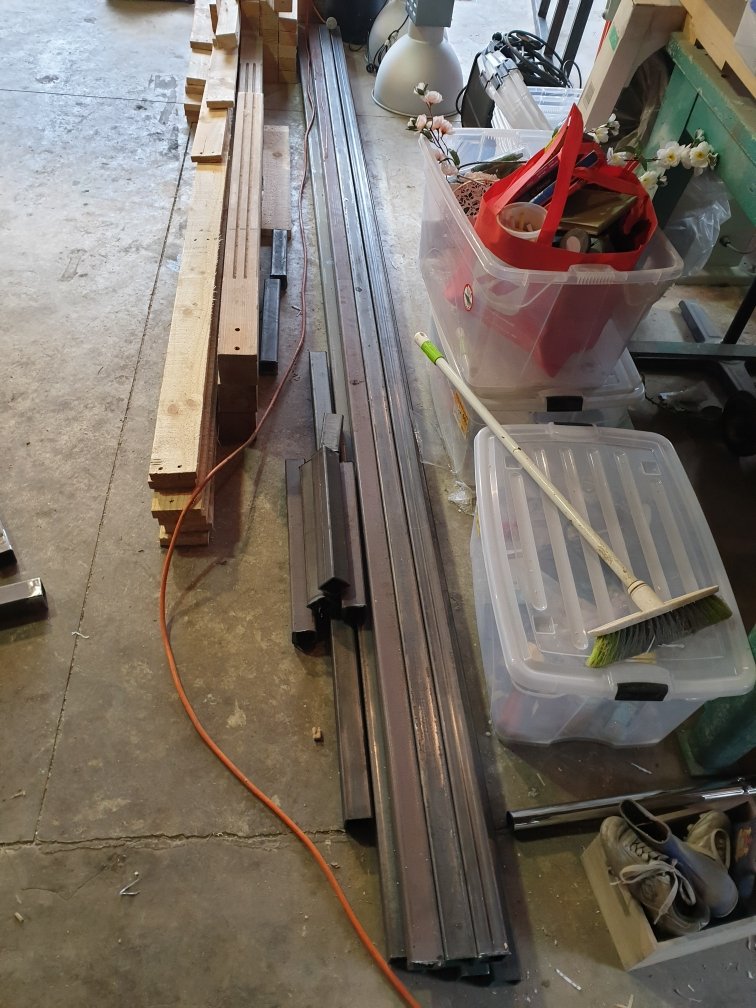
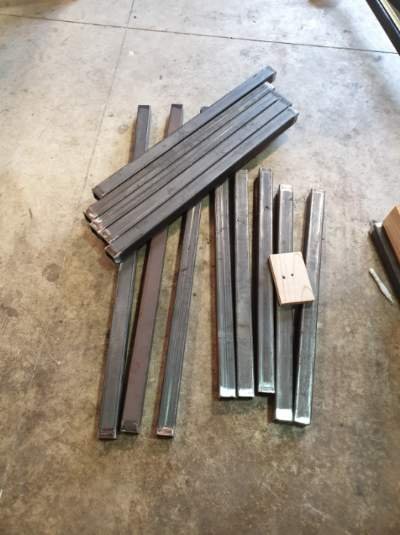
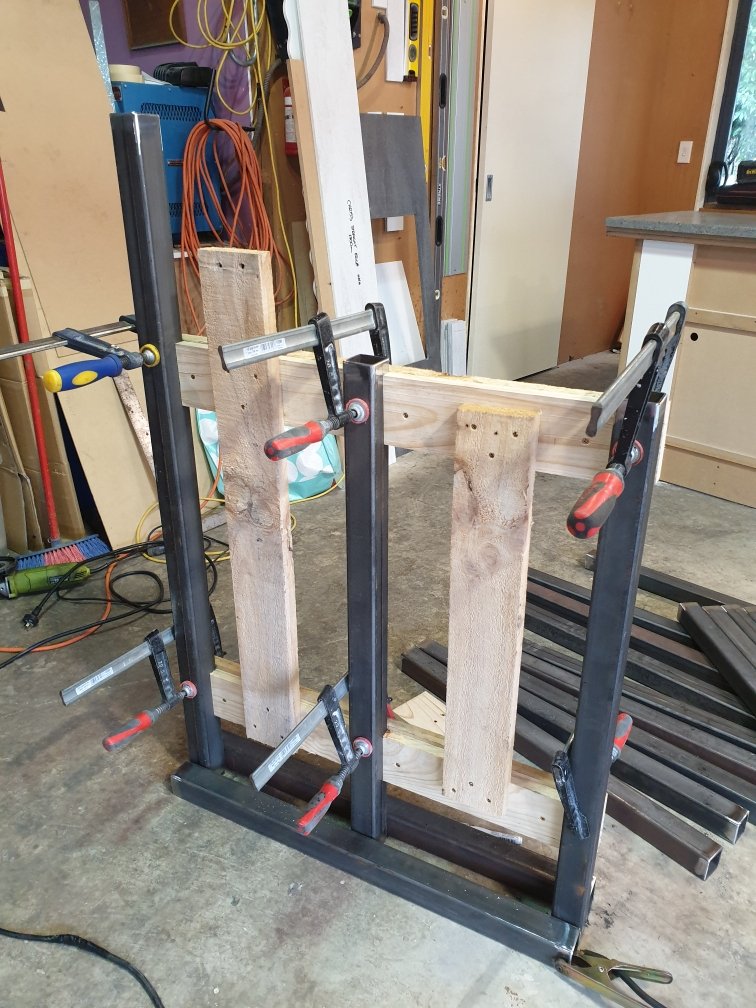
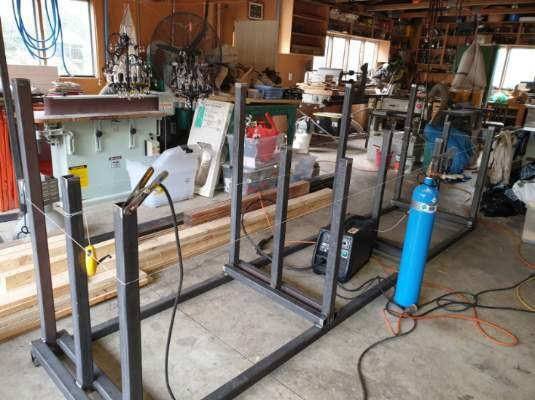
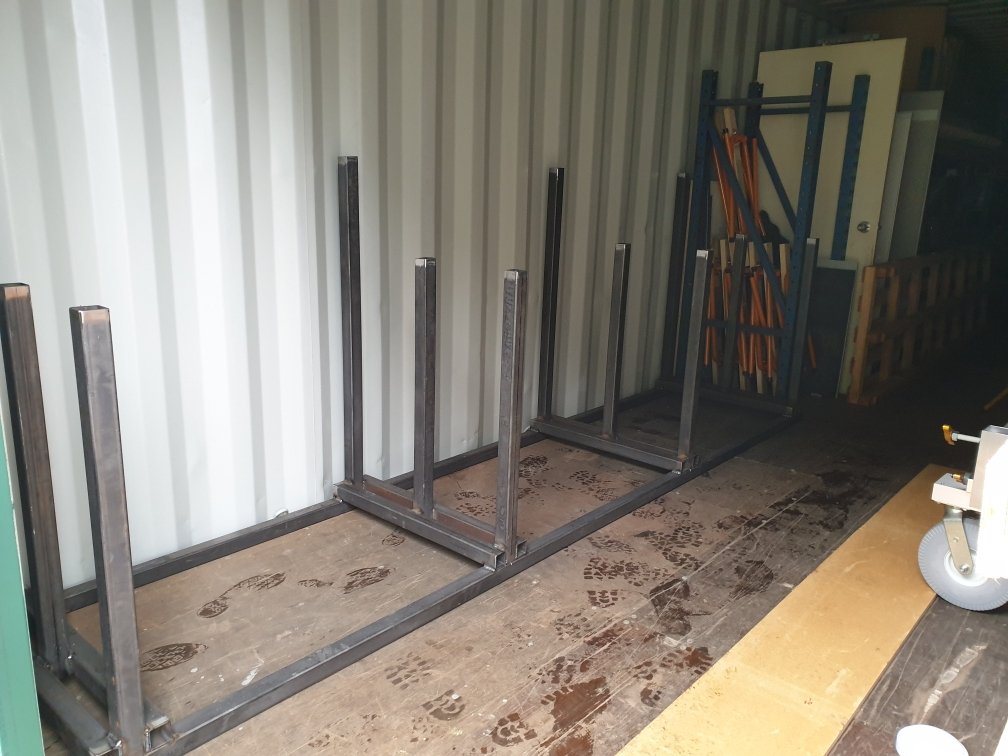
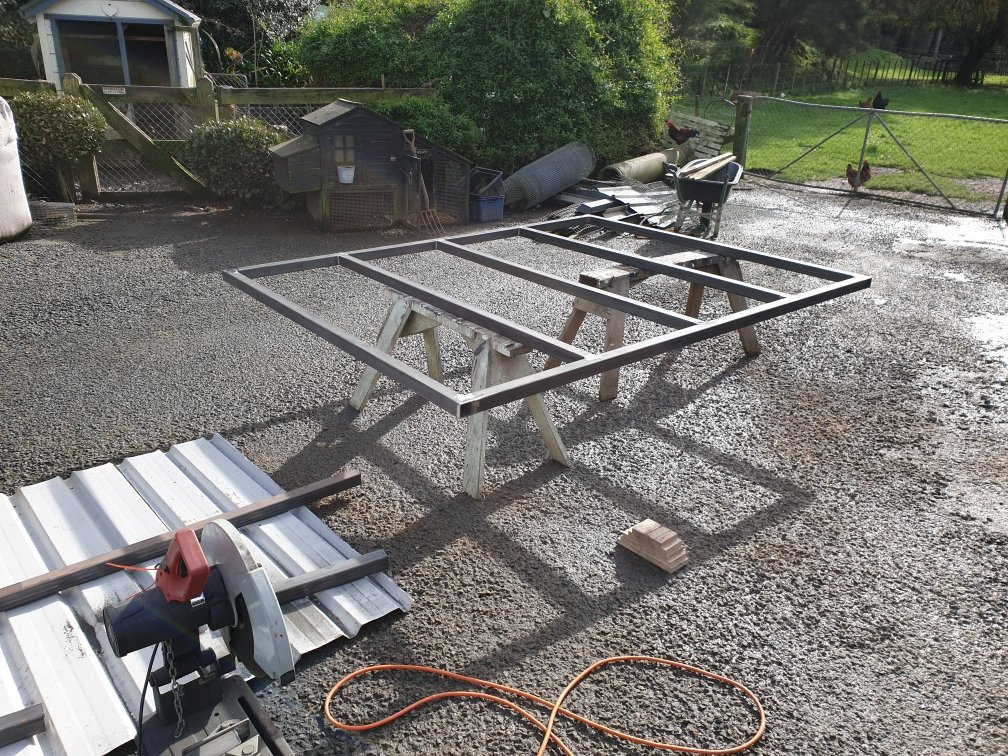
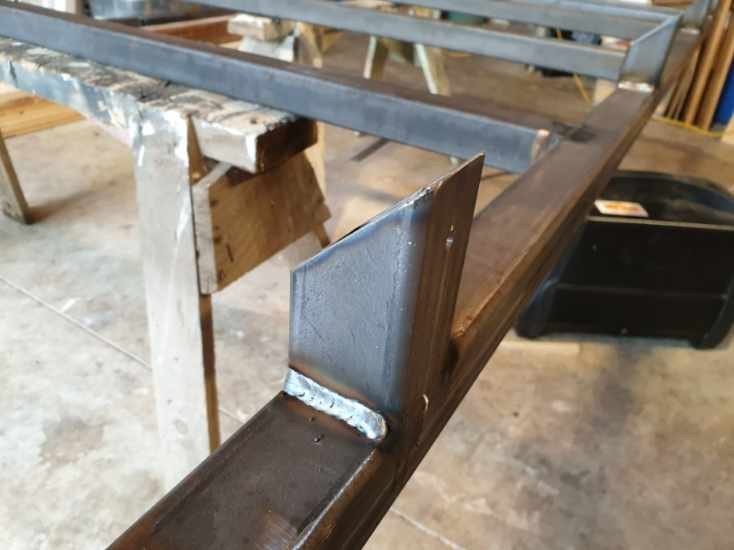
And today's efforts for the same cause (keep brother happy). A huge materials rack. Start with this...end up with that: I made a wooden jig to help keep everything the same. String lines to get alignment squared away. And in place in a 40ft shipping container. He'll paint it next week, along with the van rack.
1 point
-
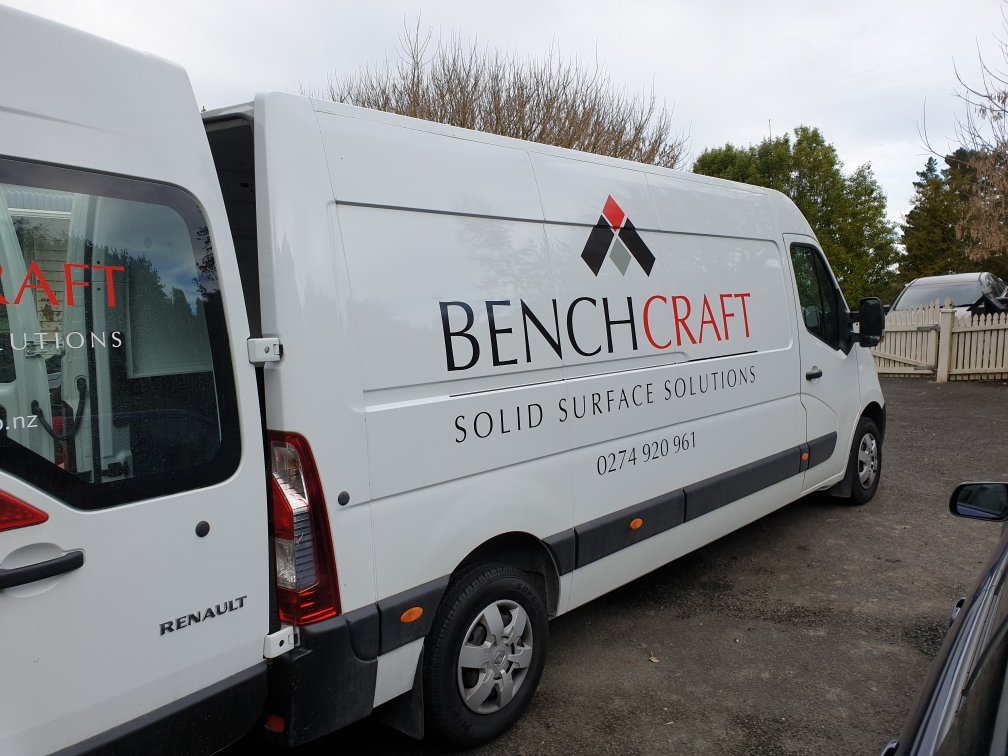
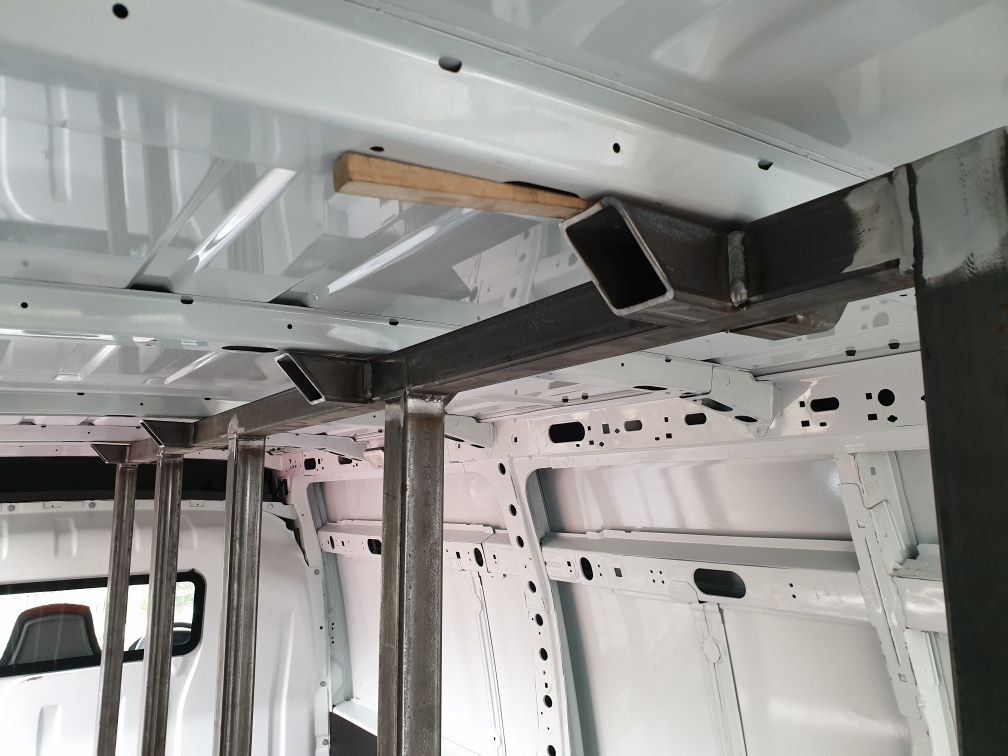
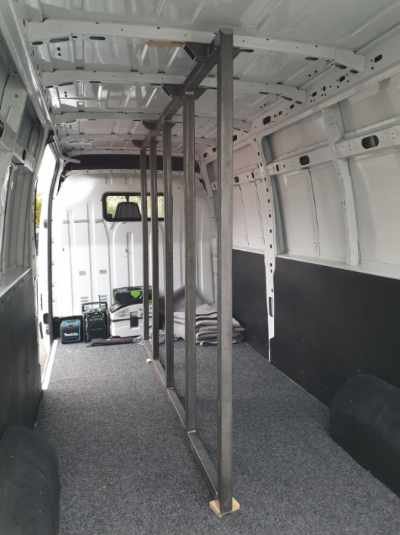
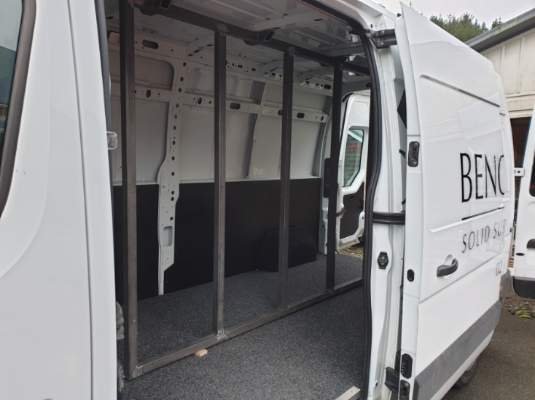
Brother is going out into business on his own. He brought a ridiculously huge van, big enough to human traffic at least 40 Russian brides in. He wants to transport his kitchen bench tops in it, so I've spent today making him this: And test fitting in the mega van: It's going to get painted, more 18mm plywood on the floor (under the carpet) and wood slats tech screwed to it for the tie downs to hold onto...but you get the idea. I'll leave that stuff for him to finish as it's just paint and screws and he's more than capable of doing that.
1 point
-
Little bits and pieces starting to come together now on the 86 - painfully slow but any progress is good progress right? I've fitted the new water pump, cleaned up and painted the coolant bypass hard lines, picked up new radiator hoses and have the heater hoses ordered and on way. Front of the engine is coming along with the hall effect sensor on the crank mounted, still have the sensor for the intake cam pulley to do but hoping to knock that off next week. I've found and mounted up an ae85 radiator overflow/washer bottle in the front drivers corner of the engine bay as the ae86 one will melt over by the headers I think. Found a brake reservoir sock thing to cover tidy up the faded gayness. Am in the process of cleaning up and painting the brake lines so I can refit those, have some braided lines to go on. The drive shaft is now in with new bolts and a new gearbox rear seal. Tidied up and painted the strut brace mounting plates. Exhaust is almost done, just have about 200mm of pipe to do from the merge collector to the rest of the system to build. How its looking currently Also picked up this which is now fitted: And this which isn't fitted Pulleys are sitting on the cnc machine so will have them done next week all going well.1 point
-
1 point
-
Don't ride it near @RUNAMUCK they are attracted to him. Atleast of you crash it won't loose any value1 point
-
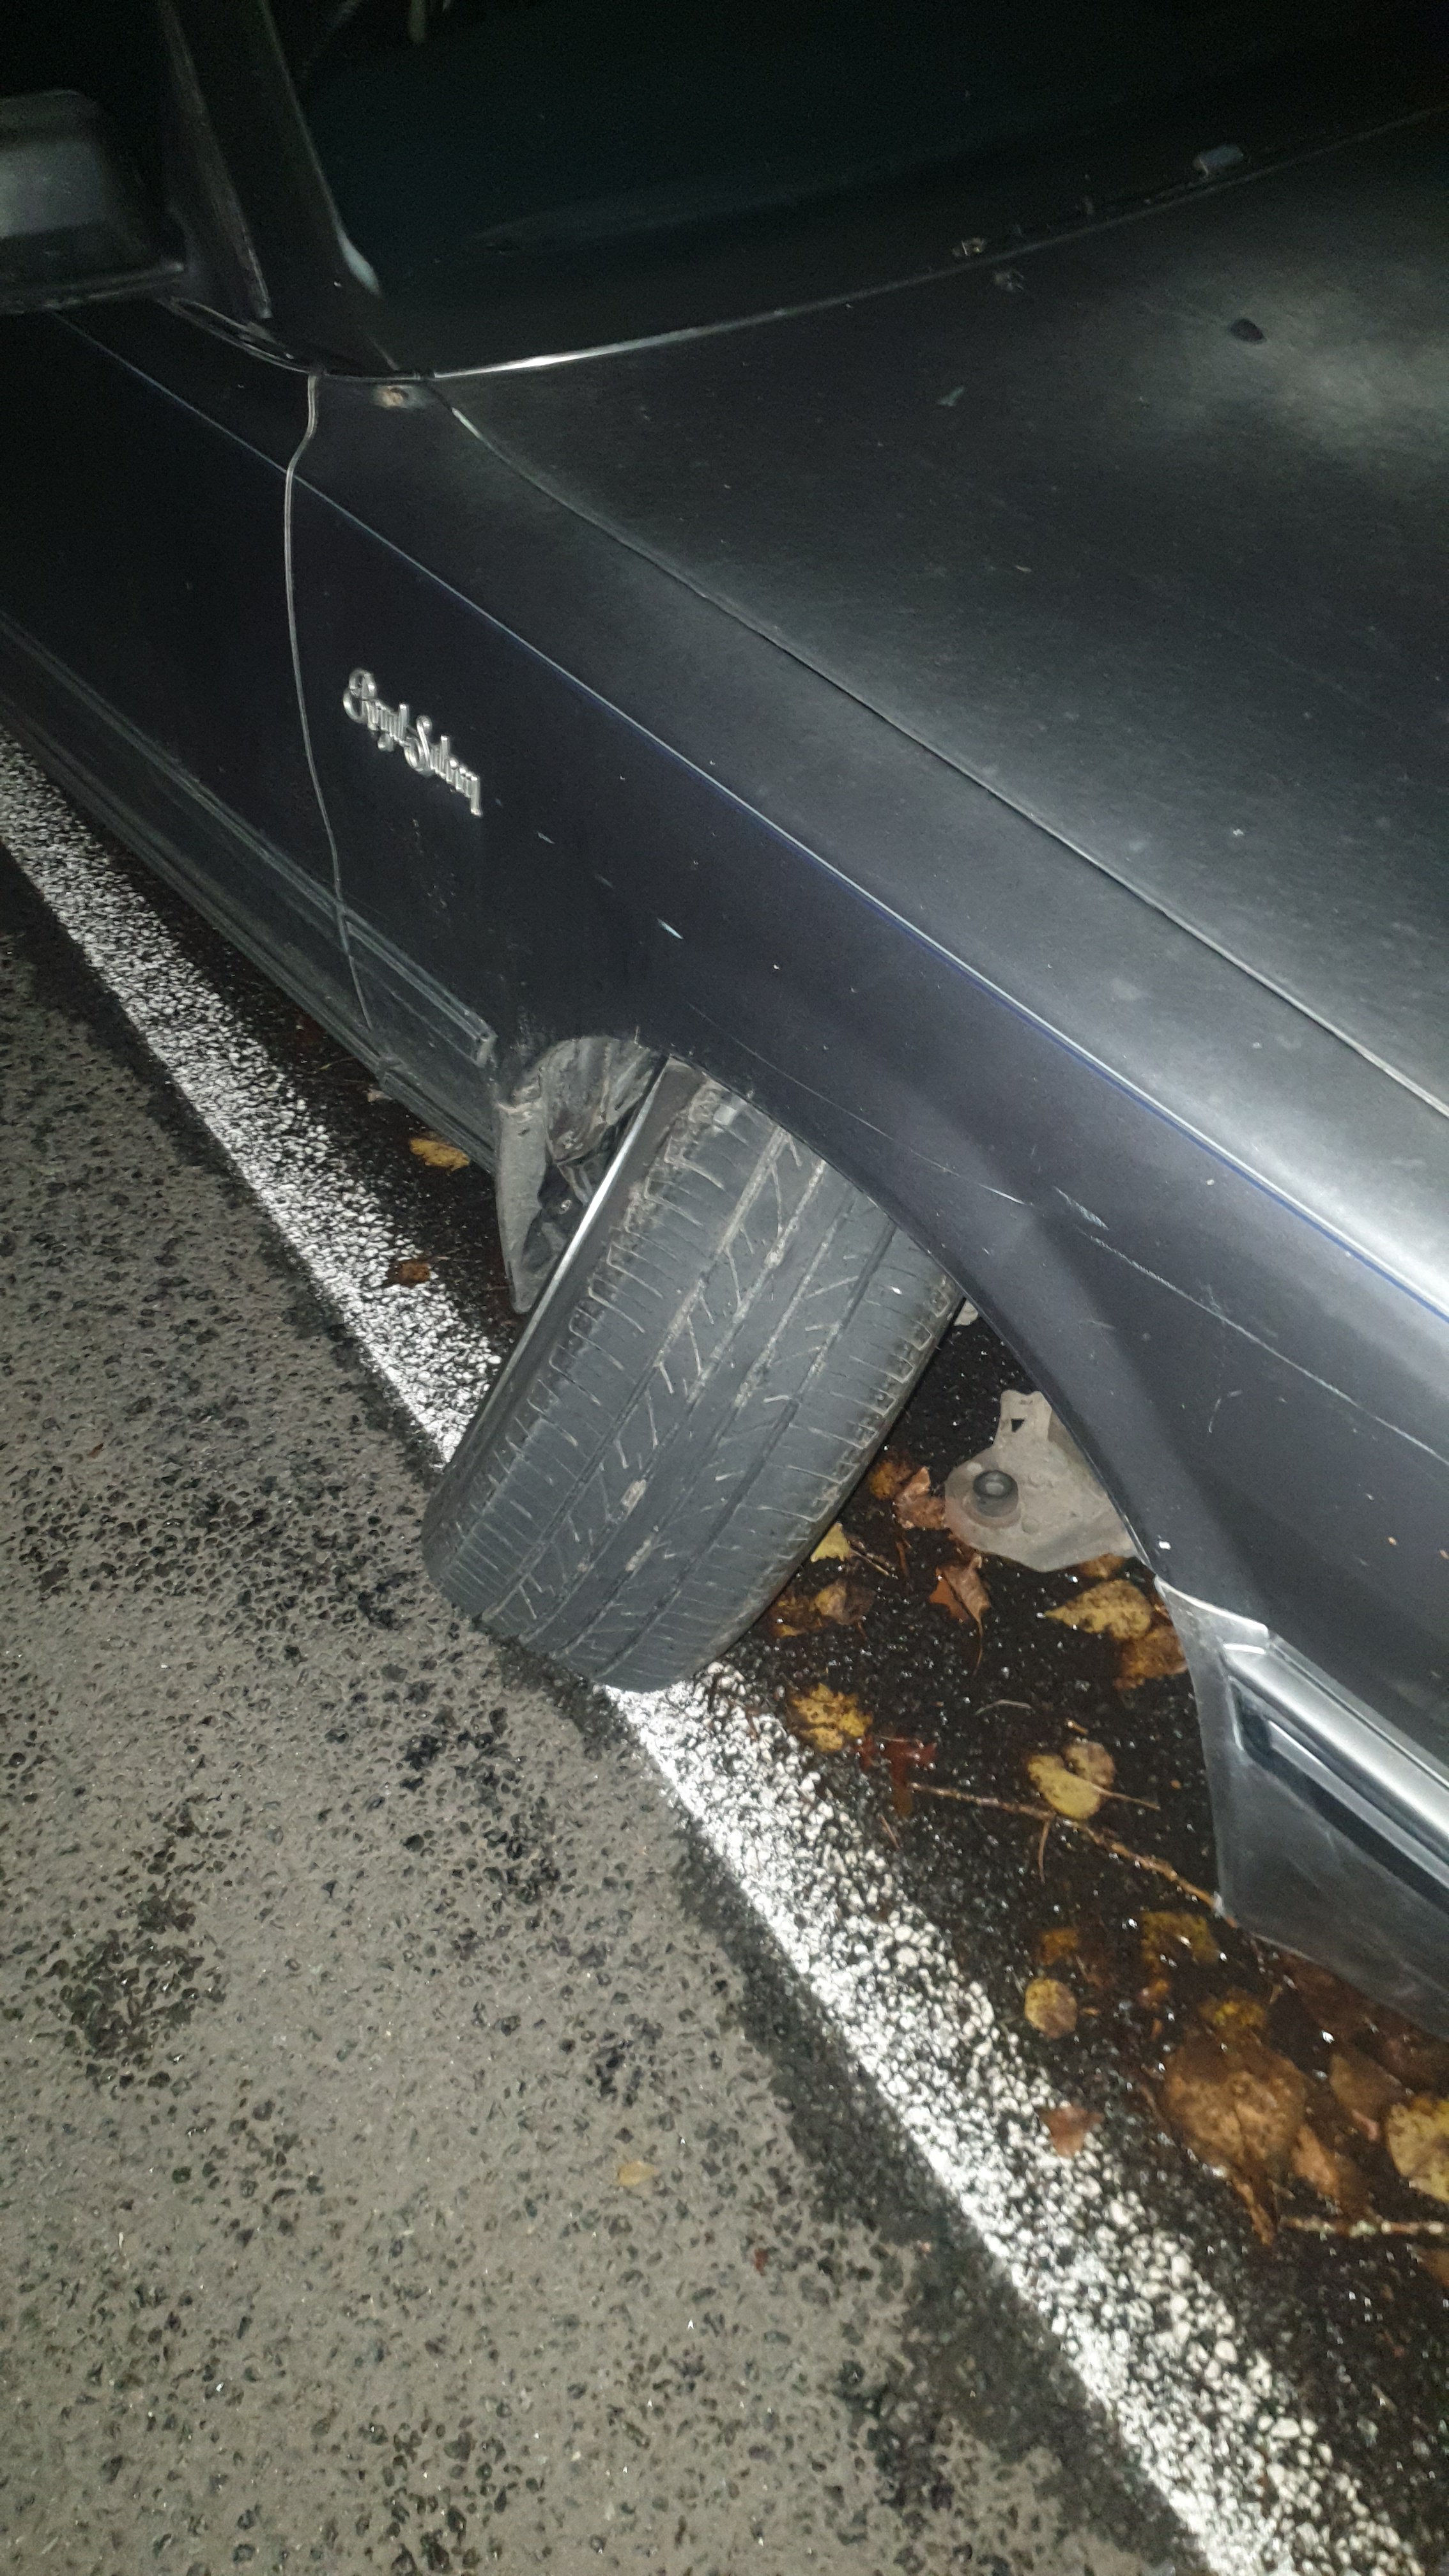
Complete ball joint failure. Don't rely on wofs meaning your shit is all good folks! That said, this can't have been good at its last wof. They don't make cars this tough anymore, the weight of the car is on the fender and no bending at all. New wheels all good too, hopefully the tire is alright. Will change both lower ball joints and check all other components. Could have been worse at speed, pretty happy with how calm I remained with minimal control over direction.
1 point
-
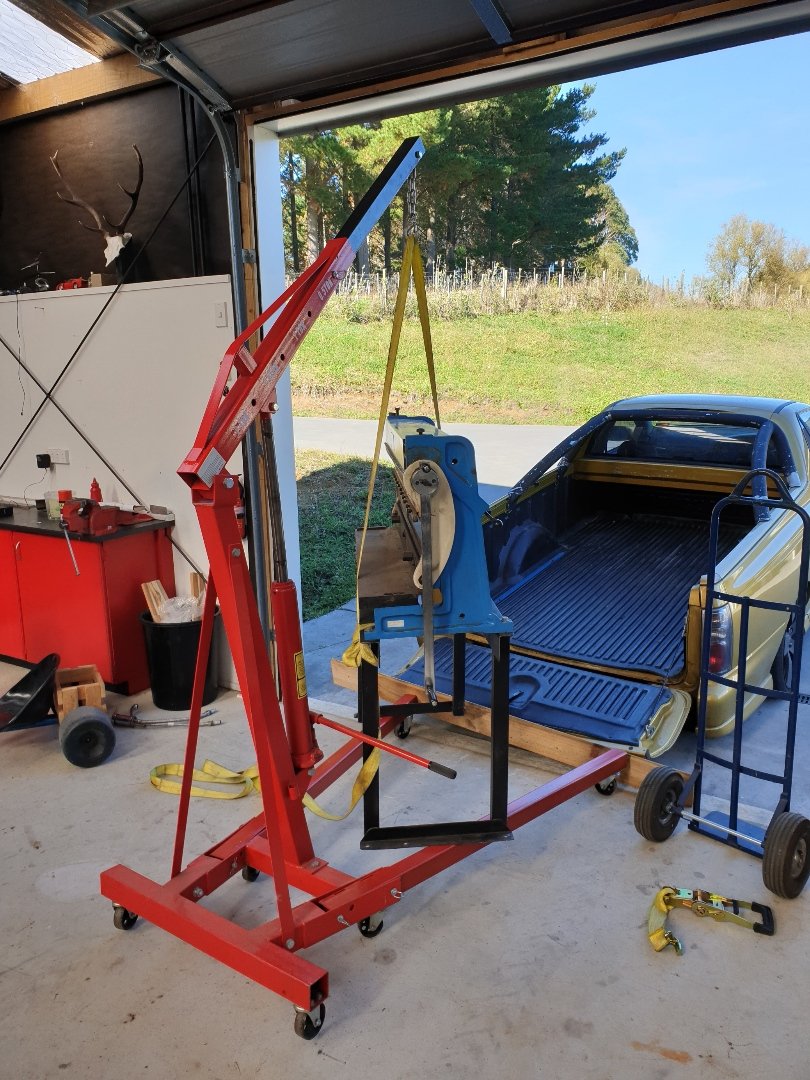
New toy arrived today. Its missing a few bits and isn't set up very well. But I'm sure with a bit more time and playing around I'll get it functioning as its suppose to. Stupid heavy. No idea of actual weight...but I'd say somewhere between "back breaking heavy" and "should have eaten more weetbix heavy"? Anyway, terrible photo. It's a 3 in 1 sheetmetal folder, roller and shear. I've been watching YouTube and all the reviews say it does an okay job at those functions...but not a great job. Considering the fact I have none of those tools - then this has to be an improvement upon what I had???
1 point
-
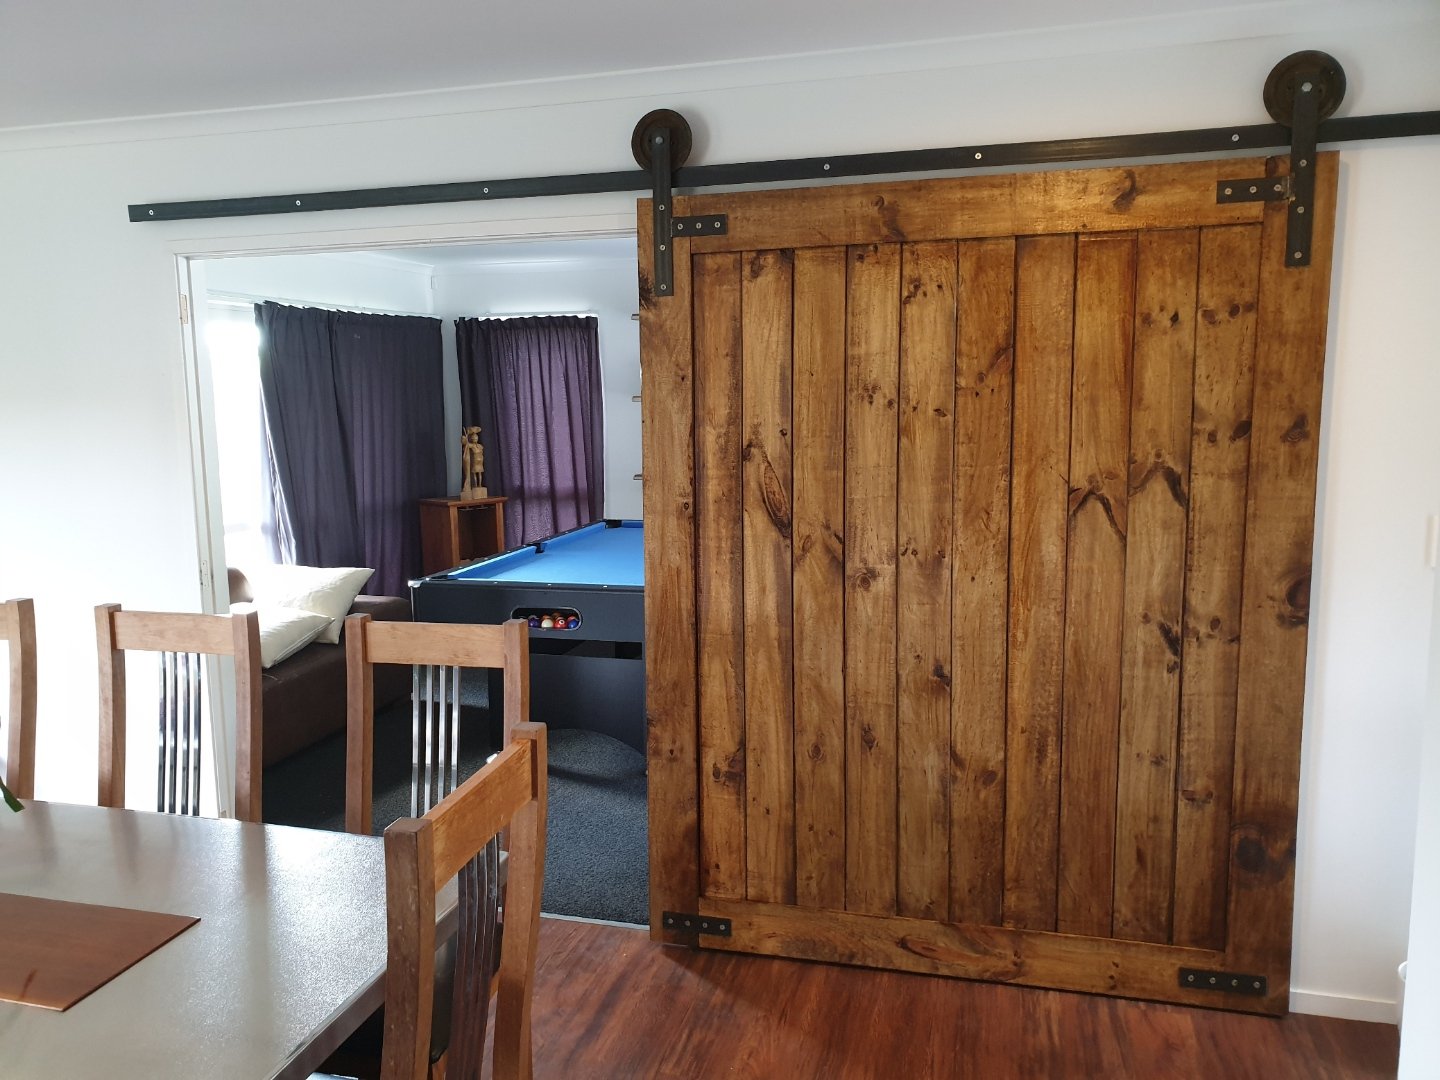
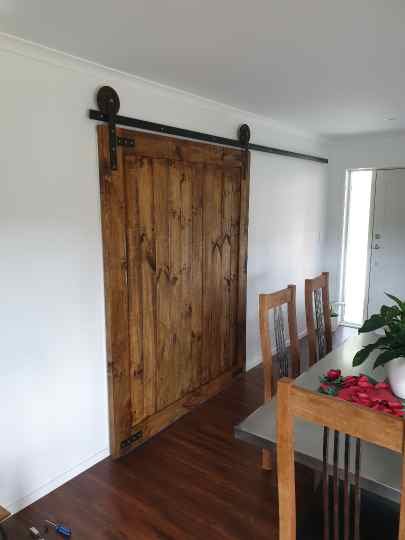
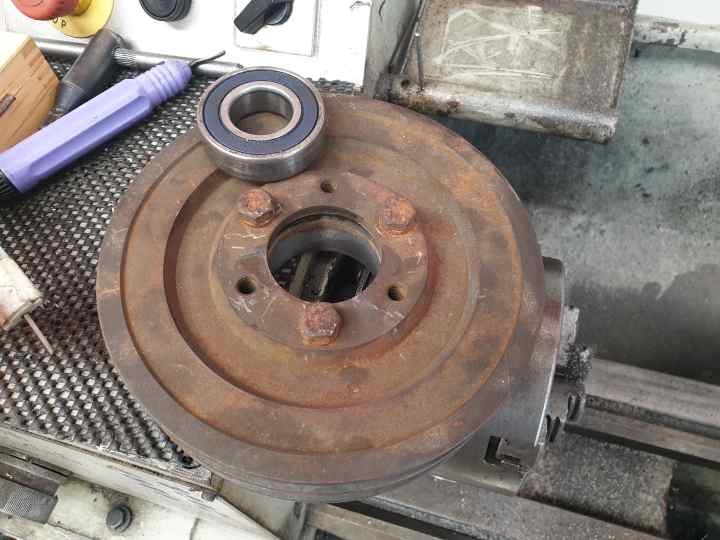
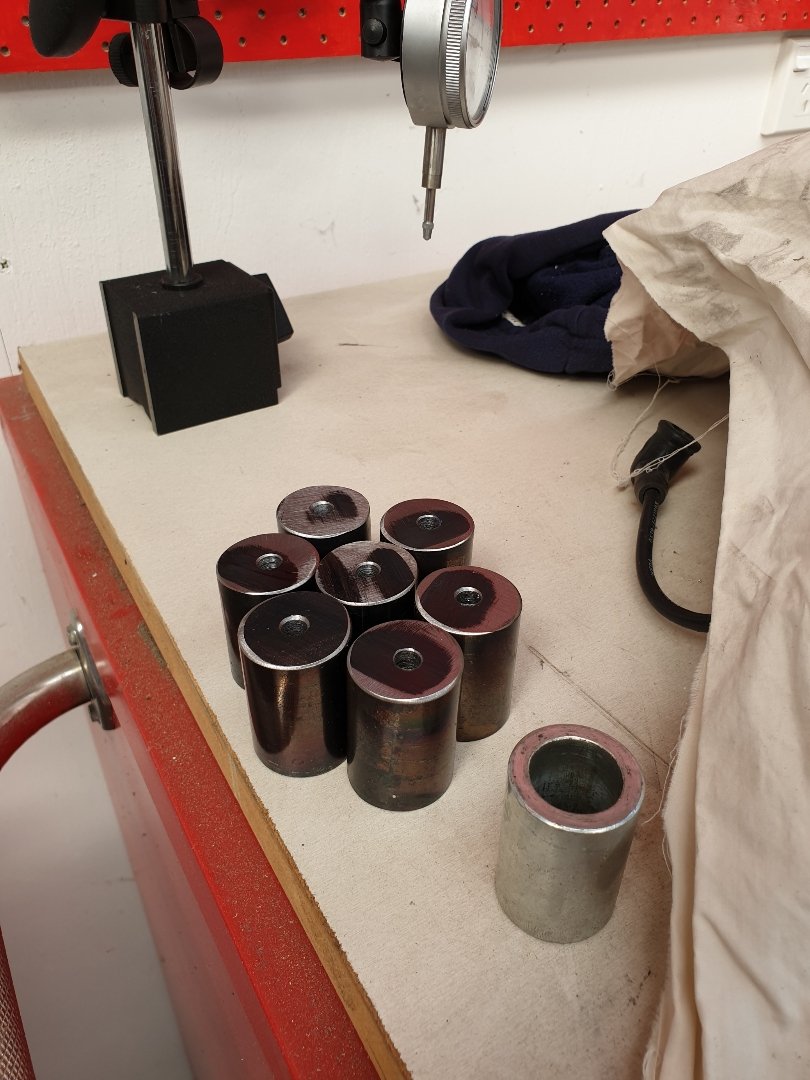
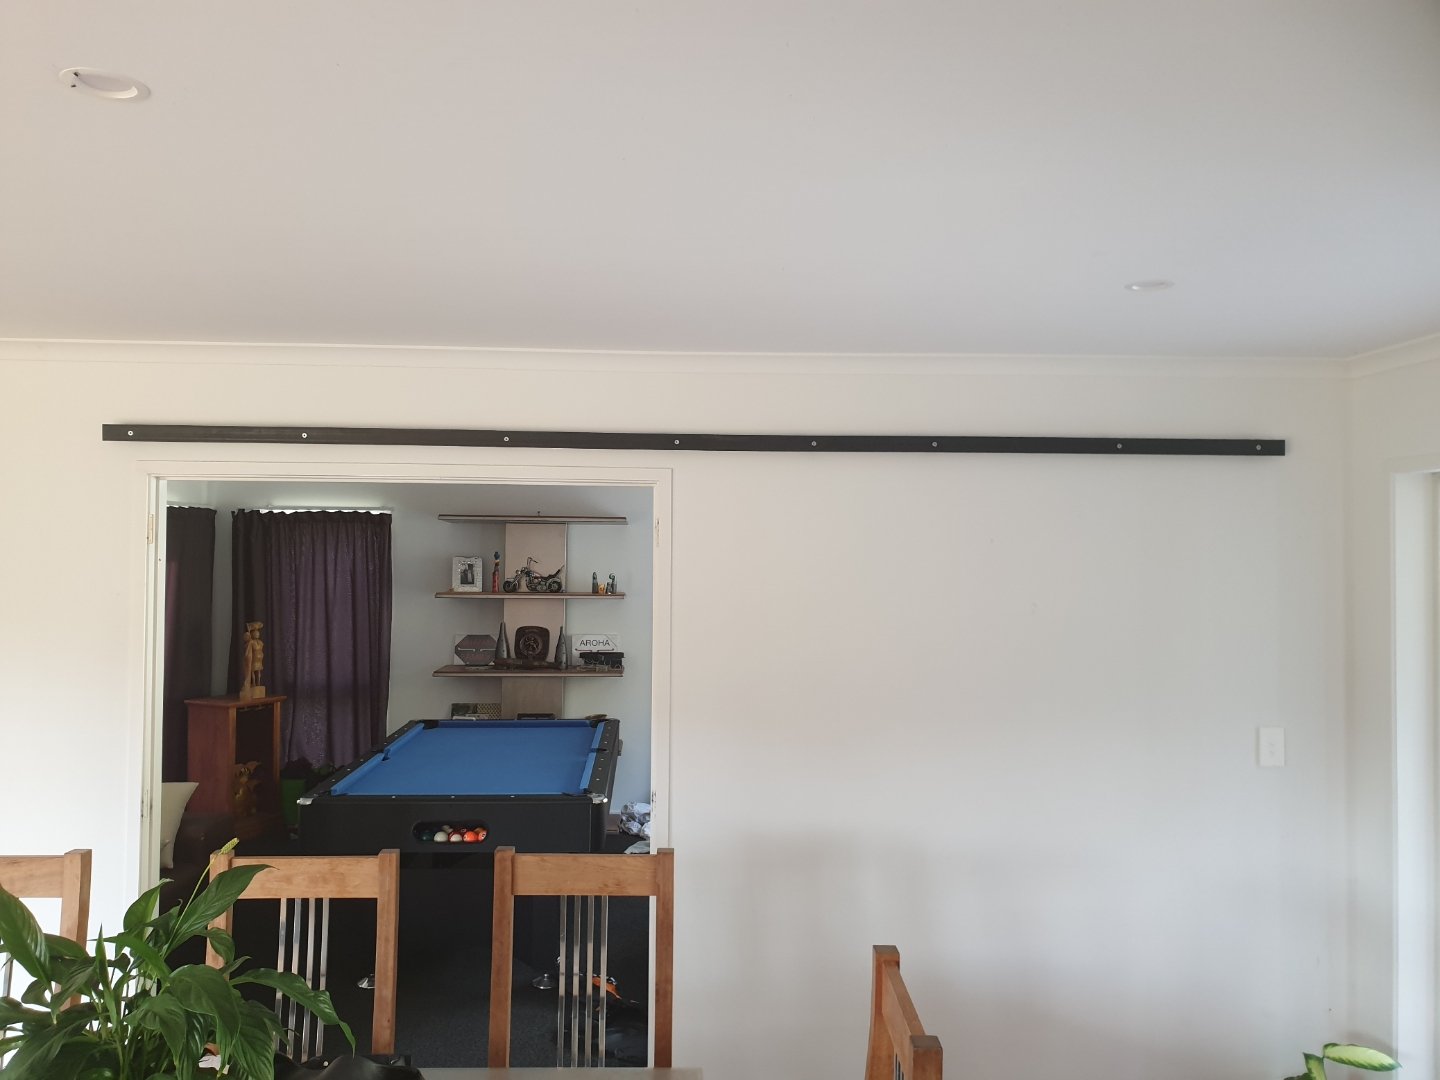
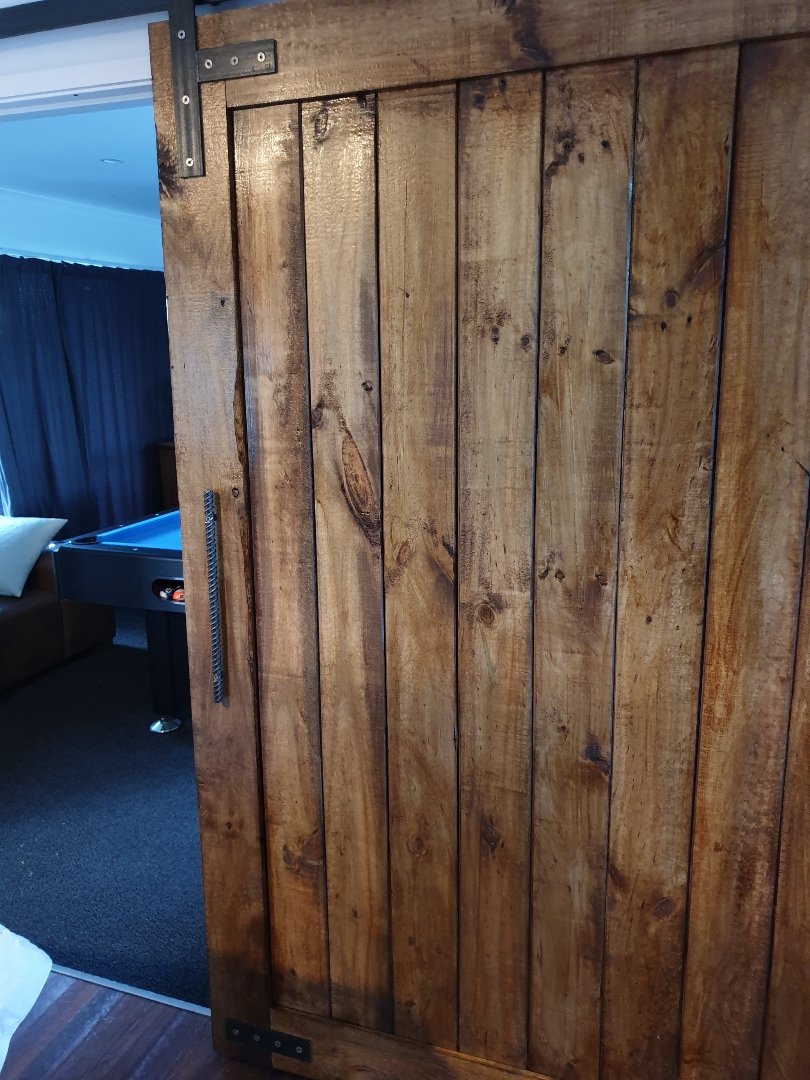
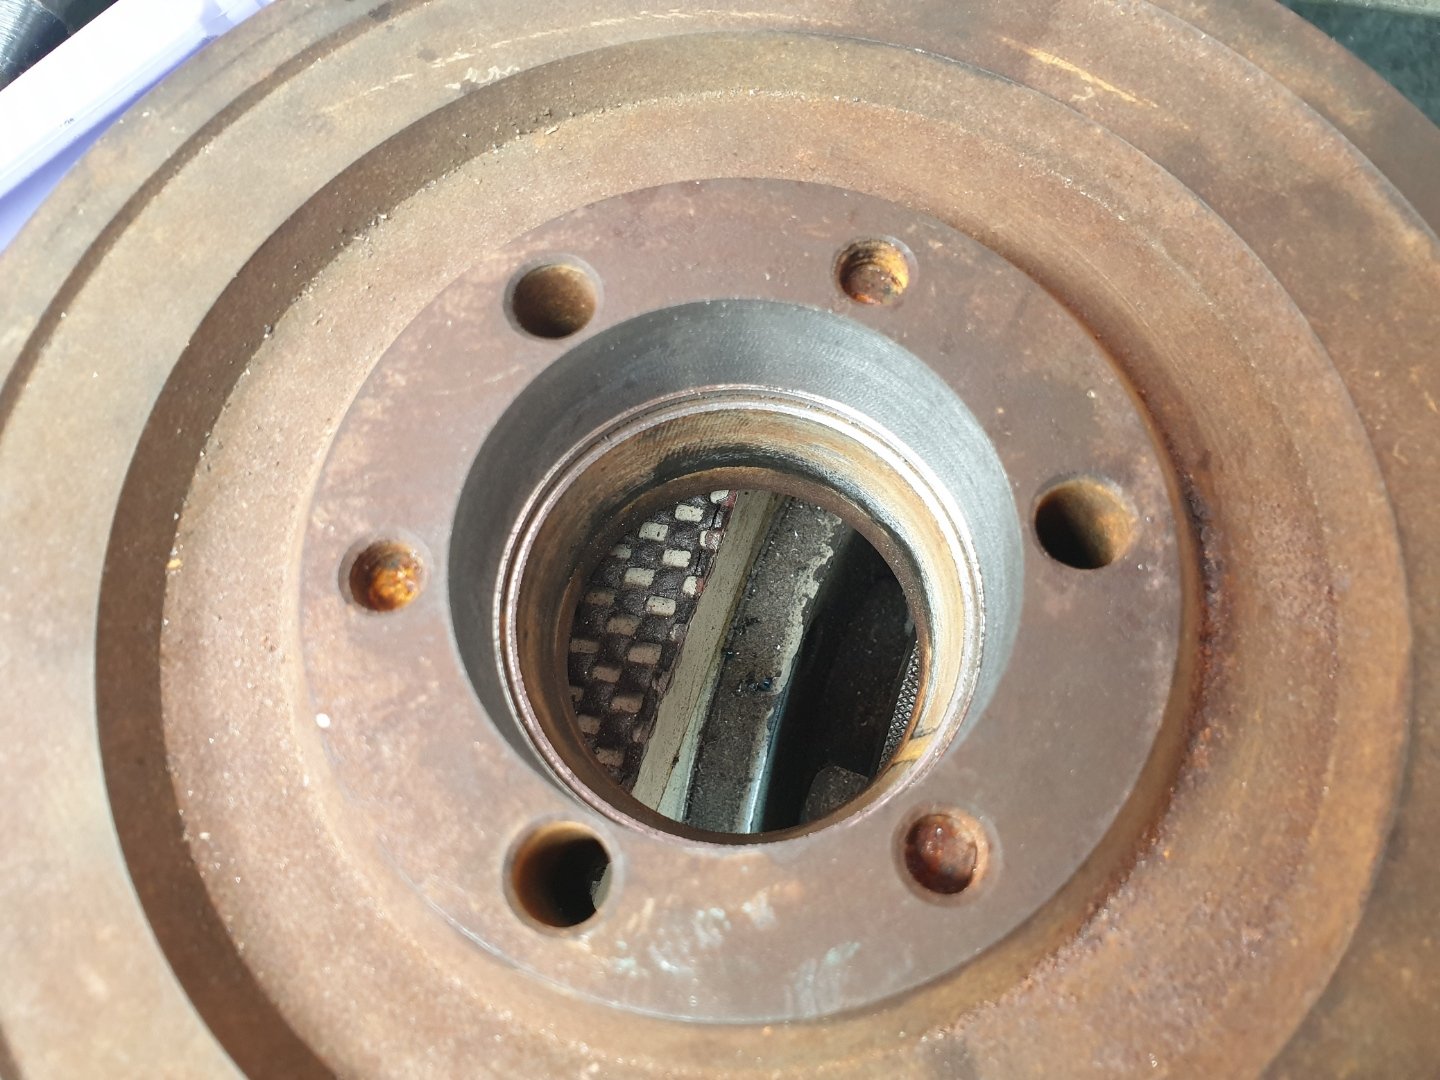
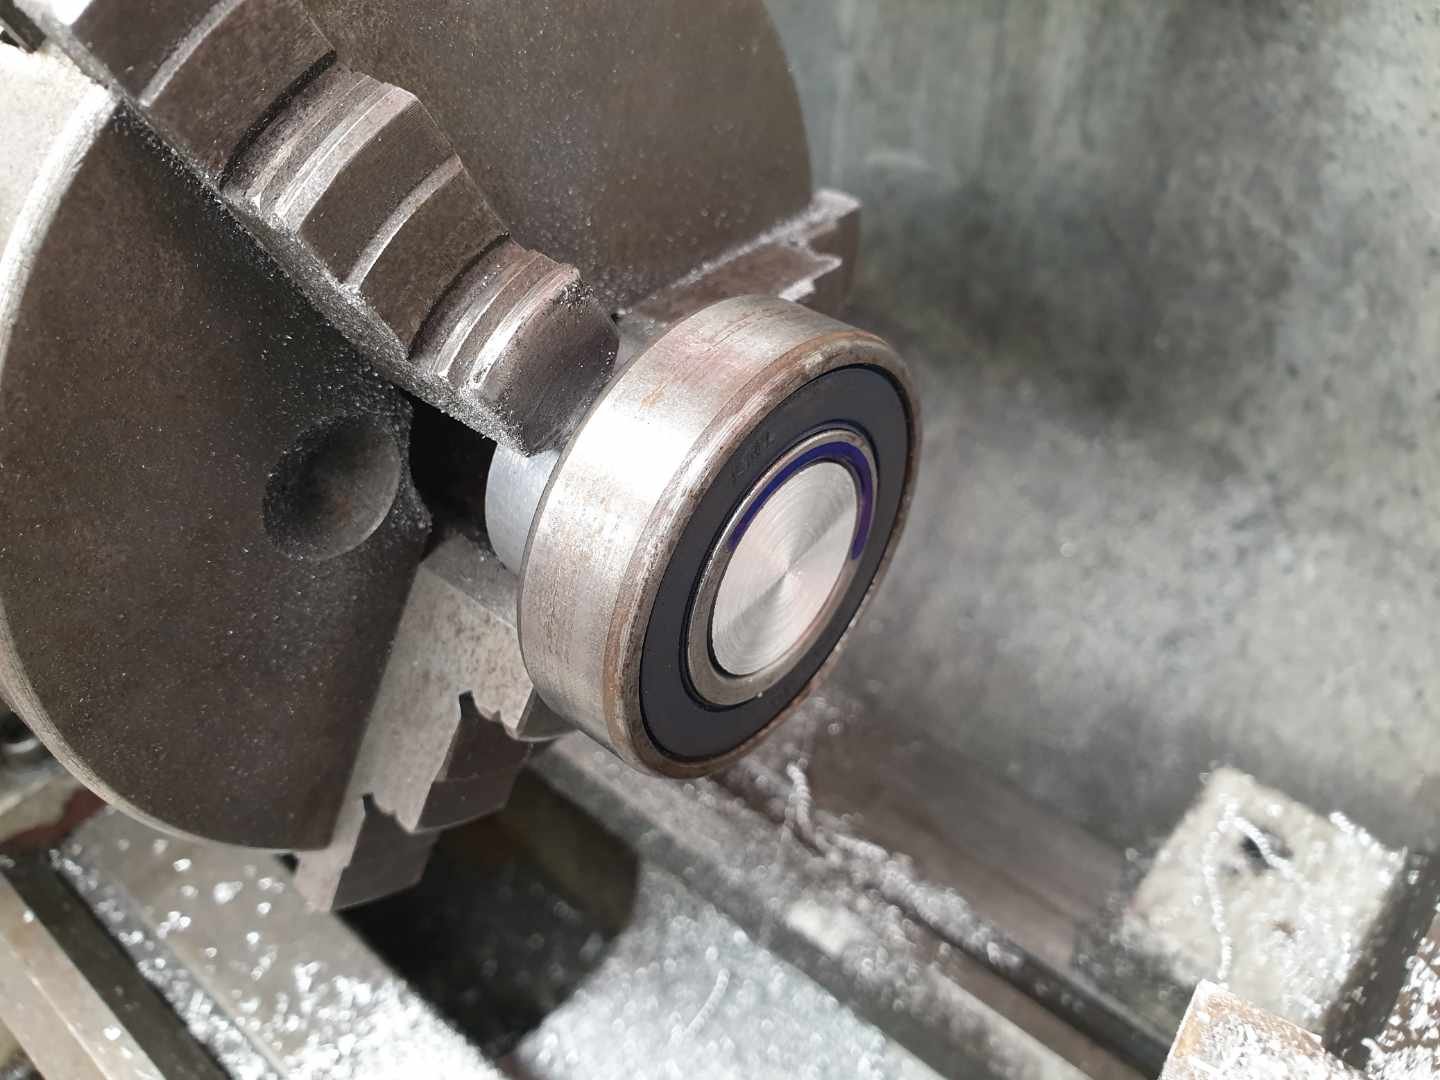
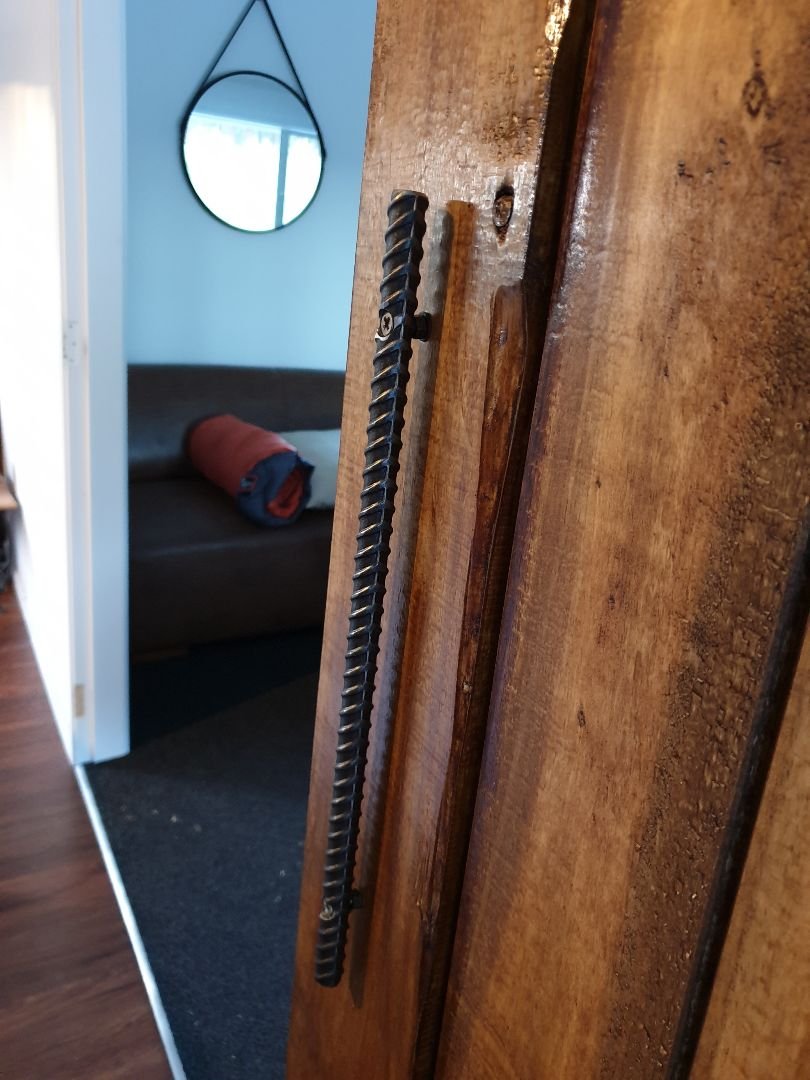
Love the e-kettle above...wicked! Finished the barn door today. Been a public holiday I totally forgot that shops aren't open. However this just made me have to come up with creative solutions, rather than buying ready made. So: Standoffs made. Then using the above standoffs I attached the rail to the wall. It's just 50x6mm flat bar. The same stuff I made the hangers out of. Then I used some left over parts from Pete's velobike. And machined in some recessed pockets to hold some leftover harley bearings. Then I had to make mini stub axles for the bearing to attach to the door hangers. And tadah!!!! It works!!! Added a big handle made of rebar. As they say "big door - big handle"... I've also added some stops, "so it doesn't go off the rails" and a floor guide for it to track on. Pretty happy with it.
1 point
-
And these!! Painted rocks with the kids one day.
1 point
-
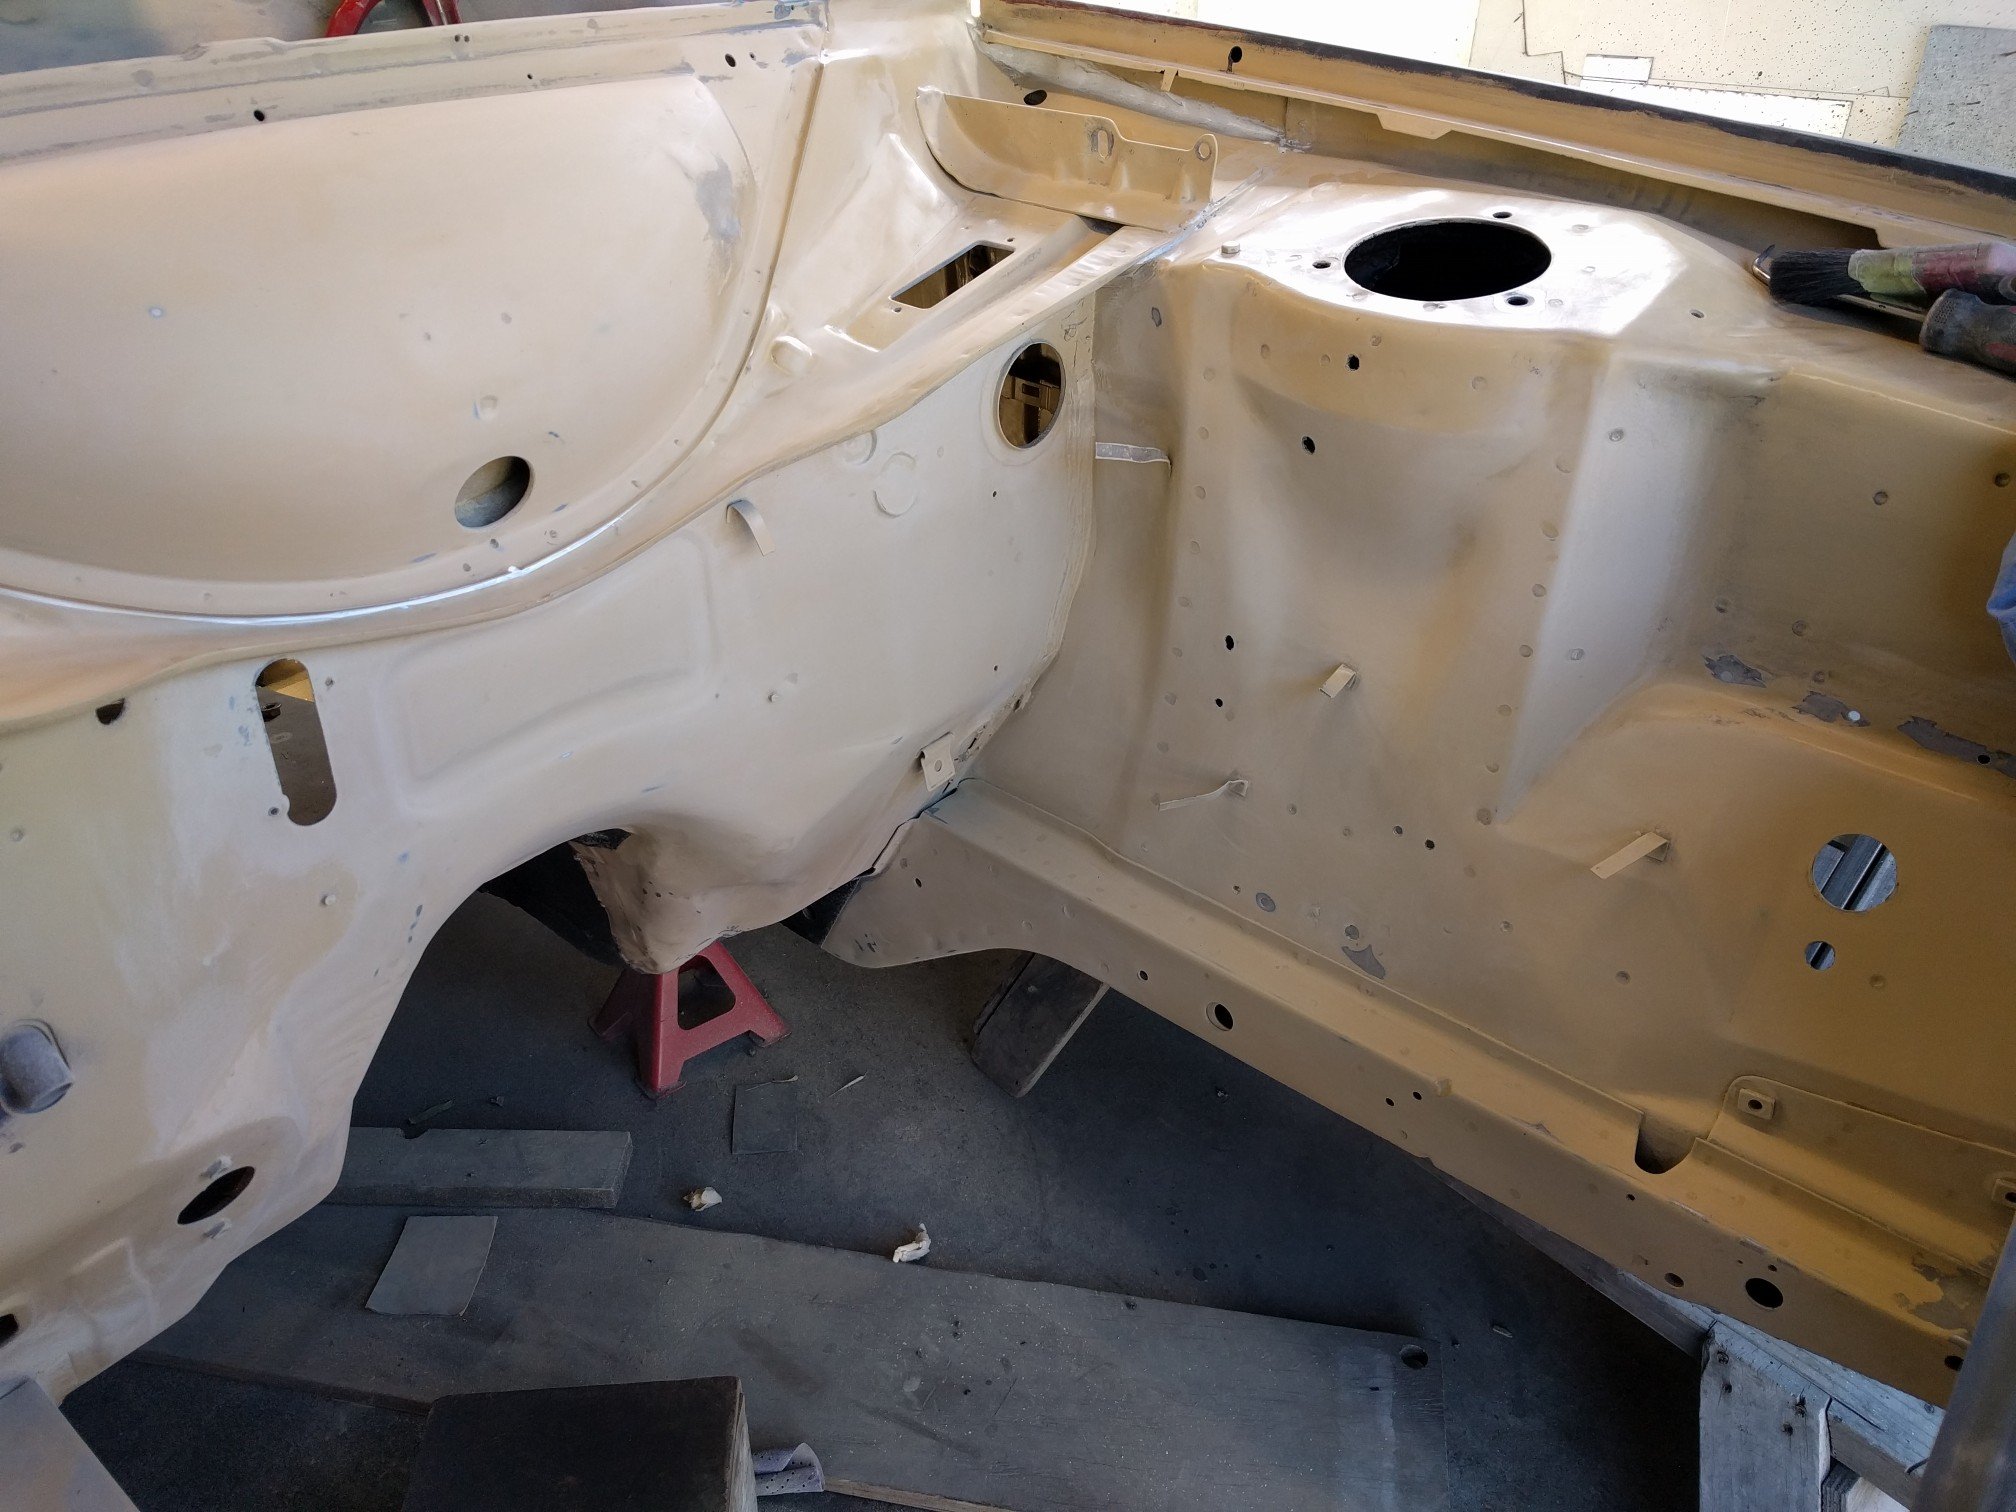
Finished all the mods to the engine bay for the brake booster and the bolt in battery tray. Seam sealed and reprimed. Have done a few more small jobs such as sand blasting and painting the pedal box and battery tray. Just need to get some paint samples now.
1 point
-
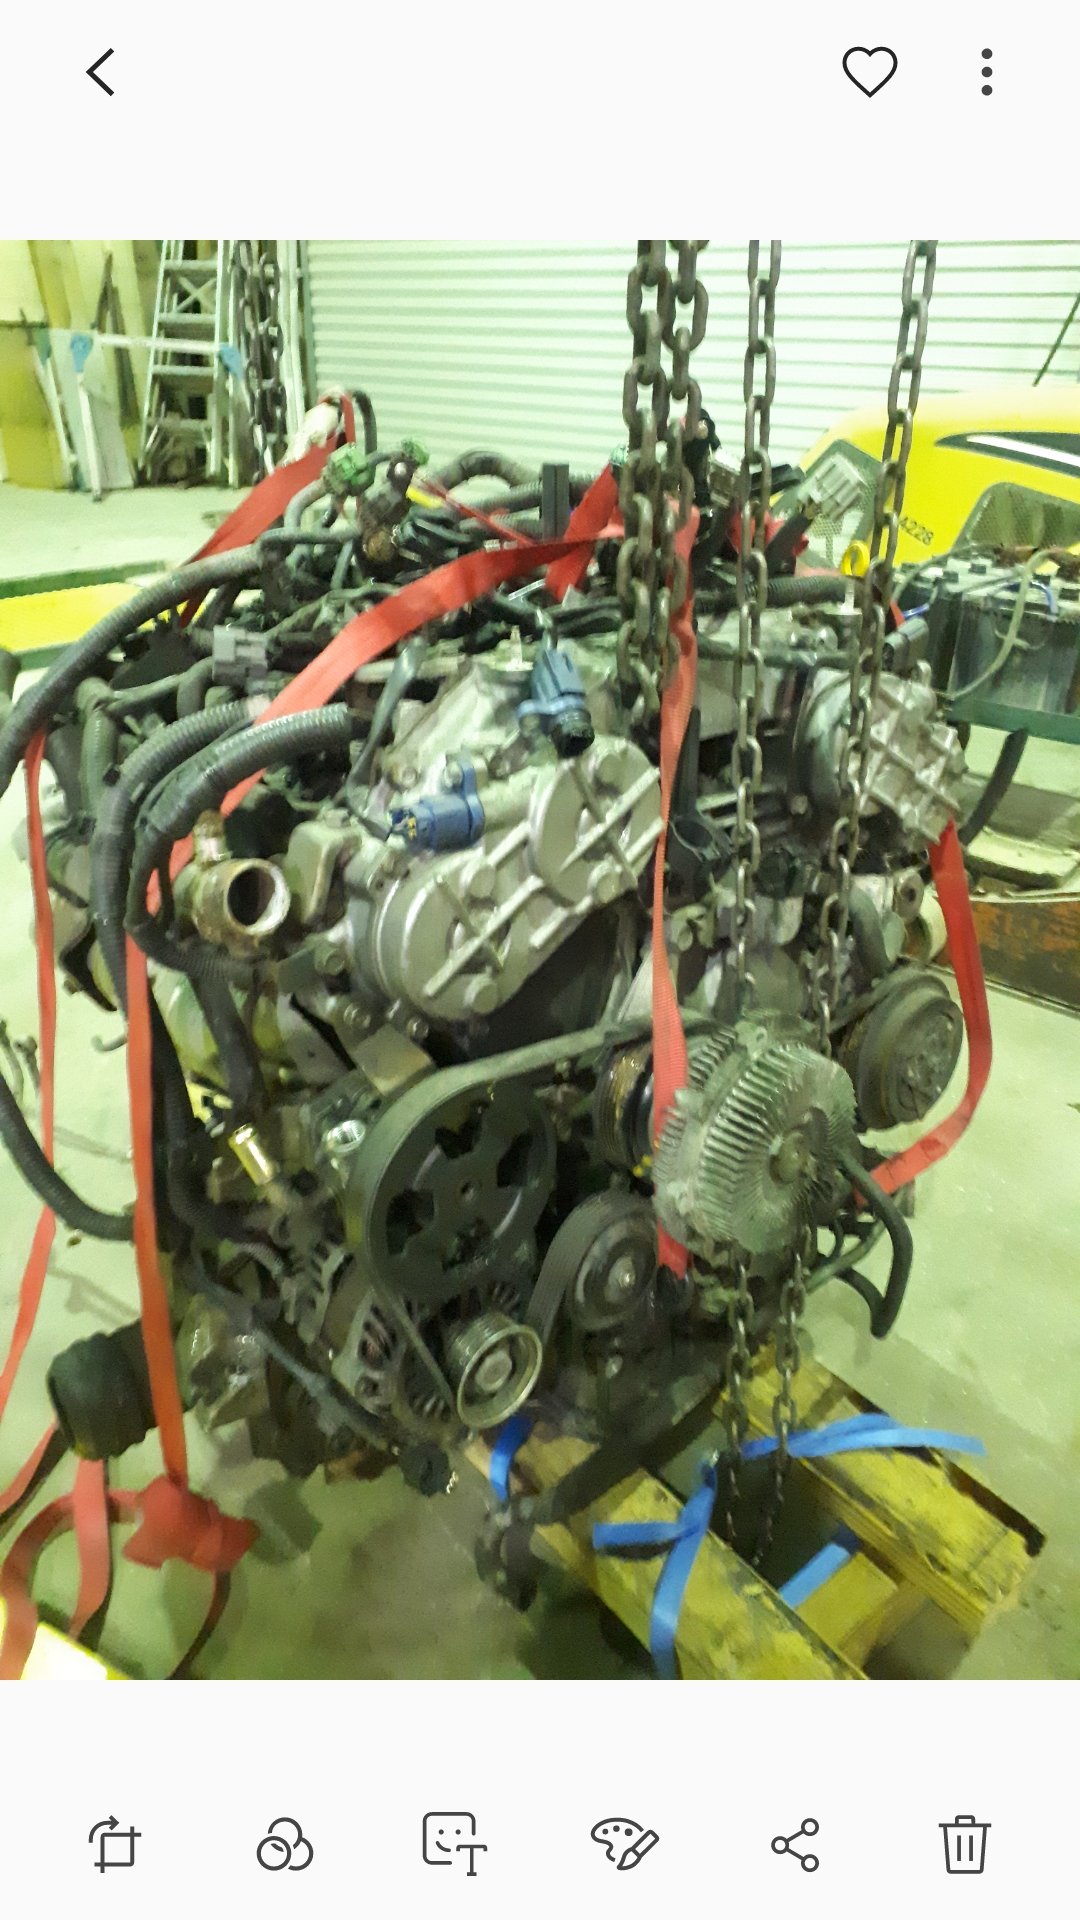
Got a VQ25DET and loom sitting at work ATM......mmmmm, would make van go nice...., might have to sell CA setup.
1 point
-
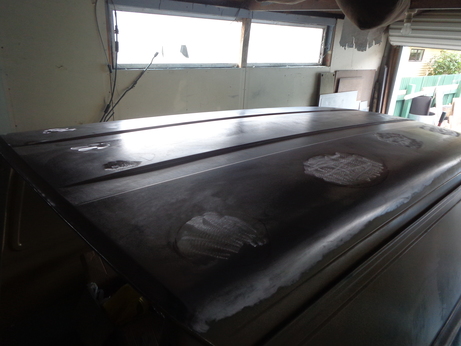
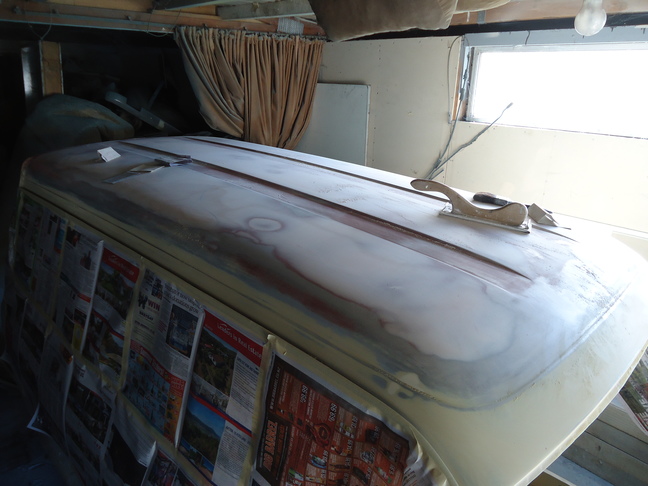
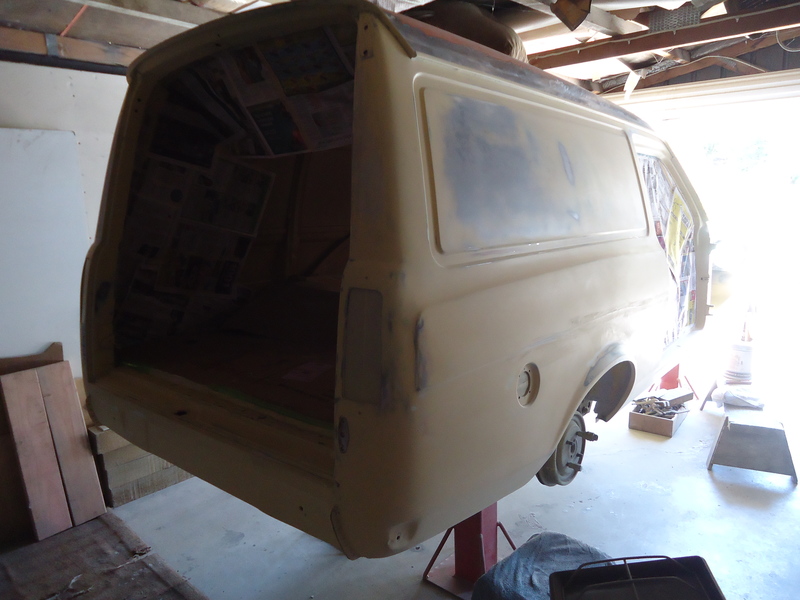
After the holidays and getting the blue van up and running, I got back into this one. Started with the long job of bare metalling the roof. For a little van it has a big roof!! Got it down to bare metal and scratched up the areas needing nuetec. Brush painted on the 2k primer. Bit of nuetec, skim of bog and then it was all long boarded down. Pretty simple doing a mainly flat roof. Tonight it was prepared and had 5 coats of high build primer applied. Came out really nice, too bad it'll be sanded back.
1 point
-
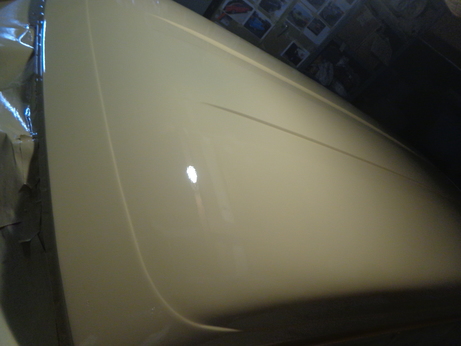
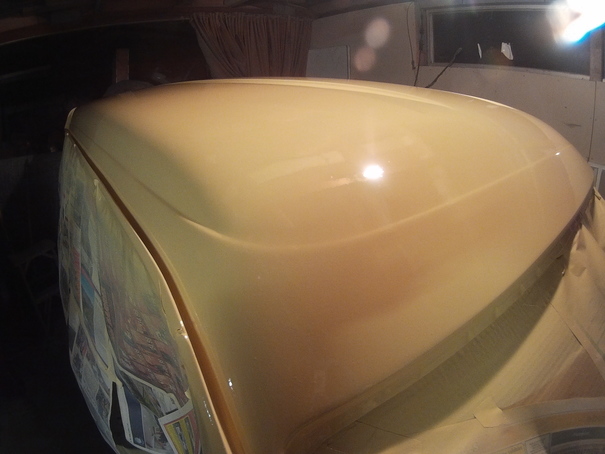
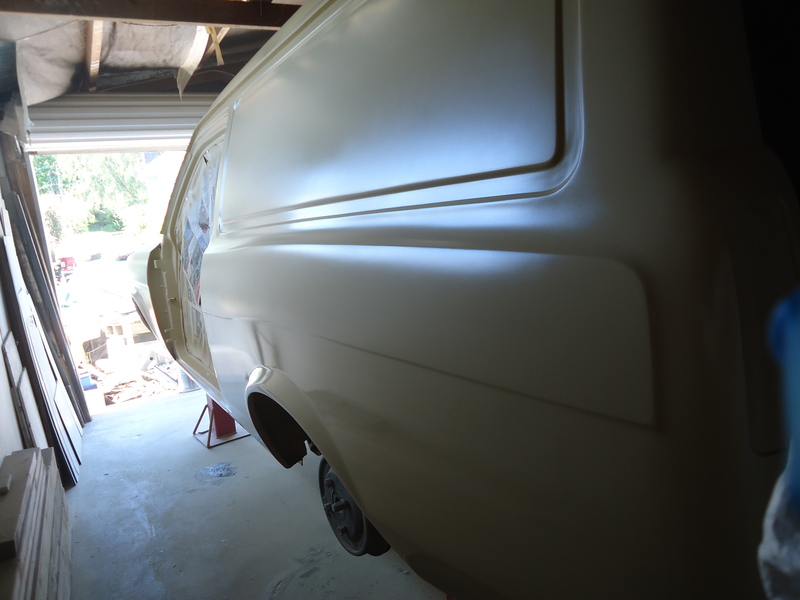
Final coat of primer was applied this morning to the outside. Very hot day, dried up pretty quick and made it difficult to keep glossy but i got the hang of it. Before After The front and back were also sprayed but the pictures were a bit shit. Looks exactly like the pictures futher back in this thread anyway. Next time these areas get sprayed, it'l be with color (Finally!). Should really pick one then. Hmm...
1 point


.jpeg.9a37bc131bbda1b309ba67c93d0194c0.jpeg)


This leaderboard is set to Auckland/GMT+12:00