
Leaderboard


Popular Content
Showing content with the highest reputation on 06/22/19 in all areas
-
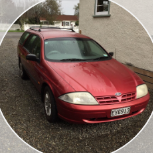
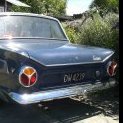
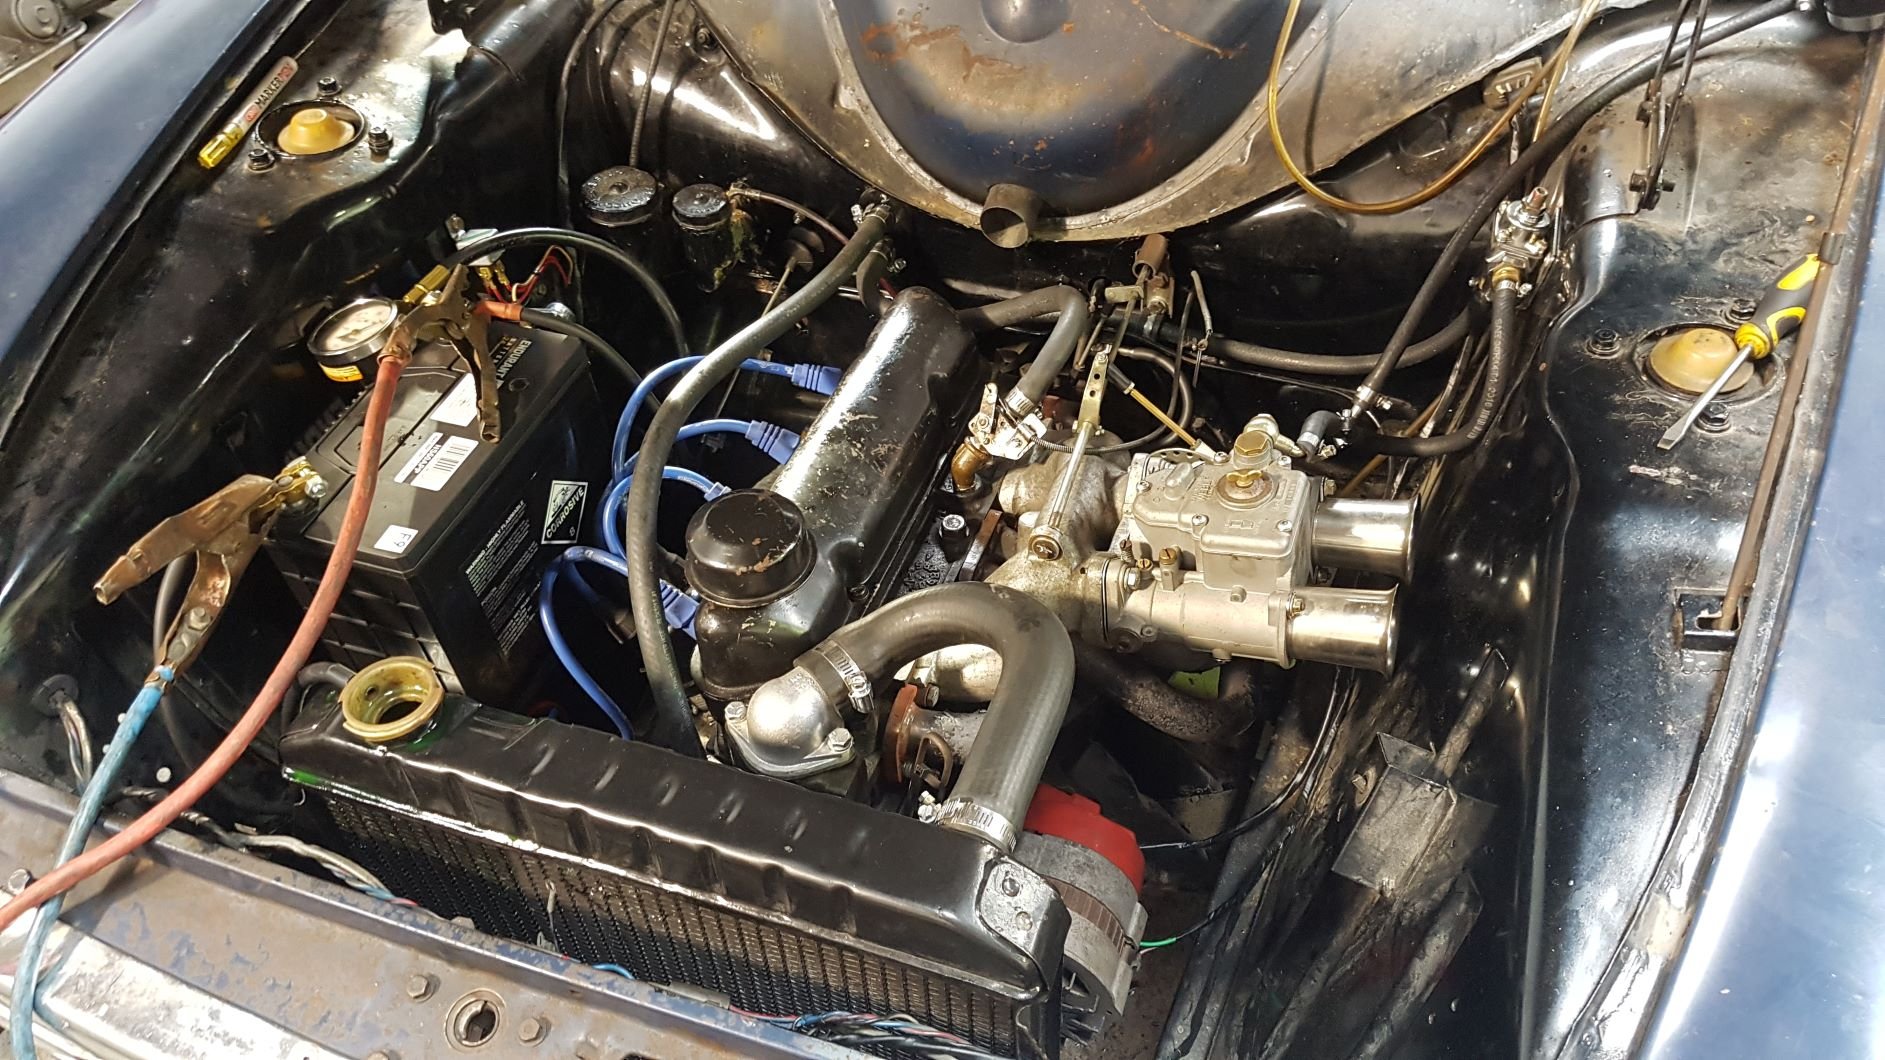
We've all done it, right? Spotted something tasty on Trademe while browsing idly on a Friday night? Sometimes, after a few beers, you might even put in a cheeky low autobid just for the hell of it. Well, fast forward two weeks and it turns out no-one else wanted that crunched Accord you were bidding on while a little bit drunk. Damn. Thus, for a stupidly small amount of money, I added another slightly rotten Eighties classic to the fleet. This one rolled off the NZ Motor Corp production line in Nelson sometime in the early part of 1981, probably into the hands of a caring gent who treasured it for a couple of decades, adorned it with a set of THE GREATEST WHEELS EVER M8, and apparently never had a flat tyre because the original Reidrubber Award is still sitting in the boot. Fast forward a few years, it passed through several more owners, and tried to pass through a brick wall which didn't go so well for it. However, considering the reputation that first-gen Accords have for disappearing slowly before your very eyes, this one seems remarkably solid. The wall-inflicted damage was limited to the pushed-back bonnet, radiator support panel, guards and bumper, with the chassis rails thankfully having escaped damage. It was in this state that I picked it up on Saturday morning, drove it to the parents place and tore it to pieces in their driveway. By Saturday afternoon it was sans front, I had pulled the radiator support panel back to where it should be (it helps when your Grandad has a low mile, immaculate one owner example you can take measurements off) and I sprayed rust neutraliser over every bit of metal oxide I could find. The whole structure is surprisingly flexible, everything bent back into place quite easily, and by Sunday afternoon the front was starting to look more like a Honda again, and the bonnet was back to where it should be. It was solid enough to make the trip home, anyway, and to drive it round to Grandad's beforehand to spin Honda yarns and spot the differences between pre and post-facelift Accords. It was already missing parts of the grille moulding and a bumper insert though, which was a bit annoying, and the bits of chrome moulding it does have are bent. Not sure where to get replacements for these, I am unused to the lack of aftermarket support for anything that isn't an old Ford... I did however find some repro indicator/park lamps from a place in Otahuhu that turned up in the mailbox the next day, which was pretty sweet. I'll take some proper photos of it once the rain stops, but here are some phone snaps in the meantime21 points
-
It made it in a few magazines recently. Performance Car in the 4 & Rotary Jamboree section. Petrolhead in the Beachhop section. NZV8 Beachhop Edition. And the recent NZV8 in the editorial. Had the transmission pulled apart and the forward clutch was burnt out. After waiting a month for the trans to be rebuilt and getting a price back, I decided my Dad could have the rebuilt one and I'd pull out the one that was bolted up to a dummy engine in one of his projects. It looked to be in good condition from the outside. Grabbed the bits I needed off my old one and swapped them over. Hooked it all up and put some new oil in. Went for a test drive and it goes way better than it has ever had!! Has been my daily for the past few weeks (sorry neighbours! The 6-7am coldstarts with the compressors kicking in must get annoying haha), haven't had any major issues! Have done over 1000km in it since the new trans has been in. Went out last weekend and took some decent photos of it.15 points
-
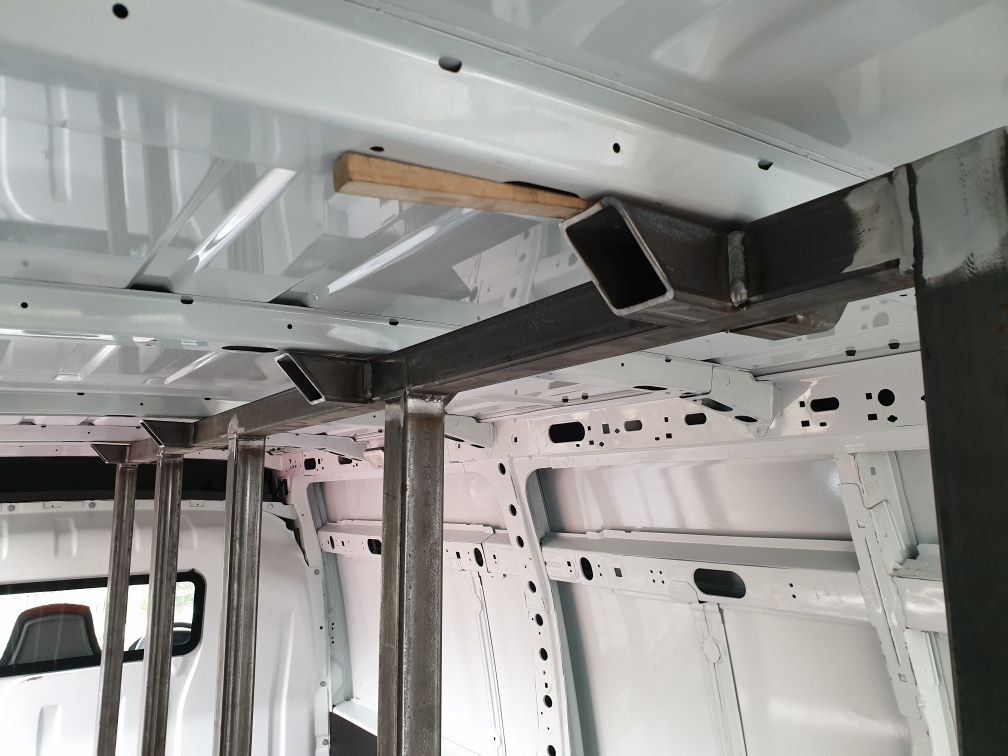
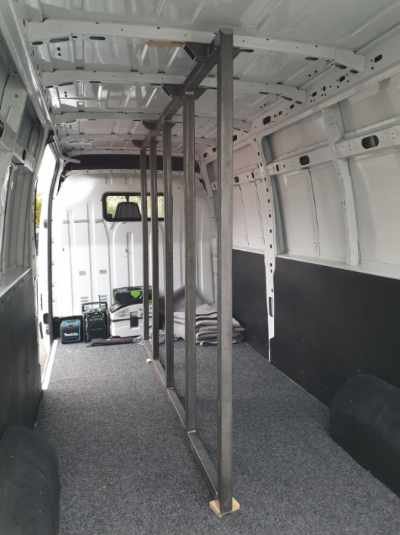
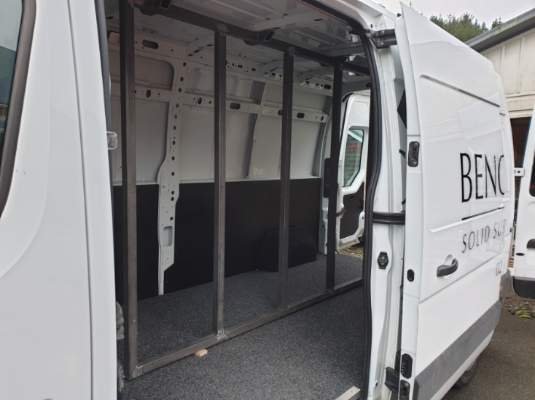
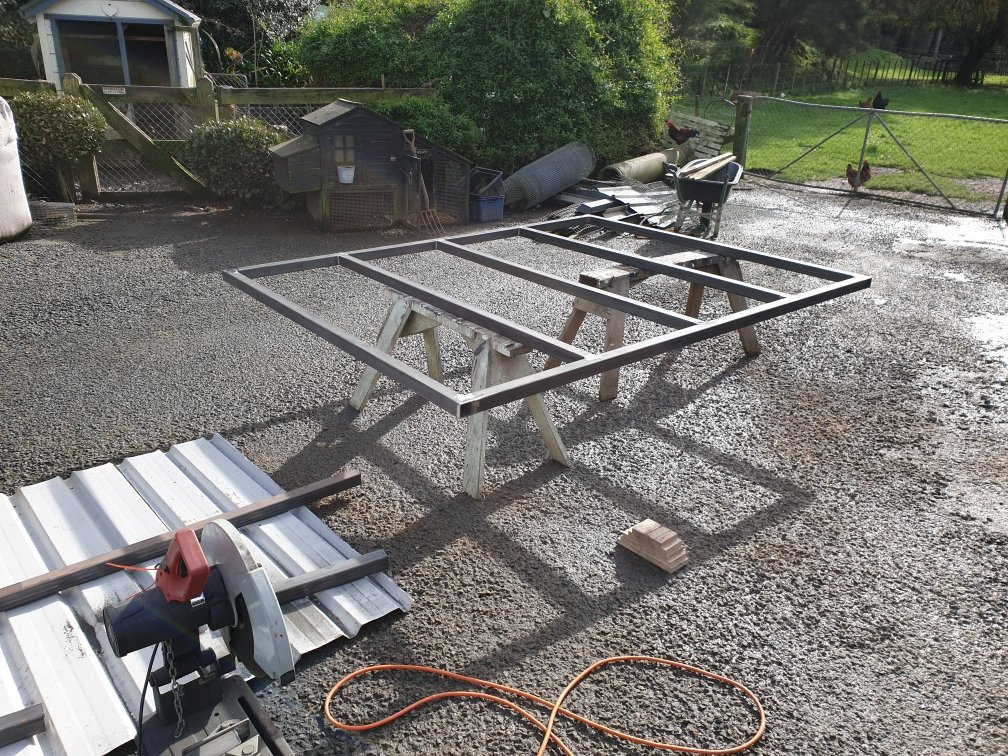
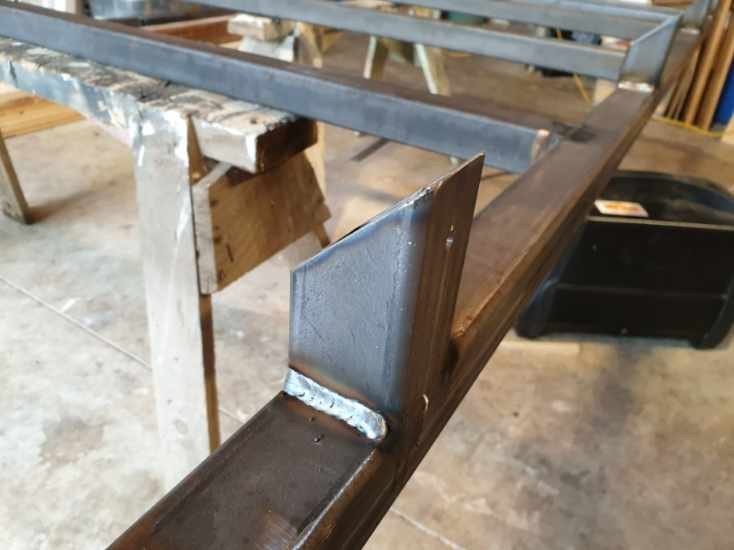
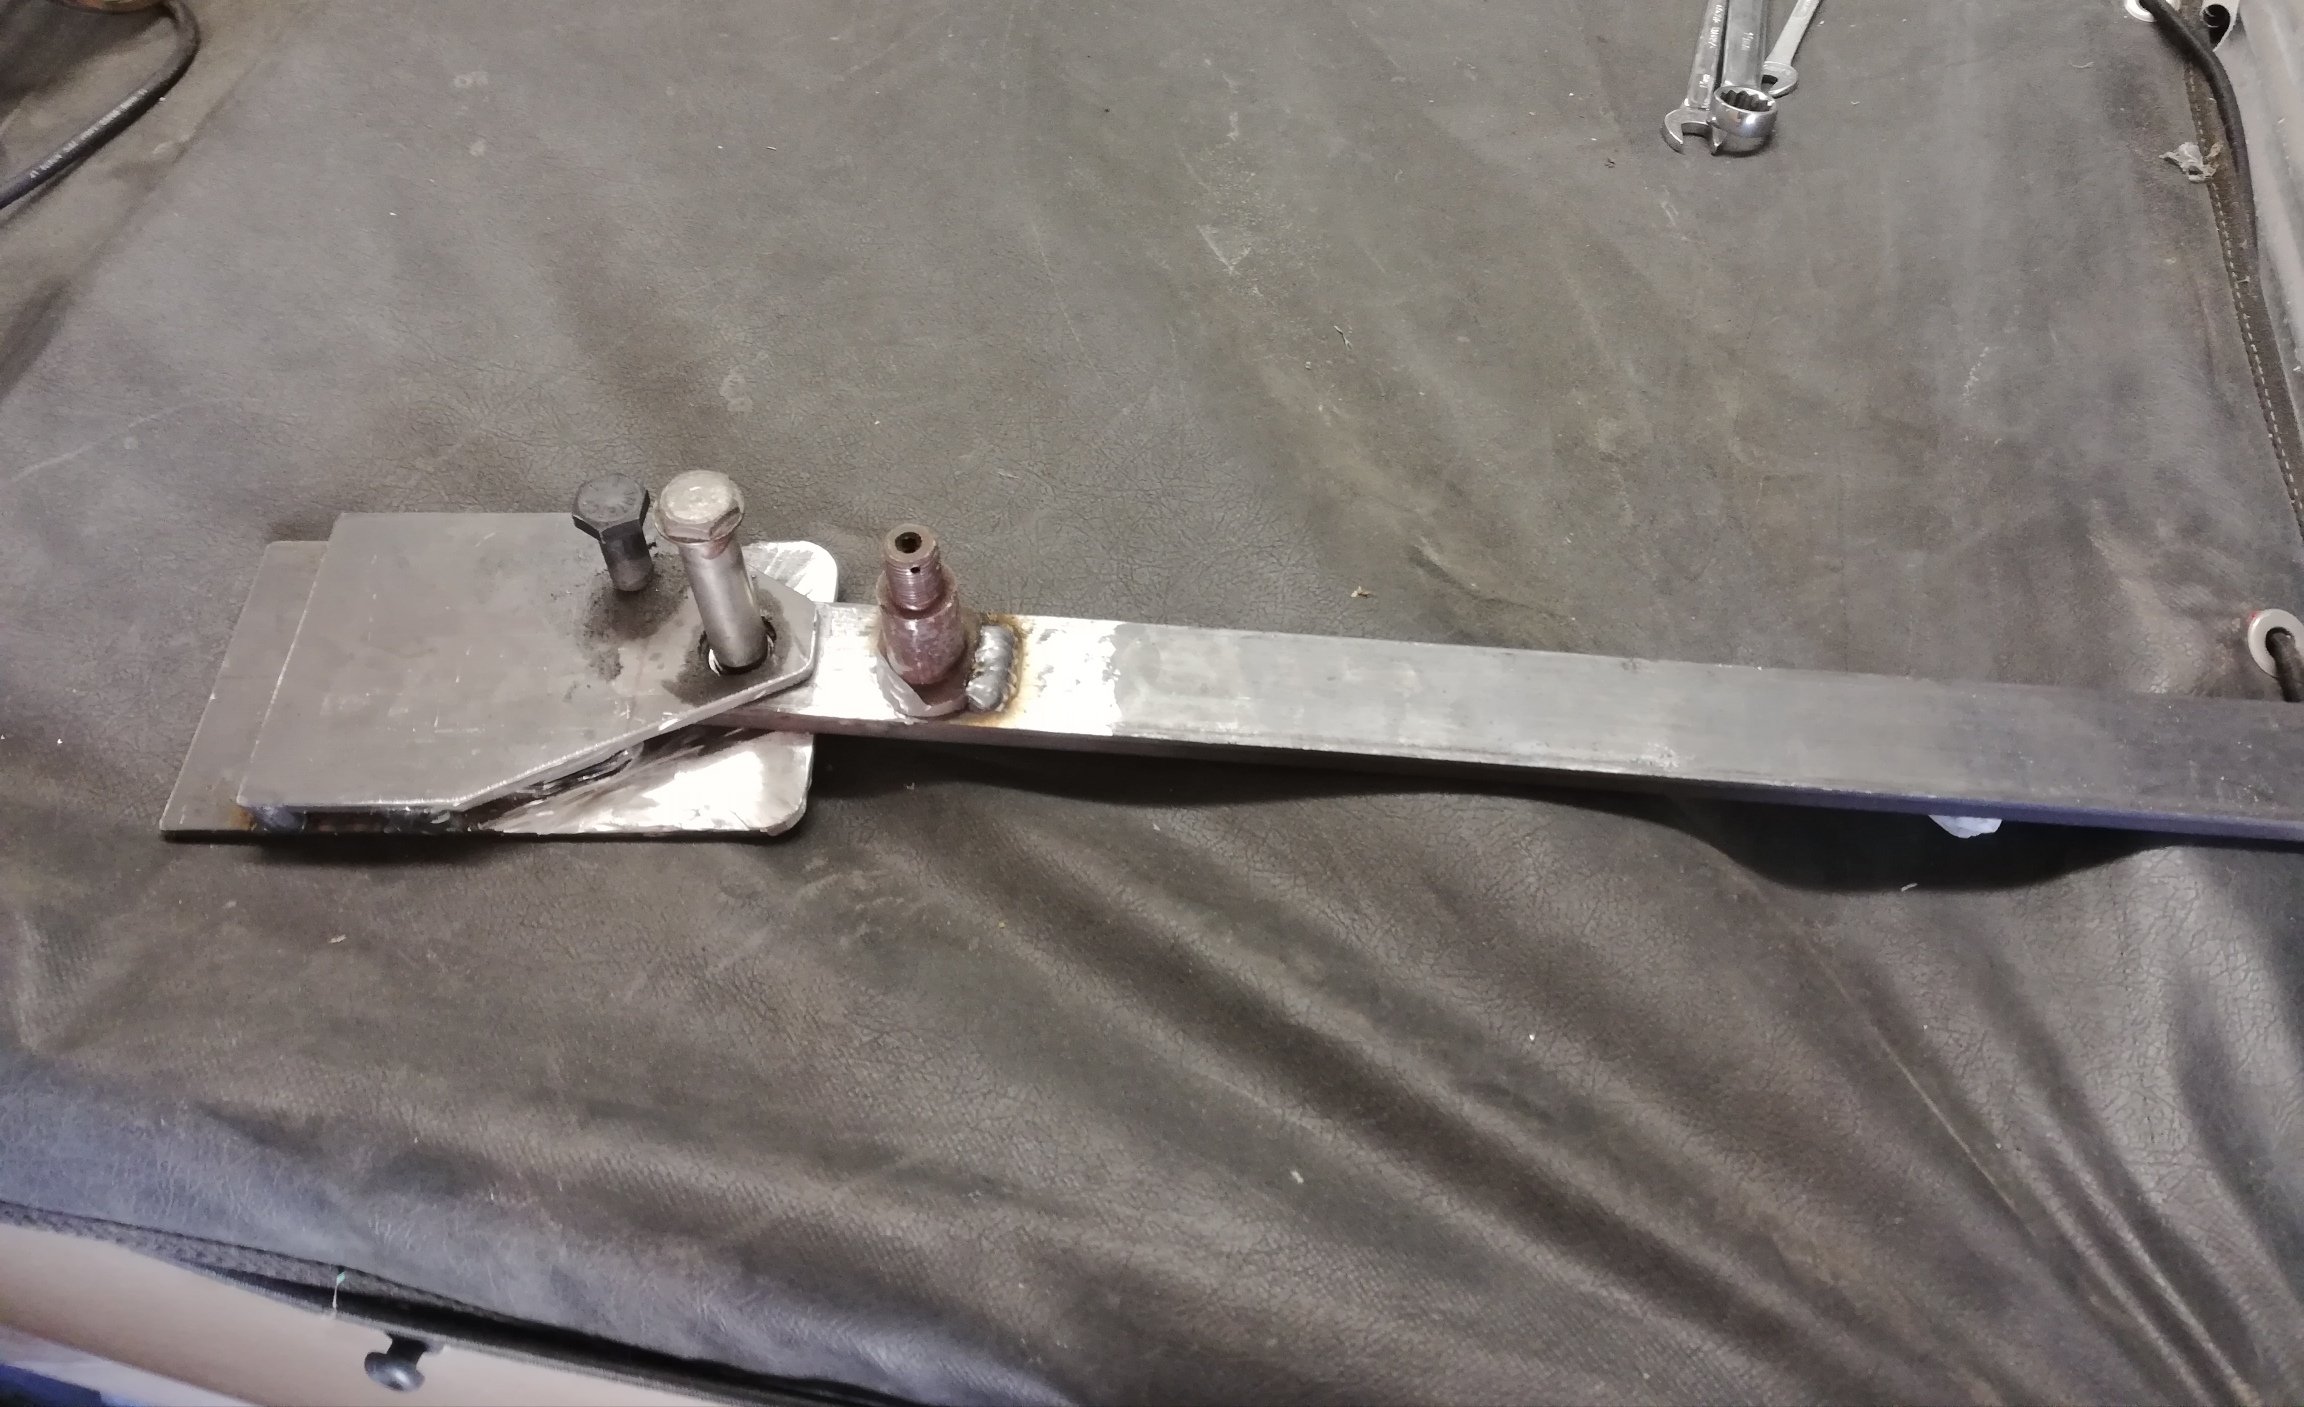
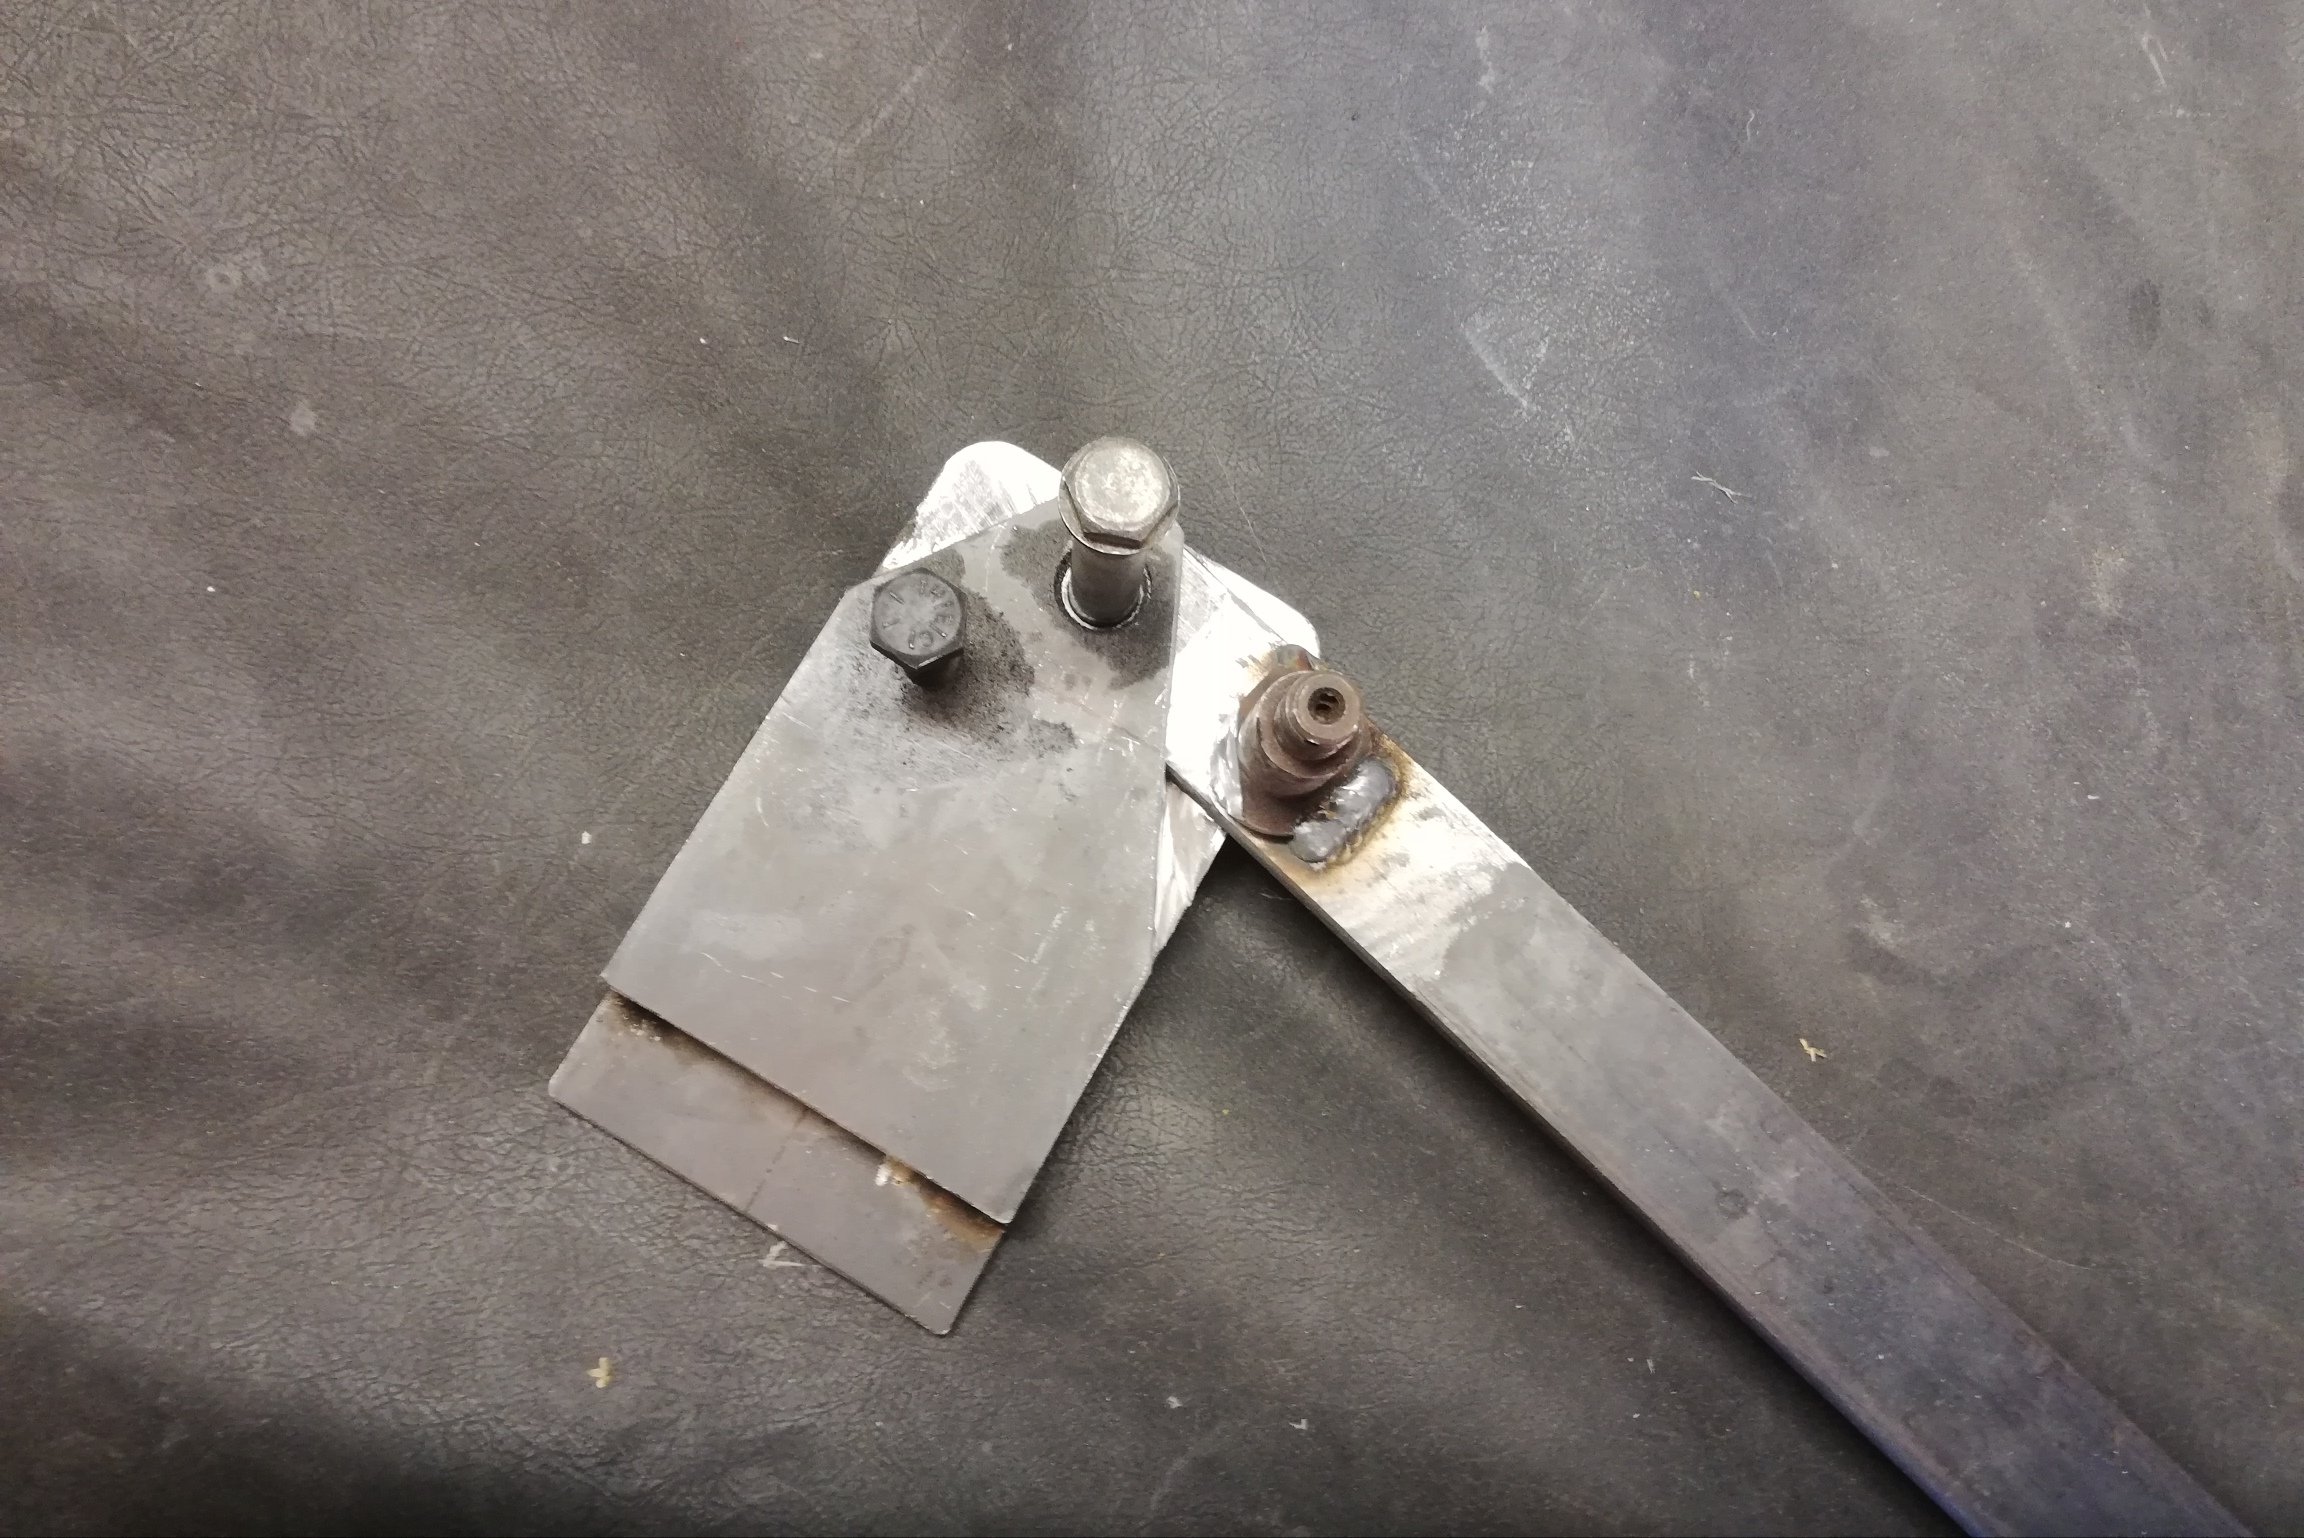
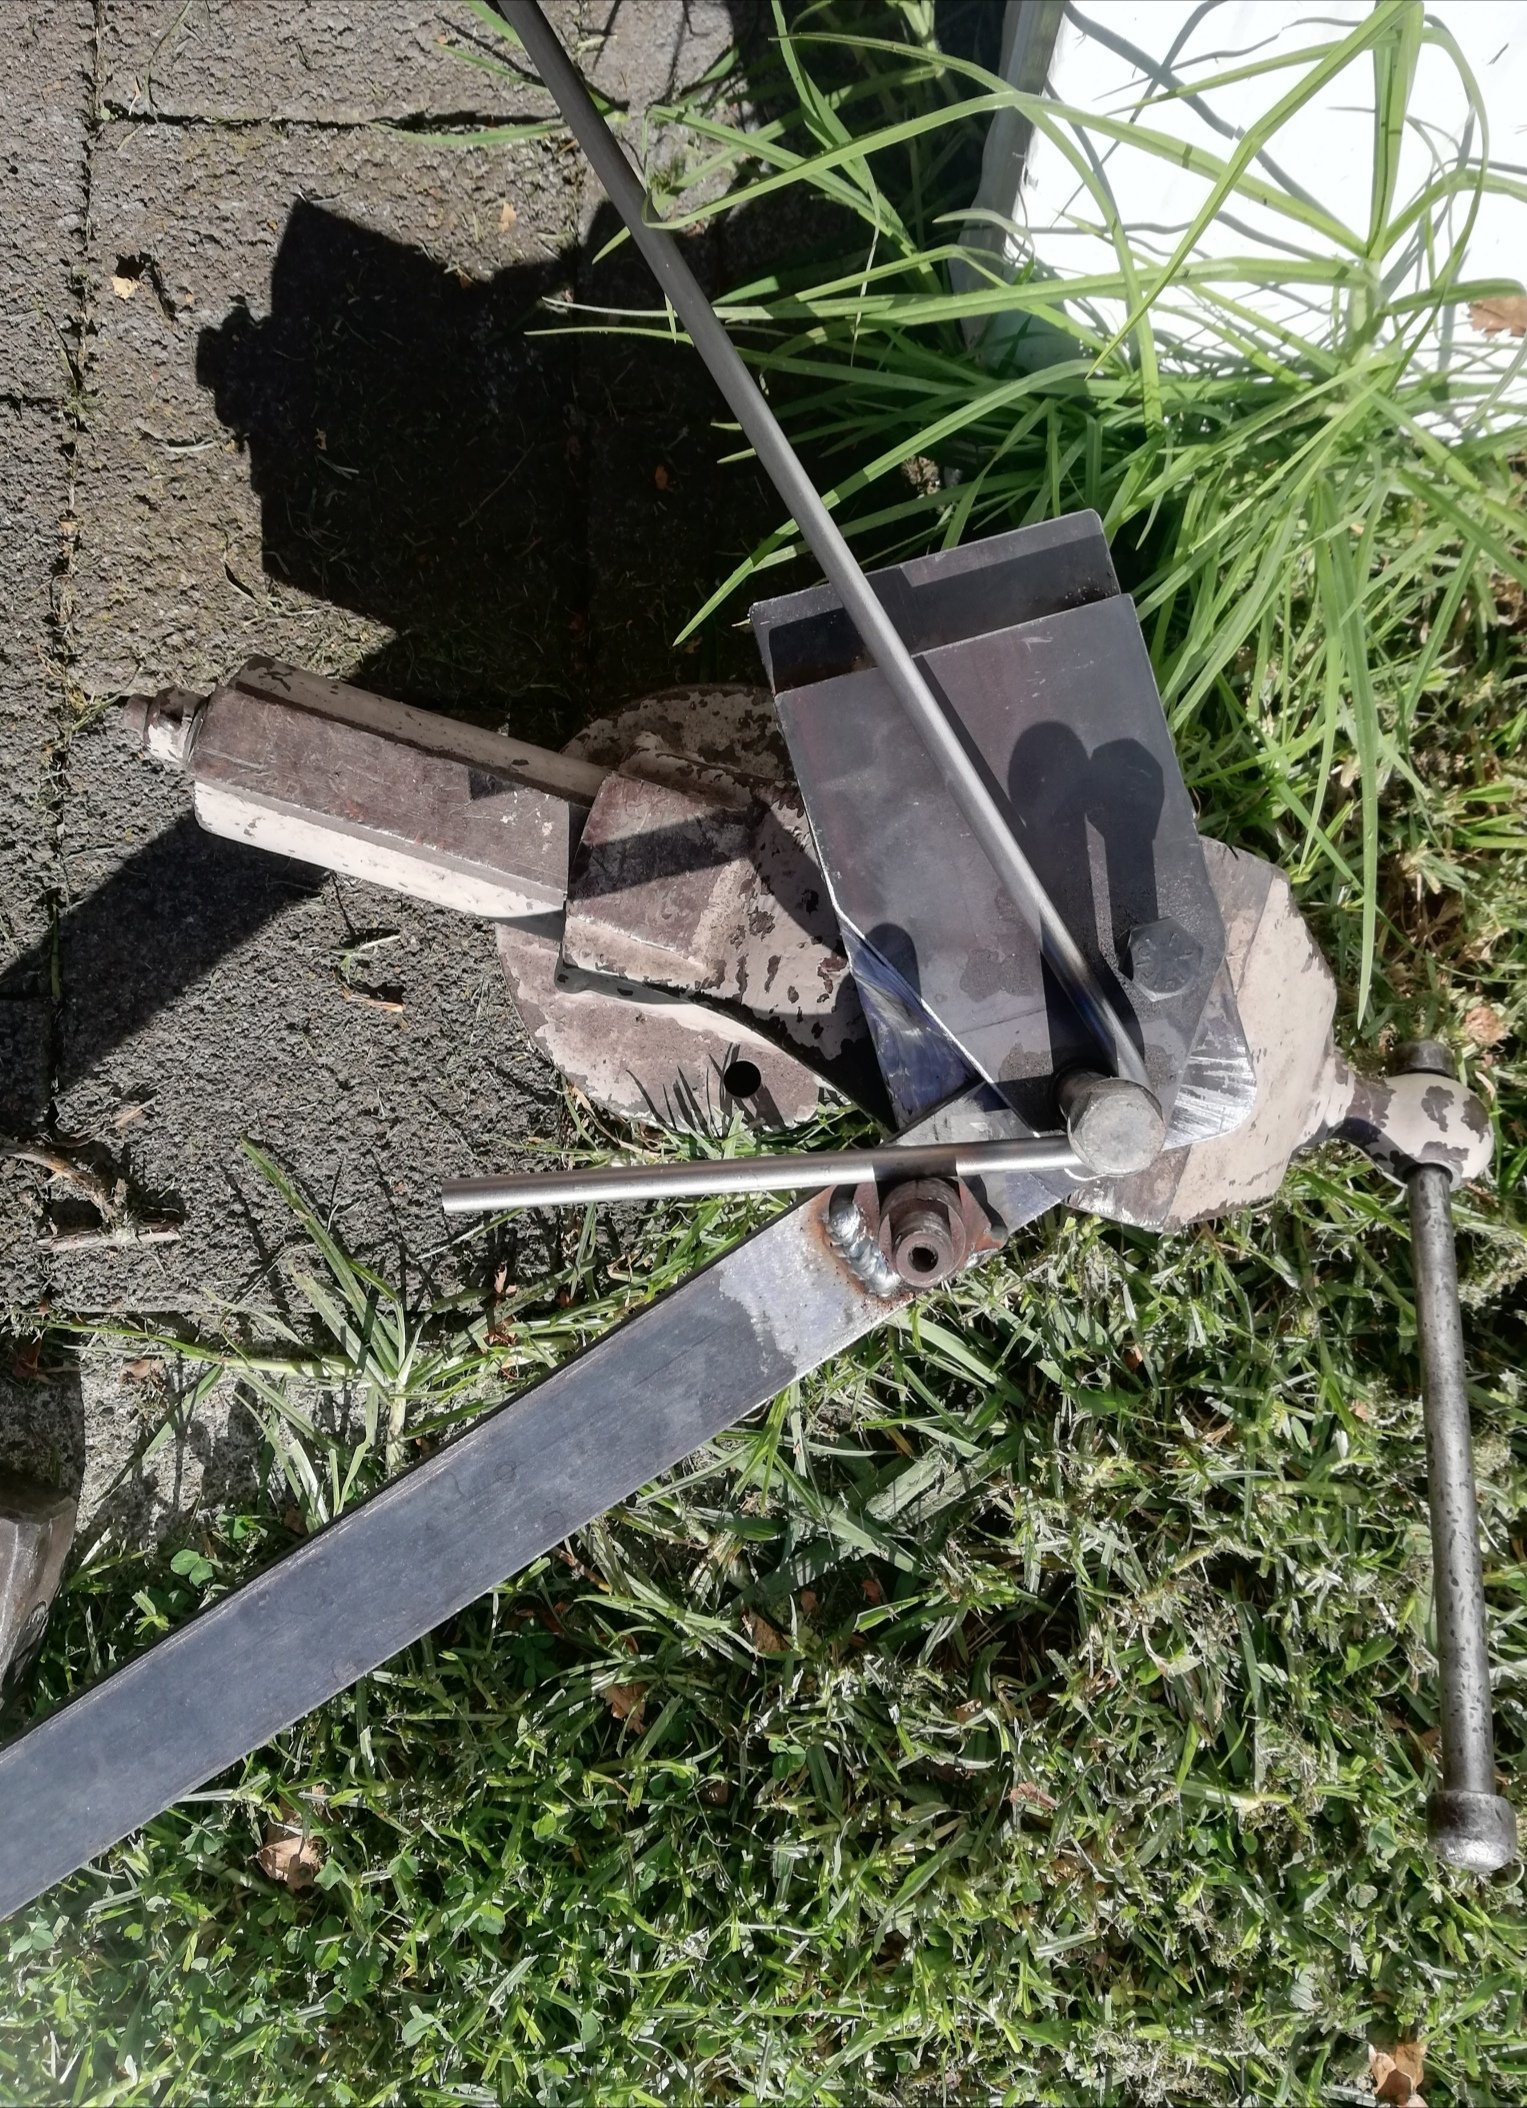
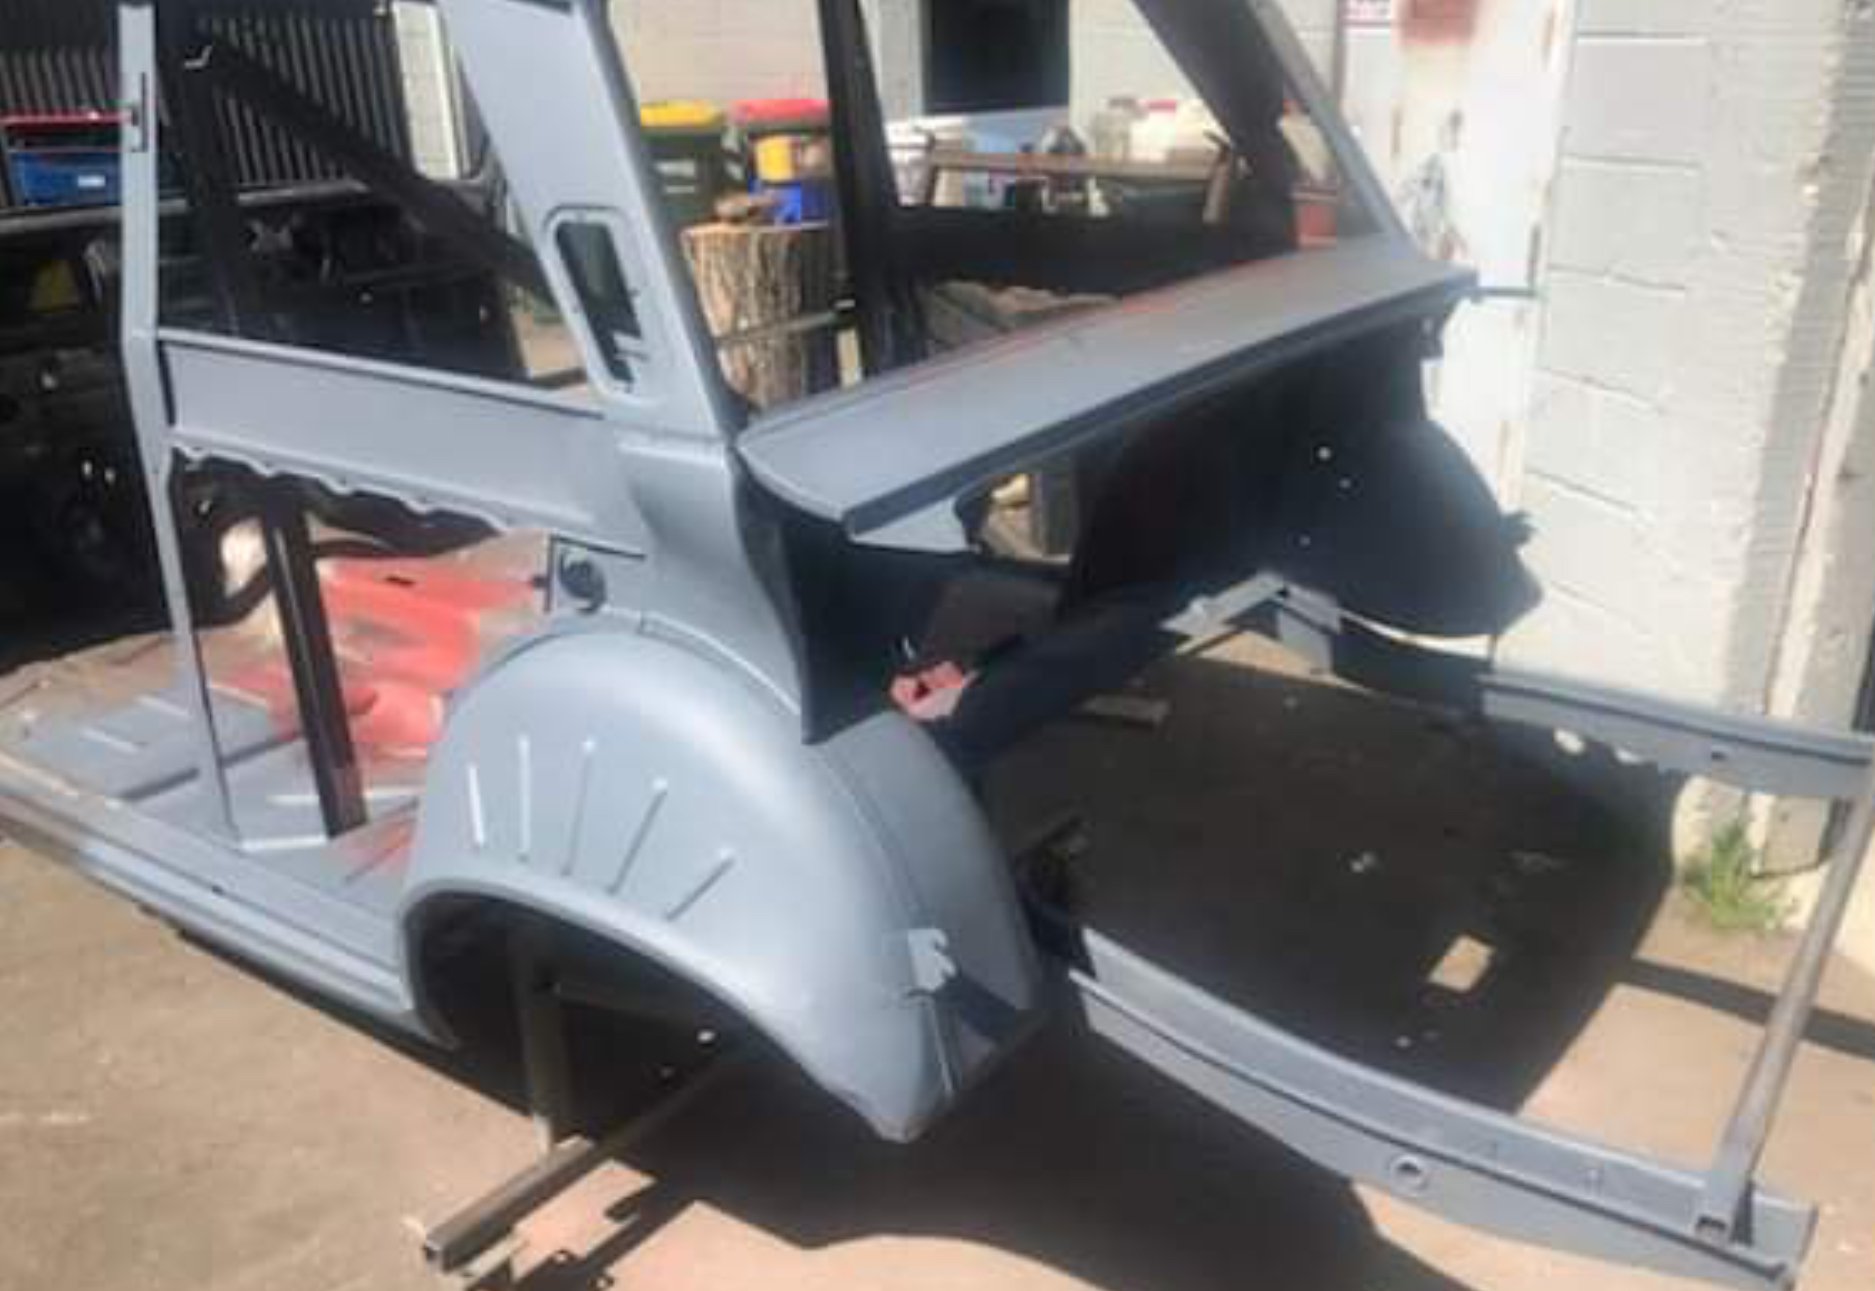
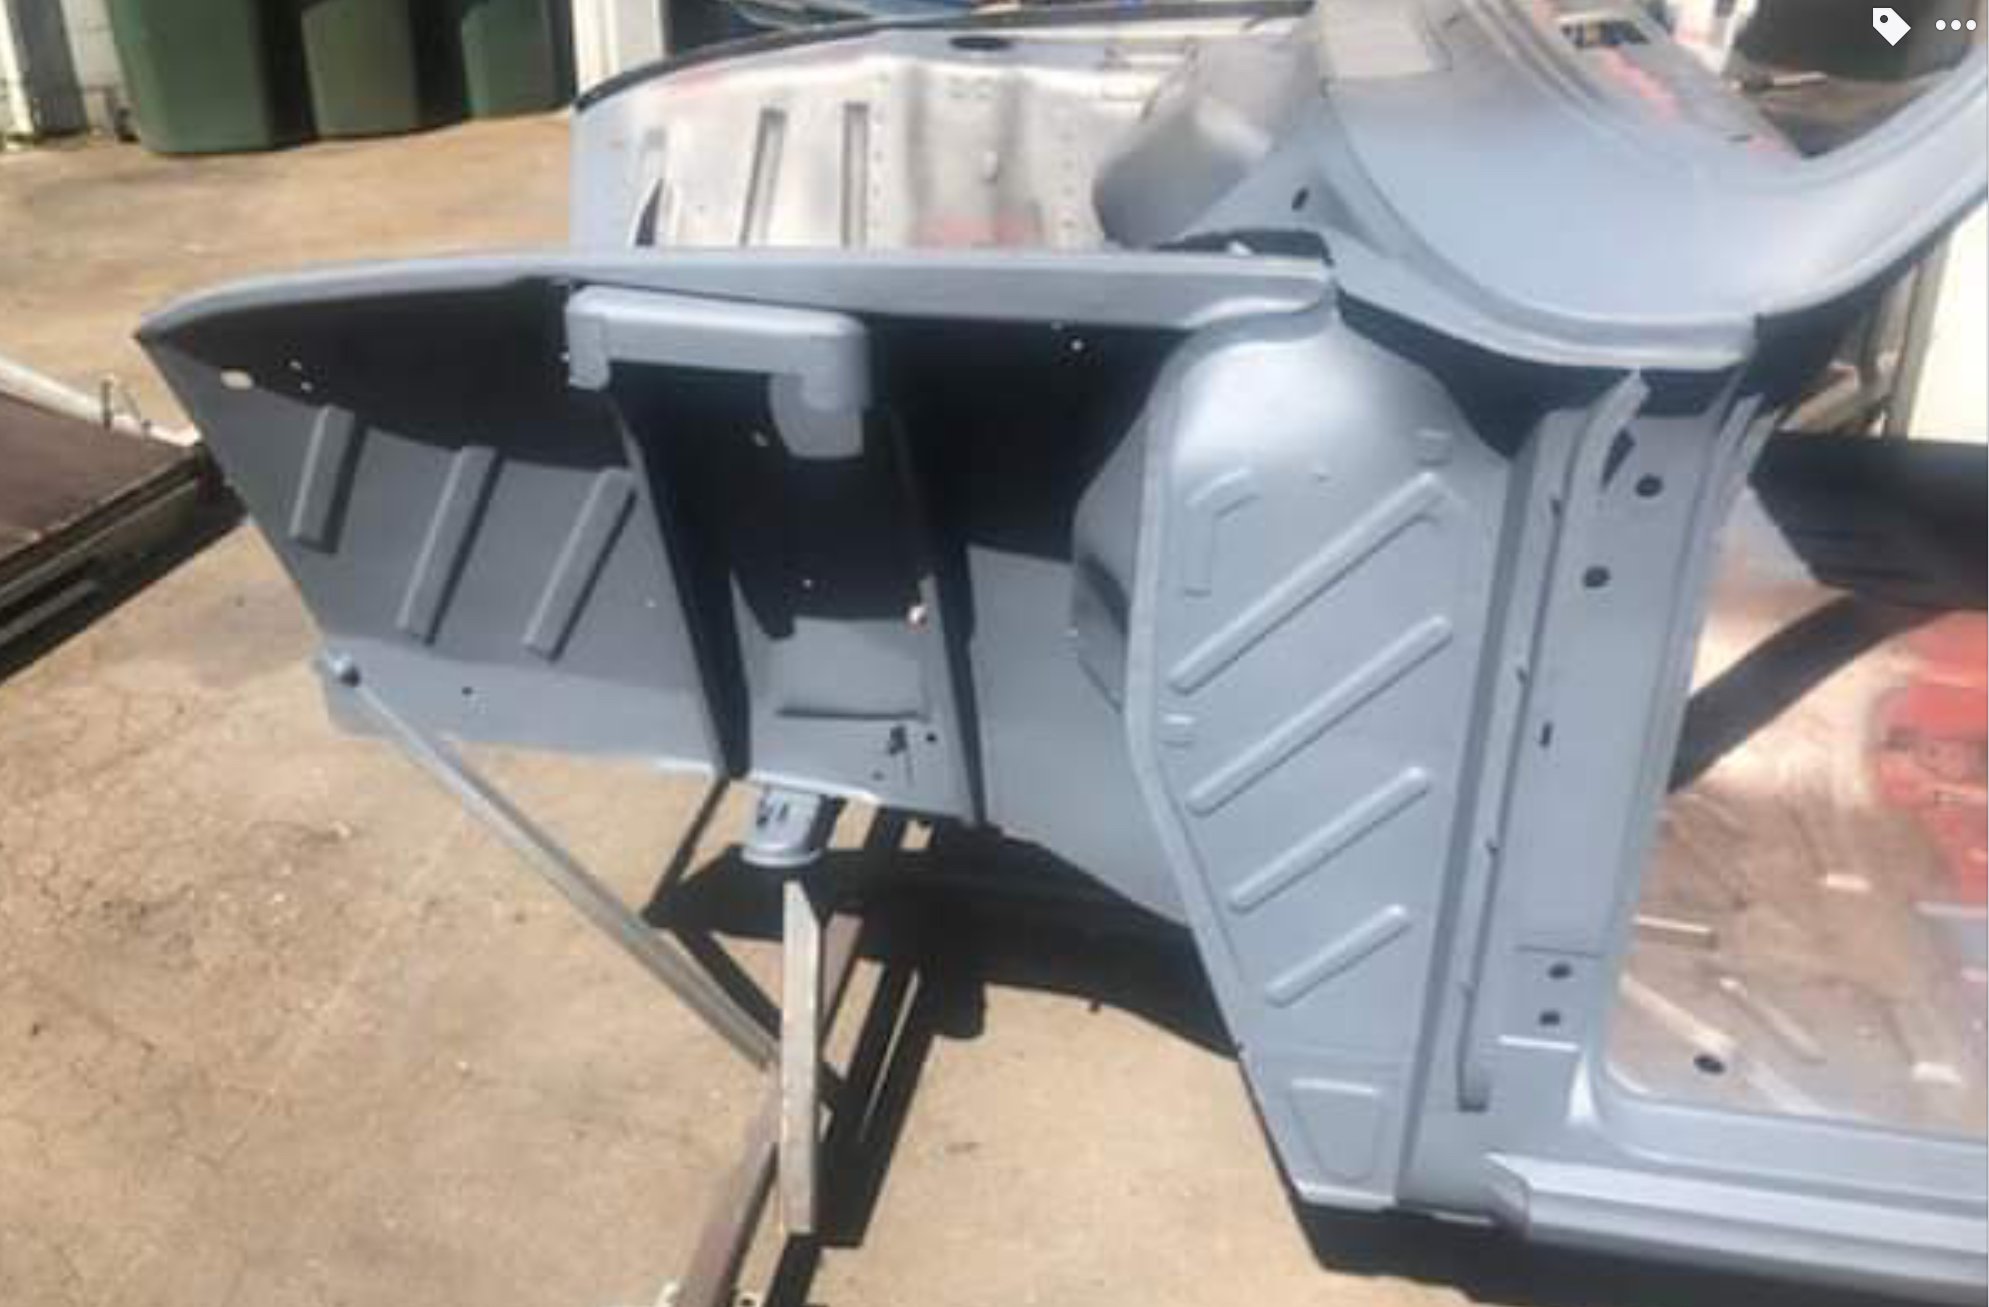
Brother is going out into business on his own. He brought a ridiculously huge van, big enough to human traffic at least 40 Russian brides in. He wants to transport his kitchen bench tops in it, so I've spent today making him this: And test fitting in the mega van: It's going to get painted, more 18mm plywood on the floor (under the carpet) and wood slats tech screwed to it for the tie downs to hold onto...but you get the idea. I'll leave that stuff for him to finish as it's just paint and screws and he's more than capable of doing that.
 7 points
 -
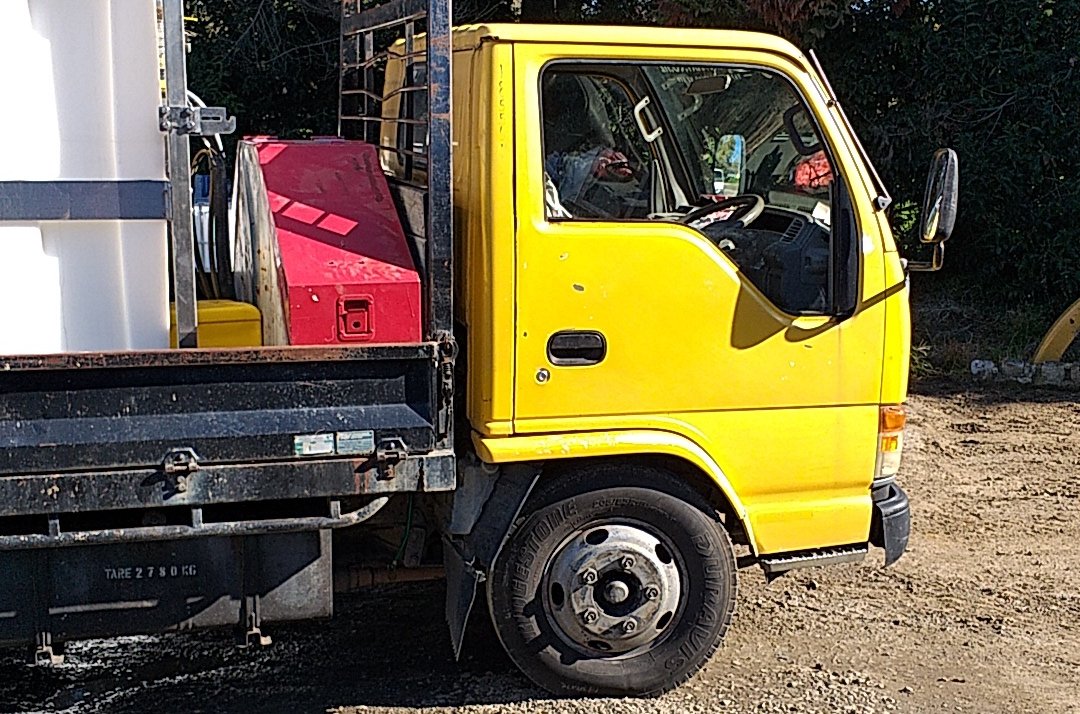
A few months ago I got a isuzu elf to cart my blast equipment. It was filthy and was in worked in condition. PO was a drain layer and he carted his digger and stuff around. in its life before that it was a mcentee hire truck. it's got a bad paint job that's cracked and ugly. a few small dents and knocks. the interior is filthy with almost every clip broken ,stereo is kaput and the floor mats torn. Tail lift stopped working not long after I got it. Business is slow and I would like to present the best image possiable. Having a mobile billboard cant harm things. So I have set aside some time to tart the old girl up. I'm just wanting it to look presentable so if I pull up on site, driving down the road the truck and I look like a professional company. I dropped it at my neighbour's paint shop for a quick spray, but he found the whole truck is covered in cracks, he stopped work and told me to strip it. I started thinking I could wrap it. I got some cheap vinyl and gave it a go on some various panels and did not have much luck after many hours of you tube videos and giving it a go I decided that I would not ever be happy with the result. So the plan is now a cheap paint job my self. Get some signage printed remove and clean the interior and replace misting clips. ali Express radio ali alarm new LED lights new tail lift pump install racking and covers. I have almost every thing I need. now I need good weather. .
4 points
-
2019-06-19_01-30-25 by sheepers, on Flickr 2019-06-19_12-40-53 by sheepers, on Flickr 2019-06-19_12-40-43 by sheepers, on Flickr4 points
-
we will rebuild today smashed in some new headset bearings, feels pretty nice up in there i tell ya. new tyres were fitted also. i went for Pirelli City Demons front and rear, both 3.00 x 18.tried and tested good quality road tyre, be interesting to see how it fears on the waikaremoana gravel.. Front rubs on the fender a little bit so i am going to have to grind down the side brace things. Still need to do a yambits order for rear sprocket, front brake pads, oil seal for kickstart, and air filter. then i will have accumulated everything i need to fully reassemble! fizzing!!!3 points
-
3 points
-
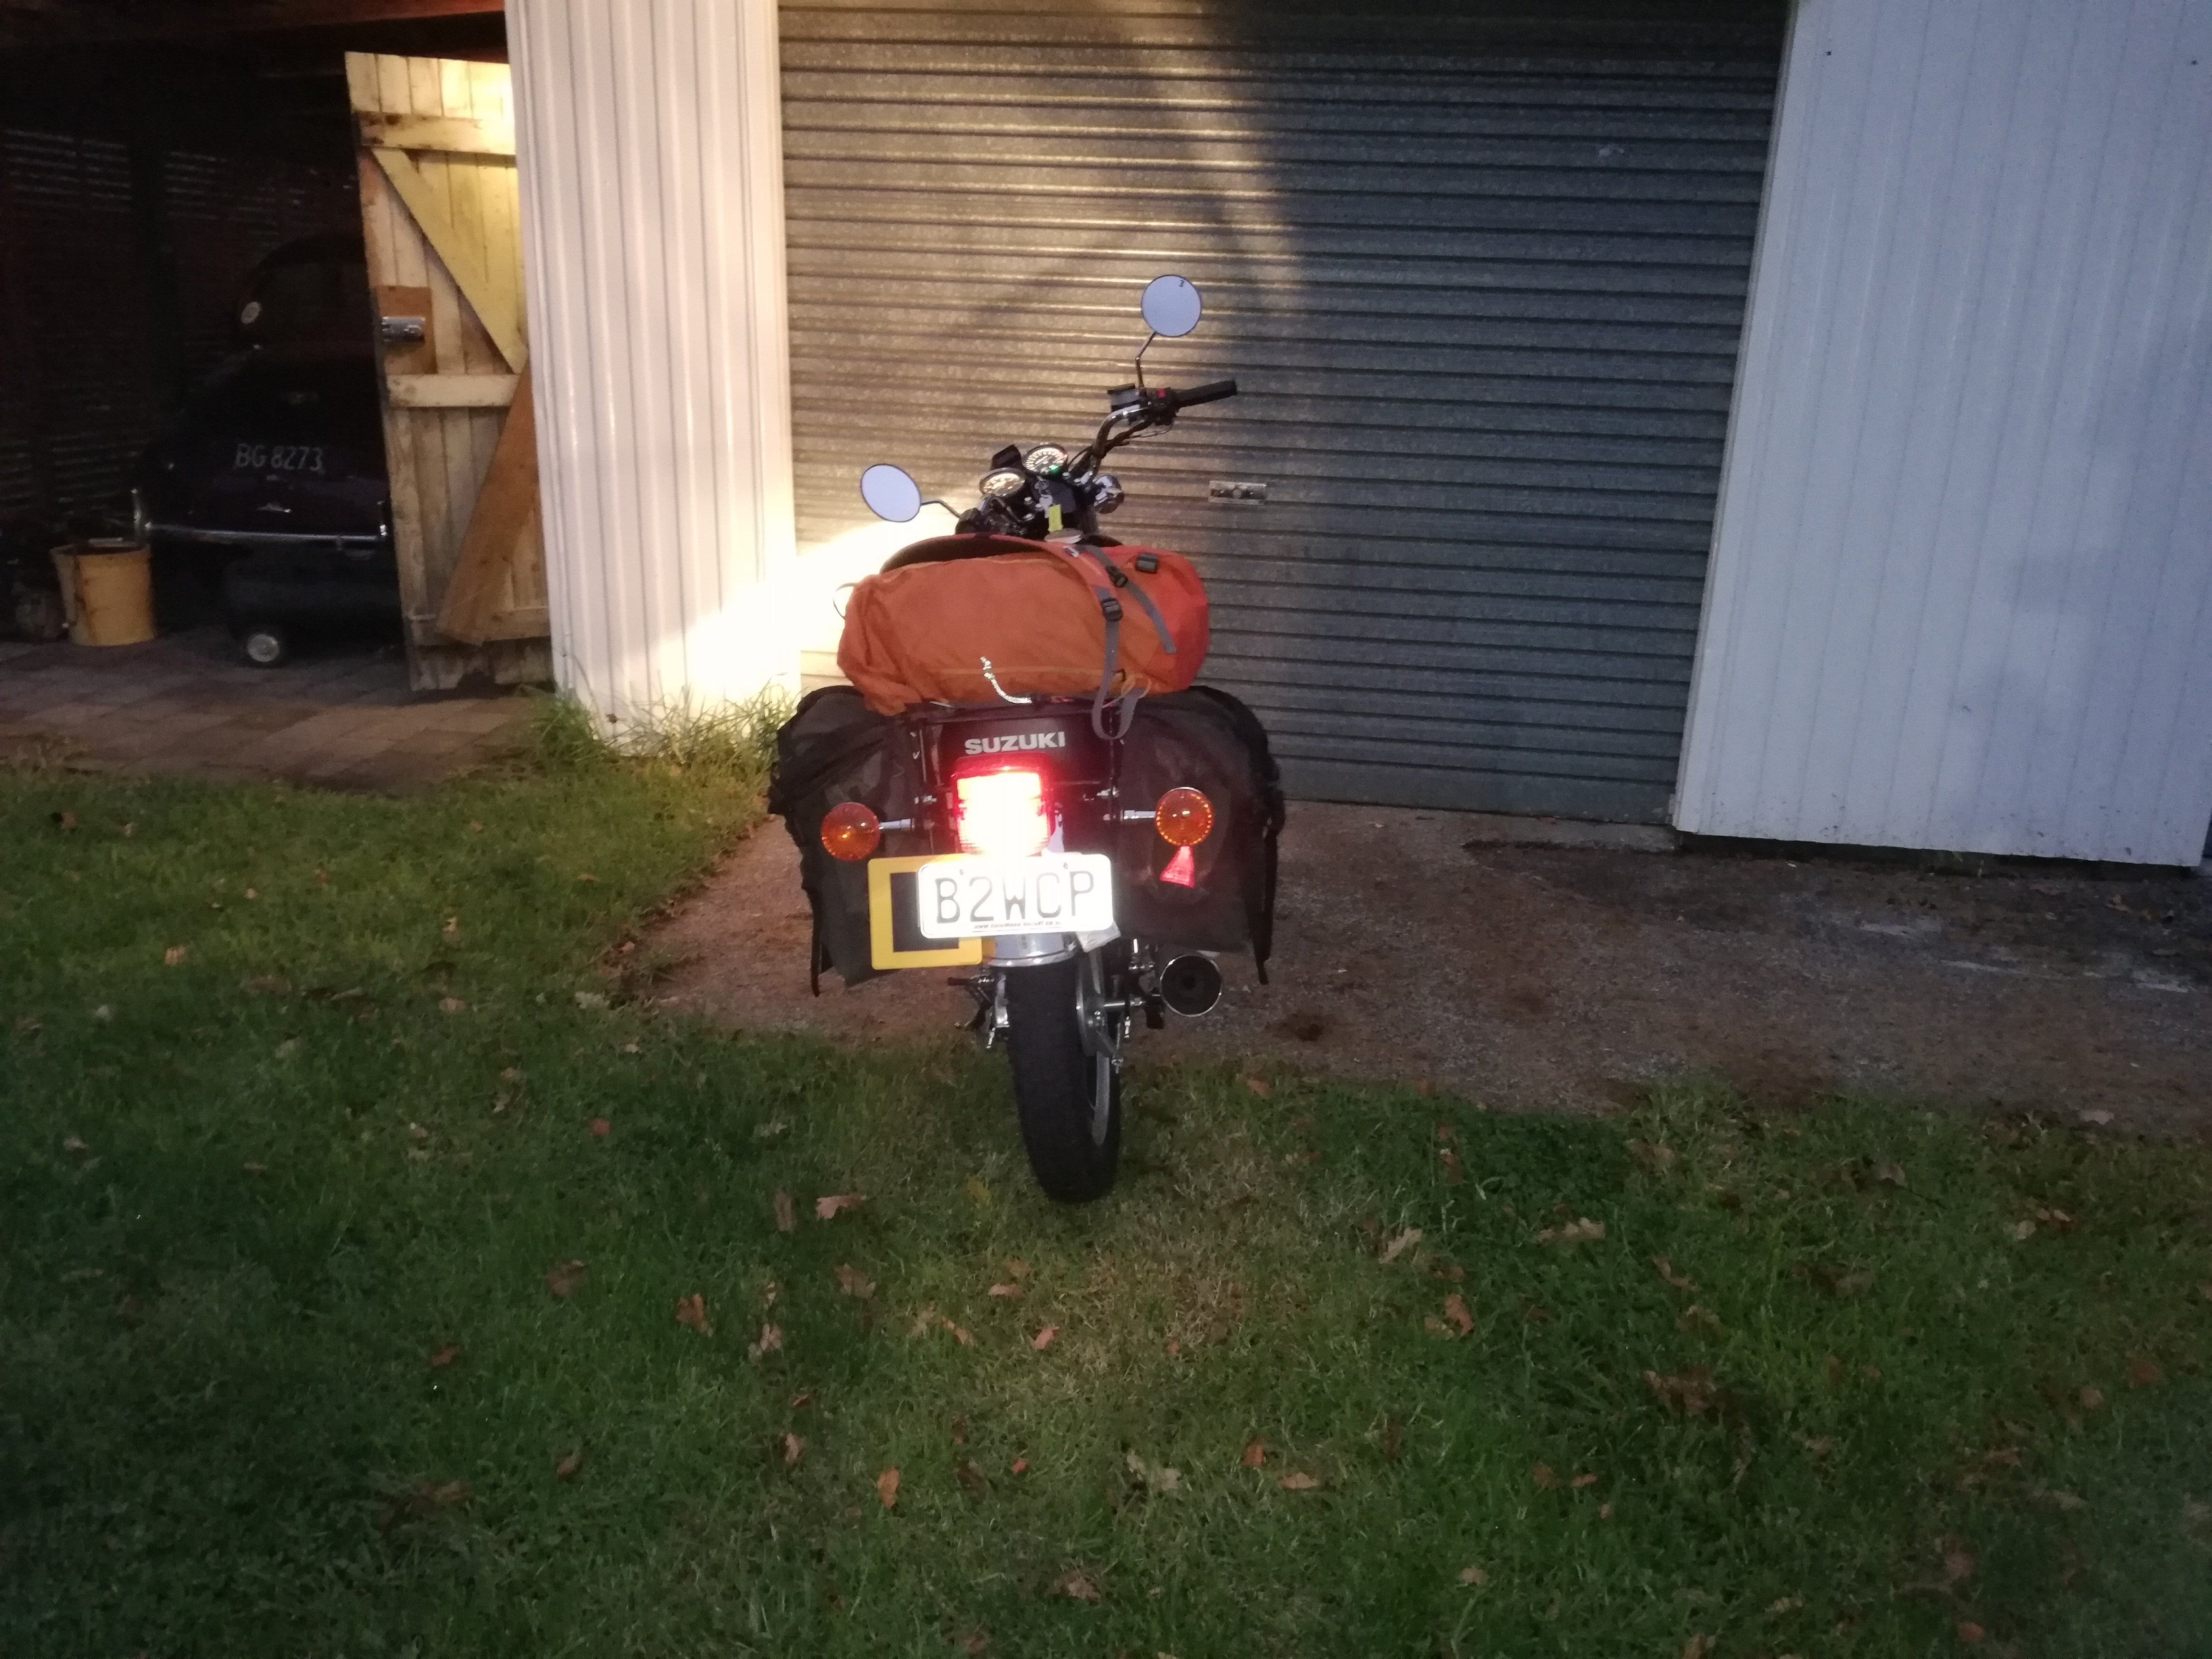
Adventure GN Does more than 100kph so I'm wondering if NZ ones get higher gearing, or are they putting 150 cyclinders on them sneakily? 260km and I've not hit reserve yet
2 points
-
Little bits and pieces starting to come together now on the 86 - painfully slow but any progress is good progress right? I've fitted the new water pump, cleaned up and painted the coolant bypass hard lines, picked up new radiator hoses and have the heater hoses ordered and on way. Front of the engine is coming along with the hall effect sensor on the crank mounted, still have the sensor for the intake cam pulley to do but hoping to knock that off next week. I've found and mounted up an ae85 radiator overflow/washer bottle in the front drivers corner of the engine bay as the ae86 one will melt over by the headers I think. Found a brake reservoir sock thing to cover tidy up the faded gayness. Am in the process of cleaning up and painting the brake lines so I can refit those, have some braided lines to go on. The drive shaft is now in with new bolts and a new gearbox rear seal. Tidied up and painted the strut brace mounting plates. Exhaust is almost done, just have about 200mm of pipe to do from the merge collector to the rest of the system to build. How its looking currently Also picked up this which is now fitted: And this which isn't fitted Pulleys are sitting on the cnc machine so will have them done next week all going well.2 points
-
Adventure GN'd today with the wife. Hit 100 2 up no worries, very surprised. Don't expect to accelerate up hills but surprisingly capable for what it is2 points
-
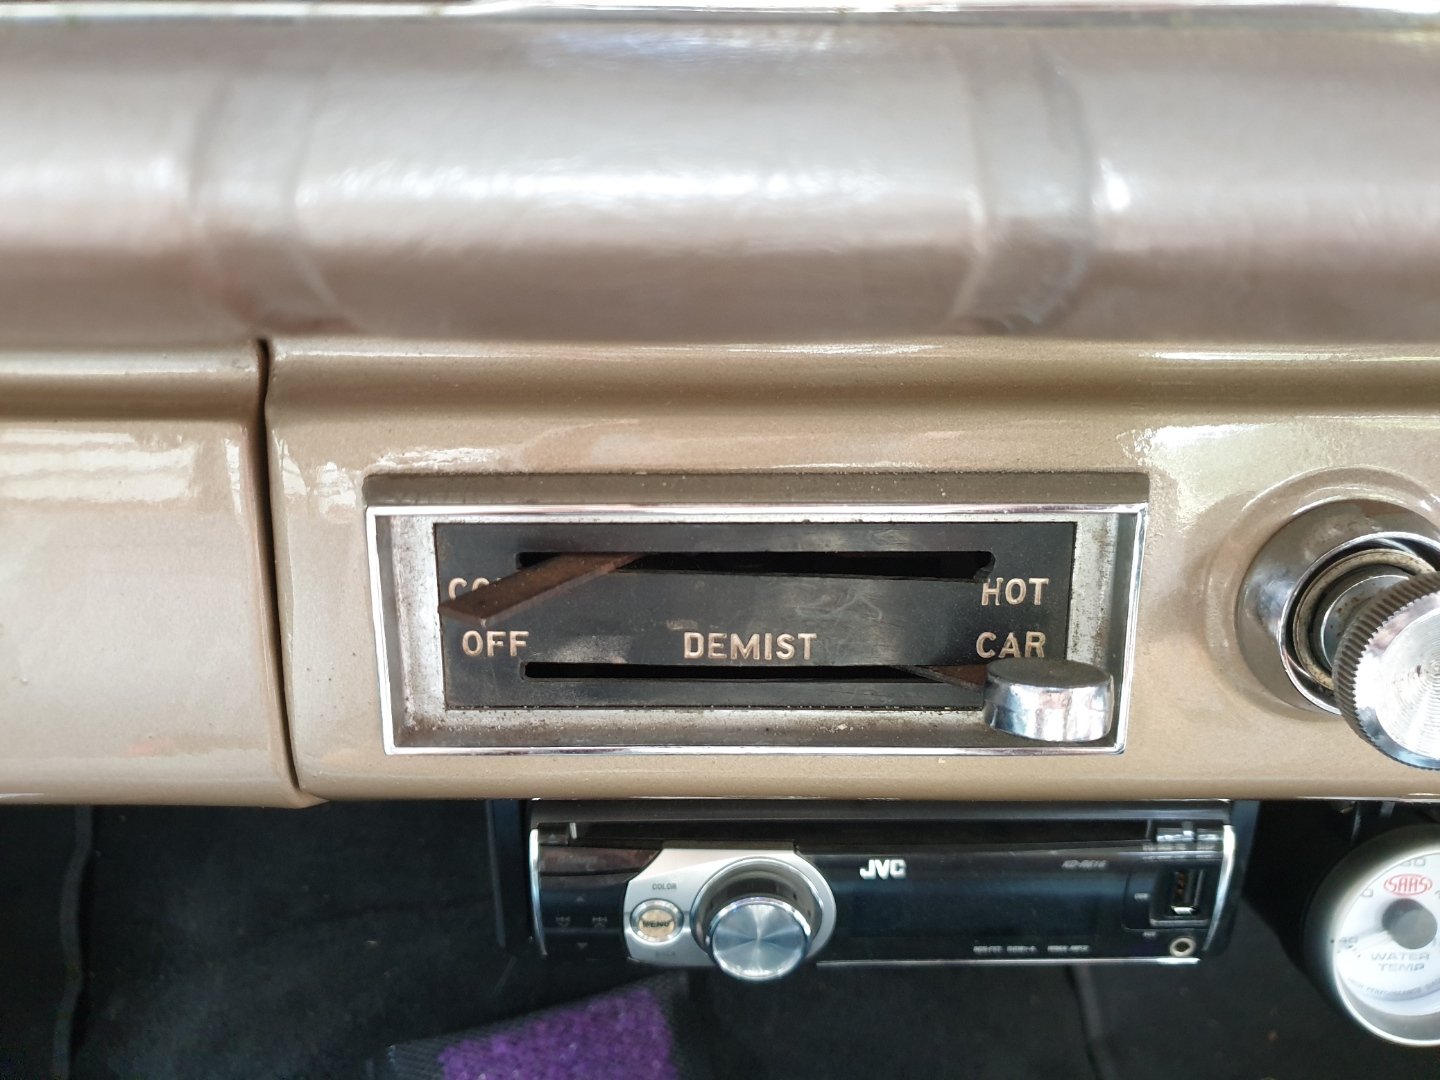
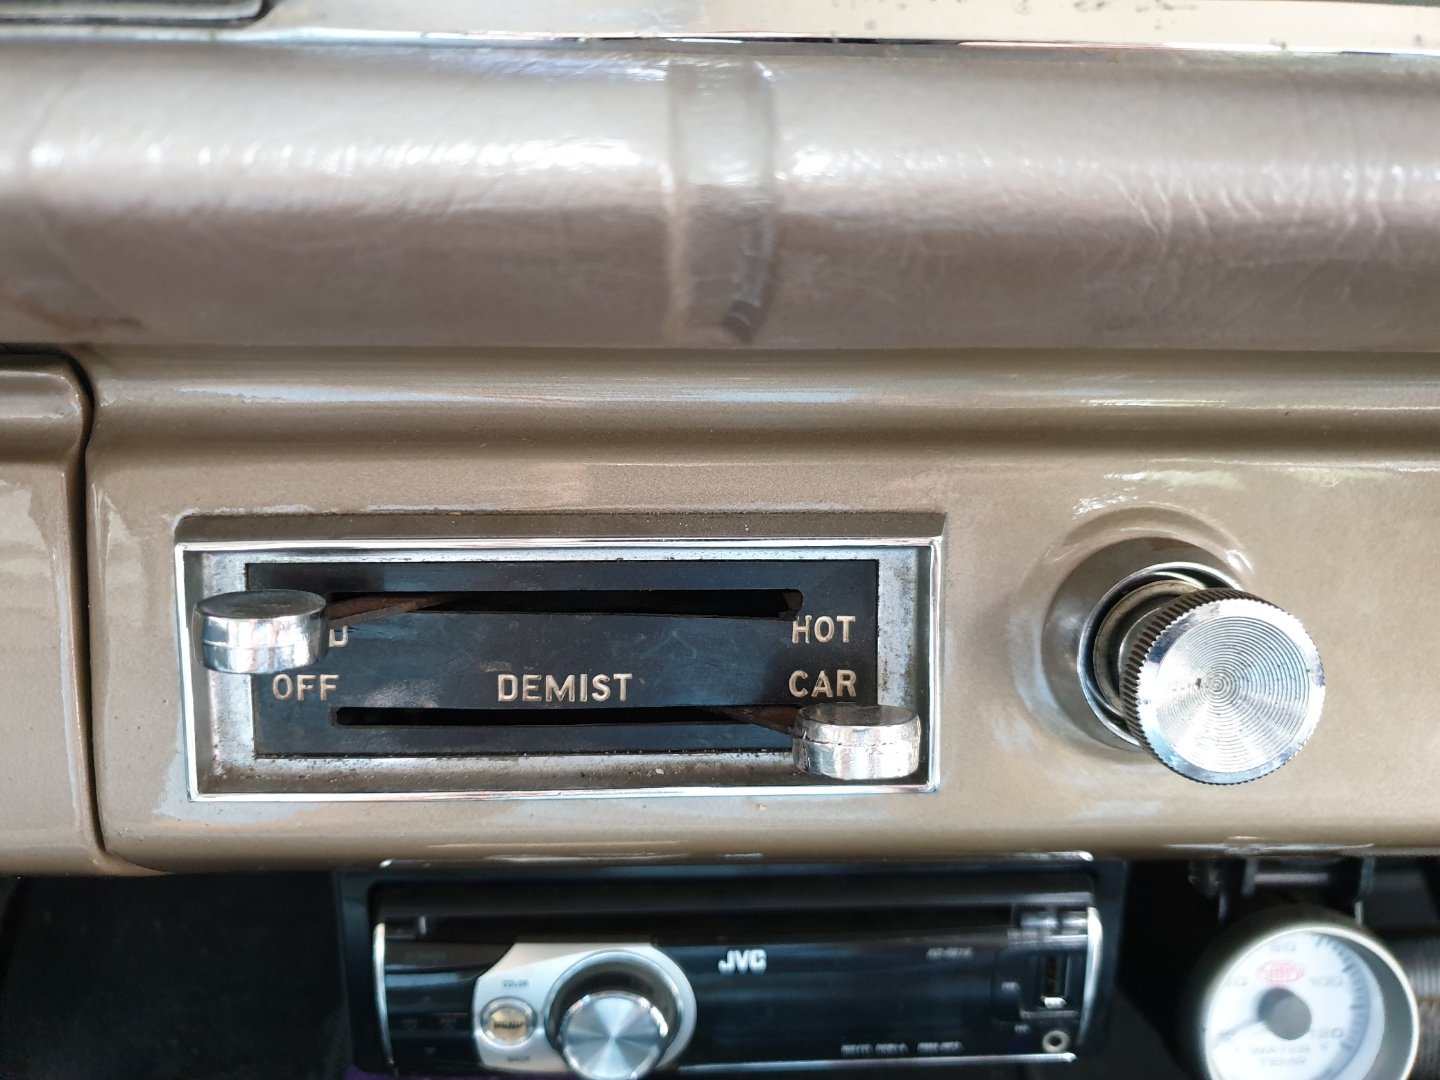
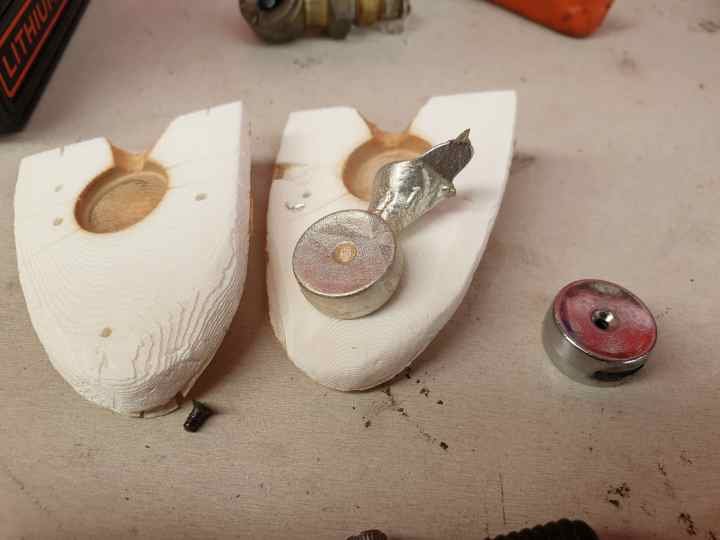
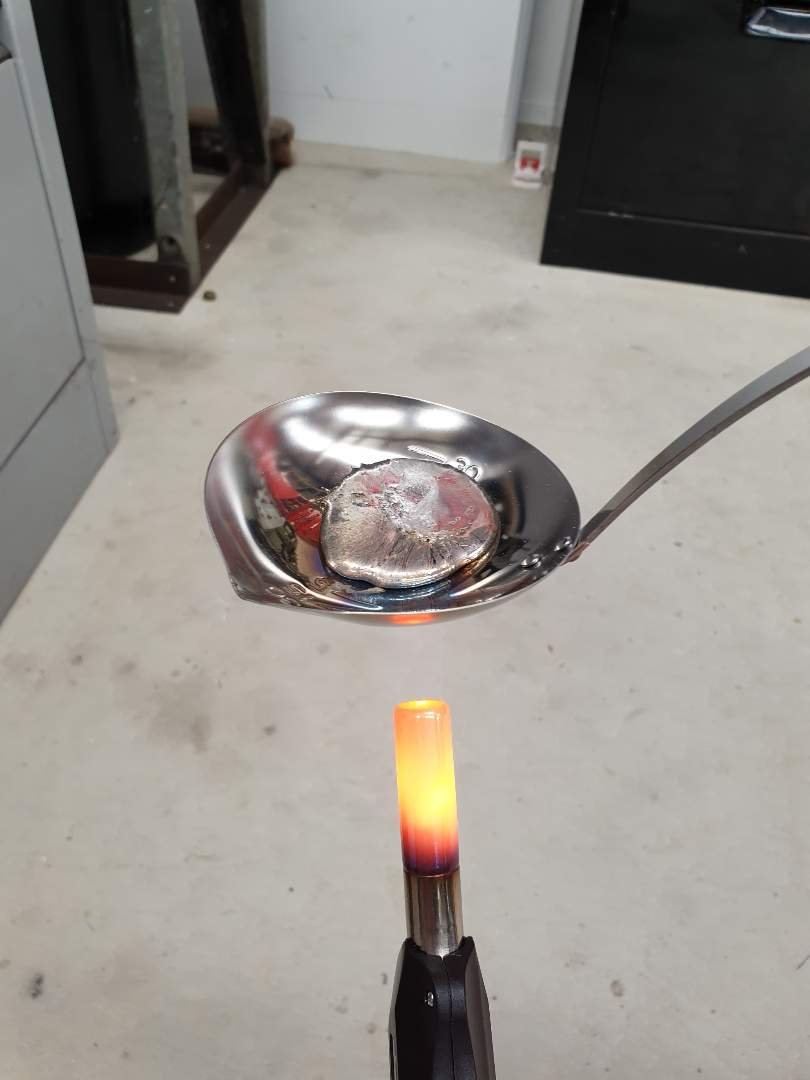
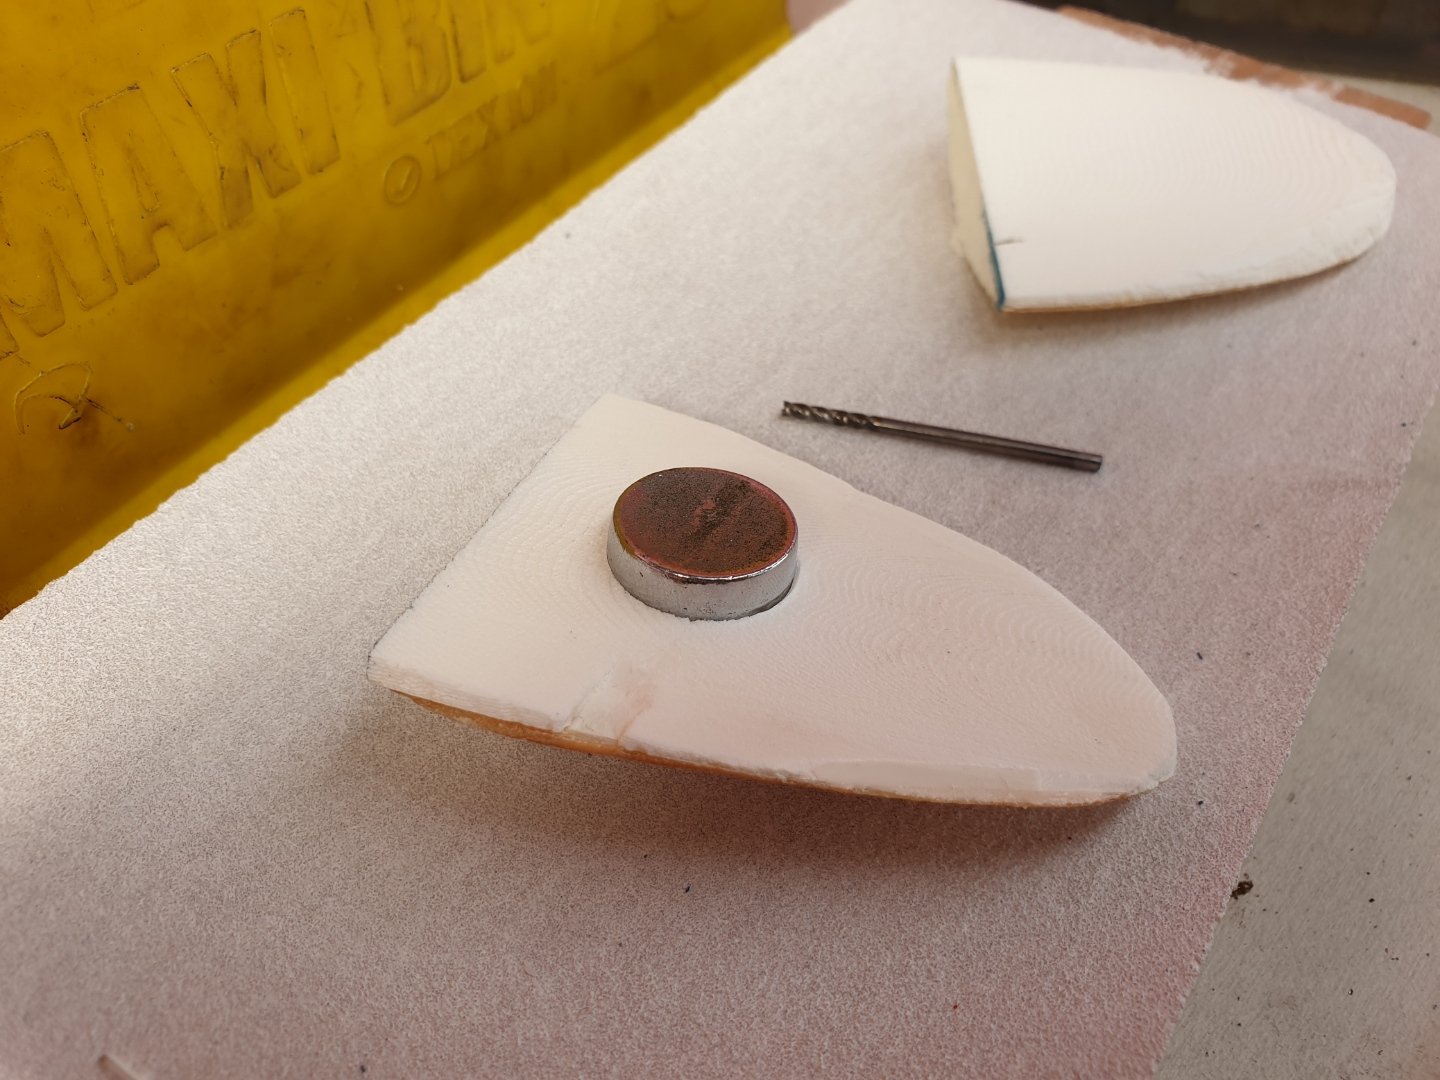
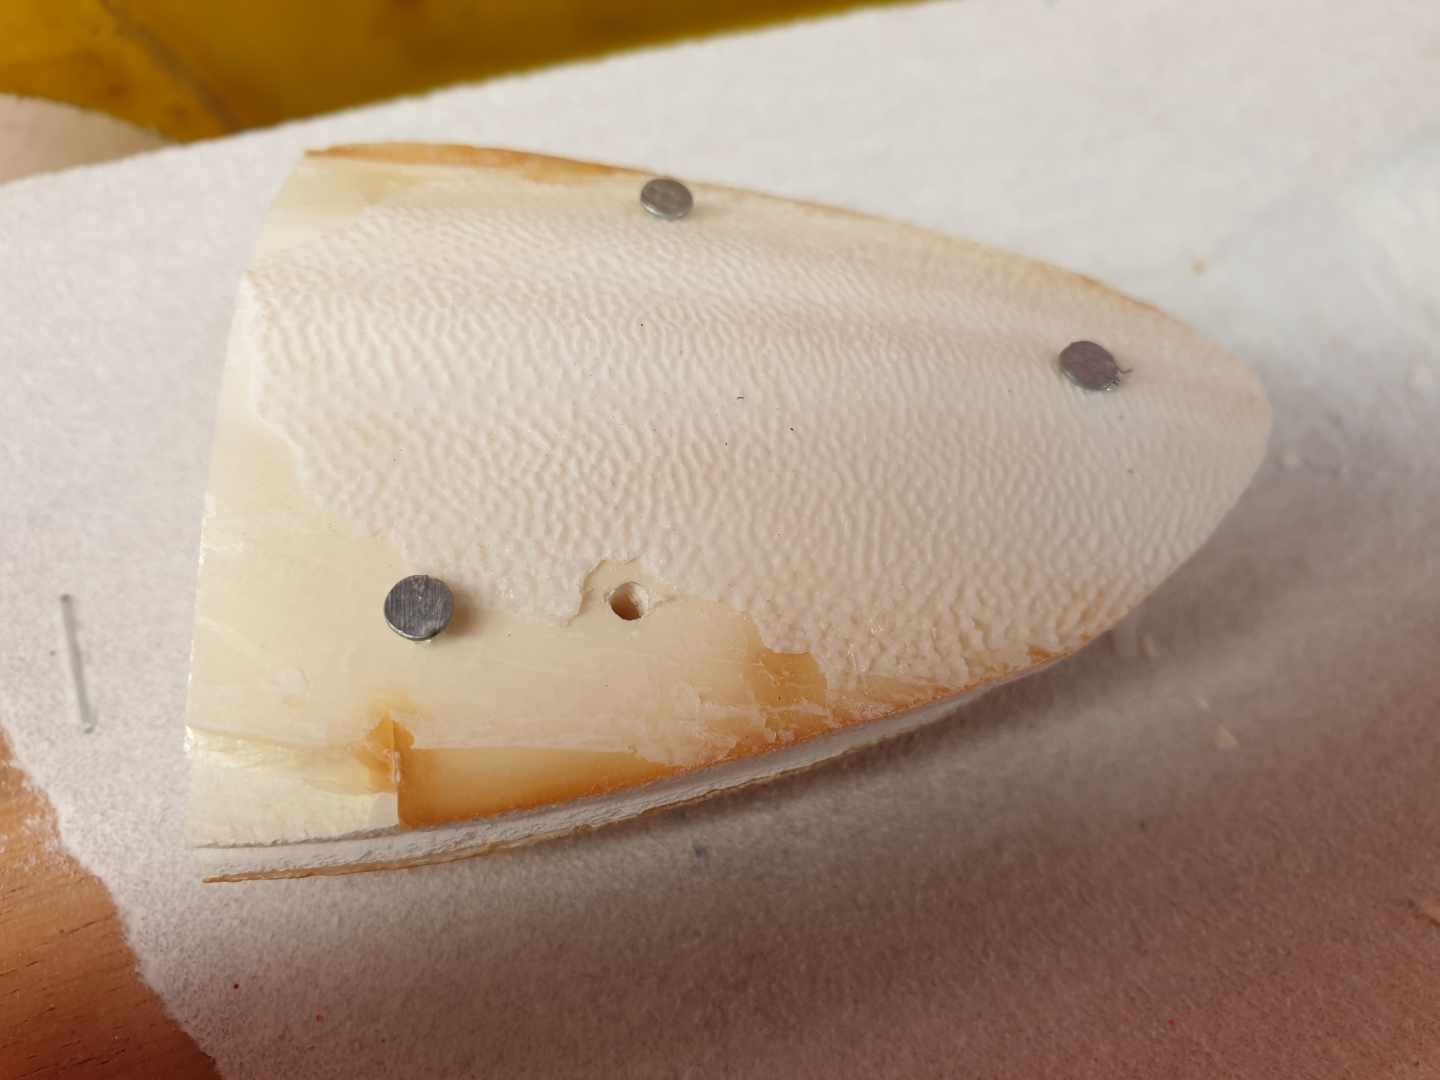
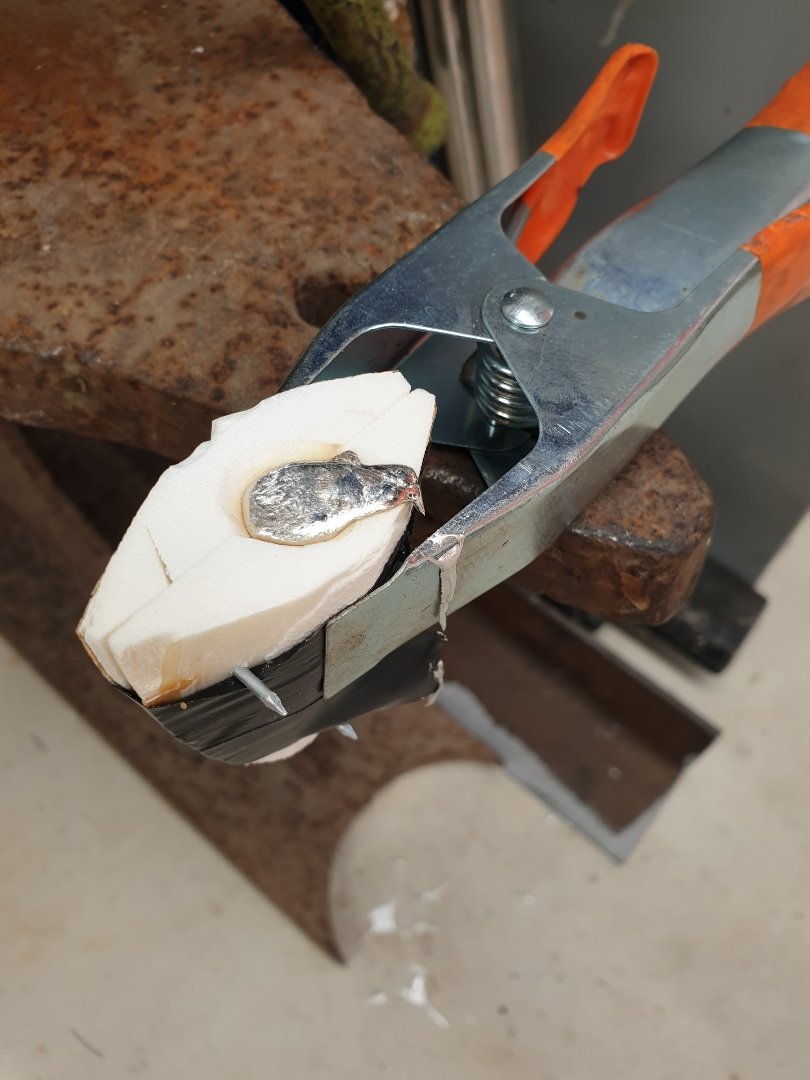
My impala was missing a knob. No one likes being knobless, so I thought I'd treat it to a brandnew knob! A Google search or two later and I was shocked at how expensive it was going to be, $30USD + $25USD postage!!! WTF!!! That's like $100DNZ. So I thought about turning one up one the lathe, but it would've looked too perfect. Then I remembered casting metal for small projects about 20 years ago when I was a student. So I thought I'd give it a go. I really wanted to capture the imperfections of the original. Original old parts have a certain amount of soul to them...new parts often don't. So here's how it went down: DIY sanding board. $2 cuttlefish from a pet store. It's that white shit you'll see budgies pecking at inside their prison cage of broken dreams and mental hell. I cut it into two halves, and then sanded each half flat. Next push in your original work piece as much as possible. Take it out, scrape away some of the indentation...repeat...repeat...repeat, until it's nicely sitting halfway in. Now match the otherside the same way. You'll need to cut a pouring funnel into the top, to get the metal in. And hard to see, but I cut 4 very small air vents on each half, to let the air out. Then I pinned the mould together to keep the alignment of the two halves squared away. Time to heat up metal. I'm using lead free pewter, same as jewelers use to make rings and necklaces etc. $14/100g online from a craft shop in Auckland. I only needed about 20g...but at that price, I thought I may make something else later? Melting it is as easy as it looks. A $2 shop ladle that I tweaked with a panel hammer to put a pouring spout into. And a blow tourch. Pouring the mould. Opening for the moment of truth...fuck yeah, nailed it first pop!!! Yeeee-fucking-ha!!! A quick tidy up, dremel a slot, buff up on the polishing wheel, scotchbright to dull it down a little to match the original patina...booyah! And what it's all about. Installed in the car. It competes me! I'm so happy with how its turned out.
1 point
-
It's a bit of a lame forum but this info is good https://www.thegsresources.com/statorpapers.php1 point
-
It's a common problem for old Suzukis, on my old Kat I had to have the alternator rewound and most of the others I had got new reg/recs after having charging issues.1 point
-
noisy version of above1 point
-
The dude with the black RD/AG100 last year is keen again. Another fella around here has a YB125 he's keen on bringing. Showed them the accommodation etc and they're getting stuff sorted. Numbers must be getting pretty solid now. The excitement builds!1 point
-
Yeah fourth is just vacuum so it will only flow when running (IMO just another thing to fail, handy if you forget to turn the tap off tho)1 point
-
Cheers. I work at Caraid.1 point
-
Hey no worries. Trying to keep it interesting with out too much boring detail. I'm definitely not the worlds best engine reconditioner, but just trying to show where some of the hours go!1 point
-
https://www.remotemoto.com/exploration-routes/wairoa-motu-opotiki-explorer/1 point
-
This might come in handy https://drive.google.com/drive/mobile/folders/1A-VWZahNUwwOMdH_KvlOAo8Pie0a2C6L/1raDJJQ2M_A8v9lFIxSyYpzRKIRMQ4a1f?usp=sharing/manuals.html&sort=13&direction=a1 point
-
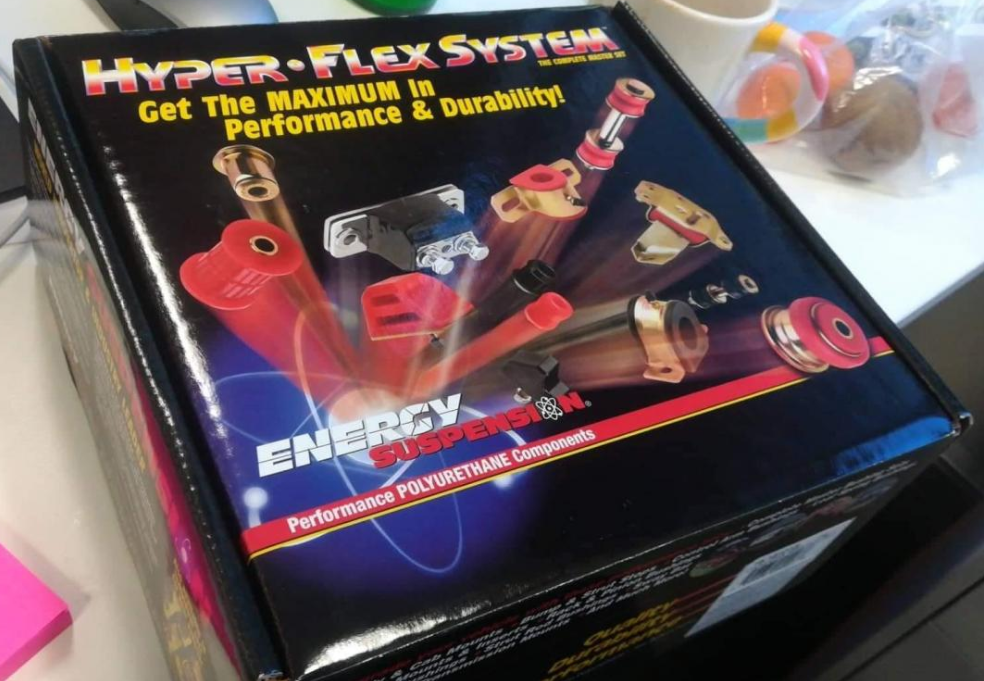
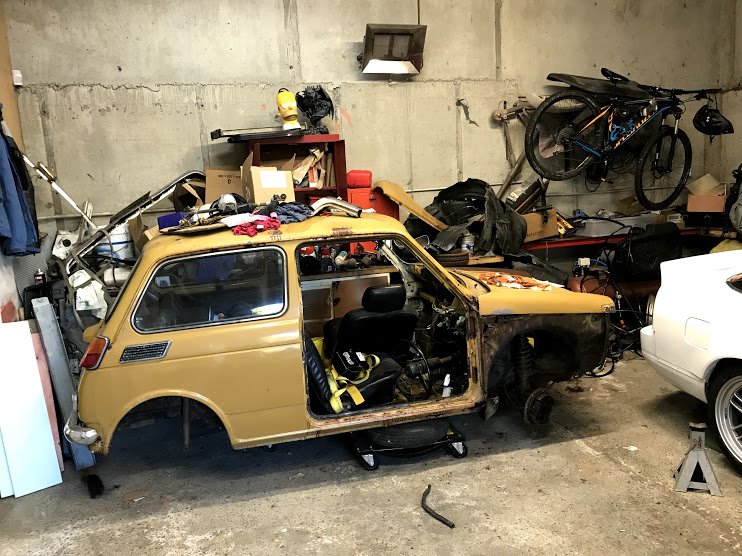
Progress slowing down, fell into employment however got a couple things done, and ordered, then delivered. Firstly a video of it back in it's hay day for you who don't have a tinfoil hat and use FB. Did: 1) Got the sub-frames out and all the hubs etc. Only have fuel tank and dash to remove now. 2) Bought and received a new engine and body loom. Got an EG9 Civic loom. Few reasons. Currently it's all been done with a OBD0 DA6 Integra loom , new EG9 loom is OBD1 which converts great for a tuneable ecu. The builder of the car originally hacked out literally every wire that wasn't needed and bundled loose wires with cable ties so not really sure what I do and don't have anymore. Finally everything was stripped from the dash so I don't have fans, radio, anything that wasn't 100% needed to run an engine was removed. I'd like to change that a little. 3) Bought a full car bush kit from Energy suspension through Adam @ Speedscience Need: (Not a huge amount is ever recorded on the interwebs about how to modify these era of cars to get any sort of handling performance out of them, so this is all my own RnD) 1) Need to head to PaP to investigate if the Honda Oddysey caliper bracket (You can google it yourself) will space the caliper enough so I can run some spare 96 spec ITR front calipers on EG9 disks. Choice upgrade as I have like 230mm disks currently from an AV Integra, so a 262mm and ITR caliper will make a massive difference. 2) Next on the investigation thing is a retrofitted rear sway bar as it doesn't have one, and I think it would really be beneficial to have one. 3) Shortened shocks for the front so I can lower it just a smidgen more (torsion bar front) and still get good travel (Y) Possibly for the rear as well, but I feel the fronts are going to be more complicated. Idea I'm tossing up at the moment is potentially figuring out if shocks form another car will work. So when I have free time I'll just be continuing on grinding back body rust, and sandblast or vapour blast the sub-frames etc in preparation for POR15 and newly acquired bushes, then they can be stored away in my spare car storage system ready to be reinstalled. Thanks for reading.
1 point
-
Don't fall into the trap of thinking you need perfection if you know it ran well before. Some engines builders scoff at me for saying this but... There have been many people who build engines with pitting in the bore. One guy bored 90 thou' oversize and still had some pitting. He calls those pits "oil retention dimples" now. 1 mm oversize should cure the worst of it. (This is only my advice and i cannot recommend pistons to fit as i know nothing of the pin height ect of said engine)1 point
-
Ok so for years i've been wondering why tractor pullers take so long to build rpm and boost, and only just thought to google it. Sorry if this is really obvious to you guys, but this blew my mind. The diesel pullers run a low compression engine.. Engine compression heats the air hot enough to ignite the injected diesel fuel. With the lower compression, diesel fuel has trouble igniting in the cylinder. This is why you see many of the diesel puller engine start with LOTS of ether assist. To build heat in the cylinder the puller will very slowly advance the throttle to speed the engine. If he pushes the throttle too quickly the additional fuel will cool the cylinder enough that the engine will die. As he advances the throttle he will load the engine by slipping the clutch. As the engine takes more load, the turbo, or turbos will start to build manifold pressure. As the manifold pressure increases the cylinder pressure rises allowing more fuel to burn. The more fuel that burns, the faster the turbo spins, the faster the turbo spins the more fuel. (you get the picture) As HP and RPM build the engine will finally be making maximum horsepower and the clutch can be released. And the pull is ON.. P.S. The low compression is so the turbo can pack more air into the cylinder without blowing a head gasket or worse. How amazing is that, it's squirting in so much fuel that it can put out the fire.1 point
-
This bitch is finally alive. Started yesterday with no exhaust so fairly rowdy. Just needs exhaust sorting, cooling fan found (looking for one currently let me know if you have one please!) I seem to have lost it over the last decade. Pretty pumped as I got the engine rebuilt over 12 years ago and was a bit worried there would be issues. Will need a tune etc and no doubt some other issue will show itself but its getting damn close. Looking forward to taking it for a fang!
1 point
-
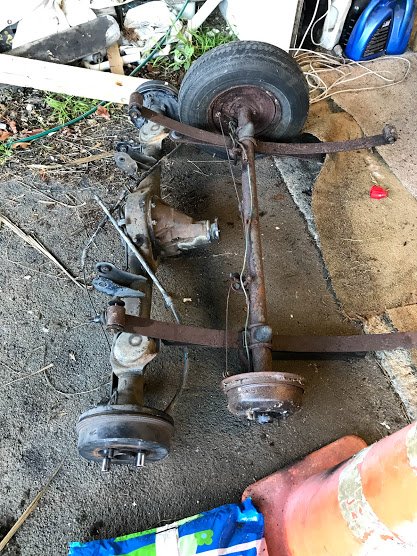
Took the axle and leaves off, jesus its tiny versus the Toyota t series one: Then played car Tetris: Just fits:
1 point
-
Those booking websites clip.the ticket too. I always find what I want, then ring them.directly and $ave.1 point
-
Just call Waikanae. It's run by a lush old married couple. Tell them you're coming through again with a group like last year and see what they can do. I know from previous times each booking site holds only a certain allotment and the actual accommodation might actually have more on offer. We had about 10 rooms between us last year.1 point
-
Tried more stuff, ended up back in the same place. Including this: -50kw was trying to find the first reflective wave. chased it along the rpm range cutting the pipe down 200mm at a time., but just found negative results. half way thru noticed the silicone joiners wern't playing the game and doing some crazy stuff. possibly giving some wack results. but pretty sure i seen what i needed to see. seems the loss in the super long pipe with bends in it offsets anything that would be gained from the reflective wave. Got the bmw throttles on there now running the big injectors further back in the throttle bodies. makes exactly same power throughout the curve as with the 47mm 20v throttles and injectors in the head. But soon as you mess with this: drop the top trumpets off and goodbye 10 -15kw everywhere. so yeh that setup seems to be on point green: current setup. with small extractors red: old engine big extractors blue: old engine small extractors And.. road test, not having the hole at 4500rpm plus bit more up top, shit hustles of the mark through 1st and 2nd gear. throttle bit too touchy for my liking though, need to revise the linkage setup.1 point
-
1 point
-
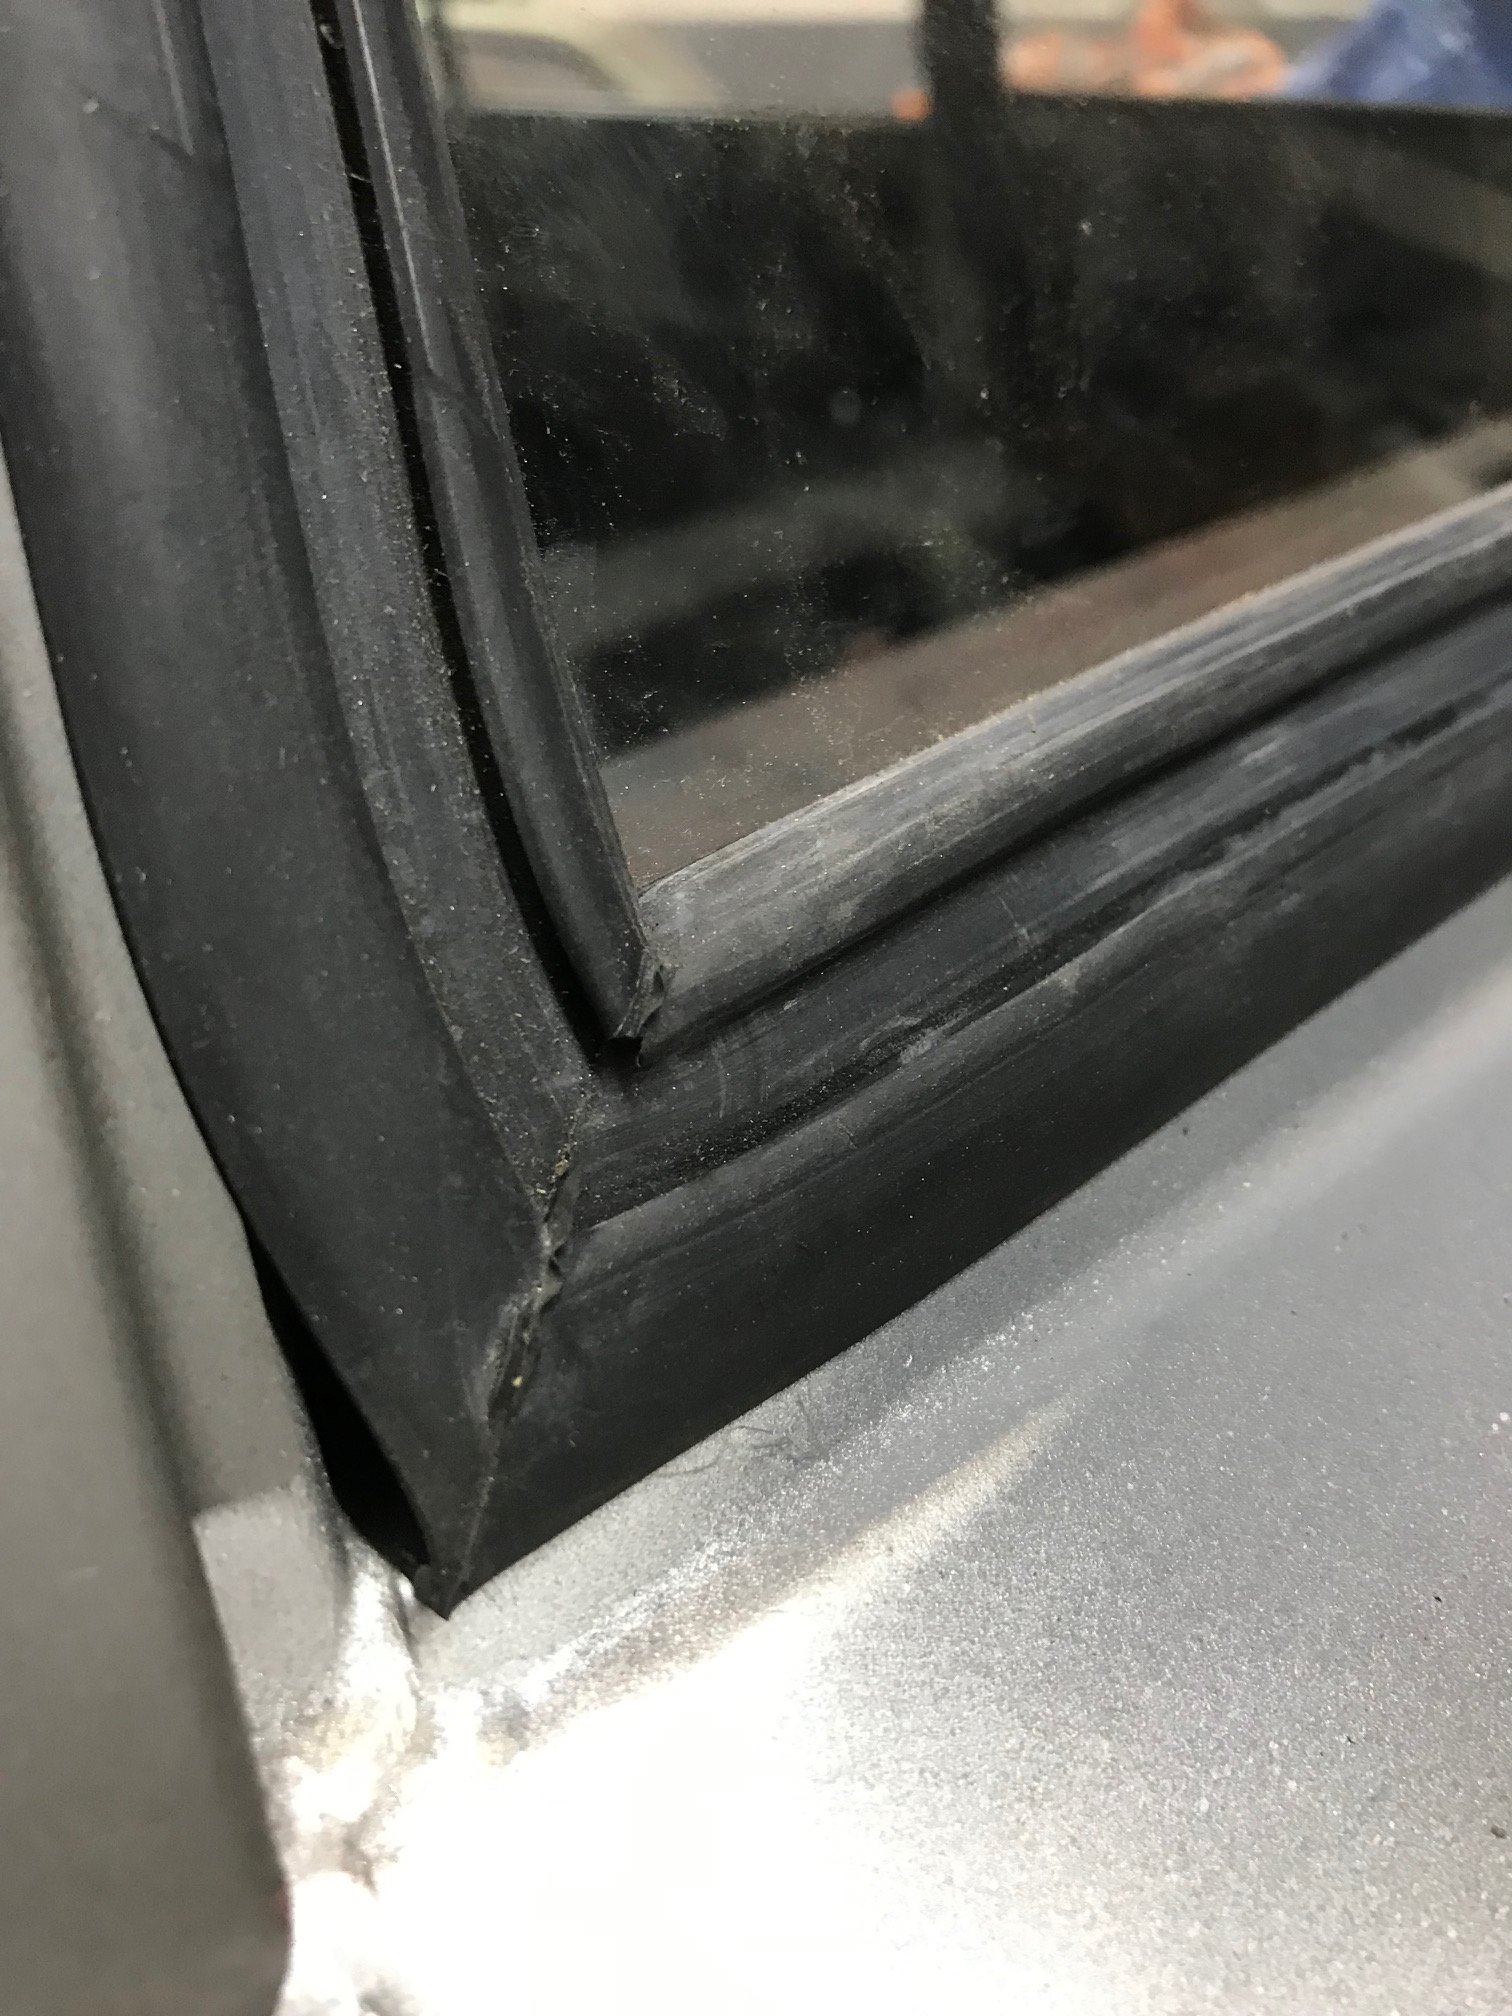
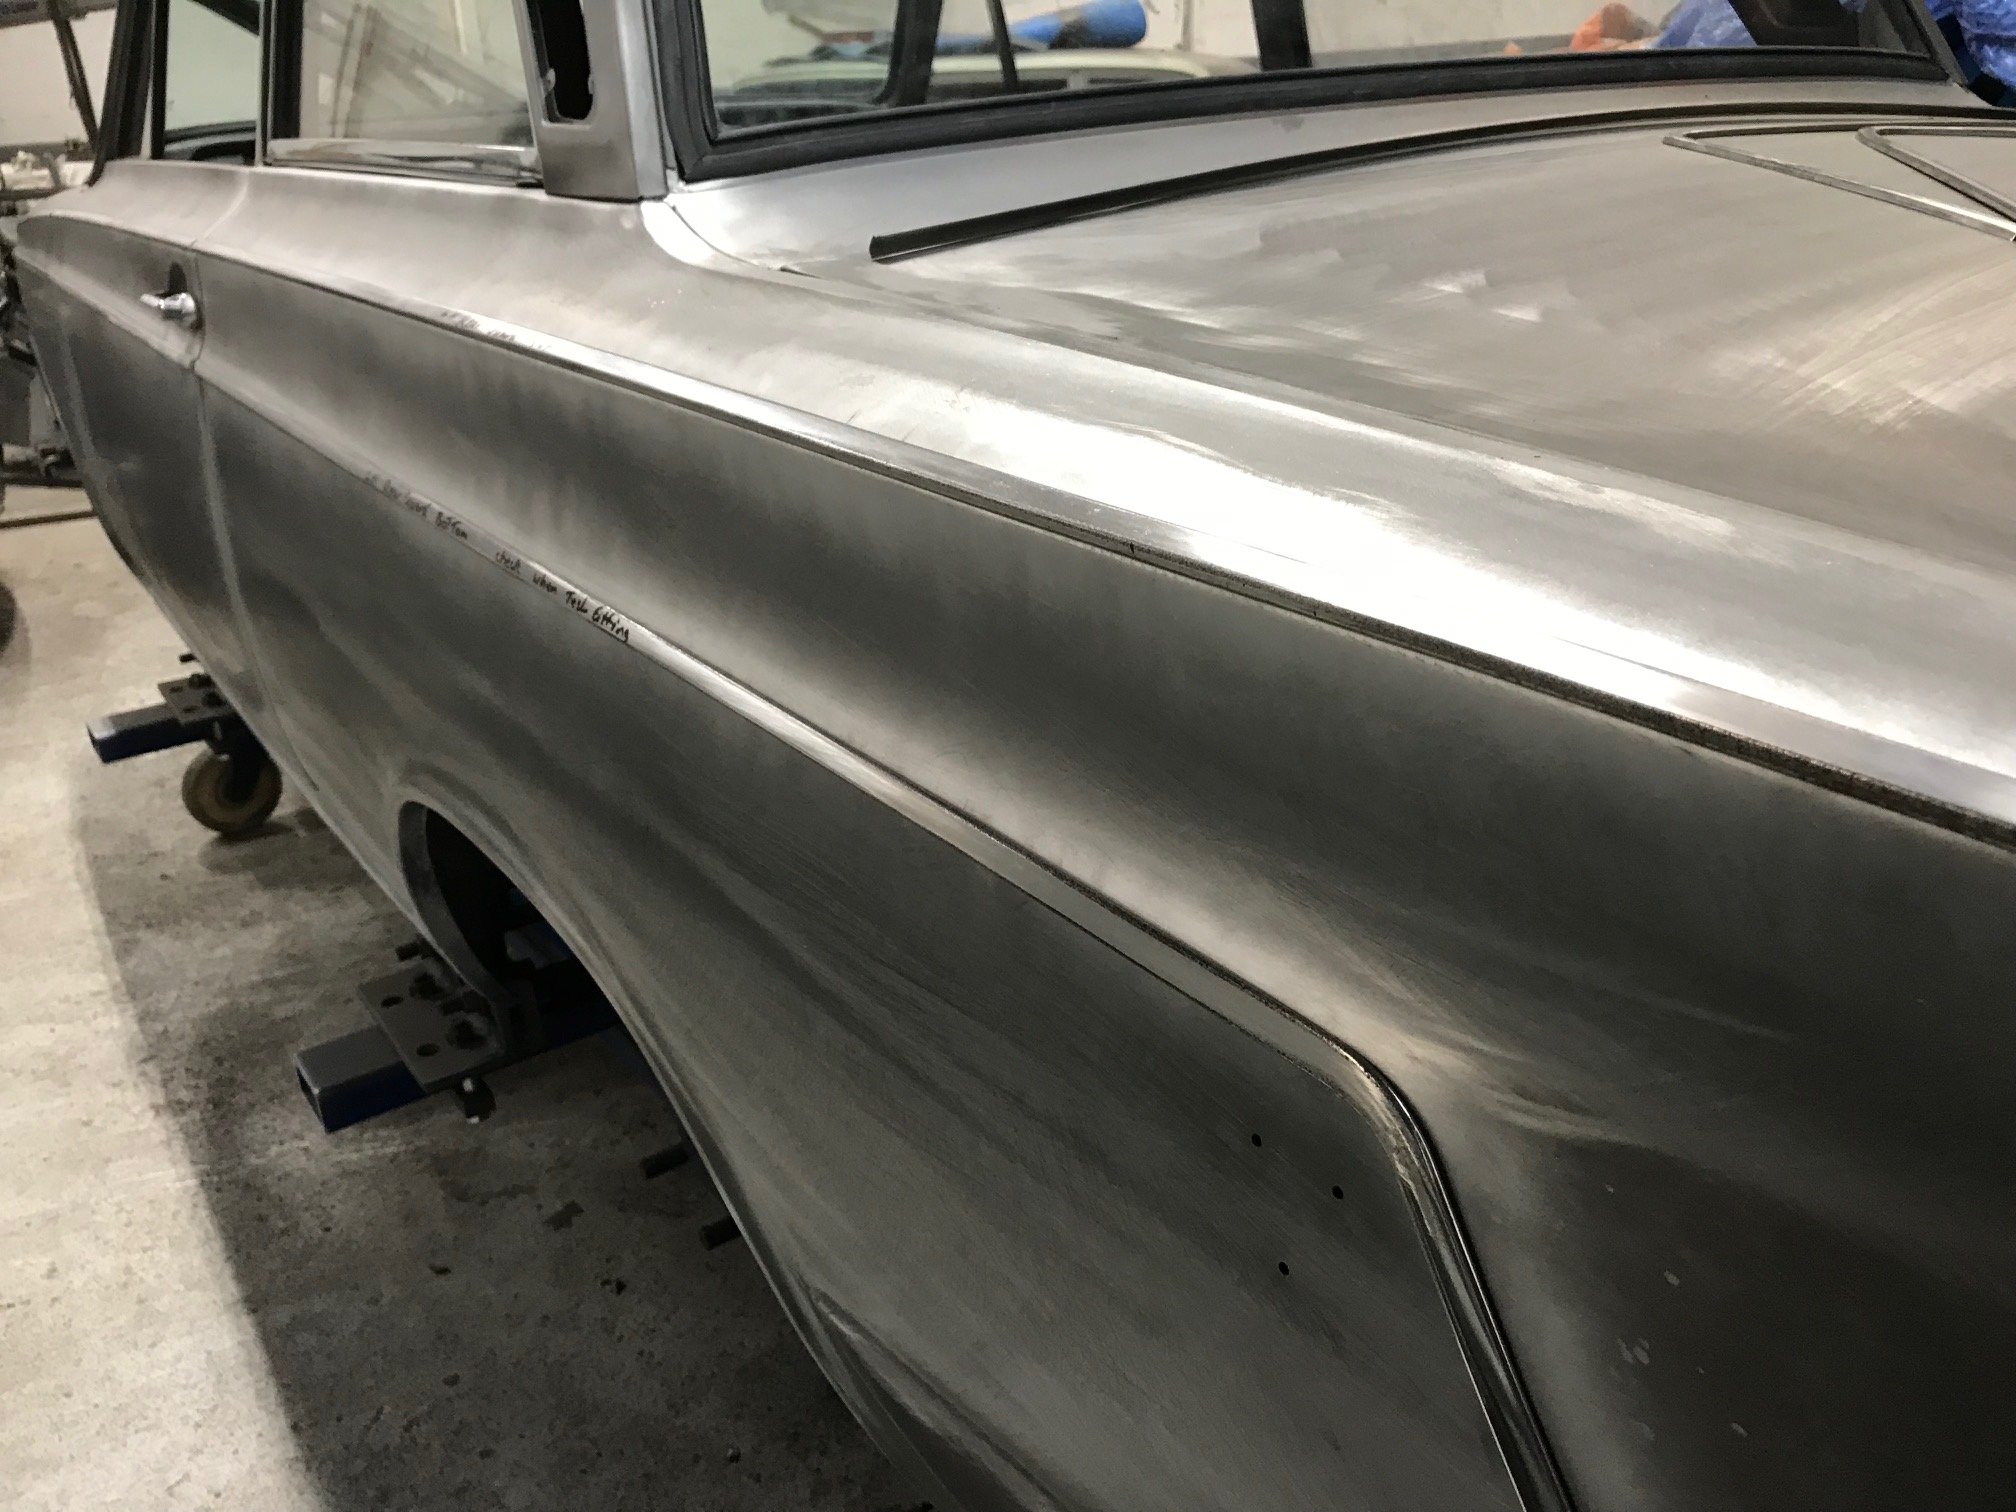
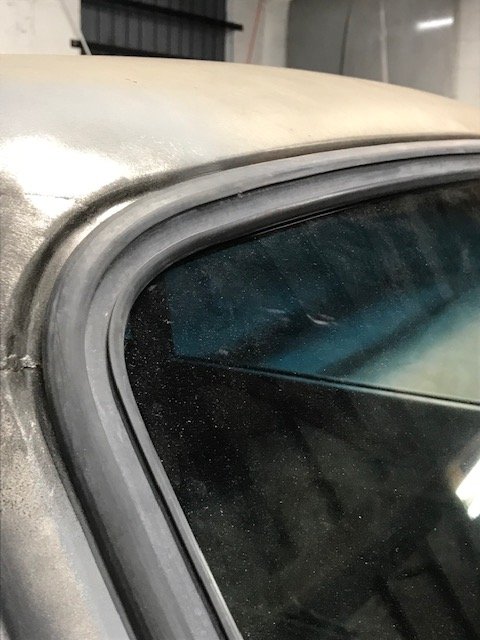
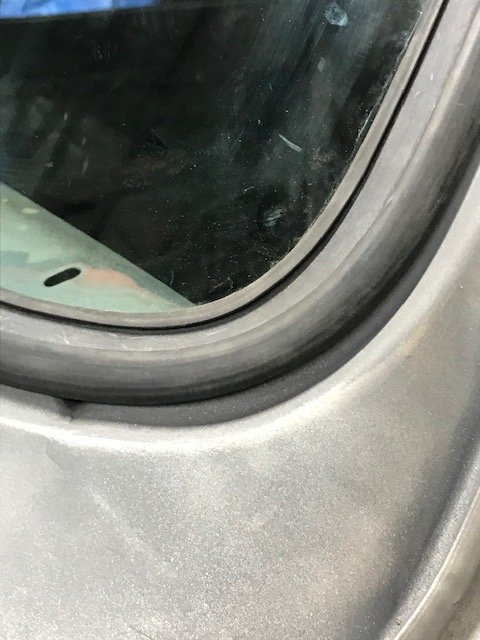
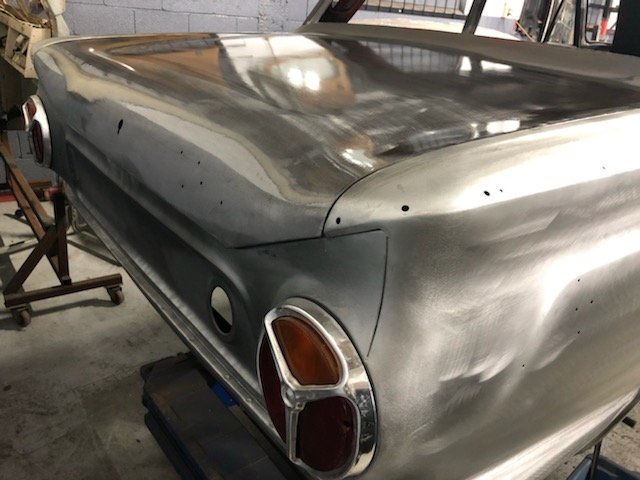
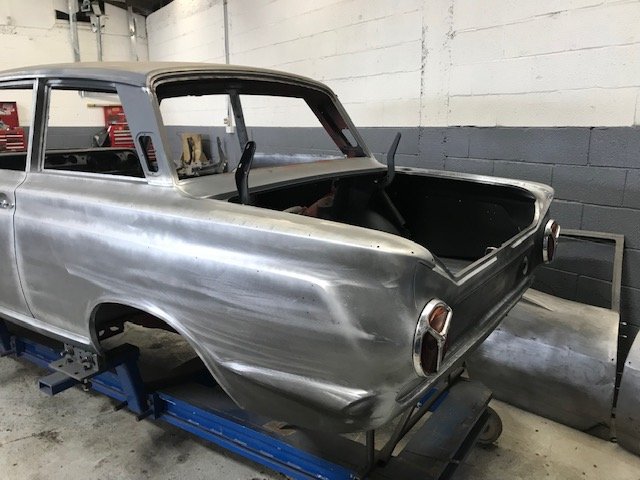
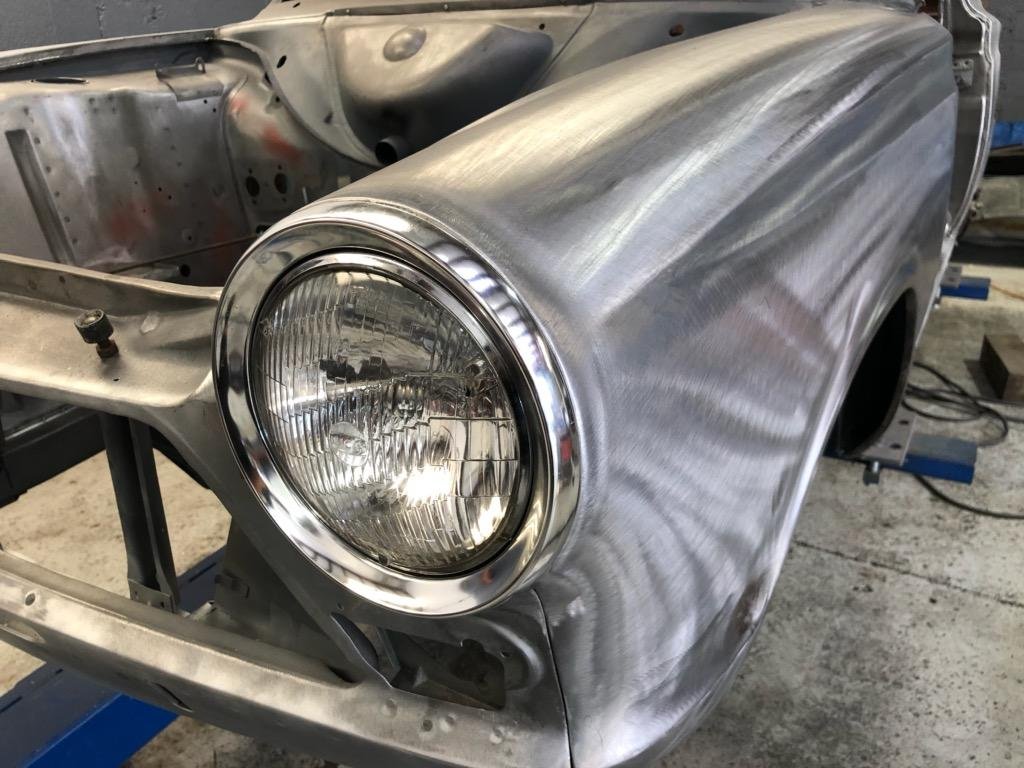
Went and check out the rubber issue today and both front and rear screen rubbers don’t fit good and the rear quarter glass rubbers are average as well compared to the originals. Need to do some research to sort the best rubbers. Rear bumper I had rechromed has a couple of ripples in at as well so it’s off to get stripped and sort the ripples and chrome again argghh. It looked very straight when I dropped it off but the new chrome highlights any defects. The moulding fit off has paid off big time as quite a few of the mounting holes have had to be welded up and redrilled to get it bang on.
1 point
-
fuck me, so they've done the compliance check all ready. failed on park brake warning light not working ( i stupidly forgot to plug it in) and rear brake imbalance. all the rear brakes are new so i should be able to fuck around with adjusters and sort it out. that's it. i am fucking stoked. i really needed some good news and this will do nicely. the other thing that happened is that Alex who runs Western compliance tried to buy the car off me, which is a complement i suppose. so ill go pick it up Wednesday night and take it from there.1 point
-
It'll fit. probably1 point
-
So I looked at the prices of aftermarket pulleys and said to myself "fuck that, I can make those" so have drawn them all up and will be putting them on the cnc lathe soon. Idea is to make myself a set and get them anodised. Will likely sell these eventually too, have got fwd and rwd water pump pulleys drawn up and the alternator pulleys so yell out if anyone is interested. These are underdriven too. Nearly there with the design, just need a few tweaks to give some added strength and make them easier to run up on the lathe.1 point
-
So this happens when you leave random carparts in reception at your business by mistake: And I received a care package from @KPR :1 point
-
Imagine how much their bottle rental from BOC would cost!1 point
-
Boot lid finished which pretty well completes the panel. It’s going to be a shame to paint it! Stainless trim already to go to the polishers.
1 point
-
anzac day progress. been feeling pretty good lately with the old back, im down to half my pain killers (except for today where i took some after breakfast because leg was turbo sore) so with that in mind ive been doing a bit more on the coupe. today i installed new inner and outer tie rods, new upper and lower ball joints and a second hand but pretty good pitman arm. i also topped up the steering box with Molly grease which has made quite a big difference. lets be honest, the steering on these things is pretty hard but its slightly less shit now. i have a power steering box to put in this which ill do after compliance. i dont have a bracket for the pump if anyone has one for a square port 4M.... so with that done i decided to go for a drive. the longest drive ive ever done in it, about 5Ks around the neighborhood. went up to westmere then down to the beach. this thing goes so well. the suspension is fucking ace, it dosent rattle or vibrate, the auto is smooth and changes perfectly and the motor hasn't turned to shit yet. the radio works and the heater /fan all works mint too. its fucking ace. and your not gong to believe this but it did a skid turning right onto the main road! ive got a few little things to tidy up but then its on to compliance!!! 2019-04-25_04-50-20 by sheepers, on Flickr 2019-04-25_04-50-11 by sheepers, on Flickr 2019-04-25_04-50-03 by sheepers, on Flickr1 point
-
pulled the mirrors apart because they were fucked. the bolt/pin that holds the top part to the base was rusted through and they fell off when i started trying to move them. i got the broken rusty bolt out and ill replace it with a new one. i need to make some conical washers but that shouldn't be to hard. i do need to replace the springs. they are pretty impressive springs when you consider they are just to hold tension on the top swivel bit. square wire (might have been round once but look like they were square to me) reducing helix wound springs. if you know of something like this i can buy new hit me up, otherwise ill find something that will work in its place. 2019-04-23_07-52-46 by sheepers, on Flickr 2019-04-23_07-52-38 by sheepers, on Flickr1 point
-
did a bit more. i gave the patches i put in a bit of a tidy up and made the whole car red. i got some rattle cans matched and just used them. i fucked up a bit on the passengers side around the wheel arch and didn't cover the primer enough so now its showing after i gave it a polish. ill blaze some more paint on that bit and call it good. i started trying to polish the paint to see if it would come up ok. it didn't. its better i suppose but the paint is pretty fucked. anywho, ive only done one side. ill paint the whole car at some point but i was kind of hoping it would come up a bit better. 2019-04-21_12-54-05 by sheepers, on Flickr 2019-04-21_12-54-20 by sheepers, on Flickr1 point
-
Hi I managed to find a full engine gasket set from the us so I've ordered one of them which will turn up next month.. Have been cracking on with putting the interior back together I'm needing a few trim clips/door card clips I guess they look like P shaped? Also the plastic circles that slot into the inner door skins so will see if can purchase some new ones. Cheers1 point
-
all working now. 2019-04-15_08-43-48 by sheepers, on Flickr1 point
-
got the tail lights back in and the bumper on. the gaskets that go around the tail light holes were all fucked so i bought some closed cell neoprene strip from para rubber and stuck that on. it worked a treat and now the tail lights are all sealed up. 2019-04-14_03-38-29 by sheepers, on Flickr 2019-04-14_03-38-22 by sheepers, on Flickr also found this cool manufactures sticker/QC mark on the back of one of the door cards. 2019-04-14_03-38-13 by sheepers, on Flickr so yea the back end is starting to come together, got an issue with the brake lights not working properly but that will be something minor, im pretty sure they all worked before i pulled it to bits....... 2019-04-14_03-38-06 by sheepers, on Flickr1 point
-
painted the boot. its not great tbh, got a couple of runs in it but its only a boot i suppose.... 2019-04-13_06-22-45 by sheepers, on Flickr 2019-04-13_06-22-53 by sheepers, on Flickr i also painted the dash. it was looking a bit shit and the sliver edging was all fucked so i had a go at masking the edges and using some chrome spray paint to bring it back to life. it came out super awesomeo! im really happy with it. the chrome isnt "chrome" as it was but its pretty close. sure looks way better than it did. im giving it a turbo win out of ten. 2019-04-13_06-22-37 by sheepers, on Flickr1 point
-
Got the intake all done with a K&N filter, looks pretty good I think. Took a guy for a drive that knows transmission things up the road and back and he reckoned the trans was sweet, shifting how it should, just the engine was massively down on power. Tried to diagnose the problem myself but I couldn't really figure much out. It was throwing error codes for the secondary throttle and knock sensors. Discovered the secondary throttle sensor was only used for traction control so I didn't need to worry about that one. Was hoping the knock sensors were just reading high because the timing was out, so I took it to Danny's Autos in Palmy to go on the dyno and see if they can tune it and figure out what's wrong. They got it on the dyno, they were just bringing it up to speed and fuel started pissing out everywhere. One of the fuel hoses going up to the fuel rail split, don't know if it just happened or if it's been like that for awhile, but we never noticed any fuel in the valley before, where as there was heaps in it then. So off came the intake and manifold to replace it. Whilst they had that off they had a look at the knock sensors and they had seen better days. The wiring pins were pretty corroded and the casings were cracked. They sourced some new OEM ones and chucked them in. They also found one of the breather hoses had a split, as well as one of the igniter modules was only firing 1 of 4 cylinders on that one side. So basically this has only been running on 5 cylinders all this time. Thought it didn't sound quite right haha. The steering rack also decided to start leaking power steering fluid out of a place the fluid shouldn't be. Beach Hop was the next week and the rack had to be sent to Auckland to be rebuilt. Managed to get the engine back together and drive it home on the Tuesday night and pull out the rack to be sent off on Wednesday. Luckily they got around to rebuilding it fairly quick and sent off again so it arrived first thing on Friday morning. Got a different igniter module from the wreckers off a SR20 and it ran waaaaaay better! Chucked the rack back in Friday morning and took it for a WOF, passed with flying colours, so went and got some rego and now it's all legal!!!! On Friday/Saturday the fuel pump must of came out about a dozen times, half of which were on the side of the road. Went for a bit of a drive and the fuel pump kept dying for some reason, thought maybe the wiring in-tank was a bit dodgy, replaced it all and soldered every connector, that didn't make much difference. Discovered that if I gave the pump a good smack it would start back up pumping a bit more fuel or just die completely. Decided to get another fuel pump from Repco and chucked that in. Turns out the brand new "genuine" Walbro pump I got off ebay was shit. Went sooooo much better again!! Took it to the 4 & Rotary Jamboree show and shine at Manfield on the Sunday and took home the Best Commercial Piston trophy. Then on the Monday took it back into Danny's Autos to get dyno'd. Made 100kw at the wheels which I thought wasn't quite right (should be closer to 200kw?), but he reckoned it was running right and just the reading wasn't that accurate, he had trouble getting into 4th, kept changing down, so had to do it in third and that was maxing out the dyno's rolling speed. It had good consistent 02 sensor readings. Took it up to Beach Hop on the Wednesday. Had no issues other than getting some brake fade through the windy bits between Waihi and Whangamata, we think there must of still been some air left in the lines. After that happened I was changing it manually between 2nd and 3rd gear through the windy bits, rather than just leaving it in drive as it engine brakes way more. Survived all through Beach Hop, including going up to Whitianga, Kuaotuna and Onemana as well as cruising up and down the main street lots, the rear bumper took a few scrapes, I think it needs some titanium stripes underneath! I think it was one of the cars that got some of the most attention. Managed to get all the way back down to Marton, then when I was overtaking up a hill, noticed smoke coming from under the dash, so quickly pulled over and checked it out. The transmission sump had either smoke or steam since it was raining coming off of it, also smelt very burnt and the oil was quite dark. My parents caught up and we decided to just keep driving. I then noticed it was revving at 3500rpm at 100km/h, where as it's usually around about 1800rpm. It was only changing from first into second gear and that's it, if I took my foot off the accelerator it would drop straight down to idle. It was a slow drive home from there at 70km/h. Next couple of days I pulled the trans out, pulled off the sump and it had quite a bit of metallic build up at the bottom and just smelt very burnt. I guess it's always been slipping, as to why it didn't make much power on the dyno. Dropped it off today to get a quote on being rebuilt, so hopefully it's not too bad. It used about $400 worth of petrol over Beach Hop, which I think worked out to be 15 l/100km. After driving it for about 1200km I have decided the seat definitely needs redoing, it's way too hard, would also be nice to sit a bit lower and further back as well. Also the accelerator pedal has your foot at too much of an angle back, so gets sore rather quick. Shouldn't be too hard to fix as the seat changes should help and just modify the pedal a little. Also the door latches + door seals are terrible, takes way too much effort to get them closing right. A softer door seal might help, and you can get bear jaw latch kits that are basically a bolt in thing for these which might be the go when I have the spare money.1 point
-
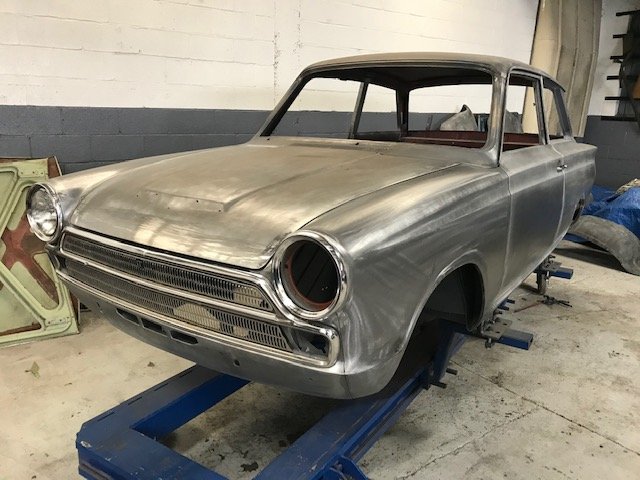
More progress with gapping the doors bonnet and boot. All welded back together again. Trial fitting allthe exterior body parts to check all good and also fitting the front and rear screens and rear quarter windows to check new rubbers all work.
1 point
-
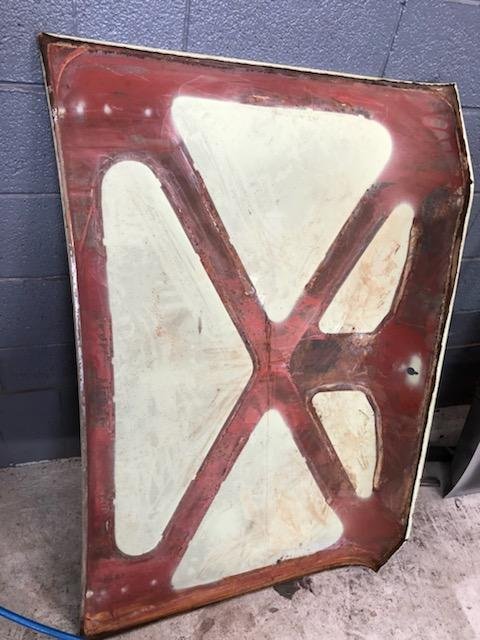
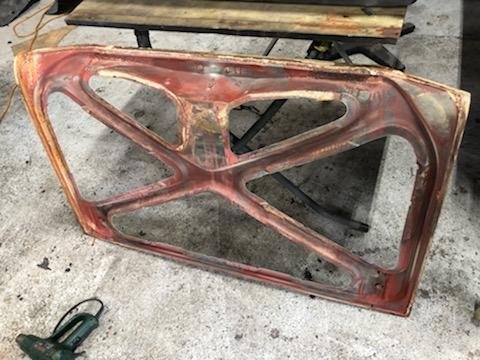
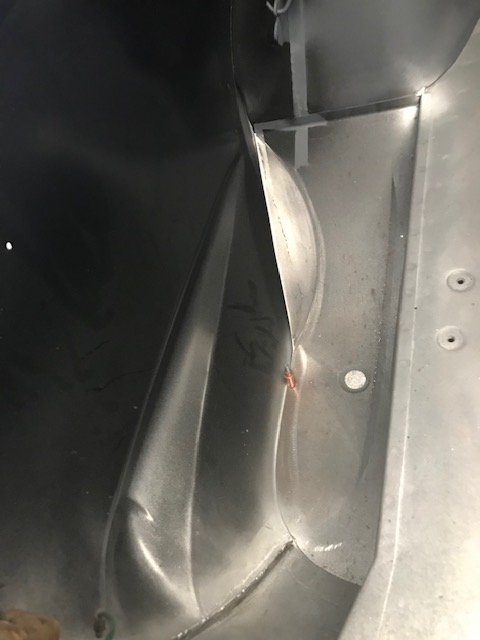
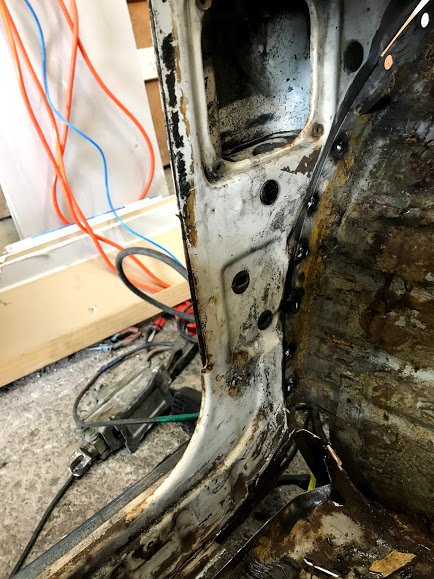
Ausy steel replacing rusty bits, just tacked in now but all reference measurements look good! The inner wheel arch there is just covered in glue it'll tidy up nicely later. This sill is not so happy, but I'll keep chipping away at it. This bonnet support frame is quite rusty. The outer skin is pretty good, so I am thinking I could tidy up the skin then make a fibreglass mould and play around with making two bonnets. One with a hole for the trumpets and one without. The vents would be pretty hard to make but I'll see. I thought this was funny, this is the complete fuse box for the whole car:
1 point
-
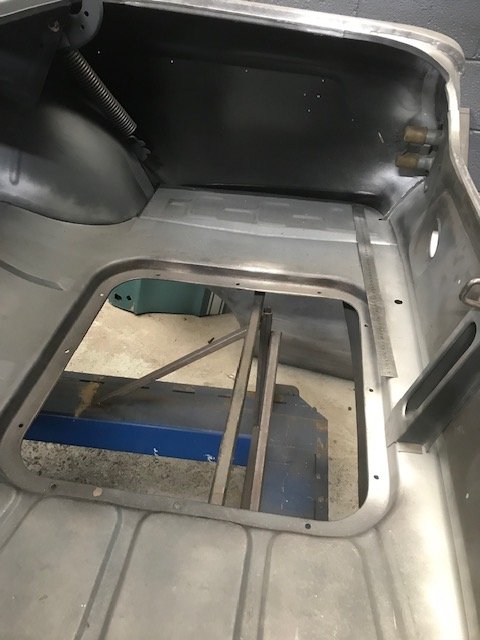
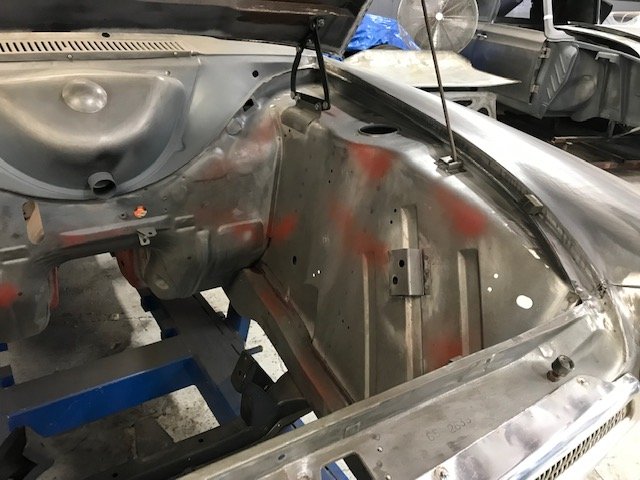
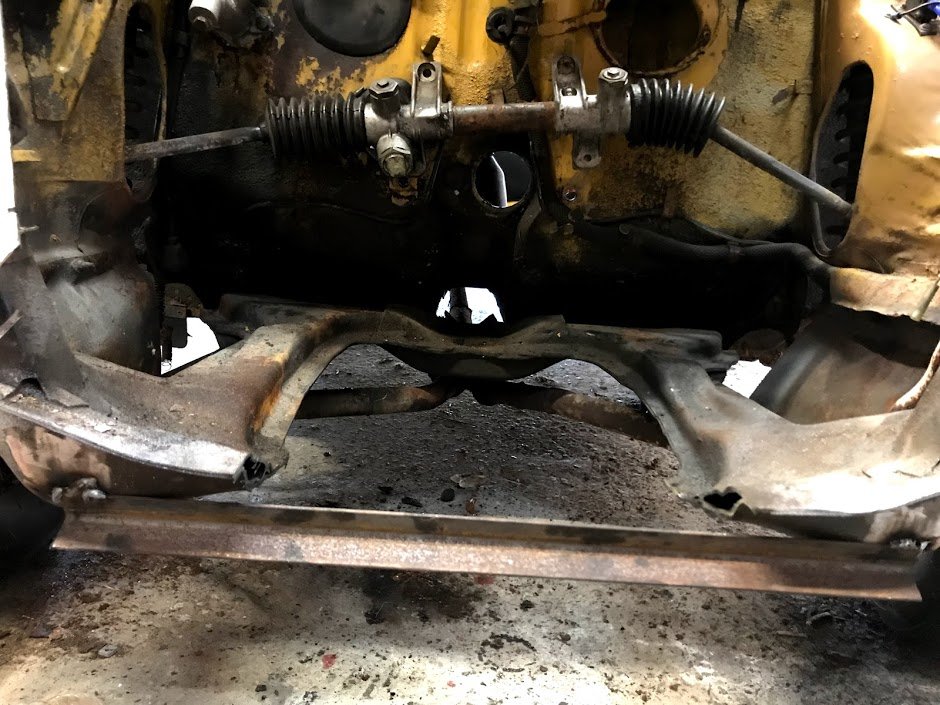
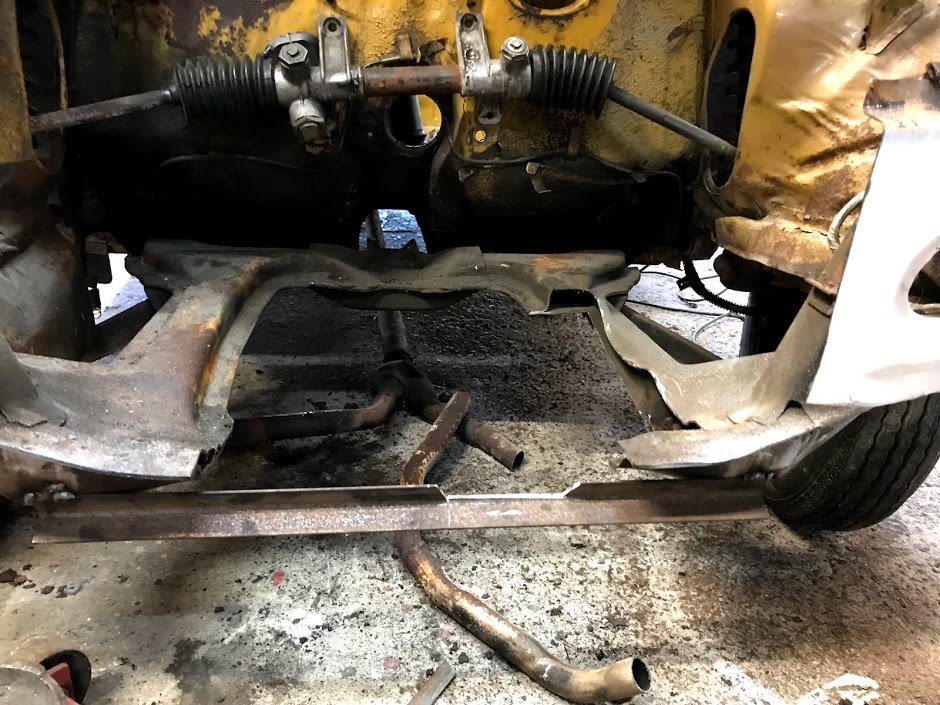
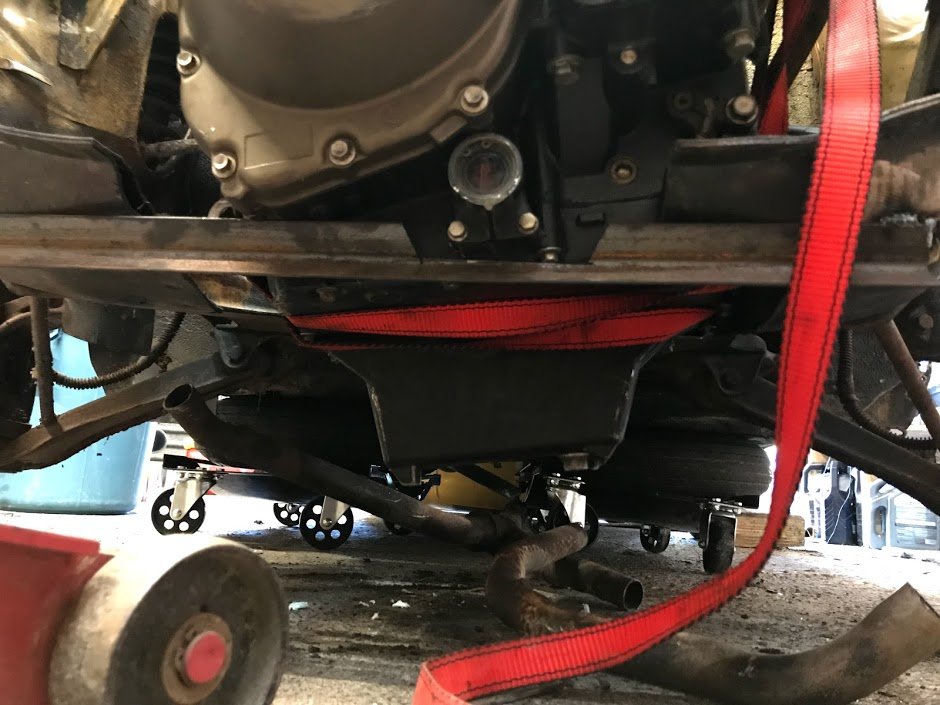
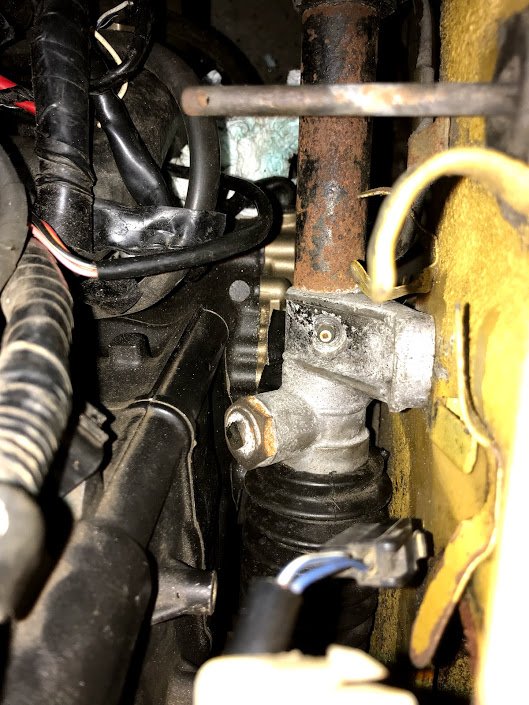
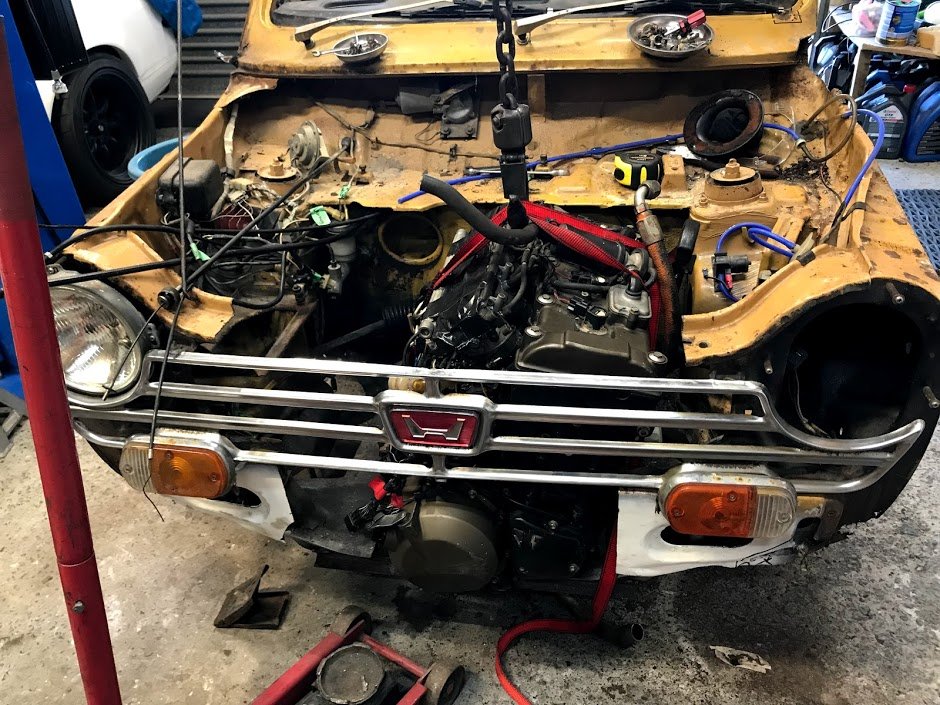
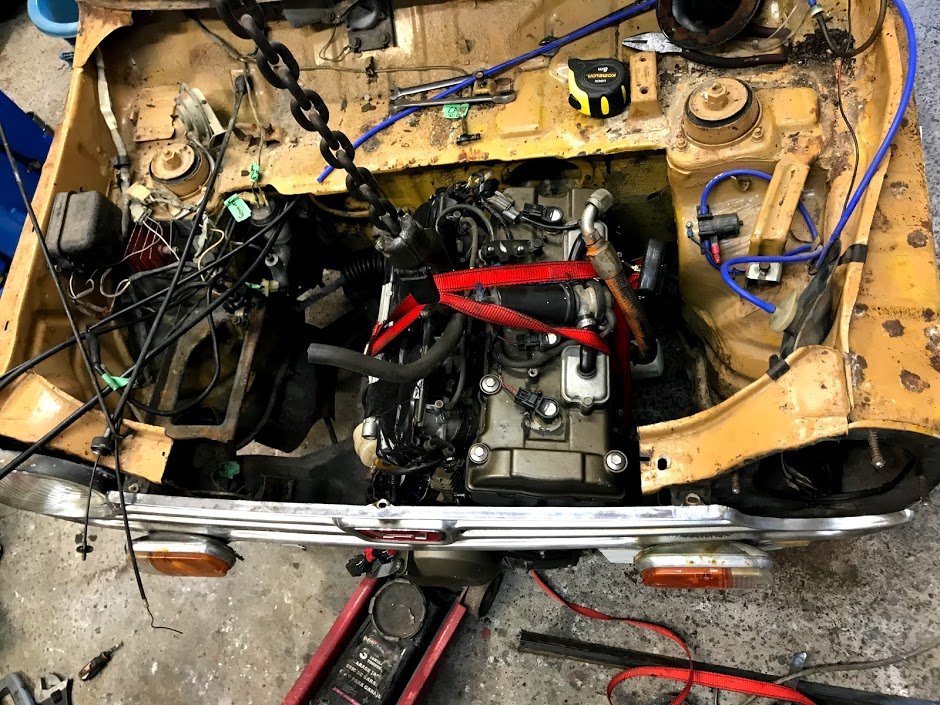
Well no turning back now, I've started cutting the subframe of which I'll make up new sections once I've finalised the position etc. I thought I might be able to keep part of the front section but it all had to go, to stop it from moving I welded on a bit of angle steel. This dropped it down nicely but the angle steel needed a notch cut out for the oil level sight, it still needed to move over to the passenger side too. So more cutting. Looking much better, the oil filter sandwich plate is resting on the subframe now so the engine isn't level yet but far better and is about 10cm further to the passenger side. This is as far back as it can go without cutting the firewall, but it is within 20mm of the closest protrusion from the steering rack. I also bit the bullet and cut the tab off the stator cover which is the oilfeed because it was almost impossible to get it to fit around the steering rack. This is a magnesium casting, so I cut it slowly and manually. Didn't burn down the house. Plan is to block the original feed then tap into the casing and have an oilfeed that way. No reason it shouldn't work, but if it doesn't I can just get another casing. They seem to be easy to get, I guess because they get damaged when riders drop their bikes. It's sitting much better in the engine bay now, I will try get it a bit further over because I'm worried about draiveshaft UJ angles. But for now it fits behind the grill! The front clutch cover was always going to stick out, I'm not sure what I'll do here but at least clutch changes will be easy access....
1 point
-
Shell is back from the blasters and ready for the final weld off. Rear quarters been dipped and already to go back on. A.l going well it should be in the paint shop by Xmas....
1 point
-
1 point
-
Man Really wanna bag my Oldsmobile freds not helping1 point


This leaderboard is set to Auckland/GMT+12:00