
Leaderboard


Popular Content
Showing content with the highest reputation on 04/25/19 in all areas
-
I guess I finally got enough courage to fix the rest of the rust. Had plenty of spare time over Easter so thought I'd better do something and was sick of having a puddle on the floor each time it rained heavily. The rust hole under the wiper motor was the worst of it, kept putting it off because of the location and how tight the space is to get at. Ground the mounting plate off, the rust was a little worse than I thought it was gonna be. Made a patch to fit and then cut a much bigger hole. Took a few attempts to get the patch the right shape. All welded in, didn't come out too bad. Got a rust cut from Olds Cool Autos as the wiper mount was a bit past it after I cut it off. Carefully removed the lower skin and gave it all a sandblast. Welded it in place after testing the wipers still worked properly. Had to pull out the mig welder for the first time in a few years since i couldn't get the rear plug welds with the tig. Mig does plug welds nicer any way. The drivers door had quite a few holes on the bottom. Also had some tiny holes on the outer skin in the front corner, was easier to just cut that whole piece out and make a new patch. Made a couple of patches for the inner skin and welded them in, then brushed on some paint. Next made up the outer skin patch, welded that up and then hammered the edge over. The outside has a little distortion since I couldn't get a dolly in there properly to stretch the weld out, but nothing a light skim of bog won't fix. Another few patches further down which finished off the rust in this door. Was a good time to fill up the original side mirror mount holes. Cutting out 6mm diameter circles wasn't that easy! Underneath the fuel cap was some more rust coming through. Sanded it back and just the top needed replacing with new steel. Rust killed it all after patching it and then seam sealed it back up. Both A-pillars had some rust coming through, no holes though, so rust killed them. Still need to fill the antenna holes.27 points
-
anzac day progress. been feeling pretty good lately with the old back, im down to half my pain killers (except for today where i took some after breakfast because leg was turbo sore) so with that in mind ive been doing a bit more on the coupe. today i installed new inner and outer tie rods, new upper and lower ball joints and a second hand but pretty good pitman arm. i also topped up the steering box with Molly grease which has made quite a big difference. lets be honest, the steering on these things is pretty hard but its slightly less shit now. i have a power steering box to put in this which ill do after compliance. i dont have a bracket for the pump if anyone has one for a square port 4M.... so with that done i decided to go for a drive. the longest drive ive ever done in it, about 5Ks around the neighborhood. went up to westmere then down to the beach. this thing goes so well. the suspension is fucking ace, it dosent rattle or vibrate, the auto is smooth and changes perfectly and the motor hasn't turned to shit yet. the radio works and the heater /fan all works mint too. its fucking ace. and your not gong to believe this but it did a skid turning right onto the main road! ive got a few little things to tidy up but then its on to compliance!!! 2019-04-25_04-50-20 by sheepers, on Flickr 2019-04-25_04-50-11 by sheepers, on Flickr 2019-04-25_04-50-03 by sheepers, on Flickr14 points
-
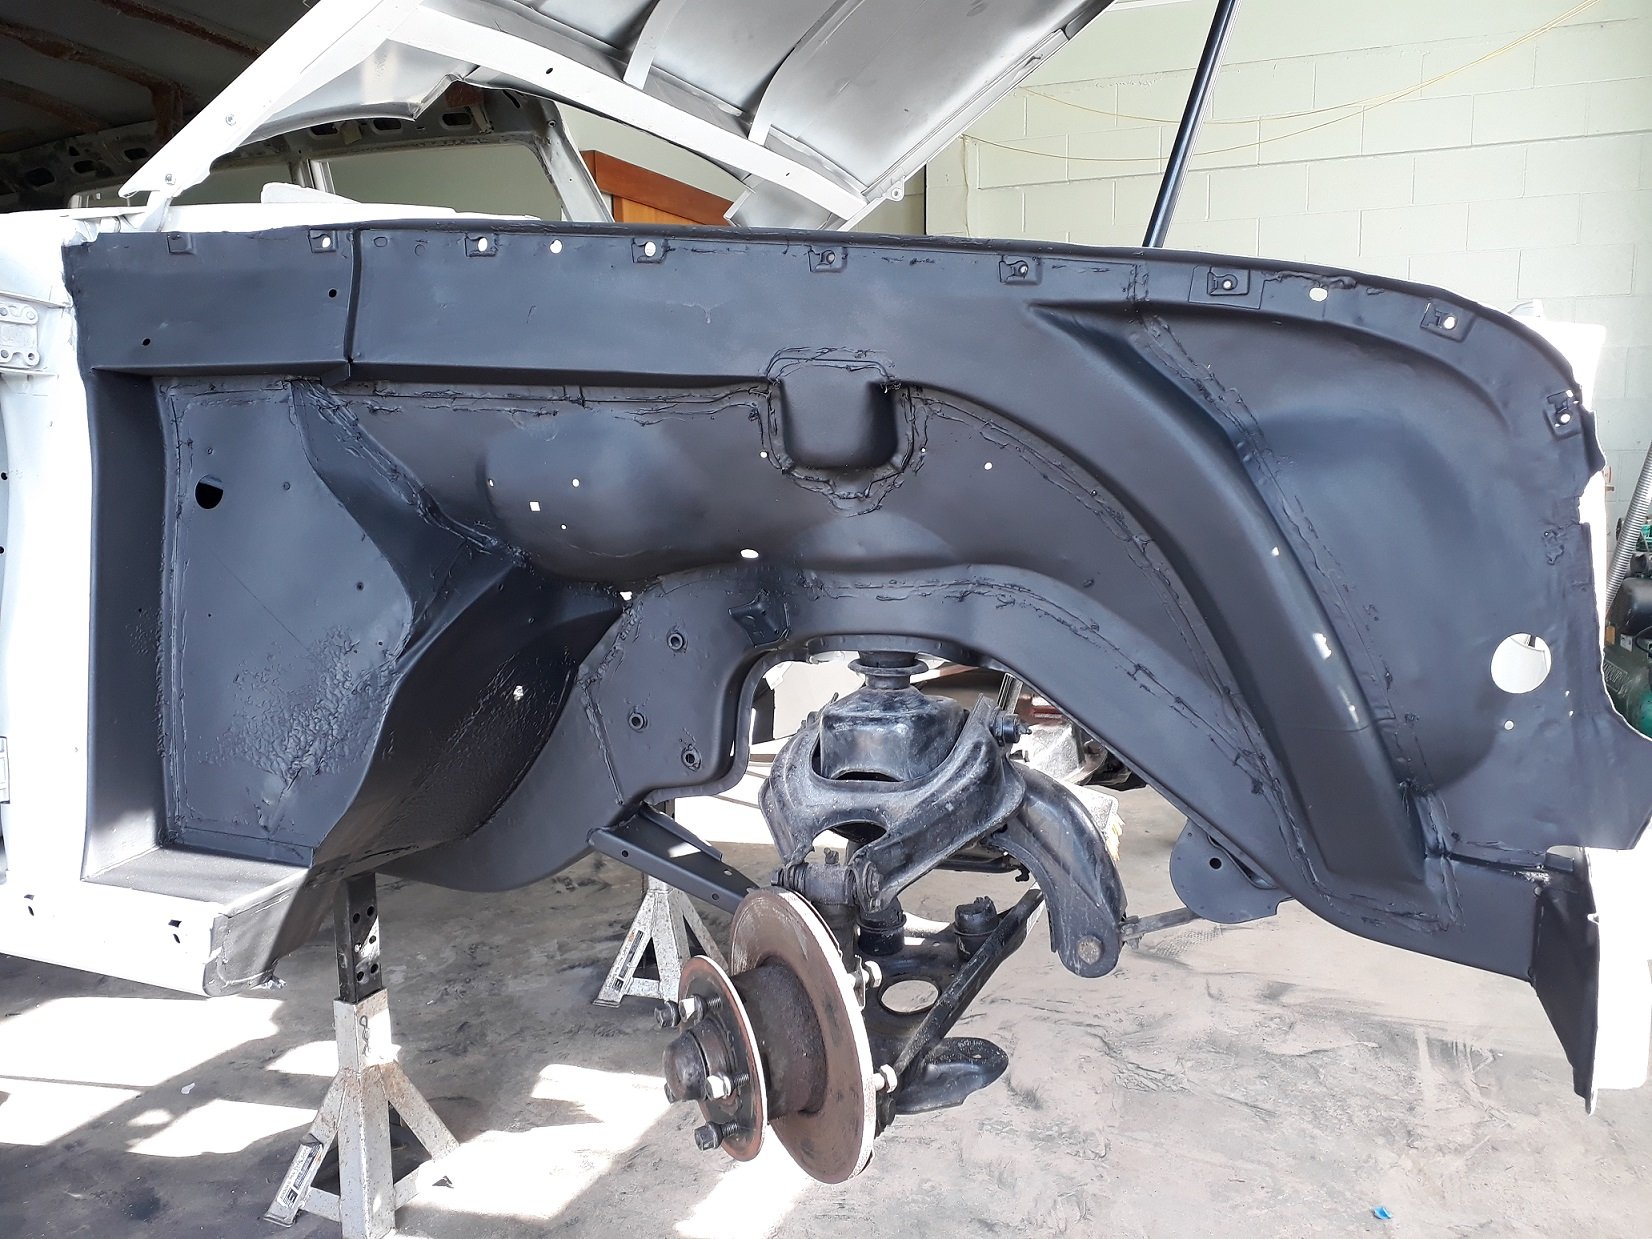
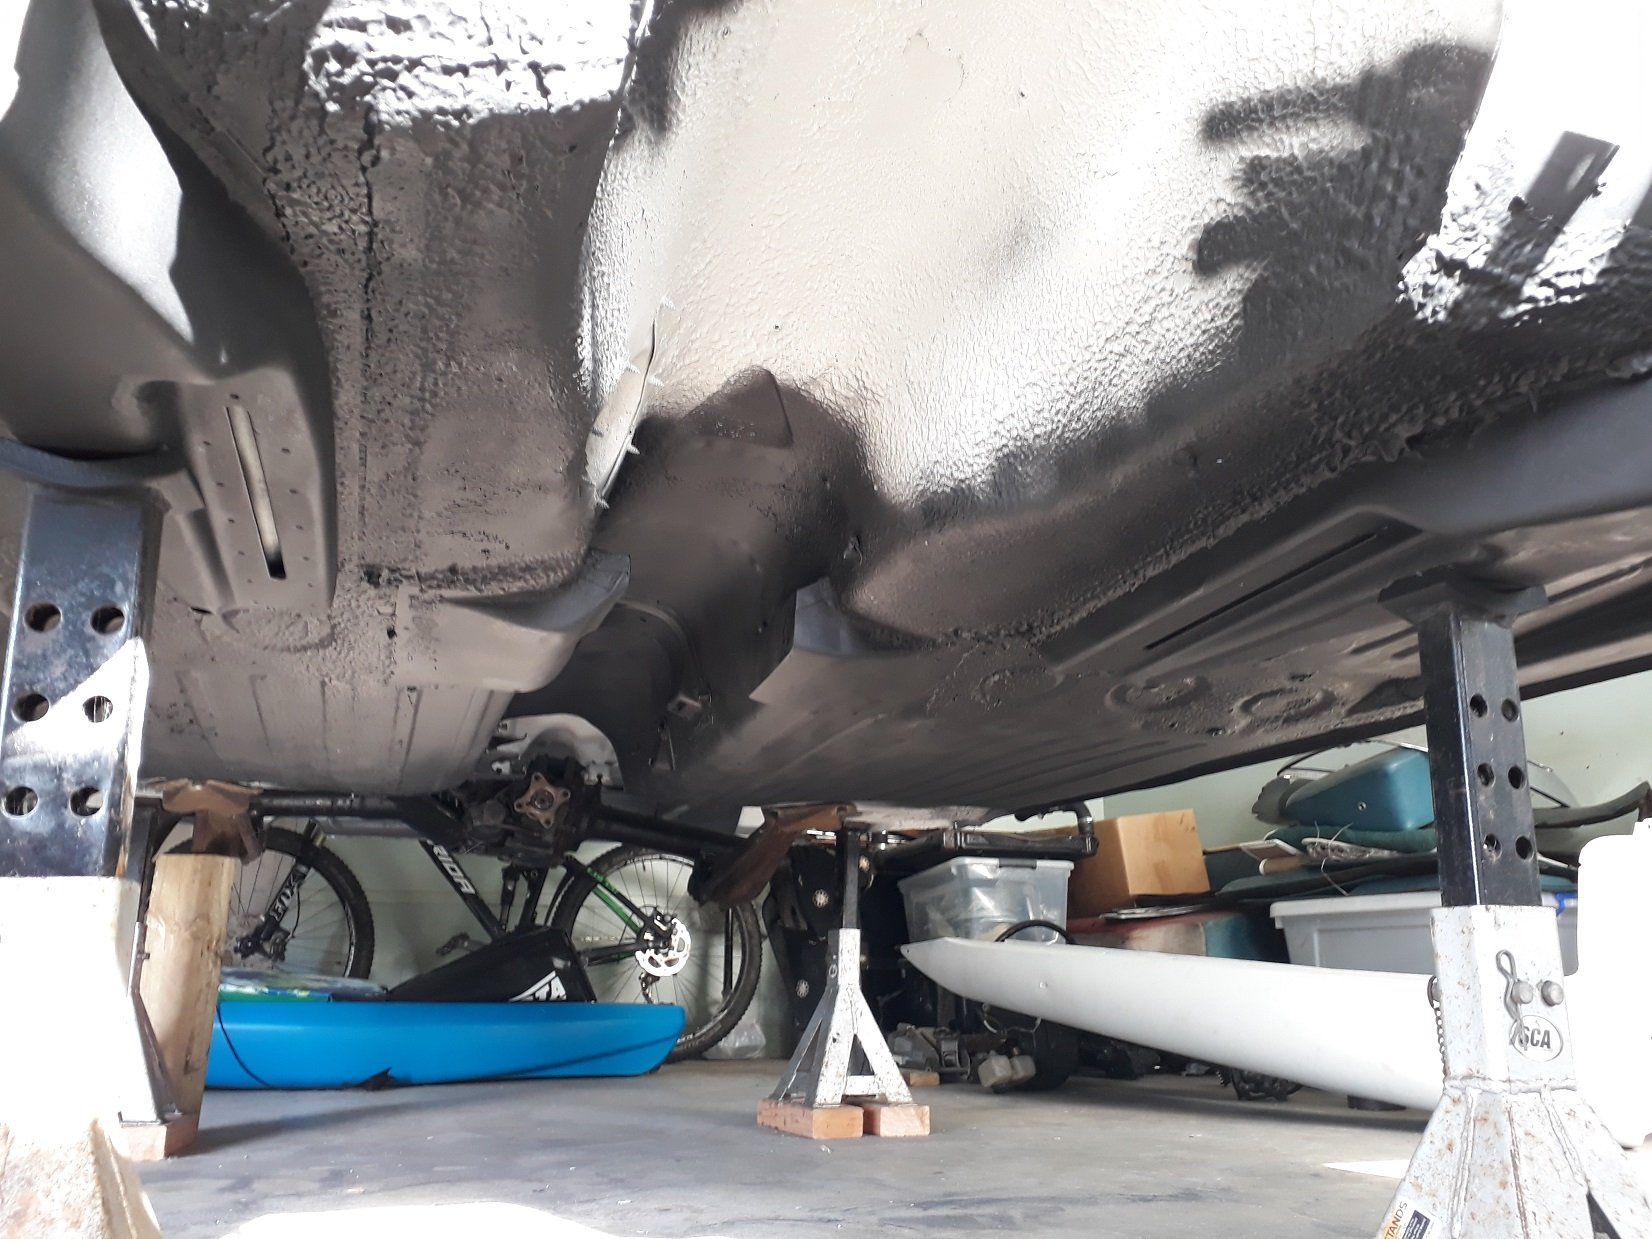
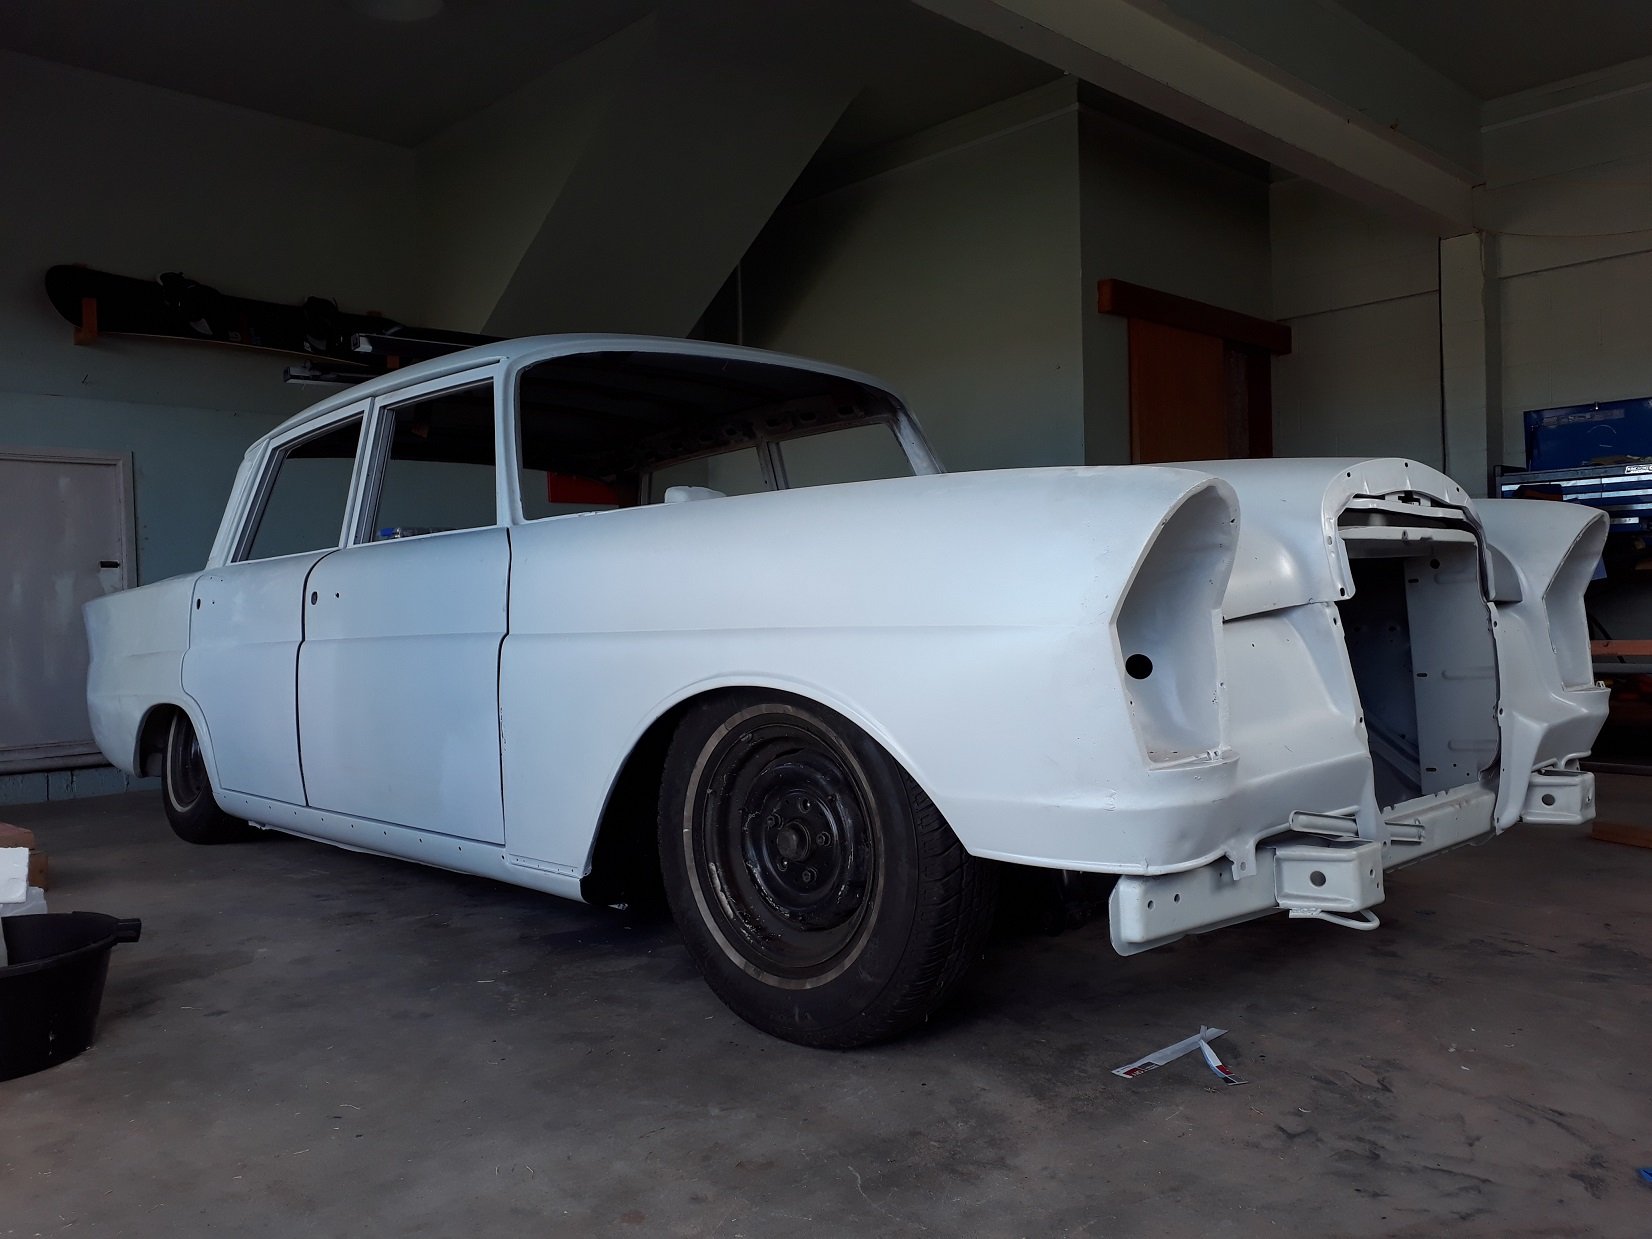
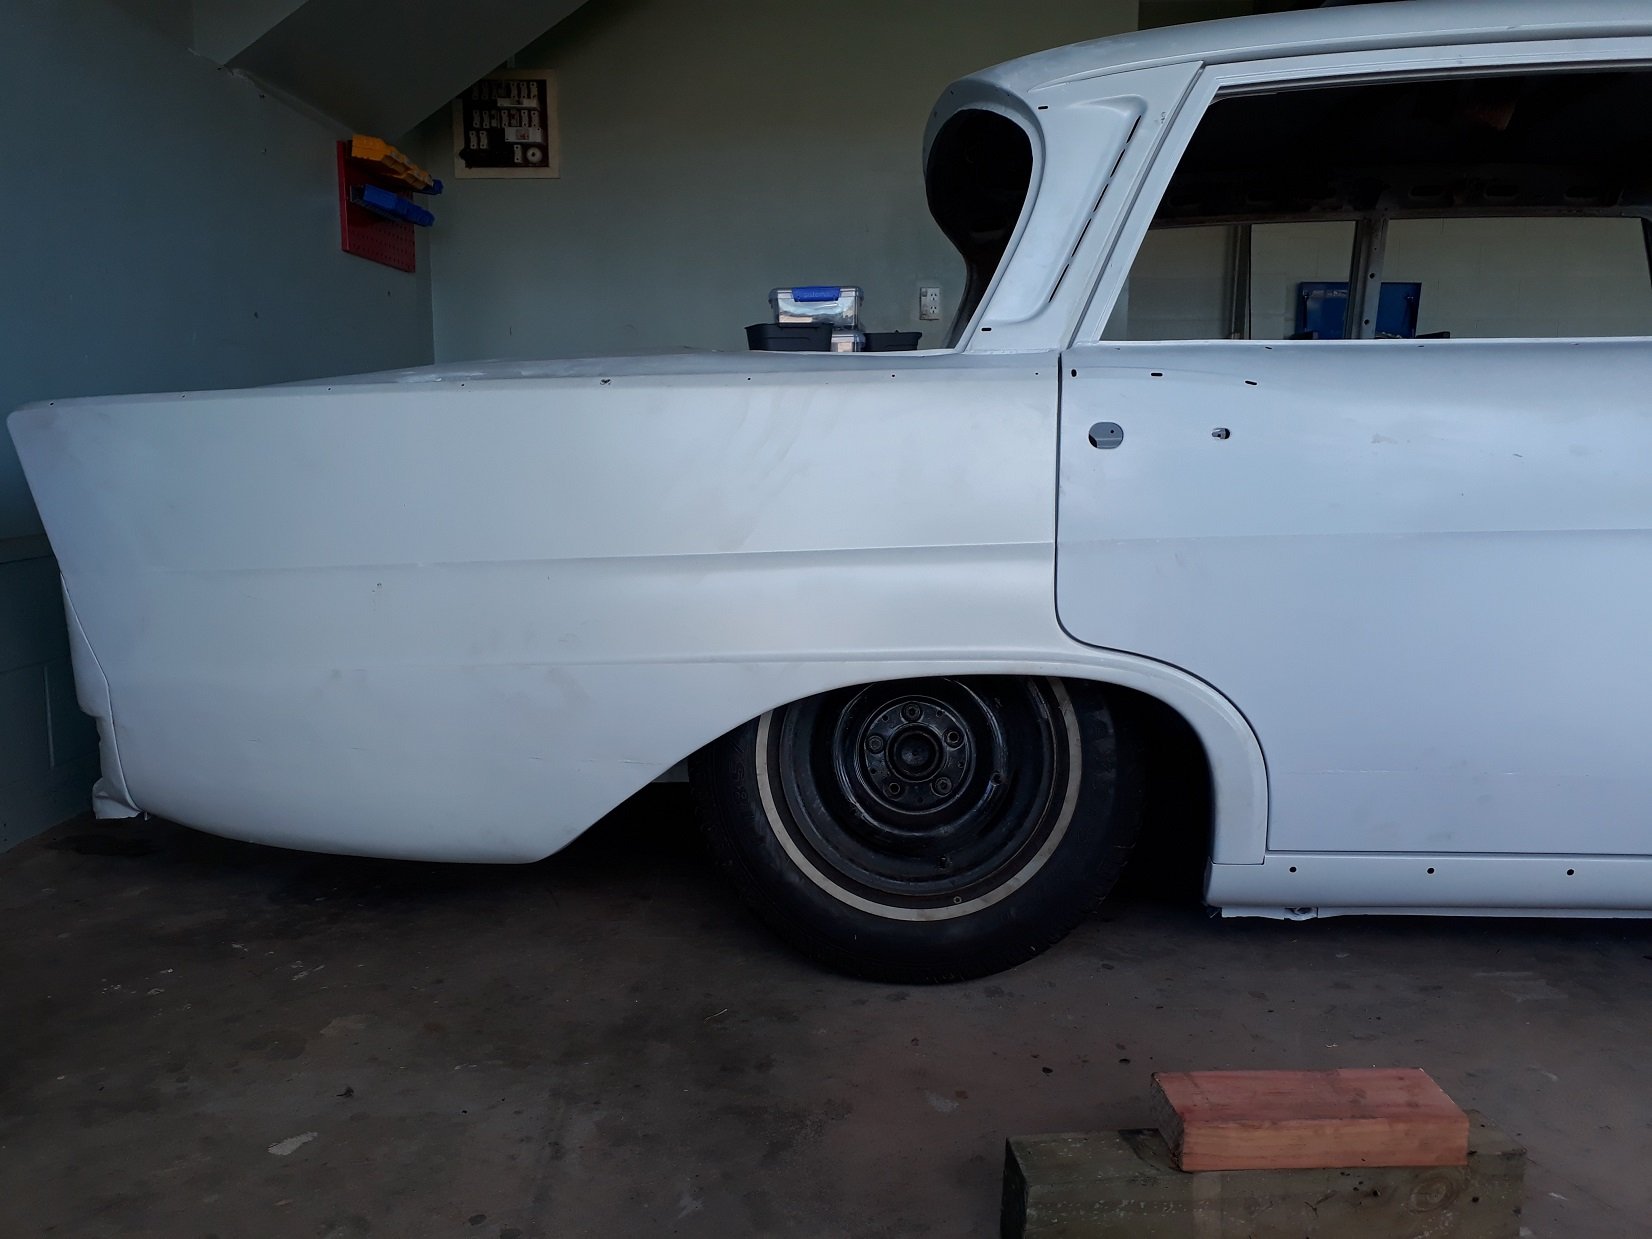
Masked up and sprayed the other side and the underside of the floors as far back as the rear seats (note all the OG underseal the blaster couldn't get off), left the trans tunnel in case it needs some clearancing for the trans I want to run (Mercedes 722.6) I need to drop the rear diff to do the underside of the boot, but before doing that I thought I should really install the bags and some wheels and put it on the ground to see how it looks, so I did. Managed to unlock the next level of sketch city in the process with mystery blocks of wood used in precarious manners to get it down off the axles stands. That's as low as you'll get one of these without taking an angle grinder to the body which I am unkeen to do, I also don't think the rear diff would enjoy any more articulation. sills are about 100mm, front cross member about 70mm and rear diff about 50mm from the ground respectfully. Now have the classic problem of the jack not fitting under it.
 14 points
 -
a care package from japan arrived. the no working on this quickly went out the window when i saw my new wheels yesterday. scored some 16x7.5 et4 Epsilon Ragunas out of japan, for not the cheapest in the world, but probably half their value in NZ. was also a set of 5. haven't decided if the 5th will get a tire mounted and act as a spare or if i mount it to the wall and hang my airline off it. also bought a cruise control spec HKB boss kit. i expected this to just include a wire pigtail for cruise buttons, but it actually has buttons built in. super clean. the lables are wrong, but it looks like i can just swap the buttons around. finally an uncracked stereo surround. i still need a bunch more plastics, but this parcel was getting worryingly big, as it was it got seperated into two parcels. which also meant it slipped in customs under the tax threshold. score. i also swapped back to the stock clutched supercharger pulley, very small performance drop, clearly the party pulley on there was only making heat and not power. plus fuel economy has improved, and thats more important on this car being my daily and much more of a cruiser than a performance car. cant wait for this to be panel and painted.6 points
-
5 points
-
Oh yep yep only a couple of weeks away. Come check out some punishing Mustangs and Camaro as part of the 'Muscle Car Theme' Graham Berry & Dave Chung will be there too, former head dudes of Berry and Chung fame. Its an okish swap meet but a pretty good car show generally. But also, there is a beard comp! Thought a few jokers here might be keen @Big Value Buddy and @Sparkle and who ever else wants to have a go/come up and play. https://marinelandstreetrods.org.nz/4 points
-
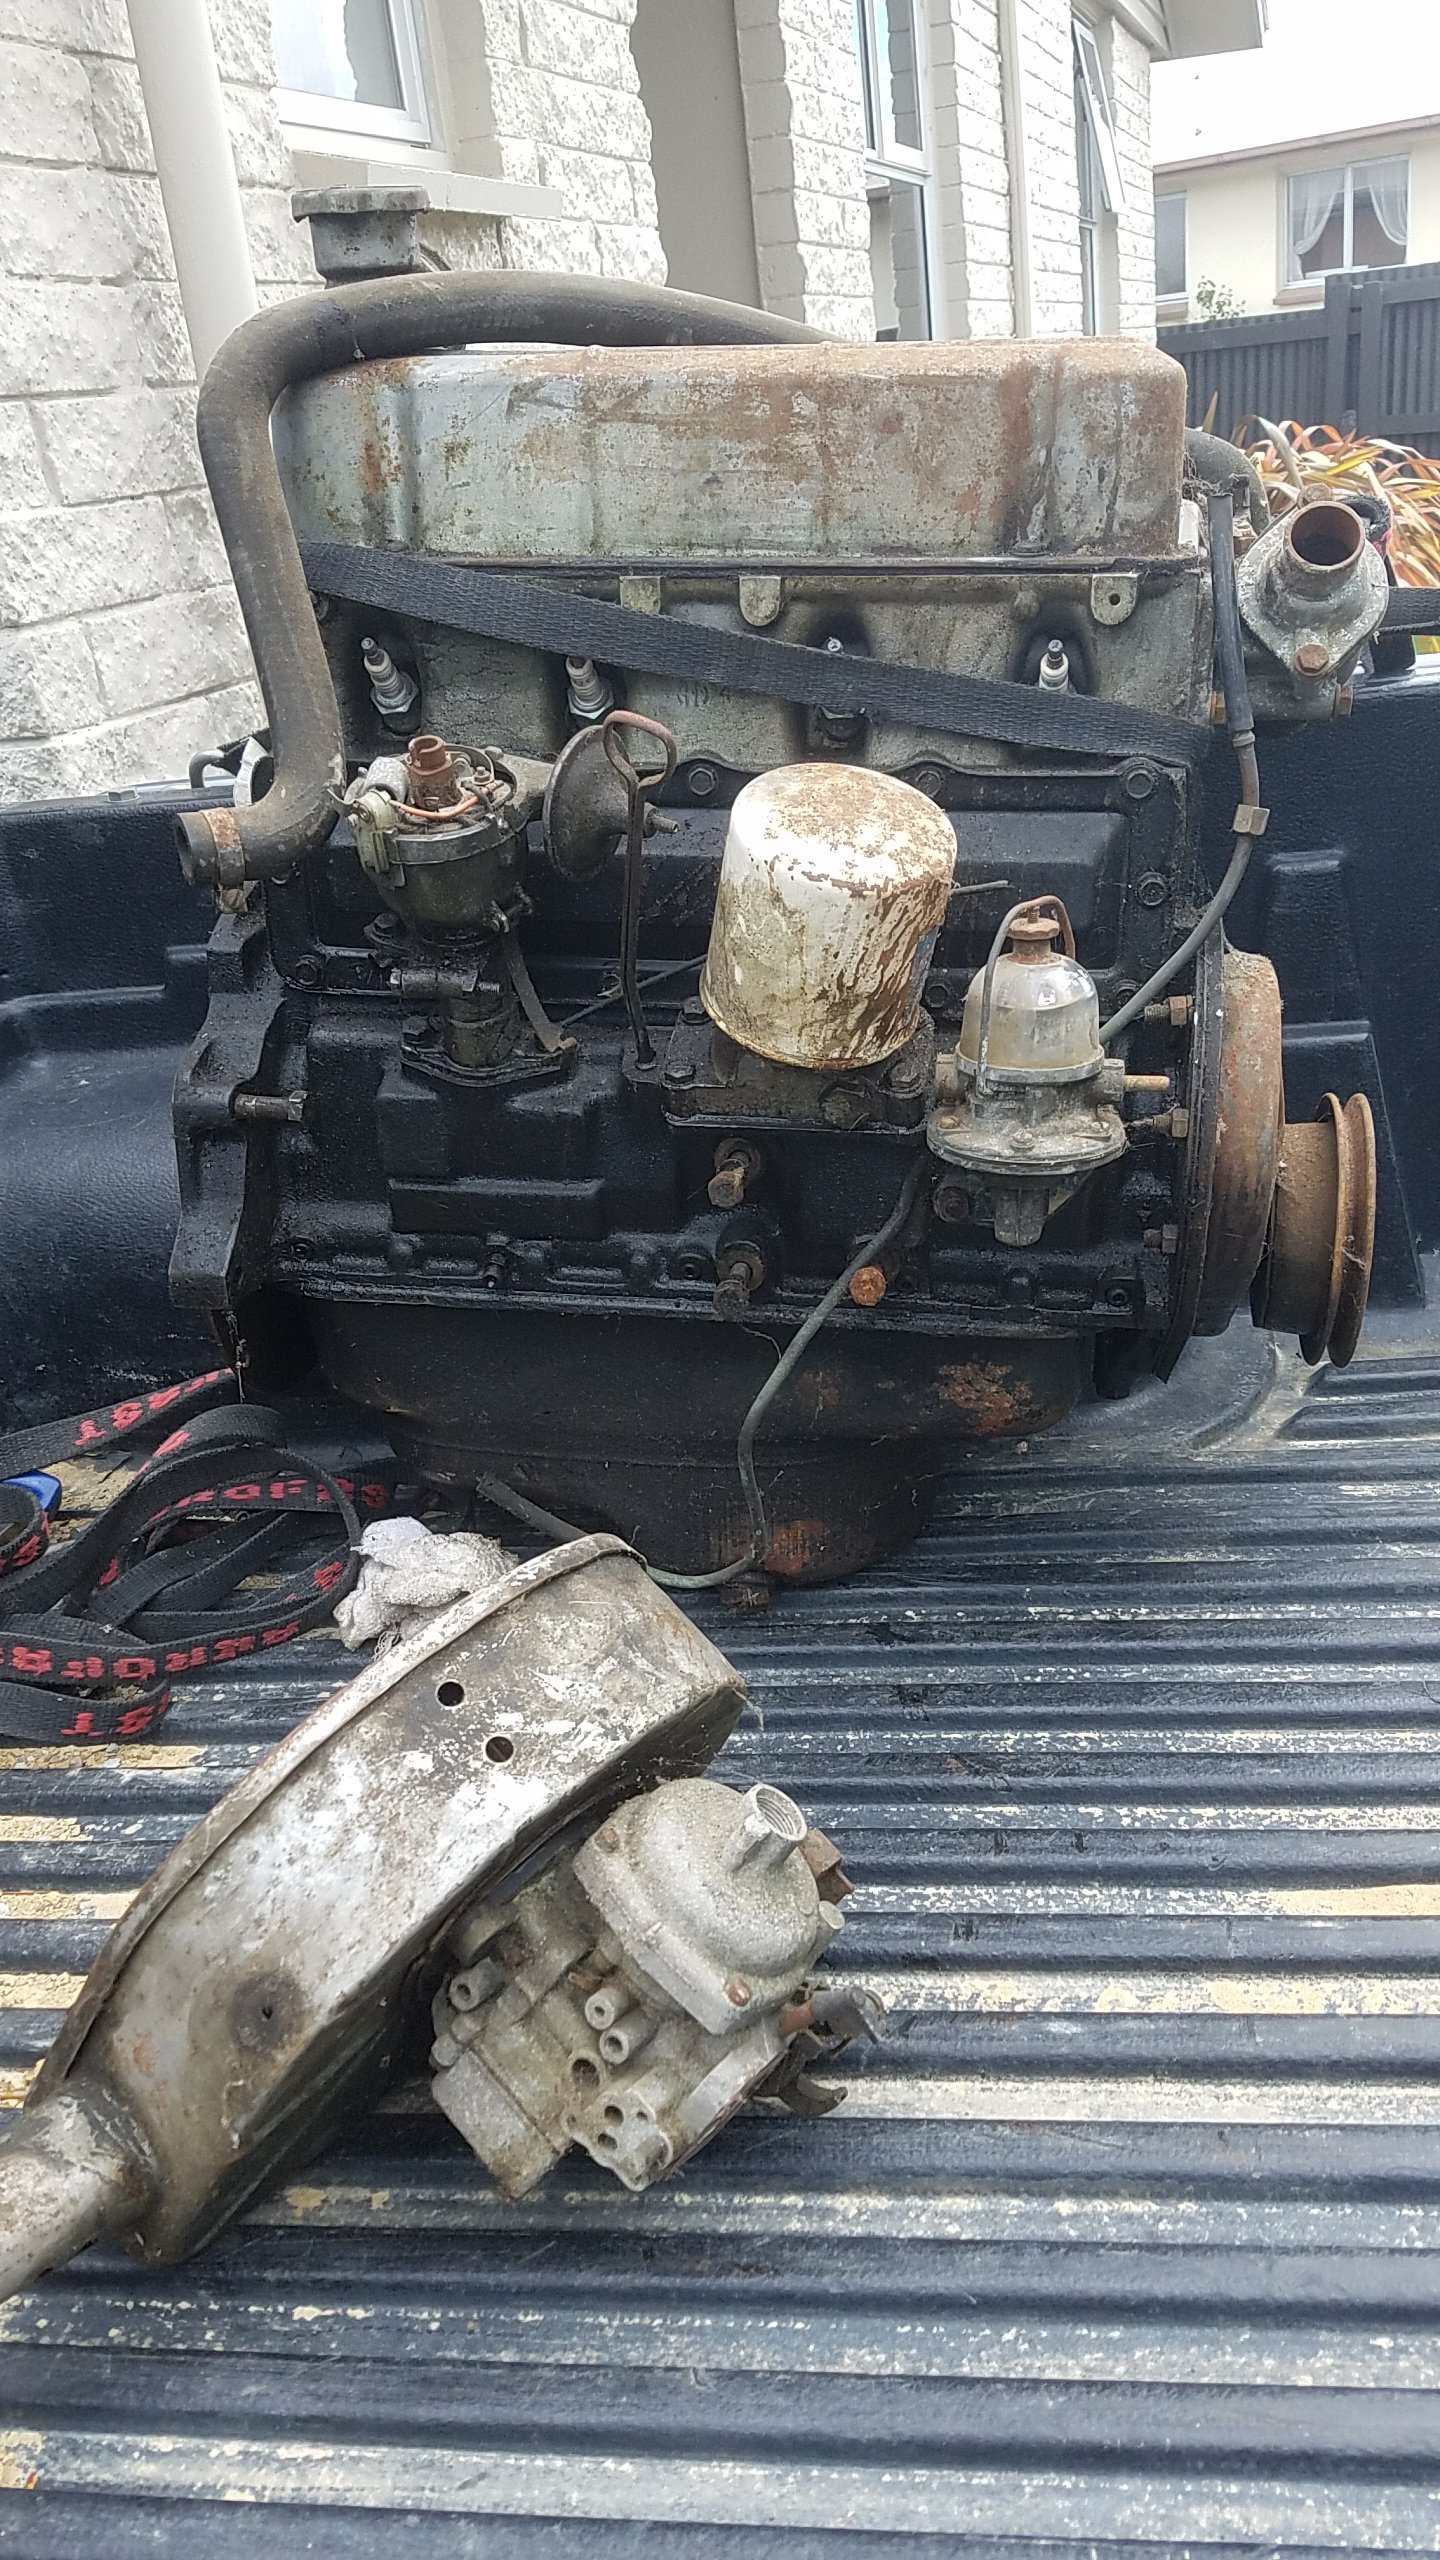
so according to an internet barry specialist what I have here is a 69 MKII engine with oversize pistons pushing it out to 1789cc, this block is a 5 bearing crank so is the better block to work. need a socket to get the crank bolt off, so I can access the cam to see if that is stock, and then send it away.. Free is good3 points
-
got round to completely stripping this bad boy, and is now a neat-ish pile of bits. got mildly overwhelmed looking at all the bits there wondering if i'll remember how it all goes back together. she'll be right jim so i have the frame bare, along with swing arm, brakestay, triple clamps and stands ready to be sandblasted and powdercoated. that will be next weeks mission. Then can finally begin the glorious task of putting it all back together! really going against the oldschool tradition and actually making progress on this. in other news, i have ordered a whole bunch of shit from Yambits, swingarm bushes, seals, sprockets and the likes, along with a carb kit. The arrival of these bits will coincide quite nicely with getting frame stz painted. i also spent today taking apart the front brake caliper and line. I thought at first that the master cylinder was good. but after trying to give it a bleed i realised it wasnt actually letting any fluid flow through. the inside looked like a Castle Street bathroom. Brown Jim put me onto one of these Aliexpress master cylinders, which could be had for a ridiculously good price. it arrived last week, i wanged it on and by gum she bled up and felt goooooood. Then i took apart the caliper and it too resembled a toilet in a student flat. But alas, a piston and seal kit are on their way. Lots of words! tldr? We're gittin 'er done3 points
-
Got the pistons and rods back.3 points
-
I have one of these Its a little more basic than the sold ones. Two hoops with a 2m ID And they sit on a large piece of C channel and roll on some boat trailer rollers. Weld some mounting tabs around the inside edge and you can make jigs to hold onto anything. Good for attaching to say suspension mounting points rather than rusted out bumper mounts. Im working on a foot brake ATM. Maybe just an additional braked caster wheel to run against the outside of the hoop. I'll probably be done in about 6 months if you want to borrow3 points
-
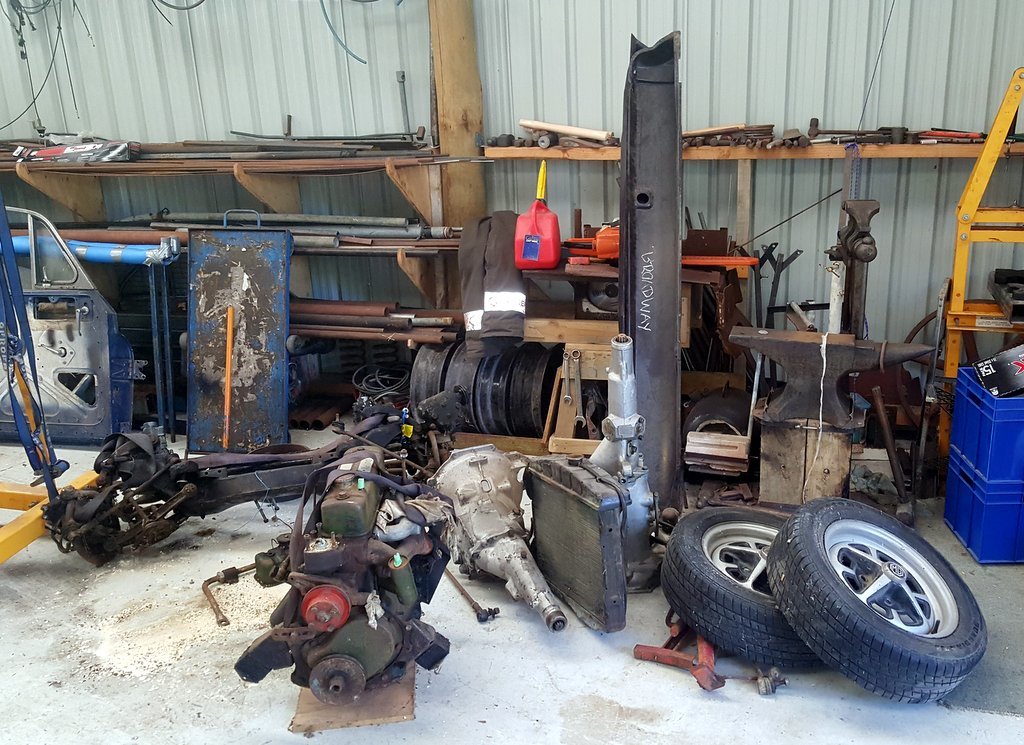
I decided to put it up for sale to declutter/make space event though it's quite a nice drive. Further improvements (like paint) would be a lot of time and money, and it is unlikely to be worth it in $$ terms. So, it's gone to a local yokel, but there are still a pile of parts to be collected.
3 points
-
Its been a while since the last update but i have been chipping away at this project. I finished the weldathon on that bus and it was picked up the next day. The owner is really happy with my work and it turns out he has quite a collection of classics. He now wants to bring me some of the cars, including a mk1 mini cooper, for some rust work. Cool! While the bus was taking up space I had been sneaking in some work on the wee Imp. I fitted the engine up to the transaxle, weighing the engine first. 87kg with the flywheel in place. Not too bad at all. Not super light like the standard Imp all alloy unit however I have moved so much stuff to the front that it should still be well balanced. I do love the idea of an all alloy Nissan cg13 twink from a K11 Micra- however that would require a full re-certification. I prefer the idea of a Goldwing engine engine more! I digress. So anyway- I had slung the engine in place using a lump of timber and a ratchet strap. Worked fine. Then started making new engine mounts and cross member. I was not happy with the state or look of the old one and knew it could be far better. Not really a lot to say about making fabricating it all- the usual story of lining the engine up exactly central and building things to connect. I wanted to make sure that the exhaust manifold and starter could be easily removed without touching the cradle. I probably over built it with extra bracing (I even ended up adding extra gussets just before painting it, because ocd paranoia) but all up it still only weighed in at around 7-8kg. In photos. I didn't take many as work progressed on this bit really quickly.. Clearance under the car was still really good, considering how low the sump looks from the back. I think an optical illusion due to the rear panel not being in place. Then painted in black epoxy.. Next up was the exhaust. The manifold that came fitted was running really close to the drive shaft! Enough that it would contact when the car was lifted off the ground. There was quite a bit of damage, dents, poor welds and other bits that needed attention so I chopped it all back and carefully shortened the bottom pipes then systematically pieced it back together. I required quite a bit of forward thinking because the access to weld to pipes all the way round was really tight. No photos of work though as I was so immersed in the process I forgot to take some. Really happy with the result though. Fits perfectly, cleaner runs and still equal length (as if a Datsun A12 with a carb the size of a small cup would care. But hey, every little helps ) Later on I painted it and then wrapped the upper pipes to ward off heat from the inlet and coolant pipe. I know some dont like heat wrap but I think its great! Its worked well on my last several car builds. Luckily I live in a dry enough area to get away with it and not worry about potential corrosion. With that sorted I moved onto the rest of the system. I have always had a picture in my mind of what I wanted it to look like and I wanted it to be rear slung with a side exit to avoid the car filling with exhaust fumes. Apparantly these early Imps with the roof vents can suffer from fumes being pulled into the car by the vacuum. I also had a rough idea on how I would build my own silencer and there wasnt anything available that fitted my ideas with a price I liked. I had built one for the Mazda Rx3 and it worked well. Money is tight (I'm too tight..), time is plenty and I love making things so I started building. Using the pipe from the original straight through muffler.. Then fabricating my silencer using some ideas I nicked from Google along with extensive coffee fueled airflow thinking in my mind. I have no idea on what it will sound like but it was a fun process and looks neat. The stainless pads worked well in my last muffler along with some glass matting I got from the neighbour. I'll report back In photos... I had a pipe bent to 90 degrees and added mount points to the muffler so it slings up under the rear valance. I made a stainless heat shield to deflect heat away from paint and bottom pulley. You'll see that later. I have yet to decide on the length of the exhaust tip, cut it and then weld it on to finish. Then the inlet. Because the Datsun engine sits flat in this Imp, unlike the rear sloping angle in its usual Datsun 1200 home, the carb is not level. I chopped off the mounting face and milled the manifold at angle to suit. Then I welded it back in place. Carb is now level. I filled in an unused vac hole, cut off the extra unused lugs and gave the whole thing a clean up till it was nice and smooth. While I was playing with alloy I made a new alternator bracket... and had to rebuild a very corroded thermostat outlet. it was knackered... I was given a better spare by a nice fella with a Datsun 1200 ute but it pointed upwards. My outlet, most likely from a van, points down and suits the pipework routing I wanted to do. So I had to fix it. I found a suitable piece of alloy pipe on an old scooter handle I had rescued from the local scrap metal pile at the dump... Much better! Then onto the pipe work in the back... Just a case of sussing out a neat route to suit my tastes, remain easy to work on and remove and allowing for a potential Davies Craig electric water pump just in case the Datsun pump is not up to the task (and also because I do rather fancy the geekiness of the little display unit not to mention how much better it could work) With the pipes sorted I replaced the transaxle output seals because well, for $20 it made sense to do them now. I machined up a stepped tool to make sure they went in straight and to the correct depth. New seals.. Then mounted the brand new BMW couplings I bought from Rockauto. I had to make some spacers to suit as they are narrower then the stock Rotoflex couplings. With the car on the ground the driveshafts sit almost bang on parallel to the ground which is good for their longevity. I didn't fancy reusing the red Nolathane couplings that came with the race car because whilst strong in shear and rotation they didn't have much flex in and out which would impose quite large stress on the transaxle casing as the rear suspension went through its motion I felt. I then did some fun little jobs (but its all fun really..) like cleaning and painting the starter and alternator... I dug out my old art oil paints and mixed up a suitable orange to paint the inside of a very faded rear indicator lens. It'll do for now but I do look forward to locating and buying some better ones when I go to Blighty in July! Then began the wiring! Like all my other previous car projects, I enjoy this part immensely. I love the challenge of hiding as much of the wires away, re-configuring the circuits to suit add ons or just to make them better. In the case of the Imp, which has no fuses fitted at all (until the later mk3 Imps came along) this was an essential item to address. It also has a terrible dash wiring layout whereby you have to unplug everything to remove the instruments. Almost everything seems to run off just one piddly feed wire coming from the key. I'll sort that lot out with some plugs. Add in some relays for the lights, fan. Wires for a potential electric pump, sound system, high stop lamp (I have a neat idea floating about in my head for that) and making sure its future proof because later on I would like to inject this engine. I have also added in a tail to attach a trailer plug to. Because that will be a thing So I had two extra looms going spare which I pulled apart. I now had a large amount of extra wires for my project. Wiring isn't the most exciting thing to take photos of. I have now finished the engine bay wiring and I'm pretty happy with it. Now I've refitted the rear valance panel and exhaust and can lower the car down and start on the interior wiring. I'll be making a removable fuse box/relay unit and fit it under the dash if all goes well. Some photos of where I'm at now...log burner in use as the nights get colder. Sofa wheeled over to middle of workshop for max stereo imaging whilst I drink beer and play with wires... Wires hanging from engine bay.. Engine bay completed (missing hose clip noted..) but for an over flow tank from header tank to fit. I will build a better two part tank in the future I think. Exhaust tip length yet to be decided and cut. Note stainless heat shield. Bumper also to go back on, with bottom mounted rego plate.3 points
-
Hi All, Long time listener, long time caller - despite being MIA for a long time. I have recently moved to Sydney and in doing so, have discovered some fantastic spare time I haven't experienced in over a decade.This has brought with it the opportunity to dip my toe back into the realm of hobbies and naturally, OS. I know theres a handful of old and new OS people now in OZ but thought this might be a chance to condense that info into one thread. @Spencer @Hemi @V8Pete @peteretep2 points
-
mean. I need more pointless shit ill never use. i'll be there2 points
-
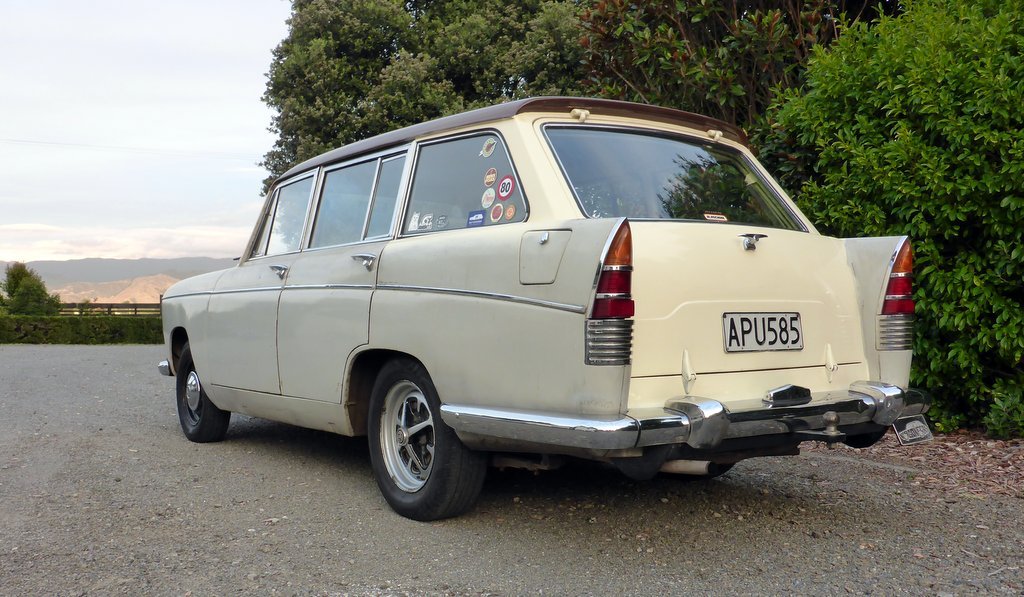
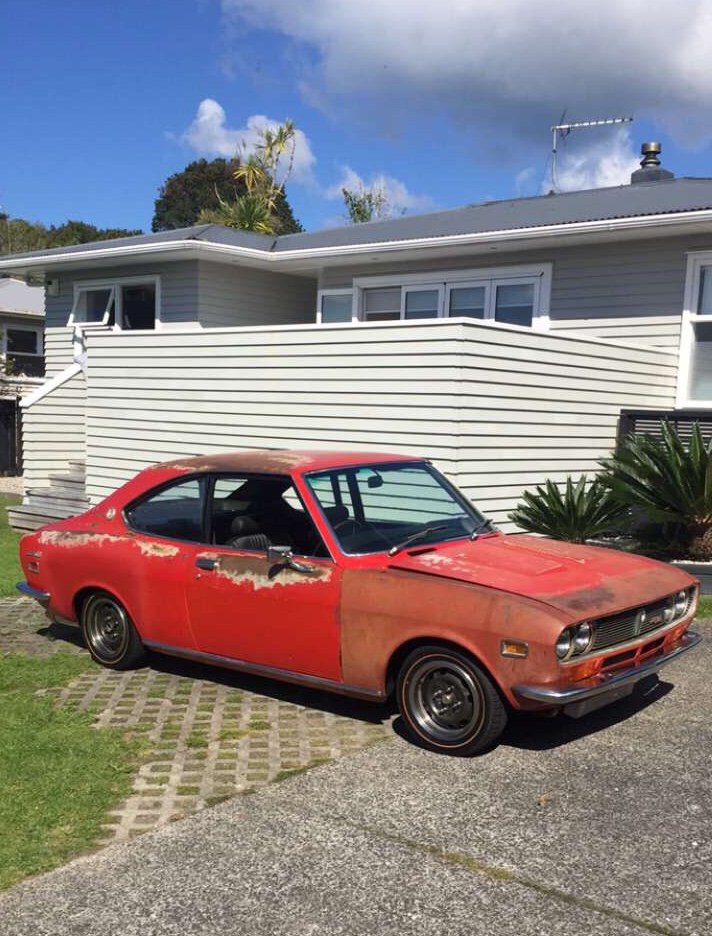
This one really only looks rough, because the clear coat is peeling. I've not found any serious rust Worst I can see is some poking out of the windscreen seal. I'll have the glass popped out for paint anyway and either fix it myself or get it fixed when the rear gaurds are sorted. Plus I'll paint it myself, also have a panel beater that we use alot for work teed up to properly fix the rear gaurds for very cheap.2 points
-
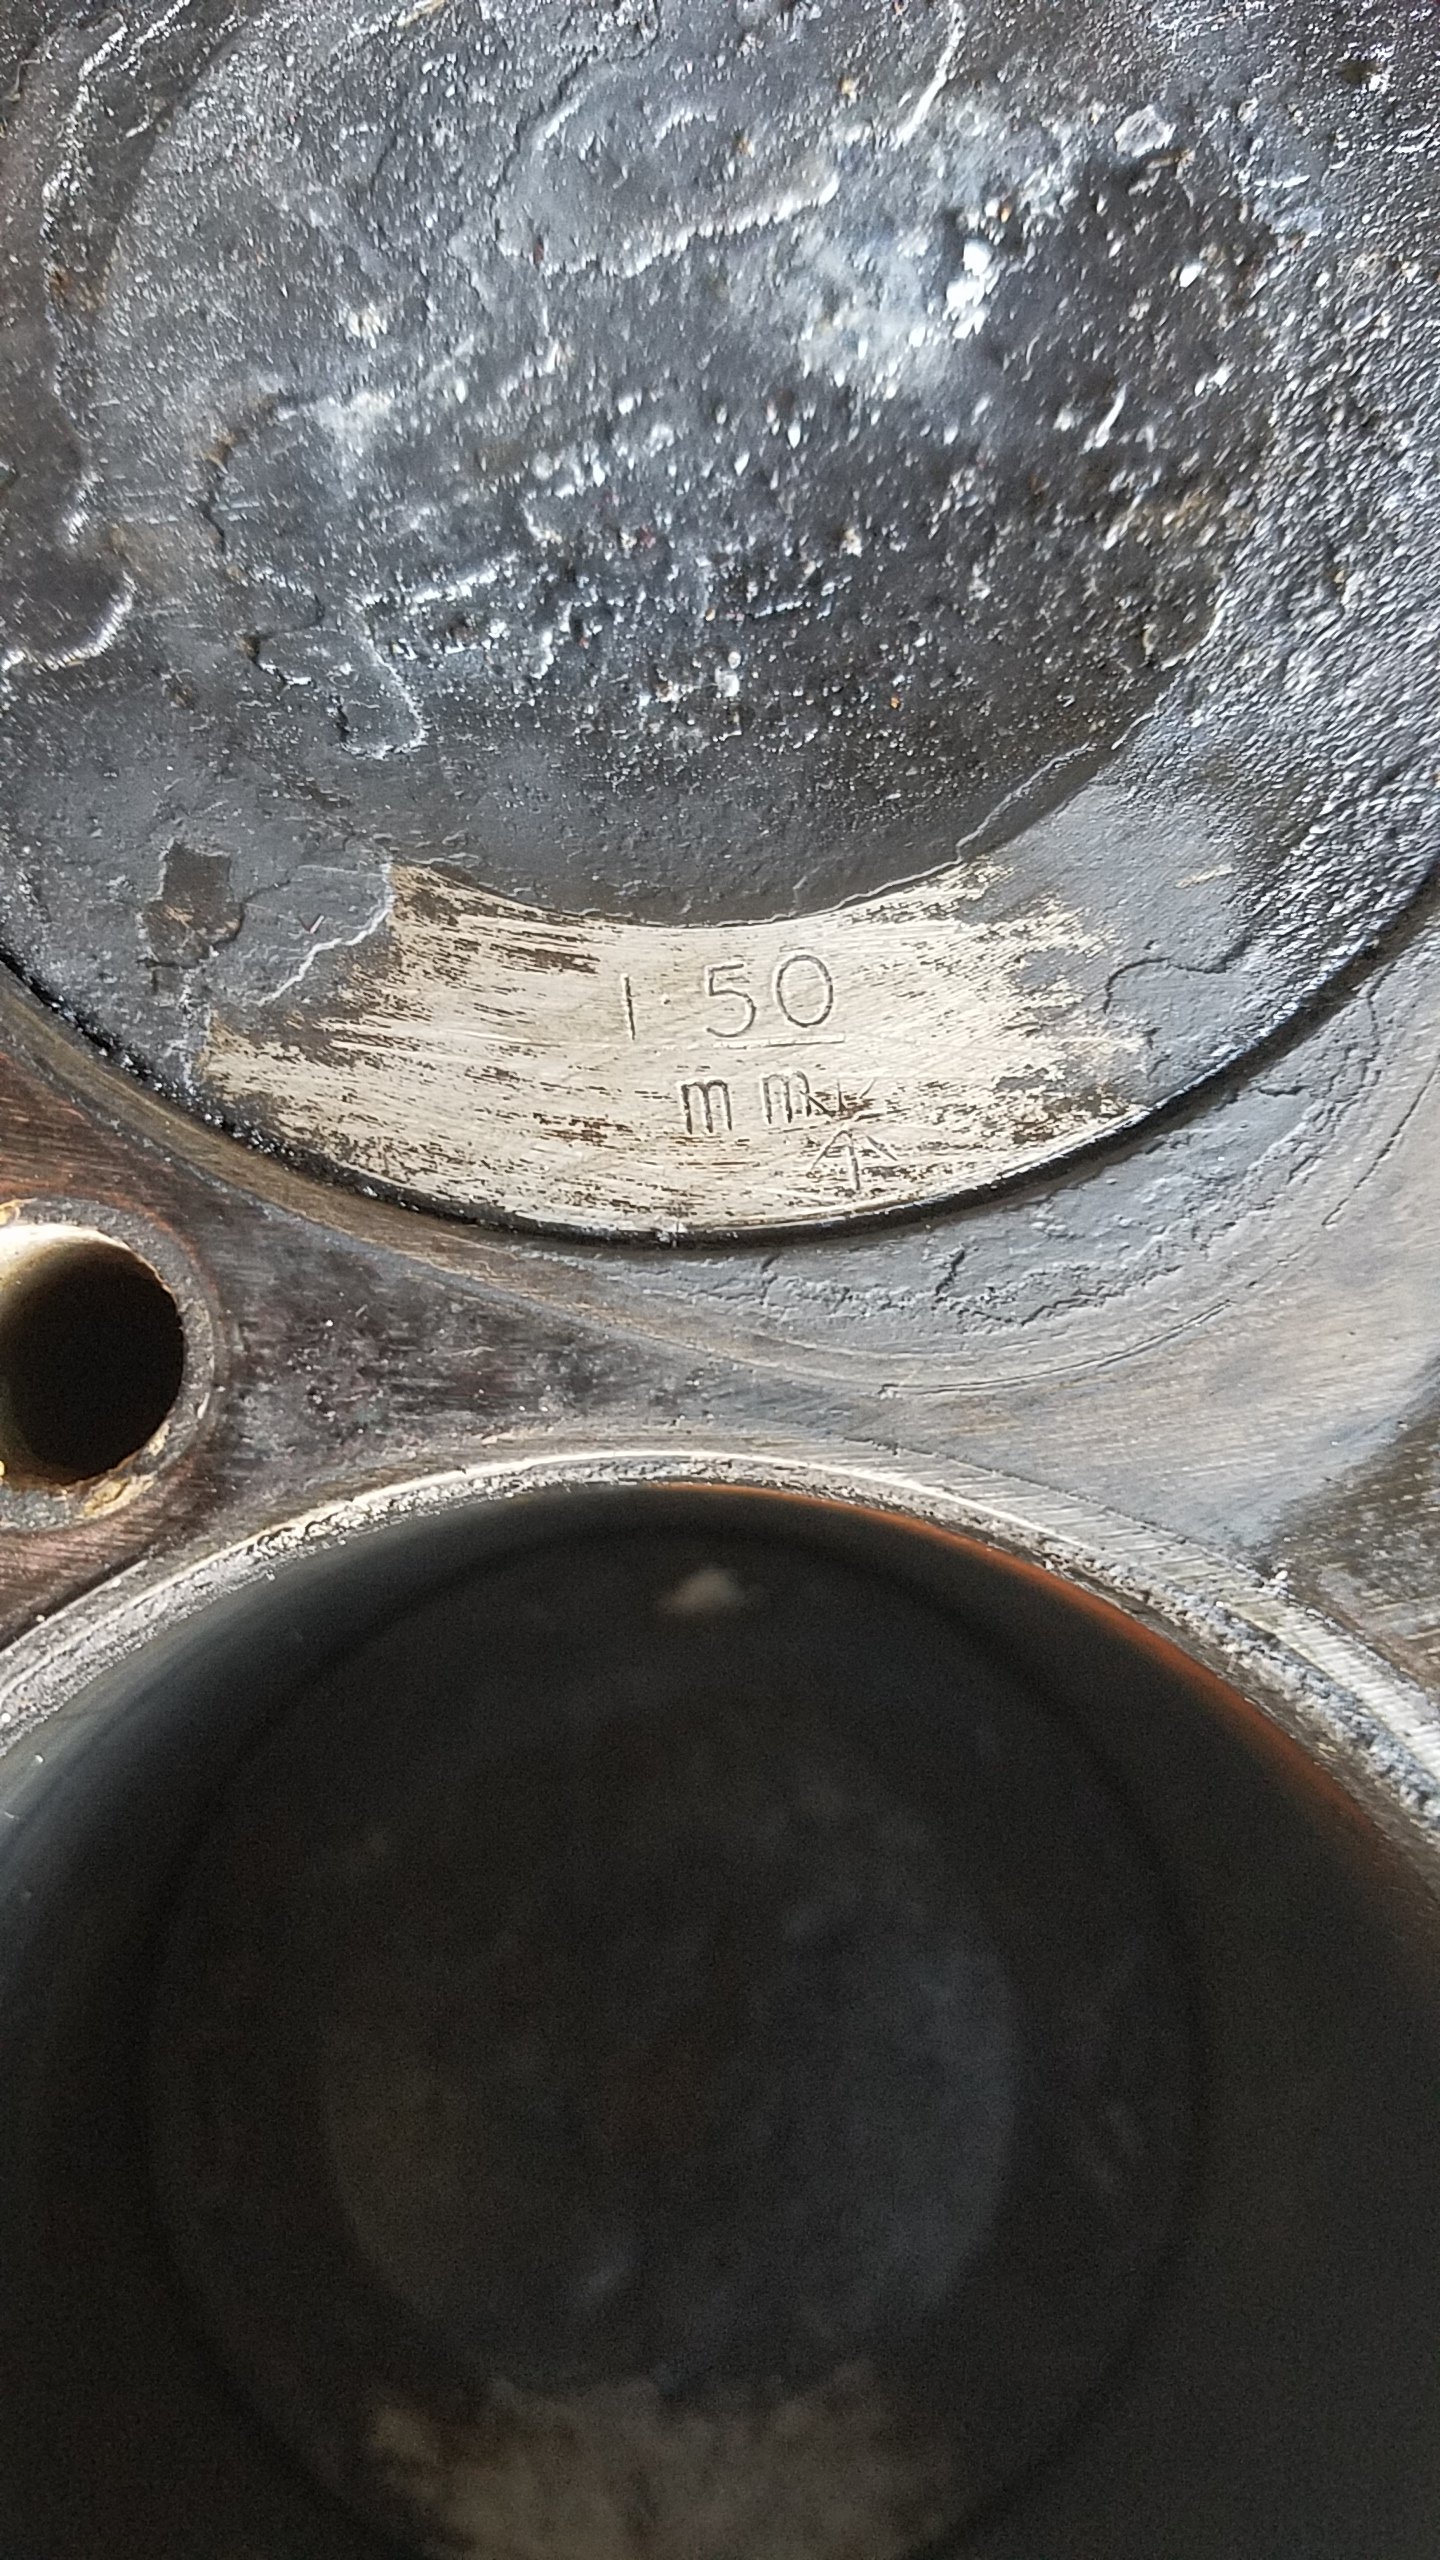
So while the family is away up north ive been bored shitless and trolling FB marketplace.. stumbled across a local who is trying to offload some shit from his old ladies house.. turned out he has a hunter motor.. contacted him, went round to check it out, looked like a pile (standard british OEM spec).. looks to be either from a 68 hunter or a gazelle or one of the other many Rootes powered contraptions.. Asked what he wanted for it, he said "just want it gone".... choice free motor for spares. got it home and started pulling it apart...plans are to bore it out and put in my +40 pistons, bike carbs and get the cam reground, and port match the head etc... then..... got the head off, scraped off some of the carbon build up (stromberg lube) off the pistons to see what they were.. they all look relatively fresh, and have 1.50 mm stamped on them fucking score!!! Bores look mint, valves dont look too bad either.. and another carb to add to the collection2 points
-
Bit more progress, have built the intake pipes and mounts to get the filters where I want them. The filters replace the fog lights and sit in the front bumper so should give nice cold air, but building the brackets to get them to sit in the right place was super fiddly, hope I never prang the front end as everything is just so... Being low to the ground I also wanted to shield the filters from dust/splash back from the front wheels so I picked up a couple of $10 mini rubbish bins and cut to suit, they made nice little cowls and there are decently strong with three anchorage points to the old fog light mounts. 3" intake pipes come directly off the turbos, are mild steel so will coat with something, maybe the same coating used for the headers (Cermakrome). I plastidipped the chrome ring of these filters but forgot to do the chrome button inside, may yet do that also as wanted these to only be noticeable to the trained eye... Mounted the pipes and rolled the ute outa the shed for the first time in a year to take some glamour pics, hoping it will help with motivation (which is pretty low). See what I mean re chrome 'button'? Whaddya reckon leave as contrast or black out? This pic shows there is progress at least, can also see the new rad I bought for it. Bought the radiator based on being the right width, and relatively short as will be using a dual in single centre out intercooler so the TB pipe will need to go over the top of the radiator. Rad is supposedly for JZ converted S13s so Im hoping its gonna cool OK, either way is definitely shiny enough... EDIT > Filter pic with BJ for more Oldschool love2 points
-
the car now also has the correct size tires on it, meaning the speedo is now accurate, and the warning bell doesnt drive me insane at 100kmh. the car is about 20mm higher off the ground, but looks lower due to much less guard gap, previously i probably could have fit my head in the rear arch.2 points
-
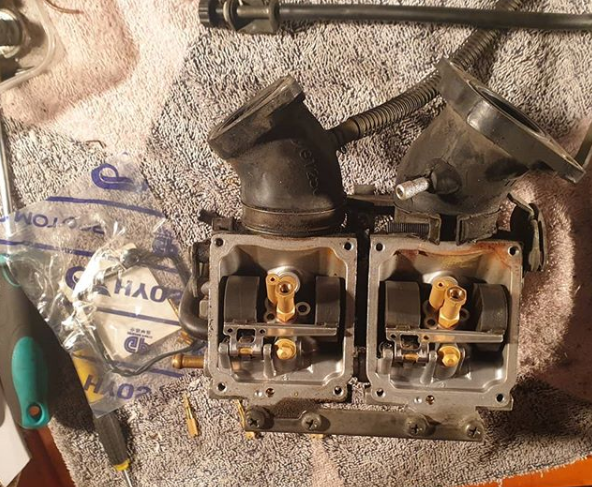
The Hyosung was beginning to take it's time to start, sometimes first click of the start button but sometimes a few goes.. My current house has a little hill on the driveway which would allow me to bump start it which worked every time but less than ideal.. Easter break meant I had some time to do some things which meant whipping off the carbs, giving a clean and replacing the jets During this process I also noticed two air leaks. Fixed those, replaced jets/seals and gave it a kick this morning and it was an instant start up. Job done, pic for thread
2 points
-
Got some more done. Painted the factory extractors and the air filter casing Picked up the new proportioning valve from mitsi this came in a pair so have a spare. And installed it conveniently in place of a female bracket on firewall Began to bleed the brakes but unfortunately the rear wheel cylinders started leaking argh.. It's over extending and leaking out of end of piston sleeve. I took one back and a replacement is doing the same thing now...the guy matched these up and no listing for orginials and these are off 70-81 I think Corolla and coronas.. Frustrated I'll leave it for time being and tackle it again in a day or 2. I had adjusted the auto adjuster so it was wiggly to get the drum on but still extends to far and leaks2 points
-
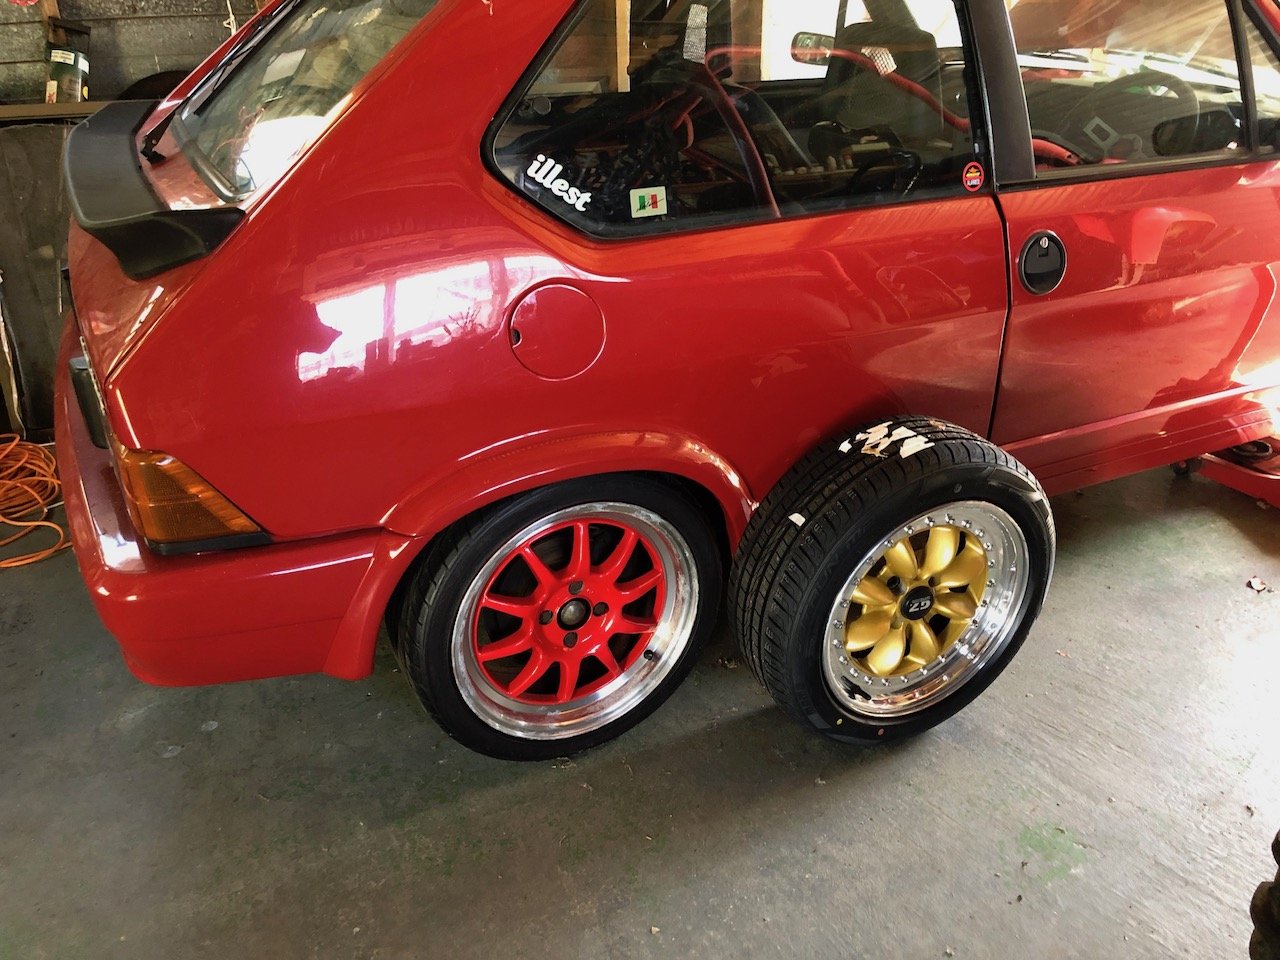
Jeeezzz, its been a while for this car!! Finally got time to work on this after 5 years of sitting in a garage. Did all the basics today, changed fluids, new hoses, new filters and got her running. Chucked some new rims on, thoughts? I think I'll like them more when I convert the bumpers and trim to black. Took it for a quick drive and fk me there a lot to fix on this car!!! Motor pulls strong however the car feels like its on skates, darting all over the road. A quick look at the suspension and literally the rubber bushings have dry rotted away. Pulled the rear arms and shocks out so I can get them rebuilt. Anyways heres a pic of its current guise
2 points
-
Need to dye the rest of the vinyl brown now!2 points
-
Update - all items on the list are done apart from adjusting the hand brake and moving the rear hard brake line up a tad on the diff. I fired the coupe up today and idled it for 20min the drove it up and down the road to get some heat into it. I wanted to monitor the temp and ensure the fan is doing its job and that the rad isn’t spitting any fluid. Pretty sure some neighbours applauded when I turned it off. That just made me turn it right back on. Cert recheck 14th May and toad test. Here are are some pics from today
2 points
-
Have now seam sealed the front right inner wheel arch. Also got the car up on axle stands and off the trolley thing it's been on for the last 18 months and seam sealed the under side, no pics of that. Masked up the front left inner wheel arch and top coated it with Wurth 'Gravel throw and underbody protection'. I don't want to use the full fat bitumen based underseal as it's a prick to get off in the future if you ever need to - a lot of the underside of this car is still coated in it as the blaster couldn't remove it and I don't have the patience to lie on my back with a heat gun and scraper to get it off, so it can stay. This stuff seams to be favoured by those in the Porsche circles online so we will see how it goes (means I have Porsche parts on my car now right?) has the added benefit of coming in a rattle can, not sure if that means it won't last but it takes a bit of effort to scratch it once its dry.
2 points
-
Level up
2 points
-
Can't wait to see this rolling down Cambridge terrace so I can throw you a stiff thumbs up. Visionary.2 points
-
Turd polished. Now to start preparing for Wagnats. edit - oops - somehow I deleted my previous post.
2 points
-
The passengers door lock actuator seized at some point, only noticed it last week. When I was pulling the door apart I noticed there was a bit of rust coming through the front inside of the door, and since the door was basically half in bits I thought I may as well fix it now. Looks like there may of been a previous repair done here. Now I just need enough courage to fix the rust that will most likely result in a respray haha2 points
-
RUST! Was just getting worse so I decided I should probably fix it. As you can see this panel has been painted quite a few times; Original brown, then yellow, blue, another coat of blue and then red haha So stripped it all back to bare metal. Did the valance as well, since that had some decent stone chips etc. Just two bits of rust to fix now; a hole under the wiper motor and a bit under the fuel flap. Not looking forward to trying to fix them.2 points
-
Hey fellas After some years outa the car building game have been making some progress on a new project, its not old but thought Id post it up here since have lurked for years here and seems like oldschool's one of the last well frequented NZ fabrication forums... Have always been a fan of the american muscle truck thing, even though doesnt seem to really exist here. When shopping for a sensible new family ute a few years back a saw a tidy '05 KUN Hilux that had been tastefully transplanted with a drag-spec LT1 350 chev and 4L60E auto. Not sure I have any pics from when I first bought it but did a few things including deleting the chromy bits to this spec Having built a few cars in the past and having always ending up jaded over how you seem to burn more money than you could have ever dreamed, this was the first car that I bought already modified, as figured may as well make good on someone elses financial haemorrhage. Problem with that is after owning the truck for some months I found more and more stuff where the quality of 'craftsmanship' drove me insane. Stuff like washers spacing out the custom front brakes to make them fit (R32 calipers and bigger rotors), modified crossmembers reinforced with mild steel chequer plate that look like theyd been cut by a blind person (no deburr), abortion exhaust that was unremovable without cutting etc. Also the LT1 had way too big a cam for just punting around the streets day to day so ended up deciding to reinvent the shiny lux... First came some BC coilovers up front and new wheels and rubber, but most importantly the LT1 had to go: Keeping the american muscle theme its a '08 Silverado donk, aka 4.8 LS motor. It is the smallest of the LS series engines, couldve bought something bigger but plan is to turbo it and hopefully get the best of both worlds being fuel economy underneath boost, and insane crazy power when so desired. Also bought some bits to upgrade the baby LS To be continued1 point
-
Yeah thought about removing them, looks easy enough, just need a new spot weld drill1 point
-
Those jelly beans are on point1 point
-
Speed science if going new would be my recommendation. Bit spenny though. Can also lurk on nzhondas.com but it's a bit quiet now Or get a cheap set off Facebook and spend a month or three redoing everything else to fit.1 point
-
After ordering some more frost plugs last night I found the ones I thought I had today. Have been working on sorting out the rest of the engine parts I'm missing and also the balance shaft removal bits. I'll probably take the head to work tomorrow and drill and tap the holes for the cam angle sensor. Z is now in storage so will bring the Starion home maybe next weekend. I haven't really said much about the car but most of it is in Zac's thread. It's got S13 front suspension and coilovers, I'm not sure if it's got calipers and rotors on the front but I've got some R33 GTS25t stuff if it doesn't, it's got coilovers in the back. It has a hybrid Nissan and Mitsi front crossmember than needs to be finished (for converting to a rack), I will probably end up changing to a Nissan steering column I think. The wheels and tyres are new and haven't been driven on. Being an '86 it's 5 stud and I believe it has a bigger diff than the earlier cars. The paint was done a few years ago but the car hasn't been driven since it was done. I'm going to try and track down a smaller TD06 (like a 17C) for it, either buy or make an exhaust manifold. I've got a later Evo ECU which can be tuned (sort of like a Nistune) which I may or may not run. ~300rwhp should be pretty achievable and hopefully not break the gearbox.1 point
-
Sounds like a well thought out way to buy a car1 point
-
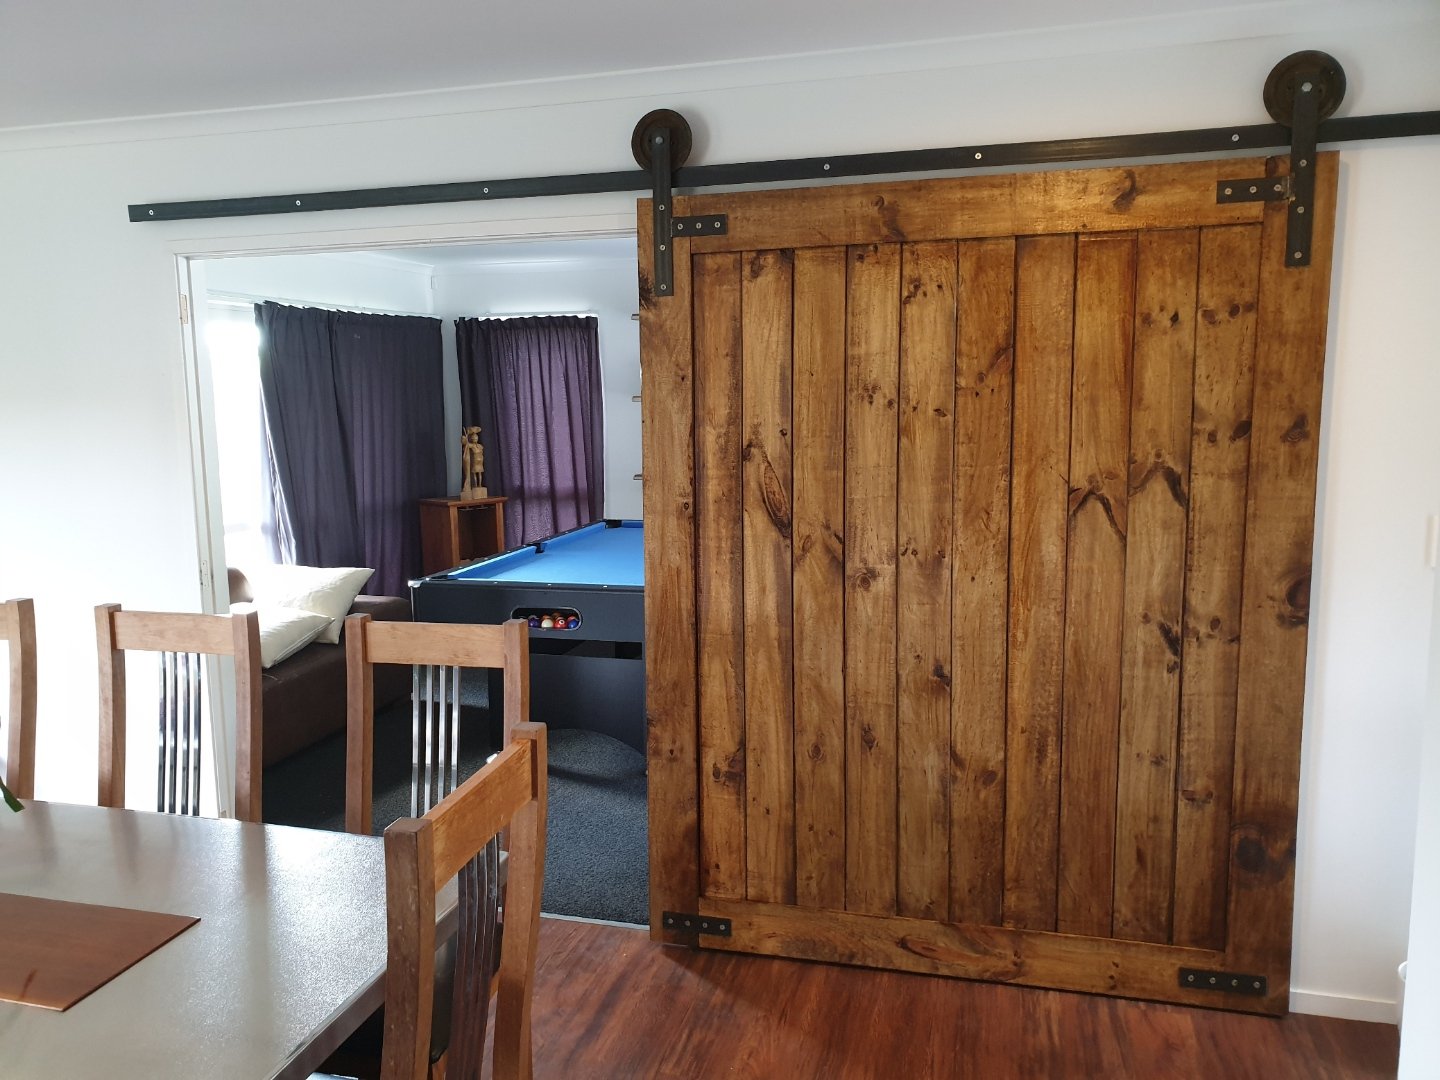
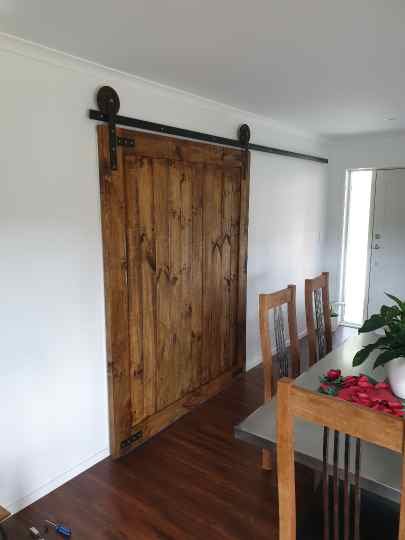
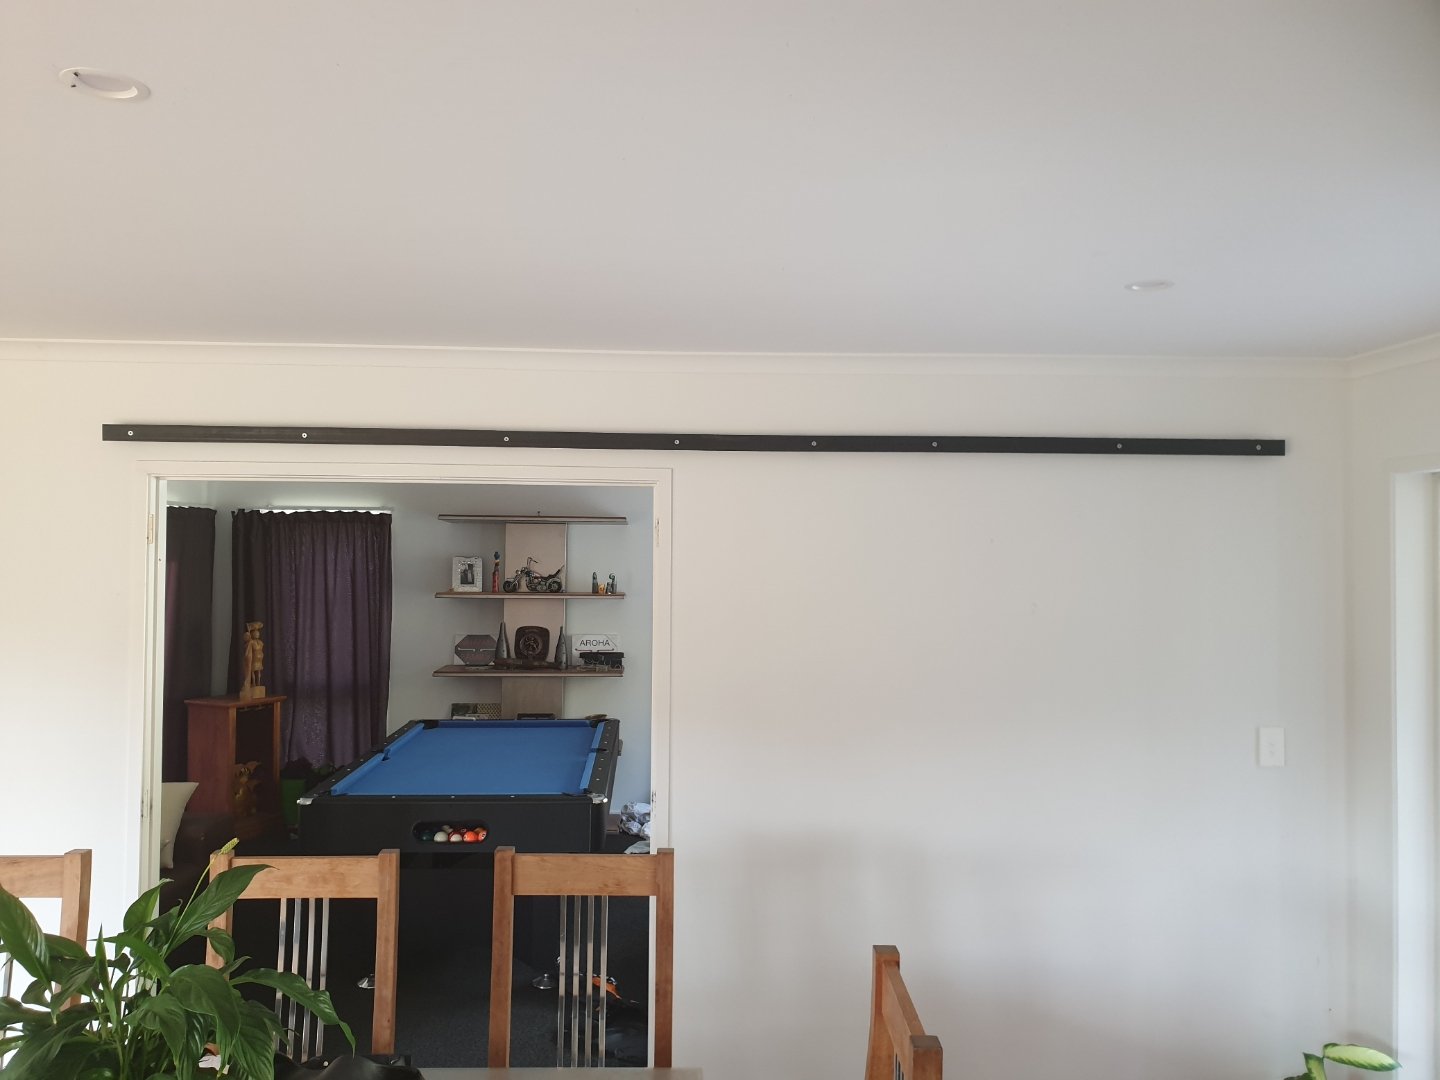
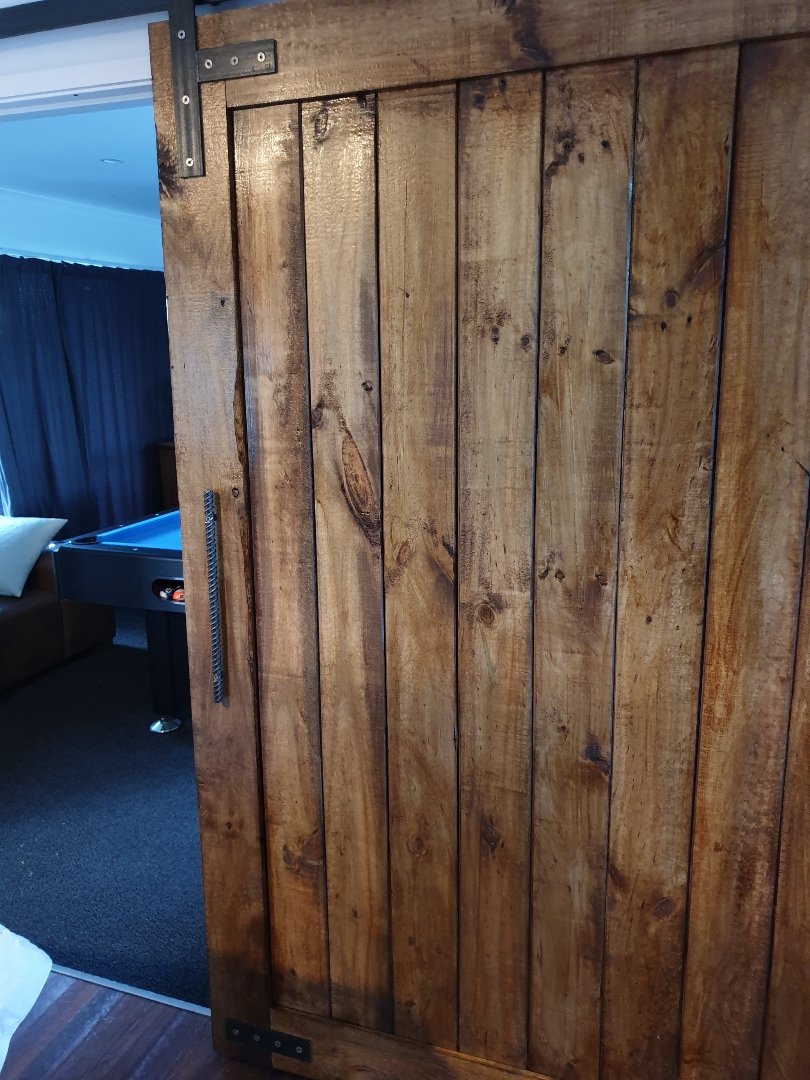
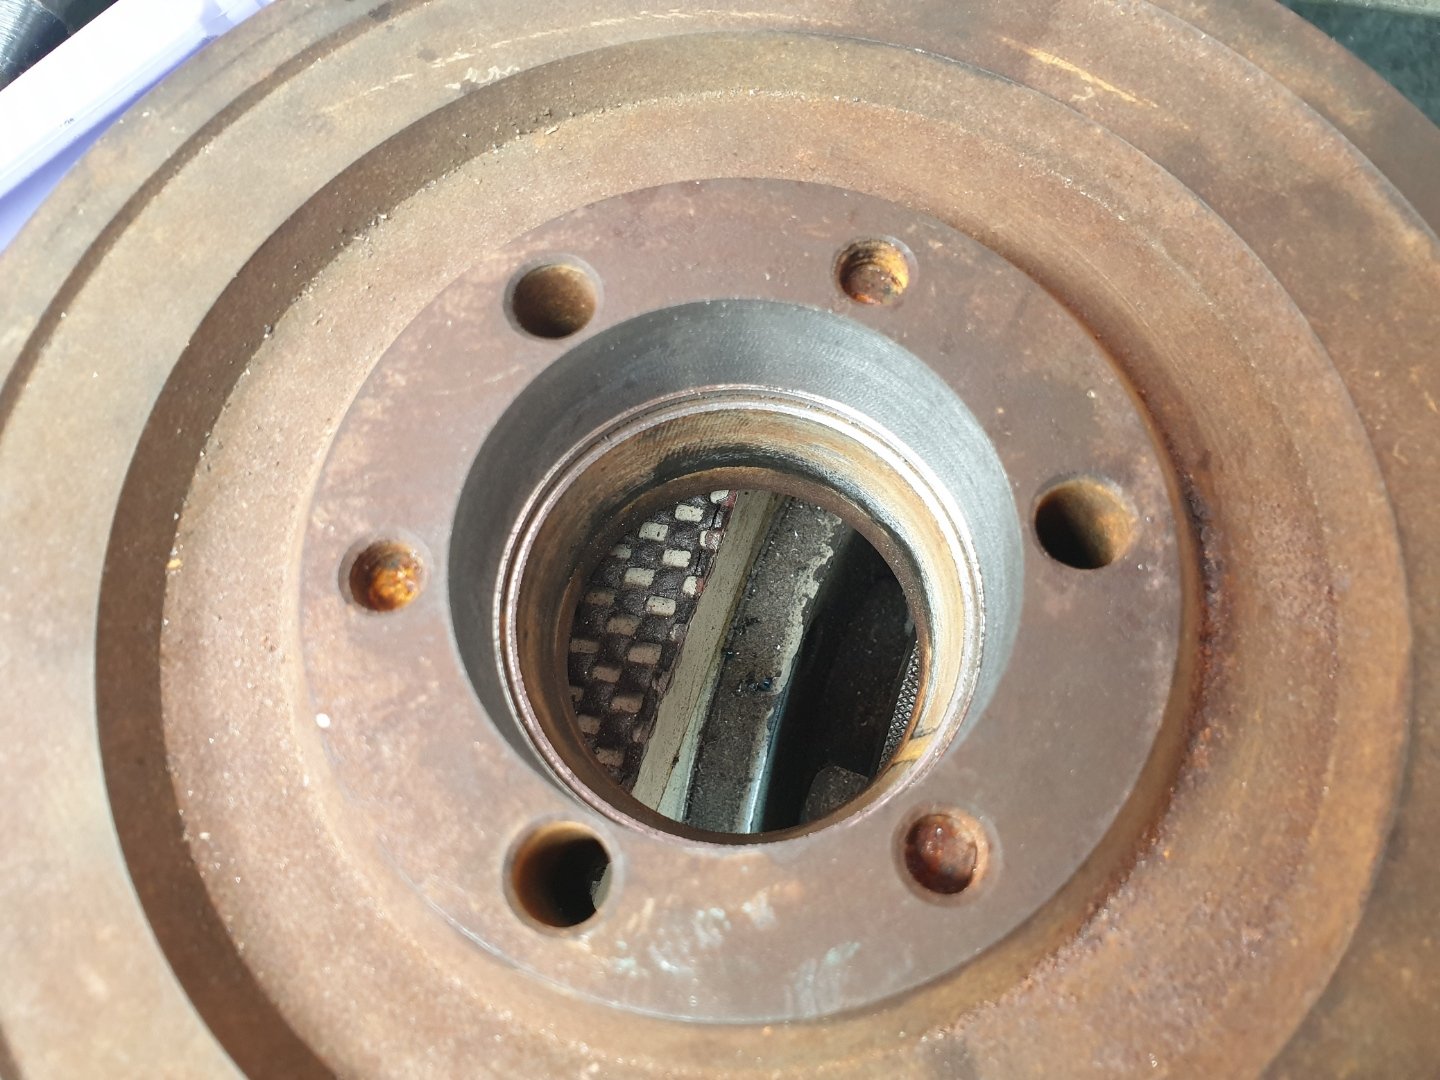
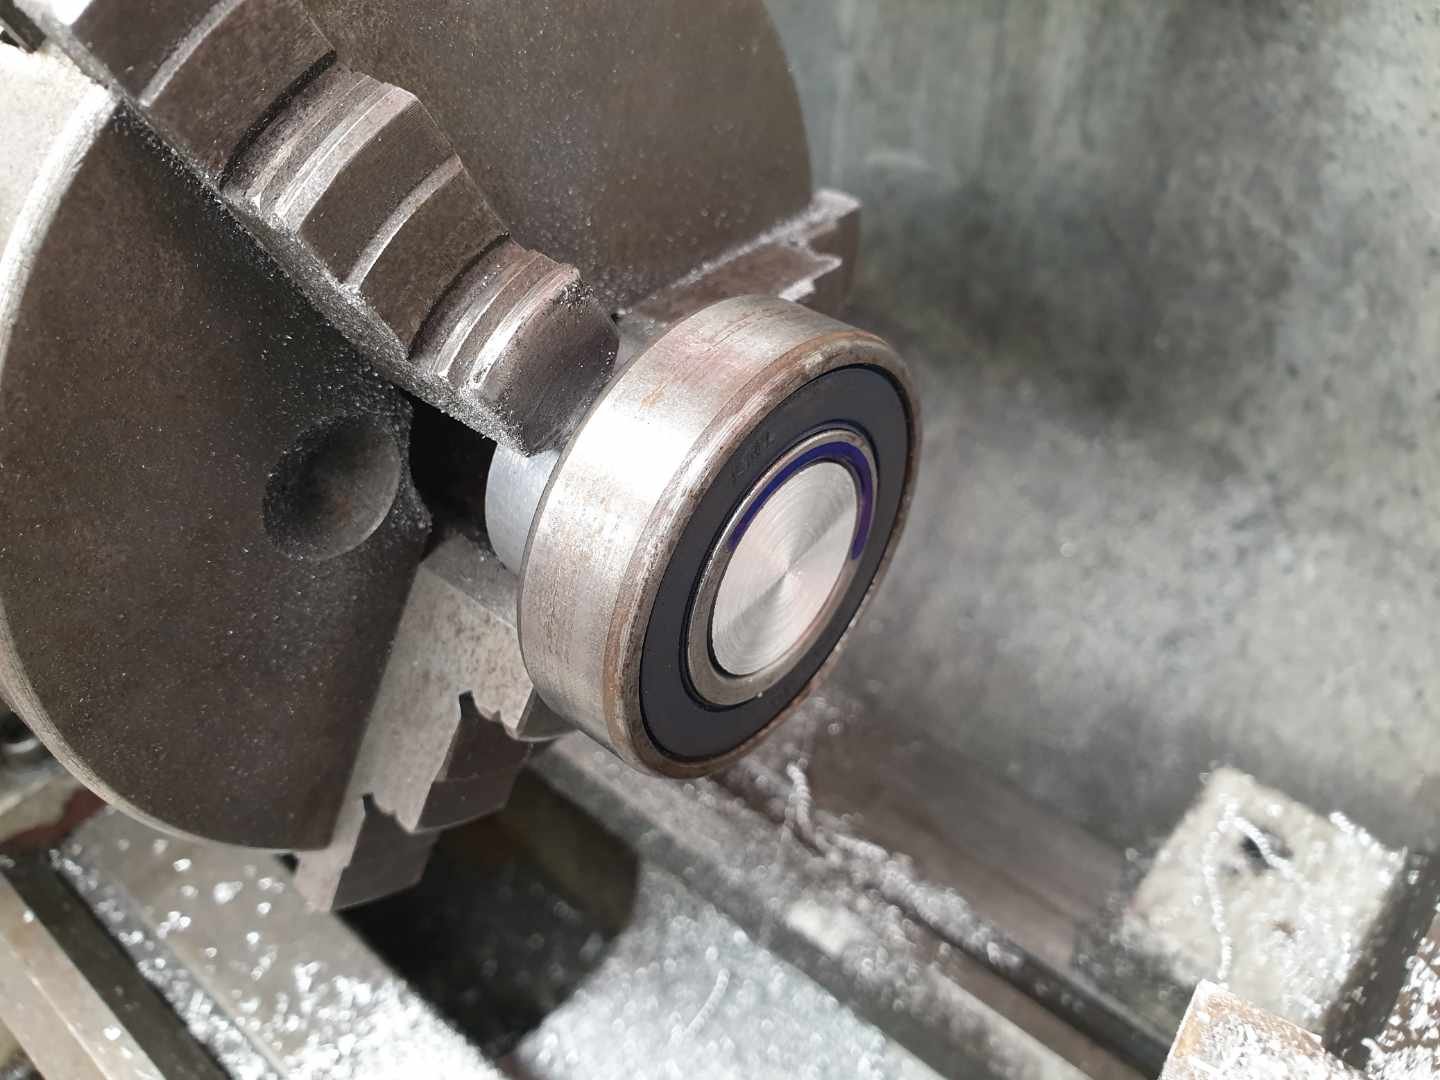
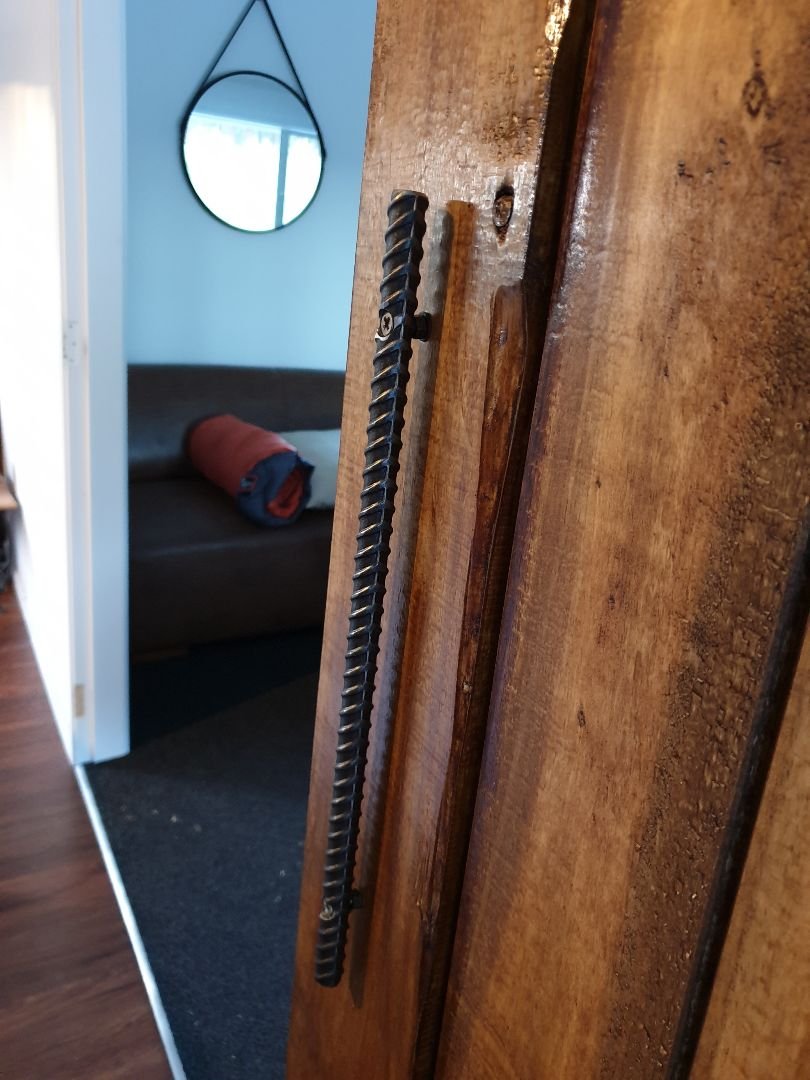
Love the e-kettle above...wicked! Finished the barn door today. Been a public holiday I totally forgot that shops aren't open. However this just made me have to come up with creative solutions, rather than buying ready made. So: Standoffs made. Then using the above standoffs I attached the rail to the wall. It's just 50x6mm flat bar. The same stuff I made the hangers out of. Then I used some left over parts from Pete's velobike. And machined in some recessed pockets to hold some leftover harley bearings. Then I had to make mini stub axles for the bearing to attach to the door hangers. And tadah!!!! It works!!! Added a big handle made of rebar. As they say "big door - big handle"... I've also added some stops, "so it doesn't go off the rails" and a floor guide for it to track on. Pretty happy with it.
1 point
-
Compliance and WOF today. Dealer plated FTW spat some fluid on the way down - shite rad cap. Swapped it out as I had 2 with me in case haha. Gagging for a tune.
1 point
-
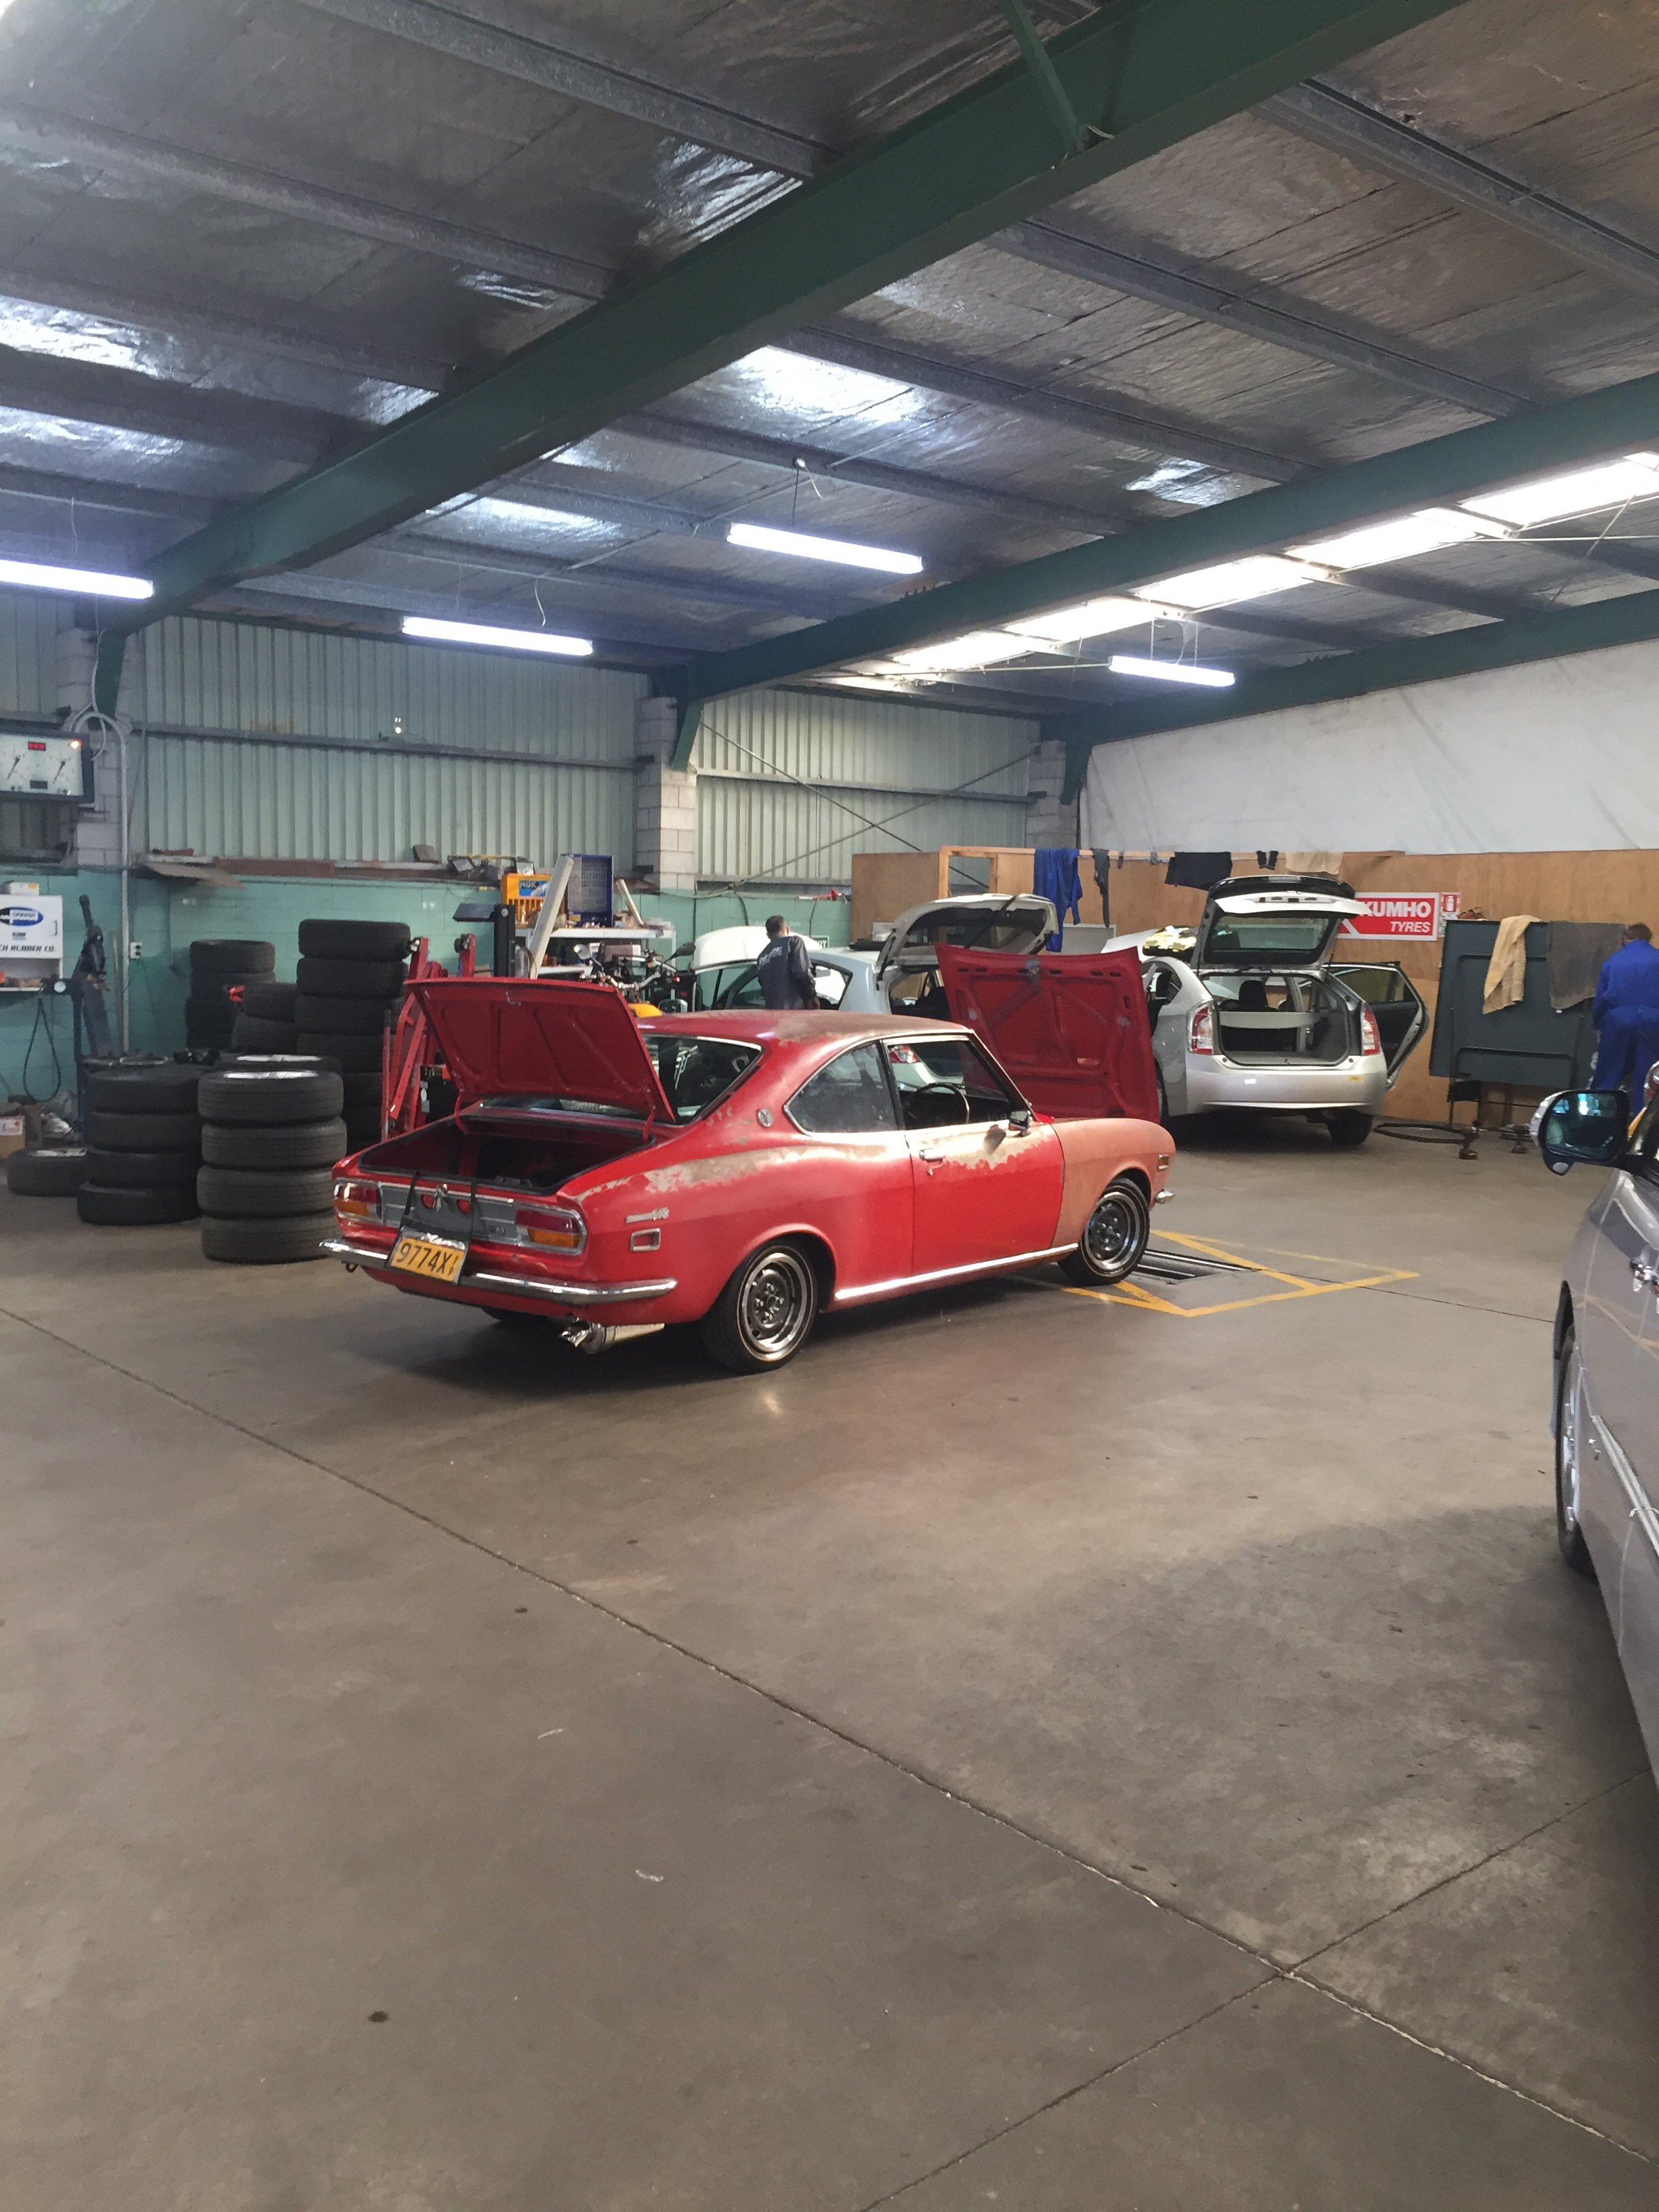
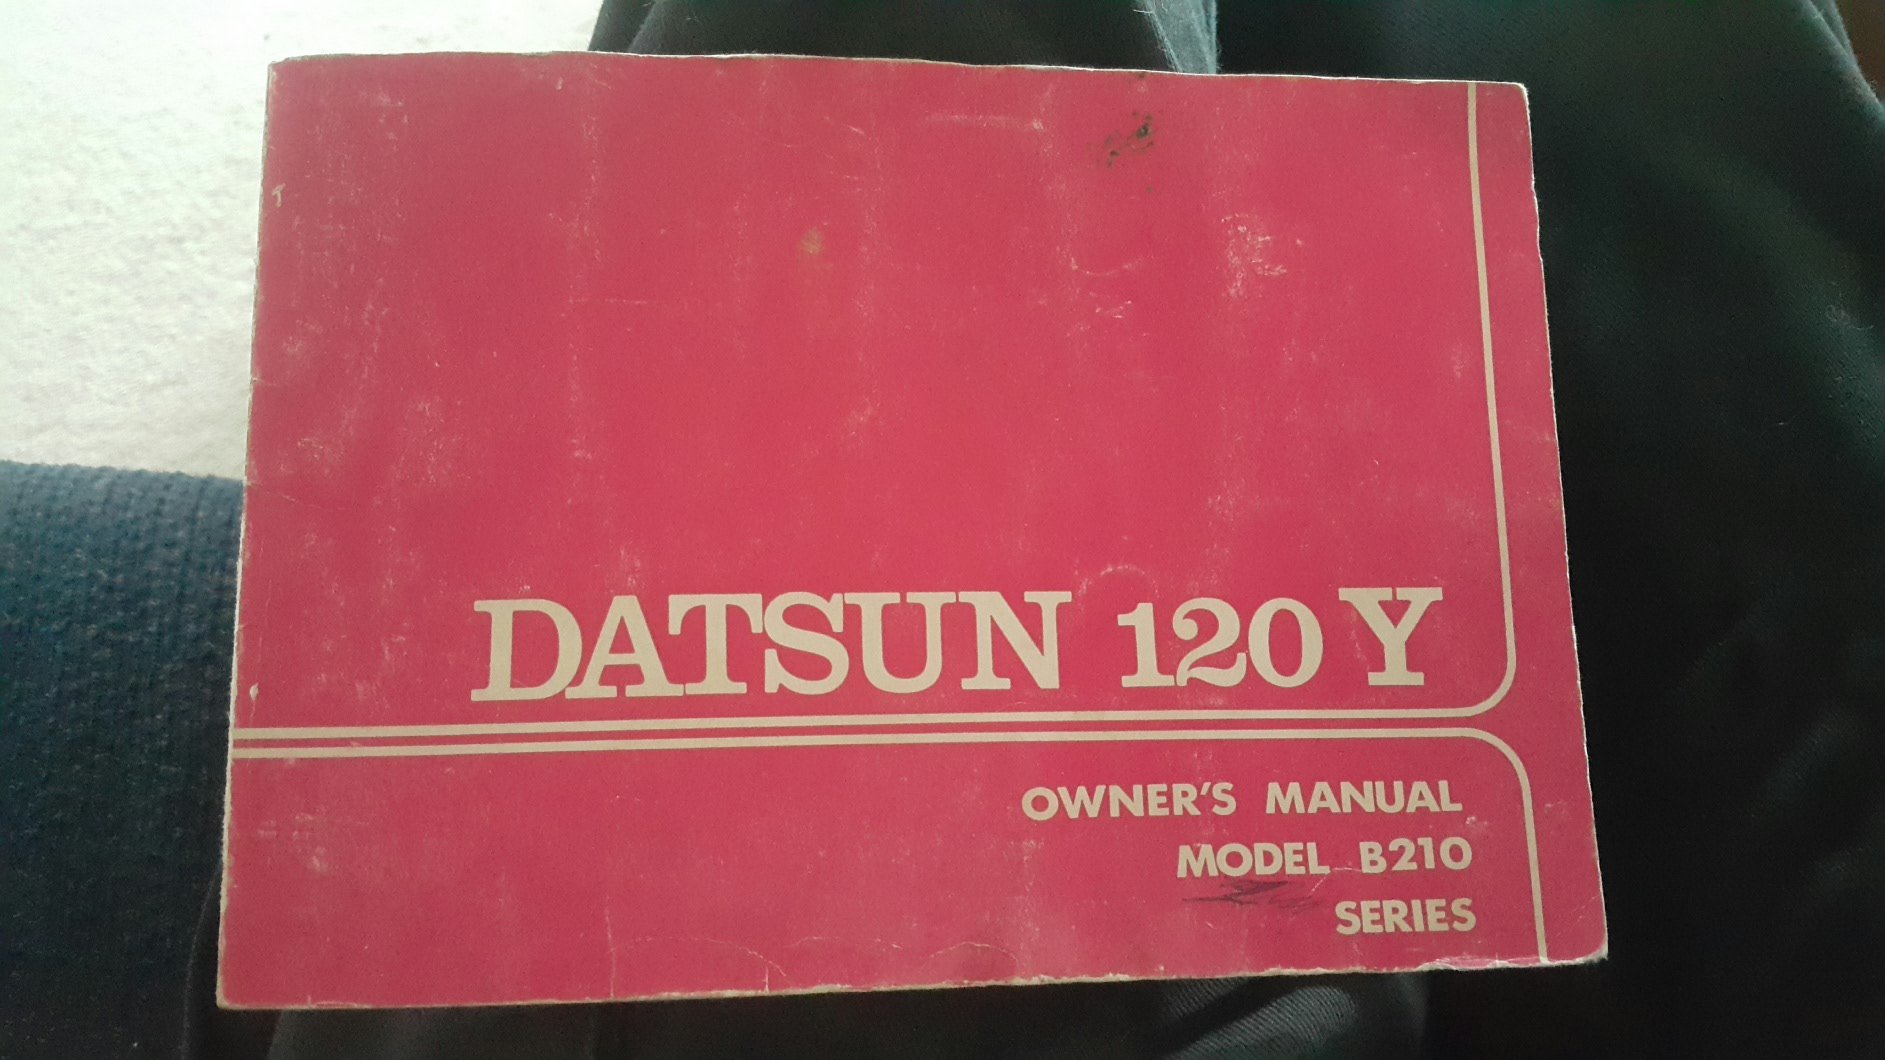
@datto_610 My parents found this the other day. Belongs to your wagon. I'll post it down. Its filled with period correct old Barry type dad scribbles and info
1 point
-
Imp work has taken a back step due to this rusty old 4wd bus thing that has come in for work... However we are both still sneaking in plenty of time on the wee car. Its so exciting to see it come together that we cant help it. Hence I have also been fairly quiet on the forums etc. So when I left off last time it was door cards I think. Or painting the engine. Yeah- that little engine. It looks quite pretty with a little blue bonnet on its head I must say... Now the doors. I cleaned out the threads on the hinge plates, oiled them, cleaned and painted the old screws and then we carefully manoeuvred the doors into place and set the gaps. I knew they would come up good because they were good on the car when we got it. They do look good. They look factory. However I think this car was assembled on a Friday afternoon at the NZ Todd Motor Corp and they had been into the beers already. The wing tops, factory, don't quite match the profile of the door tops, factory, which don't quite match the door or sill bottoms. Factory. Looking at other Imps I think this is fairly par for the course on what was a cheap run around. I'll live with it Then it was the careful task of fitting the 1/4 light windows and the rest of the glass and runners. I rummaged through all my window parts and pieced together the best I could from the stash... I had to lengthen the front glass runners to suit the new bailey channel seals that I'd bought. The new type is soft backed whereas the old ones were steel backed. The runner extension bridges a 40mm gap between the bottom of the 1/4 light and the runner. I folded up a profile the same, butt welded it, cleaned it up and all good.. I fitted the runners, the best glass I had (or so I thought at the time having since now found extra windows hidden behind the lathe which appear to be even less scratched) and then fitted new weather strips on the outside. All very posh for a 53 year old car. Then the door handles. Again it was into the stash of parts. Hannah had already selected, cleaned and polished the best handles of the bunch. I went through all the door locks, hatch lock and ignition barrel managing to get a working set which matches one key. Always a nice thing. I had to make new handle rubbers as the old ones were completely perished. Trying to cut neat holes in thick rubber is never easy but over the years I have made a set of hole punches to suit. I needed a new larger one though... which then made neat holes... Handles fitted and working fine we moved onto the door cards. Actually genuinely excited about this because after the restoration of them came up so well we knew they would look ace against the blue. Even not to bad with the mx5 seats. Nice clean shiny interior handles too along with freshly painted door bins. Very happy with it all... The Mx5 seats dont look too bad in there but we would much prefer to have some red seats.. To match the rear seats which I reckon look great!... I had also fitted the door seals. Not original and a bit too thick to start with but once I cut the bottom out they now now squish perfectly and work well. However- they have either shrunk or were never cut long enough to start with leaving a gap an inch long. I shall have to fill it with some more of the same profile. Now the doors were done it was onto finishing the transaxle rebuild. Ages ago we had scored a later stronger mk3 box from an Imp at the Marshlands graveyard in Christchurch. This car here in fact... I then had a right good collection of boxes... I had stripped down the broken box from the racecar which had some chips in the teeth and was generally in a bad way. These transaxles are so cute (if a gearbox could be cute?..). So dinky. The little diff. Nicely made wee boxes... The later mk3 box has a stronger casing due to extra ribs being cast in around the diff support bearings helping to stop case flex. There is also a breather hole built in a neater way in the back plate, the diff spider gears run the side loads against bronze bearings rather then just the bare cage, the output shafts have pressed on drive lugs rather then just held on by nuts. All the sort of little tweeks one expects as a cars design gets improved through its life. Sadly when we removed the box from the car, which was on its side, I had forgotten to release the gear change coupling from the shaft. The box at one point ended up hanging its weight off this and bent the shaft plus broke the casing. Initially I thought I could just swap the end casing over but they are a different design. There is a breather hole plus the o ring seal that seals the shaft was moved from the shaft itself to the inside of the alloy guide stub (in order to move wearing the alloy down from an O ring attached to a shaft sliding with the hole to fixing the o ring so the hardened shaft now runs within the ring- good idea that man) Photos of broken bits. Note the different casings... I had to fix the casing. I skimmed it flat in the mill.. Milled a step down... Made a small tool with some HSS to machine an inside groove... Machined groove in alloy and a step to on outside for a slight interference fit into plate lug which was then tapped into place with some retaining compound... Cool. Sorted. Then I did some cooking... and pressed a brand new frozen bearing into the case to replace a fairly rough feeling old bearing... I had to weld a block of alloy into the bellhousing to take the pivot ball for the Datsun clutch assembly and then the whole lot was reassembled... Then I had to do a three point turn within the available space, easy with an Imp, so I could par it in a spot with better access to the rear. Next up is to sling engine in place and make a new crossmember to suit because I dont like the one it came with.1 point
-
1 point
-
Fuck thats looking awesome mate !1 point
-
Just take it for a good hoon, shit will self clearance.1 point
-
So tonight, I physically ran out of downwards adjustment. Could barely drive it off the hoist, well actually I couldn't with the front so had to put it on blocks of wood. Obviously that means its still not low enough in the rear - damn it. Next step is remove one or both of the adjuster rings and just roll the threaded locater. I'm kinda hoping it sags a little more. But thats as low as she goes in the front folks. Behaved OK going home and no rubbing or scraping I could detect.. Maybe need to get someone who knows what they are doing with stiffness adjustments to help because it feels a bit pogo like, though I';m not sure if its the front or rear causing it... Check out my photoshop skills.
1 point
-
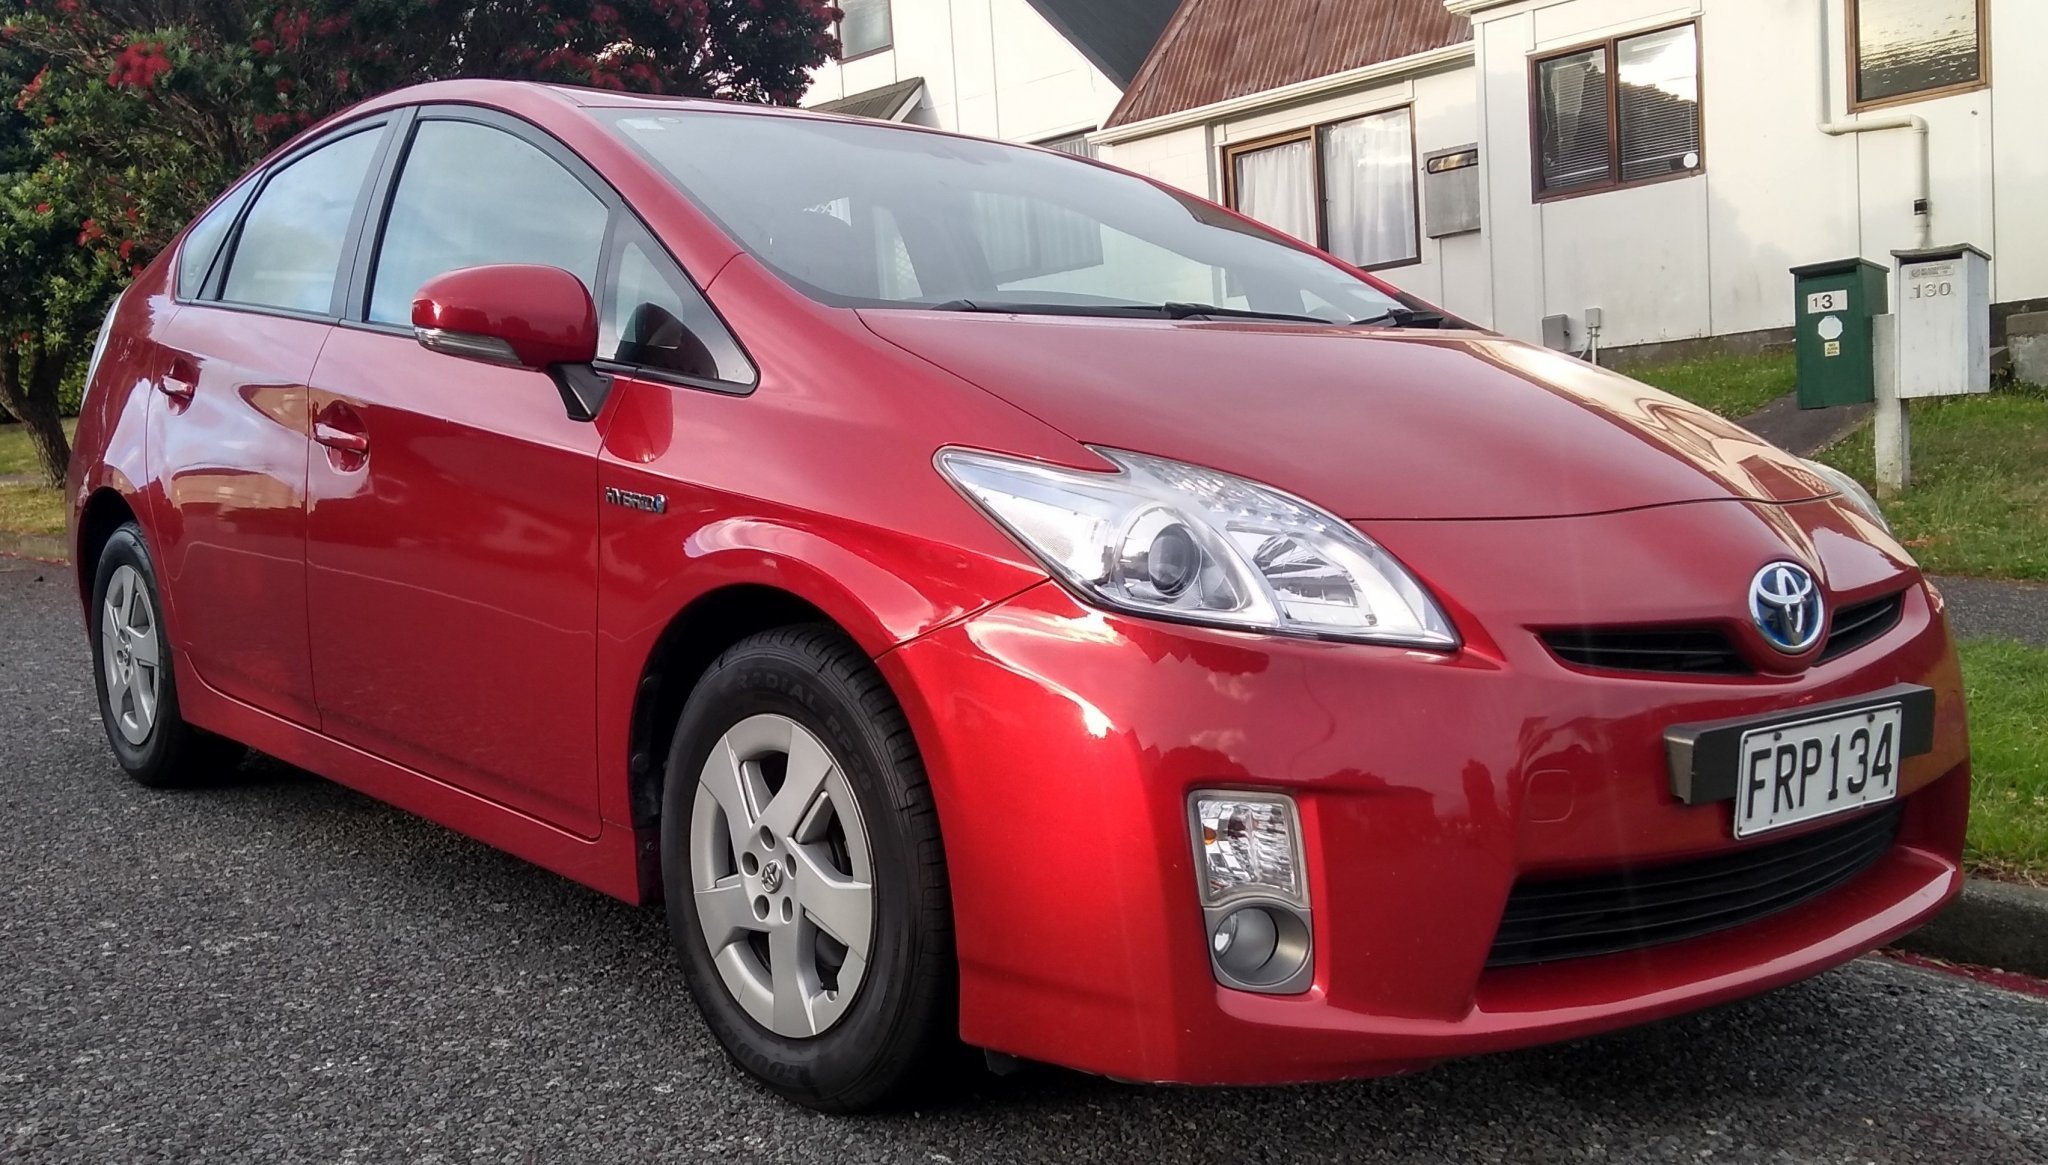
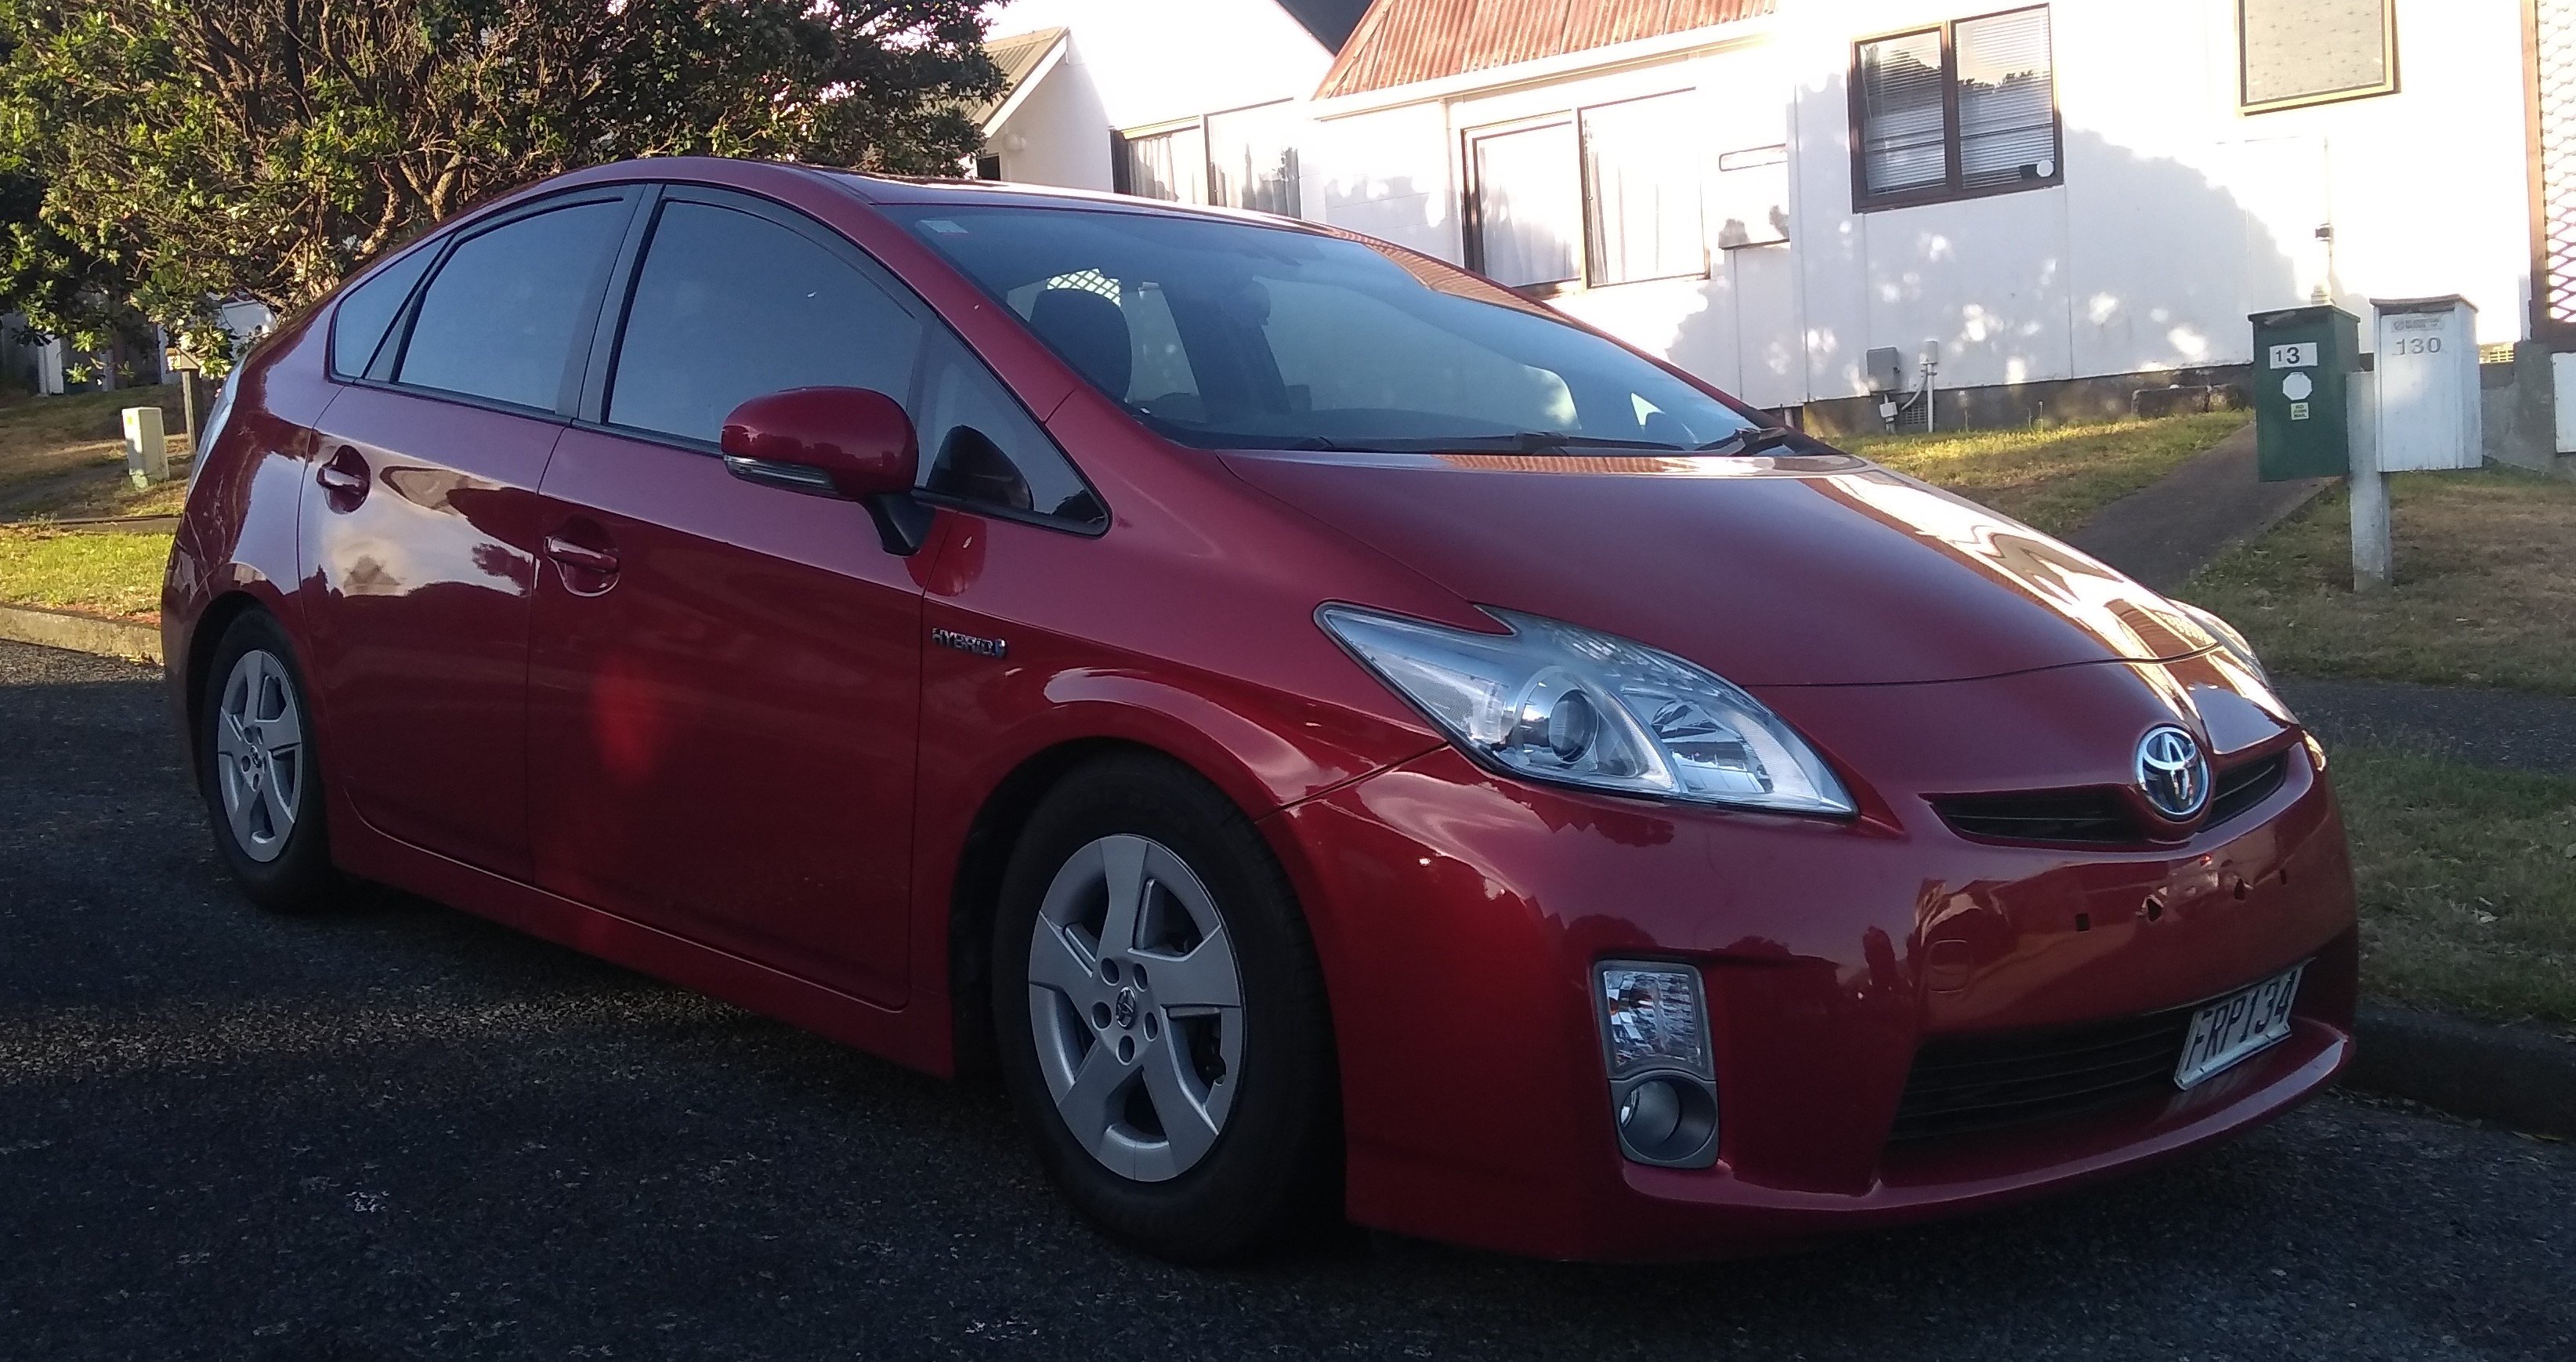
I'm glad to see someone else out there is looking for a means of frugal motoring. Very interested to see how you get on, I went on a course a year or so ago about hybrids which made me feel like one wasn't for me, issues with the batteries etc. Hopefully that won't be the case here. I'm looking forward to Prius and Leaf hop ups being available from Ali Express, imagine a brave new world of high capacity batteries and hot rod brushless motors.1 point
-
Re economy, better than the last motor I hope as was a pig, but not really sure so will have to wait and see. Is 0.9L smaller than a factory LS1 so a touch better than that hopefully, cam is bigger than LS1 though... Am taking the opportunity to swap to a manual so that will help with miserly highway driving. Speaking of which, next up was to purchase one of these bad boys: Is a TR6060, and is gonna be a pain to make work given remote shifter and fixed output flange but T56 would likely die behind that motor so decided to man up and go the reliable (but cunty) path. Also bought a fancy new clutch (Mcleod twin plate). Is a strange feeling buying a clutch that is worth more than yer daily...1 point
-
Swapped the 175/50/13 yokohamas onto the starsharks. It's so slammed now haha. It's also nicer to drive in most ways because it sits at slightly higher revs, apart from high speed cruising which still isn't too bad. Speedo is waaaay out now though!1 point
-
Installed some MRP RCAs and some rear superlow springs which made it higher, so now has even more rake than before haha. Will get them compressed once they have settled a bit. Got sick of the tires rubbing on the plastic inner guards, so pulled them off. Also rolled the guards and then undercoated everything to try and prevent rust. No longer rubs at all, so that only means it needs to go lower!1 point
-
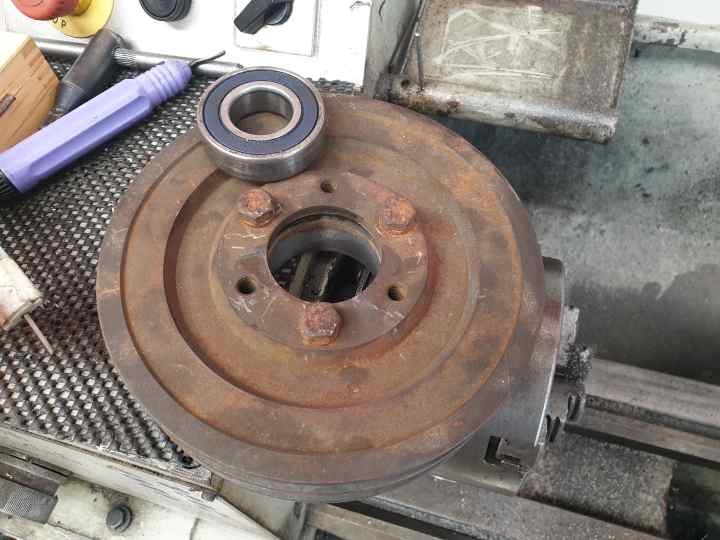
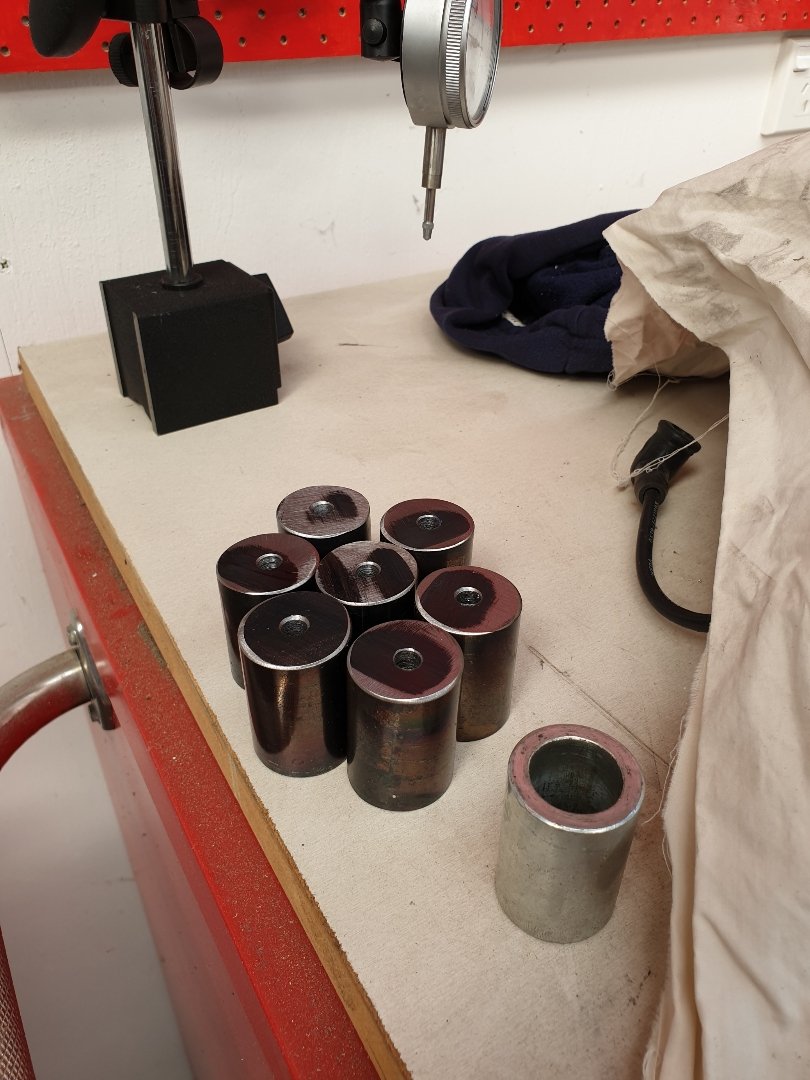
Couldn't find any front brake rotors the correct size, the smallest I could find was 226mm diameter ones whereas I needed 205mm ones. So we made a pattern and got some cast and then machined. Installed them today along with new pads and wheels bearings1 point
-
Did a little photoshoot1 point
-
Made some coilovers. Ended up getting MR2 inserts I think, they weren't really short enough and 5kg springs. I shortened the struts and TIG welded them up. Applied paint Test fitted and the springs were too hard, didn't go anywhere low enough unless I pulled out the keeper springs and wound the collars right down. De-sprung the rear to see how low it could go. Removed the bump stops as well Did some calculating and figured some 3kg springs would be better and shortened the insert shaft a bit. Bought some cheap evo camber plates and drew up some new top hats to get laser cut. Cut another coil off the rear springs and installed some shorted shocks, so this is how it sits now. Hopefully settles a bit lower. Bought another K50 shifter housing thanks to enzee. Shifts much smoother without the one that's been brazed and welded!1 point


.thumb.jpg.a2db281d9c23049231ffe92932a2a4af.jpg.82856884f74f9f19661bab062dfdc1be.jpg)


.jpeg.9a37bc131bbda1b309ba67c93d0194c0.jpeg)


This leaderboard is set to Auckland/GMT+12:00