
Leaderboard


.thumb.jpeg.384ff72c8d2b0ee0d34a7bdedb55bdcf.jpeg)
Popular Content
Showing content with the highest reputation on 04/10/19 in all areas
-
So last Saturday i headed out to the v-dub shoppe to make a start on my engine. Paul was kind enough to work late and help me out. This is my engine and everything that is ment to go with it. inc the two boxes on the floor. I get all the bitch type jobs, clean this, clean that, and yeah clean that as well. so start with cleaning the crank. a little scotch in the cleaning tub and then we rinse it off with hot water. want to know why we use hot water? well hot water evaporates and doesn't leave any residue and wont rust. unlike cold water. now that that's done onto the casing. his has been machined out to fit the larger barrels and pistons to make it a 1776 so yeah lets crack it open see how many peaces of raw material i can find. oh hello. this stuff has gone everywhere. see if you can spot the peace tucked away here. that little peace of silver on the oil pick up is what you are looking for, well now that they are all cleaned up out side to wash these down with cold water. cause these are not steel and they wont rust away. hey presto we looking good now. 1st things 1st. dizzy gear in. i didn't snap a photo of this but here is one off the net. with that lubed up and in place the dizzy goes in over top. while i was putting that in Paul was putting the bearings in and making sure they lined up and marking them to make our life easier for when the crank slides in. i have also slid on 6 little rubber gaskets over the main bolts. bearing 1st. cam gear next, with some heat slid on over and sitting in place with its key way in next is distributor drive gear. my key way was a little lose, luckily we were in the right place and a few steps to the left was a container with a bunch of them in, found one that fitted better. some heat on this and on it went. bearings for the rods and on they go now. no photo of this stage my hands fill and doing other things but lets drop that on in in she goes and lined up Pauls pink dots and dropped the cam in as well.so far the only things out of the old engine are the gear peaces on the crank and the dizzy, even the dizzy drive was in a pile of other parts to the left of me that Paul just pulled out of old stuff. The rods and cam are from another purchase of parts i ended up with including the bearings and all the gaskets.Next Paul swears at his employees for leaving his gasket goo with out a lid and we put some goo on the casing and he drops the other side of the block on. finds some nuts that should come with the casing and he torques them up. its bloody handy having a store room the size he has, off i went find myself some lock nuts, re stock the draw in the engine build section. they get thrown at the engine and torqued up but to a smaller amount. sump on and well bake to the store room to find some dome nuts for the sump plug and the mesh for in side that, and a stud kit for the fuel pump, oil pump and a few other things. actually here is a photo of the kit, thanks google ahh while this was up side down we also dropped these in. which i learnt the other day is a duel pressure relief, vw casings come out duel and single, only early ones come out single. ended up watching a YouTube video of how it works and where they are. if you want to learn here is the video i watched it was a pretty good Saturday learning and building the new engine. last night i headed in and done some more work. removed all the head studs while Paul was on the phone and cleaned them up, he then came down and gave me some shit about how i didn't get the fly wheel and shims ready for him, few seconds later he had them, he worked out the end float and put some shims in allowing some small amount of thou. he was also trying to calculate out loud and man that shit was confusing as fuck to me. with that all sorted i now have the fly wheel and we are off to get skimmed and it has a really nasty lip where the rear main seal would usually sit so ill take that to geophfey and get him to take the lip off that. all in all shes been a great few days so far.16 points
-
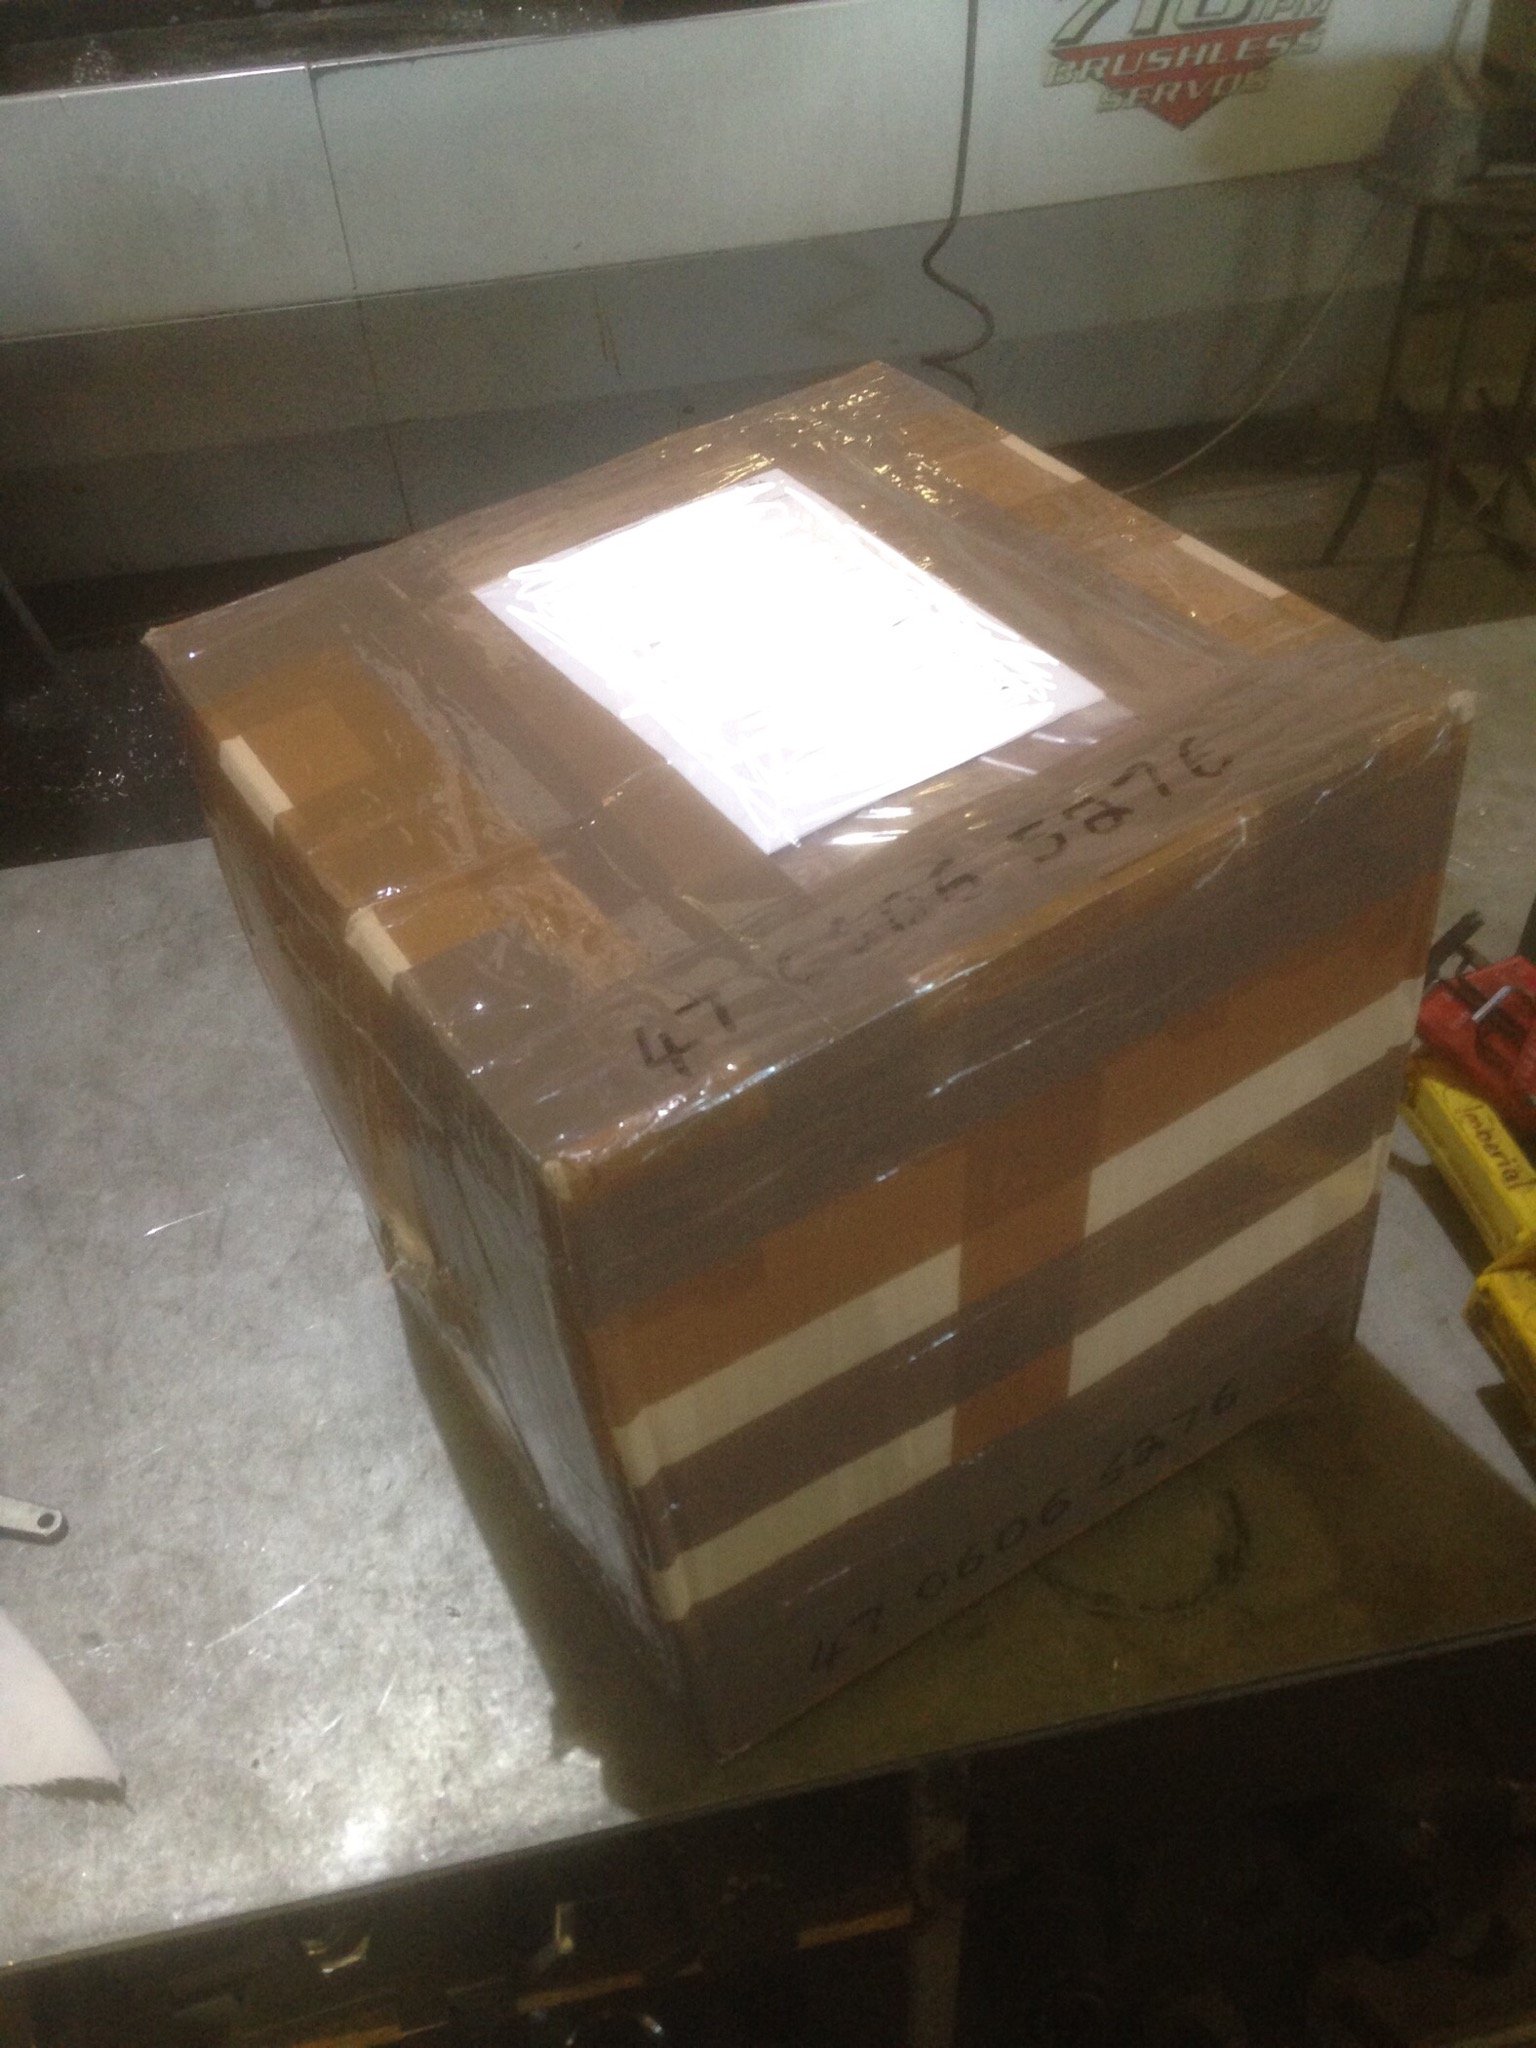
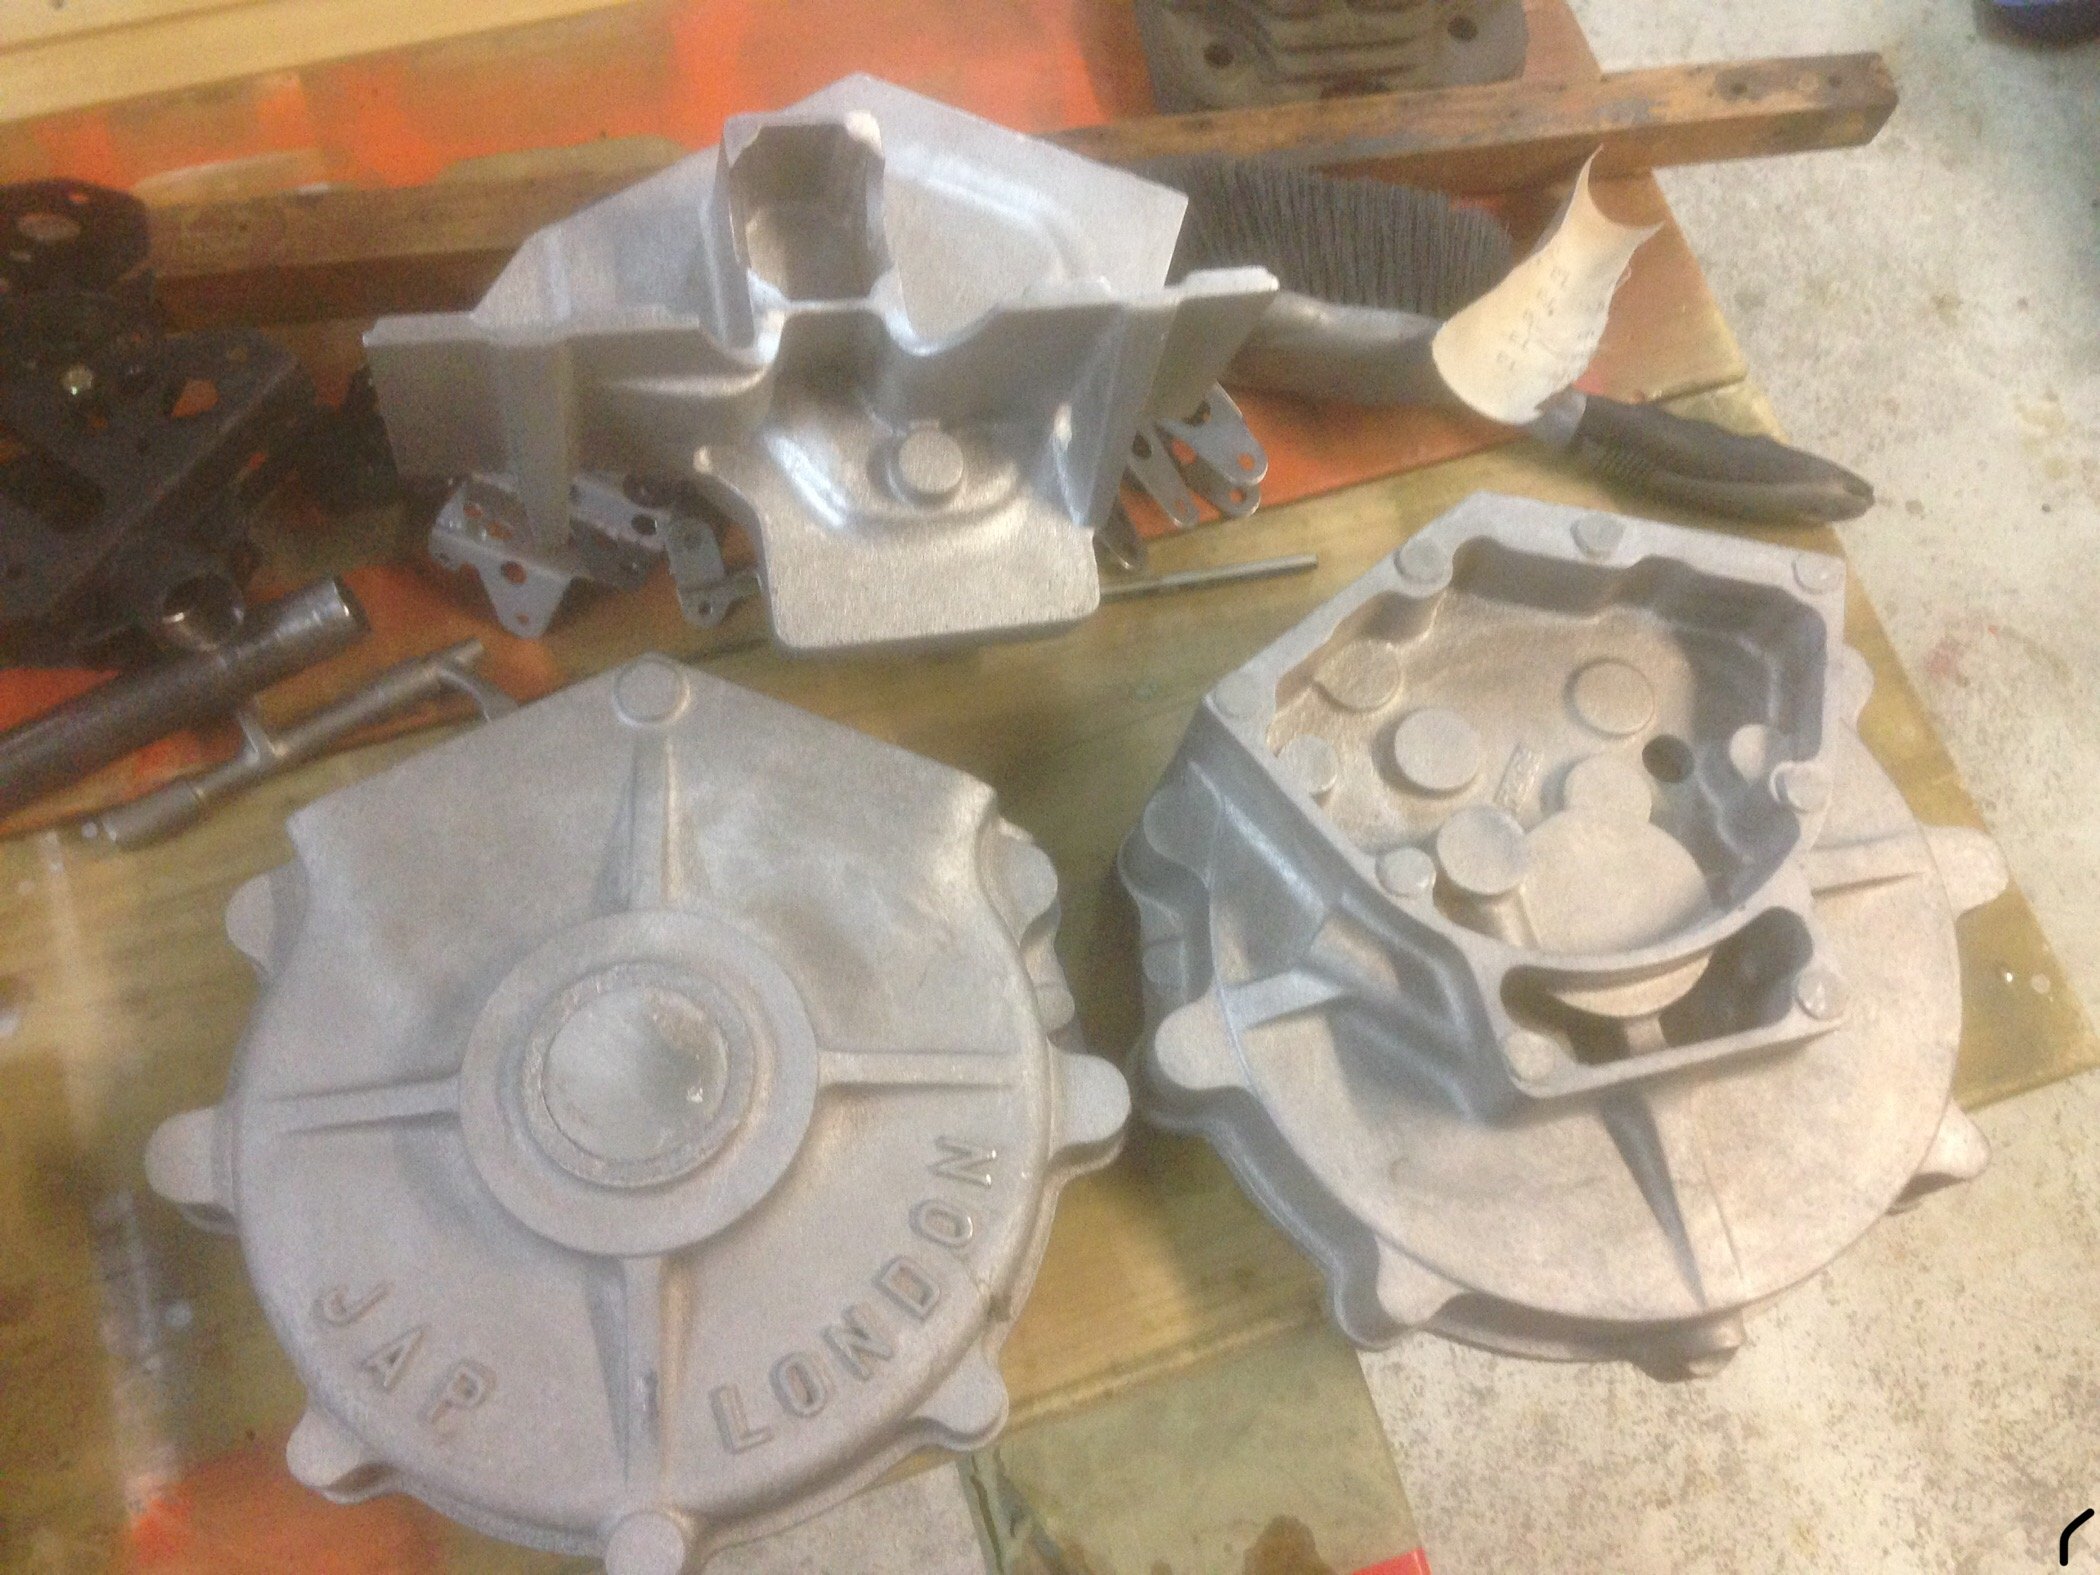
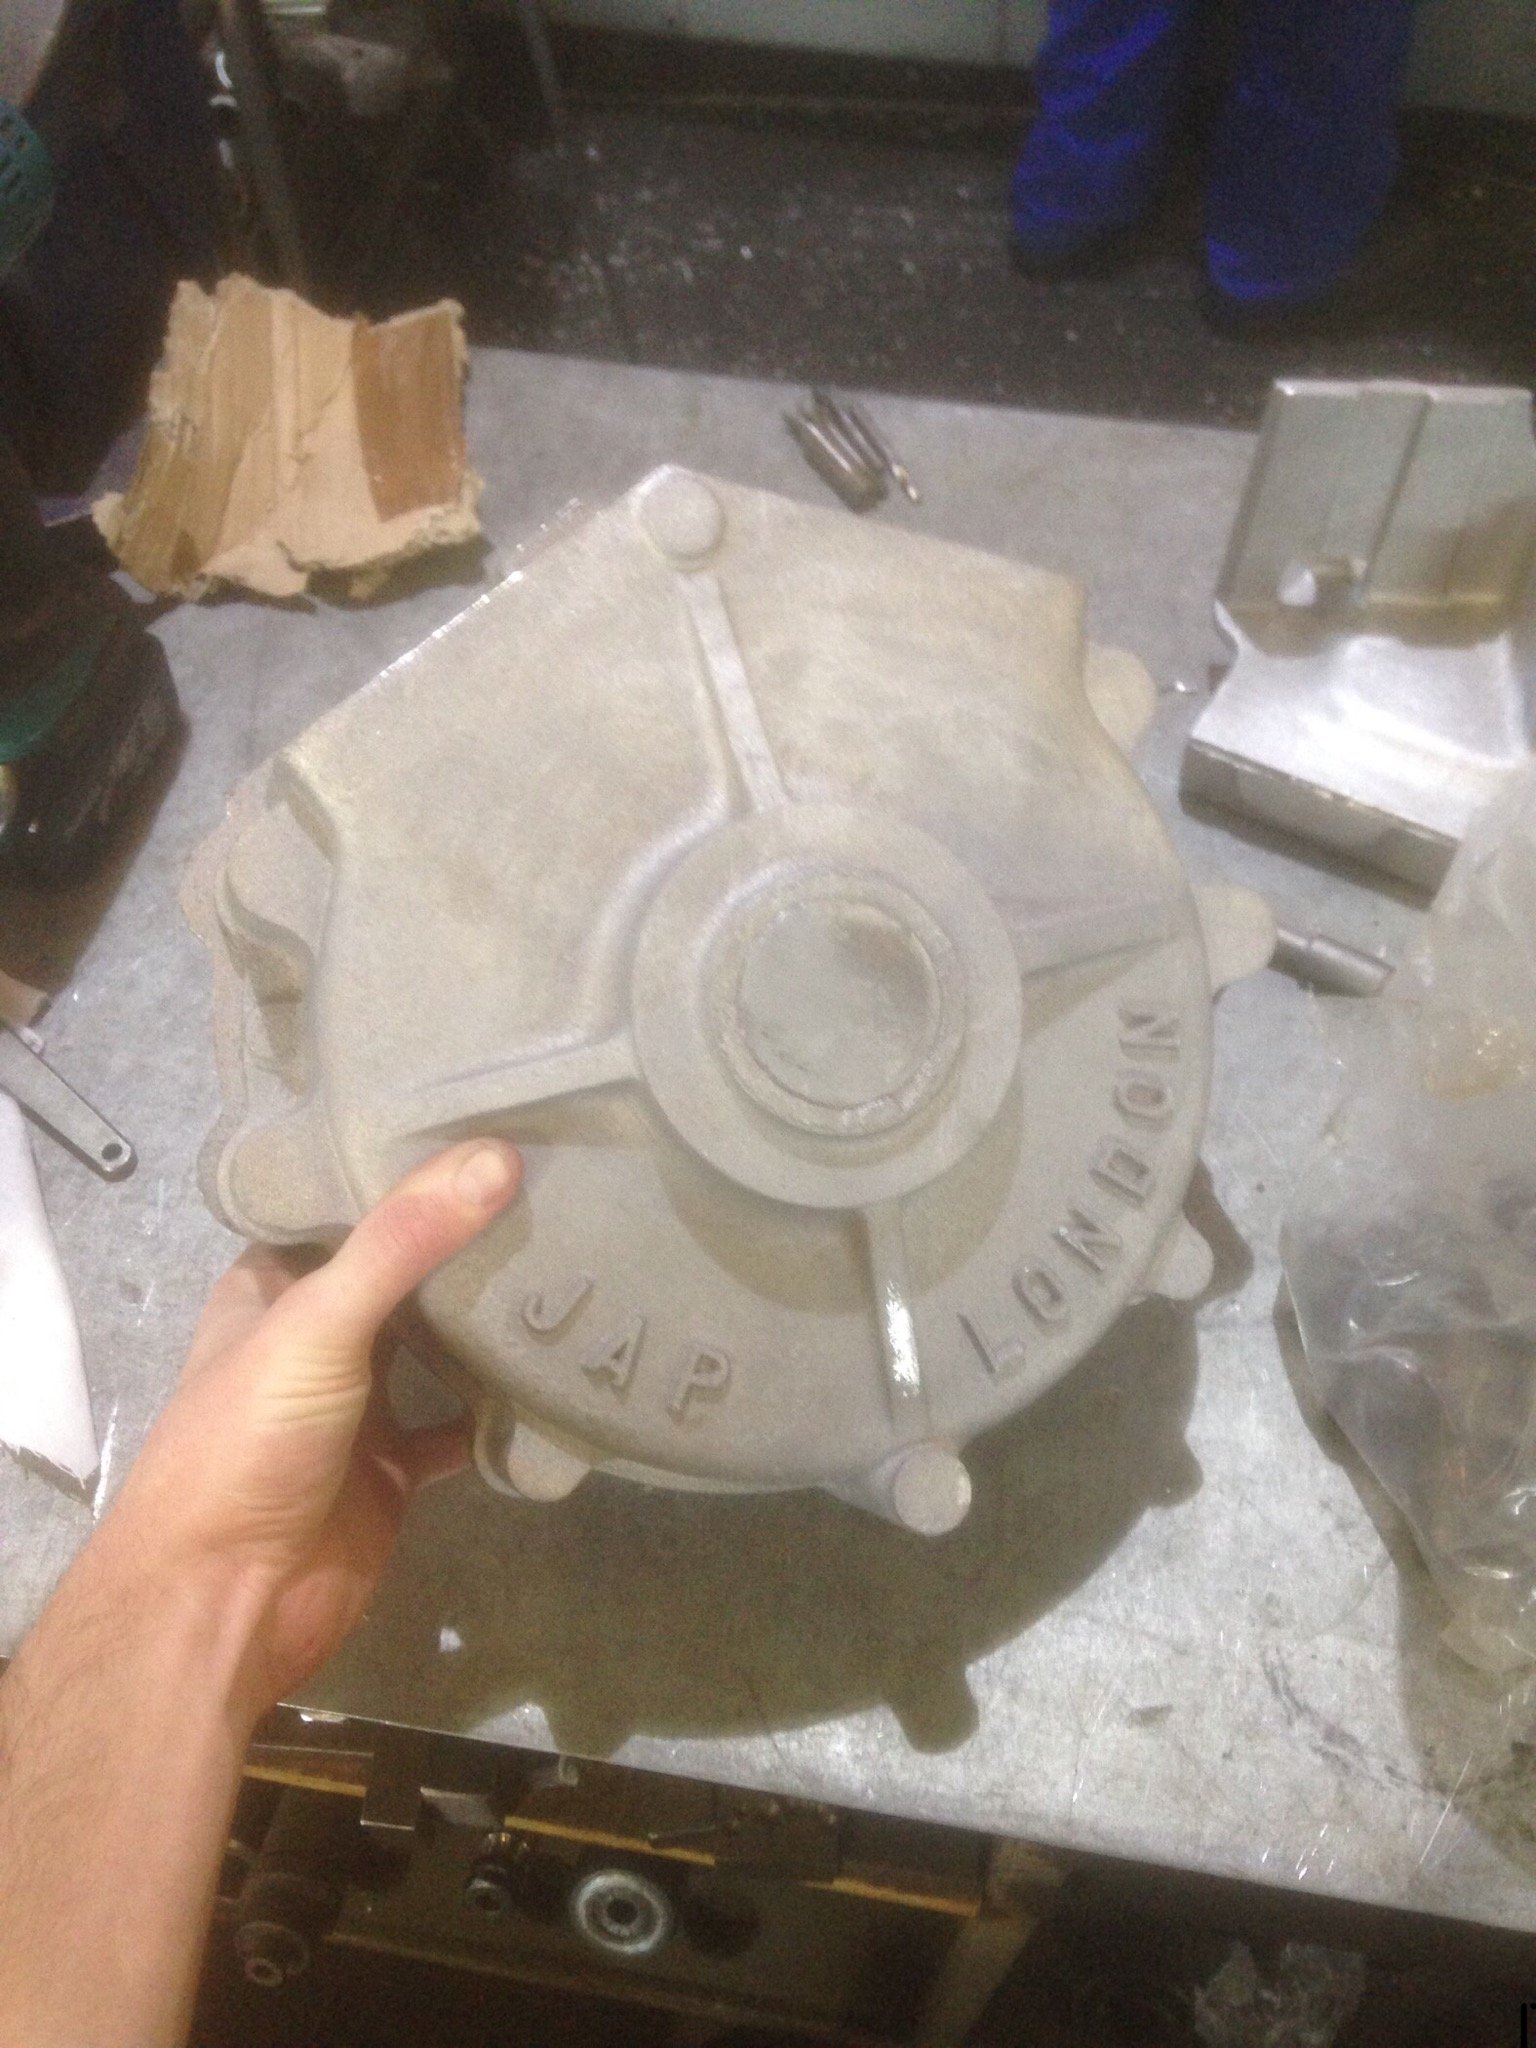
Nice cardboard box arrived from the UK. JAP V twin engine kit set, some assembly required..... Should keep me busy for a bit.
 9 points
 -
Been having tons of adventures in the wagon. Won a few more awards. Best 8 Cylinder at 4 and rotary jamboree And my favourite, the "What the ?" award from the Automania festival. Pretty much sums up the wagon You put a V8 in what??? So, back to my adventures and what not. I decided on the spark plug cover look I liked the most so I went with just the plain black covers. It worked quite well because I had heaps more people asking what the engine is, so I guess it fools them just enough without the V8 FOUR CAM 32 badge on it Before my trips I figured I would find a new brake pedal pad, I found it a hoot that it is a dodge truck part! Looking sweet, I will have to get another for the clutch at some stage, they are both the same pad So with the engine sorted and the brake pedal sussed I went for a cruise down to feilding for the 4 and rotary jamboree. I stayed at a sweet little B&B just outside of town. Got to Manfeild on Saturday for the track day, super excited because it is the only track in NZ that I haven't done a track day on, so I can tick every track in NZ off my bucket list now. Got out on track then on the first lap disaster stuck!!! The track had been used for field days the weekend before so it was super dirty, and the car in front of my chucked up a rock, smashing my windscreen!!! I drove the rest of the lap with my hazards on and my head out the window. When I got back to the pits I gave my friend Jared (A.K.A @JoKer) a ring and got him to bring me a spare windscreen over from Dannevirke. While he was making his way over I drove down to the local glass place and got them to swap the windscreen over. I got some funny looks cruising down the main road of feilding with a busted windscreen in a V8 Avenger, it was only about 1km from the track so I just drove with my head out the windows. Made it back to the track with the new windscreen just in time for the afternoon session. As a thank you, I took Jared for a cruise around the track. It was quite a blast My favourite picture of the wagon out on the track Out on the track I had a bit of a lean backfire off throttle so I pulled the car off the track early and set it up in the show and shine, After the show and shine I found the problem was the idle adjustment screws on the back right pair of throttle bodies had vibrated up so those throttle bodies weren't closing fully, fixed it in the car park. On the way back home I stopped in at Horopito, AKA Smash Palace to get me some wagon parts. They have a few Avengers there, 2 wagons and 4 or 5 saloons. Got me a good haul of parts, got some rear bumper brackets to replace the ones I had to borrow from the 75 Avenger when I swapped to the NOS Hillman bumper on the wagon. Got me a tow bar because there is nothing cooler than a V8 Avenger wagon towing stuff, am I right?? And also a pedal box for a friend, and a new door card. Got back home and gave the bumper brackets a good sand blast Then painted them with black zinc paint The next weekend I went off to @Ned house warming down in Taupo, So I figured I would camp out in the wagon on his front lawn. I am really digging the wagon for camping. The bed mode is really comfy, so I think I might do that more often rather than staying at hotels. On the way back up I meet up with the Hillman Humber club and we did a run out to a truck museum. Pretty good turn out. We had 3 Avengers there!! Then the weekend after that I had the Automania festival!! I entered my wagon in the indoor show. I figured I should actually get a photo with the bonnet down as 99% of the time it will have it's bonnet up, because V8! I went with a nice little in car display of some of my old Avenger sales brochures. I especially like the one on the back of the drivers seat because it has all the original prices hand written and a dealers stamp on the front, it must have been kept all these years by someone who was thinking of buying one, it's either 1979 or 1980 so it's from the exact era of my wagon, and even has the van pricing on it, and that you only needed 30% deposit, rather than the 60% deposit you needed for a normal car or wagon. I also entered my 1975 Avenger in the outdoor show. It was raining all day so my poor little Avenger Panther felt very unloved while it's younger brother sat warm and dry inside (Can you tell I have a favourite child at the moment?)3 points
-
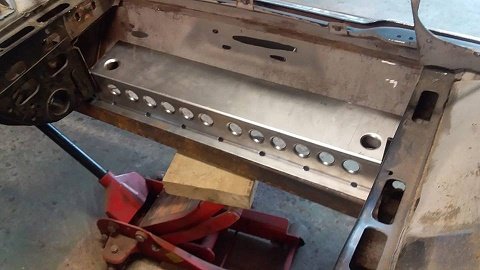
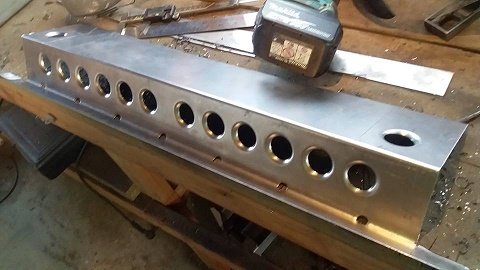
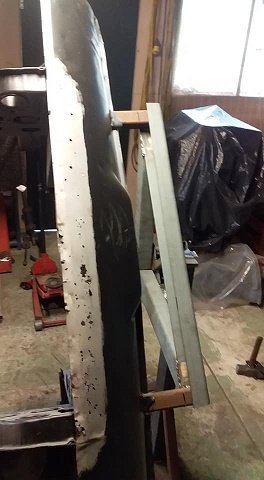
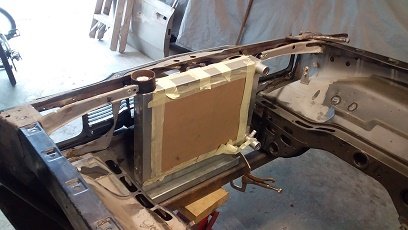
some more trimming and i think i have the base plate done.
3 points
-
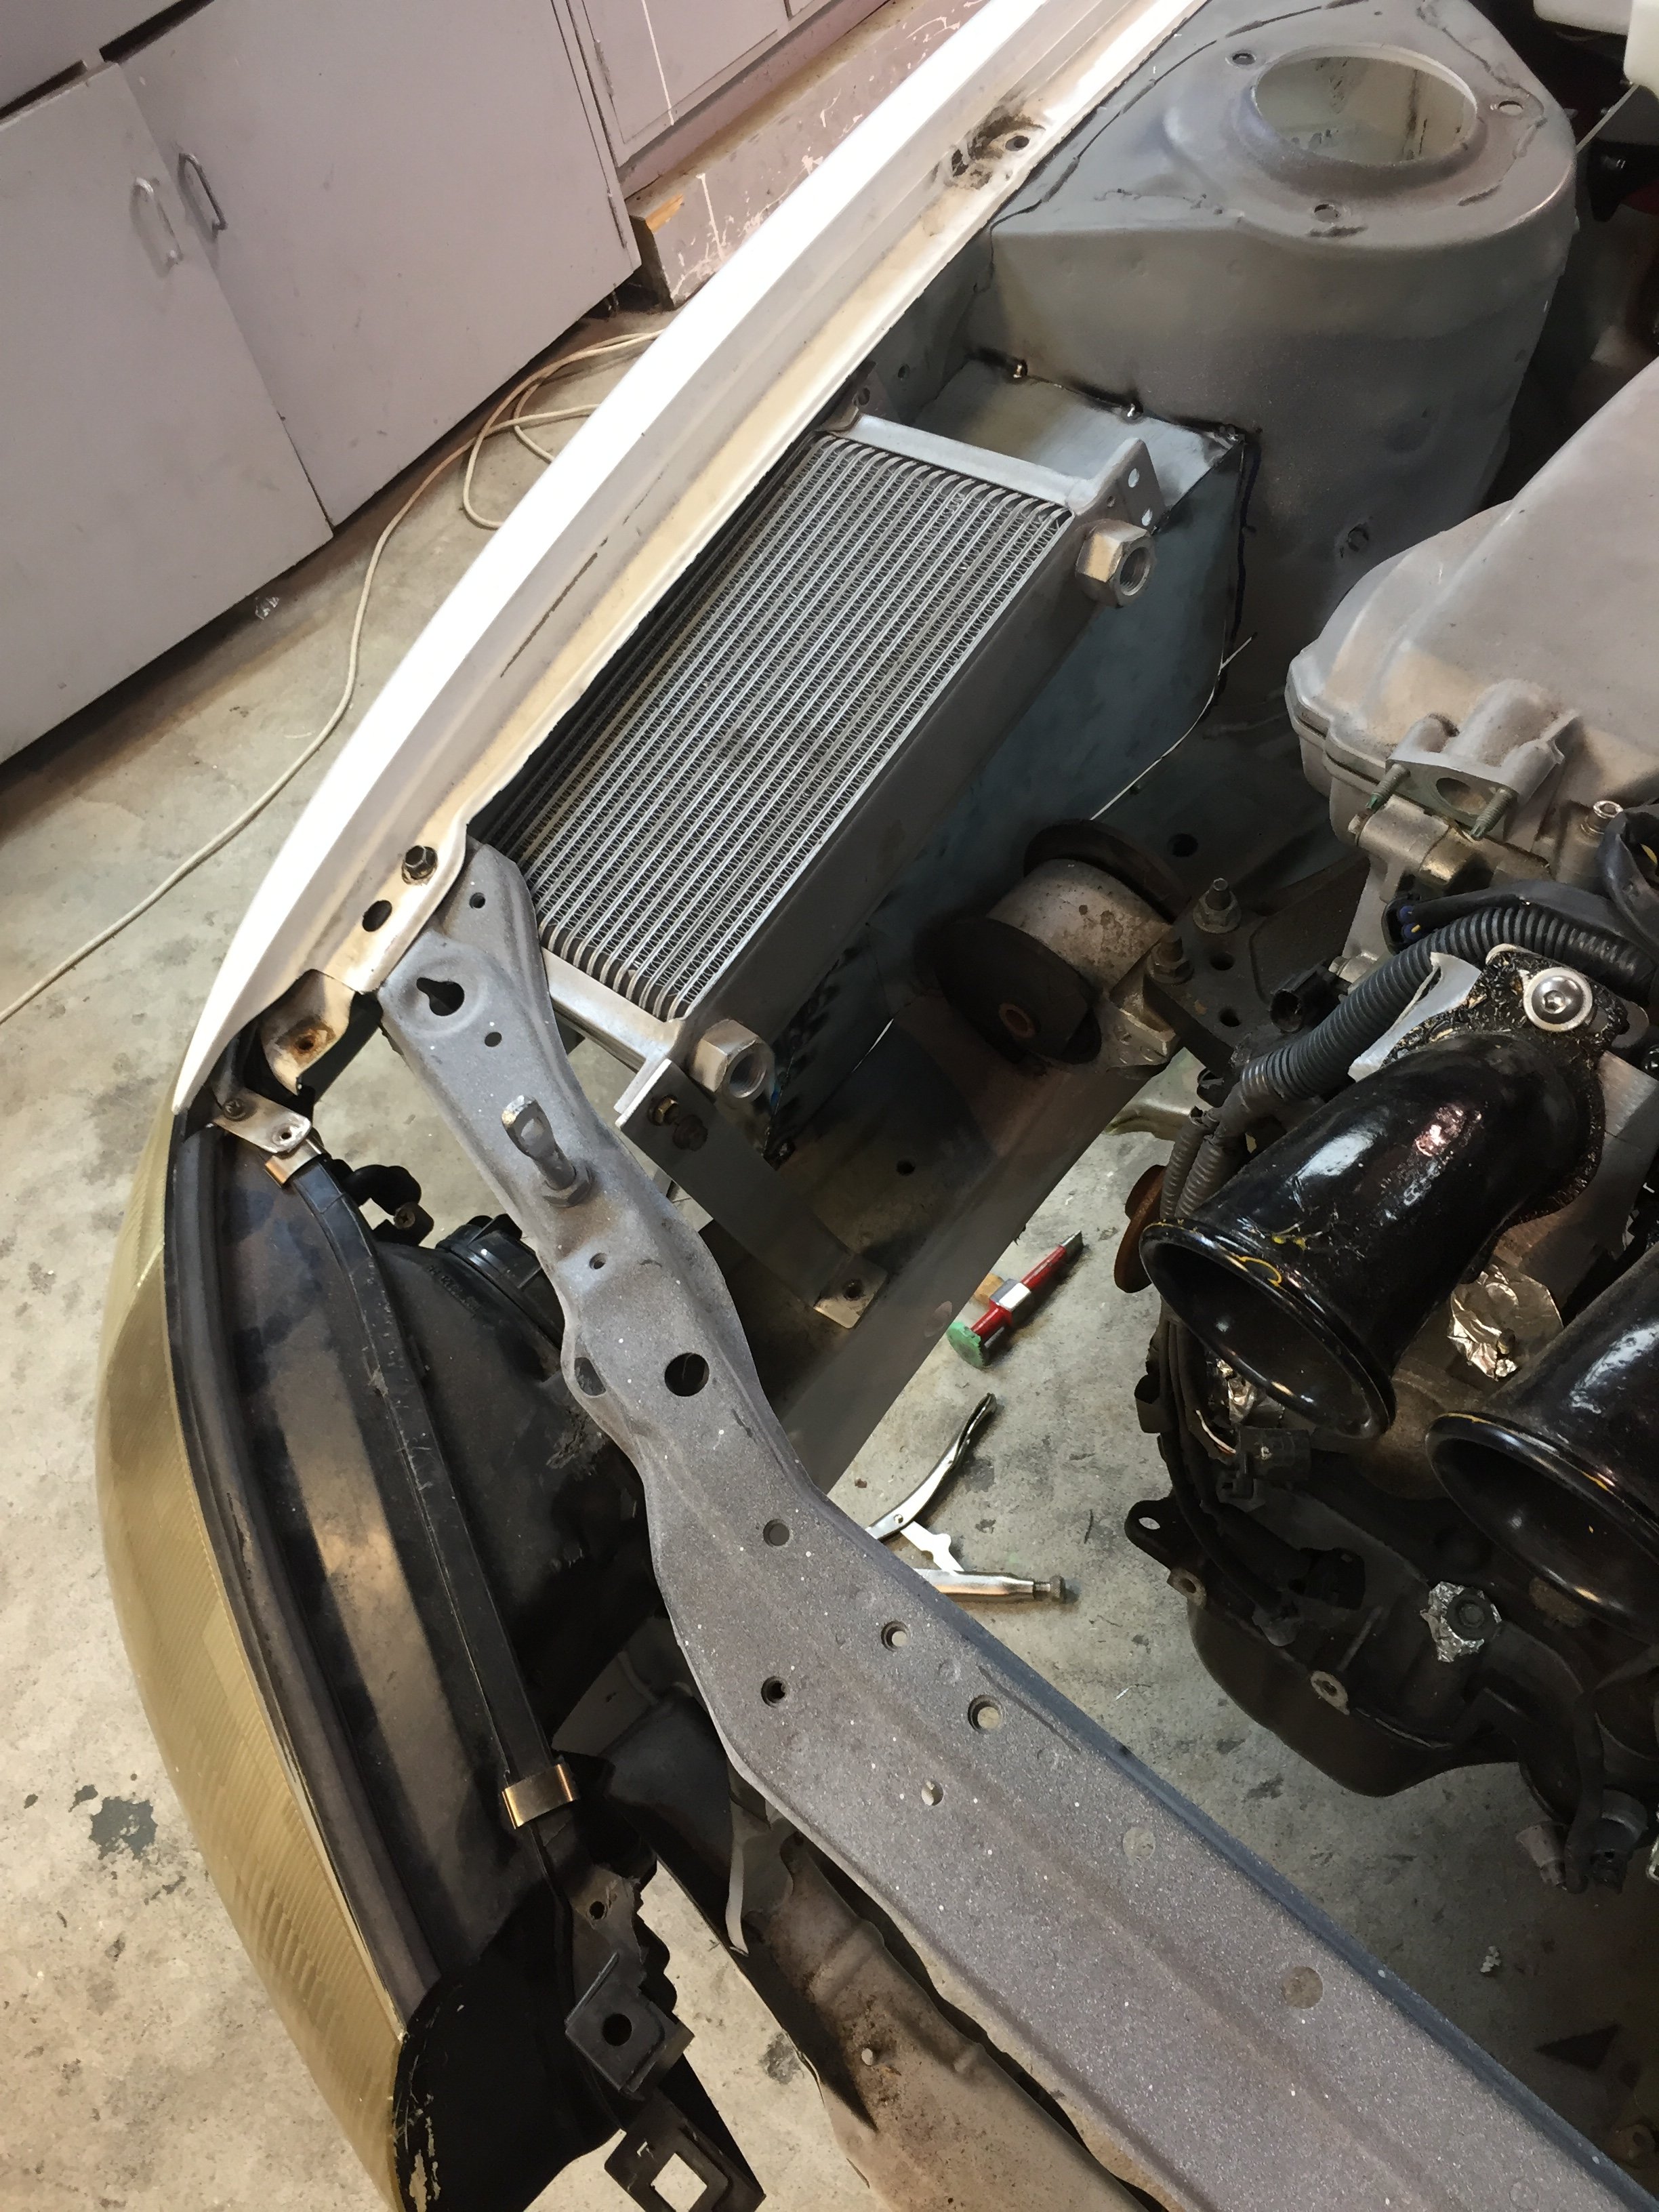
I got this off Zac a few years ago, it's been sitting in storage but I'm getting the bits together so I can assemble it then it'll get sold. I bought some 0.5mm oversize NA (9:1) pistons and bearings from Rockauto. The block was bored by North Canterbury Engine Reconditioners to suit the pistons, he also decked the block and polished the crank for me. I'm converting an Evo 3 head to use the cam and crank trigger setups that some of the other 4G63s ran, I bought new sensors also from Rockauto. I've welded up the injector holes on an Evo 4 inlet manifold so I can use it with the Evo 3 head and have the throttle body facing the correct way. Still need to get lots of other bits, oil pump, sump, turbo and manifold, flywheel and clutch etc etc.2 points
-
Thanks for taking time to put together the post(s) about engine assembly, very informative and interesting to read! Please do keep at it, Good Sir.2 points
-
This was the stuff I was looking at, unsure how well it wears, though would be reasonably painless to re do every 12-18months if you had to I guess, possibly similar maintenance if i was to polish and clear coat anyway2 points
-
So have managed to progress with this some more! Got it all back from painter Doors all on lined up not perfect but will wait till front guards are on Fitted all new door rubbers and window guides Got the motor In Swapped over the end T piece of the steering collumn to the shorter power steering one from a ms110 And fitted it back in car Found out the auto and manual pedal boxes are the same manual just has a mount for pedal so I just removed the clutch pedal and refitted as this will be auto. Painted the brake booster and fitted the new Nissan pajero brake master. That's all for now! Exciting times2 points
-
Will be vented out the bonnet when I get the rest of the ducting done
2 points
-
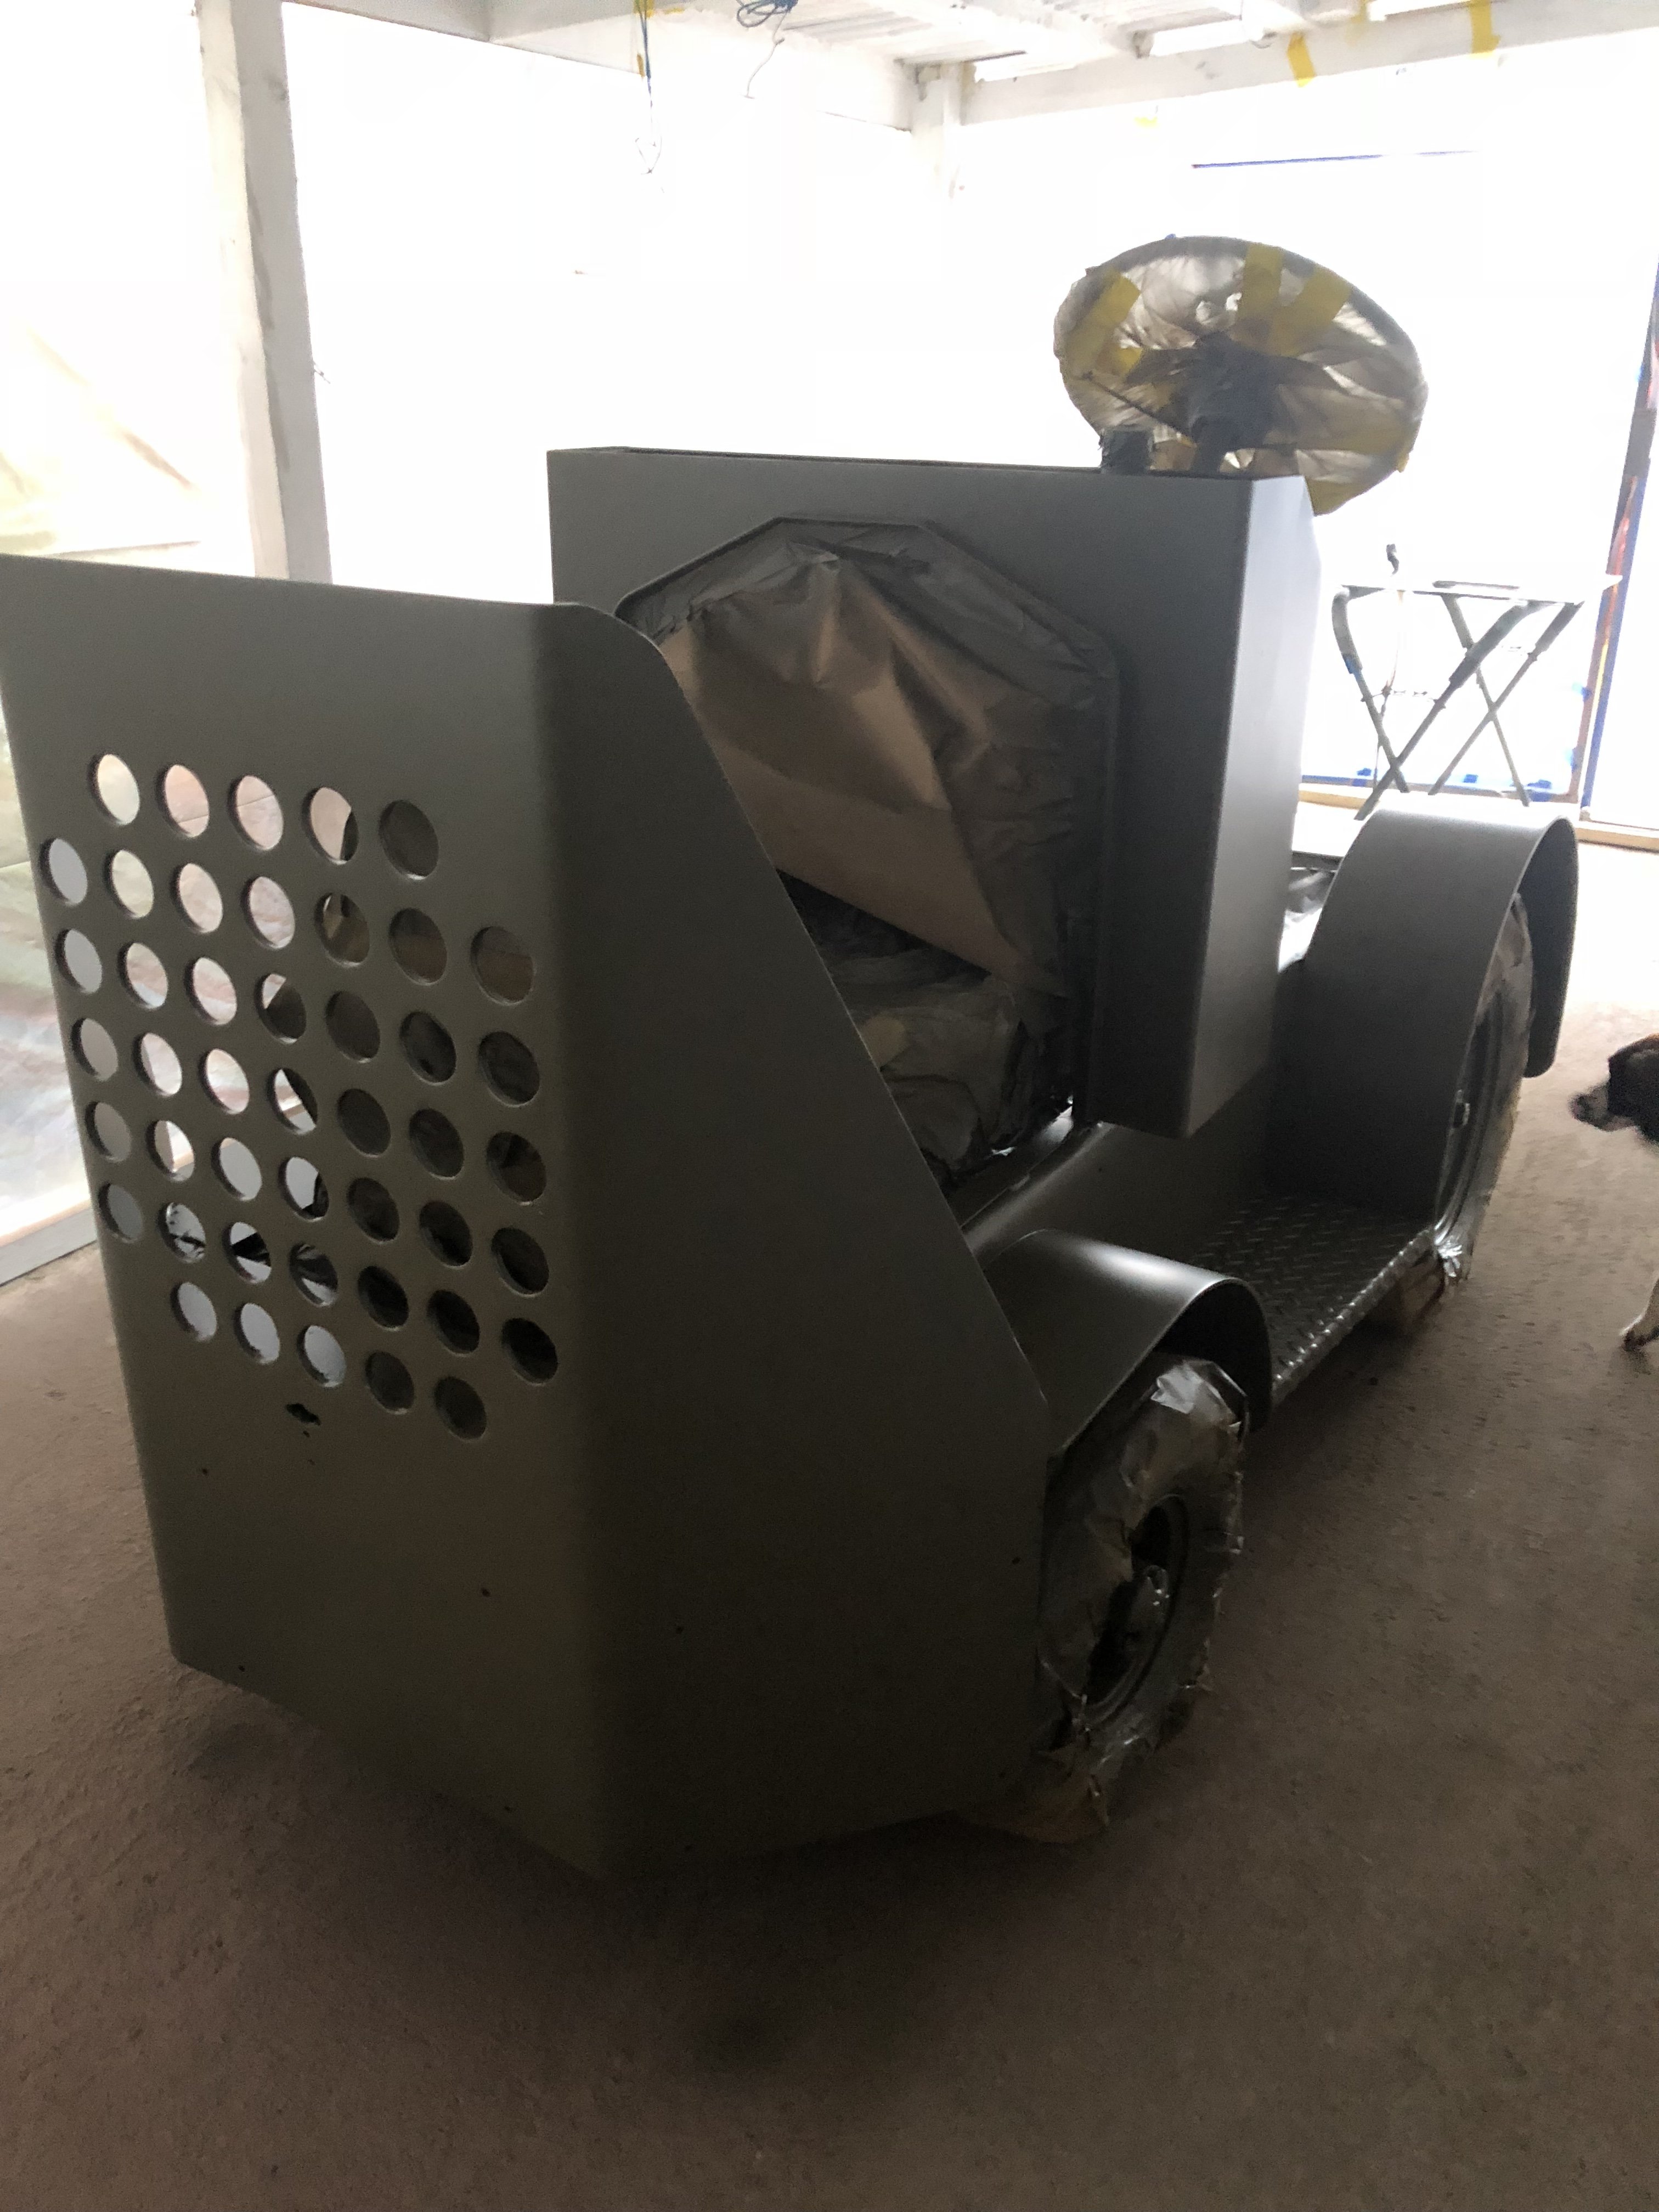
In the process of rebuilding a 30’s American aircraft tug.
1 point
-
Trailer wof rules: https://vehicleinspection.nzta.govt.nz/virms/in-service-wof-and-cof/general-trailers No minimum ride height for trailers. There are a few slam trailer builds here. https://oldschool.co.nz/index.php?/topic/28335-kks-slamiler/ https://oldschool.co.nz/index.php?/topic/33131-chriss-scrapping-slamiler/& https://oldschool.co.nz/index.php?/topic/36939-neds-slam-trailer/&tab=comments#comment-10281431 point
-
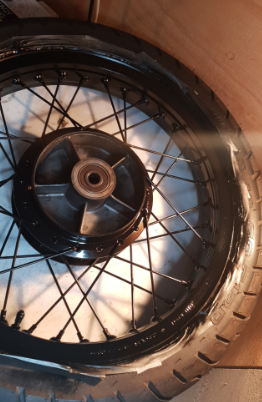
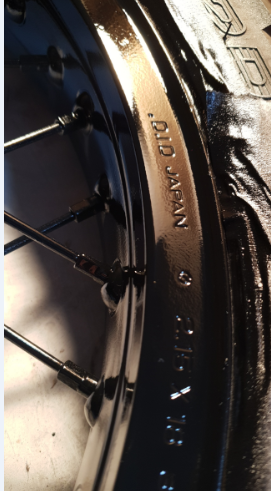
Don't know about what's available near you but my work has a special lathe set up for machining the face of wheels. On something like those I'd get blasted, a coat of black paint down between the spokes ( don't worry about getting paint on the faces, it gets machined off), get the faces machined and then a good clear coat on top.1 point
-
x2. And Paul Smith is a muthafuckin GC.1 point
-
@dave is/was just round the corner from the kamo one1 point
-
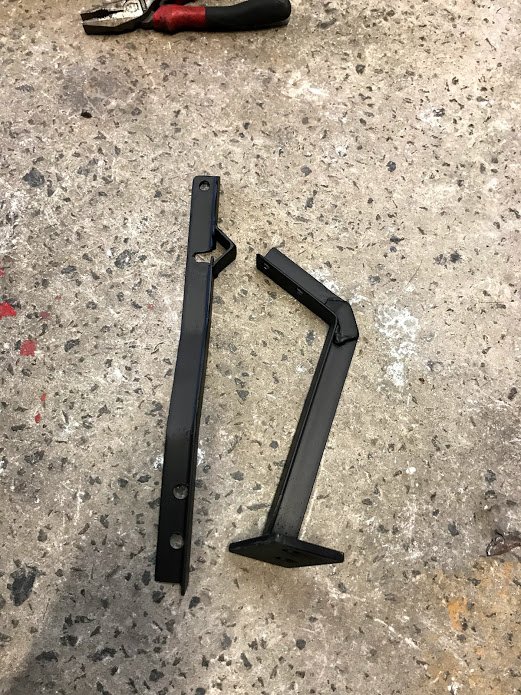
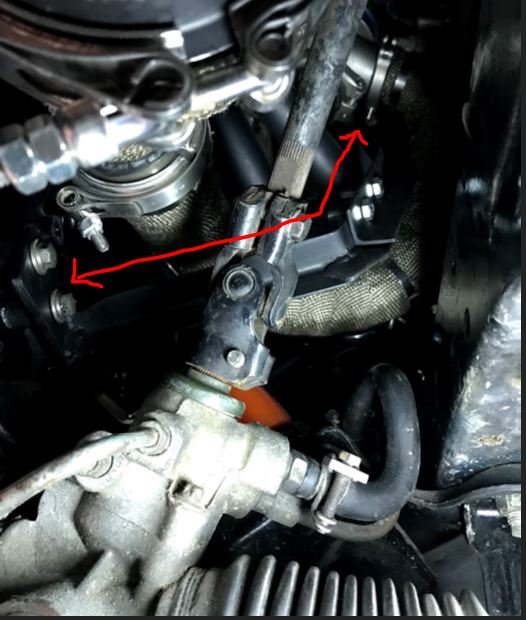
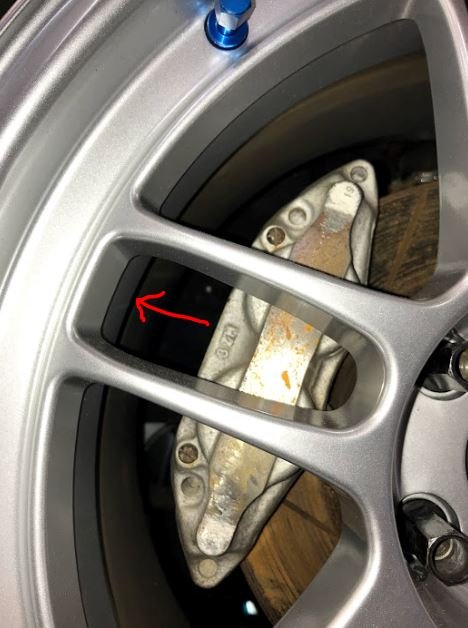
I made these weird shape brackets for a manifold brace, which bolts to the side of the turbo's exhaust housing and then goes down and to the engine block. Decided to add one since that's what Toyota did with the factory setup. Just enough room and it's nice and solid. Painted it in high heat paint then went to fit it last night and the last bolt snaps in the exhaust housing. Fcking joy. Love a snapped bolt, especially the kind you can't get to with a drill. Fck me. Anyway here is the bottom half installed: Tried getting the bolt out, but I would need to remove the turbo. So what I might do now is add a tab to brace to utilize another bolt hole in the exhaust housing and if/when I need to take the turbo off I'll be able to remove the cnutfckingbolt. I've decided I should do the Nissan-parts-bin brake upgrade before certifying it. It just makes sense. I did some guestimate measurements and it should fit within the RPF1's the only difficult bit is the caliper may touch this lip in the wheel design:
1 point
-
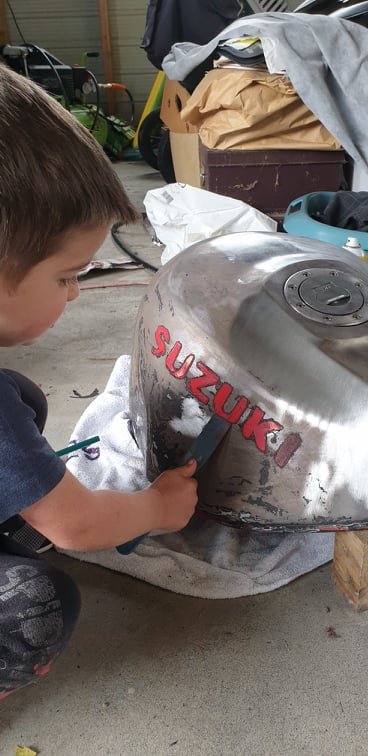
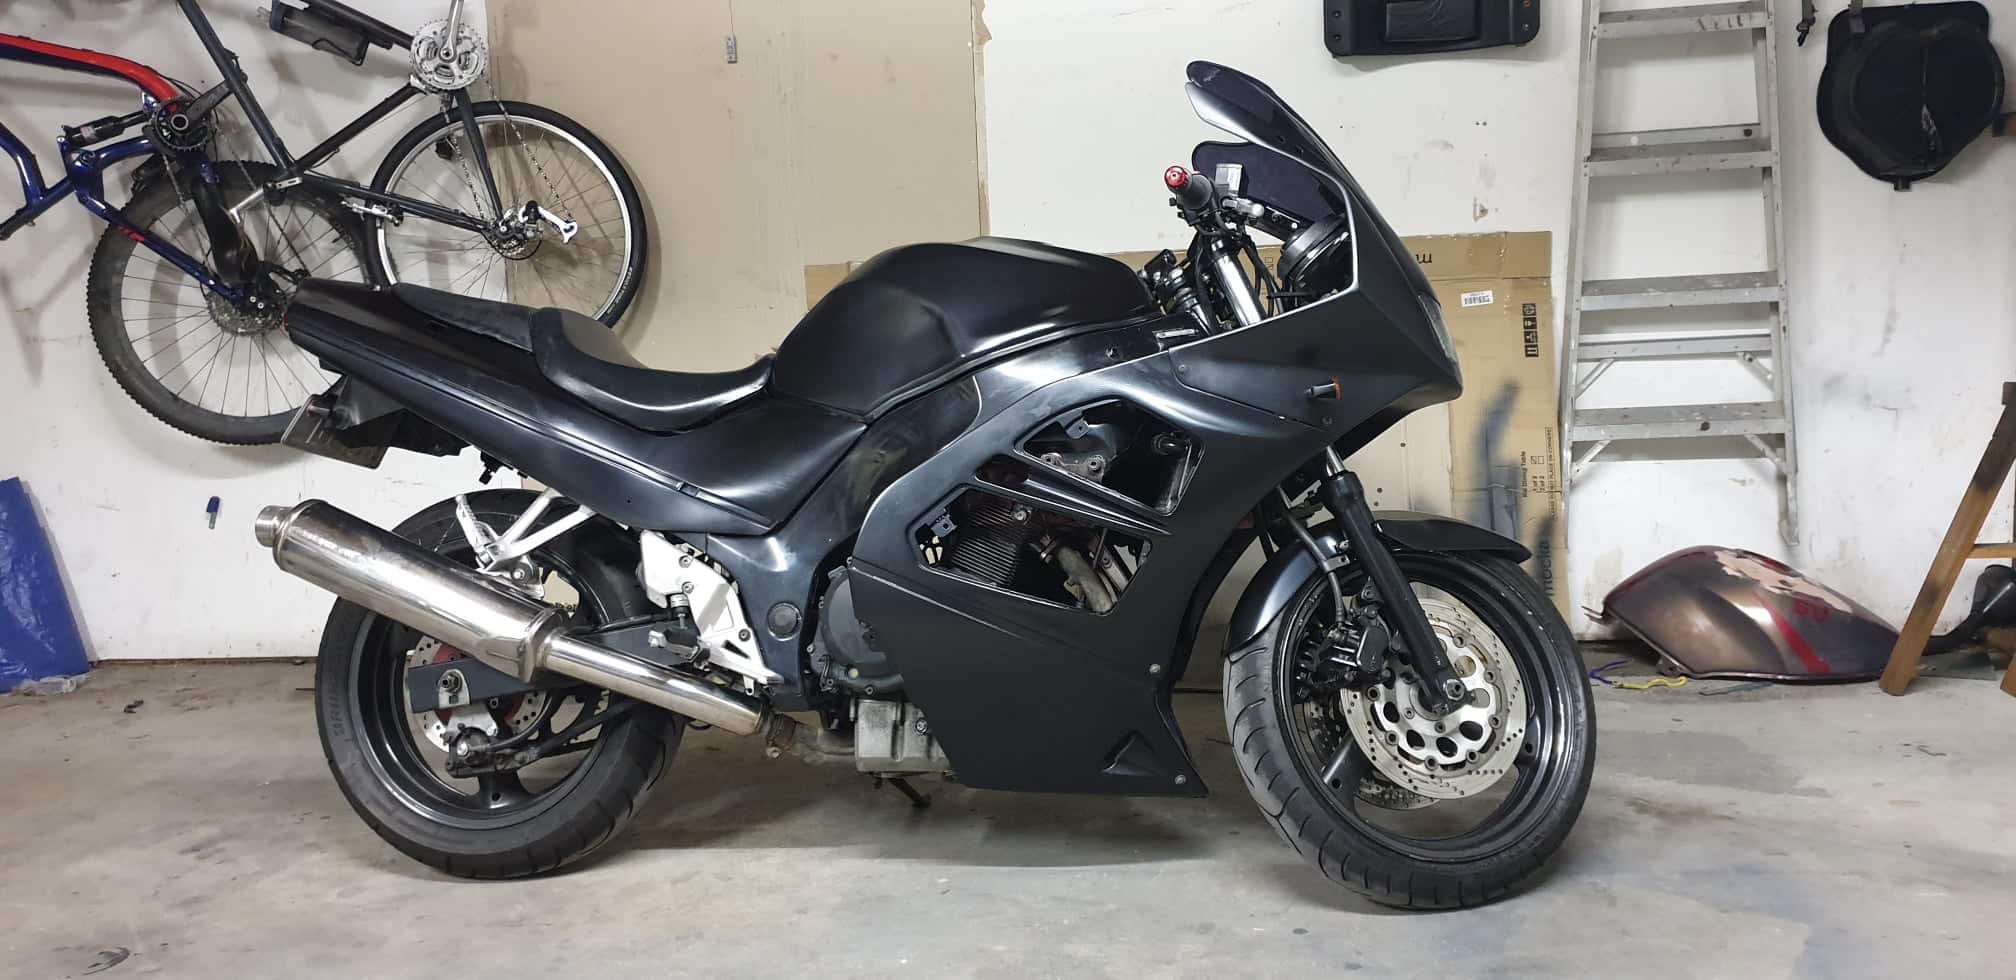
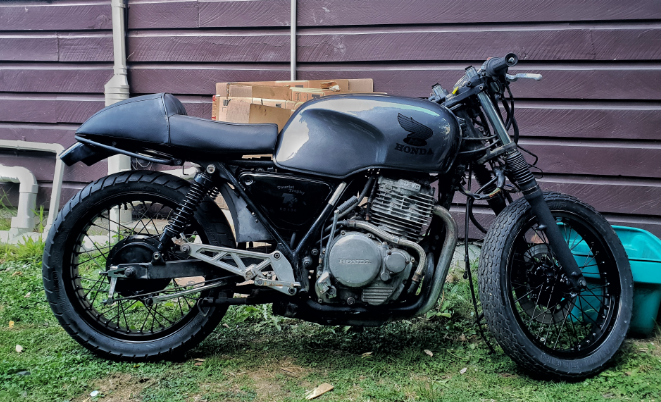
So, had it confirmed that the SV650 Speed sensor works, so have tracked one down. Expecting that to arrive this week sometime. In the meantime, i got on with the bodywork. Had a helper when stripping the tank: Got a coat of frame colour on just for now, still a number of imperfections that need to be sorted on the fairings and one small dent on the tank, but going to take my time and just rock it like this for a while. Just need to organise mirrors and i'll be good for a WoF.
1 point
-
Google translate says "Good Traffic". I concur and I thank you. /although I don't know why.... //blardy poms.1 point
-
"Test Drive" turned into blasting around in it for large parts of the afternoon, reckon I've done about 45 miles or so. Brakes are fine and it goes pretty hard (for what it is). Handles really nice and is no way stock in the springs & shocks department. Tweaked the timing a bit and it's just rattling a little under heavy load, I'll try some octane booster tomorrow that will sort it out hopefully. It was blowing oil smoke for the first 5 miles but a couple of hot & cold cycles seems to have freed the rings up a treat. Haven't revved it beyond 4 grand yet but it feels pretty strong. Over all I'm pretty bloody chuffed with it, it's a really nice car. Bit of a clonk in the drivetrain but it only sounds like a UJ. Water pump bearing's a bit wobbly and it needs a new rad cap but it held temperature & oil pressure despite some enthusiastic driving. Vids for your entertainment... What ? Skid you say ? So, it's all good. Gonna do the wheels bronze and paint the rear panel black between the lights but apart from that, roll on summer.... * Also, side-sharn.... About 5 years ago I was chatting to the in-laws neighbour about cars. Started telling him about the Hako and he said " Fucking Japanese shit, I'm not interested in those useless bits of crap". We popped round to Carols folks earlier and the neighbour drove by as we were leaving. He fucking loved the Skyline, was all over it and asked if I wanted to sell it. I ignored him. Silly bugger.1 point
-
And these!! Painted rocks with the kids one day.
1 point
-
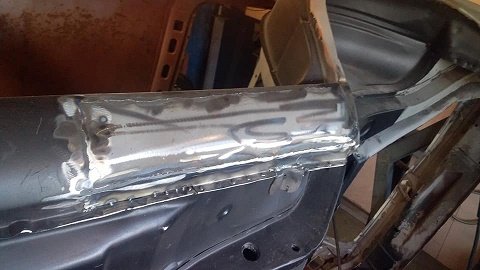
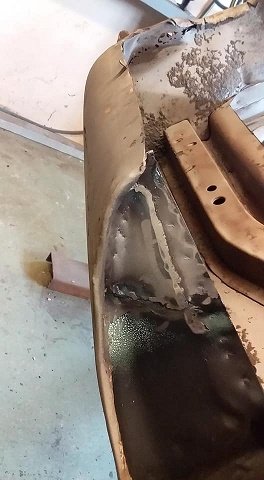
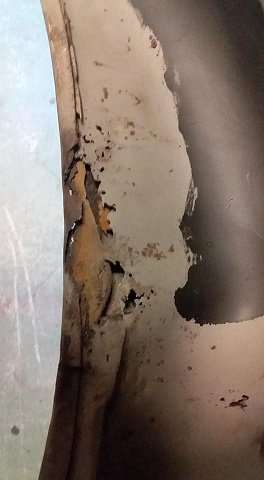
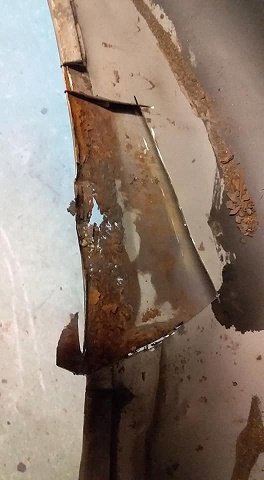
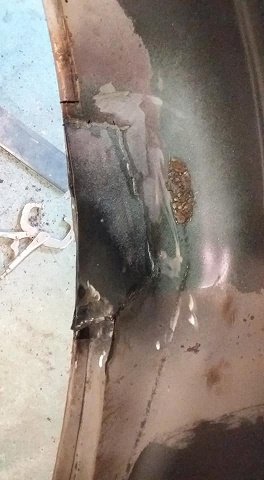
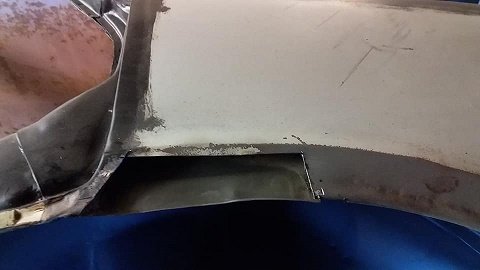
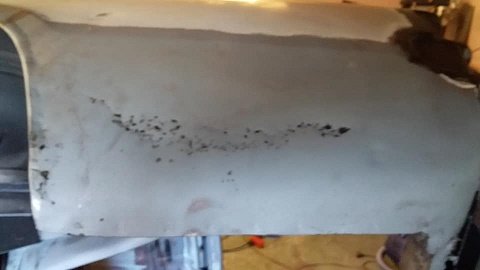
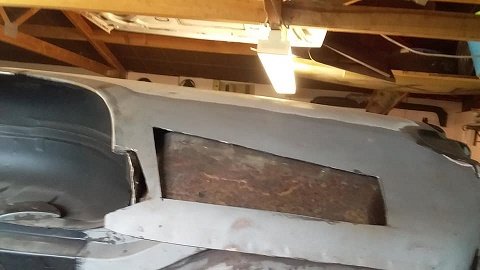
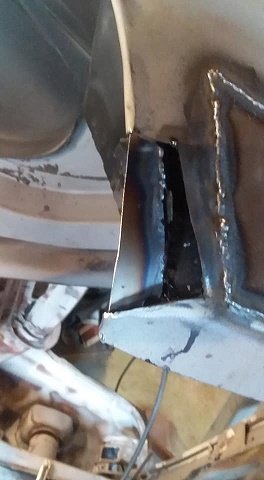
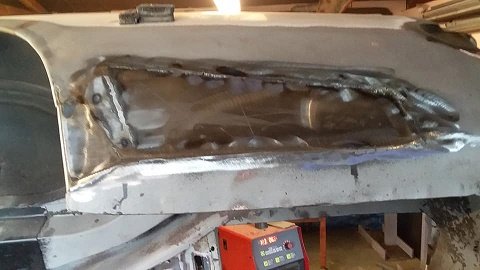
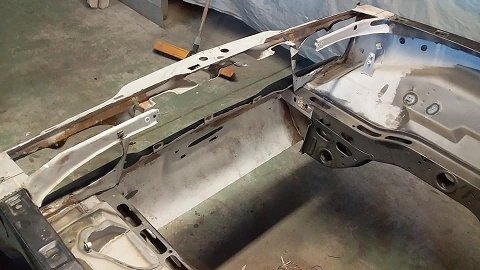
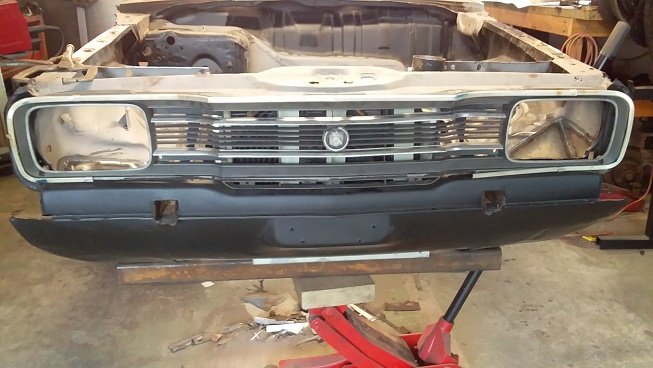
got some gas so finished the passenger side sill then moved on the the rust in the passenger side wheel well then the passenger outer guard and the passenger rear 1/4 the there is the front....i wanted to do the front lower panel rust..but i realized i needed to make the radiator support parts first and to do that i needed to cut everything thing out i didn't want.
1 point
-
i gave the center console a tidy up and a coat of paint. 2019-04-07_11-14-14 by sheepers, on Flickr then i climbed into the boot and started prepping it for paint. managed to get it ready without to much back pain so i decided to try and paint it. 2019-04-07_11-14-36 by sheepers, on Flickr came out really good so now i can put some seam sealer in the gaps and sand it all up ready for some colour.1 point
-
Got the intake all done with a K&N filter, looks pretty good I think. Took a guy for a drive that knows transmission things up the road and back and he reckoned the trans was sweet, shifting how it should, just the engine was massively down on power. Tried to diagnose the problem myself but I couldn't really figure much out. It was throwing error codes for the secondary throttle and knock sensors. Discovered the secondary throttle sensor was only used for traction control so I didn't need to worry about that one. Was hoping the knock sensors were just reading high because the timing was out, so I took it to Danny's Autos in Palmy to go on the dyno and see if they can tune it and figure out what's wrong. They got it on the dyno, they were just bringing it up to speed and fuel started pissing out everywhere. One of the fuel hoses going up to the fuel rail split, don't know if it just happened or if it's been like that for awhile, but we never noticed any fuel in the valley before, where as there was heaps in it then. So off came the intake and manifold to replace it. Whilst they had that off they had a look at the knock sensors and they had seen better days. The wiring pins were pretty corroded and the casings were cracked. They sourced some new OEM ones and chucked them in. They also found one of the breather hoses had a split, as well as one of the igniter modules was only firing 1 of 4 cylinders on that one side. So basically this has only been running on 5 cylinders all this time. Thought it didn't sound quite right haha. The steering rack also decided to start leaking power steering fluid out of a place the fluid shouldn't be. Beach Hop was the next week and the rack had to be sent to Auckland to be rebuilt. Managed to get the engine back together and drive it home on the Tuesday night and pull out the rack to be sent off on Wednesday. Luckily they got around to rebuilding it fairly quick and sent off again so it arrived first thing on Friday morning. Got a different igniter module from the wreckers off a SR20 and it ran waaaaaay better! Chucked the rack back in Friday morning and took it for a WOF, passed with flying colours, so went and got some rego and now it's all legal!!!! On Friday/Saturday the fuel pump must of came out about a dozen times, half of which were on the side of the road. Went for a bit of a drive and the fuel pump kept dying for some reason, thought maybe the wiring in-tank was a bit dodgy, replaced it all and soldered every connector, that didn't make much difference. Discovered that if I gave the pump a good smack it would start back up pumping a bit more fuel or just die completely. Decided to get another fuel pump from Repco and chucked that in. Turns out the brand new "genuine" Walbro pump I got off ebay was shit. Went sooooo much better again!! Took it to the 4 & Rotary Jamboree show and shine at Manfield on the Sunday and took home the Best Commercial Piston trophy. Then on the Monday took it back into Danny's Autos to get dyno'd. Made 100kw at the wheels which I thought wasn't quite right (should be closer to 200kw?), but he reckoned it was running right and just the reading wasn't that accurate, he had trouble getting into 4th, kept changing down, so had to do it in third and that was maxing out the dyno's rolling speed. It had good consistent 02 sensor readings. Took it up to Beach Hop on the Wednesday. Had no issues other than getting some brake fade through the windy bits between Waihi and Whangamata, we think there must of still been some air left in the lines. After that happened I was changing it manually between 2nd and 3rd gear through the windy bits, rather than just leaving it in drive as it engine brakes way more. Survived all through Beach Hop, including going up to Whitianga, Kuaotuna and Onemana as well as cruising up and down the main street lots, the rear bumper took a few scrapes, I think it needs some titanium stripes underneath! I think it was one of the cars that got some of the most attention. Managed to get all the way back down to Marton, then when I was overtaking up a hill, noticed smoke coming from under the dash, so quickly pulled over and checked it out. The transmission sump had either smoke or steam since it was raining coming off of it, also smelt very burnt and the oil was quite dark. My parents caught up and we decided to just keep driving. I then noticed it was revving at 3500rpm at 100km/h, where as it's usually around about 1800rpm. It was only changing from first into second gear and that's it, if I took my foot off the accelerator it would drop straight down to idle. It was a slow drive home from there at 70km/h. Next couple of days I pulled the trans out, pulled off the sump and it had quite a bit of metallic build up at the bottom and just smelt very burnt. I guess it's always been slipping, as to why it didn't make much power on the dyno. Dropped it off today to get a quote on being rebuilt, so hopefully it's not too bad. It used about $400 worth of petrol over Beach Hop, which I think worked out to be 15 l/100km. After driving it for about 1200km I have decided the seat definitely needs redoing, it's way too hard, would also be nice to sit a bit lower and further back as well. Also the accelerator pedal has your foot at too much of an angle back, so gets sore rather quick. Shouldn't be too hard to fix as the seat changes should help and just modify the pedal a little. Also the door latches + door seals are terrible, takes way too much effort to get them closing right. A softer door seal might help, and you can get bear jaw latch kits that are basically a bolt in thing for these which might be the go when I have the spare money.1 point
-
Update for those interested Repair Cert PASS Compliance and WOF all PASSED apart from the below 2 points - tighten hand brake cable - fix slight leak in return line to gas tank brass fitting Cert Clint did the cert on Friday and I’ve attached the list. I just need to work through that list and take it back for the brake road test. I also need the old old owner from USA to email that he sold me the car - I keep in touch so that won’t be an issue. Now to work through the list and get this sled legal. Am I happy? Yes, the answer is YES!
1 point
-
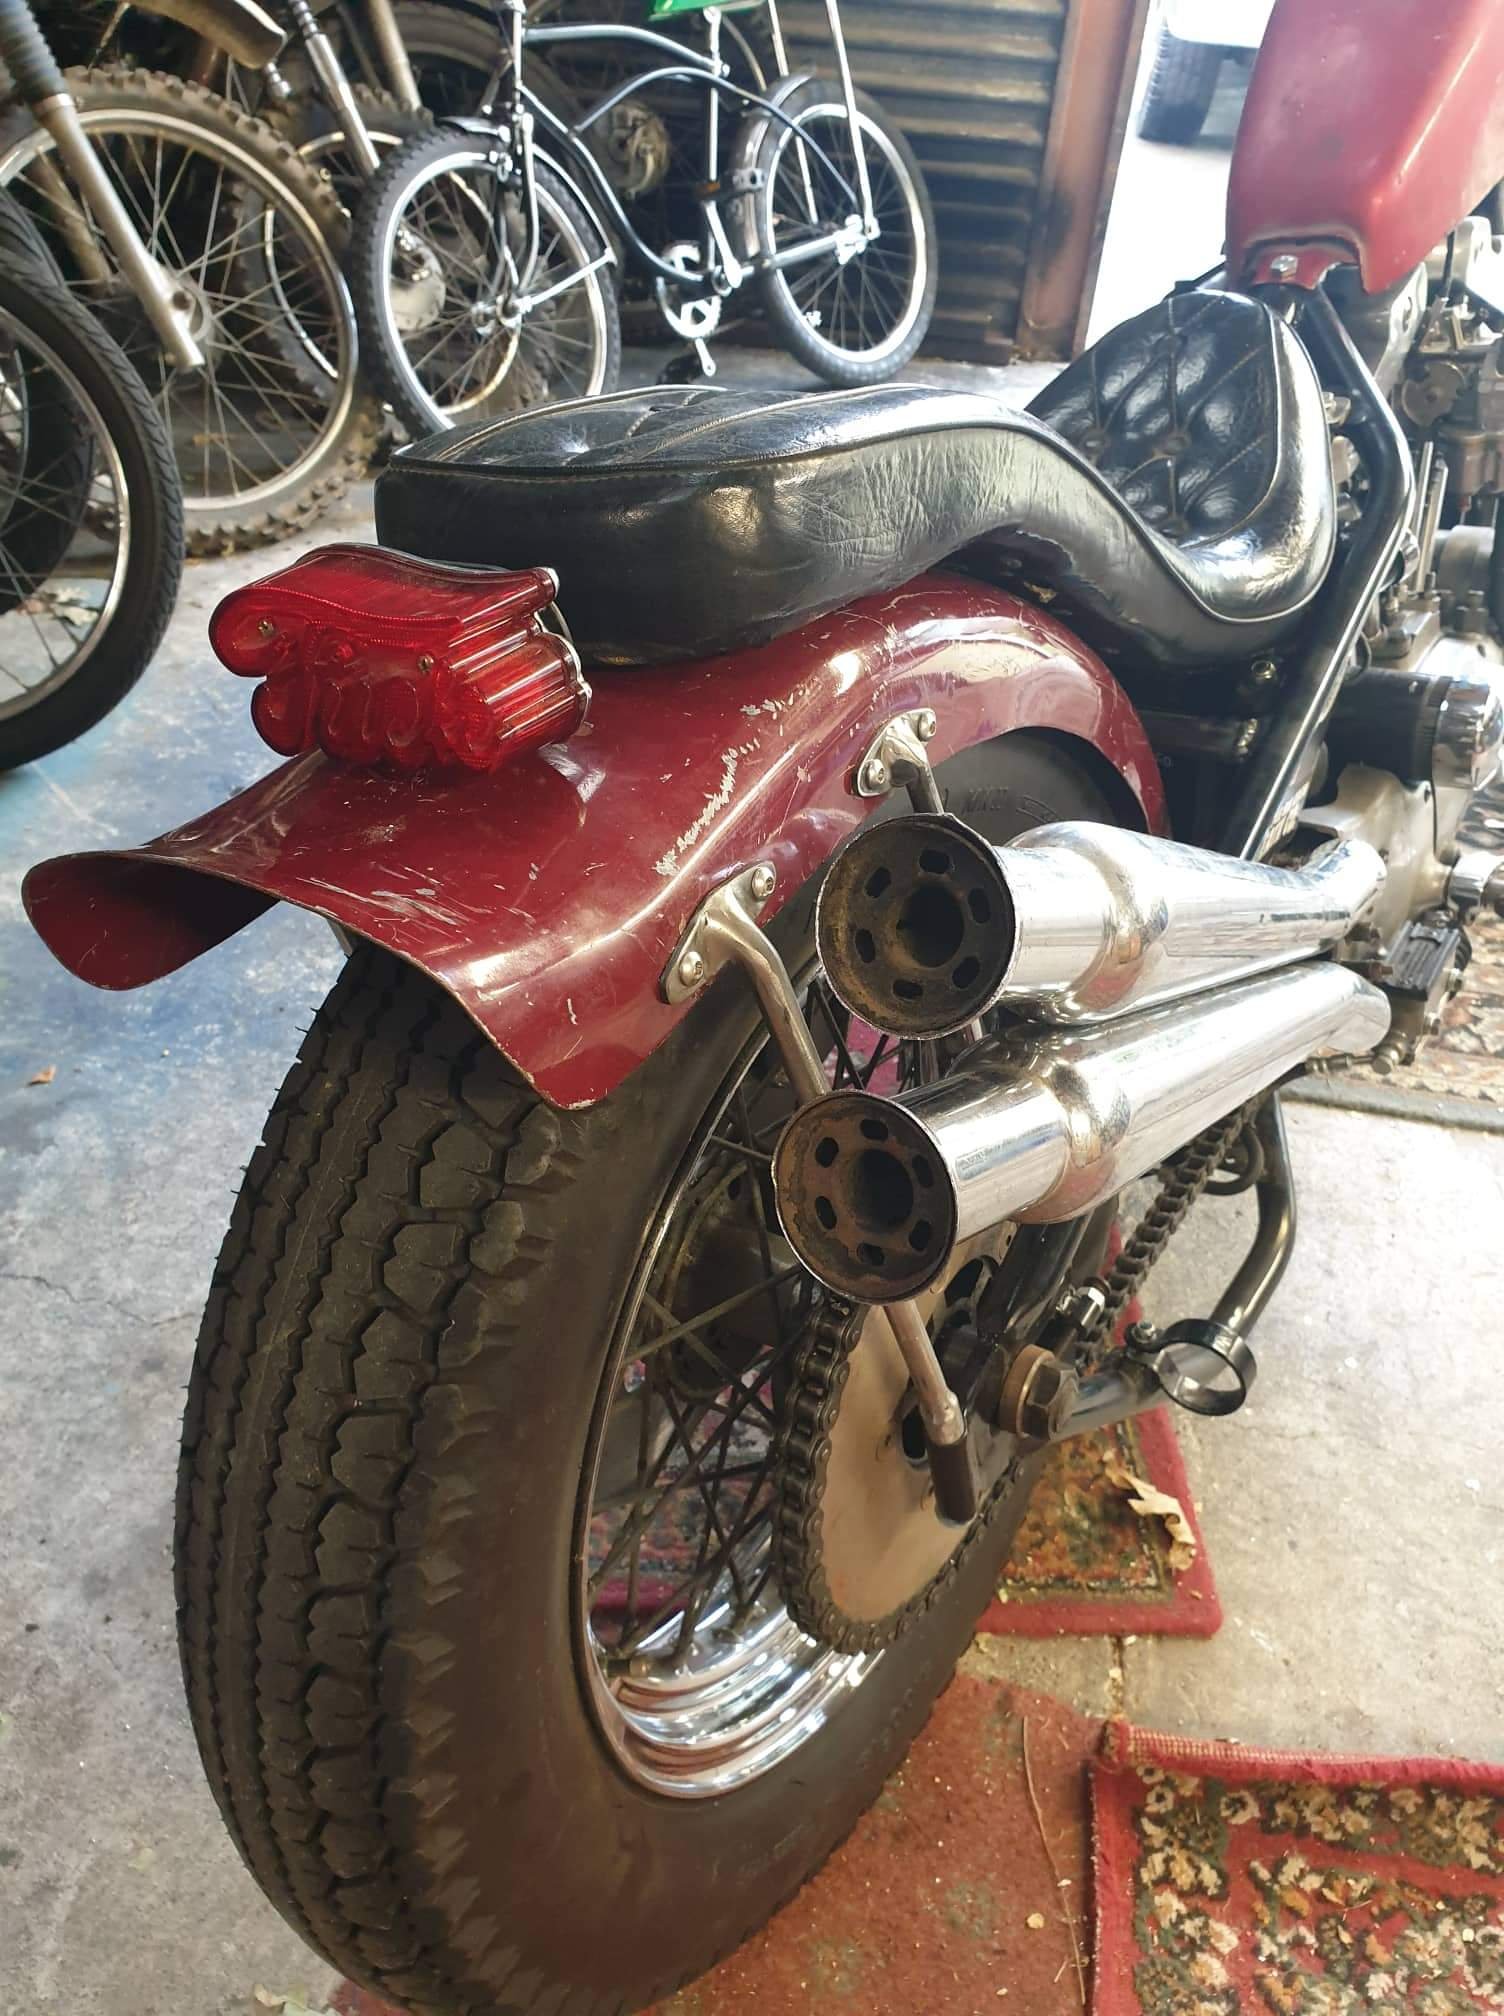
Shit photo but got the tallight mounted. In keeping with the spending no money on this thing I used this Ali X Fuck taillight . And also whipped up a small mount for the Cocktail shakers. Front bullet indicators are mounted and the rear ones should be easy enough. Next up is Chain guard next week
1 point
-
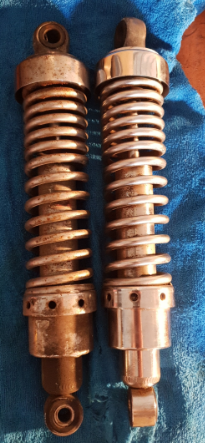
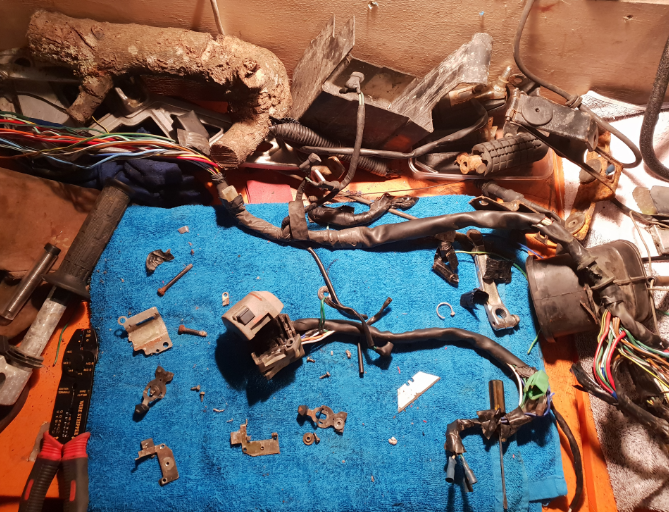
Wheels were next, as well as rear shocks. I plan to replace the rear shocks with something decent but I wanted to do something about the ones I had in the interim. Left is how they came, right is after a clean before I went to town with some sand paper Below is the "finished product" Back to electrics.. It was time to wire up my new tail light (integrated indicators) For the life of me I couldn't get the tail light to work. I knew it wasn't a faulty light as I was able to test on a known working circuit so was time to figure out what was wrong. Fortunately I had a spare loom so I split that up and started tracing the wire back to the front of the bike. I tested the wire at both ends and was able to get continuity so ruled that out. Tested the power where it was coming from and was also getting power. So it was time to test the switches. This was a pig of a job.. So many little fiddly buggers Put all back together and still the same problem. I went back to square on and found it was the feed that was feeding the tail light that was buggered.. I found the speedo back light feed and just rewired it to that feed. Job done and was able to keep it nice and tidy too. I assembled the bike now that all my painted bits were dry and rolled it out of the shed for some Vit D for the first time in 4 months and gave the shed a good clean
1 point
-
I installed the castor correction bushes, it was quite difficult to remove the radius arms, I ended up having to cut one of the bolts. Pretty sure one was coozed so good to replace them anyway. I put new pivot bushes in too, these had been done and looked ok, but no harm in replacing them. My trusty press came into its own once I had bodged suitable tooling, it is large and leaky and surprisingly shit, but always seems to get the job done. I also had a look at the radiator situation with some CAD. Basically it needs to lay forwards about 45 deg to get even close to the volume needed and to miss all of the suspension stuff at full compression. I talked through it with my radiator man, he is probably going to come look to minimise the chance of fuckups. Obviously this means a couple of electric fans. There is quite a good flow to the front of it, and he suggested cowling it to the engine as well to minimise heat soak into the cabin. The custom rad will no doubt cost money. Also I ran the last bit of brake line and mounted the fuel filter, which I had completely forgotten about until I rewatched the skid factory's TD42 conversion.. The low range lever is sorted. It ended up with a shorter throw than intended, but as it now has a shitload of extra linkages this works in my favour as this accounts for the extra slop.1 point
-
Yes, but see your certifier to get an NDT form to make sure they are NDTed to the correct standard by an appropriately qualified person. Also known as an "F008 - LVVVTA Non-destructive Test Request Form"1 point
-
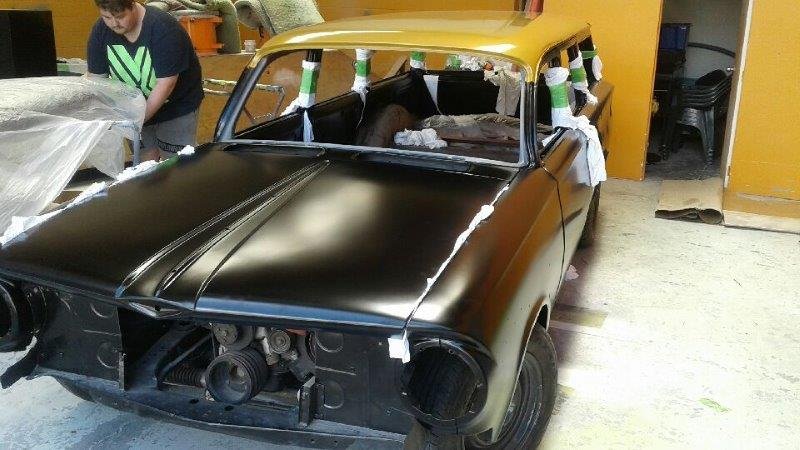
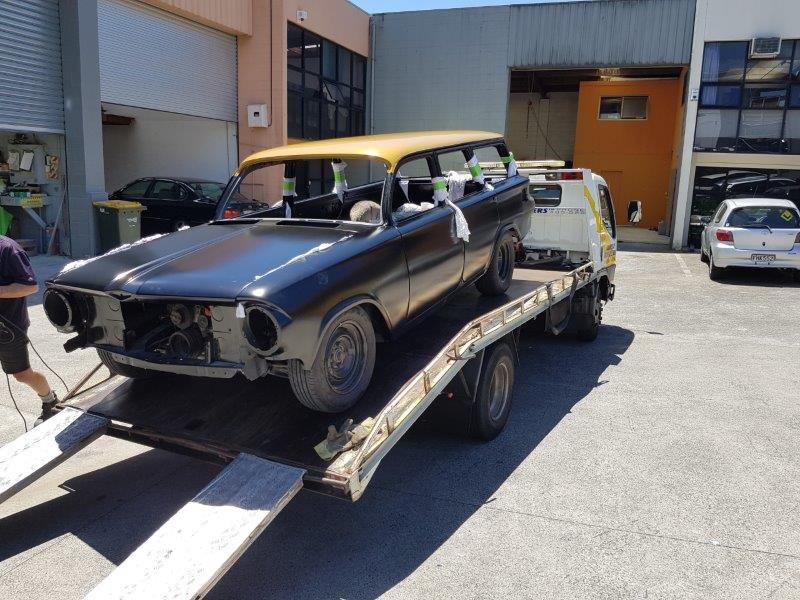
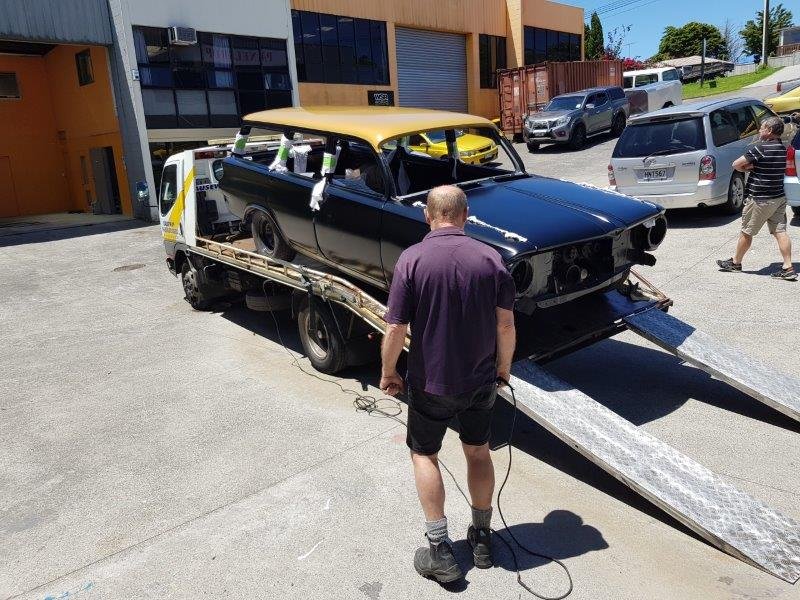
Hell yeah. as much as i was not happy about the smashed window im so happy. the clean window is so good. such a better look with out the tint strip on it. very un happy but happy with the result. so brilliant. kass wanted to stay late and work on the buss and get it going as he has been working on his BSA during work hours, not that fazed but give some get some right. so we chucked the new second hand breaks on the front. new hoses and then moved to the rear. the first job was to fix the oil leak. we are running an adapter to suit the kombi engine mount off the oil pump and casing. we stripped the thread on the bottom to bolts and i said to kass fuck we should do that, his response was like nah it cant be that bad dw about it, lols. kinda a pain in the ass. had to take the exhaust off and a bunch of other things. so yeah broke the other exhaust getting it off and well hey lets just fit this one instead. while we done that i also got into the rear breaks. Fuck me thats right, hub nuts........ 1.7 meter bar with a 46mm socket welded to the end piss easy mayte. oh hello we have a few missing peaces here. lucky i brought stuff from the vdub shoppe and it'll go straight in right. oh nice the pistons and shoes i brought are the wrong ones, so off we go back to the vdub shop and get the correct ones. its also missing a few peaces so ill scavenging through the scraps and wrecks to find the missing stuff. thats enough for today. hopefully we can get it sorted and drive it next week.1 point
-
Since my last update there has been a bit of progress. The car went to the paint shop in July for a 3 -4 week turn around. It sat.......and sat....... and then one day out of the blue I got the call, come and get it, its painted. That was December. Out in the sun it just blew me away.
1 point
-
Kpr reckons Kamo hotel does a gamechanging coleslaw with there ribs0 points
-
I am offically back in whangarei. Lets get meets going @MACKAZ @rb drifter @ESKIN8R @ruff kunt automotive @WhangareiKE700 points


.thumb.jpeg.f619b2b09d6205c0ecd09f9f2fed36f0.jpeg)
This leaderboard is set to Auckland/GMT+12:00