
Leaderboard


Popular Content
Showing content with the highest reputation on 02/12/19 in Posts
-
So the Starlet had sat for just over ten years not moving at all. I turned the motor over to make sure it wasn't seized up. It moved so were good to go! The reason it sat for so long was the water pump had froze up. So first thing to replace was the water pump Old Teq vs New pump Next was going through the entire fuel system. It was badly clogged from ten years of sitting. i had to drop the fuel tank and clean the out and return lines. Then got a new fuel pump which wasnt big enough and had to go for a bigger one. I also slapped in a new fuel filter. Next were the injectors which were pretty much falling apart as i took them off the fuel line. After getting the fuel system all redone the car still wouldn't fire up. So i started looking at the other wires and found a couple things. One of the plug wires had a nice chunk taken out of it from a mouse. I'm sure that tasted really good. Then i found the O2 sensor was just barley hanging on. After replacing those things i found the dizzy cap had mold growing inside of it. So got me a new distributor cap from Thailand. The car still wouldn't start up. So last thing to check was the timing. And of course the timing chain tensioner was gone. So replaced that and she finally runs!!!!! Parts list so far Fuel pump redone twice Water pump Injectors Fuel filter Cleaned clogged fuel tank O2 sensor Spark plugs & wires Distributor cap Timing chain tensioner Battery All new fluids Front brake pads12 points
-
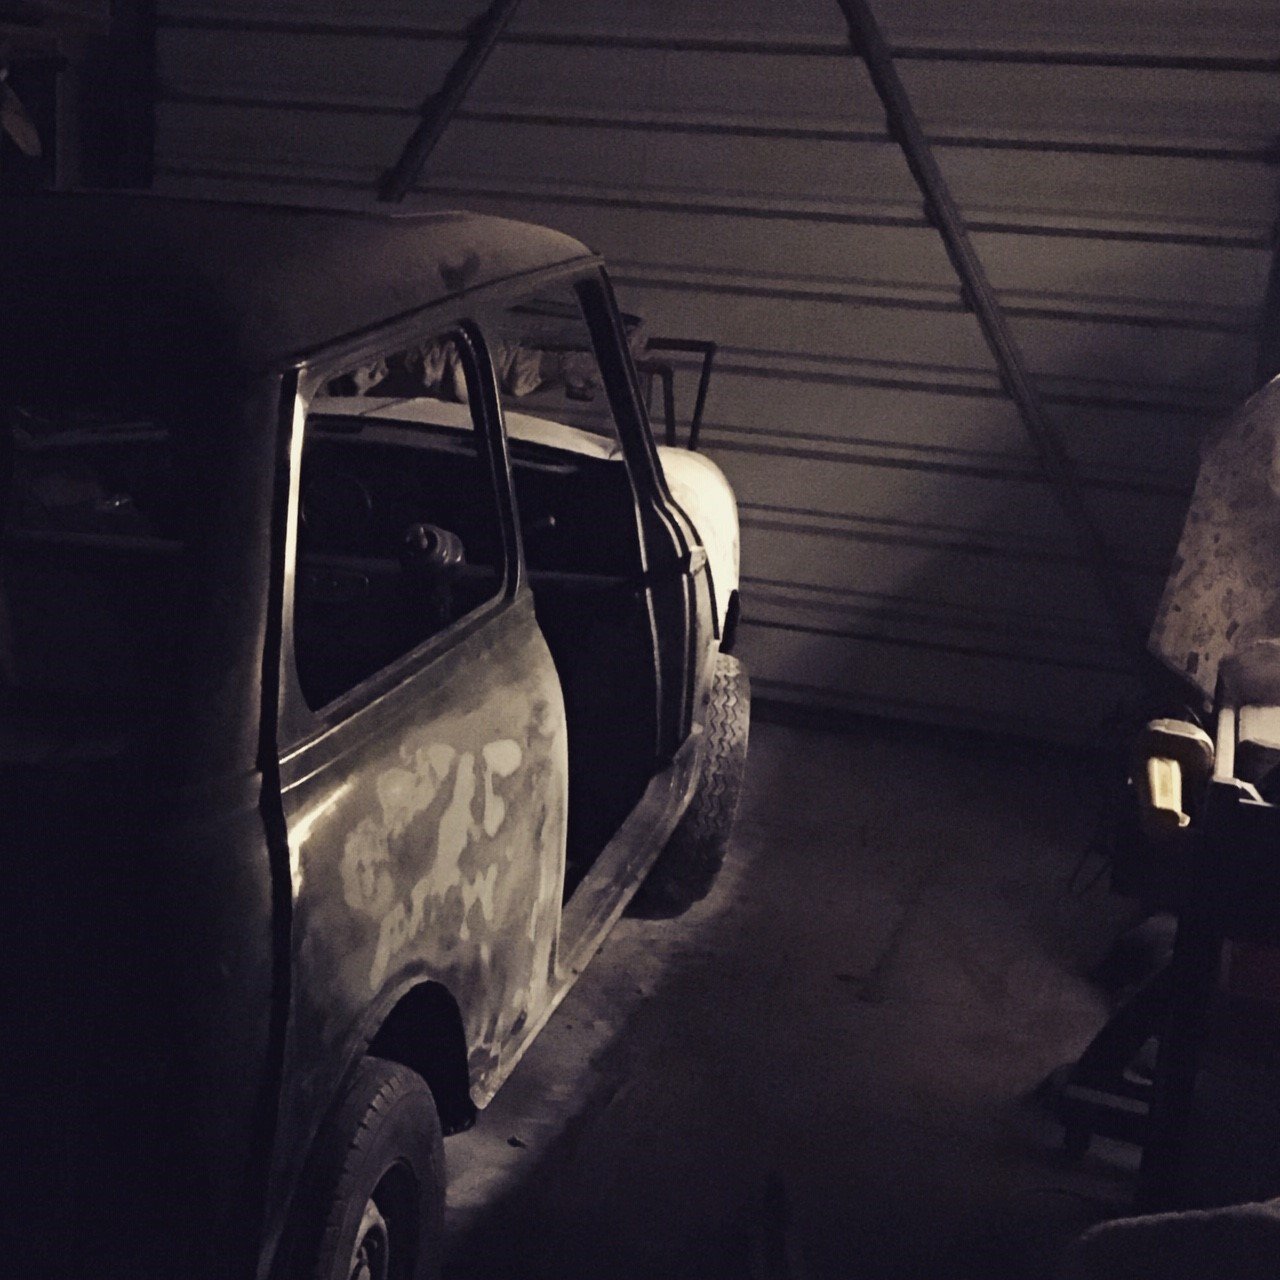
Discussion thread :https://oldschool.co.nz/index.php?/topic/60328-a-dogs-83-toyota-starlet-kp61/ Hello Gents, I have been watching this forum for a while to gather helpful information on this little project car I have. Being in America it is very hard to find parts and proper information on modifying starlets. So here I am to pick your brains for all the great Starlet knowledge you all have. The plan for this little guy is to compete in Auto Cross at the local level. I already have a 240SX drift car, So now I can use this as a grip car. THE BACK STORY The year was 2003, I was a junior in high school in Beautiful Bozeman, MT. My best friend Gabe got this little hatch for his first car. Totally stock 1983 Starlet 2 door with the mighty 4KE motor. We used to drive this hatch around thinking we were Colin Mcrae. Hitting jumps at 45mph and attempting to "drift" turns around town. He was a terrible driver and because of it the Starlet suffered. All four wheels were bent from hitting curbs all the time. So as time went on Gabe moved away and the Starlet sat at his dads warehouse for over ten years. One day Gabe came to town and he said I could have the starlet if I took good care of it. So that is exactly what i did. I picked up the starlet with my trusty trailer and brought it to my dads house. Gotta love that custom wood grill. Nothing like having a park bench for a rear bumper. USDM bumpers are MASSIVE. The rear end is in great shape(thank GOD) The interior was pretty rough from years of teenager abuse and sitting. Missing the center dash vent and the seats were junk. Windshield totally busted from angry child syndrome. Steering wheel has garden hose wrapped with electrical tape. Real Classy. Open the hood and behold the awesome 75HP of the Toyota 4KE! Motor has 150K miles on it. YEARS AND YEARS of dust on the engine.11 points
-
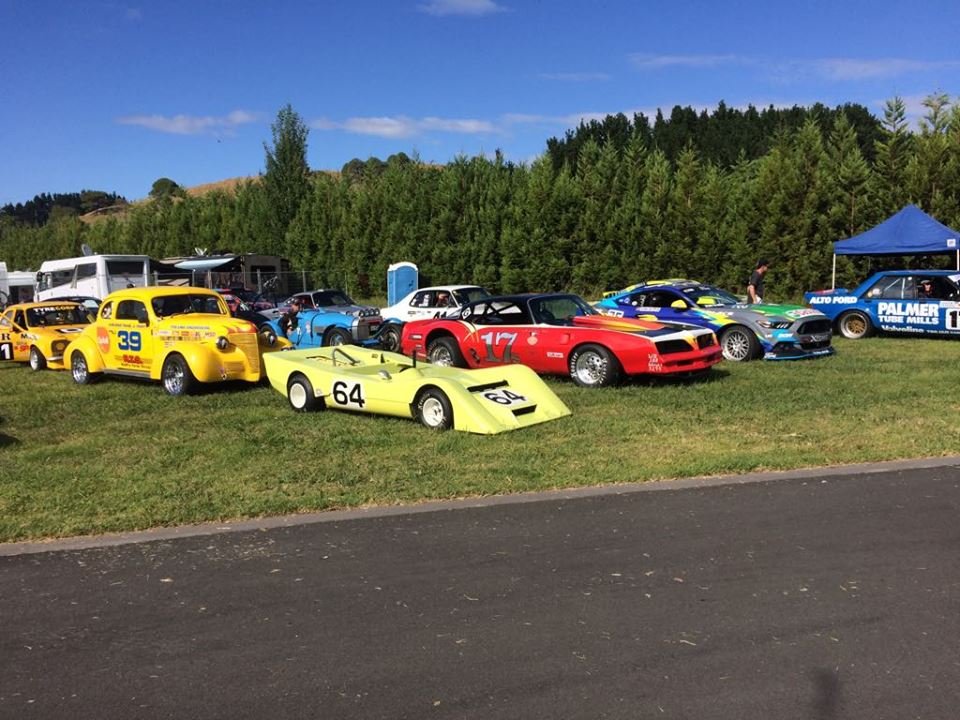
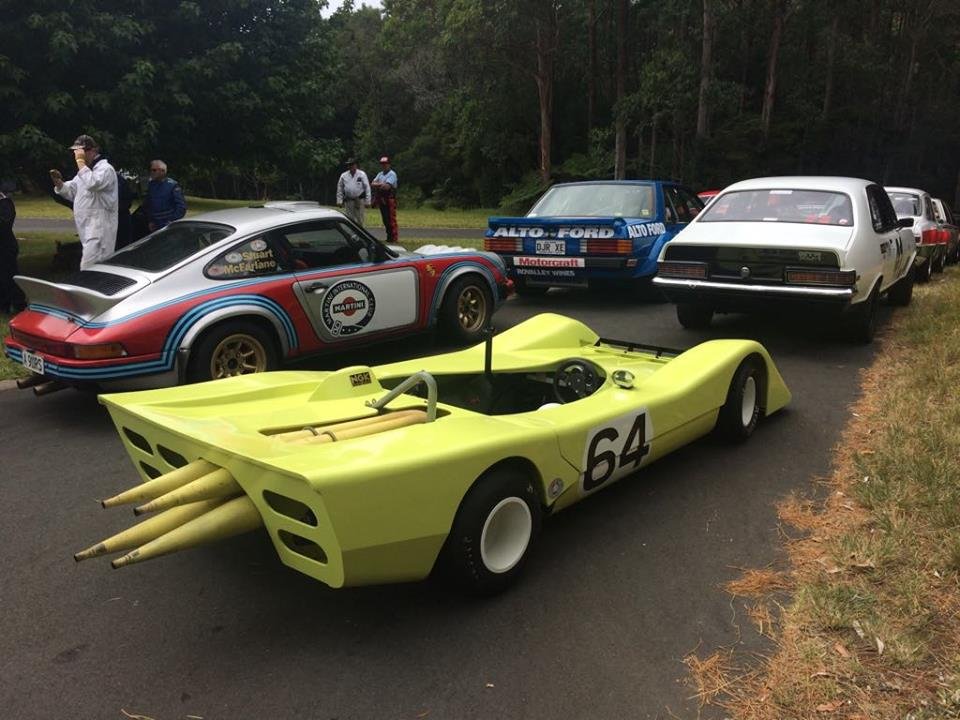
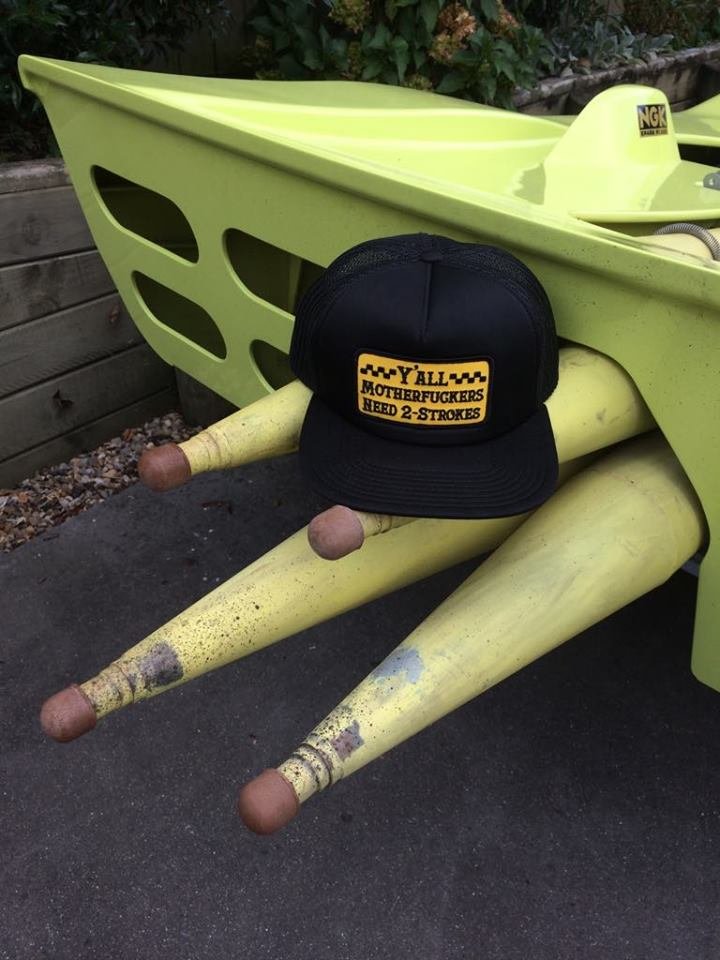
Cheers Truenotch. Had a great time at Leadfoot, so good to get the car to a motorsport event again. A few teething issues including the problem that i thought i fixed with the new diaphragms. I think the crankcase seals are toast and its lacking in crankcase compression. There was a lot of oily mess around the engine and i think the seals are the only place it could be coming from. Also missed one run after i failed to make it out to the start. Fired up the motor on the dummy grid ready to drive out to the start line, selected first gear let the clutch out and oh shit i'm going backwards........ Bit odd as it has no reverse gear. It was making some bad noises in the gearbox and i thought it had done some major damage somehow. Pushed it back to the pits, had a think about it and started it up again. Turns out it somehow backfired on startup and started running backwards, all of the noises from the gearbox was just the gear set spinning in reverse..... 2 strokes eh, Dennis had never had that happen to him. Yeah a few people made that comment about it not being as loud as they though it would of been. One of the theory's is that it was quite loud but nowhere near the level of some of the other cars going up the hill. A couple of those rotary's were extremely loud. Cheers man, Yeah i brought Dennis along for the event. He had an amazing time and was awesome for him to see it going up the hill, was probably the first motorsport event hes been to in 20 years. Yeah its miniature, all done to keep the weight down. Oh yeah got it on the scales, only 330kgs!!!!! I see a camera on the fire wall, you better post some videos young man! Also, where did you get that hat? I must have one. Unfortunately the camera didn't work VG so no hill vids. I was yarning to this young american dude at the event about the car and he was wearing the hat. Turns out hes super into 2 stroke dirt bikes in the states. Asked him where i could get myself of those epic hats and he took it off and gave it to me. Complete GC, said he had got it at a motorcross event somewhere along the line. Wise words to live by.
 10 points
 -
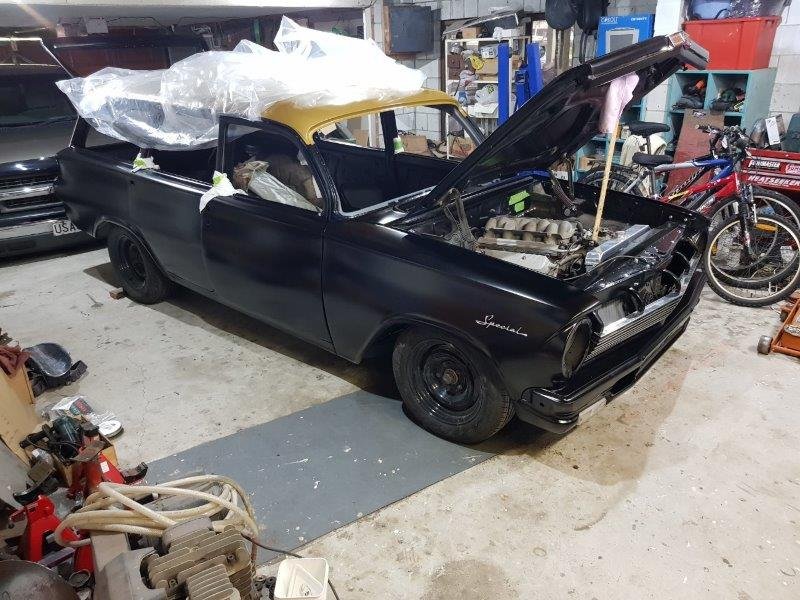
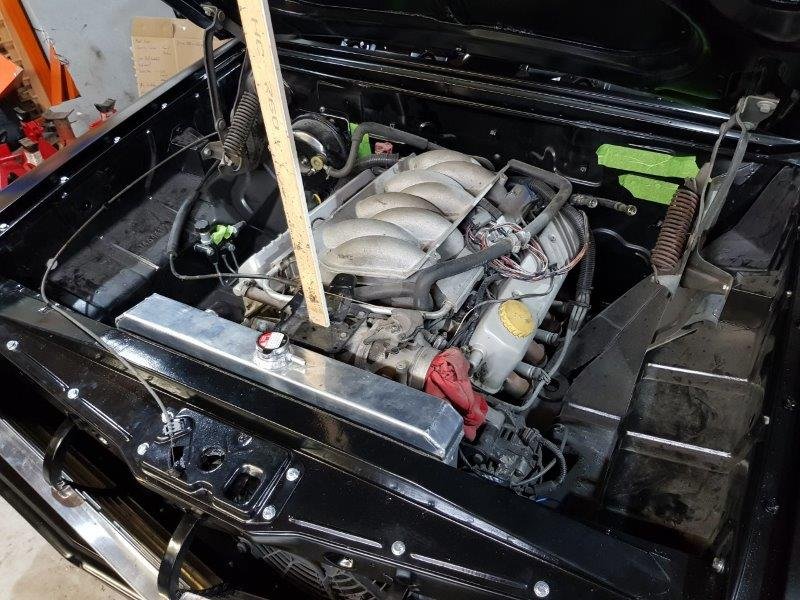
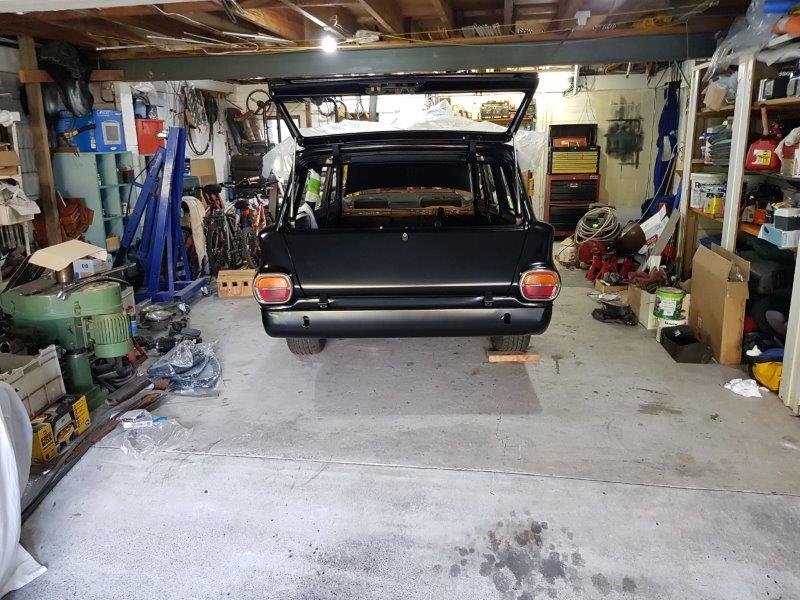
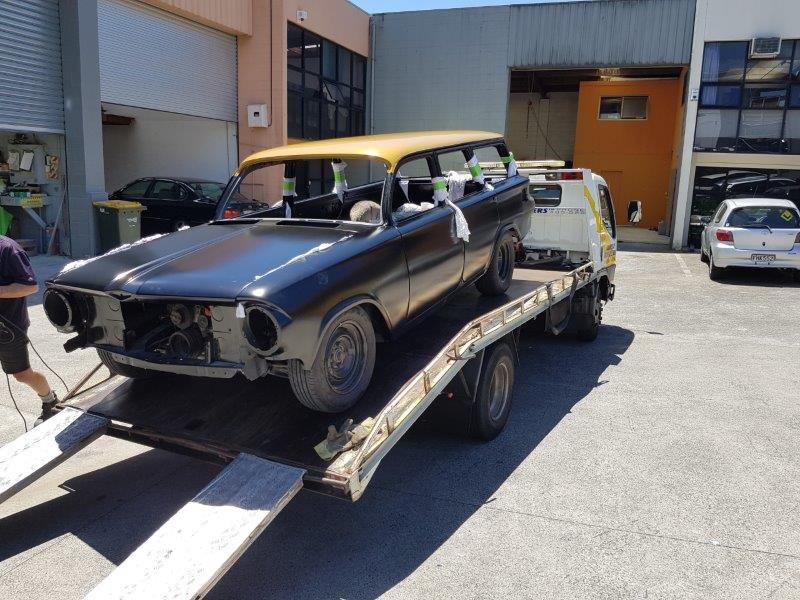
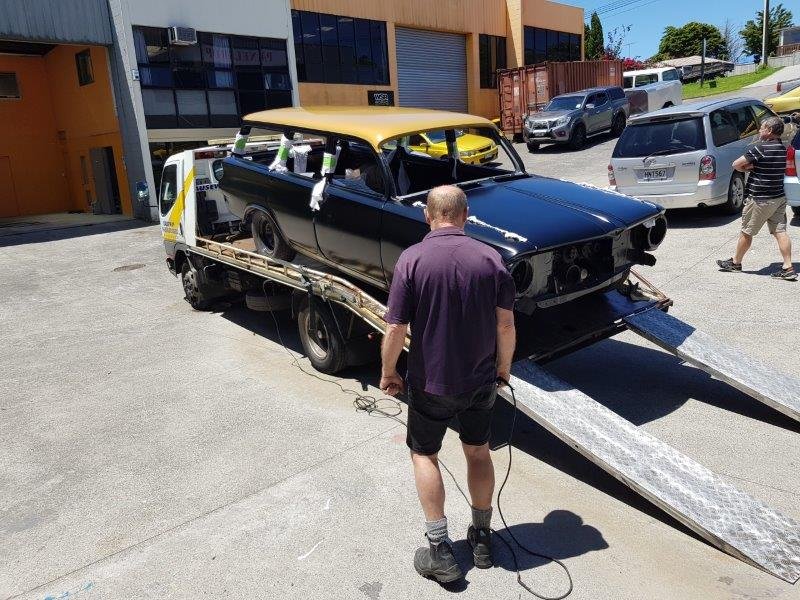
The satin black is a bastard to keep clean so its kept under the plastic sheet. I hit the car with a McGuires product that is for satin finishes. It took a whole day to fit the grill to the front panel, each slat had to be individually made straight then bent to line up. I got pretty good at it by the last one. The front panel got bolted on. Even though it had been together this is the first time all the bolts had been put in. I ran a tap through the threads which made life a lot easier, all the captured nuts were full of paint. The passengers side wasn't too bad, it was the original guard going back on, drivers side was a guard of another car so needed a bit of persuasion. Need the stick to hold up the bonnet. The extra weight of the die cast badge and bits of trim was enough for the bonnet to not stay up. I assembled the hatch and tail gate locks first after it was painted. The tail lights were some I bought about 6 months ago and are really good.
9 points
-
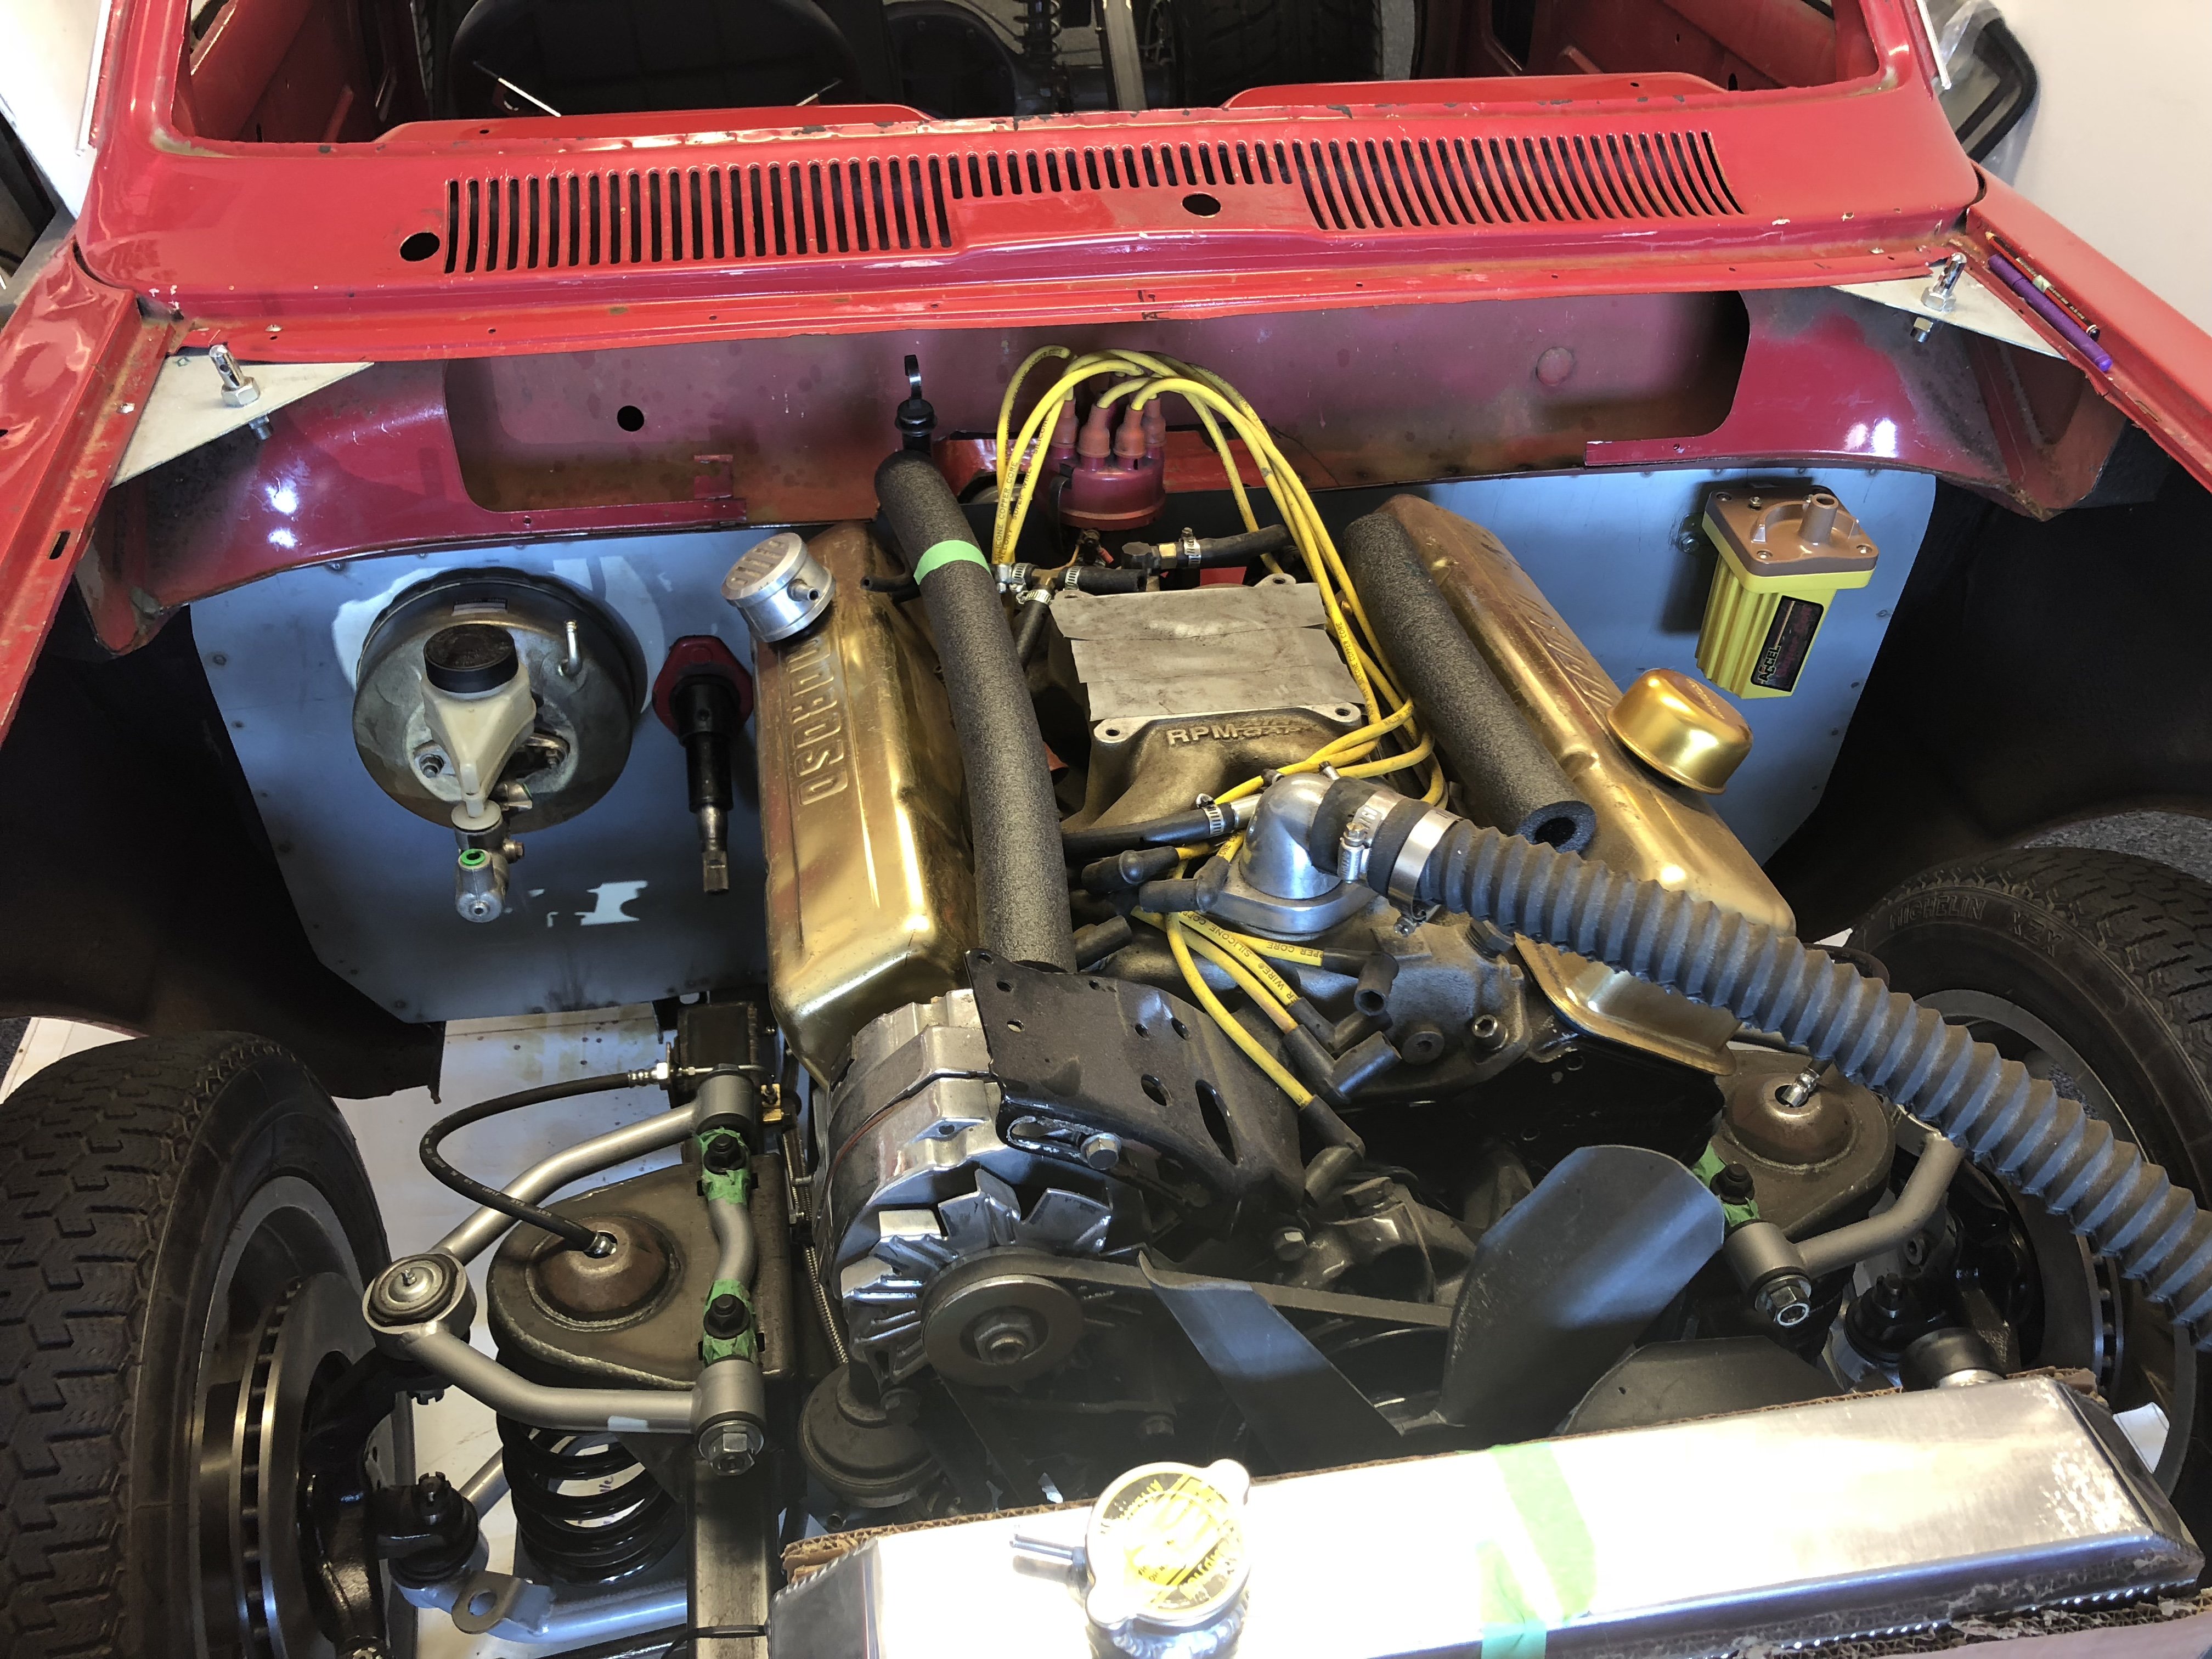
I am very happy with finally having a front end back on the Starlet. It looks a lot more like a rally car now. And it is road legal so i can drive it around town. Now that the front end is all together and it has a little sound from the muffler, It is time to get this soggy old suspension taken care of. Parts pile going on next: Replacement Front Control Arms Tie Rod Ends Front Sway Bar Bushings Rubber Strut Tower Tops Replacement Strut Inserts Camaro Rear Shocks Cut the coils a bit and see how she rides. I would love to do all AE86 suspension but I want to see what is possible with the stock suspension. I'm just replacing all the bushings that I can and putting slightly shorter shocks in it. Cut one coil out and see how it rides. It won't be perfect, but it will be far better than what it is now.9 points
-
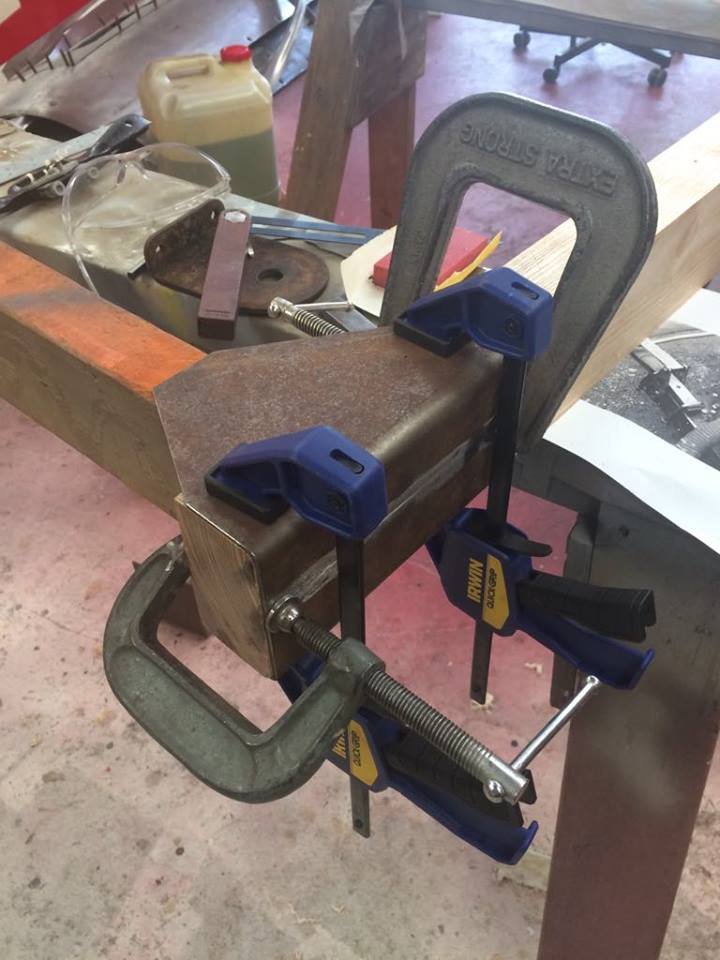
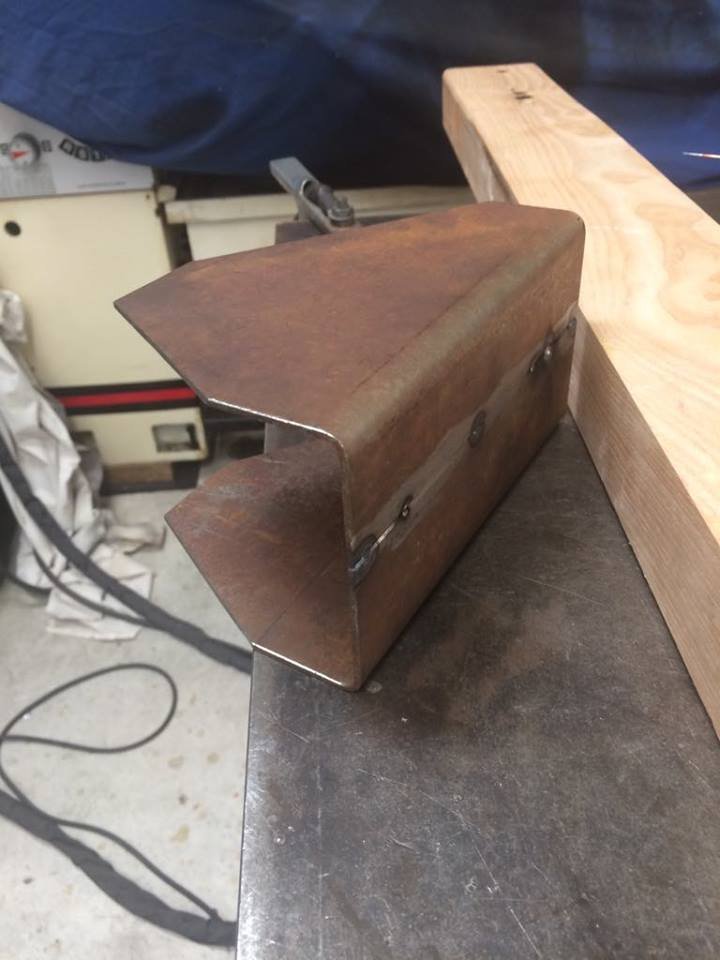
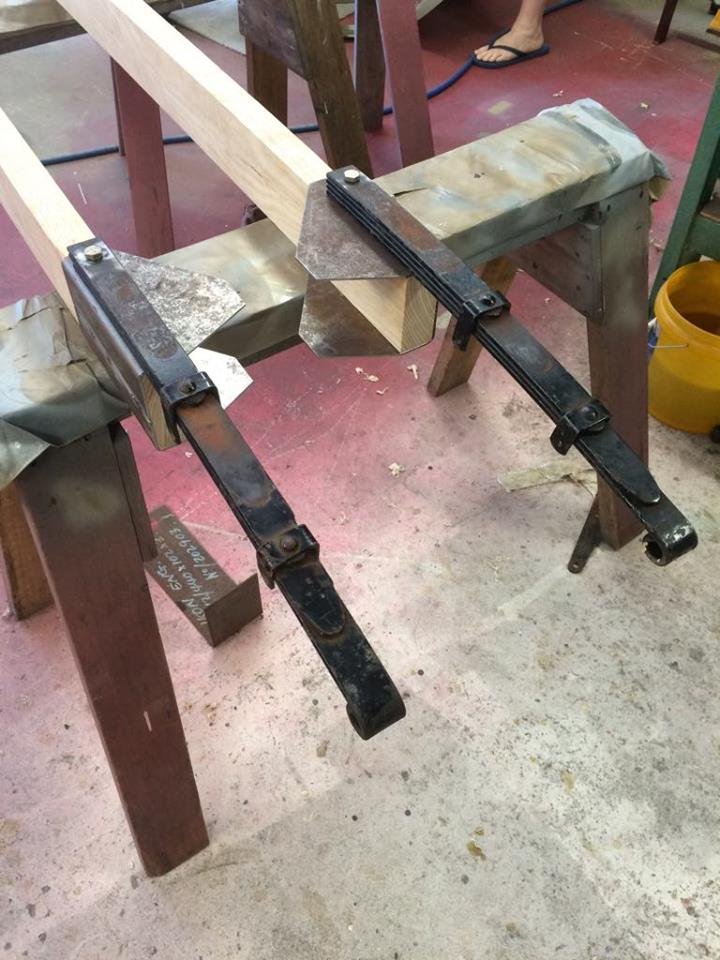
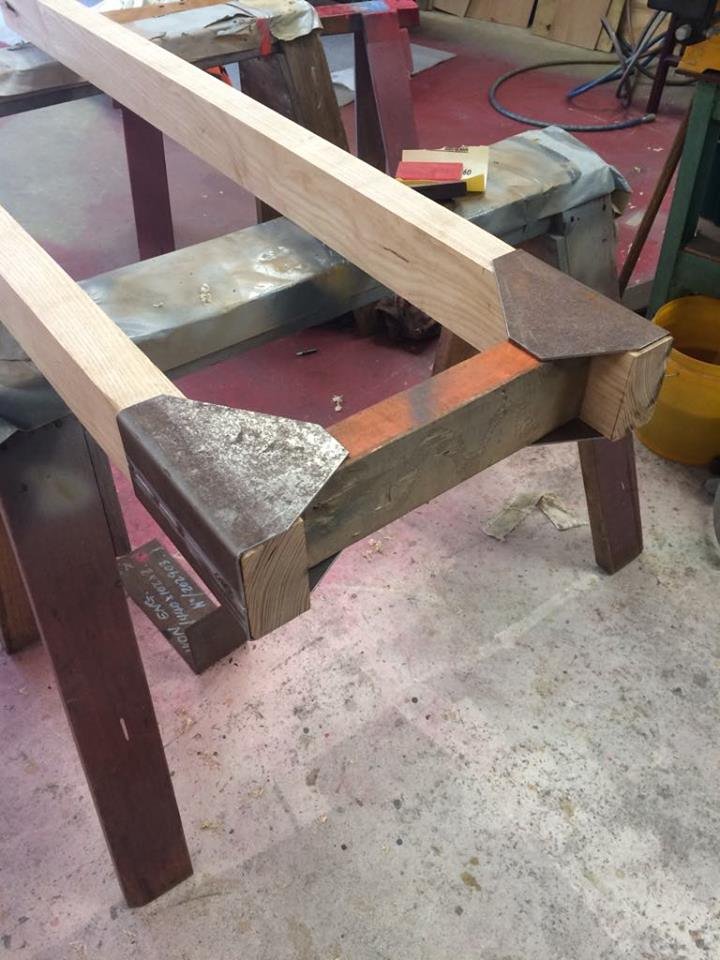
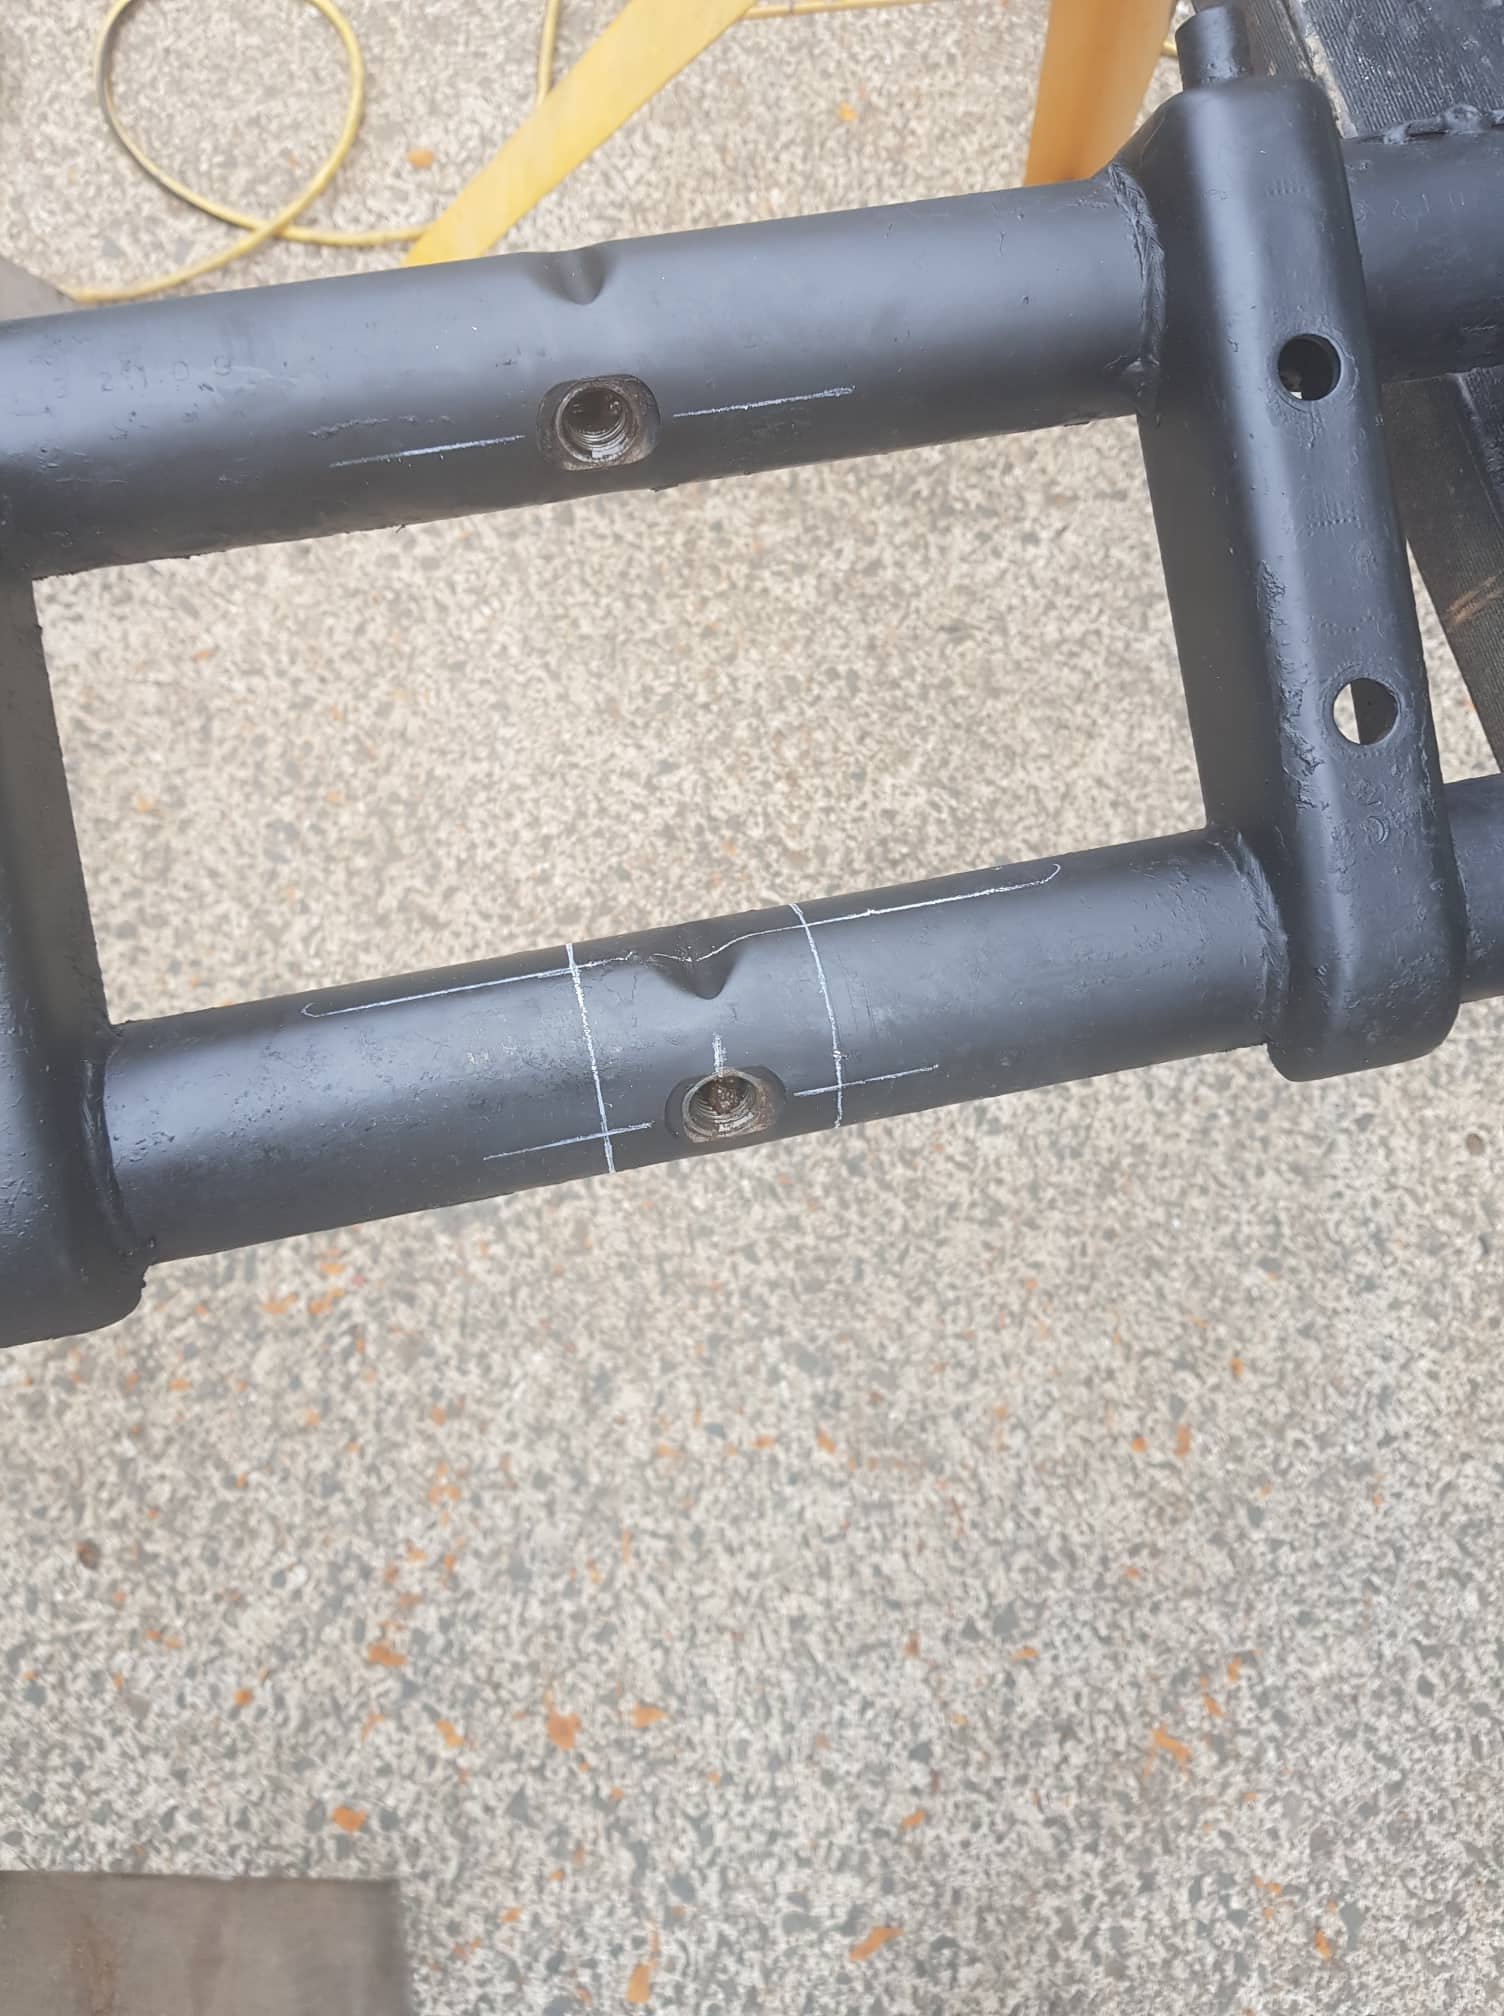
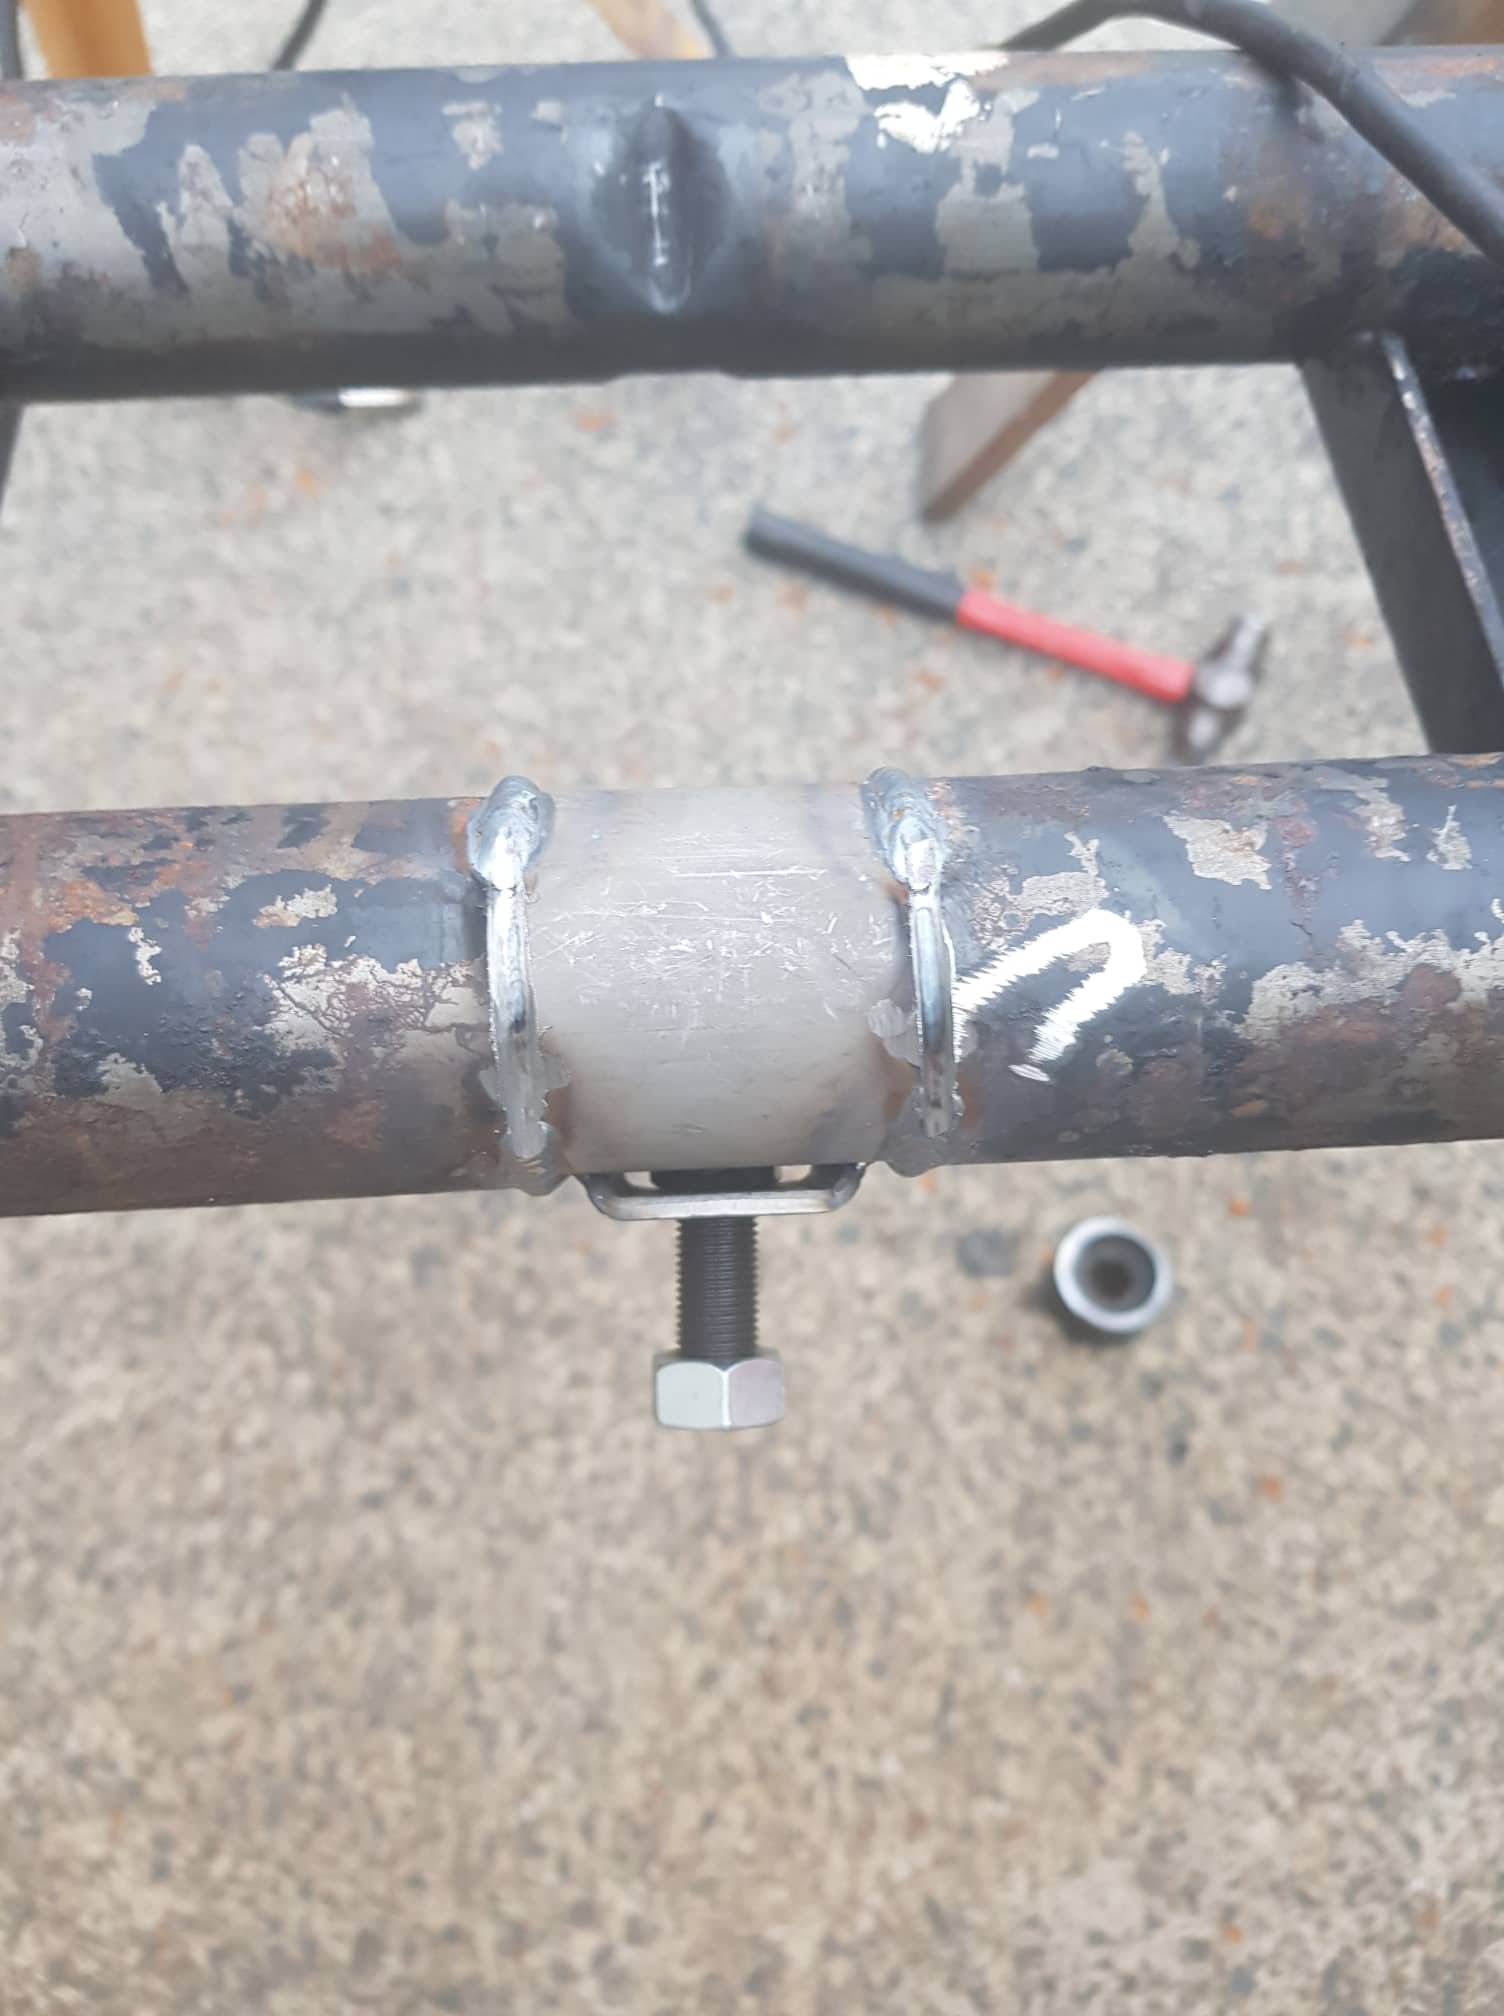
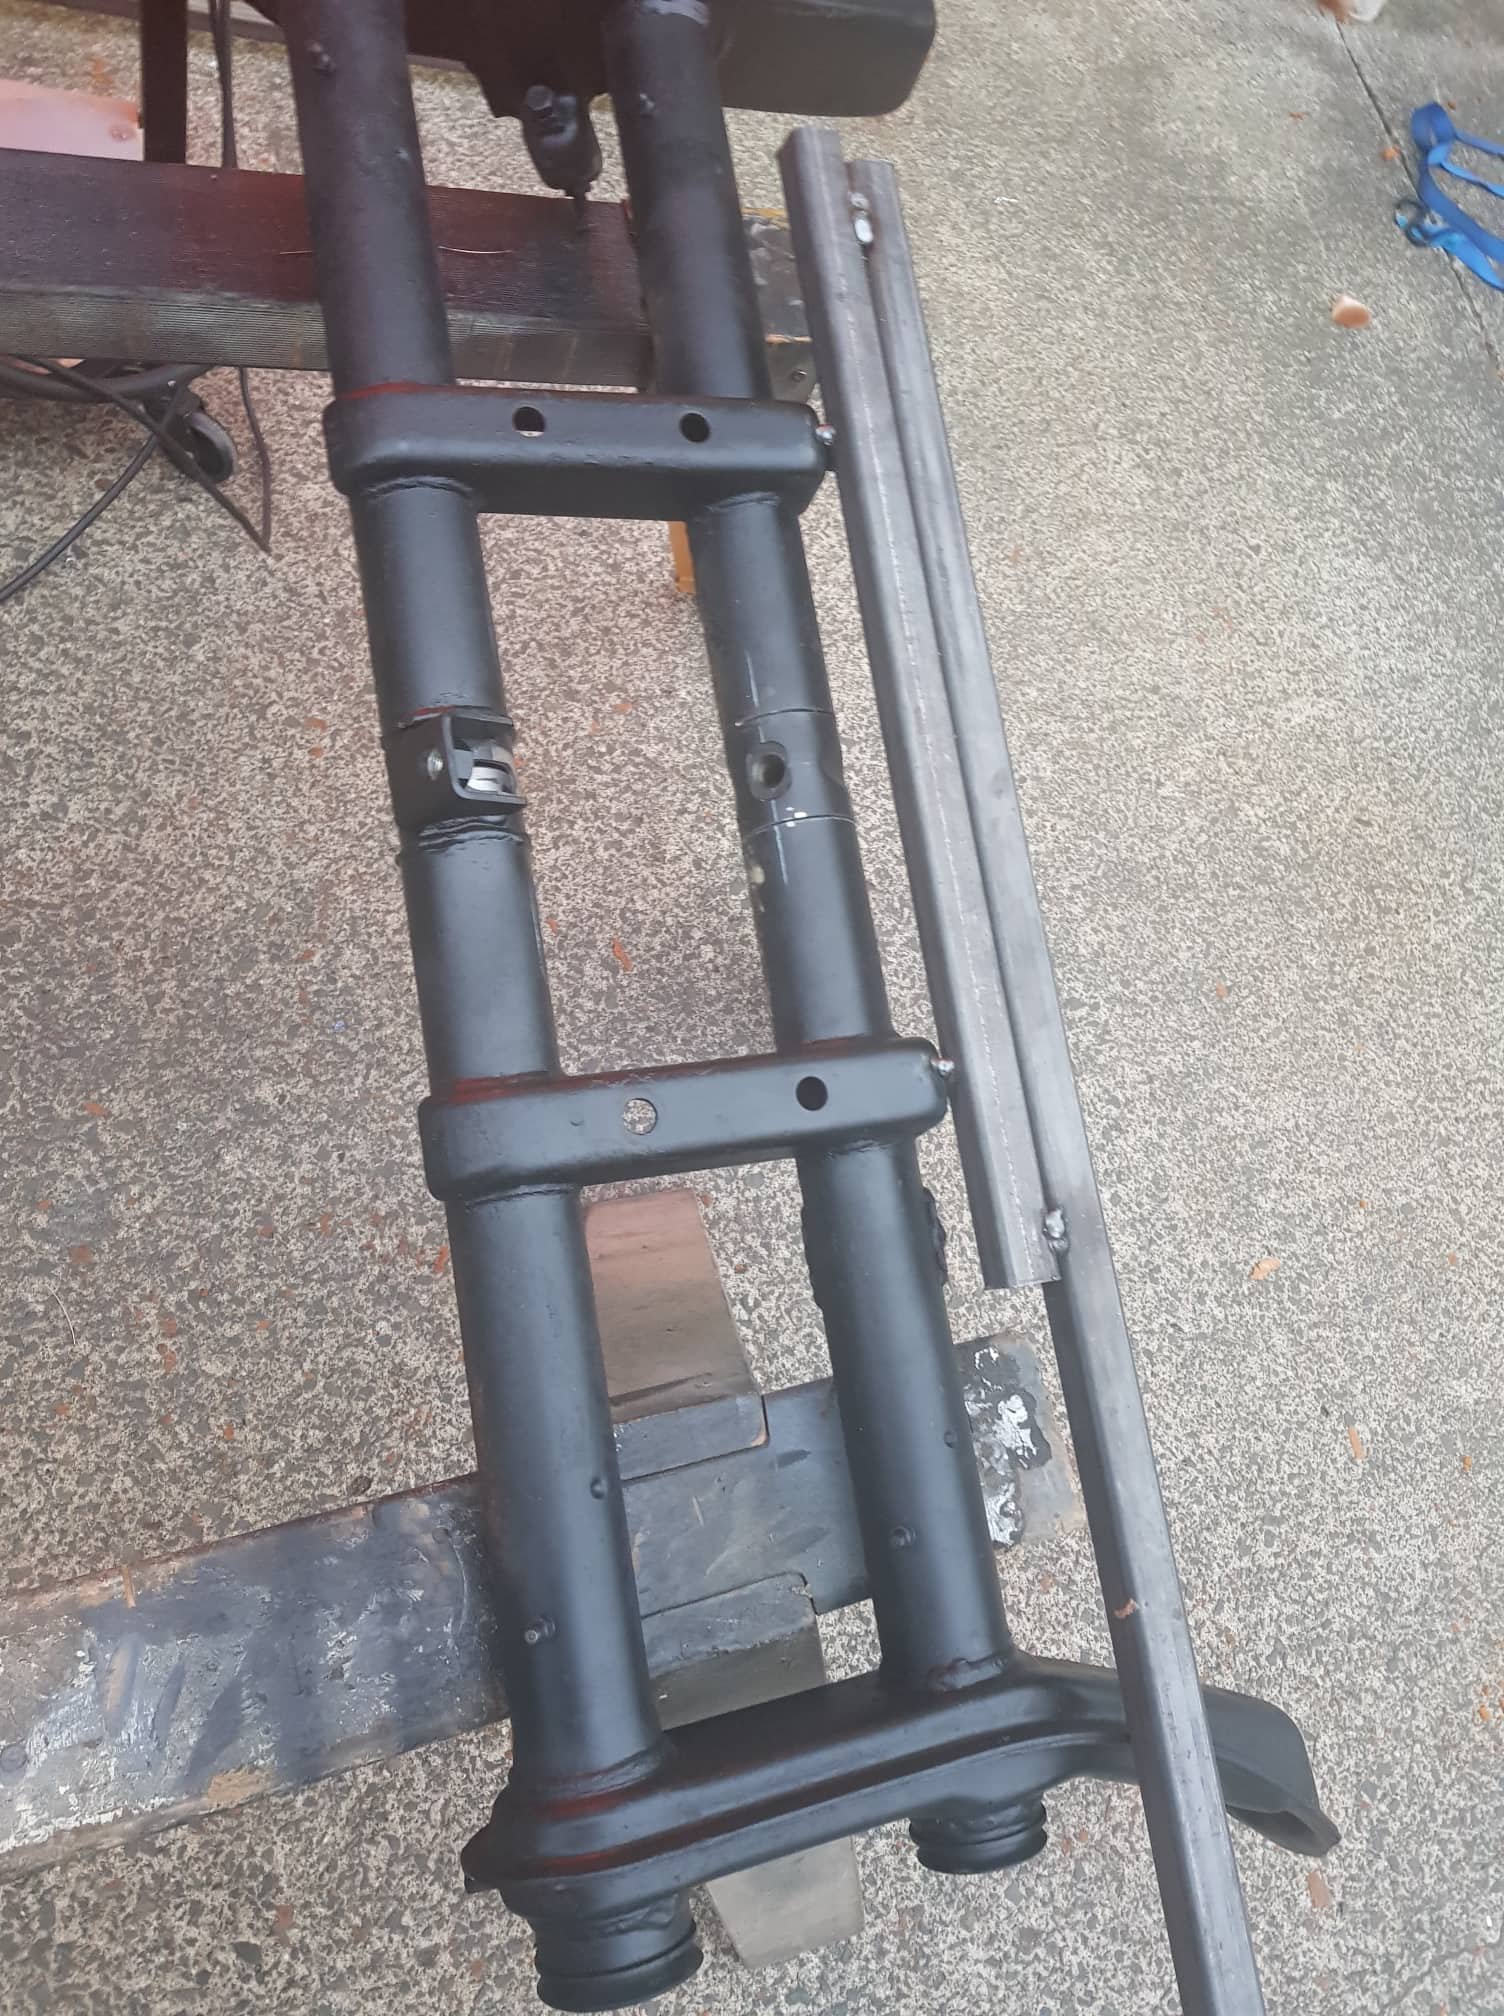
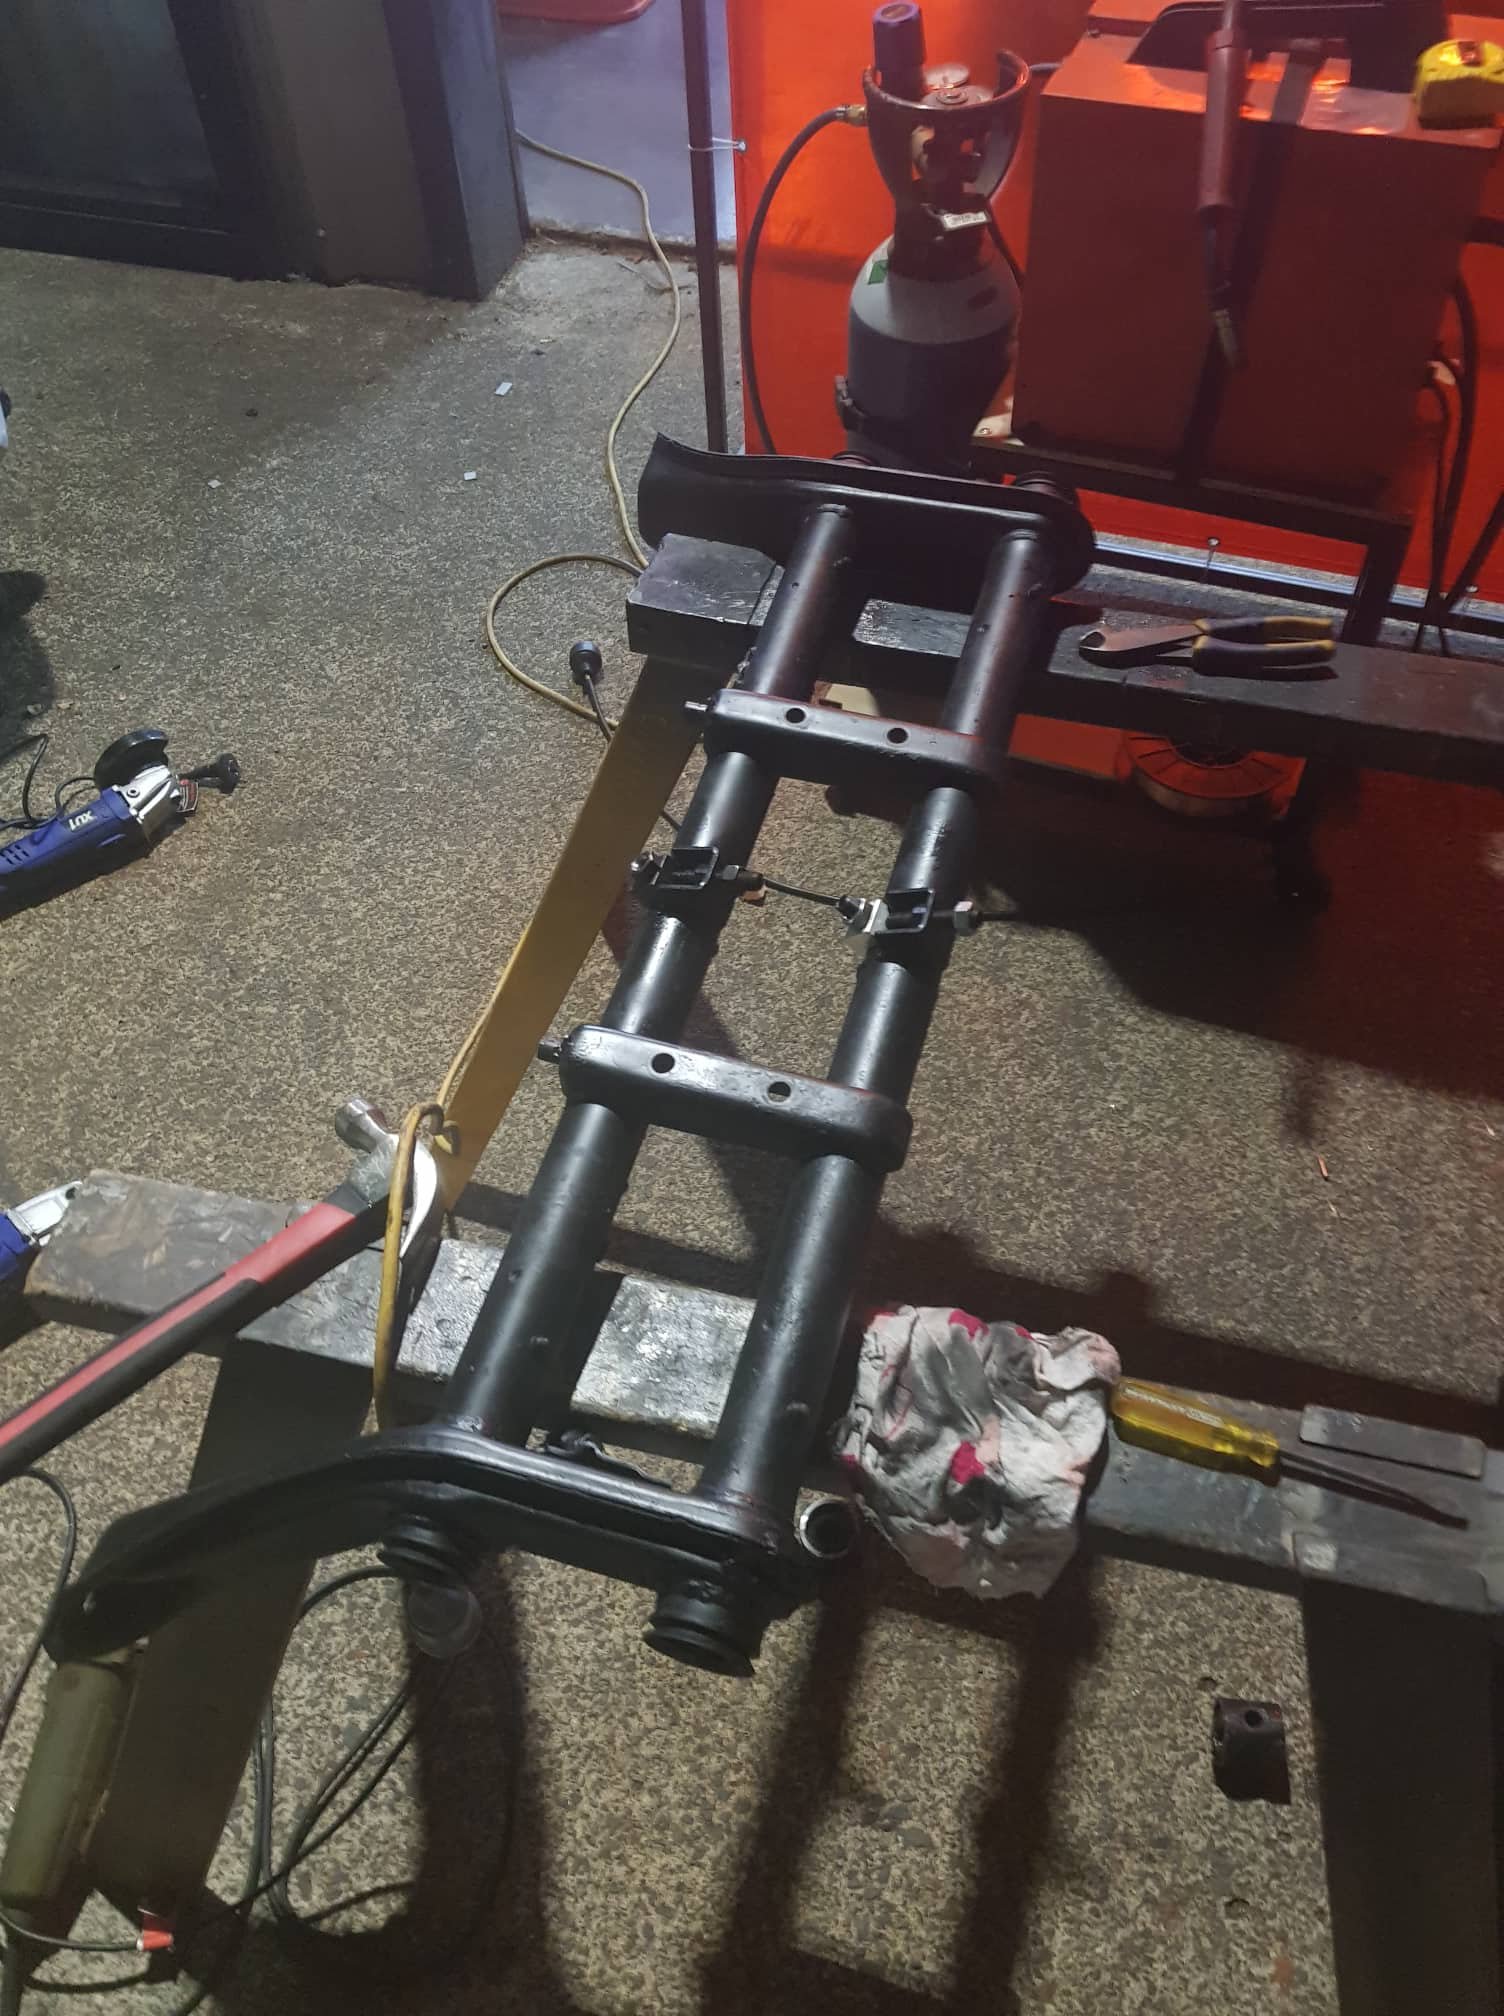
No but a mate has one and wants to chuck it in a Austin 7 chassis. Its a pretty cool rotary hoe when its powered by a v twin! luckily someone has already made JAP casting patterns...... Made a start on the chassis brackets. Did them in two half's so could clamp them to chassis rail and get a nice tight fit before welding. Have also thinned down the rails from 2" to 1 1/2''. Looked a bit bulky and heavy before. Much better now Drilled a hole through it all and mounted the springs. Will need some form of U bolt to hold them down at the front.
5 points
-
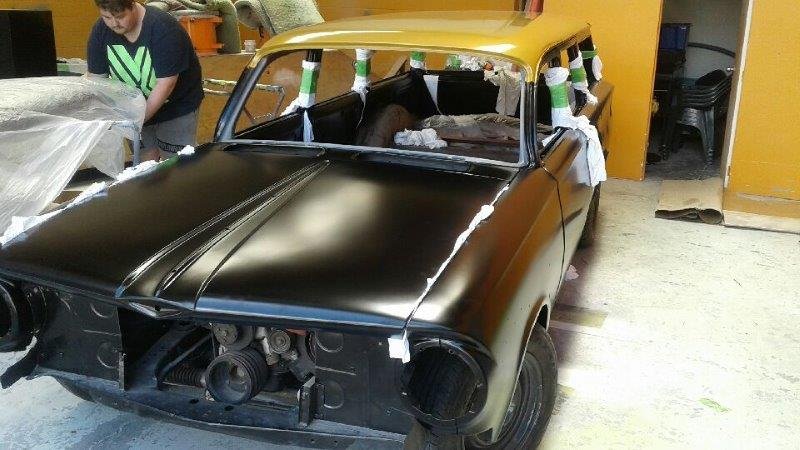
Since my last update there has been a bit of progress. The car went to the paint shop in July for a 3 -4 week turn around. It sat.......and sat....... and then one day out of the blue I got the call, come and get it, its painted. That was December. Out in the sun it just blew me away.
5 points
-
5 points
-
Bought a house : moved one of the important things in on the weekend both the House & car built in 1976! Some sort of fate / meant to be eh?4 points
-
Paint it green and blame THE BLOODY LIME SCOOTERS4 points
-
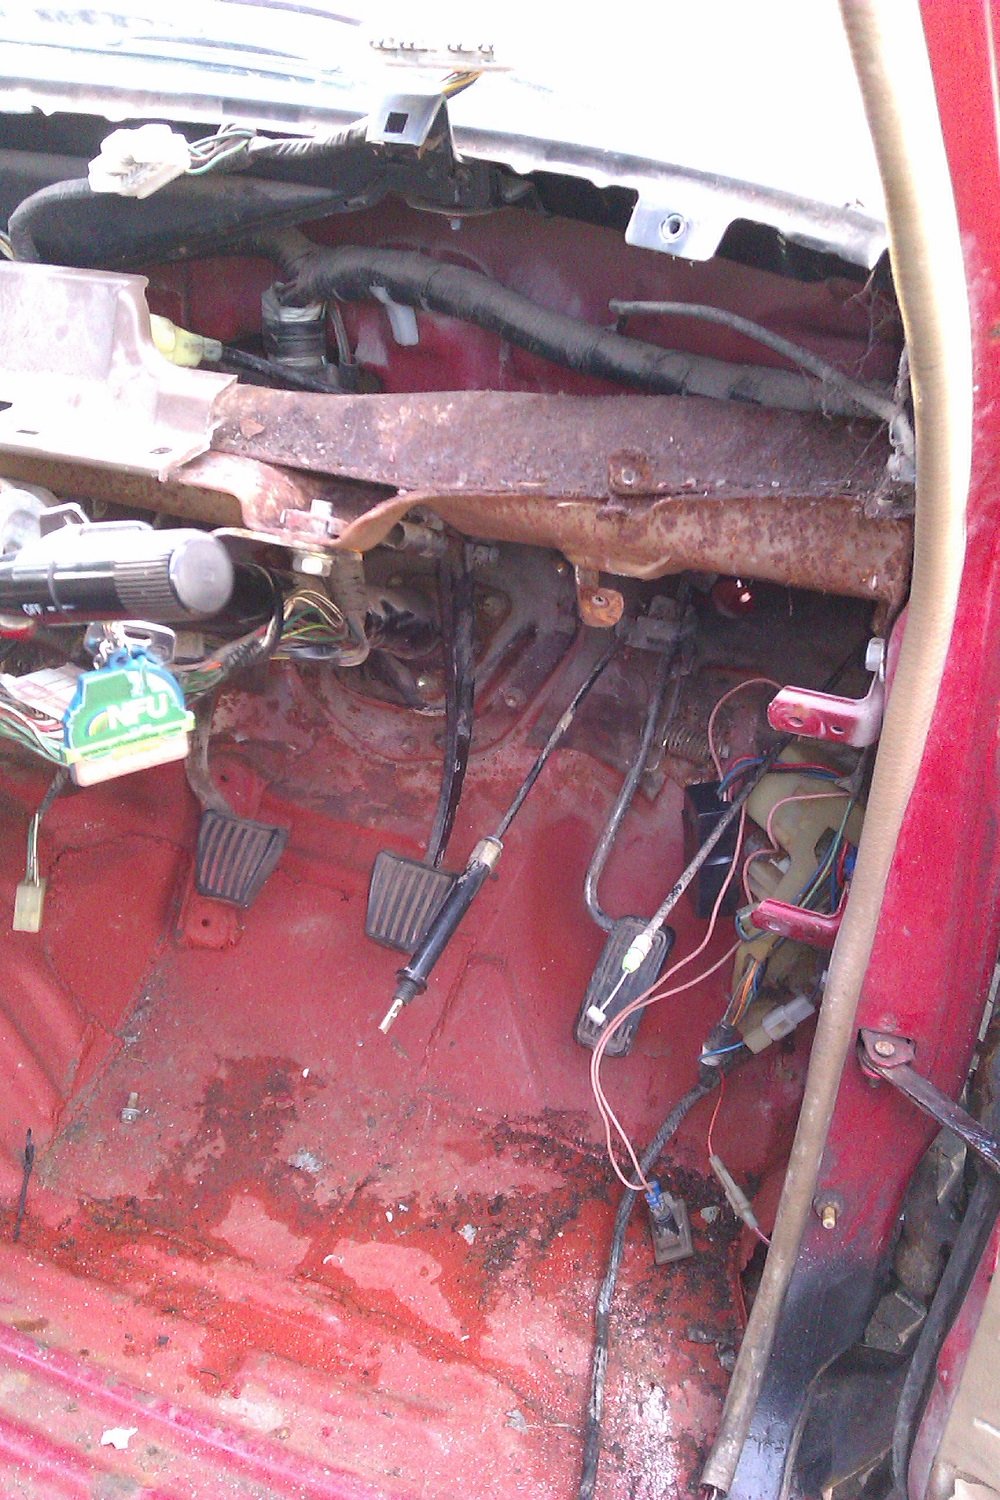
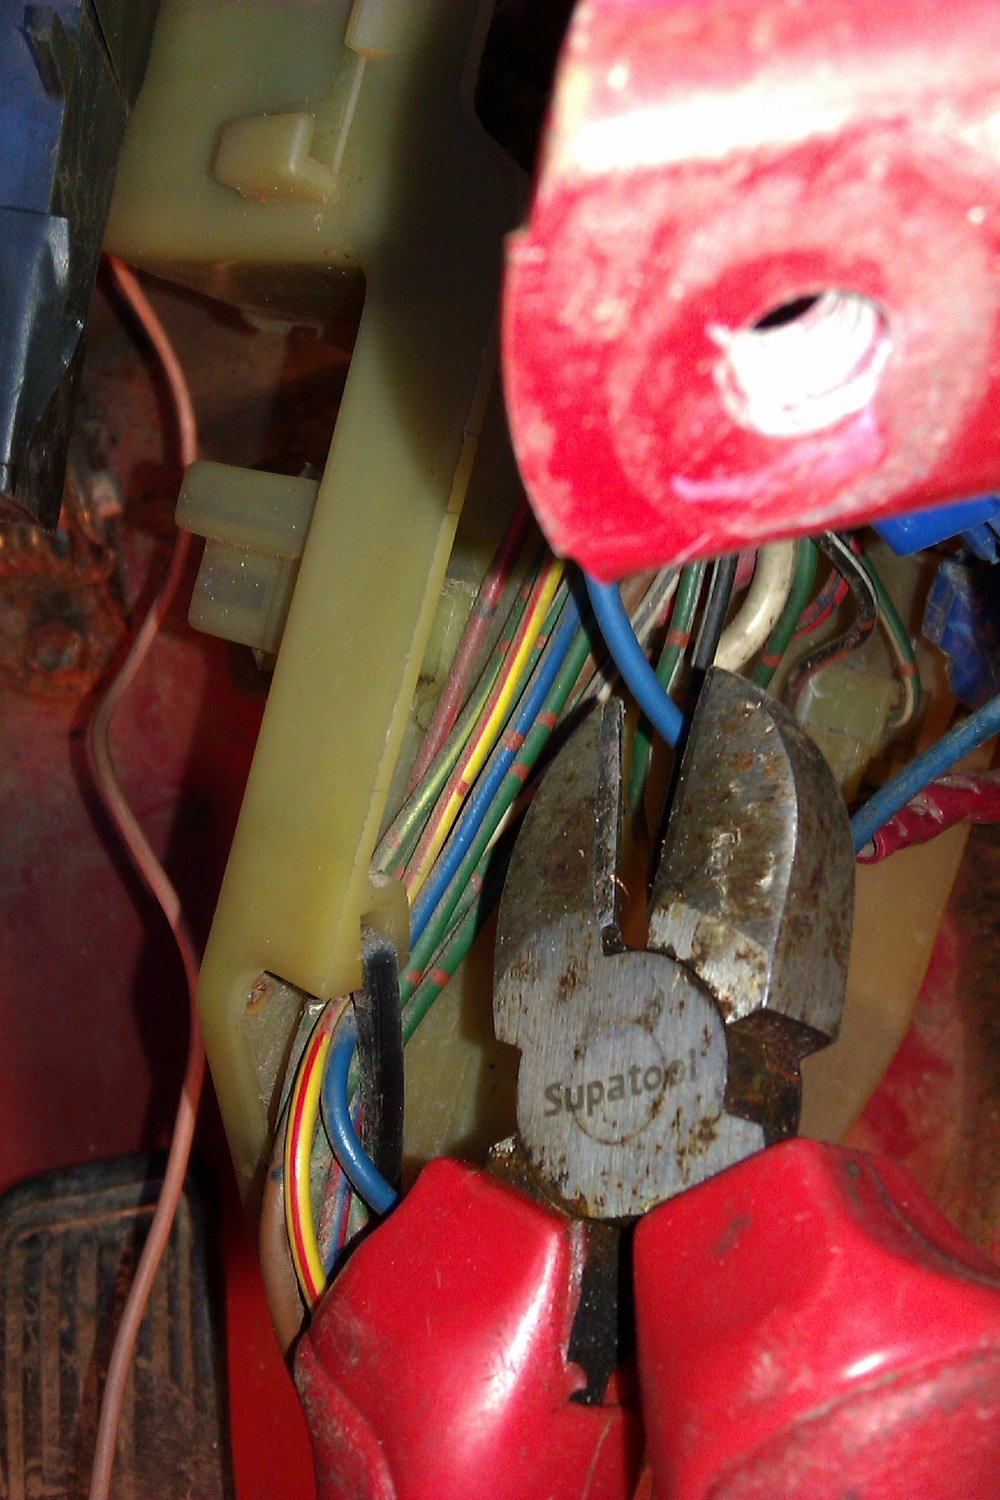
Fuck you for a couple of weeks. Had to walk away before I burned the twat. Made the interior look right pretty. Getting there with the electrics, lots of water in the loom & fuse boxes. Defusing the towing electrics. Blue or black ? Seems to have helped though. That's all I've got for the moment, not even going to tempt fate and think about when it might get tested.
4 points
-
So tonight I now have a functioning hand brake! i need to have a riv nut session soon in a few key areas and I should be in a good place for the Gettin. Sorted for Compliance. Will take it for a professional alignment before the repair cert sign off. Then compliance and the cert. I need to raise it up more and it’s still low. The rear soft brake lines need made larger so that they totally clear the diff so that’s in the to do list getting there aye
3 points
-
Dyno happened just over a week ago. I lost around 8hp from the weight of the new tailshaft haha. So after optimising the E85 tune with the new GTX turbo we got it back up to 300whp with the same boost pressure 20psi. Pushing beyond that the car began to lose fuel pressure so the boost is fixed at 20psi until I fit another Bosch 044 to make a twin pump set up. But looking at the results from when we pushed past 20psi, I will be lucky to get another 20whp out of it. Any more than that will require a bigger turbine wheel from the likes of a GT3071R which is an option even with the limited space available. The compact T04B compressor cover from a GT2871R can be used on the GT3071R (they have the same compressor wheel) and there's a T2 flanged Mamba turbine housing with Vband outlet that suits the full size 60mm 84trim turbine. I'm trying to resist the urge to go bigger. There would be some down sides- Traction problems, I'd have to ditch my 13x7 miniltes and AO48 semi slicks, then change diff gears again to suit 15" tyres. Boost coming on 1000rpm later in the revs. And of course the cost of doing it all3 points
-
Car is running and working on making it drivable. Huge thanks to @Roman answering all my stupid questions. Ran the first log tonight, hopefully the changes I made work3 points
-
Hahahaha looking at some sweet sweet waveforms while driving. The dream3 points
-
2 points
-
the ecotec engines have a problematic intake manifold/valley gasket that leaks oil into the coolant and/or vice versa so gives the impression it has a BHG.2 points
-
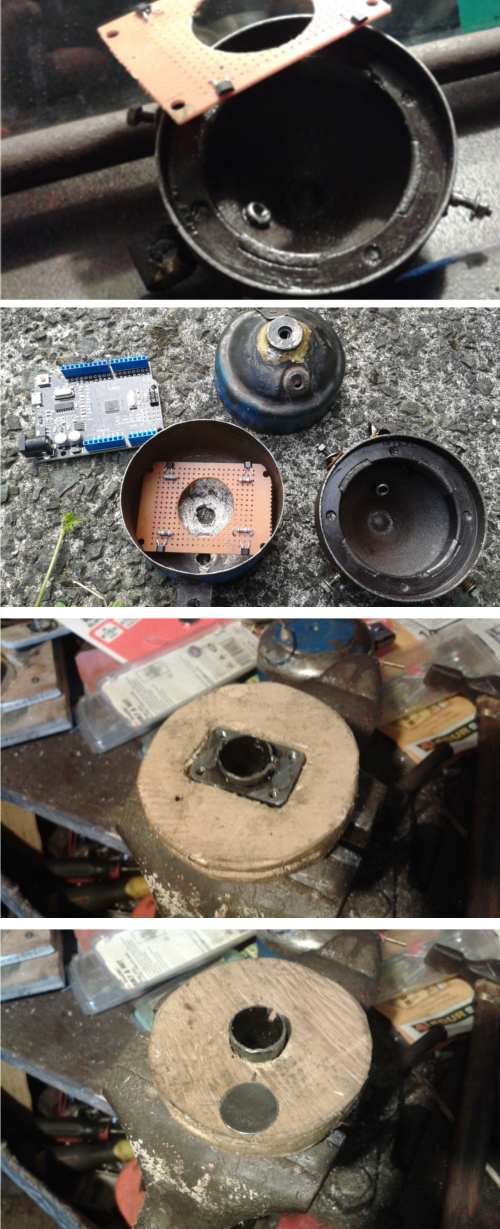
So some of you are really into programmable ignition and electronic sensors. I tried to make my own electronic ignition. After 3 seconds one of the MOSFETS running a coil shorted out. After 7 seconds all of them had. Each mosfet was rated at 20 amps. But considering they were dealing with the primary and ... lets face it. some of the secondary output (These old timers are like that) i don't think they were up to the million volt task. At least 2 hall effect sensors survived. Barely.
2 points
-
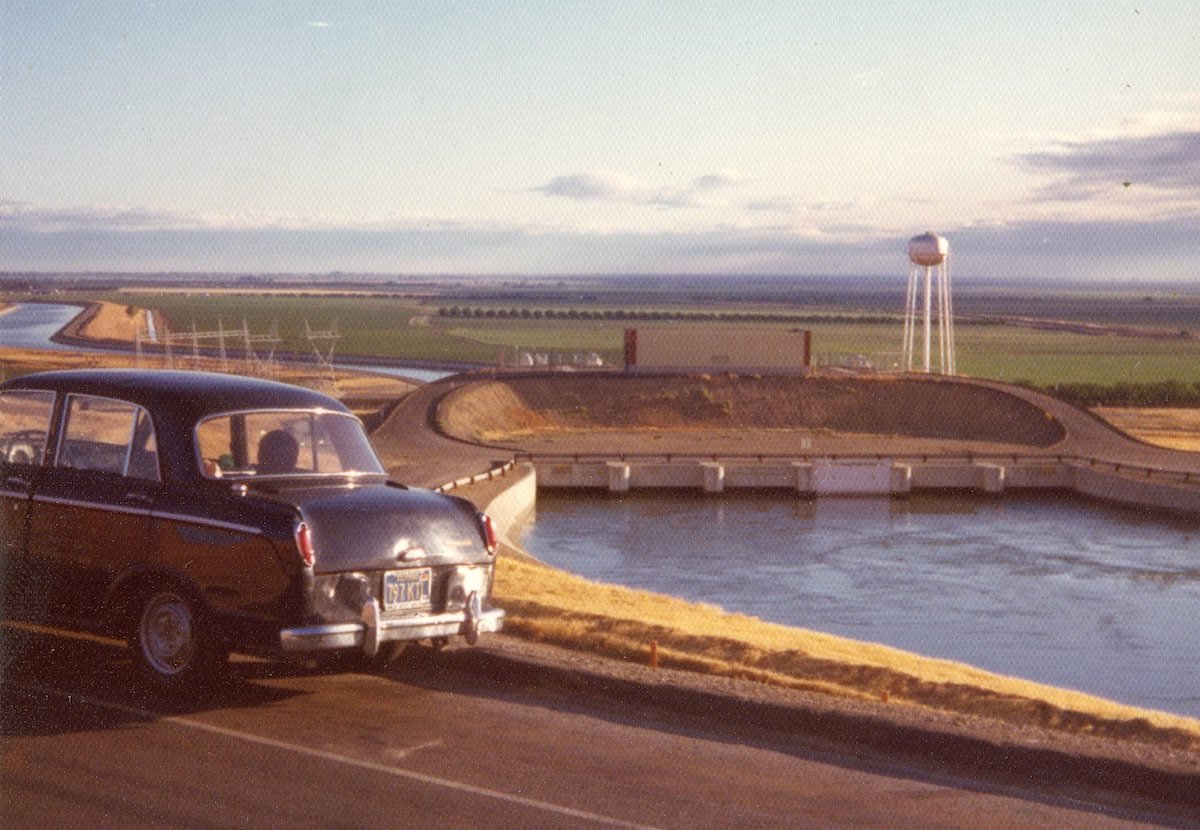
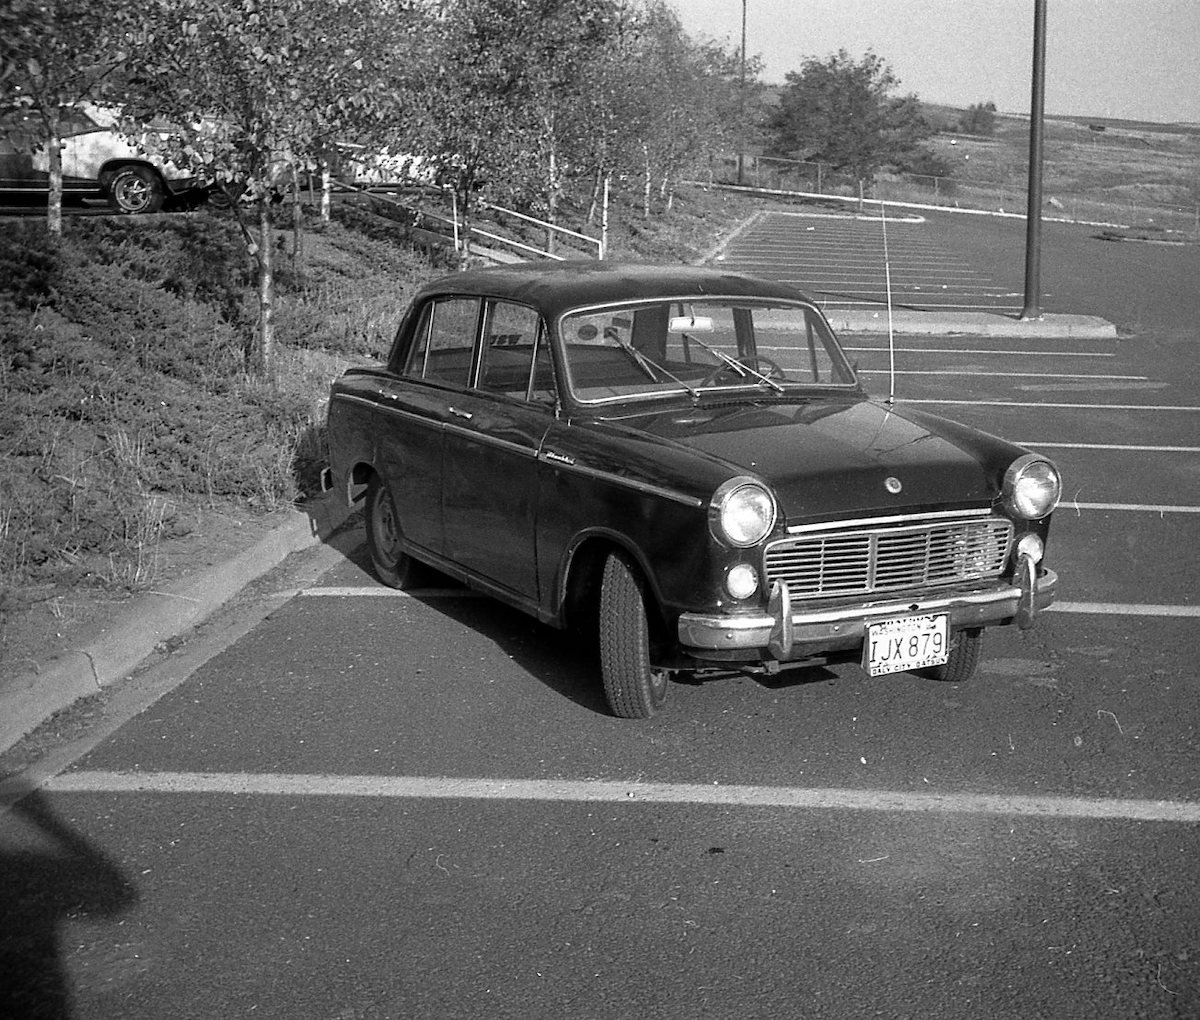
This is my Datsun Bluebird "de-rustification" project. This Bluebird is a U.S. specification 48 HP left hand drive 1961 PL310. It is the same as 1959 and 1960 310s. It is much different with respect to the drivetrain than late '61 through '64 models with the 60 hp engine, all synchro transmission and beefier rear axle components. I've swapped in most of the later model drivetrain though. The overall project been on and off again for years, decades actually. I have 44 years of my ownership history that I can present separately in a discussion thread along with this build activity. Previous historical "major" repairs included bumping out the roof panel in the late 70s due to a prior owner rollover accident. The rust work however is relatively new since early 2018. Photos. My earliest photo of the car is alongside the aqueduct in the California San Joaquin Valley in June 1975 and then Pullman, WA October 1975 . The latter photos are current covering the inner and outer sill panels fabrication, fit and weld work currently in progress. As time permits, I'll go back a year and begin describing the work and discoveries along the way to date and continue from there. https://oldschool.co.nz/index.php?/topic/60267-marts-pl310-61-datsun-bluebird-sedan/
1 point
-
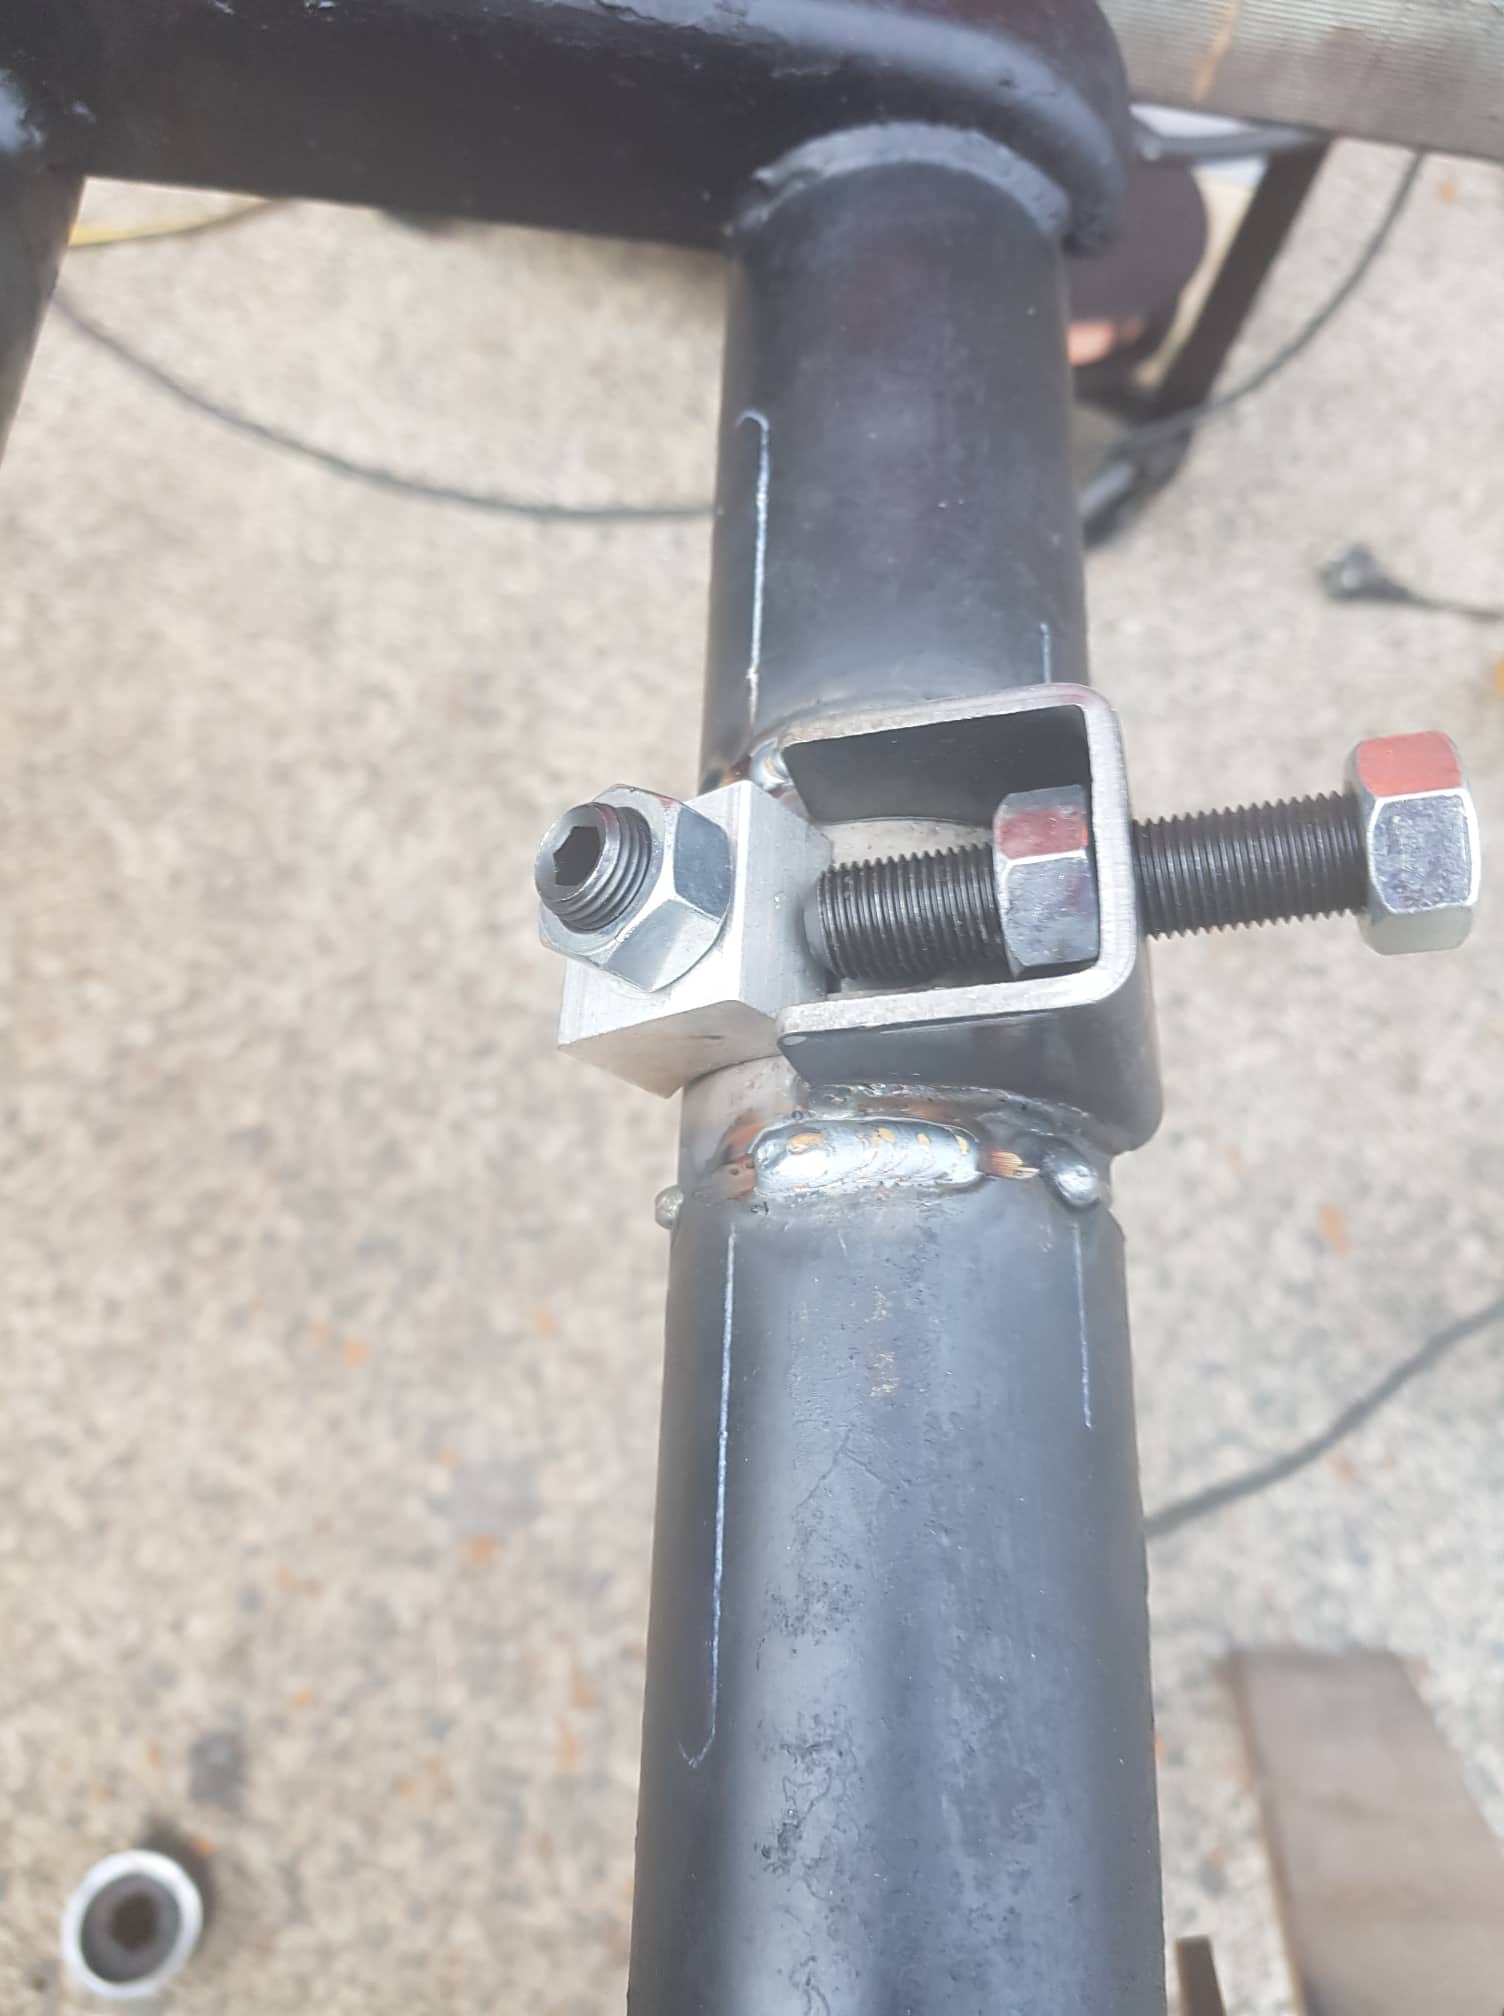
Not been on here much at all for a few months, mostly cos an unnamed mod changed one of my posts to make me look like even more of a cunt than I actually am without indicating that they had done so, this gave me a complete sense of humour failure so I lost quite a lot of interest. I guess I am over it now but we will see how things go.... Anyway I have been up to a bit of stuff in the absent months, I will let the pics mostly do the talking. Cost 3x boxes of beer White dust is from fingerprinting, was stolen and recovered.. Fitted pretty nice with minimal sheetmetal cutting Engine is seized, need to find another, but will use this to set up the mounts. Made a removable subframe for the rear and mid body mounts Later model safari steering box, this might be a sticking point but i have a plan that has been agreed with the cert man in principle. The box is rotated forward from the original position, the tie rod position is exactly the same though Front body mounts and steering box mount are all tied in. I have a design for this in CAD which looks pretty good. Fitted the Safari clutch booster in there with relative ease Engine is just propped there, I have moved it back 570mm to help with weight distribution/radiator clearance/etc. It also means I can use a SWB rear driveshaft. Gear linkage might be fun, although apparently the gearbox in a Condor/Atlas with the FD42 has the same box housing, the top plate and gearshift mech should respectively bolt on/be able to be modded to fit. Took it to a weighbridge to check axle loadings, 1755kg all up, 1130kg on the front. Axle ratings are 1500kg front and 1800 rear so should be good to go. The weighbridge was reading 65kg heavier by the time we were done so this is probably worst case. GVM of the Safari was 2505kg, so will be racecar. There is a lot to do yet, as I said the engine is seized so need to find another + turbo to put on it. Build the front cab mount and steering mount, engine and gearbox mounts Need to think how to build the front driveshaft, probably a shorty shaft to a frame mounted carrier, then use the standard front axle. Need to find FD42 gearbox linkage Probably needs new tyres and at least one more rim for a spare Need adjustable panhards and adjustable rear lower trailing arms to get the axles in a better position. It had a 2" lift that translates to about a 3.5" lift with the current weight, so axles are a bit off to one side and the rear will need rotating so the driveshaft flanges are parallel. Need to airbag the rear for load leveling. Need to convert the AC pump to continuous air for the airbags and whatever else Will need to build a deck with big ass drawers underneath for my tools. Will probably will have a budget hoist of some variety, maybe just an arm with a chain block. Electrical will be a nightmare as the cab is 12v and the chassis is 24v, need to talk to an auto sparky to discuss my ideas. Still need to 100% make sure that my cert guy will be able to take it on, there is no one in Nelson with 1D unfortunately. Piece of piss really.1 point
-
Crank seals / leaky crank case issues can be hard to diagnose too. Apparently it can make an engine appear to be running rich (and sound like it's 4 stroking), when actually it's leaning out. 2 strokes can definitely be challenging little things! But we definitely need to see more of them out there .1 point
-
Both supercharged and plain ecotec.1 point
-
USDM 4KE was rated for something pathetic like 58 hp. Rockauto has a good supply of bits for these1 point
-
They are pretty cheap over here. You could get your reground if nothing is available Type: Fast Road / Kent 234 Specifications: Duration at .017": 280 degrees Duration at .050": 234 degrees Cam lift: .293" Lobe separation: 107 degrees Type: Very Fast Road / Wade 140 Specifications: Duration at .010": 290 degrees Duration at .050": 239 degrees Cam lift:.296" Lobe separation: 107 degrees Some double valve springs and decent exhaust will be required. Turn up the fuel too and you can skim the head for 10:11 point
-
Found a great deal on some fenders from Malaysia. Just had to go with it and hope they showed up unharmed to the USA. Threw on the fenders with some ebay fender mirrors. Then painted the headlight surrounds and grill so they match. installed the new front end with some Ebay LED lights. The ebay LED are so darn bright and a million times better than those old H4 lights. SHOP TIME!! After sliding the car around on some snow I realized I need the rear end locked up. It was too hard to predict when the rear end would break loose with the open diff. So I took the little starlet to my friends shop to weld up the rear diff. Locking up the tiny little diff. Now having a custom front bash bar made. Gotta be legal and have a front bumper.1 point
-
Took the Starlet to my Mechanics shop for the rear brakes and spark plugs. As you can see below the rear brakes were caked with nasty old fluid from leaky cylinders.1 point
-
Widened sigma steels wheels Headers and a hotdog exhaust 3/4 race cam These are the days of my youth1 point
-
So i took the starlet for a spin in the rain. I mounted the 155-80-13 tires on the back and pumped them up to 35psi. Then found a big parking lot and had some fun.1 point
-
I had seen online that the old Celica/Supra wheels fit perfectly. So after some searching around MT i had a set of them. Man do they look good I may have a problem with rare and cool old school parts. I was digging through local craigslist and found this really cool old 5 star wheels. After getting them home i had to test fit them with the 175/70/15 tires Going to need some flares for sure. Lower the car about 2-3in, add some flares and these would be perfect. I couldn't help myself. I had to stack some drinks.1 point
-
Now that the 4KE is running time to start making it better. First thing to go was the Air Conditioning. Because we all know its not a race car unless it has AC removed. hahaha. By the way this whole AC package is for sale if anyone wants it. Going to the gas station for the first time to fill it up with fresh gas. all 10 gallons of it. HAhaha First car wash in over ten years1 point
-
Ive still got a piece of bone floating around my little finger from when i fell off mine. Worth the pain they are a hoot to ride.1 point
-
Just tell him to stop wasting his time.1 point
-
Tell him to block off the BOV, then he can Phil Collins Su-Su-Sututututu around1 point
-
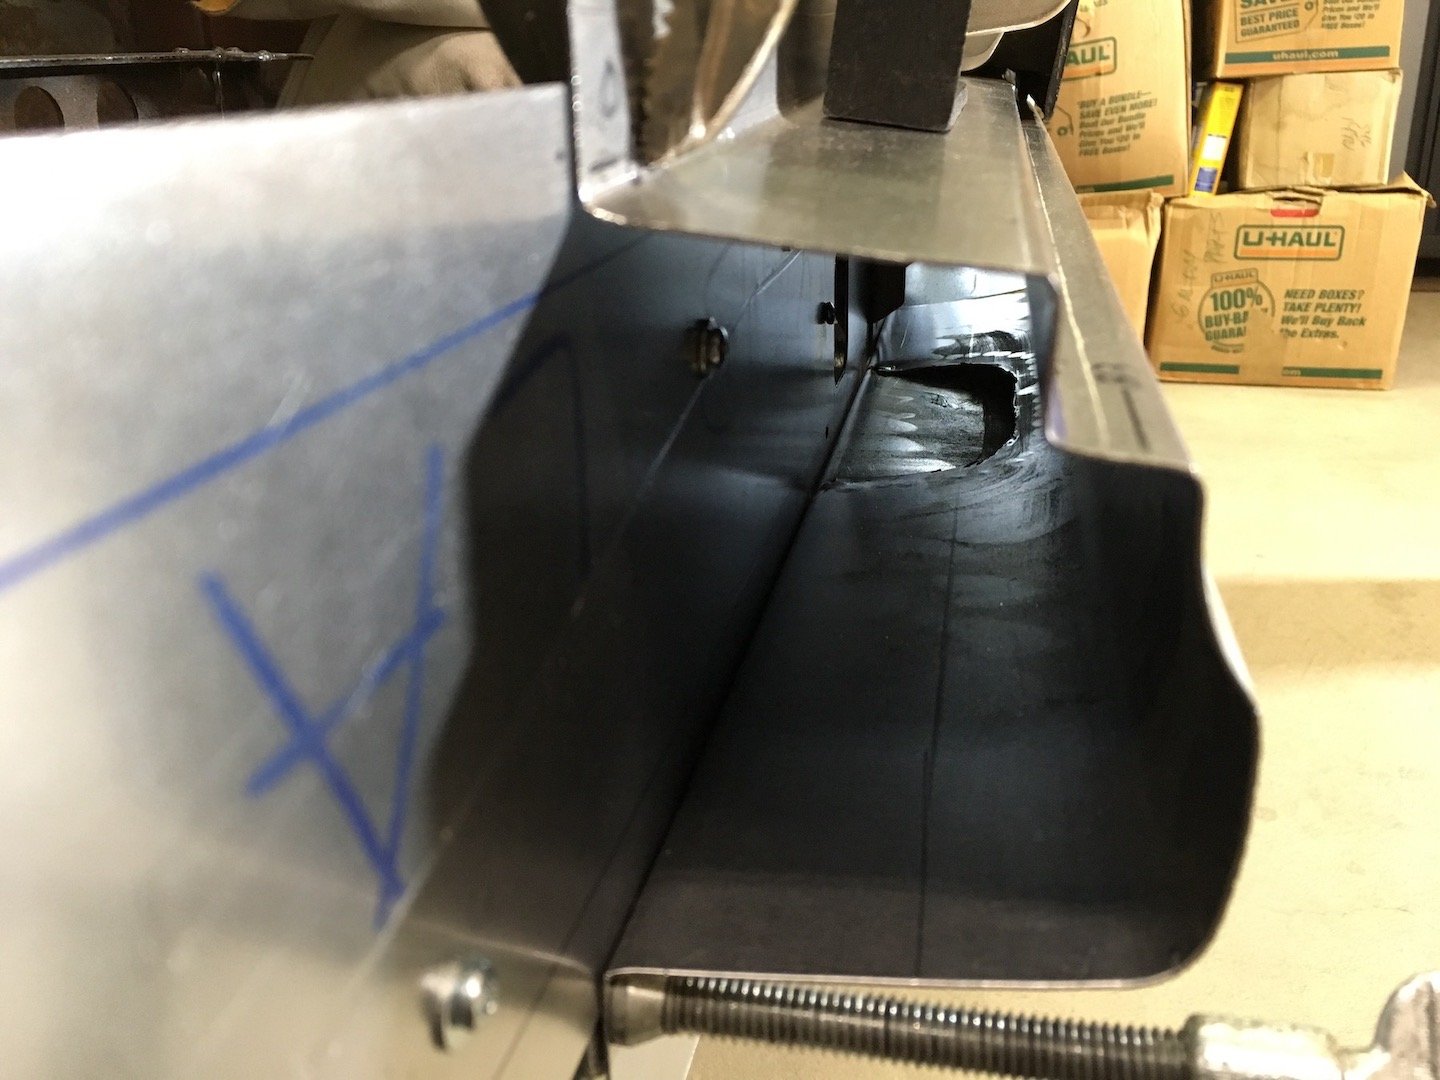
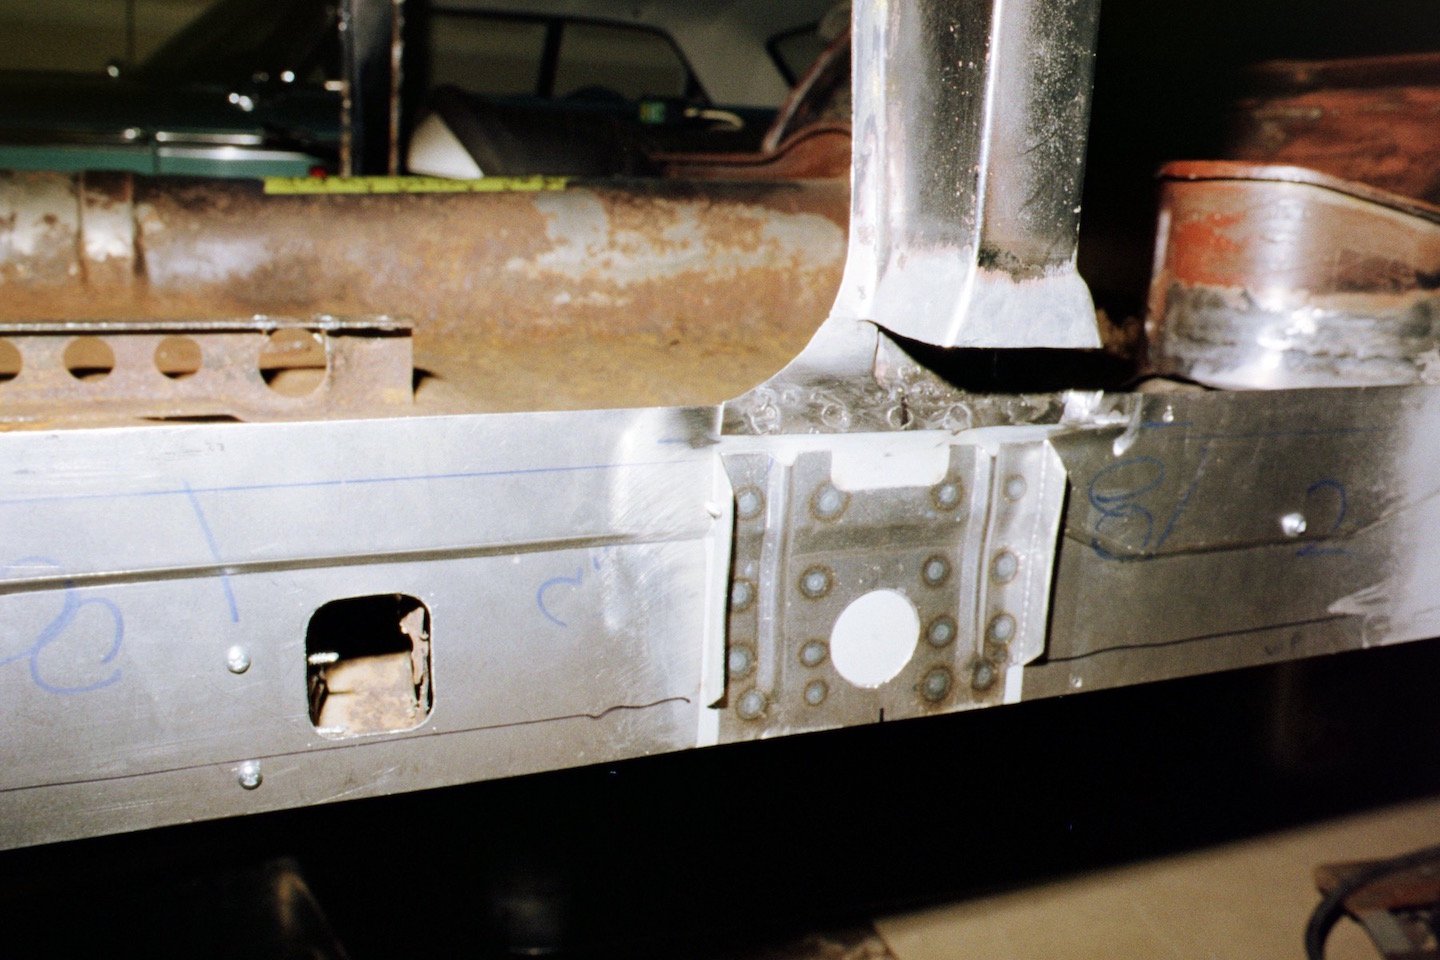
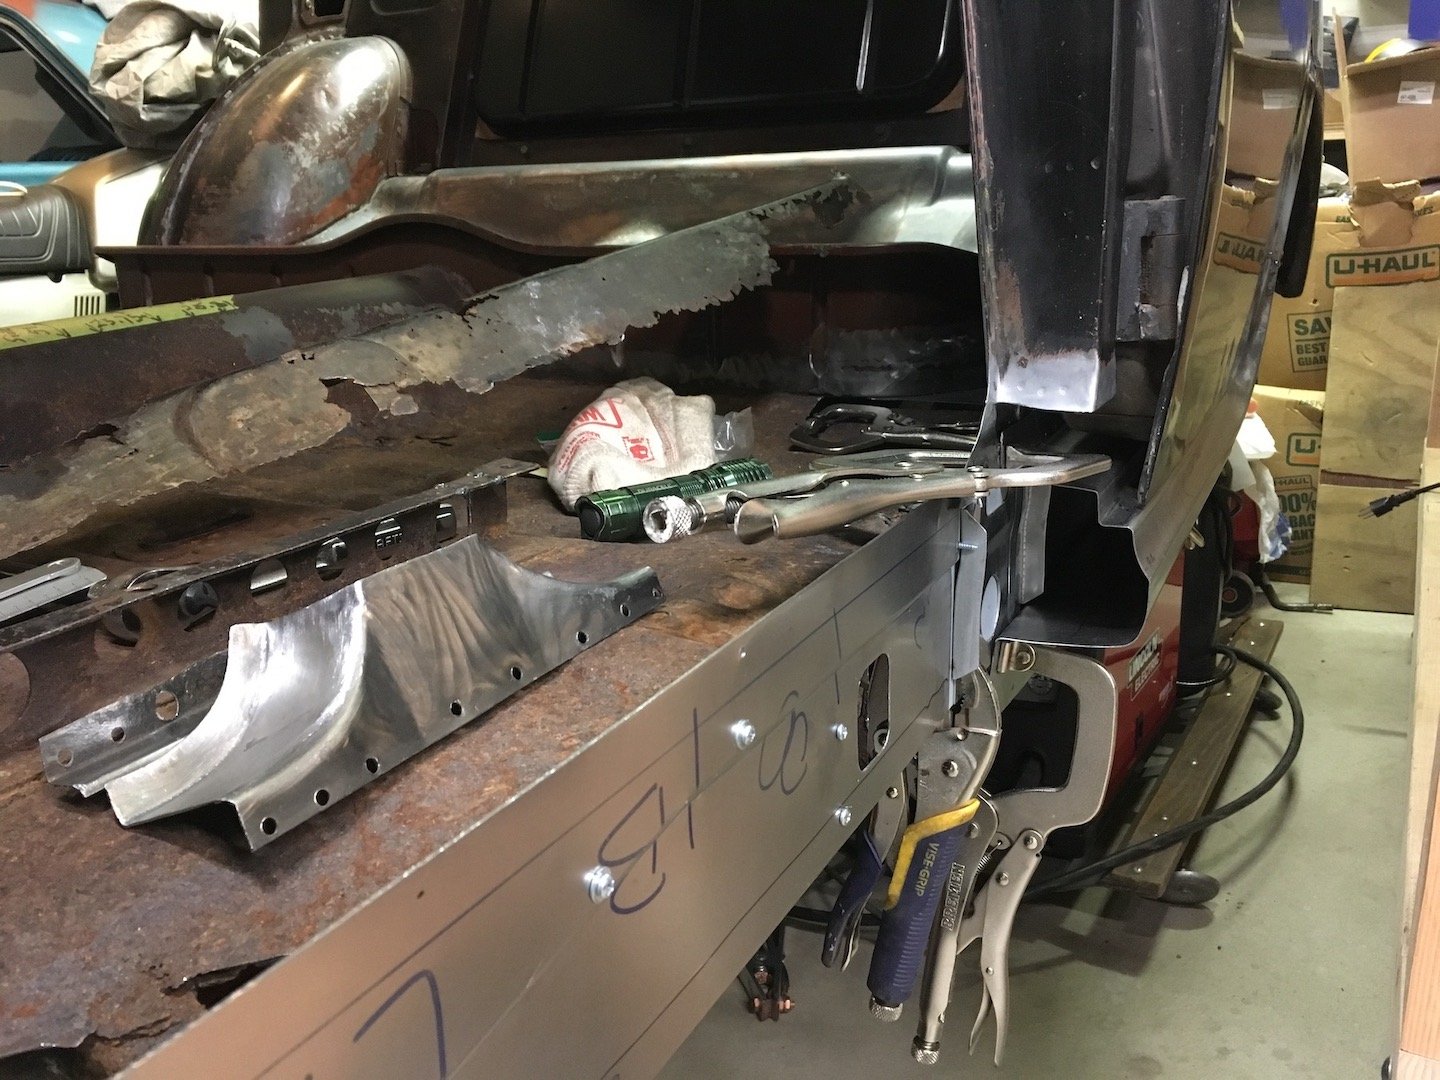
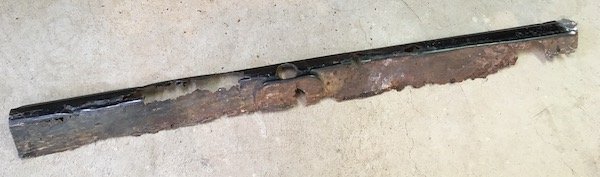
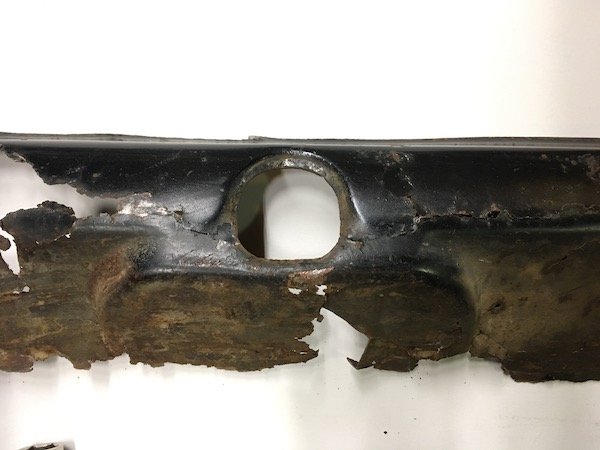
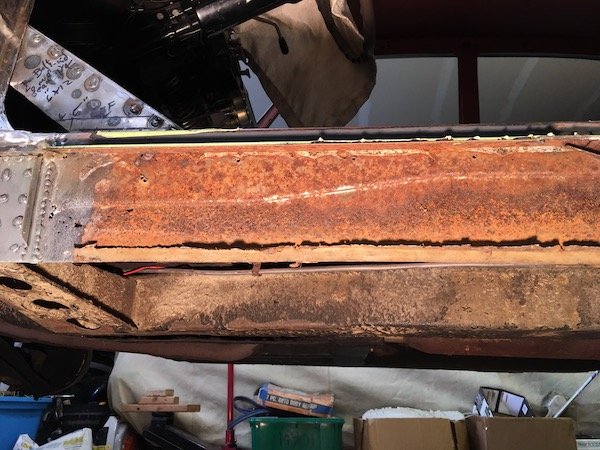
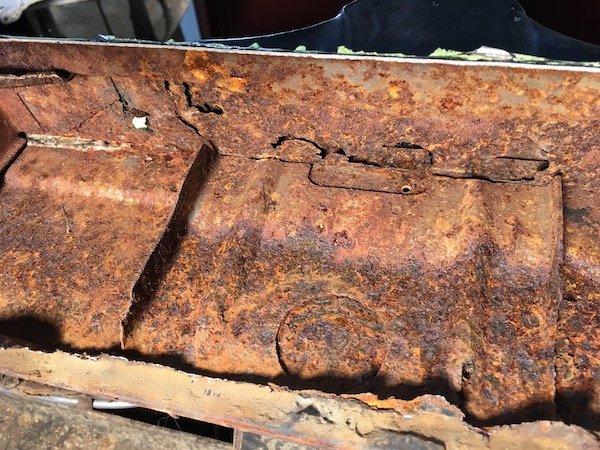
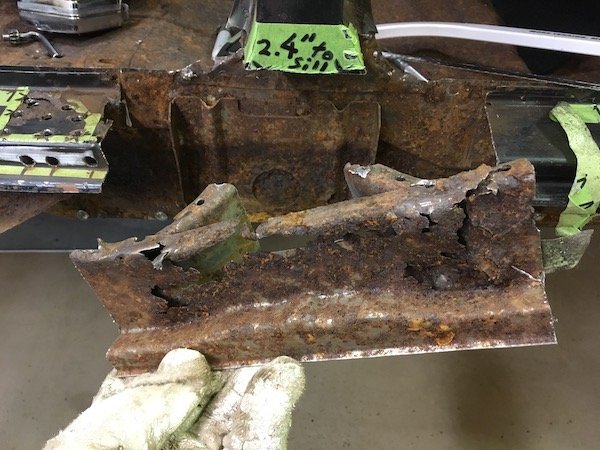
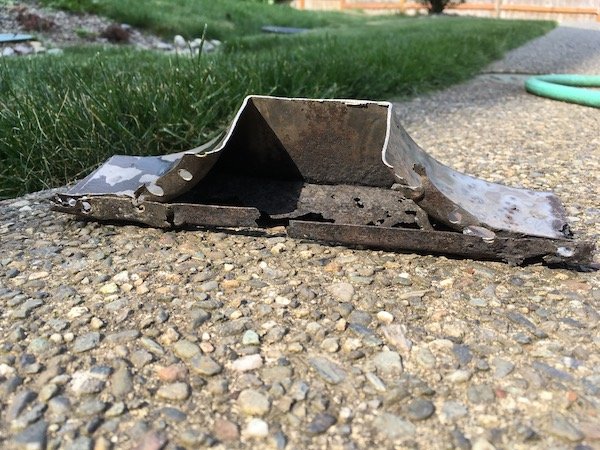
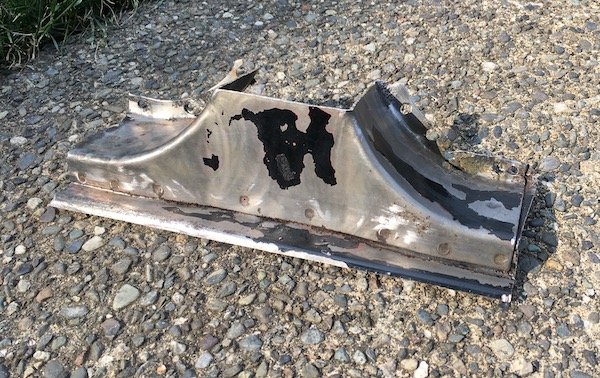
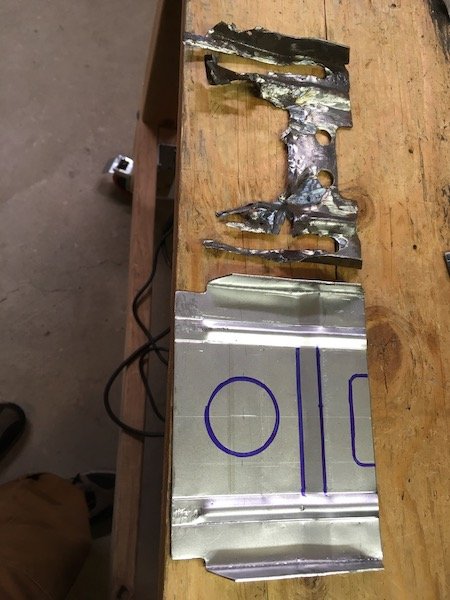
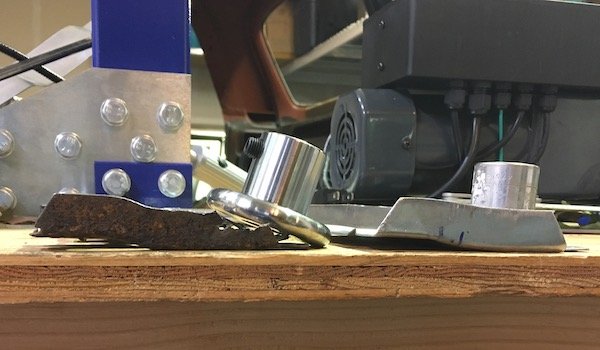
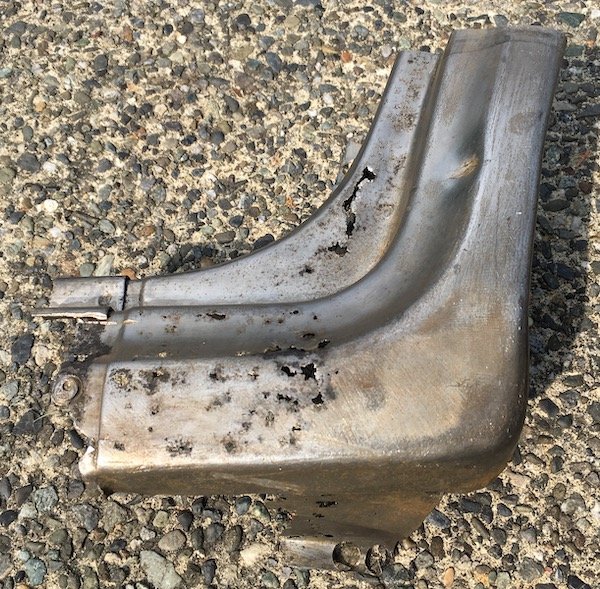
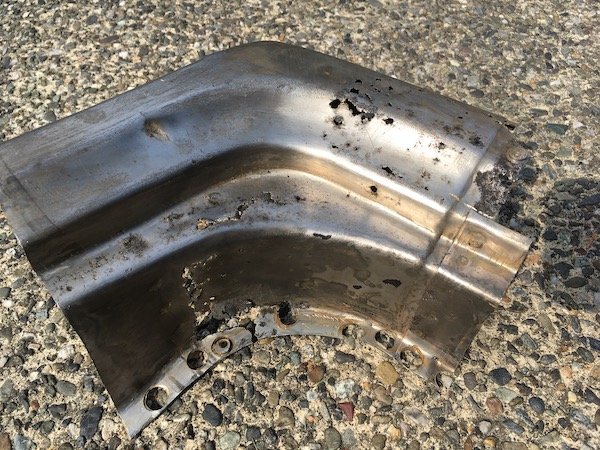
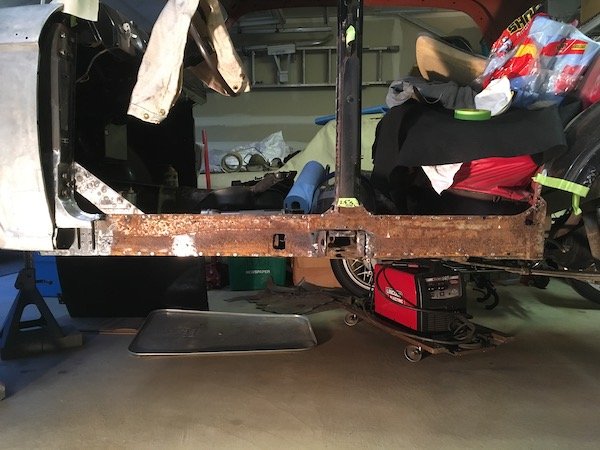
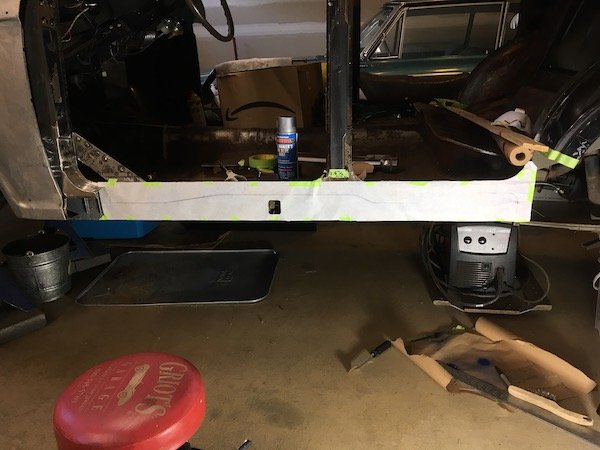
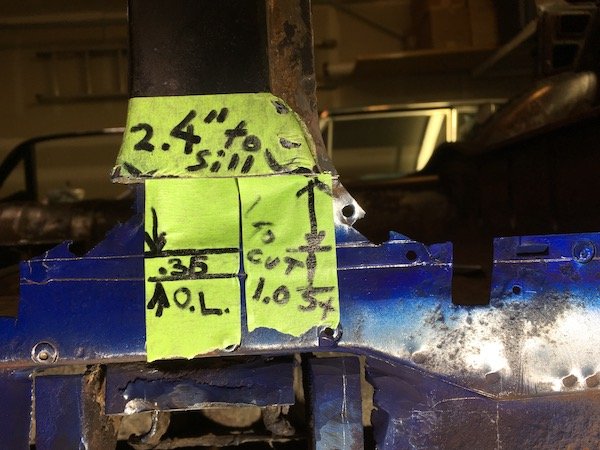
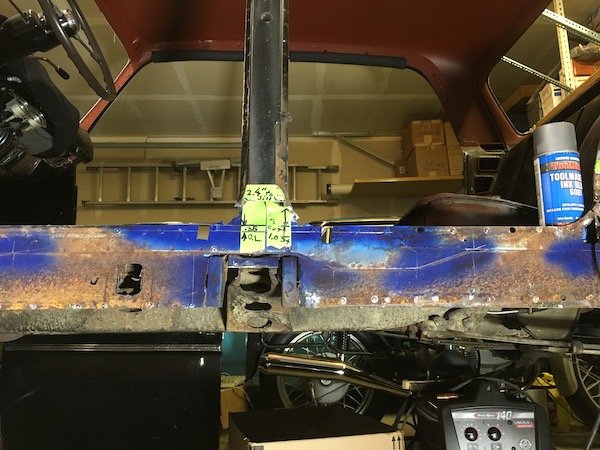
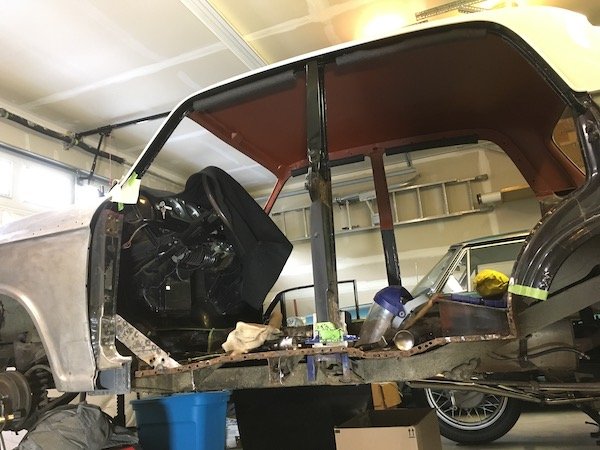
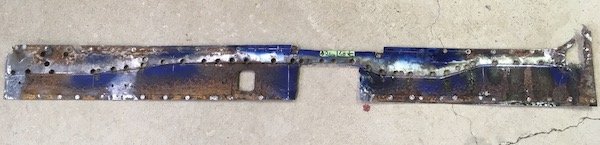
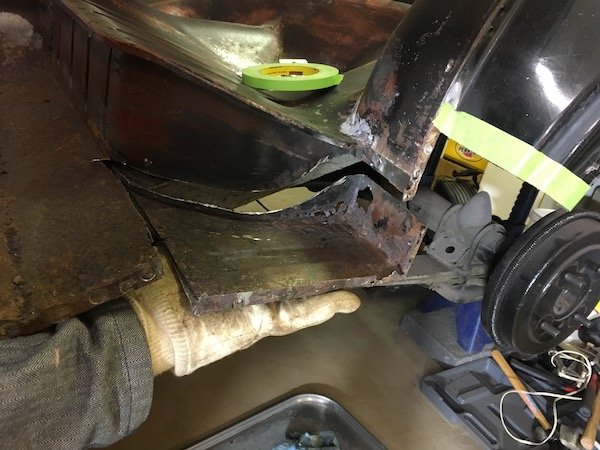
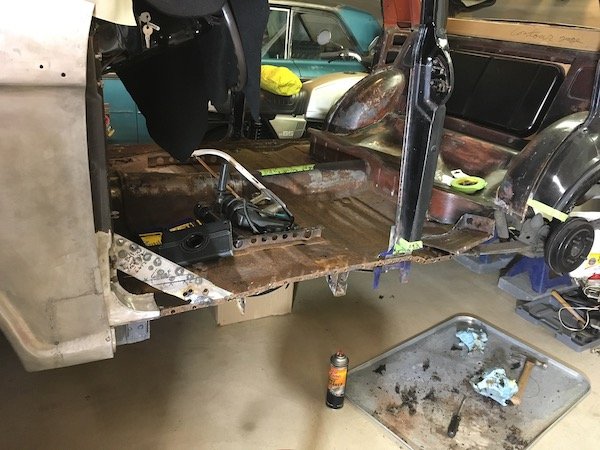
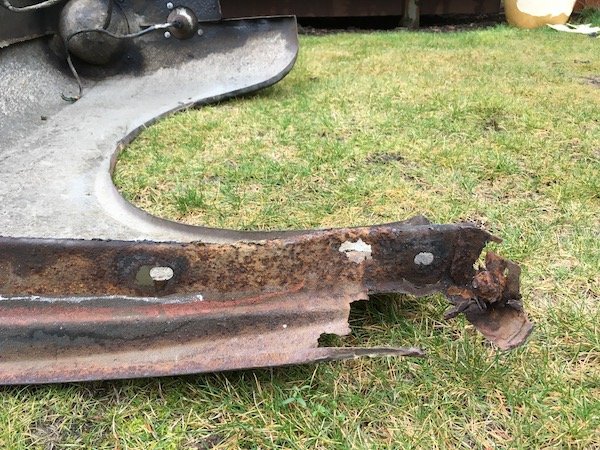
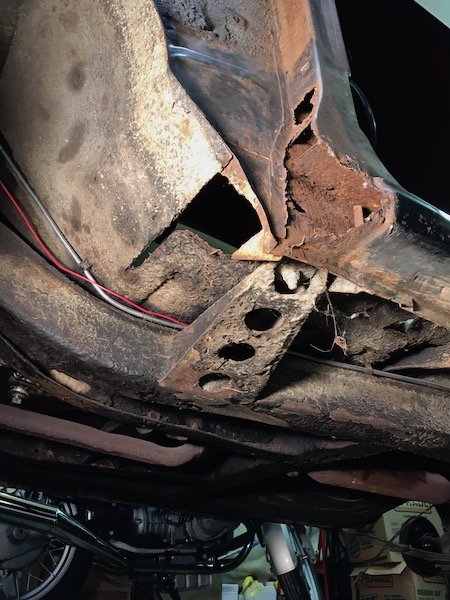
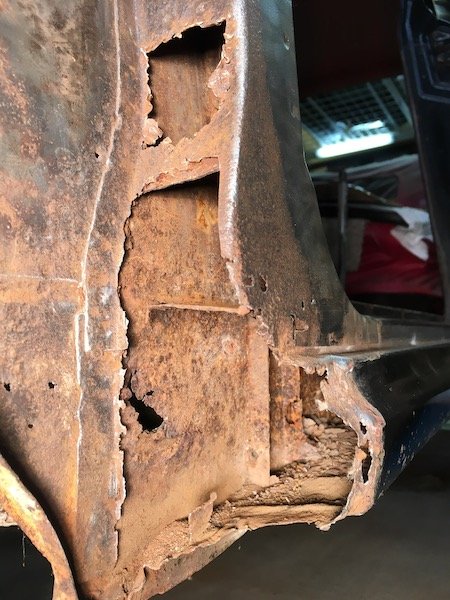
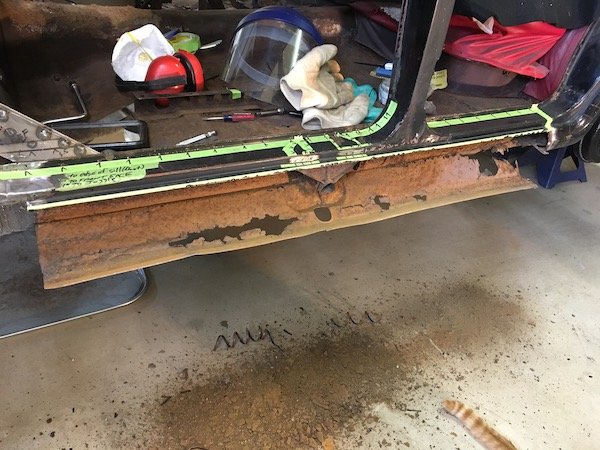
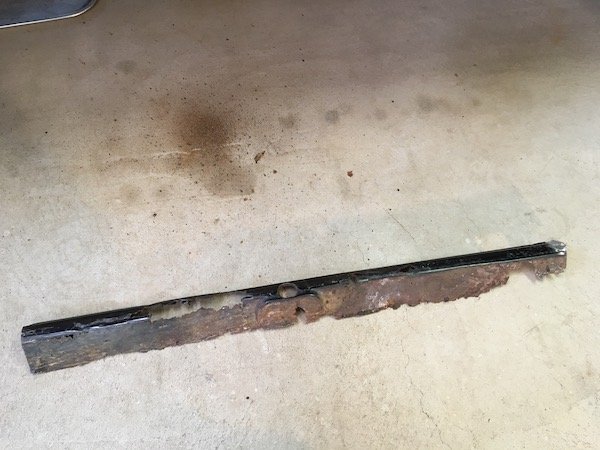
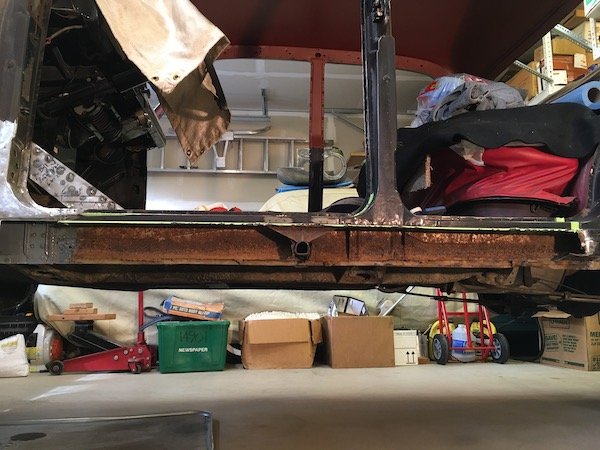
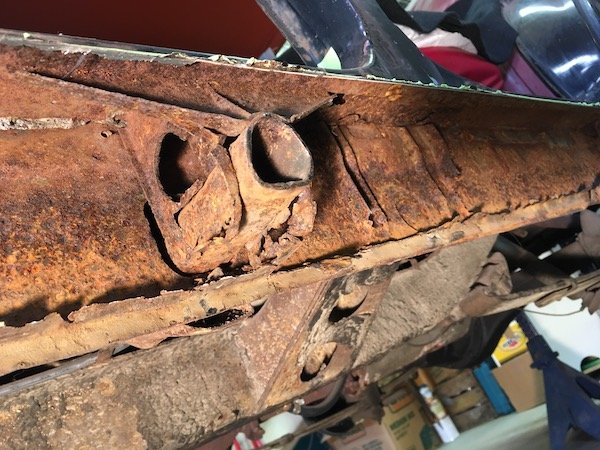
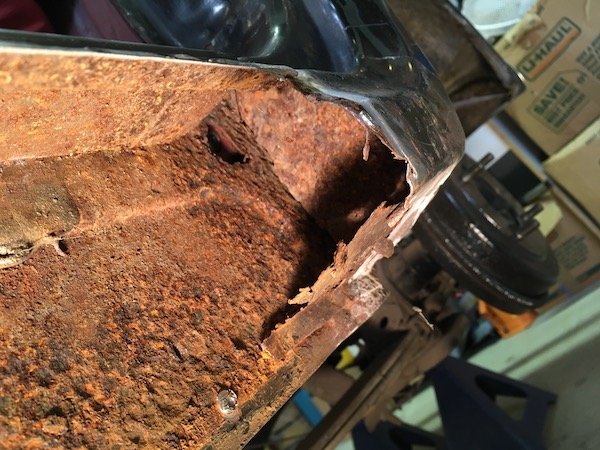
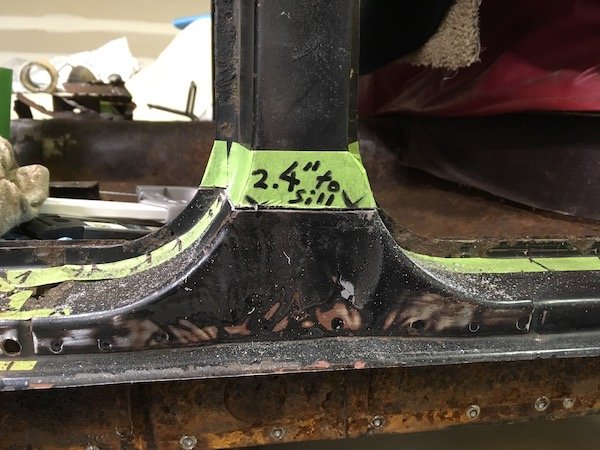
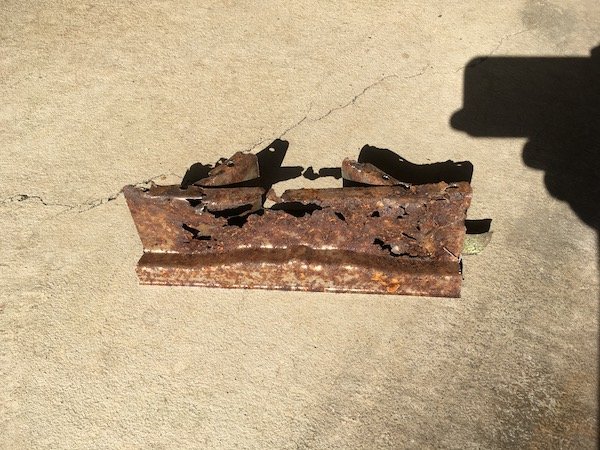
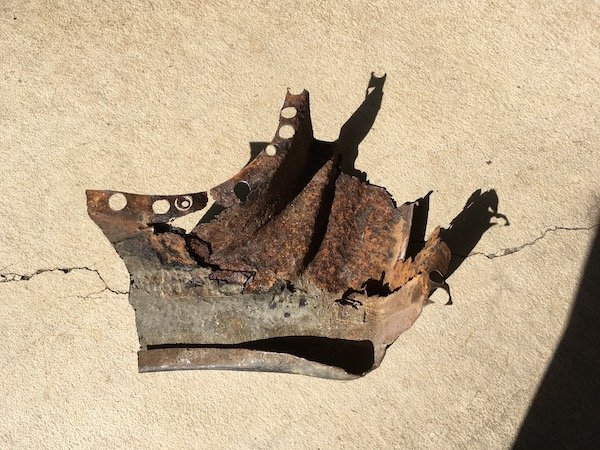
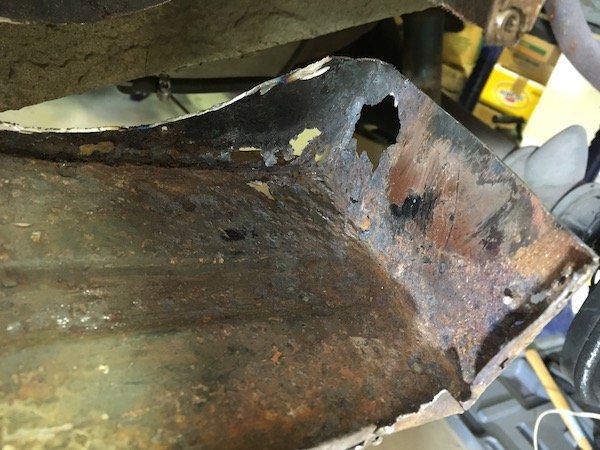
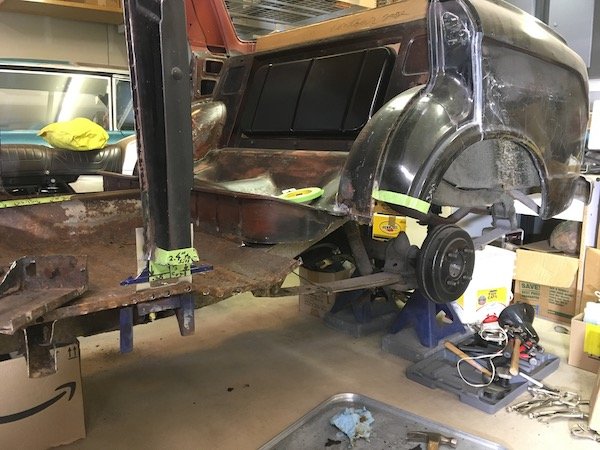
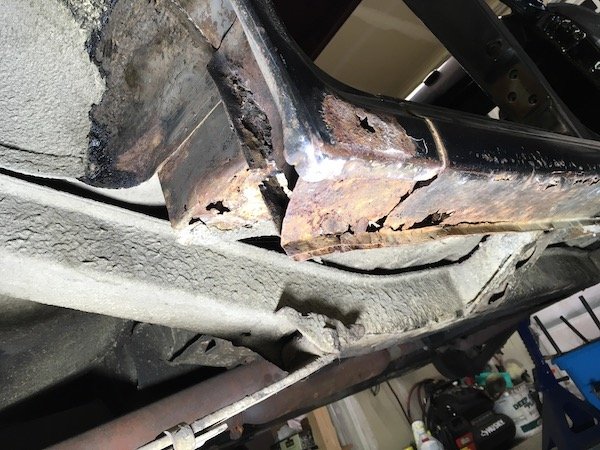
Removal of more rusted metal from the 61 Datsun Bluebird left hand side outer and inner sill, 'B' pillar, 'C' pillar and side of seat pan. A huge hole in the car structure is the end result. This gets very ugly and you may want to look away if at all squeamish. No need to panic! Almost of this is going to be replaced with new steel, but it is a very slow step-by-step process to make these parts from scratch. There is nothing here you can just go to your computer and order or even find in good condition in an auto wrecking yard. It is a heck of a learning process that will be applied to the so far untouched right side of the car. I get started by using electric metal shears, slicing and splaying open the outer sill for internal rust inspection and to understand what details are inside with respect to the side of body lifting point. I had hoped at least the upper sill and inner would be salvageable so I cut a relatively clean line against a tape edge at the body line. The outer sill immediately swung open at the lower pinch weld and then just falls off. Notice the slightly bumped out area below the body lift penetration point. This will be duplicated in the new steel panels later even though I may never use the factory lift jack tool. I do still have the jack but it is worn, unstable and deemed unworthy for safe use. It would either lose grip internally and slide downward suddenly, or the small base plate could kick out at the ground and punch the upper shaft end against the door and make a big dent. Maybe the old lift jack can be repaired and improved or maybe not. Sheet metal form detail of outer sill lift jacking point Eventually, the rusty inner sill is to be separated at the left next to the new 16g steel from the previous 'A' pillar repair and new metal lapped in at the back side of the gusset shown. If you look closely, you see the fuel line and wire to the electric pump. That line is soon removed to avoid a fire hazard. Moving further aft, we see the reinforcing structure around the lift pipe, or what remains of it anyhow. And behind that what I call the joggled gusset. This upper gusset, the near one with the three ribs, is heavy gage steel and salvageable. I thought incorrectly, that to remove the upper part of the sill, that the upper gusset would have to be separated first from the pipe. Actually the top of the pipe is not welded to the upper gusset at the notched contact point. Only the side brackets are welded to the pipe and they are weak enough to just pull apart from the pipe. I could have just lifted the upper sill right off once the regular pinch welds were drilled out. The salvaged lift pipe gusset plate. I ended up with a lot of holes from spot weld drill outs that will be used for plug welding later on. This is the joggled gusset plate that is on the opposite side of the inner sill with respect to the body mount bracket on the other side. This gusset is deemed too badly cratered and rotted and will be reproduced. I cut it out before removing the inner sill by cutting around the perimeter after a futile attempt to search out and drill out all the spot welds. Things aren't looking to good above at the base of the 'B' pillar. Lots of otherwise hidden rust damage. I'm going to cut 'B' pillar base off and repair. The damage and repairs needed to the now cut off 'B' pillar is shown in the light. I subject the 'B' pillar to an electrolysis bath to remove bulk rust and identify the salvageable sections. A lot of it is still good and will be cleaned up and reused. Portions near the pinch weld are bad and the flat horizontal section deep inside is shot. Outward facing sections are perfectly good. Jumping ahead here a little bit since I did not have a good pic of the freshly removed gusset plate. As you can see, it was total destruction to remove it. A real light show with all the flying sparks! Shown above is the newly made replacement. The joggle or step was made under force from a hydraulic press and an opposing stack of offset steel bars. The aft end inside the sill is heavily cratered and holed. Thus I go to the extreme of cutting off the 'C' pillar, aka dog leg, for complete repair as the hidden damage inside is total rust out which will otherwise just continue. Where there would be an end of sill block off plate in the far back is really just rust powder stuck to the asphalt undercoat. At the lower pinch weld, the flange of the outer sill moves upward leaving just the inner sill plate poking down about a half inch. Why? Just looks a bit odd. Probably to match and fit the slight difference in contours at the 'C' pillar. The now cut-off dog leg ('C' pillar base). About 60 percent or more is perforated or too thin to reuse. This part proves difficult to reproduce. It is still not quite right after patching it up section-by-section off the car. I tried, and will tweak it a bit more now that it is welded back on the car. I might do it differently when I go to work on the right side of the car now that I know which areas should be cut out. The now fully exposed inner sill plate. This was a bit of fun. Before drilling the spot welds and removal, I cover all the step contours with blue machinist paint and scribe on the metal the intersection points to permit accurate measurement of the sill. The inner sill steps out about a tenth of an inch where the flange of the floor is butted against it for nested fit. In addition to recording measurements prior to removal of the inner sill, I make a paper overlay as a secondary backup to sometimes flawed note taking. I've also made a full size drawing on mylar as yet a third method to help reproduce the part. Key measurements at the 'B' pillar overlap (O.L) and inner sill. It's starting to look pretty messy and getting worse soon. Inner sill is drilled of the spot weld connections to the floor flanges and removed. The underfloor brackets are cut off at their flanges because these brackets are severely beat up from impact damages. The bracket for the body mount is planned for reuse, if it is good, so the flanges are left intact. Not reusable! As final act, the side of rear seat floor pan is cut out. Is there a name for this thing? This proves to be a relatively easy and fun part to reproduce because of the straight bends and box shape. Just a little challenging to butt weld into the side of the seat pan later on. A rust hole big enough for a mouse to climb through. And they did, sometime stockpiling grass seed and such here and there. And now the huge ugly hole in the car! A preview of making new parts and closing this chasm up. Making left and right hand parts where possible. I'll probably focus on the inner sill next post. More later.
1 point
-
And we have colour...,
1 point
-
1 point
-
Took my mate for a spin just then and the exhaust flange ripped off a catseye on the road hahaha. Thats low Looks like the exhaust needs lifting up a tad innit FML
1 point
-
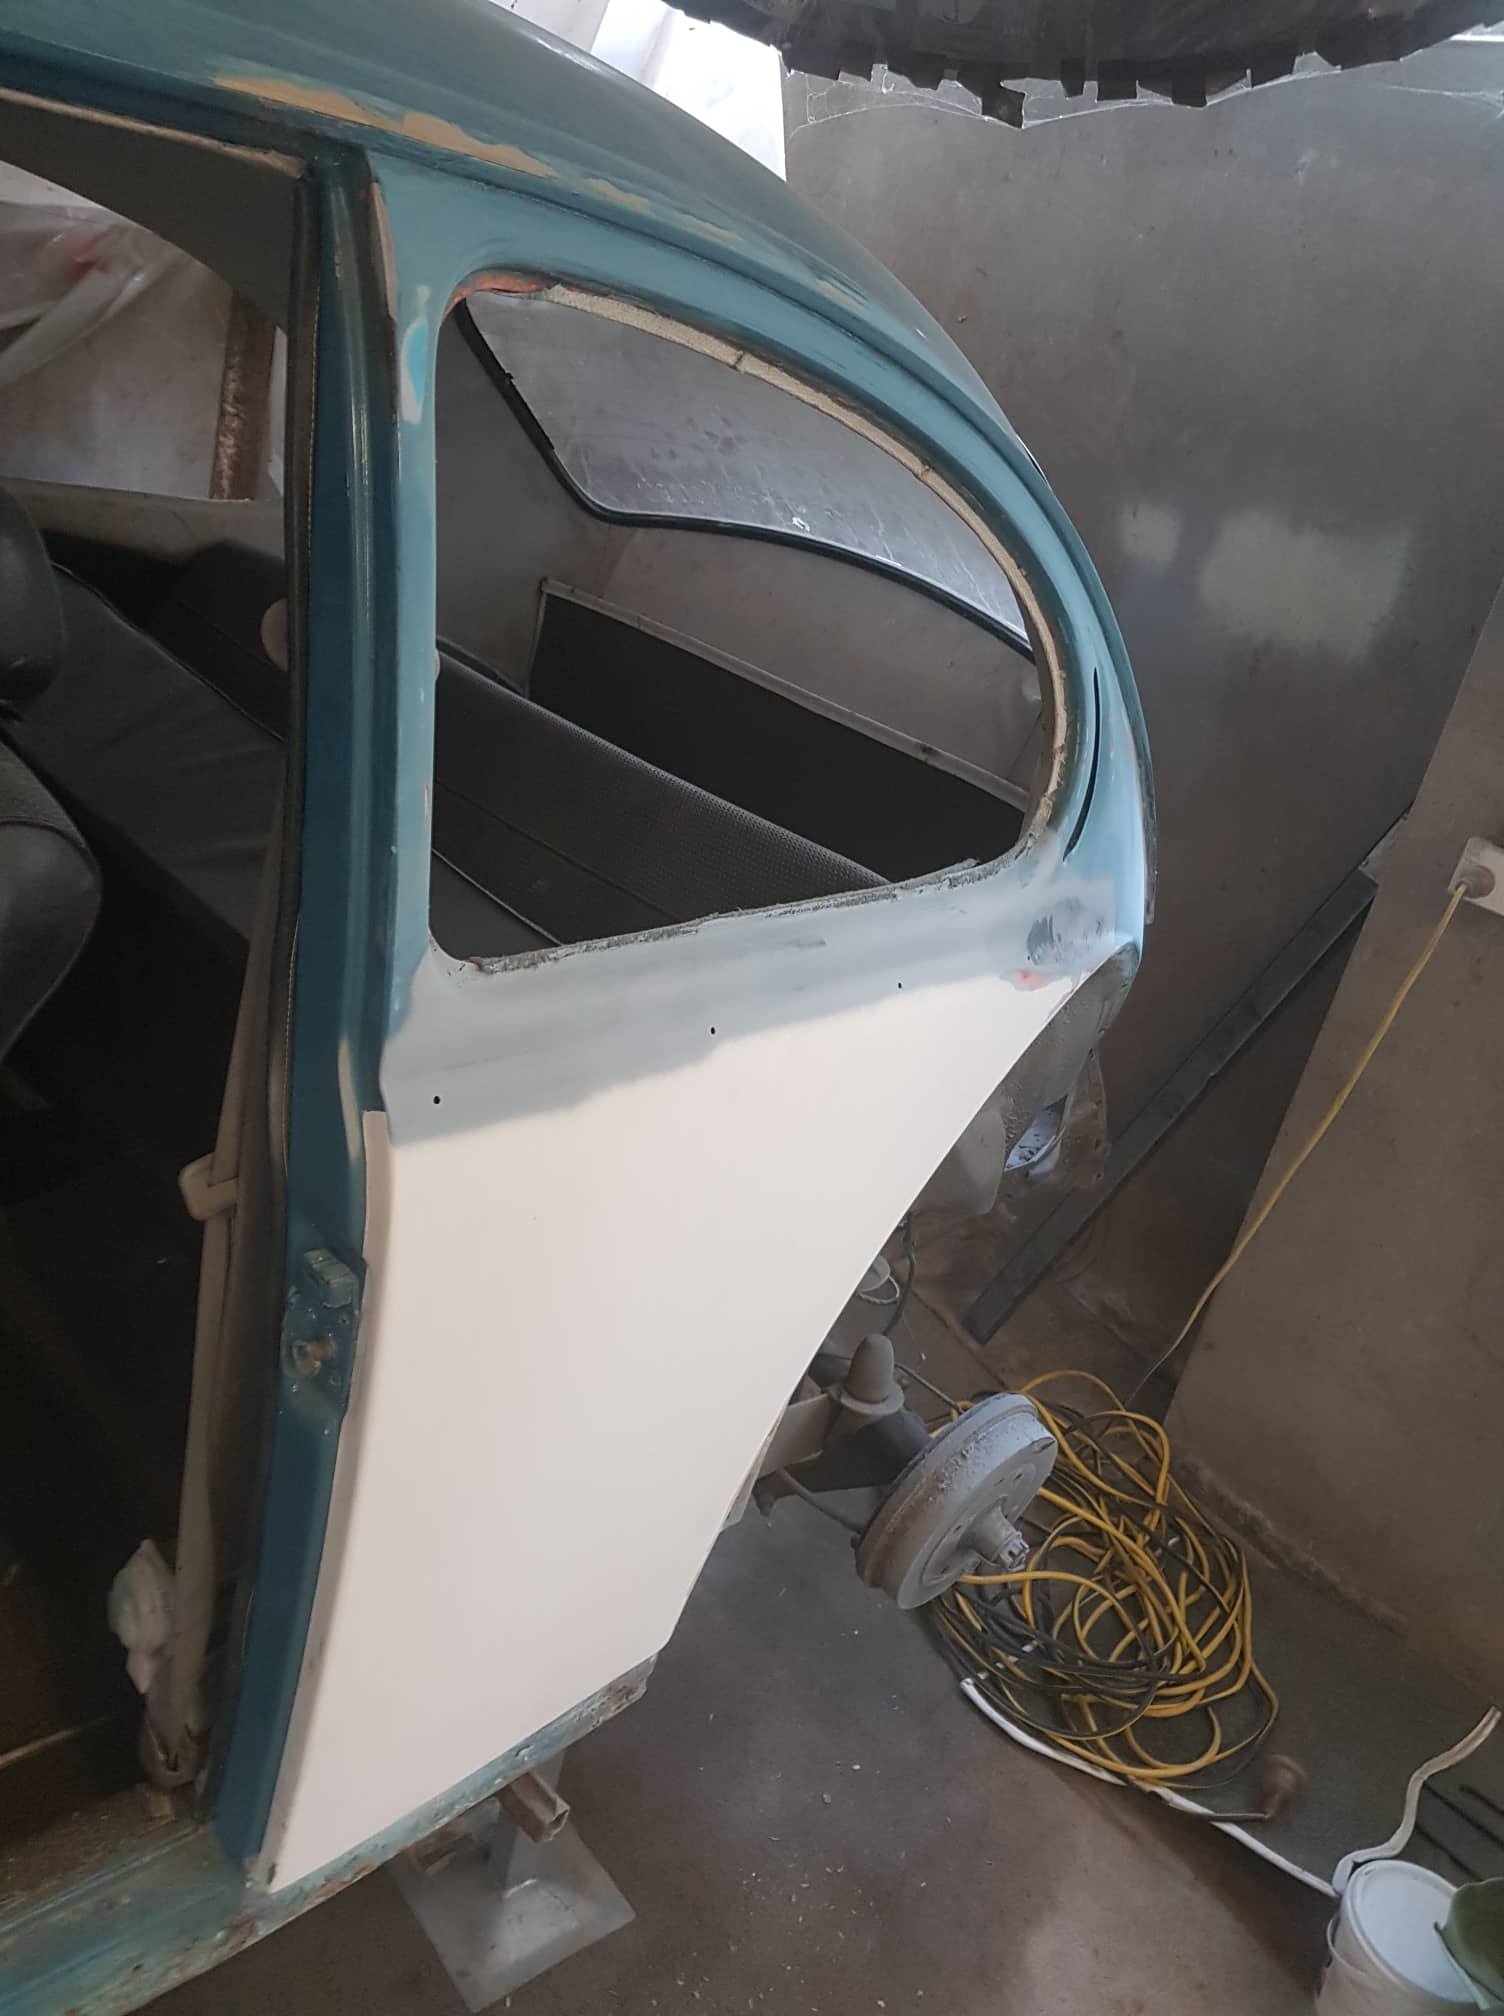
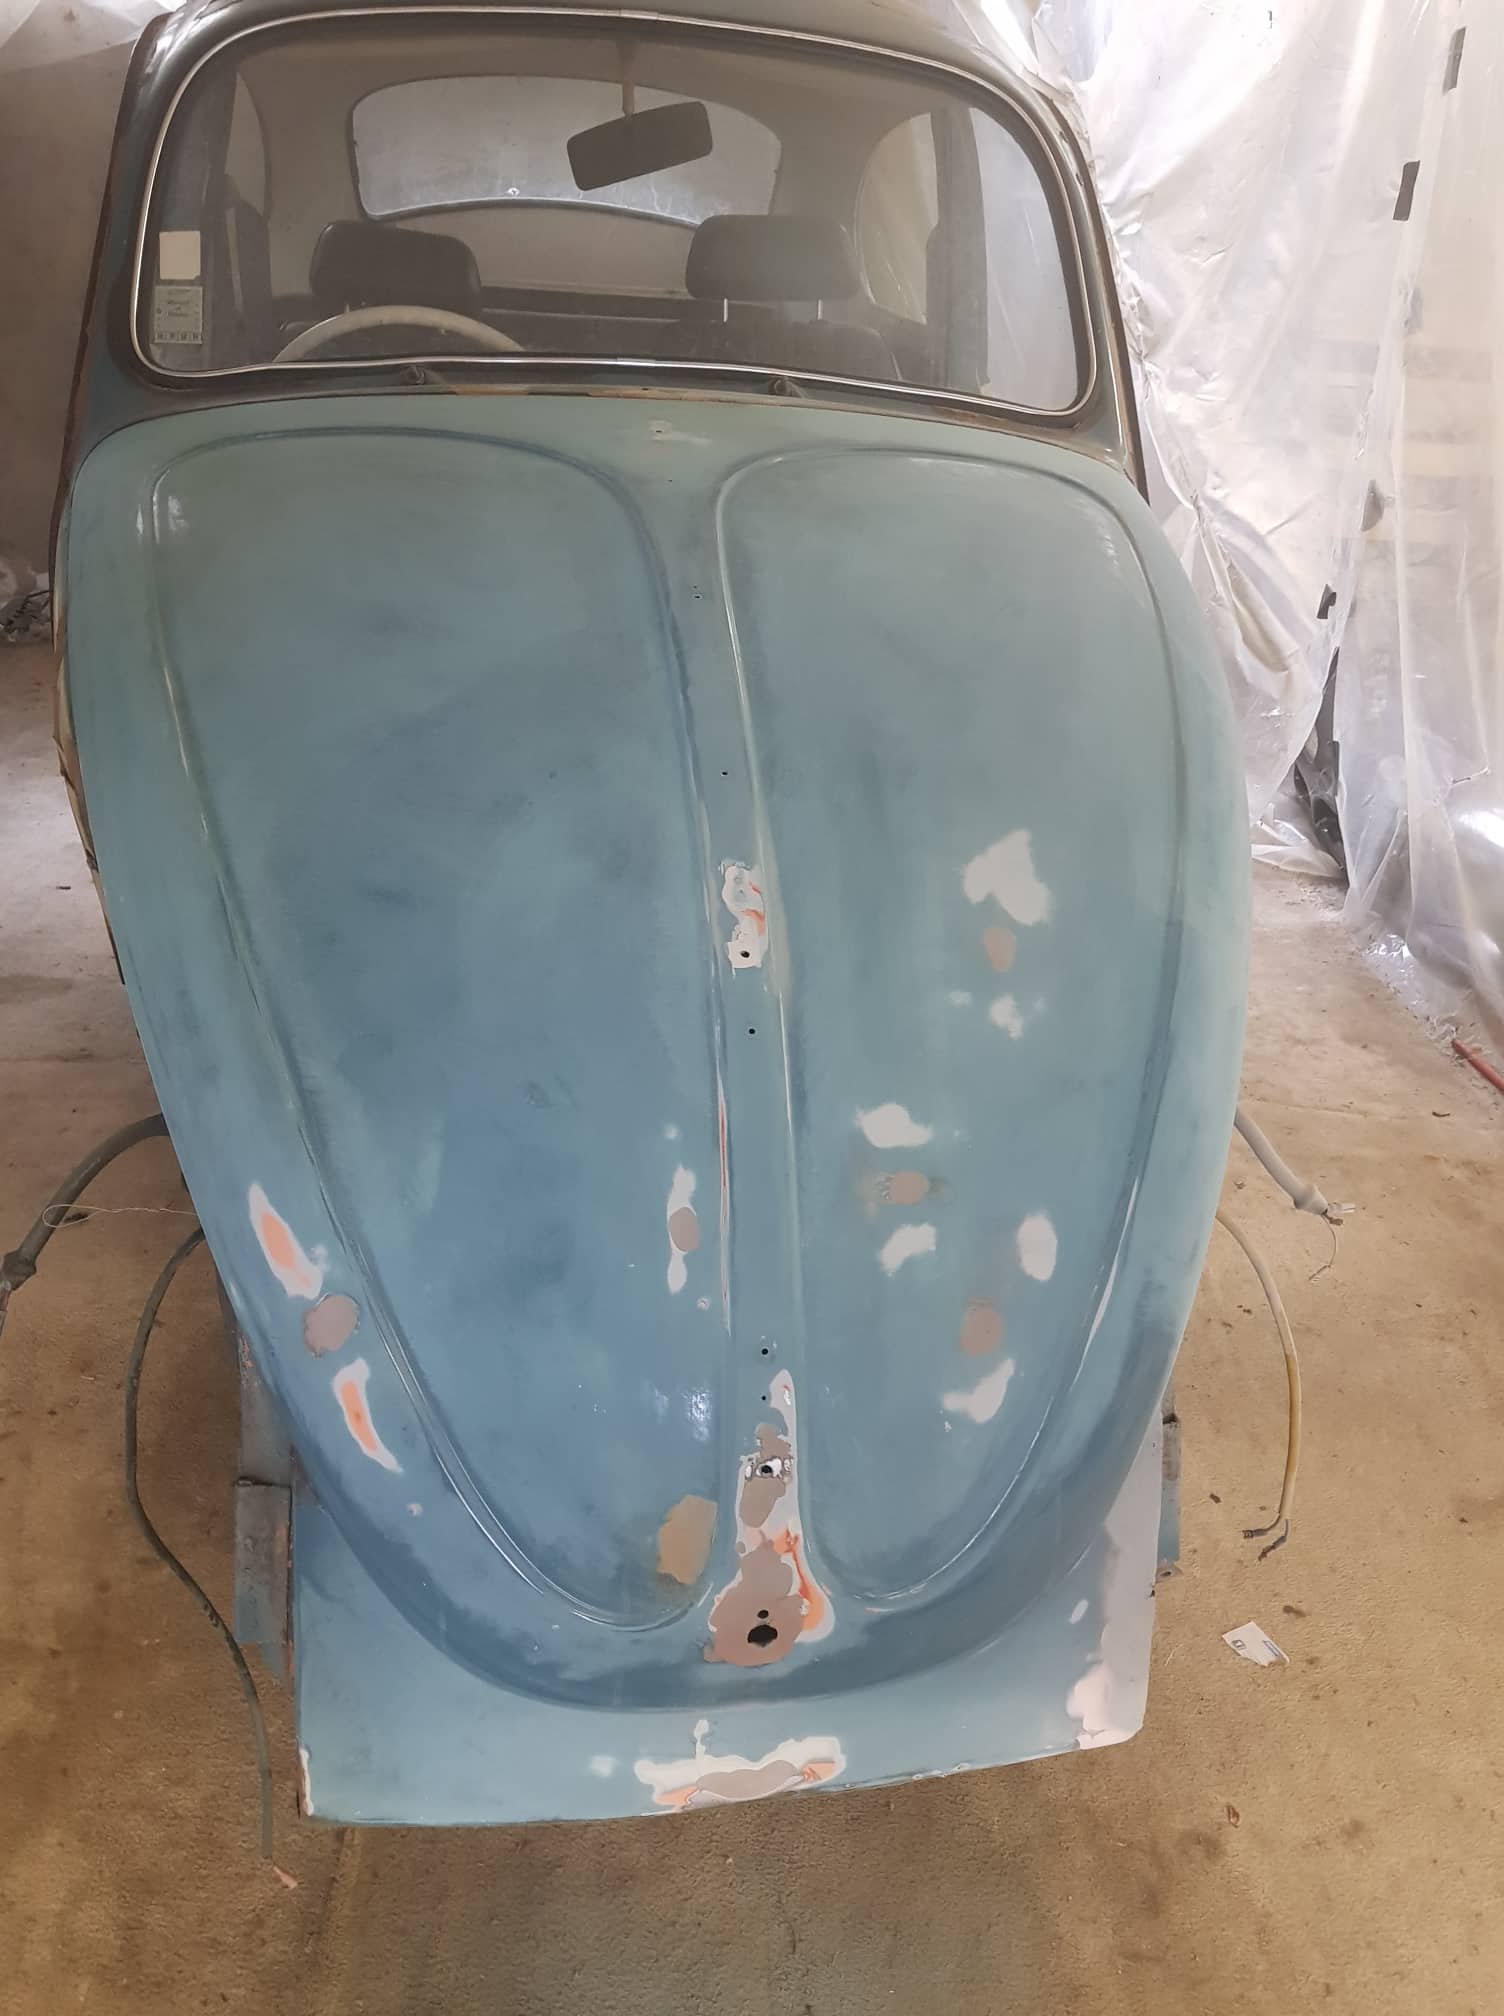
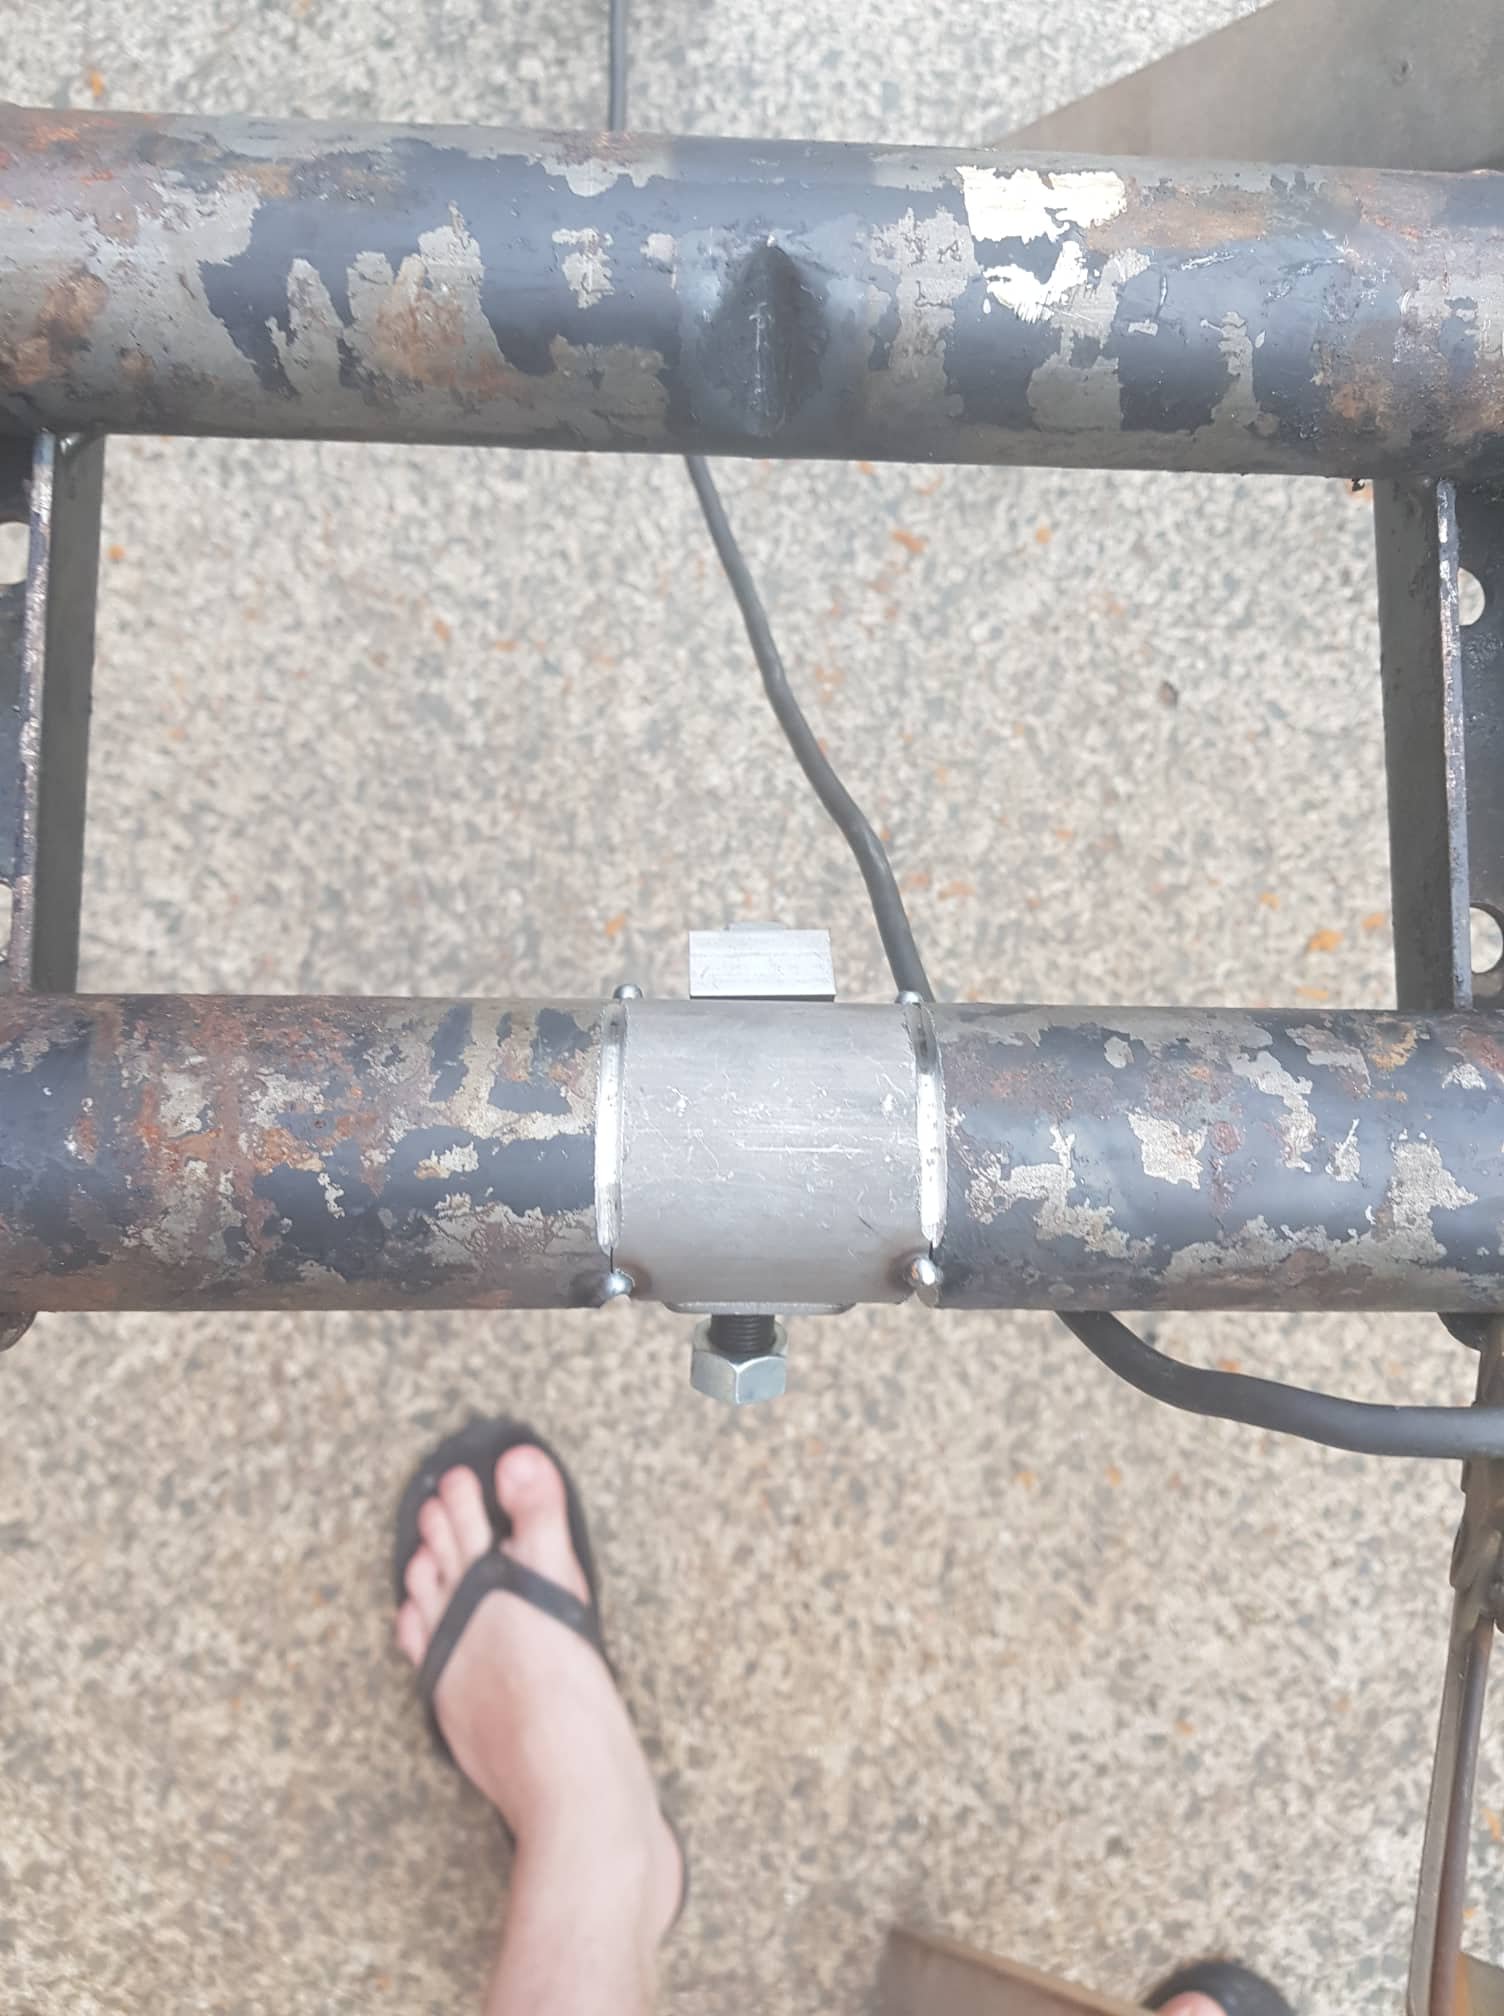
My wife and i did some bonding over the beetle and got probably 1/3rd of it sanded down and smooth. Few issues with the existing body filler being applied to a completely unprepared surfaces but nothing major. A few more hours and we will be ready for primer And this week I skived off work so that I could hang out with @64valiant, work on his bug and do some on mine. I managed to get my beam adjusters welded in. First there was marking. then there was careful cutting (and some brace welding.. this photo is a bit out of sequence) Tacking and V grinding and welding...and more V grinding and then in the time it takes to make 2x floor mats it was done.
1 point
-
Pretty excited. Had the beetle running and let it do its own thing for a solid 30mins just sitting in the shop. No water trying to escape and make a mess in my shop, no oil leaks, nothing out of the ordinary and the oil cooler is good and the radiator is working well. Old mate matt said "all we need to do is get it starting when hot" and then it started up easy as normal start up. Fucken so happy! Such a good feeling.1 point
-
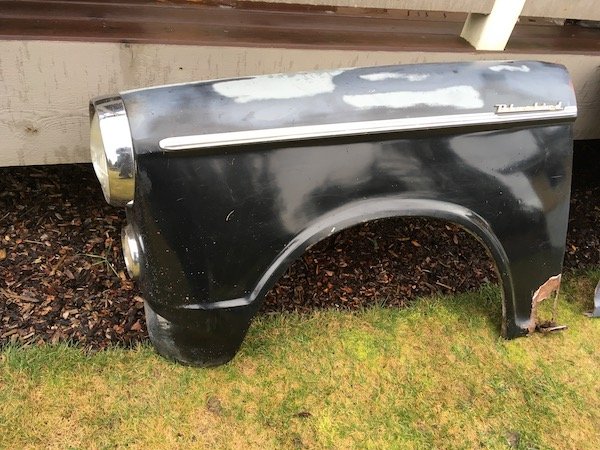
The left side Bluebird rust damage survey. Right side is about the same except much less damage to the front fender and more damage to the 'A' pillar or post. Starting with the left front fender and working back to the rear dog leg and side of rear seat floor. And a then preview of the right side.
1 point
-
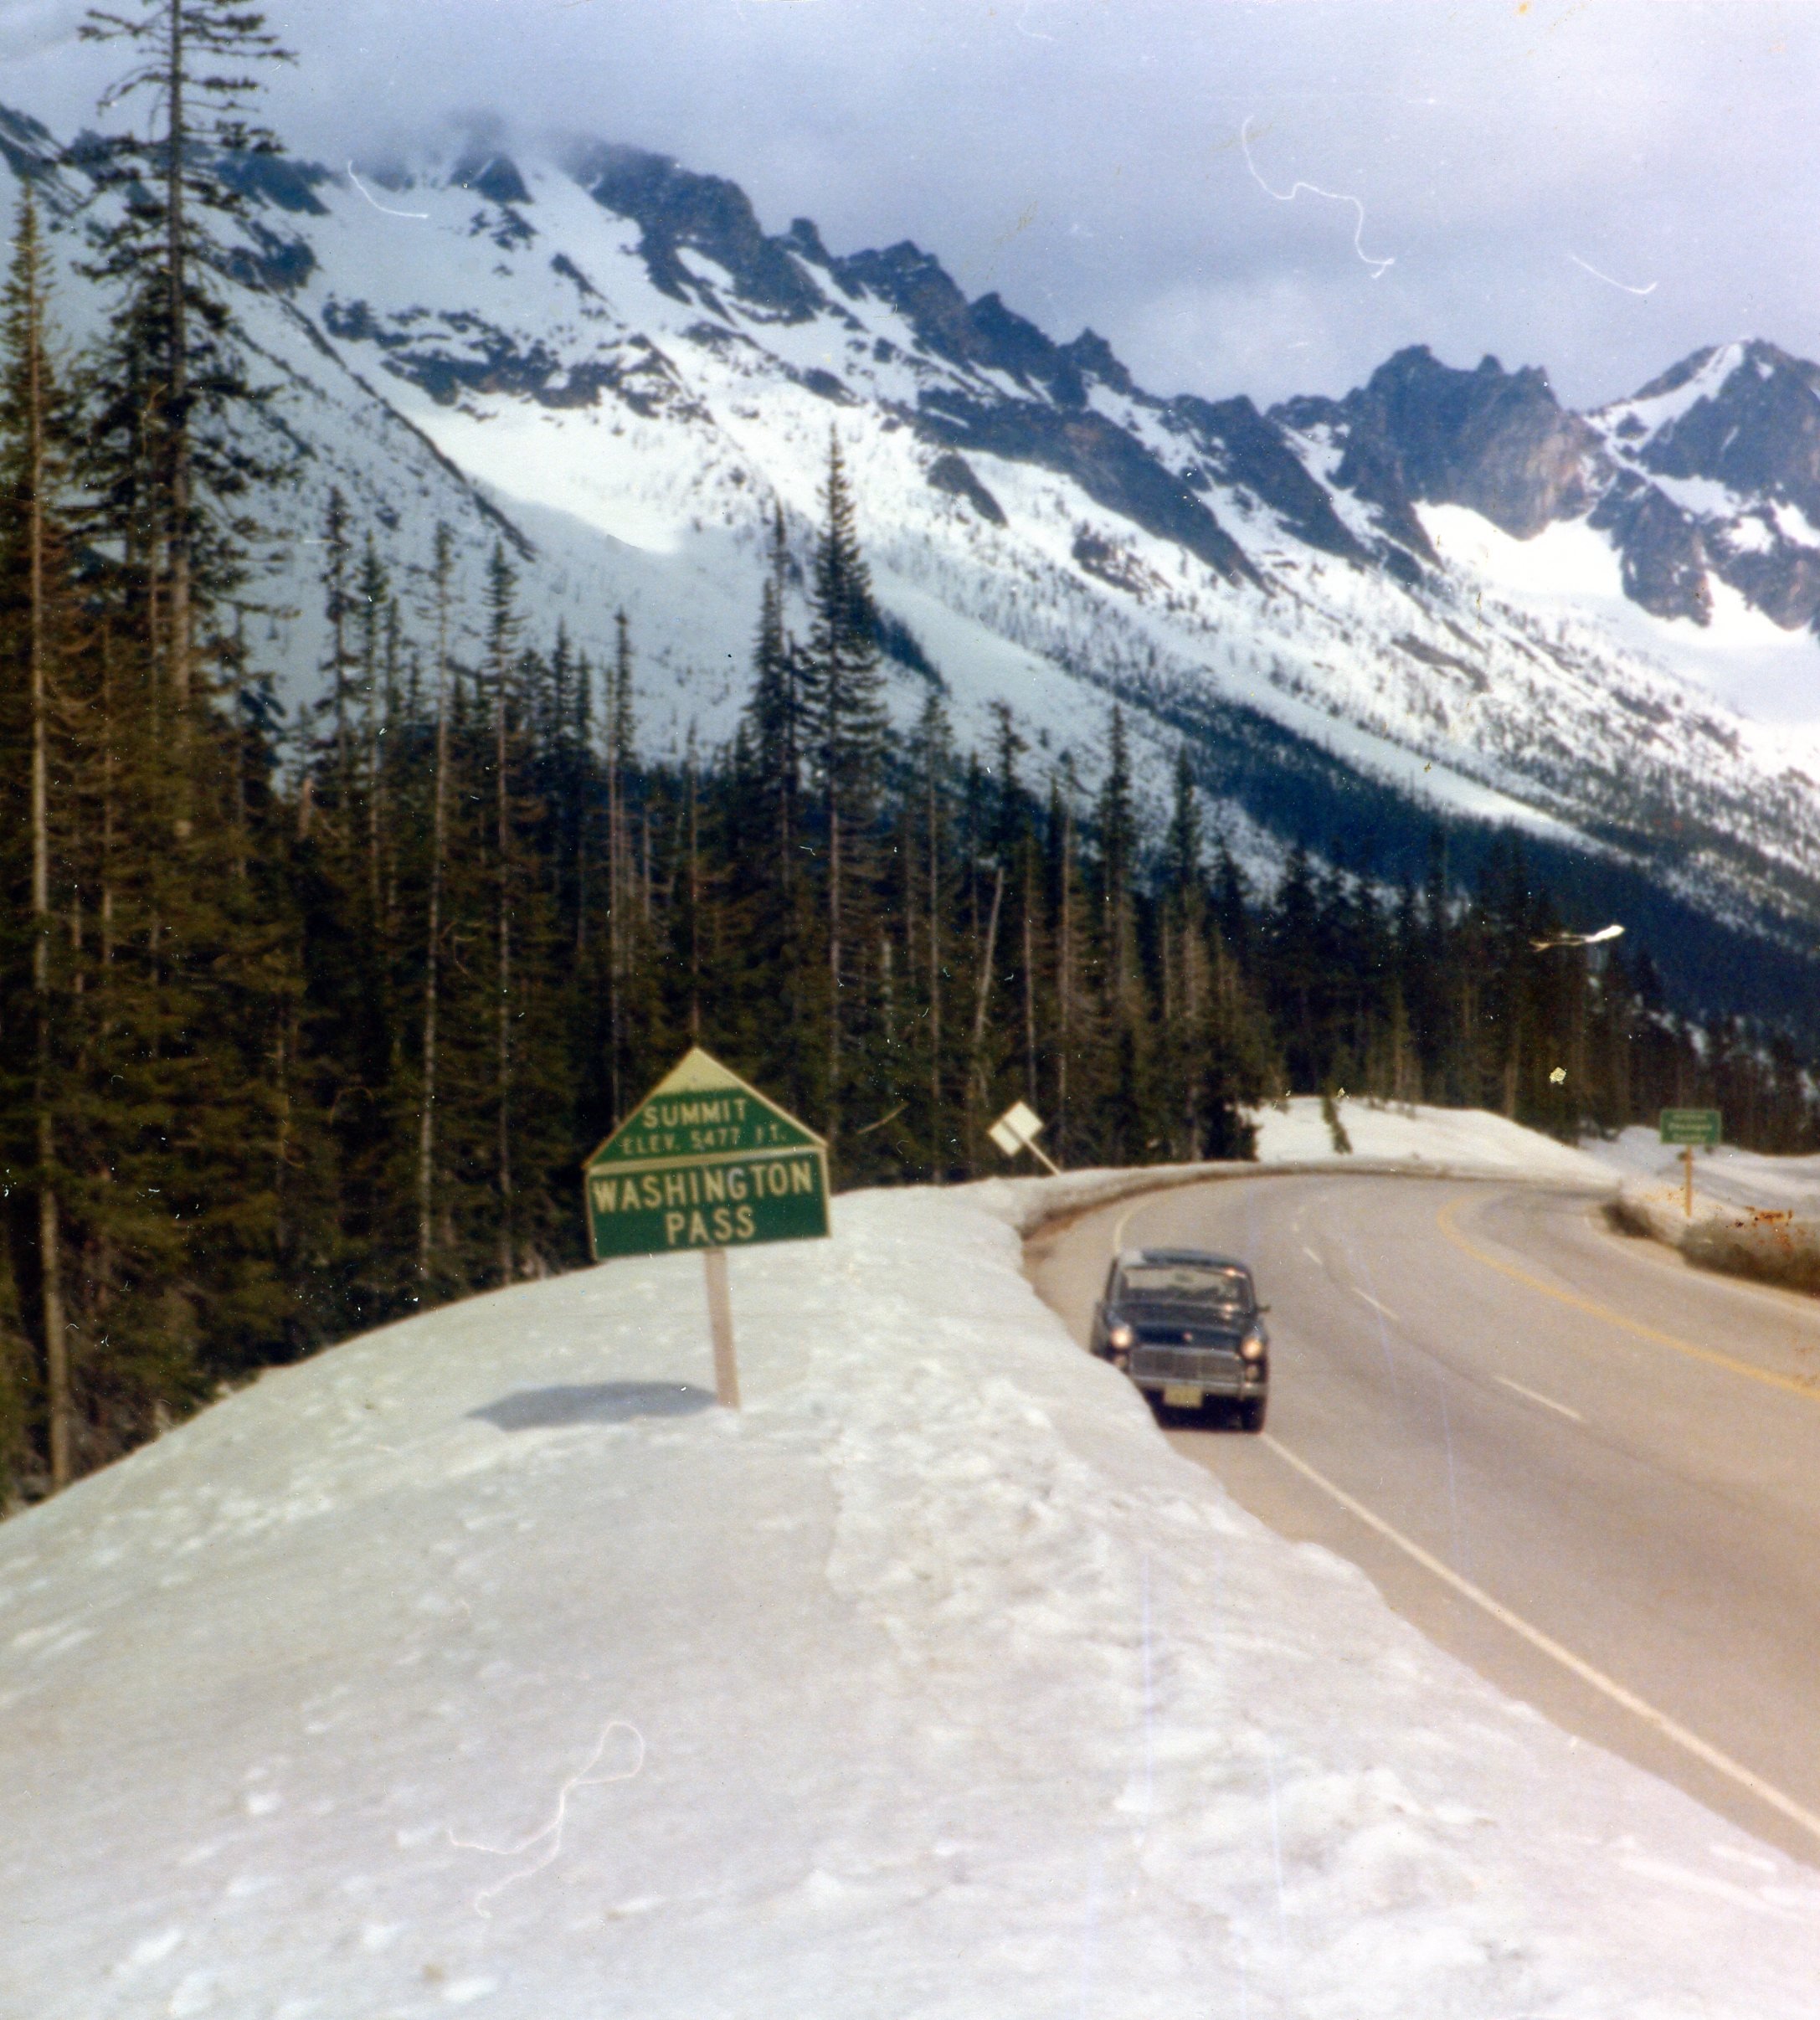
More Bluebird history. I love driving up into the mountains. Then, now and always. One of my favorite Bluebird mountain pass crossings back in June 1976, westbound on beautiful highway 20 through the Washington North Cascades. For the 48 hp Bluebird on the steeper grades, this was nearly always a maximum power event, pedal to the floor and changing down to second gear very early.
1 point
-
or an uuuuber exotic briggs v-twin?1 point
-
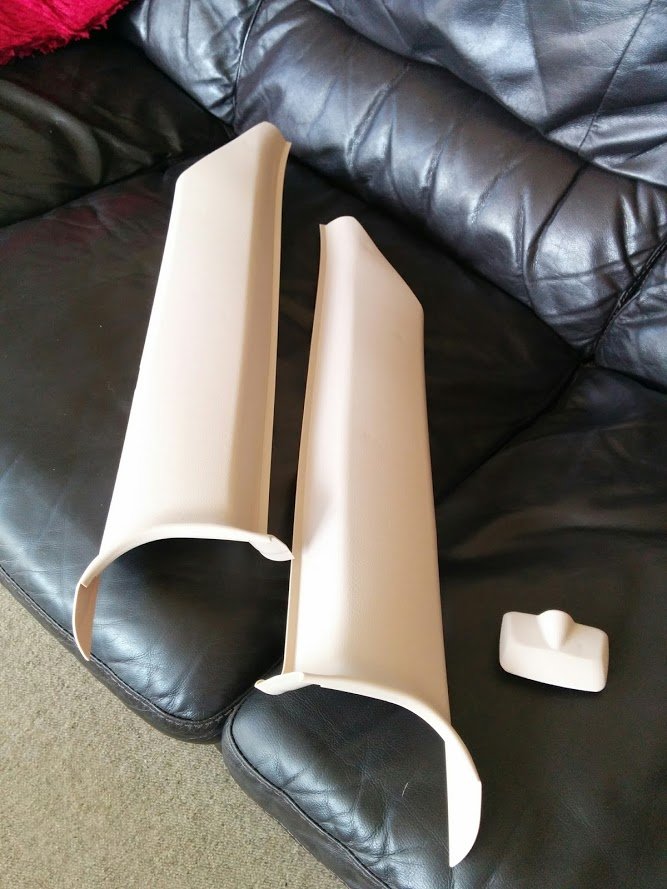
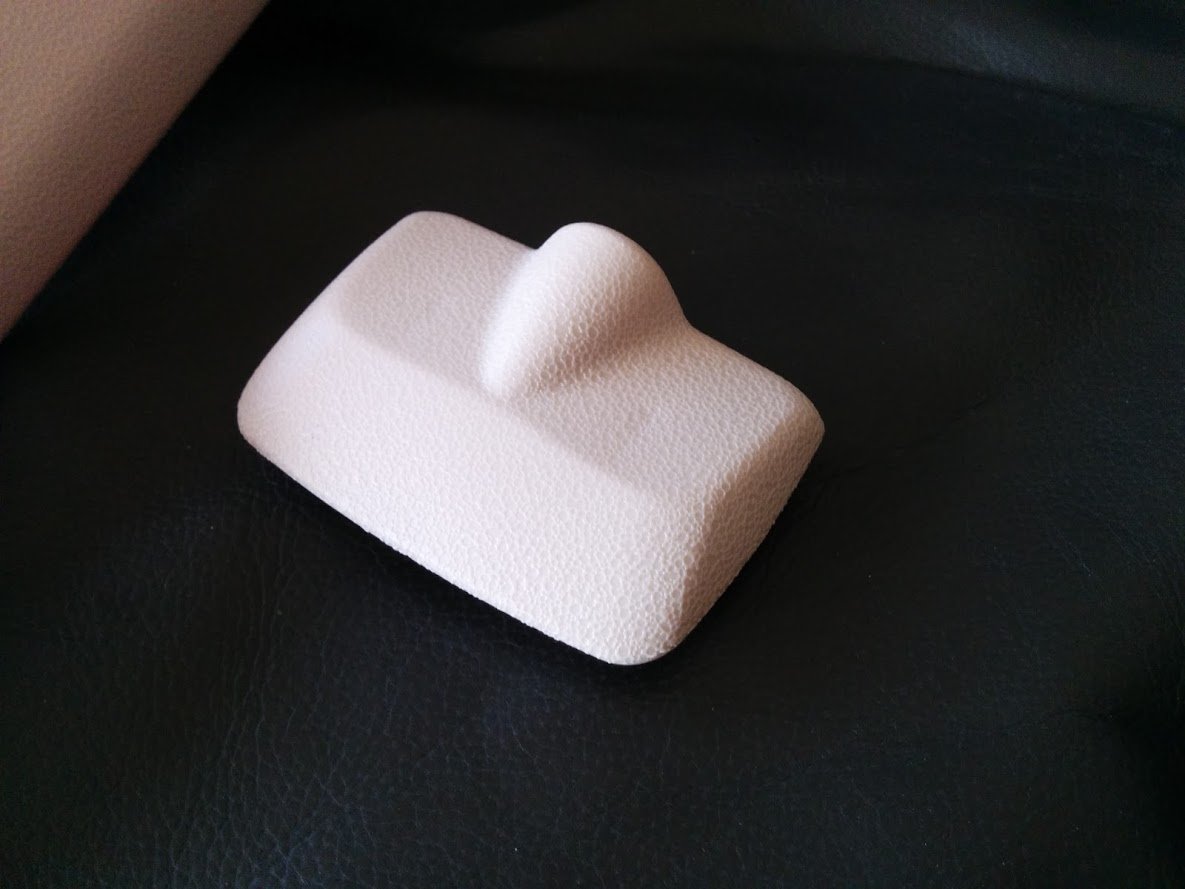
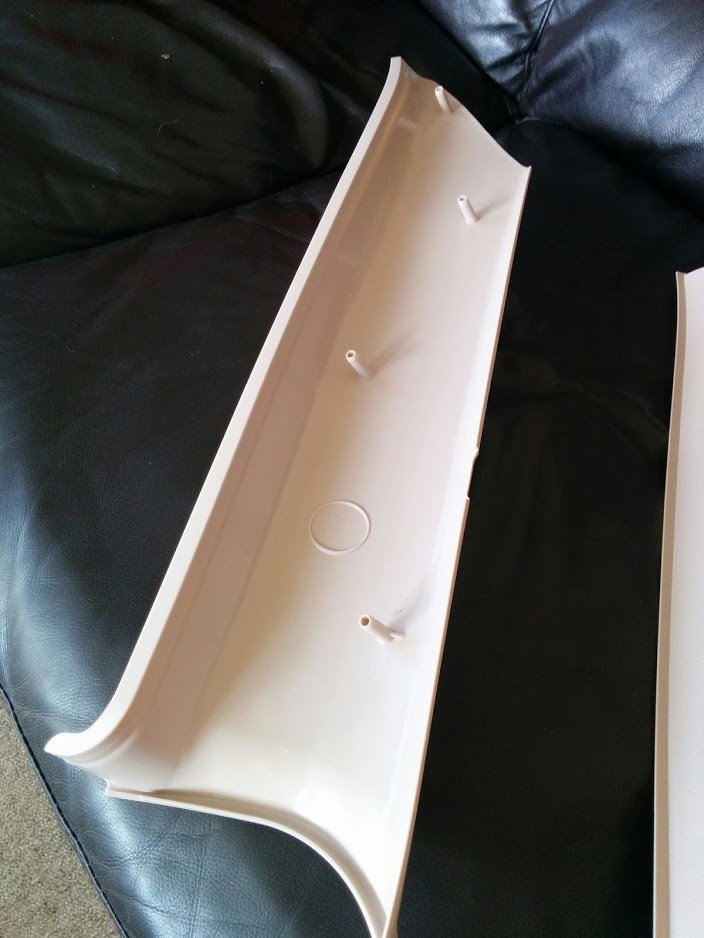
Reproduction c pillar trims and mirror cover, look bloody good
1 point
-
Still plodding on this, bodywork progress doesnt make exciting piccies. Everything rubbed down And our first coat of primer, alot of sanding to follow. Did I mention this is my first attempt at a full body respray, and first go using 2K? Its new to all of us1 point
-
Just a quickie. More filler work this week, should be able to shoot the primer in a few days. I came across another boo boo, this panel has a very slight sweep back to the wheelarch but someone has done a bit off repair in the lower corner (probably just burried the mig in it) and distorted the panel. Only way to fix is to cut it again to relieve the stress on it. A few mm makes a massive difference here... Also, cue artsy shot....
1 point
-
Hi guys. It's been a while since last post. The car has been performing great and I'm still getting out an about in it, mostly on weekends. There's always something on at the local track every couple of months. I really wanted to get back onto the forum after growing somewhat tired of facebook and all the crap it can add to this hobby. Anyway... as far as developing the car. I have learned that gearbox ratios are very important. The W58 I have is quite low in first and second gear and a bit of a gap to third. Typical of road ratios. Well, a 600hp XR6T i've not been able to beat at roll racing finally fell behind me the last time out because I rolled on in 3rd instead of 2nd. 3rd has much longer legs and I didn't lose the speed changing from 2nd to third. So I looked into close ratio gear sets for the W58 and turns out they are available. At a cost of around $4500. Needless to say, the CR gearbox can wait. But gee it would make a difference. Also, the temptation to add more power has gotten the better of me. I have bought a used HKS GT2835R-56T , it's a Garrett GT3071R with a back cut rear wheel so it fits in the T25 exhaust housing. Compressor wheel will go from 47mm-60mm 62 trim, to 53.1mm-71mm 56 trim and more importantly the turbine, from 54mm-47mm 76 trim to 56mm-53mm 90 trim. I'm aiming to add around 30 or 40hp so 330~340hp at the wheels. My current GT2860RS is pretty much out of puff @ 300whp. At first I was going to fit a 67mm GTX billet wheel, effectively turning it into a GTX 2867R. It could probably make that extra power but nowhere near as efficiently as the GT2835R-56T. The larger turbine is where the benefits will come from. A larger set of Siemens Deka injectors will also be fitted. Jumping from 60lb (630cc) to 80lb (840cc) I took it to the drags a few months ago and it went 12.75 @ 113 mph (2sec 60ft) . Hoping with the new turbo and tune to crack into high 11's. If not I will just live with it because any more power will result in problems like gearbox failure, clutch failure, cracked block etc etc. So here's a pic of the car launching when I ran the 12 with 205 60 13 rear tyres. I was only able to achieve low 13's with 185 60 13 tyres, as soon as the 205's went on it was into the 12's. I might put in some 3.45 diff gears with the 185 tyres which would work out about the same as 205's and 3.9. Cheers
1 point
-
RockAuto is really low on stock, wonder why. Factory drop spindles still available, used. No UK spec' ones available though.... NZ got canada spec ones.
1 point
-
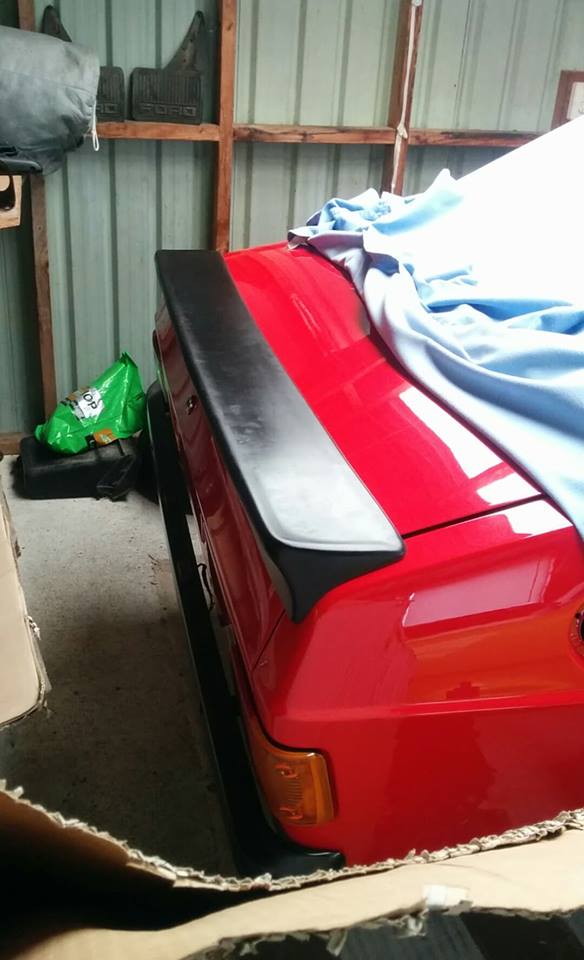
Finally got a boot spoiler sorted, after buying the second original that was not good enough decided to try the reproduction out of Australia, after hearing mixed reports on the quality I was relieved to find they are in fact bloody awesome!
1 point
-
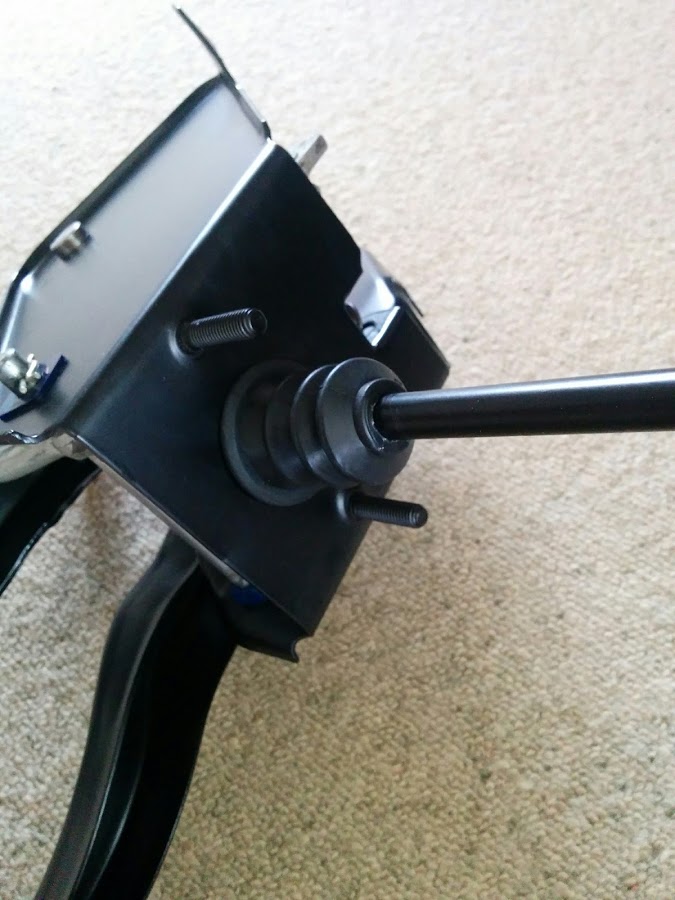
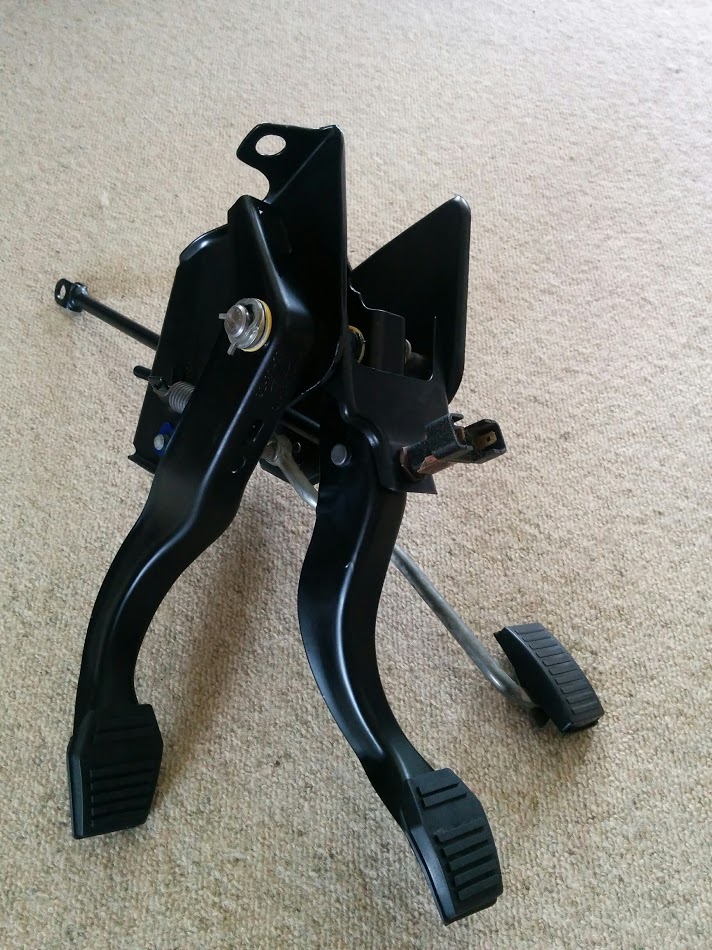
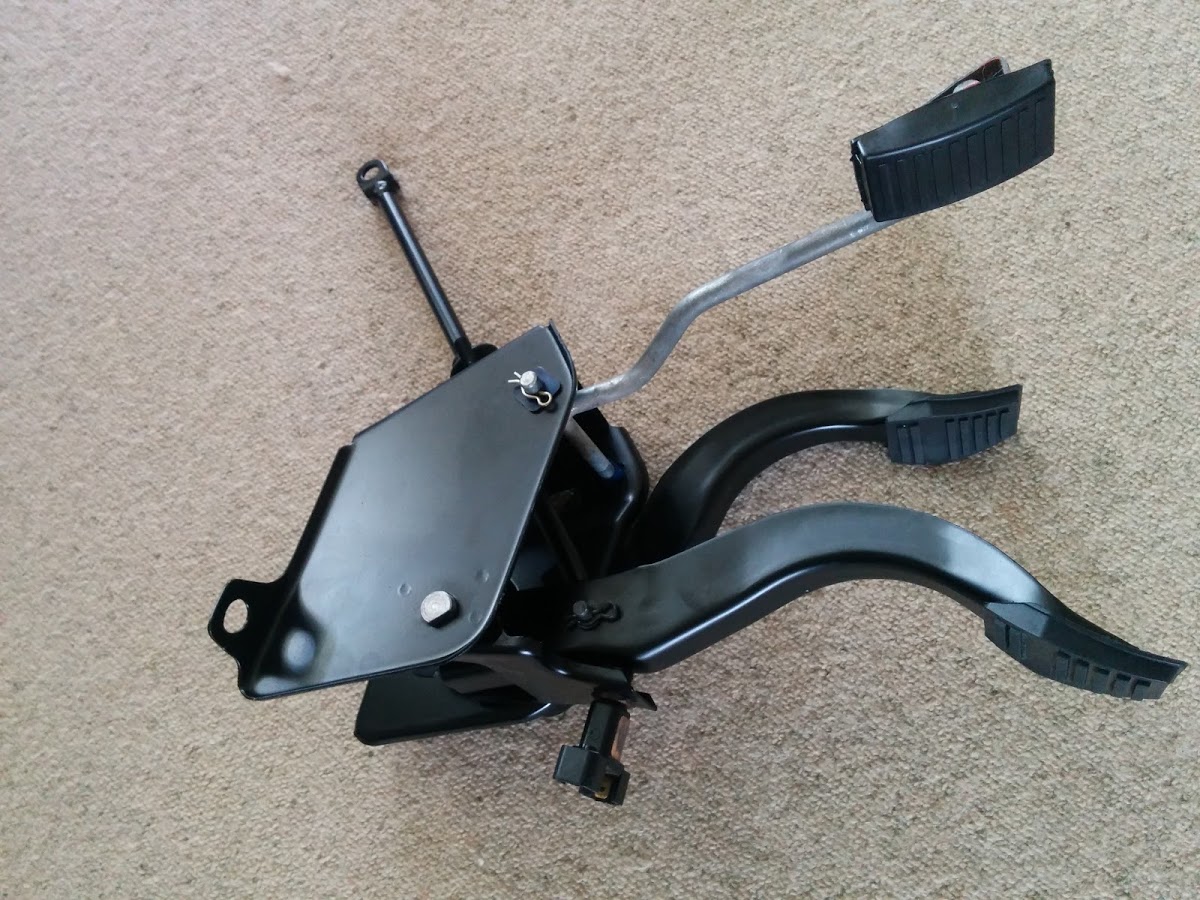
Tidied up the pedal box, new pedal rubbers and the grommet for the brake rod at the back.
1 point
-
Did you think about a make a replica for a Baby Bertha ?1 point


.thumb.jpeg.384ff72c8d2b0ee0d34a7bdedb55bdcf.jpeg)


_sedan_(23230030334)(1).thumb.jpg.34d765361d66c78db614bae6ea2c156a.jpg)


.JPG.54bc86c29e66ff4f1548ad8a48564829.JPG)

-(ZF-9942-13940-1-001).jpg.4db3eaf210c1f16d2aae8ed5f17d8b11.jpg)


This leaderboard is set to Auckland/GMT+12:00