
Leaderboard


Popular Content
Showing content with the highest reputation on 12/14/18 in all areas
-
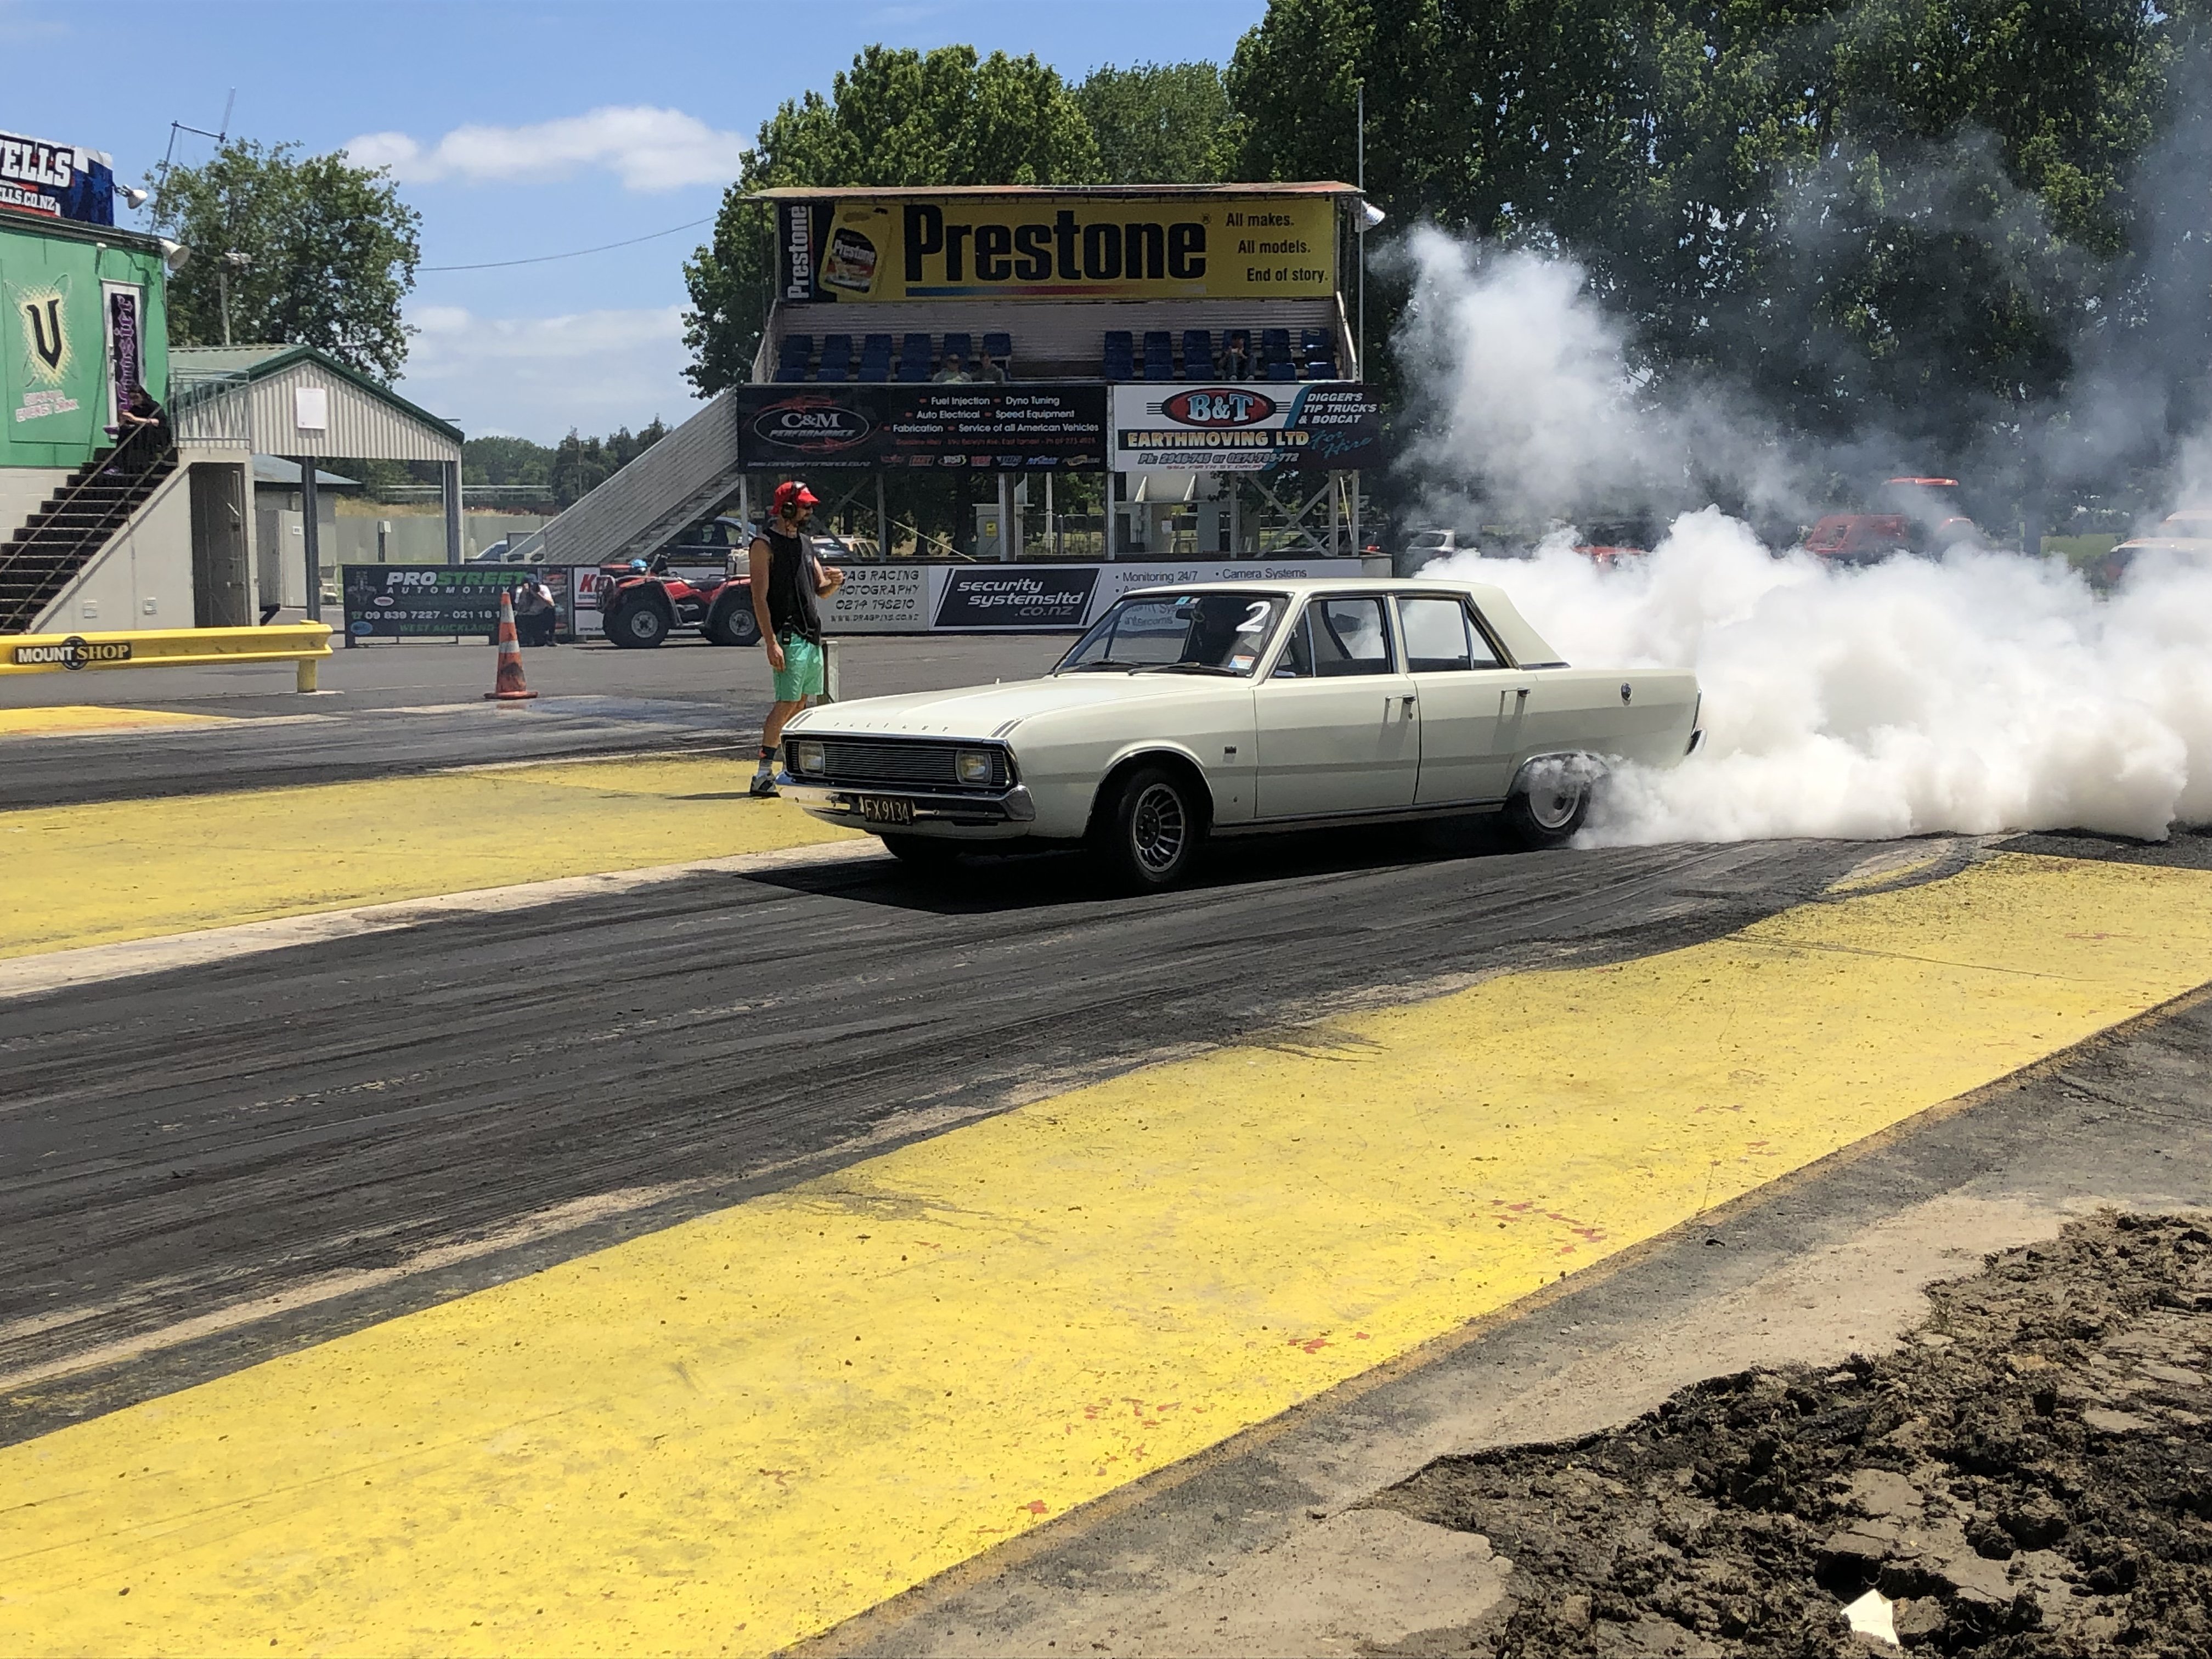
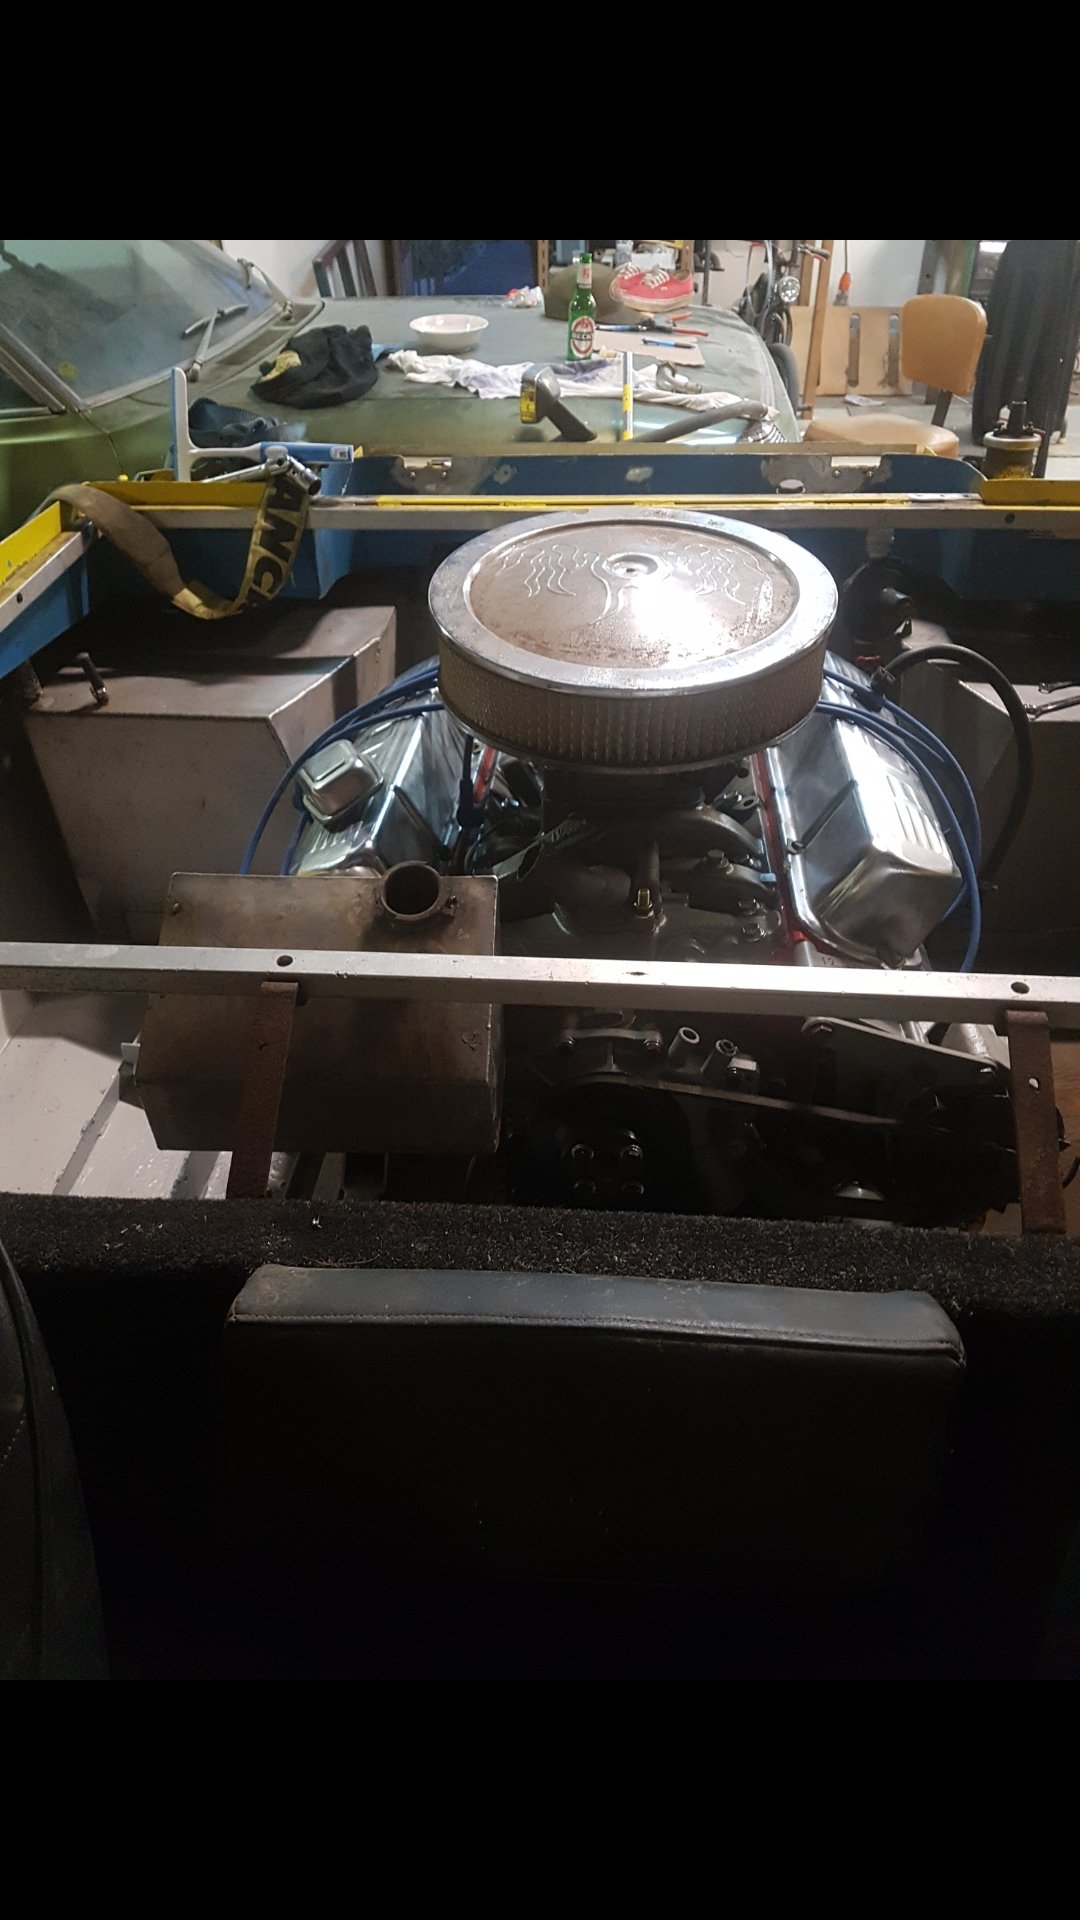
Well the fuel usage is better. Worked out to be 13.8l/100km now. Also it ran it's best time at the drags with this engine, 14.2@94mph It still has a problem which only shows up at the drags, which i avoided by shifting at 5k. If i rev it any harder it gets the splutters . I thought it was fuel supply issues but now I think the lifters are pumping up . When I put it together the block was decked 40 thou plus the heads had a little skim. I took a punt on the stock pushrods still working, but they are longer than ideal. I would also like to get a distributor with a vac advance back on it to help with economy some more Here's a pic of a skid I stole from the drag day thread, just so I'm not a boring fuel efficiency nerd
 16 points
 -
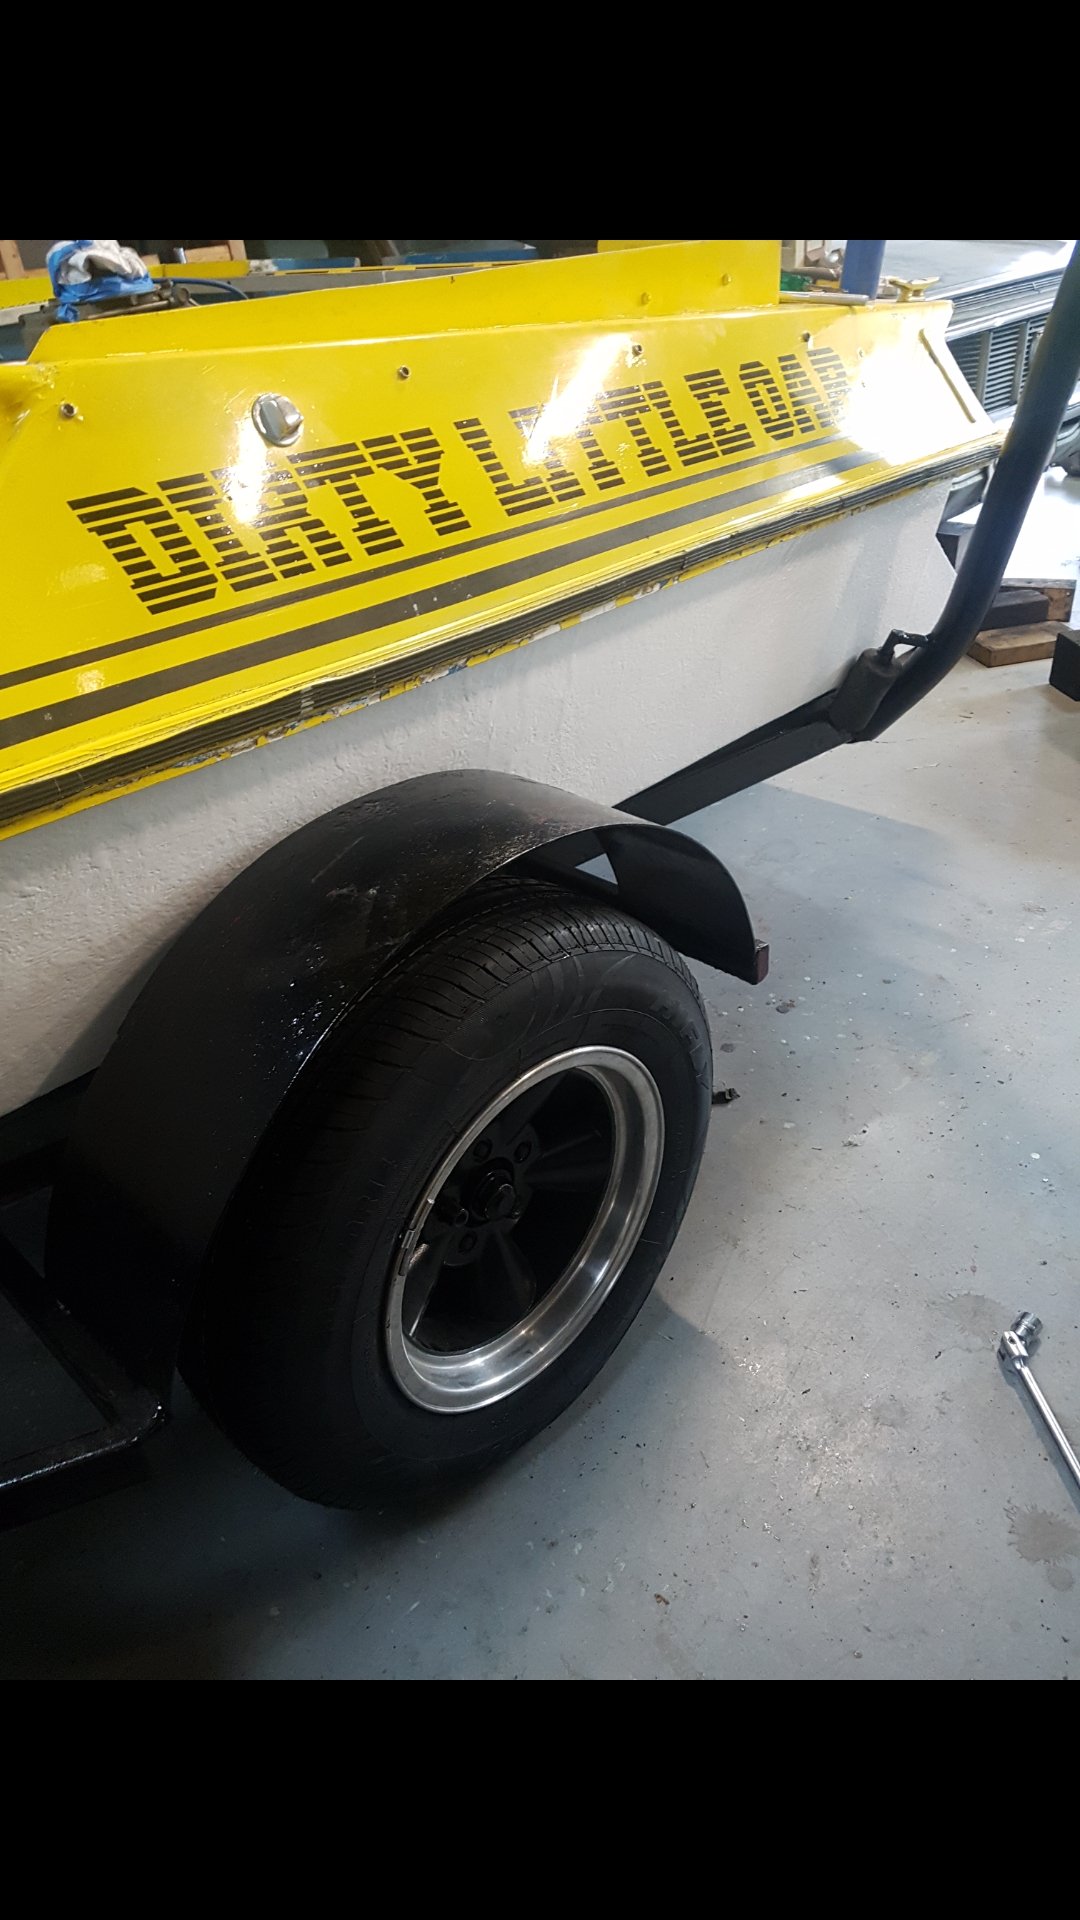
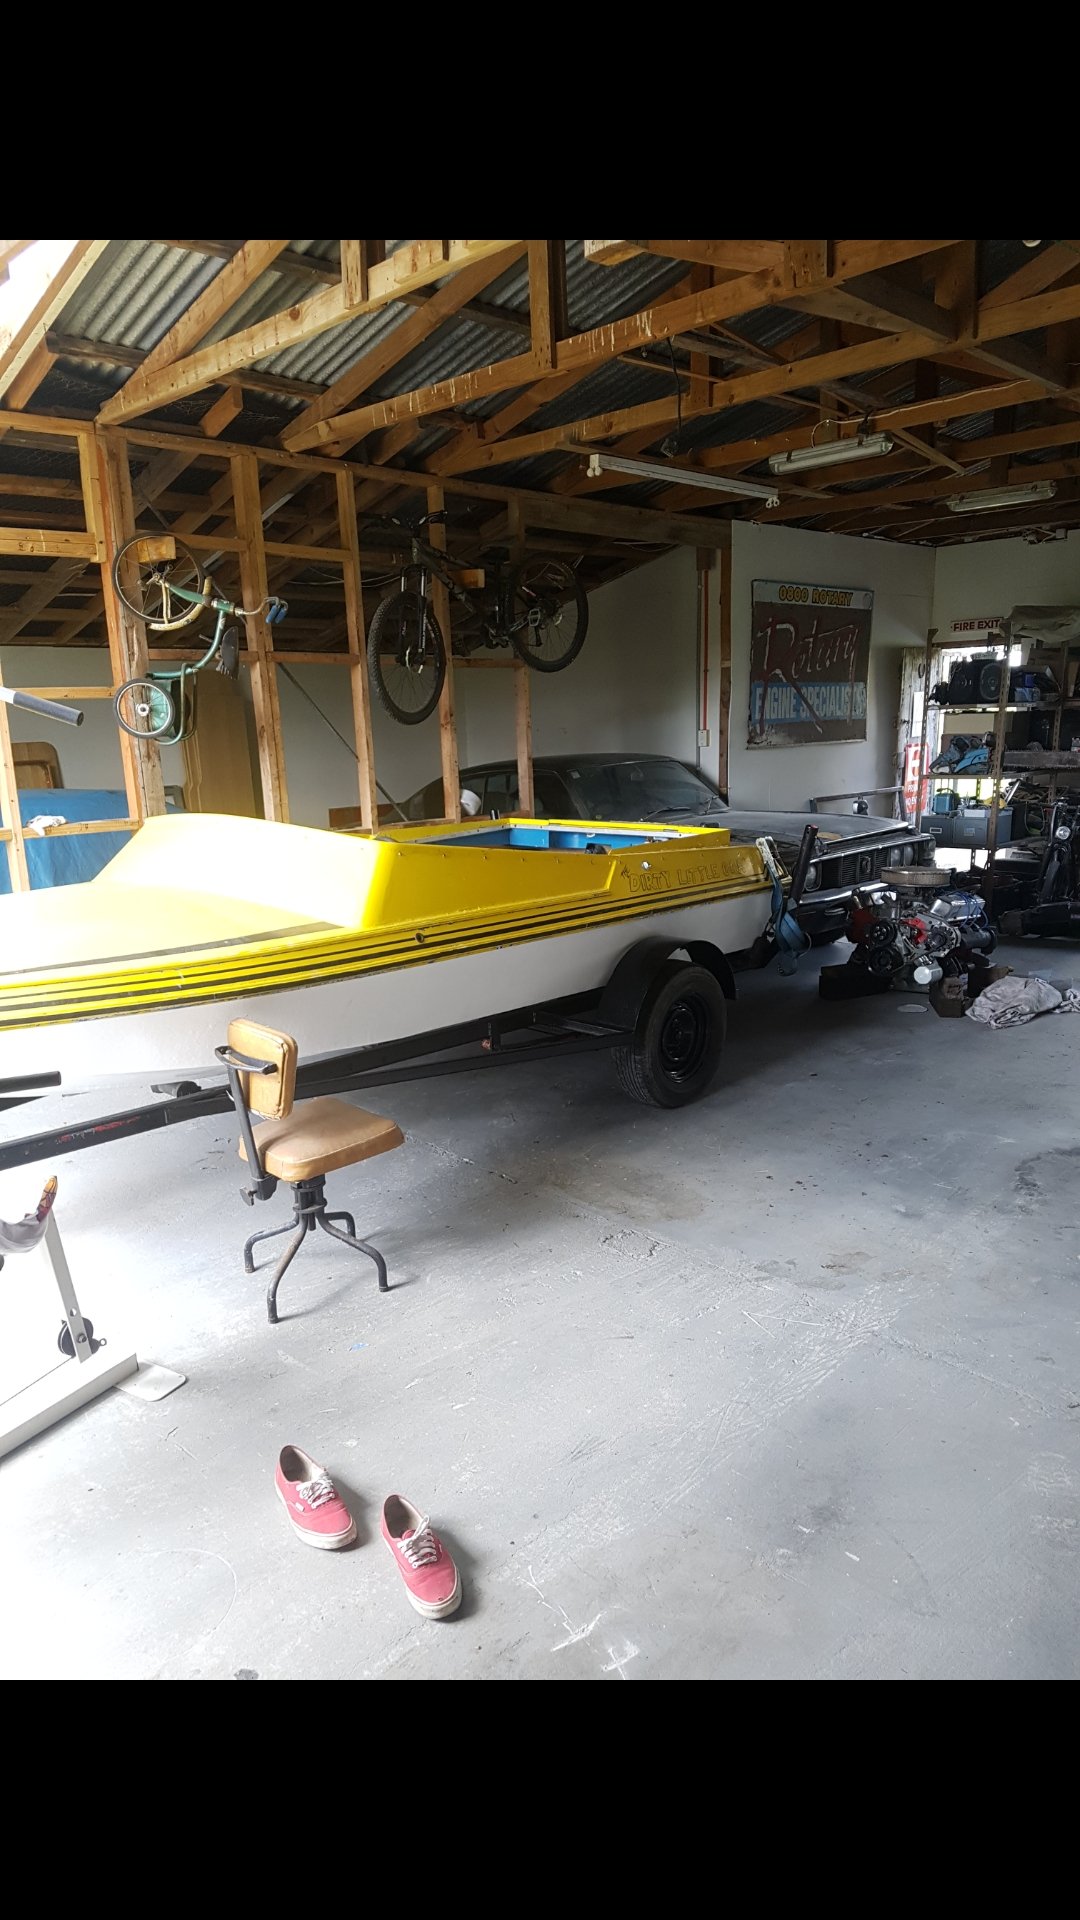
!!!SUMMER SUMMER SUMMER!!! Enjoying getting real hot in this thing already. Small trailer is real handy.11 points
-
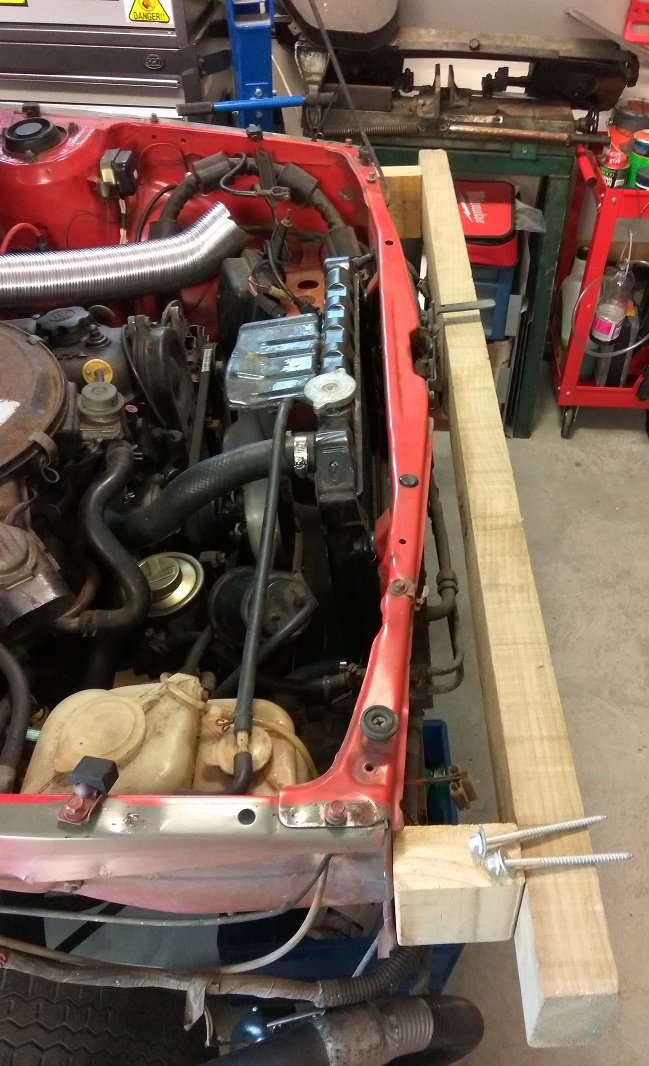
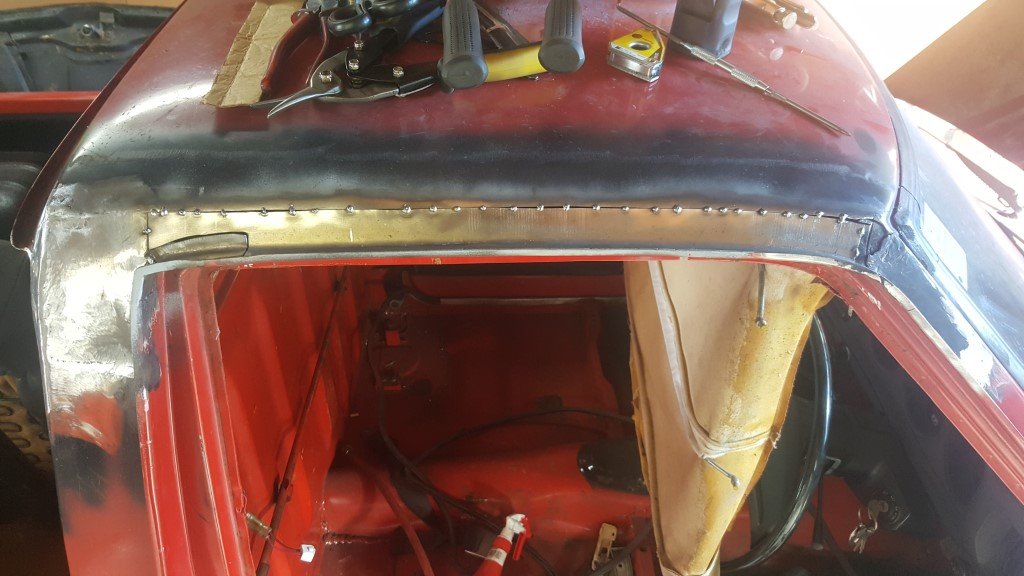
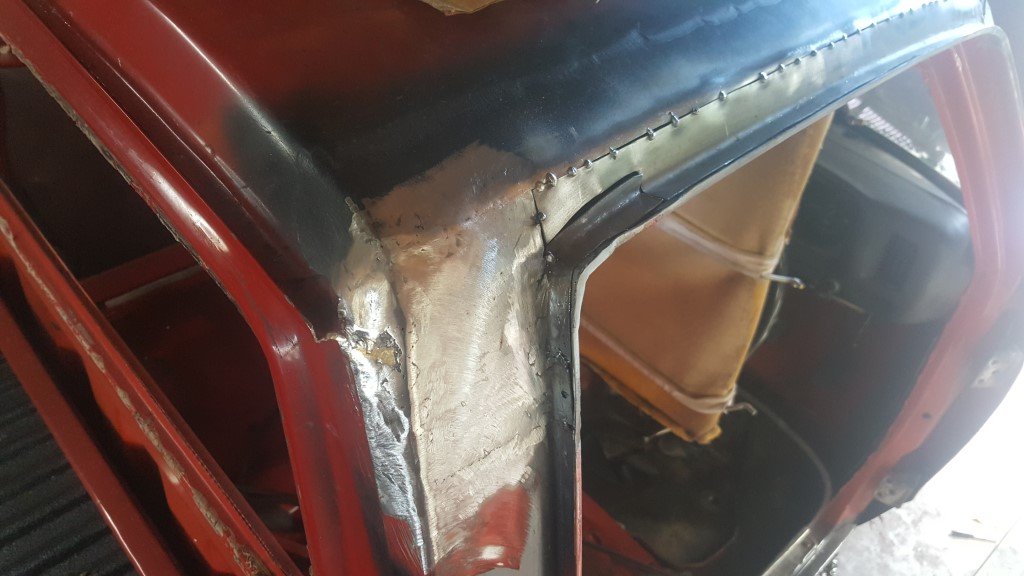
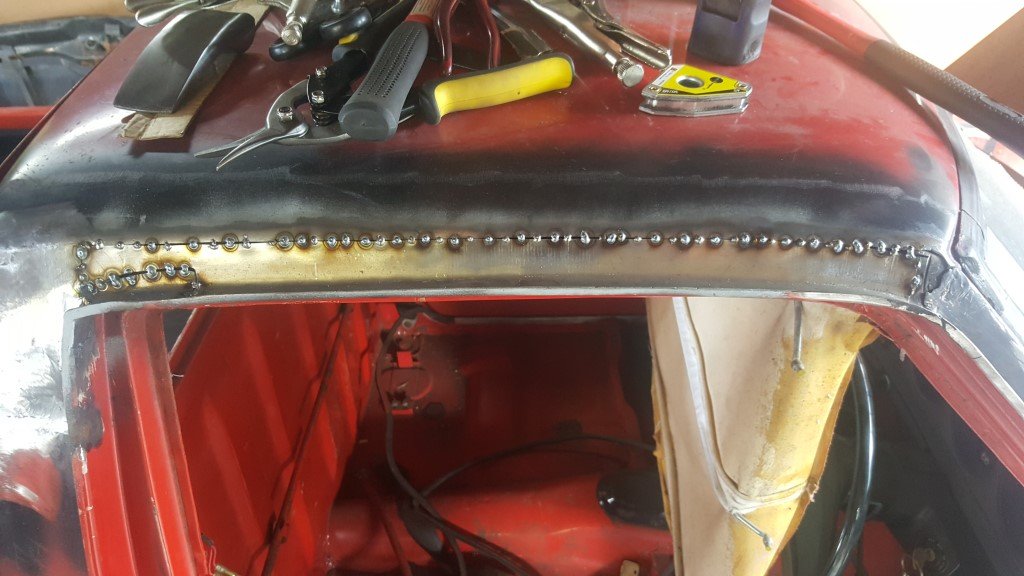
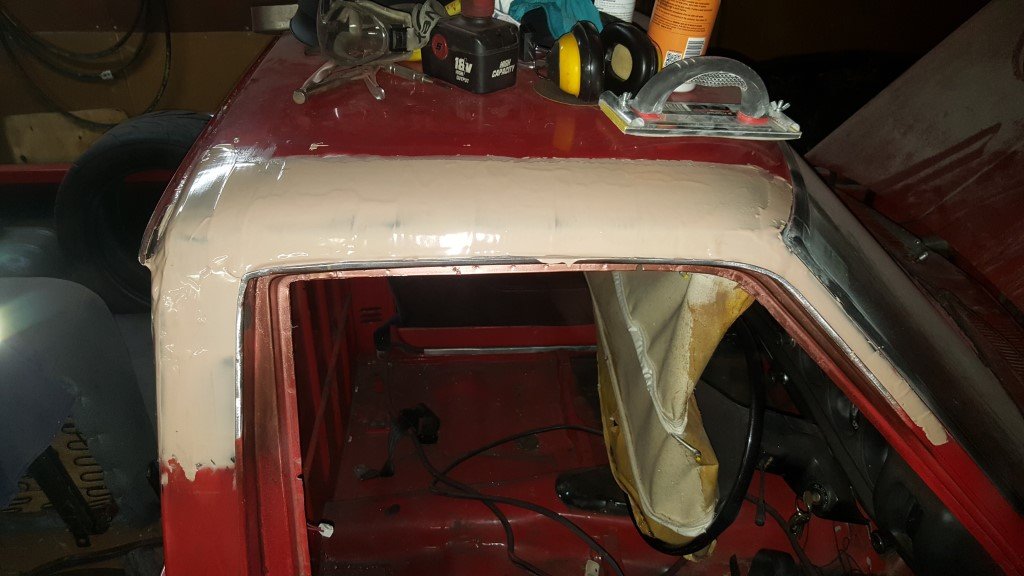
I said I should post more often so they're smaller, but here we are, another big post. I didn't think I had much to post because the majority of it has been wiring and that's boring, so not many photos. Air horns are now fully plumbed up. Used one of my dads cast aluminium fuel logs and used it as the manifold which has the main inlet and then each individual line to each horn. Bought the biggest battery that would fit inside the box I made earlier. Then drew up a clamp for it, laser cut it from some ali and folded it up. Getting better at ali welding! Fitted back into the under floor hole. Bought some battery cables and hooked them up to the main engine power junction. Wanted a killswitch mounted somewhere, made up a bracket for it out of stainless steel. Decided under the seat was the best place that is still reasonably easy to access and hidden from sight. Made an aluminium glovebox since the original cardboard one had seen better days. As the dash is quite short, it would of been hard to tuck up the fuse box behind it and not have it being a eye sore. So designed the glove box to fit the fuse box inside out of sight, which also tucks the wiring up. Started with the air bag wiring as it was the easiest to do and I don't have very much experience with it, other than a couple of weeks work experience nearly 5 years ago. Once the airbags were all done and working, I made a start wiring the rest of it. Started at the rear and worked forward. Need to make a reflector of some sort for the licence plate light. Since the engine had already been rewired at some stage, it had it's own fuse box and relays ready to go. Decided to mount the fuses up under the dash, after extending the wires to reach. The relays stayed in the engine bay since they shouldn't need to be accessed as often. Had to rewire the starter relay as it had full power going through the inhibitor switch and apparently that wouldn't be good for the switch, so cut and swapped around some wires. Stole the power steering pump off of my parent's Mercury that also has a Nissan V8, since they won't be needing one for a while yet. Only just fits, the pulley is pretty close to the chassis rail and the tensioner bolt is very close to the crossmember. Got a new high pressure line made up by using the original fitting from the Nissan line and the rack end of the Jaguar line. Assembled the inner and outer fenders and then lifted them in place, to check everything still fits. The engine bay looks pretty nice (other than the ugly engine)! The accelerator cable needed a new bracket to hold it in place since the original didn't work that great anymore. Made up a V2 under dash panel for the ignition switch and other numerous switches. Looks better than the first one, it might end up black eventually I think, brushed stainless doesn't really match anything else. From left to right has the ignition, heater, fog lights, wipers and horn switch. Also charge and oil pressure lights. Made a stainless steel bracket to mount the tacho gauge under the dash. Also above it is the headlight switch. Had to make a bezel for it as the hole in the dash was 25mm and the switch was supposed to only fit in a 8mm hole. Park/indicators and headlights all wired up with some waterproof plugs. Managed to blow the 6v sealed beams in the fog lights, so got some new GE 12v ones from America. Made some stainless steel spacers for them to sit on. Need to get enough courage to drill some mounting holes in the front splash apron now. Noticed the transmission mount was broken, asked around and found Nengun.com had genuine new ones far cheaper than any where else I found. Bought some oil filter relocation sandwich plates, as the oil filter was nearly impossible to access with the inner fenders in place. Had to get a new adapter nut turned up since the supplied one was too short like they seem to be. Made a new mount for the oil filter plate since the one that came with it was pretty pathetic and weak. Then got some fittings and hose, cost way more than what I thought they would.7 points
-
Did you lose your feet recently? I don't see them in the last 2 pics6 points
-
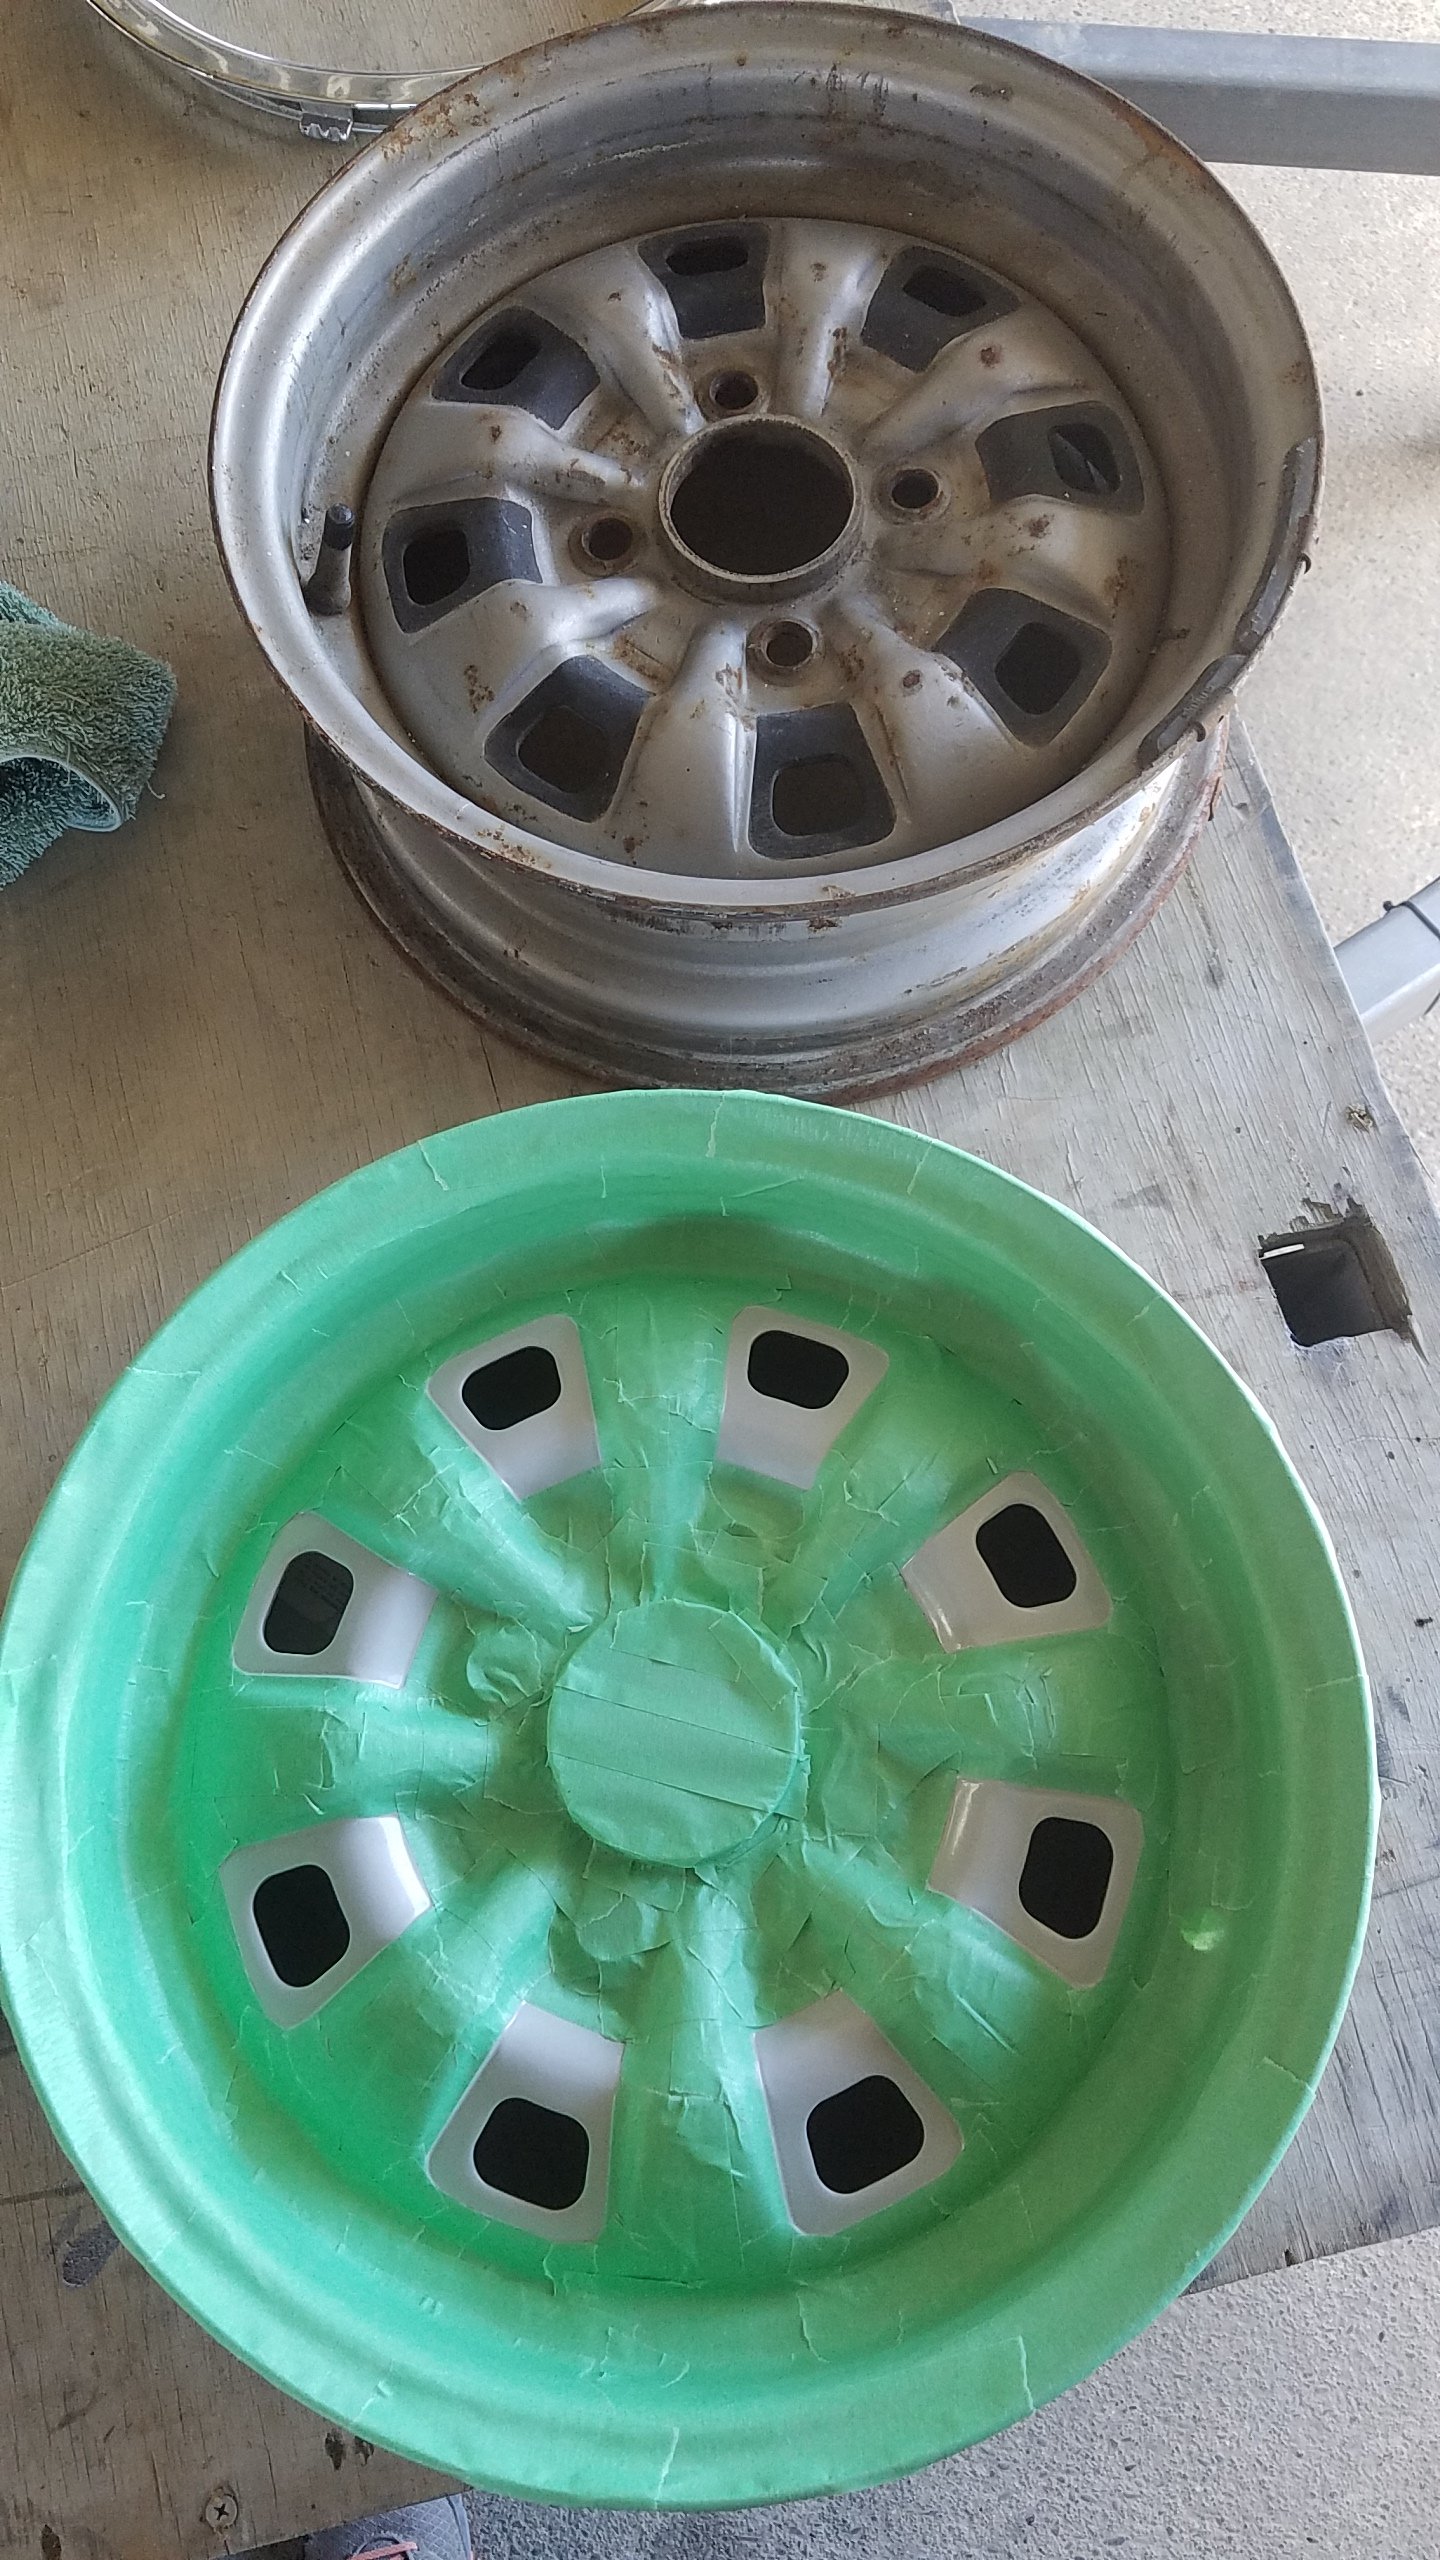
Omfg this sux, I will NEVER mask up wheels again.. These better come out good. Powder coated these in kinetic silver pearl.. think I should've gone a bit darker now
5 points
-
Depends what it is. If something was certed, and that has not been modified any other way since, and the re cert was for a different aspect of the car, then the previously certified bits don't have to be changed to meet the rules of today. However if something shouldn't have been certified the first time, we have to fail it. Example Little Johnny has a cefiro certed for adjustable suspension, an rfb20det and camouflage door cards. Johnnys 20det got a case of the nungers after racing his mates s14 so he put a 25det from a honestly not stolen r33 that his mate jayden got off Facebook marketplace. If we do a cert check for Johnny and his suspension is all the same as the previous cert plate, but it has a little bit too much camber, because it was certed prior to that being a requirement, then we don't have to fail it, or the camo door cards. We just have to check the engine. However little Johnny has cut and welded his steering arms shorter with his uncles gasless mig for more hectic drifts . Johnny claims it was like that last time it was certed. This was never allowed so that would have to be failed, even if the previous cert covered it.5 points
-
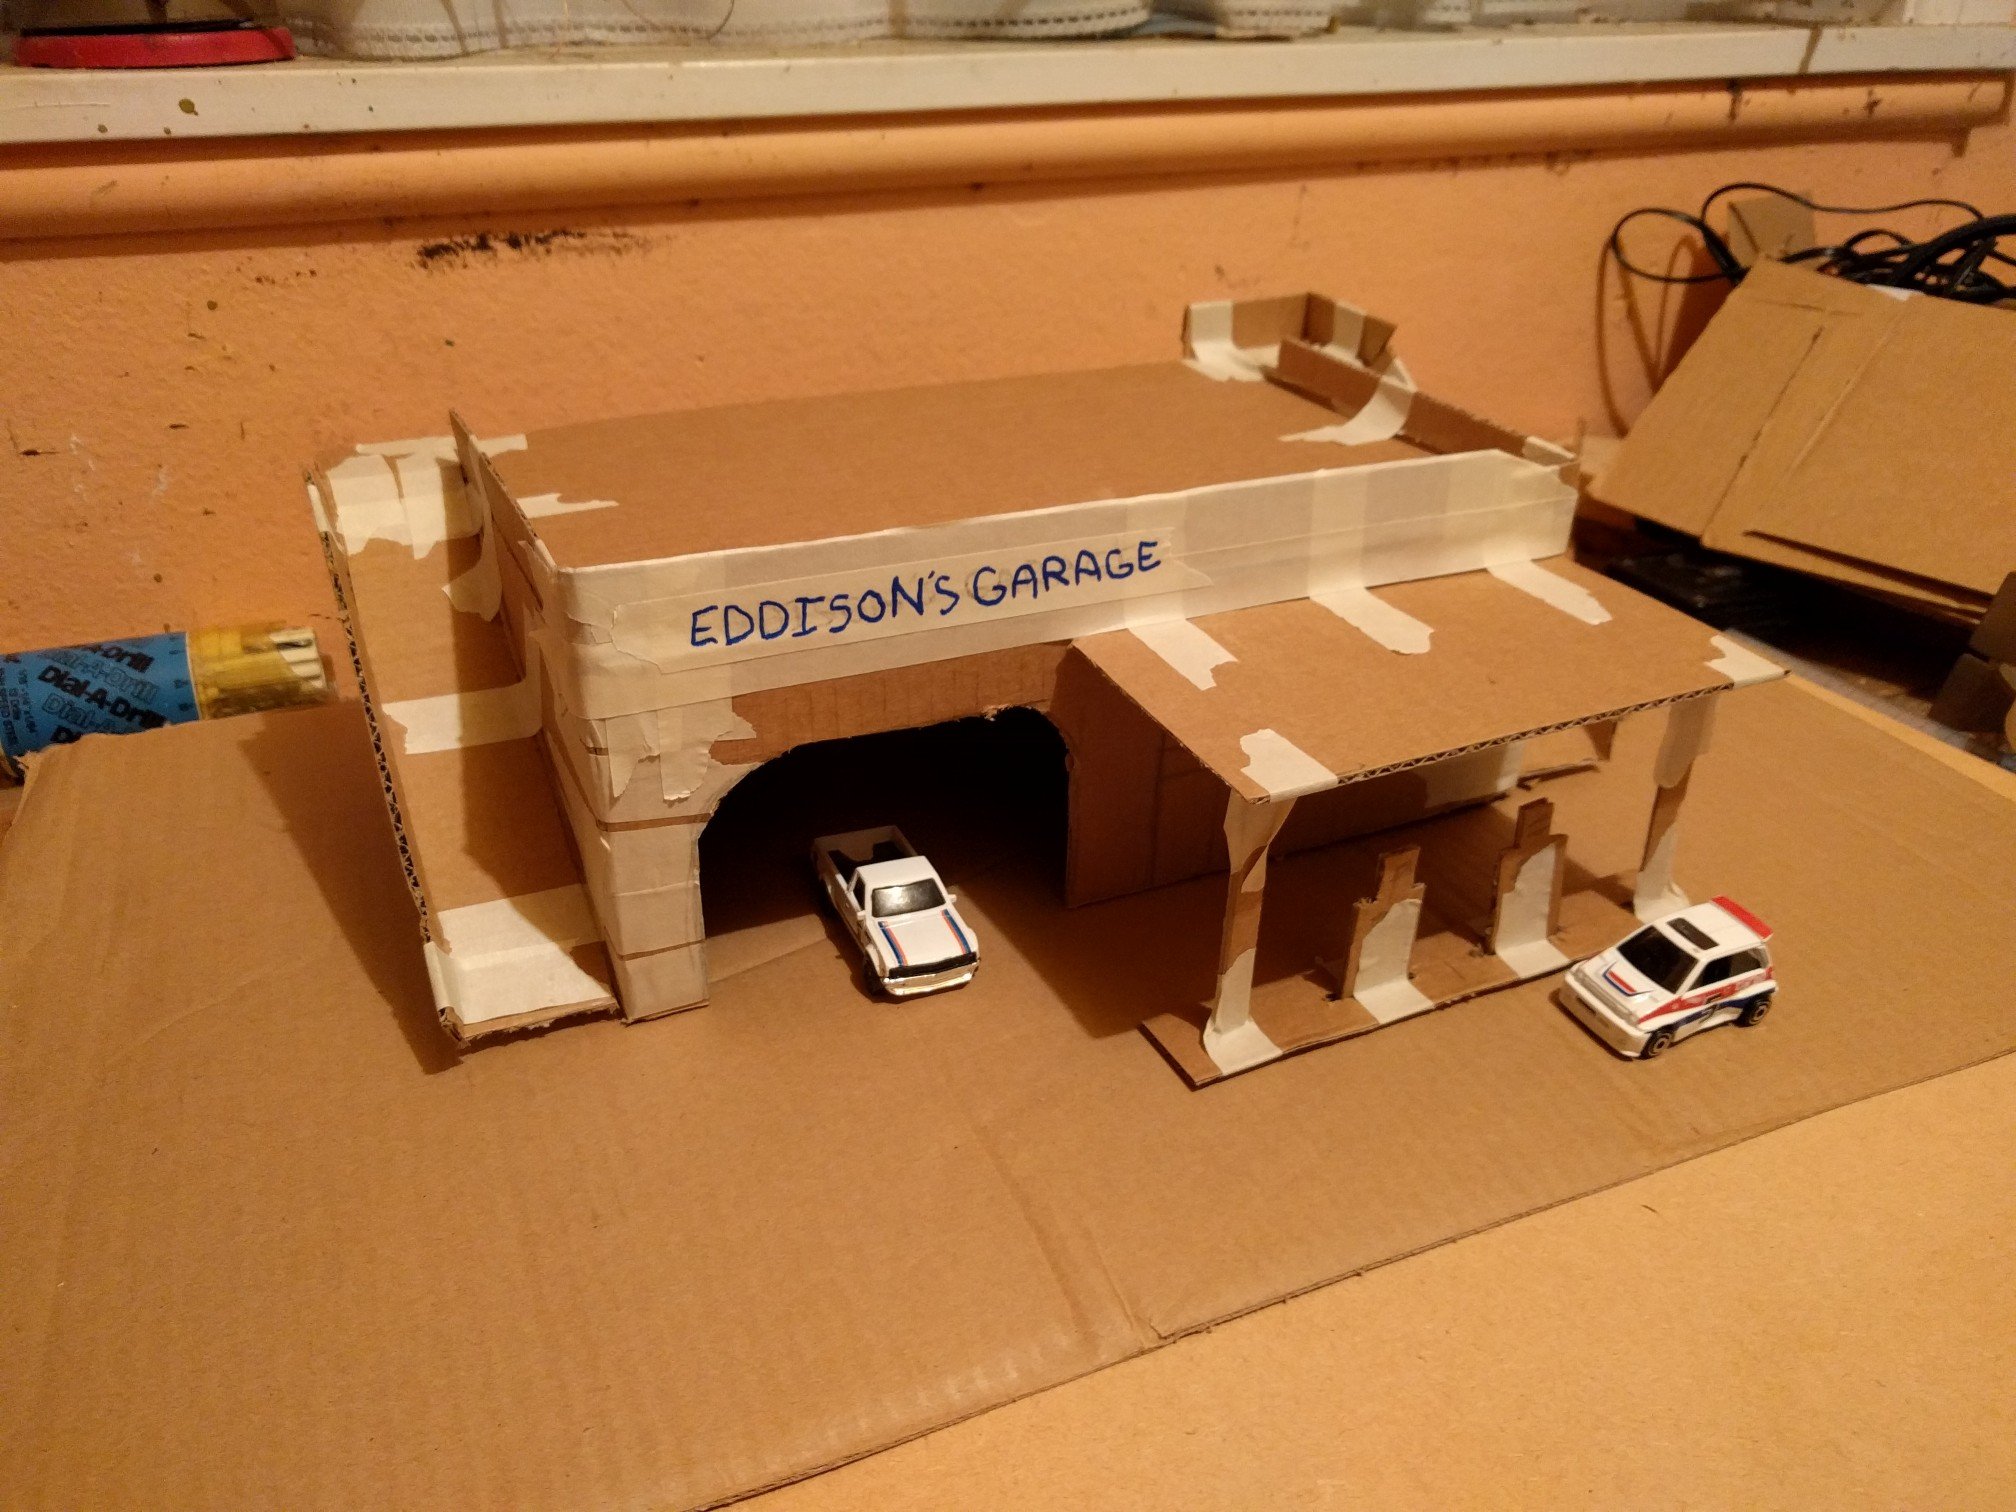
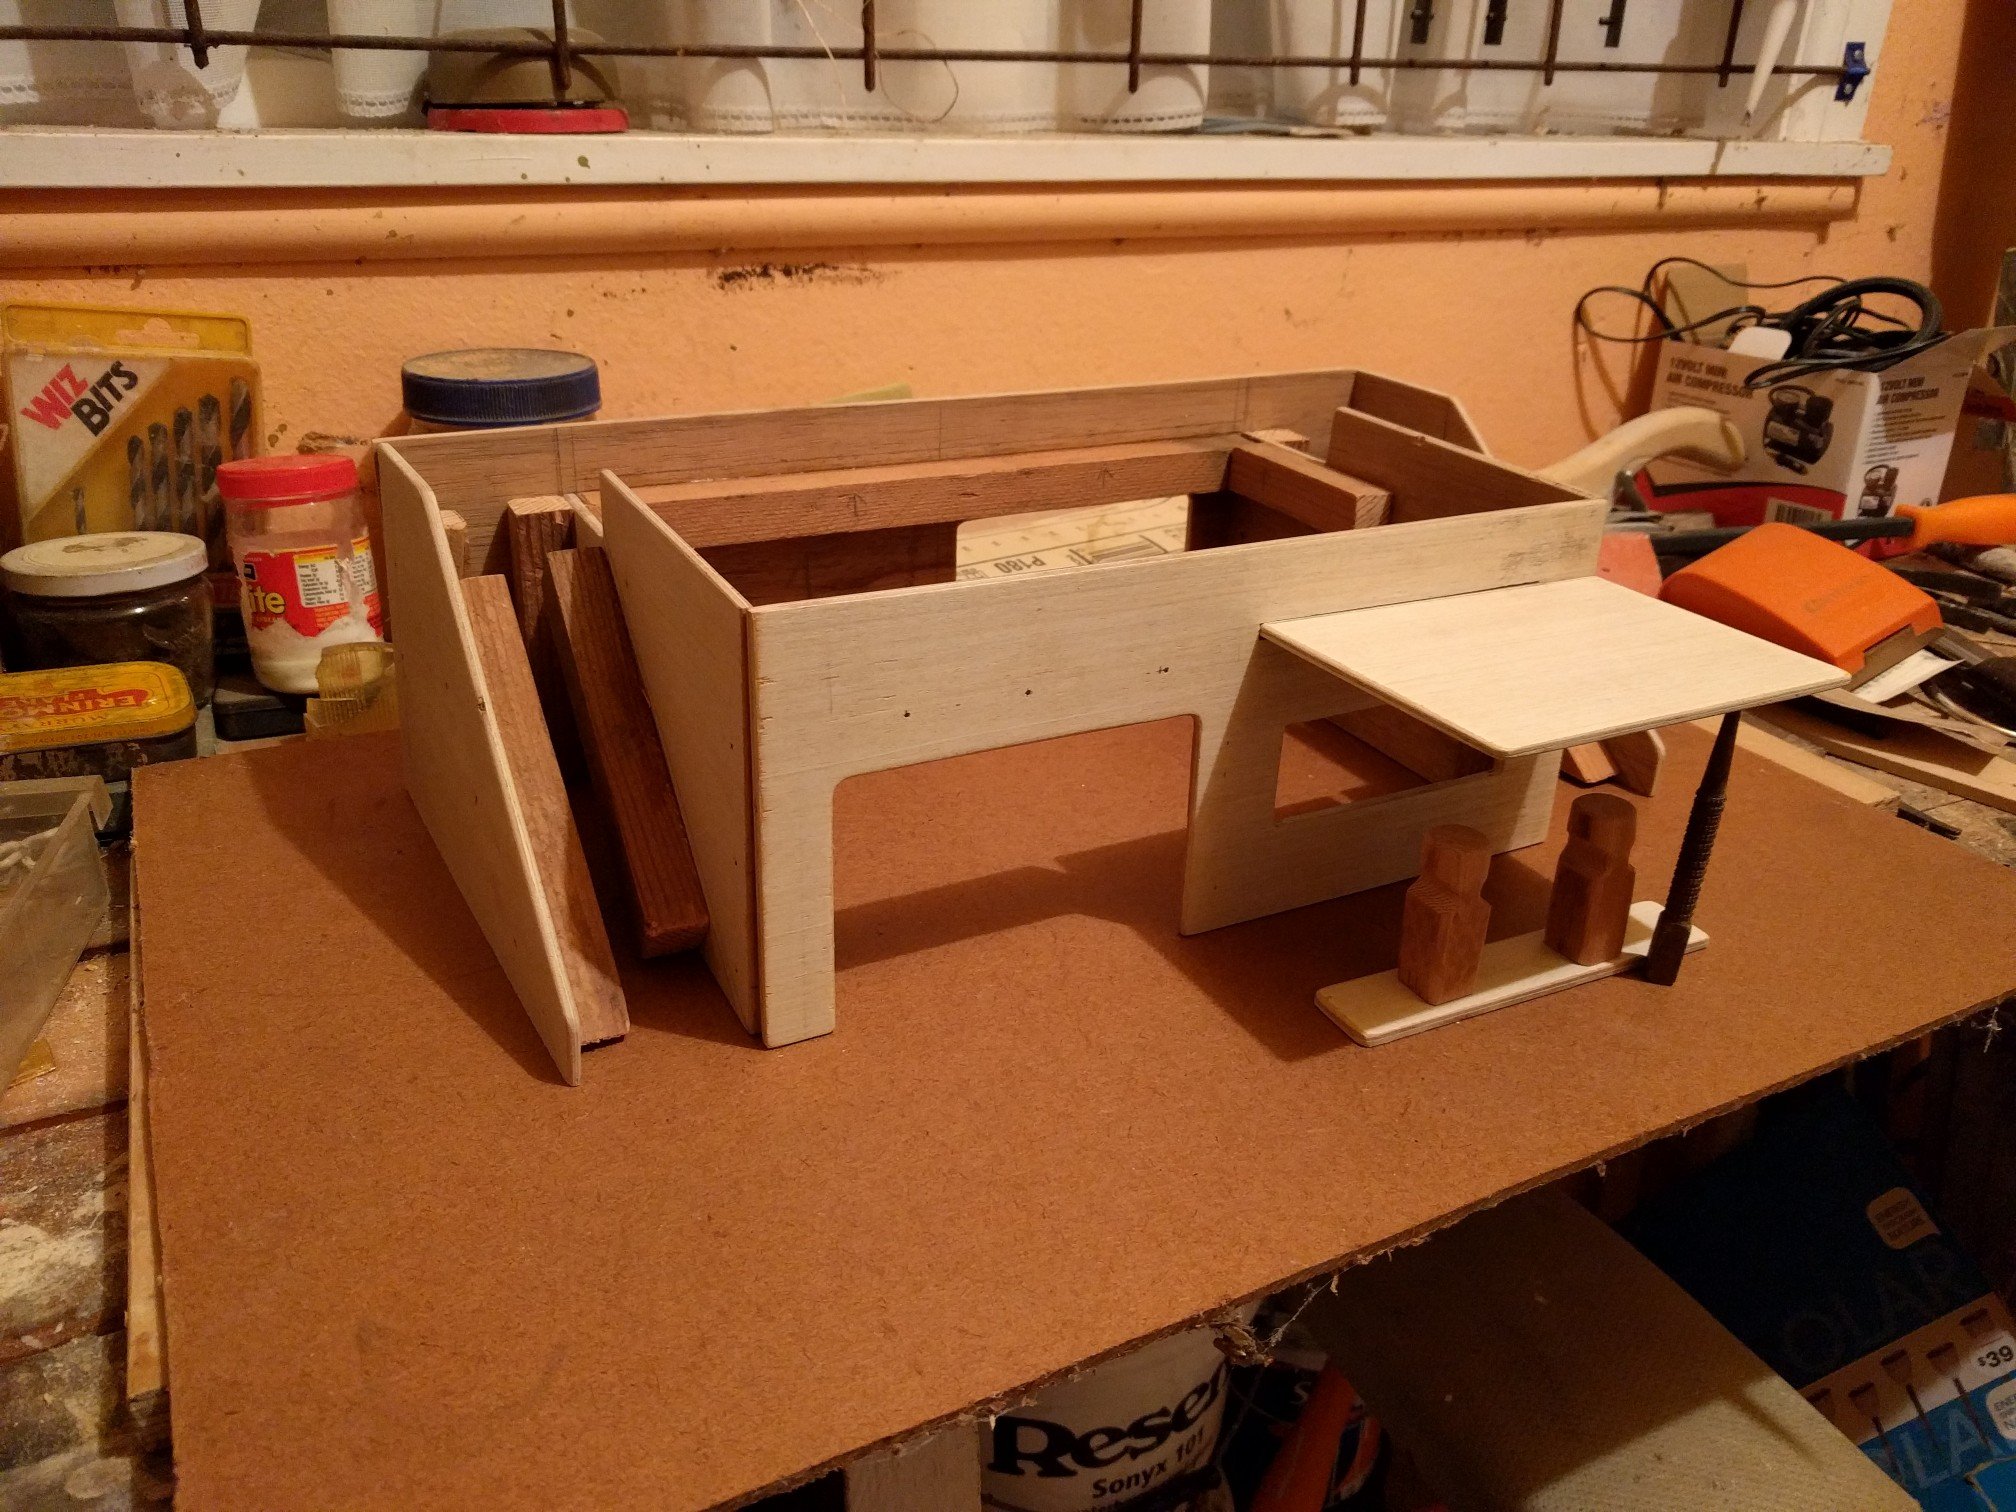
I wanted to get my nephew a toy garage for his birthday as he was starting to play with toy cars. I used to have one as a kid and thought it was the bees knees. Had a look around but everything was plastic. So I decided to make one myself. CAD Strengthened everything so if the little guy wants to jump on it then he can. Final product. I painted on some toilets and an exit sign on the side. It also has another garage door on the back, like the front, for easy exit.
5 points
-
Column Shroud upgrade, Had a shifter hole in the side previously so this replacement is a lot tidier. Hauling duties Surfer watching4 points
-
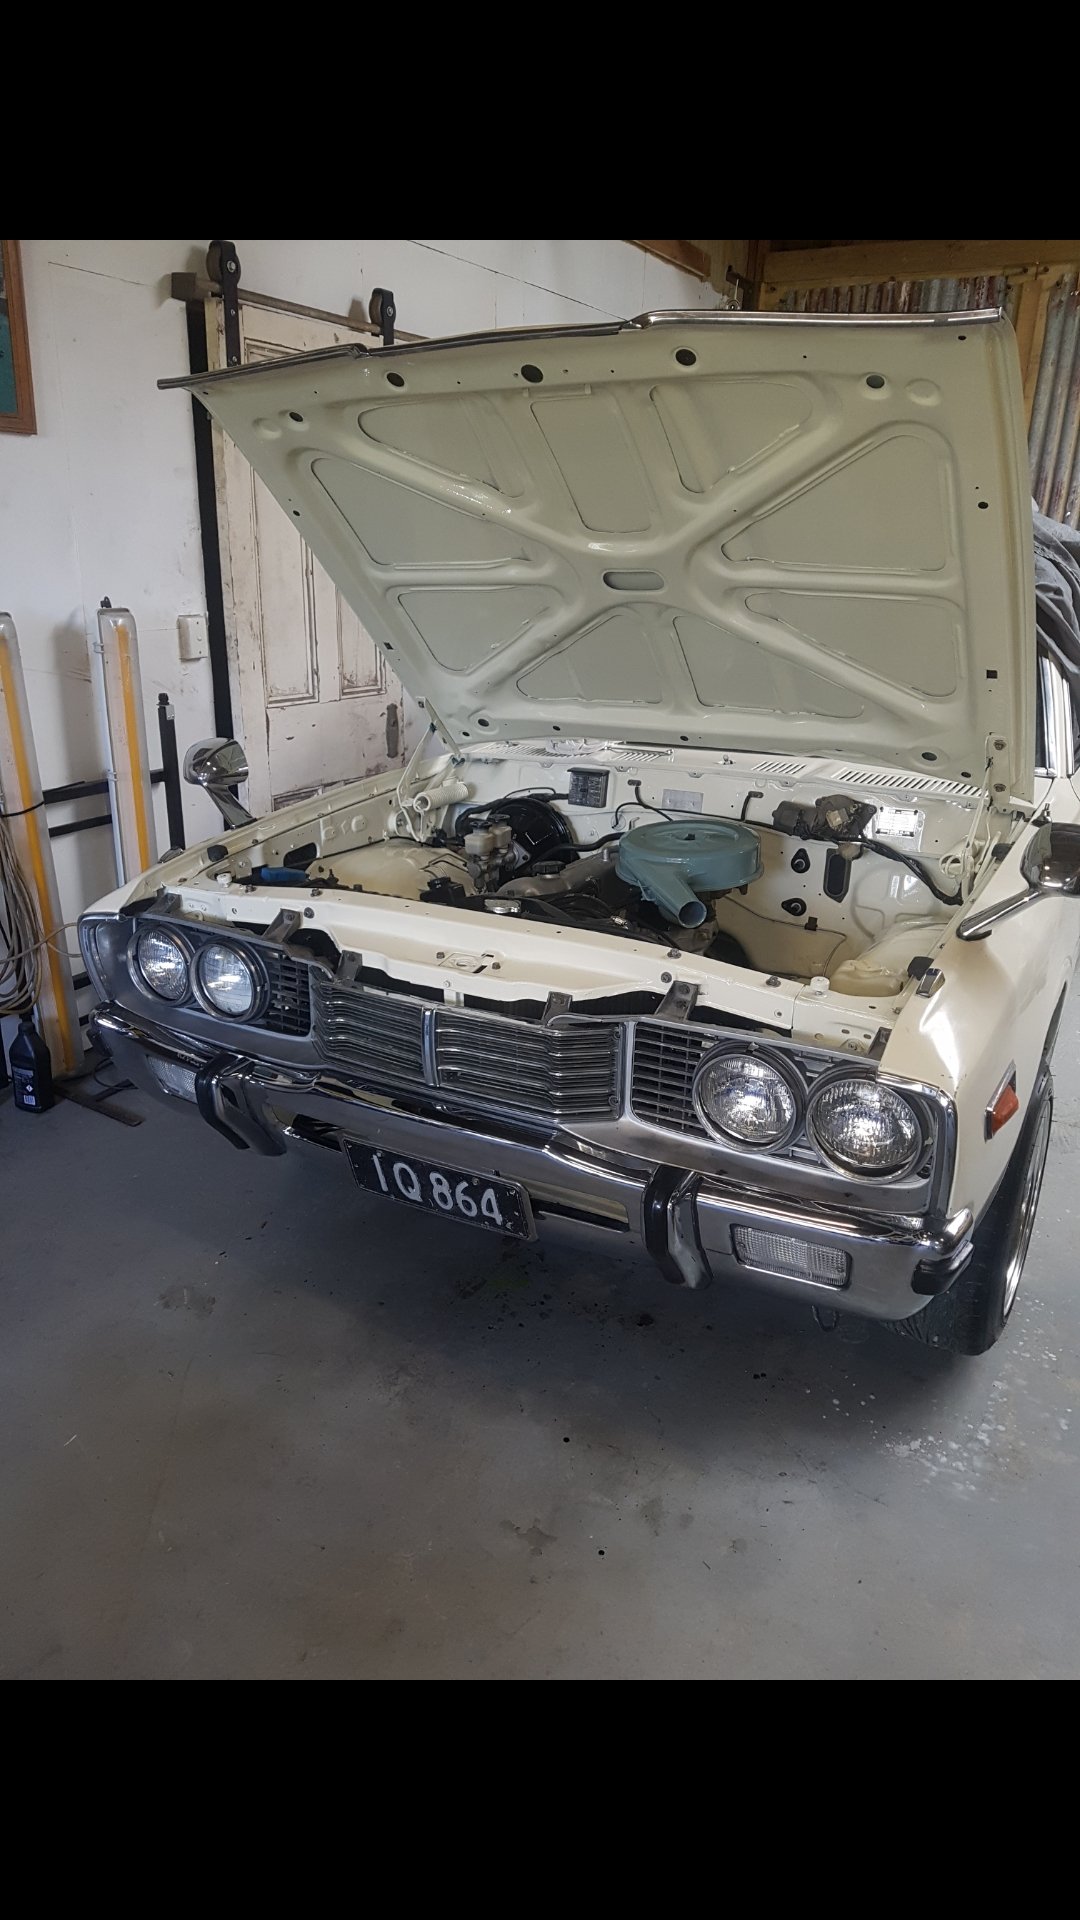
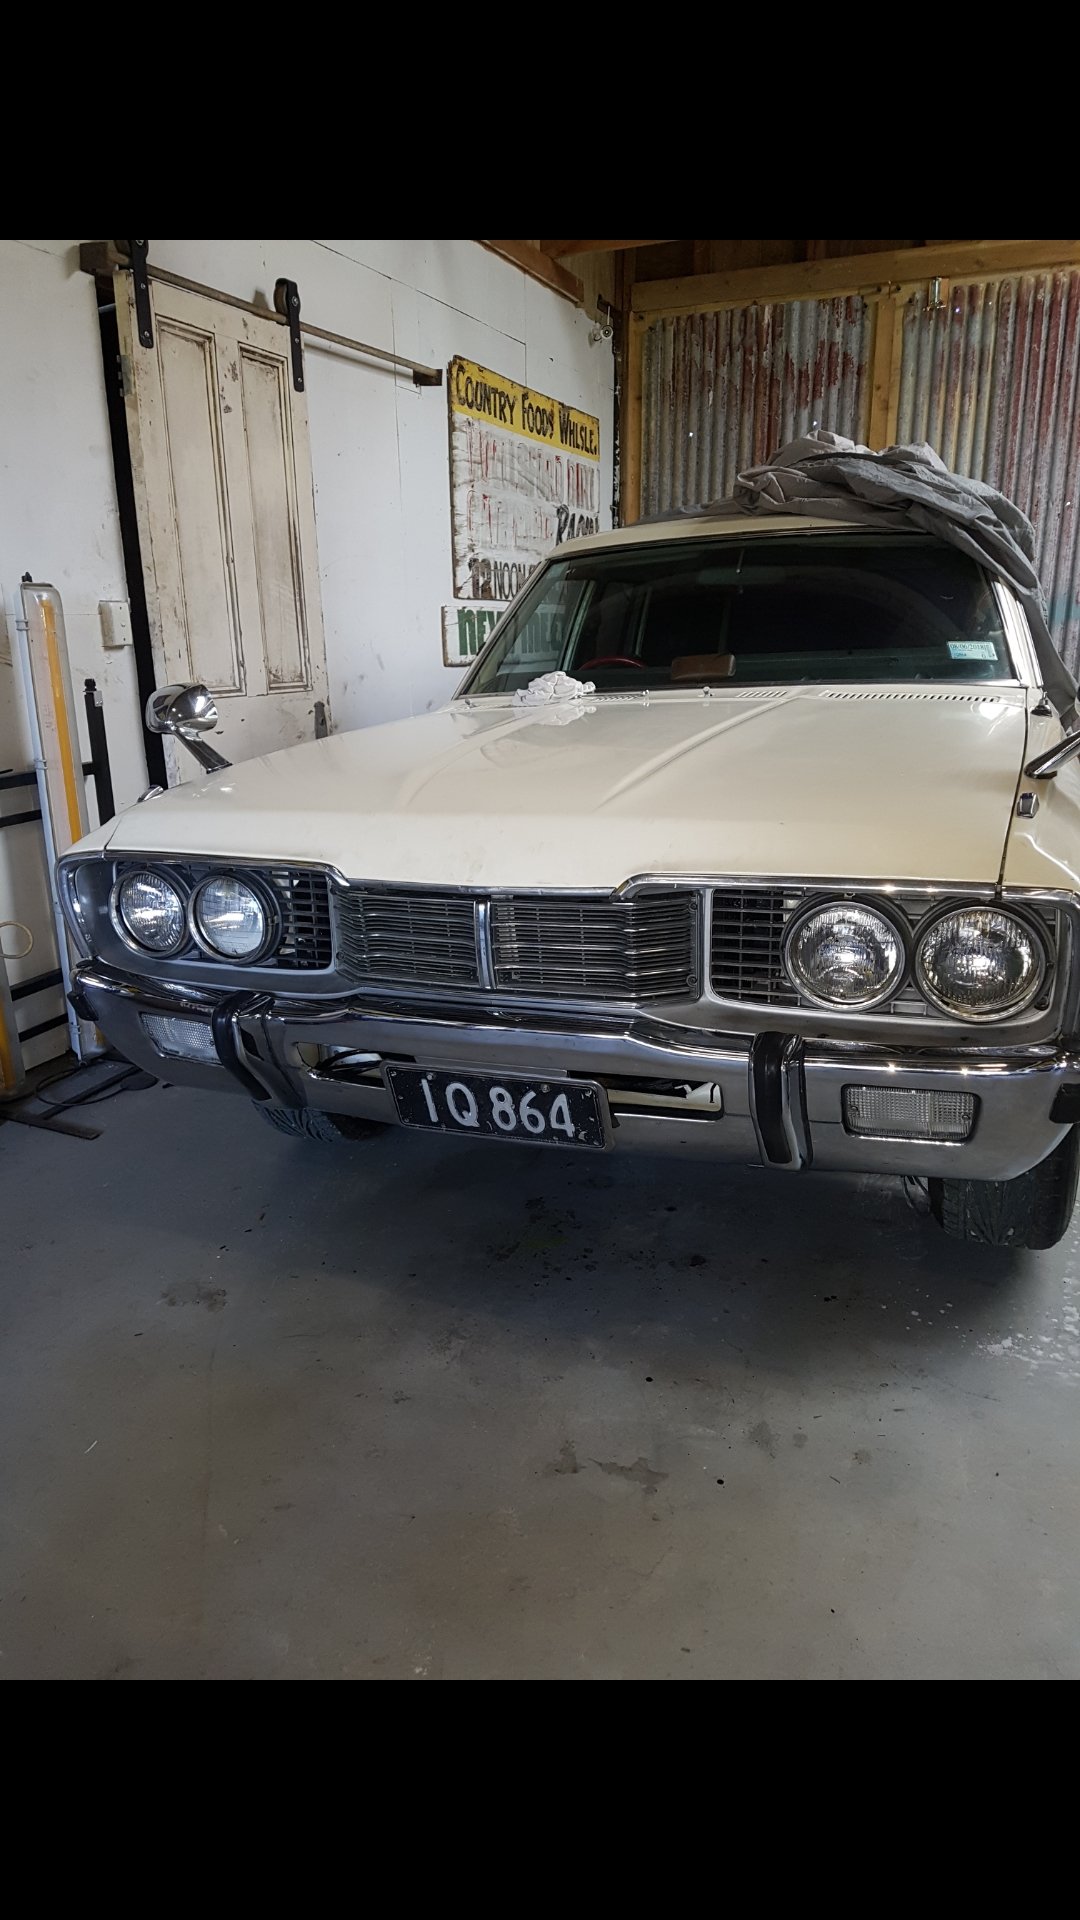
Thanks! Yea pretty stoked with the stance and look of it. had a real win today..... she’s got a wof and rego now!!! Still 1000 little jobs to do but that’s the name of the game. Can blast around in it with no worries now. Decided to drive to my mates the other sat night at 10pm with no wof and it conked out on a major intersection because I’d hosed the bonnet down and soaked the dizzy or alternator. Had to push it off the intersection with cops 100m in every direction doing a sting. Had to call my mum to gontomly mates so he could leave his girls and come tow me. Ahh it was like being 18 again.
3 points
-
Got word of a bike and car show on the 2nd of Feb in Invercargill. $10 entry per vehicle prior to 18th jan, then it's $20..public admission is a gold coin donation... proceeds go to St John. Open to all makes.. Can scan the entry form if anyone is keen
3 points
-
A few more pics for the "My mate's a bit good at welding" thread. I did some stuff too, messed about with the rear axle, modified the wheel-cylinder mounting so you can actually tighten the things. Not photo worthy. My new stealth rock-sliders... Land Rover based body mount..... Got it to myself till the weekend so a couple of days off from the arc eye. Which is nice.3 points
-
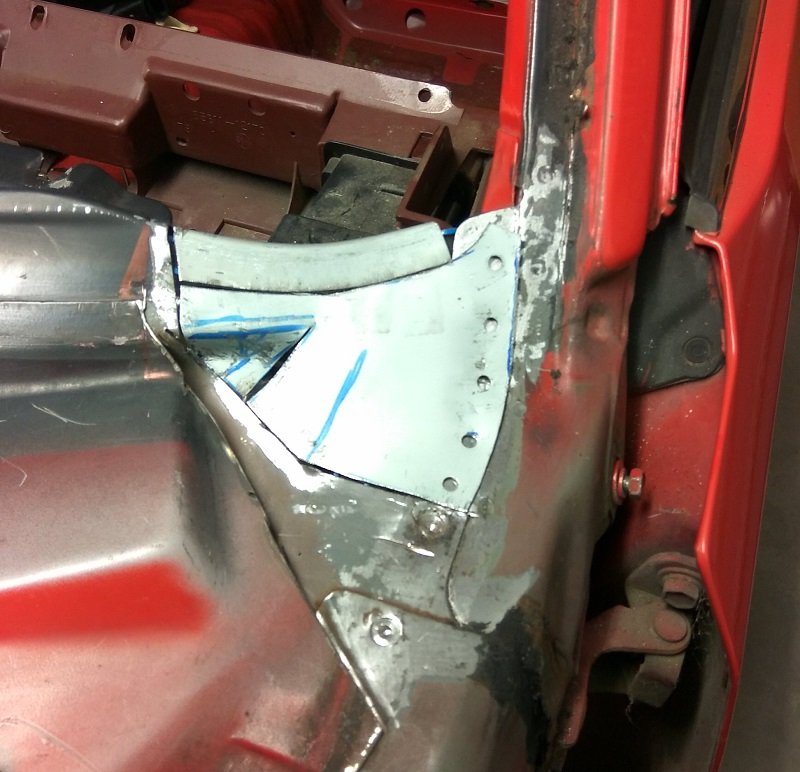
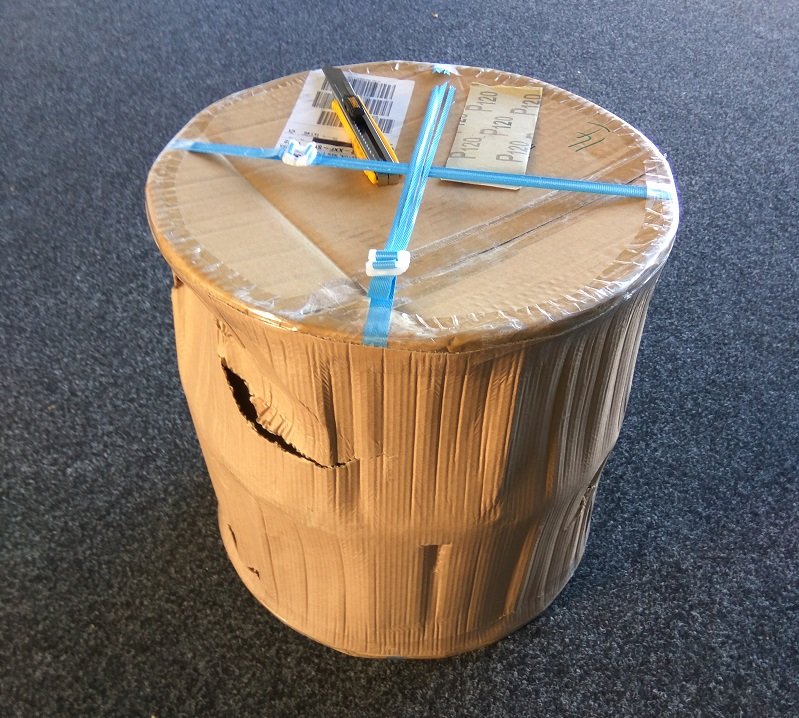
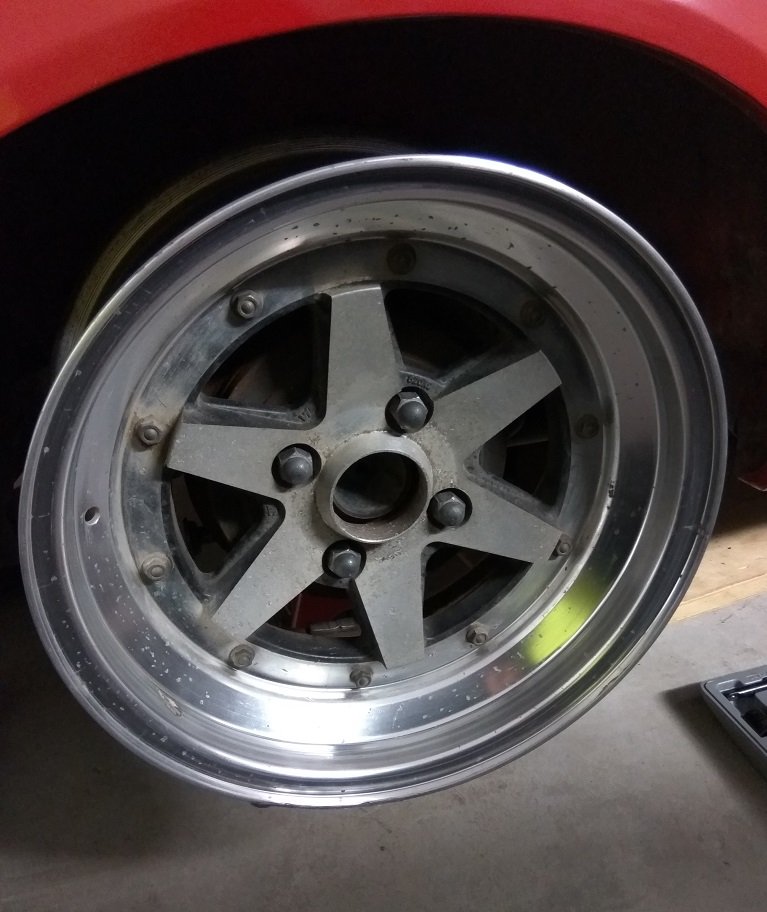
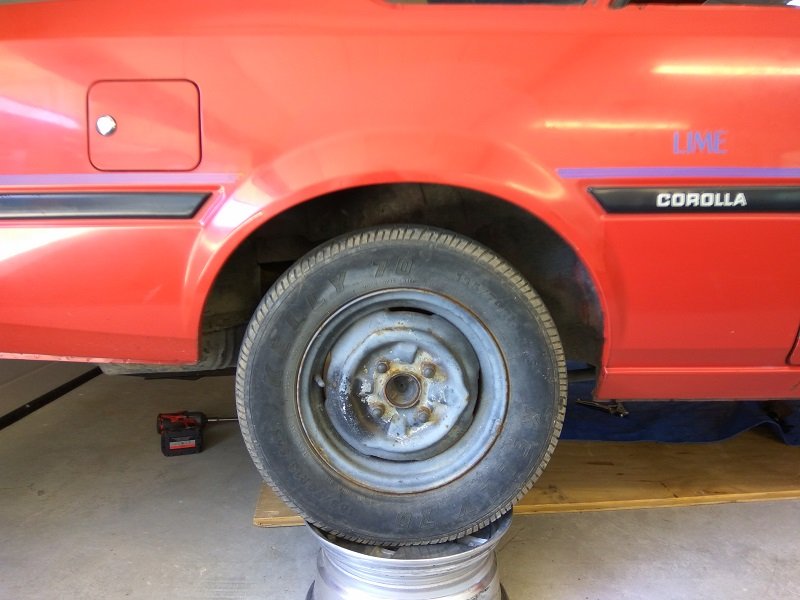
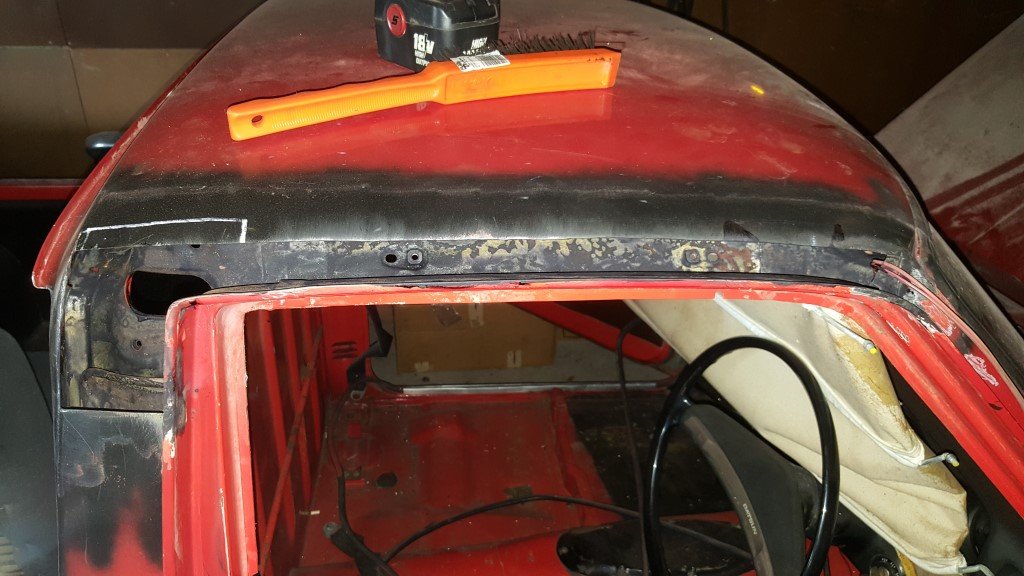
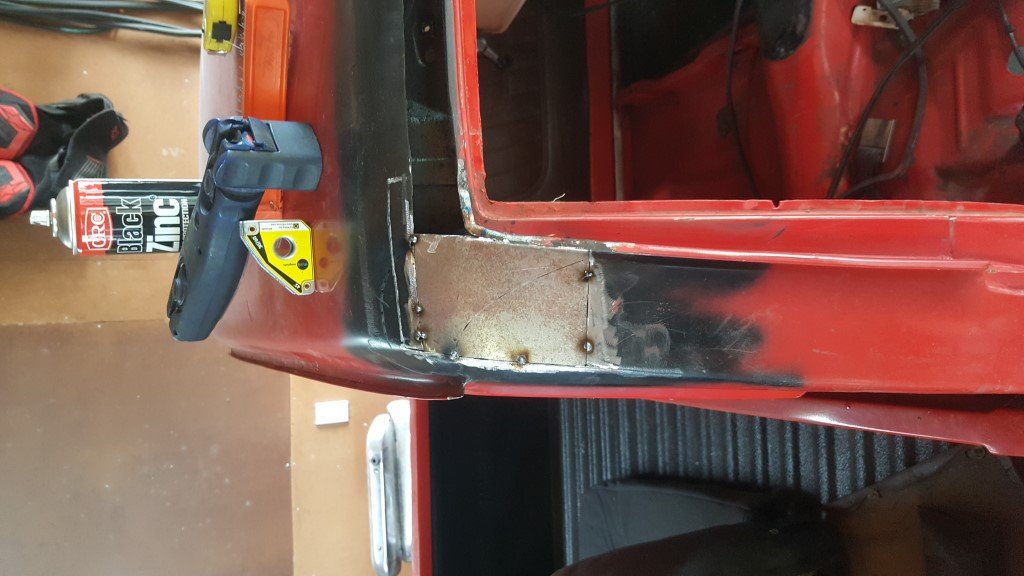
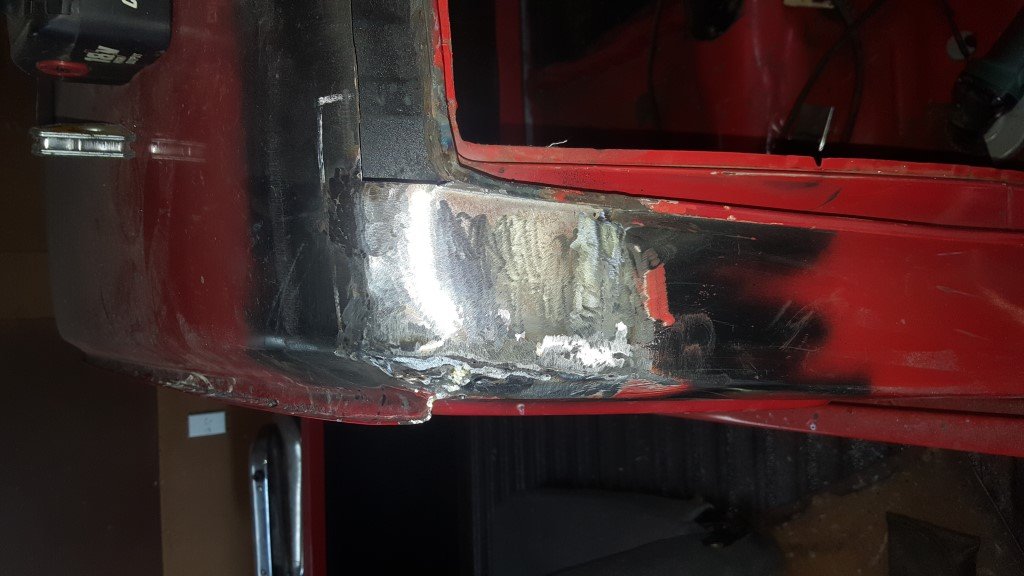
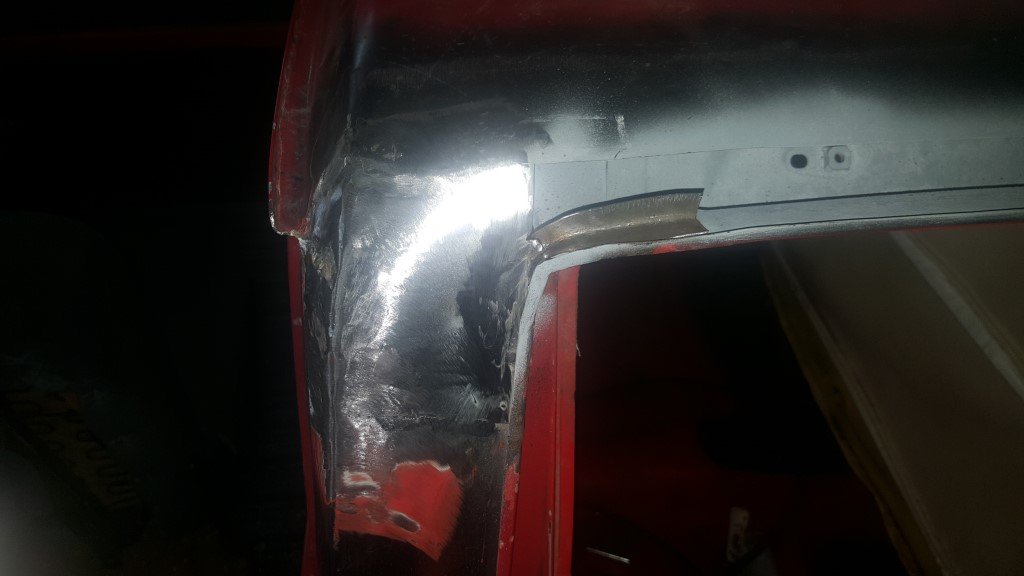
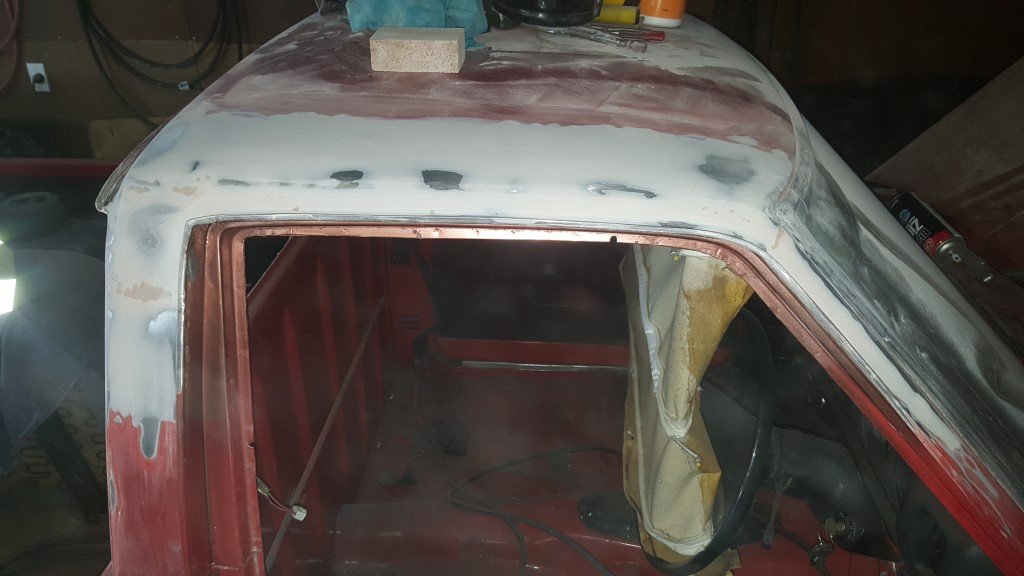
Haven't done bugger all on this recently. Had been trying to source some cert happy 14" wheels, but that didn't happen. Wheels held the build up a little bit as I needed them to start working out other things that will happen later. Anyway, some pics of the limited progress since last update. "Built" a frame to straighten out the headlight area of the front. Didn't take too long with a handful of long tek screws, to get it much closer to the right shape. Happy enough with the results, so that will get a primer / paint later on. Amazingly complicated alignment tool: Previous to that I had removed the rusty A pillar section shown earlier. Before, with the two layers removed. After, with one section made up, i'll make the top section when I have this one welded in and epoxy primered up. Then weld that over the top, epoxy, paint. Meanwhile, this turned up, with a friend another day. And unwrapped Wheel specs: SSR XR-4 Longchamps, 15x7-1(x2) and 15x7+11(x2). Lost count of the hours spent browsing Yahoo to find a set or even a pair that matched the offsets I measured I wanted. Well worth the time in the end, but it did drive me half insane, finally finding some, only to be outbid by twice my budget. Nothing super wide or dished, but they will sit well on the car I feel, and I can wrap them in damn good tyres. Similar dish on the rear to my 14x7.5-1, but with 10 times the number of tyres available, an easy choice in the end. I also removed some unnecessary weight from the rear of the car, to help sort the ride height. Shocks and springs, overrated. Before: After: I will be home alone for the whole Xmas break, so will be aiming to get the car completely back together (for now) with all of the rust cut out and replaced with new steel. Epoxied up and some red spray cans to tidy up the repairs. Then I can start the next stage which will get quite expensive, rather quickly. Until then, let me know what i've done wrong here.
3 points
-
Now some low required3 points
-
Let me know when your cumming thru my hood. Il bring the PW80 down the intersection and do a burnout as you all go past2 points
-
Bike in the van ready to go.2 points
-
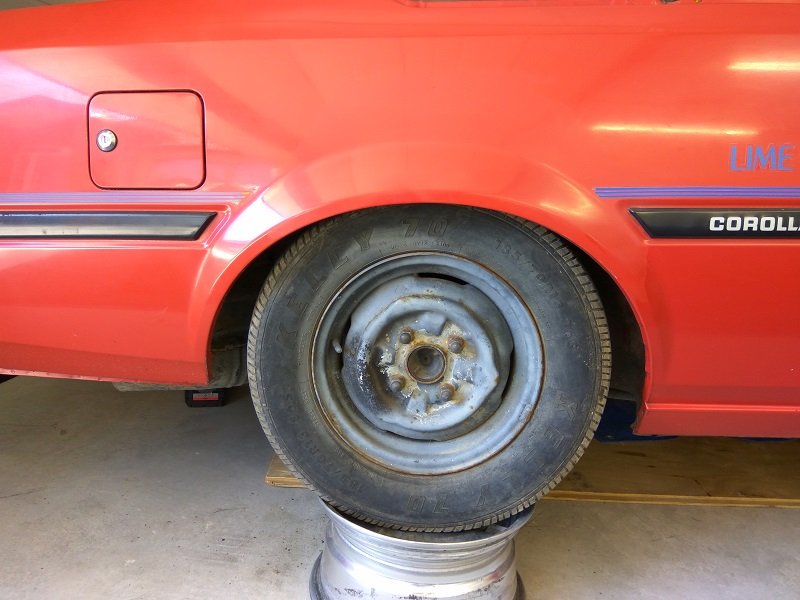
@tortron my feet are still on the end of my legs I figured I'd get some work done before my foot started hurting Pulled crossmember off and got the old extractors off. Test fitted them and they fowl on the gearbox brace, easily fixed by taking it off.2 points
-
Wordsmith level 9 there Cletus....love your work....2 points
-
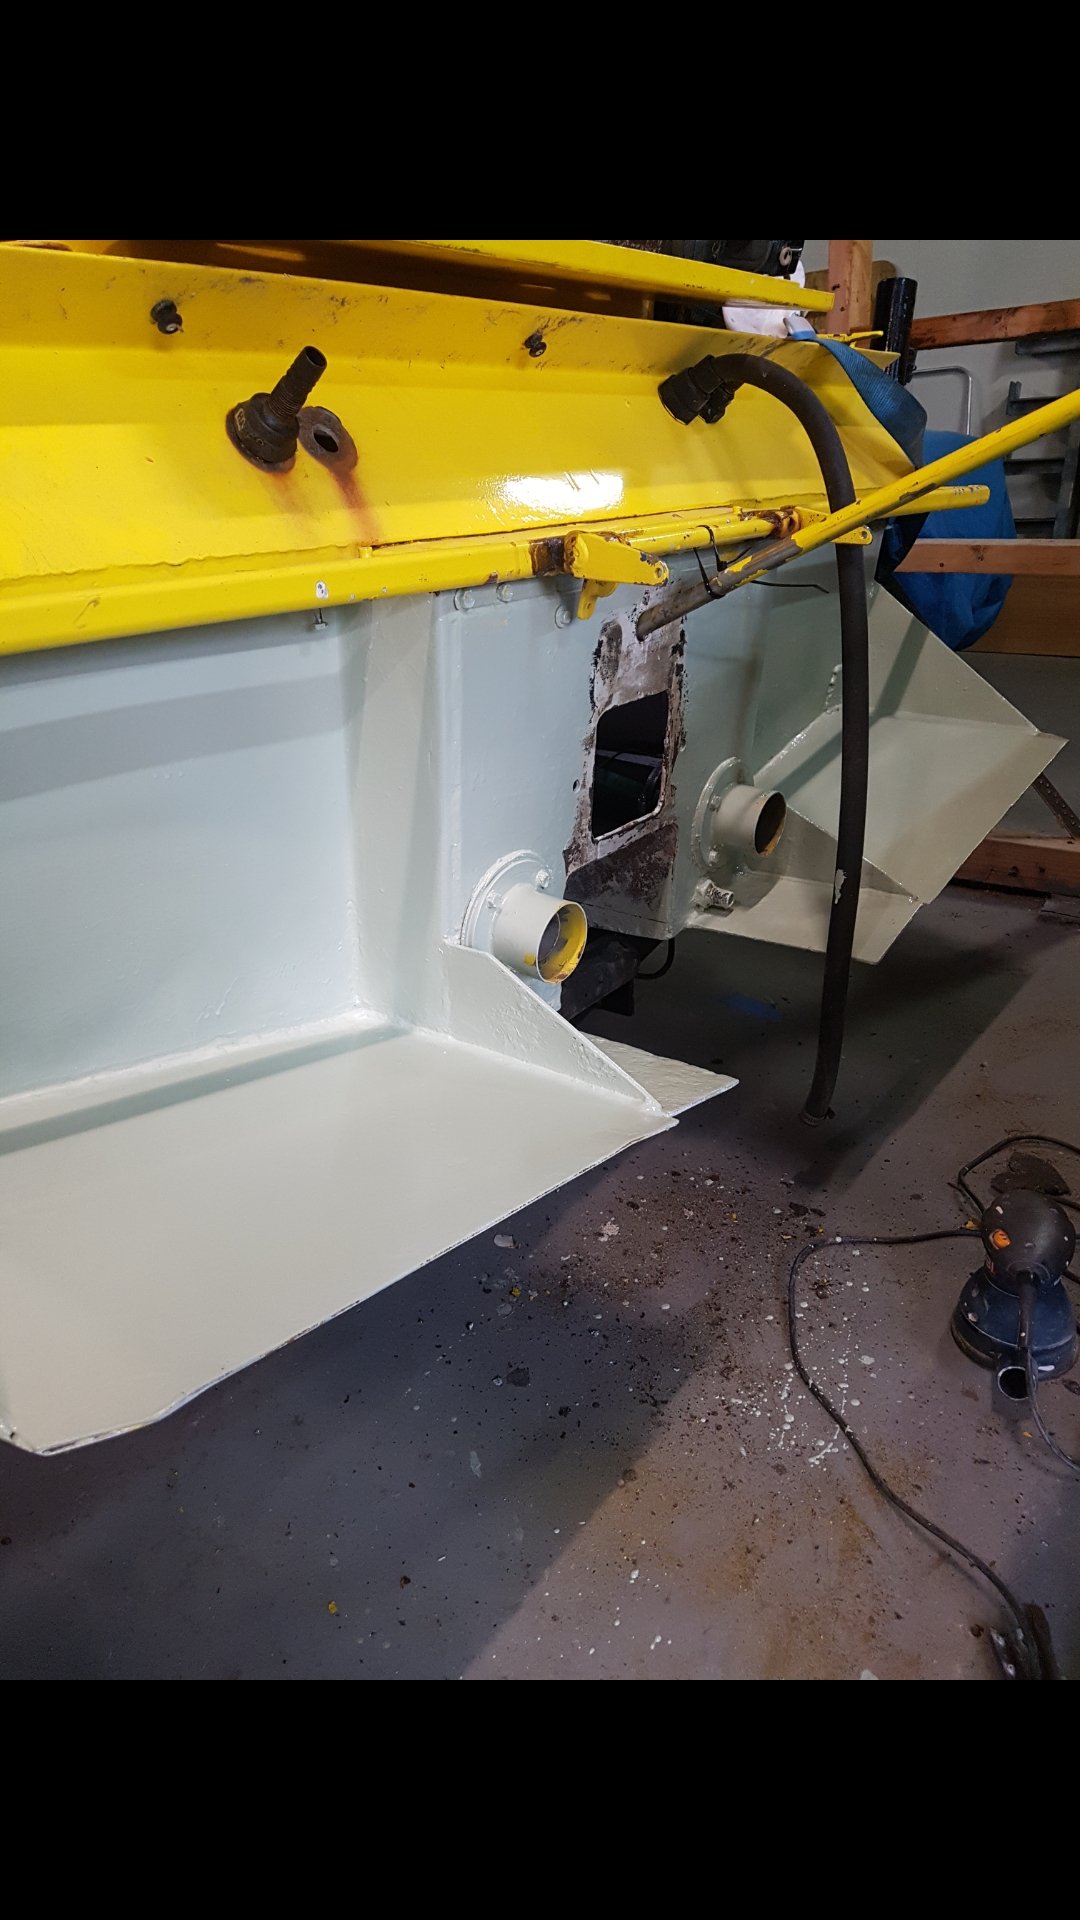
Two steps forward three back today lol. Made a few fuck ups but did get a few other things completed and bought a whole pile of parts I needed. Exhausts back in, rear of hull primed
2 points
-
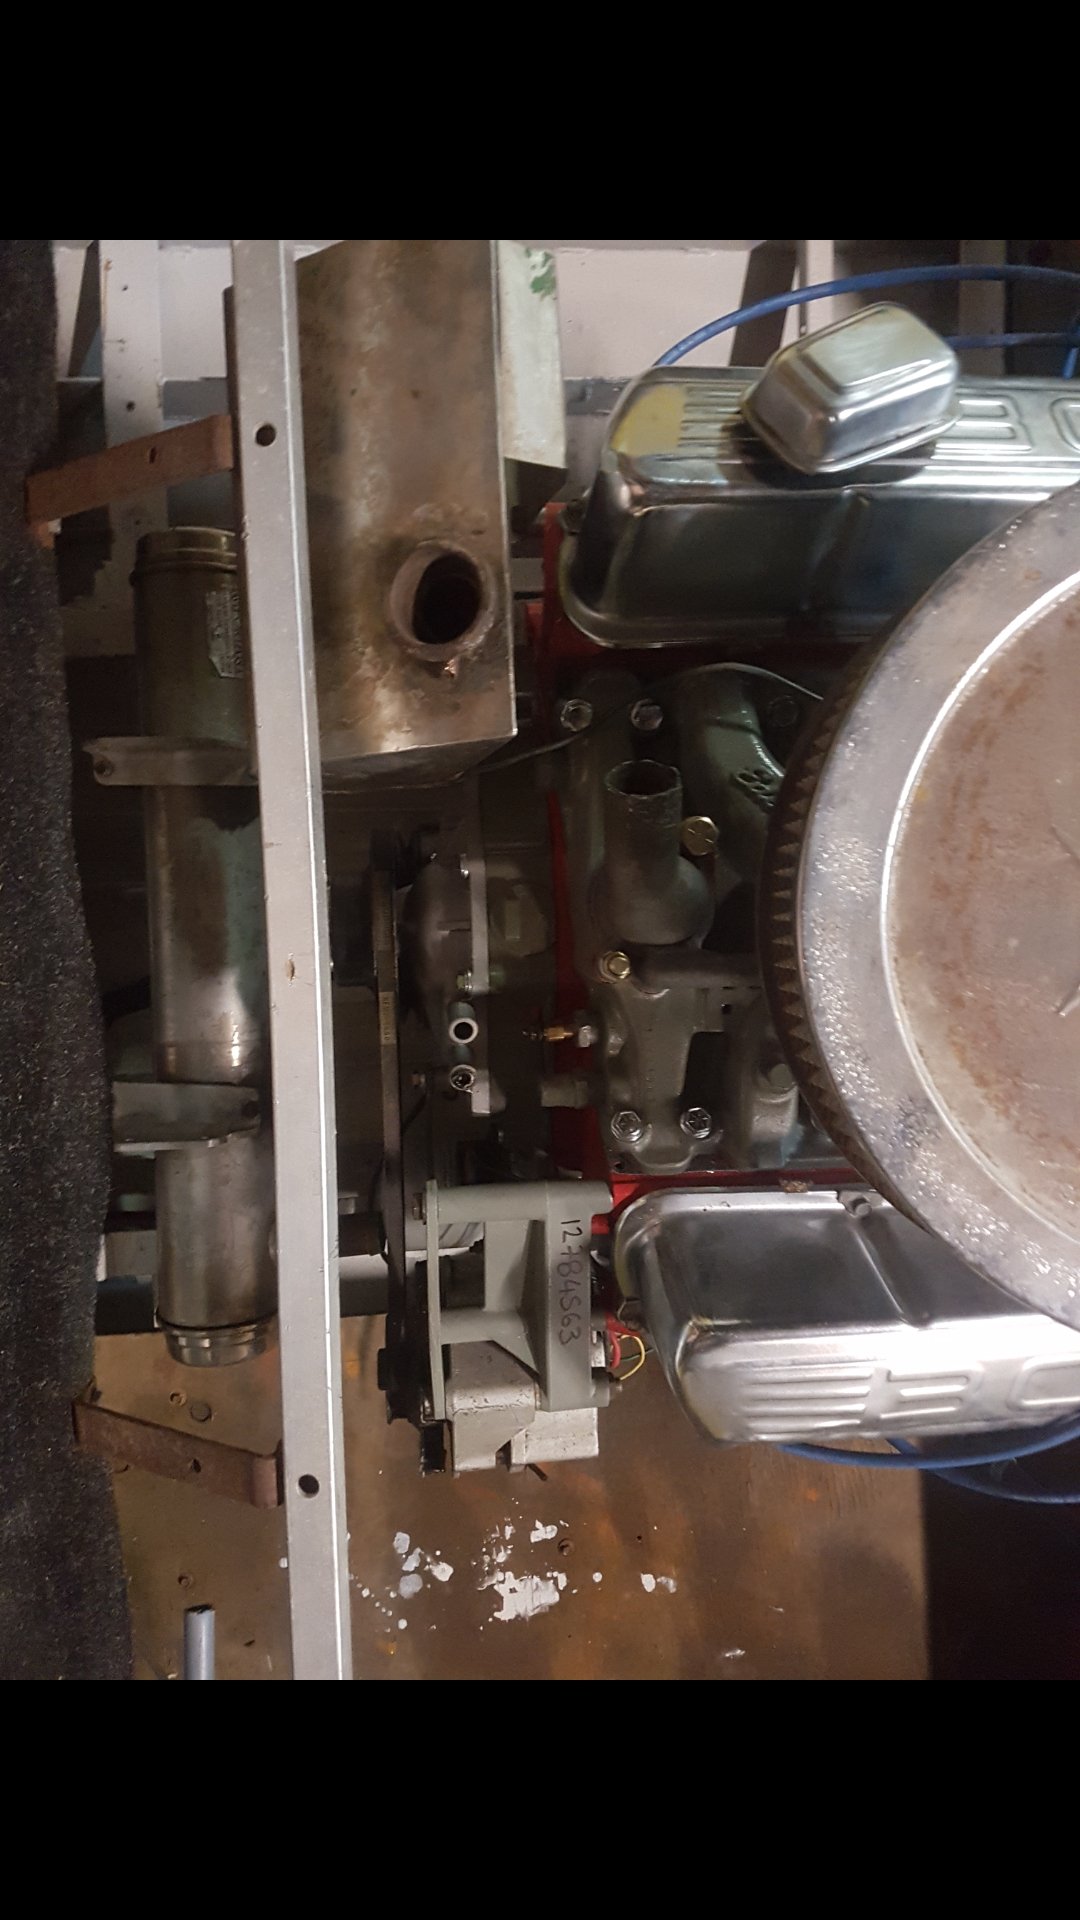
air cleaner details. because, everyone wants to know details about a 4M air cleaner. this particular one is a very early one which has the vent pipe coming into the bottom and also the sides of the thing are part of the top, rather than the normal ones which have the sides as part of the bottom. the later ones also have 3 clips round the edge. this one does not have that, so its aesthetically more pleasing, you can picture it in your mind as you're doing your yoga. im glad we've had this talk. 2018-12-12_05-18-48 by sheepers, on Flickr2 points
-
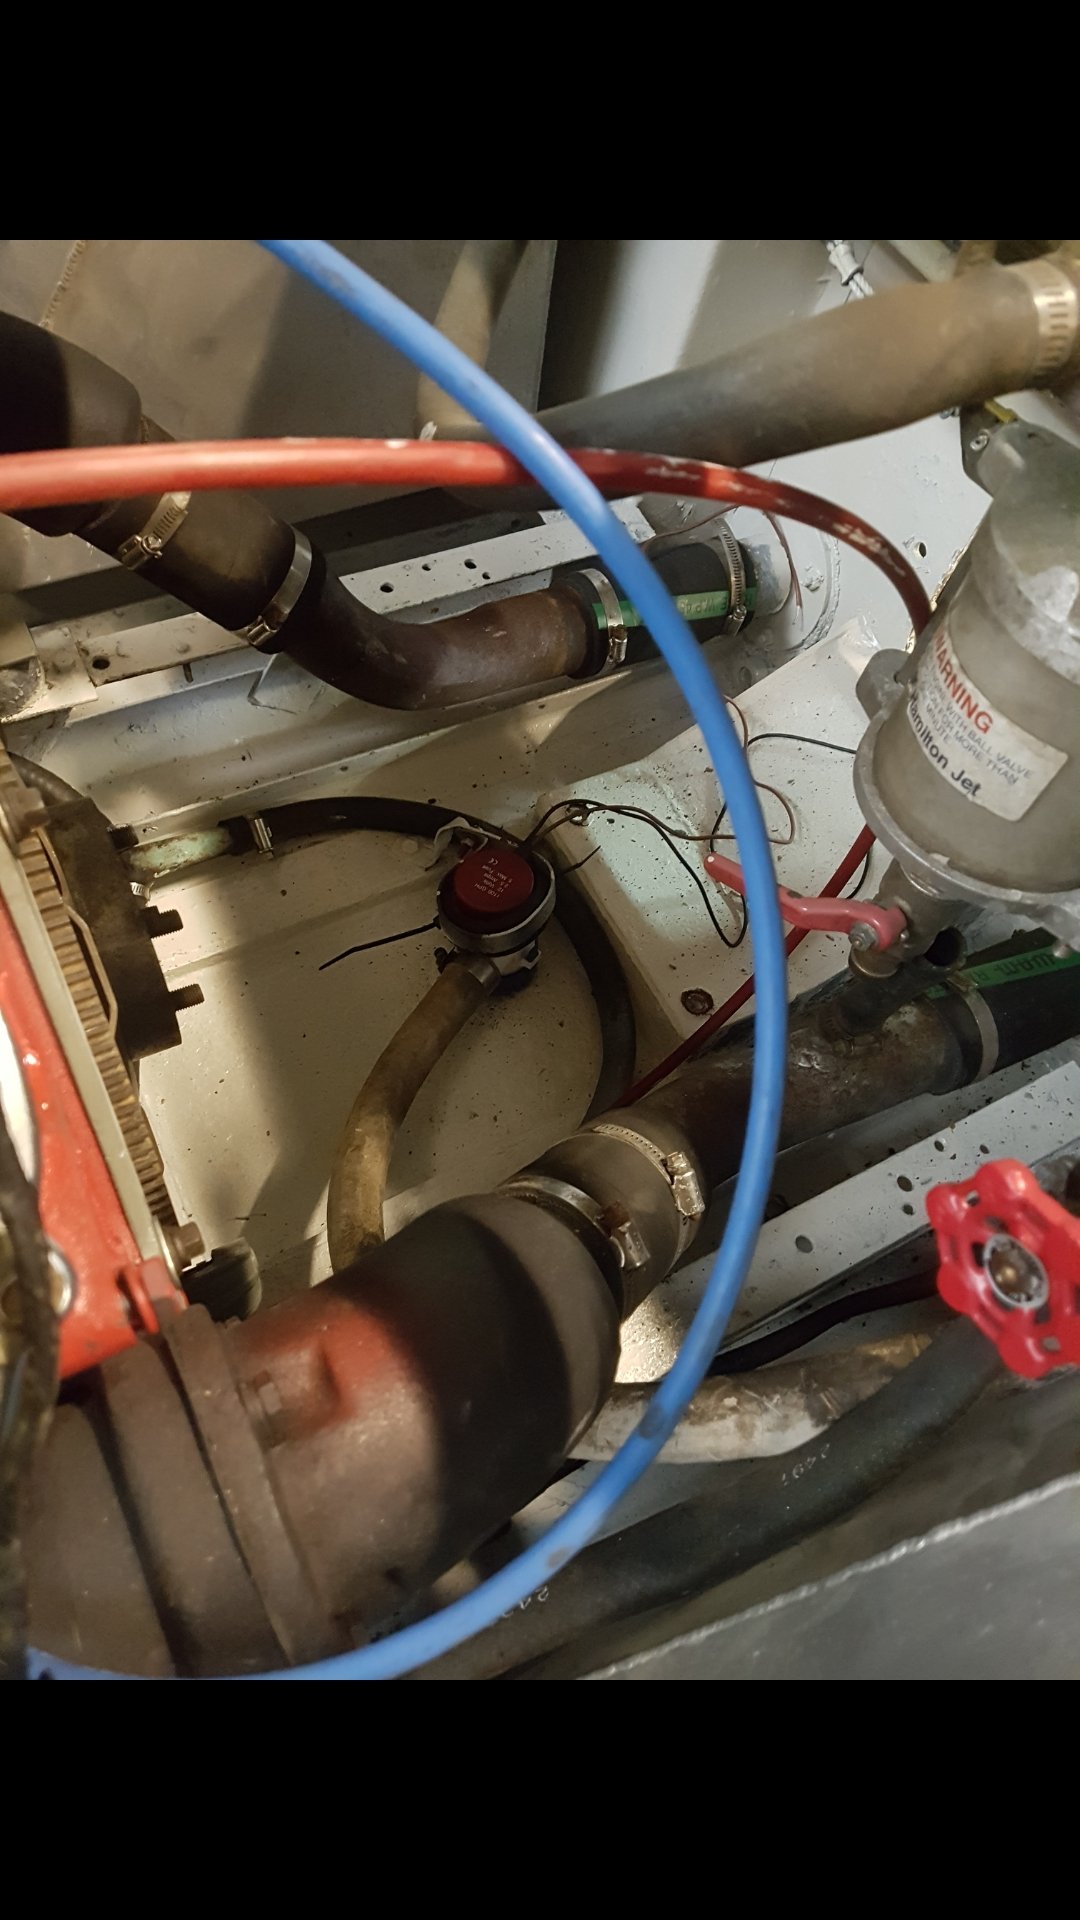
Another good night in the shed. Have now fully realised the level of work left to do in the 2 week window I've allowed myself to get it done in is very tight. Found a stainless but unusual shaped header tank at work that I'll try adapt to work. And have come up with a plan with the heat exchanger. Such a pain the closest shops with necessary adapters and pieces is a decent drive away.
2 points
-
@MopedNZ plz brg mopnz stkrz. I lik stkrz.1 point
-
Man I cant wait for vids of this hooning round mangrove shallows1 point
-
Definitely will not trade again1 point
-
tried a brush tester on the other spare rim, my hand was as steady as MJ Fox's1 point
-
yup, not to do with lobe pulses but the log. as said runners are basically non existent and #1 is directly infront of the S/C and #2 is very close but #3 and #4 are two 90 deg right turns and 75mm and 150mm of log away at 45mmish diameter, which is about the same as the port and valve sizes. The lobe pulses may have some other effects, and the bypass valve is between #2 and #3 so that will have some other effects too. just all about solving problems no one else ever has because of one else has been silly enough to persist with quite the same setup.1 point
-
so have been making adjustments every morning and afternoon driving to/from work mucking with idle/coldstart and datalogging. slowly getting better. the intake backfire is definitely from lean conditions not ignition. comes and goes with fuelling changes. have got rid of most of it now by blending in some mapDOT acceleration enrichment and adjusting the fuelling. still needs the full sequential setup though, there is a dull miss (probably from too rich) even at idle which must be from the uneven air fuel ratios, which would also explain why it seems to need a richer mixture than you would think - e.g mid load cruise 75kPa just over 13:1 when you would think 14:1 would be ok even with the S/C.1 point
-
If stuff like that is happening then the brake caliper/assembly needs a good service. There are no two ways about it.1 point
-
Rockauto comes up a champ. $45 for a guard. https://www.rockauto.com/en/catalog/toyota,1985,4runner,2.4l+l4,1272136,body,fender,13801 point
-
To quote him " It'll all be worth it when I see it coming down the road " / good man.1 point
-
LVVTA is having a Christmas sale on construction manuals $77 for the online version.
1 point
-
I have a bj71 with a 13bt. the one you are looking at rust out around the windscreen frame, I paid $4500 for mine in fairly good condition 8 months or so ago. mine has been addictive to spend money on though and parts are not cheap. if you do buy one go nuts on the fish oil etc inside the body, the handling is terrible if raised, and the brakes are shithouse at best. so yeah buy it.1 point
-
So while I've been pratting around with the rear brakes, like 2 hours to strip 'em, (really stupid wheel cylinder mounting design), Steve cracked on with the welding New inner wing/battery tray Little hole turned into big hole. Apparently I'm going to need a Land Rover body mount here.... Sills coming on a treat, he's going to roll an outer sill to make it look neat & seal at the door bottom. He reckons he'll be done by the end of tomorrow, I believe him.1 point
-
Quick Google suggests a G4+ is 40Mhz Dual Processor.1 point
-
The fun of putting it all back in! Going to be some late nights this week in the shed.
1 point
-
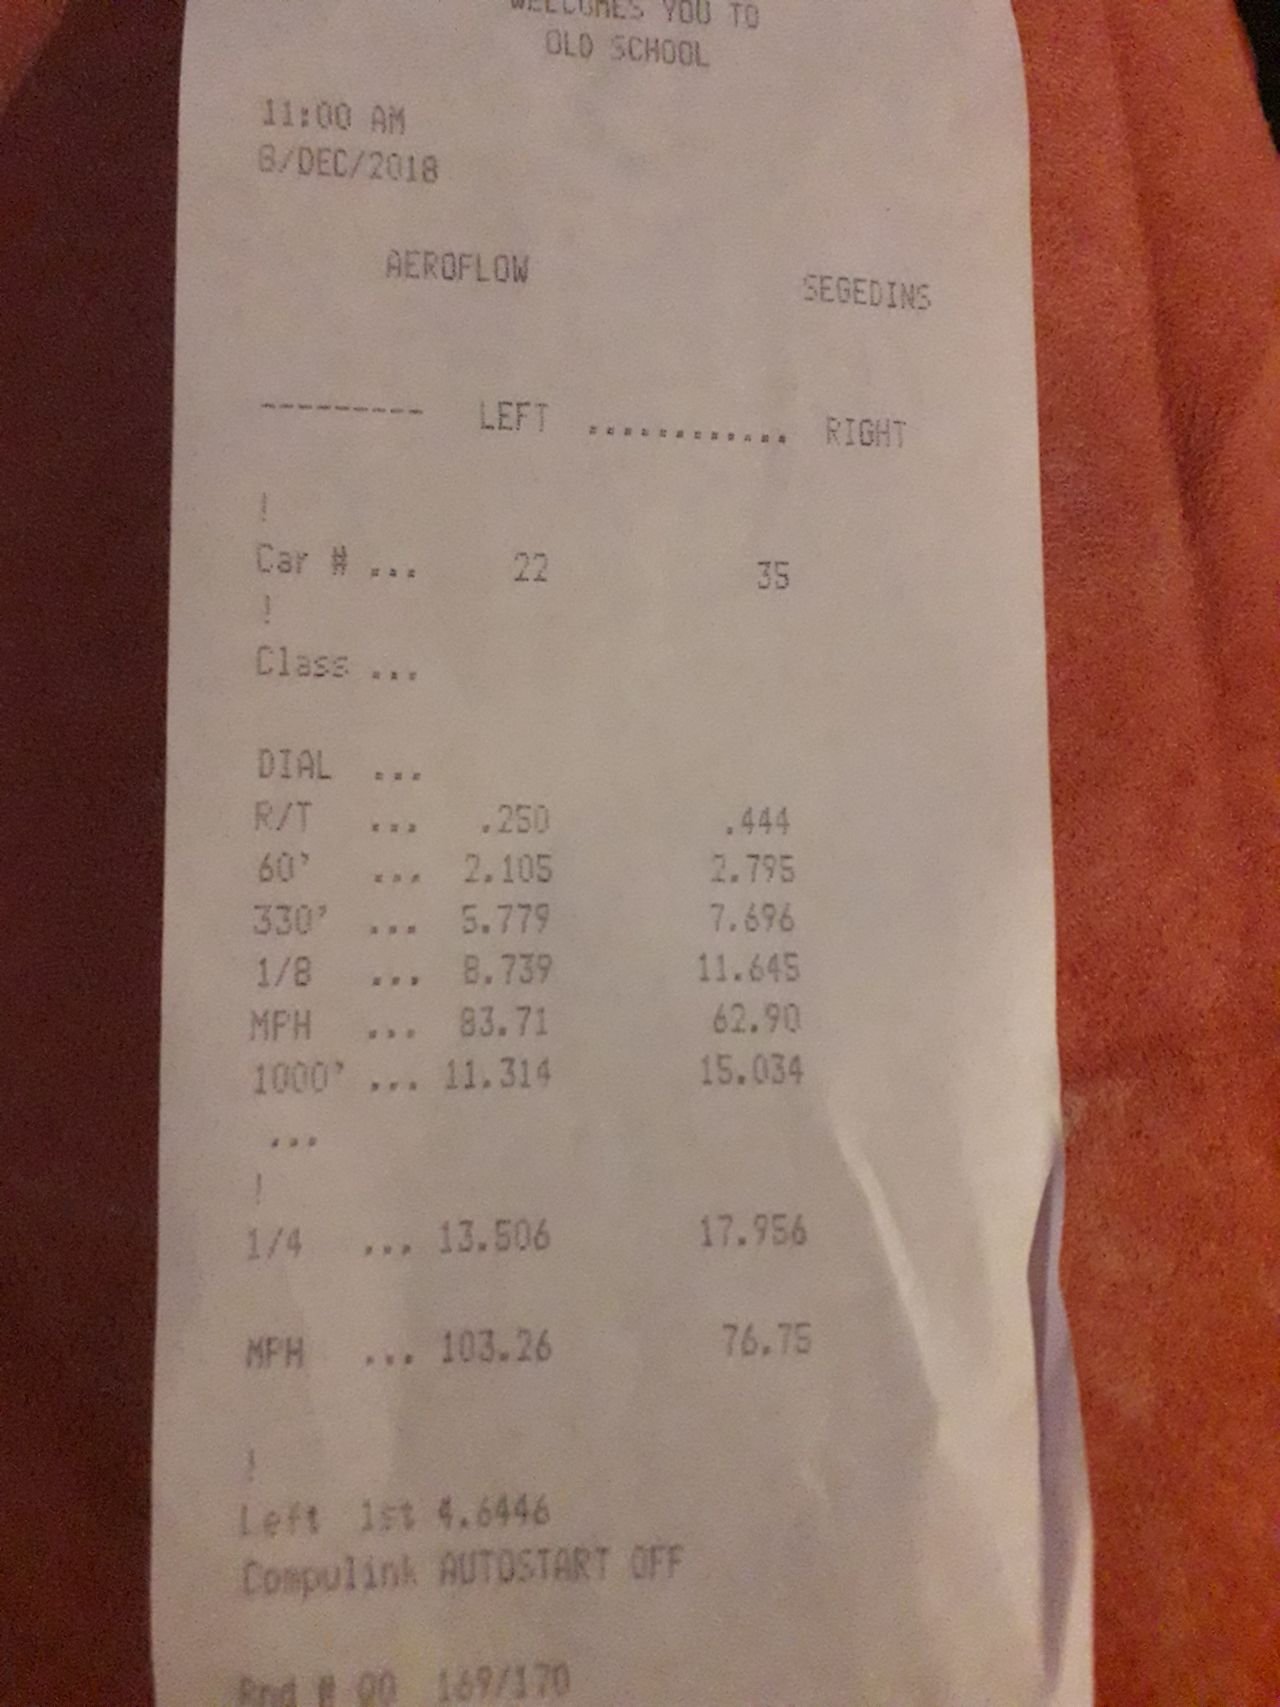
Last time at drags: 13.796 @ 102.22mph - 2.122 60ft yesterday : #22 (only change is inlet cam swapped to exhaust side and new bigger inlet cam + tuning) done 104mph in a couple of other runs, plus wasn't going full rapist on gear changes like last time. since 3 hours from home without back up vehicle. So yeh more power confirmed. if was set up for drags with some kinda slicks, would probably do a low 13 maybe very high 12. / break, so thats not gonna happen. Pretty happy with 13.5, not bad for a shitty old 4age with no turbo, in a chassis setup for going around corners Also thanks to the gc's that organized and ran os drags
1 point
-
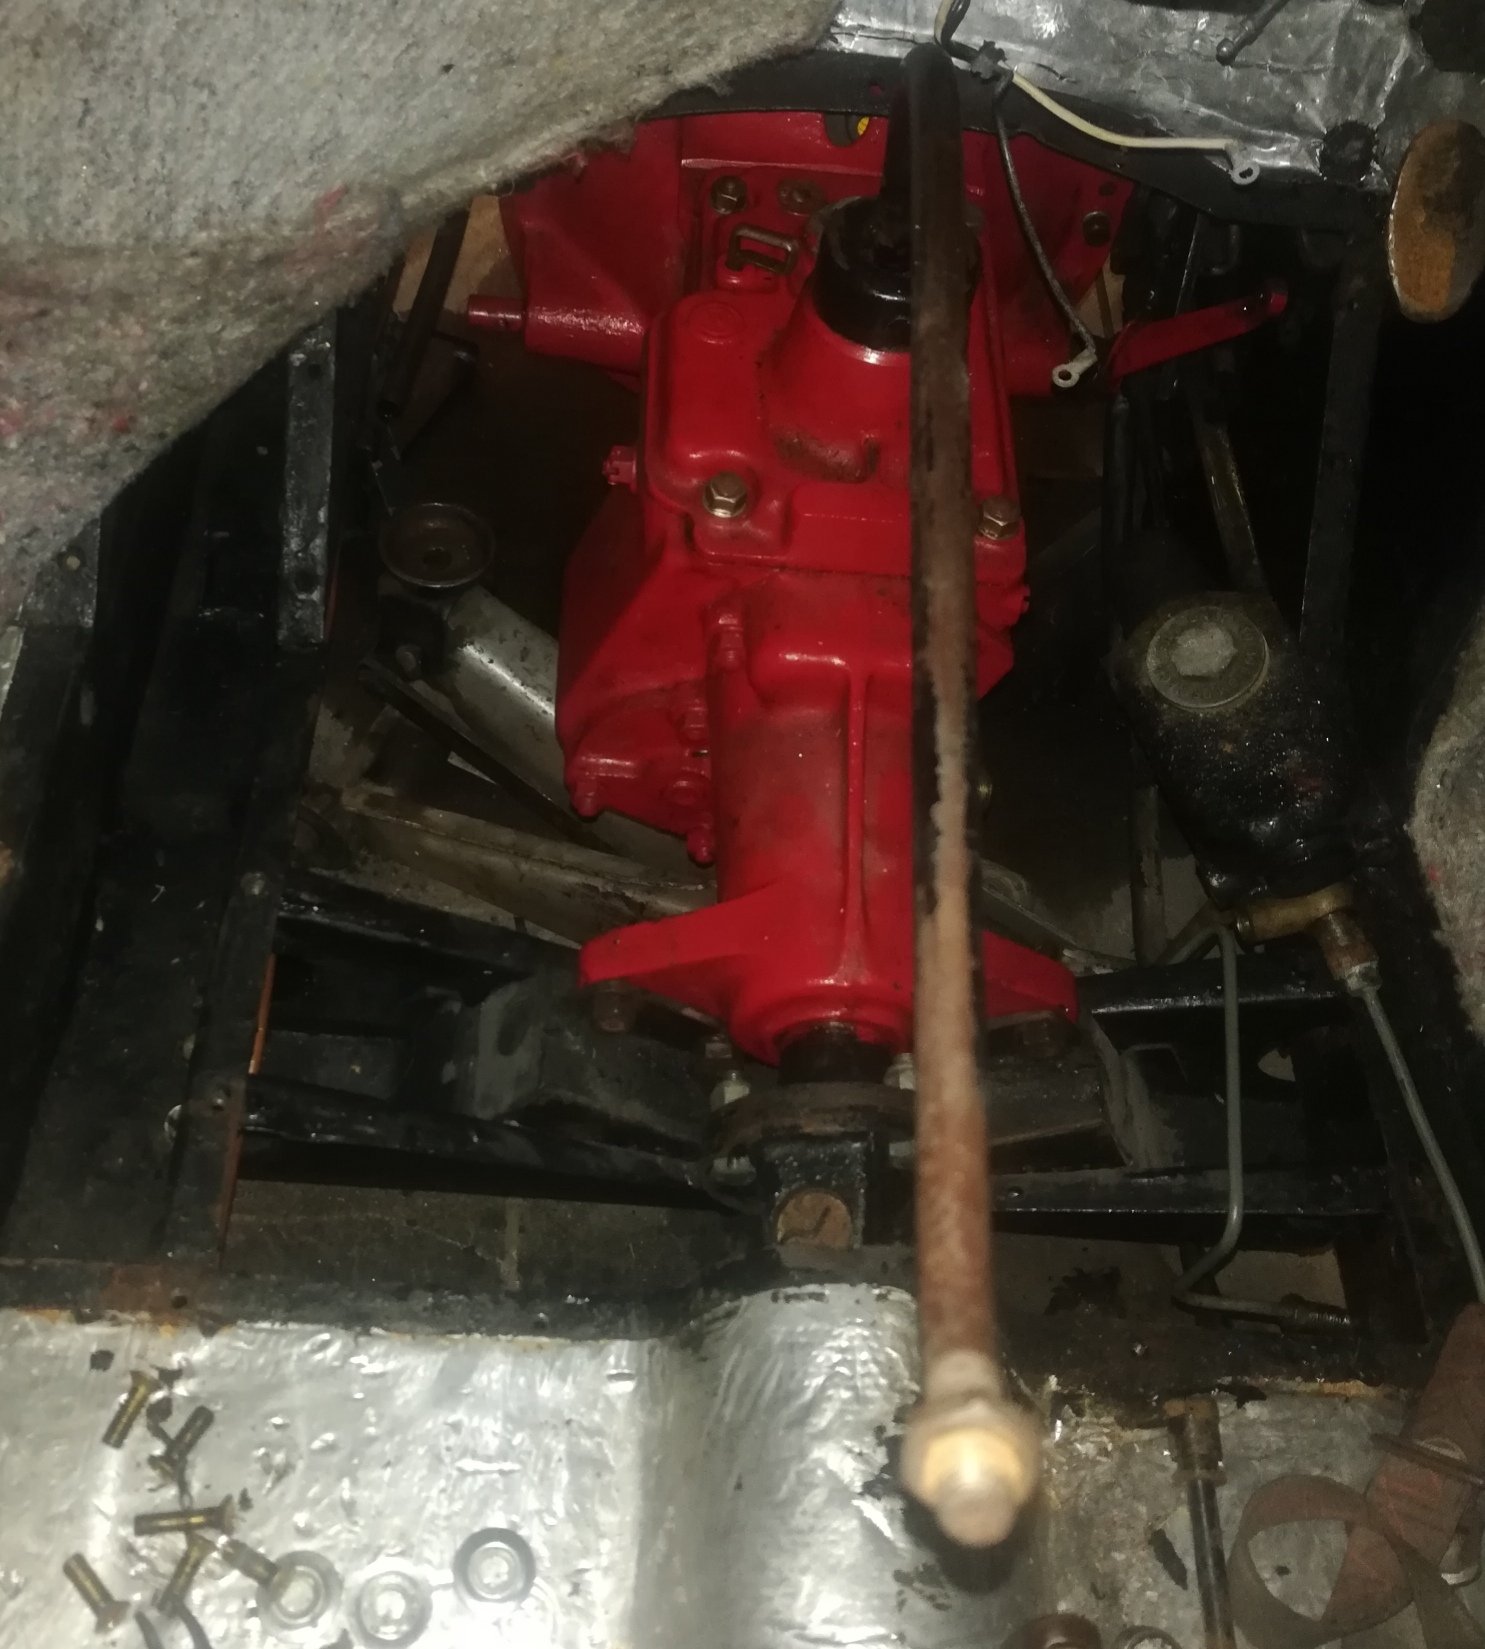
Gearbox and cross member back in and attached to the driveshaft. Special ordered some 30mm copper washers for the engine and gearbox sump bolts. So they are in and filled with fresh oil. Now I need to put the master cylinder in and rebleed the whole system. And then finally, at last, I can start on tuning the carbs
1 point
-
The guy I got the seal from also had one of these Its a quality italian FAVA steering centre link that goes between the steering box and damper, and the steering tie rod ends (2x each side!) bolt onto it. So many ball joints! Meant i could now use the cheap Delphi tie rods i got from Rockauto a while back Old rubbish vs new hotness. The old tie rods were actually ok (the outers at least were replacements) , but the ball joints on the center link (that go into the steering box and damper) were stuck solid. Ive used the straight (and much much cheaper) Lada fitment inner tie rods on my 125 Sedan as well and it seems to make no difference, the 'bent' Fiat ones just have a bit more clearance from the centre link ball joints at full lock. While i was there I also test fitted the larger 132 front brakes, and figured out why my wheel bearing keeps going out of spec. The little lock tab had broken off so the washer was able to spin with the bearing and then act on the nut is there nothing a blob of weld and a flap disc cant fix? Bigger discs fitted too, turns out just the caliper carrier and disc are different from the standard 124/125 stuff, as the calipers are exactly the same. So I dont even need to bleed the brakes, post a brake upgrade, and the top hat thickness negates the need to use the factory 6mm spacers ------ The white Hammerite was chipping off the meshies, so while the fronts were off i sprayed them Actually sprayed a couple of them a few different colours until i settled on 'wheel paint : silver' in a can over a darker (previous coat of unloved bronze) base Added a bit of a mist of highlight to the inside of the mesh from the back1 point
-
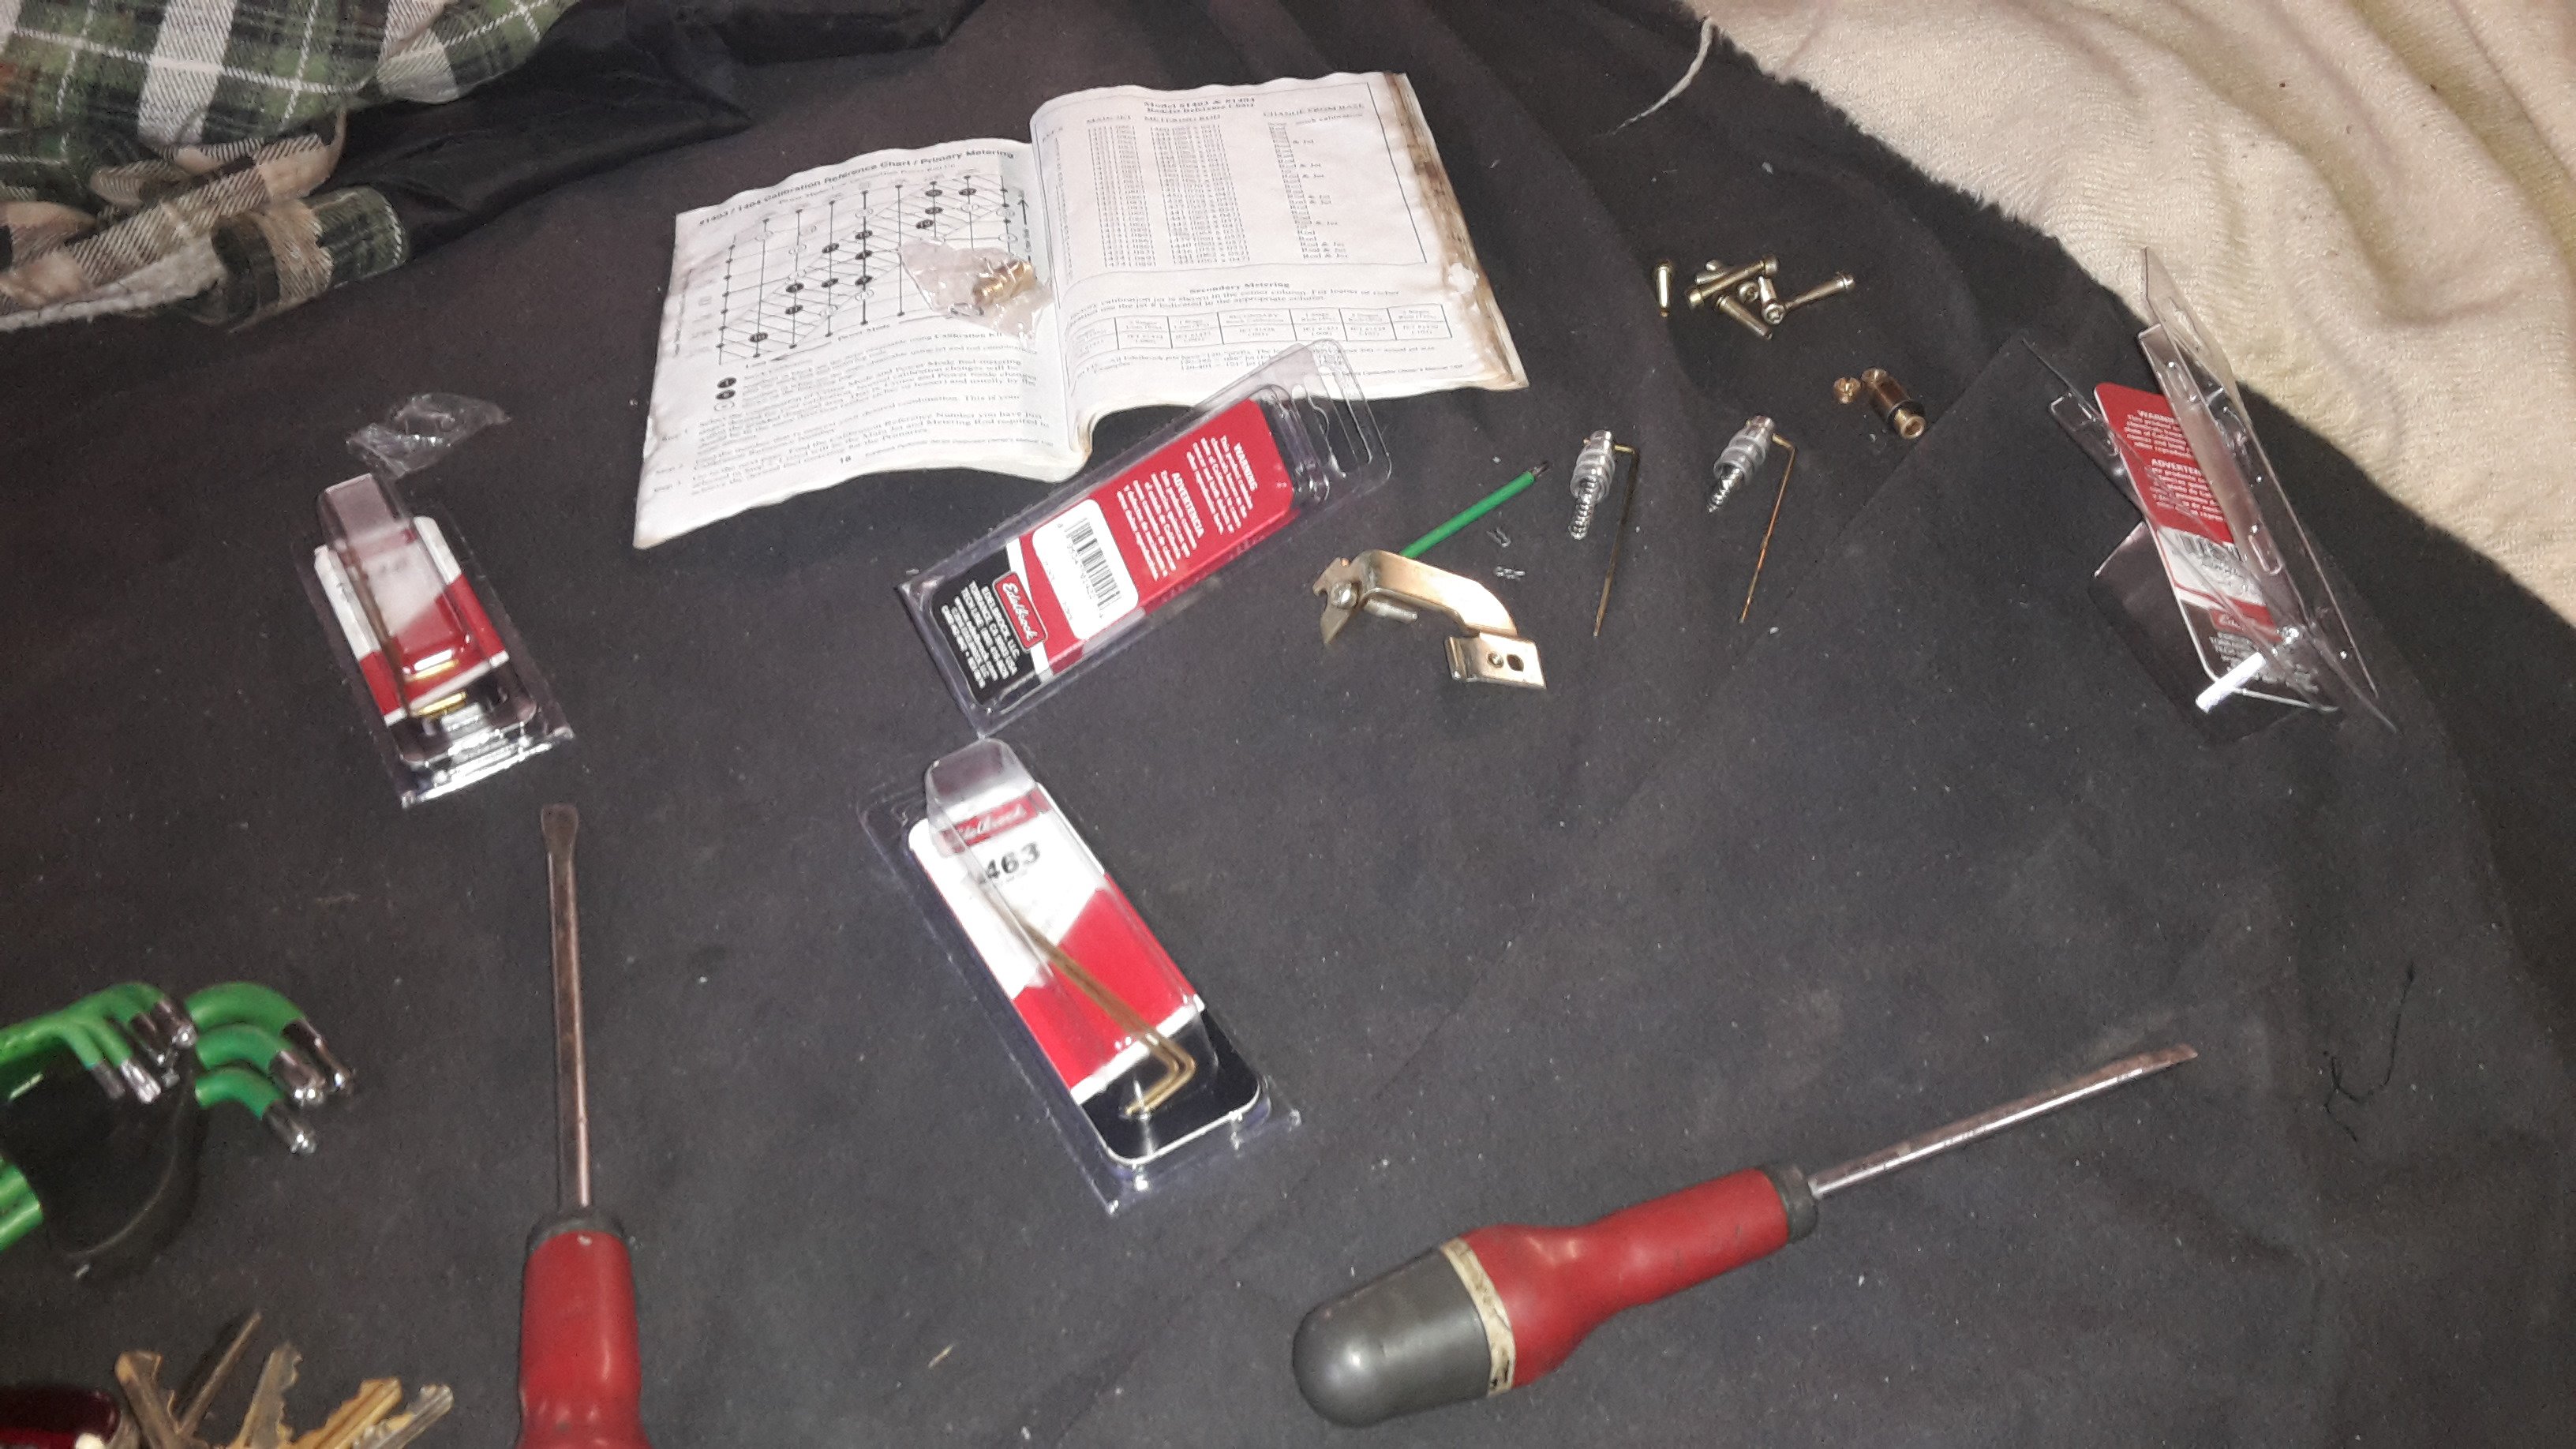
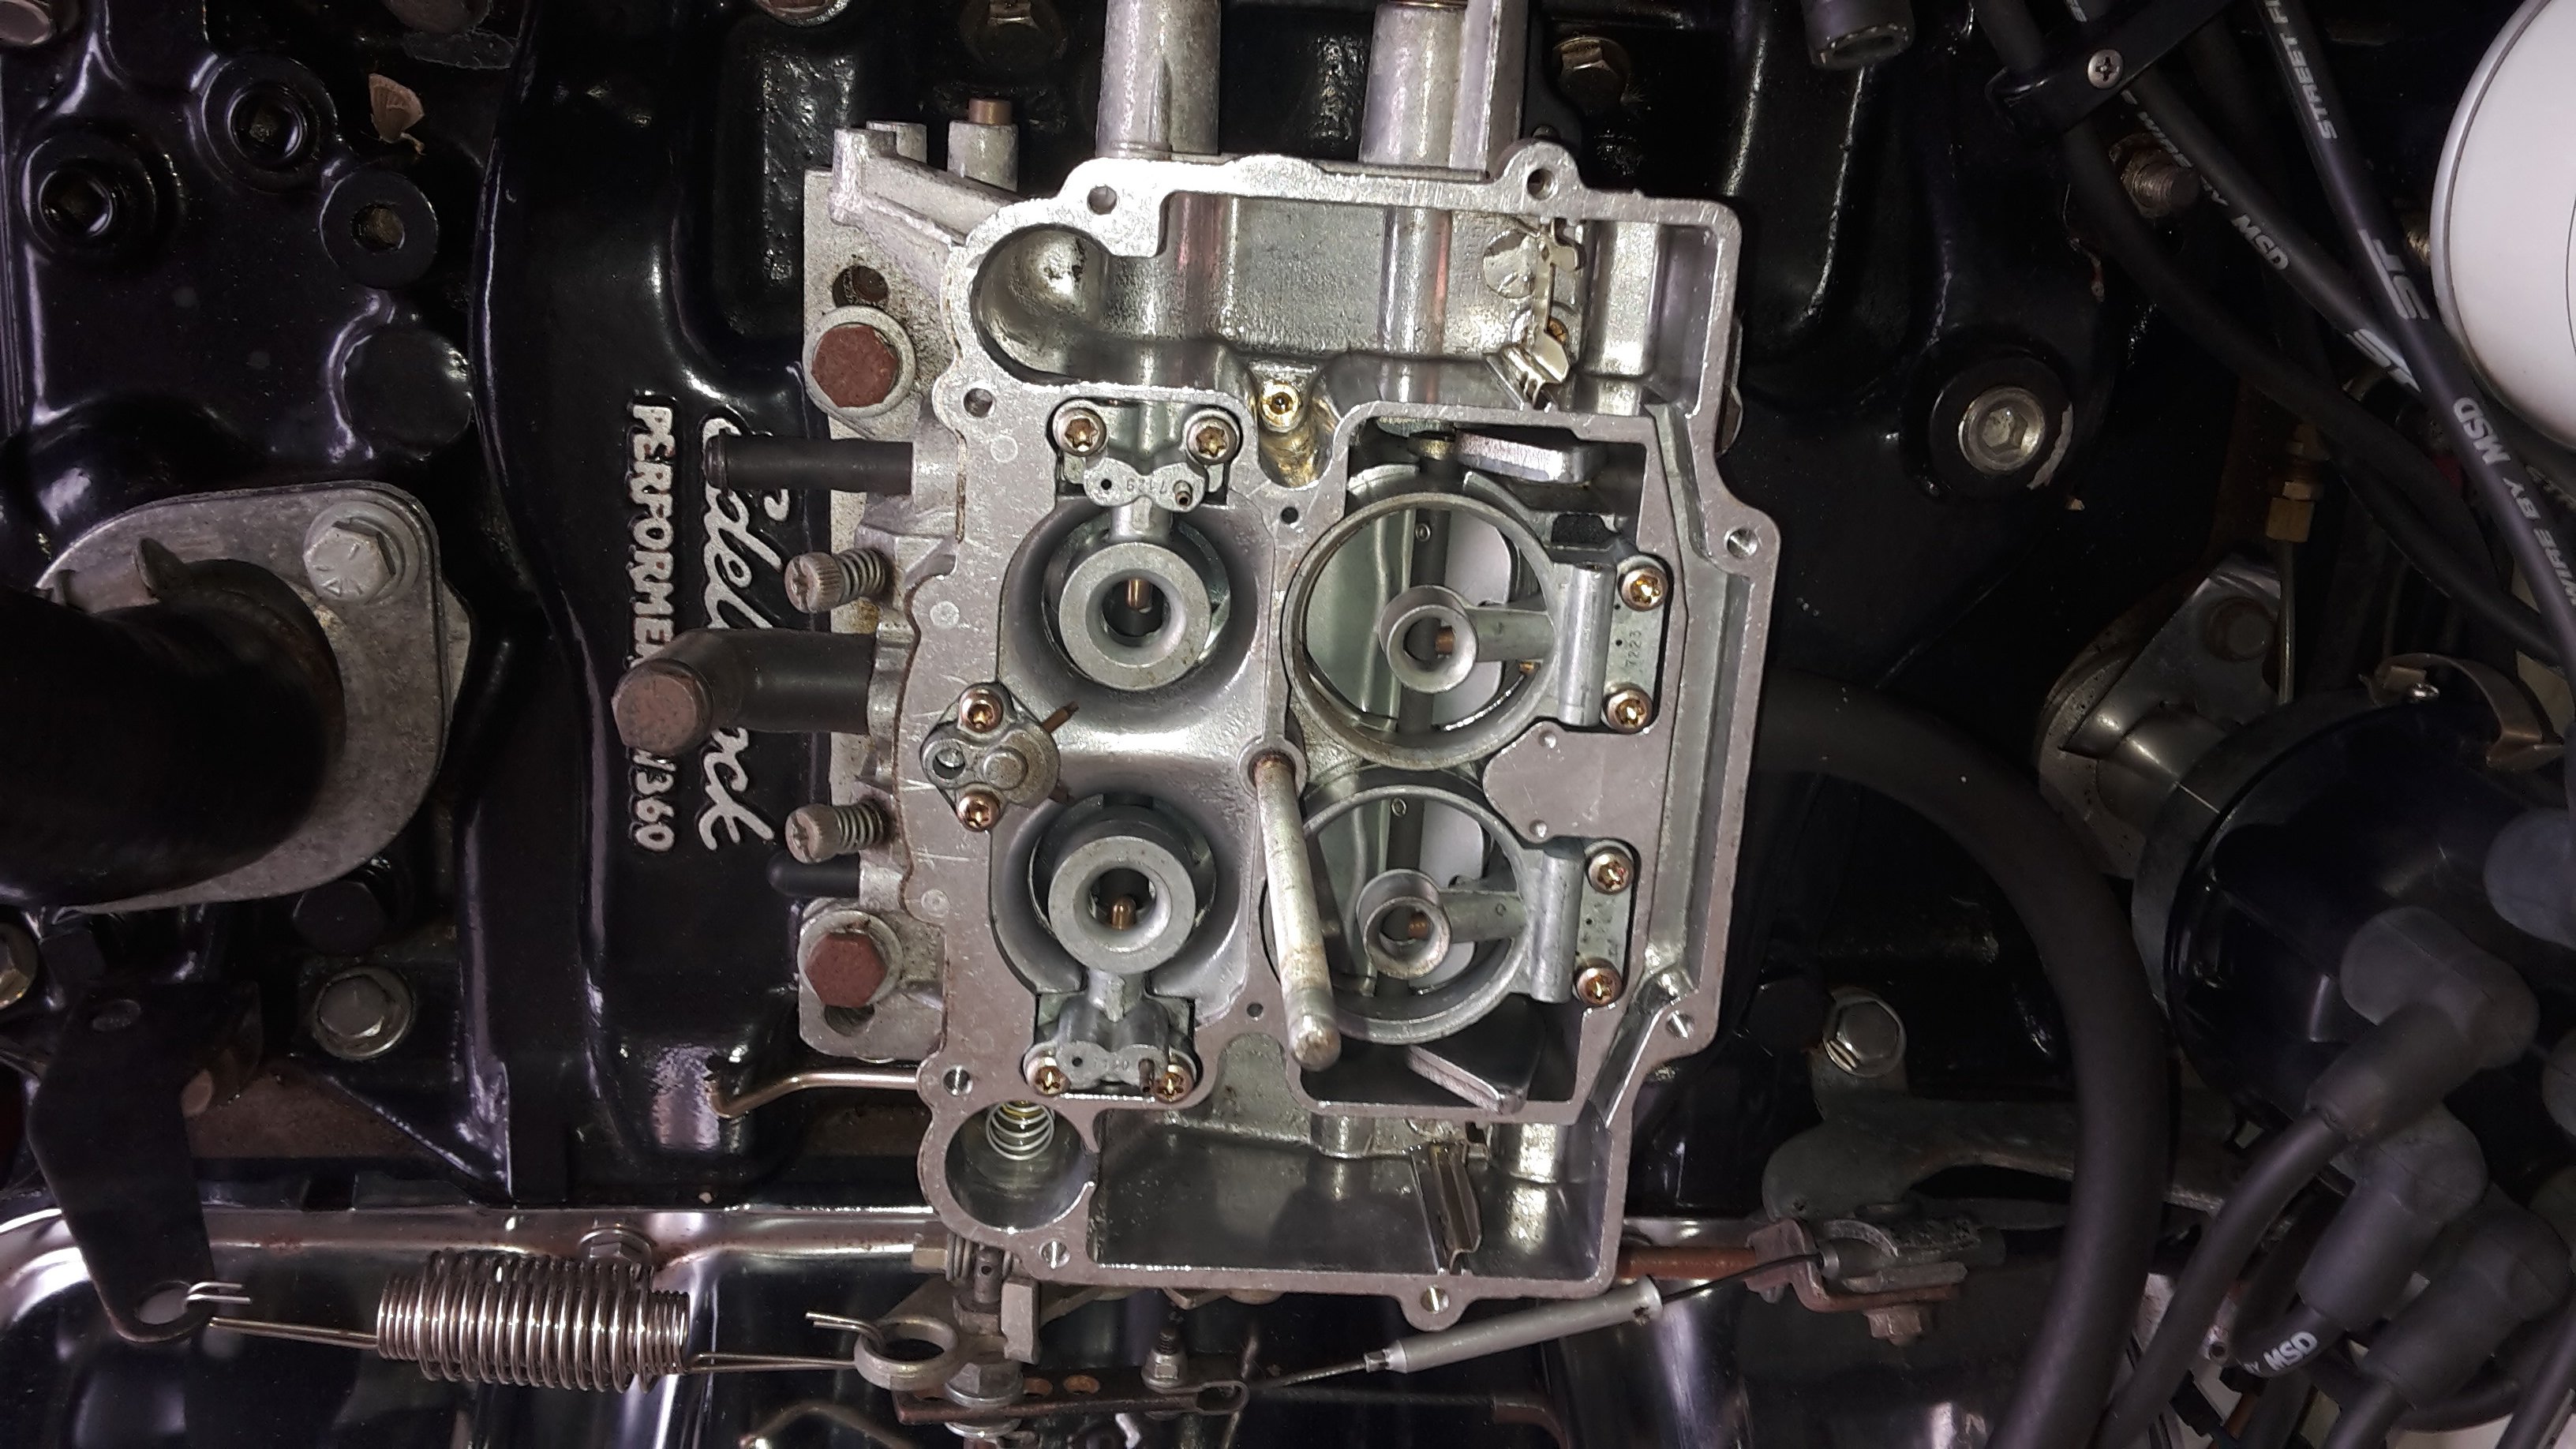
So that got me confused cause I didn't know what the heck that means. Thought about putting a holley on it cause I know how they work but then found the manual and figured out how the chart works it's actually quite simple once you have the list that is on the next page which wasn't on the internet Edelbrock carbs have a primary system which has a jet, with a rod that goes in and out, controlled by vacuum . So you pick a combo of jets and needles based on where in the chart you want to be.
1 point
-
So my donuts finally turned up a couple of days late. I didn't think to take a pre-cutting photo but this was what it looked like when it turned up: I got stuck straight into cutting them up and hoping like hell I didn't screw them up. I made up a quick and nasty jig to help make sure each cut was made square to the center line and therefore the round profile was retained. It could have been better but it more or less did the job. With the jig, I got each bend cut out quick smart and taped it all up. Here is the passenger side: And the driver's side finished up too: Of course, I had to sling it into the bay and check out the fit. It'd be rude not to really. I learned a couple of things. Firstly, there isn't an awful lot of room between the passenger side strut tower and the intakes. Secondly, there isn't a lot of clearance between the TPS and the upper bulkhead at all, and no room for the clutch fluid reservoir in the position I had it. I can solve that piece of cake though by scalloping the bulkhead slightly and repositioning the clutch fluid reservoir somewhere more convenient, a handy side effect of having a remote reservoir. I also threw the bonnet on and checked that for clearance. Here is the view through the heater bubble hole: Looks good... And from the front: Heaps of room. Tomorrow I'll see about making some tweaks to try and blend the original manifold flanges into the bends better, as well as hopefully make a little more room between the strut tower and the intake. Then I'll see what kind of a mess I can make of the whole lot with the welder while making dort noises in my head. Should be swell!1 point
-
1 point
-
Got the front back together yesterday and bonnet back on! Flew through a@Snoozin inspection today aswell so that's good! Have a few things on the list left to do but otherwise it's looking great!
1 point
-
Finally docked with this guy anonymous photo sharing sites1 point
-
Ordered some Cobras, 1 inch drop and they are the perfect length for keeping standard sett up captive Took it for a quick test drive, springs feel a bit firmer, Really need to get onto that double garage for these two After Not slammed but by the time it's got two passengers in the front it sits quite a bit lower and is still functional Picked up a sweet key ring (NOS i think?)1 point
-
HP Upgrade imgurl free image hosting1 point
-
then had some standard rims widened, 195/60 front and 205/60 rear, painted them grey to start with and had hubcaps, later powdercoated black and ran no hubcaps with bullet nuts
1 point
-
Bought an alternative set of wheels. I bid on the original auction and lost, they were old crusty wheels that needed a tart up. then they ended up back on TM after being polished and painted the correct gunmetal colour, they got cheaper over a few weeks then I got them for $400 plus freight up from nelson. they are not perfect- but I got them on the car today with a couple of new rear tyres and I'm quite pleased. 205/60 front, 205/70 rear
1 point
-
So as some of you might have noticed in another thread I started over in the dark side of the bike section..I have been having sweet dreams about a future Imp project involving a Honda Goldwing Flat six... For that flat six growl ! Create a Imp 911. Hillman 911? Anyway.. I have spent a fair proportion of good sleeping time recently laying awake going through ideas on how and looking through drawings on a workshop manual I downloaded. It had it all worked out this morning. Worked out how to deal with the oil pump drive, create a Flywheel hub, deal with the alternator and water pump issues etc etc. It was looking good. But then a fella goes by the name of Darkspeed on Retrorides, who's been into Imps for a fair while and had once investigated the same engine, quipped in... "I think they might be counterclockers" Yes. Dammit. He is correct. After all those late night/ early morning ponderings I failed to spot which side of the belts the cam belt tensioners were on... So yeah. Back to the drawing board. Which could mean using the stock transmission and cobble together a neat little diff. The output is offset though. But diff could be offset a little and then extend one axle drive outwards, supported to suit. So long as the uni/Cv joints are in line with the stock position it'll be fine. A sequential shift. Hmmm. Plus some later Goldwings have a electric reverse (how much it can deal with I dont know though) Anyway.. this idea is ways off so back to welding. Oh and also...look who came through and stayed the night on their Tour of love to Nats down south. Fun times were had that night! Very chilled. They all took a quite shine to the alluring beauty of an Imp... Hopefully I will see more Imps turn up on Oldschool in the future1 point
-
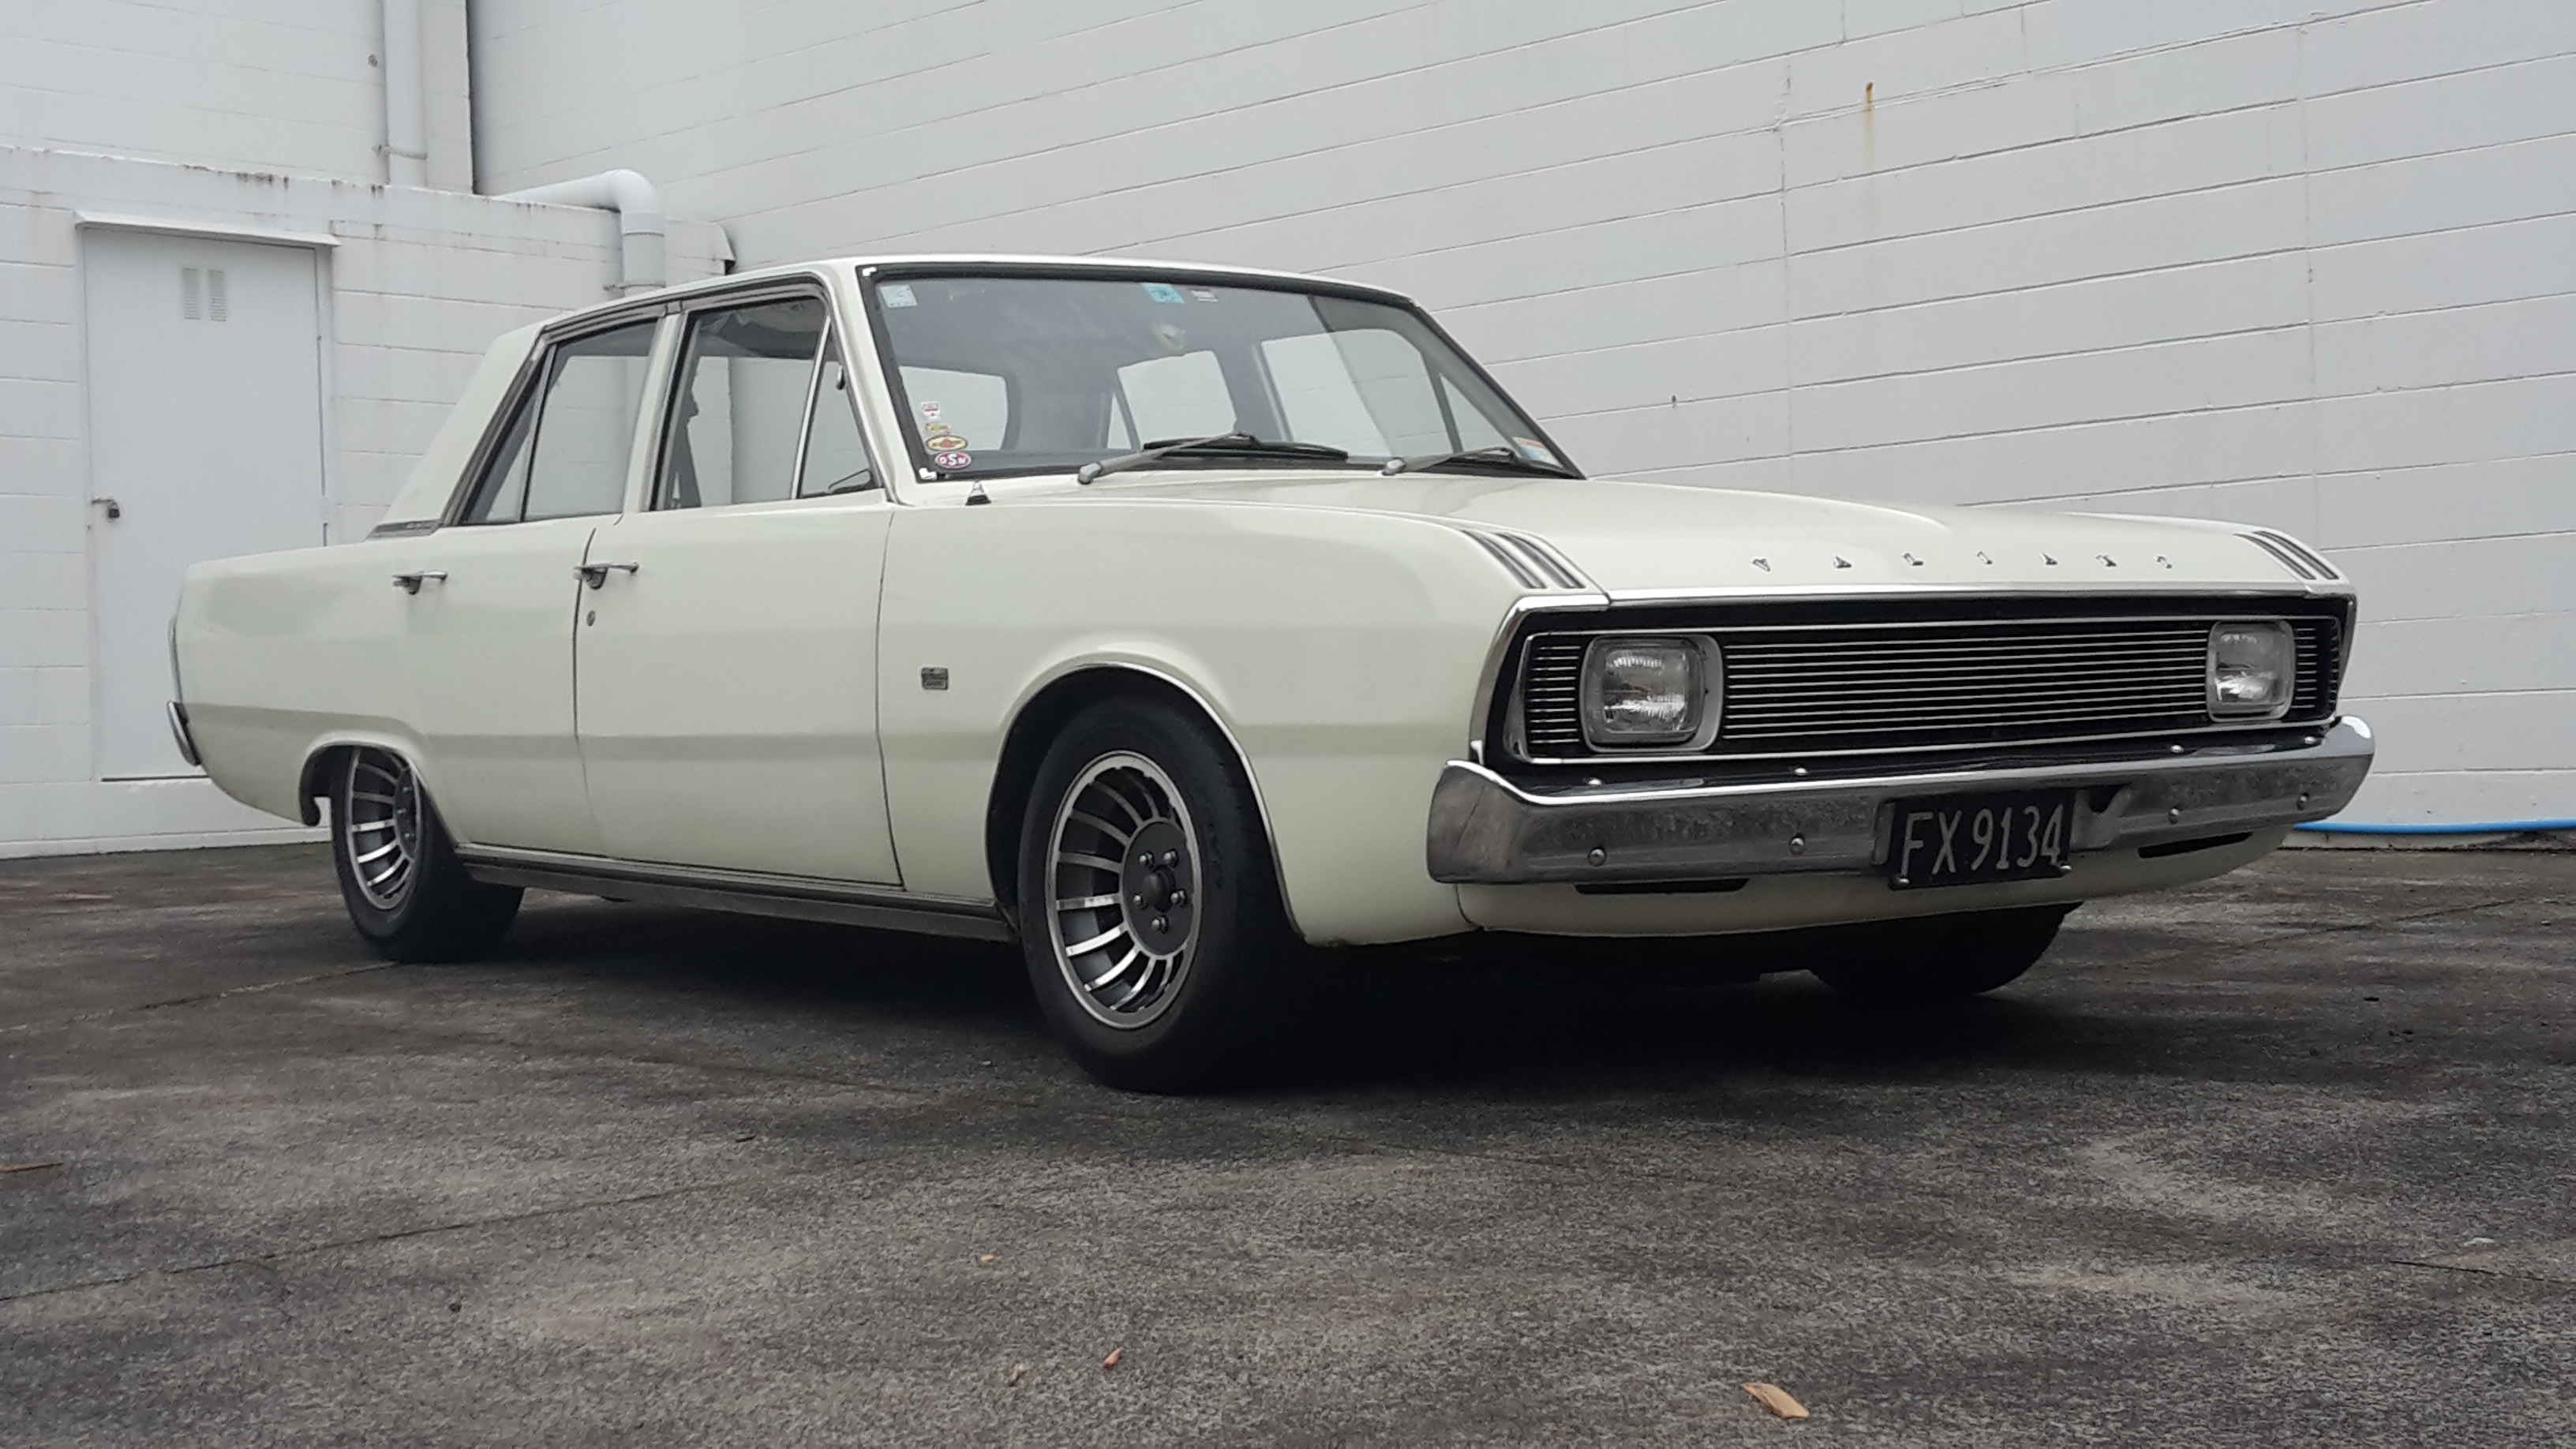
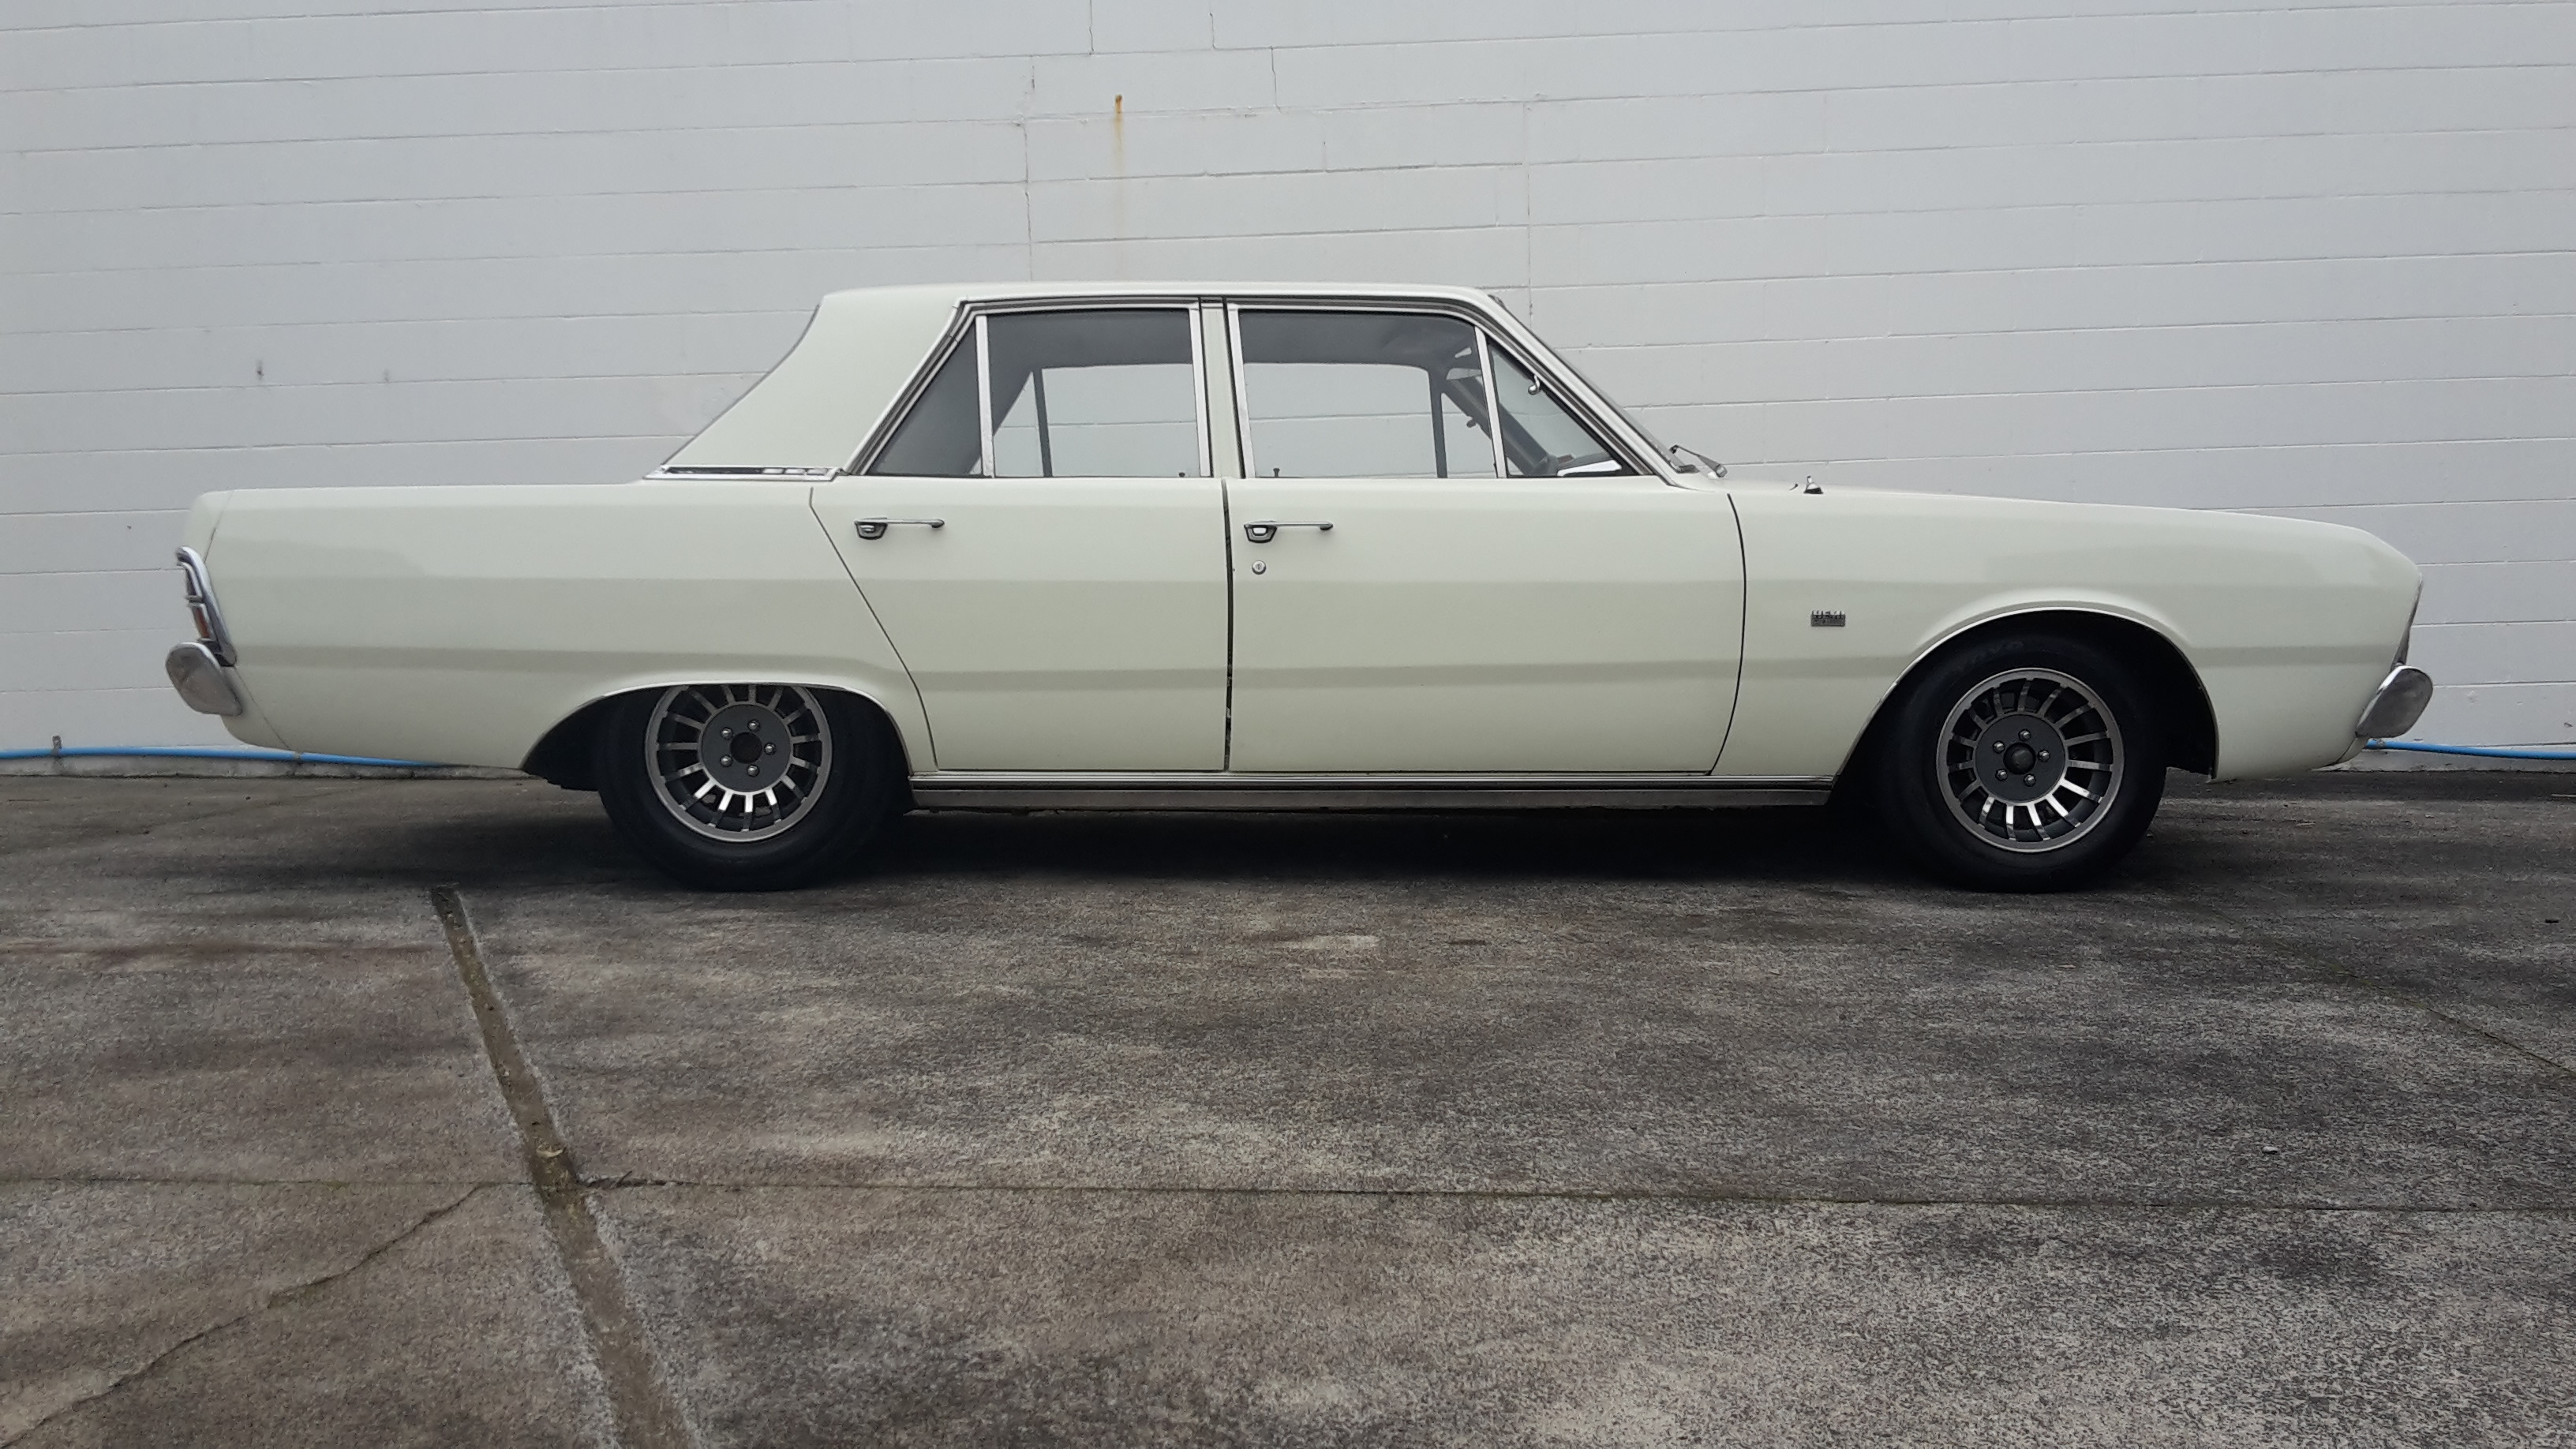
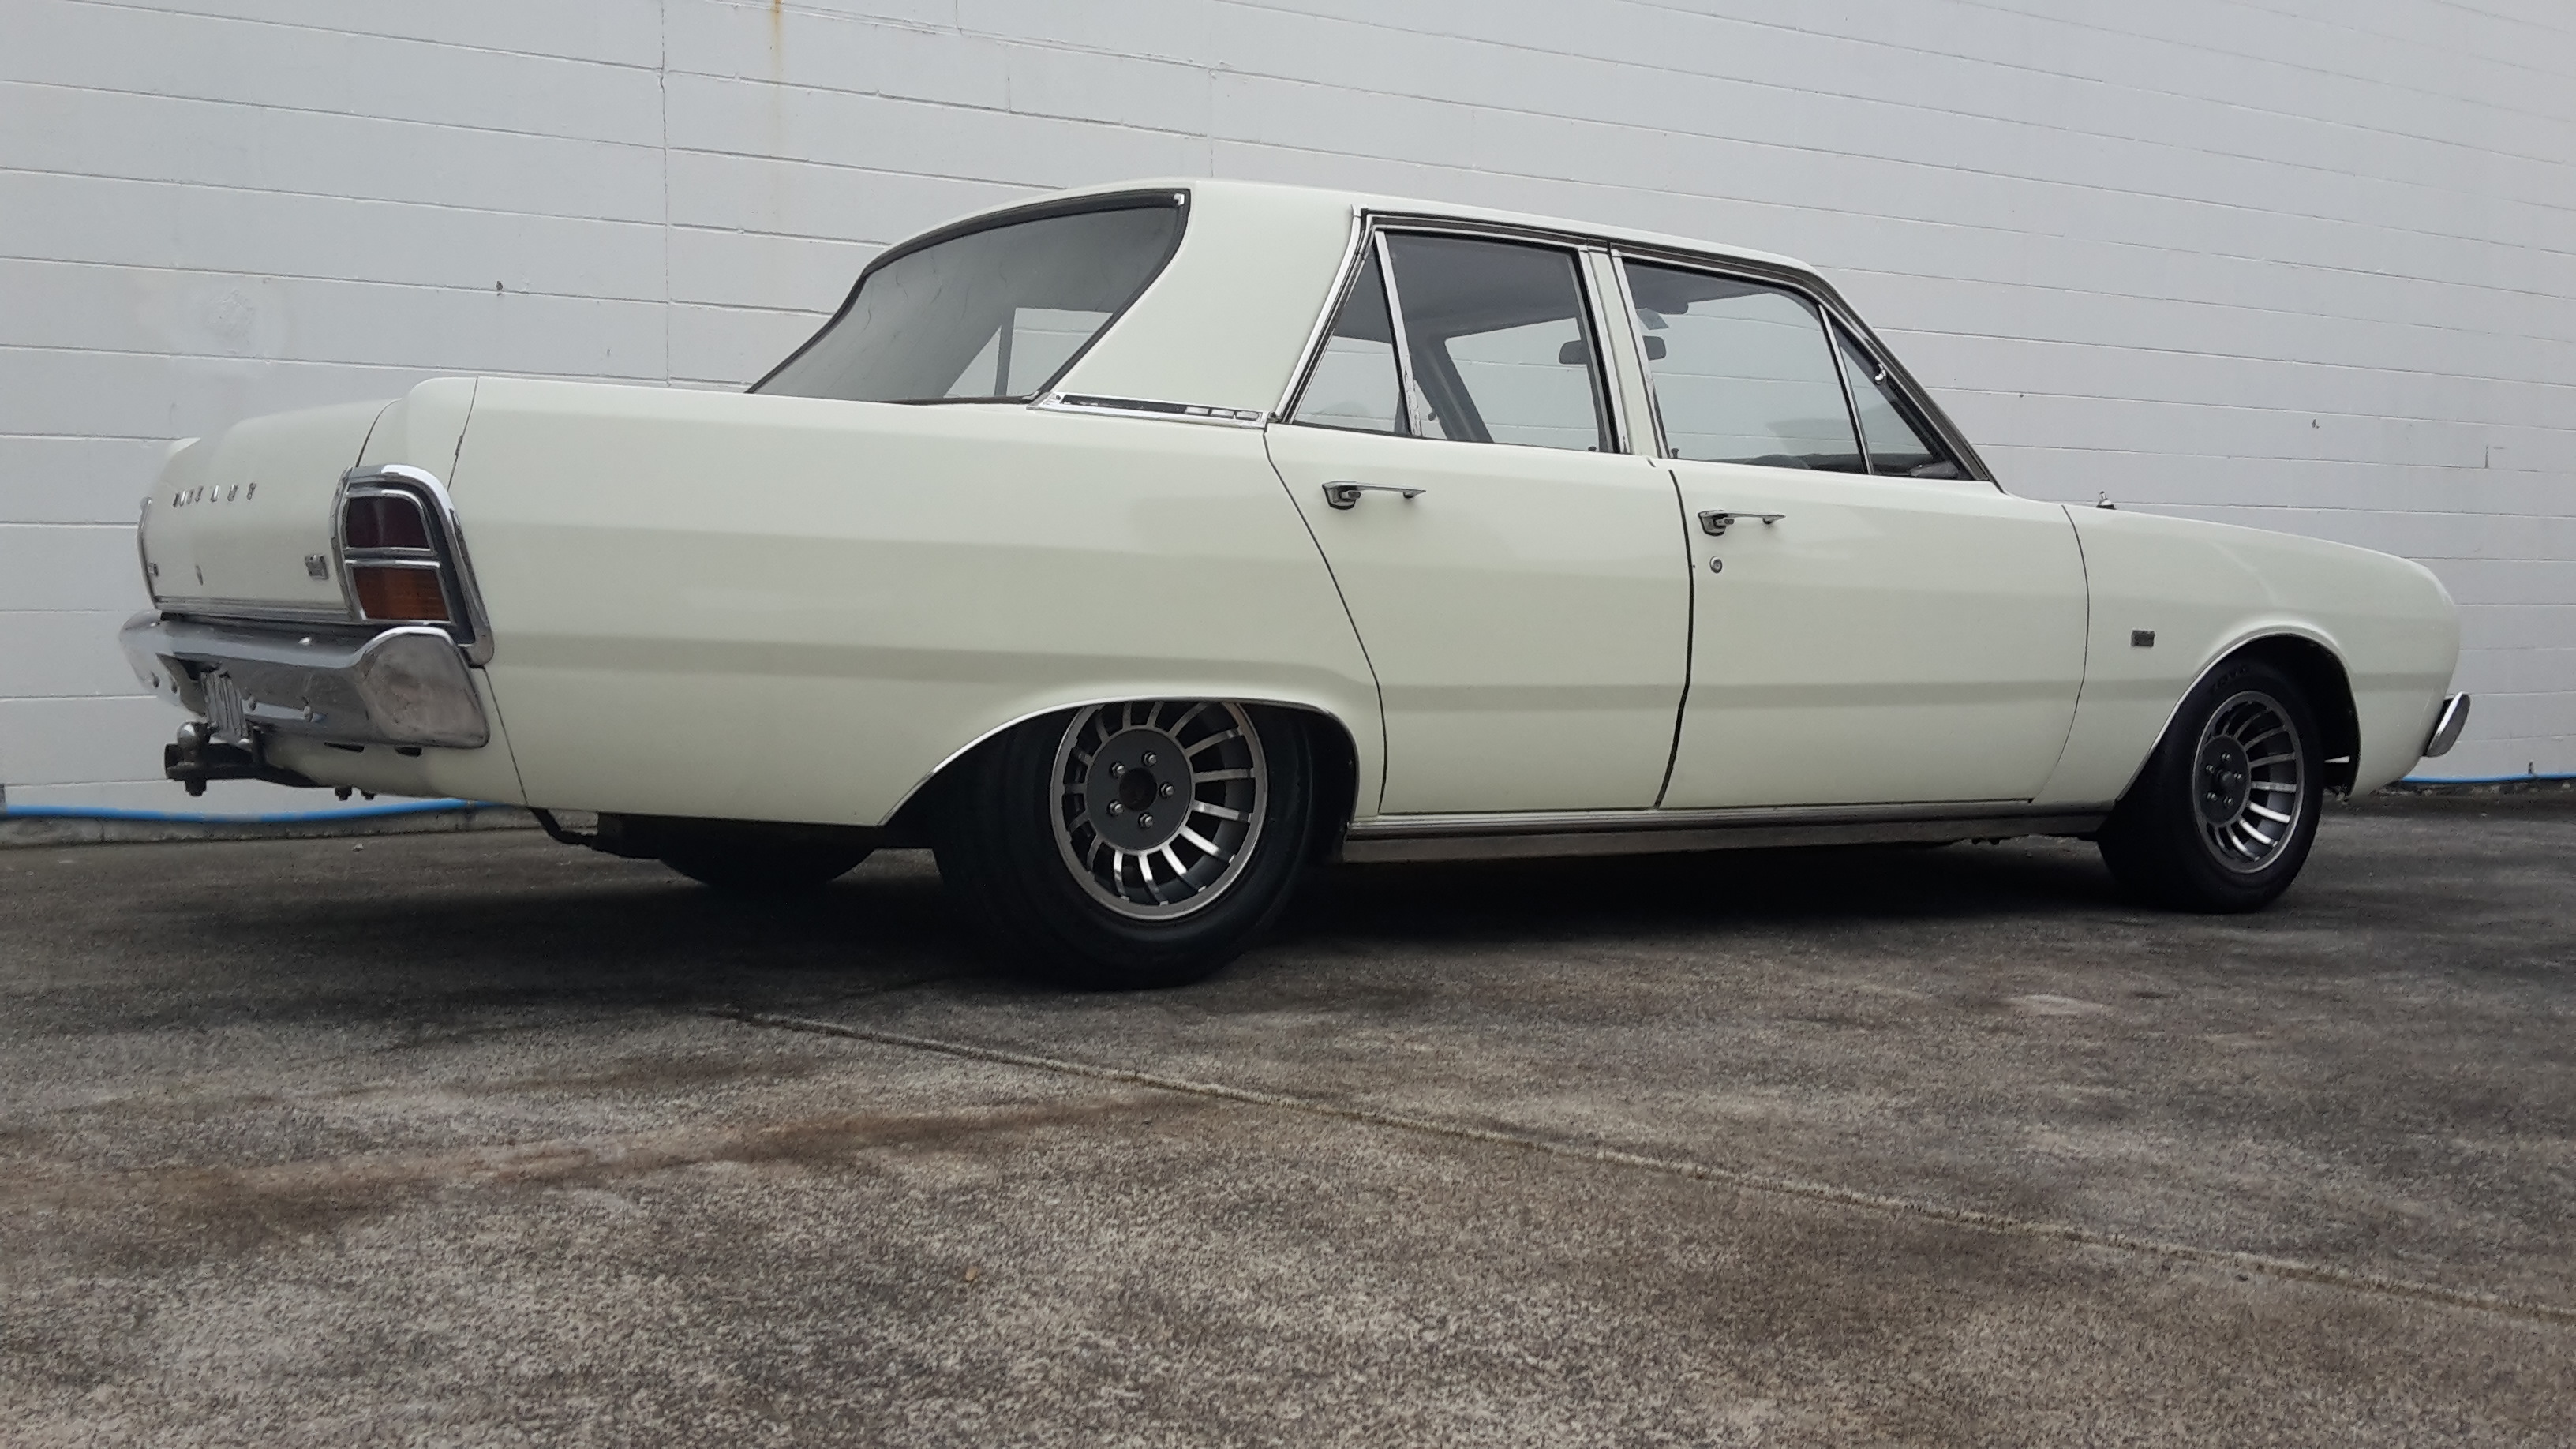
Kind of had to be white to match the race car and the tow vehicle. Would have looked silly otherwise.1 point
-
1 point


.thumb.jpeg.384ff72c8d2b0ee0d34a7bdedb55bdcf.jpeg)


This leaderboard is set to Auckland/GMT+12:00