
Leaderboard


Popular Content
Showing content with the highest reputation on 09/08/17 in all areas
-
So, been finding a bit of time to try get this running again inbetween cutting never ending rust out of wifeys 68 impala. But the end is now in sight! 2.75" aluminum Intercooler pipework done, turbosmart BOV fitted, N14 GTIR radiator plumbed in and the engine ECU wired up. I started it the other day, seems to run well enough so pretty happy about that! Only thing left to do is send it off to the exhaust shop now and get a 3" turbo back exhaust system made. Then skids?11 points
-
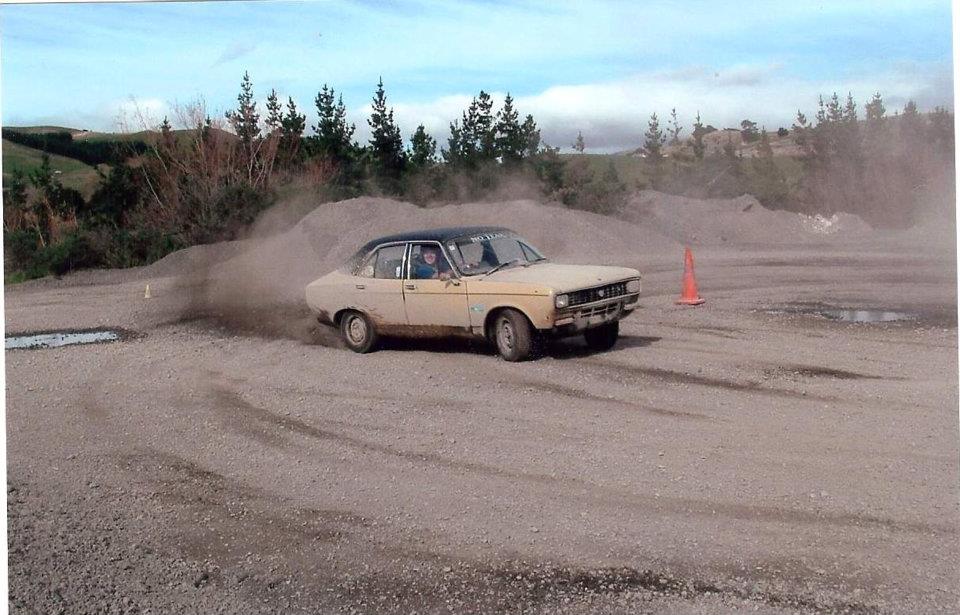
You take the spider gears out and machine a tapered bore into them. Then you make some tapered cones that sit over the spider pins out of brass/bronze i forget exactly the best stuff. You size the cones so the spider gears are pushing towards the centre a bit. You need a bit of clearance - around 2or 3 mm between the back of the spider gear and the housing. When you spin a wheel it loads up the spider gears and they push out onto the cones and bind up. Its a bit of trial and error to get the taper correct to get good lsd action vs cone wear AND getting the spoders to free up once the load evens up again. Works best on a 4 pinion diff cos more spiders. The officials had a little roller that you drove one wheel onto to make sure you didnt have lsd or locker. You had to give it a gentle rev so as not to load up the spiders, then pump the brakes to get off. Never got sprung.8 points
-
I have been busy on the van, and finally got it running and driving today!! Very impressed with the way the new engine goes, considerably more power and torque than the old engine. The first bootful I gave it left two big black lines from the RH side wheels! Sounds great too with the new big bore stainless exhaust To give an idea, my daily driver is a Mondeo ST220, which is a reasonably quick car. The Transit has very similar acceleration to the Mondeo, and jumps harder off the line, thanks in part to the shorter diff ratio, auto trans and higher power output. Anyway, still a number of jobs to finish off on it, but really nice to have my first drive in just over a year. The power steering is fantastic too -so light compared to the heavy manual box it had fitted the new Lokar shifter- nice piece but what a mission to fit and get working properly! and just after the test drive this afternoon. Engine cover not fitted, and still some tidying up and finishing off to do.7 points
-
just fitted a one piece driveshaft. old two piece had an original celica center bearing in it. as you can well imagine after 16 odd years of massive abuse it was fucked. you cant get a replacement that isint garbage so i decided to go to a one piece. ages ago i tried to use a much stronger center bearing but because of many issues including weird gearbox and diff angles and an inability to get it sitting in the right place it never really worked very well. so, one piece shaft. its a 75mm diameter tube and its max RPM is about 8000, or 255KPH. i can live with that. fitted it tonight and took it for a test hoon. christ what a difference. its probably about 50% how fucked the old shaft was and 50% how stunningly smooth the new shaft is. its like a new car.6 points
-
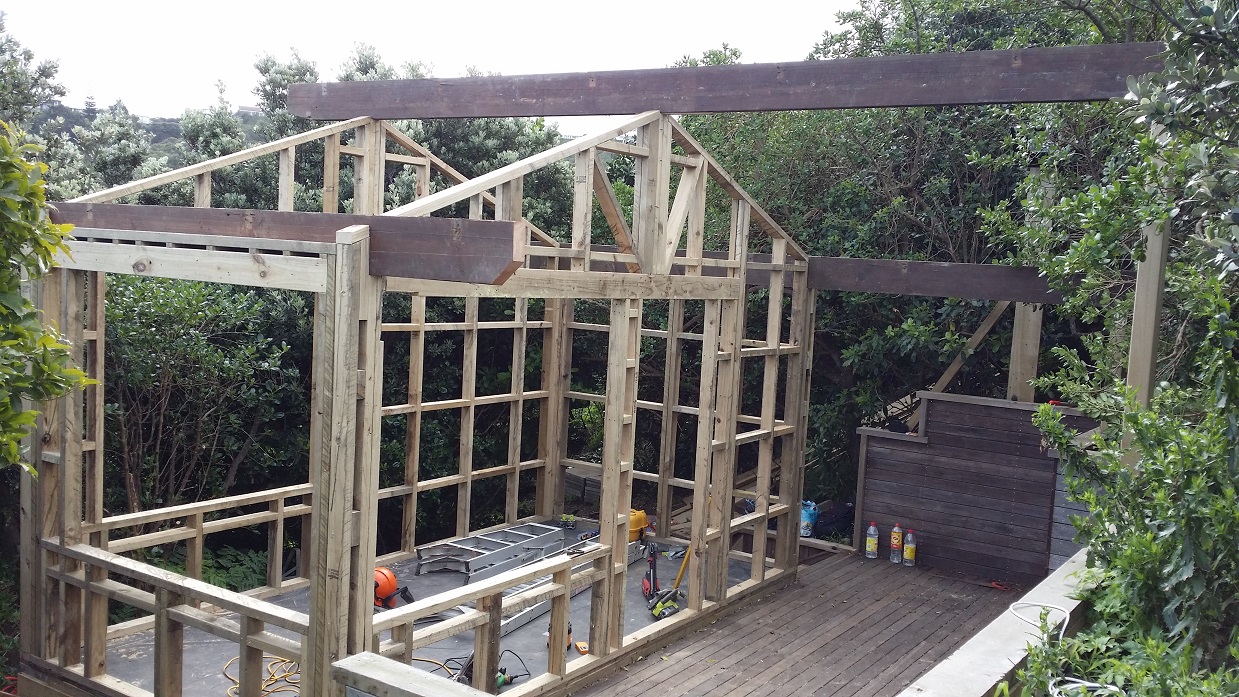
Unsurprisingly the beams were not a great deal of fun to carry. Two are are just over 6.5 metres long The cabin exterior is 4.6 x 2.4m Bathcollector. Its internal dimensions will add up to 9.8sqm... but I have an ancillary building planned for the woodshed, generator shed, toilet and shower5 points
-
Are you allowed individual wheel brakes?5 points
-
Hood tie down strap made from a leather belt. The belt is so long it forms a loop for someone 3 times my size. Could wrap that around my waist 3 times before it met the first belt hole, and it has a functional lock in it. Why would it have a lock? So i don't know if i should start a technical thread on "How to make trembler coils" as mine are toast and one of the borrowed ones died today. Never successfully made an ignition coil before, i think i'll need help of the electrical gurus on here.3 points
-
Yes totally fit farm service lug tyres. They work for me.3 points
-
That restriction plate is not in all SJ50's, they were supplied with the scooters to dealers and not all/many fitted them. The CDI story there I won't say is bullshit as I don't claim to be an expert, but in my experience it is a lot of bullshit lol, yes there's 5 wires but there's no magical rpm signal for a restrictor there. Some Chinese scooters with DC ignition has a looped wire which you cut to derestrict but I have never come across it on a Jap scooter. SJ50's are limited to 9000rpm but a cheap AC CDI unit solves that and unless your going to go with a ported cylinder, decent pipe and carb combo you won't need over 9000rpm anyway.2 points
-
You have too many scooters, giz one for cheaps2 points
-
wohooooo getting there now, one niggly job to sort was the exhaust, even with the motocross style starter and bending the exhaust as far in as i could to the engine the kick start still just hit at the end of the stroke. A bit more fiddling and some grinding of the kickstart and this is all sorted now. becuase the footpegs are spaced downwards about 10mm to clear the casings the brake pedal was too high, so i cut about 10-15mm out of this and welded the footpad back on, i also cut the pedal to bend it away so it didnt hit the casing and then welded that back together. Well the ergonomics for that are all sorted now! just the seat and side covers to go! oh and to trim the outside lugs off the front tyre so it doesnt rub like a bitch some hilarious side cover art to patch the penny pinchers theme courtesy of sparkle and my seat turned up from Craze genuine custom in bali, these seats are the lushest of lush quality, and very affordably priced. I like the look of no seat / foam on the tank, and im not phased about bum comfort but being 188cm tall i would be bent over like a maggot having a crap sitting on the tank, and need to sit just behind it, cue the craze cobra seat not mounted up yet, thats this weekends job, hoping to do a few kms this weekend to break the engine in properly and have a bit of a shakedown for DGR, much excite!2 points
-
I have had best results with feeding it more air (to bump the idle RPM up a few hundred RPM more than your desired idle RPM) and then a bunch less timing to settle the idle back where you want it, then outside of the idle zones crank the timing back in to it. this normally gives pretty sweet off idle response / stall resistance on the junk I work with. I have had to "re-do" a couple of mates cars then have come back from certain dyno tuning experts with crap off idle response and poor stall resistance. I have never bothered tuning idle to a specific AFR just to what "feels" strong (can even do the old carb trick of leaning out until revs rise then richen a bit). The return to idle stall can sometimes be attributed to injector over-run cut depending on wether you have this set-up, easiest way to check is to switch this off (or extend duration out to somethign silly like 30 seconds) and everything else should behave exactly the same. Keep in mind i don't have any science to back up these suggestions it just what has worked for me in the past, and the majority of stuff i deal with is turbocharged.2 points
-
Wednesday 20th September 2017 Click this link to see the location on google maps: Link to Countdown Mt Wellington covered carpark on google maps We will be using the covered carpark which is situated directly below the Countdown Supermarket, as pictured above. The Countdown shopping complex is on the corner of Mt Wellington Highway and Penrose Road, Mt Wellington. Food options within the complex: - Burgerfuel - Pizza Hut - Dominos - Rack & Roll Ribs Food options across the road: - Sal's Pizza - Waves Seafood (Fish and Chips) - Chunky Chicken Food Bar FIRST MEET?? If you are new to these meets then here are a few points that may help; Most people usually show up between 7:00pm and 8pm-ish. We'll be parked in the covered carpark below Countdown . Remember its always a casual affair, a place to yarn to mates and make new ones. An Oldschool car is not required at all, but if you've got one on the road then bring it along. Doesn't need to be flash or special. RULES AND THE BORING STUFF!! Basically these are in place so we have a fun and friendly meet and leave the carpark clean and tidy like we were never there. Take your rubbish away with you or put it in a bin, Use the public bins provided throughout the carpark or the ones for the food businesses themselves. Don't be a messy cunt. Smokers please don't dispose of your butts on the ground! Again, don't be a messy cunt. Be a good one. No alcohol consumption at all at this event. We are not allowed to consume alcohol on the premises. You are welcome to invite a few mates, but please note you are 100% responsible for their behaviour If you belong to other clubs and feel they might be keen to come check out our meet then that's cool but please PM Threeonthetree, Shakotom or BDA780 for permission before inviting them. NO Skids or Reckless/Dangerous driving. We're in a covered carpark that echoes so don't be a dick and rev your engine unnecessarily because then you will get us kicked out. MOST OF THESE ARE COMMON SENSE. WE WILL PROVIDE A FEW GENTLE REMINDERS WITH THE NEW RULES BUT REPEAT OFFENDERS MAY BE ASKED TO LEAVE. If you have any suggestions or input for the meets then PM Threeonthetree, Shakotom or BDA780 Thanks!!1 point
-
I saw that on tm, good score!1 point
-
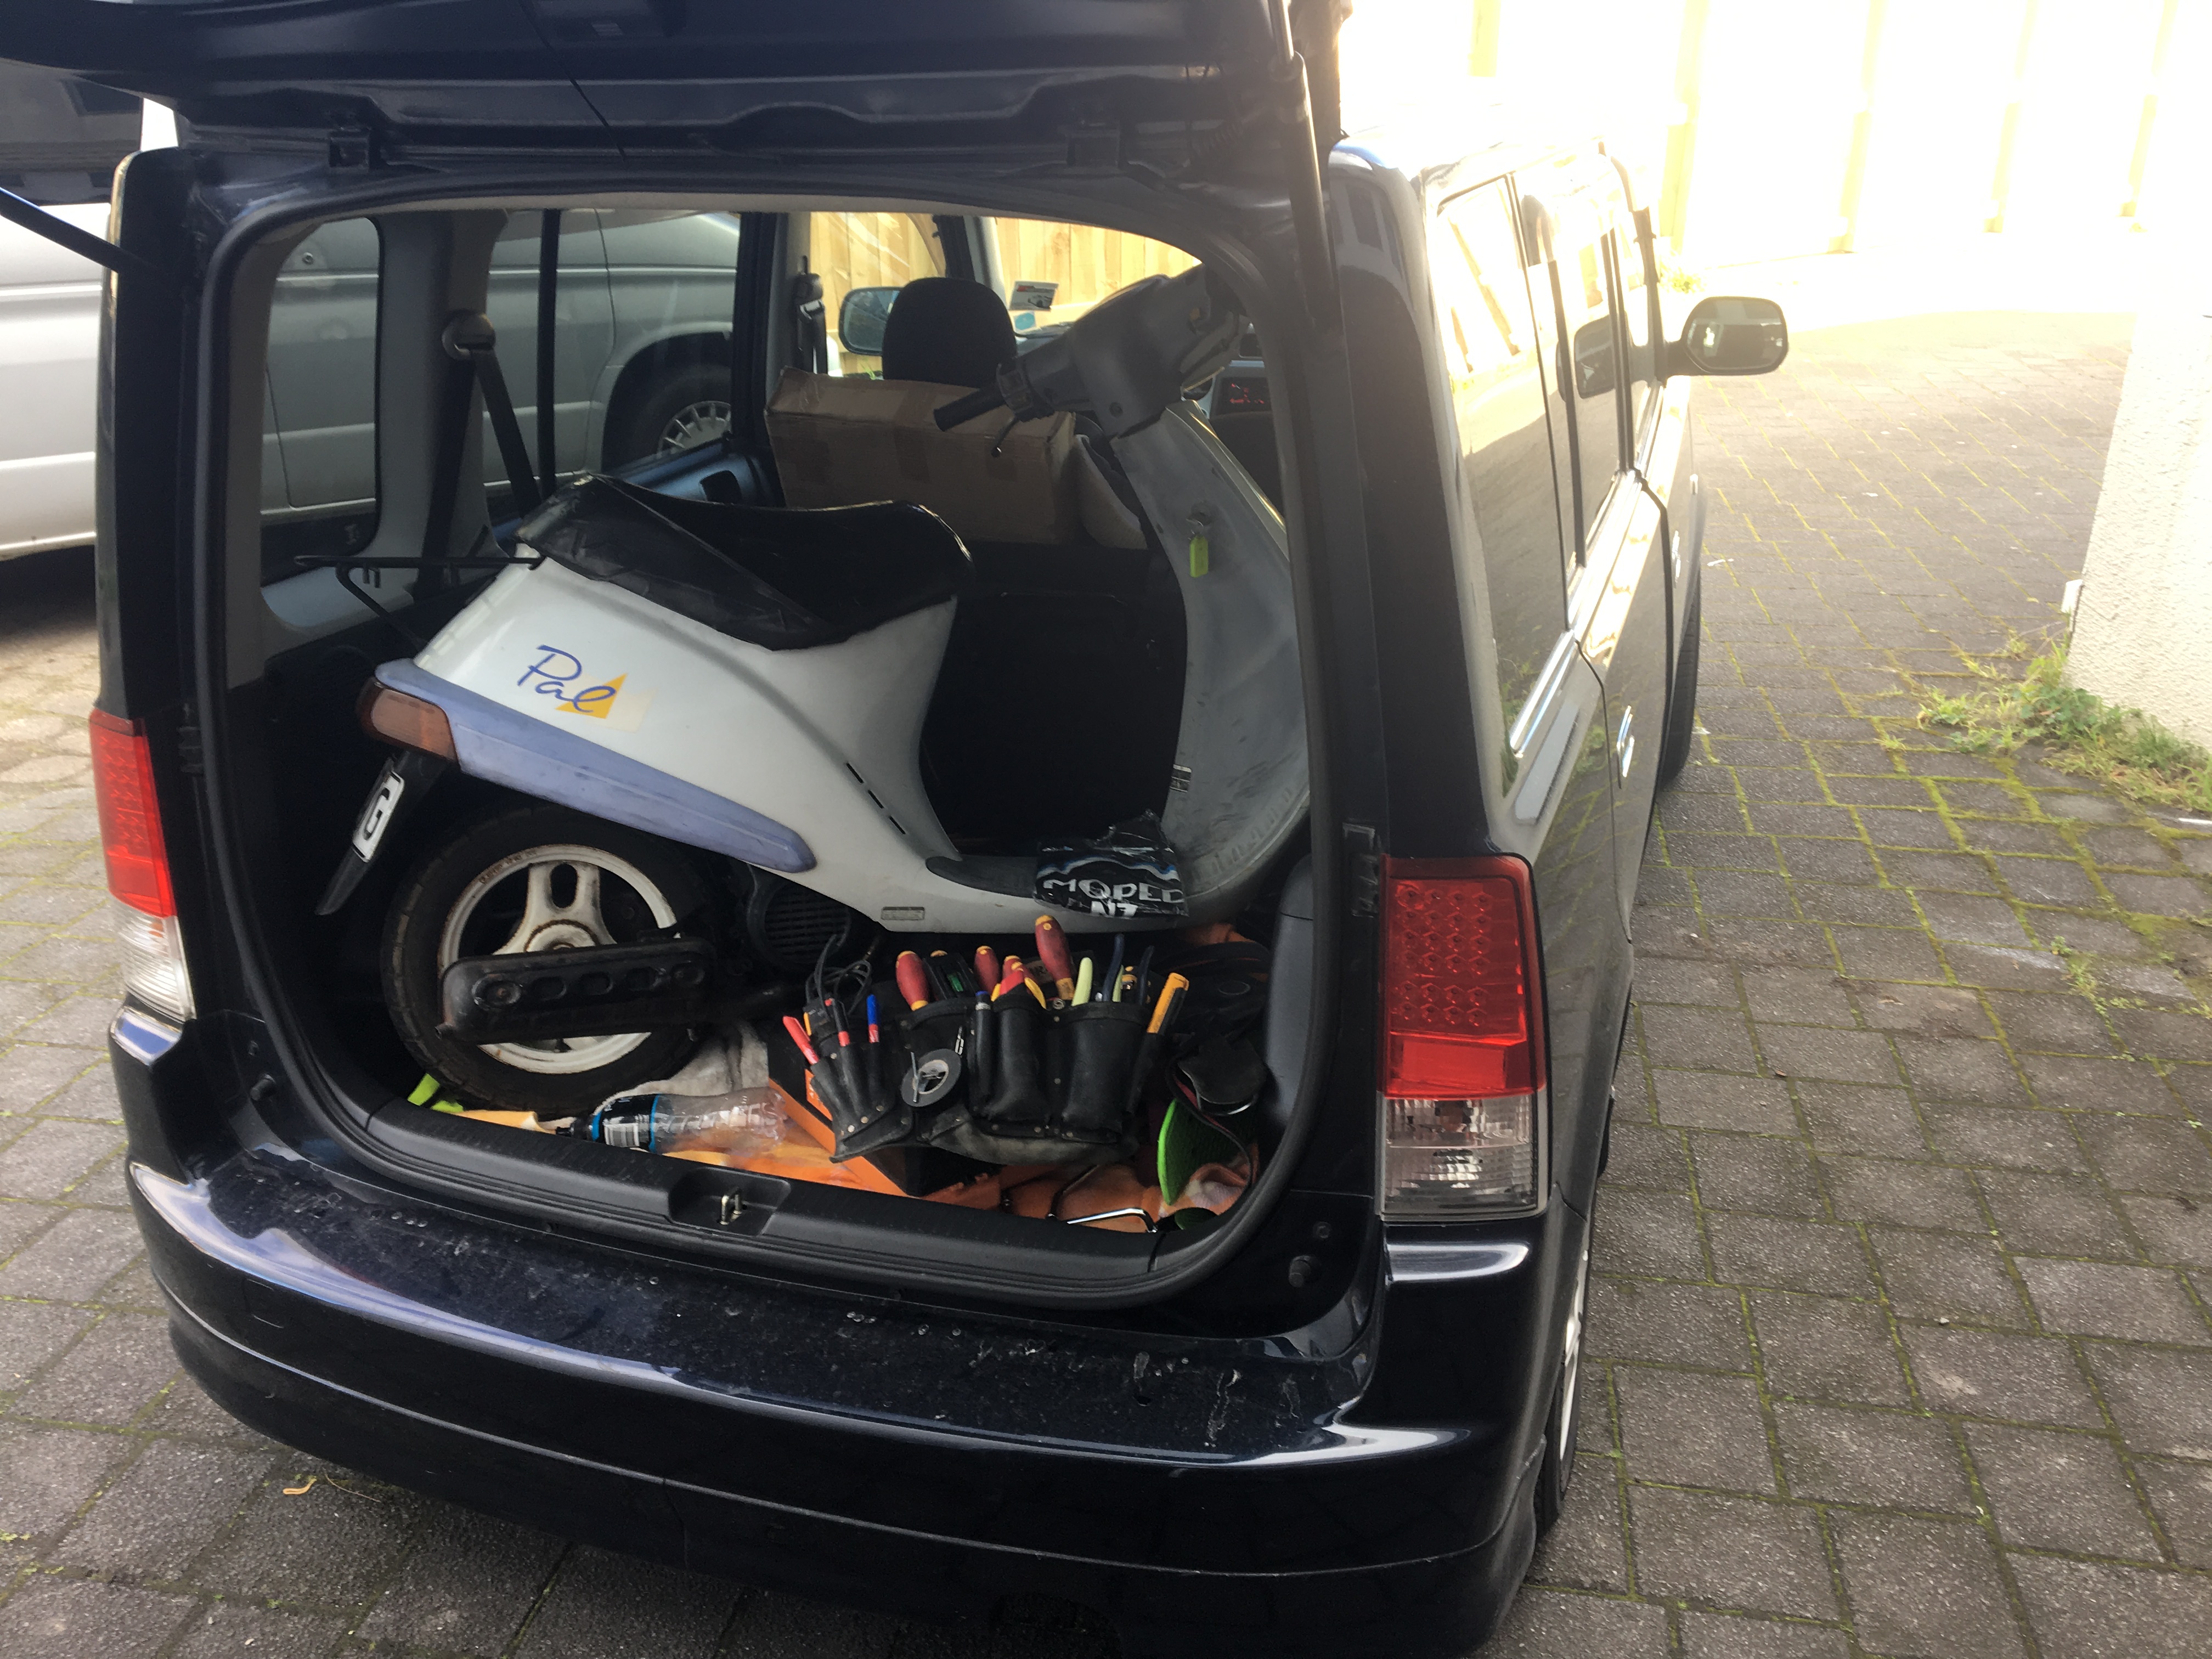
Okay so Honda Pal appeared for $200 so why not. Always wanted a '90s smoker and the shape of these is lush. Body work is okay. Engine is haggard. Will have a proper gander tomorrow and see if any life can be had from this epic acquisition. With any luck we'll be skidding away. Oh, got another FZ trans so I'll be taking that to pieces this weekend too. Imagine 2 bikes running at once? What a dream.
 1 point
 -
Streetstocks are allowed locked or LSD diffs now However, what they actually did was run 3 beads of weld around the end of the axle tube beside the diff head, the heat and weight of the head would effectively pull the head down - loading the spider gears & giving the cars a small amount of negative camber. I know a old boy that fills his historic speedway cars diff with White metal or lead I cannot recall which, for an event, then once hes done he melts it back out to flat tow it home....1 point
-
awesome, more boost is the next thing on the list once I have sorted everything and settled it in! (will be needing that for the OS Mk5 drags in December!) What do you want for that to buy/hire off you?1 point
-
10,000 is generally the accepted safe zone for stock cranks, mine often sees 11,000+ though lol1 point
-
Whats engine life?1 point
-
Not sure revving past 9000 is terribly conducive to long engine life really.1 point
-
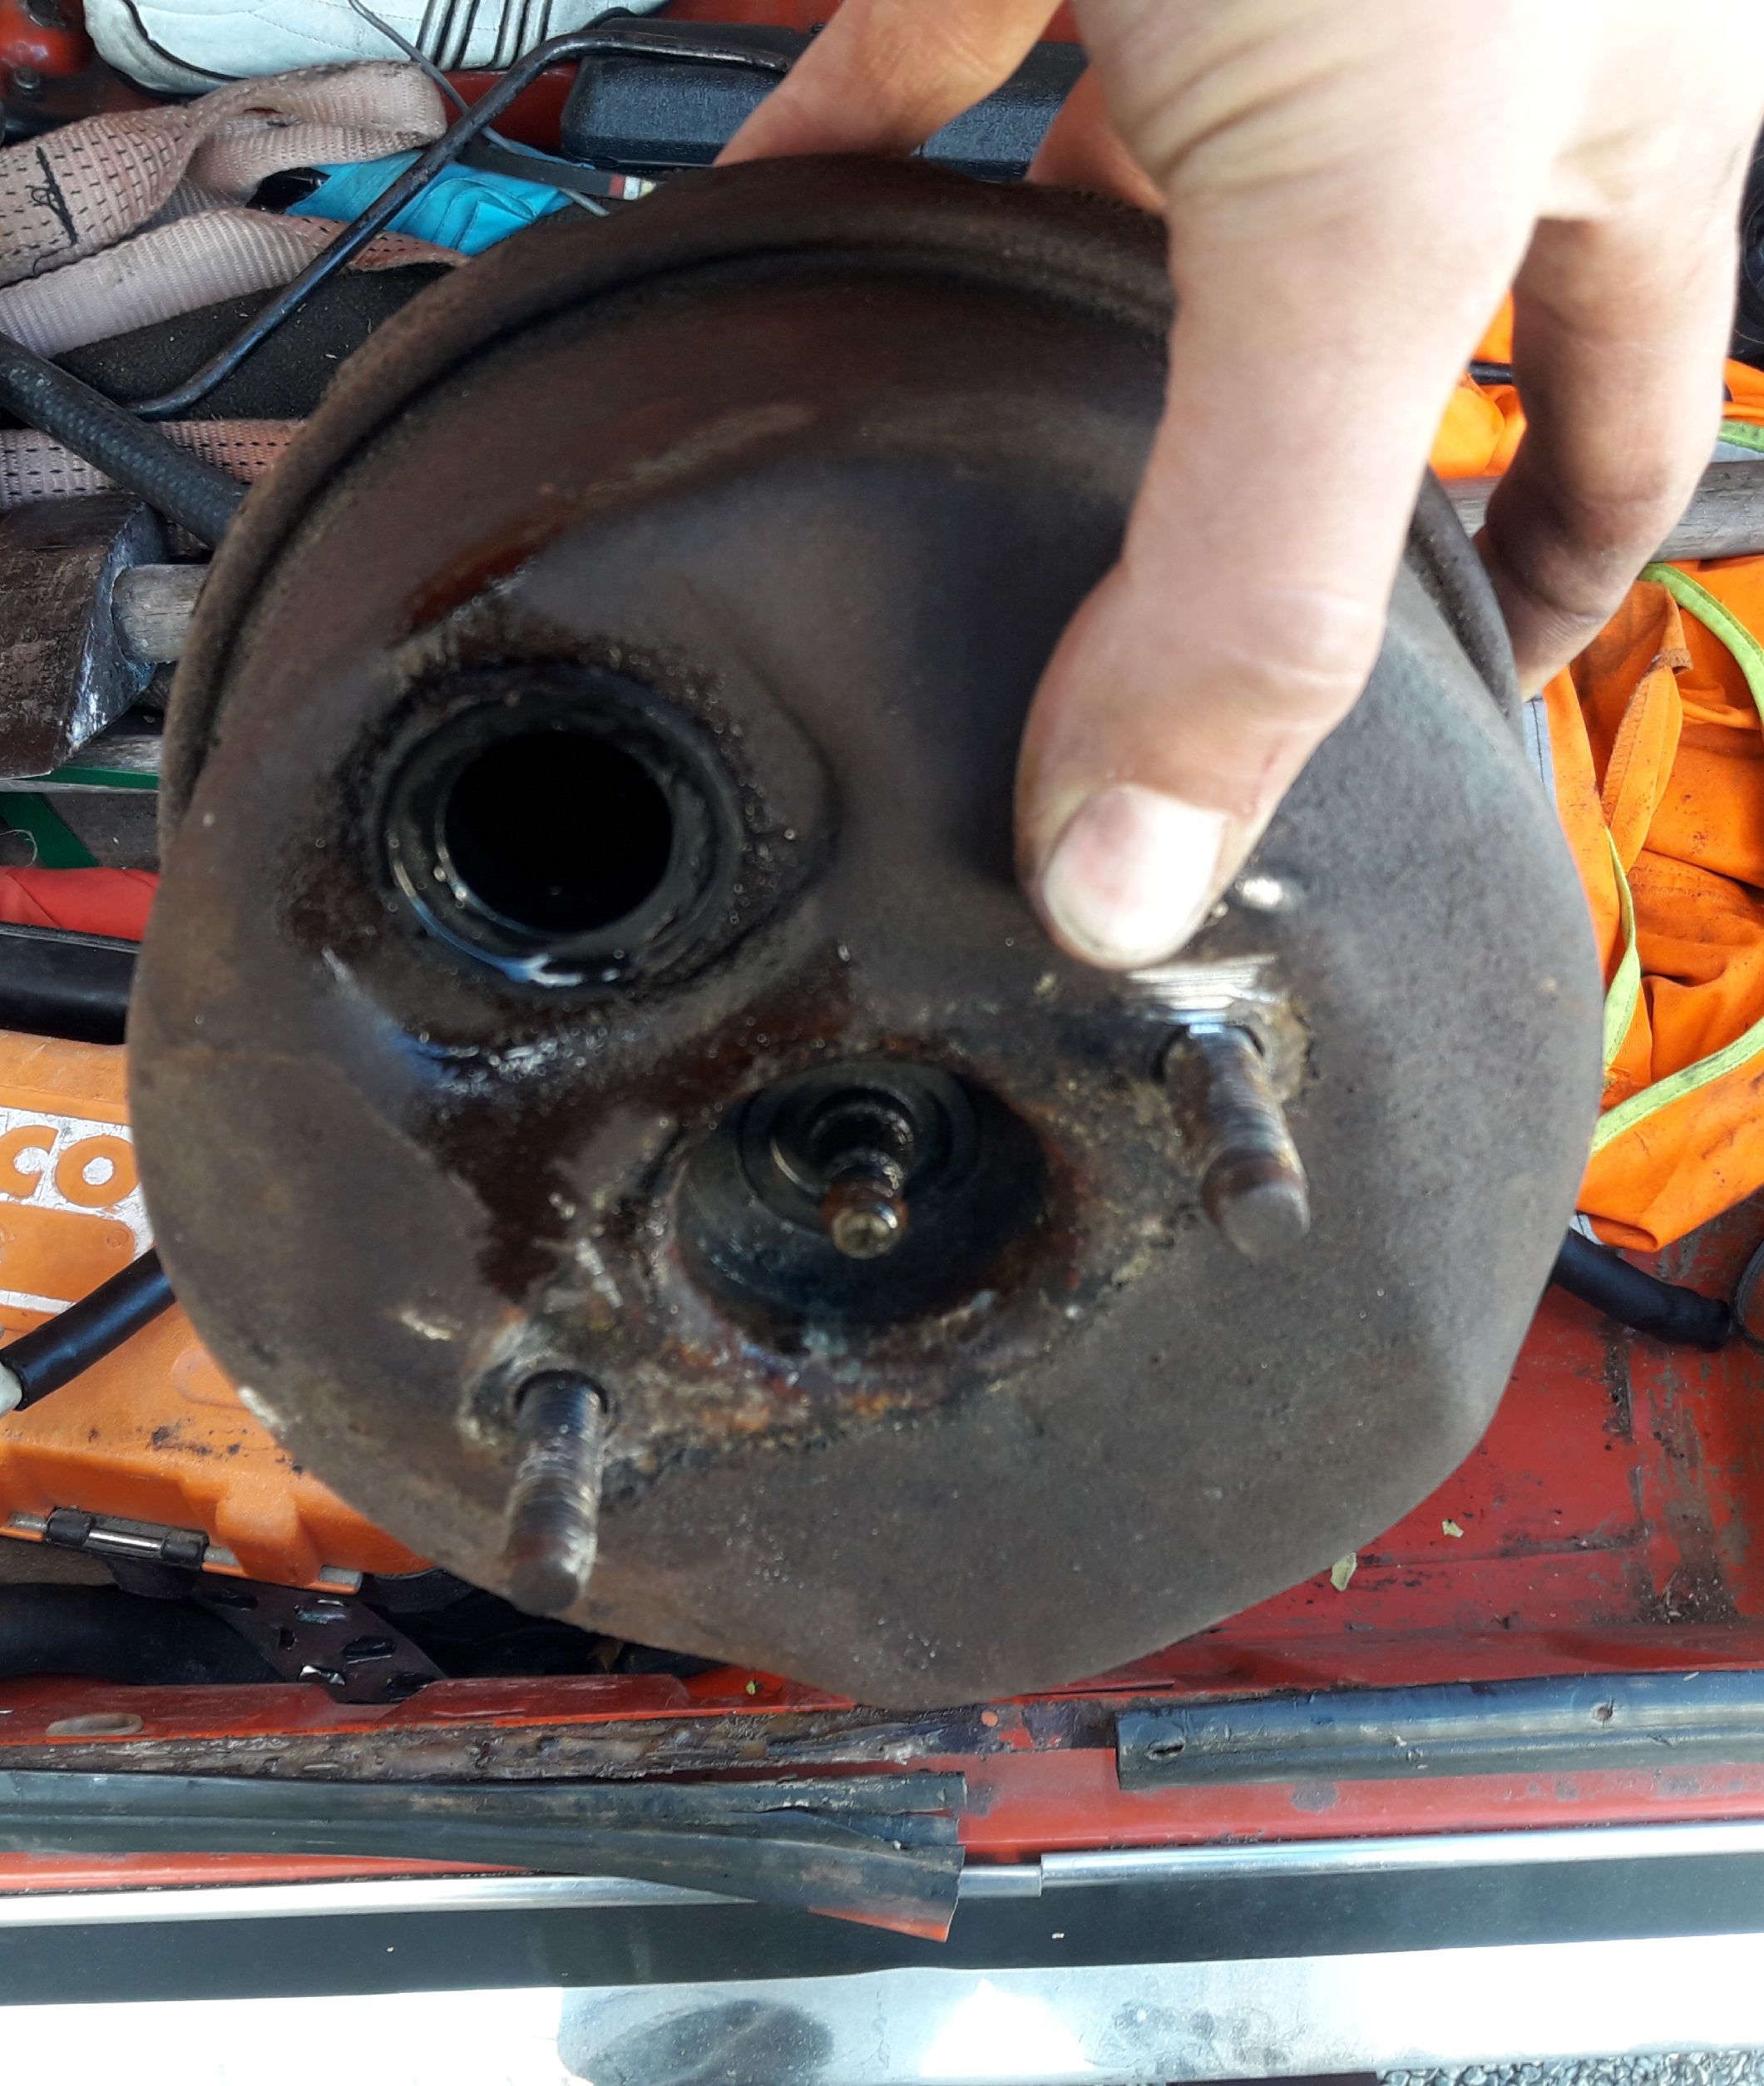
Odometer 104084'ish Mad brake fade so new booster hose, didn't fix it so Brake booster swap time Old one had fluid in it and managed to find the one out of my original '78 Avenger that I rolled and scrapped in 2007 (image attached) Much better
1 point
-
Shit, this is all so relevant to me too. I'm sitting at about 20 degrees timing at idle, which I always though was far too much. Increasing air and dropping advance sounds like something good to try. Im not fancy enough (yet) for an idle controller. All bypass screw and tuning here1 point
-
PS. googling turned up these sj50 'mods' There is a little plate between the exhaust header, and the engine, just loosen off the two exhaust bolts, and pull the little metal plate out, and she should be good for about 70kph with a 70kg person on it. This will invalidate any warranty on the bike, and possibly insurance, and cops will notice a 50cc scooter pulling 65 kmh. Your scooter will probably have a rev limiter in the CDI unit, To remove this you find your CDI unit and it will have 5 wires - Two going to the ignition coil, Two going to the alternator power, The 5th one will go to a device in the engine which gives it a voltage depending on RPM, Cutting this wire will make it 0 volts and the CDI will not know to limit the revs. The extra RPM speed gained will get your top speed from 50ish to 70ish. A couple good mods for starters is iridium spark plug for improved throttle response and easier cold starting, light weight variator rollers to get you up to speed quicker, Heavy duty clutch springs will raise your rpm engage point to give you better launches and get you into power band sooner -- these are the cheap and easy to do mods. Other mods are removing your cold air box and replacing it with a pod filter but this will require a carburettor retune so leave this until you know what you're doing and ofcourse changing your exhaust and installing a performance CDI unit with more aggressive ignition timings. Then after all that to make good use of your improved torque you might install a high speed pulley which will increase your gearing ratios giving you a higher top speed. Check out scootling.co.nz for all this stuff, the dude down there can help you out with all of that. https://www.kiwibiker.co.nz/forums/attachment.php?attachmentid=286883&d=13775100101 point
-
Factory ECUs generally won't run any more than 10° at idle, as mjrstar said 5-8 is pretty standard, but ramps up to 15° or more as soon as you touch the throttle1 point
-
Normally ends up ~5-8 degrees timing maybe, as for more air yeah just whatever you can idle bypass screw if it has one, crack the throttle if TPS is still happy(sime mitsi have idle stop feedback). Probably depends on stuff like intake volume size of throttle compression ratio and a billion other things. You should be able to set idle targets (pwm output)at a range of different temps. I had major dramas with hot idle stability on my evo with even some pretty mild cams until i started using this trick. It does take a bit of getting right but is satisfying when you do. I don't think there is any magic formula it is some trial and error but seems to work well on both map and afm cars i have. As for afr's at idle they can be fairly inaccurate as a discussed above i go for feel rather than a number.1 point
-
Facebook event here for you to share with non oldschool members. Guess I better find a bike to ride huh?1 point
-
Just do the individual wheel/differential braking. Otherwise you'll probably end up getting caught and banned from the fun. For bonus points make the left seat person control right brakes and right seat person control left brakes. Also, can you fit tractor spec tyres to it?1 point
-
If you want to bump the boost up i have a mace engineering puller to pop the pulley off the blower and drag the new one on. 8psi makes them a real weapon and doesn't seem to upset fuel economy.1 point
-
Rules are made to be broken1 point
-
If the rules specifically so 'no welding' then there's nothing to stop you locking the spider gears by non-welding means.1 point
-
Google suggests you should have some spare diffs in stock if you use those.1 point
-
Also make it bump the timing up a bit when it drops below the set idle point, this should push the revs back a little. Unless your idle timing is already set to max power1 point
-
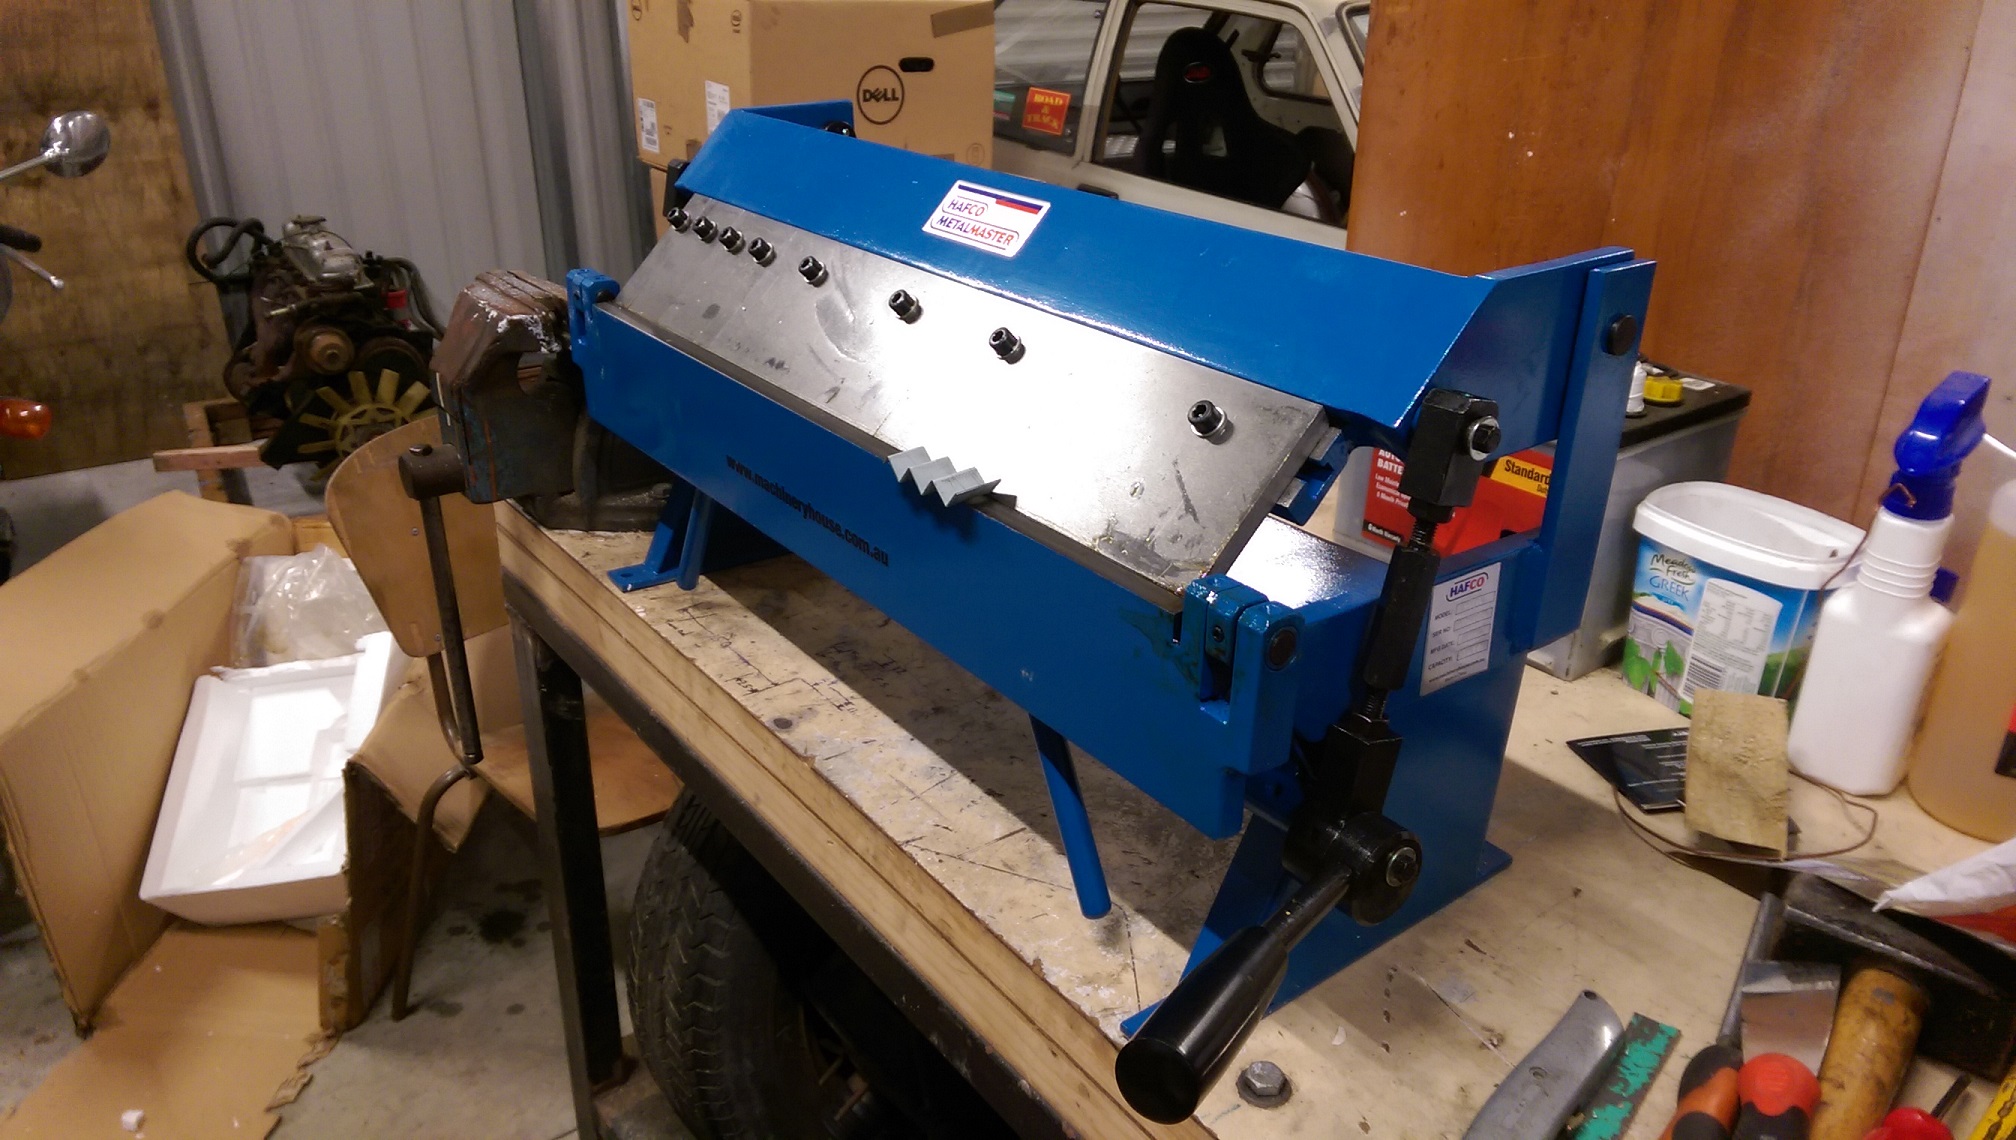
I bought a thingy. Got a $50 voucher for signing up to MachineryHouse, so it was basically free freight. So much easier than using the vice and bits of angle iron. It does up to 1mmX610mm. The majority of stuff I will be doing is 0.8mm, so it's fine.
1 point
-
Well there goes the theory that it had been loved haha1 point
-
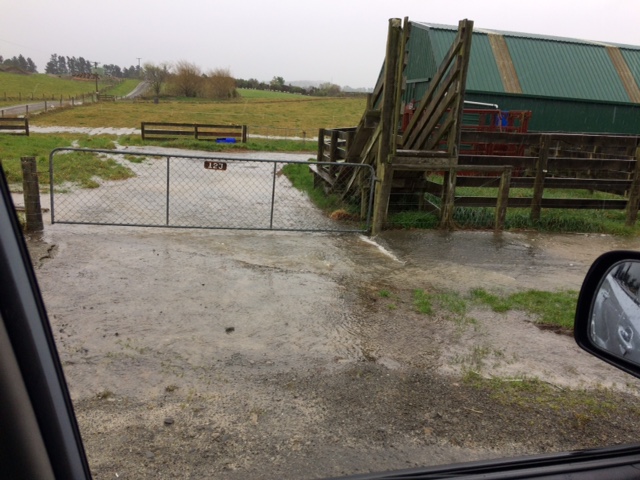
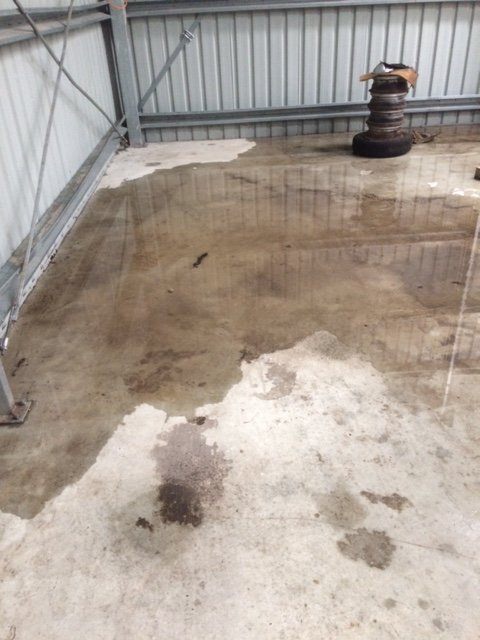
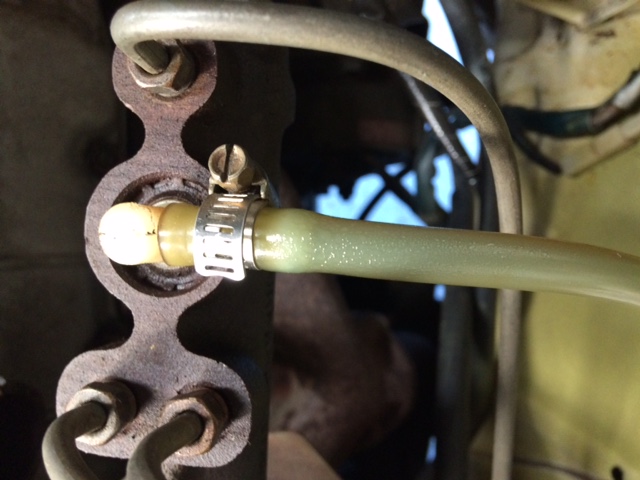
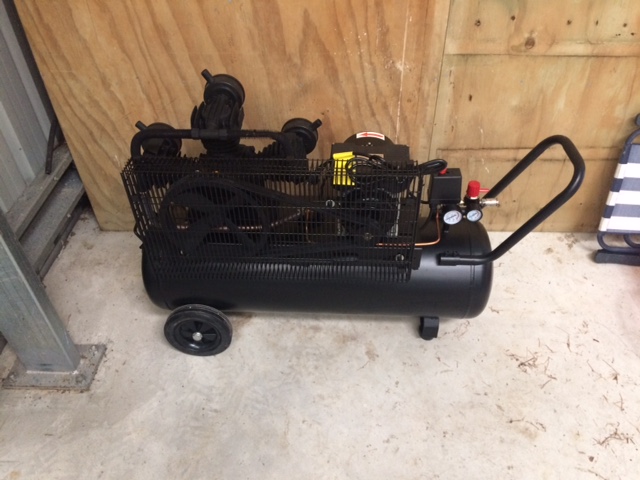
Update time, although not much to report on the car except it's still idling poorly. We have had a few dramas of late at the property with the recent heavy rains. The road culvert is not big enough, and more importantly, the shed leaks. A lot. Yesterday was a nice sunny day so apprentice no 3 and I took the Fiat for a drive. It's going well except not idling and the accelerator pump circuit is not working. I'm saving for another carb setup. I also noticed the lines from the brake fluid reservoir to the master cylinder are "sweating" brake fluid. Never seen anything like it. In happier news, I bought a compressor! Now I just need to pop a 15A socket in the shed so it can work...
1 point
-
this is looking awesome. much envy..1 point
-
Good work Son, get back to those Bogan roots. I went to school with a lad who had a very tidy VL Calais with 308 and Trimatic. Even had the lush maroon interior. I'm pretty sure I asked to buy it off him almost every week but I still think about that car every time I see another and wonder where it is now and in what sort of condition.1 point
-
The other job, was to mount the ARB's. I had a pair of 27mm bars custom made, and mounted the front bar to the front axle, using the U clamps and brackets supplied. I made my own top mounts, and welded these directly to the front subframe that the engine hang off. For the rear bar I drilled through the shock mount brackets, welded captive nuts inside, and bolted the clamps to these. I made my own chassis brackets, and welded these on. That should stop the rockin' and rollin'!1 point
-
If you've fitted square main caps I assume they're off a crossflow block. Bloody good idea if you're going to pull high revs. You got it line bored? Jesus man. That's awesome. If they sized it all correctly and know what they're doing then the main bearing tolerances should be OK, so it's probably wise to look for an assembly error... and it may not be your error - but theirs. 6015 block: Does it have a 6 bolt crank then? They have a fraction more stroke than the earlier 120E IIRC, but one thing to watch out for is the pilot bearing (to the gearbox) as I think they're a bit different... but that has nothing to do with oil pressure so I'll shut up now. If you haven't put load on the motor (i.e. tried to drive it) then you are unlikely to have done much harm yet. I wish I could remember more but I can't think of anything except a rotated bearing (that's blanking off an oil gallery). I guess it's possible that you fitted grub screws that are too long, but it's probably worth thinking hard about your next move first. If it was me I think I'd pull the motor out and get it onto an engine stand, but perhaps there's another diagnostic step that I haven't thought of yet. Sorry, that's probably little help, but I wish you the best sir. Line bored! OMG. Are you my adopted son? So awesome1 point
-
Just got the engine crossmember built. I wanted to make a proper crossmember with engine mounts welded to it, rather than the original style setup where the engine mounts just hang off the side of the chassis rails. So I got some 63mm black pipe bent to shape, drew the engine mounts and had them laser cut and folded, and got our fabricator to trim them and weld them up. Really pleased with the result, ties the chassis rails together, and is very strong.
1 point
-
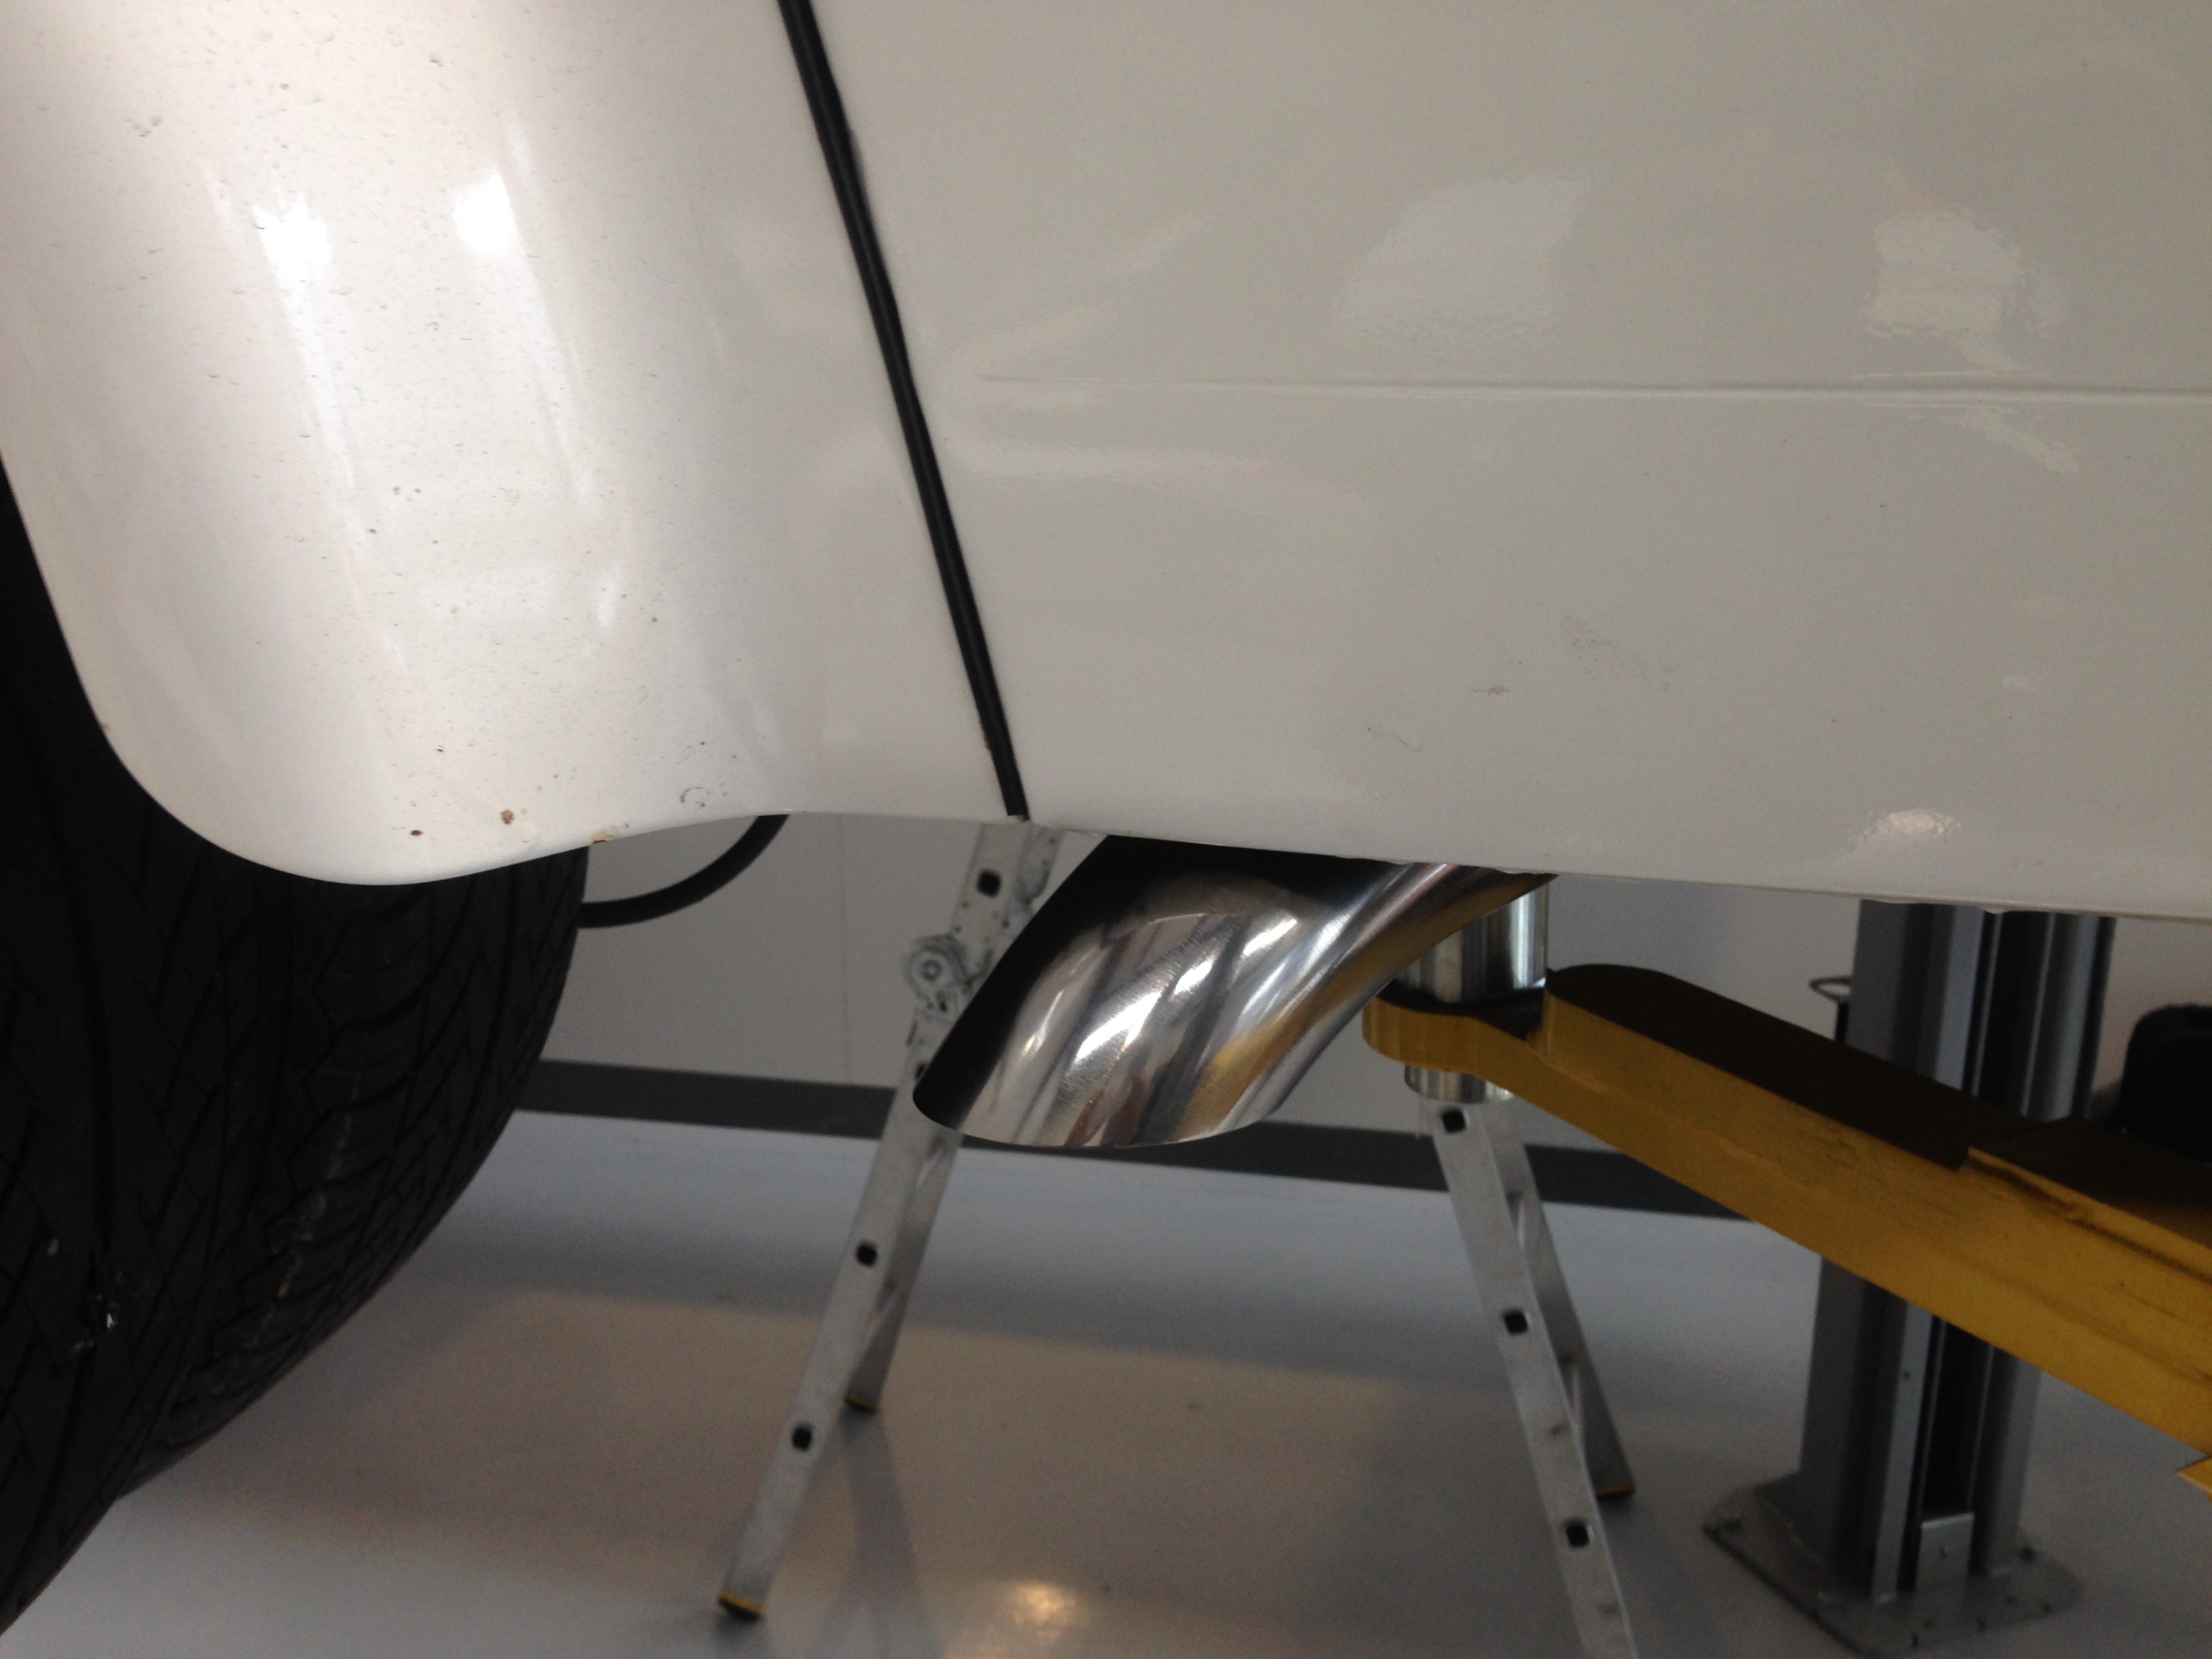
exhaust fitted today
1 point
-
Bit more progress today. Made up some bracketry to mount my generic electric fans to the slam panel, ahead of the ae86 rad. Really fiddly getting them to sit right against the rad without attaching them directly to it, but got there in the end. Even managed to modify the original kp radiator clamps to hold it all in place, pleasing. Also wrapped the exhaust manifold. Needs a bit more wrapping, but waiting for some more steel ties to turn up.1 point
-
Lift kit is here The 60 looks a bit stupid now So much guard clearance atleast a foot. Lift https://imgur.com/gallery/YrpKD Needs tyres. And big ones1 point
-
So it turns out I'm not very good at keeping project threads up to date. Or using reliable image hosts (facebook? What was I thinking?!). Also can't seem to find the edit button, so the above posts will have to stay as-is for now. I'll try and give a bit of info on the direction the little KP has taken over the past 14 months. May well have missed out some major bits, so please comment in discussion thread if I've missed anything vital! Plenty of stumbling blocks in what I naively assumed would be a reasonably easy project, so hopefully some good points come out that will be useful for others. Bear in mind my only real previous projects were stripping a Saxo for track days and modifying my MR2 with new seats, chopped springs and banded steels... SO! Yes, got some Work Equip 01's from Beaver Shod them in rubber and got them bolted on. Arch gap present to an alarming degree, but this was imminently pre-nats '15 and I owned a socket set and some screwdrivers. Plus I was a little busy trying to get some shonky twin 40 DHLA Dell'ortos running. Had never tuned a carb in my life at this point. Eventually gave up on the rubbish linkage and bought a nice Mangoletsi one from Europe which helped balancing and throttle travel adjustment immensely. Seriously recommend these. Miracle of miracles, I got the car running pretty nicely on the crabs. New exhaust had turned up the previous day and didn't need to change the tune too much. Would cold start okay, idle happily, keep a sensible temp (I think, lol Toyota gauges) and over my (whole) 30 minute test drive was happy throughout the rev range and emitted plenty of doorts. Oh, this was the night before Nats, sweet. Nats started wonderfully, did a 4 hour burn up to Taupo after work the night before, stayed the night there, then set off for a further 4 hours to Coromandel the following morning. Cold starting an over-carbed 4k with a loud exhaust in a motel car park at 6am is a fun game. Got stuck behind a boat trailer on the wiggly Coromandel coastal road for about 40 minutes, meant a lot of partial throttle compared with the all-or-nothing it had been getting up to that point, and that's when I noticed something wasn't right. A bit of hesitancy coming out of corners, a little coughing. Quickly developed to a bigger problem... Plugs were coked to hell. I knew it was rich (safe, bruh), so cleaned them up and set off again. Better, but quickly buggered itself again. Noticed fuel pouring out of the rear carb, forming nice little fuelly waterfalls from the trumpets. Damn. Pulled the carb apart at Beaver's parents place, looked to be a float issue, the pivot for the float had broken and been bodged with a bit of wire at some point. Had worked for a while but the pissing fuel was almost certainly down to that. Abandoned the KP there, it would get shipped back thanks to AA plus (win), and I'd have a fun nats tagging along with Sparkle and Goat. When I finally got it home, I swapped the original carb and some fresh plugs on to see if it would run. No luck, barely ran on a couple of cylinders, rough as fuck. Suspect overfuelling on 3 and 4 had washed the bores or something? Oh well. Was thinking of getting a 5k anyway. 5ks were about $500 at this point for a runner. Not bad. Could rebuild carbs (arguably better suited to a 1.5 than a 1.3 anyway) and swap them over to the BIG BLOCK. Bought one! Oops. Looks like it needs a decat too. Mate back home made me a keyring to celebrate this new direction: Dragged the little green paperweight to Goat's workshop, and things started happening. Massive shout-out to Goat at this point, couldn't have gone any further with the car without his help. There are definite downsides to moving to a new country and not knowing anyone, but one of the major upsides is meeting ultimate GCs that are willing to help out at any point. 4k took about 15 nanoseconds to remove. Pulled off the 4age loom and sent it to that chap on trademe what chops wires. Meanwhile, fitted the SQ engineering waterline and dizzy relocation kits to get things more latitudinal than longitudinal. Lovely quality kits with pimp CNC, nice fittings etc. Shame its all covered up by 20 year old plastics but whatev's. I'd also picked up an A-series bellhousing pattern k50 gearbox to fit the 4age. Transferred the shifter and tailhousing from the starlet k50 so it'd line up with gbox mount, prop, gearstick hole etc. Handy. Got the engine and box sitting in the bay on trademe-special mounts (damn it Jim, I'm a vet, not a fabricator) but ran into a slight snag. The capped off dizzy mount was interfering with the firewall and the heater matrix pipes. Modified the mounting points and moved the engine forward 20mm, and got one of the heater matrix pipes brazed on a little further outboard, and this just about sorted it. Still tight, but no longer interference fit. Obviously this also changed the position of the gearbox, but that would be a problem for another day. Noticed at this point that the clutch cable locator on the gearbox had been chopped off by some enterprising dick somewhere along the line. Ballz. Was having second thoughts about using a k50 behind the XTREME POWER 9000 of the blacktop at this point anyway. Suppose a bracket wouldn't be too hard to fab. Oops^2. T50 is about the same length as a k50, handy. Also came with a beefier and longer corolla prop. The KP prop was too short, (we moved the engine forward 20mm, remember), so I had the corolla prop shortened and balanced to fit. While I was at the engineers shop I had them braze a second, wider pipe into the fuel tank pickup. Now using the wide one as the feed to my Carter low pressure lift pump. This sends the fuel forward through 8mm aluminium lines I routed alongside the 6mm factory ones. When it gets to the engine bay it deposits it into an Ali-Express-Special surge tank with an integrated Bosch 044 that supplies the fuel rail. Return from the surge tank runs through the narrower diameter factory fuel lines and back into the tank through the original (narrow) pickup. Seems to work quite well! Hopefully not all too noisy when the exhaust is on, we'll see. Starting to look pretty good in there now I reckon. One of the big differences between T50 and K50 boxes is the T50 is hydraulic clutch rather than cable. Came at this from a few angles; ended up buying an ae86 master and slave cylinder, as well as some nice braided clutch line, but didn't want to bugger around with the pedalbox too much. A lot of the modified ones out there looked a bit compromised, with big flex forces on the pedal where bits of steel bar had been tacked on to get it actuating the MC. Bought a pedalbox from an EG civic for super cheapz on trademe and the separate clutch pedal actually looks like a promising alternative. The other route seemed to be to fit a Wilwood pedalbox or similar, like Snoozin' is doing for his. Pimp, but didn't want to rush down that route just yet. I'm 6'2" and was worried that a floor mount pedalbox would sit closer to the drivers seat than the factory one, and I already struggle to get my gangly legs wedged in. Hmm. At this point, Nats '16 happened, shotgunned my way around for a stress-free time this year. Found a clone in Horopito, poor thing. Was having a chat with Beaver, Manu, Goat, Ned and Cam, and one of them suggested a cable fork conversion kit from a company in Ireland. Ideal! Some googling revealed that FLOS.IE was the company that did them. GCs to deal with and did me a discount for sending a k50 donor fork for them to molest into one of these: Got myself a Christmas present, an N2 style aluminium rear wing. Nicely modelled here by a goat majestically sunning itself in it's natural habitat: Flippity flip I hate wiring. Spent ages trying to work out why engine was turning over but not firing. Had spark but no injector pulse. Finally found this absolute treasure trove of 4age wiring goodness. Had to re-wire my fuel cutoff relay circuits to incorporate the ECU starter trigger like so: et voila! Much relief. A bit of rust to sort in the heater channel, so loom came back out for now (also to solder and wrap properly, rather than the twist-and-tapes that you can see in the video...) Gave the exhaust bits and bobs a tidy up. It's a 20v manifold (not sure what make, but the bolt spacing is 20v specific), and my original 2" system. What now? Oh yeah, lows. Got some other bling from T3, these are just lovely. Fitted up well (though they sent the wrong bolts with the RCAs). Gave the dust shields and calipers a bit of a spruce before shifting them onto the shiny legs. Have since swapped the brake lines out for some pimp gold (don't judge me) Hel stainless steel braided ones. Don't trust 32 year old brake lines too much, and while it was all apart... No pics unfortunately. As for the rear, figured a good low spring/short travel adjustable damper combo would be the way to go. Integrated shock/coilover units are available, but didn't want to go to the lengths of reinforcing turrets/axle spindle etc, at least not yet. If I eventually go T-series rear end that'll be the time for those fun and games. Seems some people use mk2 escort rear dampers as their short travel shock of choice. With the amount of competition options available for them I thought that'd be a sound choice, so got some GAZ (English company, played with some of their stuff before I came over here) 38-way adjustable shocks for the rear. Should be enough adjustability to get it riding well I hope! Expecting to have to modify the Cobra springs to get them low enough. We'll see. Current ultimate racecar spec as stands: Chassis: Stock kp61 Sprint body T3 adjustable front coilovers Cobra superlow rear springs GAZ adjustable dampers (mk2 escort) Hel braided SS brake lines 13x7 Work Equip 01s A-series to K-series engine mounts Battery relocated to boot. Engine: Stock 4AGE 20v blacktop from a Levin SQ engineering waterline kit SQ engineering Dizzy kit T3 100mm velocity stacks 4-1 20v manifold (unknown brand) with 2" custom exhaust. 1G-GE high torque starter with Niteparts spacer kit Simplified loom Carter Lift pump/engine bay surge tank/Bosch 044 EFI pump setup AE86 radiator Transmission: T50 20-spline FLOS.IE T50 clutch cable conversion kit Exedy 220mm clutch Shortened corolla driveshaft Stock U-code rear end Plans: Sort small rust patches in rain channel Make up gearbox mount Make up driveshaft loop Fit O2 sensor and flanges to exhaust manifold Fit rad and pipes Cert Doorts Other stuff I can't think of right now.1 point
-
By my deeds i honour him V8
1 point
-
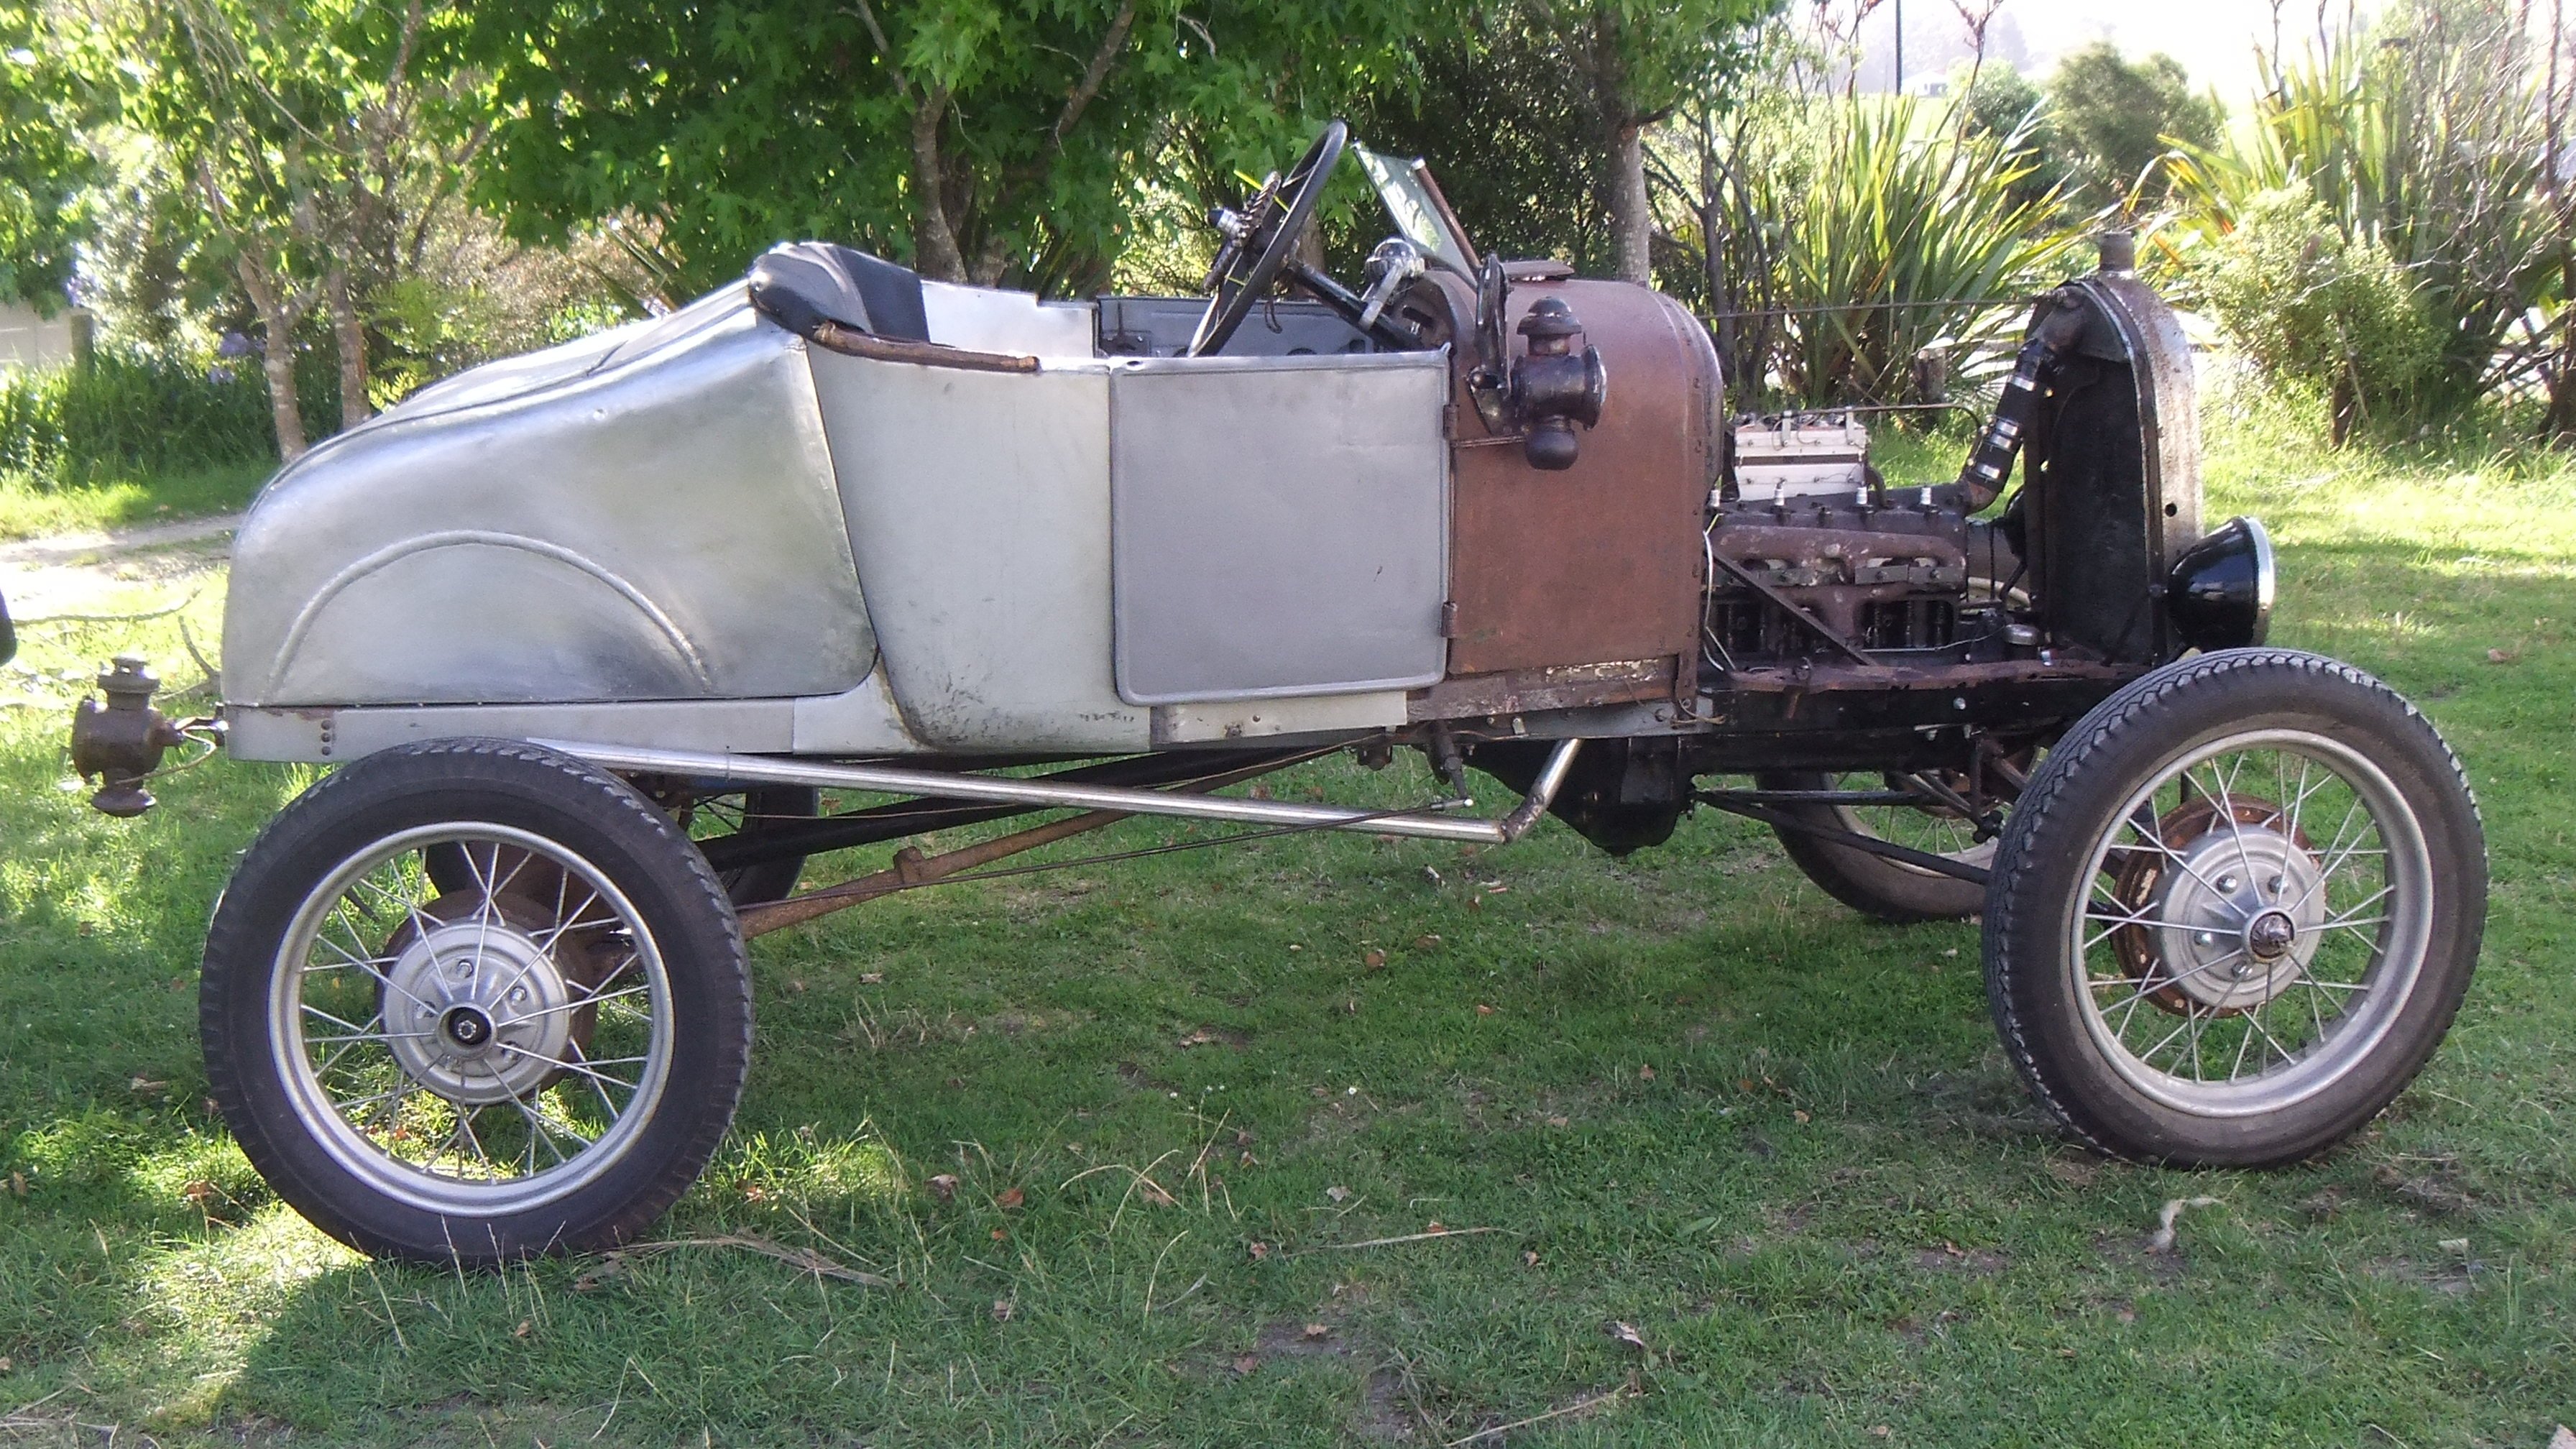
Found air leaks, it lives. Milkshake oil, gears and brakes barely work but it lives. Handbrake doesn't do anything but then again the lining is 90 years old and crumbly.1 point
-
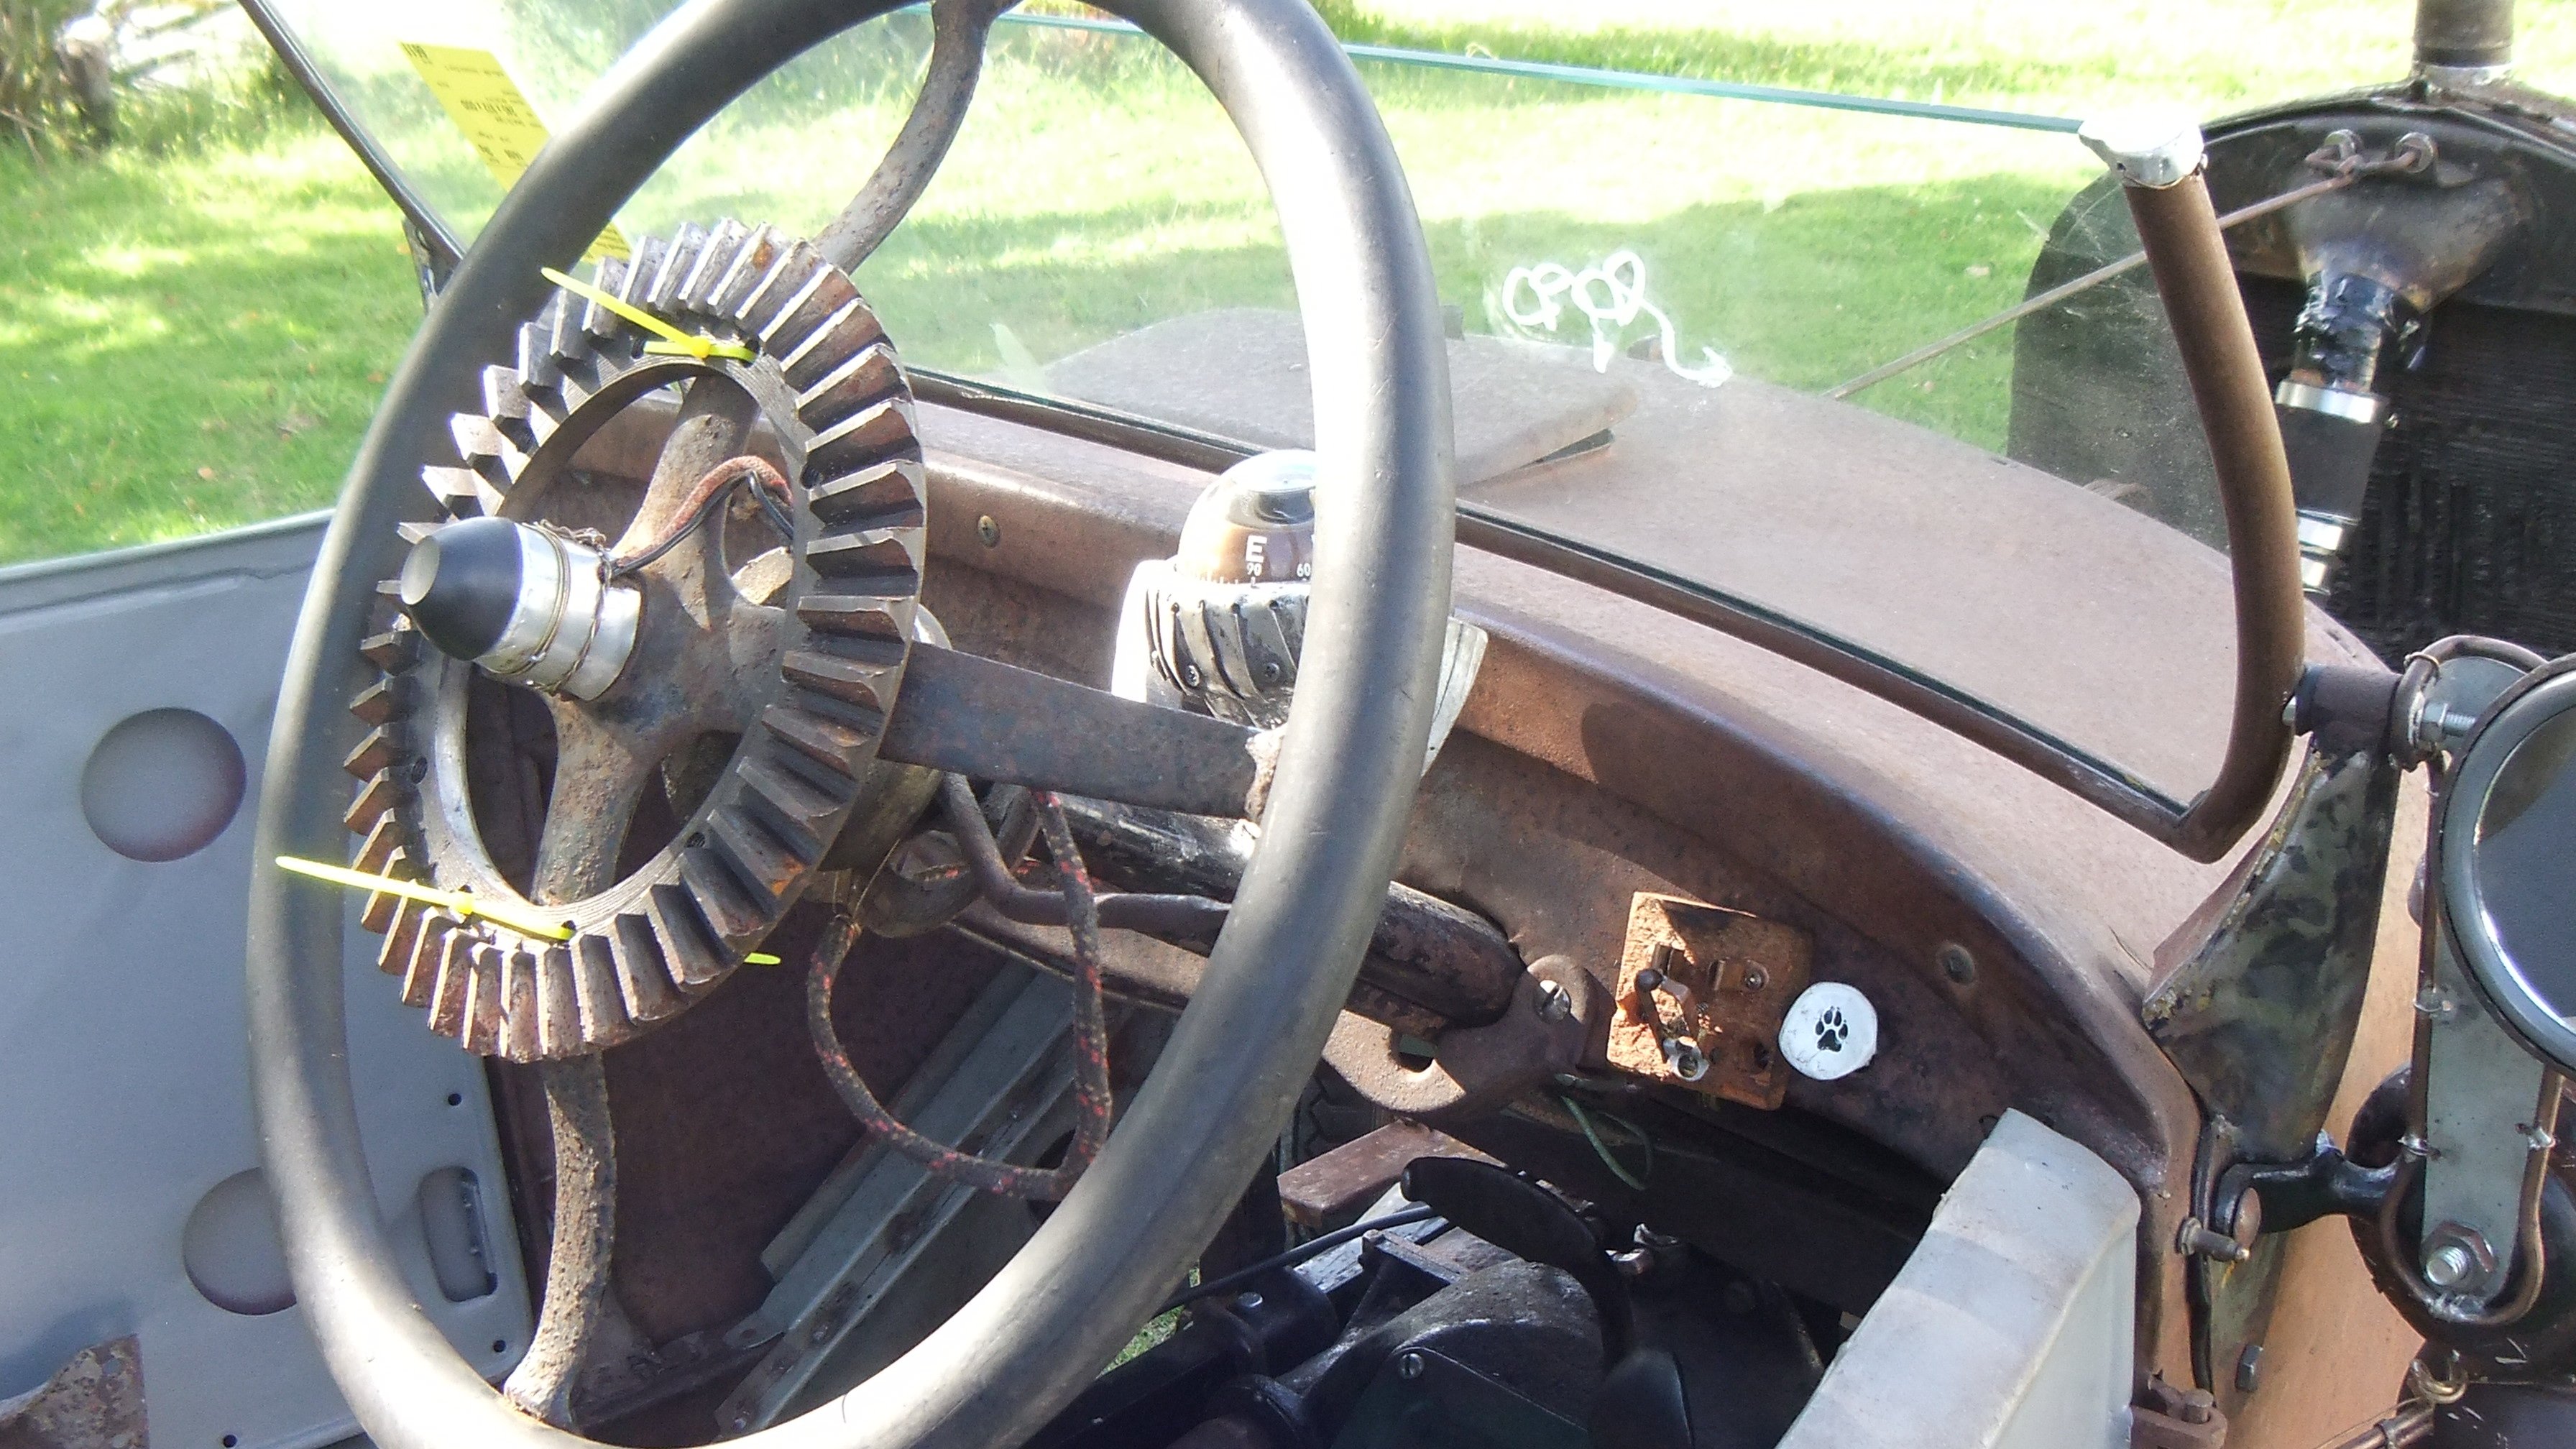
Disclaimer: this video may be faked. i took some time to polish my wiring loom. *Imagine a wiring loom made from copper tubing with wood insulators that was polished. This didn't last. Putting wire inside the tubing was ok for a while but when the wire gets damaged inside there's nothing i can do to fix it.*1 point
-
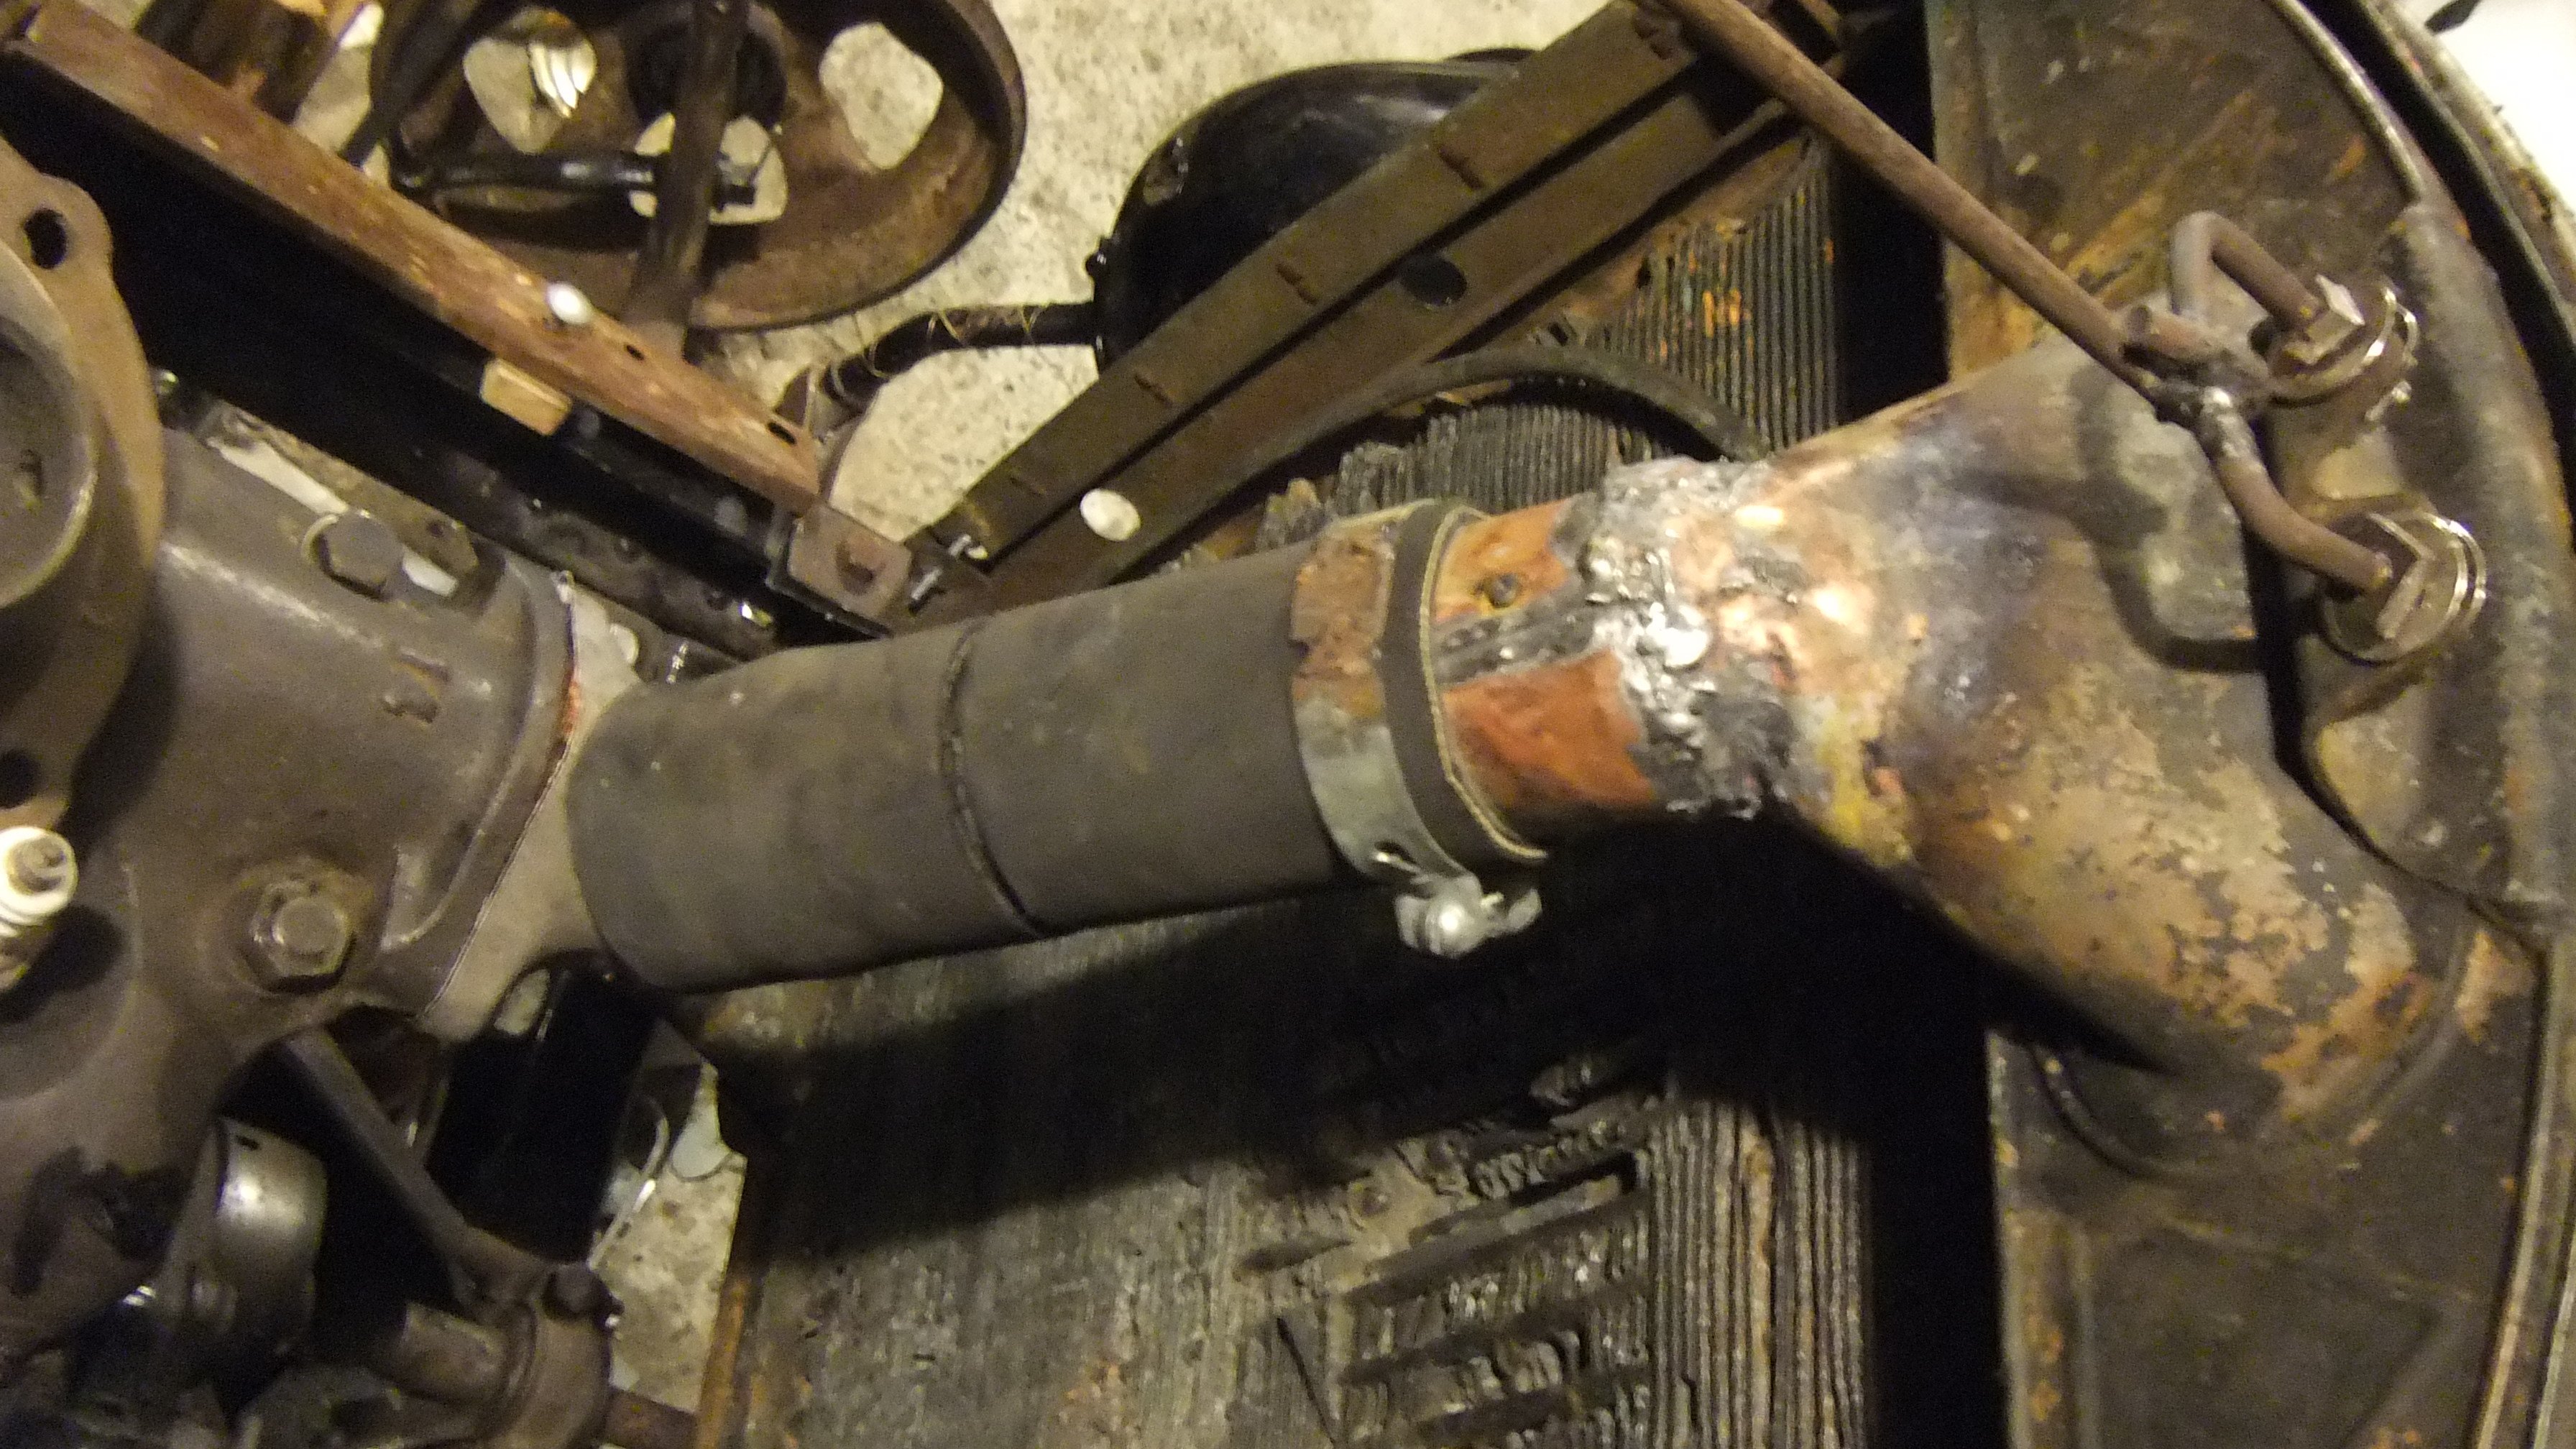
That radiator is full of holes and half the tubes have been cut and soldered up. Some when a fan went through it, some from what might have been collision damage. Tanks are pretty had it too. Can't make a new one as i don't work at a radiator shop anymore. Metal fatigue has taken its toll on the top hose fitting, it is cracked in several places and the pipe rotted off completely so i soldered this copper strip on there. Not sure how long it will last but then i'm pretty sure the rest of that rad' is nearly dead too. Liking the way it fits the whole "barely much left of anything" build style. (Edit: lasted until the year 2020 when i got tired of it's leaks and overheating on hills. Would still work on something driven to the ice cream shop & back once a month, if you wanted to shove black pepper and bread into the holes.)
1 point
-
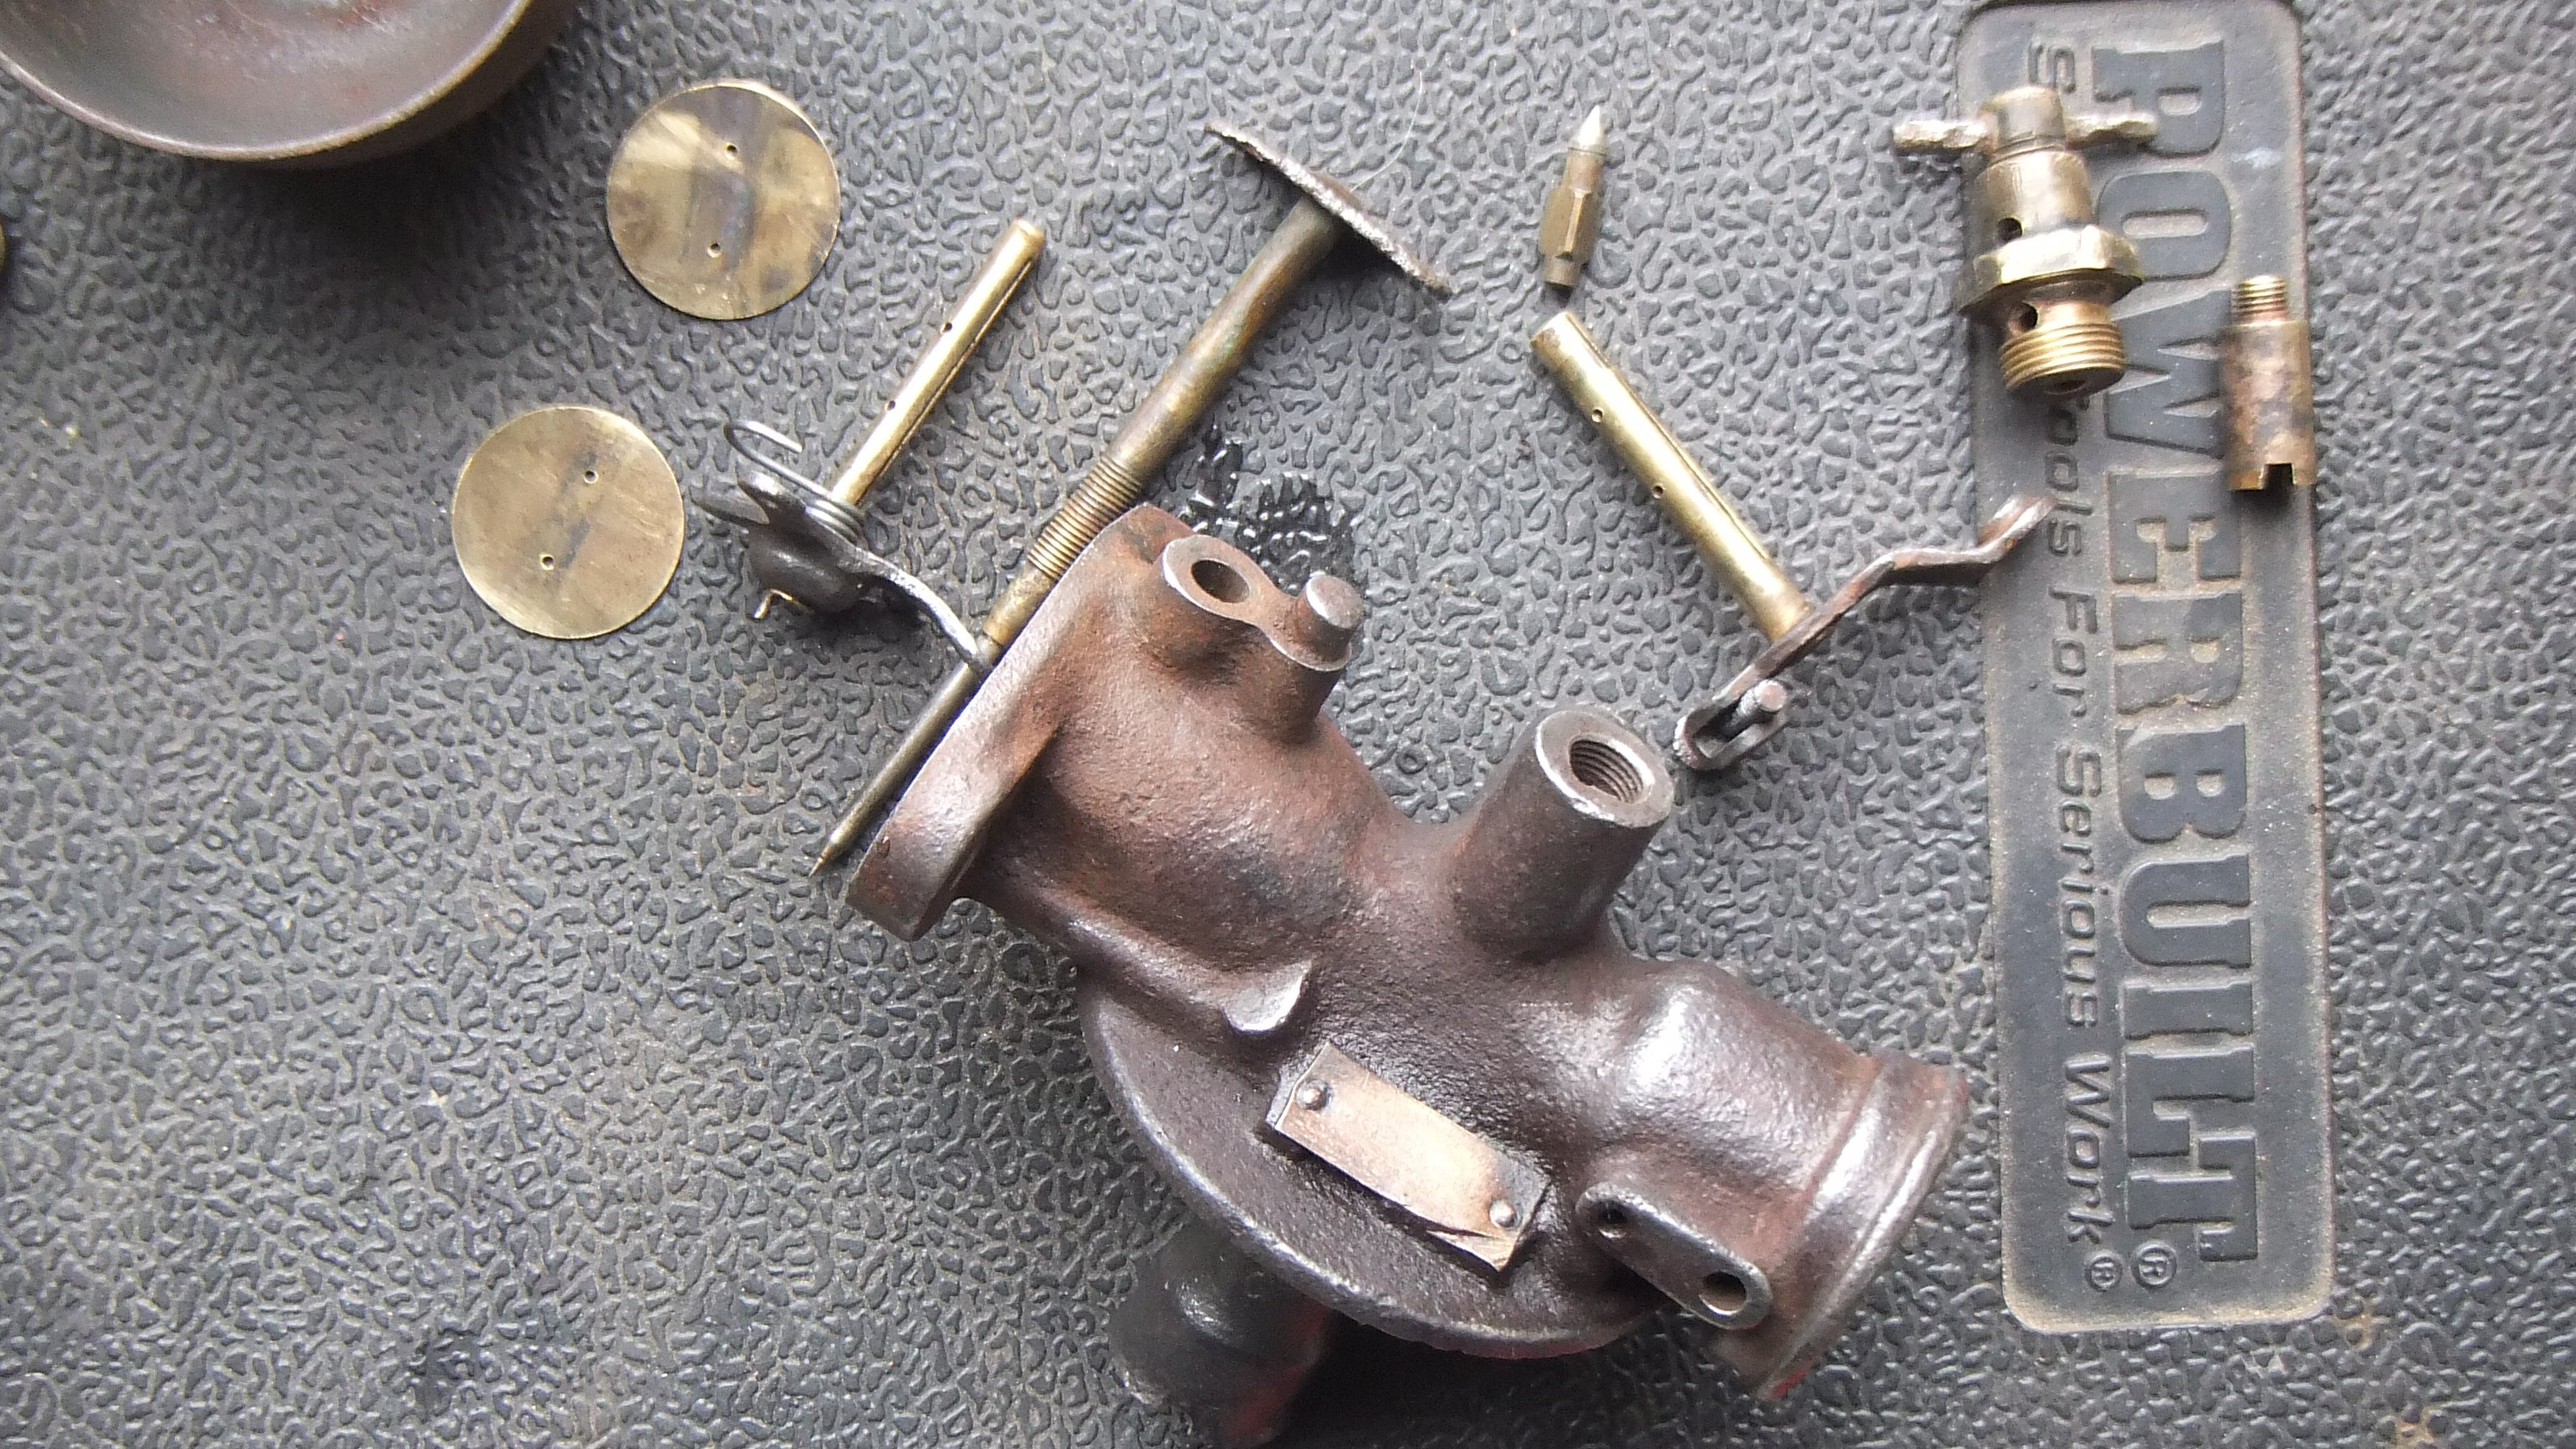
It's like working on a lawnmower carb' but bigger and no plastic anywhere. Not sure if you can read that but the name plate reads "Holley carburetor Detroit Mich" The whole car is like a mechano set.
1 point


.JPG.b1077b1e6f283ce0e6211d768e009648.JPG)
.JPG.1d7f1833524569ad4ac1d969139a4795.JPG)
.JPG.f13fb8b89f86fed761d3ec458b9e4bcc.JPG)
.JPG.33eb853e608809416a226c3a65fbcb3b.JPG)
.JPG.0bfcf6bf51036576a090533c3a444031.JPG)


This leaderboard is set to Auckland/GMT+12:00