
Leaderboard


Popular Content
Showing content with the highest reputation on 08/21/17 in Posts
-
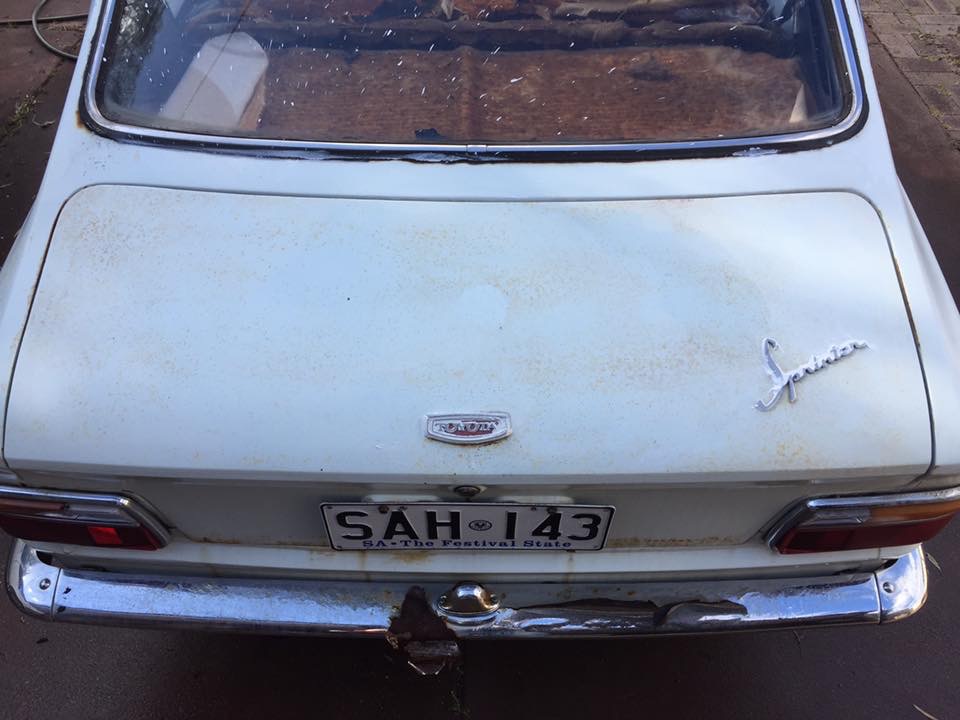
This weekend, @Alistair bowled around and helped me with a lush polishing effort on the painted surfaces of the 944. Here's a few shots of the result, taken under some neat skies on Sunday evening. 1991 Porsche 944 S2-179-Edit by Richard Opie, on Flickr 1991 Porsche 944 S2-96-Edit by Richard Opie, on Flickr 1991 Porsche 944 S2-172-Edit by Richard Opie, on Flickr 1991 Porsche 944 S2-141-Edit by Richard Opie, on Flickr 1991 Porsche 944 S2-170-Edit by Richard Opie, on Flickr Some of the S2 differences: 1991 Porsche 944 S2-129 by Richard Opie, on Flickr Turbo nosecone, a big upgrade over the old 924-style front my 8v car had on it. 1991 Porsche 944 S2-92-Edit by Richard Opie, on Flickr "Bridge" spoiler in place of the squishy rubber ducktail thing, and the under spoiler/bum flap thing. 1991 Porsche 944 S2-47 by Richard Opie, on Flickr 1991 Porsche 944 S2-106 by Richard Opie, on Flickr 16x7 and 8" "Design 90" wheels and Brembo 4-pot clappers on 300mm rotors at either end. 1991 Porsche 944 S2-116 by Richard Opie, on Flickr 1991 Porsche 944 S2-119 by Richard Opie, on Flickr 3-litre 16 valve 4-banger engine. A shade under 220hp, lol redline of 6500rpm but sooooo torquey. Actually a very smooth thing to drive, with twin balance shafts and all that jazz. 1991 Porsche 944 S2-189-Edit by Richard Opie, on Flickr Delicious pop-up headlights, I can watch these go up and down all day. 1991 Porsche 944 S2-108 by Richard Opie, on Flickr 1991 Porsche 944 S2-68 by Richard Opie, on Flickr 1991 Porsche 944 S2-80 by Richard Opie, on Flickr 1991 Porsche 944 S2-82 by Richard Opie, on Flickr 1991 Porsche 944 S2-112-Edit by Richard Opie, on Flickr Interior things and stuff. Headunit will be switched out shortly for something not silver, and Bluetooth capable.9 points
-
have hopefully fixed the worn out gas sender problem.I have no idea how much gas I have, but the old gauge don't work anyway, I can just look down the filler neck and at least I can full'er up now.And then as Sunday drew to a end...dells seem to fit. oh man those manifolds are right bastards! hooked up the throttle wire.made brumbrum noises.just need to finish wiring and install electric fuel pump, K&Ns should be here at the end of the month.So questions,1; I have a Red and a Blue wire coming from my 009 distributor, is one positive and one negative on the coil?2; loom has two large red wires in the engine bay, one goes to the Alternator?, and one goes to the starter?, and then I think one goes from the alt to the starter? my loom had no instructions, and because I've gone with alt from genny, this has changed a few things??Also how the hell do you keep the fusebox in place? I bought that little clip but I'm buggered if I can make that work!trying to avoid using a washer and wood screw like it use to have.7 points
-
Been busy over the last few months A12 out and A14 in! Ended up building a fresh A14 9.8:1 Compression (pistons flycut) Cam with 2500rpm-6500rpm range 9.4kg Flywheel (2kg lighter than standard) Firmer Kelford valve springs Ported and polished head & manifold to my ability Twin 40mm dellortos & extractors New alloy radiator on its way, also have to install the e15 electronic dizzy at some point down the track. Here is a quick video of a small test start with single carb when I first installed the engine... Pics following Pistons flycut for clearance H89 head, water jackets tapped and grub screw inserted. Also drilled a small hole to locate a roll pin from the dellorto manifold to keep it alinged Discussion7 points
-
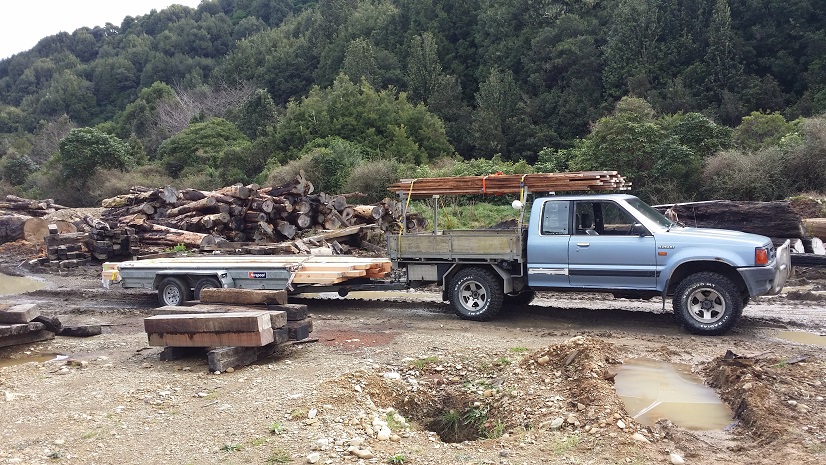
I've been collecting timber from a sawmill 'up north'. Is my ute OS? I reckon it are. It's also bloody awesome. It has self canceling indicators and power steering, but everything else you need to do yourself. The objects in the mirror are precisely their own size and I need to get out of the cab to engage the free-wheeling hubs. I love that ute. Sadly the generator died last weekend (as did a number of other things). It's a real challenge trying to keep tools dry enough to use up there, but after forking out a significant portion of the cabin budget on a replacement generator I managed to finish another frame today. I've gotten a bit better at calculating tangents... but of course there are mistakes aplenty. Sorry about blurry photo. It was almost dark
 6 points
 -
lemon party golden shower squirt munro, geyser wilhelm, donald pump, gush gush, gone fistin', dirty hose, pump in the trunk5 points
-
Top coat on, terrible phone pics but you can get the idea... Sat the engine in And all the bits have come back from the platers. Thanks to Phill at Electroless Coating Systems Next up is getting the front wheel sorted, Seat covered and the cream insert painted onto the tank. Then the fun part, bolting it all back together!!5 points
-
Who even are you. 5x200 is the only way of life. We got a set of these for the buss
4 points
-
Fitted rear quarter jobby tested wet sanding to clean up some of the orange peel. Wet sanded 2000 grit on the fibreglass and it came out nice without too much effort, but unfortunately sanded a bit too much in one spot so will need to spray that bit again. I haven't done the whole fibreglass quarter, only above the wheel and the upper rear bit to test, but it looks like this: Then I moved onto the roof and this turned out really nice! But again one small bit will need to be sprayed again... I guess that's all part of learning how to do stuff though. Trial and error. Shiny roof!
4 points
-
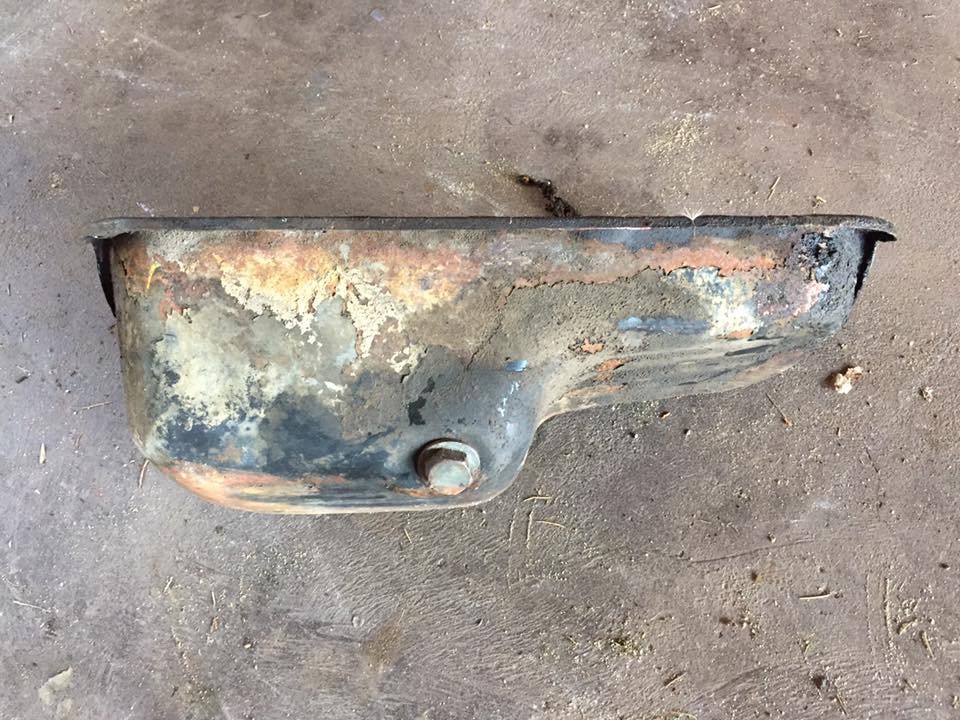
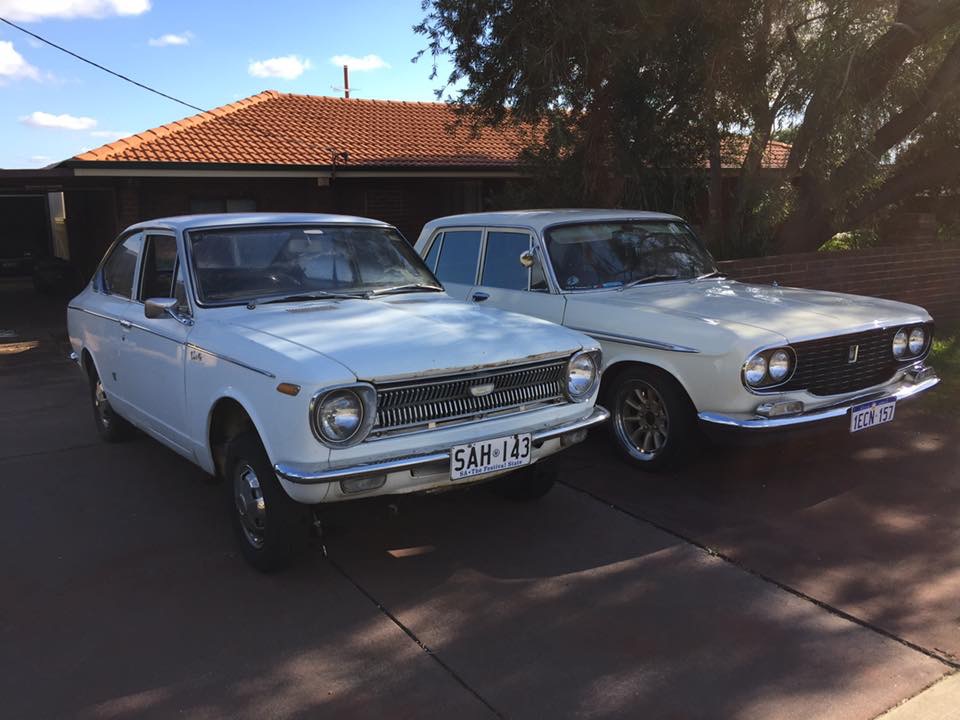
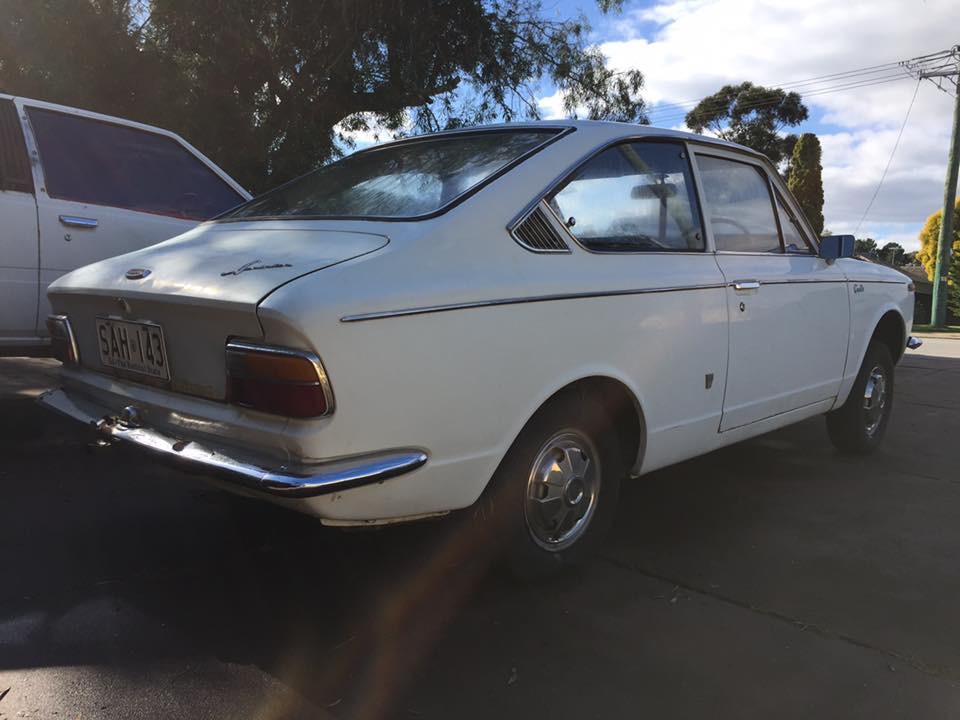
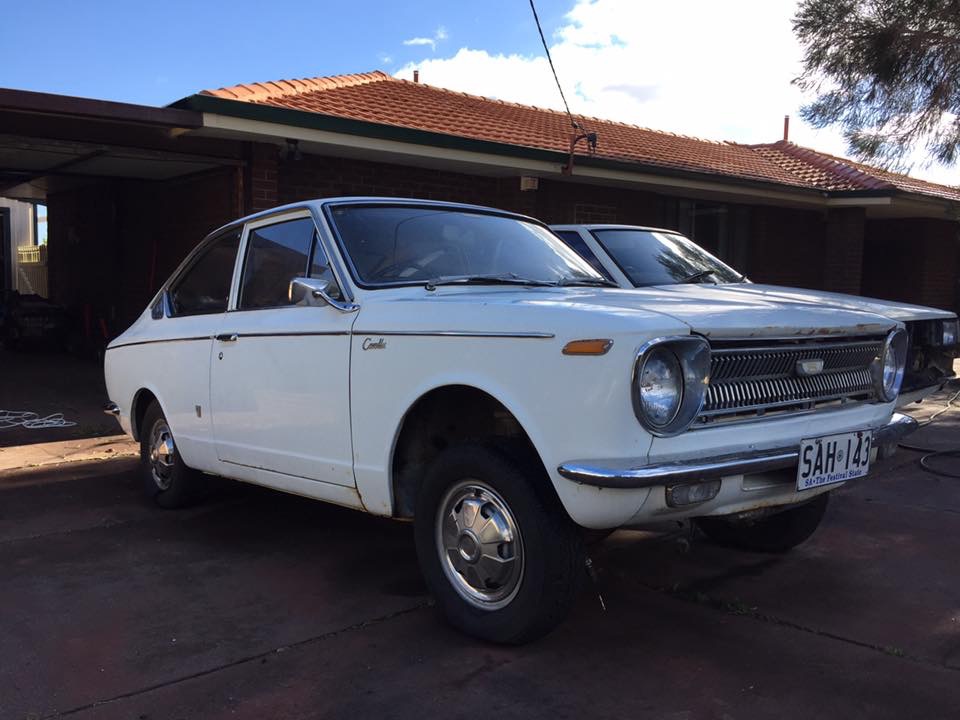
Pushed this out of the garage today to give it a wash and see what I'm actually dealing with, tried polishing the boot to get rid of the surface rust, it's better but still needs more work and I pushed it all the way up the driveway purely for a pic with the crown, GF was very unimpressed when I told her the actual reason I made her help. It's TINY compared to the crown also picked up the rest of the stuff that comes with it, except I've missed the struts I just realised. 7K-E and G52 box fit nicely in the back of the daily And I got the wheels, 14x7 and 14x6.5 watanabes, minor positive offsets, I'm pretty stoked with these! Although they require a stud pattern change to 4x114.3 can anybody ID K sumps by eye? I need a 4K one, this came with, no idea if it's the right one cheers Matt
4 points
-
3 points
-
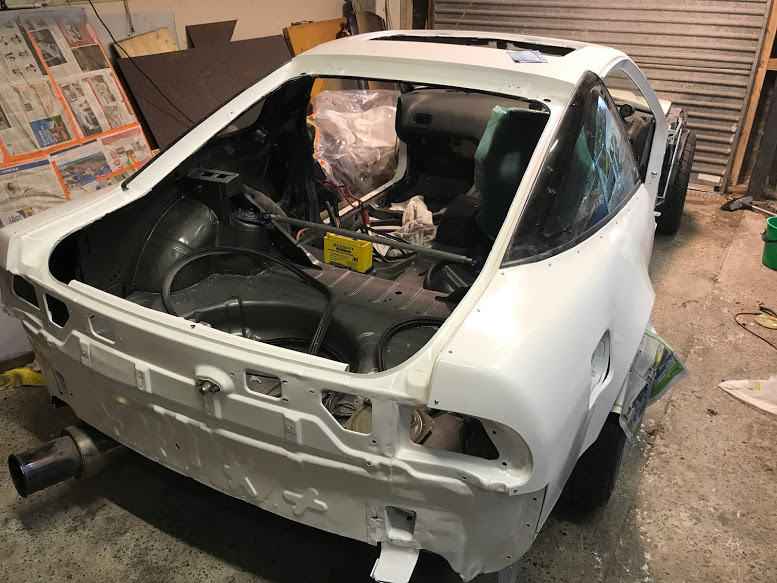
I had a closer look at the gauges of the skins that make up the rail and I found that the outer rail is 1mm, as is the panel I've made, but the inner skin is 2mm which I have none of to make a replacement. So I can't make any major structural additions today but I can work on making all the details on the outer skin right. I started by getting the sway bar mount in position. I measured the positions of the holes on the original and transferred them to the new panel. This is the mount mocked up in position. And here are the holes in position: I also went and added the "crumple zone" relief cutouts using a step drill, slitting disk, and flap wheel on the grinder. They came out looking really nice methinks. I then went ahead and put in the holes for the crush tubes in the bumper mount brace panel, as well as brand new M8 riv-nuts for the actuall bumper mounts. I measured it all and it should be in the right place but I'll soon find out. Next job was to turn up some crush tubes for the sway bar mounts. I found some round stock and started it in the lathe. The factory tubes are 45mm x 11mm ID x 15mm OD. If that was good enough for Uncle Henry then it's good enough for me. I got the whole length down to 15mm OD first Then cut off four sections slightly overlength Then got them faced to length and drilled one before I got kicked off the lathe. (this is just left on the drill bit to take the photo, it was clamped in properly while I drilled it out) I'll finish the other tubes off tomorrow. That's all for today. I'll try to get some stuff up Tuesday or Wednesday when the car turns up.3 points
-
weather boards and the butinol done on the veranda. 2017-08-20_05-37-46 by sheepers, on Flickr 2017-08-20_05-37-37 by sheepers, on Flickr 2017-08-20_05-37-29 by sheepers, on Flickr wires and shit. 2017-08-20_05-37-20 by sheepers, on Flickr2017-08-20_05-37-29 by sheepers, on Flickr rondo for attaching the ceiling 2017-08-20_05-37-11 by sheepers, on Flickr steps for getting up to the roof storage 2017-08-20_05-37-01 by sheepers, on Flickr3 points
-
@Mrs 64valiant was super excited about this build she even joined oldschool.co.nz. No covering up my tracks now..... Gotta be careful what I say in here haha.3 points
-
Can you turn up to cert someones car on this please Clint. Then can you post an account of their reactions for my amusement?2 points
-
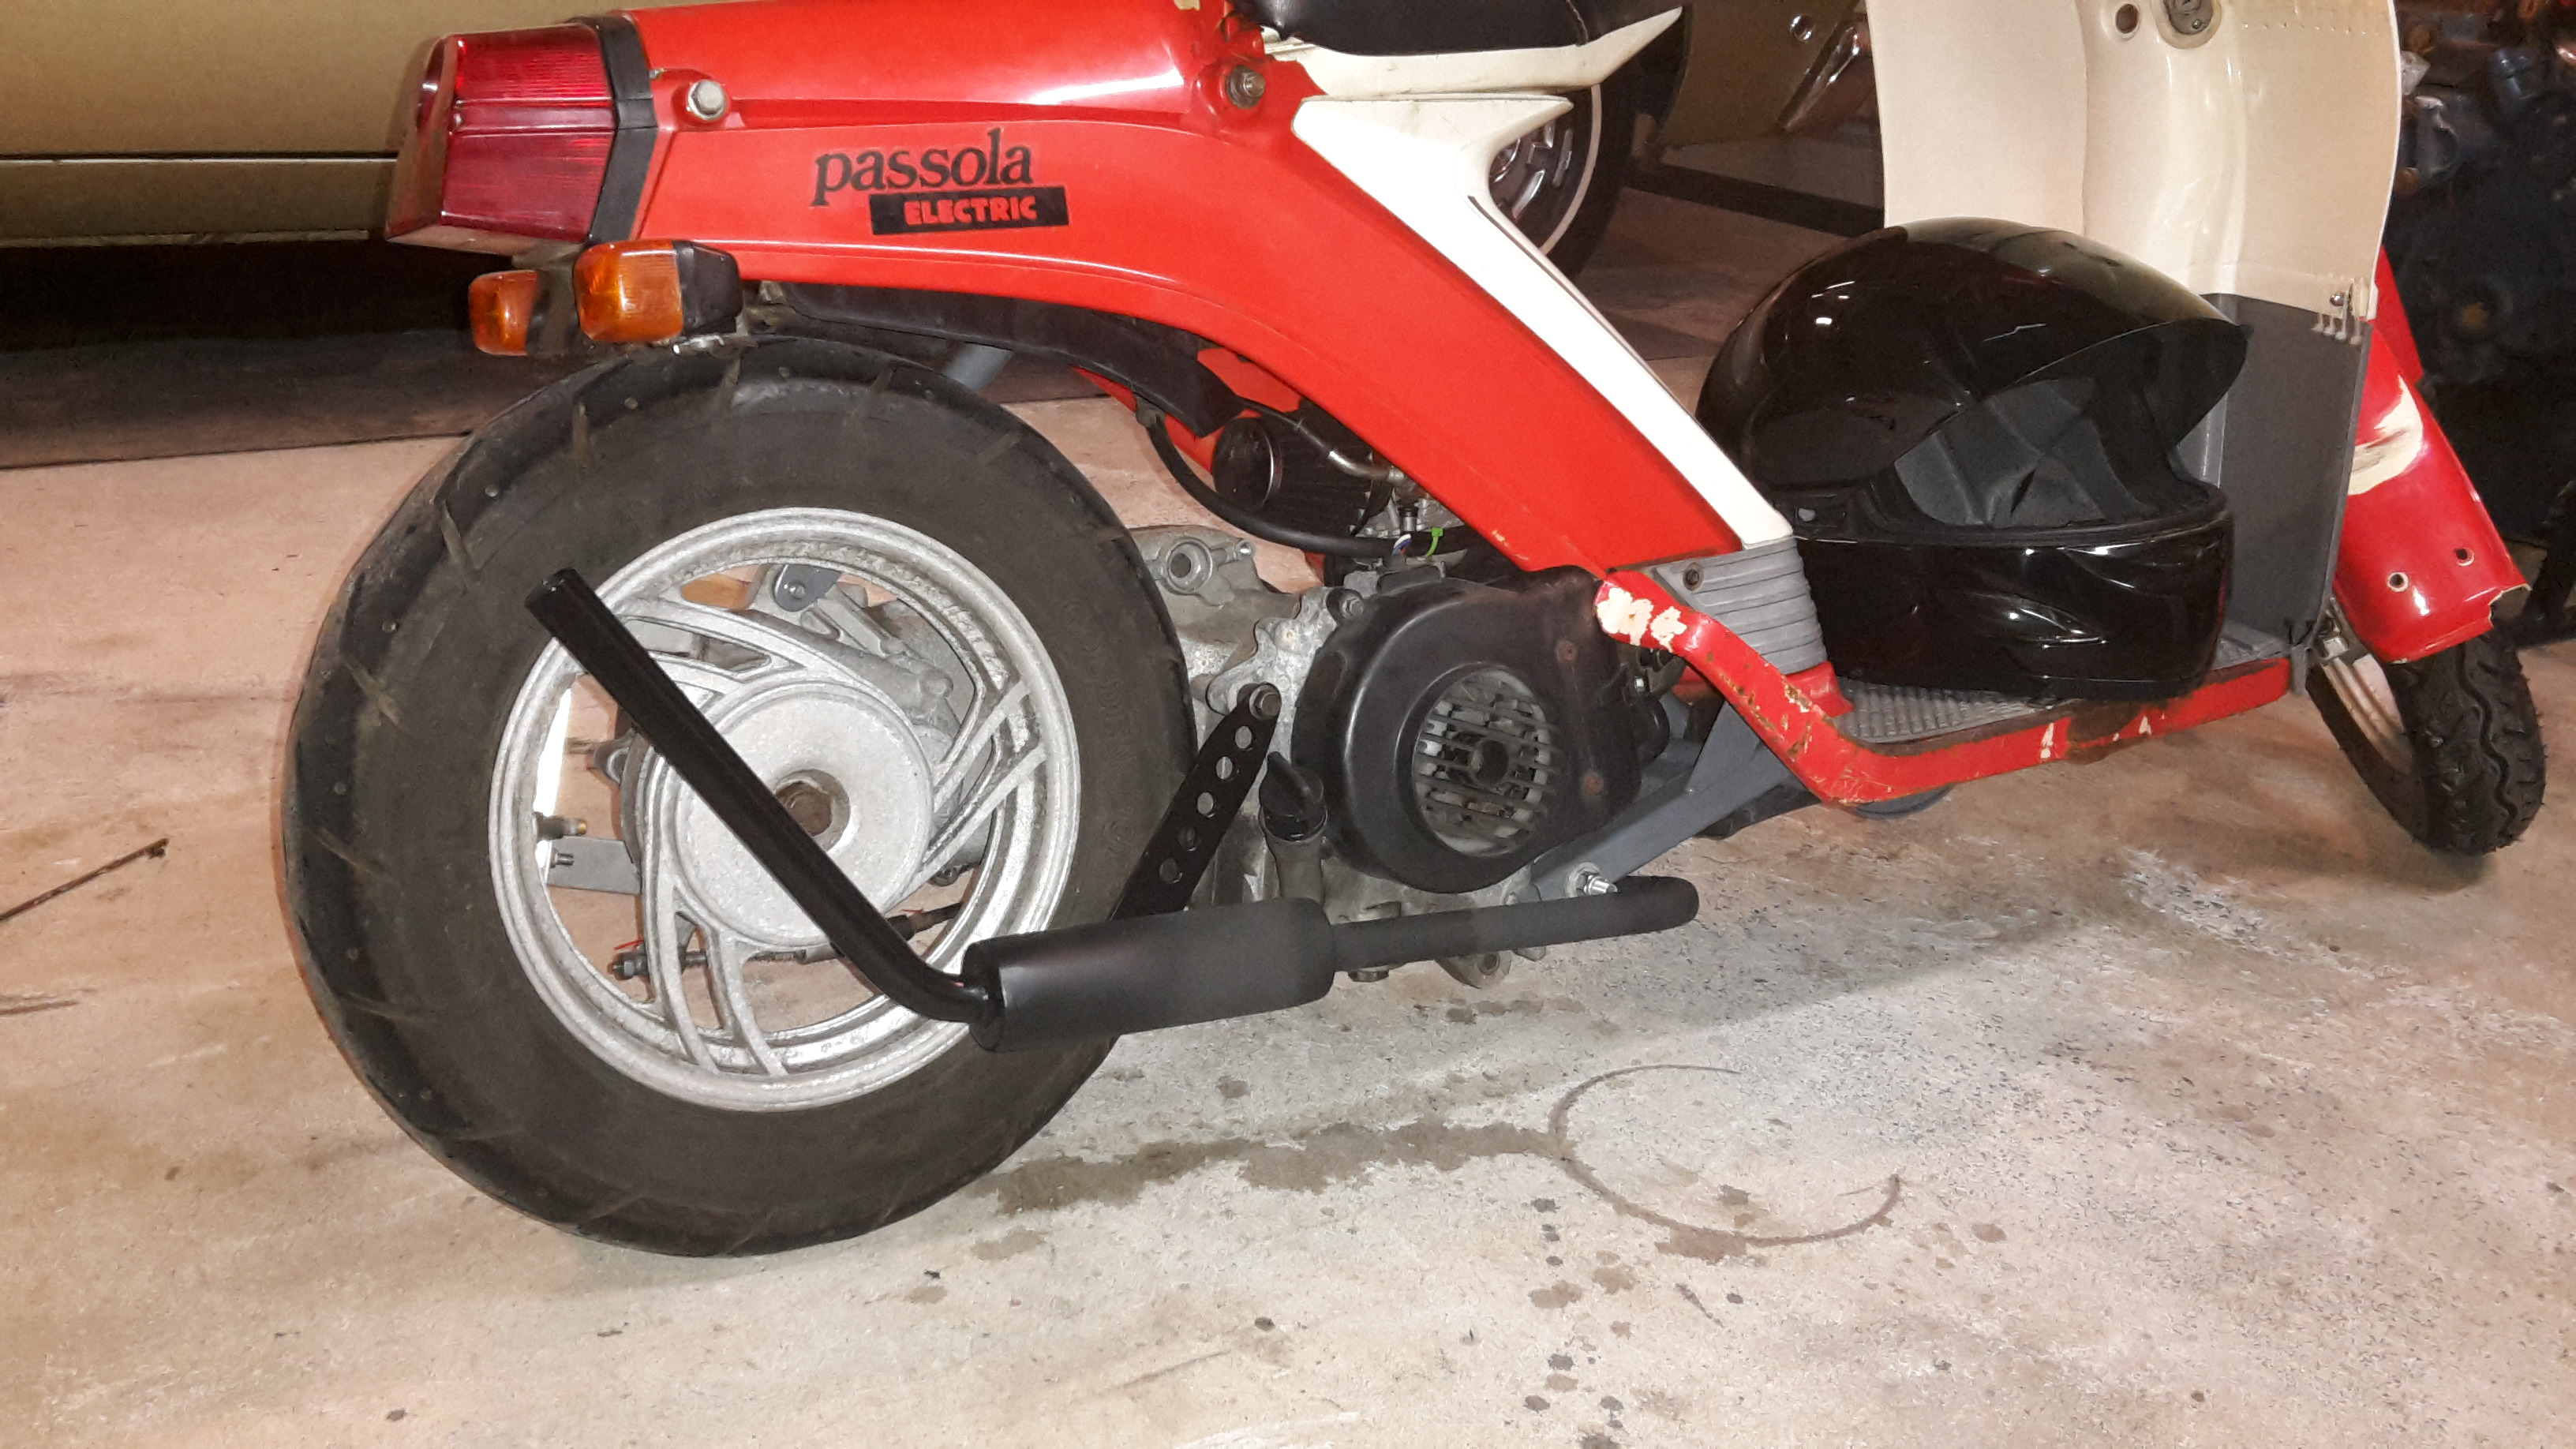
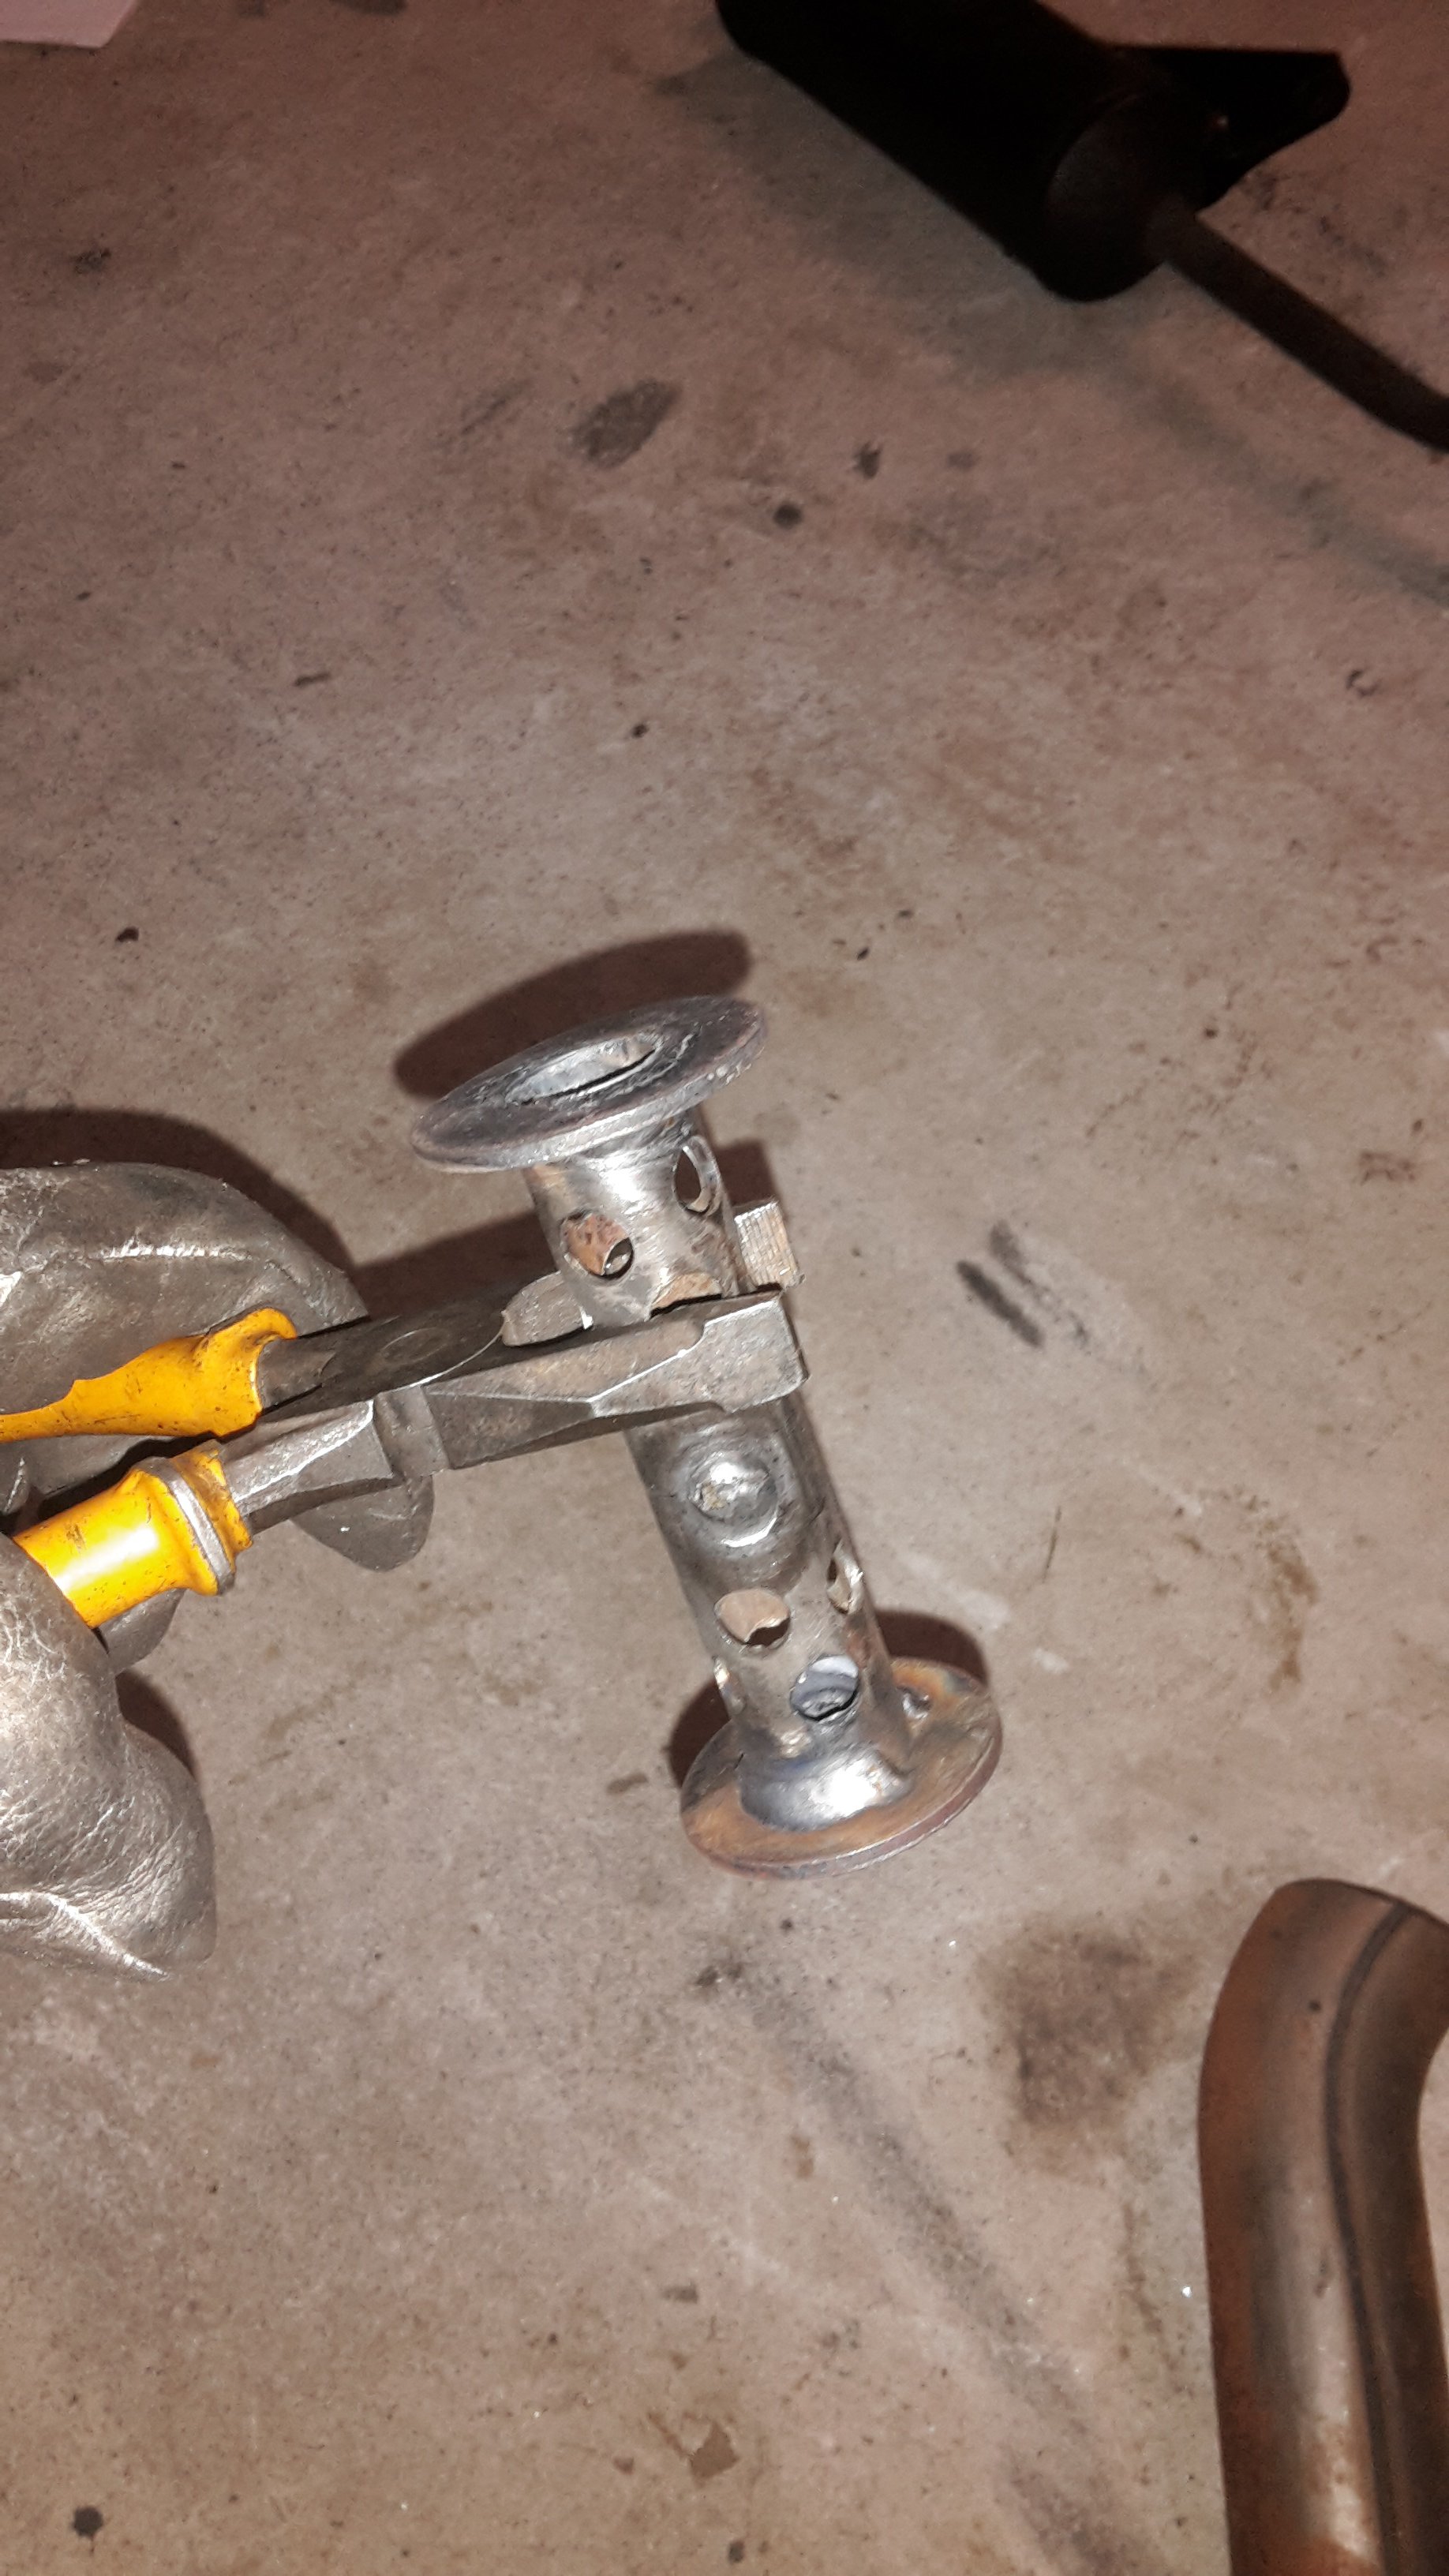
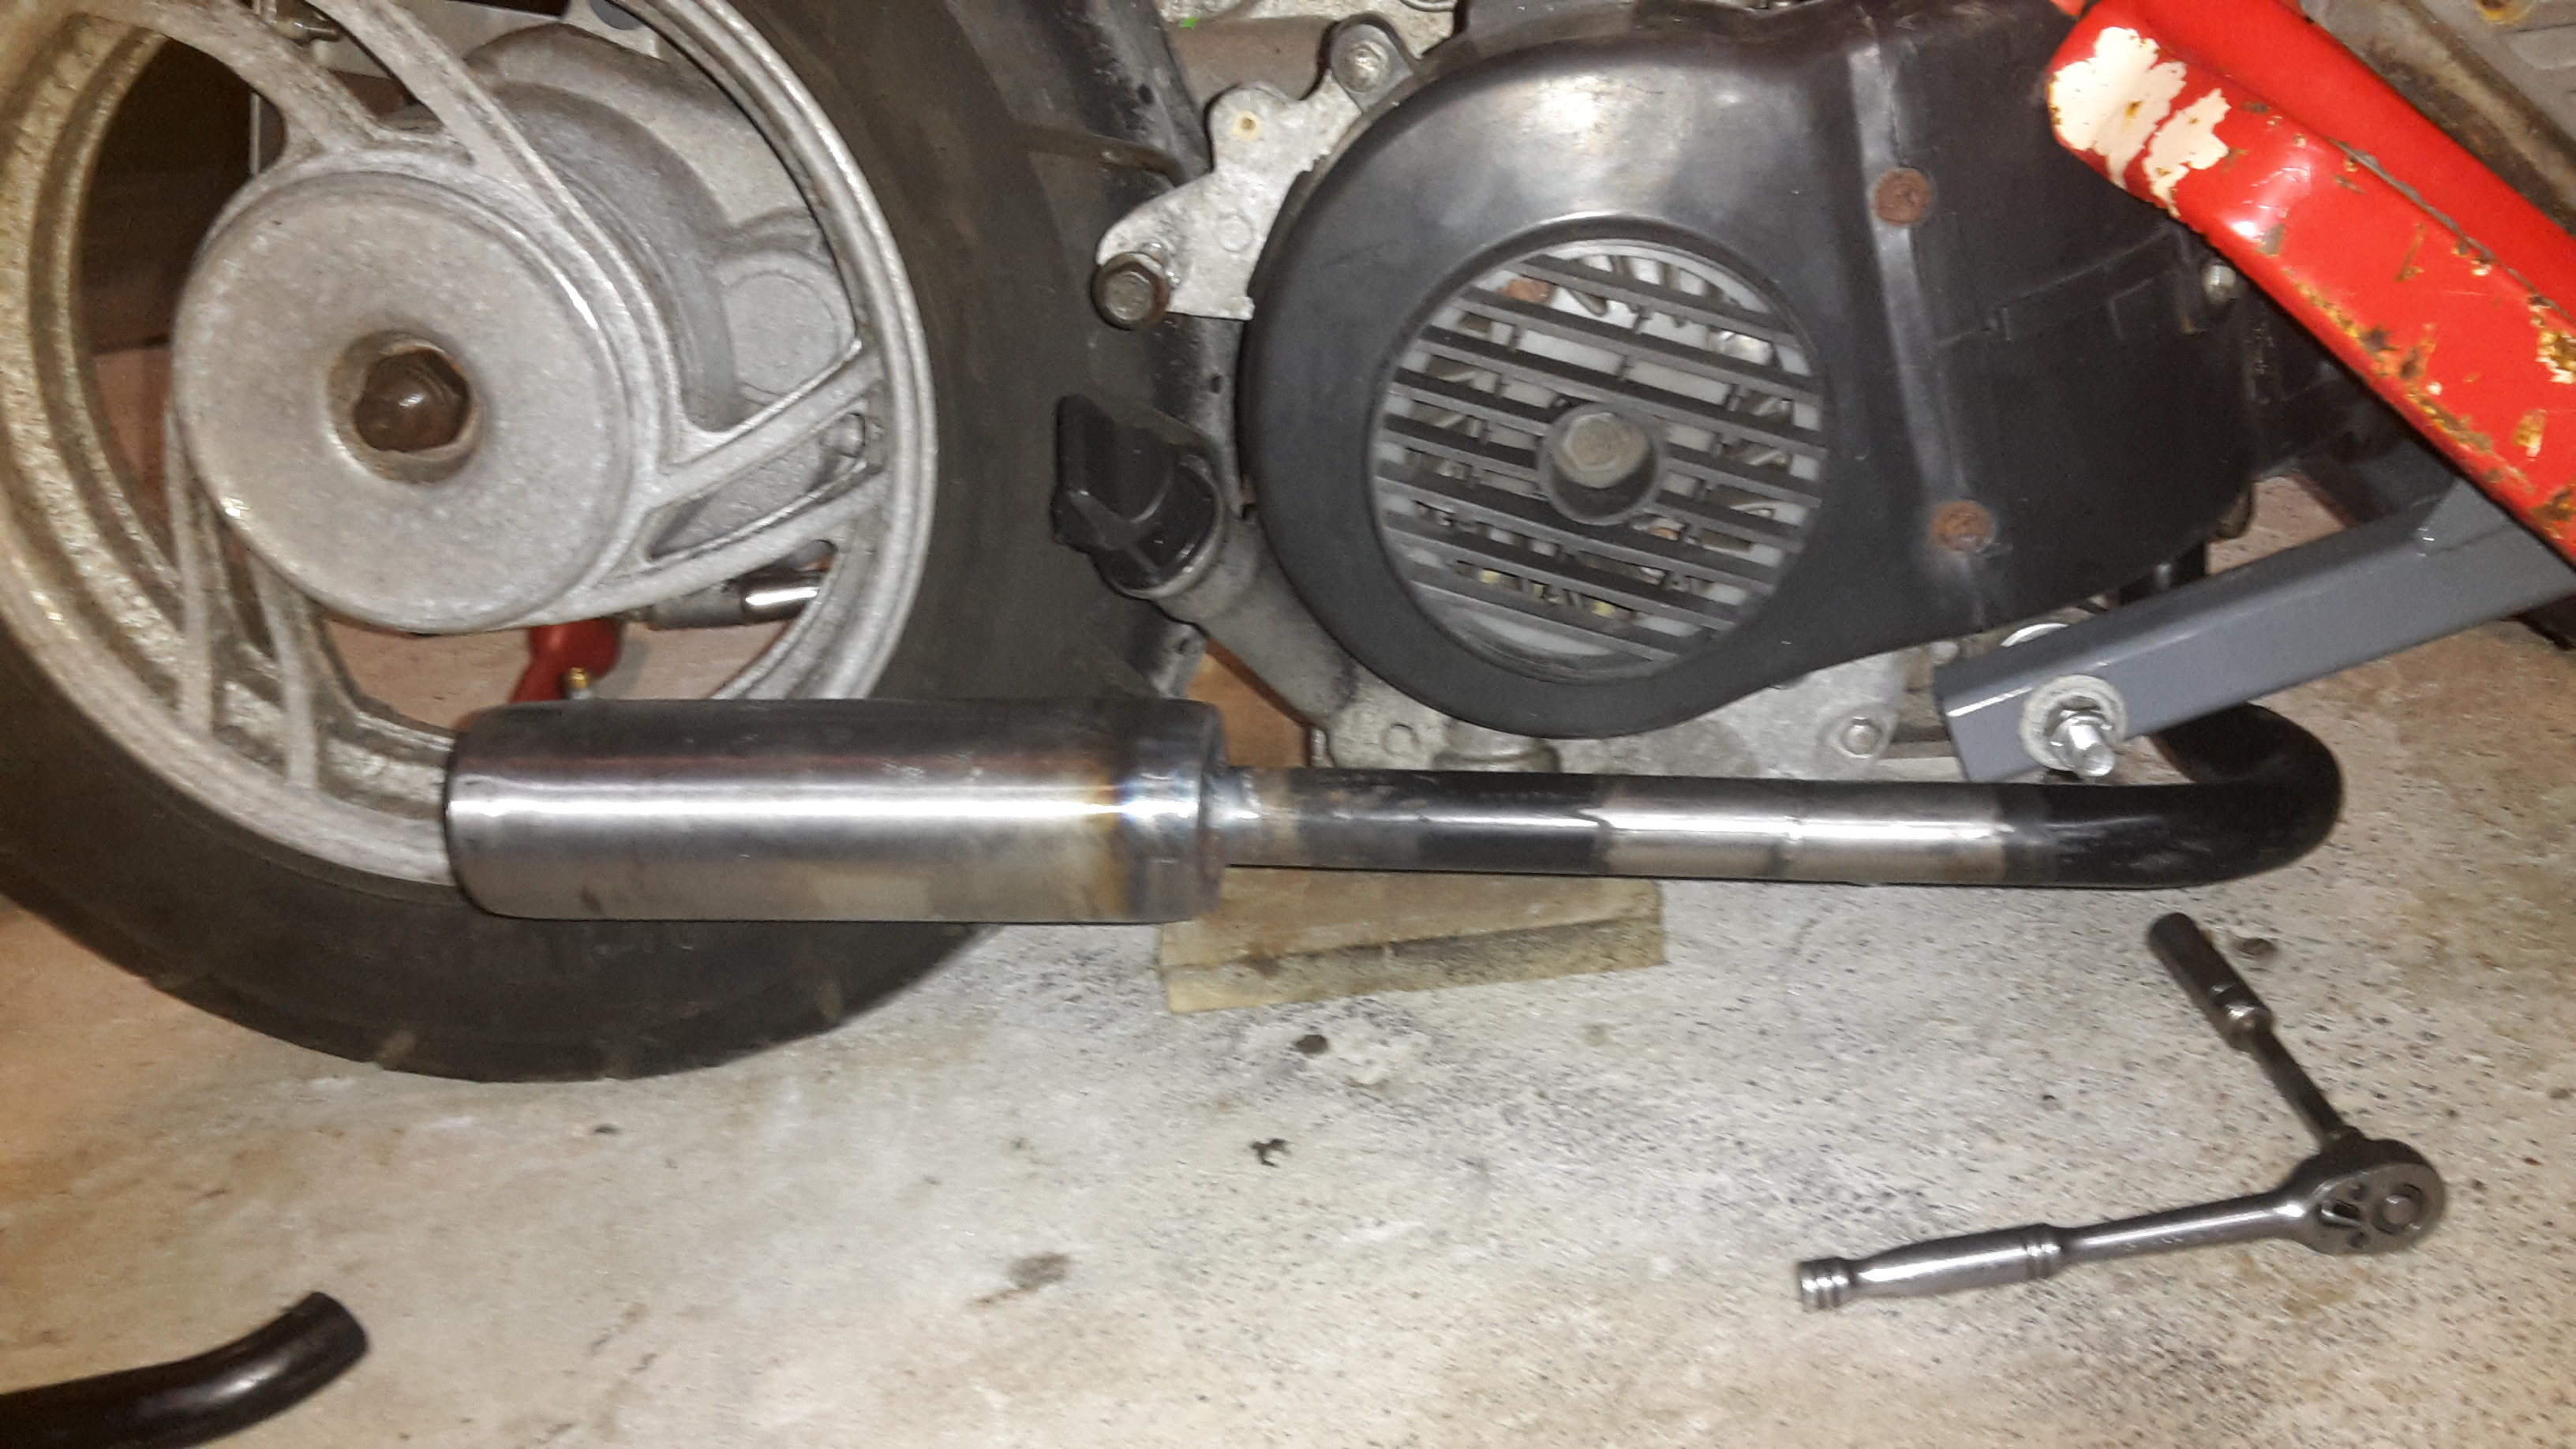
Needed more ground clearance, so made a new front pipe, too rowdy with no muffler at all so made one. Whole exhaust is made from an old lawnmower handle and a bit of 2" pipe and some big washers. Good chance to practice with tig welder, I haven't done much for ages It's probably still a bit louder than I'd like
2 points
-
Hot pink side stripes plz2 points
-
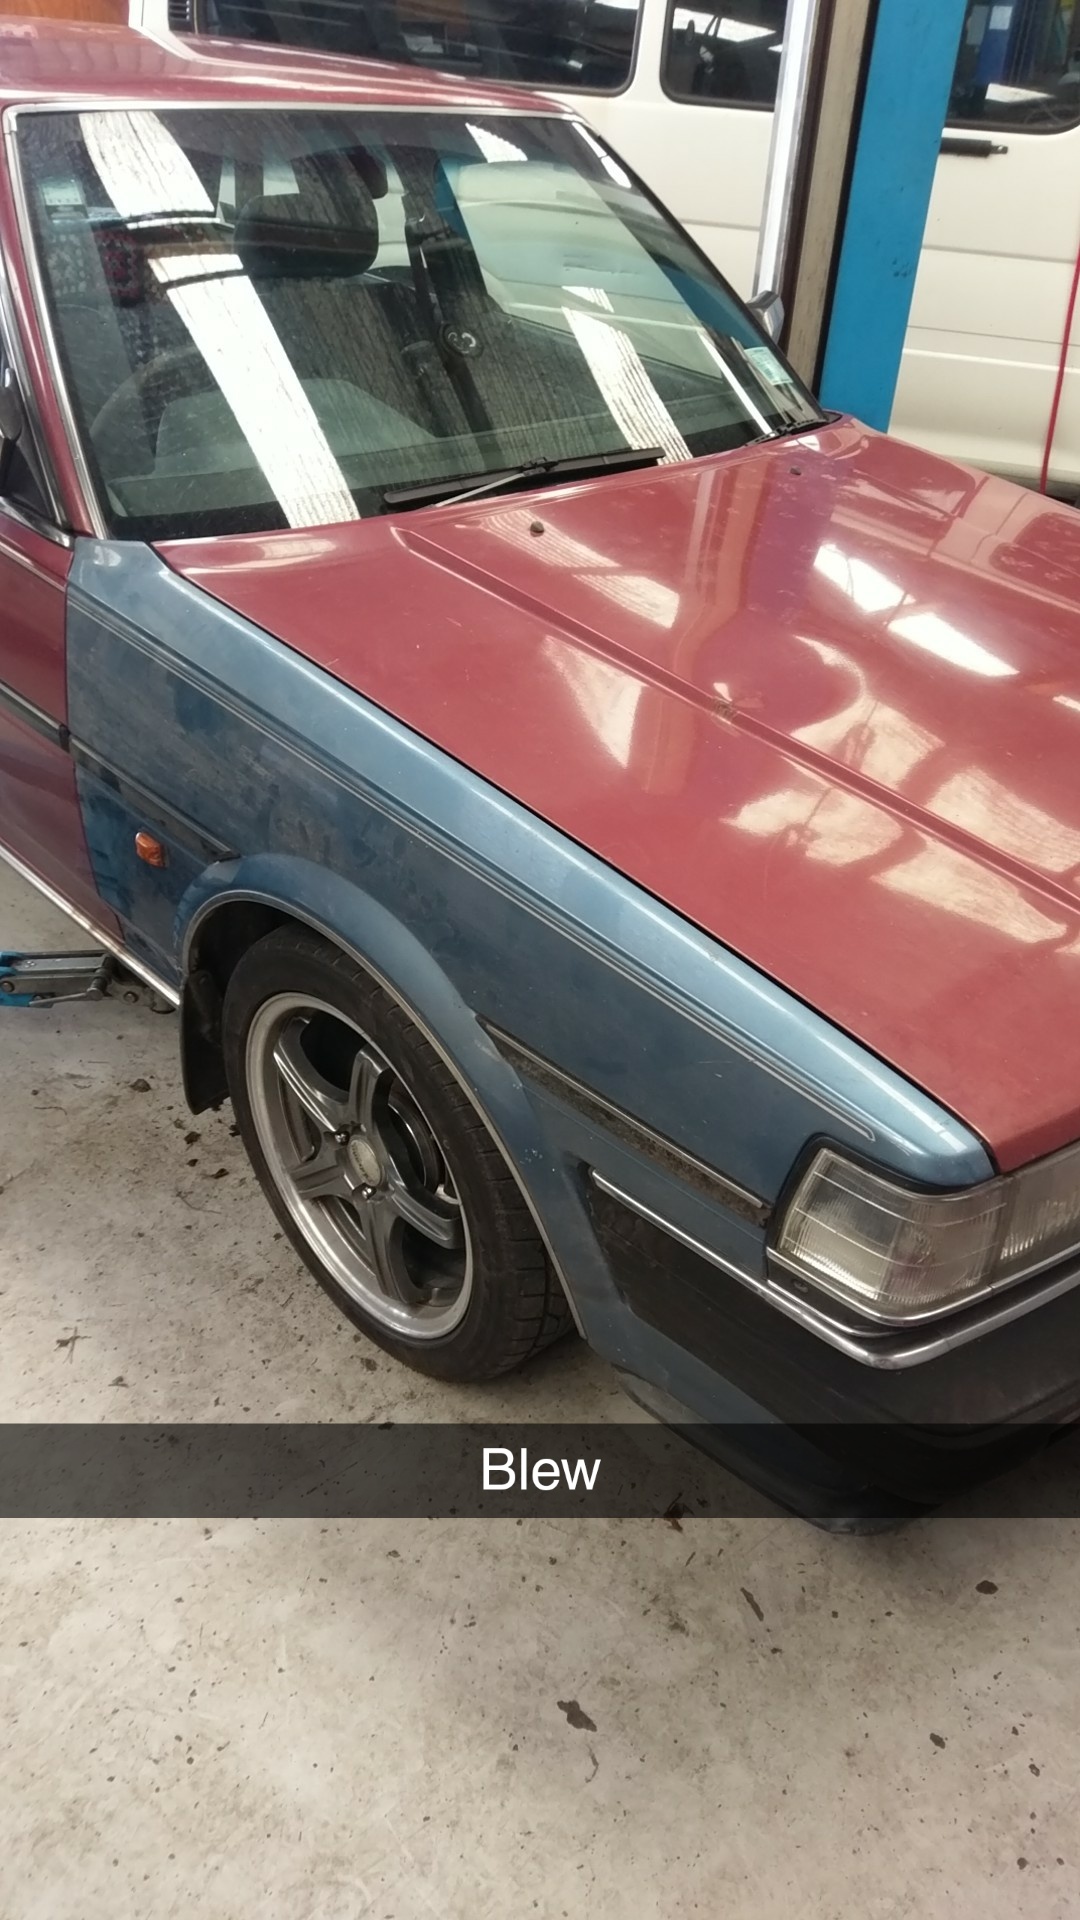
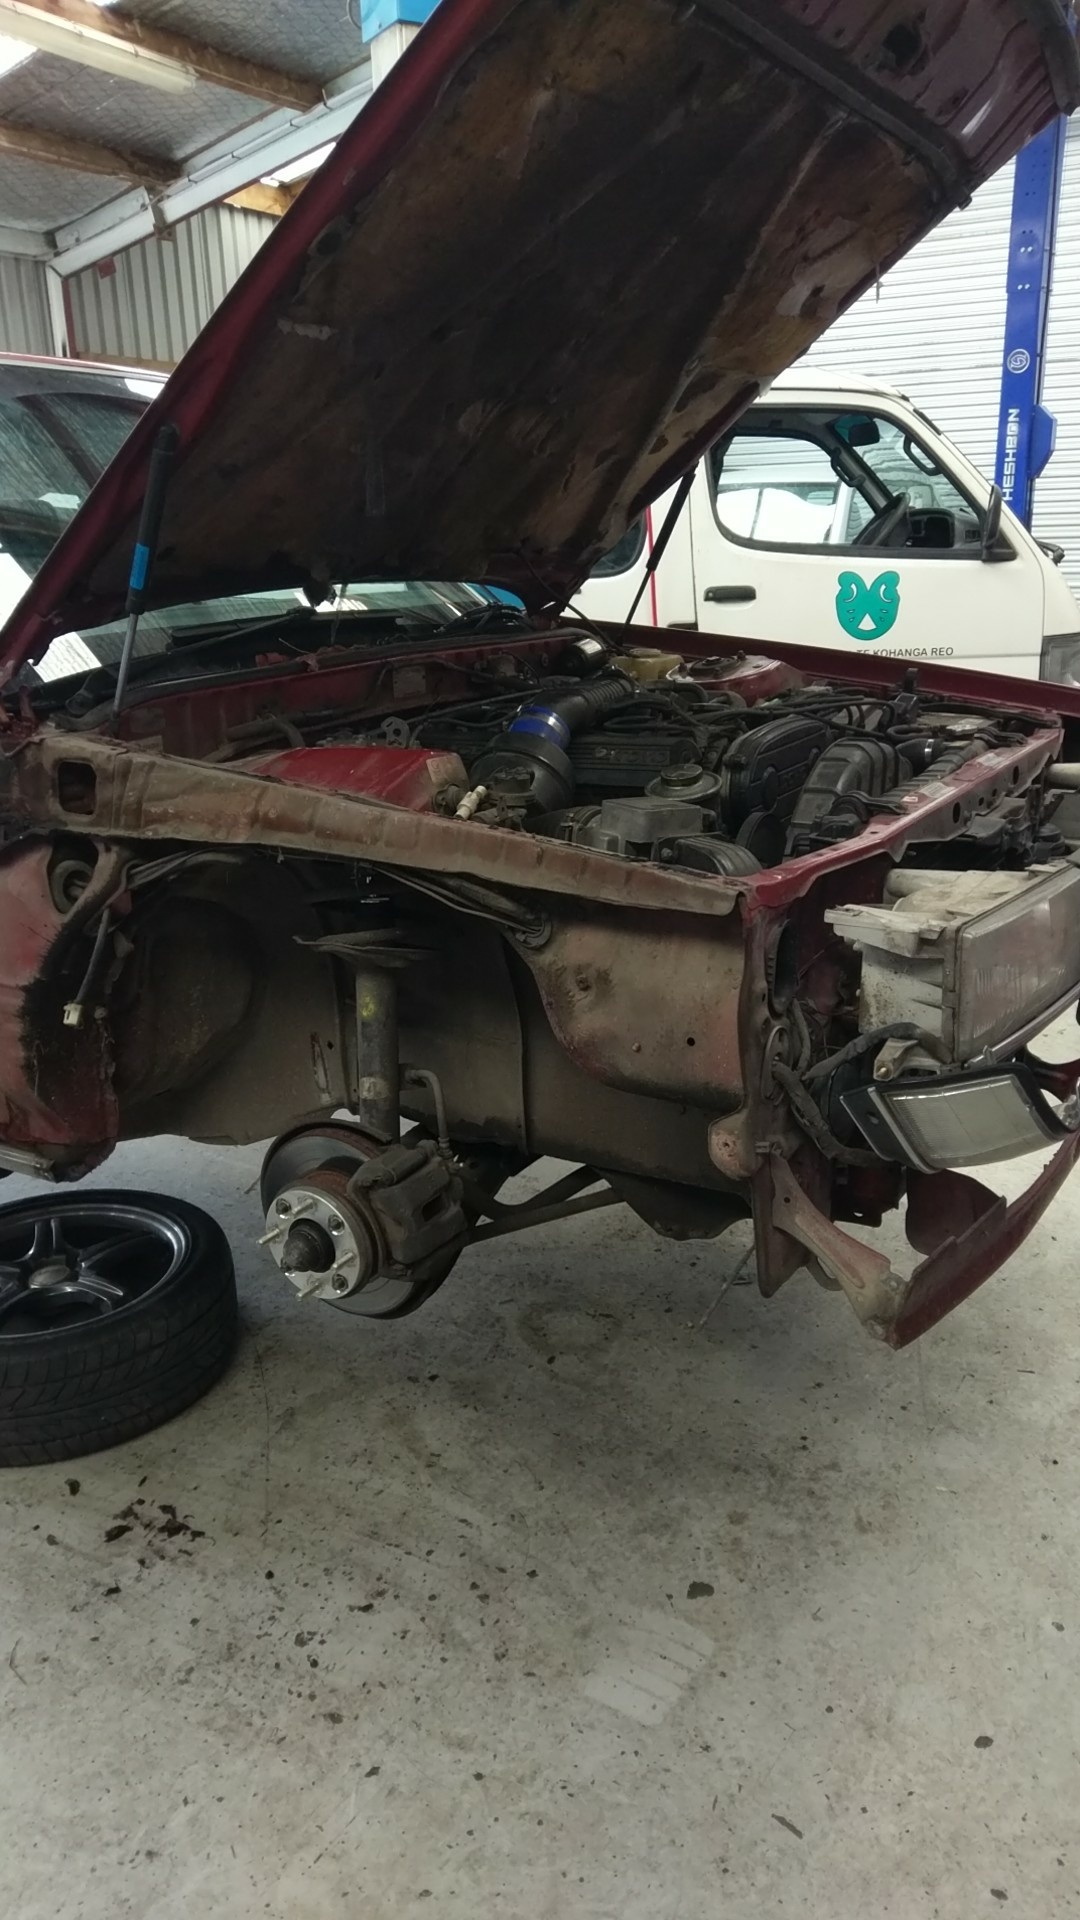
Let me remind you of my previous experiences with air cooled engines This is just an expensive cup holder now. Caved @Mrs 64valiant last night and brought some rims for the kombi. Will pick them up this weekend.
2 points
-
2 points
-
2 points
-
Yes...yes...hell yes!!!! Boom!!!2 points
-
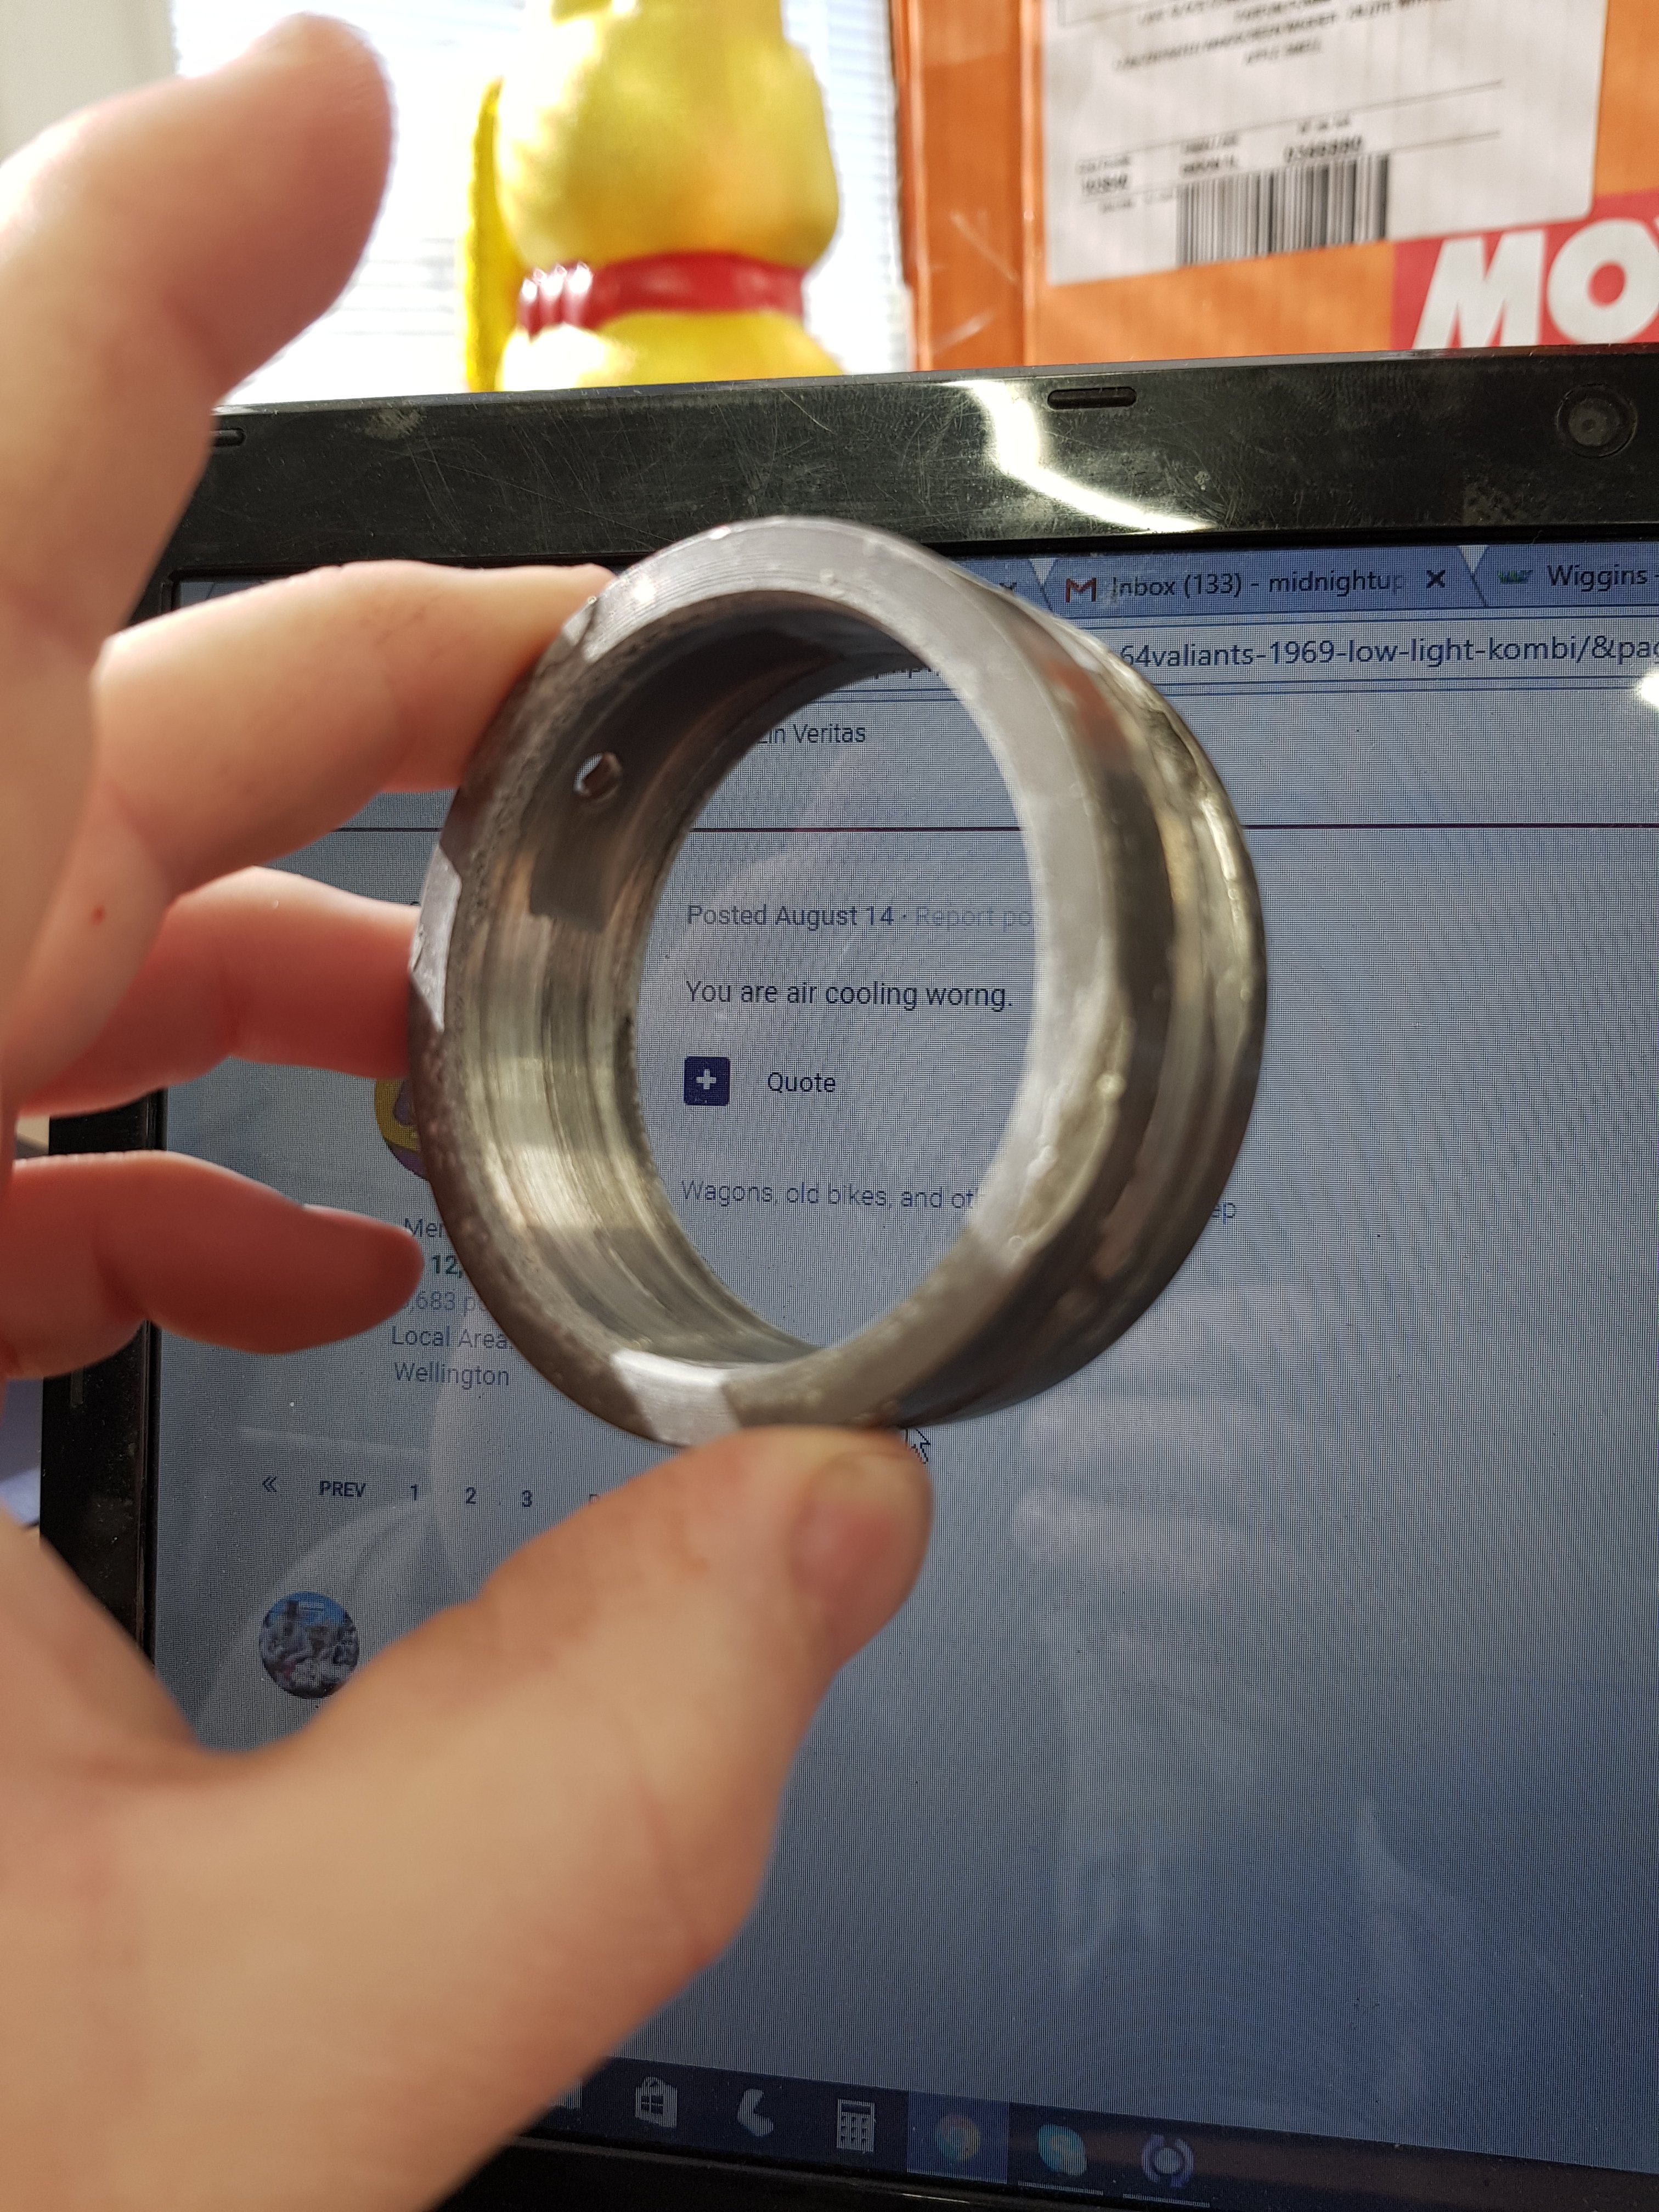
You are air cooling worng.2 points
-
I've been talking to Paul from vdub shoppe and he sells heaps of adapter kits for off roaders to suit ej20 for around the 1500 mark. If they can handle in an off roader I think this might be my best option for the van. It's never going to be a high hp van just a holiday home with better power and economy/reliability put into it. What's a Subaru gears set up worth atm.2 points
-
You missed a word2 points
-
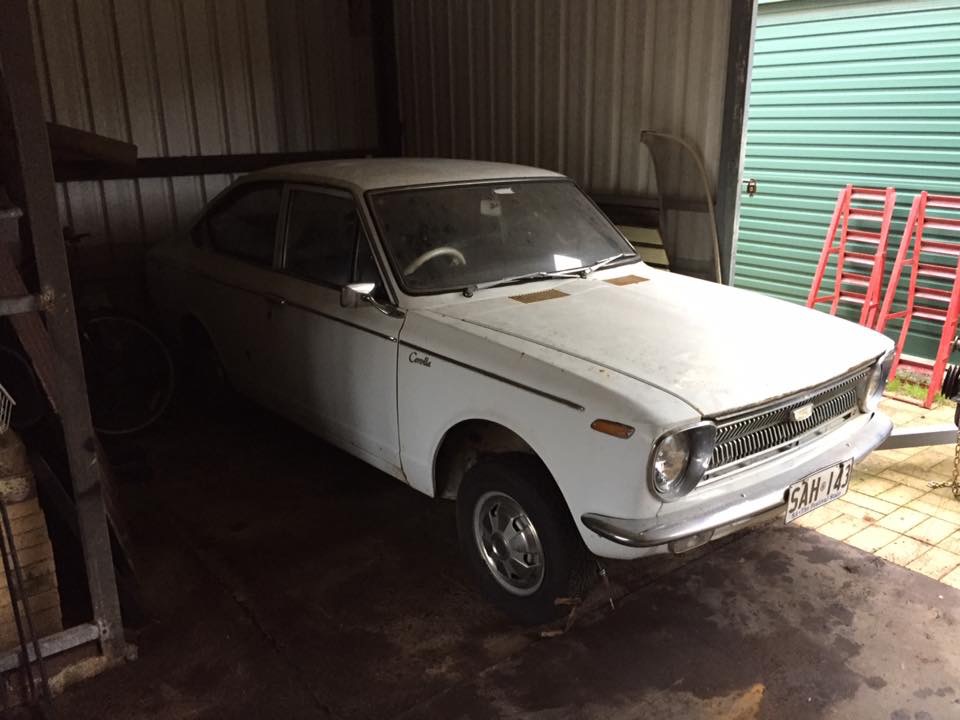
And here she is tucked away in until I've got some coin to throw at a motor and whatever else she needs for rego. Needs a good cut and polish, I know a guy who's pretty talented at bringing old paint back so I'll have a chat to him and see what he recommends. Hopefully the paint is savable, I like the thought of owning a 49 year old car with original paint
2 points
-
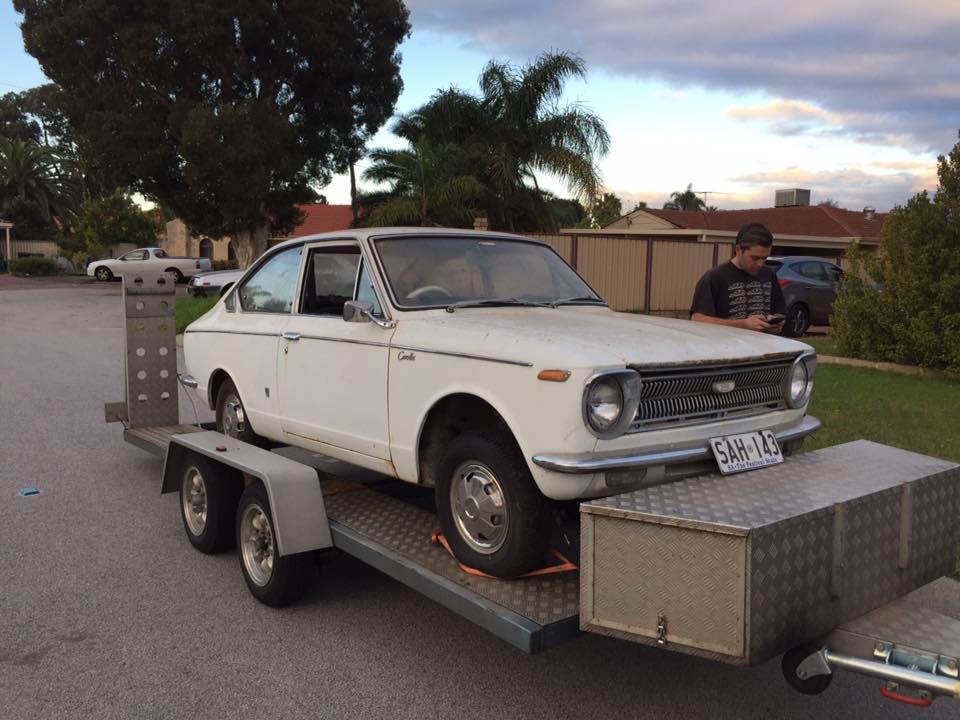
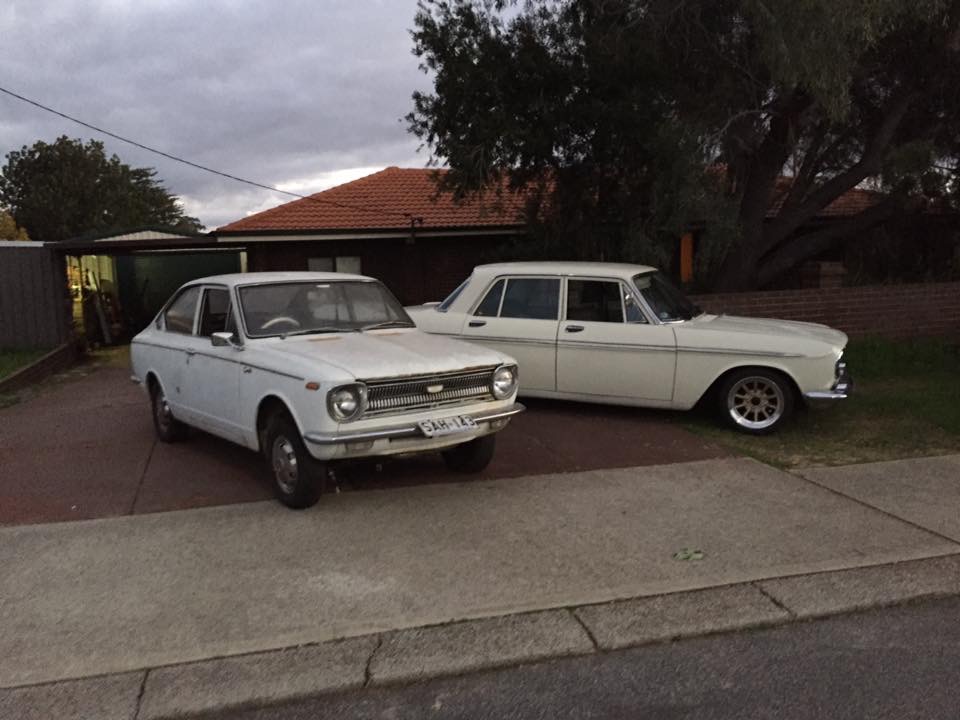
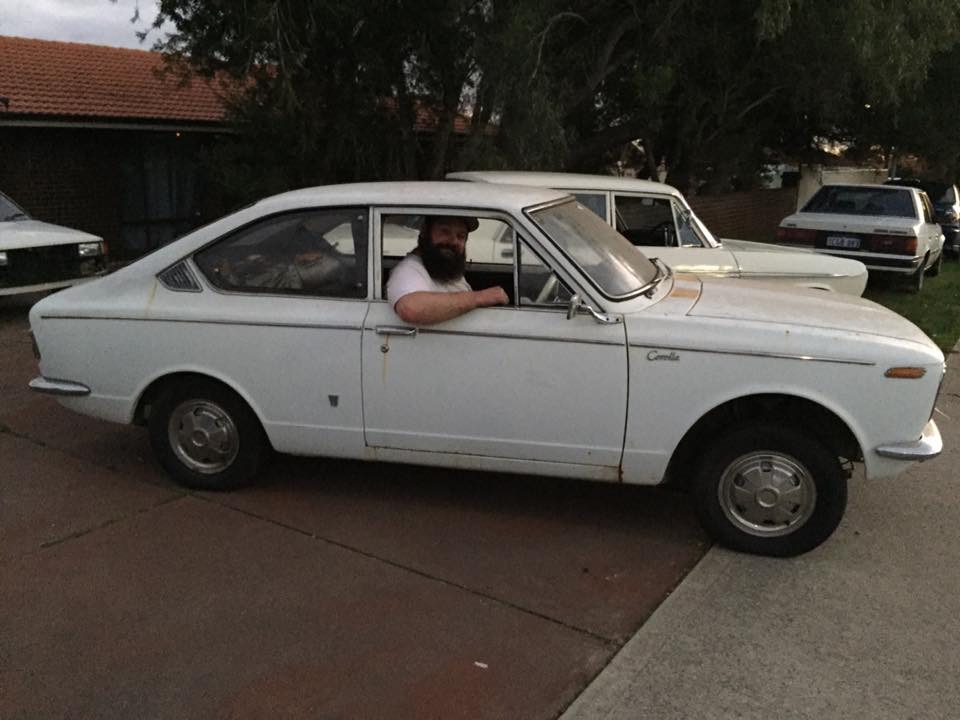
Took me a few days to get organised then I went and picked it up on Sunday, was helping my mate move out of his workshop too so it turned into an eleven hour day pretty quick. Was still mega stoked, I didn't really believe it was happening until we were unloading it at my place
2 points
-
2 points
-
So @Mrs 64valiant wrote of her golf the other day. So we now need to buy her a new car. Well why not her buy my subaru out back and I just get the kombi done. Can't be that hard right? Got the beetle driving in 21 days hahahahaha So I've been on trade me tonight found out ej20 engines are actually rather bloody cheap. https://trademe.co.nz/1386690002 Don't know which one I linked now but there where even ones for 300 dollars haha. A crap load cheaper than a rotary conversion. @Evan just said pick a part has engines for like 200. Sounds like I might be off to pick apart.....2 points
-
2 points
-
2 points
-
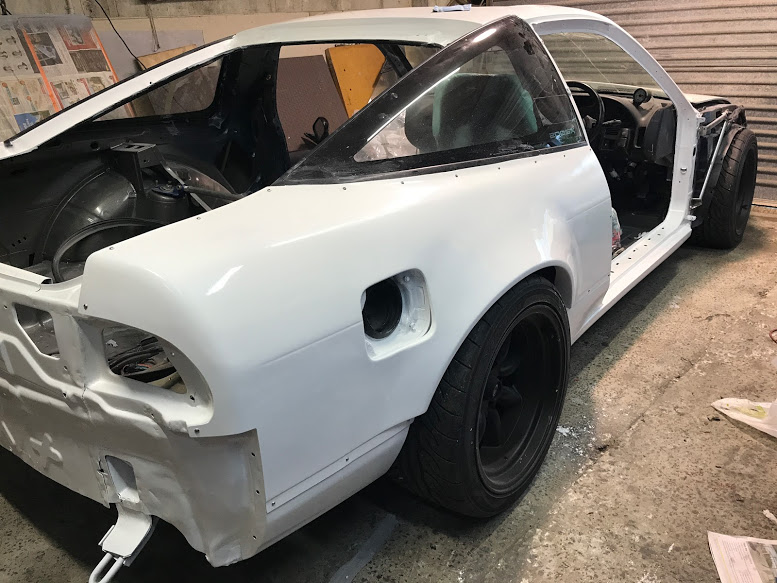
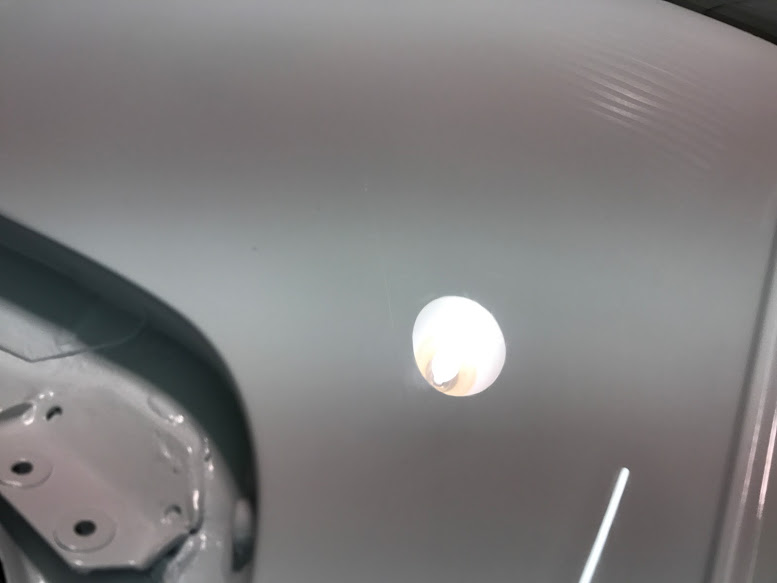
I missed my old white 944. I really, reeeeaaaally missed that car. The cash from that helped us into our first Auckland home. But I always said I'd get into another once we got comfortable with the mortgage and sorted a few things out, and I squirrelled together a few bucks on the side where I could, helped out by my photojournalism moonlighting. Even though the last car was an 8 valve NA base spec car, I'd always wanted an S2. For those playing at home, the basic differences are a 2.5l SOHC vs 3.0l DOHC, slider calipers vs 4pot Brembos, better suspension and bigger ARB's on the S2 and a bunch of cosmetic differences. I'd been eyeing this particular car up for a few weeks on Trademe. It was priced high and I always thought, "I'll wait until it comes down a bit." I waited. It came down slightly, but not really enough. And there the price stayed. And stayed. And remained. In the end I thought, "bugger it I'll have a crack," so called the number on the listing and named my budget, asking if I was in the ball park. The answer came back affirmative. So from then I enlisted the help of a Porsche-savvy mate, Tony, to scoot down and check the car over for me. At this stage, it's worth mentioning the Carjam report came back fairly positive. The current owner, (in his 70's) had owned the car for 11 years travelling around 250km per year in it over that period. Yeah, 250km. So the car's km sat at a pretty-low-for-a-944 127,000km. Great start. When Tony first queried an inspection, he was denied on the grounds that it was raining, and the car never goes out in the rain. A positive, sort of I guess. The sign of a fastidious owner. Anyway, after an excruciating week followed by a weekend of waiting to have this thing inspected, Tony flicks me a text with "call me now, seen the car" after lunch on a Monday. The assessment was brief but positive. I'd sent through this massive Barry-spec checklist of things that commonly turn to custard on 944's, after the rollercoaster ride I'd experienced trying to sort the wheat from the chaff while buying the white one. Most of it passed muster - a few minor problems, but the car checked out soundly - well, more than soundly - and the summary was, "it's a fuckin' sweet car, you'll be hard pressed to find another one this good." Decision made. So I called up, negotiated a price and a deposit to hold the car for a few weeks while I awaited a quiet weekend to pick up was sent through the ether. Now - the car had some pretty gaudy stripes on it. Orange, with a PORSCHE font in the negative space as a cut vinyl stripe down each flank. Furthermore, it had a bright orange window strip across the top of the screen. This was never going to do, but I was assured it didn't appear to be too old, and the vinyl wasn't of great quality so confidence was high that it'd peel off easily. In fact, I'd already decided that it would be resigned to the bin before I'd breached the Christchurch city limits. So the pick-up weekend rolled around, George (@Esprit) and I boarded a plane and set off bound for the shaky city. The flight itself was pleasant, smooth and some great sights of the setting sun over the Canterbury plains as we descended - but it wasn't without trepidation, as I was about to commit the most money I have ever laid down on a car by some margin. Spending big sums of money isn't something that sits well with me, but hey, this was one of the dream machines so I probably shouldn't let the opportunity slip by. But believe me, I agonised, tried to rationalise my decision beyond "I want it because I have wanted one for years" and even suffered cold feet over the whole deal. Tony picked us up in his Mini Cooper something hatchwagon thing with one rear door that opens backwards and a supercharged whatsit in the front. Either way, it was quite compact and made cool whizzy-doorty noises from the front bit and went hard for what it was. We ended up at the doorstep of John, the then-owner of the 944 and his son Simon, who I dealt with through the Trademe classified. John was one of those super nice older blokes, with the utmost passion for his car. I made some cursory checks in the dim light with the aid of an LED torch, just to make sure I was going to go ahead with the sale as John proudly pointed out the hard-to-find bits that were still intact on the car, as well as detailing his maintenance schedule, and aversion to driving the car in the rain for the last 11 years of ownership. As I said, a guy with a legitimate infatuation for his pride and joy. As an added bonus, a wee zipped-up bag full of 944 specific books and memorabilia came as part of the deal, how cool is that?! Stepping inside to sign the paperwork the discussion turned to motorsport, and Porsches in general. I started to feel a little bad, as John's eyes were definitely tearing up at the prospect of his pride and joy being driven away, but then the excitement of finally being able to own what I deem the best of the 944 bunch finally had us saying our goodbyes, and soon enough we were crawling down the driveway in the dark. Then we had to turn back as I left my sunglasses behind. Because you know, it was dark and I'm a Corey Hart kinda guy. 15 minutes later, we drove into another internet-acquaintances shed (we will call him Terry the Italian car tragic) where a heat gun was supplied and the decals came off with minimal persuasion and zero damage to the underlying paint. Bonus. Dinner was served, yarns were had, beers were downed and before you know it, it was 6am the next morning and we'd crawled out of bed and poured ourselves into the 944's confines for the journey north. The trip was swift, but ultimately uneventful. Stops were limited to food and/or tea and coffee, aside from an overnight stay with @Bullitt in which George and I both managed to empty the fridge of any thirst quenching, fermented grain, hopped, fizzy beverages and I built a gigantor feed of nacho's for all present. More sharns followed and then we departed early in the morning, making a servo rendezvous with another couple of far north friends who were making the same journey back in a just-purchased EF8 Honda CR-X. How rad! Anyway, the rest of the trip was fairly unremarkable. You know. Standard North Island scenery. Farms. Mountain and tussock. More farms. Large body of fresh water. More farms. Even more farms. The odd passing lane. Some more farms and then traffic jams and rain. But hey, what a way to get to know a car, and also find out all of the little foibles that are going to make life an OCD hell for the next short while. For now, here's some shots of the car as we departed Christchurch in the early hours. I'll outlay some plans and discuss the experience, as well as all of the flaws this particular car has that I have already started to rectify. Thanks for reading my massive sharn! 1991 Porsche 944 S2-5 by Richard Opie, on Flickr 1991 Porsche 944 S2-7 by Richard Opie, on Flickr 1991 Porsche 944 S2-13 by Richard Opie, on Flickr TL;DR - bought a poor-man's Porsche and drove it from Christchurch to Auckland.1 point
-
October 6-8 in whangamata Anyone with their British steel think they'll be going along?1 point
-
Loud pipes save lives! I kinda wish 2t pipes were so simple to make though!1 point
-
Well done mate! Not that far to be on the road again. Nice progress....1 point
-
Ay seems sick as g1 point
-
1 point
-
That's a looker! I already have an Alpine unit that I'll be stuffing in there though!1 point
-
1 point
-
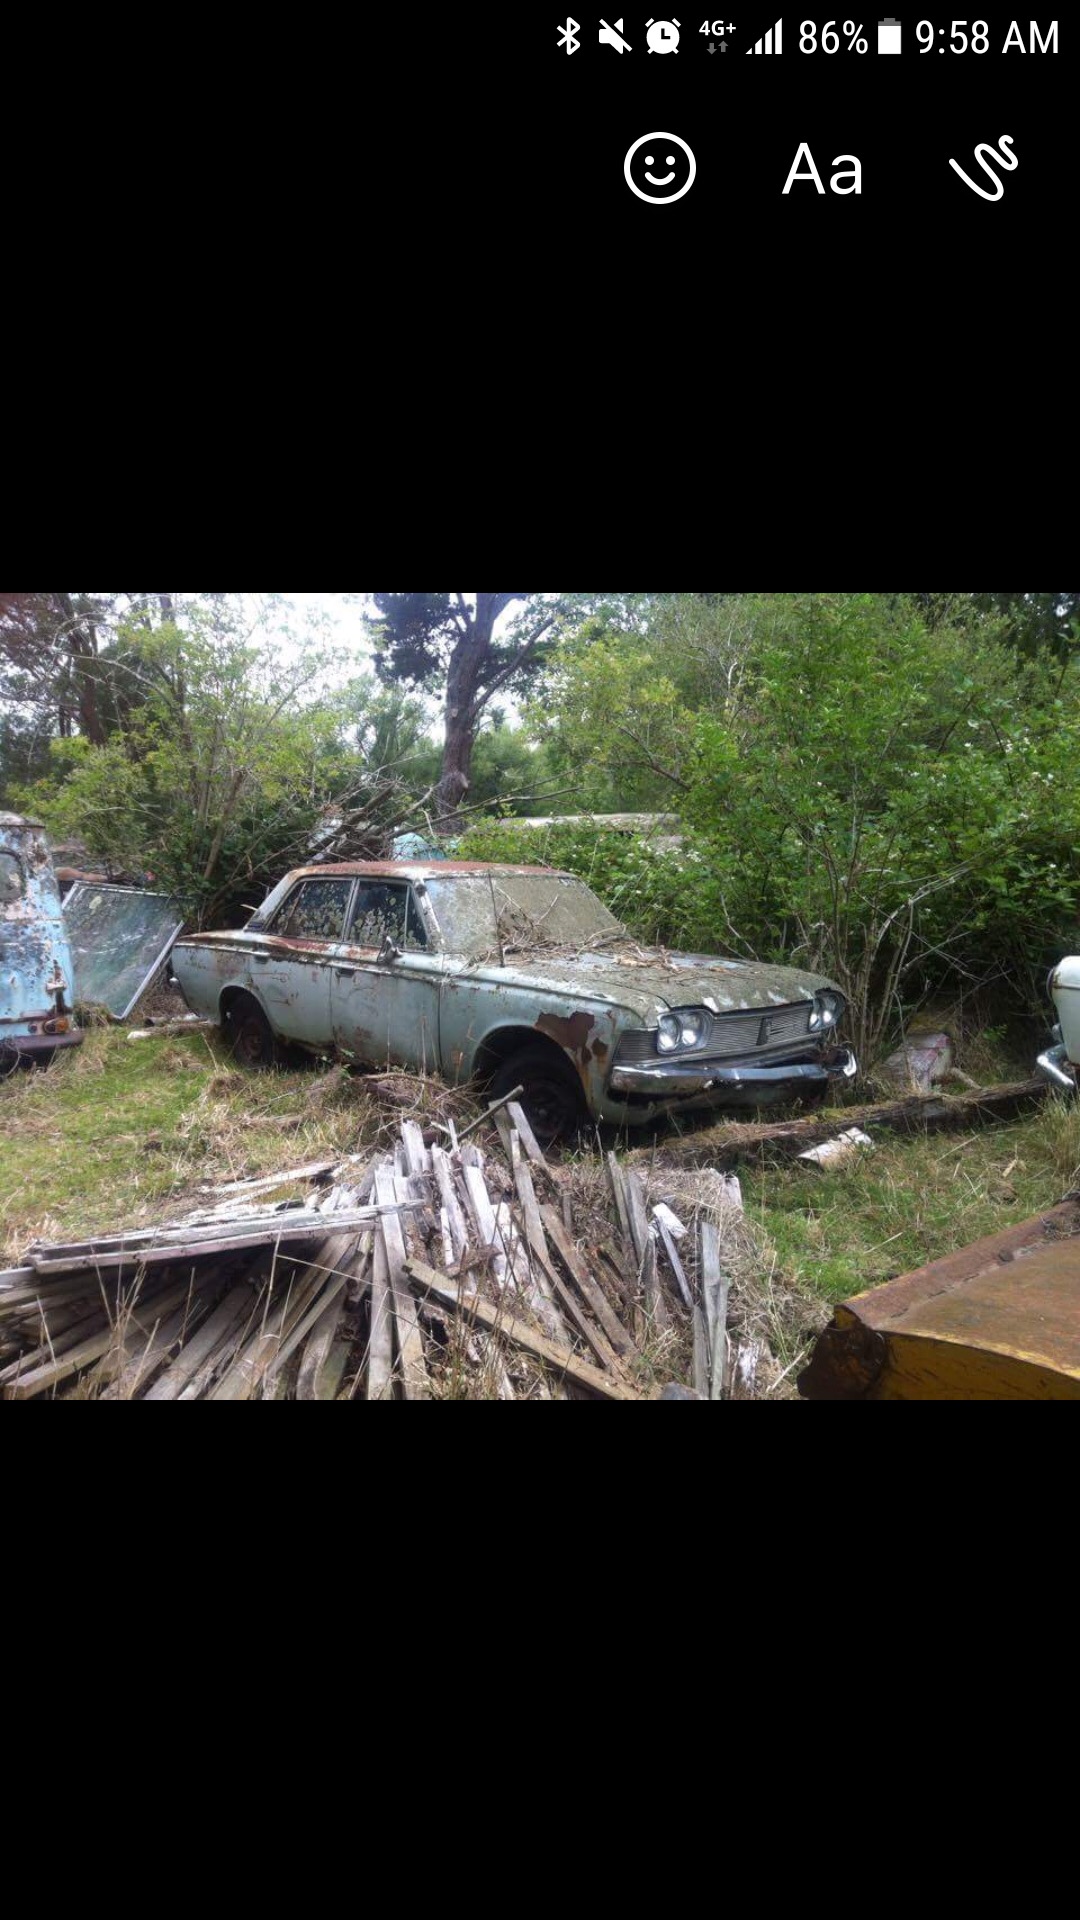
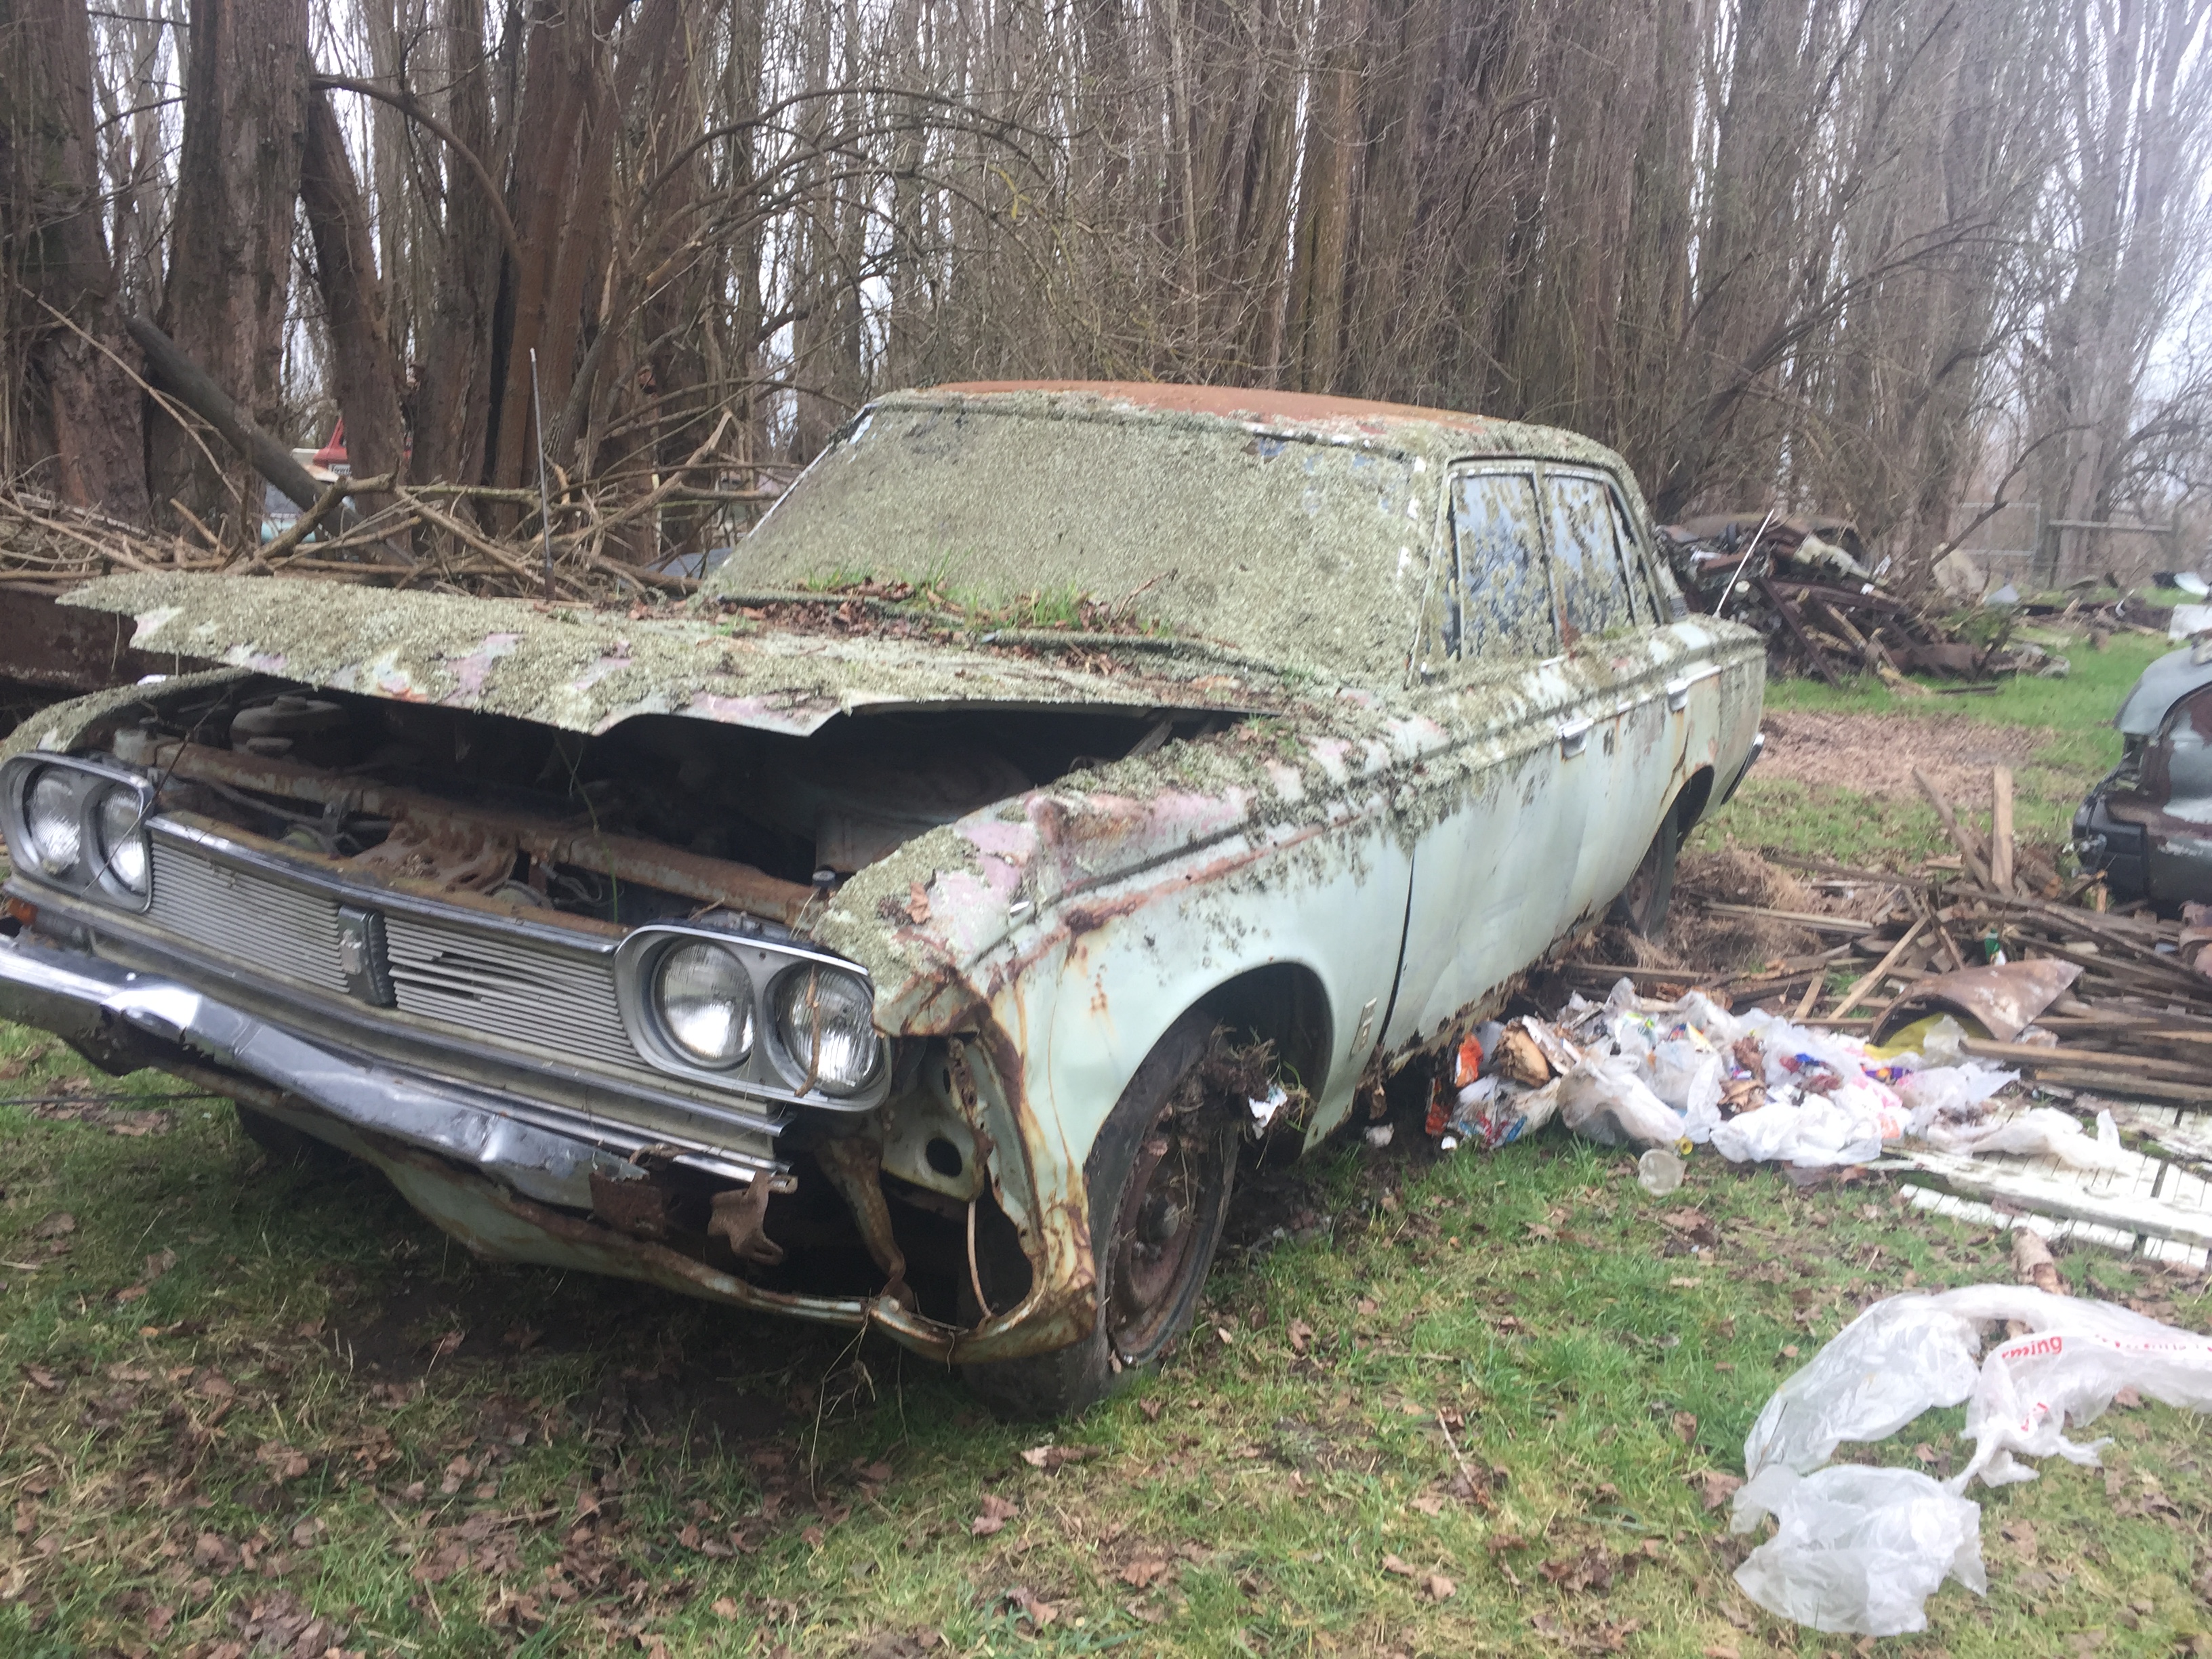
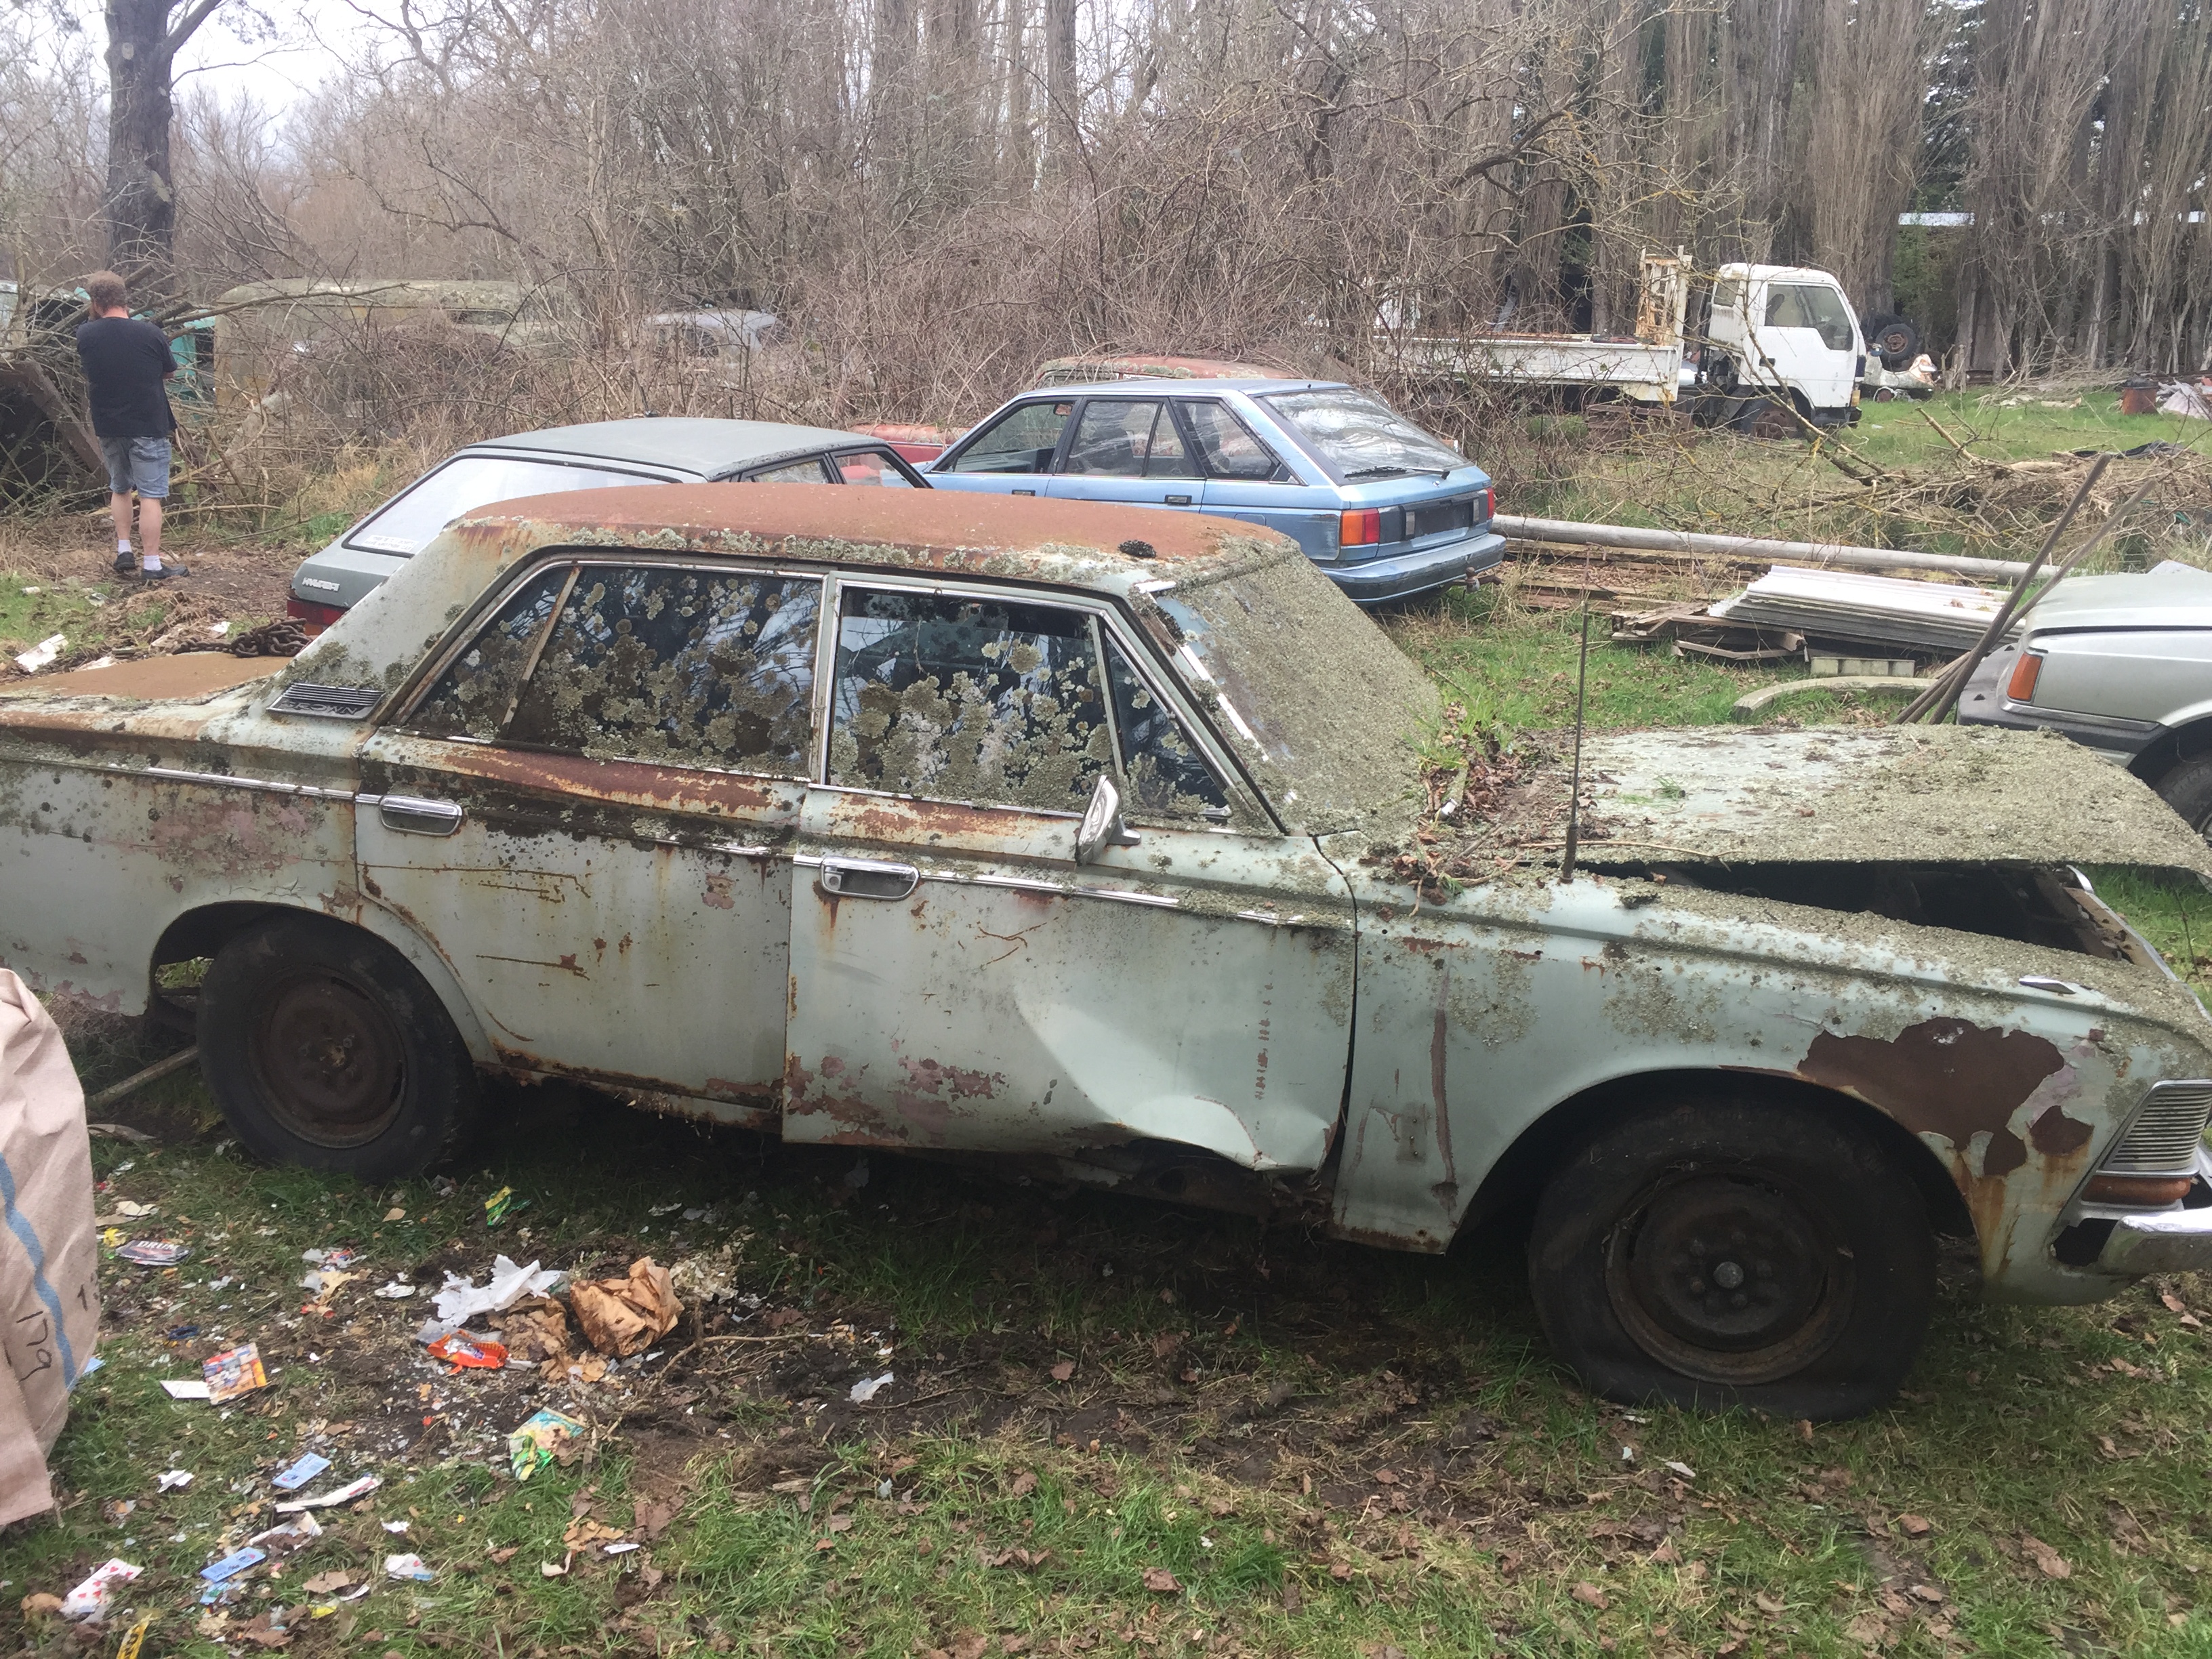
Scored a parts car for the wagon,a series 1 1968 ms55.the interior is in far better condition than the wagon so dash,front buckets and door cards will be going in the wagon,might keep some glass and the diff.sad sight ,always destined for the crusher but atleast i can save some bits
1 point
-
Sold the Meisters when I sold the old car, all went into the home fund. This likely won't be modified, I'm just more interested in getting it mint and driving it. It's so good in stock form, does everything I could want it too.1 point
-
Im imagining Sheepers on his roof1 point
-
fan stuff.new oil cooler sealsso the fan housing could get bolted down now. thinking about mounting the coil here.on the top of the oil cooler scoop.1 point
-
Kombis are shit.1 point
-
roof finished. apart from the bit on the veranda which needs the butinol doing first before they can finish the last few tiles. 2017-08-10_02-46-56 by sheepers, on Flickr1 point
-
Report for spam.1 point
-
Got all the nuts and bolts polished up ready for the platers The last big thing that had to be sorted out was the front brake, my original plan a few years ago was to use this super sweet Benelli item With my plan now to try make a period style racer it was a bit out of place, i remember finding a picture once of a bantam racer from the 50s that had a twin front drum made out of bantam hubs, i think this would look pretty cool as well as hopefully adding a bit of braking performance. A friend sent me a couple of spare hubs he had.. Bit of hacksaw action Faced true Clamped and tacked, I turned up a tube to go through the center of the 2 half's to ensure good alignment before welding Should do the trick1 point
-
My next mini project was sorting out the twin carb linkage setup. I drew a lot of inspiration from the setup on my dad's 1600 but made a few tweaks. His is designed with the primary venturis furthest from the intake ports with the idea that when the secondaries open they have a straight shot down the thing's neck. In the interest of throttle response I've decided to instead put the primaries closest. This probably has little real world effect but I liked how it sounded. As you can see from the photos, there is a central stainless shaft mounted by a pair of rose joints, themselves mounted to two alloy plates clamped between the carb and the manifold. Off of the rod are mounted three stainless arms. The first is connected to the standard RS2000 throttle cable. The other two are connected to what I can only describe as miniature track rod ends which themselves are connected to another set, then the final linkage onto the carb. I back of the envelope calculated the lengths of the different arms to give me full pedal travel for full butterfly travel, hopefully avoiding a super twitchy throttle like the one in my dad's car. I also added an extra return spring on the cam cover just in case. In hindsight I want to revise the linkage with the two tie rod end things because they are both right hand threaded onto the central rod. This means I can only adjust the length of this part by one full turn relative to each other which would make balancing the two carbs damn difficult, if not impossible. Here is a video of the linkage in action, And here is a bonus video of milling up the carb face of the manifold. A huge thanks to Earle Tito Engineering Ltd for going the machining.
1 point
-
All of the frame mods have been sorted now, started buy cutting this piece of yuck out New tube in Thats better, cut off a few other unneeded mounts and tabs as well Then this happened, cleaned the bits up and got some Durepox primer on it. Evenings entertainment this week is to get it all sanded down ready for some top coat, Excited!1 point
-
Fresh painted concrete floor is so good to work on. I swear I'm sweeping our garage out 3 times a day1 point
-
Have had to wait for floor paint to fully cure before placing any sitting items on the floor. has been 6 days since first coat so were good to go. just got to be careful not to scratch/chip it now1 point


.jpg.27415e420274596778ffef5e9c8290c7.jpg)


This leaderboard is set to Auckland/GMT+12:00