
Leaderboard


Popular Content
Showing content with the highest reputation on 05/23/17 in Posts
-
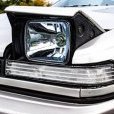
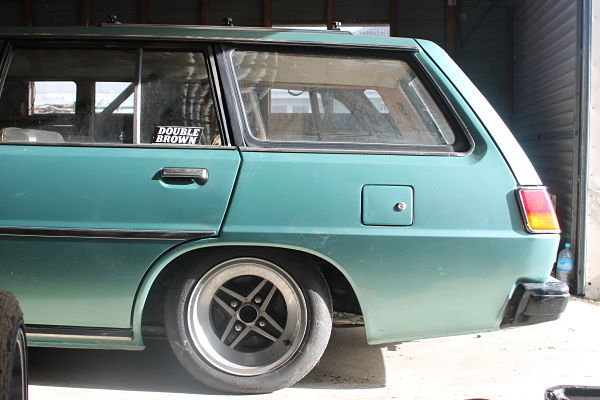
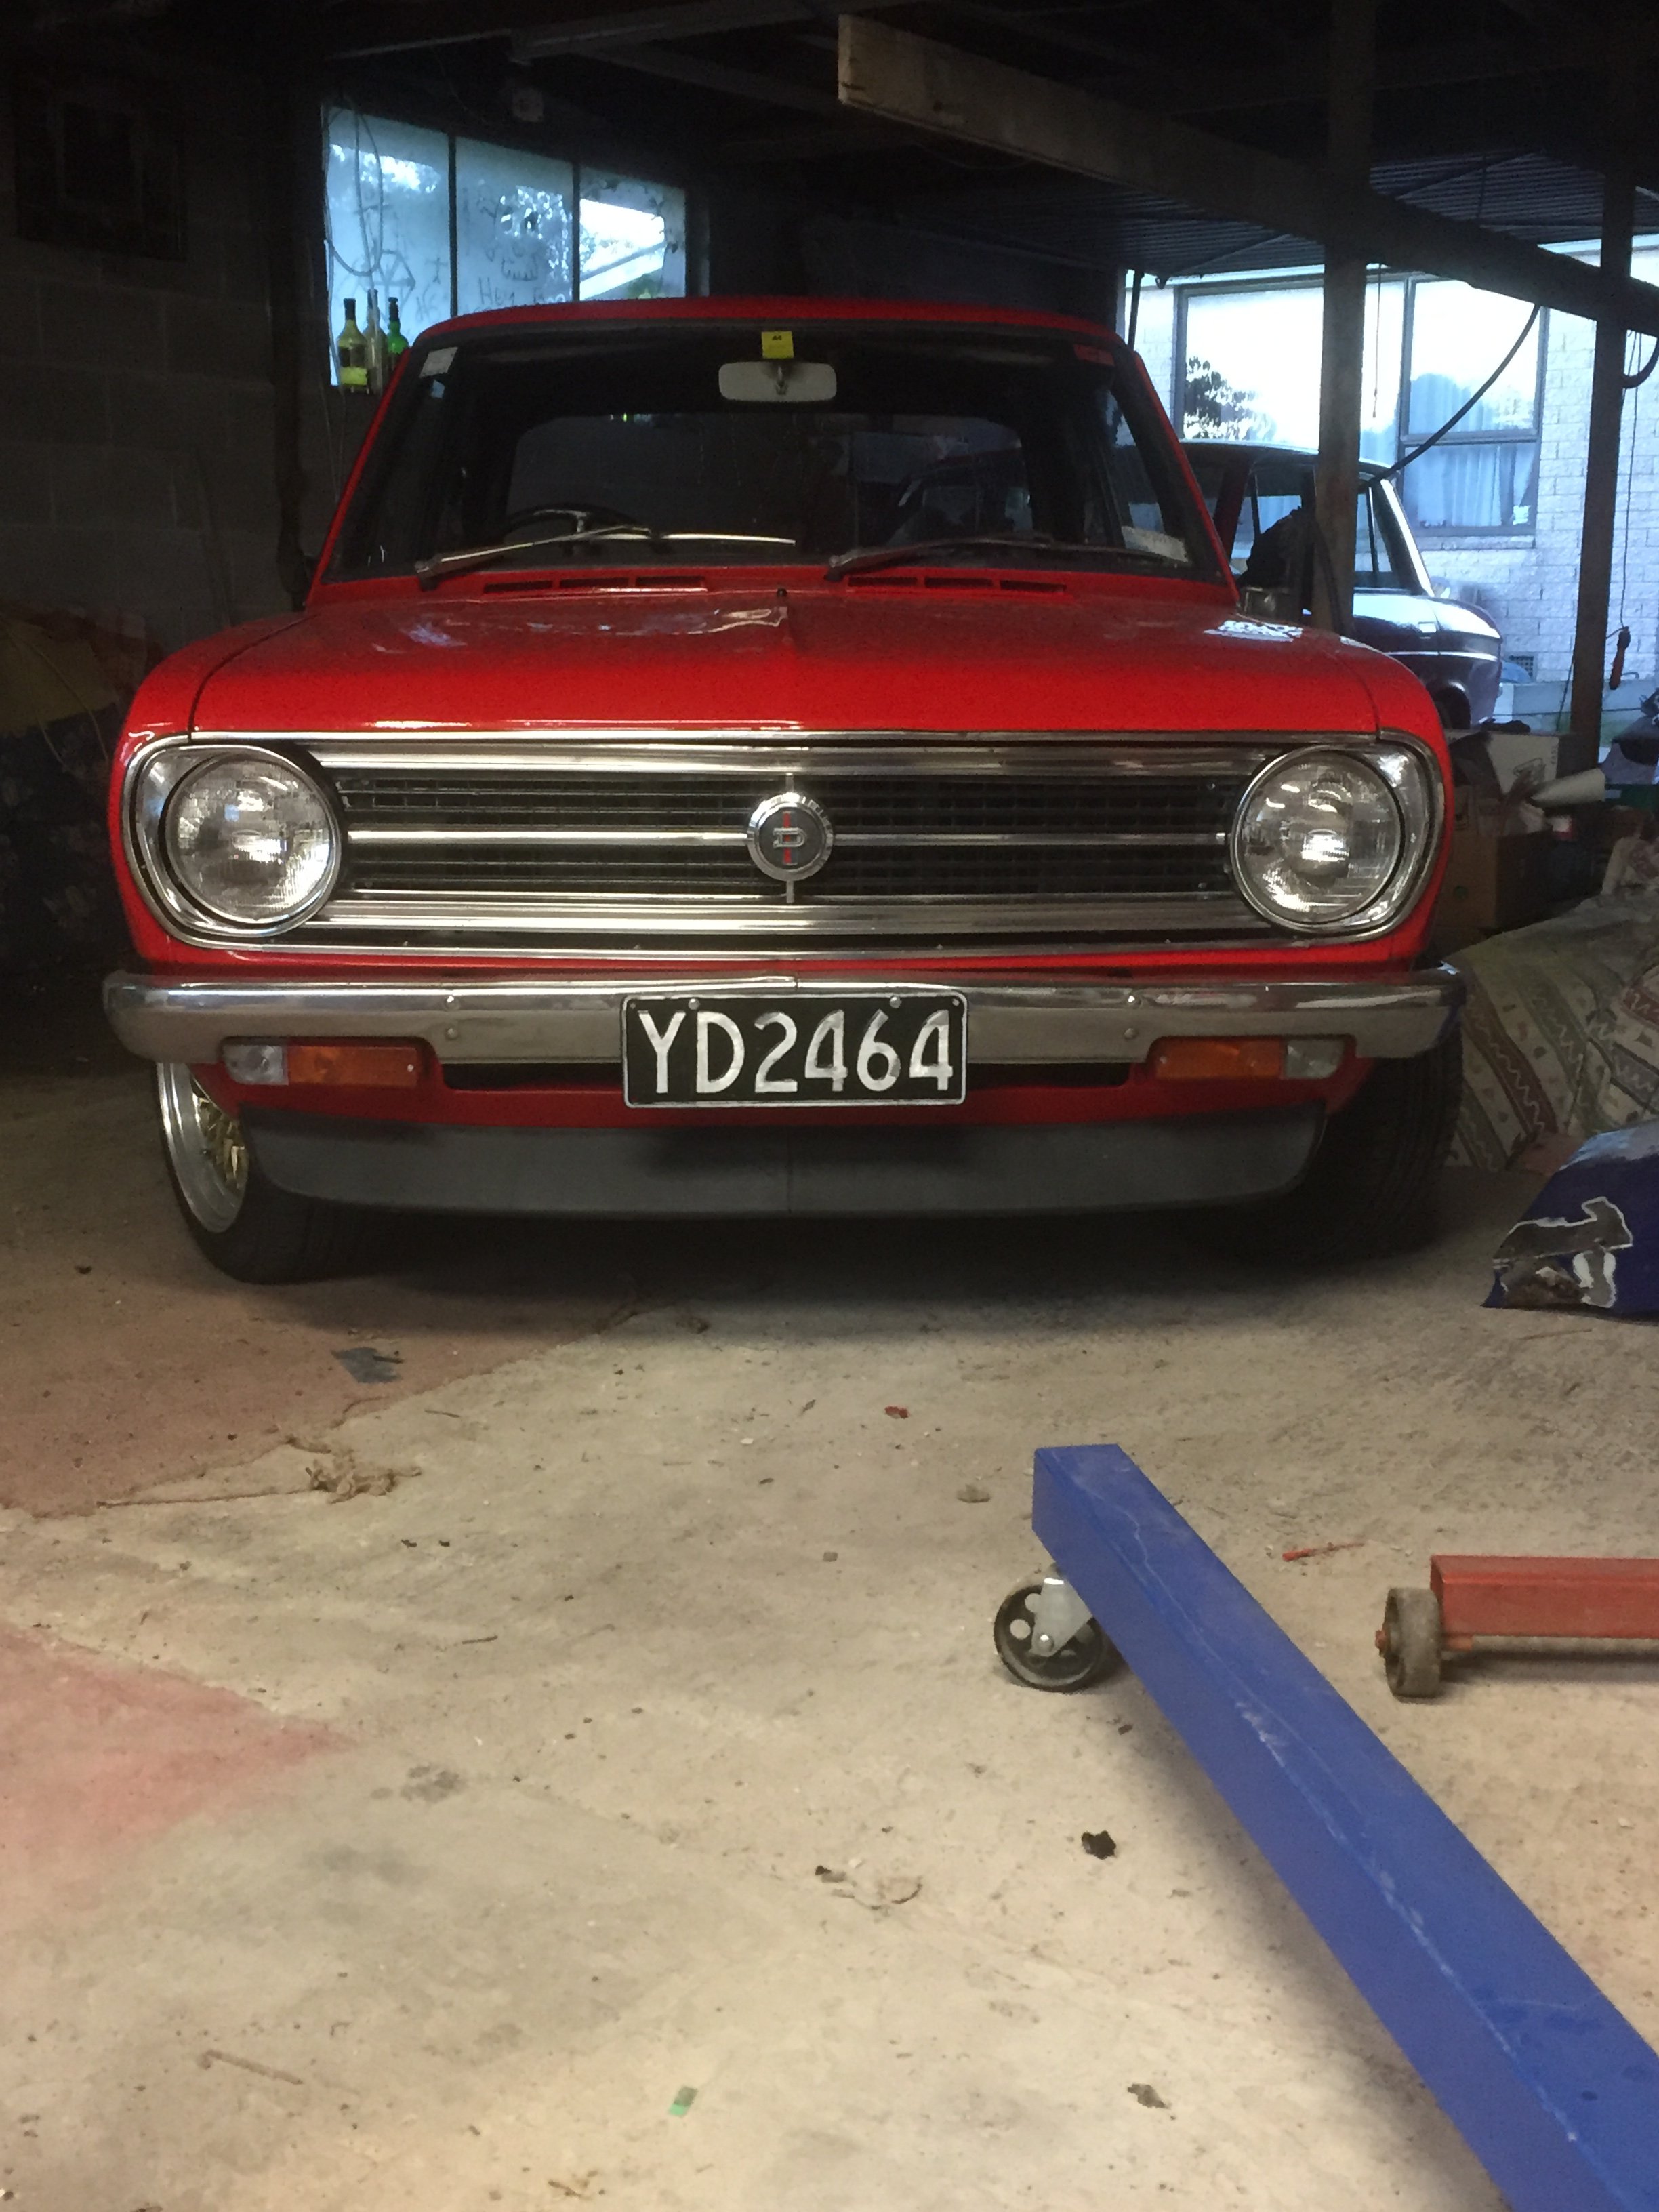
carb cleaned up and gasket made... 5/16unf nuts found in random nuts and bolts bucket - which is a feat in its self... had to die nut the studs as shit was fucked (highly technical term) looking forward to getting this sucker on..8 points
-
Finished another patch of rust. Hate trying to do them when you can't get in behind with a dolly, makes it difficult. Made up some strap sort of things to mount the fuel tank. Spent a lot of time trying to figure out how to mount it and decided that adding another bar between the chassis rails was the best. The straps pull the tank up against the top brackets, should hopefully hold it in place well enough. Made up a aluminium tray to mount the air tank and compressor in. Being able to draw stuff up in cad, program it, laser cut and use a CNC press-brake is pretty great! It's pretty tight but fits. Will swap the tank to the back as the tank will look better being visible through those holes than the compressor. I'm sure I'll paint it black so it's a bit more subtle. Got the rest of the exhaust tacked together as well. Not sure if I'll change where it exits, because at the moment it sort of comes out between the tailgate and bumper or just leave it as is. I think the whole exhaust has 10-12 u-bends in it now haha.8 points
-
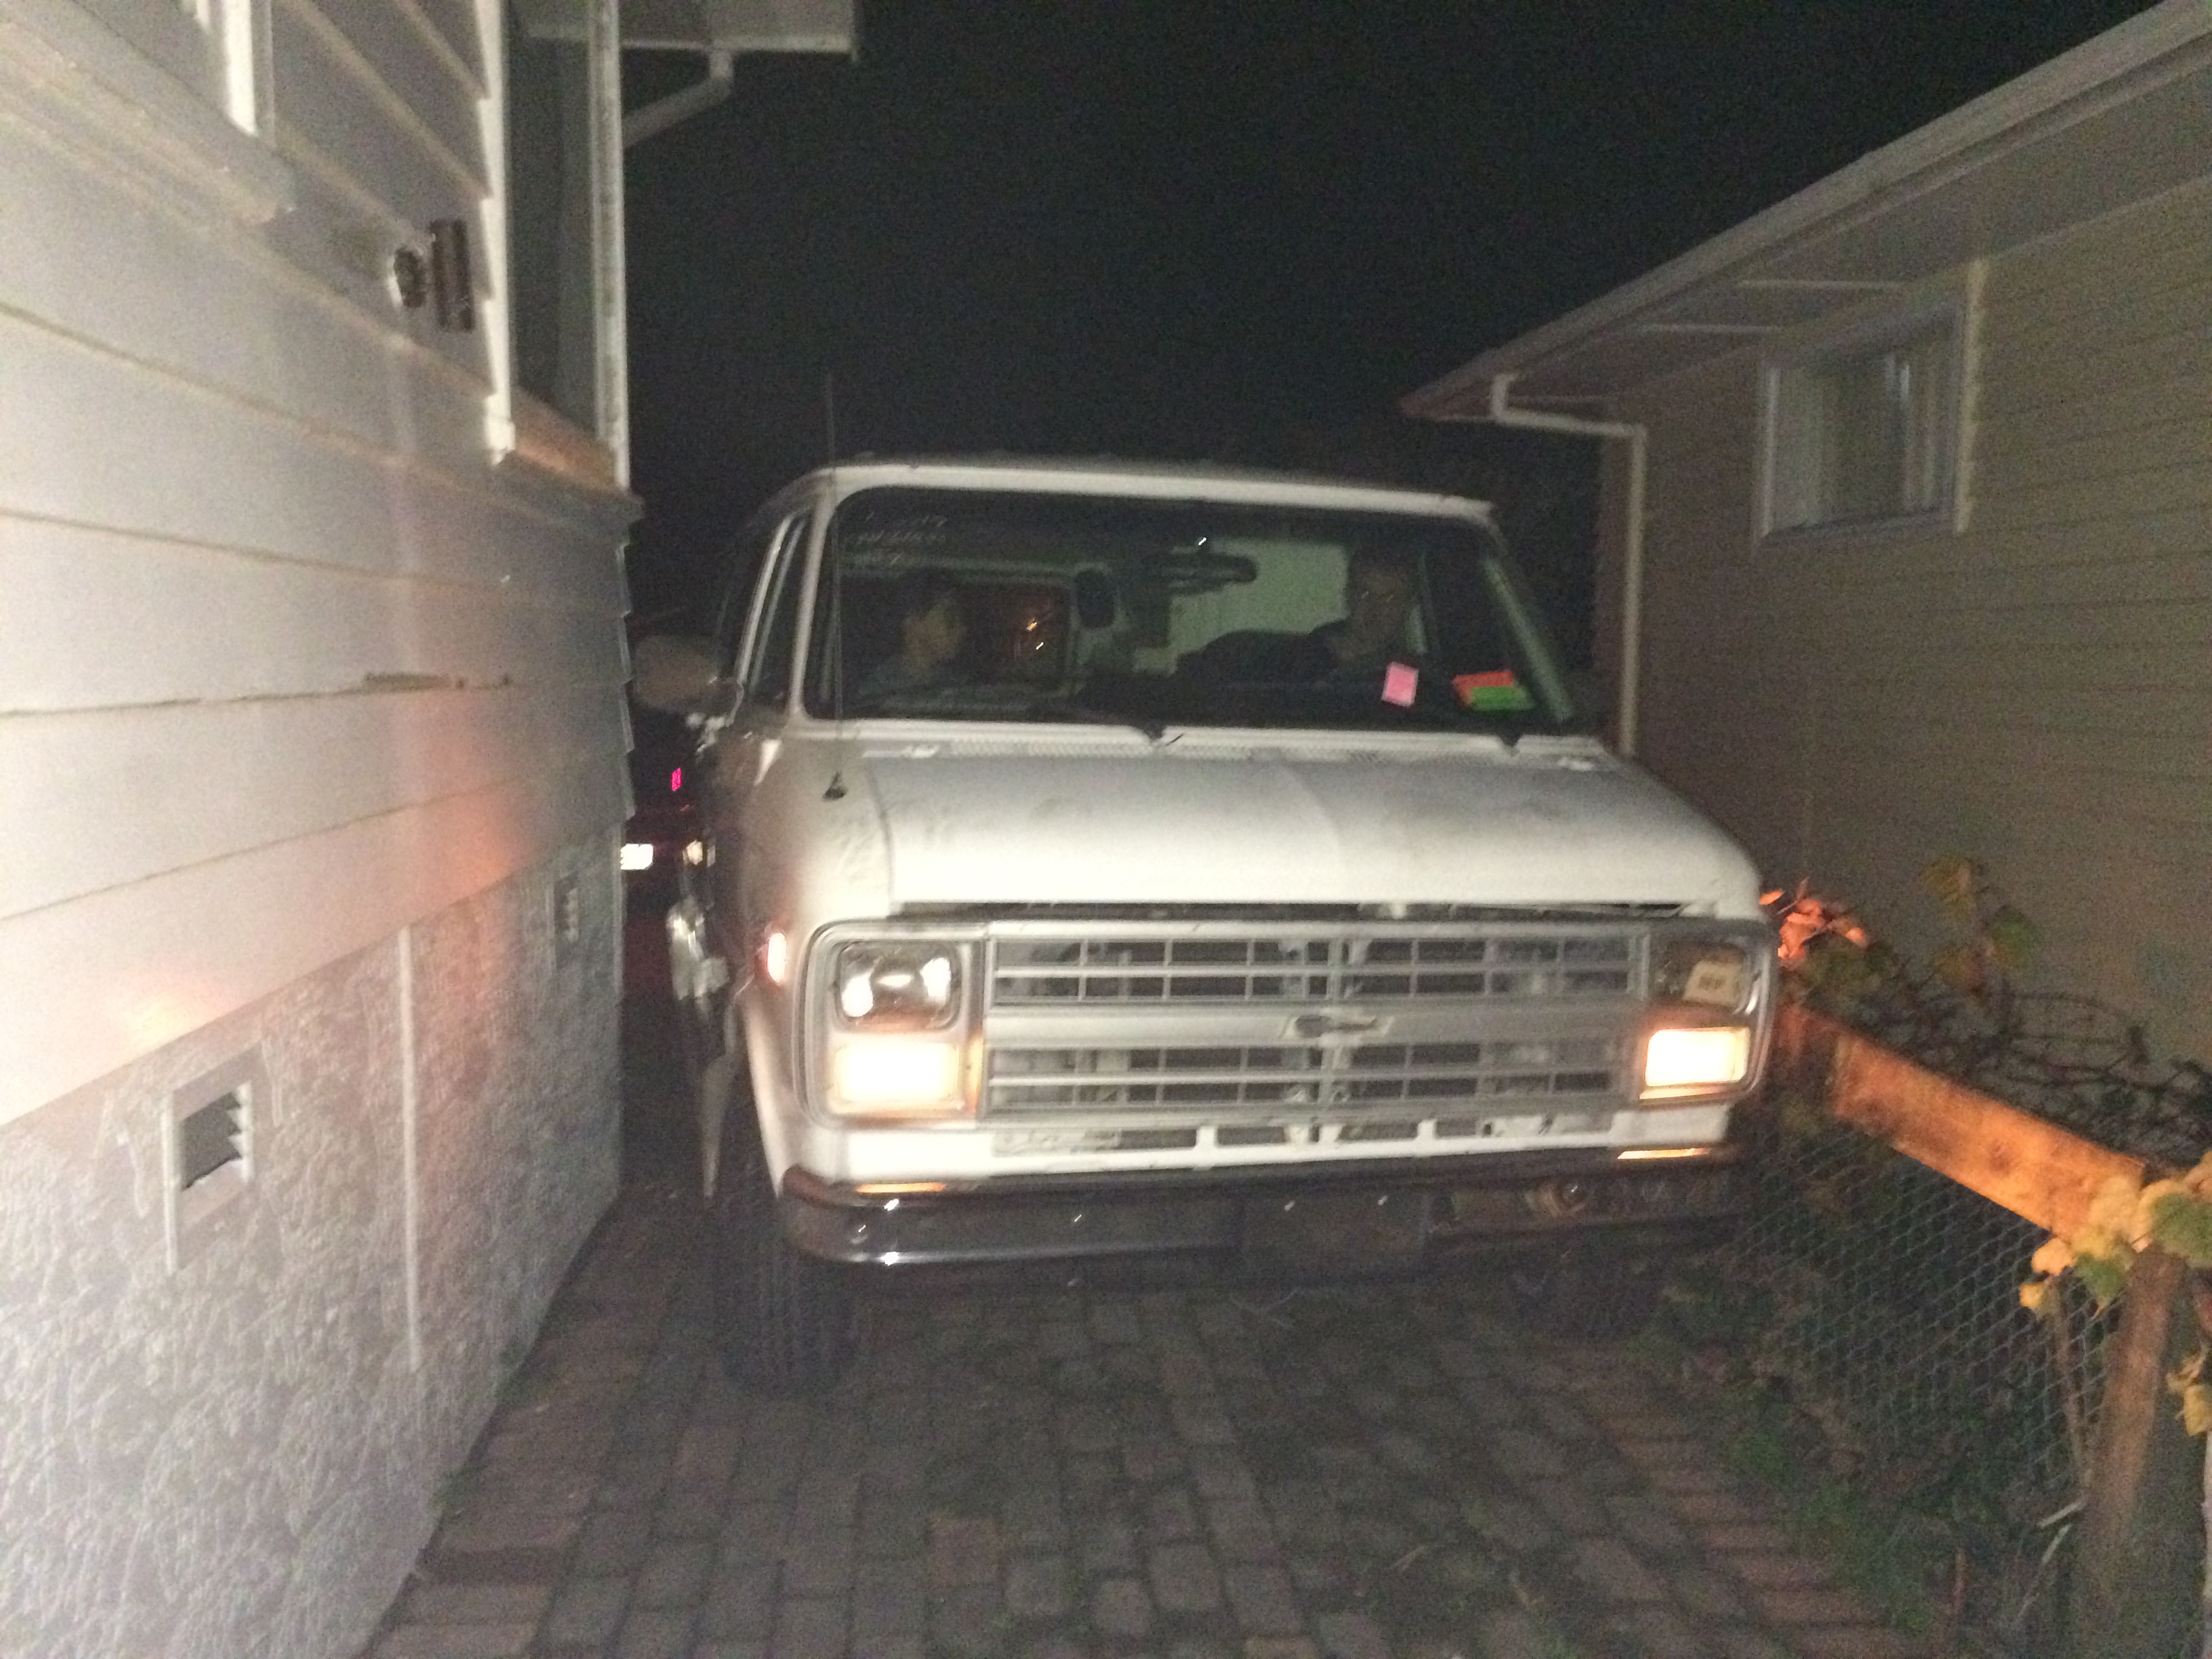
So before our wee accident last year I had left some money with a friend to get a truck or van to send home. The plan was to spend a day or two with him when we returned the rental car. That didn't quite happen but he still had the money. We both spent months looking at craigslist and looked at a few vehicles but nothing was right. I saw this van one day but It was FULL of tools, I thought to my self I can't ask Scott to deal with a van load of tools so I passed on it. I was talking to him on the weekend and he said he just bought a van full of tools.... HE siad he bought it off a old guy who was retiring and ended up chatting for a few hours. It was a bit more than I left with him so I transferred some money to him and a deal was done. A few months and many thousand dollars later I get a email with the collection documents. @piazzanoob Offered to help pick it up so I met him at the shipping yard. I was stoked when it started nicely for the the guy bringing ti to me, no horrible starter noises like my old c10. I put some fuel in, topped up the radiator and drove it home. I didn't receive the title or and paperwork so i'm hoping its still at the importers somewhere, I'll email them before I start panicking Getting picked up from phoenix I finally spotted it at the yard (just) The old guy has made some pretty decent cupboards etc, I found a lot of receipts in the glovebox. The screen was replaced in 2004 and the trans was rebuilt in 2002 by the looks of it. I was wondering what the small peddle on the left was.. He had cruise control installed too, there is even the paperwork& guarantee with it! I'll have to figure out how to get it to work. The aircon has been converted to r134a so it should just need regassing and it'll be lush. Its got lovely plush seats with two arm rests and old mate has even made a cupholder with a build in stubby cooler! Lush. Scott got a whole load of parts for me too as its easier to have them arrive with the van, a set of shocks (air shocks in the back) pads, ignition stuff and a fuel pump. It was better than Christmas tbh. lush cupholder/drawers There is a full length shelf beside these She just squeezed beside the house which is good Don't even need a free candy sign, piazzanooobs nephew came with him for a ride and was right in the passengers seat as soon as it was unlocked. I'm really poor now so progress will be slow for the next few months, I'll give it a good wash/wax and polish then start with all the service parts. Probably do a de cat at some point too as its huge and its too quiet, you can't hear any v8 rumble at all. It should be easy enough, just replace the cat with a section of pipe .6 points
-
Woo, more stuff. Good and bad.... So the good. Had the windows tinted. Has made it much cleaner looking. Excuse bad photos. Fitted up front lip. (Fitment isn't 100% due to slightly warped guard.) Looks so much coooolleerrr. Swapped factory engine mounts back in. No more vibrations through the car anymore. Note to self, for street driven car, do not put polyurethane engine mounts in. And the bad Took it for a drive to Tauranga last weekend. All good, or so I thought. Lifted it up on the hoist at work to do a quick check over on everything and oh good lord, fluid everywhere. Rear gearbox seal and front pinion seal on diff are leaking terribly. And I've blown the left rear shock. So, back home and on stands again. Seeing as I had to pull the diff out, I decided to replace the crown wheel and pinion so I can get my rev and speedo to more friendly. So managed to track down a 3.5 Hilux diff, bought that. I've got a drivetrain specialist swapping the crown wheel and pinion to my current LSD centre, tightening the LSD a bit more and giving it a freshen up with new bearings and seal/s. Should be perfect afterwards. While it's in pieces, I got the axles checked to make sure there was no runout as one of the brake rotors was grinding on the caliper. No issues there so I think my caliper is a few mm to close to the hub, so I'm getting new brackets cut out as well to improve that. So it's in pieces, random photo for the sake of another photo. I've still got to take a shock out to send to Autolign so they can match it with some damper adjustable Bilstein ones. Also had to go through and pull my drivers door apart to get the window out as one of the plastic guides for it had fallen off. Thankfully I had a complete parts door I was able to pull apart first to see how difficult it was. (Turns out it's easy as shit.) Factory plastic guide had a crack through it so it had come loose. Put the one from the parts door in, and it's perfect. And because we were working on it late one night, group photo at my work! Once the diff is back in, I'll take it somewhere nice to get a couple of decent photos of it. I haven't managed to take any proper ones since it's been road legal.5 points
-
Then you won't mind being outside in the rain5 points
-
It just fits down the side of the house... I got some more pics today in the daylight. Dat ass For some reason I really like the twin pipes hanging out Lush chairs If you line the side doors up and press the retaining strap in the right spot they open up really wide, Wide enough to hit the passengers mirror hence the open front door Crappy under bonnet(hood) shot and the worlds longest dipstick. Its longer than my leg. It smells the same as my old c10. I guess a mix of 350 horsepower sweat (have to find somewhere for the power to go thats not the wheels) and dust. I had plans of washing it today but had a nap instead5 points
-
Plus you shouldn't be going camping to watch god damn TV...blardy kids these days4 points
-
I'll need someone to draw up a mural with lots of titties4 points
-
Pretty sure it works like a 4A-GZE one, the ECU triggers that relay based on intake manifold vacuum. When vacuum drops below 8" the supercharger clutch is engaged. The clutch stays on until intake manifold vacuum has risen to over 10" for a period of 5 seconds. This time delay was added to avoid cycling of the clutch during shifts and momentary throttle transitions. http://mr2.com/TEXT/SuperChargerInfo.html4 points
-
4 points
-
And a Viking ship. Also West coast mirrors, Cragars & lots of crushed velvet. There's a good chap.3 points
-
So no update as far as working on it goes. But I've been trying to do some digging into the engine swap and if its ever been legit. No sign of cert, previous owners and LVVTA have no record of a declaration ever being issued for it, last WOF issued in '05, and engine swapped a long time before that. There is a possibility the original engine is still available so if the LD28 conversion is too difficult to get up to a certable state then maybe going back to OE is an option. The other problem with the LD28 is its mounting. The oil pump lines up pretty well with the diff head, and hits it pretty easily from what I'm told. I also found out apparently it has had some kind of modification done to the transfer case or gearbox to give it a better final drive ratio? I'm not quite sure what it entailed though. Heres a bad picture of the sump/diff IMG_20170513_155448 by John Bell, on Flickr And heres a bad picture of the bellhousing adapter. IMG_20170522_155601 by John Bell, on Flickr3 points
-
Im a regular guest here browsing but I made an account just so I can post on your build. Have read the whole build thread start to stop a few times over in a row and where i see you taking this is awesome. Totally impressed. Its a big dollar build whats cool to see. Unlike myself and every other person on here who just recycles old crap then needs to massage it and fix it up to suit. I also had never heard of a Hudson until the movie "Cars" and Doc Hudson. Seems to be what all the Mercs want to be but cooler due to race heritage. I see in the upcoming Cars 3 they have a hudson pickup. after looking them up I started drooling with truck envy. large, wide and chopped looking. Im now a fan of the Hudson vehicles. Hudson car envy aside. I have to say a dressed nailhead happens to be my favorite engine. Nice to see a swap that isnt a 351 or a chev. Those finned covers look ace. But im worried. two x 650 carbs. Over carbed to the max? most guys would run just one of those and be optimal. Welding workmanship is spot on and that C-Notch is just done right and looks so good flowing like that and not all boxy. Needs to be as this could be a show winning car once done. At first i was like "Racing brakes are a bit overboard for this style of car" but then i asked my self why? And couldn't say why not to use them. As i said its got potential to be a magazine car so why the hell not. Also using Wilwood MC and other power break parts? Cant wait to see it all together and with that 1950 Buick grille and what ever other custom mods you do. will look amazing air out. keep at it and at the level you are doing it at bro. The Rev'3 points
-
WOF time and one problem I hadn't fixed is the gauge light didn't work. Upon spending an hour removing the gauge cluster I was reminded some pratt had glued the gauge lights in with RTV. So the fix was to reinstate the original poverty spec gauge cluster and repair it with parts from the diesel one. I realized that of the wires that were cooked only 2 needed connecting up. A few hours work and I had my MPH gauge cluster with functional illumination installed in the car. Leaving mums place the first bump I went over the speedo light went out... bugger. The second bump set off lights and sirens in the car. turns out the oil pressure sender wire came off and grounded on the engine making the car think there was no oil pressure. The car got a wof and is now ready for another 6 months of driving and breaking down.2 points
-
Great read. I think it's cool when people hang on to a car for a long time. Interesting to see how much development you have done2 points
-
With the car now off the rotisserie its time to start looking at the front end. As is blatantly obvious there is a slight lack of one currently. Its laying outside somewhere. The old Hudsons one although fine in the days of dirt track NASCAR was a little lacking for what I was after. That being an updated drive train with disk brakes, power steering, airbags and room to fit the engine & trans in. Unfortunately the heavy old setup fell short on pretty much all these points. Now I think I have already rambled on about the process of deciding what to do up front and so wont go on about it to much. Basically it boils down to shelving ideas such as restoring & updating the old setup, to a Fatmans front clip, to Jag IFS, to a Holden HQ-HW setup, to the current custom made setup that is made to my ride height, weight, drive style with zero bump steering, anti dive and all that guff. It also meets all the rigorous New Zealand certification requirements. The little progress we did on Saturday was just assembling the fronts hubs & brakes along with nailing down the desired and final air out height up front. So nothing to hardcore. Using a Wilwood setup. Main thoughts being I already had Wilwood at the back, they sell the complete hub & brake kit so things should fit together easy, and they should give no worries with stopping the heavy hung of iron. Also the kit should fit under most 15" wheels but would be fine with larger wheels upto say 20inch. - yes im still unsure what im using wheel wise. The kit used is a 6 piston, vented, drilled & slotted 12.19" rotors with ford stud ( part no. 140-10741-D ) purchased from Summit who had them on special and nicely also chucked in stainless hose brake kit for free valued at near $60 USD. Nice perk that will make it not only fit all together easier but will look sweet as well. I must admit I think Summit Racing is one of my favorite stores in the world *~*' Bearings and aluminum hubs all fitted together nice. packed up with high temp grease. Of course Wilwood would have to be different and used bleeping star shaped T40 & T45 headed bolts. And naturally we had to drop everything to pop down to the local engineering shop to pick up a half inch set so we could torque em up. Once back said newly purchased sockets firstly snapped trying to torque to a small 20 or 25lbs then twisted trying to do the next size ups 40lbs. Was more than disappointed with Teng Tools quality and they will be going back. these happened to be the only ones they had in imperial at the time. It will all be pulled off anyway when we go to paint everything but still... holdups and crap tools. Sure many of you know the frustration of it all. And whats one of my posts with out a bunch of photos... Setup on the welding table. Sitting in front of the car. Drilled holes in the shock bars at air out/low height and have it set to that. This is the car at our original ride height. note the 25mm/1 inch bar up front under the car. Bleeping low and we have decided to raise the front up another inch so will have two inch clearance at this lowest point when air out. Will also give a slight rake to the car whats cool. The rear can be raised or lowed as well as its on its middle setting but we are planing to keep it there currently. And to give a better idea of how high it currently is.. a pic of yours truly standing next to the car. Love how the roof looks chopped but its still factory. Again note this is air out not at ride height.2 points
-
So here's the plan. Last time I pulled this car apart it was a major, it was properly broken and couldn't be used until a whole lot of stuff was fixed. This time things are different as the car is running great, has proved to be very reliable and doesn't really need anything major in order to keep it on the road. This project is all about fixing up a whole lot of little things that are bugging me and I want to starting getting the car finished to a higher standard. The to do list: My friendly WOF guy politely suggested that I should replace the upper control arm bushes and one of the upper ball joints before the next warrant check so this will be done. The weather belts on all the side windows need to be replaced as they are all in bad shape The side window glass is all pretty average as well and I have collected up a full set of replacement glass for the car so all the side windows will be replaced. Door seals are leaky and looking very shabby so all will be replaced Door cards require some attention to repair and replace the trim clips that hold them on, a couple are held on by screws that don't look too flash. The stainless trim on the side of the car also requires some renovation, a couple of them are held on by rivets so they will be removed, repaired and refitted with new trim clips. There is a little bit of rust showing in the left rear guard and this will be repaired before it gets nasty. I am sure I will discover plenty of other little things to tidy up along the way but I want it all finished before the start of summer so will do my best to stick to the plan.2 points
-
2 points
-
Towers done. Paint isn't really the same colour, but i'm sure it will all blend in through the first mud hole Gotta weld a bend to the compressor housing to clear the tower. other than that everything seems to be fitting2 points
-
Thanks for all the help i have been getting from people. Not to much has happend but i i gave it a quick little polish, it come up much better than i expected. Also picked up some lowering springs the back looks good but the fronts still too high, so i might get the fronts springs compressed a little. its looking pretty cool tho. Also test fitted some other wheels 14x7 Enkei Crossfever im leaning towards keeping the Work Equips tho. Also have some 14x8 ssr Starsharks that ill test fit, once i get tires for them. assume they will be to wide tho.
 2 points
 -
I replaced the twin plate with a Fidanza Aluminium flywheel, sintered puck friction plate and a something/something pressure plate – yes, I obviously had not learned anything from the twin plate fiasco. I got to thinking about why Mitsubishi rotated the engine and gearbox 180deg in the Evo 4+, common reasoning is that it removes a shaft in the gearbox. Earlier models need 3 shafts, Input, Intermediate and Output whereas the Evo 4+ have only an Input and Intermediate. Or perhaps it’s so if the flywheel explodes it takes the passengers nads out and not the drivers. Hrmm, think I need a scatter shield. Actually, I need a polished scatter shield. Next minute these goodies arrived. A set of Brian Crower 280 degree duration cams, matching heavy duty valve springs, titanium retainers, Fidanza cam gears, ARP head studs and ARP rod bolts. Totally over kill for a standard short block but, you know, why not right? Matchstick for scale, tissues for clean-up. To install the valve springs, it was easiest to take the head off for a freshen up. I used a local machining shop to clean up the head, skim, check the valve seats, install new guide seals, springs and retainers. Next up was a Cometic Multi Layered Steel Head Gasket along with the ARP head studs. Brian Crower recommend the 280’s to be installed straight up but at the time I didn’t have a dial indicator to check for actual Top Dead Center of the Pistons since the head and gasket height were different now. I have since checked with a dial indicator and it’s just under half a degree out, not enough for me to worry about cracking the Loctite on the cam gears retaining nuts. And another turn for the project, a local was selling this low km turbo and I had to impulse buy! Unfortunately, the standard unit of measurement, the Nokia phone was unavailable, I had to substitute with another period correct device. It’s a PTE SCM 6152E, in hindsight it’s a complete ass of a turbo, but it’s a bolt-on to the Mitsubishi mounting flange and well, bigger is better, right? Apparently its rated for 630hp, with a 3.5” Inlet, 56 trim compressor wheel with an Inducer of 61mm and Exducer of 82mm. What really lets it down is the custom rear housing made by PTE to suit the Mitsubishi flange and the 76 trim T350 turbine. But what’s done is done. With a bigger turbo, you need bigger injectors and I picked up a set of second hand SARD 800cc injectors and had them cleaned before installing. What’s annoying about these injectors is SARD don’t offer any decent specifications on them, just a vague Dead/Lag Time of 1.1ms, like at what voltage and fuel pressure? It turns out that at 3 bar fuel pressure these are closer to 855cc. Not quite enough for corn juice, but that wasn’t even available in West Australia when I was building this. Getting ahead a little here, but I recently purchased an oscilloscope and measured the actual dead time on the car while it was running. The Hantek DSO 6074BE IV is a kit specific for cars and makes testing this stuff easy. I varied the voltage by turning on ancillaries, disconnecting the alternator and running on battery power etc. then used a non-linear extrapolation to get the lower voltages. At standard operating voltages, the dead times are now exact and much closer at the lower voltages. I dummied the engine up on the engine stand to see how much additional clearance would be needed on the water pump inlet pipe which runs behind the turbo, fortunately none was needed. I also gave the exhaust manifold a heat wrap in the hope it would help with the overheating the car had while sitting at traffic lights. On a stock car, there would be some heat shielding on the manifolds and dump pipes and maybe with the tighter engine bay in the Cyborg compared to the VR4, the unwrapped manifold may have been radiating too much heat into the bay for the near stock cooling system to dissipate. It couldn’t hurt, right? One of the other changes here was that the oil feed for the turbo could not come from the stock location in the head as the oil pressure at this point is too low, PTE recommend taking the oil straight from the filter housing which is as close to max pressure you can get.2 points
-
Speaking of induction, you may have noticed no exhaust manifold/turbo or intake in the previous images. Well, I happened to acquire a TD05 16G-6 from a Hyper RVR, this turned out to be a bit of a gem as when we looked closely at it, it was the same physical size as a normal Big 16G but had a revised compressor wheel, which I assumed to mean good things. One drawback was that I would need to clock the turbo compressor cover to fit and that would mean I couldn’t use the stock internal wastegate and actuator. Damn. So, to solve that problem I purchased a TRR Stainless manifold with a 38mm Tial Wastegate. This was before the golden age of Chinabay and quality was assured A couple of other parts arrived, a 2.5” Throttle Body Inlet and an Injen Turbo Intake for an US Eclipse. A bit more happened on the fuel system and boot. I wasn’t thinking of building a show car, just a nice streeter and I was trying to keep the boot a usable place. Battery boxed and a huge fuse added inline. I have a friend in the sign writing business who owns a CNC router, he machined me up this awesome custom sparkplug cover and I added some Taylor Ignition leads for something nicer to look at. The standard intercooler wasn’t going to work for this engine, its tiny and sits inside the driver’s side wheel well. The obvious choice at the time to was use the VR4 cooler, being the Evo Zero spec it was slightly larger than the normal JDM Galant cooler and with a 2.5” end tank mod should work well for this setup. I positioned the standard VR4 Oil Cooler in the passenger side wheel well, it gets its airflow from the standard bumper vents, but probably needs a little fan behind it for the summer time. …and I also added a little cold air induction on the driver’s side in the form of a 250mm 90deg Bunnings spec storm drain, this earned the car the affectionate nickname: POSBOG from my mates. With Cyborgs & VR4’s, they share a lot of wiring and sensors. This made the swap quite easy but when it comes to ECU’s there are only a few good ones and they are the single board ECUs from late model VR4s. These late model single board ECU’s can be chipped and they can also data logged via an OBD like protocol. Thankfully with the 2.0 litre engine came the accompanying MD165808 ECU that I had socketed and chipped by a local guy to include a stock VR4 RS Fuel & Ignition Map, updated code for the newer E1-3 Air Flow Meters and “stutter box” which is a launch control mode that creates about 7psi of boost while popping & banging. The data logging on the single board ECU is done via a Palm IIIc with MMCd Logging software installed. It works really well and is a lot faster than real OBD/II, enough so that it actually provides useful information and can be setup in a dash mount with night lights.2 points
-
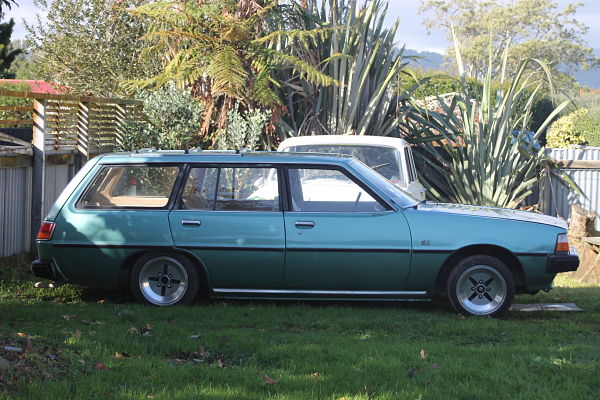
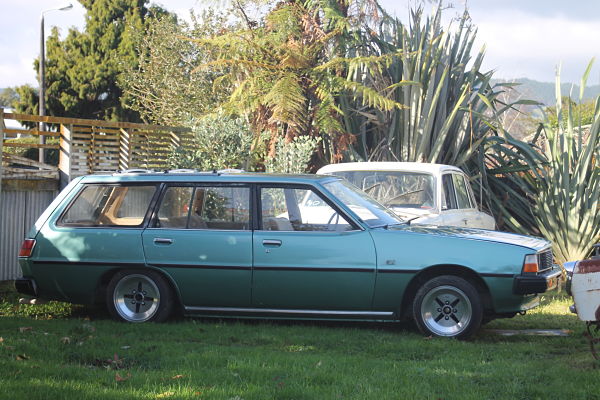
Car passed cert. Ended up getting the factory shocks shortened and putting them in, also lifted it a little bit. Cert plate showed up yesterday, passed wof and got rego. So as of yesterday the car is road legal. Had some little rust spots tidied up on just to smooth it off. Now that I'm driving it I've find a few little bits that I need to tidy up. There is a hole where the factory handbrake lever was thats letting hot air through, one of the springs is knocking in the back under load, not sure why and I want to put factory engine mounts back in. The polyurethane ones in it now cause everything to vibrate so much.2 points
-
This is interesting if you can be bothered reading it and is important if you have an old manual car http://www.widman.biz/uploads/Transaxle_oil.pdf1 point
-
Thanks guys, Its been a love/hate relationship that is for sure, but its good driving it again. Still some more todo though, that friggin sump is still leaking the old gearbox that is in there is really, really hard to shift I'm probably going to ignore the leaking sump and just try some different oil in the gearbox. then think hard about the next stage (if any). Shane, I had previously taken it on an Evo cruise, was many lols and a very fun night. I think i will attend the next powercruise/supercruise if i can keep it together long enough. Kws, there is even less of these in Australia, just about every one thinks its a Galant.1 point
-
When I bought my 110 it had an isuzu c230 engine fitted, cleared everything, could be an option if you are wanting another diesel. Also have seen 200tdi engines fitted, they pretty much bolt up, people run them without the turbo as well1 point
-
Kind of proves why you shouldn't use GL-5 in a 2 speed diff' from the 1920's due to the brass/bronze wearing away. Someone was saying ti would take 800 years to eat the brass but that's only if its not driven.1 point
-
That's why you bring the Mrs1 point
-
Fridge slide aswell.1 point
-
yeah load it up and let it soak, keep turning it over every few days and topping it up remember to drain the sump and top up with fresh oil before restarting you will probably find that there is a tight spot when truning it over, thats where the piston rings are rolling over the ring of rust in the bores. gentle does it1 point
-
3x on the above comments. It is good to see the progress of a longer term build and how things change1 point
-
+1 read the lot and it was a great read. Some real ups and downs in there! Its a cool little car, and you dont see them around much. GUess they arent as desirable here as the GVR4 is.1 point
-
Yep agreed, great write up. Not many people take the time to do this since Facebook came along and most forums died off. (Note: FB is a fcking awful alternative to forums).1 point
-
This!is my new best friend.Going back again.don't leave those chrome knuckle guard things on your car to long!thats a bunch of rust and a small hole in a stupid ass place.primer on small things. Last bit of the old red paint getting sanded down.going back looking at the old pic of the sides it looked okay, after I worked it over with the 2x4 it needed alot of work, I must have but a good 8 hours into each door and quater panel in this thing.getting closer and closer to top coat!finished up at about 6pm, temp was dropping, gun was blocking up and spraying like shit, hopefully it will be okay.last little bit under the tank/beam mounts.1 point
-
Poor thing Didn't want to start for me last time I tried so I cranked it on the starter until it got here. I'm actually quite liking the steelie/whitewall combo. I need to tidy the garage enough so I can get it inside. I have ordered some bosch ev1 plugs off aliexpress so I can replace all the fucked injector/temp sensor plugs1 point
-
So, steering box had a bit of a leak. ID'd it as a 2nd gen l200/starion/dodge d50 box. ordered a kit from the states stripped it down, input and output seals were dried out, output seal shattered to bits when I removed it. Teflon inside was looking sad and the fluid was pretty dirty tight as to pull it out, but not as bad as it could be cleaned up and resealed back in and bled. went alright actually, but id be a rich man if I were getting paid hourly1 point
-
well still no luck the 500 holley had more fuel leaks than a bucket with a hole in it tried to put the std carb back on but its leaking fuel priced up a new 350 holley wow lots of $ so tonight i won a good rebuilt 350 holley on trade me with air cleaner off a 265 valant motor so when that turns up i hope the fuel issue will be fixed ( or it might end up with a lexus v8 lol)1 point
-
Since the car has been on the road again, I’ve put on a set of Bridgestone Potenza RE003’s and printed some custom hub-centric rings. For the hub-centric rings I used ABS plastic which should be okay, its transition temperature is around 105c and it would probably still be okay around 140c. Really its only used to locate the wheels while doing them up and don’t really serve a purposed after that. This is where I am today, almost the middle of 2017, 12 years after buying the car. Where to from here?1 point
-
Following that line of thinking I spotted a second hand PWR barrel cooler setup for sale that was used on a very well sorted VR4, perfect! When it first arrived, I set it all up for a test run. The reservoir was built quite large and had a [dry] ice pocket inside for extra cools, but that also made it large and heavy. The reservoir was originally mounted in the boot of the VR4 it came from so that’s the route I intended to take. I added some ball valves so the system could be drained and to allow bypassing the radiator for pure Icey cooled water, most likely a bit overboard. Now, I was still using the Fidanza Aluminium flywheel, sintered puck friction plate and a something/something pressure plate that I mentioned earlier and I had come to the realisation that it too, much like the twin plate was probably a bit unsuitable for this cars driveline. Since I had the barrel cooler setup to install now would be a good time to drop the gearbox and install something a bit more practical. This time around I went for a Fidanza chromoly flywheel, ClutchNet Kevlar puck friction plate and Fidanza 1500kg pressure plate. The idea here is that the Kevlar friction plate provides enough slip to give a good increase in driveability, while also being resistant to overheating and the heavy pressure plate helps with the overall power handling capacity. Clutch setup No#3 While the box was out again I installed some Nolothane engine mount inserts in the north – south, gearbox and cam mounts. This was not an easy task as the new mount inserts eliminates all the minor free play needed to bolt the engine in easily. I needed to get quite creative with the order in which the mounts were installed, jacks and pry bars to get it all lined up and installed. Before reinstalling the gearbox, I gave it a quick lick of paint to help hide it in the engine bay. Gearbox Nolothane mount installed as well, engines rock solid now. Tick. How the heck was I going to fit that barrel cooler? The outlet of the barrel was 3” and the throttle body was 2.5”. It also needed to reduce through a nearly 90 degree bend and had to be a little flexible. Easiest way I could see the cooler fitting is like the below dummy setup, but if the throttle body was 3” it would work well for the top bend. Taking a closer look at the intake manifold. It’s the original Cyclone intake from the VR4 the engine came from. It’s a rather complicated intake manifold compared to others in this generation as it has two runners per cylinder of differing lengths. In the picture below the blue line is the short runner and the green the long runner. The short runner has a set of butterflies that close at low rpm to help promote velocity through the longer runner and then the short runners open at about 4000rpm or 6 psi of boost. Interestingly if the butterflies were closed at high rpm it would be a significant restriction as it would act like a choke… hang on… let me re-check the wiring to the Link G3 – Fuck! Turns out I had setup the G3 to Close the butterflies at 4000rpm instead of opening! This was likely the restriction that gave the lower than expected dyno result! FFS! Too far into it now to stop though… The next logical purchase to solve the barrel cooler mounting problem and my inability to check the old manifolds cyclone wiring is of course a new intake manifold. Perfect sense. Only the best eBay here, but I had them move the vacuum port location from the top of the manifold the rear and to leave off the standard throttle body flange. I then ordered a Plazman 3” throttle boy and had the adapter flange welded to the new intake manifold. The throttle body, unlike the manifold is a work of art and has a cammed/progressive linkage to try and help with small throttle positioning. In the picture below I briefly consider mounting the barrel over the top of the turbo inlet and clocking the turbo. Eventually I decided against mounting the barrel high and used the original low route, I think it makes it look like there is more room in the engine bay. Here you can see the short outlet pipe from the turbo to the barrel, on the underside of that pipe is the blow off valve which just vents to atmosphere, though it does have a little filter on it to keep shit out.1 point
-
A few months later all was complete and with the locked center diff it made the car a bit of a fun to drive, the inside rear wheel would skip if turning at low speed or if trying to reverse and turn, the inside front wheel would drag. It did cause no end of a confusing looks at petrol stations from the local bogan’s. I entered Motovation 21 at Perth Motorplex with Old School Toys and apart from the blazing heat it was an amazing experience. Unfortunately, I couldn’t enter any events as the Fuel Pressure Gauge failed, leaking fuel everywhere and the car would overheat if it wasn’t getting enough air flow through the radiator. At the time, I thought the overheating was probably the dodgy super cheap slim line fans. First mod post Motovation was improving the Brakes. Standard Cyborgs run a Single Piston front and rears but they just don’t slow the car down quickly enough, especially now it has double the power of the stock motor. The obvious move is to install the VR4 braking system as its meant for a heavier car with similar amount of power – this is exactly what I did. CB Lancers and by extension, Cyborgs run a captive front rotor and there isn’t any option to increase the size of the rotor from 236mm to the VR4 sized 276mm. Removing the rotor also means breaking apart the whole hub assembly which means you may as well replace the hub bearings at the same time. Bugger. Thankfully a friend had been down this path before and the remedy is to disassemble the hub, replace the bearings and machine down the stub axle to fit inside the VR4 rotor. This is the stub axle, effectively I need to have about 3mm machined off the outer edge for it then to fit inside the VR4 rotor. This then turns the front braking system into a floating disk. Now some might be wondering why I don’t use a whole VR4 hub assembly? Good question grass hopper. The problem with swapping the whole hubs over if that the geometry is different and the mounting point for the steering arm is upside down, this all impacts handling and gives the car a tendency to tramline over any bump, not something I really wanted. Once the stub axle has been turned down it slots easy inside the rotor, problem solved? Nearly, but now the rotor is effectively offset by the rotor hub face thickness, which means the caliper is no longer centered with the disc. In the end, all that’s needed is some 6mm spacers behind the calipers to bring everything back into alignment.1 point
-
1 point
-
manifold cleaned up and painted.. found an air cleaner off an 86 dodge truck which is perfect , 2280 holley looks great will try it out before i make a call on rebuilding it... #super61 point
-
Off the rotisserie. Sitting at Air out lowest height. Looking at assembling front clip this week at some point. Then from there its fabricating the new front ends rails etc and getting it all together.1 point
-
Try to lock him in a British Leyland sharn. Eventually he will glaze over and make an exit, never to return. In keeping with my record this year, I will not be able to attend this meet due to being elsewhere. 5/5 fail.1 point
-
Ass end is pretty much done! Well the hard parts any way. Full ridetech 4Link tacked in and Moser housing in place. Useing HQ 8000 series Shockwaves from Ridetech at the back. The mounting brackets have three height settings. All welded in and a quick coat of black. This is shown at the lowest height. once the skirts and rocker panels are on its going to look pretty good on the ground at this low height. Guess i will do a bit of a write up of whats going on gear wise back there. Whats in and still to be put in sitting in boxes. Talked about the Ridetech 4Link but im also using the before mentioned Shockwave airbags from the same brand. For those not in the know click here to check them out with all the fancy videos and marketing guff. Basically they are air bags that mount like a coil over but with air shocks with 26 tuneable rebound clicks. The company was great to deal with and extremely helpful. Another company who had exceptional service was Moser Engineering. Drag racing heritage & brand so built to withstand alot of abuse. the guys build and race the kit they build. Website here. Man i feel sorry for Brian Miles as he steered me through the process of ordering the custom 9′ rear end. A million emails, measurements, re-measurements latter we got it sorted. Bare classic looking Ford 9″ Housing made to my measurements. (2inch narrower than stock Hudson) Moser axles w/bearing package 5×4 bolt pattern with screw in studs. Moser perf nodular case. Trac Loc posi 31 spline. Nodular support. 1350 Pinion yoke – steel gearing at 3.50 fill & drain plugs. Wilwood breaks i will cover when i get to installing. Should last me well. So next step is taking it down off the rotisserie and sorting the front end. It will be back up on there a few more times yet i imagine1 point
-
No photos just quick update. Was doing some little maintenance things on the car. One of which involved fixing 4 leaks in the intake system. Once that was done, the car wouldn't run or idle or anything anymore. Went through so many different things trying to fix (injectors, CAS, replacing AFM, fuel pressure/fuel pump) turns out the guy I bought the motor off gave me the wrong AFM. (I bought one with the same part number) $40 later I had the right one and it runs primo. Replaced rear springs with 5kg rears. Looks like I had 8's in it which is why it was so hard riding. and big news; Cert booked for next week. nearly 7 years and it's almost legal.1 point
-
I had an oh shit moment a while ago when I tried the new HQ type V8 radiator I had bought. Width wise it would fit OK, bur height wise it was 100mm above the the support panel. I did think about some serious cutting to make it fit. Something in the back of my brain said there is a better option that you have seen before. There was a green EH wagon that made NZV8 a few years ago and they had used a HiAce van radiator. I got the dimensions and had a measure, all looked good. This morning I picked up a slightly used one off trademe for $50. This first non Holden part.........I'm on the slippery slope.1 point
-
Now that some of the old crap is off the rear its time to start the cutting and welding madness! God damn but i am excited! So as you can gather from the above posts the springs etc have all been ripped on out. I chose a RideTech Triangulated 4Link to take its place. Must say im happy with the product. 5.6mm(0.219inch) wall thickness tubing and 4.8mm(0.188inch) laser CNC brackets – included is brackets for the shockwaves. It just feels sturdy and built right. Ridetech sales reps are great to deal with and more than happy to go over everything making sure the right product was ordered for the car, weight, ride height and driving style. I chose triangulated for a few reasons. One being no panhard being needed to free up room with luck for the exhaust as not much room under the Hudson for two pipes. Another was i could get tighter wheel to fender clearances due to less or no side to side play compared to a parallel 4link. They should give a much better ride quality than springs whilst being able to cope with rising and lowing the car better as well with bags. Anyway a refresher of how it was once the big stuff at back was stripped off: Below you can see the old brace and spring mounts. Flockie dealt to these. And then fabricated a Hudson bracket kit & pipe support to replace original chassis brace for each side. Good thick 5mm plating. Welded the four brackets to the car along with the ride tech one. Everything is rust killed and sealed up under the plates. With bottom bar attached. Bottom bar & mount. Right hand side bottom bar done. Left hand side bottom bar. And done! Bottom two bars attached to car via with some nice brackets. Next is notching the chassis to allow diff, rising the unscraped section of trunk floor a bit and attaching the top triangulated bars. Flockie just sees the gear and the car, visualizes so quickly how it will go together, quick glance at the NZ certification rule book to make sure its good then attacks it.1 point
-
A long overdue update. After many promises of the Holden will be next to be finished at the panel shop there has been big progress over the last couple of weeks. Trevor the owner of the shop has been doing most of the work and now 90% of the cutting and welding has been completed. Here is a couple of photos that really don't look that different from while ago. I guess the great thing is that when its finished I know that all the rust is gone and it will be fill with fish oil so it wont be coming back any time soon.
1 point
-
I swung by the Panel Shop to get a couple of photos to prove that the car has moved. Time to get the bonnet and front panels stripped of the should be shiny bits and off to be blasted. I keep forgetting how small these cars really are, especially now there is some space around it. Lastly I have bought a modified chip for the VT 5litre I have to go in from a Guy named Tony off trademe. The big thing is the chip has the VATS disabled. The tune should take the motor close to HSV specs. This should be fun, 190 Kw in a car that weighs 1200 kg with 215 tyres on the back..
1 point


_sedan_(23230030334)(1).thumb.jpg.34d765361d66c78db614bae6ea2c156a.jpg)


This leaderboard is set to Auckland/GMT+12:00