
Leaderboard


Popular Content
Showing content with the highest reputation on 04/27/16 in all areas
-
2016- 2016-04-26_05-47-04 by sheepers, on Flickr11 points
-
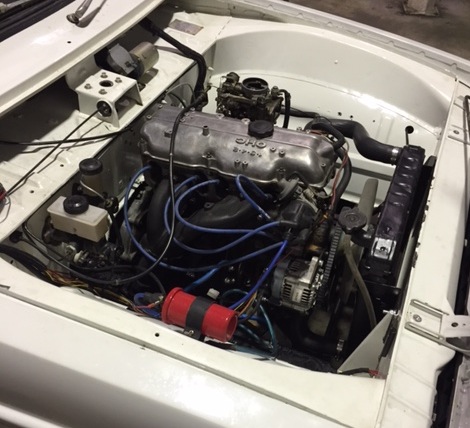
wof time tomorrow see how big the list is I get engine bay is staring to look tidier after swapping over more of the cleaned and painted parts over from the lemon that once resided in there
 5 points
 -
Okay enough of that, back to graphs. I had Threeontree come help me the other night, he drove the car while I tootled with ignition settings. Managed to advance the timing by up to 20 degrees in some areas, on the part of the map for cruising along. We used cruise control to hold the engine at a particular speed so it stayed in the centre of a column on the ignition map. So I had this big stack of data collated from driving at all different speeds, and I have accurate injector info from my test bench thing. So Excel'd together some maths to try see which speed is most economical to drive my car at: (The lower the trend line, the more economical) So it looks as though peak economy is ~73ish kph? And not too bad 10kph either way. Most cars are most economical at about 85kph, but I guess this has 80s box aero features and does ~3400rpm @ 100kph thanks to the diff ratio. It's probably the pumping losses from spinning the engine so high at 100kph that keeps the optimal speed that much lower than normal. Aint changing diff ratios though! Coupe Life!5 points
-
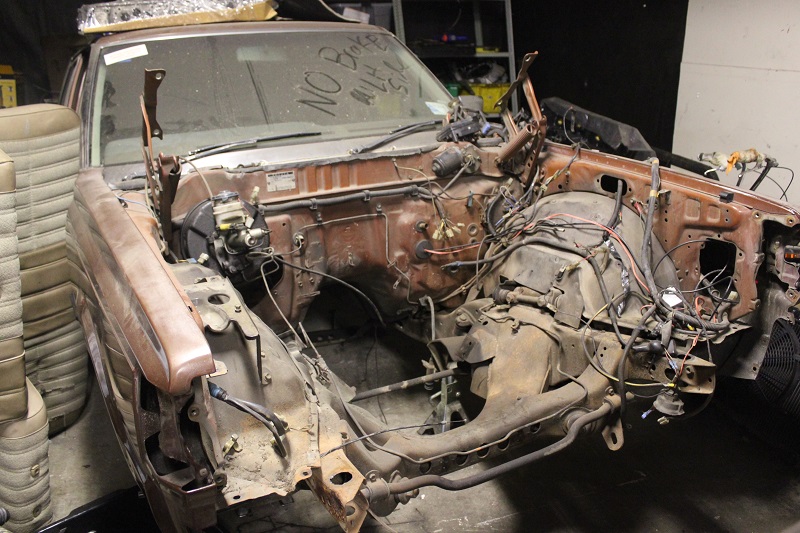
Cos scotty asked for an update here it is. Motor is in. No plumbing yet as oil cooler mounts are being redone. Need to fit starter motor and a couple of wires, exhaust and plumbing and it might run? Few maintenance items have been done - new tie rods, a handful of bushes, fixed up a couple of hard lines (thanks born loser for the use of his flare kit). Halfway through undersealing the rear so the fuel tank can go back in. All interior is in minus hoodlining. Ummm yeah idk ask me questions if you have any Thanks shauno and brdflu for helping inbetween drinking speights, smoking durries and getting bikes ready for dirtmasters5 points
-
A bit more progress, cars082 cars081 cars083 I was definitely driving it around like this - note the straight pipes, vise-grips holding the battery cable, fuel tank that was tied on and G-Clamps! On the construction side, I was given some white colour steel ex an industrial fridge so this is glued and riveted on so it doesn't rattle - no painting required.4 points
-
Bit of a saga with the headers, Any coating (incl ceramic) requires curing, and doing it on the vehicle doesn't work in with the running conditions to bed in a new cam. I debated leaving them as-is and doing a proper job later (priced ceramic coating with Elite in Ch'ch) but I can't really be arsed pulling them off again and didn't want to stick rusty old pipes on my shiny engine, so decided just to rattle can VHT on them to see how it goes... So a couple of weeks ago I dropped into the largest sandblasting place in Invers (a place I put a bit of work through incidentally) to ask about blasting them clean. 2 weeks later, despite me going in there twice plus leaving my details, hadn't heard a bloody thing. This disappoints me as I treat every job as a trial for bigger ones, and not being contacted pissed me off more than a little, this will be remembered when larger contracts come about... Anyways, did a google search for sandblasting Invergumboot, and Sievwright blasting/panel/paint popped up. Never knew anything about them but called past on the off chance to see what they could do. The GC there said sure, no probs, they boys had a window and as they were in the car I could get them done right then, and pick them up in an hr. Done... Crap pic but shit this saved some work, I'm over sanding stuff down and would happily pay for this service again. The bloke asked me how I found them as they don't advertise, and laughed when I said I had the arse with the normal outfit (Southern Industrial Coatings) and went looking... And I knocked off early and degreased, warmed and chucked a few coats of VHT black on 'em... These look pretty good now but I'm under no illusions it'll last, so I looked into curing them prior to bolting them up. I need to bake at: 120 degs for 30 mins cool 30 mins 204 degs for 30 mins cool 30 mins 315 degs for 30mins After my last shed cleanup I discovered I had 3 hot air guns (no idea how) so toying with the idea of using these plus an IR thermometer to give it a go. I know I can get the pipes to over 100 degs with one gun, so will be interesting to see what I can do, can always plumb in an lpg torch for bit of extra oomph. Worst case is I'll waste a bit of time trying it out, best case is it works and I have fun trying...4 points
-
Gah, its easy to forget how much a conversion can cost when your are trying to sort out the whole lot at the same time haha Just purchased EFI pump, fuel lines (need to replace all rubber lines for EFI hose), pipe fittings and hose clamps. Along with a fuel pump bracket. Total of 253.60. Not to bad I guess Actually think that is the most of the spending sorted now, Just need to do rear exhaust section, and some rear tyres. Damn......... Oh and buy a 32mm hole saw to do my clutch master cylinder mounting. WHO DOES UP CARS! Slash might need some recovery time before I start on the next one.......3 points
-
I just me with Shakotom. He is rolling to the Swap Meet with his Hot Rod club. They're meeting at the top of the Bombay Hills before 7am and rolling out at 7am sharp. That would be a good place to meet if you are a hardcore Meat swapper etc. Otherwise 8:30am at the Bellagio carpark on Plunket ave works for me.2 points
-
Mock me up baby. The LED mini-bar doesn't touch even with my full weight on the front. Booonus.2 points
-
Yea my guess would be linkage too - everything was turning as it's supposed to when we fiddled with it.2 points
-
Ah, it was British.2 points
-
Twinning Outer brackets are different so I had to drill 5 spot welds on each side to put the twin outer months on Just put bolts through the spot welds for the time being until I get some time to lines it all up properly. Gonna need to space the inside head light mounts as they sit in like its cross eyed. Probably use some TV wall mount bracket spacers. And of course wire it up. Thinking I might get some multi pin plugs so I can wiring them up so its one plug and wire the single ones onto a plug as well so if I decide to change back I can simple just unplug it at one point and plug the single plugs back on
2 points
-
Purple FA50s been running mint Took it to dromeageddon because Im a bitch with no fab skills so I couldnt build a dronebike. Go hard or go home right Also took this POS and spent more time trying to keep the kickstart in place/had to go buy circlips/making it run/lost drive/gaveup Also, Remember my other Fa50? the blue one.... It sort of fell apart.... Untitled by OR4NGE, on Flickr and the paint disappeared Untitled by OR4NGE, on Flickr but its now registered at least! Untitled by OR4NGE, on Flickr2 points
-
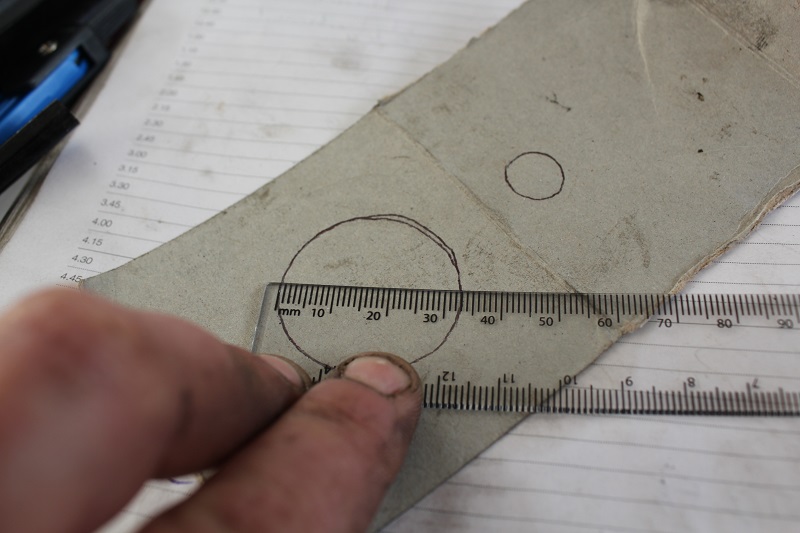
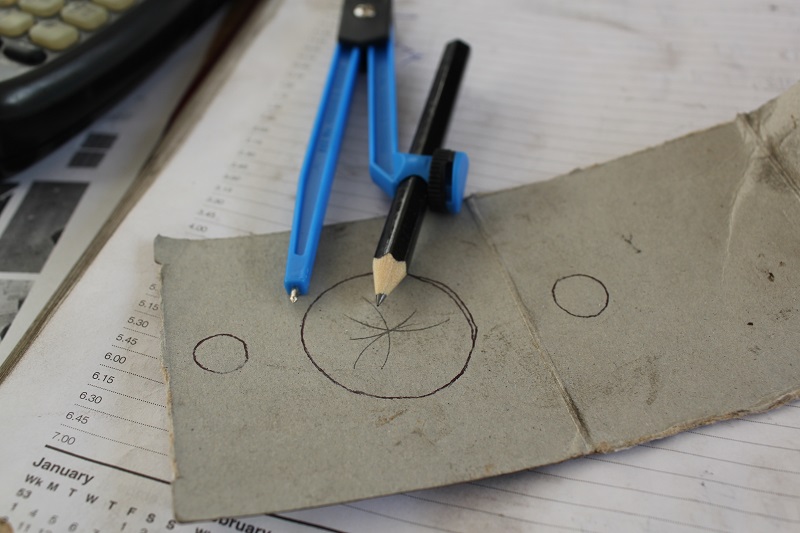
Did a couple common mods that are tried and tested. The first, combined with a needle and needle jet change, helps smooth out the midrange when running expansion chambers. It requires the blocked air jet (6 o'clock position) to be opened up and sized correctly, generally with a 2mm jet. There is a brass ball that needs to be removed, one spun out easy when drilling, the other needed a screw to dig it out. Once removed you can either drill through to the needle jet cavity with a 2mm bit or drill and tap it for a 4mm thread and buy a 2mm jet to fit. I just ran a 2mm bit through, nice and easy. The next item was to replace the steel reeds with a better performing option. The reeds from a YZ125 are a recommended upgrade and require a minor trim to fit. All done2 points
-
This post has: No Graphs No long paragraphs on boring topics JUST DOORT NOISES New PB of 1.21.72 points
-
http://www.trademe.co.nz/motors/used-cars/toyota/auction-1076308159.htm buy it andy1 point
-
Another epic meet ticked off. A few faces not there tonight, you guys missed out!1 point
-
They coat the insides too I believe. Bloody expensive to do though, I looked into it for my churbro manifold but wasn't willing to part with the better part of 5 hundy1 point
-
That's a sweet looking engine crane there champ I'm still guessing it's a linkage issue but will wait for your next update(s)1 point
-
http://www.znoelli.co.nz/1 point
-
I can confirm it is actually an ej and no it isn't that particular white wagon, but none the less I feel a thread is in order(says the guy who doesn't actually have an os car at the moment)1 point
-
could shut up shop/event early and make a cruise back to Auckland via back roads1 point
-
Pretty keen to go down for cruise in my vl1 point
-
Lol Yeh Probably. Always like to have a untouched set just in case. Also rolled the rear guards with kickers roller contraption. Worked a treat.1 point
-
Sounds good beaver Just cut the springs while you wait for your lowering springs to turn up Good? Good.1 point
-
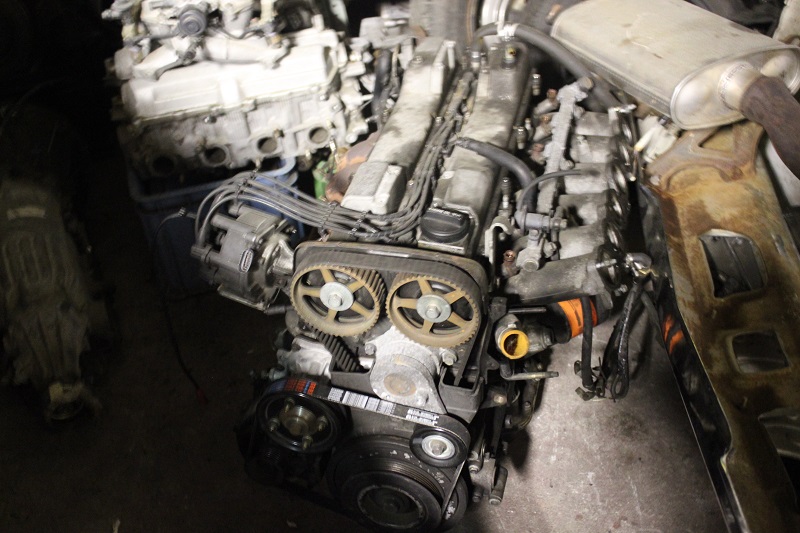
Is that valve seat ok? that damage looks like the piece of what ever got stuck between the valve and valve seat when the valve was closing.1 point
-
most of the time all the broken crap gets sucked out the exhaust. expecially if theres no marks on the poston you will be alright new valve is like $10 but considering you already have a spare head i would just take one of those and give it a quick lap in, take the shims out of the other engine and find one the right size1 point
-
6cyl full sequential with 3ms dwell means that at 3,333.33 RPM multiples will be on at the same time. So at worst case of say up to 10krpm, youll have 3 of them on at one time. Now just gotta see how much current they draw and what you can draw through the 18awg, which is probably 20A without any real issue? So if the coils draw less than 7A each, youre ok at a guess1 point
-
Clutch life
1 point
-
Position now filled1 point
-
sounds like fun il be there1 point
-
The air cleaner was off for install mr simpson! Rx7 was off the road while i went studying full time so funds were limited. I had a few years use of it before then. I dunno, i guess cos I pine hard and I've wanted one for years. I've spent every spare dollar on it for the last wee while and a buttload of hours. Scotty pines so he has put in a huge amount of work too. He's done the mechanical shit I'm too retarded to do. You gotta do these things while motivation is high!1 point
-
There's one just for you xo1 point
-
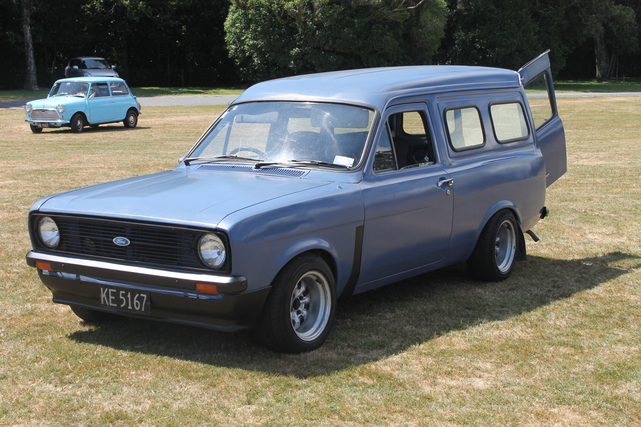
Bit more low and the cleaner guards put on1 point
-
You'll just break your T series axles and then have a hard time finding anymore. I hope you like understeer, locked diff is terrible. Regarding headlights... Twin front is best front! More the merrier!1 point
-
Thought I'd better bang in the frost plugs before I forgot about them. gave the block a good clean up with scotchbrite and brakleen, then a light smear of permatex #1 (hardening) sealant on each surface, and knocked them in evenly with a socket... And yes they are aligned vertically cos that's how I roll...1 point
-
more of this, 2016-04-24_10-11-19 by sheepers, on Flickr resulted in more progress. namely fixing the ever shit handbrake mounting plate. celicas came from the factory with this bit fucked. I've never seen one that wasn't rooted. anywho, i welded some bits of flat bar into the floor to give it some strength and stop the handbrake from coming out of the floor. 2016-04-24_11-26-35 by sheepers, on Flickr 2016-04-24_11-28-28 by sheepers, on Flickr 2016-04-24_01-15-49 by sheepers, on Flickr there was also a massive hole cut in the floor for some reason so i made a panel that i can then attach a boot to to cover it up. 2016-04-24_05-10-57 by sheepers, on Flickr the other things i did today include welding up a small hole in the exhaust, cutting the rear muffler off to see how it sounded (loud, very loud) and changing the oil in the gearbox. yes, i changed the oil in the gearbox. i replaced the air that had previously been used to lubricate the gears with oil which has been a massive step forward in shift feel and quietness. i recommend oil in gearboxes, not air.1 point
-
1 point
-
I got the zorst bits. Flow master mufflers etc so very happy. Then bought 4 sets of mild steel vband flanges from DSR (great blokes to deal with and great pricing) and got some flexis from STA. Had 15 minutes spare at work today so zzzzzt. Bloody love doing exhausts for some reason.1 point
-
Yes, will need the extra speed to beat the rust1 point
-
Fuck I have owned this car for a long time, and most of that off the road. Ah, project life' Anyway, Wash this face.
1 point
-
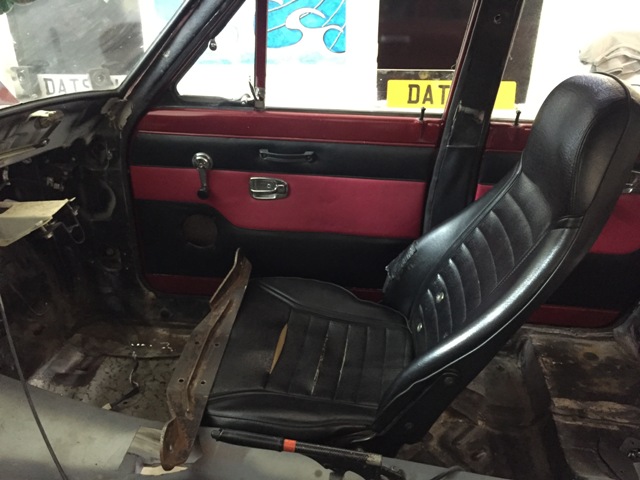
Slowly chipping away at this. Drive shaft now made. Engine bay almost ready to paint. got a pair of seats, will get them re-covered sometime.
1 point
-
..Just in time for the british car show. Hardly touched it since, just been driving it most weekends. I'm Dan and thats my story.
1 point
-
Now featuring wof and reg! Bring on nats I say. Also threw a new water pump, hoses and thermostat at it today as well as removing a metric tonne of crap from the radiator. Have run out of time to sort radiator properly before nats but this haven given in the best chance of getting there and back. Also, wag lyfe. Fuck yeh. Discussion //oldschool.co.nz/index.php?/topic/41006-beavers-87-gloria-wagon/page-41 point
-
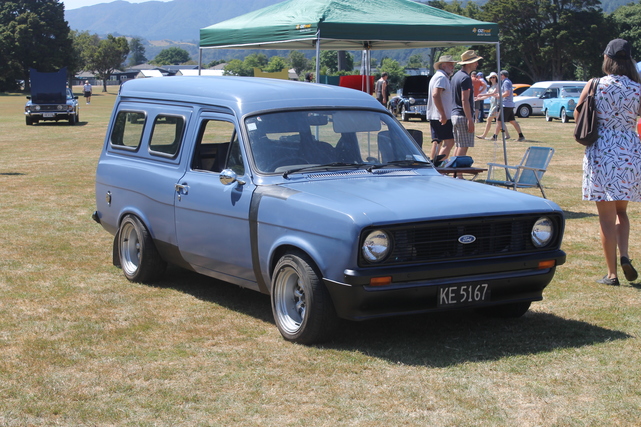
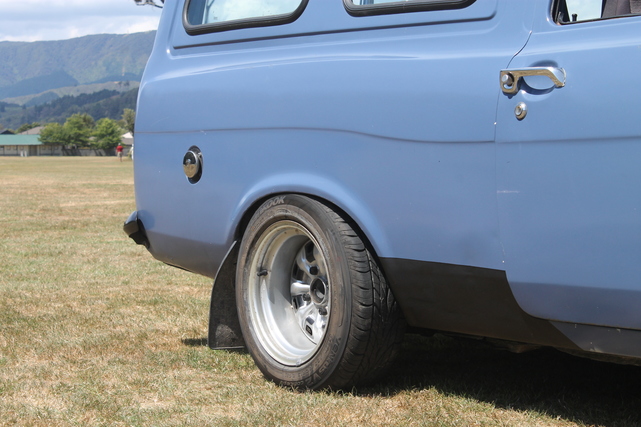
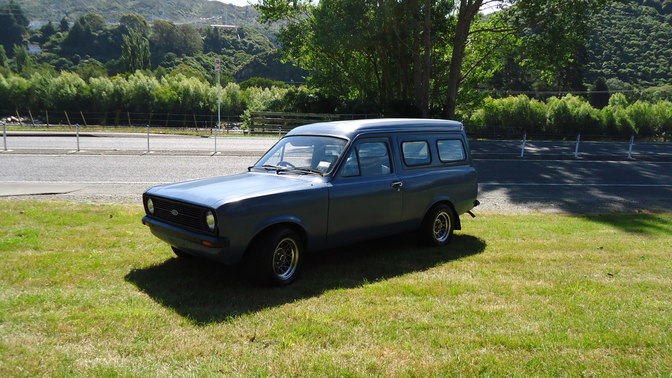
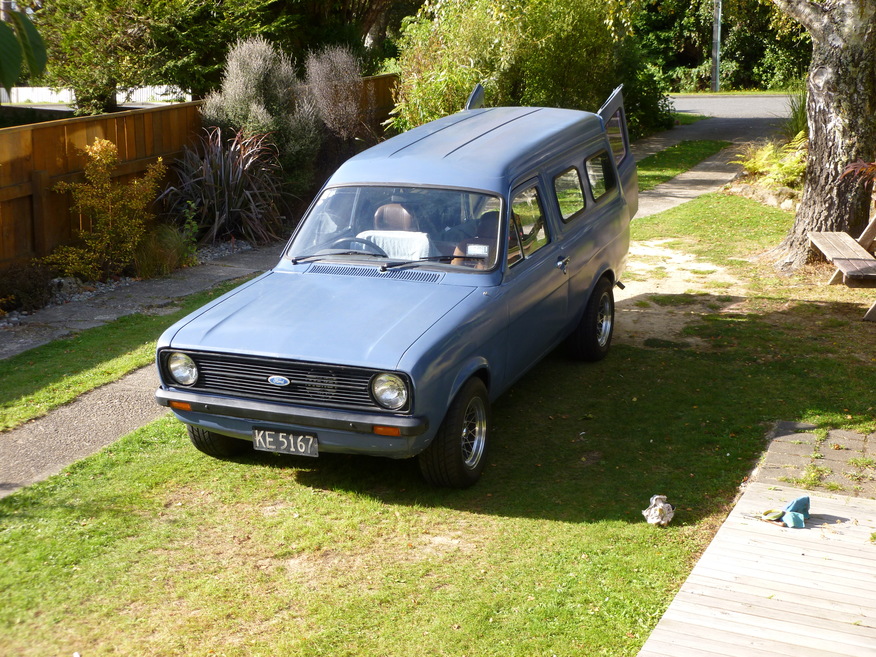
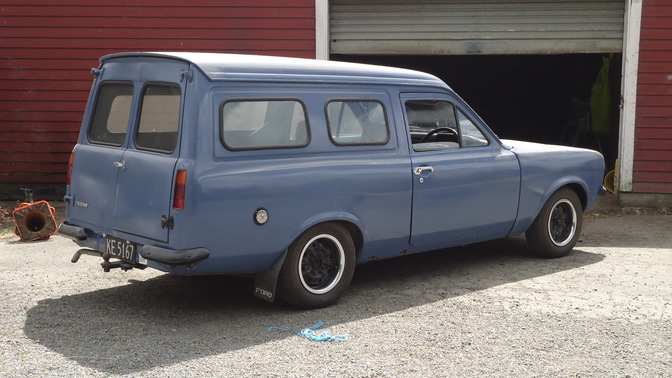
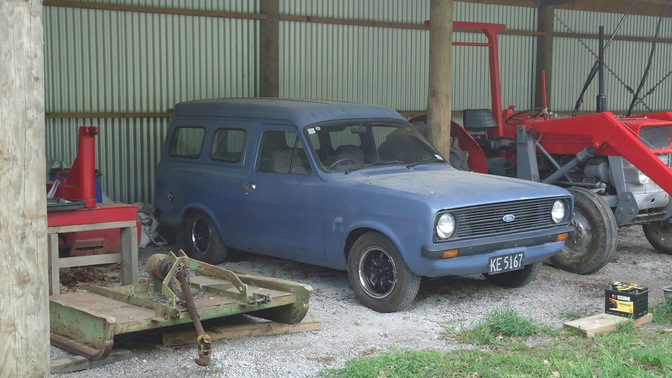
Being an escort, the first choice of wheels were always going to be hotties. I also mucked around with the height with some blocks and springs I had. Treated it as a test van for parts which would end up on my other. Other then that it sat dormant for 2 and half years because of rust issues. Plan was always to finish the other one, then play with this blue one. That was until earlier this year when I decided I wanted this thing on the road again....
1 point
-
Check that the gear selector shaft is connected to the gearbox - the pin sometimes falls out1 point
-
Rofl. I have to own it for at least 11 months and 10 days (wagnats 2017)1 point
-
Bittersweet moment Enjoy it Beaver!1 point
-
cheers guys, and no, you just take a punt and hope you're up to the task really. you CAN probably model bits of the circuit in some weird program, but thats only part of it as the layout often has a lot to do with it all and you cant really. Plus i've never used the modeling software so wouldnt even know where to begin haha. you just design a schematic (kinda like a wiring diagram) and then you do the PCB layout and route all the tracks etc. The software will tell you if your PCB matches the schematic and can perform a design rule check, where you can setup things like "i want my tracks to be no closer than 0.15mm from each other" and it will run through and tell you if that all passed.1 point
-
Re shimmed and re assembled the transmission and did a few odd jobs on the donor engine today. 1. Clocked around the turbo for Engine mount clearance. The turbo itself is very small but it will do for now. 2. installed the rear engine mount to suit the MK2 Platform 3. Deleted EGR and started eliminating some of the unneeded functions (anti shudder valve etc) Also yesterday I got my new Brake discs back from being Slotted1 point


This leaderboard is set to Auckland/GMT+12:00