Leaderboard
Popular Content
Showing content with the highest reputation on 01/03/16 in all areas
-
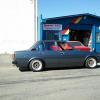
after having two whole days off i was feeling like it was time to get some more shit done. so i did. i drilled the holes for the badges and the mirrors and checked their fitment. all good. 2016-01-03_11-43-18 by sheepers, on Flickr 2016-01-03_11-42-55 by sheepers, on Flickr i started sanding but it was cripplingly hot and muggy as fuck so i took a break from that and aligned all the front panels properly and then i set about getting the front bumper to fit right. its a pet hate of mine when celica bumpers don't line up right at the sides (both my other cars look terrible and i haven't fixed it….) so i wanted this to be right. as is always the case the bumper had been stretched by being hit on the apex of the bend on the front. they are all like this and they splay at the sides because of it. I'm going to paint these bumpers (because they have already been fucked in a past life so not much choice really) so i was able to cut it and close up the gap to bring it back to how it should be. after a fair amount of fucking around i got it so I'm happy with the fit. its about 2mm higher on one side than the other but I'm not going to loose sleep about it. 2016-01-03_02-43-34 by sheepers, on Flickr 2016-01-03_02-43-44 by sheepers, on Flickr 2016-01-03_02-44-06 by sheepers, on Flickr 2016-01-03_02-44-23 by sheepers, on Flickr so then it was back to the sanding. the saying "sweat blinding you" has never been more true. fuck it was muggy. anywho i reckon the car is about 75% done on the sanding front. I've got a few things to fix and stuff about with but on the whole its coming along nicely. my goal is to paint it on the 6th, but Greg (who will be painting it) isn't back until the 5th so i can't talk to him about it until then. i did talk to him about it before the break and the vague plan was to paint it about that week somewhere. hopefully tomorrow i can get the body to 99% then i just need to stuff about and make things exactly how i want them. we shall see. 2016-01-03_04-11-15 by sheepers, on Flickr13 points
-
Hi all. I thought it was about time I started a thread on my Hako. Please go here to tell me your thoughts..... //oldschool.co.nz/index.php?/topic/51341-karol-shusbands-72-skyline-betty-the-hakopotamus-discussion/ There's not many cars that you can remember the exact first moment you clapped eyes on them. In this case it was June 2004 and I reckon it was likely to be a Saturday. I was probably avoiding doing something important and playing 'Gran Turismo 4 Prologue'. I had unlocked the bonus 'making of' movie and was watching all the JDM goodness when all of a sudden a car jumped out of the screen at me. I had no idea what it was but I knew that I had to have one. It looked a bit like my mates 69 Dodge Coronet and was obviously Japanese. At this point in time I hadn't ever owned an internet so it was off to my parents house and I started googling '1970 Datsun/ Toyota/ Mitsubishi', etc and eventually found this picture on a site called jbskyline.net. I then started reading up about Nissan Skyline GTR's and soon realised that I couldn't afford one. About the same time I discovered Japanese Nostalgic Car and kev's car. No linky to post coz JNC is broken but this is the car. Kev's thread was an education and I got my head round the K's, G's, C's and P's and the number 10. I also realised that a 2 door GTR look-a-likey was was I wanted in my life and at a stretch I could get one. Watanabe's were a definite and the car would be silver or even better, white. So that was that. I knew what I wanted and all I needed to do was order one from one of the many Importers and It would be here in a jiffy. Sorted ? Nope. More next time10 points
-
Nothing happened really. I kept looking at Hako's. More and more cars were appearing on the 'net, lots of lovely GTR reps in Silver, white, or sometimes red. JDM Legends were firing them out the door at god-knows-what price to eager buyers. While all this was going on, my brain had got bored and was wandering off in another direction. As time passed I was getting more into the Sedans. They were definitely a boxier 'Box Skyline' and the more I saw the more I liked. Dropped with nice rims they looked a bit more gangster in my eyes. Yeah, I know. Shut up Dan, you want pics.... I rest my case. So, the fight was on in my head. I'd always wanted a Coupe but I'd started liking the Sedans. Problems, problems. That might be it for today !8 points
-
Sick of my good engine getting covered in so much crap. Filled the holes between chassis and body with some rubber and ali where the rubber would melt, by drop pipe etc. Along with the under tray, should stop most of the crap going on front half of engine at least. Made a heat shield. Goes here It heat soaked pretty bad when driving around slow/parked up, when 4wding/waiting for geezers having a chat and 12 lunch breaks. I had thought about mounting the radiator under the tray. but feeding it air and not mud was too much drama. plus half the problem is heat from manifold and turbo. heat wrap would turn into a big mess. so rather elaborate heat shield it is. seems to work pretty sweet so far. These things are pretty squishy at 4psi. have something on the way to sort that.5 points
-
Another interesting use in this form, when it's not creating future customers for the local hearing aid supplier its an awesome weed blower. Very effective on concrete, not so much on grass as it has a tendency to scorch things which in itself in another bonus as there's not usually a lot of weed/rubbish left to throw in the bin either.5 points
-
whipped the engine out just now so much rust falling off in the process. I swept underneath three times already hah. plan now is get engine degreased, onto the engine stand and whip head off and give it to ol' mate g-man for a tickle up bit flasher camshaft check bigend and main bearings few other new bits and pieces then slot it into my 109 with a new clutch. cheeee4 points
-
I spent the next few years learning all I could about Hakosuka's, finding as many dealers in Japan as I could using Google Translate, trying to work out the strange pricing that I found but more importantly saving up the pennies I would need. In about 2010 I felt I was ready to get one bought. My budget was up to 2,500,000 Yen at a push and there seemed to be cars available at that price. I then started a two pronged assault. In the UK I emailed and phoned all and any Importers I could find. The responses I got were varied but mostly gave me no confidence in their ability to actually find me a decent car. Saying things like " No problem" and "yeah, we can get one of them" was not going to make me part with my cash. One guy said "Why do you want one of them ? I can get you a nice R33 for that price and it will be faster" Thanks for that... All the ads on their sites had pics with the heading "Cars like this available in Japan". I knew that already. I've had old cars all my driving life, Rust, fatigue and wear are things you have to be aware of, most of the people I spoke to didn't have a clue. Started feeling a bit pissed off. Still, there's always Japan ! I had got quite a collection of Japanese dealer websites so I emailed them all in English and Google-Japanese asking if they would be happy to deal with me and if they had more pics of cars on their sites. Vintage, Takeeys, Bikoworks, etc all responded with complete silence. Happy days. At this point I nearly gave up and bought a mid 60's Plymouth Big-Block. JNC was about to come to my rescue...4 points
-
So Just before Xmas I managed to get my Celica up to Auckland where it now resides in my garage. While I was in Wanganui over the Xmas hols I managed to get a lot of my dads panel beating tools so I can start getting back into the project. There are still a couple of items I need to get, like a welder and a air compressor and I still have my wheels and my air suspension to bring up which is still sitting in my parents garage.3 points
-
So, there was this Texan on JNC called David. He lived in Nagoya and was well into his old cars, I had followed his threads and realised that he didn't live too far from the dealer 'Vintage' in Kawagoe-cho and he had visited them a couple of times. http://www.japan-vintage.com/ At that time they had 2 cars for sale in my budget. Both were silver GTR-style coupes, one was very good nick but quite tame, the other was a bit scabby but had the triple mikunis and fat Watanabe's front and back. 2.2 mil and 2.5 mil Yen respectively. I asked David what he knew of Vintage and whether he'd fancy having a look at the cars for me. He replied that while they had a big stock list, stuff didn't sell too fast (there's still one car on there that's been for sale since 2004 !) and they didn't really seem to into old cars. He then said that he was spending a lot of his tie at a family garage called Classic Car Nagoya and they might be able to source a car. http://www.n-classiccar-jp.com/ They had a 4 door GT in stock but he asked if I'd like them to keep an eye out for a coupe ? Er, yes please ! I sent David a list of my requirements and my budget and he said he'd get on the case. This was the point in time that Hako prices started going a bit mental, but I reckoned I was still on to get a half decent car. I sat back and waited for the emails to flood in. (sound of thumbs twiddling)3 points
-
Someone finally got a video from the outside when I was drifting on the rally tyres and makings dort noises.3 points
-
I maaaaaay be purchasing an RX-7 (if all planets align), downfall is its in Tauranga and is a rolling body. The main thing I am interested in is making sure its not full of bog - its had a fresh respray in gloss black, so hopefully it helps show up any flaws. Happy to buy a box for someones time. Let me know! Brad2 points
-
Will be around tommorow. Some do a pretty good job of hiding bondo but the magnet on my key ring normally tells the truth2 points
-
Took the Skyline around the block to make sure all still working as it should be, rides a bit nicer on the new tyres compared to the cracked other ones so that's cool. Also did an Instagram walk around as hadn't done that yet. Got several puzzled looks in my short around the block journey haha, people can't work out what it is. https://www.instagram.com/p/BAEEuXSGbEx/?taken-by=mlracing_alex When I parked it up to open the garage it was in the right spot.. Squad.. with myself? haha I had a really good time just driving it around the block, it's made me excited for this year! Also the new woodgrain Nardi is so much nicer to use, perfect for the car.2 points
-
2 points
-
2 points
-
Please feel free to tell me what an arse I am, that I bought the wrong car and that I did it all the wrong way. None Taken. Linky //oldschool.co.nz/index.php?/topic/51342-karol-shusbands-72-skyline-betty-the-hakopotamus/#entry16385081 point
-
3/4 way through a 3litre can of bog, roof, doors, bonnet and boot are done, just side and rear to do now. //oldschool.co.nz/index.php?/topic/43814-darryls-3rd-1200-coupe-discuss/1 point
-
1 point
-
1 point
-
1 point
-
why not roll two reverse? or more of a spotlamp for a reverse lamp tucked a little under the tray? I have a couple of different LED options that I have some spare of if you're keen.1 point
-
Sounds like another Welshman on here I know... Enjoying the story so far mate..1 point
-
I'm trying to install S13 coilovers into a 280Z, I've done it before on my car and I modified some other control arms to fit but that meant changing the sway bar and the radius rods. The problem is the angle of the ball joints, the Z ones are straight and the S13 ones are angled. Do you think it would be okay to make an adaptor out of steel (something like 10 - 12mm thick) and use S13 press in ball joints and the bolt them in place of the standard ball joints? Something like this - it's not dimensioned correctly but gives you an idea. Plus one of these: Instead of this:1 point
-
Please dont leave us hanging too long, ive got cabin fever and time on my hands to read stuff! X1 point
-
Hey mate nice write up so far keen for more1 point
-
Neat. Good dedication on getting one. Bravo. Ain't no Kenmeri but it'll do.. It'll do.1 point
-
Switch on torch sweet little machines, great bang for buck resale is awesome I got $1430 for a 12month old machine1 point
-
1 point
-
Thread is massive tease. More pics plz1 point
-
I have now ! Chicken and egg thing... //oldschool.co.nz/index.php?/topic/51342-karol-shusbands-72-skyline-betty-the-hakopotamus/#entry16385081 point
-
Have you got a link to the build thread?1 point
-
Modelled my fuel lines, rail, hot bolts, fuel flow rates from pump etc etc to see what happens. Looks as though just hot bolts holding the rail on are enough to send fuel temps up and up as the fuel circulates. However adding a cooler with a little airflow through it and problem solved. Soooooooo..... I'll do that at same time I fit an adjustable FPR to get the pressure up a bit higher. Once I've got the fuel temperature and fuel pressure sensors fitted (as well as an adjustable FPR for higher pressure) I can switch over to a different fuel equation type in the ECU that should help keep it more accurate with changing conditions. Not that it's awful currently, but something interesting to learn about.1 point
-
Is it possible to run the cable inside the sill to bypass the crossmember? By the looks of your pic you might just get away with it.1 point
-
I didn't think their purpose was to rely on them to torque the nuts, but to limit the torque so you can spin the bastards on quickly without risking damage and then give then a click afterwards.1 point
-
Not a lot has happened except being washed a few times and doing a few k's. Yesterday I cleaned and waxed the engine bay and painted the washer bottle to tidy shit up a little. And so today I cleaned the underside of the bonnet, gave her a wash and went for a small cruise. Took a heap of (shitty iphone) pics cos I friggin love this car Tomorrow the rear bumper is coming off to be massaged so its a little straighter and I may massage the bootlid some more too. Basically just doing what I can without spending coin until after it goes to get pulled.1 point
-
Super cheap auto had a special on what i assume were an unpopular trailer light today absolutely perfect period style 63mm round jobbies so for under 40 bucks i got 2 amber and 2 red when fitting them found them to have leds too. Not exactly landy style but do look right. Oh and i painted it too and made a tailgate as it never had one. tmrw should have pics of what will likely be its finished guise for a while.1 point
-
When I worked at Firestone seven years ago, we had a set of them hanging by each impact in the store. Never once used them, at least not without checking them after. The idea of them hopefully being to torque spec is heavily outweighed by the risk if they aren't.1 point
-
Quiet times here, an update is in order. Both rams were different shades of blue, now they are dark green and blend in much better. I made a mistake when I built the log splitter and brought right angle hydraulic fittings and found they cost a fortune. This time I've brought black steel right angles and plain 3/8s nipples, much cheaper! Did a deal at work and scored a nice battery, it's perfect fit in the chassis, I made a nice base and clamp to hold it safely. The suction side of the pump needed to be redirected, done. This needed some thing to rev the engine. It would have had a hand throttle but it was long gone, when I got it it had a lawn mower throttle which was a pile of crap. I've made a foot throttle, it seems to work well, and it mounts to the hand throttle bolt holes. Return springs look a bit average. Meh. Luckily this MX5 fan I had floating about in the garage was a nice width to fit the radiator. The hydraulic tank is finished, mounted and connected to the pump. It looked too new though so I splashed some paint and a bit of salt water at it. It's better but not a perfect colour match. Put the control valve on it too. That was where things got really exciting! This thing runs! I got it going this afternoon. Drove it out of the garage, up the drive, on a little adventure down the road and back. Wow, yeah. It feels great to drive, I put the auxiliary gear box in first and the dozer box in third and it pulls away easily from idle, first/first is very very slow which will be great when I get the blade on. The steering works nicely, PTO engages easily, all the tractor gears are there and engage easily. It starts and runs well, not very loud but nice and tractor sounding. I'm so pleased. And the bad news. I think it has a blown head gasket. I got it warm, shut it off and went inside for tea. When I restarted it some water came out the exhaust. I took it for a drive anyway and it overheated big time, whistling like a kettle. No problem, I'll pull the head off soon.1 point
-
i have used them, best to set your gun on low/1, give it some nungas nungas , then set your torque wrench on like 80 nm, check it and wind it up till you find where its actually torqueing the nut to. and adjust your rattle gun setting to the best position. I did find when I went to a much better quality rattle gun I had to dumb it down to the lowest setting to get the right torque i went away from using them in the end because for my own peace of mind knowing that you torqued the nuts up helped me to sleep at night. especially on them long as days were your doing 14 jobs and you cant get of to dream land cause you cant remember if you did up the nuts on the last rush wheel bearing job. thankfully that has never happened to me, but as i said peace of mind knowing its right was worth the extra 2 mins . I do things the same way every time , so if I haven't put the torque wrench back in the draw I know I haven't torqued the nuts, its a good system, same goes for sump plugs, and brake caliper bolts, all ways put the spanner on the drainer, or ring end on the hub, if the spanner is on the drainer/hub then the plug/bolts aren't tight. I may be a little ocd but I have never left wheel nuts loose or fucked an engine cause the plug fell out . my 2 cents , got a little of topic sorry1 point
-
I had some tyres that needed to be removed from the car because they had cracks all through them, surprised they hadn't blown out! Luckily I had some already from other wheels. All different brands/models because I like to live dangerously. Also the sizes slightly different (two 175, two 185) so put the 185's on the rear, naturally. While I was under the car I had a look at the rust and repair places that will need to be fixed up. Some really awesome Japanese typical body panel repair jobs involving urethane, silicone, cardboard (or plastic) and metal tape. Just the usual. The good thing (but maybe expensive) is that inner/outer sills are available as well as a couple other common failure points as repair parts. Not genuine Nissan of course but a couple restore companies are reproducing them which is excellent. They were all like this, and also had cracking inside the tread too. New (old) tyres on.. I think there are some from China and some from Korea, quality. So much room for activities. Bit of a shitty look at the stainless exhaust. It's loud. Hmm those could be a problem. I had a feeling it was on cut springs after driving it. The rear actually is captive so that should be OK, but the front is no bueno, will look at upgrade options because the shocks look pretty average too. Looks like a bolt missing from there... and interesting exhaust hanger situation. Talk: //oldschool.co.nz/index.php?/topic/49704-mlracings-hakosuka/page-6#entry16314961 point
-
well picked up my new project yesterday needs a bit of work but nowhere as much as my old ponty drained the fuel tank out today cleaned the carb and started it up then snap the dizy bearing seized snapped the bottom off my dizy in the oil pump lol never mind more things to fix if anyone has some 318 v8 parts let me know thanks ill up load more pics later1 point
-
Arts and crafts time! The black paint on these light surrounds was peeling off and looking a bit average so I decided to fix that. While I was there I painted the front grille as well, slightly differently to the OEM just to see how it would turn out. The reason I didn't just take out the honeycombs and the middle emblem is because everything was seized in. Being a Friday afternoon I didn't feel like fighting it so.. in it stayed. Finished! I didn't leave out the 2000GT badge on purpose, just forgot to put it back on haha. Probably leave it off though. I'd like to get in and polish the metal at some stage as it's quite cloudy and average but overall it's pretty average. Probably needs to go to some fancy metal guy to make it nice again. Oh, and need to paint the N in the middle of the badge red again as that's fully faded out. Discuss: //oldschool.co.nz/index.php?/topic/49704-mlracings-hakosuka/page-6#entry16160091 point
-
1 point
-
1 point
This leaderboard is set to Auckland/GMT+12:00




.thumb.png.b2aee08688778d18bdc7b3e3c1852d9c.png)

