
Leaderboard


Popular Content
Showing content with the highest reputation on 01/01/16 in all areas
-
Quiet times here, an update is in order. Both rams were different shades of blue, now they are dark green and blend in much better. I made a mistake when I built the log splitter and brought right angle hydraulic fittings and found they cost a fortune. This time I've brought black steel right angles and plain 3/8s nipples, much cheaper! Did a deal at work and scored a nice battery, it's perfect fit in the chassis, I made a nice base and clamp to hold it safely. The suction side of the pump needed to be redirected, done. This needed some thing to rev the engine. It would have had a hand throttle but it was long gone, when I got it it had a lawn mower throttle which was a pile of crap. I've made a foot throttle, it seems to work well, and it mounts to the hand throttle bolt holes. Return springs look a bit average. Meh. Luckily this MX5 fan I had floating about in the garage was a nice width to fit the radiator. The hydraulic tank is finished, mounted and connected to the pump. It looked too new though so I splashed some paint and a bit of salt water at it. It's better but not a perfect colour match. Put the control valve on it too. That was where things got really exciting! This thing runs! I got it going this afternoon. Drove it out of the garage, up the drive, on a little adventure down the road and back. Wow, yeah. It feels great to drive, I put the auxiliary gear box in first and the dozer box in third and it pulls away easily from idle, first/first is very very slow which will be great when I get the blade on. The steering works nicely, PTO engages easily, all the tractor gears are there and engage easily. It starts and runs well, not very loud but nice and tractor sounding. I'm so pleased. And the bad news. I think it has a blown head gasket. I got it warm, shut it off and went inside for tea. When I restarted it some water came out the exhaust. I took it for a drive anyway and it overheated big time, whistling like a kettle. No problem, I'll pull the head off soon.14 points
-
Took the car down to Milford Sound/Bluff over the last two days. 1700 km in 36 hours and the only issue was yesterday morning when the carburetor iced up when leaving Milford, switched to "Winter Mode" and the engine started back up. Averaged 6.4 L/100 km with two people, equipment and open windows, going the speed limit the majority of the time. This cheeky little bugger had a go at eating my car:8 points
-
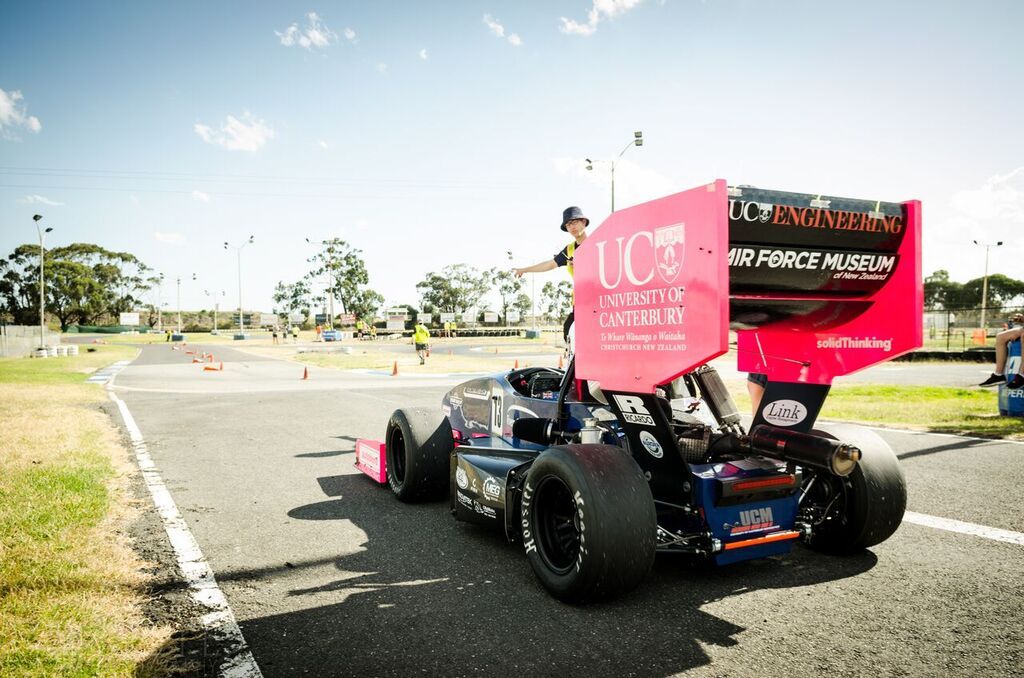
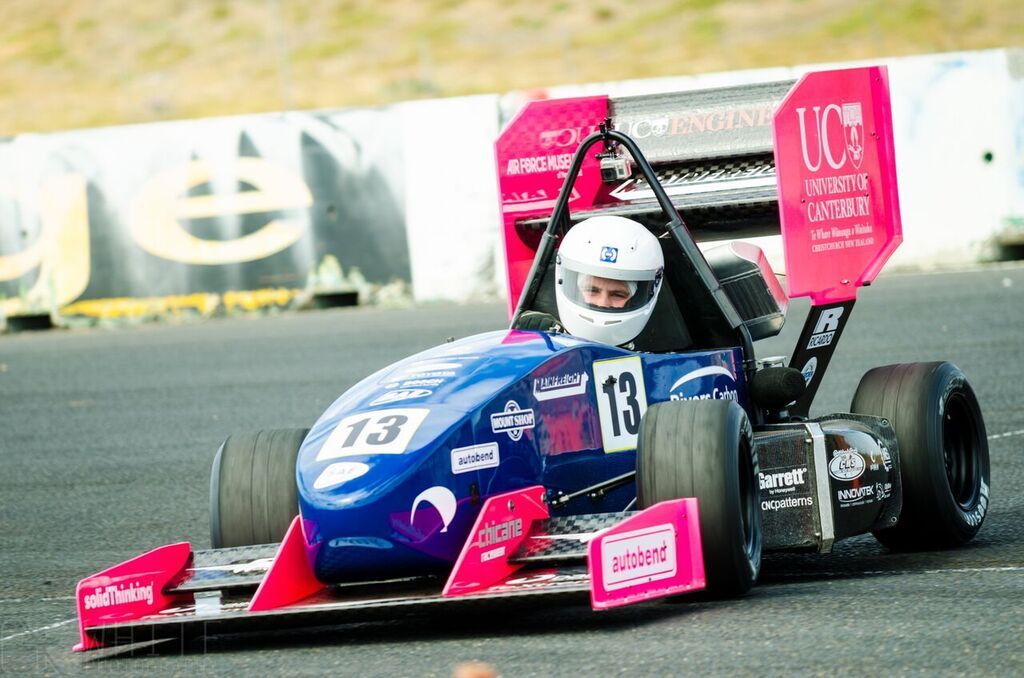
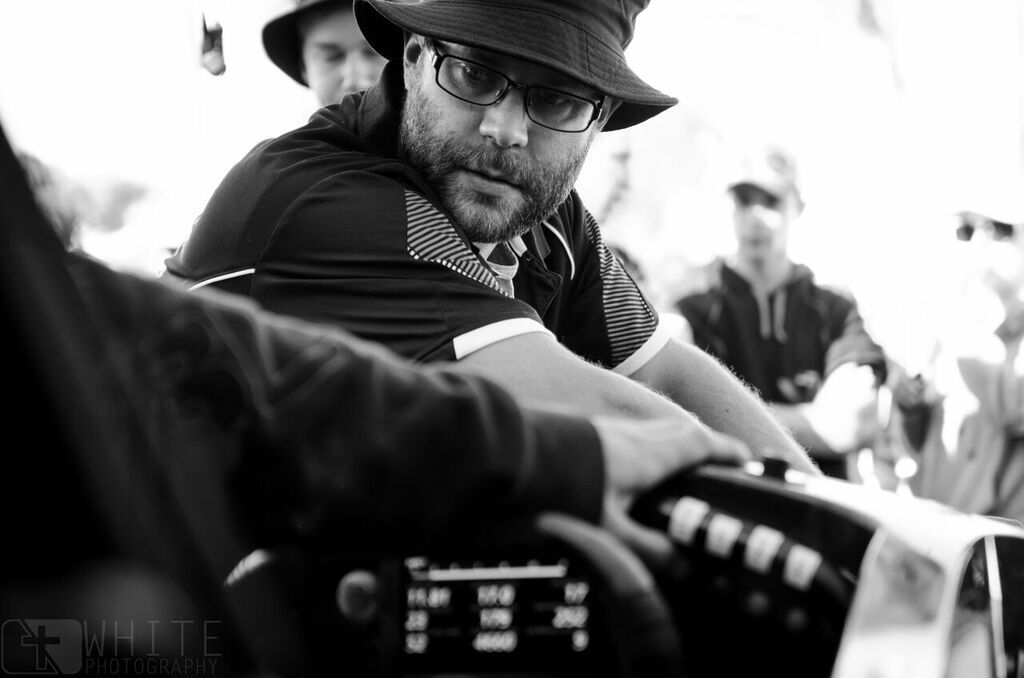
Whoa, a whole new year! 2016 is shaping up to be a pretty exciting one, automotive wise. Just want to put down the thoughts here on 2015, and what I'll be doing with the RX7 in 2016. The end of 2015 was pretty awesome. We took our FSAE car to Melbourne for the Australasian competition, kicked some ass, and had a bloody good time. We came third overall, which for a team that has only been competing for three years, is unprecedented. I'm a bit biased, but I reckon we had the fastest car on the day, just not quite enough luck! But that's racing. That's me, getting my hands dirty fixing up a slight issue with the brake over-travel switch. My role in the project was the electrical system, I ran a Link Fury ECU, a Nautech PDM, and a MoTeC C185 Dash/Logger. I designed, spec'd and constructed a fully sealed and shrunk loom using all the good gear, as it was on the universities dime . The electrical system was rock solid reliable, which was my own personal goal for my part of the project. I also undertook a lot of the engine tuning... Tuning a turbocharged single cylinder raciing dirtbike motor with an aggressive cam is not something I'm looking forward to ever having to do again. Very very pulsey and lots of challenges to overcome. We got a great result in the end though, with lots of mid-range to top end grunt which is what we really needed to meet our goals. Shame it still sounds like a lawnmower, hah. Car is a full carbon monocoque, with a very effective aero package. Weighed just shy of 200kg's, made just over 40kw's (all the air has to pass through a 19mm restrictor). If anyone out there reading this is at uni, and has an opportunity to become involved with FSAE. Do it. It's a massive commitment, a huge time-sink and extremely addictive, but I met some awesome guys, and got two fantastic job offers out of it. The one I've taken is a real unicorn job, I wont say much about it, as I don't start till the 11th, but it's automotive related, and will provide opportunities that I wouldn't have dreamed of a year ago. On to the RX7! I've been using it as a daily fore the last three months, and it's been great. Not as thirsty as I was expecting, better than my old 81 L200 sport (but that really needs another tickle up). I've replaced a few interior pieces to tidy it up further; new door skins, speakers, stereo, steering wheel, etc. Reverting as much as I can back to stock mazda stuff as I find tidy pieces. It's got a pretty decent oil leak from the rear of the sump. It's on my immediate list to fix this week. The turbo's are also on the way out, particularly the secondary, as it's a bit smokey. Something has gone wrong in the sequential setup, and the boost pattern is a bit intermittent, I'll hunt down that issue too. I've got a couple of good condition spare turbos pulled apart, and will get some rebuild kits for them on the way. They have a different type of front seal to the other hitachi turbos, so the kits are a bit more expensive than I'd like, but still not massively expensive. I've got a replacement downpipe to go on, and I'll build a decent exhaust for it while I've got the turbo's off. I bought a cheap shitty stainless muffler off the tard a few months ago, because it has awesome twin tips on it. I'll cut them off and use them on a decent muffler. Will make the exhaust look pretty factory from the back, but with slightly larger tips. Should look cool . According to teh interwebzzz I can expect boost control issues once I modify the exhaust. I'll port out the factory wastegate system, and hopefully that will help out. Cross that bridge when I come to it . Happy new year, 2016 is going to be a kickass one .
 7 points
 -
Scored this from the huntly transfer station today for 20$ its solid as! some surface rust on the frame but easily buffed up. Tyres were a bit perished so my old triumph wheels went straight on. http://i.imgur.com/czjVEJT.jpg Cant decide to tidy up or leave as is tray is off a 110 landy i think and is all alloy weighs sweet fuck all i changed wheels over 1 handed holding trailer up with the other.6 points
-
*rebuilds engine* over REALLY long time. Thanks CAM. Making new engine mounts. Old ones were a bit not right.3 points
-
Cheers for the help flyingbrick:) Here is a walk round video of it. Soooo much sanding to be done! I need to invest in a sander. It's a shame I'm cheap/broke.3 points
-
Fuck that looks so cool. Can you get rubber tracks to fit and then take it into town for a coffee?2 points
-
today i started final sanding the outside of the car ready for colour. I've never dry sanded a car for the final prep before so i spent the morning trying different things and in the end it became apparent that i could use the 150mm DA for the big flat bits. so I've been using the DA with 400 to knock the tops off then going back and finishing it with 600. this has worked a treat on the big flat surfaces and is about two billion precent faster than doing it by hand with water. I've finished the boot lid, the roof and the bonnet. early in the day i was still trying to see if i was fucking up the lines using the DA so I've been wiping the panels with prepsol quite a lot and everything looks good. so i started on the rear quarter and thats about 80% finished. once again I've been using prepsol heaps to see how the lines look and so far so good. dunno if ill get anything done tomorrow. it was cripplingly hot today and for a while i was long boarding it by hand which nearly killed me. i might take a day off tomorrow.2 points
-
Discuss: //oldschool.co.nz/index.php?/topic/51323-adooms-1982-kp60-starvia-discussion/ So my project thread started out on Club-K then moved to Toyota Team 80's then Toyspeed. Now here I am. I'll just put in some historical highlights rather than copying the whole 14 pages/6 years.... I started off in 2005 with a KP61 4 door, for $300 from Pick A Part. I was all like ermhegerd must have rotoreee because I was in my early 20's. Then I wanted to get a 4age... Then a low km CA18ET single cam 1800 turbo from an S12 silvia became available for FREE!!! Over a period of 3 months THE STARVIA was born. But after about a year or two, I got rear ended while waiting at an intersection. The car was sandwiched between a big ute and a twat in an accord. The damage was mostly to the shell so I could salvage everything else including some panels. The buy back value of the car according to the insurance company was $300 So the insurance money got me a 2 door with no engine leaving change for UPGRADES! Upgrades like: LSD, coilovers, a 2nd bucket seat, intercooler.1 point
-
So i live in kaiapoi and i needed a car to fit in with the locals. This came up for sale on trademe without photos and i couldnt get a hold of him, till one day i posted on Dirty South advertising and got linked to the sellers profile. Went to look at it the next day, brought it. Basically when i was looking for one it had to be Column/Benchy so we could pack the boys in and go for a cruise. It has been in one family for most of its life and i am the fifth registered owner. Genuine 194xxx kms!! Here it is when i first got it. Discussion Thread1 point
-
that is farrking epic i want one!!!!!!!!!!!!!!!! great job1 point
-
Ideal, I'll keep you posted. Thanks Bart.1 point
-
Yeah I have a head, and an inlet manifold. I think your A15 zhort will work, but I think I also have an A12 zhorst mani at mums too.1 point
-
cool dozer, theres one for sale on fb for a grand if you need 2 , its on classic cars and wrecks nz for a grand,1 point
-
A give away as to how hot the head has been, is how deep the imprints are where the head bolt washers are. Because these motors are so indestructible, they can get cooked up so hard the metal goes soft. Then they're a paperweight. (Sorry for telling you how to suck eggs) Lemmie know if you think it's fucked/get it tested and it is fucked/or would like a round port A12 head with smaller ports etc for more bottom end torque. etc etc. Kudos for getting so far with this beast!1 point
-
You can drag logs home from the paddock to split at your leisure1 point
-
Nice wood pile!1 point
-
led lamps are win but pretty dear for decent quality and decent looking ones. I'm pretty keen to get some new lamps for my landy from rimmer bros. if you're keen to get some you can jump on board with my order i need a full set for mine (mine has a mixture of fucked hella bodge options) http://www.rimmerbros.co.uk/Item--i-RTC5523P i also have some brand new hella ones that may suit at work. prolly $50 for two tail and two indicators http://hella.com.au/cgi-bin/catalogue-hkg.pl?flcmd=preview&flmaint=11501 point
-
At some point I decided to make a better clutch pedal. A straight one... I also put a stop on it, because it was pushing the clutch springs too far and they would touch the clutch plate. The Starlet speedo cable screws right into the CA18ET gearbox. But it reads ~20% high. With the link, I could use a PWM speedo and a speed sensor in the box. I'm cheap/poor, so I tried to find a factory fitted pwm speedo I could use. No such luck. But a rev counter is pwm. So after very much fucking around I ended up with a rev counter with a speedo faceplate It turns out I don't HAVE to have an ODO?! I made a spider. It lives on the roof of my house now1 point
-
Unfortunately, not really. It's not super secret or anything, but as it's a competition, we never really released any details about it till it was unveiled at the end of October... so no build-thread type stuff . Lots of pics here though: https://www.dropbox.com/sh/vax4j5nm8q74eow/AAALvwcgwovN6j5PZzl88YH_a?dl=0 Credit to Toby White for the photos. He's a talented man . There was some video coverage of the event, available on YT now: Saturday Morning: Saturday Afternoon: Sunday Morning: Sunday Afternoon:1 point
-
https://www.hella.co.nz/en/products/marker-signal/led-83mm-marker-and-signal-lamps/ What about these? They kinda look land Rover ish1 point
-
Fuck yeah great start to 20161 point
-
Nicely done mate, be proud as punch to drive it from the garage after all the hard graft!1 point
-
Shiiieeeeeeeeeeeettttttt This is awesome1 point
-
Awesome work Pete!1 point
-
I haven't seen them on full rubber tracks but I have seen rubber or wooden blocks bolted to the tracks Like this. It will be something to look at in the future. Got wheels, tracks, rollers already thanks mate. This thing is just meant to be.1 point
-
T class endorsement on your licence is dead easy then you could drive it to the shops no worries. Jumped on a 30 ton digger having never used one managed a pass. Slamdozer a thing yet?1 point
-
Fuck, so choice. Good work man.1 point
-
On the way there I looked boss, on the way back it was steaming like a mad bastard which eroded my street cred somewhat.1 point
-
Fuck, might have to fuel up at airports instead1 point
-
I reckon you have earned a day off!1 point
-
What they do is push the glass down into the surface while also allowing the resin to flow upward and out to the surface. They work really well at pushing everything down and removing air bubbles. If you DO get an area that won't stay down then just use sharp snips to cut a relief. On the nice rear of the body you need to use a glass tissue. It's exactly as it sounds- made of very fine fibers that's quite easy to tear..feels like thick tissue paper kinda when dry. On the rear you can use as many or as few layers as you want BUT all edges need to be TORN not cut. If you do this then you will be left with no sharp edges- the torn tissue edges will roll down and blend in REALLY nicely with no ridges or lumps and bumps. Any questions I'm happy to help (or call the fiberglass shop)1 point
-
After a play this afternoon, the engine bay went from this To this guards and front back on, just need to sand and paint the bullbars and do a quick service and it will be ready for re-reg . Oh, and cut the rest of the paint to match the guards.1 point
-
In the glove box were $2000 worth of receipts for recent brake work/servicing etc which was nice to see. There was also the original owners manual and service book, with the original owners details and abit of its early service history , where it was purchased from etc I went to butler auto mart yesterday as somehow i stumbled upon headlight protectors on their website! The box looked like itd been sitting for 10+ years and i would not be surprised if it actually had. They have one pair left if anyone wants to grab them. It had genuine ford protectors on there originally but both were cracked, so i replaced them with these Aunger ones, same people who make the louvres. Now from front on it looks like its wearing kanye west glasses, ill try get a proper photo soon.1 point
-
Well I am off to Motunau for new years. I was going to take the Anglia but it is not charging. The alternator provides 14.4 V for the first 5 min of running then stops charging. So the work wagon will be towing the teardrop up. It has the spearfishing gear, shotgun, .22 and AK fitted so should be sweet for a fun evening.1 point
-
this one is looking back at the brake reaction rod, if you watch carefully you can see the front crossmember flexing under braking loads, and the engine moving around under braking1 point
-
Have got someone making me some new tie rods which take a factory inner tie rod end, and a commodore outer tie rod end which has the pivot point lower, which should reduce the amount of bump steer. and i went to OS drag day also, big surprise, if you do skids for ages, brake drums dont like it and get shuddery. luckily i have a spare set, put those on today. it did a 14.28 @98mph. it did have a couple of runs where it had a splutter- its either running out of fuel (it has a stock fuel pump) or the lifters are pumping up. i have an old camera that i "improved" the battery door on by bolting a bit of steel to it, which also makes quite a good mount when combined with 3 strong magnets, its interesting to video the suspension and whats going on when you drive it. Quite surprising to see the amount of movement- eg 0.37 there is 2 reasonably heavy applications of brake, you can see the caliper rotating the spindle- this is mostly movement in the brake reaction rod bushes, but the upper arm bushes move as well, and if you study it closely, you can see the whole inner guard deflecting. in this one the camera is mounted to the bumper iron looking back at the left front wheel1 point
-
Putting a cortina back together isn't as easy as i thought it might be. It's been a month since It came home and its been a battle in almost every respect. It dosent help that my search for perfection gets in the way, making sure every lil bit is cleaned and in mint working order or brand new looking. I know at the end of the day I will sit back with a giant smirk on my face bathing in the glory that is my cortina but even I know I have gone quite insane. Anyway for the fickle few who enjoy my update here she goes. 1.Today I finished my under dash wiring. I have installed some fuses for stereo and need one for main power feed. 2. I have made my rear parcel tray and back seat cover upholstered it my self.looks good. super happy. 3. Put engine in and installed battery and new coil + electronic ignition. Just have to install alternator and sort out radiator and fuel lines. Thanks peps that will do for now.1 point
-
right so all the known rust is now done filled and reprimed its not perfect but its close enough it was never going to be a masterpiece but it should see me though a few years of racing we noticed that there was lots of little surface rust spots on the floor so i decided to repaint it with a little help from my co driver my fiance we also removed all the rollcage padding as it was perished , We also gave it a wash chucked some fresh fuel into it and it ran way way better its idling super high so will have a look for a vac leak and start with the easy stuff and go from there need to finish painting the floor and do some undersealing over the next few days and have a look at the brakes and take it for a run round the block1 point
-
This morning I got the car out of the sauna/shed and continued with the task at hand. Things now look like so IMG_7471a by Richard Opie, on Flickr IMG_7503 by Richard Opie, on Flickr The loom is pretty simple, even though it looks scary as fuck but I'll stil going to need some expert assistance to sort that one out. And that rank furry firewall liner stuff was full of sand from past panel repairs, and also fucked in general so I took the liberty of throwing it all in the bin - perhaps I'll put some kind of dynamat on the firewall later on. Or just deal with the noise/heat... I've ended up with a big old pile of interior - most of which needs a decent clean up before it goes back in really. Also looking out for a non-aircon vent arrangement for the LHS (the fresh air inlet and the pipe that runs to the fan unit) so if anyone has those bits, I'm keen to purchase them off you. IMG_7495 by Richard Opie, on Flickr Cheers!1 point
-
So ive just been cruising it round and using it as a daily It was good fun on crate day trying to get over bumps and shitty roads with 5 of us in it, without scraping the bottom of the towbar on everything, this is pretty much how it was sitting Im currently trying to find a 9" so i can do a proper 351c conversion on it1 point
-
So i saved up and brought 4x new eagers. Sent the rims off to get blasted, then painted them satin black. Got the boys at mag n turbo to fit + balance them and roll the rear guards1 point
-
After lowering i had to find some rims, couldn't find 8" tridents below one million dollars, so was on the look out for some 12 slots. A mate ended up giving me a full set of them for free and the rear ones had the centers flipped = dish So i ran it round for several weeks like this, standards on front, big dish on rear looking really bogan till i could afford eagers and to get them sand blasted.1 point
-
Instead of cutting springs i did it properly and brought cobras + monroes which set me back 500 odd and gave me the same ride quality.. haha Took the hubcaps off because they didnt look dirty enough And on the R/F lower guard i fixed the only rust on the car but unfortunately couldnt find the paint code to match up some paint for it properly, even after the spray stores best attempts1 point
-
Pretty much!1 point
-
Thanks for the link, I'd seen those dyno results posted on another forum but without the info. My stock CDI has a 10,000rpm limit so I'll likely never get the Stage6 "on pipe" running it, then if I upgrade the CDI pushing the stock Suzuki crank much over 10,500rpm is a gamble too, so I'm thinking I'll save the pipe for a 70cc screamer build in the distant future/sell it. I'm attempting to save some $$ to buy a Leo Vince or a Tecnigas Next R pipe, either should give much more low & mid range power and a wider power band peaking around 9000-9500. Soldered a 10KΩ 1/2W resistor in the RPM signal wire, tach is steady as a rock now. Oh yeah, found a ummm private road this morning1 point
-
Trucking on. The steering brake levers have always been poked on this. One was bent, all of them were worn out. Not ideal. The pivots for the levers were 9/16" which I turned down to 13mm, tidied them up a lot. Made some new pivots for the levers and welded them on. Welded up the clevis holes, re drilled them and made up new clevis pins. It was so much fun I ran my finger through the drive pulley on my drill press to celebrate! Finished, works much better. I asked the engineer we deal with through work to cut me some 3mm steel to make a hydraulic tank. I'll get it welded up this week if I can.1 point
-
Come to my hose, build underground doomsday bunker lol1 point


This leaderboard is set to Auckland/GMT+12:00