
Leaderboard


Popular Content
Showing content with the highest reputation on 11/24/15 in all areas
-
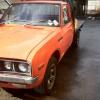
Hi Oldschool, I would like to introduce you all to Jezza! I bought this beautiful girl earlier in the year but up until now I have had too many other commitments to get her running and legal. She is fairly factory - 250ci, 3speed on the tree, only real changes were installing bucket seats and sound system. I am an Auckland uni student through the year but I do research for the uni (Optical Coherence Tomography on in vivo tissue differentiation) over the summer and I am enjoying all the extra time I have. As of ~1 week ago Jezza become fully warranted and registered and only needed a little bit of welding which I was pretty stoked about. She we be driven the f*ck out of over summer. I don't know any people that share my interest, and to be honest I know stuff all about cars but I am always keen to learn. If you see me around please say hi and if anyone needs a hand I am pretty good at being gopher/toolboy. PS I swear the front number plate is legit and defo not plastic Discussion: //oldschool.co.nz/index.php?/topic/50930-fluoros-74-xa-falcoon/18 points
-
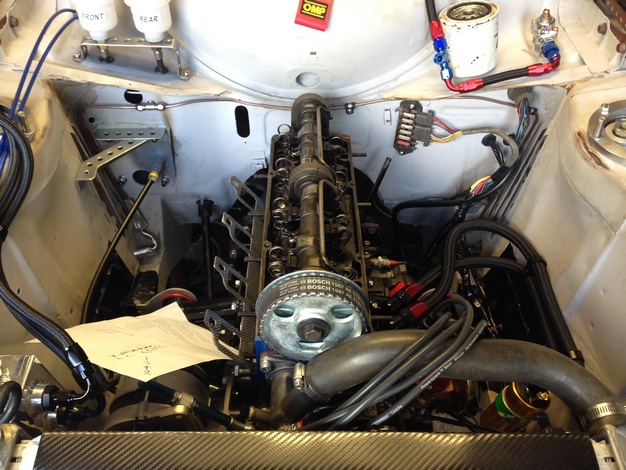
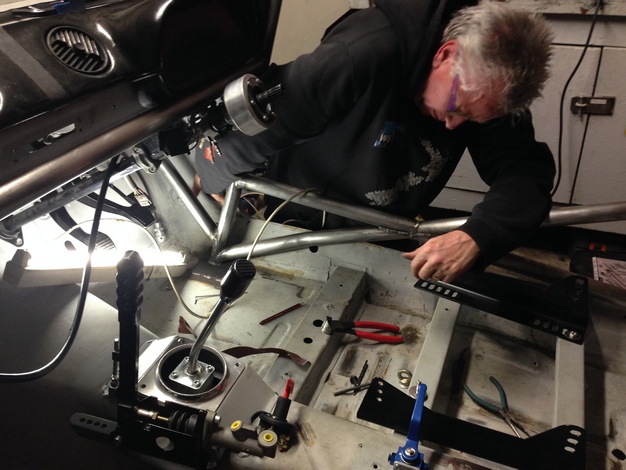
Some of you know that I went and got engaged while overseas. We have chosen a date, booked a venue and my one priority was to be able to drive my own car for the wedding. So this has now put a date on things and means there is a busy year ahead. The steel around the window was in pretty bad shape. Previous repairs had buckled the roof and was an area of the car I was worried about but its looking pretty good now and I think I can say that the car is now rust free. I also asked if Kayne could change the way the engine mounts were so he modified the cross member to suit the JZ alloy and rubber mounts which looks really good So the car needs to be wired up and running. back for paint and then put thru cert, re-vin. All the repairs have been documented with heaps of photos and pretty sure the repair cert guy was involved during the project. //oldschool.co.nz/index.php?/topic/30893-crustys-jzx31/ This section was removed. Might have to keep it as a souvenir8 points
-
This is a story post, not a question or anything, keep your non constructive opinions about my crappy workmanship and setups to yourselves - yes you are a master machinist - i dont care. For years i have been frustrated at my lack of facilities to cut splines due to not having good access to a form grinder, so making and maintaining a hss form hob to spline axles has been in the too hard basket and i have mucked around with adaptor plates and trying to mishmash stuff to work around it. In a pinch the other day i decided to try contour milling a involute spline form with a 60deg threadmill. This worked amazingly well & i Decided to write a story about it. total investment: 1x Iscar 60 deg cutter. $60. (my only arbor is too long, you can hear it struggling in the video later on the case hardened steel) Plan of attack - one million little passes per spline. Microscopic view of resulting stress raisers. meh. overlay chart. looks fine. machine down celica axles outboard end outside dia and length. the reason the transition is not tapered at the stage is that it will be used as a clamping surface as you want to avoid using a center when splining so you can test fit your thing without taking it out, Mill and crummy little indexer setup, see last step. (axle doesnt fit inside indexer past chuck) keep your comments about my awesome stack of clamps to yourself. thats some deep case hardening . (end gets cleaned up in a later op) cutty cutty completed 30 mins later. some knowall threw the plates away for this indexer and was relying on the pin holes in the chuck mount. fark. i put an encoder on it at the 11th hour. next time i will just use a vice and encoder with no indexer. horay/even a broken clock etc. in car in summary, i was amazed how easy and cost effective this is after spending so long humming and harring about it. there is no reason you couldnt do this on a little tormach machine. (or if you were a real sicko on a turret/dro.) two things to note- one for the love of jeasus i cant get camera to focus and they look all weird, however they look sweet as and fit up mint - and two: the cam side pics arent involute correct, "magic of tv."6 points
-
this goes here, thanks kicker6 points
-
i need to take more photos... Some cool cat (slacker.cam) tidied up some of the standard wiring yesterday because there were a bunch of no longer used bits in there etc as you can probably tell, all the super lush shit generally gets done by Cam and im the dick in the background complaining and doing sub-par work5 points
-
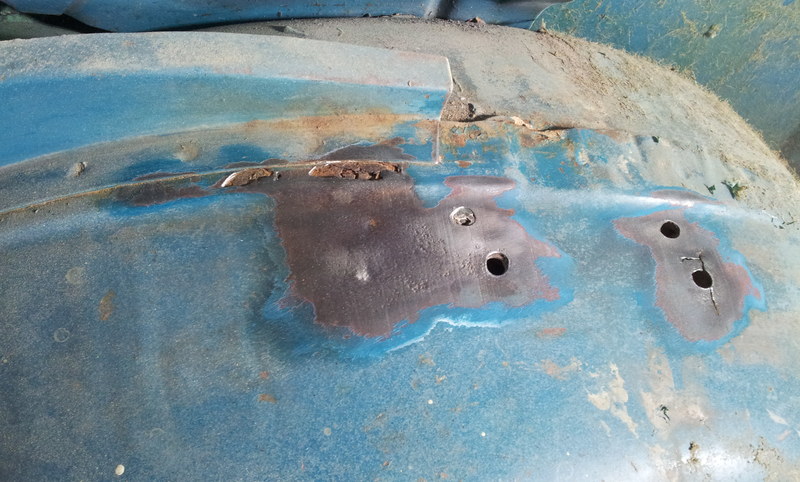
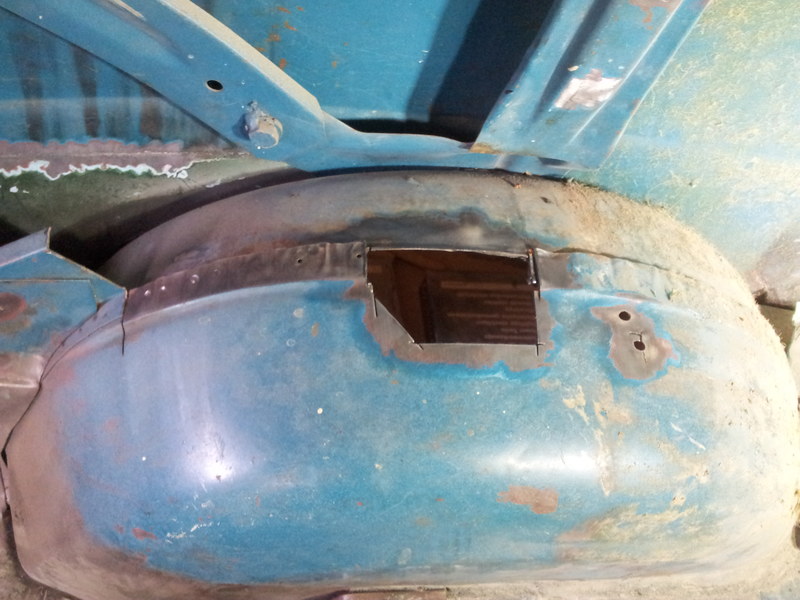
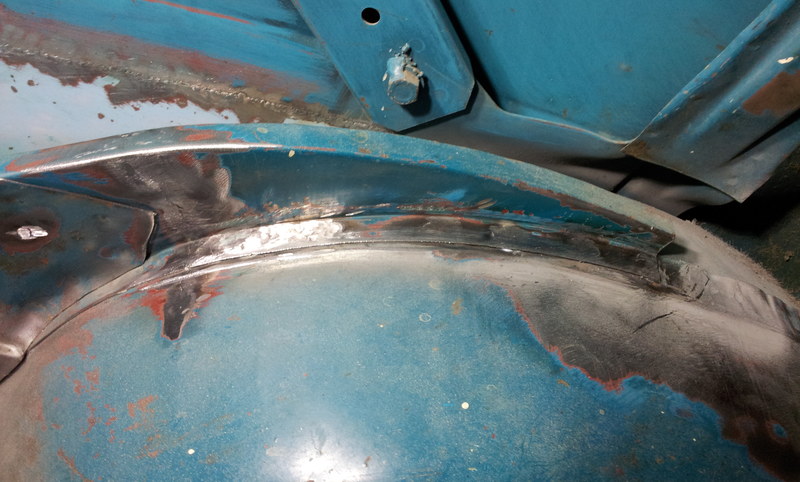
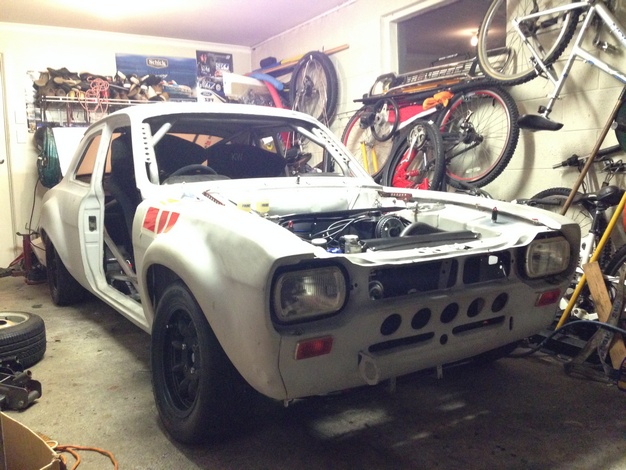
...Fuck. So dug a little deeper and got to this point before finding good steal. This is directly above the rear wheel. Effectivetly its 3 layers. The bottom two fold over each other to create a seam over the wheel arch, all spot welded together. The rust was between these two layers. Not sure how it started because it was covered in underseal and doesnt seem like a prone area. Anyway, i made up patches for these two, primed and welded the top piece back on which was rust free. The holes on the right were patched up too. These were for the poorly made back seat bracing which i'll remake later on. Decided to check the other side, same story, rust between the 2 bottom layers. Cant work out why. So i gave it the same treatment. This knocked me back a bit. Before the day was done we were able to blow the whole van down, prep it and spray 2k epoxy metal sealer through the seams, chassis, sides, anywhere paint cant be sprayed. Finds its way into every seam and hole throughout, messy job chasing the drips. This stuff is great, similar idea to cavity wax or fish oil but this stuff sets and can be sanded and then painted. Busy 3 days. //oldschool.co.nz/index.php?/topic/43995-bmxnz11s-mk2-escort-van/
 5 points
 -
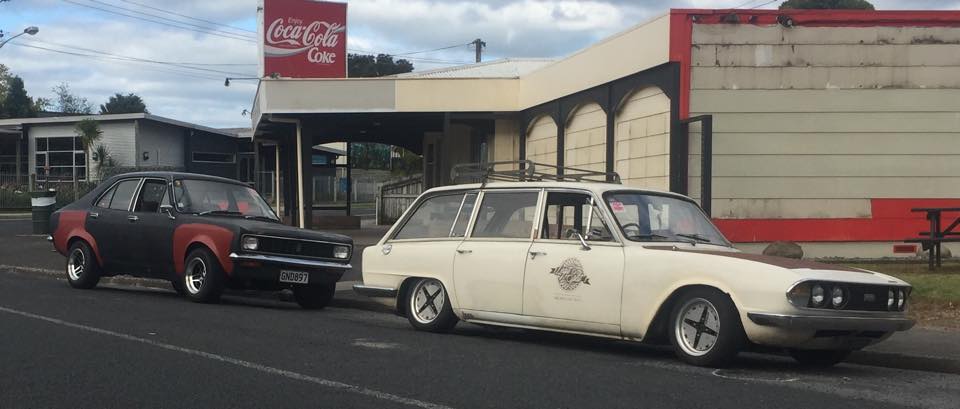
so after a bit of a mission on the weekend we went down and picket this bad boy up. Apparently in the week between paying the lady the money and picking it up three people tried to buy it off her, i certainly timed it well. happy chaps! Got the thing home and gave it a good dose of 30 seconds and a water blast, then spend 3 hours cleaning all the rat shit out of it. Came up surprisingly well, someone has previously painted it with house paint which although flaking off has done a reasonable job and protecting the fibreglass is very fitting hangin out the back of the triumph a quick bit of investigating has revealed (like most of these now) that the wall supports are completly rotten away where it meets the chassis, so there isnt much holding the wall up. Will see how these can be replaced once its all stripped out as the chassis looks like it can be resurrected. hopefully these can be replaced with 3mm angle without removing the whole fibreglass top, which would make it easier to keep all true its now tucked away in the shed at work waiting for the work on the rally car to be done before it do anything else on it. pretty excited to see some progress tho, whats even better is that unlike any of my cars the cooks pretty excited to get this done up too, winning.4 points
-
A couple pics from the Southwards swapmeet I forgot to post3 points
-
http://evolocity.co.nz/ This is on at Ruapuna this weekend, I'll be there/able to bring stuff down/up from/to Nelson if anyone needs anything Shuttle sized moved?3 points
-
Are you in Hamilton? I'm in Hamilton and can fiddle with SUs3 points
-
another step forward, kinda, I screwed the measurements I wrote down on paper for the rear mount so we need to adjust that, but it's getting closer couple more pics Trial fit on the bike frame Here's the the rear view, still need to adjust the mount width and add a support frame that slides over and locks onth the rear carrier. The actual jet mounts on the underside of the SS tube and mounting tabs need to be welded on to the frame yet. Measuring up the fuel lines and control cables to go inside the SS tubing.3 points
-
i went to jaycar and brought some sound deadening cause dam the last engine was noisy and then i had some mates shoot round and chuck it in for me while i continued working got it all in and bolted up and i chucked the wires on it got it going and drove it out side hell yeah it goes....... nope maybe it doesnt. went to go for a drive yesterday and this happened coughing and splattering and losing power!!! wtf is going on!!! get it back to the shop and switch out the new condencer with my old one and WABAM!!!!!!!!!!!!!!!! problem solved it goes again was farting around with the carb i didnt know what i was doing so i went to a mates and he was like wam bam thank you mam and done..... runs mint goes well and almost like something else is due to brake now..... but for now WAHOOOOOOO victory3 points
-
..........BREAKING NEWS.......... The cortina is home. After being at work for a month or so I hired a trailer on saturday and dragged the hollow shell home. It will be the last trailer ride home for it and now its fit up time. While it was at work I got the windows put in and it actually looked weird for a couple of days. Its been so long without glass. I had a couple of hours free so started putting the dash in and it looks awesome but without further a dieu heres the pics That is all for now......3 points
-
Discussion //oldschool.co.nz/index.php?/topic/50926-jordons-1974-procrastinated-ke20-discussion/ Thought i had started a build thread on here for this but couldn't seem to find it, anyway here's the story so far Started a few years ago now!I i was looking fora clean ke70 on a college budget when corolla prices were on the rise. My ladies brother had one of the nicest ke70s ive seen and thought i need one of those, came across this ke20 on tardme. didn't really grab my attention to start with but after seeing a few ke70s that had 'minimal' rust work required i decided to contact the seller of the ke20. Asking price was over $4,000.00 with spares included. I ended up paying 2k for the car on standard wheels, running the original 3k. 'fresh' panel and paint with all rust removed of course... uhhh young and dumb!! oh and no wof, reg, carpet, whole interior painted black, like everything rocking some jamex bucket seats. Drove it home and broke down on the wellington motorway, apparently they had fueled her up and the petrol gauge was stuffed so read nothing. Well actually it read nothing because they hadn't fueled her up. Dad got me some fuel and off we went. Next was the wof, went to vtnz and failed on a few things like front strut being welded, rust (huh wasn't it all removed?), high beam dash light not working, lowing blocks weren't aligned and neither were the headlights. Fixed all of this, because i didn't know anything about anything at the time i took it to a sparky i knew tofix the high beam light and align my headlights. $450.00 later i decided to do all the work myself on this. By the time i had this fixed the recheck date had lapsed, oh well. failed on high beam light again... fuck vtnz!! took it to local garage and put it through there. all good and allowed me to do some work experience to pay for it. So i was pretty broke at this point so just enjoyed driving it. Usual issues of not starting, over fueling, dizzy playing up etc etc. Over the next yearish i did small things like spray the dash parts black, buy a centre console, make carpet, spray the door cards grey, respray interior trim, match all the seat belts, buy hot wires, sell hotwires etc etc. Just small things that i thought were awesome but were just a waste of time. after that i bought a 5k and thankfully Aaron (club member) who sold it to me pretty much got it going in the car for me. real legend as i had no idea of what i was up to. that probably took 8 months to sort out. Joe (goat) sorted me out with some perfect fitment streets and the money i had from selling the hotwires bought me some tires... dumb size tires. Panels got stripped parts got painted and polished. Ke30 discs, calipers and backing plates were fitted. Bought other parts along the way which will come later on. then i thought it would be a good idea to put a silver top in there, it was i think but i lost the end caps for the block... uhggg so the new story starts here I have missed lots out but thats a medium run down on the poor girl. shes been neglected for the last couple of years and has really deteriorated. Some photos for interest, look ok here but a lot of rust repairs and panel and paint is required.2 points
-
Come say hi if you are - it's shaping up to be a pretty cool event, Our team are already scheming for next year!2 points
-
OS Monthly bombing meet. Count me in.2 points
-
Kp n tear drop shud be fine. Its mostly yank tanks but is a real mixed bag. Il be sleeping in the escort as usual unless i pass out in the caddy.2 points
-
so after two days of busting my arse and having a particularly bad time i now have one seat mounted and all finished. had a bastard of a job trying to get the seat as low as possible. the seat rail channel is 4mm away from the exhaust now. it just can't go any lower. my head is 10mm higher than it was so all good. ill mount the other one through the week. 2015-11-22_07-13-52 by sheepers, on Flickr 2015-11-22_07-10-09 by sheepers, on Flickr 2015-11-22_07-09-56 by sheepers, on Flickr2 points
-
Brake pads in , fluid topped up Bled the brakes Set the tappets , filled with oil and water almost time to start it
2 points
-
yep so she's back on the road, little bit of an update eh. - a bunch of rust needed doing, plenty more to go. sills etc. - front short shocks, Ultima, from online auto parts aussie site - had some standard KYBs floating around for the rear. glad i didnt cut the original shock mounts out during the hydro process! - whiteline swaybar and bushes, as above - new spring packs care of Archers springs, Rotorua. - thermostat, first time in years - fan shroud, first time ever - went back to the muzzy rims with some maxxis 175/70 14 biccies - new rear brake lines - super-drone side exit exhaust managed to stay, yeah! it drags round left handers under the right circumstances - stoked. - cleaned all the paint off the front end trim. fuck it drives so sweet now (for what it is), best it ever has. still a bunch of niggles but pretty happy with it. the new springs are great but came down a whole bunch during the trip to Wagnats. a little unusual for new ones. anyway, just got them back from HG Inghams blacksmiths in the Hutt. i dropped off the springs and my old main leaves on monday, by tuesday's end i had them back in the car with the old main leaf added to the pack, and all reset to suit. will get it out for a drive tonight but from standing on the towbar the car is noticeably stiffer, and only sits a half inch higher at the back, unloaded. loading up a bunch of shit and a Hemi2doz in the front and driving it for a week/nats should be a good test!2 points
-
stuff and things - two days till wagnats 'new' motor for a rainy day, thanks sentra dave!! stuff in front stuff in bum hello driveshaft byebye driveshaft fo' do's fo' mo' hose home after wagnats at wagnats, cheers whoever took this - IT WAS LEE2 points
-
Hey team! well last night myself, Shonesy, Dolan and Jemma went on a bit of a mission to go aquire my next project that we are both rather excited about as it was the deal of a century. Tis a rather original 1963 12foot starliner caravan! so pine as these things are pretty hard to find now and although very neglected this one seems to have pretty good bones. anyway pictures first - So it has sat in this resting place for the last 8 years, and in another resting place for several years prior. The cool things about these starliners is the entire top half is a solid fibreglass shell, so they dont leak! thus the bottom alloy half and framing doesnt rust!. The fibreglass has a few patches in it, and will need a new gel coat on it. The chassis is very surface rusty, but i will try repair this with the floor out but shell on, as apparently it is incredibly easy to break the fibreglass shell when removing it. it has a rather whack but cool duratorque suspension setup that keeps it relativley low, with drum brakes and a what cable break setup. the interior lining is also pretty degraded as it is a spray on foam type that is all brittle and cracking and falling off. most people rip it out but i have seen someone use carpet underlay and "solo" what ever that is, dont know how they have done it, but this is it here - anyway back to our van, our plans are for a re line, tidy up the cupboards, new gelcoat and paint, all to the original colours as factory etc, probs try find some sweet brown / burnt orange retro lino for the floor, get it real tidy, and then use the hell out of it, will look sweet behind the triumph. only thing i am gutted about is the sweet starliner hatch in the roof is missing, and has been replaces with some shitty broken wooden one. can you all please do me a favour and head to the starliner nz facebook page, there is a competition post to win a bunch of parts, can you please like my comment "blake jones" so i can win the shit out of some stuff. please and thankyous, line here - http://www.facebook.com/photo.php?fbid=423583487844790&set=gm.1064454596920661&type=3&theater anyway more photos for the thread -1 point
-
Nice avenger in that photo1 point
-
Awesome cheers for the advice man. It is getting a bit thin, there is a few spots where you can see the fibres, and it will get a good sand back before I do anything with it. I'll look into that stuff cheers. Also another real cool thing with it is when we popped off one of the hub caps we found this! Some old Barry's name and address that used to own it. A quick search in the archives of that address brings him up as William Edwin Adams, a carpenter, and it looks like he passed away in 1996 at the ripe old age of 80, imagine how cool it would be to track down some old photos of it in its hey day!1 point
-
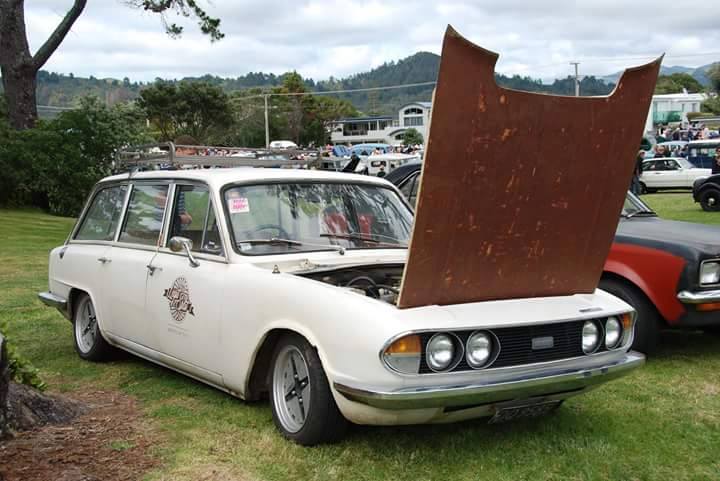
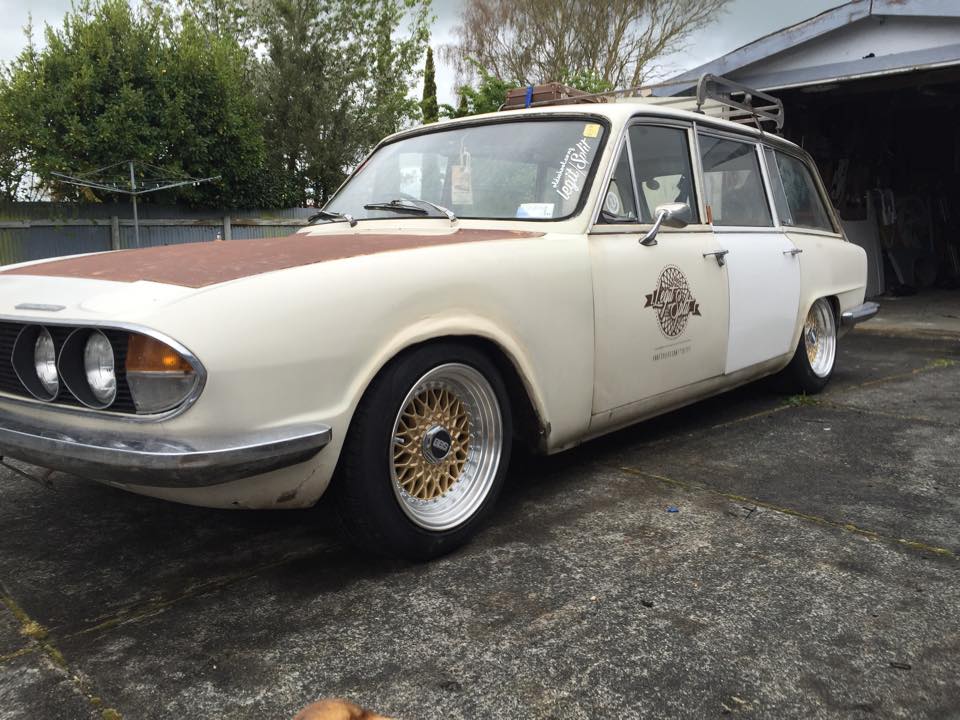
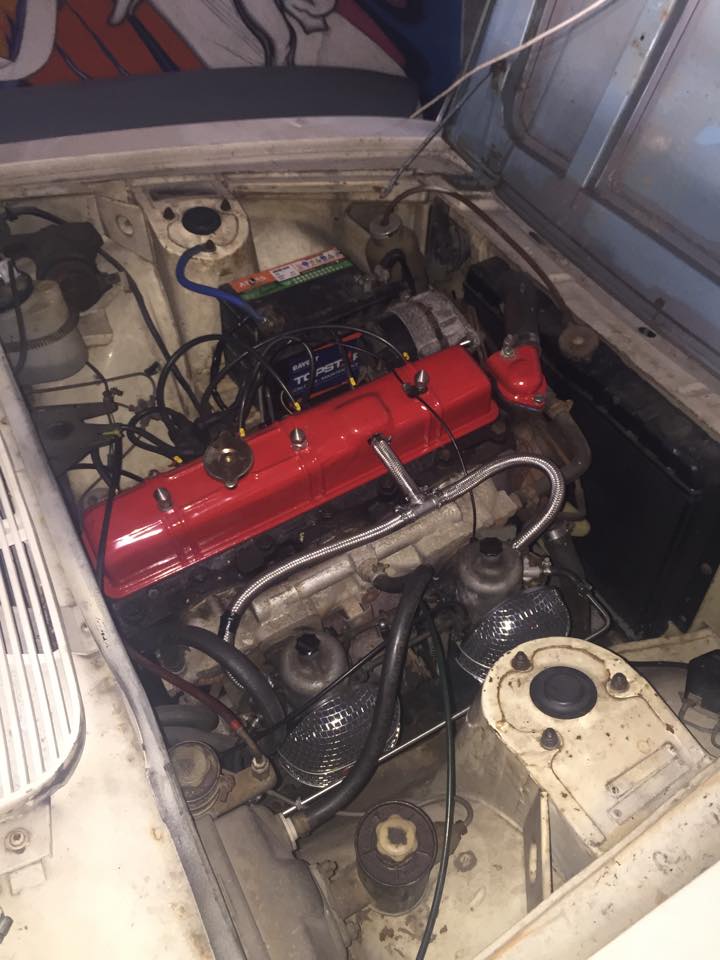
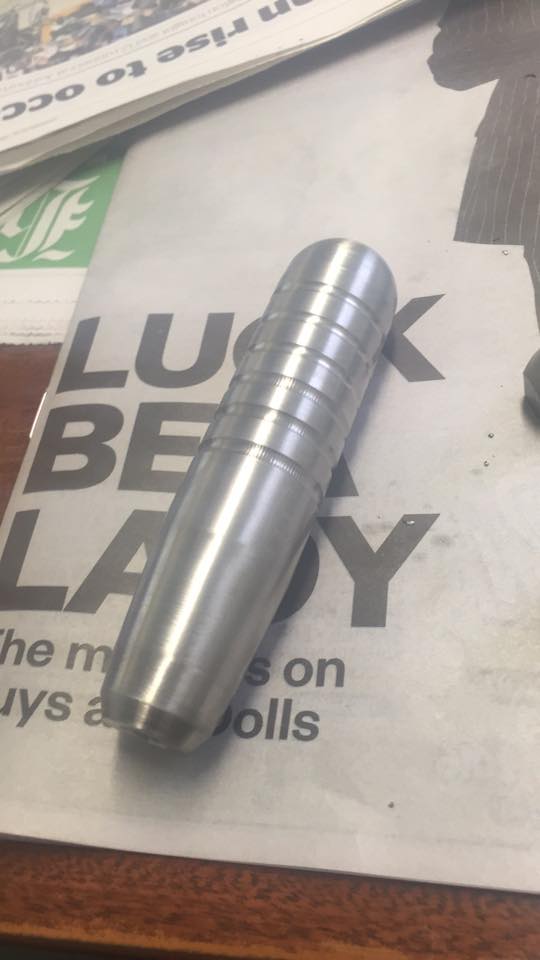
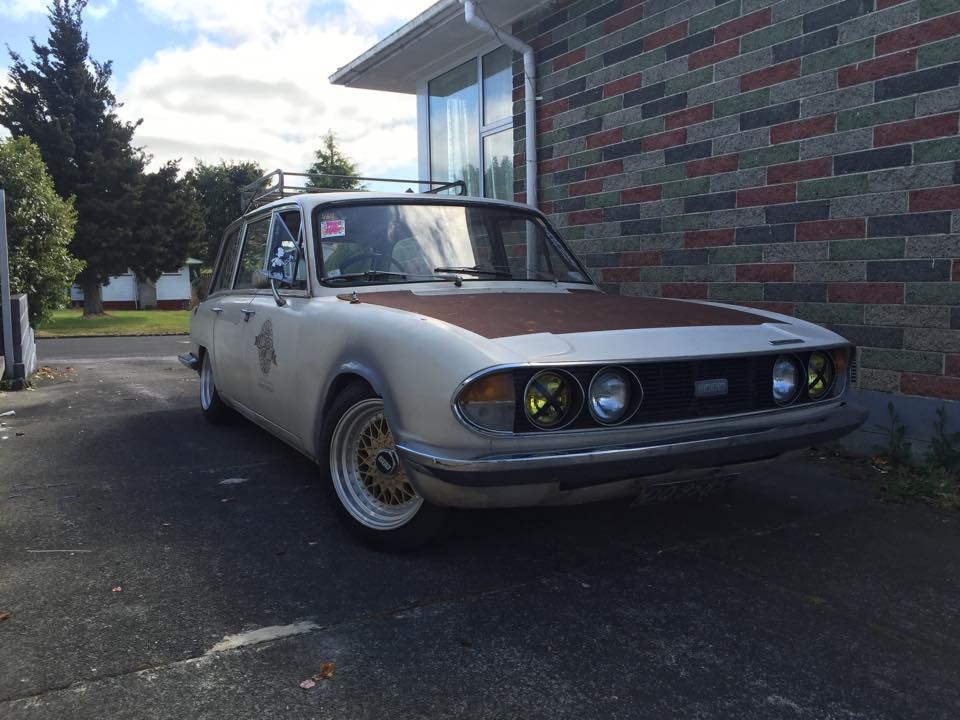
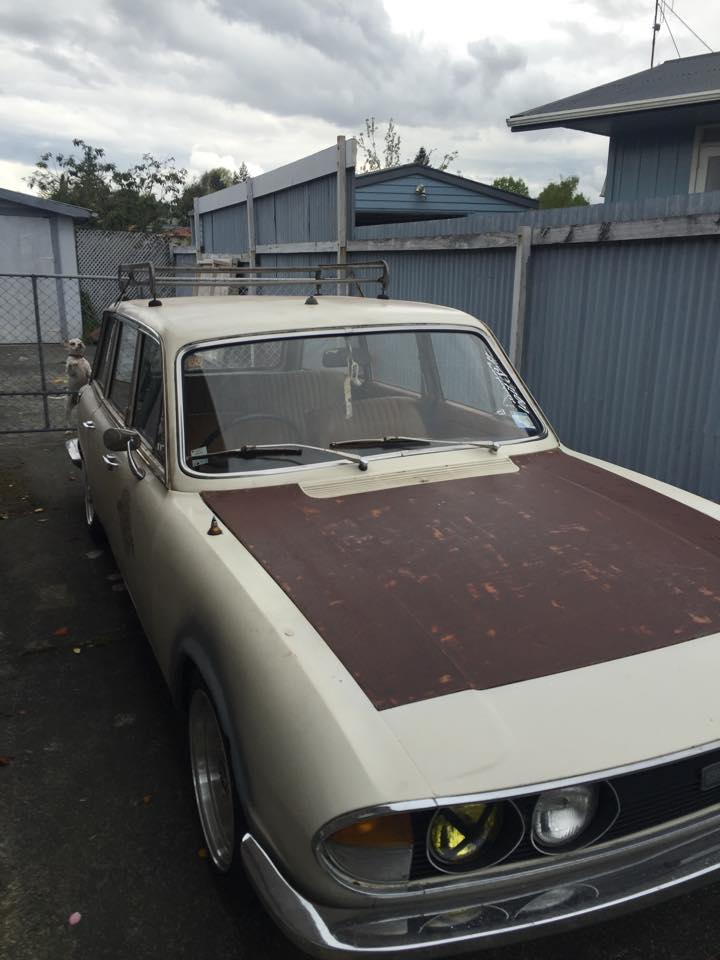
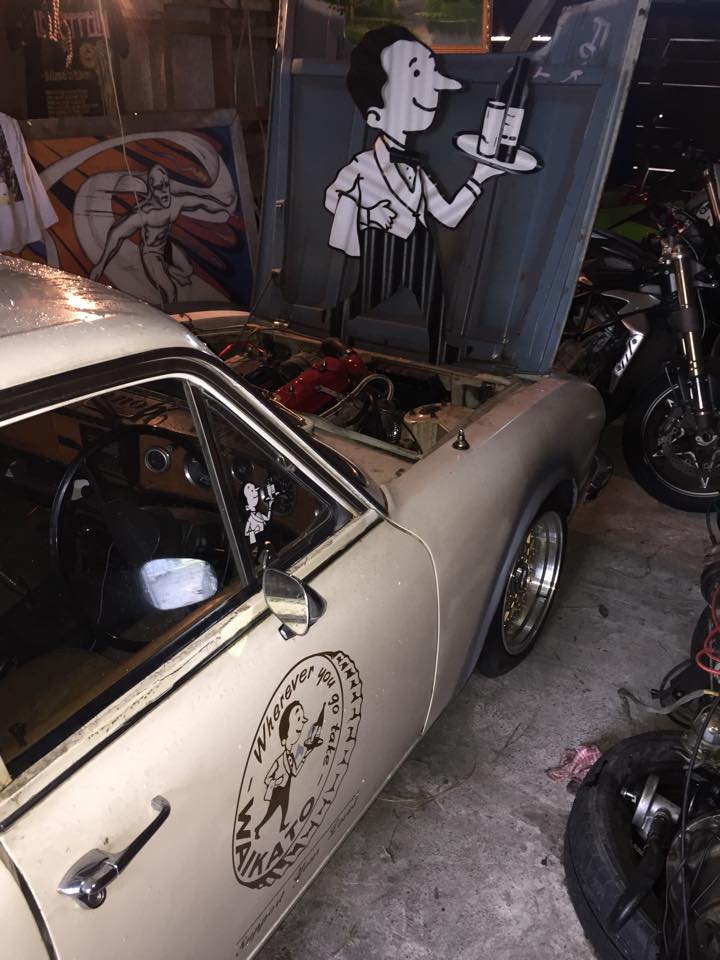
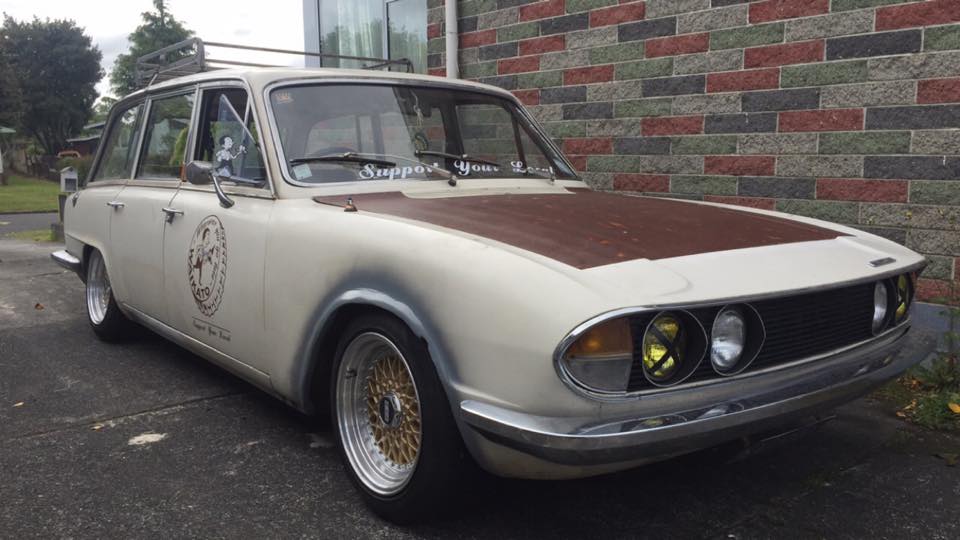
Okay so i'm sure you're all familiar with this car.... I saw it on Trademe a couple of months ago and it wasn't far from home so i decided i had to have it. Got in touch with Jake and set up a time to go and have a look. I jumped in my ute with a mate and we head over. Eventually found the place, checked out the wagon and a after a quick driving lesson and loading up a ute full of spare parts we were off back home. The thing was so low it looked cool as fuck. But when my mate who was following in my ute said that it was throwing sparks out the back, and when I couldn't back it out of my shed, I thought i'd better put in some slightly longer cutties... god damn practicality. Next thing I wanted to check out was the air filters because I couldn't feel any suction at all, and as I thought they were pretty dirty. Shot down to Repco and got the only air filter they had the were narrow enough to fit between the carb and the strut tower, and after much modification to the backing plate, I now had twin ram flows This made the wagon run pretty rough, and since I was planning to take it to Brits at the Beach that weekend i googled all sorts of carb balancing/tuning instructions and did the best I could to get it drivable. Also adjusting the timing was a big help. I got a new head unit and tidied up the speaker wiring in anticipation for by far the longest drive i had taken the triumph on. All set, off to Brits at the Beach with my mate in his '71 Avenger, walkie talkies in hand. Got there very slowly with no issues at all. Not everyone there was a fan of our cars but who cares right. Back home after the show and very quickly realised I needed some flashier mags. A bit of searching and found something i liked with in my budget. Unfortunately they're BBS reps which makes me look a bit silly having a sticker that says "fake splits can fuck off" mean while i was still playing with the mixture trying to get a better tune. A few trips out of town soon made me realize Im not a huge fan of exhaust fumes so I had a new exhaust made and a few hundred dollars later no more leaks. A slow day at home i decided i paint the rocker cover racing red. Jumped on the lathe at work and made a little shiny dildo shifter and a couple spikes to go the the rocker cover studs. Decided I wanted to tint the head lights yellow so I went ahead and did it, not every ones cup of tea I guess but its also not everyone's car. Desperately wanted the chrome surround on the front windscreen seal so I got a new rubber off Rimmer Bros (as well as some other parts) and took it to a guy in to get it changed. Made it look alot nicer I think. I got a little rev counter and put it where the not working clock was. Brought a sub woofer for a little more doof doof since the 6x9s in the back were blown. Did a rough repair on the speedo cable to get that up and running. Put in a new fuel level sensor because that thing didnt know which way was up (Still doesnt, if any one knows why please let me know) and set the valve clearances which were really far out on some of them (0.040")... No more ticks And at last my not so creative mind came up with a theme to replace Legit Splits. Being from the heart of the South Waikato... Waikato Draught it is "Support Your Local" Had some stickers made, stuck them on. And that pretty much brings us to now. Cars running Average - Good, looking alot like I want it to look, and with out a doubt keeping me busy and entertained. Next thing to do is shocks and springs because the shocks are fucked and theres no point putting in new ones if the springs are gonna fuck them up again. So Im currently in the process of sorting that out. Keep watching this space
1 point
-
Phwoar, check out the pins on that denim shorted adonis.1 point
-
I'll be there, but maybe not camping. It's my birthday on Saturday so I think I'm going to have to have some sort of party with friends or some shit, idk Feel free to buy me lots of presents guys1 point
-
I hope not because then the headgasket would blow and there'd be no meet Yes, it is tomorrow. See you there!1 point
-
I love that mesh sleeve stuff over wiring. I may or may not have some sort of wiring sleeve fetish.1 point
-
Oh yeah, anyone got hook ups in Argentina? I found a source of expansion chambers, they go for around $100 for a nice chrome one, fucks knows if they are any good or not. I contacted them using google translate but they were all no senor to shipping overseas. Might just have to knock one up myself.1 point
-
Intake manifold won't need powder coating. It's alloy so a good blast and polish will see it come up lovely. Remove the carbs as they need to come off in order to remove the intake manifold anyway. Carbs can be individually cleaned and the top covers polished. While the intake side is off the engine you will have access to the engine bay which would have been hard to get to with the carbs still fitted. Whip the rocker cover off and give it a repaint, new gasket and polished oil cap. Or you could get flash and fit a new alloy rocker cover from Rimmer Bros as they're not as expensive as you might think (and the black/silver one looks lush).1 point
-
and last here are some better pics done today1 point
-
1 point
-
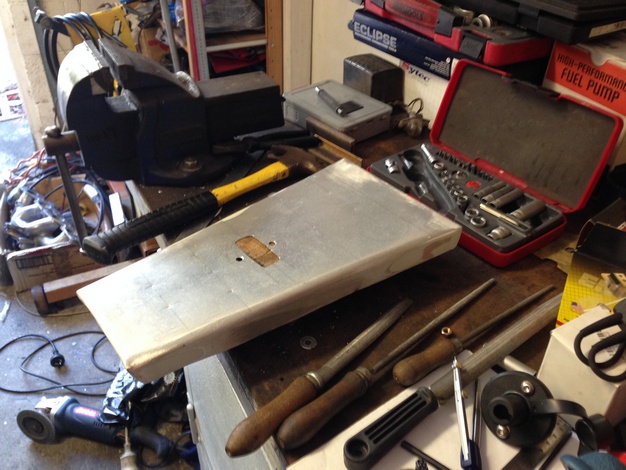
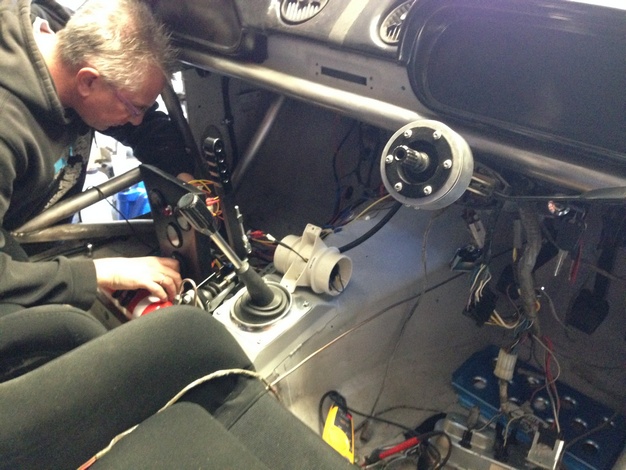
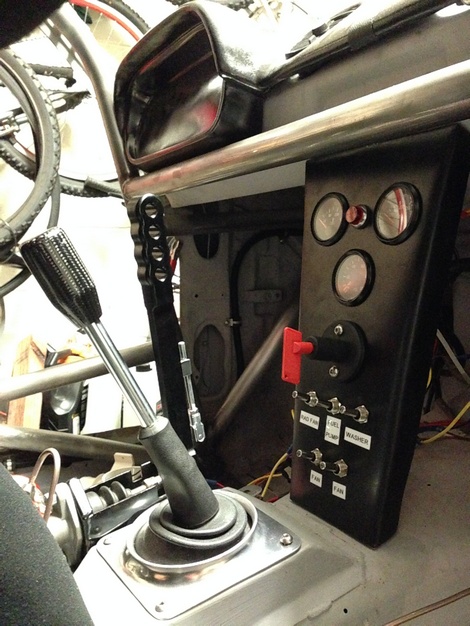
Wiring Time with help from my trusty electrician "dad" Also made up a temporary centre console for the essential gauges
1 point
-
They can shrink if they are out of the car for a while, try leaving it in the sun on a hot day as it should soften it up so it can be streched easyer. ados f2 spray glue is what we use at work for gluing trim back down, just make sure you not going to need to pull it out again as it can be hard to get things un glued if you need to move them.1 point
-
And some more pics Body gets primed tommorrow so will update with that soon1 point
-
1 point
-
Crap it's still slow going.... I'm happy with how strip planking it is going to look but shit its taking me ages.1 point
-
long time no post! well, the 'dros are on the way out, try and get me one of them wof things, the last one being in 2010. here it is on the way to a quick wag camp we had recently. will miss this 'ride'height, IMO it's about the only thing that makes an XM look less goofy!1 point
-
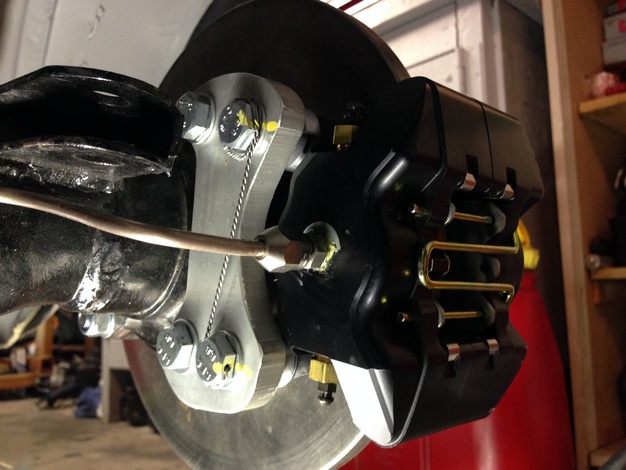
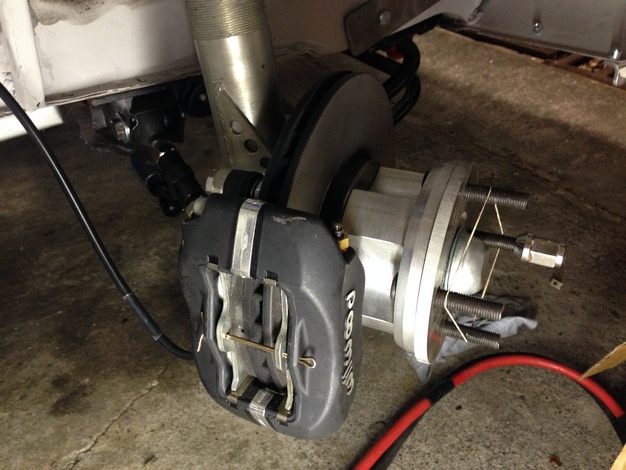
ok pics of my new cambered rear end done by race products in briso in some of the pics you can see the cambered rear its like a shim, and the other pics are the axles which are skinnier than the std f series axles the rear end now has 295mm dia and 24 mm thick1 point
-
Yeah I am keen to view my sloppy gear changes and ham fisted steering in excruciating detail.1 point
-
I've been thinking about importing some of this, and see how it works for some automotive stuffs: http://www.hytechsales.com/insulating_paint_additives.html Might make my floor near the exhaust a bit cooler / keep intake manifold from heat soaking perhaps. Possible start of an obsession with various engine bay temperatures, hhhnnnggg HPC on the exhaust manifold would probably be 90% of the battle done with though.1 point
-
Started giving the SSRs a tidy up.They had a bit of curbing on the lips and the clear coat had pitting in places. Should have sent them off to a polisher but thought i would have a crack at doing it myself. Split the centers and barrels Stripped off the old clear coat with rubber stripping disc. Then jacked up the back of the datsun and used as a poor mans polishing wheel. Bolt on wheel, throw in 3rd at idle and work your way through sandpaper grades. Stripped back the flaking paint of the centers and resprayed gunmetal. Also repainted all the cap screws black. All done and bolted back together Came out Ok for a rangi home job. Tyres going on this week fingers crossed.1 point
-
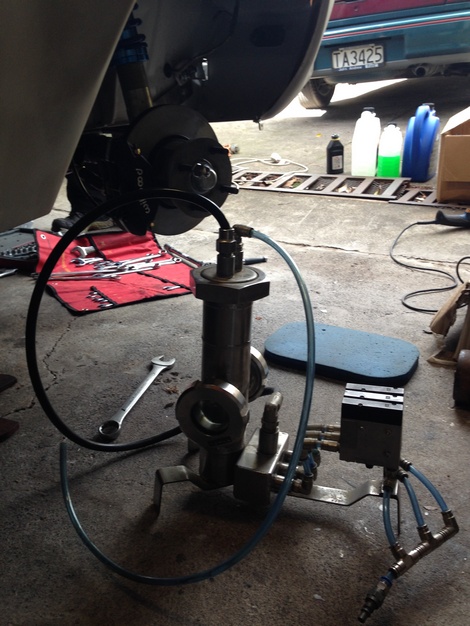
dry sump lines done on the scavange side just have to do the -16 feed into the pressure sidefrom the tank and the oil filter back into the motor and its finished1 point
-
ok at the moment ,i have had the rear end cambered through race products in brisbane ,back end has now 2.5 degress neg with half of toe in at the moment getting some hats made up to suit the cambered rear end also working on the dry sump set up just have to finish off the alloy fittings etc1 point
-
Bit more progress Last few bits back from electroplaters so could finally put the carbs back together and bolt them back on. Radiator mounted for the last time hopefully and water hard lines done. Because of my new home made strut brace I had an issue with my old fuel line setup not clearing. So had to get all crazy with AN fittings to make it work, yep its totally ridiculous but only way I could make it clear brace and throttle linkage gear. Shes pretty tight.. Catch tank mounted and plumbed Coil up front As it sits now, pretty much all the mechanical stuff now done Wiring nightmare now begins...1 point
-
ok with some new pics rear spoiler is on ,new steering wheel plus foot rest dumby motor is in plus moore trims are finished on the out side etc1 point
-
ok some pics of the broken box and the cut up white 1 and a few spare race motors some for customers and the others are mine1 point
-
pics of the quads my own design ,copy of a black top 20 v and with 2stage and ram tube1 point
-
for the motor im using some new parts will also have new tapered quad throttles new 2 stage injection a special harmonic balancer etc1 point


.thumb.jpeg.384ff72c8d2b0ee0d34a7bdedb55bdcf.jpeg)


This leaderboard is set to Auckland/GMT+12:00