
Leaderboard


Popular Content
Showing content with the highest reputation on 09/06/15 in all areas
-
Trims all back on. Lights . brake lights. Indicators all working only need to sus out reverse lights for WOF. Also need to hook up windscreen sprayers for WOF. Have traveled 160 kms with next to no problems . heater core leaks so looped that back on itself. 4 bolts that hold fan and water pump belt was loose so had to tigethen that. Have taken car to tune . runs a lot better .. Goes well when you give it shit. Seems to strangle itself when you first put foot on gas . needs new points will have another play with my electric ignition during week. If still same problem I'll have to look at getting the carbs looked at.. All in all drives good considering no wheel alignment yet . Here's some pics n videos of today6 points
-
First time on all four
 6 points
 -
and also sorted out the bonnet.5 points
-
Pulled clutch master cylinder out. Circlip holding everything in had bent and popped out which had allowed the piston to come out and piss hydro fluid all over the floor. Went hunting for a seal kit for it, but it seems a lot of suppliers are confused and supply a brake master cylinder rebuild kit as a clutch one, but that didn't seem right because the clutch is 5/8 and the brake is 3/4. So i was scratching round in the garage, and one of the bags of parts i was given by previous owner had a clutch master cylinder in it!!! I suspected it had been removed because it was also buggered, but i filled it with fluid and it seemed to push it out the right end, so i bolted it up and managed to bleed it and the clutch is working again. Hooorah!5 points
-
Get one of these for daily. No need for alarm. Would be cheaper to buy than alarm too.5 points
-
Recently I acquired a set of floor mats out of an AH Civic. They were covered in filth, but after a fair bit of cleaning product, elbow grease and liberal use of a water blaster, they've come out looking quite reasonable. When I first got them: And after a clean: The colours won't match with my interior of course but whatever, interested to see how they look in the car!4 points
-
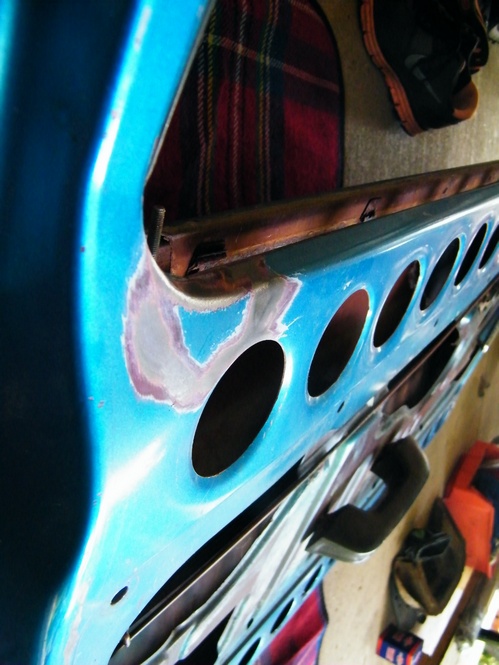
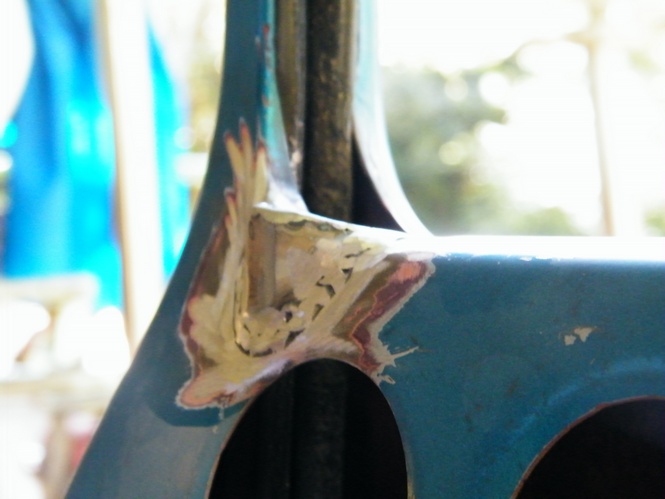
So I just spent a few hours pulling the head off the Z24 in my Navara. I thought the head gasket had blown (apparently they delaminate on Z24s quite regularly), but no such luck. This is the exhaust side of the engine: So yeah, someone has drilled and tapped a new hole under the proper exhaust manifold stud, scoring the top of the block in the process, then spot welded some threaded rod in there. Was gunked up with some sort of gasket goo. Is it worth having this head fixed? My thought is no, but finding Z24/2 engines at a decent price is pretty difficult. Also the block, can that be machined out?3 points
-
https://youtu.be/9ySWVQ1ckco3 points
-
Grinter: hey Dadums, funny thing happened to me today, I was mopping the bathroom floor, slipped over, and my ballsack and dick got stuck between my legs. I stood up, looked in the mirror, and it looked like I had a vagina! Dadums: whoa dude, that's seriously fucked! Same thing happened to me today as well... Snap! Grinter: Anyways, totally unrelated, but I can't make that cruise. Sad face. Dadums: me neither can't make it, for the same reason. Grinter: Dadums, have I told you that you rock? Dadums: Yes Grinter, you have.3 points
-
Go tthe mrs to give me ahand to crank this over today, I got her to write down the compression tests (before it started) Not so good on 3 and 4! However ITS ALIVE! https://youtu.be/HCPhc2MetpI https://youtu.be/HCPhc2MetpI Mrs actually got it going first, shes stoked, lol, this my my first start. fresh fuel including filling the carb bowl got it running so guess the fuel pump is borked or has an air lock I forget to test the compression again afterwards but it started & revved well enough so im guessing it was a gummed up valve or something. Stocked as that mean i can get it built up with the existing running gear. Wont be going too far before the engine comes out, for a freshen up but at least it can theoertically move itself around till then! Once it has brakes and a working clutch...3 points
-
Had to convert passenger door to match lock on the drivers side riveted and fibre glassed rear arches on More holes
2 points
-
I got the Cromodora CD9's cleaned up - i only had black etch primer, and i liked the look so i went with a matty b top coat as well. wound the torsion bars down as far as the adjusters would allow, need a 44mm socket to get the retainer nut off the front of them to take them out and rotate them a spline - surprsing amount of adjustment with just the nut tho. right rear caught on the handbrake thingee, enven tho the left has about 5mm clearance, so unsure what to do about that, will worry about it later as its on the 'against the wall side' for now. pretty happy with how it panned out:2 points
-
Thanks for a great Father's Day cruise, even the weather was good! We too are keen for more of these over summer, hope to get cortina road legal for the next one!2 points
-
that shit is fucked2 points
-
Ok more progress from today, I got my calliper mounts back last week, this is how they ended up There was a bit of mucking around getting the step machined as I had a couple of goes to get it right, didn't want to take too much off, then I got some 5/16" threaded rod and cut it up to make some studs for mounting the brackets to the diff, the mount holes in the diff are tapped so the threaded rod is screwed through then I have nuts on one side to hold the calliper mounts and on the other side for the axle retaining flanges. Once that was done it was a simple job to fit up all the lines etc I just want to make up a couple of tags to hold the bundy tube, I will do that this week then the diff can go back in. Then next job was to get the crossmember all mounted up, I used urethane bushes in the end but now I am wondering if they are going to be a bit hard, there isn't much movement in the mounts so it is probably going to be a shakey ride when the car is sitting at idle pulsing away, ahh well I guess I can change to rubber mounts if it is too bad, or more likely just not even worry about it, anyway here are some pics of the crossmember in position. From the bottom and from the top don't look too closely at the paint job, it is pretty rough.... So once I get the diff in I will start on the wheel alighnment and checking the bump steer, Fletch had suggested using a cheap laser pointer to set it up and measure the bump steer and the more I thought about this the more I liked it so I bought 2 and will build a little rig this week that will allow me to set both the alignment and the bump steer. And just to finish off here is another shot of my prototype steering arms, they are pretty cool, 3D printing is awesome.2 points
-
this was really good I would higly recommend the brewry again I spoke with the long haired dude before we left, said we will be back in numbers, would you prefer we call. he said yes.2 points
-
Could you jam a rag in that cylinder and hit it with the mig and file it flat?2 points
-
welding the head and resurfacing it seems quite reasonable. The block though, how deep is the mark? It could possibly be machined away and reassembled with a copper spacer plate. Or not for massive compression and bad cam timing. Take it to an Engine Reconditioner, see what they think.2 points
-
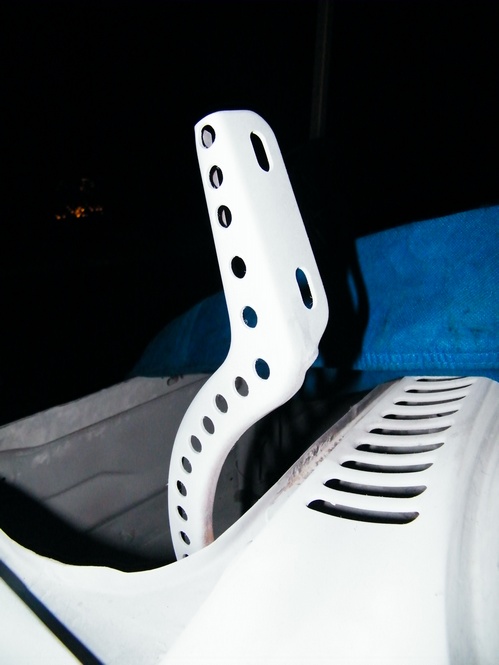
Almost ready to burn this project!* ZZ AC stator fitted. Today saw next to no progress. AC stator gives an awesome pulse signal, but both the lighting/main and charging coils are putting out 0v. The guy i brought the CDI from claimed with DC ignition scooters you can take the pulse from the charging coil, so chucked the factory DC stator back in. 7VAC from the lighting coil and only 4 or 5VAC from the charging one, pulse light on CDI box flashing less excitedly than with the proper pulse coil on AC stator. No output from the CDI box to coil. Also now I can't seem to get spark out of any of the 3 coils I've got when bench testing. Have just brought a TGB engine to rob bits from, there a clone of the Suzuki. It's supposedly a great runner, has AC stator and comes with CDI so if the stator won't swap in I may attempt making the TGB engine fit. In more positive news the ZZ starter and Bendix fitted sweet, the Chinese scooter had a brand new battery fitted so I've now got electric no start. And I got several emails from Aliexpress, my tail light, indicators, LED flasher units and other bits are on the way. *Welder was dropped off today, so time to melt some metal. Chucked it on the SJ today, had to block half the air box inlet off as it's made enough difference the carb needs to be up jetted!2 points
-
Side shot2 points
-
Finished, with 2 of the grand kids in2 points
-
Good day for some outdoor porn . color looks so good in the sun ,2 points
-
Put the doors n stuff back on tonight looking good !!2 points
-
//oldschool.co.nz/index.php?/topic/49929-pbaines-1985-ae86-corolla-levin/ Well, I have bought myself an AE86 in from Japan. Always wanted a Sprinter Trueno but ended up with a Levin as it costs a lot more for the Trueno (probably 4-5k NZD) but to be honest, after getting this Levin here I am over the moon. As an AE86 always does, there's a bit of rust here and there. It does need a repair cert but the fella i'm dealing with is very helpful so should be good to work with him to get it all sorted. Engine is built to N1 spec, and goes like the clappers! Needs a new CW & P though, as it is massively high strung at the moment and I sit at around 4200rpm at 100k so definitely not ideal at all. As it was in Japan at Stacked (best guys to deal with, highly recommended. Was shipped via AutoHub which was 100% hassle free) THEN It was time to get it on the boat. But not after removing the side skirts and raising the suspension, with the greatest method of adding nuts as spacement. It was on the top of the list to go 'remedy' from the VINZ inspection too Lastly Here is the VINZ inspection sheet.1 point
-
Sold Mister Two in May or so, bought another car and flew down to Christchurch on the weekend of the crazy flooding in the north island, and came back with this. 'goze hard 4 wot it iz' It's a piece of shit but I love it. There's a fair bit of South Island engineering going on throughout the car (no hate ). This includes (but is not limited to) battery in the boot with the main battery feed in a taped up plastic box hanging around the engine bay, what looks to be a home-made stainless exhaust manifold that is full of cracks, and there was even a crack in the chassis but I got that sorted as soon as I found out about it. On the upside, it has a hybrid turbo (what looks to be the factory IHI RHB51 exhaust housing, with an IHI VJ20 compressor housing from a Familia GTX), an Apexi AFC Neo air/fuel controller and a Greddy Profec boost controller. It is currently my daily but plans are to tidy (and fix) it up once I have another daily, take it to the track a bit, and possibly coilovers a bit further in the future.1 point
-
Keto Steering Systems LCAs,castor arms and knuckles went in lastnight original castor rods vs new knuckles are about 40mm shorter and LCA about 35mm longer BCs/stub axles came back from crack testing last weekend and were promptly installed wound the front down a bit and set camber to MAX this weeks job is to source some new tie rods to suit and then look at getting everything aligned and set up for drifting1 point
-
Glad it was easy fix. I was in a second hand shop today and spotted ahaynes manual so scoped out the clutch section and was going to suggest checking the circlips1 point
-
I have seen some Oldschool repairs done (on TV and the net)that would fill the block damage pretty easily. From.memory it was like a chain of holes that you tapped pins into then cut off and filed flat1 point
-
leave as is... 10:1 with 8psi will make the same sort of power as 9:1 with 12psi, but 10:1 will be much much nicer to drive! If you are really worried then run AV gas, we run 10:1 with 18psi with a huge turbo on av and it's awesome all round1 point
-
They can weld anything thees days, I am sure it could be built up and the head could be skimmed at a fraction of the price of another head1 point
-
WTF, I'm gonna say most engine builders are gonna steer you towards a new block/head combo for economic reasons tbh. Thats cray cray. I'm still confused to be honest.1 point
-
Good spotting Kyle, yup wheel alignment and two new front tyres as the originals had sidewall cracks from disuse. Not long to go now, just a bit more red tape to sort out. Hoping it will be ready for this month's Caffeine and Classics if not burgermeat.1 point
-
Unsure if mentioned BUT can you flip your manifold upside down so that they are angled upward? Oh..carbs probably can't do that. Plus dumb water inlets1 point
-
See you there with the AE86!1 point
-
Knuckle progress, thanks to fletch here on old-school i have the loan of a tapered reamer so put it to work... I settled on 98rpm for the reaming speed. Then machined the outside taper and parted it off at the correct thickness. Knuckles now look like this, they have been on a bit of a diet..1 point
-
I cant be fucked working on this take it somewhere else1 point
-
Why does SU and Lucas points dizzy mean it'll never run properly? The distributors aren't really a big issue on these except for maybe waterproofing when it comes to a 4wding sense. Carbs aren't difficult to sort out either. If you can't get something running nice on points and SUs or Strommys then you need to rethink whether you should be twiddling spanners on old cars. for dizzy if you're hating the stock lucas item then a mallory HEI dizzy or a 123ignition dizzy = sorted. Stock disco electronic is an option too but if you're messing round in rivers then it doesn;t help the wet running issues (dem fans love chucking water alllll over the dizzy) don't need no trigger wheel horse shit on these things mang. if you wanted to go injection then Discovery inlet manifold and most of the bits would have you cheesing for bugger all outlay. there's plenty of rotten discoverys out there at the moment. the lucas injection systems on disco 1s aren't hard to seperate to an engine loom and aren't too bad in a reliability sense. I've followed a fair few series and deefer build using MS and it seems that they all have horrific issues running them offroad when it comes to changing altitudes and low speed running etc. Pretty needless for something like an old landy when you can get good results from the stock stuff.1 point
-
Looking like.an asian wrecker already noice get two identical scooters. Cut the front end off one and use it as a "sidecar" twin engined. Saw one in peru, it was sweet1 point
-
Not much to report but any progress is good progress. Replacement gearbox is in, it probably would have taken longer but I had to move the car out of the shed I was renting cos the new owners wanted it empty. Once back in my own garage I had access to such luxuries as light and powerpoints and after much use of light and powerpoints I had my exhaust back together with extra clearance over the diff and a couple of flanges thrown in. I put some tyres on the rims and had a test fit, pretty good fit with the 8's, the 9's stick out an inch further due to offset so some work required. Incoming potato pics And because I can't stop fiddling with things I have plans to modify the cooling and charging areas. On the cooling side I am going to ditch the engine fan and fit a Volvo 2 speed unit. While at PaP I grabbed a dual thermo switch from a BMW which should have the temp settings I need to have it working properly with the thermostat. An inline housing for the switch is on its way, after a slight mod (tapping it to fit the BMW switch thread) it'll be usable. As far as the shroud, I'll probably fibreglass one up to suit. For charging I have an RB alternator to replace the stock externally regulated item. The wiring is pretty simple, may need a diode on the field circuit and the pulleys will need to be changed too. In less interesting news it also has a full complement of new balljoints in it, woooo1 point
-
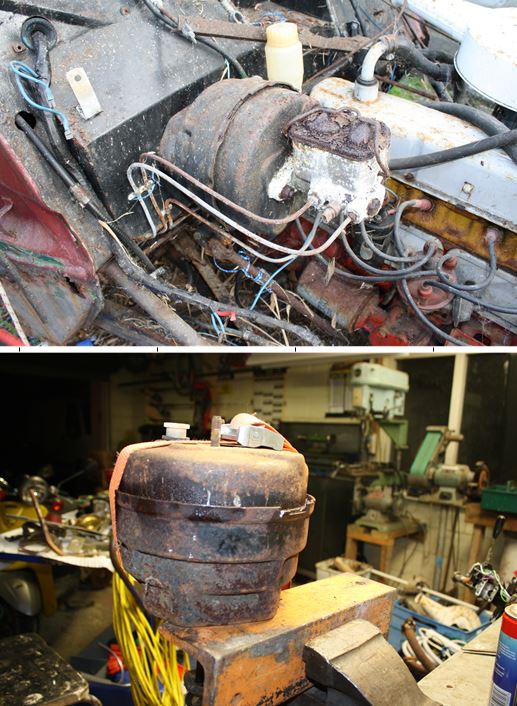
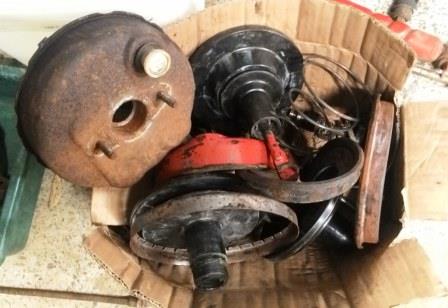
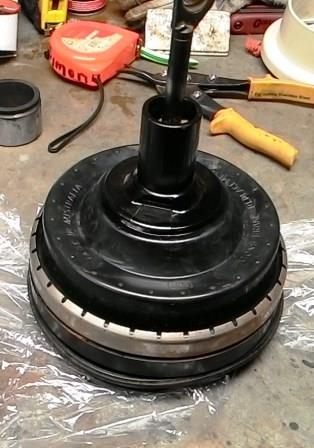
Time to have a look at the booster and master cylinder. I found a crack in the Bakelite valve body but a mate in a local brake shop (thanks Kevin) donated some 2nd hand parts and a few new seals. Spent an evening turning this….. Into this…. And putting it back into the can’s…. To end up with this….
1 point
-
Holy crap thats awesome.1 point
-
Dude. Legit. Love it.1 point
-
Replaced the right rear wheel cylinder. Imbalance dropped to 11% which is good enough for a pass. VTNZ WOF attained, happy owner.1 point
-
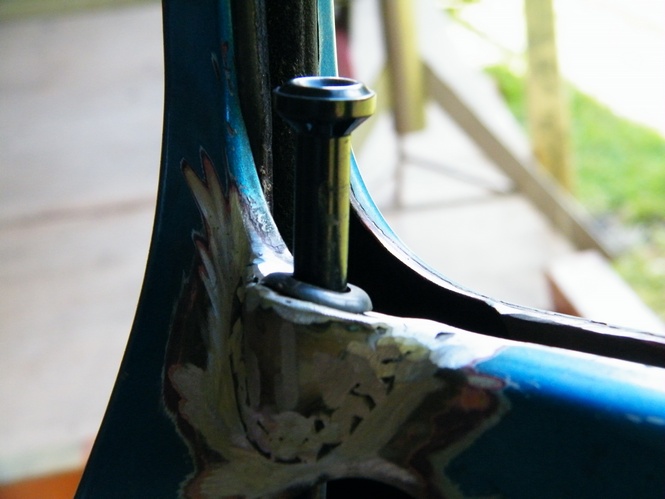
Hey guys Back from holiday so time to get stuck into car. Putting door jam trim back on and will send some chrome to polisher 2m . A couple of pieces has very small dents etc does anyone no of someone in Auckland that can remove em without damaging it ? The panel beater reckons he would . he is also straightening out my bumpers which I'll then get rechromed. If ya no someone lemme no in discussion thread in the mean time I'll leave these here.1 point
-
Any room to tip the motor slightly, or space it over to one side? Maybe just a shim between engine mount and chassis or something? Would be a pity for something as simple as this to be what ends up limiting the engine's potential when you've spend $$$ making it all fancy. Although, pics of problem or it didnt happen... Actually MSpaint will be fine too1 point
-
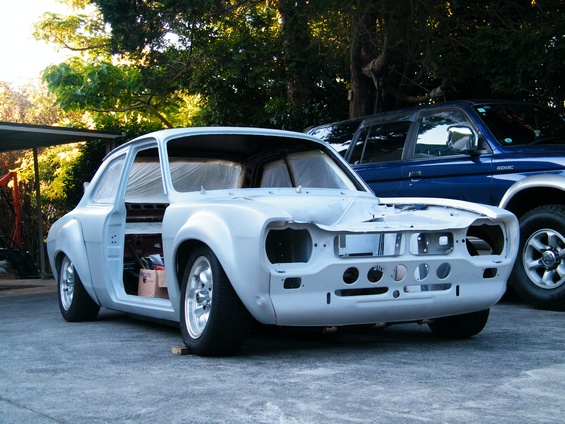
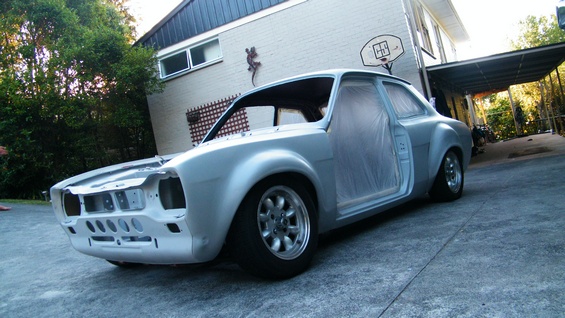
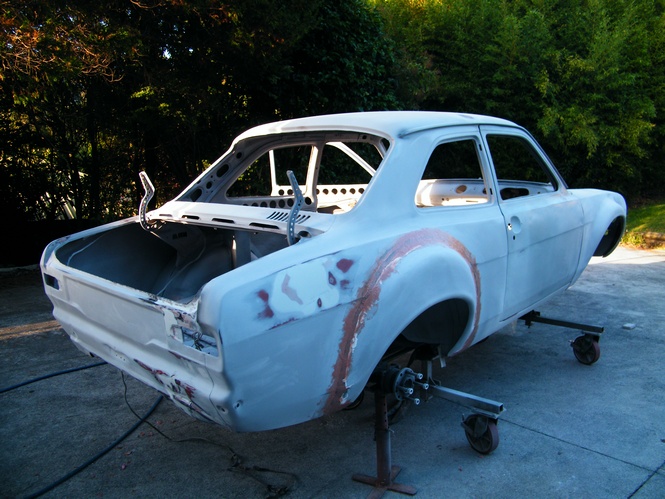
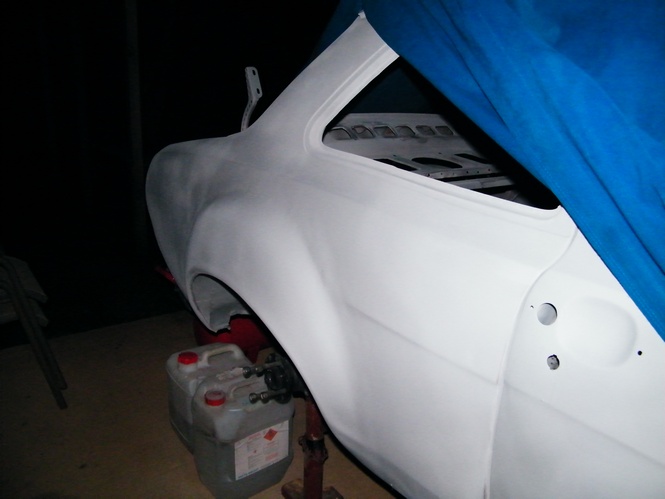
BOOM ! After an extremely painful experience the car has been painted . unfortunately not quite end of paint saga tho . they didn't mask up door jams propley so over spray was all in my door jams and on some of the side doors were they meet .... And on inside of bonnet.. Oh and boot fuck sake. So off it all came to respray it all for a 2nd time Used up every last drop of paint and finished up at 4am today with just enough time to drive home n mate to shower n back to Aussie he goes . he is the fuckn man may I say the least. Anyhow I'm shattered like fuck will get a bit of paint Monday so they can fix their overspray cut n polish then cars off to get an exhaust made then WOF. I'll let the pictures do the talking . they don't call him "glass master Adam" for nothing1 point
-
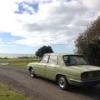
Gidday Guys, Just a little photo update of what I got upto today. Attached the AA badge to the grille. Swapped the side indicator lenses for a pair that were in better nick. Comparison below. And then took it for a cruise to Ardmore. Looking at doing the interior bits next weekend.1 point
-
Gidday Guys, Wee bit of an update. She is now painted and looking pretty bloody good. Just needs some love and attention to the smaller details from me and it will be looking factory new (or pretty close to it for a 37 year old car). Some pictures below, look forward to better quality ones once I get it in the daylight with my DSLR. What I have planned for it in the next couple of weekends: Affix AA badge to the grille Swap out interior wood for less weathered stuff from the donor car. Swap out centre console for the non cracked one from the donor car. Swap out mint condition dash from the donor car. Repaint the flaking black areas on the hub caps and polish the chrome. Give all the windows a really good clean to get 20 years of salt grime off them. Give all trims a light polish. Replace thermostat cover with a non rusty replacement. Give anything in the engine bay a repaint/polish where possible. Keep an eye out for a very good condition rear bumper to replace the current one.1 point
-
I am planning to leave the car original. So the Auto box will most likely stay. The car had a couple of minor flaws. The centre console was cracked around the choke lever and the dash had a crack in the vinyl. The wood around the gauges also could have been tidier. I set out to remedy these little faults. I found a 75 2500TC at a local Pik A Part which is a D.I.Y wreckers. Here she was when I found her, still complete minus the steering wheel. I needed a few things, but decided I'd take many things. I soon had the dash out, bonnet removed, badges stripped, wooden trim removed, side indicator lenses flogged as well as the centre console and a few other things. I got home and made quick work of swapping out the rust free bonnet from the wrecker car onto my TC. Green bonnet being the original. The car will be going in to be be re painted its original colour as well as having some rust repaired.1 point
-
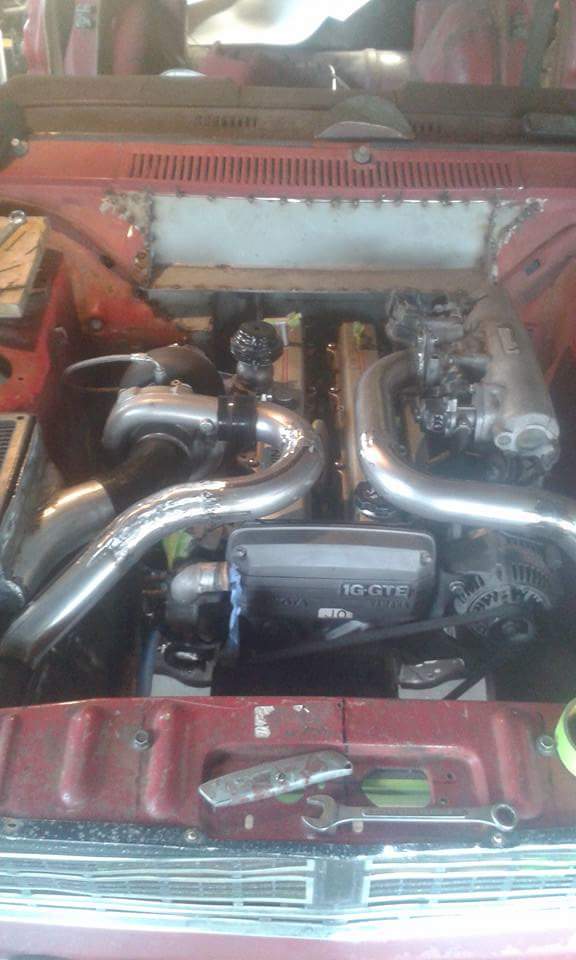
All 4 silicon joiners in place and that's the air system all sorted from air box to intake manifold.
1 point


This leaderboard is set to Auckland/GMT+12:00