
Leaderboard


Popular Content
Showing content with the highest reputation on 07/30/15 in all areas
-
The last week or so has been a bit quiet as I have been waiting on bits to arrive, the rear caliper mounts are being gascut and I have been gathering bits to make up the new crossmember. I thought I would put up some pics of what I have been working on though. SO I have been told that because my front suspension is a jumble of Anglia, Mk2 Cortina and custom made parts that I will need to do a bumpsteer test as part of the cert process which is fine but there was one thing that made me nervous and that is the steering arms that I bought out of the UK, now these are supposed to correct the steering geometry with the Mk2 stuff so I thought to be on the safe side I would model up the Anglia suspension and check to make sure that it is all good. So I took a bunch of measurements and put it into Solidworks so I could move the suspension and see how it reacted and actually get some proper measurements relating to bumpsteer. This is what I came up with straight away It was looking like there was going to be a problem with all this, I was getting something like 3 degrees of toe change over 100mm of suspension travel, which is quite a bit, anyway there is no way that it was going to pass with that so the steering arms got put on hold until I get to the bottom of this. I had a read through of the technical bulletins from LVVTA relating to the bumpsteer test and found some really useful info in there pointing to the fact that the tie rods might be too low. One thing though, it did get me doubting whether I had my model correct, I was thinking that maybe if I had taken some measurements incorrectly then this could be throwing off the whole thing. So as a check I then modeled up the standard Anglia suspension to see how that compared and it was all good, basically no toe change over the same 100mm of travel. So it now looks like I might be correct that the tie rods will end up sitting too low here are some pics to show what I mean Standard Anglia My setup In the top pic the dashed lines representing the TCA's and Tie rods (the ones that angle down towards the bottom of the strut) are basically parallel, in the bottom pic they are not and I am pretty sure this is the problem. Now I am no expert my any means so if anyone out there has a different interpretation then I would be keen to hear it. Something that I noticed that I think may be giving this problem is that the Anglia steering arm is a lot thinner than the custom ones I have so the connection point for the tie rod sits much higher, also these custom ones have the tie rod connection coming off about halfway down the body which also isn't helping, and finally the fact that they need to be 16mm thick is also a problem. What I need to do is move the whole arrangement up and there are a couple of ways that I can do that with the most obvious being to make them out of thicker plate and machine a step between the strut mount face and the top of the tie rod connection point. Anyway I haven't got it sorted yet but at least I know what I have to do (I think...)6 points
-
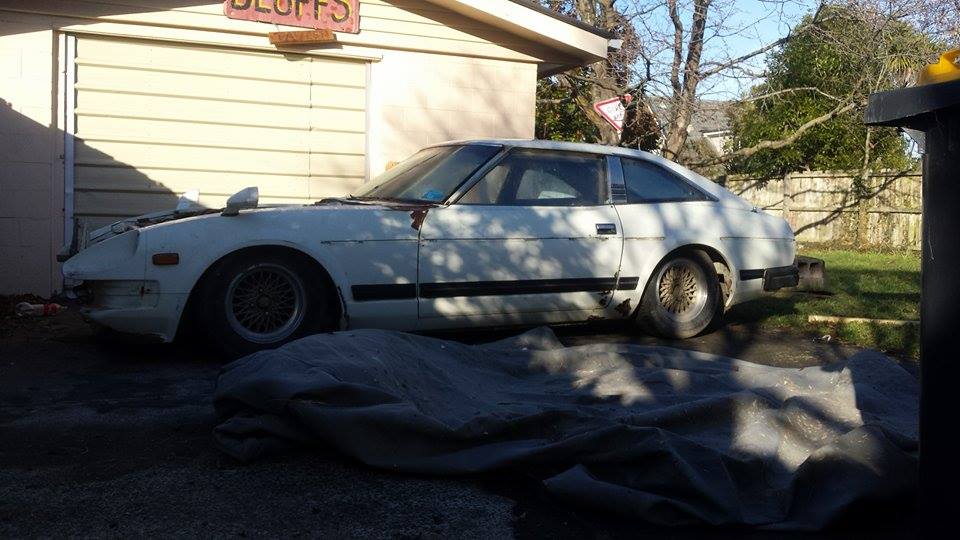
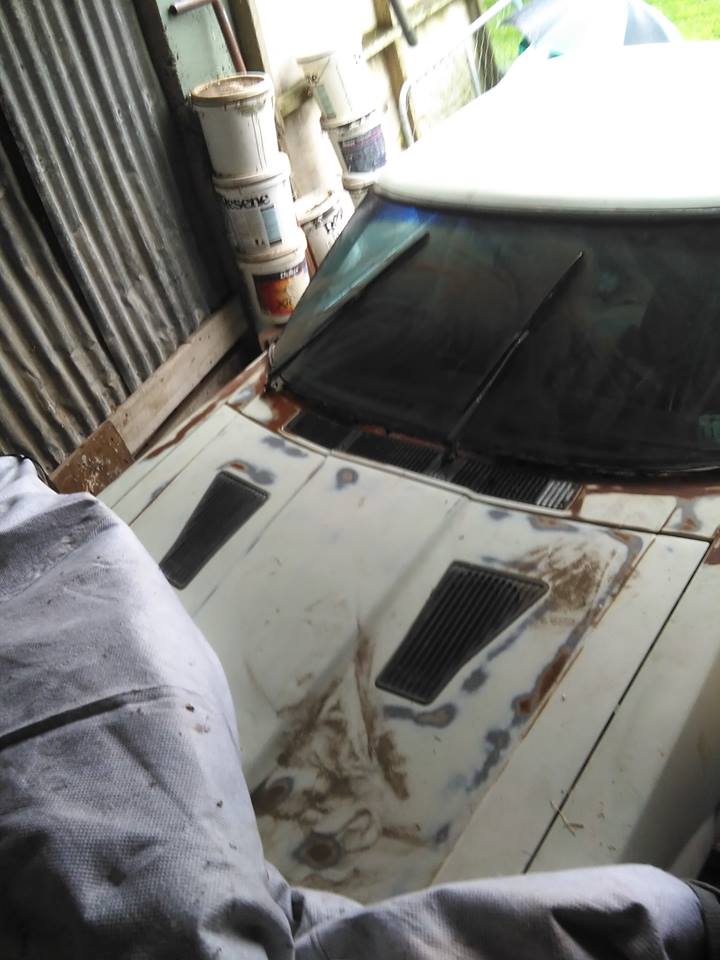
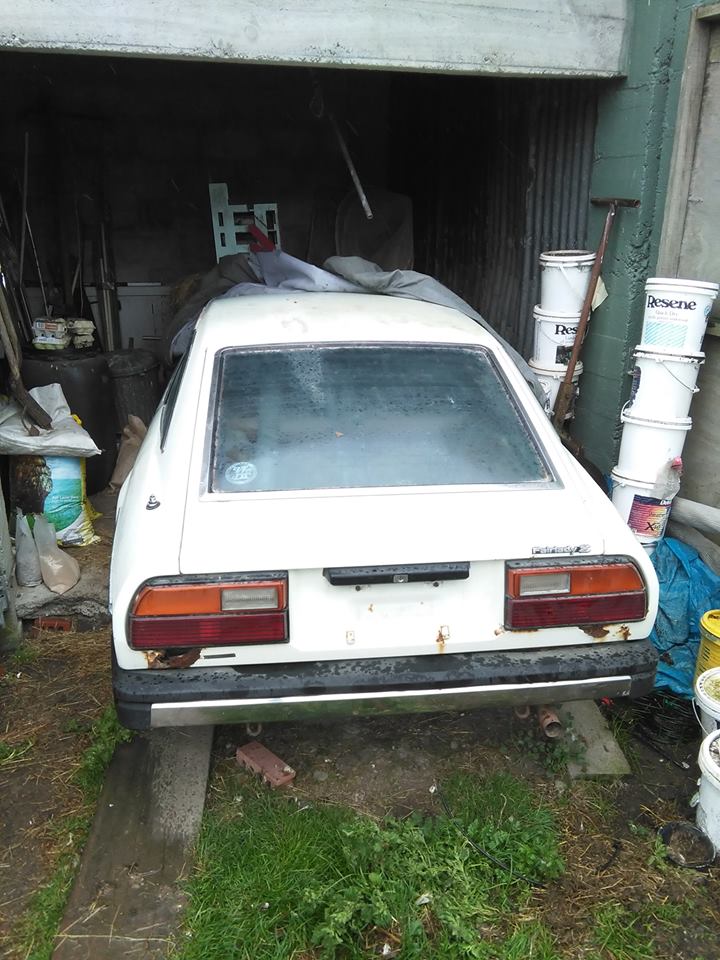
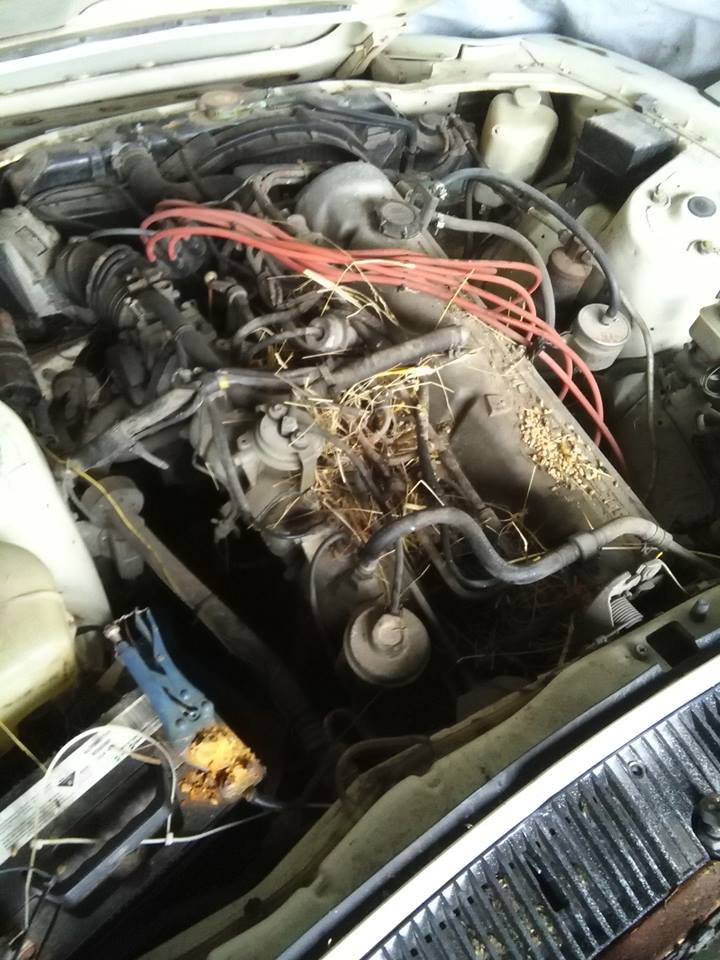
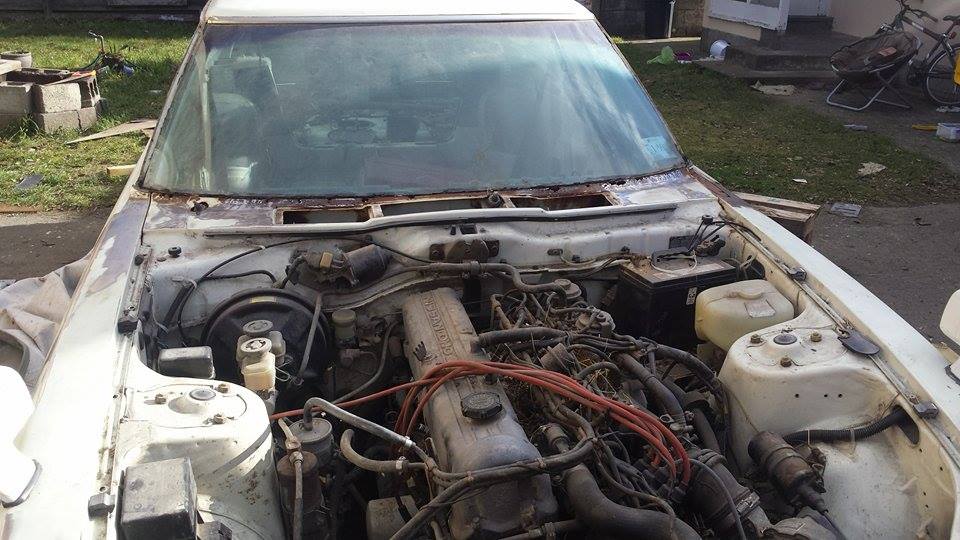
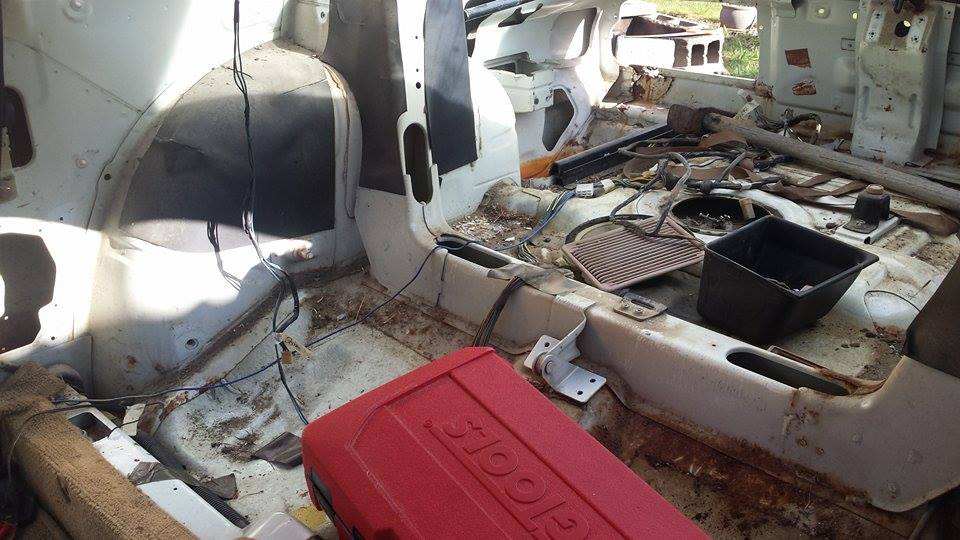
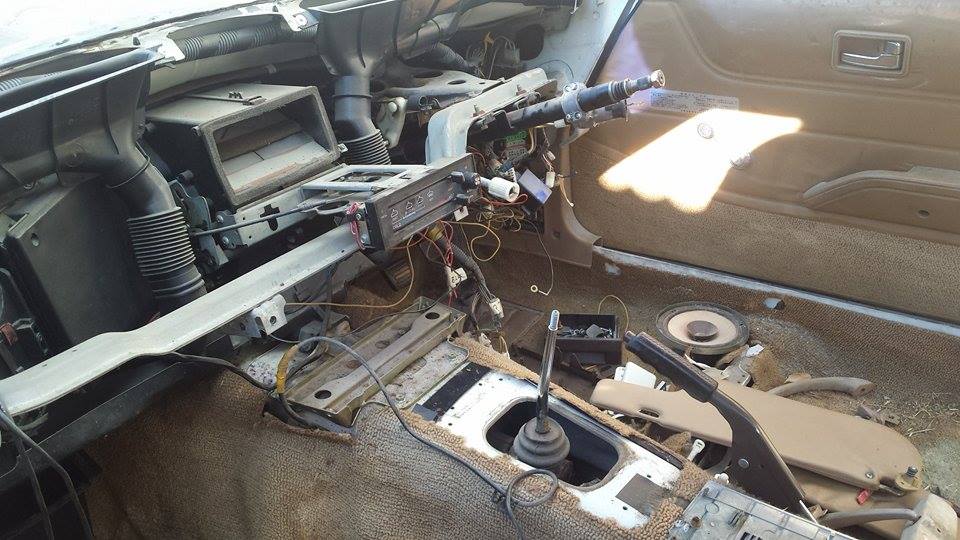
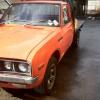
Bought my first project car last week and thought I would start a build thread. It is an 280zx Nissan Fairlady. I've always wanted a 240z or 260z but couldn't find any. I picked this 280zx from a nice old guy in Ashburton for $800. Had lots of trouble getting it home took about 2 hours to load it on the trailer. The car was on the bumper stops which made it catch on the trailer when pulling it up. And then to make matters worse, the towing car couldn't get traction on the grass. Thank god for the neighbors and there 4 wheel drive, who towed us out the paddock. Some car details: - L20e straight 6 (turns over) - Interior was average but all the peices are there - Exterior shows some signs of rust, probably many more hidden spots. What I have done so far: Removed the interior pieces and the doors and fenders. Got to remove everything to find and patch up all the rust spots.
 3 points
 -
Did a bit more today, welded the bottom panel to the inner one. I started making the patch panel but it was getting dark and i started rushing, so I stopped. The patch is just some 25x3 angle, but it will reform the lip perfectly, and tuck upwards behind the rusty bit. This means I will get a full bead of weld along the top and bottom. I cleaned out the lead as much as I could but I expect I will need to bog at least some of it which is unfortunate. I also wedged a bit of steel up behind the trailer connection hole and filled that up.3 points
-
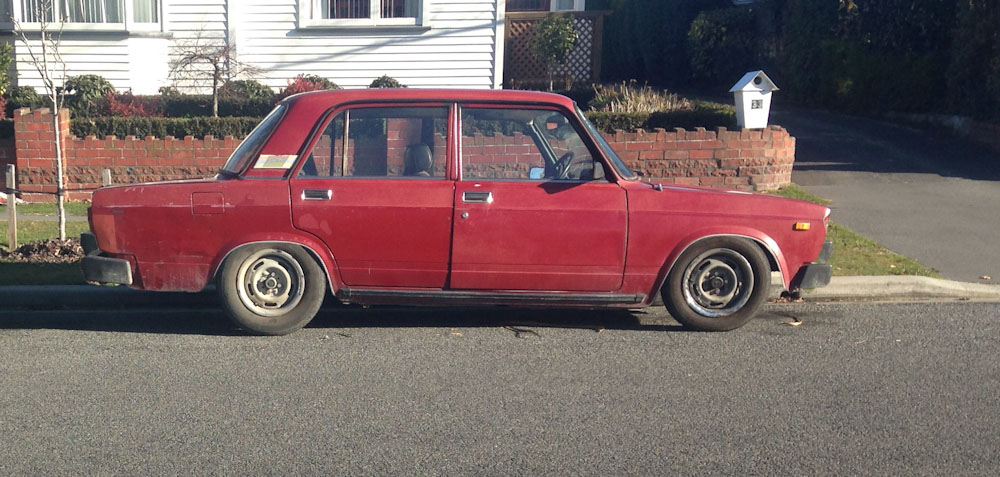
Had Photoshop running so gave a quick chop, looking at the layout of the suspension I think that would be as low as it could go, and most likely on the stops, really need to learn Russian to work out how they do it! edit-added pic of low
3 points
-
http://www.aliexpress.com/item/TIG-MIG-MMA-ZX7-ARC-welding-machine-Solar-Auto-darkening-filter-welding-helmet-face-mask-Electric/32269820242.html3 points
-
Finished the front standard and started work on the rail sliders today. The camera rail is from some kind of clip together shelving system they sell at bunnings. Its 1" square ali tube 450mm long, nice and smooth with anodisation for corrosion resistance. will probably shorten it and get another piece for if I end up getting different lenses that need a longer bellows extension at a later date. Front standard and MDF mock up lens board: The sliders will have a clamp screw at the bottom to pinch the rail and a rotating platform on to hold the fork the standards pivot on. There will be 3 sliders, one for rear standard, one for front and one for the tripod mount. Slider on rail: Mockup of the camera on rail to get an idea of proportions: Slider number 2 glued and clamped: That's all for now, not much woodwork left to go. Will soon be on the lathe making pivots for the rail sliders. Will probably have to invest in some taps and dies though as my budget chinese ones are total poos. Or steal some from a friend maybe, dies are stupid expensive.3 points
-
LOOK WHATS BACK TO RESEMBLING A UTE. Next step is motor and box back in the hole/find rest of things
3 points
-
I picked up some wheels from Jessie on here, I just couldn't say no! the tyres were the complete wrong size but I rocked them anyway for a few months, 14x7et8 Watanabes. I really liked the small wheels on the Z, just needed some fat meaty tyres for the 70's racecar vibe. Went out for a photoshoot with a good friend of mine, lucky we finished shooting before the fuel pump decided to stop pumping! The sagging 50 year old rear springs are greatly exaggerated by the small stretched front tyres. The whole car sits very nose up, will need to be sorted. Its a tough balance between wanting to keep the car original, vs wanting to slightly modify and make the car 'mine'
3 points
-
i cant work a computer well enough to model all the suspension. I made some steering arms out of a bit of thin box steel that were a bit of a guess, but had the correct ackerman. then bought a cheap laser pointer from somewhere, attached it to the hub face, took out the spring, and lifted the suspension up and down. Get someone to mark the line on the wall as it goes up and down, bit of trigonometry and you have the angle. you want it to be vertical meaning no toe change. if your cunning, you will put a mirror on the wall, and a plate on the hub, then your twice as accurate and can do it with no helper Then you change the steering arm length, height, rack height, pivot point etc. one day it will work out and then measure up and machine out of steel2 points
-
Picture of fresh wheel setup. I knew new tyres leeched into white walls, but wow, quick! Looks nice and aged, not phased! Took the same pic on Tuesday and thought.. Shit that looks gay! Turns out the coil had popped out of perch and it was about 3in higher than usual! Rectified.2 points
-
so i left the door in the sun all day and when i came home it was hard enough to sand. so i did. its now really good shape wise and needs 1 more coat of primer and its ready for wet sanding along with all the other panels in the shed. why is it leaning up against the bench? because I'm painting the seams inside the door and i want the paint to run into the seam. ill do each seam 1 day at a time turning the door each time to get the paint right in there. you can see it running out the lock hle because I've been painting the whole inside of the door. Untitled by sheepers, on Flickr Untitled by sheepers, on Flickr next is the bonnet. actually next i think ill fit the panels I've done and see how everything lines up before i go to much further. after the bonnet its the rear quarters and the roof to do as well as the minor bits and bobs. its getting there….. it'll be red soon if I'm not careful2 points
-
Got lots of plans for this car. However being a student, money issues will make this a long term project. The plans include: Restoring the whole body, repairing rust and giving it a nice fresh paint job. Then going to upgrade the suspension and brakes. Not sure what engine to chuck in... Thinking of staying with a nissan engine so maybe a sr20det or rb25det. Heard somewhere that a rb25det fits in with a few modifications to the engine mounts and oil sump. But its a long way off putting in a new engine. Not going to restore this car to its original look. Want to turn it into a street drift car of sorts. If anyone has any ideas as to what i should do with it just post up in the discussion. Link is below. //oldschool.co.nz/index.php?/topic/49451-hellabroke-1980-280zx-fairlady-discussion/#entry15624692 points
-
I'm acknowledging this thread but committing to nothing at this point in time. As usual.2 points
-
This one you mean?2 points
-
both of the above parts have been moved to the next stage. the drivers door has now got some bog in it to make the shape right and its got another coat of primer on it. the boot lid has been long boarded with 250 and the shape is tip top so its got its final coat of primer on it. Untitled by sheepers, on Flickr Untitled by sheepers, on Flickr Untitled by sheepers, on Flickr2 points
-
You only have two options really. 12a or 13b.2 points
-
Carrying on from yesterday there are a couple of other things that I forgot to mention, the angle of the stub axle relative to the strut body is greater on the MK2 as it is on the Anglia (which is why you get the positive camber when you bolt it up, the fact that the tca's are longer actually helps in this respect. As a comparison here is the Anglia tca (in front) next to the MK2 one It is about 25-30mm longer The other thing that you need to do is to adapt the Anglia sway bar to the MK2 tca's I turned up a stainless washer that was countersunk to match the end of the Anglia sway bar, this gives a nice flat for the bush to sit against. I think that is about it for the steering and suspension, the brakes are another matter but once again fairly straight forward just with a few things to watch for. Anyway back to progress First thing was to get the pedal box back in and get the lines made that run under the dash The ones up by the master cylinders are a bitch to do up so I am really hoping that they don't leak! Then I got the oil cooler bolted up, I made up some brackets for mounting it and it looks like I am going to need to re-make a couple of hoses as it has moved position slightly from where I had it in the other shell but that isn't a biggie I also got the oil filter in as well. I really need to do something about that stupid FRD badge And the rest of the day was spent trying to figure out the engine crossmember In this pic you can see how low it sits, it is the lowest point on the car and it doesn't need to be. I made this thing years ago, it was one of the first things I did but I am thinking now that it will be the first thing to hit the road and having it bolted through the chassis rails means that they could end up getting smashed as well which wouldn't be cool. So I am going to re-do it and raise it up a bit, this is why it is sitting on the axle stand - plus this is about the only thing on the car that I haven't done multiple times and I can't have that.....2 points
-
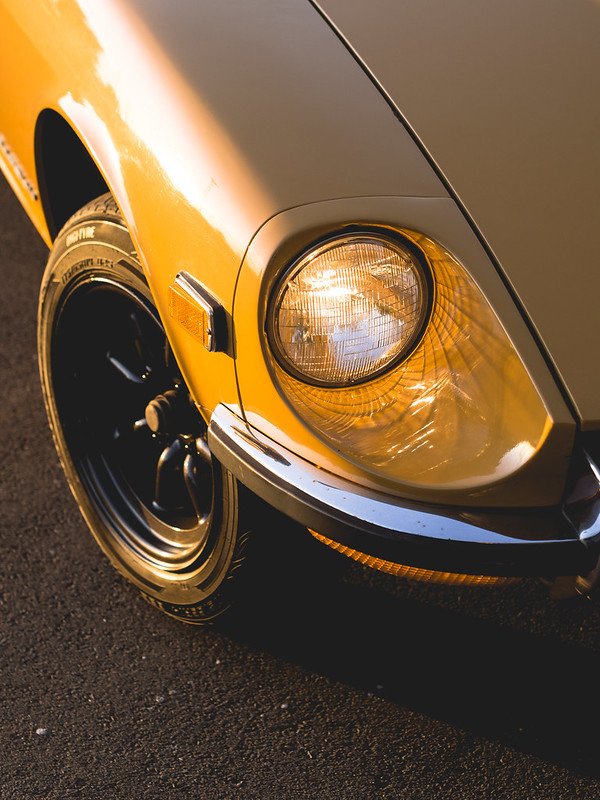
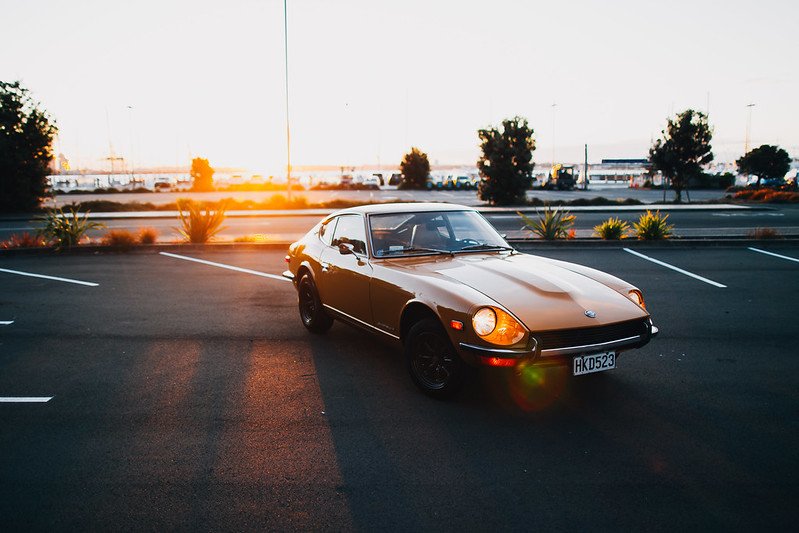
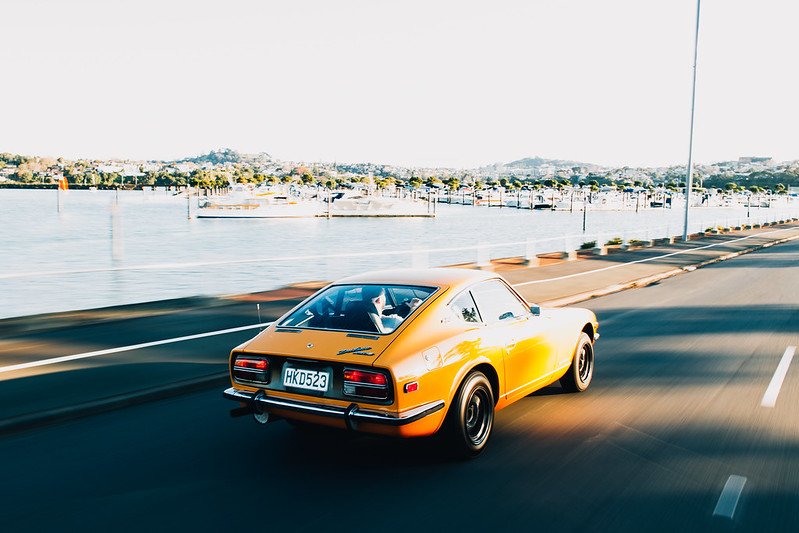
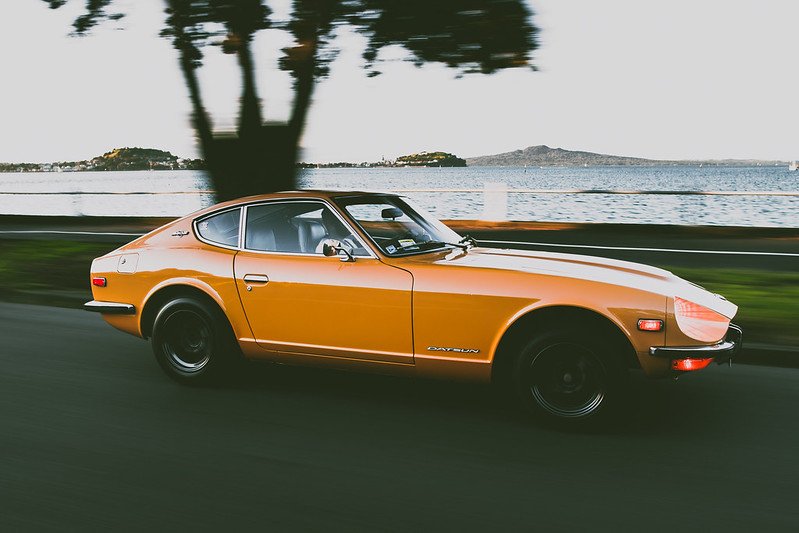
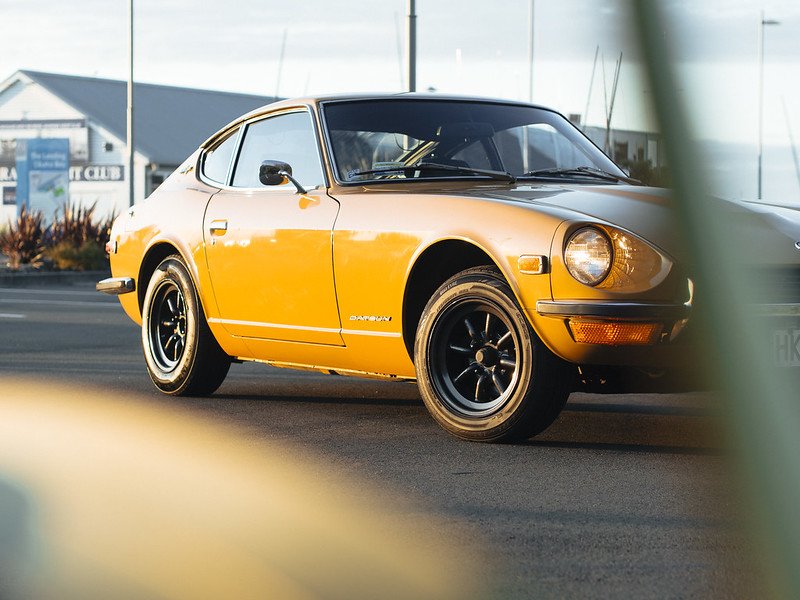
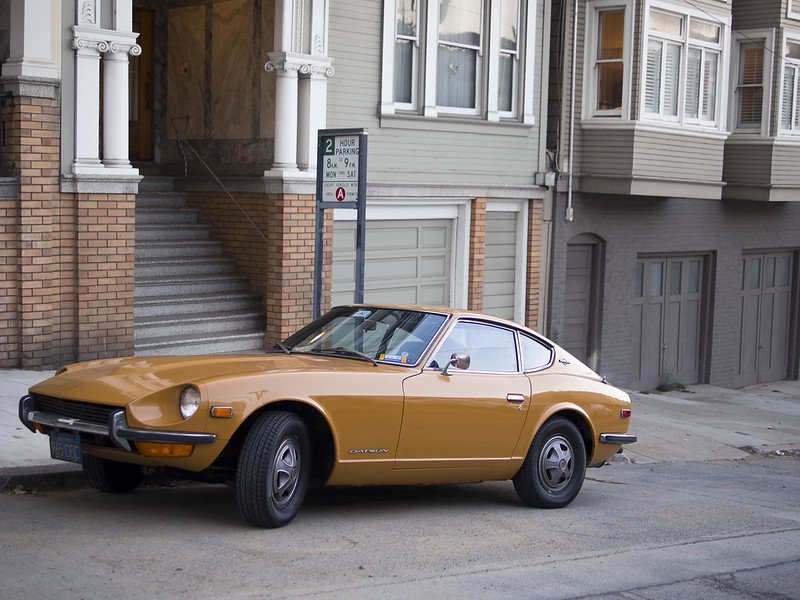
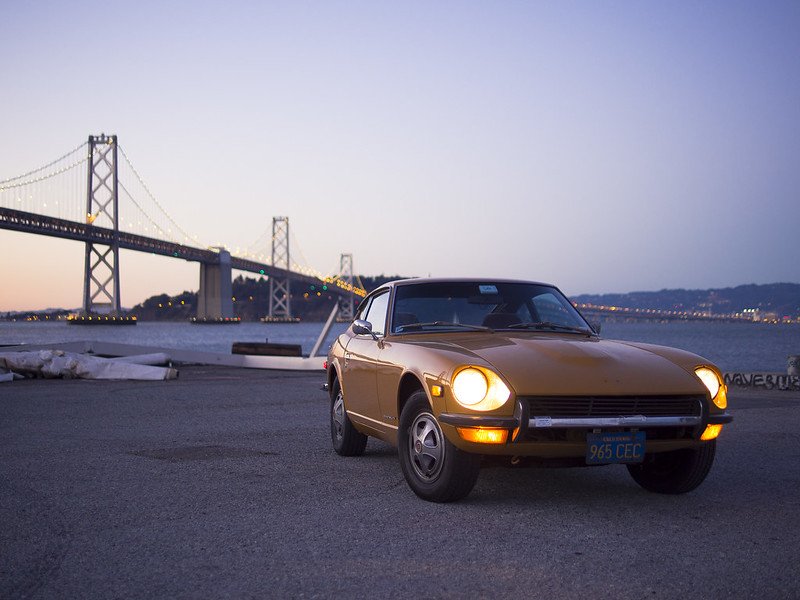
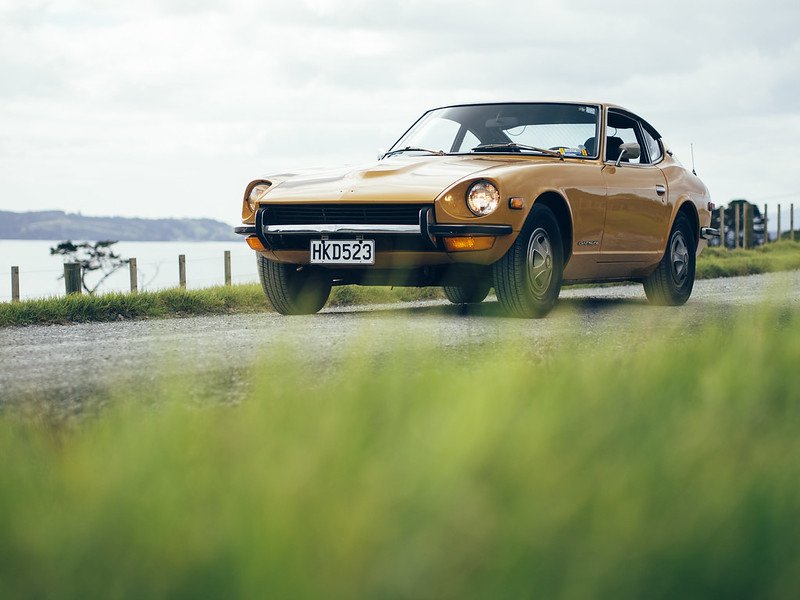
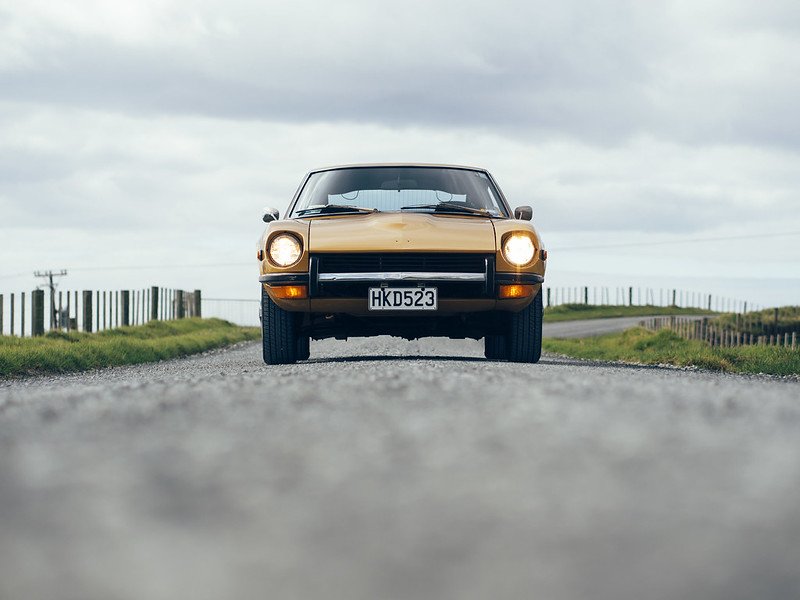
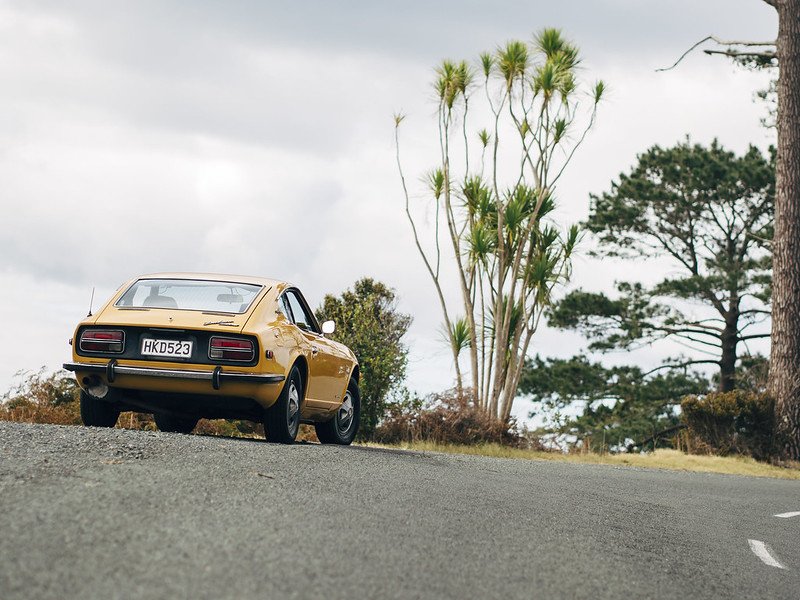
Hi Guys, Here is my 1970 series 1 Datsun 240z. Vin#: HLS30-10681 Build Date: 9/70 I will attempt to do a basic rundown timeline of how I ended up with it... 1970 - My grandfather purchased the car from his local dealer in San Diego 'Economy Car Center' 2005ish - The car got parked up under some carpet in his garage as he was too old and sick to get into it 2011 - My granddad passed away 2012 - My grandmother told me the car was mine as long as I got it out of her garage ASAP - I had the car picked up from their home in San Diego and all fluids replaced and the engine turned over - I flew to San Diego and drove the car 600 miles to SF, left it in a secure warehouse and flew home 2013 - I spent 4 months living in SF working using the on occasion - In December I sent the car to Auckland 2014 - I finally got the car registered in NZ after having to replace a chassis rail from battery acid rust. Here are some images of the Z in the states, before its rough trip home... Discussion click here
1 point
-
Well, the bug bit again. I guess you could also call this thread "I lost my marbles and imported another shitty old car from Japan! Ask me (almost) anything!" Originally I wasn't planning on buying another AW11 for a couple of years... if at all. After owning five of them over the course of the last ten years and getting sick of repairing botch jobs on hacked-up local examples I firmly told myself not to bother anymore unless it was a truly tidy one, which meant most likely having to import one from Japan. Then a series of fortunate events including a career change, the sale of my Mazdaspeed Axela to a family member earlier this year (which freed up garage space and capital), and a strong dollar to yen ratio at the time all led me to engage Ewan from Stacked to check out a few nice looking AW11s on my behalf. Yeah, I'll admit that six months after selling my last AW11 the itch inevitably came back, so I'd been keeping a surreptitious eye on the car sites over in Japan for the last year to see what the market was like! After a few hits and misses I settled on a midnight blue hardtop from a yard near Tokyo called Marumi Auto which had low kms, very little rust, one careful owner, and had been quite well looked after. It wasn't cheap, and blue was never my first choice of colour (I was angling for either a Sherwood tone, white/grey, or white/gold example this time), but for the price nothing in NZ came close in terms of quality and condition, and after owning my last one the colour eventually grew on me. By some stroke of luck, this particular one had been specced with the much more aesthetically pleasing black interior instead of the default eye-watering blue that 99% of the midnight blue cars had! It arrived at Stacked's yard in Osaka around mid-May, having made its way across the country from Tokyo on a transporter, and Ewan made arrangements to load it on a RORO carrier departing in late May. Around the end of June the export certificate and some other documentation arrived, followed by a notification from Stacked's NZ based customs brokers in Tauranga that the car would be arriving on 11th July. The AW11 then spent the next week and a half on the wharf while Customs, MPI, MAF, and Land Transport NZ all poked around and carried out their various inspections in the name of bureaucracy. I was heartened by the fact that during the border check the car wasn't flagged for rust issues nor underbody damage! Then, finally, once all the Is were dotted, Ts crossed, and palms greased in the form of invoices paid, the car left the wharf on a transporter headed to North Shore Compliance and spent a few days there before I drove it a short distance up the road to the panelbeater where it now currently sits, and will undergo further inspection to pass a Repair Cert. Compliance revealed that the left rear quarter had been subject to a minor impact in the past (20 years ago or thereabouts), and because you could still buy replacement TGP panels at the time the entire section had simply been replaced. There are no marks to indicate the chassis had to undergo straightening, there isn't any cancer creeping in around the seams, and all the spot welds look good - but there are a couple of areas where surface rust has started bubbling (the join around the left hand tail light, for example) that will need to be cleaned up once the repair certifier completes his check. I've had very limited time to spend foaming over the car because of other commitments, so it was a nice surprise today to discover that it already sports a set of incredibly rare TRD lowering springs. I'd bid on some in Japan as the car was making its way over here and just barely lost the auction, so had been feeling a bit despondent about ever finding another set. So where to from here? I'm not all that interested in making the AW11 stupidly fast, but will eventually perform a few judicious tasks such as sprucing up the suspension further, now that I know it has TRD springs (some good Bilstein struts and a rear swaybar would be nice), adding a LSD, fitting a set of extractors I did manage to win ex-Japan, transplanting a few bolt-on bits I'd hung onto after selling the first '80S KID, and tidying up all of the little interior and exterior blemishes I come across. May even pull my Buddyclub P-1s out of storage, paint them a nice shade of bronze, and fit them to the car, and also hit up Yahoo Japan for any oddball accessories such as driving lights and roofracks that might pop up. Still undecided whether I want to go for a full period-1980s look similar to what I'm planning to do with squid (my Skyline sedan) but overall I'm hoping for a nice "clean-slate" build - not concourse spec but tastefully tidy and done up without a hundred things wrong or fucked with! Stay tuned for more. Discuss: //oldschool.co.nz/index.php?/topic/49412-80s-kid-part-ii-eds-aw11-sc-chit-chat/1 point
-
Sup fellas As some of you may be aware I've been waiting for rubbers from the states for my pontiac found out yesterday they will be out of stock until xmas. . So gave up & went hunting then found these guys did the lot & had i all in stock. http://www.basisnz.co.nz/index.pasp I brought Cortina stuff off them when I built it but thought all they did was old ford stuff.. Not only do they do everything for almost everything but its a lot cheaper. Was gunna cost me $880 through Chucks but only $507 delivered plus a few extra bits .. Thought some of you may like the info1 point
-
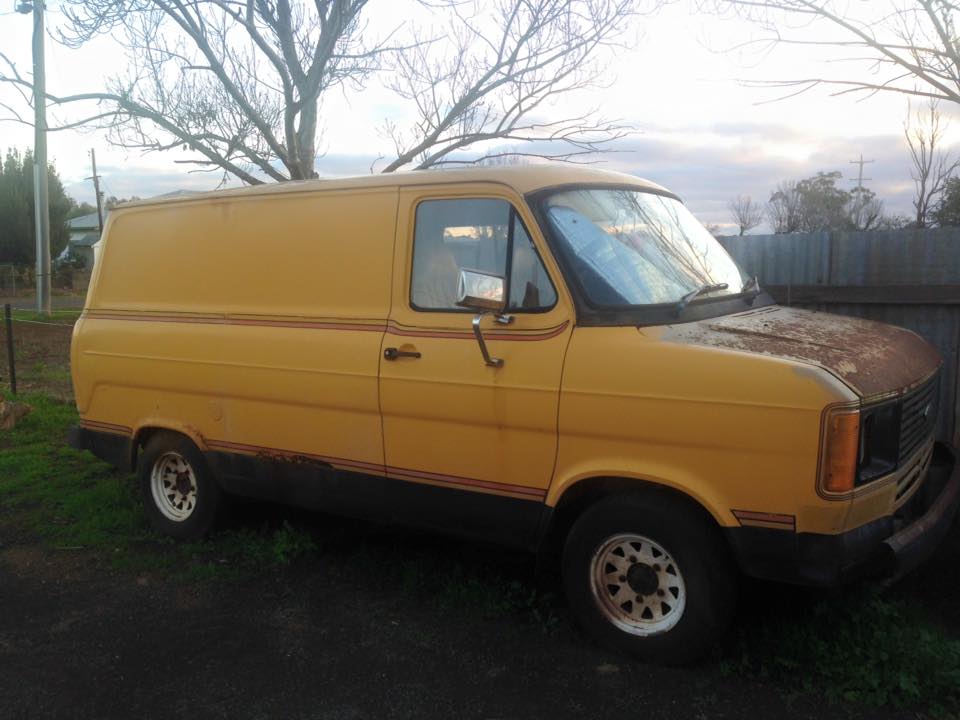
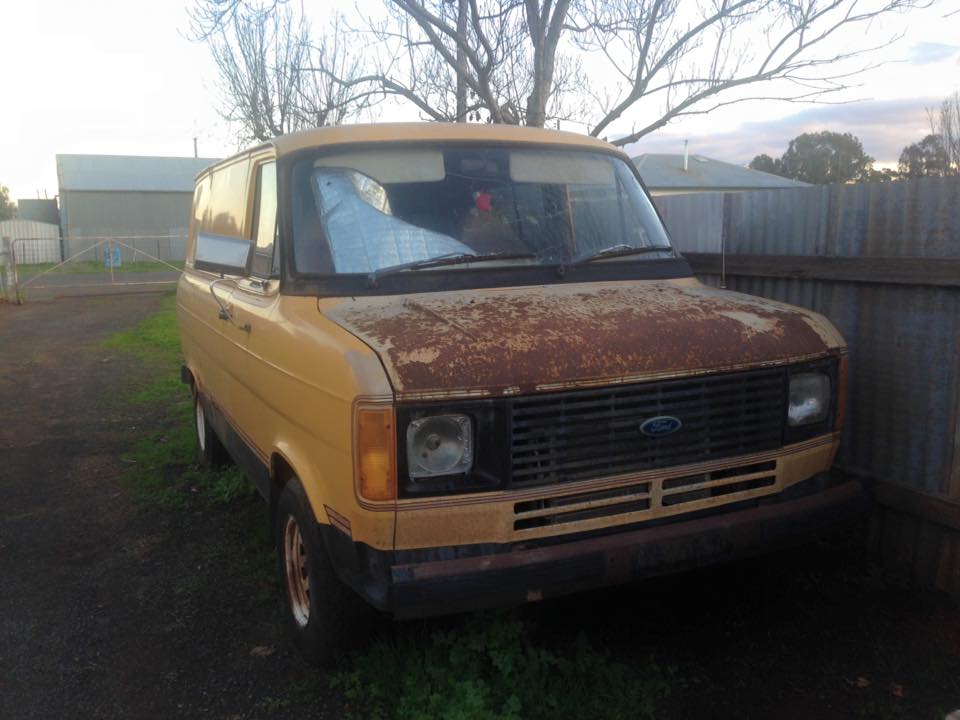
It's a bit like waiting for a bus (or a minibus in this case!) you wait for ages and ages, then two come along at once! I had been looking for a Transit Sundowner for several years, and had pretty much given up on finding one, then a friend pointed one out to me for sale on another forum in Adelaide, and I bought it. I have only done a little bit of work on it so far, but still plan a stripdown and full resto. Then two weeks ago someone else pointed this one out to me, and I just had to have it. It is a 1979 build, in a colour called Marigold, and is very original, even down to the stripes. It has been parked up for about 20 years, and the person I am buying it off purchased it 3 months ago from the first owner, with a view to restoring it. Things changed, and he advertised it for sale. I saw some pics and had to have it Originally a 3 speed manual, it has been converted to auto. It had power steering fitted from new by a dealer, as well as air conditioning. The power steering box looks like a Ford Bronco one, it is quite a good conversion. The vendor is just getting the brakes working, as the shipping company won't move it on only the handbrake, which is all that works at the moment. The engine runs okay though. Anyway, I am just arranging to get it shipped back to NZ, and it should be here in a few weeks. Discuss here: //oldschool.co.nz/index.php?/topic/49414-browndogs-1979-ford-transit-sundowner-yes-another-one/
1 point
-
I started building this camera last Friday because I have a nasty chest infection and cant spend time in the garage at the moment (too cold out there), but I get stir crazy sitting inside watching youtube/reading books/internetsing etc etc. Wifey isnt so happy about all the sawdust Im making but at lease she doesn't have to put up with me whinging about being bored every 30 seconds so she seems to be putting up with it. Heres what I started with: The lens and shutter work nicely and from what I have read online covers up to 5x7 so 4x5 with movements should be all good. The black thing is a film cassette, it holds 2 sheets of 4"x5" film, hence 4x5 camera. A lot of landscape photographers still prefer this format over digital apparently as resolution is 13x that of 35mm film which is said to be around 16megapickles equivalent, and the movements of the camera allow you to change the perspective of the photo in ways normal cameras generally cant. So far I have almost completed main frame of the rear standard. It will hold the film cassette, the ground glass that you use to compose your picture (yet to be made) and will pivot on a rail, and also be able to slide back and forth. I dont have much in the way of woodworking tools so this is all done manually with knifes, chisels and handsaws. Also dont have much in the way of woodworking skills so learning plenty on the way. kitchen counter at the moment:1 point
-
I bought a company and the owner had never knowingly thrown anything away, This is some of that stuff. Everytime a bit of the workshop gets cleaned we find something interesting, last time it was a complete virtually brand new laser level set and an insinkerator. I have about a dozen gas regulators and the like, and we once threw away 10 broken grinders that were being kept as spare parts, also 3 or 4 broken broom handles. You get the picture.1 point
-
Slam but retain bumpers1 point
-
Found it on one of the facebook buy sell pages. Guess i was the first one that made contact and a bit of luck.1 point
-
Knowing these cars faaaiiirly well. I would suggest you have a lot .. a whole lot, of cutting and welding ahead of you. Probably even more than my 110 and that's saying something.1 point
-
Wow. Now that's a barn find L20! You certainly have your work cut out for you! Awesome!1 point
-
cool project, always liked the old dr/gn donk. but you are the worst at taking pics,1 point
-
chris/euron8 has vintage grumbles old lada IIRC which had a healthy dose of slam. Infact the build thread will still be around. Hold one moment caller //oldschool.co.nz/index.php?/topic/32728-euron8s-lada-1500vaz-2103%D0%B6%D0%B8%D0%B3%D1%83%D0%BB%D0%B8/?hl=lada1 point
-
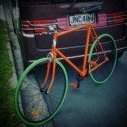
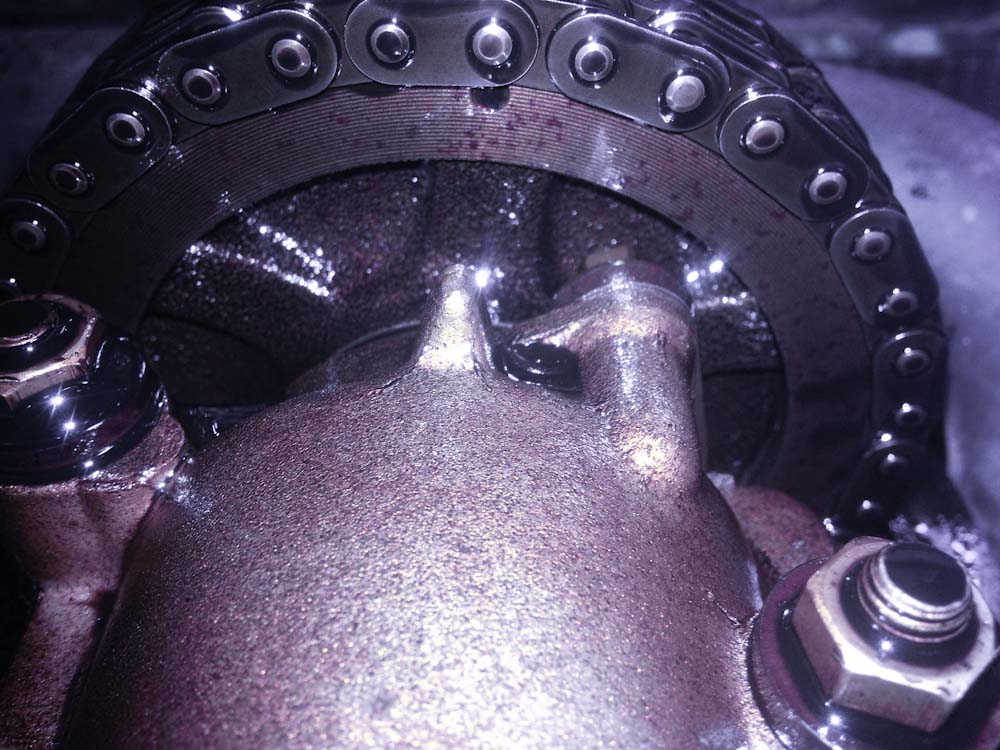
Few more checks today, my original Niva engine ran rough the whole time I had it eventually we found the timing chain had jumped a tooth, being I have already found the carb needs a birthday I'm no longer paranoid but I figured i'll check the timing just because, and I get to have a look at the condition of the engine, it all looks amazing in there! (dot should line up with the post, rotates ccw) Cam timing is just behind, not sure if I can be bothered shifting to the next slot to see if it improves, static advance was bang on 10degBTDC, so thats all gravy. Pulled the steering idler out after a small battle with the bolts, bush measures up as 21mm, shaft 19.6mm, that explains the wobble! also the grease inside was dry and took some scrubbing to free up. From the Niva i've found these seem to wear the lower bush and not the top, in the past i've swapped them over to get more life, as i'm ordering a bunch from overseas i'll just replace the lot. Pulled the instrument cluster to get this gauge out, has what looks like mould inside, was hoping I could pop it open for a cheaky clean, sadly it looks like they're sealed, only bonus was half the warning lamp bulbs were missing, add a few bulbs to the growing shopping list... Also took the bonnet off, makes for easy work!
1 point
-
Buy my fe 2.2, do the bearings and stick that in1 point
-
New handle, not much happening.1 point
-
Speaking from experience of myself on sparkles drive this thing does good burnouts, even with flat tyres. We pumped it up, but it's stuffed. Thing runs pretty good, just watch out for the sticky throttle cable, sparkle wound up in the fence / bushes because of it.1 point
-
yes correct. My white one does too, bit of a recurring theme? problem is they don't fit in either of my garages, too tall! Luckily I have free storage in a nice warehouse unit And it's 3x Transit vans, one ex Police LDV van, and 1x Econoline campervan. Oh, and an Escort van! I got given a brochure at the last Caffeine and Classics by an old guy asking if I wanted to join a vannners club! Couldn't think of anything that would excite me less......... But speaking of rape vans, check out this bad boy that a friend of mine just bought, makes the Transit look quite innocent and friendly! :1 point
-
Are you suggesting because Dave has a vw he should dress like a hipster?1 point
-
ha you and 50million other escort piners1 point
-
Thanks BVB, I need to get them finished for the ride I'm doing in October. It's quite good knowing you need to get something done by a certain date or else you won't be able to do the event that you have already paid for haha.1 point
-
New bars!!! Its a bit cramped with the stock resivoir, so a new little one may be on the cards, Gotta get a new brake line sussed cause its split Pics of the bars on and loaded with the stock gauges and everything. ( also discovered how to resize my images, finally) still can't rotate them though1 point
-
Well she is still cruising around in this most weekends at netball, at heaps of car shows and the odd trip to the shops. I still havent gotten around to sorting out a nicer push pole or a gear lever and the lake pipes are still sitting in the garage somewhere too! She loves cruising around in it and her typical driving style is one foot on the wheel, kicking back and people watching. Few things to note if you are going to make one. Be prepared to be stopped constantly to be asked "where did you buy that from?" or "so cute, can I take a photo?" Because it is so low to the ground my daughter sometimes gets bored and decides she wants to pick up random crap of the ground or drag her hands through the dirt. Watch out in crowds, retards wont notice it despite being bright pink and could end up tripping over it and sitting on your child. Castor wheels are not that flash on rough ground. She rattles like a bitch sometimes. Might try to rubber mount the front castor but most places we take it are nice and smooth. Women think it is the cutest thing ever and flock to it, Dad's usually look very jealous and grandparents ask if she is wearing her seat belt or has she got a drivers licence. Few shots out and about Greeting Dodgy Uncle Hayhole and Auntie Laura on his trip to Australia Spotted at car shows:1 point
-
So I drove this around a bit in the weekend, my man warned me that it will attract old men like flies on shit. Literally the first time I stop in a public venue an old man in his eighties wanders up. They are like fucking zombies attracted to fresh meat... not very fast but extremely intent on the purpose at hand. They love them old Humbers for sure. No issues so far, it runs like a dream. The steering is probably the worst bit, it needs a fair amount of positive input. My mate reckons that it is just how it is, but i imagine some loving to the steering box and checking the geometry might help. It is not that bad really, but it would be nice to improve things. Intent this week is to fix up the rust under the bumper and the gearbox mounts then try for a wof. That is all.1 point
-
Got a little bit more done on this now, started off by making a frame for the ground glass. I carved a portion of the inside of the frame so that the ground glass sits on a step on the inside at 5mm from the face of the camera back. this is important as that is where you focus to and it has to be the same point as where the film sits in the film cassette. Next I ground the glass with a combination of fine valve grinding paste and cerium oxide mixed with water. Last time I did this I used medium valve grinding paste and the grind was too coarse. On cutting out the piece of glass it chipped out on one edge, so it was back to the grind stone (or chunk of stainless steel in this case) for round 2. Grinding glass: Chipped piece: 2nd time ok! Glass in frame: This frame will be spring loaded against the back of the camera and you will lift and slide the film cassette underneath once you have composed/focused your image like so:1 point
-
Had POOMAN swing round today and help pull trans away from motor. We pulled the bent flex plate off anf swung down to segedins who were more then happy to replace the flex plate and also upgrade me to the more expensive one free of charge. Everything was hard work but came apart and went back together without to much swearing and cussing. Also mounted radiator properly. Went for a burn in it was super stoked with everything. Also bought some straight through mufflers and made a few dump pipes which I'll tig weld up this week at work1 point
-
Some progress on the rear brakes here are the old axles that I had redrilled The problem is the big holes on the flange that are so you can undo the axle retainer bolts, because of the position of these I can't redrill the Anglia axles to 4 x 114.3, I have been told that there isn't enough metal between the old stud holes and the new ones, you can also see how close the new suds get to the edge of the flange which is also not going to pass, made worse because I had the od of the flange turned down to suit the discs. So this was kind of a major, basically the wheels that I have are not going to work, I have looked at all the different possible ways to solve this, adaptors and different offset wheels, custom axles etc. and what I came up with is that I am going to have to keep the 4 x 10⁸ stud pattern. So that sucks but it is what it is so I just have to deal with it. Anyway Koya offer custom drilling and offsets on their wheels so it looks like that is the way I will go. The other thing was that the wheels don't have any load ratings on them (this is probably the one thing that I really have issues with) apparently LVVTA are clamping down on wheels as there have been a couple of cases where rims have come apart on the road recently. So factoring in that as well changing wheels just makes sense, shame though, I really liked those wheels. The next issue is that I welded the caliper mounts onto the end of the diff housing and they reckon that it is a cast item (plus it was MIG welded) here is the mount. The solution is to have bolt on caliper mounts that pick up on the axle retaining bolts. Here is how I had done it. the mount sits about 20mm back from where the studs go through and where the new bolt on bracket will need to attach, I went through a bunch of disc brake catalogues to find a rotor that had 4 x 10⁸ holes and the shortest distance between the rotor face and the mounting face to try and minimize this and keep the bracket as flat as possible and the best I could do was a fiesta disc out of the UK, it gets the offset back to about 8mm with the S13 Silvia calipers that I have. Anyway thanks to the fact that I am a parts hoarder I had a spare set of axles so these were turned down to suit the new discs Then I went to cut the old welded mounts off the diff and the more I cut the more I thought it was a bad idea, I figured I could grind them back but it was going to take ages as there was hardly any room for the grinder and the chance of going to far and wrecking the housing was quite high, so I grabbed another housing and I will use that one and just add the brackets for the shocks etc. Here is the disc and caliper on the diff and this is the offset between the caliper mount and the face where the bracket will sit Interestingly (well I found it interesting), this housing has bolts retaining the axles and the other one had studs pressed in, I am guessing the stud type is earlier as I think that diff housing was out of a 1960 model and the blue one is from a 67. So this week I will try and get this mount bracket sorted, I need to figure out if I should go with a bent bit of plate or machine down a thicker plate to get the offset.1 point
-
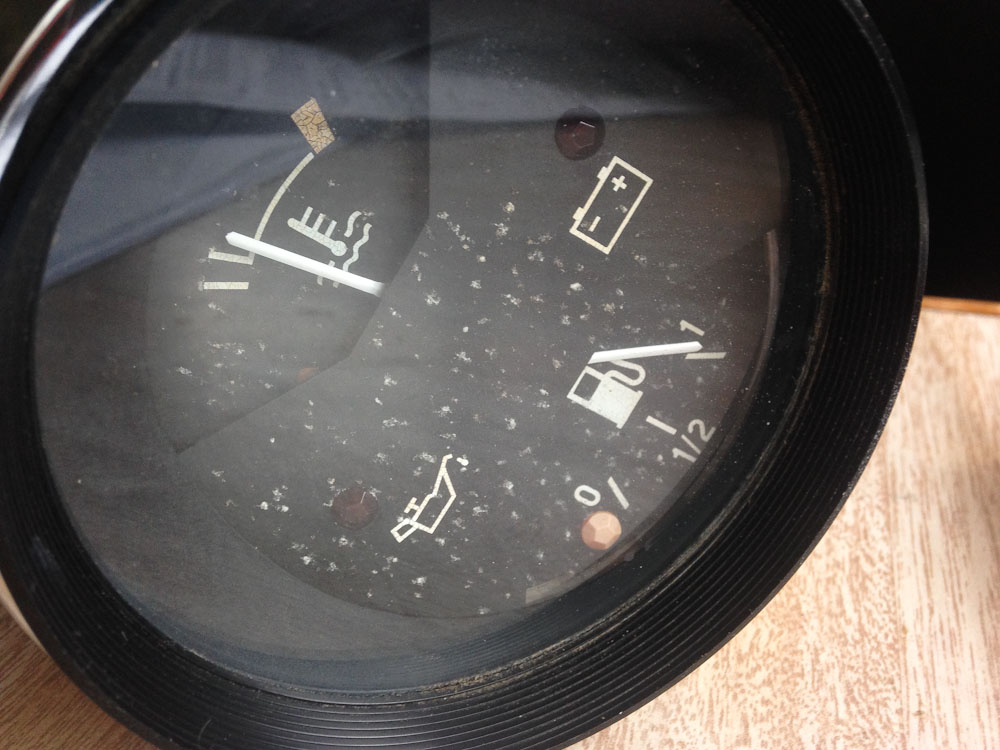
Took apart a diff'. Great thing about the old dinosaur oil is it has been underground for 100 million years and hasn't gone rotten. This bolt still had some on the threads after 70 years in the weather. Under the crumbly leather and felt oil seals the bearings look perfect. Too bad the shaft sticking out the end is so rusty, only good if i wanted to narrow the diff now. Brake backing plates might need replacing but the brake cams freed up nicely. Will probably replace those though because they have some rust pitting that the LTSA might be prejudice against. In with the old and out with the new. Replaced shiny bracket with rusty old one. Floor boards don't fit exactly but i guess i can trim them. Free bracket with chipped paint anyone? Another oldschool user has provided me with a a template for making the windshield glass, just one problem. My frame is made of round tubing while the originals were flattened tube, hence the glass would be a tidy bit too small. Random shot of light bracket. Only problem is there are no places to bolt fenders which i'd need if i don't get a fenderless exemption. But i think fenders would look dumb on this particular car anyway.1 point
-
this hit the shelves today. many thanks to Richie for his superior skills at taking pictures and making words good. Untitled by sheepers, on Flickr1 point
-
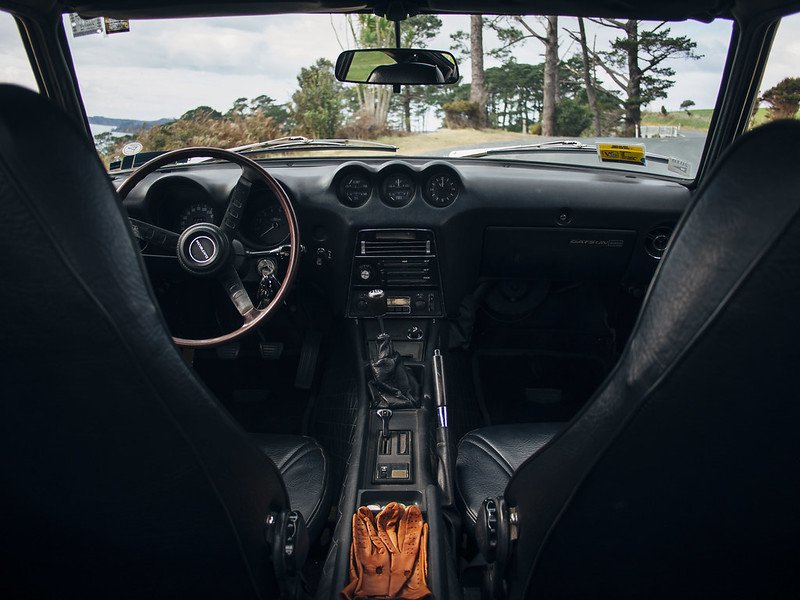
Woodheads auto in Auckland did amazing work replacing the right hand-side chassis rail, as well as a new clutch. At this time I was working a lot and the car was stored at my parents place up north, So it only really got driven every now and then. Took it for a nice gravel road drive after spending 4 hours cleaning it... I replaced the door seals and a bunch other seals around the place, was hoping to help with the fumes, it helped a little but still more work to be done... Cleaned off the stickers on the front bumper, and order a new badge. Found some sweet leather driving gloves in a leather market on a recent trip to Italy. Ive never worn them, but they look sweet sitting in the car!
1 point
-
I very much like this rear spoiler, ill probably make an alloy one at work because i dont really like fibreglass parts. Not much of a fan of the over fenders though
1 point
-
Next day was DIRT TRACK RACING! When I decided that I was taking the Van, I was a bit skeptical as to how it was going to go So I wasn't overly enthusiastic. I had to stop for a bit to give it a break after hooning up a hill trying to keep up with some much faster cars. So what better to dio than take a photo. eventually got to dirt track, emptyed out the back and jumped straight onto the track. Pic by: Snoozin It actually went better than I expected... and sounded the part due to keeping smashing the exhaust on things. Could hoon it down the straight and just flick/throw it in and it would feel as if it wanted to slide... Until it started coughing and spluttering. I dont think the carb really had the float level set correctly for it and it would starve itself of fuel and once you straightened up it would go back to normal.
1 point
-
so replaced all front brake cylinders and adjusted + bled them. The mrs (Annika) found a good rug for the seats, suits it really well Removed and flushed water lines and radiator,replaced hoses as they were rock solid and cracking. The radiator was full of lime stone and crap, stained all the concrete at work, oops. all good now and got all the bits for engine service. need to find a thermostat housing or make one as the one on there is stuffed. oh also cut some under lay up and got Annika to sew it on the weekend.1 point


This leaderboard is set to Auckland/GMT+12:00