
Leaderboard


Popular Content
Showing content with the highest reputation on 04/14/24 in Posts
-
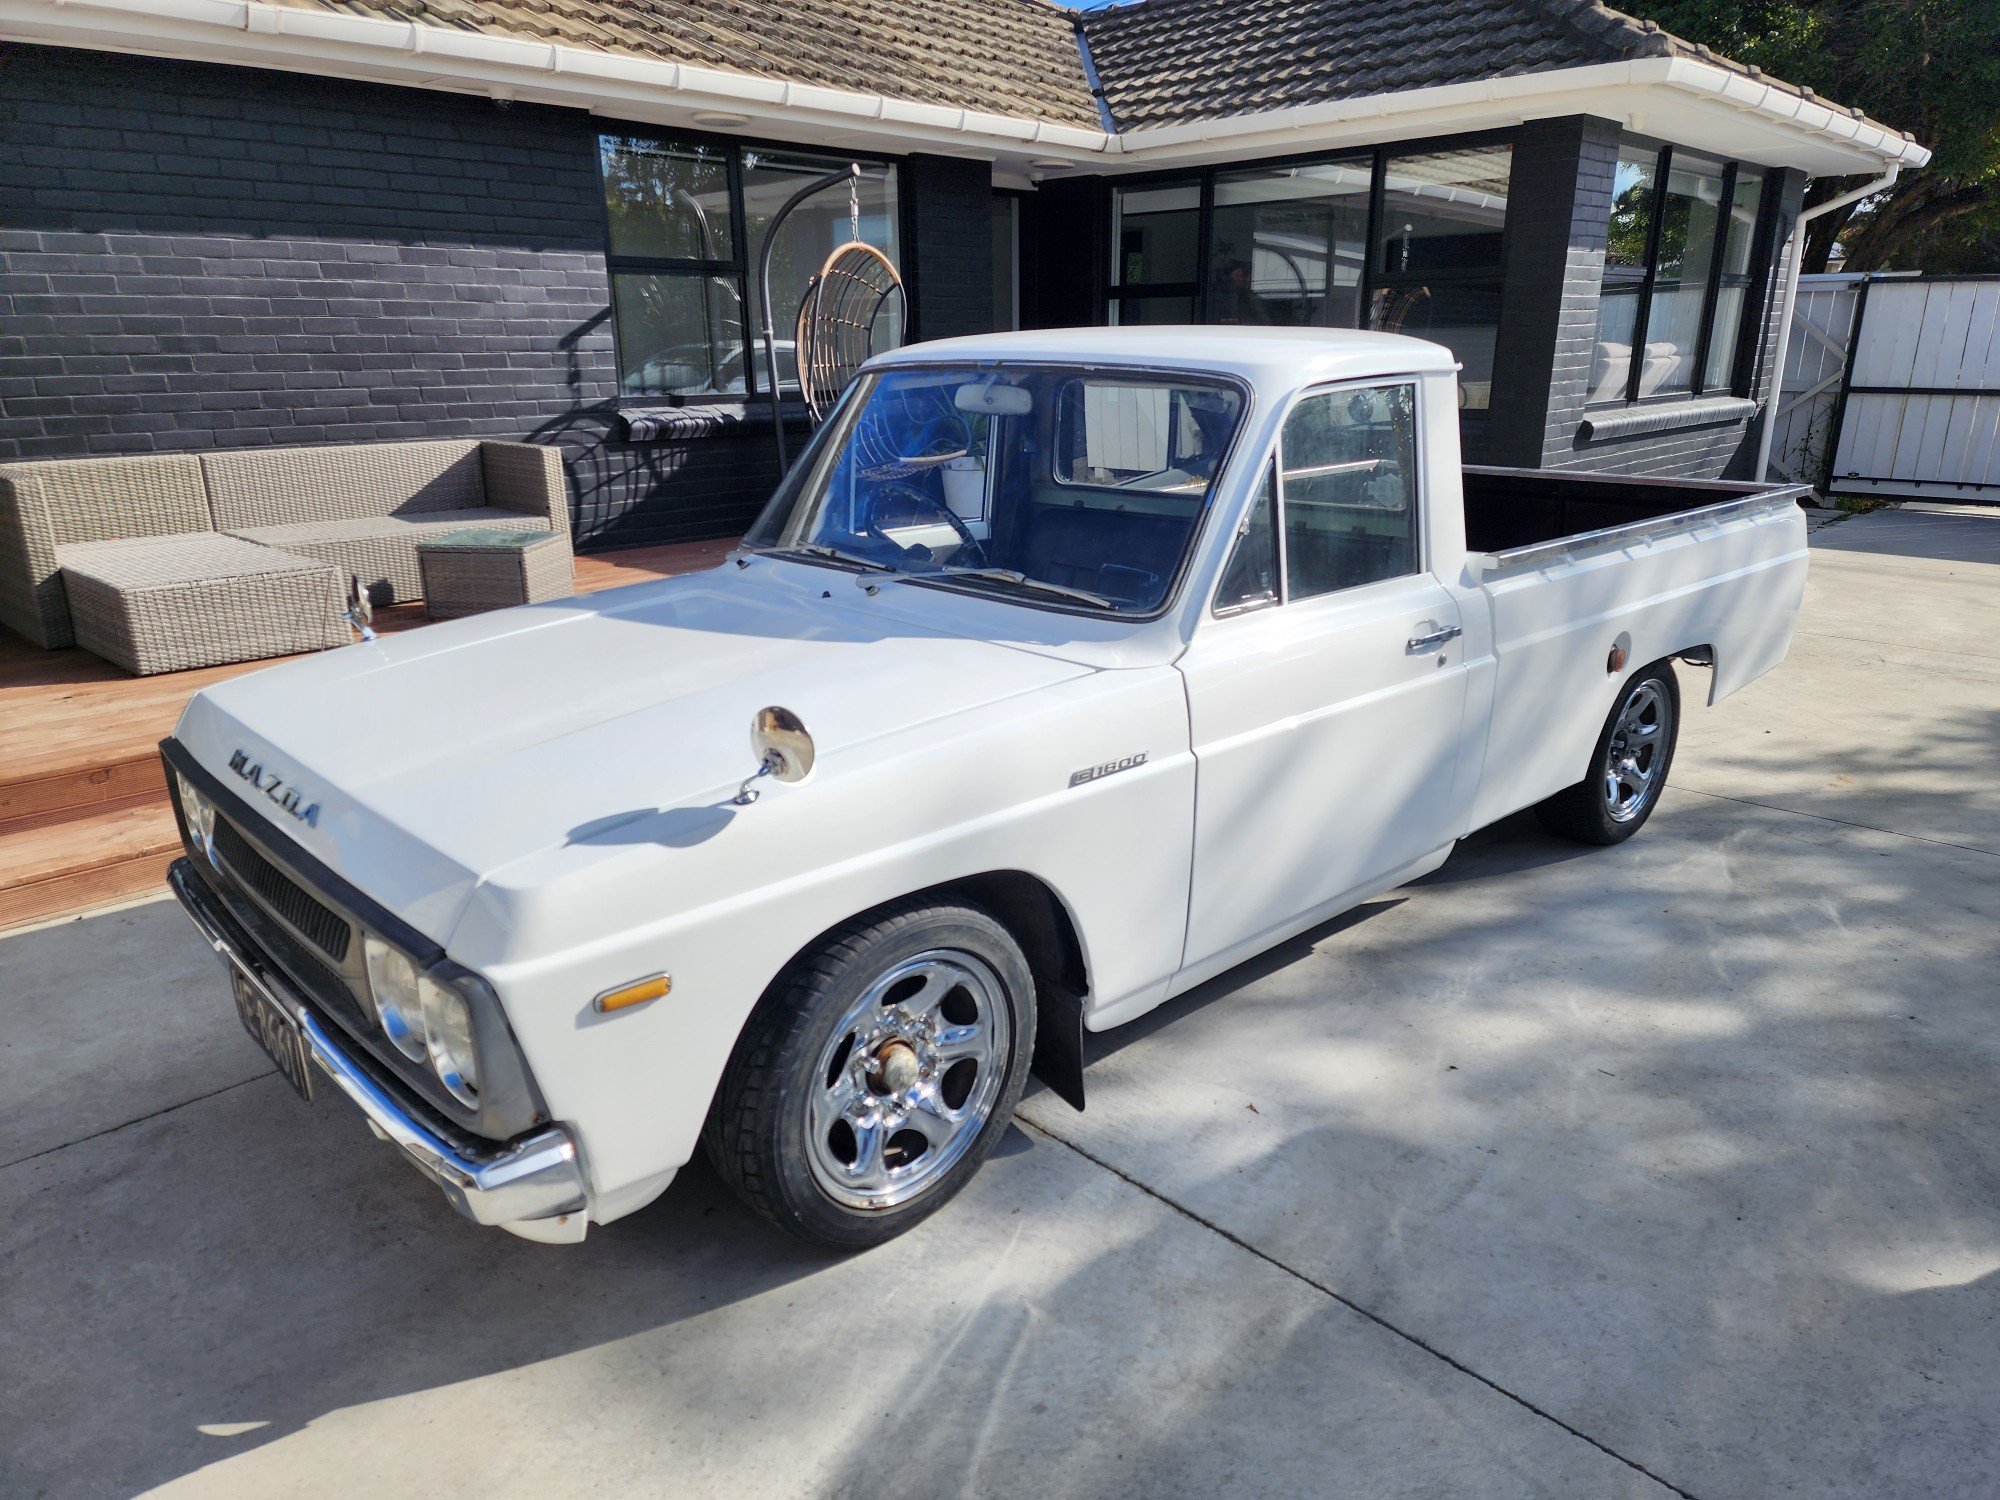
Bit of a bitter sweet update. After the last monthly meet the 2l decided to run a bearing on the way home leave me stranded on the side of the motorway. I managed to source a gamble na 1600 motor of a friend so whipped that in and after the legend himself @RUNAMUCK worked his wizardry swapping out the dizzy and timing the motor up I was back in business again . Have taken it for a wee drive around the block and the motor seems to be happy enough. Old water pump was shot so picked up another and slammed it in. Oil change and some new plugs and hopefully it's smooth sailing from here on in I also put some guard mirrors on it. Damn they're useless but they look the part
 14 points
 -
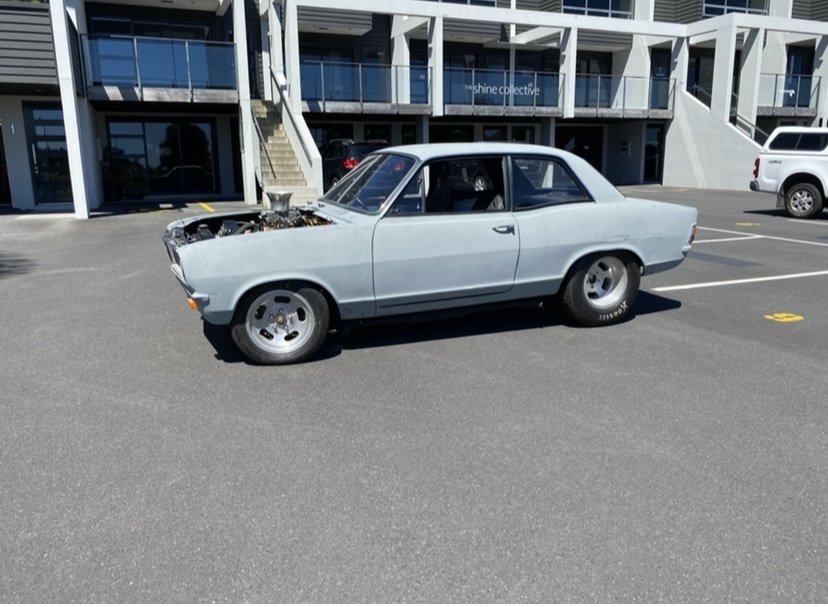
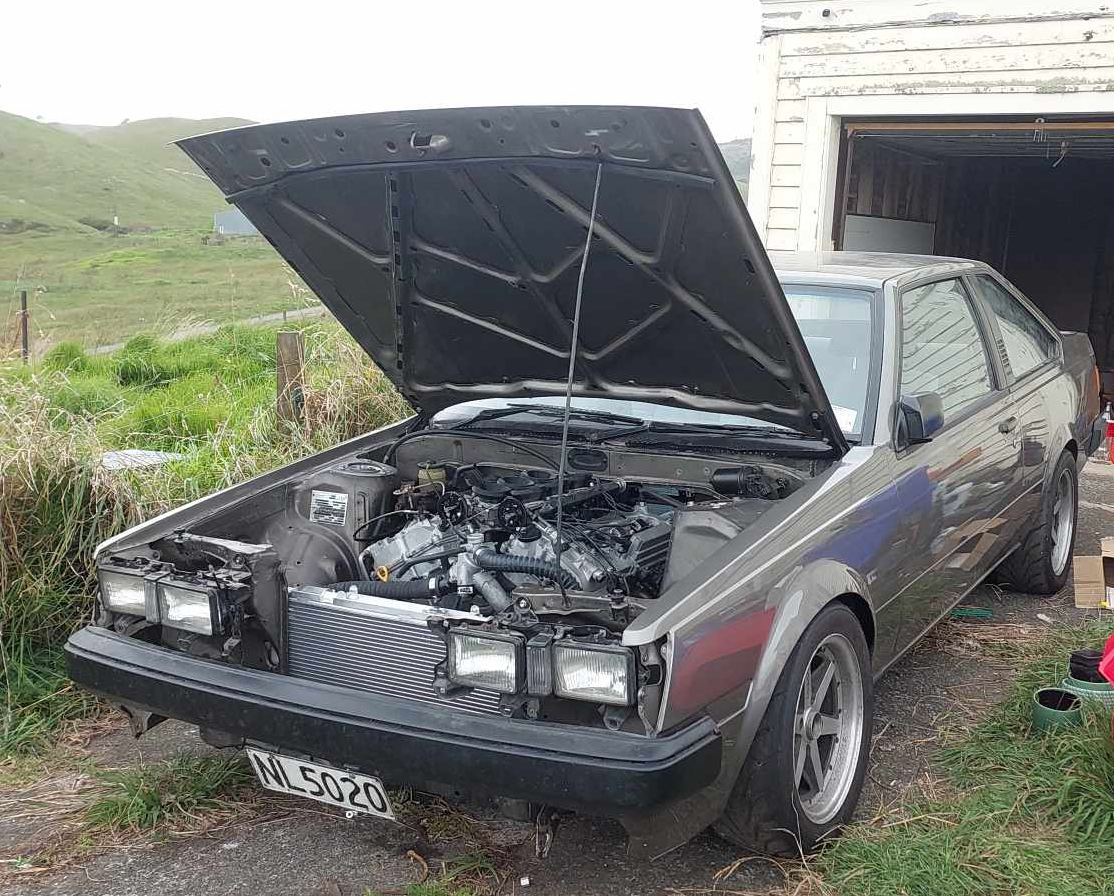
The HB Viva went to a new home and have this new project arriving next week
13 points
-
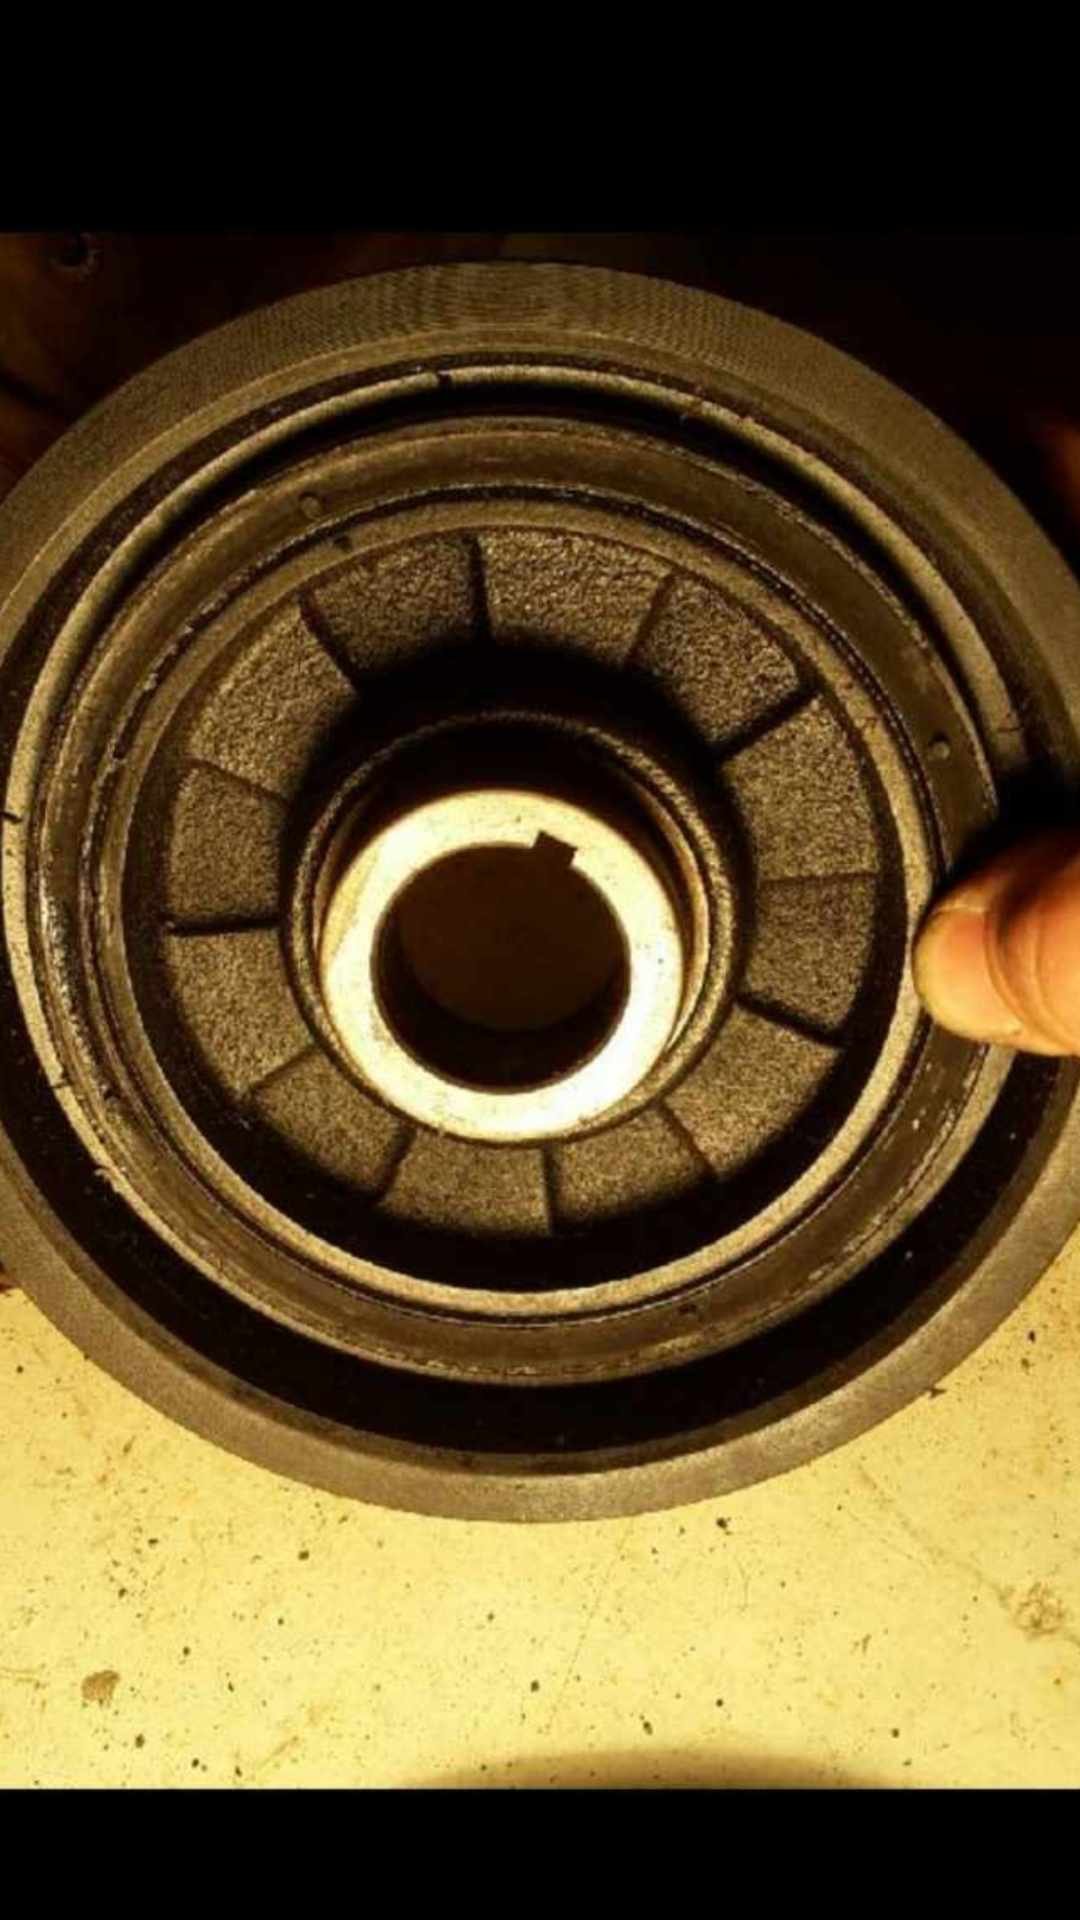
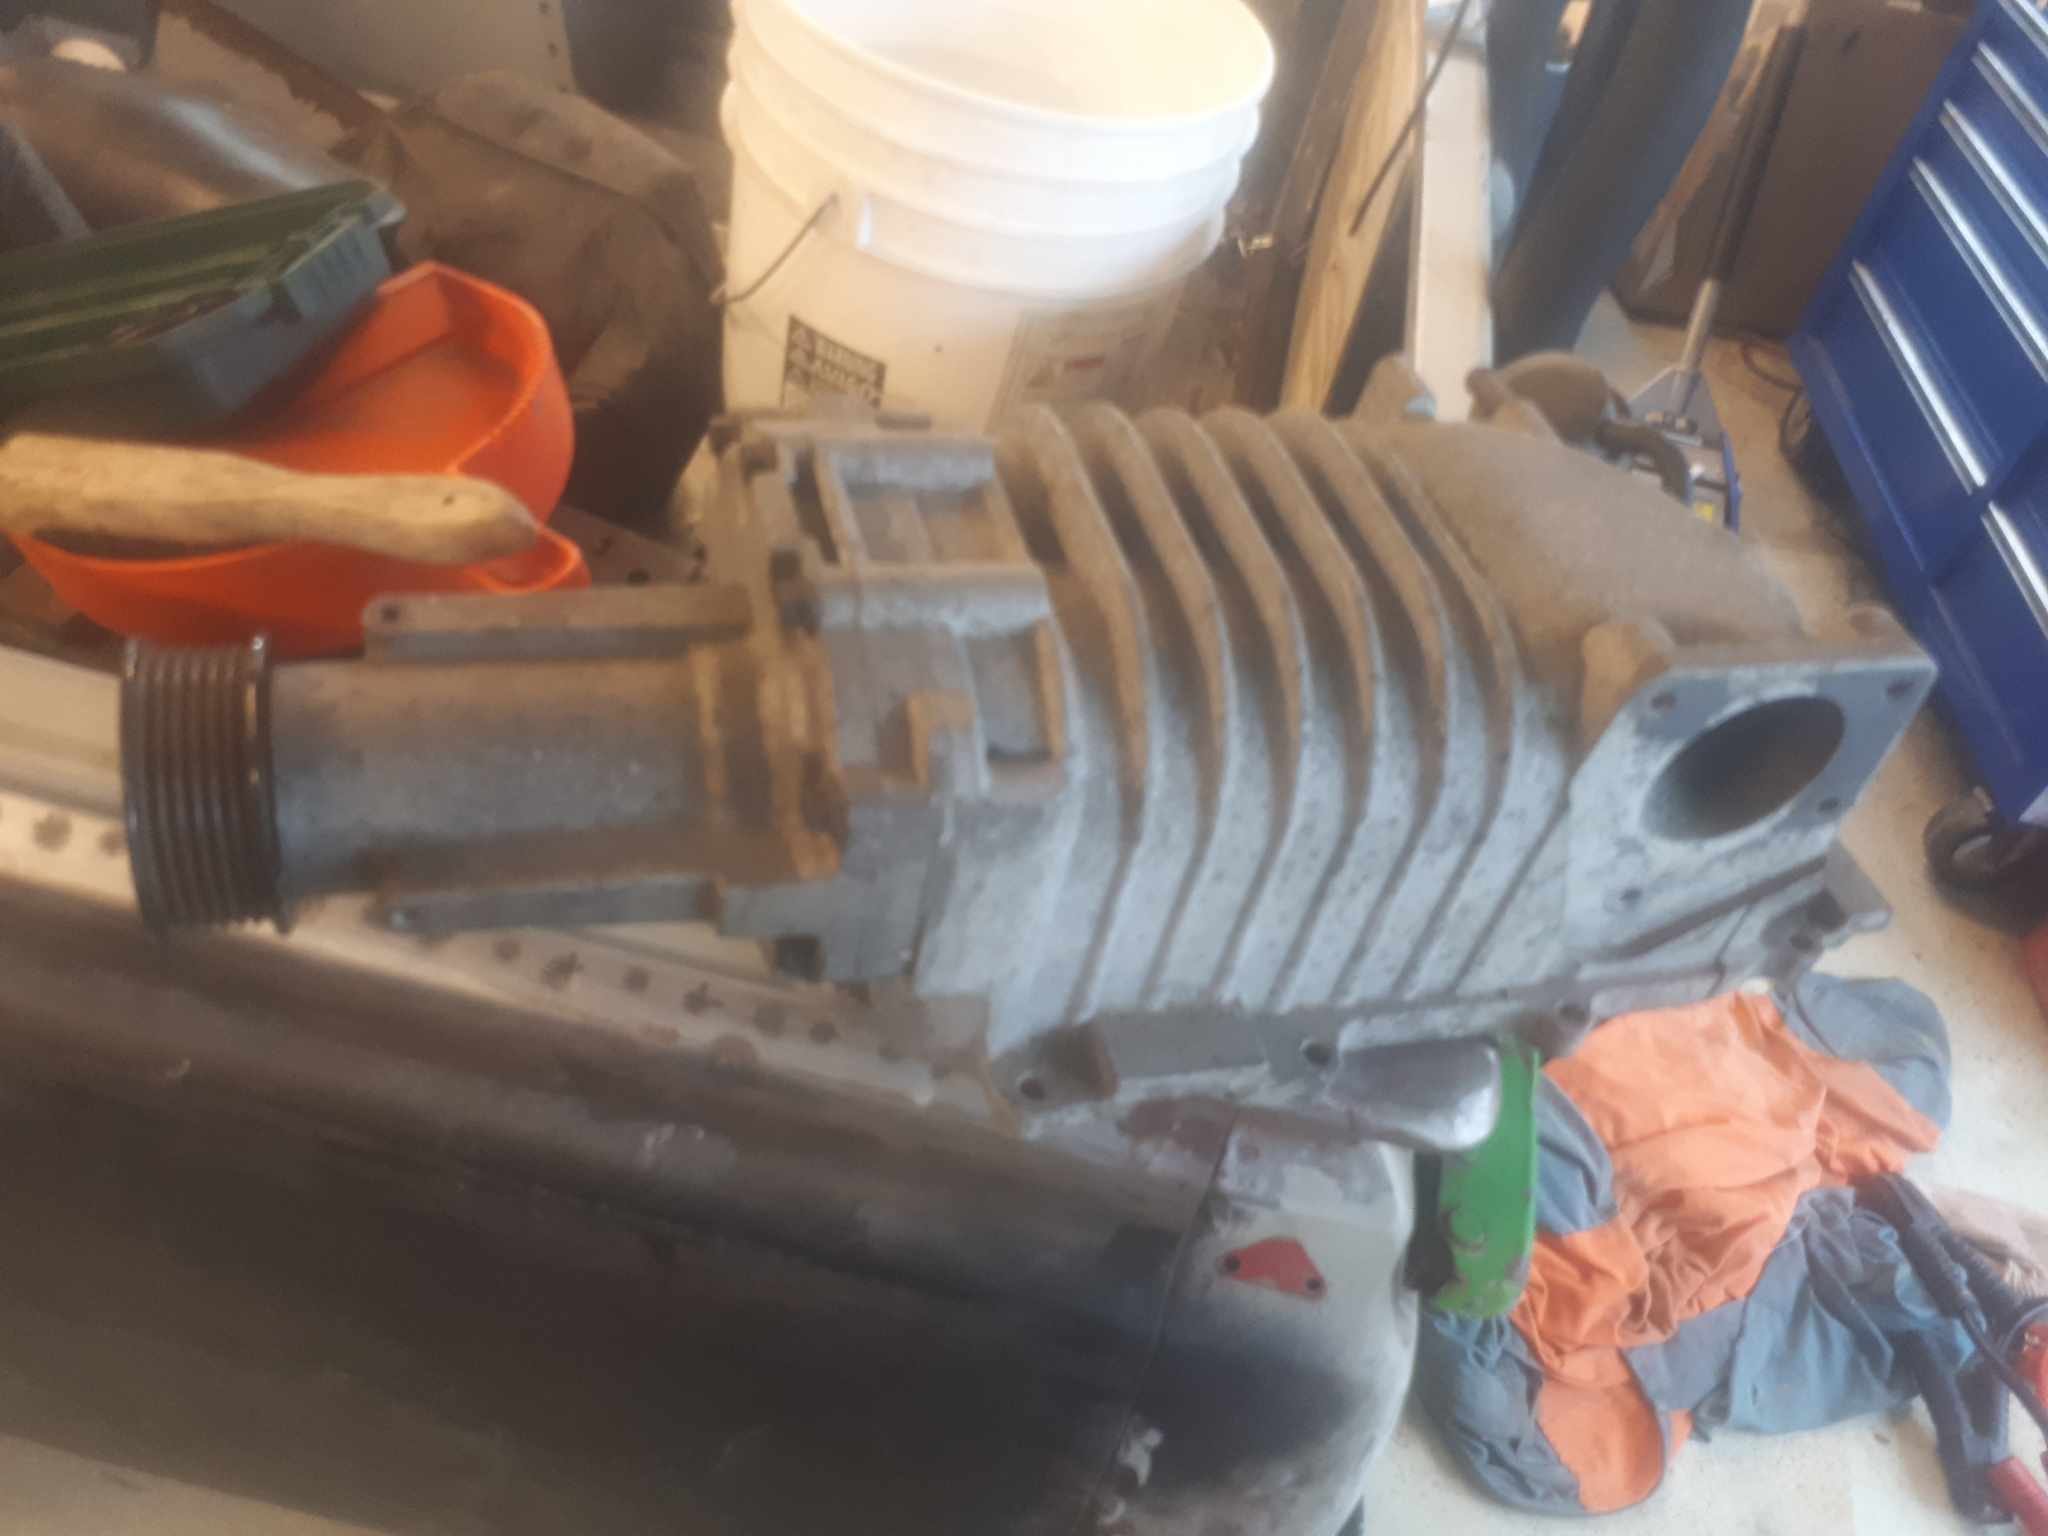
PNot an update as such, more a musing/potential future upgrade. Upon procuring the engine, id noted the front crank seal had been leaking. I whipped the crank pulley off, and much like the pinion seal on the diff, the seal journal was quite rutted/cut into. A speedy sleeve put this back to new. While i had the crank pulley off, i noticed an interesting shape was present. So i figured while it was off, it would be a travesty not to machine off the power steering pump pulley, (these are attached to the main hub, not the dampered pulleys that drive the water pump/alternator/AC) A nice spigot was machined on, and some holes drilled and tapped to correspond with those nice bosses. This is very hard to photograph in the car. Quite a while ago, the old boy picked up an Eaton M62 supercharger off Ebay. It came off a USDM nissan frontier truck, with the nissan VG33ER. (The larger version of the single can VG30 which were once common here) i basically told him, i was commandeering it. And back when @Vintage Grumblewas a cool kid, he had some SR20det injectors which he kindly gifted to me. So in the unlikely event 5his wreck ever sees the road, it wont be too big of a stretch to turn the wick up.
10 points
-
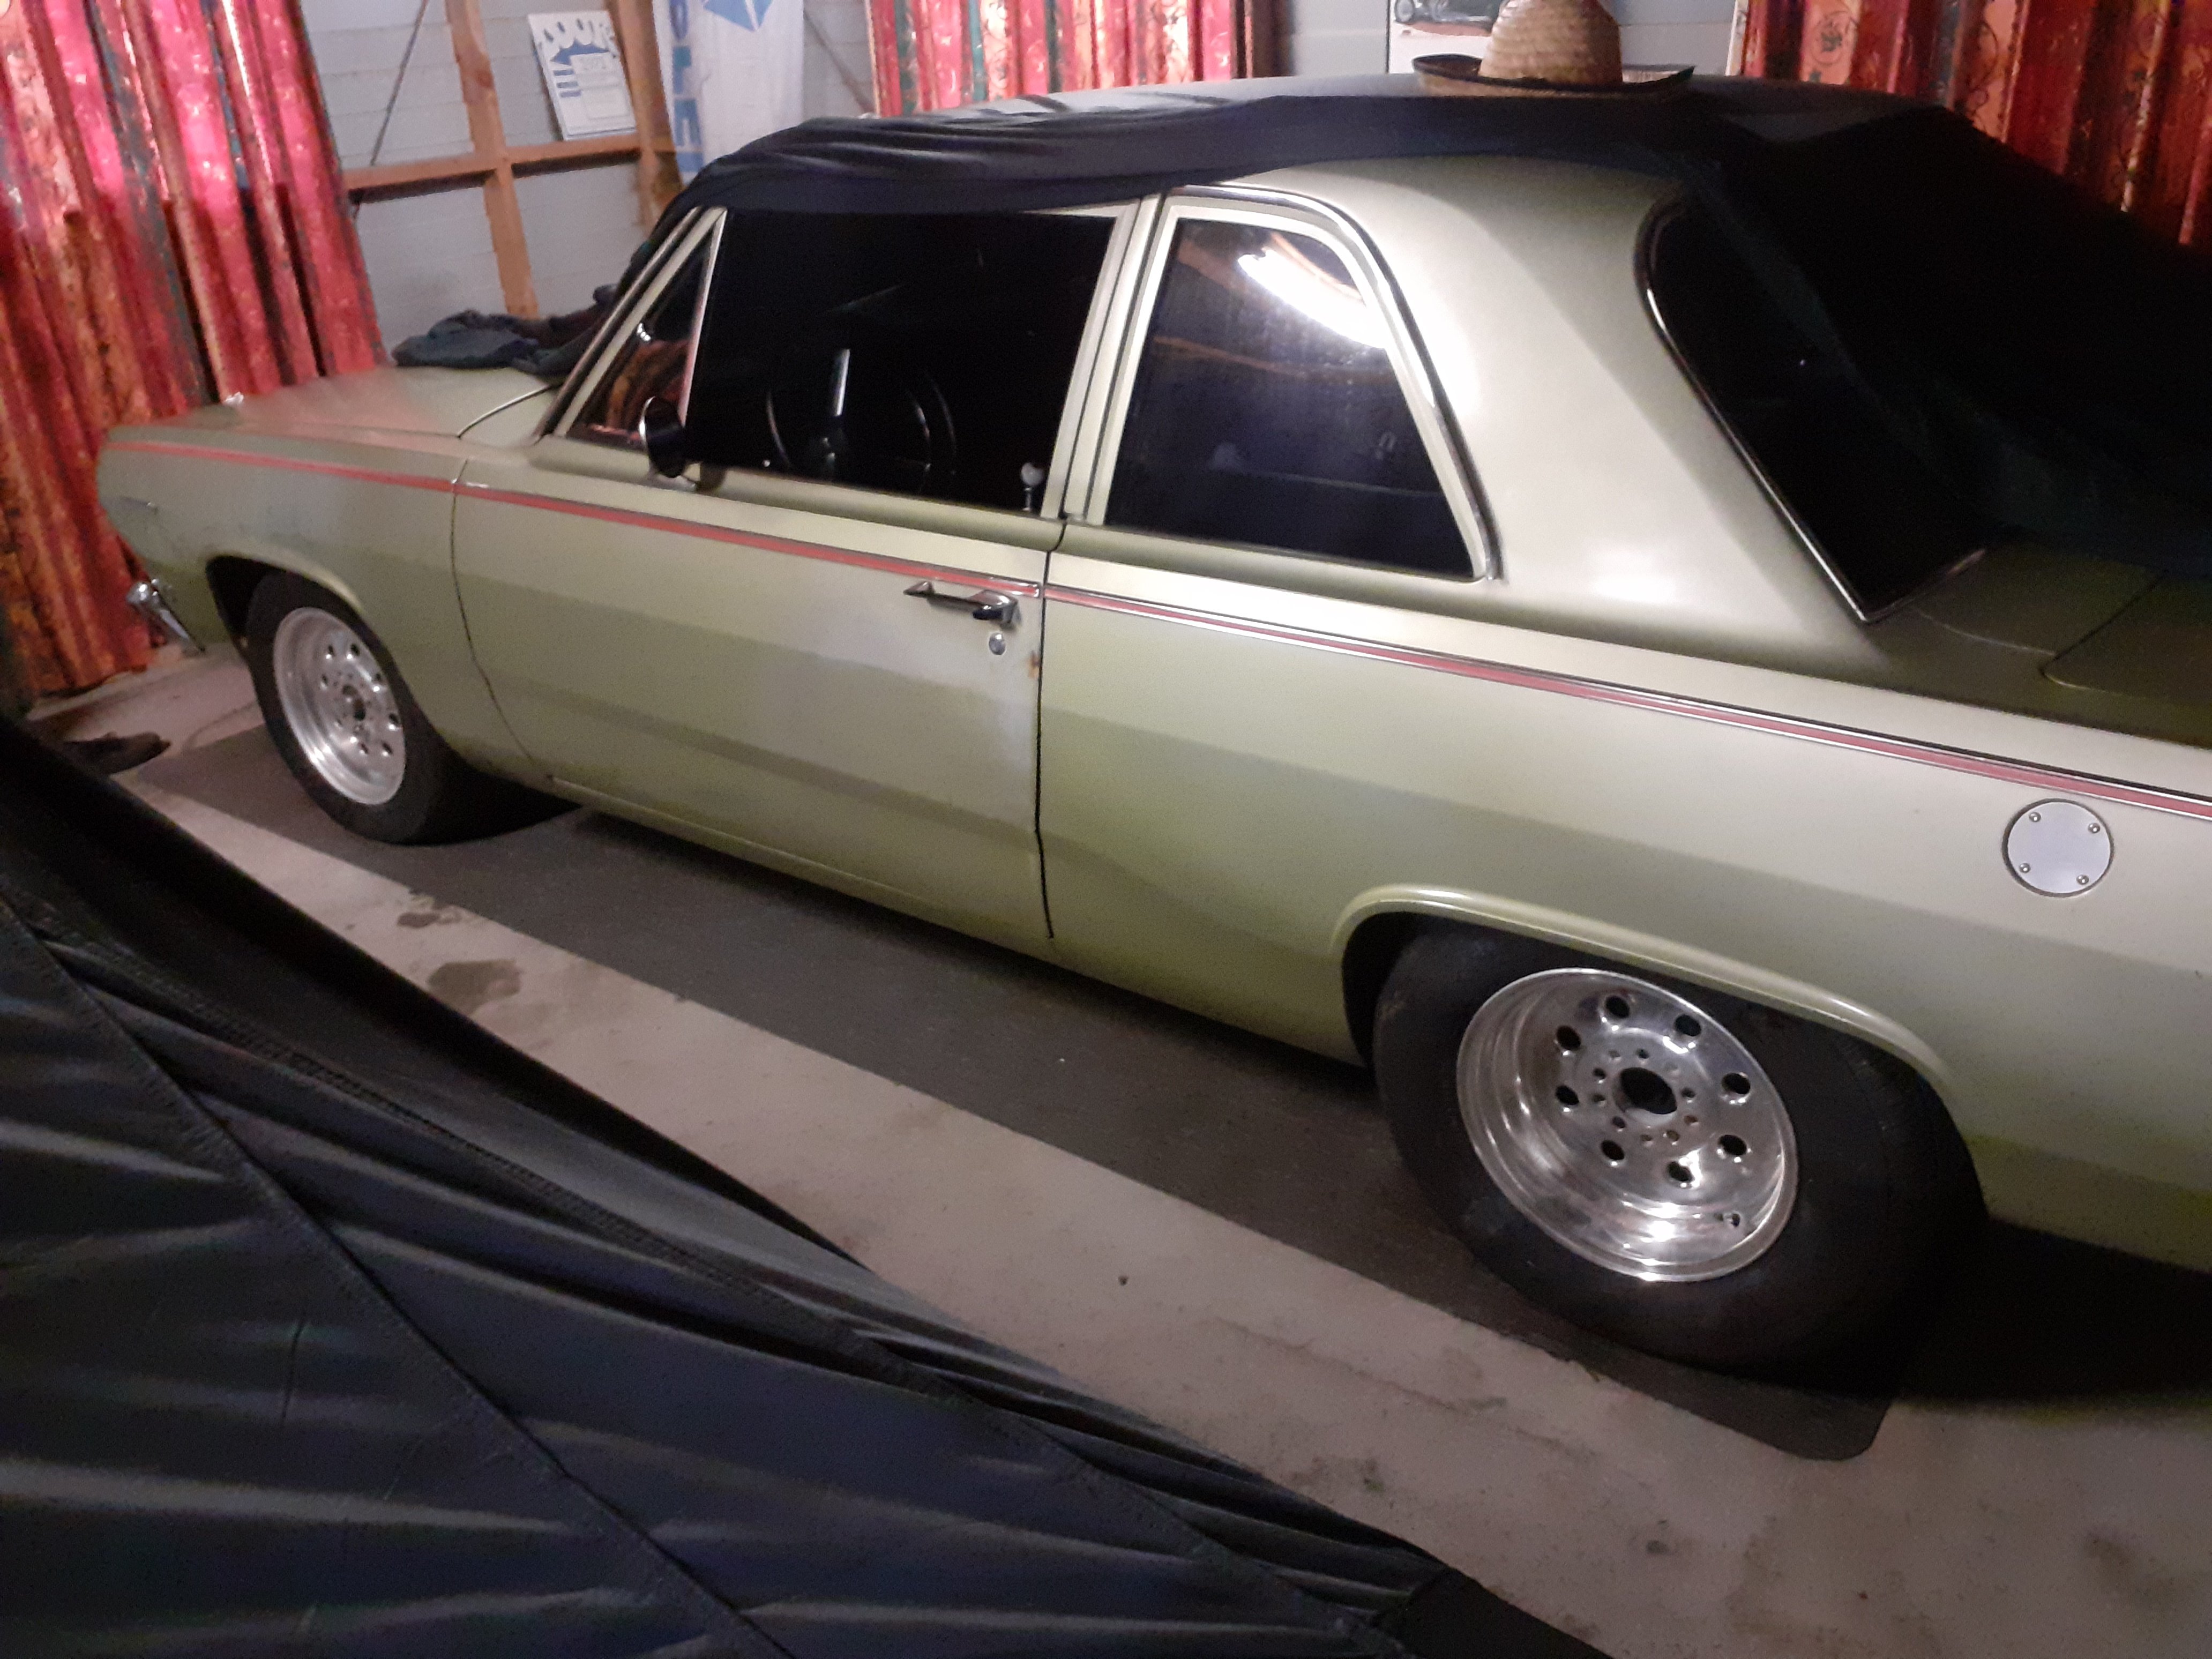
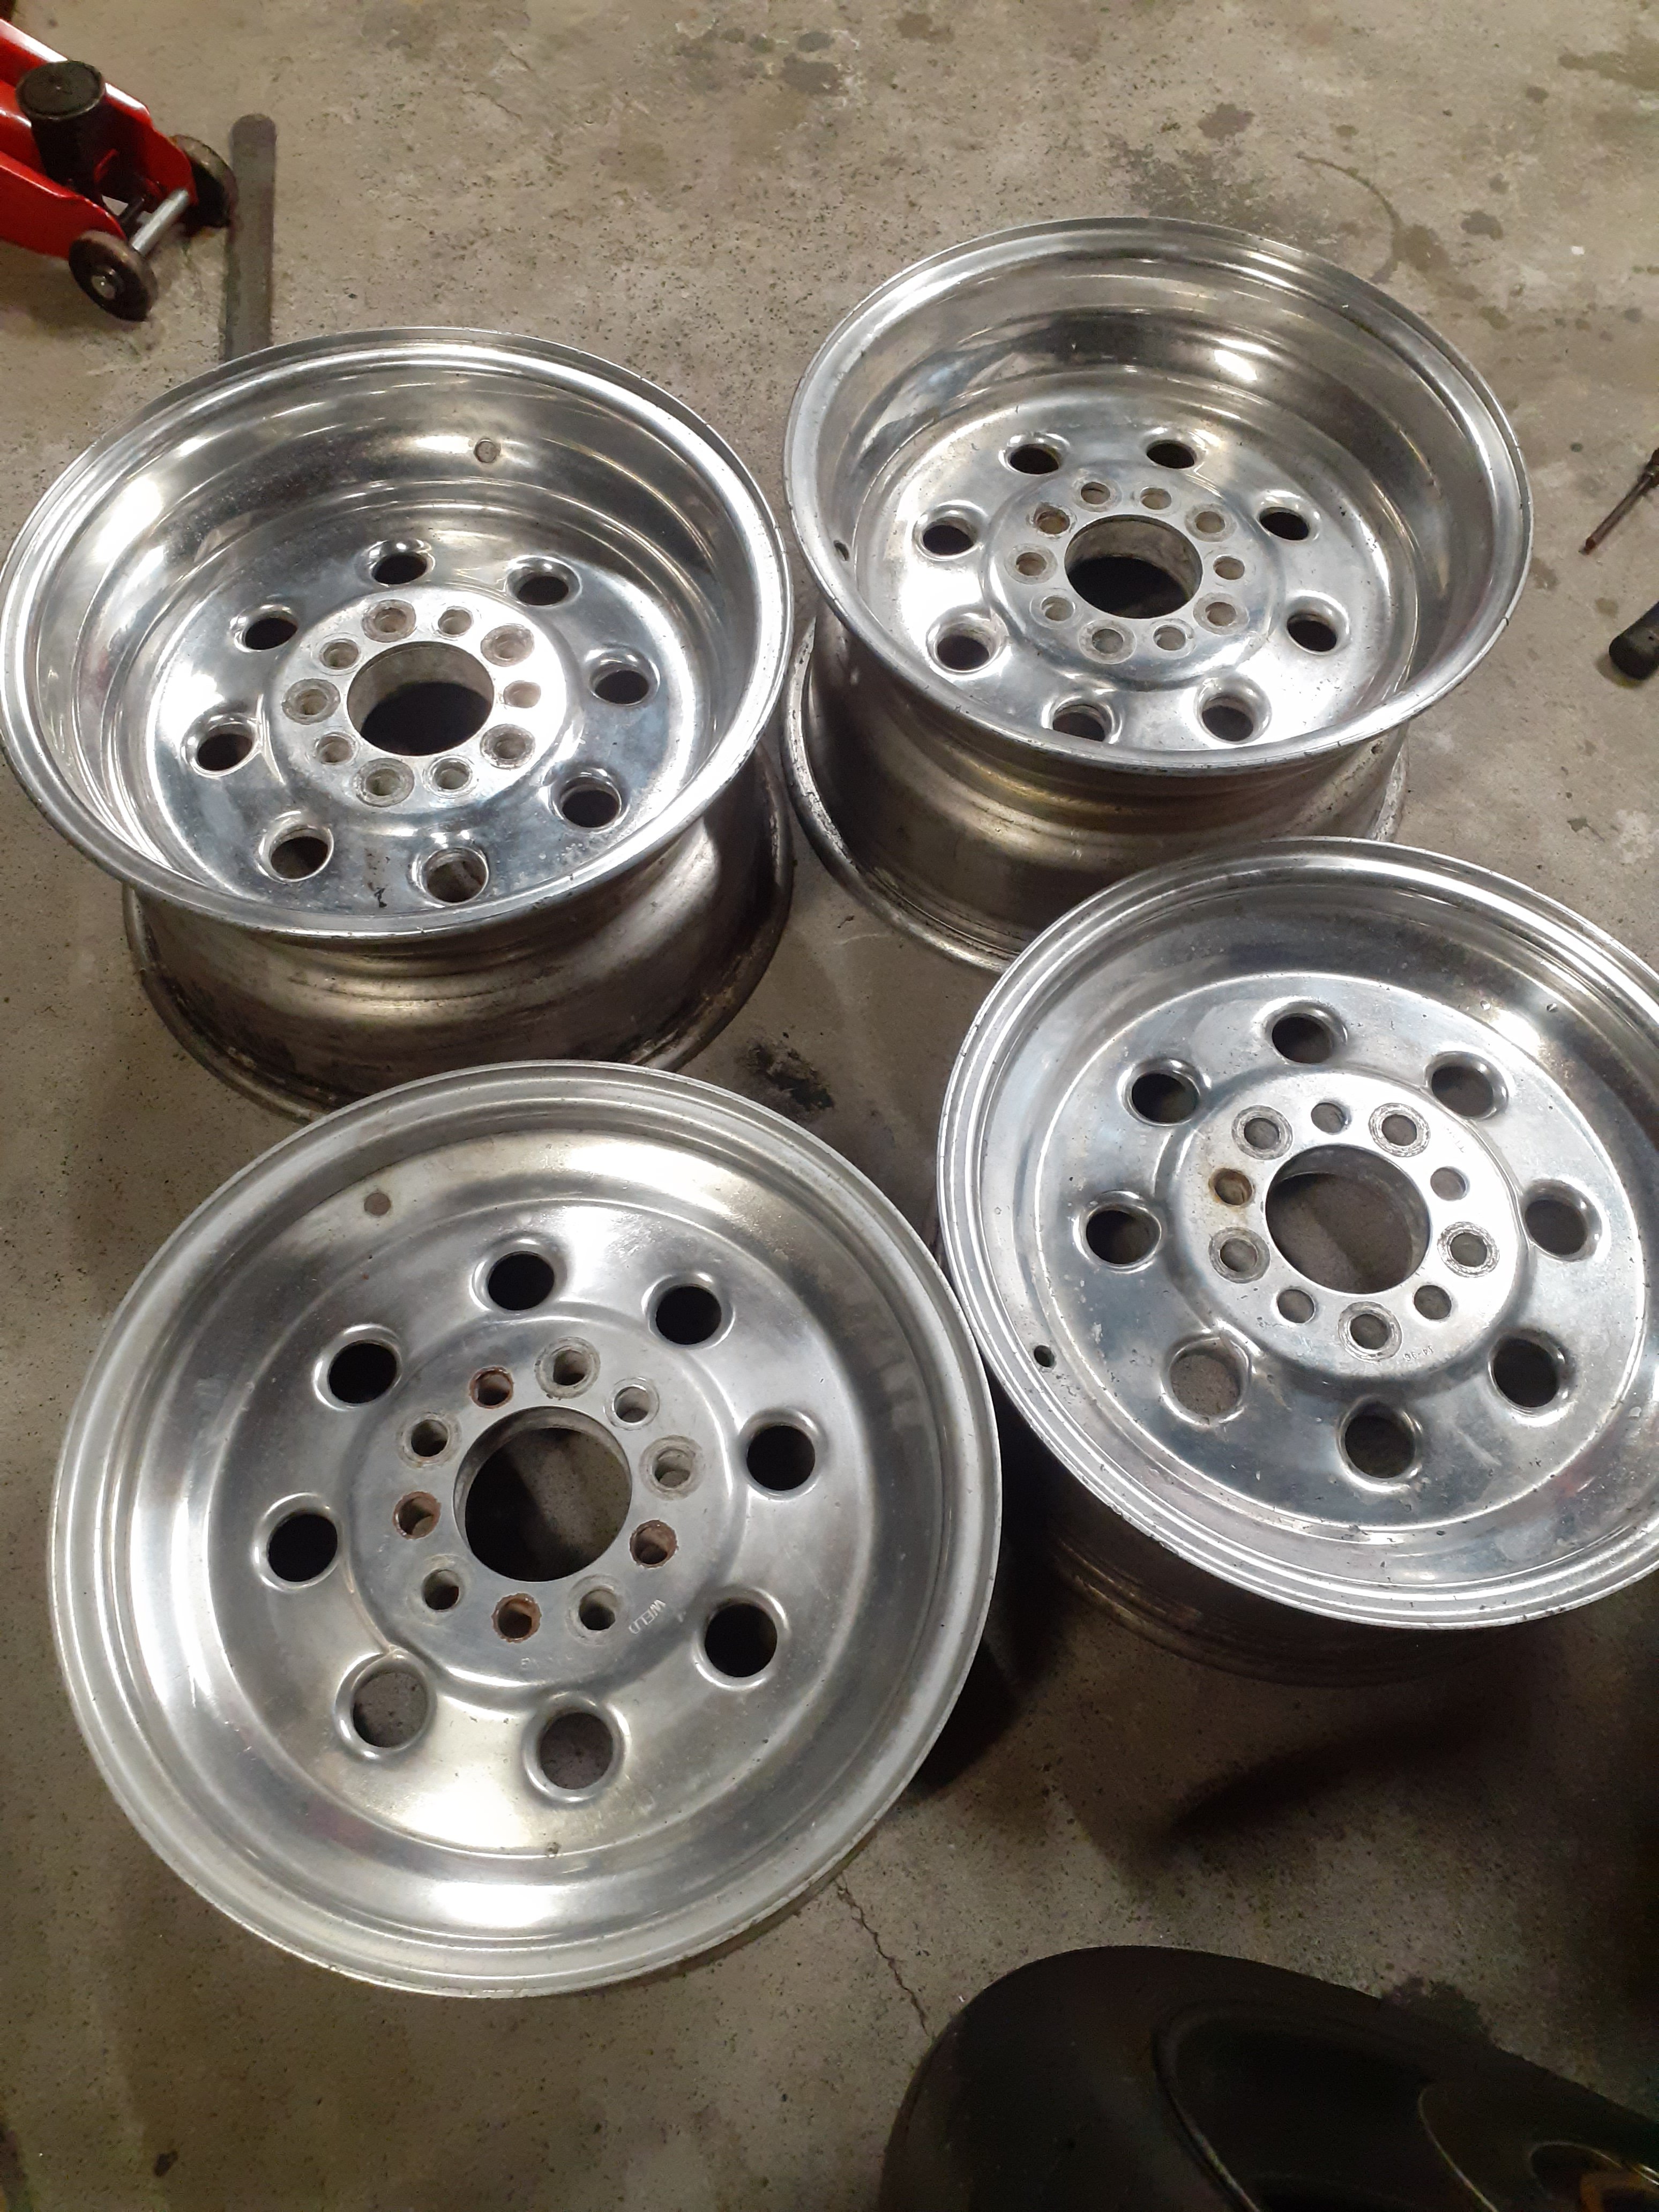
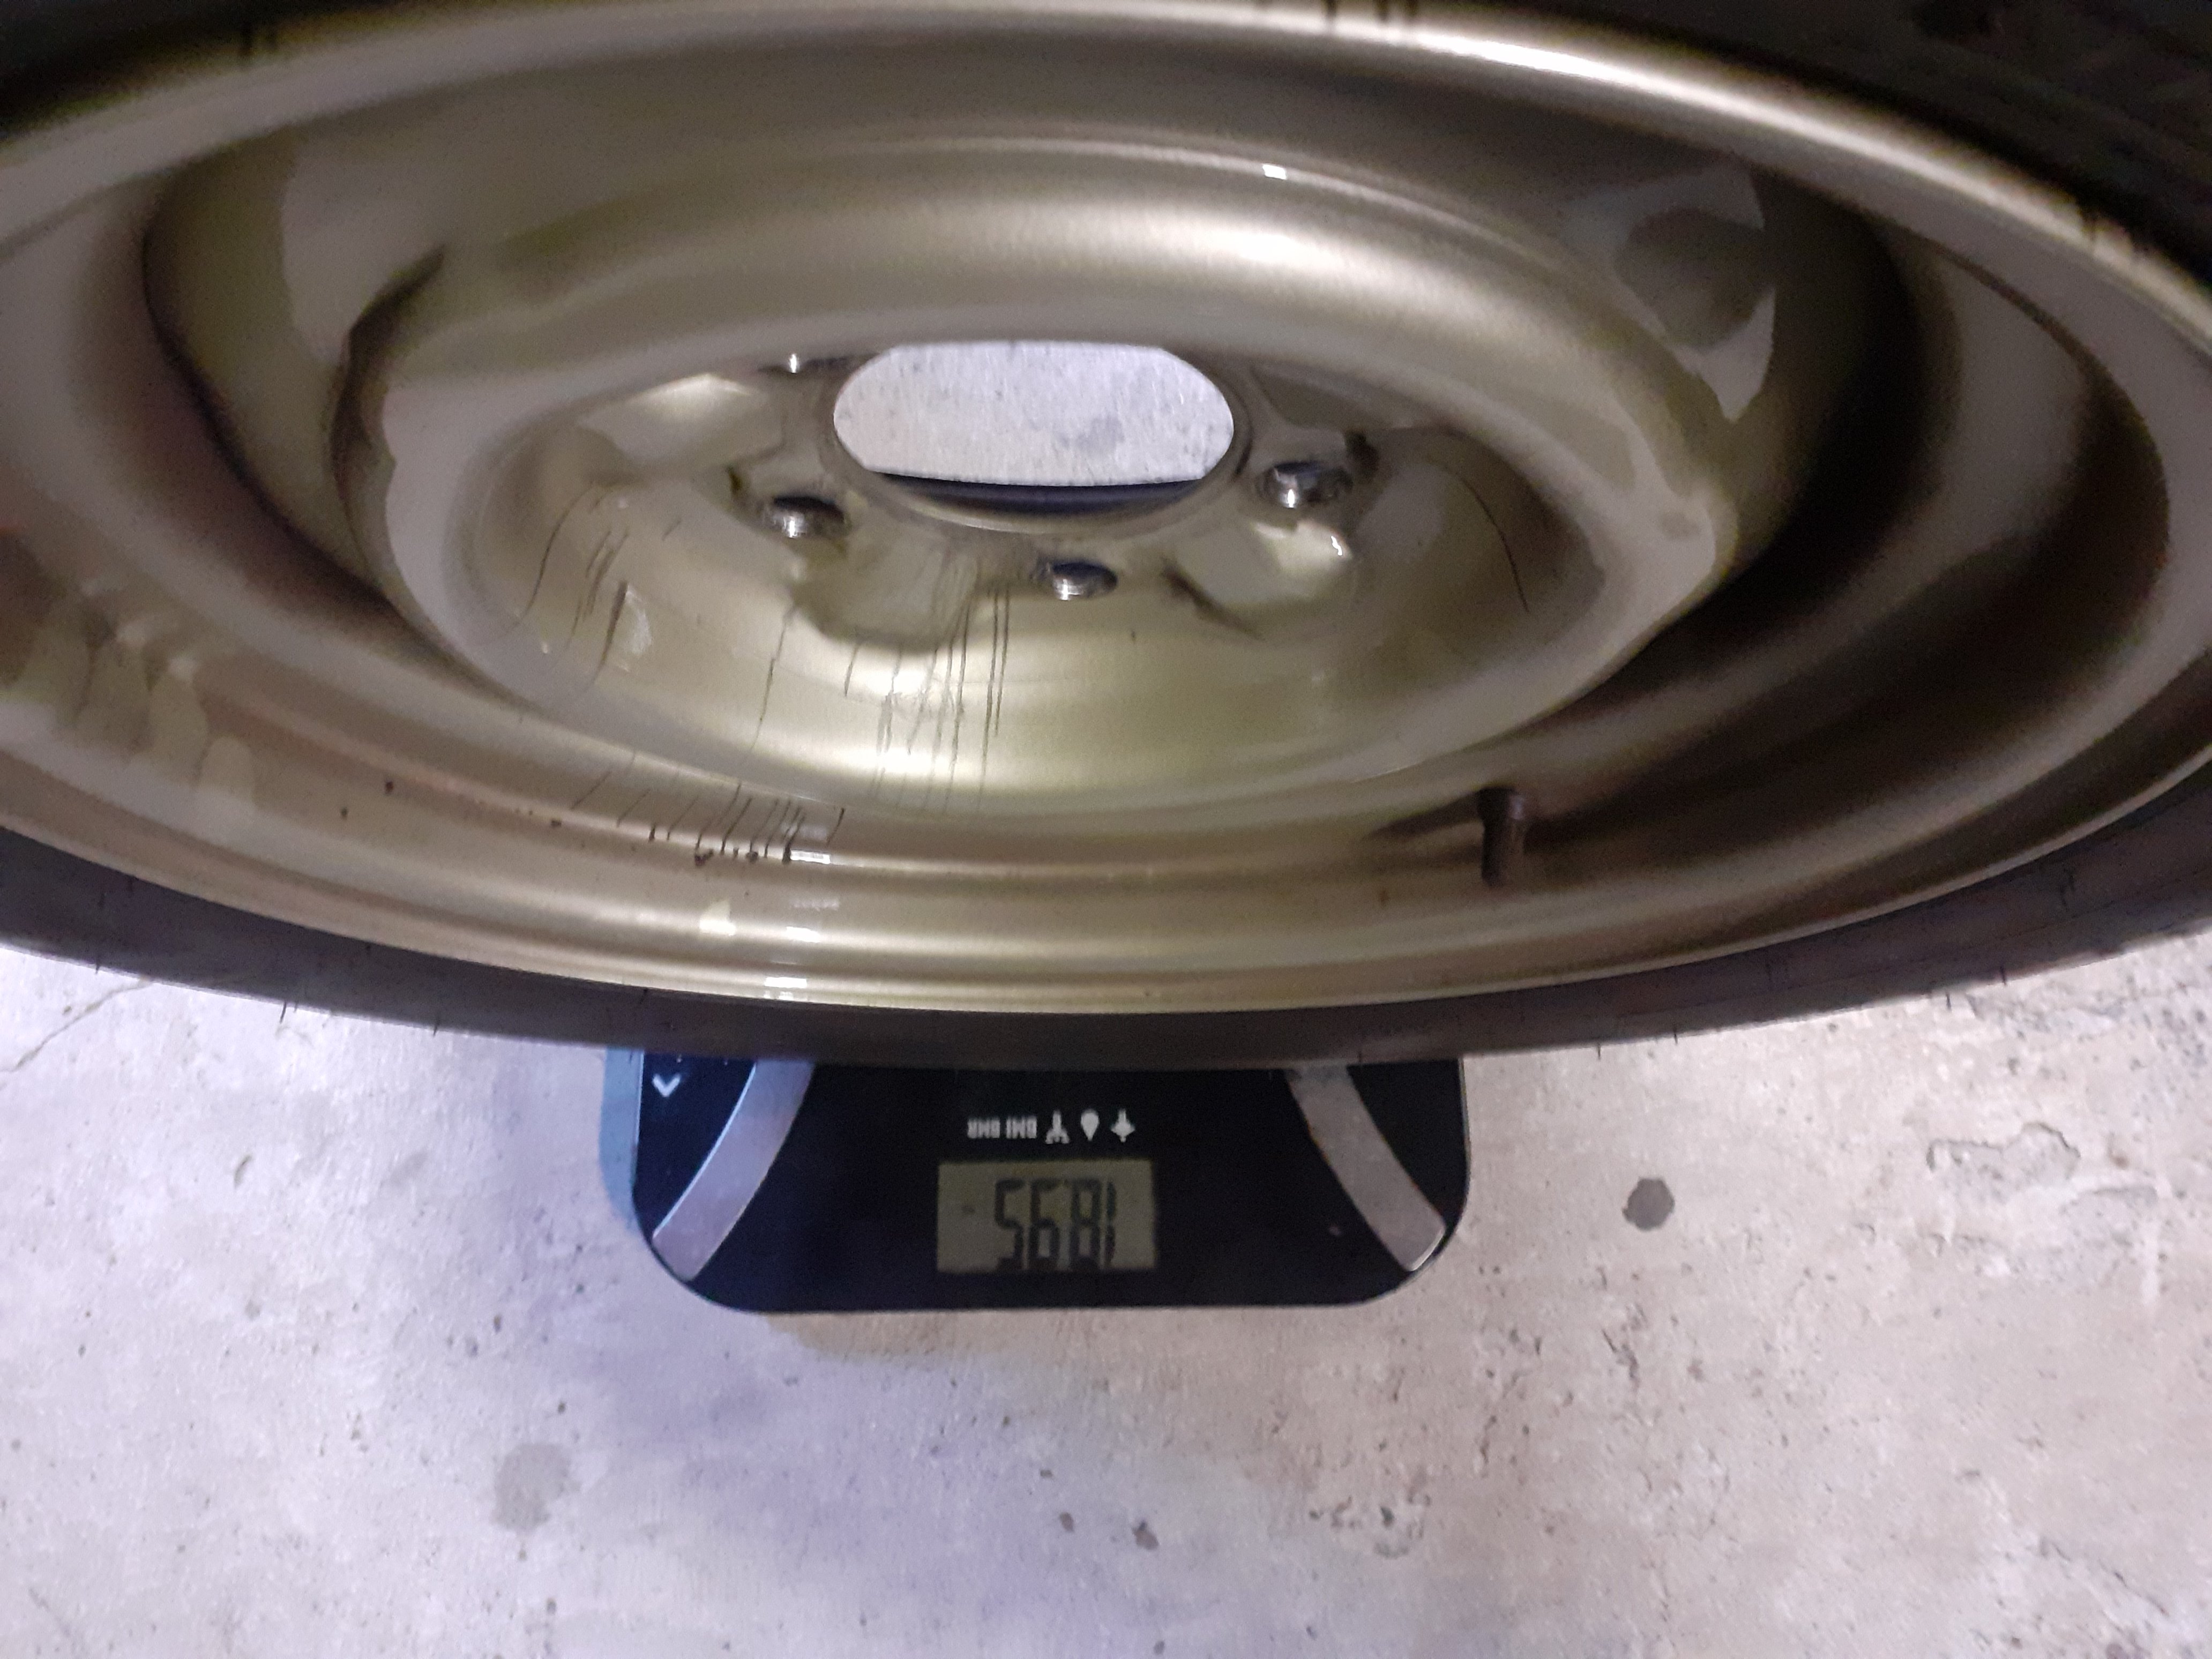
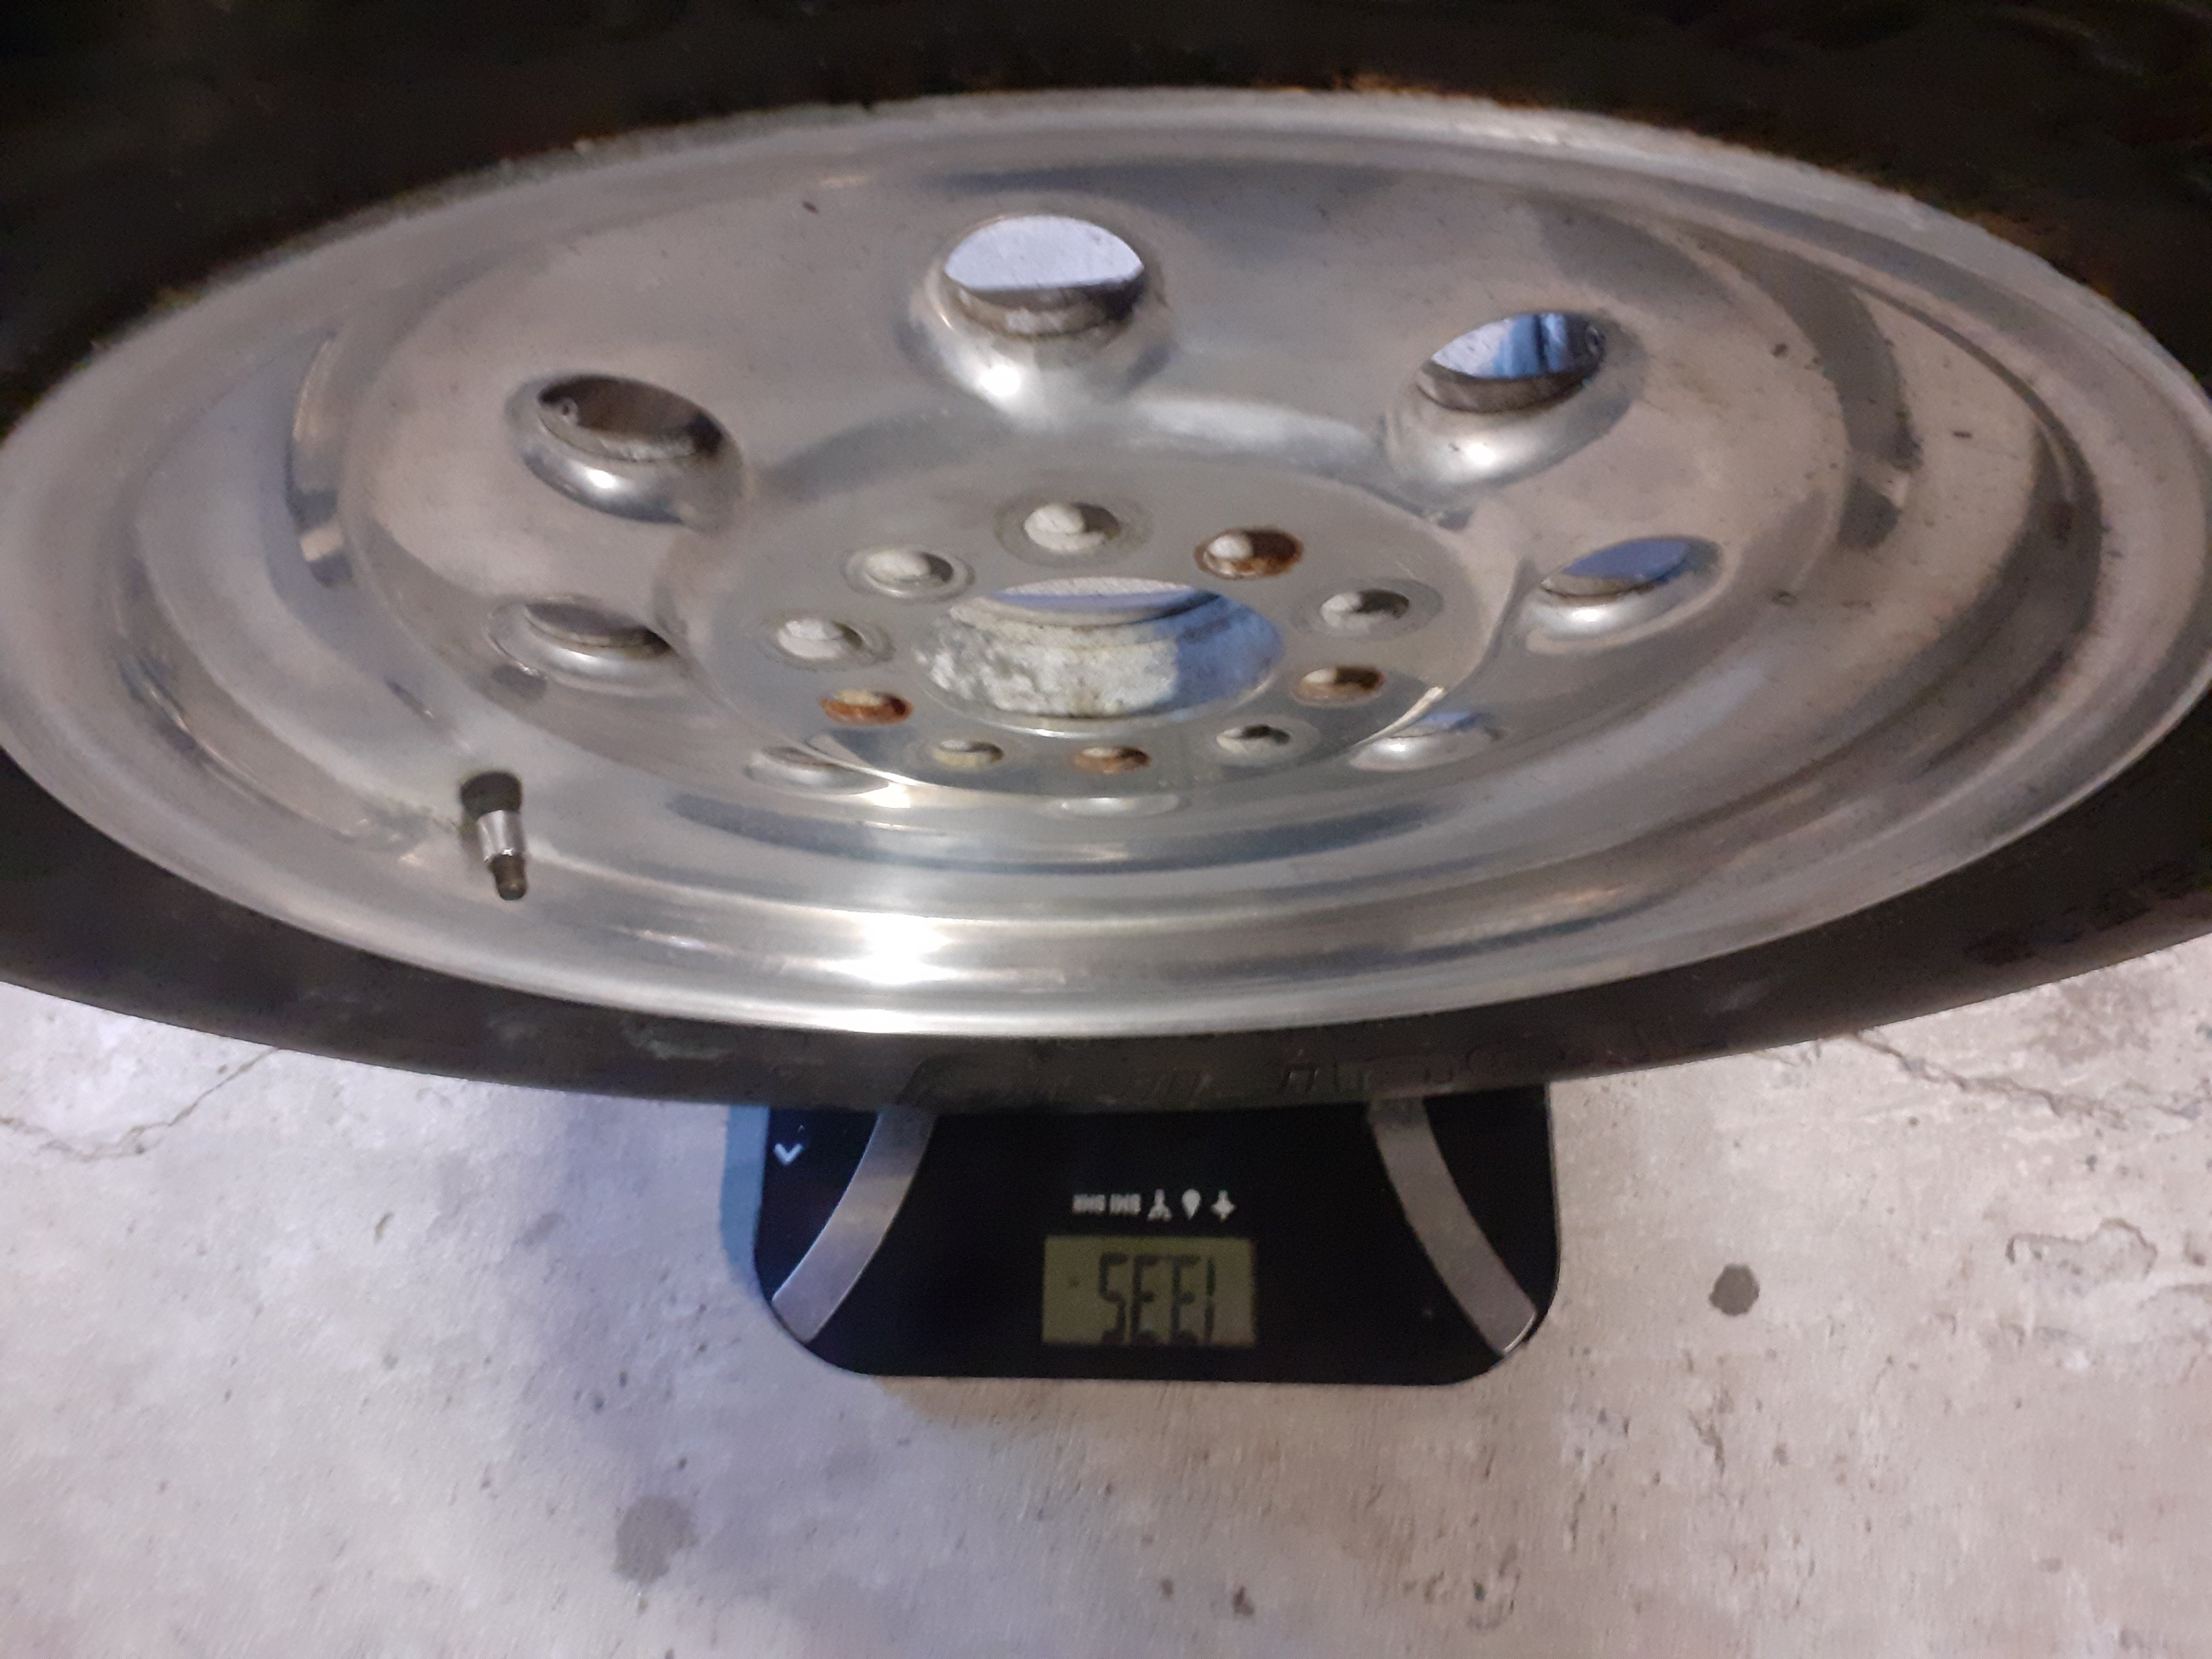
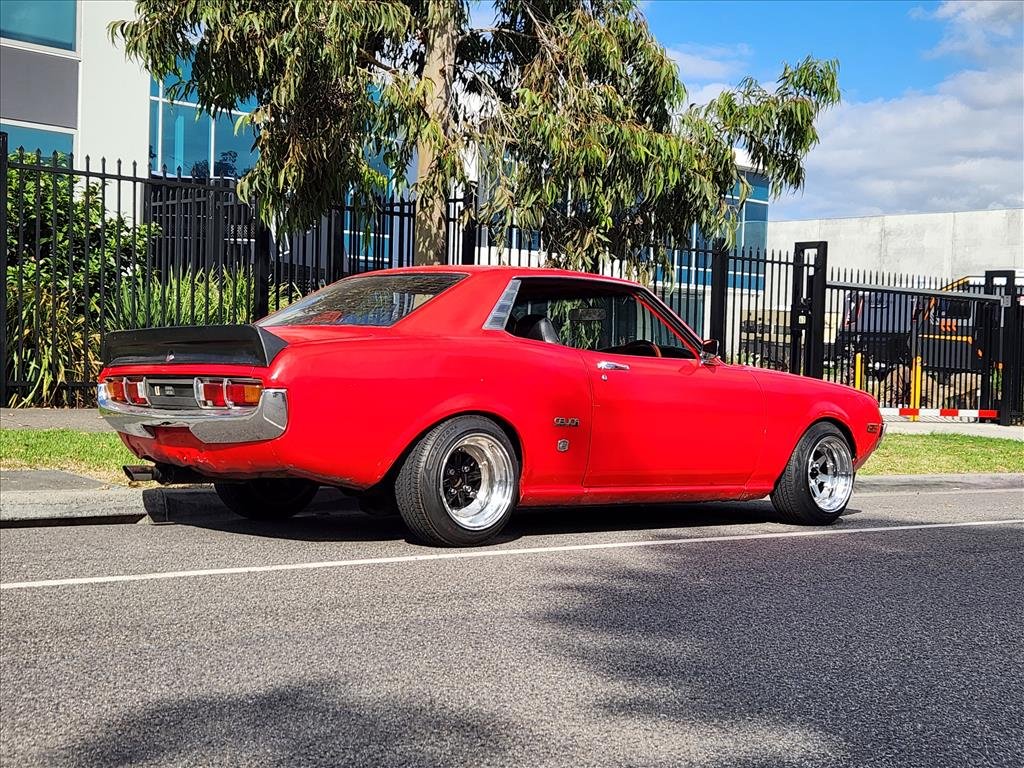
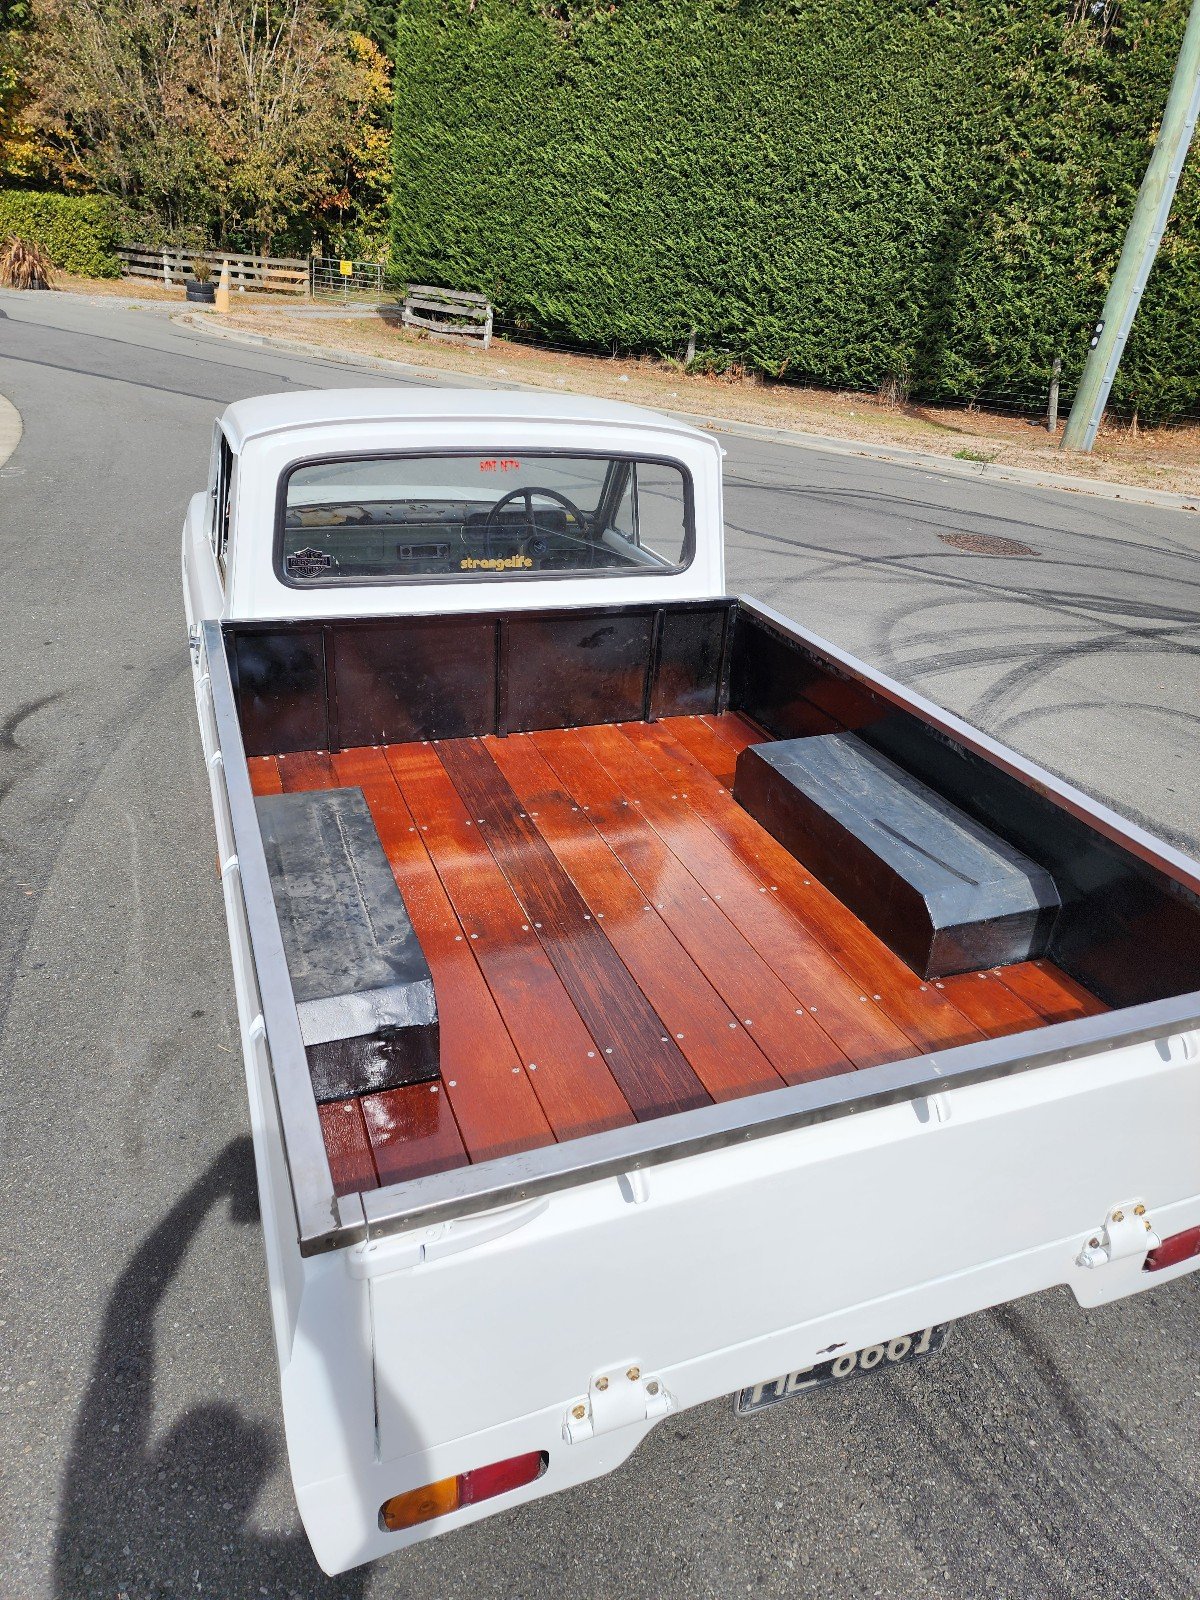
The steel wheels on it are very heavy. When it did its quickest time it had some very light cragar super tricks on the front. They were popular in the 70s but the internet reckons there's not many around these days because they were prone to failure. I bought them ages ago from a guy who took them off his car because they made creaking noises when doing tight turns, they were very cheap. They weigh as much as a bag of chips and are a bit sketchy, also the tyres were right on the limit speed rating and load rating wise. Plus I had to run a 5mm spacer which I did not like. I only did 2x passes with them on and didn't like it So I've had my eye out for a second set of wheels suitable for drag racing Being an impressionable teenager in the 90s who read street machine magazine a lot I've always wanted a set of weld draglites. They don't come up often second hand, I found a set a while ago but they were not wide enough. You can still buy them new but they are pricey Picked these up today, 15x5 and 15x8. Tried them on then got the tyres off, they are very fucked. They need a polish but should tidy up well Anybody know a good polishing place in south auckland?
8 points
-
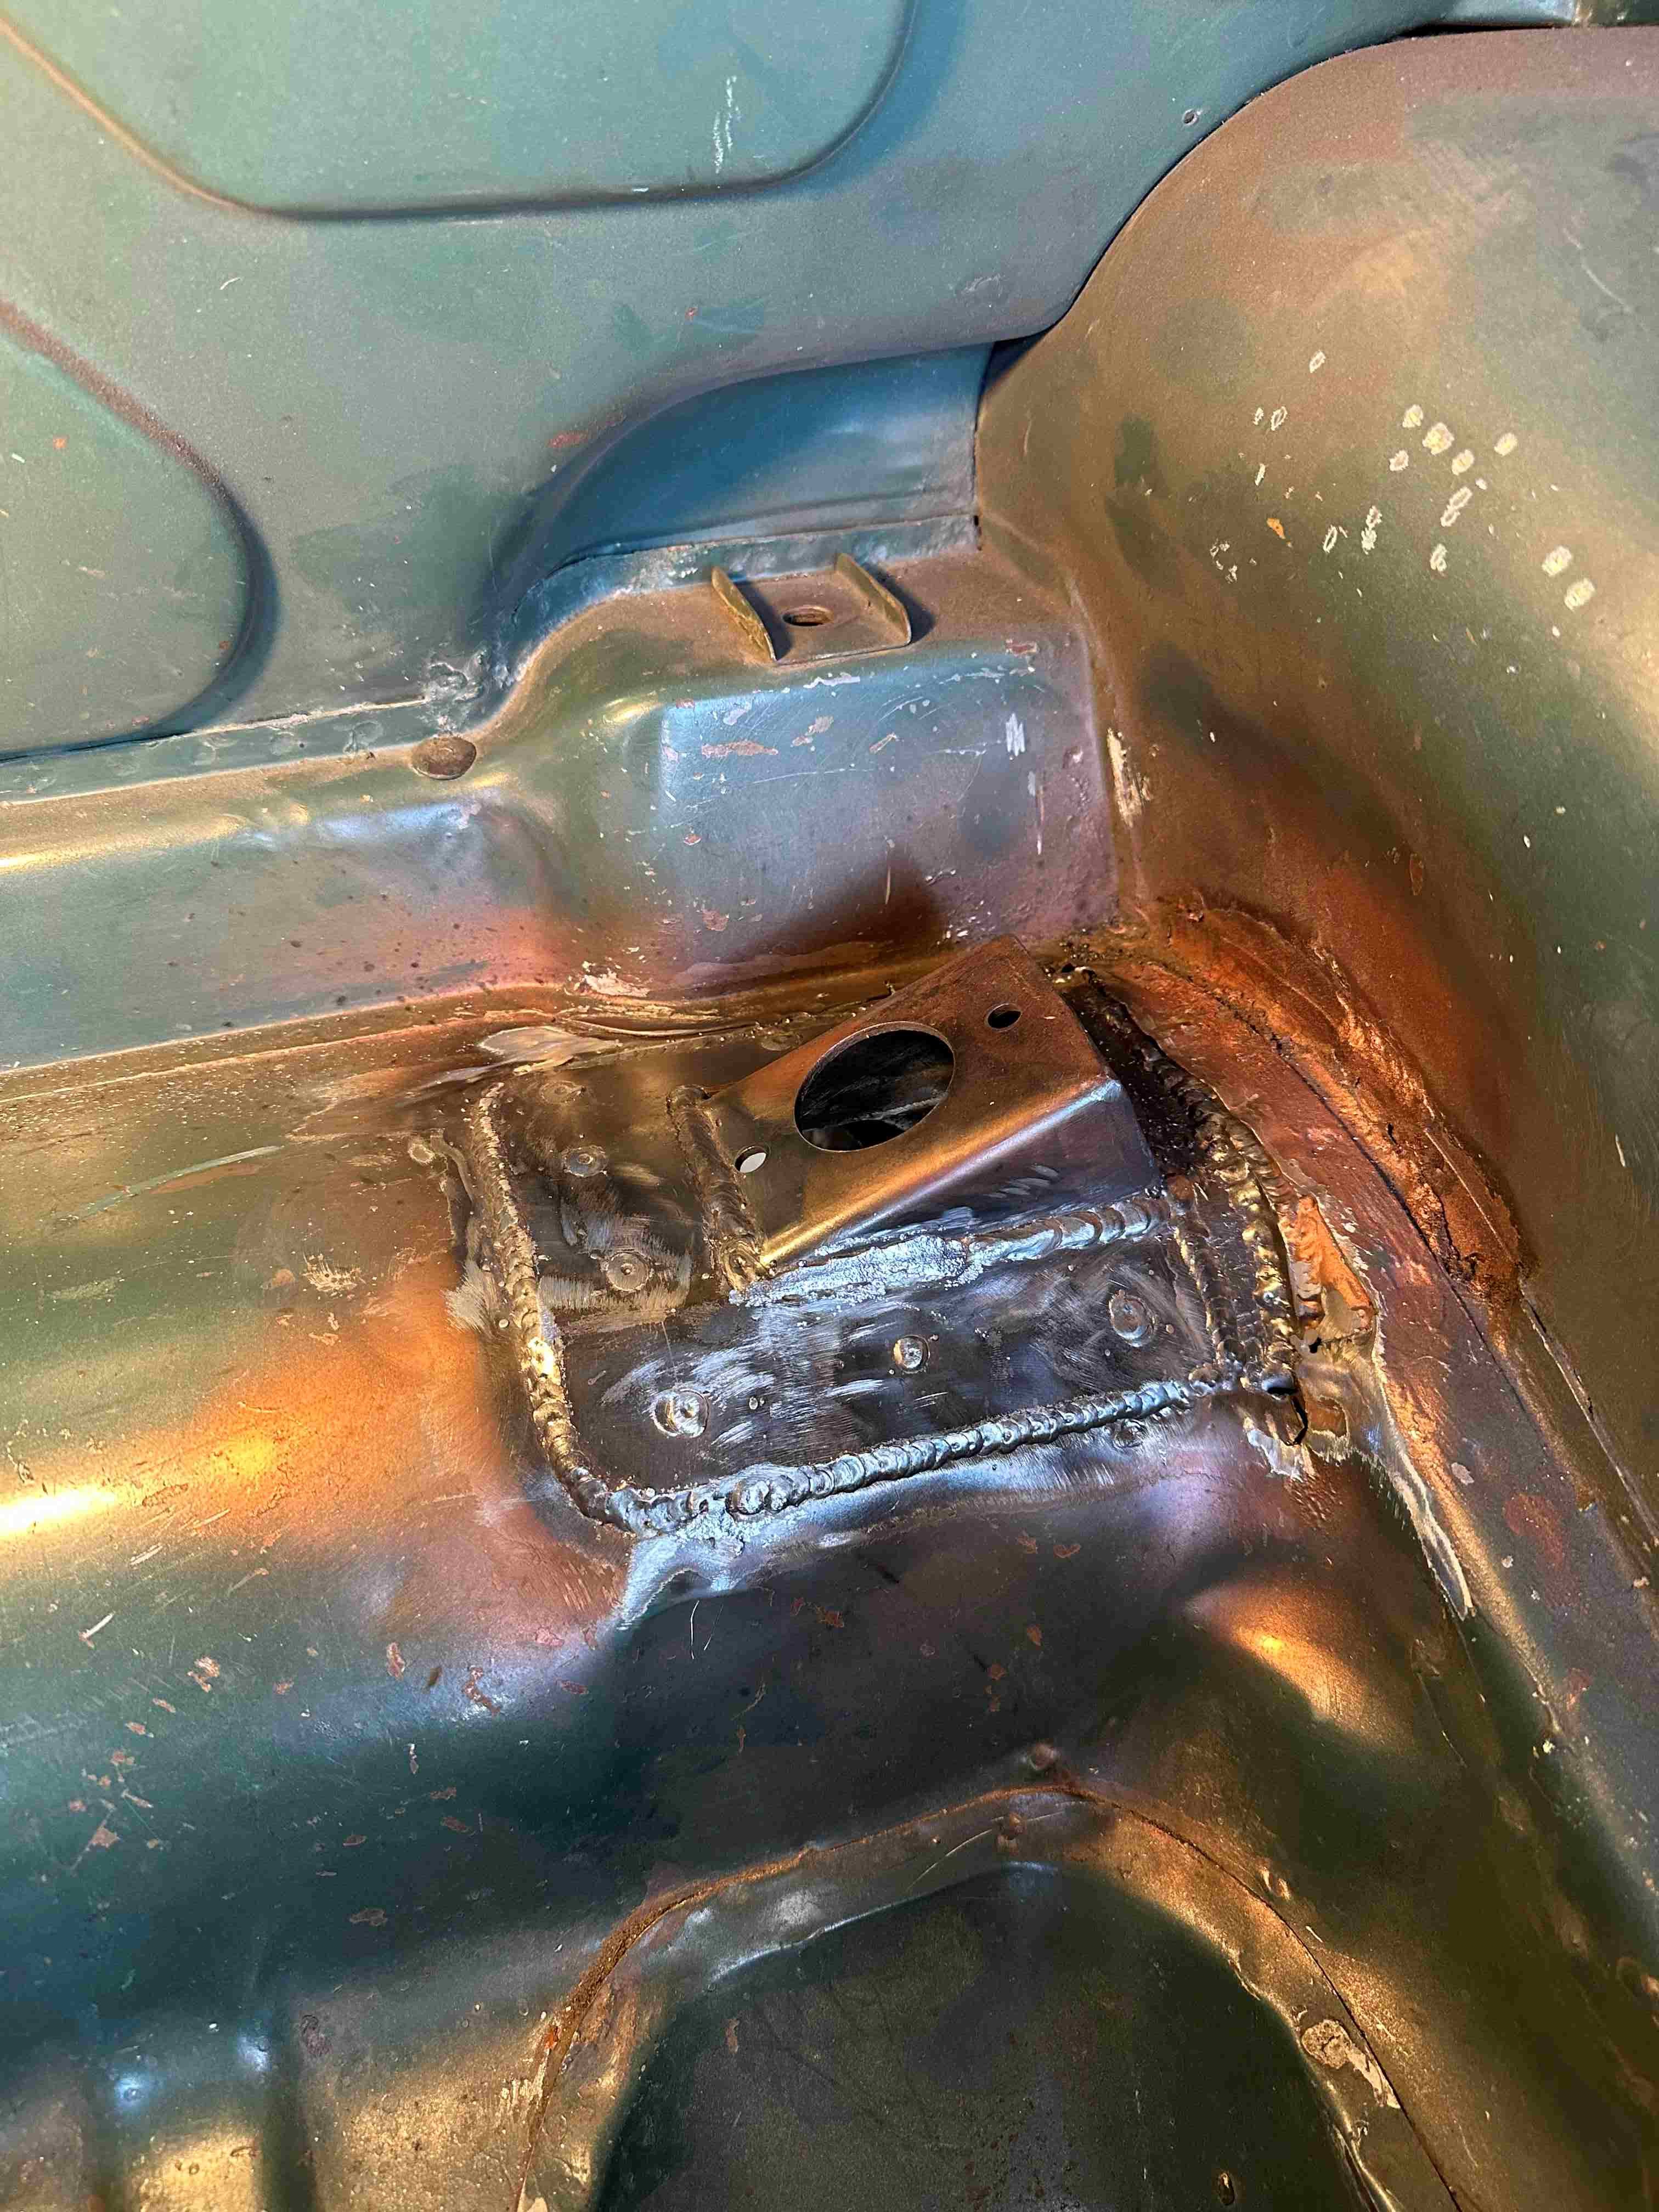
After much head scratching and thinking about the radiator situation I listened to Koro @sheepers and just got a radiator that fits. Using the telstar rad as a template as its the perfect size I went down a rabbit hole of radiator websites to look up dimensions, turns out the perfect fit while fitting the criteria of cooling a forced induction 2L engine is a EVO 1-3 unit but i wasnt going to drop $500 on a brand new one incase it wasnt going to fit so haggled a deal on marketplace for this Fenix unit with electric fan for $150, few bent fins to straighten and a rattle can overhaul but im not complaining for the price. Yeah it just fits but I couple of quick mods will give me as much room as im going to get without hacking the whole front of the ute to bits. Water outlets will be easy to run with a few bends and straight sections but glad to have that headache sorted. Just the loom to sort out and mount an external fuel pump somewhere then il be close to firing it up7 points
-
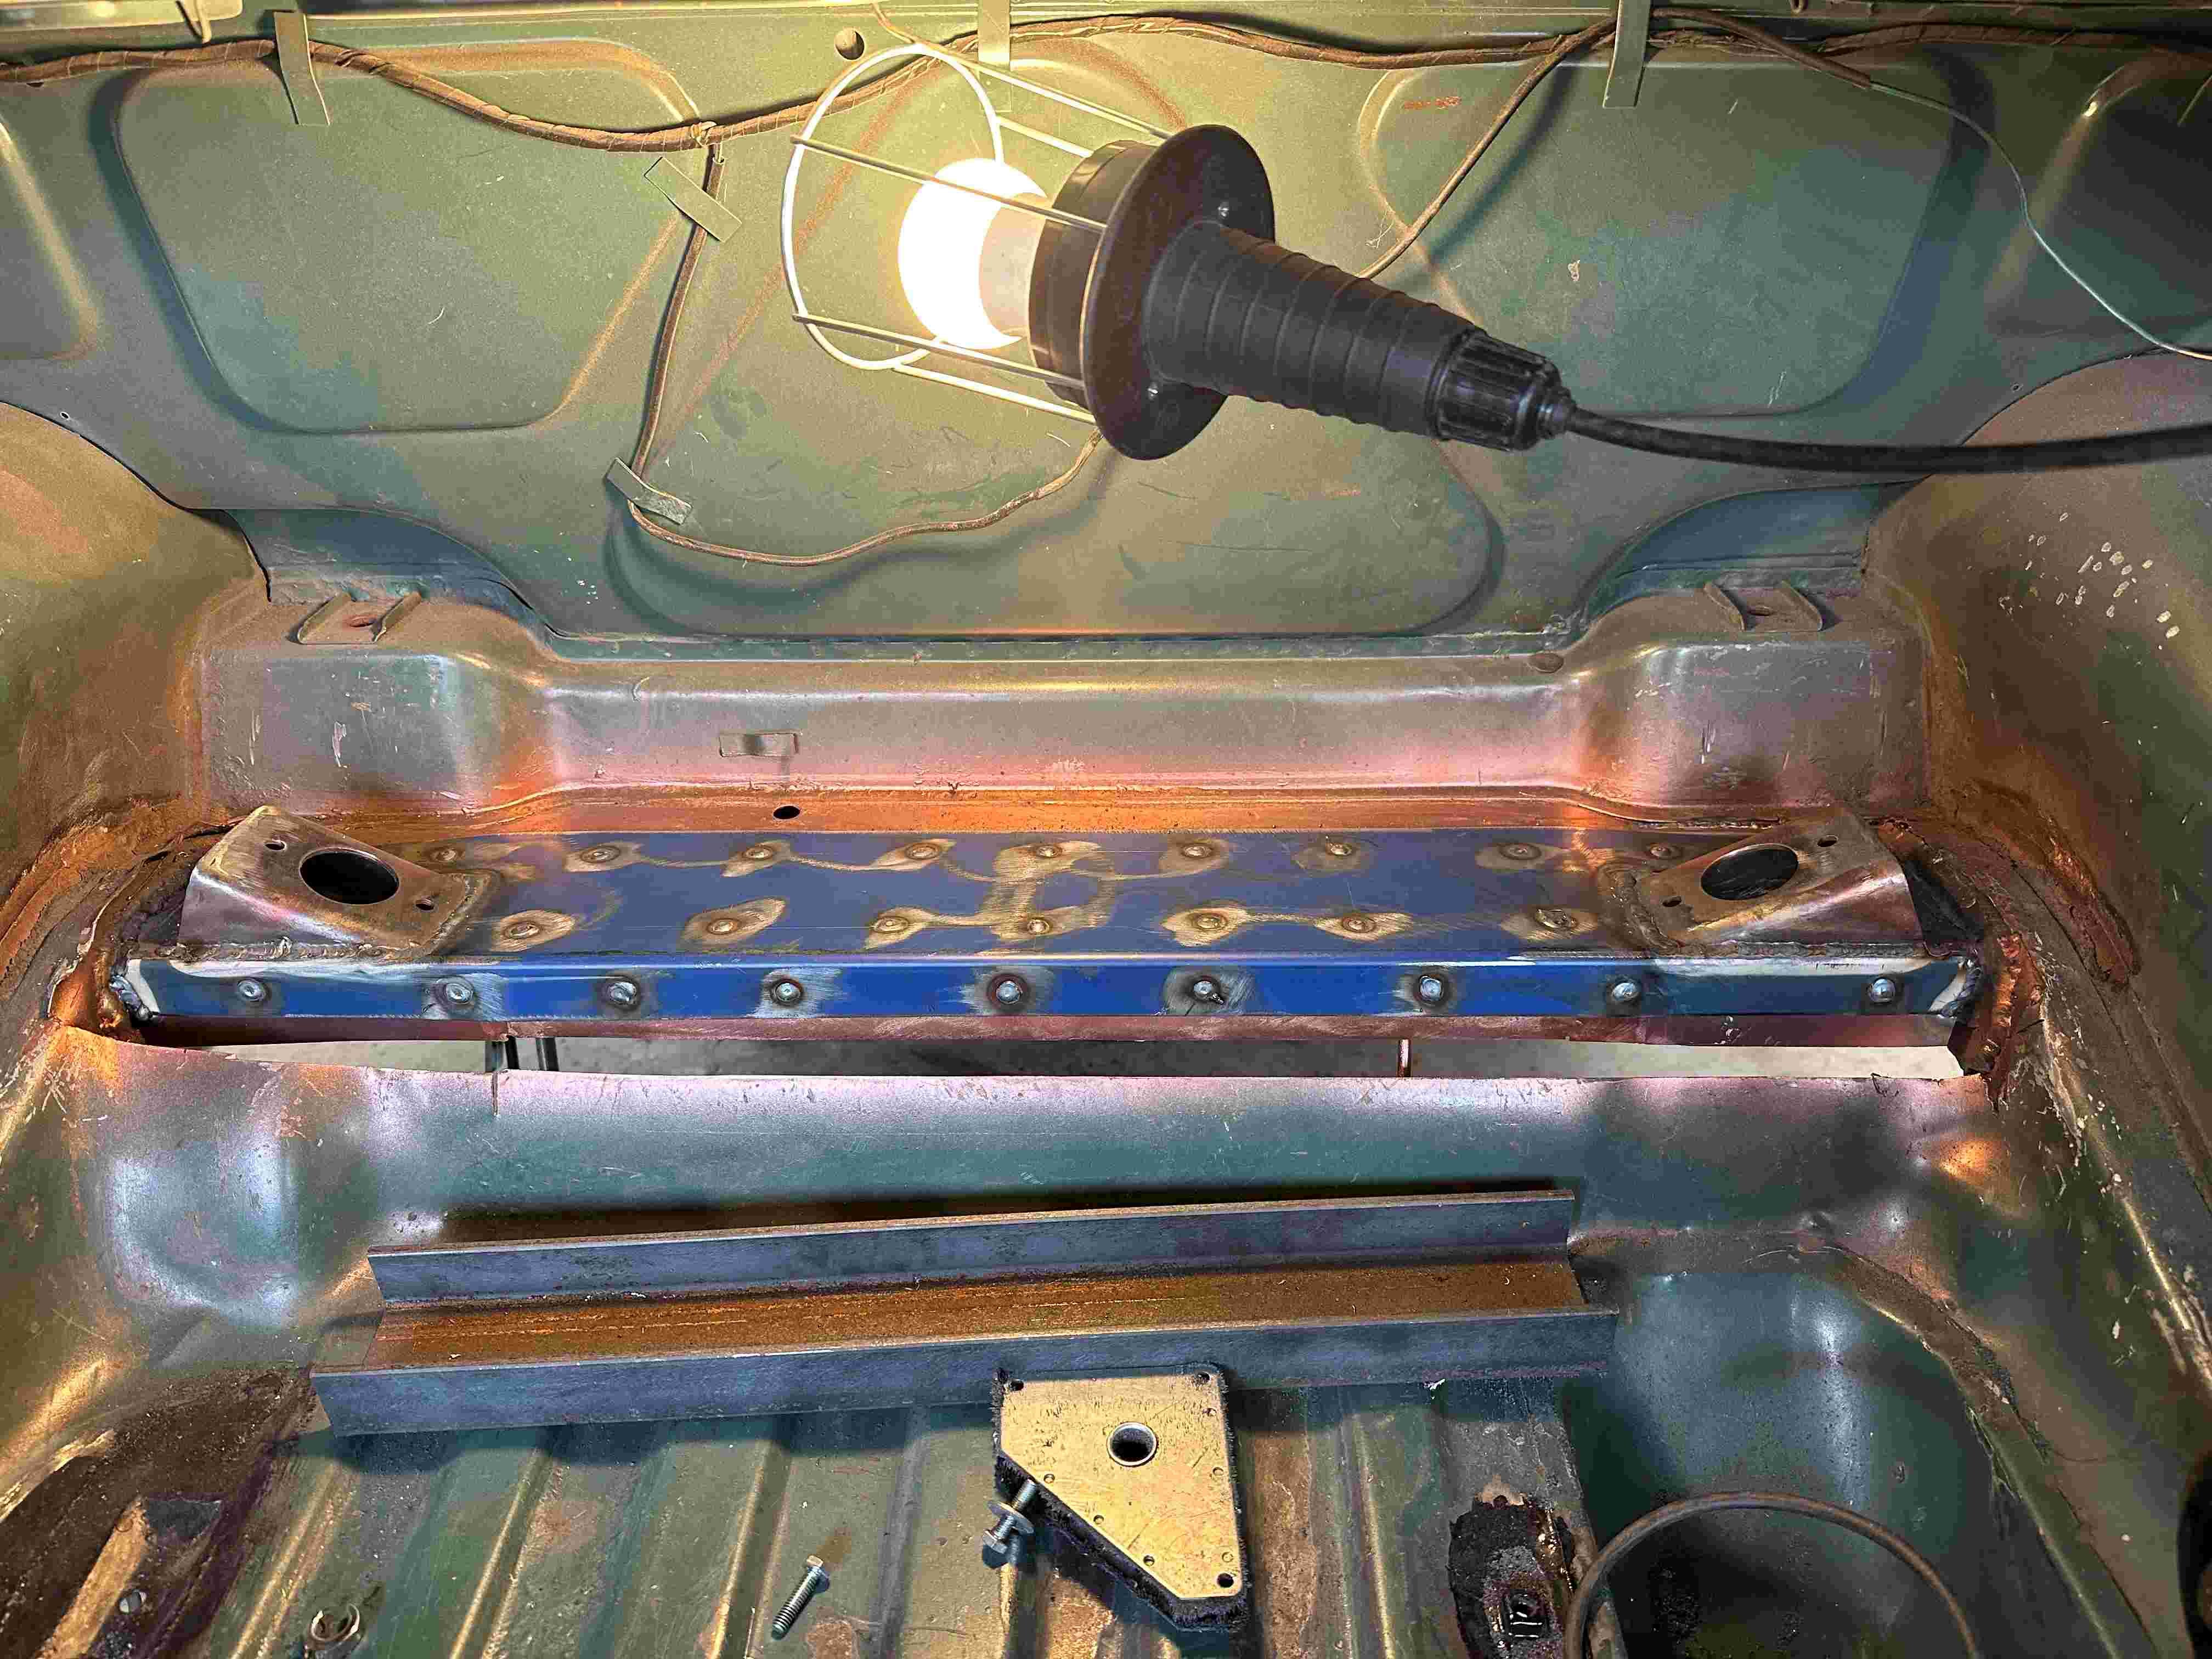
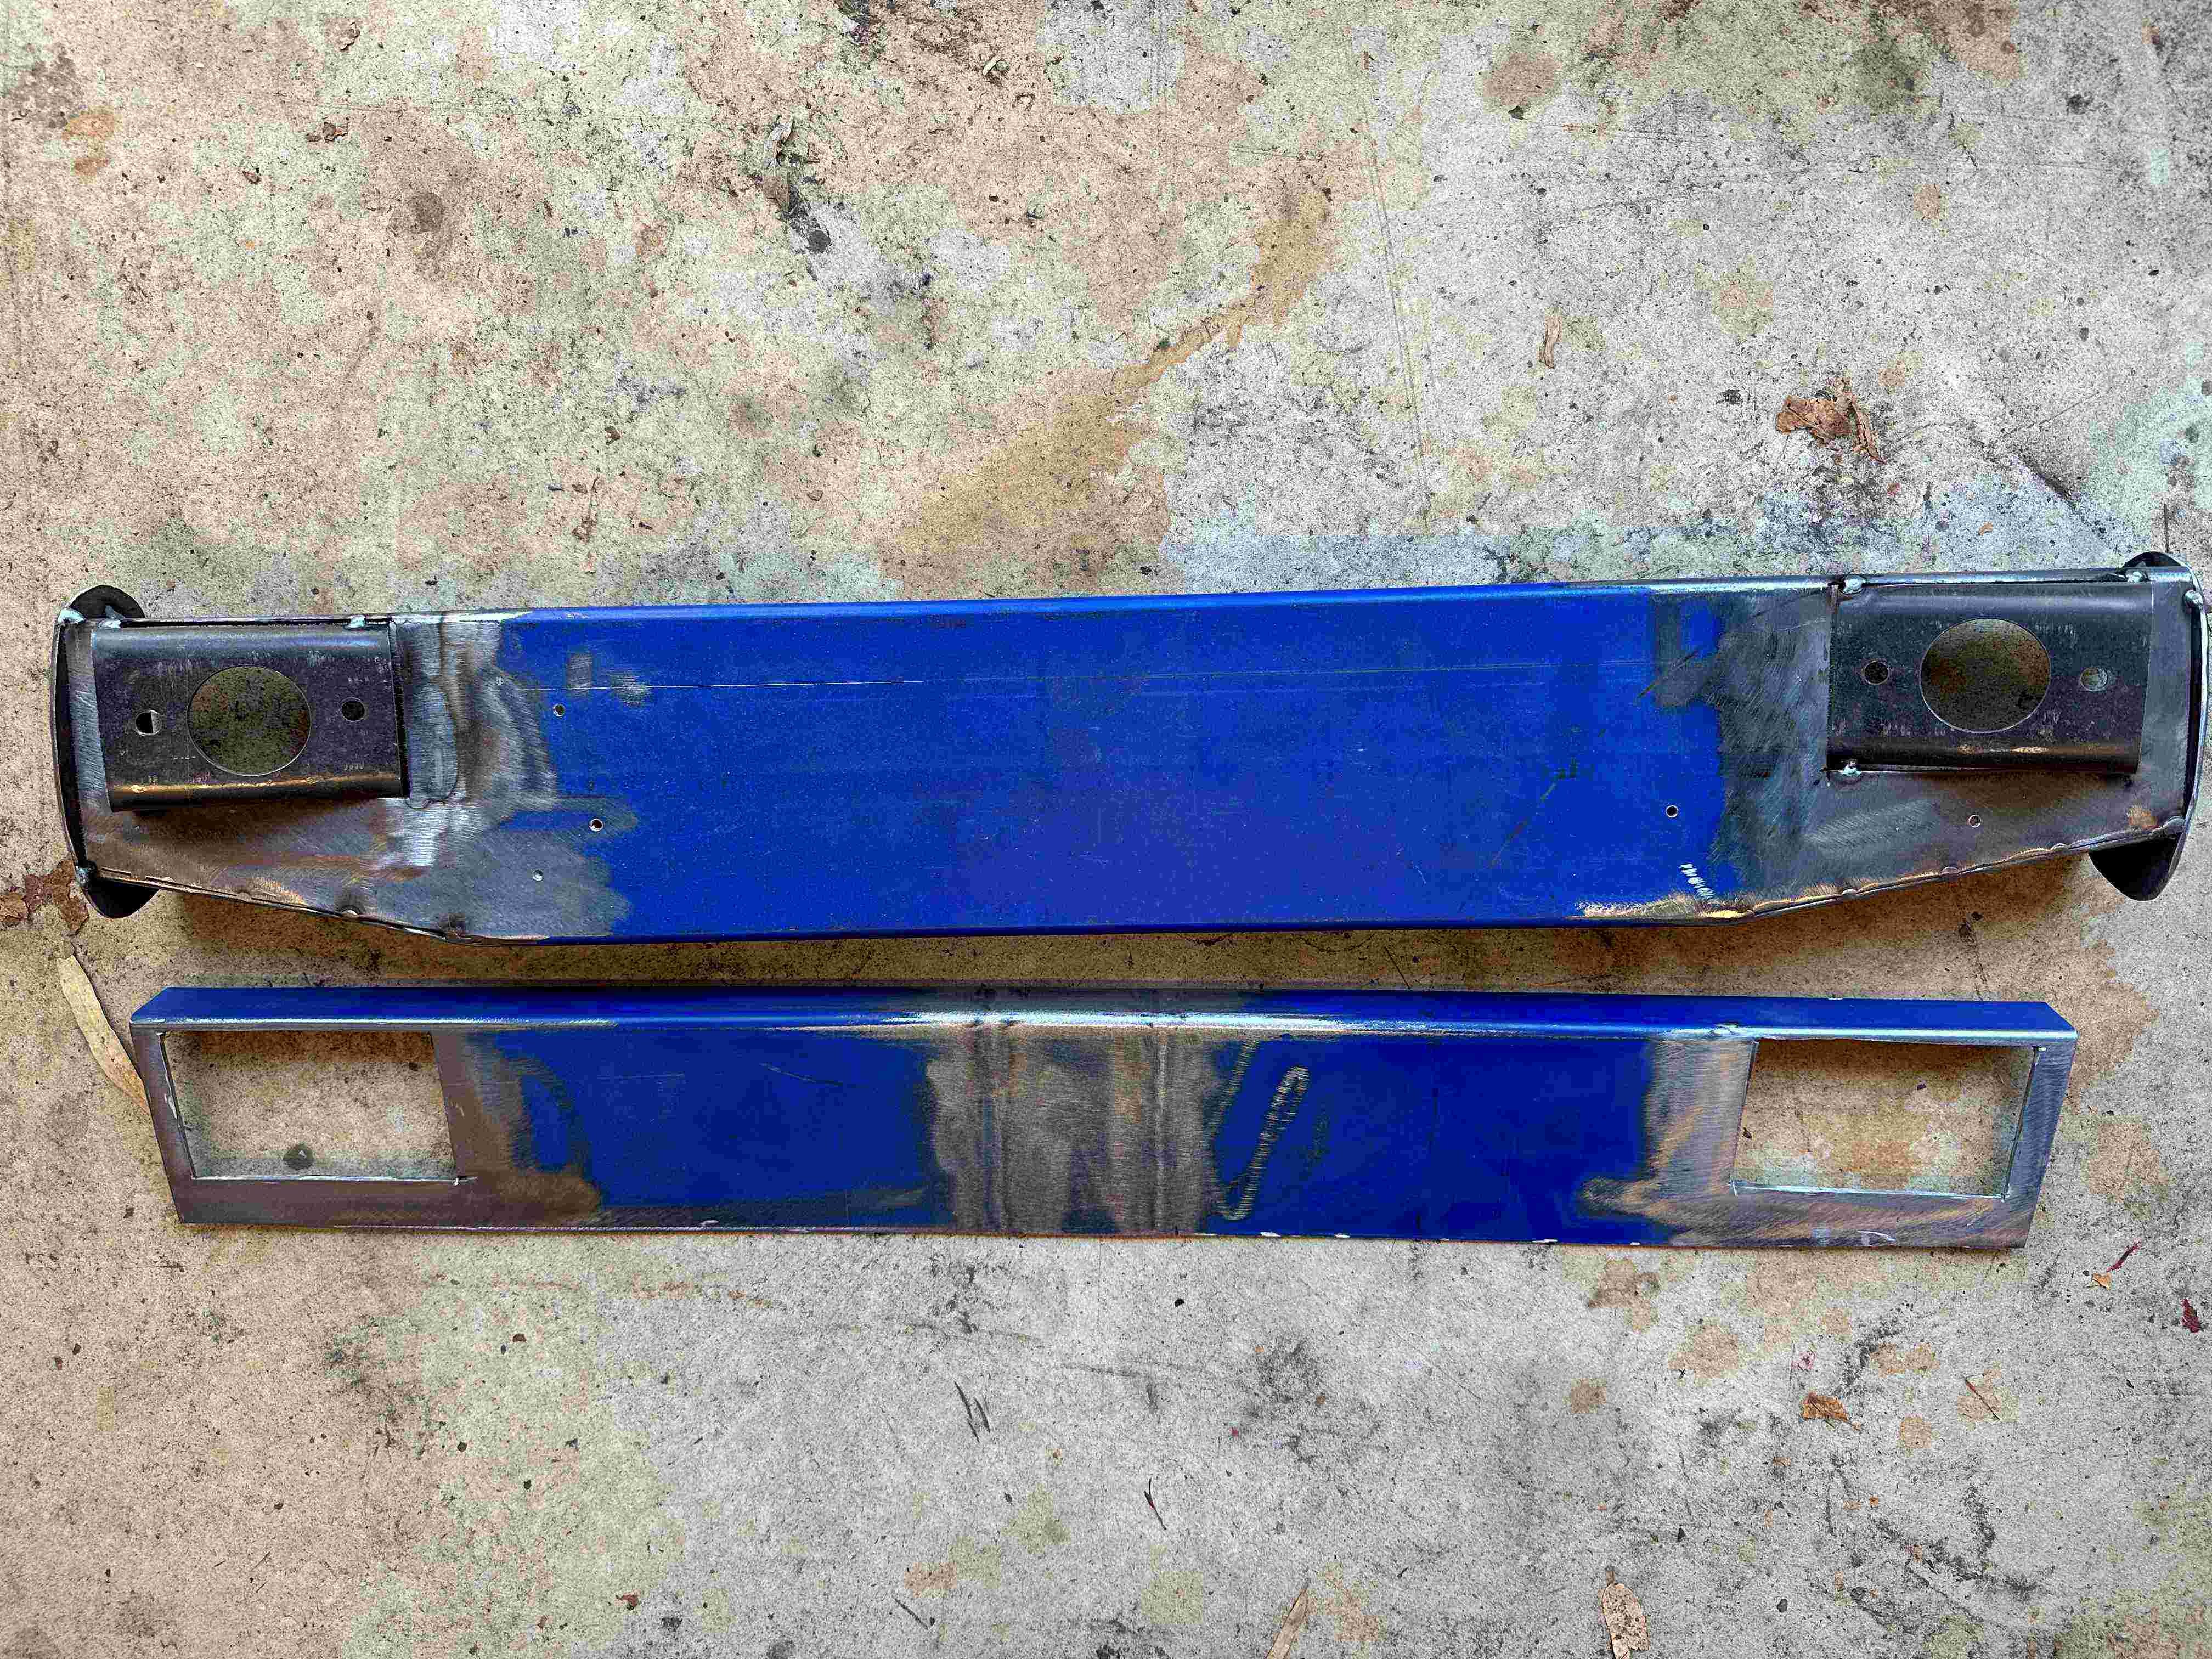
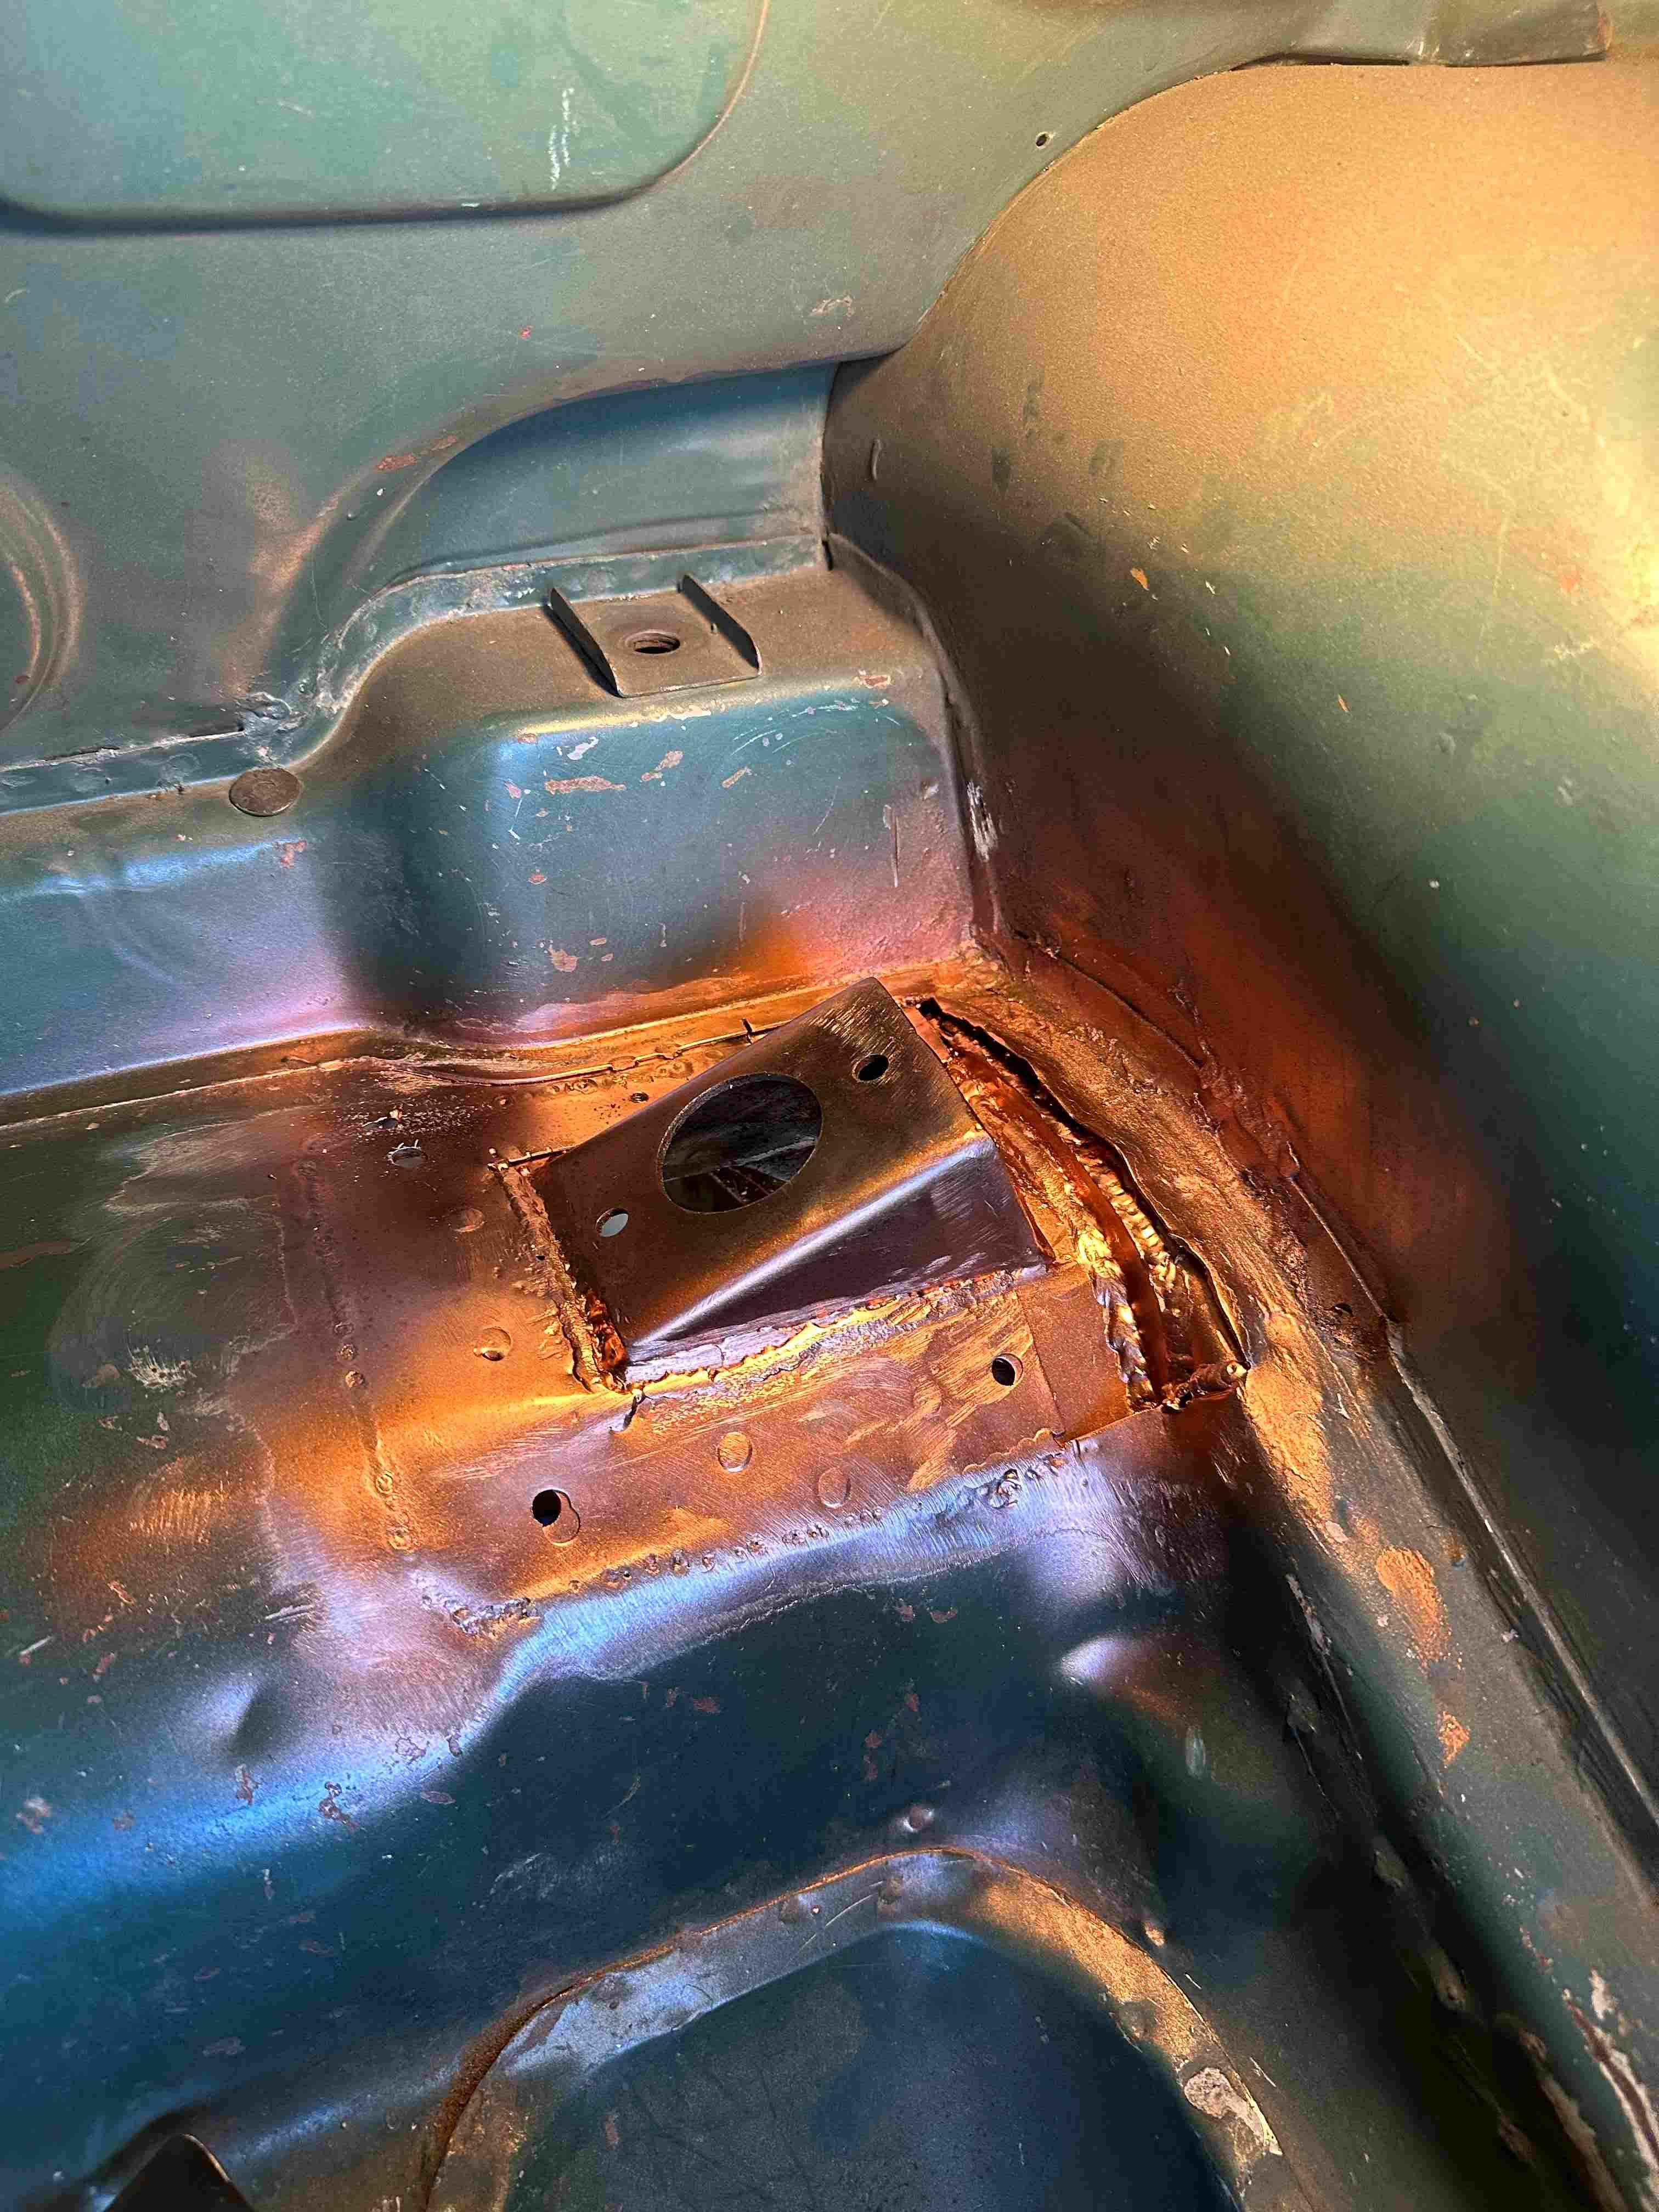
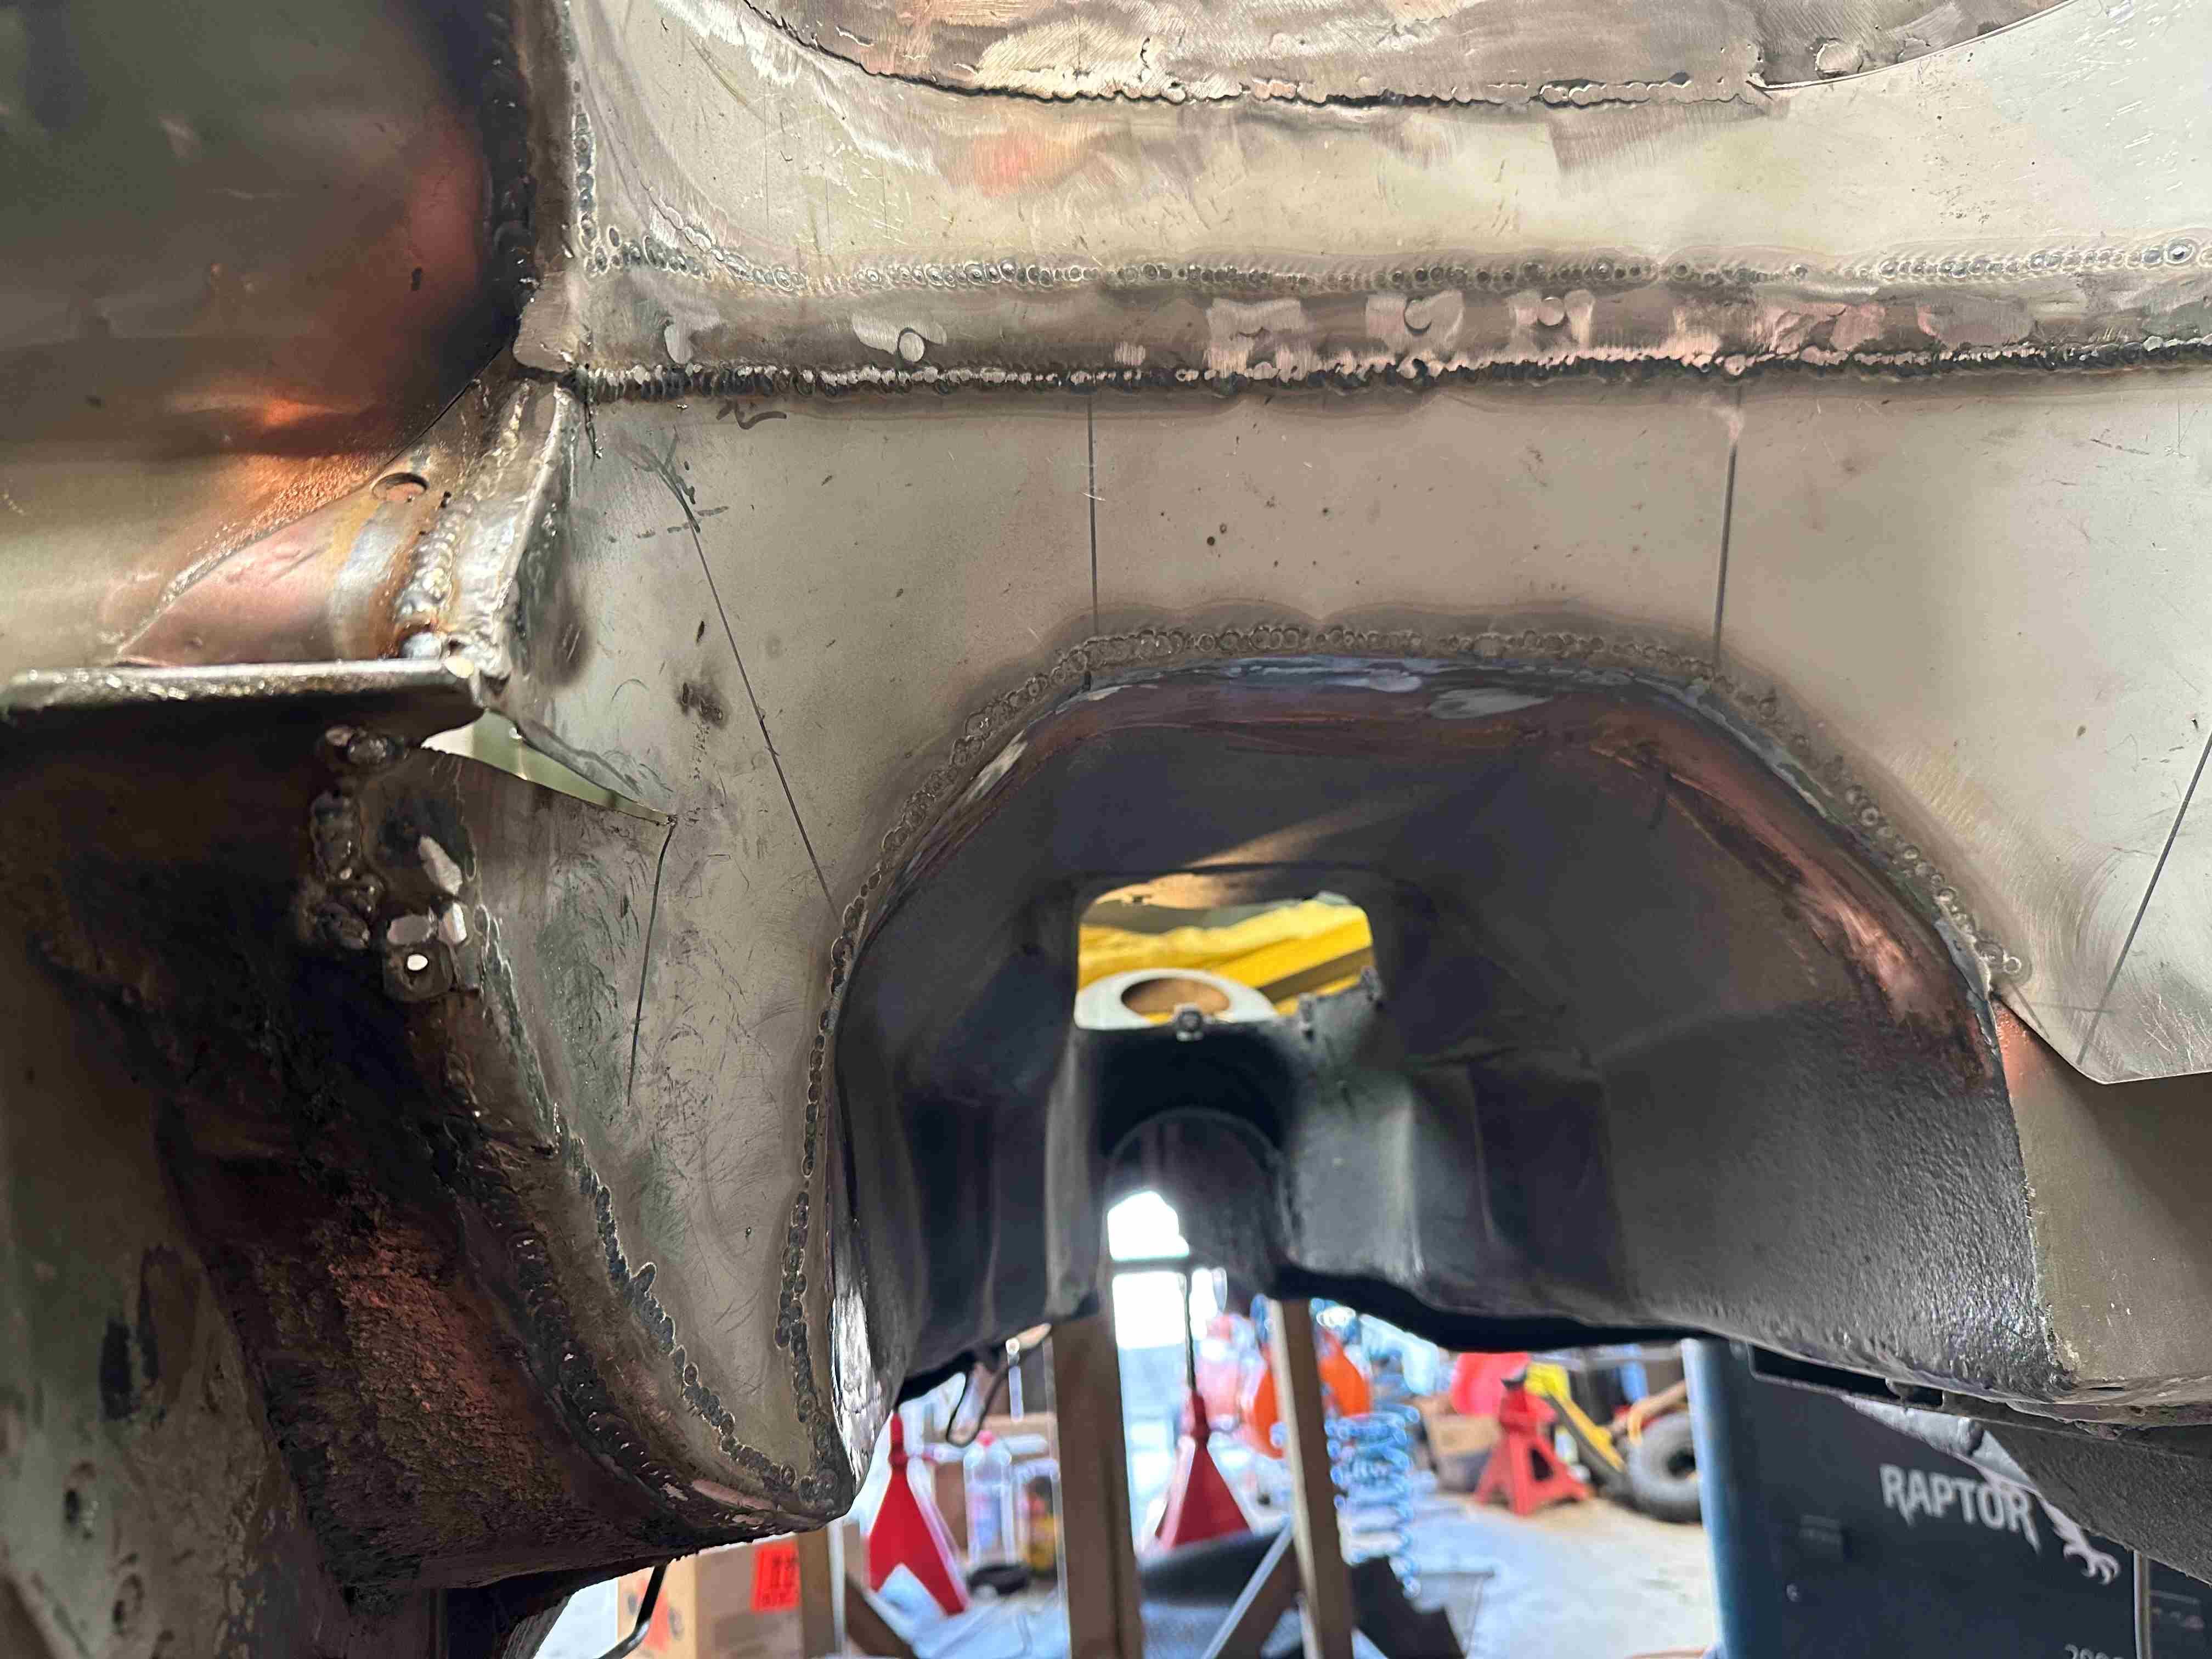
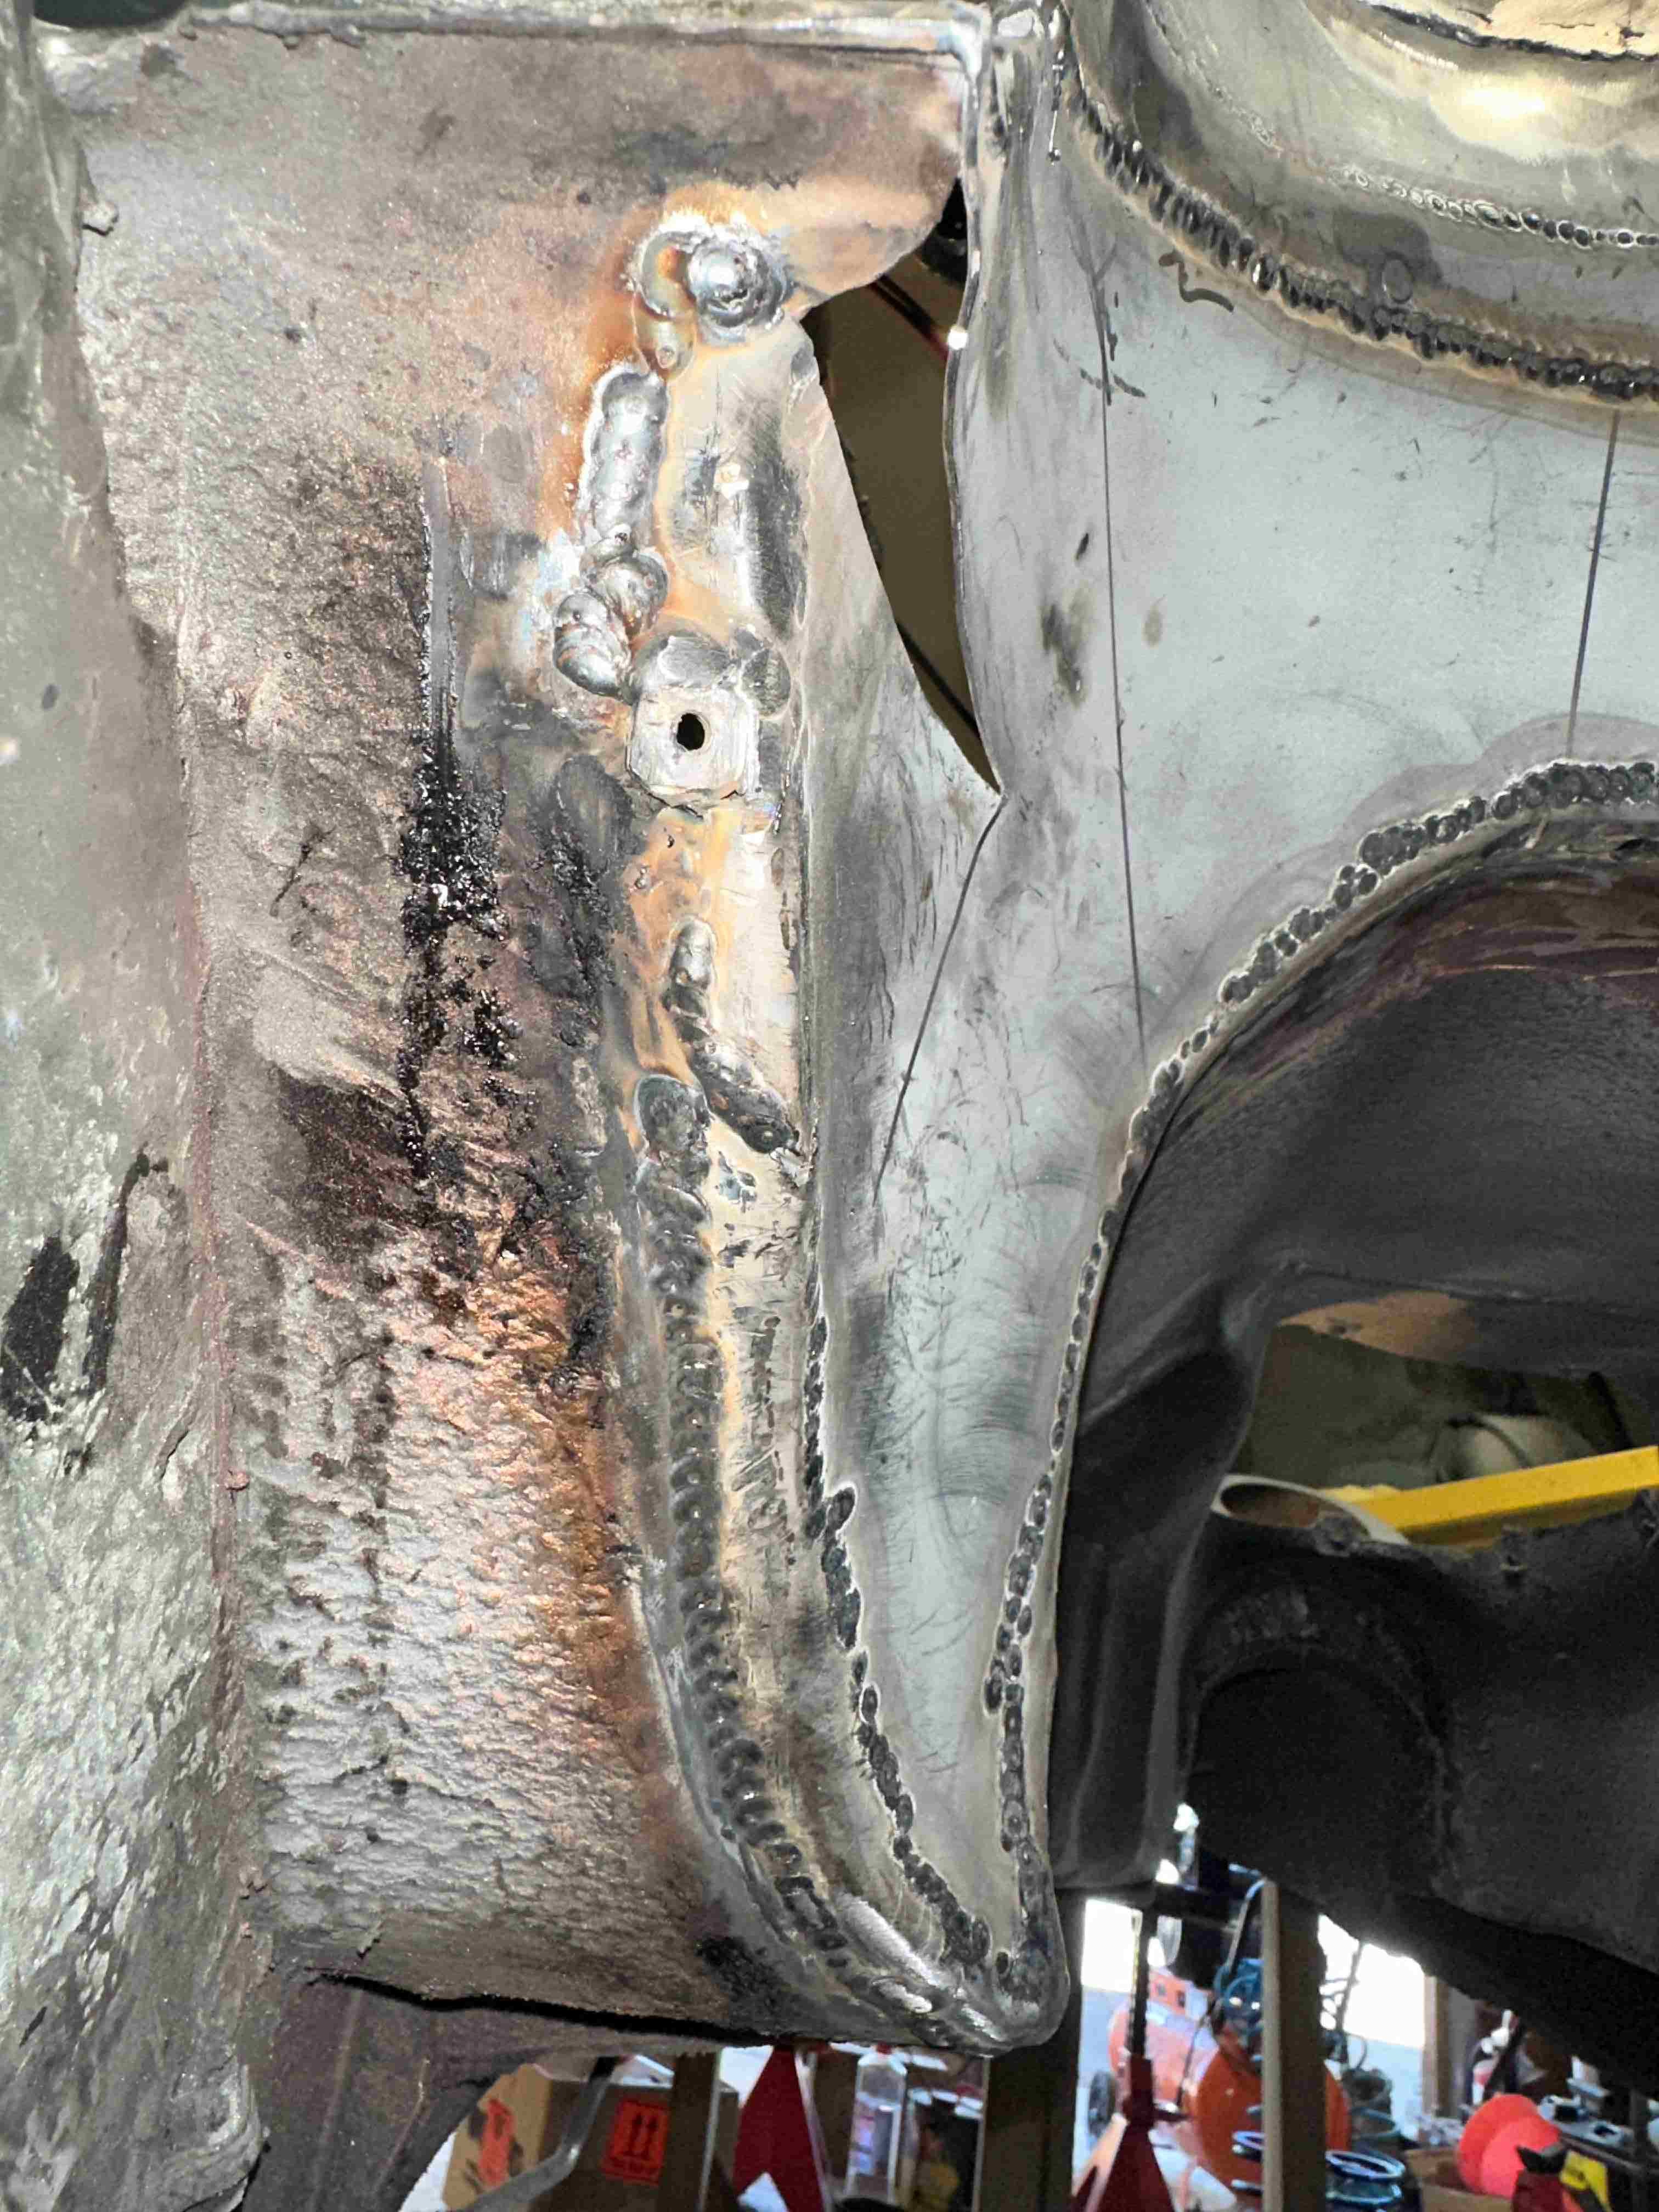
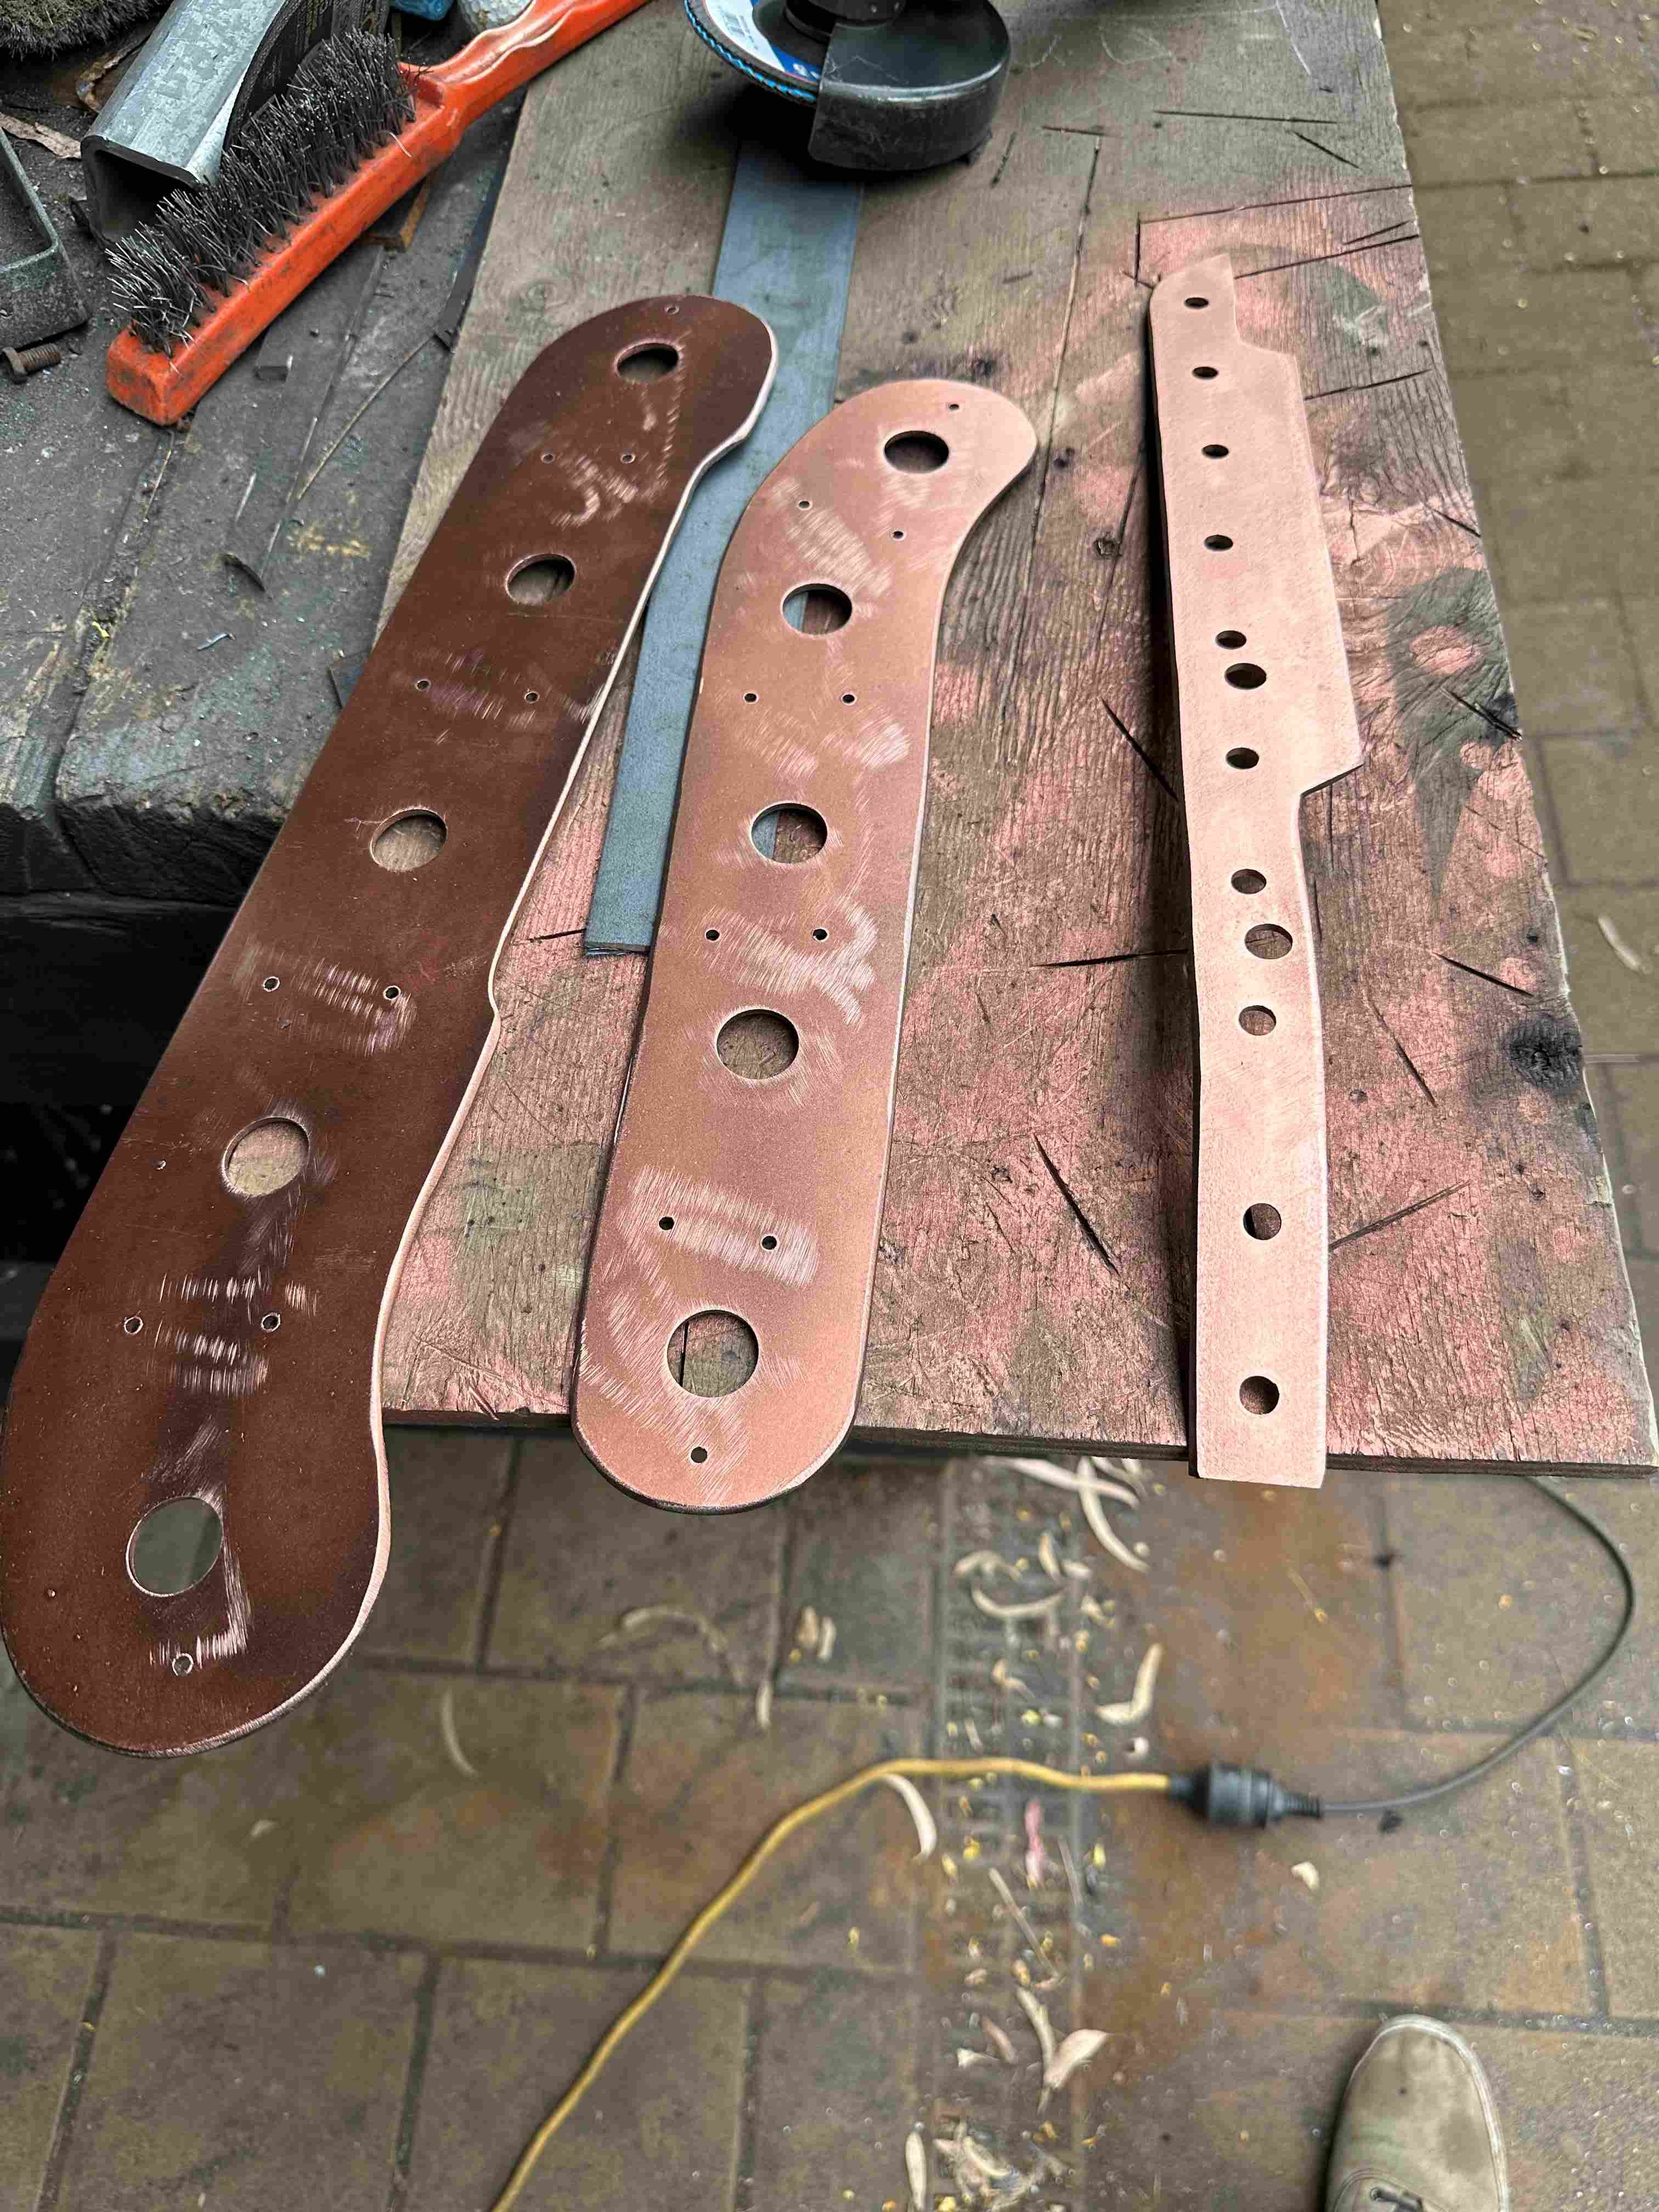
Some more boring old shock mount photo's. It's been a while as I ran out of gas and time but finally found the time and bought some gas so I was back into it. I did make up another top piece, so it didn't have the added middle section. I drilled lots of holes and used bolts mainly and some clamps to sandwich it all together. Welded up the plug holes and then the bolt holes. I will weld around the edge as well both underneath and the top piece but I will only weld it in about 25mm sections 50mm apart should do. I certainly think it is better being one piece going the width of the car. Certainly easier to get both sides the same.
6 points
-
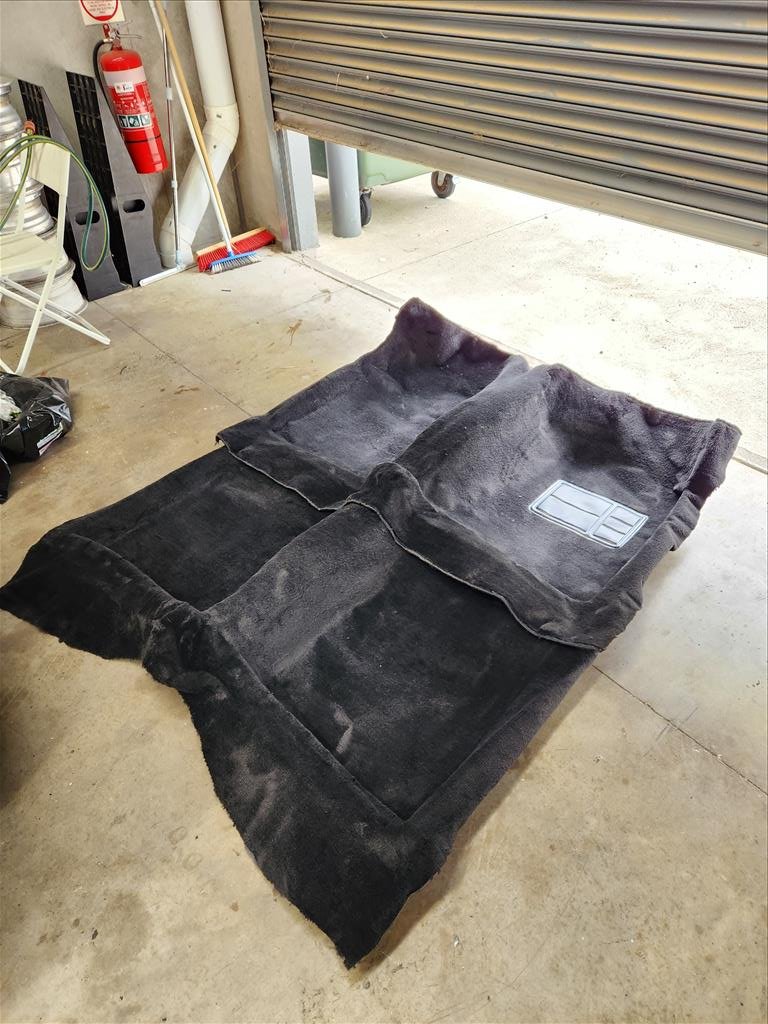
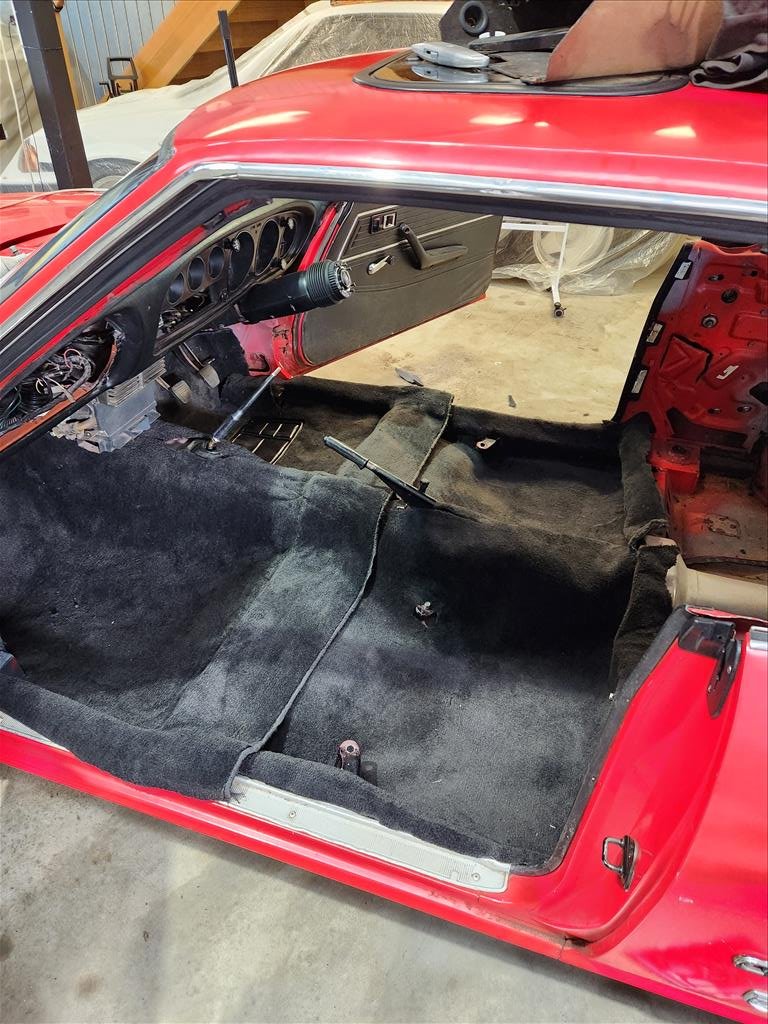
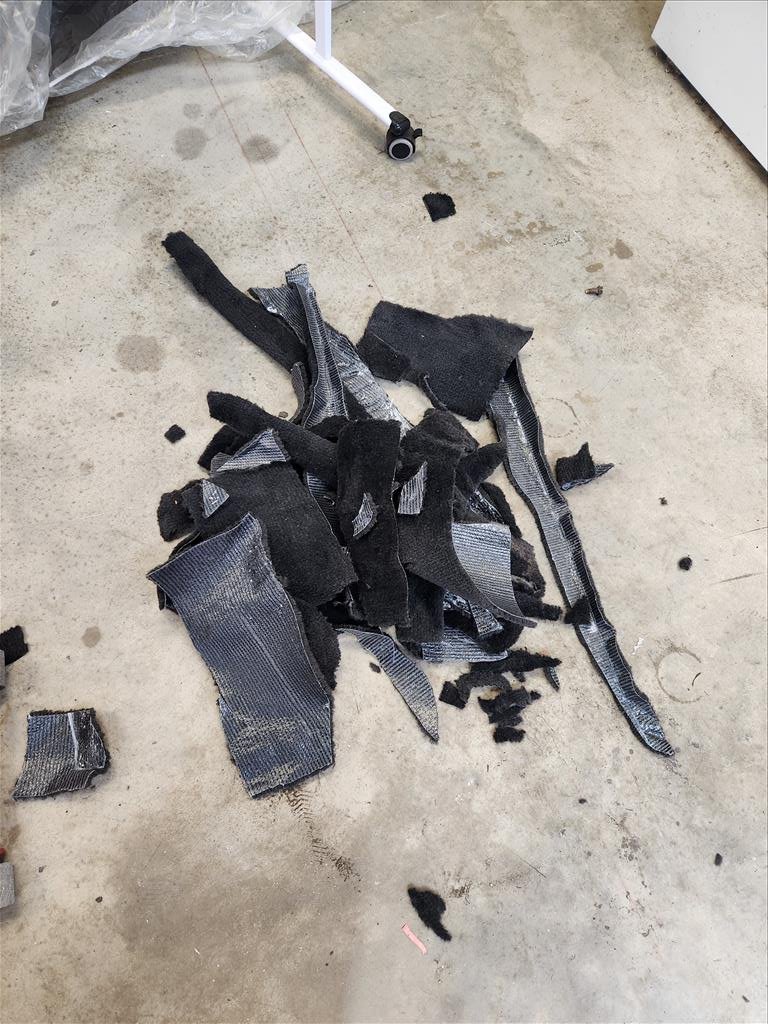
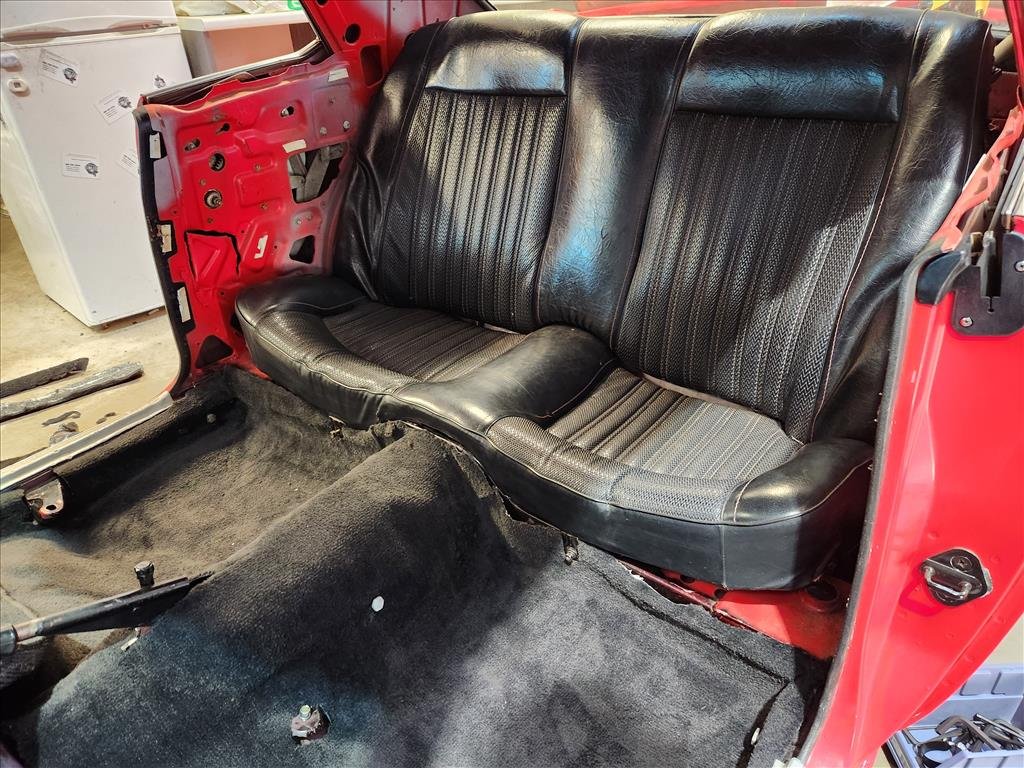
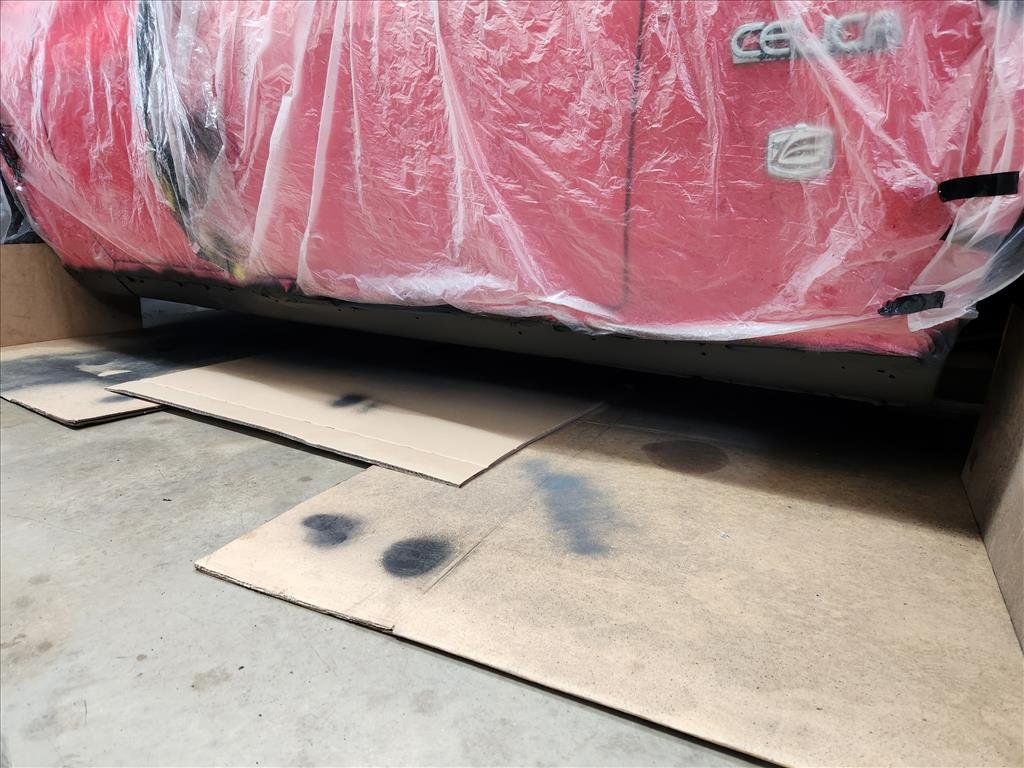
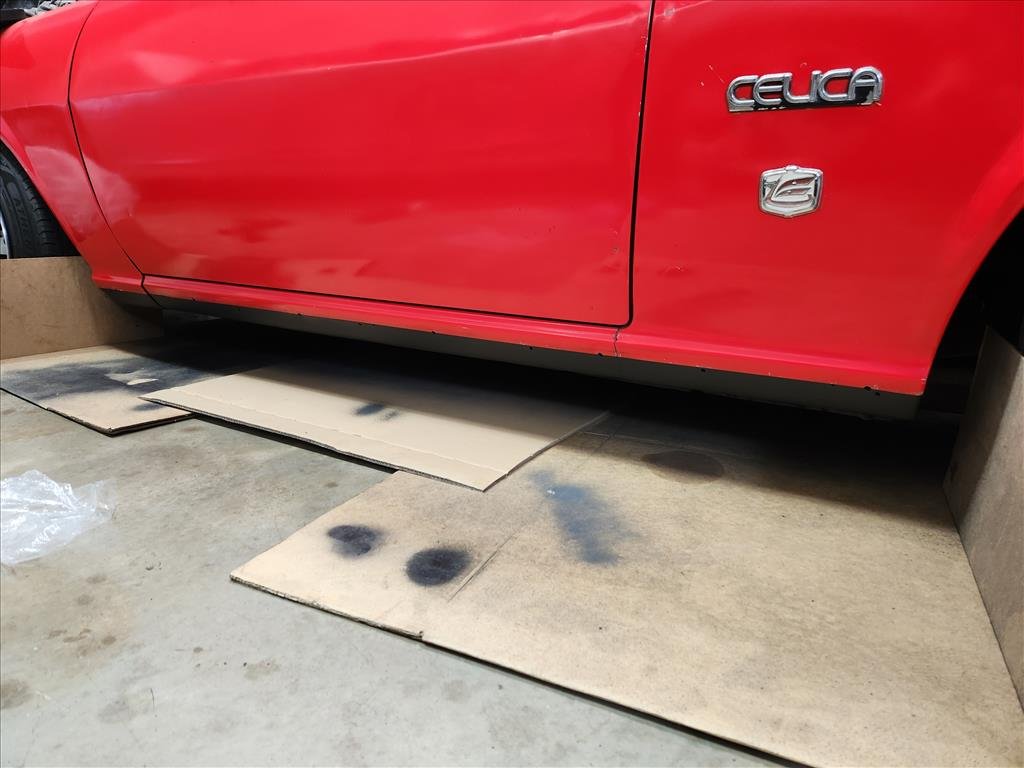
Aftermarket carpet sucks. I learnt this the hard way I suppose. The Celica carpet was already aftermarket by the time I got it and it was super old, dirty and chopped to hell. In my attempt to try and freshen up the interior this year I decided to get one of those moulded carpets. I quickly realised I'm not made for an upholstery career. They say you should start from the rear and move forwards when fitting them up. The problem I quickly found was that these are not quite right for this car. Research suggests that they are in fact moulded off TA23 not TA22, a small but important difference. TA22 did not even have carpet like this from the factory, more like glorified floor mats. My cutting skills are terrible as I was getting annoyed by this point, and the blades were getting blunt. I initially wanted to wrap it under the seat base however the seat sits directly on the body with no room to move so that was not possible. Additionally the roll cage mounts in the rear are in the way of the seat bottom which is why its curved up on each end. I'm not sure what the OEM TA22 carpet looks like but I believe there are some clips that it can use to hold up, but I've not actually seen any factory standard TA22 carpets in person before to compare it. I'll paint the floor black and the rear around the seats so it is less noticeable but yeah, disappointed with my efforts on that one. Another thing about the TA23 vs TA22 is the TA23 side rocker sill things are designed for the edge of the carpet to go underneath and bolt down, TA22 are not. That means more rough cuts along the side edges too. As you can see, lots of bits cut off. Anyway I got the front kind of fitted up as best as possible (remember those fucking blocks in the way) and installed the seats back. I'll need to replace these as it turns out as there is some damage on both of them (more than just superficial and foam). Then I got her fired up and went for a burn and I didn't care about the carpet at all. The fuel is probably 2 years old by now and it still worked mint. Sadly I don't have a phone mount but the sounds on song were excellent. The panhard rod I put in stopped any rubbing that I could tell and actually the car handled surprisingly well. It goes, stops and turns just like it should. Good car.
5 points
-
Then I painted it red because that's the first tin of colour I pulled out of the cupboard.
5 points
-
Been getting a bit done, cbf smacking out a big update right now. Couple weeks ago we got the bitch fired up. Thanks to the GC @fletch for his exceptional trouble shooting abilities.And timing light. Working on water pipes now so will hopefully be on to diff next Chur https://youtube.com/shorts/loj9hqDgwQE?si=C8Xhtq75FGZGLL2j5 points
-
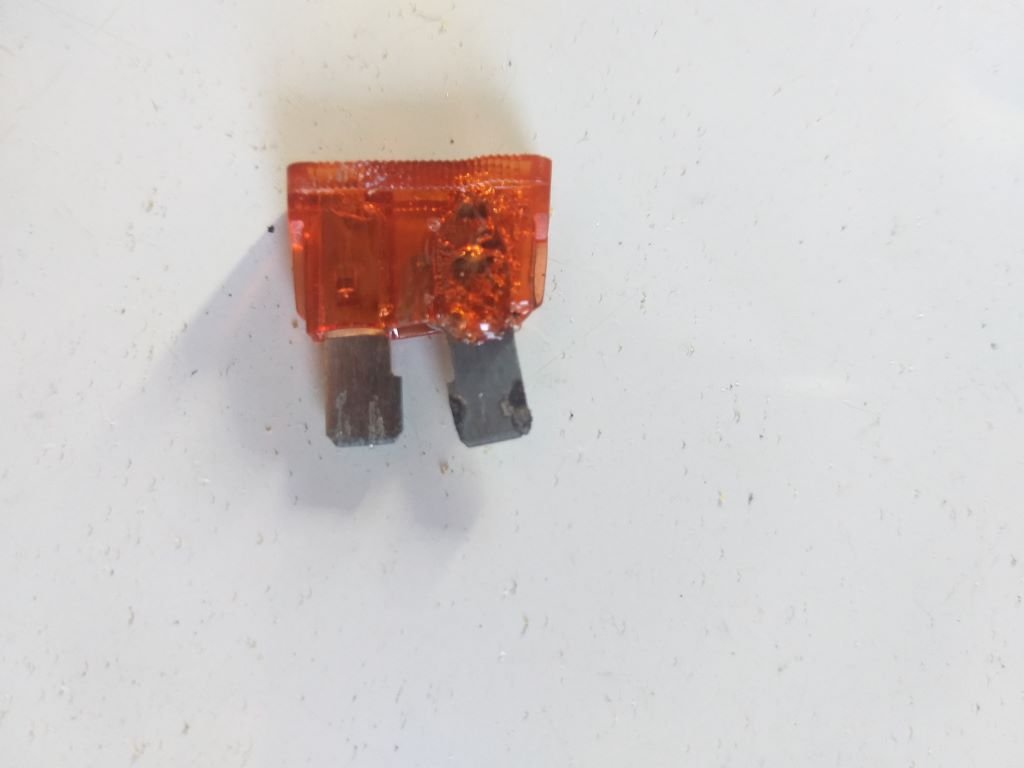
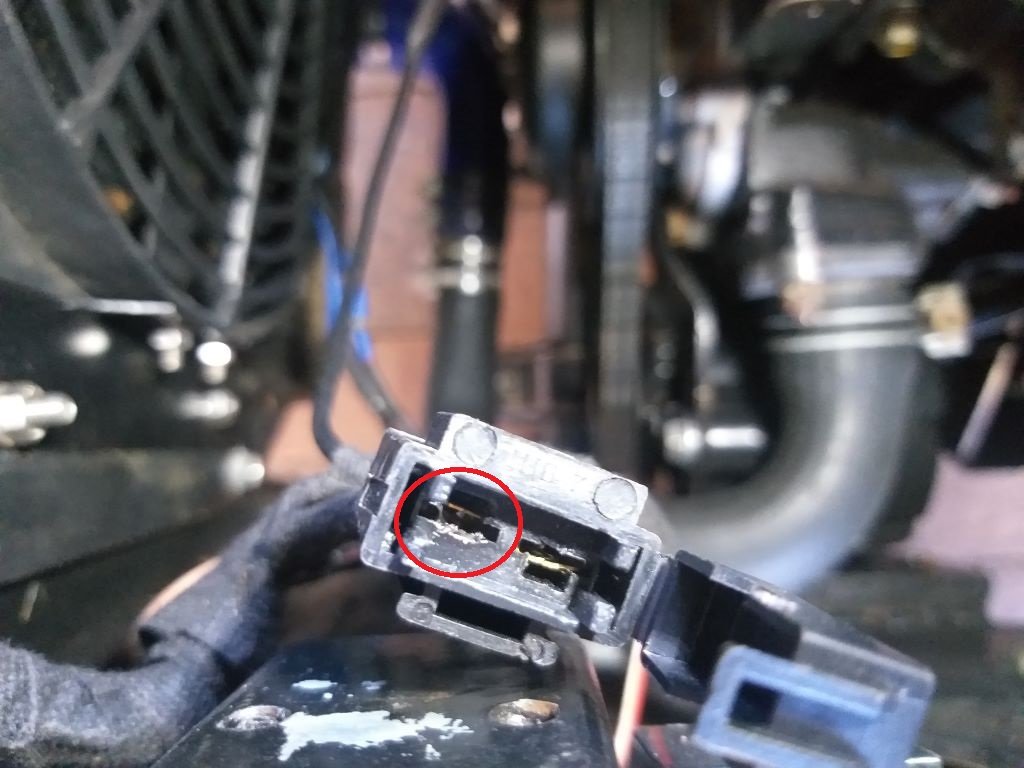
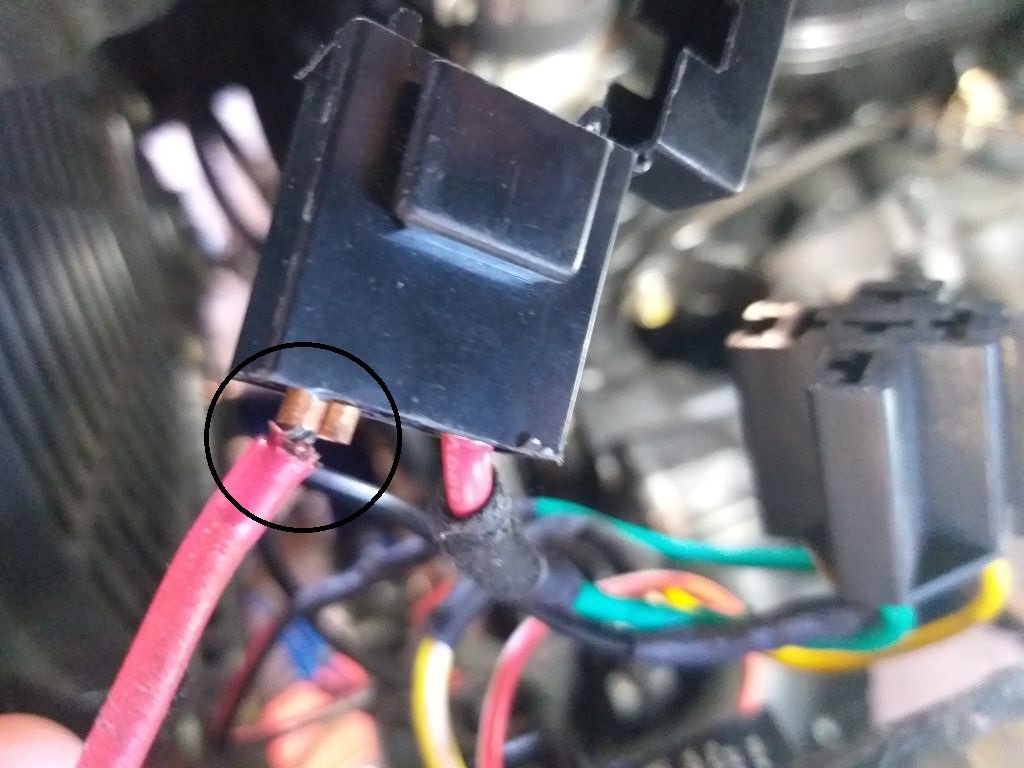
Last week we headed off on a supply run in the pouring rain and as we got into town, I noticed the temp creeping up above normal. Quickly pulled over and switched off and when I cycled the ignition key to the aux setting I noticed no noise coming from the thermo fan. WTF. Checked the under dash fuse panel and the fuse for the thermo fan relay exciter wire was still good. Lifted the engine cover lid to get a closer look at the inline fuse on the relay power feed. Bloody fuse wouldn't come out. Grabbed a pair of longnose pliers from my tool kit and gave the fuse a bloody good yank and out she came. Yikes, definite signs of overheating, but the fuse itself was still intact. Fuse holder looked decidedly shabby too. Looking at the back of the fuse holder and I could immediately tell that the input wire on the connector had dropped. Managed to push the connector back into the housing and with a working fan we were back on the road again. Fast forward to today and I figured I'd best do a proper fix. Luckily, I had one of those fairly robust auto reset trip switches in stock, so I've mounted that in the battery box and have run a new relay power feed directly from the battery. The relay trigger wire is still ignition switch activated via a separate fuse from the under dash fuse panel. Longer term I need to replace the crappy thermo fan with a decent Spal unit as the cheapies sure do suck up the amps.
4 points
-
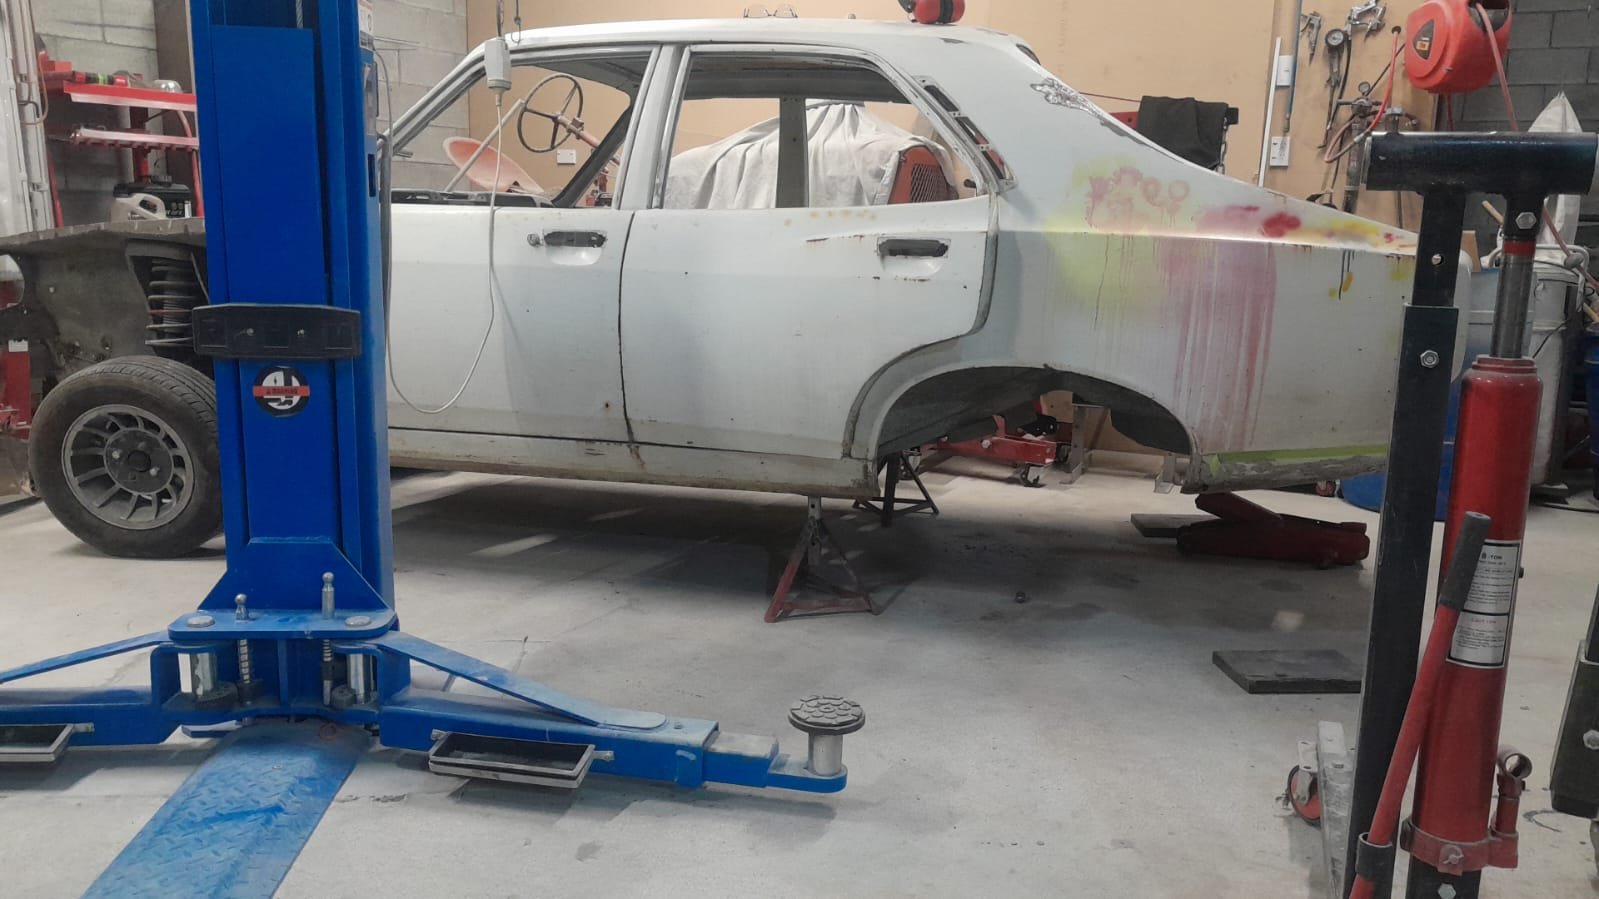
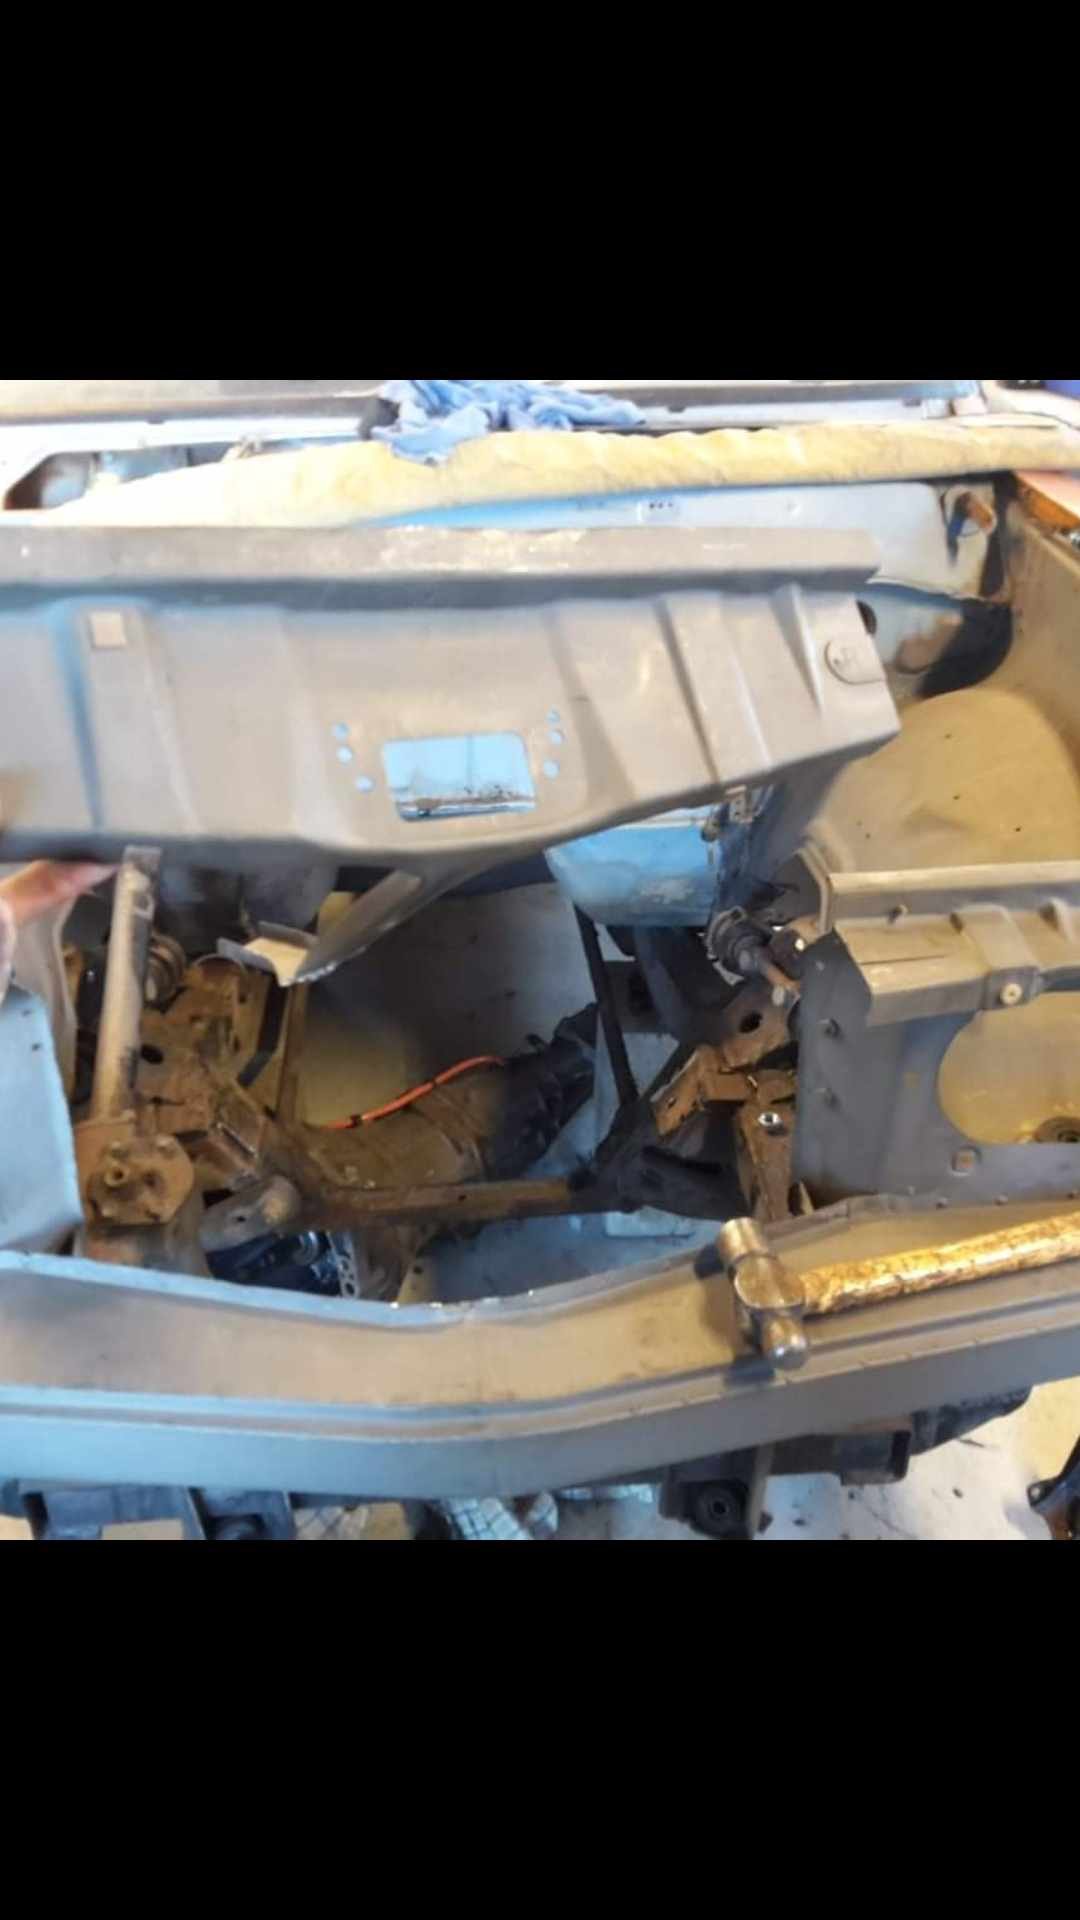
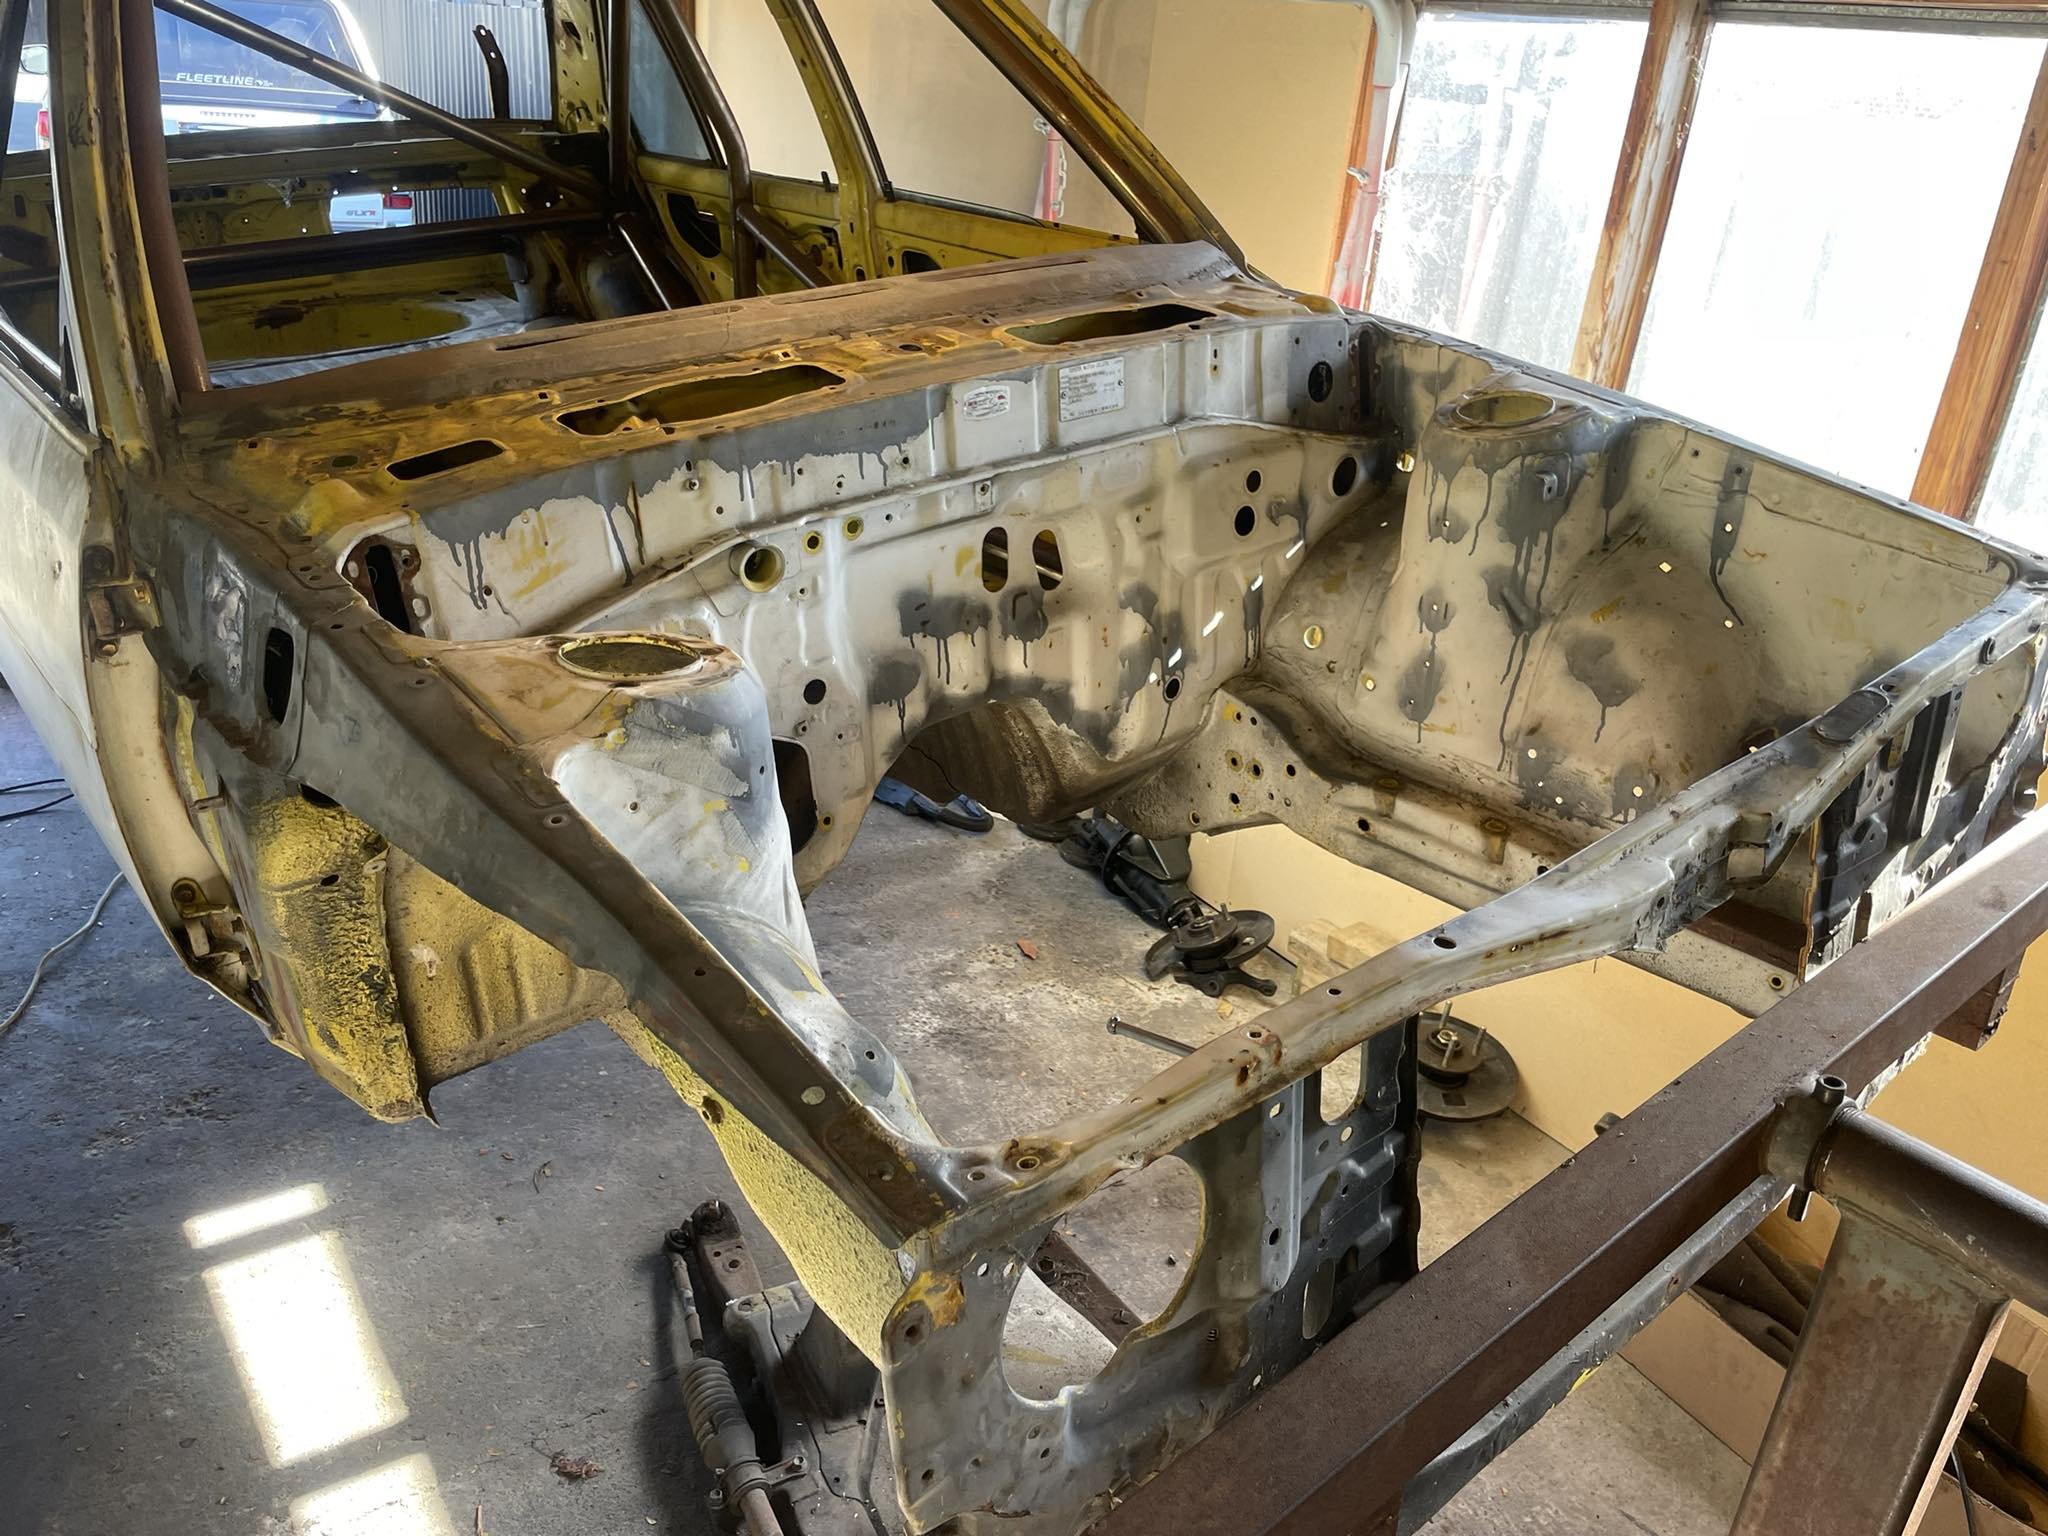
the good diff is out now, something fugly is going in just to keep shell mobile, front end out soon too, paint it all up ready for refit
4 points
-
so it was bent twisted, and bent all over the place. ive managed to get it fairly straight, and got the front end in primer.
4 points
-
I’ve seen it, it’s not as good as a Morris, but I like it.4 points
-
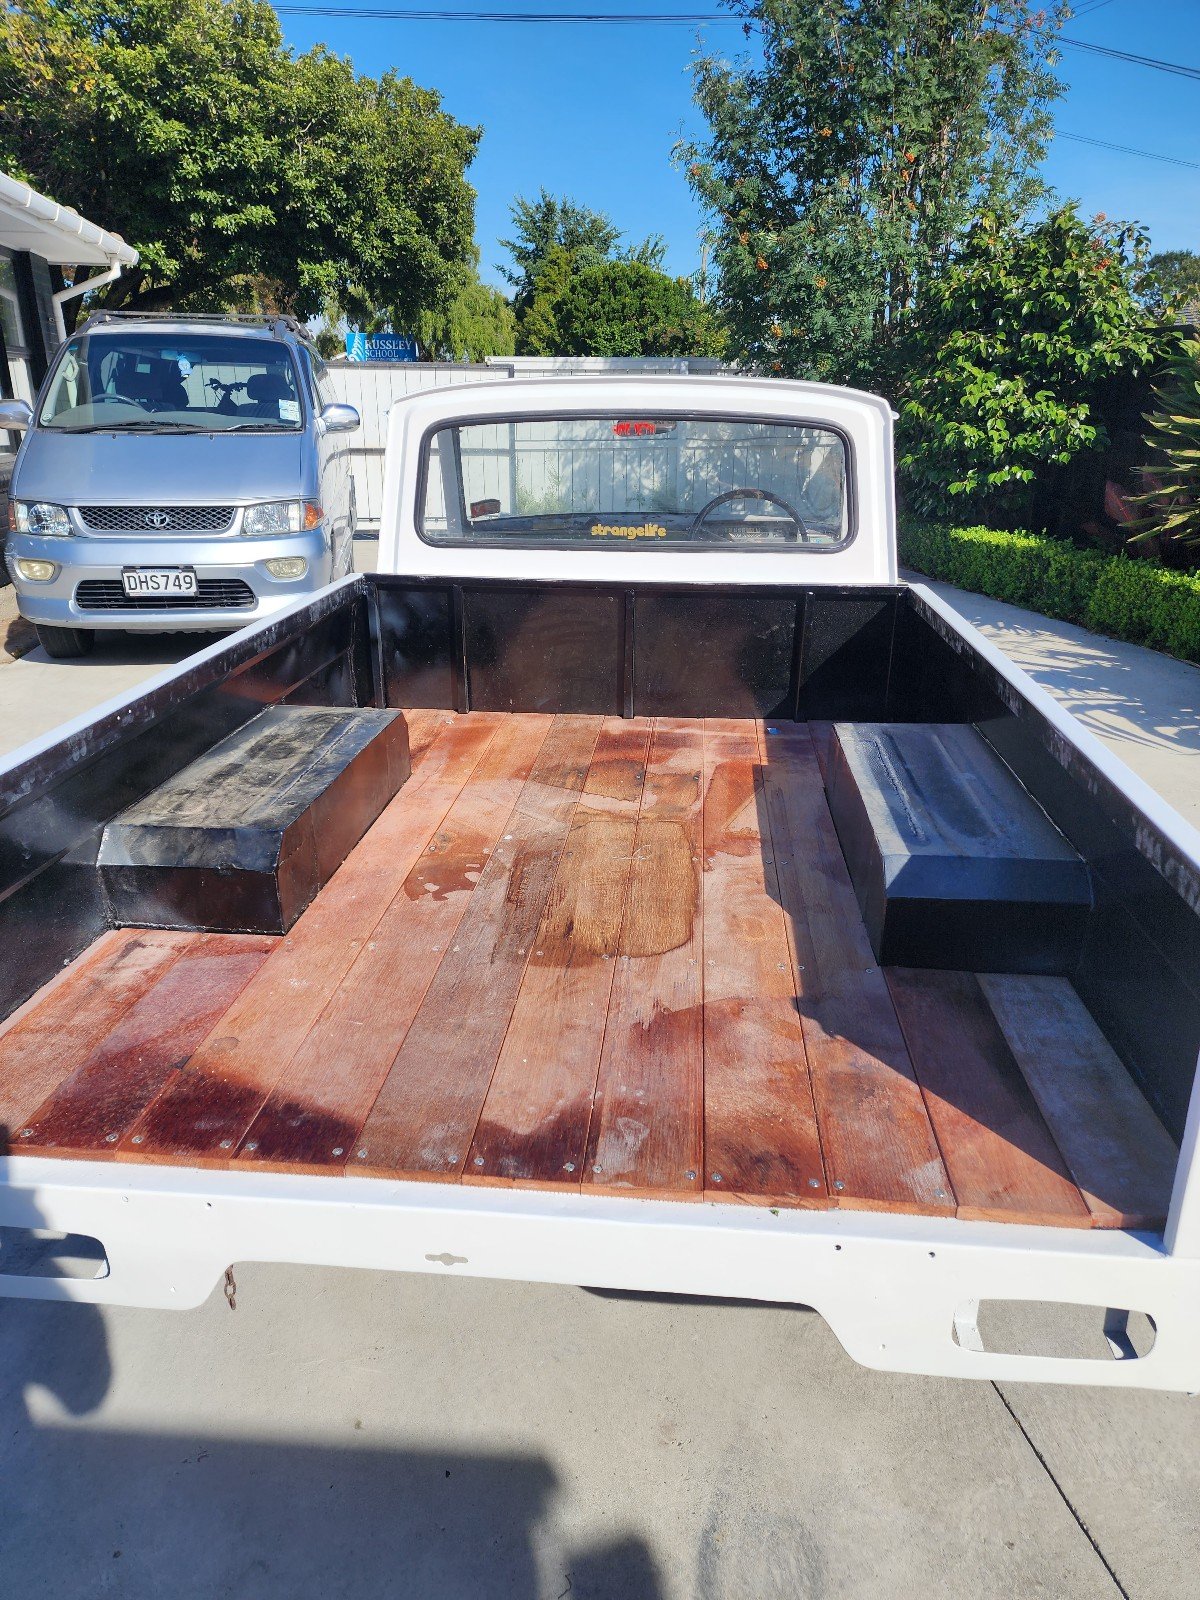
Imagine all the stuff you can bring home with a ute, and rapidly in this case3 points
-
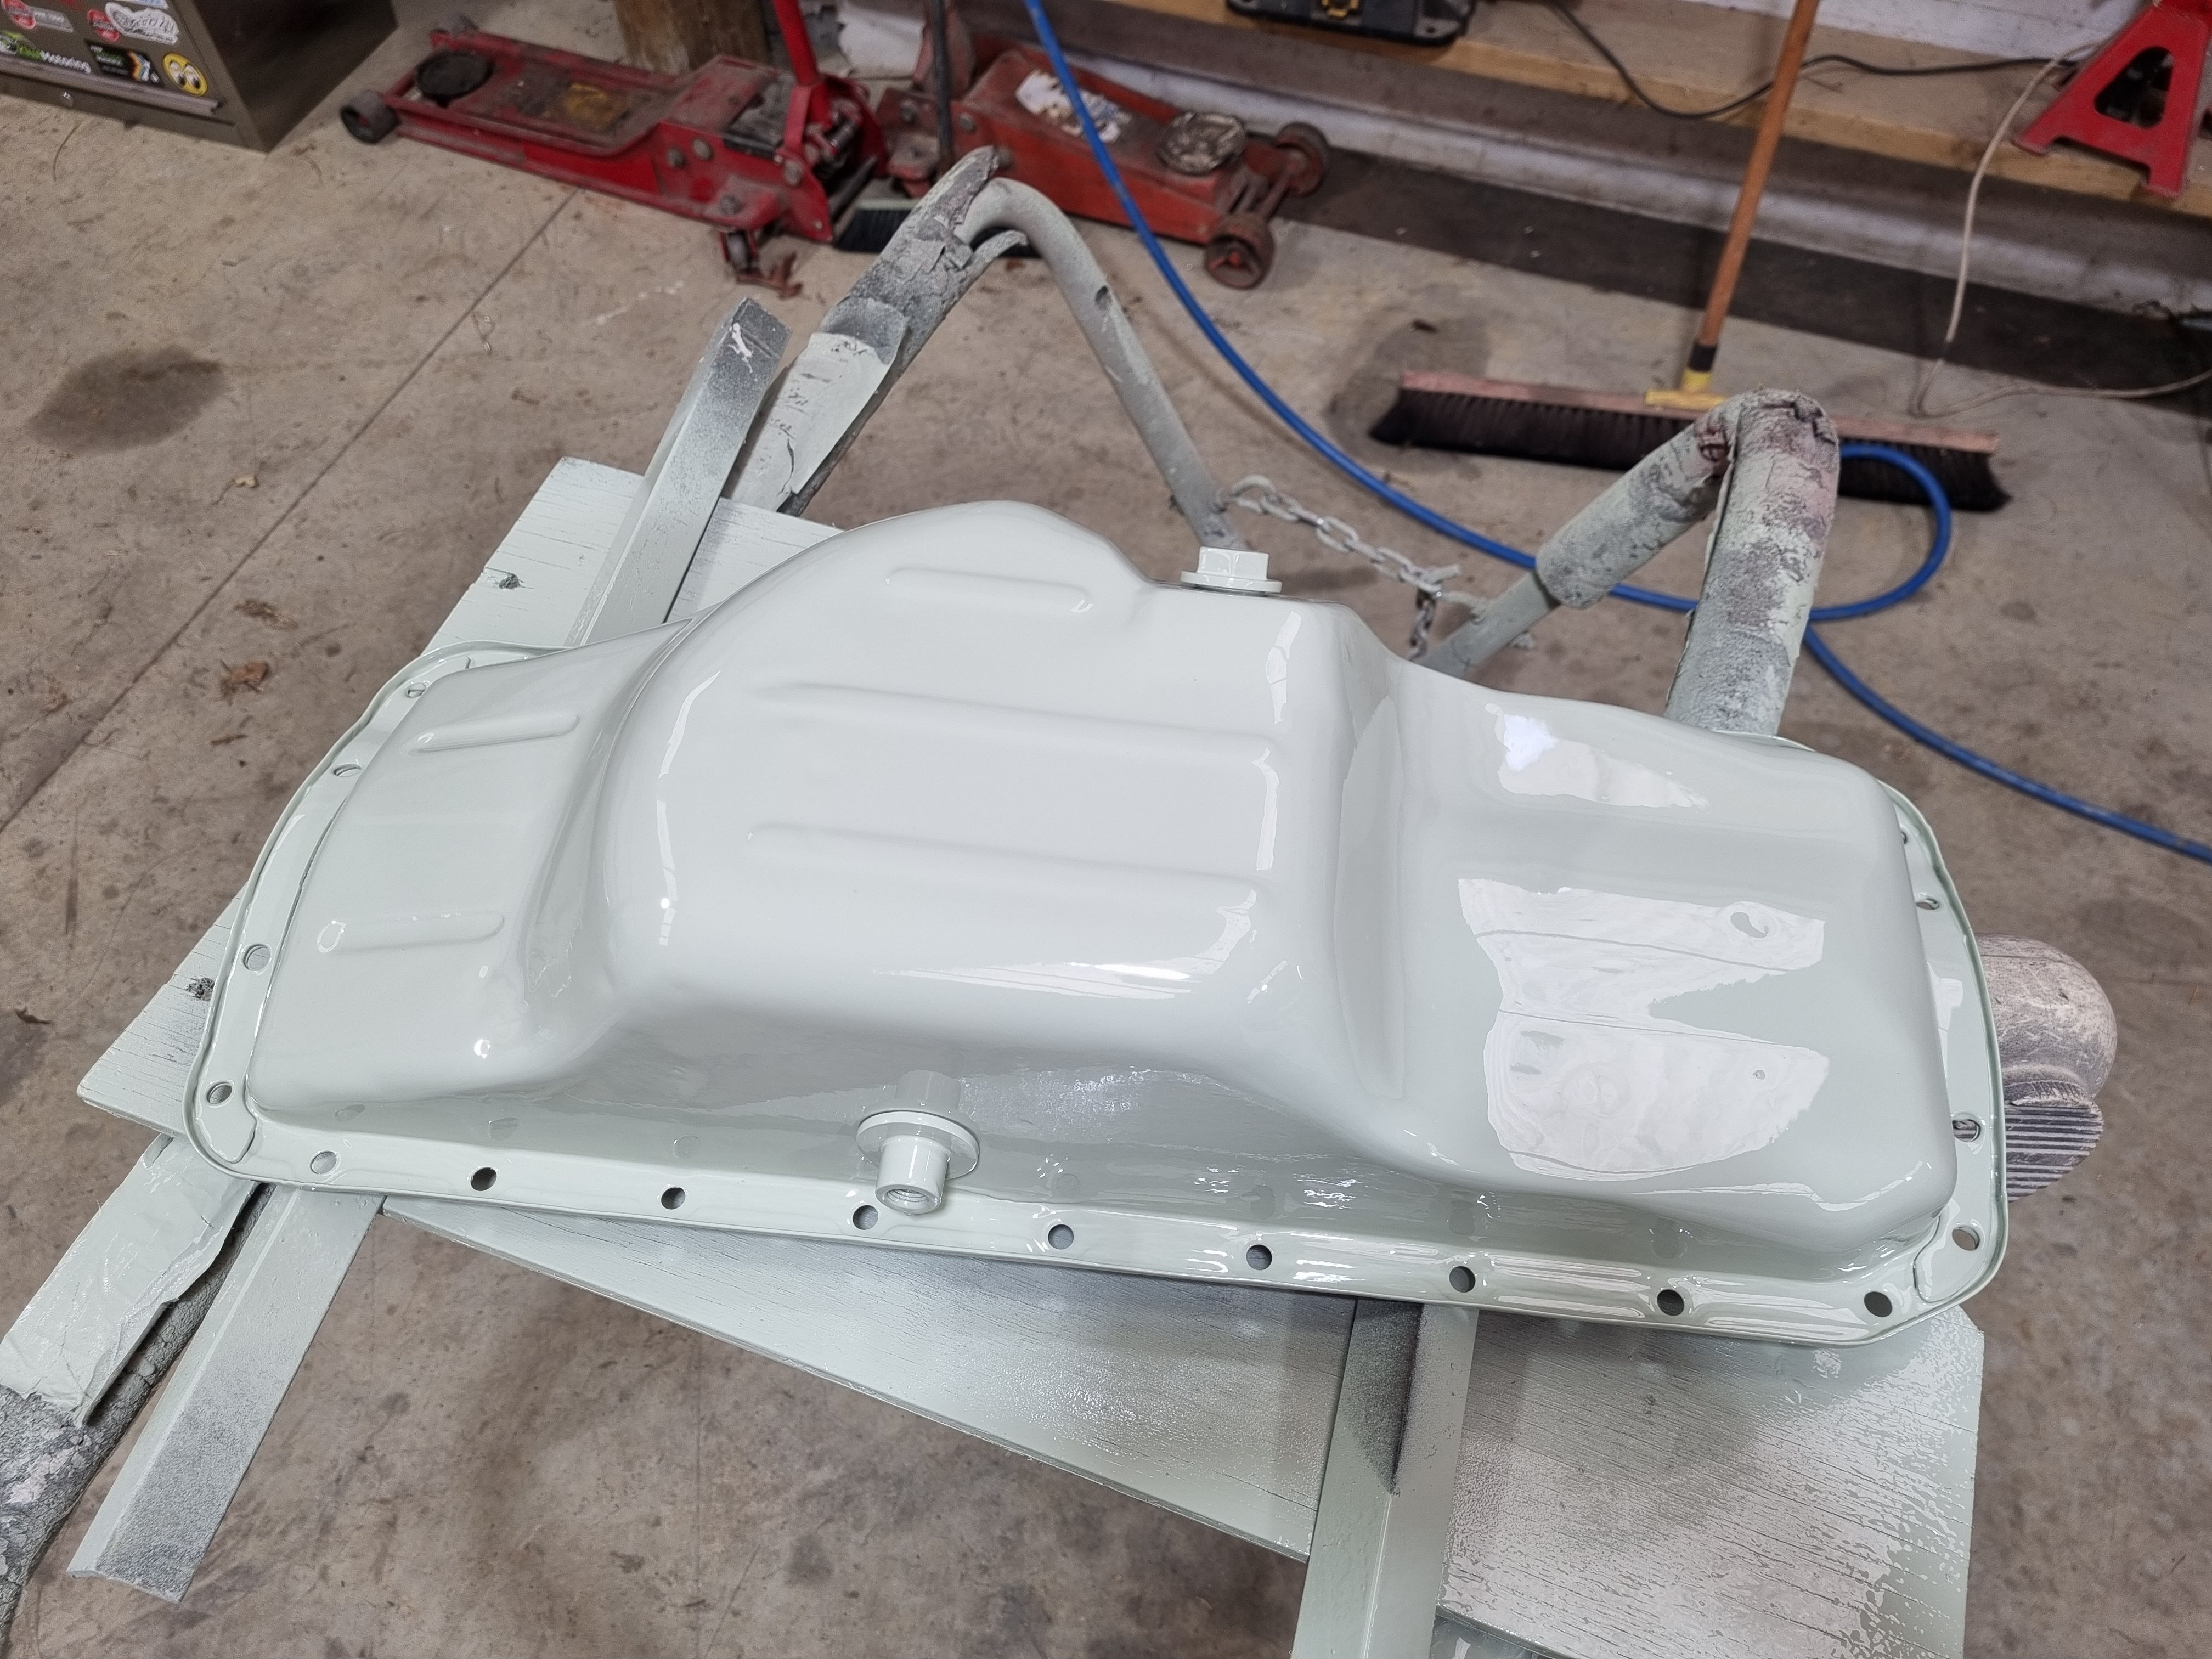
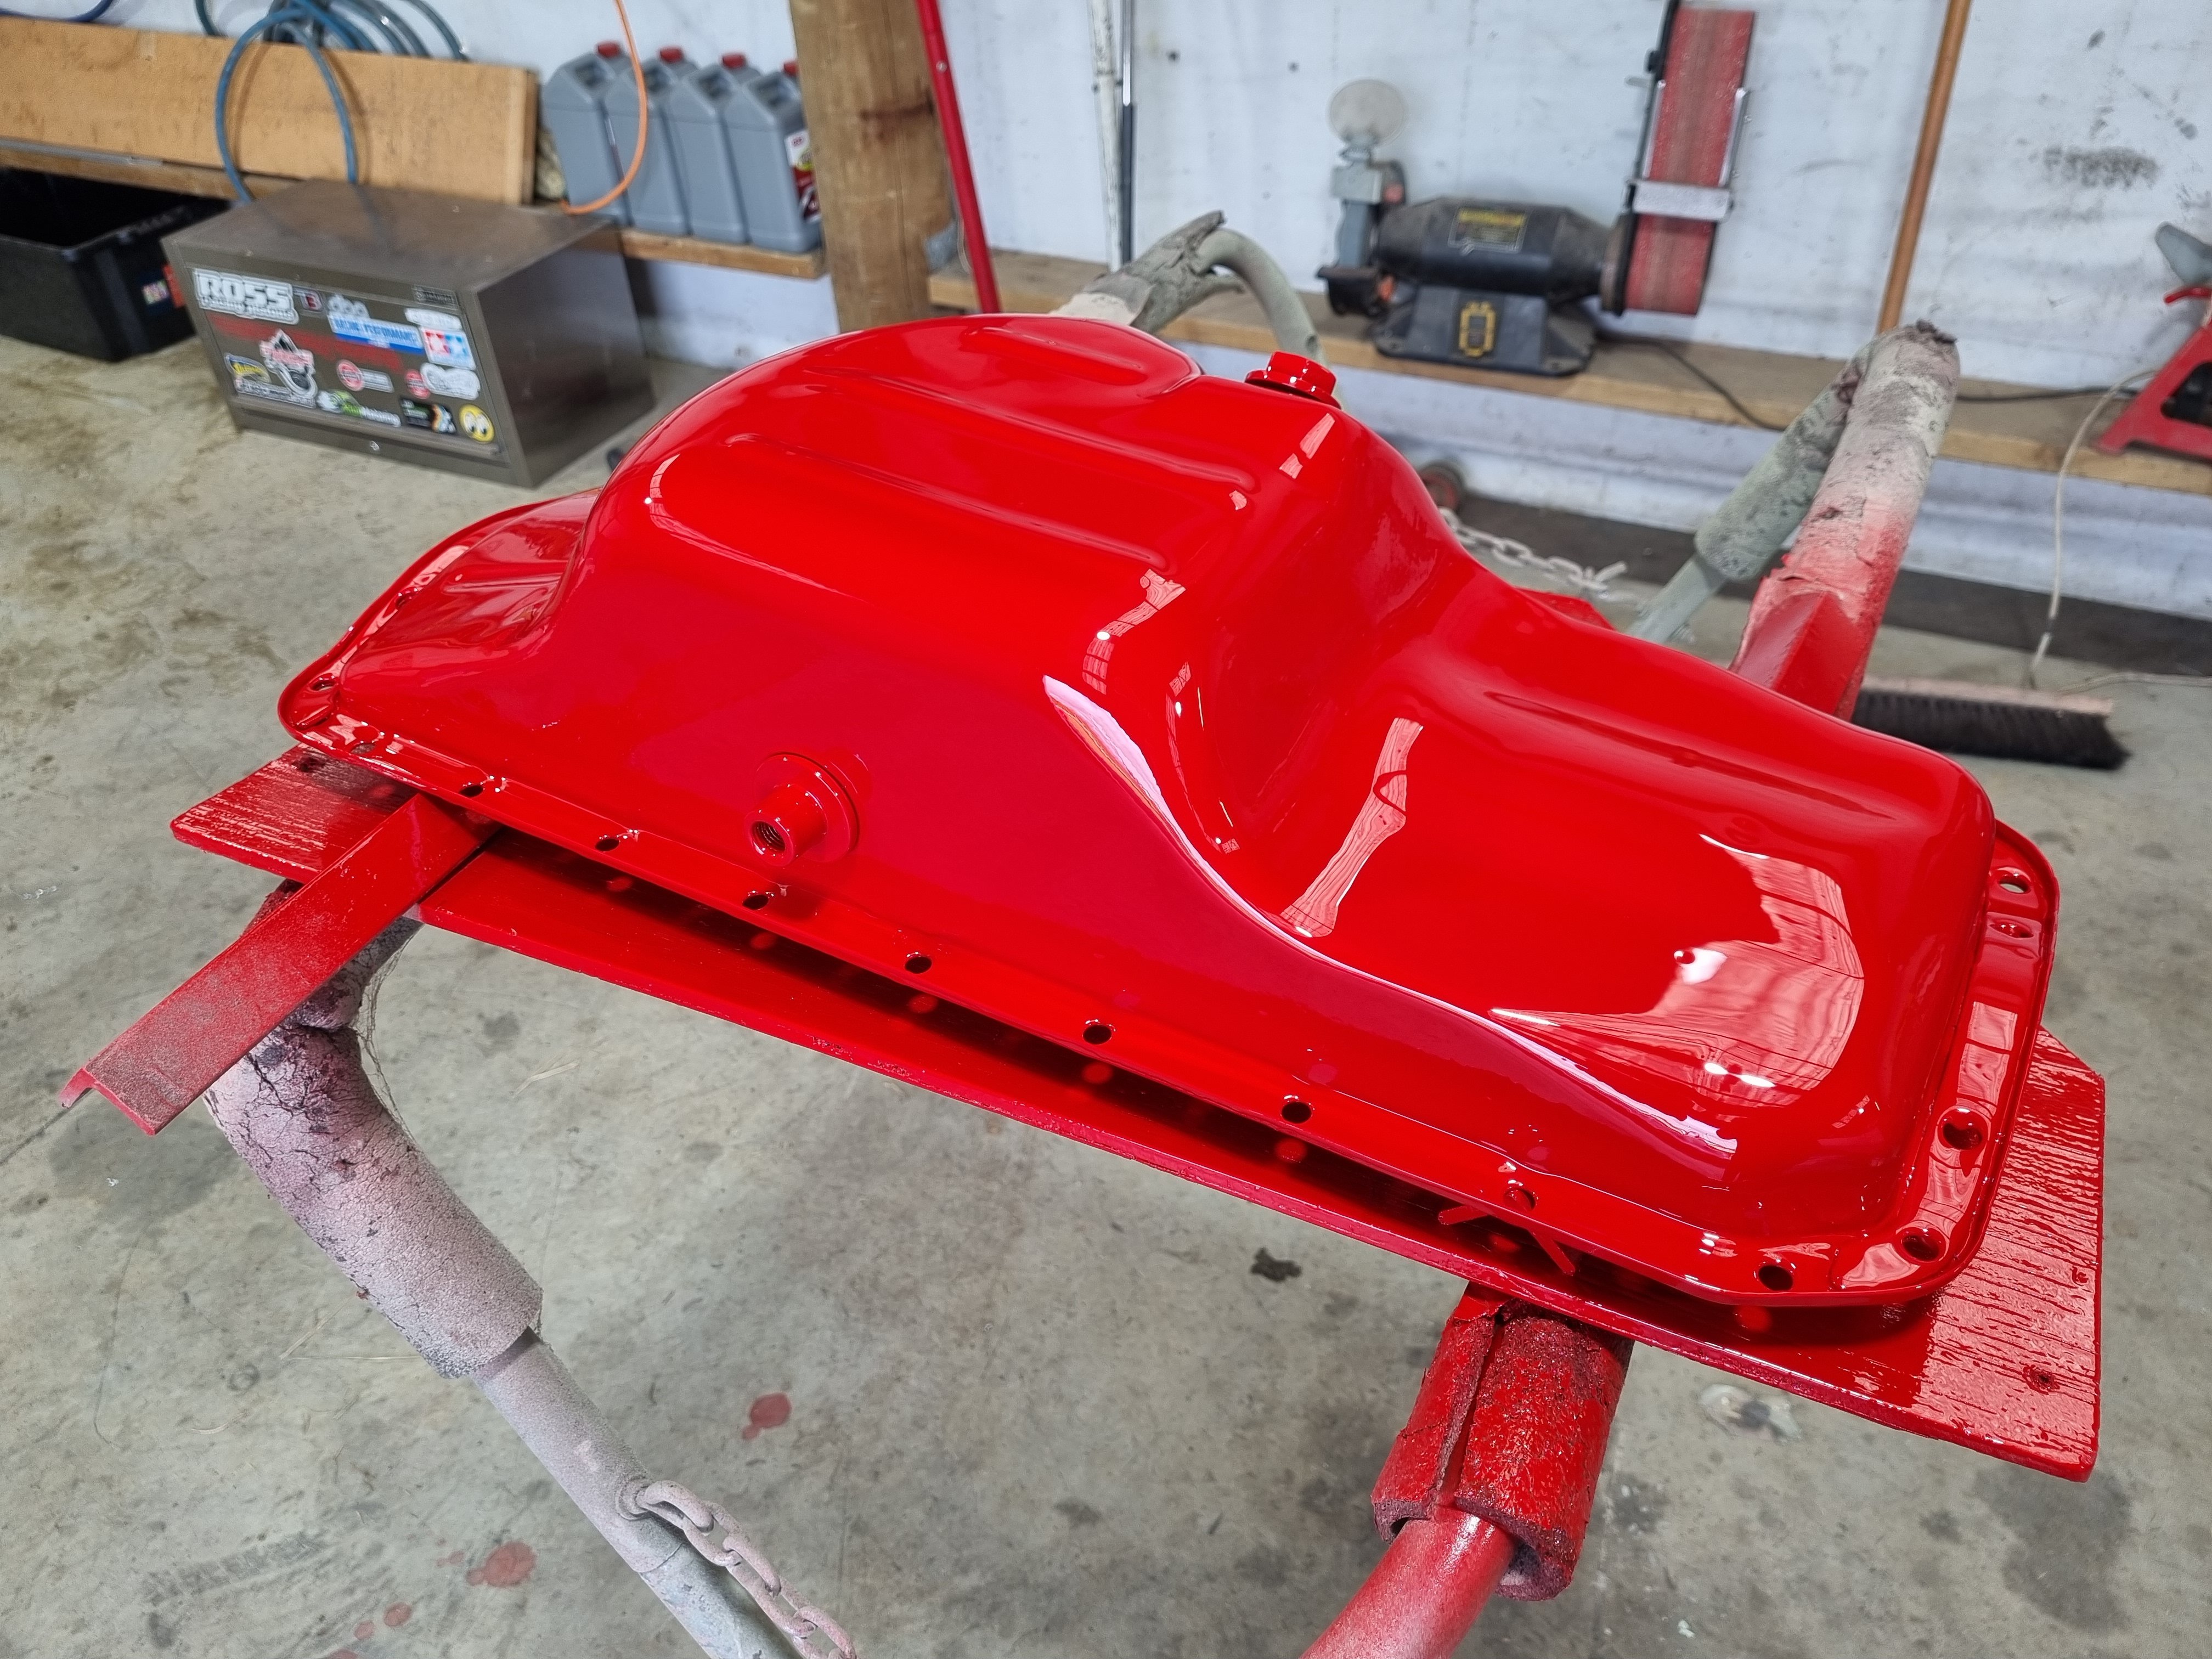
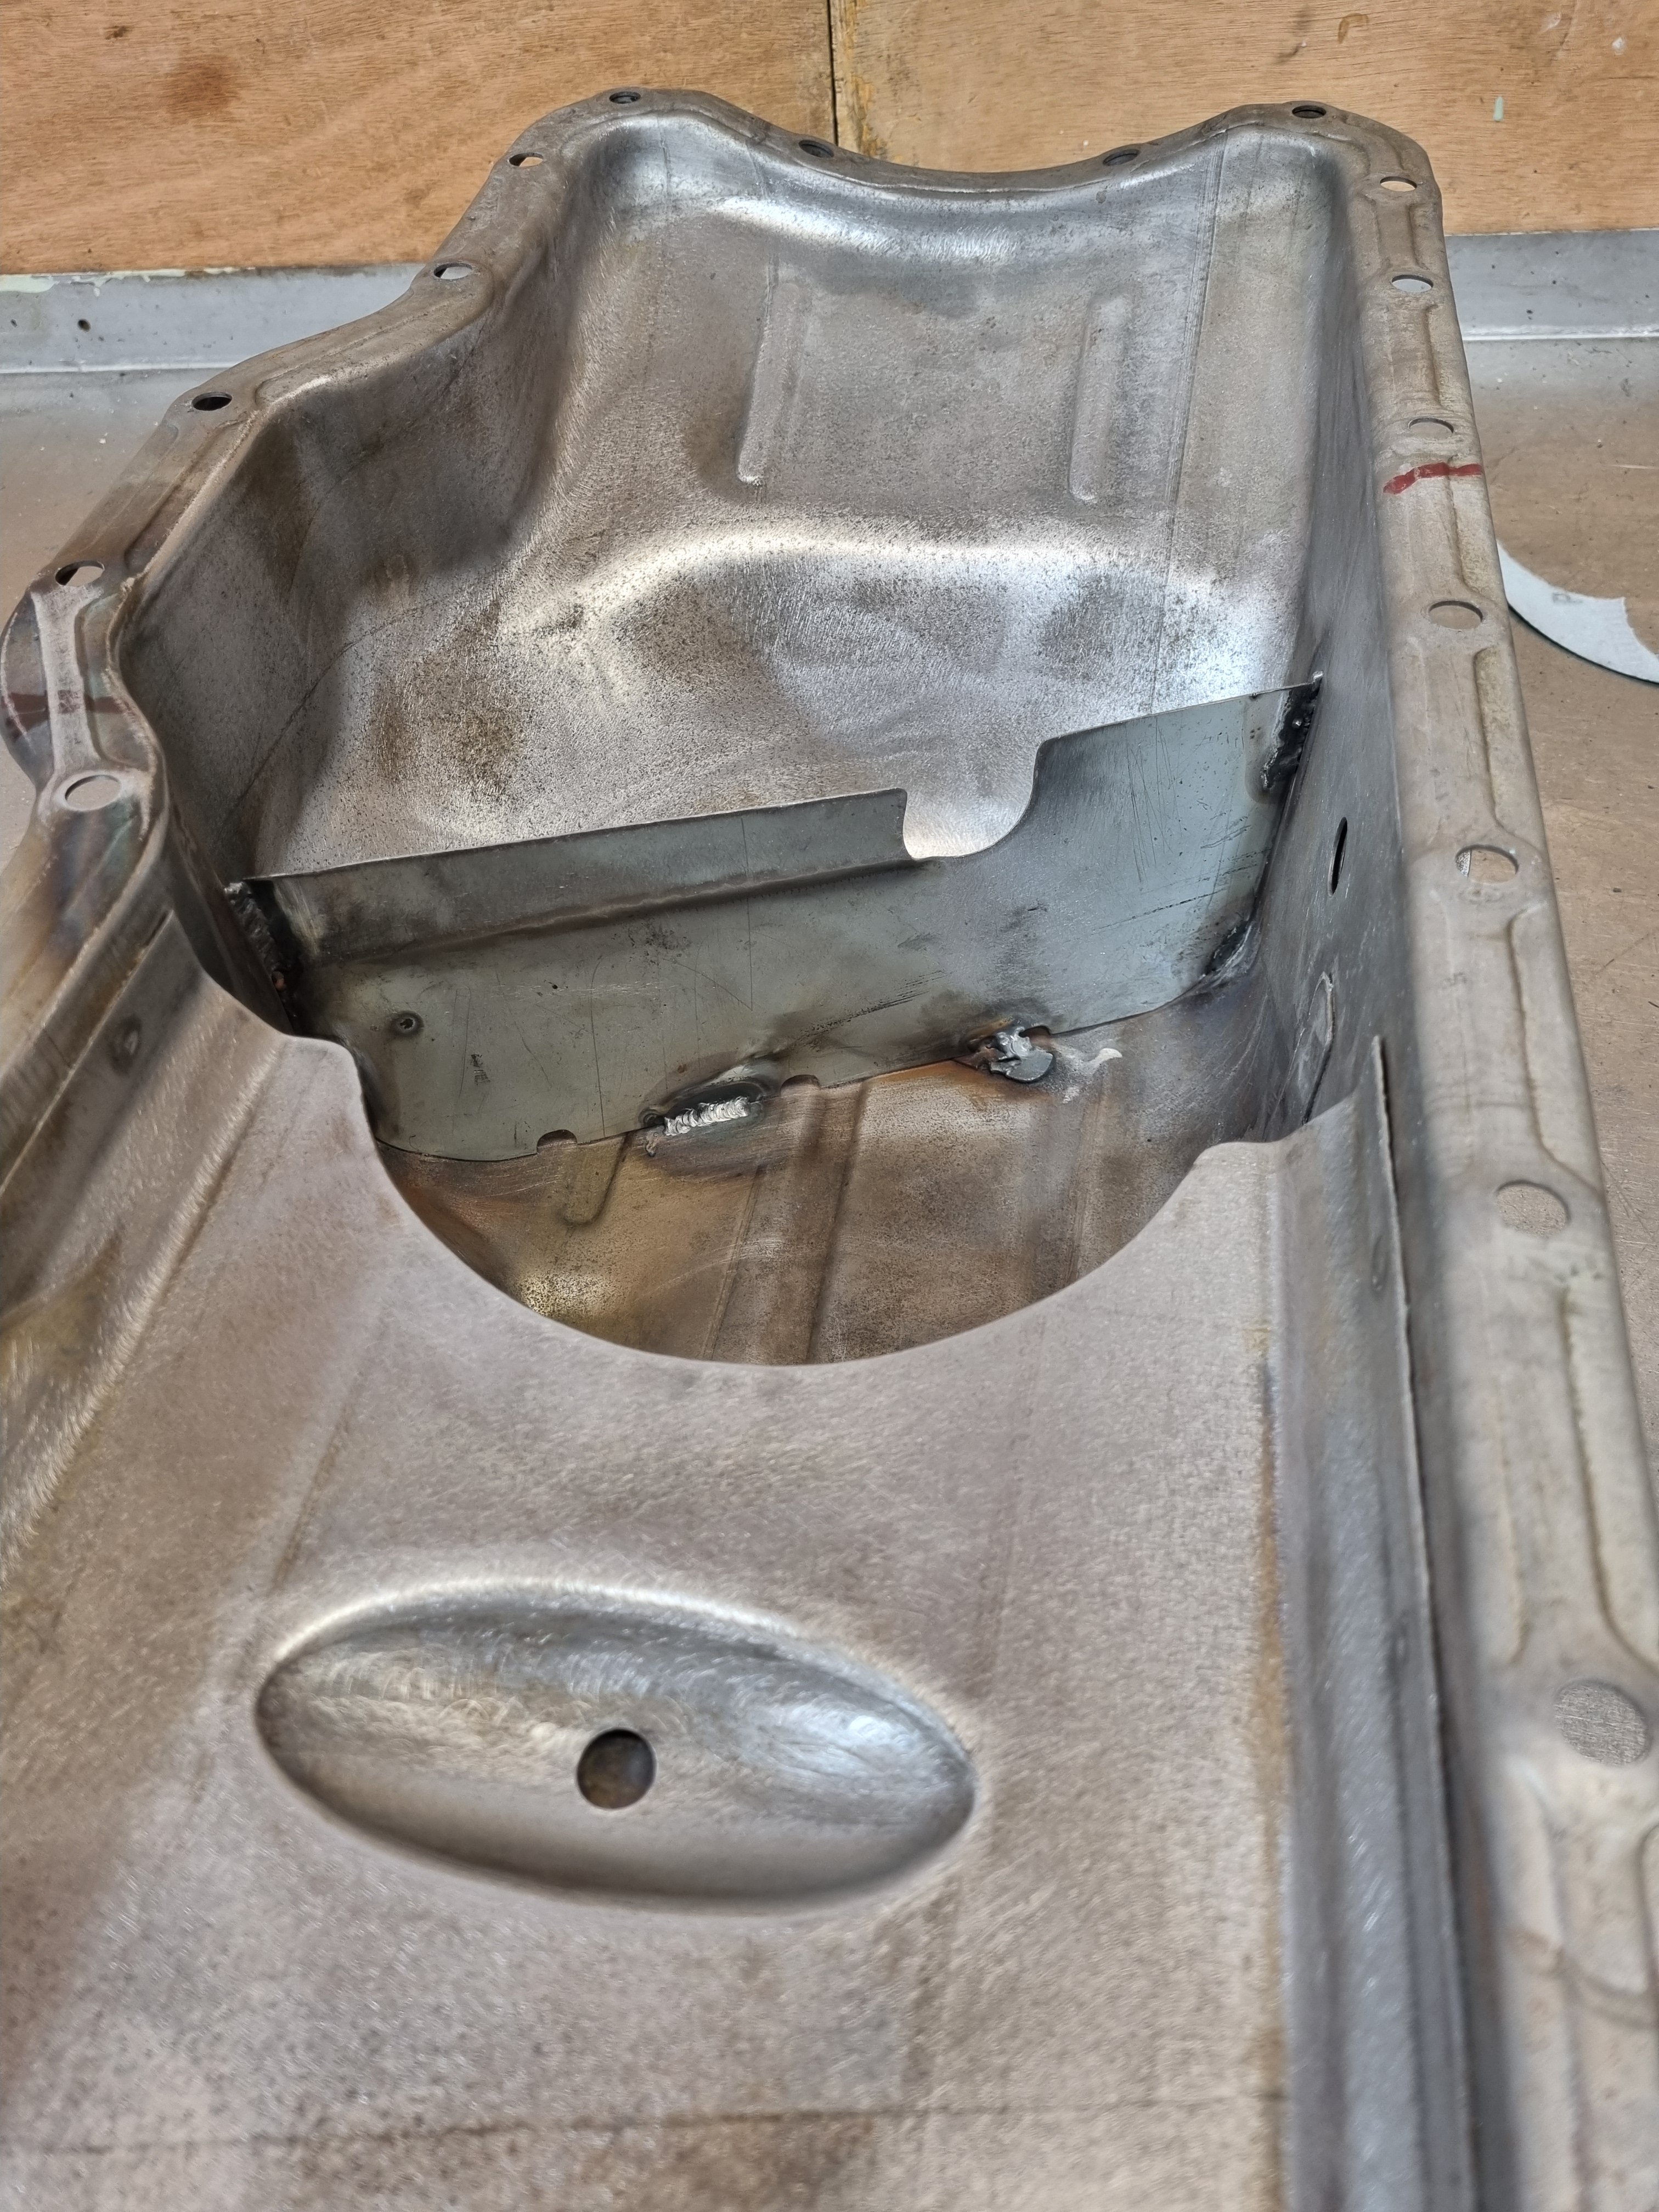
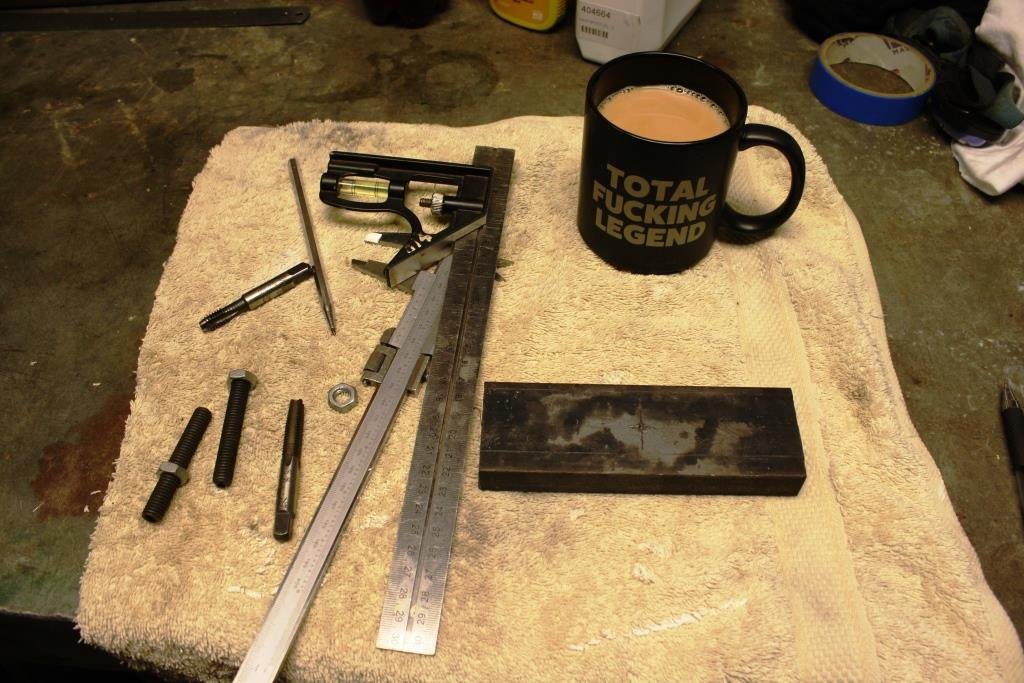
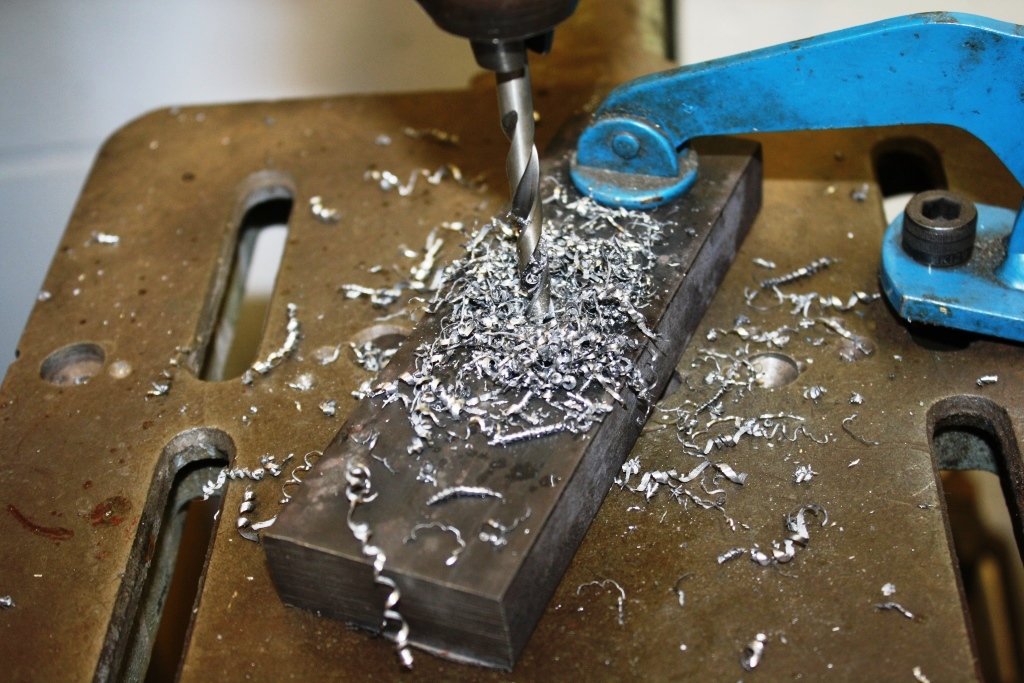
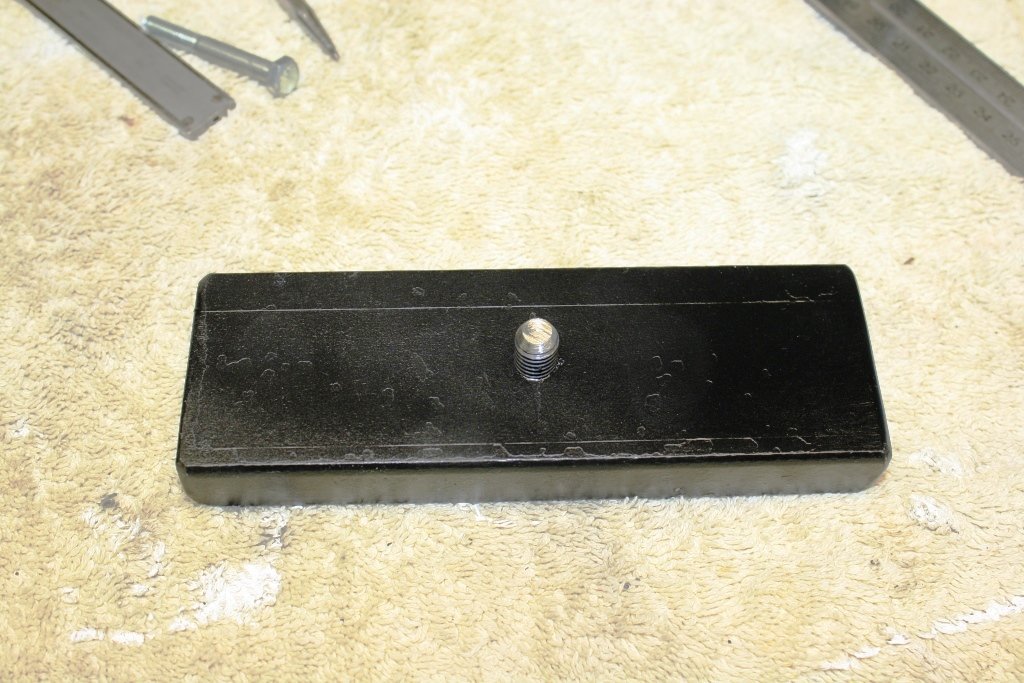
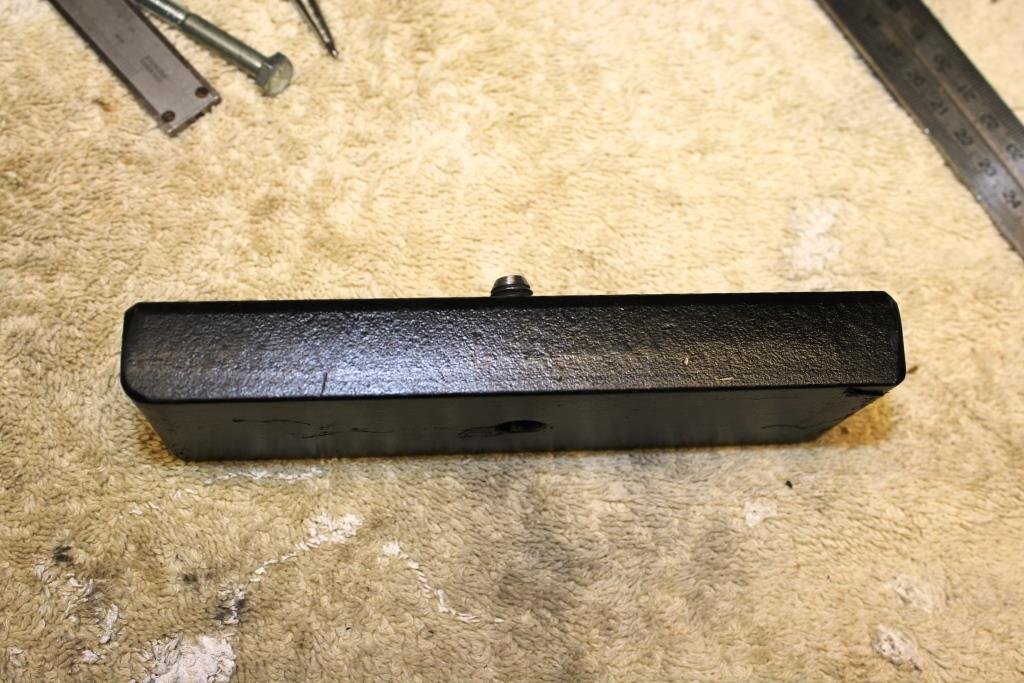
Sump baffle. Anyone who's driven the misery Inducing stock 4M will know that the stock sump baffle setup is a bit shit. You don't even have to be hard on the brakes to get the oil light to flicker on. And besides all that the stock baffle wouldn't fit now anyway. So I made a new one that might work a bit better to keep some oil around the pickup under braking. Let's not kid ourselves and think that acceleration is going to be an issue. It won't. The baffle sits across between the pump and the pickup. The red lines on the block indicate where it sits. Now I'm going to paint it
3 points
-
My old kart has the motor mounted on a hinged plate, with a bolt on the non hinged end. The bolt was tightened down to raise the motor plate, and tension the chain. Also, delete the governor.2 points
-
You are one million percent correct. A mate has a pair literally returning to the earth at Maheno. (20 mins south of Oamaru) they are rust fucked beyond human comprehension. The bottom of the A pillar was disolved, to the extent that when you opened the door, you could see the chassis outrigger where the cab mounts to the floor. I robbed some bits off it when i picked up that 1200wagon recently, and the chassis rails have now collasped too. As this truck spent most of its life in Alexandra (which is as dry as a fuck without foreplay) its not suffered the cancerous attrition which 99% of 620s were afflicted with.2 points
-
620s must be amongst the most water soluble vehicles ever made, my Dad owned one before I was born, was on its third set of guards (now in fibreglass) by 1984 when replaced with a new ( and heavily rust proofed) 720. I admire your perseverance.2 points
-
I like your bort ute2 points
-
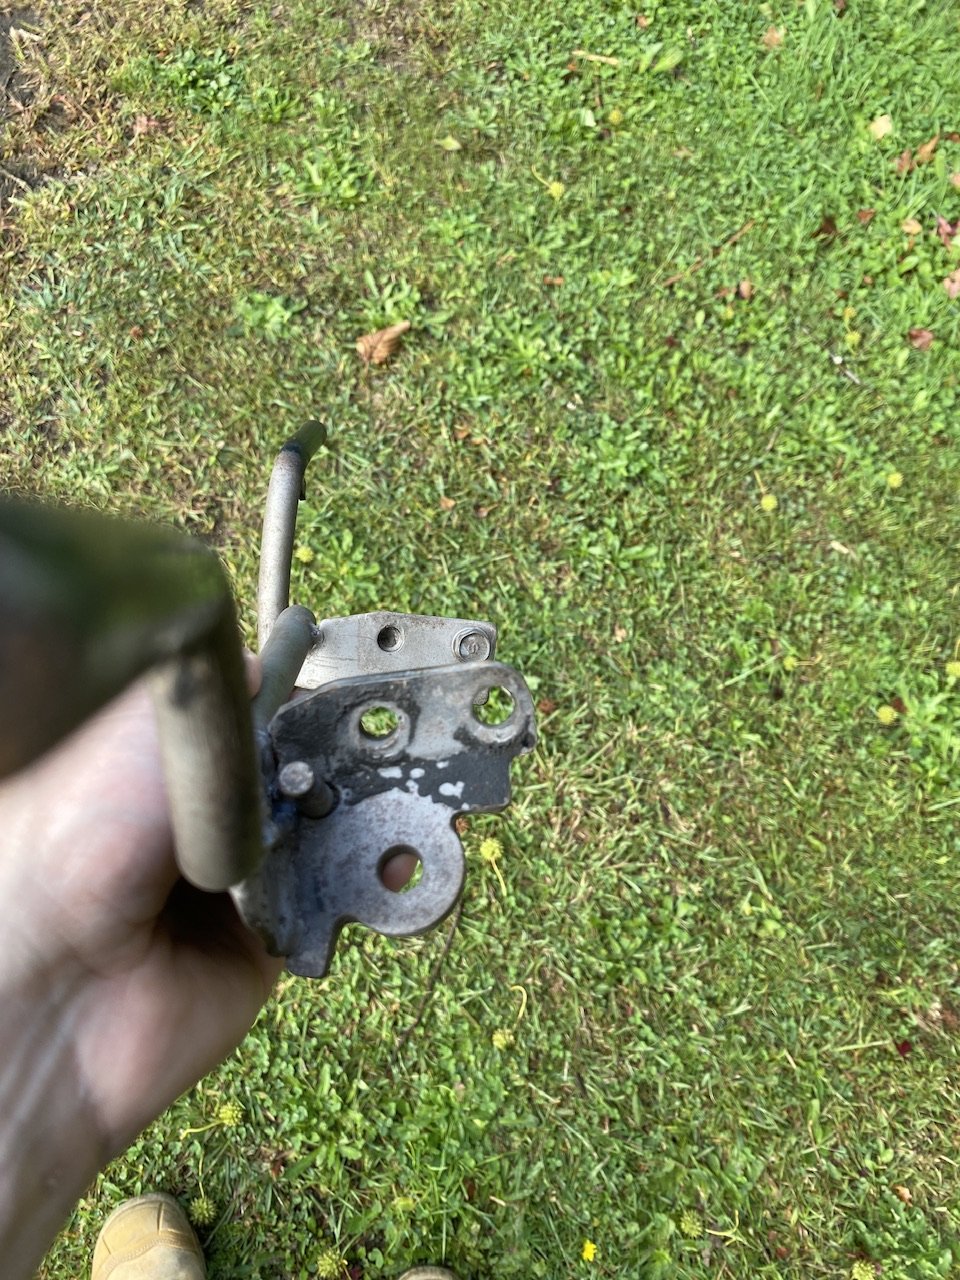
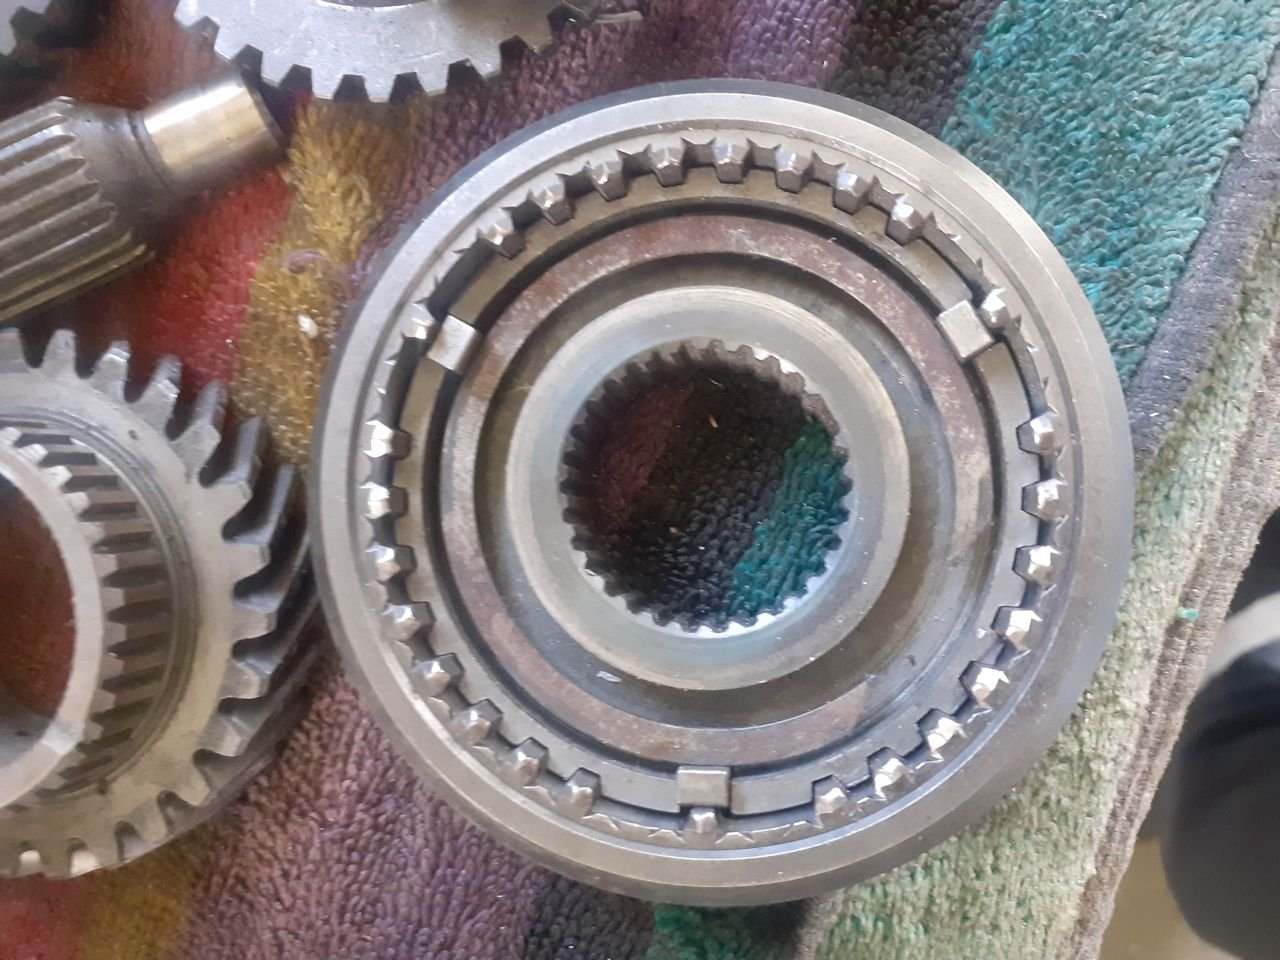
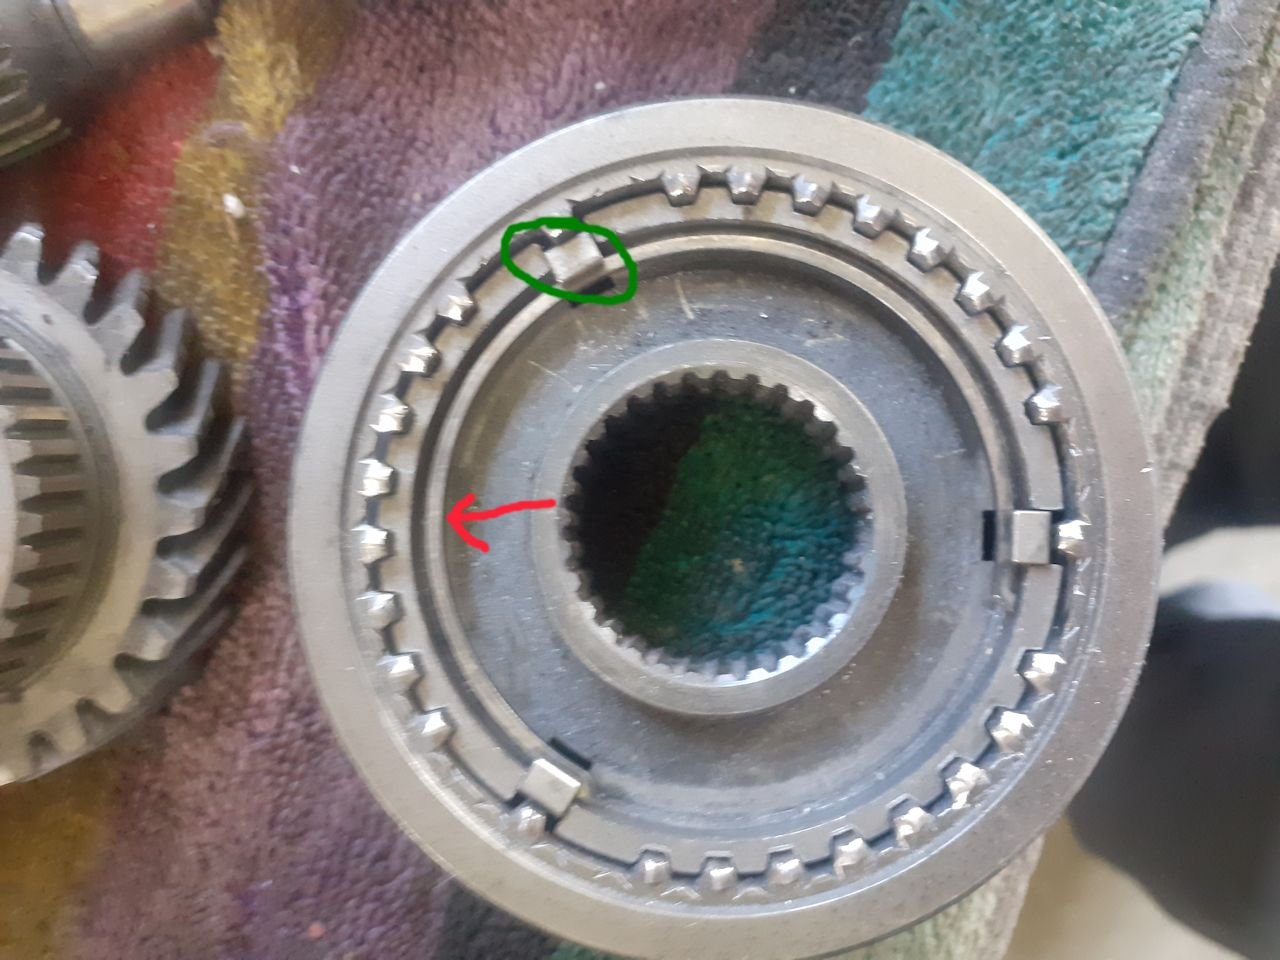
Some years later, seems i have a solution. if it doesn't break; I ended up making the gearbox better replacing a lot of parts, but was never amazing at high rpm. had to shift pretty slow so didn't grind. recently tried some thinner mt-lv redline oil, in an attempt to get the syncro's to grip some more. Yeah it made it worse over the castrol vmx. After sifting through the internet and finding not much other than the old grind some teeth off the synchro. Found a comment saying something along the lines of; "putting double springs in the selector may help with high rpm changes" The spring being what red arrow is pointing at below. Yeah you cant put 2 in there, but some have a coil spring the sits in the middle of the hub so maybe that's what they meant. After looking how it actually works, rather than just replacing parts. The spring presses up against the little keys in green. they have a raised section that sits in a recess in the selector hub(outer part) Now when you go to change gears the selector hub pushes the 3 keys up against synchro ring, which pushes the synchro ring onto the cone, slowing the gearbox down. Until you put enough pressure on the shifter/selector hub, the selector hub cams over the keys and selects the gear. So having a stronger spring on the keys will put more force on the synchro ring before it trys to select the gear. which means it should slow the gearbox down more before it tries to change gears, cool. Will it work who knows. sifting though my pile of gearbox parts I found some bearing retainer spring clips that would work for 1/2 gears. 3rd/4th found some that would work out of some hilux front hubs I dont have any pictures of what it looked like once i modified it them. but ground them down to similar shape as the factor ones as above, just thicker, so more spring pressure. I ground a few teeth off some of the synchro rings also, but i dont this would have changed things much. All this went into my spare t50, with the best selection of 2nd hand junk i could find. So worse base than the one in the car. Result. It amazingly works, can throw it through the gears at 10k easy, haven't been super rough with it yet, but changing pretty fast no crunches, changes nice. only side effect, is its a bit more notchy selecting gears, but not terrible at all. I even used the same oil that come out of the gearbox in the car, for a fair test.
2 points
-
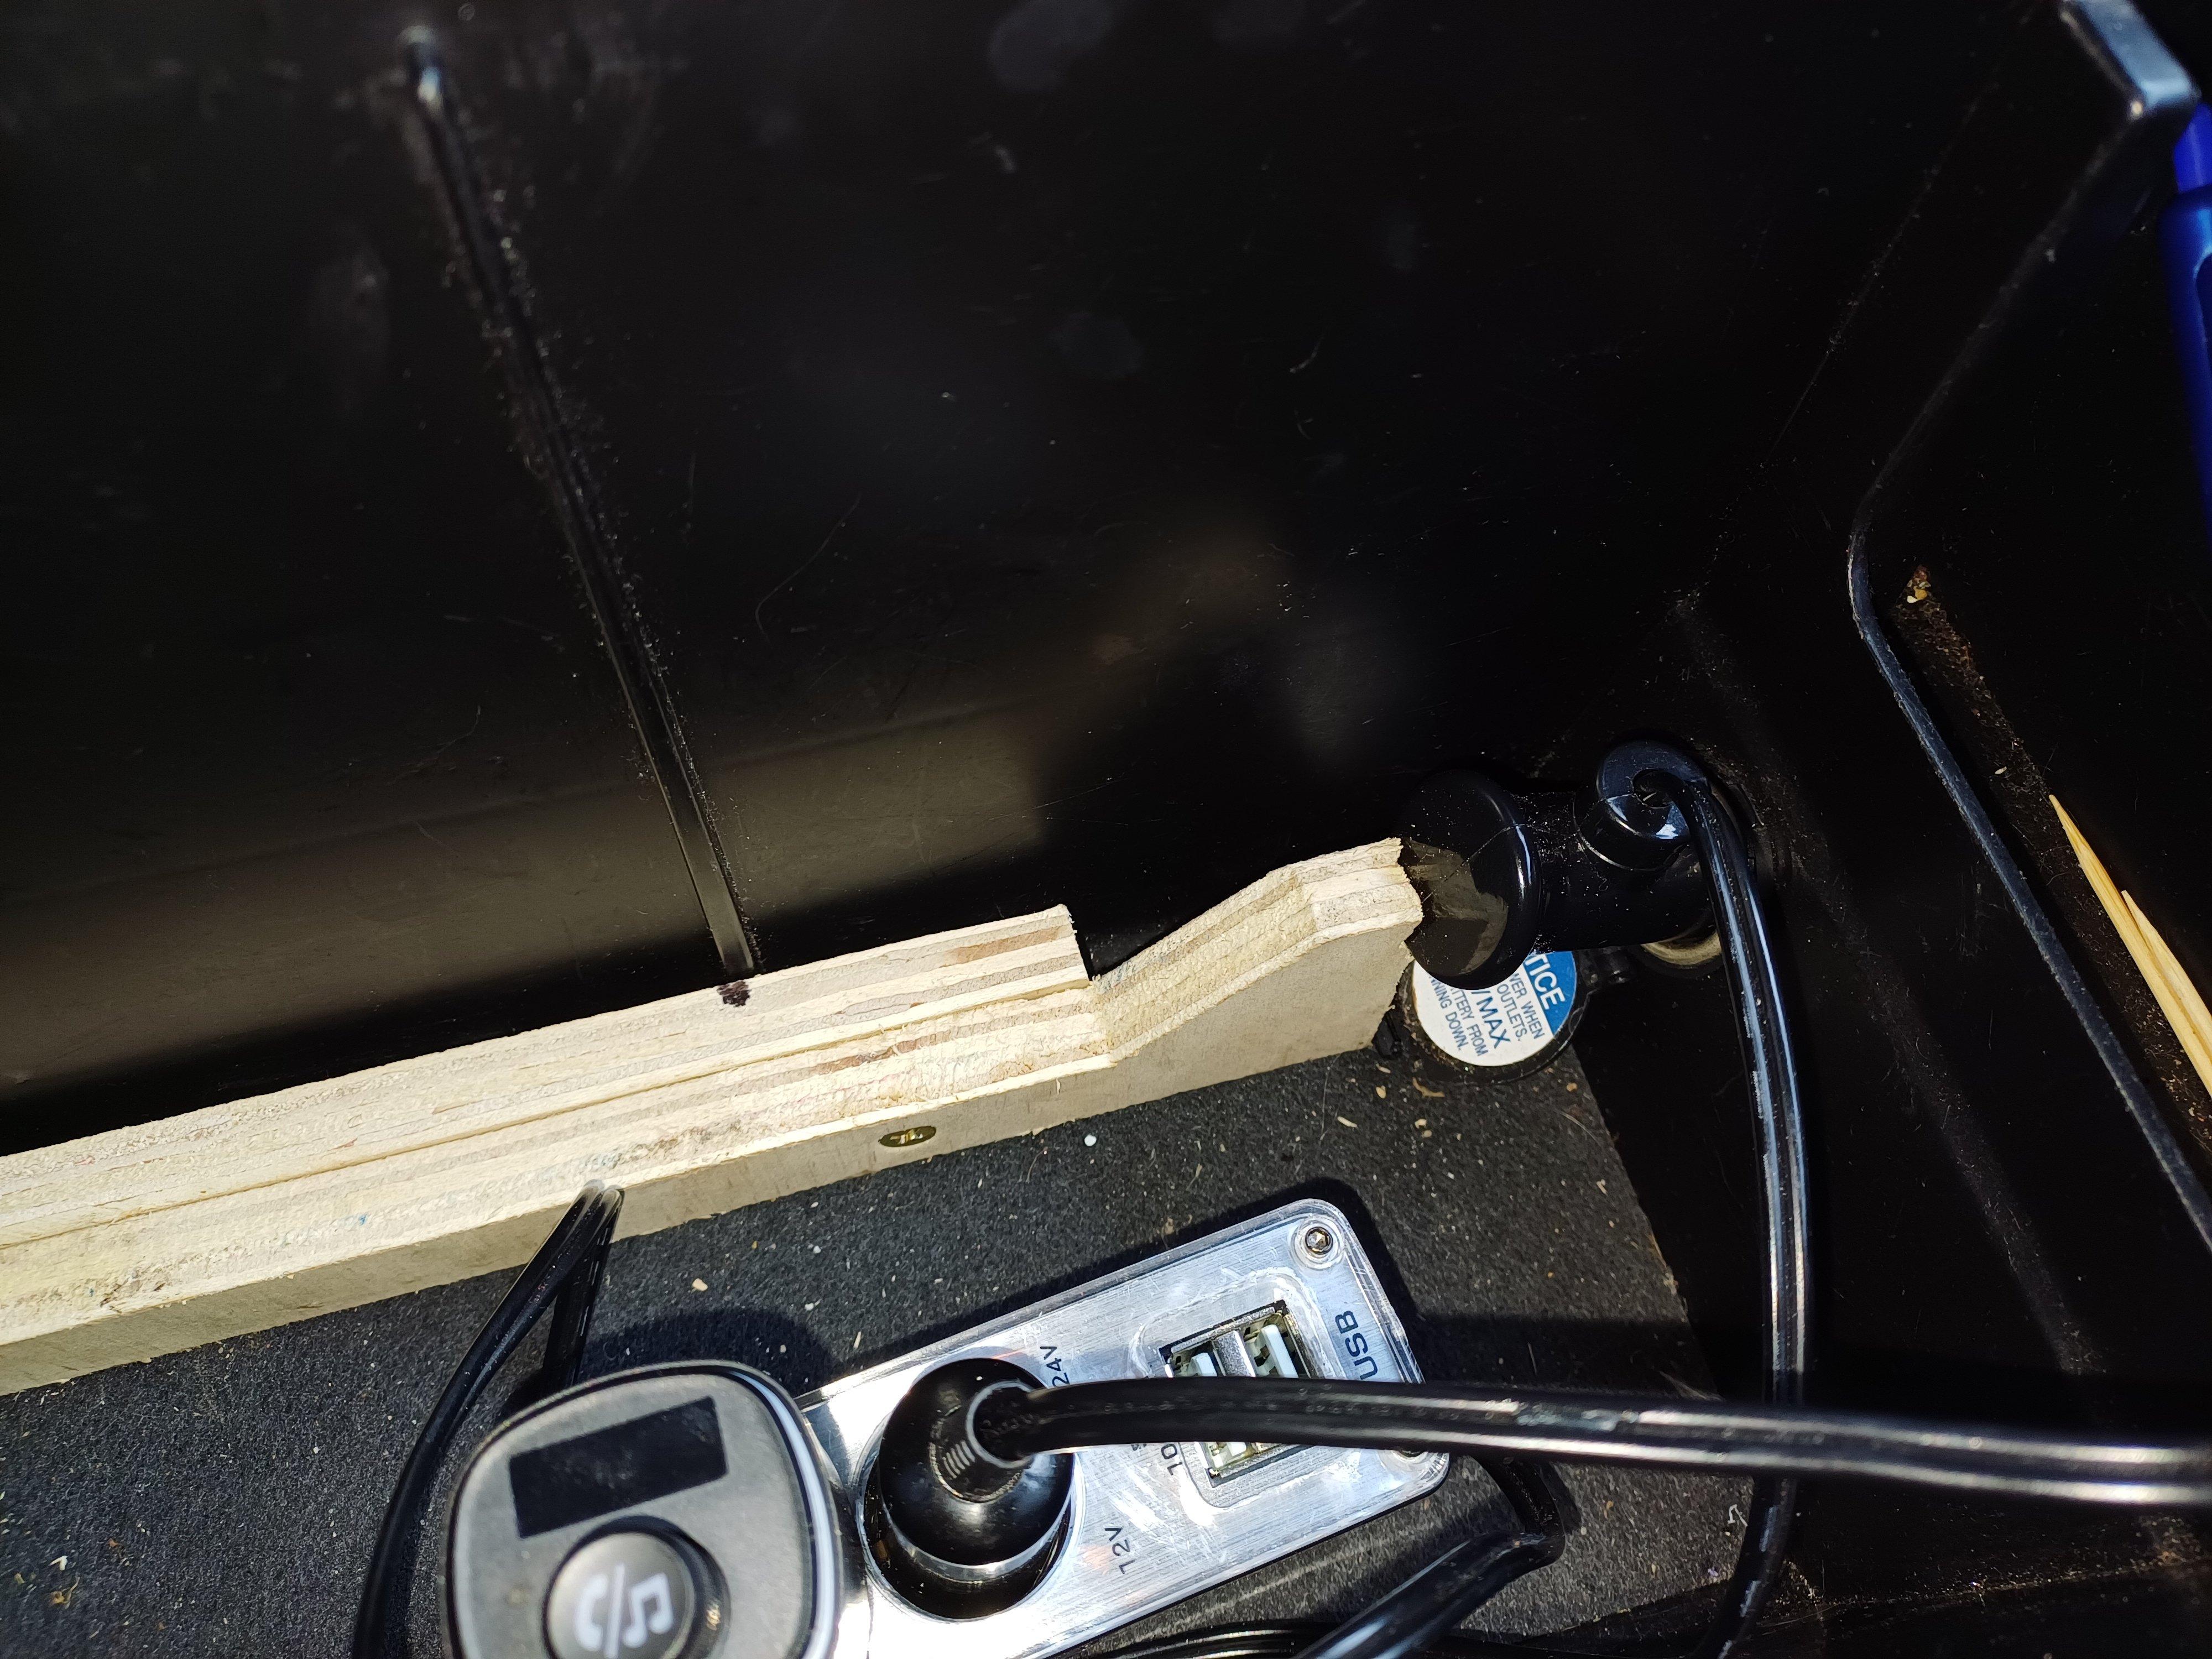
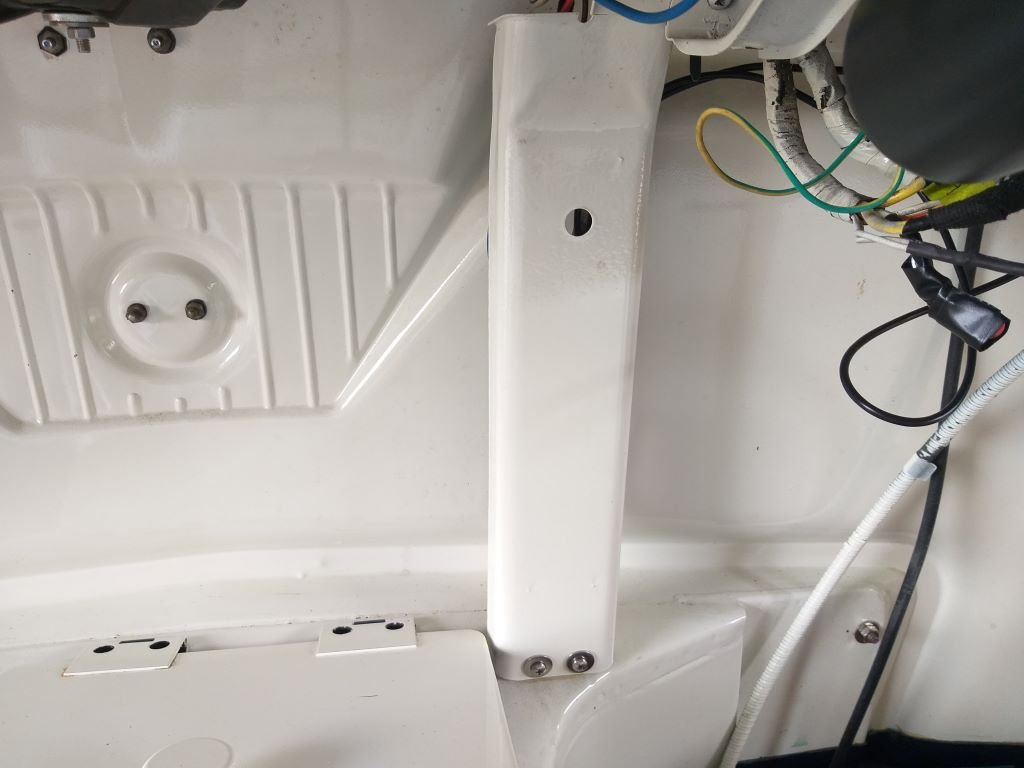
Middy's phone has a soggy battery, and she's complained it doesn't always charge in the car. The cig plug was coming out of the socket, so Now I can go back to ignoring the phone battery
2 points
-
Alright alright alright! So I pushed the car outside this afternoon so I could reach some wiring inside to try fire it up. I filled the car up with coolant, by which I mean water because I was expecting things to leak. Sure enough each head had a hole up the front where water started leaking out. I couldnt remember what these were for, then found out that they are like an air bleed channel that goes back to the thermostat housing. So, these seem to have gone AWOL when moving house so I'll need to pickapart some more. I must have removed them when taking the heads off to clean them. Easy fix. Then I got the fuel pump working and fixed a few fuel leaks. It turns out that AN fittings arent very good at sealing if you havent tightened them up? Crazy. Then I got my tune somewhat sorted, and tried cranking the motor over.... and the bloody battery died! Ugh. I mucked around to get another battery, it sort of spluttered a few times but not quite. I had a look through the tune settings. Engine size was still set to 1500cc from using this ECU in the Echo - woops. I needed to disable the fuel pressure sensor allocation. As since this isnt wired in yet, it took 0v to believe that the motor had zillions of psi worth of fuel pressure. Then when I cranked the motor it was registering the crank trigger, but not cam trigger. Checked the settings, had this wrong. Both were set to VR sensors, but the crank is VR and the cams are hall effect. So once that was fixed... Bam! We are running. It was absolutely awesome to reach this point. So whats next? Lots. Get the coolant system functioning properly. Make an exhaust for it. A lot of wiring work, get the fusebox setup all connected nicely and mount all of the wiring nicely. Need to put some gearbox oil in the box, will do this before running the engine any longer. Pull the fuel rails off, and do tests to work out the CC rating and deadtimes for the injectors. Calibrate all of the sensors Mount a radiator fan Check intake for leaks (I think all of the air bypass screws are currently all the way out) Install the wideband Finish wiring up the alternator And a bunch of other little similar jobs. Most of these I can peck away at over winter with limited space. Making an exhaust will be difficult when weather starts getting darker and wetter and I can only really work outside. Will push ahead as best I can. Super excited for first start though!
2 points
-
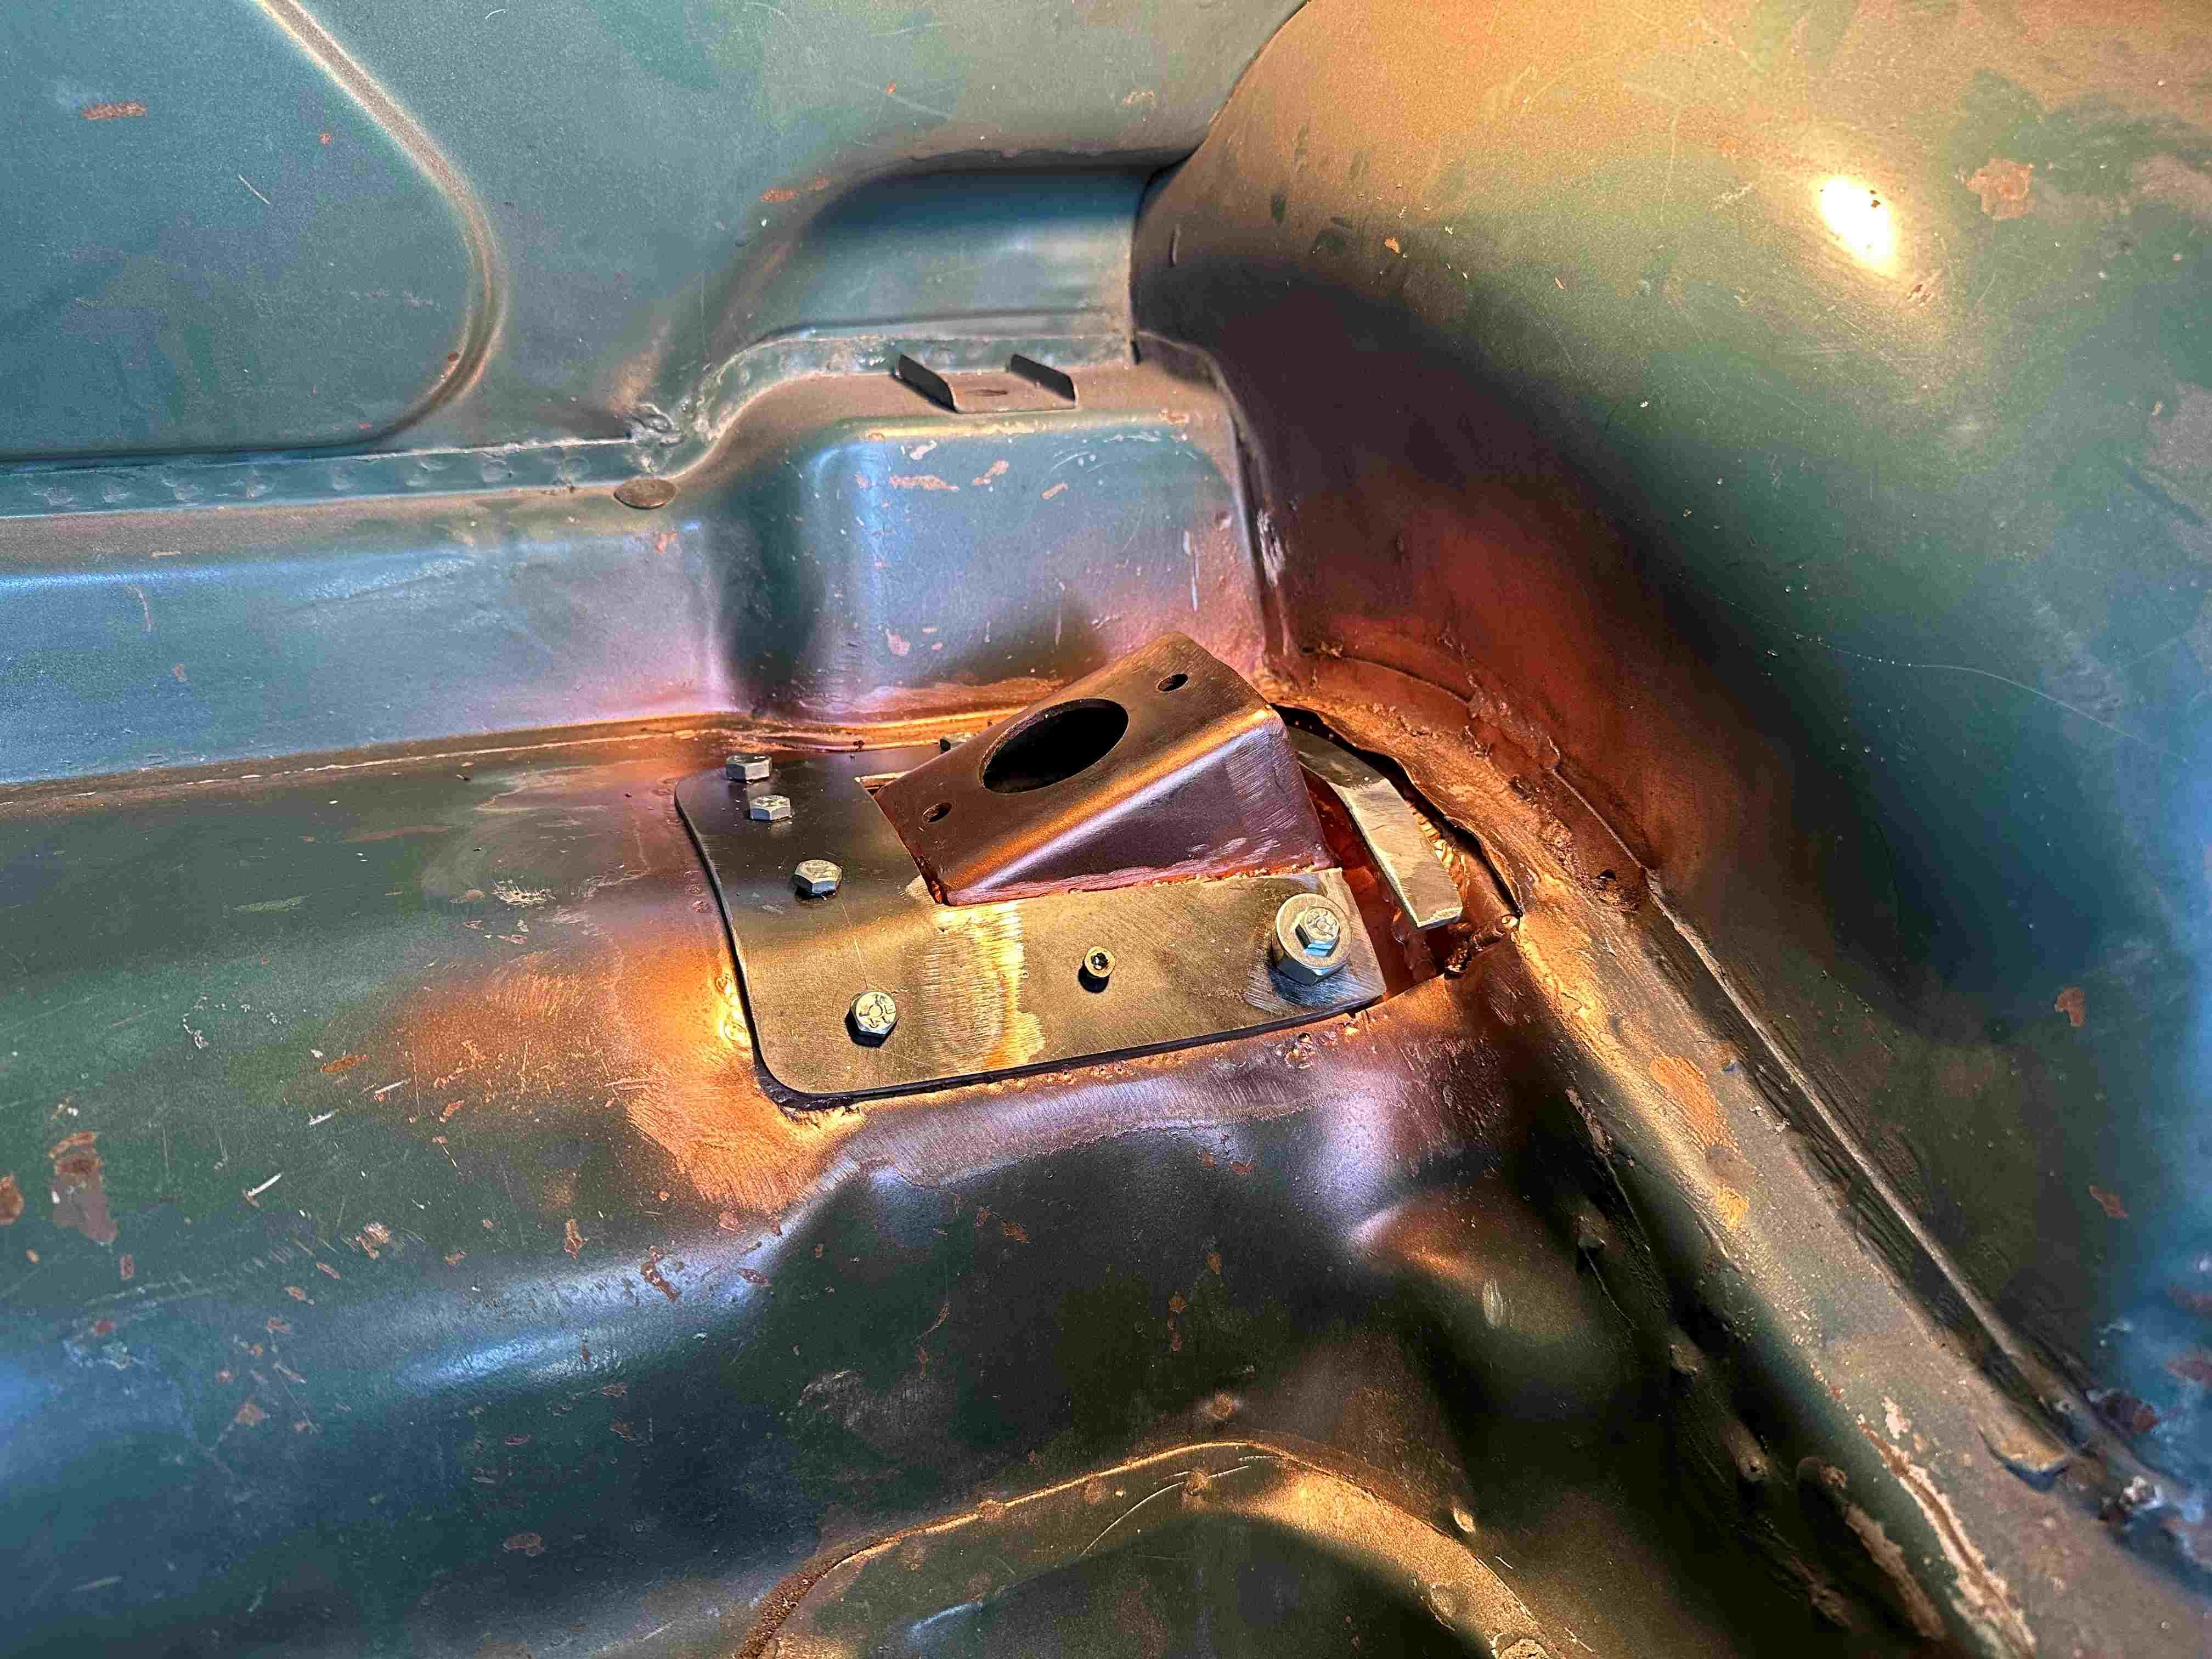
So I decided to make it one piece which I should have done the first time. It makes it much easier to get both sides the same. Pretty much the same design apart from that, with the boots sheet metal sandwiched between the two pieces. All just being tacked together for now until I am sure it is right. Shouldn't need an additional brace between the two sides now.
2 points
-
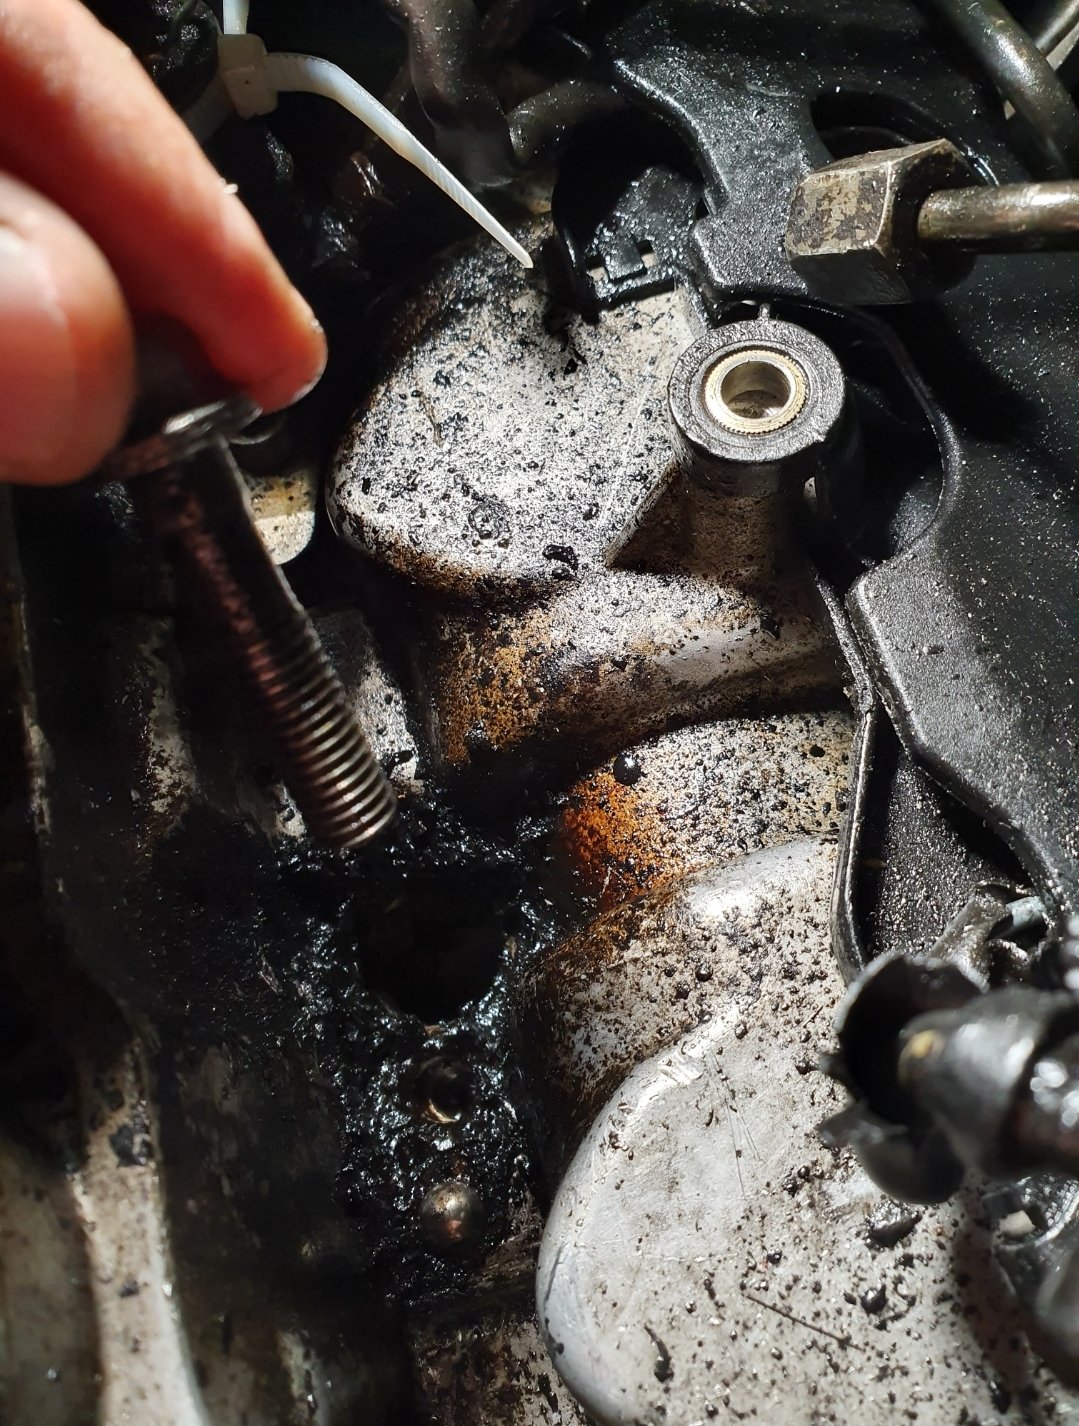
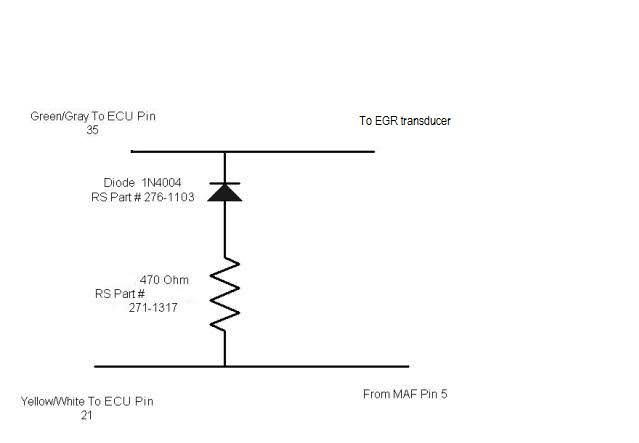
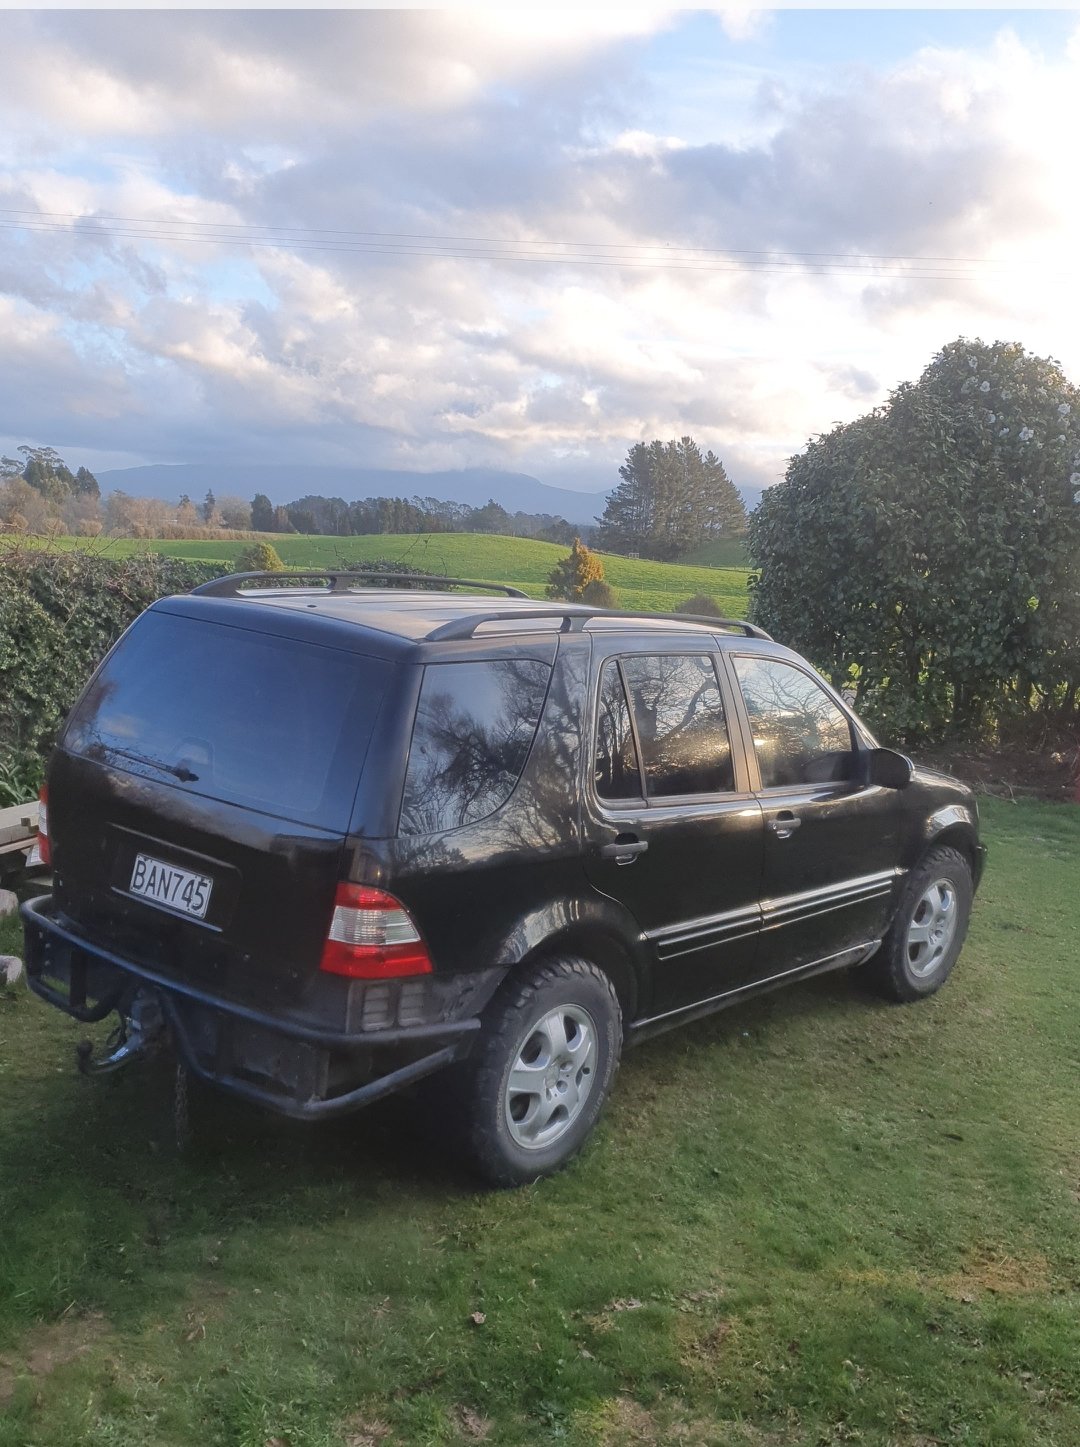
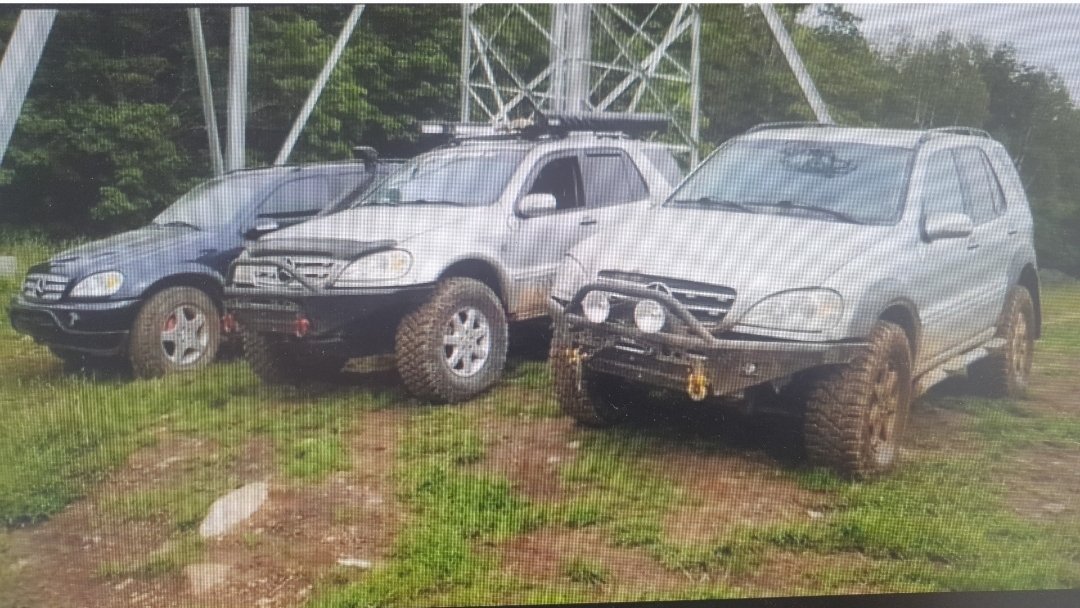
So my experiences with the w163 span most models, including both the v8 and V6 petrols and the diesel 2.7 common rail. Largely the petrol models are fairly simple reliable things out of the box. All models run the 5 speed 722.6 trans, which is used in a heap of mercs of the era. It largely gives few problems if serviced well. They are meant to be a 'service free' trans. Don't buy that bullshit, fresh oil and filter does wonders. One issue that does crop up is the low range selector motor electric motor can seize, necessitating either the bash with a hammer technique, a pull apart and fettling of the contacts, or a replacement. The V6 M112 engine isn't really much to write home about as it uses nearly the same amount of gas as the v8s M113, so why bother... They are effectively the same engine with two cylinders lopped off so share a lot of parts in common including water pumps etc. In nz I think all models are rated to tow 3200kg braked. Other general issues are around the radio chip in the key failing, requiring recoding a new key. I've never had this problem. Also something called the All Activity Module, which is sort of a central brain. I've never had that fail either, but they can cause some dicky little issues. It would be great if someone made some sort of emulator to delete this, it would sort a lot of little bugs. Window switches as mentioned above. Lots of cheap knockoffs on AliExpress for cheap - along with many other parts. The door locks can sometimes be problematic too. They have a weak spring in them which breaks and the locks fault. I've never replaced or repaired these...not bothering locking my car I found was the easiest fix.. they are a cunt to remove so I gave up, haha. Like all vehicles there are other things that can fail all over the show but I haven't experienced much else there, and what I'm outlining here is the common stuff. Oh the odd bit of trim falls off, my solution there was often not to replace or use some boogie up to fix... My main area of focus has been around the diesel engine. It's a solid unit and makes a healthy 121kw out of the box. My first one went like a cut cat, my current one has been remapped to 150kw to achieve the same thing by some random eastern European YouTuber, Caryfuk8 I sent the file to. I used a cheap AliExpress Kess clone box for sucking the ECU file off and he did the rest. Dark art that shit, I don't know how to write a map.. his intention is to get a 0-100 in the 6 second bracket on largely stock hardware, which he has very nearly managed. He mapped mine to 20psi, I didn't want to roll coal, and he put in a hard cut which sounds awesome.. example here. before undertaking a map, there are a few hardware issues to sort with the 270. Underneath the complicated things is actually a simple bulletproof engine. The trick is to get rid of a lot of shit up front so it doesn't cause you grief, as much of it will at some stage. I know a local Dutchman here who's pretty clever with them and he has one that's seen over 900,000km. So yeah... The main problem with Merc common rails, and probably a few other common rails is a thing called black death. The injectors hare held down by a cantilevered forked bracket by way of a stretch bolt. It is truly a shit design. Over time the injector seal to head becomes compromised allowing a slow built-up of diesely sludge around the injector. Bad ones will chuff and damage the sealing face on the head. Sometimes removal of really bad ones will result in snapped bolts (I've had this problem). I've found that it's best to pull all the injectors and clean seats with a bit of scotchy on the end of a screwdriver, or recut the faces with a cheap AliExpress seat cutting tool. Also cut a groove in an old bolt and use to fastidiously clean threads with solvent etc to ensure correct torquing and bolts no bottoming out on old sludge..Replacement with factory Merc seals or aftermarket is generally fraught. New stretch bolts are always required. One fix is to use a Honda diesel washer, and annealing it to soften it to allow better crush. The Honda washer has an oval cross-section so you get proper point contact. During lockdown I tackled mine and due to limited oversease shipping I couldn't get the Honda washer, so I resorted to making my own. I brought stock Merc washers, which are flat and hence useless. I lathed up a little press tool that I then fit the annealed washer into and smacked with a hammer. The press tool was shaped to effectively compress the inner and outer diameters of the washer and raise a peak in the centre on both top and bottom faces. I then reannealed the washers before fitment to soften and allow 'crush'. These are presently over 50,000km deep and no sign of leaking. Furthermore Merc updated the torque spec on these to 7nm +90deg +90deg, formerly it was only one 90deg. It's a shit design and it feels like it was designed to fail, the cleanup is a patience game but once you sus it they can be pretty reliable. Once the injectors are sorted the other main issues largely revolve around the egr system and the inlet swirl flaps. The swirl flaps are to increase low rpm air speed, but they sometimes fall apart and get lodged in the inlet tract, or leak around the pivots, or seize up, ironically due to egr sludge buildup, causing the actuator motor to fault and throw a limp condition. So the trick is to simply remove the manifold and get rid of the flaps and drill/tap/blank the pivot holes in the plastic manifold then clean all the exhaust sludge from the manifold from the egrs most positive influence over emissions.. if your swirl motor is still working just leave it plugged in. If it isn't you can put a resistor across the plug so the computer thinks it's still there. Lots of internet info on this mod. The egr system also needs to go. This can either be mapped out, as can most things including swirl motor etc, or you can splice a little diode/resistor combo in to the ECU inputs to trick it. A lah below.. Again. Computer still thinks it's there, it's basically emulating a difference in airflow condition that the computer wants to see. I also physically removed all egr stuff and made a blanking plate on the head by number 5 cylinder, which only has a water outlet to hook to the heater. I also remove the fuel heat exchanger while I'm at it as it's only useful in Russia and Nordic countries where it's arctic cold. Makes life easier. Only other mod I've done is add a bigger variable vane garret turbo off an e320cdi om613 3.2 6 cylinder. It was bolt on and only required some exhaust mods, removing the cat. I actually lunched the first turbo due to not fixing a dodgy turbo inlet pipe and bits got sucked in... Aside from that there is not much else. It seems like a minor laundry list, but if you buy one knowing these things from the outset, it's about a 2 day program of work as a baseline to get rid of a whole lot of future niggles that have a good chance of cropping up. Knock off parts are really cheap. Probably due to Russia's proximity to China. Ball joints are about $40 a corner and can be fit in 20minutes on a jack for instance. Bumpers are made of something akin to glass, and owing to my roughness I have disintegrated both ends of mine and replaced with steel buttyness. Any questions feel free to ask. I'll move on to the start of my GL320cdi adventure next...
2 points
-
Bart, your ute I like.1 point
-
I like your Ute Bart.1 point
-
1 point
-
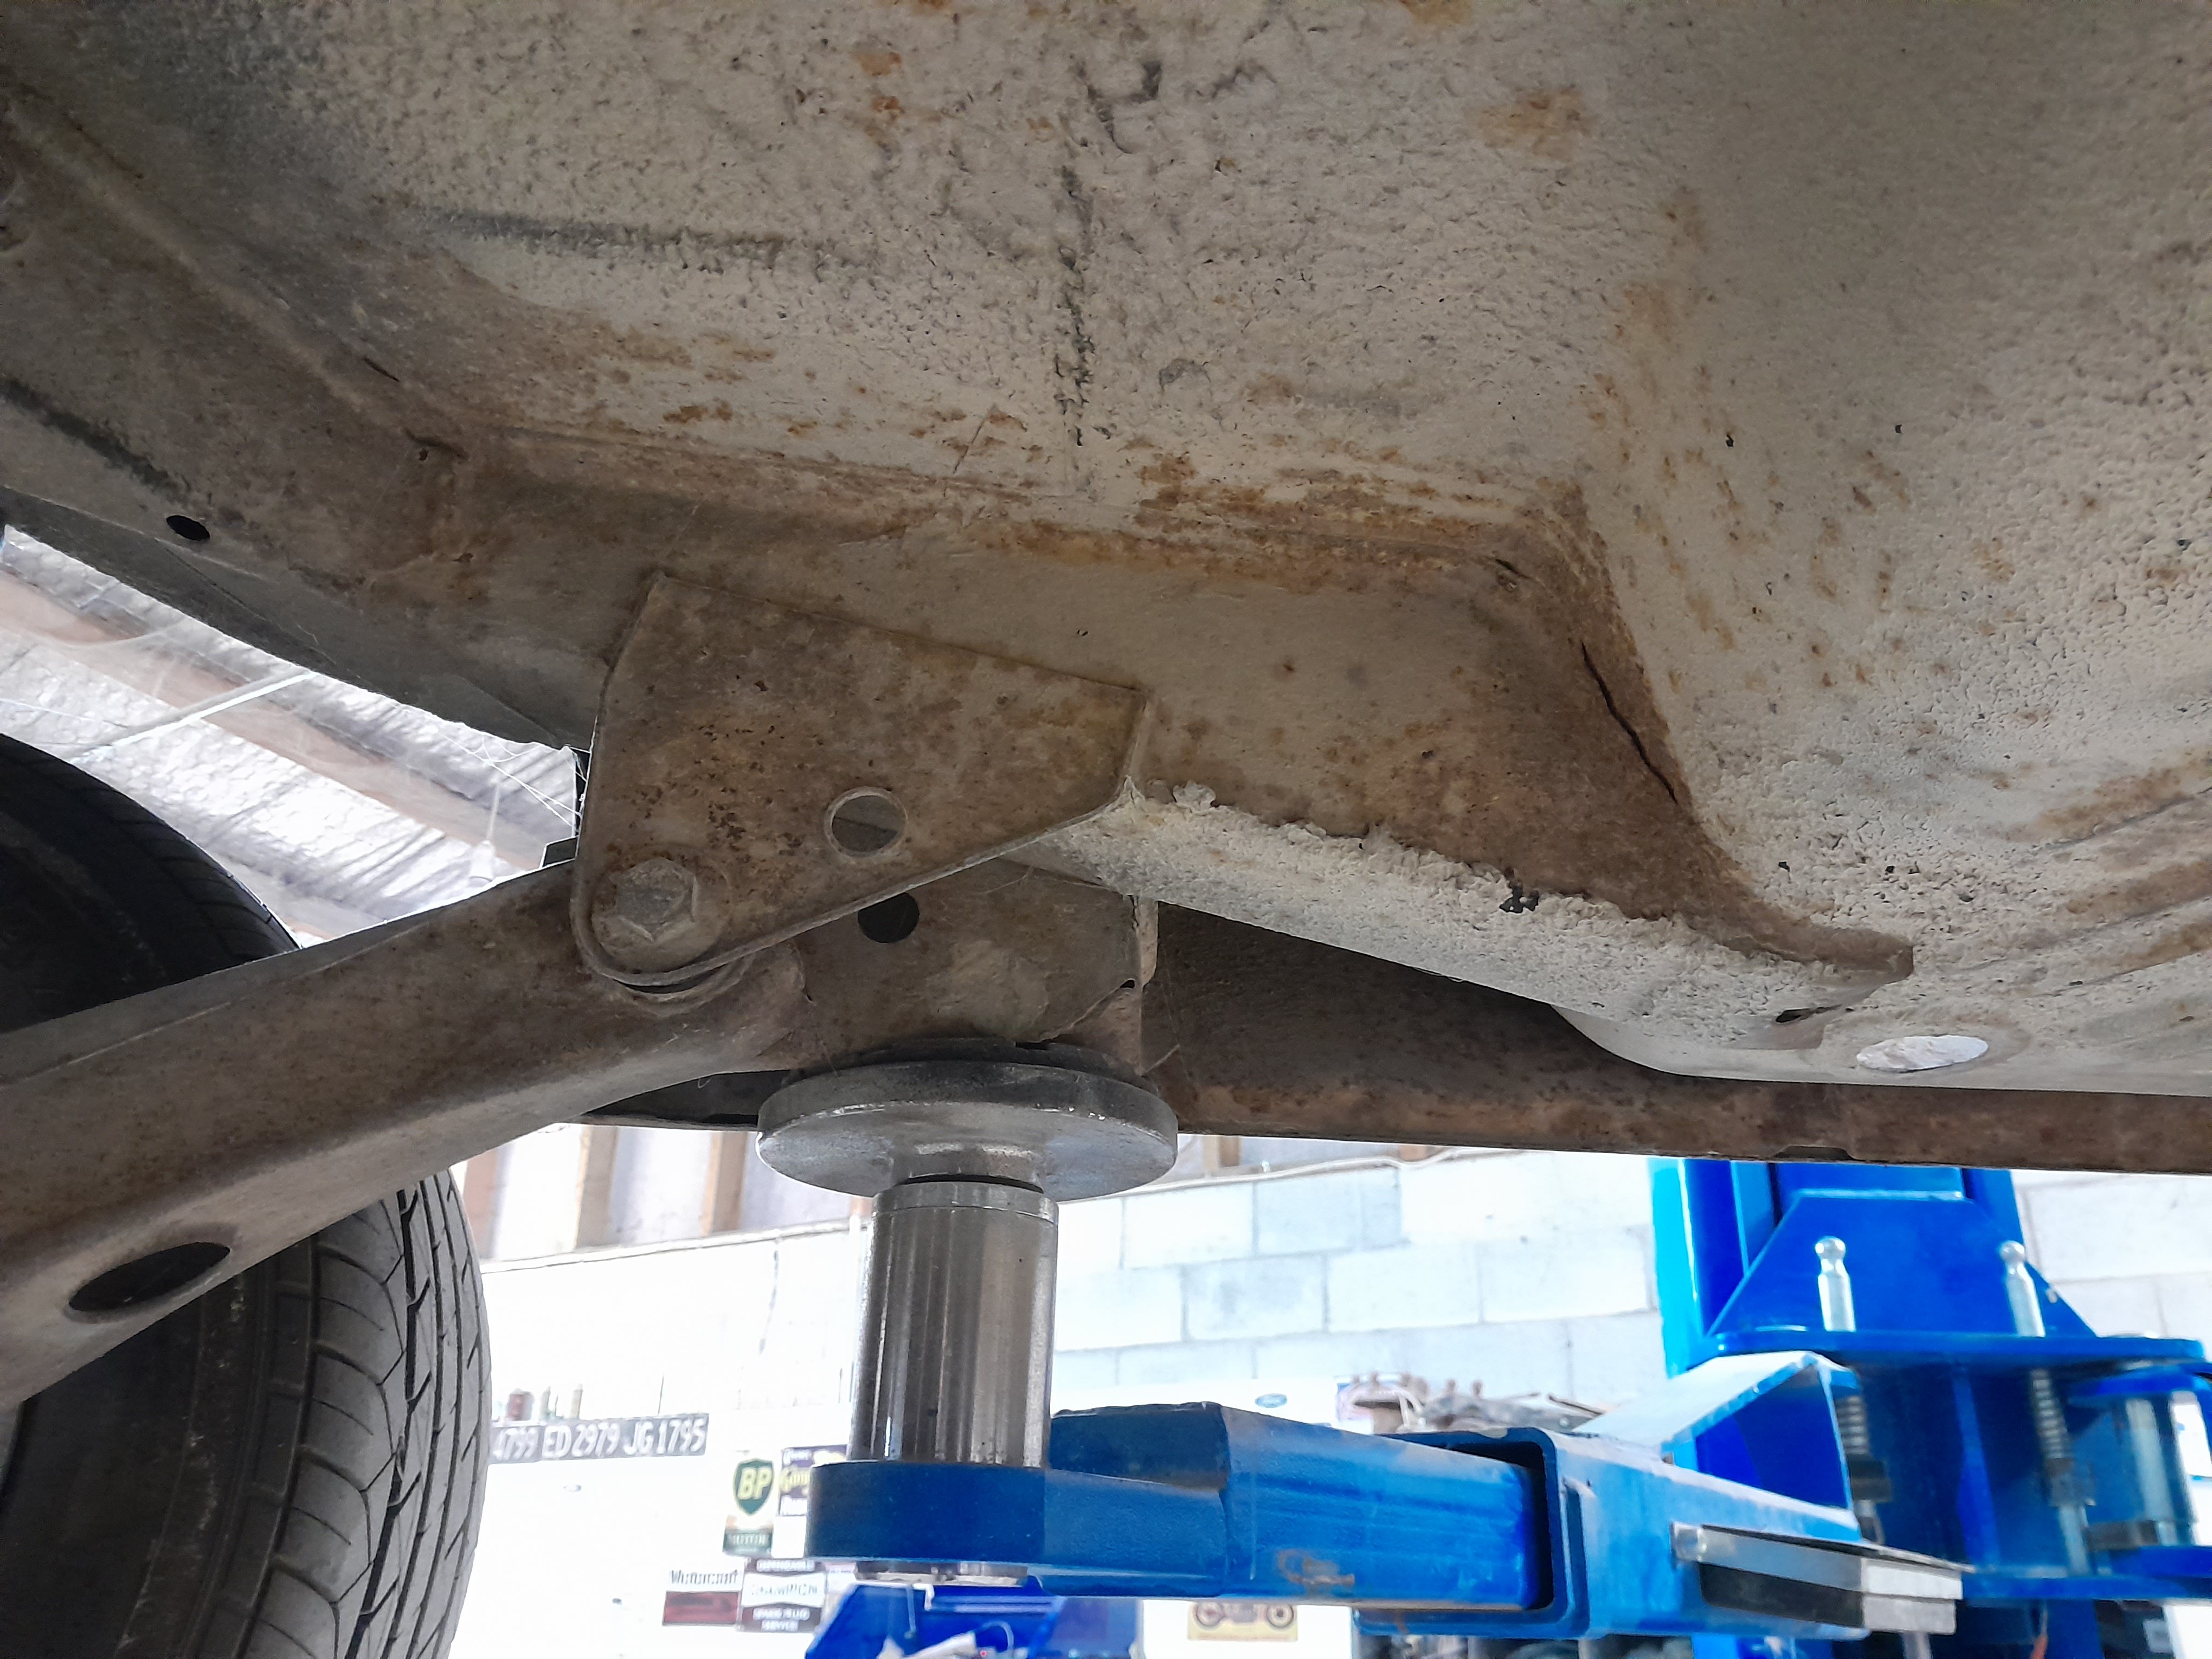
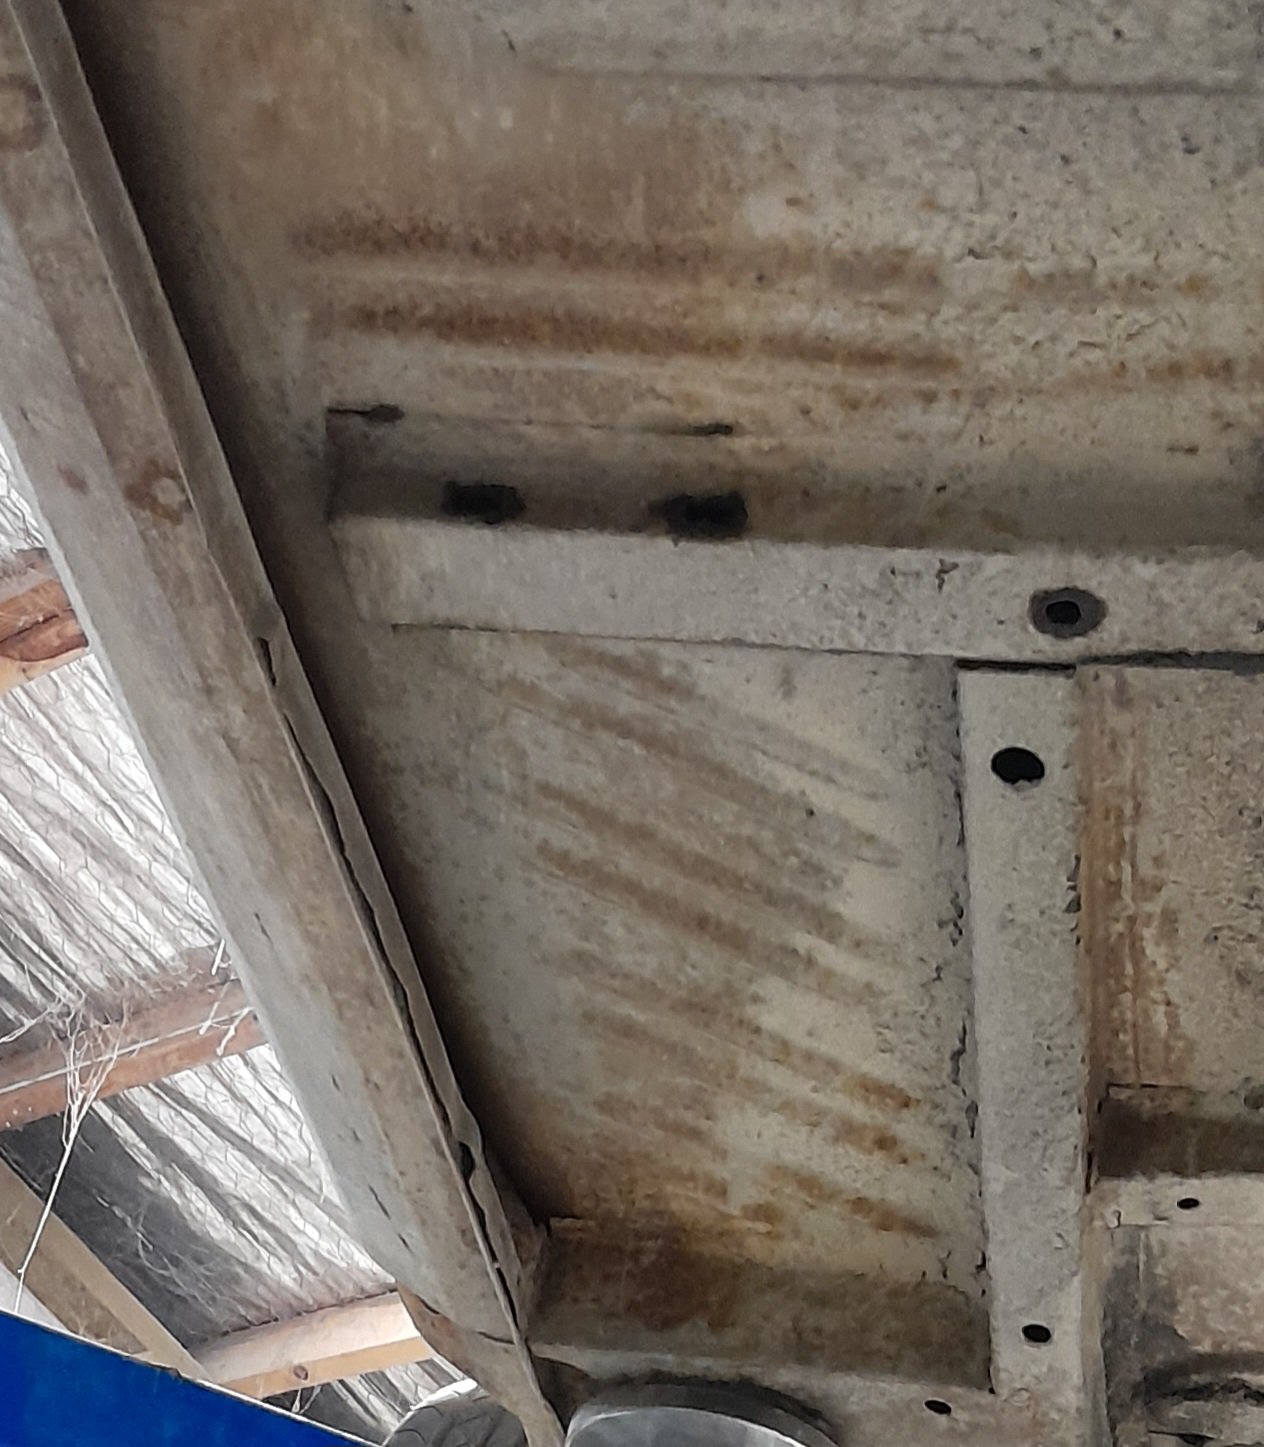
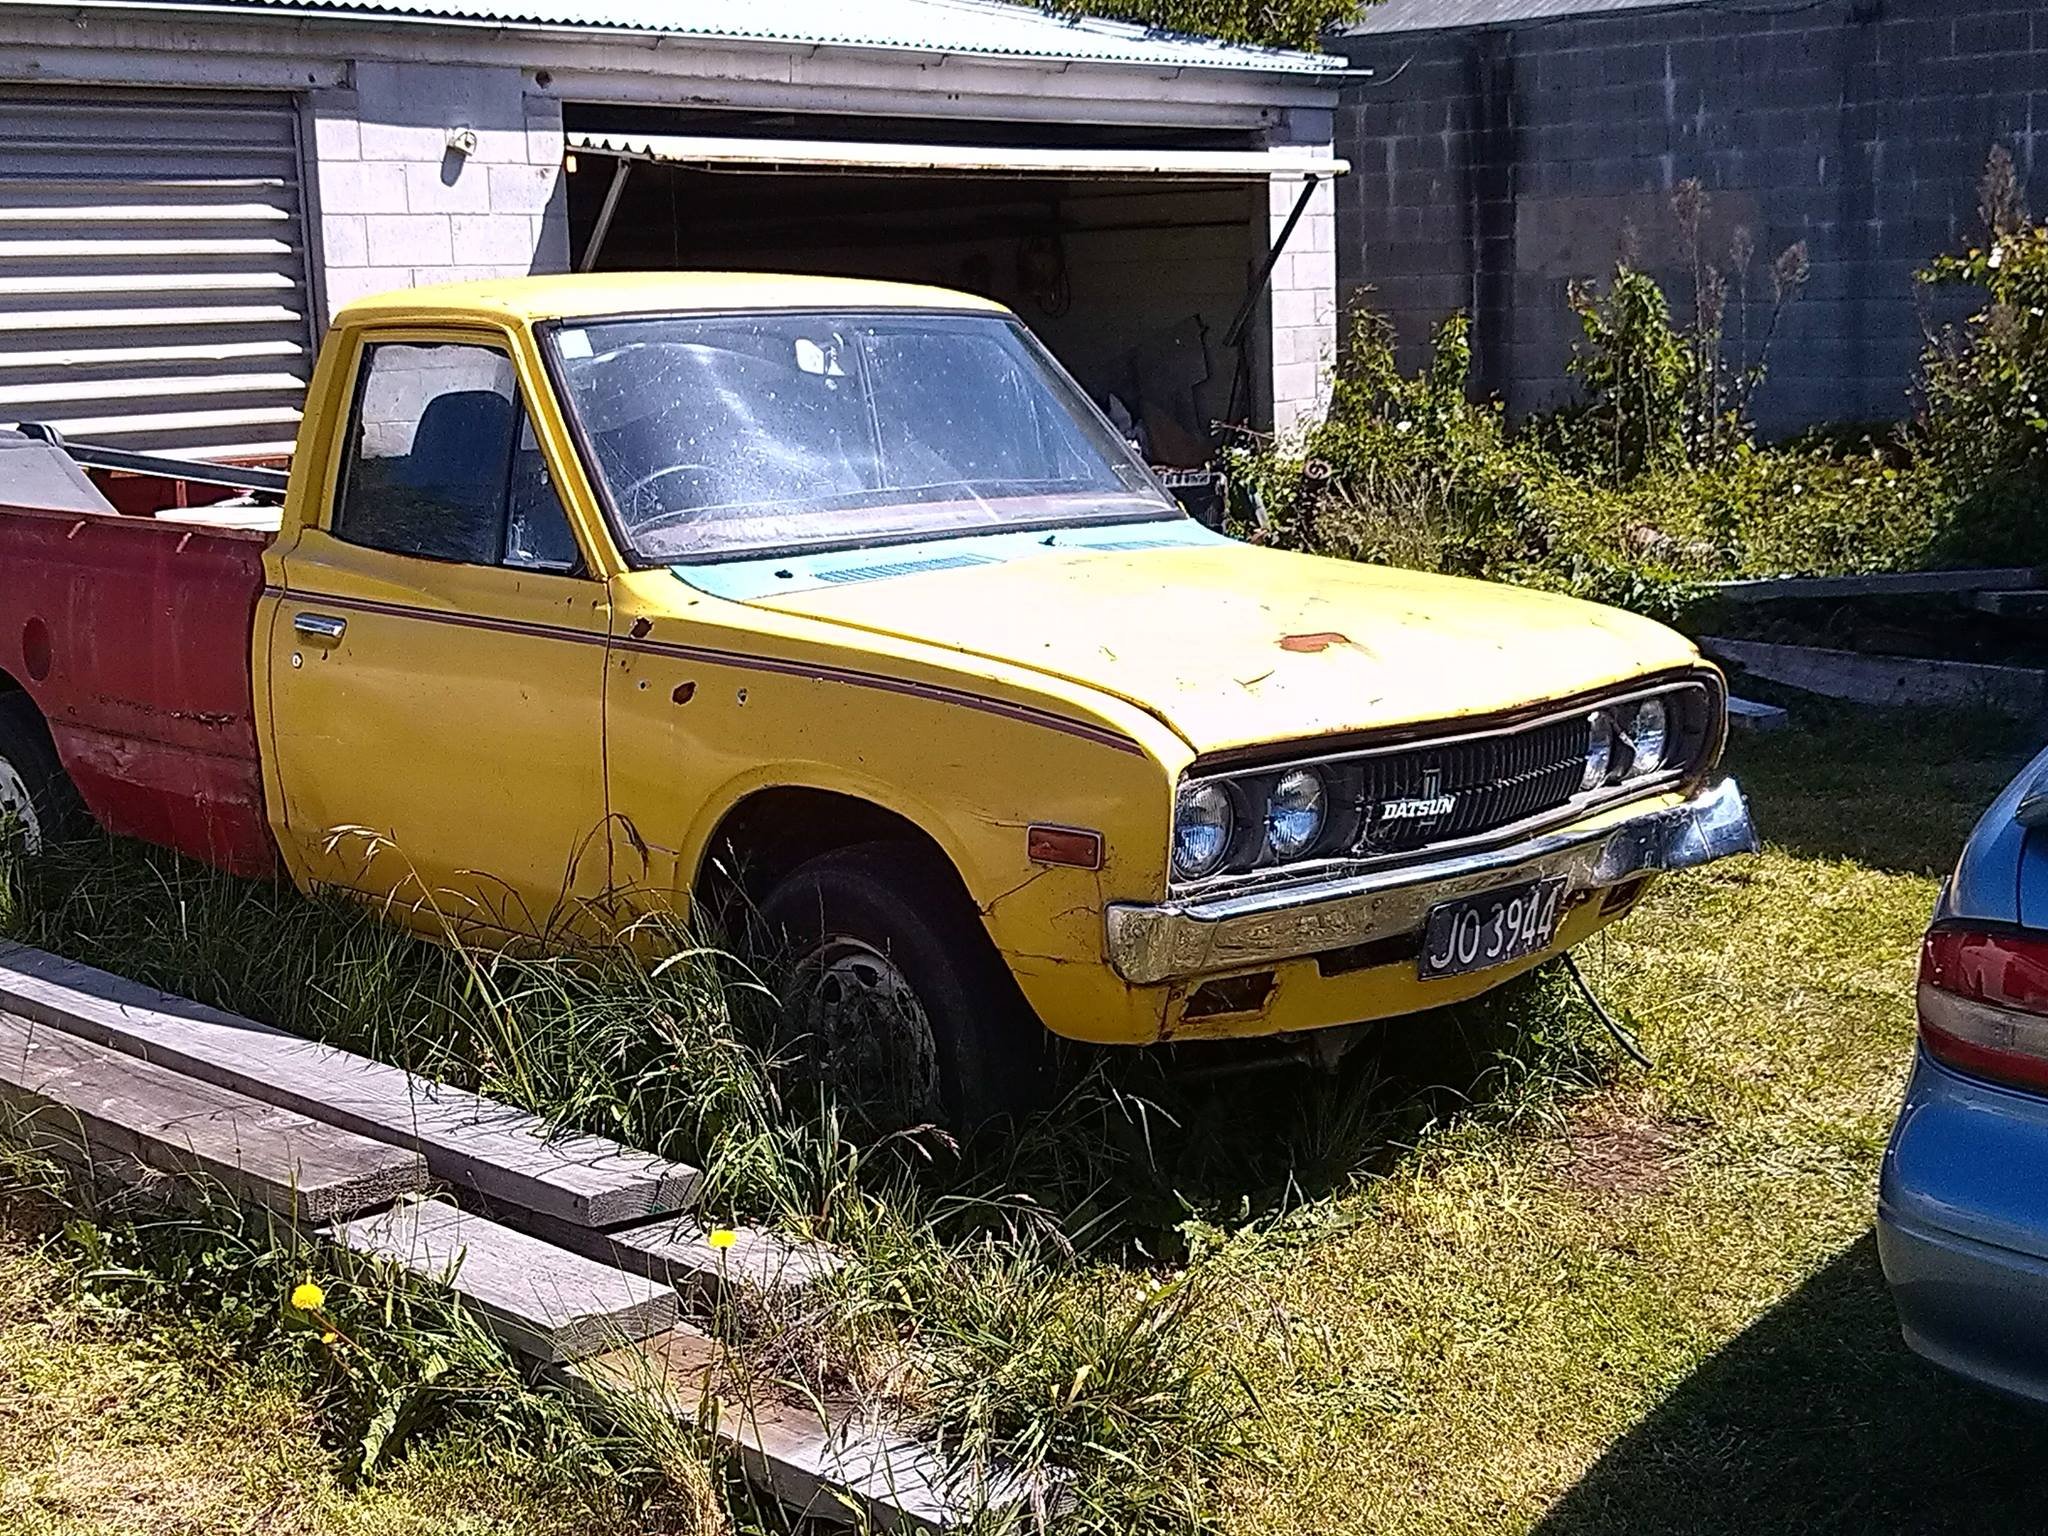
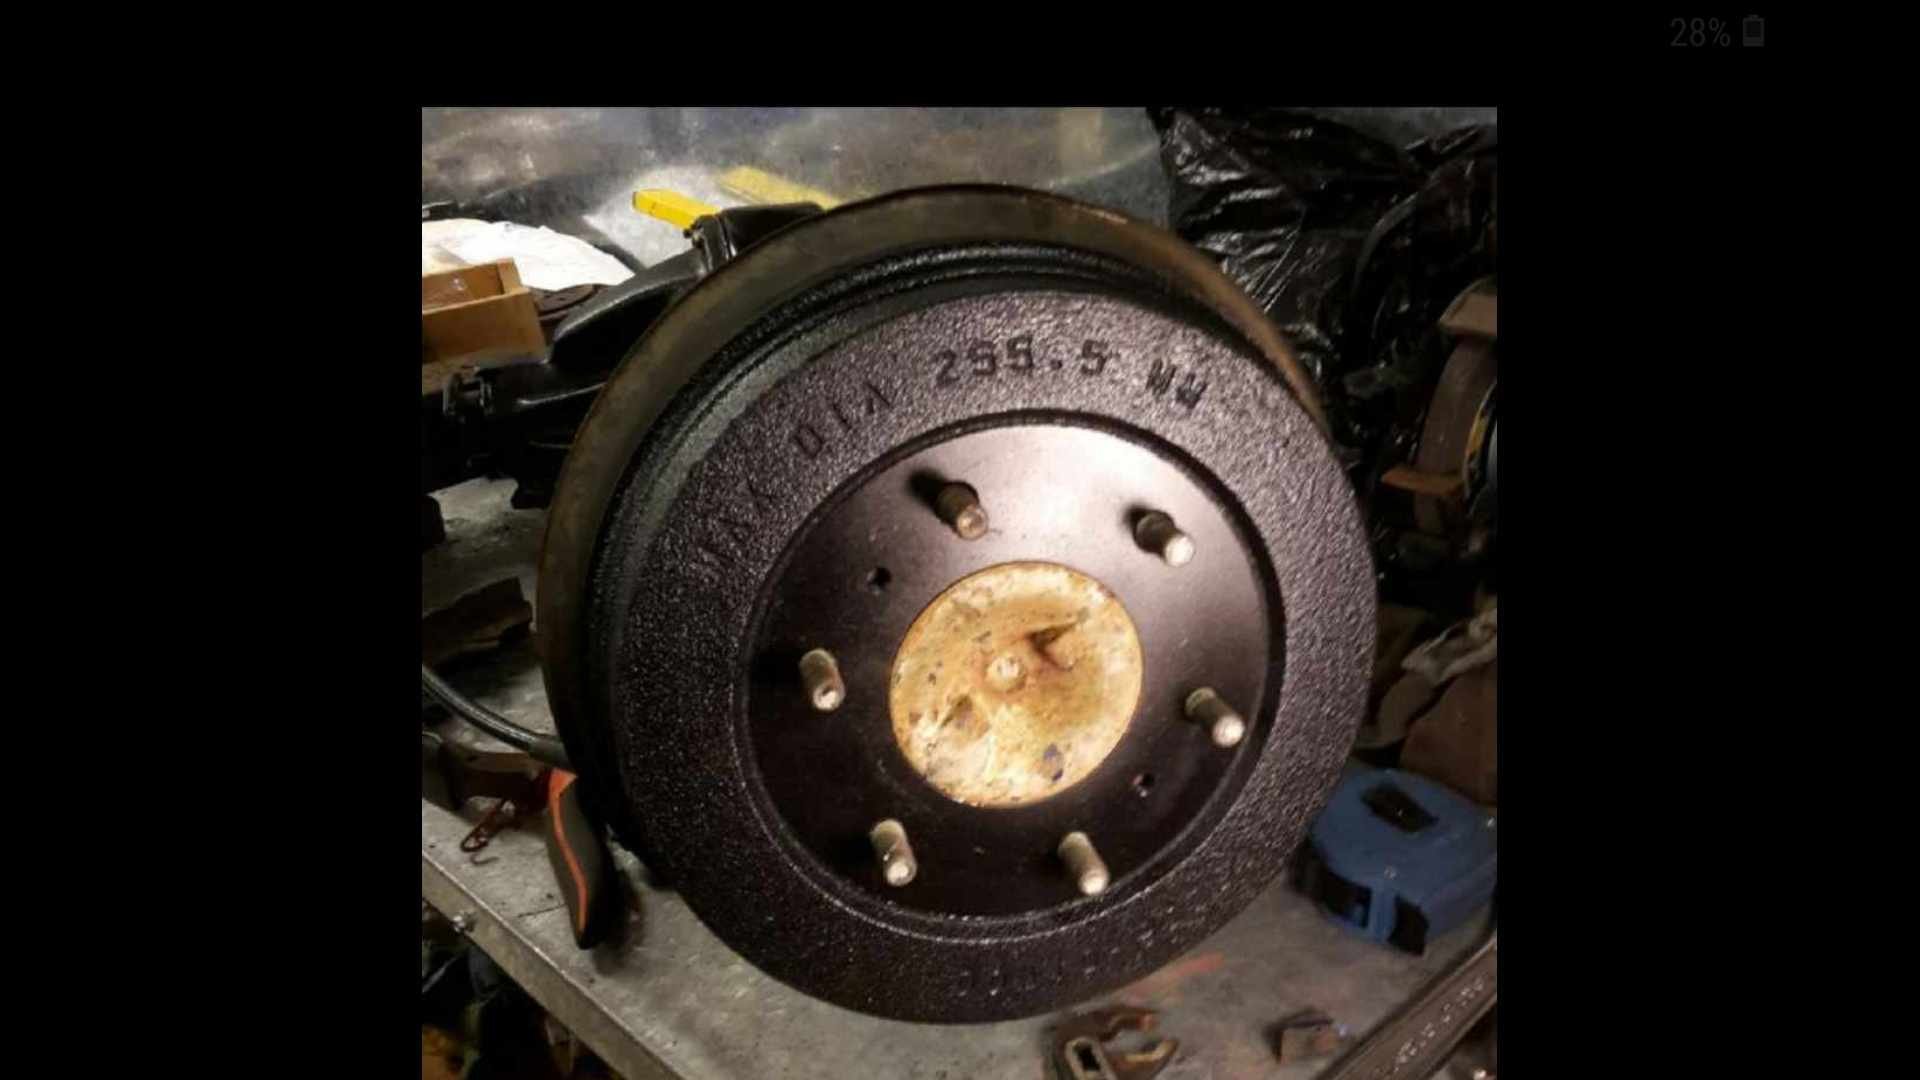
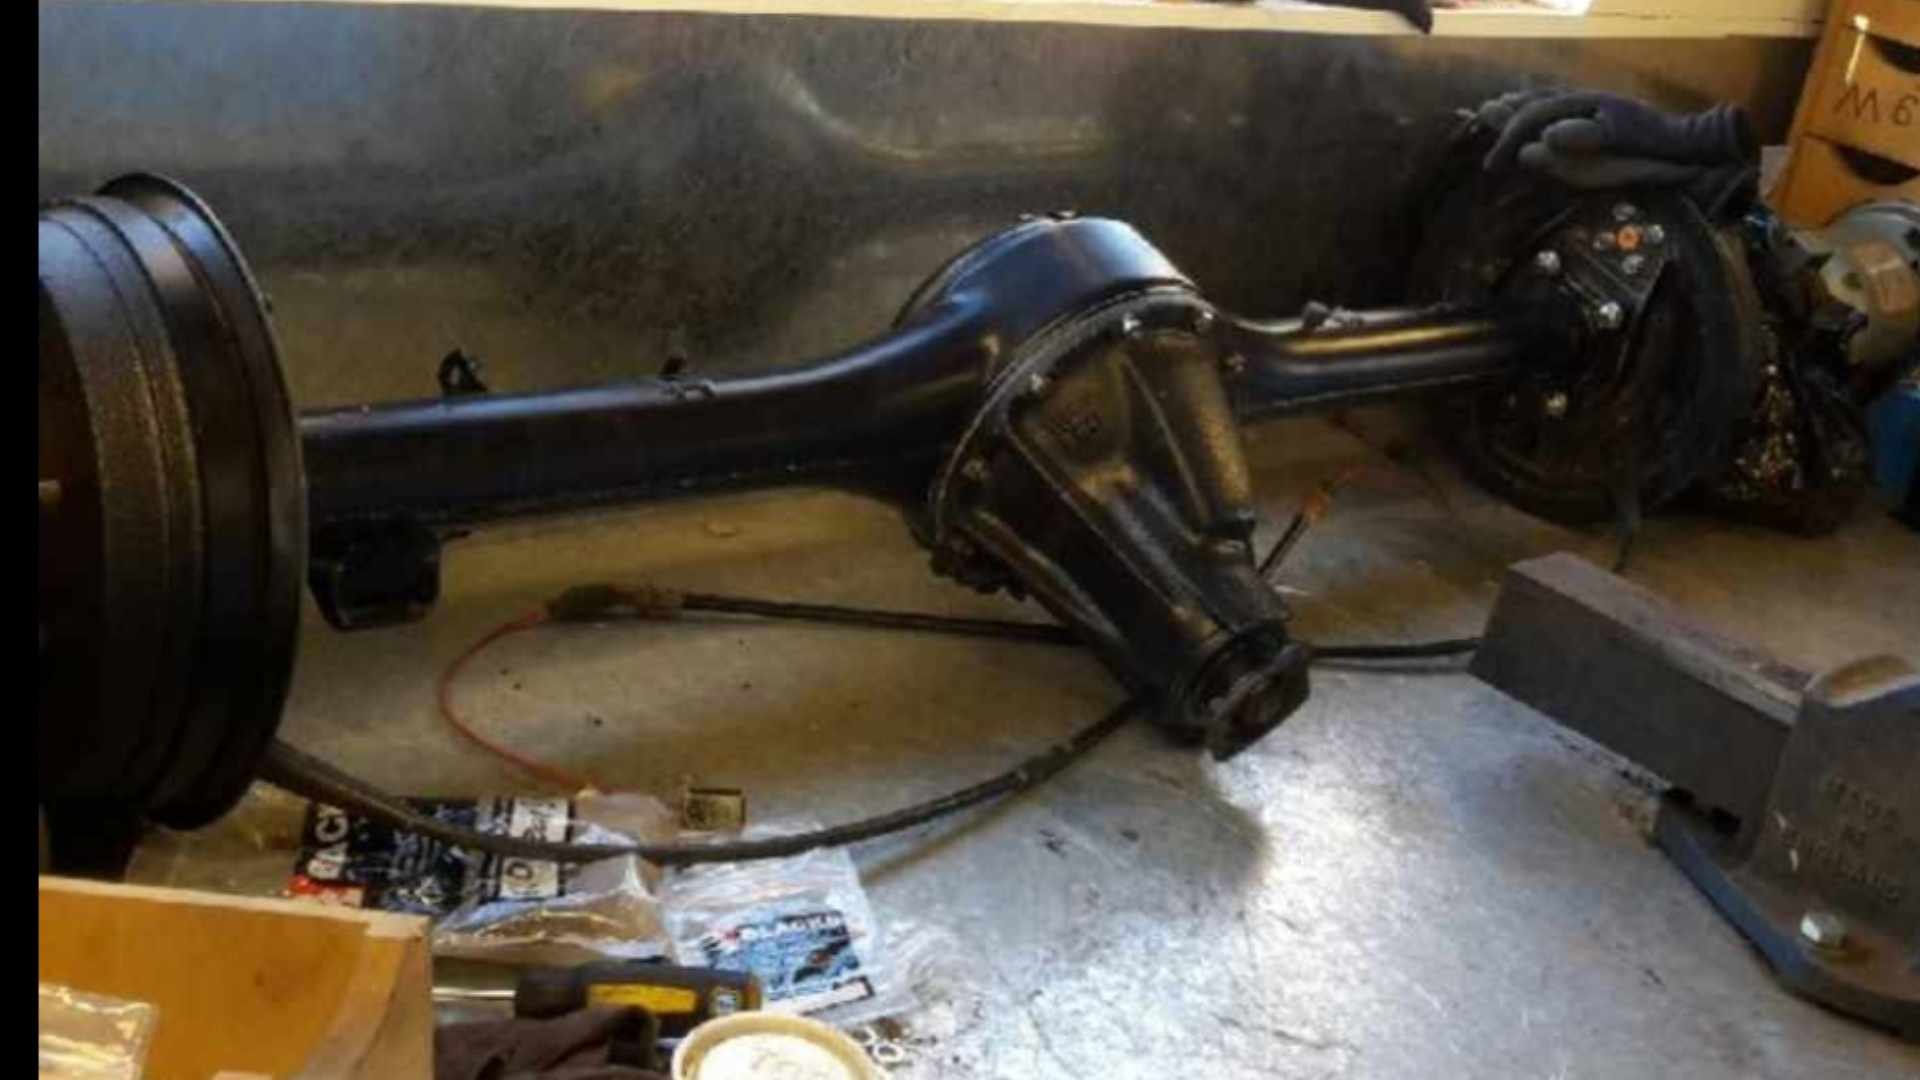
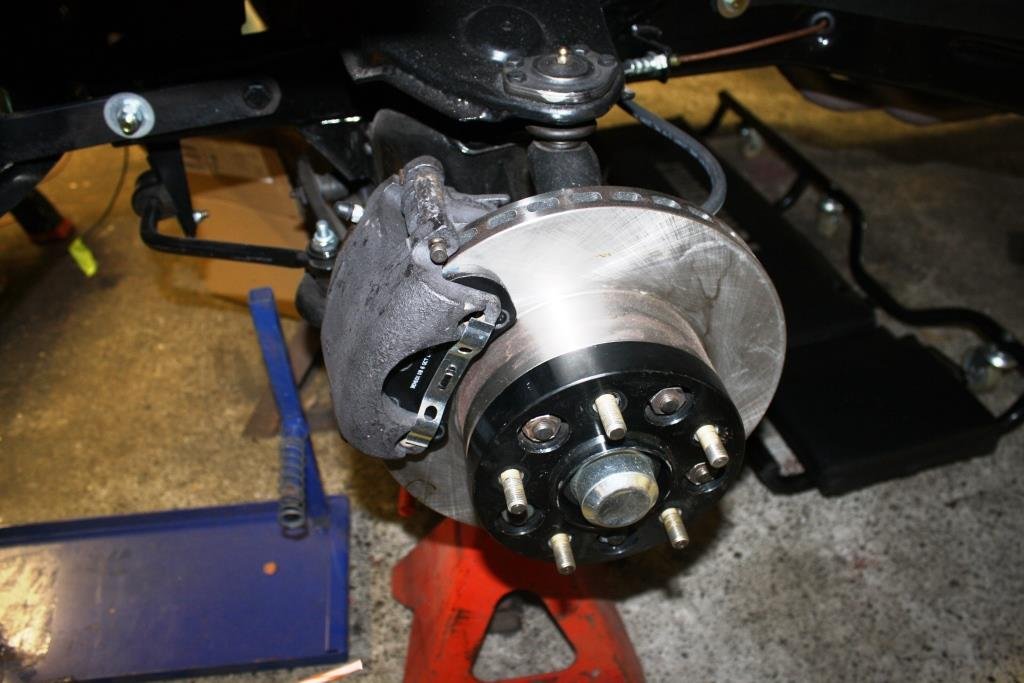
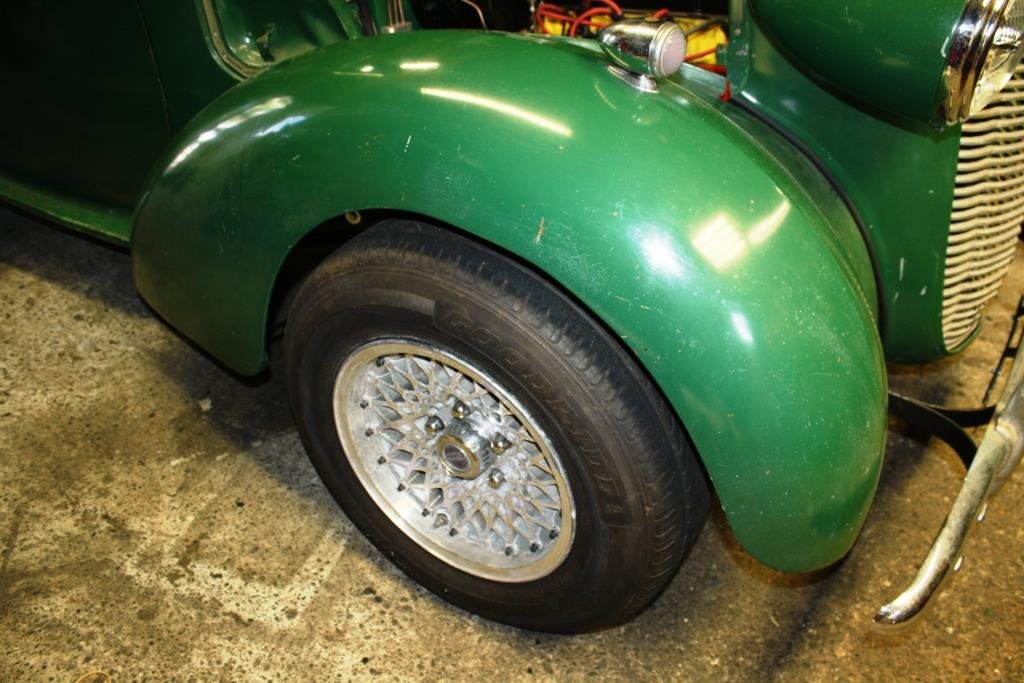
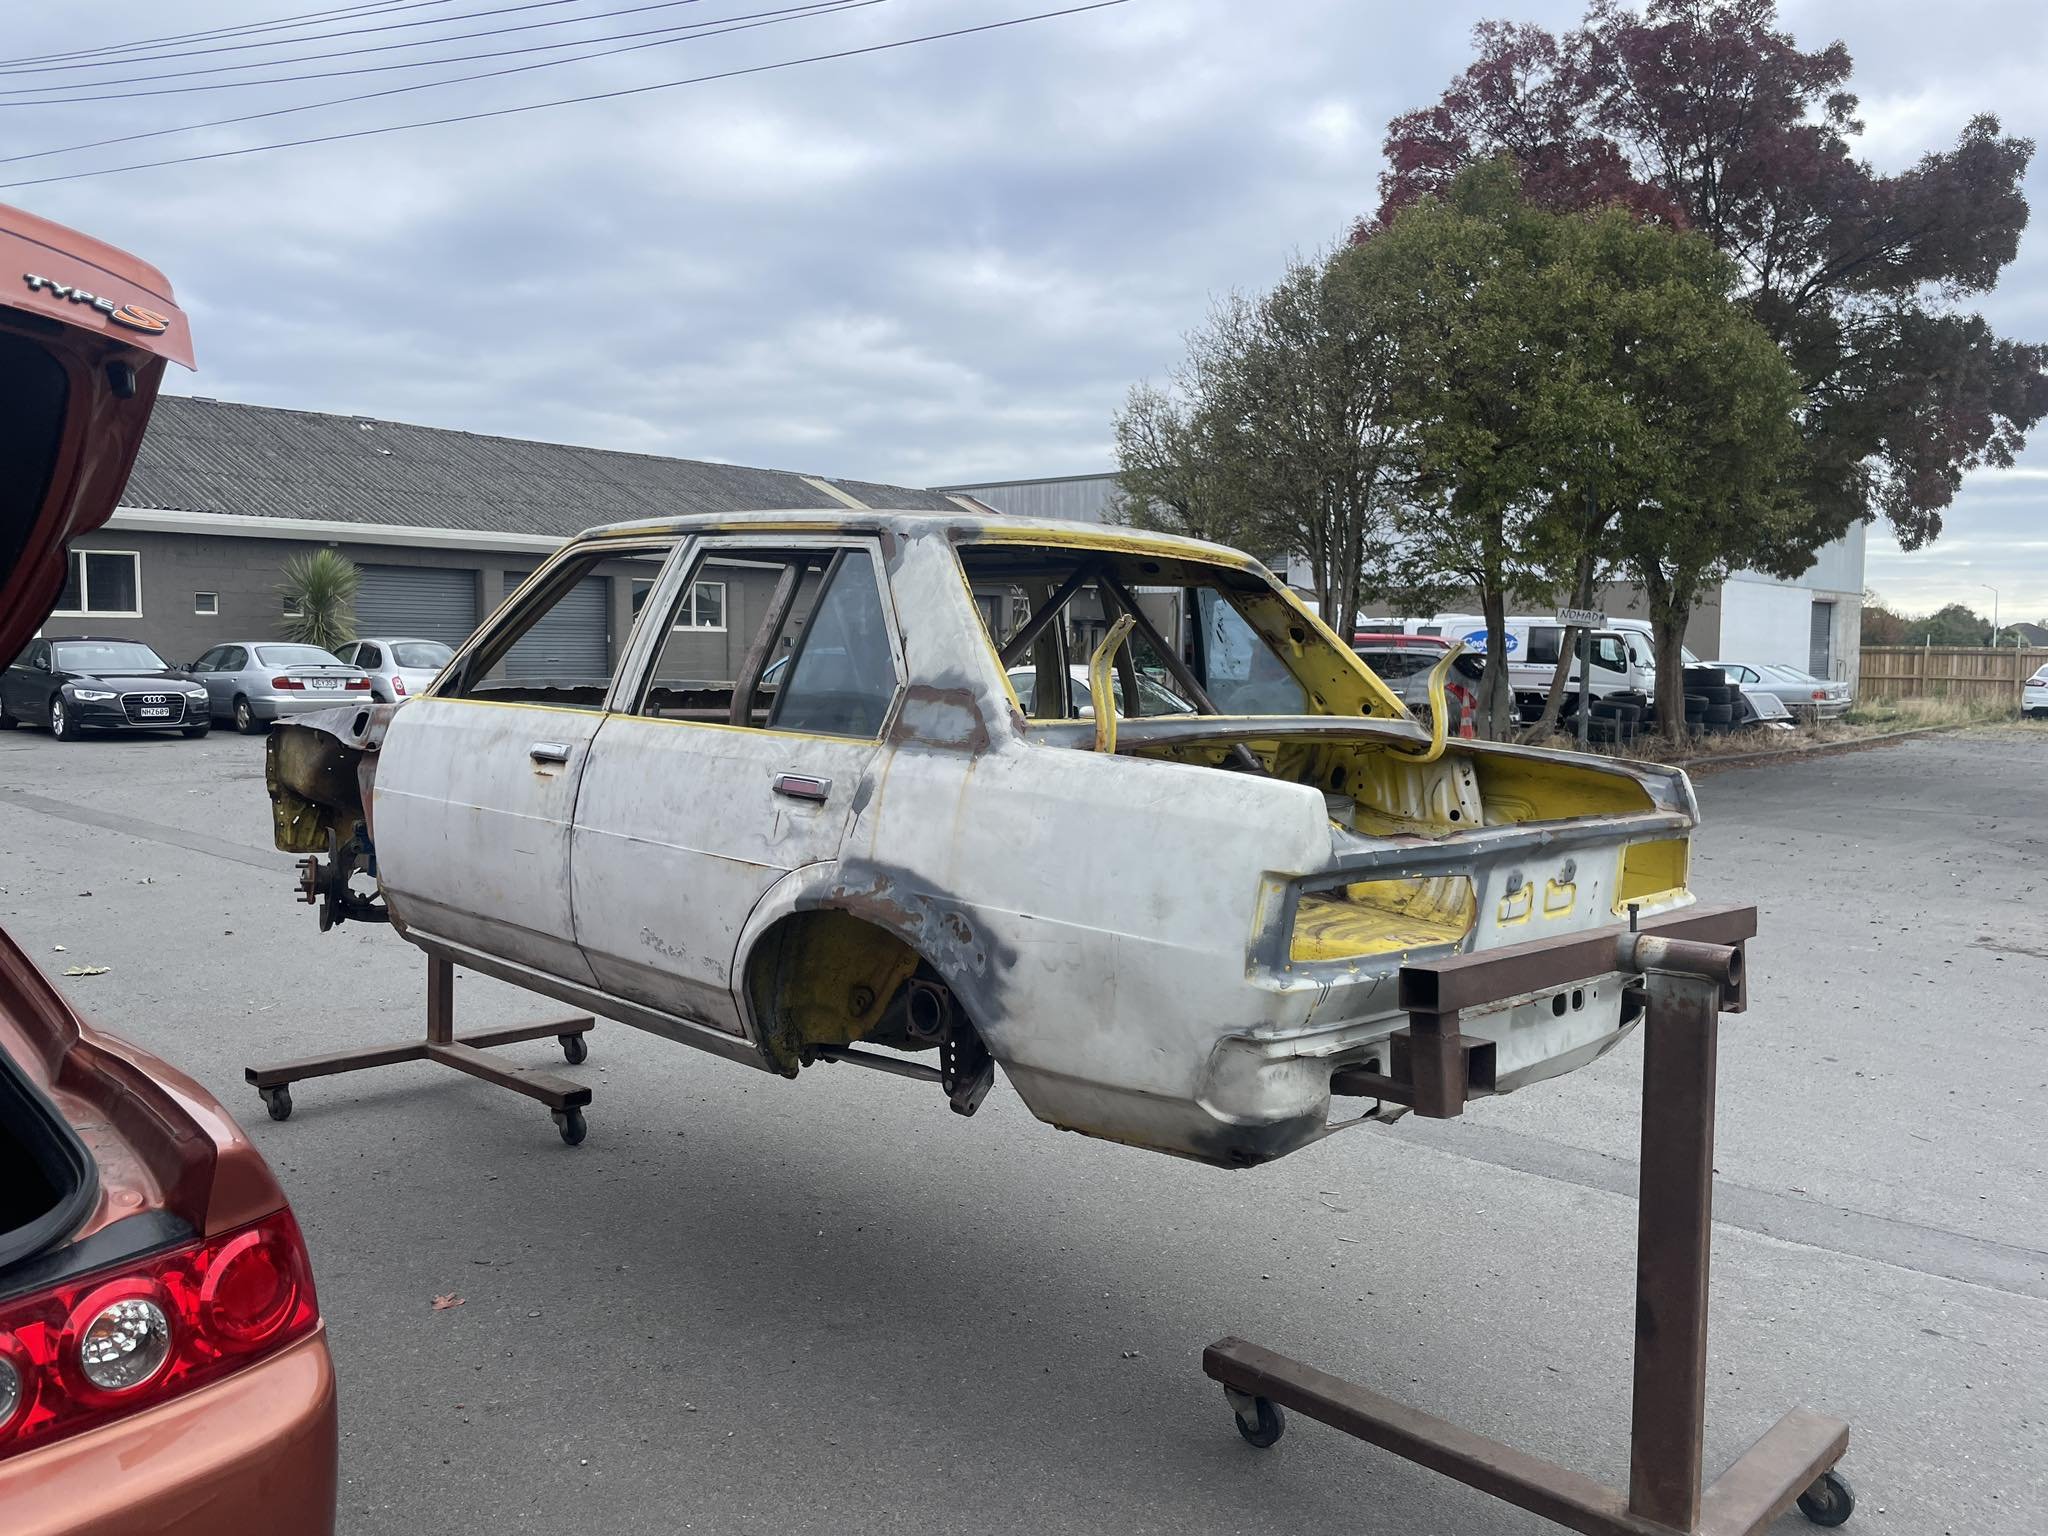
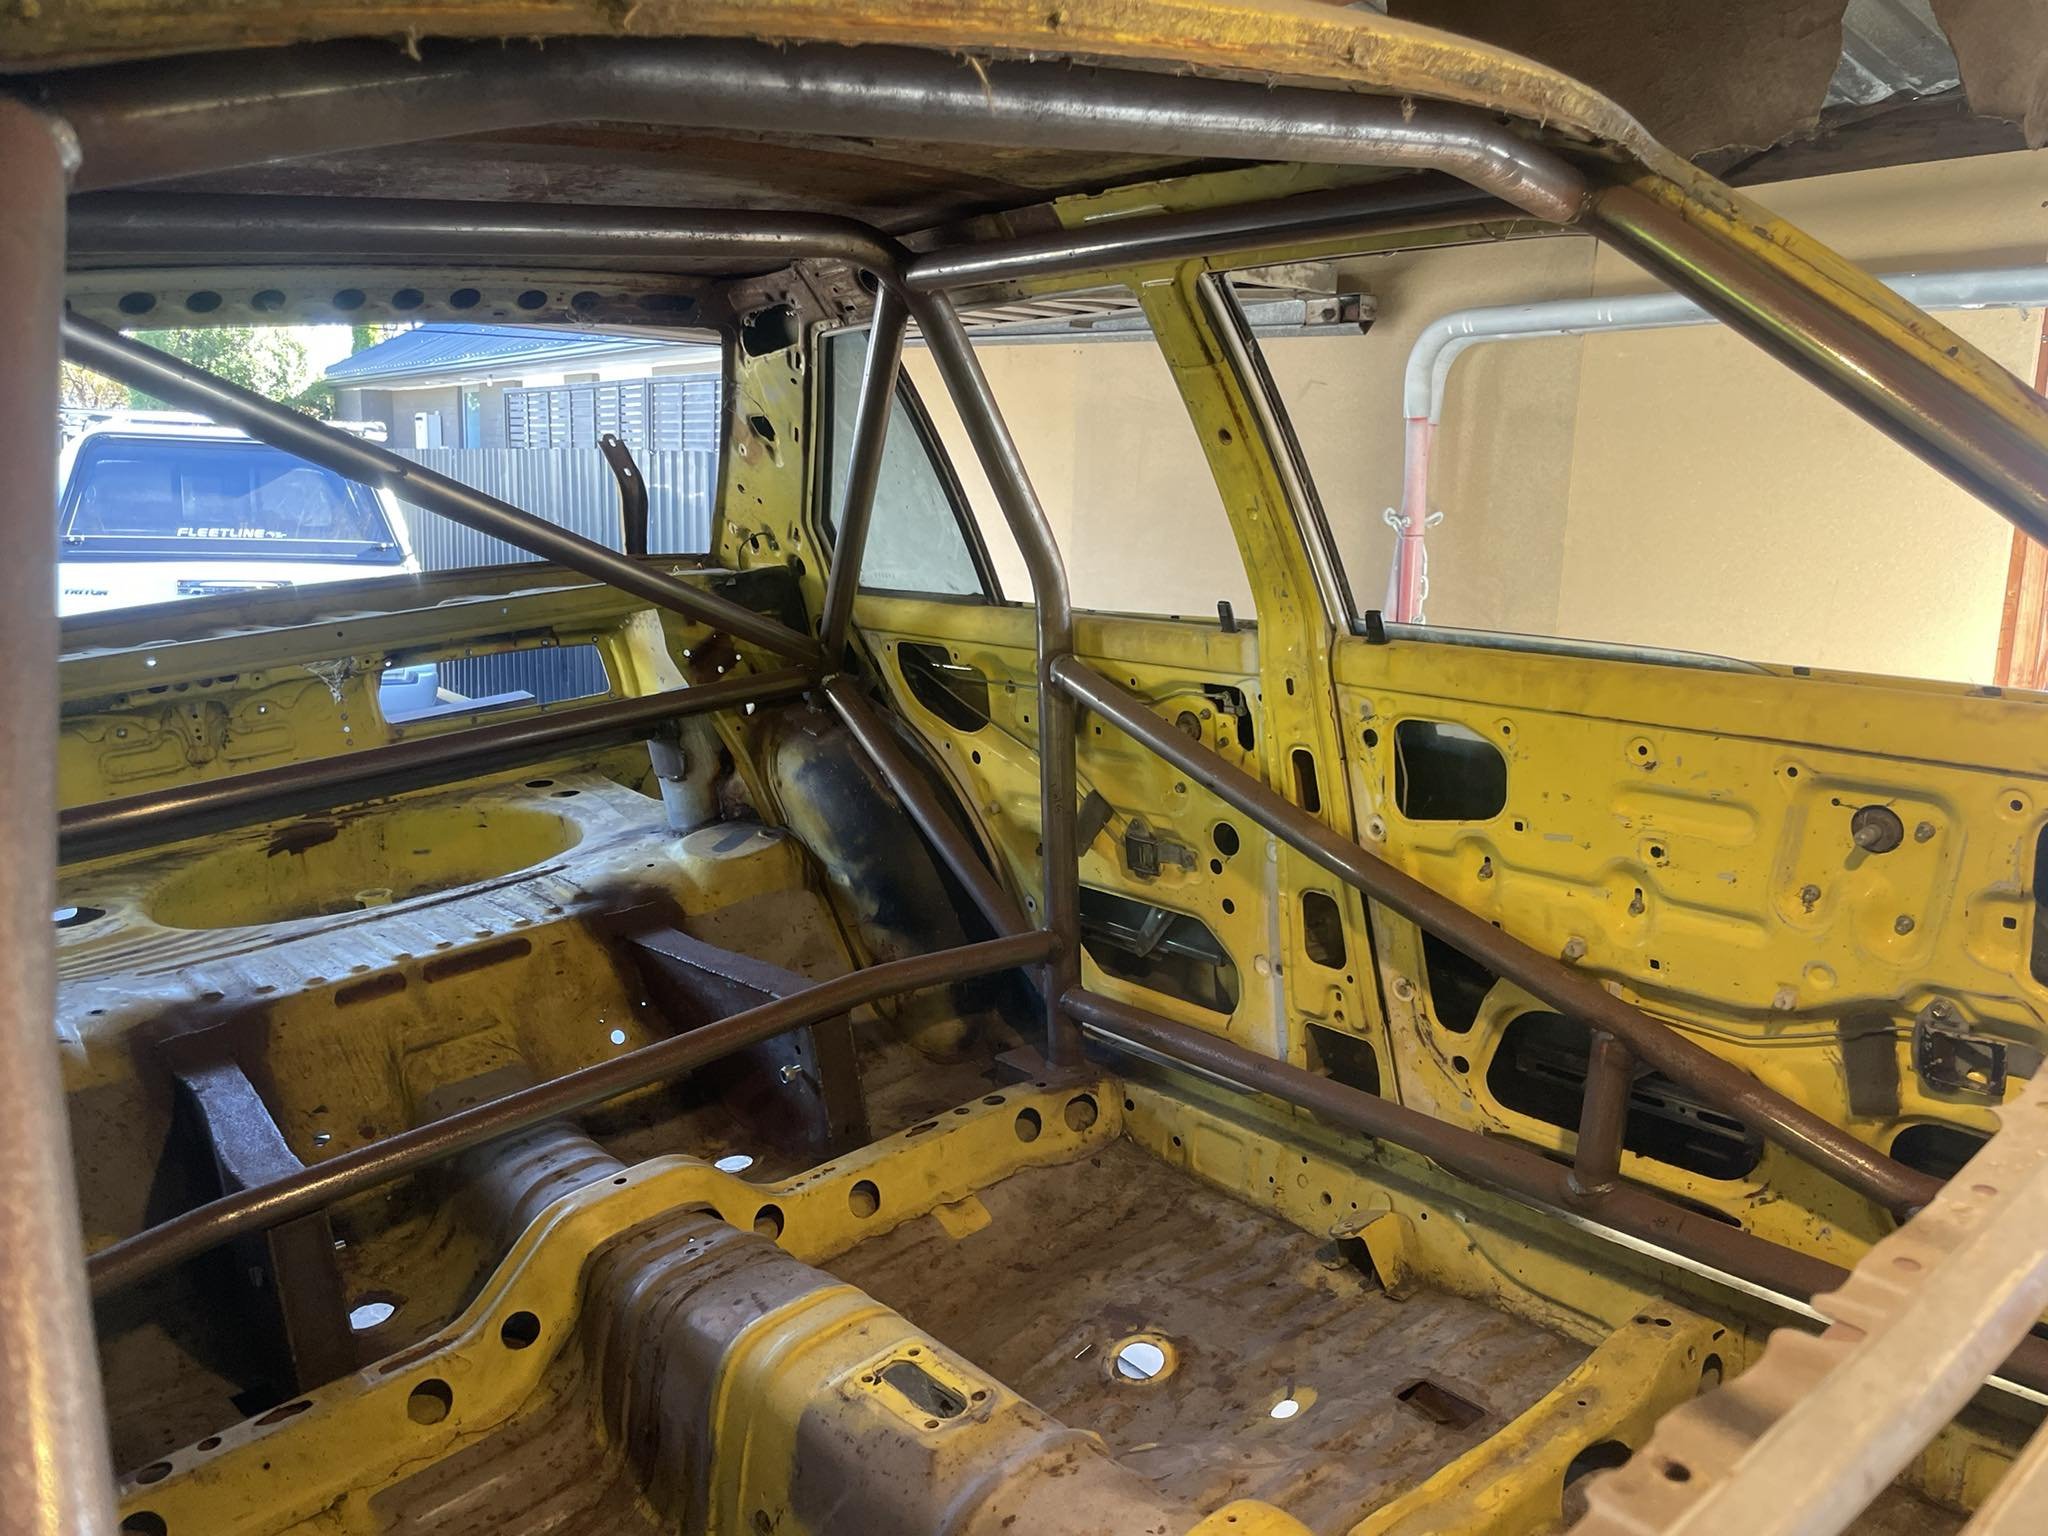
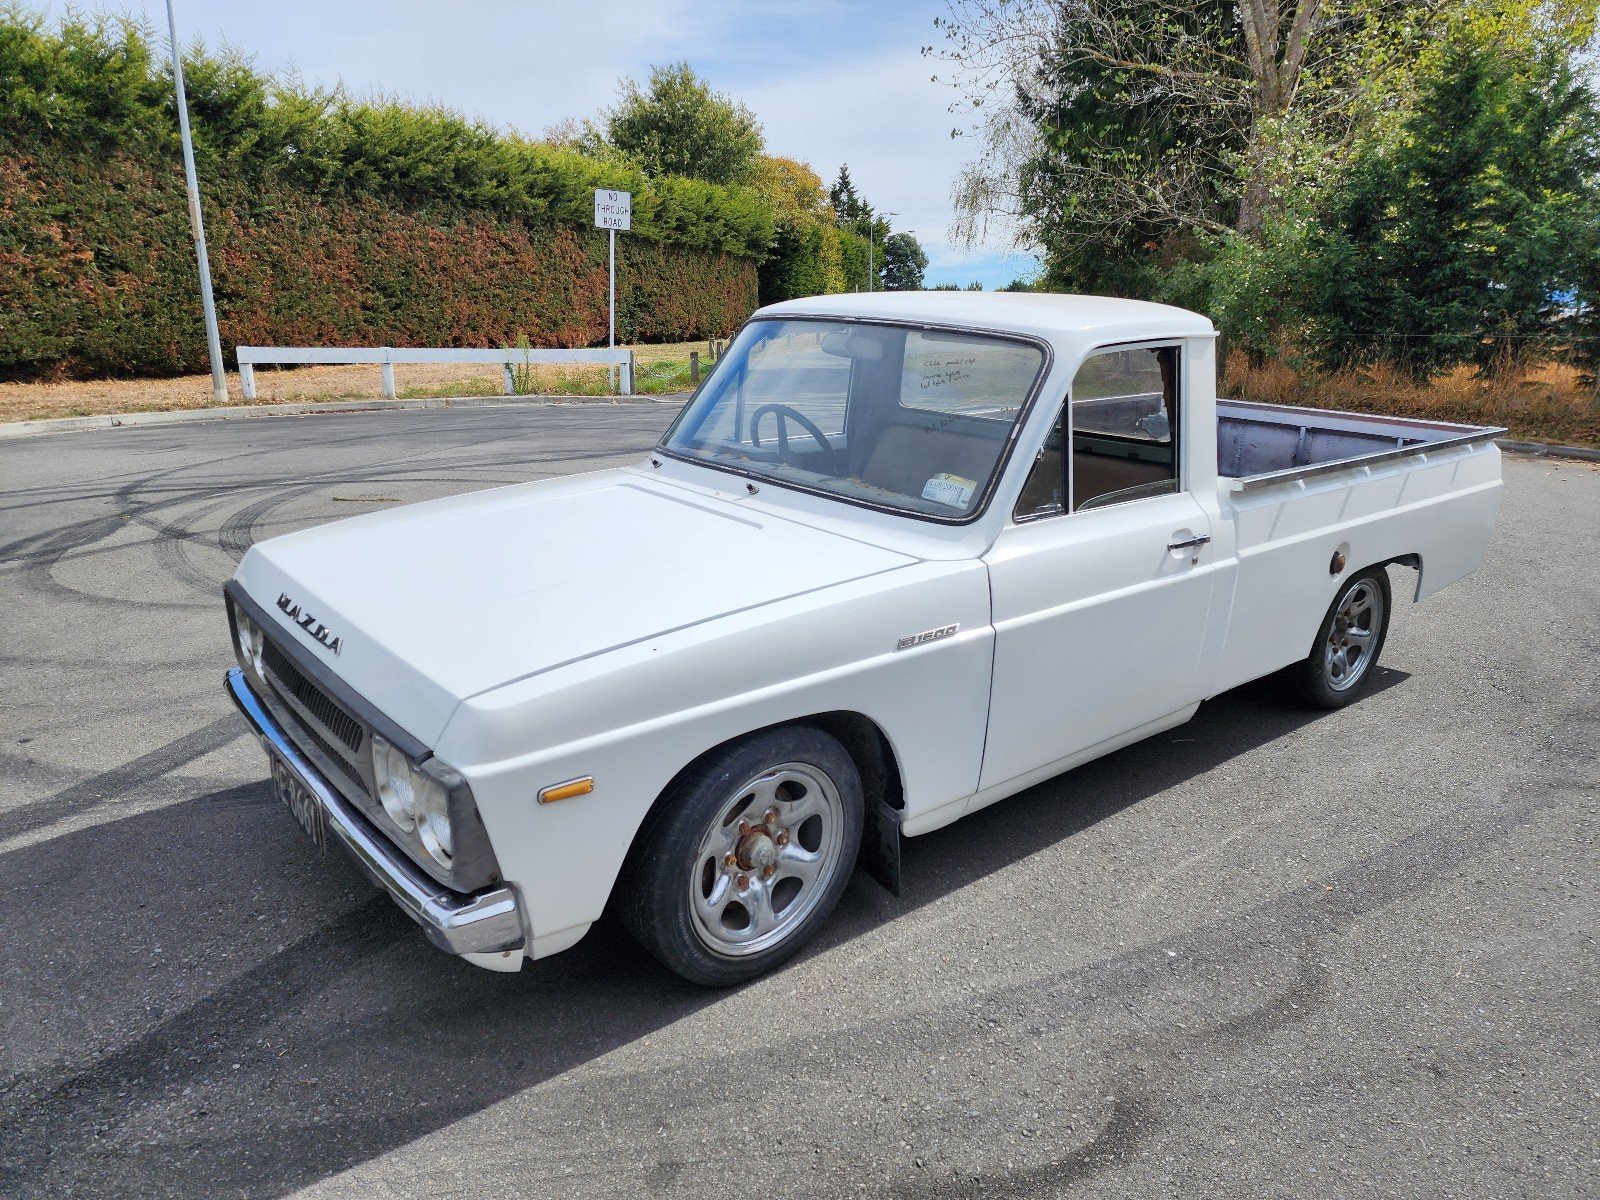
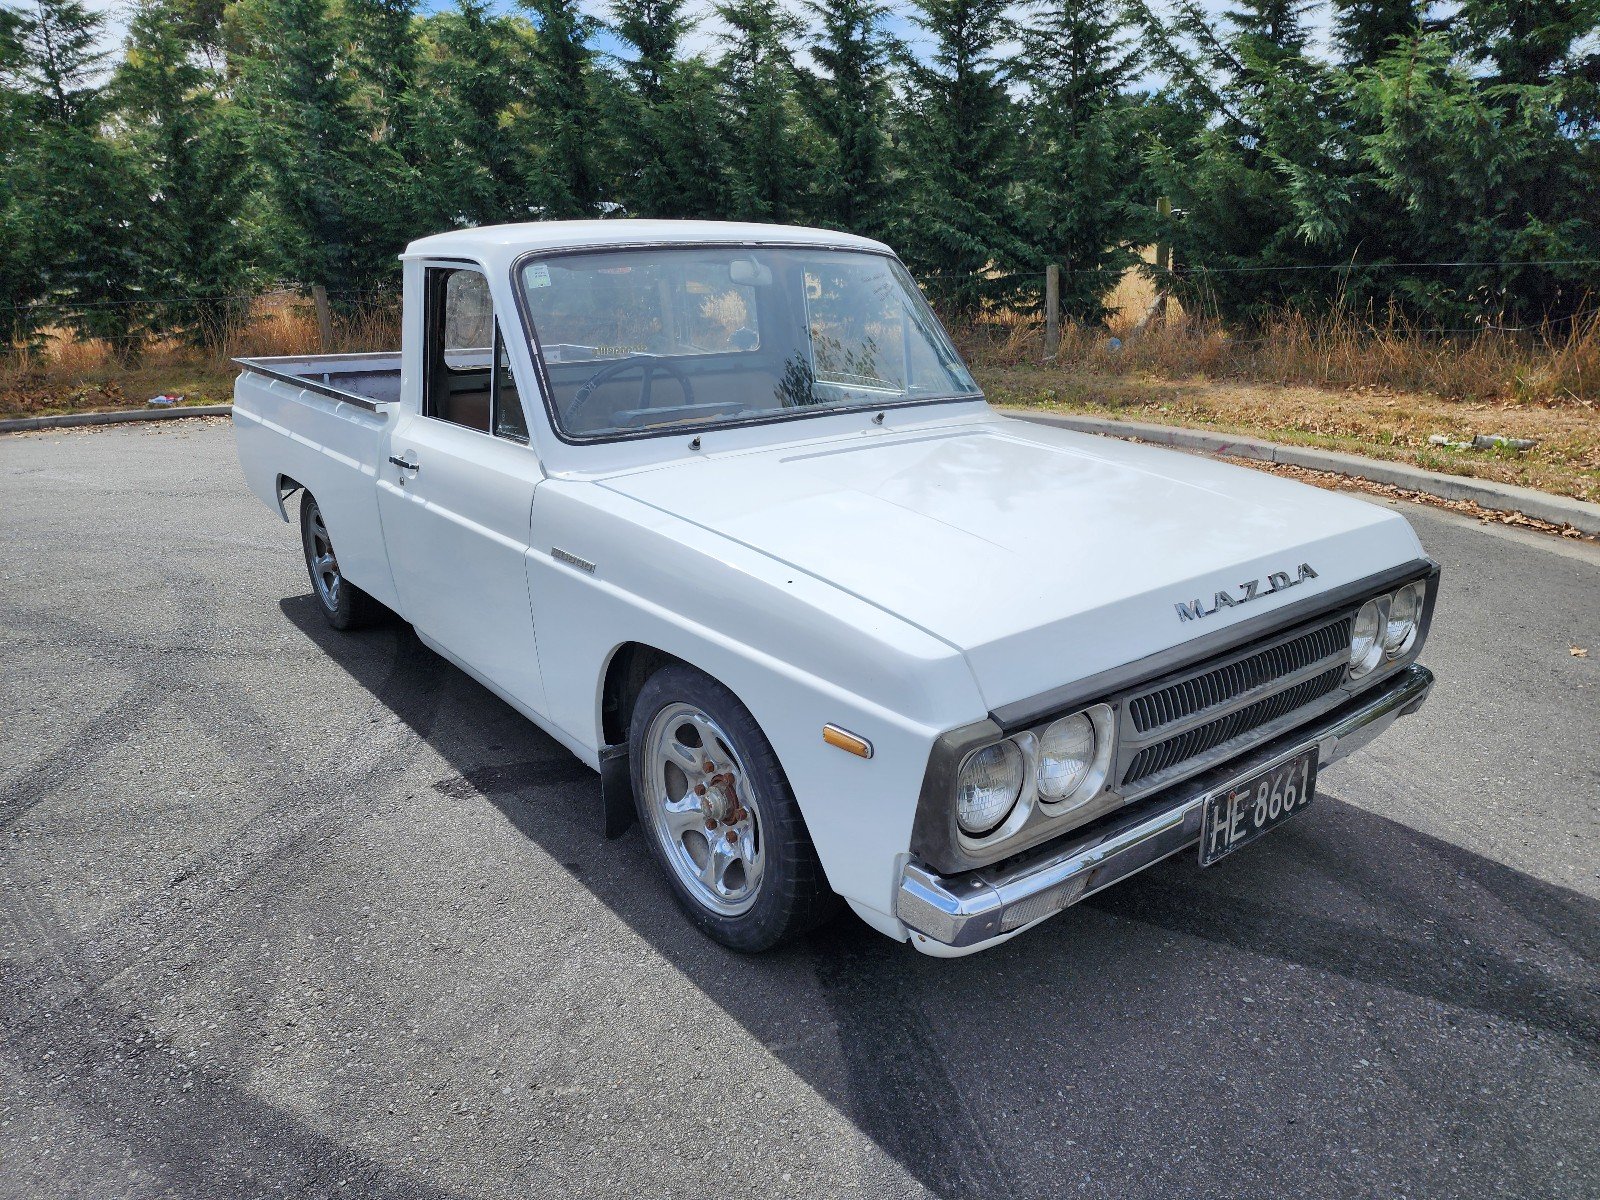
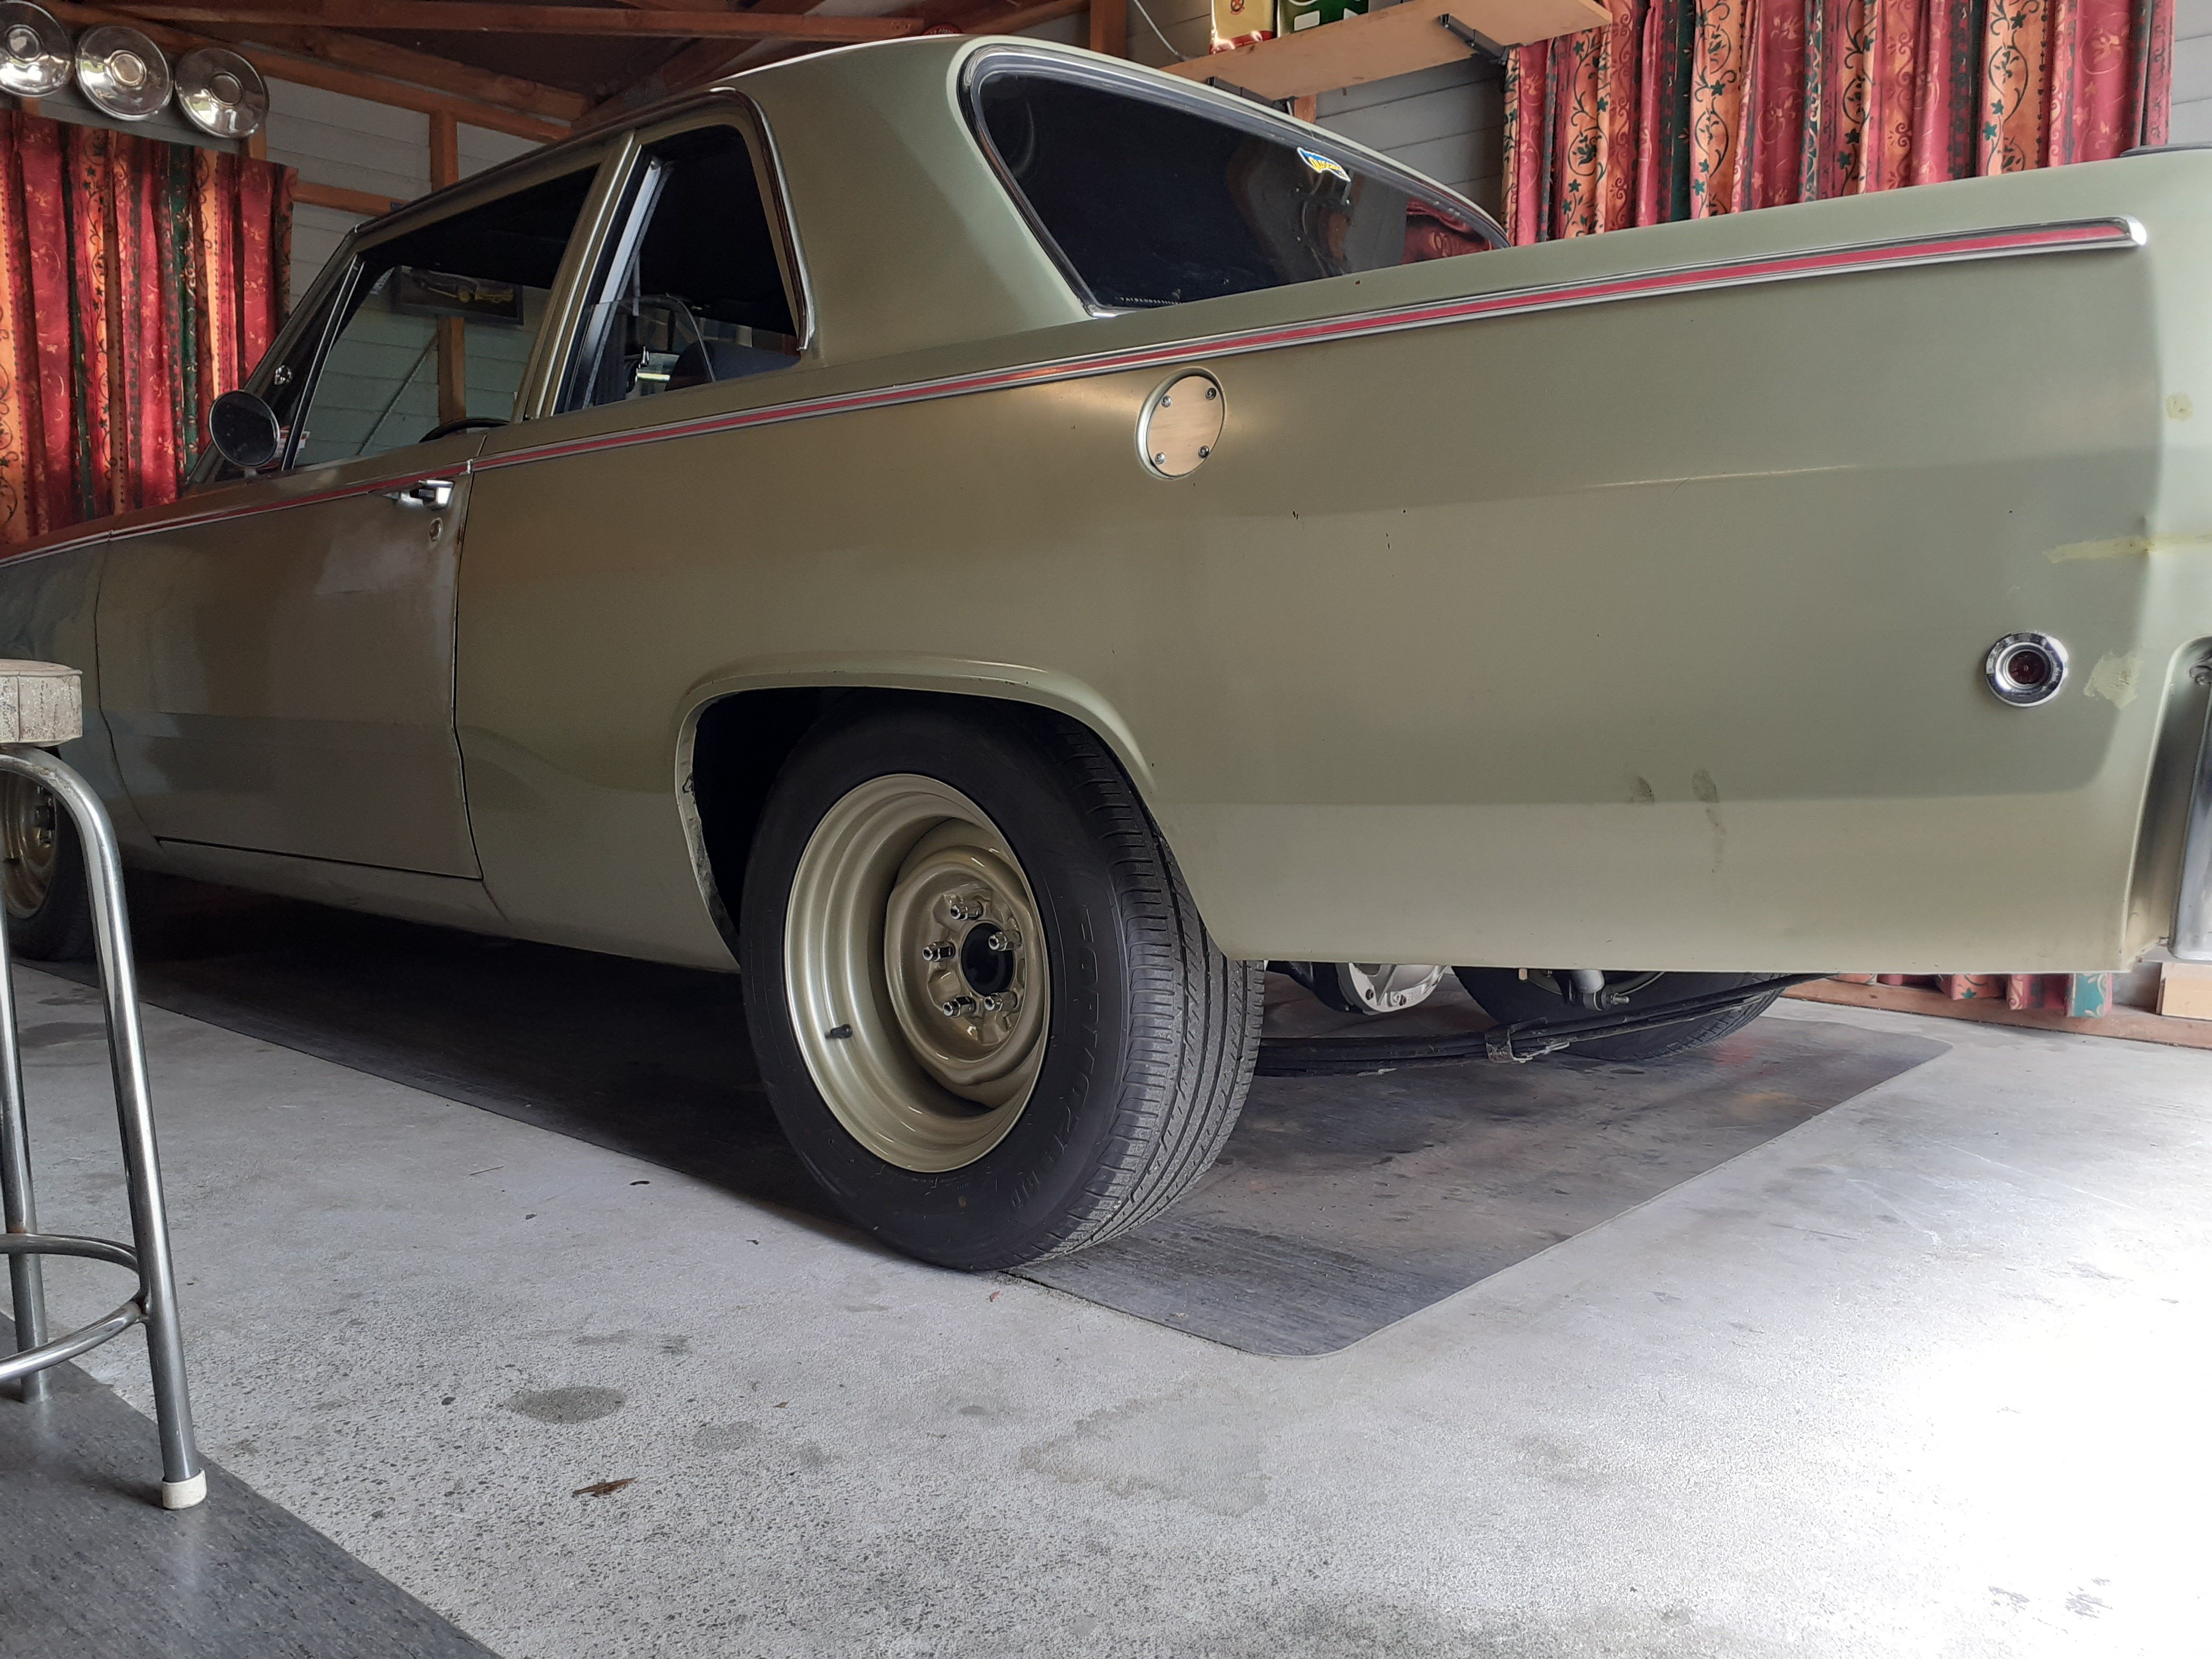
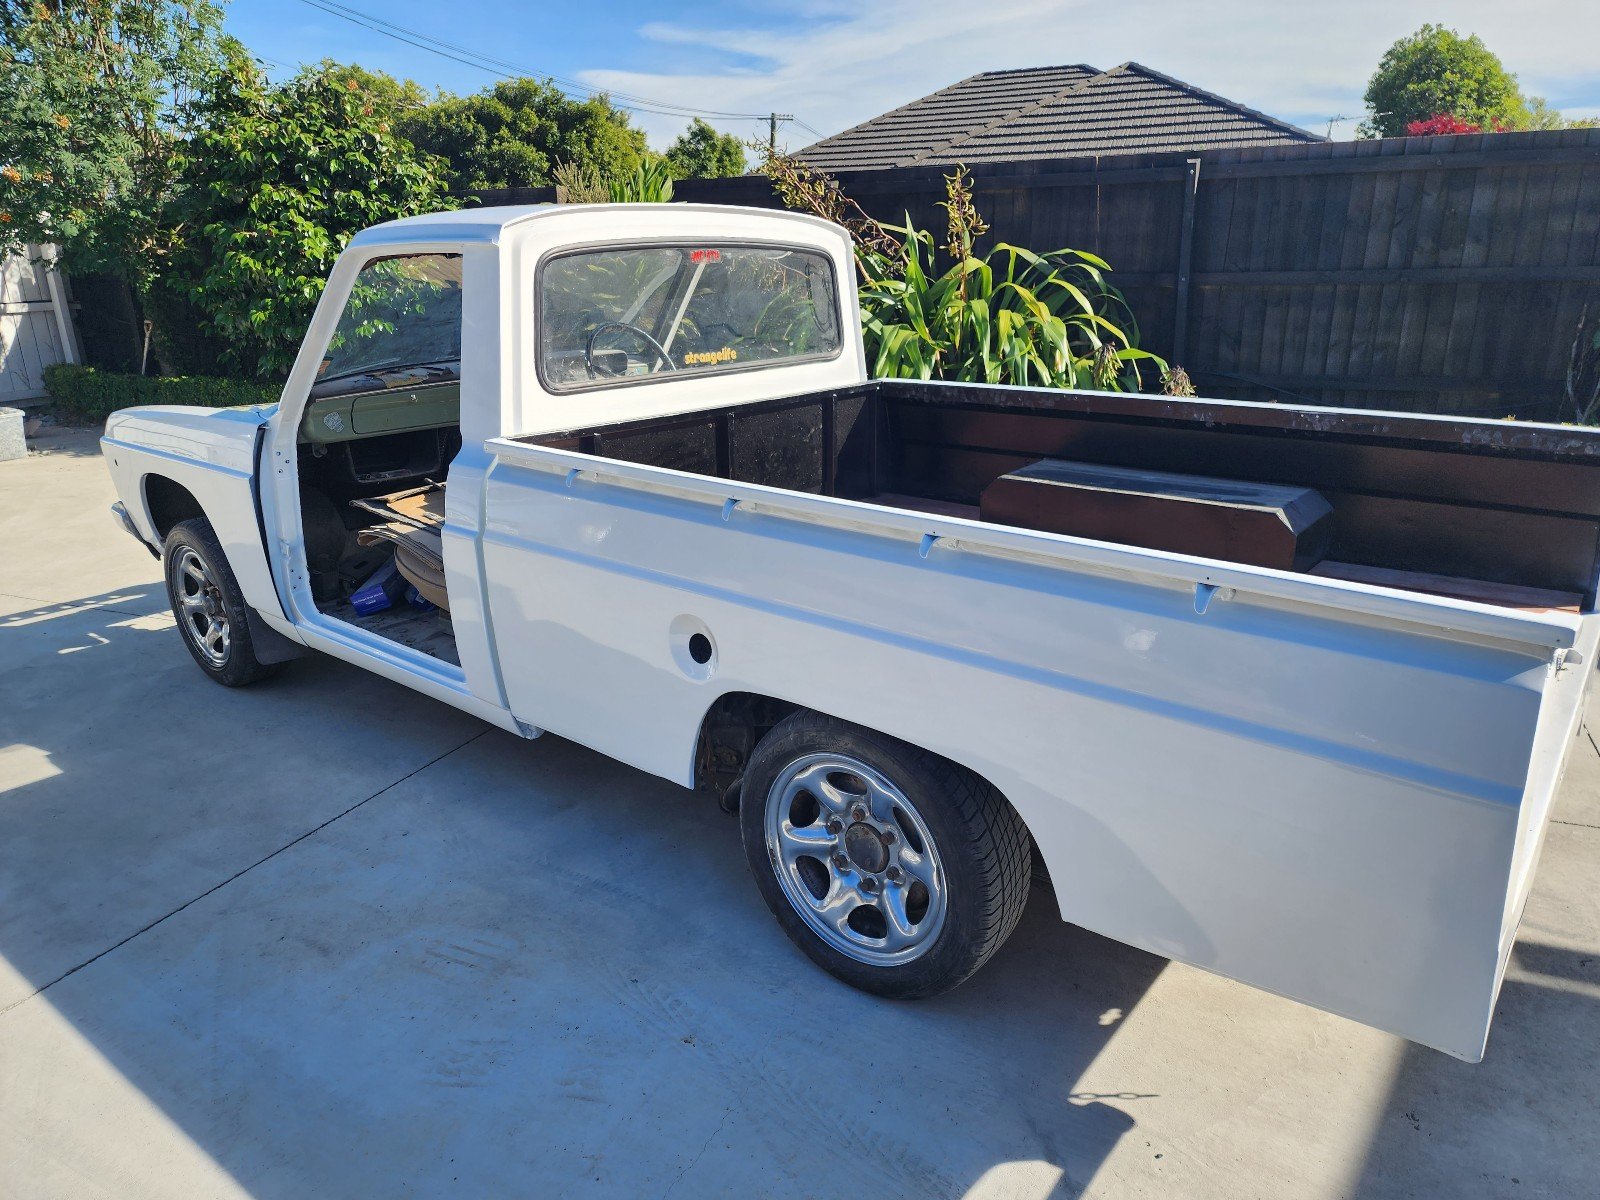
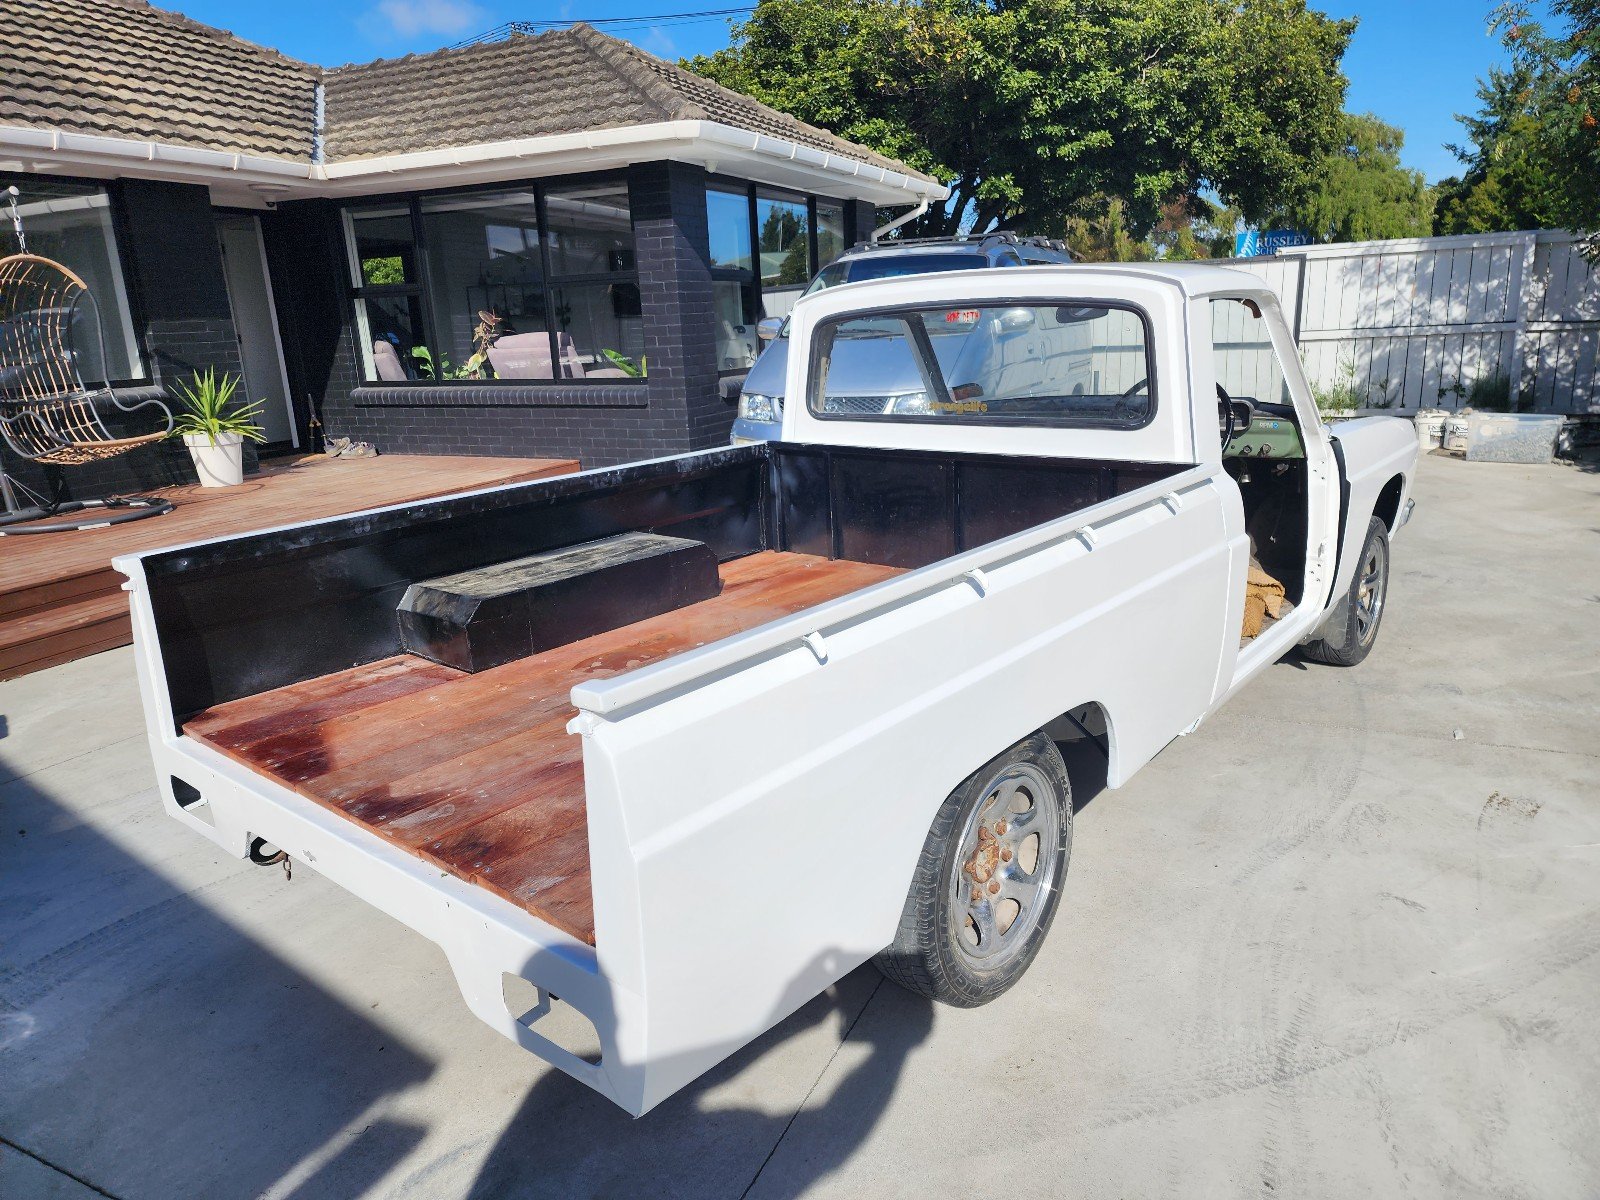
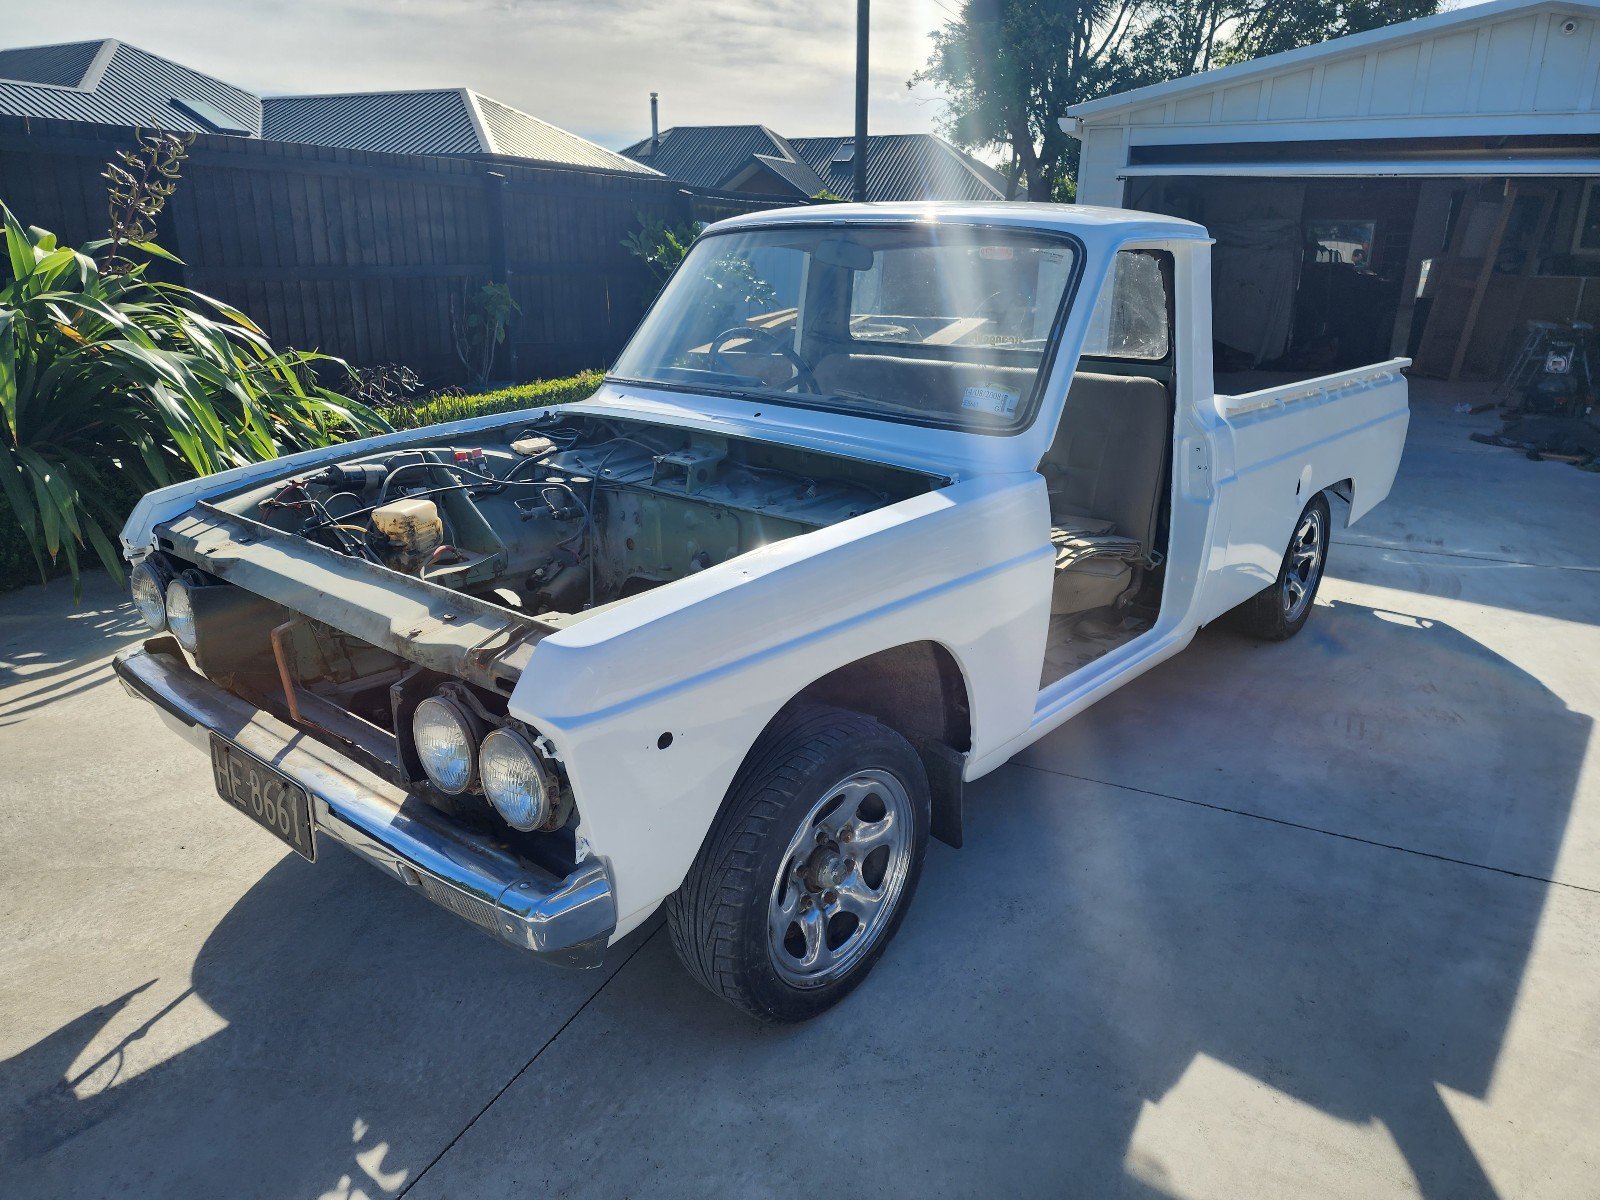
A few people have asked why theres no thread for this vehicle. (Because the owner is so useless tbh) i showed some pictures on my phone to some people at Garlic nats. And one of them convinced me i should post them up. (Thanks @Sungai Sungai) The story begins quite some years ago when i bought a datsun 620 ute of @Mr.Mk1. He'd rescued it from scrap. He also found a pretty fucked wellside tray for it. (Which is also rockinghorse shit 8n terms of rarity) it would seem i only have one picture of that truck. It needed plenty of work, but the rego was on hold, and it was (mostly) complete. When josh and i did the mission down to Alexandra to collect it, he showed me another 620 ute. It belonged to the landlord from whom his brother rented his business premesis from. Daily driven, and a real sweet honey. Because Alexandra is as dry as fuck with no foreplay, it was completely rust free too. (For what its worth, 620 are without a doubt the most rust prone vehicles on planet earth) Some time later, i learned that the elderly gentleman who owned that truck stacked it. And some time later it popped up as wrecking in Christchurch. Hoping to get some parts, i shot around there. Where i met @Agent75. The truck was still pretty rust feee. But unfortunately Shane had cut the radiator support panel off to make removing the engine easier. The inner gaurds were a little bit puckered, but it could have been straightened out. A deal was struck, and i dragged it home. Another mate had another 620 he wanted ro move on. ( @I'm new here) it had been completely dismantled. And had some prettt cunty rust. So i bought that, and had a coachbuilder mate graft the inner gaurds and rad support panel off that cab onto this one. Unfortunately i have no pictures of this. I also picked up a pair of front guards off another mate. As i didnt get the nasty, underpowered, leaky, J15 with the truck, i opted for an S14 SR20 that i bought off @mint16. With the gearbox attached, i had to make the centre of the rad support panel removeable. After id painted the engine bay, @fletch have me a hand to do the final engine installation. Because id slung the engine so low, and so far back, the sump had to be notched to clear the drag link. Seeing as this chassis is the later model/last iteration of the 620, it was fitted with ball joints, rather than king pins. This is a wicked bonus, because i learned that if the top ball joint is swapped over, that D21 navara hubs and stubs are a bolt in affair. No more gawdaful drum brakes. Best of all, a mate gave me a set for free. (Less calipers, which i then sourced of marketplace) because im not a total broken arse any more, i threw on a pair of new rotors too. Discussion,
1 point
-
The main problem I have with the process is they're expecting me to submit a design to get approved, but Im not an engineer (happy to fab things, but plan wasnt to do final welding myself). When I asked engineer, they told me to talk to certifier. Talked to certifier and they want me to go to design approval. Ultimately I don't want to spend $150 to go for design approval for them to laugh me away and stop wasting their time. I have all the enthusiasm for learning, but seemingly no one who's interested to teach1 point
-
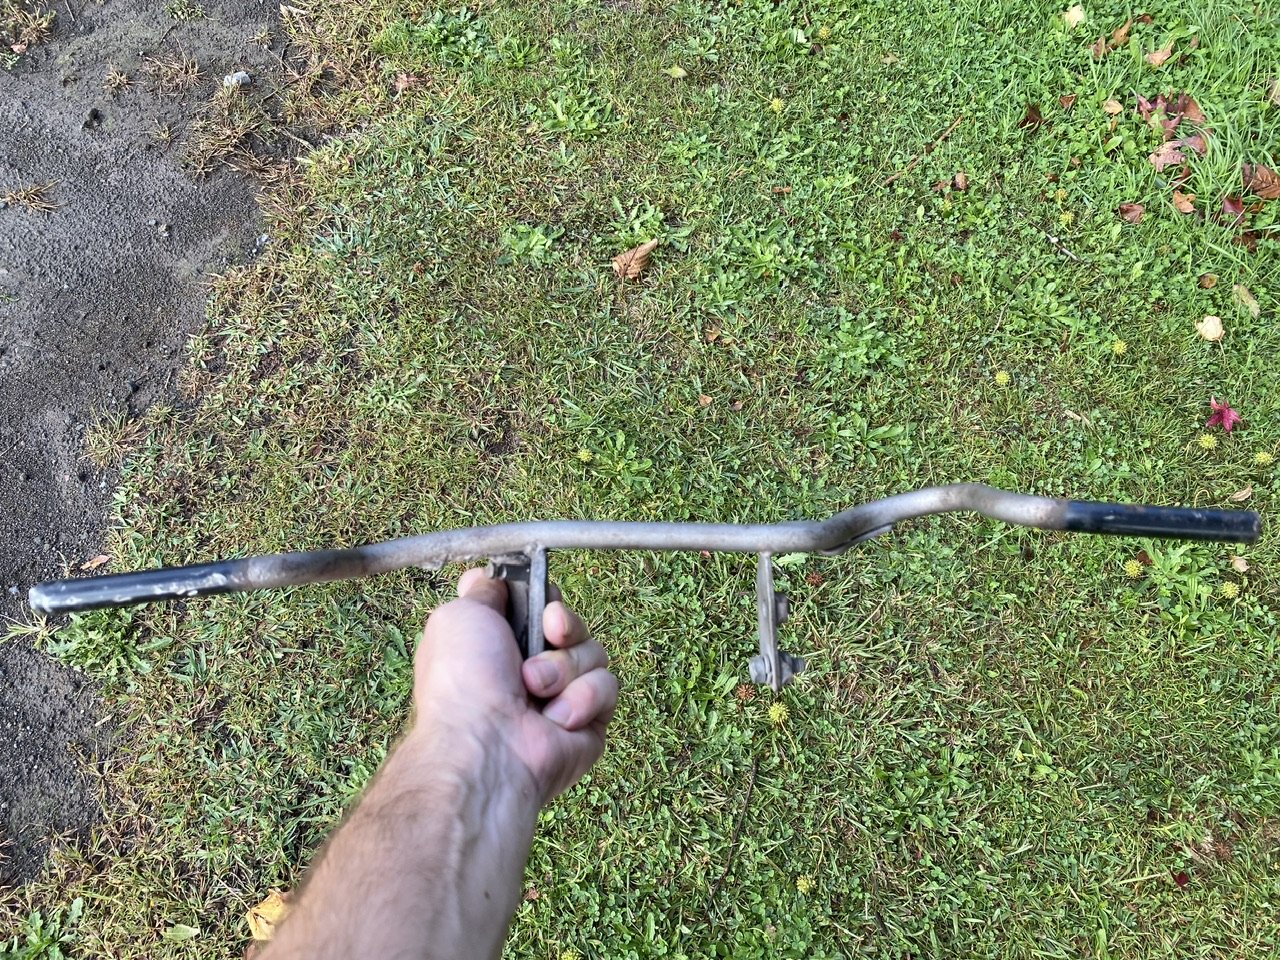
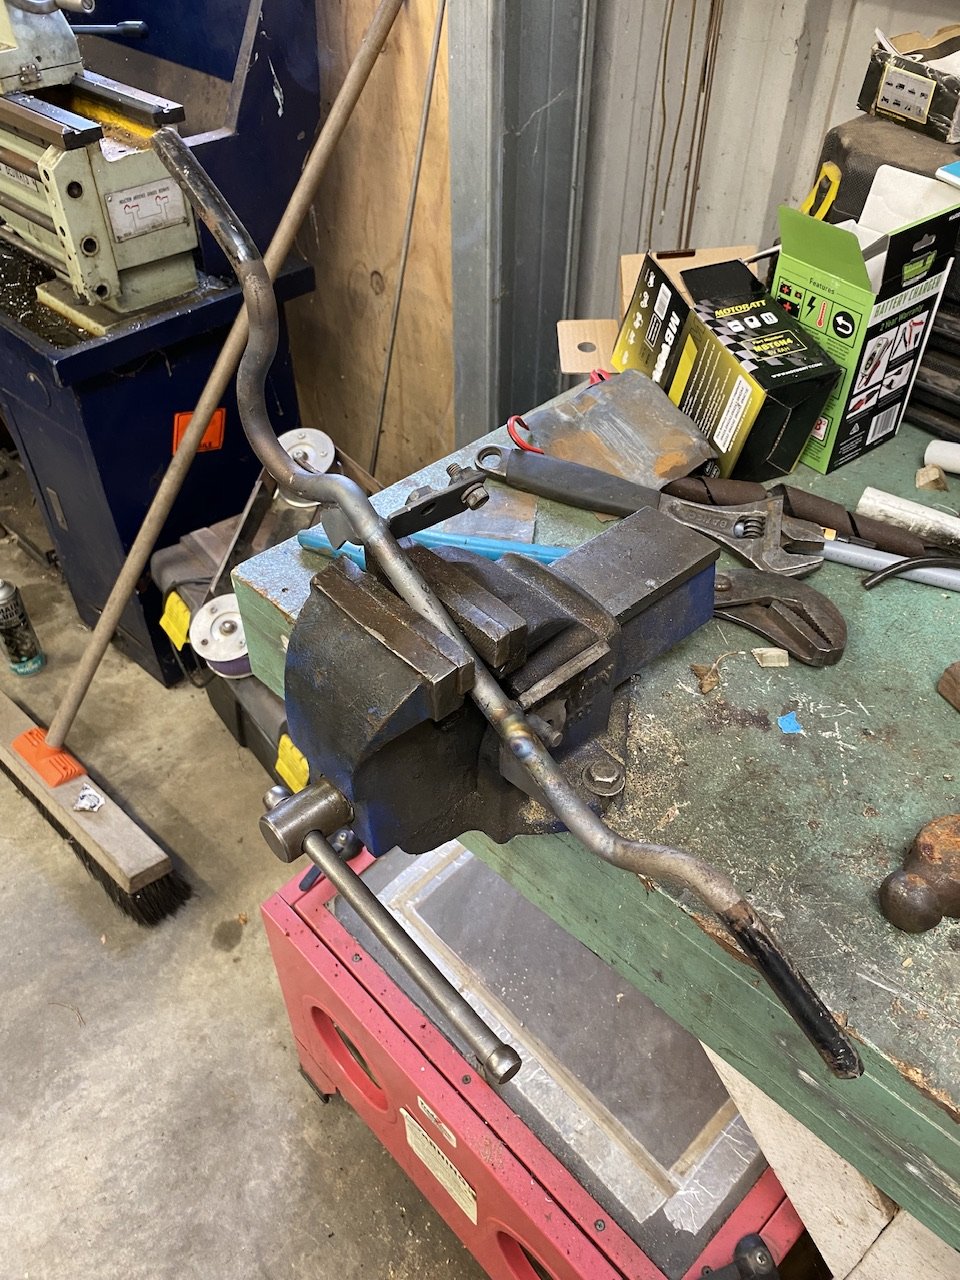
Oh yeah, and @governorsam gave me a Jaffle iron yonks ago, I finally put handles on it for holiday beach fire eating
1 point
-
Oh man I have some embarrassing shit to divulge. I talked to Palmside today about getting some jets and during the conversation I mentioned that it was running rich and that it was weird cos making the air corrector bigger would make them much bigger than most of the setups specs I had collected. The dude asked me what I had seen on the AFR so far and I said like 16 or so. He said that that is lean..... And of course I actually thought about that for more than two seconds which is longer than I ever had, and fucking of course that is lean... What a cunt I am, I obviously had some preconceived notions and hadn't actually thought about what that reading meant. Oh man I can never talk to Palmside again, the dude clearly and rightly thought I was a fucking idiot. So having gone through that self slapdown I will probably put some smaller air correction jets in, and maybe some bigger idle jets.1 point
-
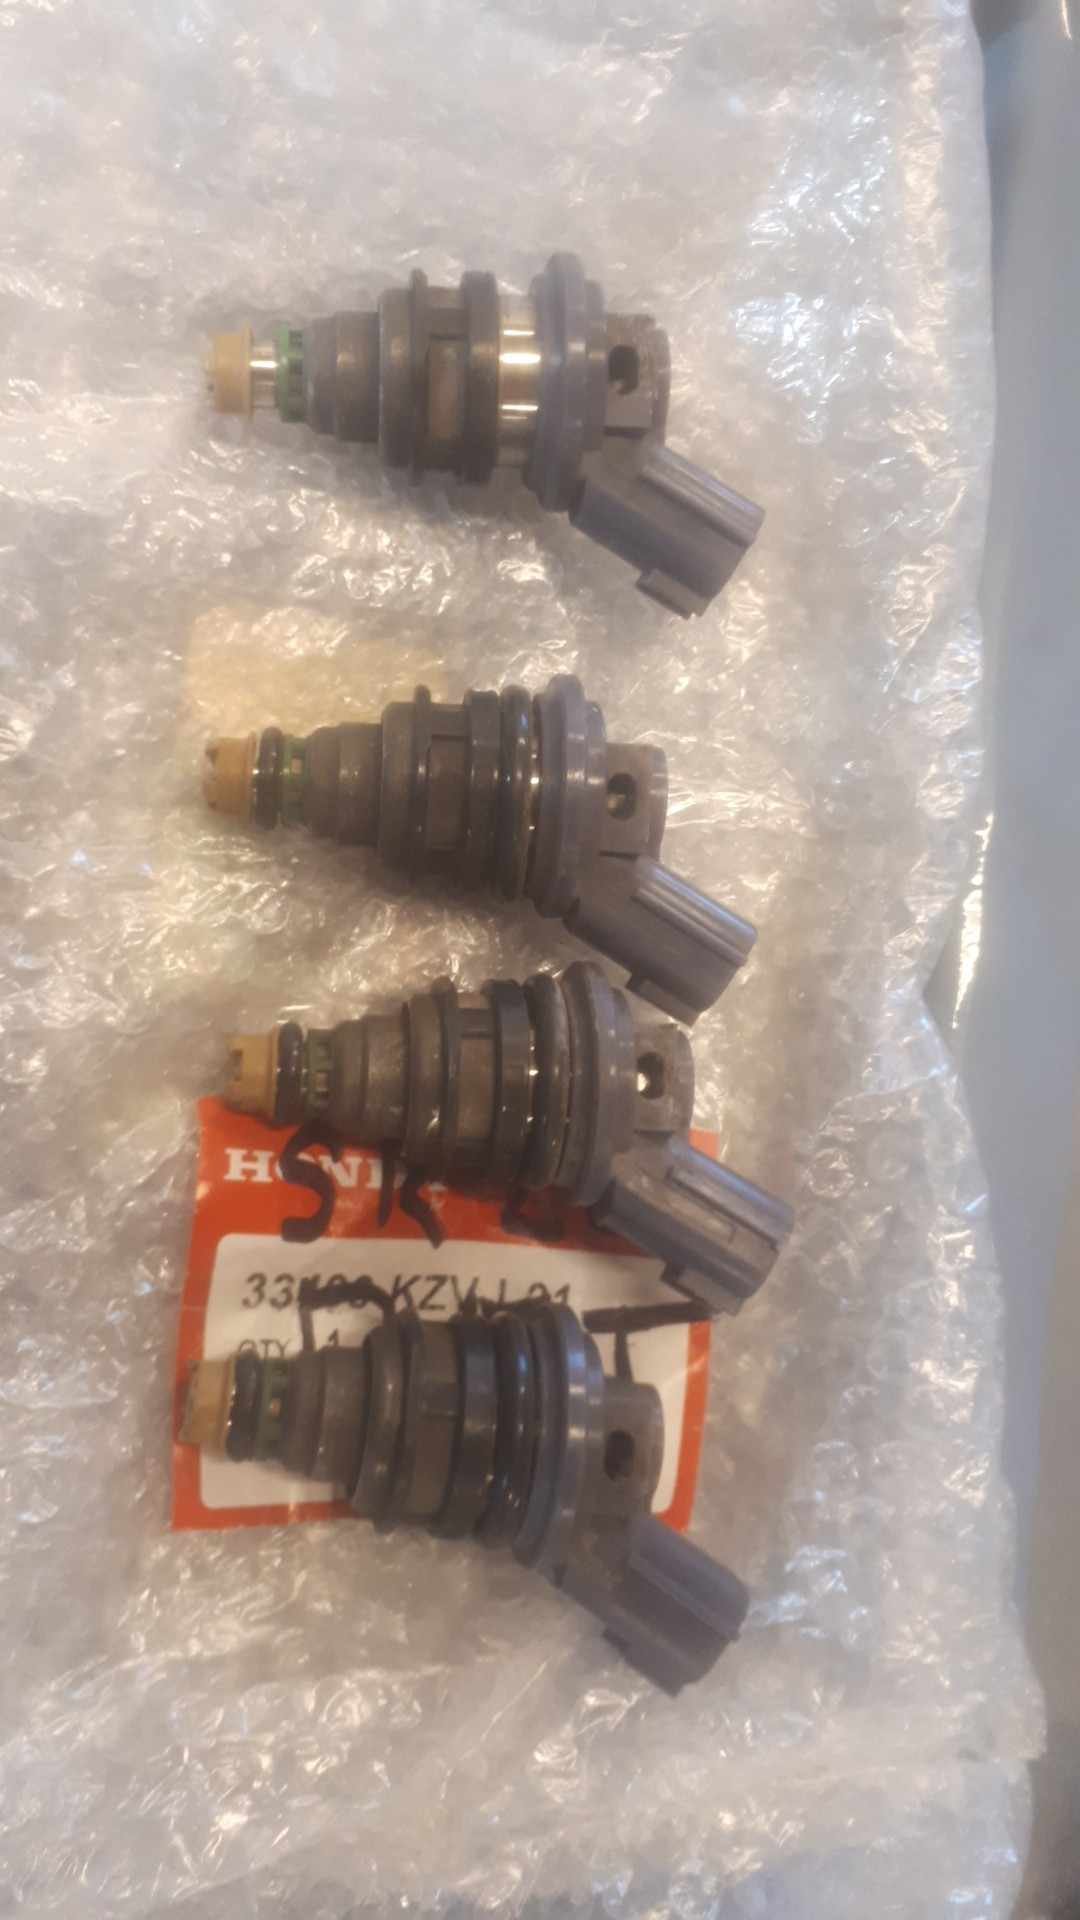
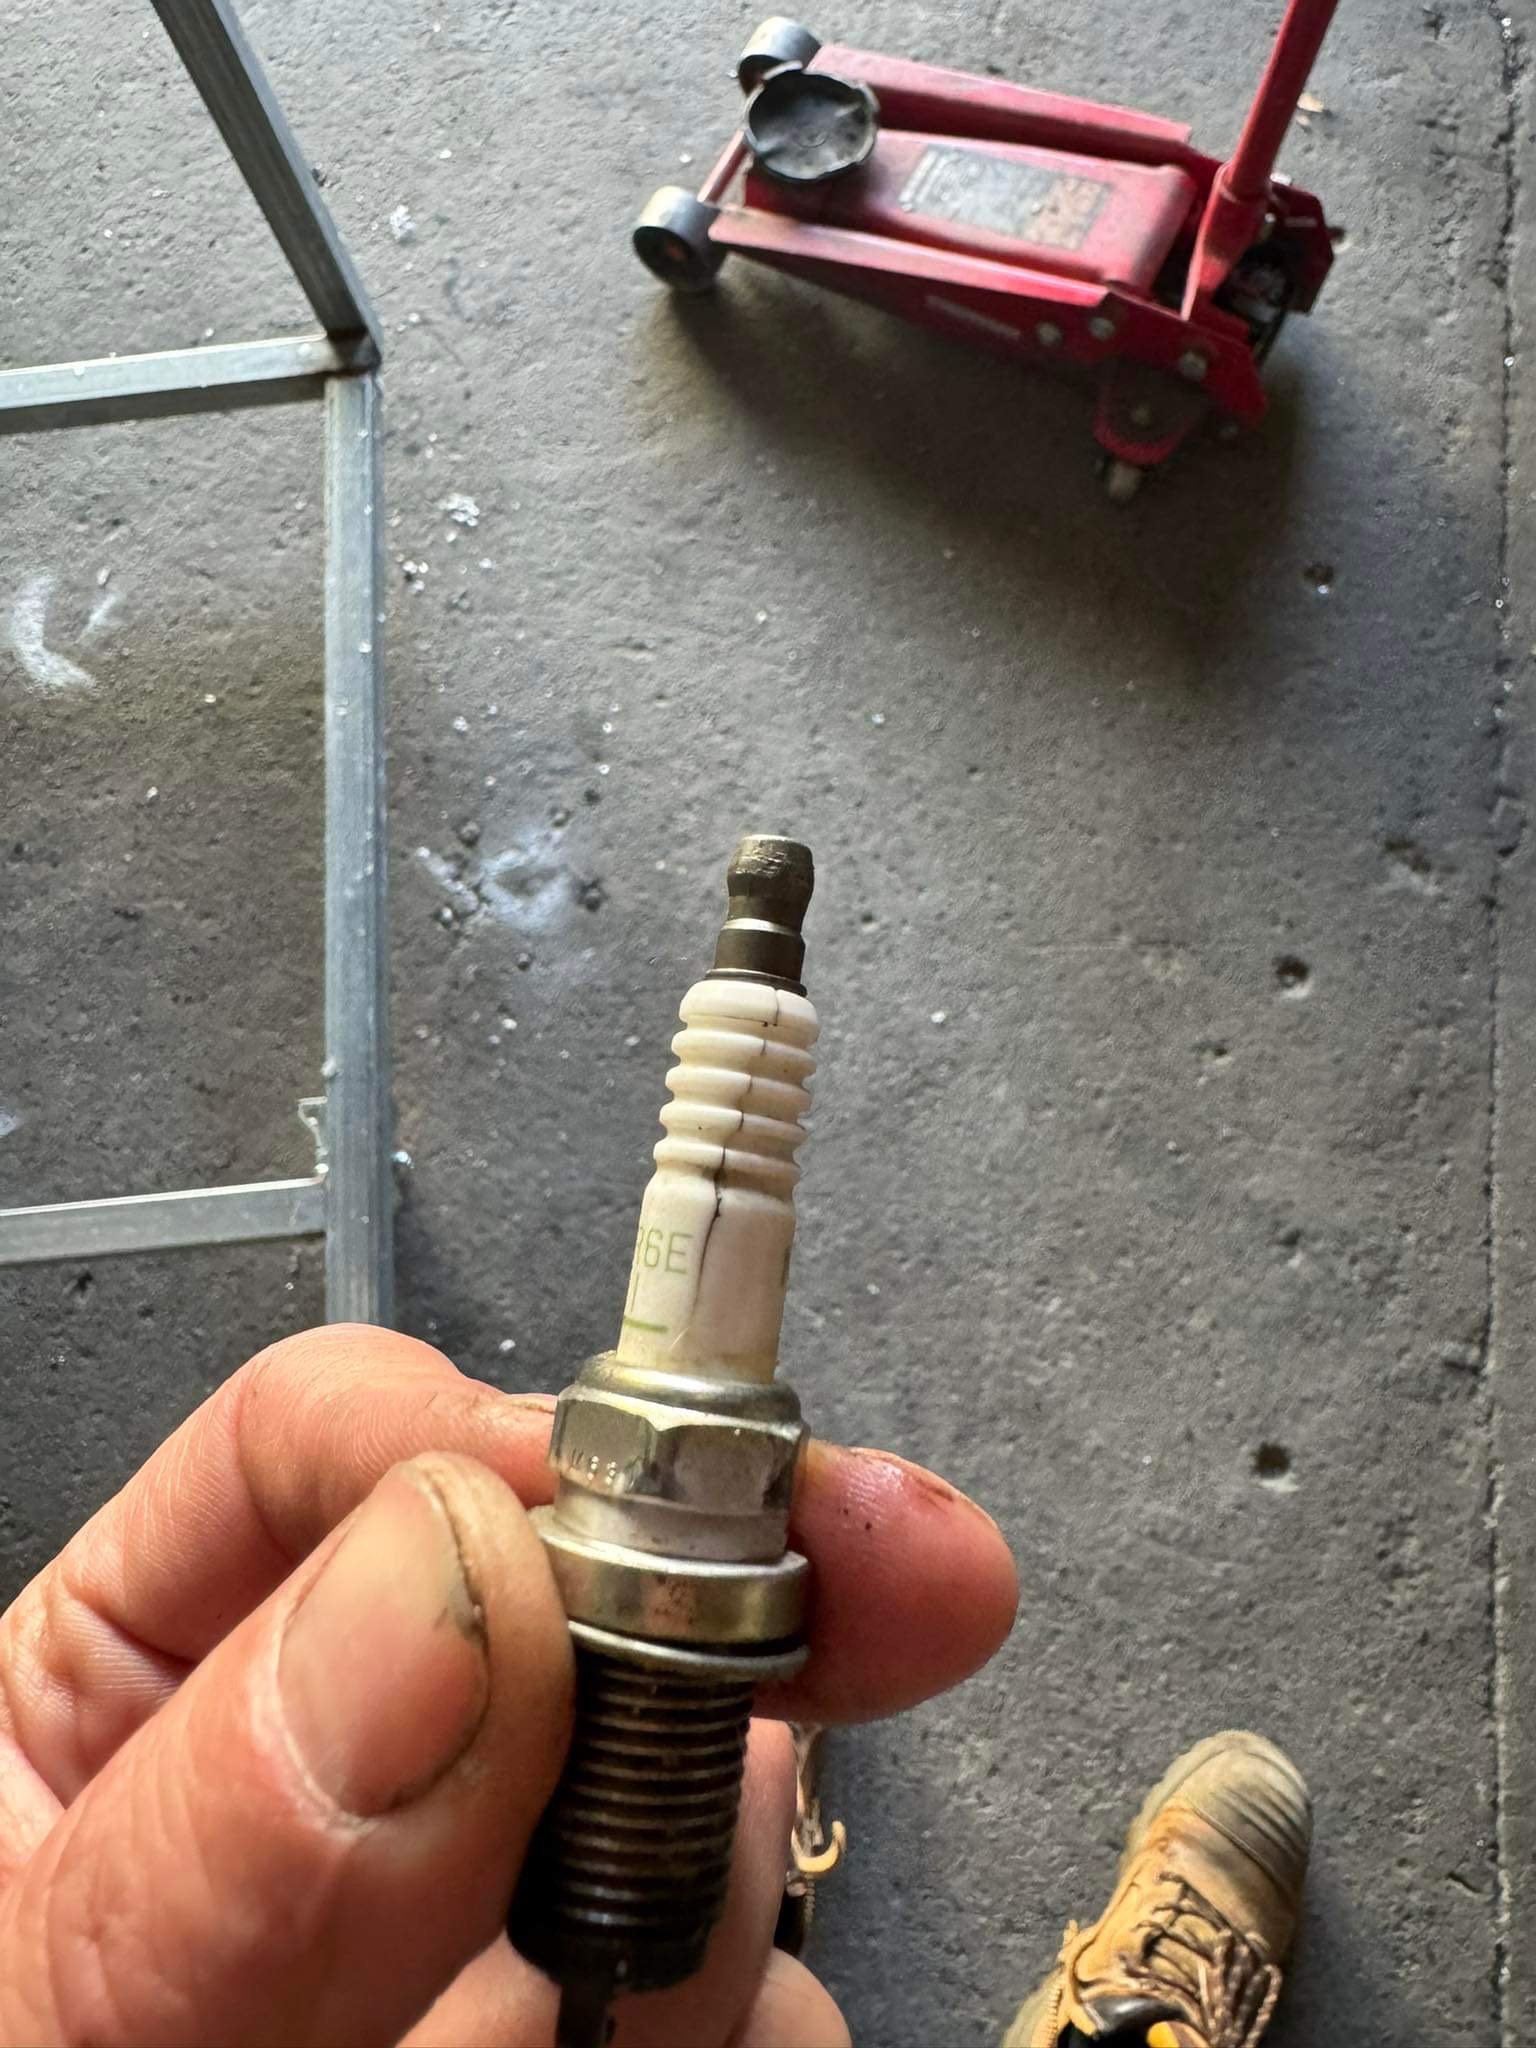
Found the misfire. This was after I took the injectors out and had them clean and flow tested, new filters and seals. $175 later in platinum plugs
1 point
-
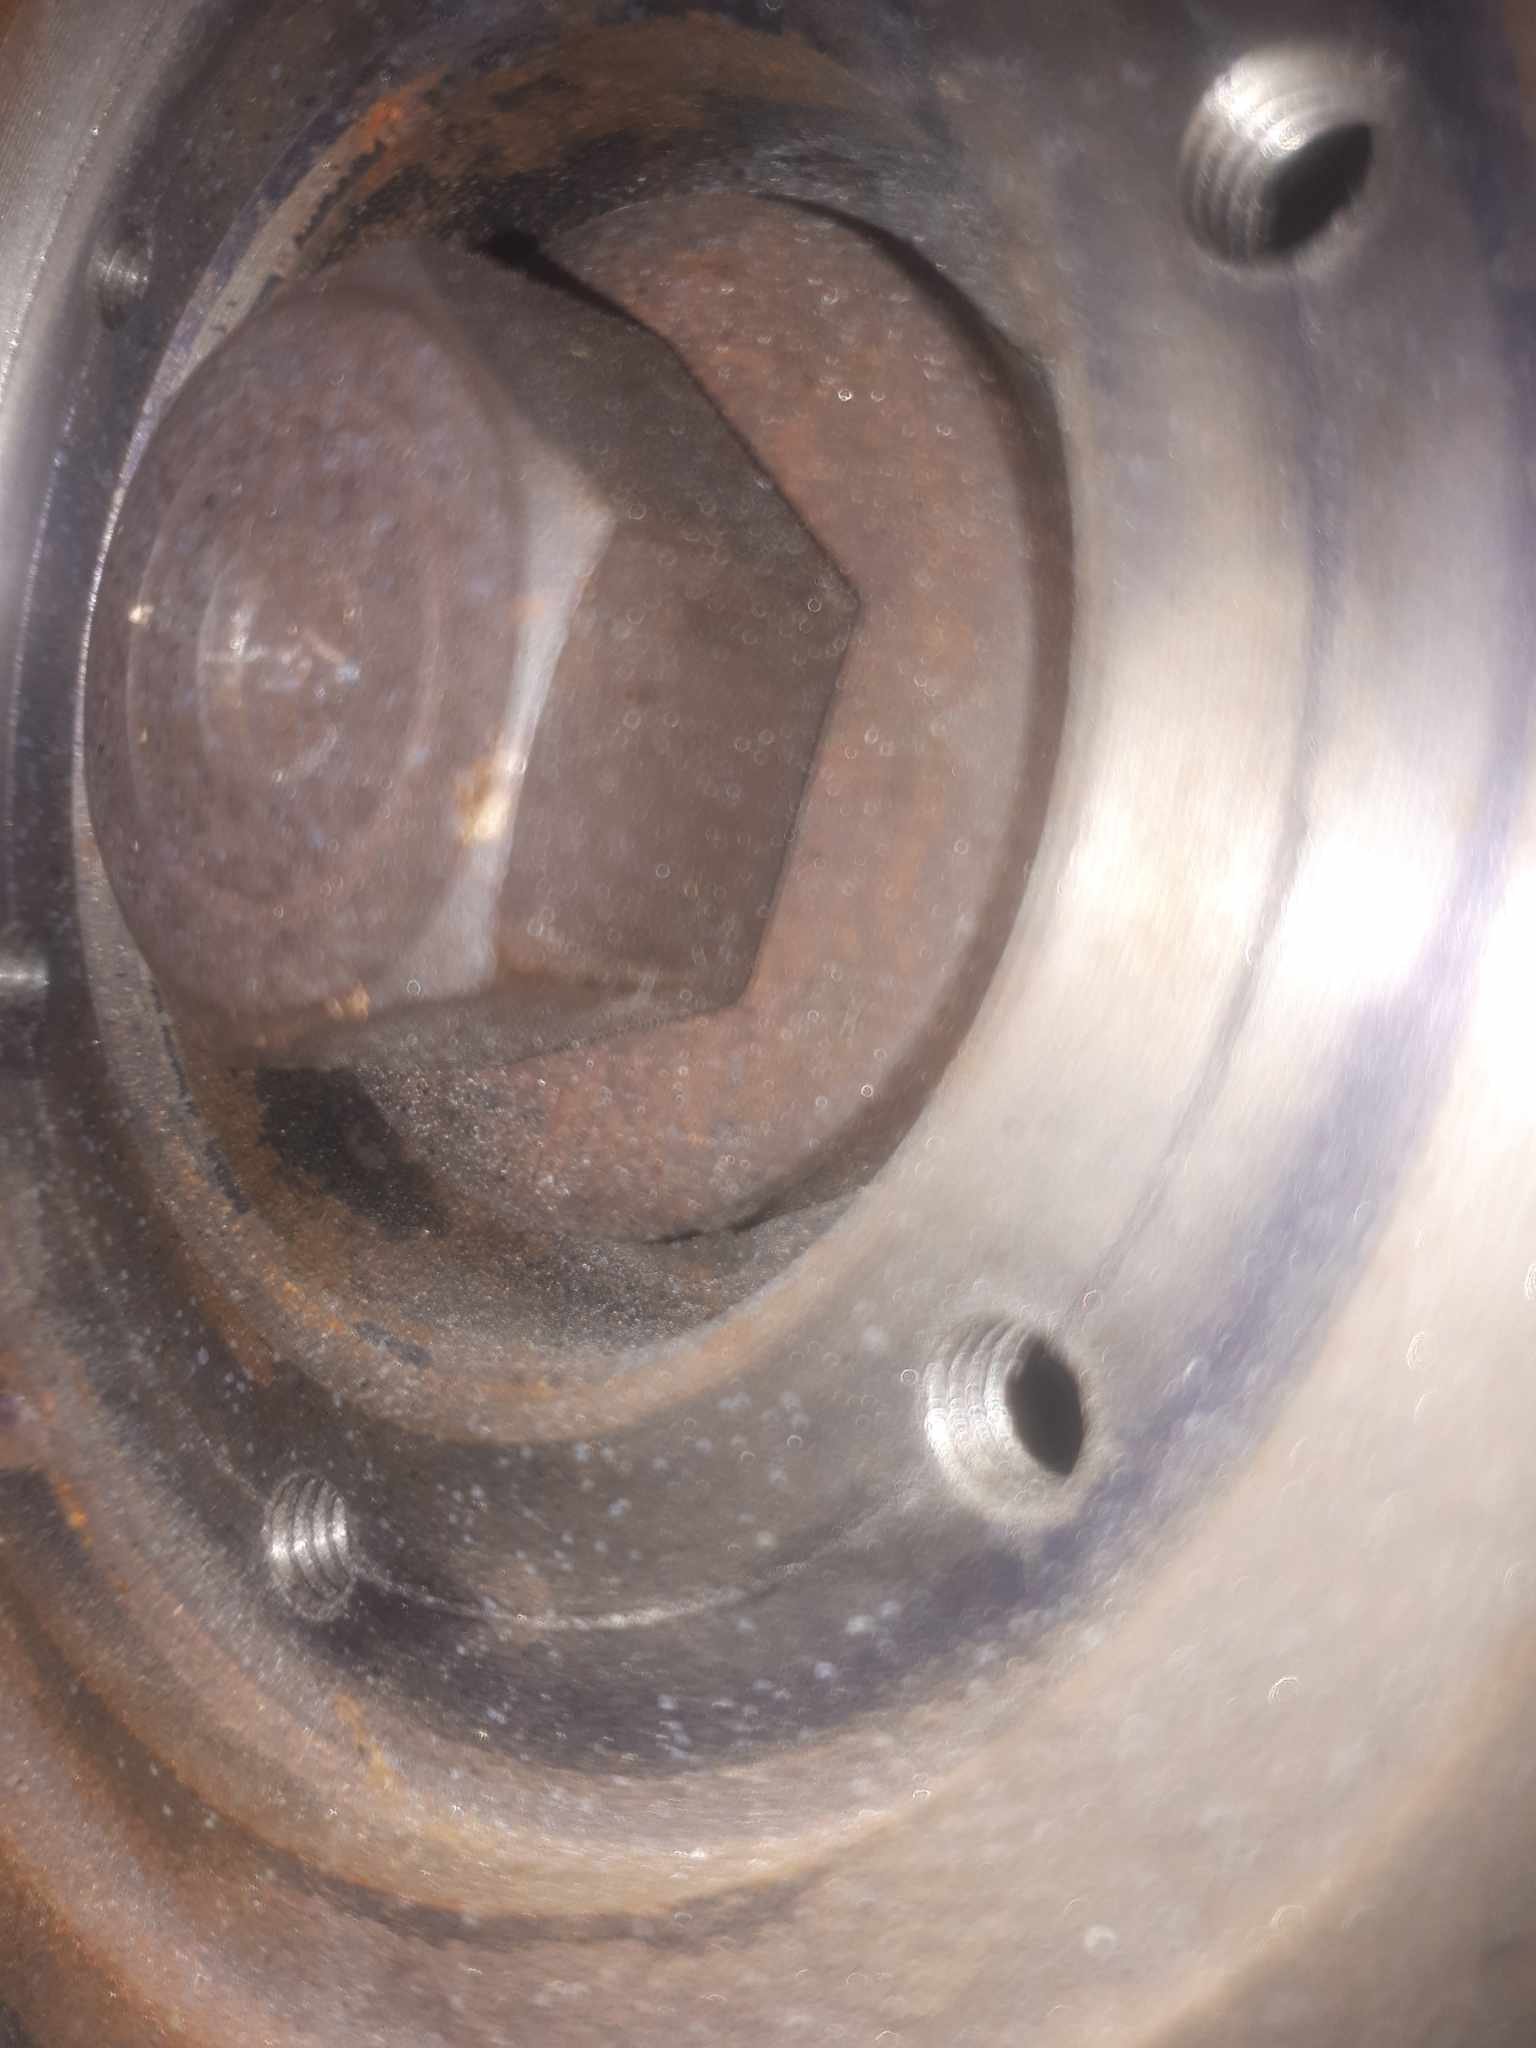
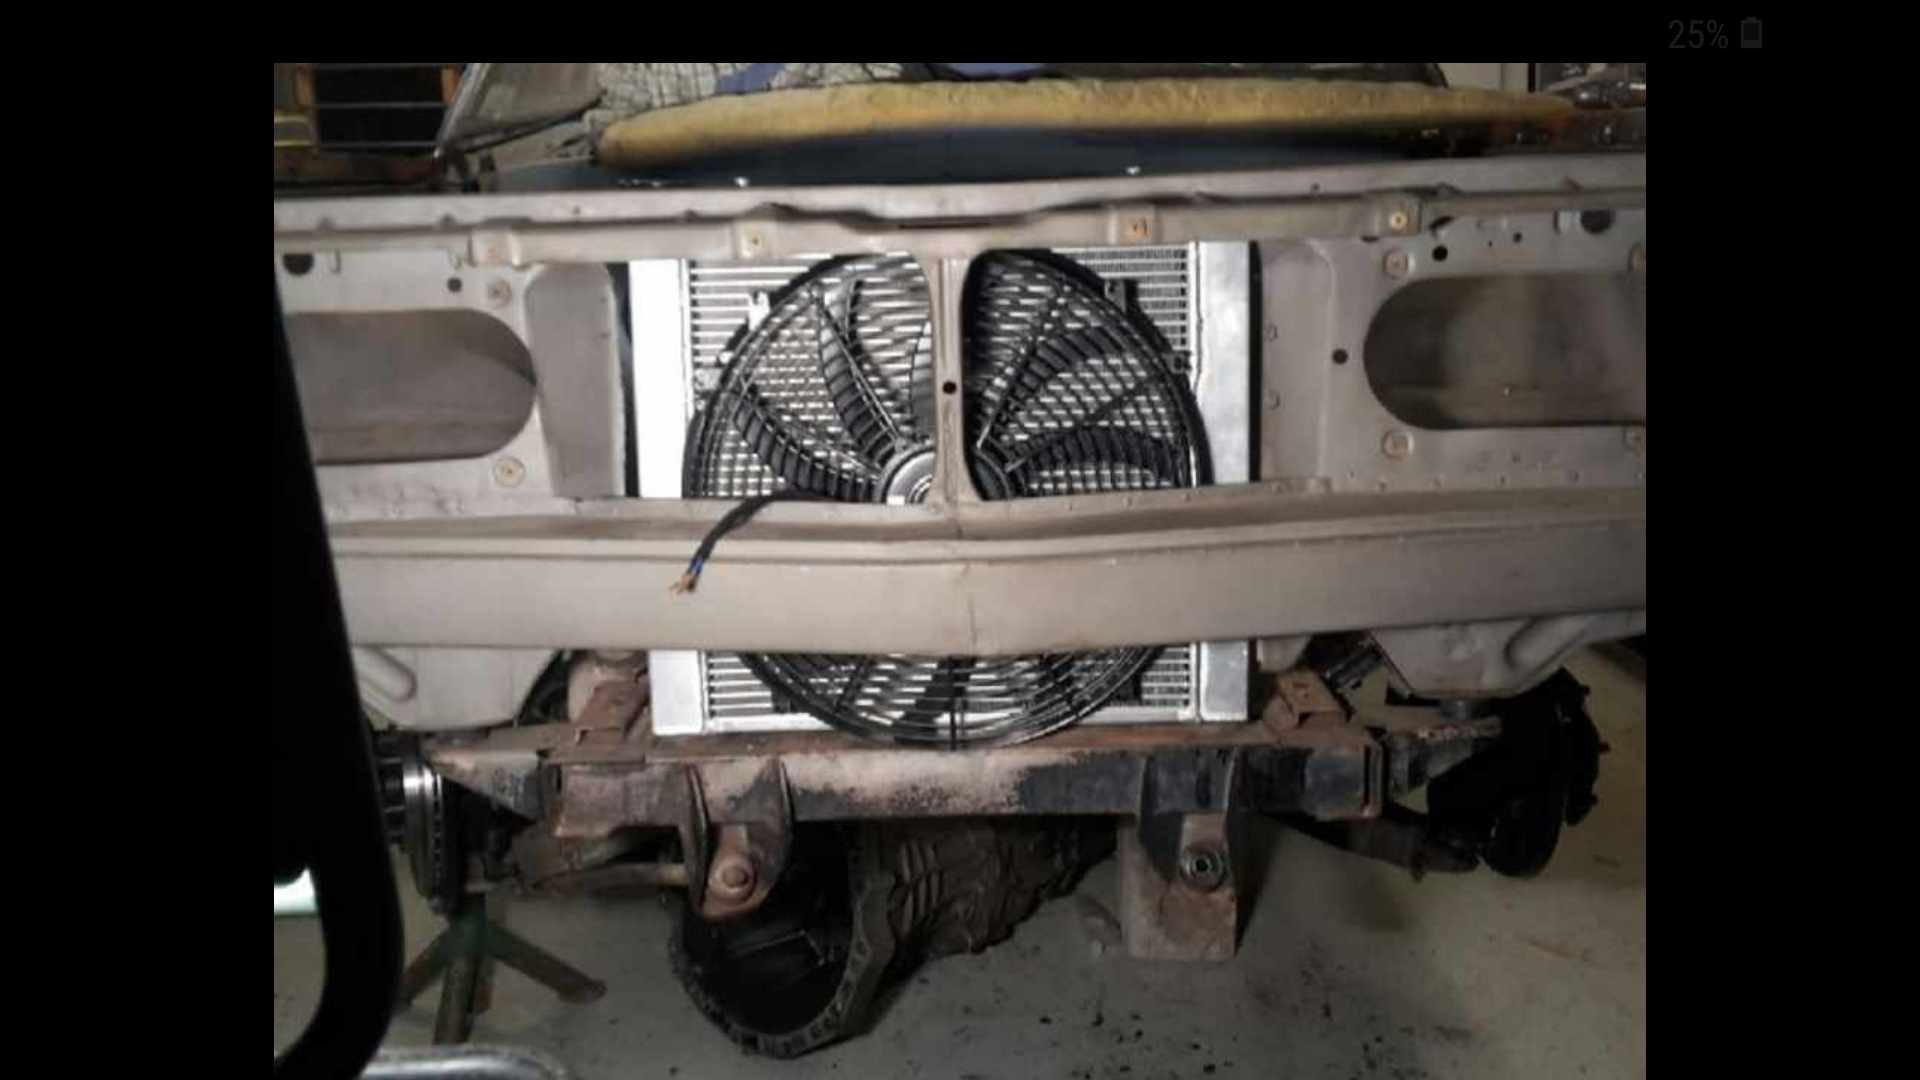
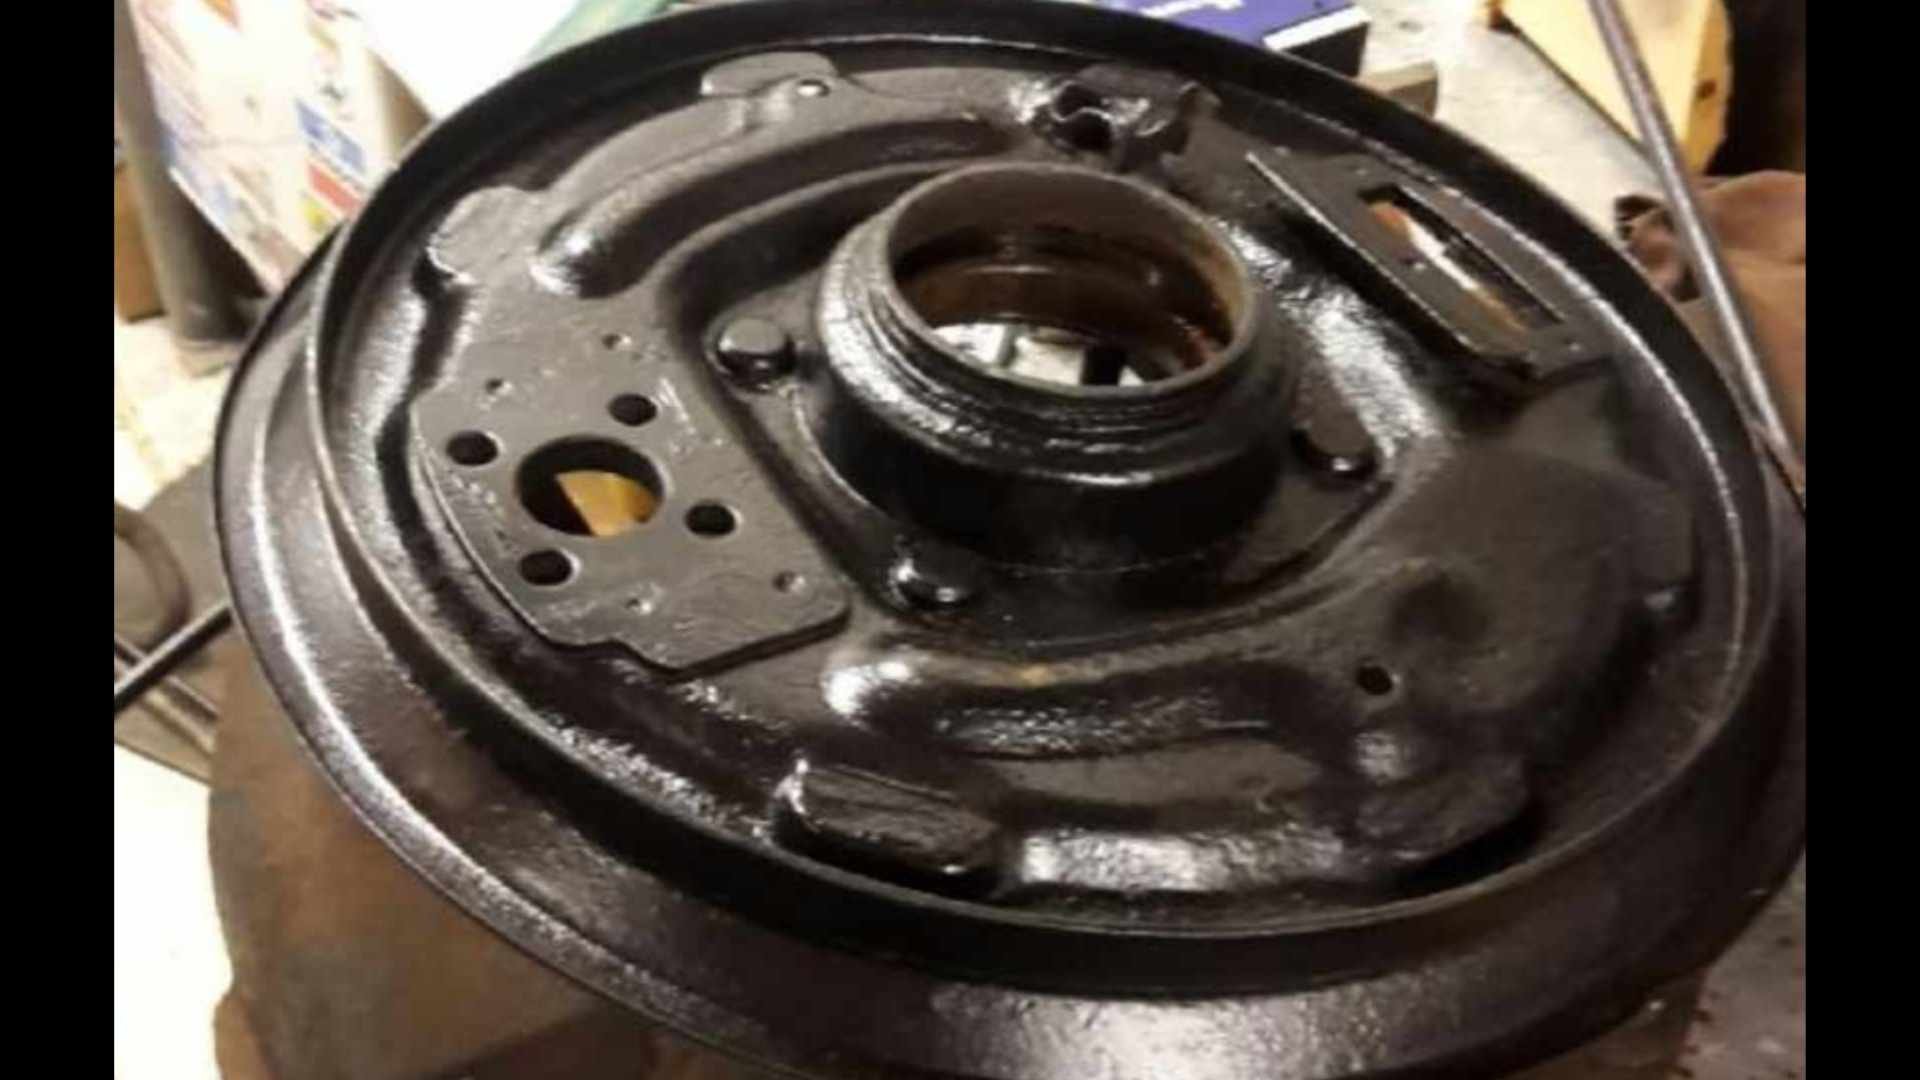
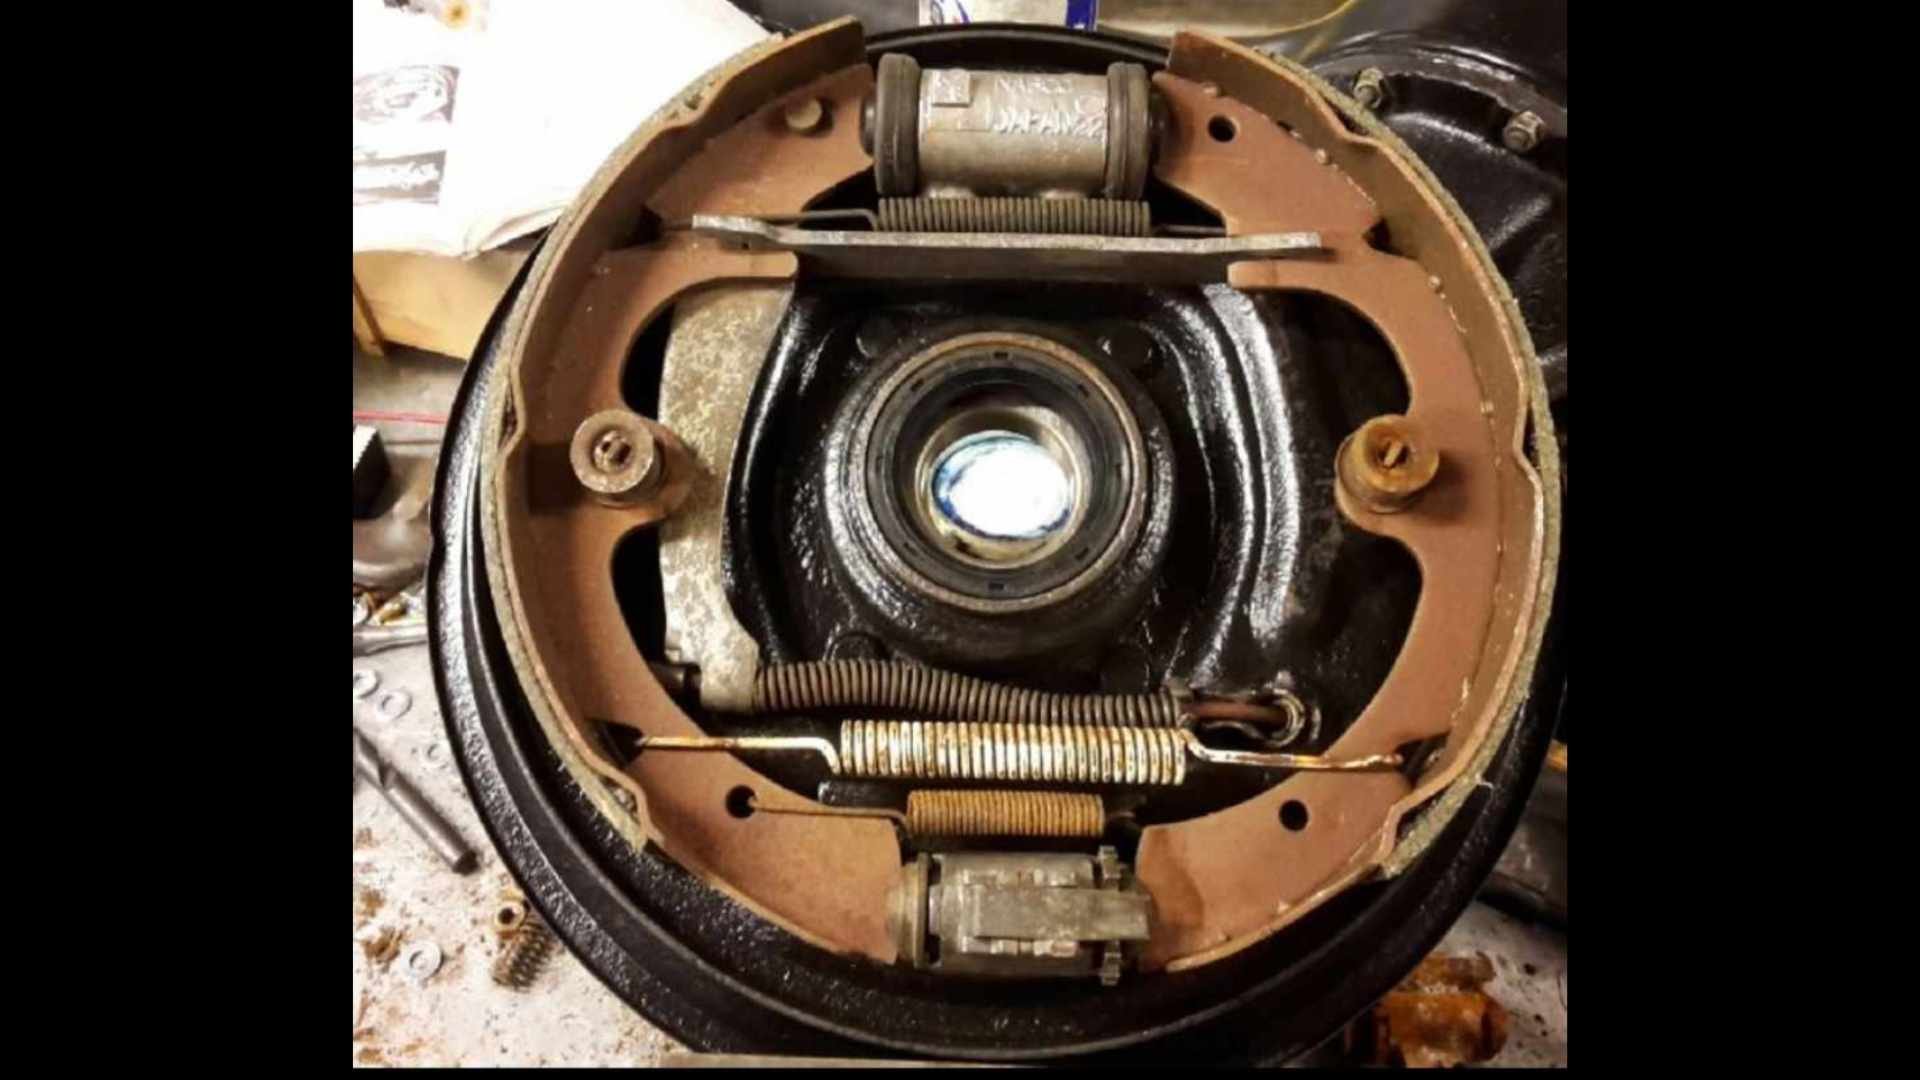
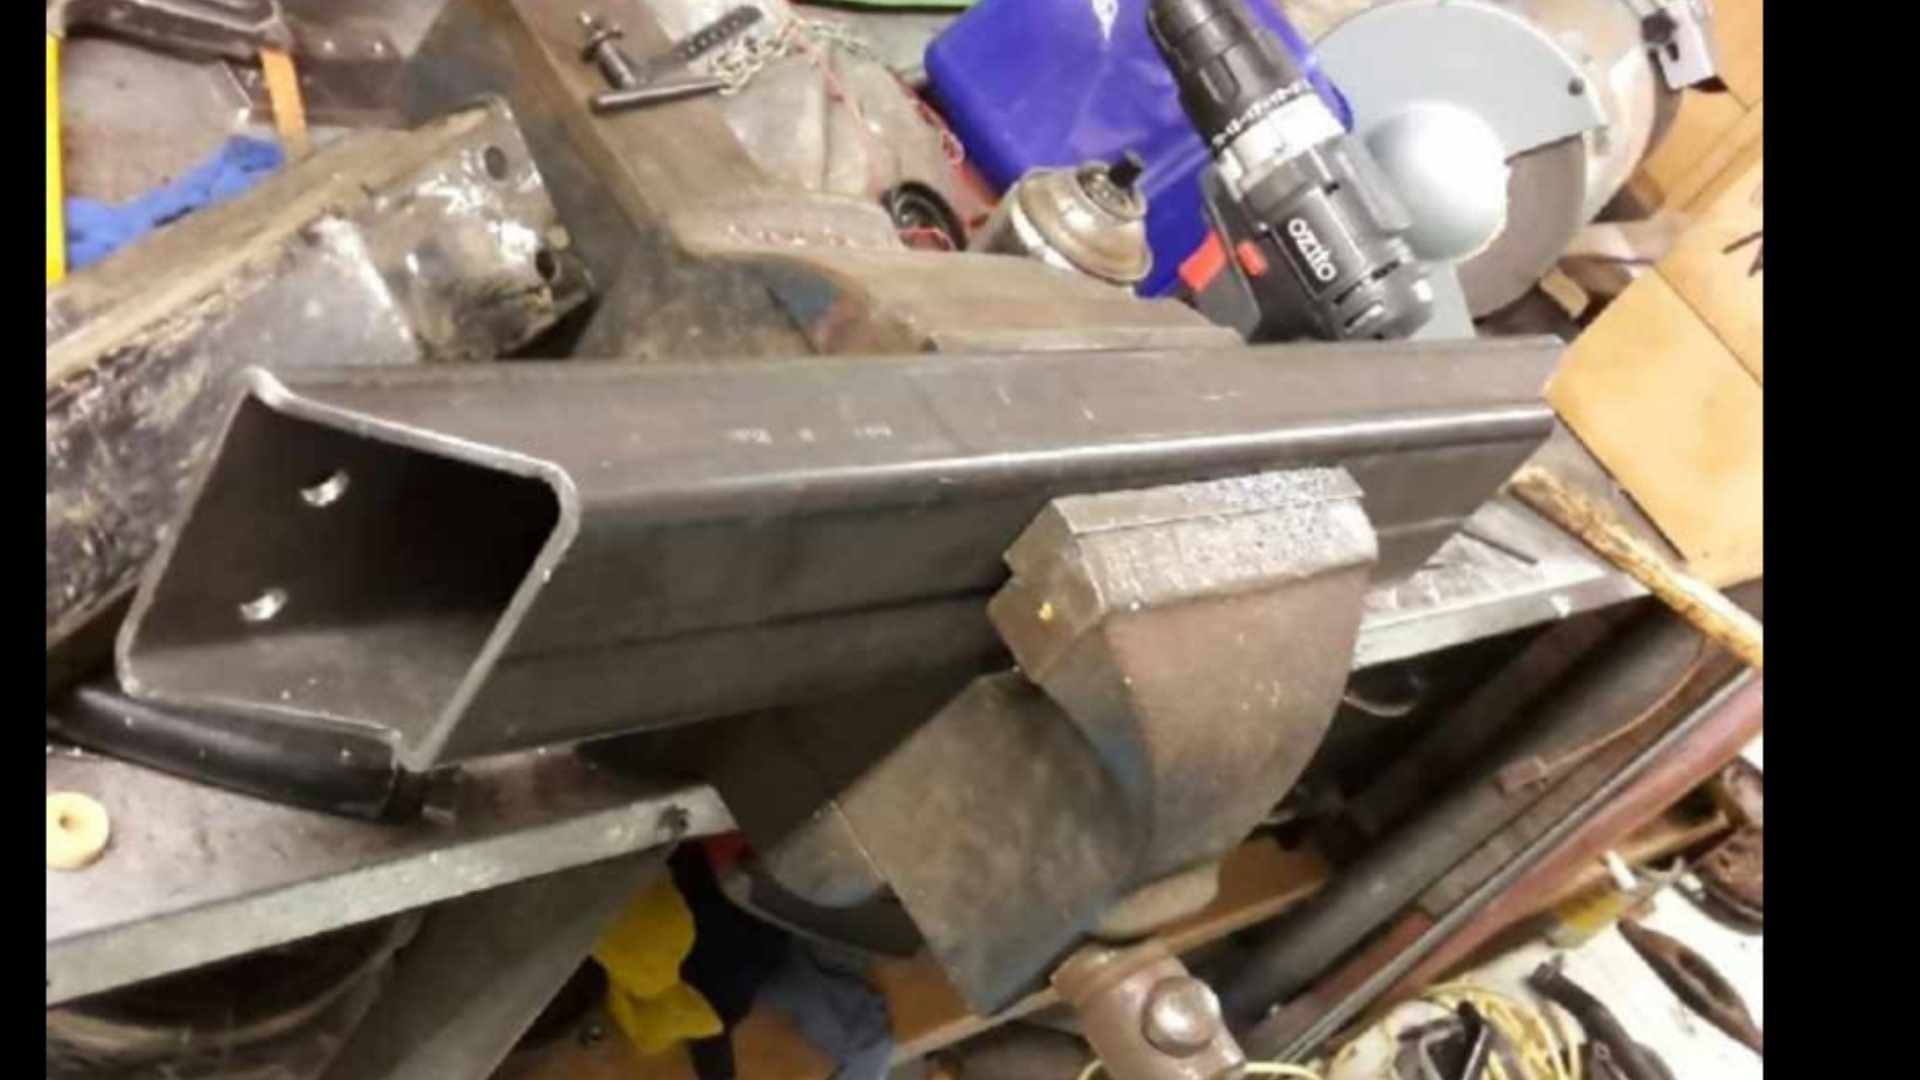
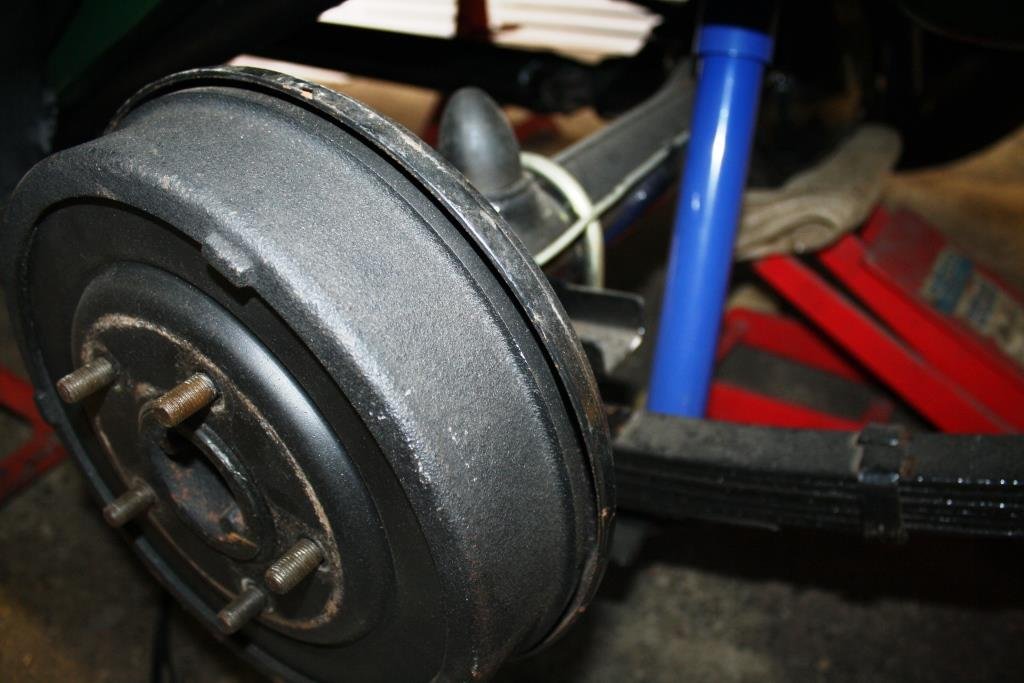
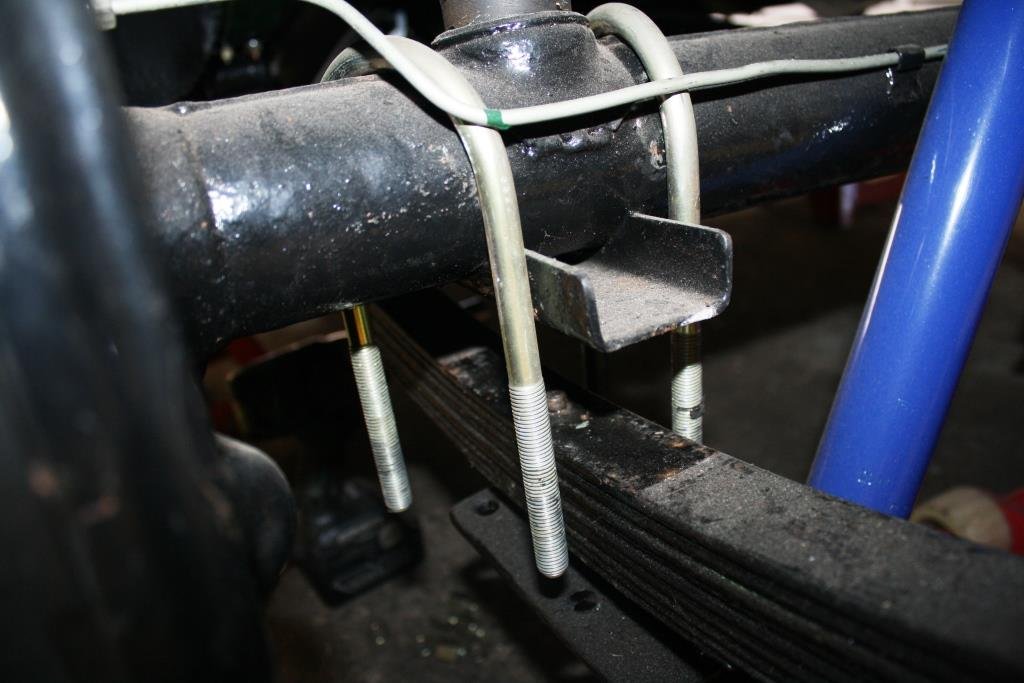
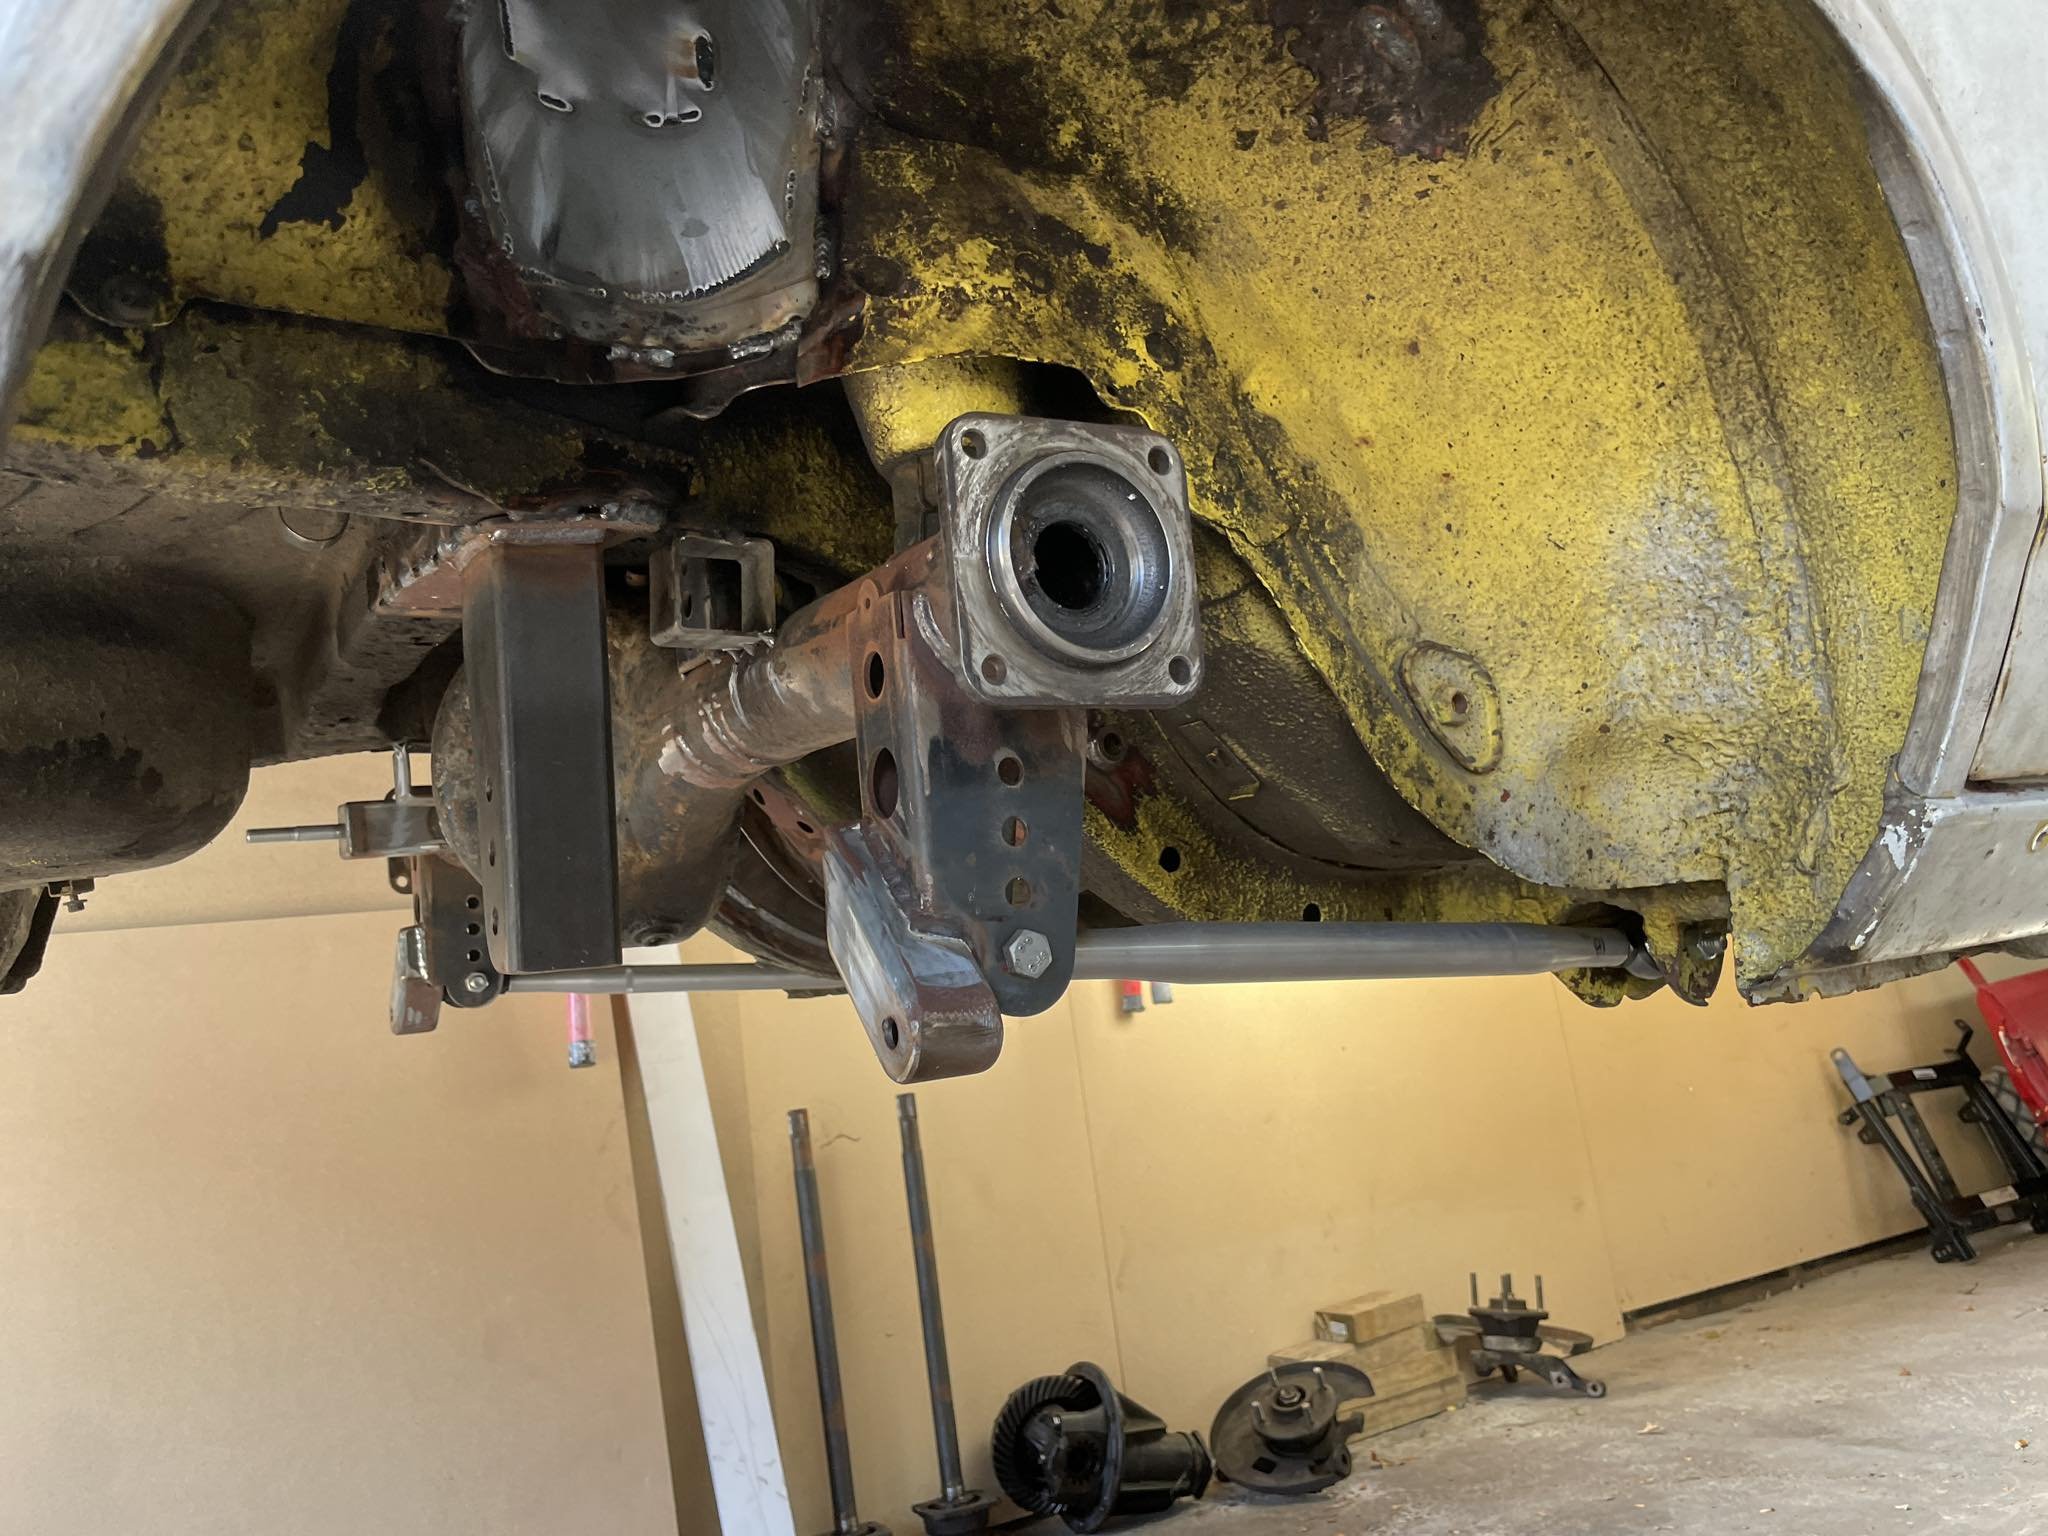
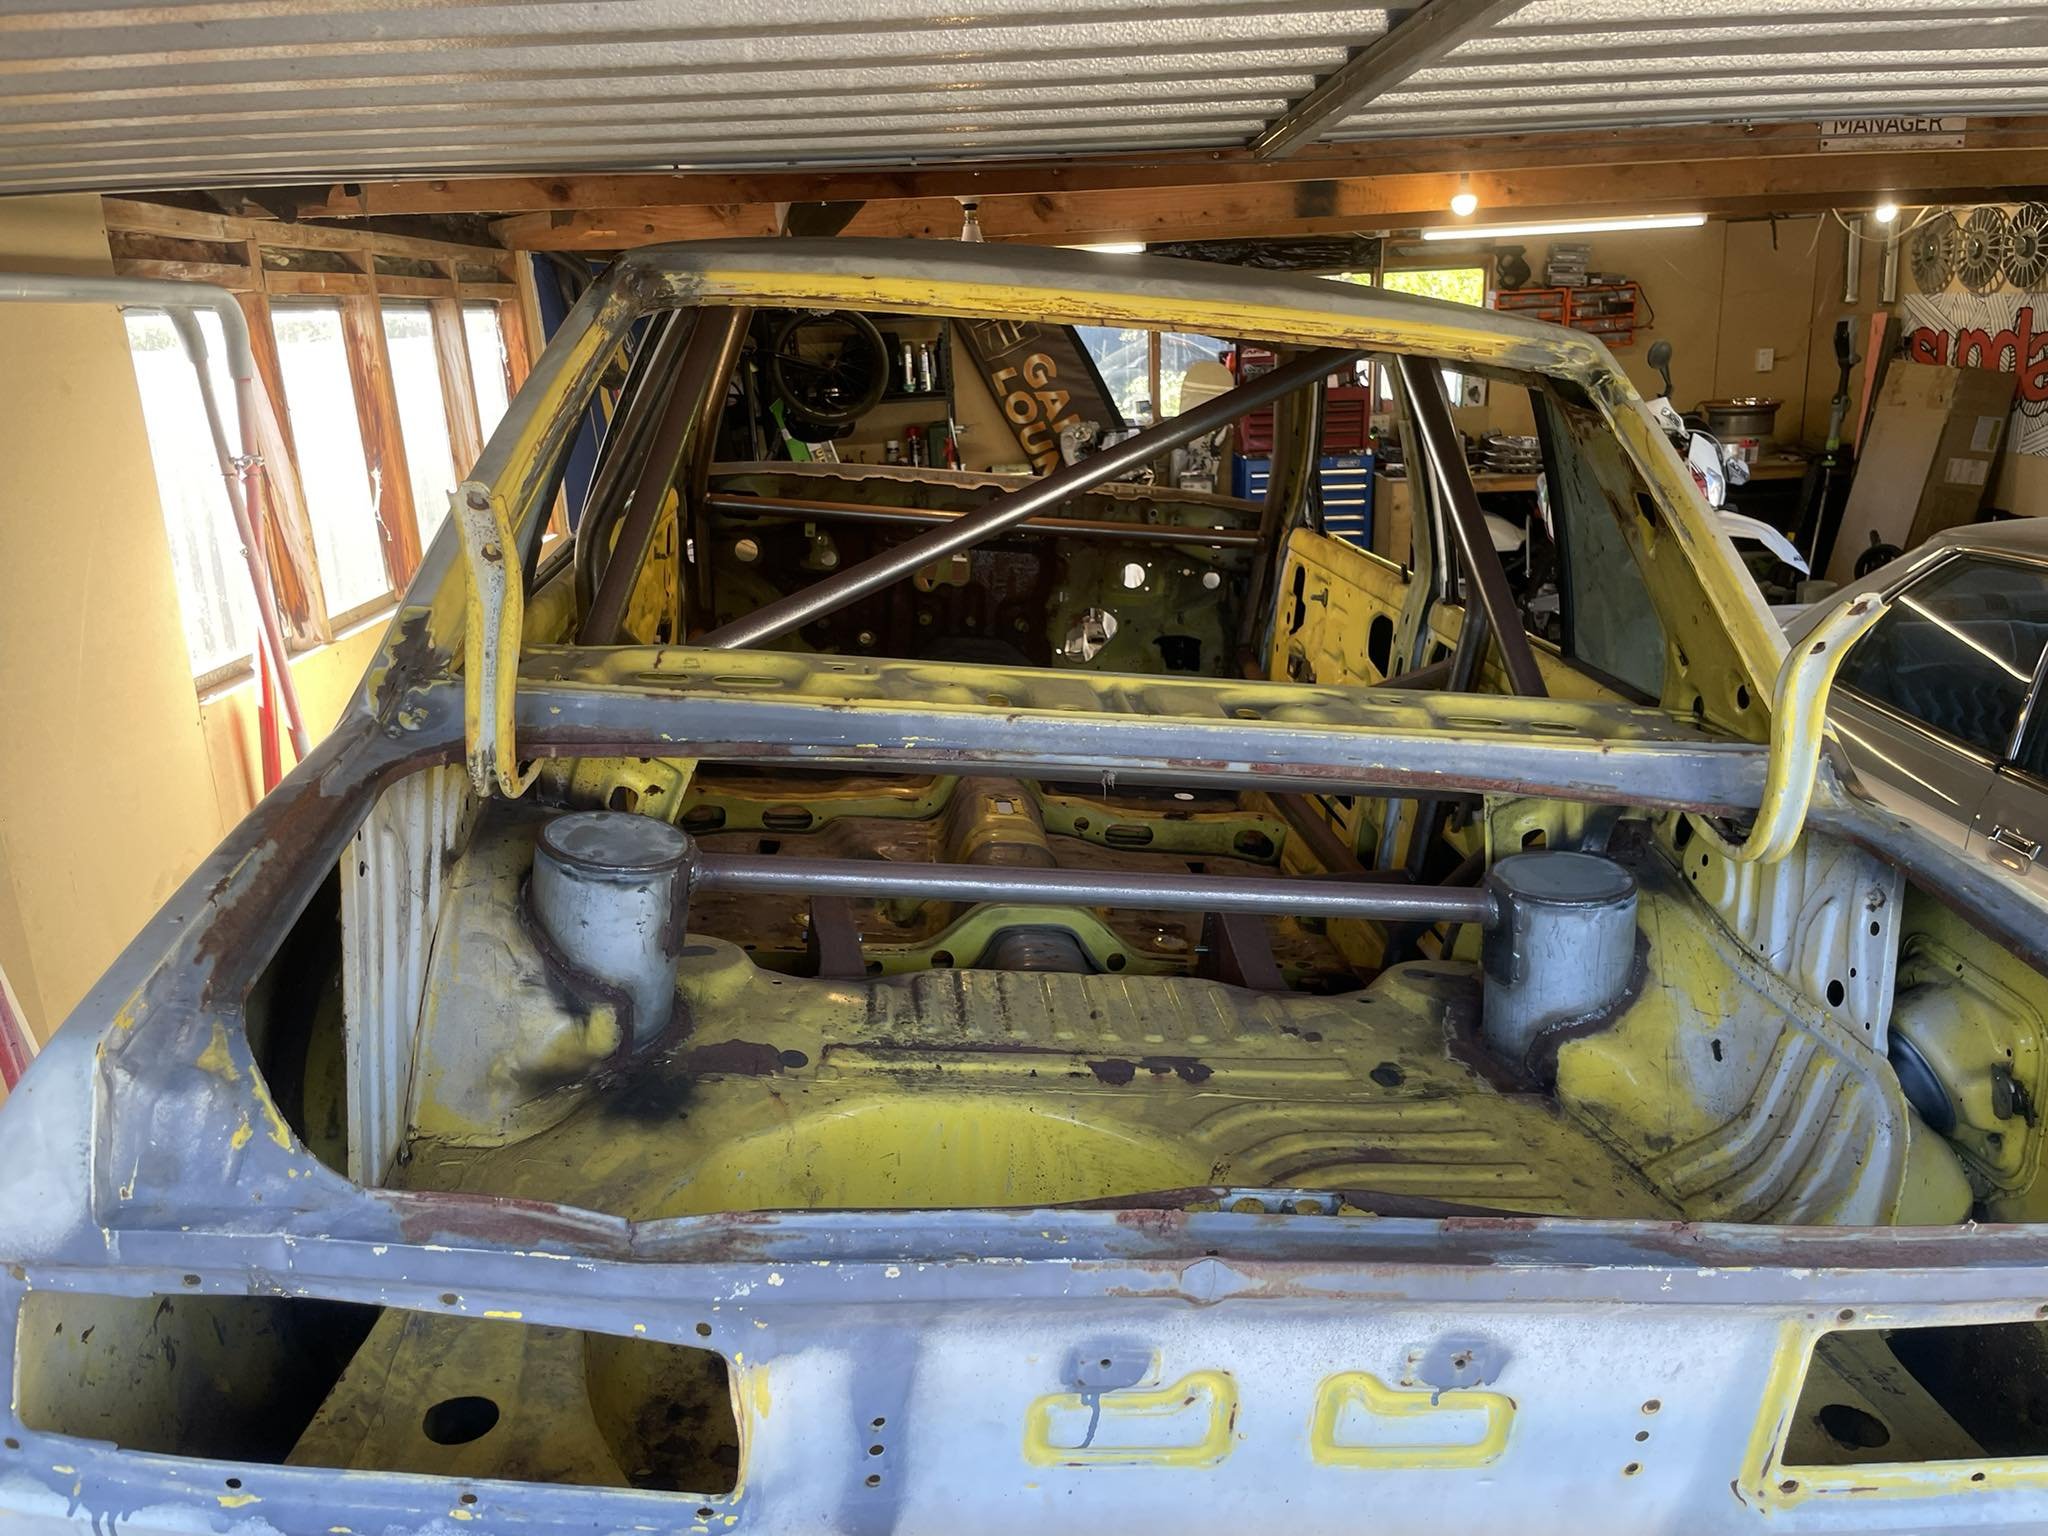
Id made a bet with @Luke that id have this thing drivable in time for an event aaages ago. I lost miserably. Id been sending him pictures of my progress at the time. (Before i had messenger, so by txt at fantastic cost) talking to him the other day, he still had them, and sent a few back to me. I manages to squeeze an Ebay special fan between the custom radiator and the front panel. And i got some pics of the diff too. 620s run an H190 diff, with an aluminium centre housing. However because they were an underpowered light comercial vehicle, they run a 4.6:1 ratio. Great for rally driving, or farm duties. But and absolute fucking nightmare for open road driving. I found a 3.9:1 head somewhere in Hamilton. @mark105 kindly delivered it to camp Rangiwoods for Old school nats 2013. (I might have had the yellow truck that far back) since we were only rolling in a dastun 1200, @Gomaxgo kindly dragged it back down to Christchurch for me in his 6cyl KE70 ' goon. Because reasons, i finished up using the axle out of the one i parted out for the front cut. As i mixed and matched a few bits, (my handbrake cables were fucked) i discovered this axle was ~15-20mm narrower each side. I had the housing blasted by Blain at FastBlast. And @LowTech powder coated the housing back when he had a powedercoating booth. I swapped the pinion flange over. This also required a hefty sleeve be fitted. Both because the seal journal was bady cut/worn, and because the seal journal was considerably bigger on the 3.9 diff. A lick of paint on the head, and it was glued in. Absolutely nobody had a listing for new brake drums. And all of mine were worn out of spec. ROCK AUTO to the rescue. (For all the parts your car will ever need) they were something stupid like $20 each. I gave the backing plates a brush up and paint. And rebuilt the brakes/ew cylinders and shoes. (My bench hasnt been that clear for a looooong ass time) I dont have any pictures, but these diffs use a turbo gay cup and cone arrangement on the axle bearings. You have to set the axle bearing preload by changing shims. (Theres a thrust block in the centre of the side gears that the tip of the axle runs in permanent contact) i fucked these off, and replaced them with deep groove bearings. The deep groove bearing was a few mm narrower than the Cup of the cup and cone. So i had to make a spacer ring as insurance that the bearings could never migrate in and out within that pocket. The other picture i found was of the gearbox X member i made. Its nothing fancy. The material was kindly donated by @Chris.QCR
1 point
-
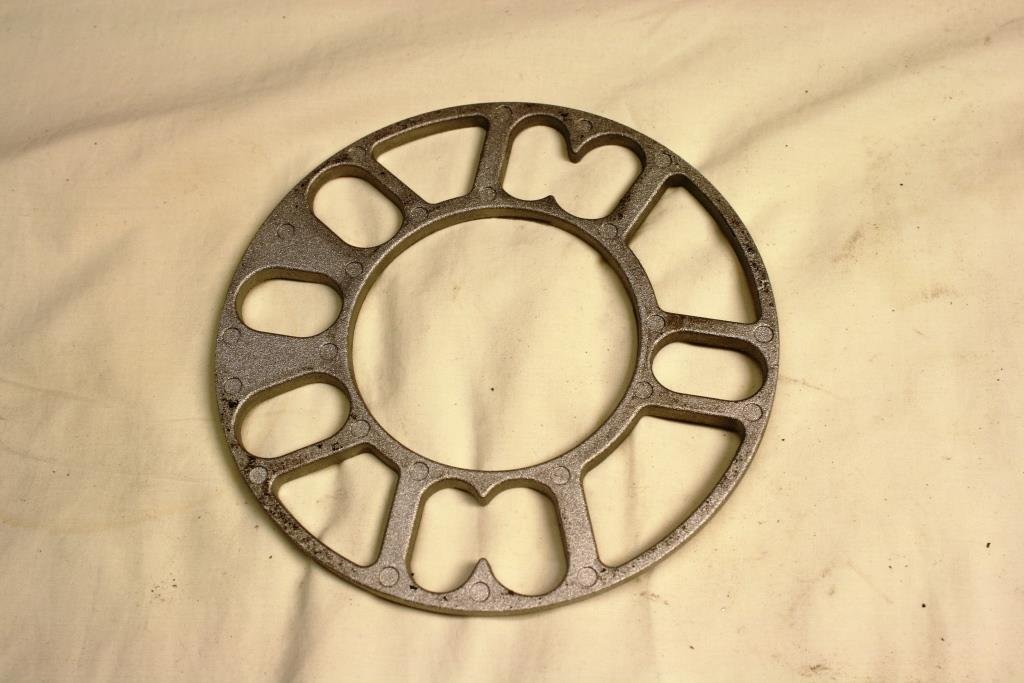
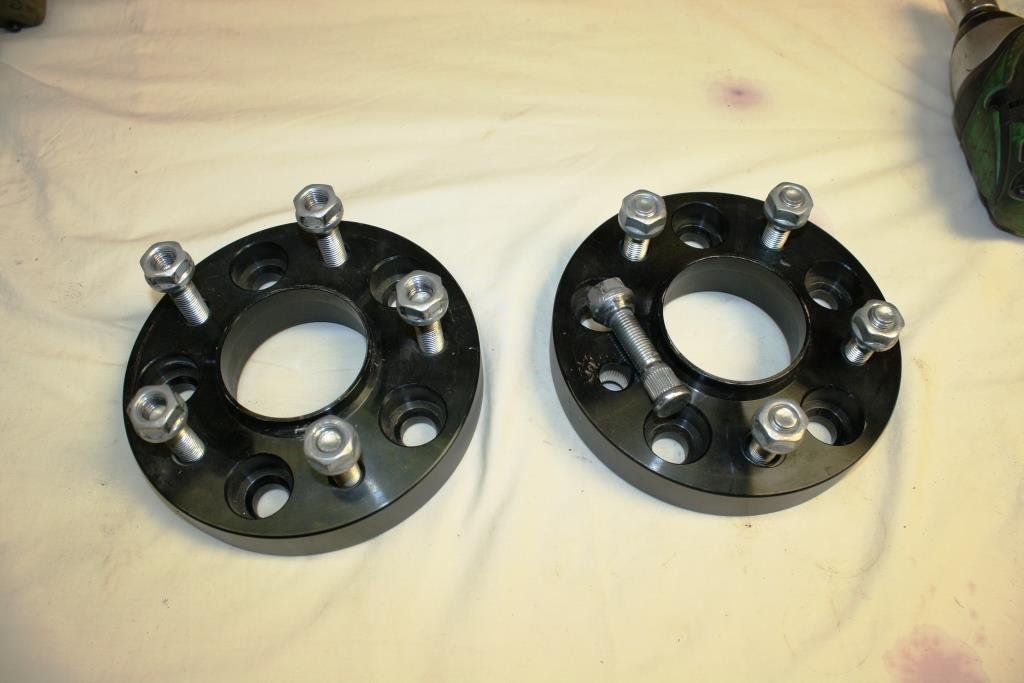
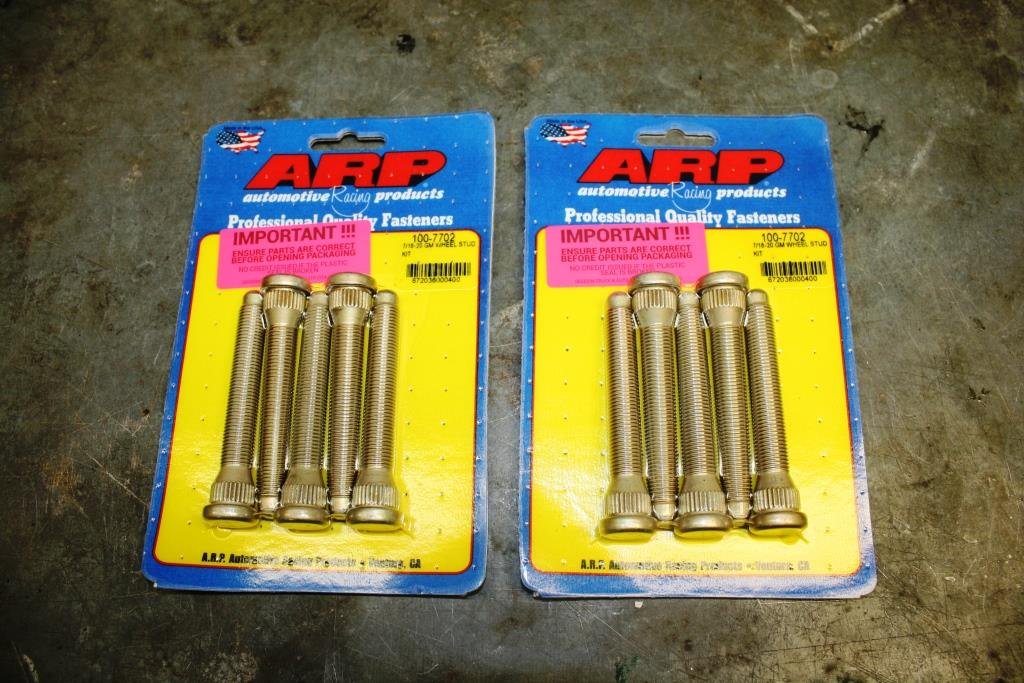
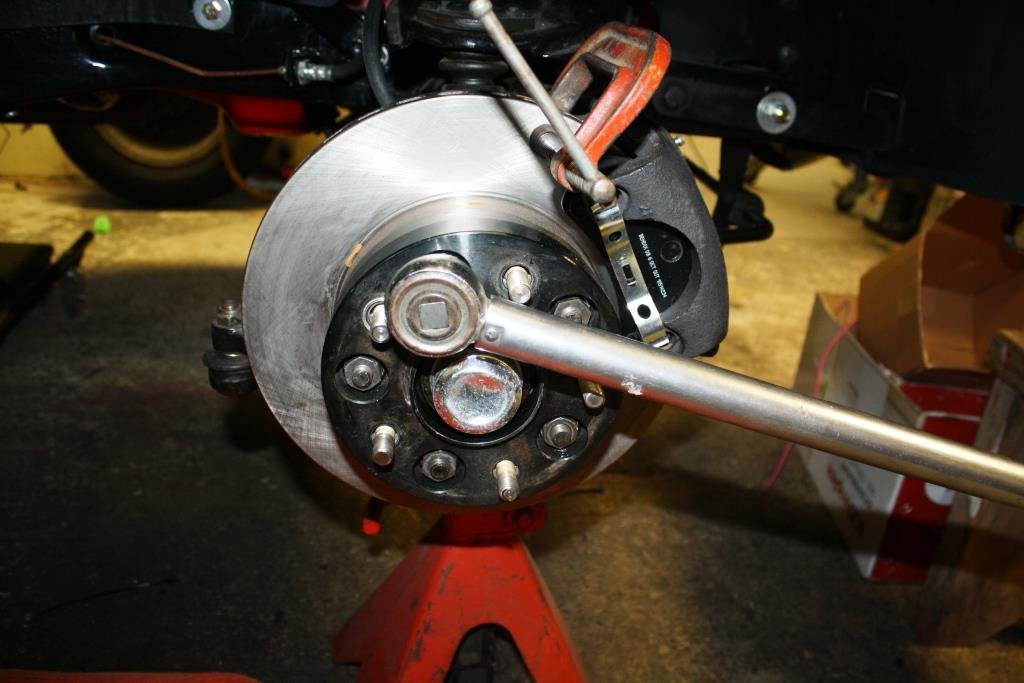
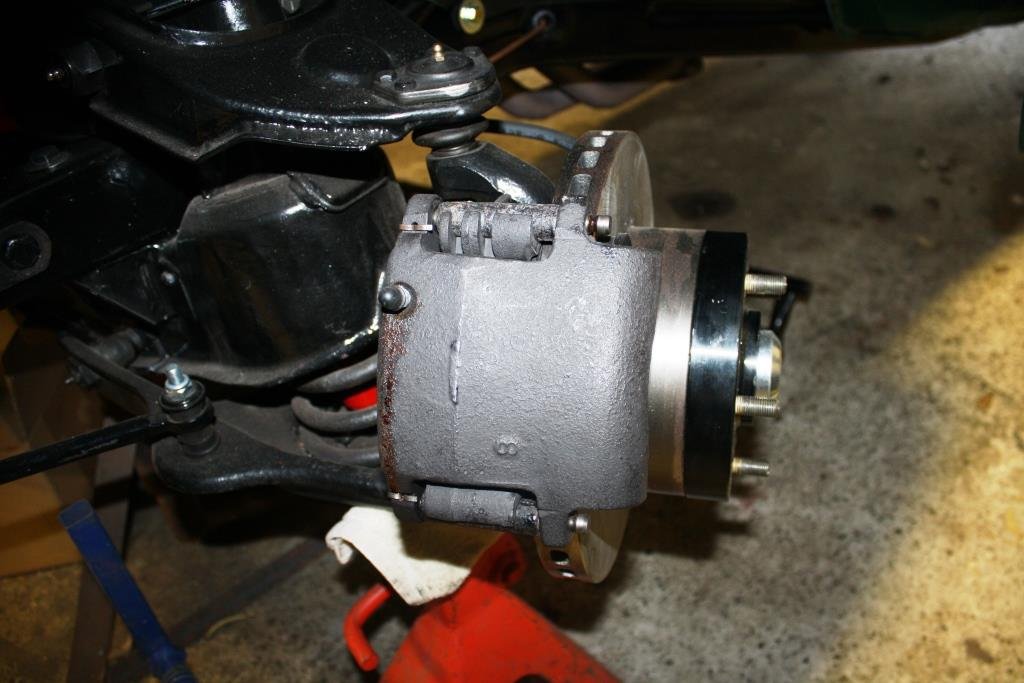
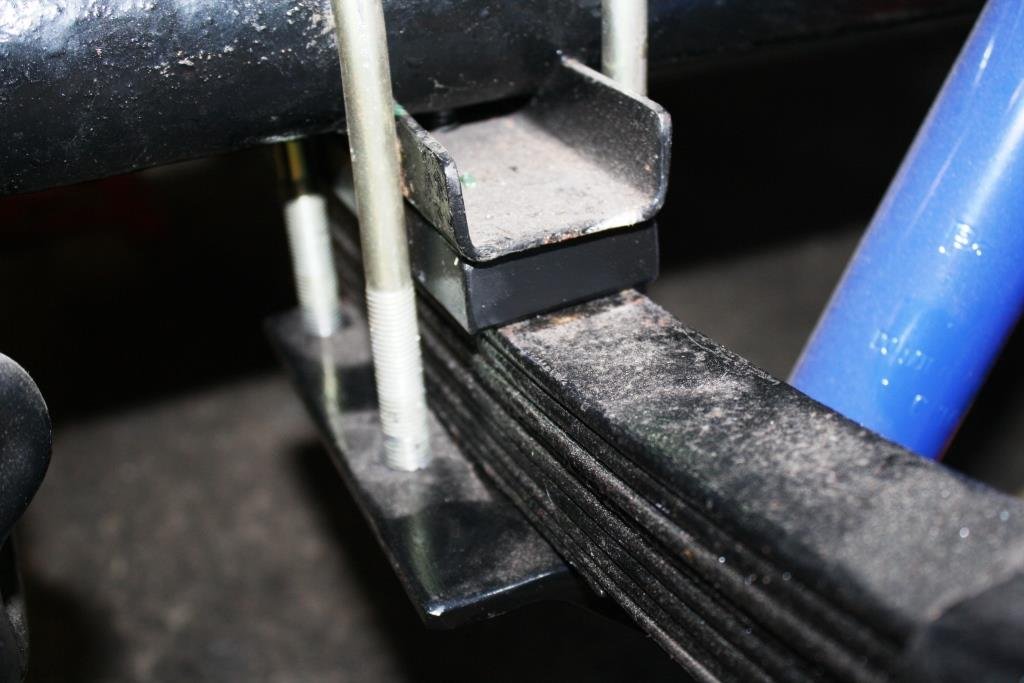
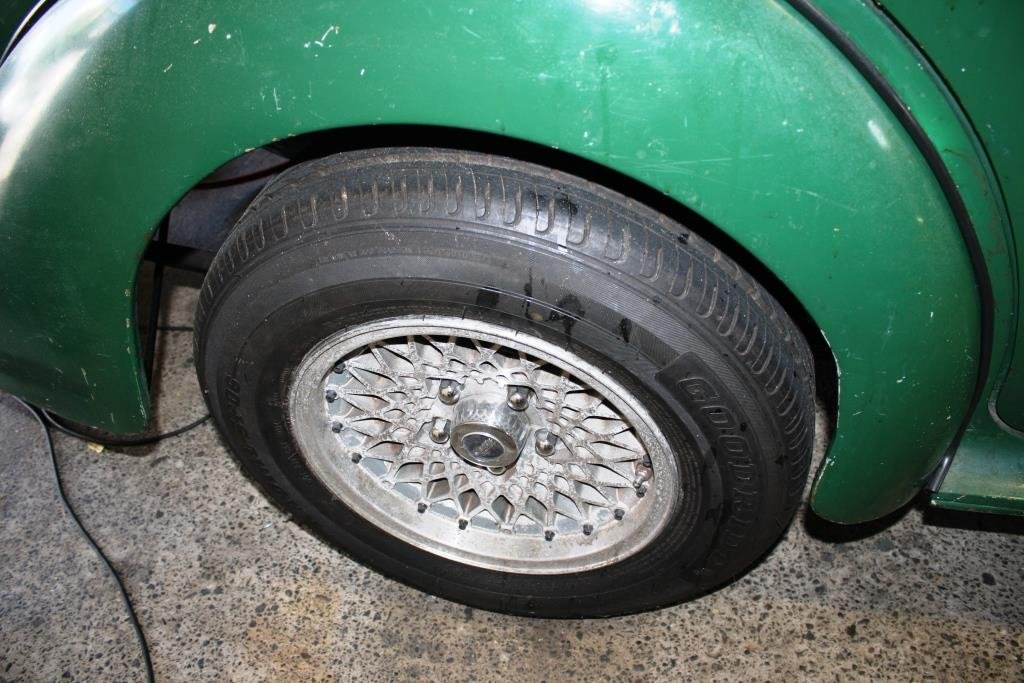
One of Rigamortice’s dirty little secrets was a set of these little shockers hidden behind the front wheels! I found a pair of proper hub-centric spacers on Trademe for a very reasonable price. I then upgraded to some ARP studs at a very unreasonable price. (Talk about charging like a friggin wounded bull!). All torqued up with a snug fit on the hub and wheel. Finally got the front ride height and wheel track just where I want it. Decided the rear needed a tweak, so I backed off the rear U bolts…. …and figured out how much I could safely lower the rear. I ended up using solid bar for the spacers I’m expecting the rear springs to settle with a little use….. Have to say I’m finally happy with the old girls stance.
1 point
-
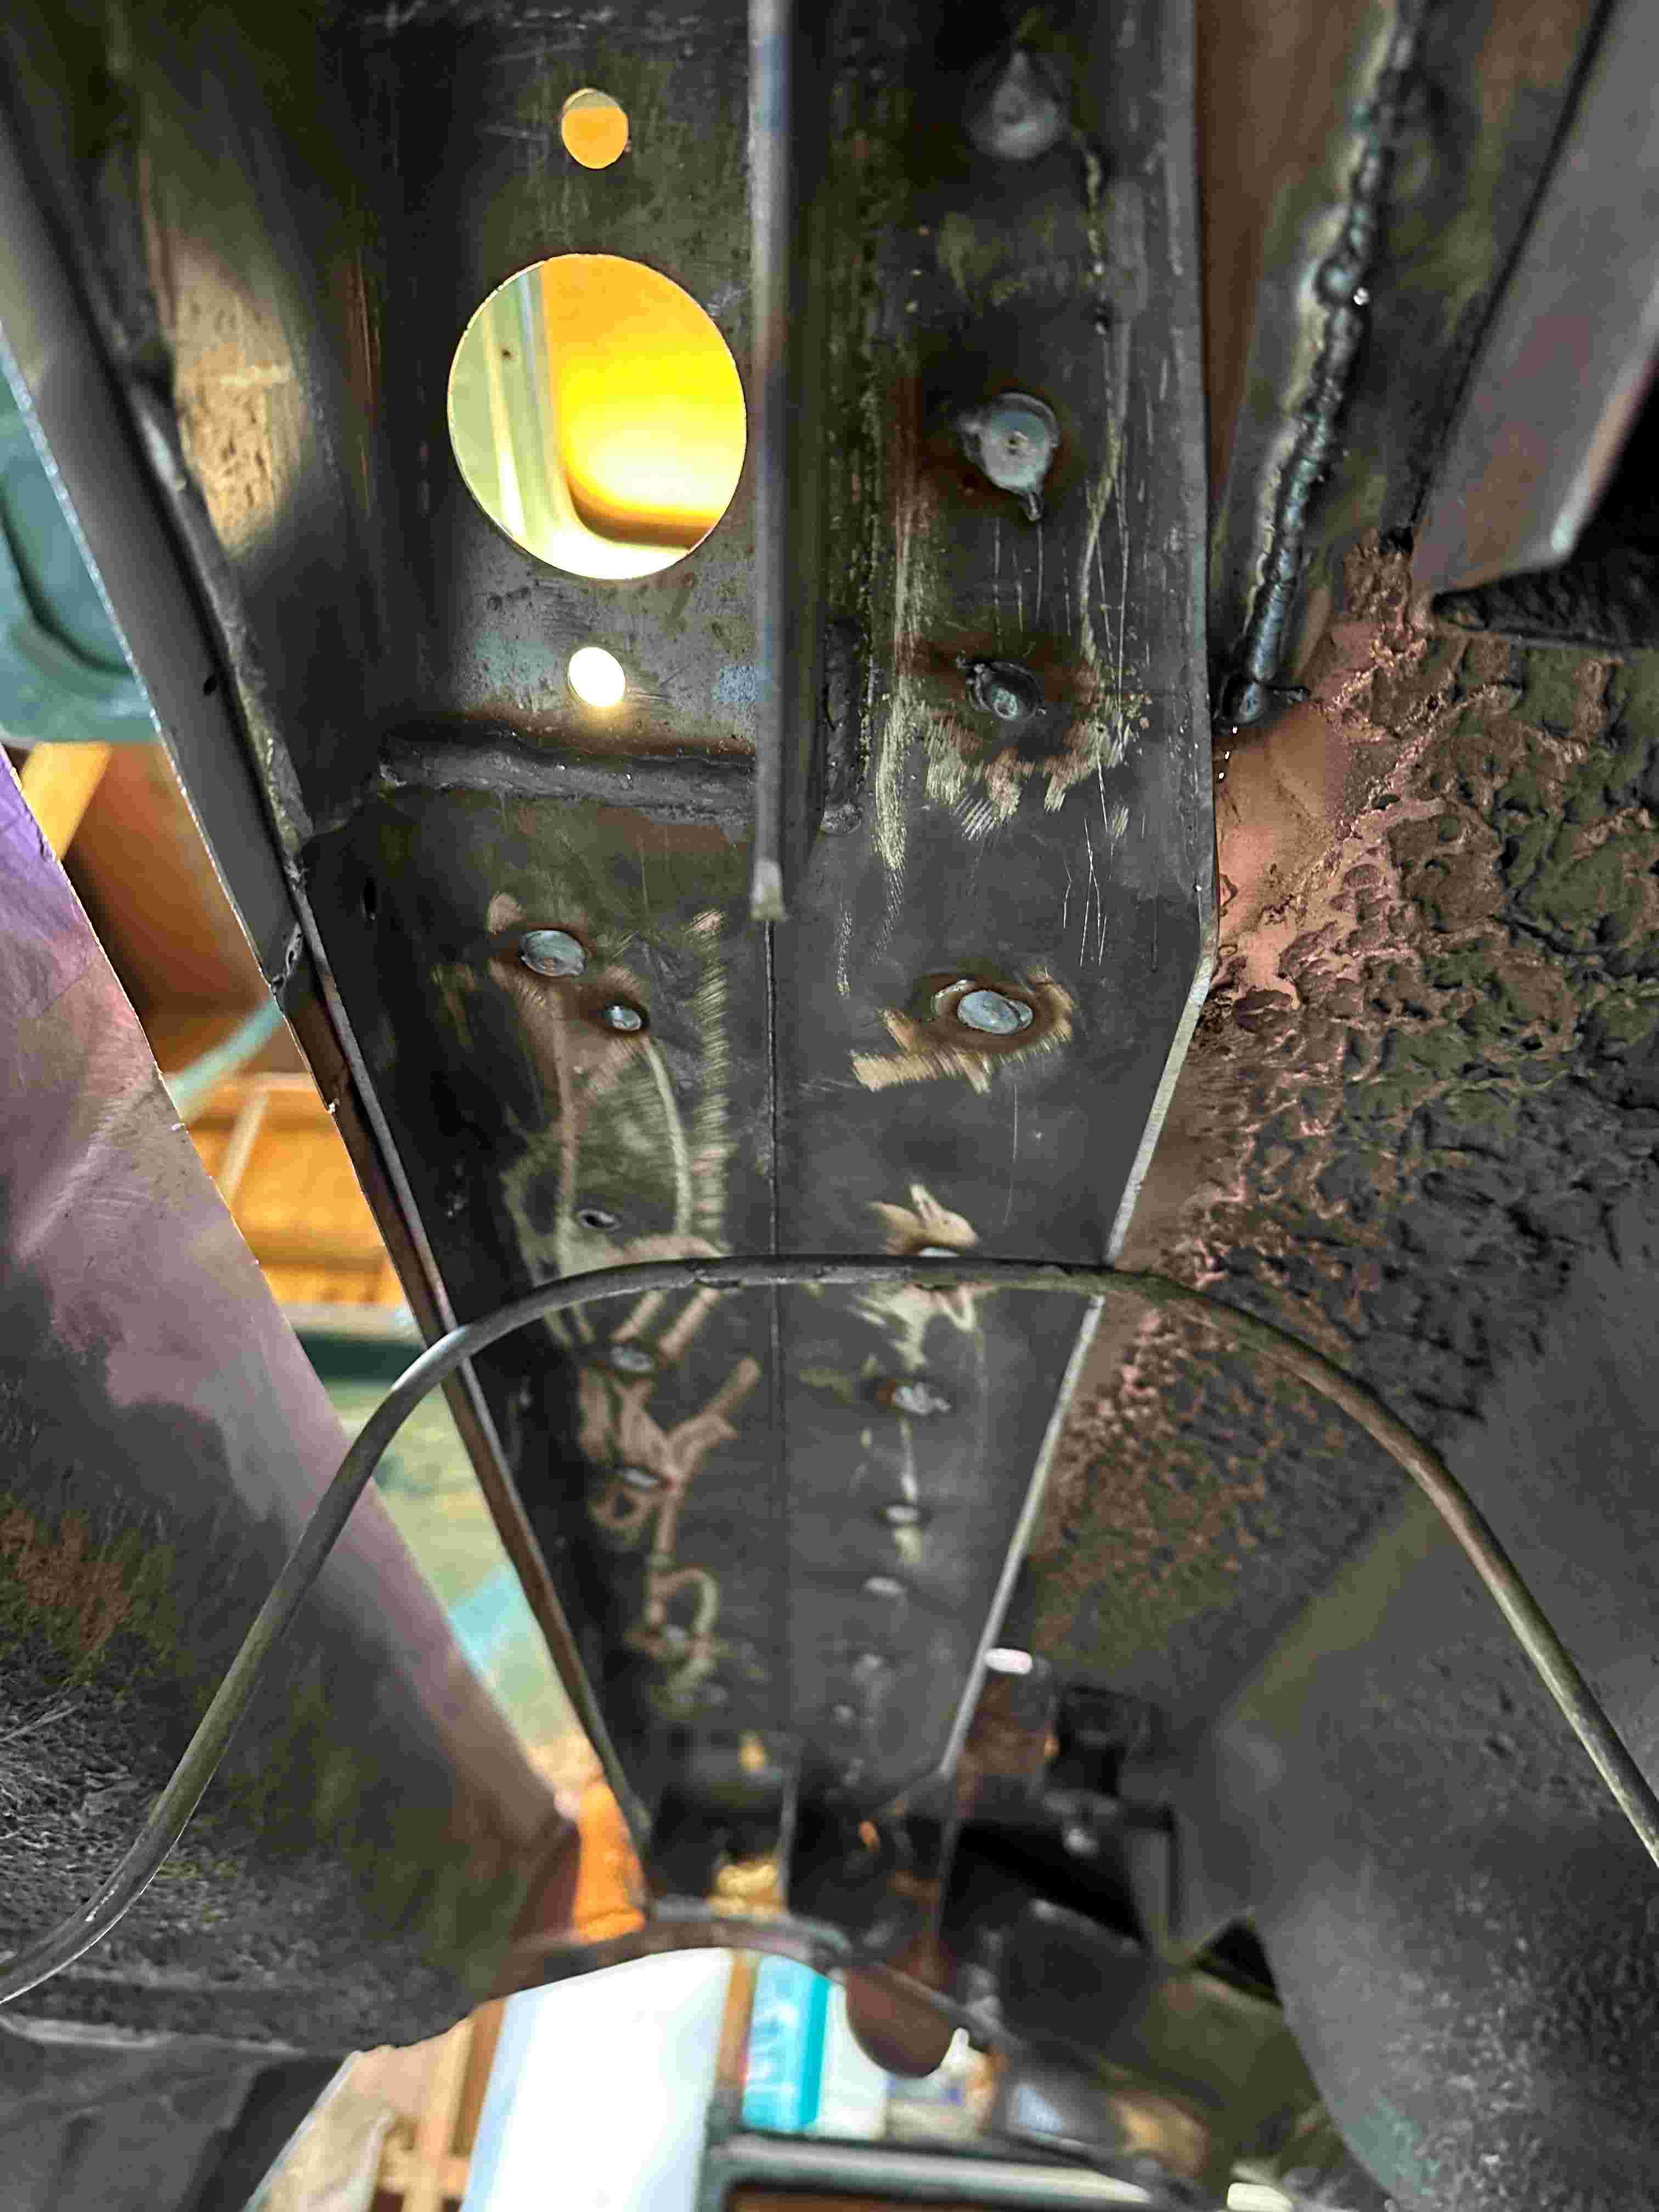
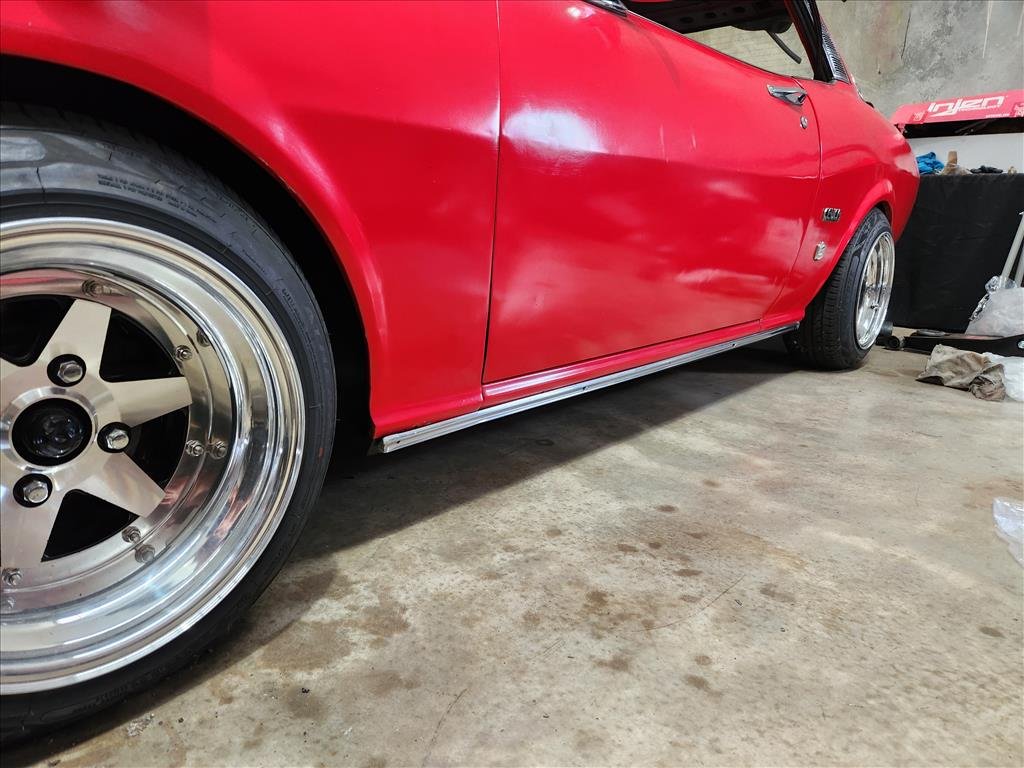
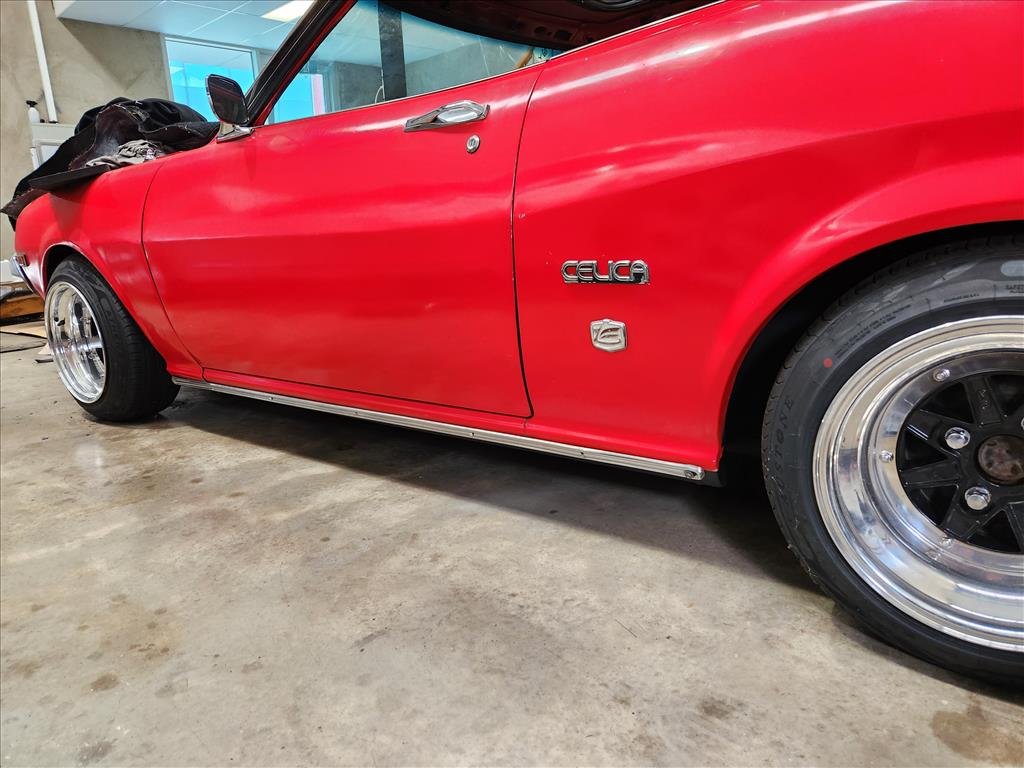
In typical Alex fashion I started a job without having all the bits to complete it. That mess I posted yesterday got covered up today with new underseal but I ran out so only have the one side done so far. I've just sat the trim on there loosely with some incorrectly sized screws but you can get the idea. I think it turned out pretty good. The trims looked pretty nasty after years of sitting around so I hit them with a bit of scotch pad to get rid of the muck and surface rust. That'll do.
1 point
-
so after getting rid of my ae85 levin because i made it too nice to bash about at the track i was on the lookout for a suitable car to buy/build to have some fun in, bonus of this car is its also rego on hold if i get that way inclined. This popped on on market place for sale, the previous owner had JB Fab here build a 6 point cage and equal length 4 link setup with a b1600 diff, photos below how i got the car. It came with a lot of spares and all the parts needed to put a rolling body together really. i got it home yesterday and started attacking some dodgy spots with a wire wheel to see what i'm dealing with rust wise, didn't find too many surprises only a couple of bad spots that need patches. Removed everything that was bolted on, it had Silvia front suspension which i will be getting rid of and i have ae86 coilovers and knuckles to replace this. before i got this car i had already purchased an engine mount and j160 adaptor kit from Niteparts for 2zz. looking into diff options for the b1600 diff, i've seen a bit online about what heads fit into the b1600 setup. Ideally i would like a nice 2 way diff for this, I saw that potentially fc3s nuggets bolt in? i have a 4.9 Ratio at the moment which is perfect. current plan of attack is: - Rust patches. - wirewheel and re undercoat the underside. - Doors and front end to panel beater for a quick panel and paint. - Weld up all the unnecessary holes in the engine bay. - Mockup j160/2zz combo and start headers and itb setup. - Sort rear brake setup on the diff. - Powedercoat/Zinc everything to make it nice Discussion - Discussion
1 point
-
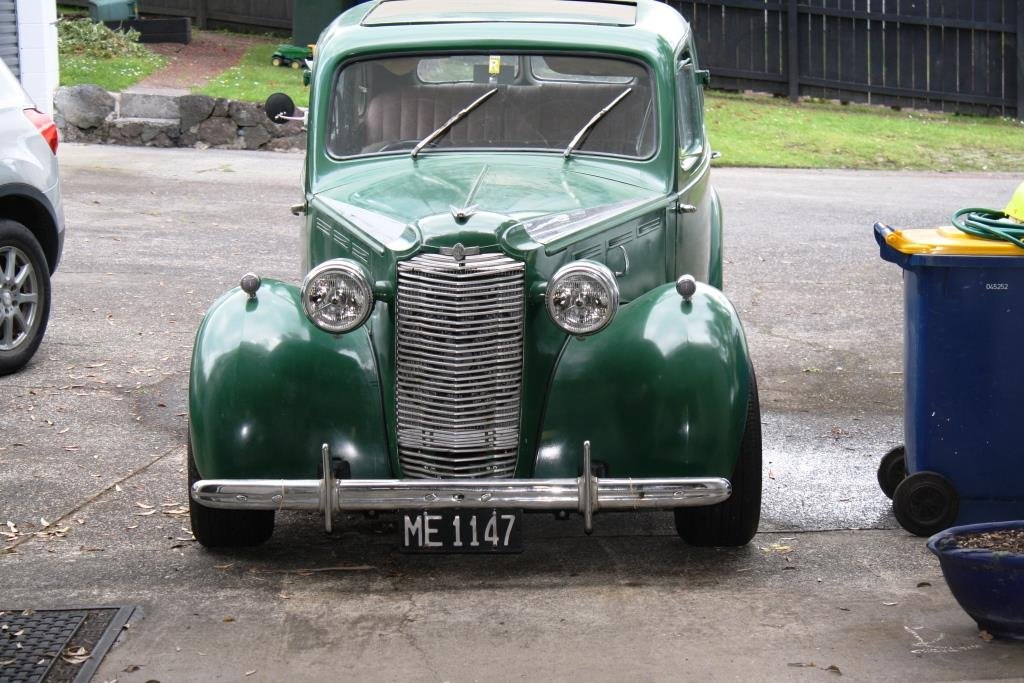
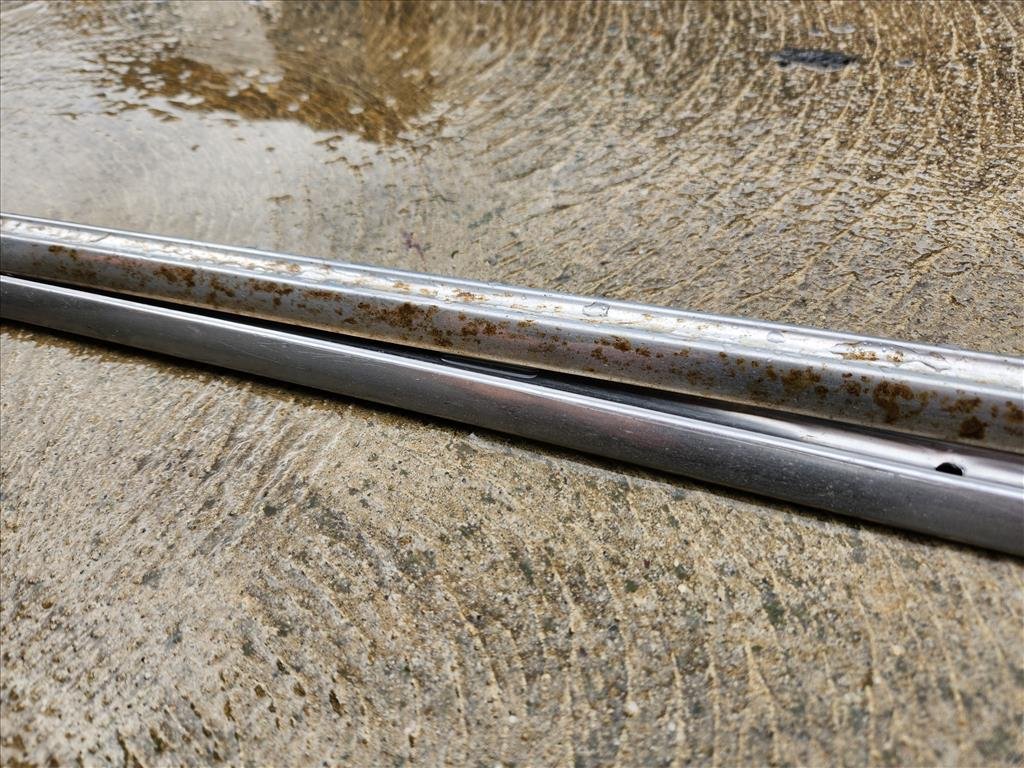
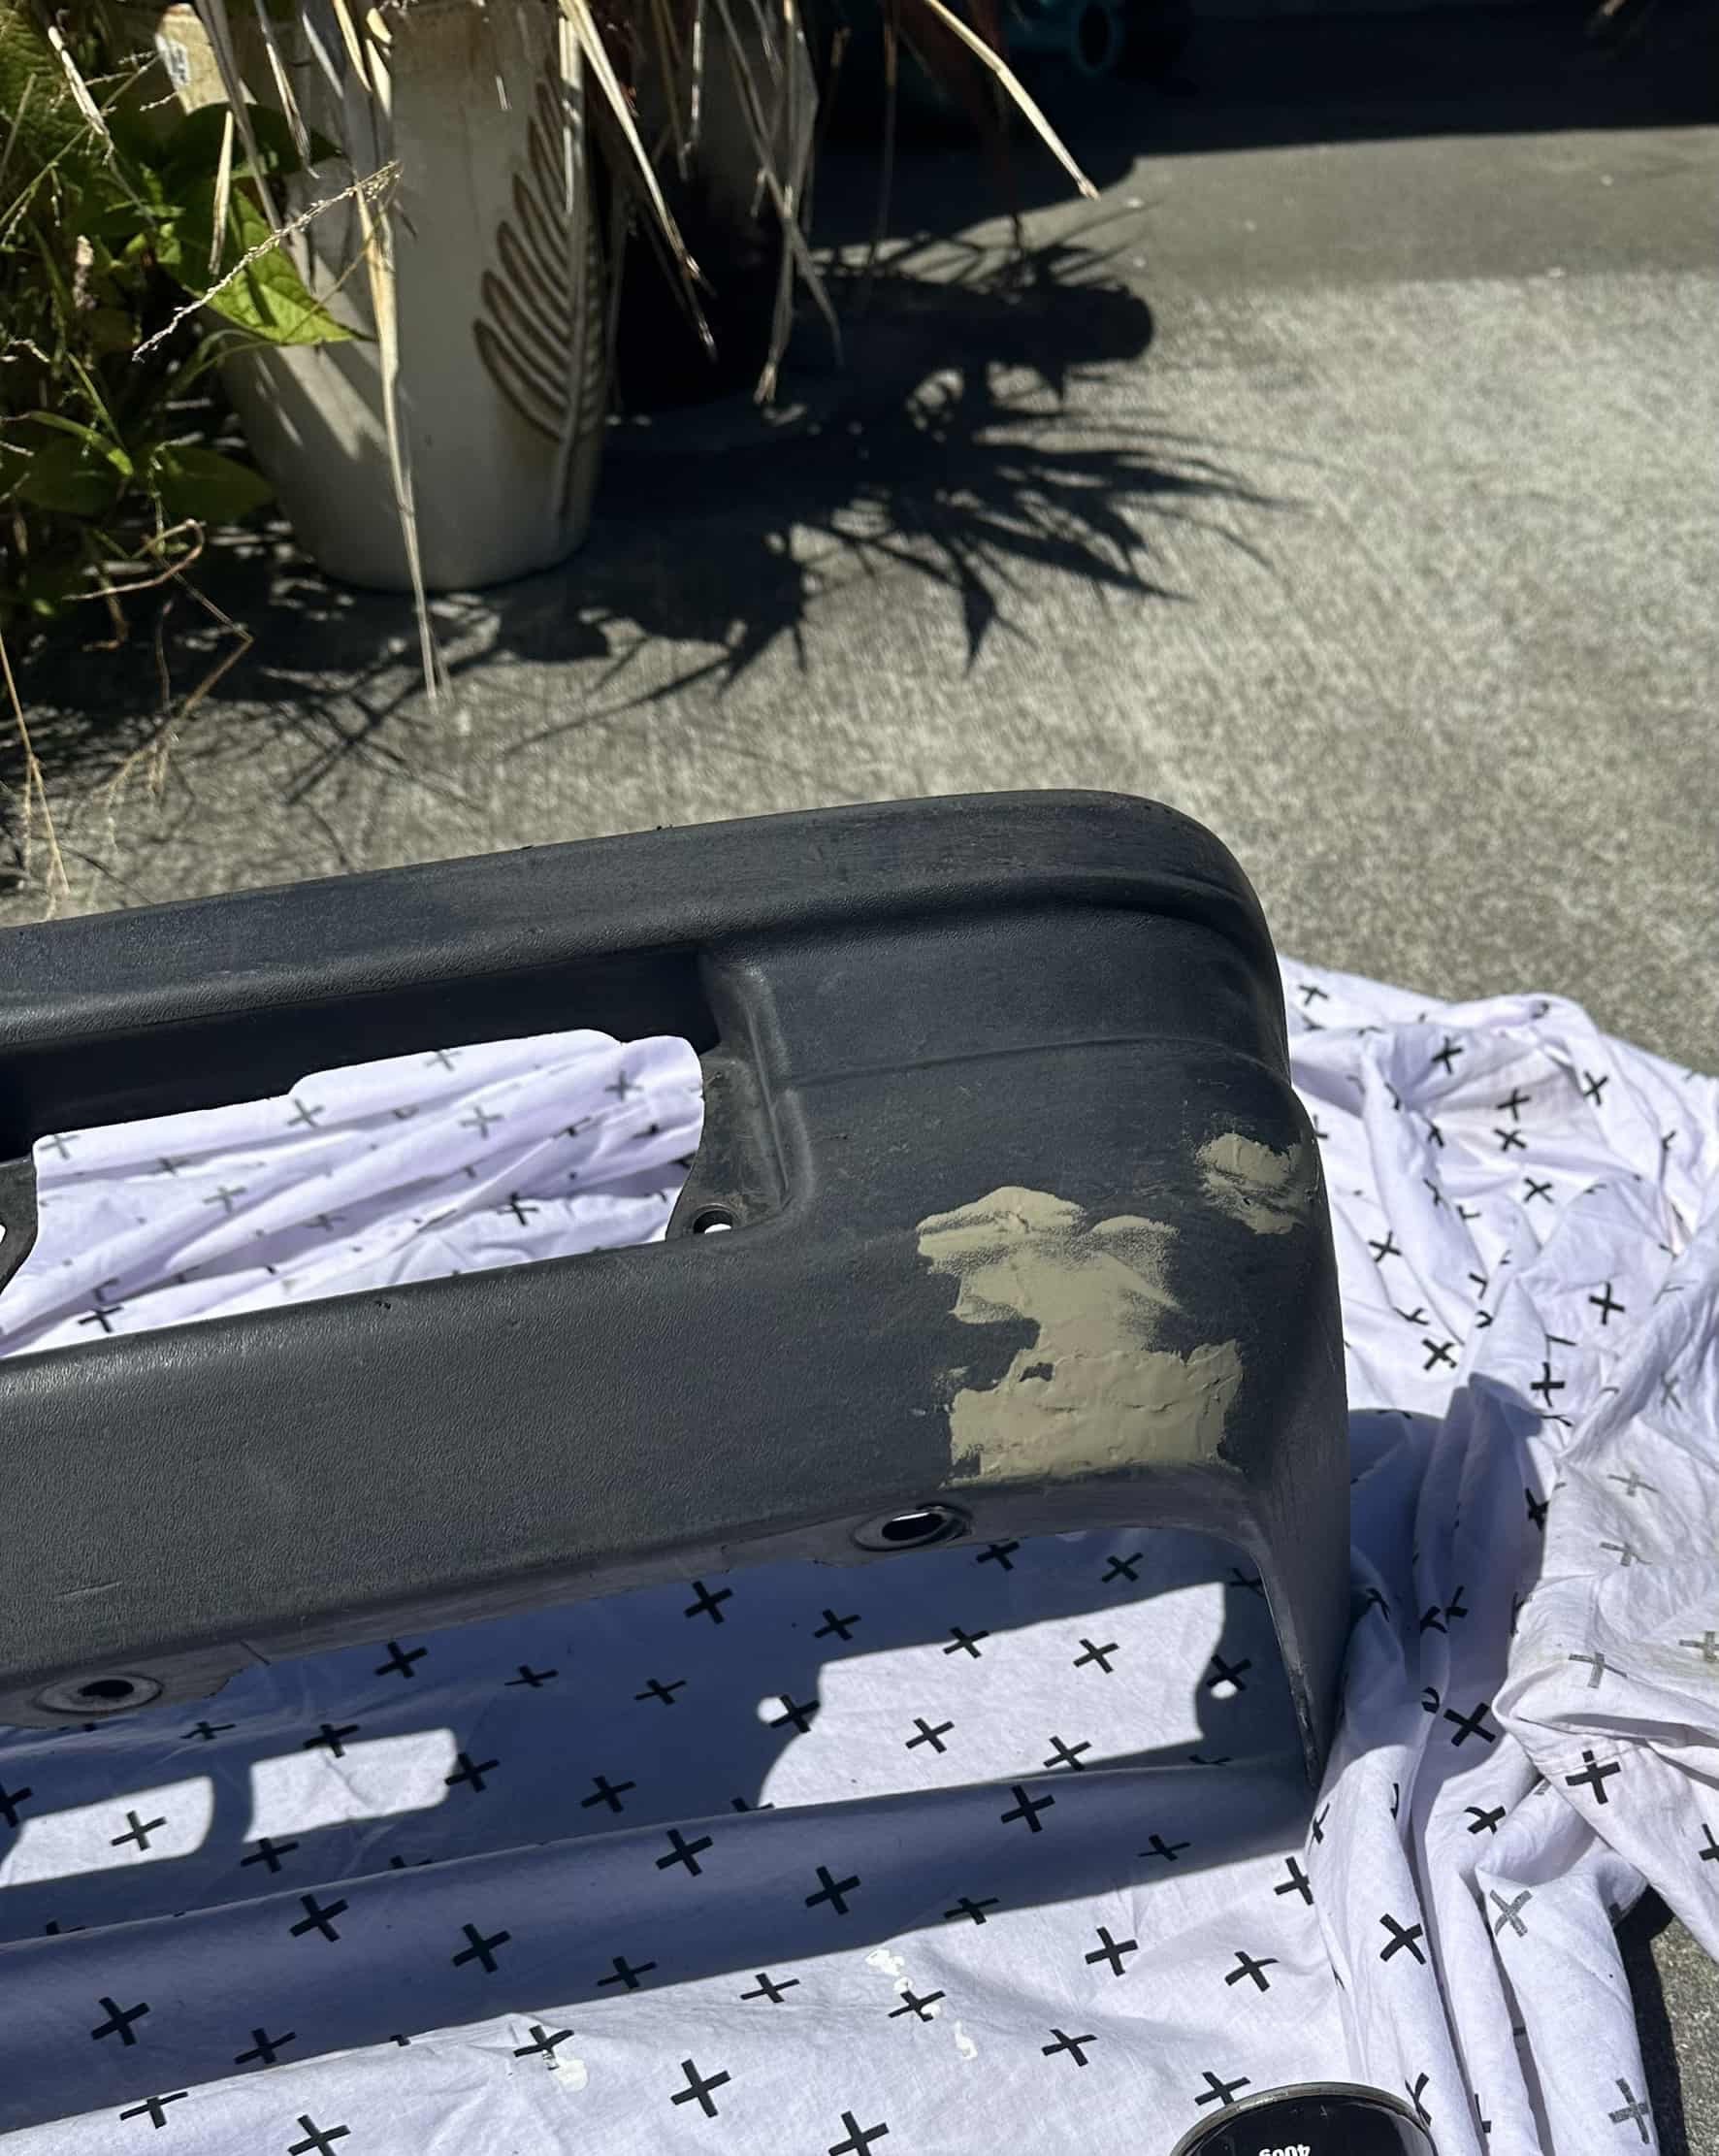
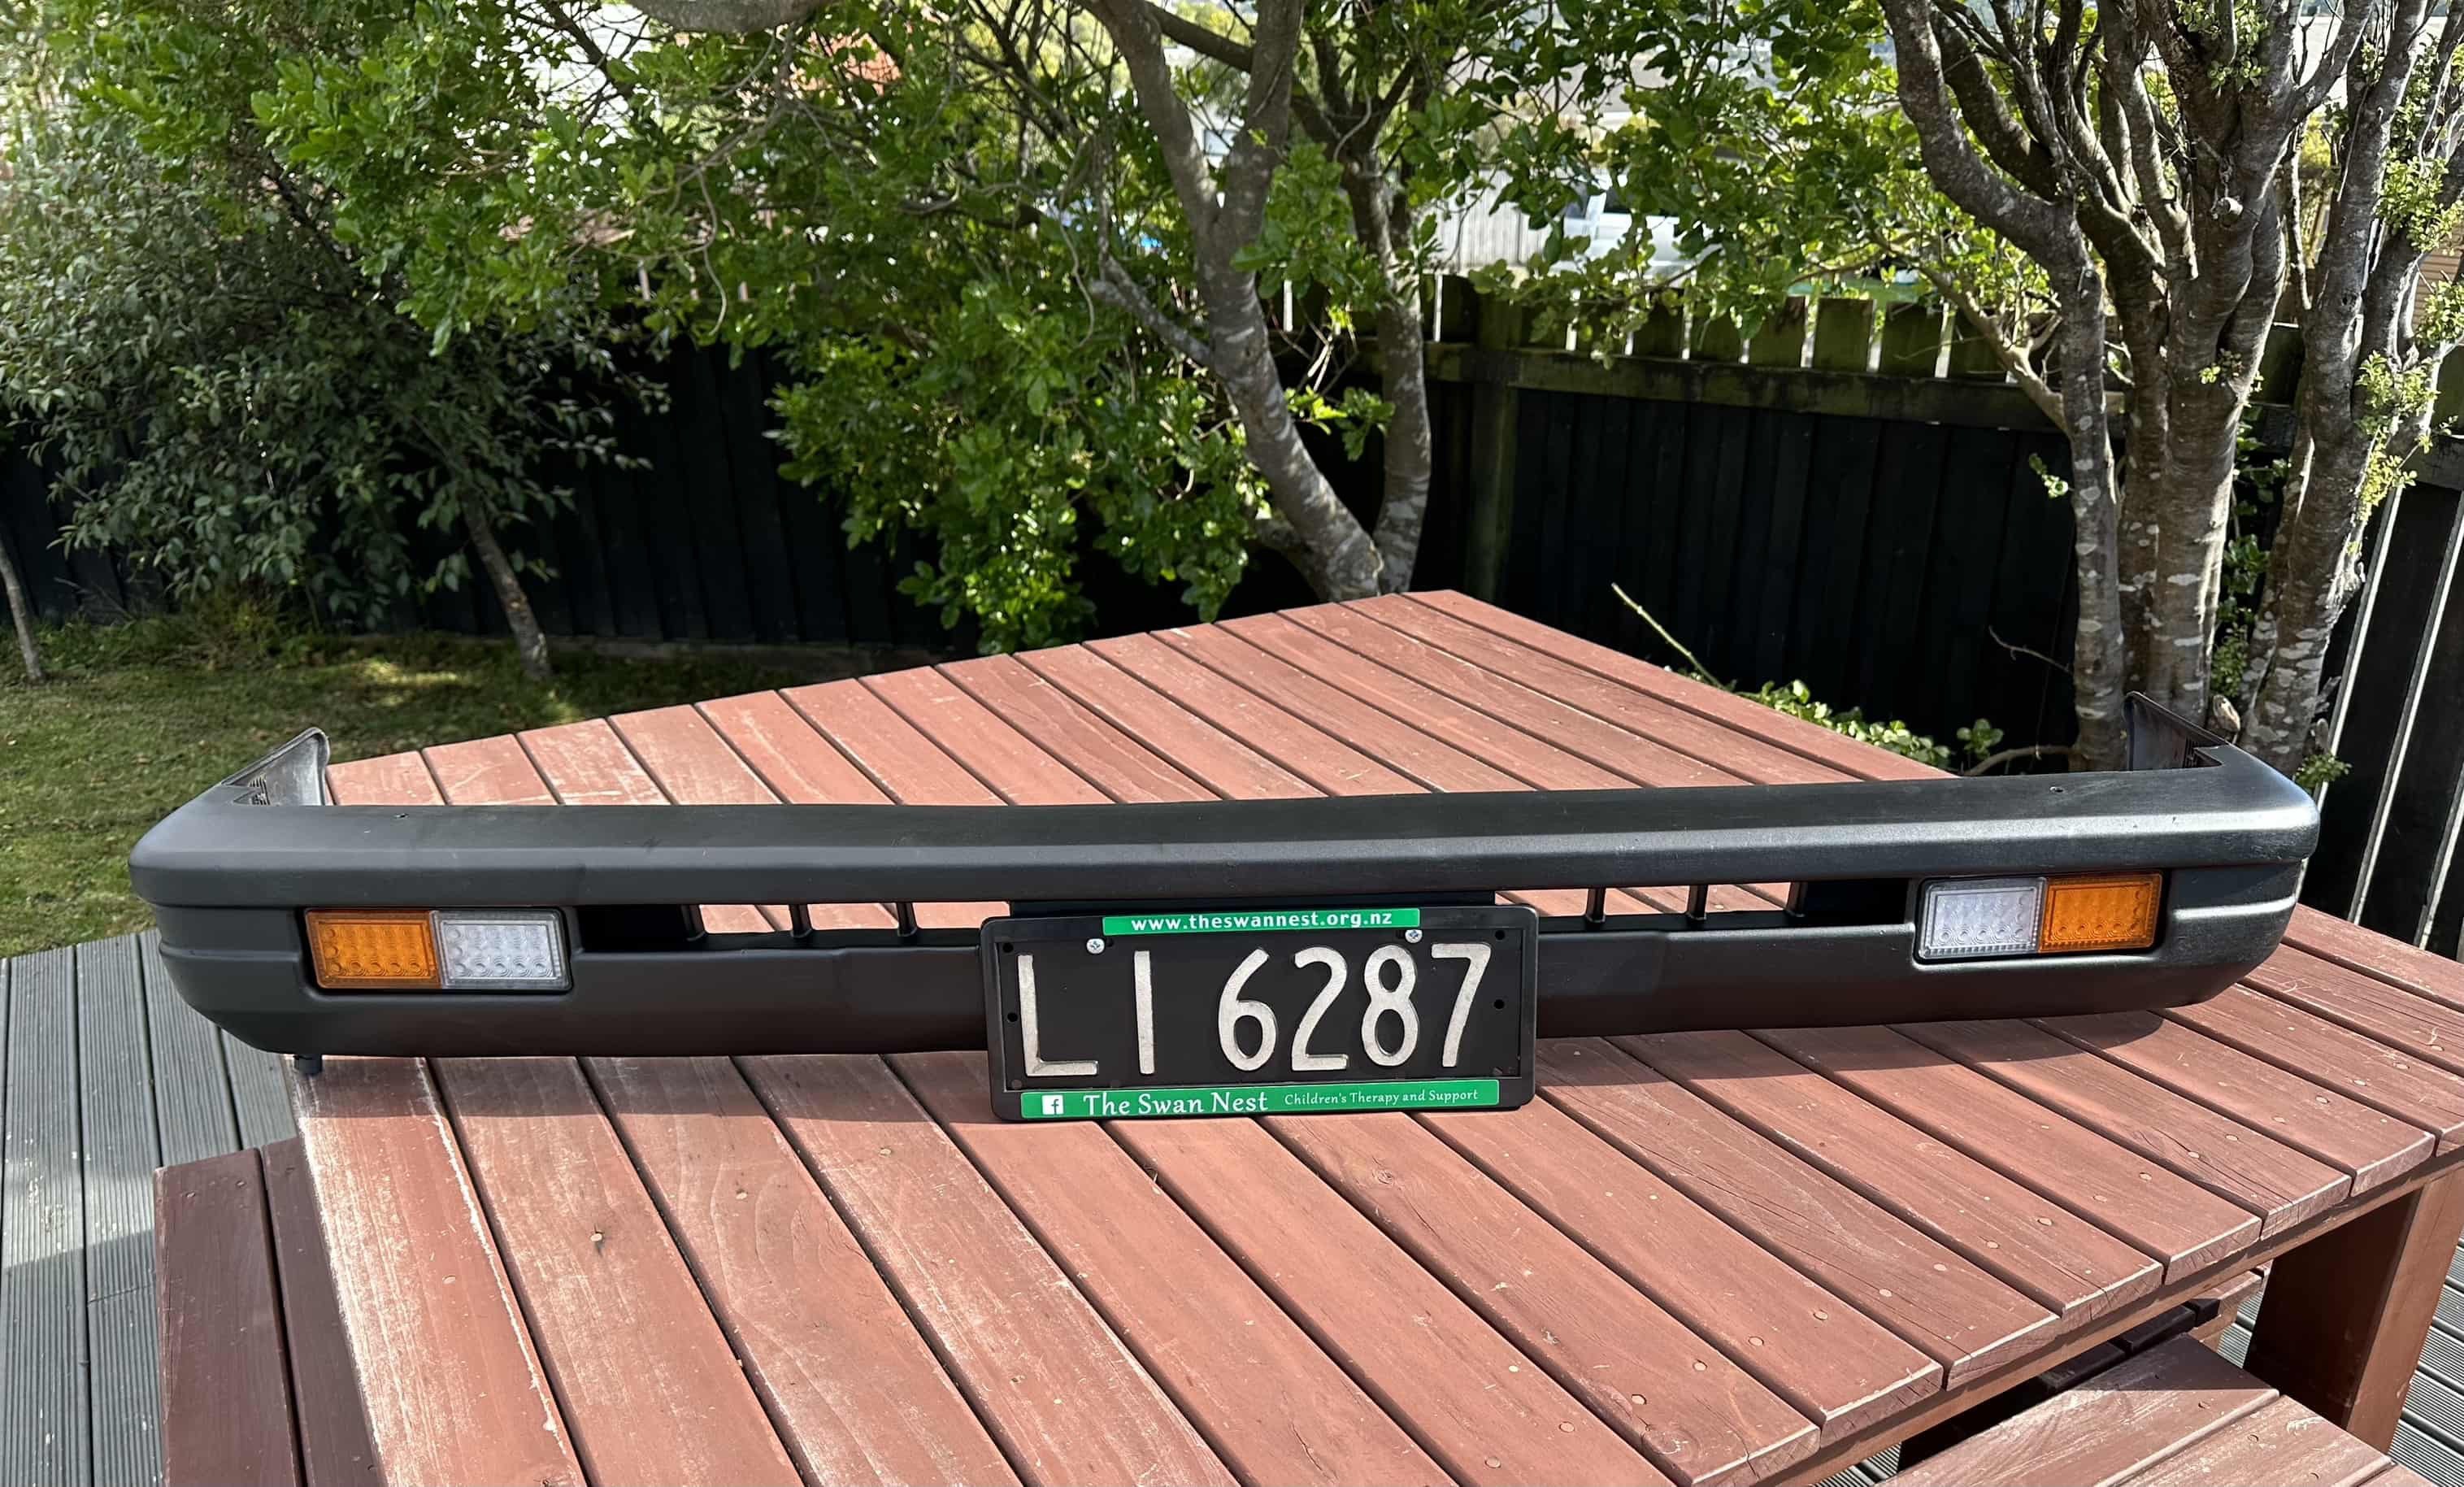
Front bumper restoration complete. After giving the bumper a good clean, firstly with a water blaster then scrubbing with a brush and some warm soapy water, I needed to fill in some of the larger scraps and scratches left by the previous owners touch parking attempts. After some sanding and a quick clean with grease and wax remover it was time for a spray with bumper paint, 4 coats later and it was looking pretty good. I also took the time to paint the headlight surrounds, grill, number plate lights and grill. Now all reassembled with freshly painted number plates and LED indicators and DRLs The finished product
1 point
-
The radiator situation is proving to be a bit of a headache as the available space is minimal thanks to the S/C electroclutch pulley taking up alot of space. where you would ususally plonk a nice thick rad for plenty of cooling. Did a bit of mocking up today with a couple of radiators I had kicking round its looking like a unit from a GA61 Supra will juuuust fit with a pusher fan on the front of the radiator. This one is pretty beat up and manky so will see if I can find an alloy option1 point
-
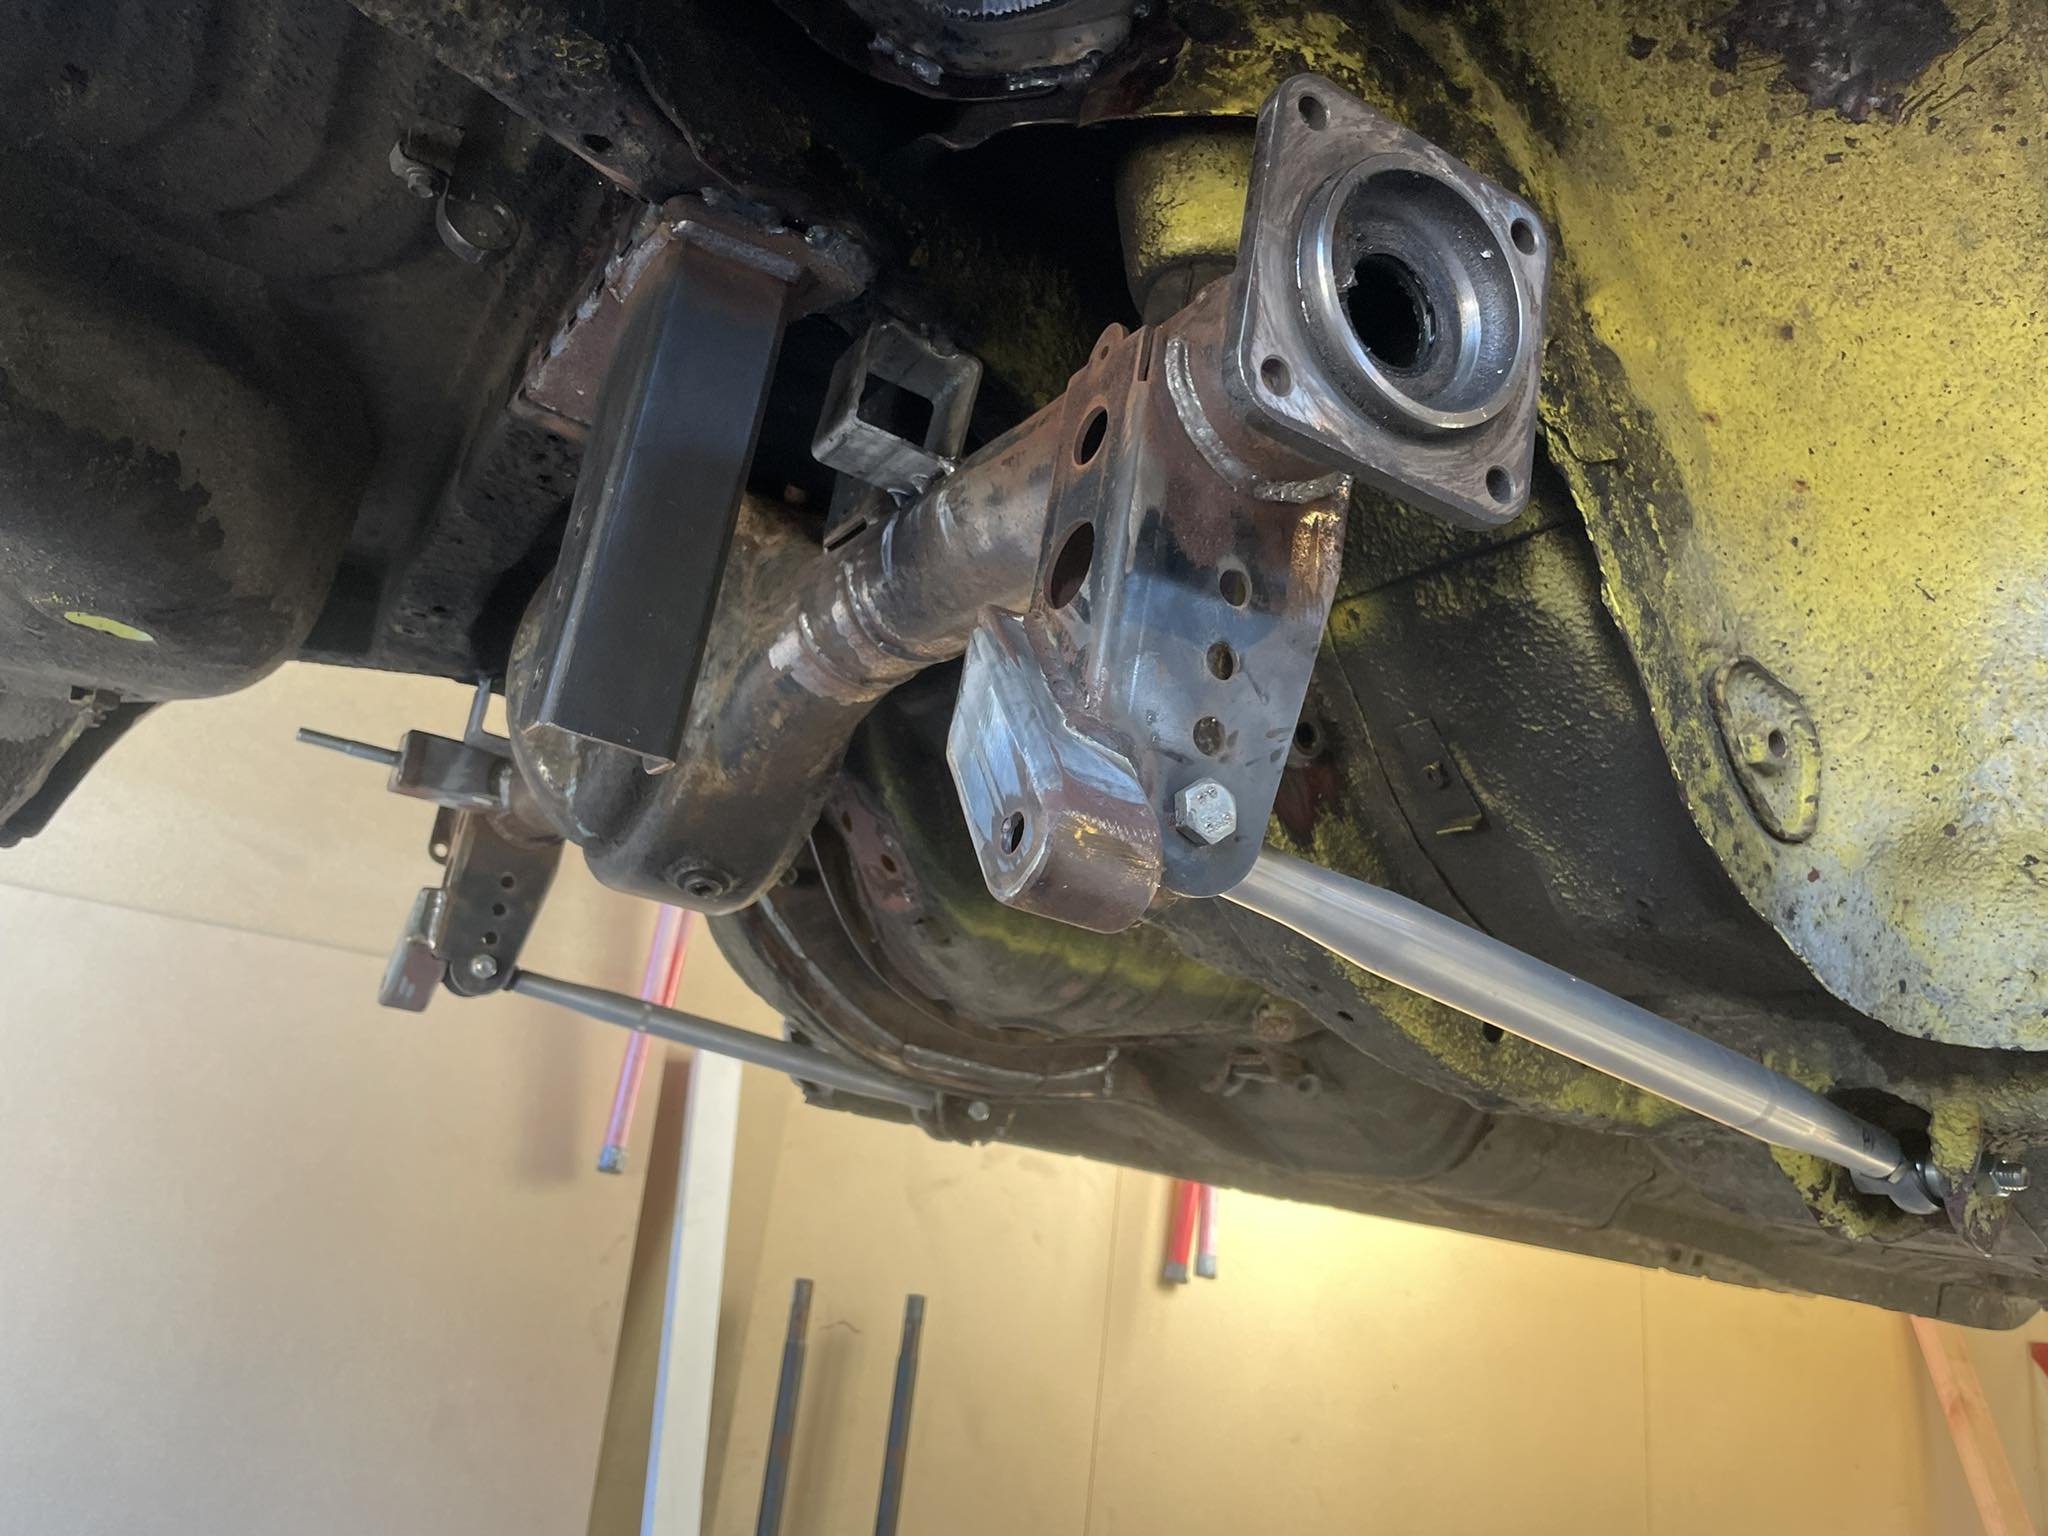
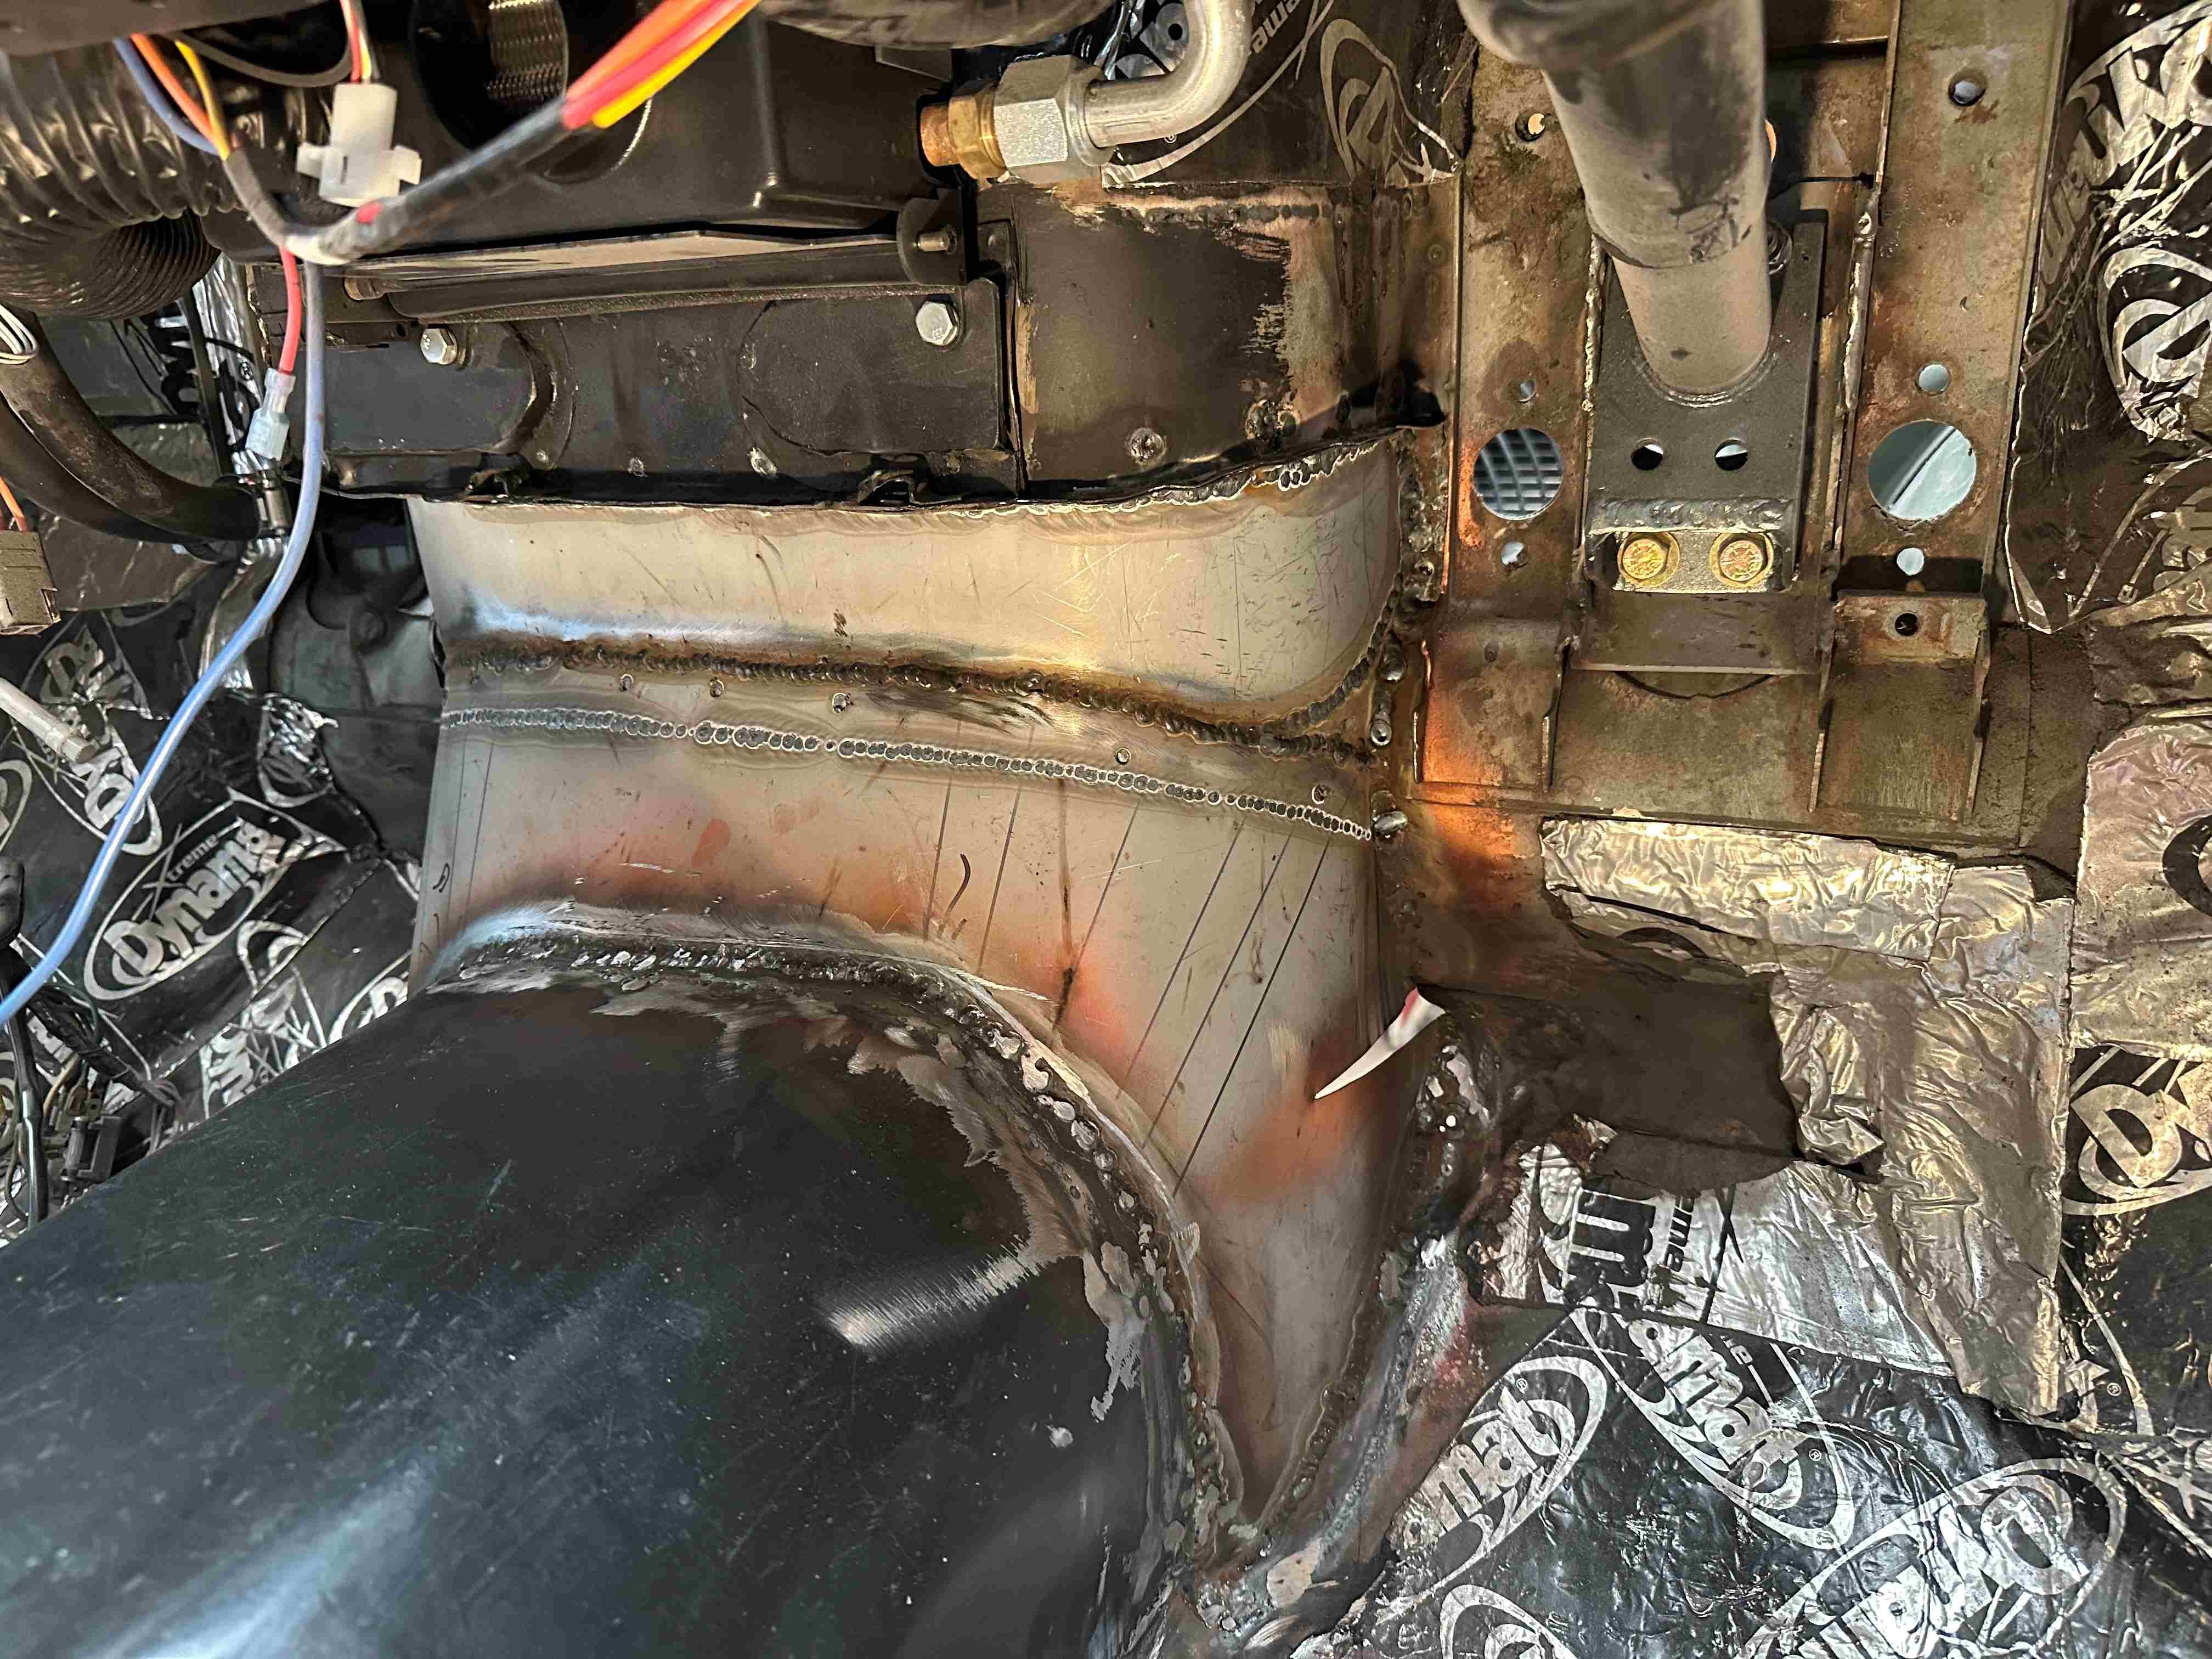
Here is a wee update. The fist job was to sort out a couple of issues on the hydraulic clutch setup. I realized that the slave cylinder I had that came with the bellhousing fowls on the headers. After a bit of head scratching and hunting I found another slave cylinder that just fits. I heated the headers then tweaked them out about 15mm to give a bit more clearance, it is still very tight. I still only have about 10mm of clearance. I'll make a heat shield I think. That is the new one, only problem is that the bolt holes don't line up with the holes on the bellhousing. So I milled slots in it. I was going to TIG the bellhousing holes and tap them but I decided not to just incase this new slave cylinder doesn't end up working out. For the master cylinder I welded a backing plate to the fire wall and mounted it in the engine bay between the booster and the header. Tight fit but it works. That picture makes it look much closer to the header than it is. I couldn't have it directly behind the clutch pedal unfortunately, so it's off set from the pedal. I used some steel rod linking them all together and threaded the ends. It's nice and smooth, I'm hopeful it will work well. Engine in for hopefully the final time. I couldn't mount the gearbox as when I went to fit the fly wheel I realized I don't have any flywheel bolts. Doh. ARP ones are on the way. Next I'll start wiring her up and put the dash back together. Cheers guys. P.S. Pro tip... Don't spray a car in jandals. That was taken after 2 showers.1 point
-
Just took this for its maiden voyage. Zero travel in the front . 50 percent of a exhaust. So bumpy and so rowdy. Love it . Still a shit load to do but darn it's a good feeling
1 point
-
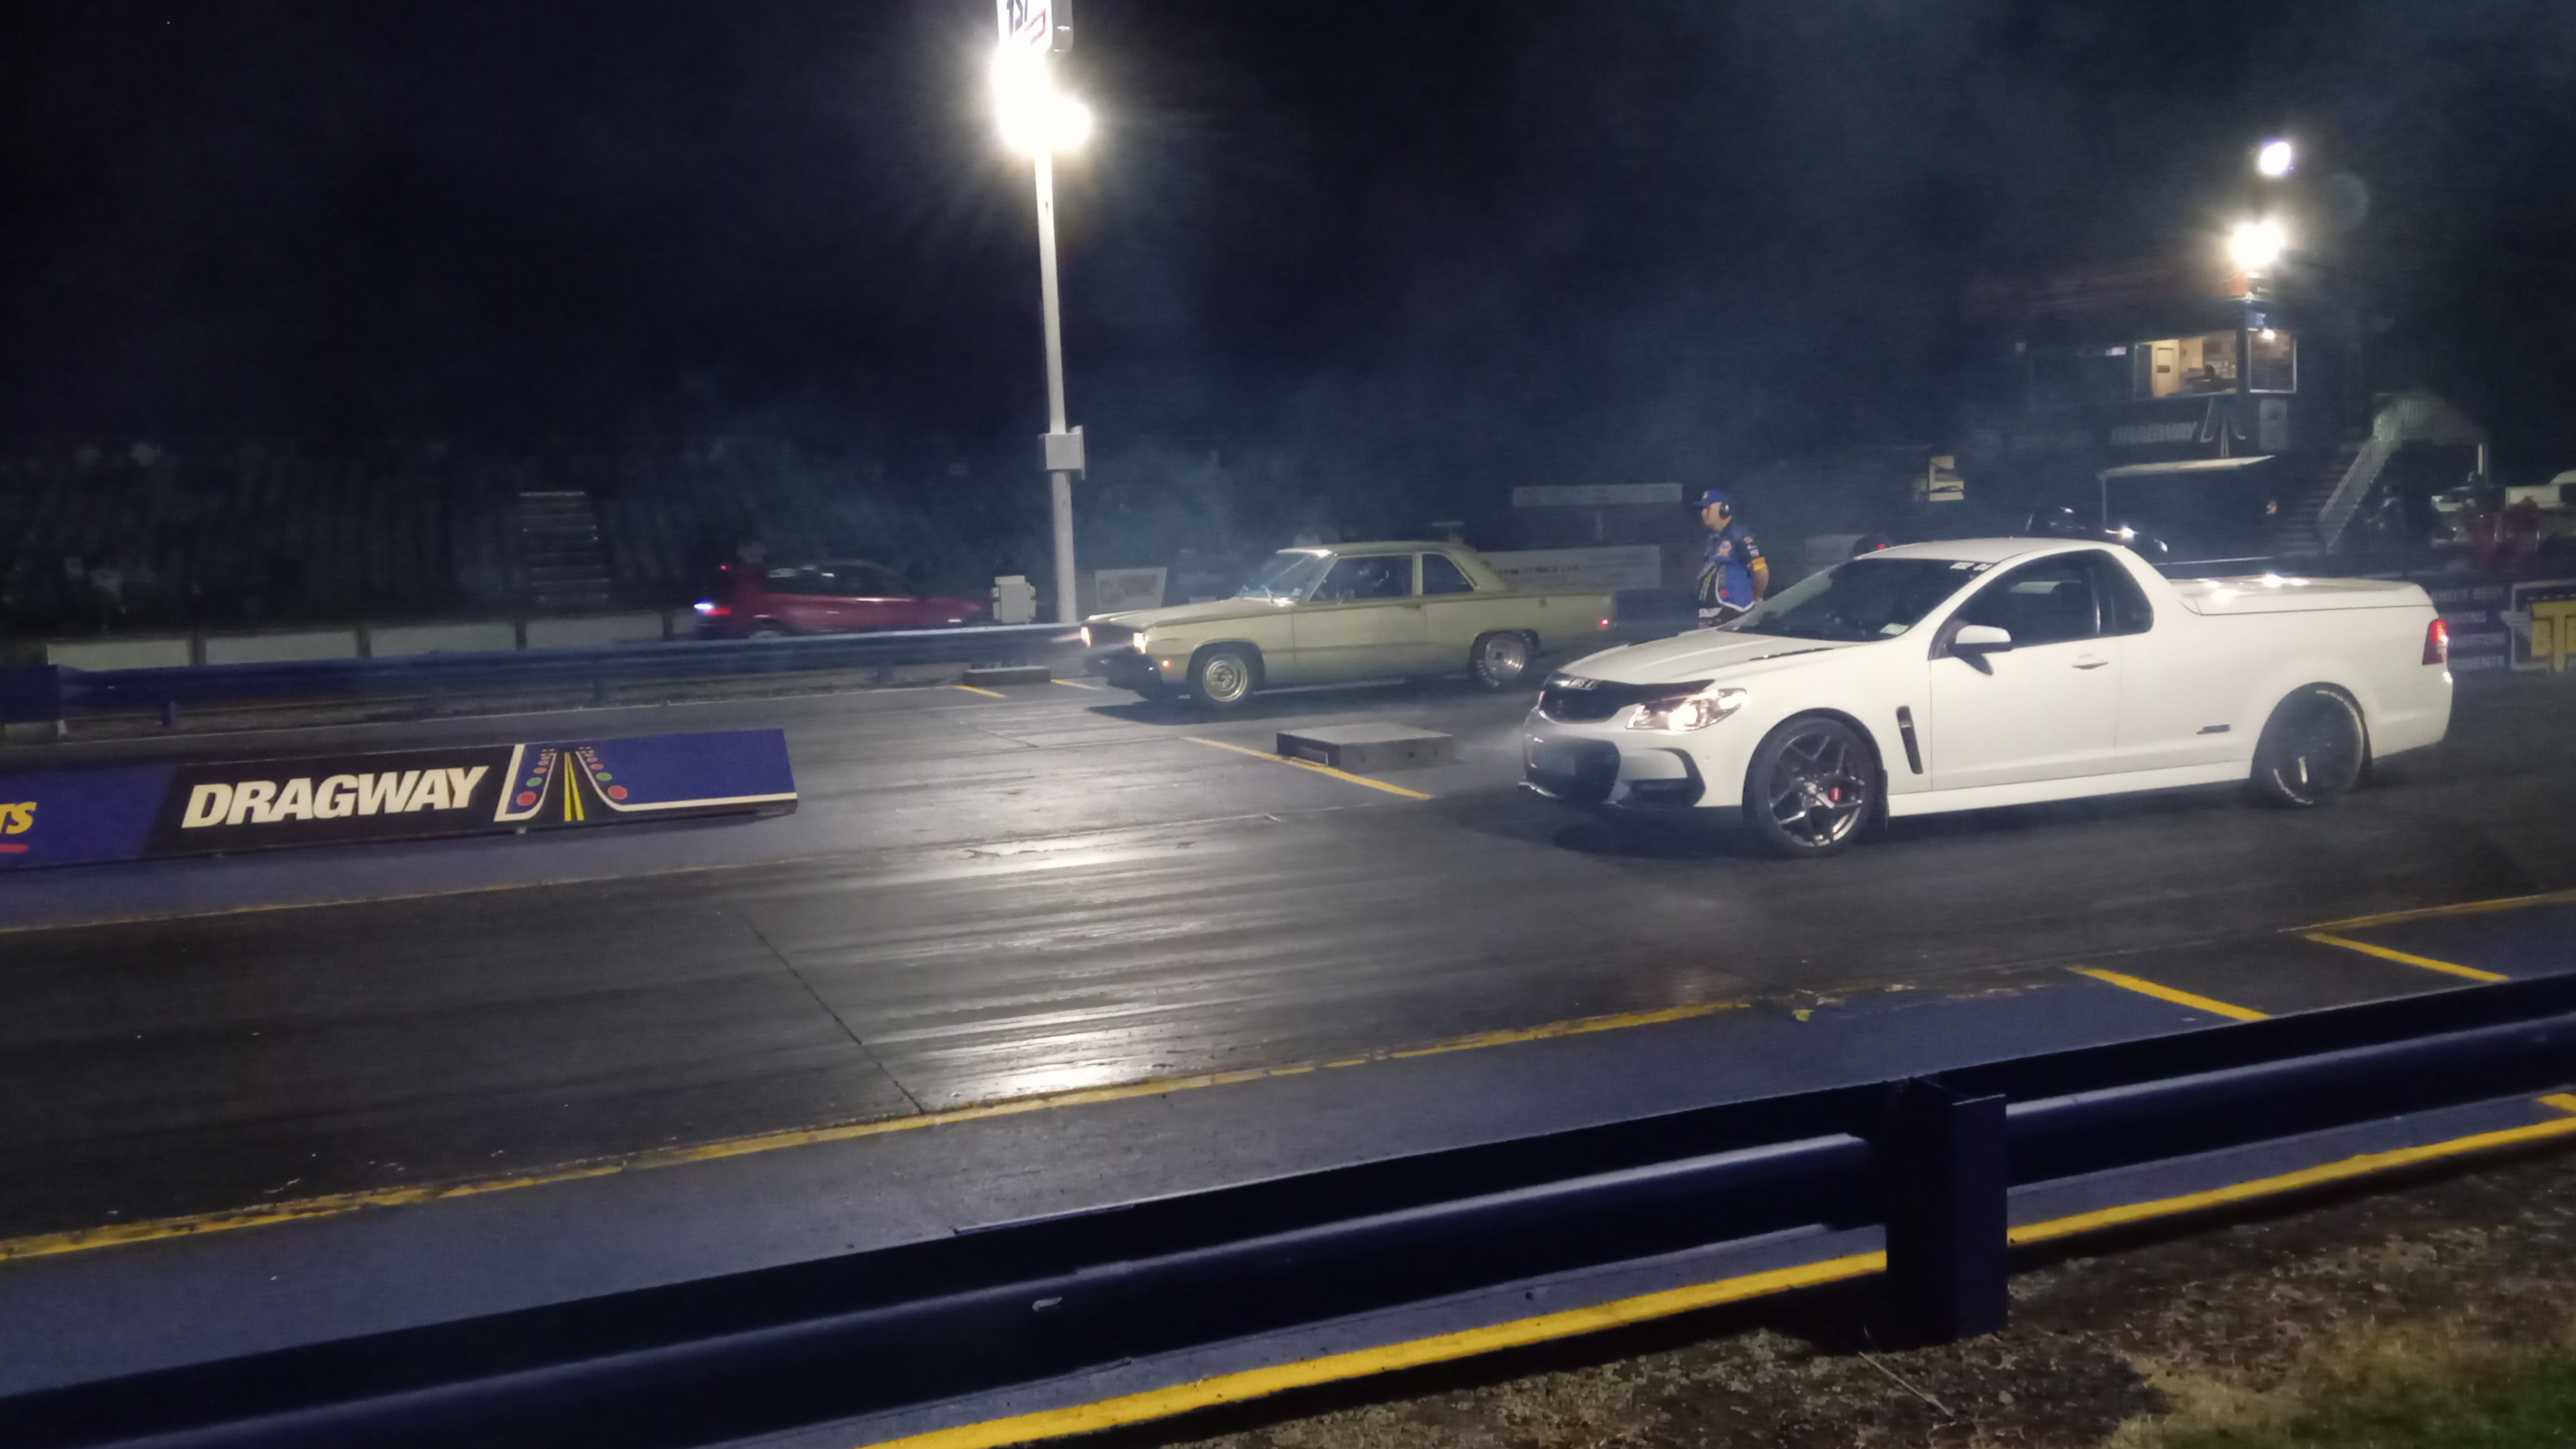
New springs made it more consistent,although slightly slower. Different wheels and muffler off when it did the 11.35 previously 11.5@118 every pass I have turned the 2 step rev limit down slightly as it was having trouble holding on the brake which I can probably fiddle with to improve I'd like to get it down to 11.0 so it's more competitive at the night drags https://m.youtube.com/watch?v=kdfGgT2pKHw&pp=ygUMVW5kZXJjYXJ2aWV3
1 point
-
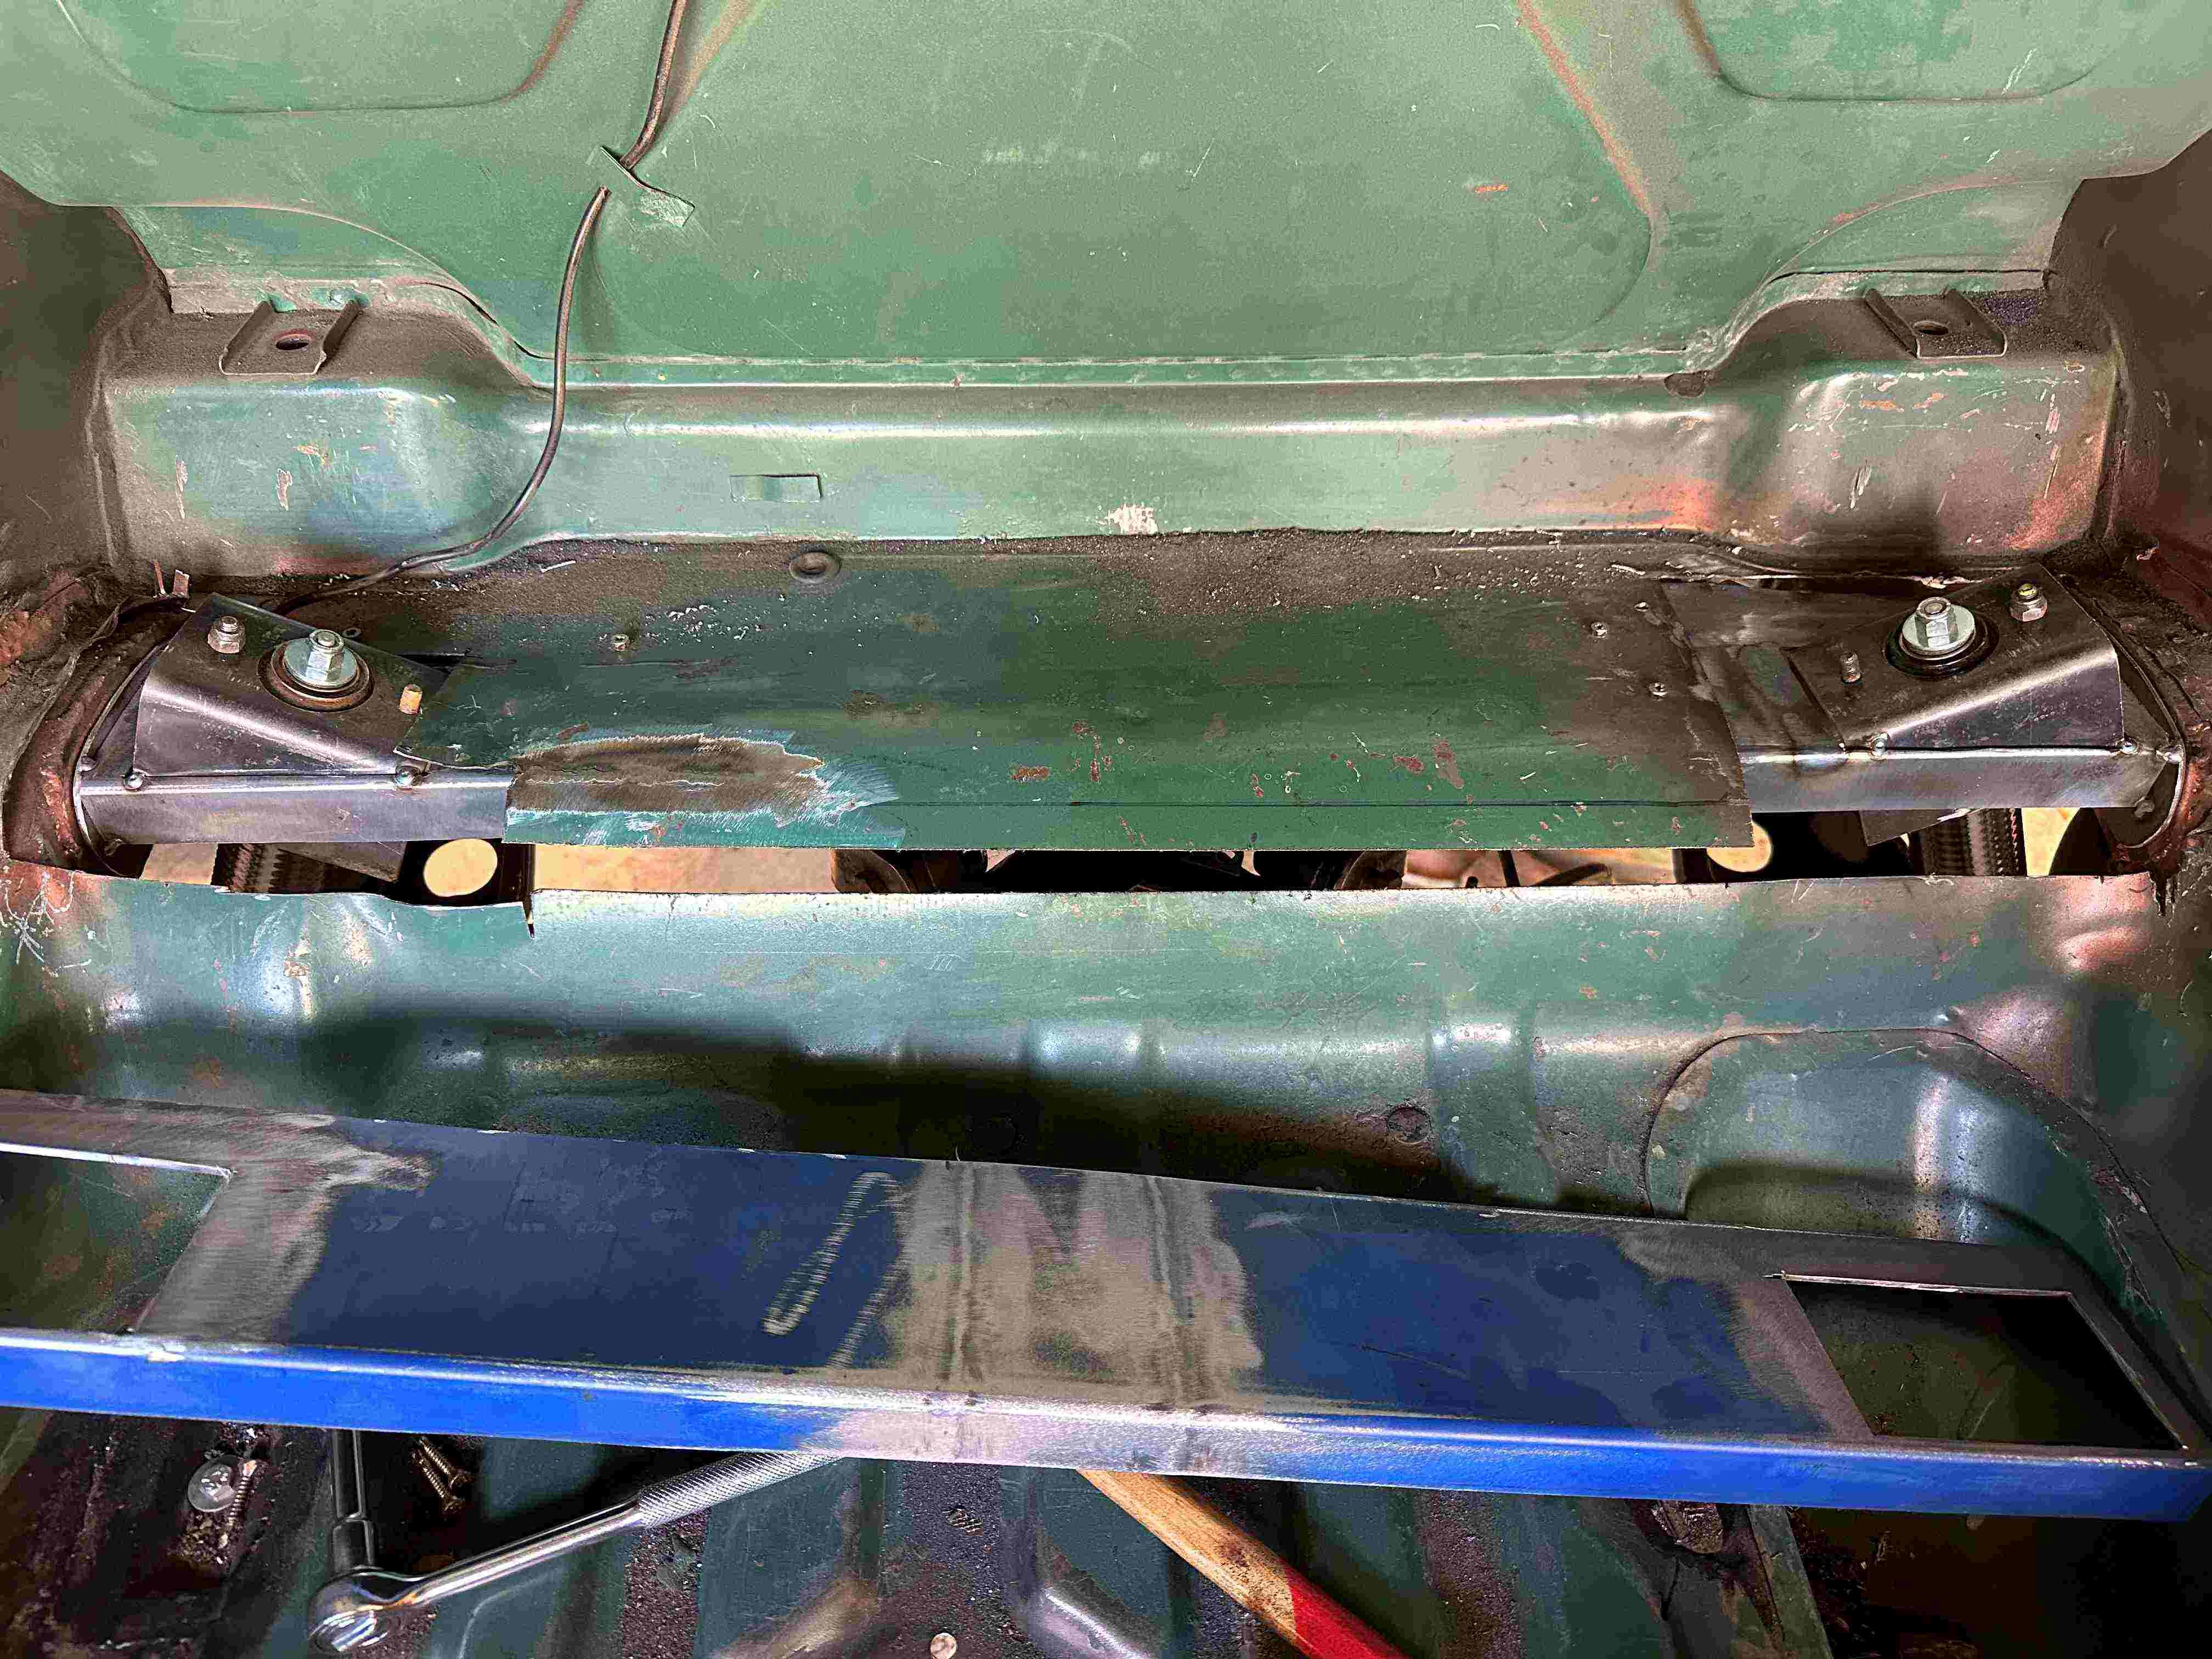
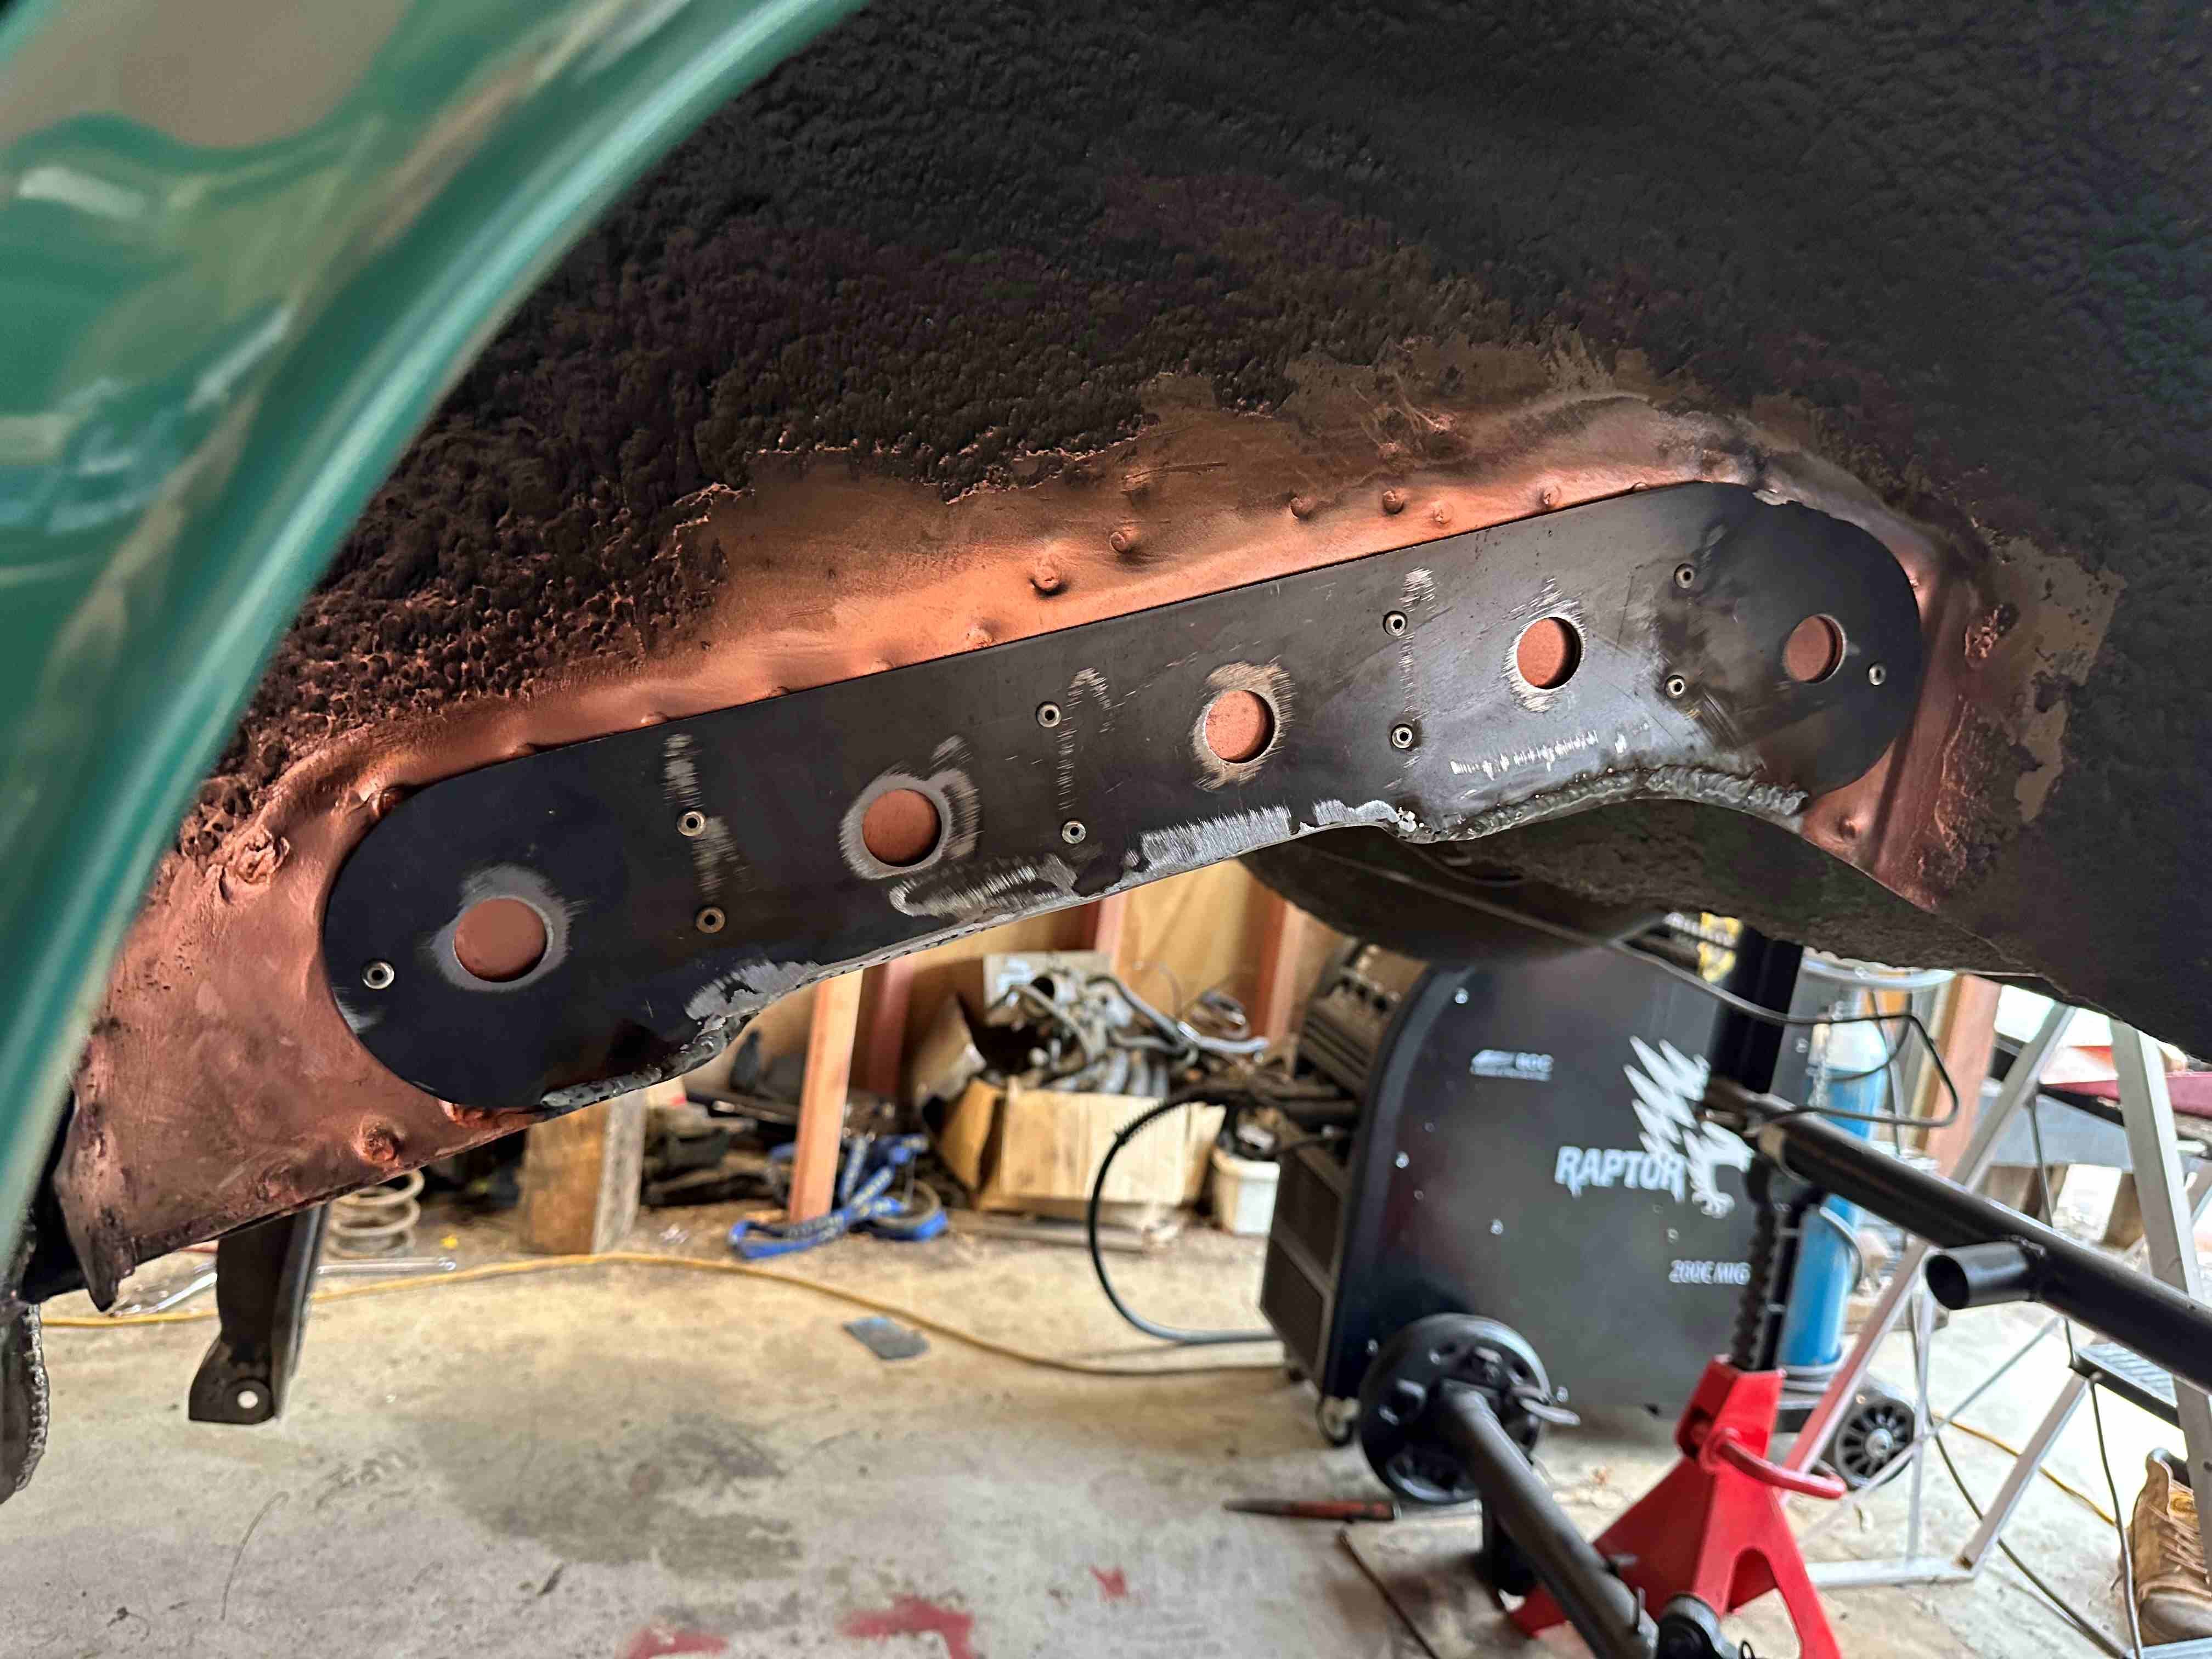
I managed to get the driver side welded in. Man, that took some time. By the time I clamped it in place (the easy bit) then put the 4 bolts in to hold it to the boots sheet metal. Then used some metal screws in between the bolts to hold the sheet metal to the shock mount. Then welded the bracket to the boot floor and the chassis fish plate. Once that was welded in I had to fit and weld the top plate which sandwiches the boot floor between the two. I made the top plate a little smaller in size so when I welded it, I was welding to the weld and bottom plate so I could use a bit more heat. Same procedure with bolts and screws and then welded it in. Welding went well really (well I think), though not that easy being folded in two inside the boot for some of it. Should have taken the pic before I sprayed on the weld through.
1 point
-
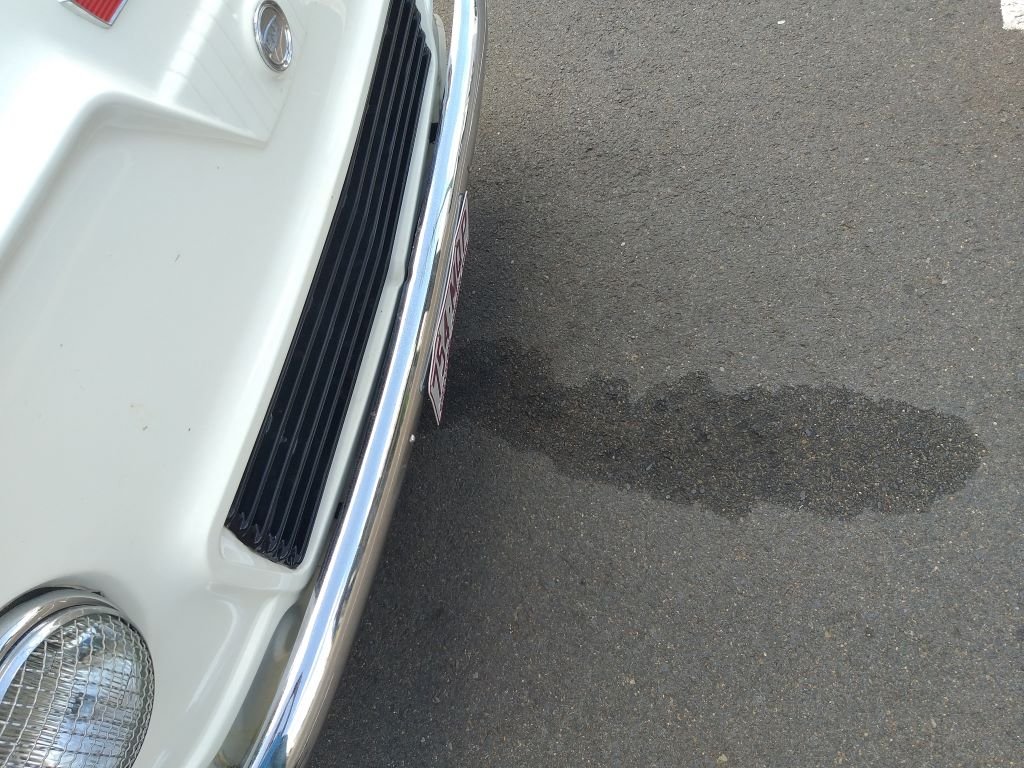
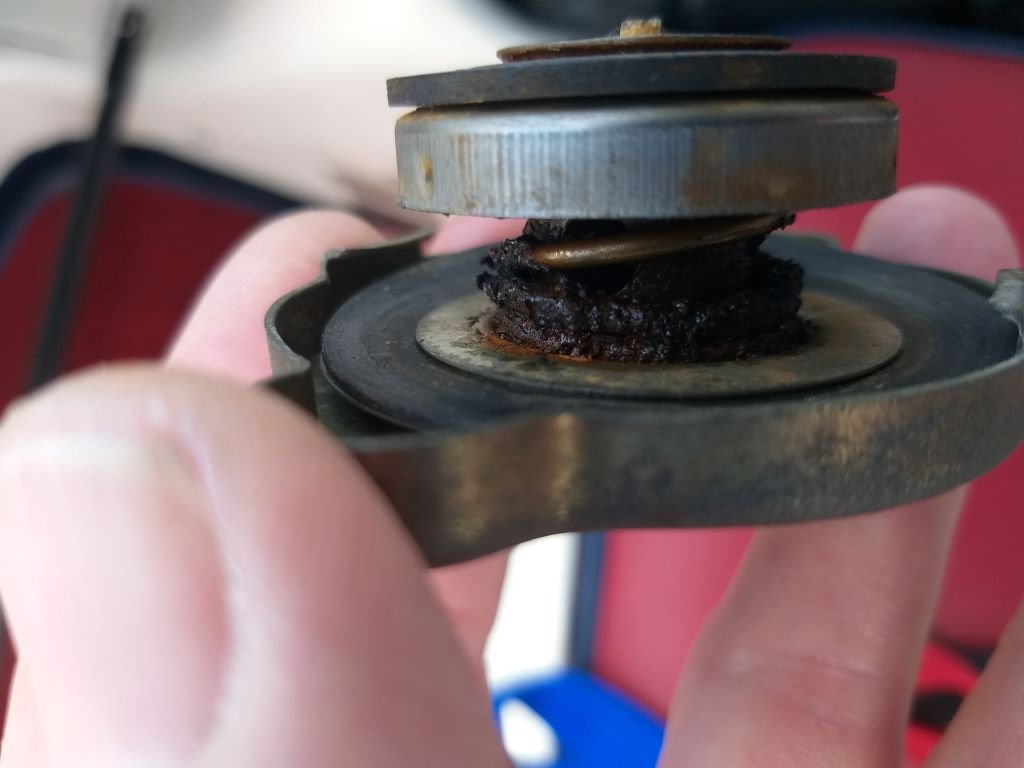
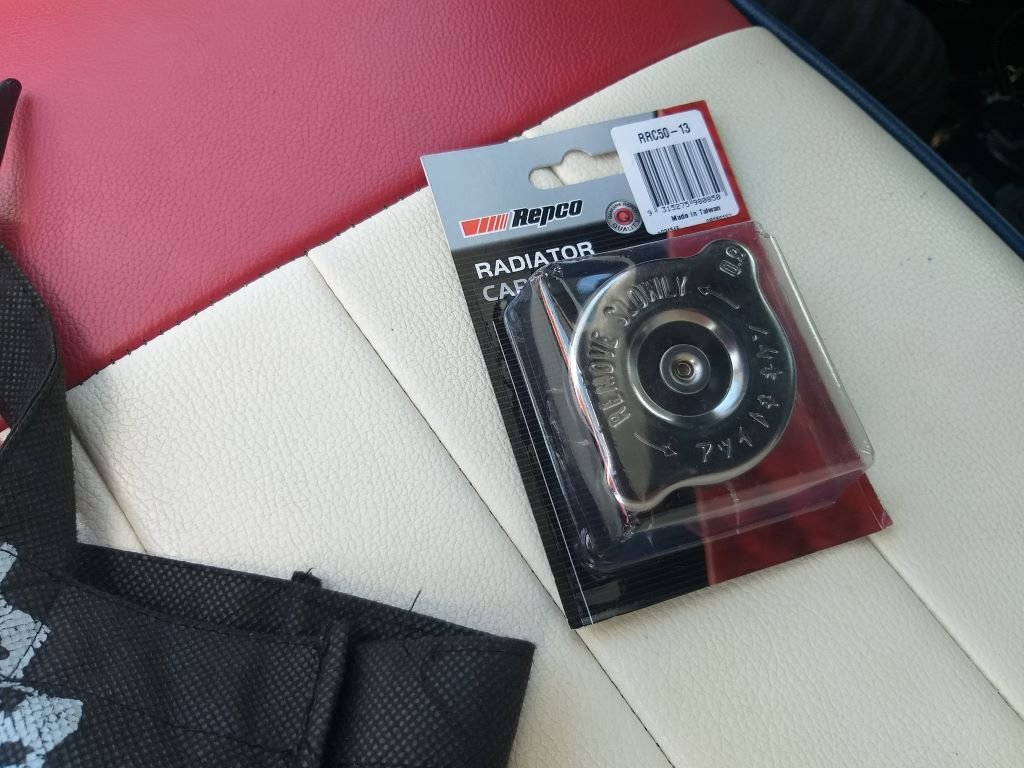
Did a supply run to town this morning and when I got back to the van it had done a little wee. Stuck my head underneath for a nosey and it looked suspiciously like it had originated from the radiator overflow pipe. I keep an almost constant eye on my temp gauge, so I knew that she hadn't run any hotter than usual. Grabbed a rag and popped the radiator cap off and he didn't spew his guts, so I figured that was a good sign. Cap spring felt pretty weak to the touch and on closer inspection it looks pretty crusty: Luckily Repco was just a block away, so I strolled on down and grabbed a new one. The new cap is the same 0.9 bar rating, but I could definitely feel the difference in the spring resistance compared to the old one. Made a few extra stops before heading back home and no more piddles, so looks like that's another win.
1 point
-
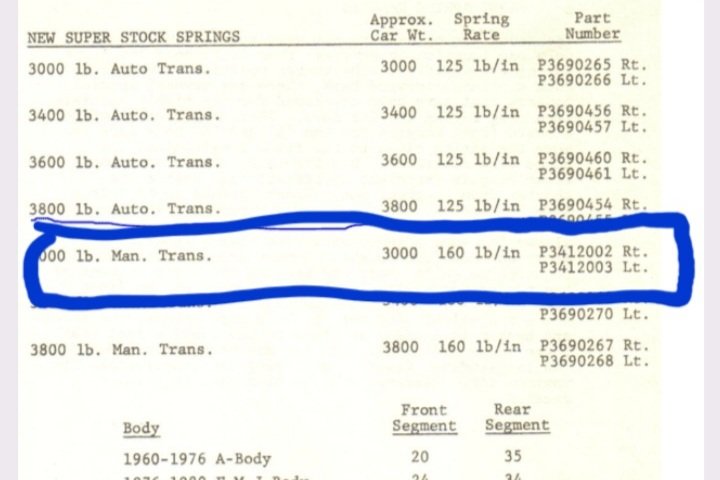
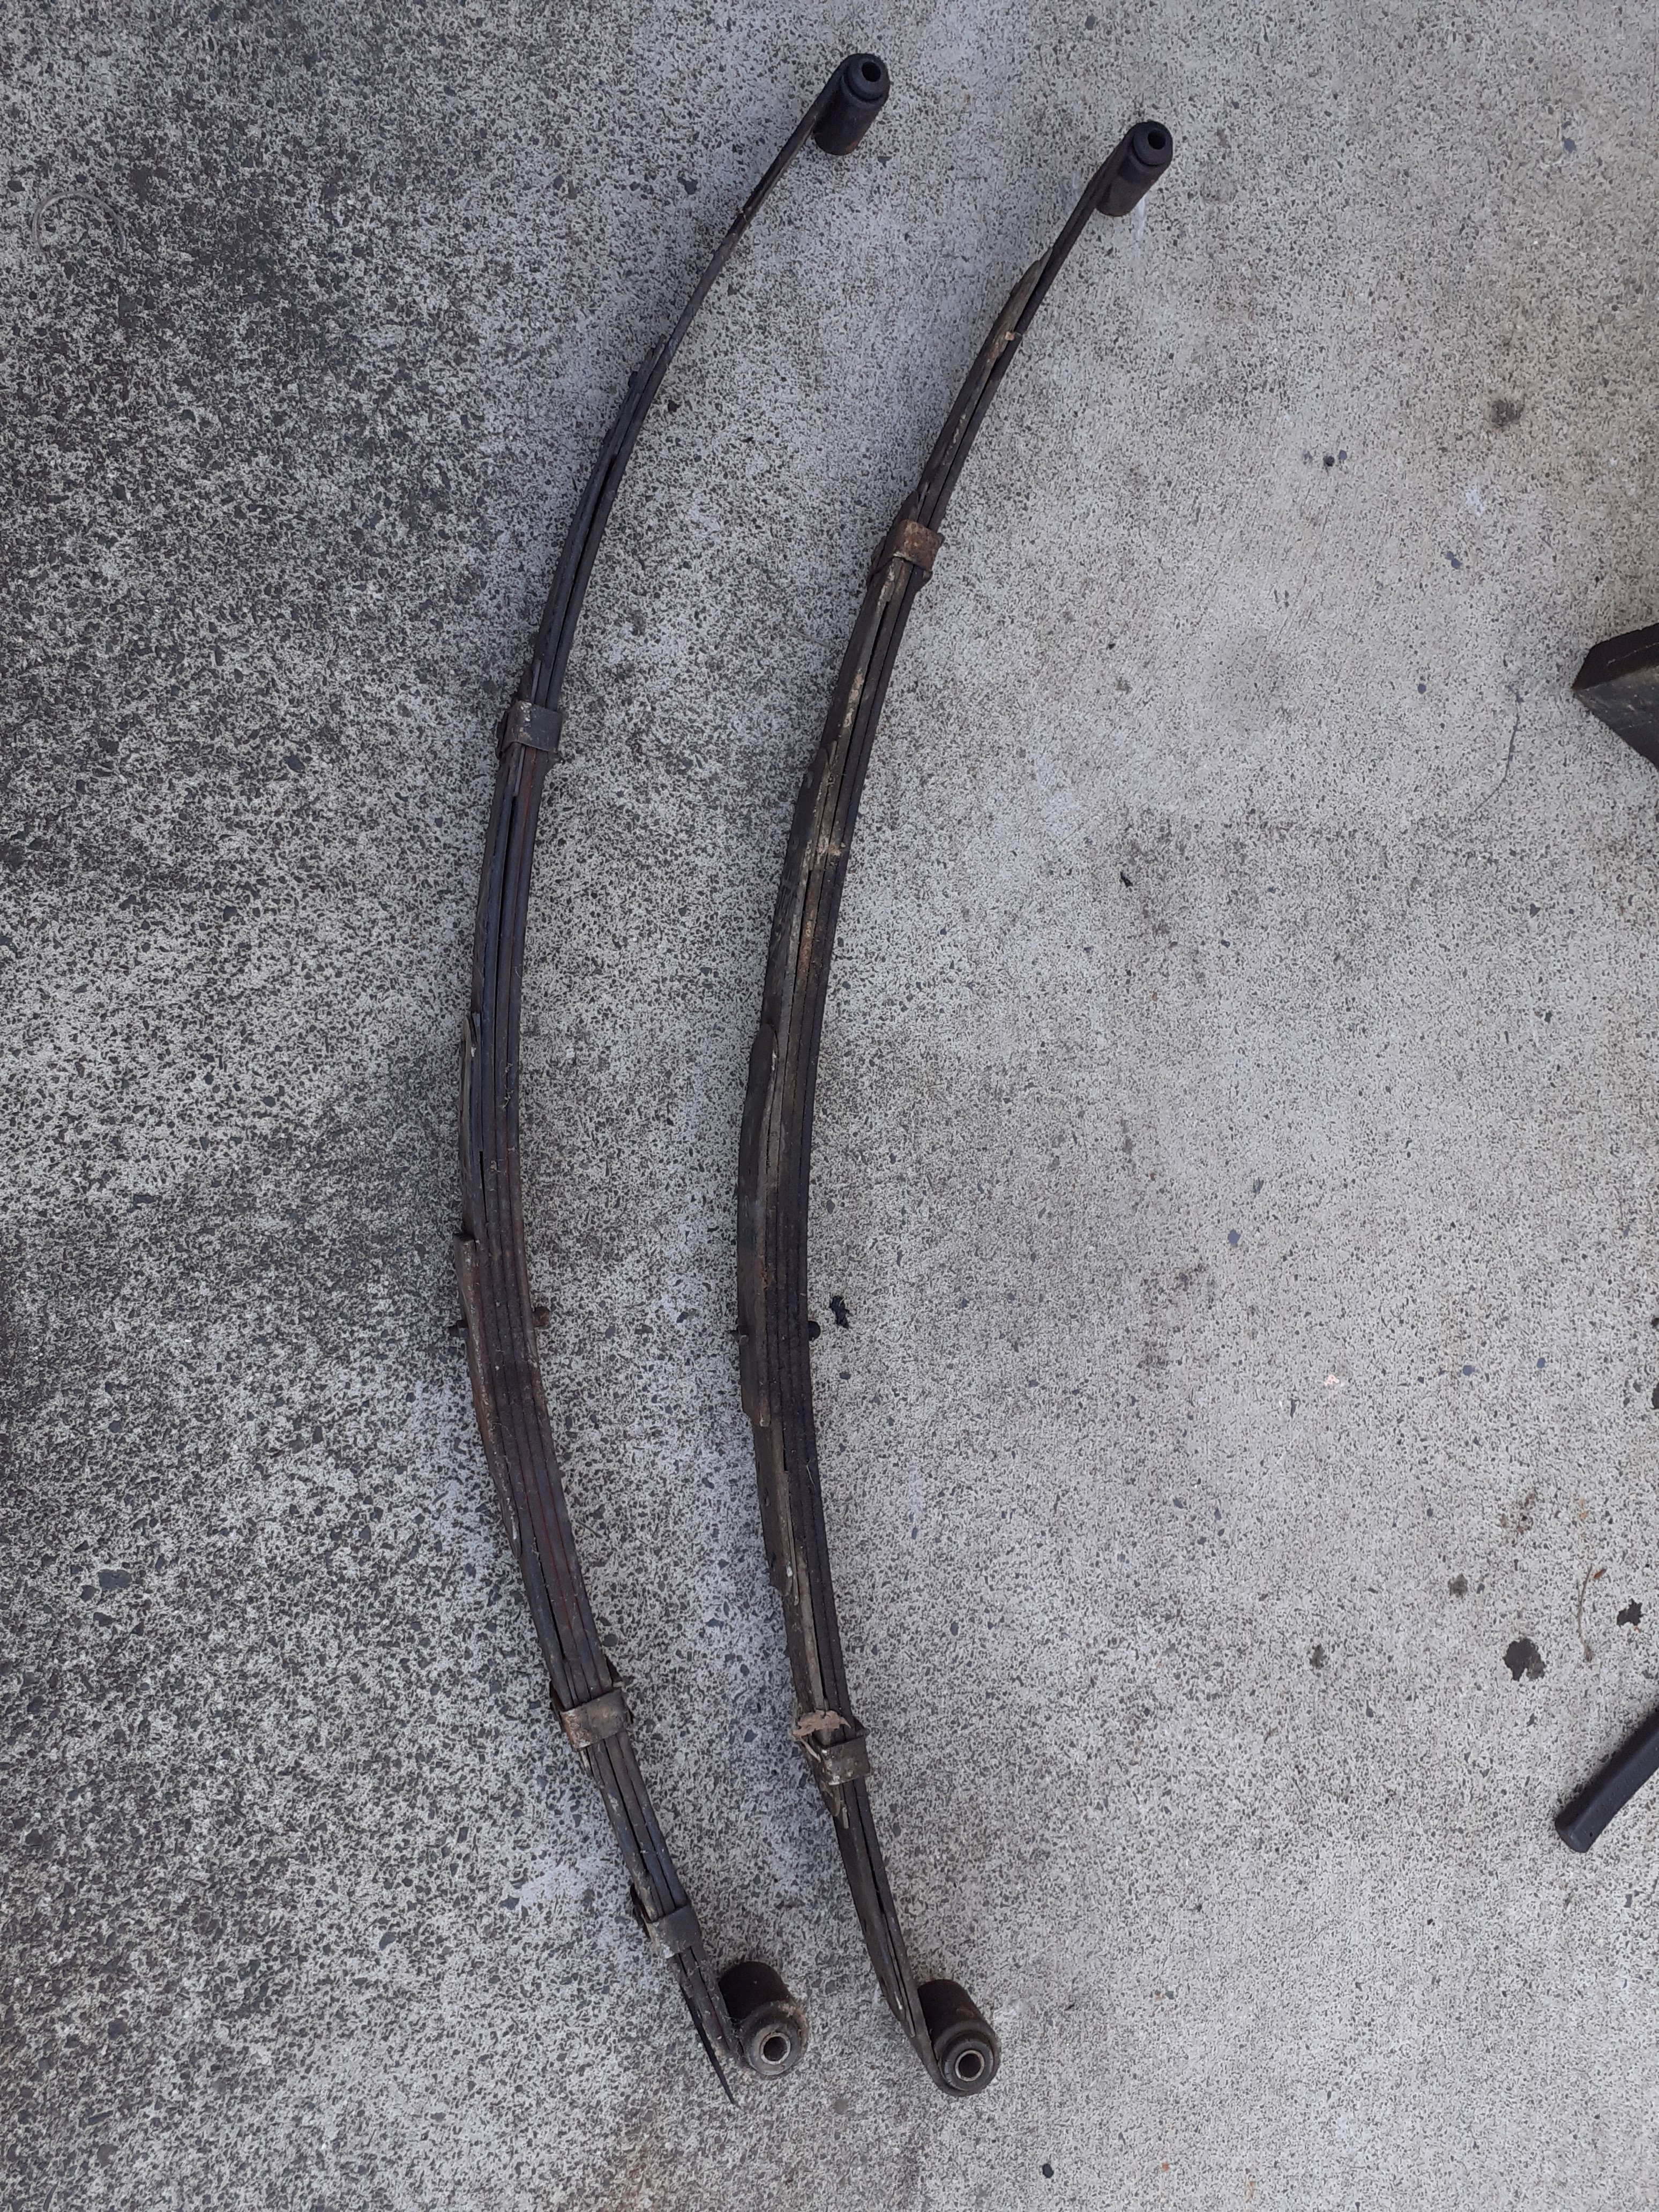
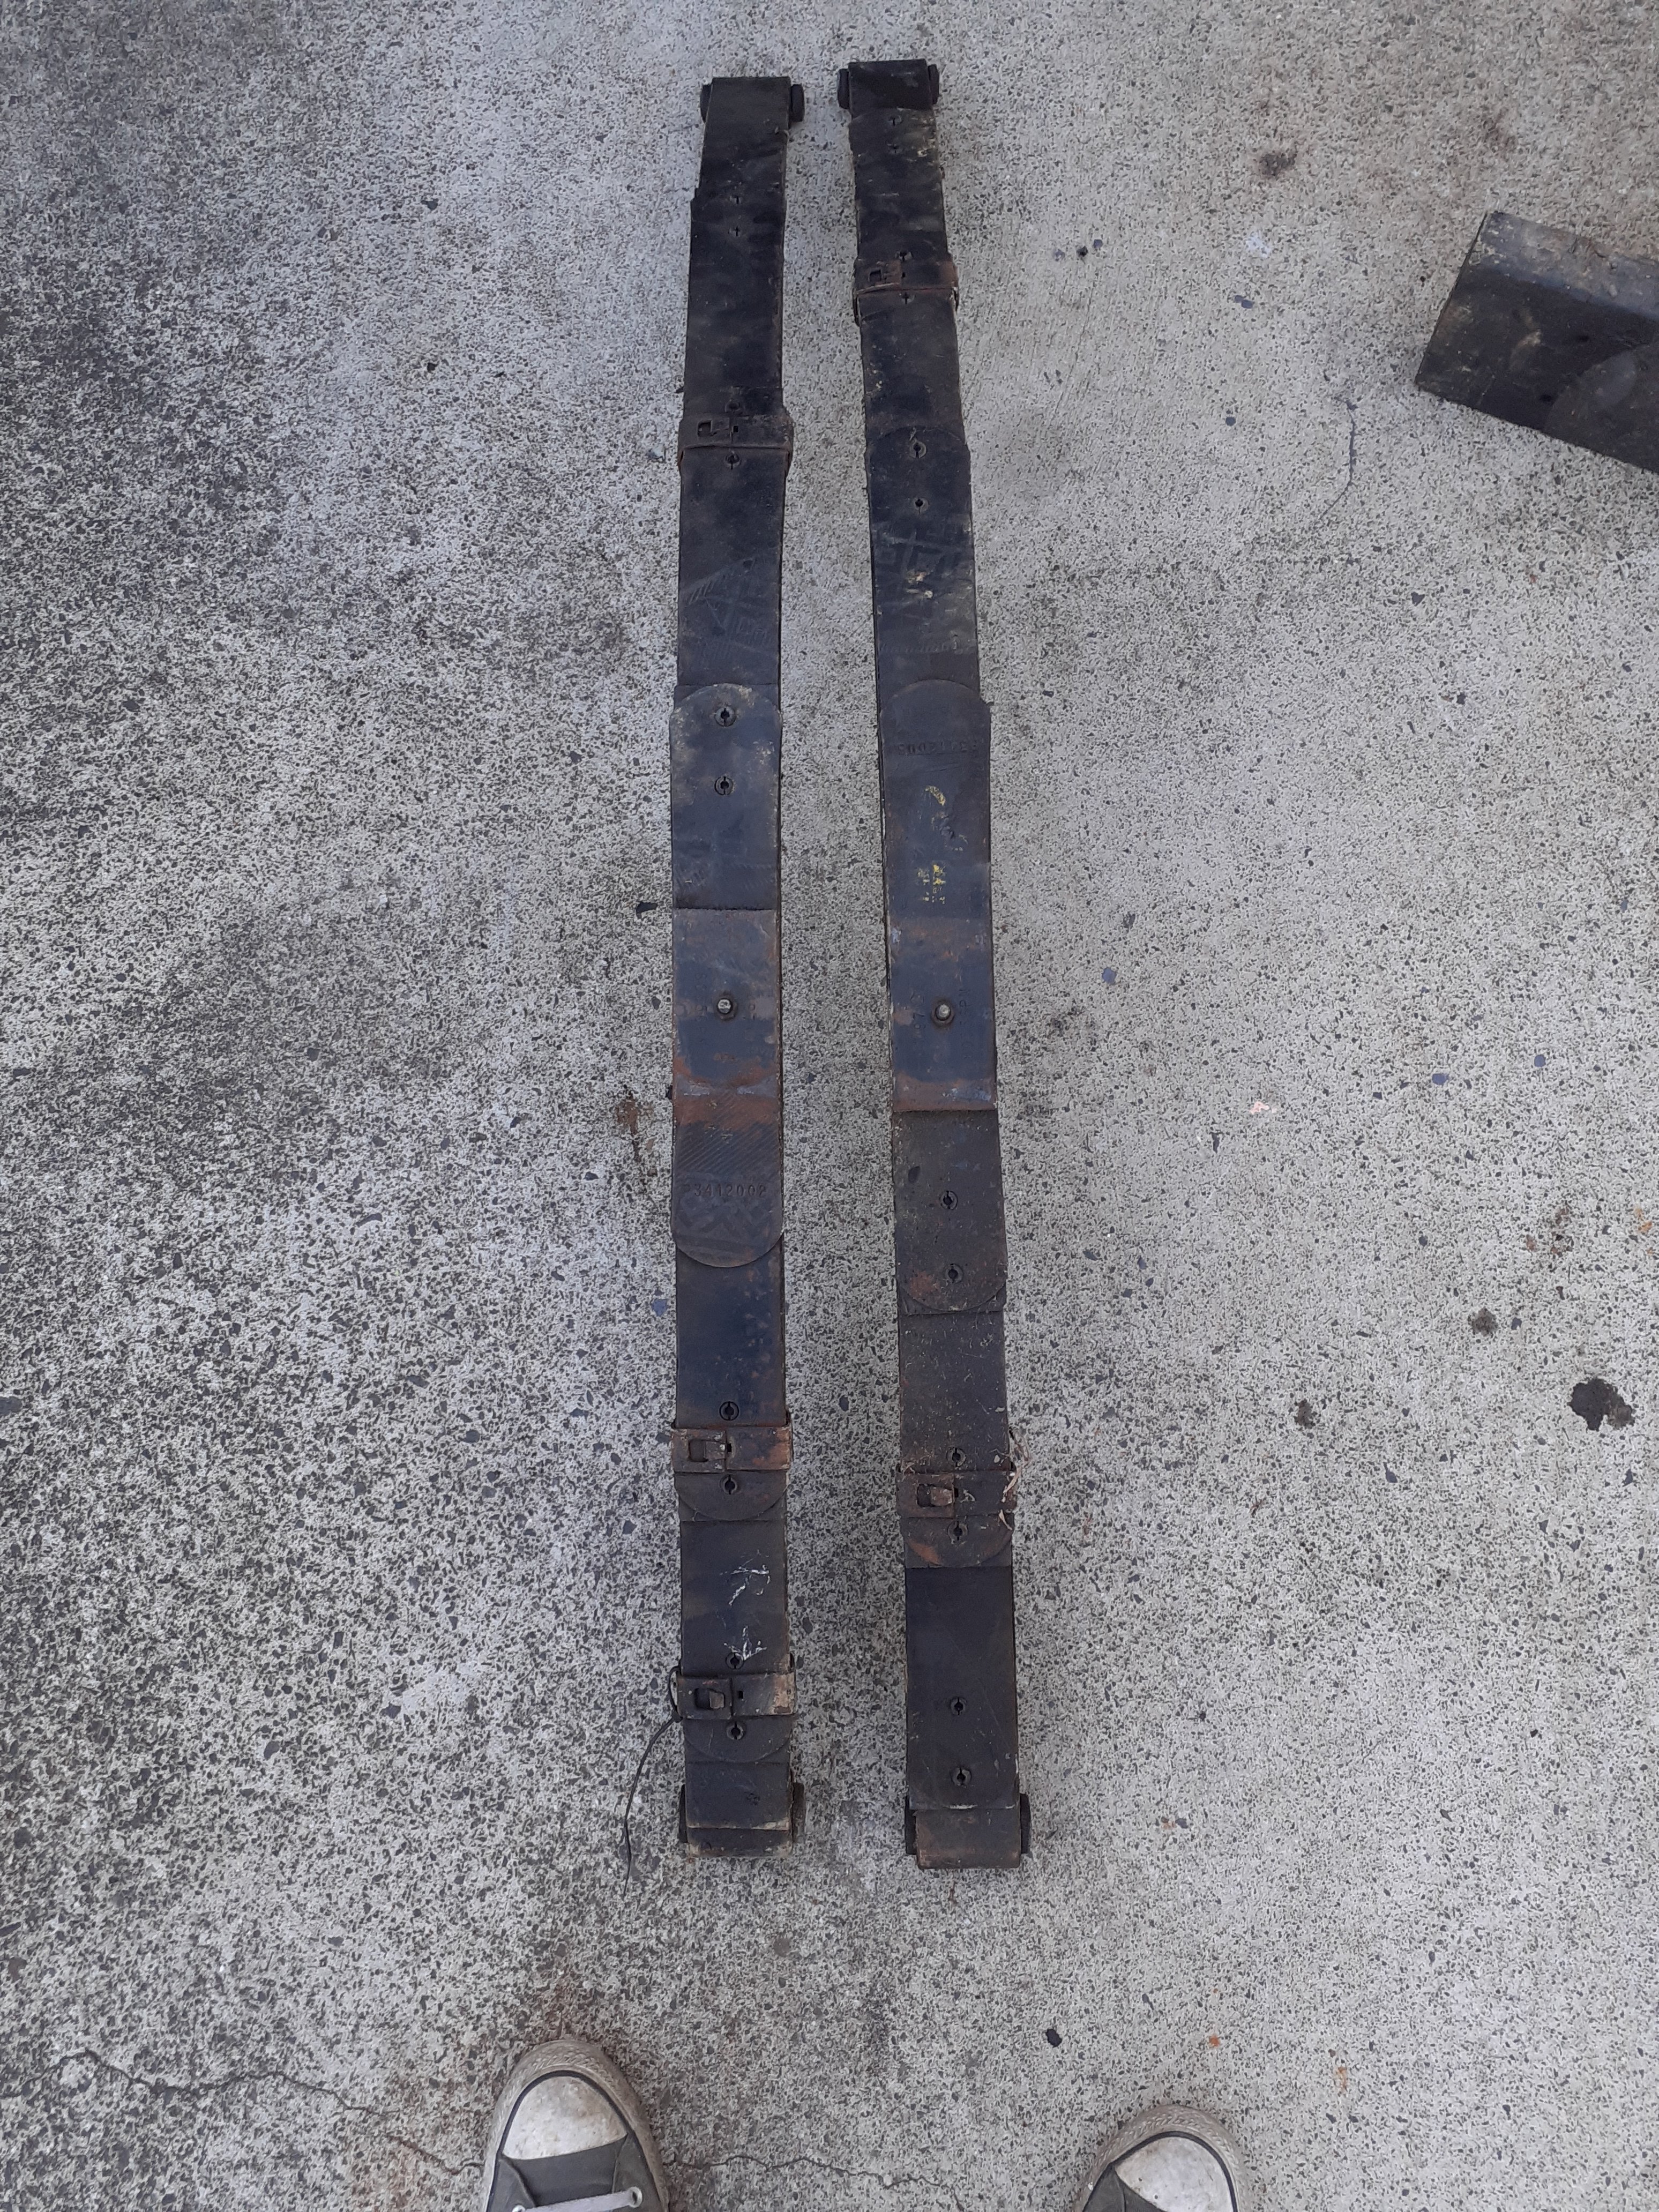
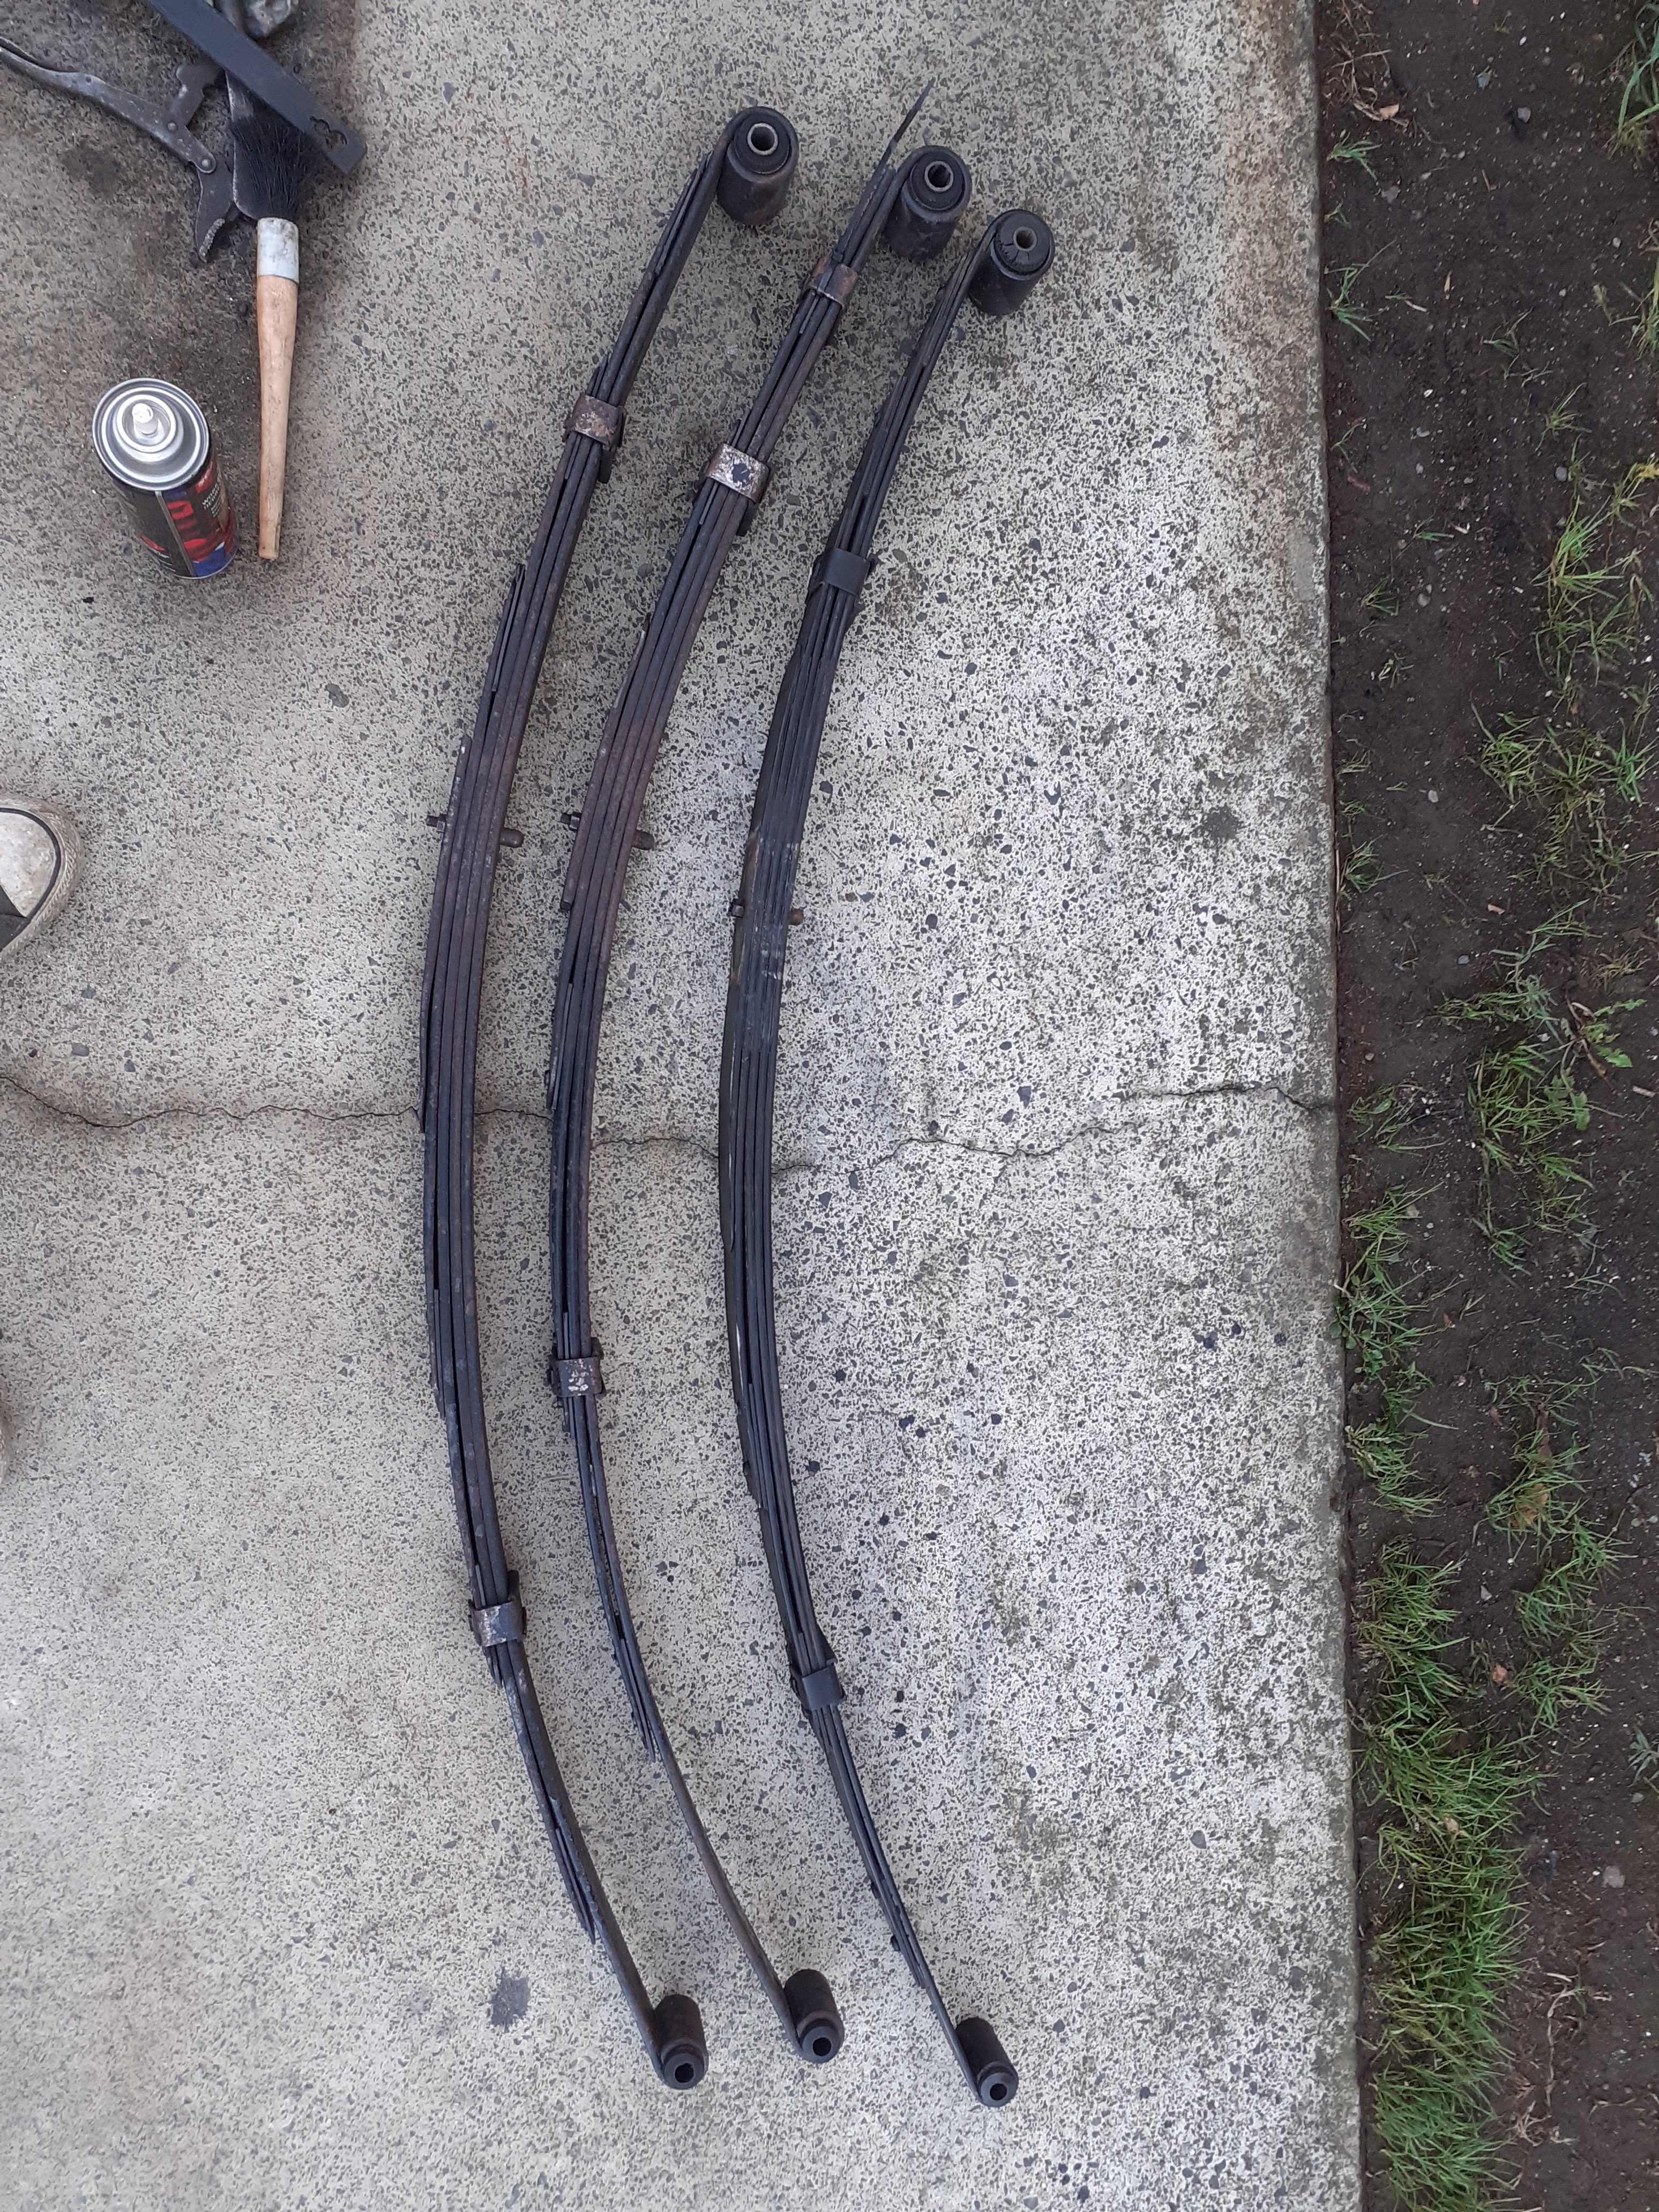
Ages ago someone gave me some mopar super stock springs which are meant to be pretty good for these things, I never really thought much about using them though because they are a bit wierd, they are different side to side with different shape and length leaves in the pack, apparently to counter the torque effect I thought I'd try them so put them in The leaves are considerably thicker (7.5mm vs 6mm originally)and the front eye bolt is bigger, plus they have a bigger arch so I knew it would raise it a bit, so I put them in and took it around the block. It is definitely stiffer, but not unpleasant, the height is now within 5mm per side, but looks dumb so I pulled them back out to get reset 50mm lower
1 point
-
Thread dredge from a million pages back. I do still have this . Went hard over the holidays and got a few panels painted. Made a start on the deck ages ago. Still a bit to finish off.
1 point
-
Mainly done. I need to weld in a small piece to fill the hole you can see in the pic's. It's that shape to give a bit more clearance for the odd square corner of the Honda engine. Also, another piece to fill the tight corner up on the right. It will make a little shelf but will be ok. I am pretty happy with the welding. I seem to have good penetration and not too much build in the main. I have taken a few high starting lumps off but it won't need much more. Some filler will be needed to smooth of top join (I suppose I am allowed to being sheet metal), but I still need to weld that from the inside as well. I think it is coming along well. Far better than my first attempt which was not so good but still gave me a stepping stone to doing a much better job the second time.
1 point
-
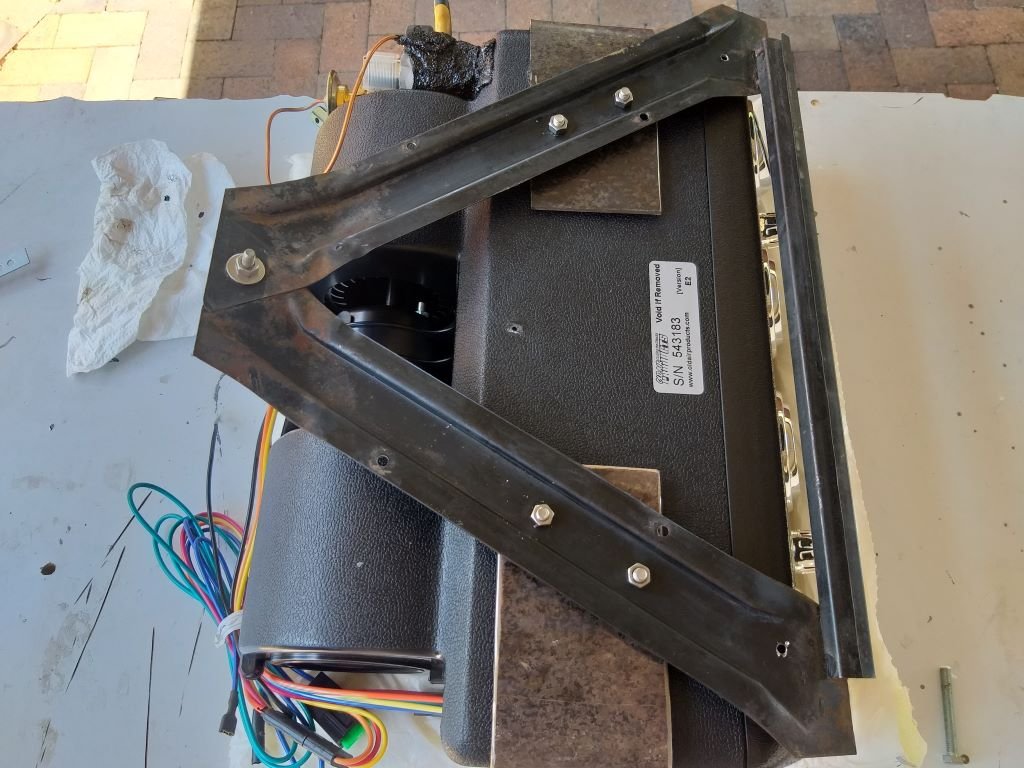
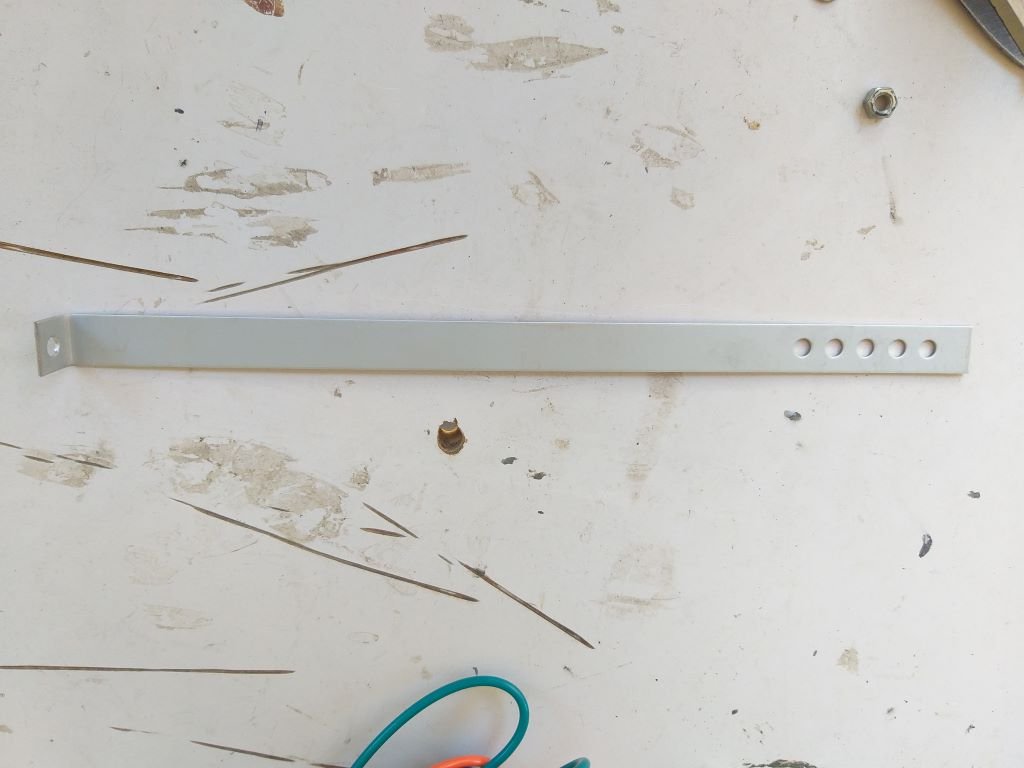
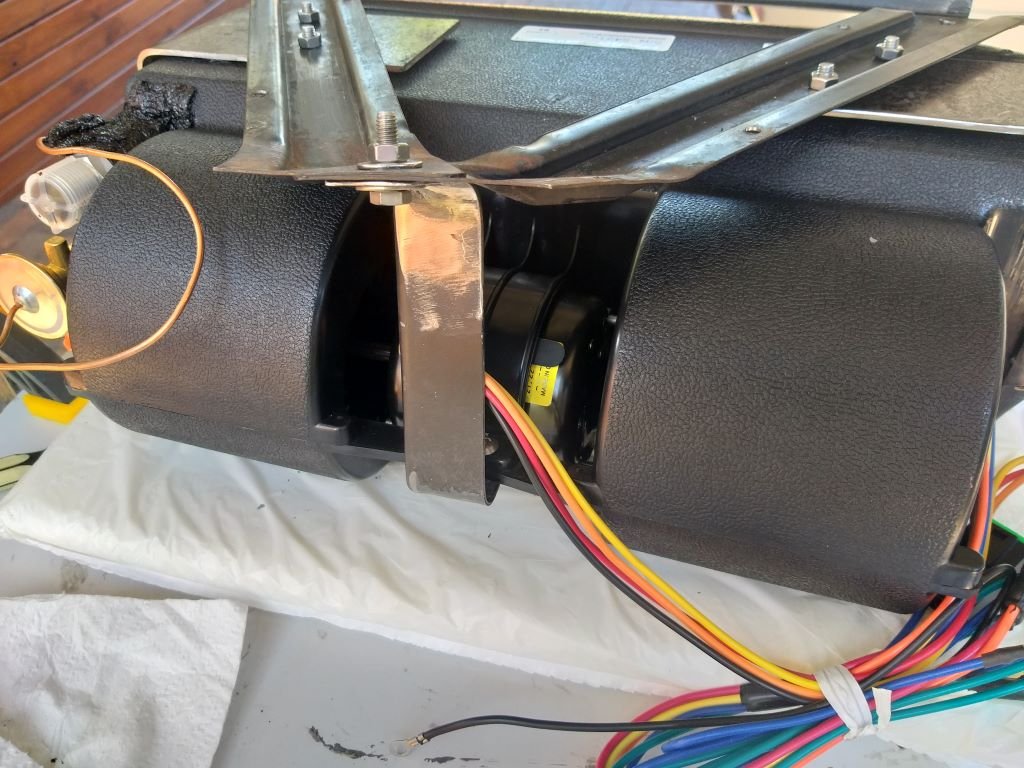
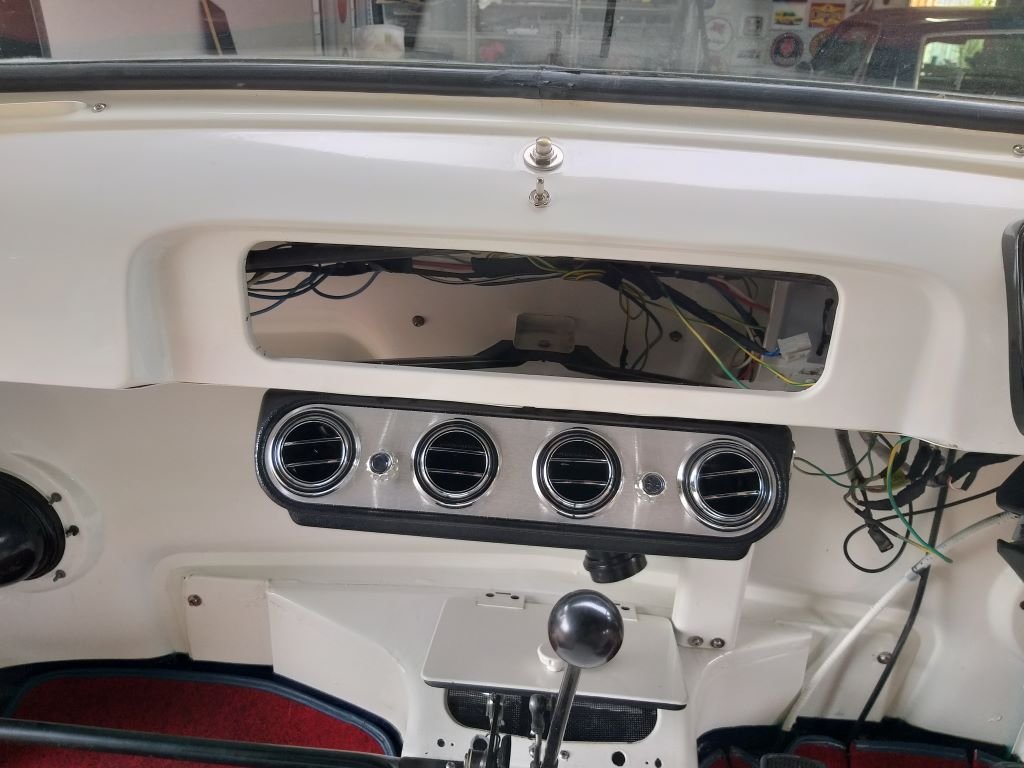
And that's the holes drilled so that my a/c mounting brackets bolt up to the glove box bracket. I wasn't happy with the puny looking rear mounting bracket that came in the a/c kit. So, I spent a bit of time making up my own rear bracket in true "Rough & Ready Restos" fashion. With all of the mounts completed I slapped the glove box bracket back in position and then bolted in the a/c unit. I'm pretty chuffed with the result. It doesn't look too out of place. The other good news is that the gas lines are located on the RHS of the unit which means that I can hopefully hide them behind this panel: The panel currently hides the main wiring loom and a few additional circuits that I have recently added. I whipped it out to see how much space is left behind the panel. Looks like I should be able to squeeze the a/c pipes in between the wiring loom and the front panel. I've still got a few additional circuits to add (including some a/c related wiring) before I can wrap my extra wiring loom, but hopefully that will neaten things up too. Thanks for looking.
1 point
-
I made up the plates for the passenger side today and took some pic's. I made a start on welding in one of the plates. I will leave it there for today. It will be interesting to see how it sits with the Avenger springs in. The minx is about 100kg heavier. I think I will need to get some shorter springs made to get it sitting where I want it.
1 point
-
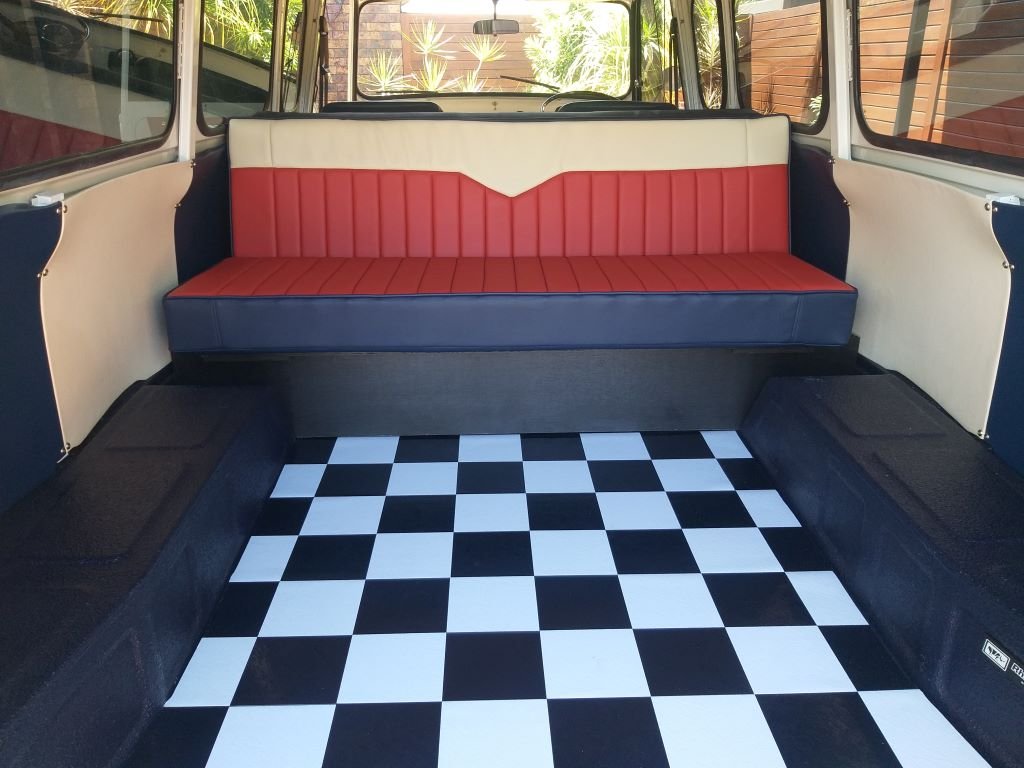
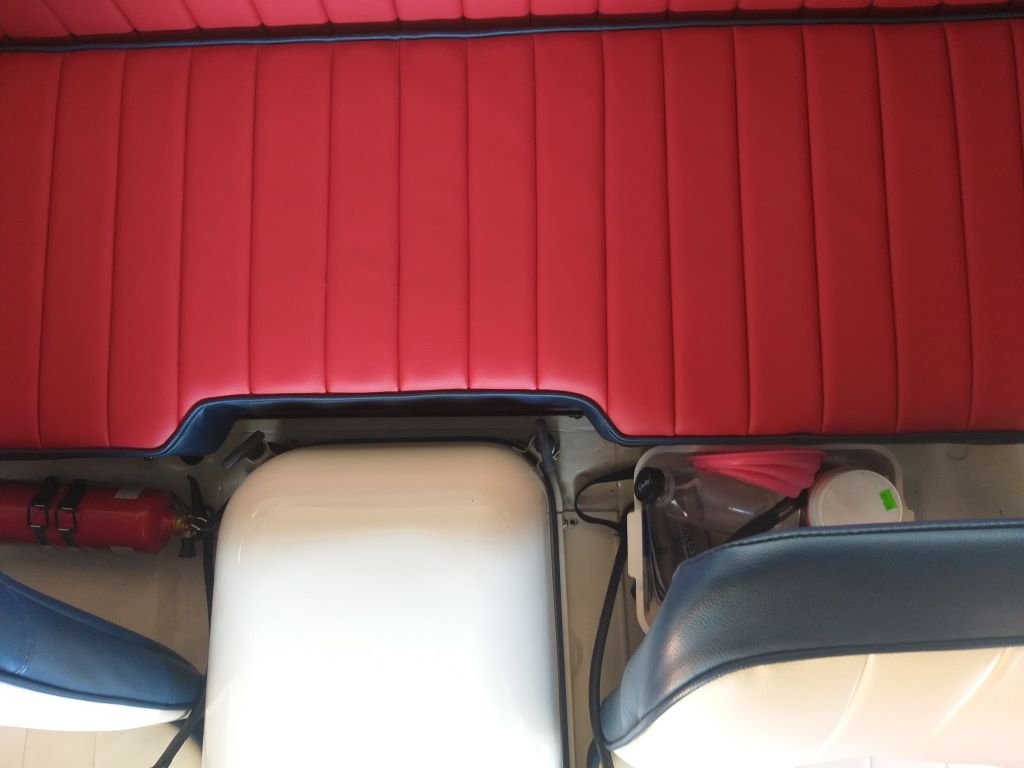
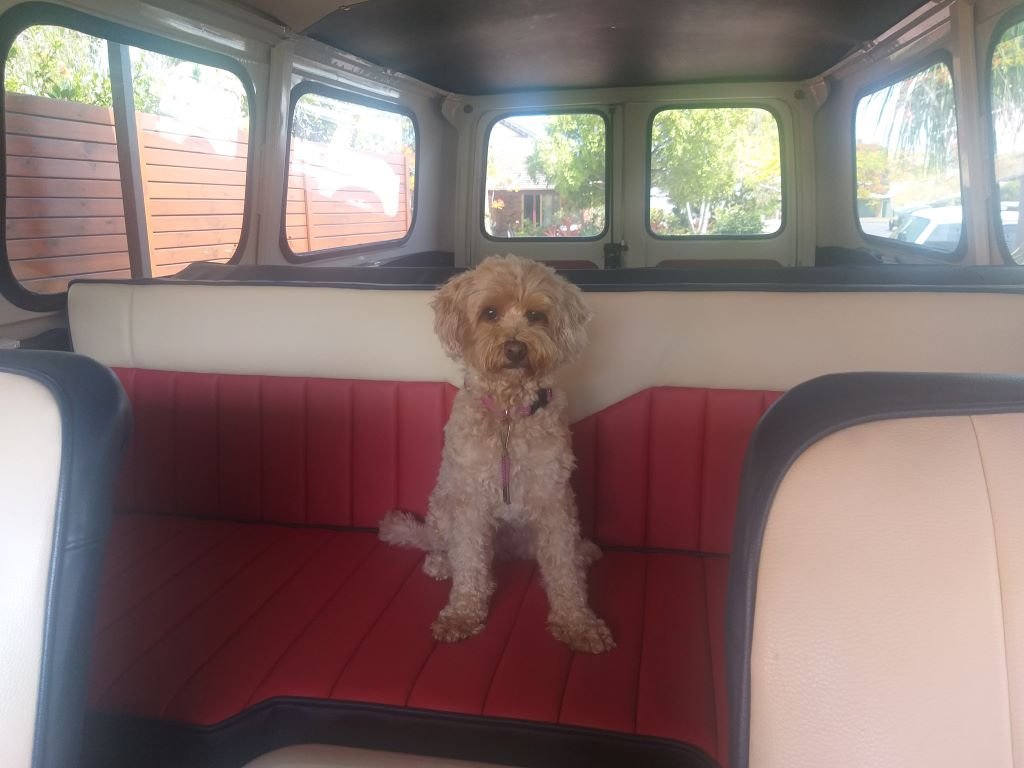
This year is one of those significant wedding anniversaries for Mrs Flash and I, so a few weeks back I asked my lady what she would like. Now most ladies would ask for some new jewellery or maybe a new outfit or two, or perhaps a romantic weekend away at some fancy resort. But that's just not how my girl rolls. Without even thinking about it she immediately asked if we could rather spend the money getting the upholstery work done for the back of the Thames. Jeez, no wonder I love this woman so much. So, with the decision made off I headed to town to visit two of our local upholstery places. The first stop was at the auto trimmers. Now I get that these guys do nothing but cars all day, but I was still expecting the chap to at least comment on the Thames, but not a peep. He noseyed around with a measuring tape and then proceeded to give me one of those loosey goosey "between this and this" verbal quotes where you immediately know that the final figure is going to be nowhere near the bottom figure quoted and you are likely to get very little change back from the upper figure quoted. Anyhoo, undaunted by his lack of enthusiasm I headed off to the next stop which is a place that mainly specialises in recovering furniture. Now as I pulled into their driveway, I spotted this guy scurrying across to greet me and we proceeded to yarn about the Thames for a good 10 minutes before we even started talking business. It turns out that Bill is originally from Masterton where his dad ran a motor trimming business back in the day. The minute that Bill was big enough to reach the pedals on the sewing machine he was put to work and by the age of eight he was already doing diamond stitching which was all the rage back then. We chatted a bit about what I was looking for style wise and Bill was already throwing in some really good suggestions, so I knew I was on to the right guy. We looked at some samples, Bill took some measurements and the next minute Caroline the owner handed me a written quote that was significantly less than the first quote I got. Winner! Roll forward a few weeks whilst Caroline sourced the marine grade vinyl material and some top-quality foam, and I then took the van around for final measurements. Because the cushions are loose, I didn't have to leave the van with them which was another plus. Roll forward another week and late yesterday I got a call from Caroline to say that the cushions were ready for final fitting, so we wheeled through first thing this morning and Bill laid down some velcro to keep everything in place and then proceeded to do the final fit up. To say that we are blown away with the results would be an understatement. The job has turned out absolutely amazing. Rear facing couch looks like so: Bill even shaped the base of the front facing "dog box" so that it clears the engine cover tie downs: And lastly even our doggo seems happy with her comfy wee seat. Thanks for looking.
1 point
-
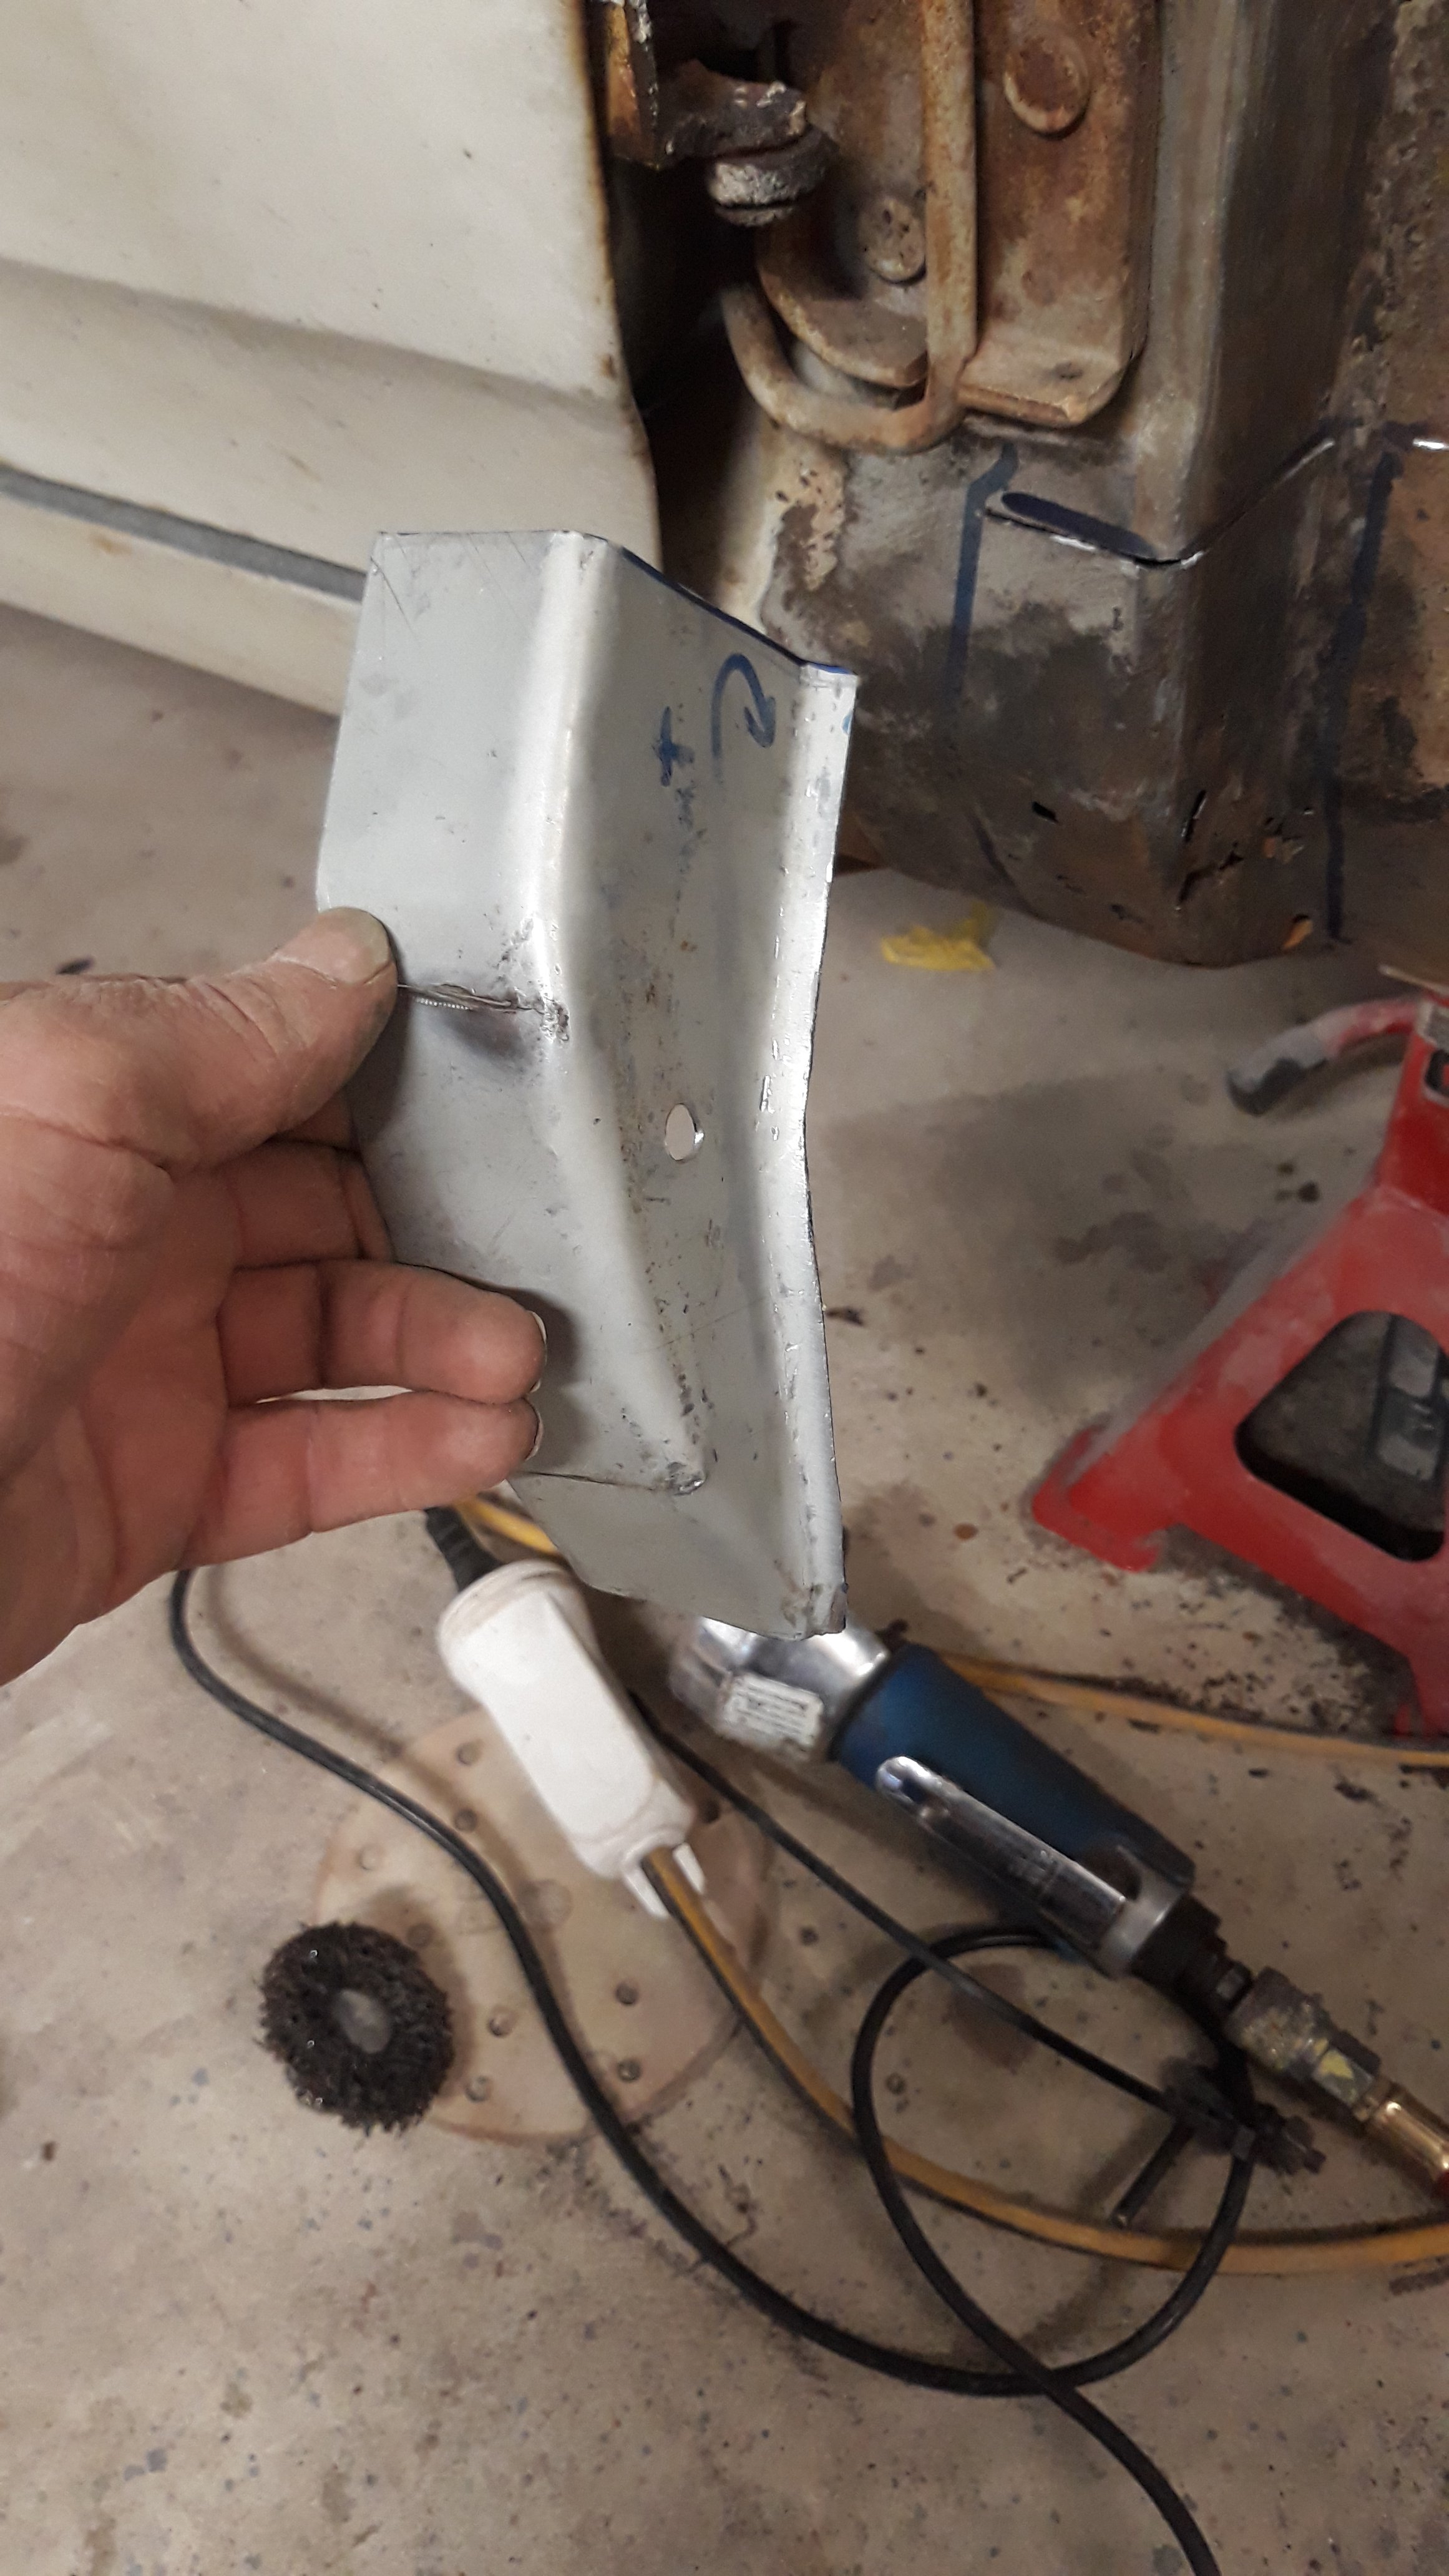
Rhs needs glued up, panelbeater may not appreciate me cutting holes hehe, i made a single piece patch for him to glue in for me.
1 point


.thumb.jpg.570970b401ac8d26ce9af7c1bf2bd8cd.jpg)


This leaderboard is set to Auckland/GMT+12:00