
Leaderboard


Popular Content
Showing content with the highest reputation on 03/29/24 in Posts
-
Fixed the rust hole, no pics cos boring. Made a heatshield for the alternator, first drilling and tapping some brass hex to stand it off, then some CAD, then some shiny so it reflects heat; Then I grabbed the pretty non functional catch can that I made for the truck, modified it so the wire wool was less in quantity and right before the outlet rather than at the inlet, which is why I suspected it didnt work well, then gave it some chode so it would fit in the engine bay; Went and filled it with some 95 as it was pretty low and it definitely needs some time spent on tuning, the low throttle popping and banging sounds good but the afr tells me its not right. Man it feels good to drive tho, the combo of the gogo and the noise is pretty great. If anything it sounds better now the air filter is on, a really purposeful growl.9 points
-
It works.
 7 points
 -
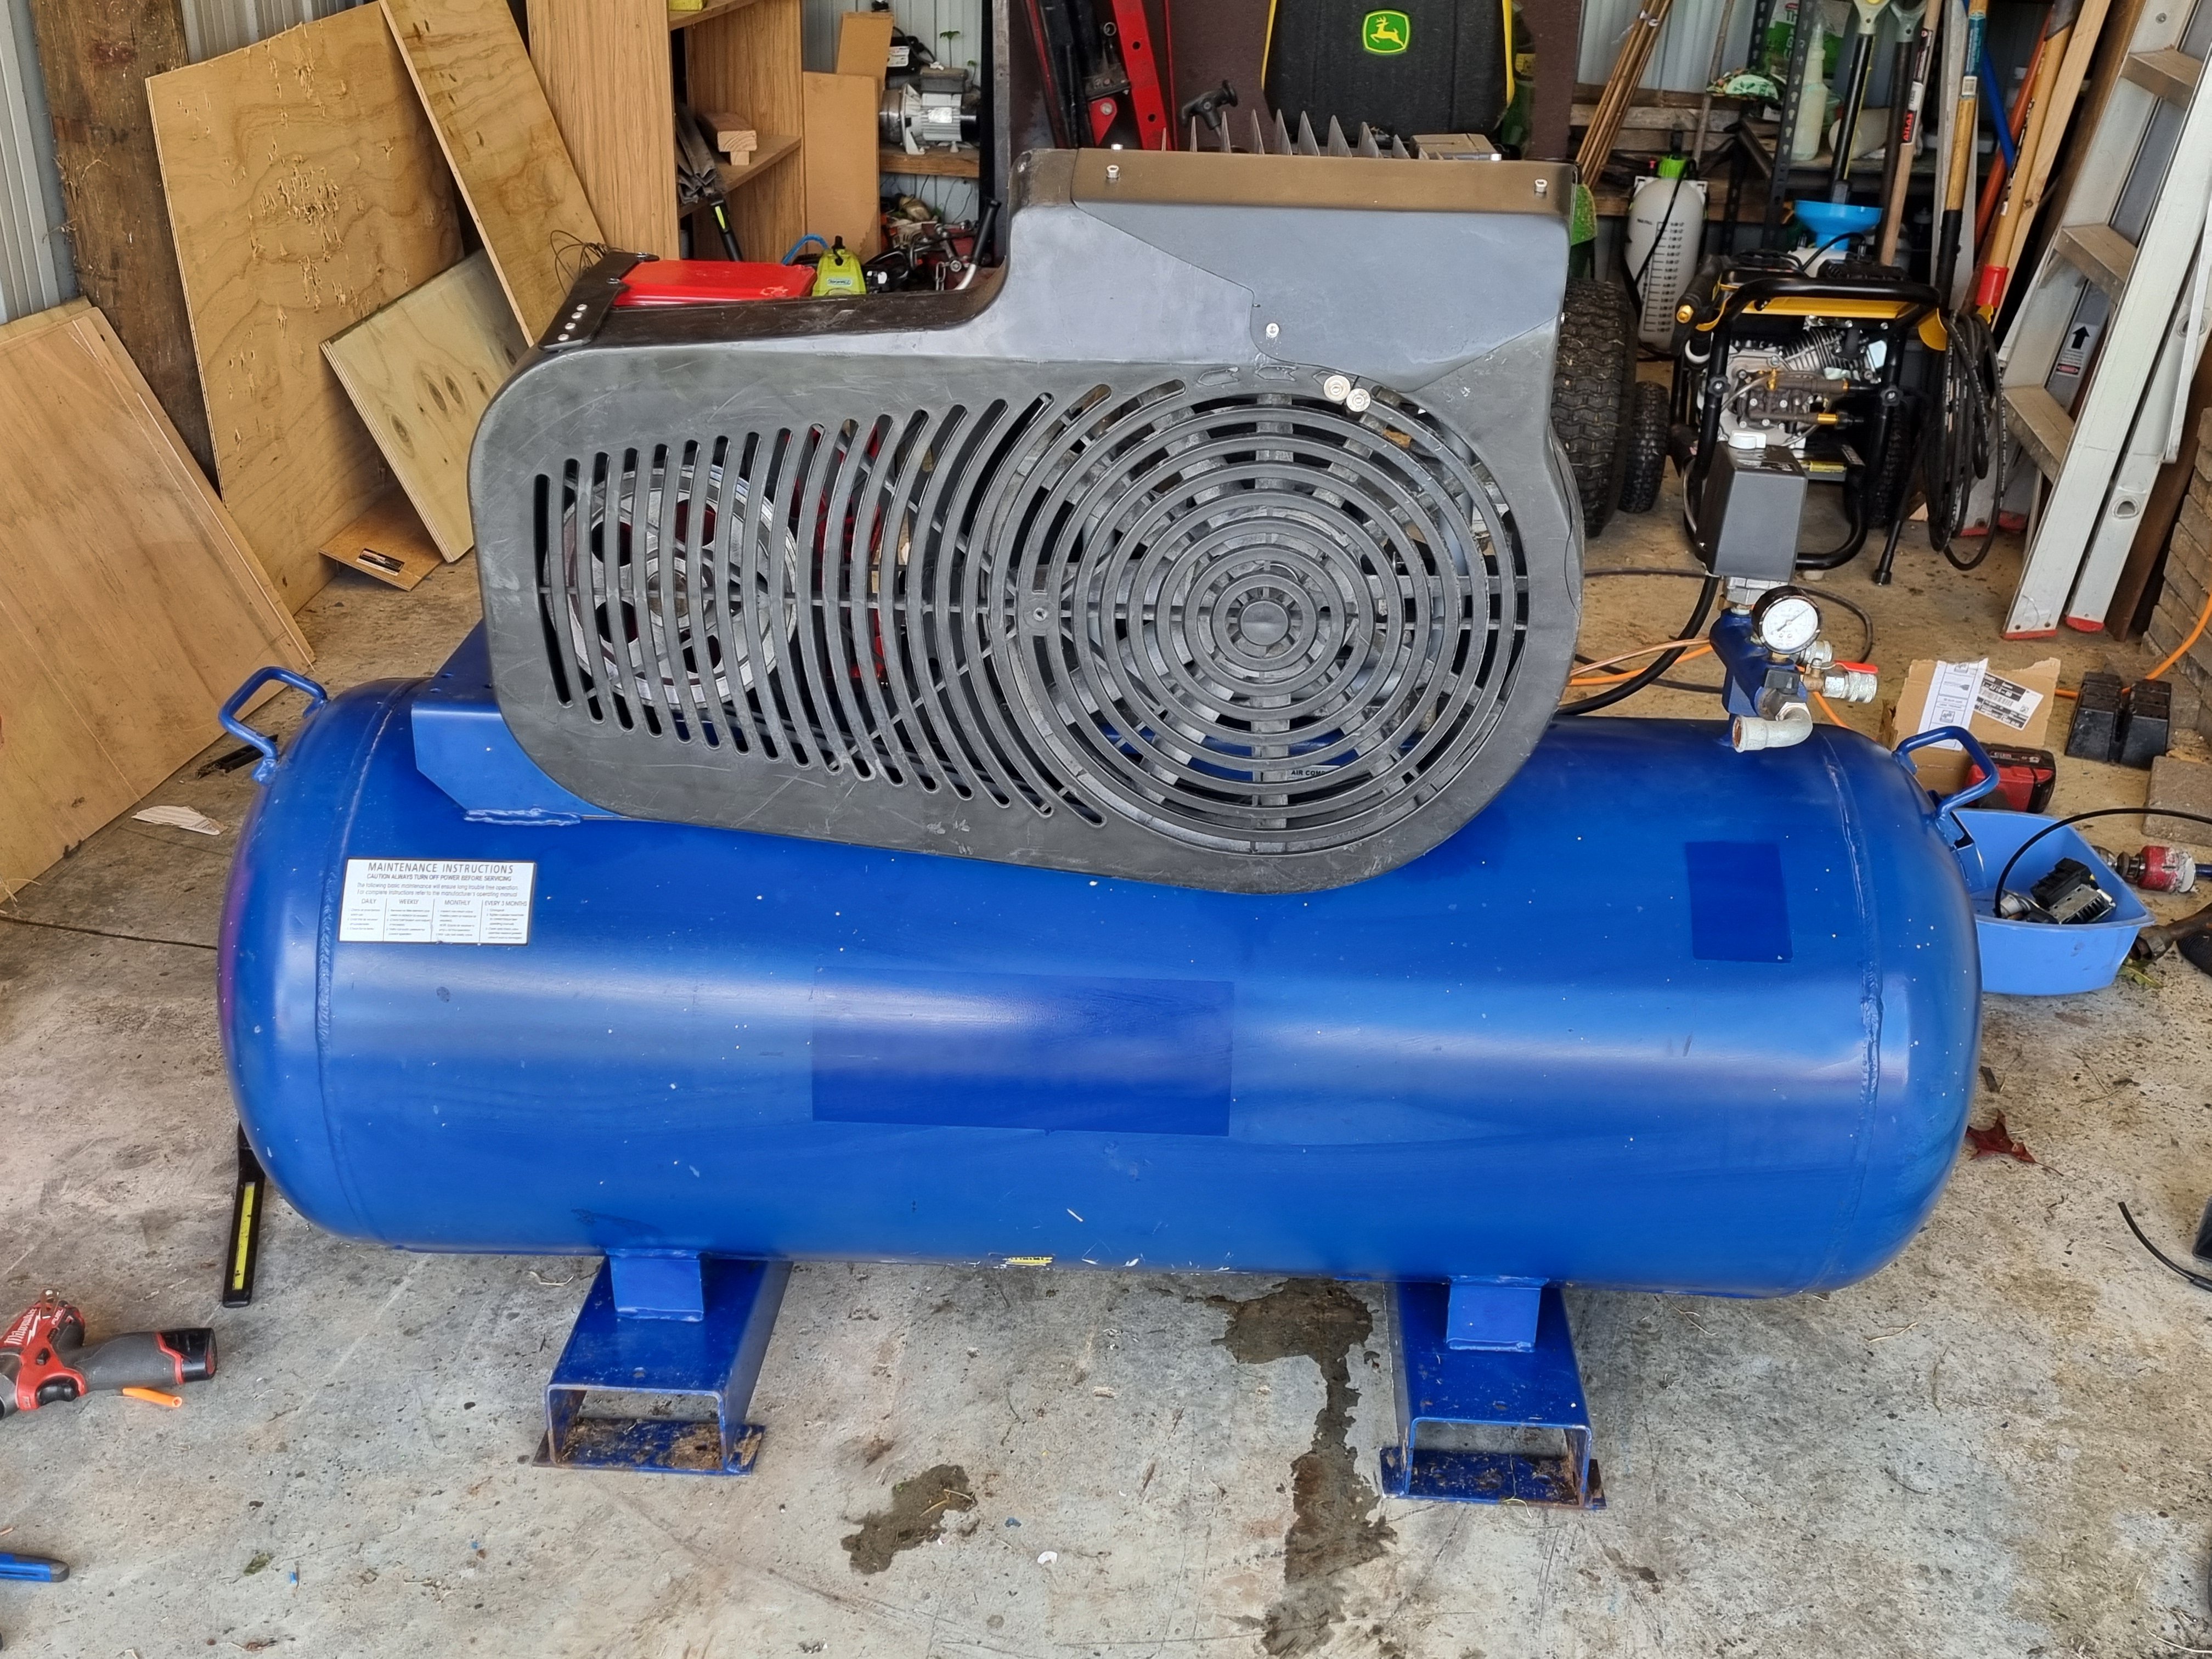
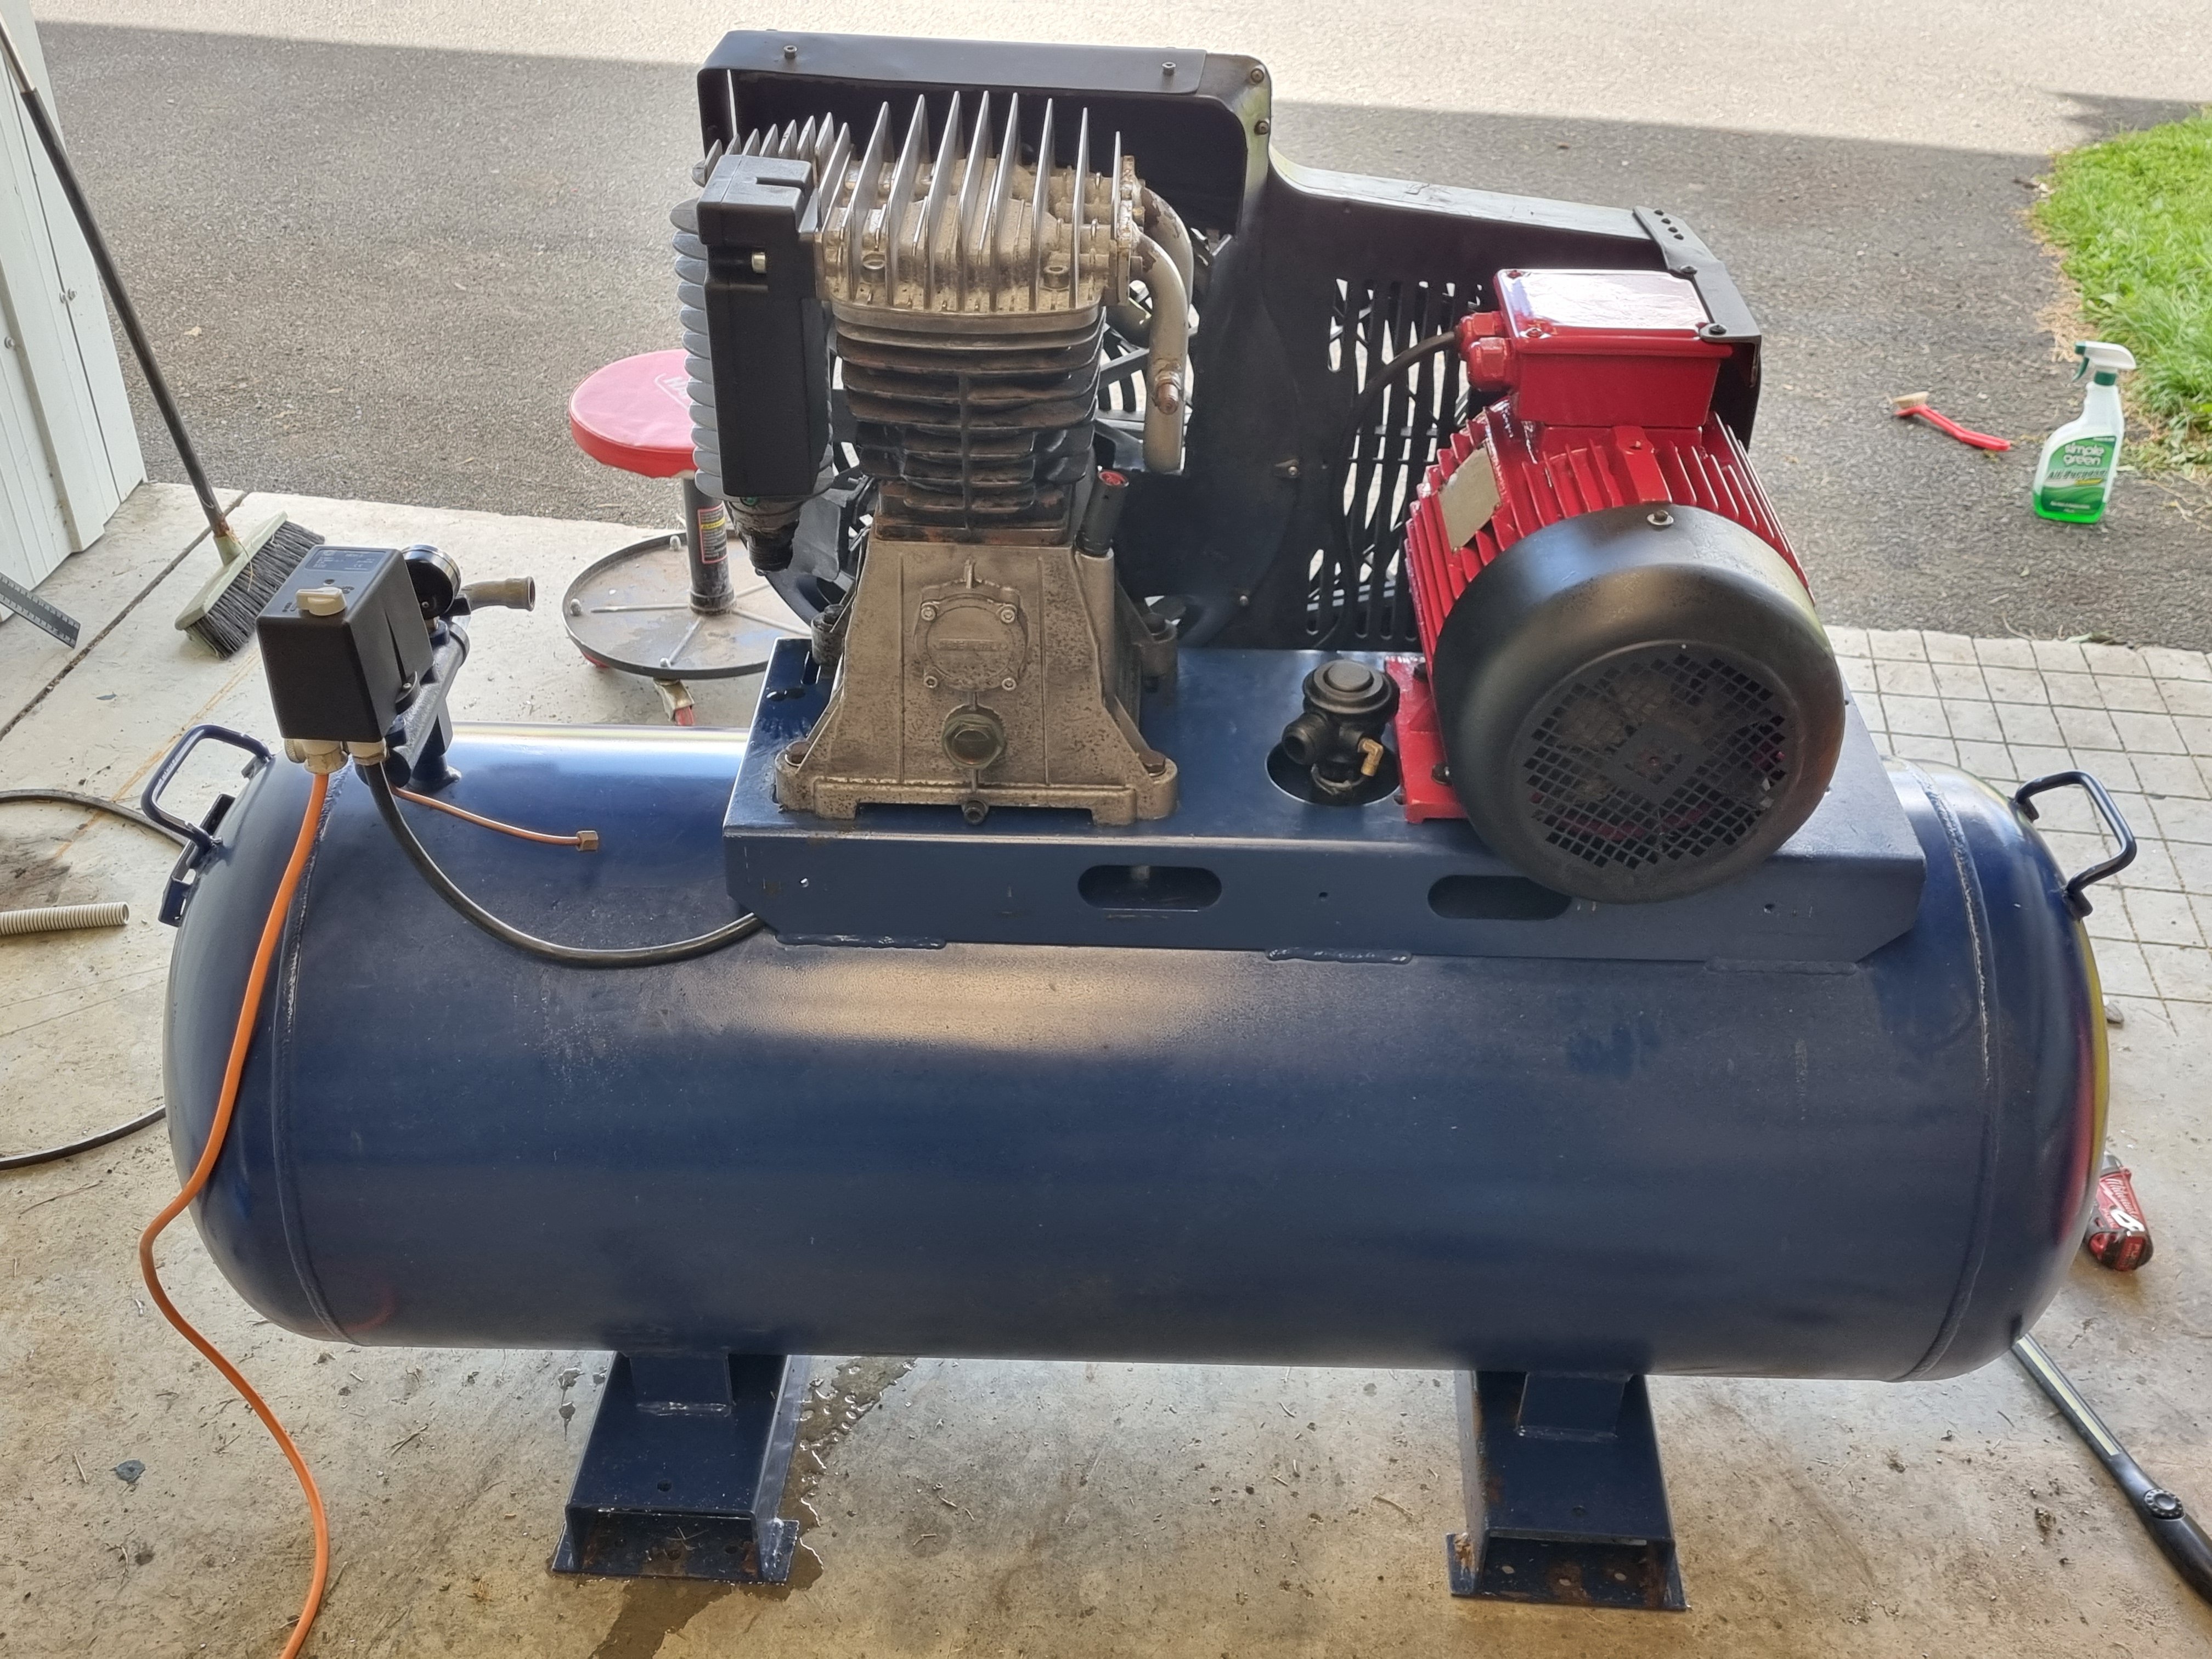
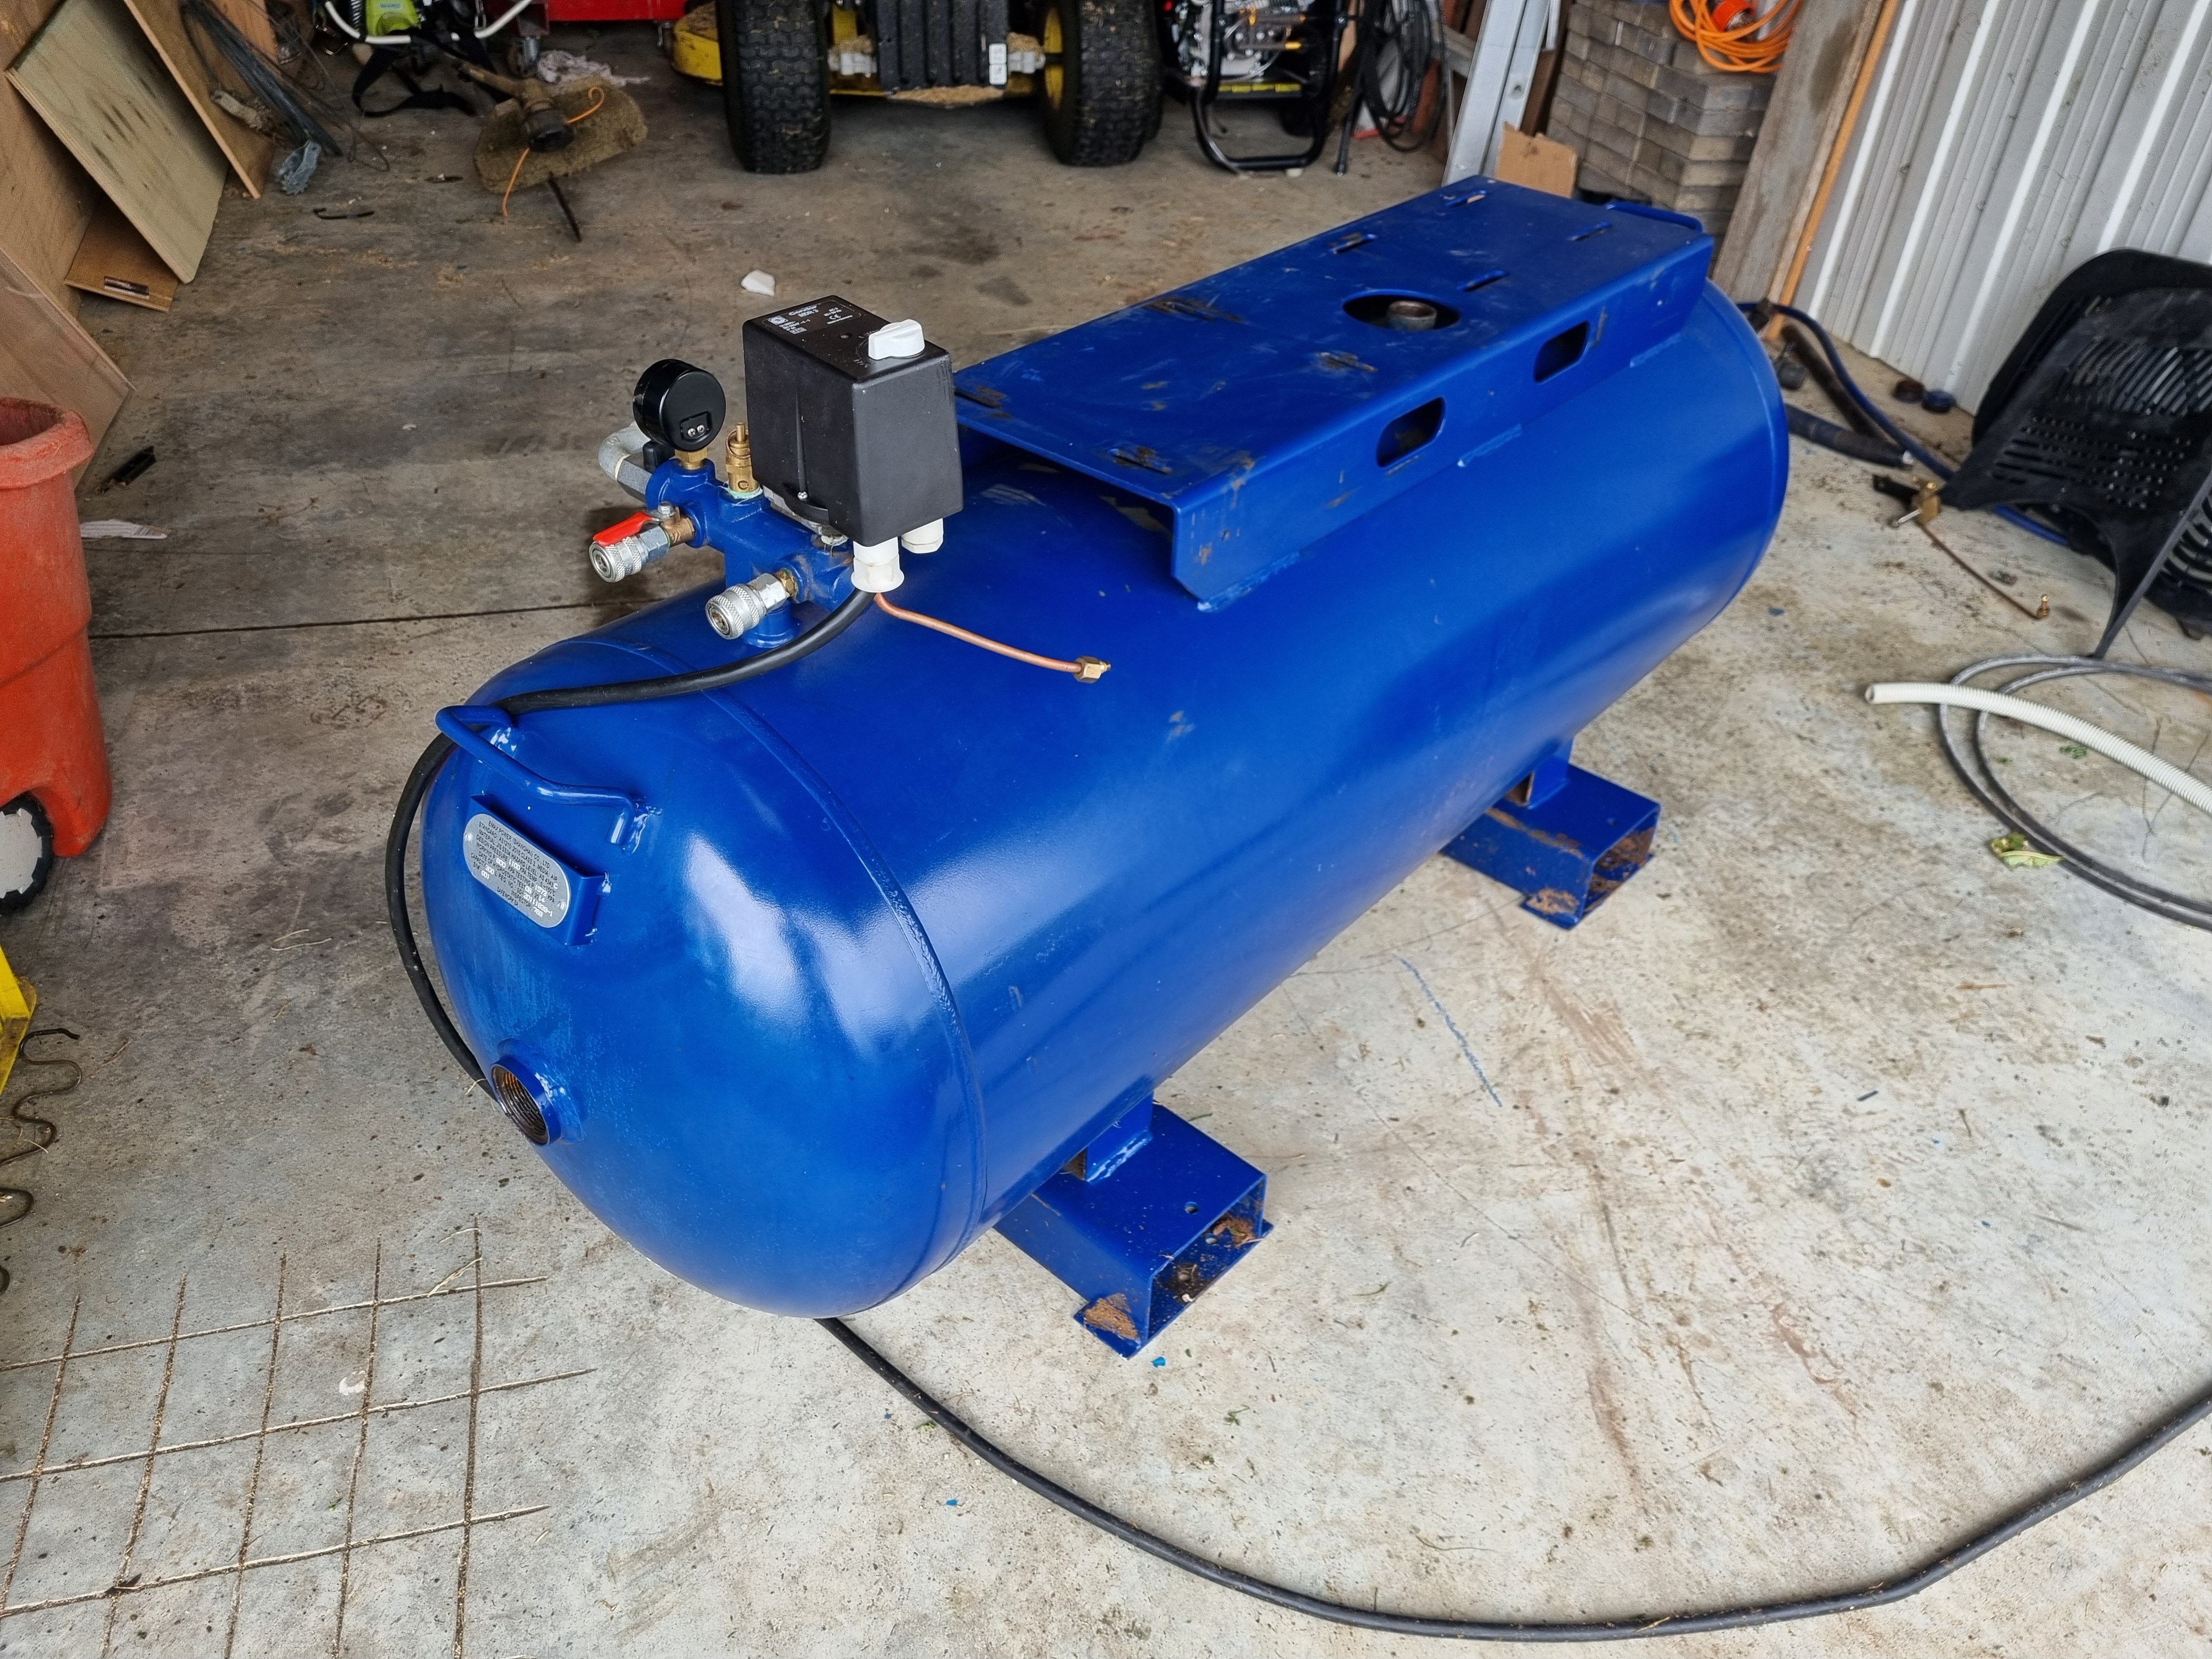
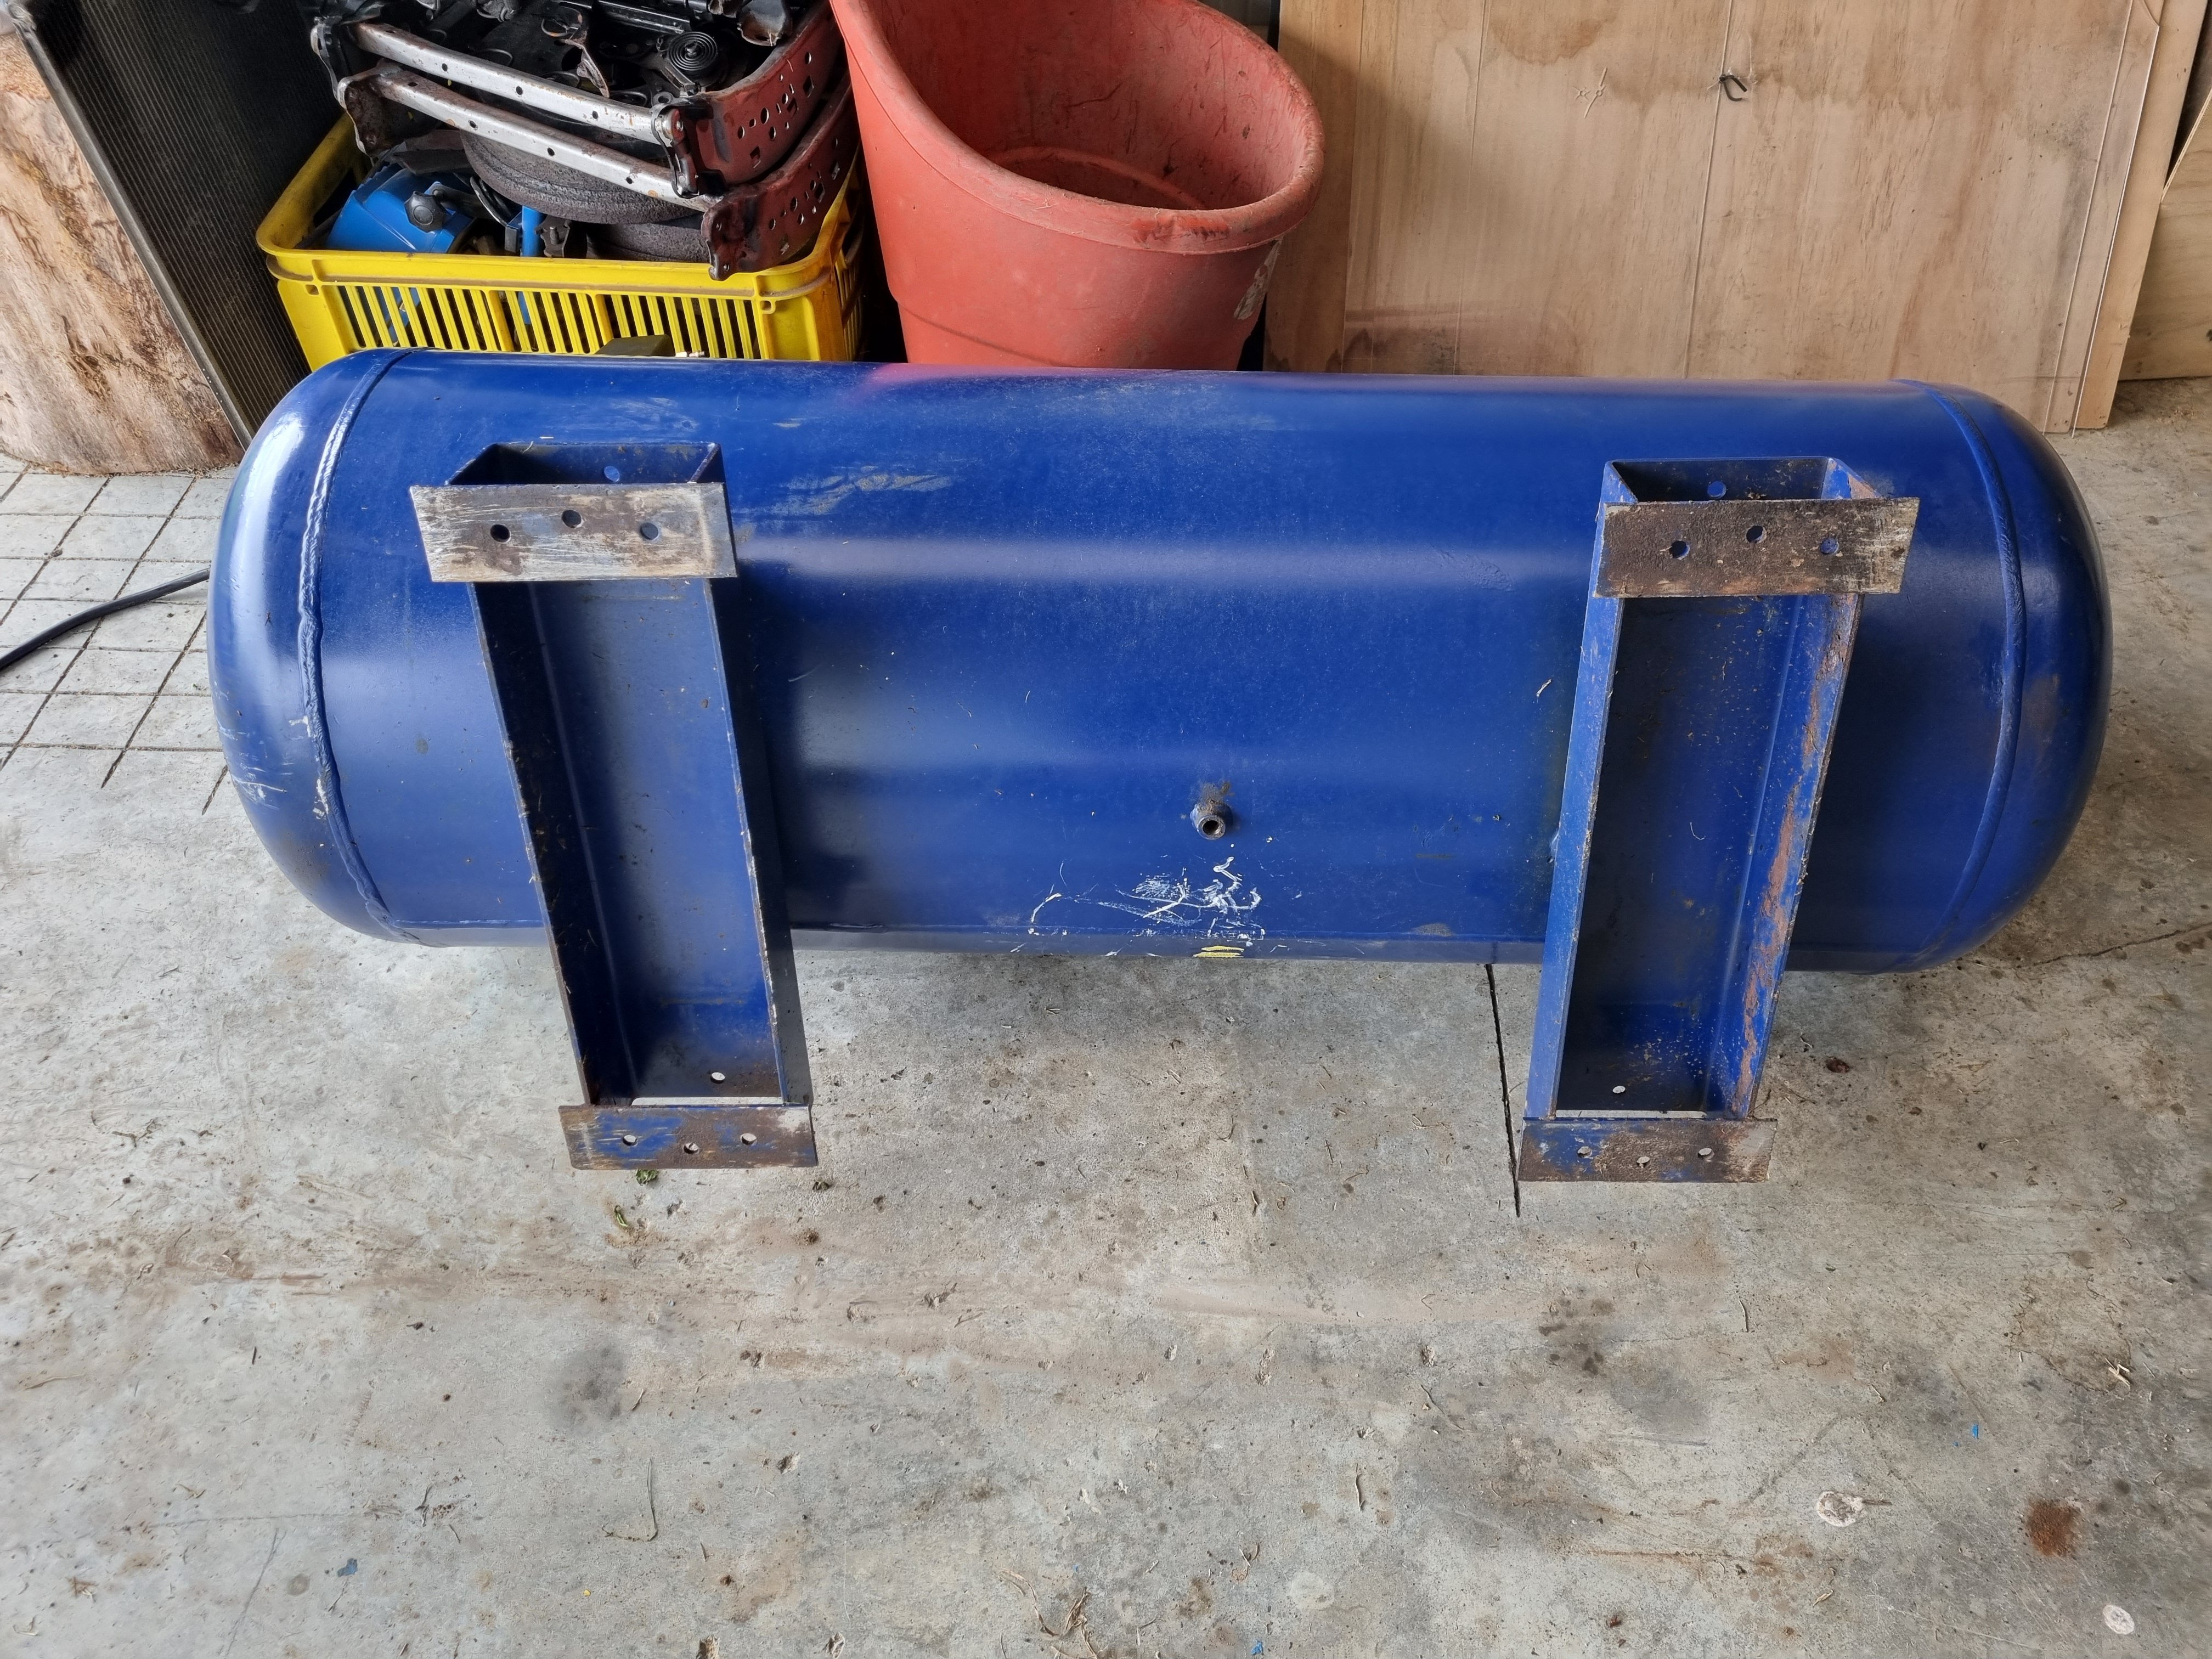
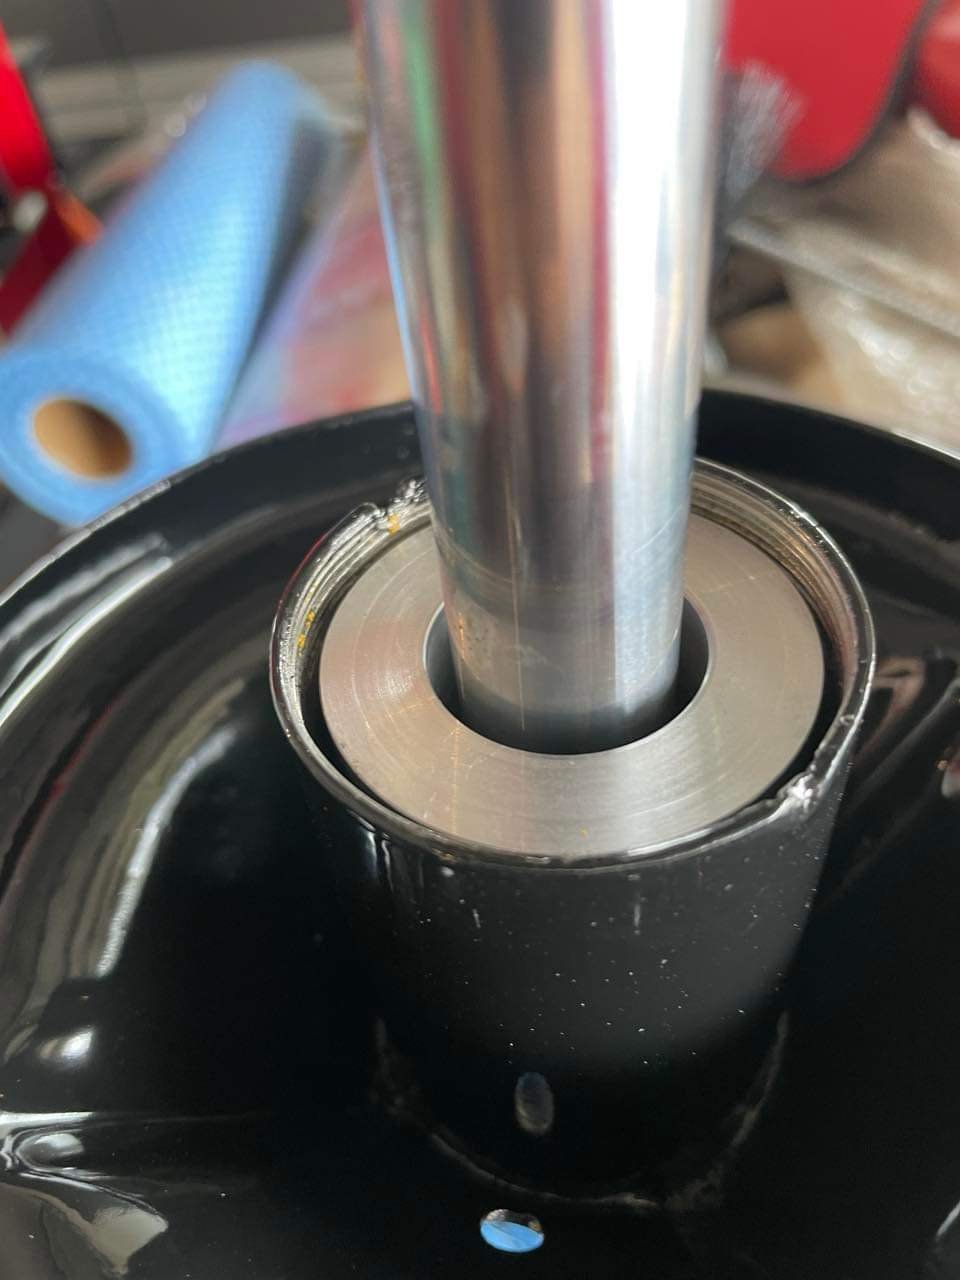
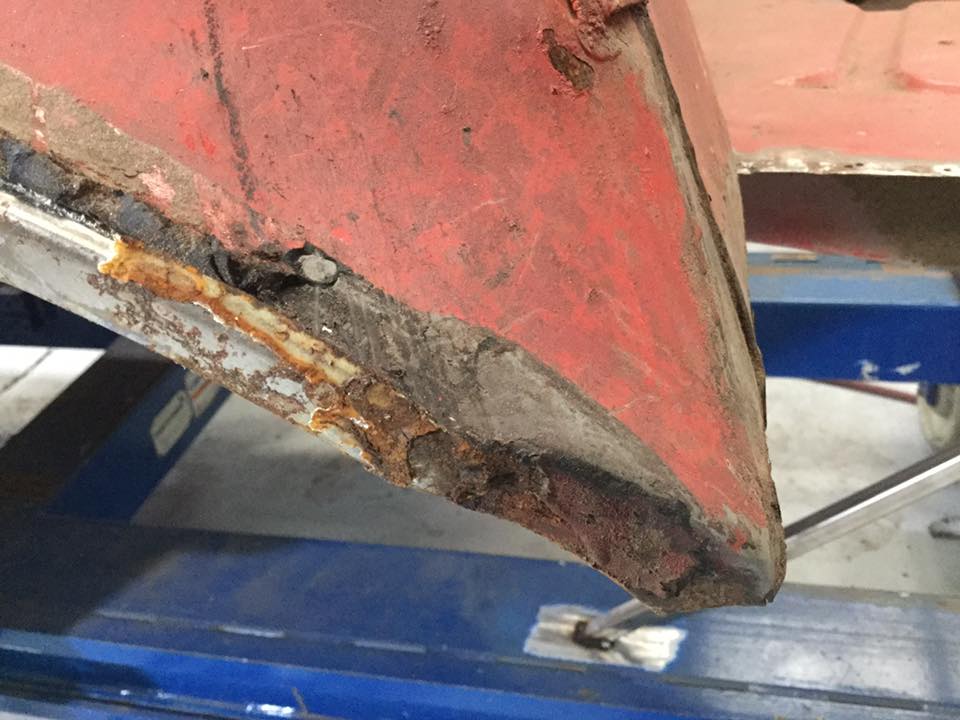
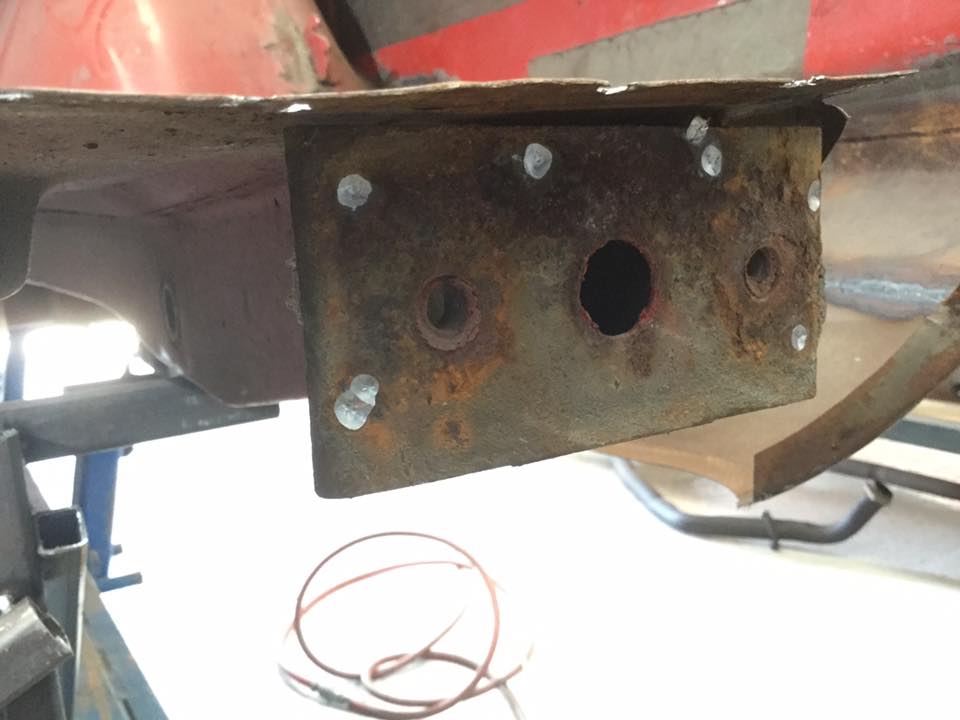
So I took the tank to get pressure tested and it had a crack where the motor plate is welded on. I decided to see what was available on the tard and a perfect (almost) tank was for sale for a price less than another pressure test and paint so I bought it. Is 300L, made in 2014 and comes with a pressure switch and some fittings I don't have. The only problem is the inlet port from the compressor to the tank is in the middle. I don't have a pipe long enough to plumb it. I need a new pipe for that, probably about 900 long. I'll try to mount everything into the tank today and get it running without the pipe. Let's see how far I get.
7 points
-
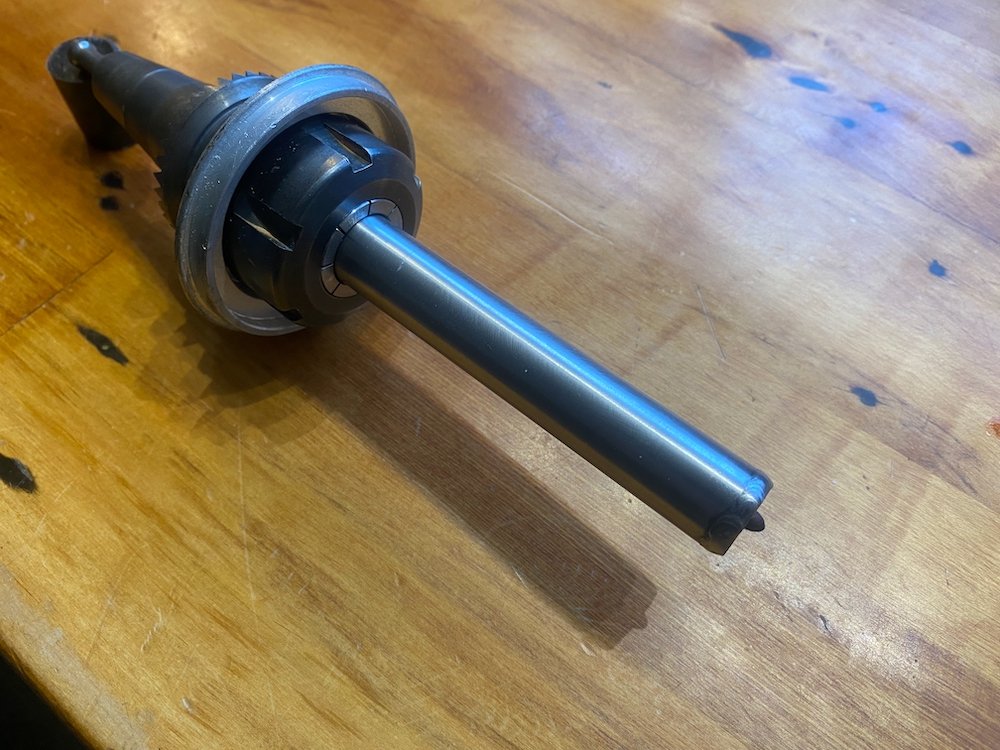
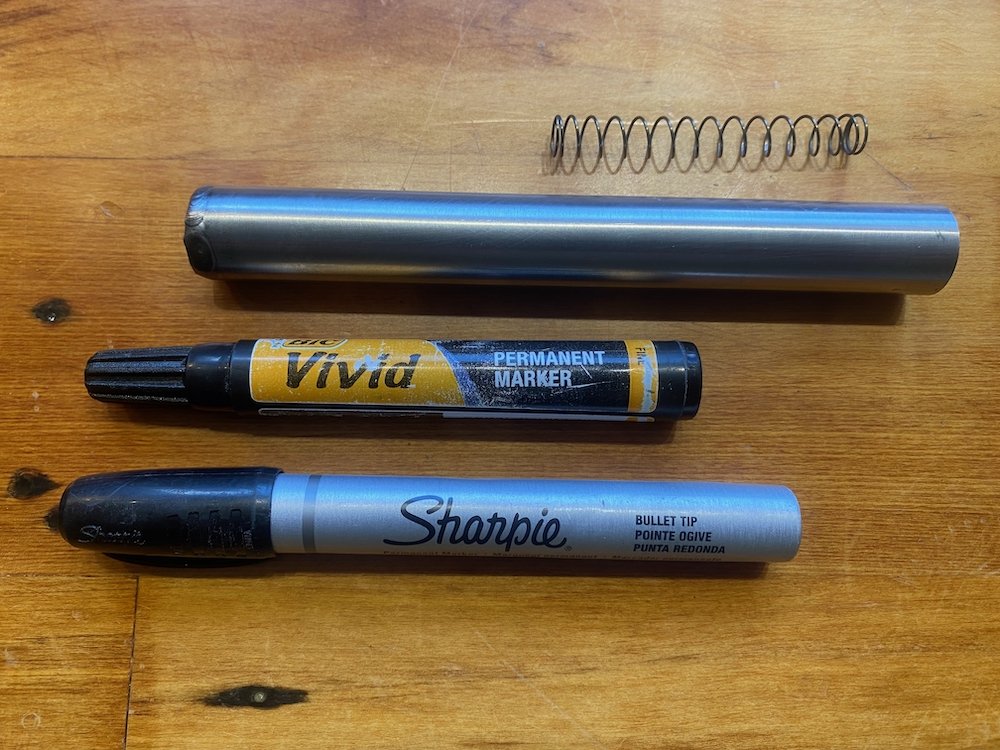
Had access to a large plotter table at my last job which was super handy for reverse engineering or taking prototypes from the computer to the real world, could print notes and datums to cardboard before cutting out for test fits or confirming bolt holes before longer/expensive processes. Today step one of bringing that capability home began, a vivid/sharpy holder for my cnc router. 3/4" mm seamless tube offcut has the same id as the markers, weld 1 stainless washer to the end completes the holder body, complex eh! All I needed was a suitable compression spring to ensure the marker holds a constant pressure without needing a perfect level bed. Awesomely, big green and big orange hold stocks of these things, sadly they are both closed today, buzzkill. Wanting to test NOW a full workshop search was initiated with a suitable donor found in an old BB gun, the slide spring happed to be 110% perfect for the job. Length is set to hold the two types of marker I usually have littering every corner.... Fitted up into a tool holder and good to go
6 points
-
So the car has pretty much been all sold. *Motor is going into an escort. *loads of parts are going to others to keep other st170s on the road *and the rest of the car is going to palmside to be a race/rally car ....so thats awesome.....no waste6 points
-
Yeah .. I could have held for way more money ..but I got the car back cheap and sold things for what people offered..... I made my money back and enough to get my mk3 all legal.... so happy as with that5 points
-
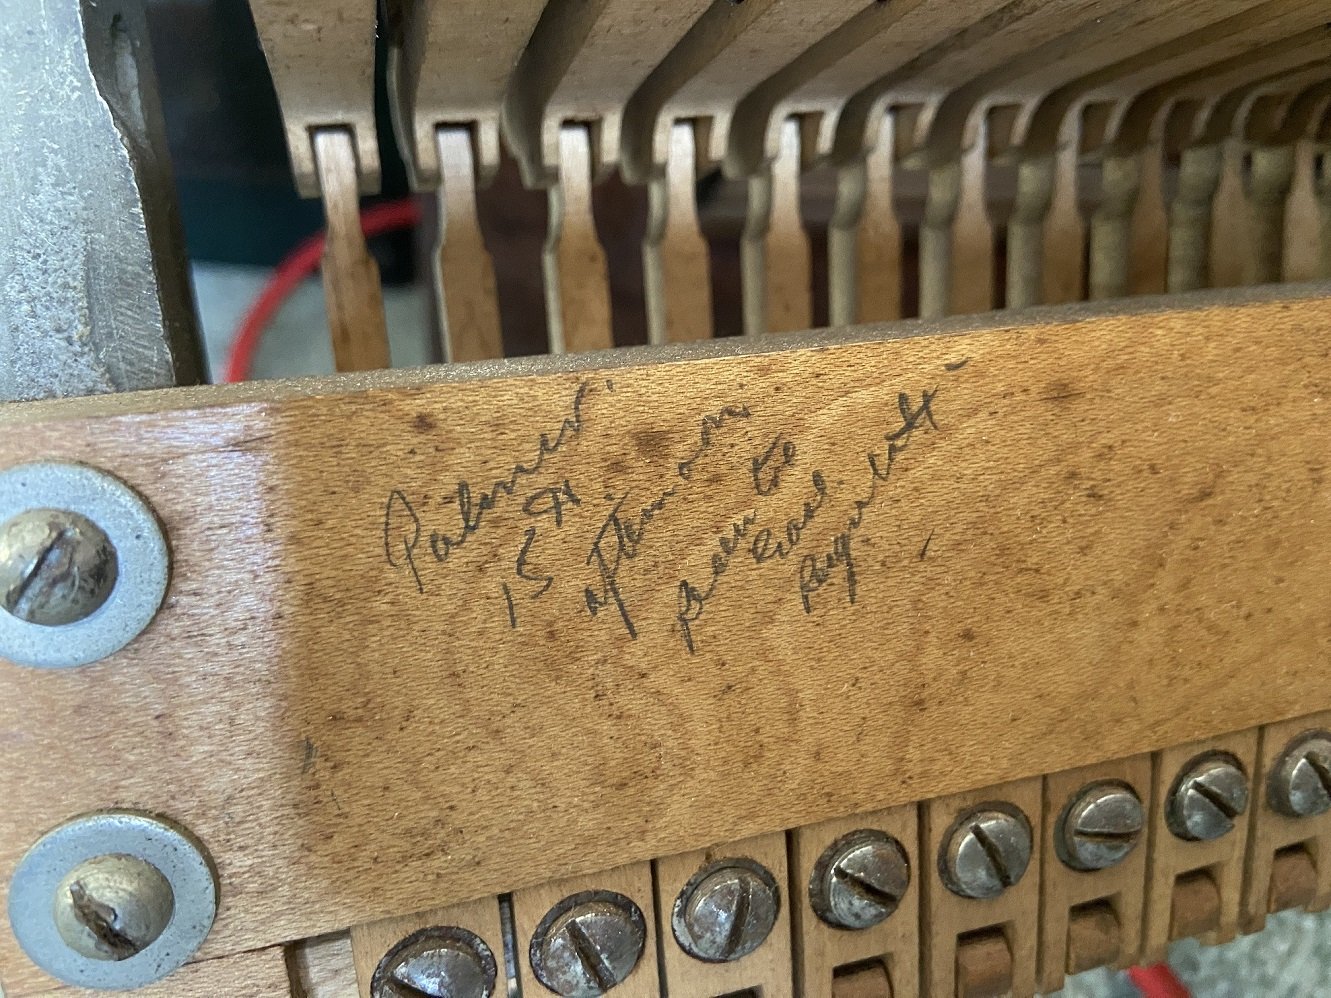
Interesting. A guy from my industry randomly decided to retrain as a primary school teacher, but he didn't last long in the field. I used to flat with a primary teacher years ago, and I remember her making strong vodka jellies to take to school and share around the staffroom at lunchtime - presumably those helped the teachers get through the day. I had David Jenkin assess my piano years ago. I found it interesting and I was sorely tempted to throw money away on a rebuild, but instead I bought a new piano for some reason. Now I have two pianos, because of course I can't get rid of the old one. More than a decade ago I was already finding it difficult to book piano tuners - they were busy, which meant they would tell me their one and only available time slot a month or two in the future, and I'd have to make that work. Then they'd decide to specialise in tuning expensive Steinway grands and stop accepting jobs for old British uprights. The piano tuner I use now is someone I was forcibly transferred to when my previous tuner basically said he was too busy. She's not the norm for the industry as she's about a decade younger than me. She was able to bring forward her return visit to finish the hammer bushing replacement to earlier this week. So that work is mostly done now, but it has an annoying short-term downside - as Tim Finn would say, what I need is a positive action, but there's a fraction too much friction. Ooo, and I noticed this written on the back of the action: I think it says "Palmer. 15th afternoon Recentre Ease Regulate". Palmer was my great grandfather's last name, and ironically he must have been getting the same work done to the action as I've just had done.
5 points
-
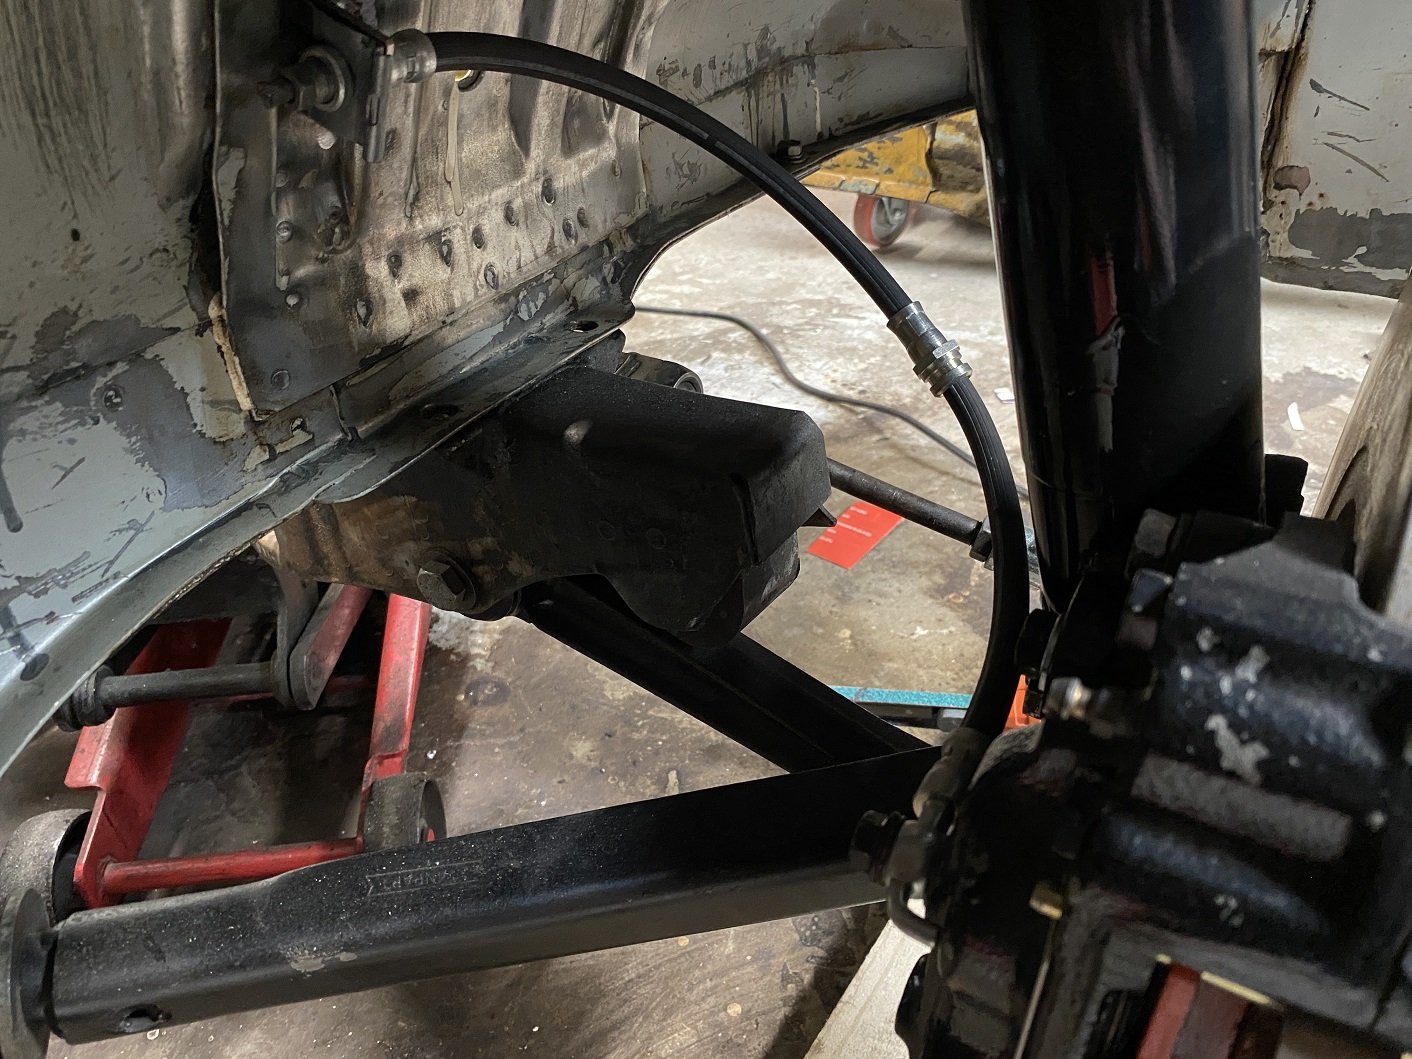
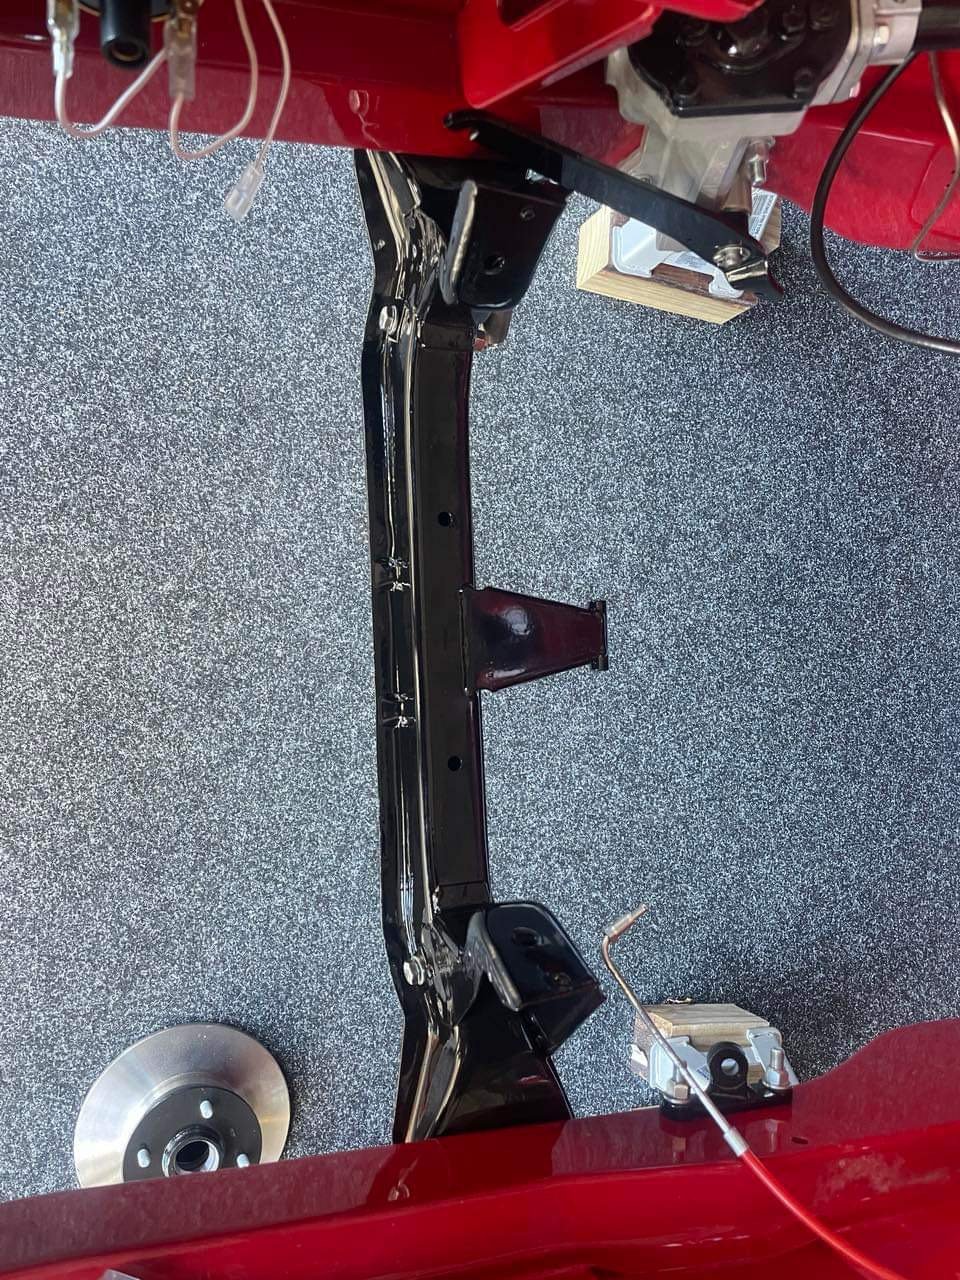
A clutch line. Bent by hand so not robot straight. I made it a little longer than required just in case I need to redo the flares. Hopefully having it go higher than the reservoir do not cause issues bleeding. The reservoir is just on a hose and bracket, so I could make it higher if I needed to. And the hose bracket I made. With the hose like this it keeps out of the way of the wheel and it doesn't get tight from lock to lock. The hardline originally went under the chassis rail, but it will be way too close to the exhaust, I'll run it through the inner wing.
5 points
-
Cert= can't cut that bumper beam unfortunately4 points
-
Broke out the angle grinder and created a space for the intercooler tried to be conservative left some structure in it so it's not all floppy 2x 8mm bolts and the intercooler is hanging securely off it. Now I can start making intercooler pipes and fitting up the turbo setup.
4 points
-
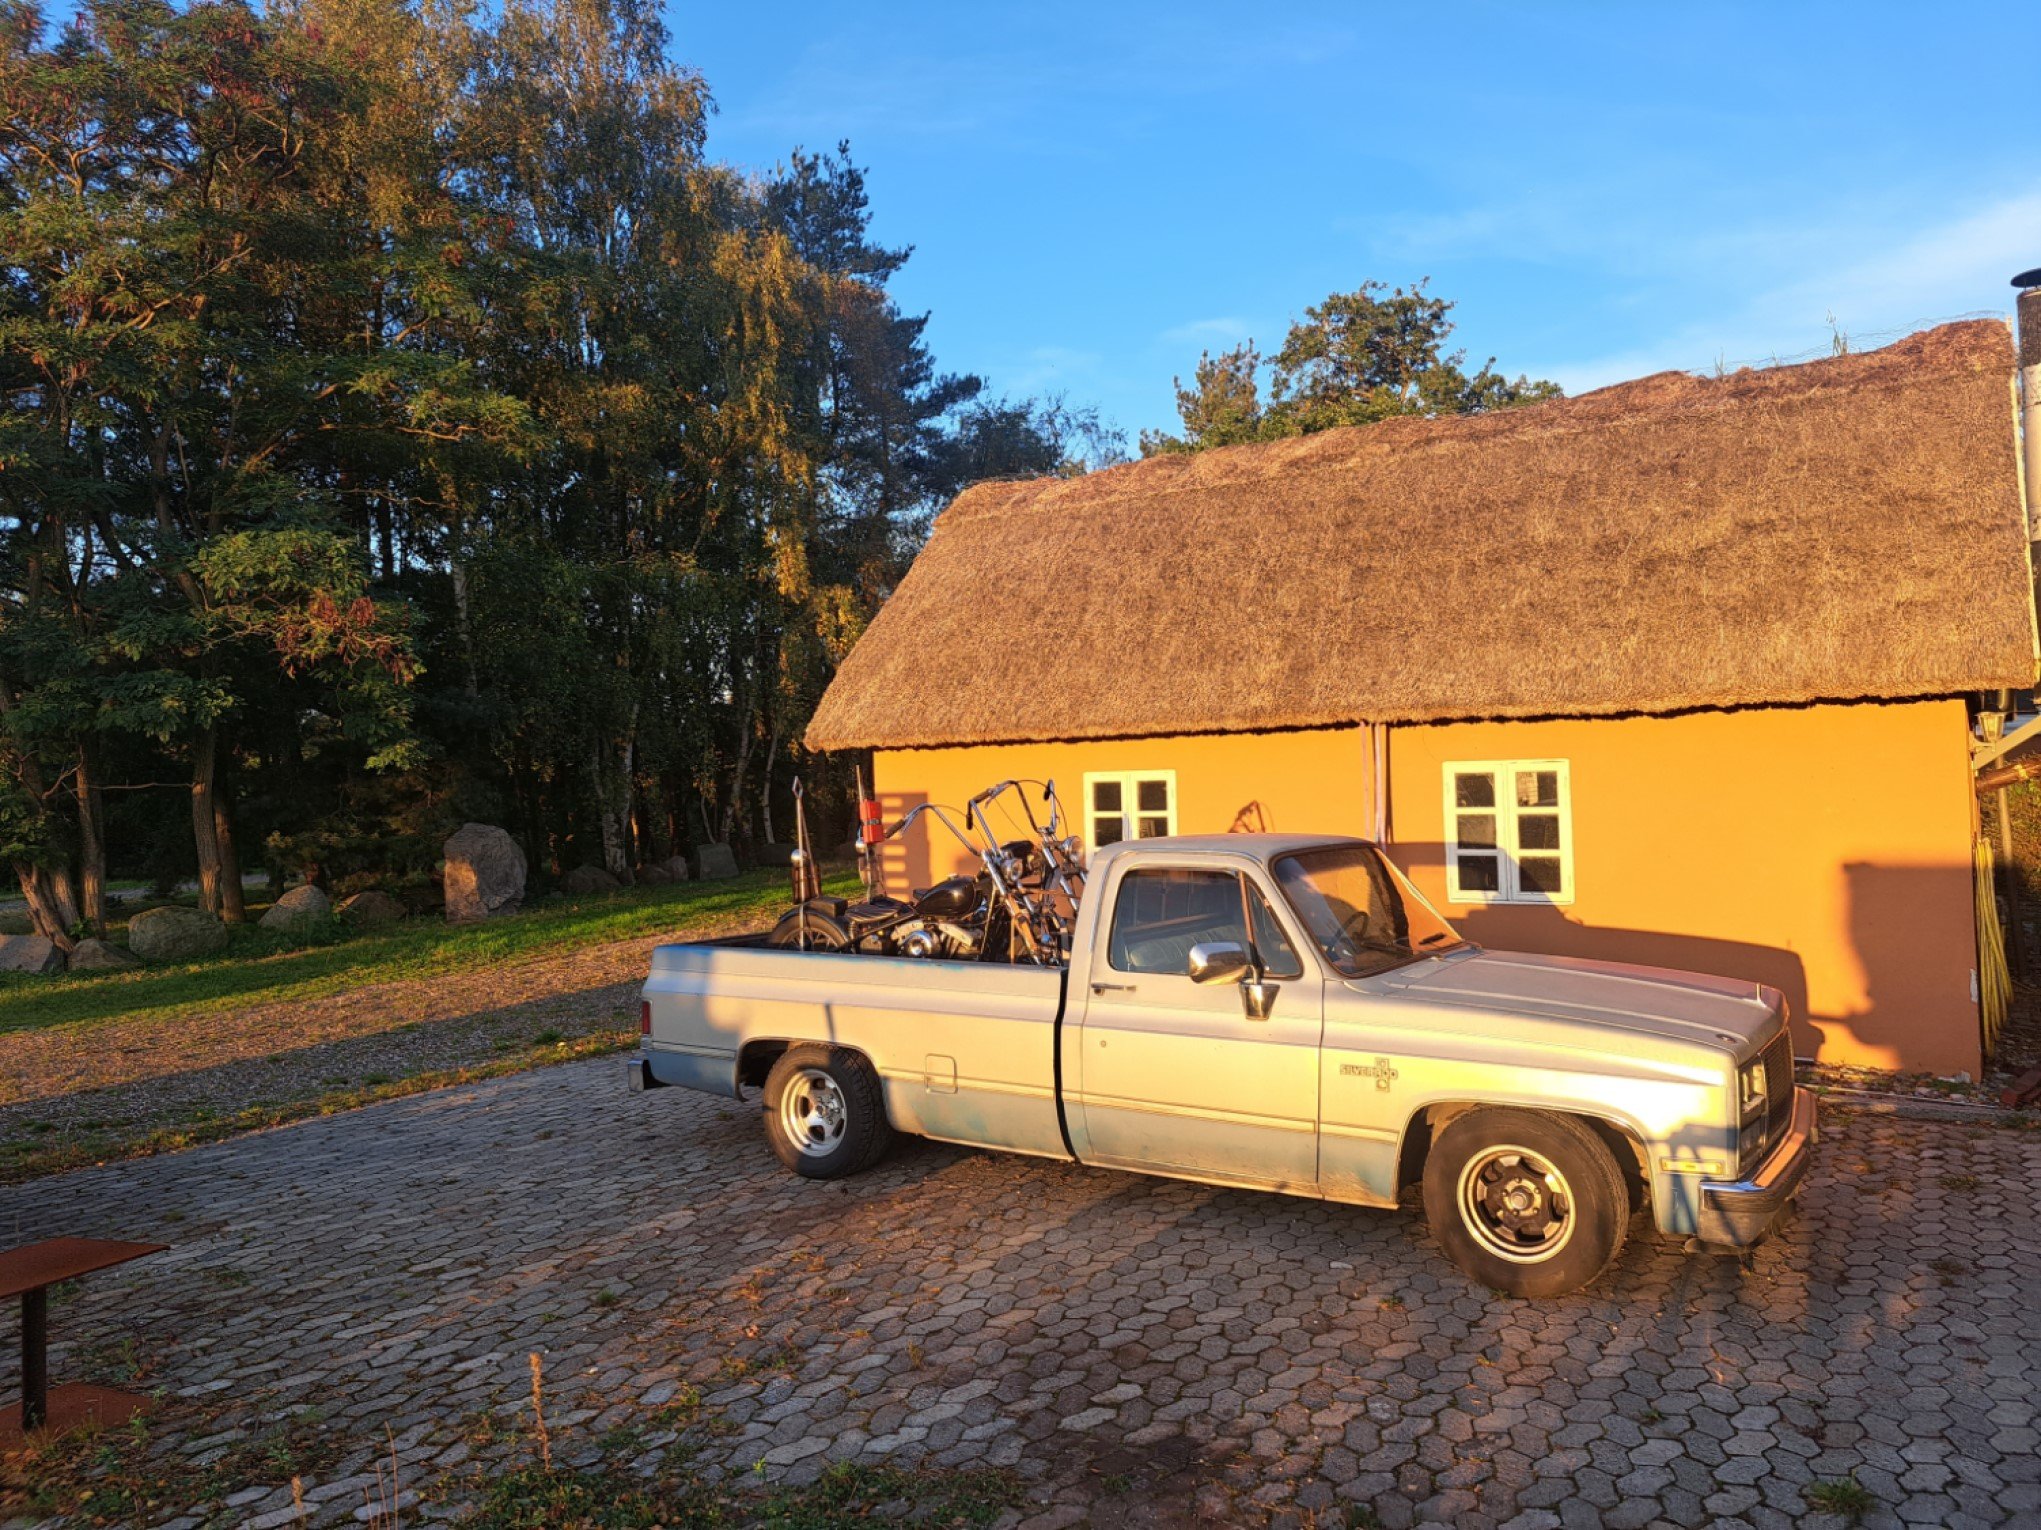
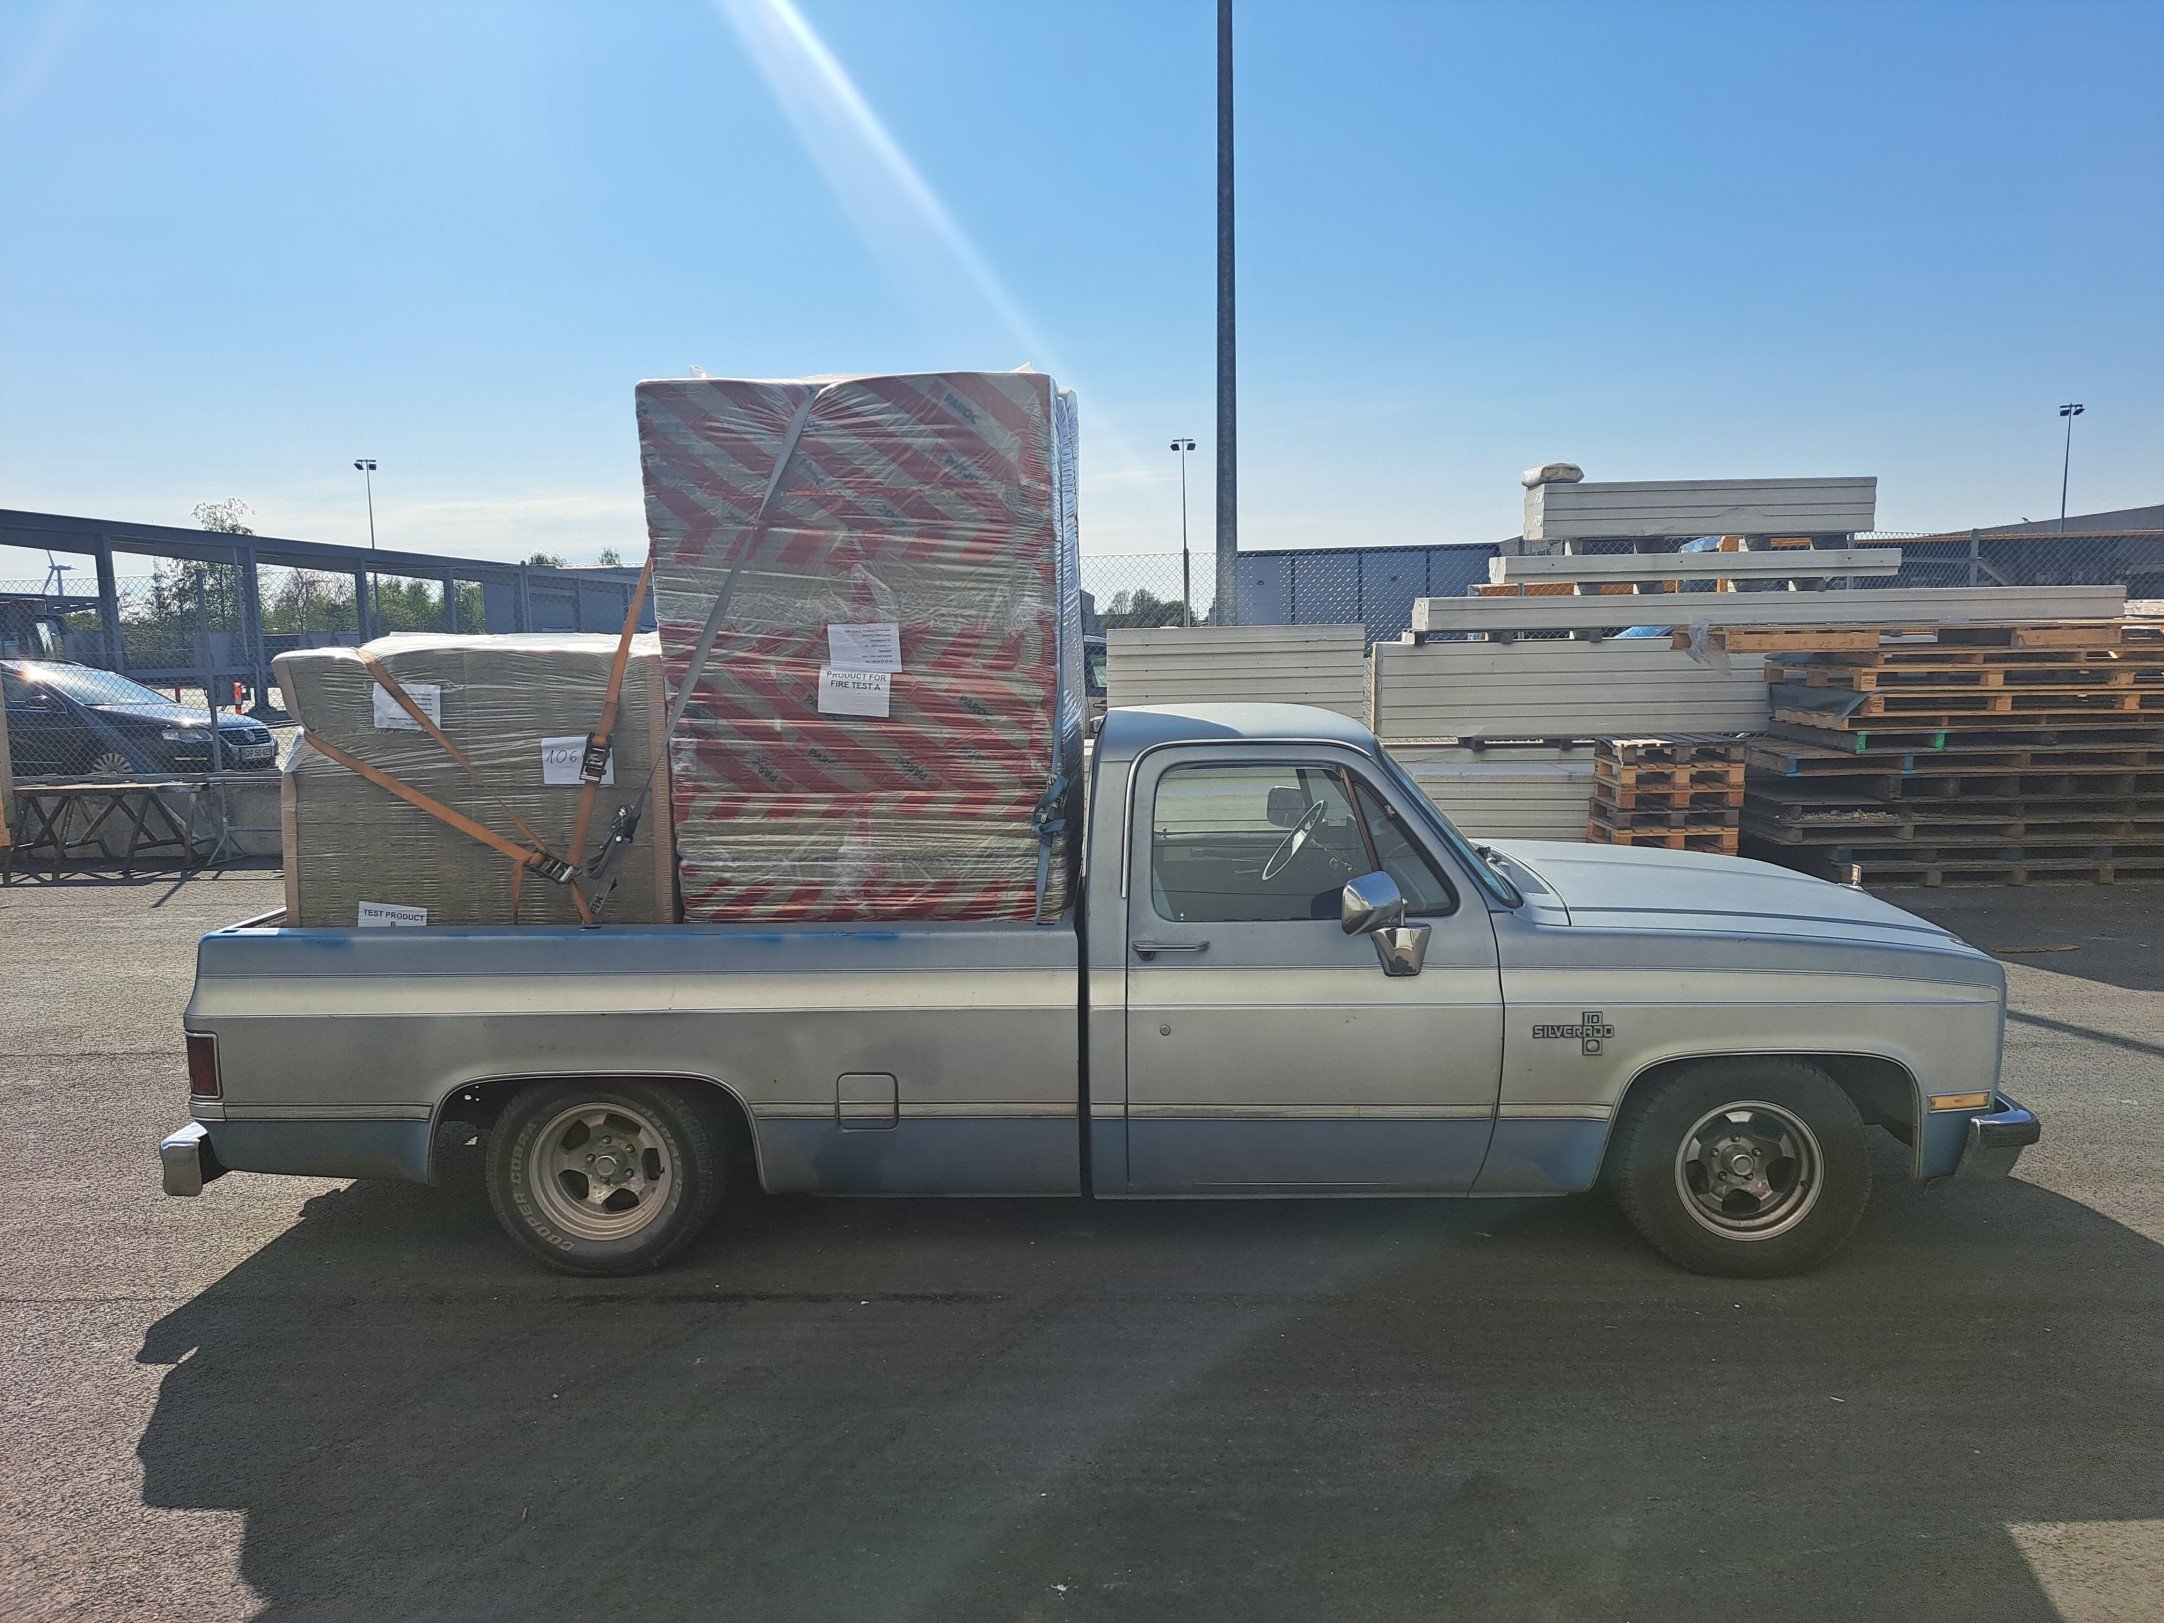
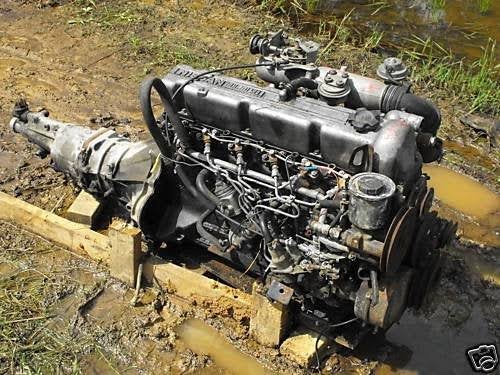
Yo, Long time no see, I figured that because im about to embark on phase 2 of this heap that I should probably make one of these. Anyway, I needed a new daily so I went shopping and found this sweet 82 long bed, I was after a long bed specifically as I needed/wanted it for my shop truck to haul choppers round with. The 350 had a sweet cam and gear drive so it sounded cool and had the requisite chop chop but the 4km/l fuel consumption meant that the daily part of the new car purchase didnt work quite so well. Luckily I had done my due diligence before the purchase and also bought a 2005 Mercedes Benz E320 cdi. Anyway @98cc hit me up and said he wanted to come visit so I put him to work and we pulled the 350 out and swung the OM648 in. Then at some point a @peteretep came and visited so we did some more work, anyway, I had a deadline, I made it, the truck got its maiden voyage with its new motor around Norway chasing a bunch of bikers, good times. Basically the rundown of the swap were: OM648 3.2l inline 6 diesel, the same one the Blacksmoke Racing dudes use. Baldurs Control Systems DID1 stand alone ECU 722.6 Mercedes 5 speed Auto with lockup OF Gear TCU 3 inch intercooler Built 10 Bolt with 30 spline axles, 9 inch housing ends and bearings, Eaton Trutrac and 3.08 gears. At this point it turned into my summertime daily and did truck things Then doing the usual facebook marketplace thing late at night I found a truck camper for sale, so of course I had to have that... At this point I found the limit of the 1/2 ton suspension so with the camper and the 6/8 drop that it has, so I had to do something, I made a bag over leaf setup in the back to help with load carrying capabillity. So about here is up to date, the engine swap is legit, it now gets 14 km/l and will happily cruise at 120 on the highway, because of the 8 foot bed it hauls all manner of things without asking, and does a skid. Discussion
3 points
-
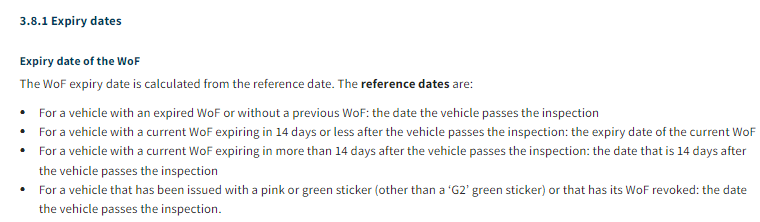
It's the hassle factor more than anything. What makes a 2000 car safer over a year than a 1999? Nothing, that's what. It's a stupid rule, but I don't expect a change.3 points
-
Looks ready for D1NZ.....
3 points
-
Other than schooling myself up on making new AN lines (I gonna have a few questions about that) , I been getting bits trickling in like Coils/injectors. Bigger news is I'm getting my very own Easter Keg this weekend.
3 points
-
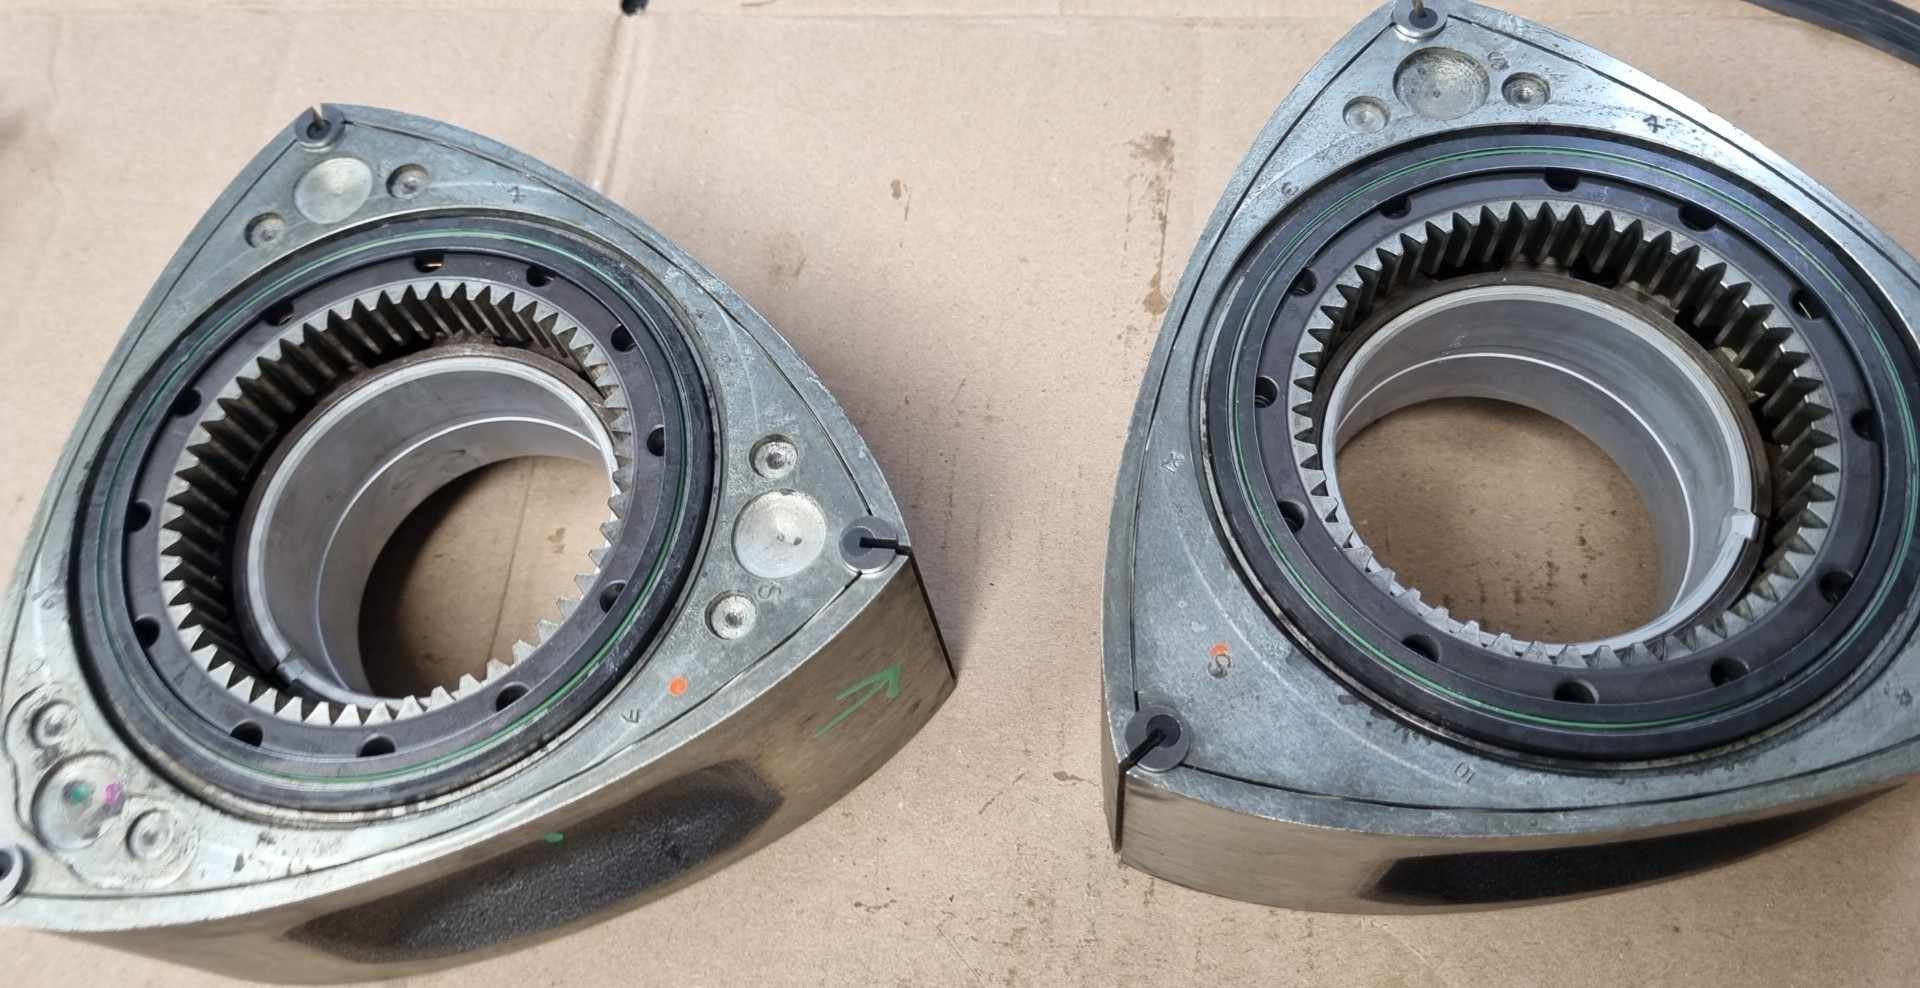
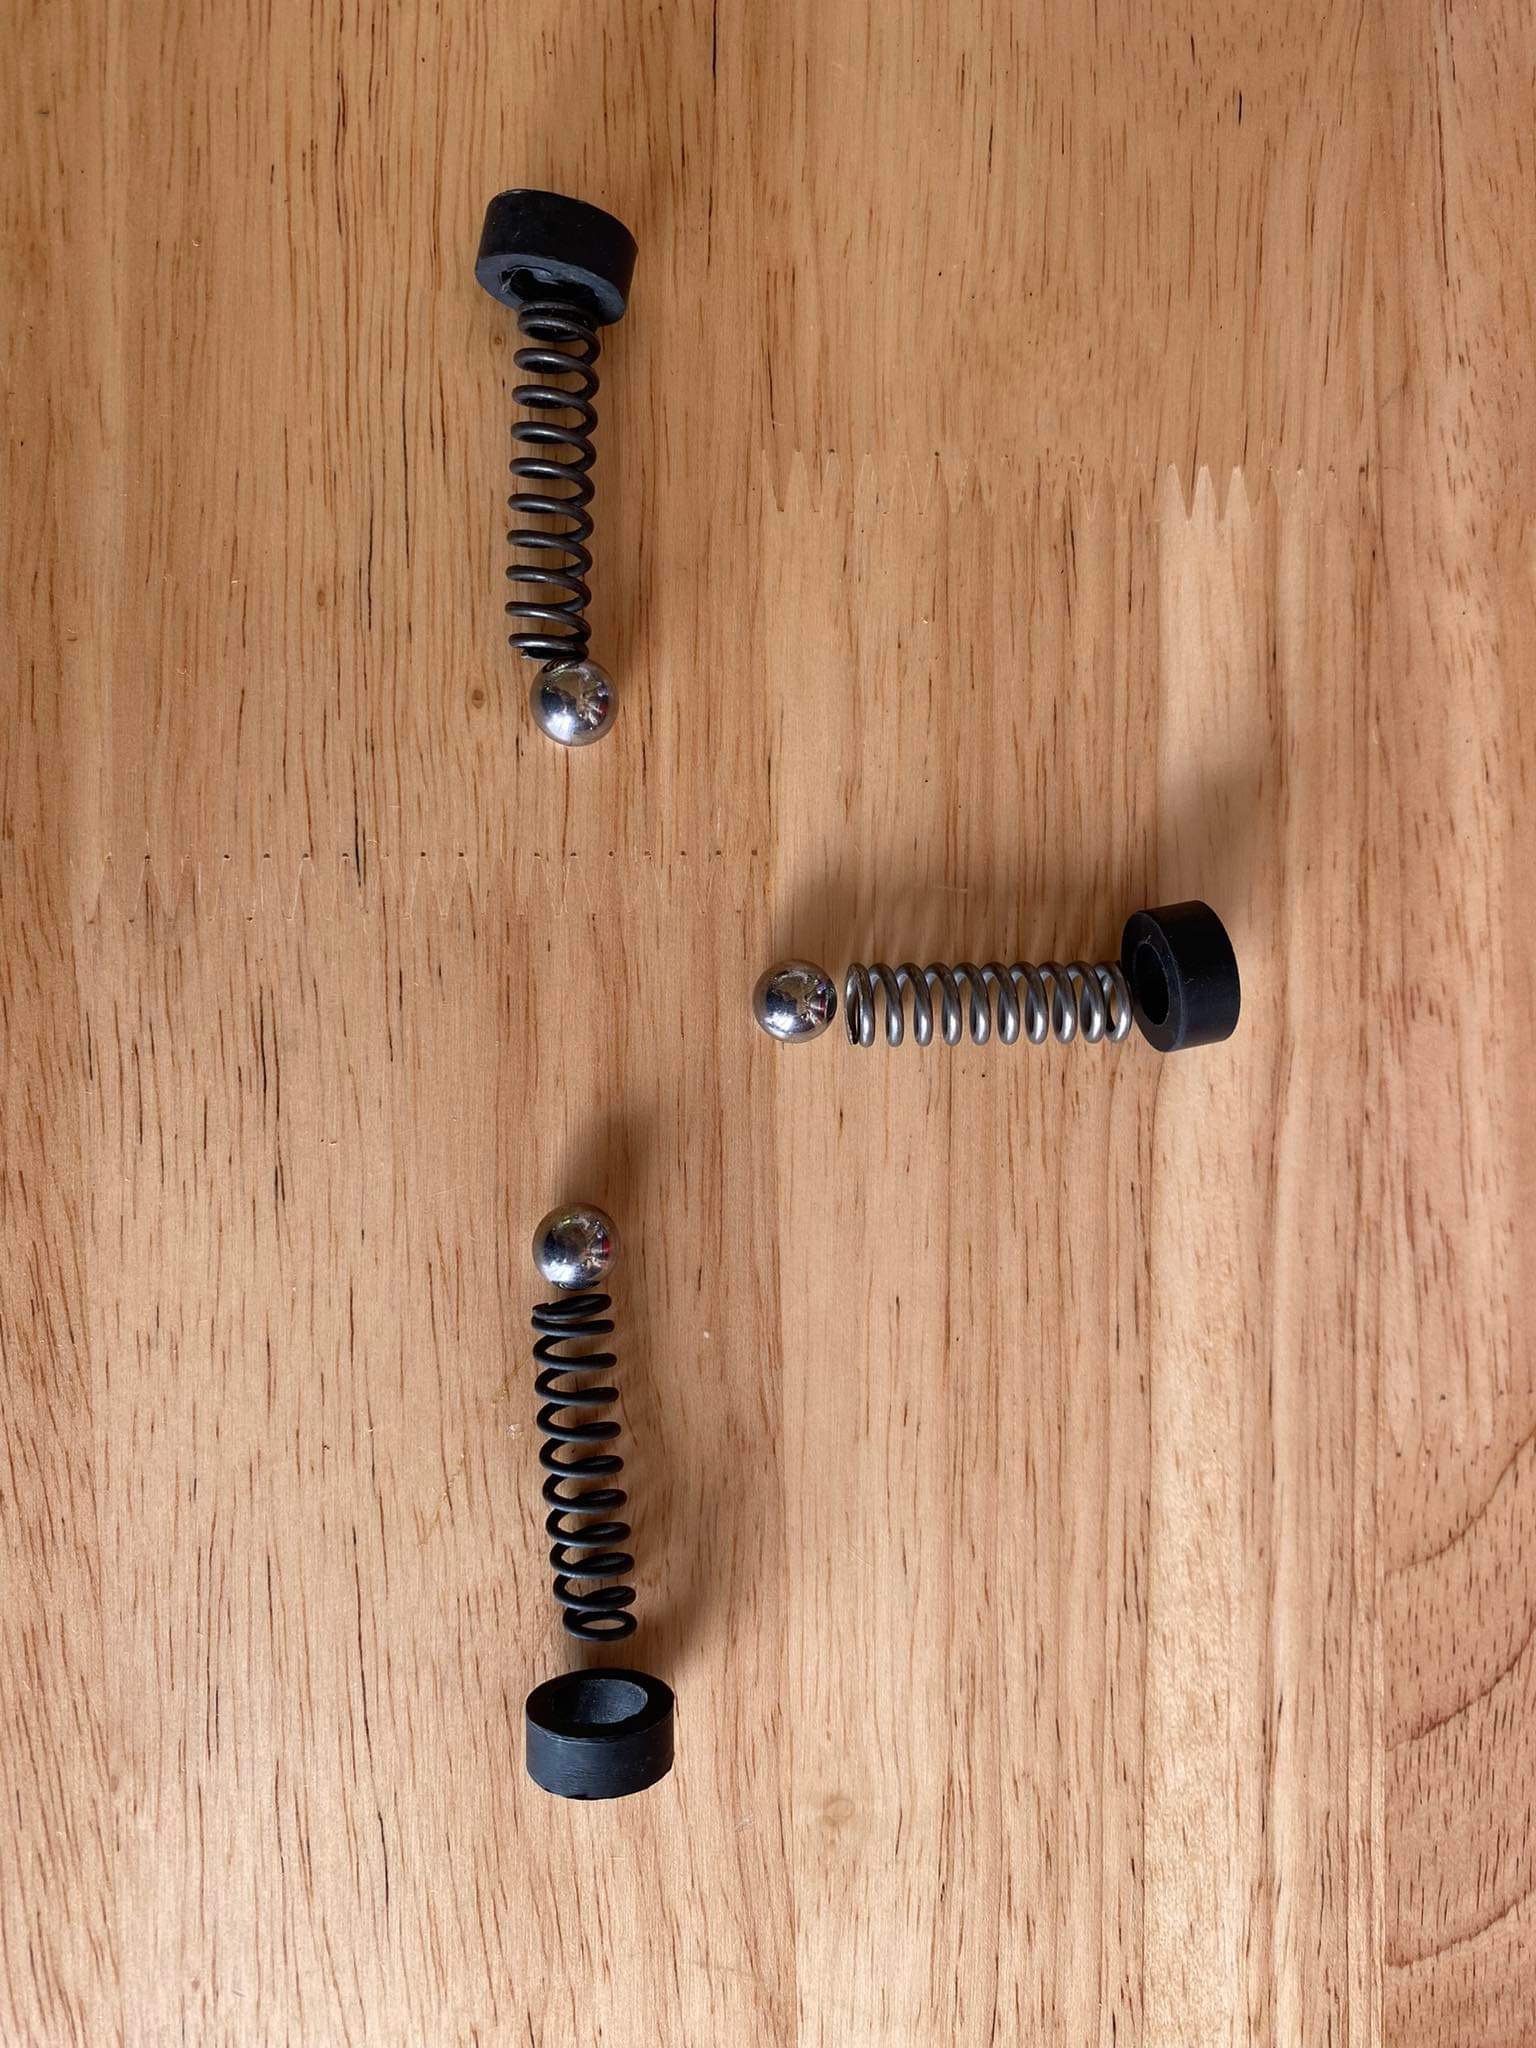
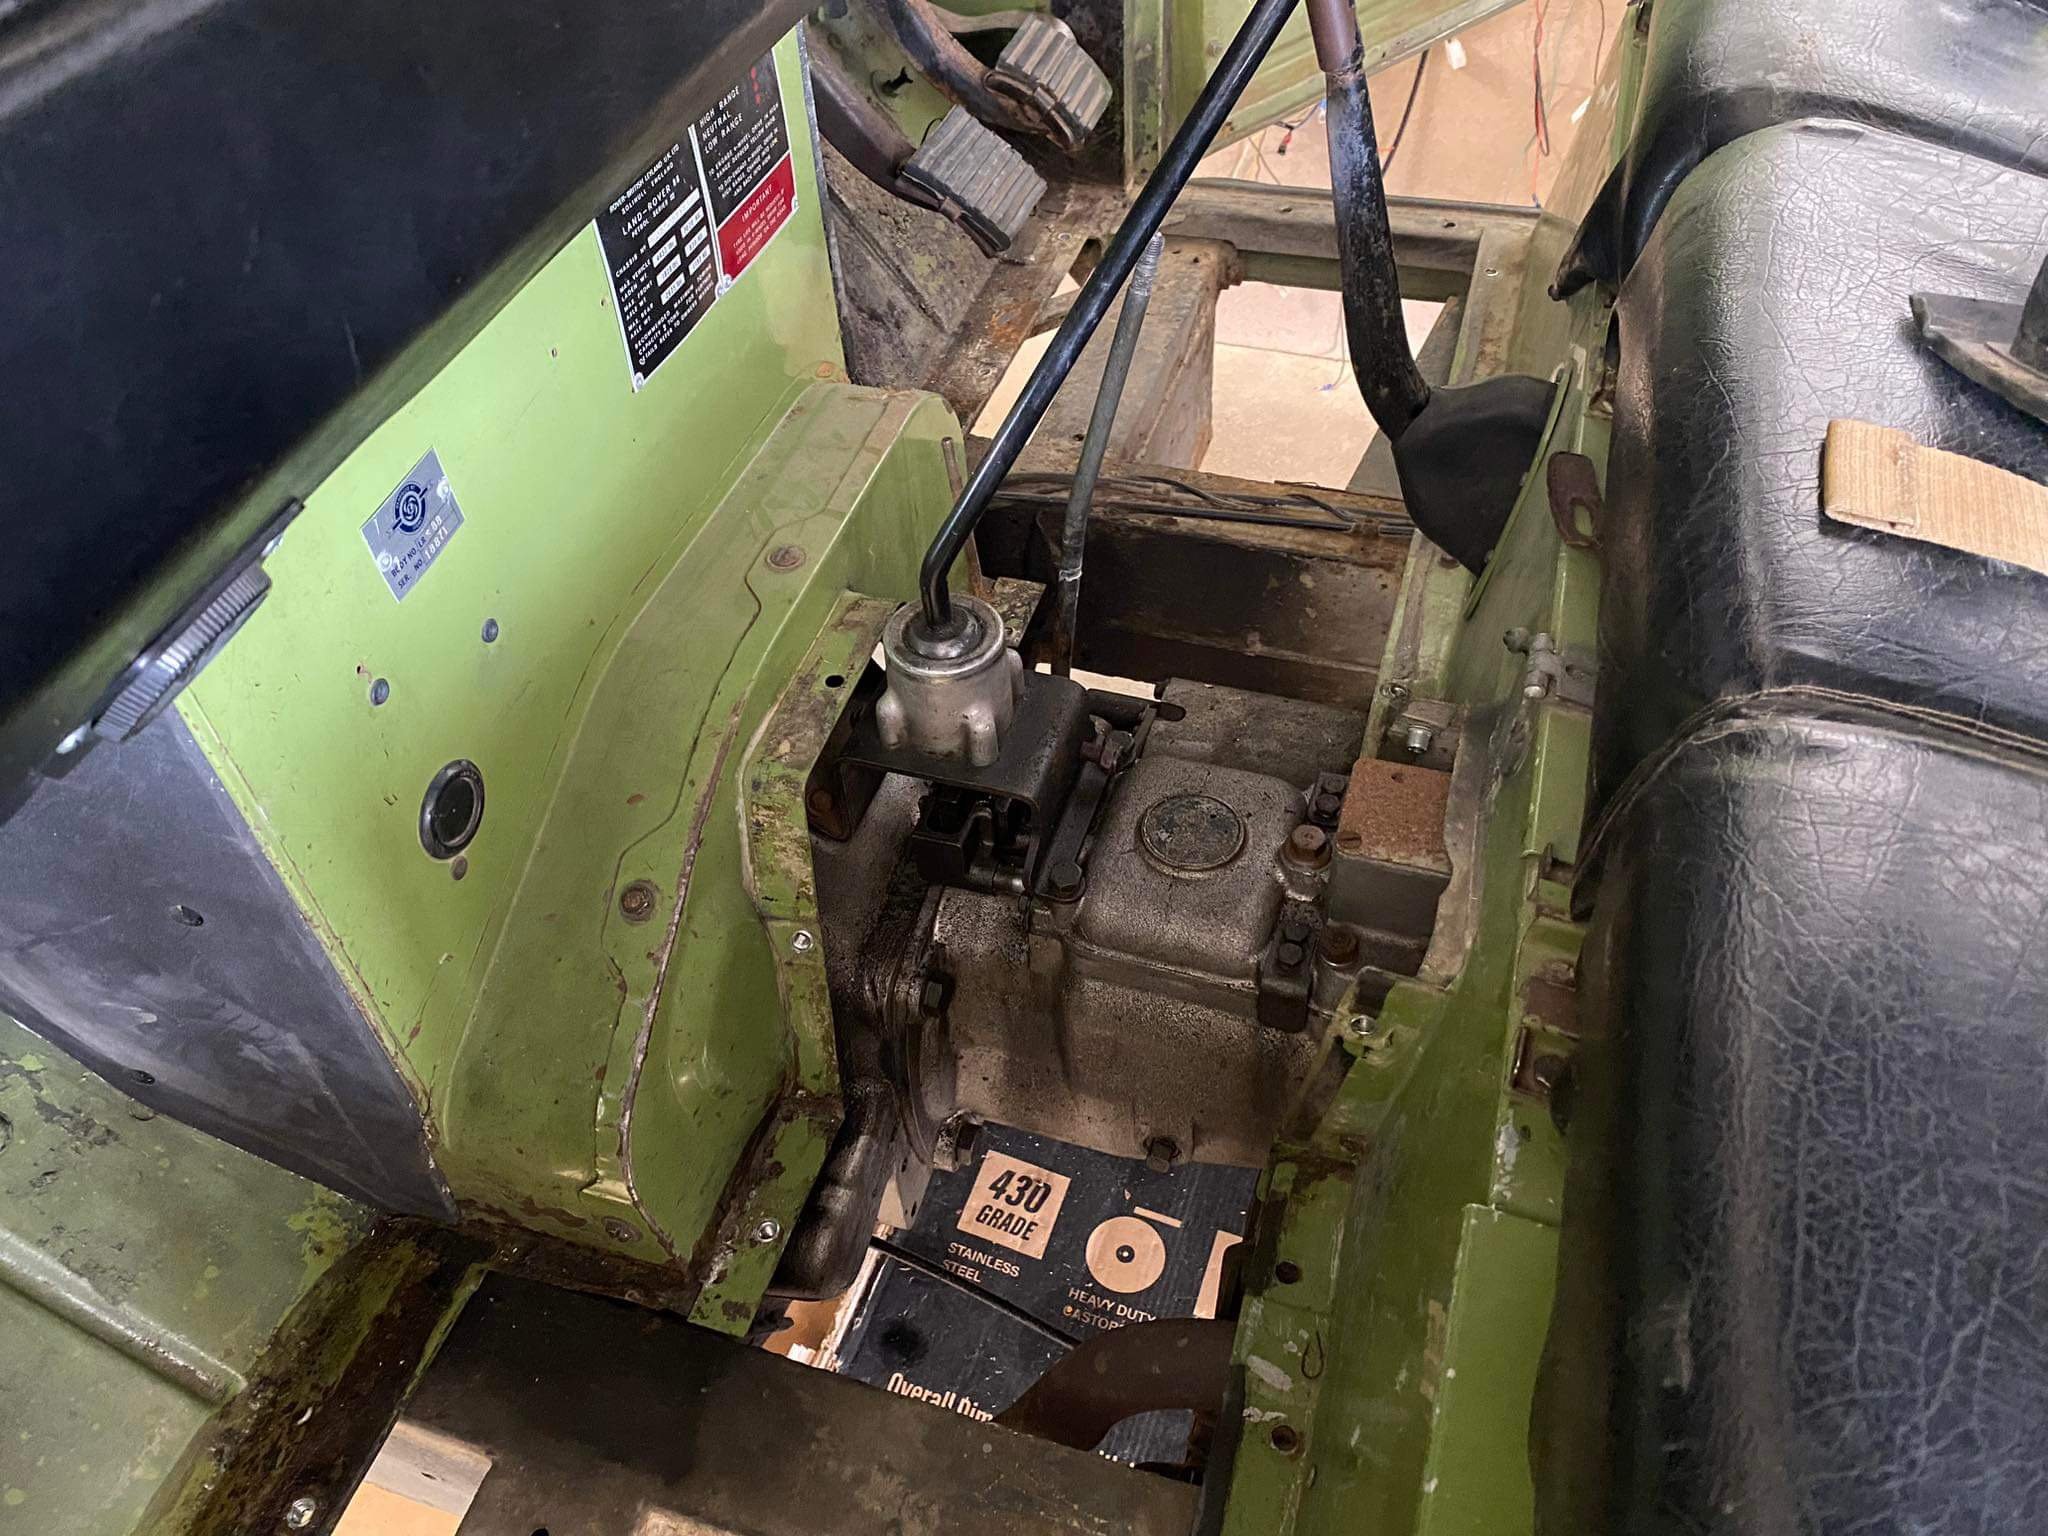
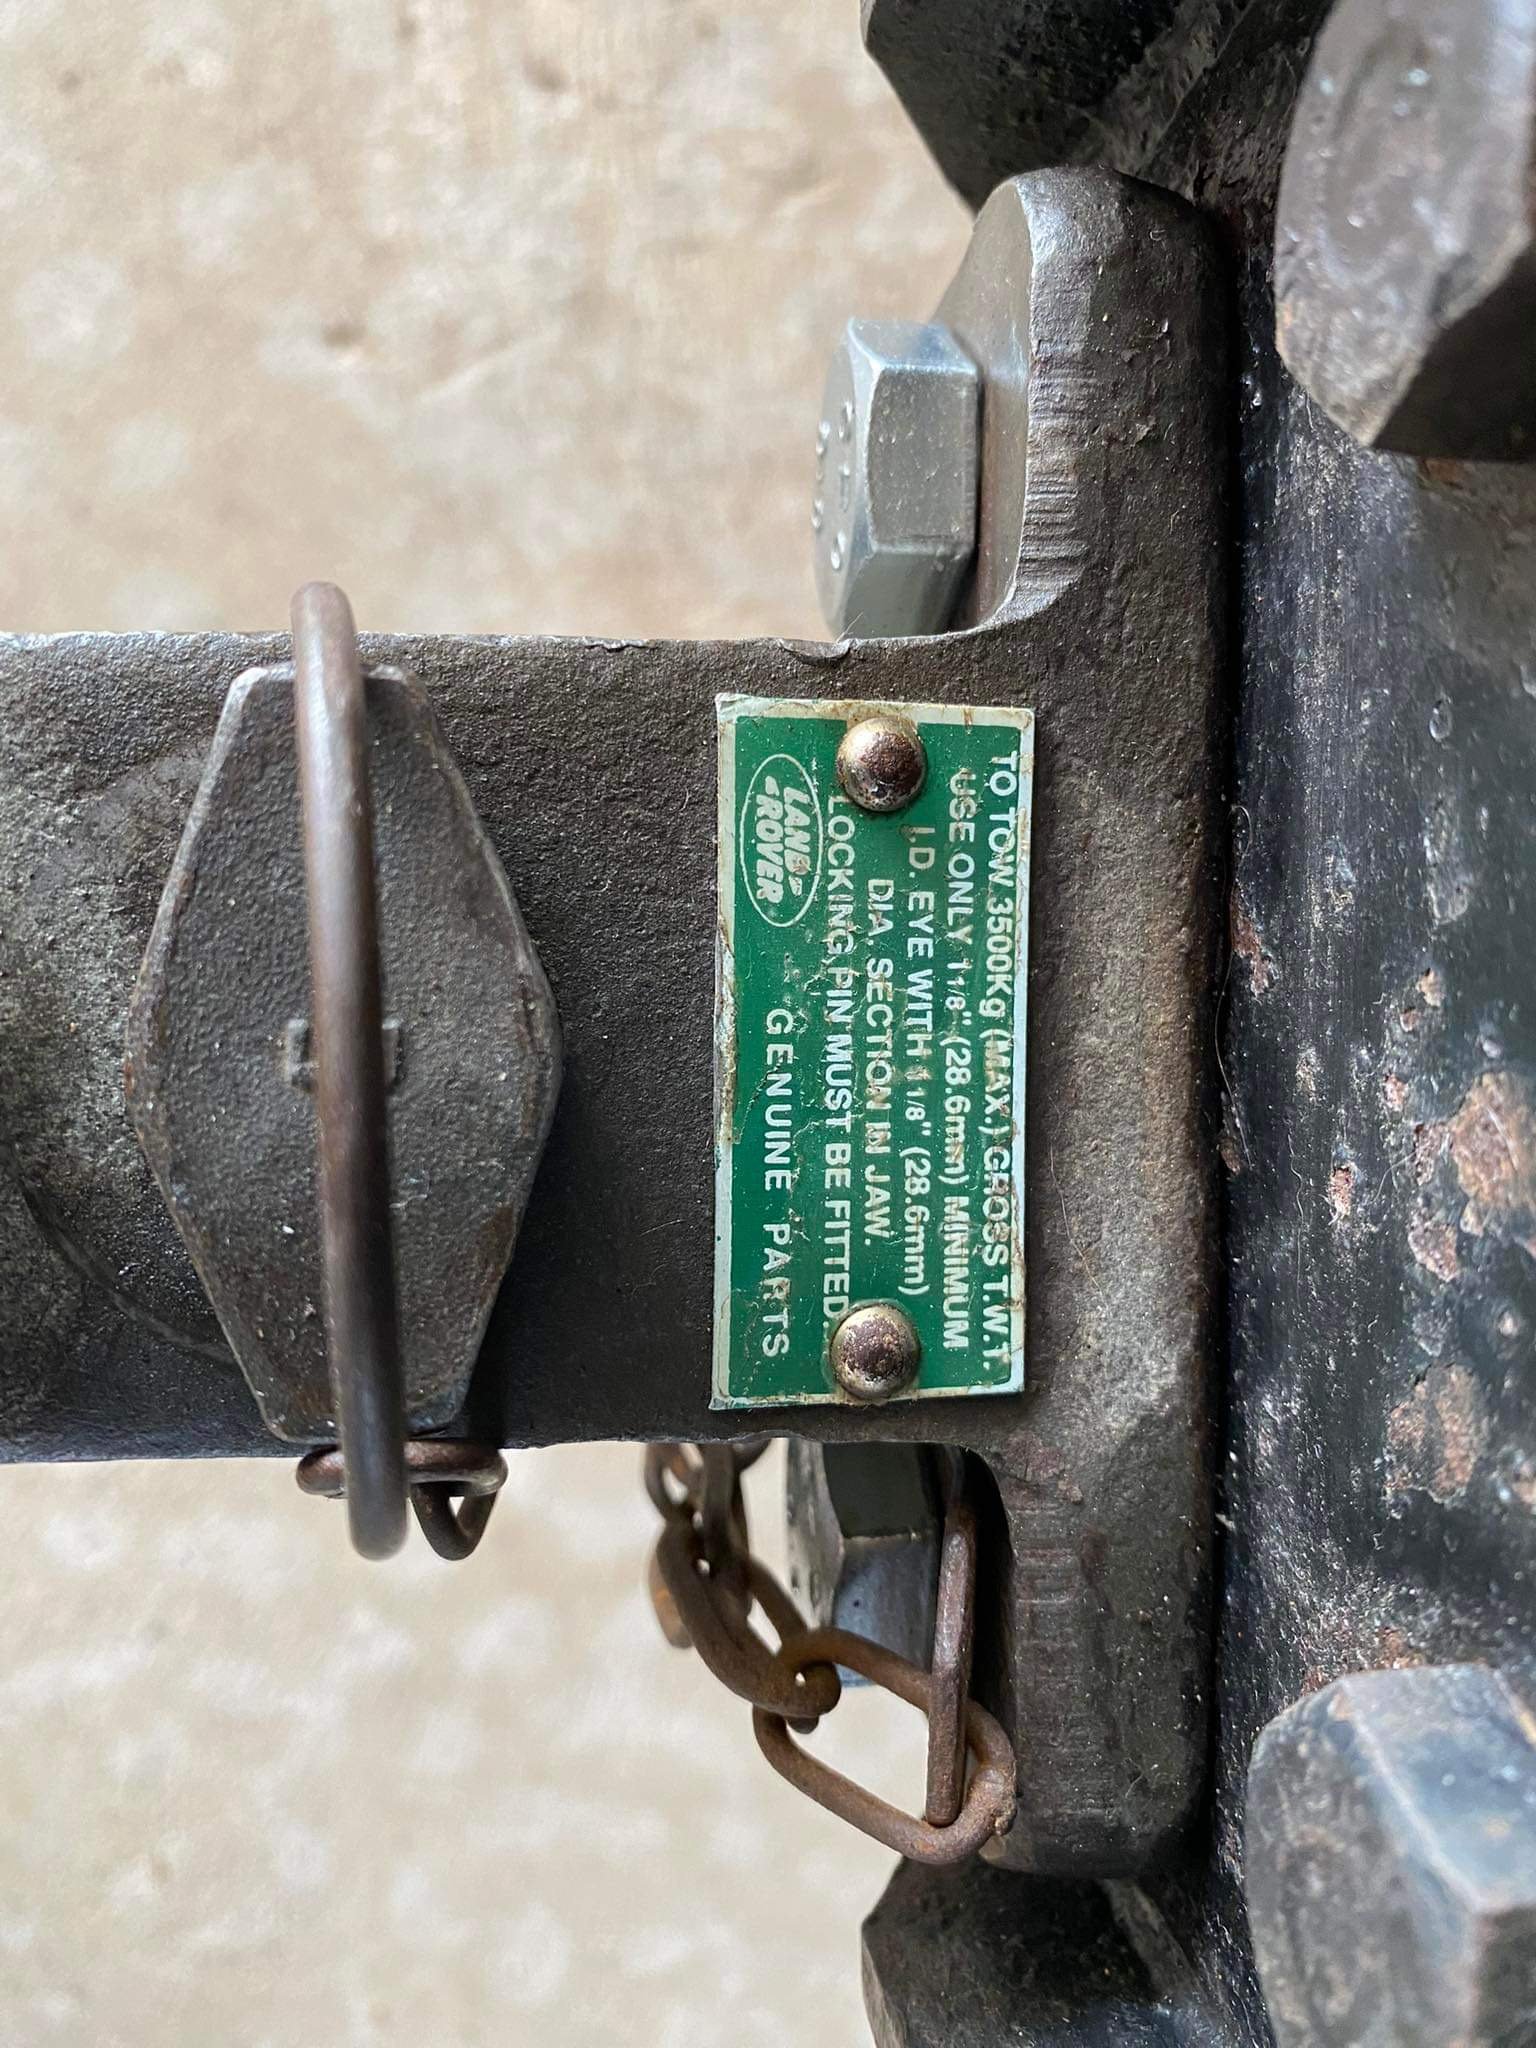
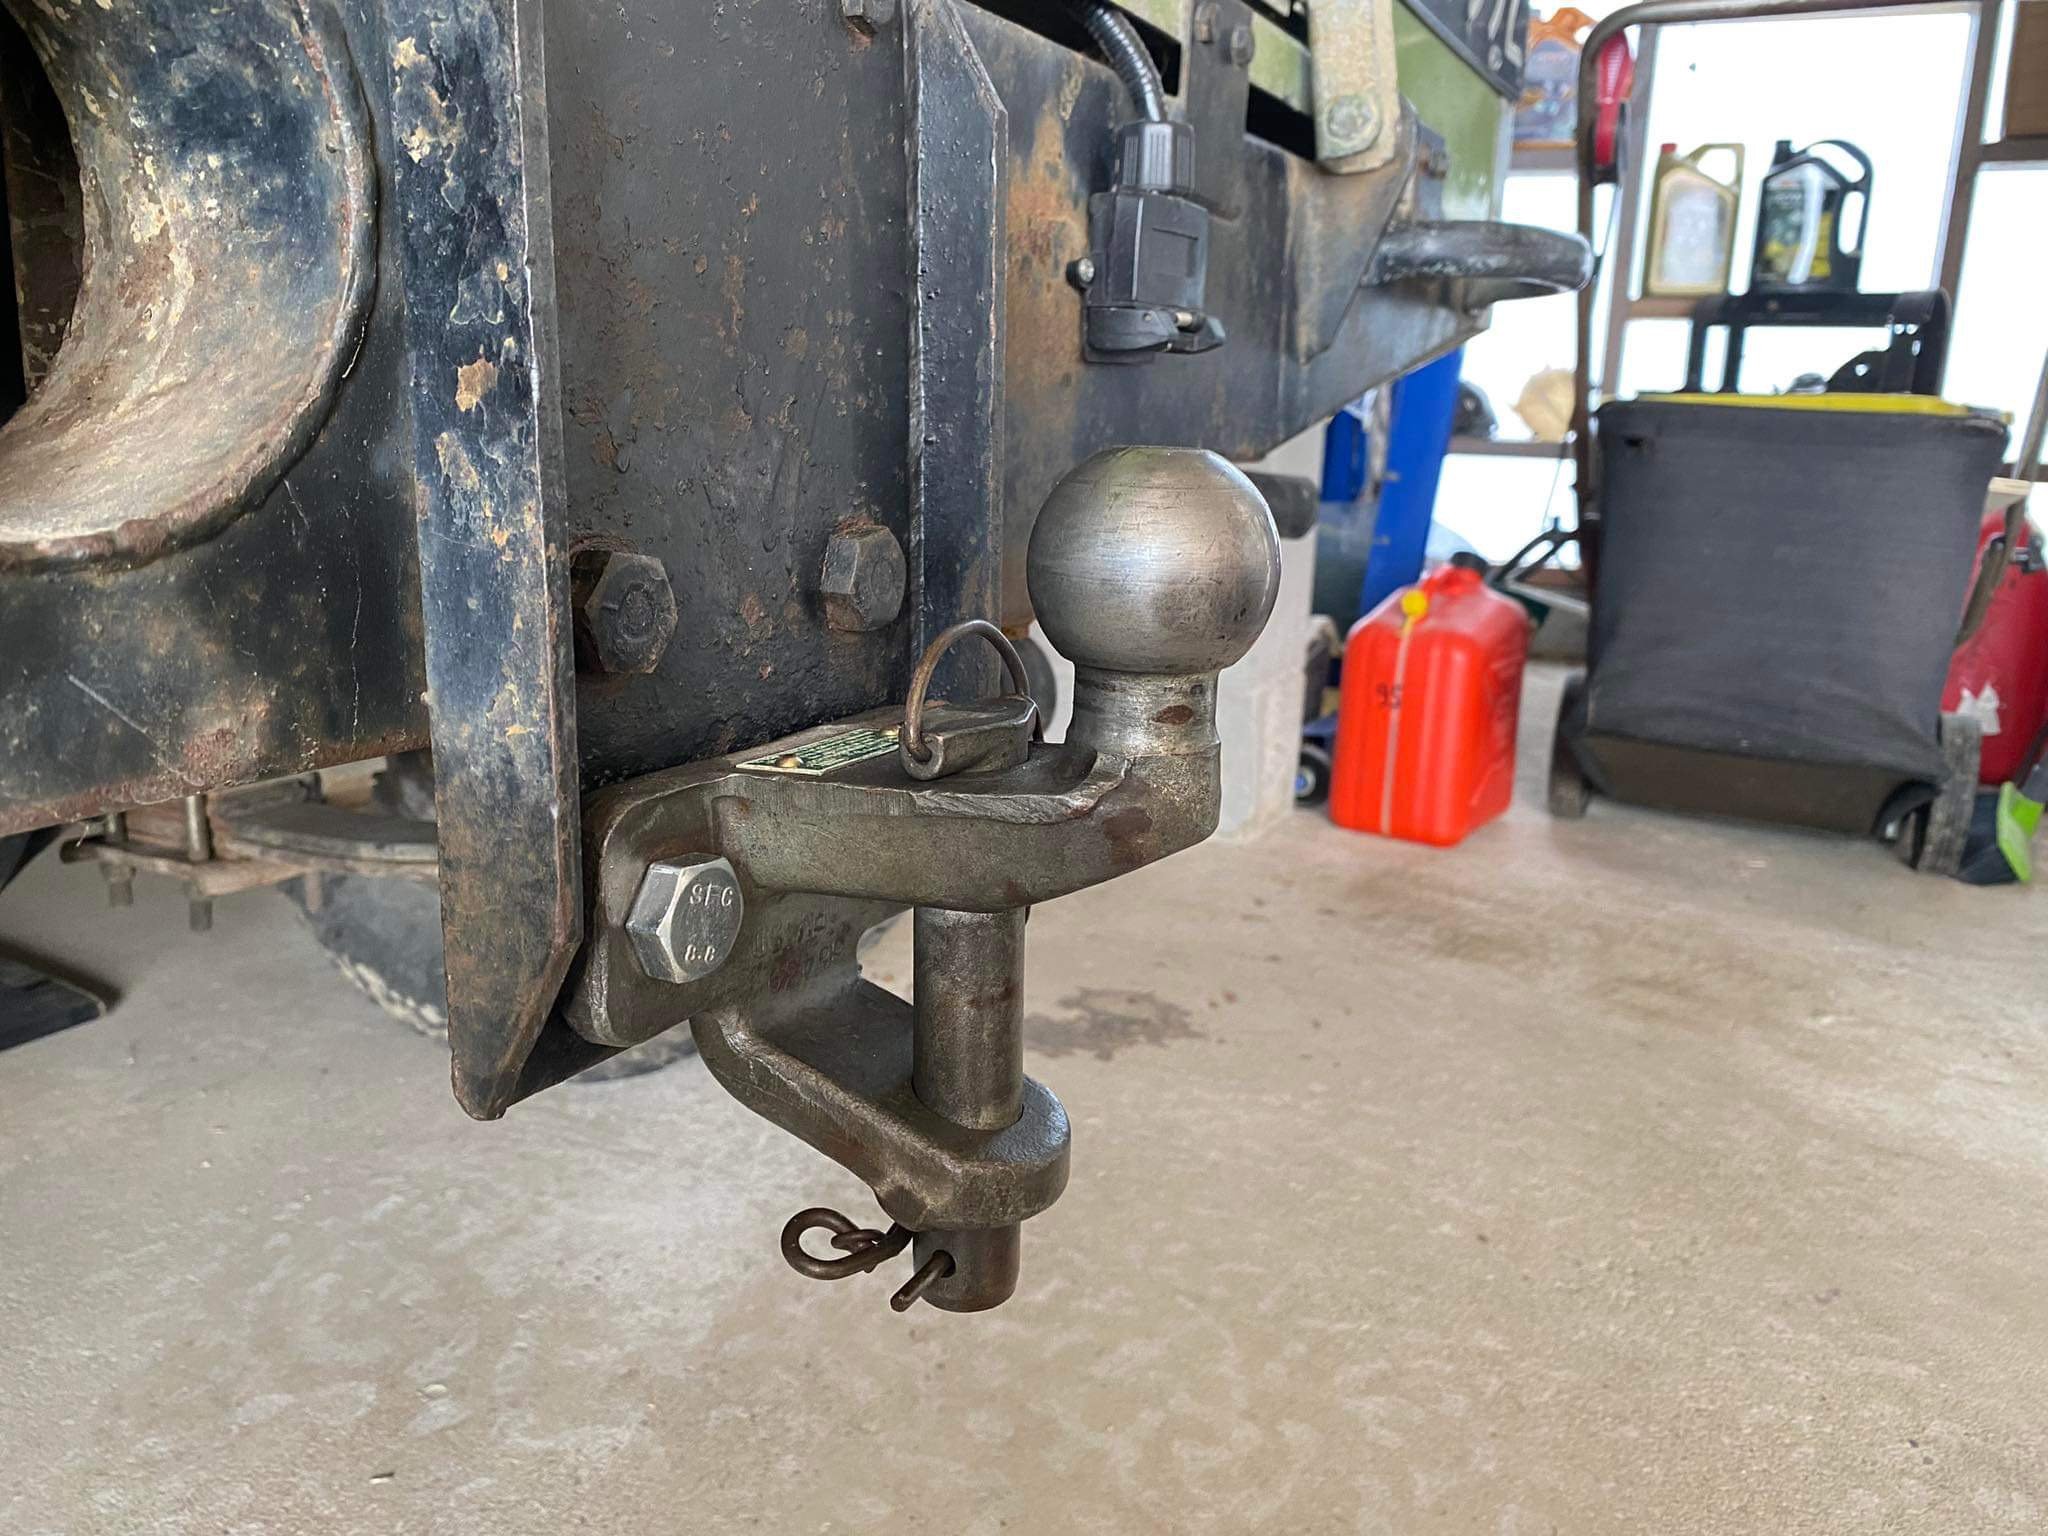
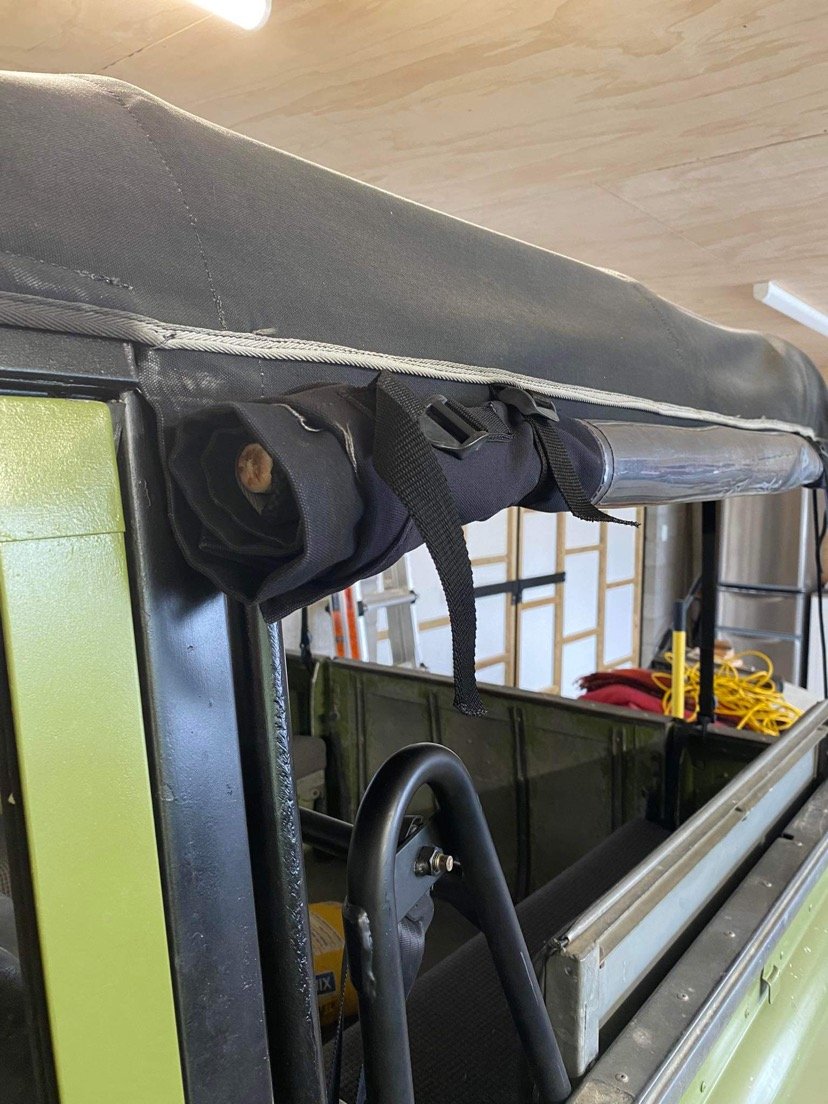
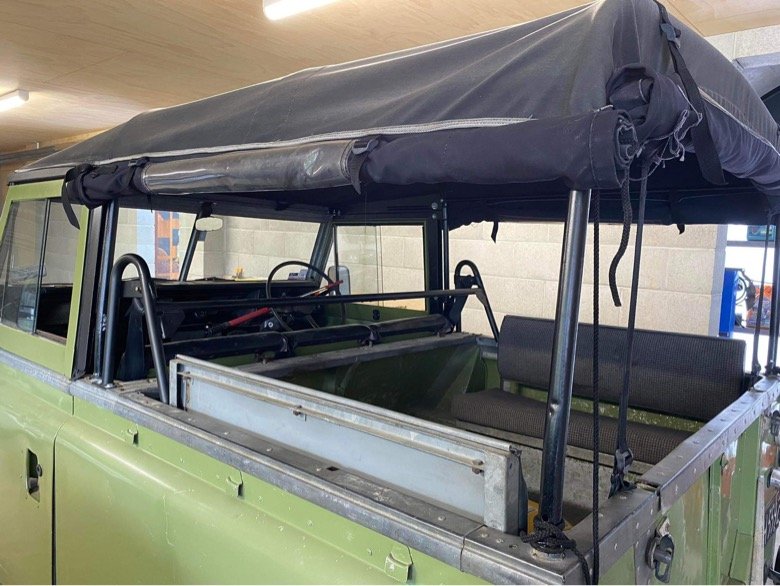
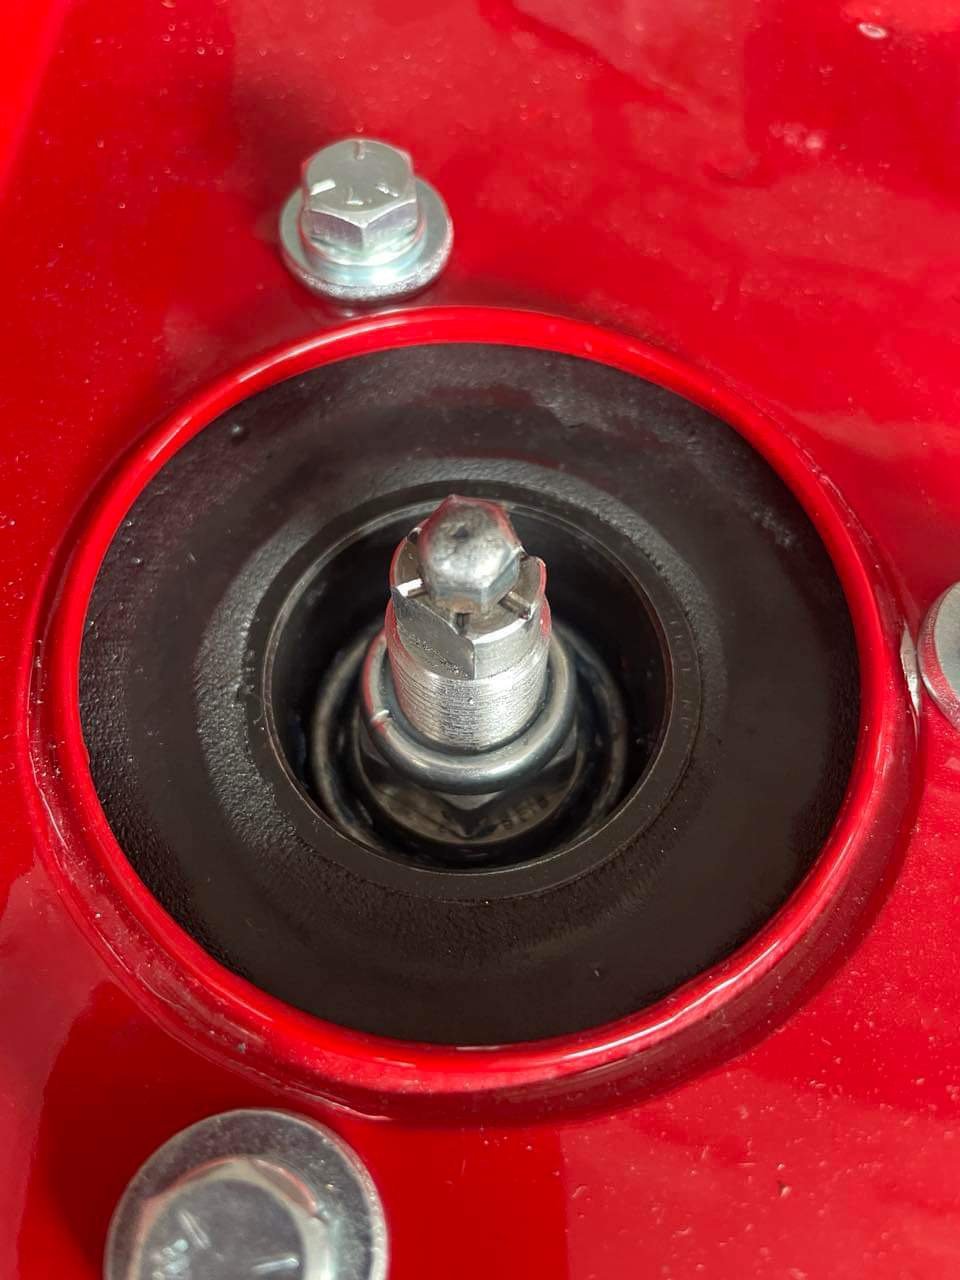
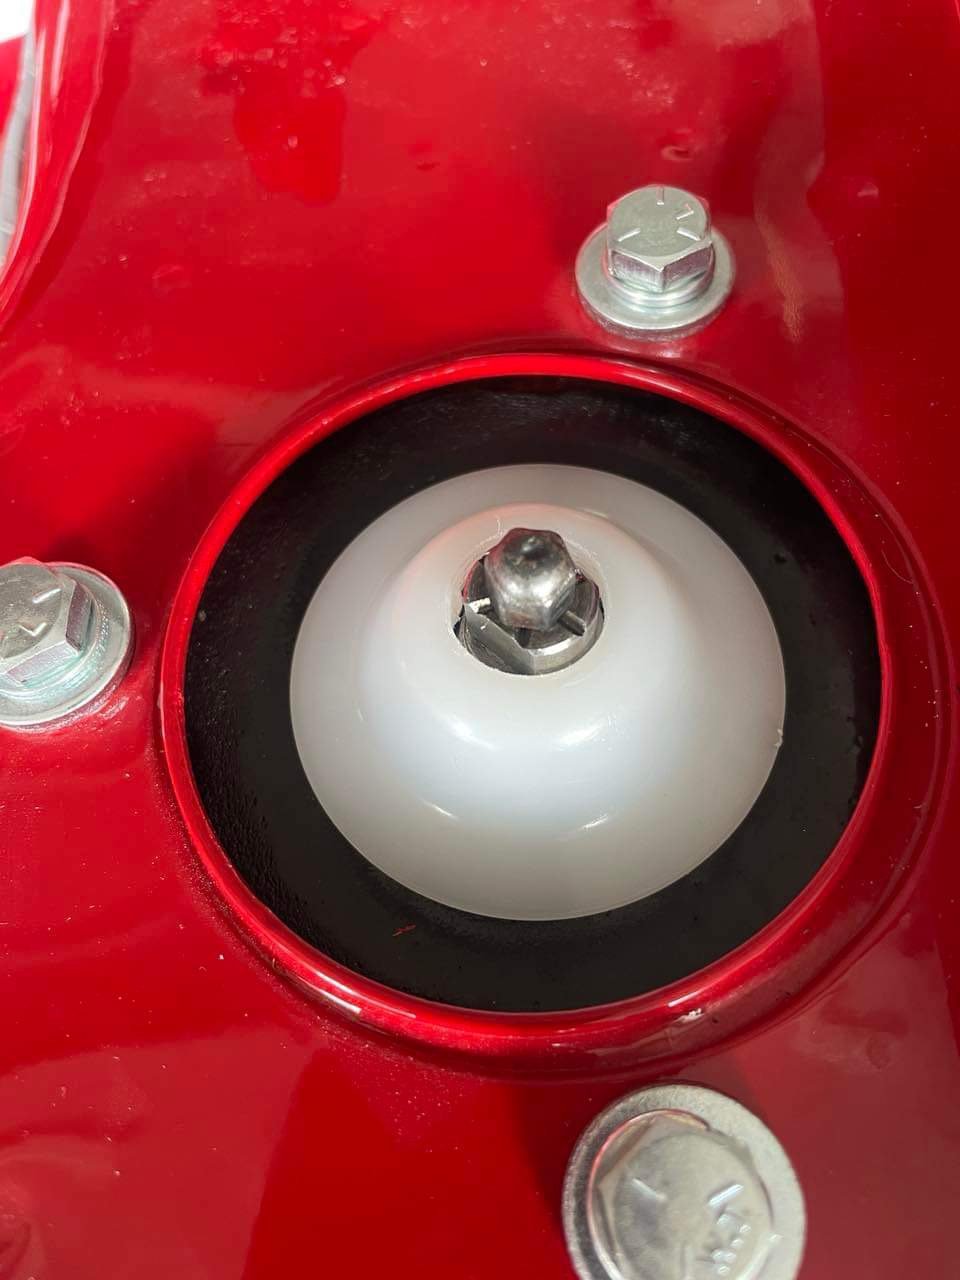
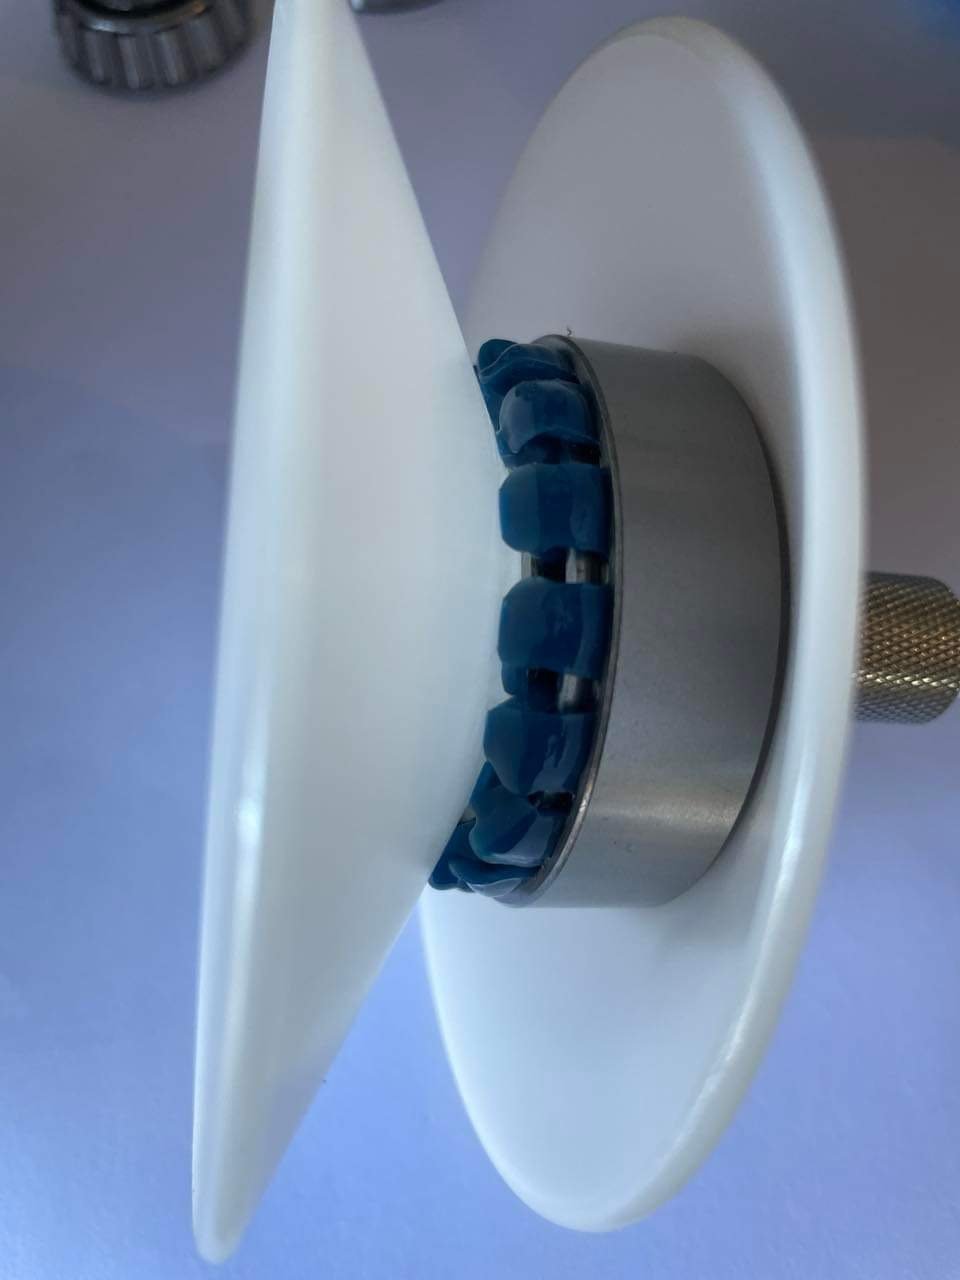
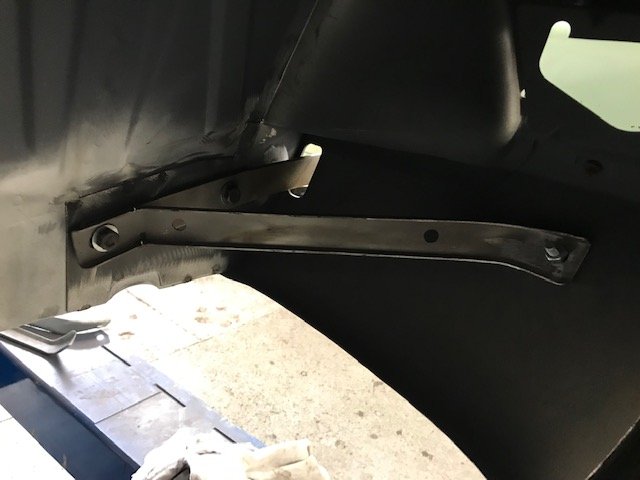
Pulled the floor and tunnel panels off to change the detent springs last weekend. Didn’t know what to expect or if the old ones would be in bits/not even there. But they were all present but a bit more compressed than the new set. Turns out I didn’t need 3 seals, the top one had a recess in the nut: Tightened the gear selector grub screw as it had backed out slightly. It’s no short shift kit but it’s certainly better. Scored a genuine Land Rover tow ball with hitch pin on the tard for 80 bucks. Old one may have become compromised using it to pull tree stumps out a few years ago… Saw a neat trick on Instagram to keep the soft top sides tidy when rolled up. 3 wooden broom handles slipped into the hem of the soft top.
3 points
-
Old man had a Kingswood wagon when I was 7 or 8. He swapped a Chevy big block in, not sure exactly what size but it was rowdy. I remember when he sold it, guy who bought it was in a wheelchair, had no legs, tried to pay in weed. So yeah the 90s were interesting2 points
-
I have updated the main meet thread. 7pm Wednesday 3rd April at Spitfire Square2 points
-
I think the 1/24 scale aspect of this thread went away a long time ago lol2 points
-
I’ve just started building USS Voyager. It’s not 1/24th scale but I’ll punish you all with my terrible slow progress anyway. You’ve been warned!2 points
-
Rookie Daves diesel mobile doggin unit2 points
-
2 points
-
2 points
-
Been doing more
2 points
-
Anything from 2000 onwards gets 1 year WOF, it's not a sliding scale.2 points
-
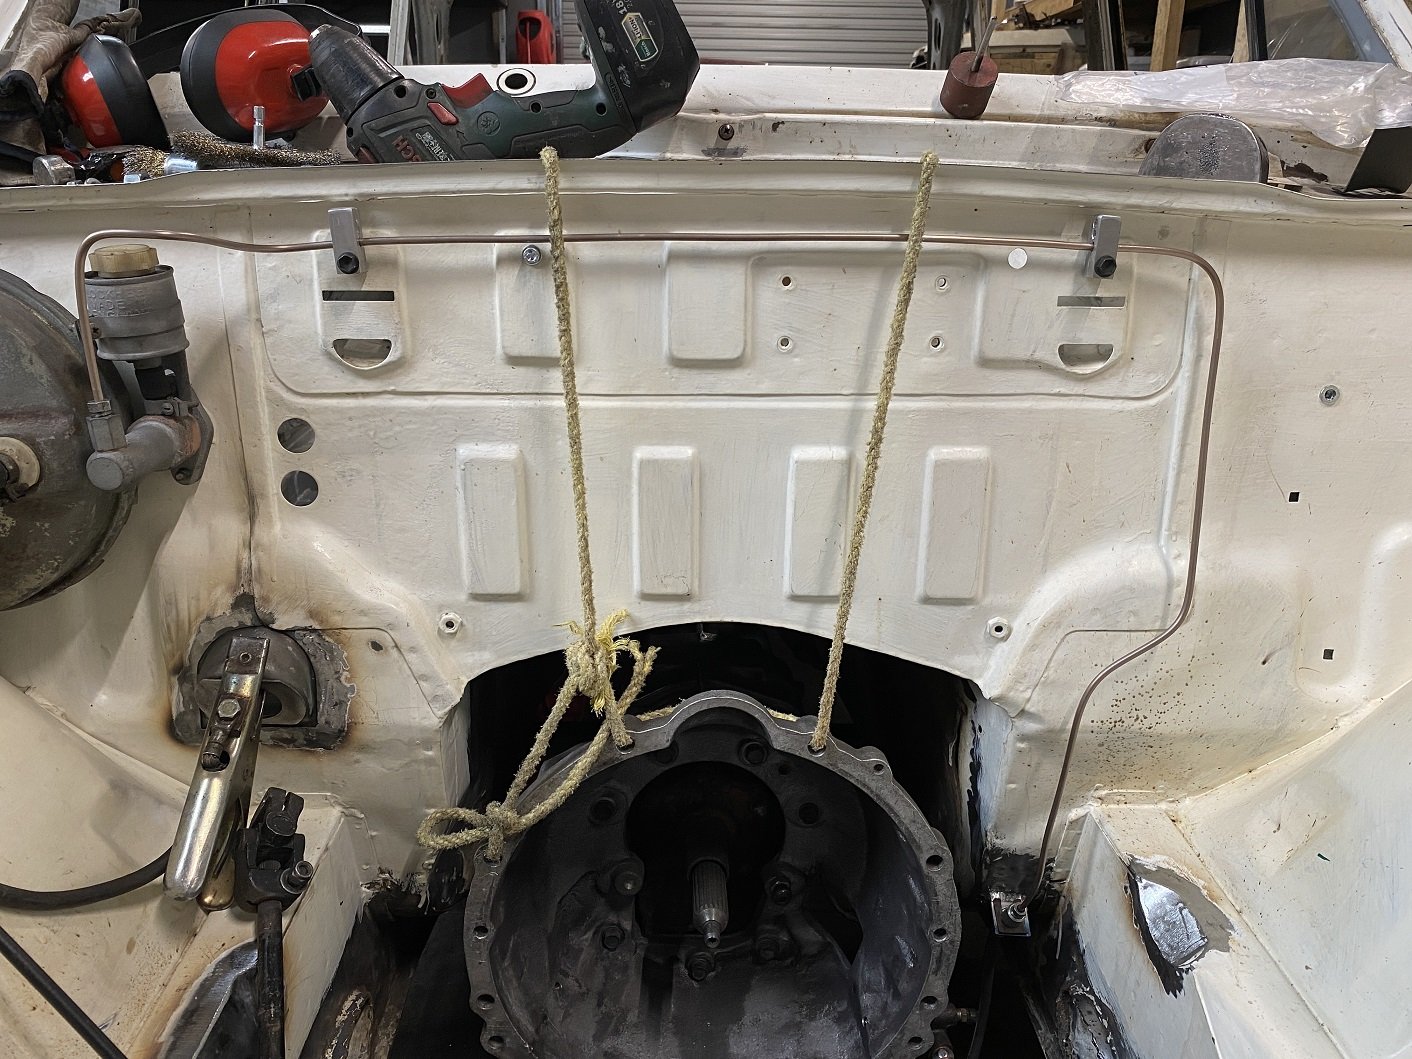
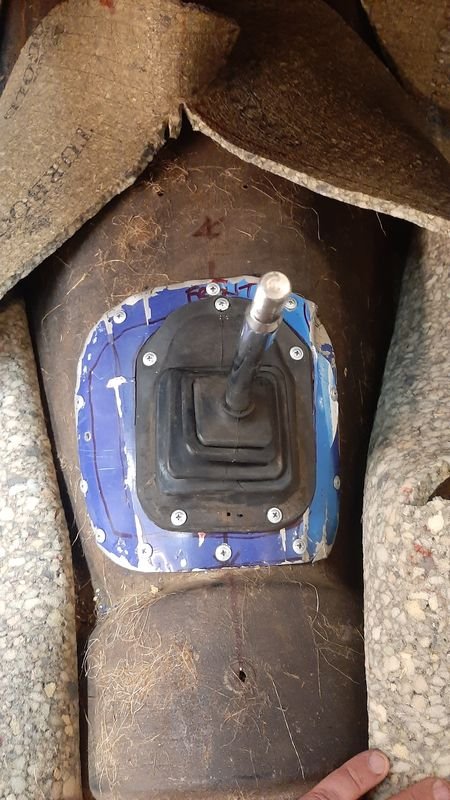
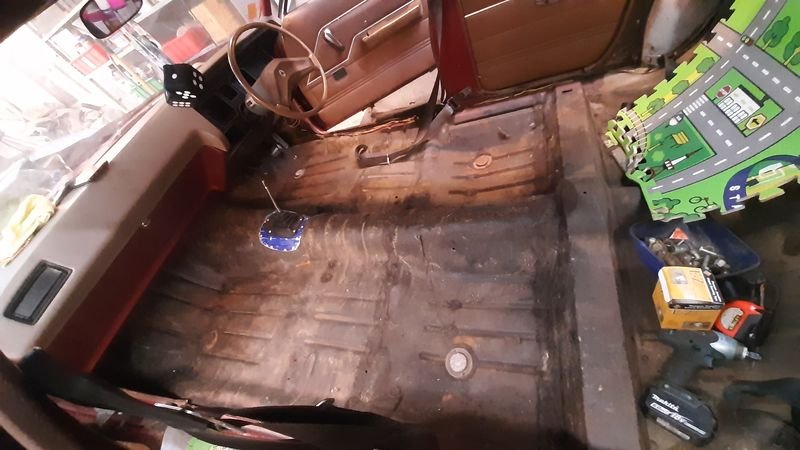
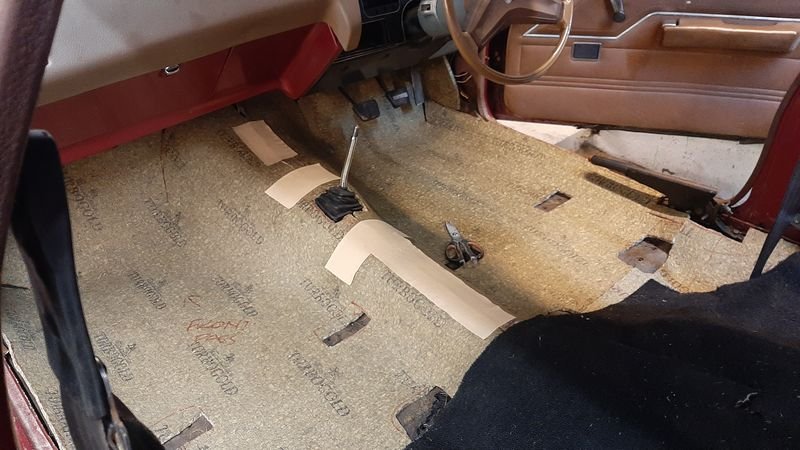
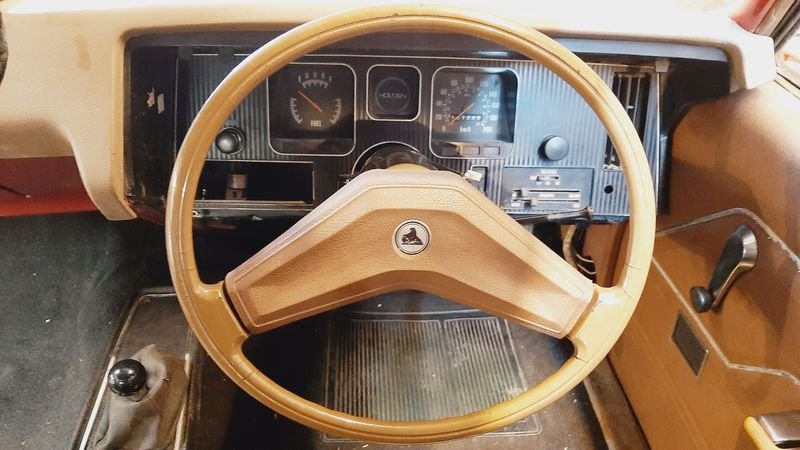
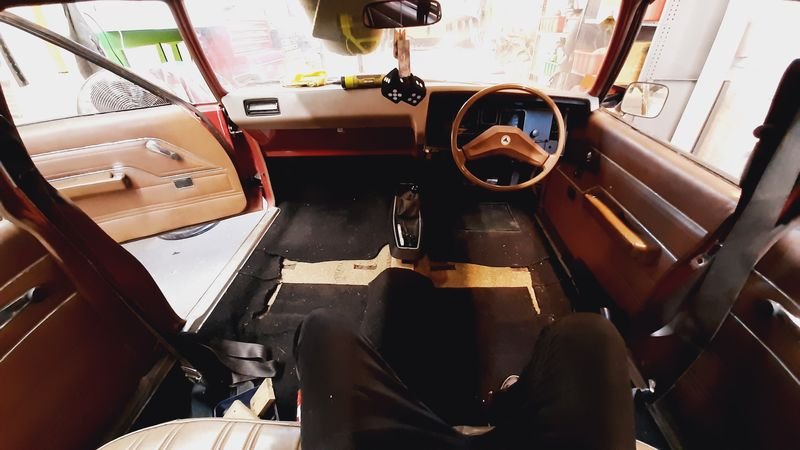
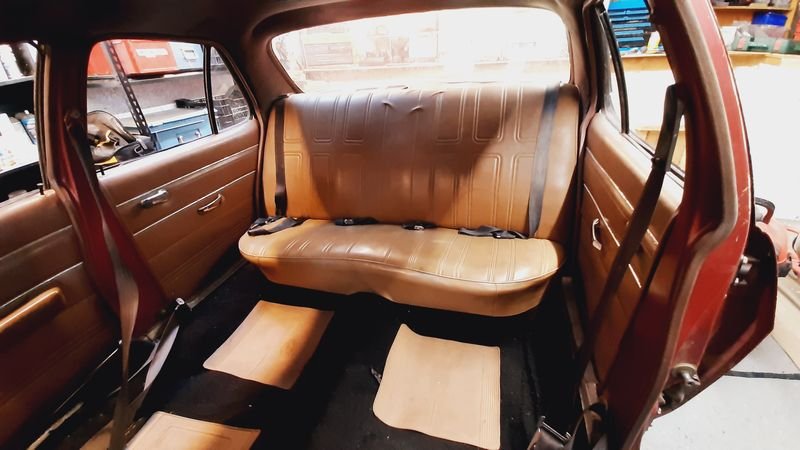
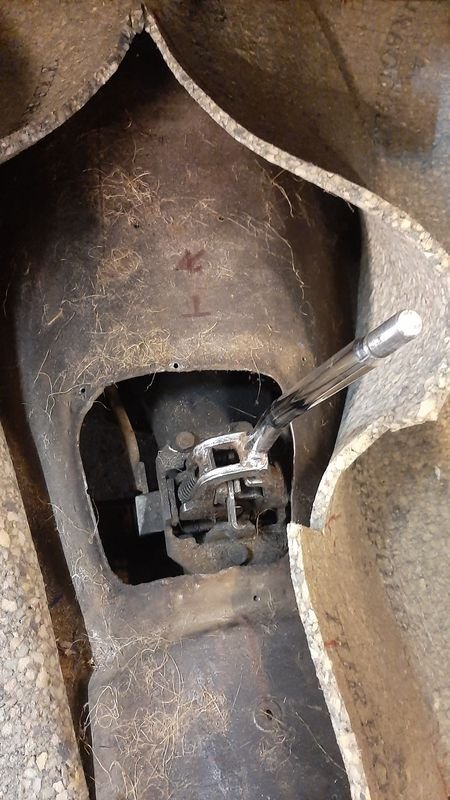
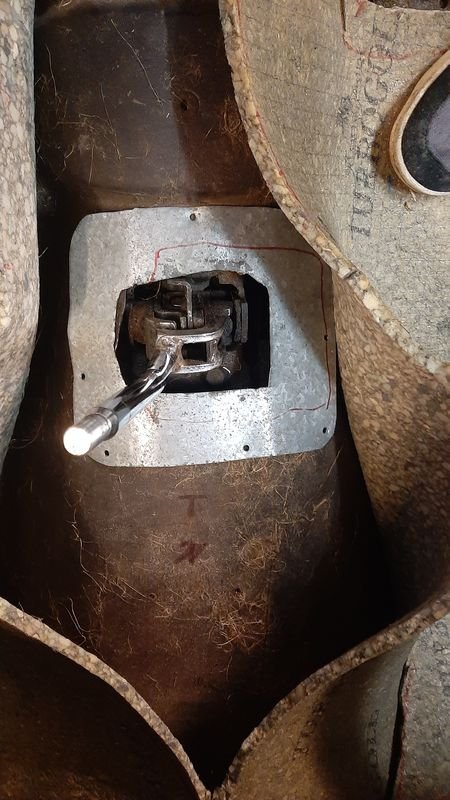
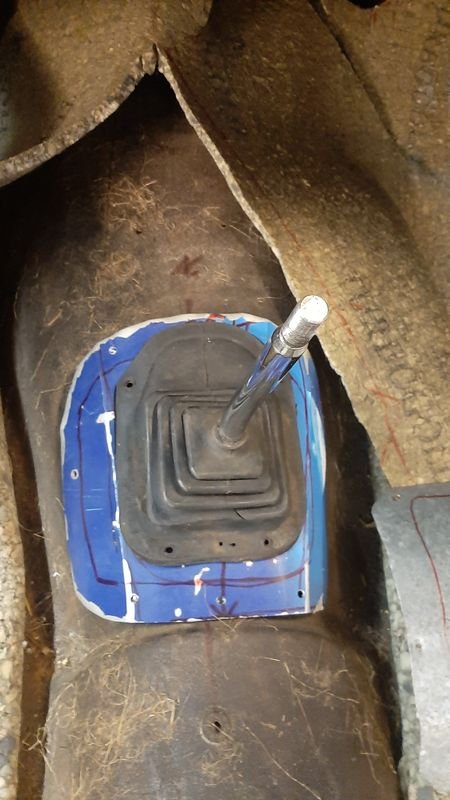
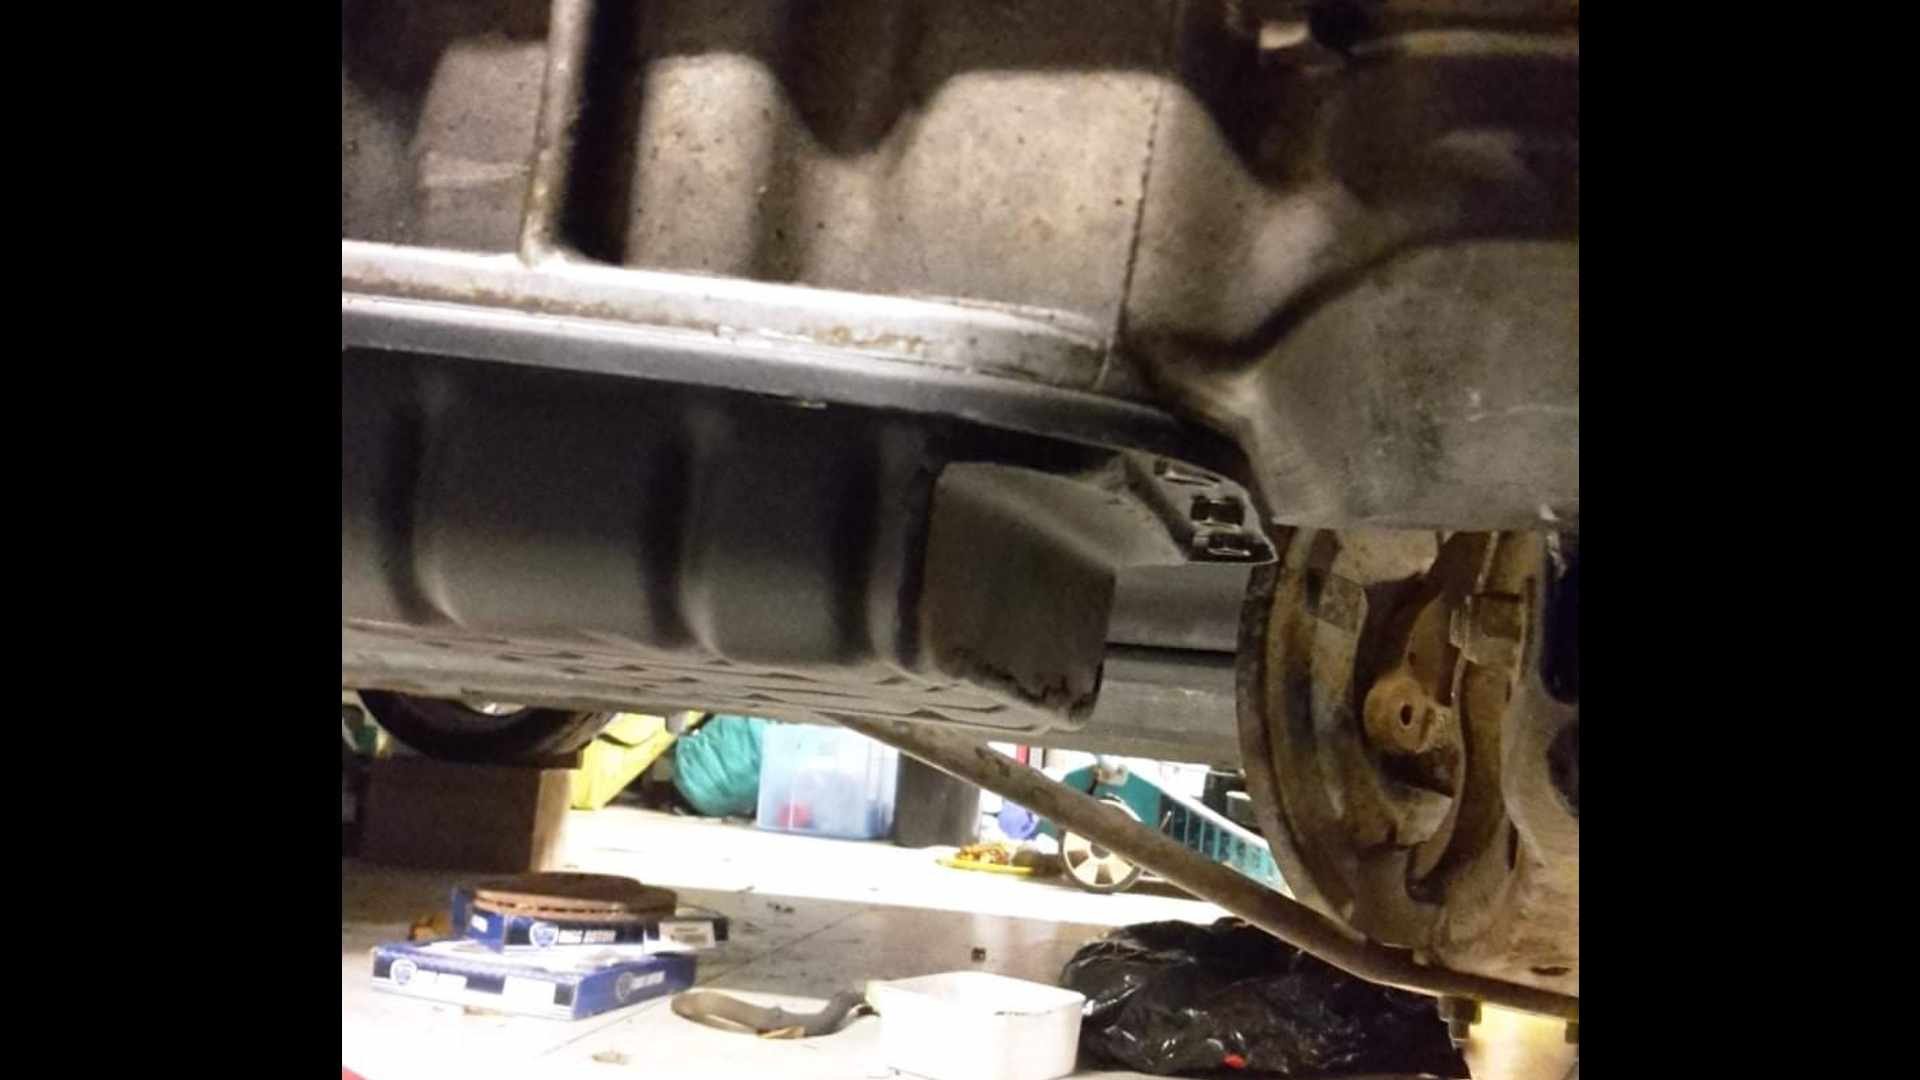
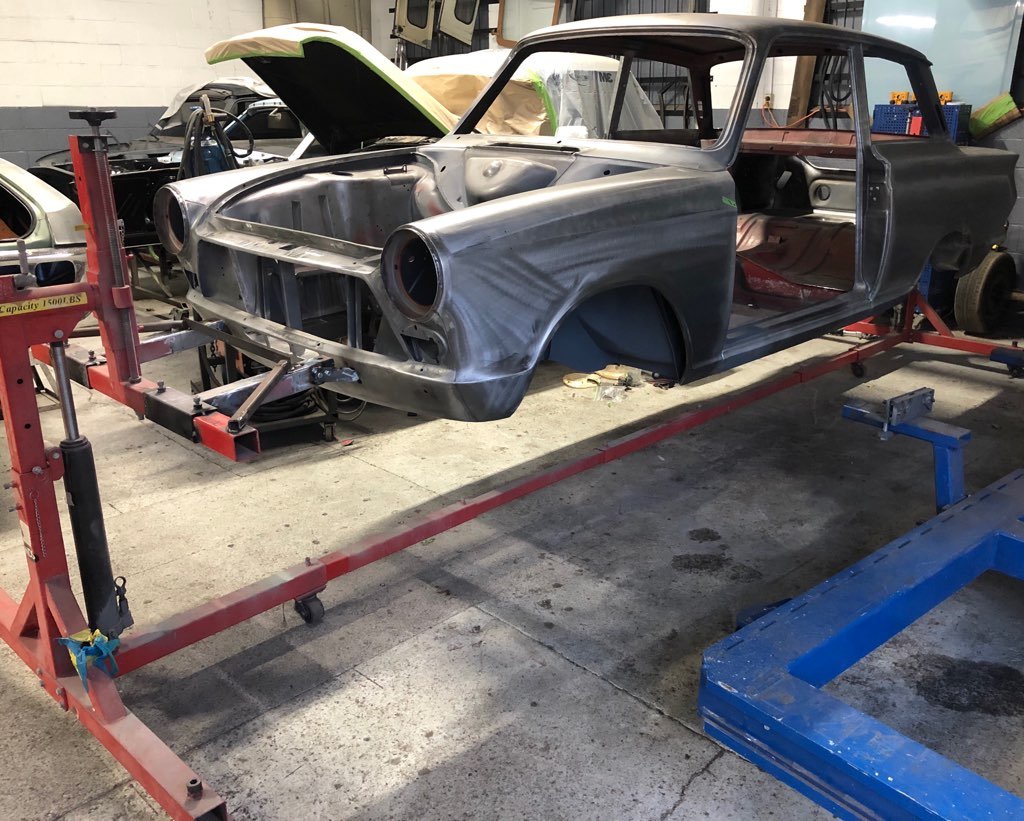
Now we know it runs, next step is to make it worth driving The interior was pretty good condition but there was a lot of evidence of rats eating and storing snail shells in the engine bay and mice droppings in the interior, but no evidence they lived there long, and the shed it was in wasnt water tight so it was all a bit smelly and musty Anyway, all needed to come out for a clean & deodorised the seats, throw away the original horsehair underlay and to make it easier to do a few other jobs, like... Improve the shifter opening, replaced the galv flashing and countersinks that dind really cover the hole with some alloy sheet (from the Sign of the Year! - now in 5 of 5 of our classic cars!) and a rubber boot - adding my first FIAT part Removed everything else and give it a good cleanup. Floor condition is excellent, no rust at all! 'New' Underlay (free second hand stuff) to replace the original horsehair stuff that was a bit smelly and flat. I think the front carpet might be ex-torana too, it doesn't quite meet up with what im pretty sure is the original HQ rear carpet. Both carpets are in nice nick, and we will cover the gap (which under the seats) with some cheap nylon outdoor carpet from m10 that we will also use for the parcel tray that is also unmolested by axe holes for 6x9s etc. Rear came up nice as well, car has a tan interior with dark brown headlining - class! Removed the steering wheel spayed the steering column black (was grey and still has the column change mech in it) and tidied the (omg its so janky!) dash up a touch, and the wiring behind it mainly by removing anything that has added in And then remove the dead weight out of the boot to make room for bodies and crates of DB Its easily 80kgs, empty Things will likley slow down a bit now, as from here its time to start spending money on parts, most likley starting with brakes which i have not even had a wheel off yet to even check what they are apart from being discs up front and drums out back) I suspect the weird too easy/dead stop half way pedal/no brake function issue is the piston is jammed halfway down the master cylinder, as there is no leaks from any soft lines, and lots of fluid in the MC.
2 points
-
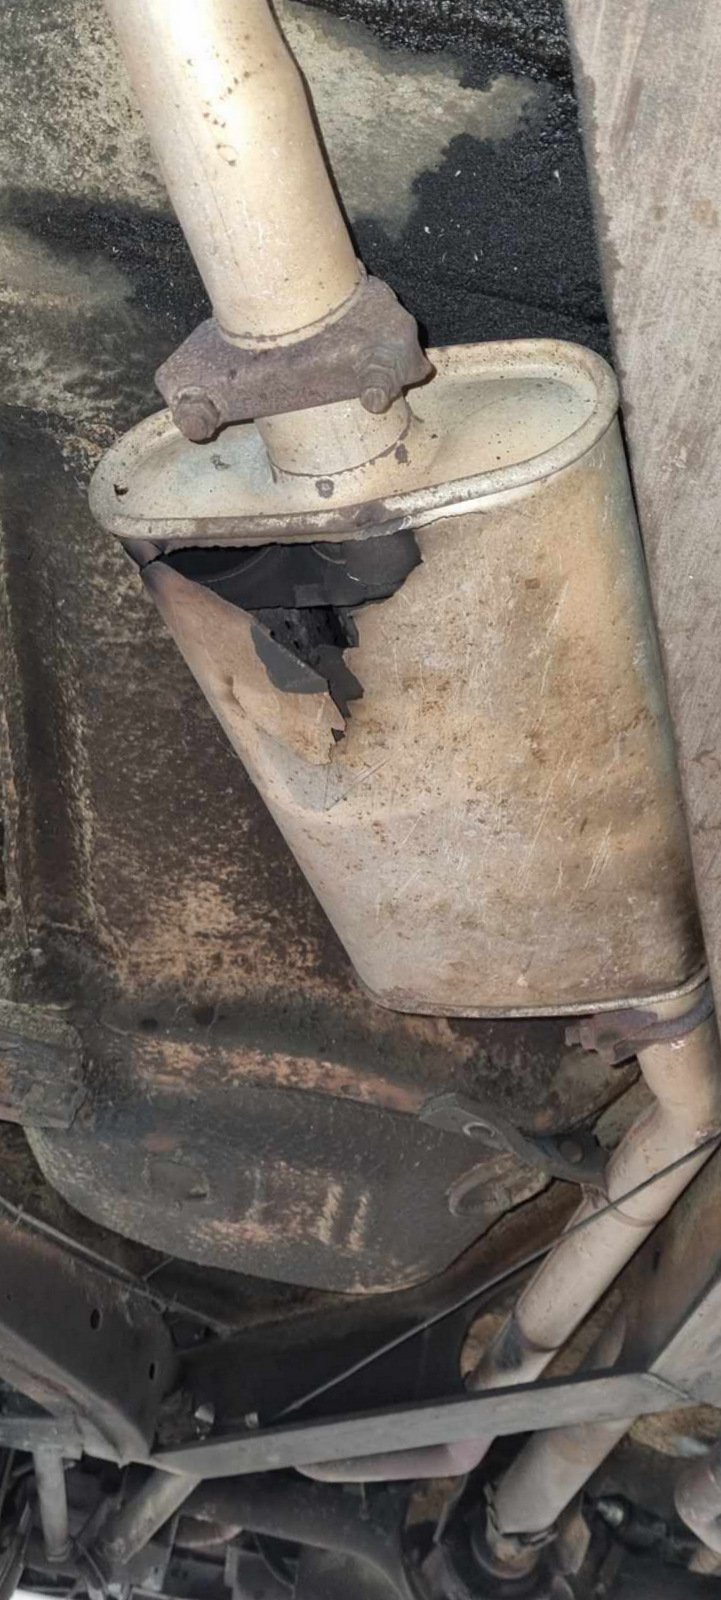
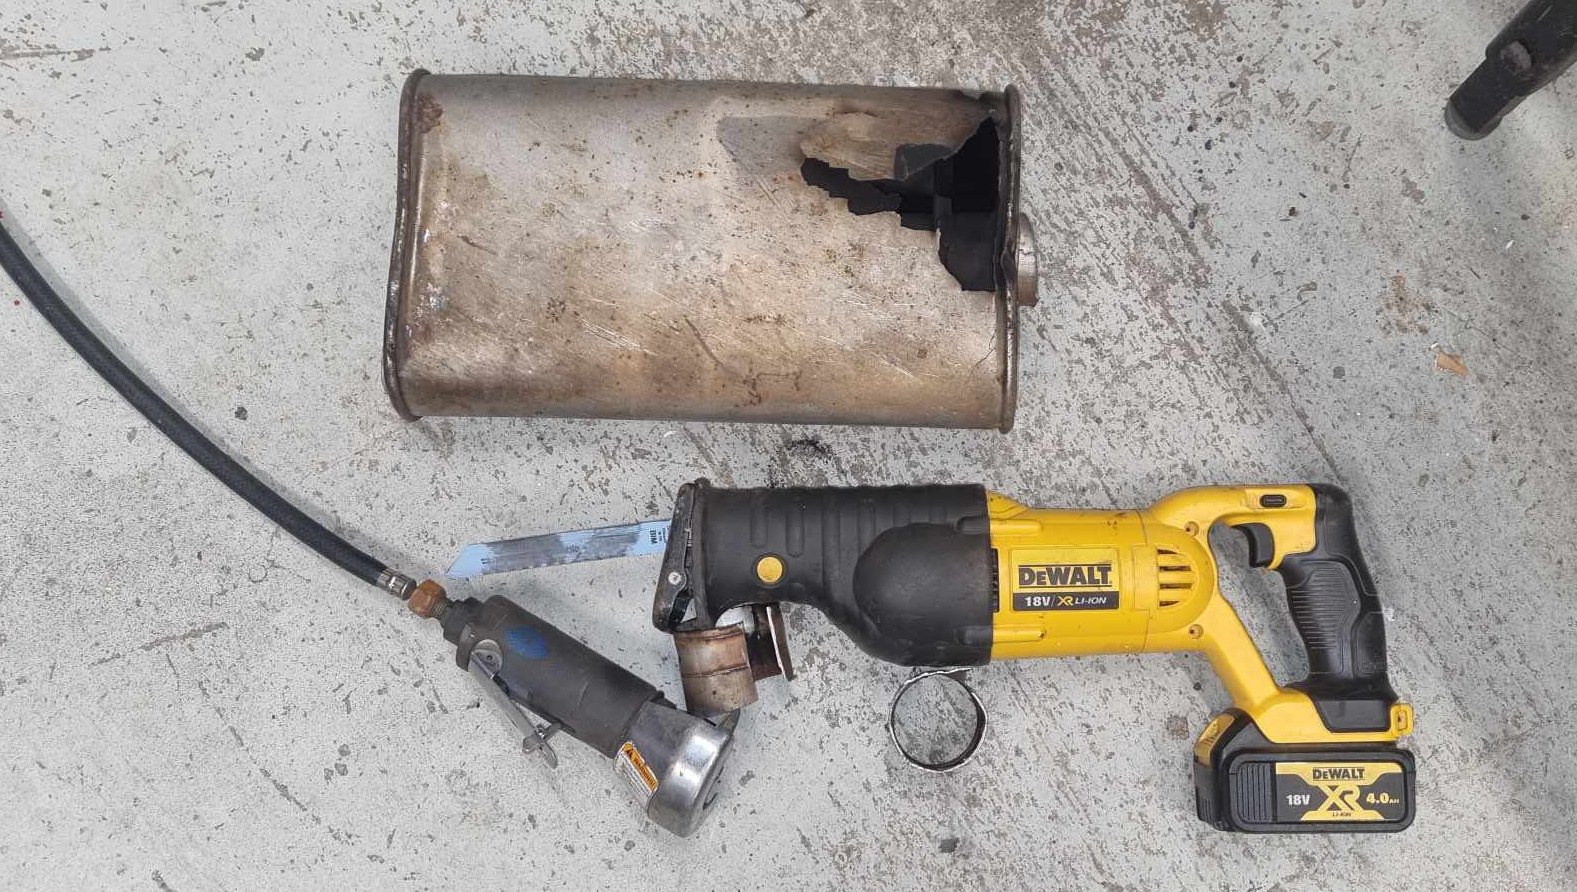
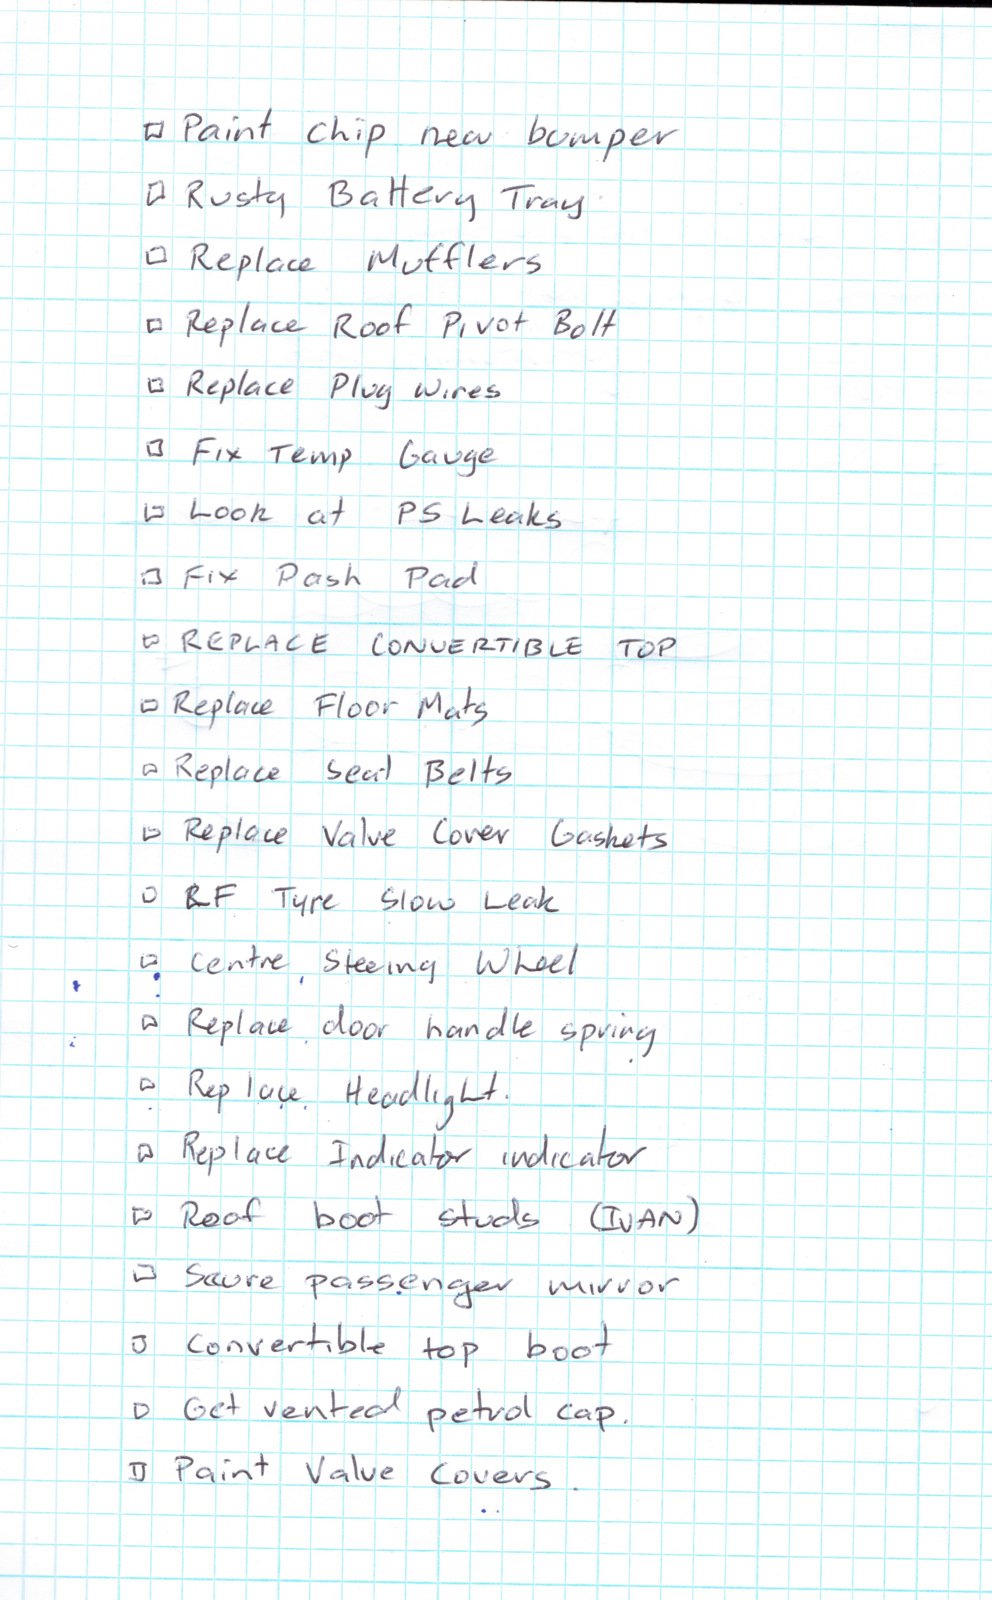
On the way back the LF tyre was going flat fairly quickly, and needed some air every couple of hours. All good until Levin when the core of the valve blew out while I was putting the valve cap back on. Spare is an original 14" and doesn't fix over the discs. I think my plan for this situation was to put the spare on the back, and swap a back wheel to the front, but that would be a faff as the rear tyre needs to be deflated to get the Radir wheel off, then pumped up again from the air bag system. There happened to be a tyre shop nearby so I humped the wheel over there and got the valve replace (for free - thanks Advantage Tures Levin) Even thoug I just got a fresh WOF one of the mufflers gave up the ghost on our travels. It might have involved a bit of road contact but I'm not sure, these have been on the car since we got it in the USA in 2003, so notbad.jpg Got it off without too much effort, will replace both sides. After driving it a lot over 10 days I realised I have been ignoring a lot of small and not so small issues so I made a list.... have already ordered some bits off rockauto, so will pick away at this while we wait for a house sale.
2 points
-
Went for a decent blat into town tonight. A few things to note before I forget. Cruises at 2200rpm at 100kph and has buckets of power upwards from that so the gearing is spot on. Maybe because Im used to a shitty old slow chevy but it feels like a rocket. Makes a weird noise for a second on startup. The sump is too low. Either I have to put in stock springs or modify the sump. @cubastreet got any spare sump pans? The oil filler pipe is now hitting the firewall so I have to modify that again. Second is a bitch to find from 3rd but I'll get used to it. It has enough torque to take off in 4th but I'll leave the clutch alone. I might make the aux water pump booster linked to the ignition as I forgot to turn it on. It's criminal me having this car and living 10kms from a decent corner. It wants to corner.
2 points
-
And it is a lot cheaper.2 points
-
in new zealand it always needs to be licenced/rego paid to be on the road at 40 years it becomes "classic". this means a slight change to "continuous licencing" in that it takes a little longer for it to be come deregistered if you forget to put it on hold2 points
-
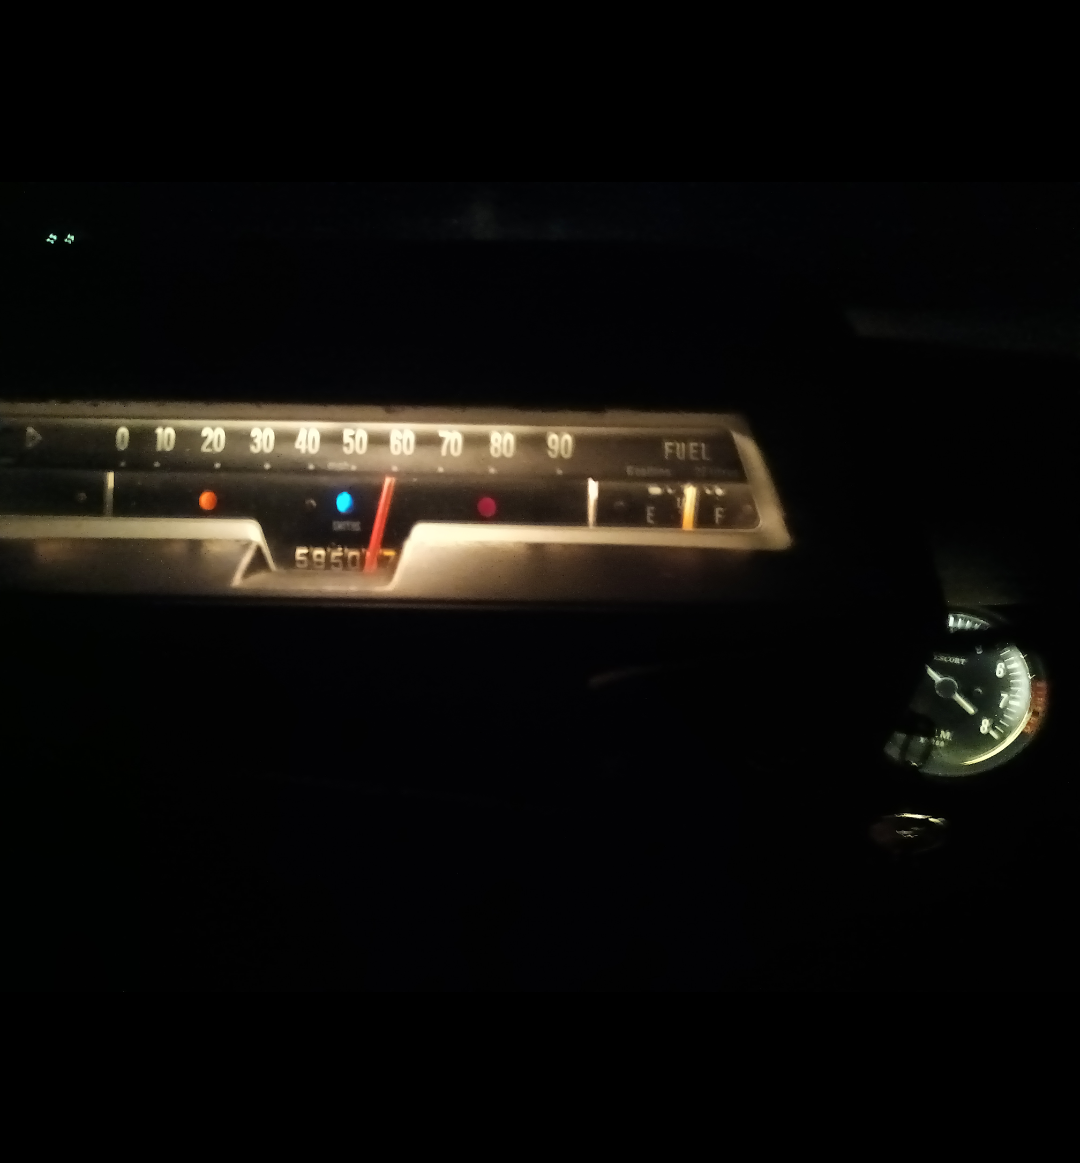
My Datsun has a haltech and running std tacho with inductive loop, i just ran the power wire for the coil, coil no1 in your case, through the inductive loop and it works mint.2 points
-
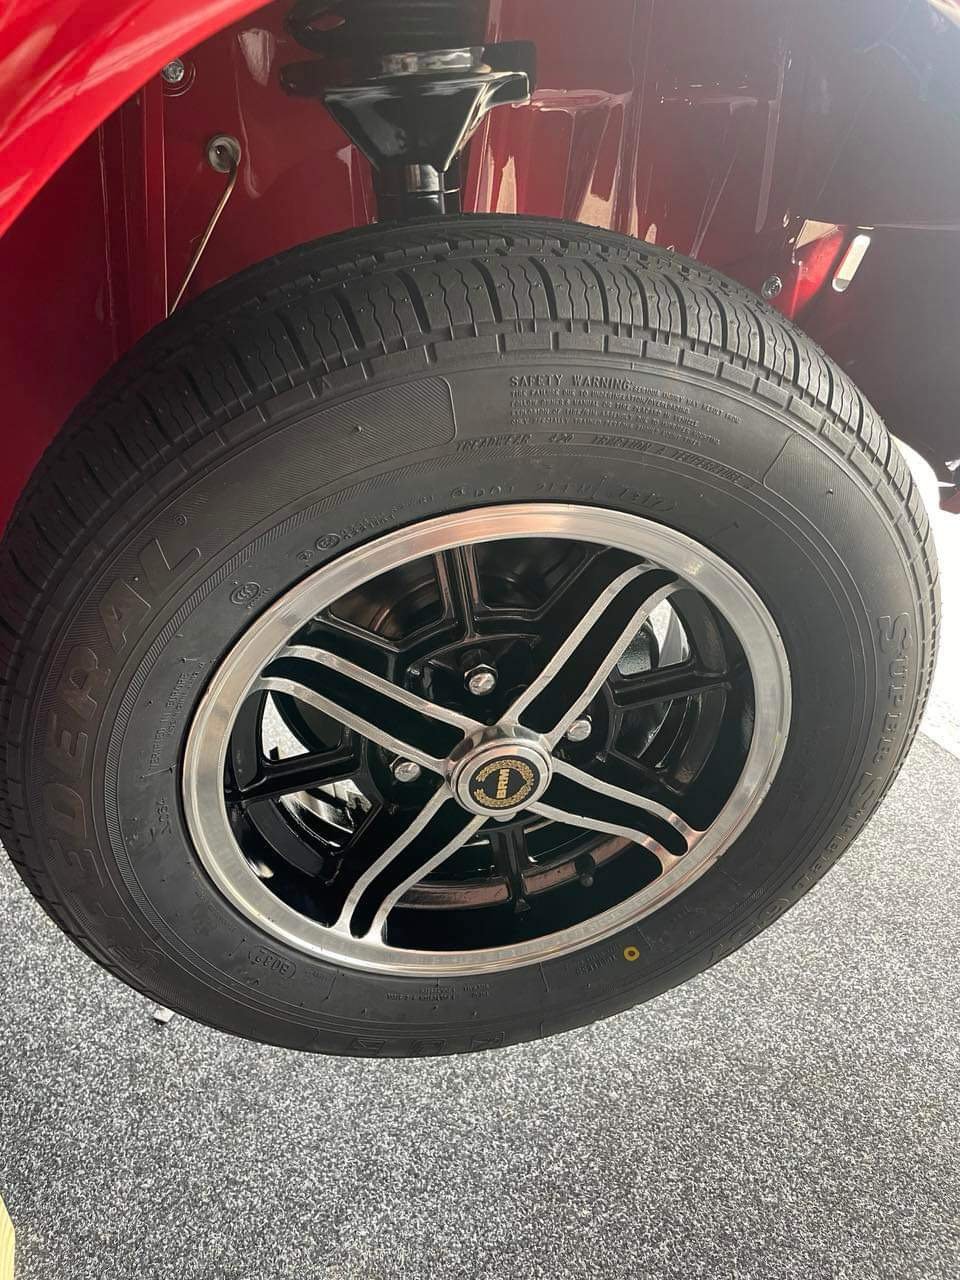
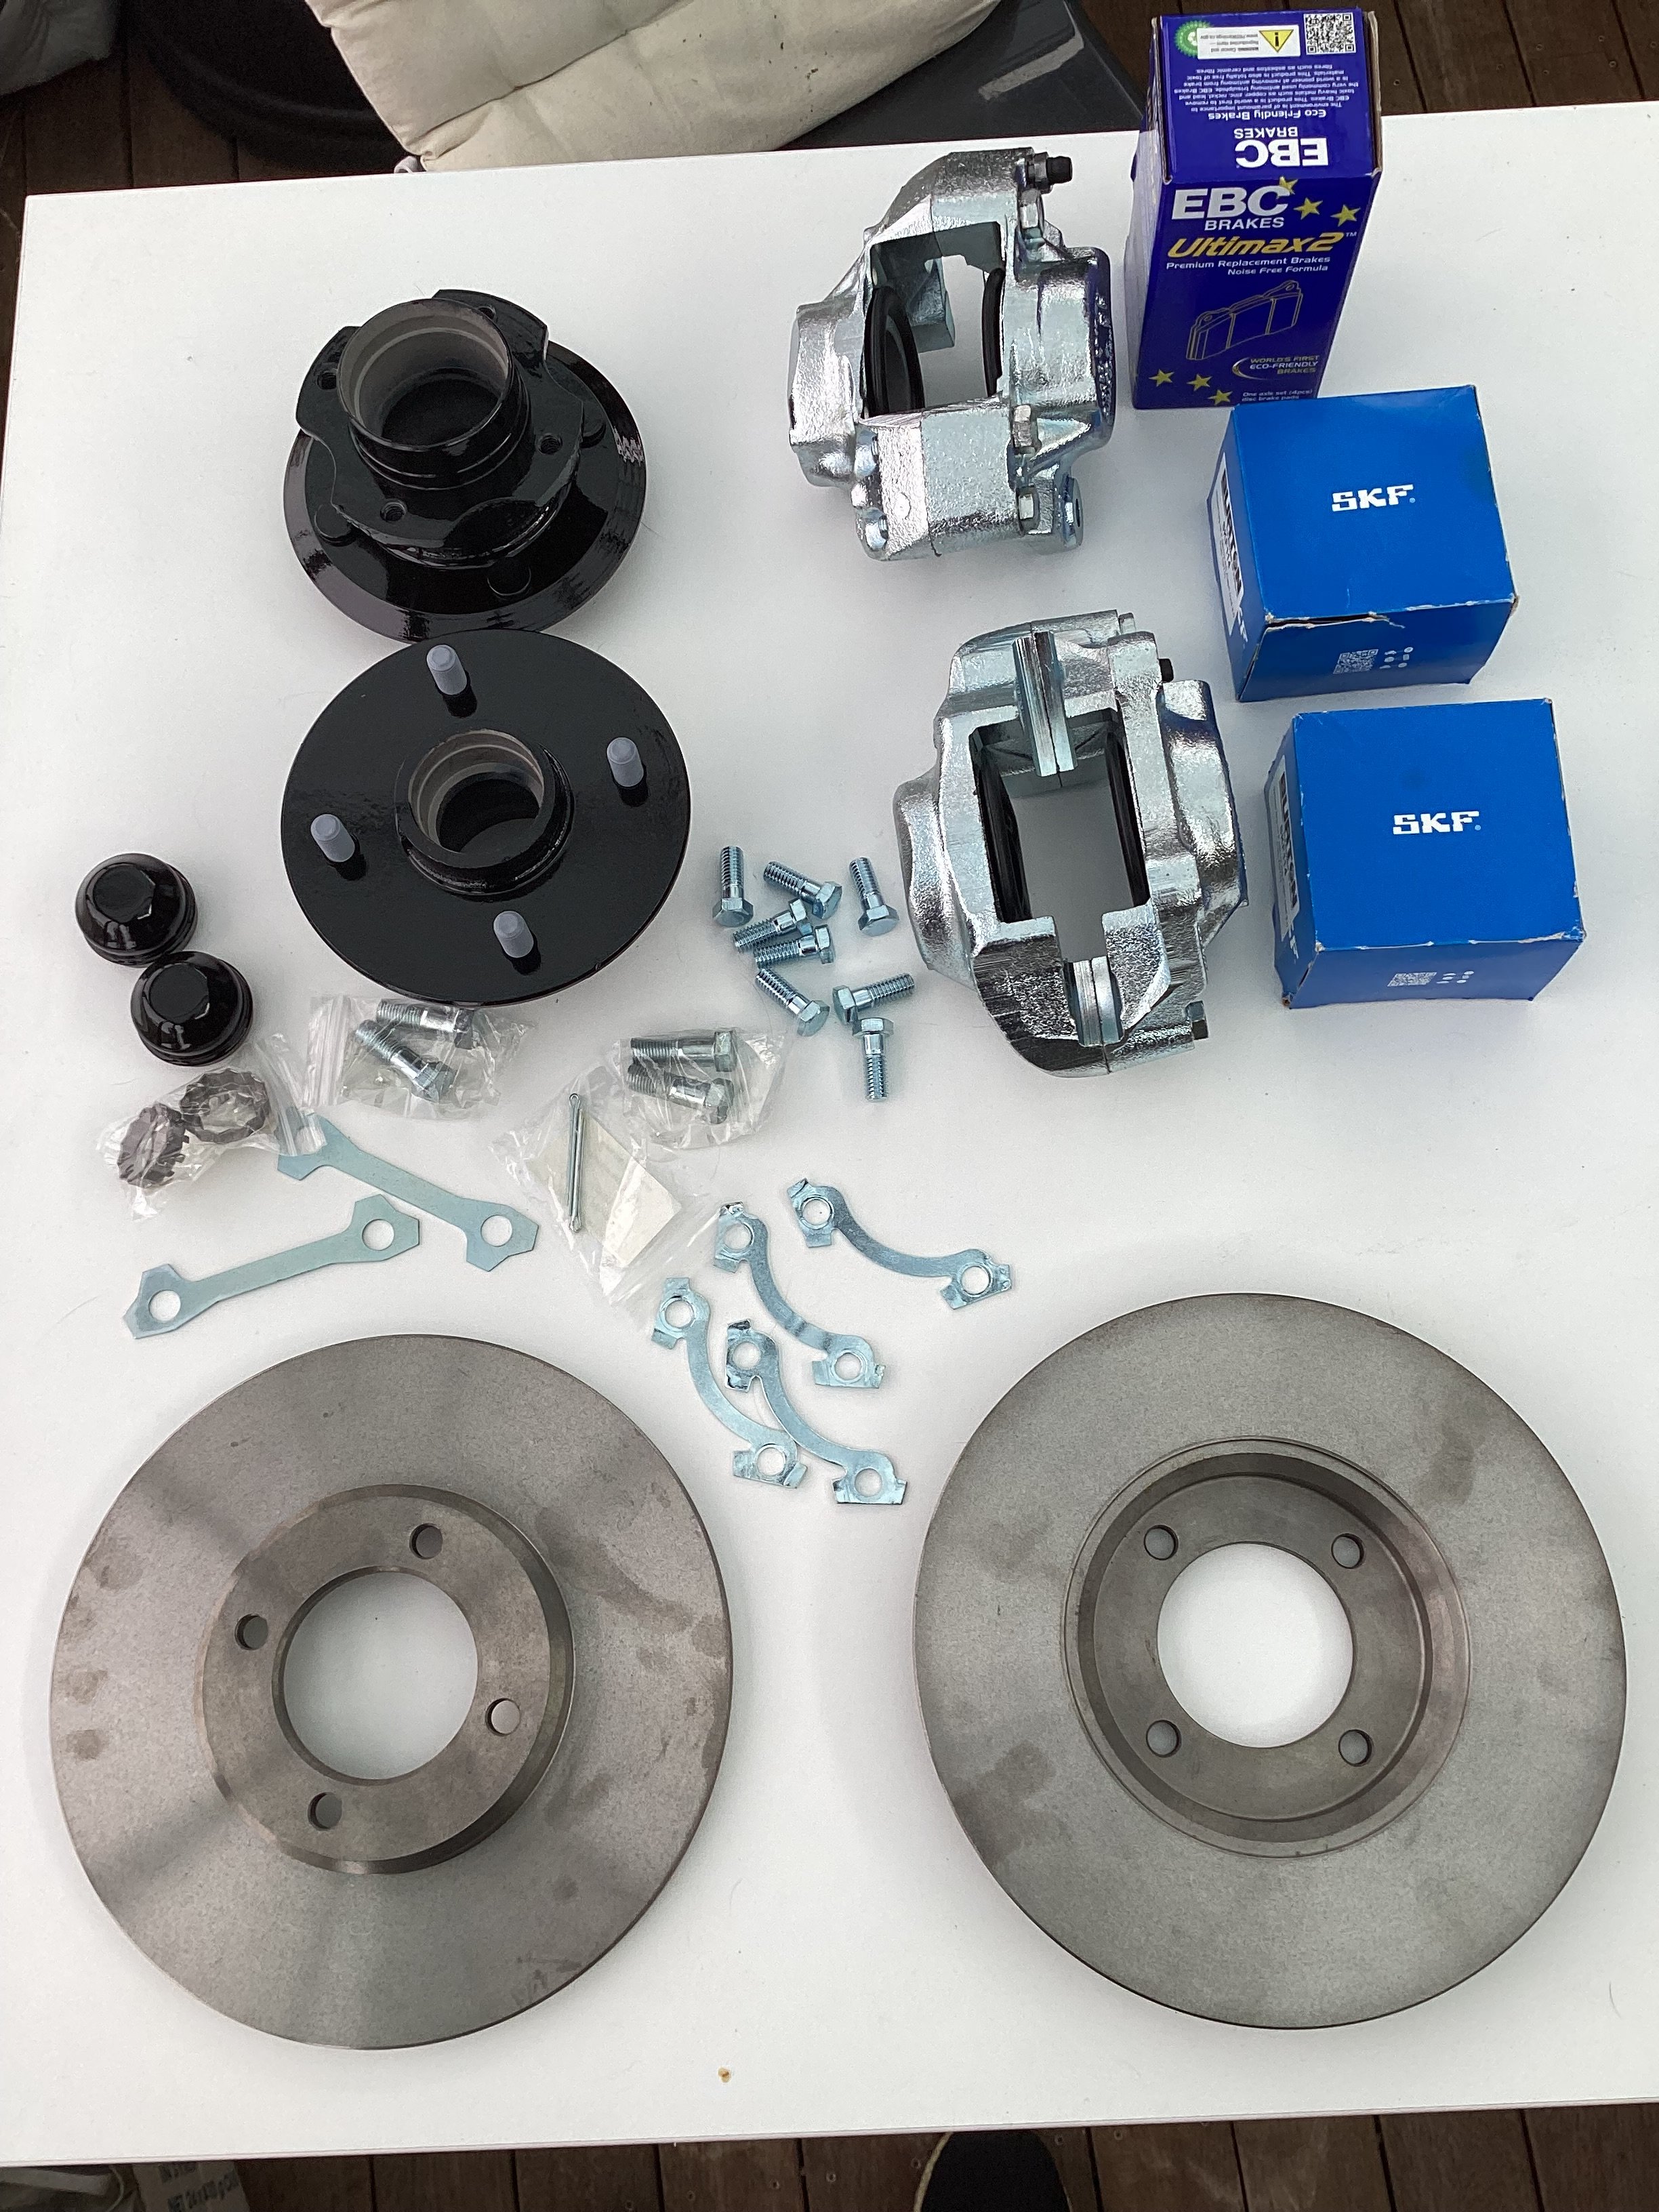
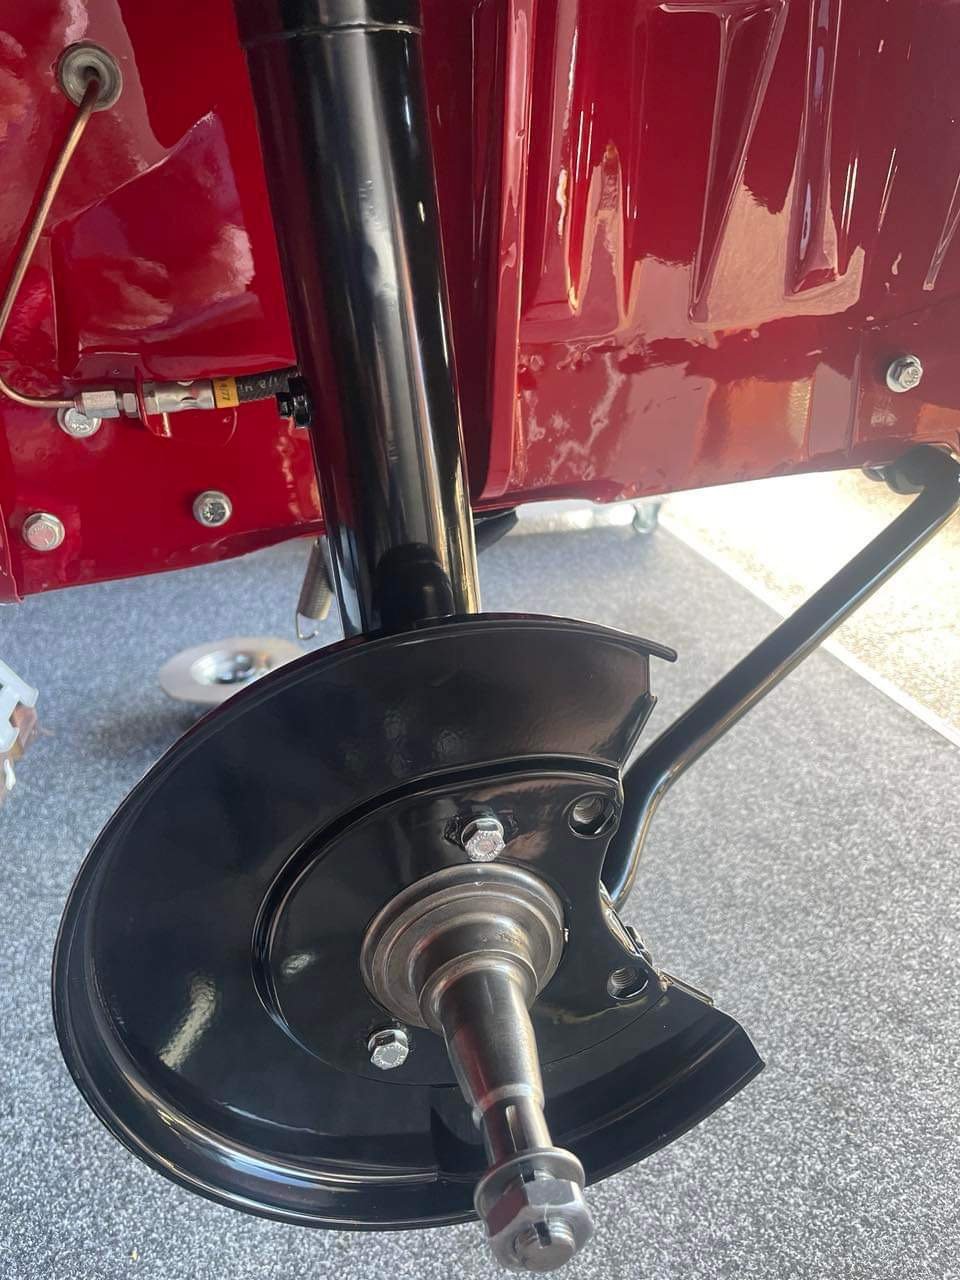
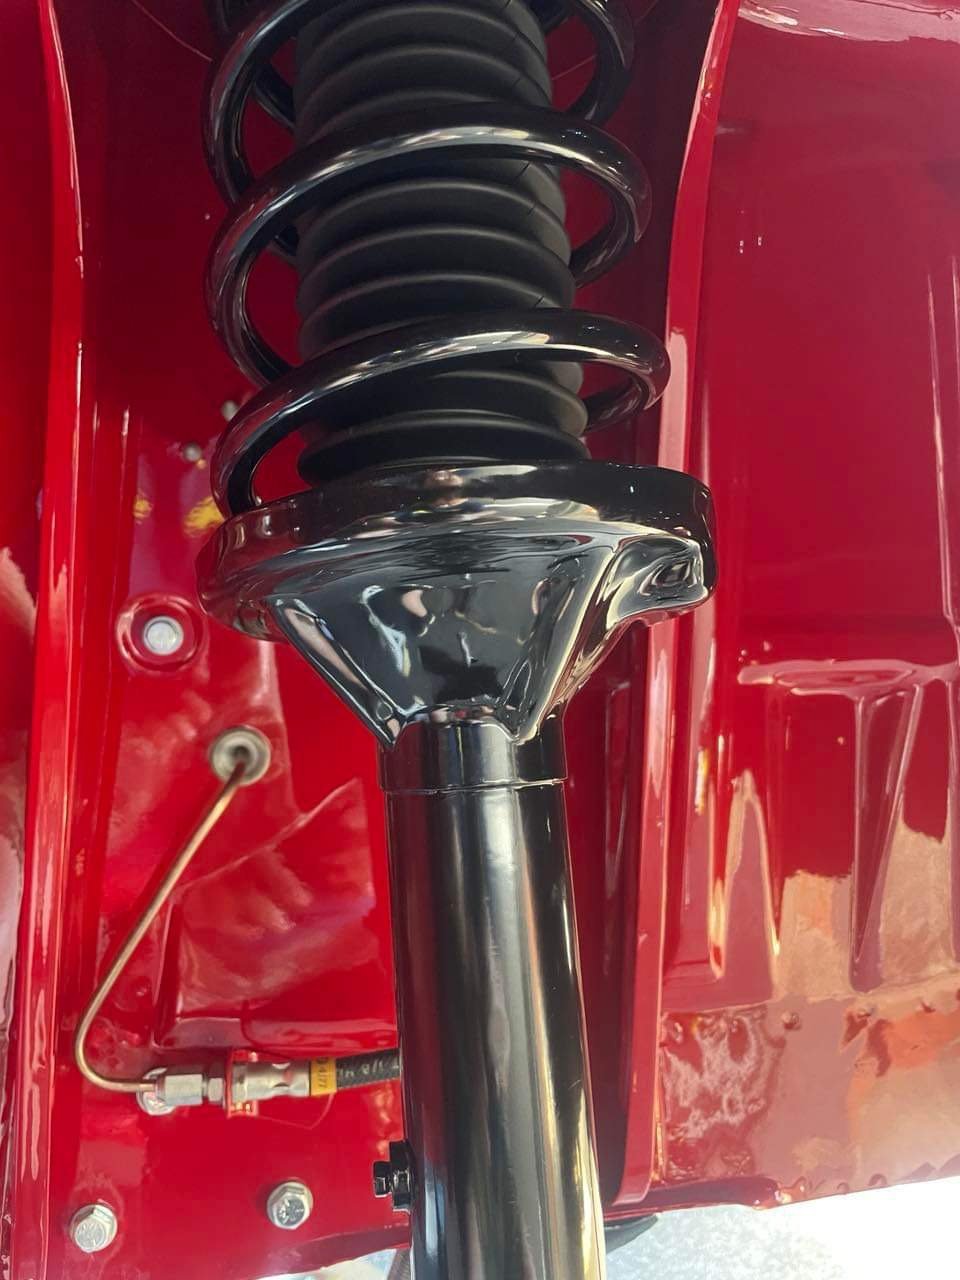
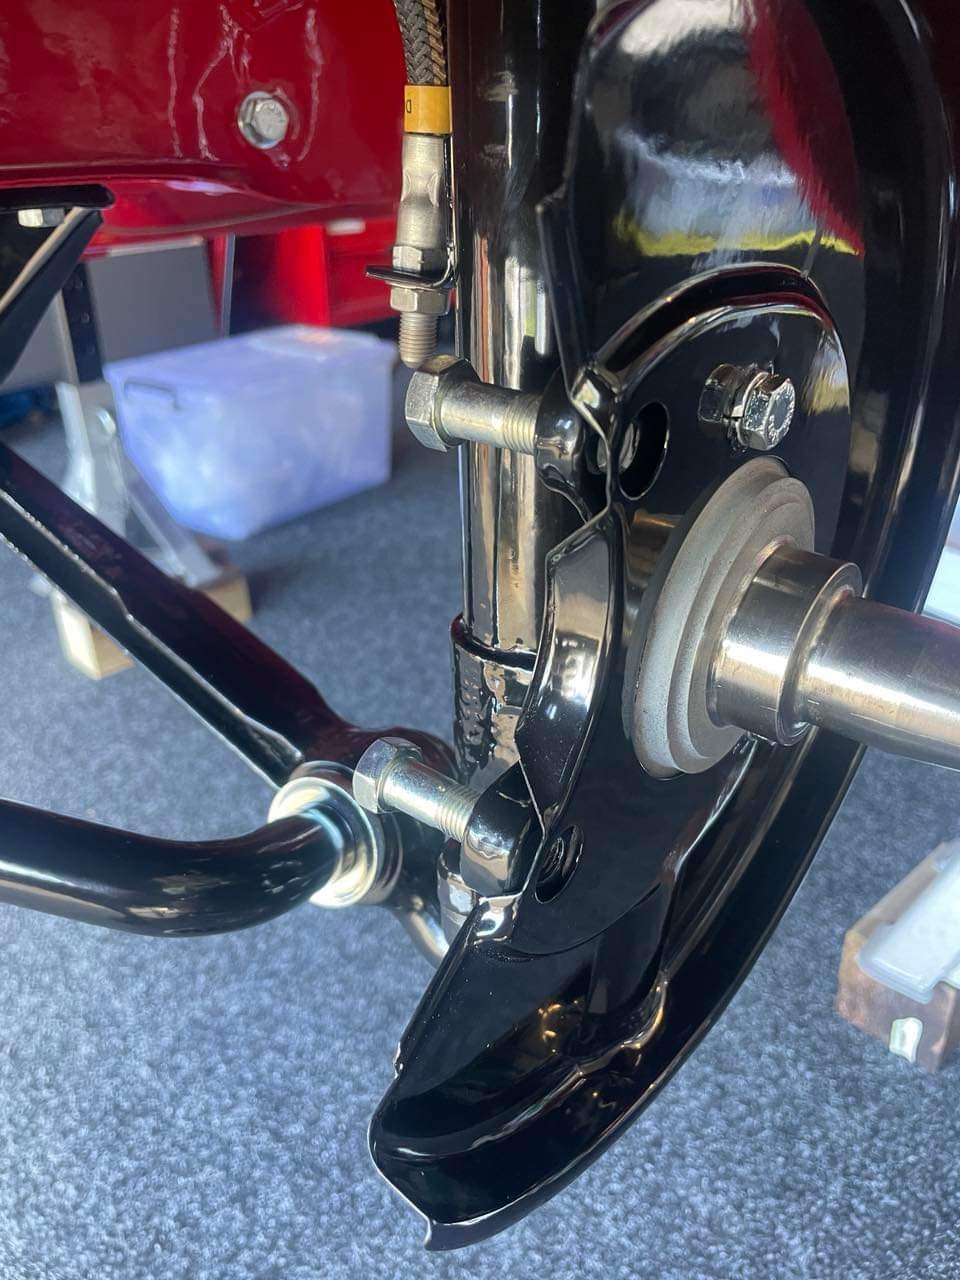
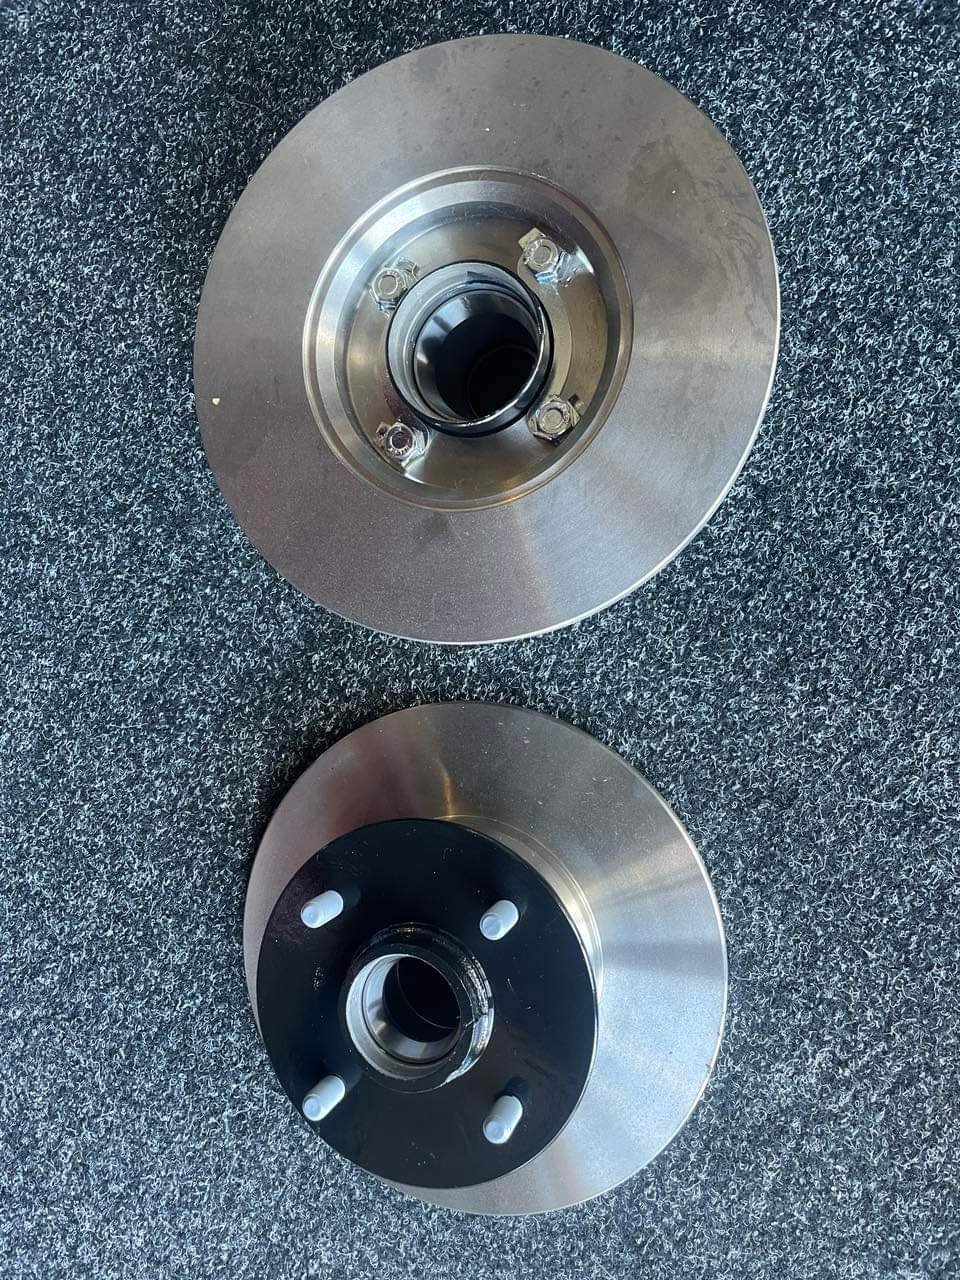
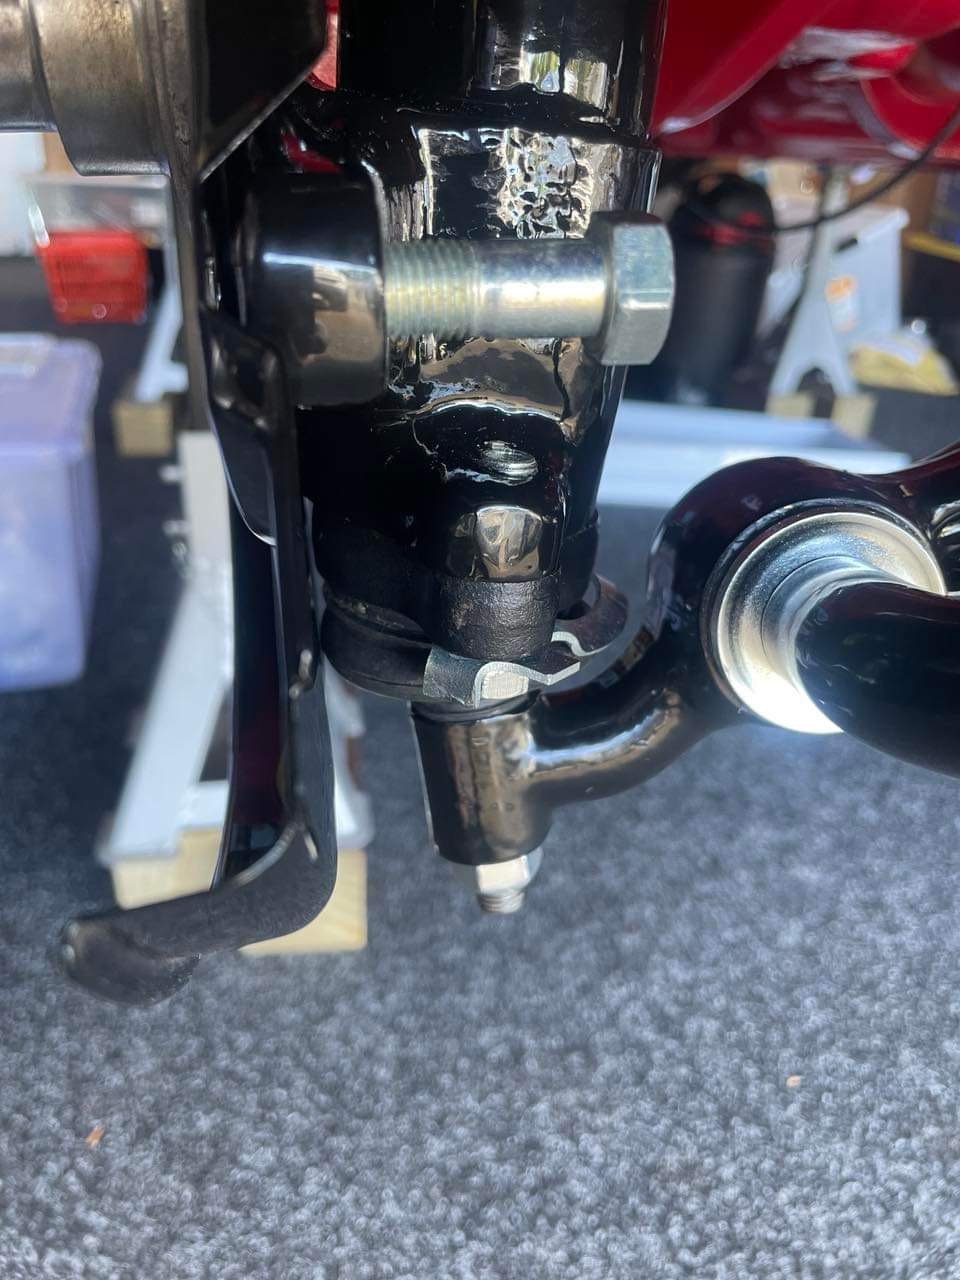
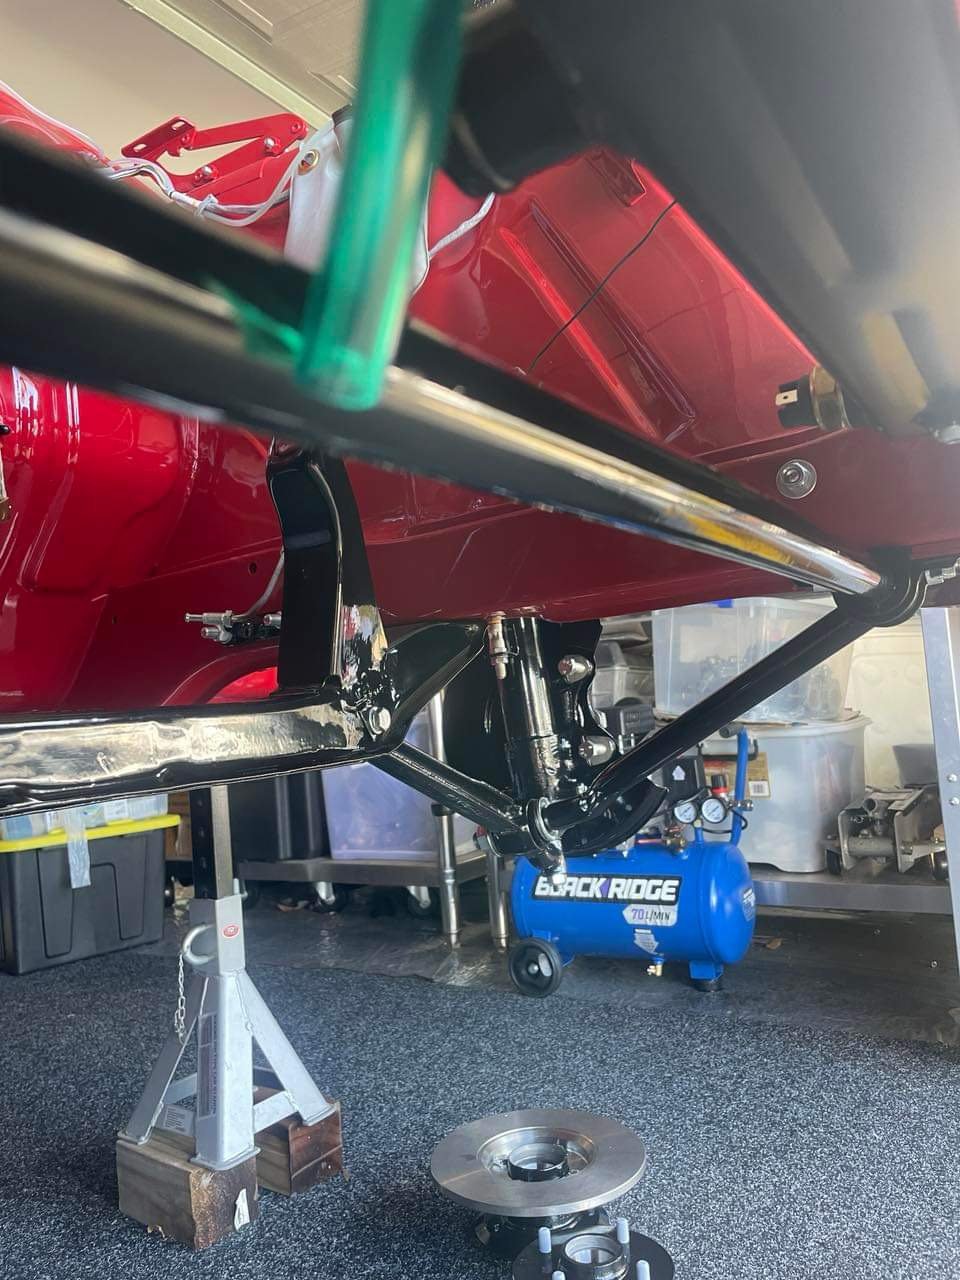
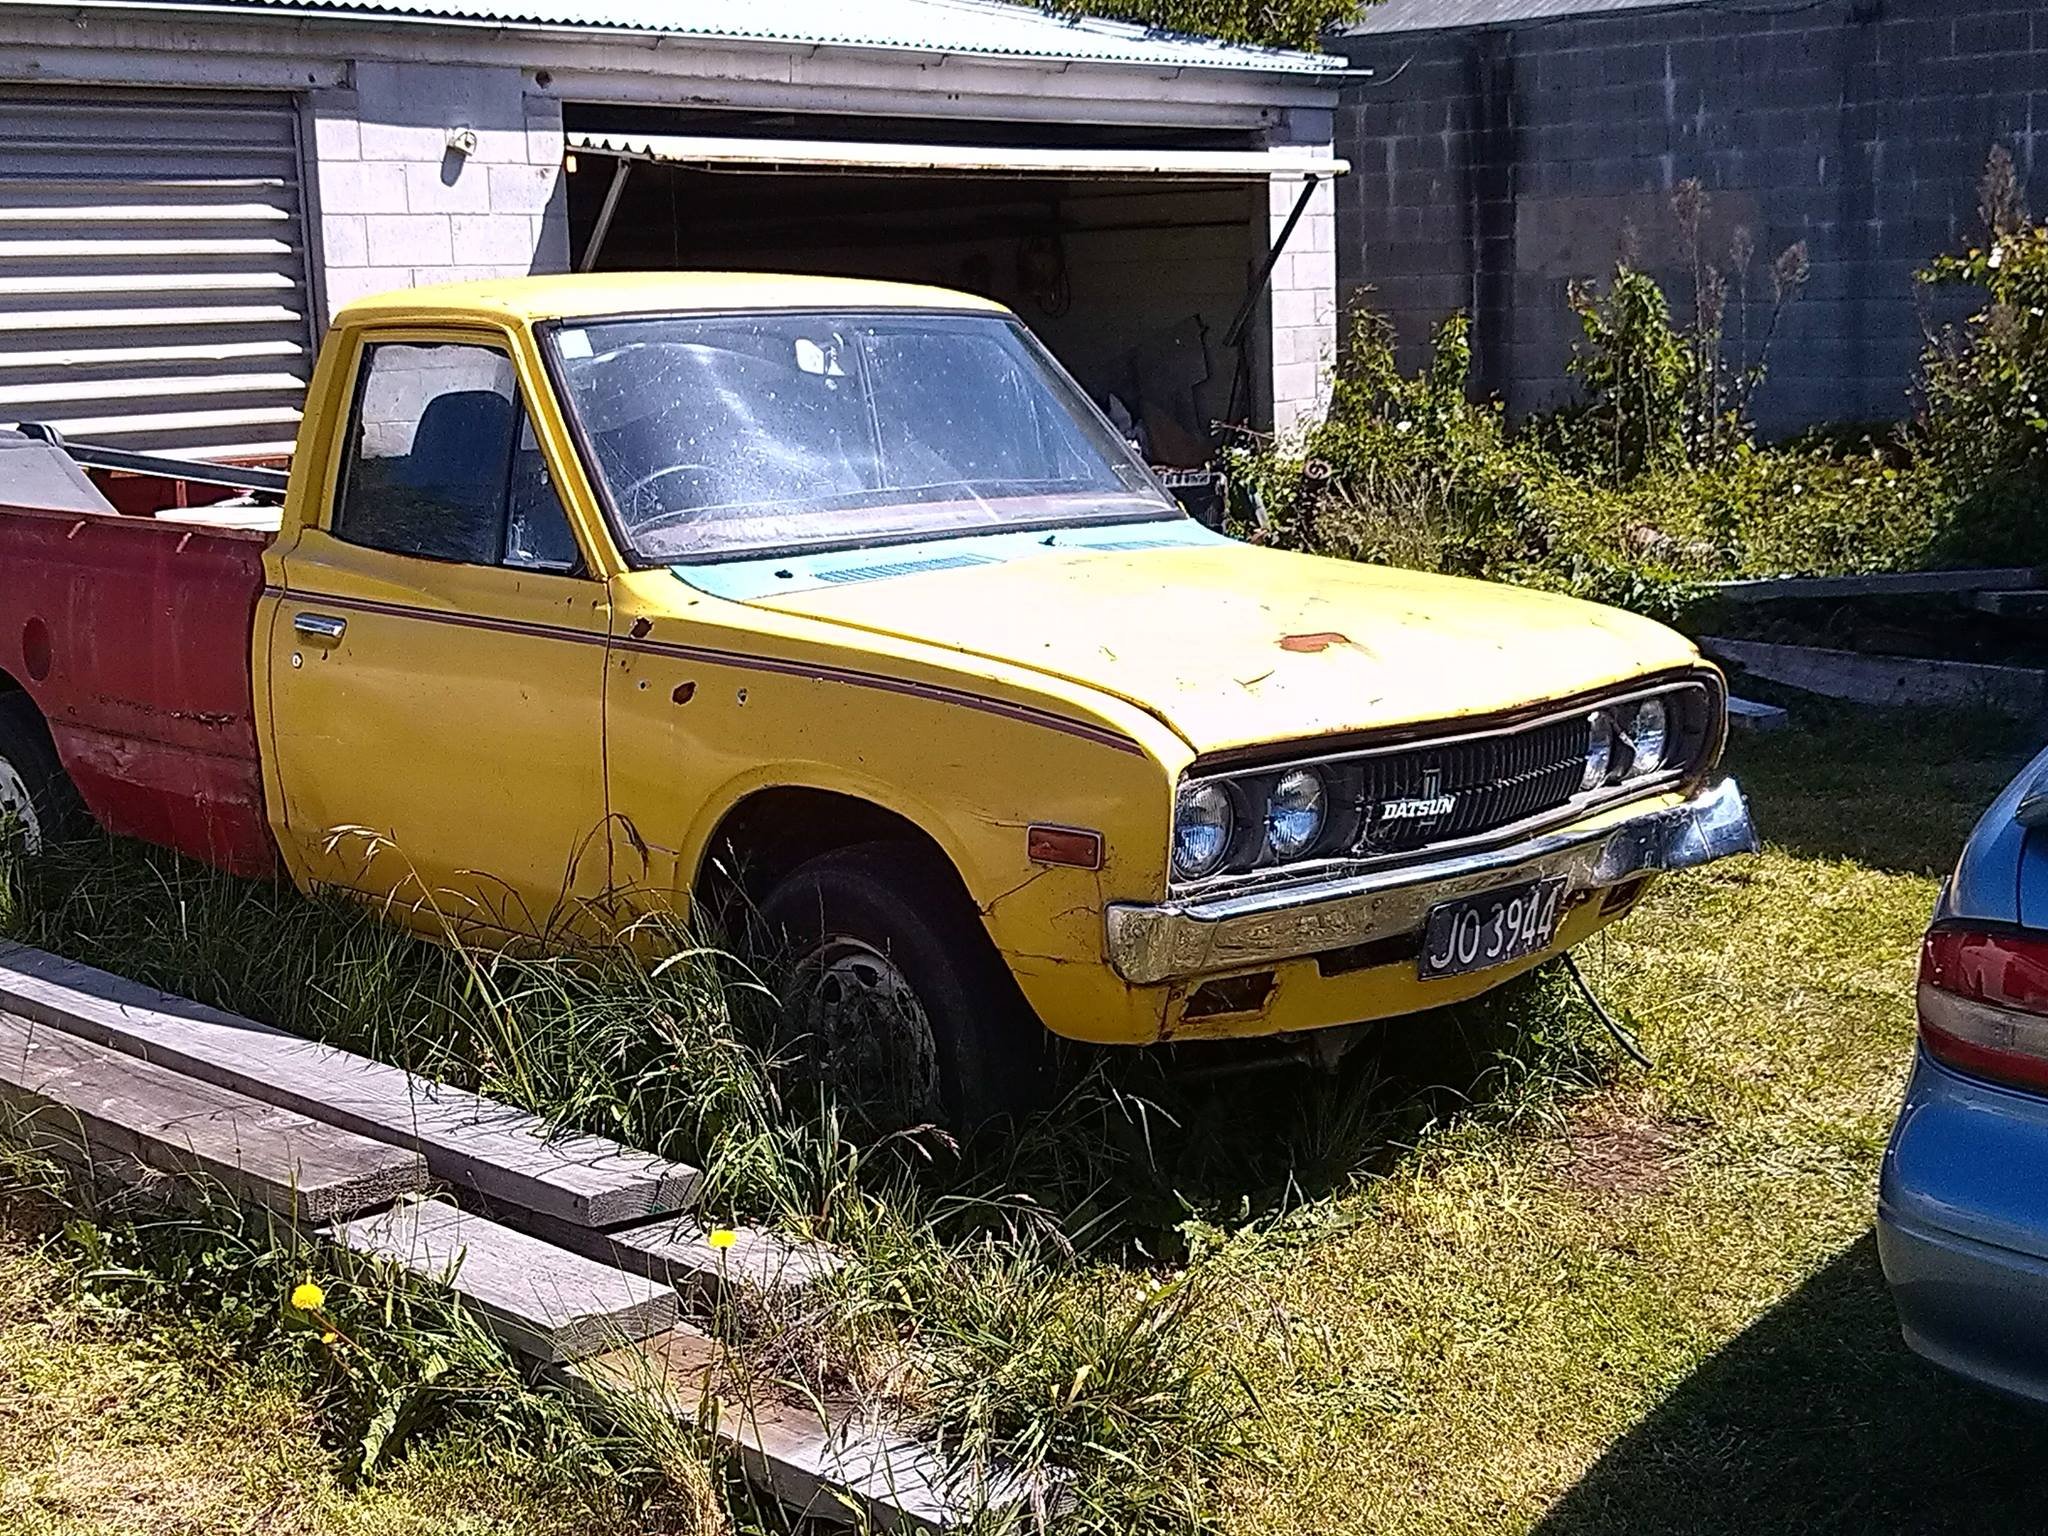
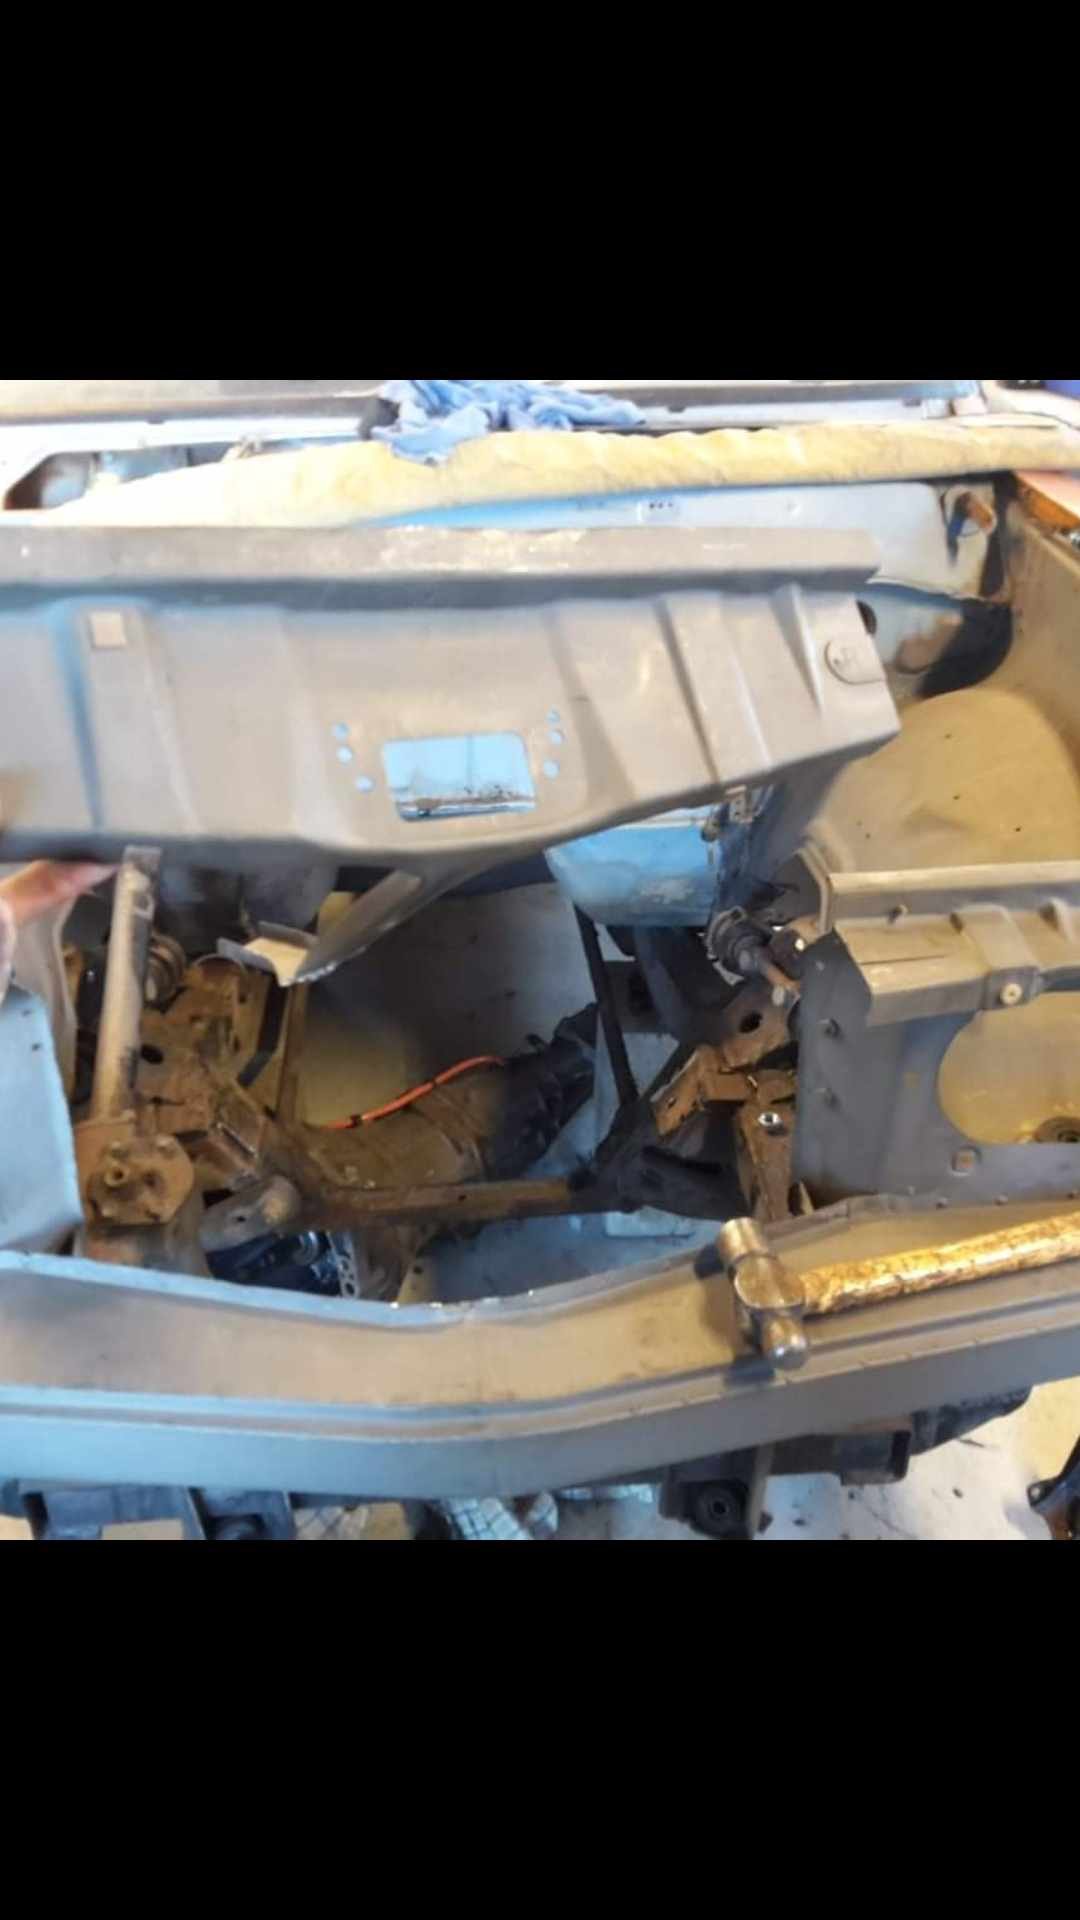
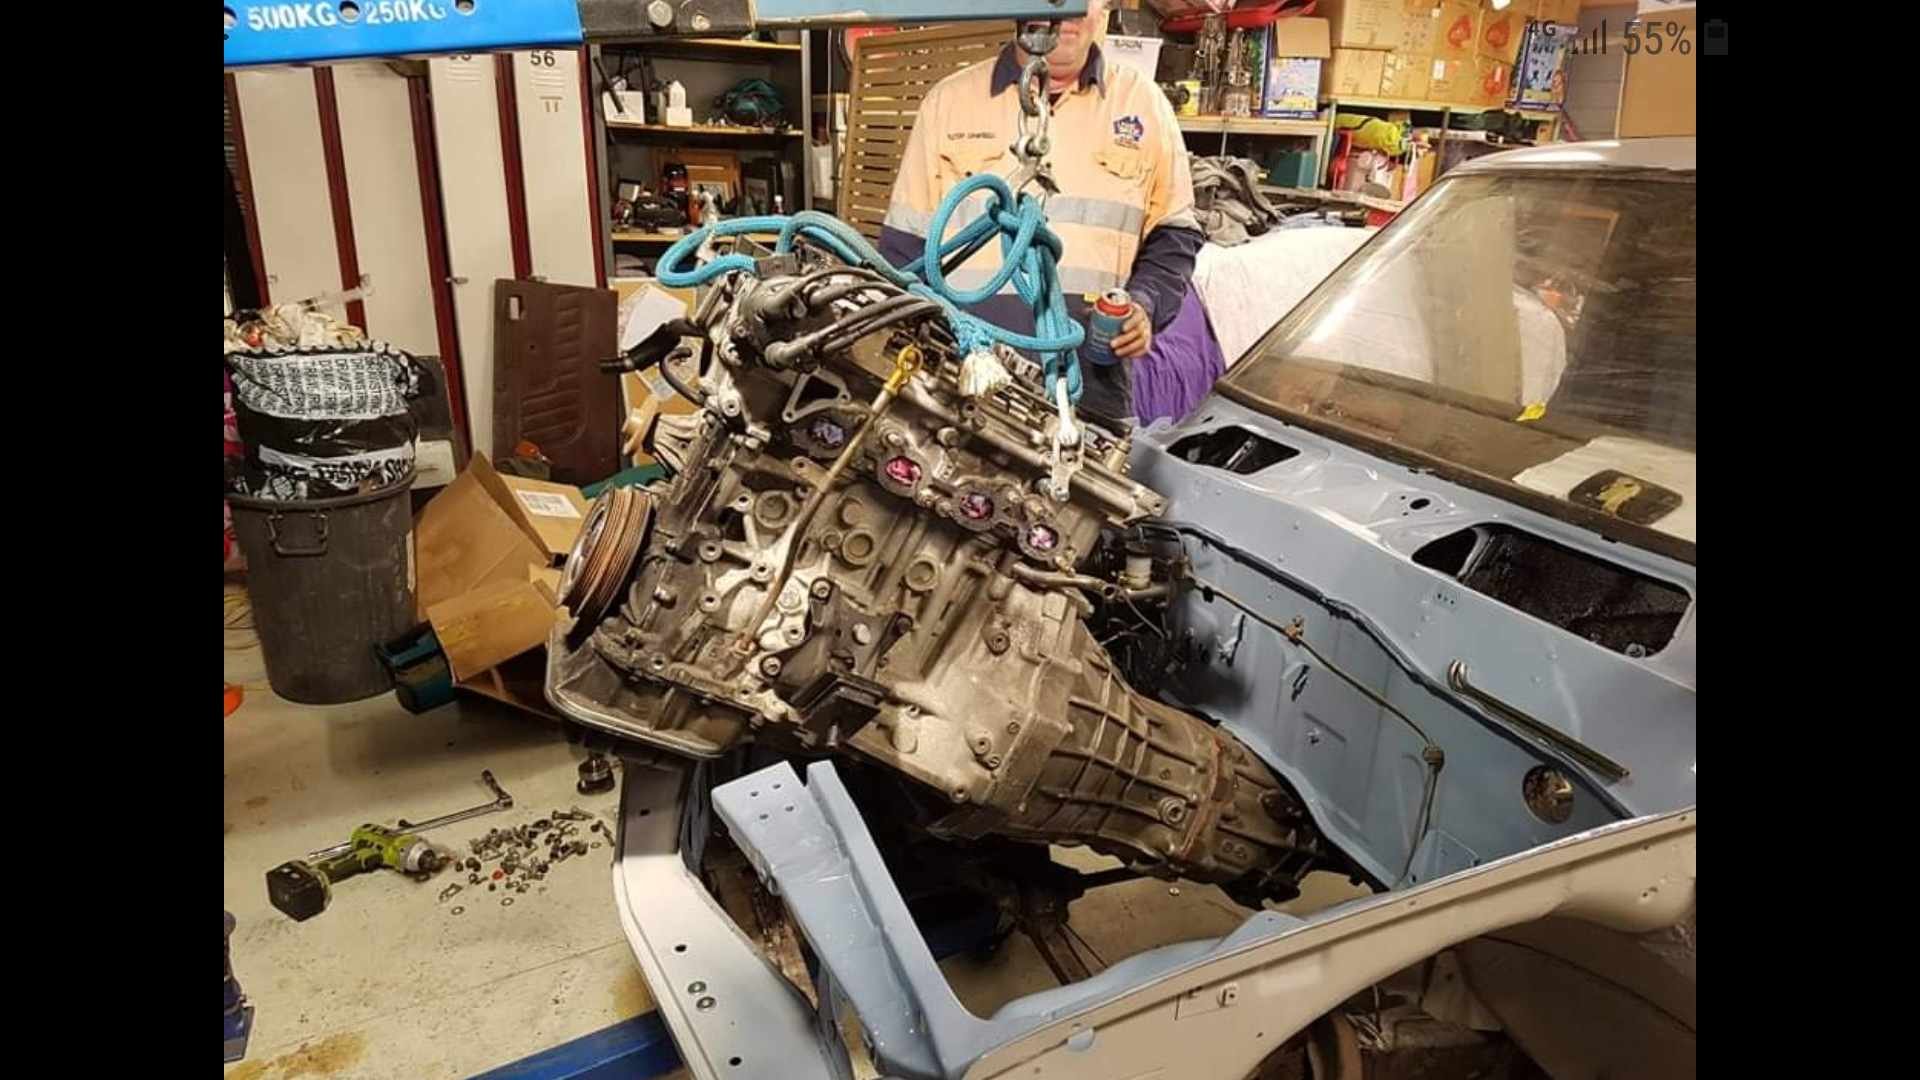
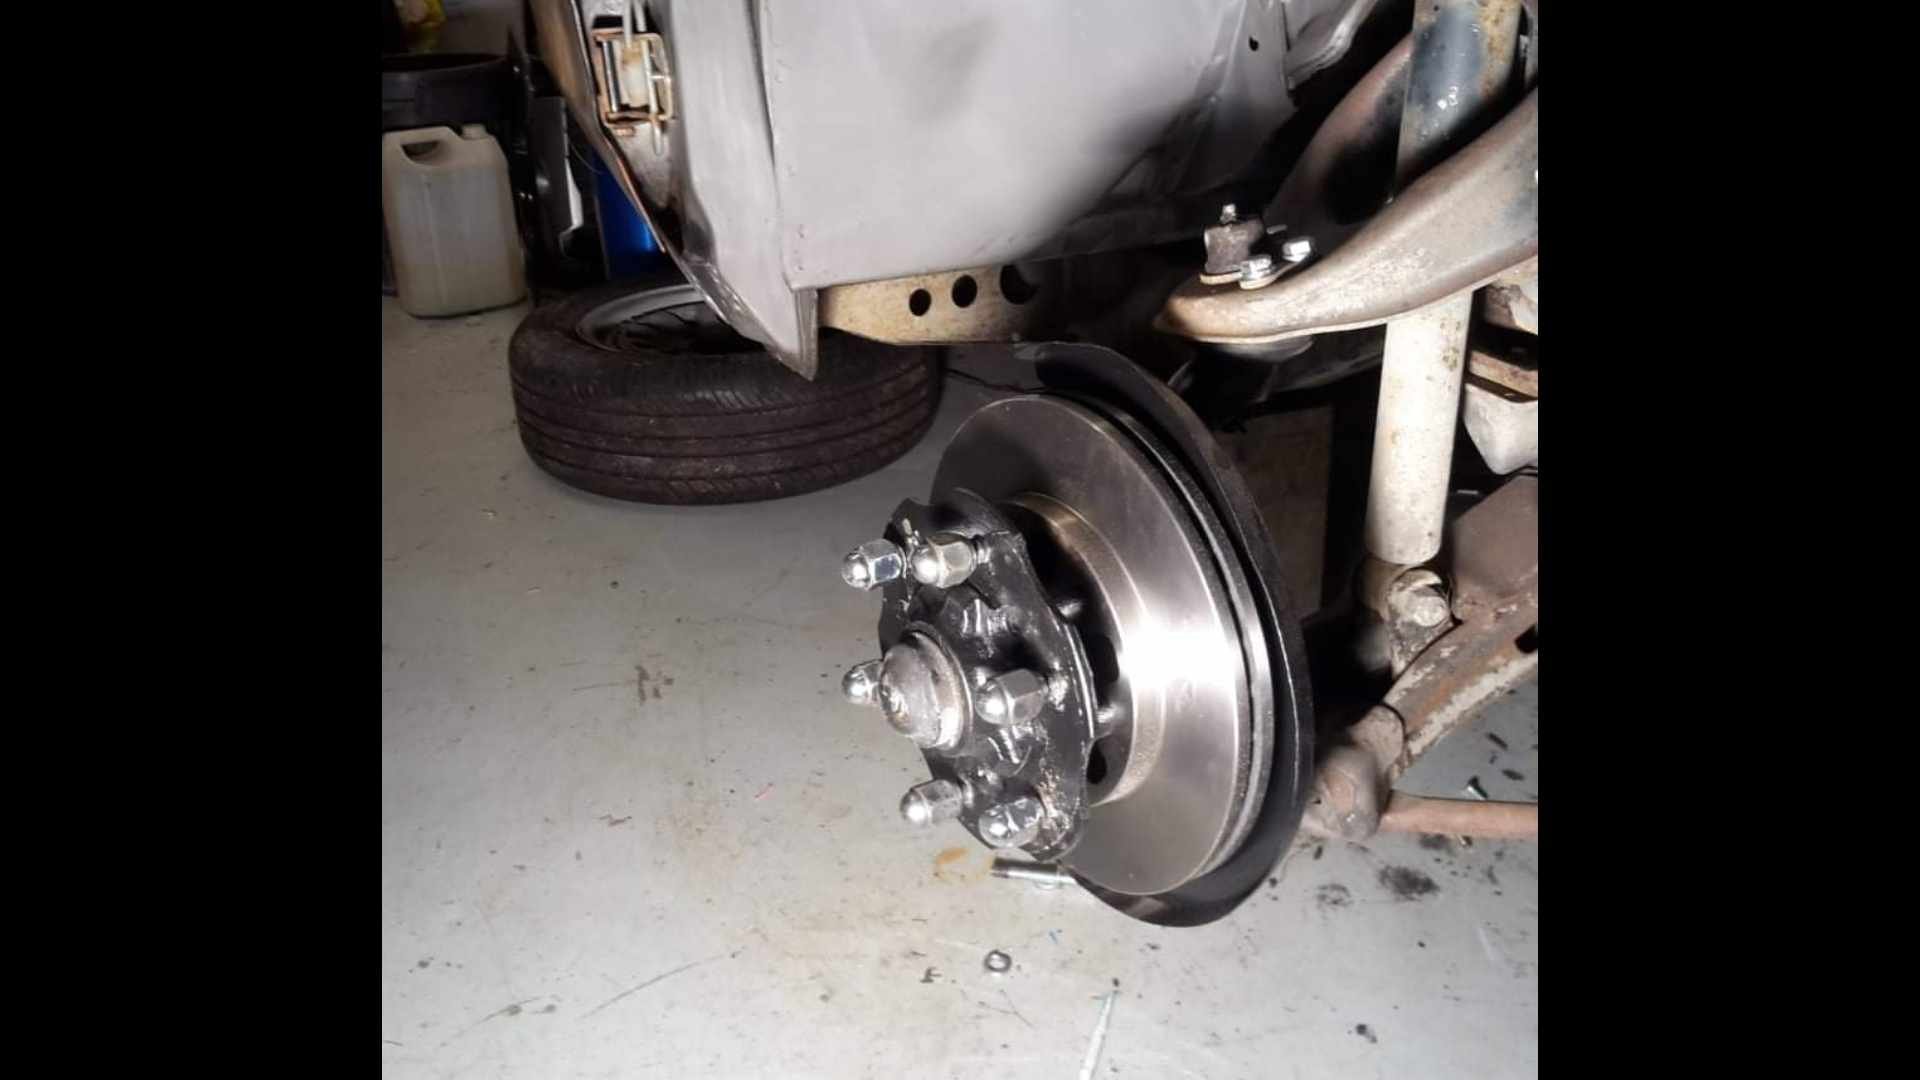
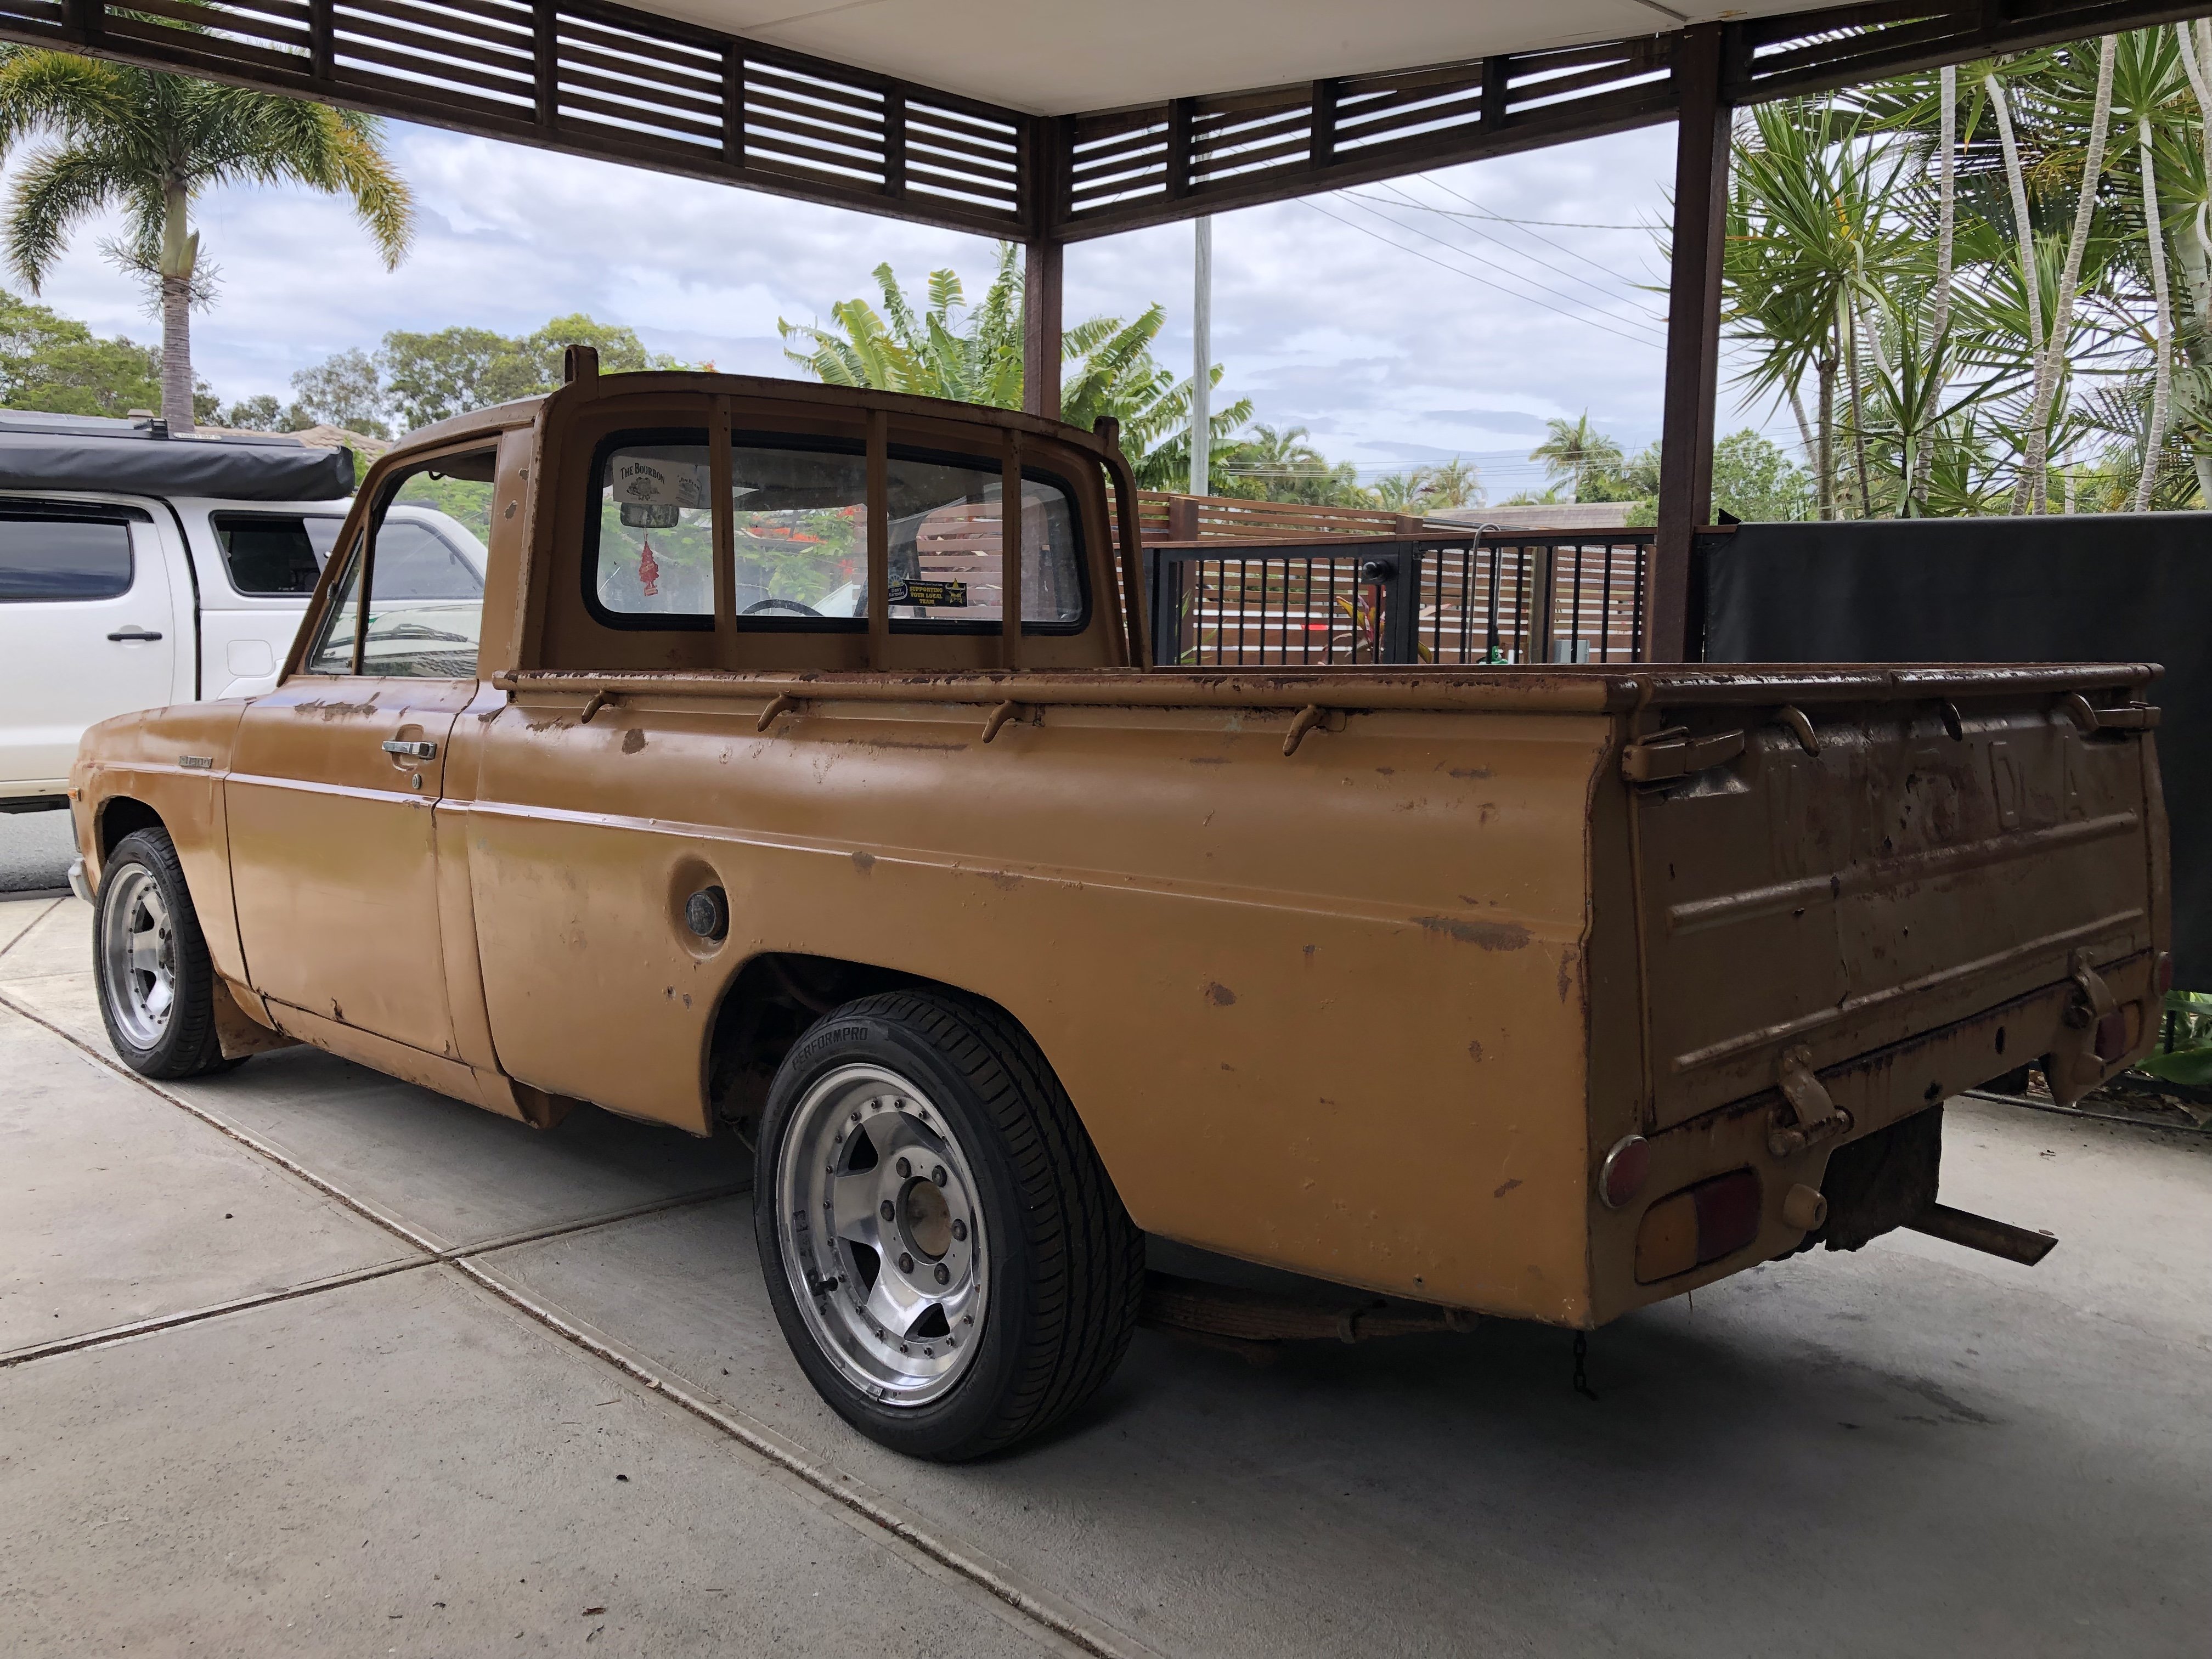
A few people have asked why theres no thread for this vehicle. (Because the owner is so useless tbh) i showed some pictures on my phone to some people at Garlic nats. And one of them convinced me i should post them up. (Thanks @Sungai Sungai) The story begins quite some years ago when i bought a datsun 620 ute of @Mr.Mk1. He'd rescued it from scrap. He also found a pretty fucked wellside tray for it. (Which is also rockinghorse shit 8n terms of rarity) it would seem i only have one picture of that truck. It needed plenty of work, but the rego was on hold, and it was (mostly) complete. When josh and i did the mission down to Alexandra to collect it, he showed me another 620 ute. It belonged to the landlord from whom his brother rented his business premesis from. Daily driven, and a real sweet honey. Because Alexandra is as dry as fuck with no foreplay, it was completely rust free too. (For what its worth, 620 are without a doubt the most rust prone vehicles on planet earth) Some time later, i learned that the elderly gentleman who owned that truck stacked it. And some time later it popped up as wrecking in Christchurch. Hoping to get some parts, i shot around there. Where i met @Agent75. The truck was still pretty rust feee. But unfortunately Shane had cut the radiator support panel off to make removing the engine easier. The inner gaurds were a little bit puckered, but it could have been straightened out. A deal was struck, and i dragged it home. Another mate had another 620 he wanted ro move on. ( @I'm new here) it had been completely dismantled. And had some prettt cunty rust. So i bought that, and had a coachbuilder mate graft the inner gaurds and rad support panel off that cab onto this one. Unfortunately i have no pictures of this. I also picked up a pair of front guards off another mate. As i didnt get the nasty, underpowered, leaky, J15 with the truck, i opted for an S14 SR20 that i bought off @mint16. With the gearbox attached, i had to make the centre of the rad support panel removeable. After id painted the engine bay, @fletch have me a hand to do the final engine installation. Because id slung the engine so low, and so far back, the sump had to be notched to clear the drag link. Seeing as this chassis is the later model/last iteration of the 620, it was fitted with ball joints, rather than king pins. This is a wicked bonus, because i learned that if the top ball joint is swapped over, that D21 navara hubs and stubs are a bolt in affair. No more gawdaful drum brakes. Best of all, a mate gave me a set for free. (Less calipers, which i then sourced of marketplace) because im not a total broken arse any more, i threw on a pair of new rotors too. Discussion,
1 point
-
You should get up to 14 extra days:
1 point
-
I wish I had that sort of talent! There is a reason I'm going for a one wire hookup diesel and it's entirely skill based.1 point
-
Always been curious of those standalone ECUs for the common rail Mercs, great to see someone using it for a conversion. @dmulally do this mate! There is one sitting at pickapart in np... Would love to know how simple these setups are if you have more details1 point
-
I spent some time dicking round with the airbox as I didn't like the long studs coming up off the carbs, plus the carbs themselves seem to be mounted in a slightly different position and the airbox really didnt like sitting down in place. So I made a new baseplate that fitted nice and put some 16mm tube in there so the screws could clamp it directly through the baseplate. Its a bit cleaner looking too... Then I glued the windshield trim on with some extra and probably non standard fixing methodologies; I am missing the joiner bits but I might just poo the gap up for now once its cured in place. A new and marginally sexier fuel pump arrived and got placed; Ooh and here is my sexy top link what I made in place; So just the rear valance to make, plus probably a heat shield for the alternator as its still close regardless of the wrap. And the alternator light doesnt work for some reason. And I found another sneaky little rust hole in the drivers floor. I should have noticed it as there was a 20mm stalactite of bog hanging down underneath, but obviously I didnt up til now. There is an argument for step drilling it out to 25mm and calling it a drain hole, but I will make a closer investigation. Oh and I bolted most of the rest of the bits back on;1 point
-
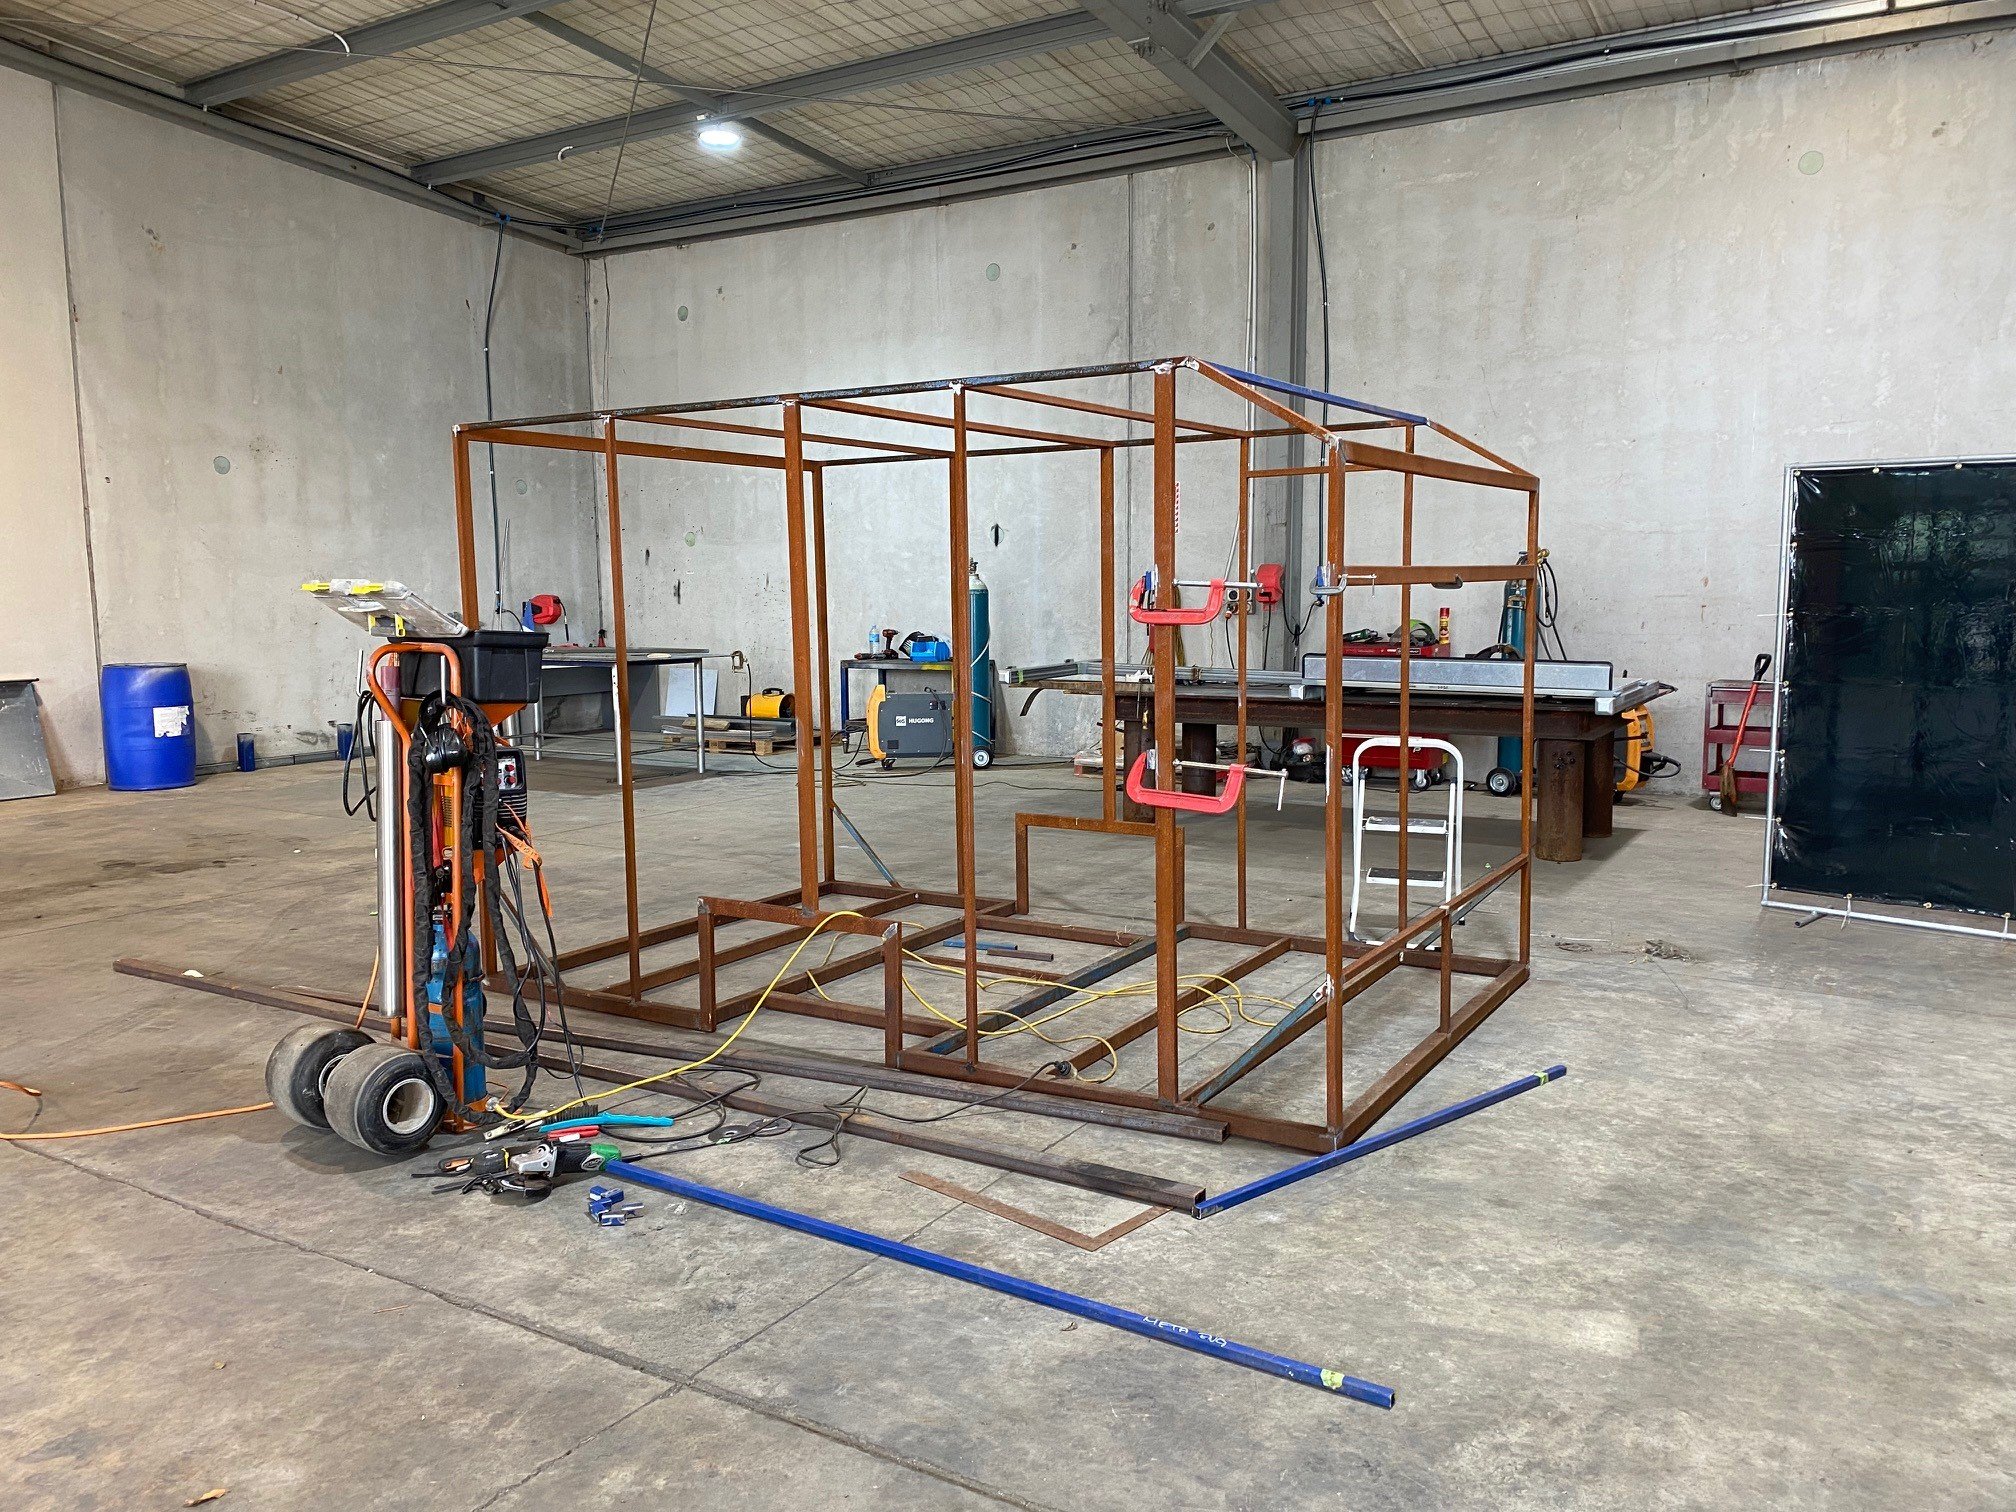
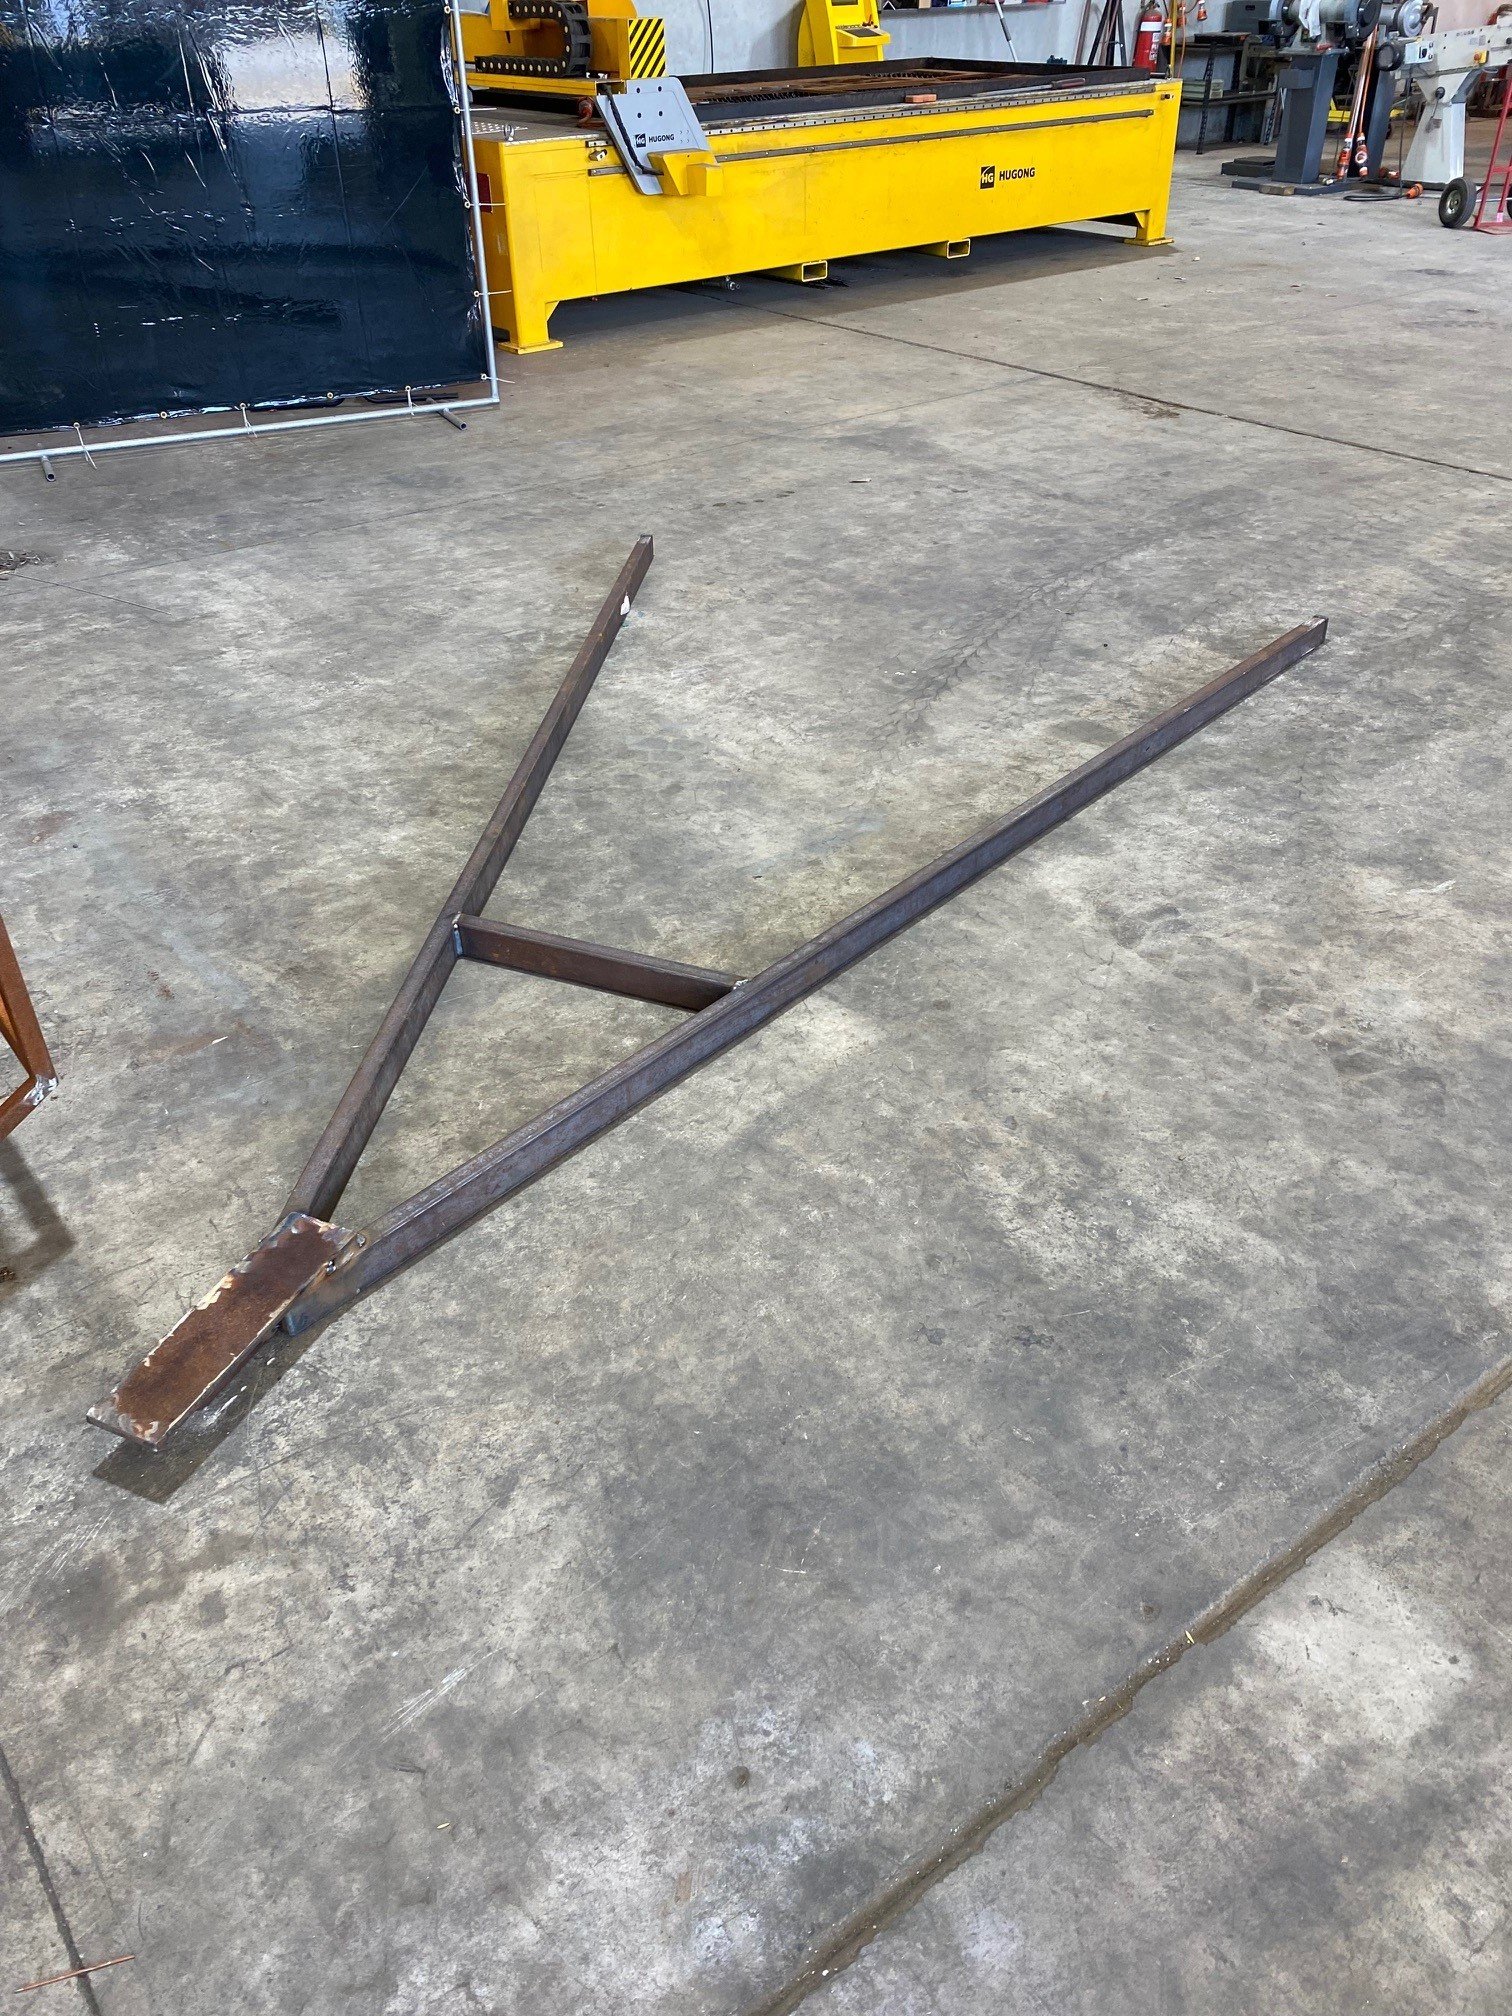
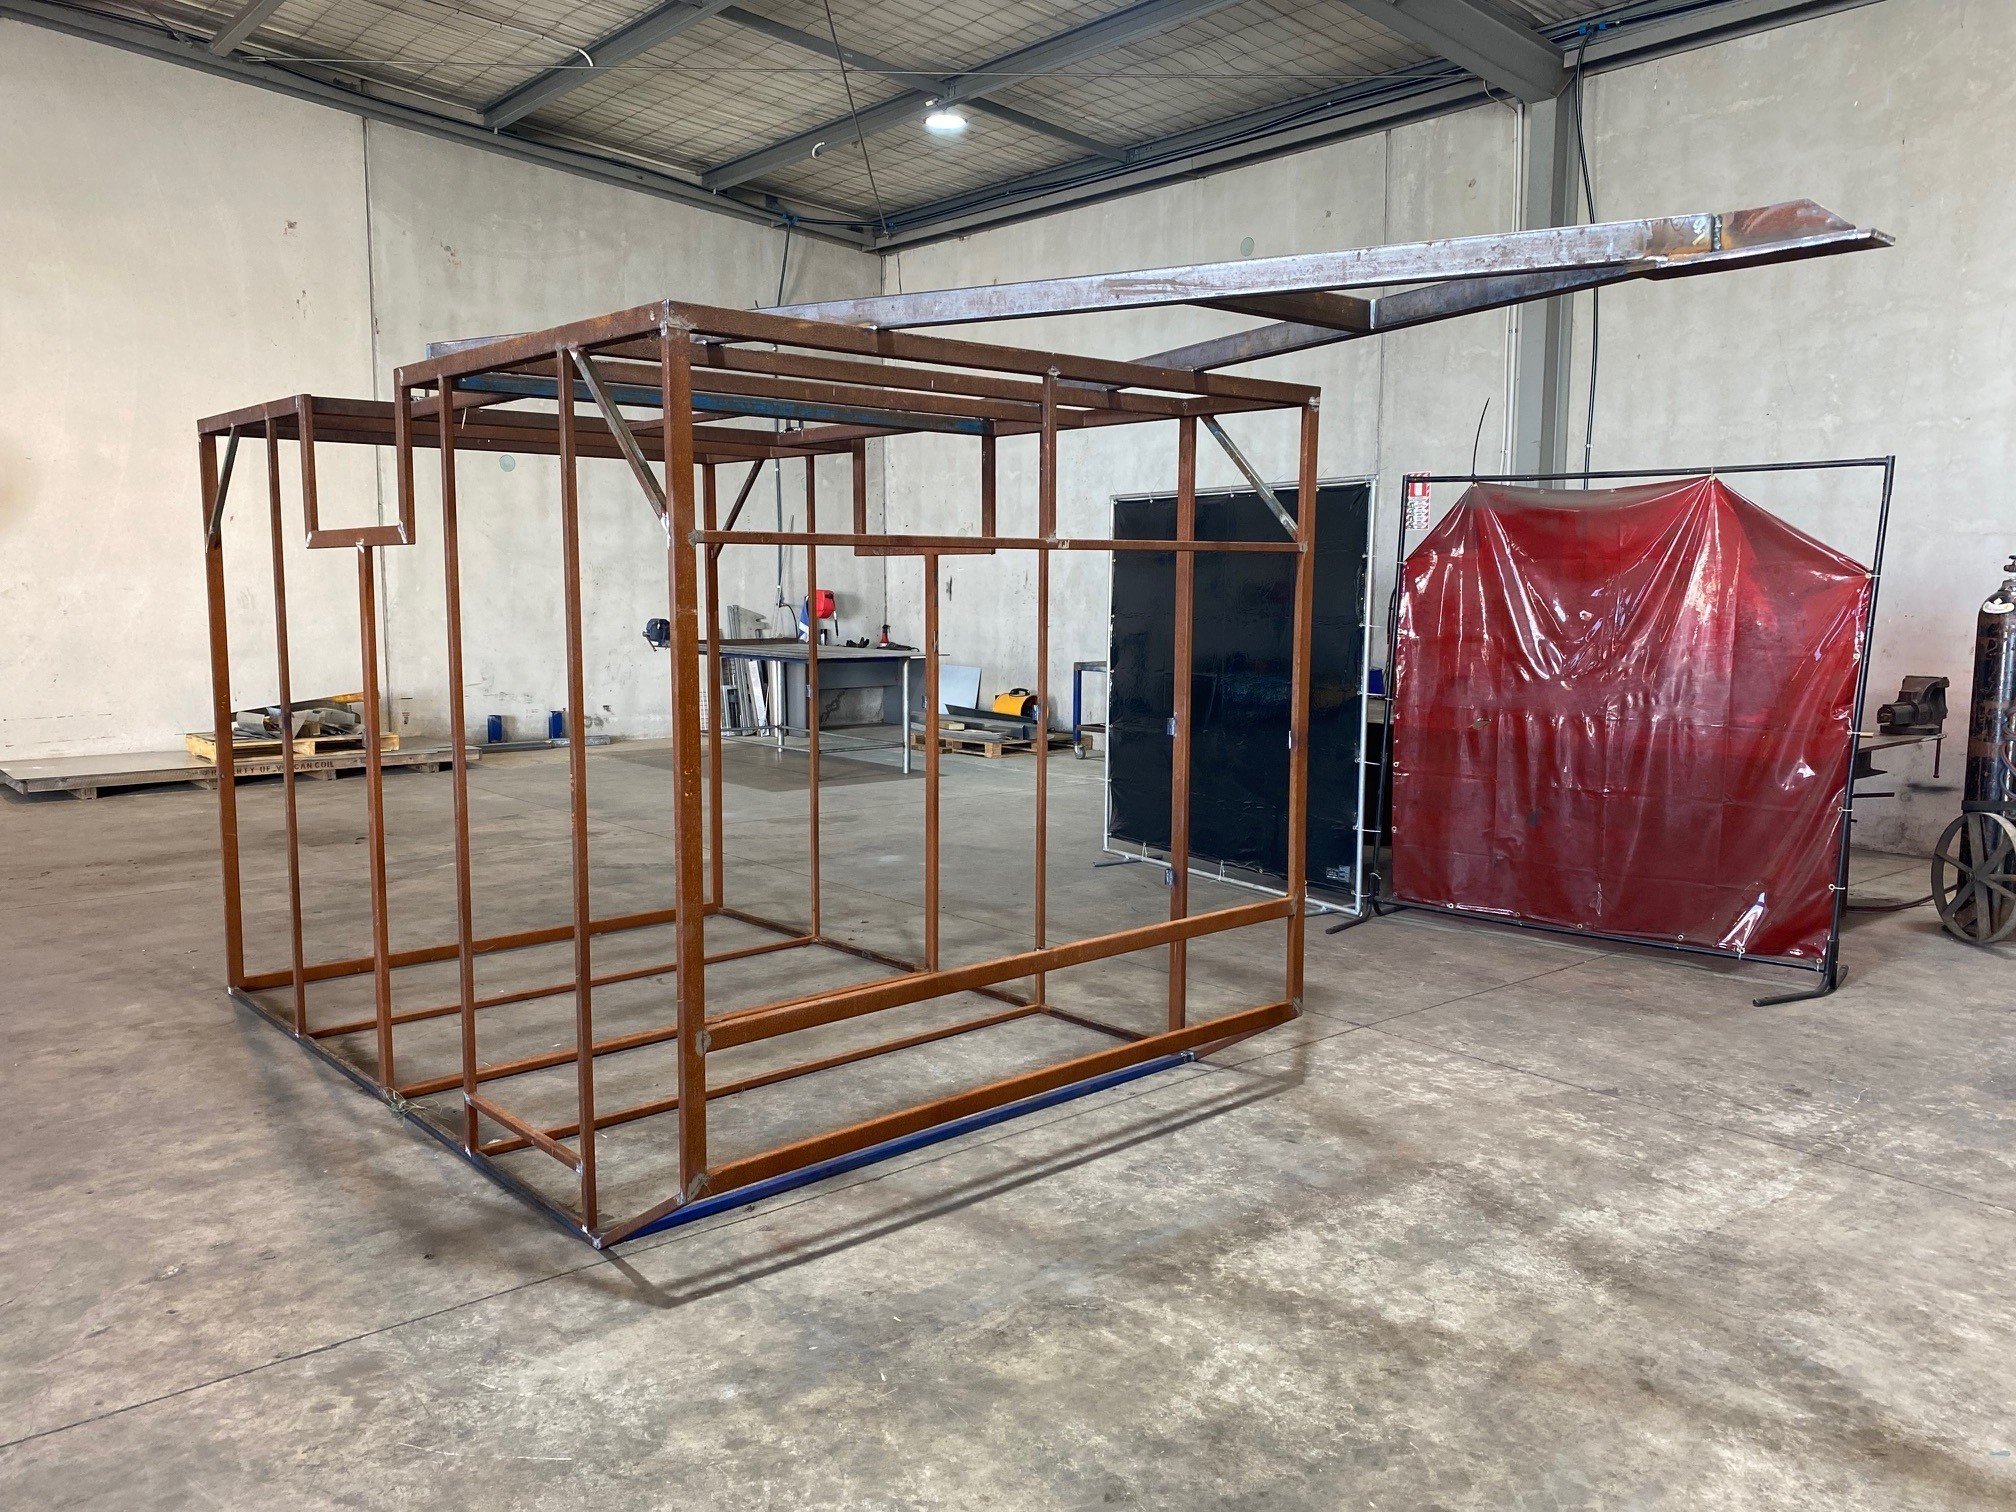
Jesus! 2022 was my last progress on it! Well, after that update, we decided to sell our house. So I was frantically working on the house for about 6 months and then we moved, and the trailer doesn't fit in the new garage. So its been outside, in the grass since last June/July and its developed a bit of scale. Anyway @Duke Blackwood decided that he wanted it off his lawn, so he came up with a clever scheme that got it moved and forced me into working on it at his workshop. Yesterday I took a day off work, welded on some mounting points for a future removable tire rack and work bench, fabbed up a draw bar, and welded on the spring mounts. It was a pretty massive day in the workshop for myself, usually an office fairy... so today I'm pretty shot, to the point where my boss commented this morning on how tired I look Anyway, its finally going to be heading off to blast and paint, and then I will make it towable so I can at least move it around while I sell something to pay for the cladding.
1 point
-
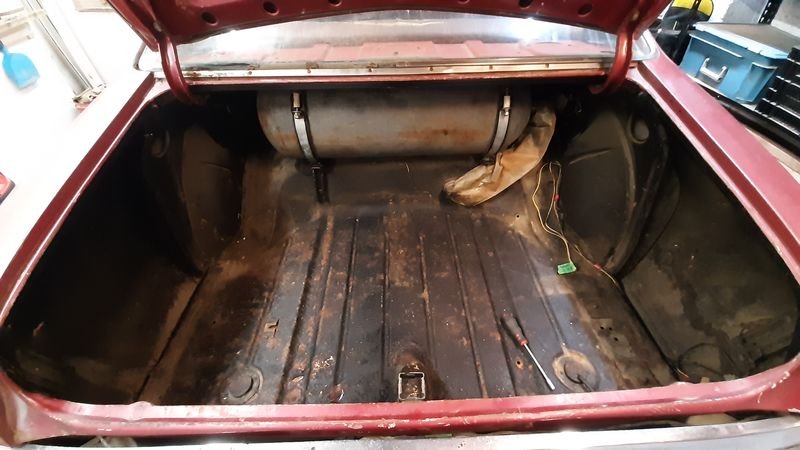
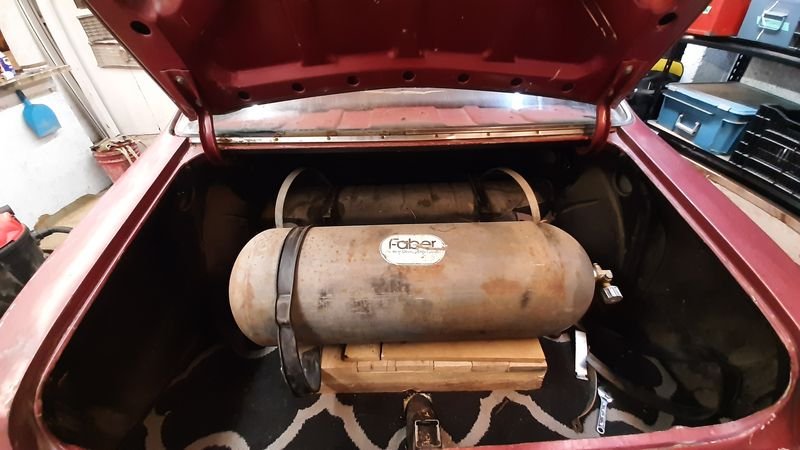
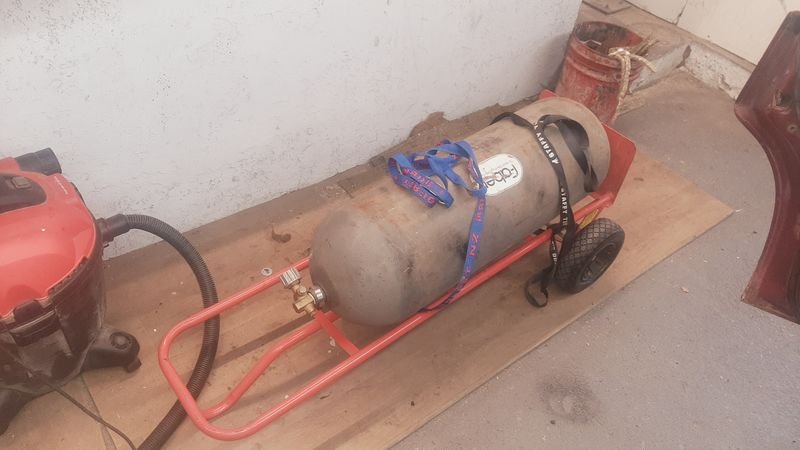
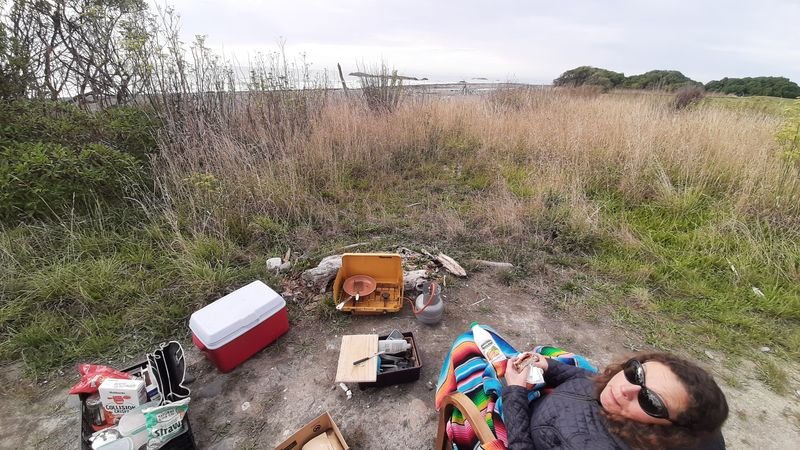
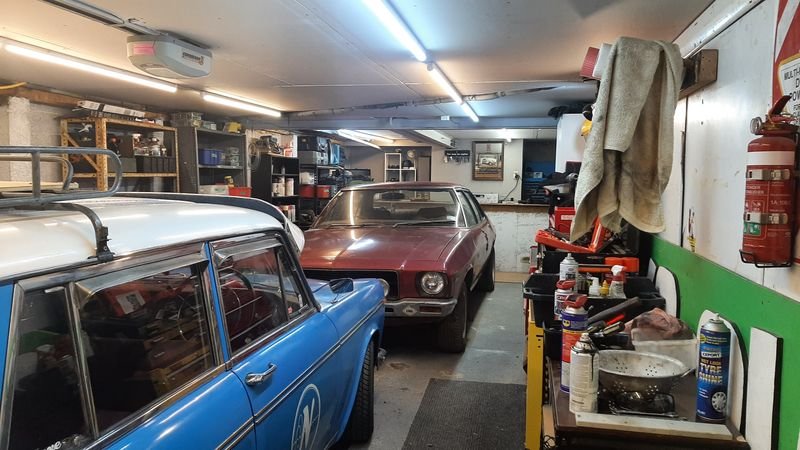
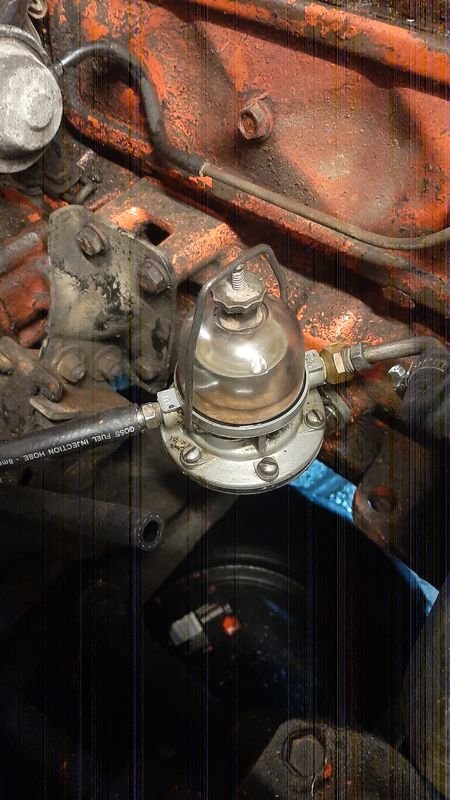
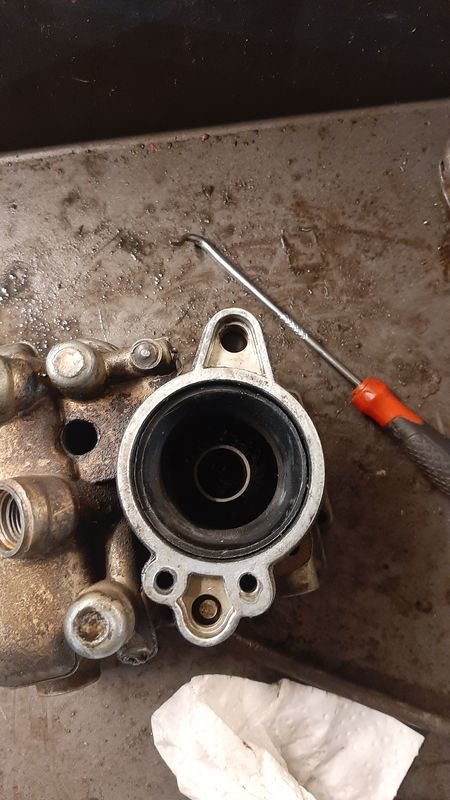
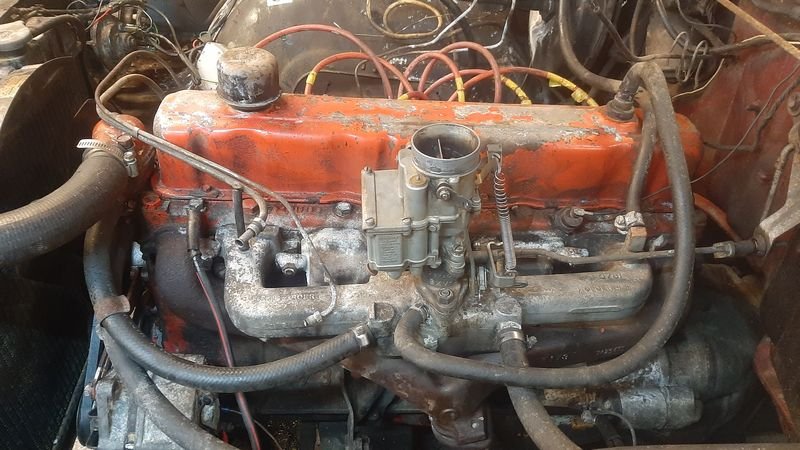
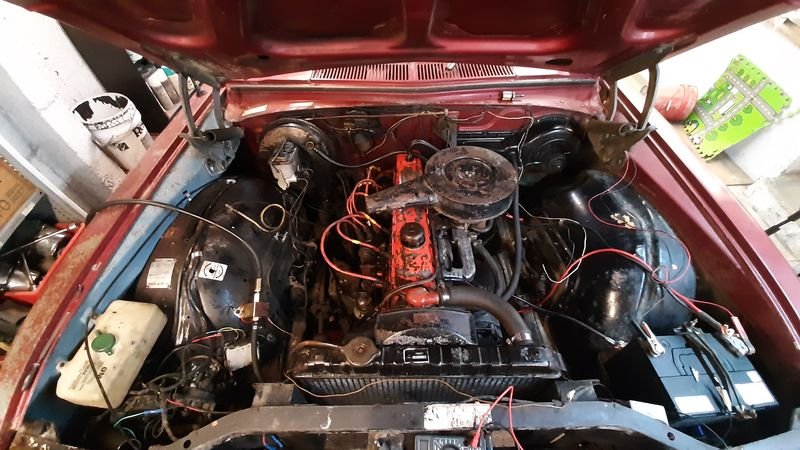
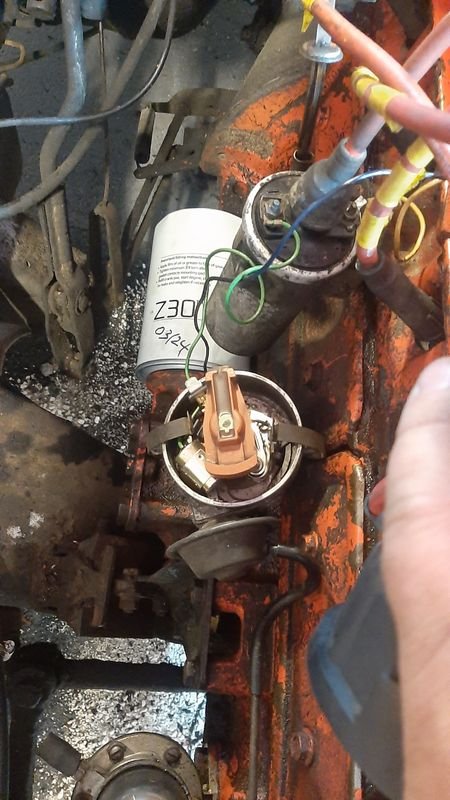
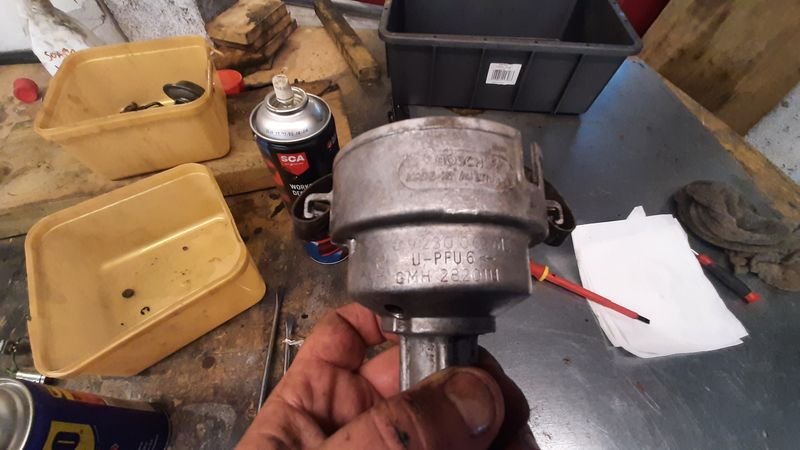
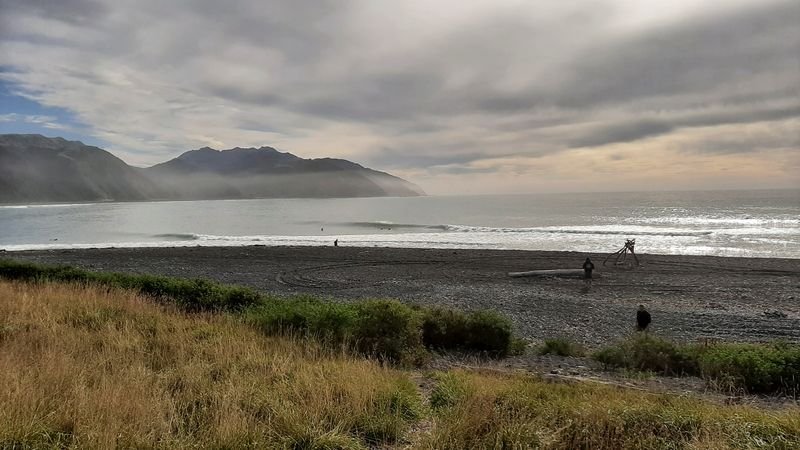
Ma te wa to Bill and whanau, then we headed home, with our van loaded up with other treasure from the shed(s) Forgot to mention i got jealous of her getting new car, so I got me one the same colour as hers on the way up. Given i had to drive this, Kirsty was driving the van the whole way home, she was none too pleased about it (But, yes it is better than my current 2005 Forester X its replacing in every way, thanks for asking - 2002 XT, totally stock, sub 200k and after a few wee issues (MAF sensor, oily connectors, new spark plugs) it really kicks when the whirly boi winds up!) Good Day in Welly before overnight sailing Breaky fry up in Kaikoura a quick stop to rise the north island off And about 3 days after we got home, this turned up. Used Classic Towing - worked out fine, but lucky both Bill and myself are home most of the time because the communication around changes of plan was a bit lacking tbh. The man can sure back a trailer tho. Its a fricken whale compared to my 'big' Fiat, an easy foot wider. Time to poke the bear First thing, remove the CNG stuff from the engine bay. Not only is it unfillable, the electrics are one of the layers of fuckery (the least bad to be fair, but also totally redundant), the tees that loop into the factory heater coolant lines to stop the regulator freezing up were corroded apart, and the carb hat gas injector thing made the air cleaner butterfly nut rub on the underside of the hood. 'New' heater hoses (from the old CNG line) and a bit of a wiring tidy up Fuel pump clean (no go in Feilding, leaks like a sieve now, still no pumping action), now bypassed with a clicketyclack, needs a rebuild kit (diaphram and gaskets) Carb cleanup, was pretty clean inside the bowls etc, works ok now, needs a kit too (tore a gasket) Sitting clean on the still very oily 173 Dizzy removed, cleaned and oiled, gap reset, but all the points, cap, rotor, leads and sparkplugs all look relatively low miles Changed the oil and filter (black and smelled like petrol but no chunks), re-crimped a new loose connections, taped some twisted wires, removed some vampire taps and chock blocks as well Put it back in starting from first principles (ignoring the marks, get cylinder 1 on compression stroke at as close to tdc-ish you can with a long thing in the spark plug hole, rotor pointing to lead 1) and it was about 90 degrees off where it was before - dizzy couldnt be turned enough to get the right timing, so i wonder if it had been tutued with before and the hassle of it not running well was why it got parked. Bill did say it had several minor issues needed sorting out and they got a newer, better car and he just stopped driving it. Anyway, buttoned up and after some further fine tuning it starts on one pump of the pedal and idles smooth. Not smoky (any more) Still no coolant or brakes.
1 point
-
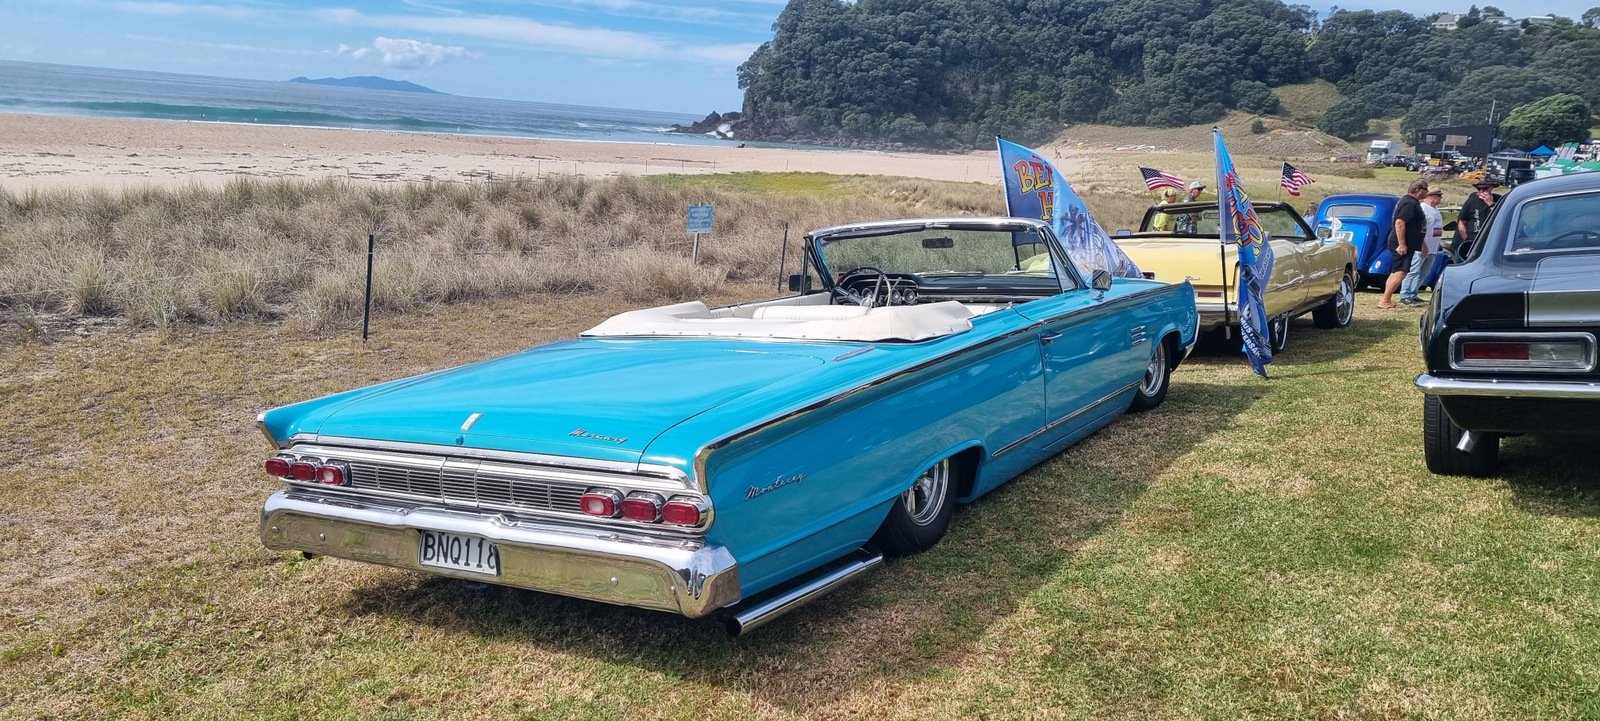
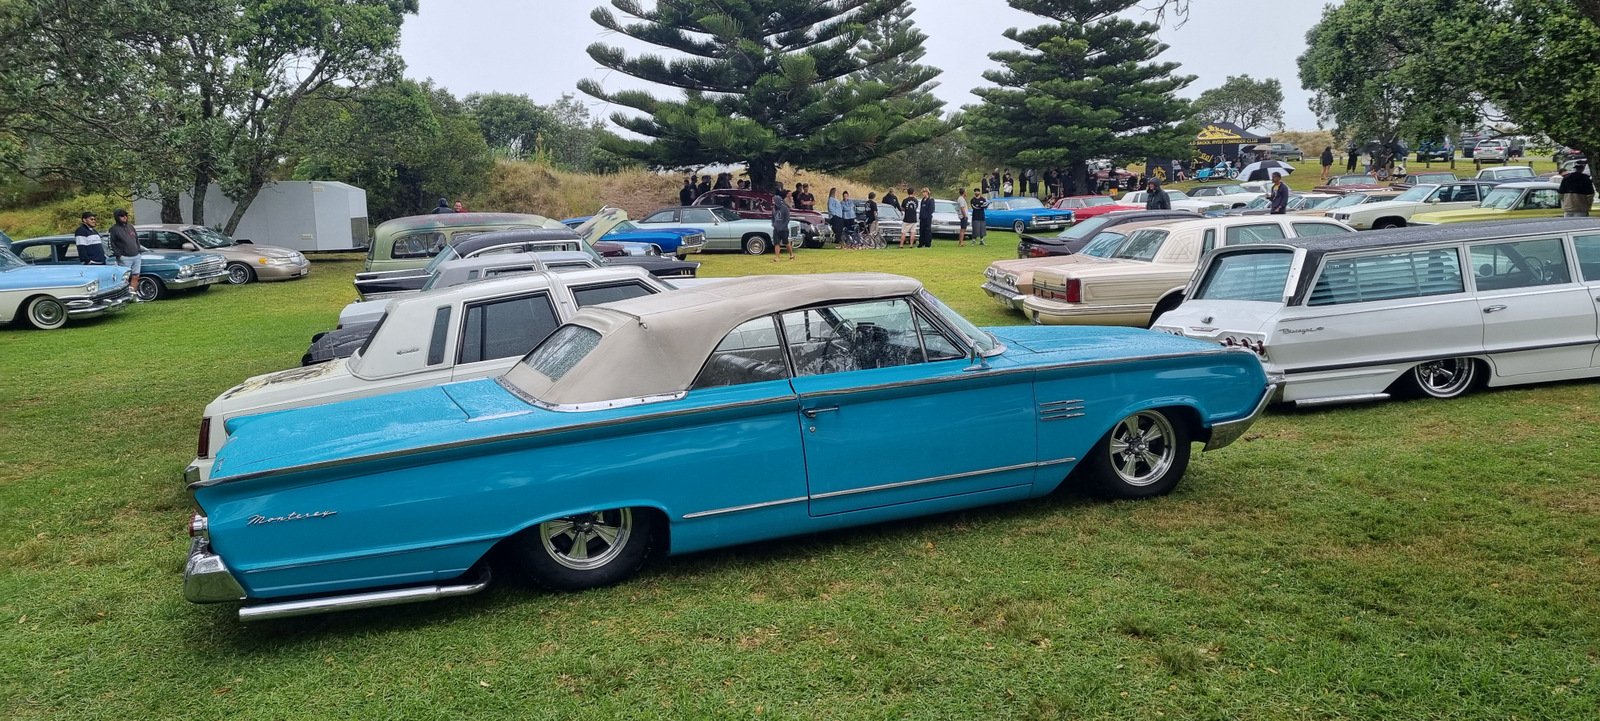
Made it up to Waihi Beach the Whangamata OK. Parked near the beach, and then in the slamfest on Saturday (bit damp that day). New paint is a big improvement.
1 point
-
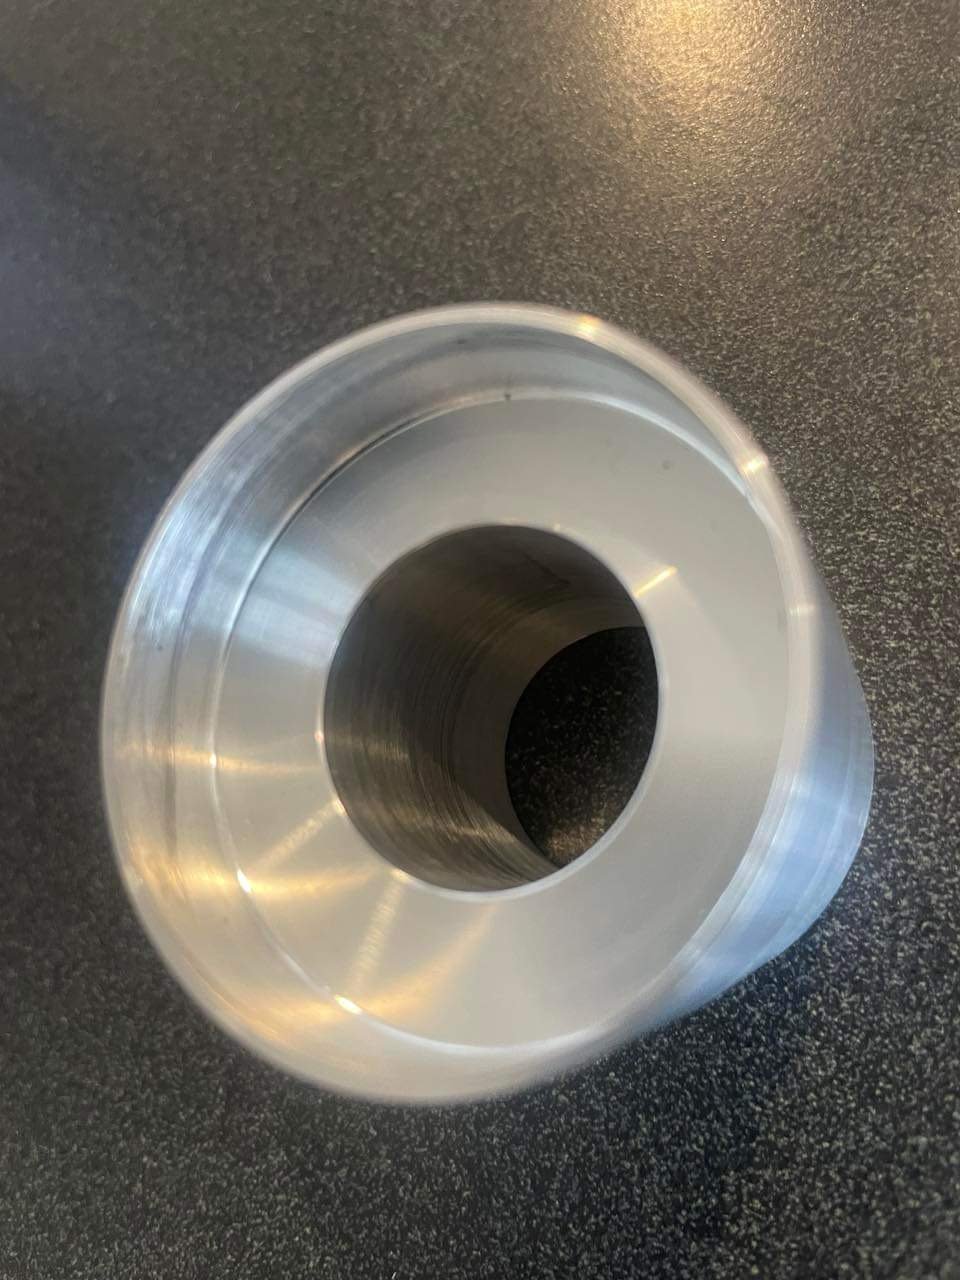
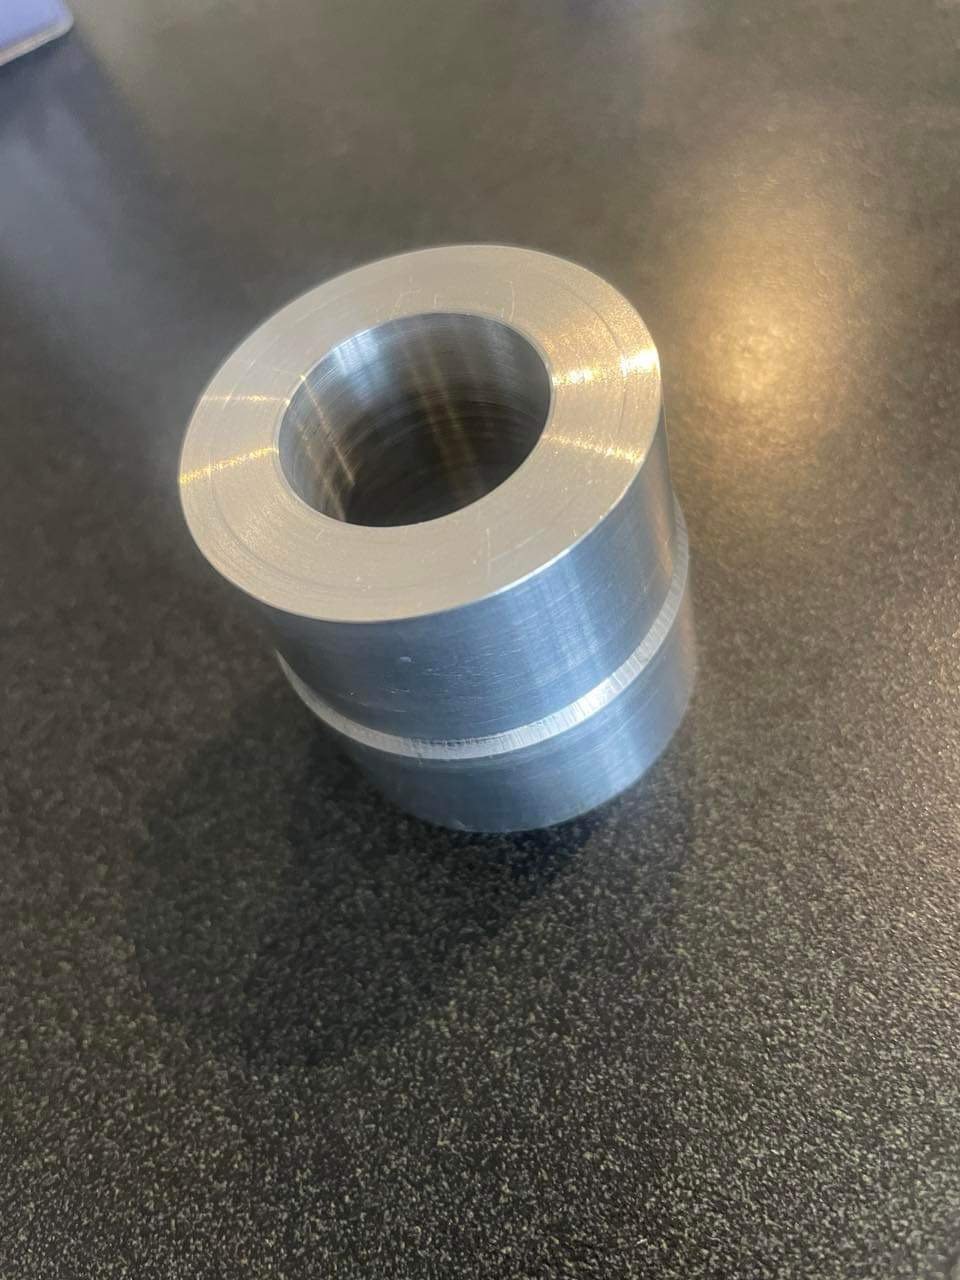
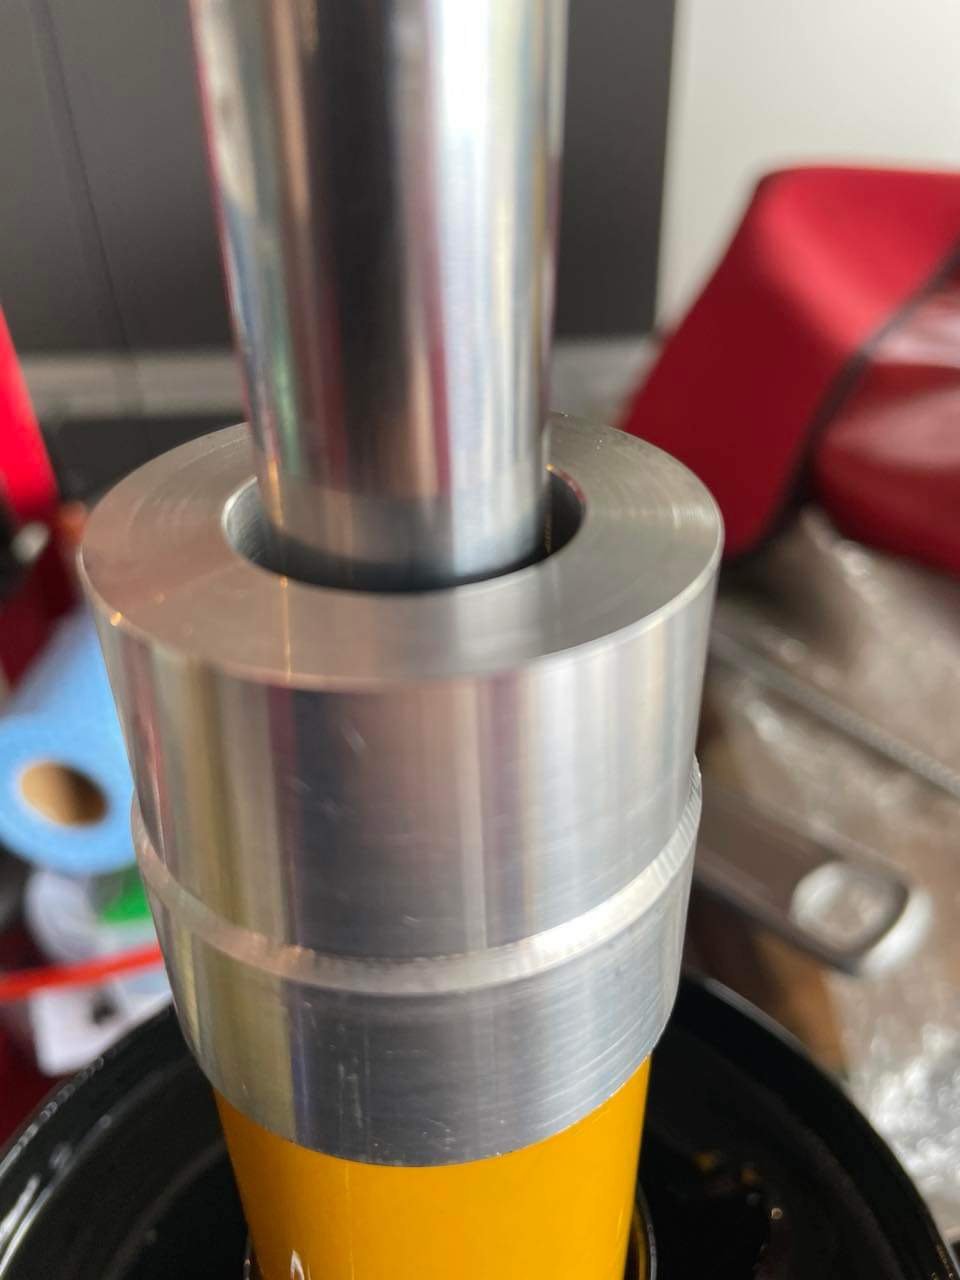
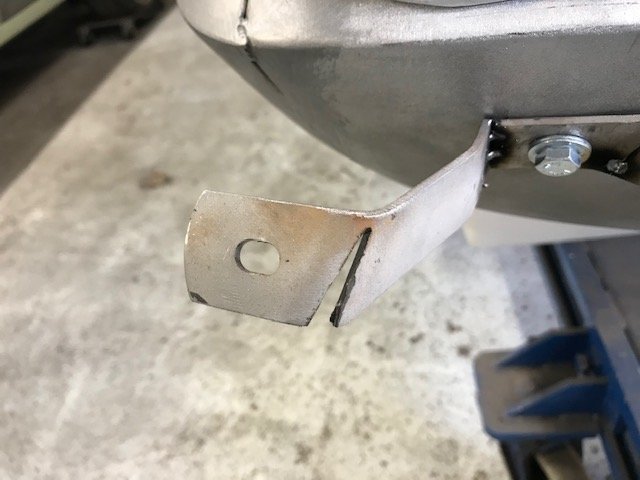
Here is a wee update. The fist job was to sort out a couple of issues on the hydraulic clutch setup. I realized that the slave cylinder I had that came with the bellhousing fowls on the headers. After a bit of head scratching and hunting I found another slave cylinder that just fits. I heated the headers then tweaked them out about 15mm to give a bit more clearance, it is still very tight. I still only have about 10mm of clearance. I'll make a heat shield I think. That is the new one, only problem is that the bolt holes don't line up with the holes on the bellhousing. So I milled slots in it. I was going to TIG the bellhousing holes and tap them but I decided not to just incase this new slave cylinder doesn't end up working out. For the master cylinder I welded a backing plate to the fire wall and mounted it in the engine bay between the booster and the header. Tight fit but it works. That picture makes it look much closer to the header than it is. I couldn't have it directly behind the clutch pedal unfortunately, so it's off set from the pedal. I used some steel rod linking them all together and threaded the ends. It's nice and smooth, I'm hopeful it will work well. Engine in for hopefully the final time. I couldn't mount the gearbox as when I went to fit the fly wheel I realized I don't have any flywheel bolts. Doh. ARP ones are on the way. Next I'll start wiring her up and put the dash back together. Cheers guys. P.S. Pro tip... Don't spray a car in jandals. That was taken after 2 showers.1 point
-
Gah I don't want to diagnose something I just want to fit new parts and get on with my life.1 point
-
Hi all the cars all certed and legal . Went racing a few times best time of 11.5 @ 119mph , still some time to gain but I was stoked with 1.5 60ft times and consistently running mid 11s is good enough for a Streeter. I recently put some recaro seats and a nardi in for a lil more comfort haha . Need to get the body in one colour at some point and do panel work ect . https://youtu.be/PJ3eeytABvs?si=PAPPHMMweas_vHgb https://youtube.com/shorts/UQabmthphQU?si=tQETPYKIxKYWsf0W My mate done a 11.2 in his 13bpp hatch with a samsonas 5speed sequential which he's just built a 20bpp for .1 point
-
1 point
-
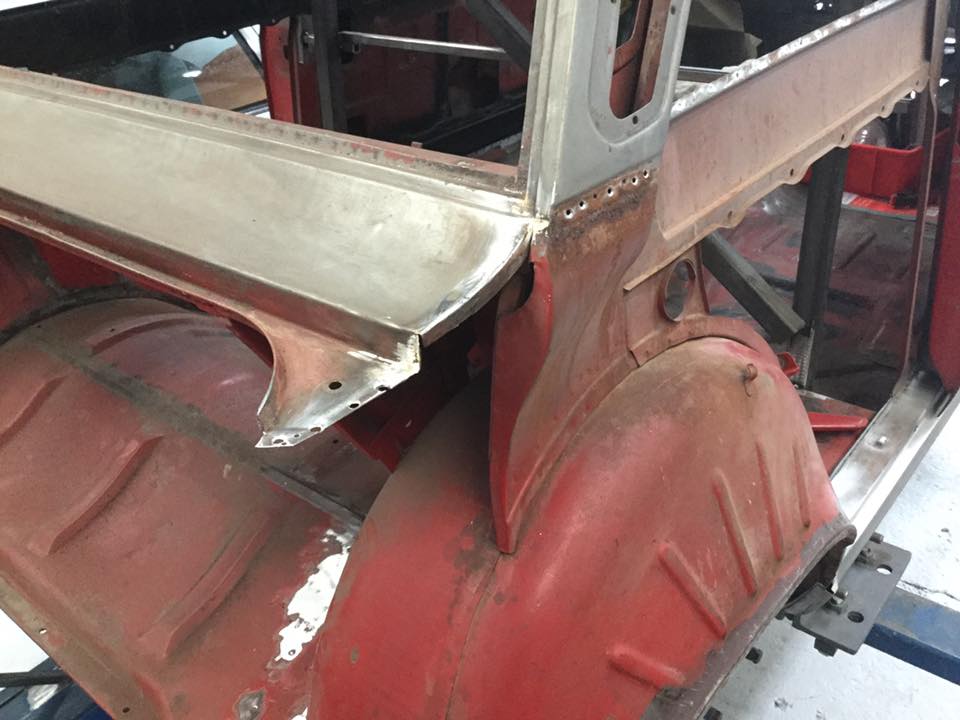
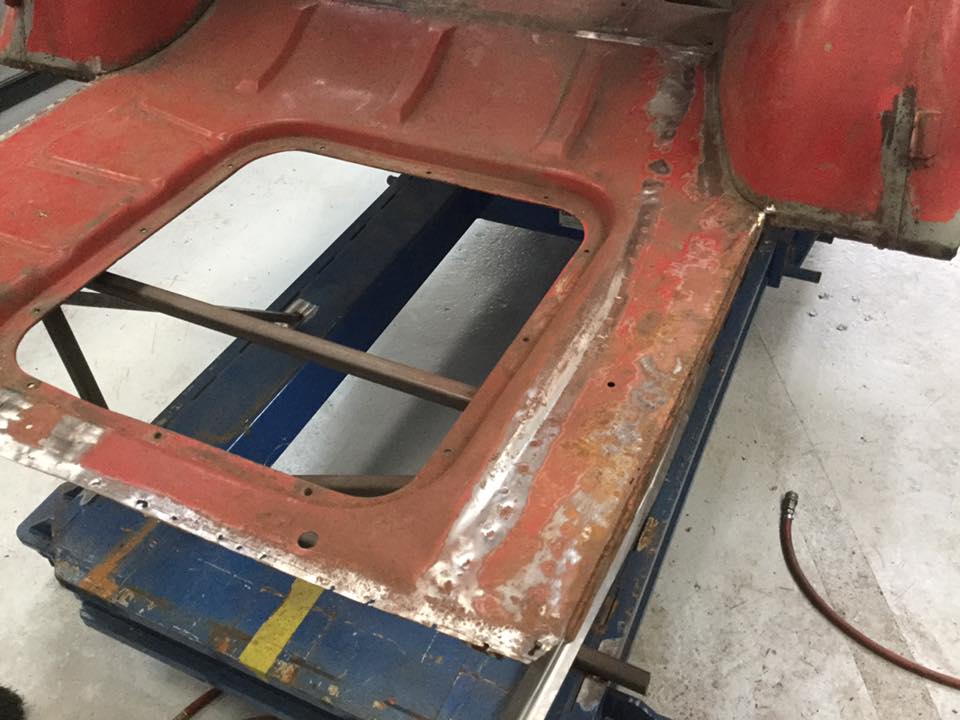
More rust done. Bother the inner and outer corner replaced on the right rear door. Also the rear quarter seam had rusted through. Replaced the leaded up seam with a steel patch. On to the worst exterior pieces of rust that I kept putting off, the lower rear quarters. Replaced the lower half of the inner to start with. Then made a patch for the outer which I formed in the English wheel. The right side was quite a bit worse, so I decided to cut the inner right out and make a whole new panel, was easier because it only needed plug welding along the top, not fully welding like the other side.1 point
-
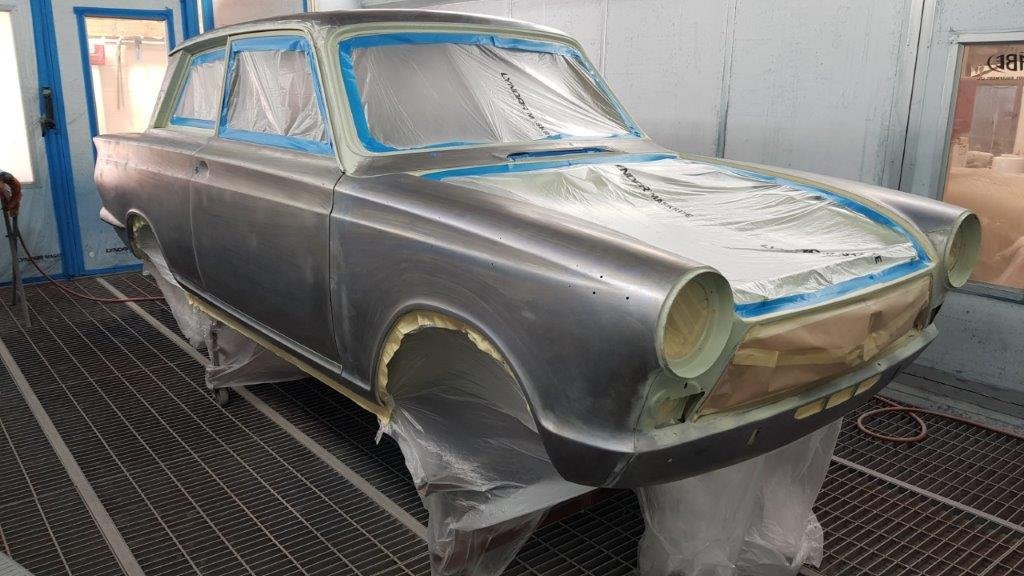
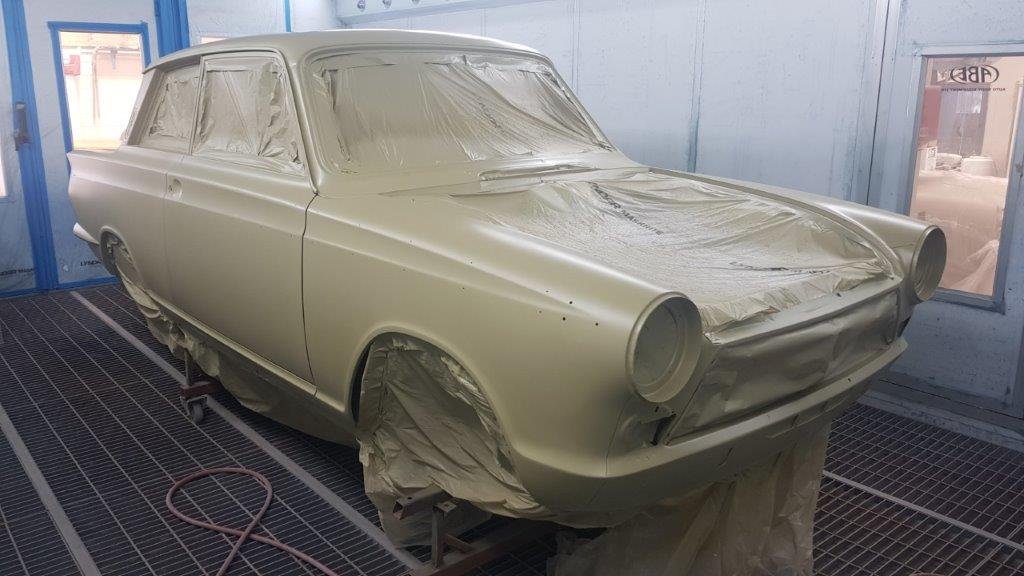
Finally into paint. First seal coat on and now it sits for 7 weeks curing
1 point
-
Off for the final blast, then refit the bonnet, doors and boot lid and then off to paint woohoo
1 point
-
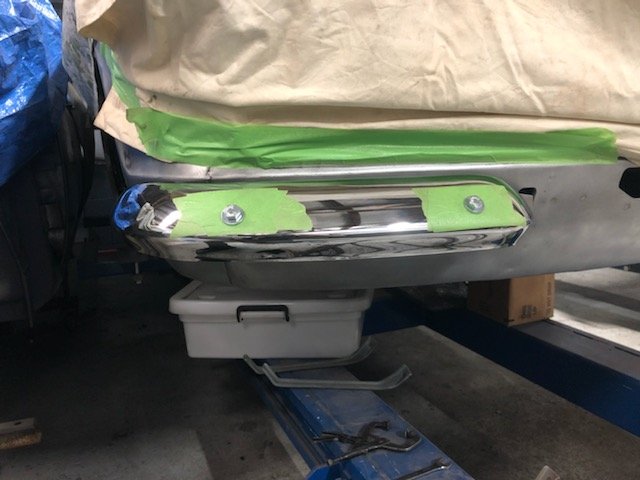
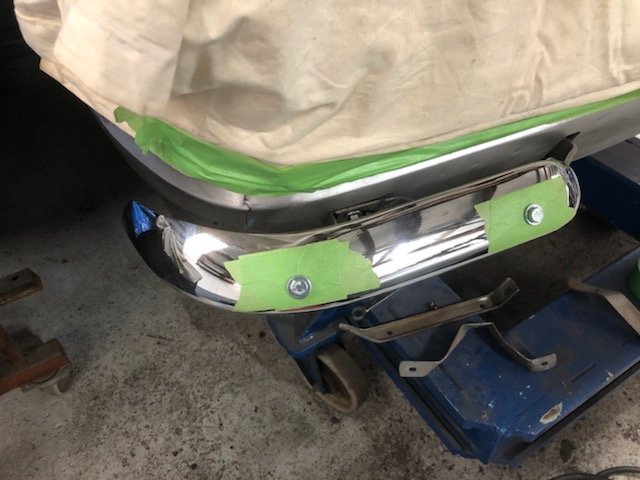
How many times have you heard ‘exact replica of original’ when it comes to copy parts? Nothing here a grinder, welder and skills can’t fix. Stevie Wonder must have been on the job the day these brackets were made. Got the back bumper and left front bumper stripped to repair again before recrhoming.
1 point
-
Been away lots lately so no progress on the rubbers. Back in NZ next week so need to get them sorted. Fitted off the front quarter bumpers and had to do a few adjustments to the brackets to get them sitting right. Unfortunately the left front one has had a crappy repair before caroming so it’s off to the strippers for that and the rear bumper and Greg will get them mint before getting chrome plated again.
1 point
-
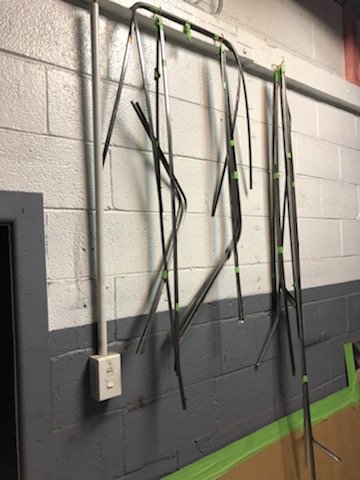
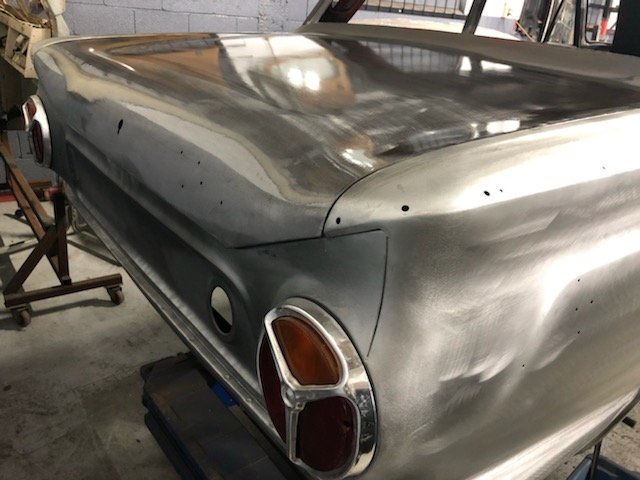
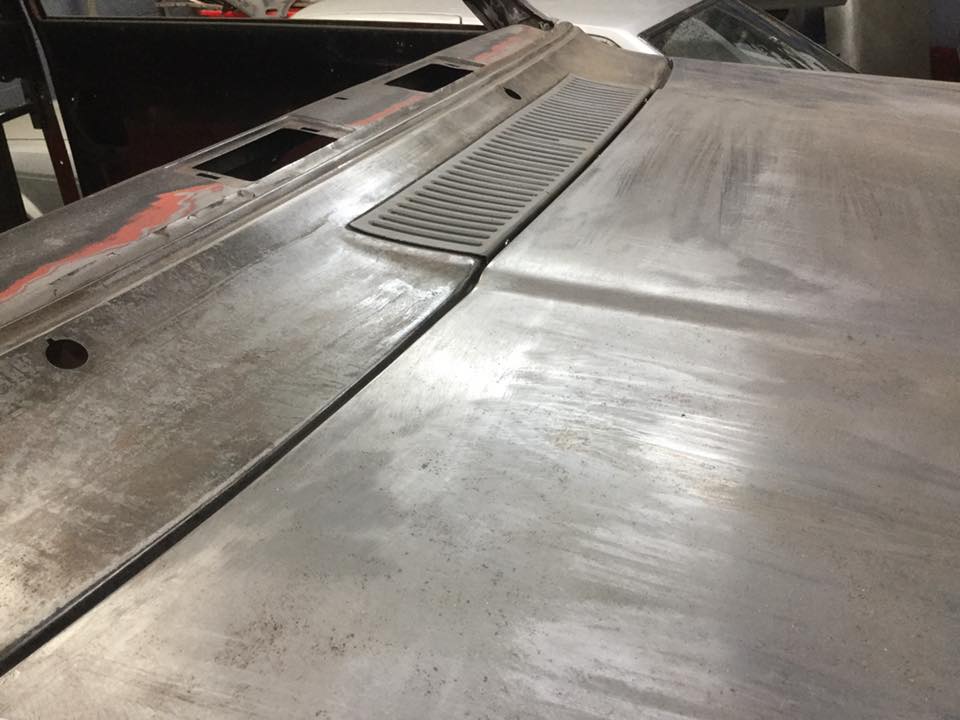
Boot lid finished which pretty well completes the panel. It’s going to be a shame to paint it! Stainless trim already to go to the polishers.
1 point
-
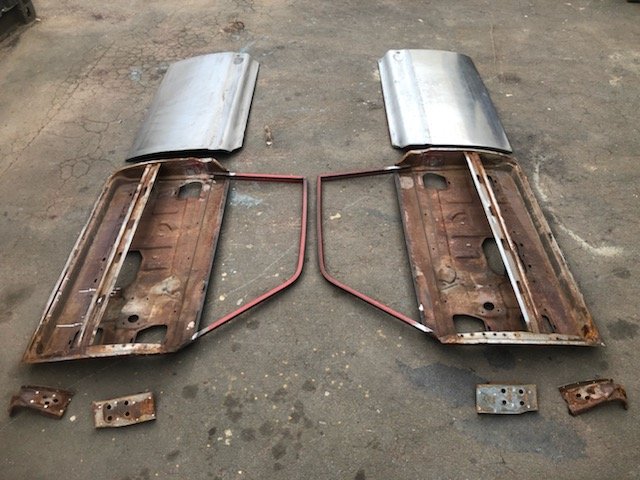
Doors taken apart with skins removed and hinge plates. Frames off to the dippers.
1 point
-
Some more pics
1 point


.thumb.png.b2aee08688778d18bdc7b3e3c1852d9c.png)


This leaderboard is set to Auckland/GMT+12:00