
Leaderboard


Popular Content
Showing content with the highest reputation on 02/25/24 in all areas
-
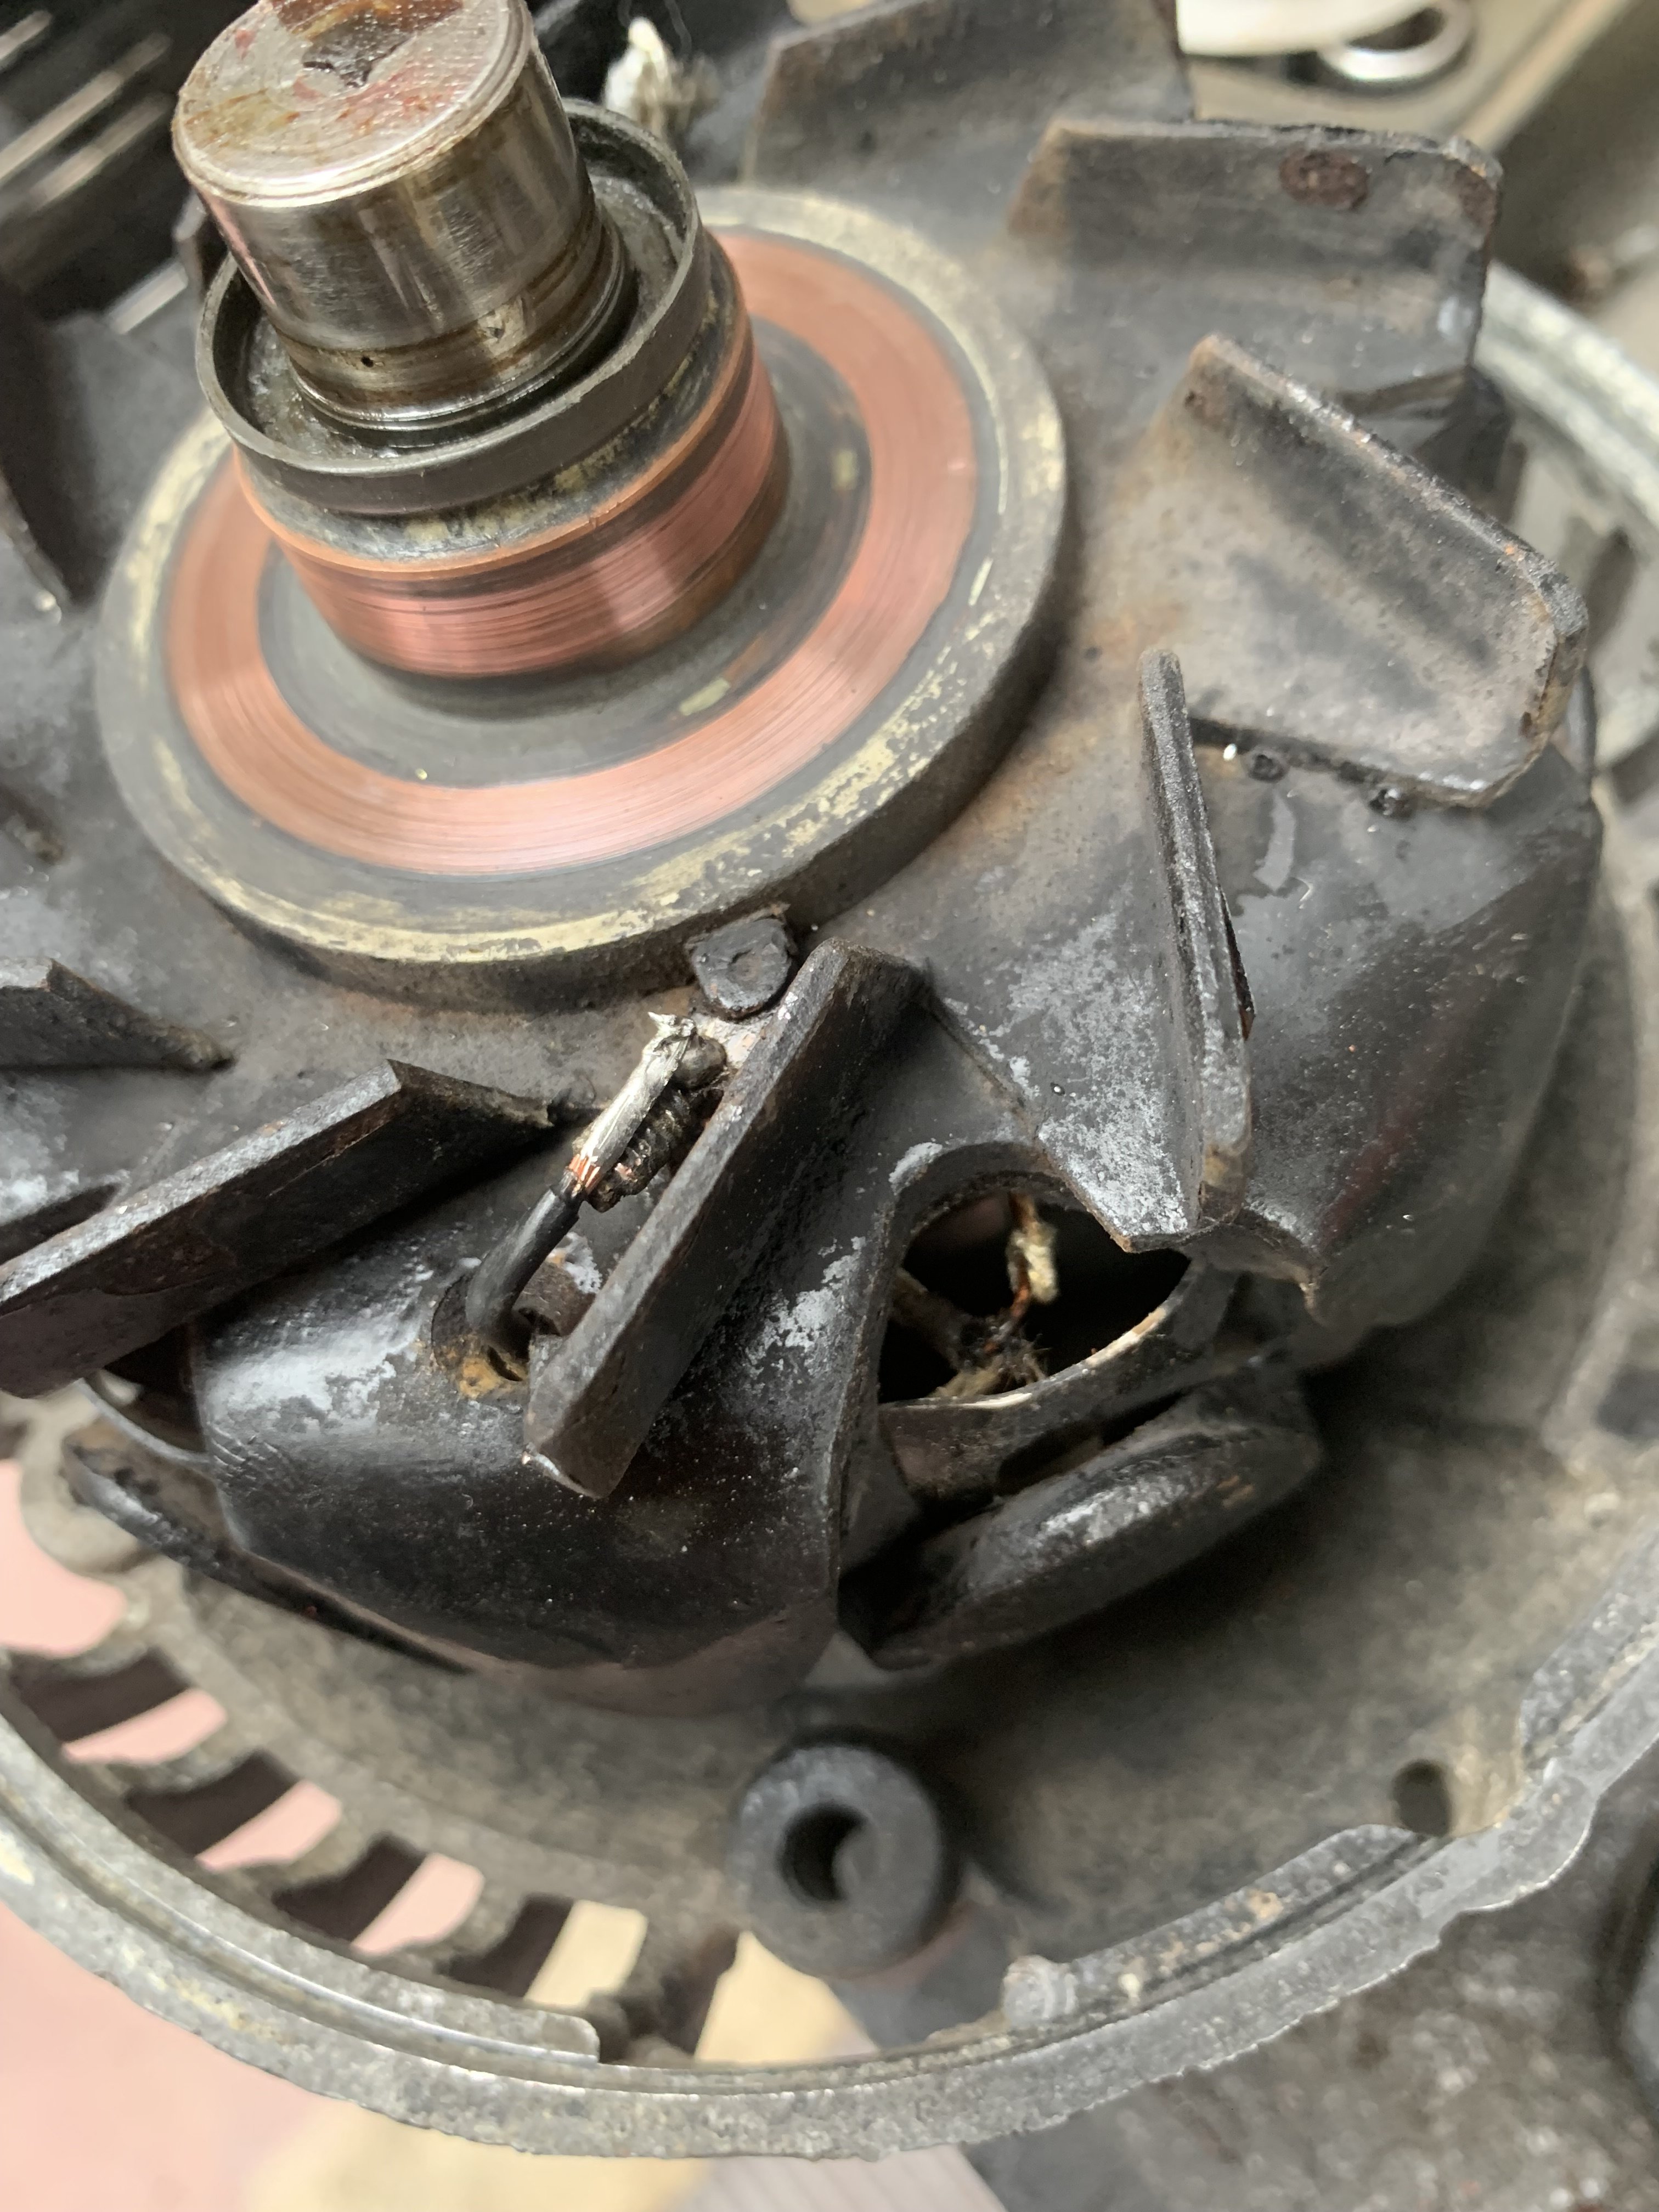
I had Lets Get Graphic re-make my side billboards in proper vinyl..much better! Accordingly the duraseal peeled off the adhesive and then they had to thinners off stubborn glue..oops. Took it for its biggest run out to rangiora MCM show.. went great until the needles wiggled and it stumbled then the Amp gauge read drain. Parked it up and left it until the trip home couple days later, it did it again but didnt hinder the journey. Few hundred metres from home it backfired and the needle came back to life and it was charging again! By the time id washed it and drove back in shed it wasnt charging again. Tore it open and spotted a broken field wire so i soldered it back on and not change. Weird. Fucked aroubd with tests and bypassing things, external reg tested ok. Left it with a customer whos a sparky, could tell he wasnt into it but said hed take a look but his test bench wasnt working. Few weeks passed so i went and grabbed it back. He did say the wire sheath looked like it was degrading and it might be earthing. Put my pick under the other field wire to tweak it into open space and there was no pull resistance..broken too. Was a bit awkward but soldered a new wire in between the broken ends and threw it back on, Amp gauge working! Then it stopped. Decided it was the centrifugal forces throwing it out and the wee bare wire patch was touching so dripped epoxy glue in/on to make a protective sheath and its been great since. Will get another Alt cause its pretty fragile and old.
 19 points
 -
I mentioned in my last post that I had new shocks on the way, well, they arrived, so let's get them fitted. I began by jacking the rear of the car up, putting it on stands and removing the rear wheels. This gave me access to the shocks and springs. Both the yellow stripe and the part number on the shock indicate that it was a poverty spec shock from a low spec (not Works) Alto. Note the missing lower rear spring pads, the spring shouldn't be sitting on the metal like that. The spring also had the incorrect colour code, yellow and white, not blue and white like the Works spring has. Other than the paint mark they look visually the same, I don't know if the Works has a higher spring rate or anything. Removal is really easy. On my car the side boot trims have been cut, I believe for the damper adjusters for the adjustable rear shocks the car used to have. This gives me perfect access to the nut that holds the top of the shock in place. Because I didn't care about the old shocks, I used a rattle gun to zip the nuts off. Before completely removing the nut I supported the rear beam with a jack under the spring, so the force of the spring wouldn't ping the arm downwards With the top nut removed, I removed the lower bolt on the shock and removed it. This one was very dead. Because they have gas in them, once compressed by hand they should extend to their full length again. This one had no resistance to compressing it and made no efforts to extend. The other side was only marginally better, where if you left it for about 5 minutes it would have extended in full (it should extend to full in a matter of seconds). The new shock has the correct KYB sticker and P/N on it, but it appears the new replacements don't get paint codes like factory-fitted ones do; the factory paint code for a Works is purple and green. I ordered these from the parts book to Works part numbers, so I know they're correct. With the shock removed, I could push down on the hub by hand and pull the spring out. I then fitted the new lower spring pad, in the correct orientation based on the service manual I then replaced the old upper spring pad and fit the spring The new shock slips into place next The top mount on the shocks is interesting to me. The top of the shock has a captive rubber mount and steel sleeve. There is then a top bush and metal washer that sandwiches the shock tower into place. On the underside of the shock tower there is a metal cup that locates the captive bush Even the top bush is weird, the shoulder goes face-up The washer sits on top of it and the nut is placed on top As the nut is tightened, the bush squishes and flattens out under the washer I guess compressing the bush like that creates a fair bit of tension, so the shock won't be rattling around in a hurry. Other than jacking the hub up to ride height and torquing the lower shock bolt, that was one side done. I copy pasta'd the other side. and then onto the ground it went. With the combo of fresh new zero km un-saggy springs and the lower spring pads being fitted, the rear ride height has increased a touch. It's only a couple of mm higher and should settle a little as the springs bed in. I know why they put the KYB sticker where they did now The Suzuki lineup at work the other day Looking clean sans tow hook now too So, how does it drive now? Well, the blown shocks explain a lot! I thought it was just lame povo spec shocks, but even that wouldn't have been as bad. On the road at low speeds the rear feels firmer, but there is a huge difference in how the car feels on the open road, the rear is much more planted and doesn't pitch and dive so much. In the corners, it's a lot more controllable and the rear doesn't feel like wobbly jelly. I still think it needs the extra stiffening of the rear swaybar to balance it, but cornering speeds can be higher than they were beforehand and the rear follows the front wheels like it should. I reckon it'll be good for a second or two off my laps at Manfield next time, particularly if I can get it to rotate as the Jazz did (no hope for trying to do that when I was lacking any confidence in the rear end). Some more (boring) bits should be with me soon to tidy the interior up further, and other than that I'll just keep driving the pants off it. Should hit a milestone soon too...10 points
-
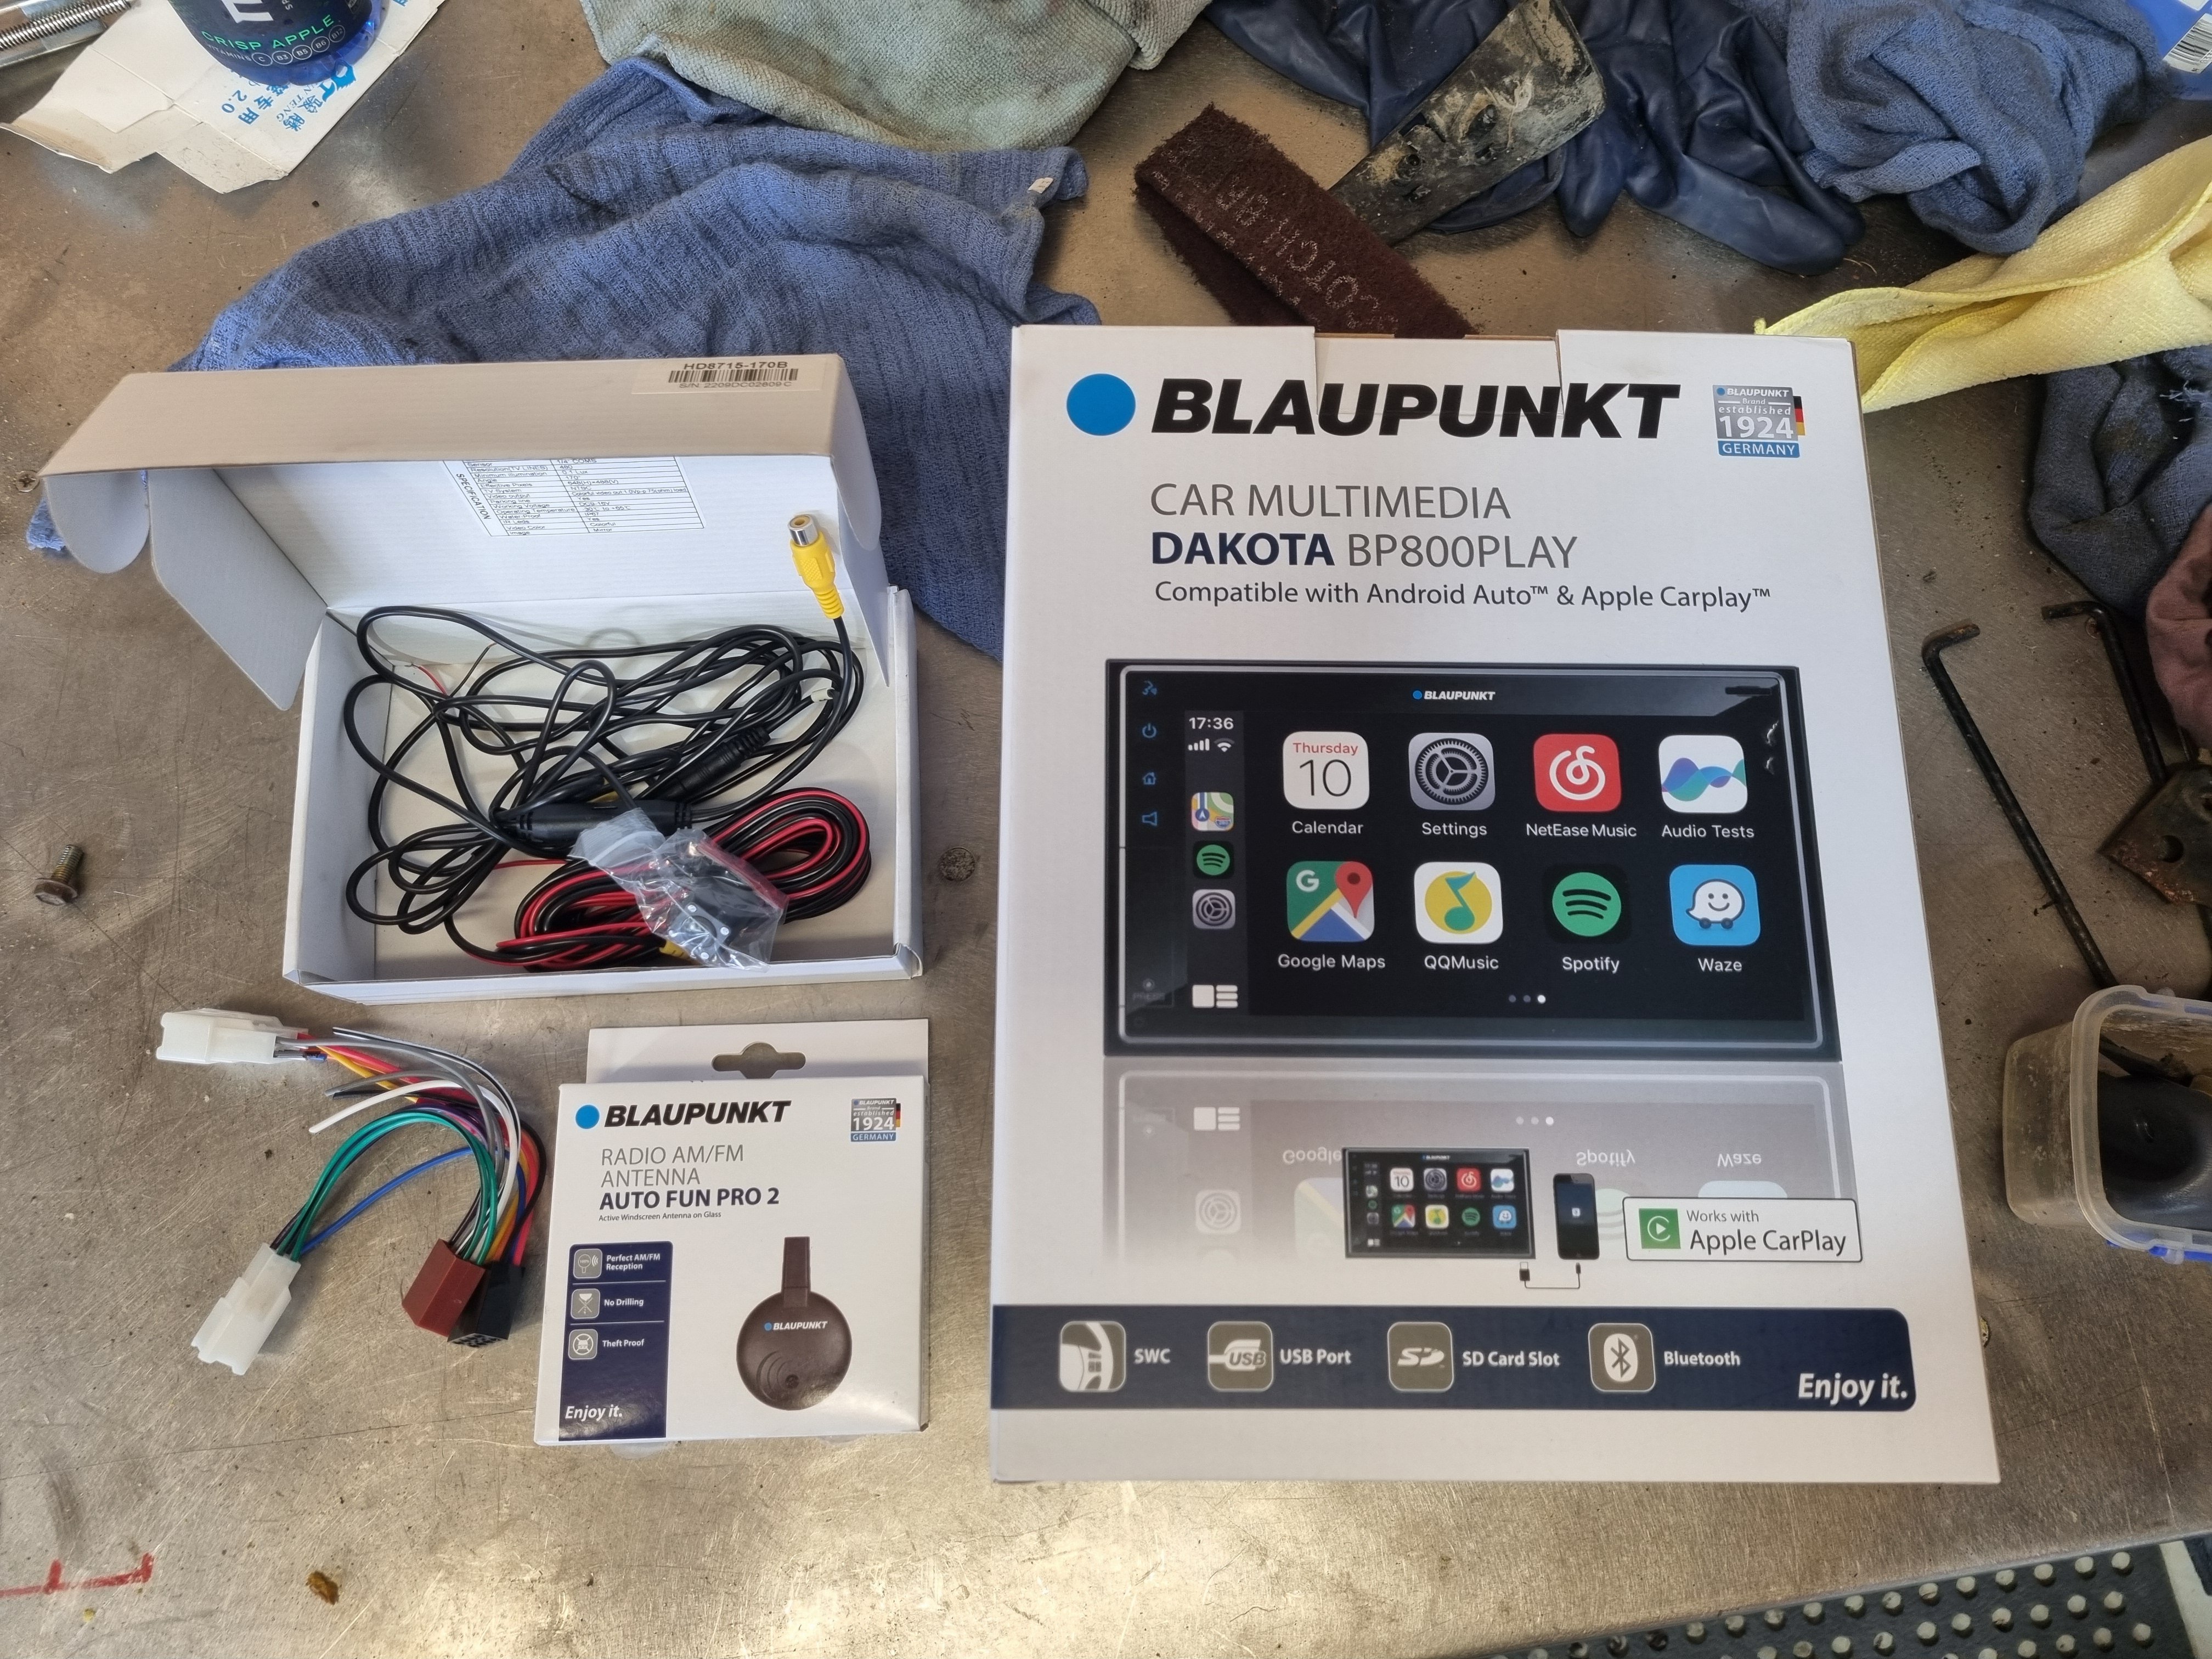
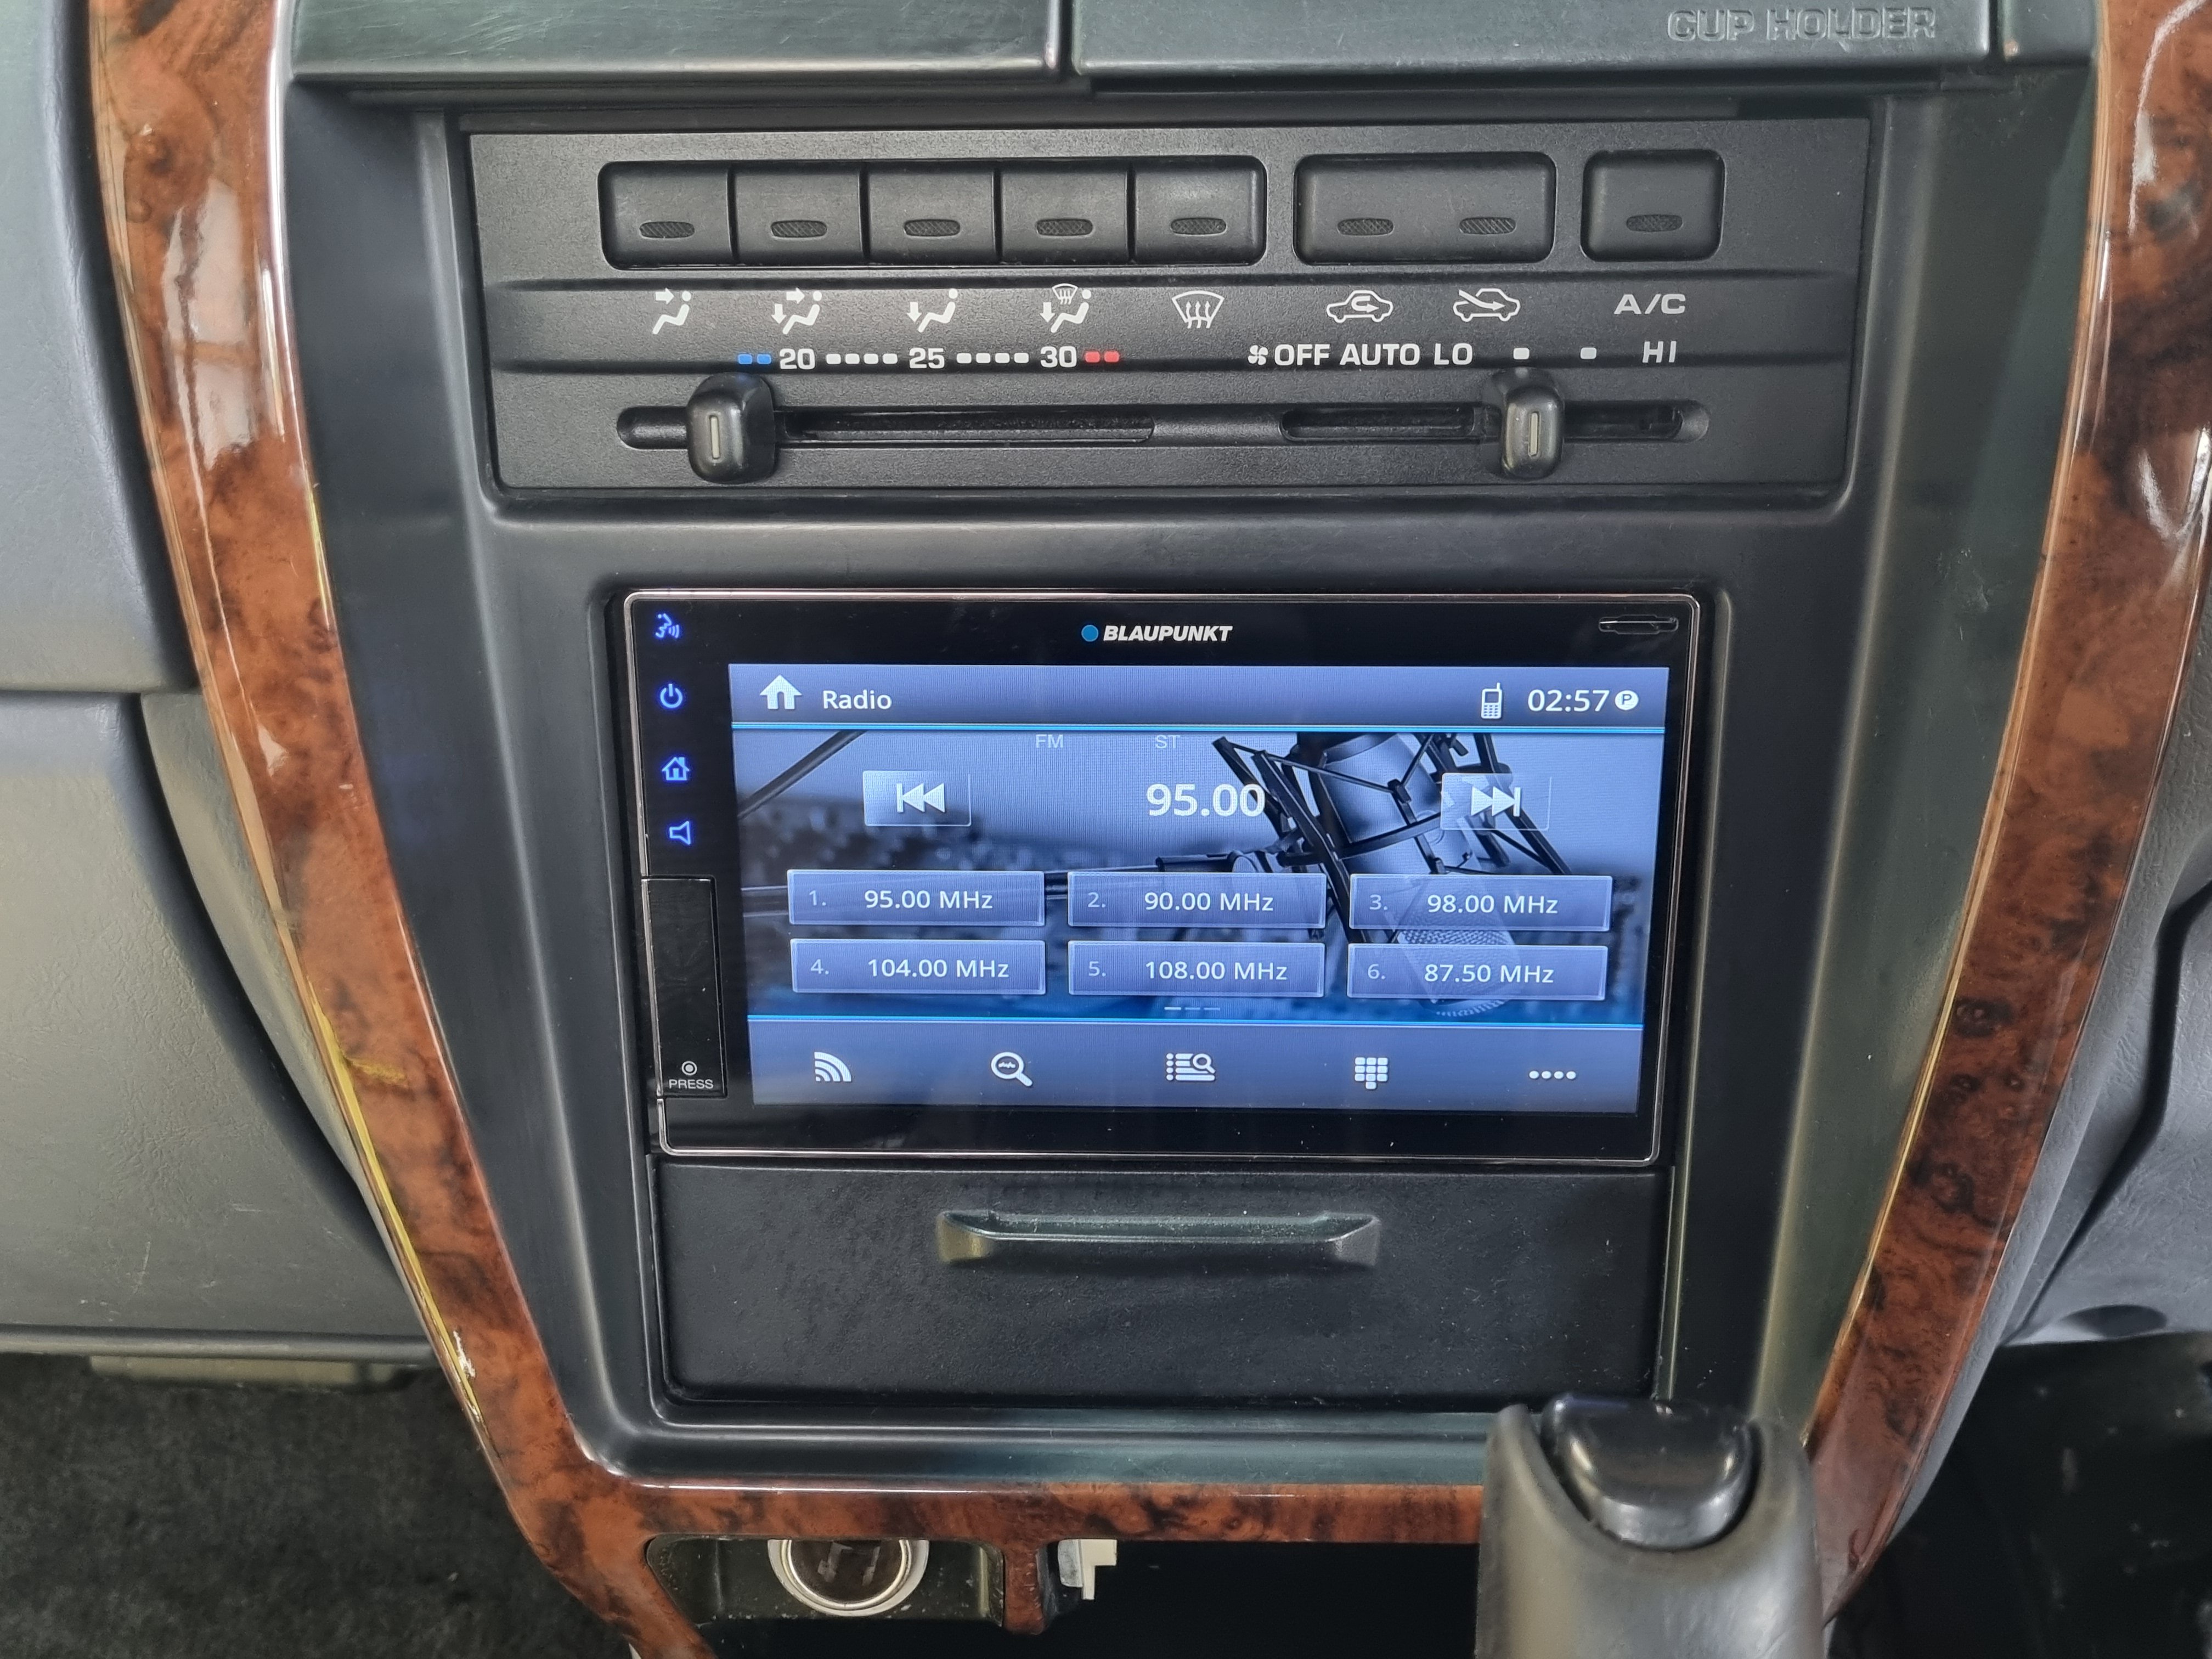
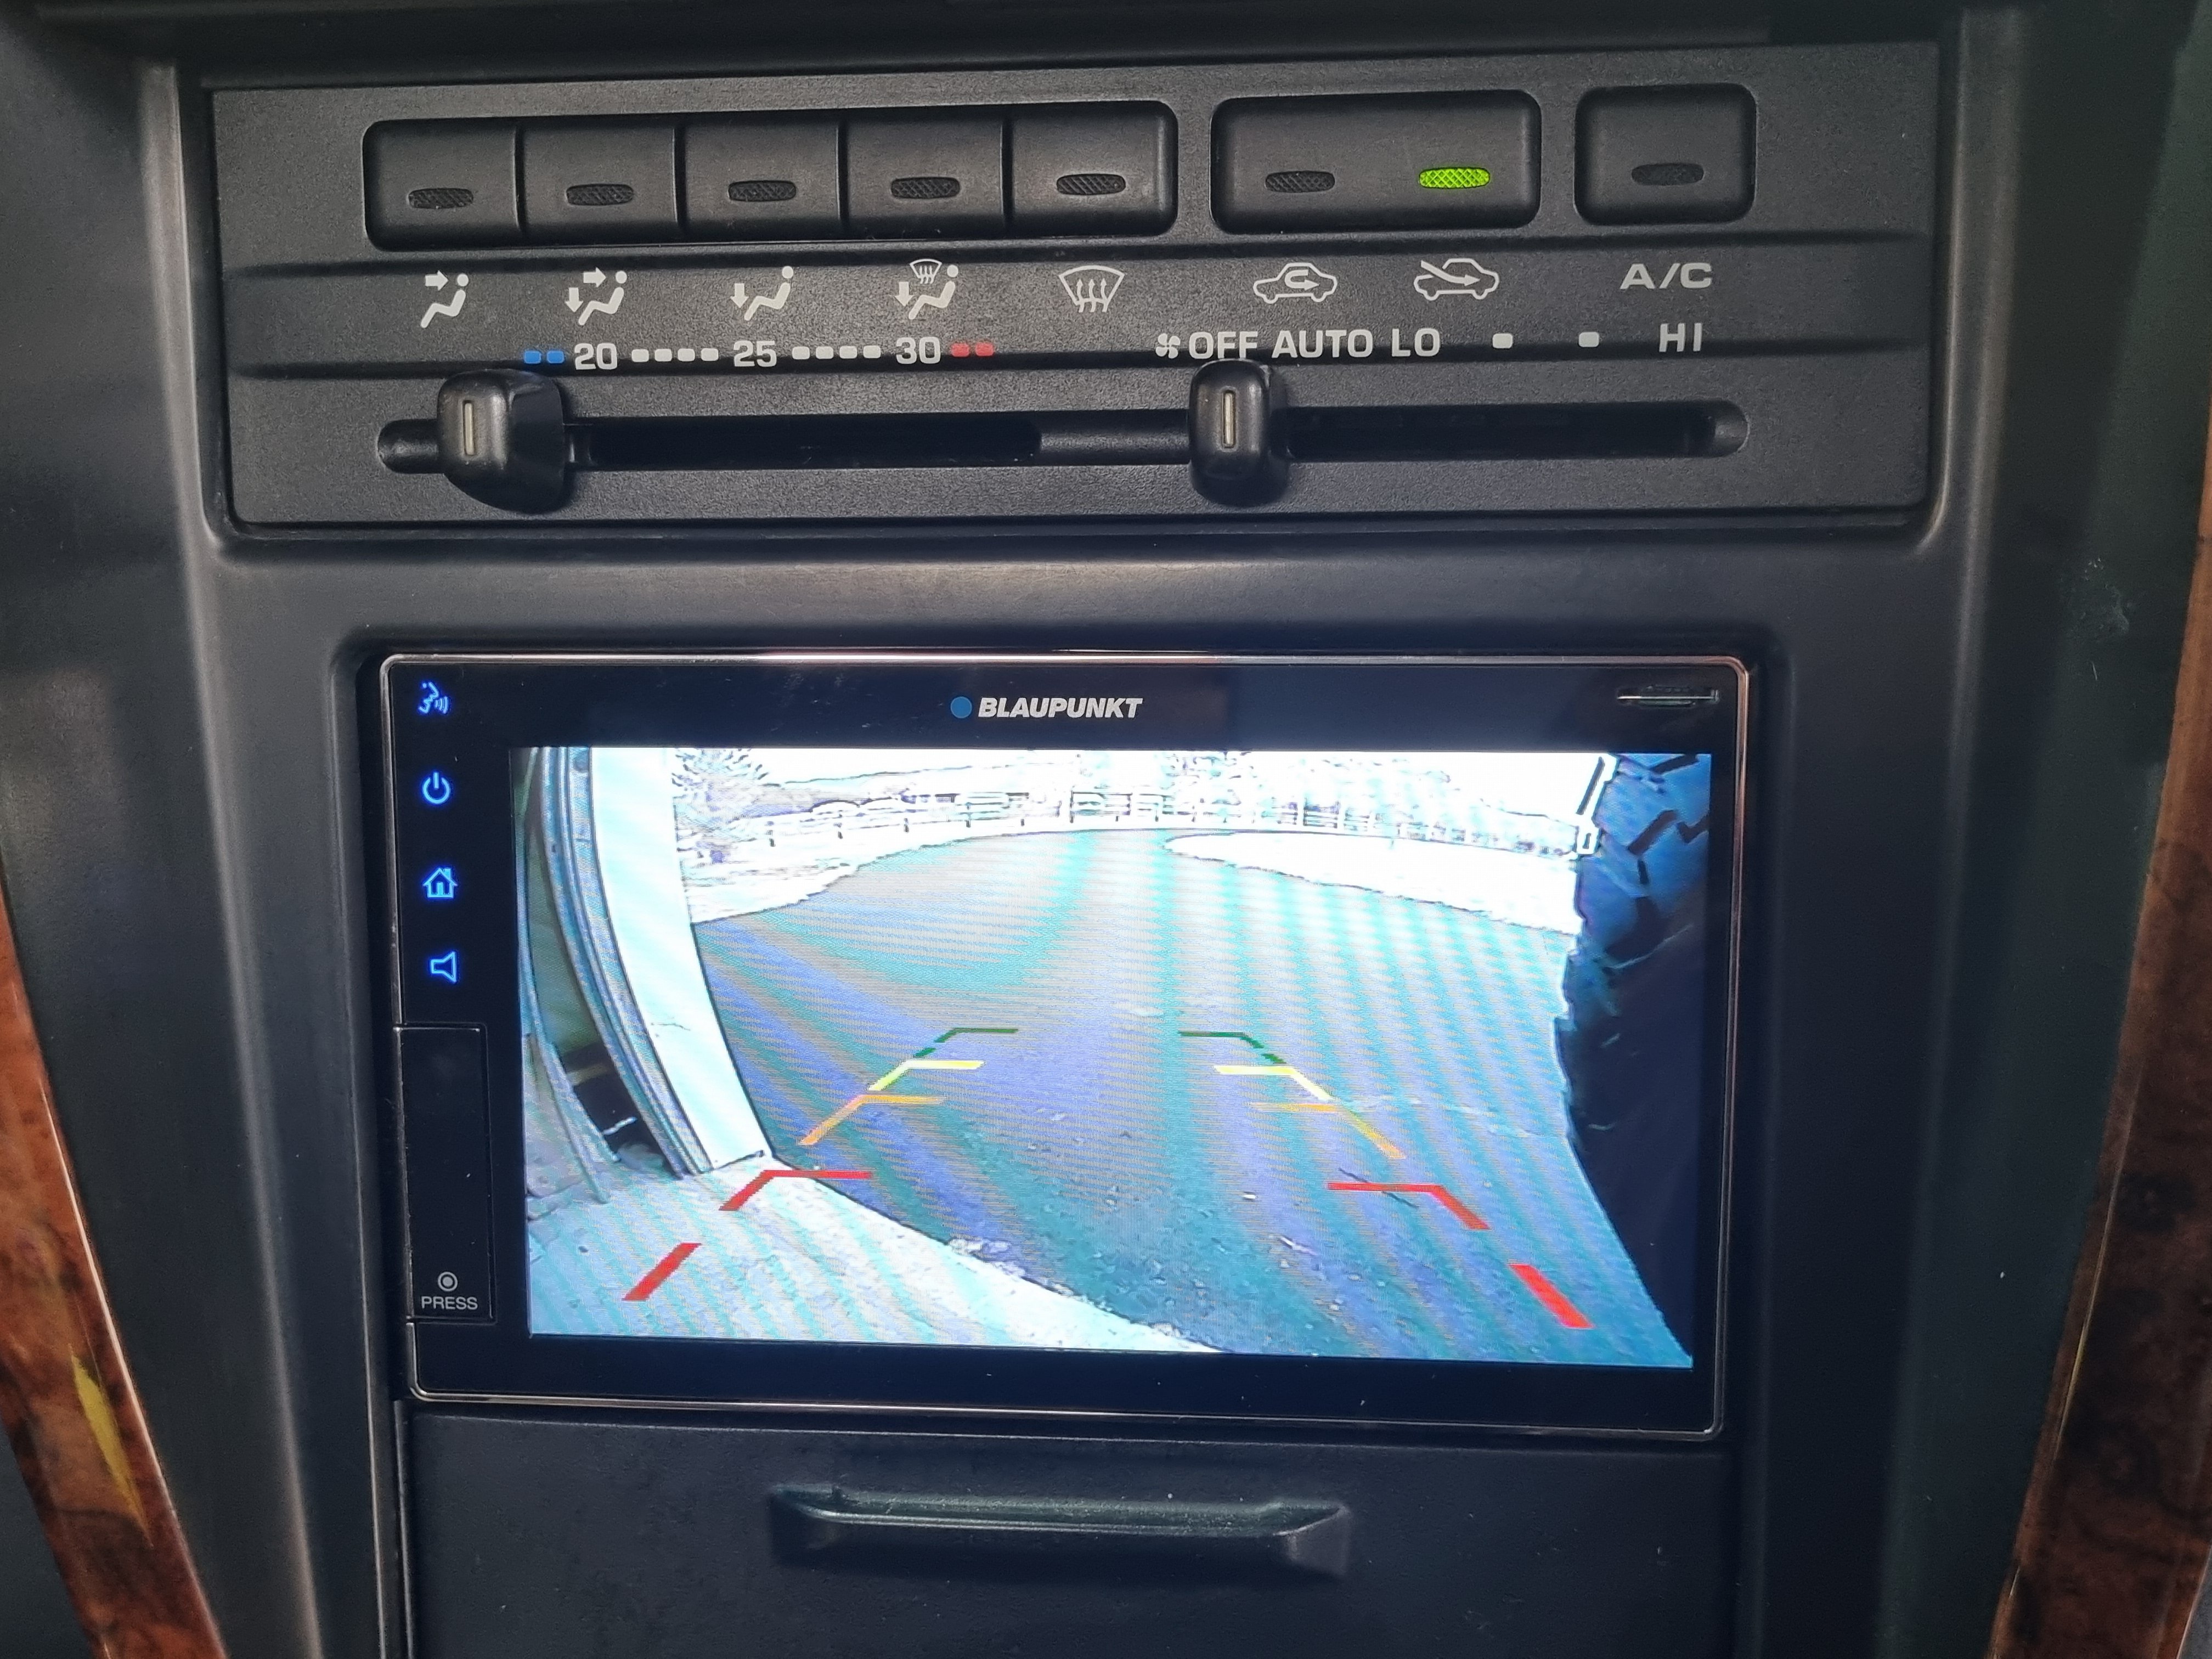
Also fitted a new radio. The one in it had FM and CD player. And nothing else. Yip yip new radio. Nick the sparky found this thing on special so it was cheap enough. Also fitted a reverse camera which was quite the job getting the cables into the rear door. By some fluke it works.
7 points
-
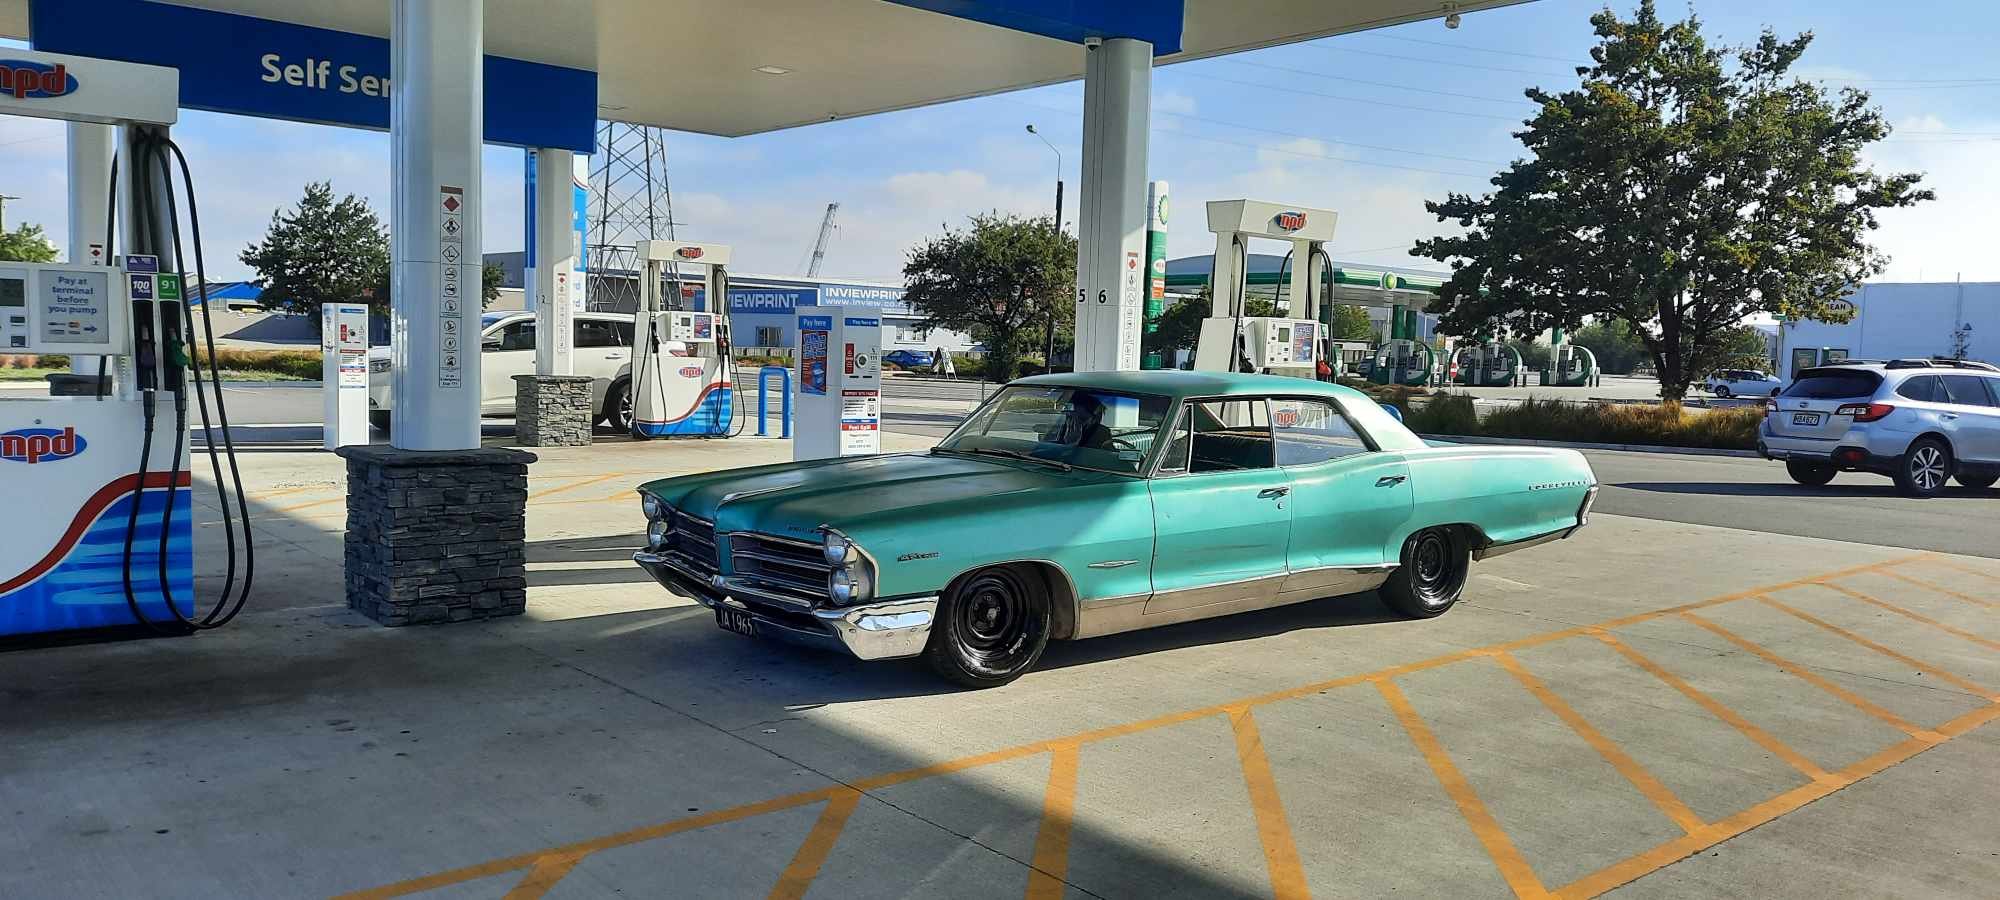
Went to hanmer motorfest for the day. Only took a pic when I filled it with gas
7 points
-
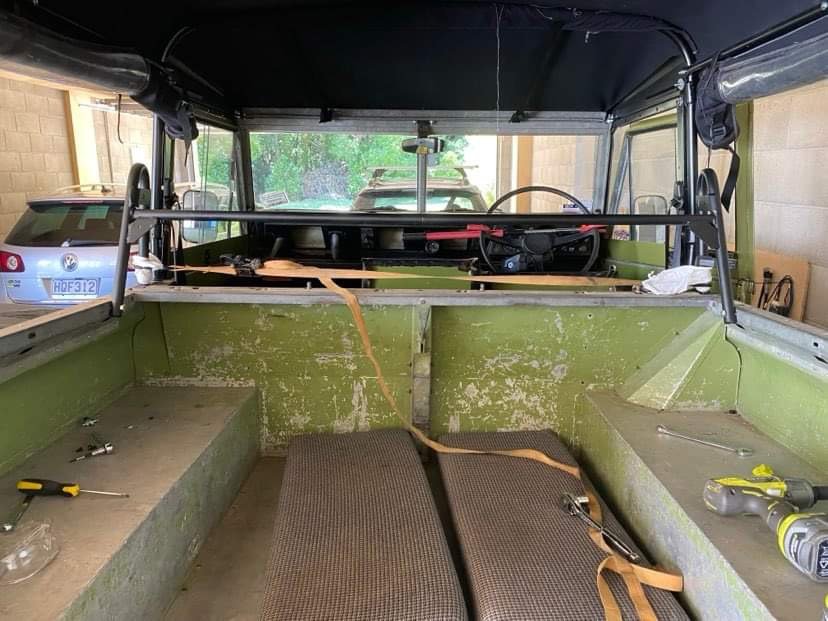
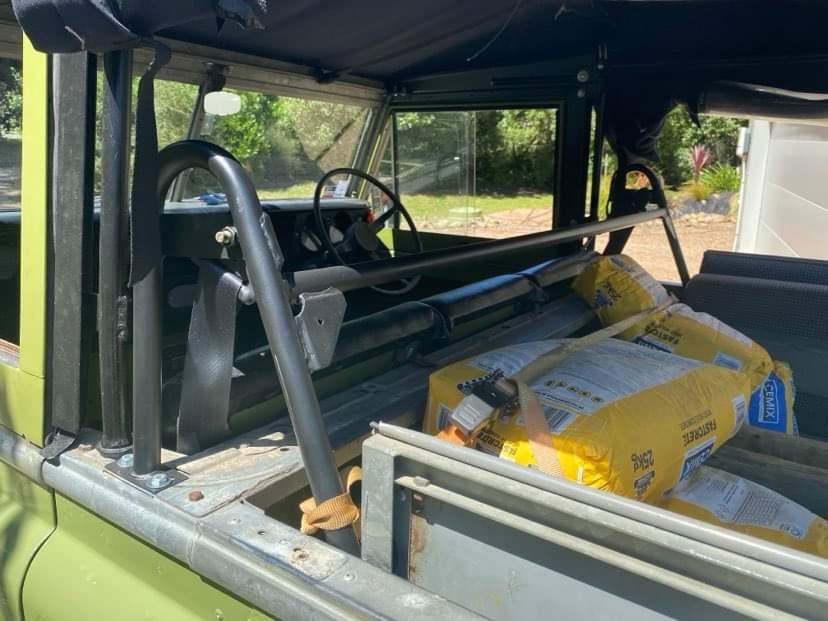
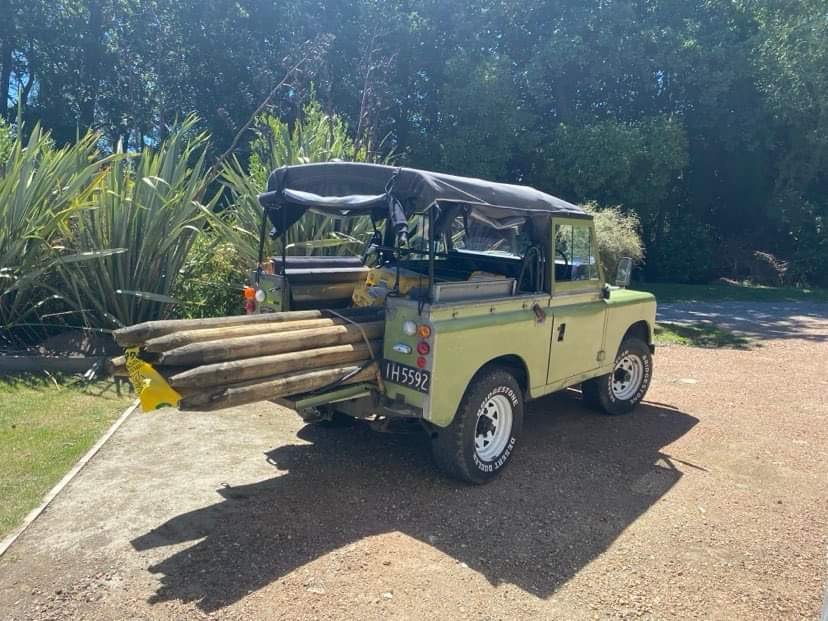
Seat belt bar arrived so fitted it a few weeks ago with a bit of ratchet strap persuasion Been using it to grab fencing supplies the last few weeks, can fit a 2.4 post in the back, less dodgy when weighed down by a few bags of premix Next job is to replace the gear selector detent springs, sometimes it doesn’t want to deselect gears or it’ll jam in gear, hopefully this fixes it.
6 points
-
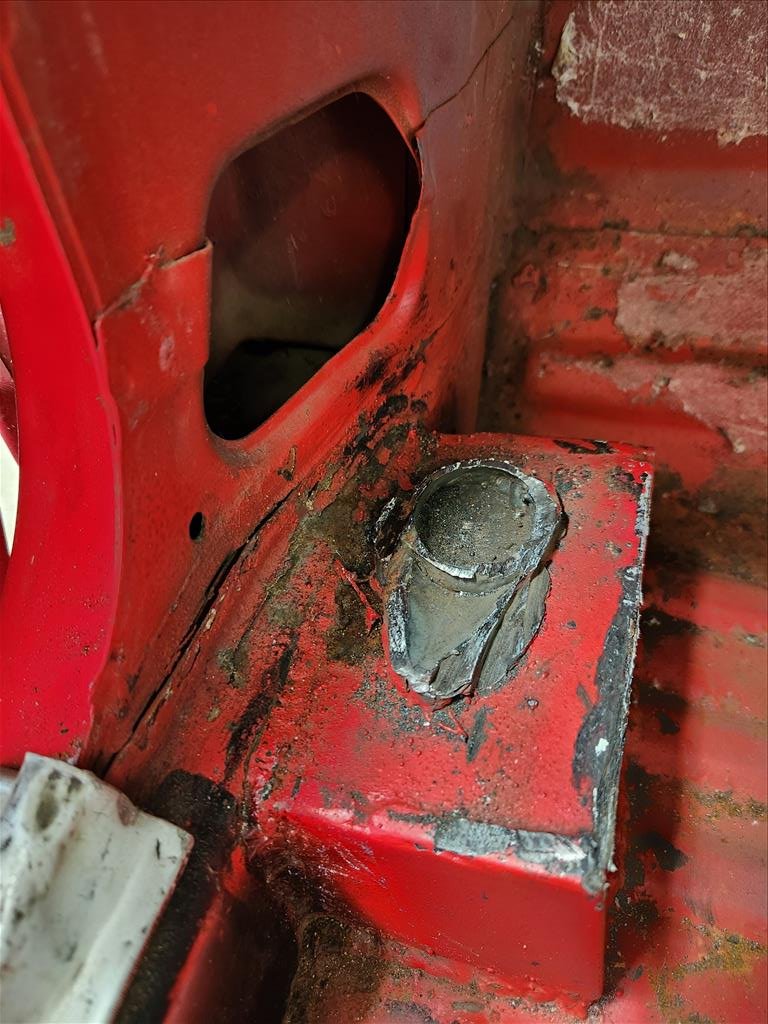
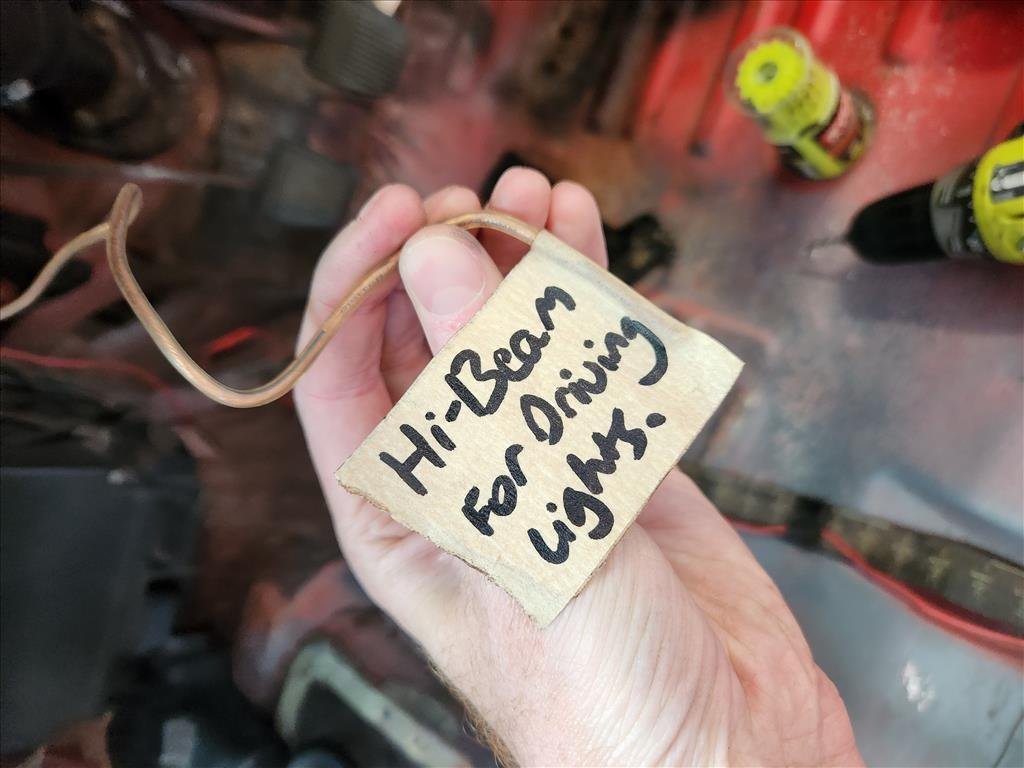
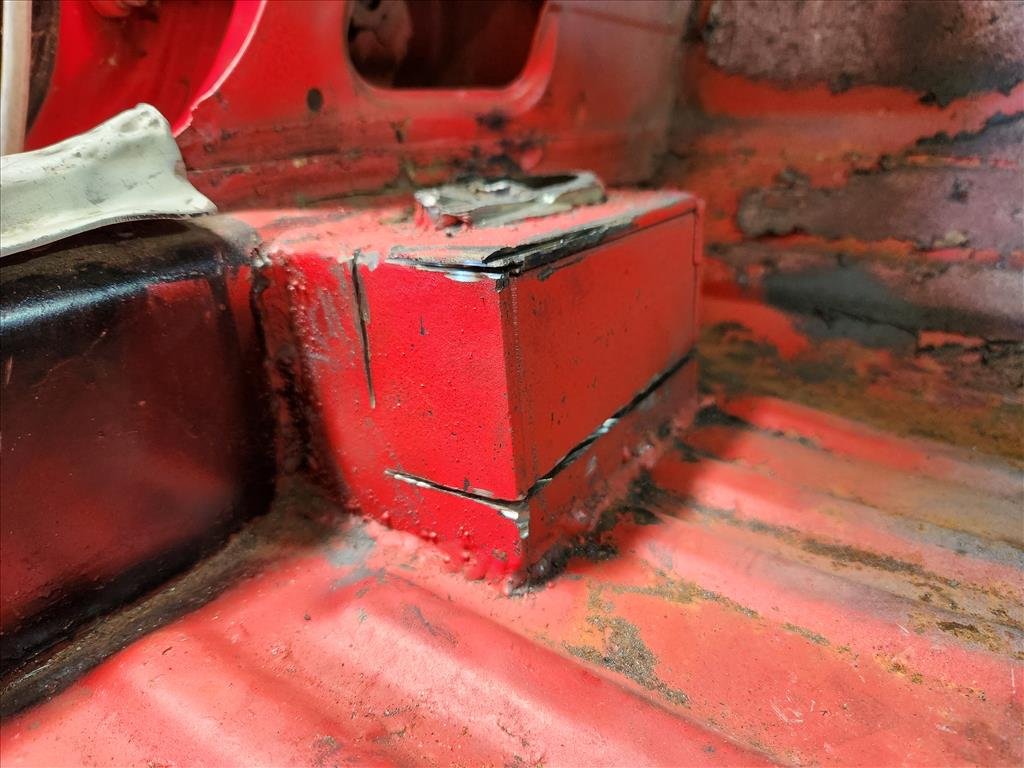
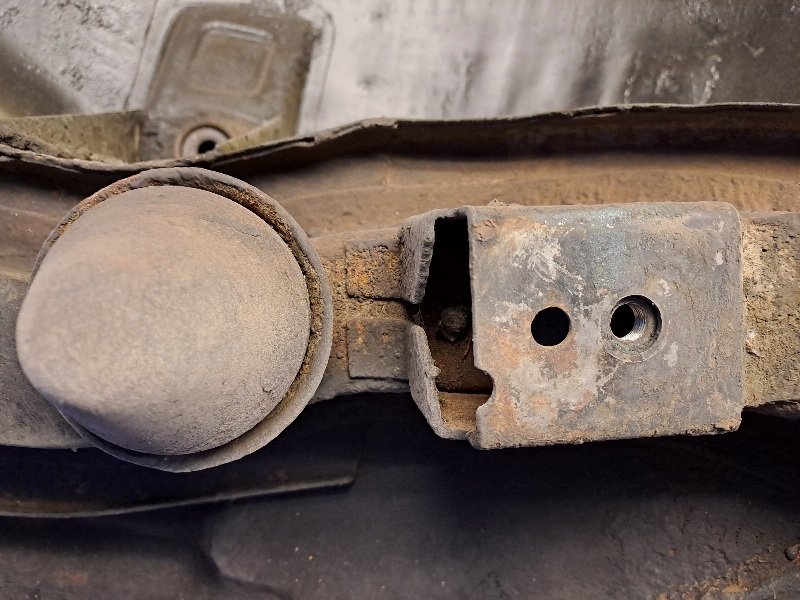
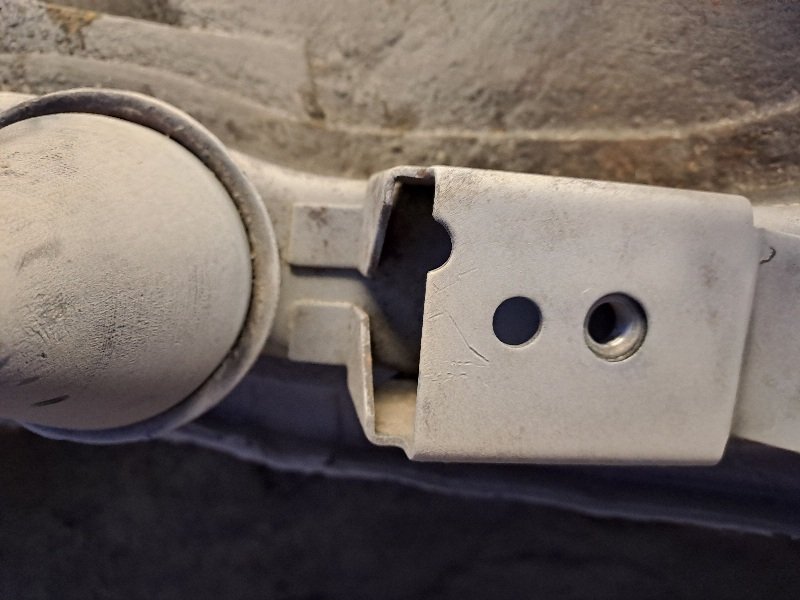
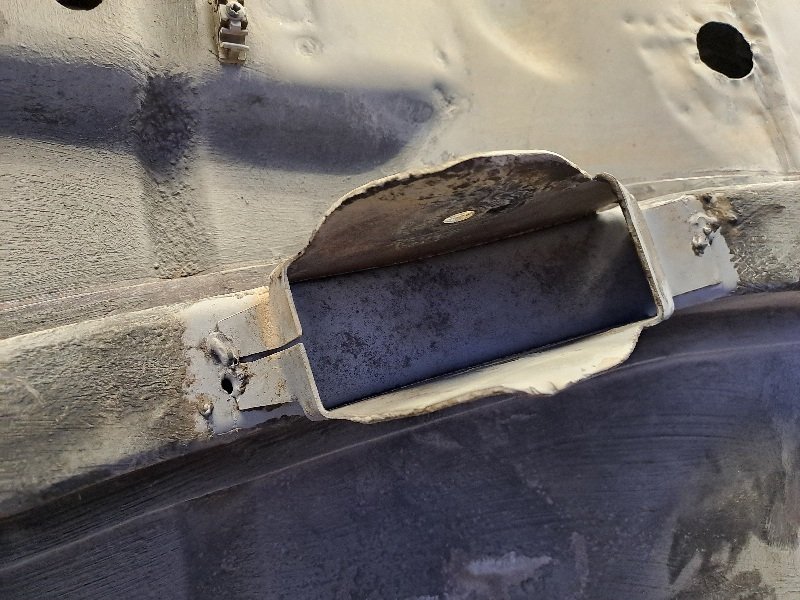
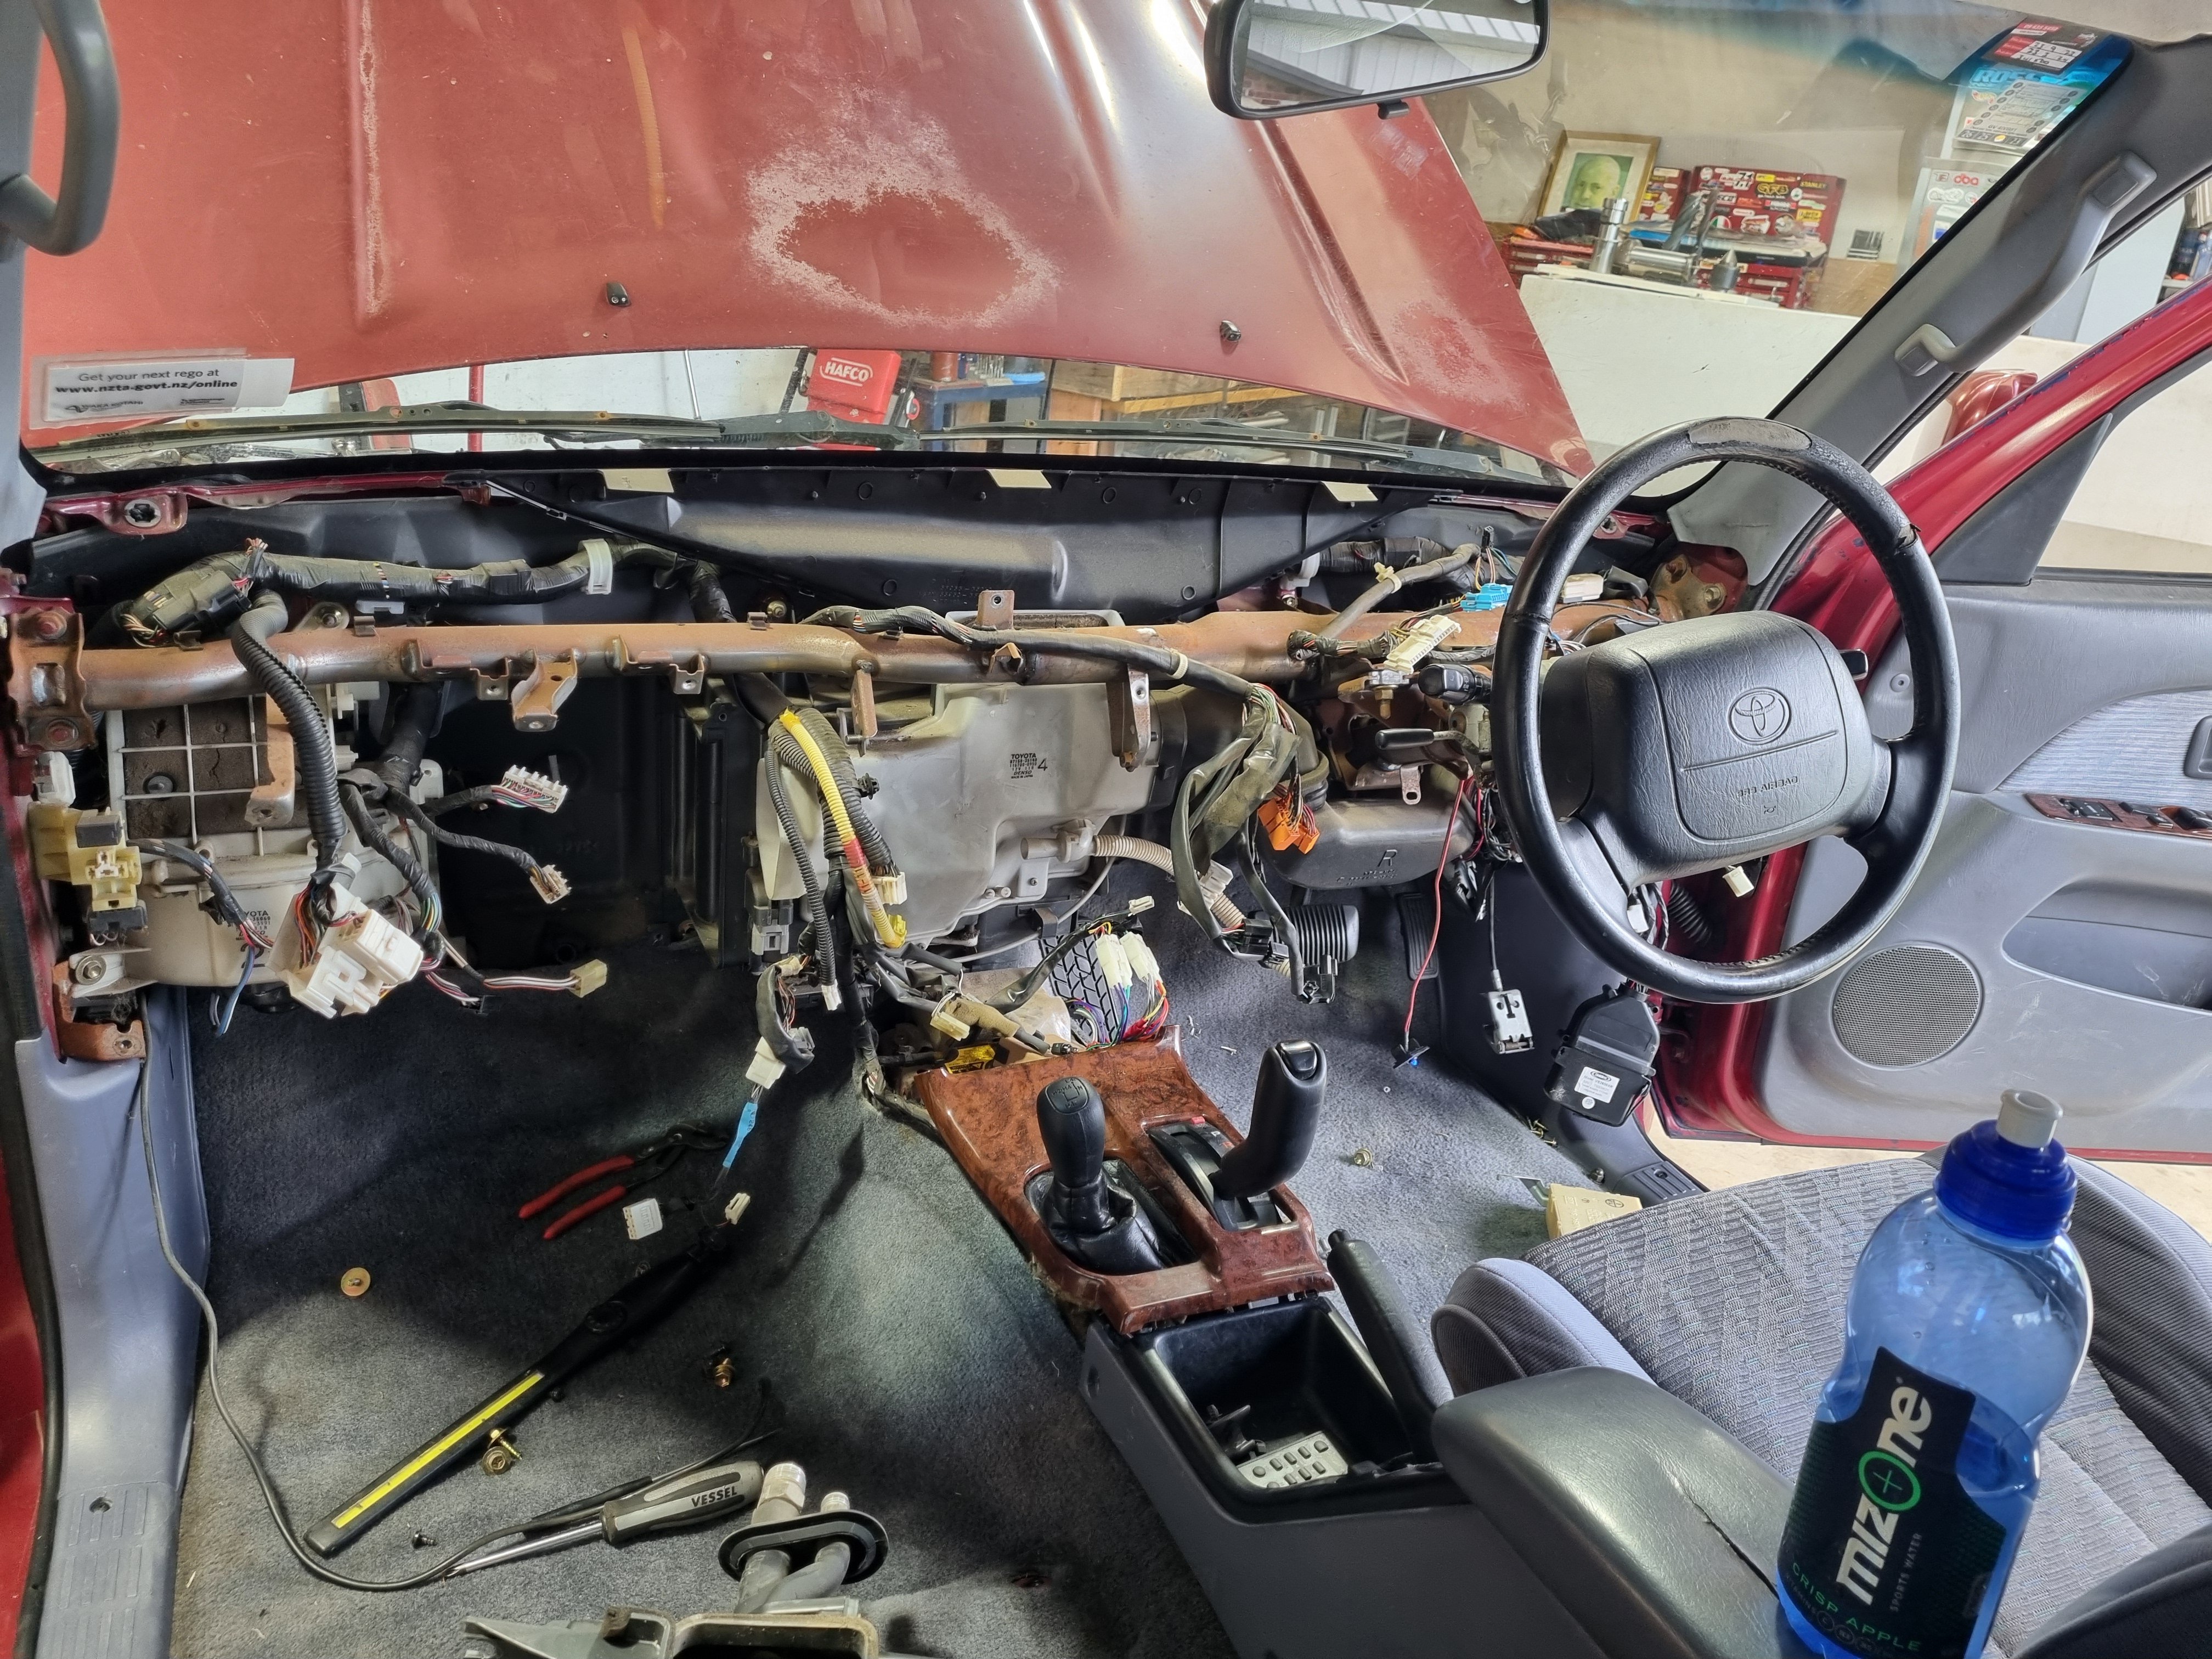
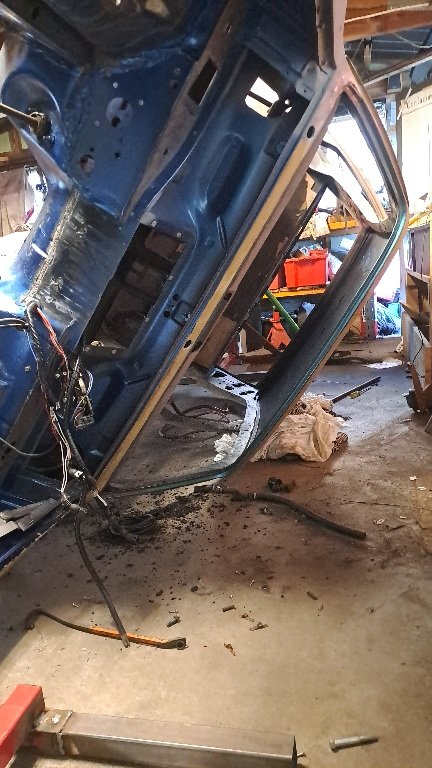
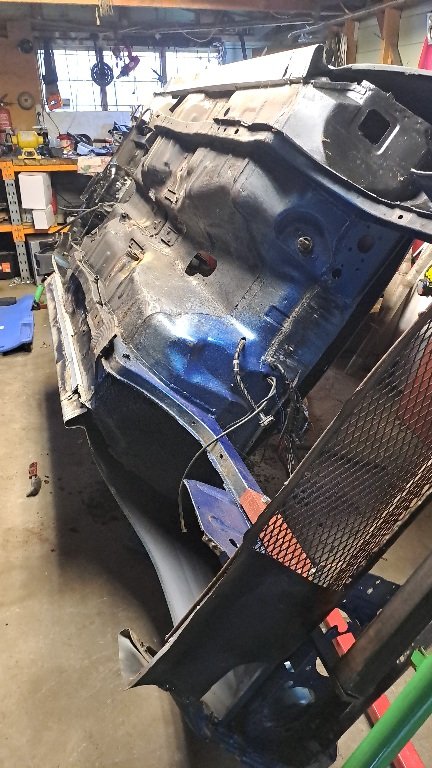
Two tasks planned for today, both failed. First task was to remove the dashboard. Reason for that is so I could check out some wiring behind it and also make sure I could eventually get as much undercoat sprayed up in as many areas as possible. Additionally I didn't want to damage it when trying to grind away the mounting blocks that were put in for the roll cage. After drilling out one broken screw and breaking the surround for the steering column unfortunately I did not get to take the dash out. I was thwarted by the choke cable knob that seemed like it was fused on by the nuclear power. I also didn't want to undo the choke cable from the engine bay and drag it all the way through as by this time my interest in that portion of the project had been depleted so I put it back together as best as I could and had lunch. I did find this gem under there which answers one puzzle about the headlights. After lunch I thought I'd see how I went with grinding away the roll cage boxes at the front. Unfortunately I could only access so much with the grinder and when I got to about here is where I gave up. Talking to some panel beaters the suggested method from a DIY point of view is reciprocating saw to get in as many cuts and angles as possible really and smash/grind out the rest. Just a shit job all around. Oh well, an excuse to get some more tools.
5 points
-
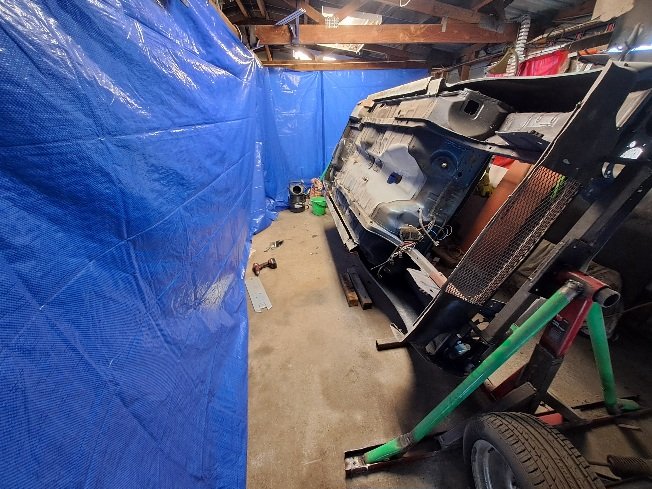
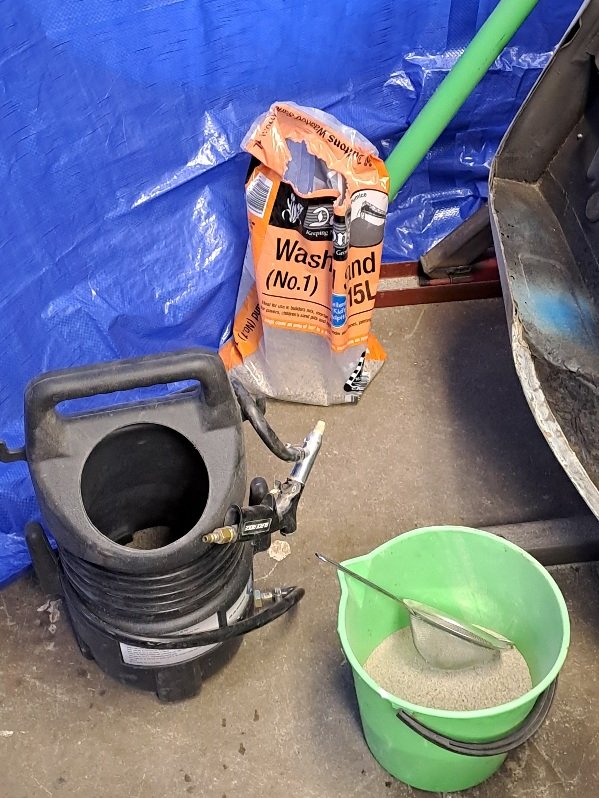
So time to attack the underside so I looked into how to do this. Acid dipping was going to be 1st option a place nearby but that was no longer around and closest place was tauranga with a 6 month wait? Next plan was sand blasting, the entire shell quoted was 3k so out of my budget. I decided to just go cheap and learn along the way. I first got a sandblaster unit from super cheap. For sand I bought a 10kg bag from bunnings. I fired up compressor and it was a fail. Sand would not flow, it was damp... adding water to it was a worse idea it blocked it entirely. I undid hose and blew it out. So wet sand and water was a no go. Dry sand only. Tipped the entire bag out on clean concrete floor to dry, then sifted it into bucket ready for launch. I then made slight increases to the diameter for sand input and the air hole. Since this stuff goes everywhere I put a tarp up and wore a mask and welding helmet for protection. Had the fan blowing dust outside and got cracking into it. These are the 2 sides as a comparison, check out the horrid welds? These are factory or before my time...
5 points
-
New AC system. As previously I bought one of everything from rock auto. Then I installed it. It was quite the job to get the TX valve out but yea whatever. I still have to fit a fan to the condenser, factory they don't have one which doesn't do the rest of the system a lot of good and is the reason why the TX valves shit themselves.
5 points
-
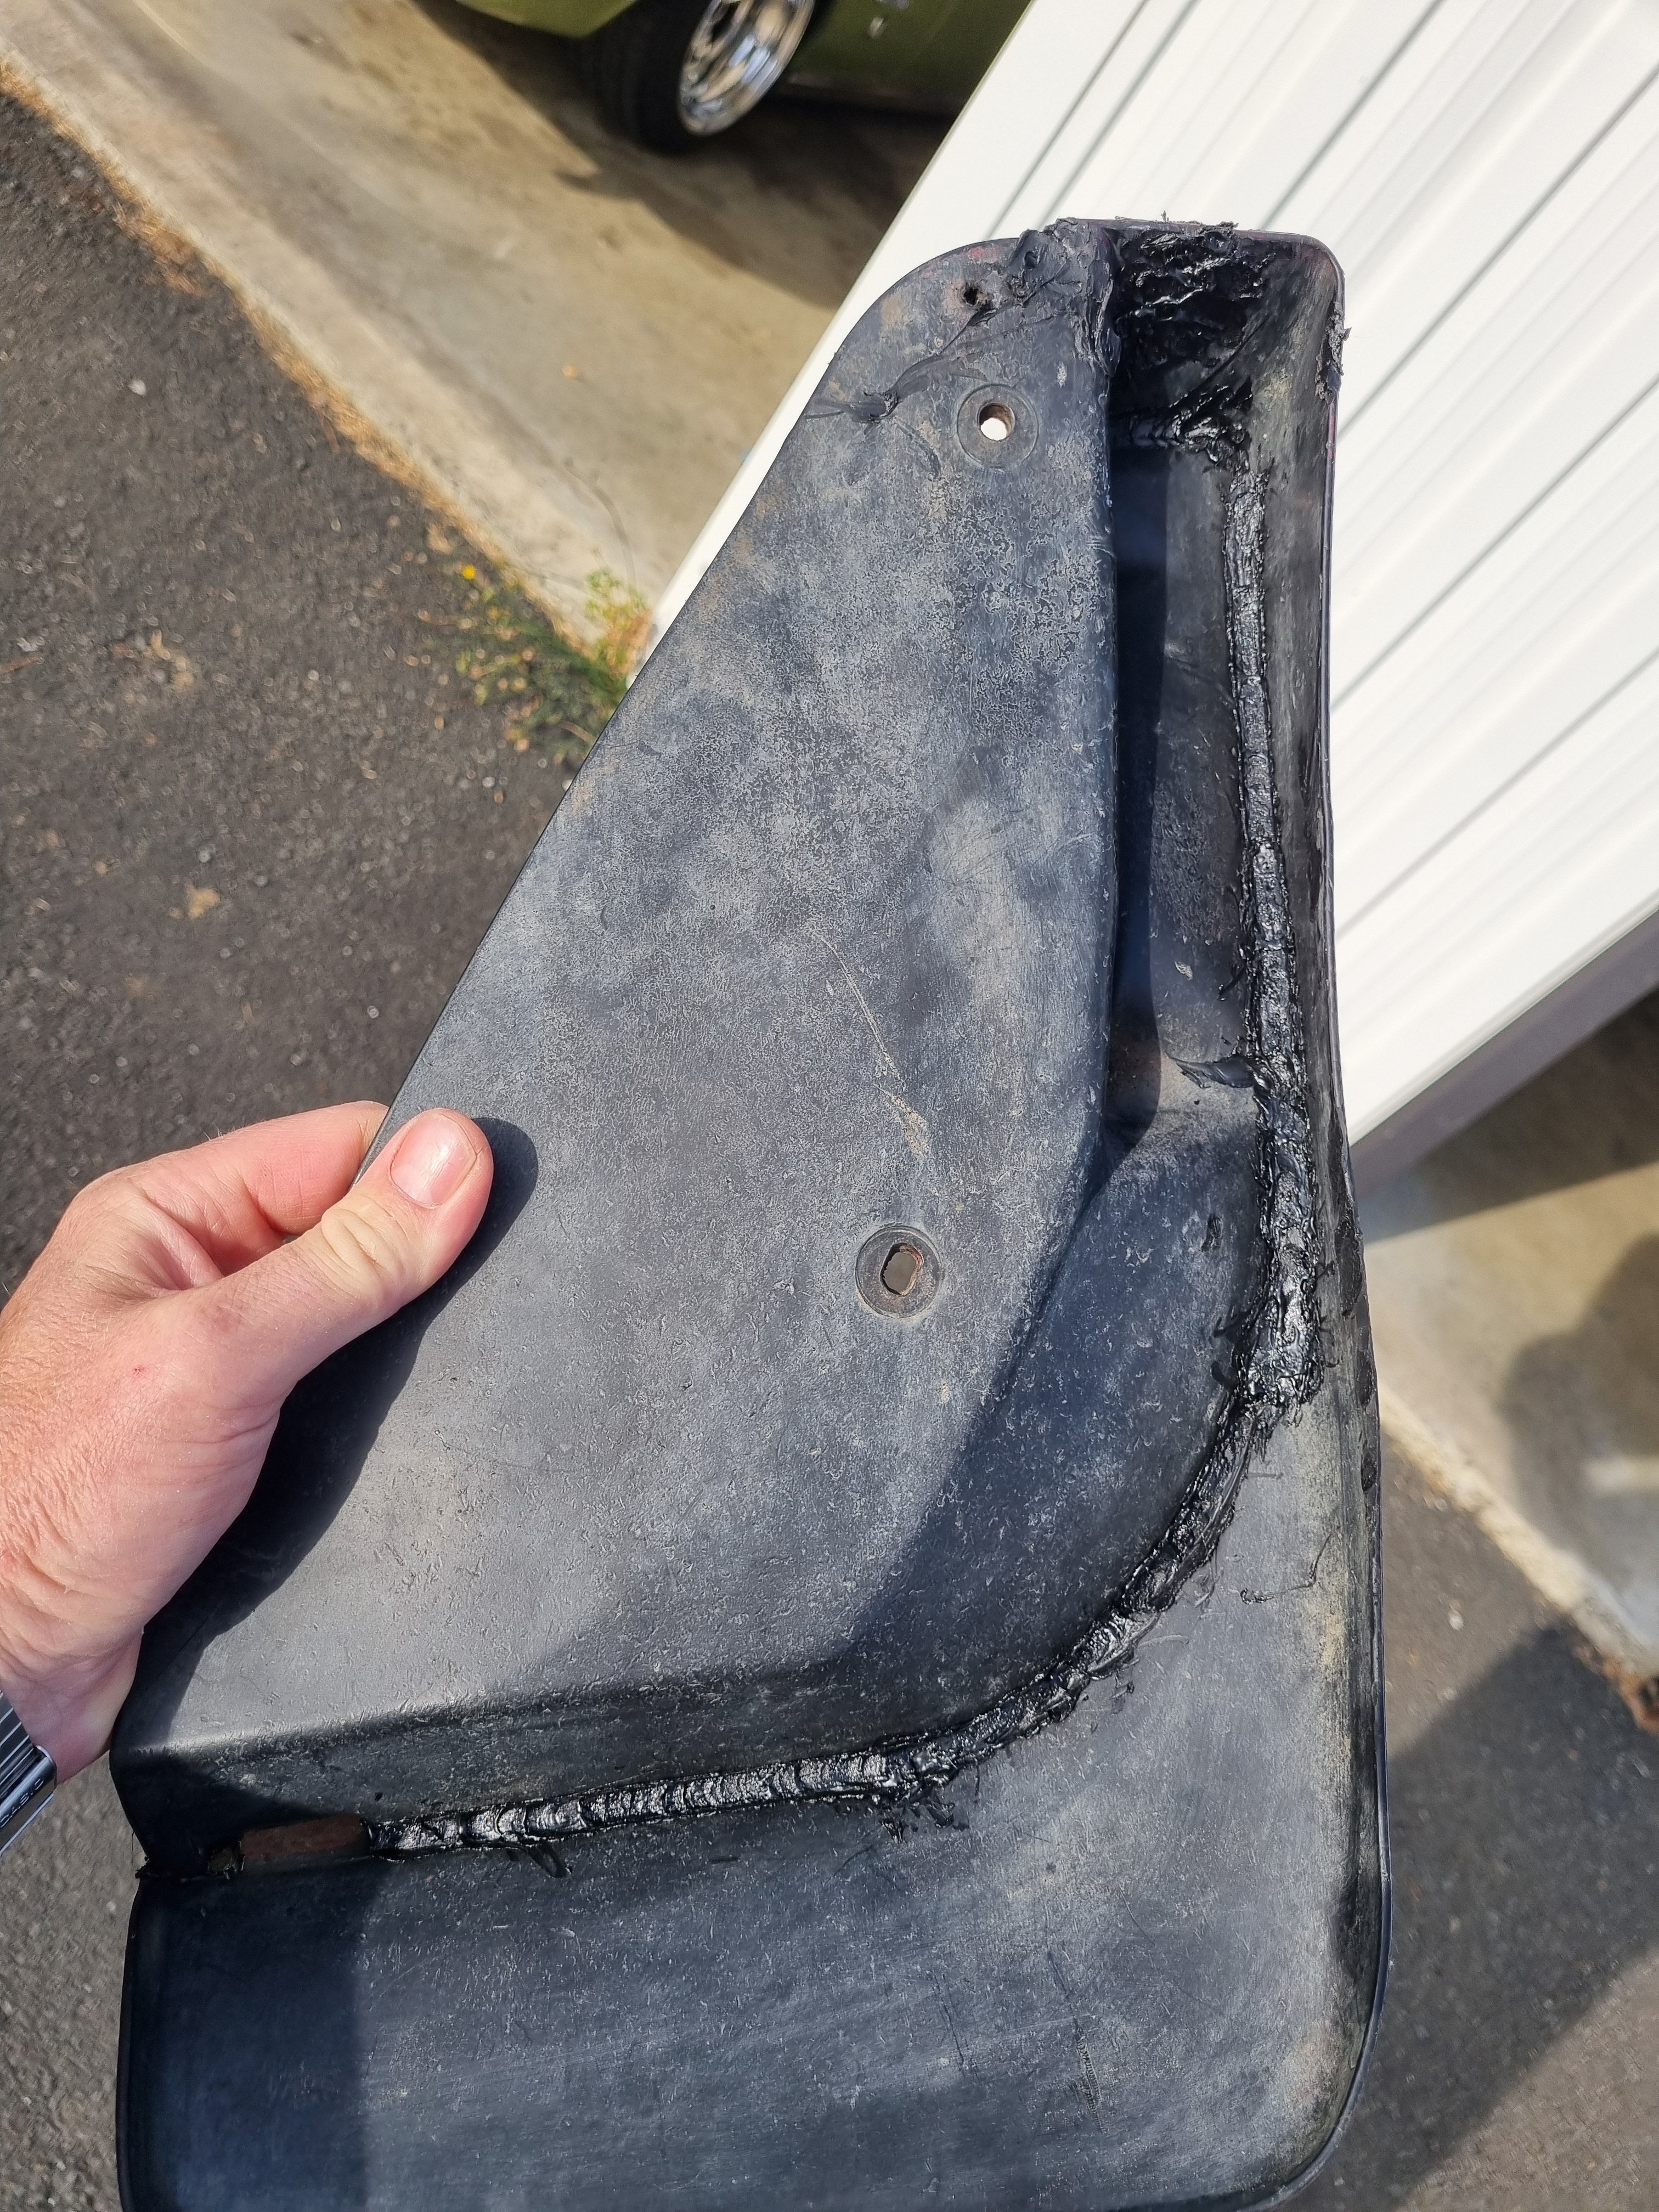
Also shit I forgot to mention that I put the rear bumper back on. This was harder then it sounds but basically I pulled all the brackets apart, soaked them in evoporust for a few days then painted them all. I beat most of the dents out of the side bits and then bolted it all back in. One of the mud flaps was broken in two so I welded it beck together with a soldering iron using cable ties for welding rod. Is it good as new? No. Will it last a thousand years? Also no But it's back on the truck and works until it doesn't so I'm calling it a win.
4 points
-
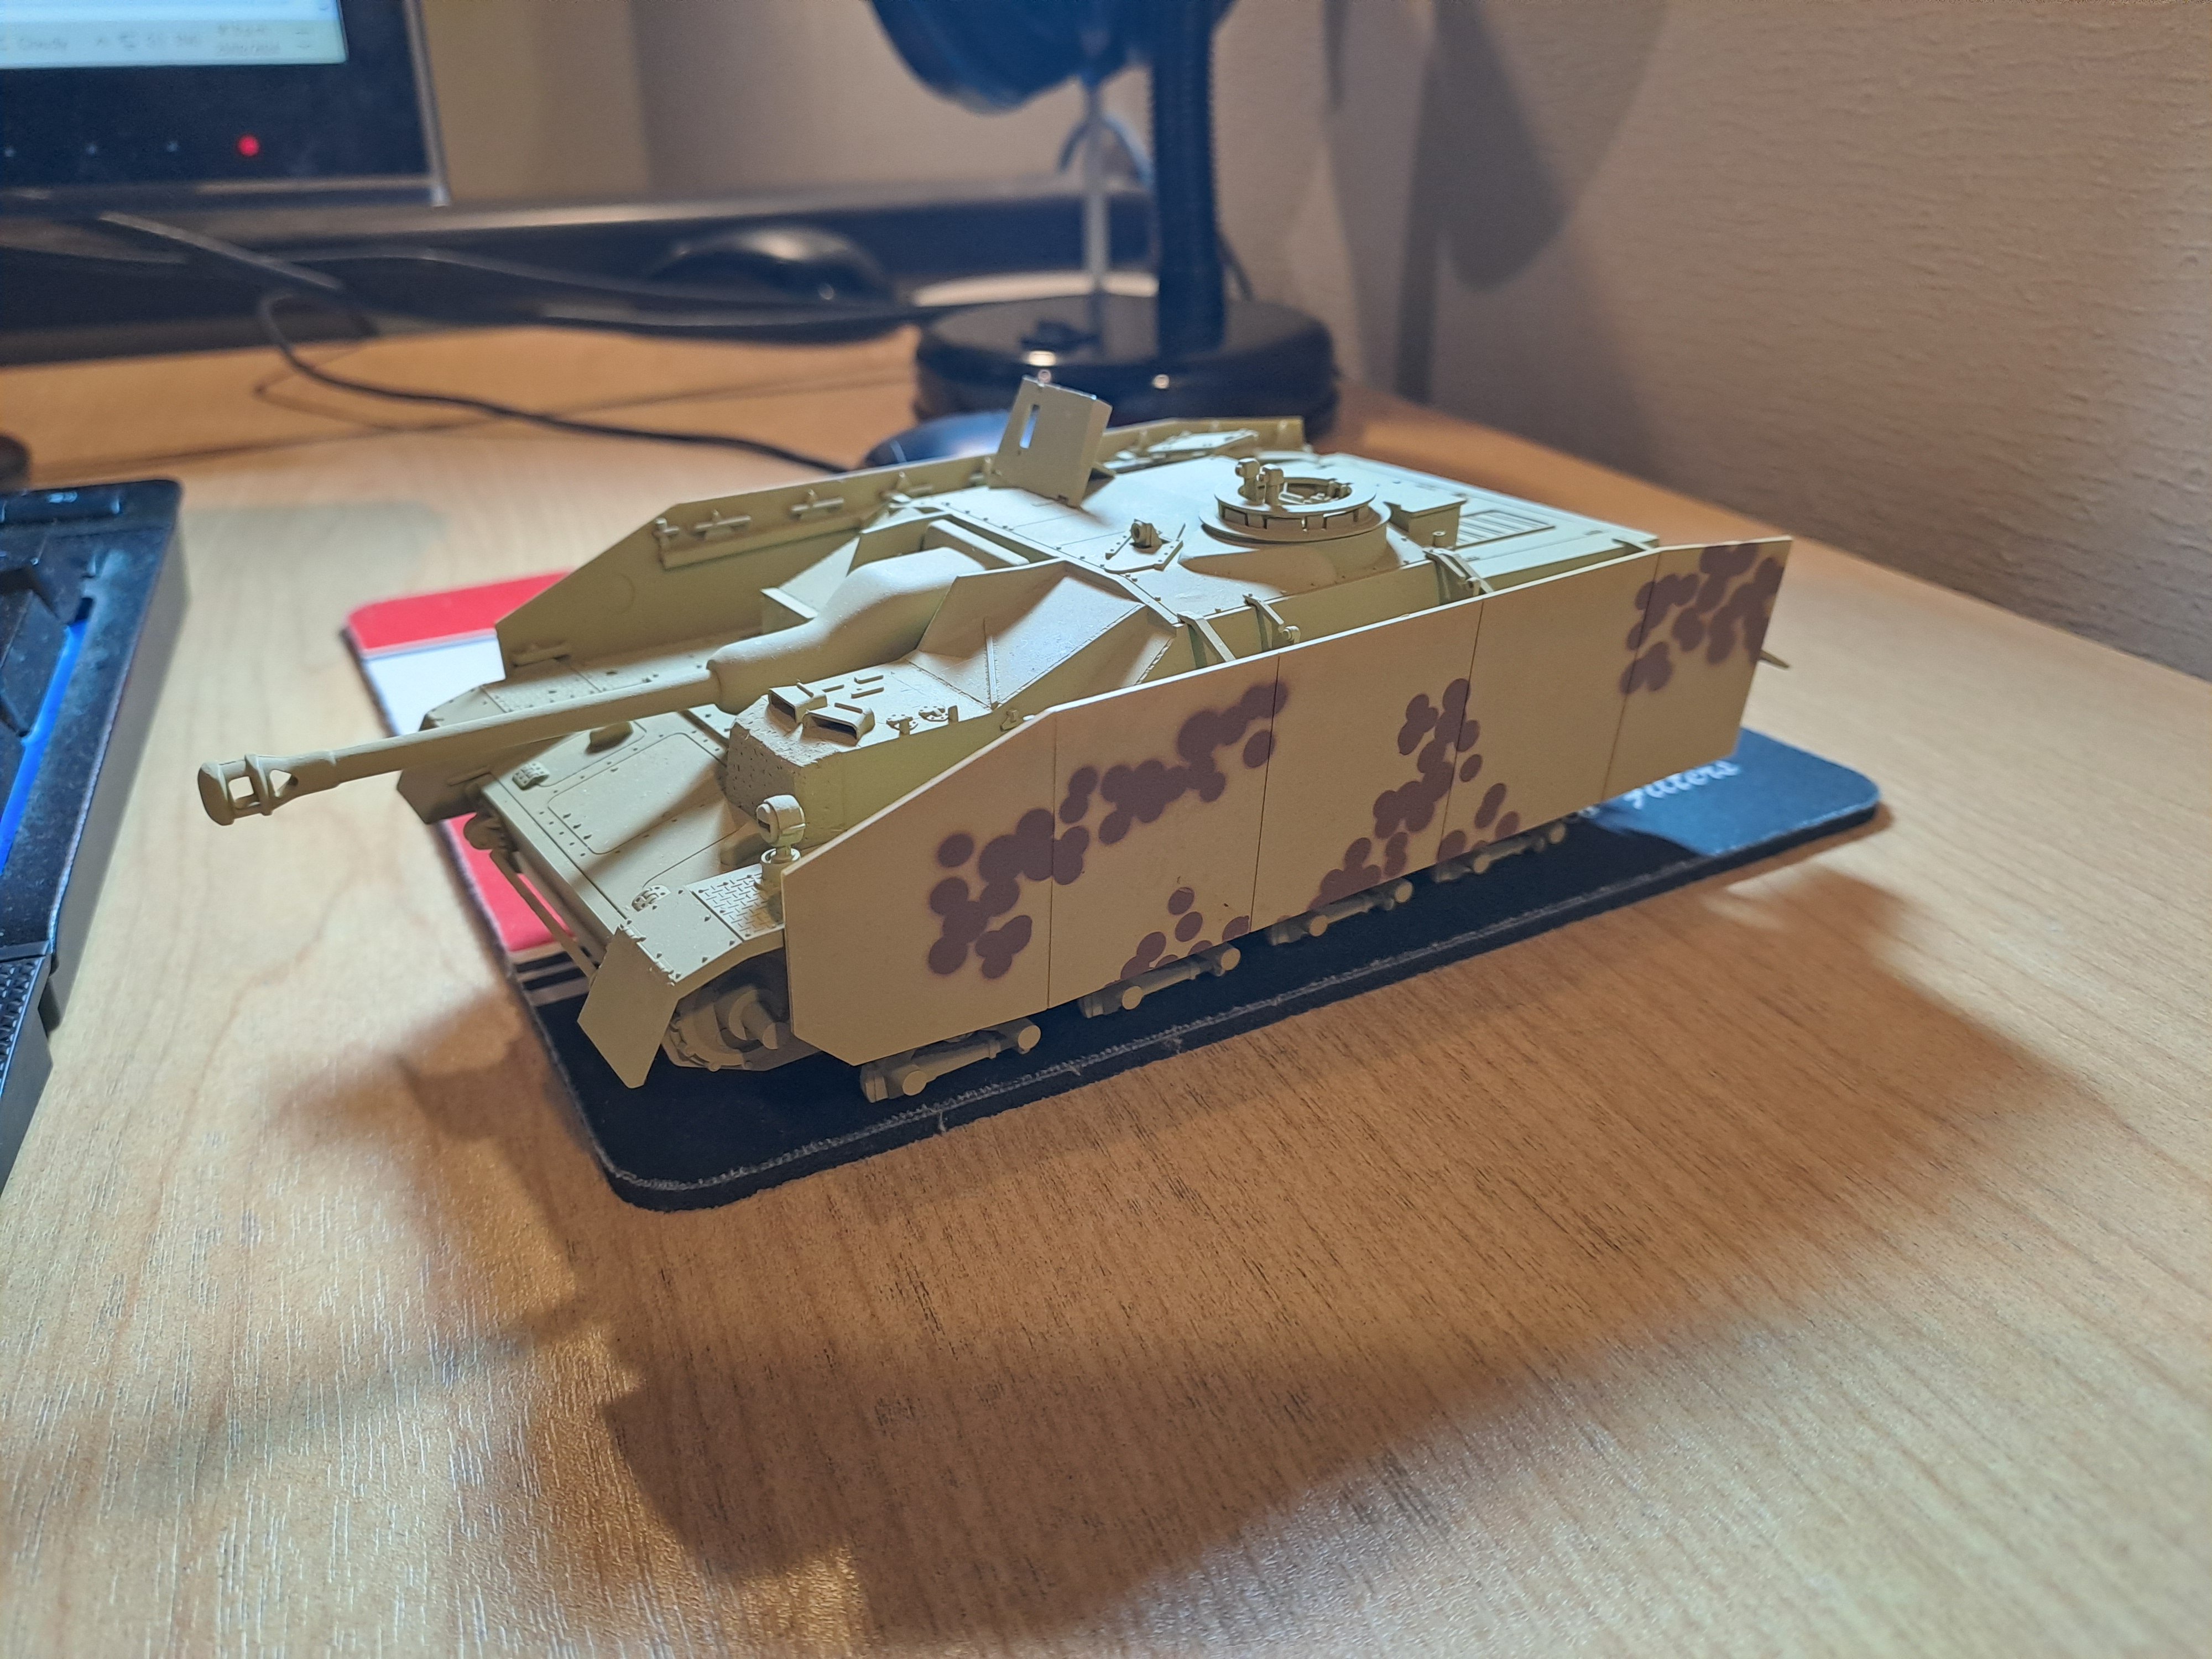
Got my stencils and have had a first go with the brown, green next. Also slowly working my way through the wheels.
3 points
-
Some small car enhancements, as opposed to some small car enhancements: Prius rear-view was vibrating a little on the trapezoid mount on the windscreen. This is a toyerda. We don't need that crap. we have other crap to enjoy. I got a bit of random skanky hose, put a scallop cut in one end to nudge the mirror stem. Boom. I now have crystal clear view of the cops following me who have zero interest in the Prius I'm driving. I'd cut down an window shade for the Dai, but it's missing a sun visor to hold the passenger side, so I hot-gooed some left-over Neodymium magnets to it. Now I don't have to bother fixing the actual problem:
3 points
-
Ha. So pretty much the day after I had cleaned up that old alternator up and got it running on the engine the second hand replacement for my original unit turned up in the post. It came with a 3 month warranty so I'd better check it works before stripping the engine of its ecu etc. Started to fit it and oh.. Poos. It wont fit. So I took it apart, along with the original.. Discovered its just the front housing that's different and I can swap them across.. So while its apart it would be rude not to clean all the parts up and polish it all (tempting fate just a bit...) Fitted to the engine and started it up. Yay - it works and it looks great, which is really quite important given its right there, in the middle on display. I'll keep the other one in storage just in case I need it one day. Now I could strip the engine back down, removing all the cooling, wiring and fuel lines that I had installed just for bench testing. Then I removed the transmission and put the engine back onto the engine stand 2000, stashing it away because its gearbox tinkering time. This Leone transmission has a few little issues that need sorting out in order for it to run in reverse rotation and not potentially turn itself into an expensive insinkerator or coffee grinder. I could probably get away without doing these modifications because the box is overbuilt for the application but I wanted peace of mind. Remember I had acquired the two gearboxes, 1600 and 1800 items, before getting the engine. Ages ago, in fact 4 years ago I think!!! I had wanted to know if it was feasible to run these boxes in reverse. This pic I posted up way back then gives a good idea on what's going on inside... I had already worked out some of the issues back then and knew what I was up for. With more study I found a couple of other areas that need addressing. Here's another bit of wonderful scribbling I did this evening.. The pink arrows show the new axial forces that are being imparted onto the main (driver) shaft and pinion (driven) shaft. The circles are areas that I think needed attention to make sure it doesn't throw it toys from the cot. 1 : the blue circle. Under high torque loads this area could possibly create the sound of nashing teeth but with much messier consequences. The top left one being the third gear driver wants to move to the right and clip the teeth on the bottom right second gear. In normal rotation they would move apart. There's 1mm of clearance there which is probably enough tbh. But I wanted a bit more and had already worked out how I could get it with no other issues and just a bit of tool making. Which is fun. 2 : The yellow circle. This ring was no going to take thrust loading. It is a strong ring and has a deep groove but I wanted to make sure there was no way it could ever shift. 3 : the green circle. In this area there is a thrust bearing that also acts as a neat little oil pump and squeezes oil through the gear hubs/bushes. Under the new loading the thrust aspect is removed but I still wanted to it pump oil and it was going to be the wrong shape to do so in reverse rotation. So I set to work and checked off each job. I made a bolt holder for ease of reassembly - several different sizes and lengths. Once apart I started with the gear side clearance. First off I needed to split the mainshaft assembly down. 4 years ago I had out of interest tried using a puller on the spare 1600 box, which shares the same layout and design but with smaller parts in many cases. The puller didn't work. But this time round I have the rather handy workshop press I made. I just needed some extra tooling to do this job. Starting with some press plates... Allowing me to carefully press the shaft out... Because I'm not posh (or rich) enough to own a surface grinder I needed to make one. Yes its a bit basic but it will work. I made this... Which allowed me to do this.... I ended up with this gear having the 0.5mm more clearance I wanted. Super happy with the result. Now onto number 3 - the little oil pumpy thingee. I went to my friendly engineering workshop in town and got a big lump of 4140 steel. I drilled it out... Machined out a ring which had to be an exact width. Just in case it needed finishing after the hardening process I made an abor to take it.. I carefully machined it to the right profile, cut the sides down and filed the shapes in, just like the original but in reverse. Happy it was going to work I heat treated it. I have not done any heat treating for over 25 years since I spent a fair bit of time in the blacksmith department while doing my apprenticeship. But it wasn't a super loaded critical component and just had to have a durable hard surface. I didn't take any photos. Hannah was there helping as I carefully heated it up with the oxycet to the austenitic stage and agitated it in some lovely rice bran oil (because I can be posh sometimes) then slapped it in the oven to temper it... Following morning I polished it. It came up sweet and the old file test showed it to be as hard as the oem item. You can see the reversed design here... Here's a little vid I took showing it in action... While stripping the mainshaft down I was also pleasantly surprised to discover that this 1800 box has needle bearings in all of the gear hubs unlike the 1600 box which uses bushes on the mainshaft. So oil starvation would not have been as much of an issue but I'm still really happy I did this modification. Last issue to sort was number two - that ring on the bearing. It would hold fine I'm sure but if could make it bulletproof then why not - it's just a bit of extra machining. I started with another lump of high tensile steel and machined out a ring to suit... This fits over the other ring and then the main thrust plate that sits over the bearing was machined out to suit my reinforcement ring. Its all held in place by the end housing which I have yet to fit. All the potential issues covered I set to cleaning out the casing and then started reassembly. In doing so I discovered that the original axle seals are sided on these boxes. They have those helical lines on the lip surfaces which aid in pulling/pumping oil back into the oil side of the lip ( the lip does not actually touch the steel when the axle is moving and in fact runs on a tiny bed of oil) which I had not realised before I'd bought plain lip seals from an engineering supplies. This pumping capacity is shown to be twice as high in helixed seals. Subaru fit left and right handed items. But I'm running mine in reverse. Luckily the originals were in excellent condition anyway so I machined up a stepped tool, popped them out and swapped them to the other side. The diff axle seal surfaces came up good after a clean. Cute little diff.. I'm now about ready to put some 3 bond gloop on the case half and drop the other side in place. Its looking all very nice, clean and shiny in there...3 points
-
Have being doing a lot of stuff recently to try get this ready for beachop. The doors now open electronically with the small spring loaded knobs next to the window. And lock using the factory lexus Remote. Door Rubbers are all on. Window rubbers are all glued up. Bitumen sound deadening in the doors. Is much more of a pleasure to drive. Even with the door cards off. Reversing Lights added and wired in. Have moved on to version2 of the boss air struts. Such a better product. No welding the bush onto the bottom, they come with a threaded boss on the bottom and a range of Threaded mount options. Also a 1/8 female npt hole for the air supply. Instead of the Hydraulic style male fitting and hose they had before. Made it to the last southwards Cars and Coffee in Kapiti. Excellent morning out with lots of cool cars to see. Matts & mine were easily the lowest cars present. Had forgotten about the 1954 210 inside. Was a nice surprise. Have also put a false floor in the trunk. With a 4 channel amp beneath that. On top of the space saver. Wired into the parcel shelf speakers and ready to wire into the front door speakers this weekend. Have an infinity Bluetooth Amp adapter to wire in, instead of a headunit. (despite costing more than a decent headunit) Also next up is to get some gas struts onto the hood. in place where the springs would of been. As at highway speed the hood likes to lift and float around. And is quite disheartening at 100kmh.
2 points
-
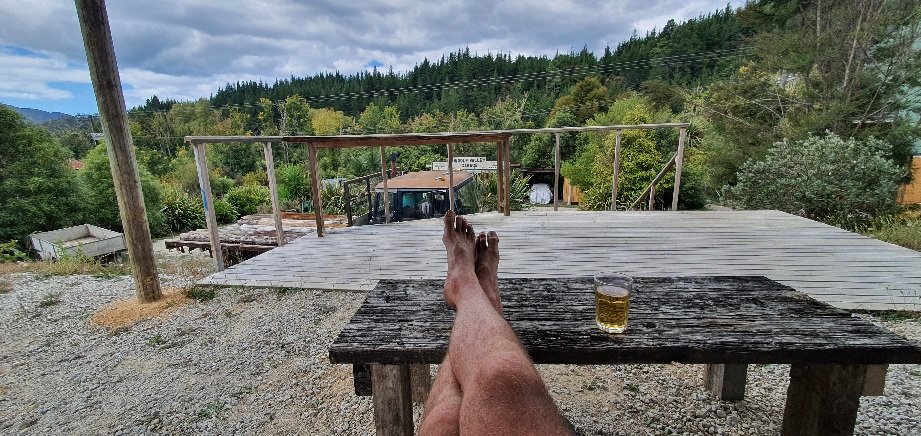
Now to enjoy it
2 points
-
Some things fell out and that's ok
2 points
-
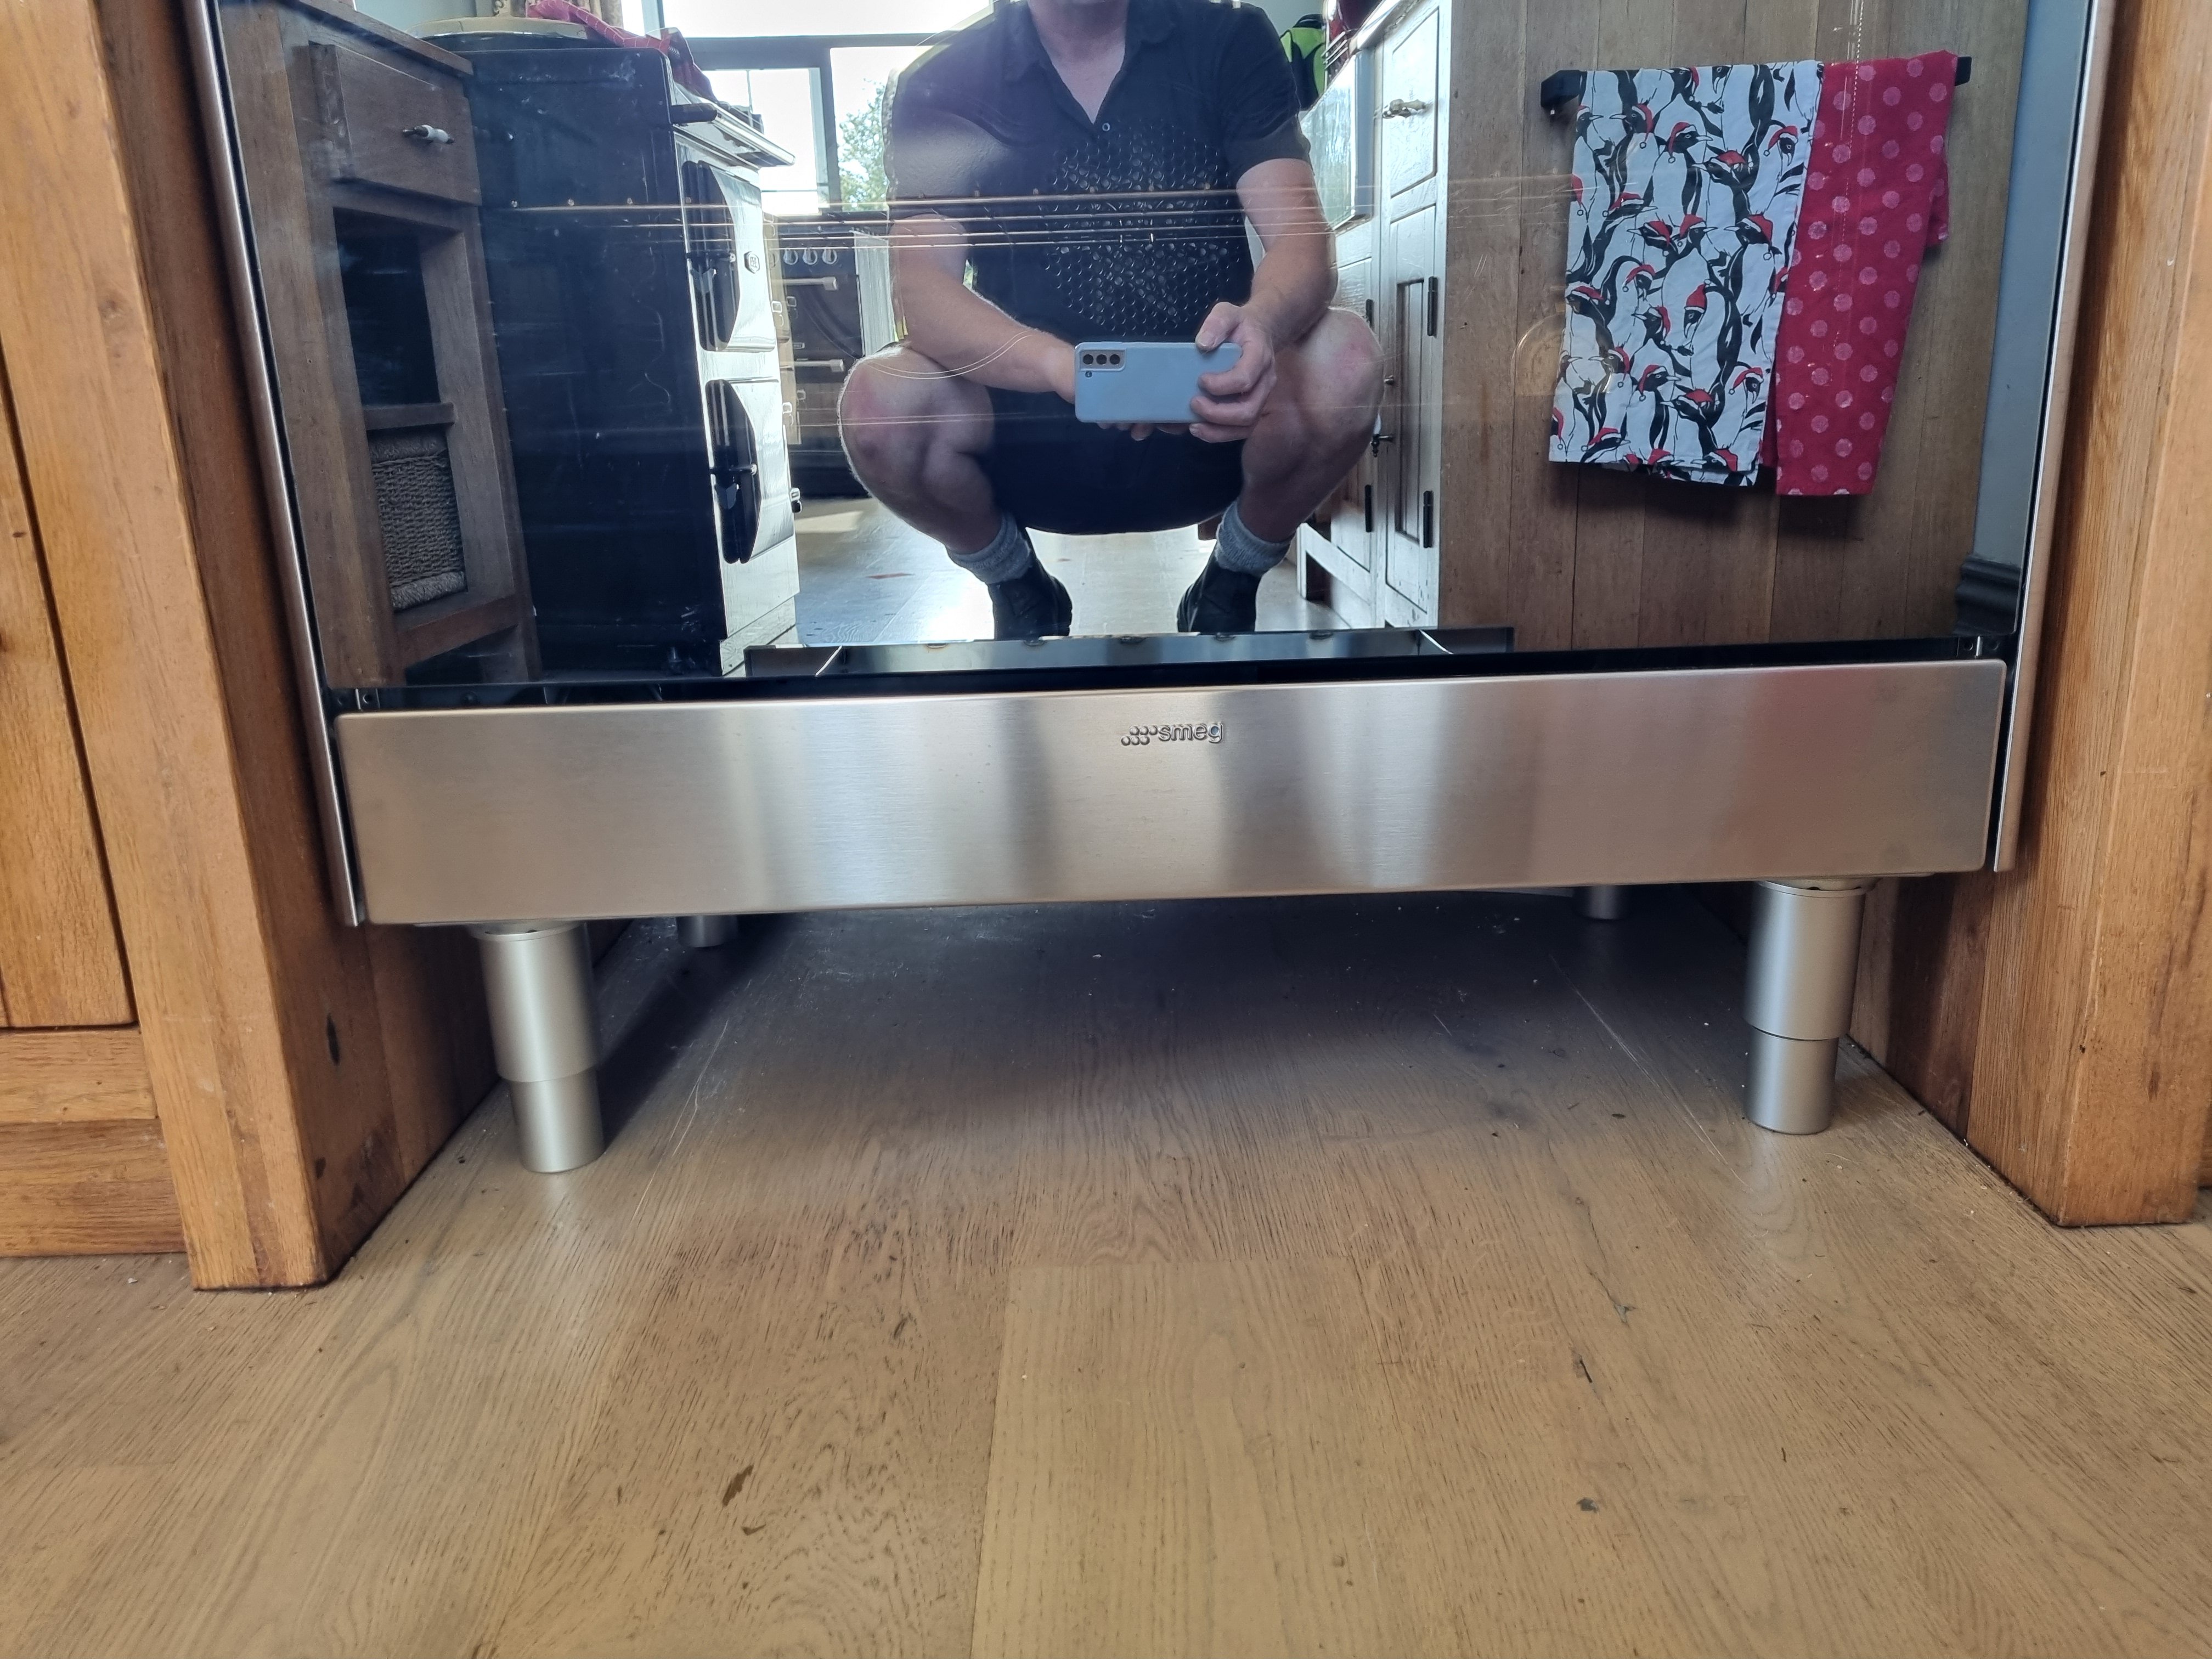
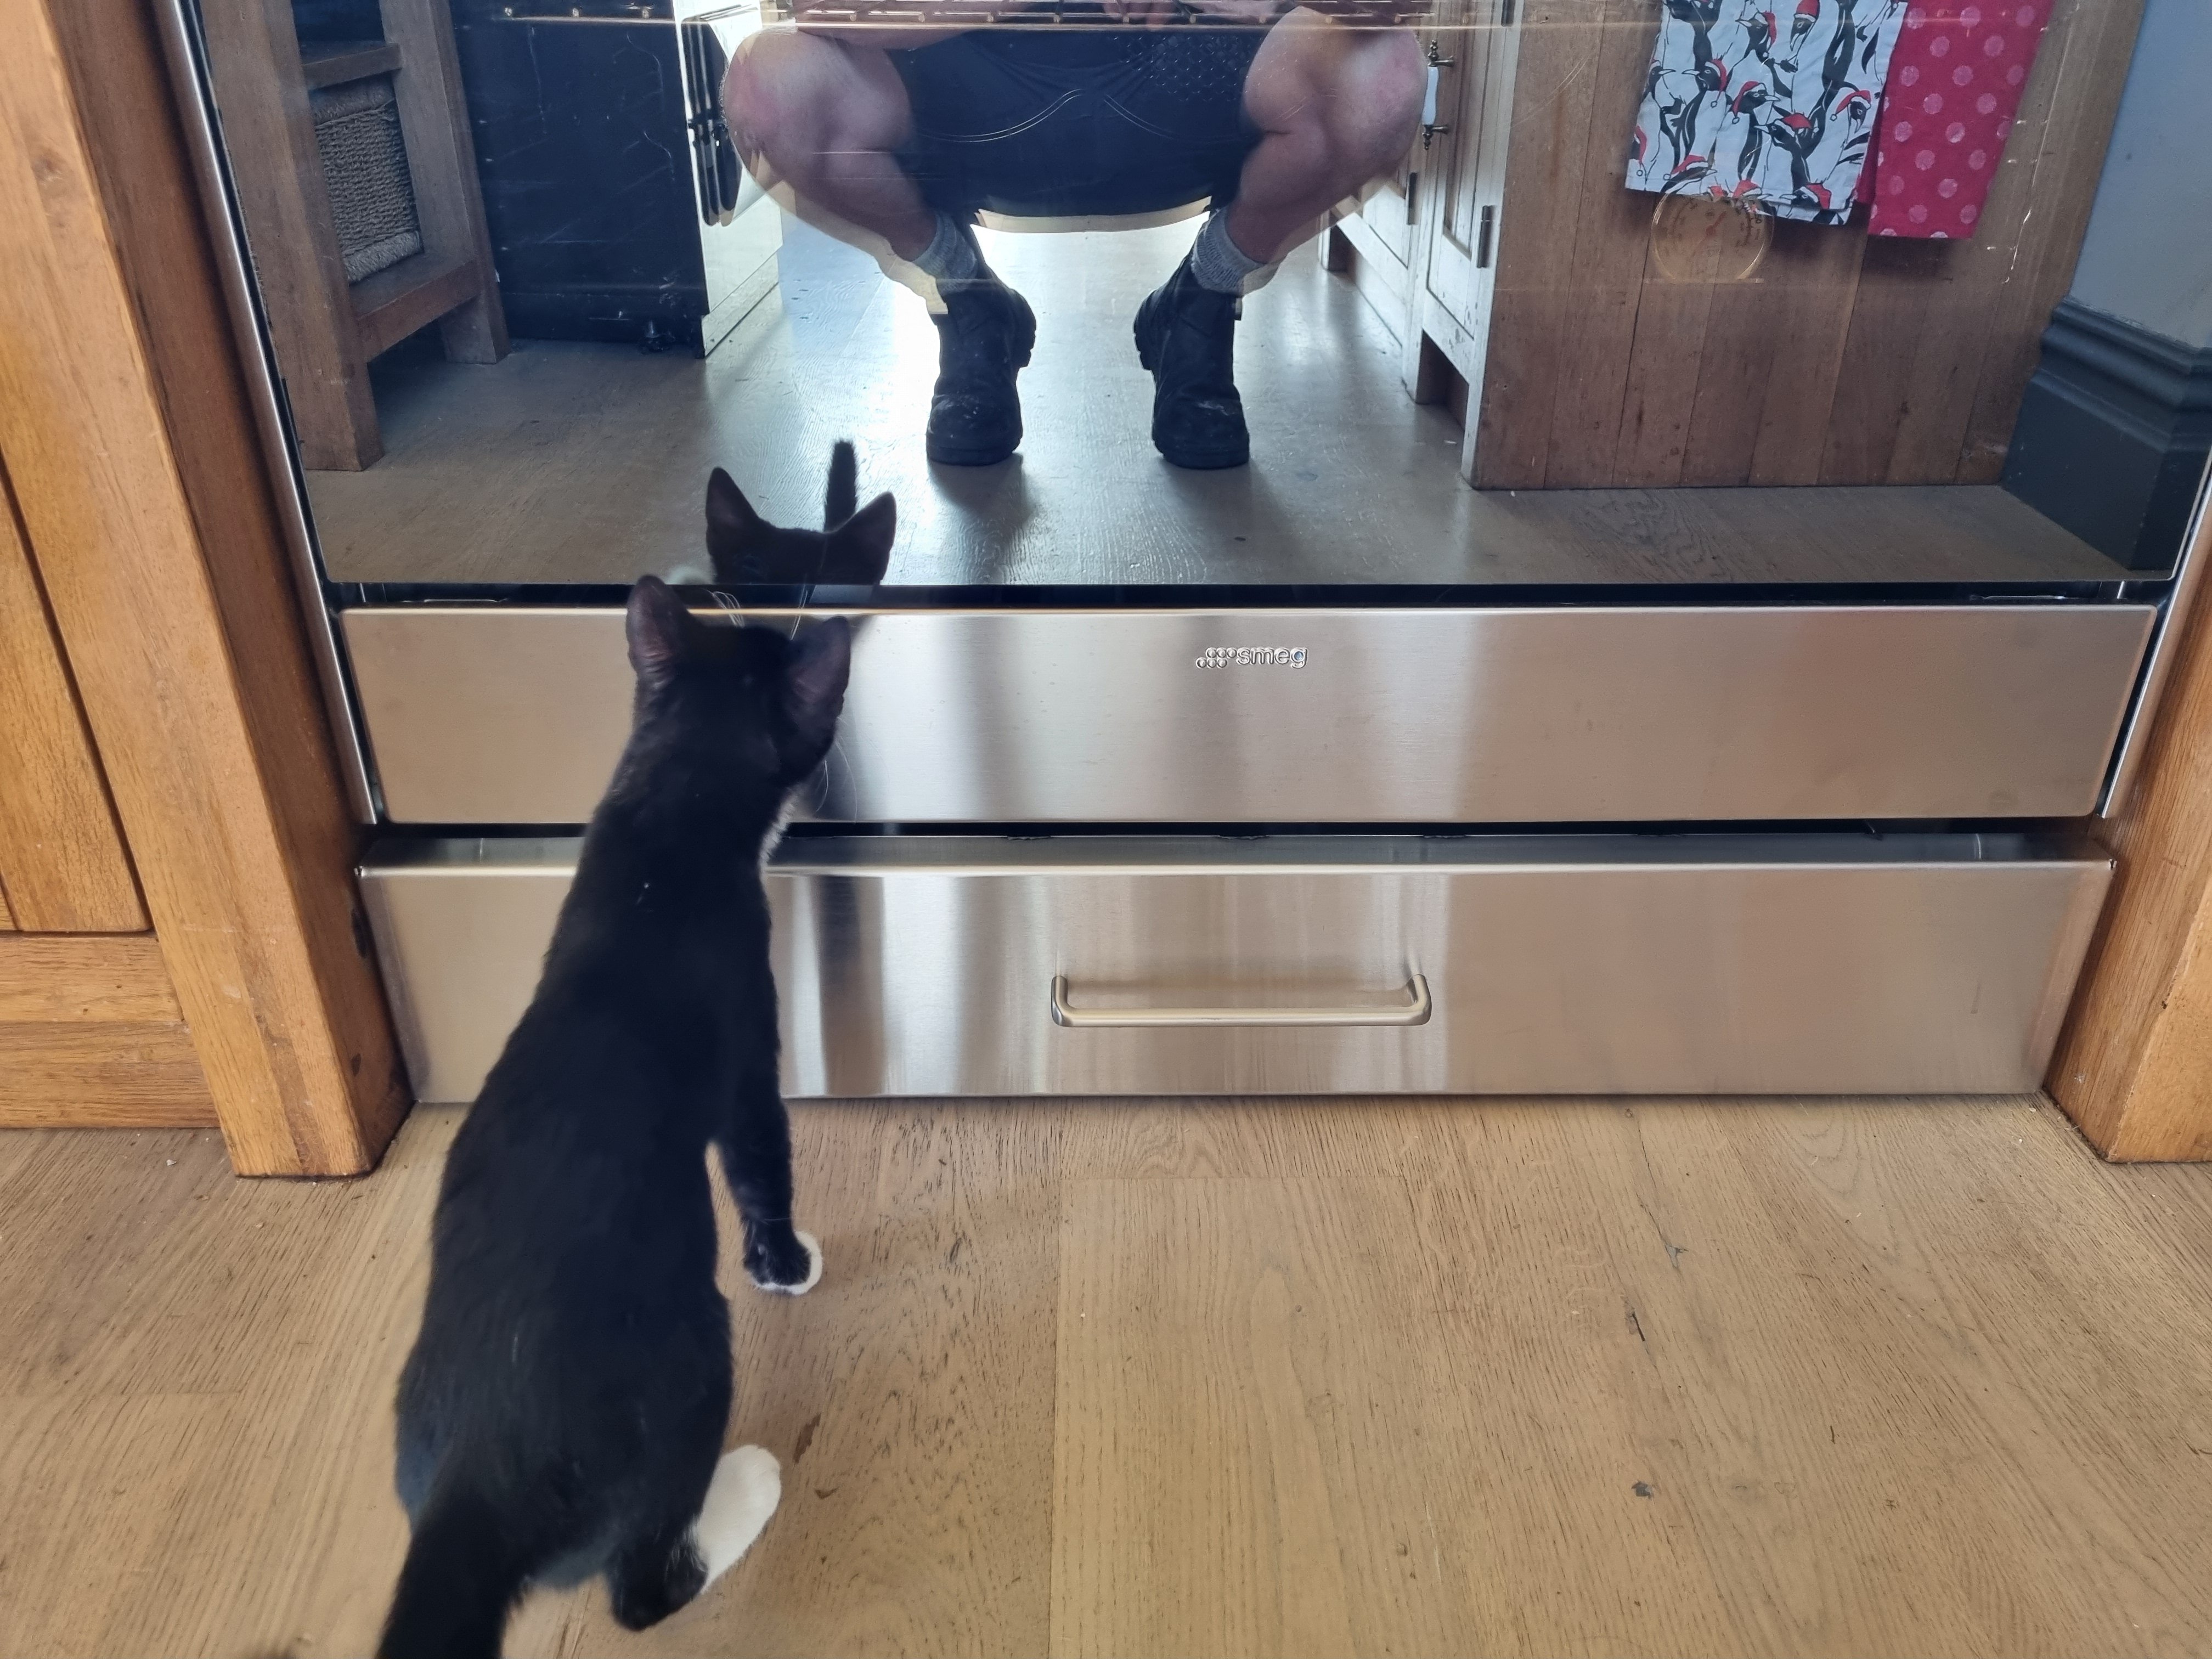
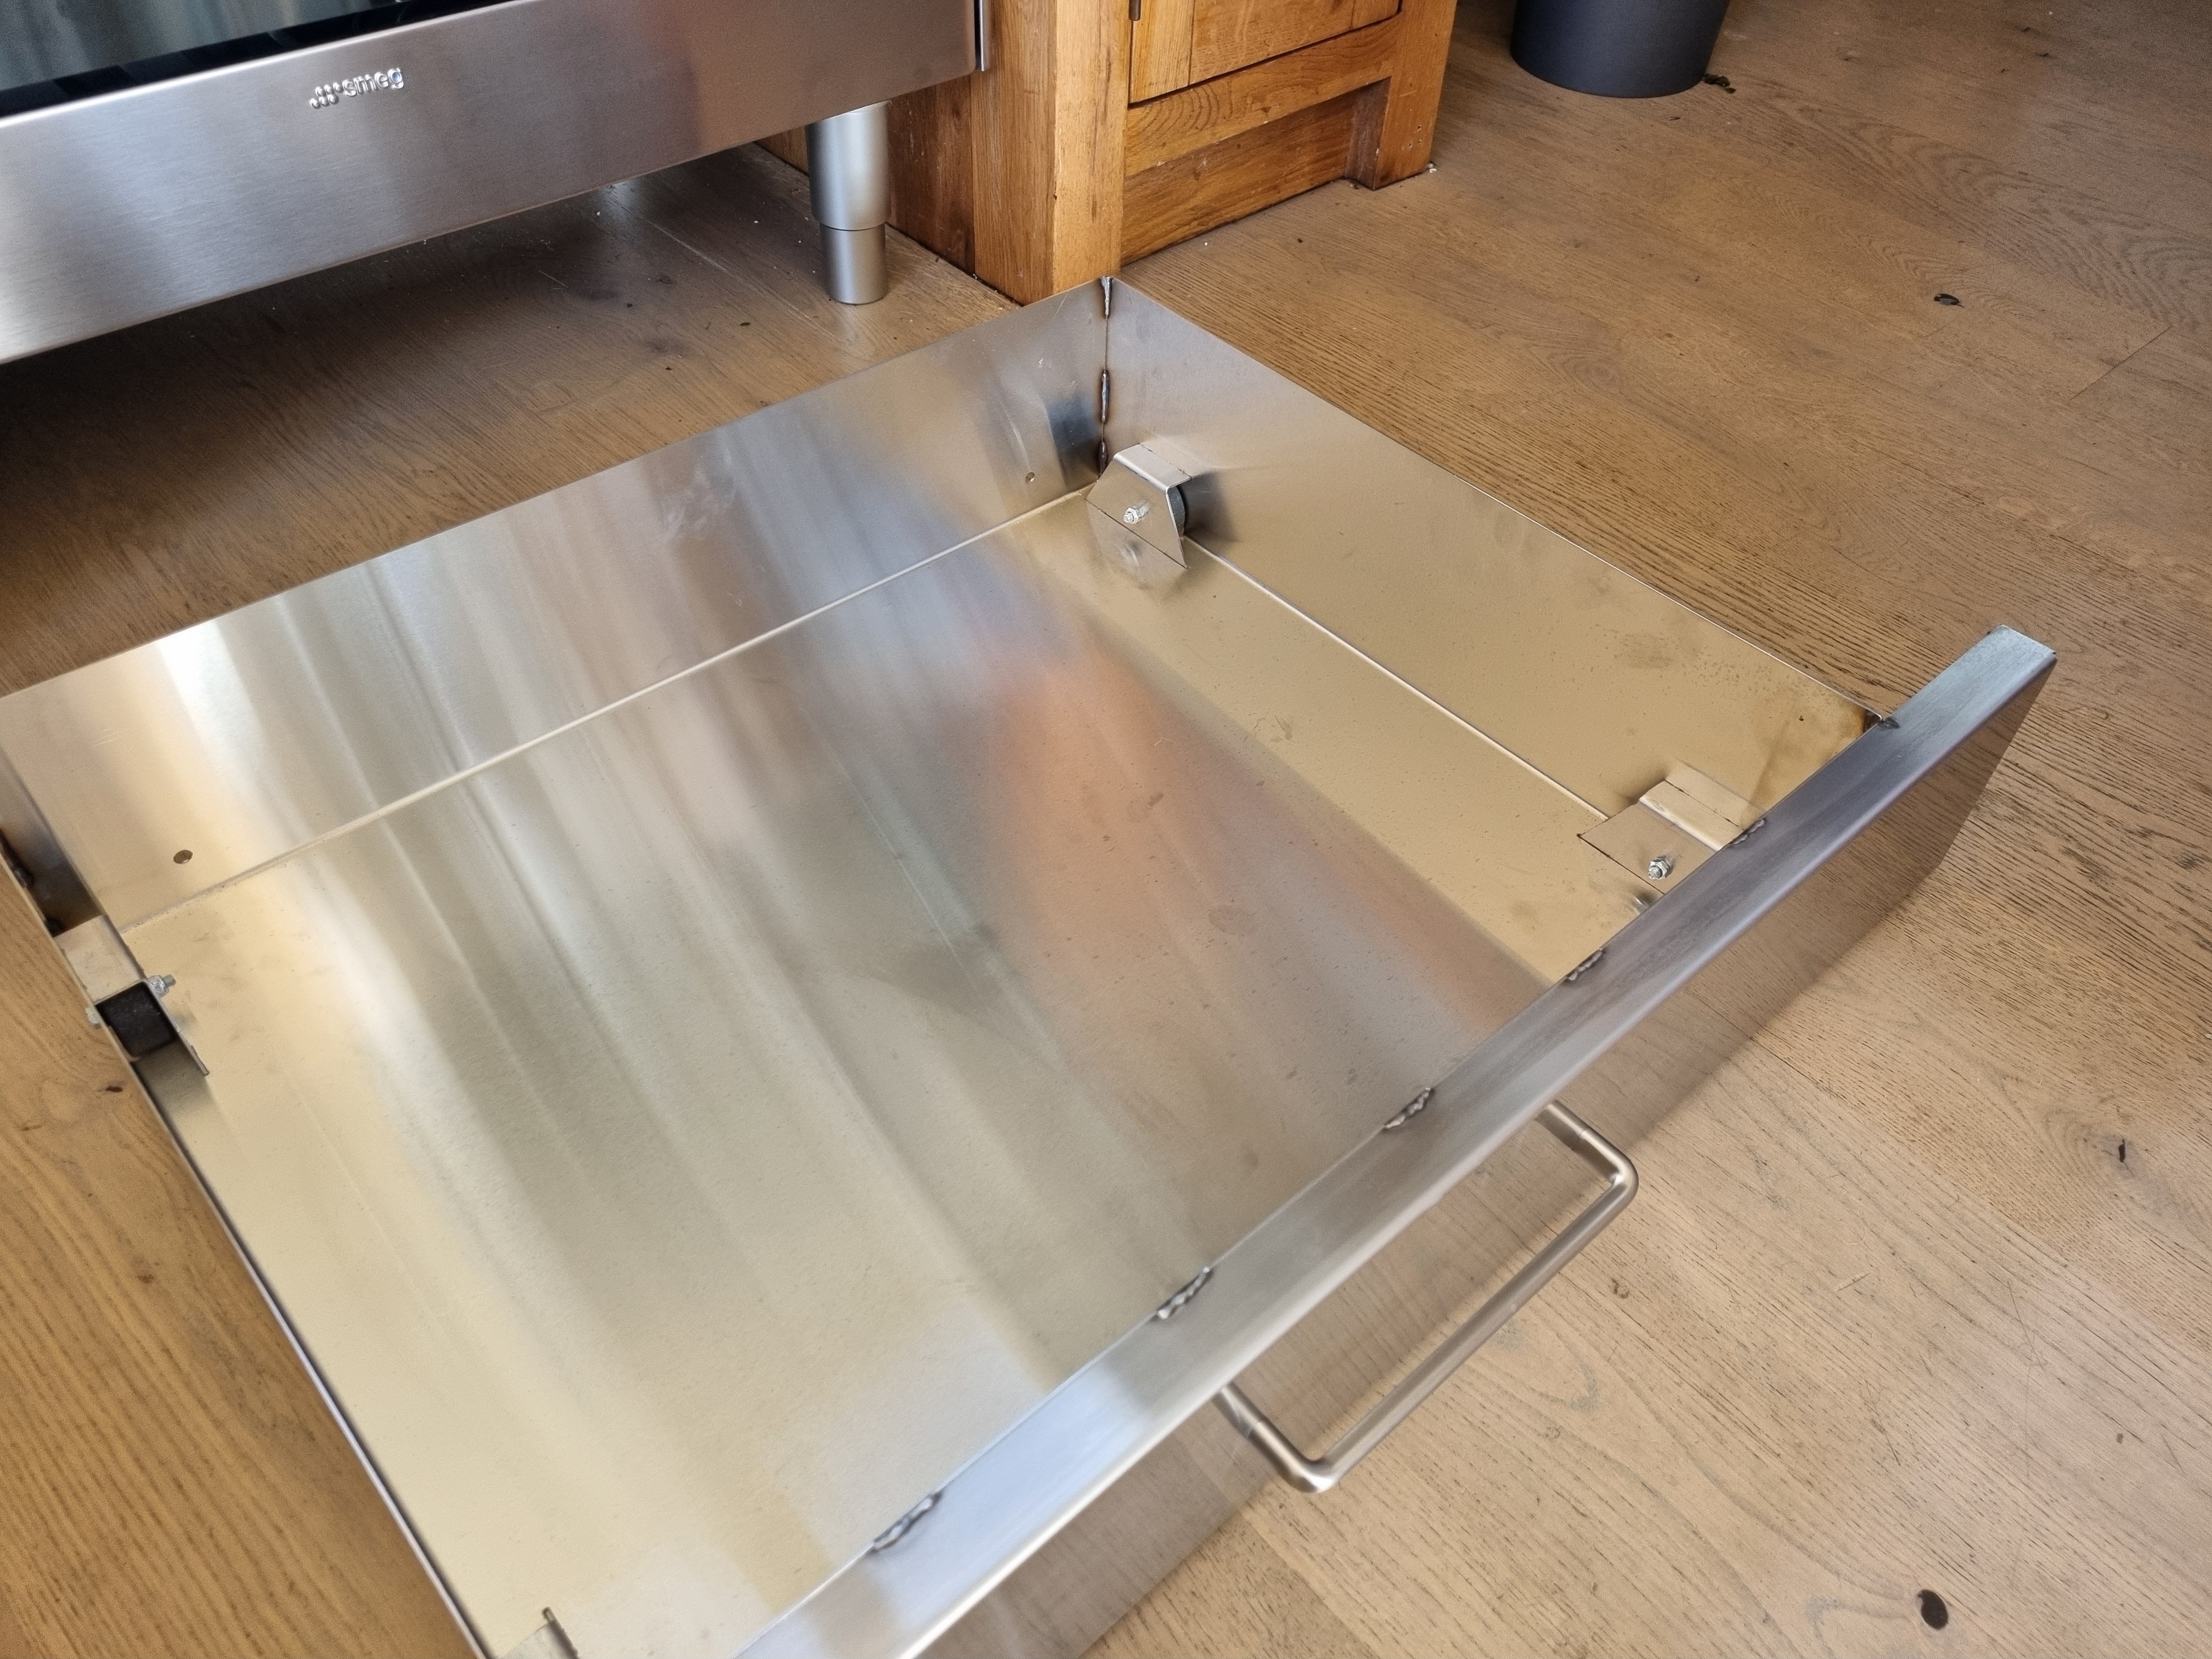
Our new oven came with a huge waste of space under it so I drew up a drawer with wheels on the corners and I got it cut and folded. Then I welded it together. Its designed so the wheel brackets slot into the sides and base but it doesn't need welding, that way I can change the wheels if I ever need to.
2 points
-
Nice, that's going to look mint.1 point
-
Love your perseverance man! A lot of love and learnings going on. One tip for the spot putty (pinholes/chips/whatever) is to buy a pack of single sided razor blades, and holding perpendicular to the panel, scrape the excess putty away (once its hard) The less you have to sand the flatter it will be come clear-coat time.1 point
-
Be careful when sandblasting. Sand contains a lot of silica which will fuck your lungs. A dust mask won't cut it for sandblasting like you are doing. You really need to wear a respirator probably of the correct grade. You can get dust masks to filter silica but they are really for dealing with low level amounts.1 point
-
Try this, it's also got some fitment of you wanted to measure up at a wrwcker https://www.amazon.com/Dorman-300-337-Power-Steering-Pulley/dp/B01M3Q2XGF You can also put part numbers into rockauto. Try this one too 126056771 point
-
Note to self - the original motor did 2200 rpm flat tack. Thanks british narrow gauge foamers1 point
-
Looks like you put in a few late nights and got it back together for Americarna. Good effort.
1 point
-
This guy exudes Erics dodgy gold mine1 point
-
100% keen to come do some back breaking labor on some old timey machines in an illegal gold mine1 point
-
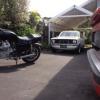
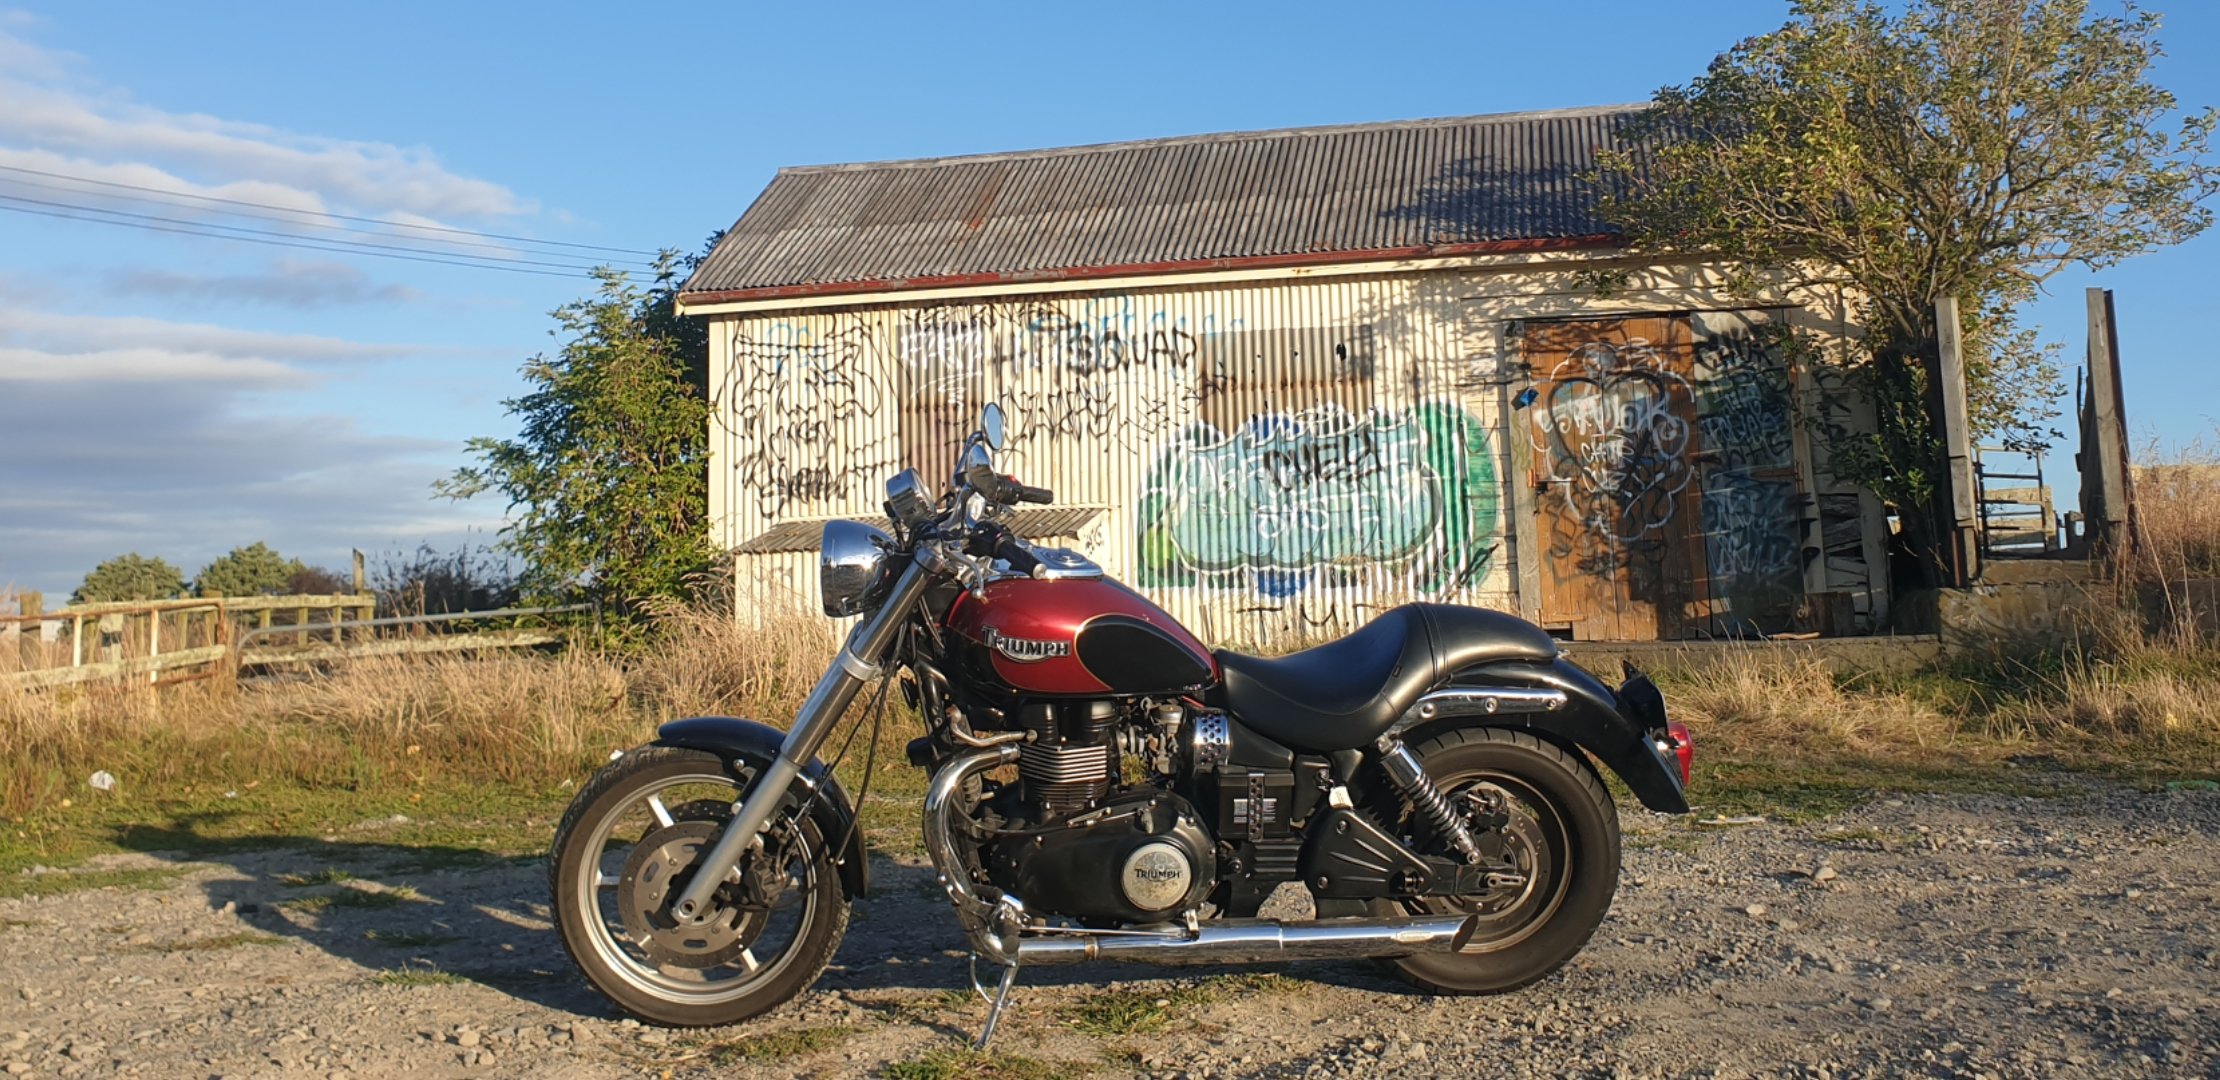
Yea we all know im adhd lol and get bored I got bord and brought a 07 triumph speedmaster goes great mine do small stuff
1 point
-
1 point
-
Body painted, trunk and hood should have been done today. Popped up the road and collected the rear bumper and other parts from the panel shop. Plan is to be all back together for the Beach Hop.
1 point
-
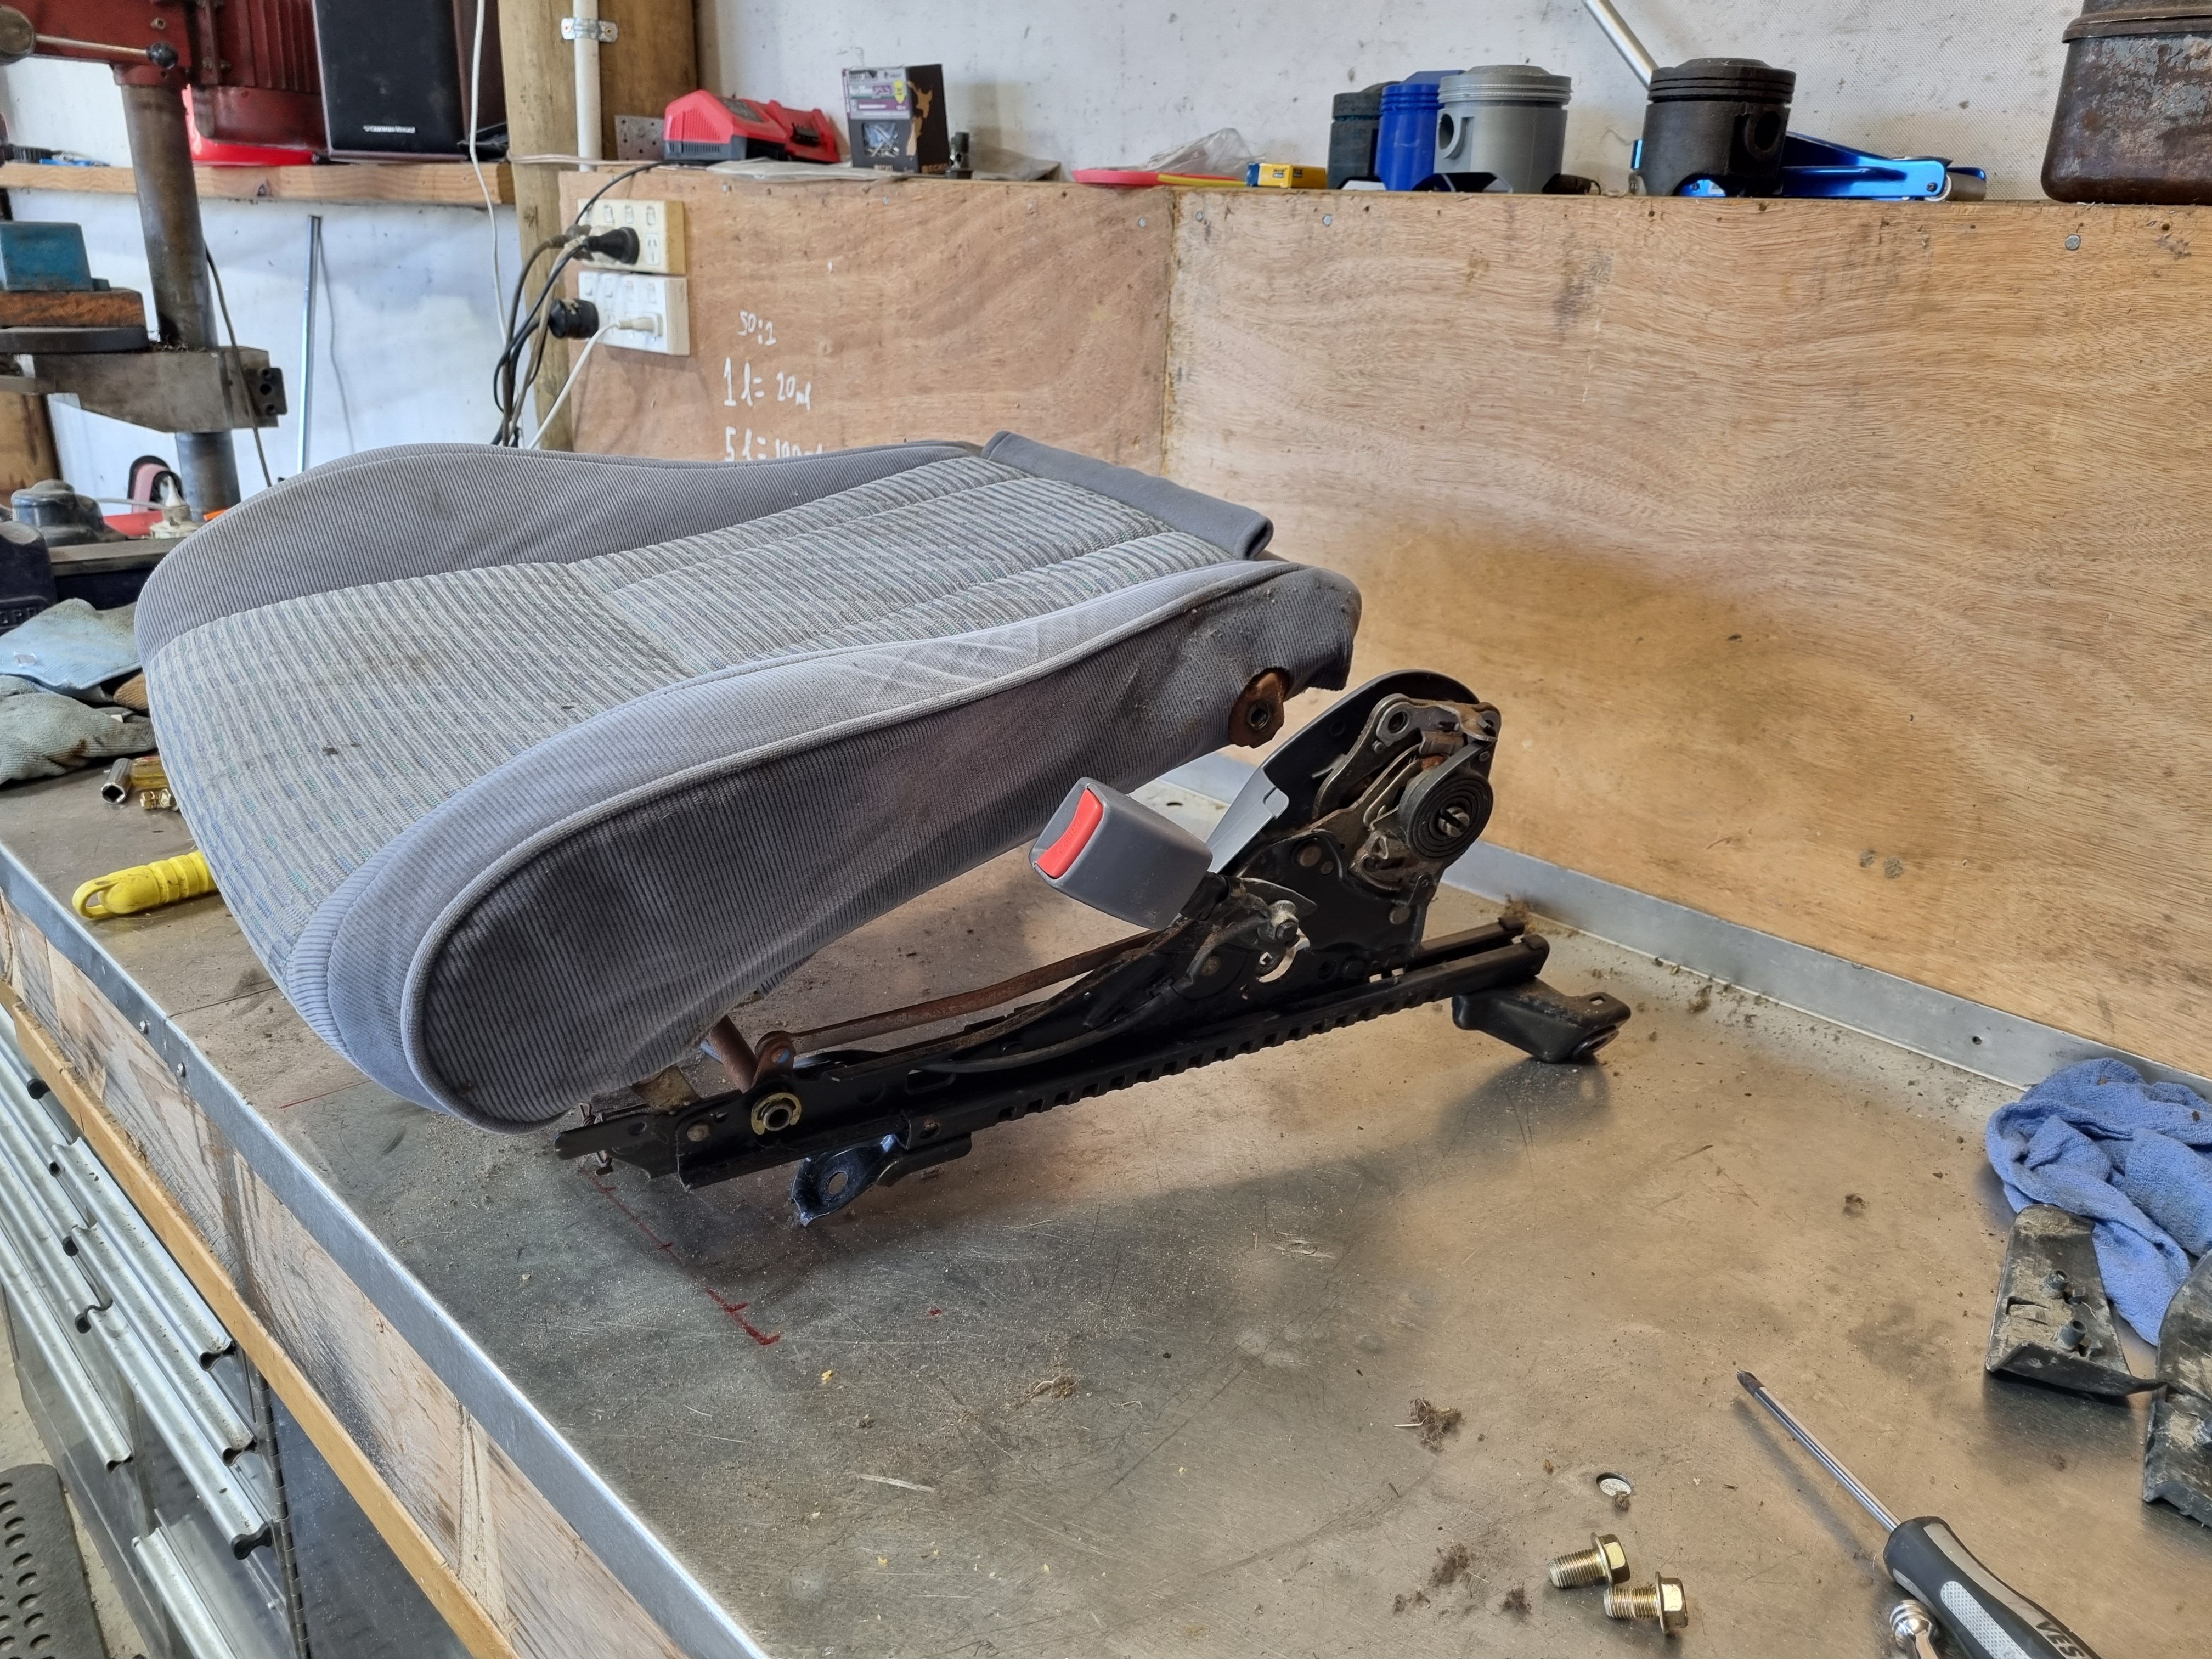
With no idea what I'm doing I decided to pull the seats apart and see if any parts are interchangeable. Long story short, the cushions can be swapped over. So I did. I now have a fucking ace drivers seat and a fucked passenger seat. Then I found a pair of good looking seats on TM in the same colour so I bought them. Between the 4 seats I should have no issue making 2 good ones. Stoked tbh
1 point
-
Albert the NDT man in Wingate has tested the welded struts for cracks. Took 10 minutes. He has an electromagnet and a solvent containing iron particles dyed with a flourescent dye so they glow in a UV light. He puts the magnet across the weld and sprays it with the fluid. The magnetic field aligns the iron particles which you can see under a UV lamp because of the dye. Any cracks will cause misalignment because the field goes around them. So I've got a certificate that says it's passed. YAY!1 point
-
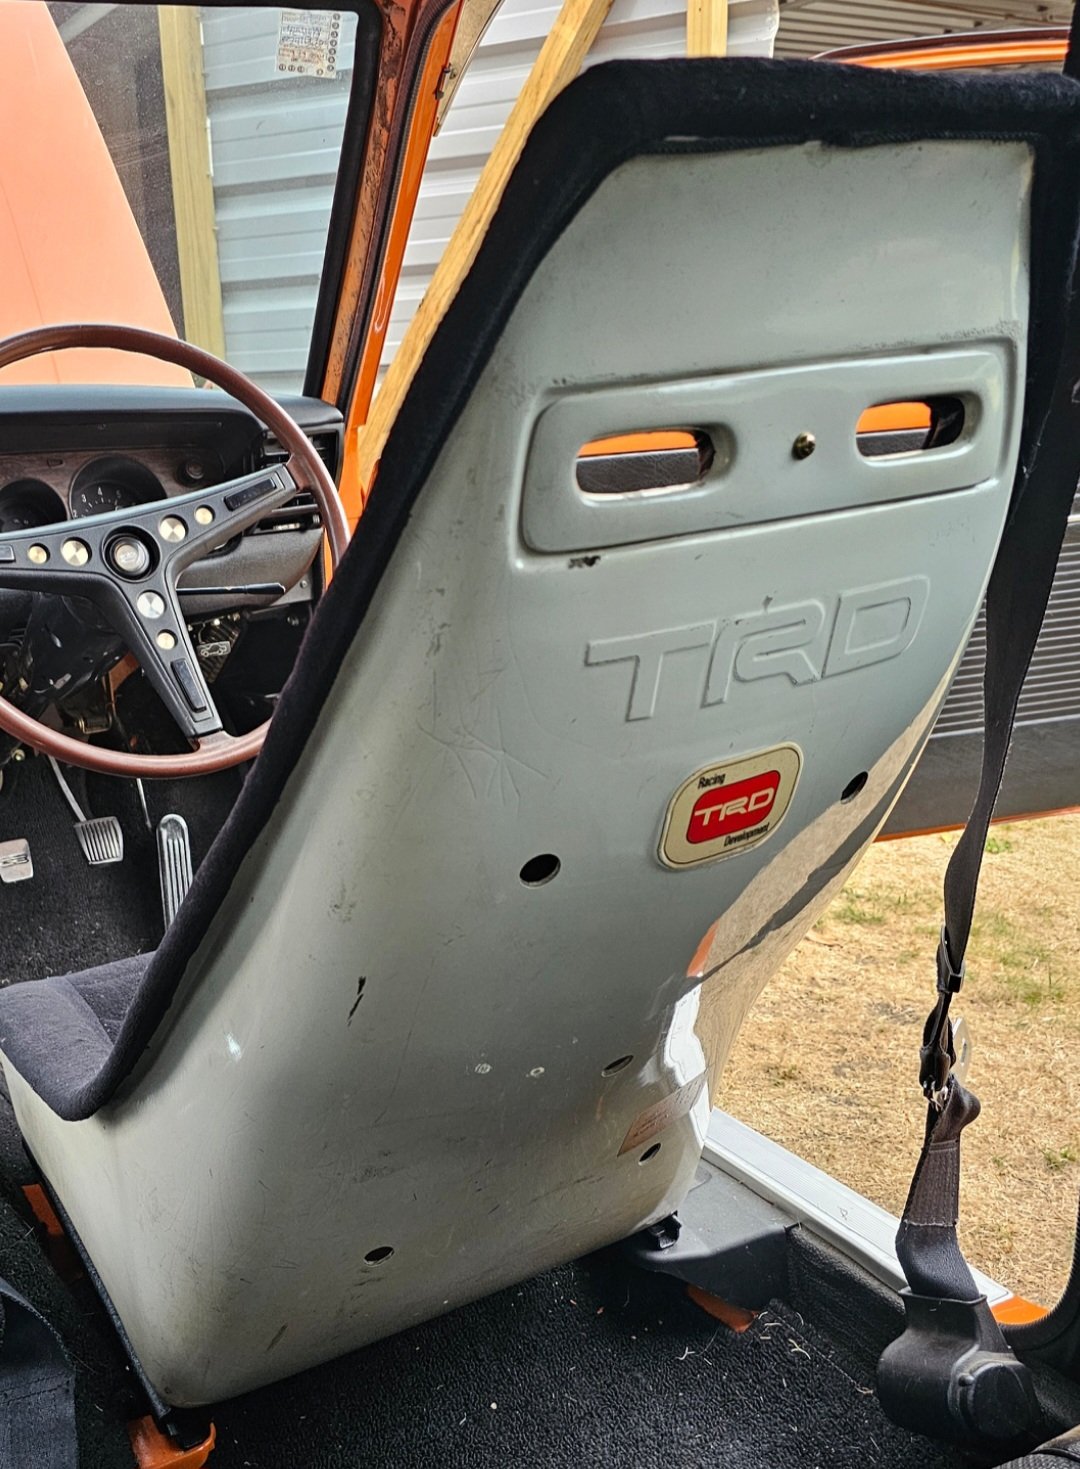
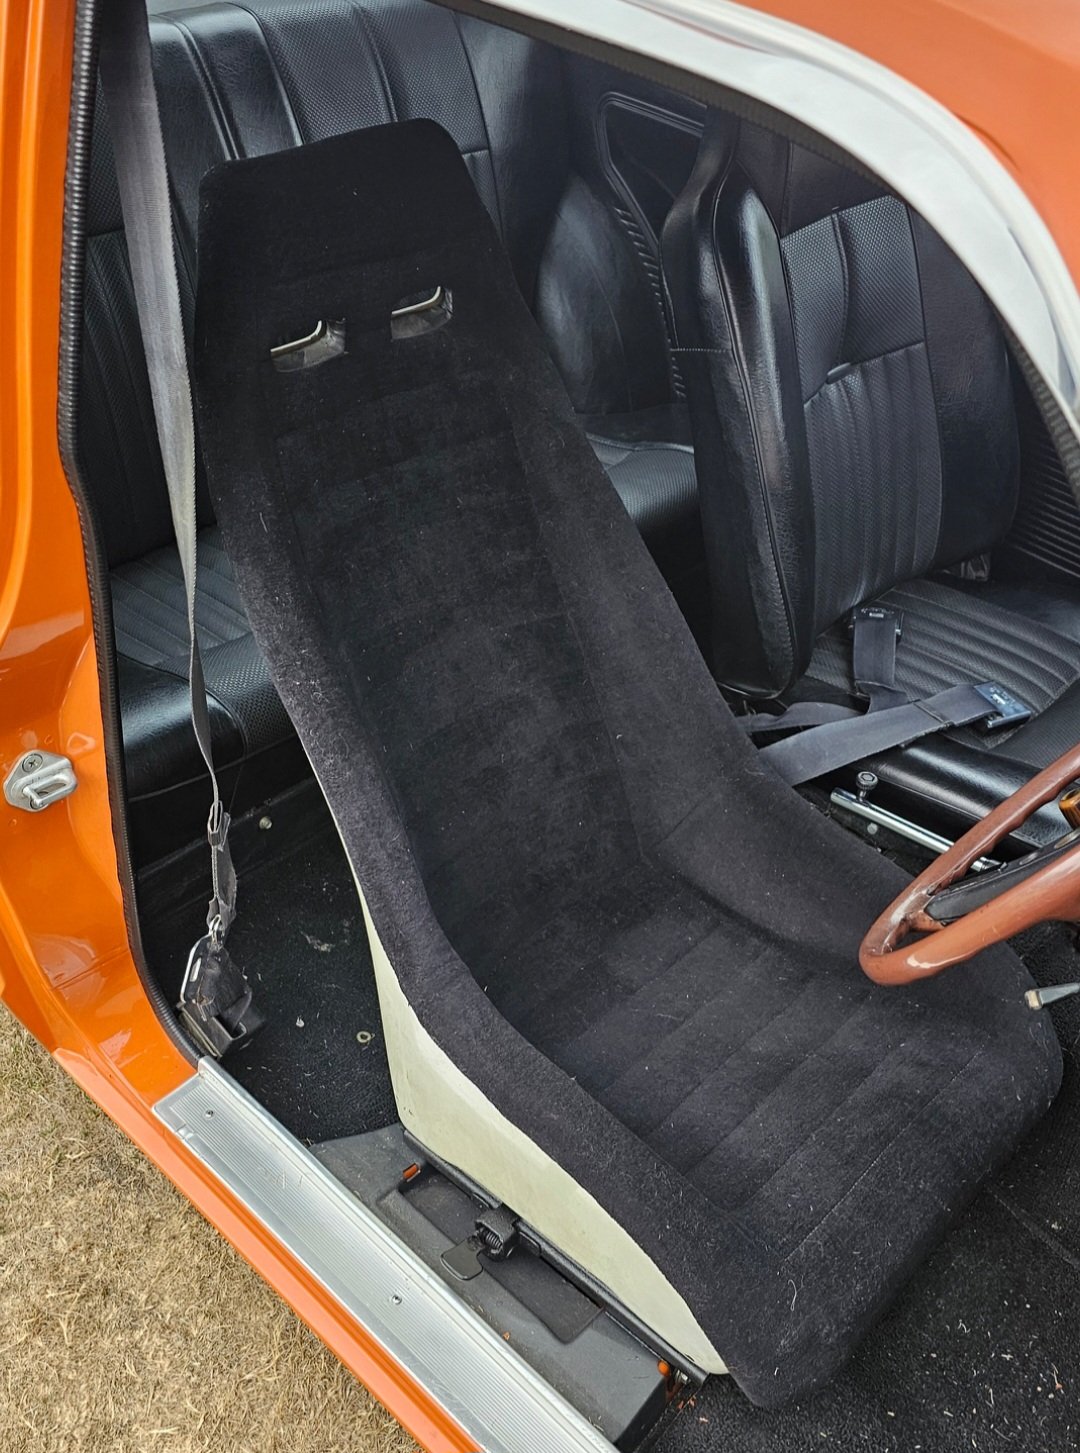
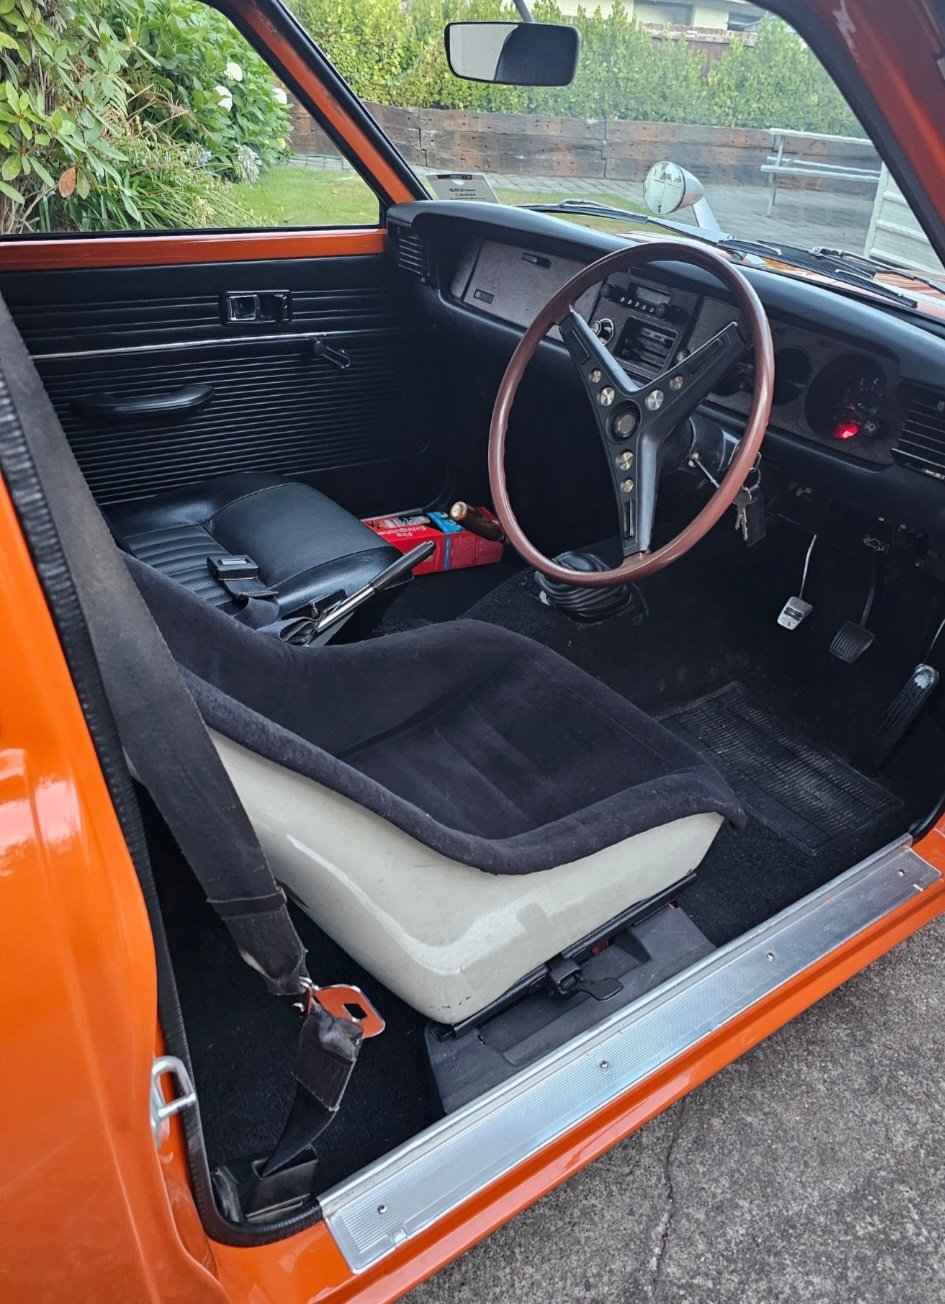
1970/80s trd bucket seat on factory ke25 seat rails
1 point
-
So I started on the body. Did some CAD modeling, And then started hacking into 18mm ply, Then I took the old temporary seat and floor off, and made a new seat etc. I then started screwing everything together, And where it's at now, The back corners are meant to be rounded, but that's too hard for an amateur woodworker like myself. The floor and firewall will stay on the chassis, and the rest of the body will lift off. The bonnet and front mudguards will be the hardest part to do, but I have ideas, will find out soon if they will work. Oh and I decided to make it a BJ/FJ land cruiser (maybe it should be an EJ?) because the kids cousin has a Jeep already, and because I'm forcing them to like Toyotas, because not doing so would basically be child abuse. Regards, VG.1 point
-
what next? ive ordered most of the stuff to replace the AC system because it doesn't work as well as id like. coming from rock auto is a new compressor, condenser, TX valve, drier and a full o ring kit. other things to do include a new stereo, full oil and filter change, order a bunch of clips and bits from Amayama, new steering wheel (current one is through to the foam at the top so wont get a warrant like that) probably new front seats? and if i get really carried away i may paint it. i purposely bought a red one because it would be the most sun fucked (read, cheap) and I'm keen to paint something that doesn't require 8 months of rust repairs and panel work before painting. time will tell if i ever get around to doing this or not......1 point
-
Approved by Kevin..
1 point
-
Had this old picnic table for 10 years, was given to us by friends at a campground so it's proper old, bowed, rustic and full of engravings from lots of campers over the decades. But heavy, in the way and not used by us so we chopped it up this arvo. (using our other younger table as today's bench)..
1 point
-
Eeeeeek has a proper light inside bucket now and got ablil briggs n straton cigar muffler on it now whata difference runs amazing
1 point
-
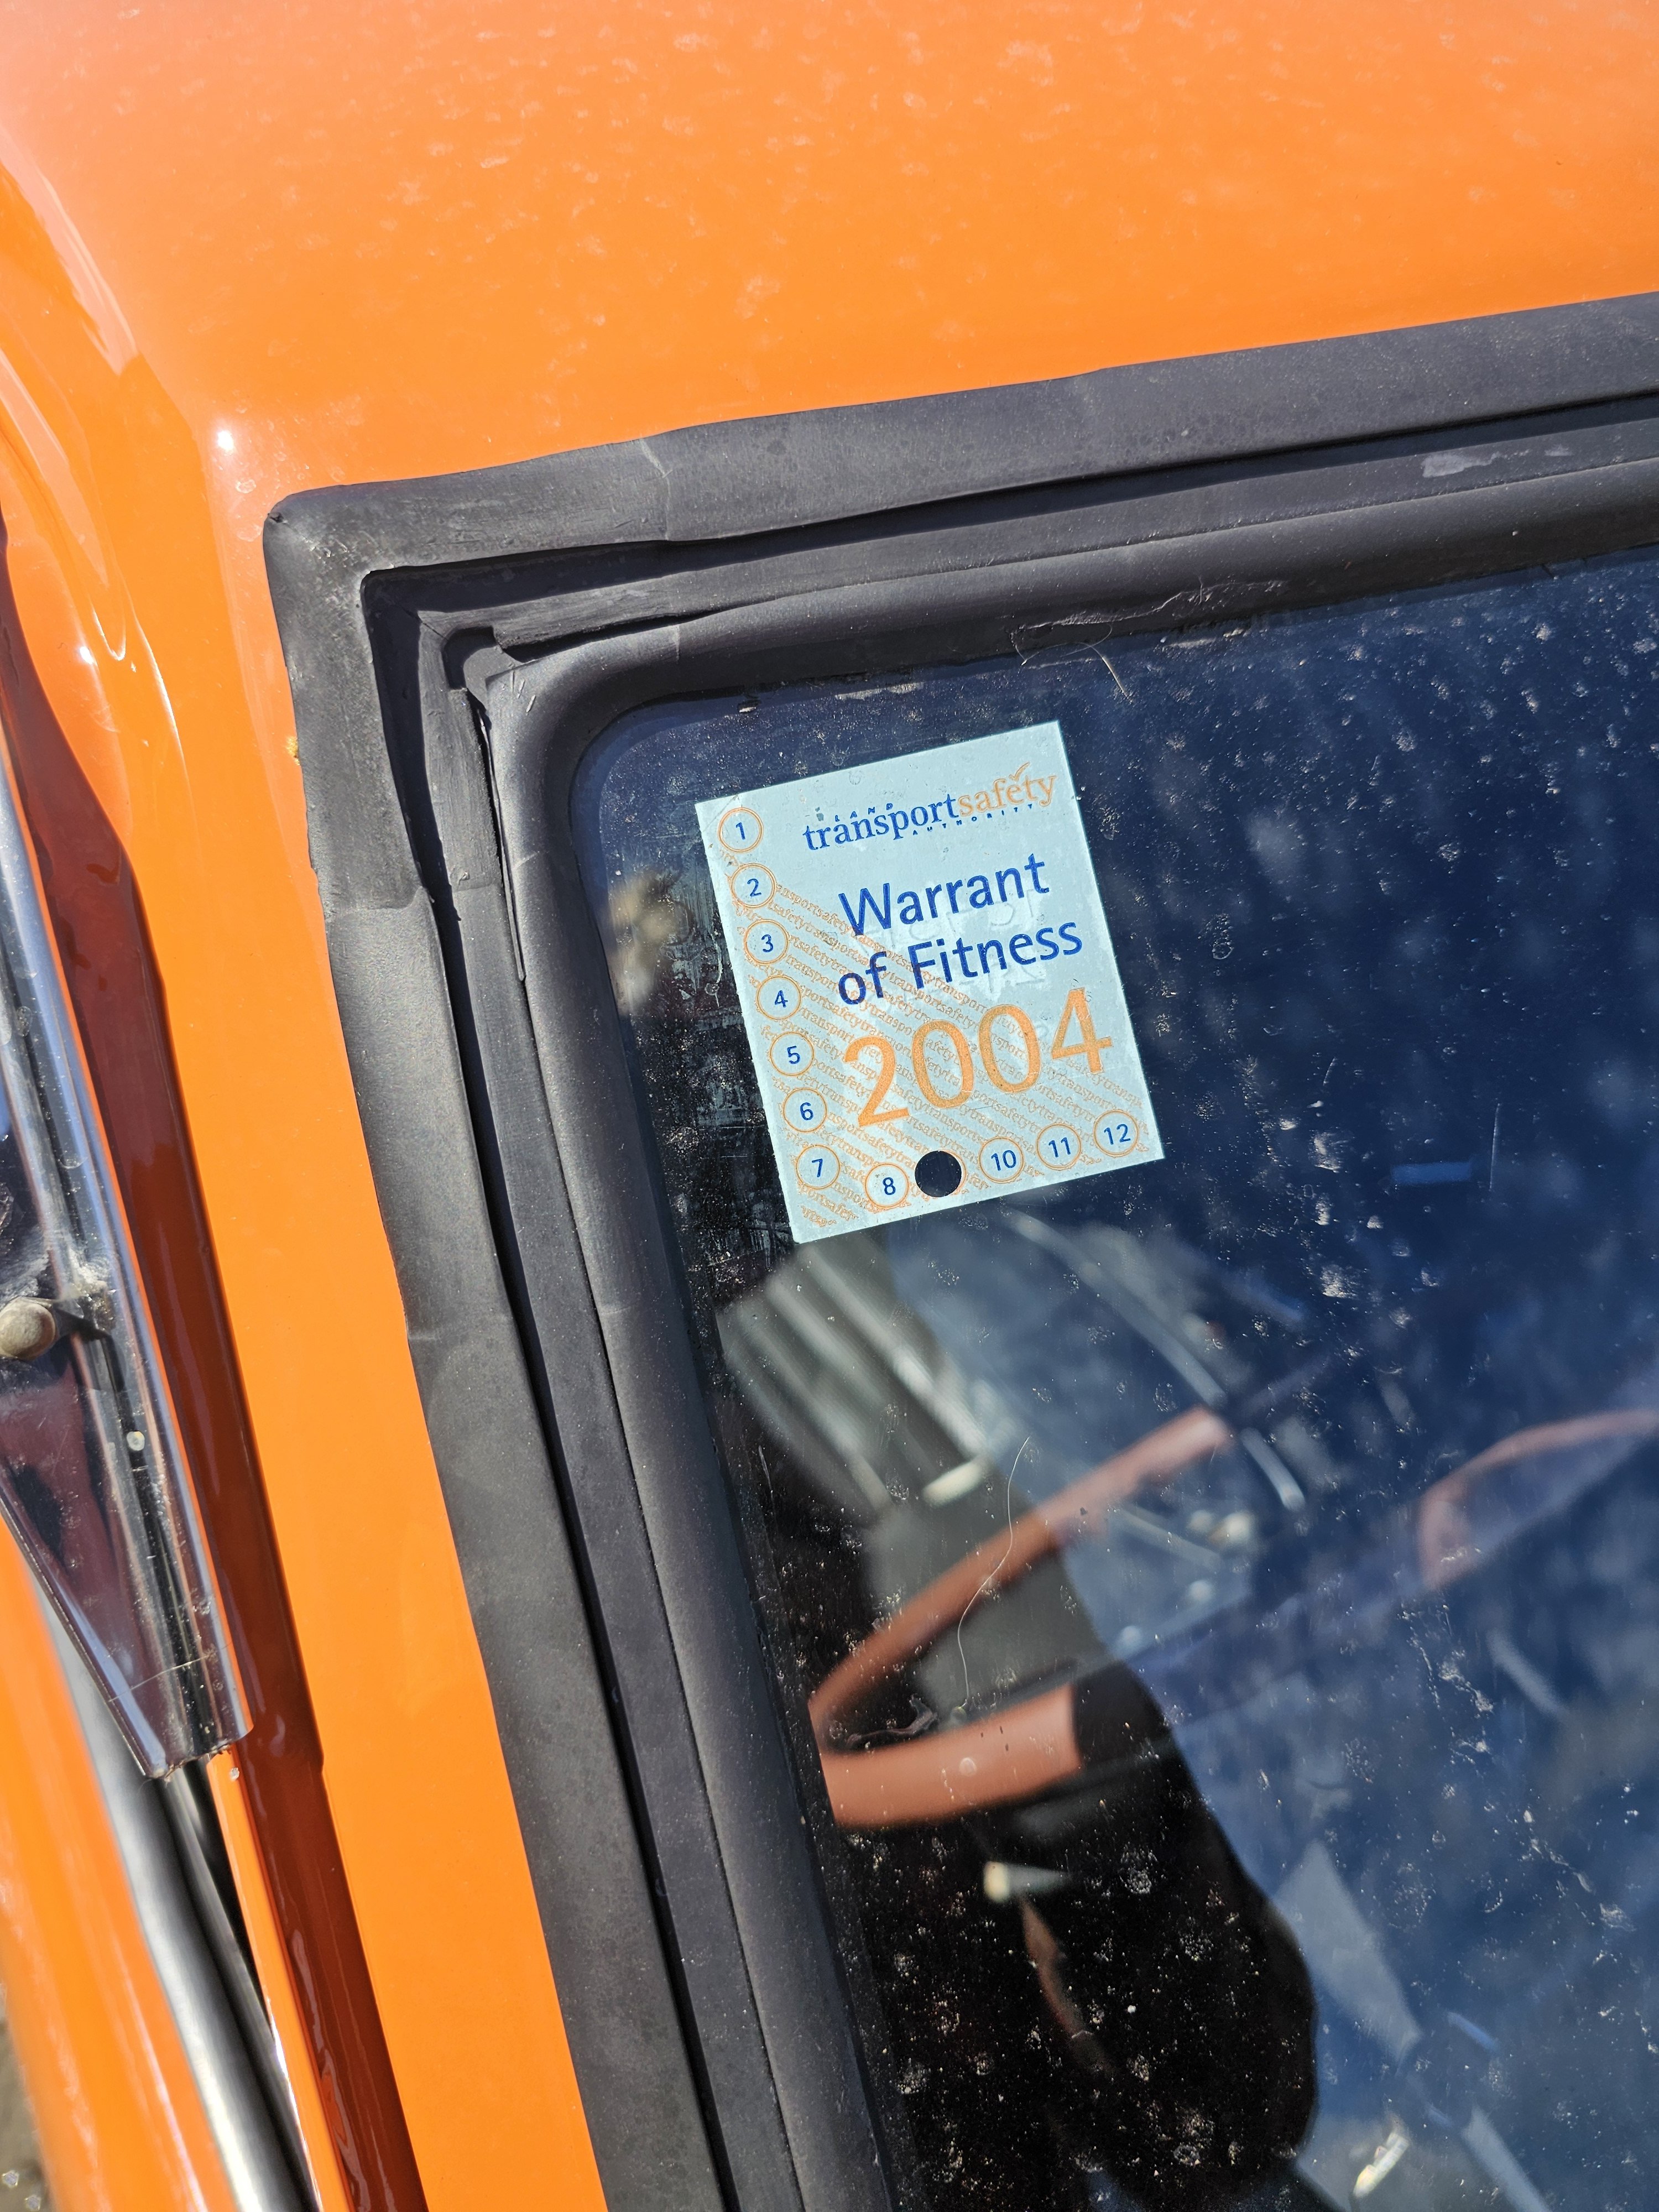
2004 wof
1 point
-
Got myself another car to add to the collection. Still got the 911, the GTR and now got another japanese legend to add to the stable. Plans are wheels, intake and see where we go from there. Everything else seems rather expensive since you cant just crank the boost up. Overall it goes pretty hard for what it is (which is harder than I expected)
1 point
-
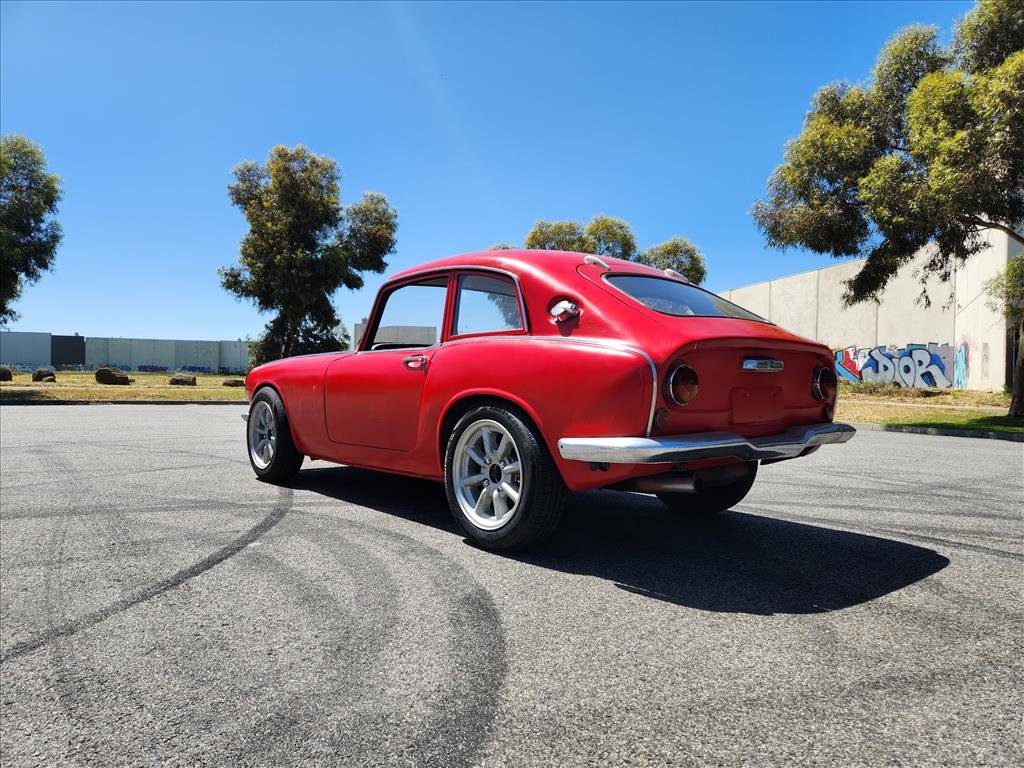
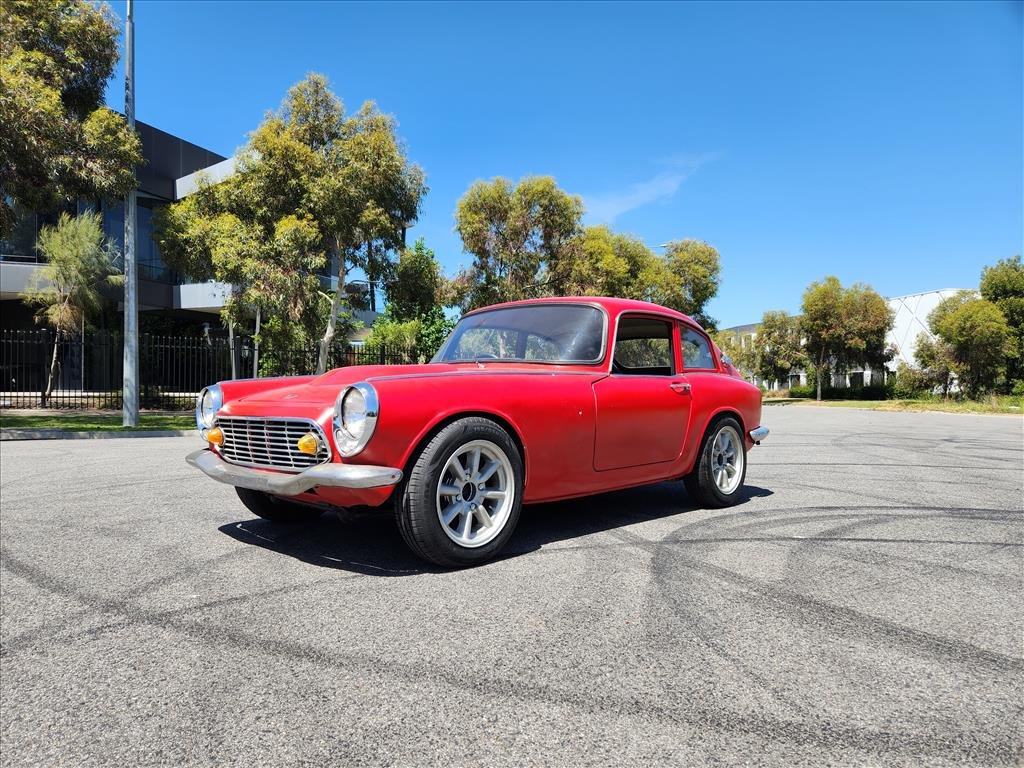
I found a use for the tyres that didn't fit properly on the Celica wheels.. these! They are 14x5.5 B-Type Watanabes which I was hoping would fit on the S600 but sadly the spacer adapters mean on the front no bueno. The spacer adapters are multi-piece (I think I posted about it somewhere earlier) and I had to get somewhat large ones to clear the nuts (deez). Why do I need spacers? Oem is 5x130 remember! Actually in hindsight probably looking for 5x114.3 wheels would have made adapters easier but the available range is way less. Well it looks cool but unfortunately couldn't really turn properly so had to put back the OEM wheels.
1 point


.thumb.jpeg.e0a4bff61111e0c8c7396950fcc94da1.jpeg)


.thumb.jpg.570970b401ac8d26ce9af7c1bf2bd8cd.jpg)


.thumb.jpeg.384ff72c8d2b0ee0d34a7bdedb55bdcf.jpeg)

This leaderboard is set to Auckland/GMT+12:00