
Leaderboard


.thumb.jpeg.384ff72c8d2b0ee0d34a7bdedb55bdcf.jpeg)

Popular Content
Showing content with the highest reputation on 02/18/24 in all areas
-
So I started on the body. Did some CAD modeling, And then started hacking into 18mm ply, Then I took the old temporary seat and floor off, and made a new seat etc. I then started screwing everything together, And where it's at now, The back corners are meant to be rounded, but that's too hard for an amateur woodworker like myself. The floor and firewall will stay on the chassis, and the rest of the body will lift off. The bonnet and front mudguards will be the hardest part to do, but I have ideas, will find out soon if they will work. Oh and I decided to make it a BJ/FJ land cruiser (maybe it should be an EJ?) because the kids cousin has a Jeep already, and because I'm forcing them to like Toyotas, because not doing so would basically be child abuse. Regards, VG.21 points
-
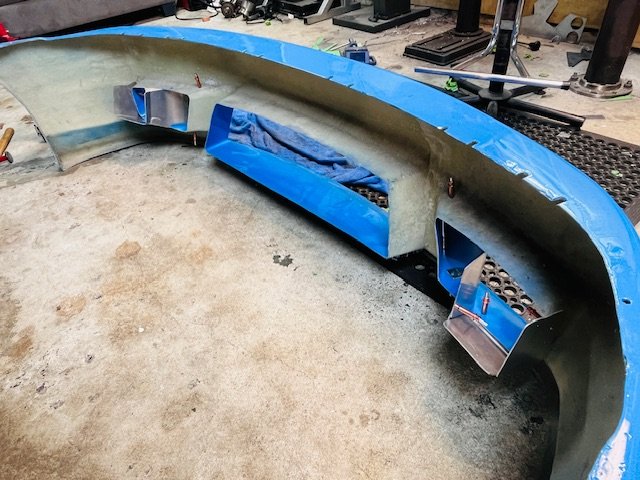
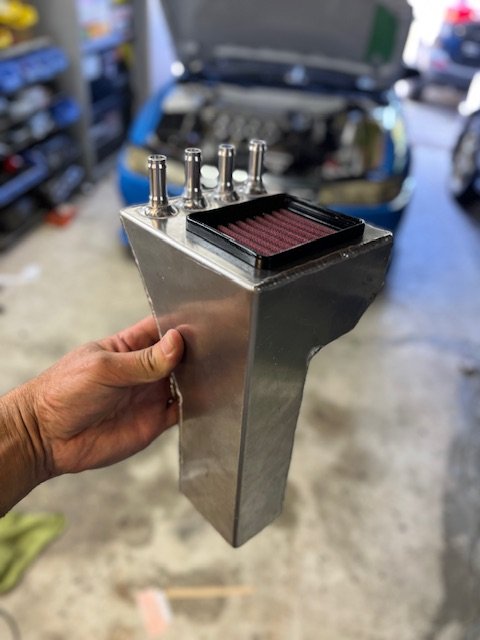
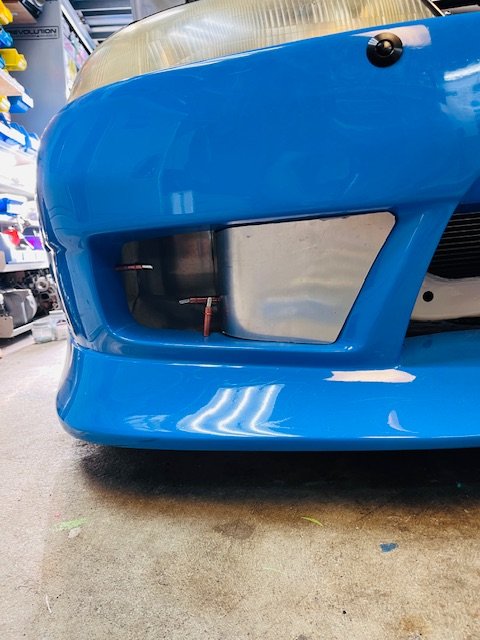
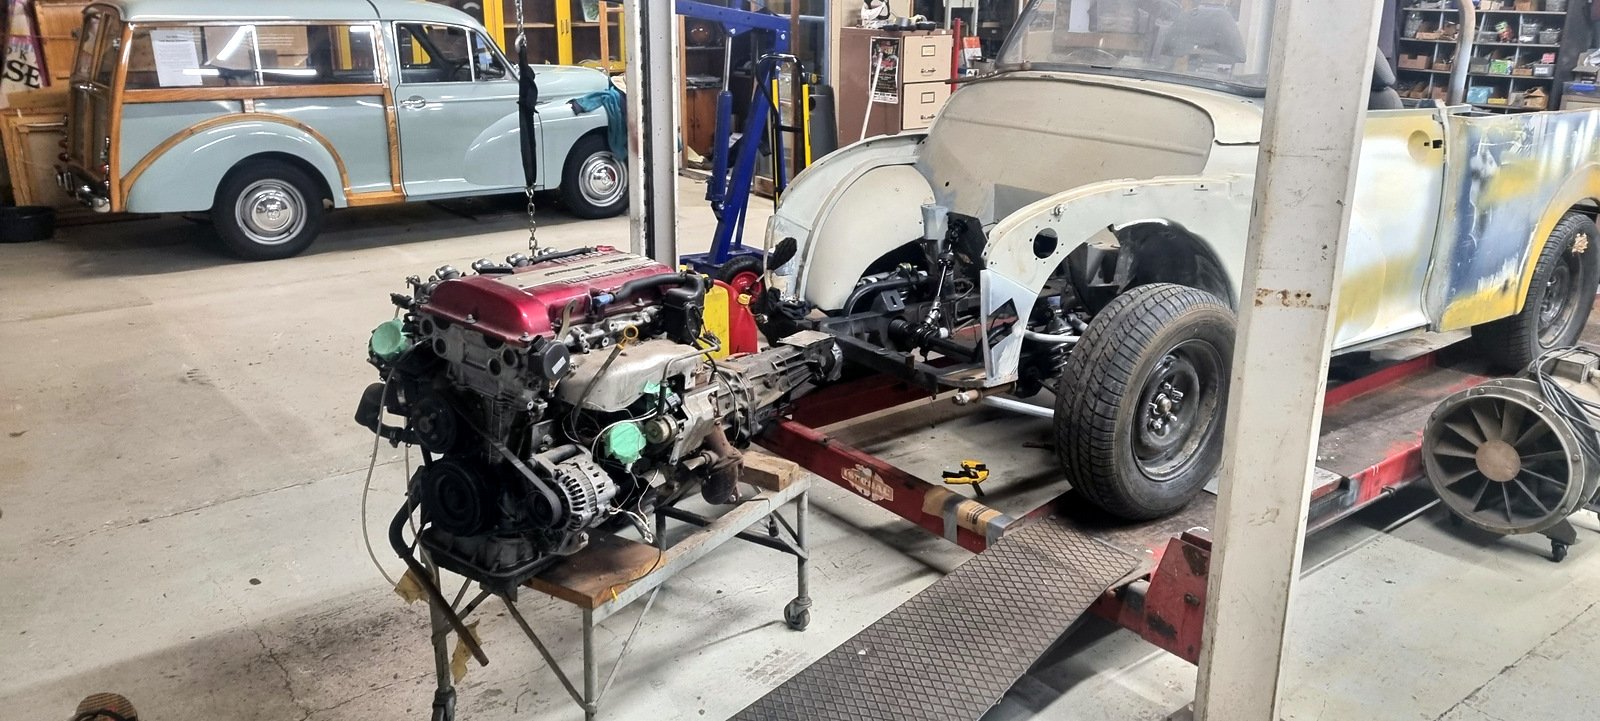
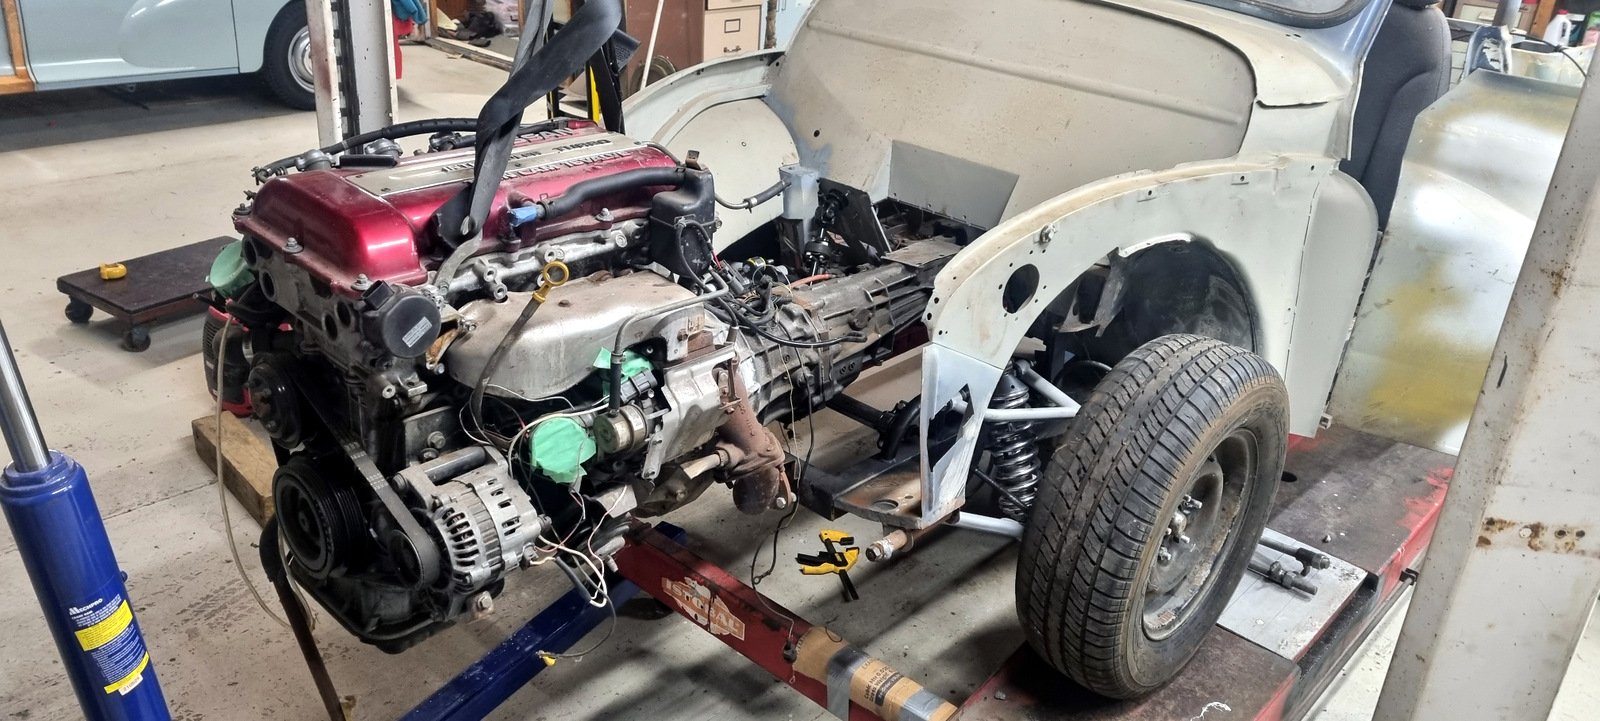
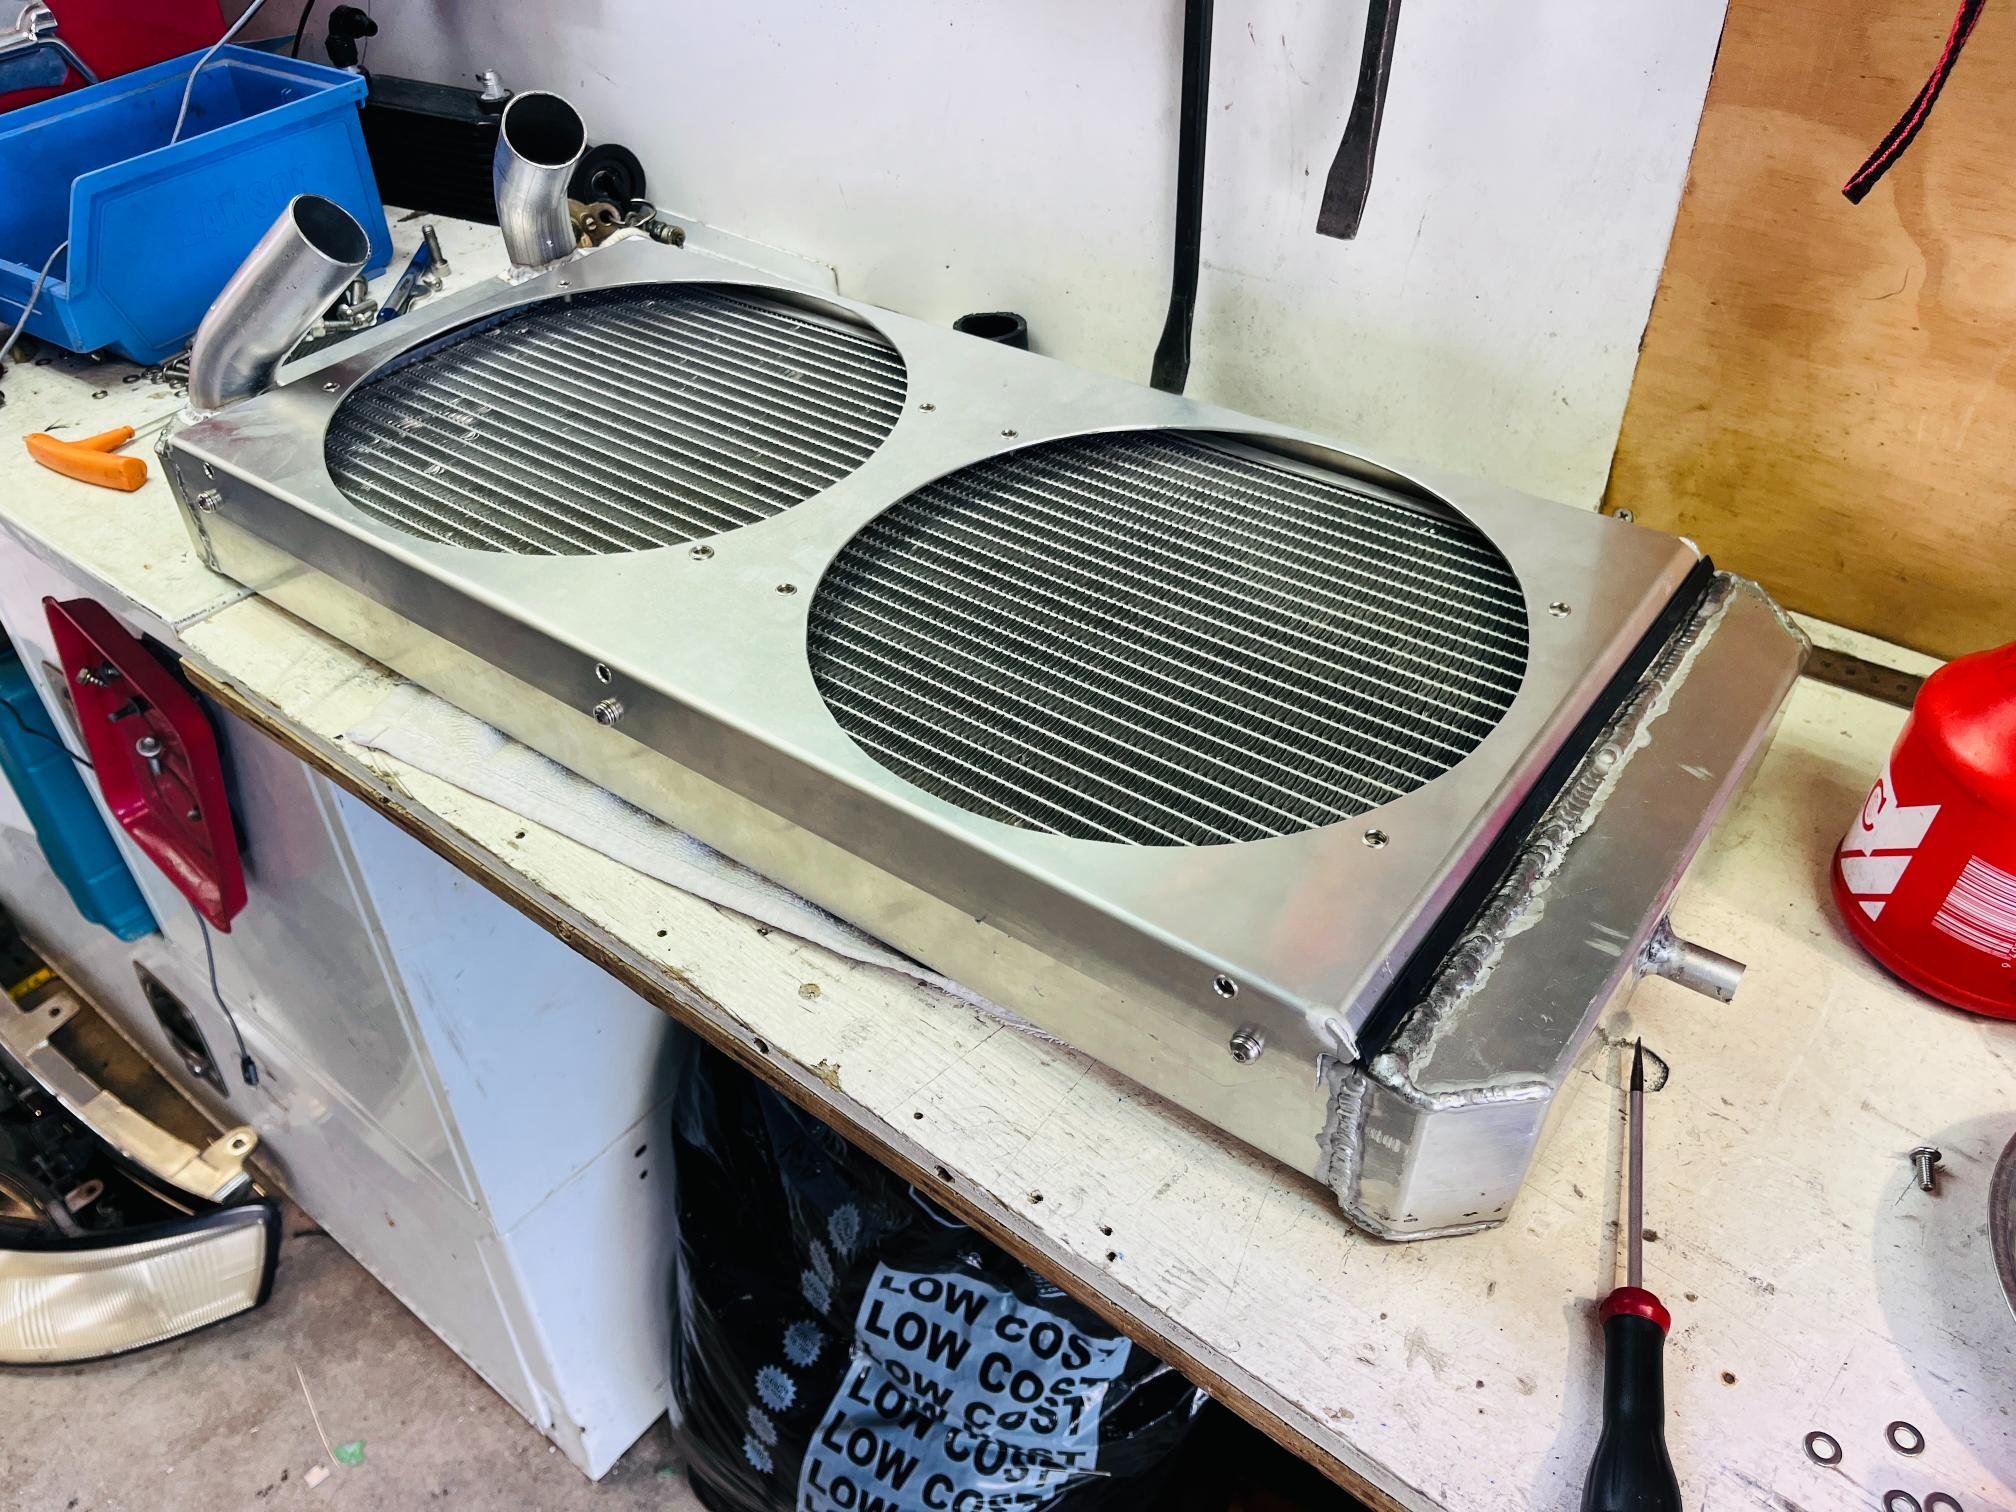
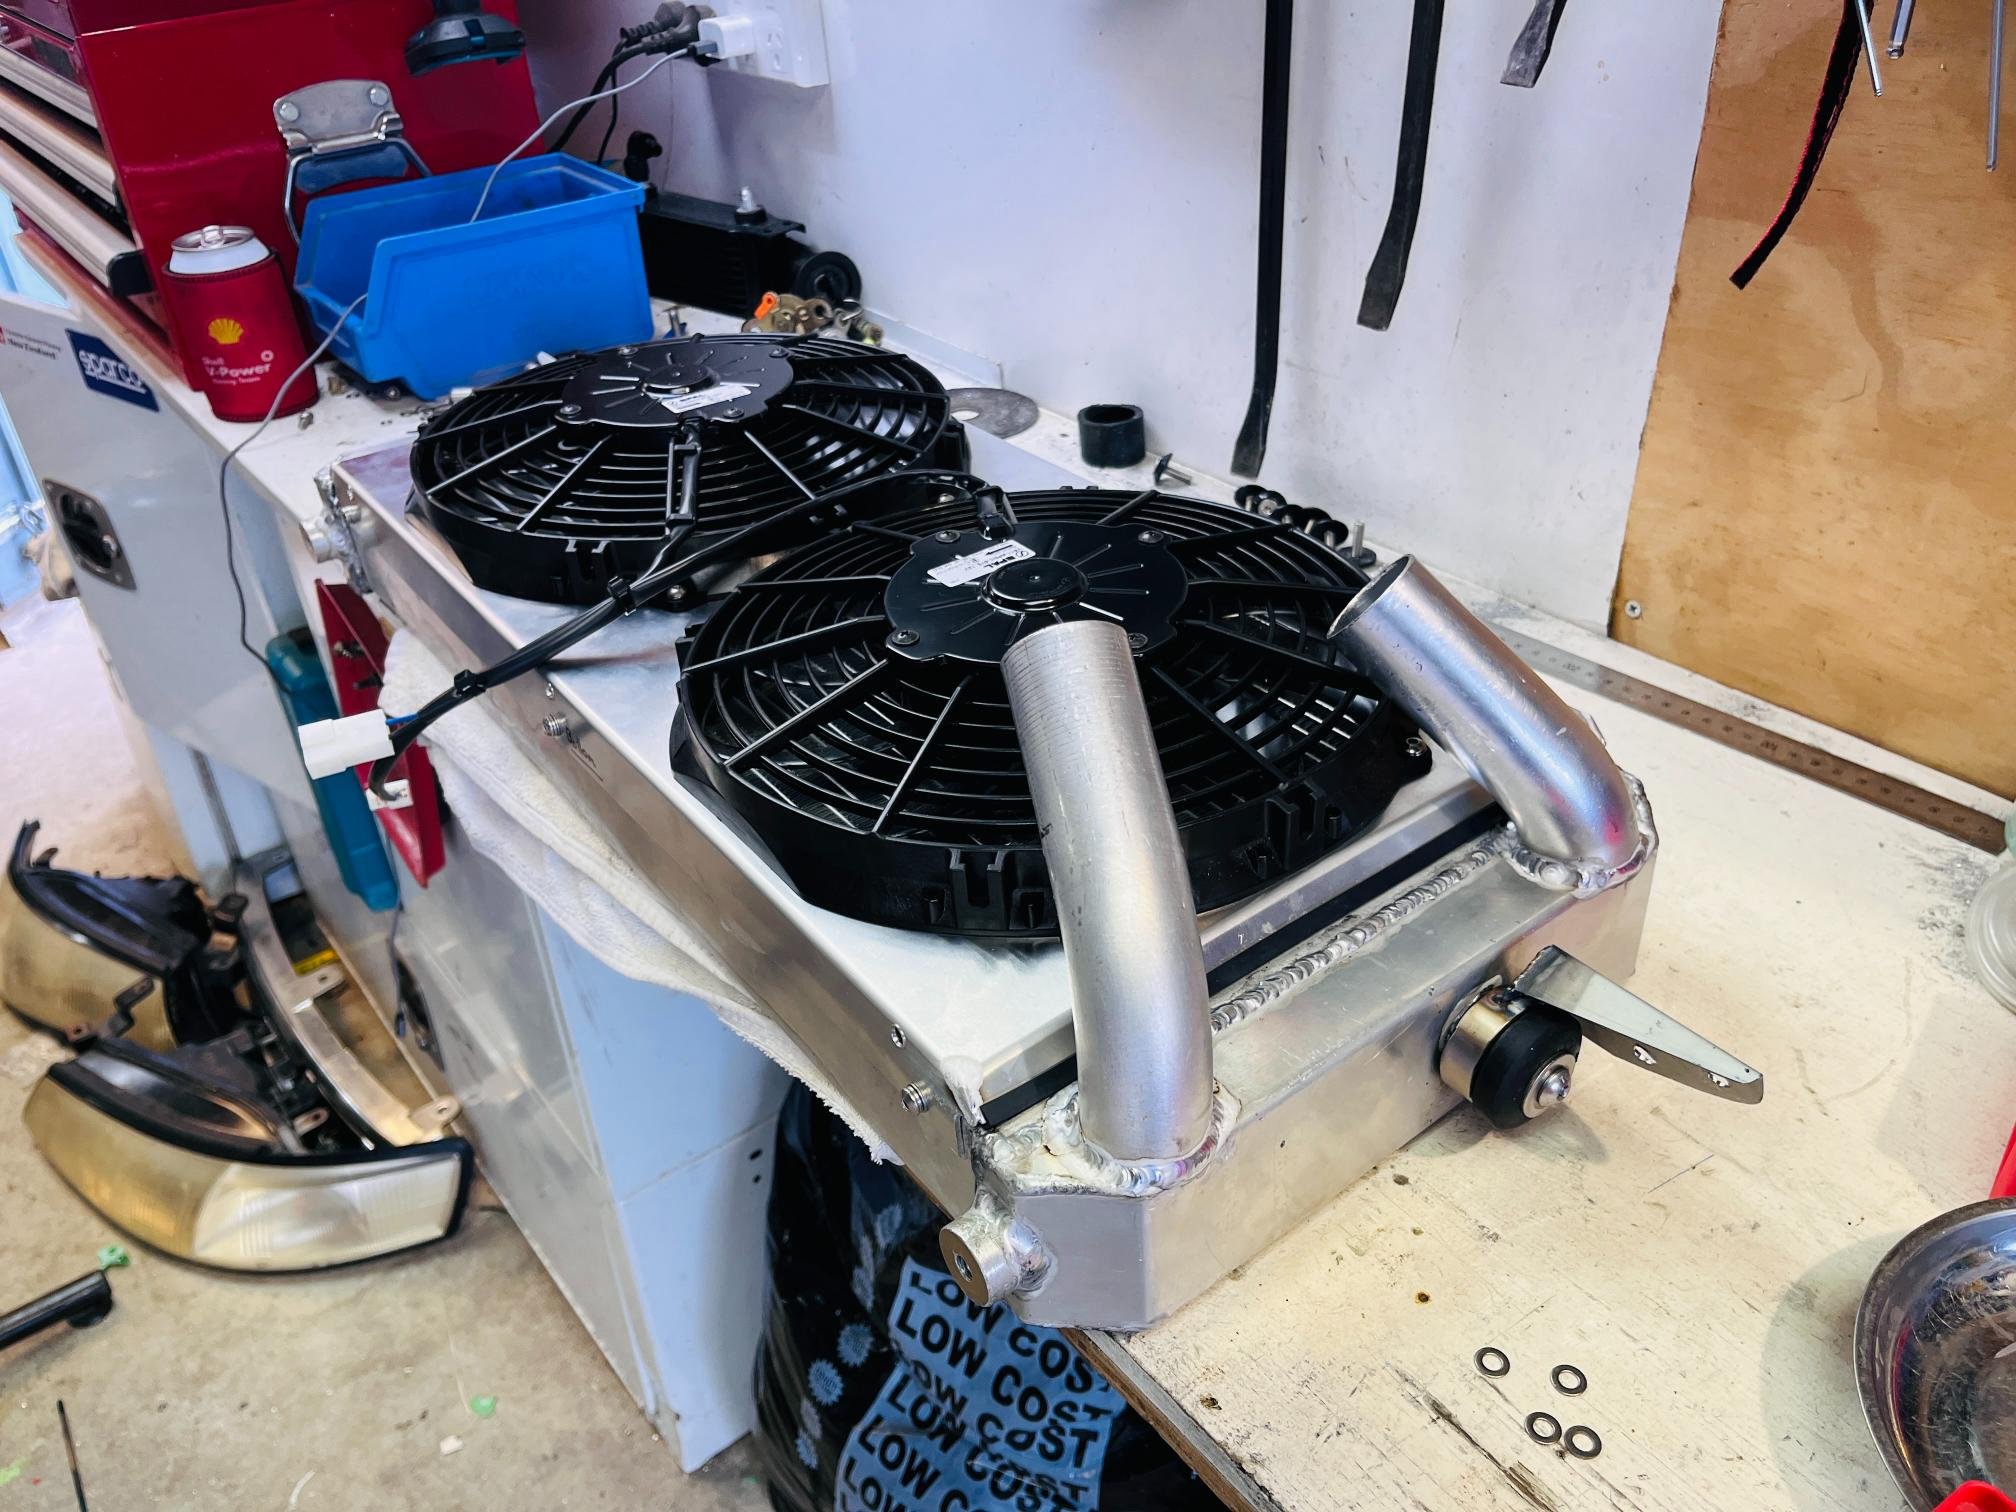
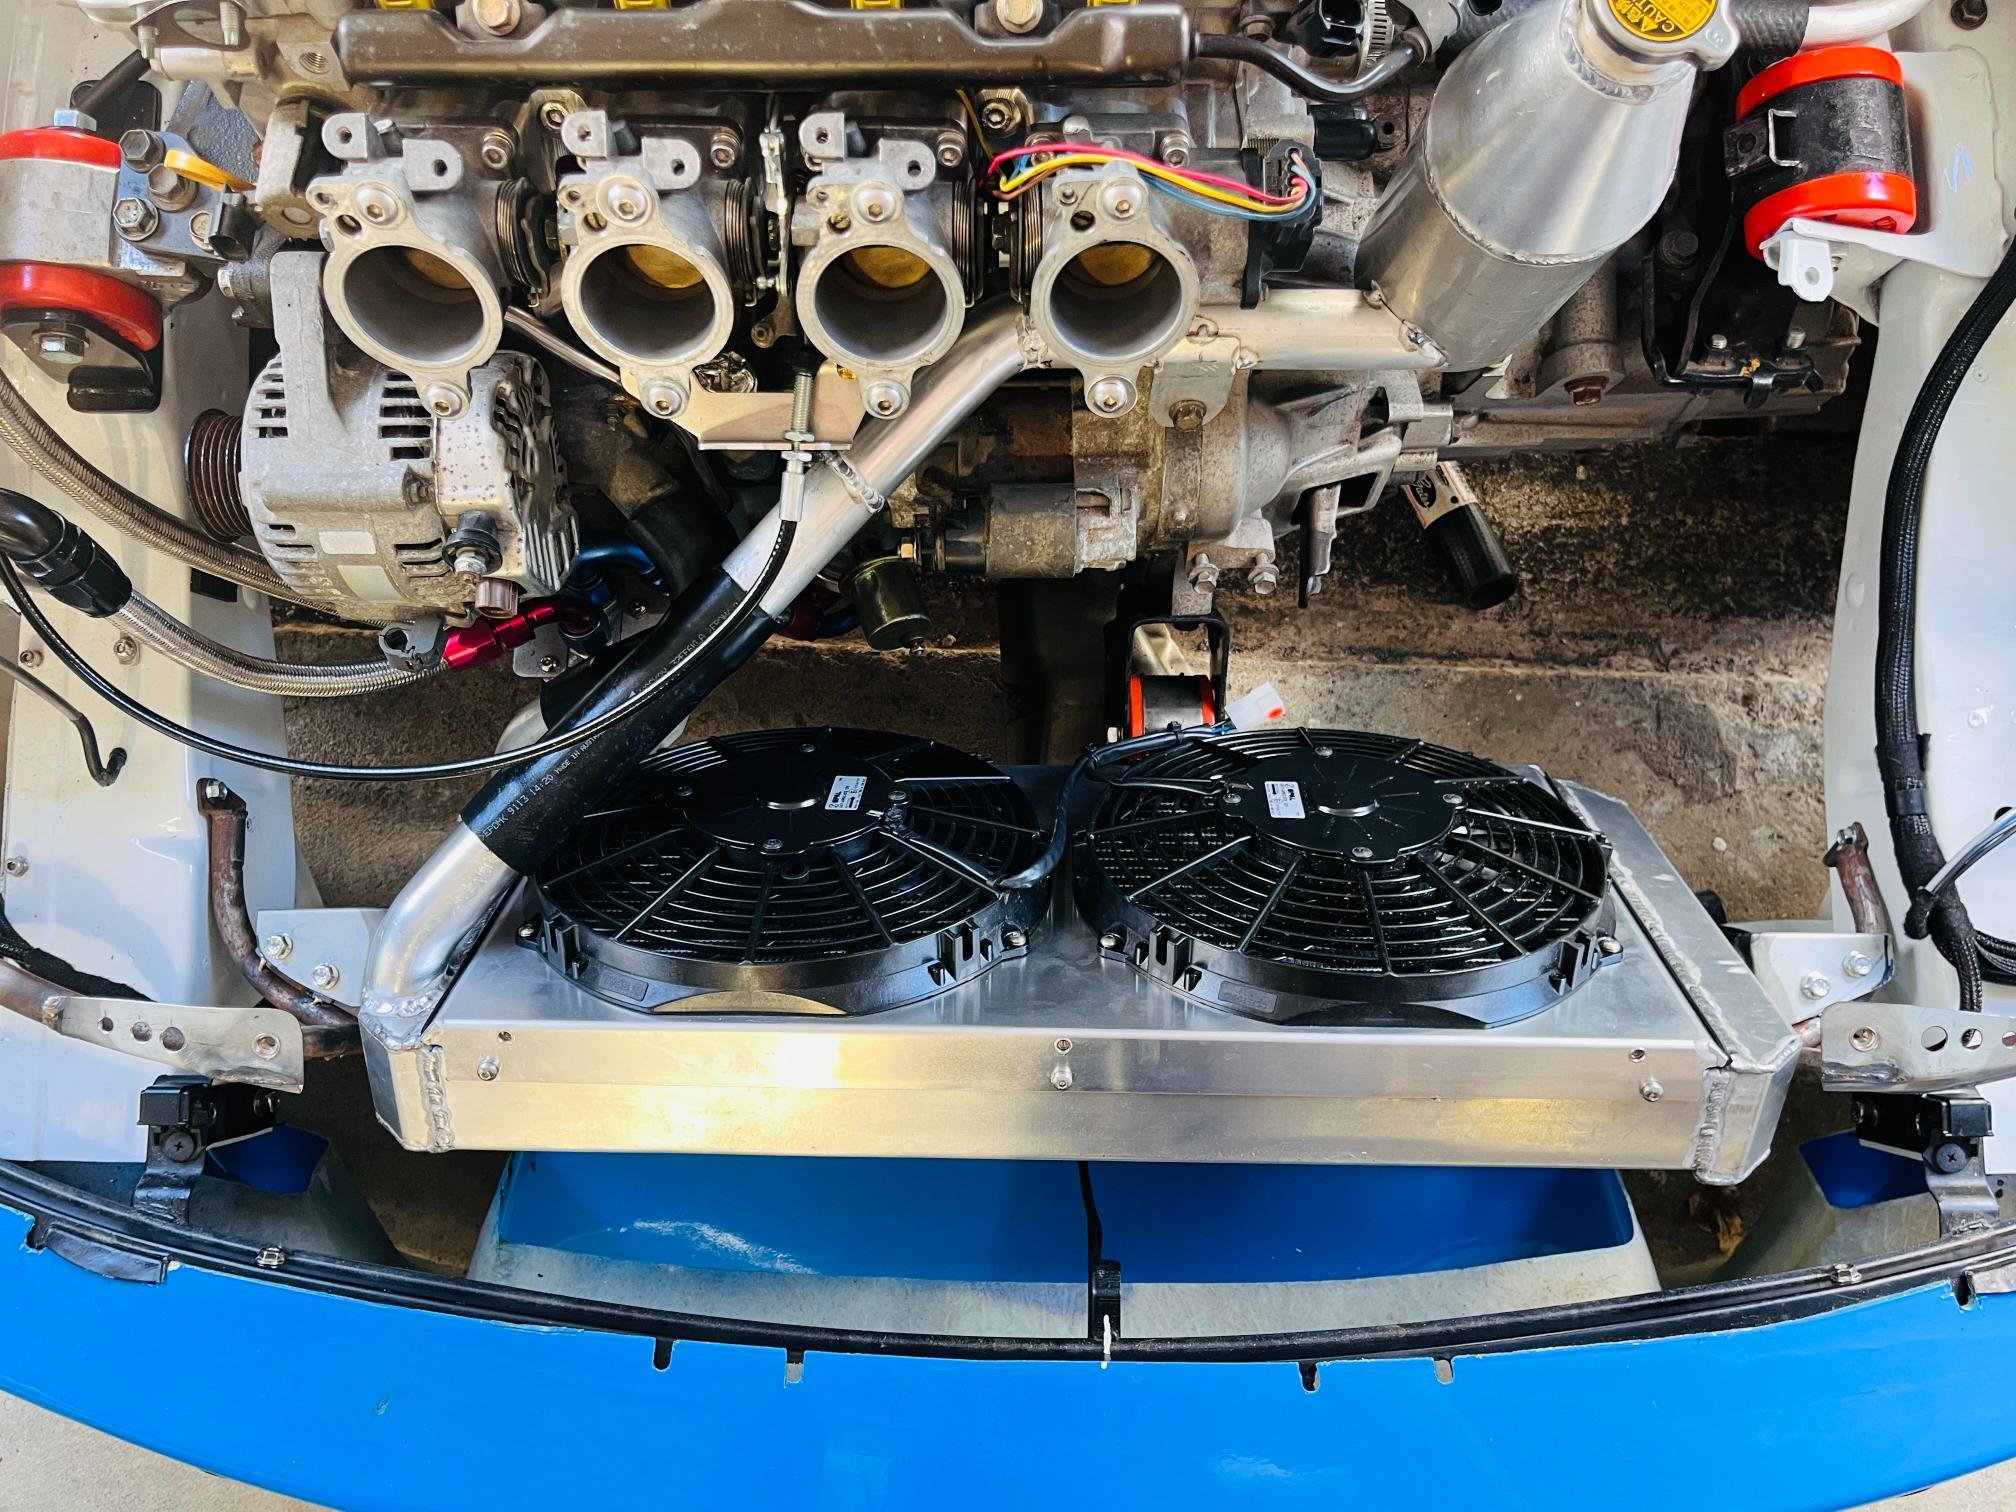
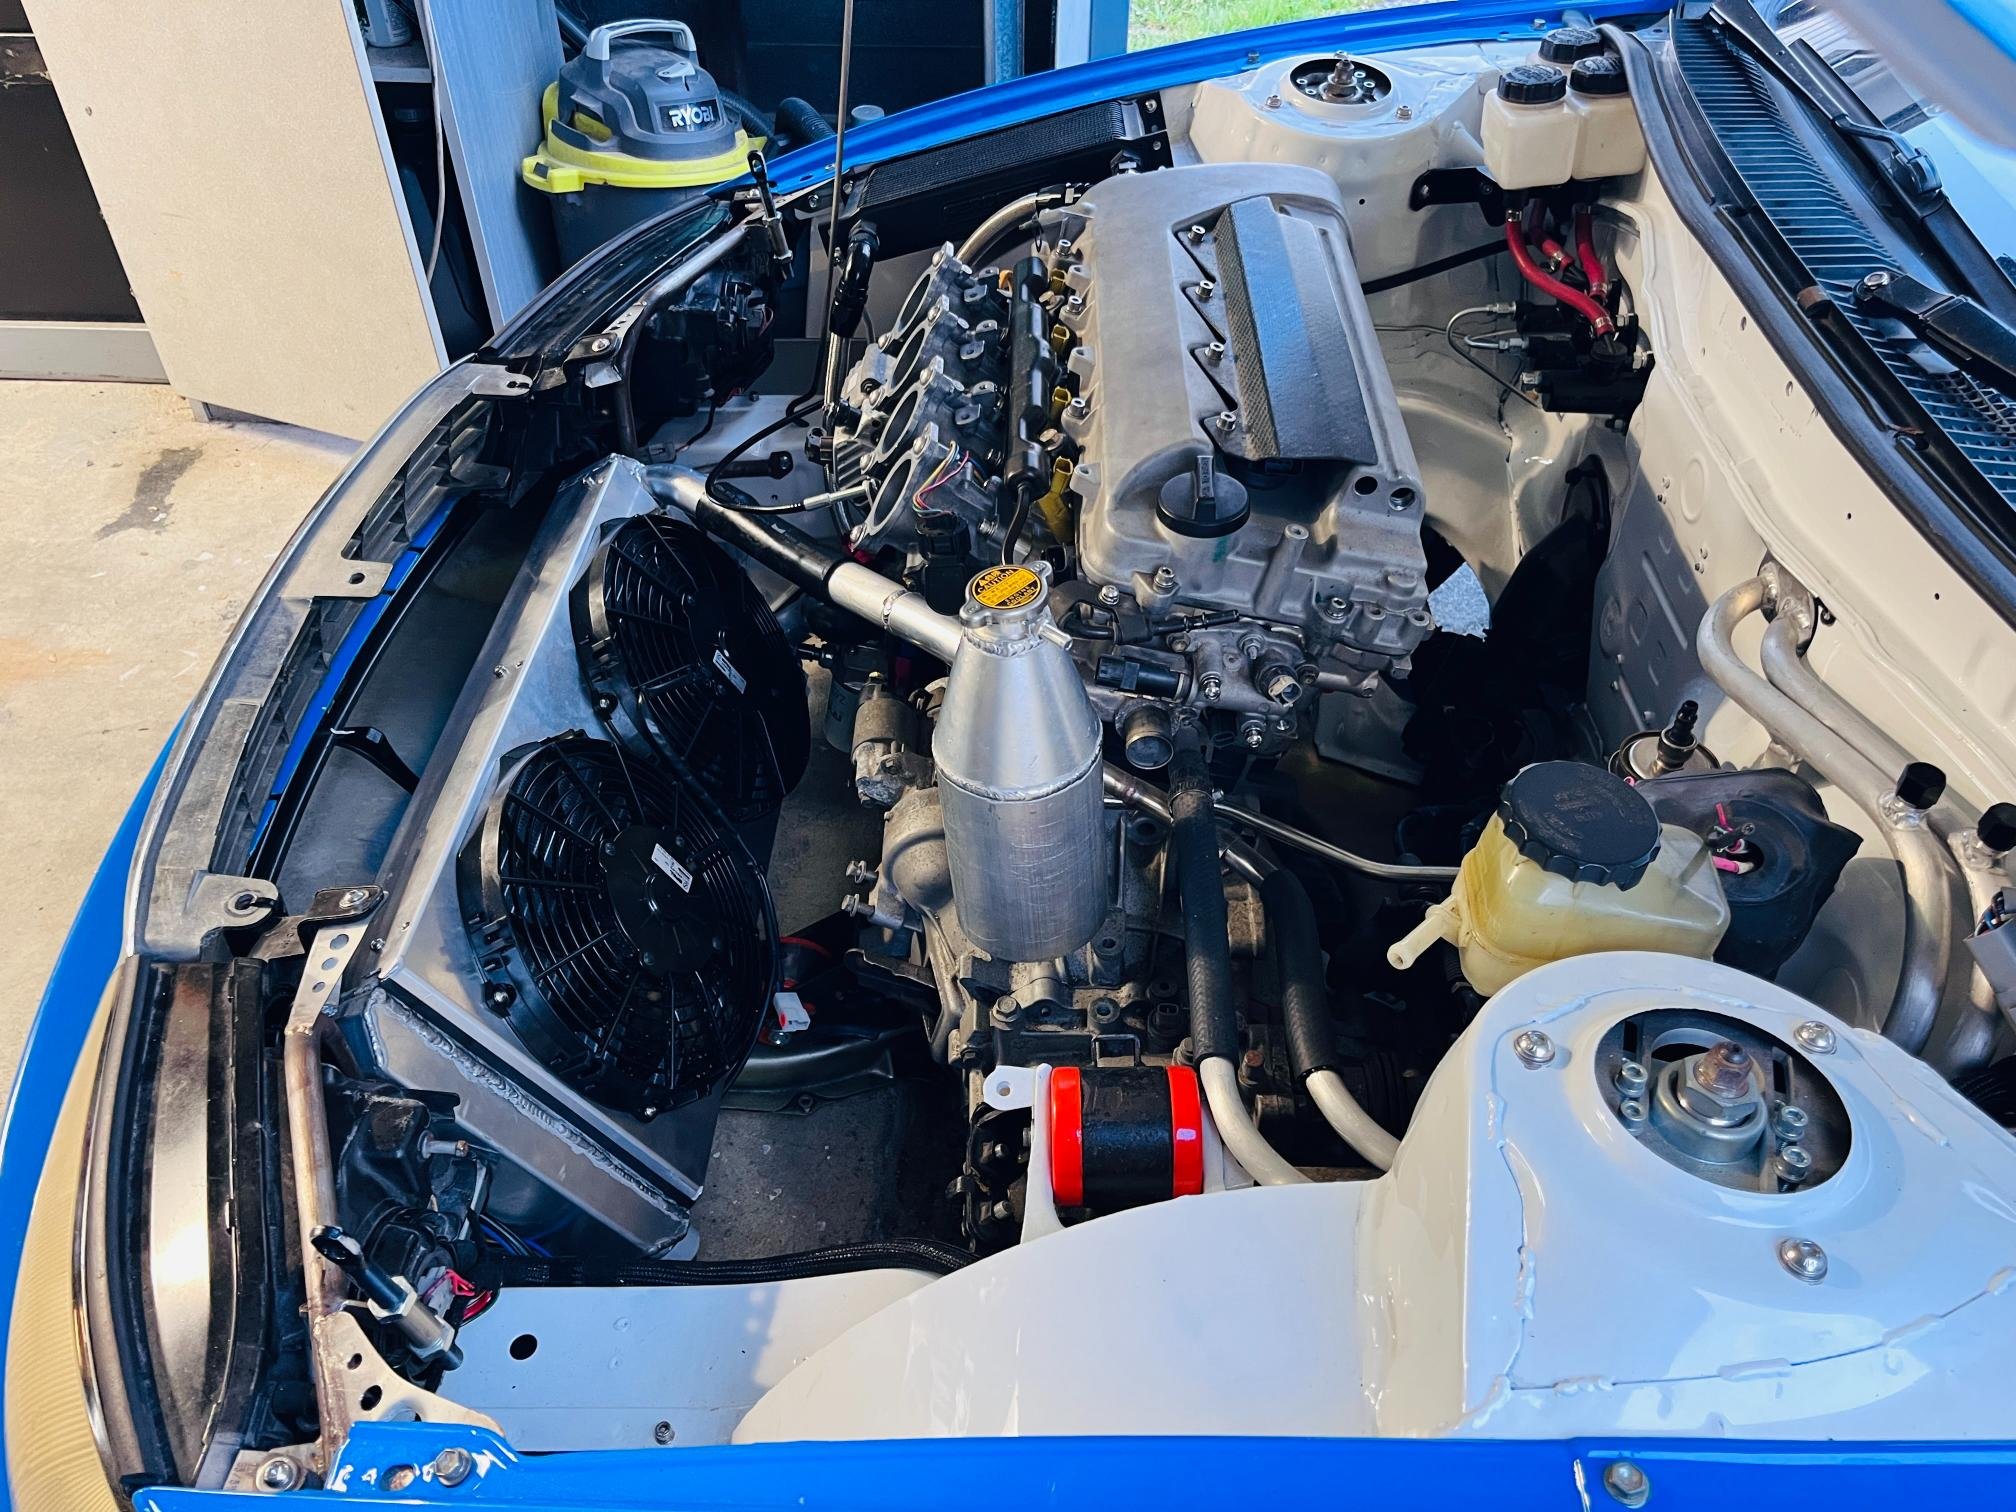
Getting a few loose ends of jobs tidied up before I tackle the last big job - extractors. Starting to look like a complete car. Catch can finished up. Internal baffle, tiny K&N filter from a BMW bike, drain tap in bottom so you don’t need to remove to empty!! Fits very well in the allotted space finished up radiator and swirl pot pipework (pending rubber hose) also finally finished the front bumper side ducting (radiator to come but that’s big job/non important to start the thing) Keep moving forward
 13 points
 -
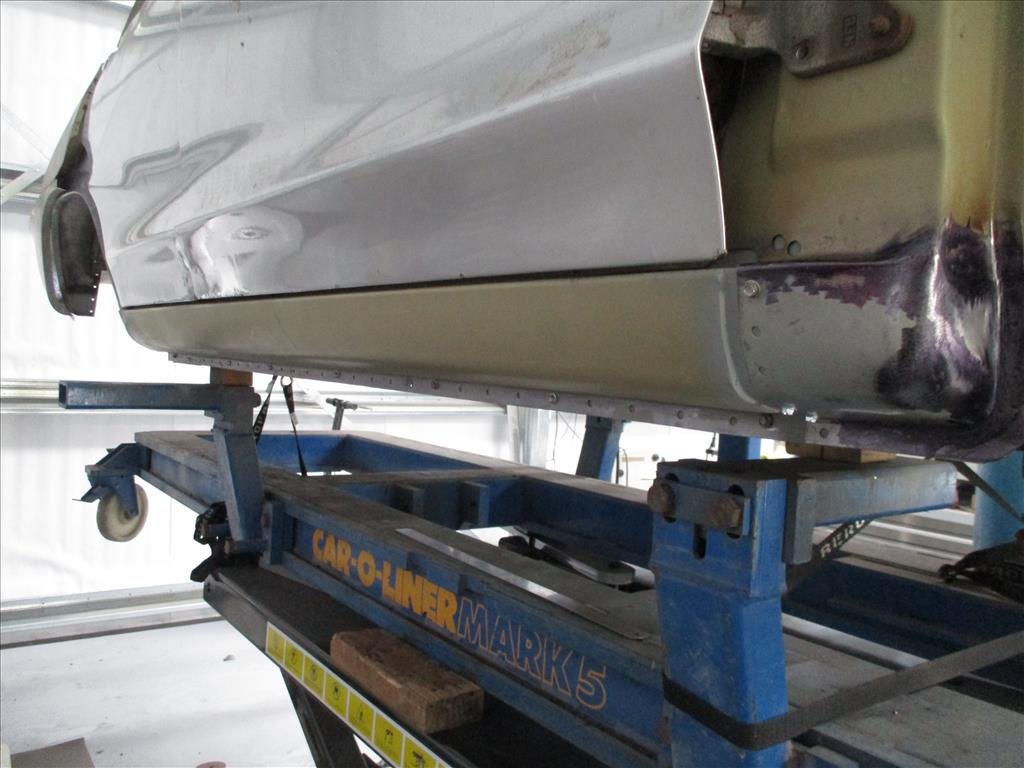
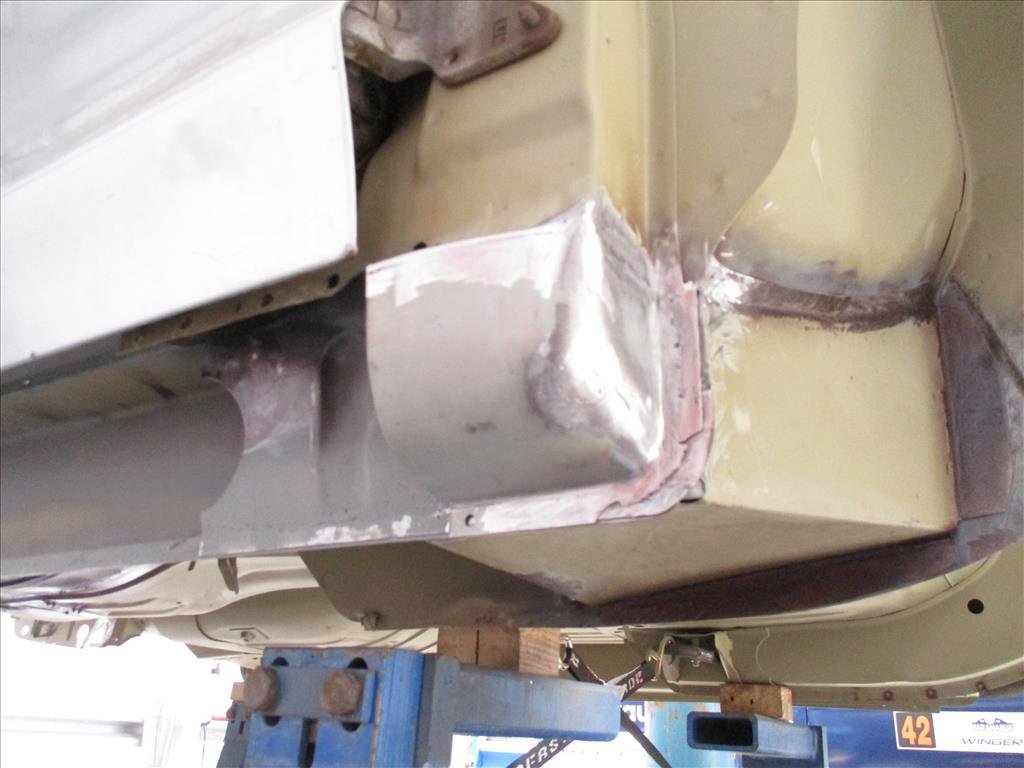
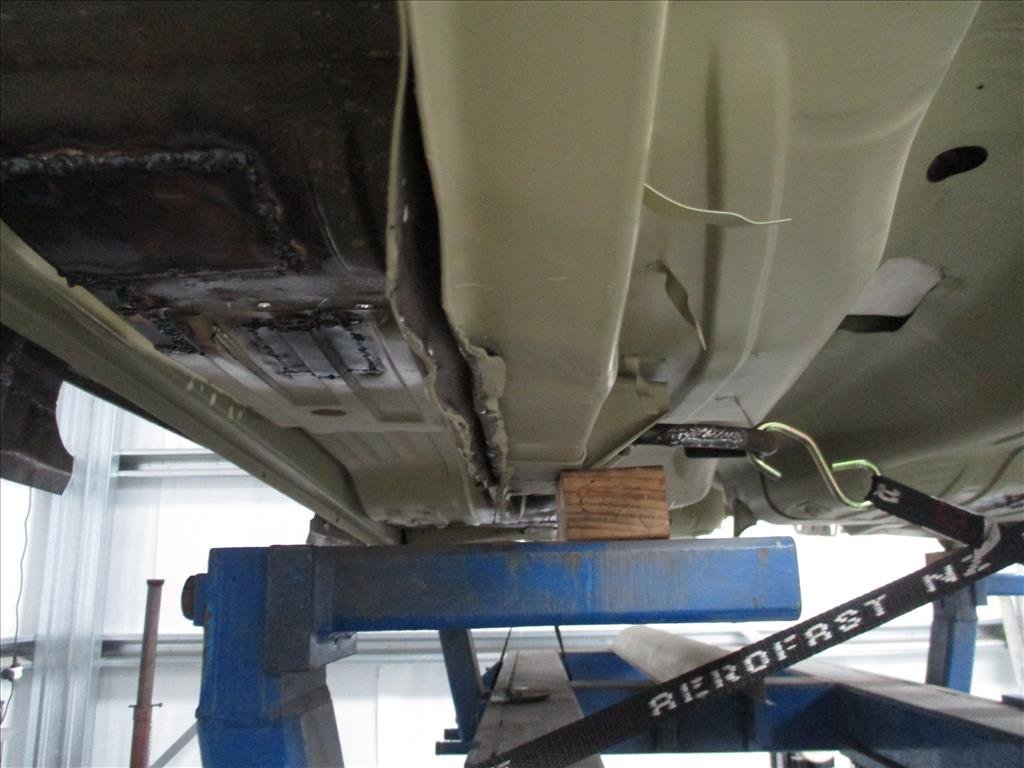
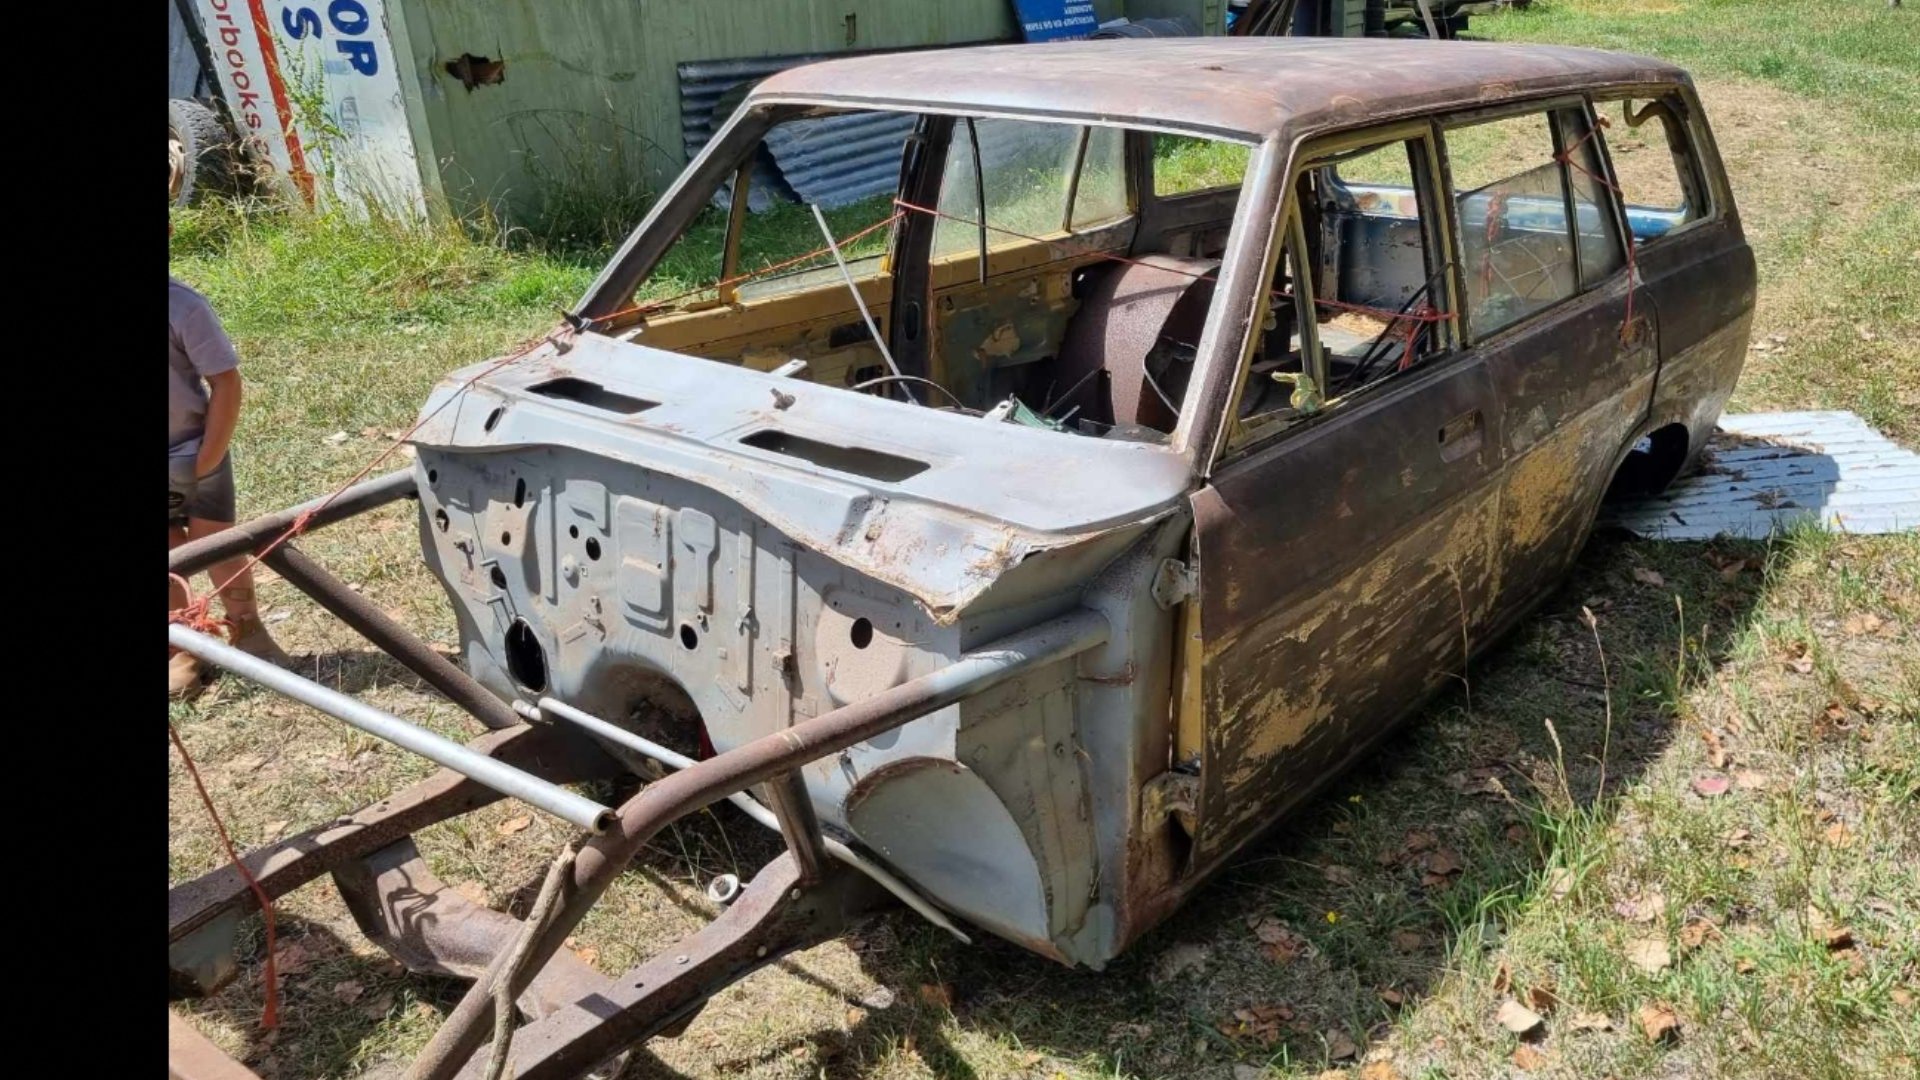
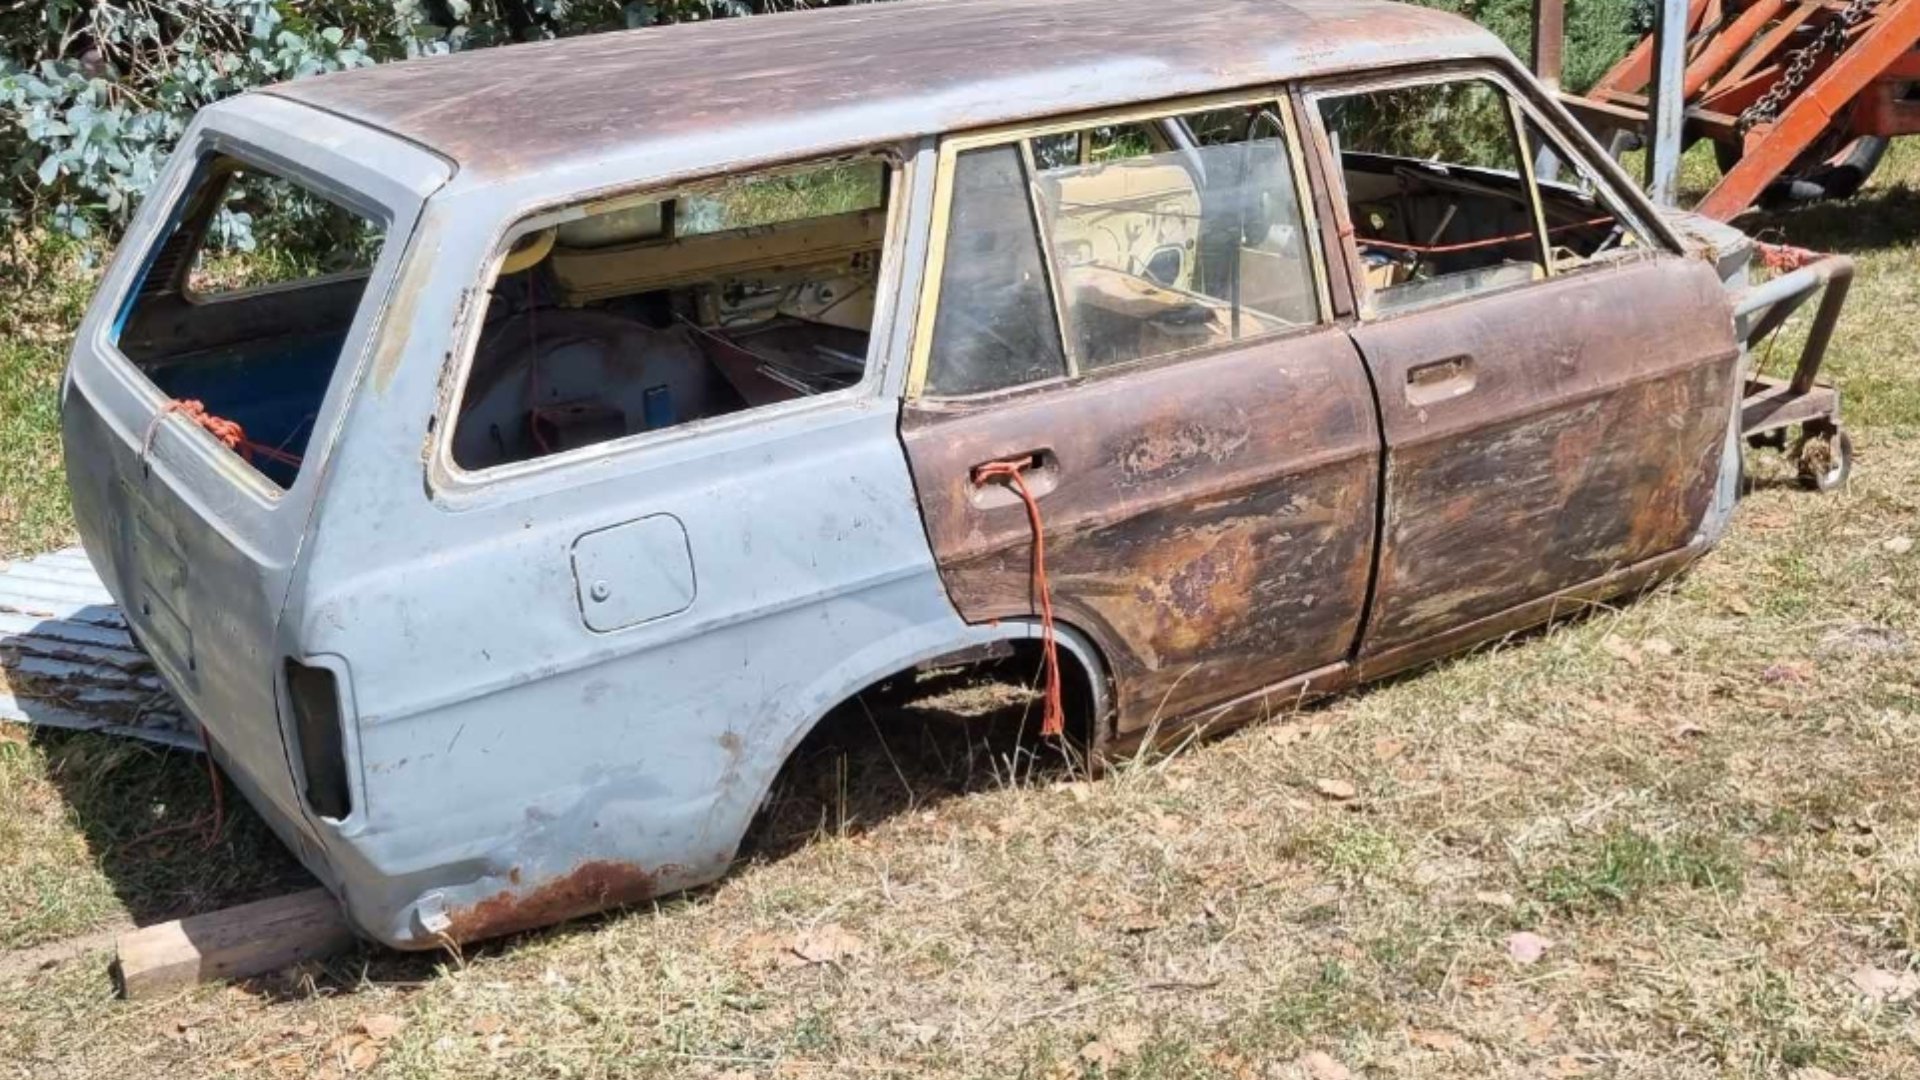
Today i pulled an 11.5 hour mish to go collect this thing. Loading cars that dont roll can be tricky. But it went better than expected. Came with a lot of tidy parts. But theres also a fair bit missing. (Including plates and tag) (the old rego number is etched into the window though. And it comes up in car jam. Theres been more work done to the undercarriage than i expected. Has a full C notch done. And the mounting points for the 4 link look to be there. Theres also lots of extra stiffening done to the floor. And fuck all rust. (For a datsun) it also came with (but not pictured) front guards and bonnet. These have been tack welded together. (The guy was planning a flip front)
13 points
-
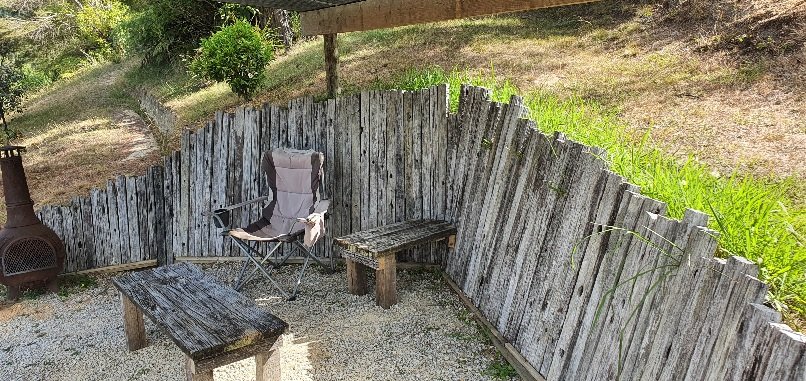
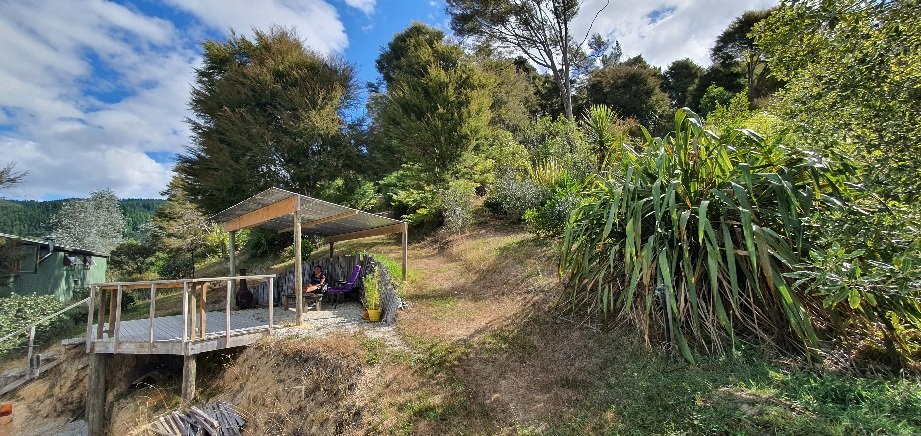
In January 2024 I suddenly needed somewhere to live in a hurry ... so I figured on building something small out of scraps of building materials I already had.. There's no power, water, sewer on the property, but 10 days ago we got most of the driveway in. I'm the kind of guy who thinks a fair bit before I act, so after some further thought most of the scrap timber/plumbing/etc. I had available got pushed to one side as they just weren't going to work. Queue more invoices for better timber (plus freight) I think this project will take until spring 2024 to be weathertight. Shipping delays and huge freight expenses will add to the timeframe and budget. For example I have $500 of under concrete insulation here at the port. The freight bill for that insulation alone was $1,200. The proposed dwelling will be single bedroom and about 60m2 I always start very well but never finish anything. Let's see what happens this time.10 points
-
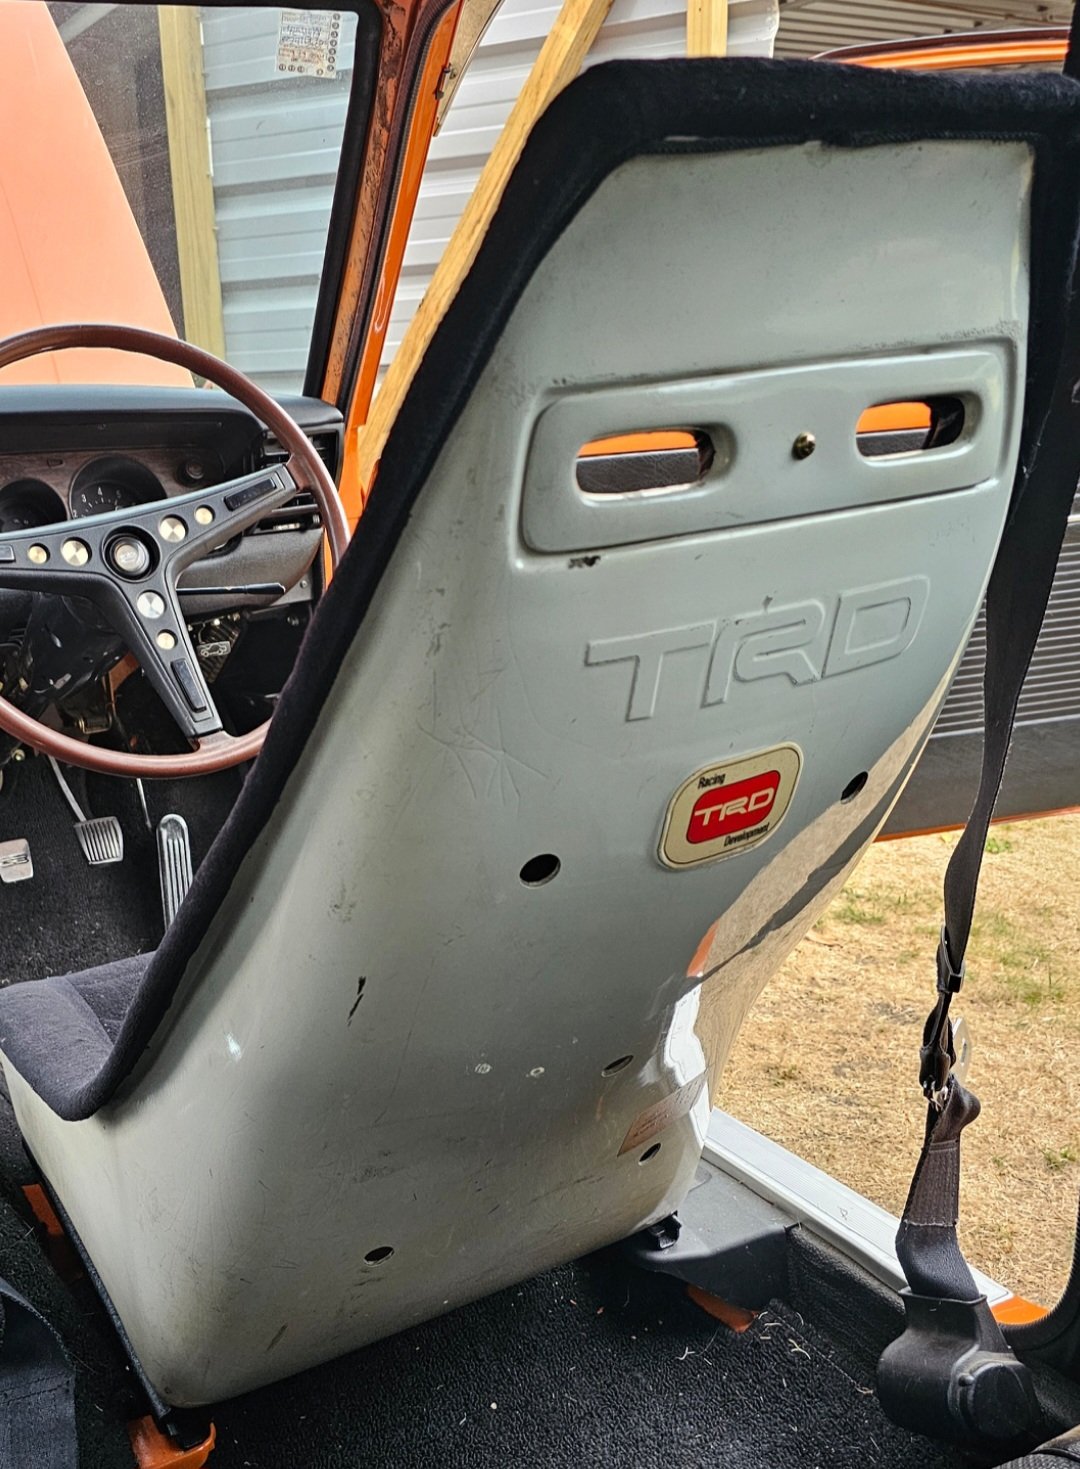
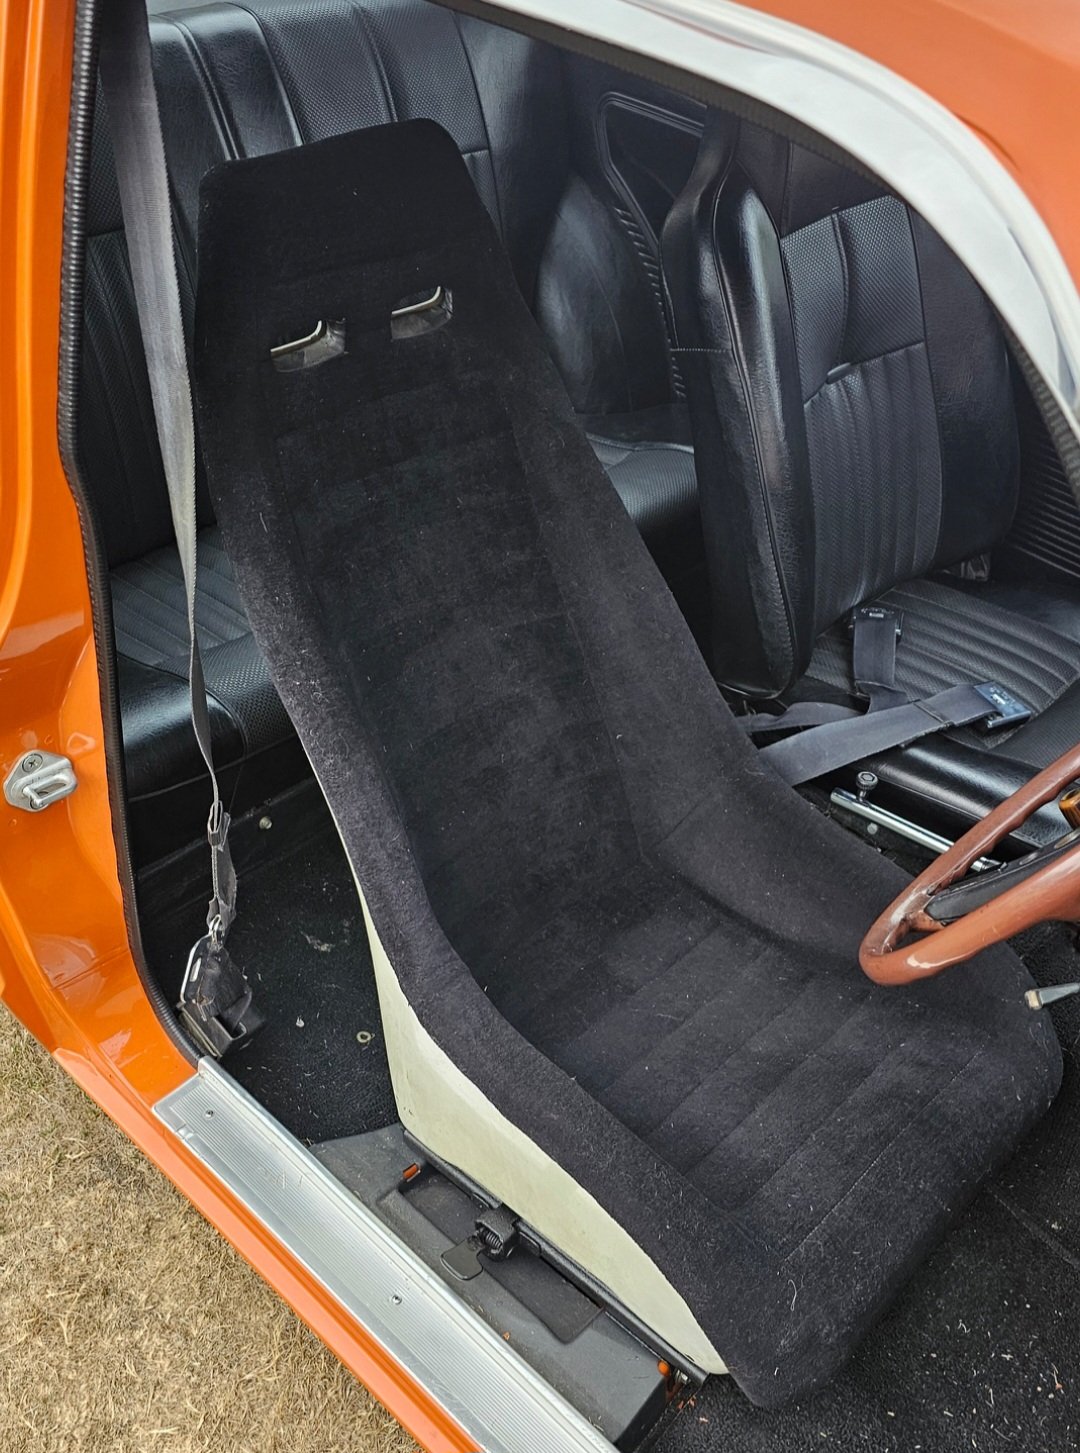
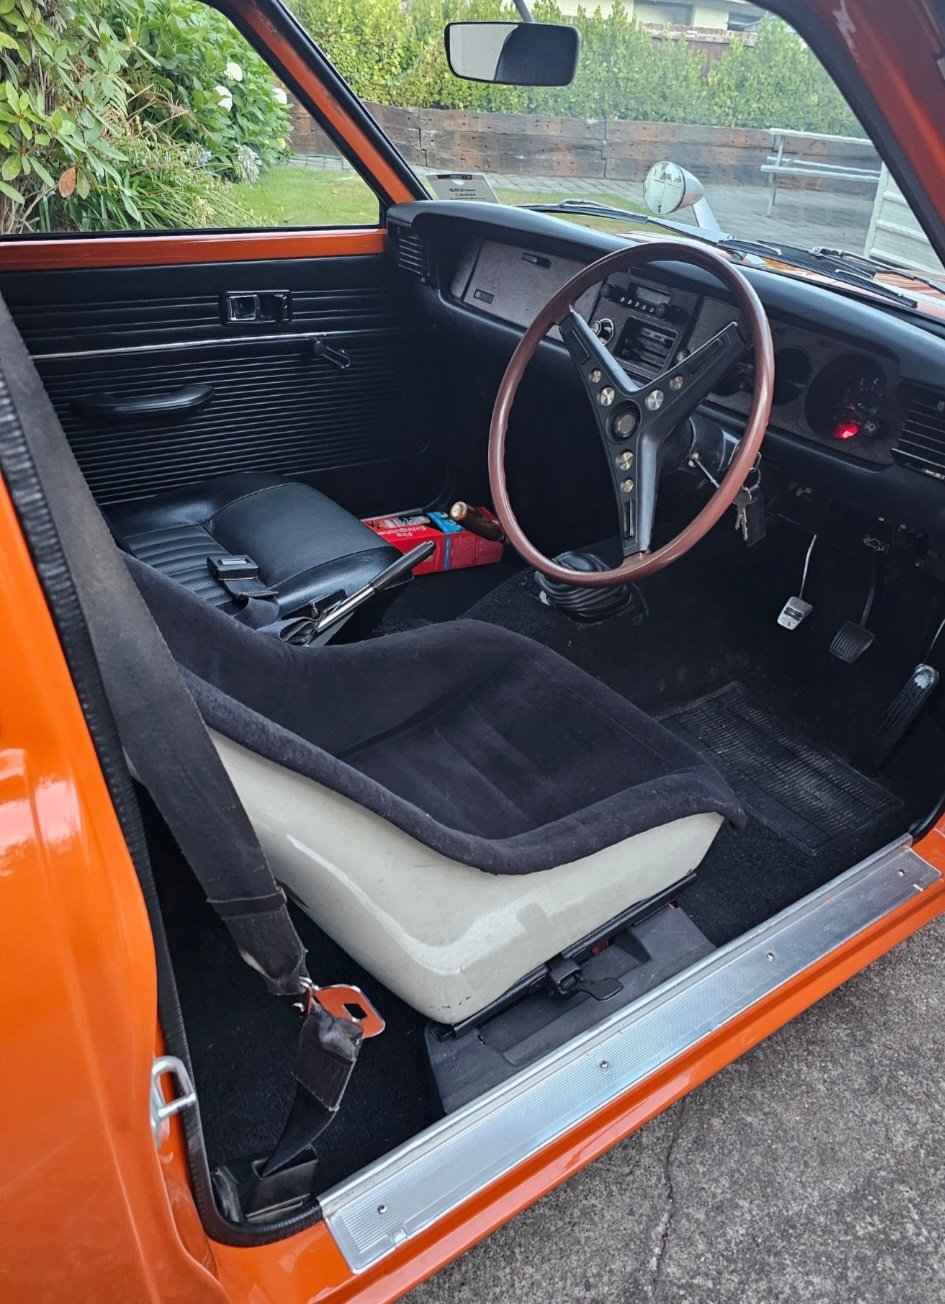
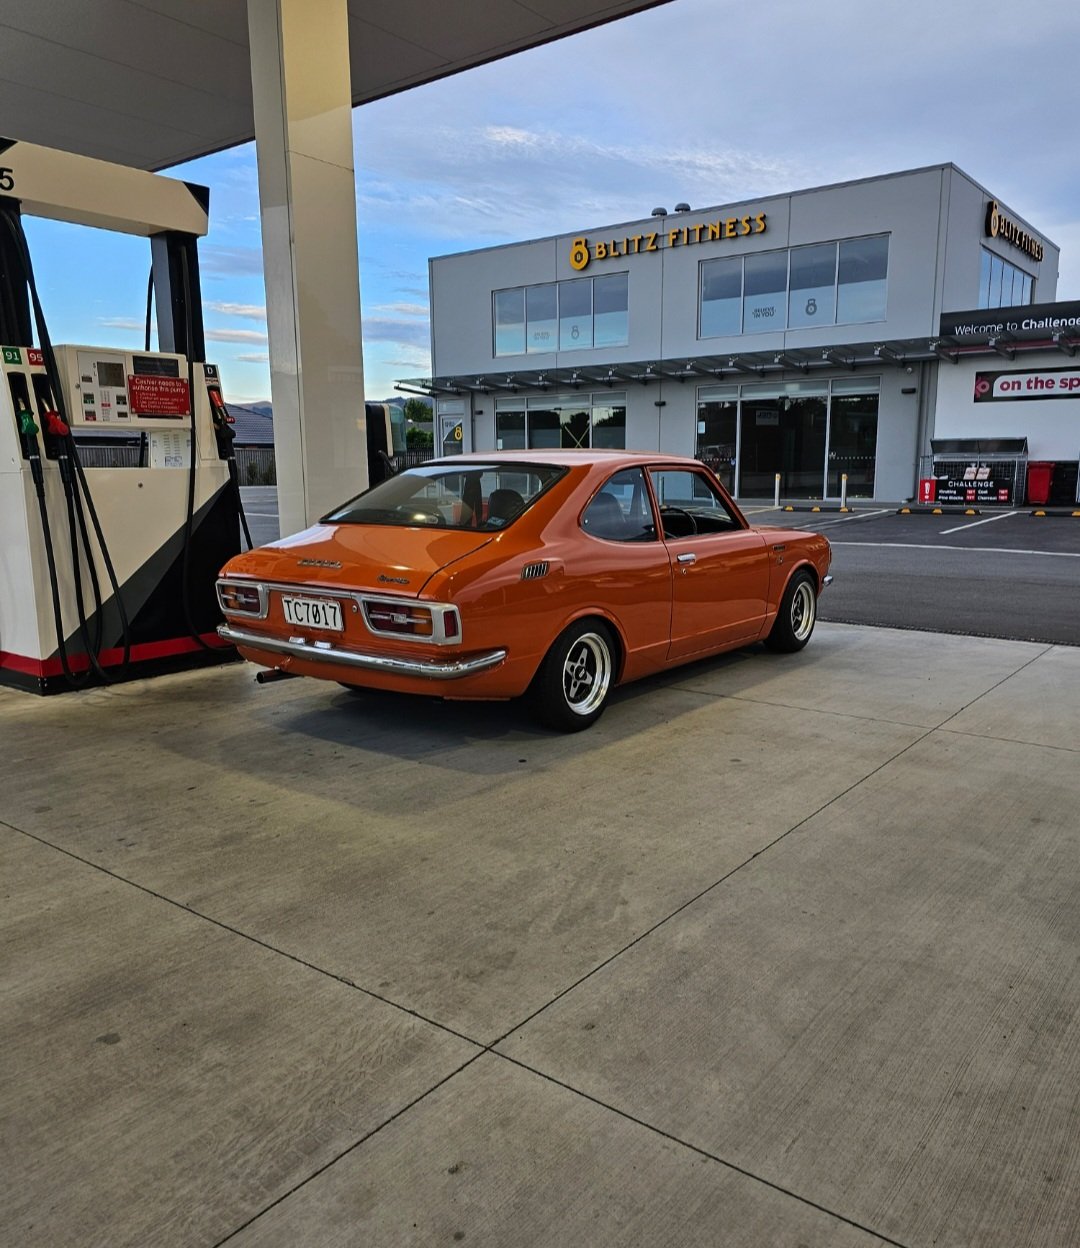
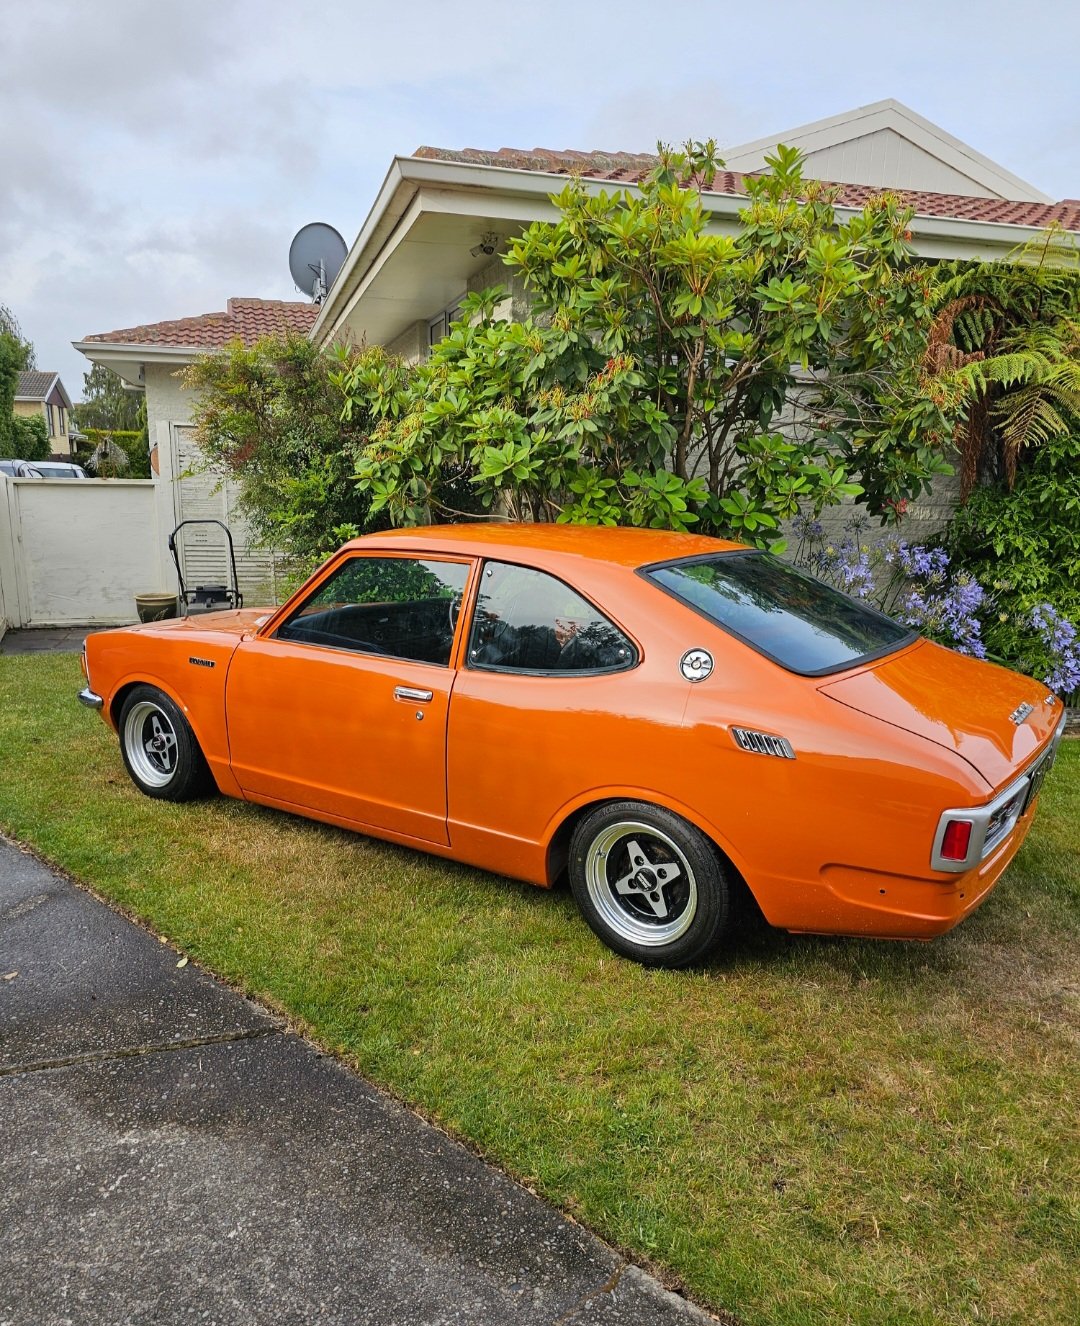
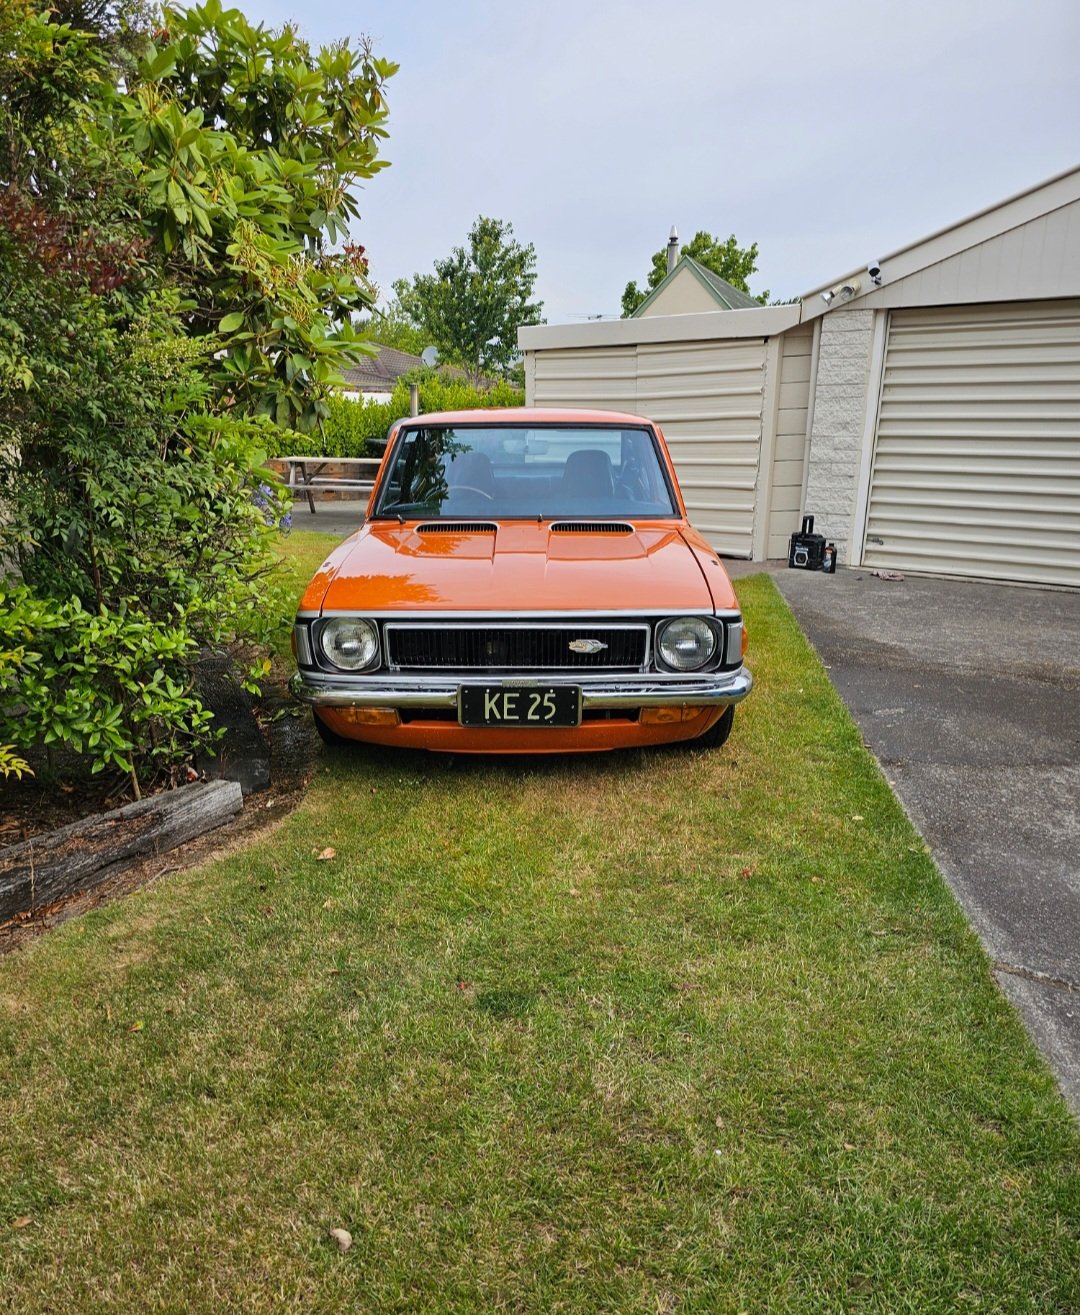
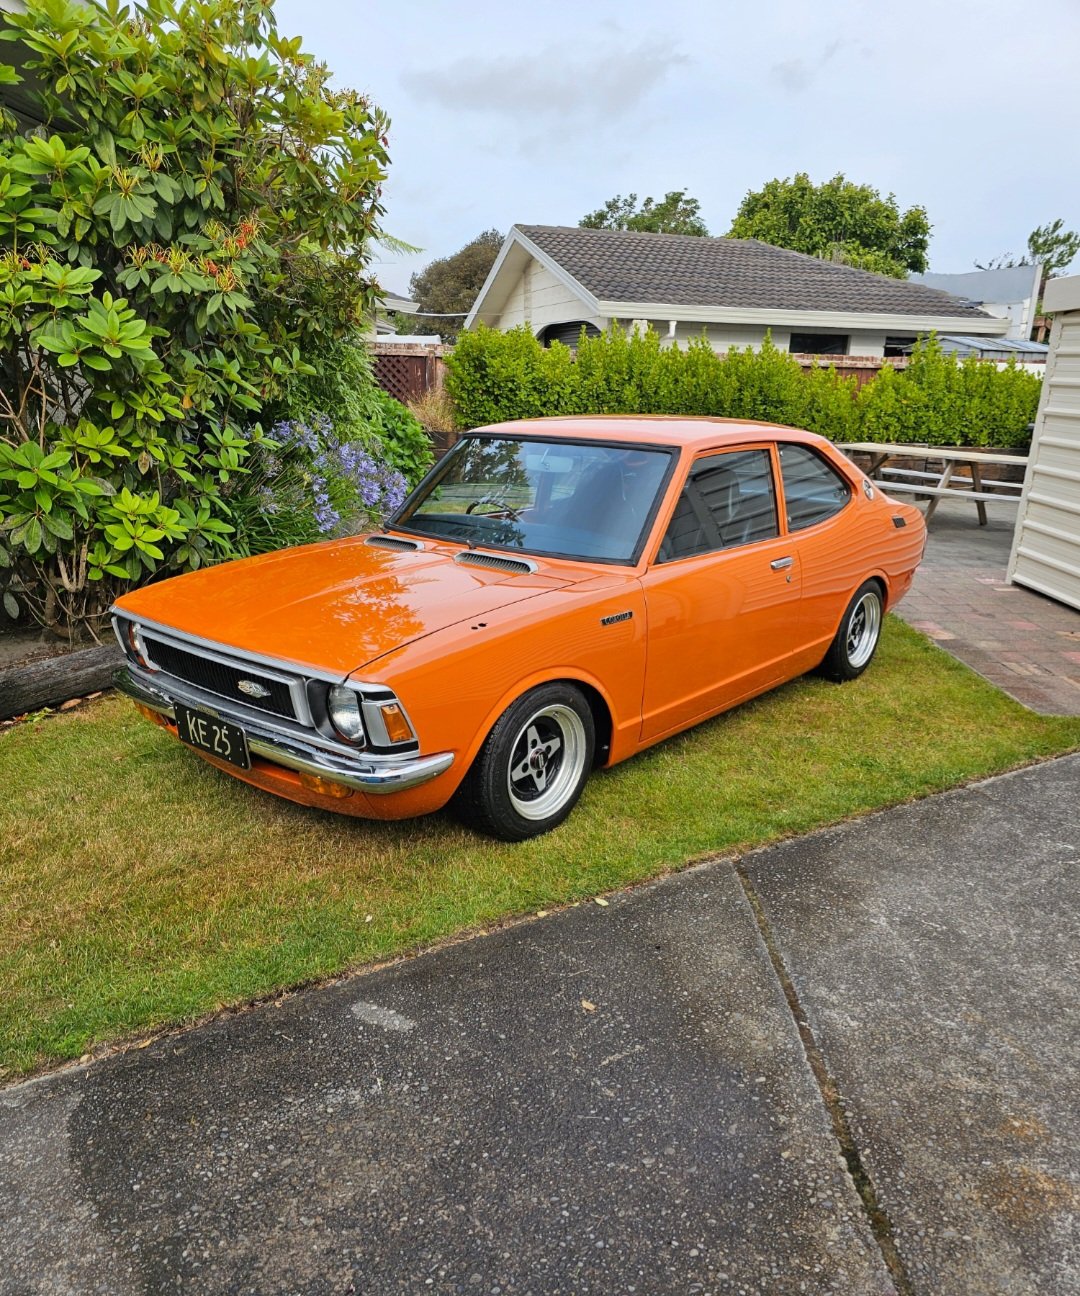
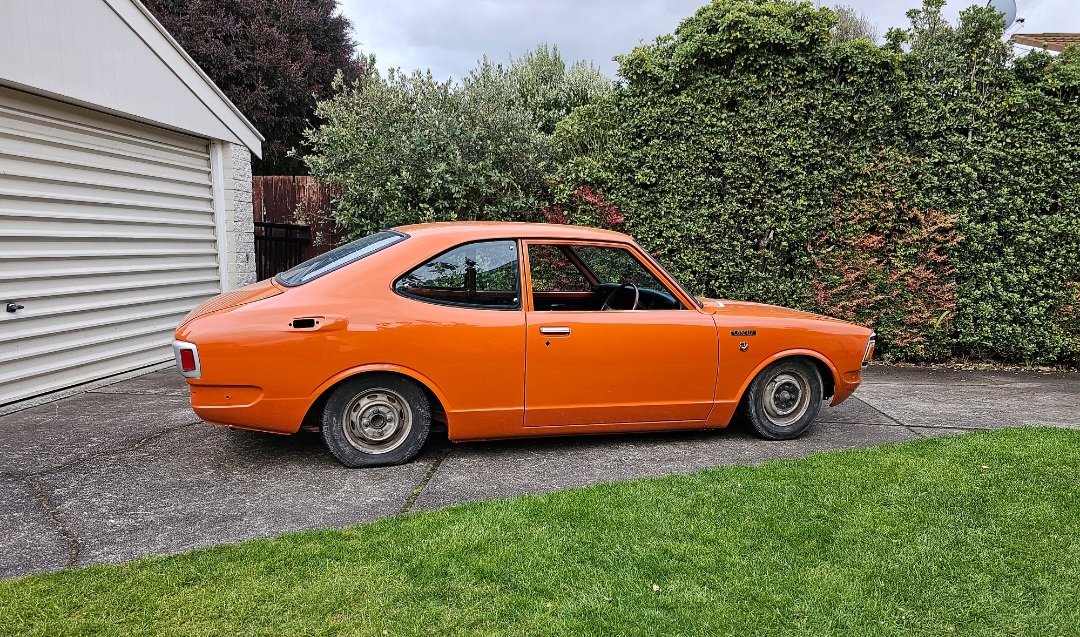
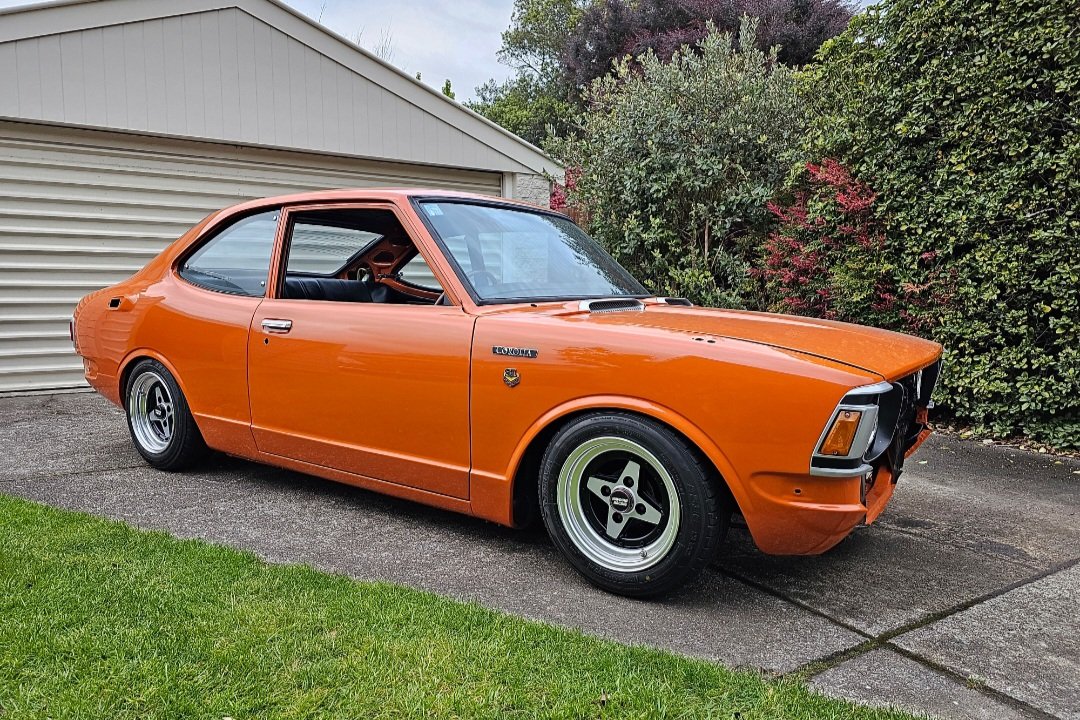
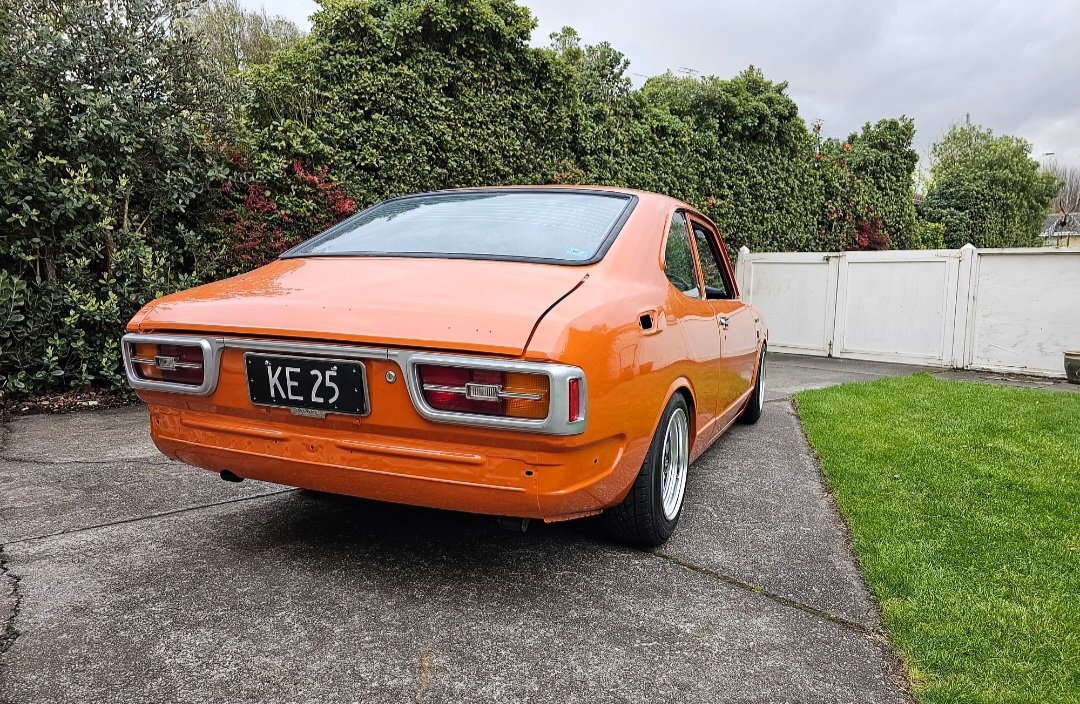
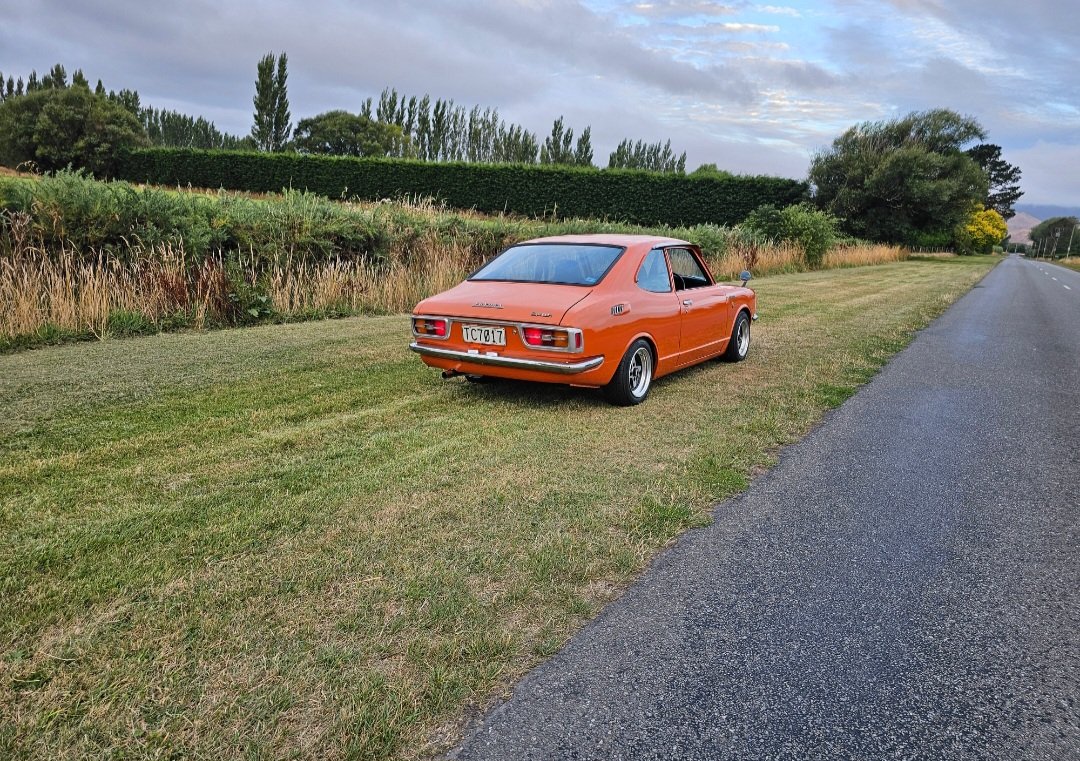
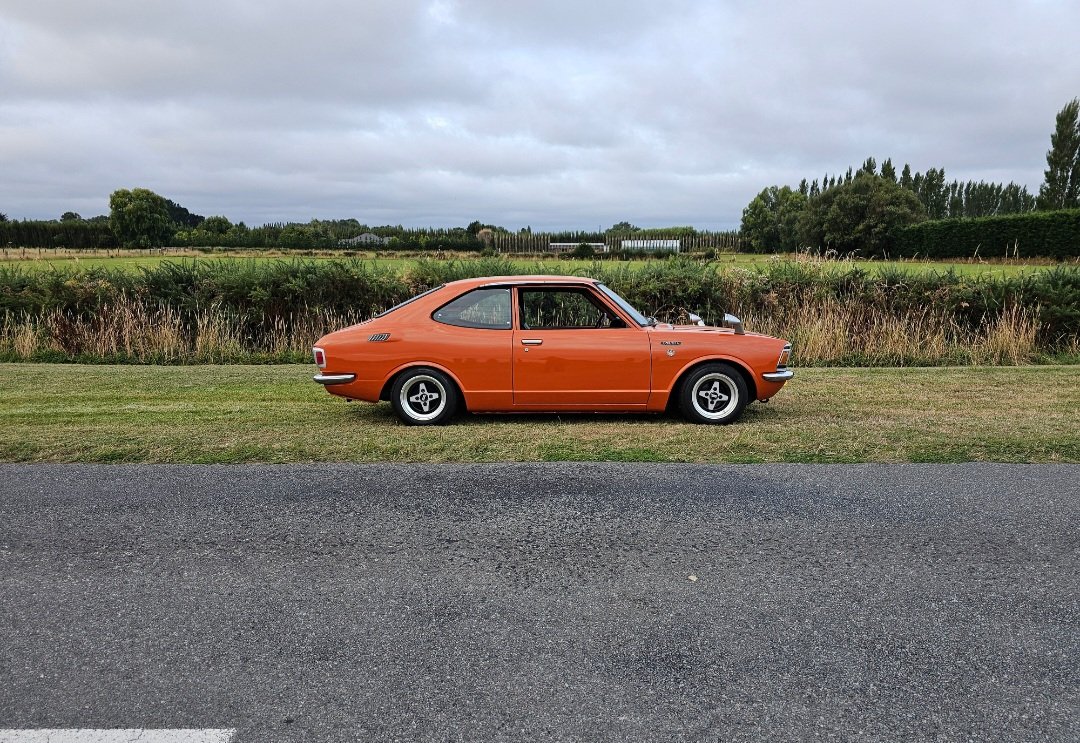
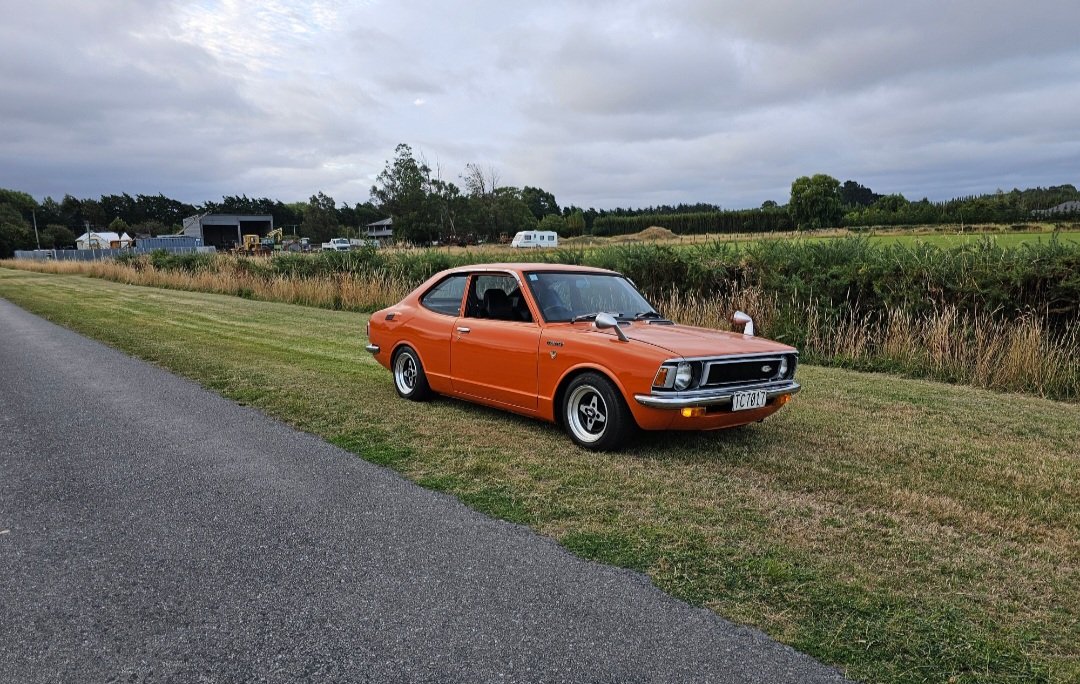
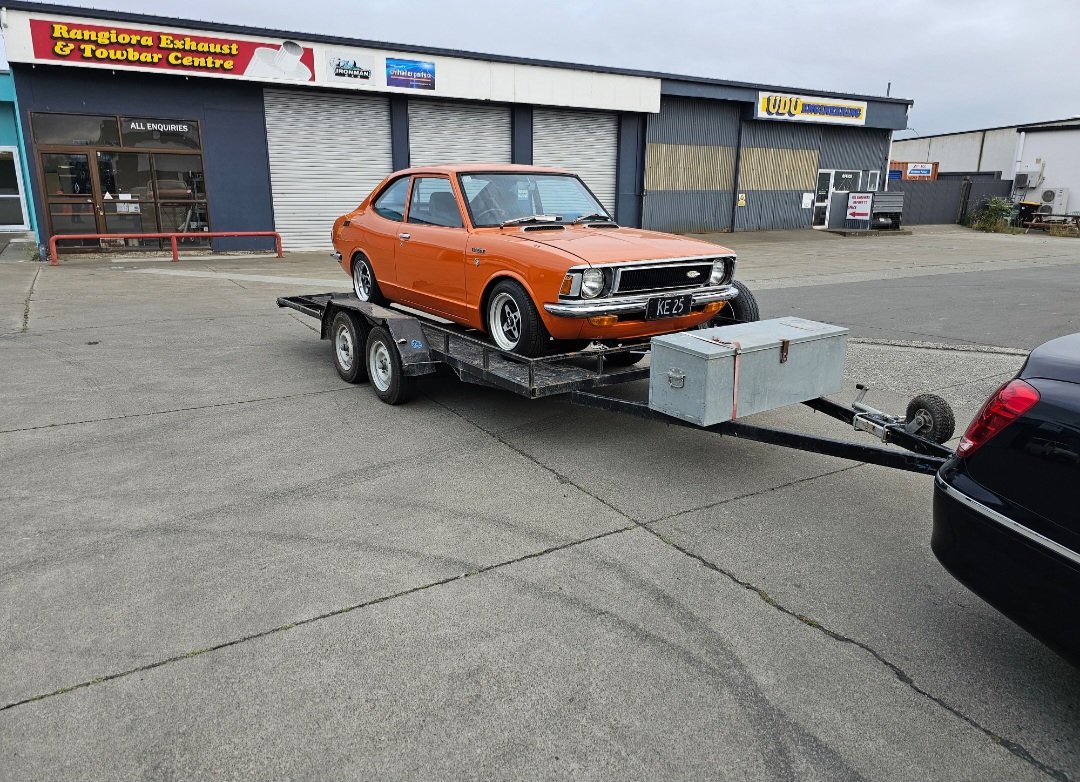
1970/80s trd bucket seat on factory ke25 seat rails
8 points
-
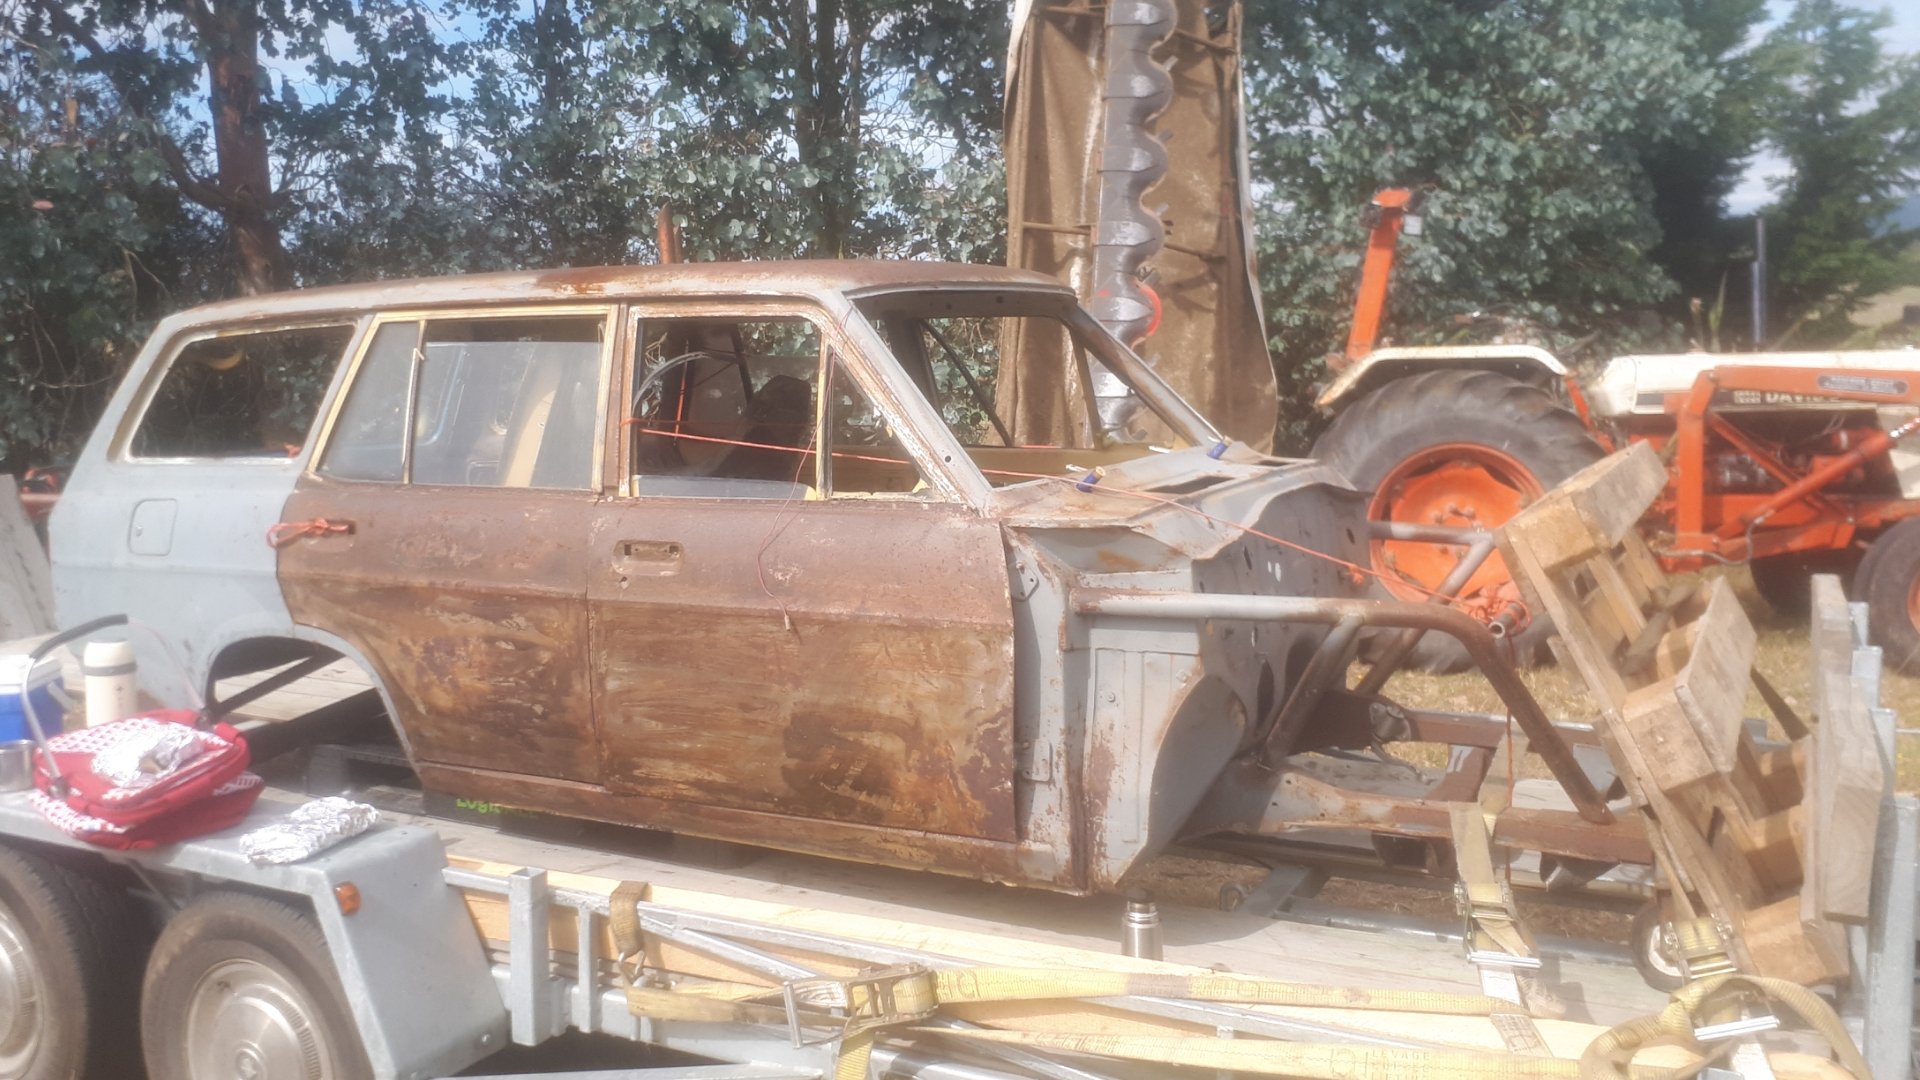
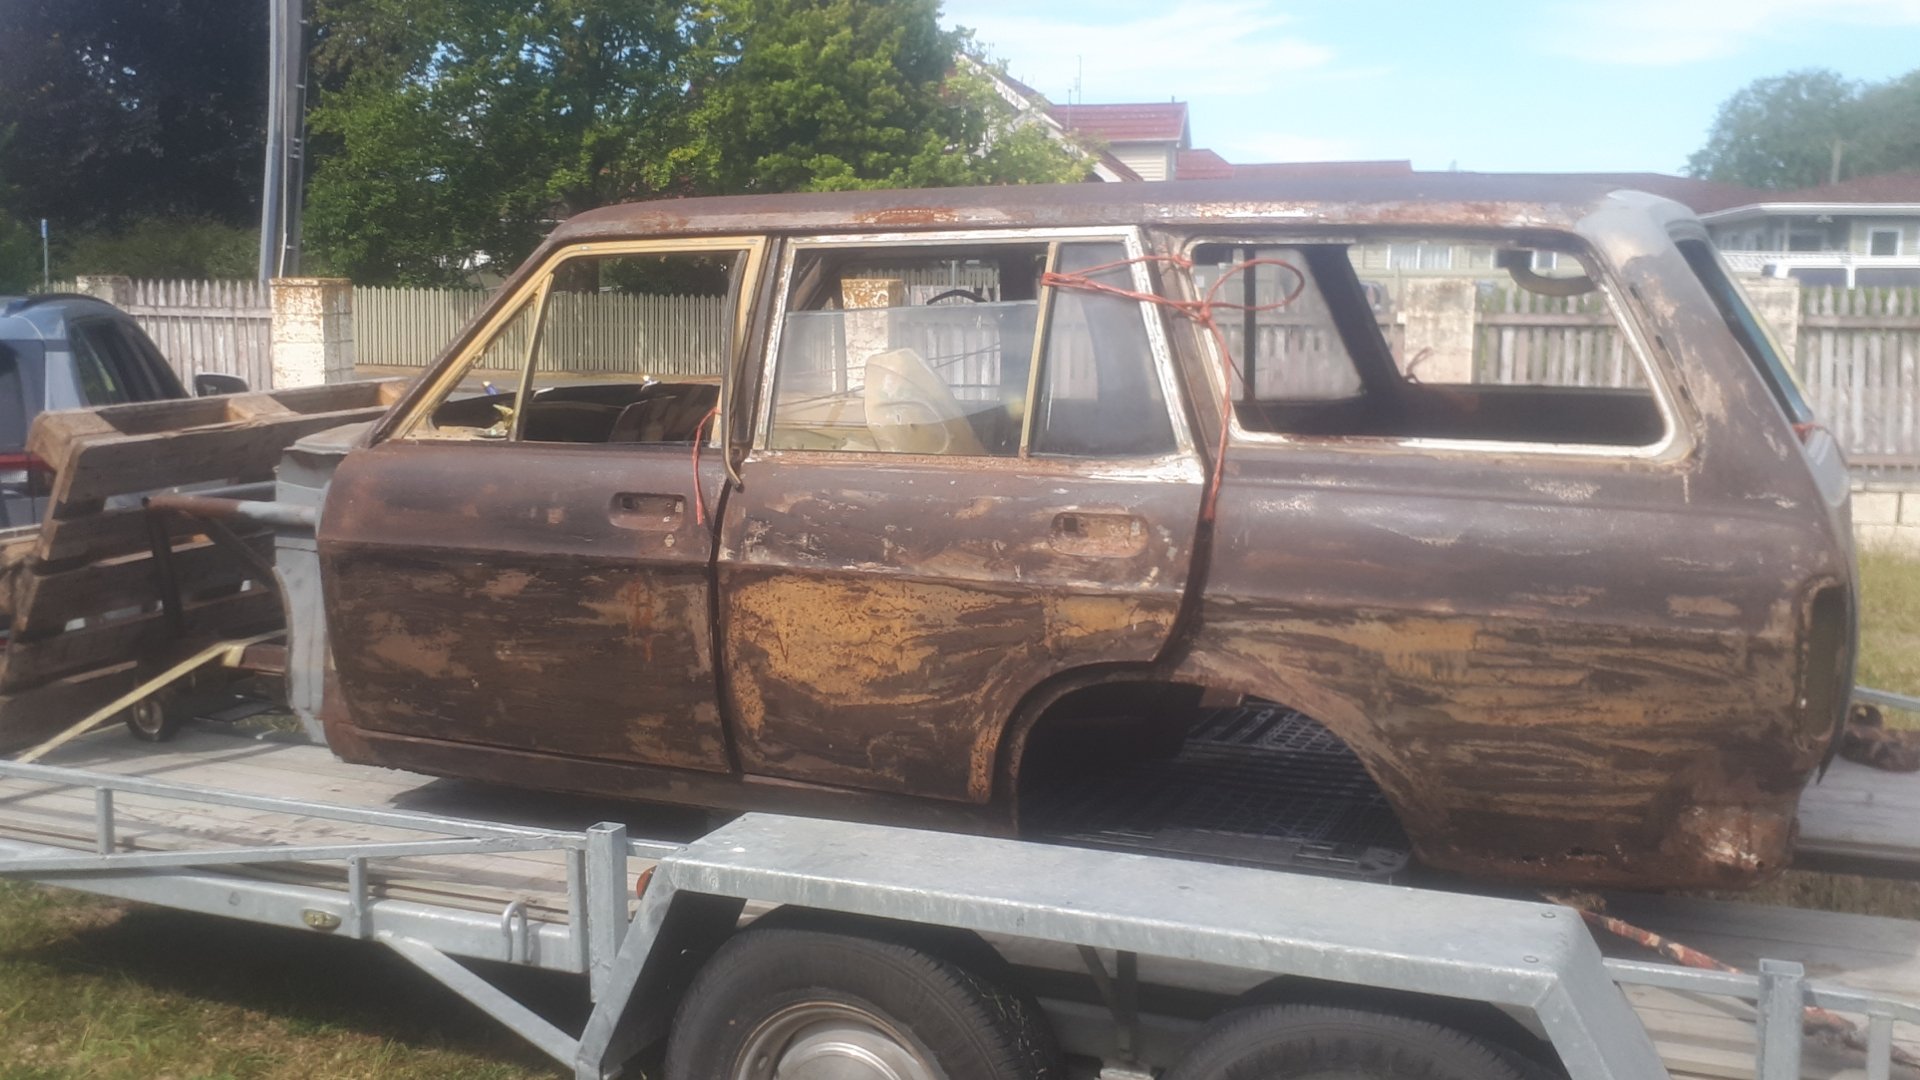
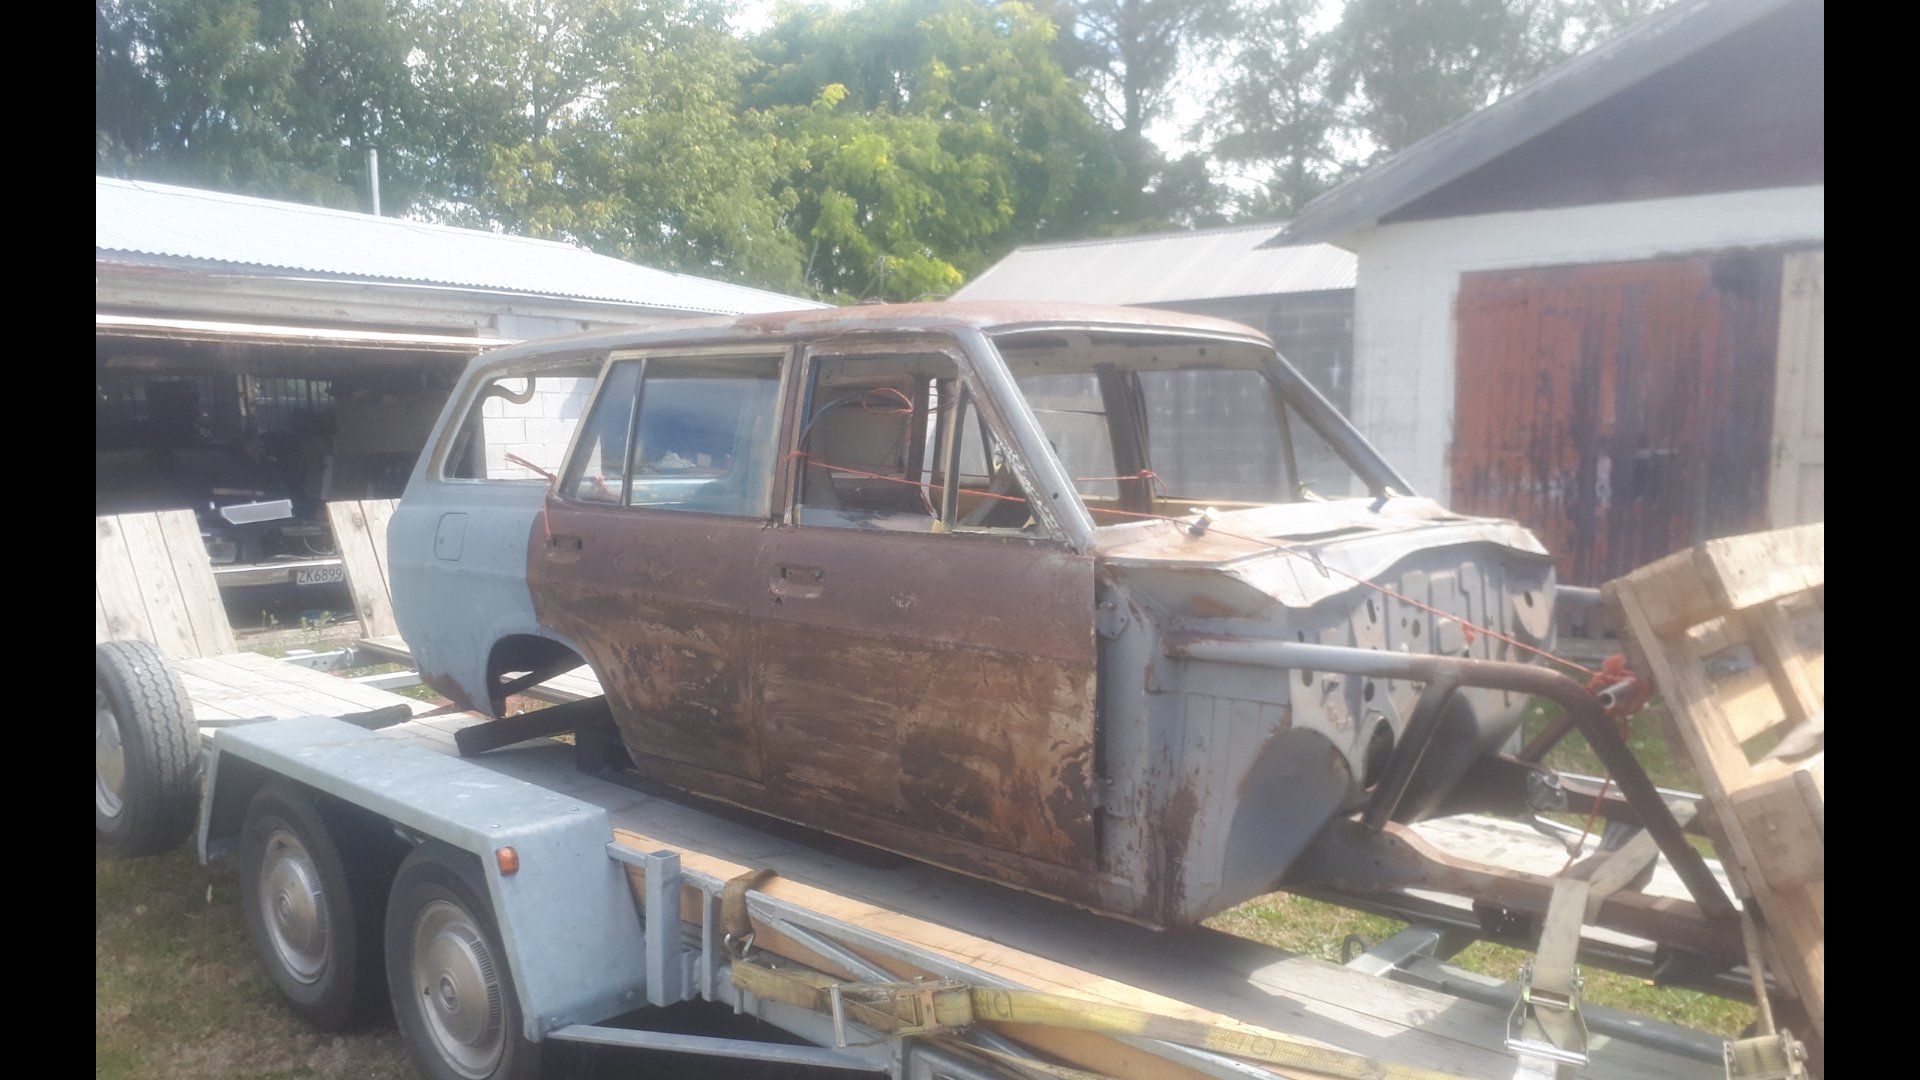
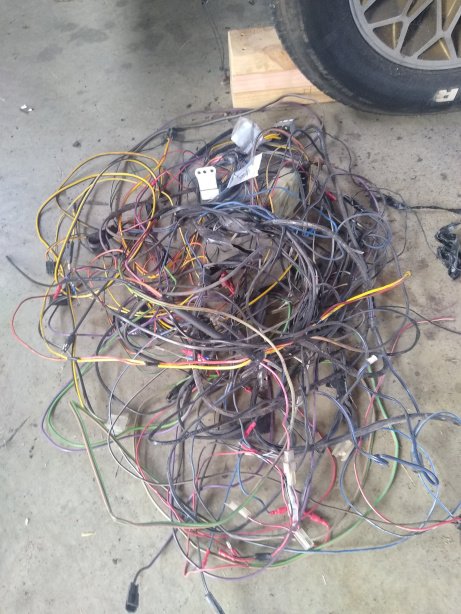
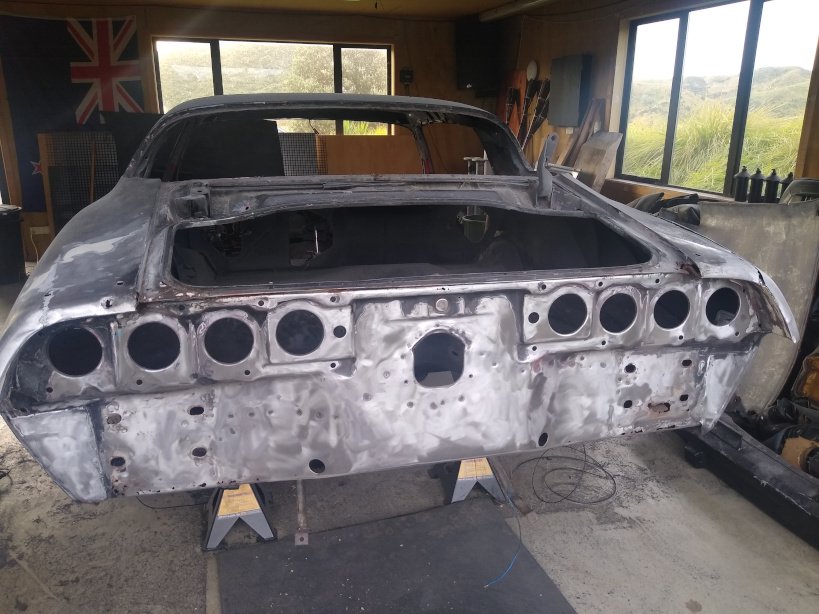
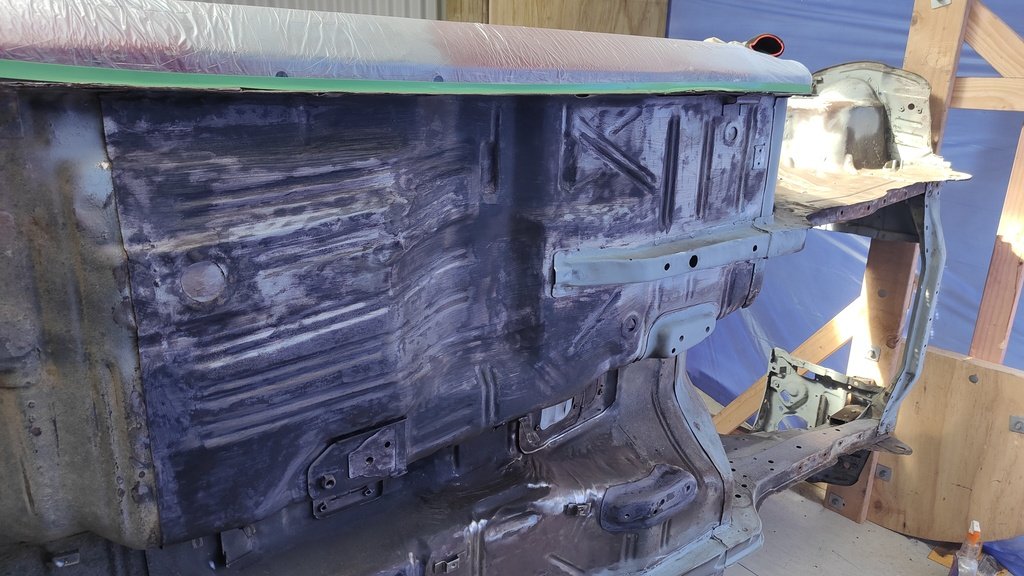
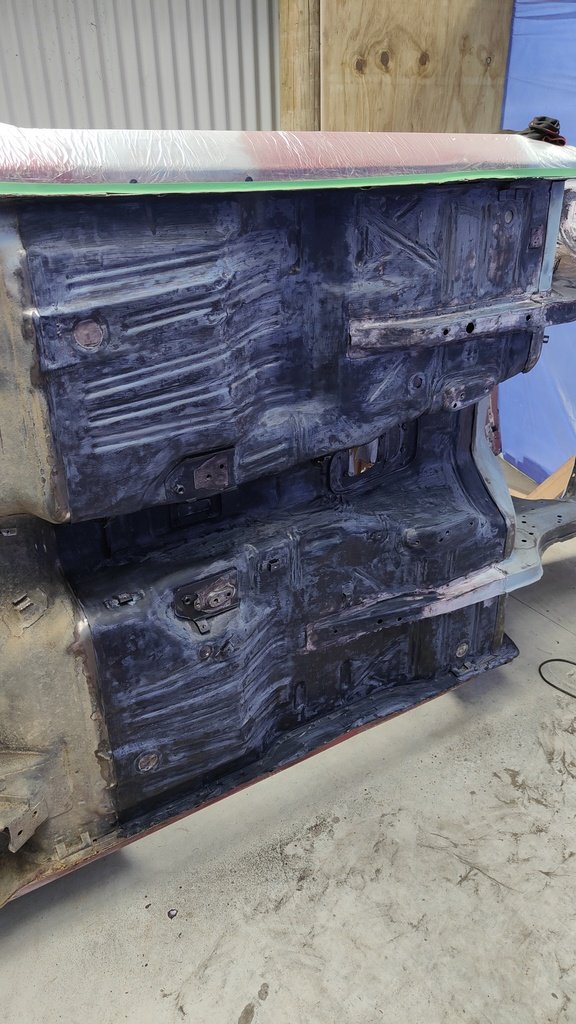
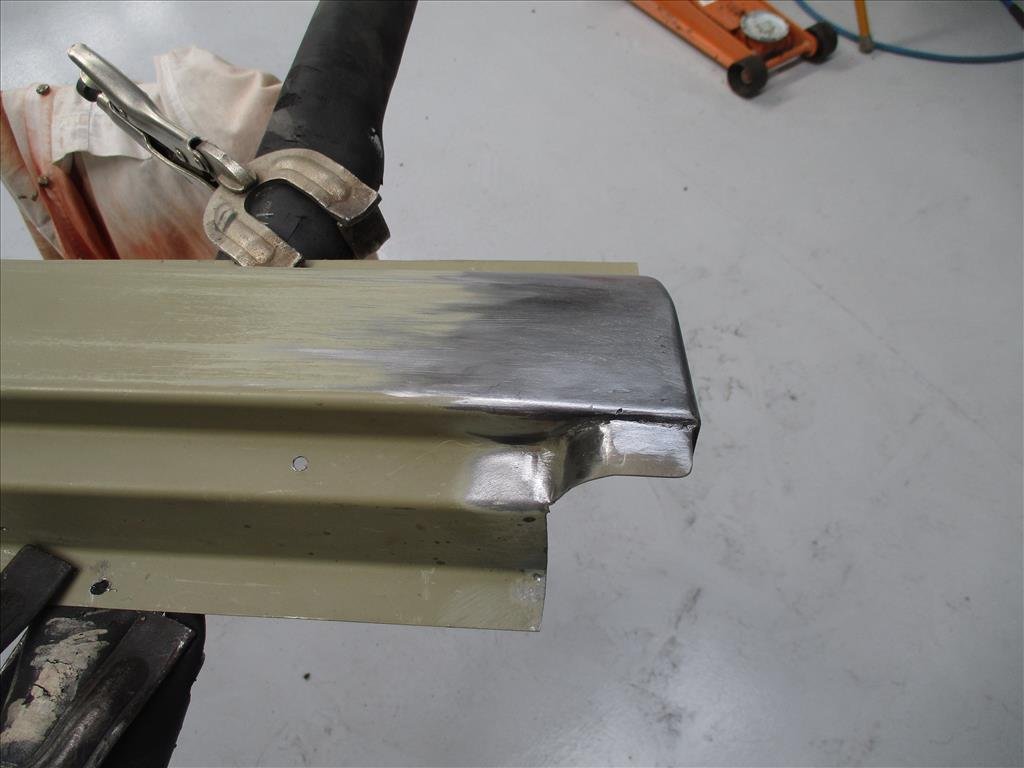
After more summer holidayin' some progress got made. Using some old guitar strings and longer 0.75mm galv wire, son-shine and I managed to get the front and rear windscreens out without cracking them. Huzzah for that because I don't even want to imagine the cost of glass for an older car like this. Found some rust holes in the rear window channels but the front's good. We emptied then removed the fuel tank, fuel pump and then some garnish like wheel flares, door electrical boots, and all the redundant electrical wires that weren't bound up with the main harness wrap. I'm pretty sure the car will start without this large mess of cables, he said hopefully. Then it was stripping time. I'm daunted by a bare metal restore but it's the only way to be sure, play it by ear I guess. I started at the back and boot where the rust is the worst, managed to find some steel under it all. After I've found out the extent of the rust I'll get onto patching in new metal.
7 points
-
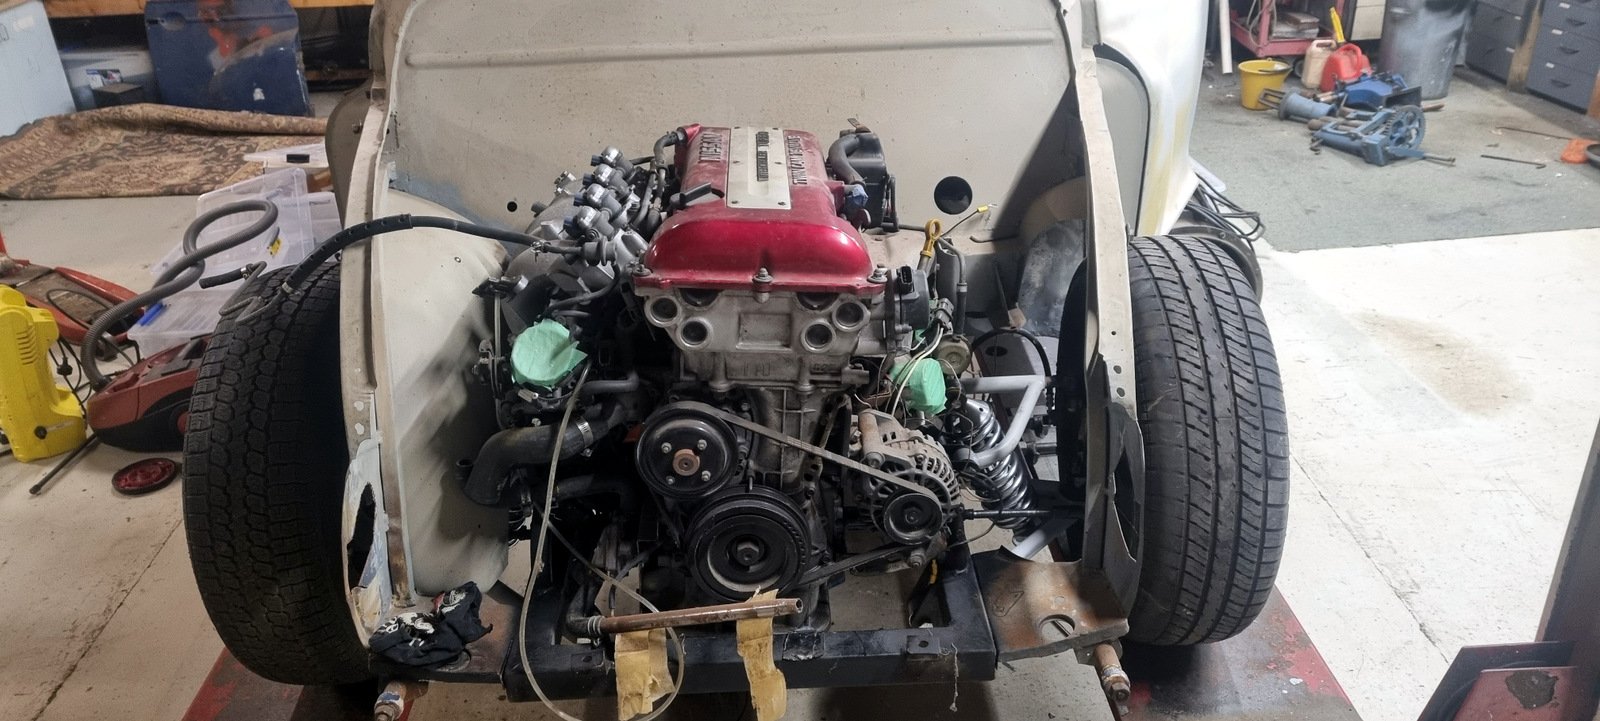
Oops. I was just going to post a li'l update since things have slowed down while I wait for stuff, but I now realise I forgot to share some stuff. We disassembled the engine. It's otherwise fine really. The oil pump housing halves look fine fortunately, no scoring or anything. The pump gears themselves are impregnated with bearing material, they still turn inside each other without much resistance but without a reference I don't know if they're meant to be smoother ;). The block's journals aren't happy. You can feel the scoring on two of them, one is particularly gougey and definitely would need a grind, if it can be saved at all. At the time we were unsure if we could just use as-is but since then I've been learning some stuff from HP Academy and uh yeah that wouldn't fly I've dropped the block off to some reconditioners in welly. They asked for the rest of the rotating assembly so I slapped the caps on in 5 minutes in what I hoped was the right order (it wasn't) and went over there with Andrew. One of the first things Engineman asked was "want us to try save the crank?" We just assumed it was toast because of the overheating discolouration. I mean maybe it is, but if these guys can save the crank then that pays for the cost of saving the block! It's great to have "good news" dangled in front of me for once! That said it could easily just go in the other direction if the block can't be saved. Engineman didn't seem too bothered about the damage, but said it might be a PITA due to one side being aluminium and the other side (caps) being steel. We'll see what he says, this is a blocker for plans going forward because if we have to buy a block then it's probably cheaper to buy a whole new engine (which isn't cheap!). A brief diversion into engine swaps. A swift turbo engine swap would be nice, but honestly one of the fun characteristics of this car is its little 0.6 litre engine which somehow manages to make this little thing hurtle around faster than it should be able to. I wouldn't hate a K6A or something in there (if it could fit...), but it's a lot of fun to have this little angry thing make its noises and confuse people when the bonnet is up. ANYWAY. Here's all the bits strewn about. Consolation prize: expensive aftermarket coils. I have since sorted out the mess a bit. Andrew cut open the oil filter I'd put on the car after it had arrived from Japan, the one attached to the engine when it started quacking, and yeah, sparklies. No surprises there. It looked like a pain in the arse but in the absence of anything to do I picked up the saw afterwards and sent it on the old filter that was on the car when it arrived in NZ. Here's @kws's hands modelling for us. Oh my. Okay Heckies So uh yeah I bought a lemon. Kelv cheekily admitted that he was glad that I'd won the car. Fair. That said, I'm strangely not mad. Nor am I put off the car. I just want to fix it and get back in it. That's got to be worth something to find out about your relationship with your daily driver. More importantly it tells me two things 1. I didn't break my car. 2. The question of "how did I break my car?" is no longer present. On the surface this seems like a shrug of a point to make, but it's much deeper than that. If I didn't find this out I'd probably never be comfortable driving this car hard again - or possibly any car. Maybe that's why I'm not mad.7 points
-
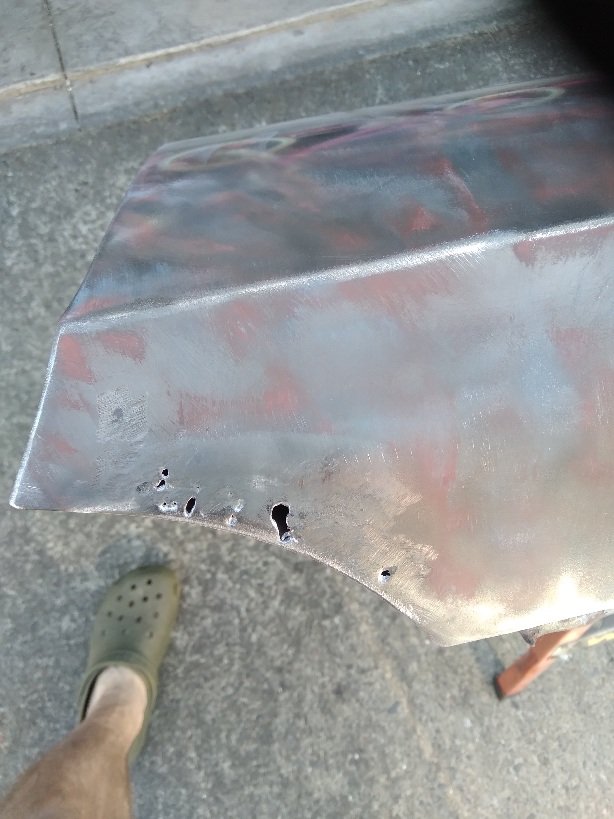
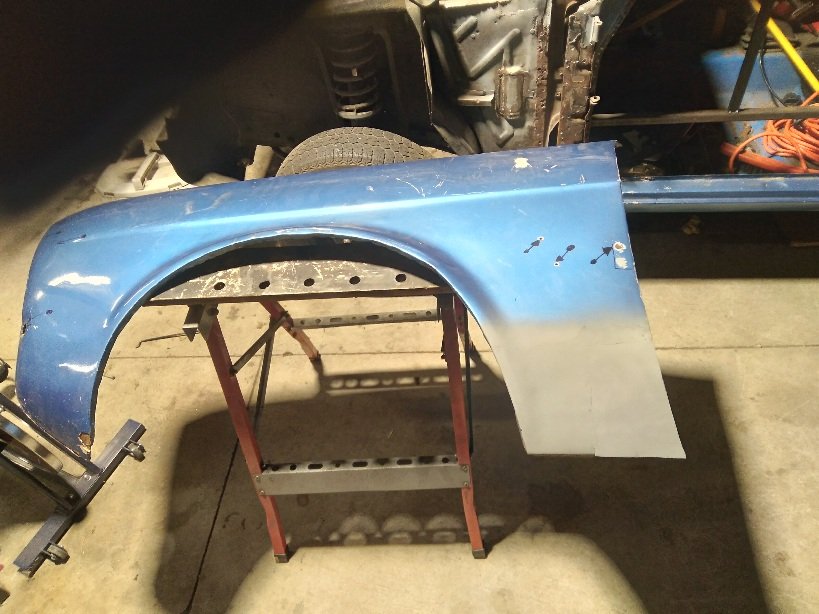
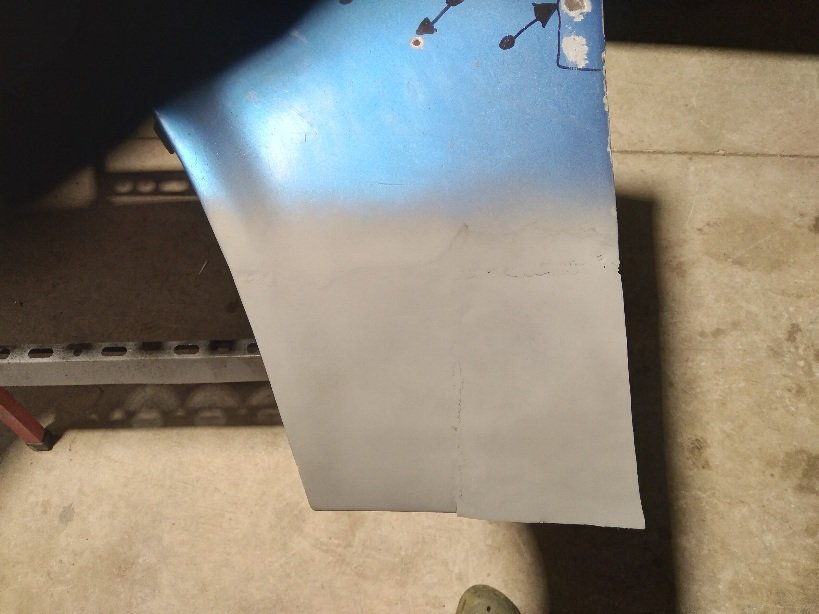
Found alittle rust hole and the panel is pretty lumpy and uneven. I will be smoothing it out with my hammer and dolly but it's only the front half by the bumper that is uneven. Pretty stoked with how good it is really.
5 points
-
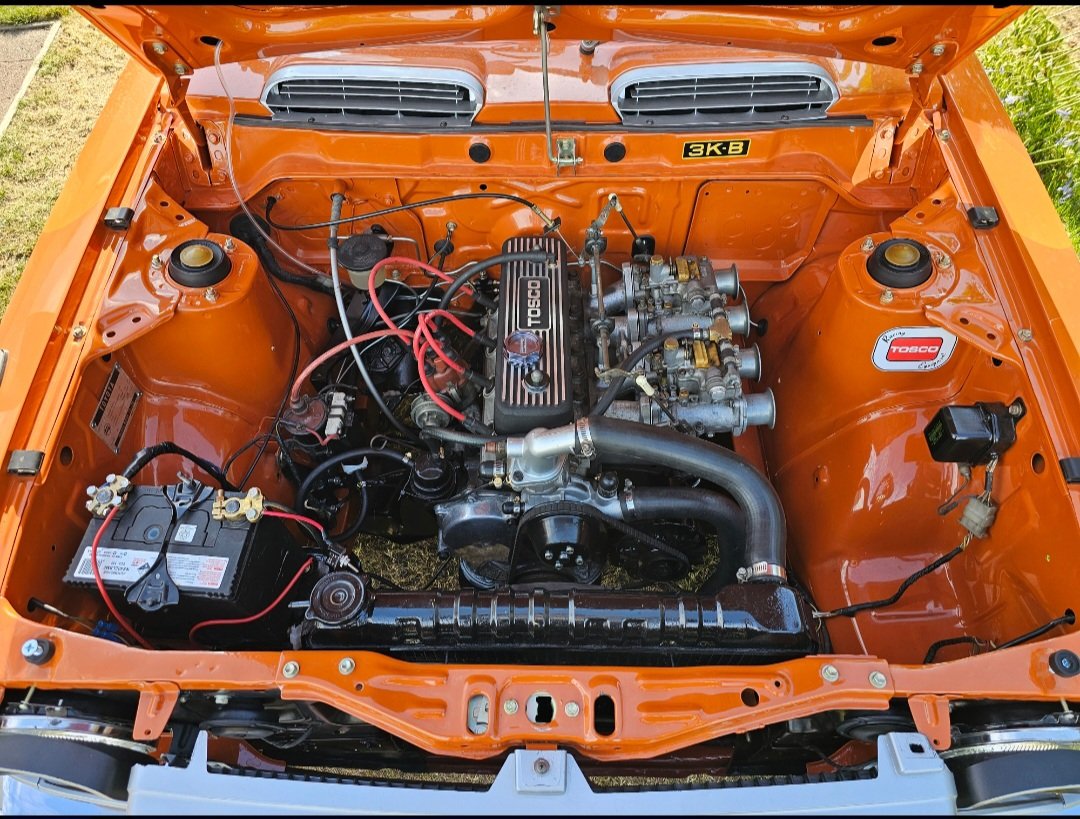
Bspeed tosco cover now on
4 points
-
So ages ago I got an old mobility scooter, with the intention of convert it into a mini Willy's jeep that my kids can blast around in. The donor vehicle was this beauty, in working condition but with no batts. I borrowed some old batteries from my BIL, but they were well past it, so had to invest in a good set, not sure on the range yet, but it will be decent with a couple of 50ah's in there. I then half assedly rearranged it to have a steering wheel from a ride on, and lowered the seat so the kids could drive it. I also fitted a foot pedal accelerator. It was like this for more than a year or so I guess. Then recently I decided I better actually work on making it into the jeep it was meant to be, before the kids get too old. So I did quite a bit of chassis modification to get the batteries back a bit (mainly so there's room for my feet to fit in) I also fitted new black tyres, as the old fronts were rooted. I then widened the front track 80mm to match the rear, not sure why they made the front skinnier to begin with tbh. Then I started work on repositioning the steering to one side. I used bearings and pressed steel housing I already had, and got a couple of sprockets to reduce the steering speed by half, to make it a bit easier to turn with the smaller steering wheel. The center hub slides to tension the chain. The shitty pressed steel housings didn't like having the leverage of the long steering shaft on them, and bent, so I machined up a hub to replace them, it's mint as now. I then whipped up a crappy temporary floor and seat (not finished in pic) so the kids can drive it while I build the body, which is the next mission. Regards, VG.3 points
-
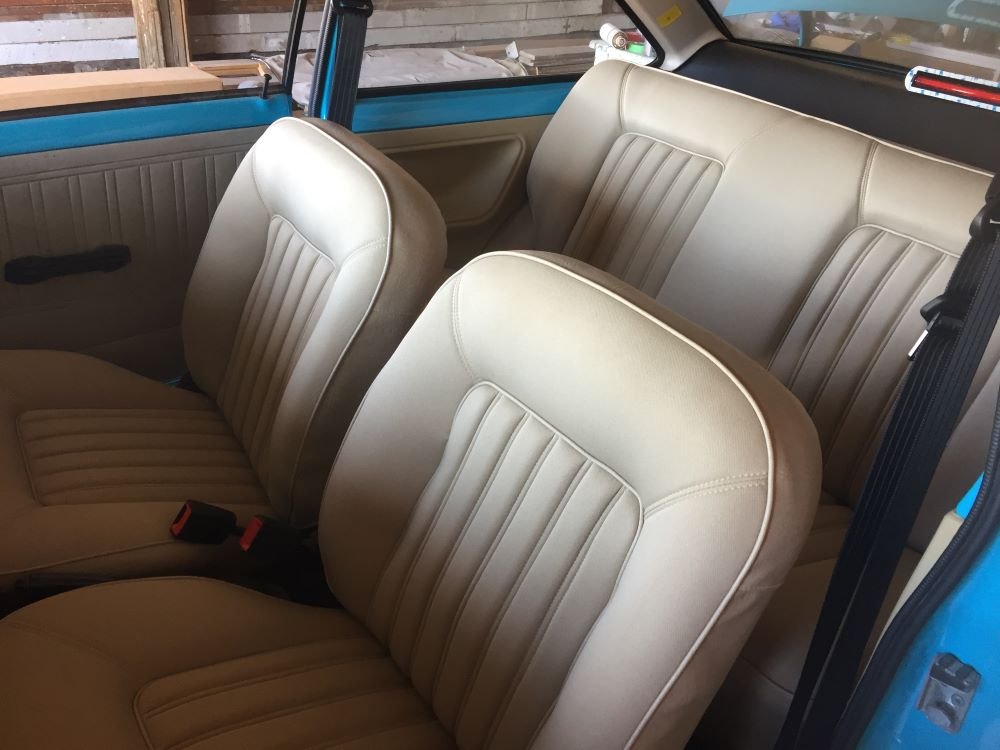
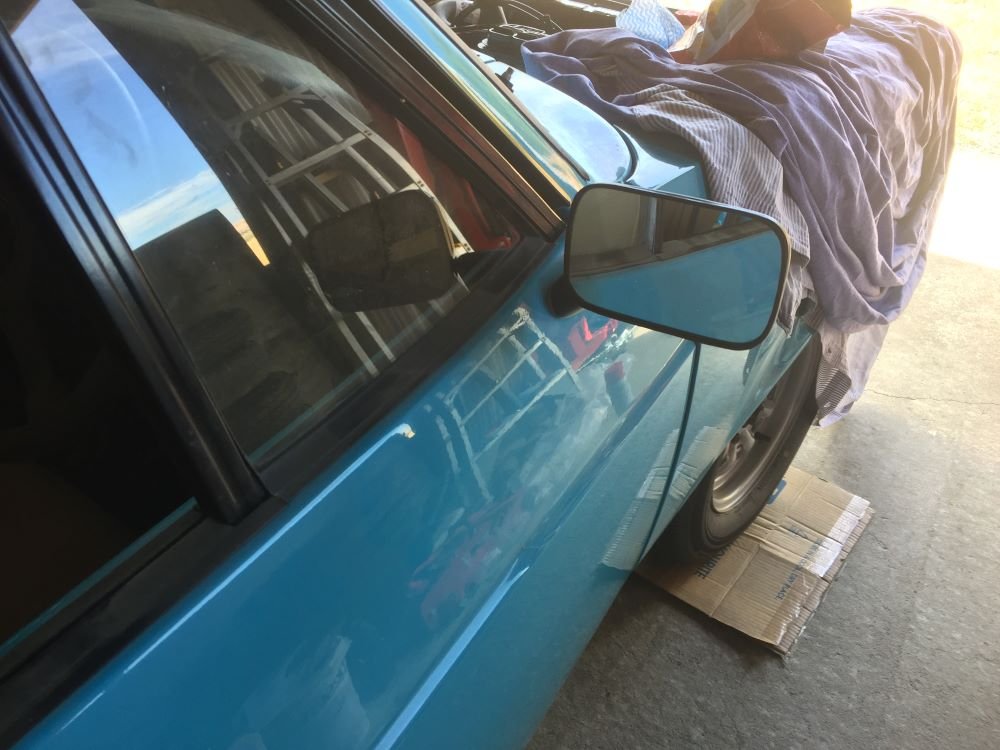
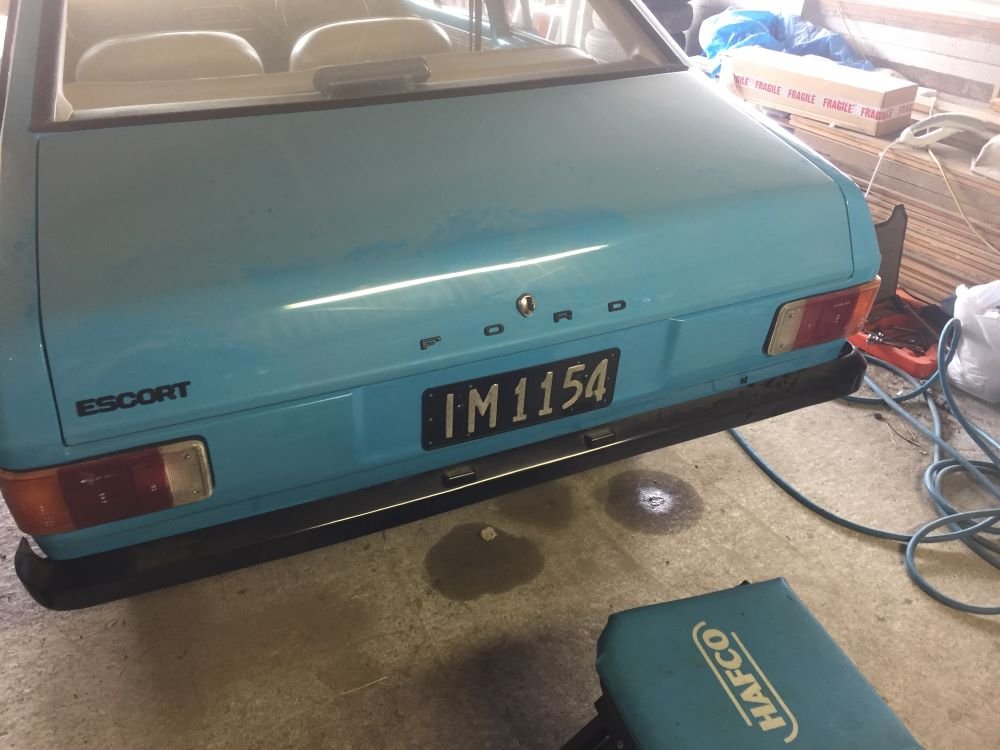
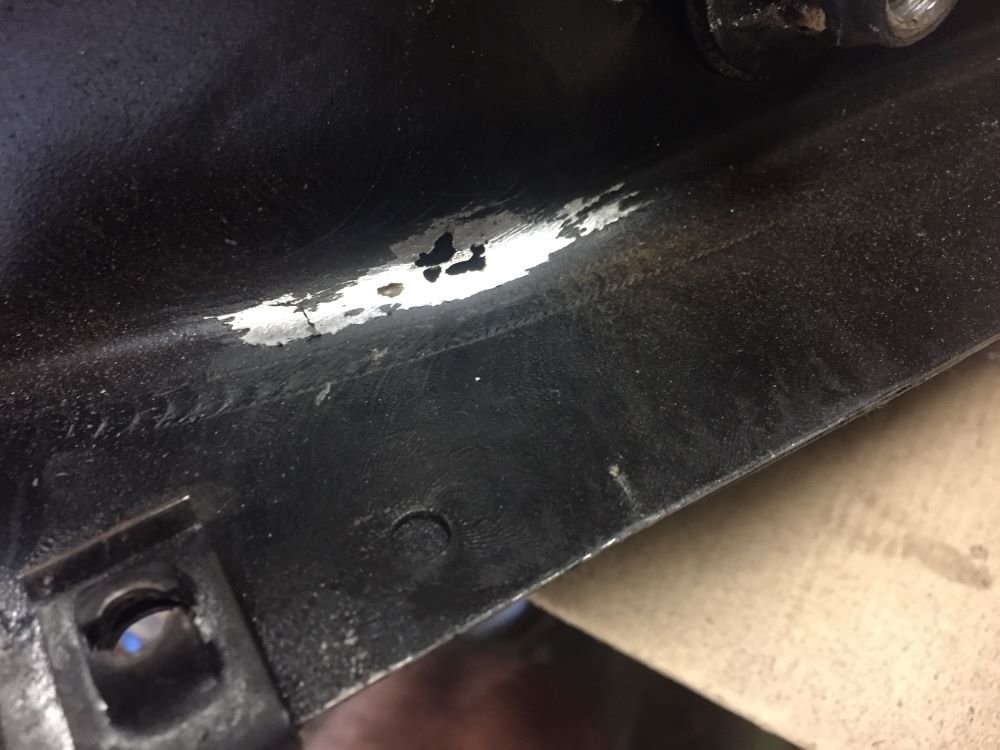
Just slowly picking off jobs as time allows. Fitted the carpet and cut all holes for seats, seeatbelts, gear stick, brake handle. Installed gearstick and rubber gaiter. Next put in seatbelts and also fitted door cards. All looking pretty good. Next in was the seats which took a while as quite hard to line up holes I had cut in carpet. Starting to look like a new car. Next put badges and number plate on rear also mirrors on doors. Time to put some petrol in the tank in anticipation of startup but it all ended up on the ground. Didn't see that coming and had to take tank out to find hole. Rust never sleeps. Luckly had another tank which I checked more carefully. Cleaned, painted and installed. No leaks Result Project Discussion https://oldschool.co.nz/index.php?/topic/84912-petes-mk2-escort-1600-sports/page/3/#comment-2618039
3 points
-
3 points
-
Good work. I look forward to updates on the kittens names3 points
-
Ford Model T carriage lantern: (hopefully those images allow remote linking) Looks pretty similar. There seem to have been a few variations. Looking at the NZ Model T club photos, often the lanterns don't seem to have that red side light. http://modeltford.co.nz/media/1588/img_4080-copy.jpg http://modeltford.co.nz/media/1574/img_4066-copy.jpg http://modeltford.co.nz/media/1578/img_4070-copy.jpg3 points
-
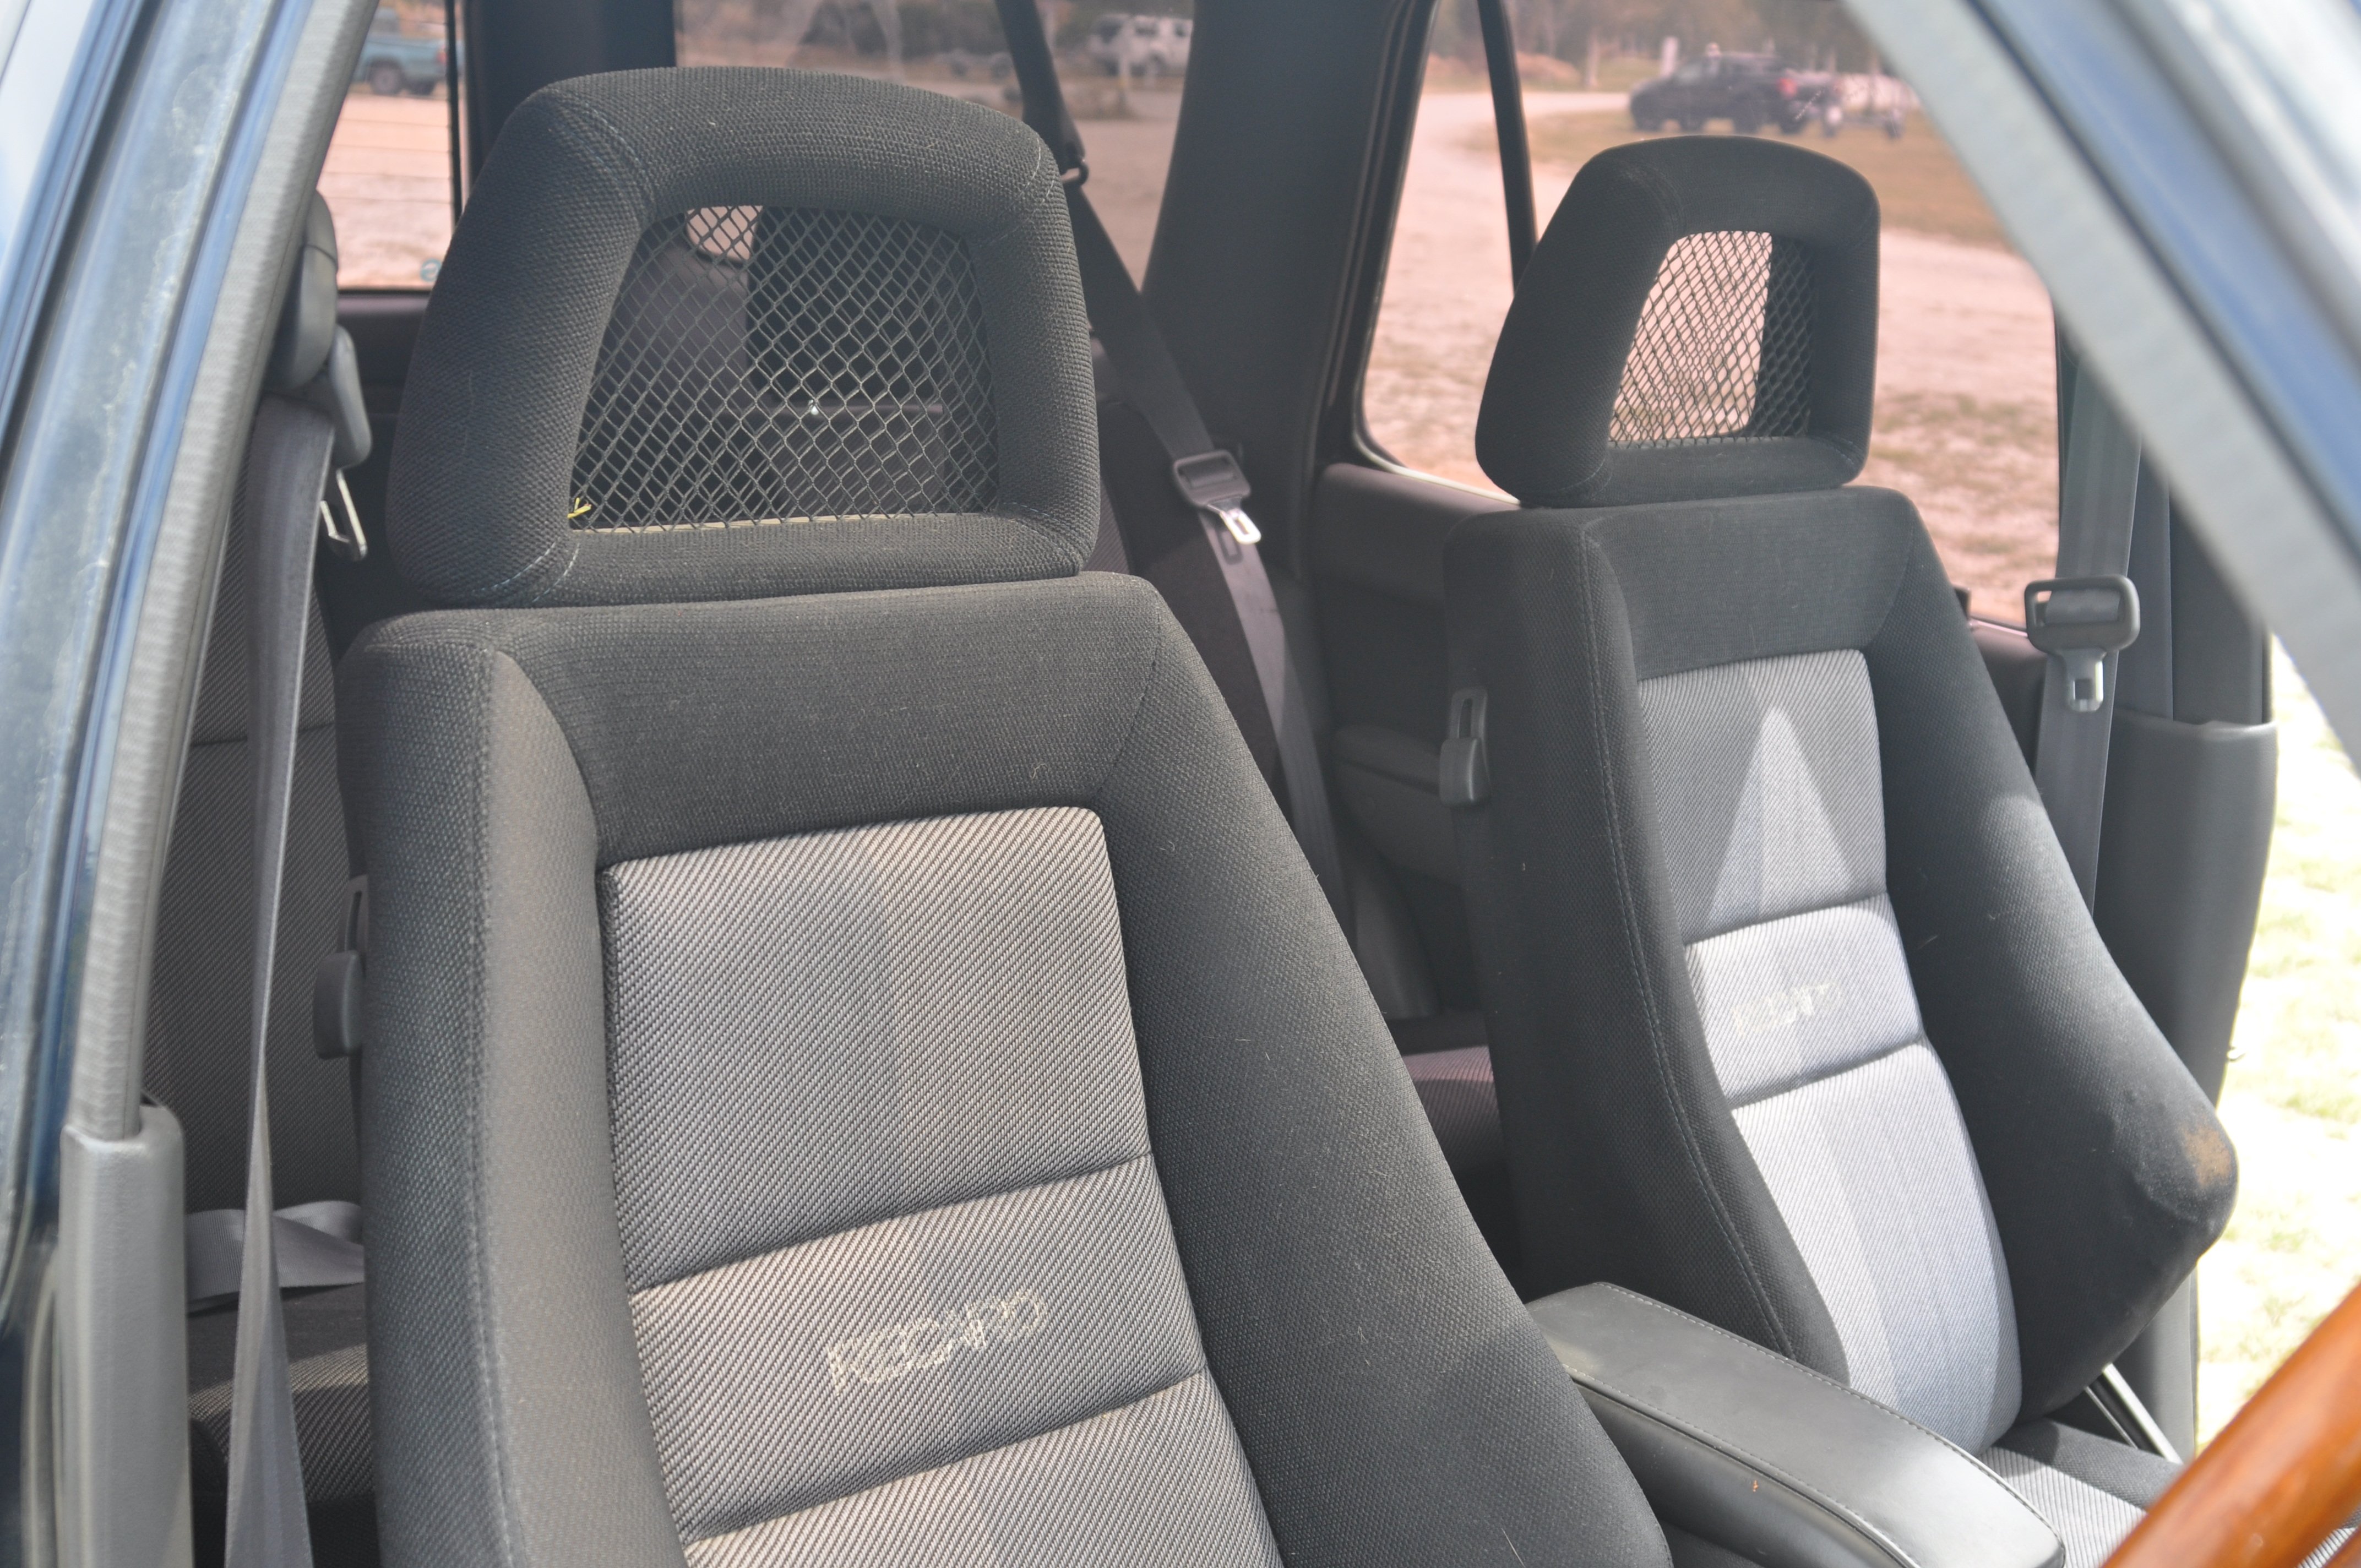
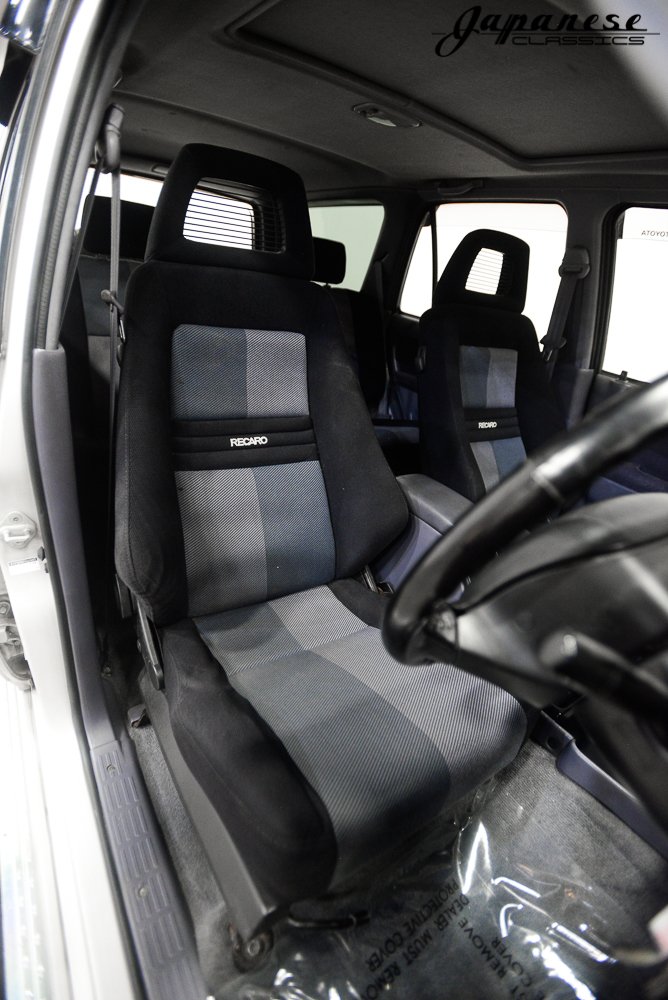
Our Hilux had factory Recaro’s with the rear seats matching. Was super lush!
2 points
-
Quite possibly from something like this
2 points
-
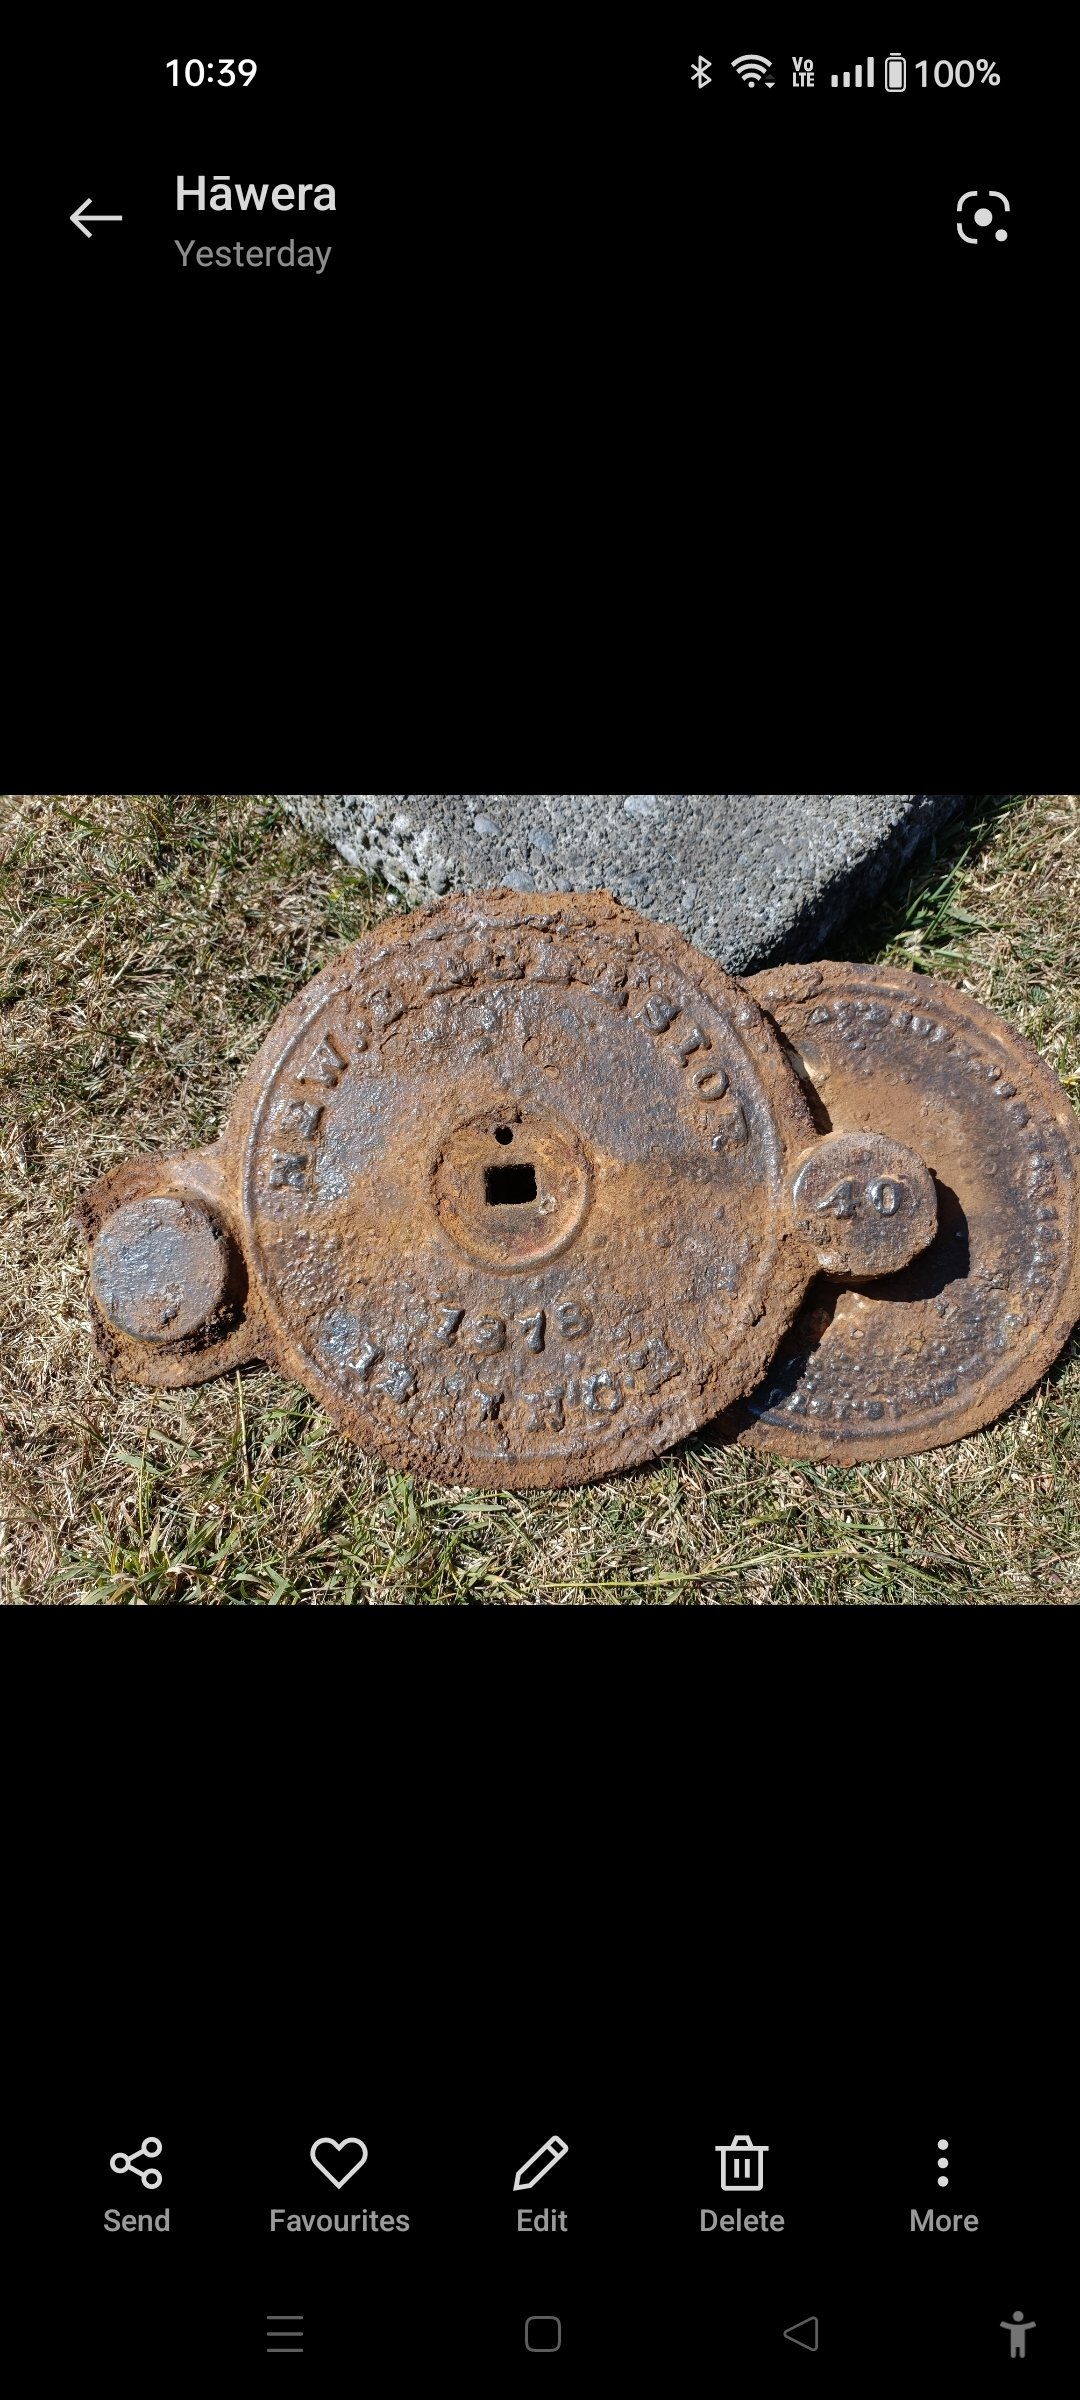
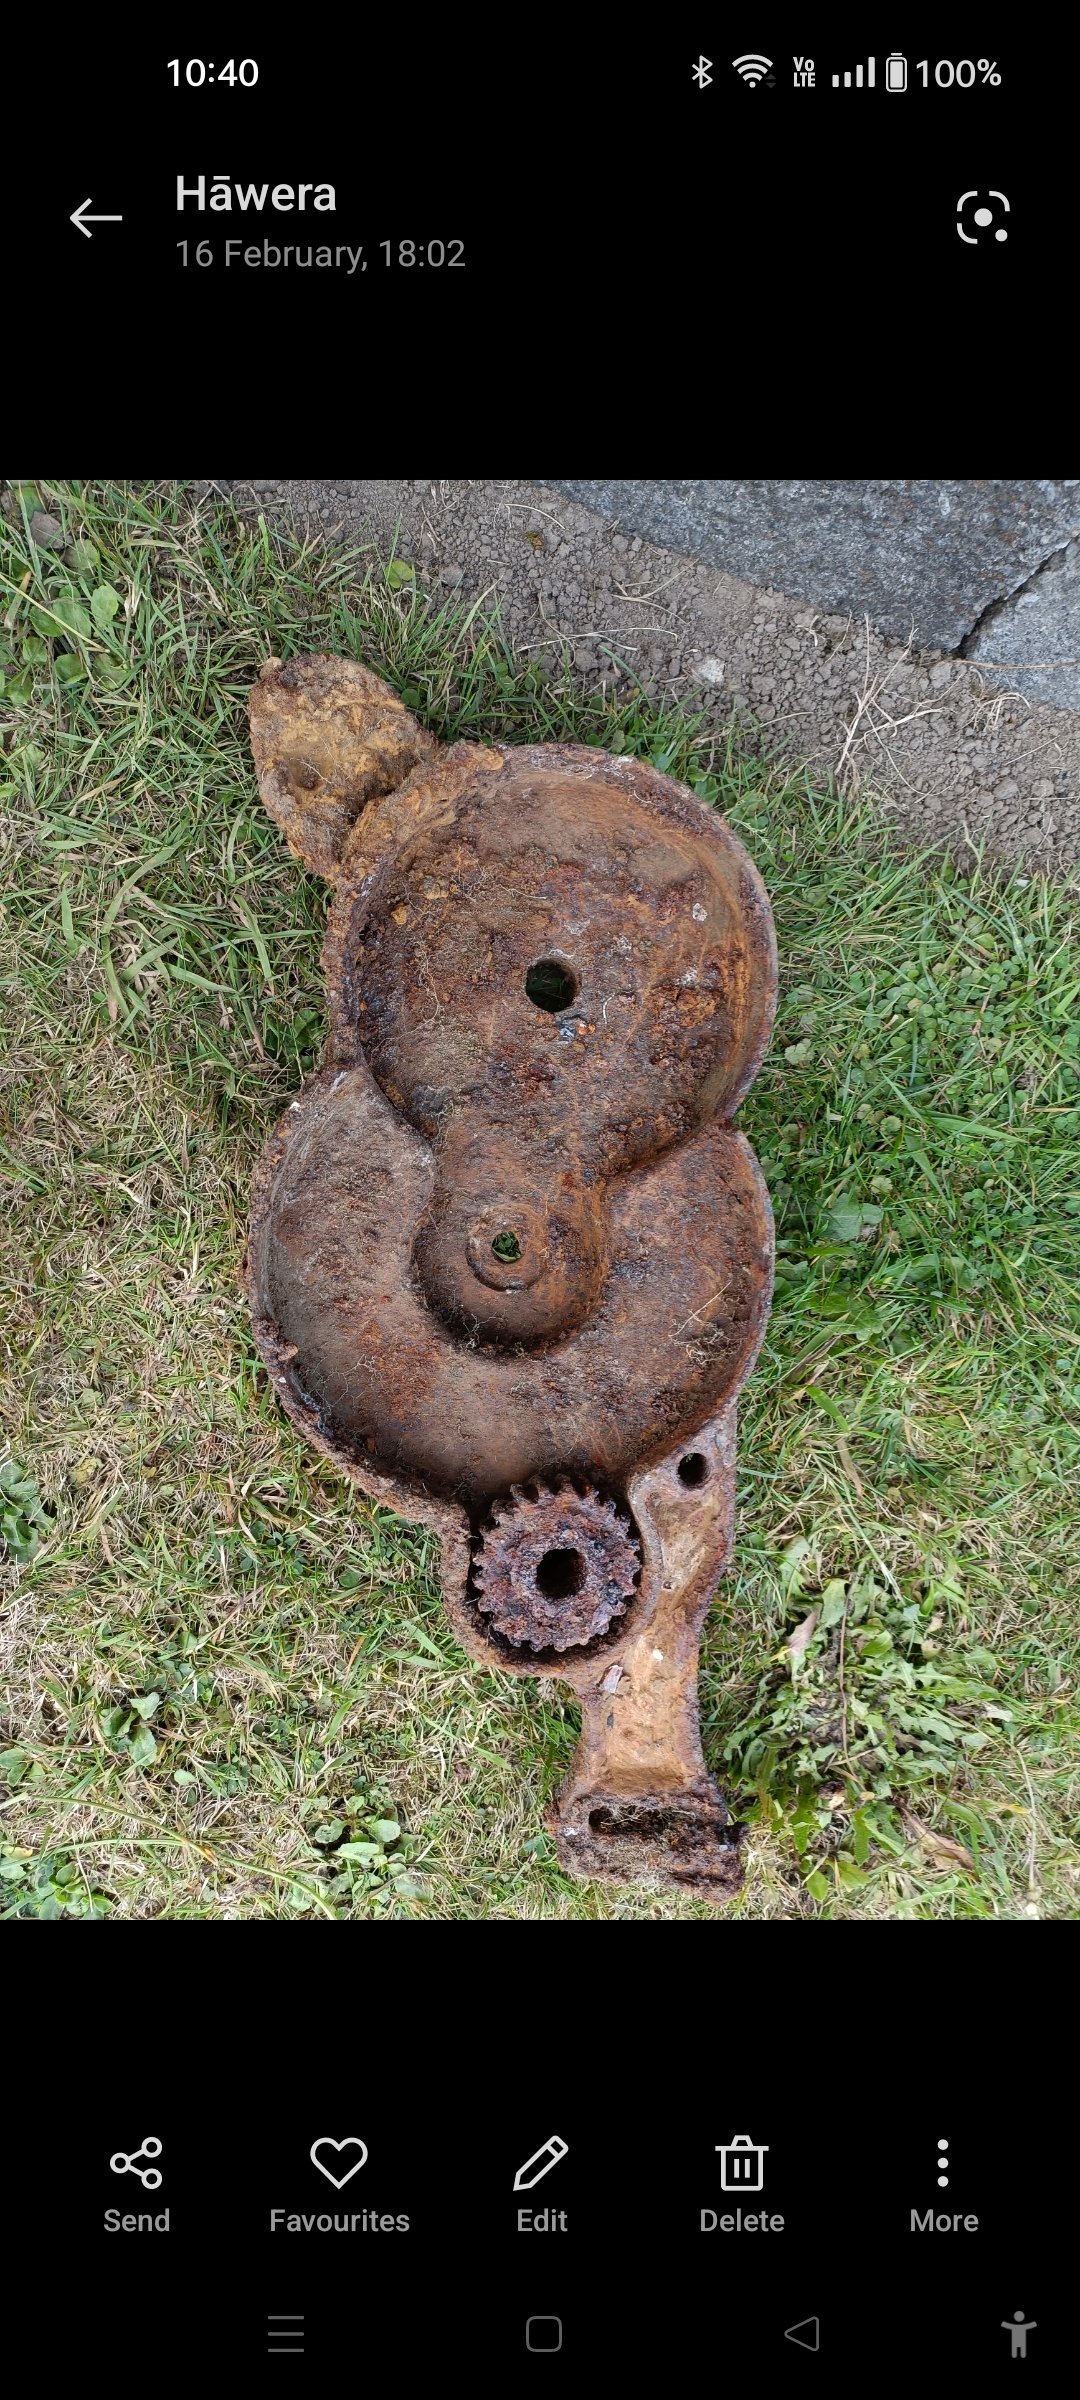
The river bank next to old mechanics shops is always full of a mix of treasures2 points
-
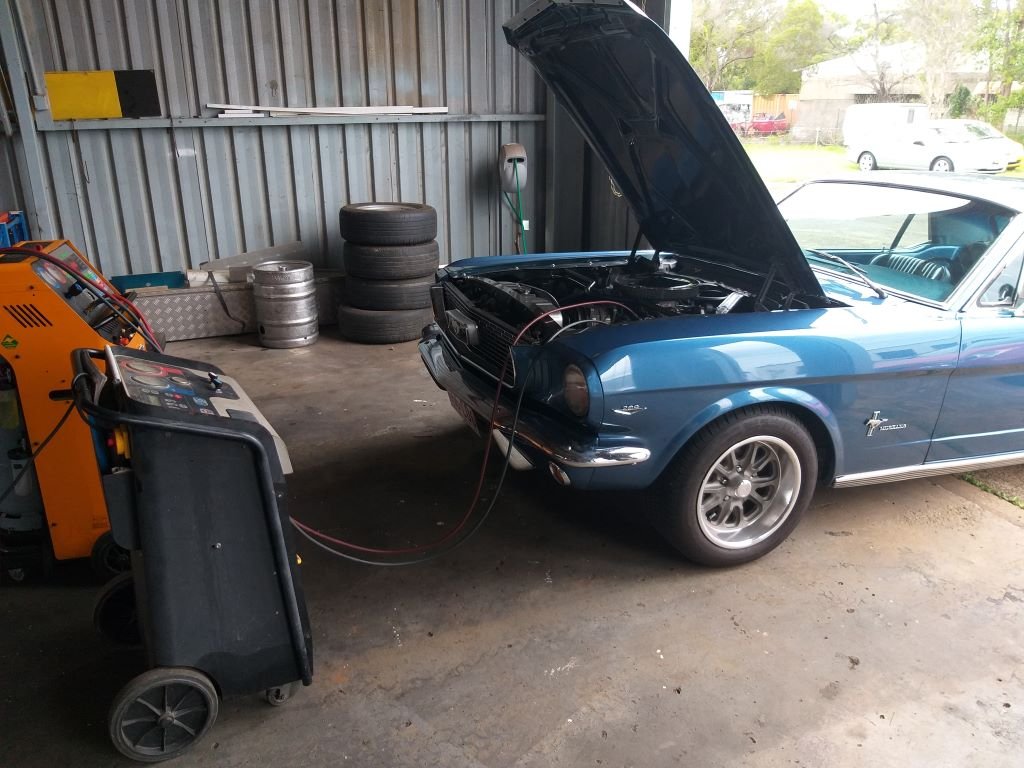
First thing this morning Josh gassed up the a/c which is now back in perfect working order. Hopefully that's the Mustang sorted for the next few months.
2 points
-
Good advice I reckon.2 points
-
Couldn't stop there. Need a place for coffee mugs.. It's a nice little spot now. We are owed a whole load of macrocarpa from a customer so will soon build bench seating along the back.
2 points
-
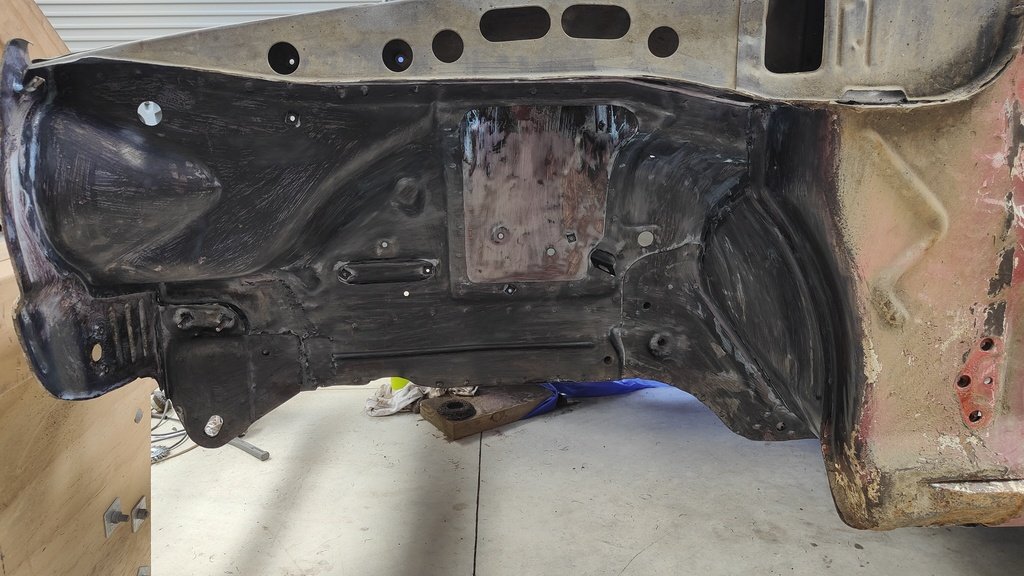
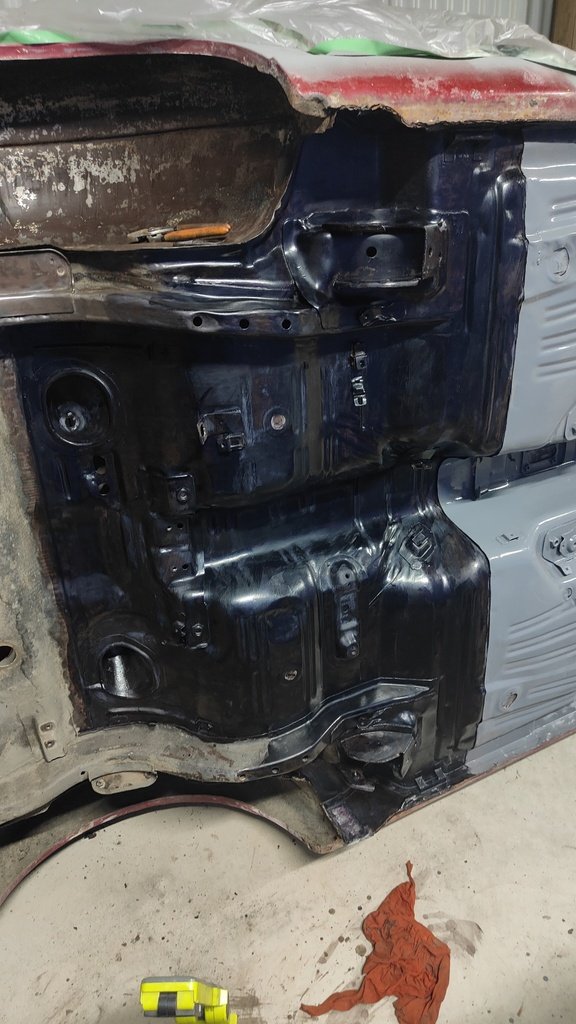
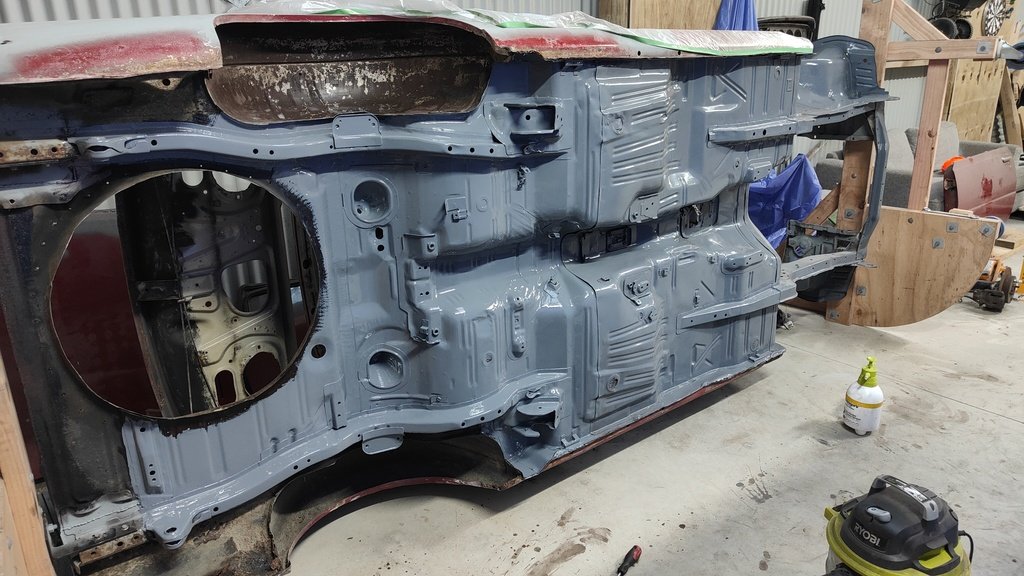
Been a little while since I updated. Made a start on the underside. I removed all of the old underseal and rust converted, it wasn't too bad for rust but a bit of rust converter wouldn't hurt. Once the bulk of the rust converter was done I hit the underside with an epoxy enamel, will then go over this with a textured underseal and seam seal the joins.
2 points
-
Had my 1st drive of it tonight that where I'm currently upto wof is booked in for Friday so fingers crossed
2 points
-
Front end painted and re assembled
2 points
-
2 points
-
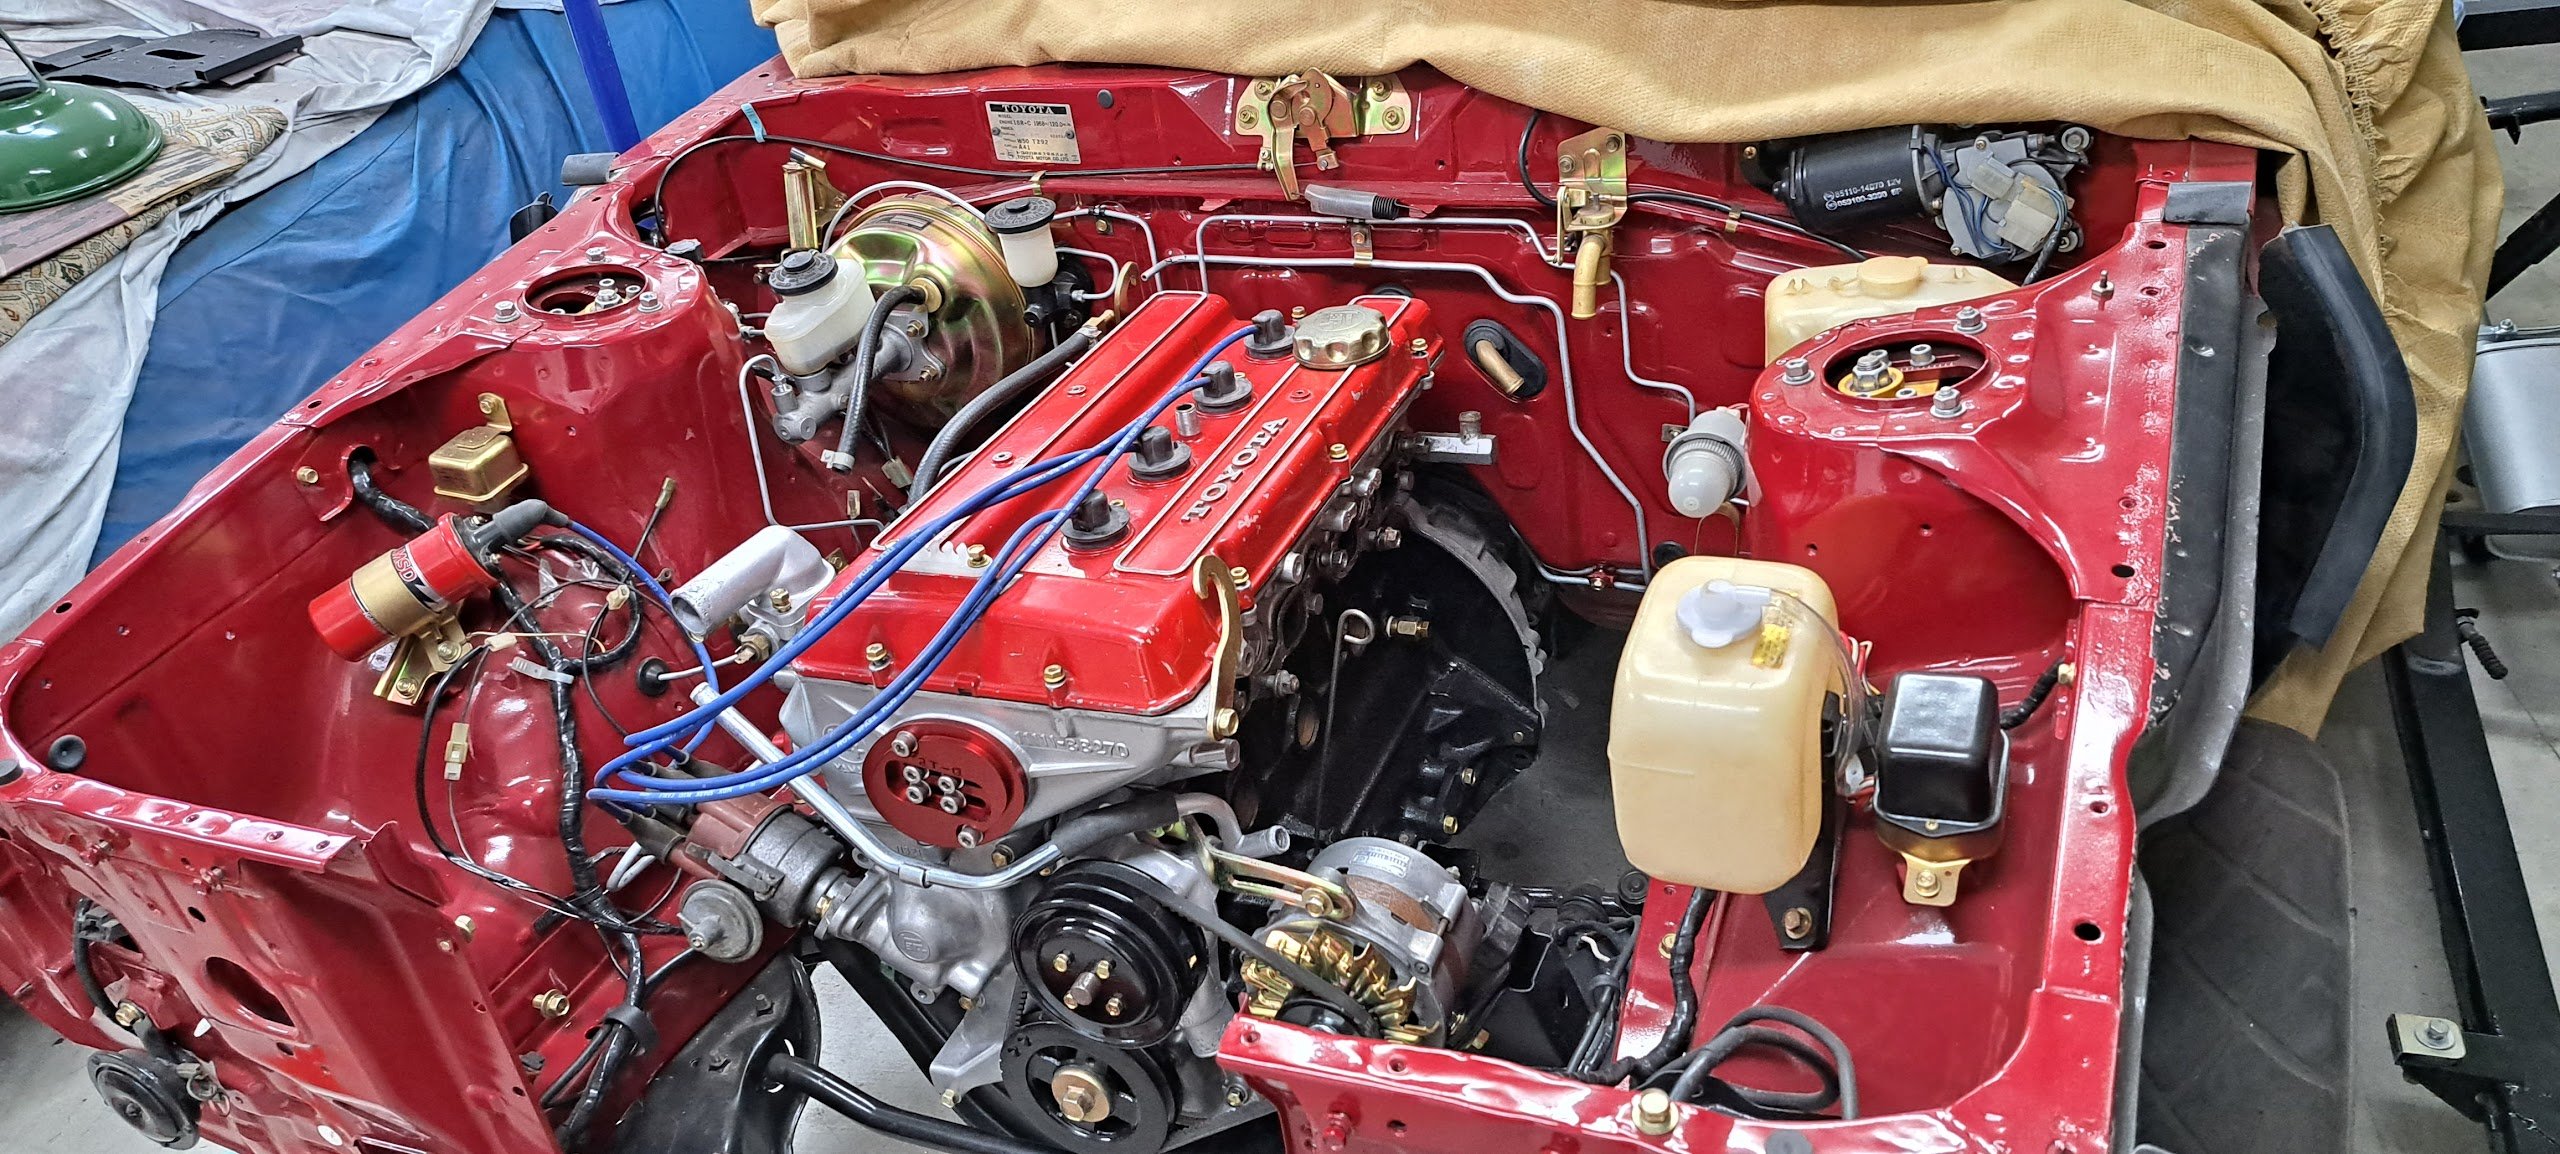
End of weekend engine bay shot. Made a nifty heat shield for the firewall to keep the important stuff like brake masters and fuel hoses from melting. Rocker cover is off getting a parts wash to get all the swarf out from drilling breather holes out. Sump needs to same treatment after I added an oil temp sensor hole.
1 point
-
1 point
-
Is it possible that the parts you have found do not all belong to the same vehicle/machine?1 point
-
I think so, if it's the original. There won't be that many around that don't need work.1 point
-
Yeah they certainly did, had a headrest with horizontal strings, instead of the fishnet type. See them more often in the V6 Petrol models.
1 point
-
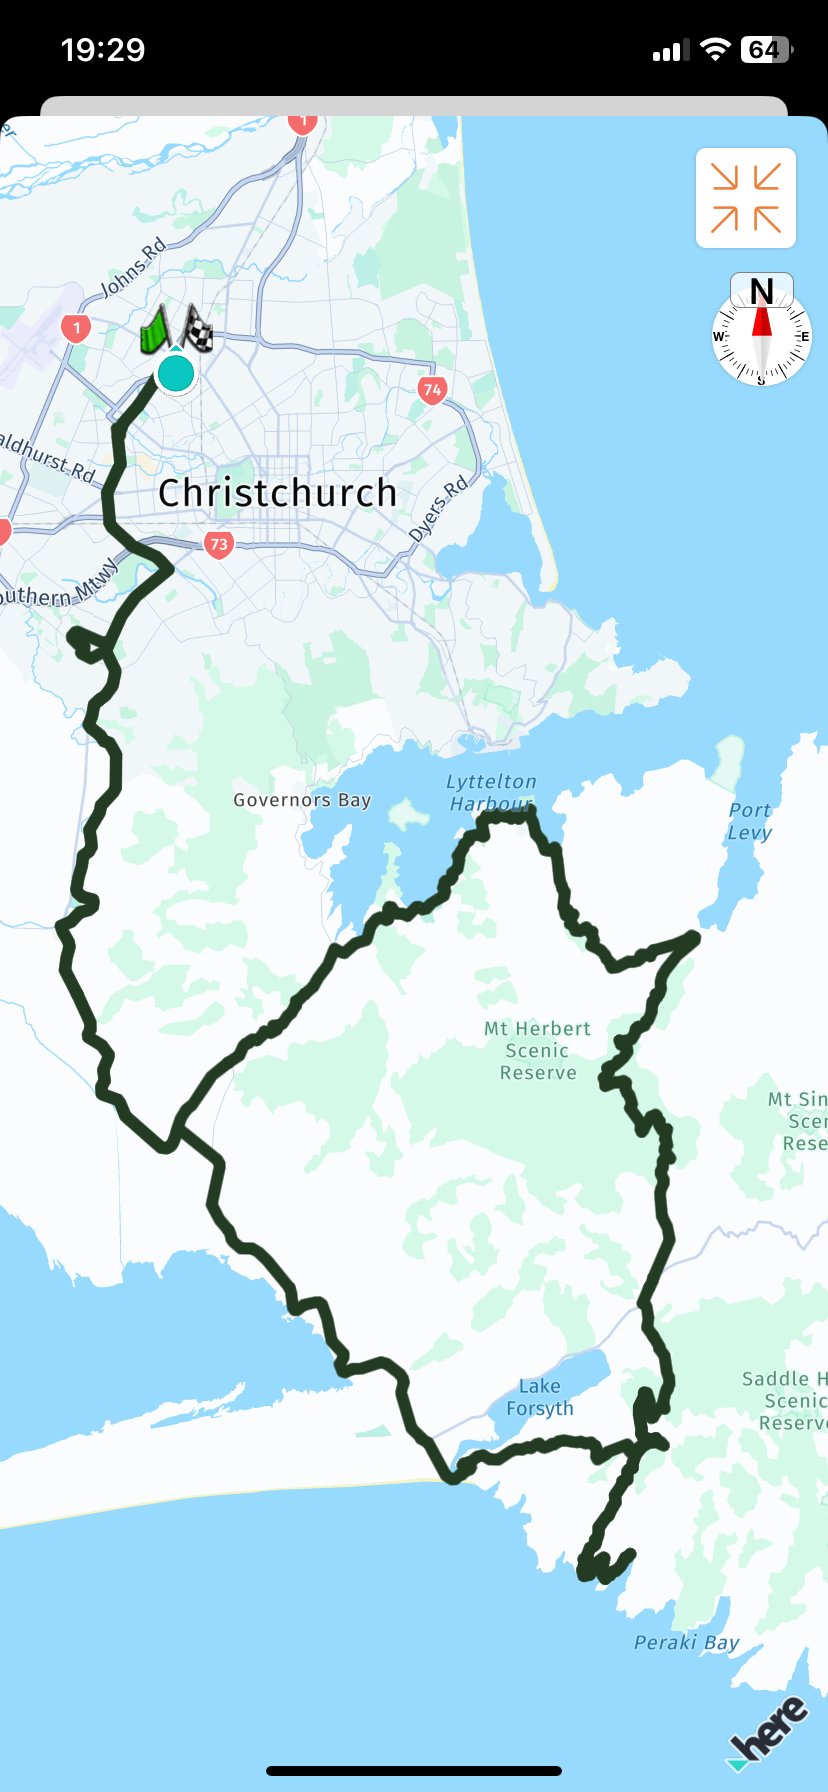
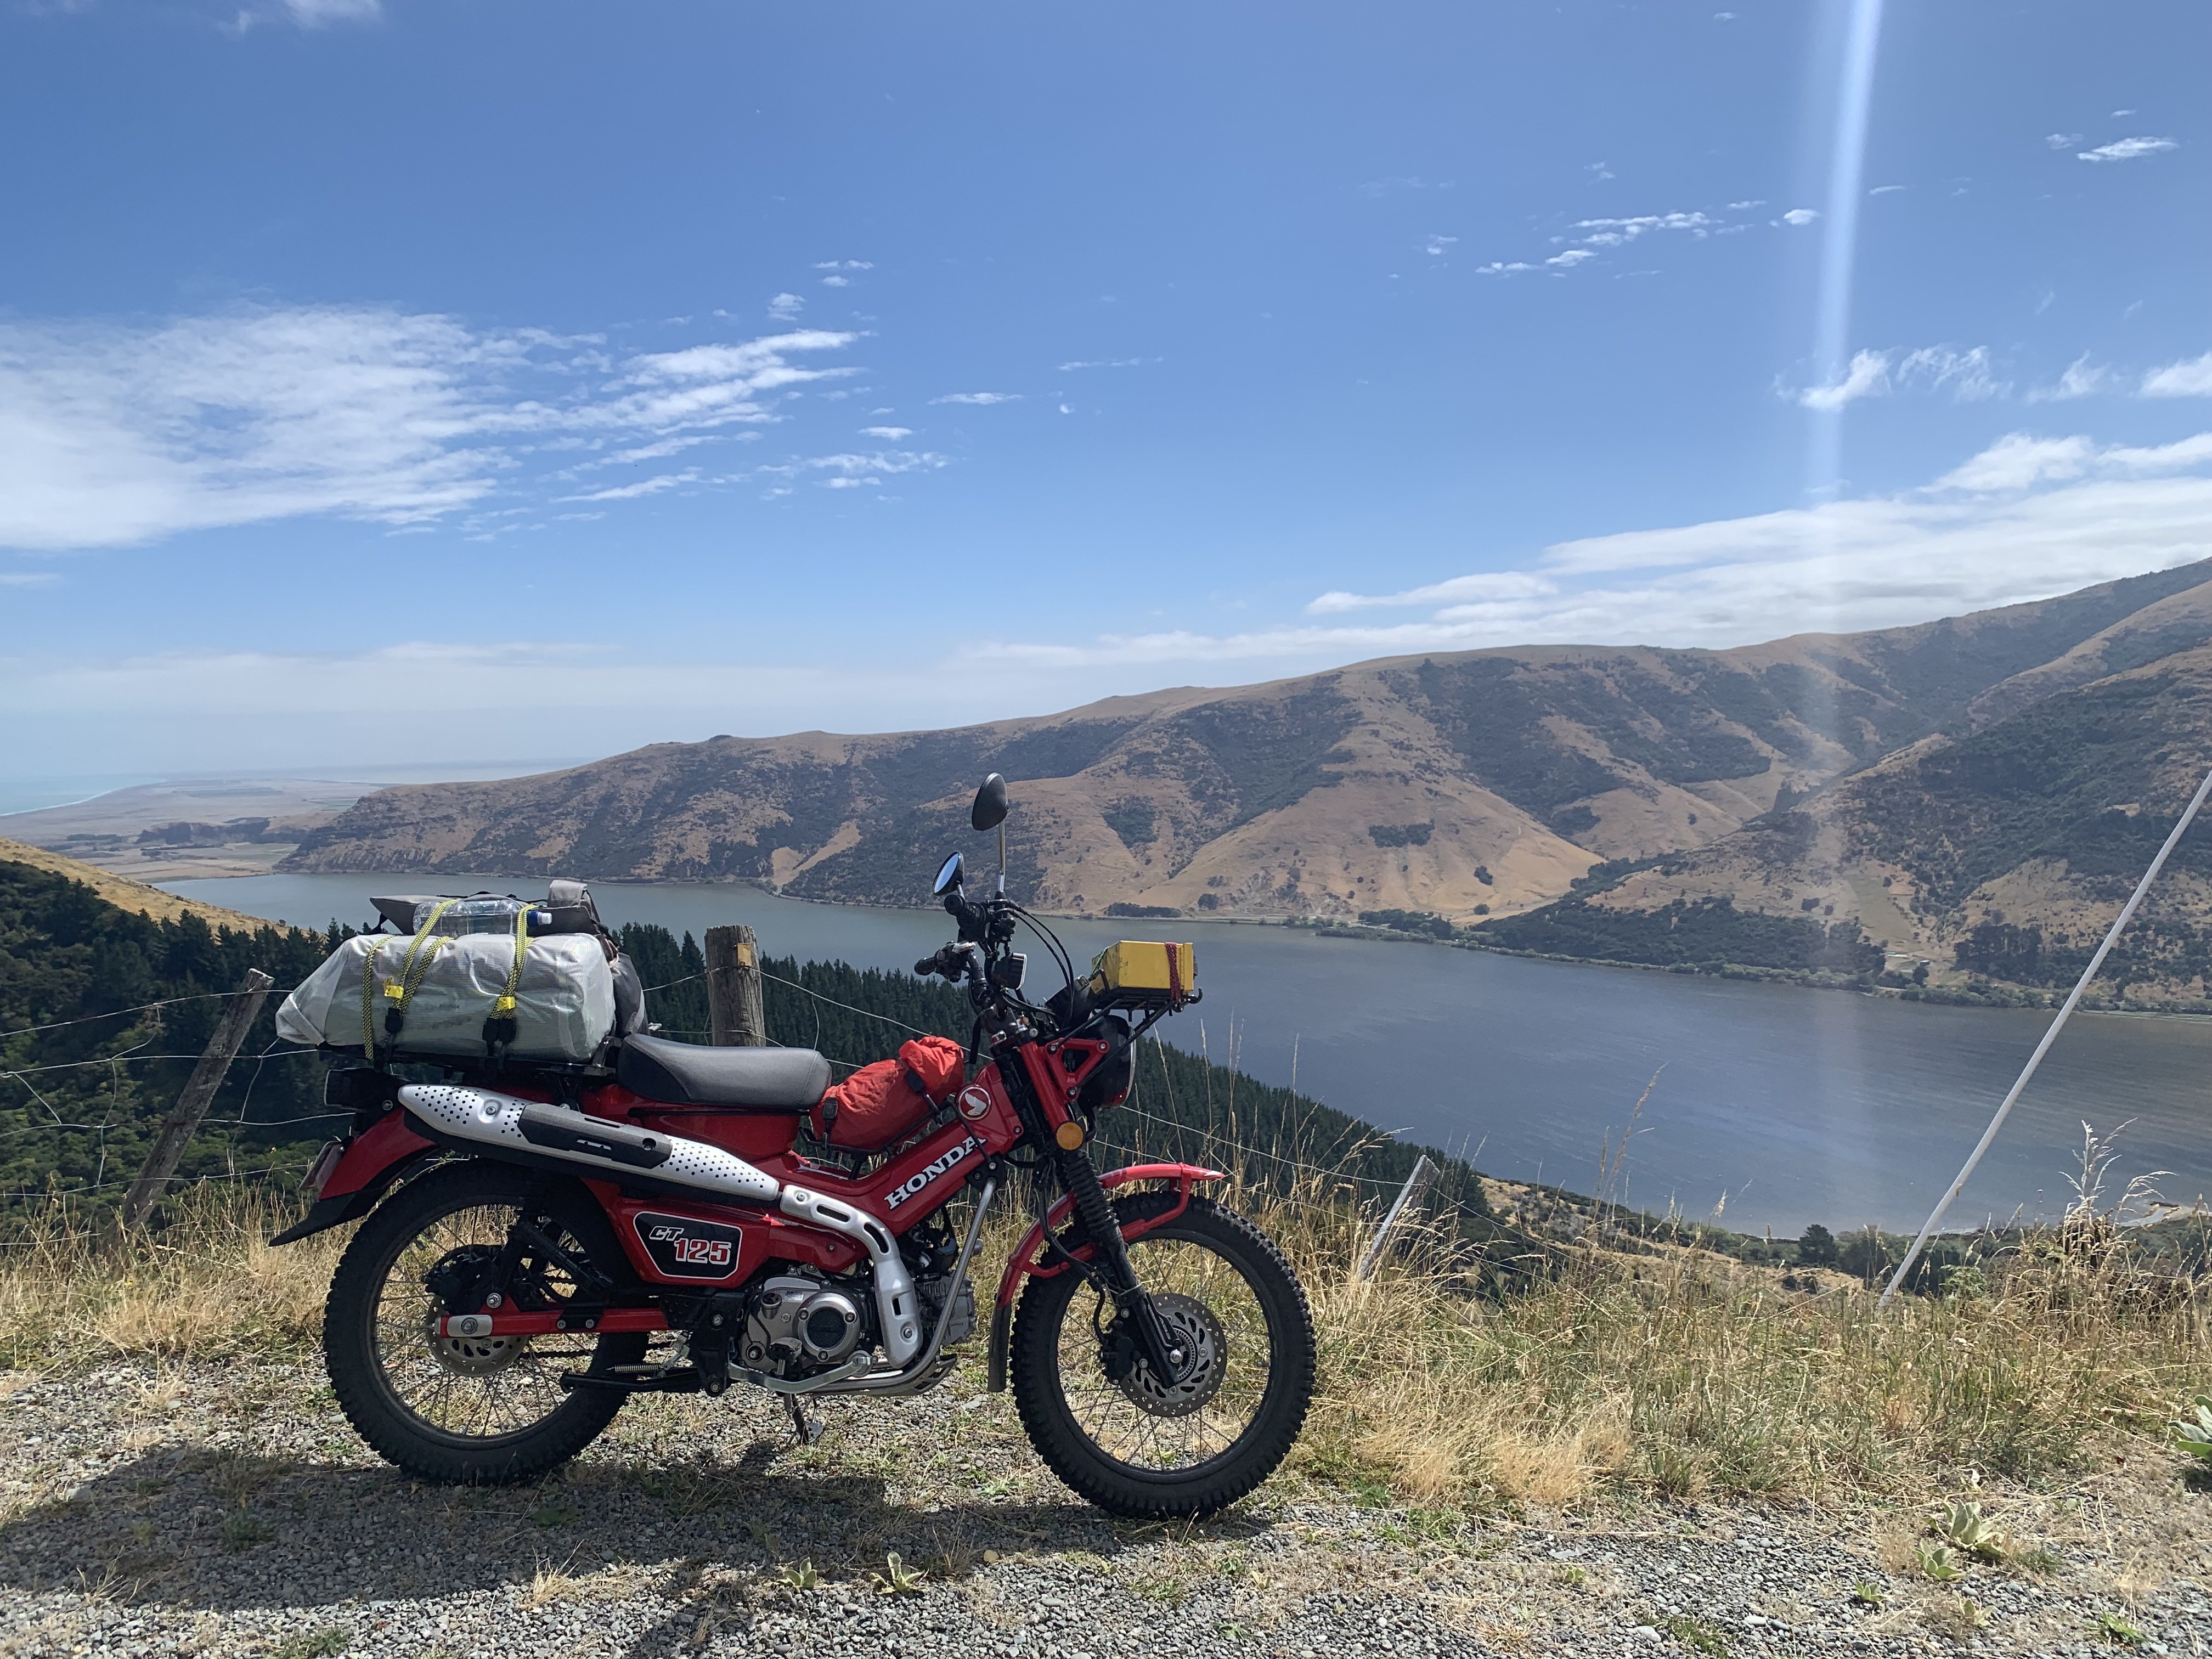
A few of us went for a bit of a shakedown run today, doing 170km and I took all my gear. Pretty happy with how everything went, and fizzing for the main event in 2 weeks.
1 point
-
Injector rebuild ASAP. Even with an immaculately clean cooling system a sad injector will easily take out the head, learnt that the hard way.1 point
-
Don’t get it too clean. You’ll be too scared to use it in case it gets dirty again. I’m sure you don’t need to be told to make sure the cooling system is 110%1 point
-
A friend of mines old man pretty much told me to suck it up and pull the motor and he's got a guy that'll hone/plane/sort the block n head, so will get that under way if I don't find a like for like replacement soon. How did I end up rebuilding this bloody motor1 point
-
Say Aaaaaah
1 point
-
Finally bunged it back in the hole. Carbs to have a birthday, extractors to be stripped/coated and driveshaft needs shortening +10,000 other small things
1 point
-
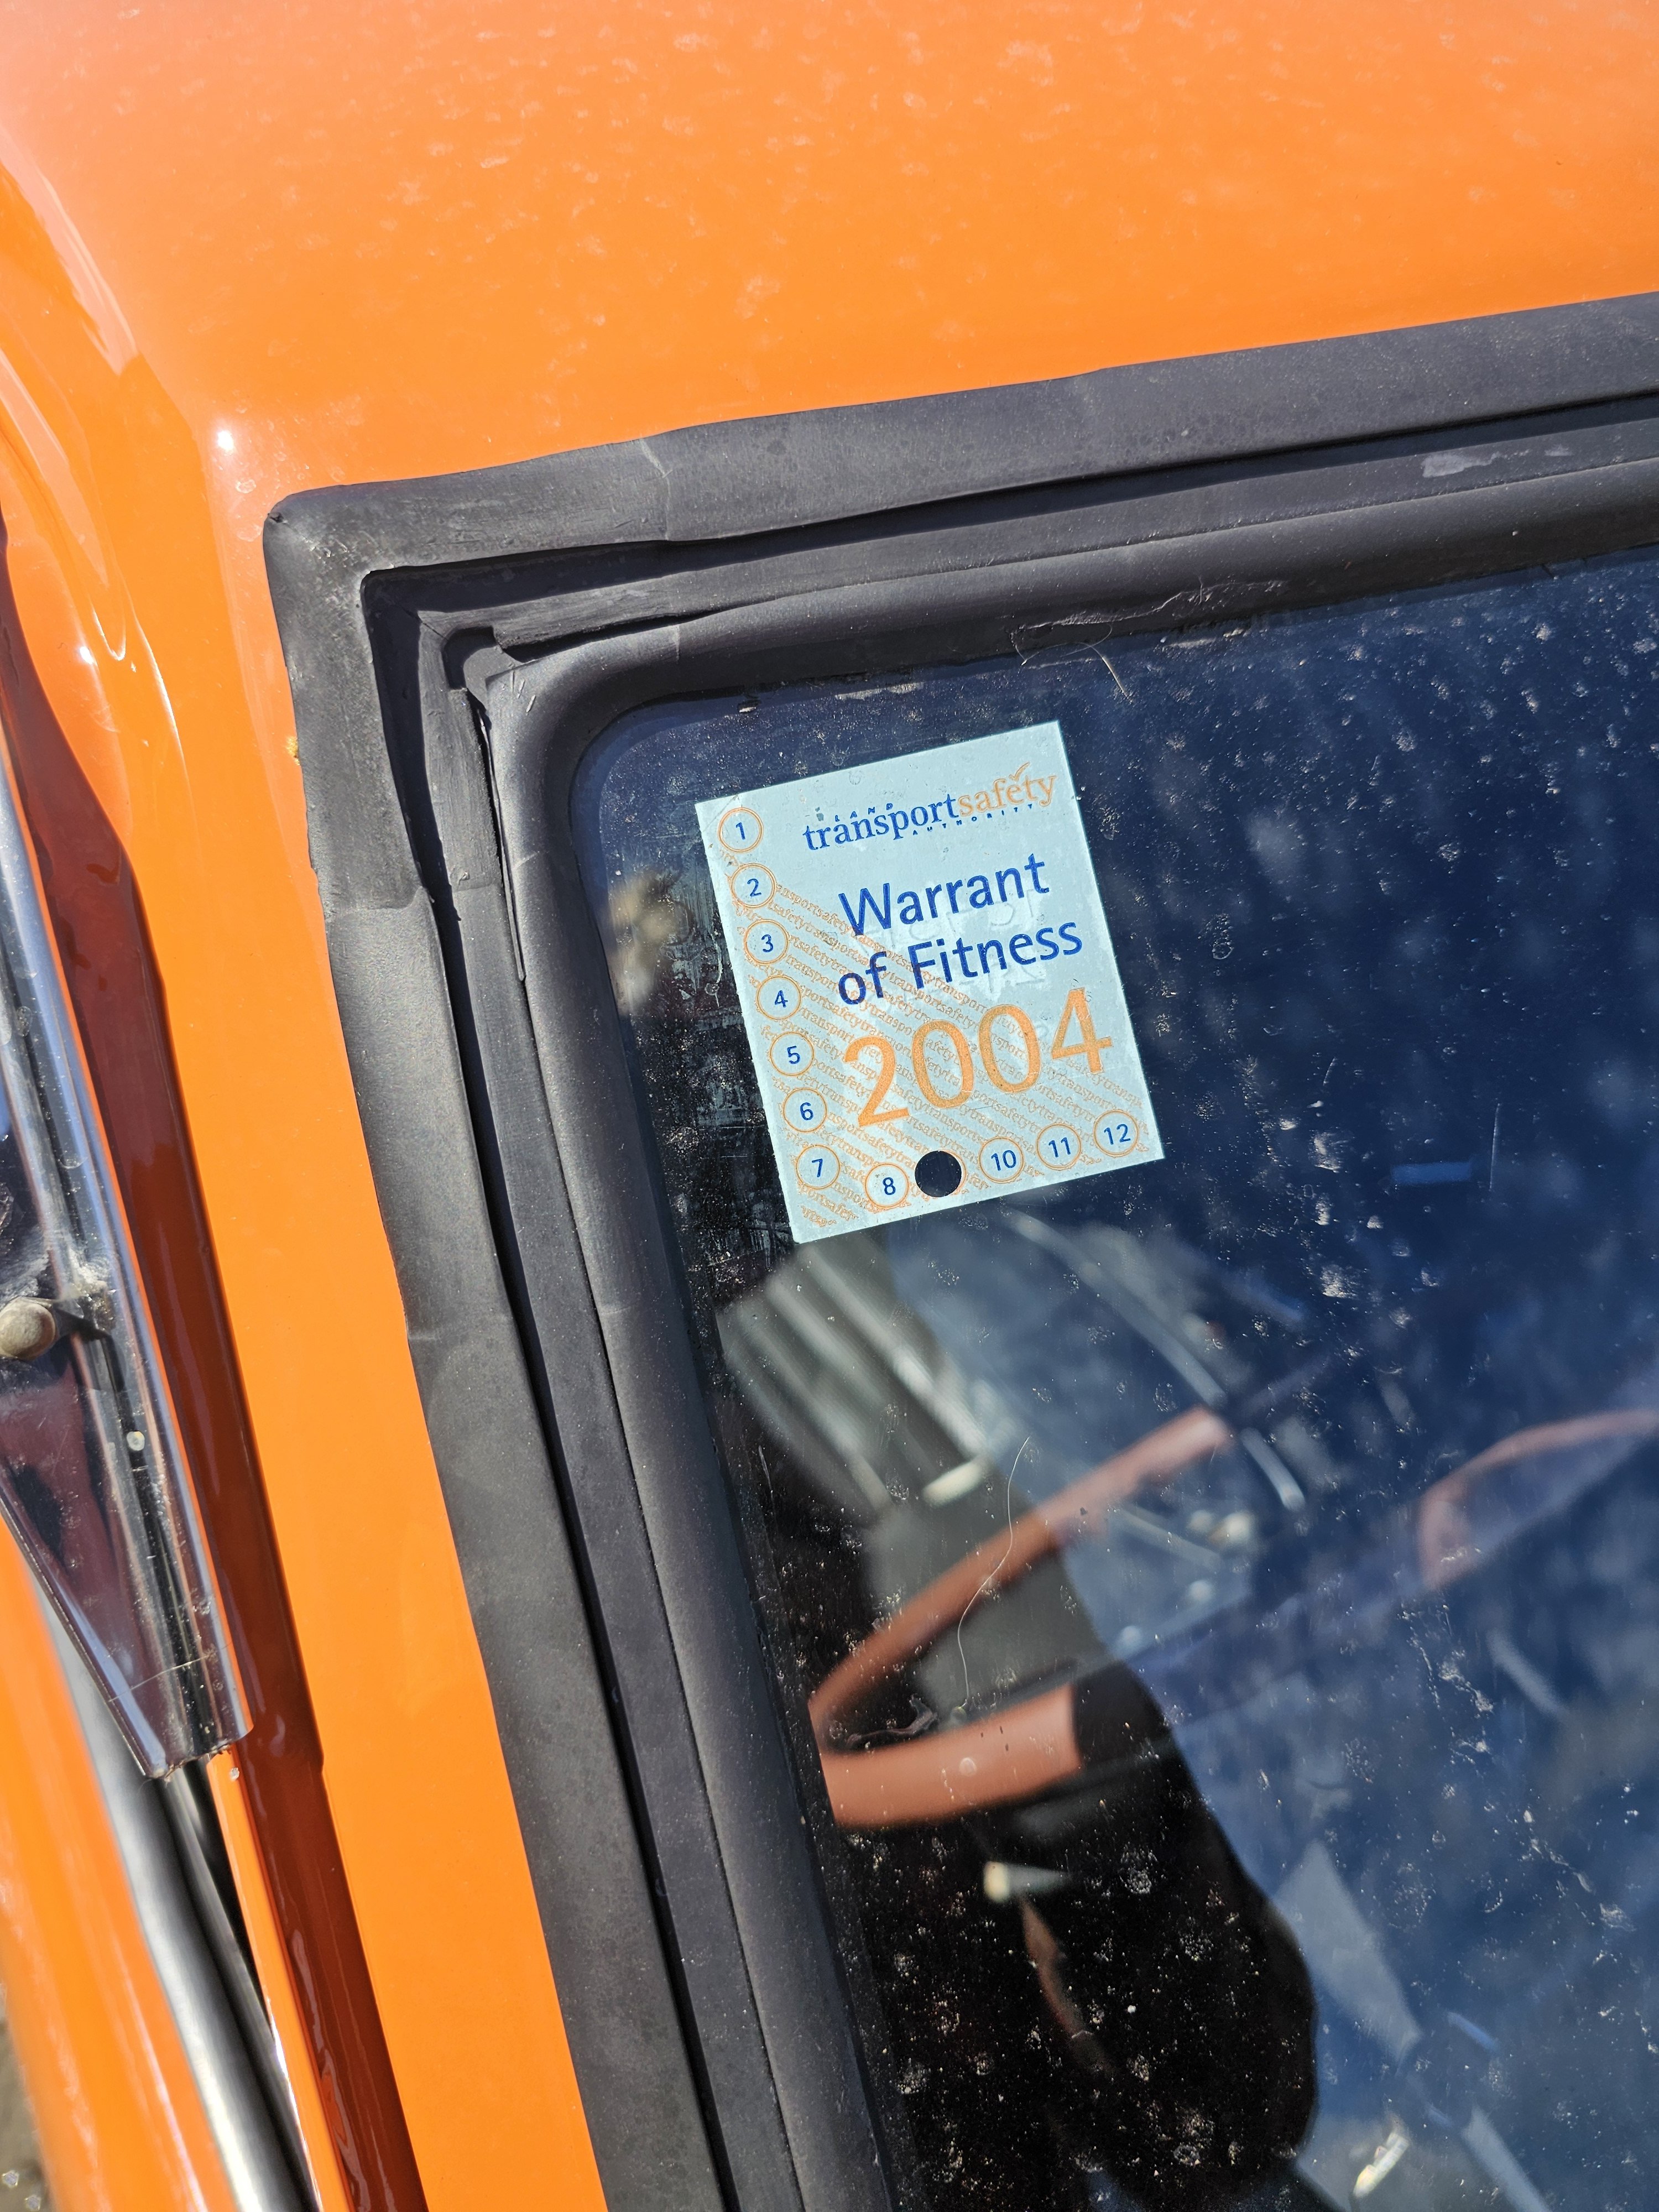
2004 wof
1 point
-
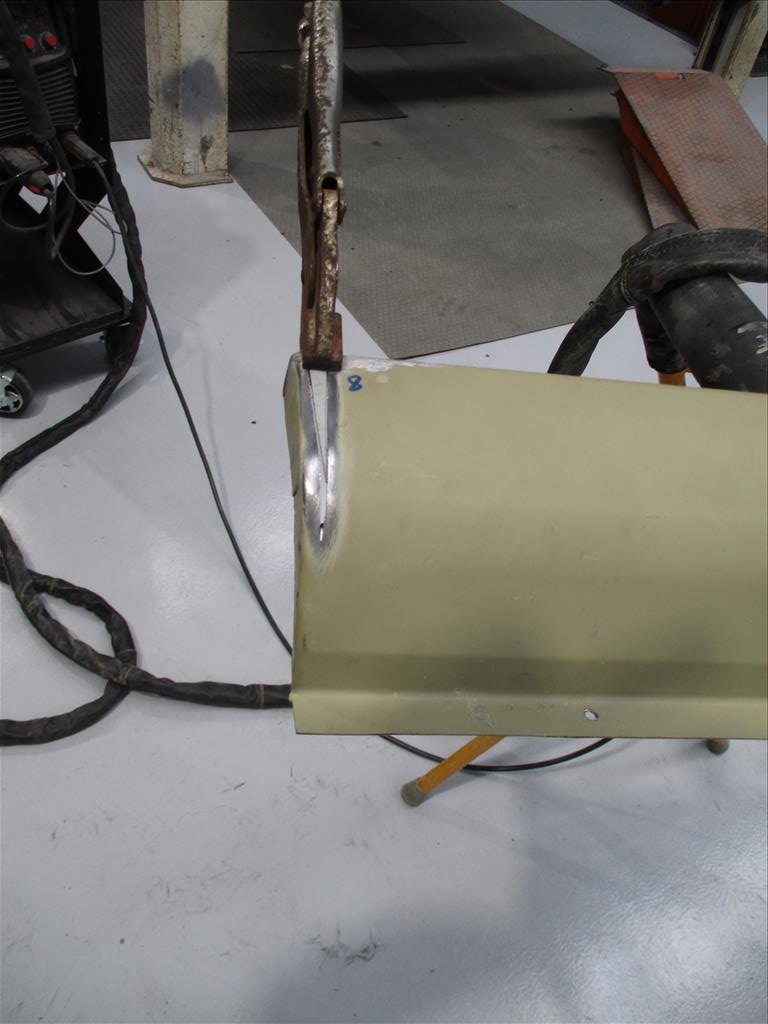
I ordered a new rear 1/4 from Aussie in September and it finally arrived 28th December. I was excited so got stuck in! Images do the talking, ohhh and I got to use the Christmas present I brought myself - a Plenishing Hammer Yuck. Rot behind, removed back to solid metal. Remade and replaced the first inner section. Corner support for the panel remade. This is where the bumper comes around and bolts back into the car. My new toy, what a machine this is. Absolutely made mince meat of making the curved panels, something I've been needing for a while. Curved in two directions, identical to the old one. Welded solid back in place! Rust treated, primed and painted black (not photographed) New panel clamped up for fitment prior to cutting it to suit. Very well made panels and fitment is bloody good. Thanks Automotive Panel Craft Australia. Welded and spot welded in place, ready for a grind. Ground and ready for primer................... Progress feels good and its looking a million bucks from where it was! Discussion; https://oldschool.co.nz/index.php?/topic/86954-120whys-75-datsun-2-door-wagon/1 point
-
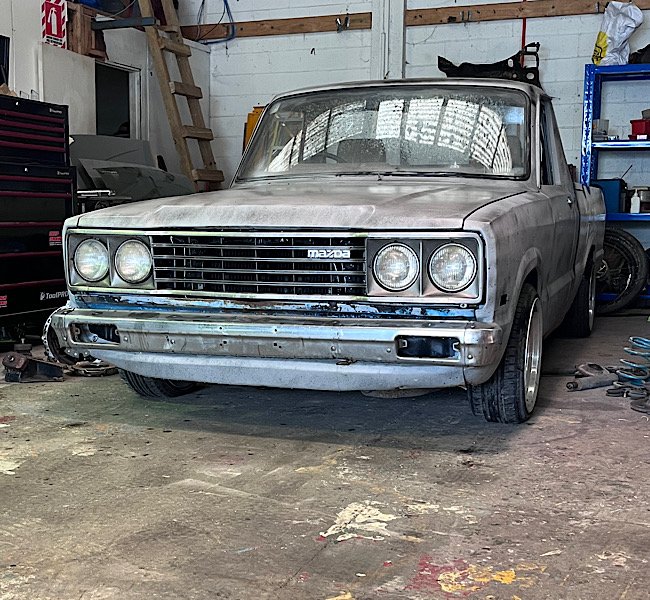
I drained all the coolant out, took the radiator and pipework off and flushed the whole lot through until only clean water flowed. Let it sit in the sun while I did other jobs and gave the engine a couple of short 30 second runs to help dry it right out. I left it at that and decided to sort out the idle control valve that wont shut completely. I started by removing it and putting it somewhere it'll probably just collect dust for a few months and then maybe get sold/thrown in a bin. I then took Hannah on another exciting date to the local wreckers where we looked under many bonnets to find a suitable replacement. 'Automotive foraging' I like to call it. Here I am in the wilds of the wreckers... I took home a couple of throttle bodies with valves attached. One from a Mazda 3 and the other from a Mazda 626. They had almost identical iacvs but one had an adjustment. I cut a section of alloy out of a big block.. Milled it flat and square.. Throttle bodies.. tested them with some pipe and the earlier 626 item has a similar fail safe to my now removed Bosch item, whereby it still lets air through when 'off'. So that just wont do and I have decided the keeper... Mazda 3 unit wins this competition and gets to stay in the workshop while the 626 item went in the bin. I did some more machining of the block so turning it into a ported hub the iacv bolts to, with an in and out pipe pressed in place. I made a bracket to suit the starter motor through bolts to which the aicv block bolts onto. In pictures.. Bolts onto starter like so... Ended up being not only more compact and better mounted than the old Bosch unit but with better pipe routing too. I ran the valve through some tests on tuner studio and it works really well, shuts properly and is also much much quieter , partly due to it running at a much higher frequency than the Bosch unit. The next thing I thought I'd check was the headbolts out of curiosity to see if they were still torqued up fine. I first laid out some neat material that was absorbent, but waterproof. My sister, a surgery nurse at Wellington hospital, gave it to me and said its handy stuff to have about. Certainly is!... Bolts were all fine and I saw no point in giving them anything extra beyond what Mr Honda specifies, so possibly risking deformation of the heads etc. Next thing was to sort out the electric water pump placement. Where I had mounted it turned out to make it a pig to bleed of air due to the outlet pointing downhill and I knew it could be better. See here... I removed the mounting bracket I'd made for it... Unplugged the ecu etc etc and slid the whole engine/transmission onto the the 'engine stand 2000'. This process is super easy as it can be adjusted to the same height as the big table or workshop bench and the engine slides really nicely on the ribbed sump. Then I slung it into the spare imp and tried out the water pump for size in the new location I had in mind... Cooling pipework serving the Datsun engine exit the bodyshell roughly about here... Much better position. Not only will the pump almost self bleed, being at about the lowest point in the cooling system, but I will also clear up the area of uglyness where it used to be. It also gives me full easy access to the transmission filler/dipstick. I removed the engine, put it back on the table and set to work marking out for a mounting bracket... Then fabricated this bracket.. Which mounts the pump here... New improved temporary cooling setup which filled up sweet and bleed of air easily.. Quality touches.. With the cooling system now filled with just water I ran the engine up to temp. The new iacv was working well and I was more confident in running the engine for as long as my lunchbox fuel can would allow. I kept checking for any leaks and found nothing. The cooling system was working well, the fan kicking on and off, the temp staying around the 95- 97 degrees range I had set on the water pump controller (which also controls the fan relay) and I was finally able to set the idle properly with the idle bleed screw on the throttle body - something I was not able to do with the Bosch iacv which was letting in too much air. Still no leaks. I ran it several times, let it cool down, checked it the following morning and the level was spot on. Touch wood but I think the extra heat and lack of slippery coolant has allowed the head gaskets to 'set'. Either that or maybe there wasn't a leak at all and it was just residue coolant from spillage when I had removed the top pipes to pressure test them. Anyway.. I was a farking happy bloke! (Hannah was super happy for me too) Now with the coolant system working and it idling nicely etc I had the confidence to finally give the engine a decent rev up and see what it sounds like at 6000 rpm. Hannah took a vid... I just love that sound. The overrun rasp that flat sixes make. It revs up so quick and clean (and there's no acceleration enrichment setup on the tune yet until I sort the main fuel table later on so it can bog if you snap the throttle open too quickly) Another vid I took showing the hand throttle... So far the little Mandalorians have managed to keep all their limbs in place. In fact the plenum chamber stays quite cool with the constant stream of cool air flowing into it. Their spaceship has aircon? Anyway. I was happy. The only issue was that the whole time I have been running it without any alternator so meaning the ecu is having to use the voltage compensation tables and its not really an ideal situation having everything running at 2-3 volts less than it should. I took my alternator apart again and ran through as many checks I could, following a very handy NZ auto electrical school tutor video about alternator testing online. I suspect the rectifier is kaput and I couldn't locate a cheap replacement. I managed to locate a second hand alternator, pretty much the same unit and have bought it - now just waiting on the seller to sort their sh1t out. In the meantime I got another similar alternator, this time a nippon denso unit from a Honda prelude that actually has a bit more clearance out back, but with an ugly grey painted steel cover. I ran some pigtail connections and bolted it up, started the engine and now have charging! Yay. With things running at full voltage I tweaked the engines idle tune and cold start settings and am much happier with where I'm at there. In case the other alternator turns out to not arrive/be a dud etc I decided to give this working unit I do have a bit of a polish and paint. In pics, finishing it off with wrinkle finish paint on the tin end cover. Much better looking. I bolted it back in place and did one final run up to temp with a bit more tuning of the fuel table idle zone. I now have the engine able to idle at 650 and I could almost get a 50cent coin to balance on the plenum lid. The engine is still only sitting on the table, not bolted in place so I cant really expect it to be perfectly smooth. I think it idles a bit nicer at around 750- 800, a zone where its also running leaner at close to 14.7. Lots of time in the future to play with settings. Confident its all a good starter and idler, plus realising I'm stalling on the next stage, I have now started to take the pump controller, cooling system and temporary wiring apart. The next time it will be started will hopefully be in the Imp. Next job is to reassemble the transmission, bolt the lot into the spare shell and sort out the gear shift linkage.1 point
-
Its looking more like a car now!1 point
-
Mirrors and monsoon sheilds on. test drive to try and sort a few noises out
1 point
-
Correct, iv wanted one for years but she was a good price. As for the diff iv learnt the mk3 zodiac or some mk3 zephyr crown wheel and pinion fit the transit square diffs and will give me a 3.5 ratio which should be better than the 5.6 that I believe I have. Failing that its just an axle on leaf springs so I’ll measure flange to flange and find a whole rear axle to fit. These vans have the diff under the leaf springs so I’ll have to cut off the spring perches and flip them for the axle to go above to lower it more, at this point a whole axle out of something better might be the better option. anyway maybe it’s time to start a build thread1 point
-
Exhaust done 2inch
1 point
-
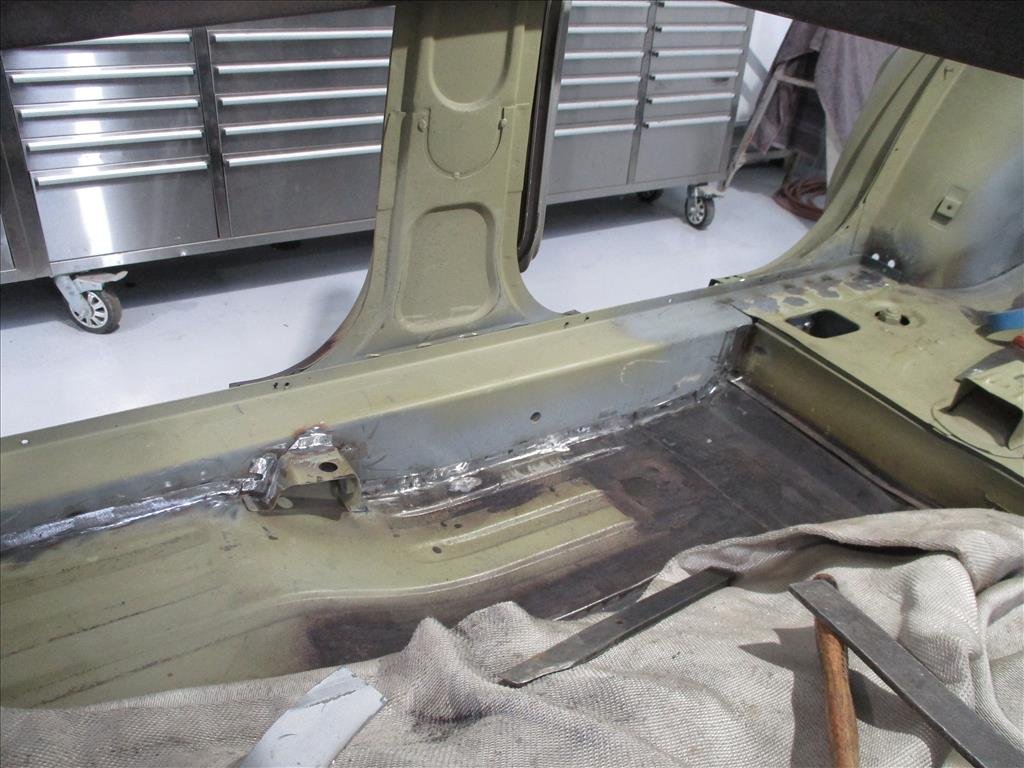
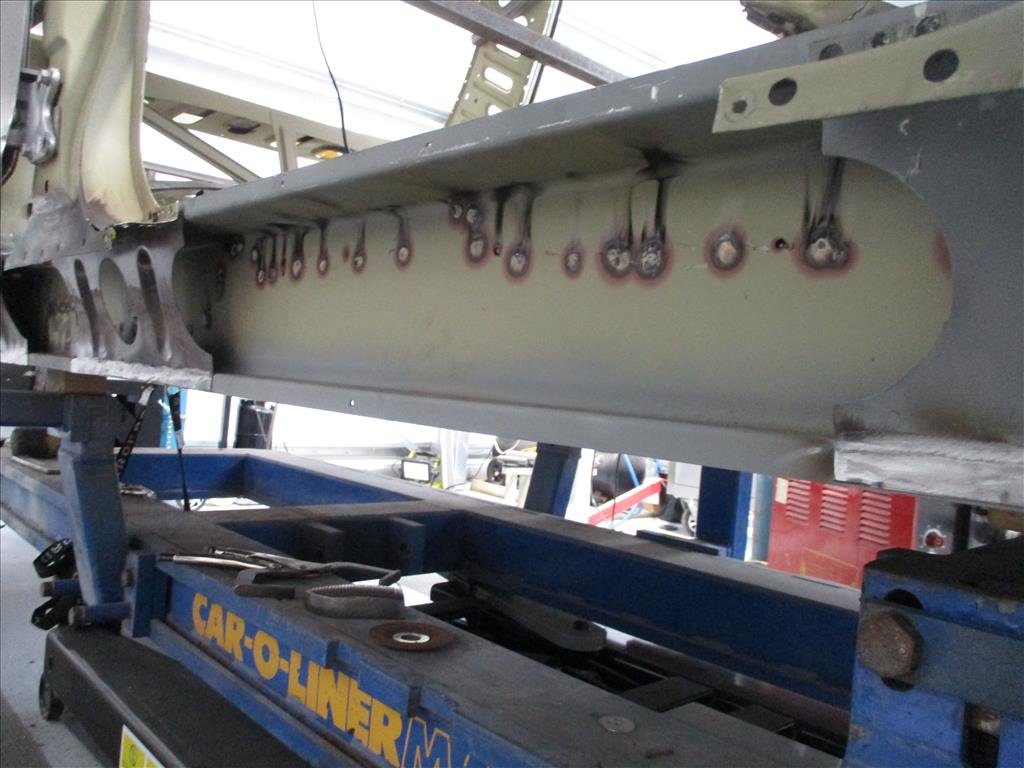
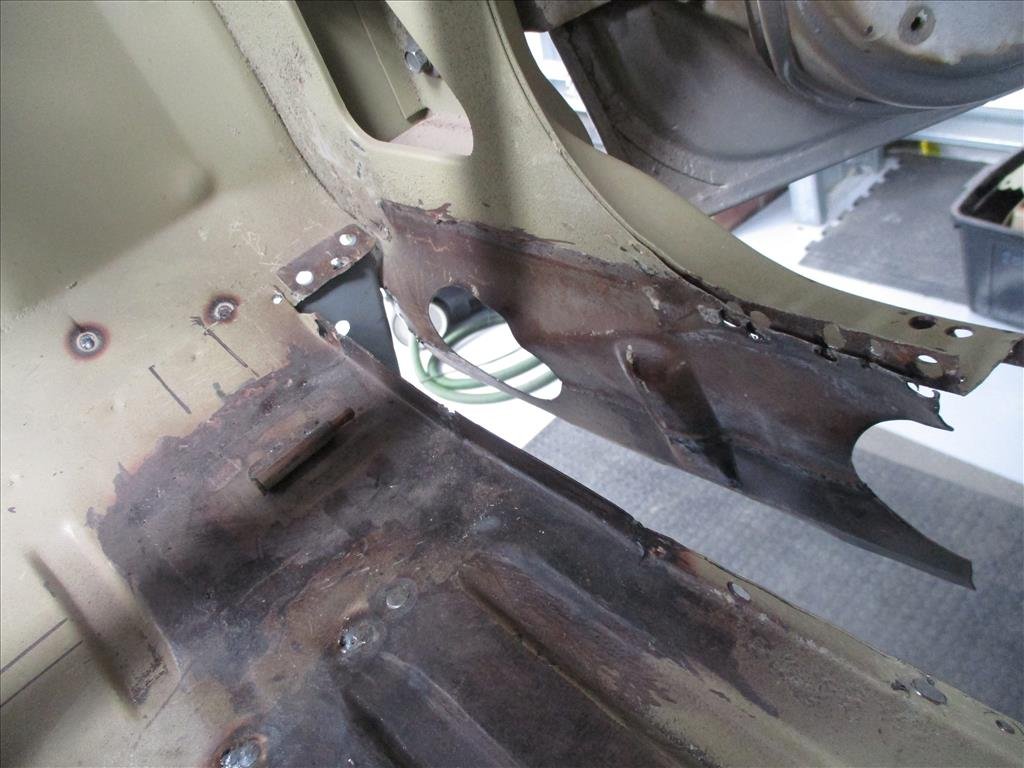
I might've jumped the gun on a previous post saying the car was quite straight, turns out there was a bit more to do.. Chassis rails were mulched from forklifts as mentioned earlier and once the car was pulled straight it was apparent more things were not in great shape. The side sills on driver side had to come off and be modified as well as the chassis rail torque boxes. Some more rust was found underneath (to the surprise of nobody) so they were recreated. I was a little worried about this part of the b-pillar as it was pretty pitted originally especially where it connected down with the inner sill but that's looking much better now. Door gaps looking mint. So yeah these are the kinds of jobs which take ages but aren't really exciting to look at but needed to be done to ensure it can survive another 50 cycles around the sun.
1 point
-
For any big Chev parts I used Charlton Auto from Gore. I have bought gearboxes from them before. If you have a short diff then get a T56 and if the diff is in the 2's then I would go 4 speed. For carb choice I got 7 litres saved per 100km with a quadrajet over an edelbrock. Everything is expensive these days however marketplace prob the cheapest place to look. https://www.facebook.com/marketplace/item/1536298060551851/?mibextid=dXMIcH https://www.facebook.com/marketplace/item/6964925783630541/?mibextid=dXMIcH1 point
-
For fucks sake! This is why each kid is getting a kitten when Oscar passes and you will shut your mouth and just accept it or I will divorce you! I will marry you just so I can divorce you and take half of your shit including this piece of shit and then I will take it down to the Waimak and set it on fire! This is not to be anywhere near our garage and my Honda. This is living at your mother's and you'll count yourself lucky not to be living there too!!!1 point
-
And as it sits as of a couple of days ago when it was exhumed from a barn its been buried in for probably 10+ years
1 point
-
Well tonight I decided to weld the patch panel in Not sure if I'm happy with it but will sleep on it. Still have to finish the bottom of the patch and also make an inside flange for the wing Fitch panel to fit into. I also took to it with a dolly and a panel hammer to try and sort out the low spots. Might give it a weld from the inside to get ultimate penetration.
1 point
-
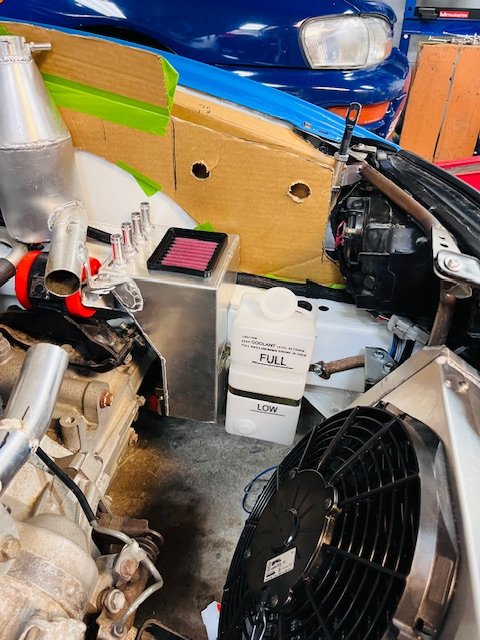
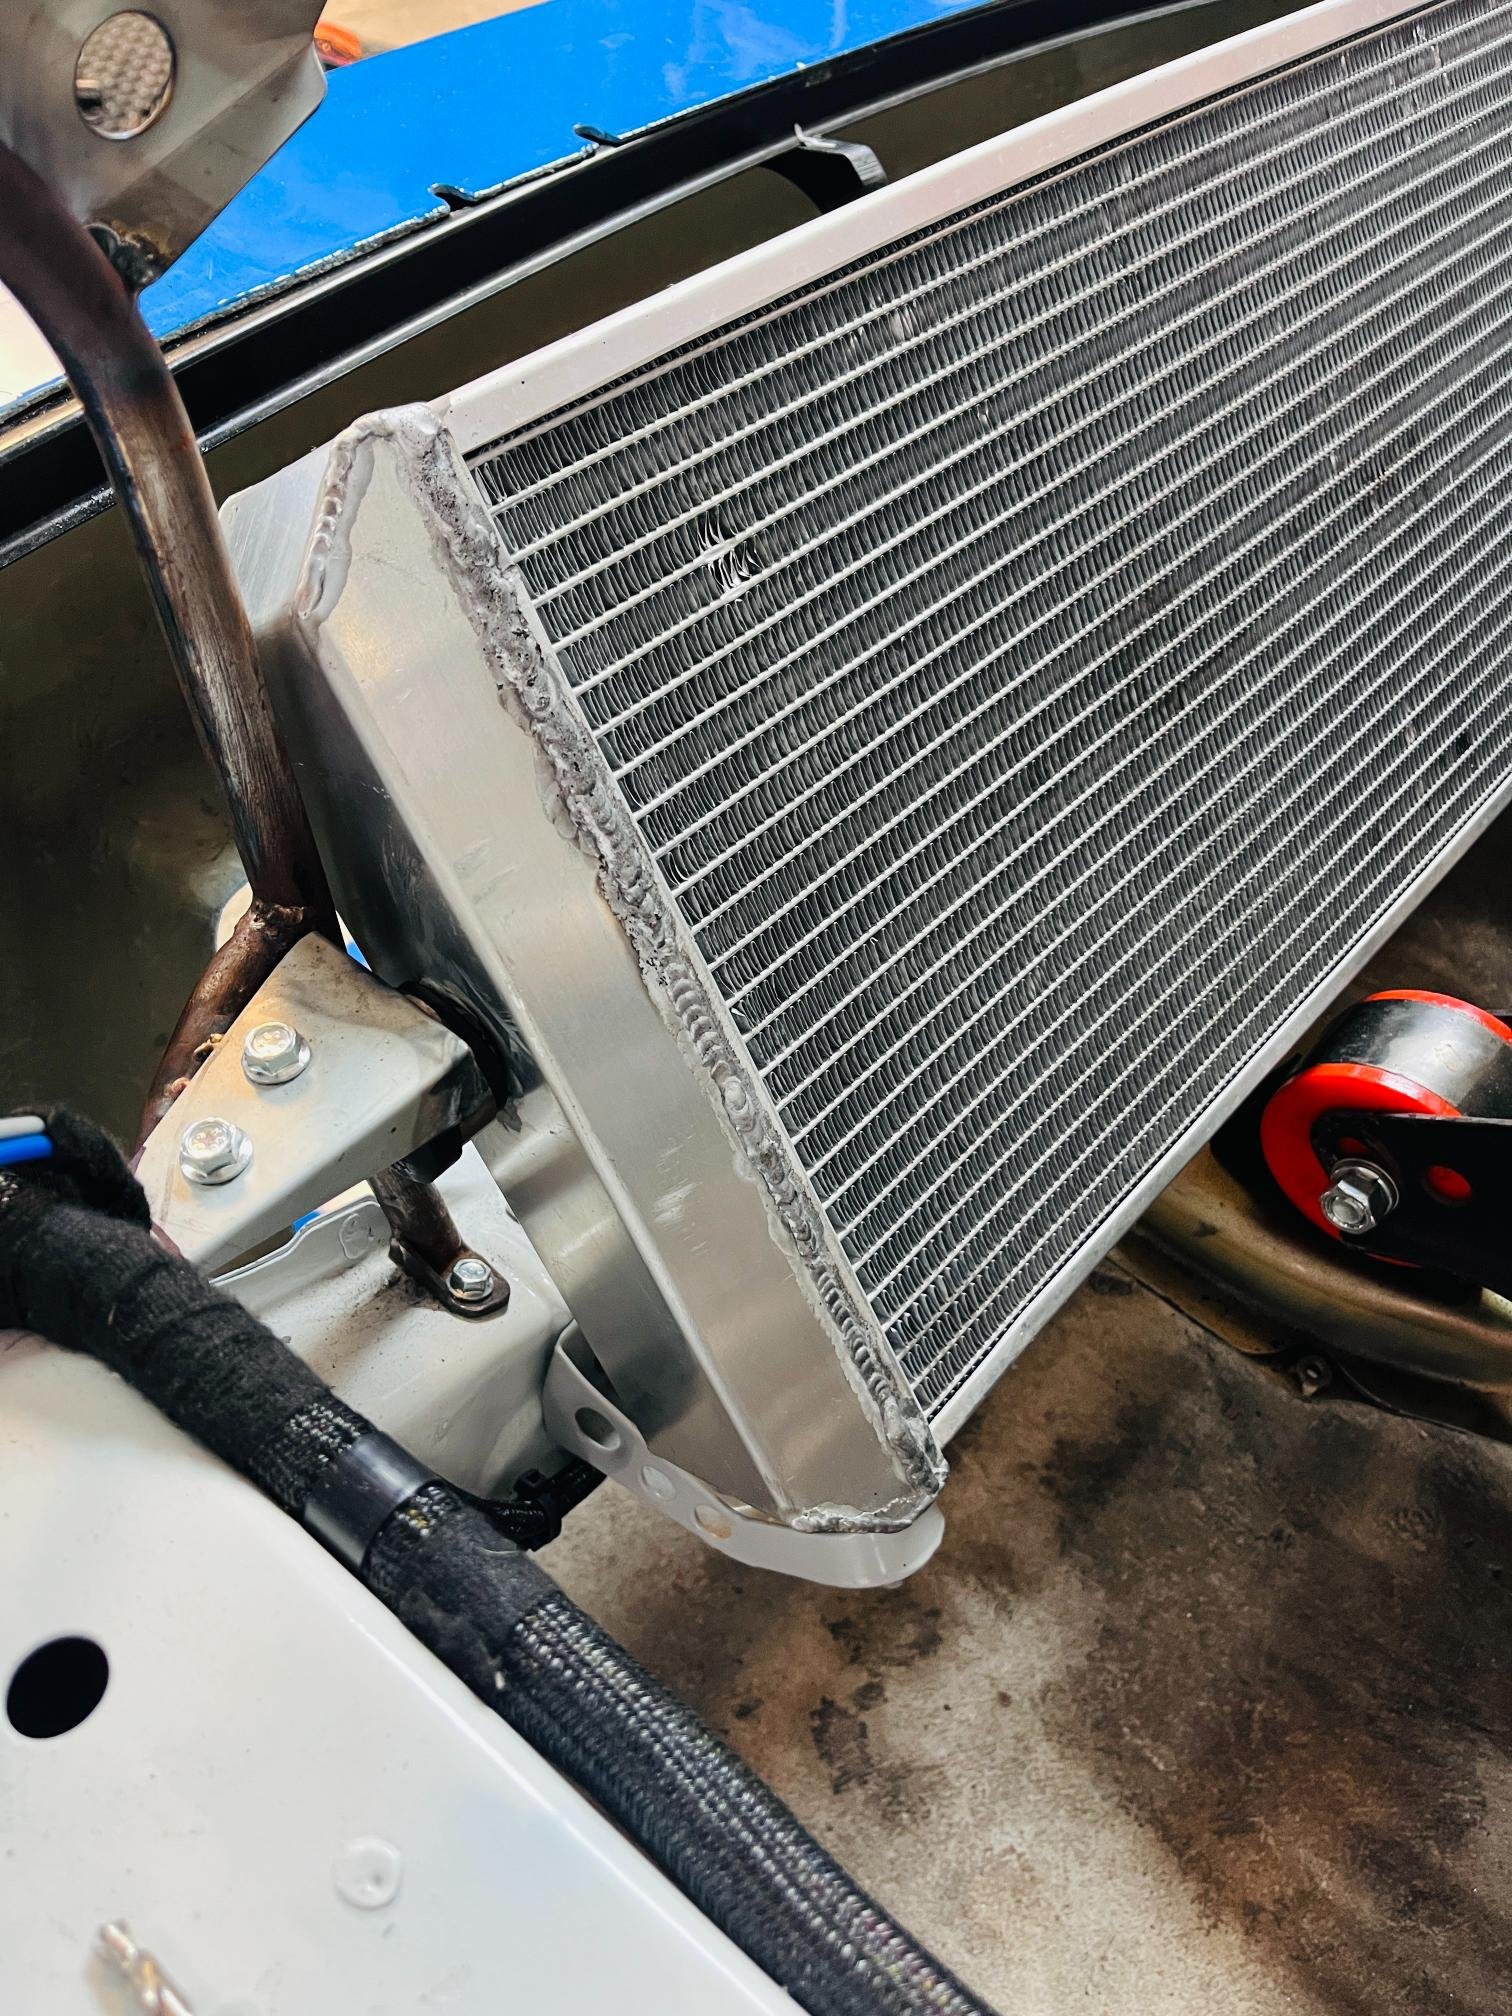
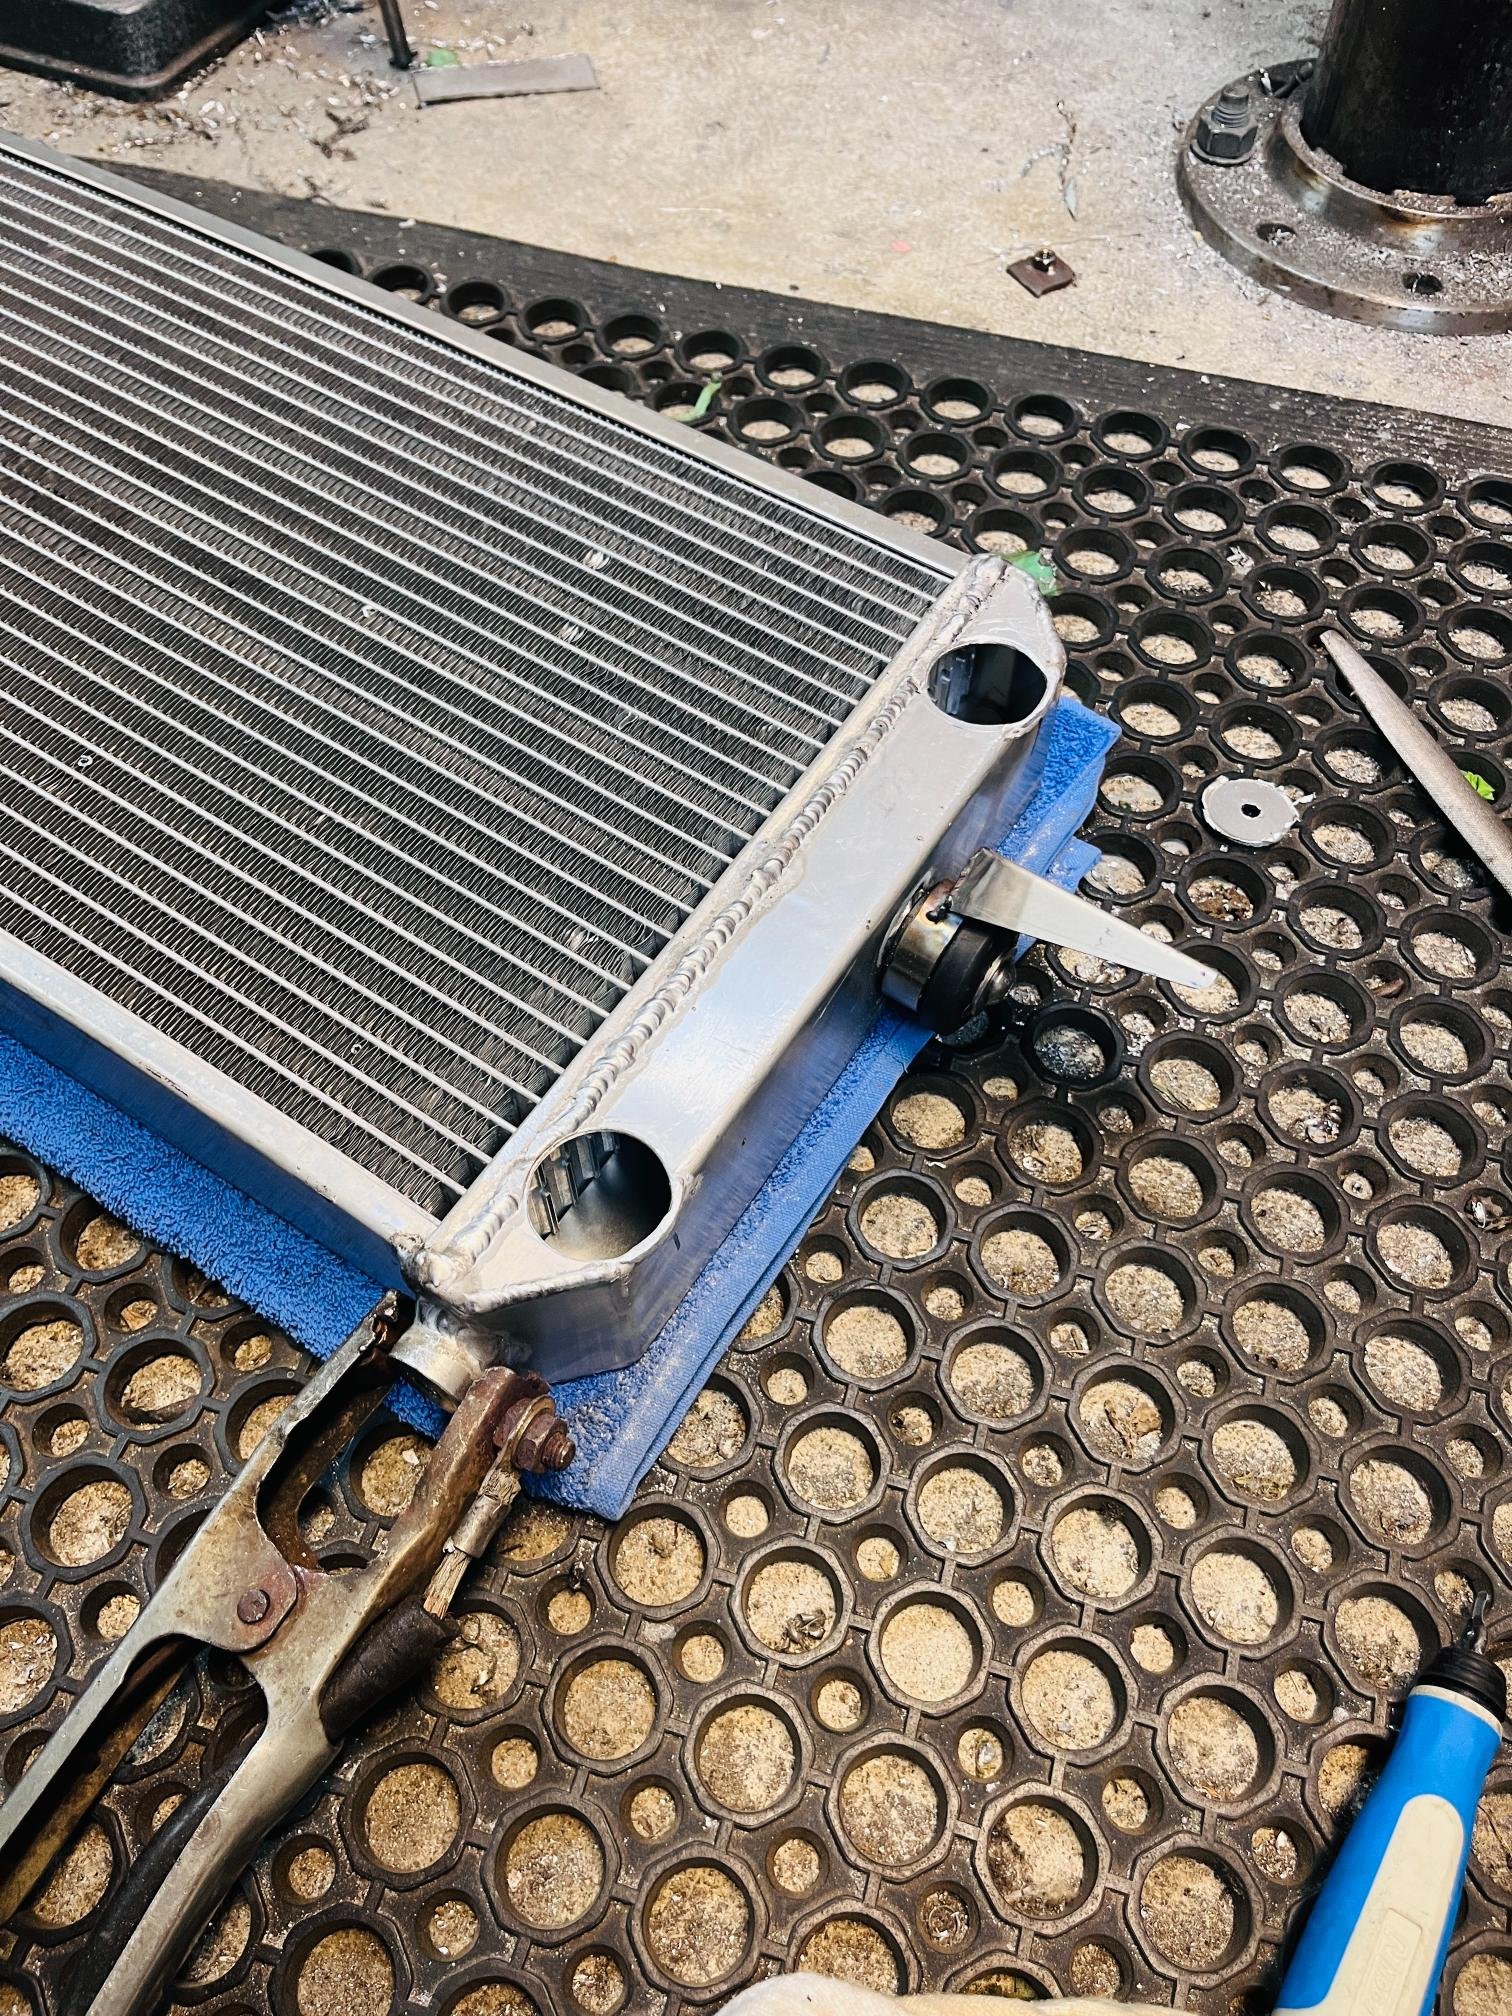
Got radiator side mounts, fans and pipework all sorted over the holidays. These had been holding me up until as their location determines a lot of other engine bay related constraints so was great to get it ticked off. Without a radiator cross-member mounting the top of the radiator was tricky. I ended up welding a boss on each end and finding a shackle bush to mount to the headlight frames. I bloody hope I never bend the front end cause everything will get damaged..... Might need a good crash bar post-cert for bumper-to-bumper racing! Made a shroud for the fans (which are the wrong direction currently due to a brain-fart on my part), mounted 15mm from core so hopefully enough to draw air from whole radiator surface. Have included rivnuts for future addition of bonnet ducting. Now I'm in the process of moving the header tank over to the guard to make the bonnet duct simpler. Should be a great layout when header tank, catch can, rad overflow, bonnet duct and airbox are all finished up. These may take a while to finalise as I'm focusing on jobs that get the car started.. ] This is a HUGE step for me. And super happy with how it worked out. The end is feeling a lot closer and achievable now! Just got to keep moving forward.
1 point
-
we need to know how big your missus is first. a pic will do1 point
-
2022... I put the call out for a 78-84 b1600... Got a pm about one down in chch. It is an 83 with an 80 front on it. I let it pass due to ligistics. Ive done too many interisland vehicle purchases to wanna trade again. But then 4 months later i got a lead on the owner of the plates RX3UTE.. Asked if he was keen to sell, yup but at $1500. I ummd and arrrd.. left it for a bit. Got hold of the guy with the ute, "still there?" , "yup"... sold. Arranged for transport to Auckland, $1400 later..ouch. It arrived, and i was expecting a complete pile. It was fairly sound. Didnt run though.. But thats fine..i had my 12a to go in there. He offered to buy back the engine and box, so i won there. 3 weeks after getting the ute to the shop, i had the 12a and box in there. Made the purchase to get the plates back. It was ON!!!! RX3UTE is making a come back.
1 point


.jpg.4929511e3e3b26082abbfc0132b75478.jpg)


.thumb.jpeg.cba3dbd83fd850104bccdf9537a099b9.jpeg)


This leaderboard is set to Auckland/GMT+12:00