
Leaderboard


Popular Content
Showing content with the highest reputation on 12/16/23 in all areas
-
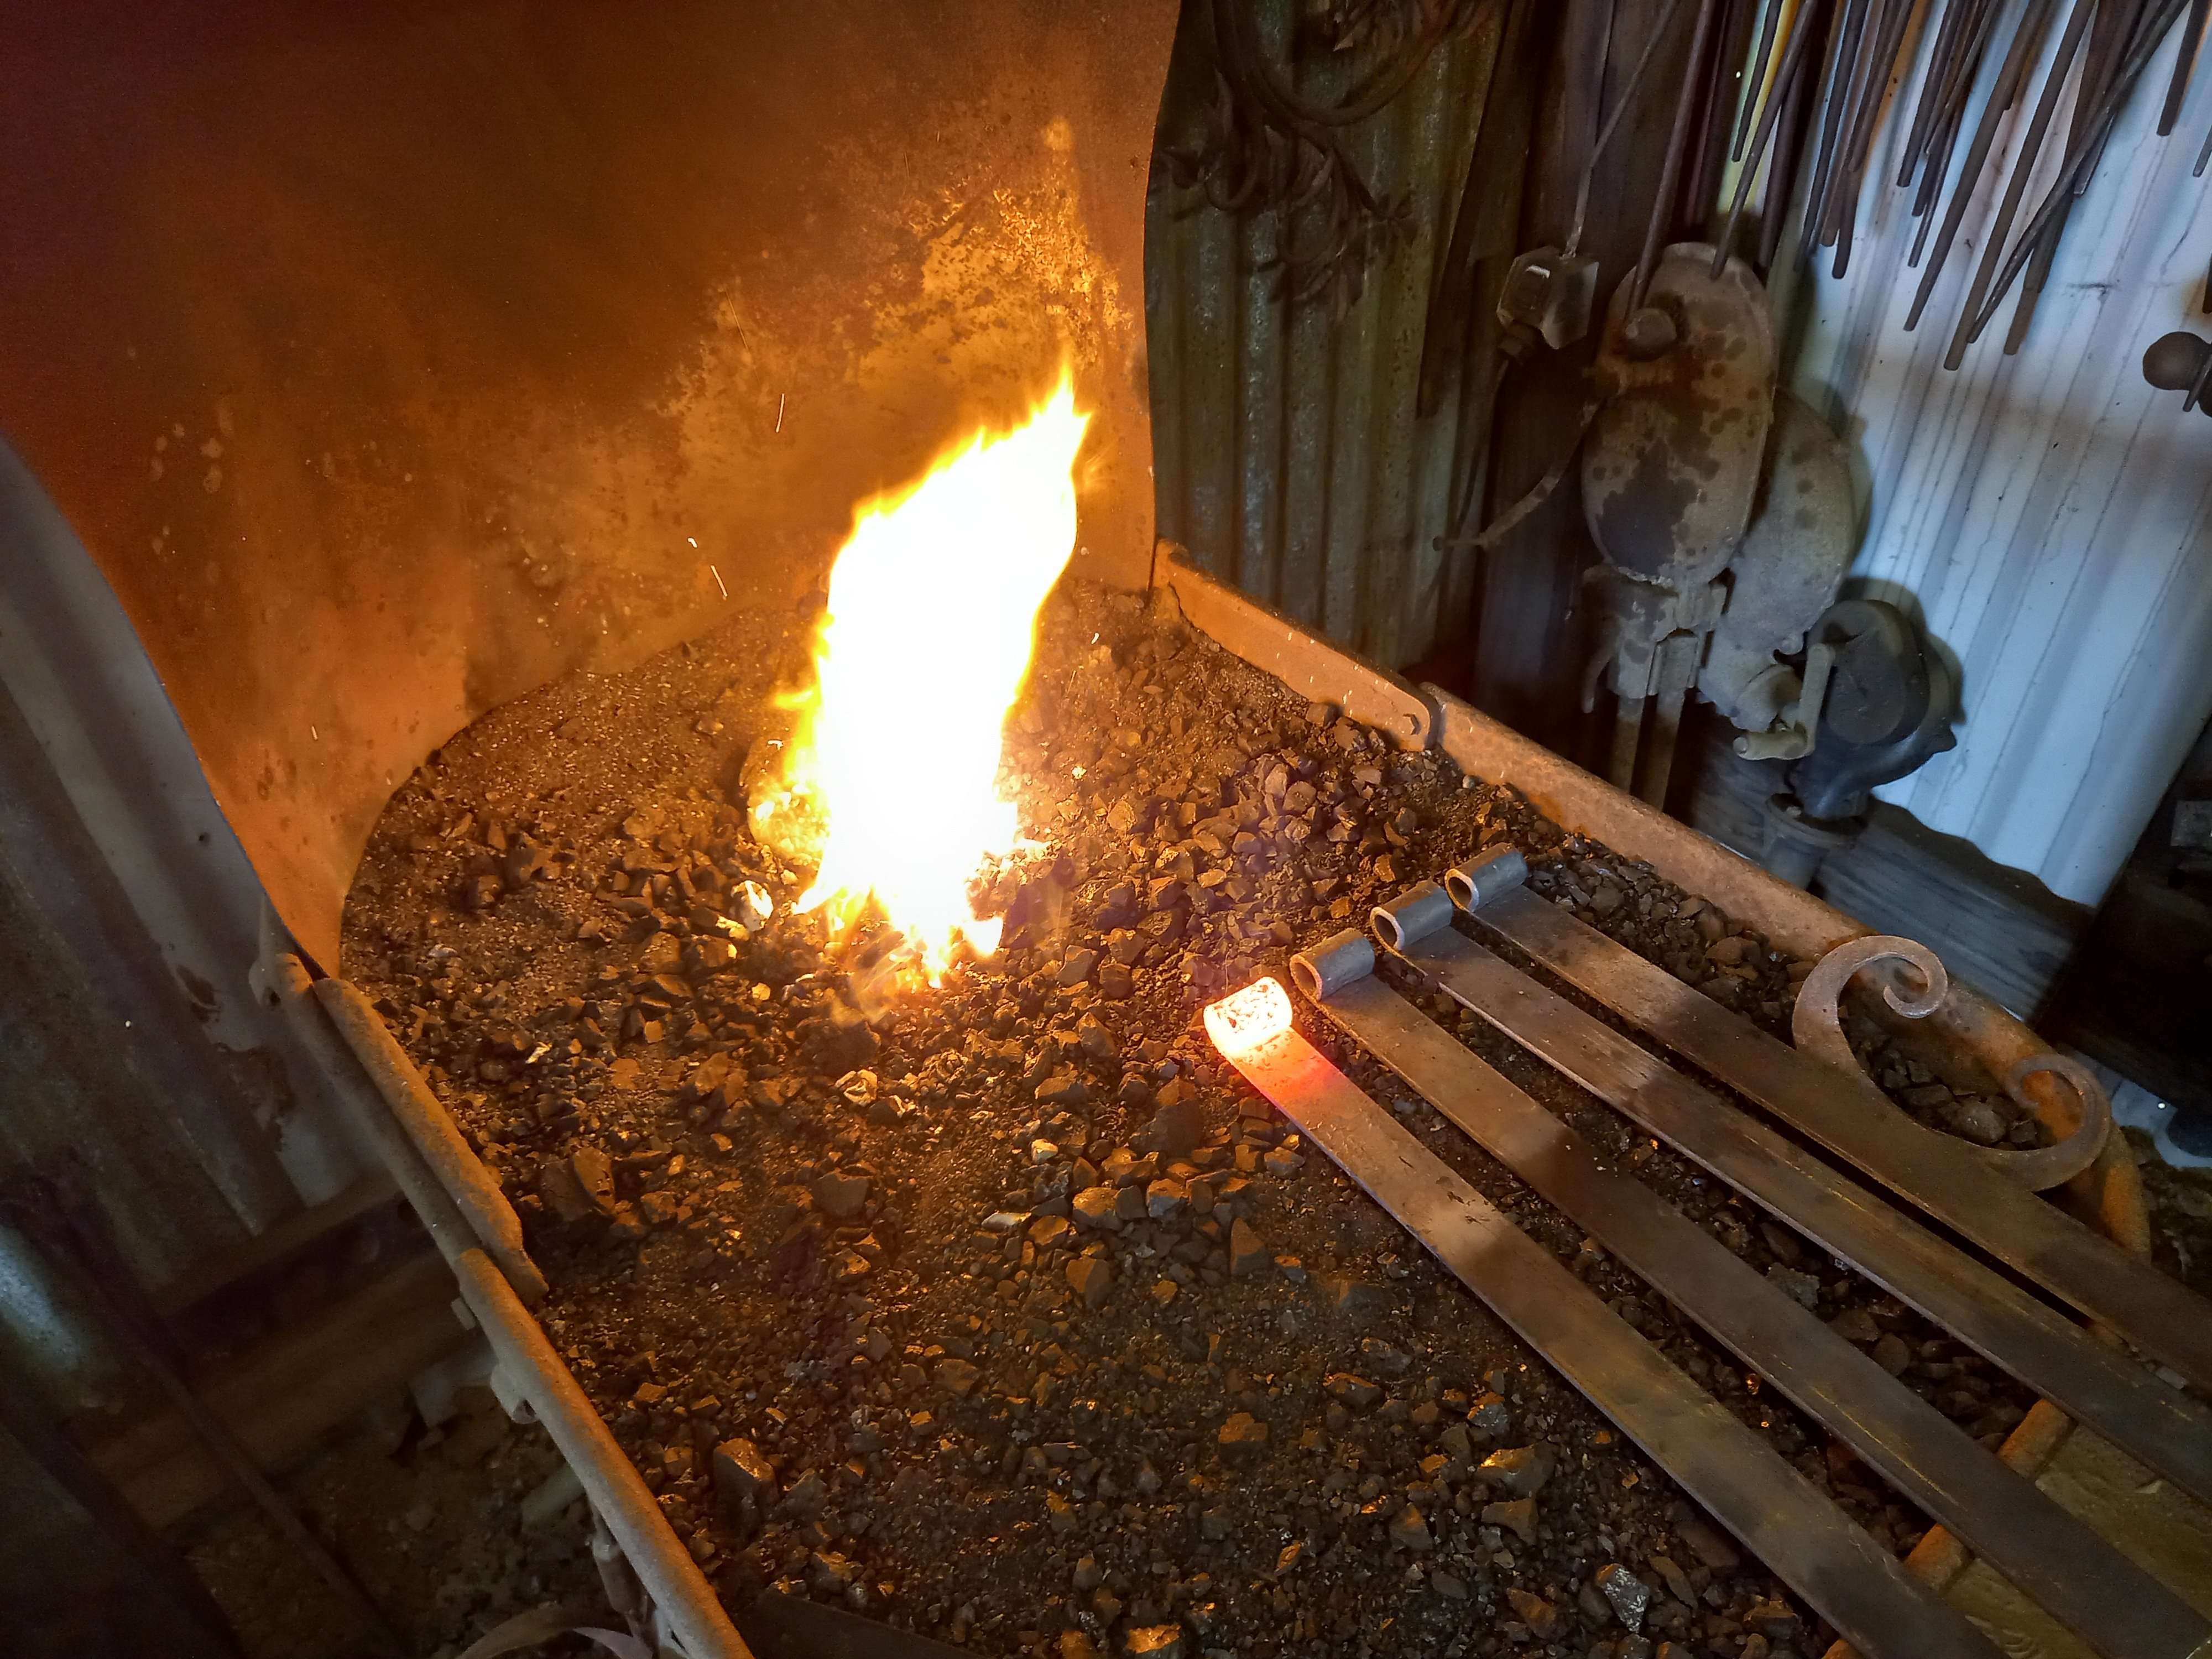
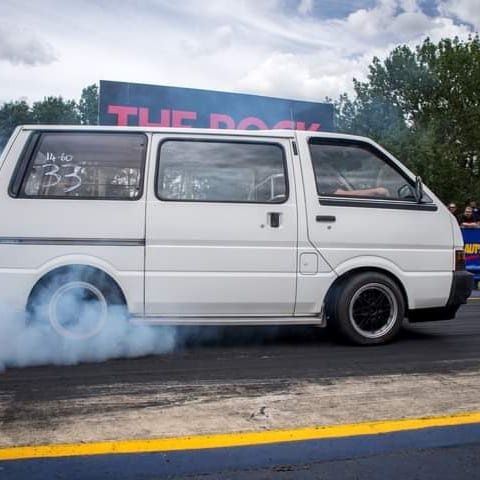
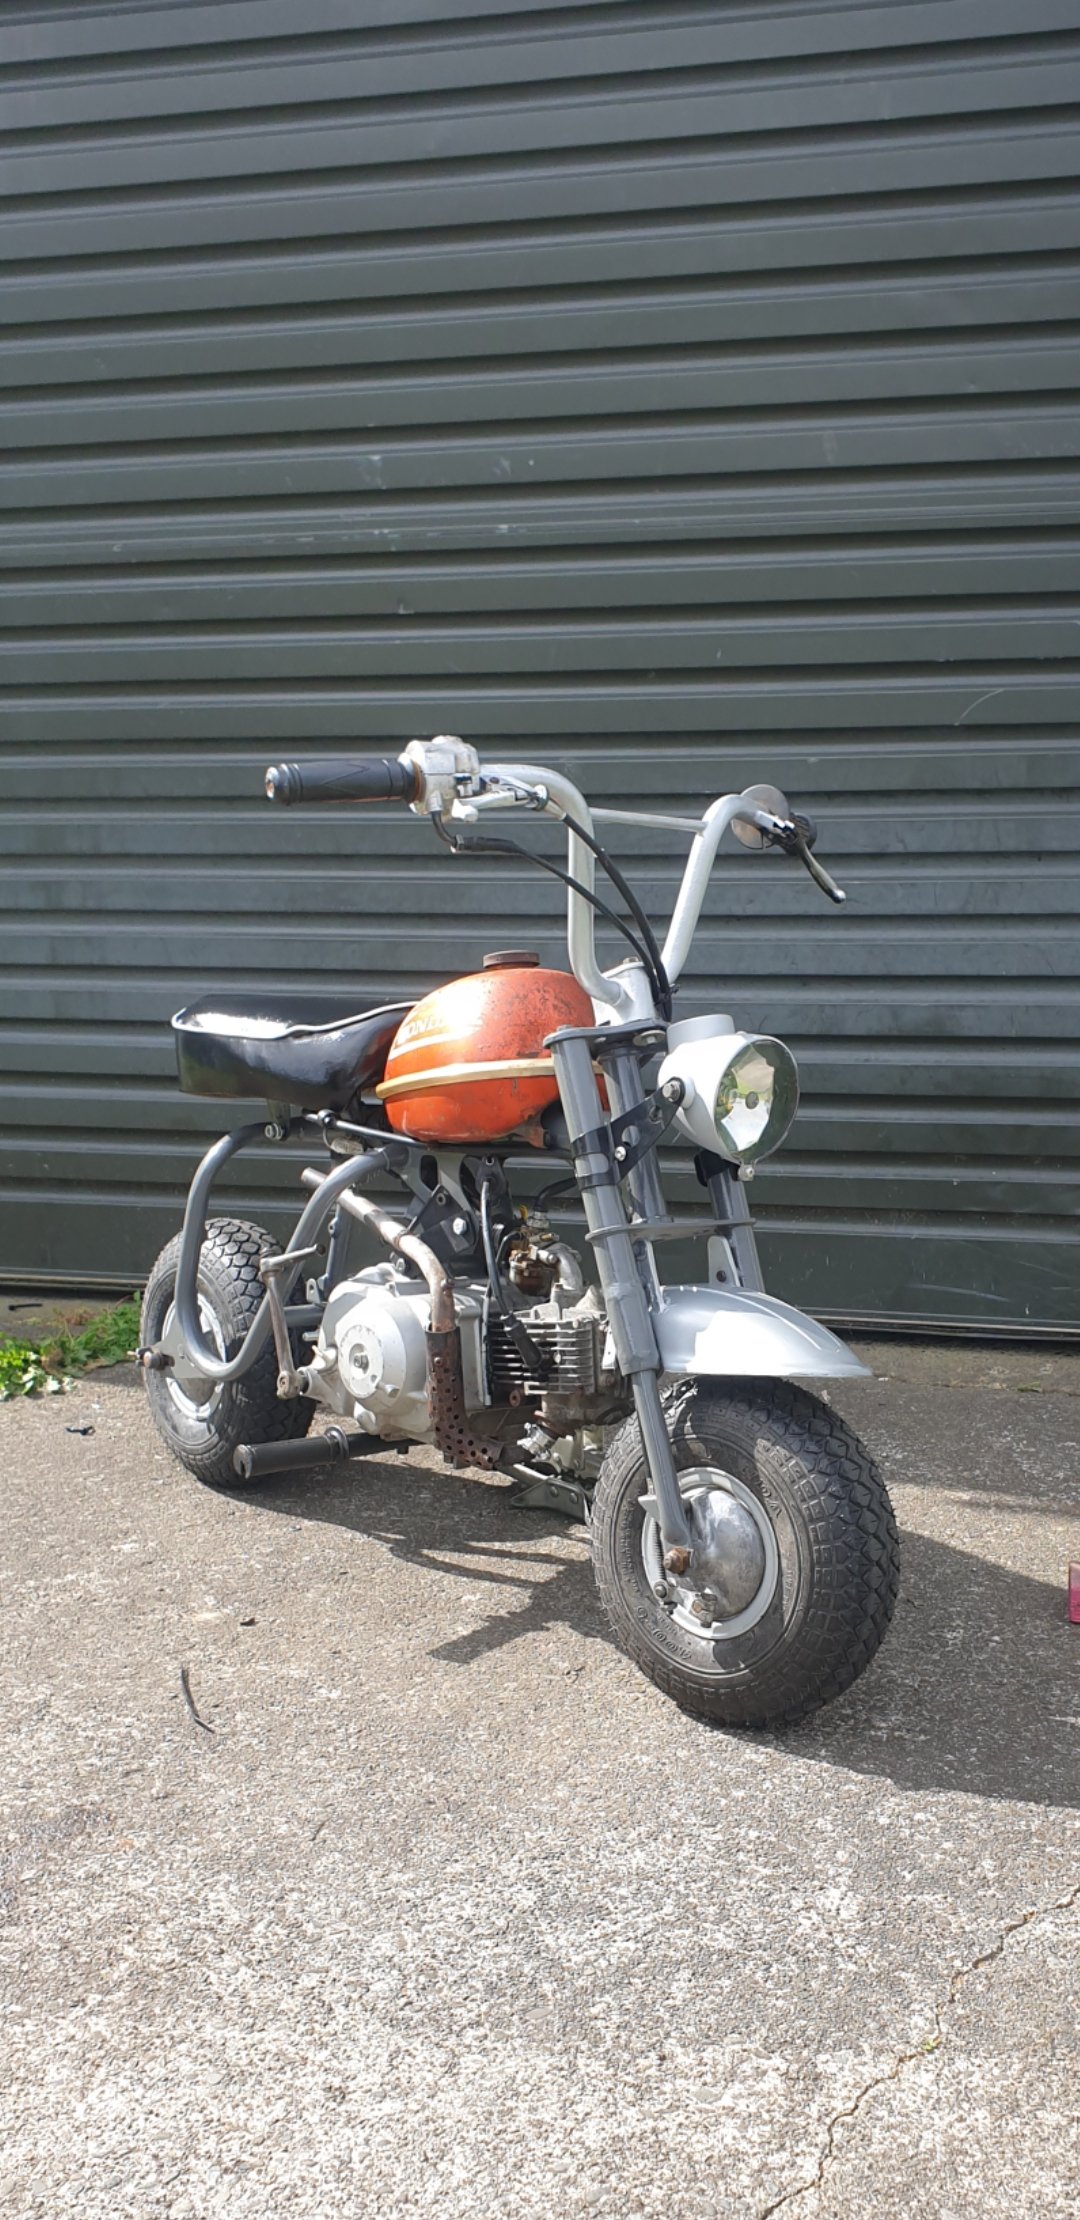
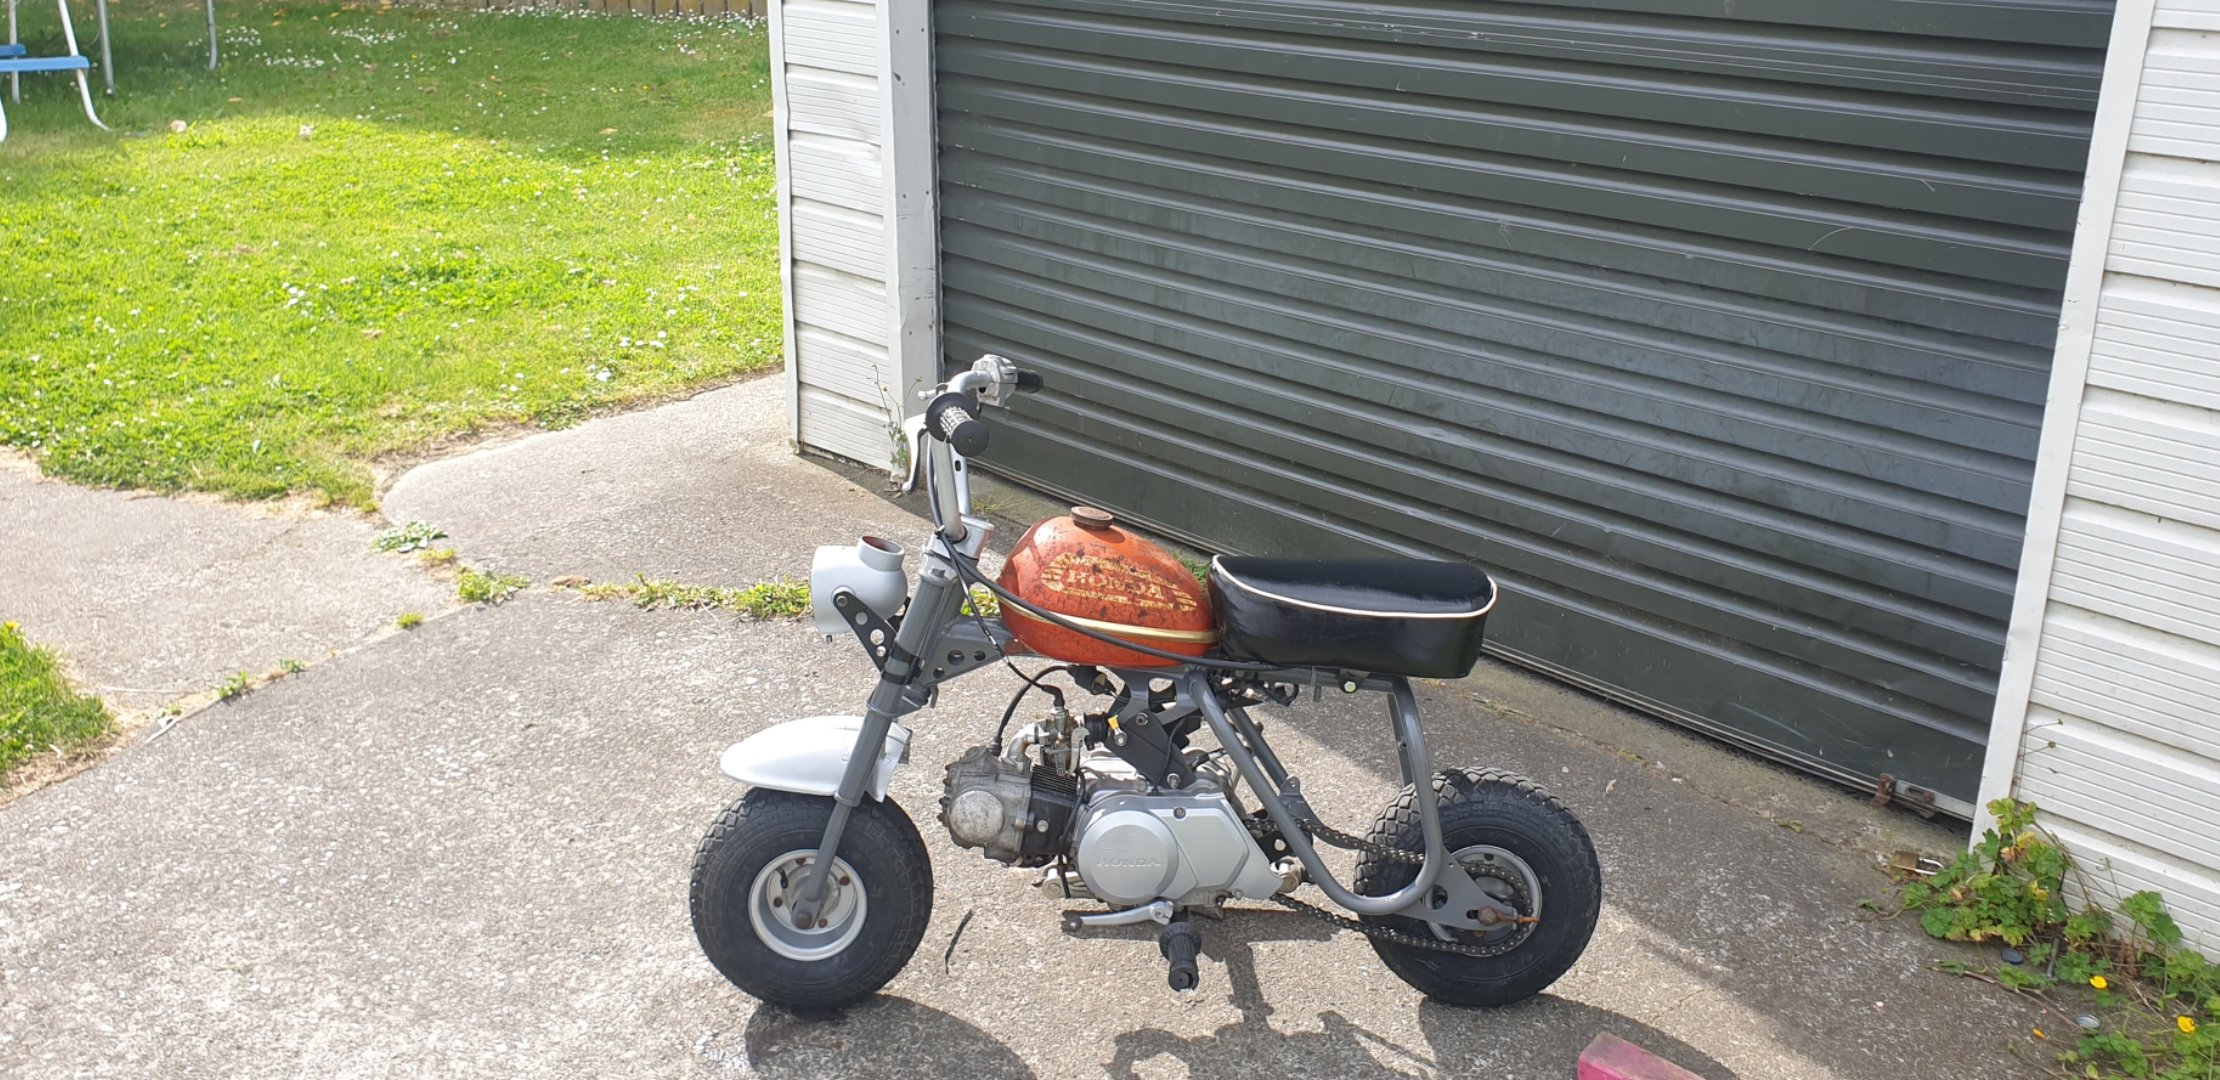
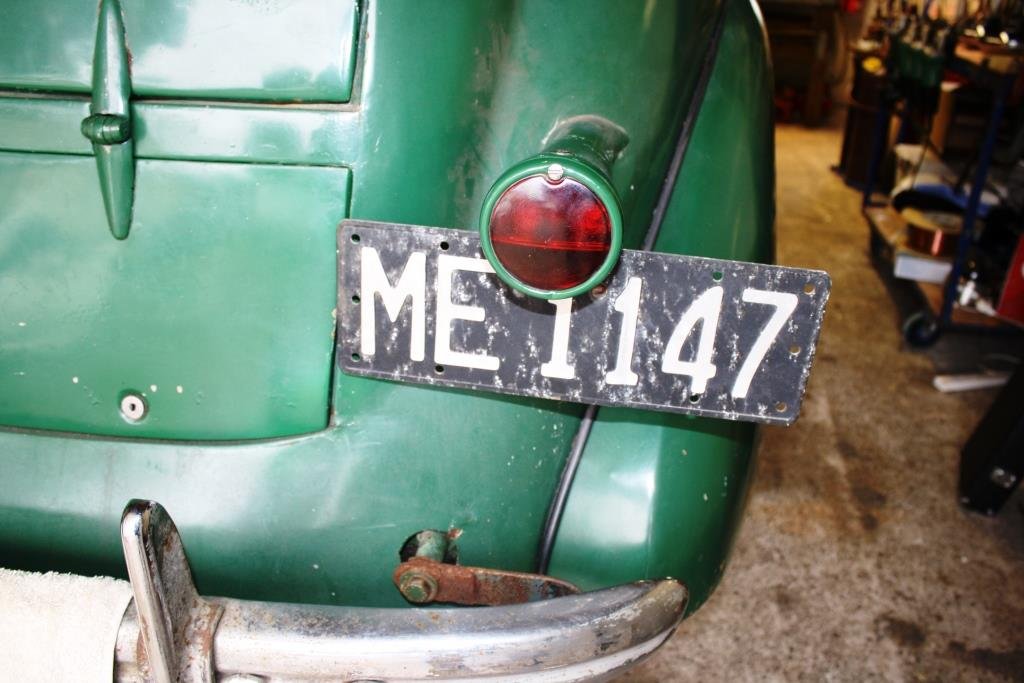
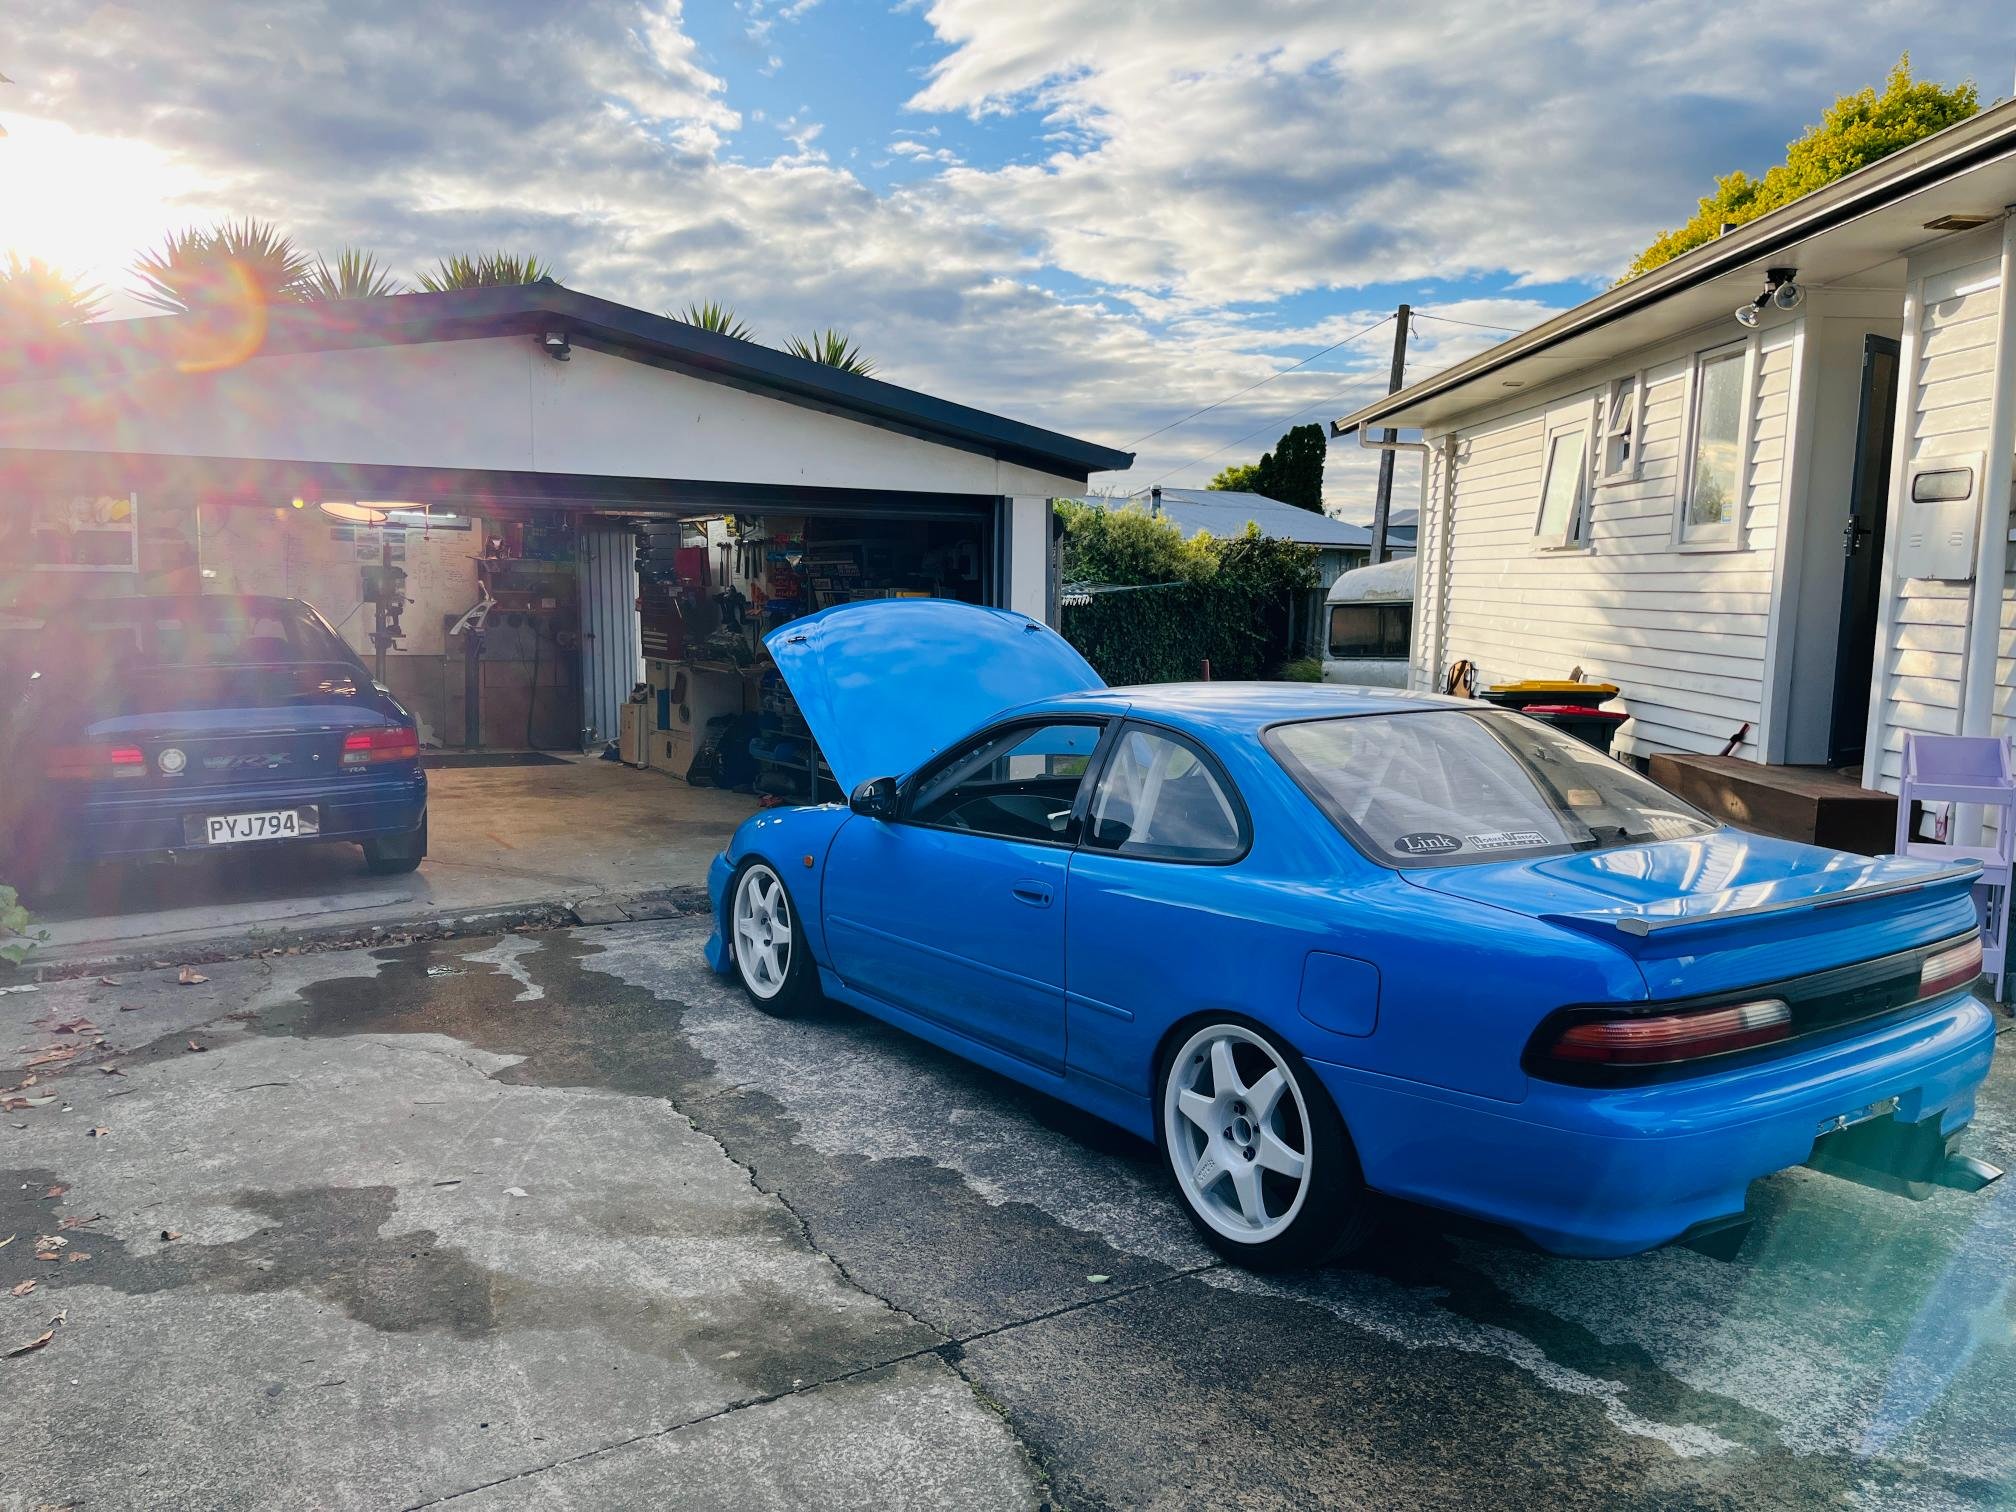
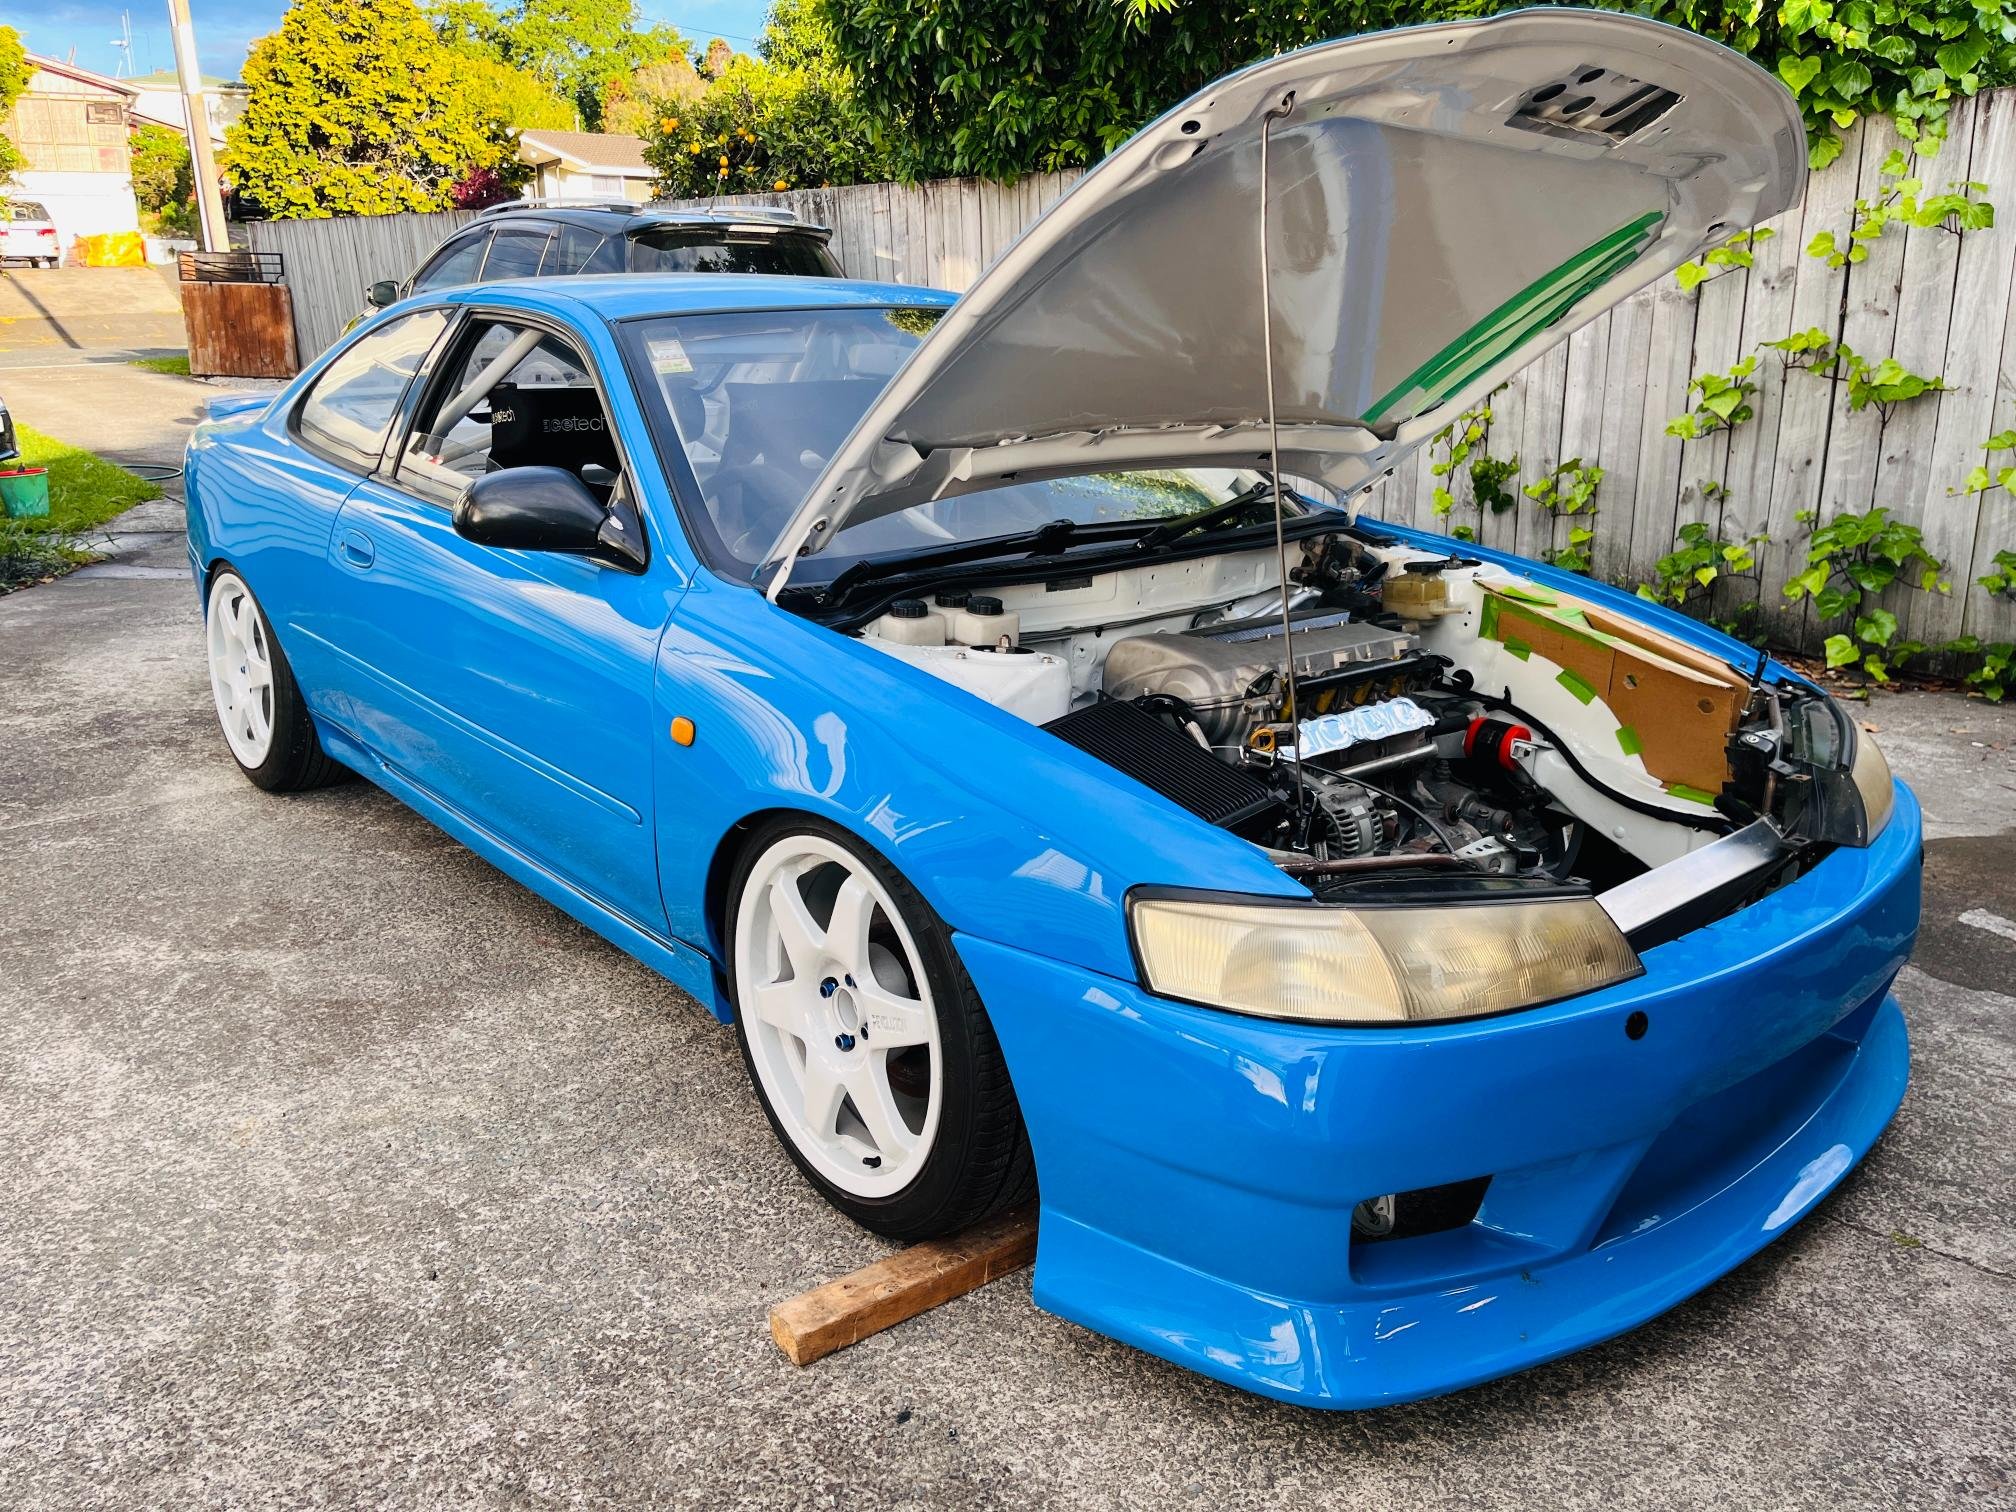
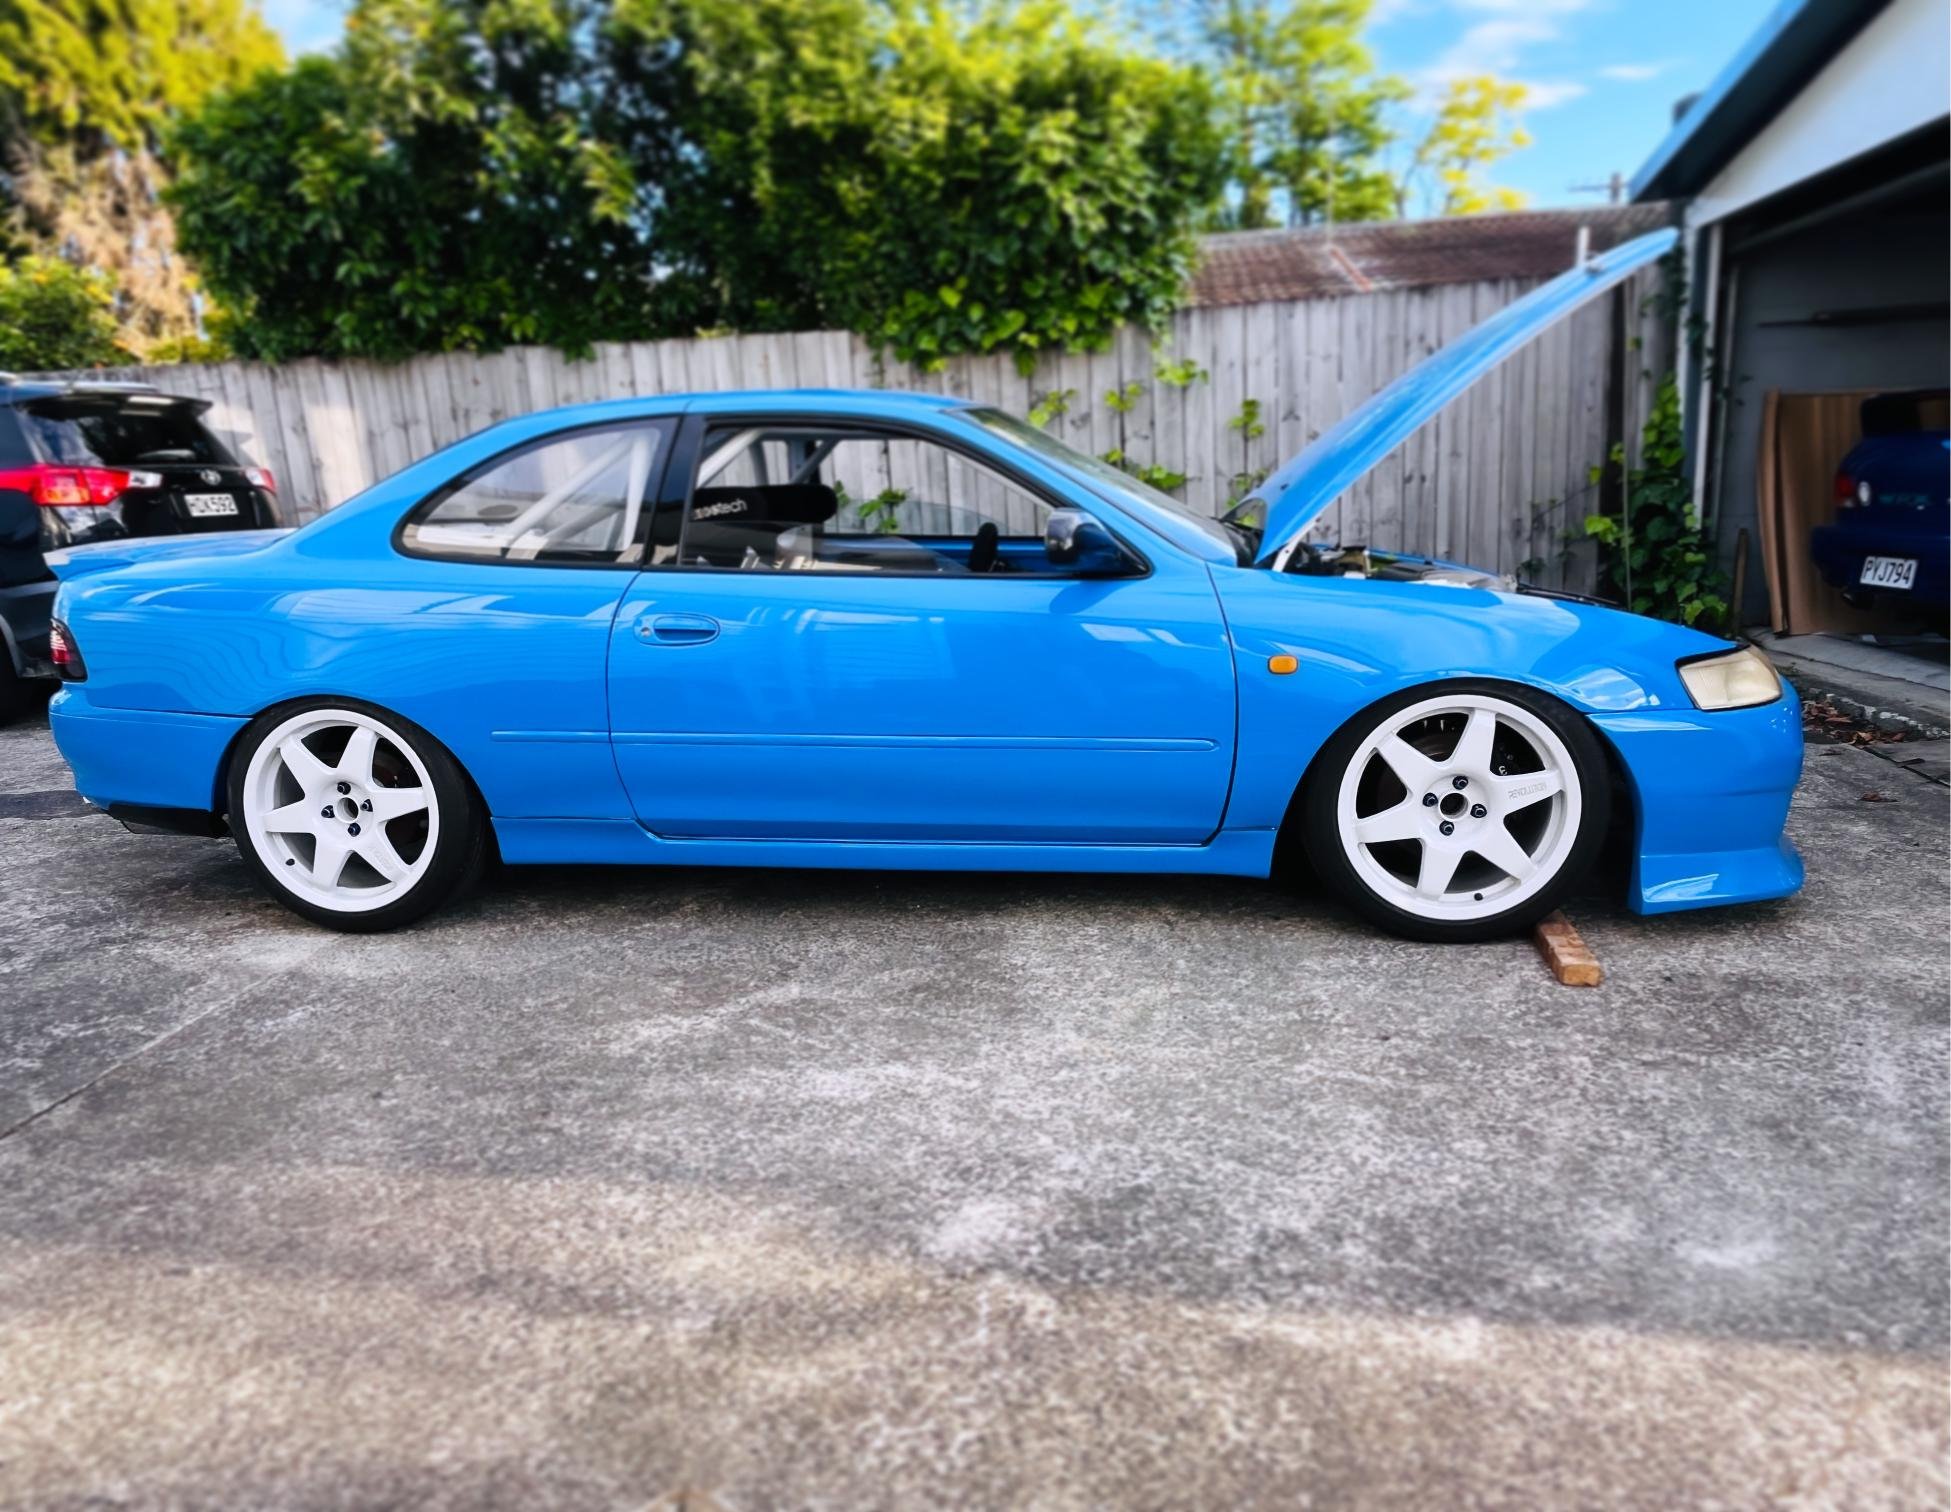
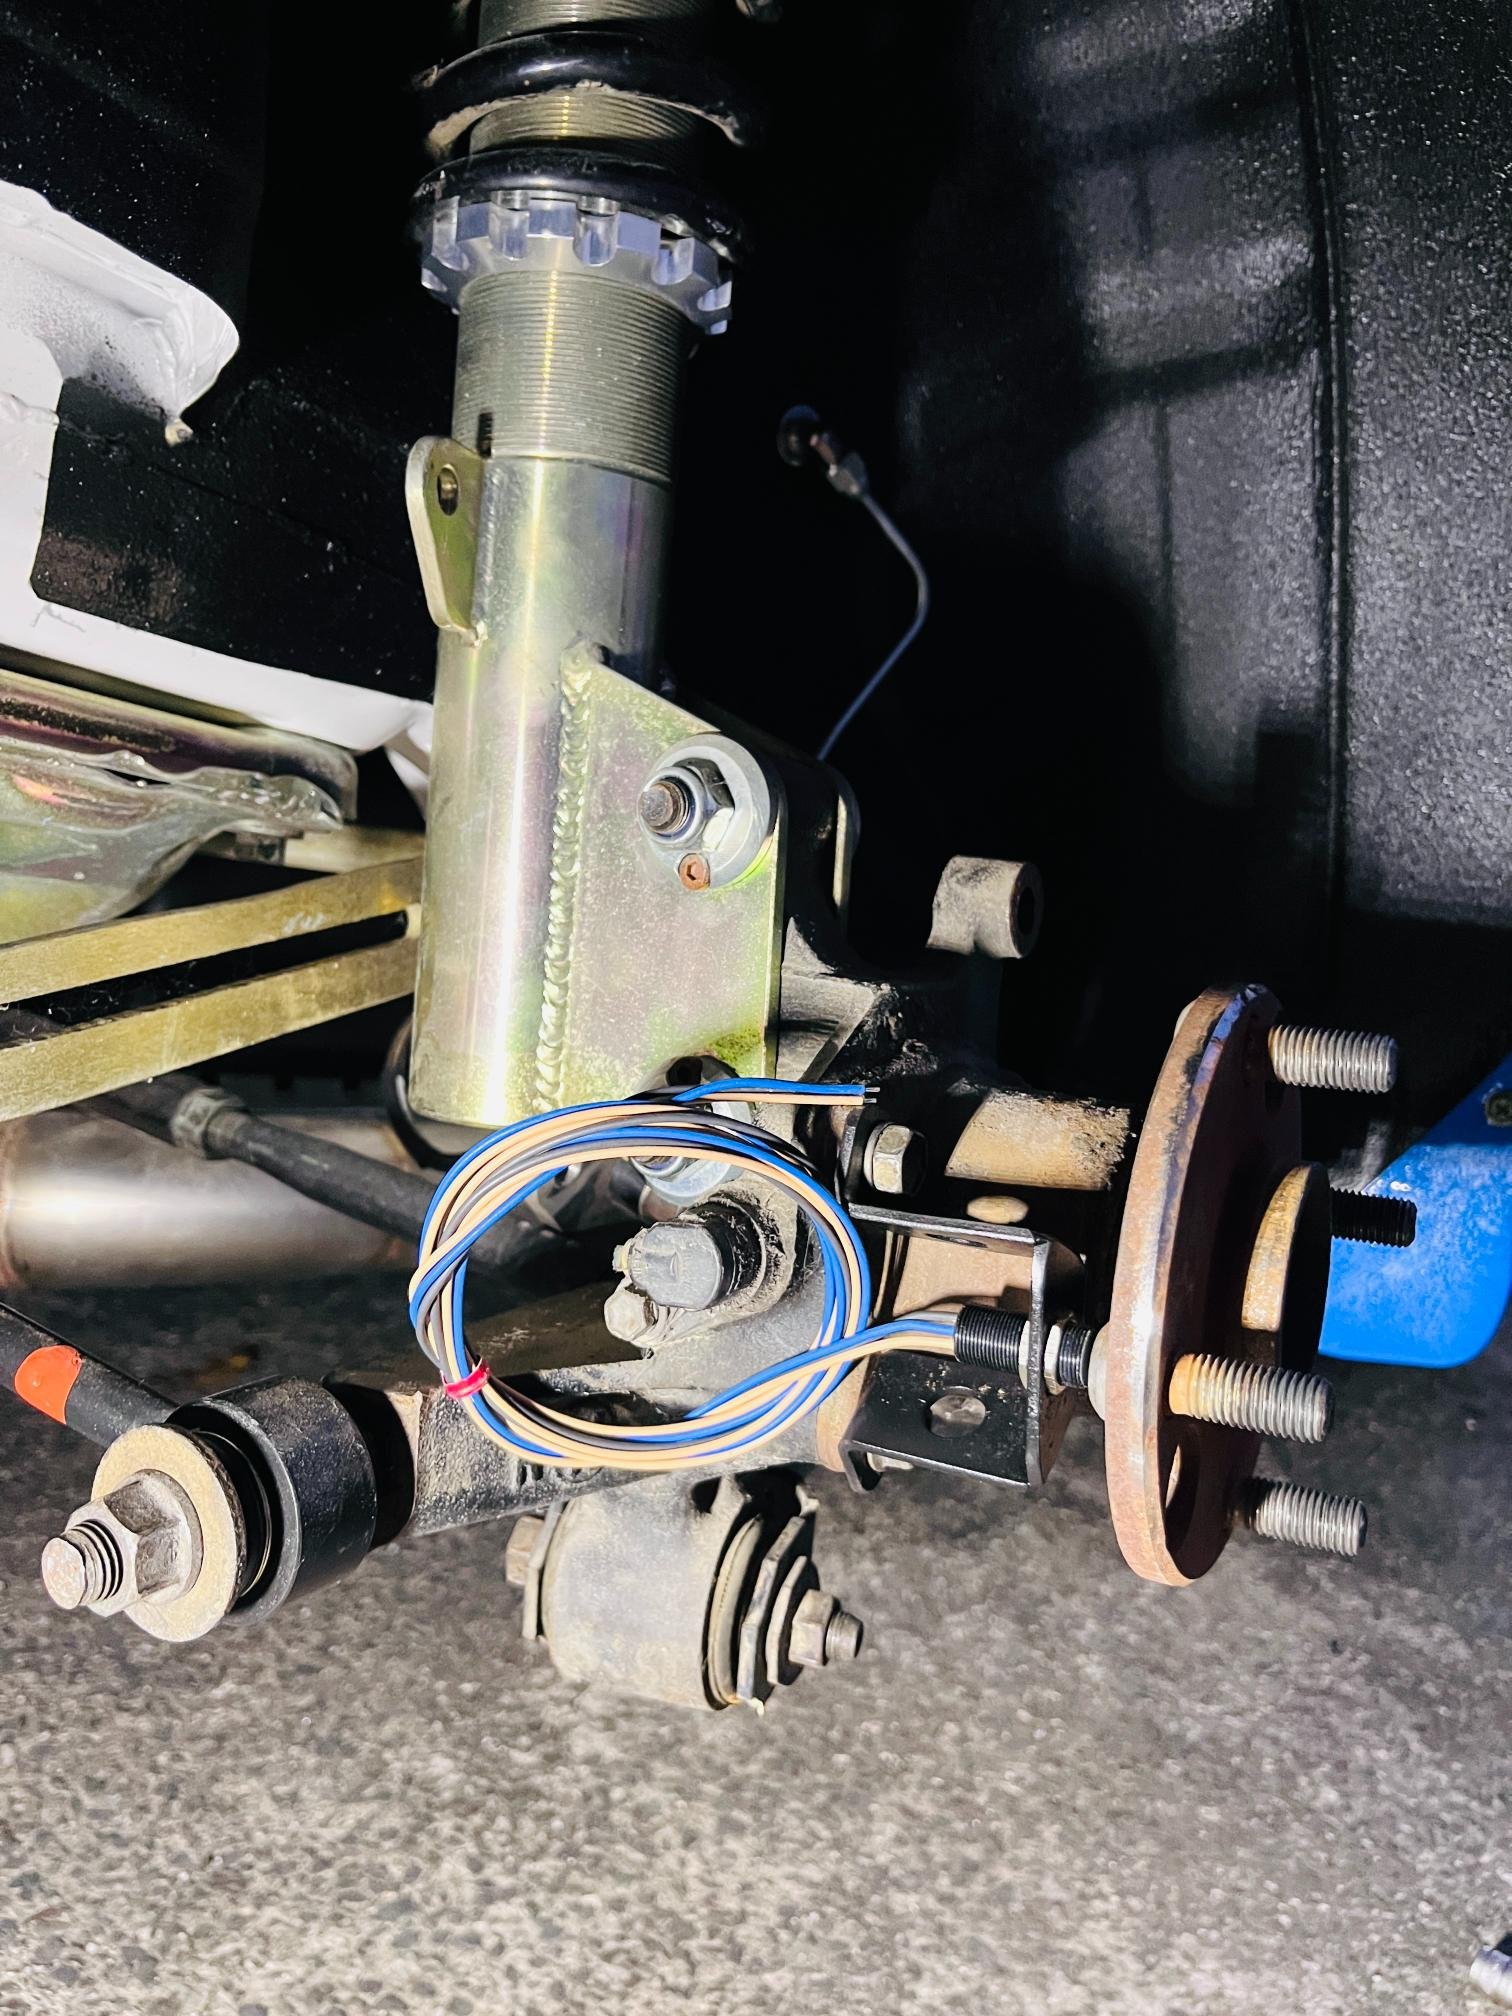
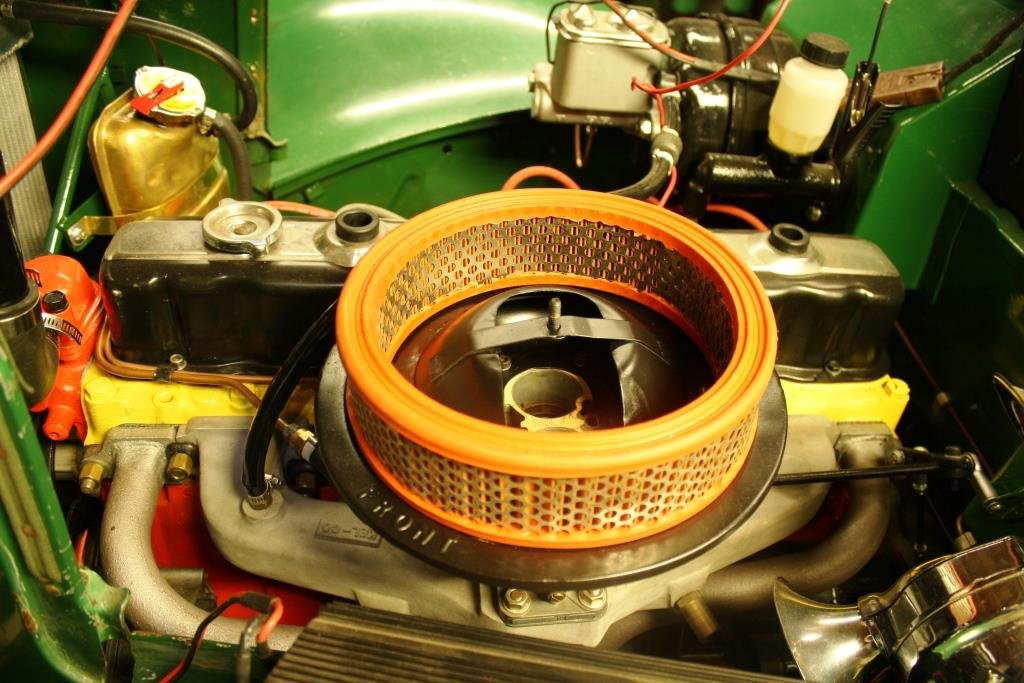
So, we left off with me giving up on importing an Alto. Where to from here then? I nearly gave up on Altos. The whole importing thing had really stressed me out, and the constant rollcoaster of emotions involved in it just did my head in. I started looking at other cars, but absolutely nothing interested me... except an Alto Works. In the time I had been trying to import an Alto, I had heard of one that had been brought into the country earlier in the year, with the intention to be a track car for the owner. He never got around to doing anything with it, so asked on a Facebook group I'm part of if anyone was interested in it, and posted these photos Phwoar, what an angry looking little car! Obviously it had had a life in Japan, being fitted with a bolt in cage, no carpets, obviously lowered and on nice wheels. Under the bonnet were some visible goodies too. Hold on a sec, that engine bay looks familiar.... Sure enough, using my Google searching powers I managed to dig up where I had seen the engine bay photo before; a Minkara Carview blog from the previous Japanese owner! The most interesting bit though? It was a legit JDM trackday car. I even found the owner's Youtube channel, which has many videos of the car fanging around tight little tracks in Japan Along with finding out it was a track car, I also found out all the mods the owner in Japan had done to it. Now, I didn't know what was still fitted to the car and what had been removed, but I knew two important things it still had; a Cusco 1-way LSD in the gearbox, and a Cadcars 3685MAX 85hp upgrade kit, including an HKS FCON piggyback computer and HKS EVC6 boost controller. It also had adjustable suspension, wider 15" alloys, full exhaust, the front lip and rear spoiler, carbon blade on the bonnet and some bigger intakes under the bonnet. (It also still has the Cusco front swaybar, discovered after purchase) It was missing its factory Recaro front seats and anything resembling a rear seat though, which wasn't ideal. You can see in the above interior photos it has some billy basic Alto seats fitted in the front. Anyway, I got in touch with the seller in NZ, and found out he was in the process of having the car complied for road use in NZ since it would be easier to sell on the road, than as a track-only car. As part of that process, the cage had to go. It wouldn't meet NZ cage standards, and couldn't be used in a normal road car. To make the process easier, and not have to certify the car (an extra process and expense, limiting me from further changes to the car), the owner swapped back to standard Works KYB shocks and springs and some wheels he had from another Alto. Yes, the owner had privately imported three Altos, a Turbo RS and two Works (this one and an AGS "automated manual" one). After quite a bit of discussion, I agreed to buy the car, with some conditions. It needed to be complied and on the road. It needed to have the full Works Recaro interior, a stock airbag steering wheel, and had to be on standard suspension and Works wheels. With some jiggery-pokery involving his other two Altos, and one that was being wrecked local to him (a real low spec poverty one), he managed to get this one into the spec I needed, and still have two other complete Altos, albeit missing some of the Works bits from one. The car went in, and failed its inspection. The cage holes needed to be welded up by a panelbeater and signed off by a repair certifier. Not a problem, it was booked in for the work to be done, and we waited. And waited. And more waiting. Eventually we heard from the compliance shop that the work had been done, and it was all ready to go, but they had been waiting on the one and only repair certifier down there to actually give it the big tick, and he had been away on unplanned leave. After a couple of weeks, the car was finally signed off, it had a new WOF and just needed to be registered and have plates fitted in order to drive it on the road (A task left up to me to keep costs down). As it turns out, as part of the work at the panelbeaters, the underside of the car had been completely sandblasted and undersealed... and guess what, it cost about $2,000. I believe on this car it wasn't done because of rust, but because they had to protect multiple areas on the underside where it had been welded, so was easiest to just do the whole underside. Once back the seller changed to the stock wheels. The car looked much better on the stock 15" alloys (even if I don't like black wheels; they suit it). The tires on these are stuffed, which is why they weren't fitted during compliance. The seller also fitted the Recaro interior front and rear (the rear fabric matches), and a stock Alto (not Works) airbag steering wheel. A truck was booked. They sent the biggest one they had. An anxious wait over the weekend and I had the call, it was 10 mins away. I wait outside, expecting to see a delivery truck with the car on the back. No, I hear this angry little growl coming up the drive, and sure enough, it's the Alto. The guy gets out and apologises, he had to drive it the 10 mins from the depot because the Alto was too small for their local delivery trucks. He loves it though. I park it up, have a quick look over it and take some initial photos First impressions; it's small, but also very spacious. The Recaros are more comfortable than expected and fit my wide frame fine. The gearshift is divine, it's almost rifle bolt action. It makes great noises and pulls like crazy on boost (and it's not even at its full boost currently). It's not all perfect. Everything is covered in dust from the panel shop. Its everywhere. There are some areas where the paint isn't perfect, and the dash has some random screw holes and things from various track based gubbins being used. It's not an open road car, at all. At 100kph, it's pulling just shy of 4000rpm. Sure, it's on boost instantly, but that little 3 cylinder 600cc engine is just whirring away constantly. There are kits to replace 5th gear, and lower the rpm to about 3000rpm, so I'll probably look into that at some point. The LSD is brutal. It's a clutch type Cusco Type RS 1-Way unit. When cold, it knocks, it binds, it thumps. It's quiet and smooth when warm though, so I have some new Cusco oil to change shortly. The way it works is making me rethink how I drive and corner though. When on the throttle, the diff will relentlessly pull you around the corner. The steering feels heavy, but where you point the wheel is where you are going, no exceptions. The moment you come off throttle though, the front end suddenly darts to the inside of the corner as the differential unlocks and allows a speed difference between wheels. I can't wait to see what it's like exiting a corner on the track. I have already started removing the decals on the bonnet and along the Works side stripes. It was a shopping list of some things the car no longer had, and I wanted the nice clean stripe instead. Stickers were the previous owners thing, not mine. There's plenty to do. Parts are constantly arriving from Japan for it. Being a 2016 car, and so modern, parts are ridiculously plentiful and readily available for it. I'm used to having to hunt around for scraps years after the cars stopped being popular, but currently, anything I want, I can get. This weekend it'll get a full oil service, since I don't have any real service history, and it'll get a couple of the goodies that have already arrived from Japan fitted. It's not the stock, 4WD one I was planning on, but I love it. *Parked next to my colleagues Honda S660. One of few cars that makes the Alto look giant.20 points
-
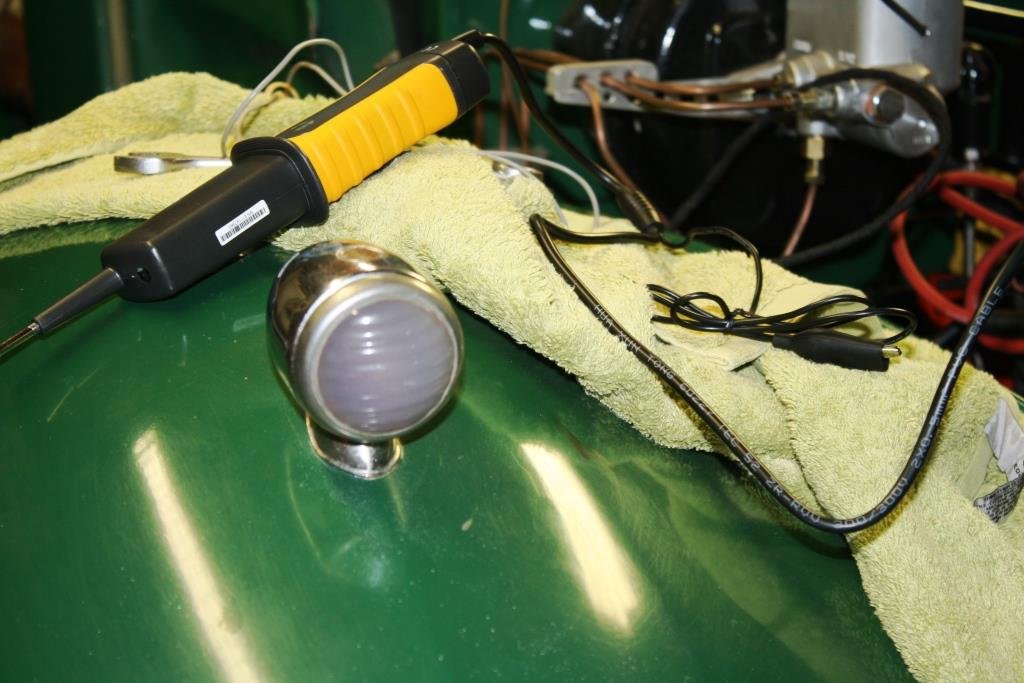
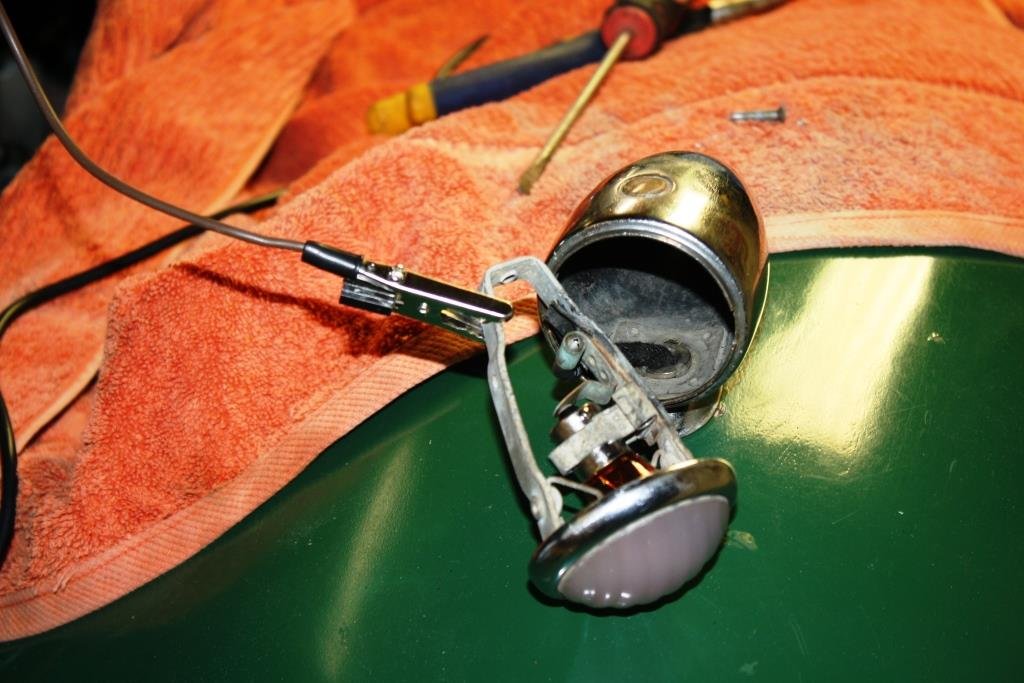
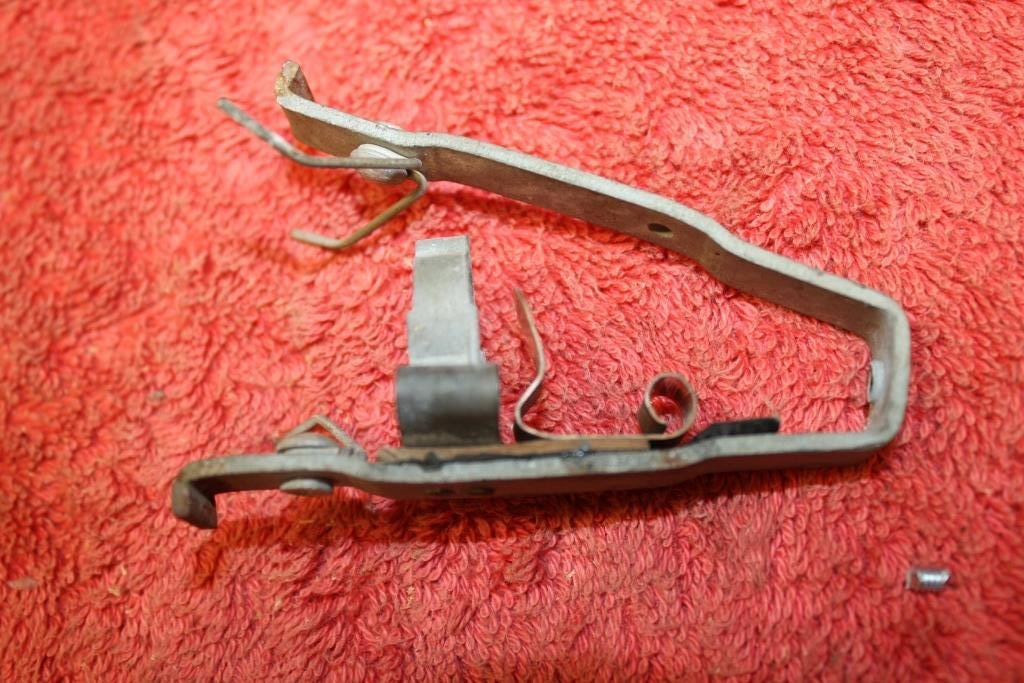
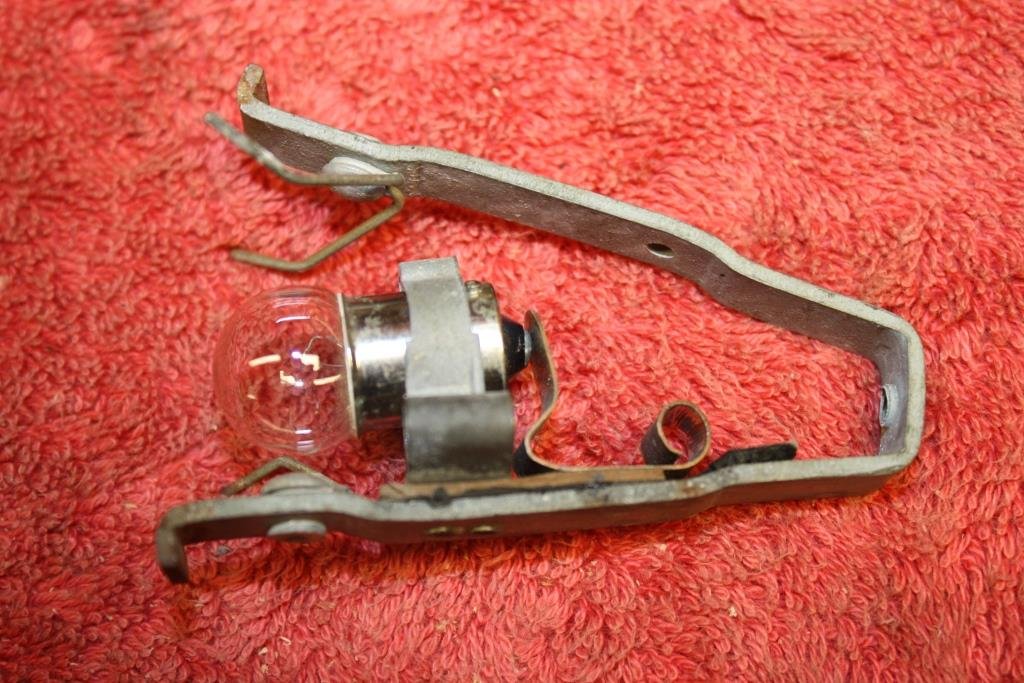
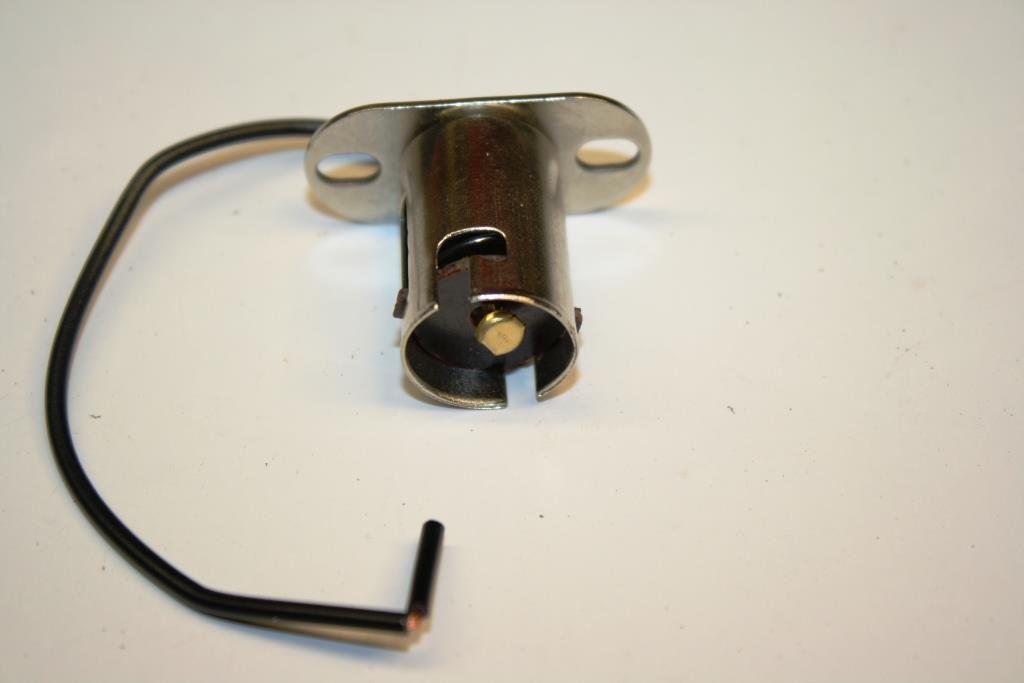
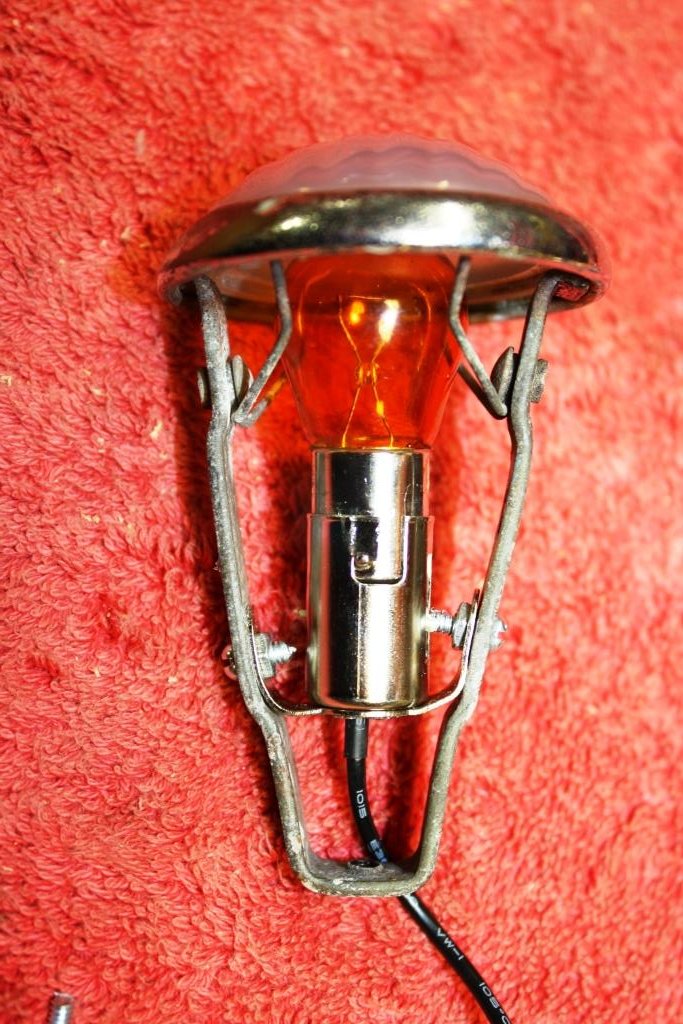
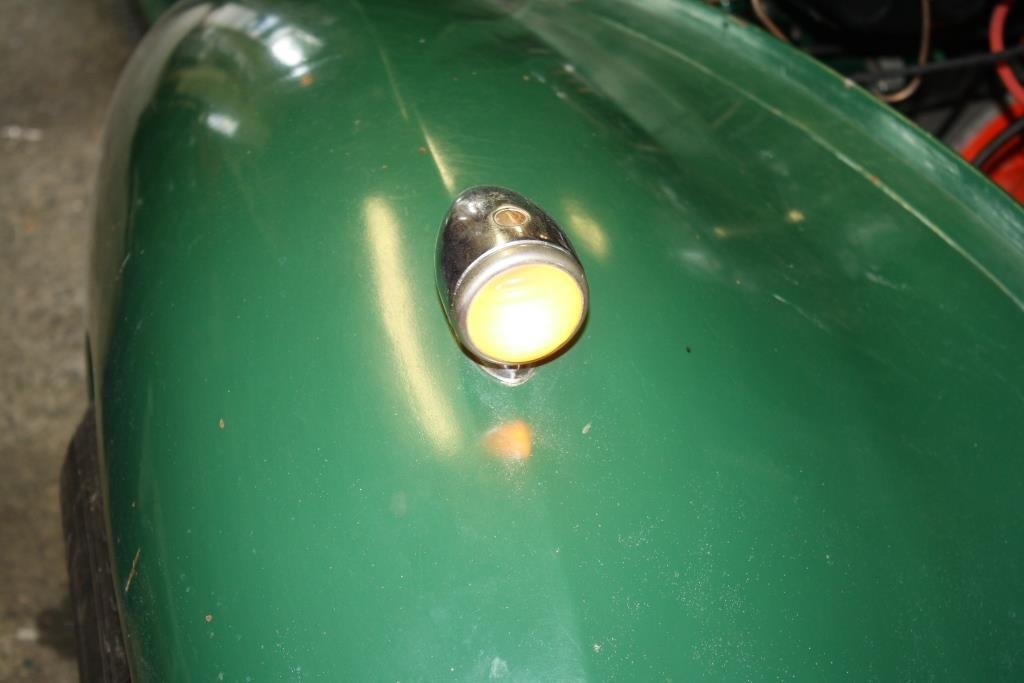
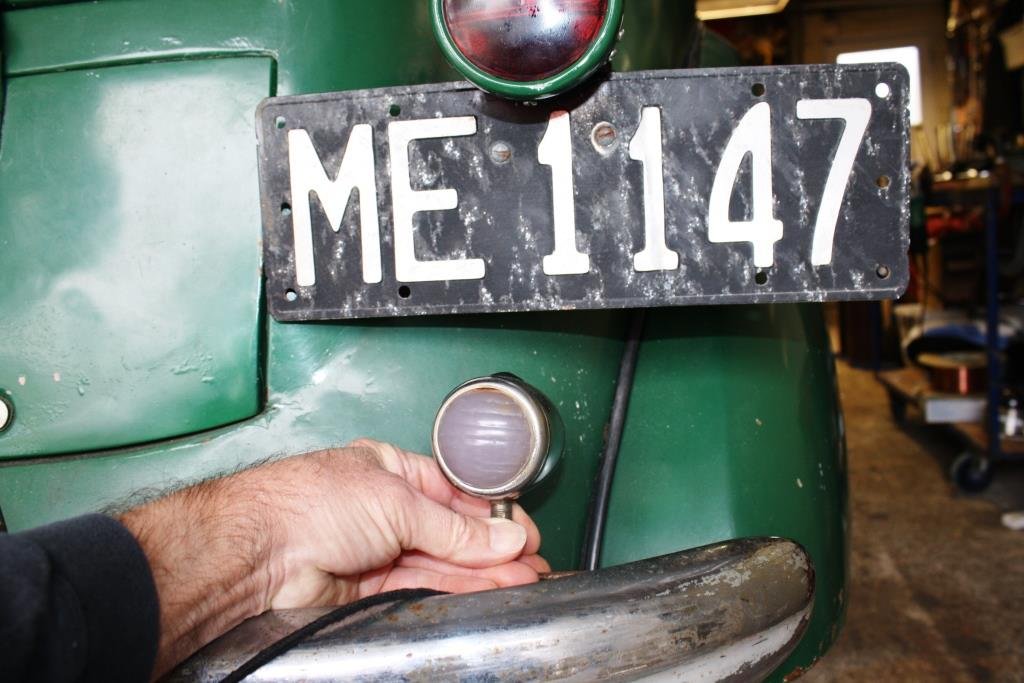
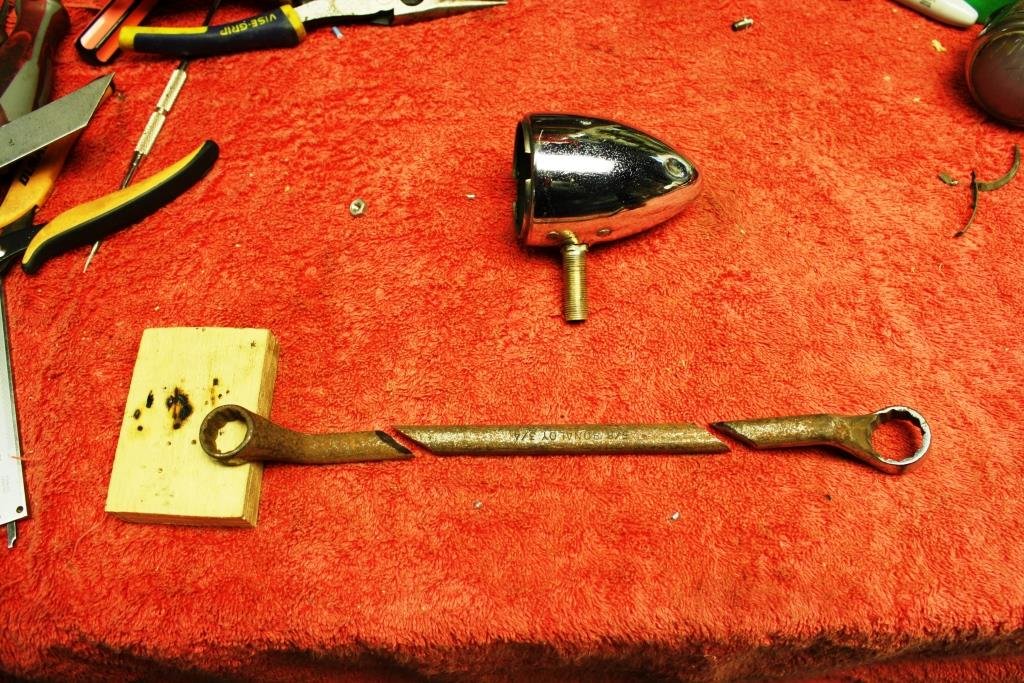
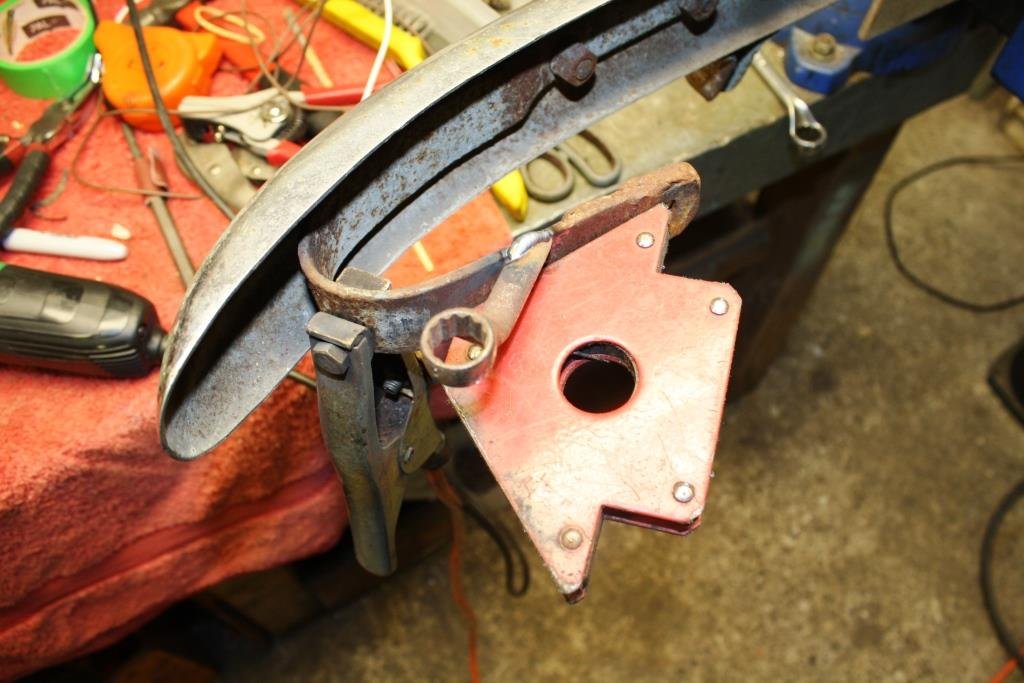
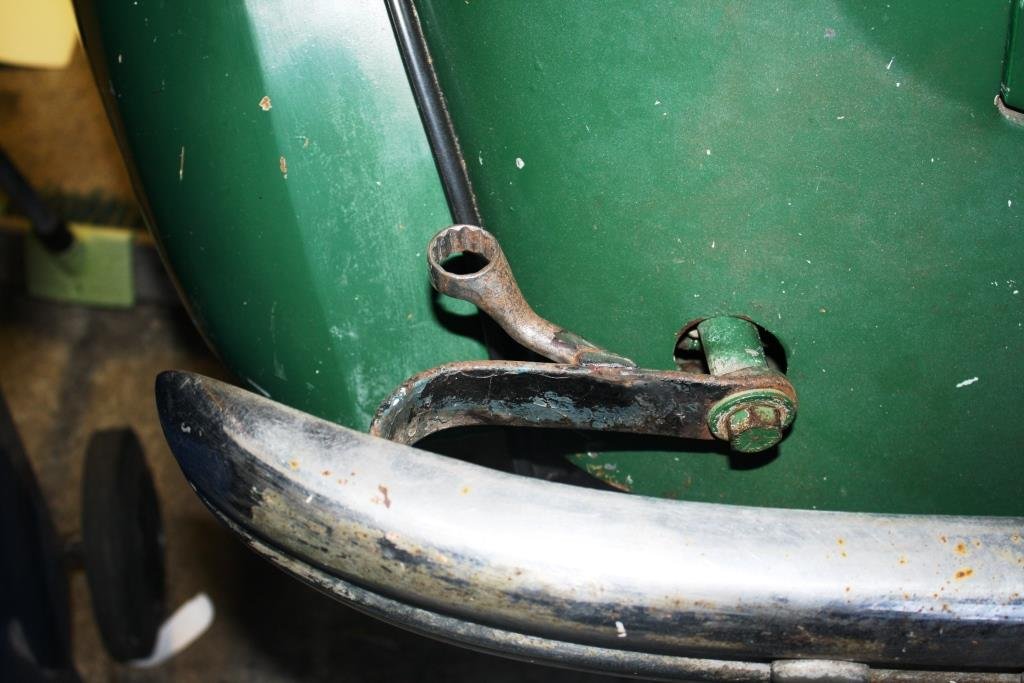
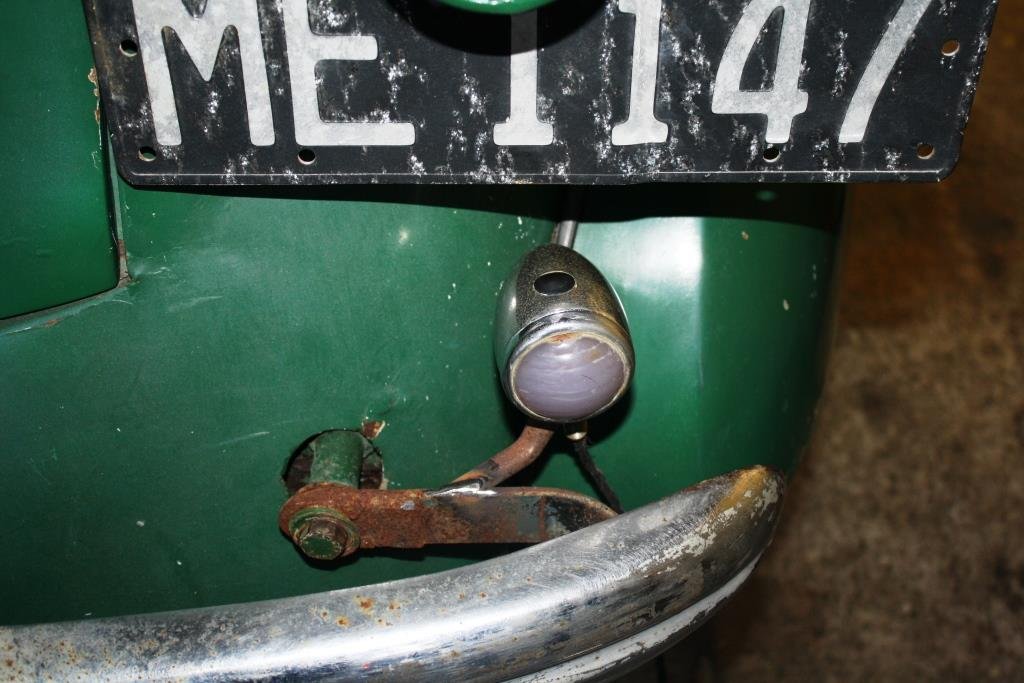
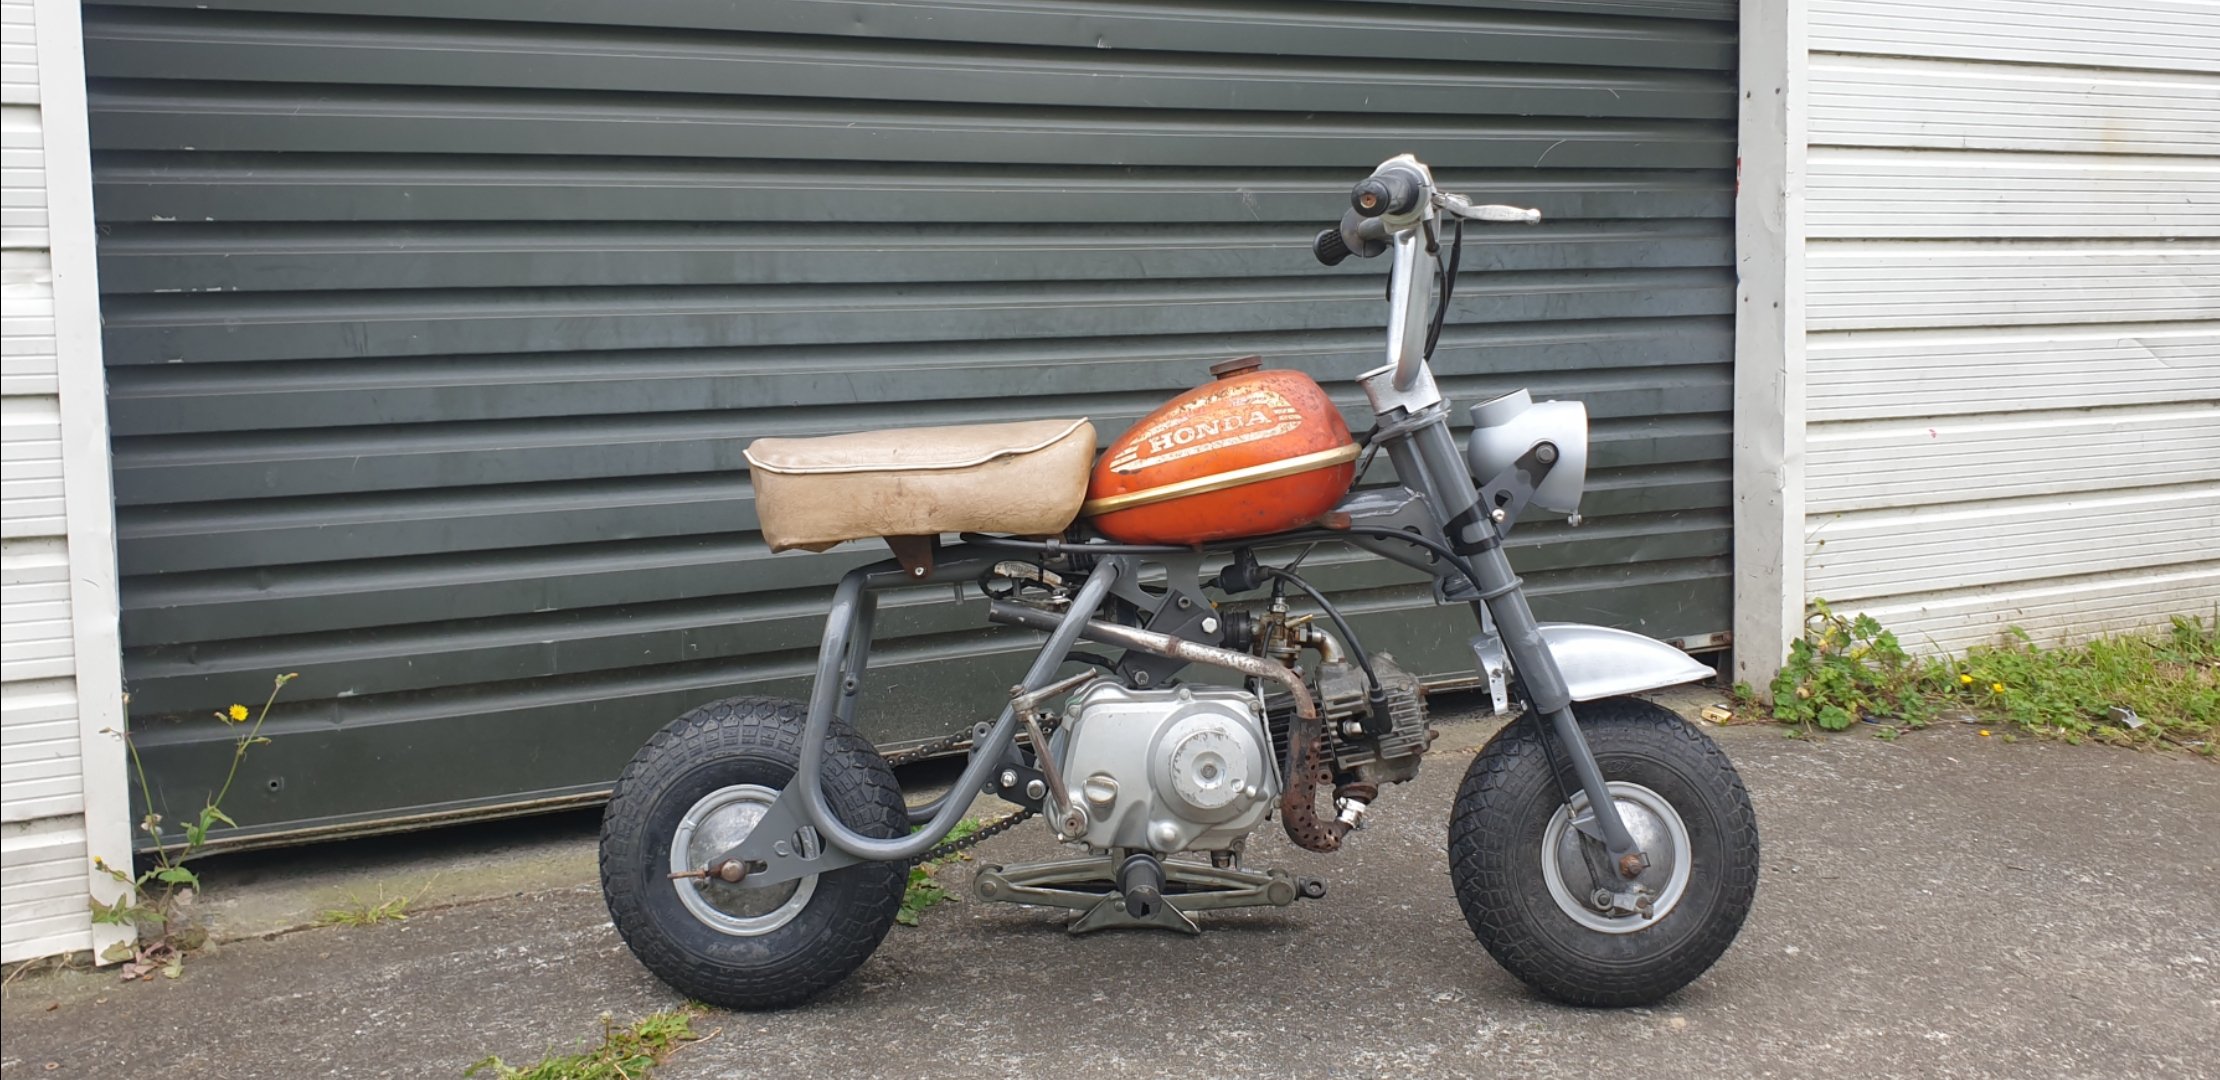
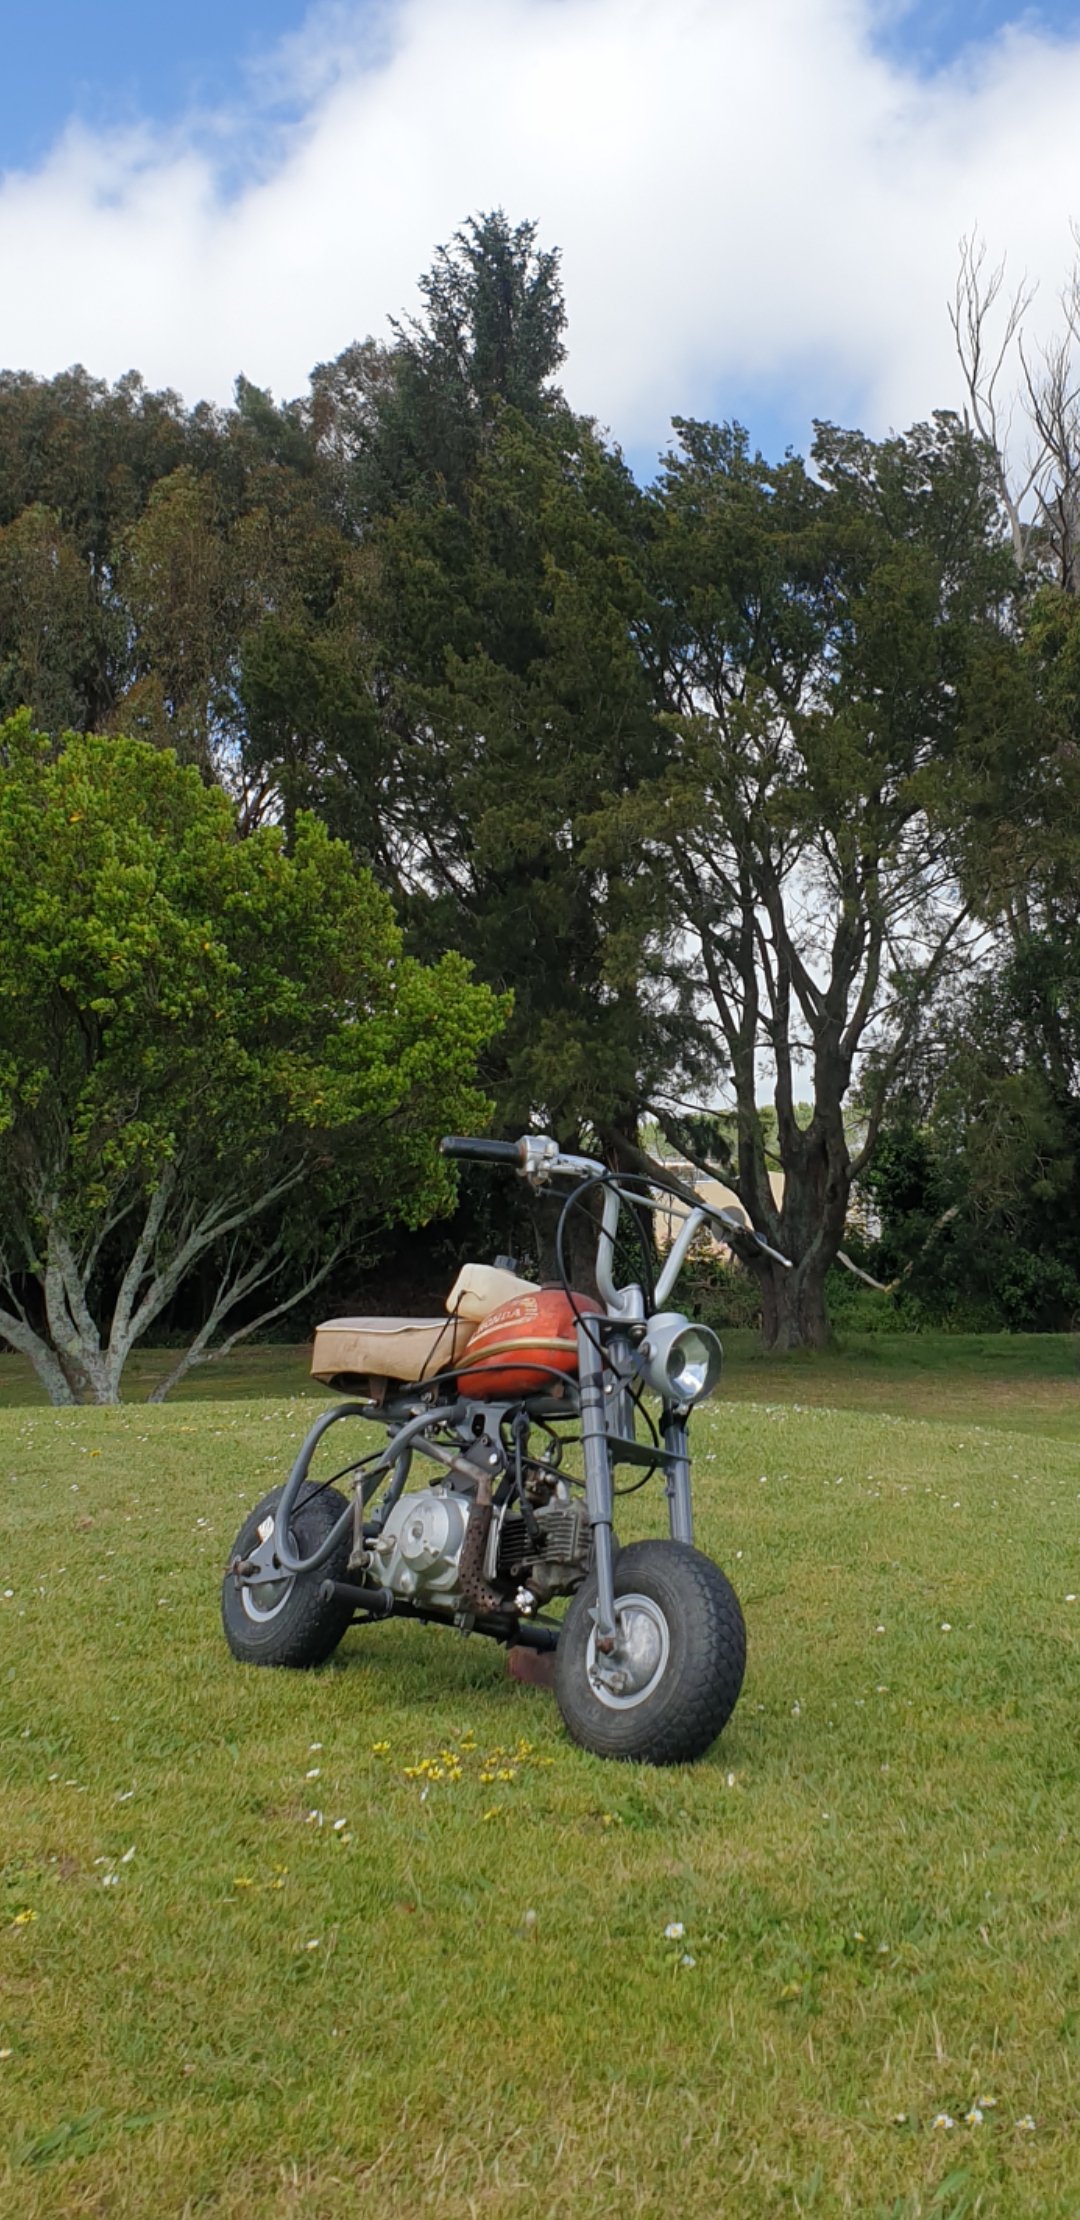
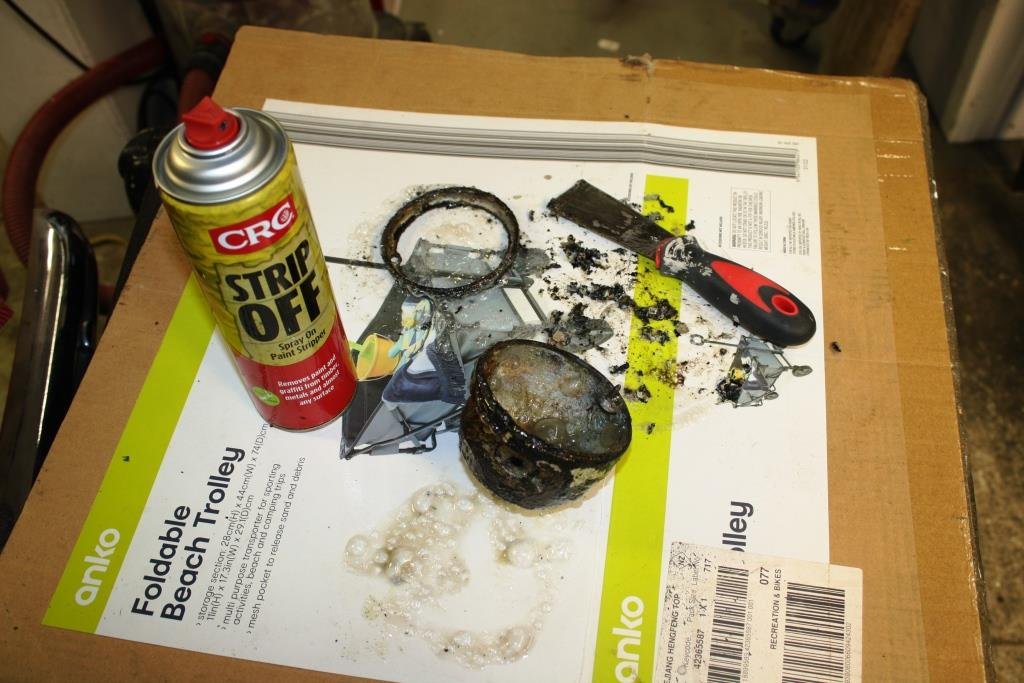
After countless, sleepless nights of painstakingly thorough soul searching and self-analysis, (fuelled by the considerable imbibement of 101 Wild Turkey) I came to the conclusion that for Rigamortice and myself to have any chance of surviving typical Auckland traffic we would need indicators! In 1947 indicators were yet to be invented and trafficators were considered to be state of the art high-tech. Maybe the side lights on the front guards could be converted to indicators with an orange lens or bulb…….? This became my fiendishly cunning justification for Rigamortice and me spending far too much money on a beautiful pair of P700 replica headlamps that had the parking lights built in. I struggled to get anything that resembled either light or life out of the existing sidelights. Same old problems as with the tail light, corroded terminals, dodgy insulation, and almost impossible to strip down while keeping it intact. Yes; sadly 70 years ago when they were new they were junk - Lucas, “the prince of darkness” strikes again! So I found these bulb holders on line…… …and fitted them with orange bulbs. Old vs new….. Luckily the original lenses gave it that elderly, faded, glow! I had a spare pair to use in the rear. I attacked an old Whitworth offset ring spanner with an angle grinder….. …welded the bits onto the bumper irons….. ….. with some fabric wrapped wiring they look the part - and they work!
 10 points
 -
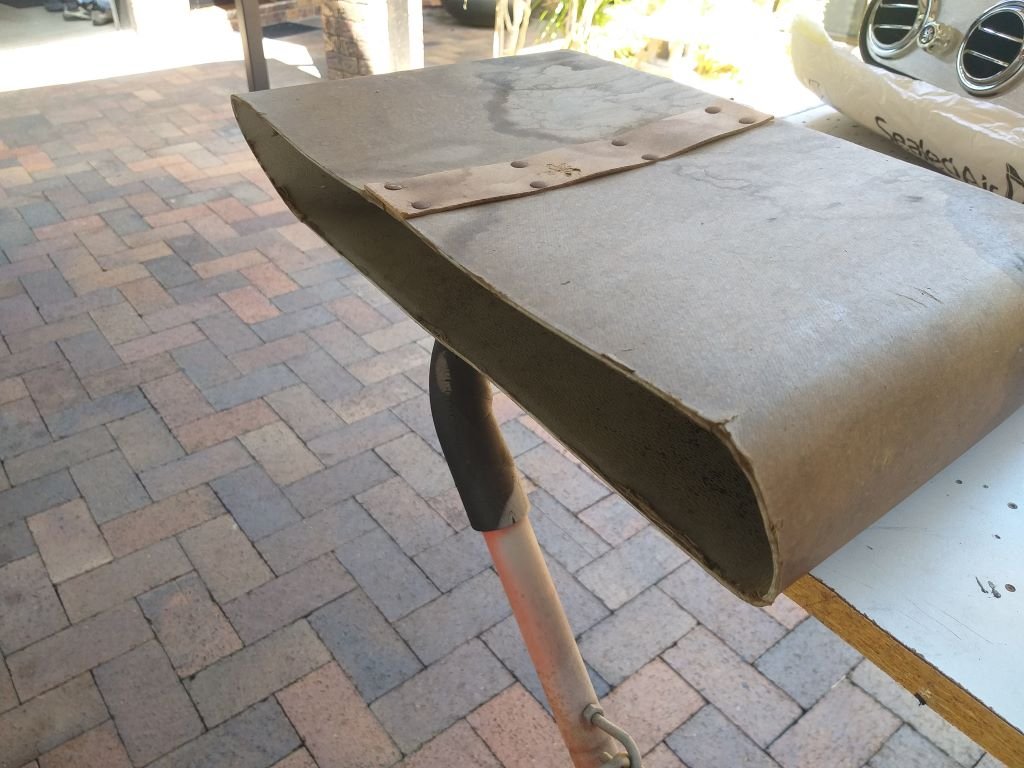
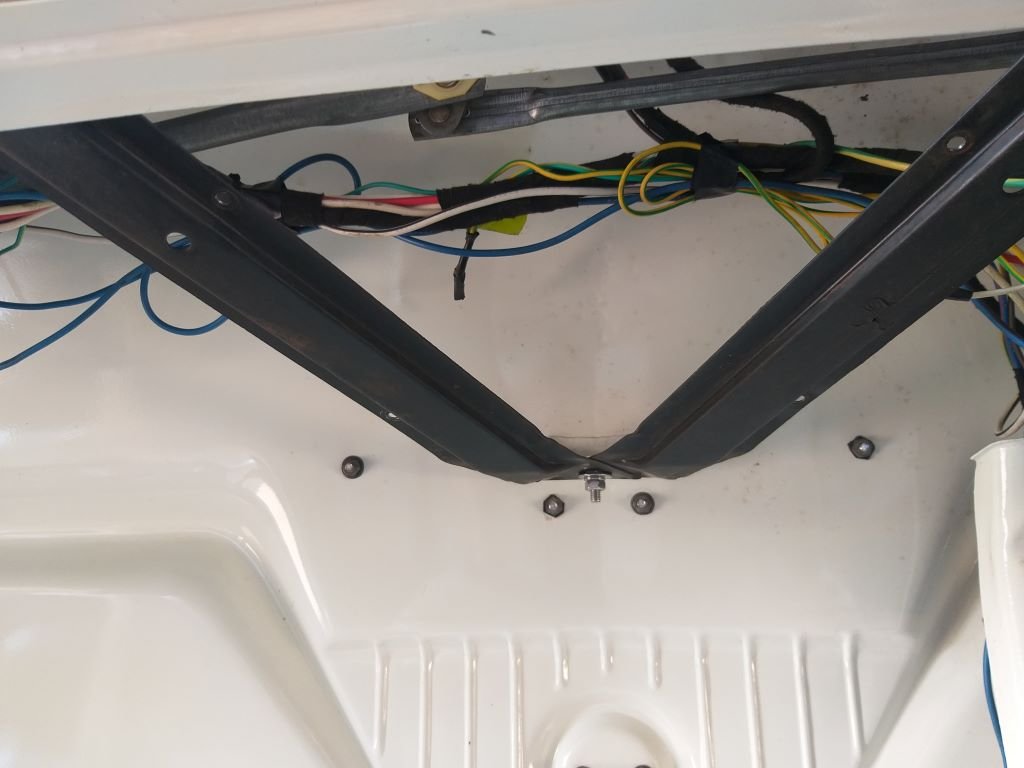
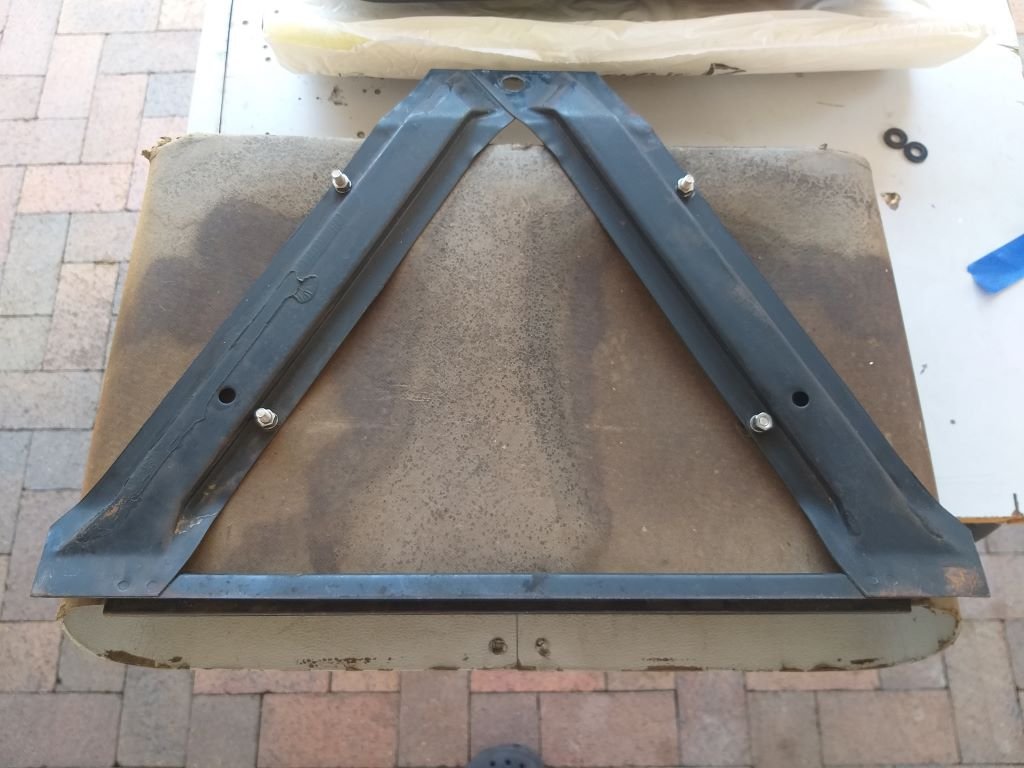
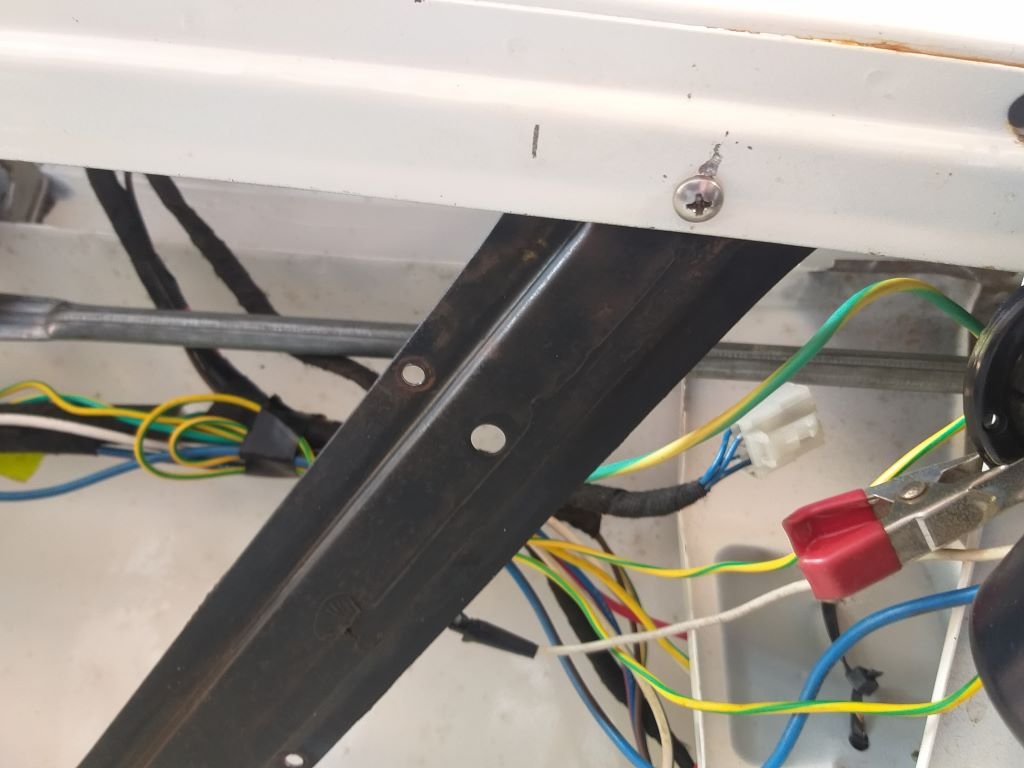
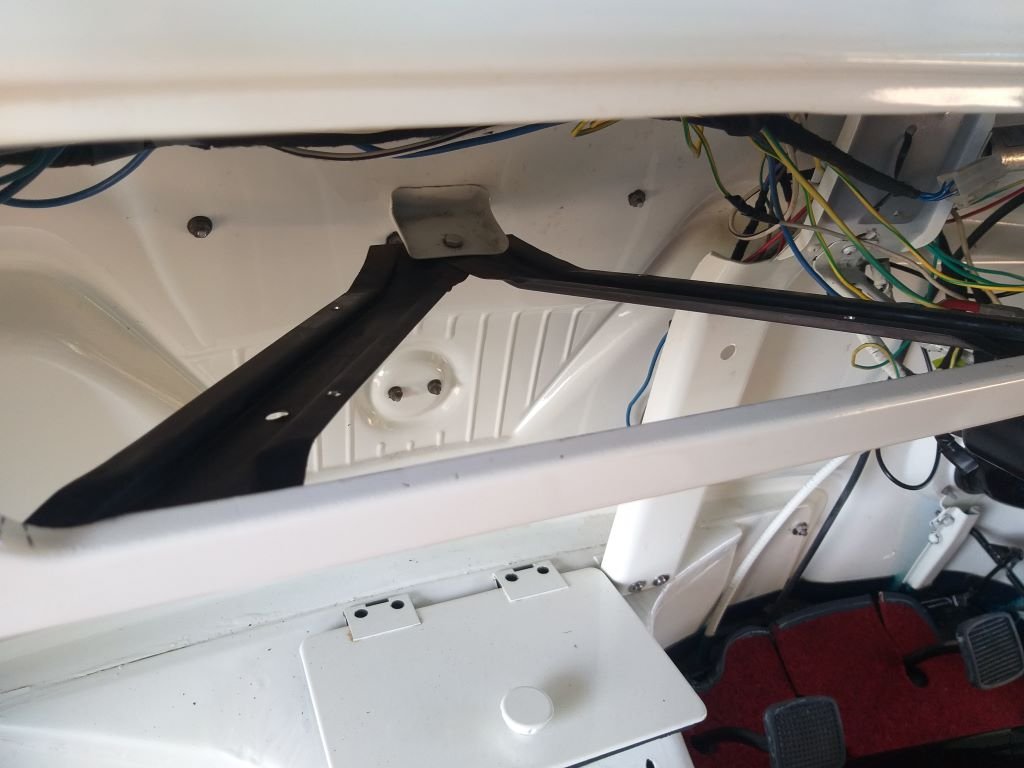
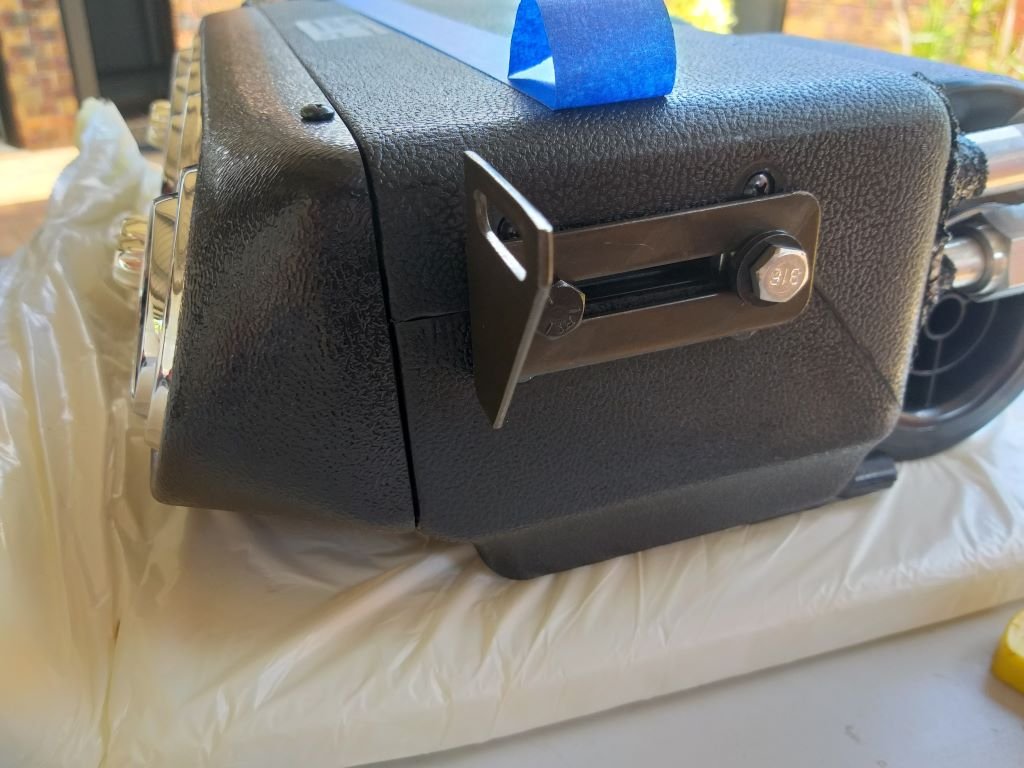
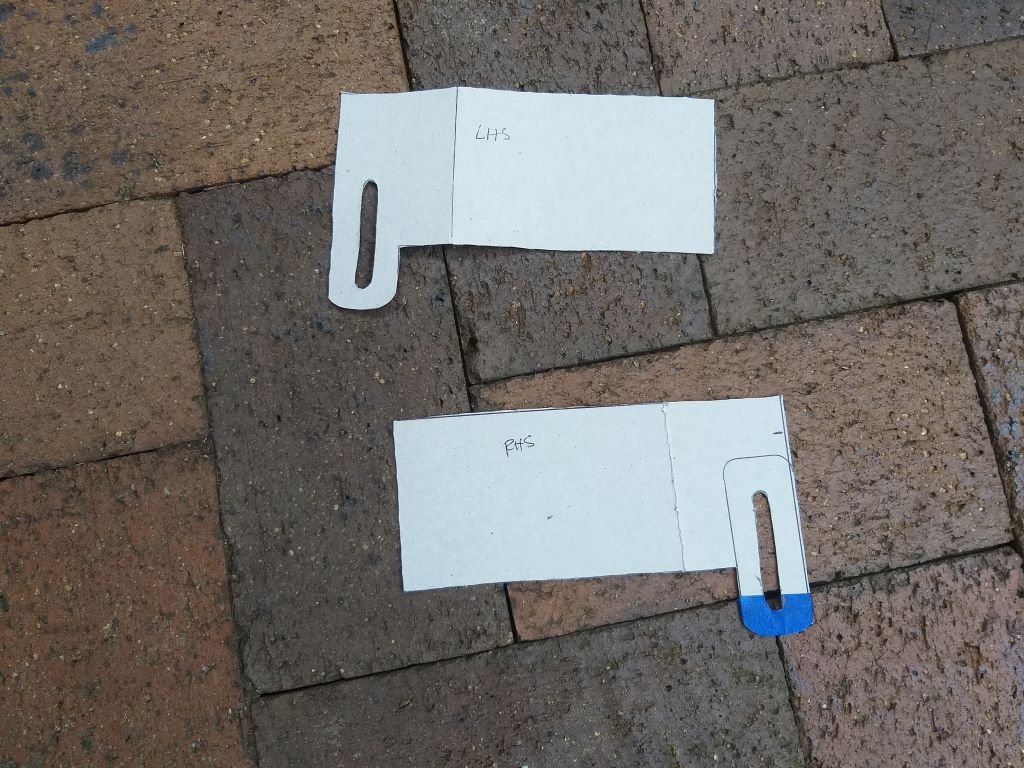
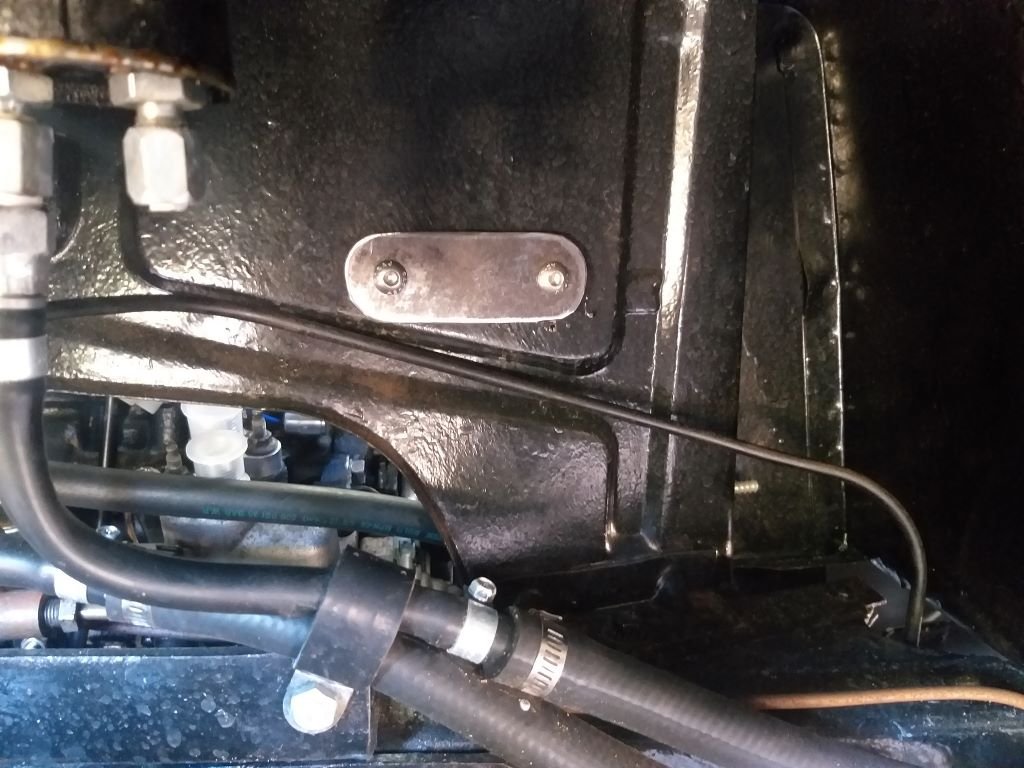
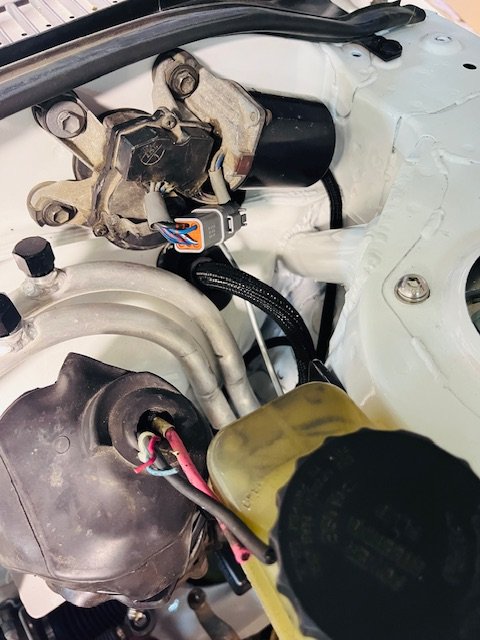
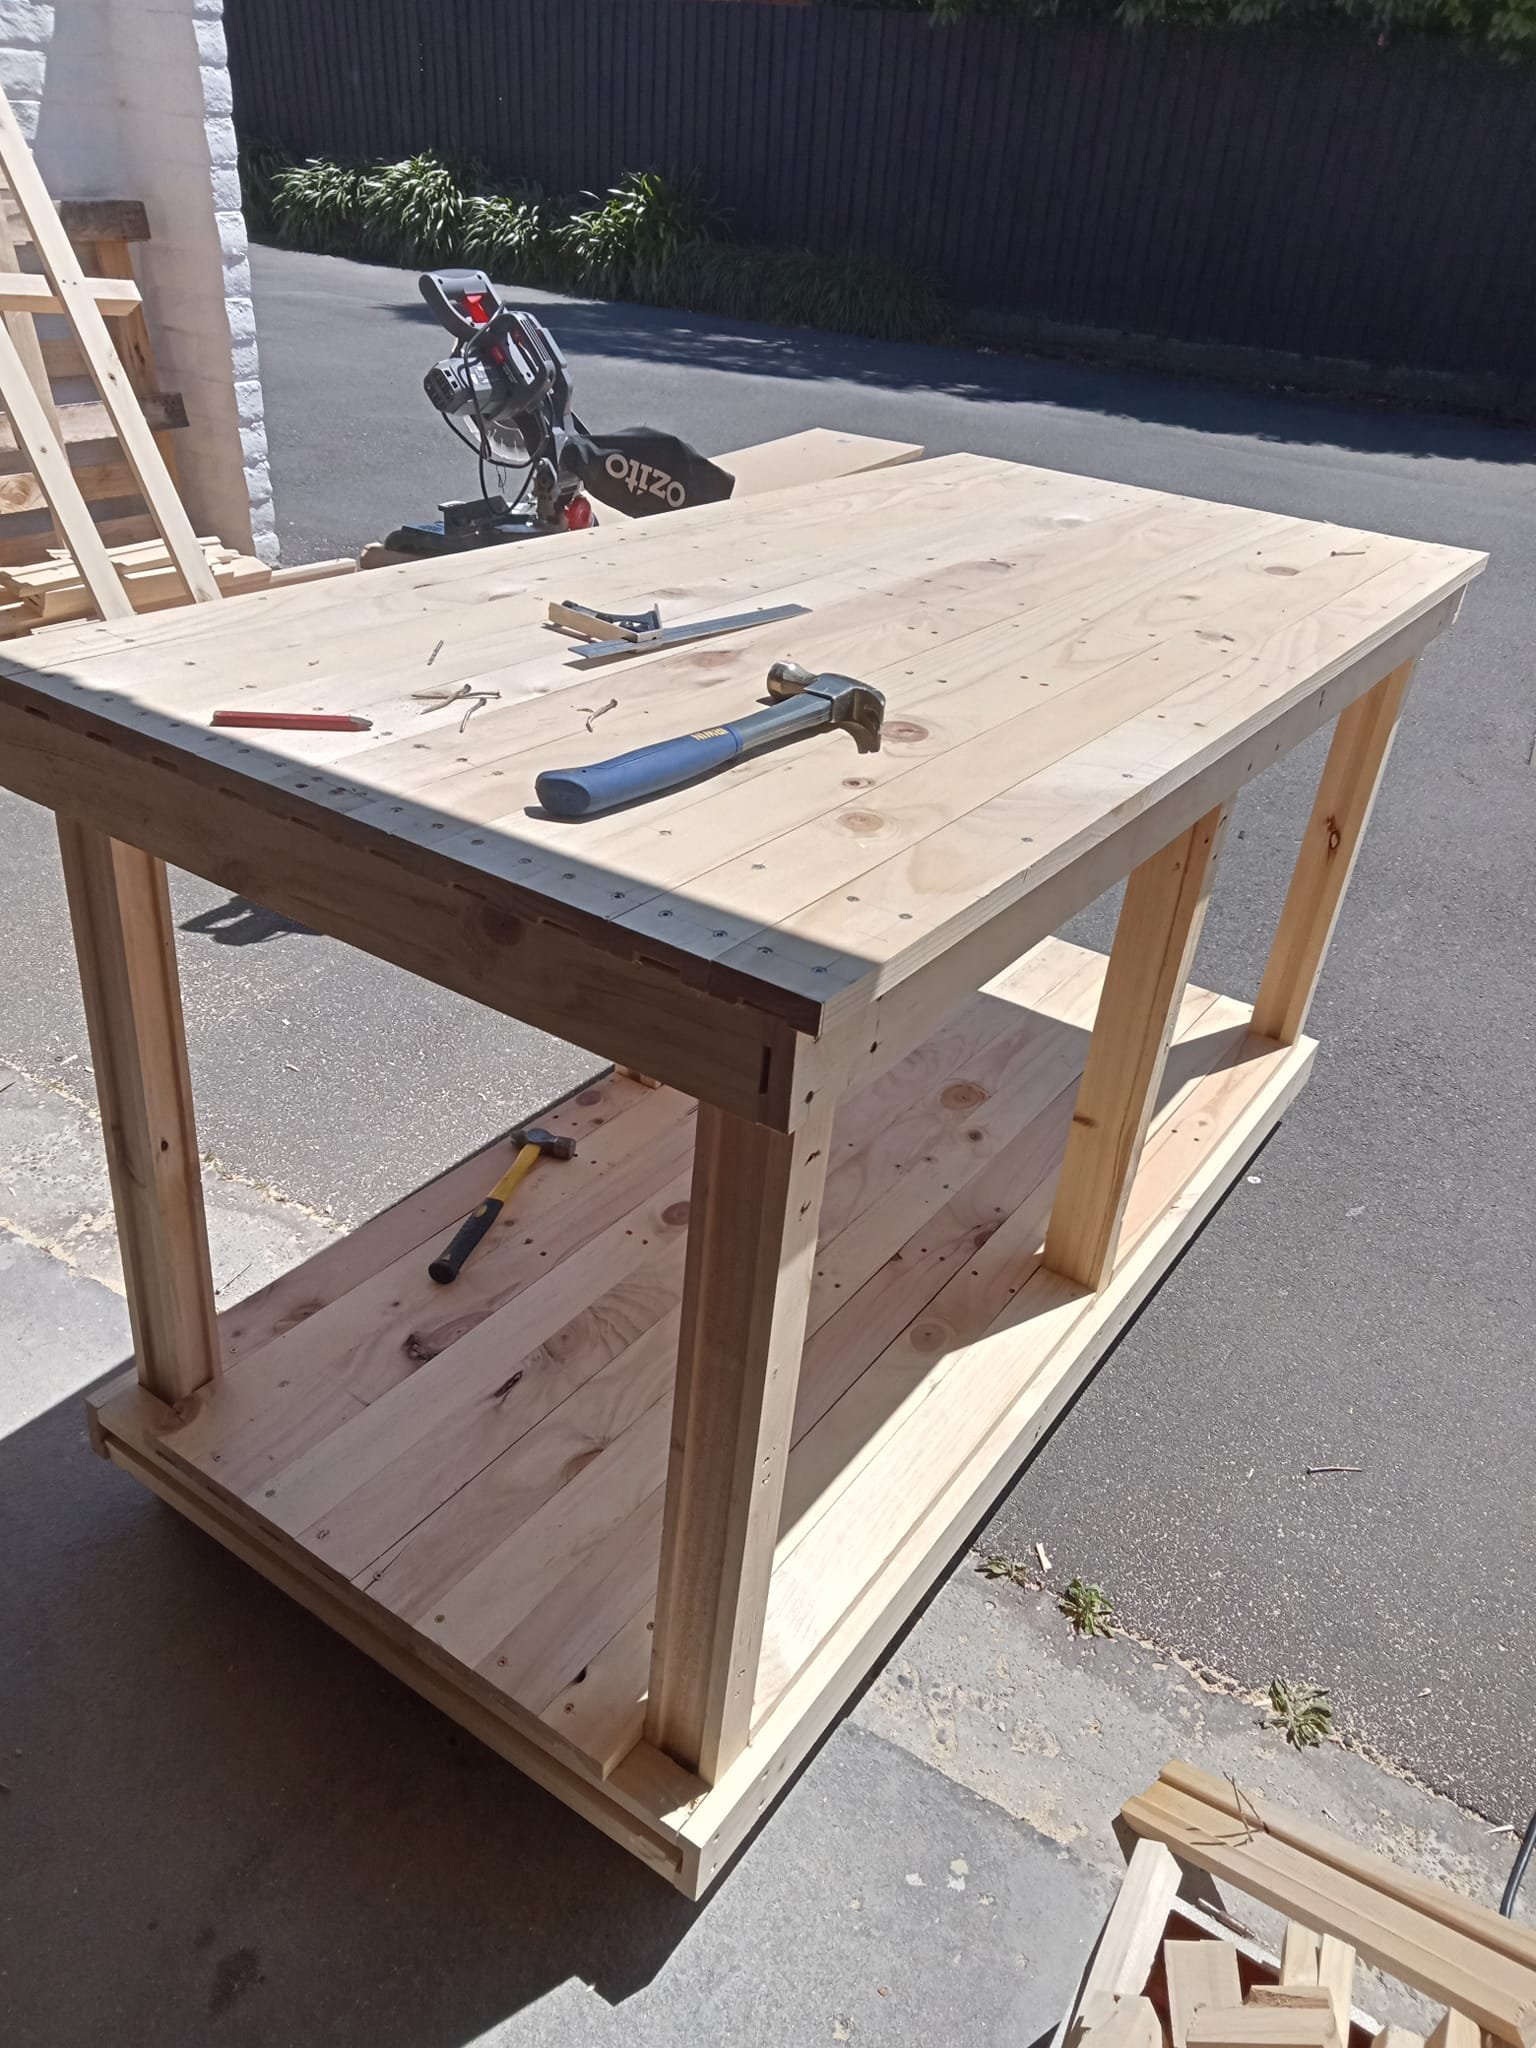
Next step from a windscreen wiper perspective would be to fabricate a mounting bracket for the L300 wiper motor. Now I'm thinking that I can fine tune the positioning of the motor by either shortening or lengthening this intermediate drive shaft. And hopefully that shouldn't affect the sweep in any way. Feel free to correct me if I am wrong. I figured it would be better to finalise the glove box and under dash a/c unit installation and I can then position the wiper motor in the space left over. So the first step was to retrieve the dusty old glove box for closer inspection. It's a bit grubby but still looks functional. The underside of the glove box has a nifty mounting bracket that looks like so: The pointy end of the triangular bracket mounts up to a little bracket welded to the inside of the front panel with the longer side resting up under the lip on the dashboard, like so: Now I'm thinking that refitting the glovebox has the added advantage of allowing me to use the same mounting bracket to support the under-dash a/c unit. But in order to do that I need to add some fixings to the dash lip to make the bracket more rigid for the additional weight. I poked two extra holes in the dash lip and added some stainless-steel self-tappers and it's nice and solid now. Next step was to take a closer look at the mounting brackets supplied with the a/c unit: Those definitely aren't going to work for me, so I spent a bit of time doing some CAD and came up with these: Grabbed some 3mm plate that I had in stock. Did a bit of cutting, did a bit of bending, poked a few holes to replicate the mounting slot and I ended up with two of these: And the plan is to bolt my newly fabricate brackets to the factory glove box bracket in more or less this configuration: So, the plan for tomorrow is to mount the glove box bracket back in the van and then offer up the a/c unit so I can work out exactly where the holes for my mounting bolts need to go. Stay tuned for the next exciting episode.
5 points
-
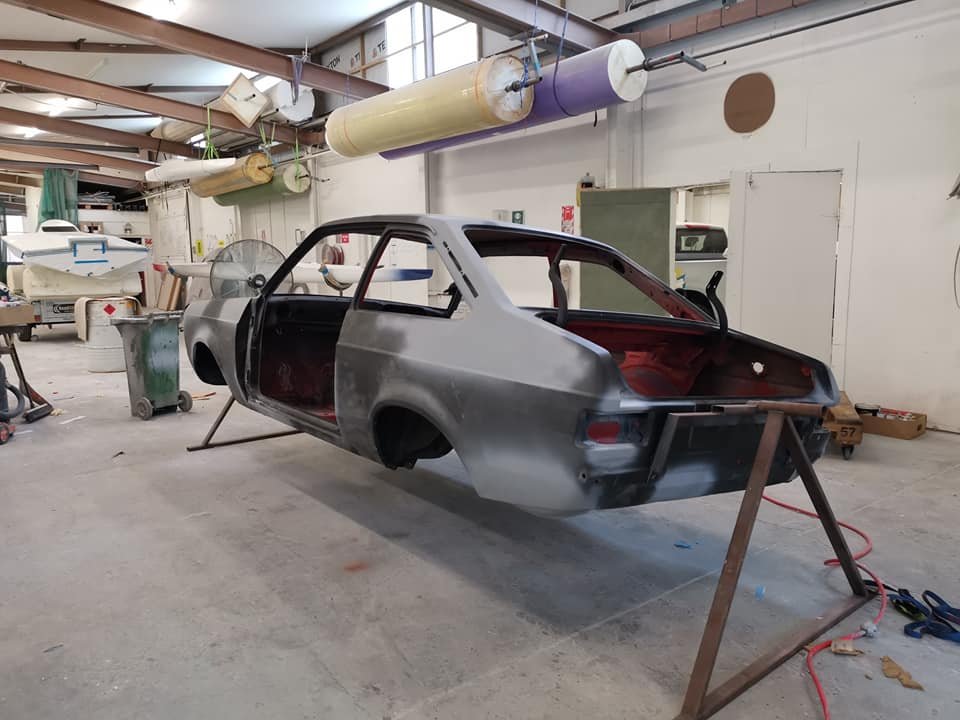
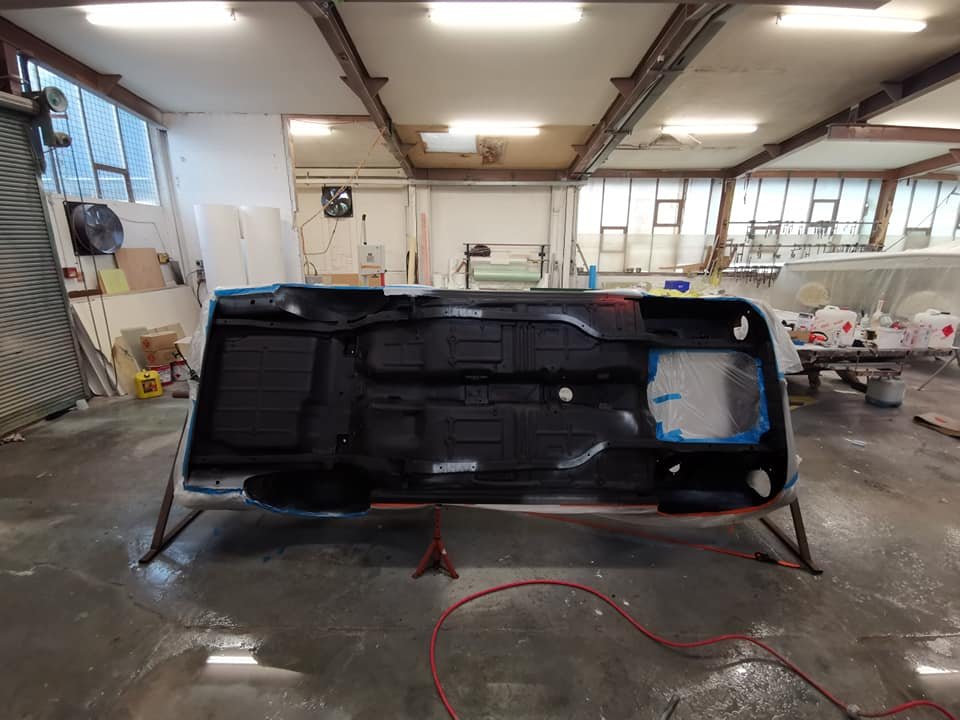
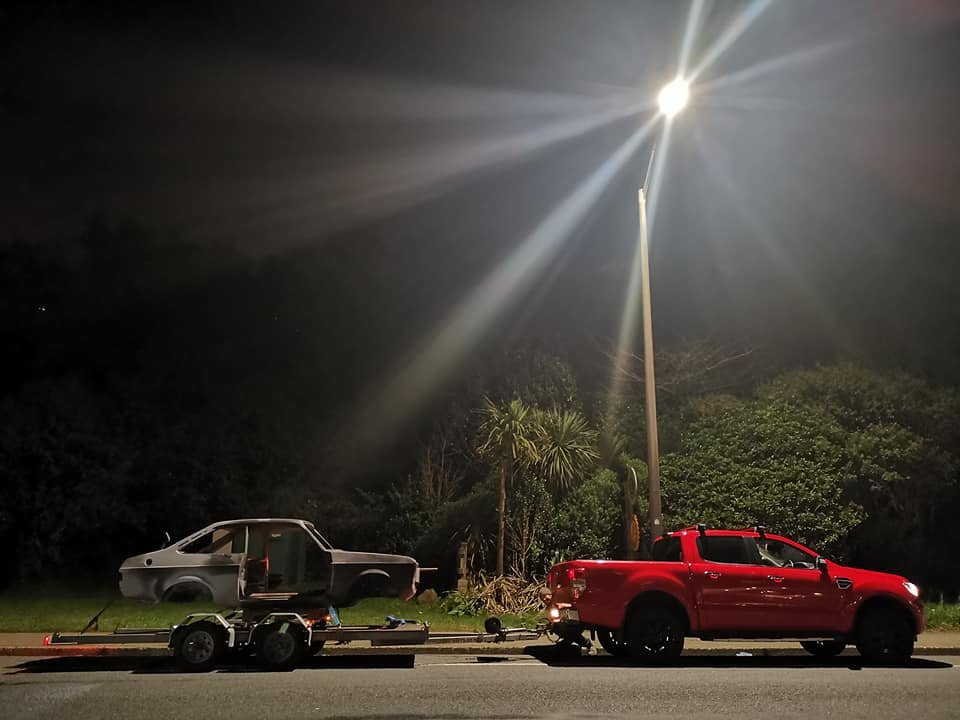
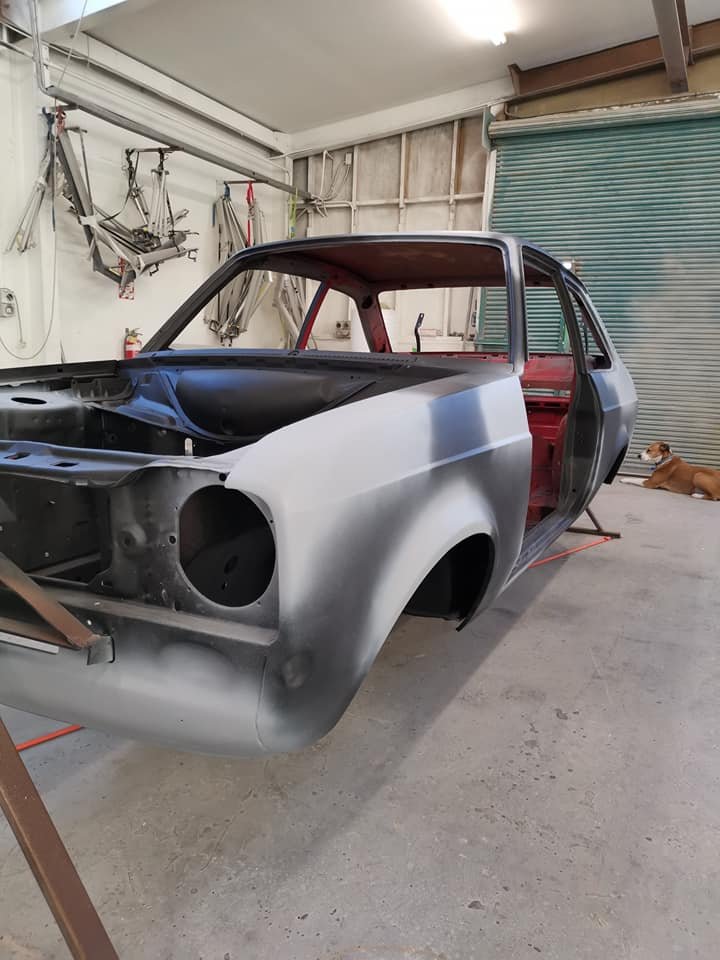
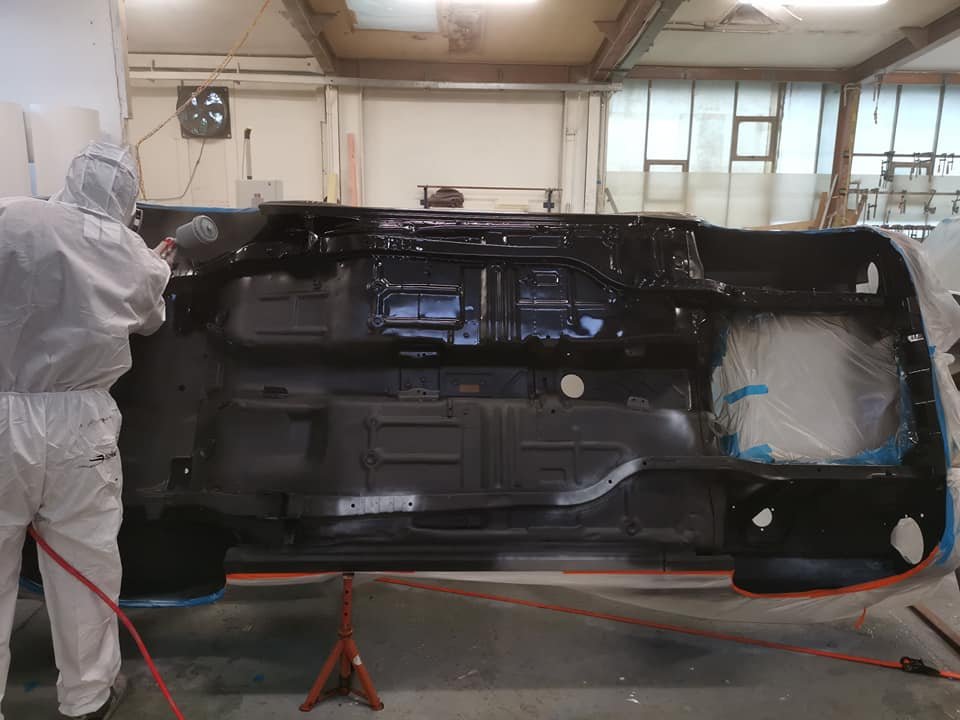
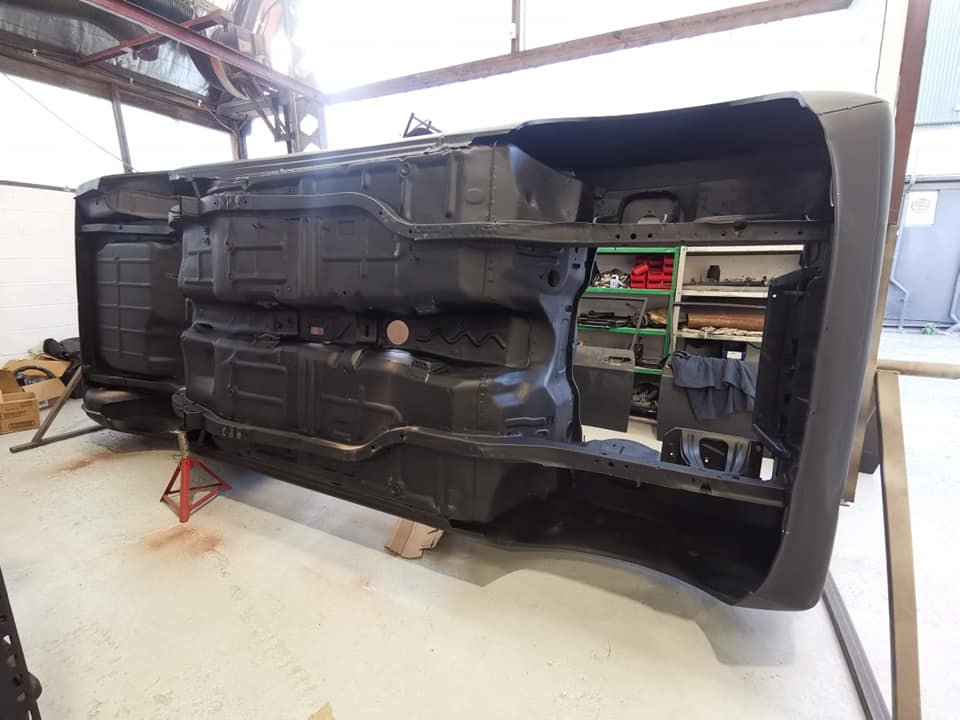
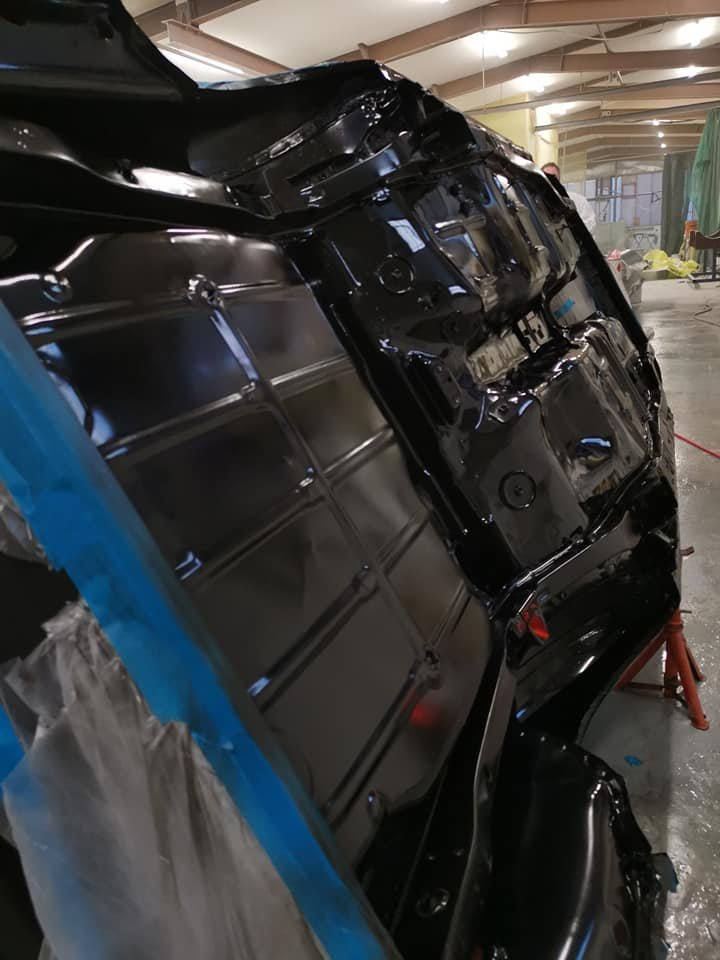
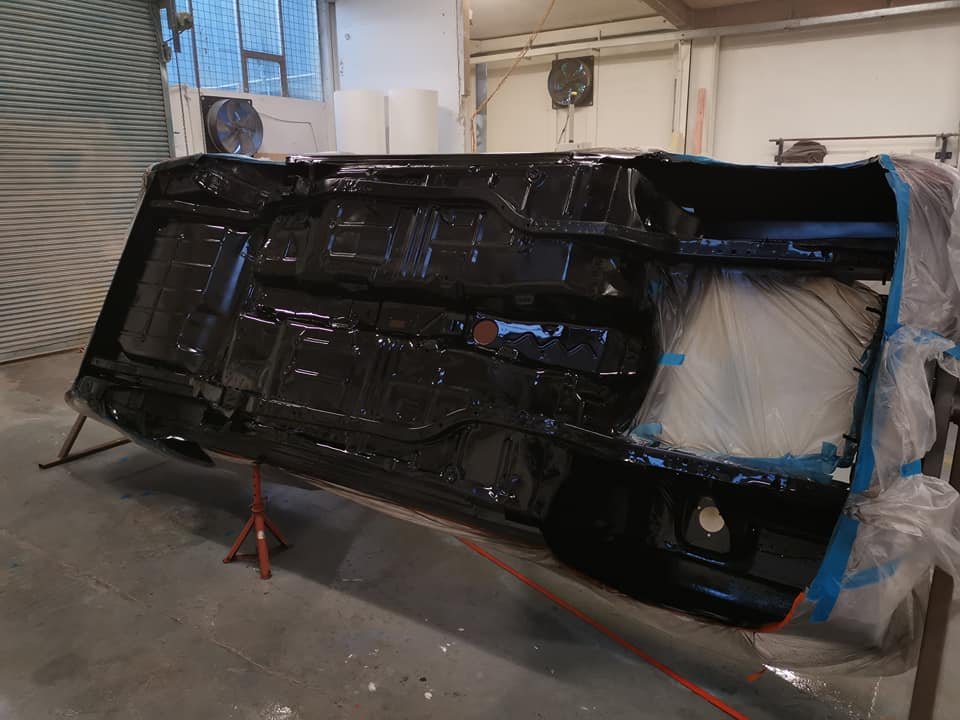
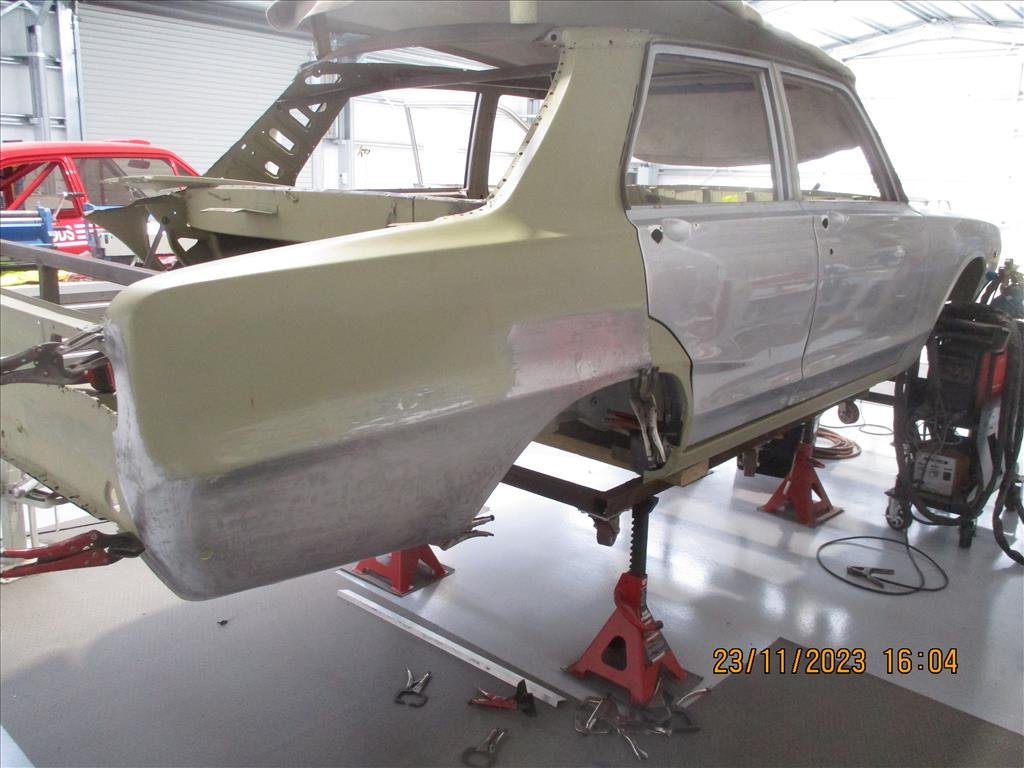
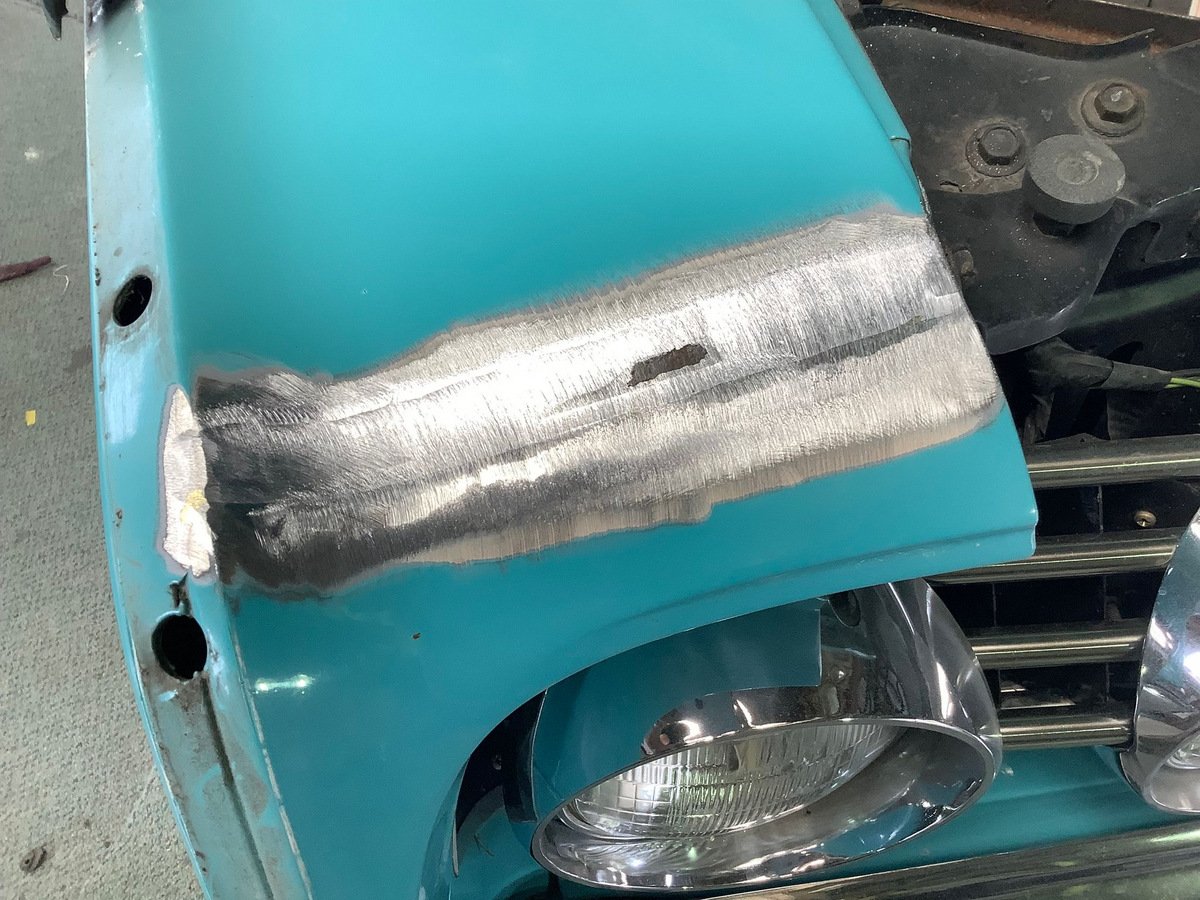
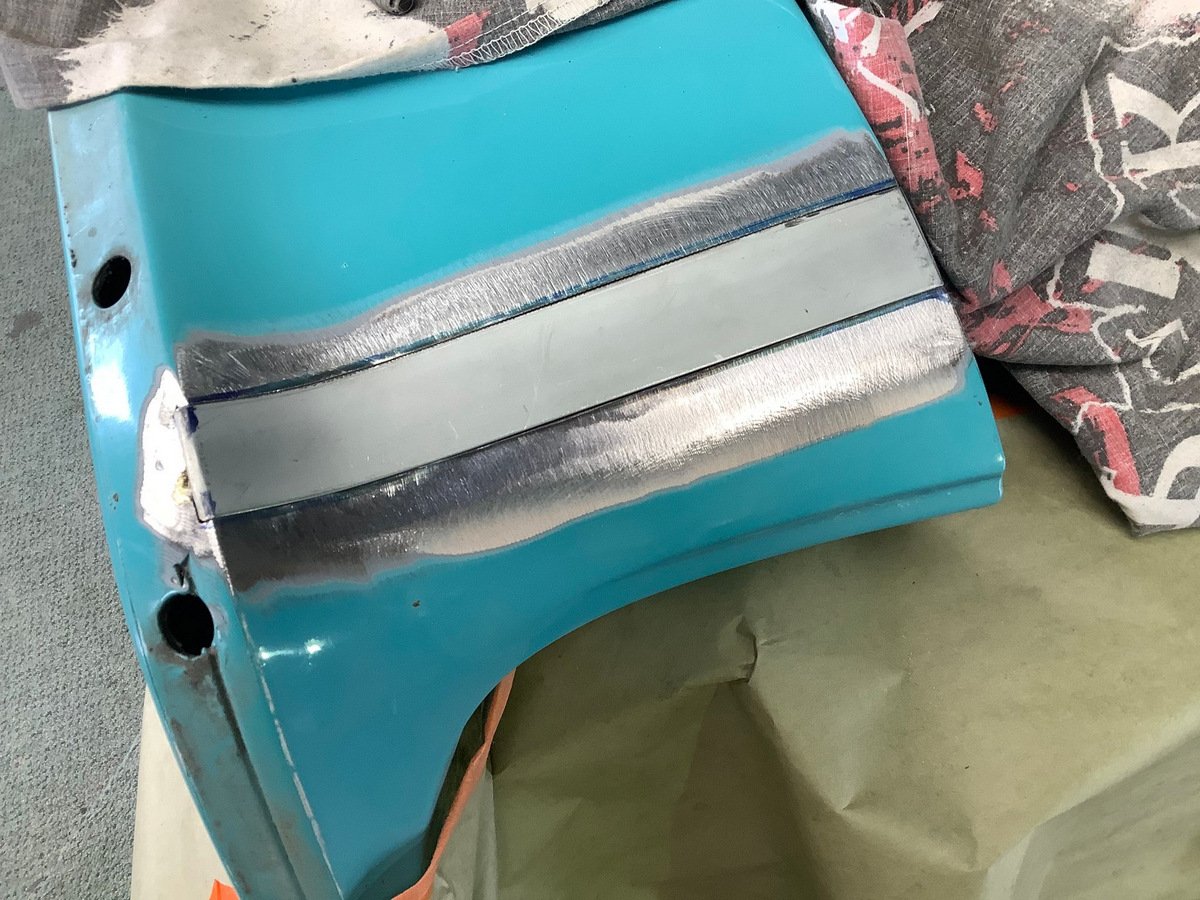
The next bit was sorting the paint and dealing to the underside. Good ol Brigade Red was actually a pain to get correct but well worth the effort. Thanks to the budget rotisserie it made life much easier. We managed to prime and paint the underside over a long weekend. Once this was done the car came back home where it sat for some time. As we went into lock downs, I got busy on the panel beating. With only the bonnet and boot lid under my belt previously, I did what I thought was right and it came up pretty bloody well.
5 points
-
Mainly because they eventually came through with the refund, so feel mean completely blasting them. If you wanted to Import Your Car, it wouldn't be hard to work out who it is.3 points
-
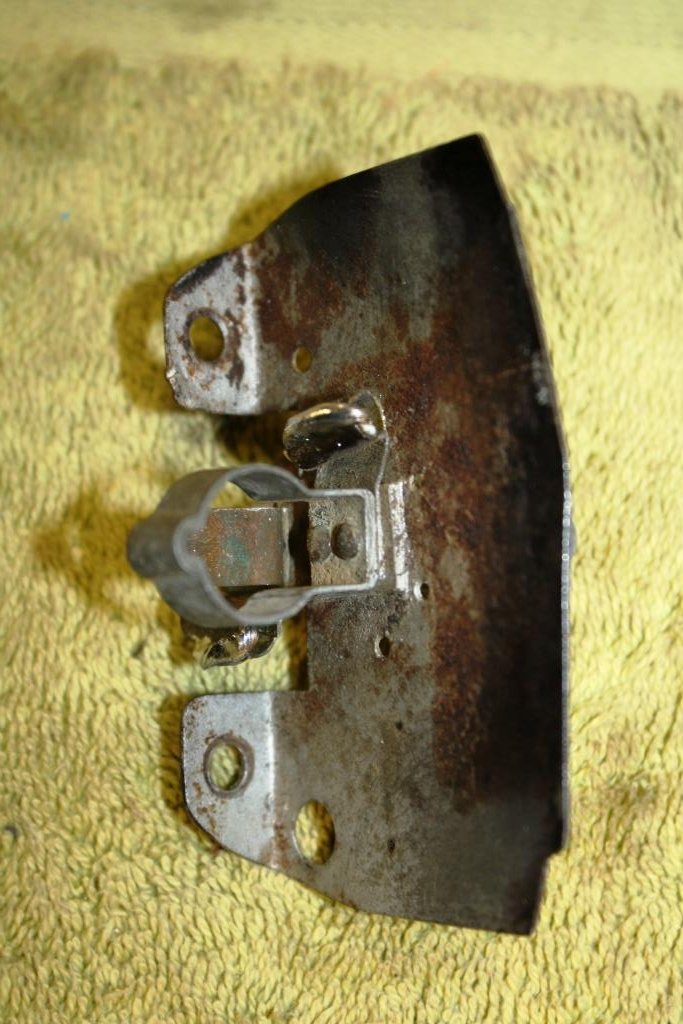
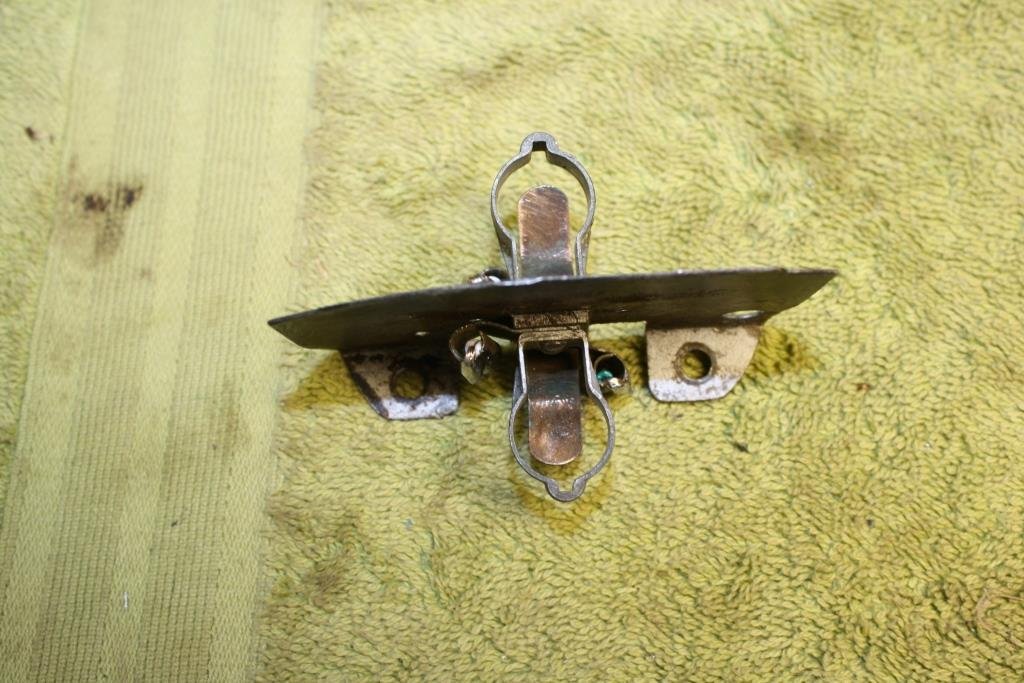
Flatbed truck hinges
3 points
-
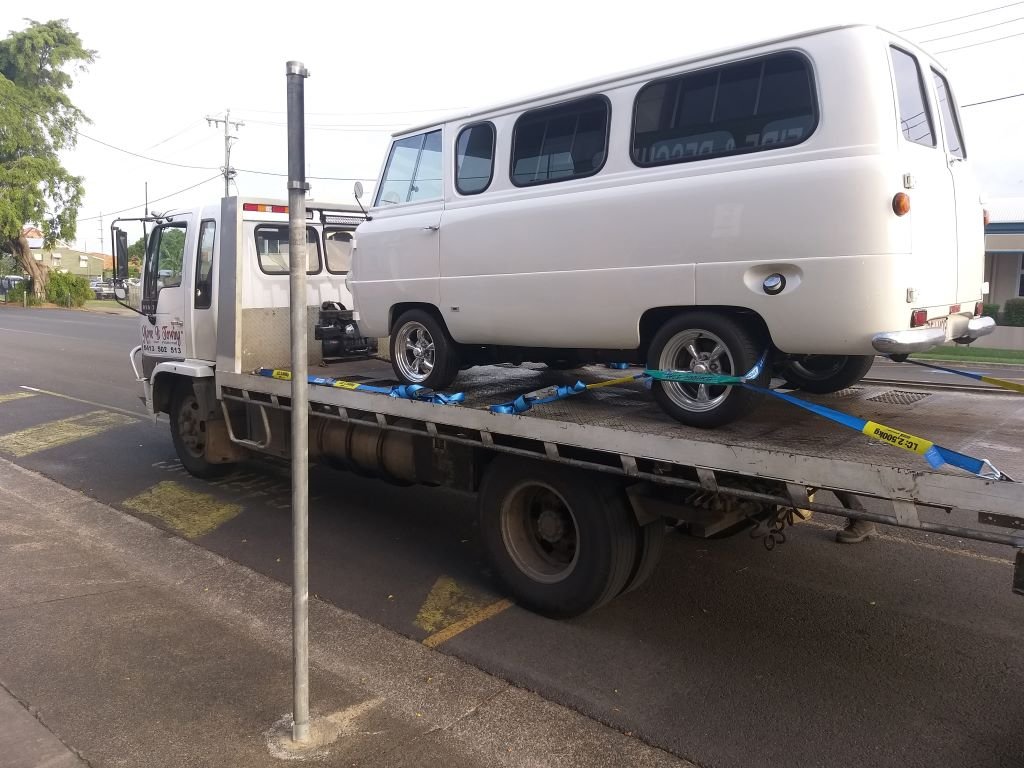
Well, here it is, the culmination of months of trying to import a car. Months ago, I heard through Facebook about an estate sale auction that was happening a couple of hours north of where I live. There were a few cars there, including some cool MG and Healey classics, but only one really caught my eye; a little 1990 Suzuki Alto Works nugget. I've always loved Altos, and here was one that was small, manual and turbocharged. It had been off the road for at least 11 years or so, and the rego was on hold. There were no keys, the condition was unknown and they could not confirm it ran. Excellent, my sort of car then! Long story short, I took some time off work, borrowed a truck that could tow a trailer, and made a trip up the line to see if I could win the car, with a plan to bring a trailer back the next day if I won it. We get there, and there it is, in all its glory. Look at that little face, what a nugget. I'm not sure how long it had been up on the blocks, but it was certainly in "barn find" condition, dust and all. It's clear that it hadn't been touched in a long time. The interior was.... disgusting. Everything was covered in dirt, or mould. On the plus side, it still had all the original features, like the cool seats and steering wheel with WORKS horn button. How good is the dash cluster though The little F6A twin cam 660cc turbo engine would love to rev all the way to the 7500rpm redline. The car had been converted to manual, and wasn't quite in showroom condition, with peeling paint, the horrible interior, and a large dent in the front RH guard, which had slightly damaged the door and bent the hinges Worst of all though it had rust in both sills, and the rear boot seal lip was just crunchy flakes at this point. Still, I wanted it. I found the keys to it (on the keyring for the Wagon R next to the Alto), but didn't try to start it. Long story short, the bidding started at about $200, and there were a handful of us bidding on it. Suddenly it was jumping up in hundreds, and only two of us were left bidding, in the thousands now. I had a firm budget in mind but the guy I was bidding against was there to win. Not once did he drop his hand. I hit my limit, and bowed out. I later heard from someone else there, that the winner had wanted an Alto Works as a garage ornament for years, and was prepared to pay whatever it took to secure it. It was not to be. Hopefully he got what he wanted, and it sees the road again one day. So, I did what any reasonable person does and began to obsess over Alto Works. Old ones were cool, but had the inherent issues of being old, and harder to keep on the road. I knew of the newer HA36S models from 2015, and although I always loved how they looked with their angry face, I had never seen one in NZ and didn't think I could afford one. But as it turned out, between the sale of the Yaris, and Lucas, I suddenly had a healthy looking bank account. The next problem was the fact that as far as I could tell, when I started this process, there were none in NZ. I had been curious about the importing process and buying from auction in Japan, so got in touch with an importing broker, who agreed I should be able to get what I want, with the budget I have. The HA36S Alto Works comes in a few variants (including the Turbo RS, which is more common but didn't come in manual and is a bit less "hard core"). I wanted manual, not black or red, and preferably 4WD. I bid on a few cars at auction in Japan and just kept falling flat. Despite watching auctions for a bit before I could afford to jump in, the prices were suddenly thousands of dollars more than I was expecting. Not only that though, 4WD ones were proving rare, particularly ones that weren't from the snowy northern regions. After bidding on a couple of dozen cars, and missing out (one, a nice blue 2wd one, by only a few hundred dollars, which ended up being imported by another Kiwi and now lives locally), I finally had one on the hook. It was 4WD, manual, wasn't from the north, in silver, and had good KMs. It was grade 4, and had minimal damage marks on the sheet. It looked nice in the photos, but Japanese auctions are very limited in the info and photos they provide unless you can get an inspection. In this case, it had a couple of exterior photos, and an interior one. No underside or engine bay. I did spot and liked the slightly wider flares, and aftermarket muffler though. I liked it. I contacted the importers, who translated the auction sheet and gave me some bad news. It had underbody coating, and some rust. Not to worry though, in their own words, "for around $2000 trade rust repair will be carried out under the supervision of the repair certifier and come with a repair certificate. It will be sandblasted and rust treated and painted black. Rust repair is in fact a good thing, your car will be protected from future rust and will pass every WOF for a long future". Sounds good, but to be sure, I ordered an inspection at my cost. In the mean time, knowing that it'd only be a couple of grand to have it blasted and coated, I submitted my bid, factoring that repair work into my bid. It was all the specs I wanted. The auction came and went, and I heard nothing, and no inspection results were provided. Guessing I had lost it, I went to bed that night and forgot about it. I woke up the next morning to two emails. One, at 10:51PM "YOU WON A CAR TODAY!" and a second, at 11:03PM, the inspection result with photos from the inspection. Handy. Well then, I had an Alto! I was excited. I looked over the inspection photos, and noticed some spots of rust I would rather weren't there, like in the bottom of one of the doors and around the engine bay But other than that, nothing really concerned me. The underside had been undersealed and there was still some rust in the seams, but nothing a couple of grand of repair work couldn't fix This is where it started to go pear shaped. I got an email from the importer, asking "are you sure you want to import the car, we don't know how bad the rust is and the rust work costs could be higher". Based on the photos, I was still confident it wasn't that bad. Heck, I could've fixed most of it in an afternoon with a wire brush and some rust killer. Also, I had agreed to buy the car already, I didn't know at this point rejecting it was even an option. I said to continue. The invoice for the car comes through, and I pay promptly. Yay, I'm getting an Alto! Three days later, I get another email. This is where the scaremongering really kicked up a notch. They had "spoken to compliance" and would need the engine removed to repair the rust, plus sand blast, plus repair cert $$$$$. "Good thing the car will be protected from any future rust" he continues to say. Suddenly the repair work was being quoted at approx $5000. Well, I own it now. I've paid. What other choice do I have? About two weeks of radio silence later, I get an email from the boss. It failed border check and has been flagged for rust. That was expected, they fail any signs of underbody rust. The advice was to abort, and send the car back to auction, otherwise the potential repair costs were now "$8000++". That's a lot of money for a car that was already going to be $15,000 landed, on the road. I weighed up my options. I could import it and risk the costs. Or lose my $1000 deposit, get a refund and either try again, or find a different sort of car. I chose the latter. I rejected the car, and asked for a refund. That was the end of that car He agreed to refund my money, less the deposit, by the end of the week. Happy days. The money didn't arrive. I wasn't too worried though, I could use that money to bid on another car; so I was still looking, and bidding in the mean time. I was advised to stick to higher grades like 4.5, and to avoid anything that mentioned rust. In order to be sure, they wanted to get an inspection on any car before I could place a bid. The funny thing is, now they could suddenly get an inspection to me before the auction closed, unlike the one I won. I found a nice looking blue one. It was manual, 4WD, 67,000km and grade 4.5. It sounds like a winner, so got them to get an inspection with the intention to throw big money at it. The auction sheet said nothing about rust. I actually found this car later listed on Beforward (another importing site), listed in the north, in Hokkaido. Not a good start. The inspection came through quickly, well before the auction time. Externally, it looked very nice. The drivers seat was worse for wear. The bolsters were squished, and the fabric looked very worn and gross. Surprising for 67,000km. But worst of all. Rust. It wasn't as bad as the one I won, but it was there. It was on suspension components, on the sills and worst of all, coming out in the seams in the engine bay. Clear signs of having spent time in the snow. Keep in mind, this was a grade 4.5, with no rust noted on the auction sheet! I decided not to bid on that one, I couldn't take the risk again. There were a couple more, but only one that was really notable, made me very angry, and was the nail in the coffin of my importing experience. Manual, 4WD, silver, completely stock standard, 117,000km on the clock. It was the spec and condition I wanted, in the Ks I could afford. It was a grade 4. I wanted it. I asked for an inspection, and sure enough, it came through with plenty of time to spare. And it looked GOOOOOD. It was spotless. New AD09R tires all around, the underside was clean, no sign of rust, the interior was nice. The body even had minimal dents and marks. Someone had looked after this one. I was very excited. It was perfect. Nothing could stop me now. I placed a very generous bid on it, to make sure I would win it. I didn't win it. It sold for well under my top bid. It went for less than my last one. Why did I lose it? Because they chose not to bid on it, based on the recommendation from the person in Japan bidding on the car. Why? because of this dent in the rear quarter panel. Apparently that would "need a repair cert" to import. I threw my toys at that point. There is no way a dent you can barely see would stop that car being imported. My closest guess is they forgot to place my bid. I was angry. On top of that, I still hadn't got my refund. Twenty two days after I was told it would be refunded by the end of the week, after me asking repeatedly, I received a partial payment of about a third of my money, with an excuse that "Japan was holding the money from him" but he could "manage it next week". Next week came and went. Just shy of a month later, after a rather terse email, I received anther partial payment of less than half of what was left and yet another excuse, about the car having not sold (not that that was ever a condition or term of the refund, that's what the deposit is for), but that it would be sorted. Two weeks later, and my patience was done. I threatened court action to recover the remaining money. I was sick of the broken promises and deadlines. Two days later, I had the rest of my refund, in full. I know it's not the norm, but the whole auction and importing thing just left me feeling really bitter. If I didn't know two people now who have used their service (albeit at least in one case, not completely smoothly either), I would've wondered if it were a scam of some sort. The auction system itself seems to be broken and the auction grades mean nothing. A grade 5 is as close to a new car as a used car can be, so a 4.5 should be near new with some minor marks. Grade 4 should still be very good, with a couple of slightly bigger marks. So why were the grade 4 and 4.5s so junk? I have heard reports of corruption in the system too, where sellers have paid for higher grades, but I don't know how true that is. Long story short, I was left $1000 out of pocket, with no car to show for it, and a bitter taste in my mouth. I'm very glad I could even get a refund; although the Terms on their site allow for it, I still wouldn't have been that surprised if they tried to decline the refund, or wait for the car to sell first. Don't worry though, not all is lost. I gave up on importing, but I didn't give up on an Alto Works.2 points
-
Apologies for not making it today, wife’s car (vw golf) did the European thing and shit the power steering. so I spent the day fixing broken motorcycles.2 points
-
Man, reading stories like this makes me feel so lucky with my importing experience. Is there a reason why you're not naming the brokers company?2 points
-
Interesting yarn and can't wait to read the next bits. Conscious of not spamming up a good thread in the making but I've had a bit of experience with bike auctions from Japan and have the same experience with grades. Always tried to bid on bikes in the 4-4.5 range. Sometimes they would be amazing, sometimes utter shit and obviously graded by someone thats legally blind. Then again I've had 3.5's turn up in amazing condition. There was no rhyme or reason in the 2-3 years I was involved with it - as you have we just had to hope and pray based on photos. Just reading that had me excited a couple of times and deflated an equal amount, I can only imagine how it must have felt for you. Thanks for taking the time to write about the process so far.2 points
-
https://youtu.be/NkqrAkC47kY?si=xV532fGI7k3Sk2Zr o/s drags, just for fun-times diddnt get any better-so was just a good day racing different cars. Its got a stainless 3 inch front pipe with a screamer on it haha Couldnt afford the drag radials
2 points
-
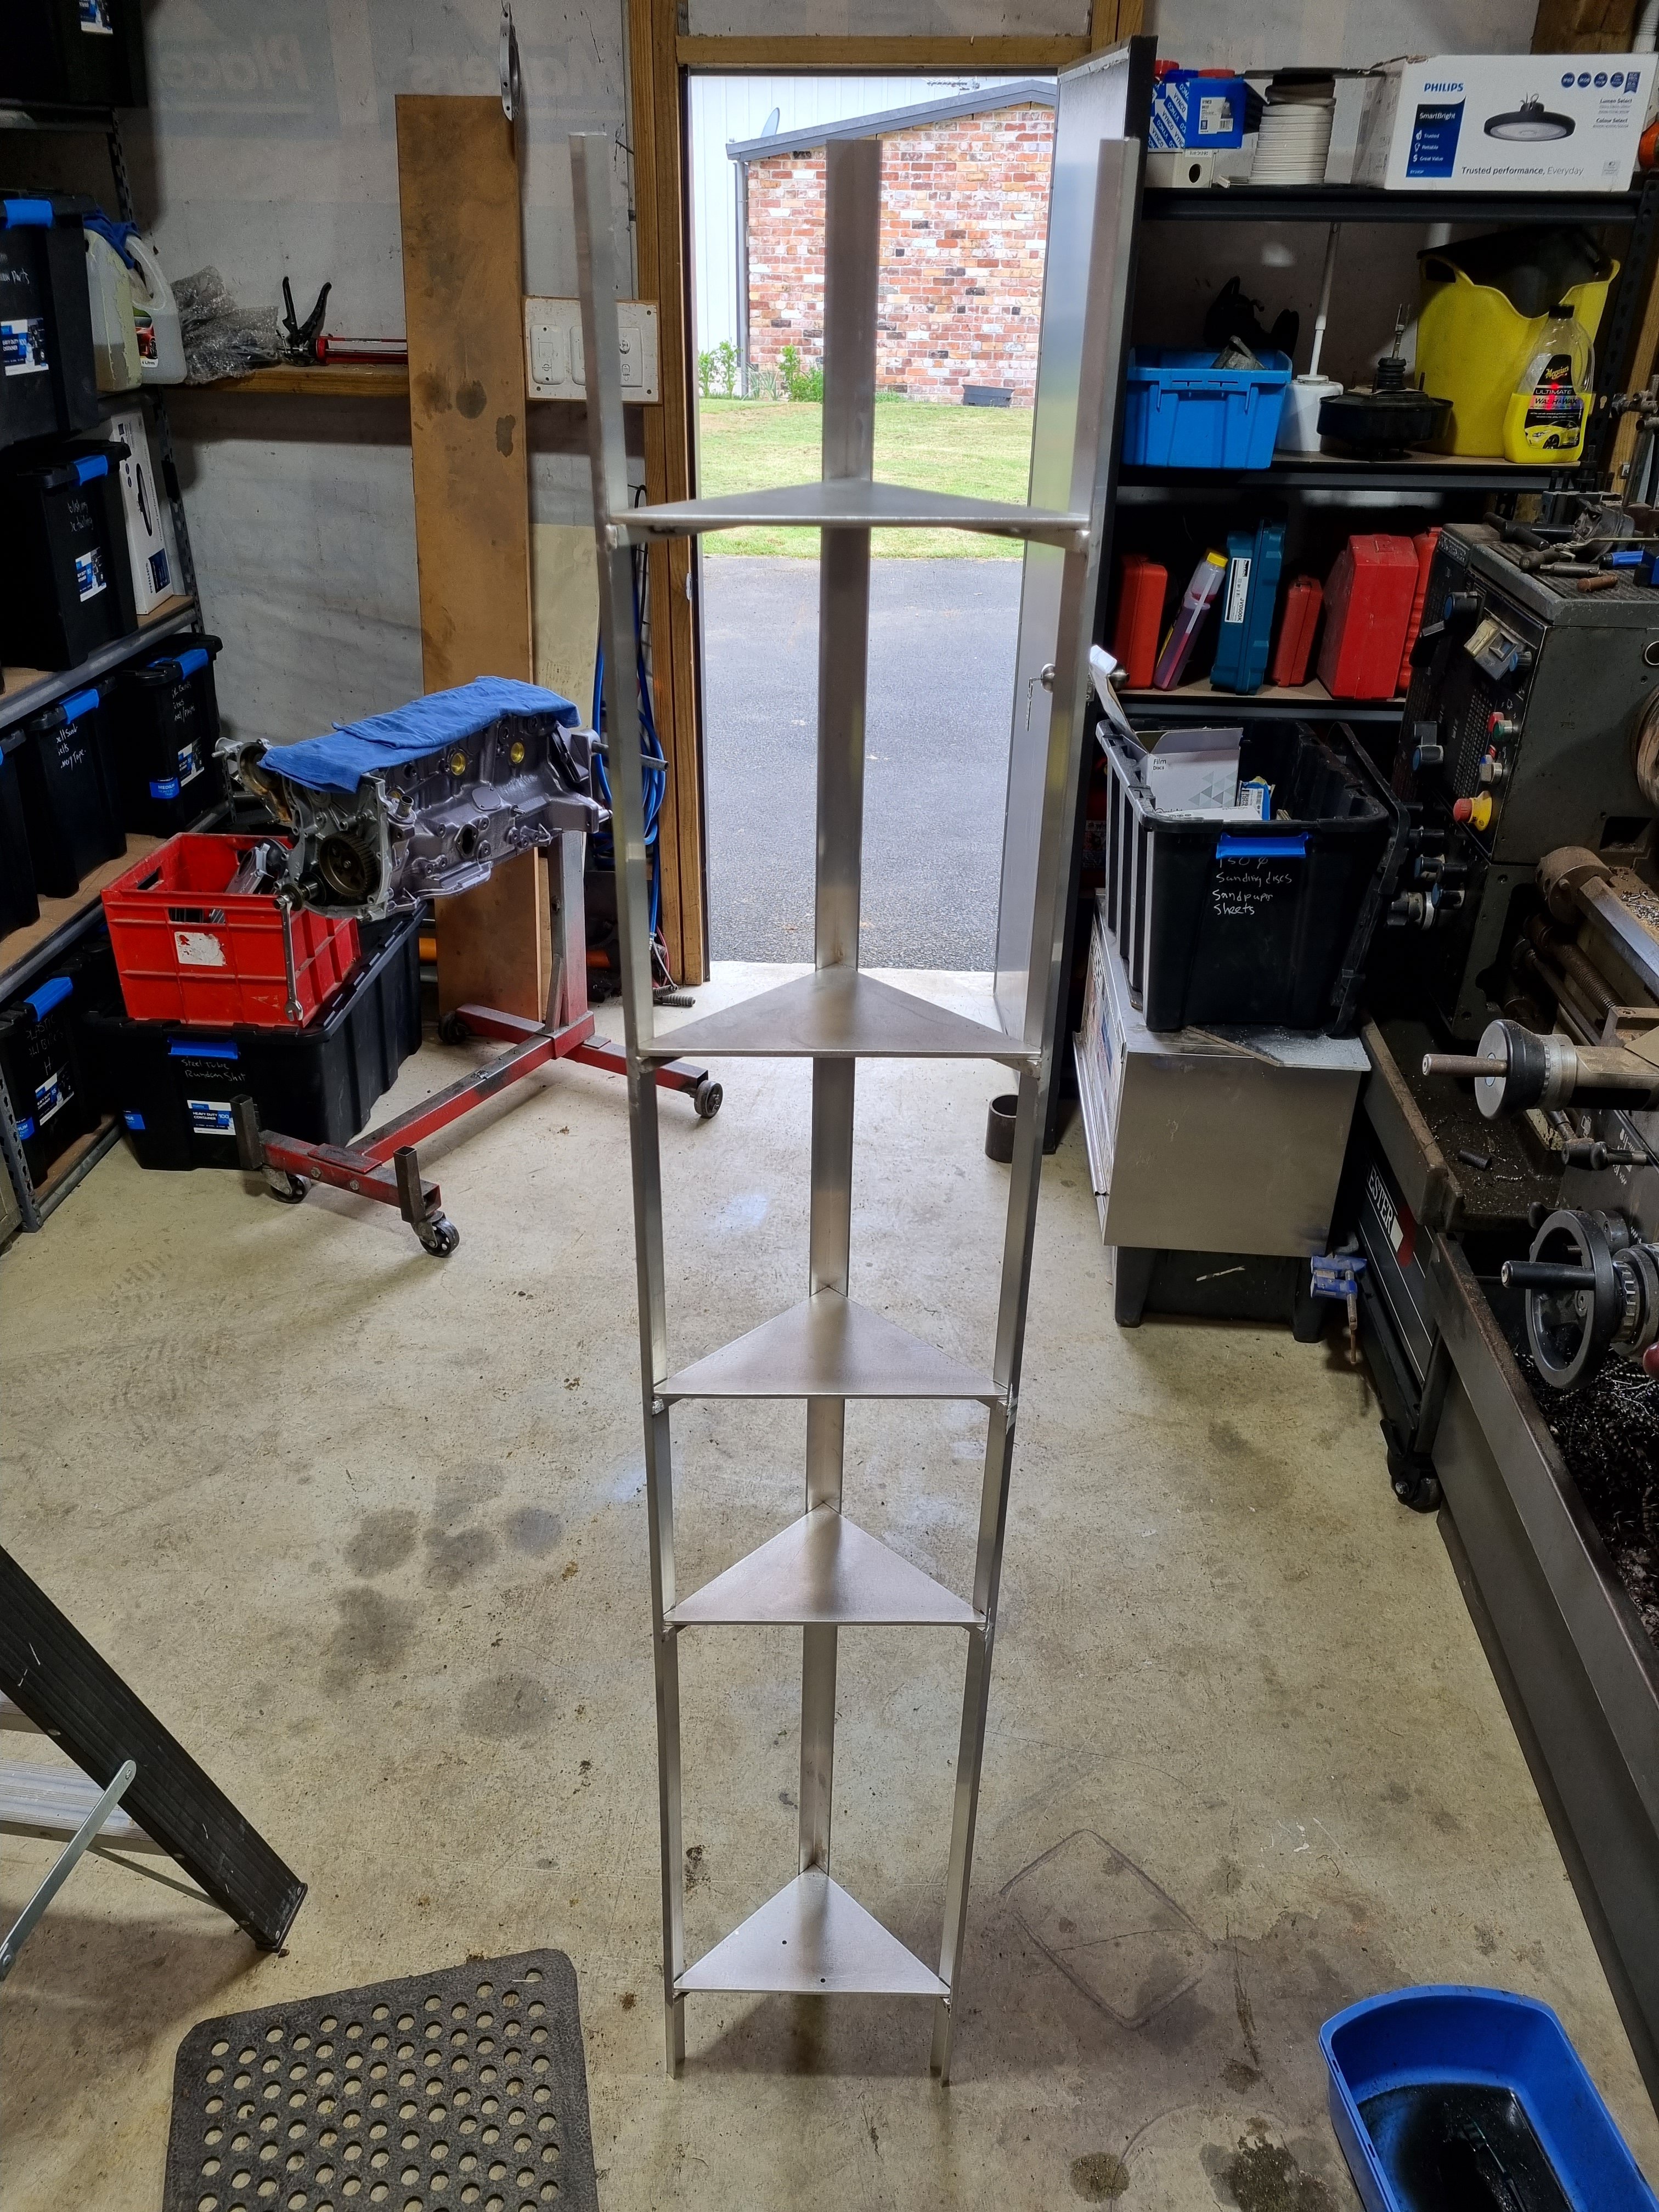
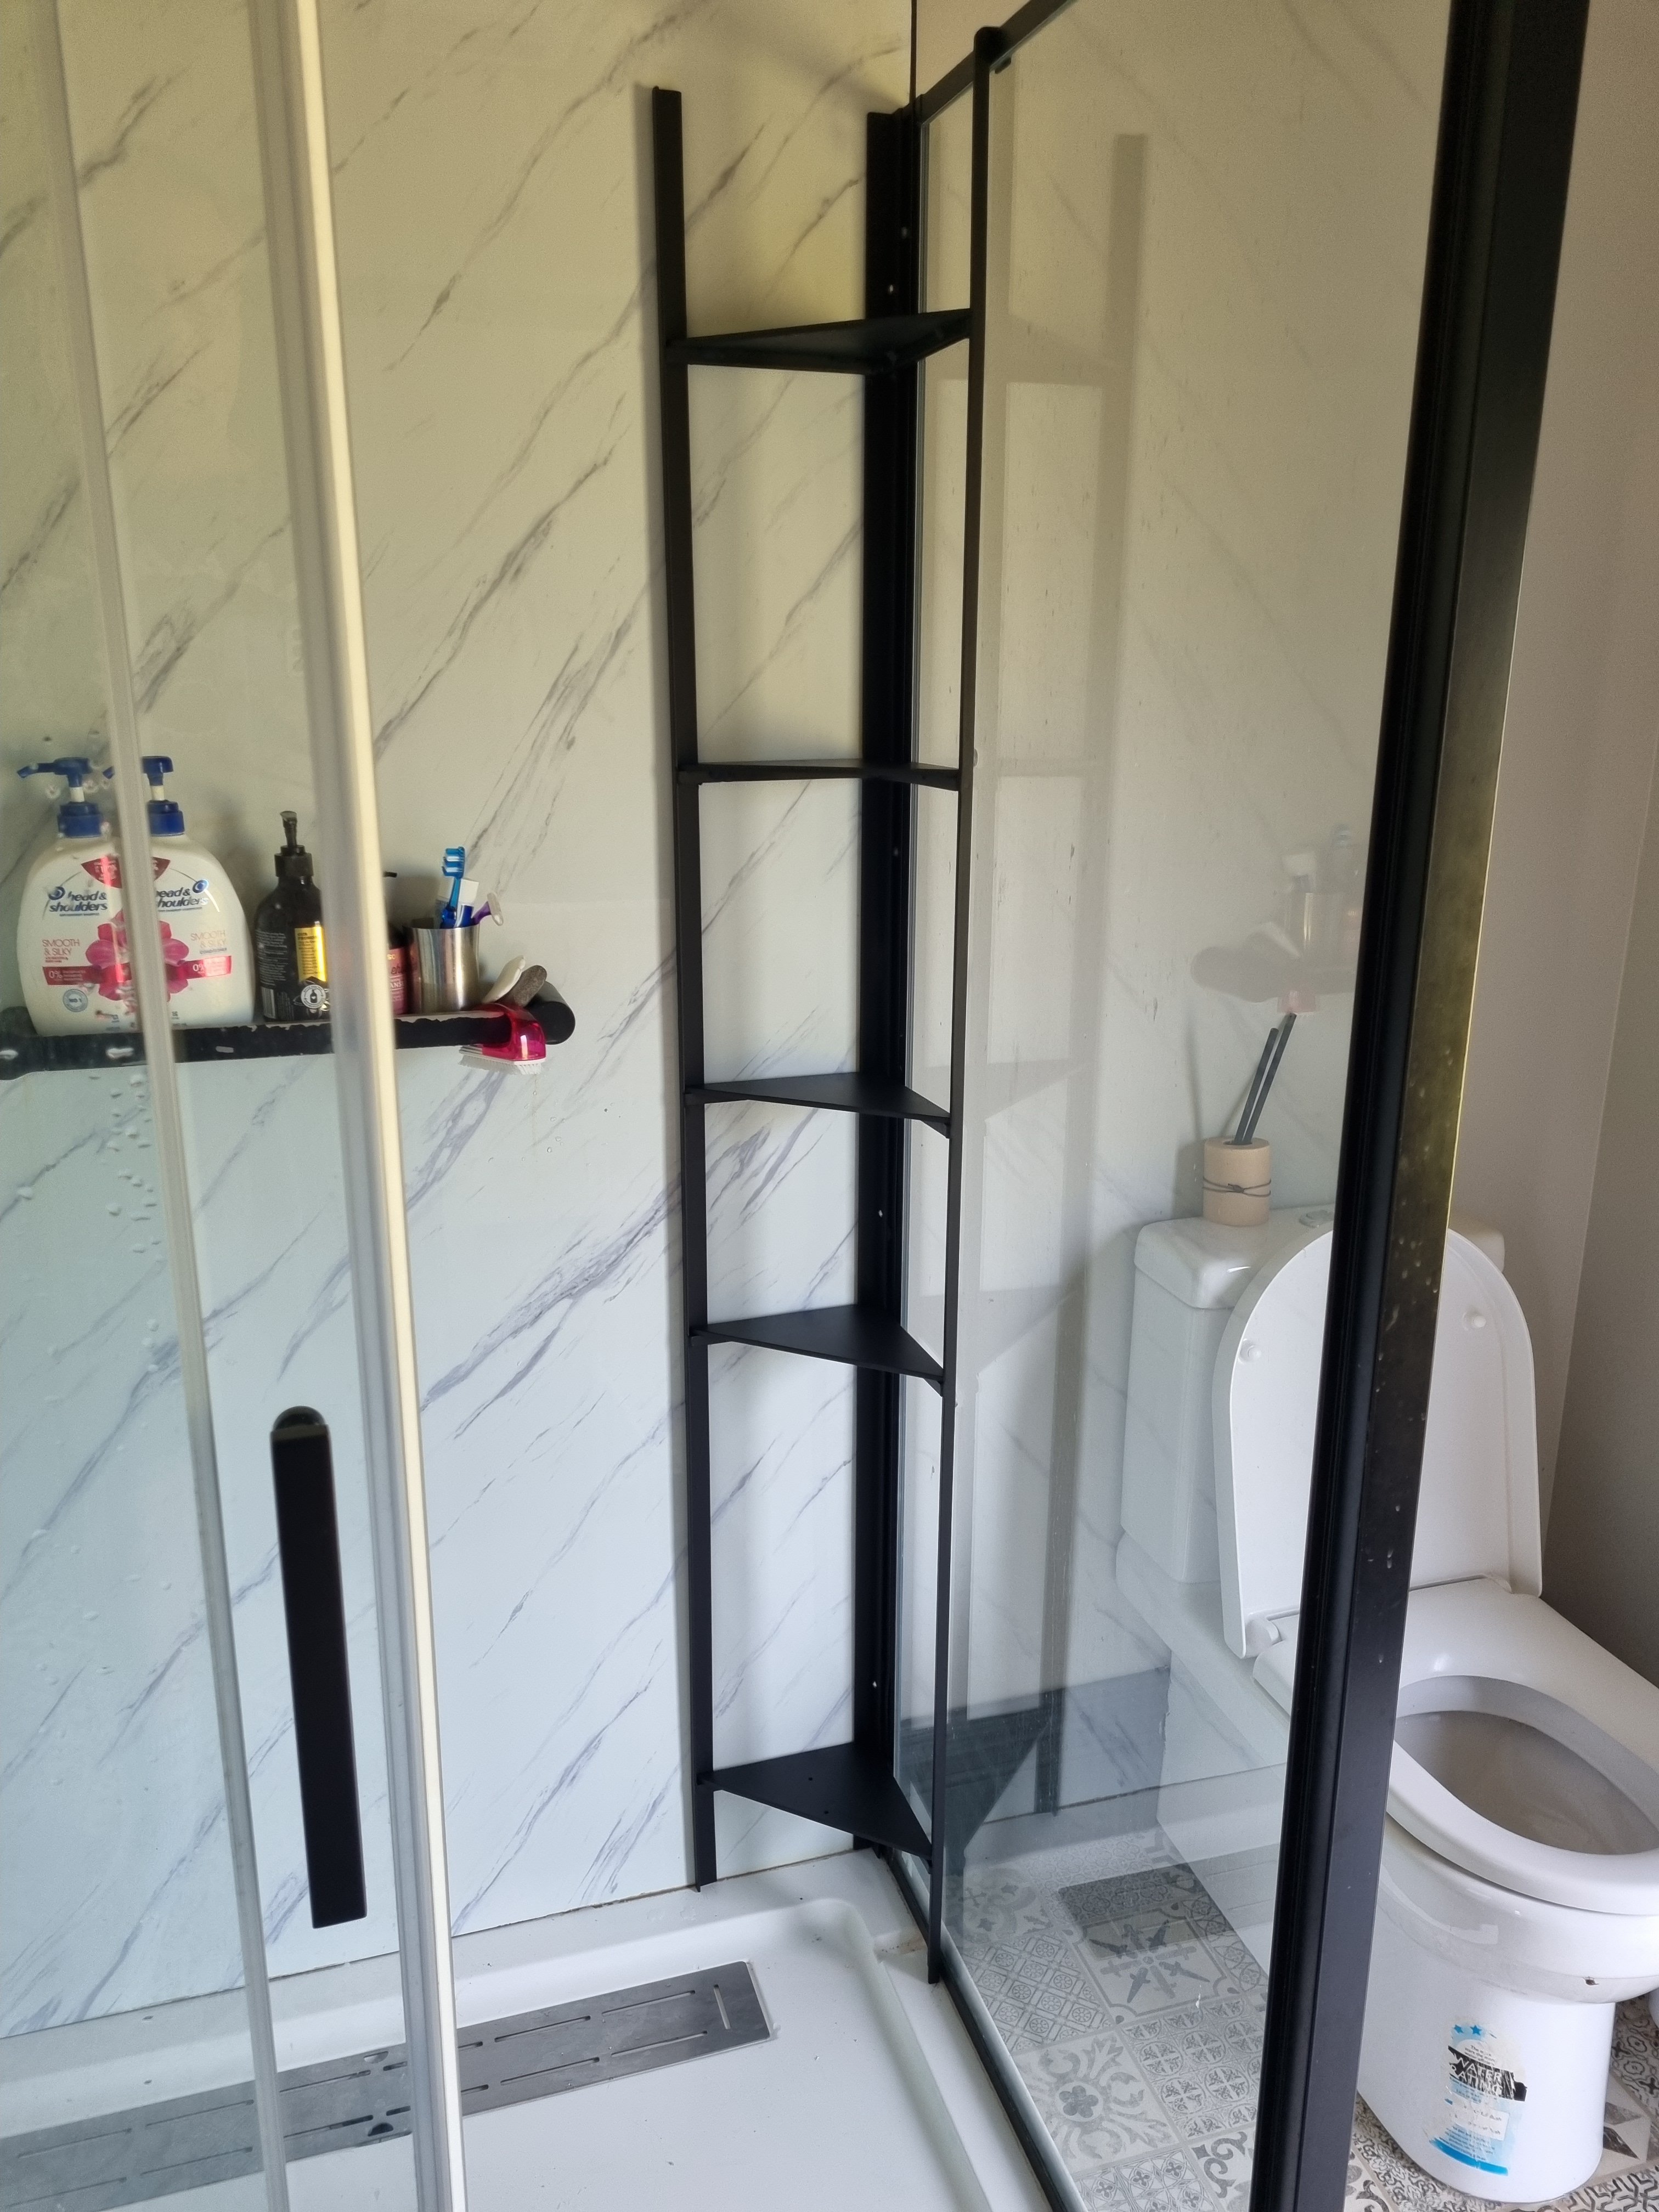
Also I made this. It's a corner shelf for the shower. Currently there is a tiny shelf thing which is worse than useless and gets drenched whenever the shower gets used to soap gets turned to mush very quickly. It's made it is some bits of ali angle and chanel I had.
2 points
-
Onto an existing trailer.. Without knowing exactly what your plan is (and an indication of size/ lining material etc) I'd say with a bit of diagonal bracing some 25x25x2.5 would be fine for such activities.1 point
-
LoL. Someone wanna list the good sharns, so I can hear them again for the very first time next bbq?1 point
-
You guys can get new jobs you know, OS meat, new year, new job, winning.1 point
-
Oh what a difference the die has made to the seat tryd to scrub the seat but didnt come up too well think with a rear guard maby a little rear light will b prety sweet
1 point
-
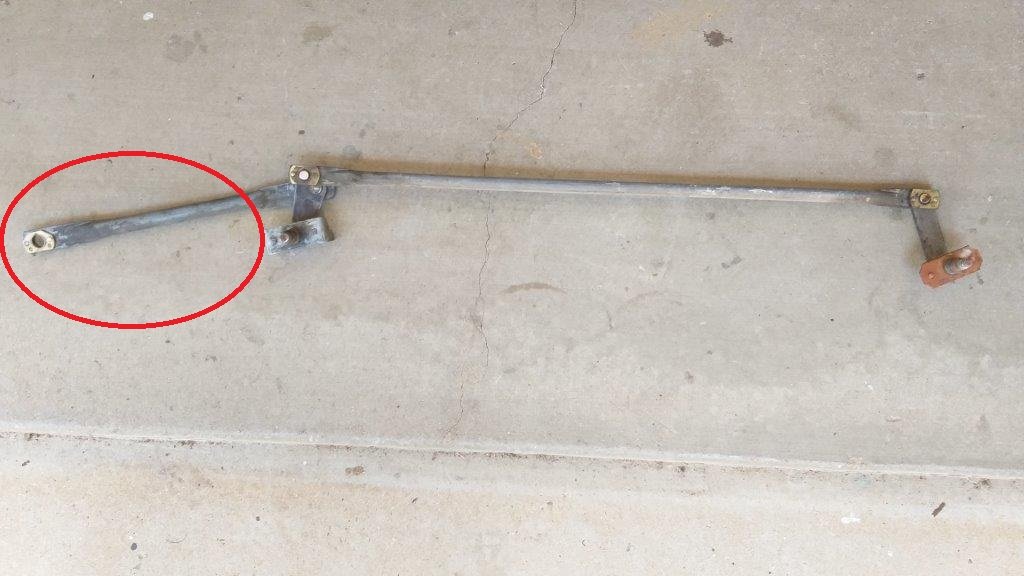
Started the morning off by fitting the freshly painted spacer to the LHS wiper spindle and then bolted the mechanism in place. Managed to get a clear shot of the factory seam that I was talking about yesterday: As you can see the factory had already trimmed the seam in the area of the spindles and I'm guessing that was done to provide the needed clearance for the Thames spindles, but just wasn't enough for the L300 ones. As you can see in the below photos there is still plenty of depth to the spindles even with my extra spacer. I'm liking the rubber seals and shaped washers that came with the L300 units. If the Thames units ever had rubber seals, they are long gone. As can be seen the splines and threads are also in perfect nick. With the spacer in place I chucked one of the L300 wiper arms on and Mrs Flash held the manky old wiper blade slightly off the windscreen while I climbed under the dash and manually manipulated the mechanism. The good news is that the LHS wiper sweep looks to be really good. The angle on the L300 wiper arm looks good, but the L300 blade is too long and goes well over the windscreen seal. Should be easy enough to source shorter wiper blades. Spurred on with the success so far, I proceeded to make up a spacer for the RHS spindle. In order to explain why my spacers have the extra little locating holes on either side of the spindle hole I'll share this photo of the original L300 front panel that I kept when I wrecked that van: My guess is that they prevent the spindle backing plate from rotating by holding it firmly in place. Anyway, a quick "in progress" shot of the next spacer which has now been completed and has received its first coat of galv paint, so I thought I'd update you all on progress while the paint is drying.
1 point
-
Looks like the legs of a man i saw at a bus stop one time. The slave wasnt a borrow @Roman its a gift! Merry Crampus1 point
-
Dont feel bad about the chopped front guard it was absolutely cooked. Someone had drilled holes in it and use door hinge to hold together errrr. So had to dremil them off as they were rusted completely. Filled holes paint Got bulb in light Last pic from yesterday went for its 1st ride out of the street to a park near by went great no issue. Tank needs clean inside. Can only do lil bits at a time due to health stuff but tickn along nicely
1 point
-
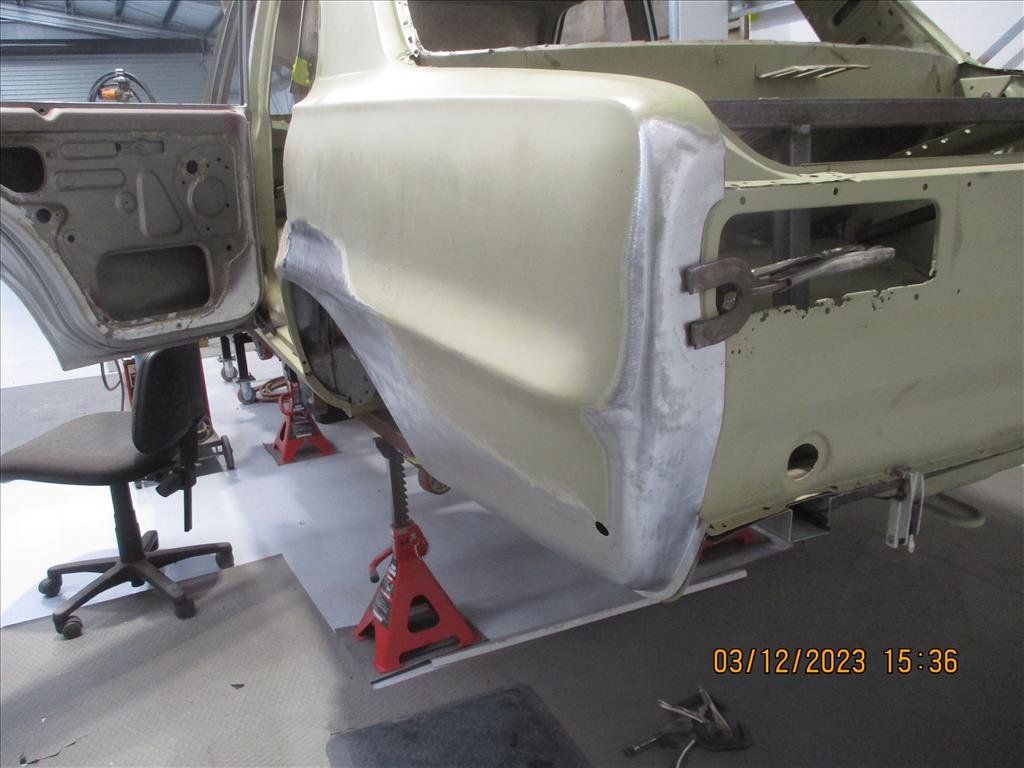
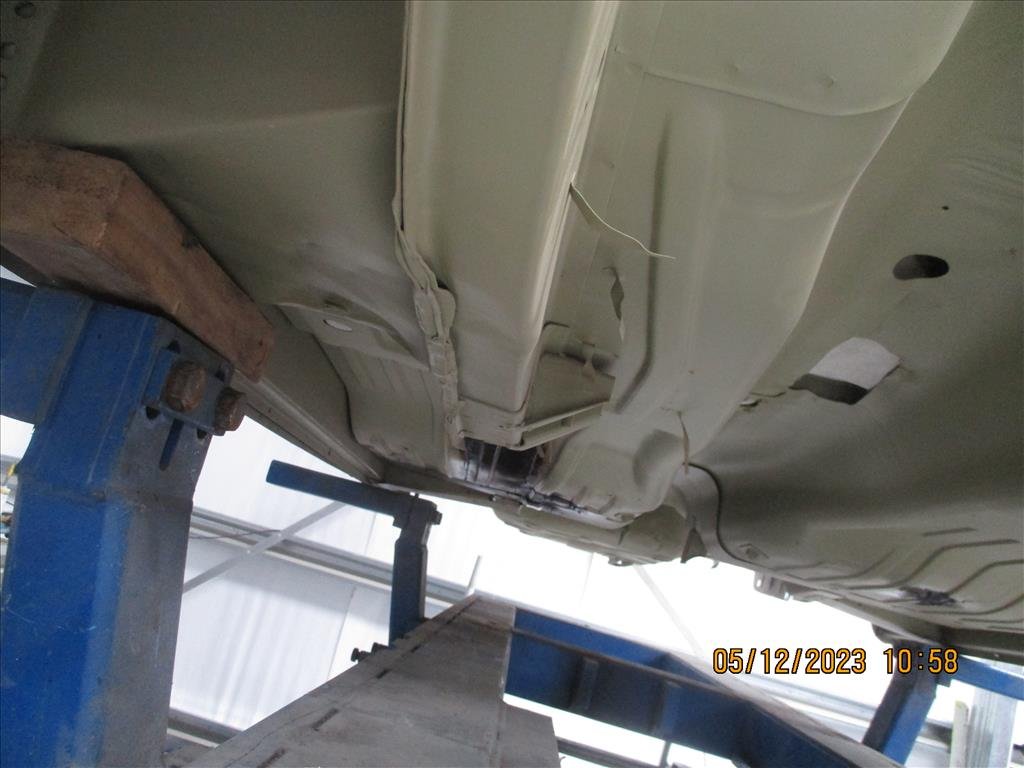
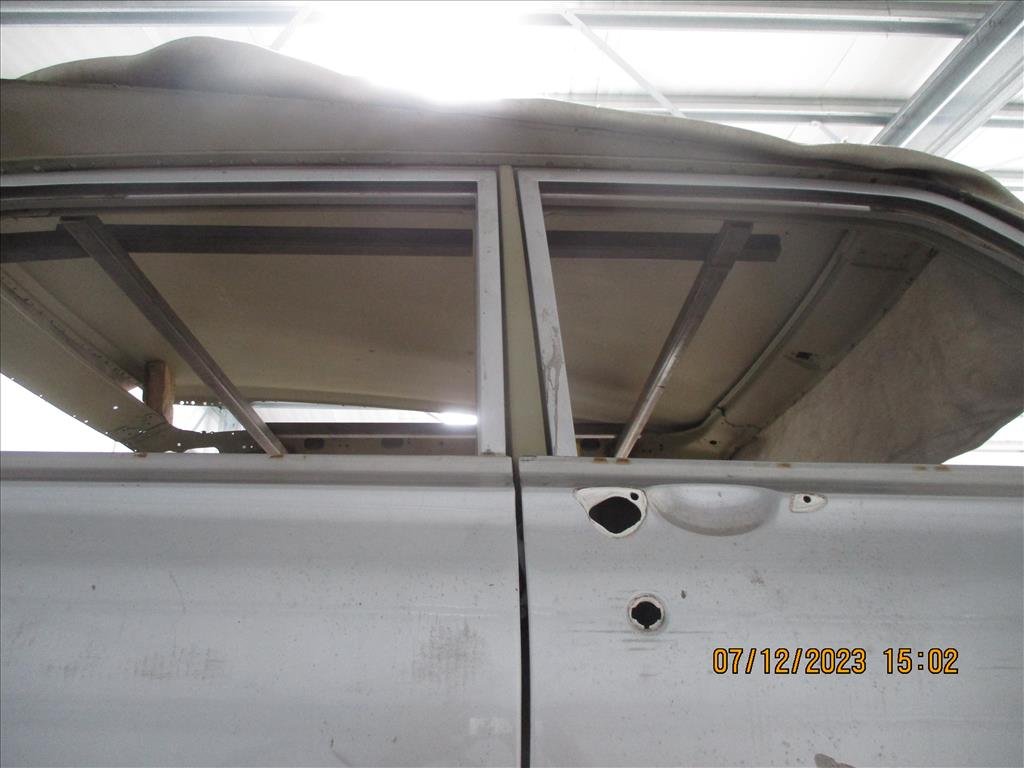
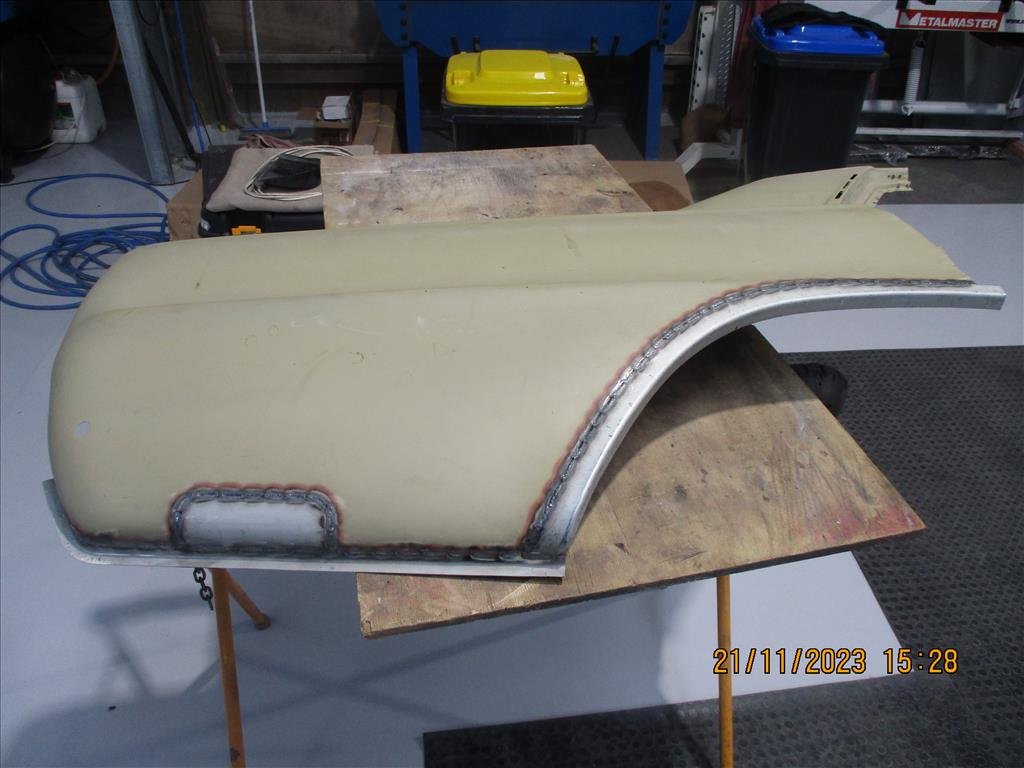
Another Panel Barry update has arrived in my inbox. He's now finished up all the rear quarter work which was quite extensive. The edges were rebuilt on both sides as well as some of the inner parts where it met up with the side panel and inner arch to make sure it was seamless. Next step as mentioned earlier was to get it on the chassis machine which much to our surprised it seemed fairly straight but there was marks from where it had been previously pulled. Not really a huge surprise, the car is old so it would have been ambitious to presume it had never been in an accident before. He's also been busy doing some re-alignment on the side sills and the doors to make sure they all line up and close properly before having the doors dipped and see how much of them are just filled with bog. He also found some damage on the chassis rail at the front and underneath a bit, probably from a forklift lifting it which is unfortunately common in Japan so that's being fixed up too.
1 point
-
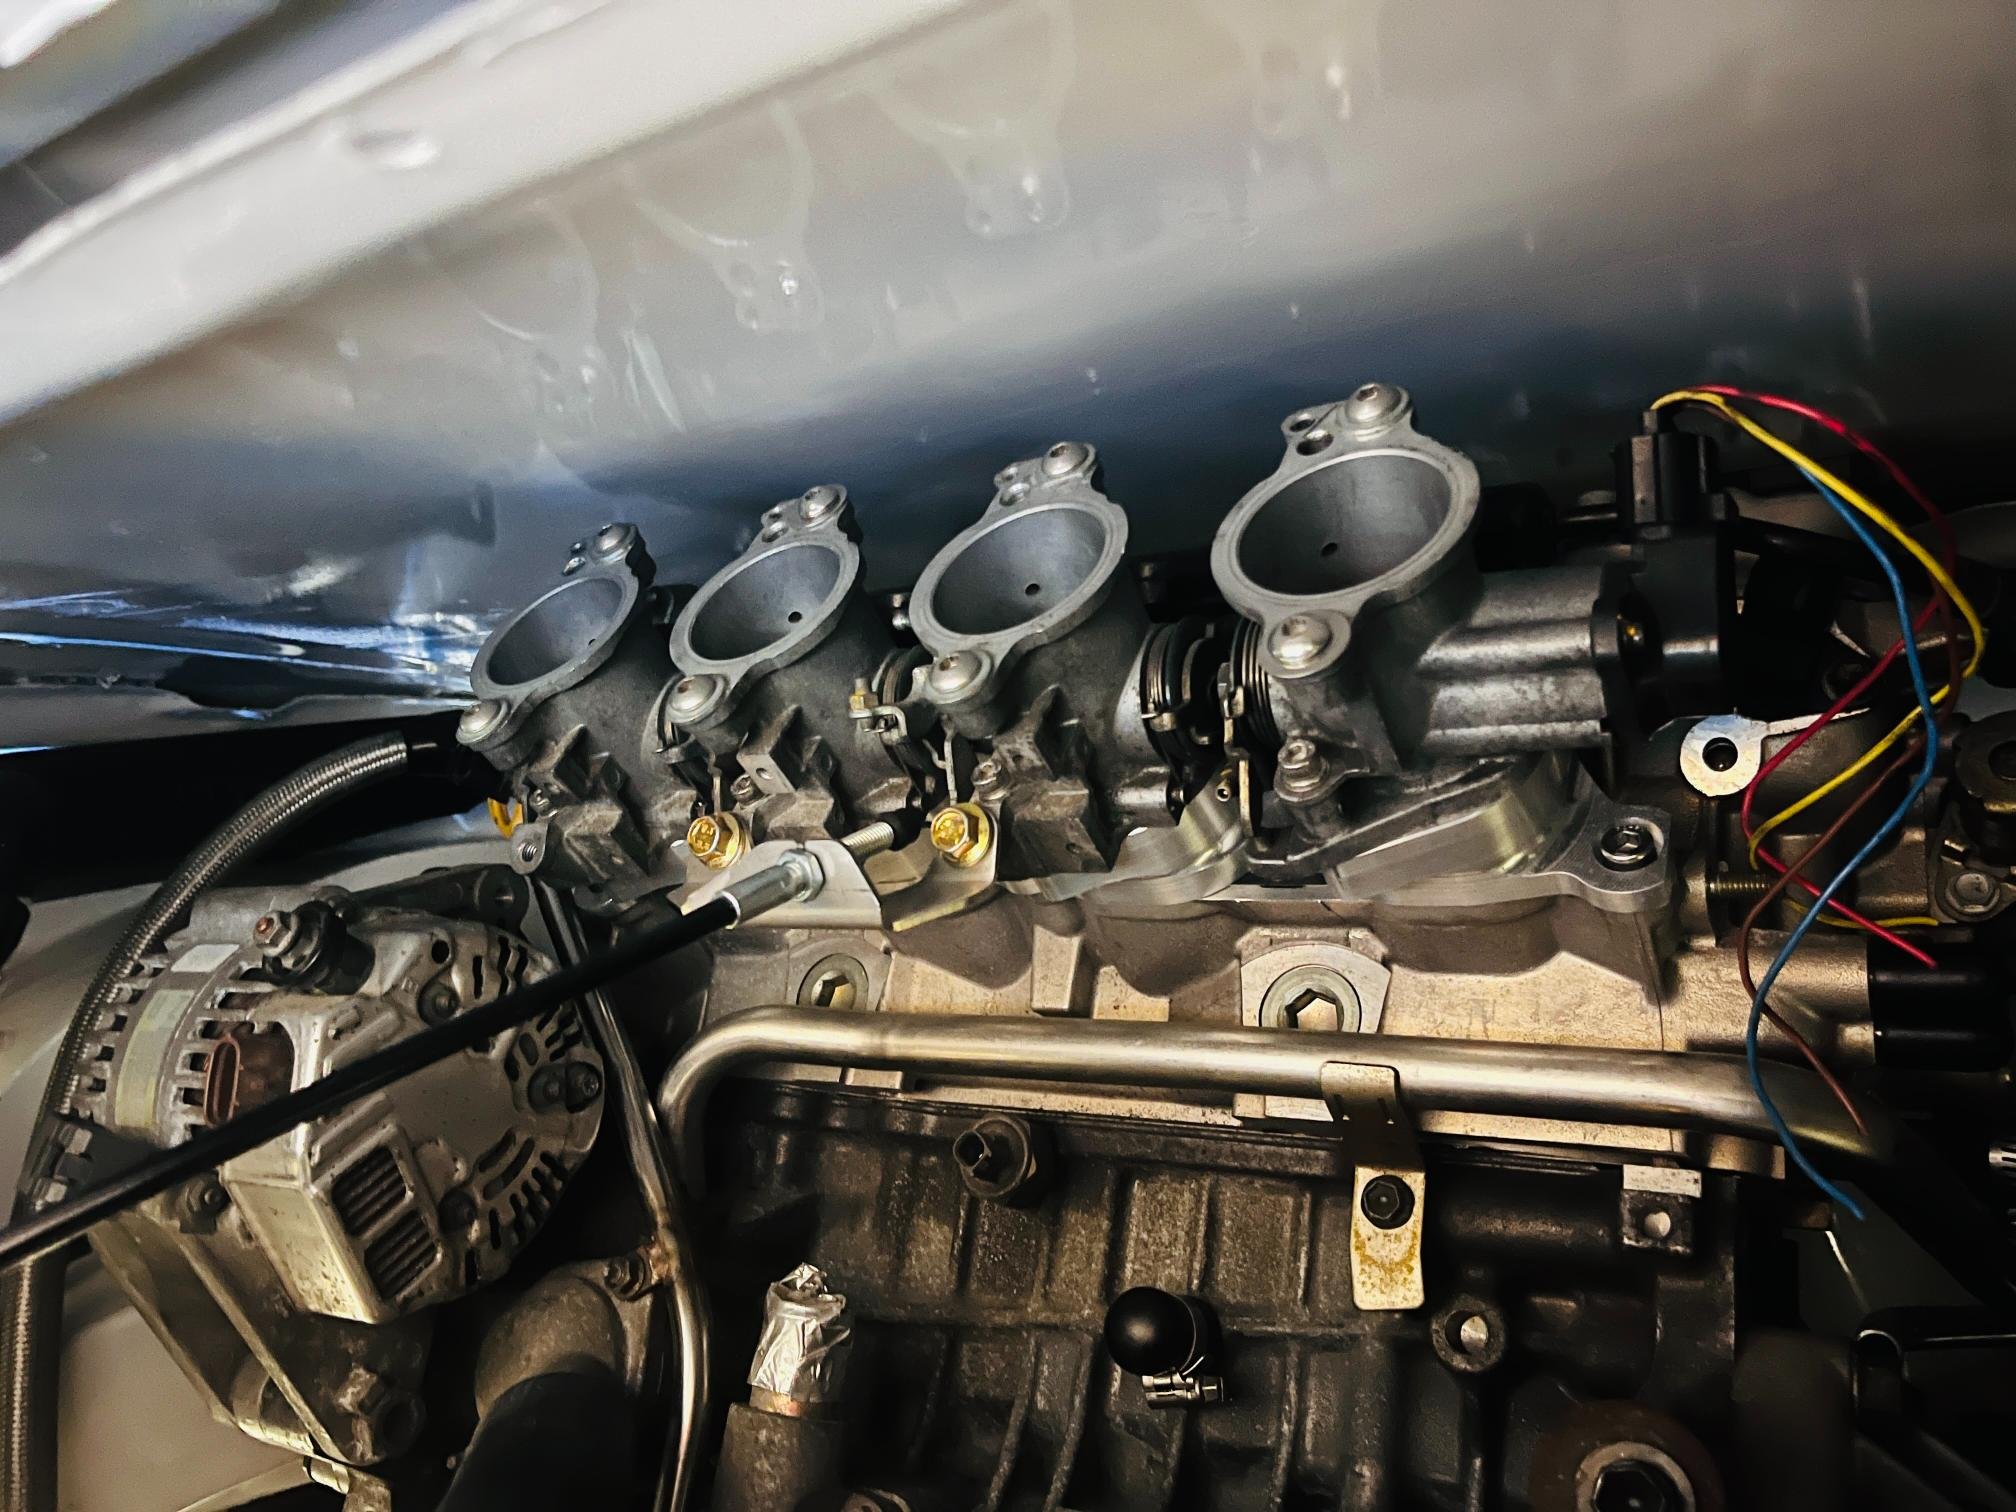
Intake looks really short? Surprisingly it isnt. Here is some mspaint magic showing overall runner length. The gumby looking part isnt as bad as it looks, it's just from where I've sliced the model slightly off center. As that's the point where it splits into a single runner per valve.
1 point
-
My son wanted a lemon squeezer hat after watching Full metal jacket, got this hat from the opshop and formed it with hot water and it reformed perfectly.
1 point
-
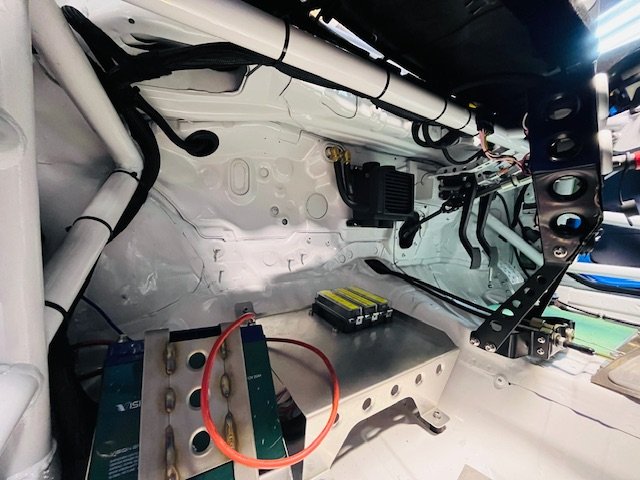
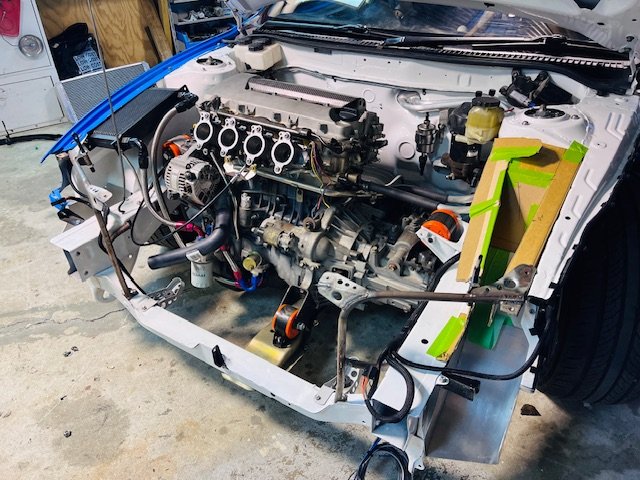
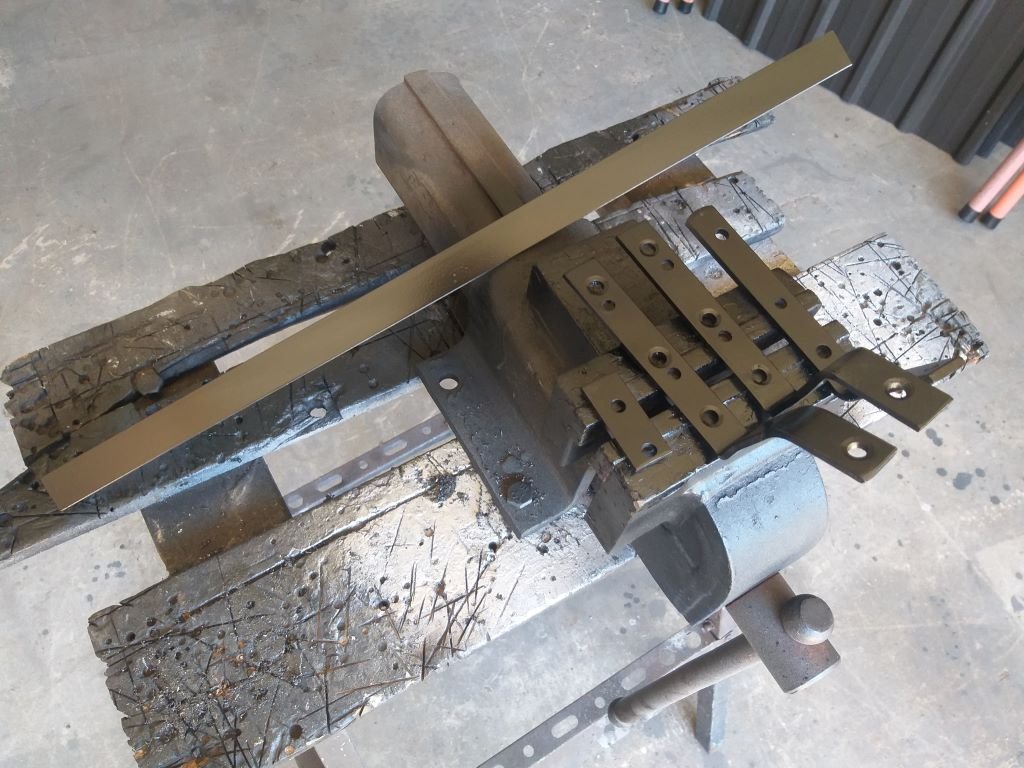
Slowly getting there! Once the proper fuel rails are fitted I should be able to fire it up which is exciting. The clutch fork situation is not working out well so I'm borrowing a concentric slave from @Sungai Sungai to see if that will work. Looks like it should be good with the right sized spacer behind it. Most of the fuel lines are all finished. I've mounted the corvette fuel filter right down by the tank, so there's now only one main fuel line running to the engine. I finished printing some trumpets. Ordered some more AN fittings so I'll make it a straight tee at the back. Slowly getting there Still to do: -Drill throttle linkage rails -print carbon nylon version of manifold base -radiator mounts -remake firewall -finish exhaust -remake fuel lines -print housing for dash and fit dash -battery tray A few other things I've forgotten about. But just firing up the motor will be an exciting milestone. I've got no budget for exhaust parts etc for a while but I'm still making little bits of progress on the parts that dont cost anything.
1 point
-
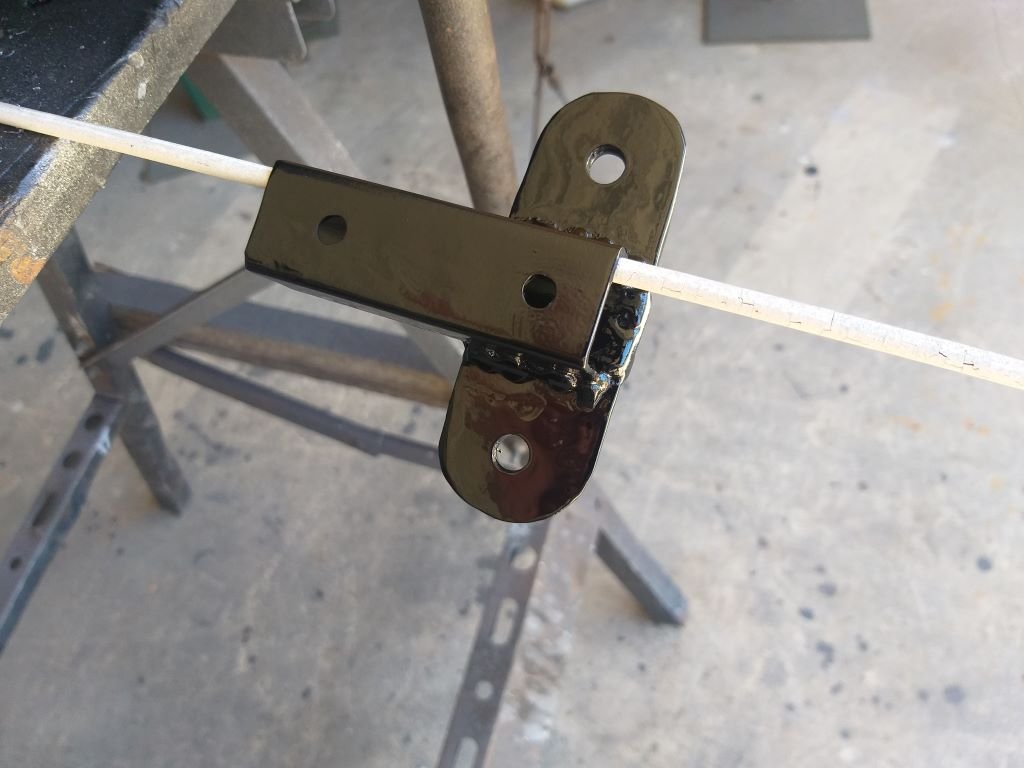
I promised to share my receiver/drier mounting bracket efforts with you all, so here goes. The plan is to locate the drier in the RHS front fender well tucked up above the chassis leg. I decided to make use of the existing bolt holes that mount the coil in the engine bay because if I do go to an electronic distributor sometime in the future the coil will become redundant leaving me with empty holes which will mess with my OCD. So the first step was to carve a little flat plate out of a steel offcut, and I then poked a few holes in said plate. Test mounted like so: The eagle eyed amongst you will likely spot the hydraulic clutch hard line that sits slightly proud of the side even although it has its own factory formed channel to live in, hence the need for the mounting / spacer plate. Next step was to fizz a bit of square tube to my newly carved mounting plate and after a spritz of satin black I ended up with this puppy: I've left it to dry overnight, and I'll assemble it all in the morning.
1 point
-
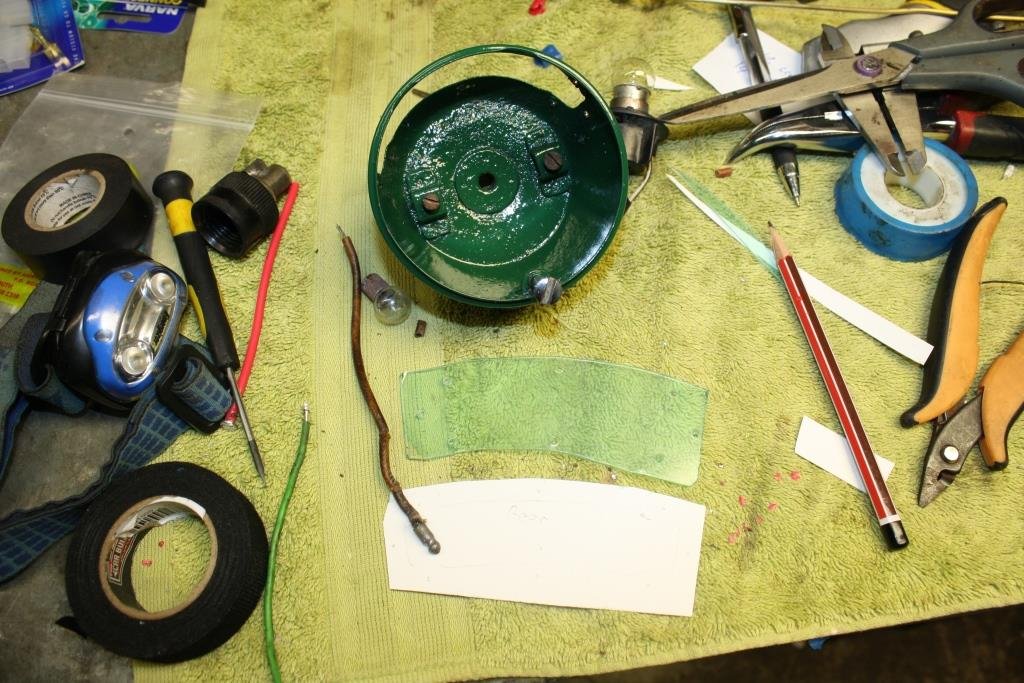
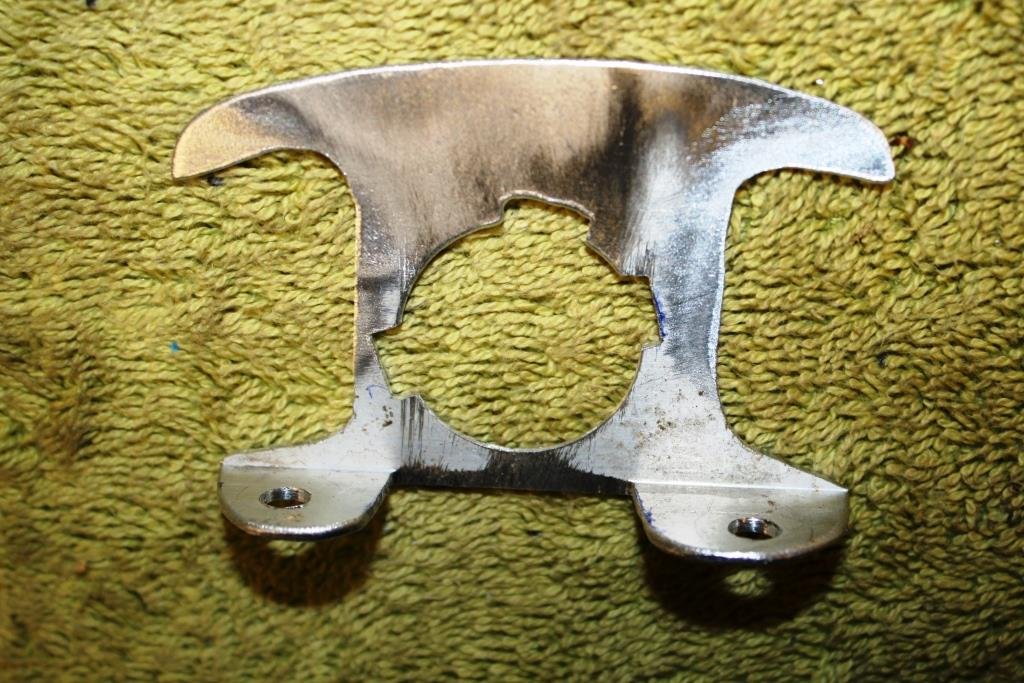
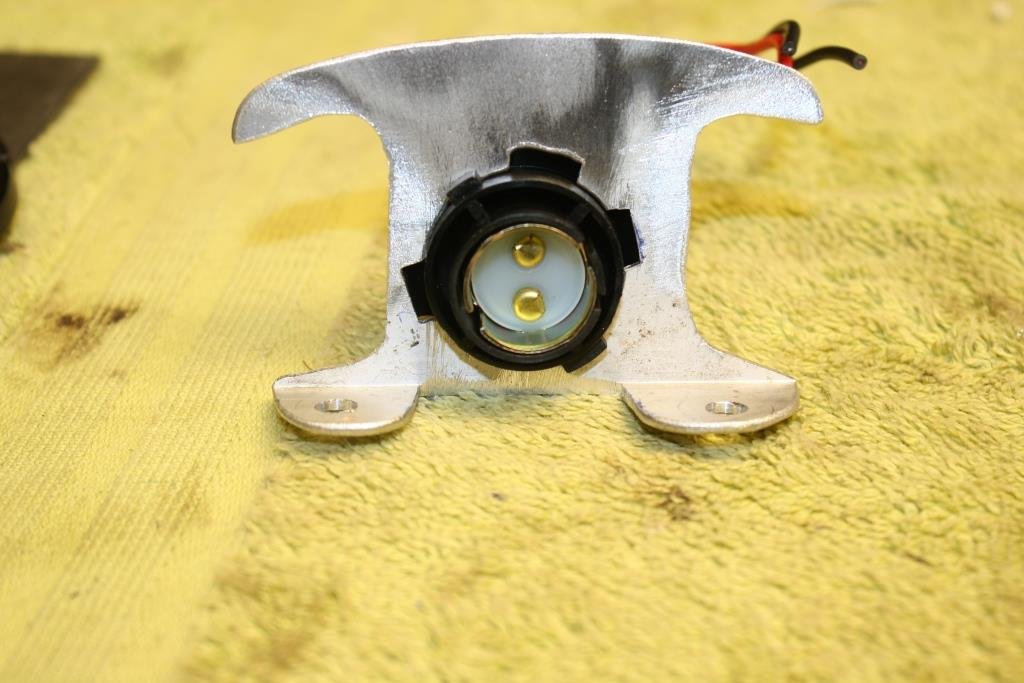
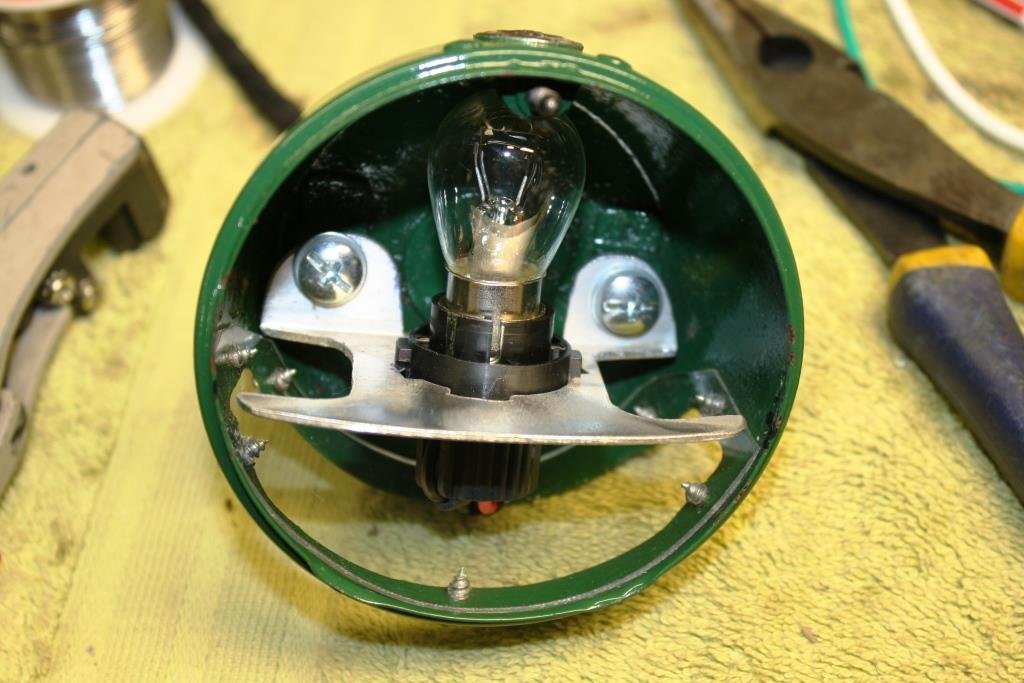
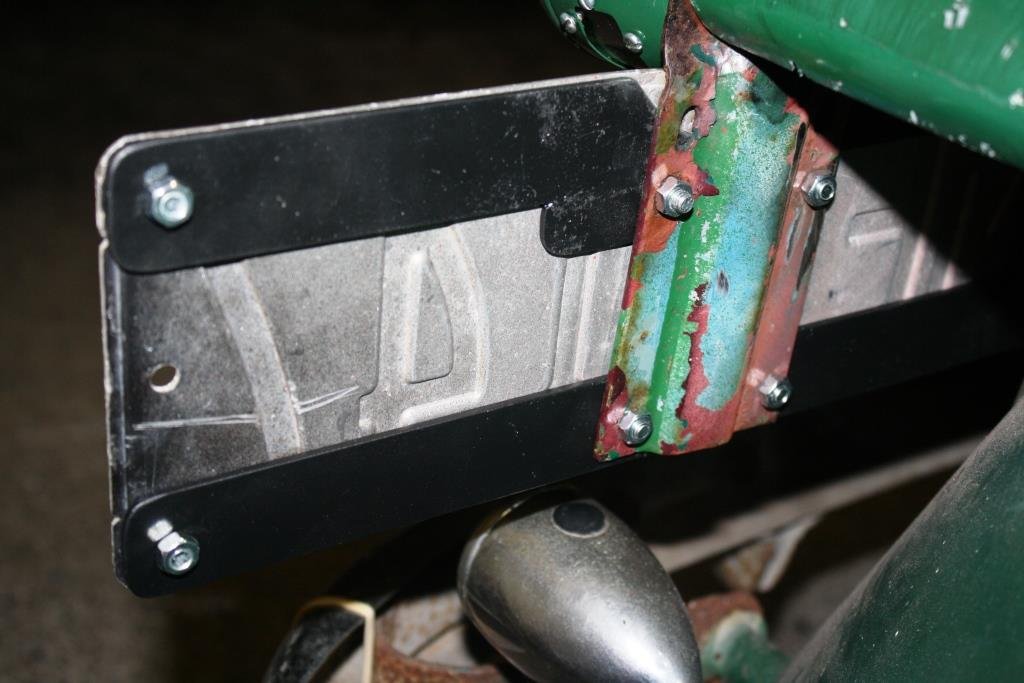
Working my way through the electrics….. This is all that was left of the original tail light, (i.e. the bloody thing fell off!). I started stripping down the tail light I’d got from the Vauxhall Car Club. Paint stripper, rust kill and paint……… I replaced the clear number plate lens with plastic cut from a welding helmet lens cover. The bulb holders were badly corroded and shorting out. I made the call to upgrade it and made one of these out of a piece of scrap alloy. It fits a modern bulb holder……… And just fits inside the housing. The number plate was a little bashed and battered so I reinforced it a bit. Still looking suitably bashed & battered but it all works!
1 point
-
Rusty rust rust. The leaded seam between the guard (probably the same pressing as a Galaxie) and the headlight peak was going bad on both sides. Seam cut out and replaced
1 point
-
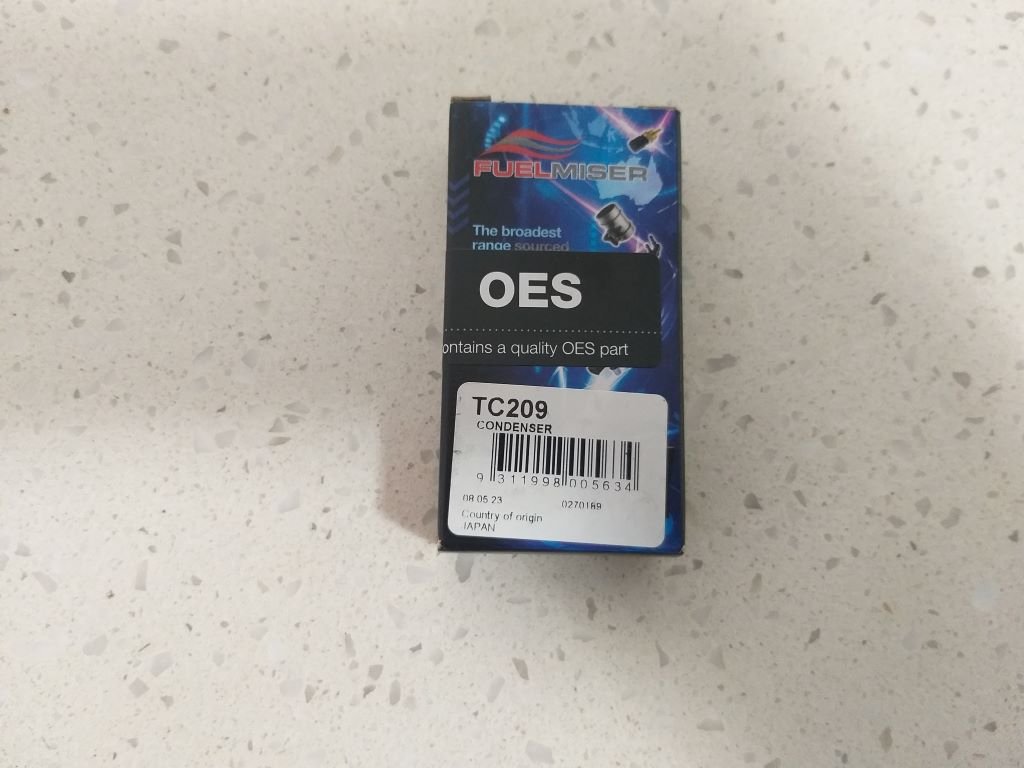
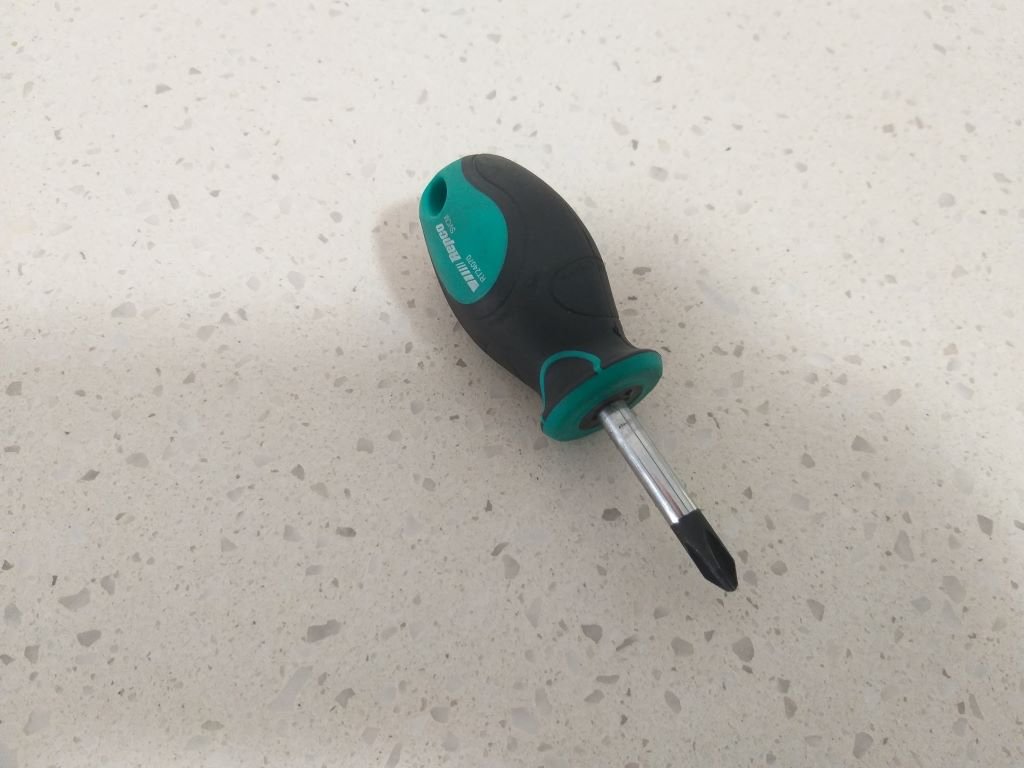
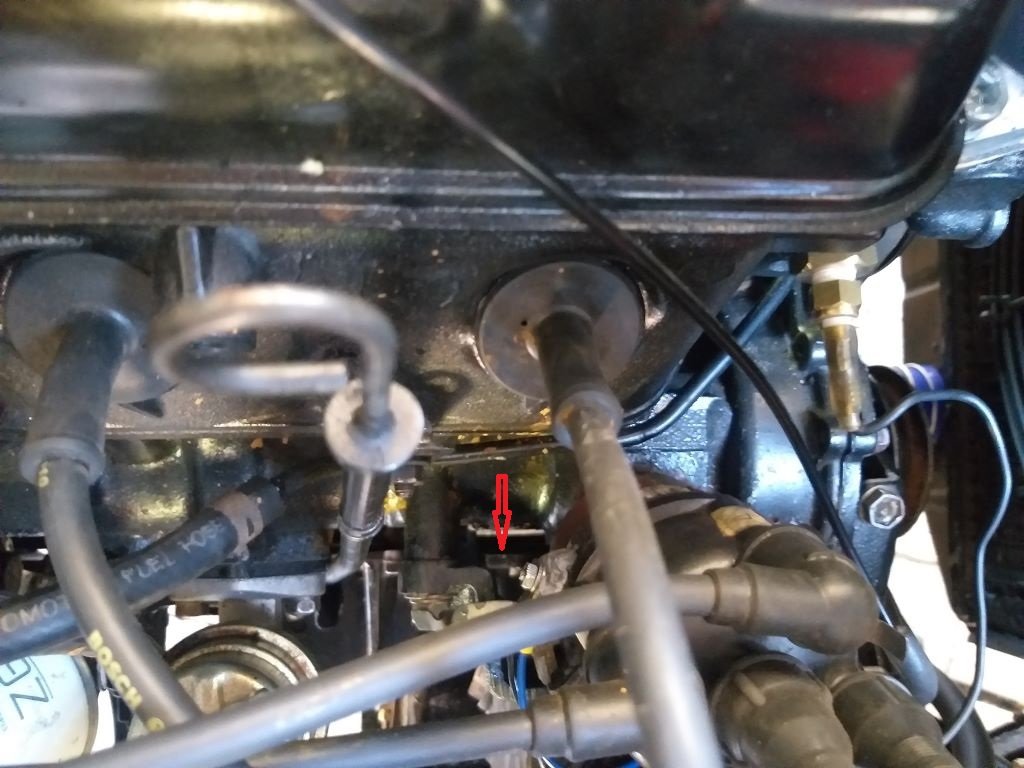
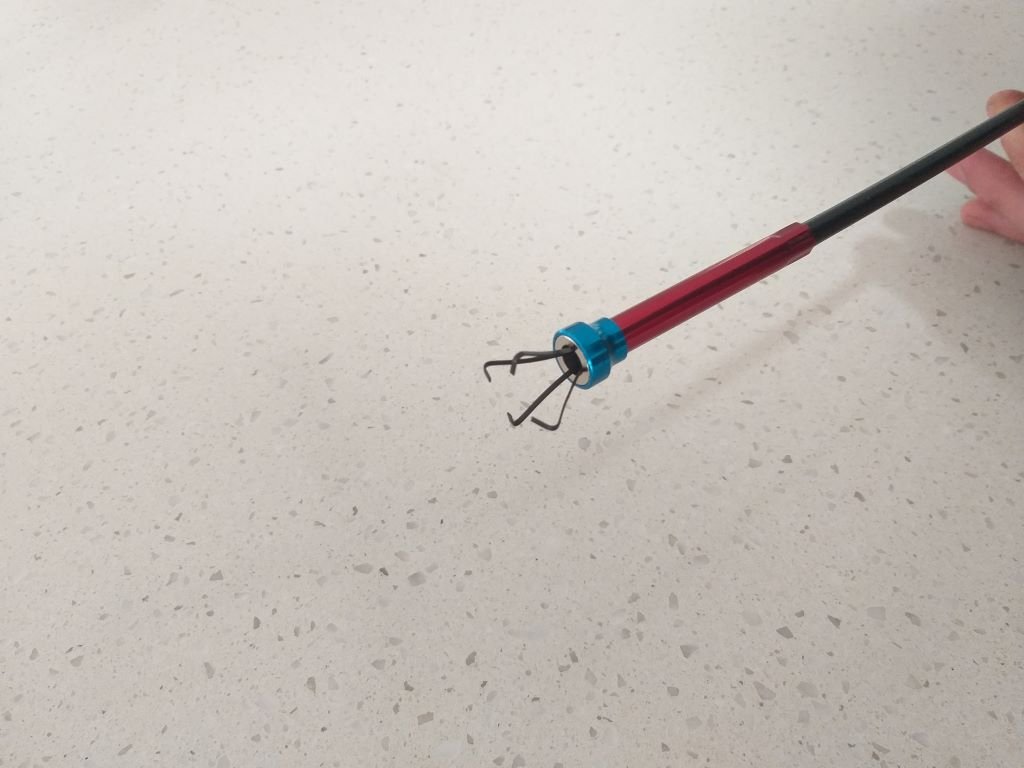
Well, strap yourselves in for an absolutely epic comedy of errors. Yesterday just after lunch we got a call to say that something that we had ordered was ready for pickup in town. It being a relatively coolish day with a slight breeze we decided to take the Thames rather than the air-conditioned Mustang. So, Mrs Flash, our we dog and I headed off. On the way back from picking up our parcel we were navigating through the back streets of town when the Thames cut out. I managed to coast into a handy parking bay. Lifted the engine lid and checked the glass fuel bowl on the fuel filter - plenty of gas so I knew it wasn't that. Pulled the dizzy cap off and gave her a crank over. Sure enough no spark at the points. Okay I thought it's either a dodgy condenser or coil. Luckily, I was only a block away from the local Toyota aftermarket parts specialist so I figured I was in with a good chance of sourcing a new condenser. And yet .... nyett ... none in stock the bloke says - WTF. "Try Repco around the corner mate" he says. So off to Repco I go and, yes, they have a condenser in stock .... winner. Okay, now all I need is a stubby Philips screwdriver and a pair of pliers and I'm home and hosed. Repco had a stubby so I grabbed that. But they wanted moonbeams for a set of pliers, so I passed on those. Went back to the Toyota place as I had spotted a pair of pliers on sale there. Grabbed these puppies and headed on back to the van. So now comes the easy part. Loosen the condenser off the dizzy body with the stubby screwdriver ... tick. Loosen the nut off the dizzy through bolt with the pliers .... tick. Make sure I don't drop the nut and spring washer as I remove them ... tick. In my haste I forgot that the outer part of the little plastic isolator is loose once the nut is off, so ..... yes ..... you've guessed it in one .... numpty here manages to drop the little isolator down into the bowels of the engine bay ....... but not just anywhere .... no, no that would have been too easy. It manages to hit the sweet spot right between the a/c compressor bracket and the engine block. Like right down where the red arrow is pointing in the following photo: Now that bracket has three sides to it so there is no way that you can get to the dropped part except from above. The gap is probably about 15mm wide and about 50mm deep. I could clearly see the part, but do you think I could get to it. To make matters worse the engine is nice and toasty so that just added to my overall feelings of happiness and joy. Okay so off to Repco I go and I figure a magnetic pickup isn't going to help me as the part is plastic, but maybe one of those claw-like grabbers will work. Back to the van with my claw thingy and guess what ....... the thing is too wide to fit in the gap. Jeeez ! Okay, so after a bit of head scratching, I go across the road to one of those small convenience stores and luckily they sell a pack of blu-tac. Back to the van with my blu-tac. Stick it on the end of my new claw thingy. Poke it down into the gap and ........ the end of the thingy where the claw lives is too big to go in the gap and I'm about 30mm short of my target. Time for Plan B, I think. So what if I plug the gap where the plastic isolator is supposed to go with some blu-tac. Maybe that will stop the wire from earthing on the dizzy body just long enough for us to limp home. Shoved some blu-tac about the place. Closed up the dizzy and gave it a whirl. She fired straight up. Winner! Started to pull off and she was running like a bag of dicks then she cut out. Obviously my blu-tac band aid wasn't cutting the mustard. By this stage it's dusk and the homeless types are starting to hit the streets and a few start giving us the eye, so Mrs Flash and I call it quits and I give Steve the towie a buzz. Luckily he wasn't far away and nek minnit .... What an undignified end to the day for the poor ol Thames. Fast forward to this morning and armed with a thin rod and a piece of blu-tac I make quick work of retrieving this puppy: Who was very chuffed to be re-united with his mate: Put it all back together and she fired straight up. So, I'm left wondering whether it is actually the condenser or perhaps my coil is on its way out and is okay now that it has cooled down. Time will tell I guess, but needless to say I've now put together a pack of basic tools that will live in the van together with a few rags and some wet wipes. I've also added a spare dizzy cap and coil to my emergency pack, and I think I'll invest in a spare condenser and maybe some points. Long term plan is to convert to electronic distributor, but hopefully I can keep things going until then. And so endeth my tale of woe. Thanks for reading.
1 point
-
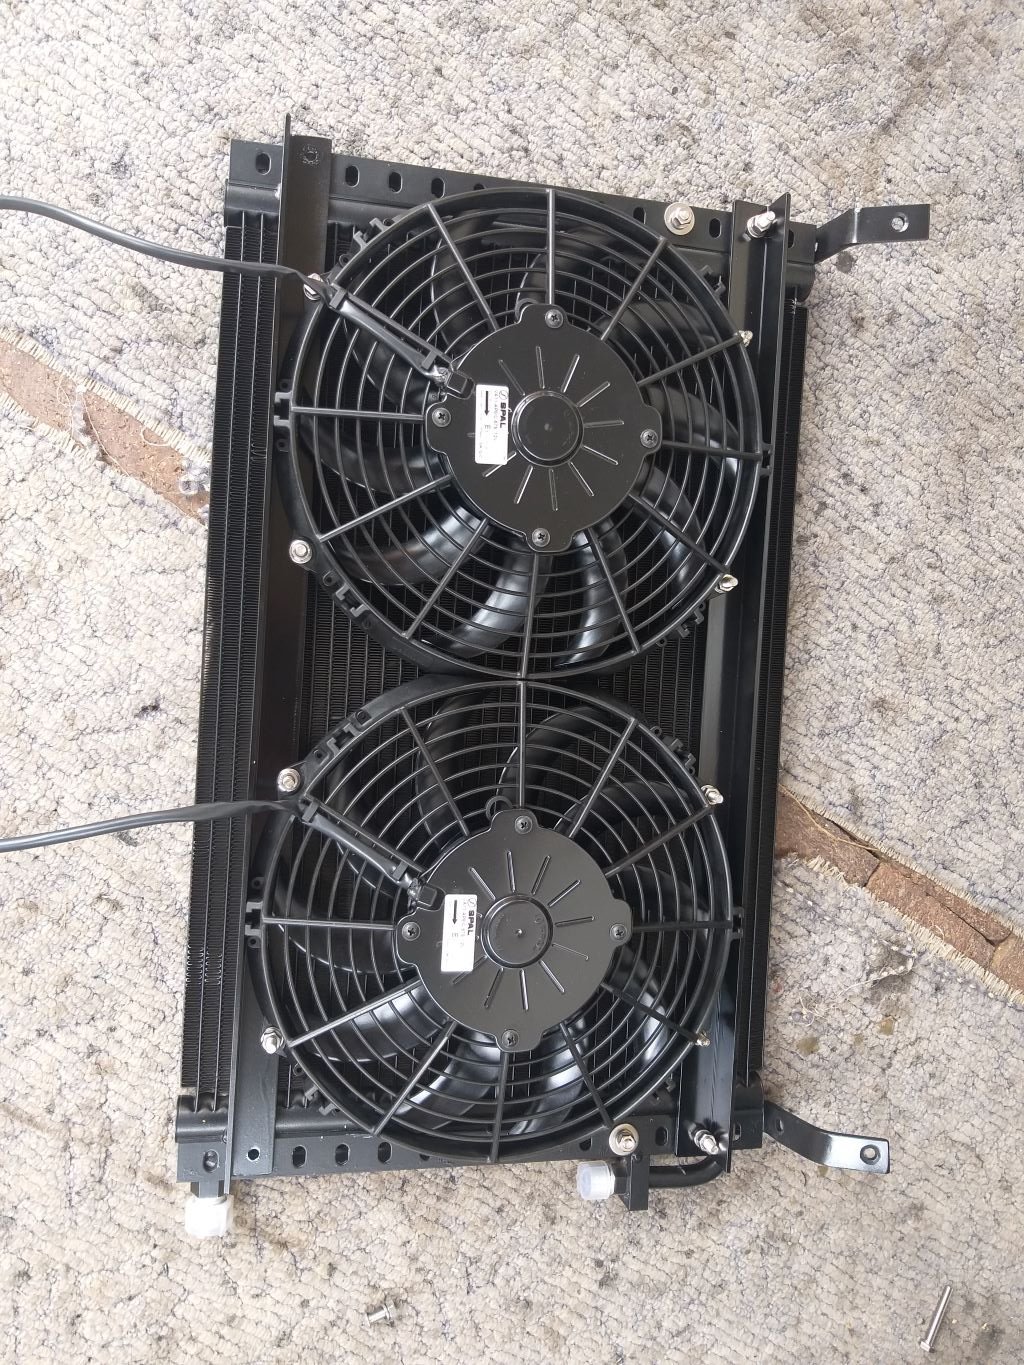
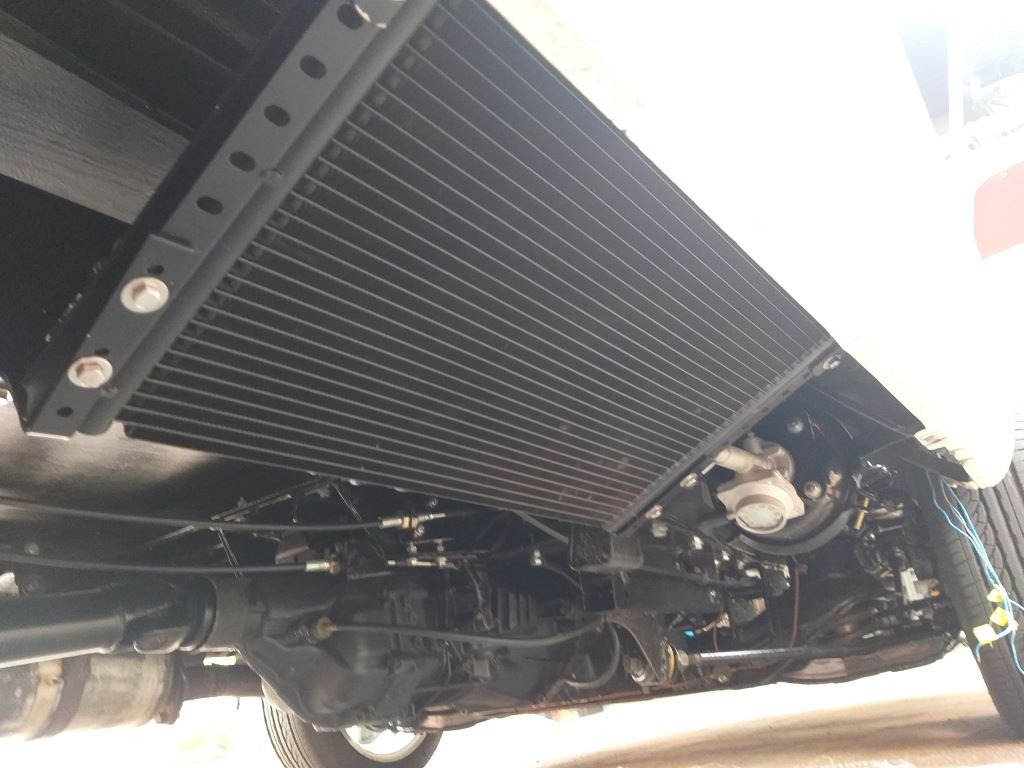
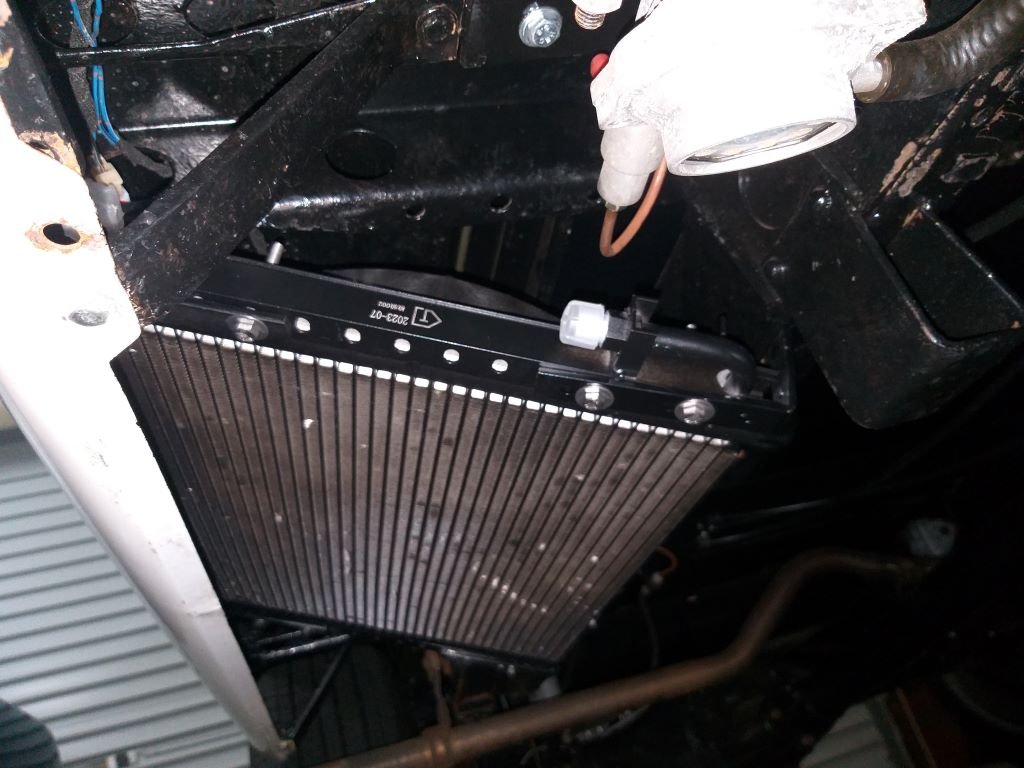
Late last week we did a town run and I was able to source the stainless steel nuts, bolts and washers that I needed to complete the a/c condenser installation. Chucked the freshly painted brackets back on and took one last photo of the condenser in the light of day. Managed to wriggle under the van and wrestle the works into position. Not easy to photograph, but you get the idea. Next up is the mounting of the receiver/drier bottle.
1 point
-
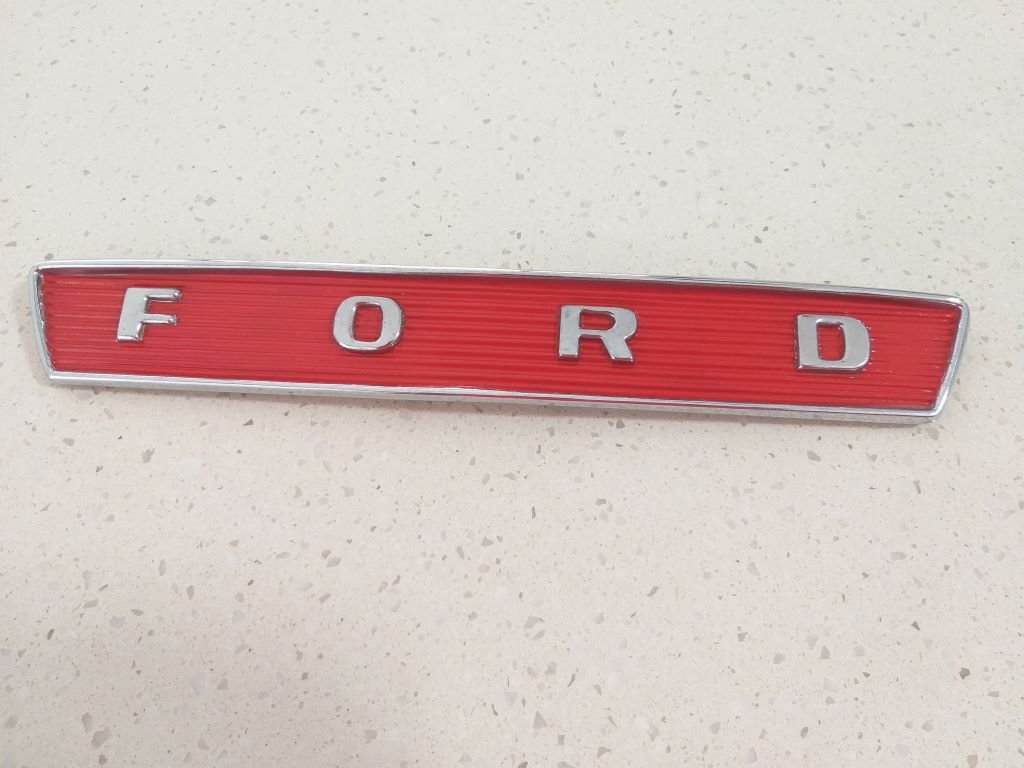
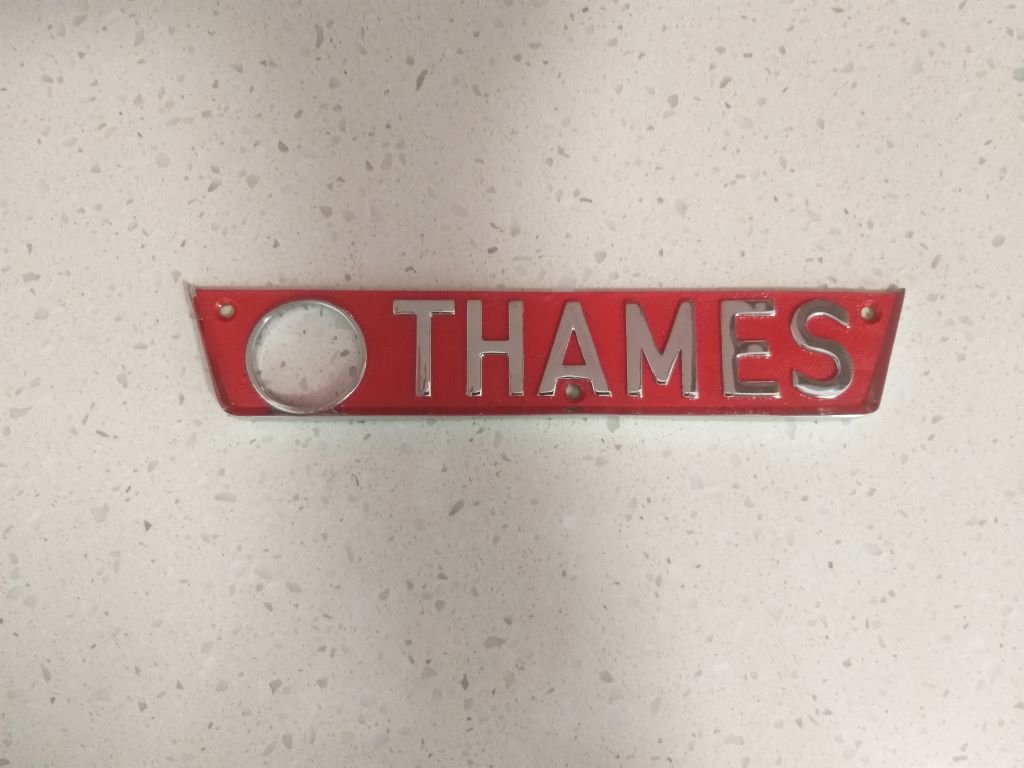
The front badge is a NOS unit so came already painted but the red was a bit patchy and faded from many years in storage. Mrs Flash gave it a fresh coat and it now looks minty.
1 point
-
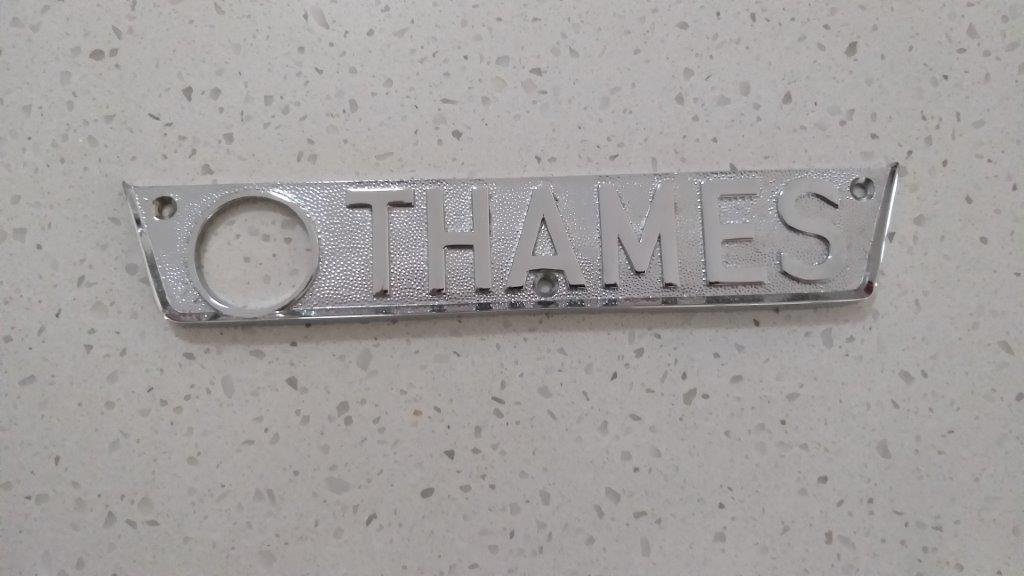
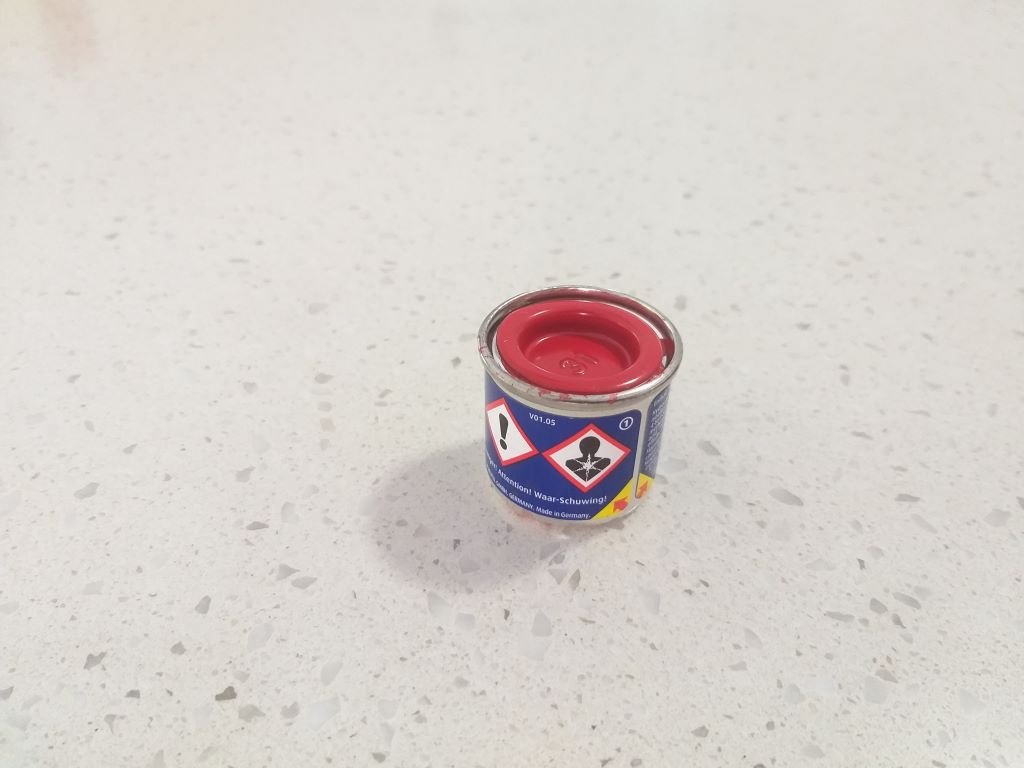
While I was waiting for the paint to dry on the second batch of a/c condenser mounting brackets. I pulled the remaining badges off so that Mrs Flash could give them a bit of loving. The reproduction rear badge that I sourced a while back came unpainted, so it looks a bit bland. We ordered in a little pot of Revell enamel-based model paint (number 31 Firey Red Gloss). Mrs Flash gave it a few dabs with a brush and it came out pretty mint. The shadows in this photo make the chrome work look a bit manky, but in real life it's perfect. A really nice touch is the round hole in the badge that the spare wheel winch handle fits through. Talking about the spare wheel my original winch was seized solid and I tried unsuccessfully to resurrect it. But fear not as I have a cunning plan for a replacement that I'll talk about sometime in the future.
1 point
-
some more detailed shots of the wiring loom front loom is very tucked up against the bottom rad support. Very minimal most of this area will end up getting covered by a catch can so won’t see most of it. Nice and tidy through the firewall. Tight space so stoked I could make this work. Power steering pump still needs wiring from nearby relay. super happy with how it all fits under the dash Gauge lights all working. All the steering wheel buttons and control panel are working mint. Just another plug needed for the rear part of the loom. This makes me happy. So stoked we wired up the yellow fog lights they look great!
1 point
-
Loving the slam on this car. Can't wait to slay some backroads in this (at a bit higher height) @vk327 cranking into the wiring. Body loom is 98% complete and working. Very exciting to see lights flashing and wiper going. Starting to feel like a real car, not just a collection of parts thats been sitting in my shed for too long...
1 point
-
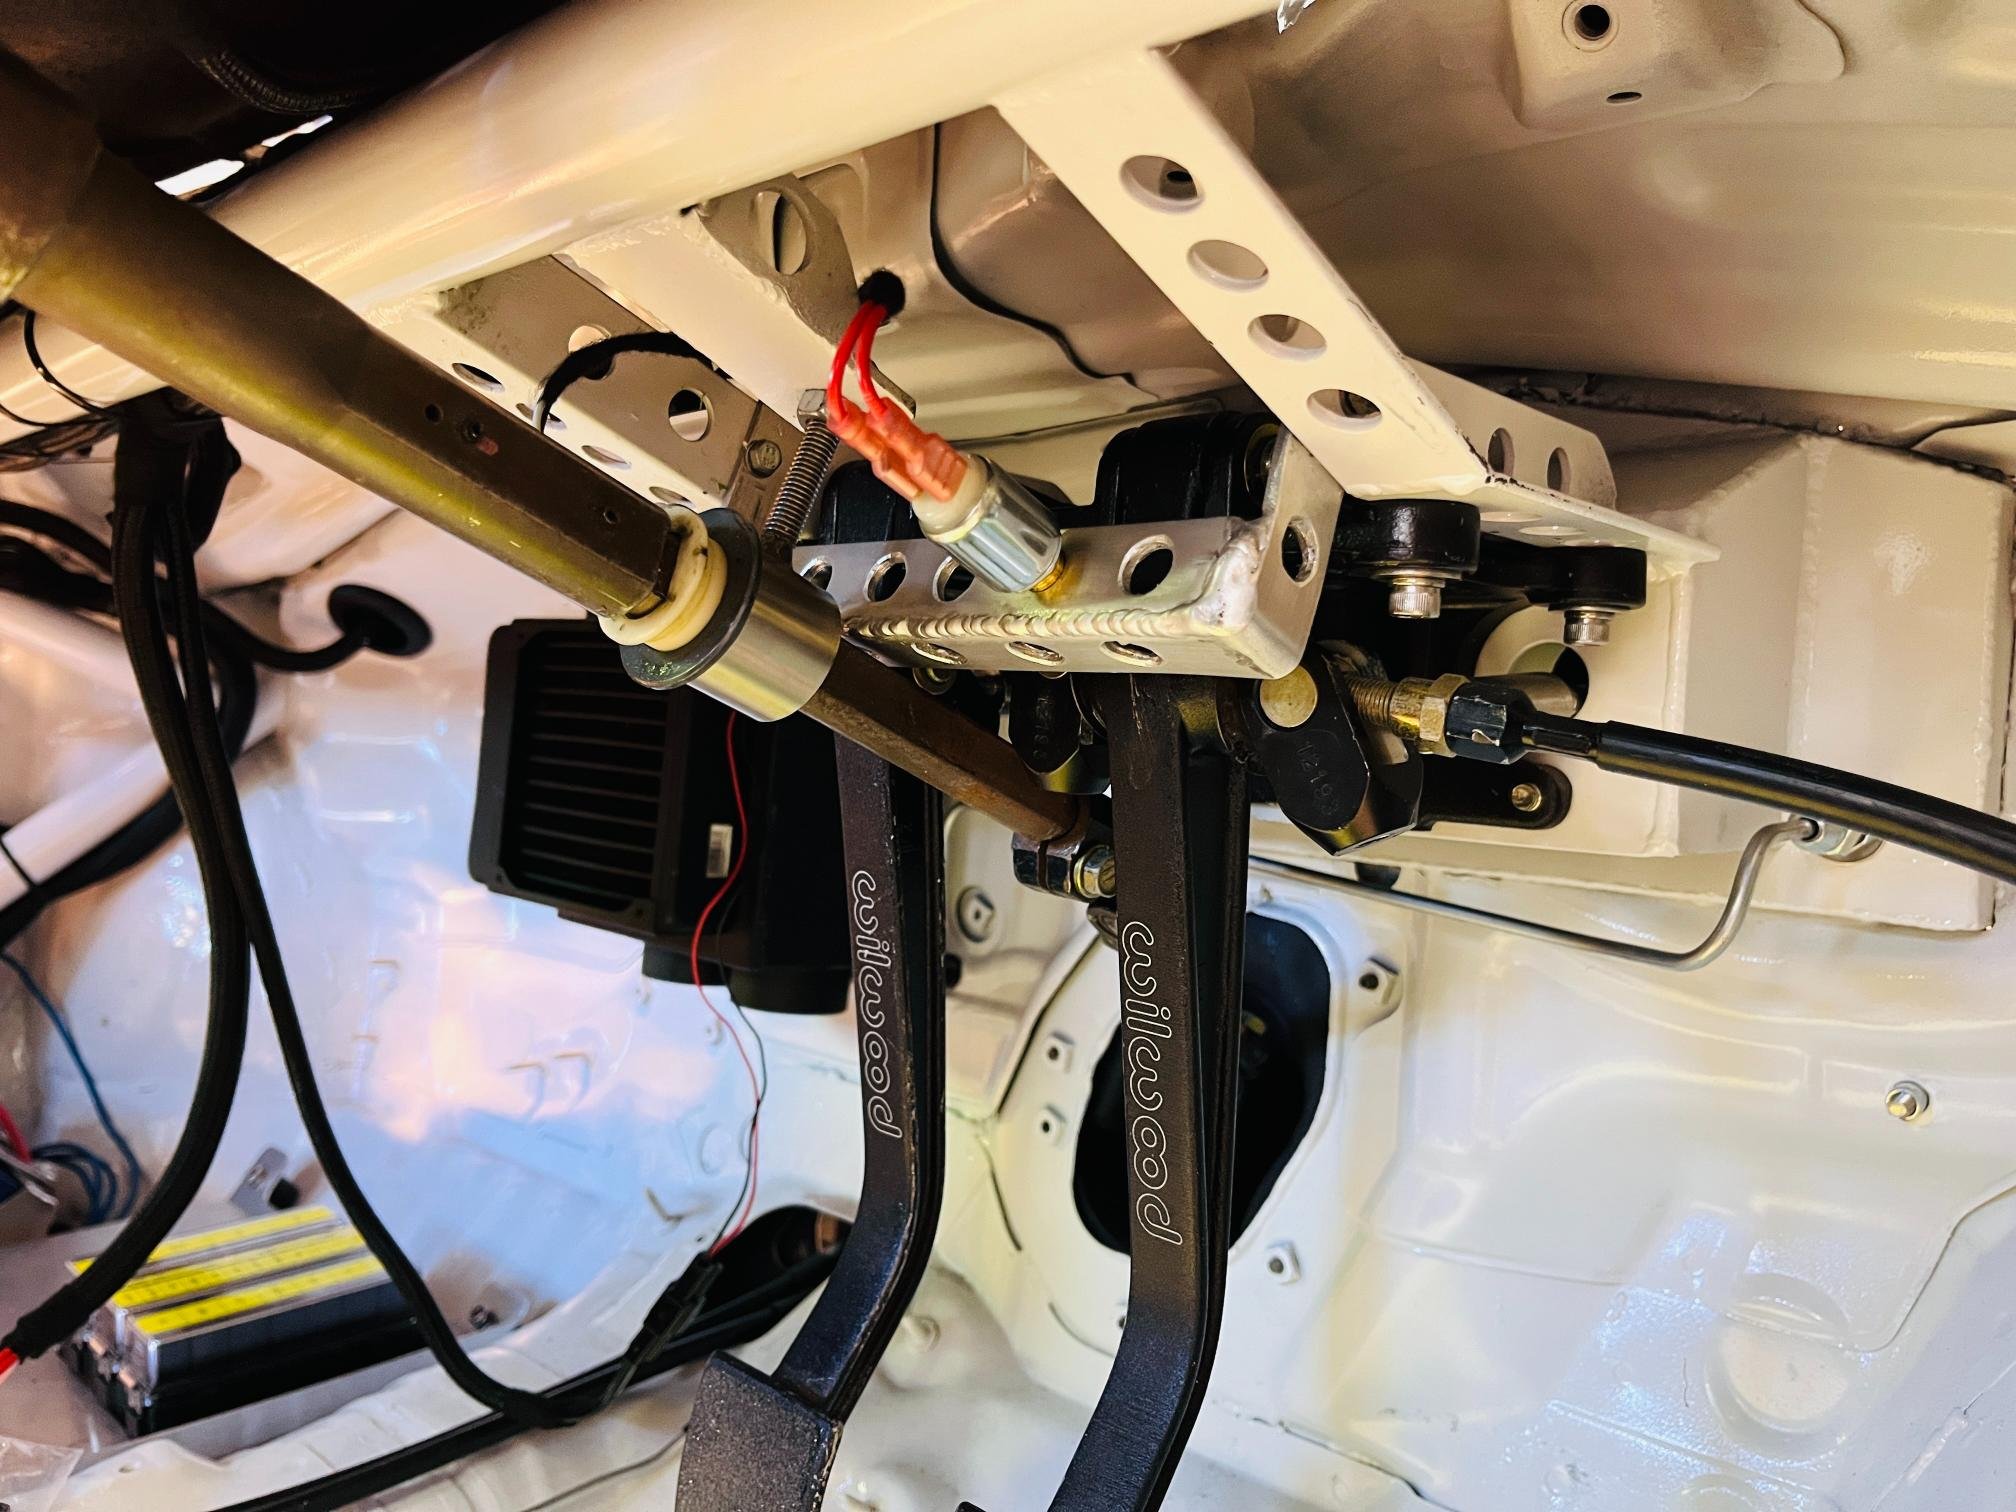
Thanks to @Guypie for machining my intake manifold on a 7deg angle. This netted me 16mm of additional bonnet clearance so I'm happy. This should be enough to design some funky-shaped trumpets to fit under the bonnet. Very interesting seeing @kpr testing results, it seems shape doesn't matter too much, as long as length is correct. IIRC 130-160mm trumpet (330-360mm total) is what I was aiming for. Lots of wiring progress lately. A bit more on that soon, but for now here's some satisfying pictures of general tidyness/not being hory. Made a sweet bracket for the speedo sensor pickup off rear hub. This will drive the Monit (for wof purposes), but also allows ECU to do some launch/traction control things (compare front vs rear wheel speed etc) Sweet bracket for clutch and brake pedal switches. Included clutch to do launch control/flat shift at some stage. Lots of holes because aluminum isn't lightweight enough I guess?
1 point
-
And that's all of the condenser mounting brackets done. Some crappy quality photos of the brackets that mount to the body brace. This is the bracket closest to the rear of the van: And this is the one towards the front of the van: With the test fit successfully behind me, I've stripped everything out once again and the first batch of mounts have already received their first coat of satin black. More tomorrow.
1 point
-
Picked up the new tailgate skin today damn near perfect fit, just need to trim it to size and fizz it in. also dropped my axles and discs off to get the axle boss machined down to accept the disc. Then that can go back together.
1 point
-
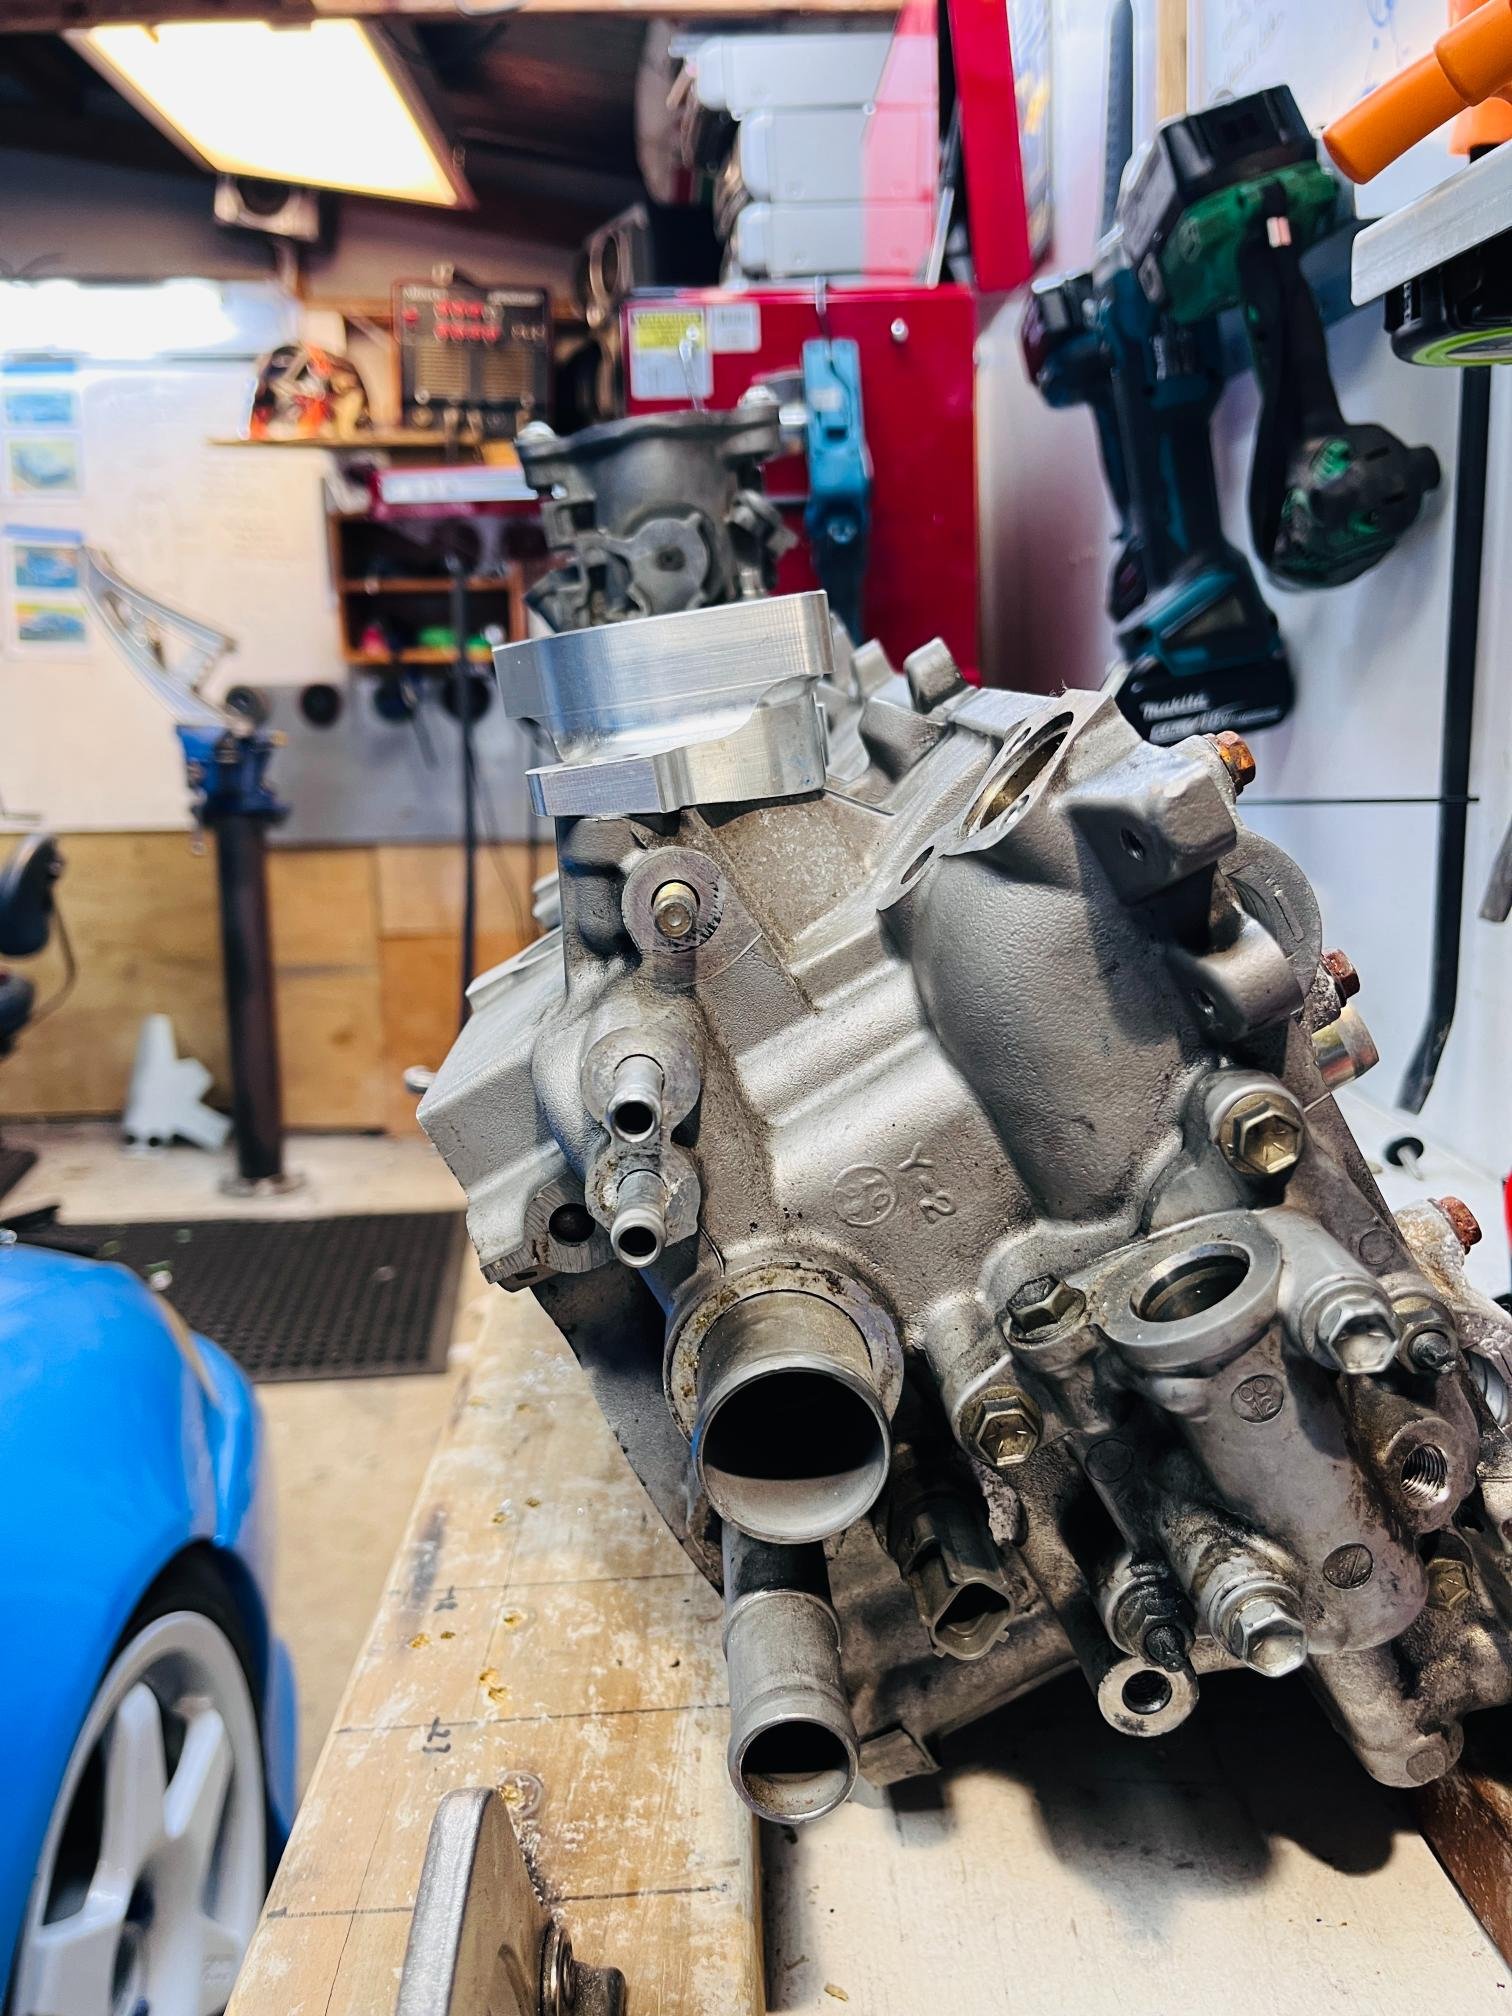
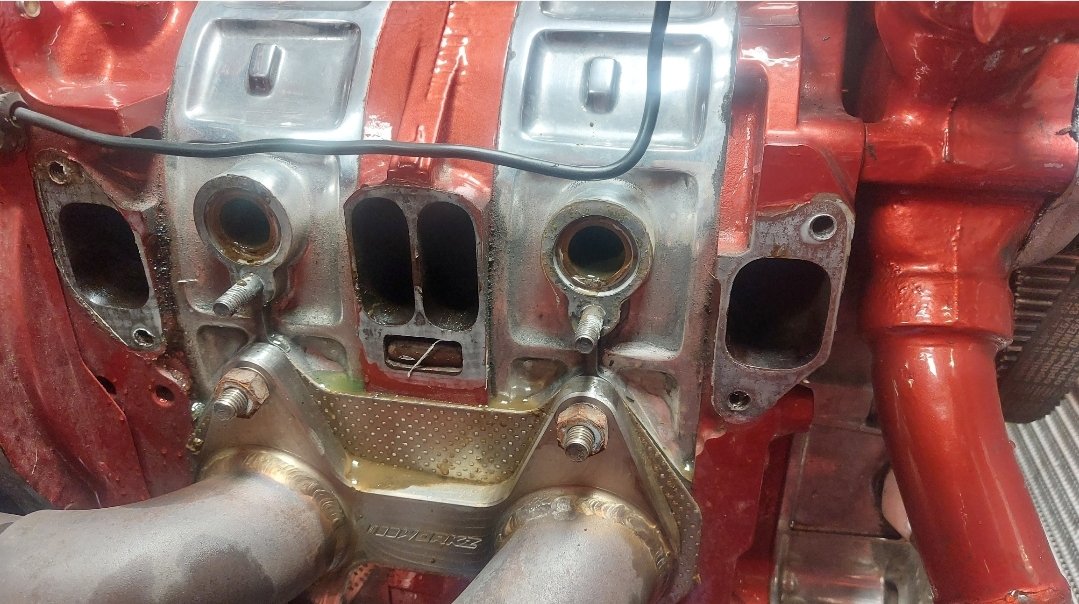
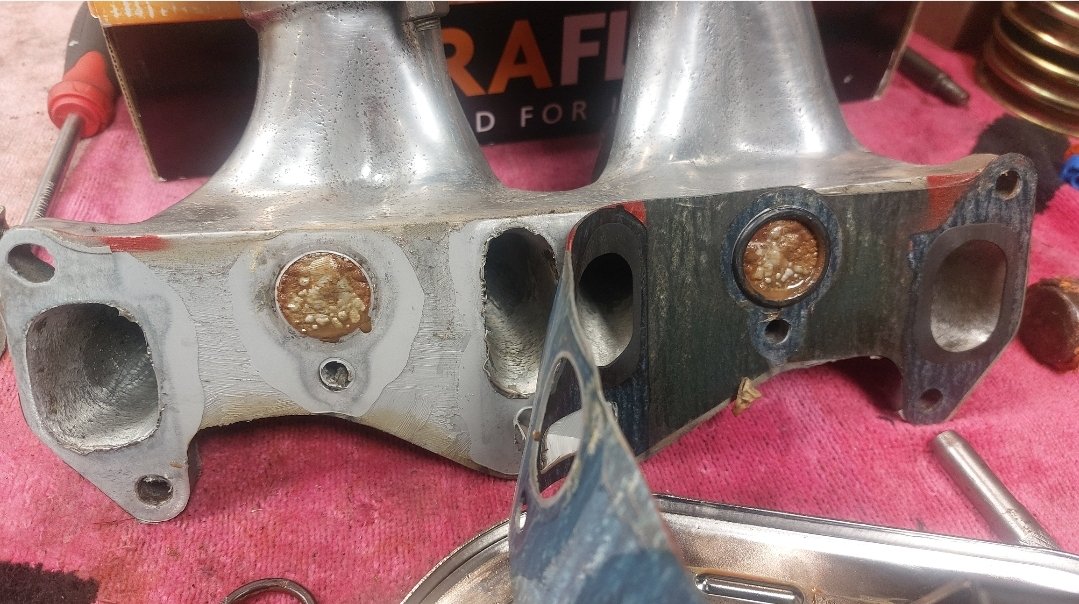
Been messing around with the tune, the car just never felt right, very lazy to rev out, and just low on power, less than I expected for what should have been a stout 13B Bridgeport anyway. Started from scratch again, and re-indexed the gilmer drive pulley for the correct TDC mark, and set timing to 20deg Also checked IDA, the main jets were a bit big, went from 230 down to 220, still felt that it was rich up top so changed the air correctors from 120 up to 130 Still felt lazy, found chokes were 43mm, so bought some 42mm to give better air speed, definitely improved, but once again I felt there was more in it, left me scratching my head. Lastly I pulled the inlet mani off to get a better guage on what sort of porting was actually in it and - there it was all along....... Nicely flowed inlet runners into large old school style BP- Its a ROTECH motor who was legendary back in the late 90s for his port work. Anyway, somewhere along the way some numpty fitted a new gasket without matching it to the ports. After cutting out the gasket, refitting mani including doing the 20c water gallery blanking trick, and resetting it all up, the difference is night and day, far more power 42 chokes, 220 mains, 120 airs (might change those up to 130 again) Took the car to Mad Mikes summer bash at Hamptons Downs on the weekend, out on track it felt strong and pulled well, sounded badass and popped flames out the back, nice! Despite being passed out by every turbo car there it was lots of fun. Better dIff gears are definitely on the cards, gearing is far too long, 4.8 should do it
1 point
-
The front drop spindles and disk brakes finally arrived after about 9 months of waiting. So chucked them on, the calipers didn't clear the 14" wheels, but we had a 14" HQ Holden rim sitting around to test fit and they just had clearance. So got a pair of them to run on the front. Went to America for a couple weeks a month ago and brought back a bunch of goodies in my suitcase. Twin antennas, body mounts, tail lights lenses, steering column rebuild bits, driveshaft centre bearing, accelerator pedal, fender ornaments etc. New port wiper motor aswell, since the original one never worked and I couldn't get it working. and a CPP power steering box. Had the power steering pump and reservoir on the LS so thought it'd be nice to have it. The CPP drop spindles pushed the steering arms out 19mm each side, so that made the Ackerman angle pretty much zero. I asked them if they made any steering arms to rectify it, but nope. I guess Americans can just heat them up and bend them to suit. Drew some new ones up and had my brother 3d print the prototype. All looked good, so had them laser cut out of 20mm mild steel. Also shortened them up for quicker steering too. On to the front airbag mounts now. The lower arms aren't quite flat, so welded another piece of 3mm on top once the had shaped the main piece of 5mm to suit. Made a compressed size dummy bag for the RE7 air bags. That way I could get the upper and lower mounts the correct height and in line. Used some wooden discs to build up the height on top of the dummy bag and then packed the rest with some resin. This allowed me to push the lower arm right up and get the resin to form the shape of the top spring pocket. Once set overnight I cut it to the diameter of the steel pipe the upper cup will be made out of. That then gave me the cut pattern after wrapping some paper around it to make the template. Steel cup all made the perfect shape to fit inside the spring cup at the top. All fitted with 3/8" threaded rod holding the top mount in place. Still need to countersink the lower plate holes and figure out a bump stop for it. Also new shock mounts made up, basically a copy of the Ridetech ones as that was easy to do. Test drove a truck with the single pot GM brake calipers on it, which are what came with my disc brake kit, and didn't like how they barely stopped it. Dad said he had the same issue with the ones on his too. So decided to make some adapters for some WIlwood Dynapro 4 pot calipers. Made a wooden mock up first, then drew them up in Solidworks and then 3d printed to make sure they were all good. Got them laser cut as well, out of some 16mm and 10mm mild steel. Still got to machine them up to fit.1 point
-
Rear disc swap almost complete. sourced a set of caliper adaptors to run the Primera calipers, and uses a s2 rx7 rear disc. this fits the red rolled axles perfectly and gains all kinds of clearance to run the 13”s. only have to machine down the axle centres to accept the rx7 disc. Bonus is the rx7 allows the hotwires to fit really well. just need to sort the front discs out to get vented discs on it. not much point trying to go bigger, just more efficient
1 point
-
Simply add 4 cubes of garden mulch and hey presto! Raisedish garden bed.
1 point
-
These old newish pellets are great all dressed and easy to work with, made this work bench and some shelving for all that shit on the floor now ill have to buy more shit to full the other shelf.
1 point
-
Before I ordered the other key caps I thiyght I'd have a look on trademe and see if there were any model M. There weren't but was a listing for a "antique keyboard" Chucked some bids on and in had a delivery when I woke up this afternoon1 point
-
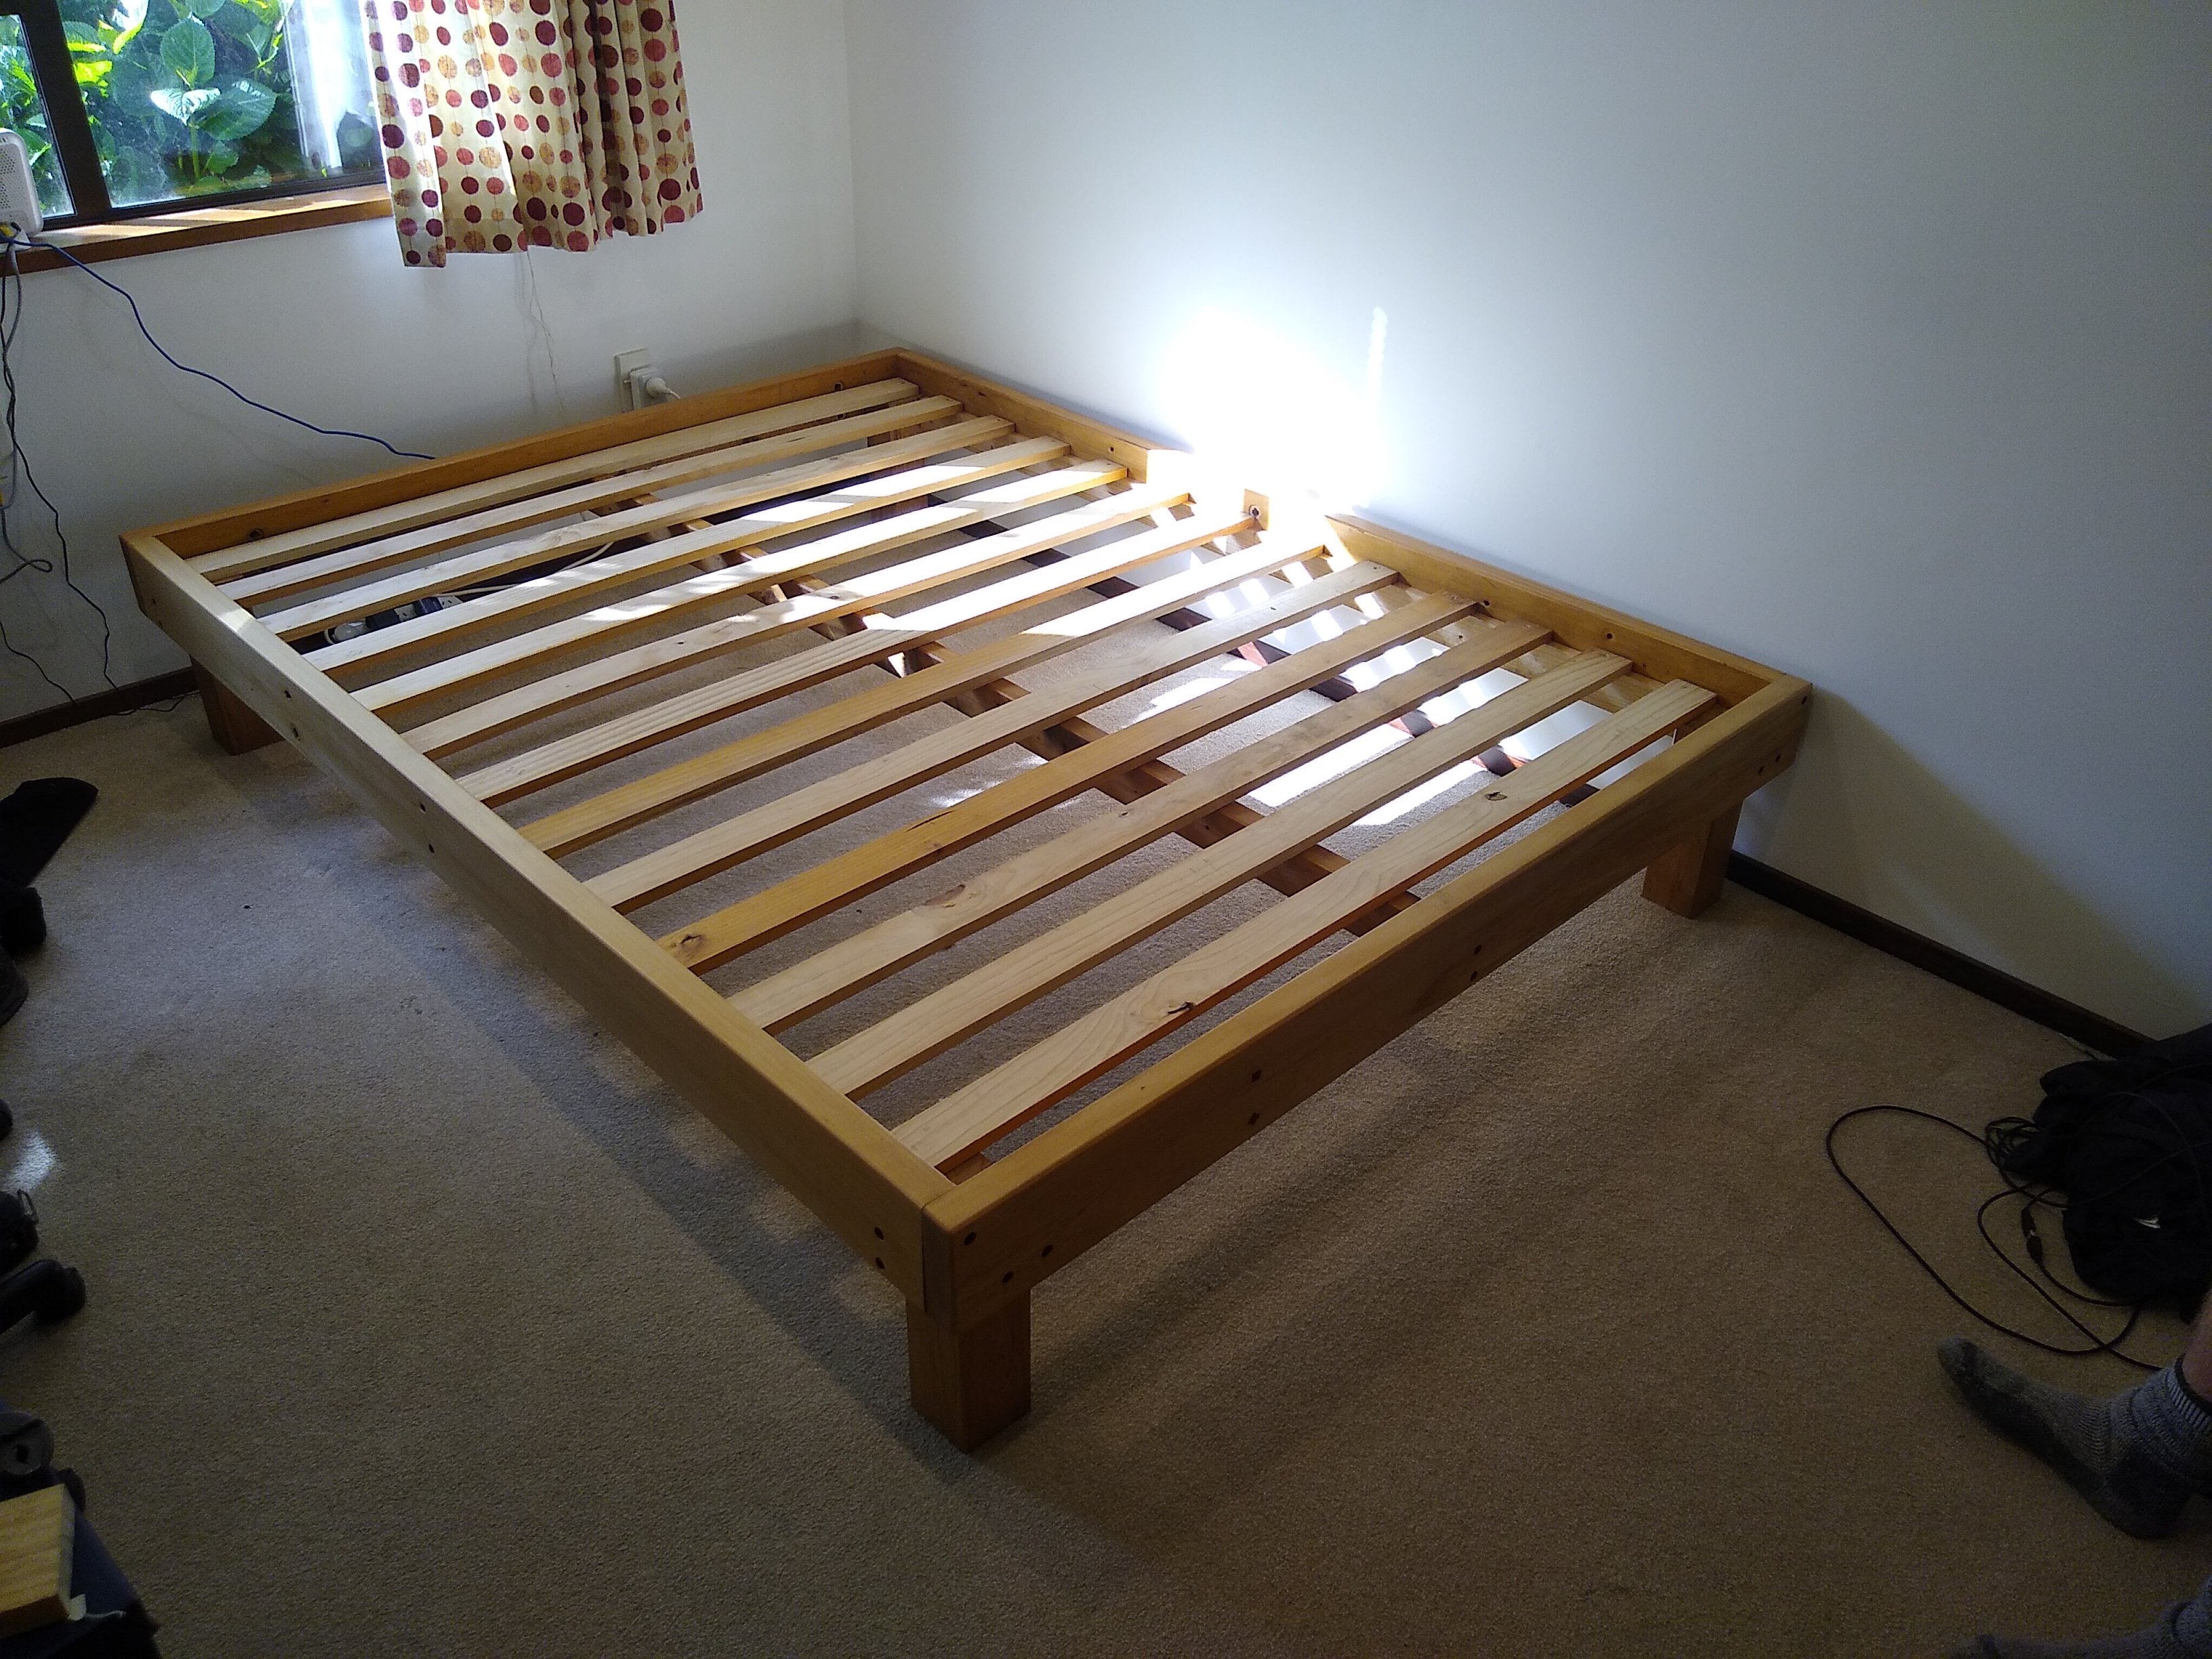
Spent a few hours turning some scrappy Rimu into a bed frame for the spare room. Now need to find a mattress from somewhere. Also eventually need to make a head board to suit the holes from the wood's previous life
1 point
-
Right so many hours later I've found the file/instructions and figured out how to remap the keys on the other converter so that two of them working and USB converted now This one is running the original control/encoder board with a teensy module attached to it - Can kinda see the teensy module above it there Ended up jumping between 4 different programes to sort out the mapping Had to figure out what key was actually being pressed then cross-reference it to the table of key tags/labels. The firmware I flashed into the teensy is called soarers converter and once everything is figured out you just need to create a text file with the remapping then enter that file into a compiler/flash tool Then everything will work on the num pad. I've mapped the tab button as a backspace and the old scroll lock button as the windows button for now1 point
-
Remembered I had these in my hoard and had some inspiration to dig them out I'd forgotten how dirty they were I'd forgotten/lost the link to remap the teensy so cheated a bit and ordered that board which replaces the original control board Cleaned up the housings Tried a single keyboard worth of key caps in some dish soap. Left them to soak overnight and they came up pretty good with next to zero effort The cat helped me sort and group the key caps One cleaned and usb converted model m. Only thing is the num ad scroll lock lights are swapped around. I'll see if I can figure out how to reprogram that.1 point
-
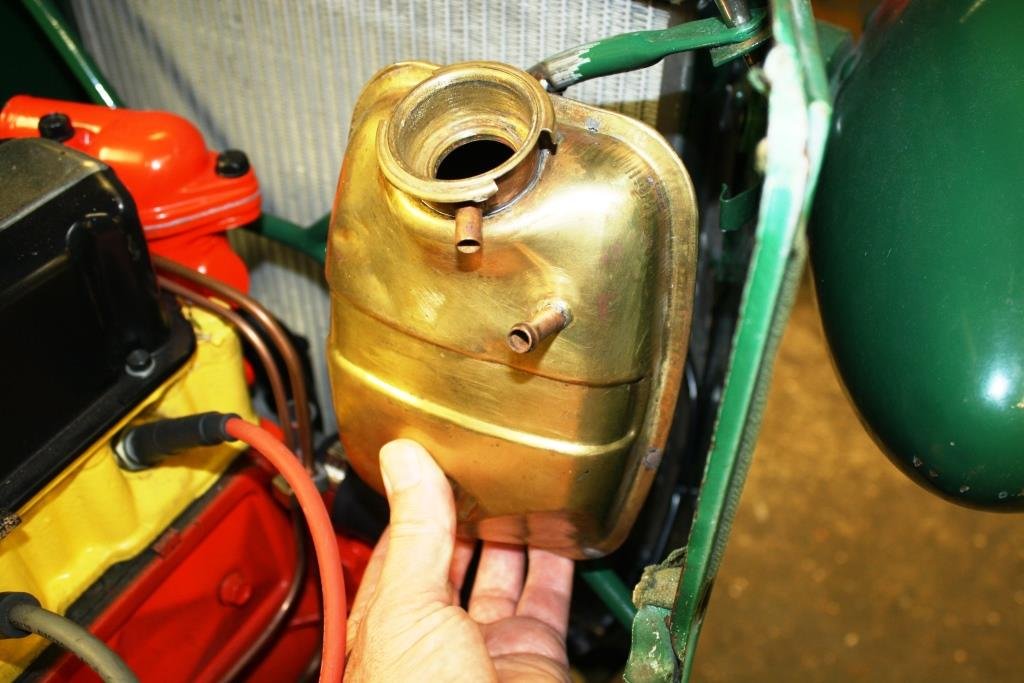
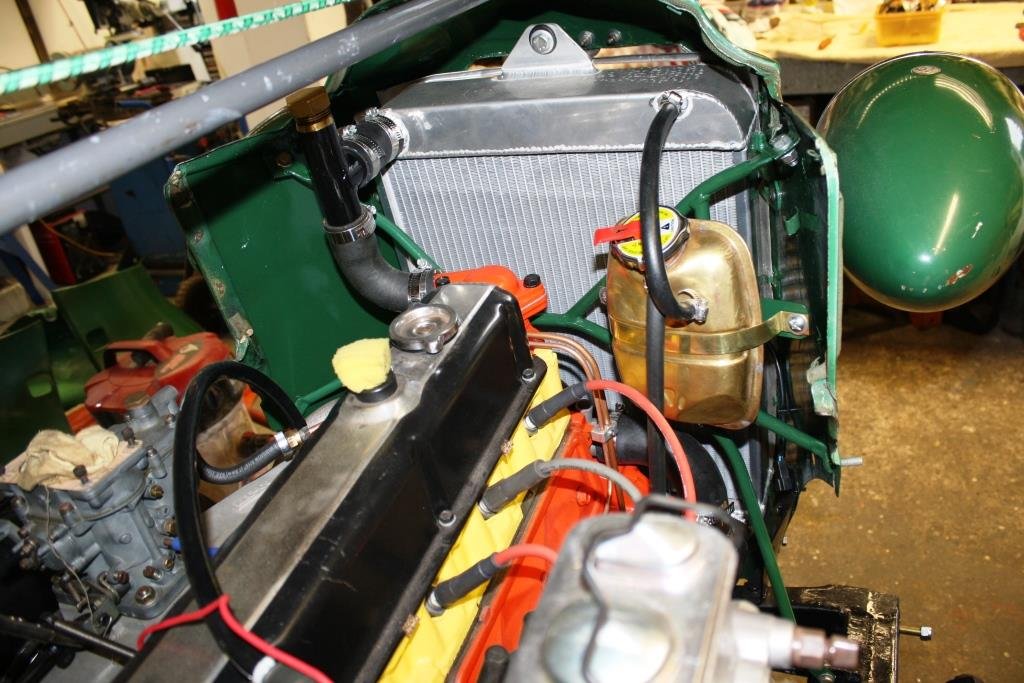
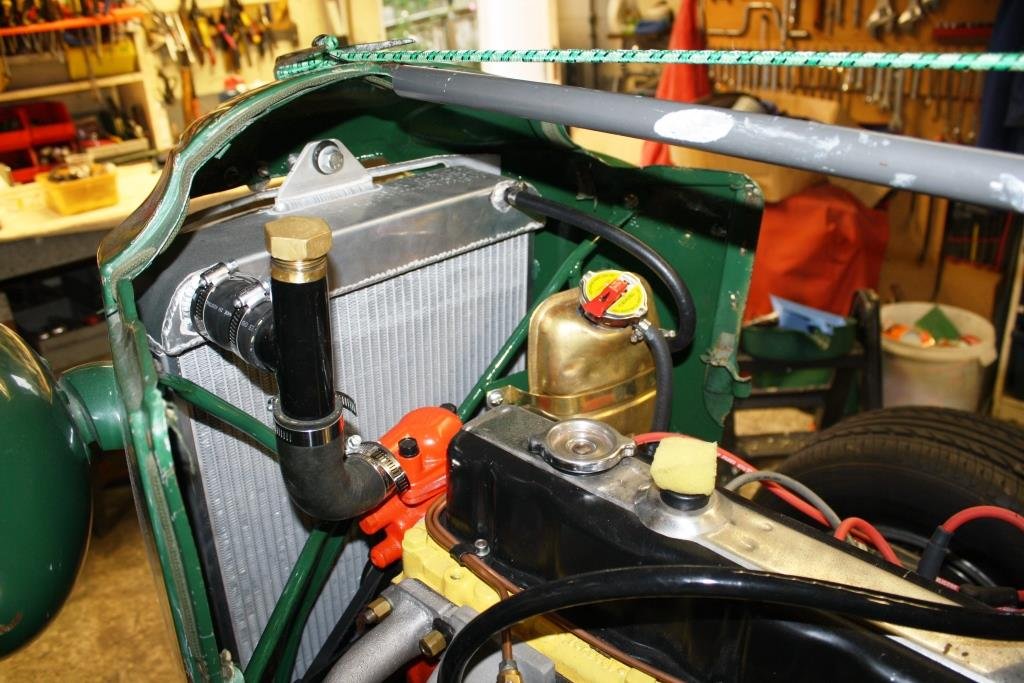
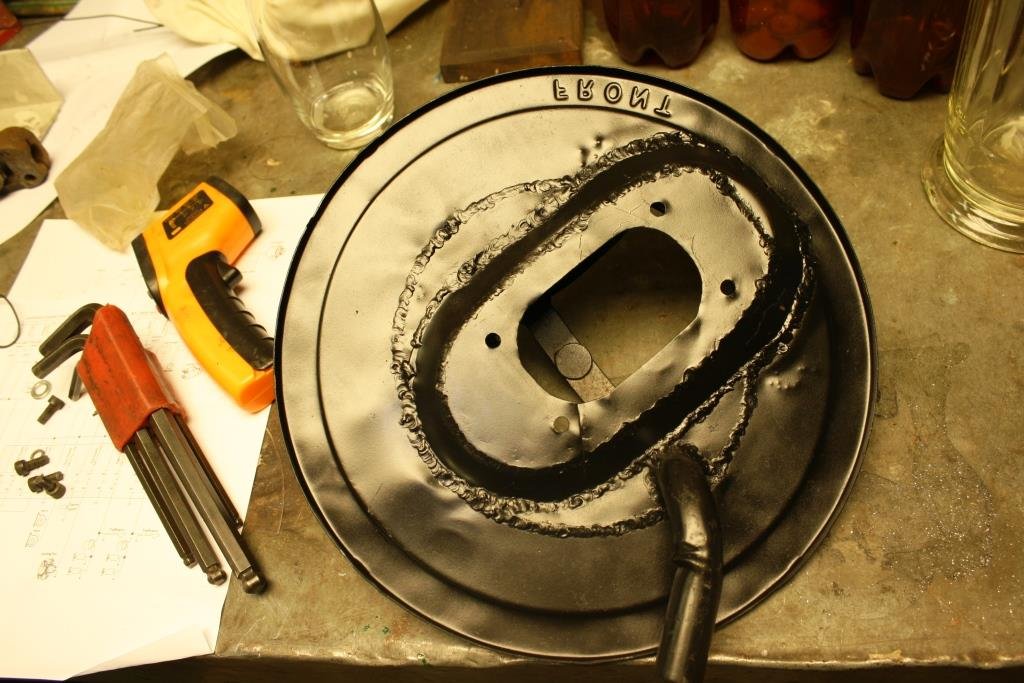
Time to mount my brass overflow bottle, I still haven’t a clue what it came from! Should fit in here nicely….. Tacked in some round EWS. Then a piece of flat with a couple of Rivnuts… Found some brass strip to keep things in character… Found a cap to fit, I’m a big fan of the type with a pressure release lever. All plumbed in and looking good. Finally filled and bled the coolant system. As always I added a big dose of glycol and a can of Bars Bugs. As much as they are my passion in life these old Holden 6’s are nothing short of a plumber’s nightmare with every 2nd head bolt ending up in the water jacket. I finally found the air filter base I’d made for Rigamortice some 40 plus years ago; I cleaned it up and added some paint. …..yes I’d gas welded it because no one had a mig in those days and none of us had even heard of fringing tig! Flipped it over, cut out a gasket; it all still fitted, so bolted it up. A Weber carb disguised with an HR Holden air-cleaner…looking good. Slapped on a filter… And fantasised about running with no bonnet and the intake poking out the side. Time to spark the X2 up. I kicked the old girl in the guts and ran her up to temperature at a fast idle for 30 minutes or so. Yes she could do with a more aggressive cam but what a gloriously responsive little 3 litre six; we’ll get all the legals in place before we finish building and fitting the 208 Motor. https://www.youtube.com/watch?v=L0A8eSZyu2A
1 point
-
Finished off the heat shrinking and soldered the rtc module on with the nice 90 deg pins. Ran out of caring getting the shrink identical lengths Trimmed some bolts so the top plate fits. Screwed the back plate on so it's as done as it can be I'll order another tube when I have some spare project money and it'll actually display the time1 point
-
And for shits and giggles I got all of the clocks in one place1 point
-
That evening Rigamortice and myself opened a bottle of 101 Wild Turkey in the new and improved sr2 man cave for a long awaited celebratory drink. Much later in the night with ‘Darkside Of The Moon’ cranking on the new man-cave sound system (Sub installed) we both experienced a religious epiphany and……….. saw God. To be more precise we saw the Great Spaghetti monster in the sky and the following day with fuzzy heads we joined…….. a religion! The day after the following day I had to get a medical and eye test to renew my class C license and took the opportunity to renew my picture while wearing my new religious head wear. (The “ever-lovely” Mrs sr2 has threatened to never travel overseas with me again if I ever do the same with my passport). Discussion thread…. https://oldschool.co.nz/index.php?/topic/49843-sr2%E2%80%99s-1947-vauxhall-%E2%80%9Crigamortice%E2%80%9D-discussion-thread/
1 point


This leaderboard is set to Auckland/GMT+12:00