
Leaderboard


Popular Content
Showing content with the highest reputation on 08/07/23 in all areas
-
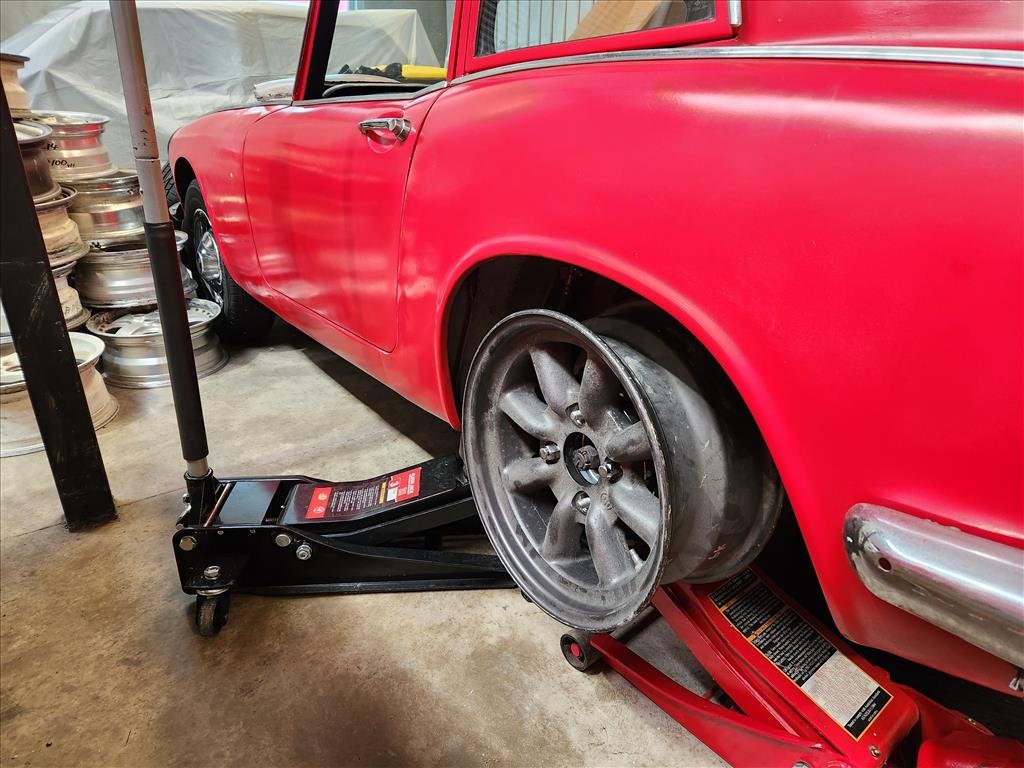
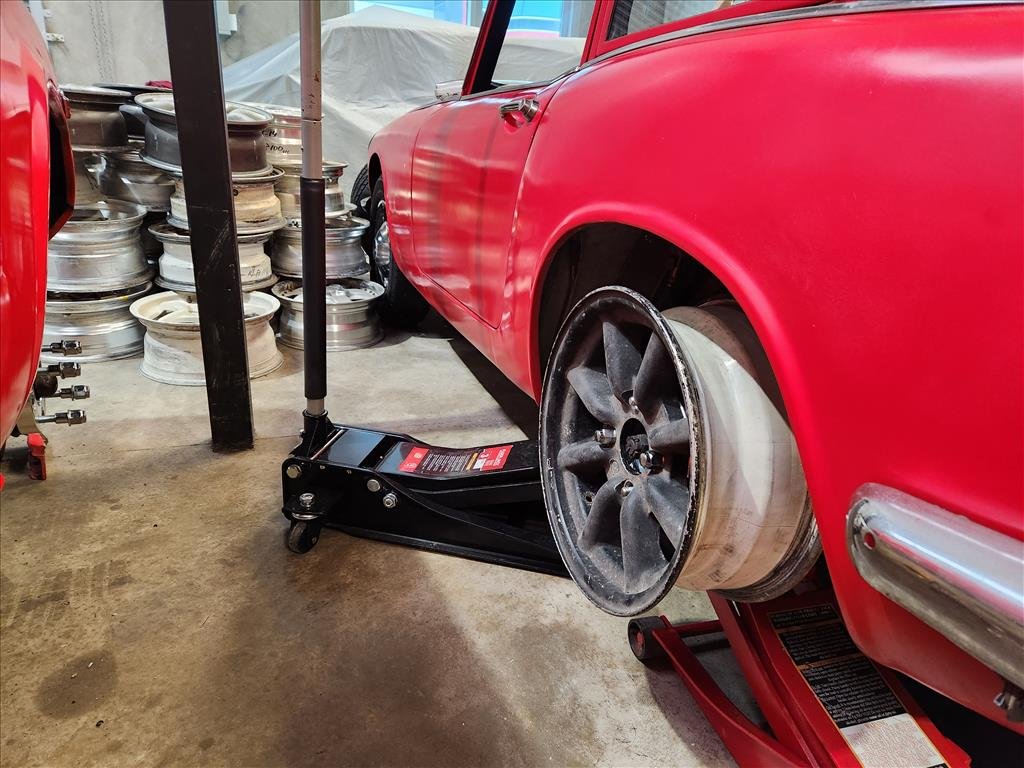
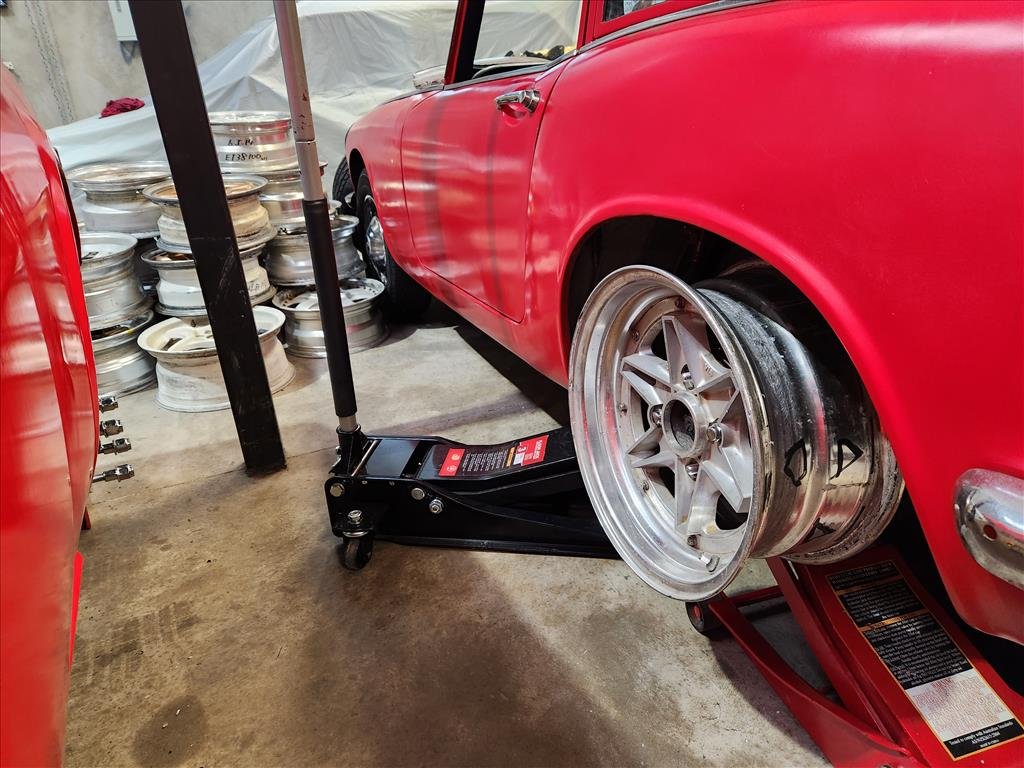
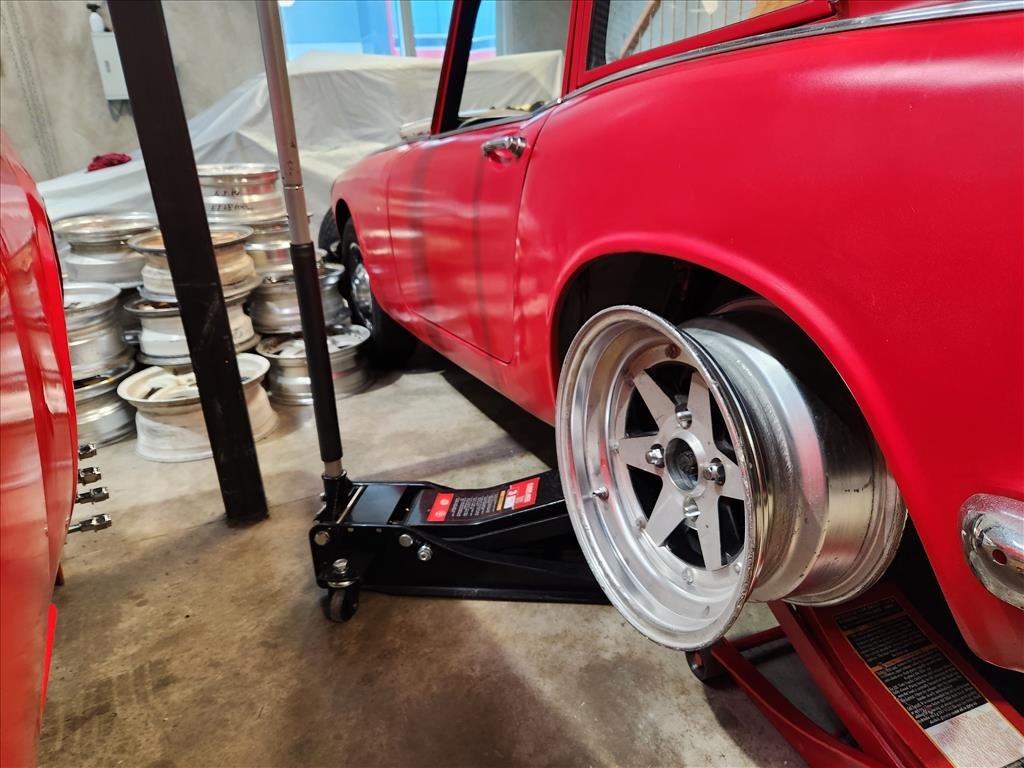
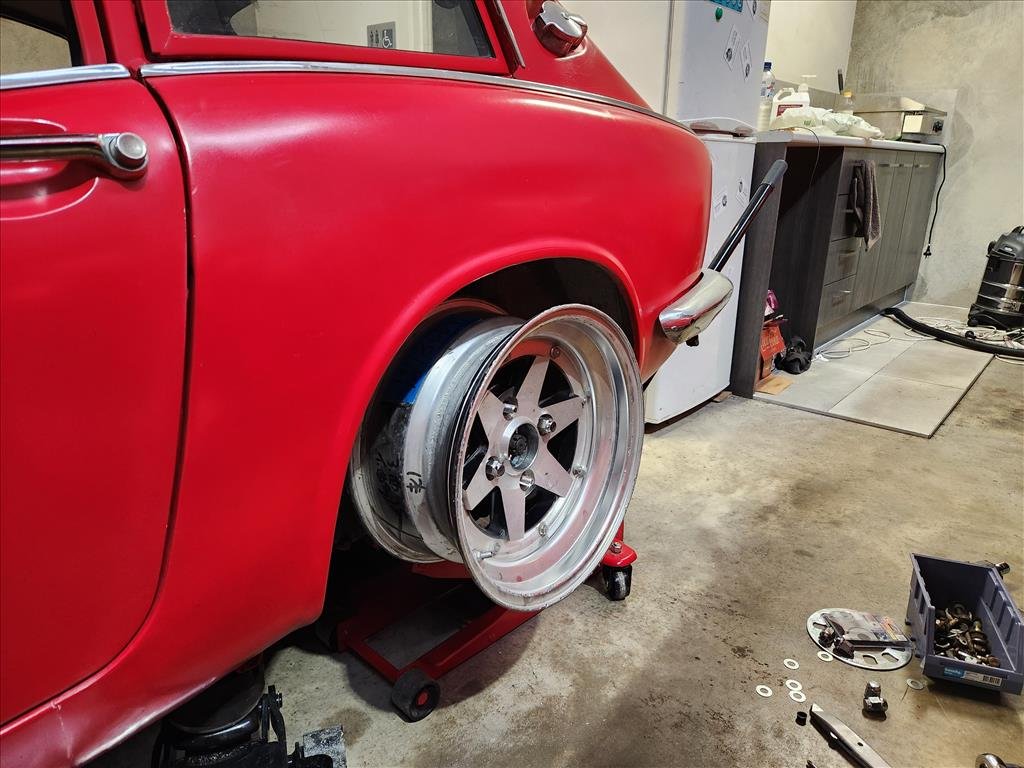
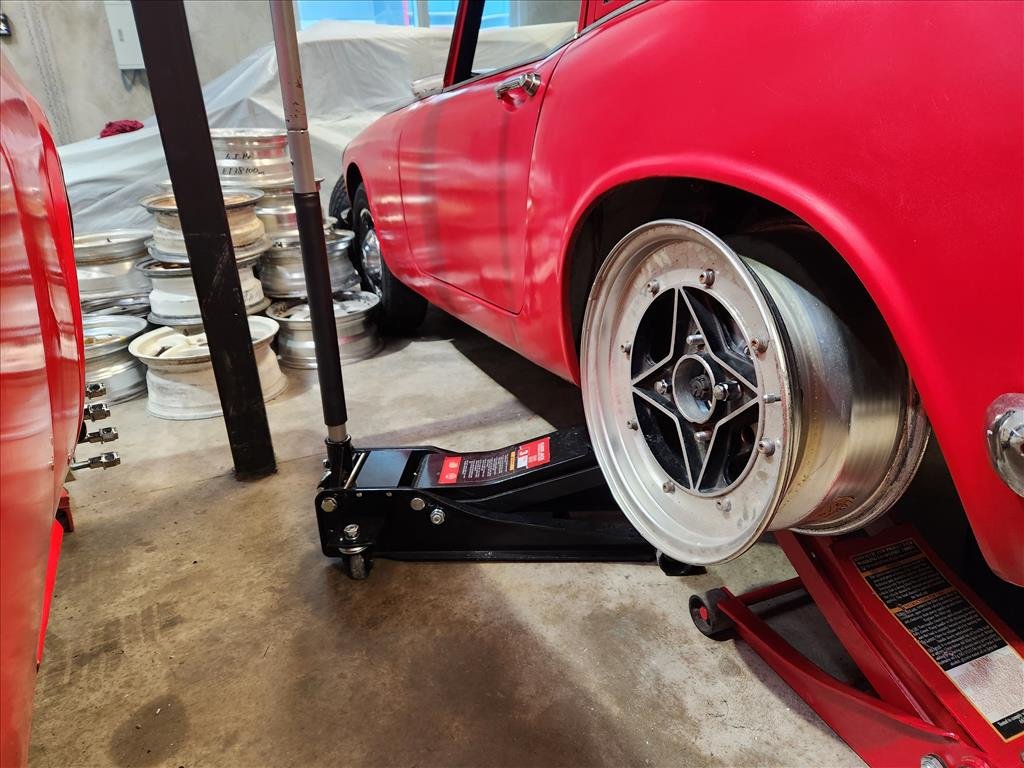
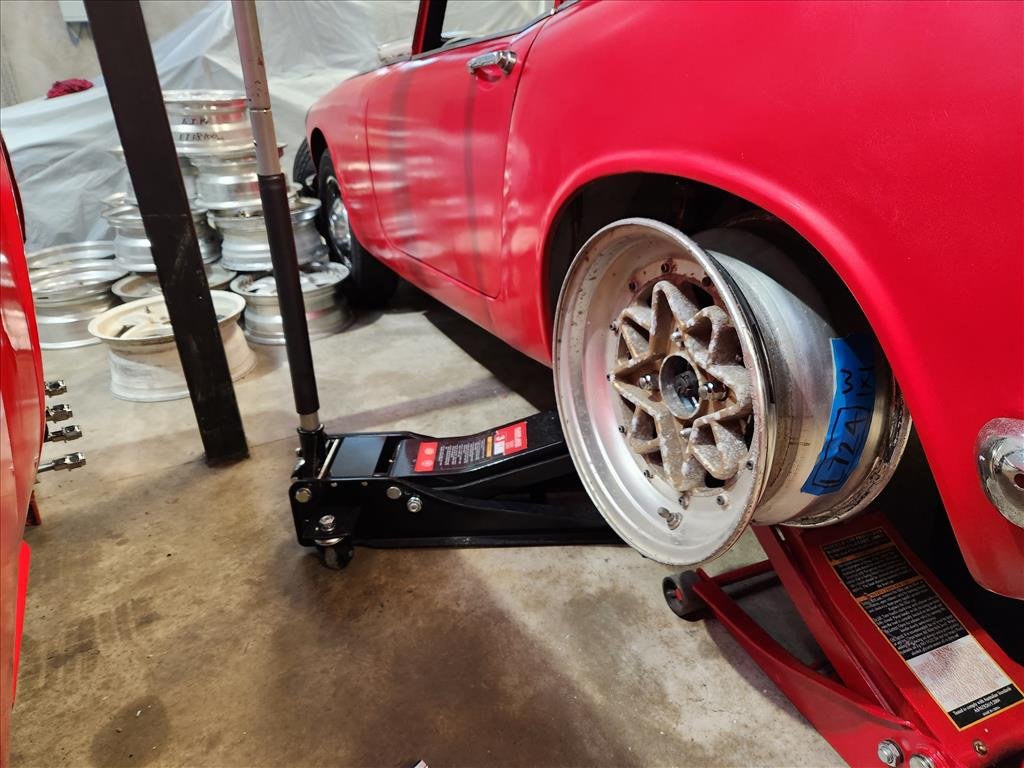
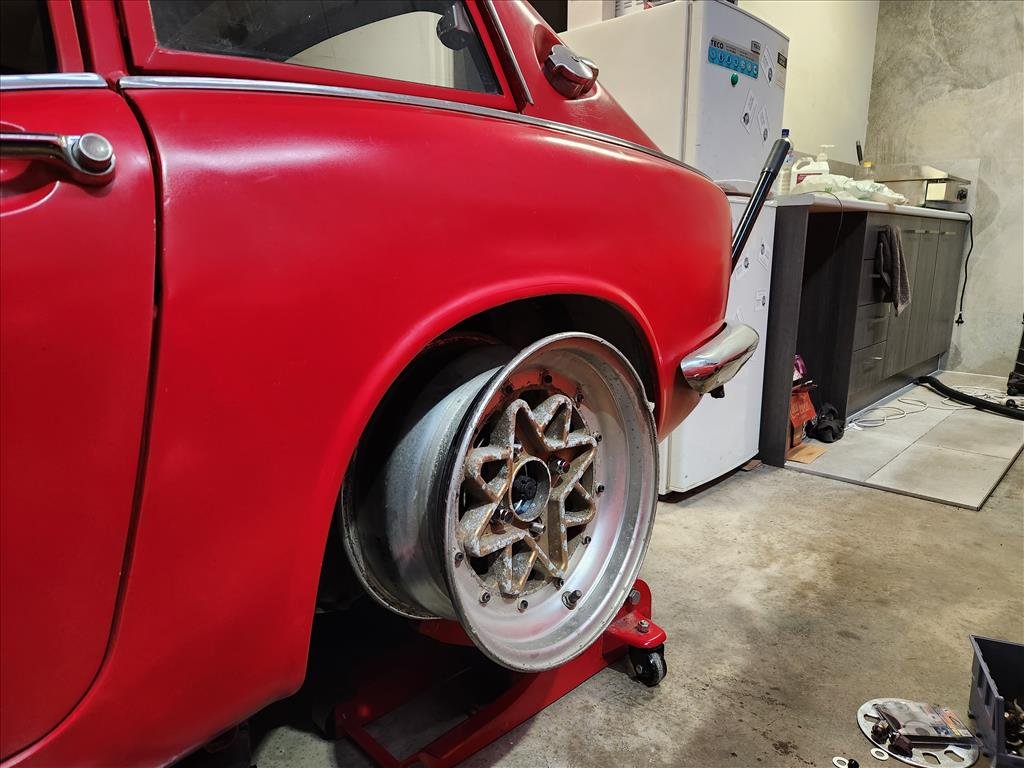
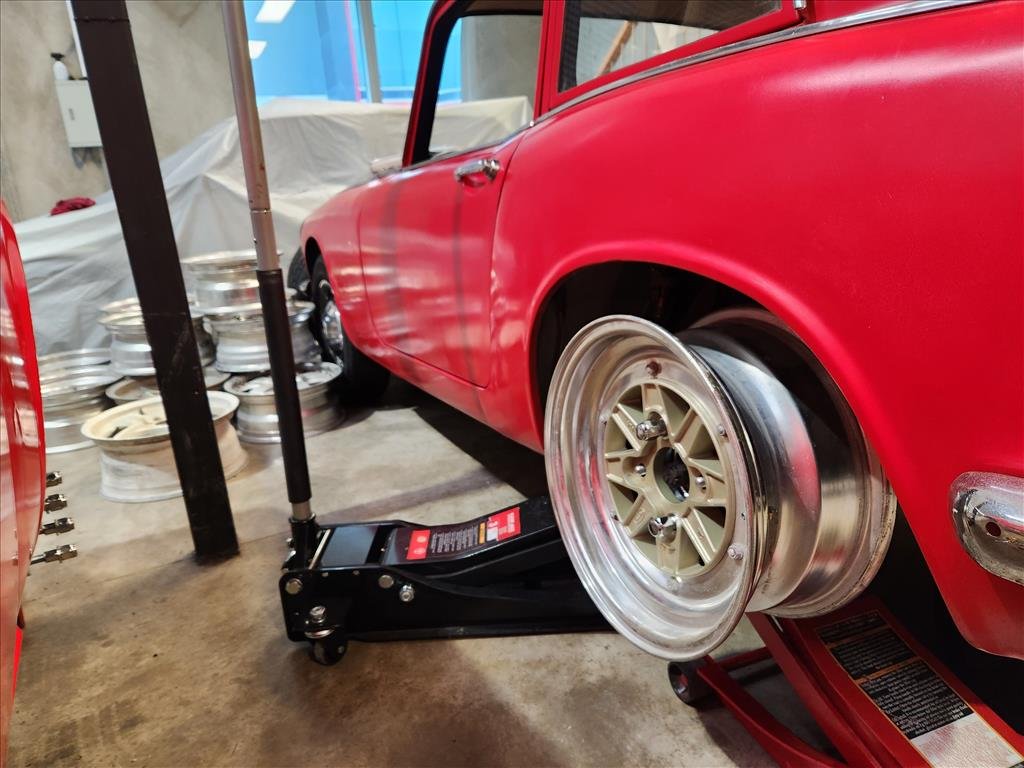
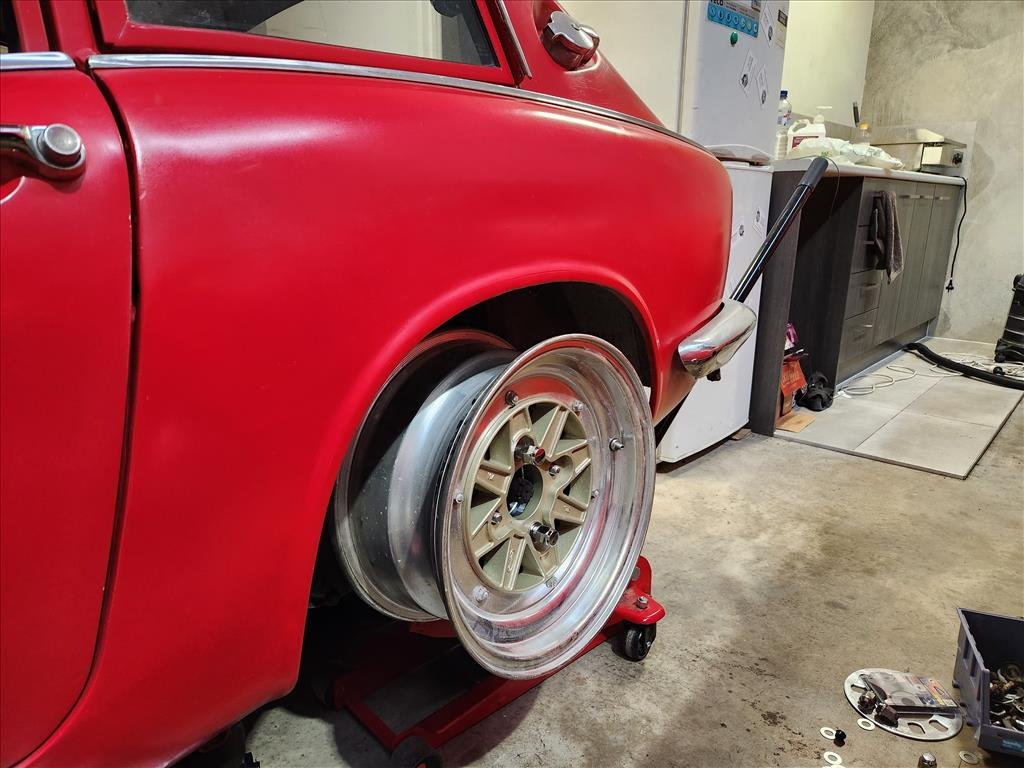
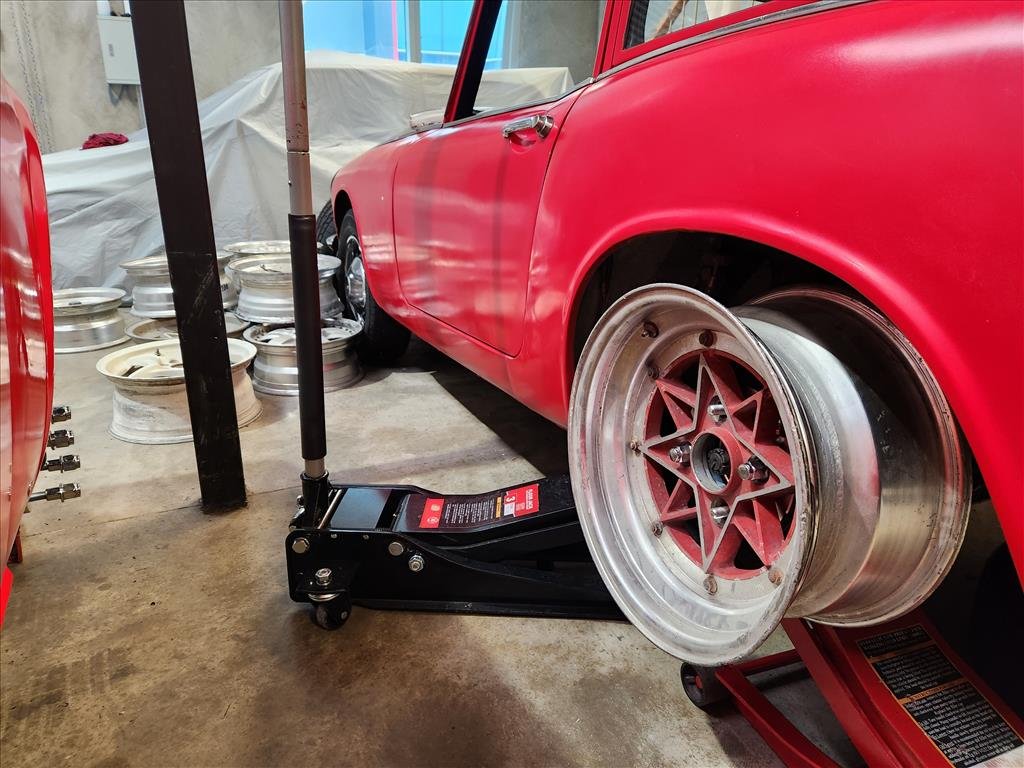
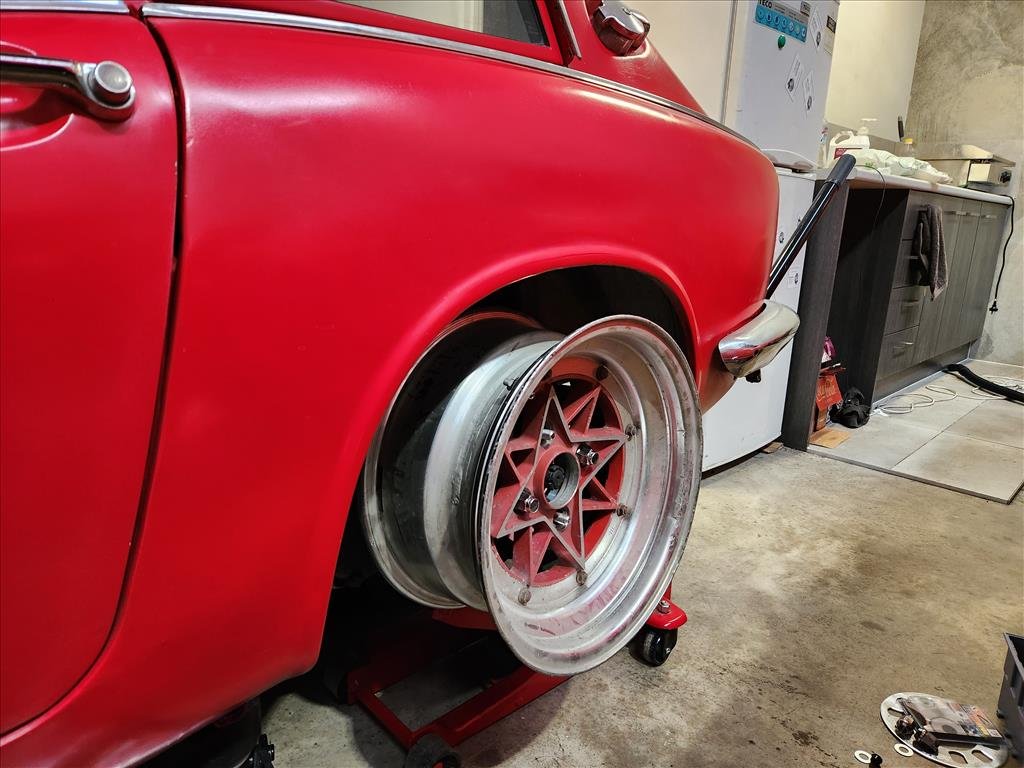
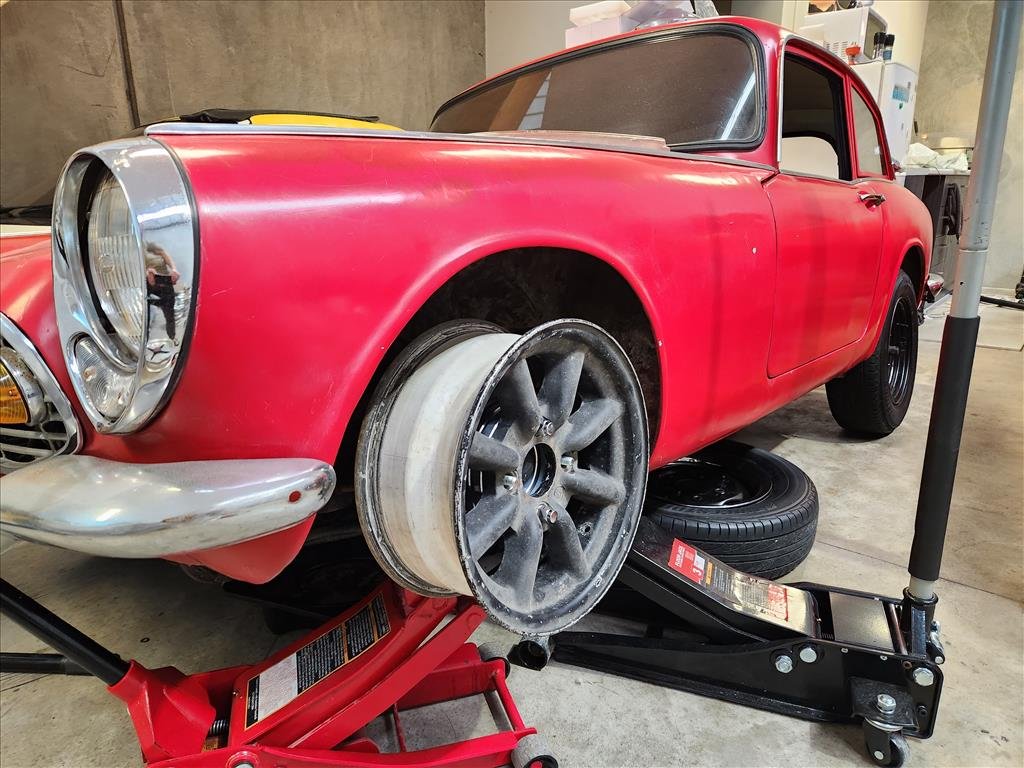
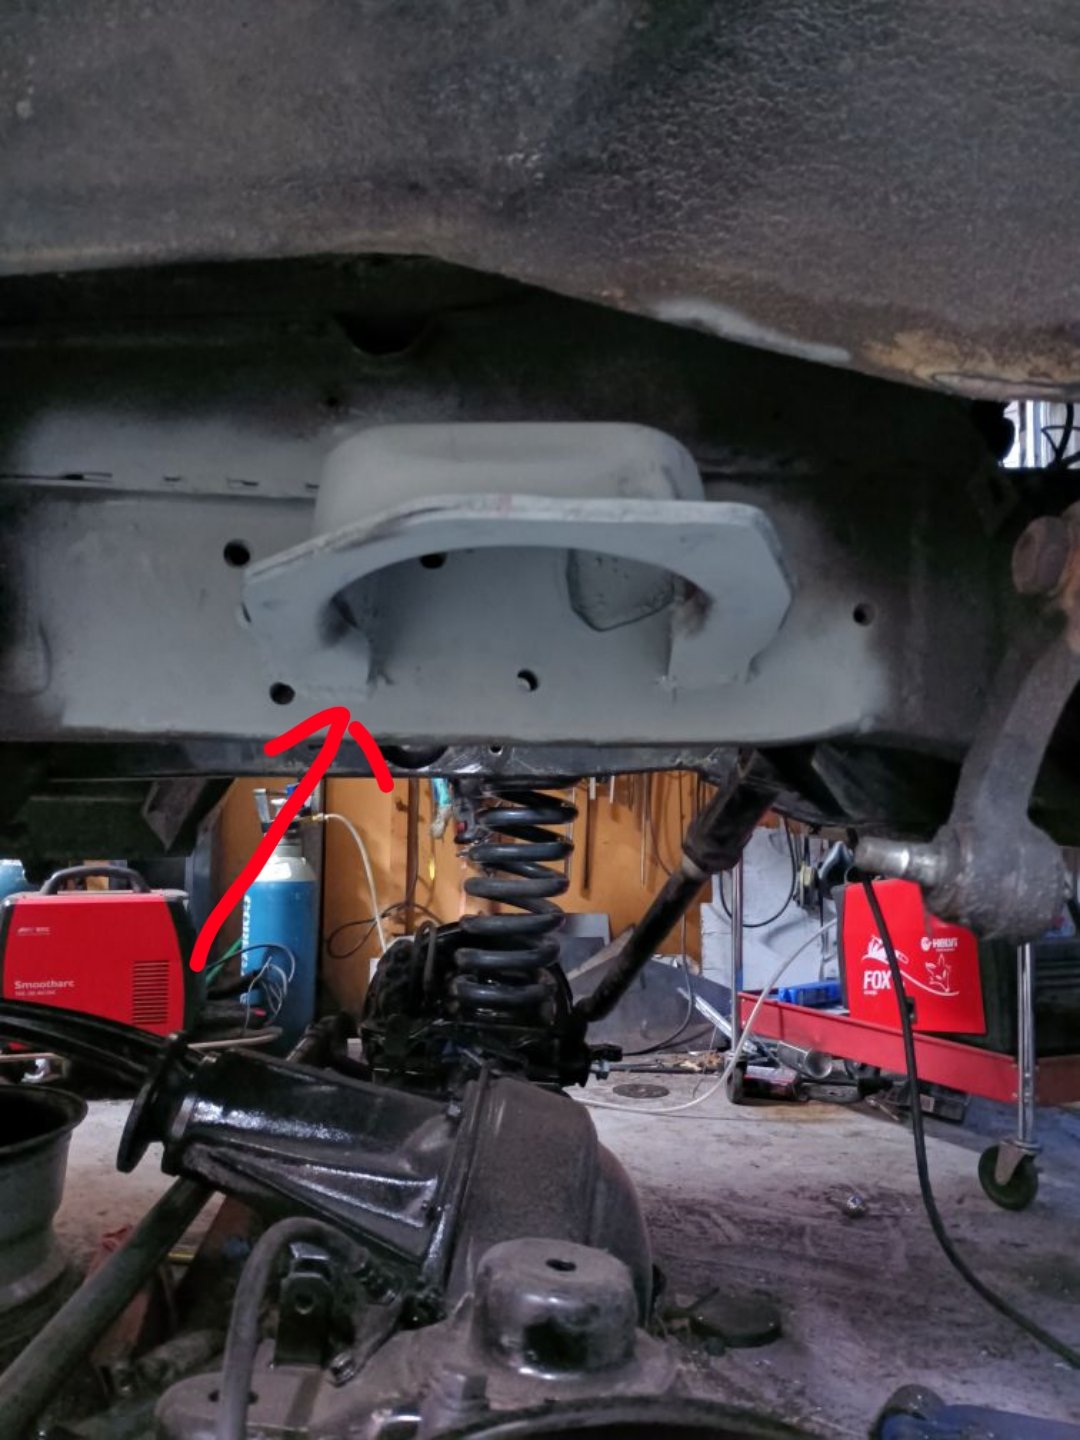
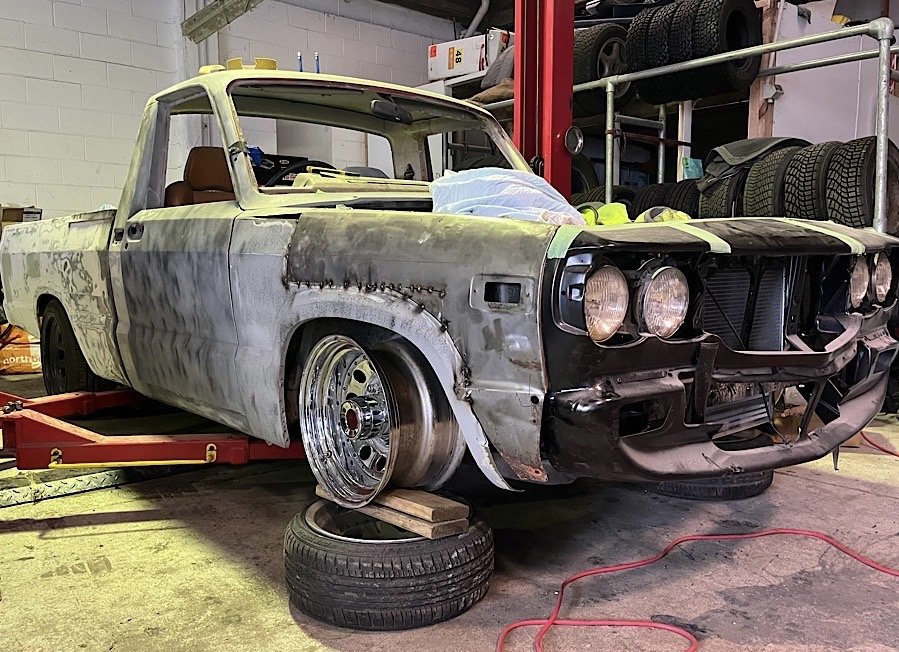
Since the last update she’s been for a few mile drive to the Sergio to fuel up and test fuel gauge which went well, the oil pressure sender changed from the gauge type can that was on the motor, to factory idiot light type - which works. Dropped it down the road for a wheel alignment as per the structural repair and compliance process - paperwork squires and dropped off to the guy in charge. Painted the exhaust manifolds - had planned for them to be only temporary and get some headers in the near future but the more I looked the harder it got. Wanted hooker headers but they dont suit P/S models, others run a pipe down under the drag link and compromise ground clearance etc etc. Rigged up a spare wheel and a wee tool kit, will pick up a scissor Jack too. And a thing I didn’t know I needed until I saw it last week28 points
-
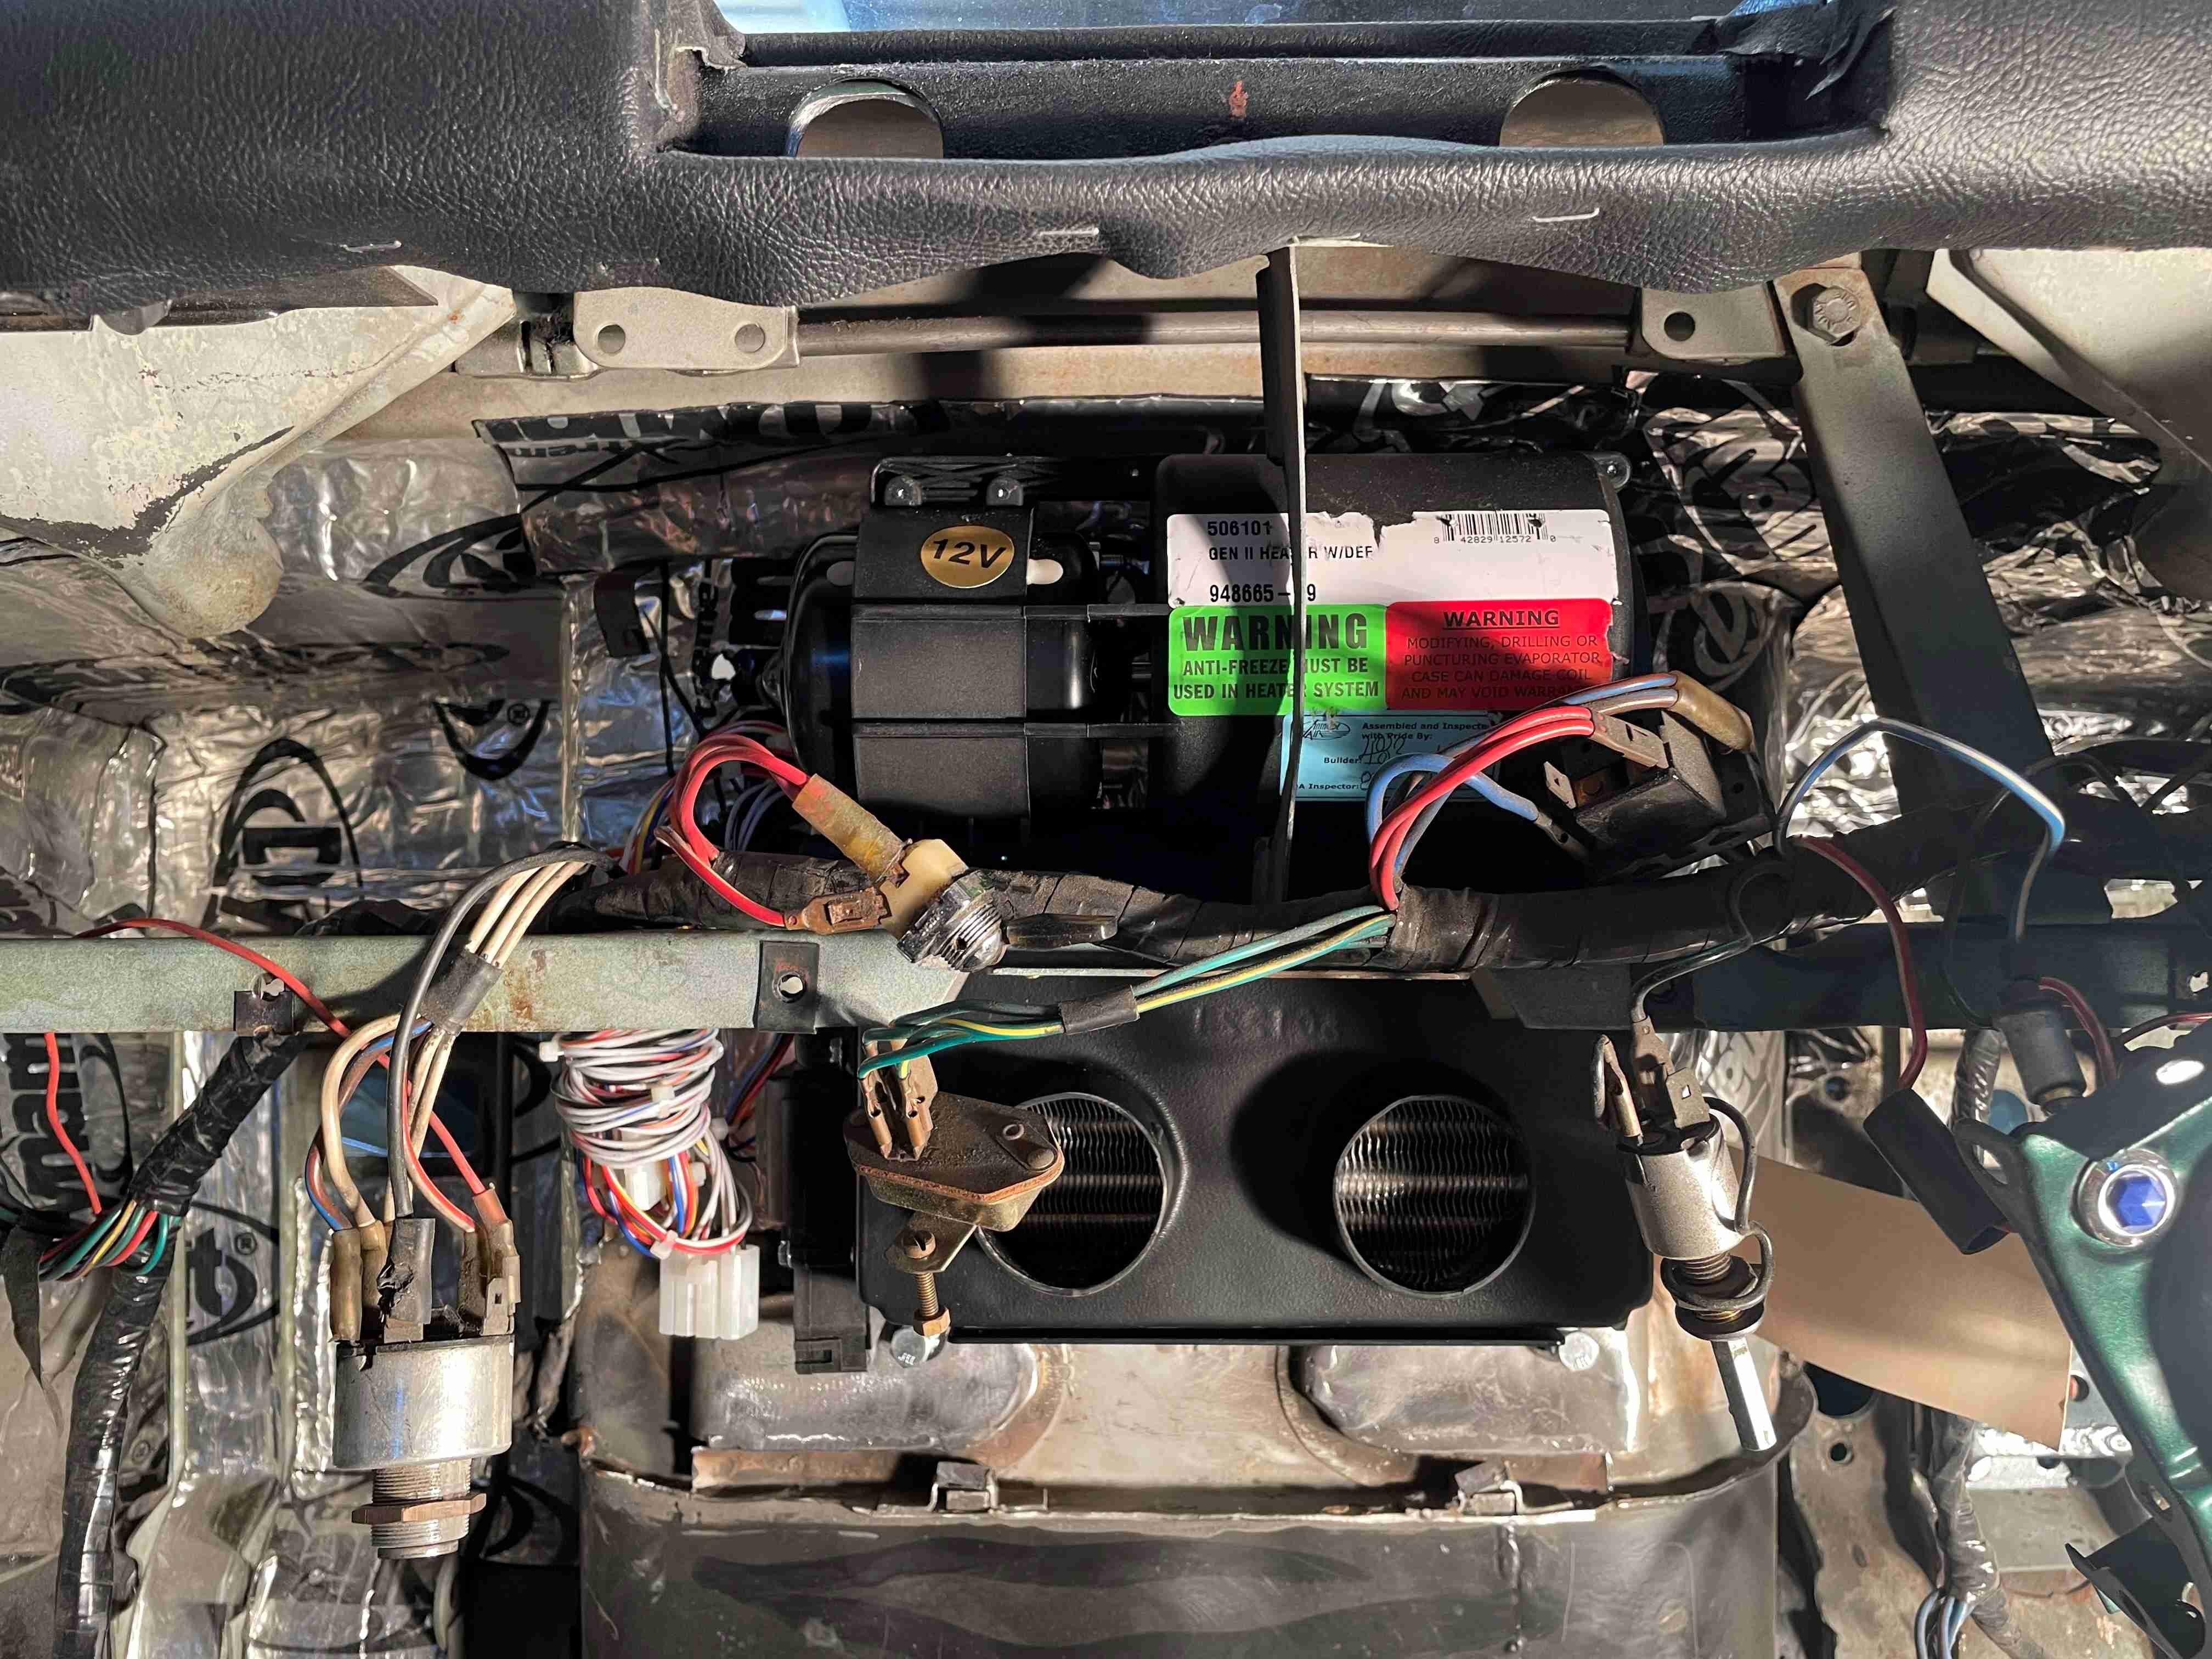
Wife has been all 1984 about this, the thought police etc. cos she found my copy of the Haynes manual under my chair. I told her she cannot control what i think and it turns out waterboarding isnt so bad. To be subversive i have not only been thinking about it but also buying things like this collection of wiring components. The extra relays are to replace the dogshit ones that came with that relay box. The big one is a dedicated headlight type.; And thanks to @ynot I have a heater box now. My heater tap was seized and I broke it trying to free it up so I have ordered a generic replacement. So that is possibly the last missing item, but probably not. Tony also gave/lent me a spare gearbox as well altho it isn't a 1500 5 speed. It is either out of a Fiat Ritmo or it is a 4 speed with 5 speed internals grafted in. If it is a Ritmo the ratios might be better suited according to the internet. I can't use it as is because the output is the tripode type not the CV type on my car, but the internals should swap over ok. This is just in case my gearbox 3rd gear crunch has gotten worse, we will see in due course.15 points
-
Every dickhead is doing a subie swap now
 12 points
 -
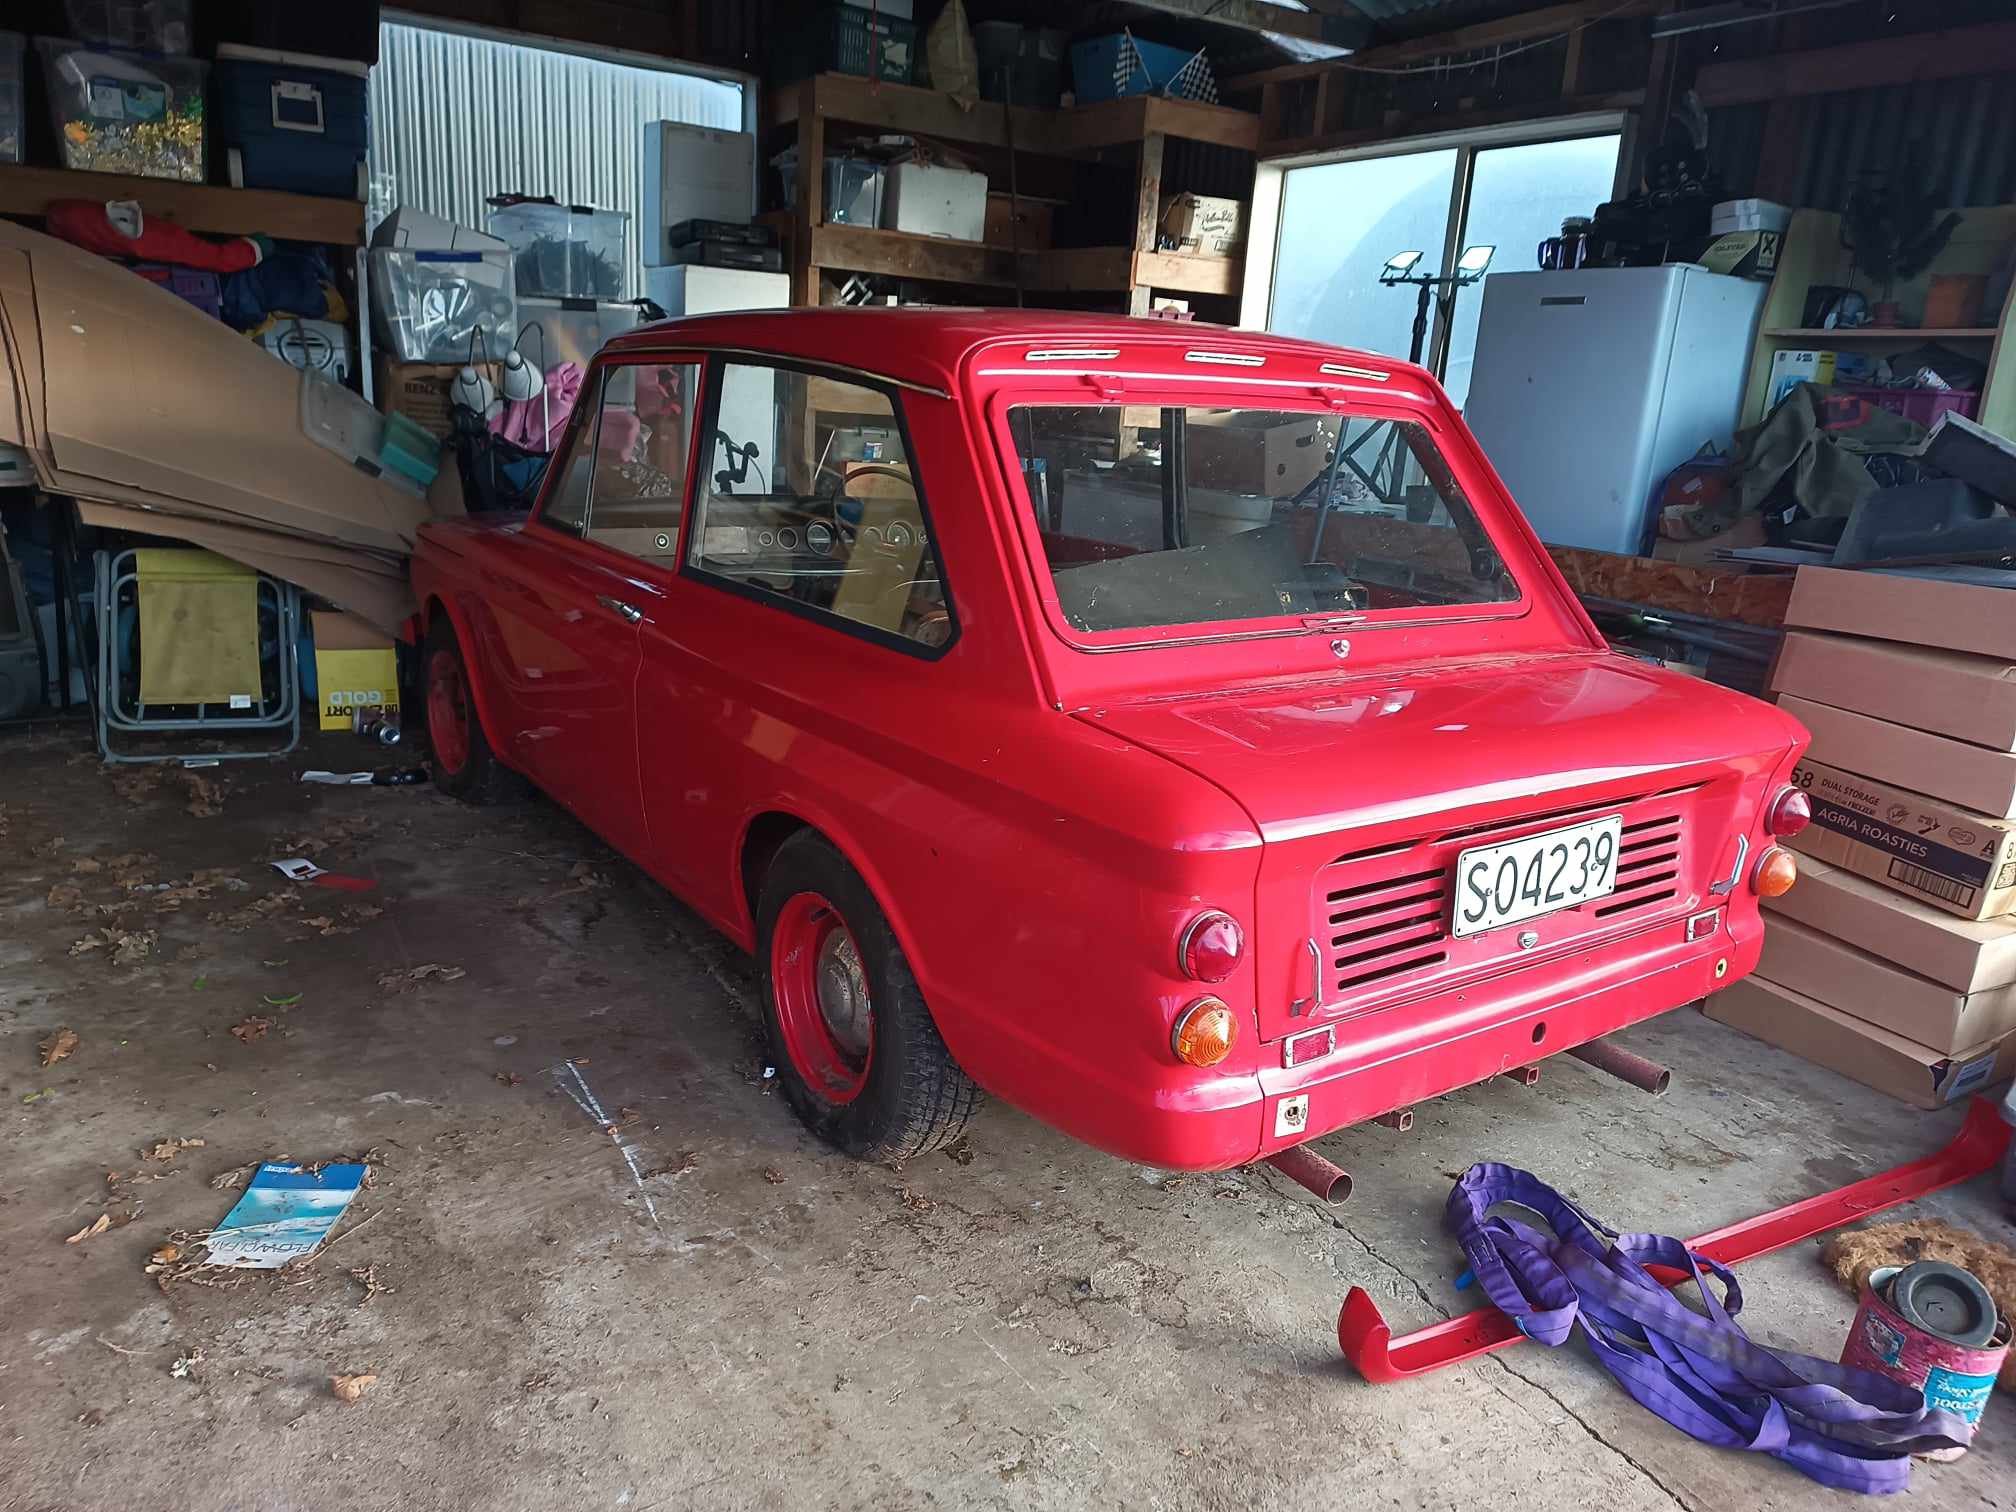
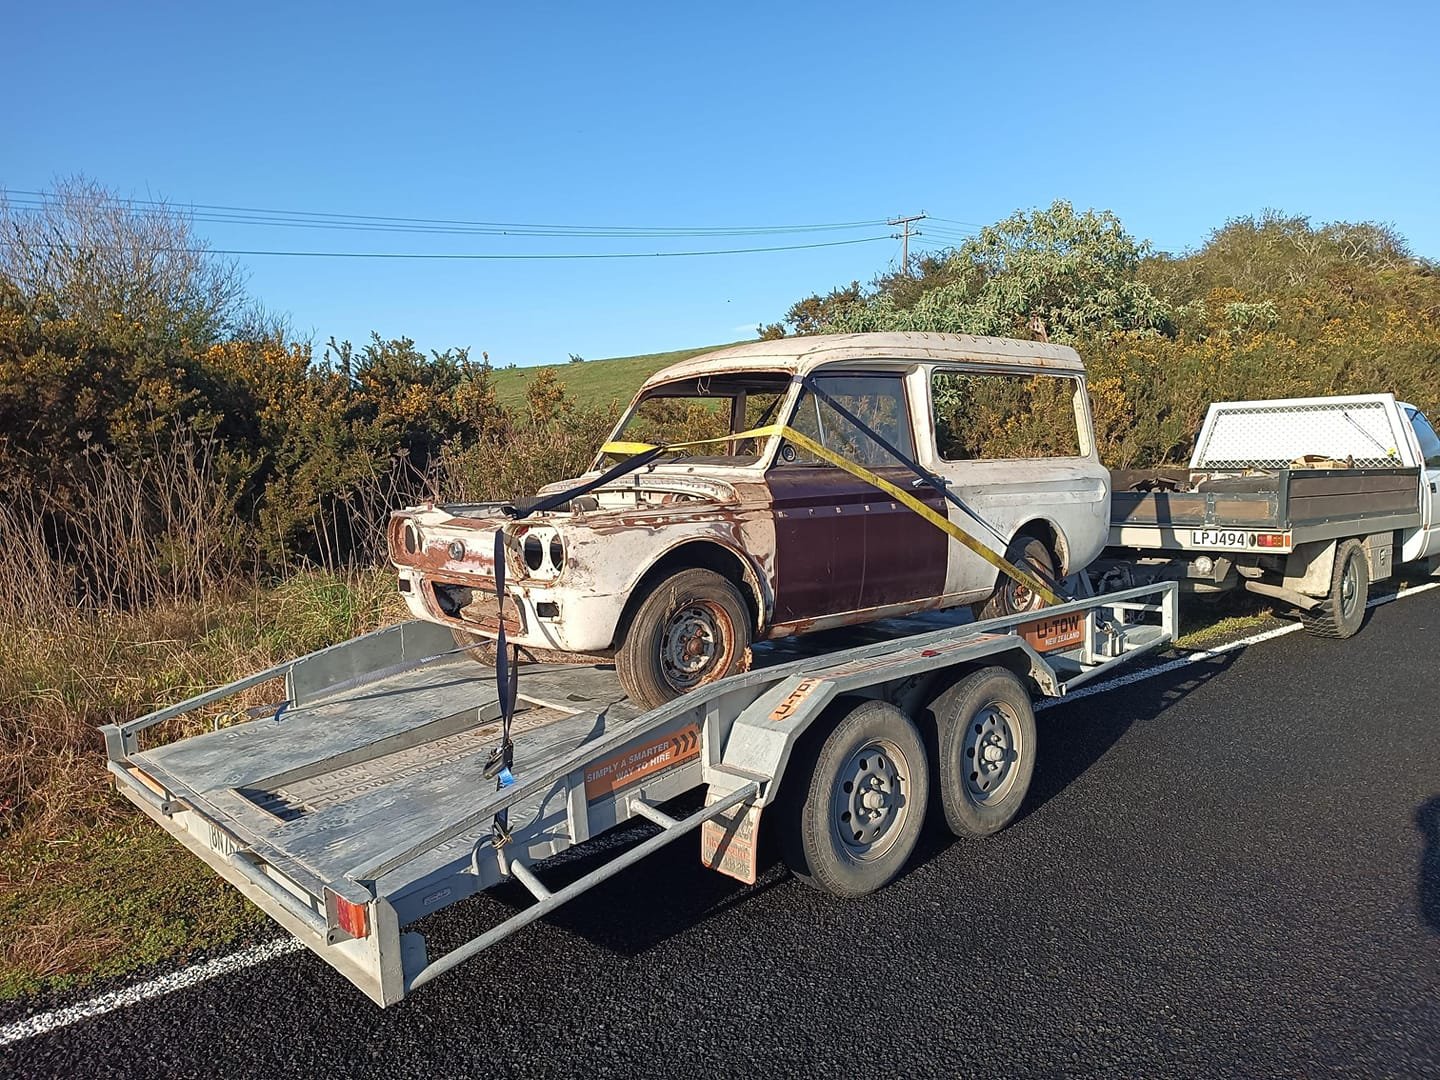
So this followed me home on the weekend very slowly. Also came with another Hillman Imp with an EA71 installed in it. I'll drag that home in a few weeks and see as both are dead reg, I'll swap the Subie gear into the yellow Imp. If anybody wants a mint body/interior Imp with no engine sing out. It'll be cheep.
9 points
-
New benchmark for exhaust note goals. This is 3500cc 2gr motor in the lotus, so tack a few thousand more rpm onto this, and imagine that noise screaming out of an 80s toyota haha.8 points
-
I found a belt path that hopefully works decently, with a very simple tensioning setup. If you undo the top bolt of the alternator and swing it down, it's not tensioned by the idler anymore. Ha! So you can get the belt off. Hopefully has enough tension on it this way. The trick to making this work was a smaller diameter idler pulley, that was on clearance sale at repco for 3 bucks. Which makes it sound like I'm smart so lets not discuss the $6 pulley and the $100+ of wrong sized belts that got me here. Either way, it's another small task sorted hopefully. Also! I've been doing scouting missions to pickapart whenever I'm near one of them for work. I've been waiting for a Mark X to turn up that's got the motor and box out for easy access. As I'm still looking for a bellhousing. I found one at Mangere where it's all out on the ground in front of the car. So will head back with some tools at some point and try wrestle that bellhousing out. It's tempting to just grab a whole extra motor and box, as they're cheap - Hopefully there will still be a few around when I've got a bit more $$ and space to put things.
7 points
-
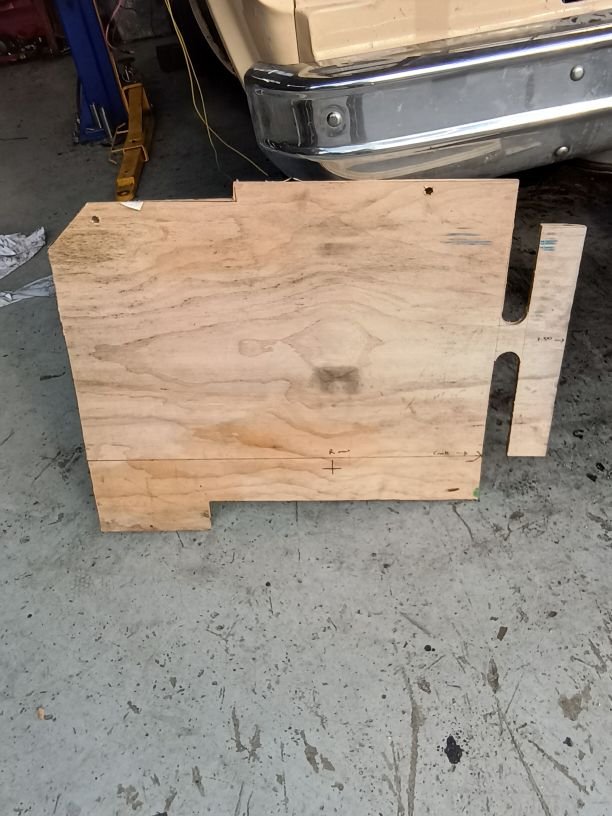
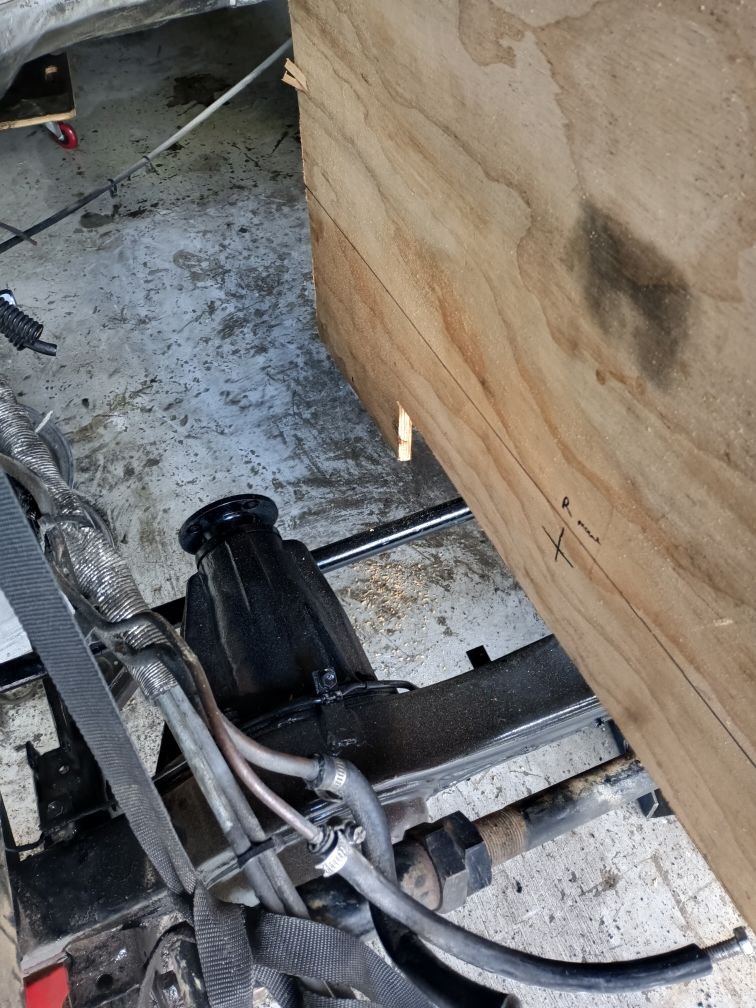
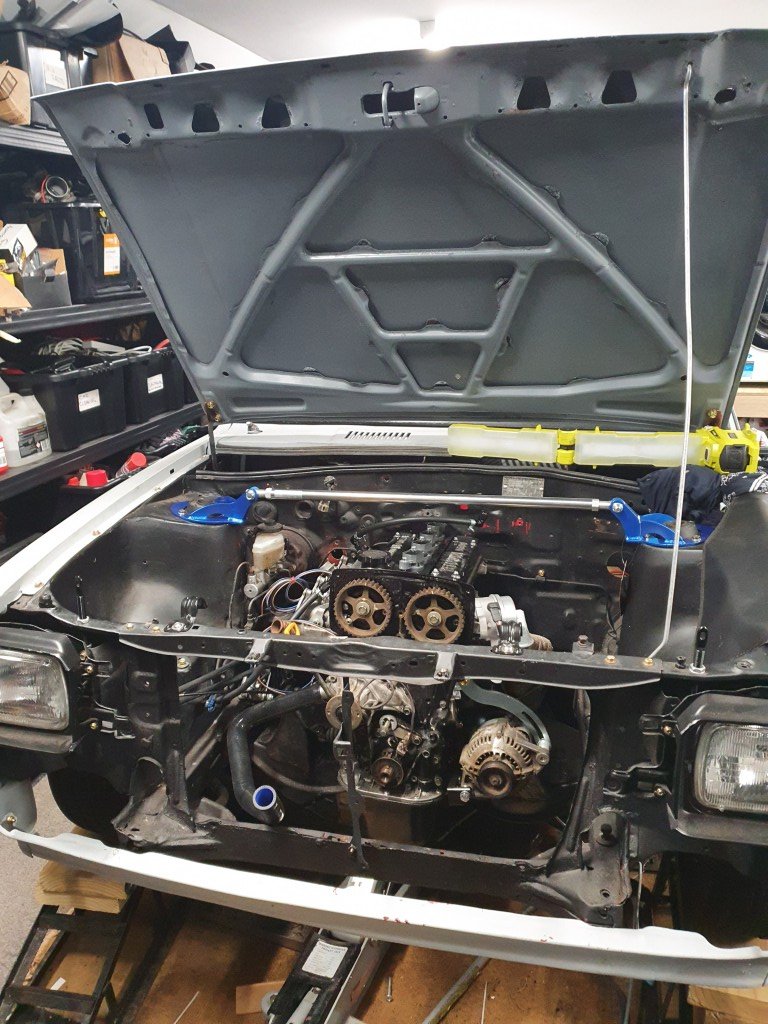
I had a pretty productive weekend on this pig. I got most of the wiring done, just need to add speaker cables and trace a couple of the back ones. I've got a generic Aeroflow GM harness, all coloured and labelled, great but of kit. I've used painless ones etc before that are sold as vehicle specific but they are just generic ones with add ons. In a wave of steamed genius in the middle of last night I decided I needed and engine template to get the mounts and sump figured out, i wish I'd thought of this last time with the Cummins. Mounts are offset between sides but it fits in just fine and gives me 150mm or so of clearance with sump I drew up crank centreline as well to calculate the " Static stability factor " for cert which need to be over 1.1, it's at 1.28 as is which is great as ive got no engine, so in theory it can be raised still but it's up 8" on what it was and I still need to be able to get in it. With the spring hats etc I'll weld in a couple of 100 X 50 beams and brace the shit out of it, that'll take care of the spring mounts, and give me somewhere to mount engine, Panhard bar mount and steering damper, I'll try and get that done this week. Also made up and offset gauge for the wheels, right side is going to be a problem with 33x12.5 tyres and -44 rims. I might get some bigger offset wheels made, I'm not keen on spacers and want space to run 35s.
7 points
-
Looks like I'm going back to original... Gotta go pick it up next weekend.6 points
-
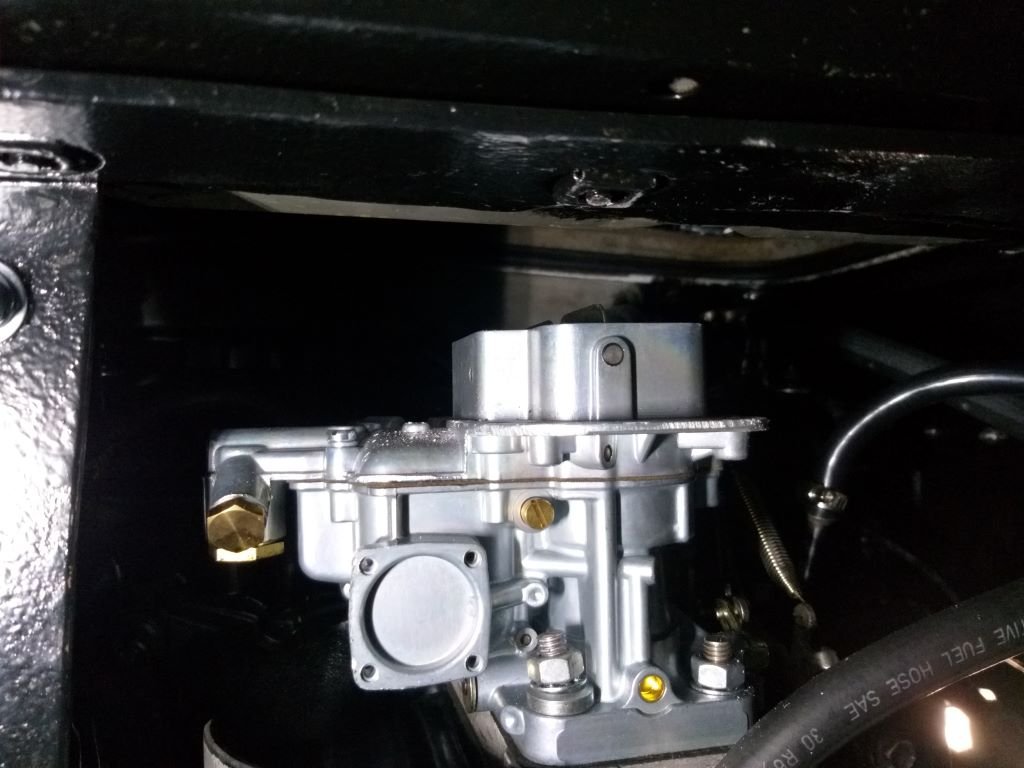
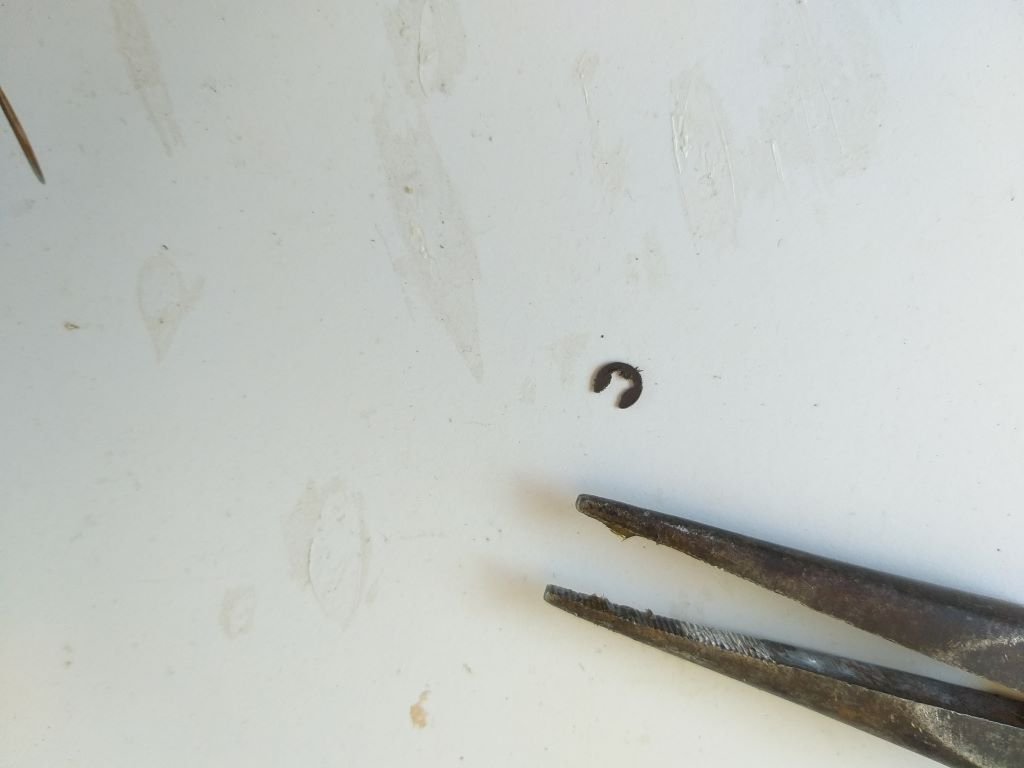
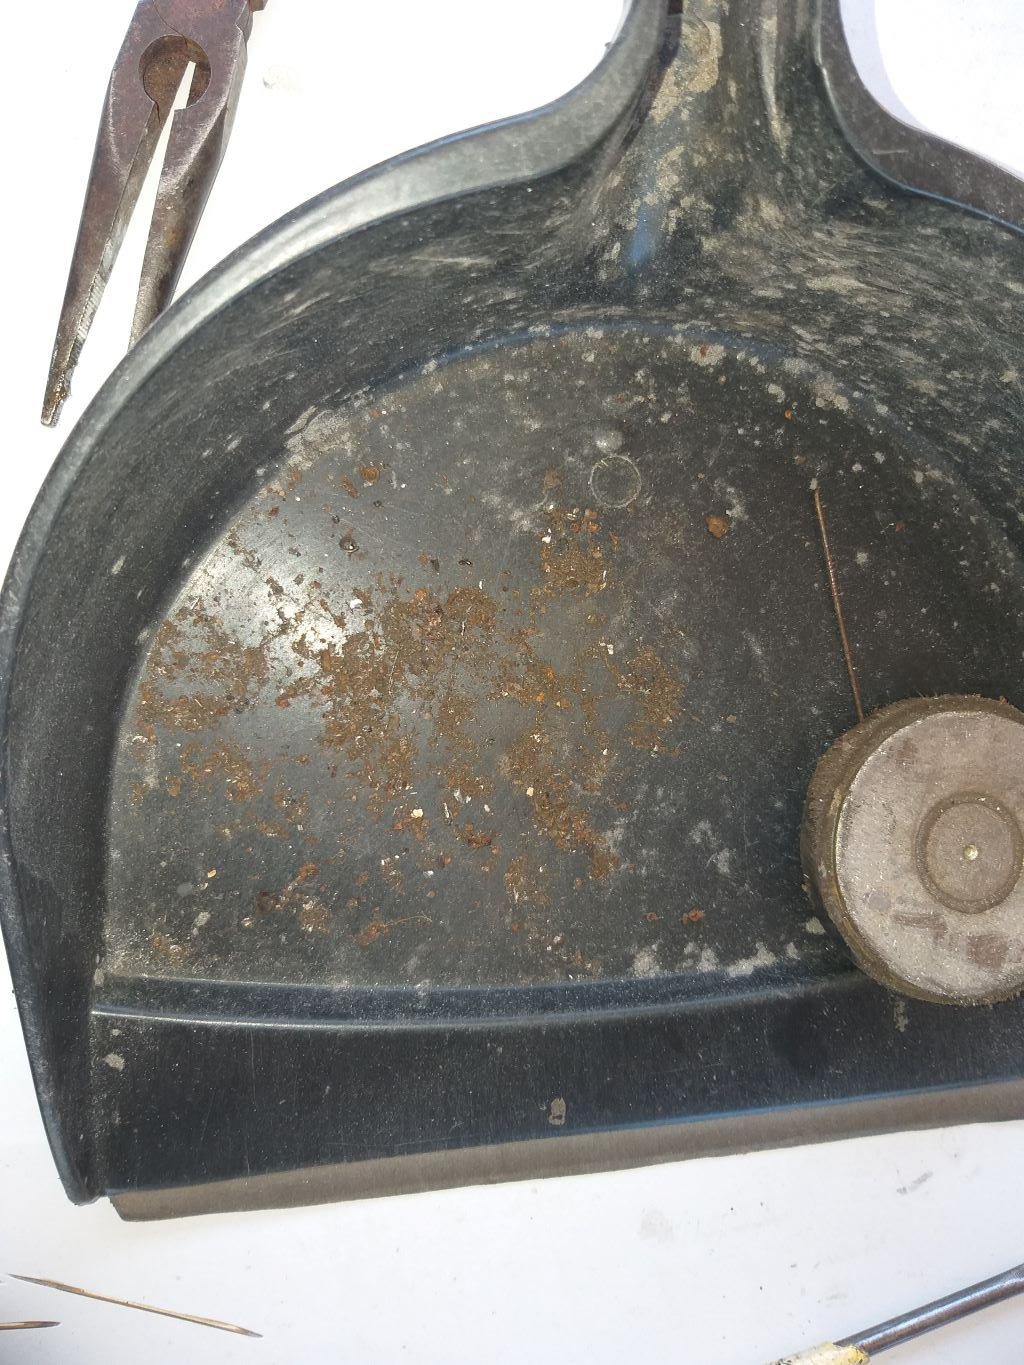
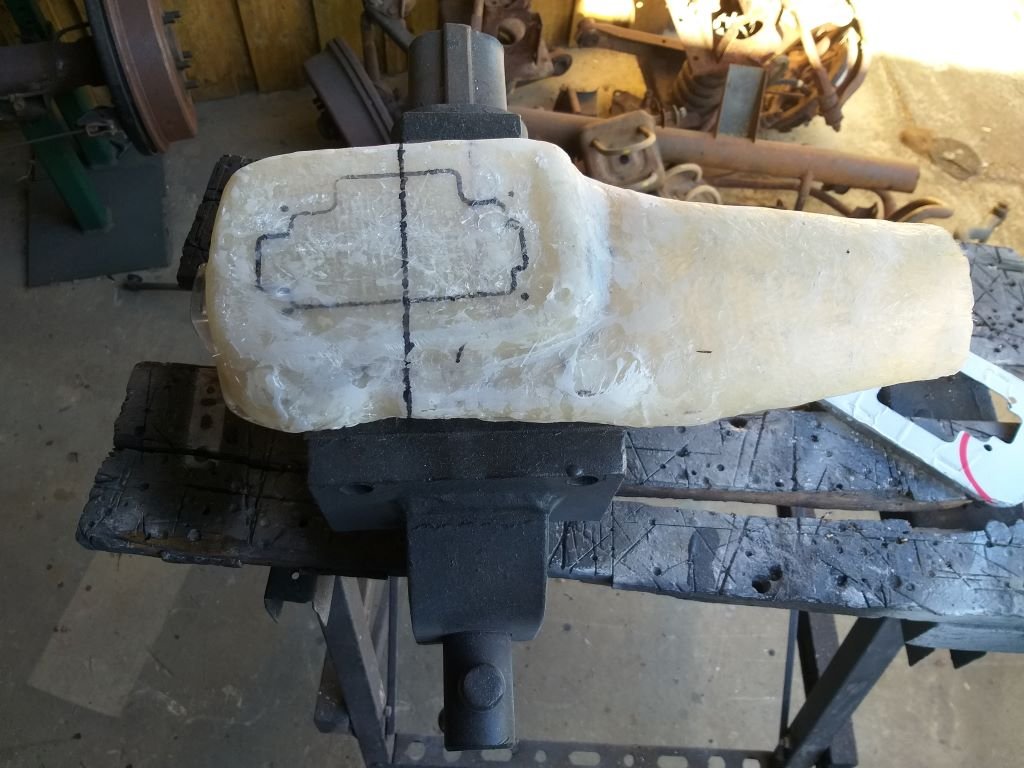
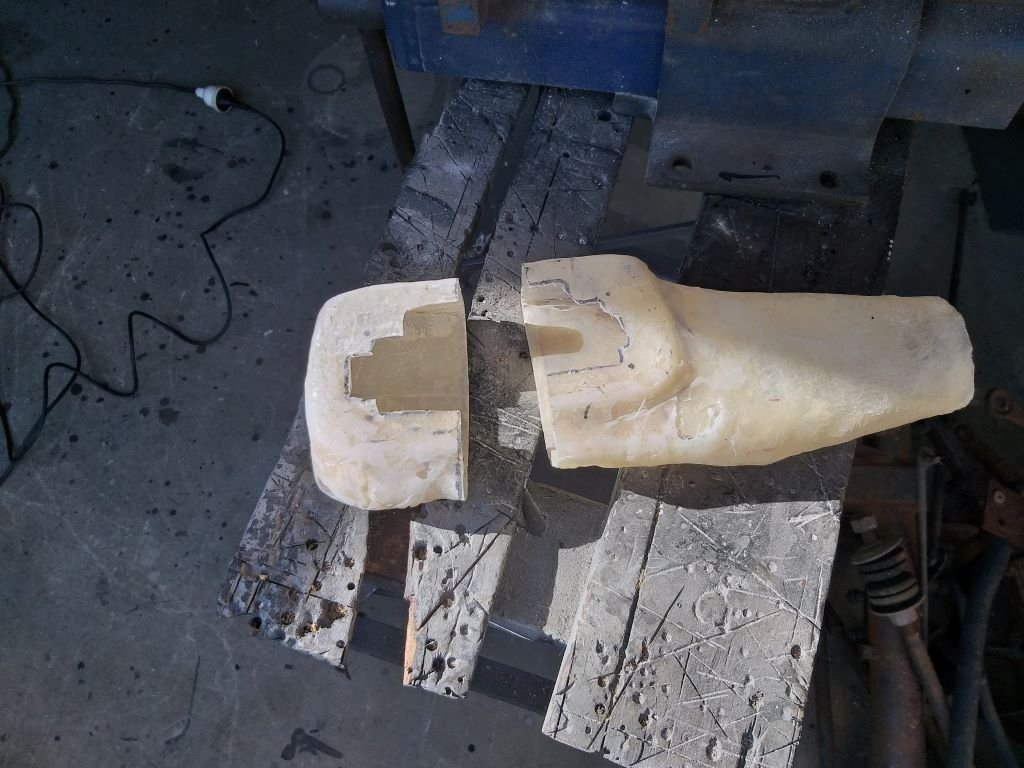
It's a bugger to work on the carby in situ as there is absolutely no space, so I whipped it off to make some adjustments. Pulled the lid and sure enough the float level was way out. Adjusting it was easy enough and went off without a hitch, apart from me managing to lose the little circlip that holds the choke lever in place. Spent a good 15 minutes on my hands and knees with a magnet until I found the little bugger. It's amazing how many shavings my magnet picked up at the same time. Eventually found the circlip so all's well that ends well. While I've got the carby off I'm going to complete my fibreglass snorkel hat. First step was to cut my creation in two and give it a test fit. It's still a bit too high, so I've sliced a good 15mm out of each side. Lunch stopped play, but tomorrow I'll mix up some resin and patch it all together again. Oh, in other news while we were out on our cruise, I checked the speedo against our GPS. Turns out the speedo reads 10% higher than the GPS which is pretty lucky when you think I'm running a Toyota gearbox coupled to the original Thames speedo. Thanks for looking.
6 points
-
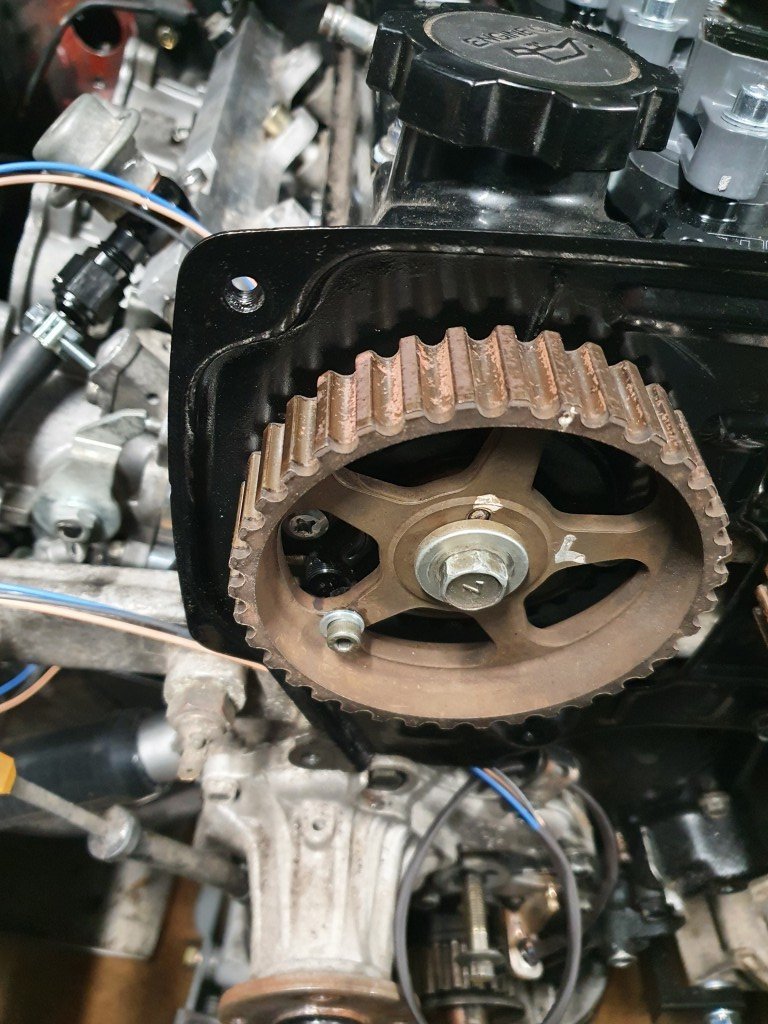
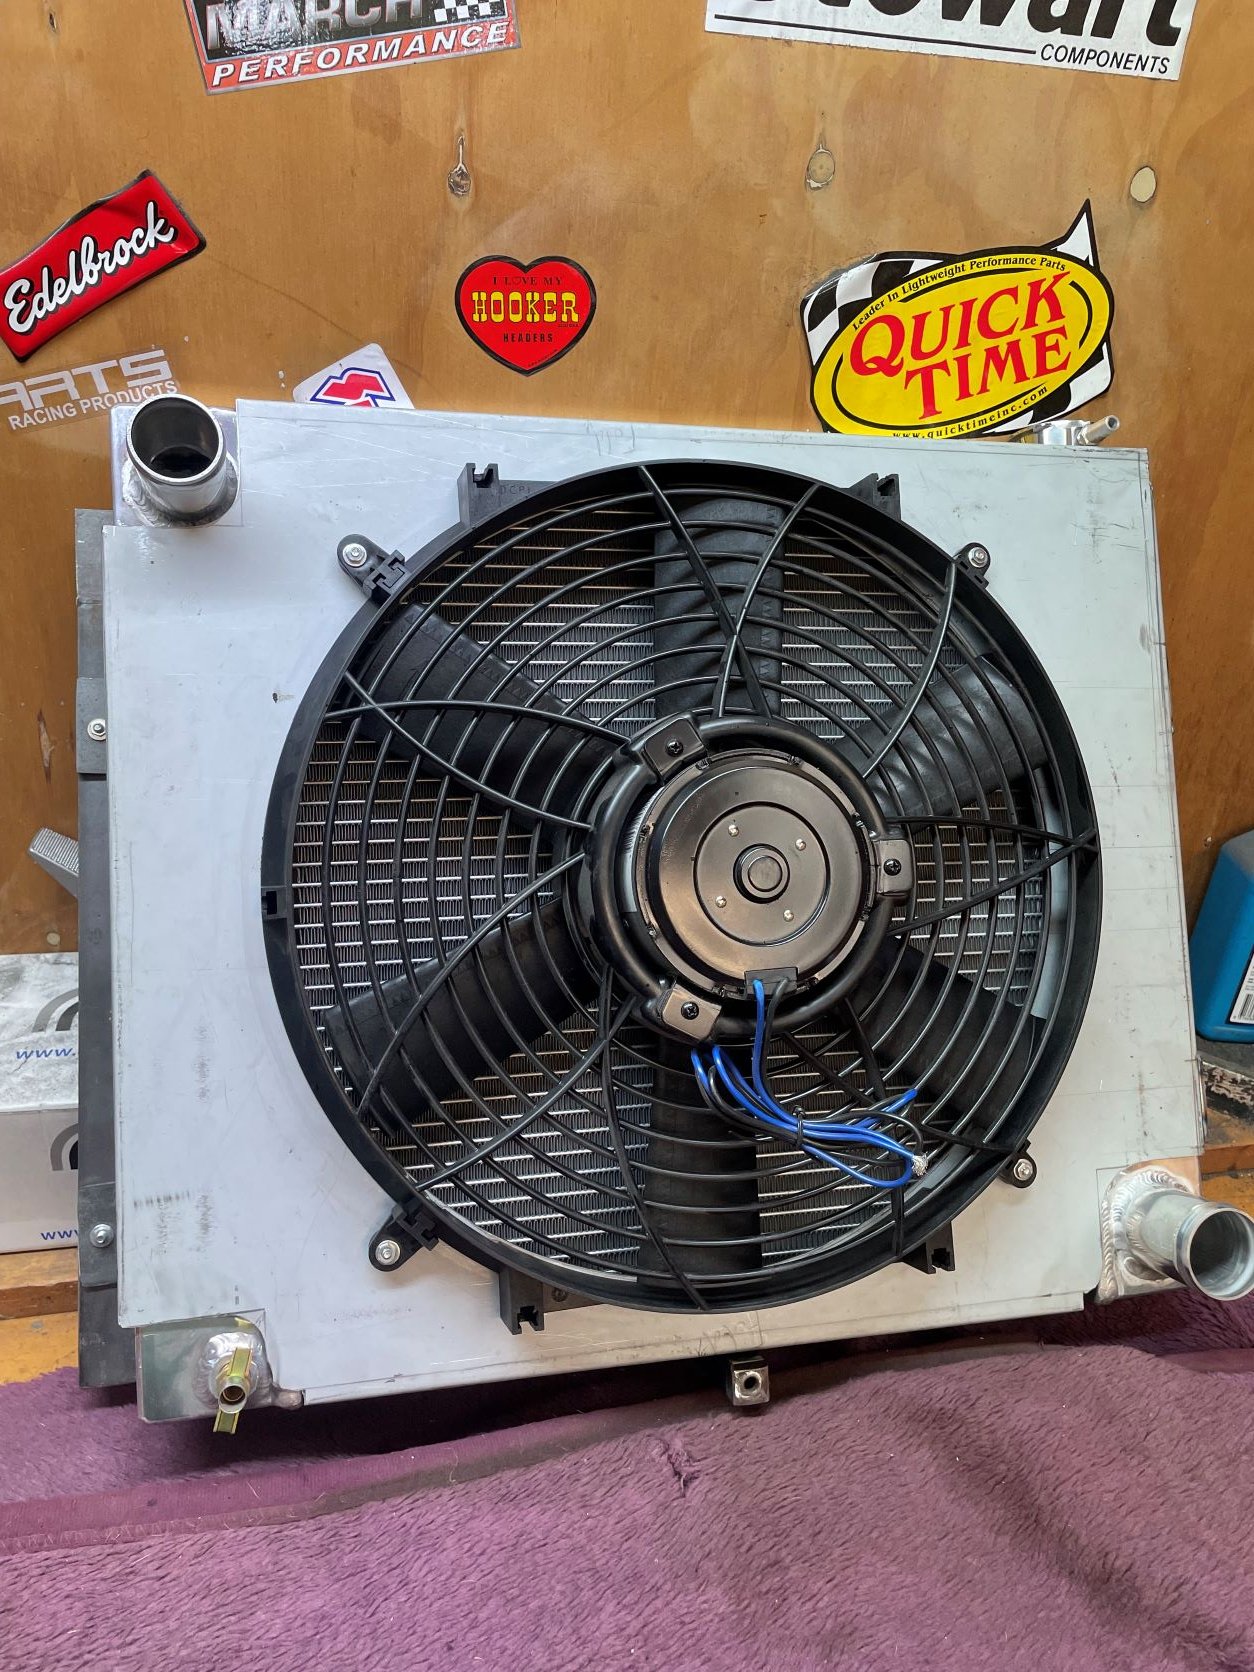
Small update: Bolt, locktite & jam nut on the cam pulley to activate the sensor. Got a small bit of bling I've been waiting on from Japan for 3 months, looks like a Cusco strut brace. Radiator mounts should be done this week and I've tracked down most of an exhaust and driveshaft local to me. Excuse the lower radiator hose, its only on there because it was getting in my way while working.
5 points
-
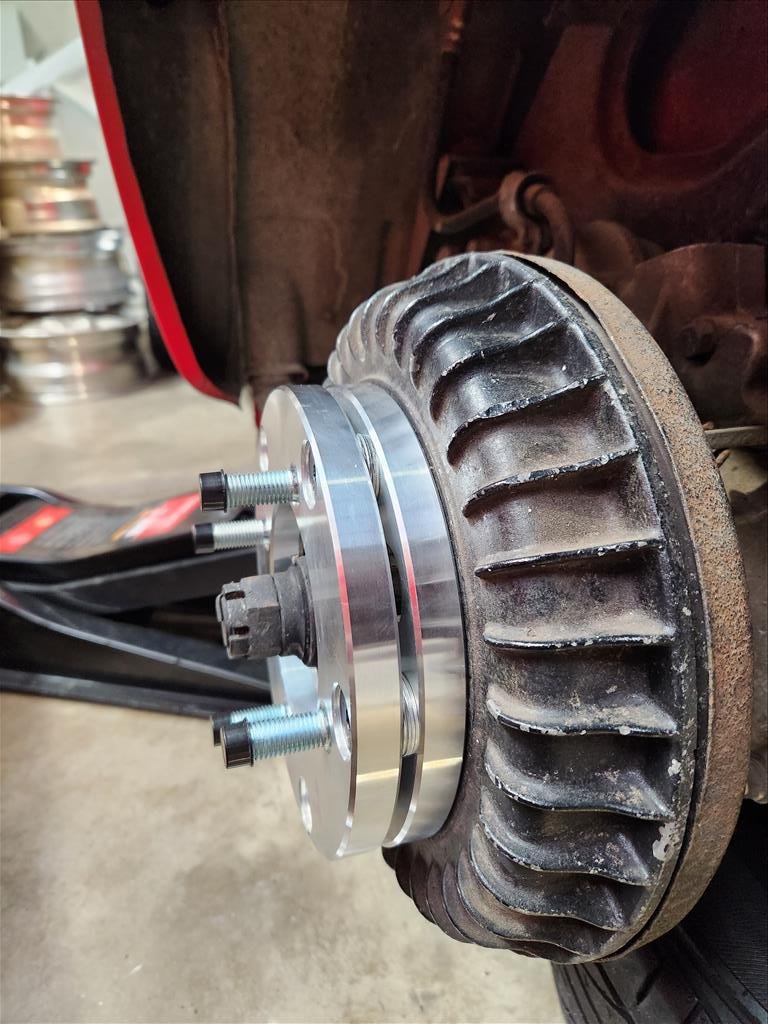
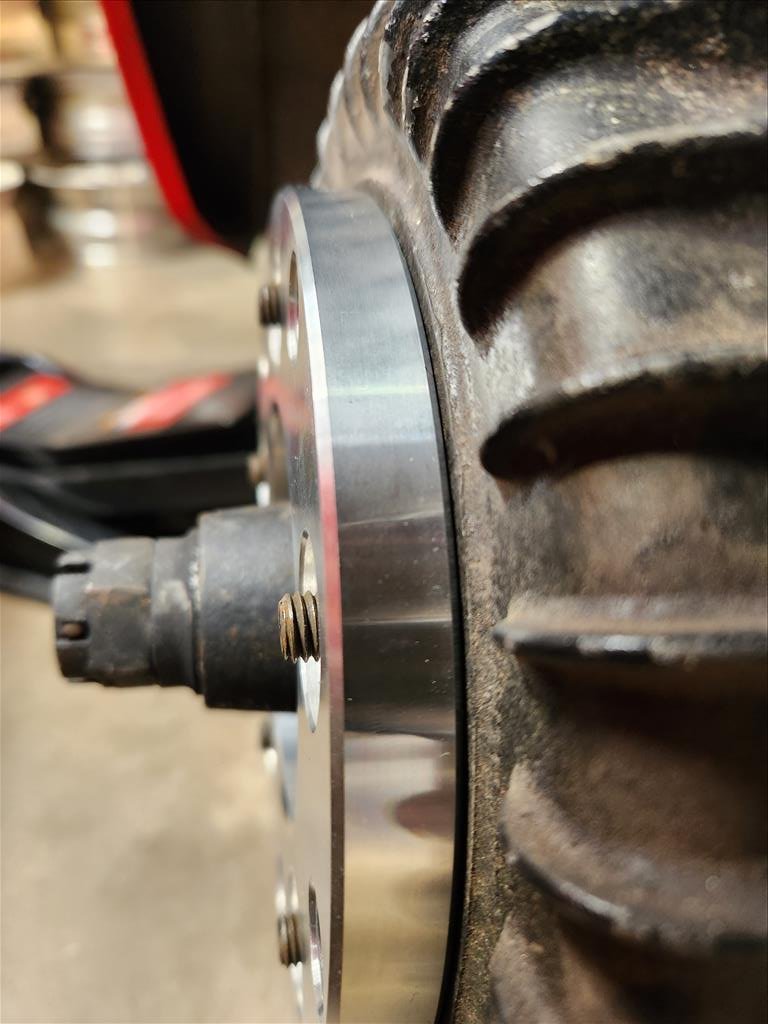
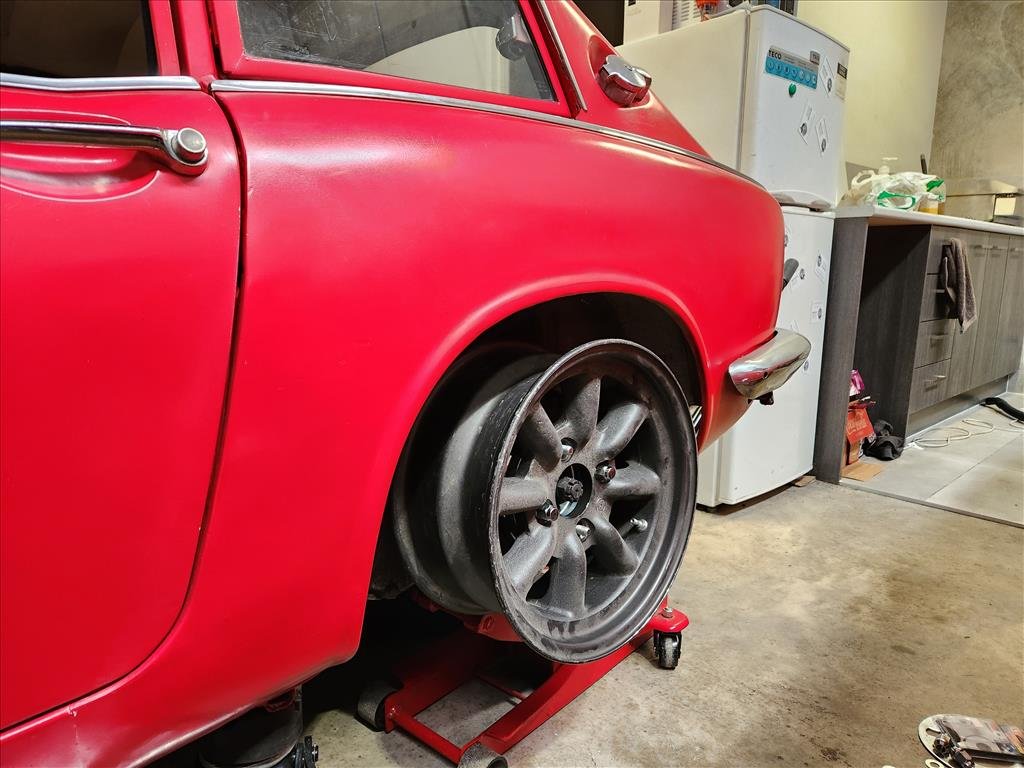
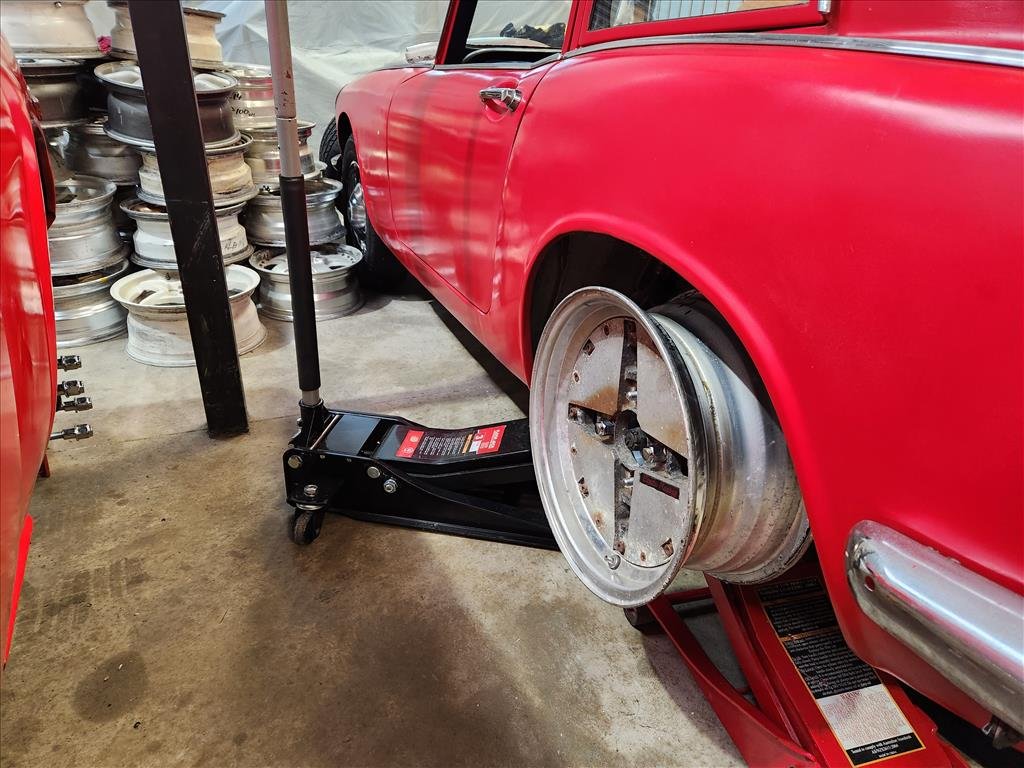
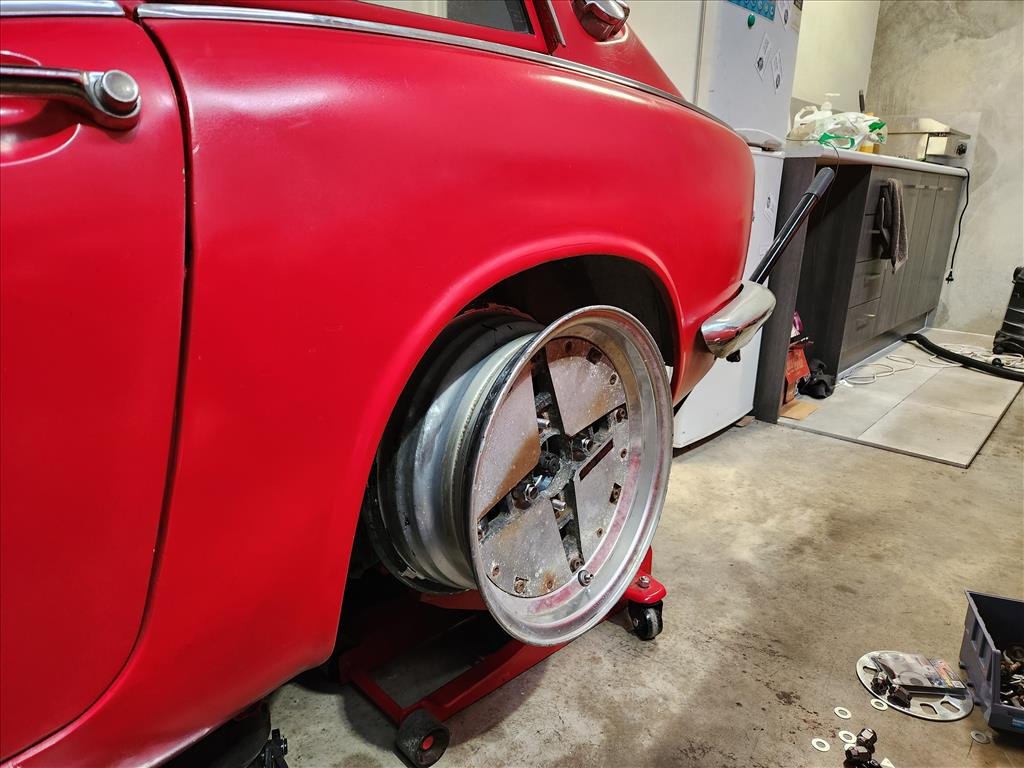
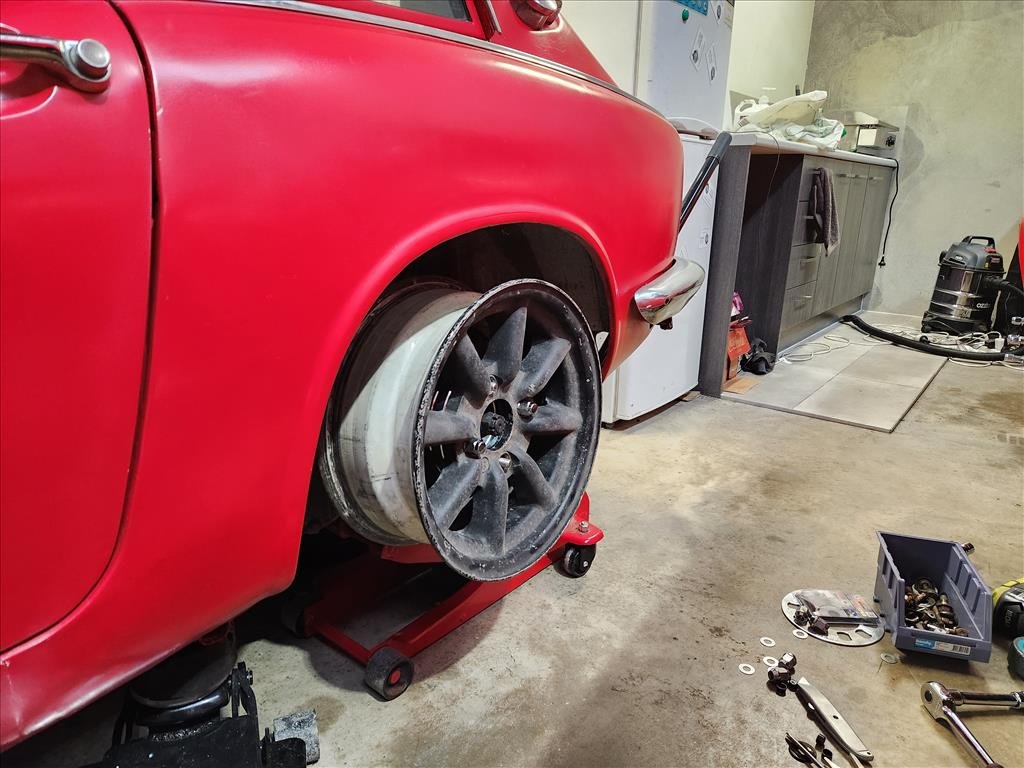
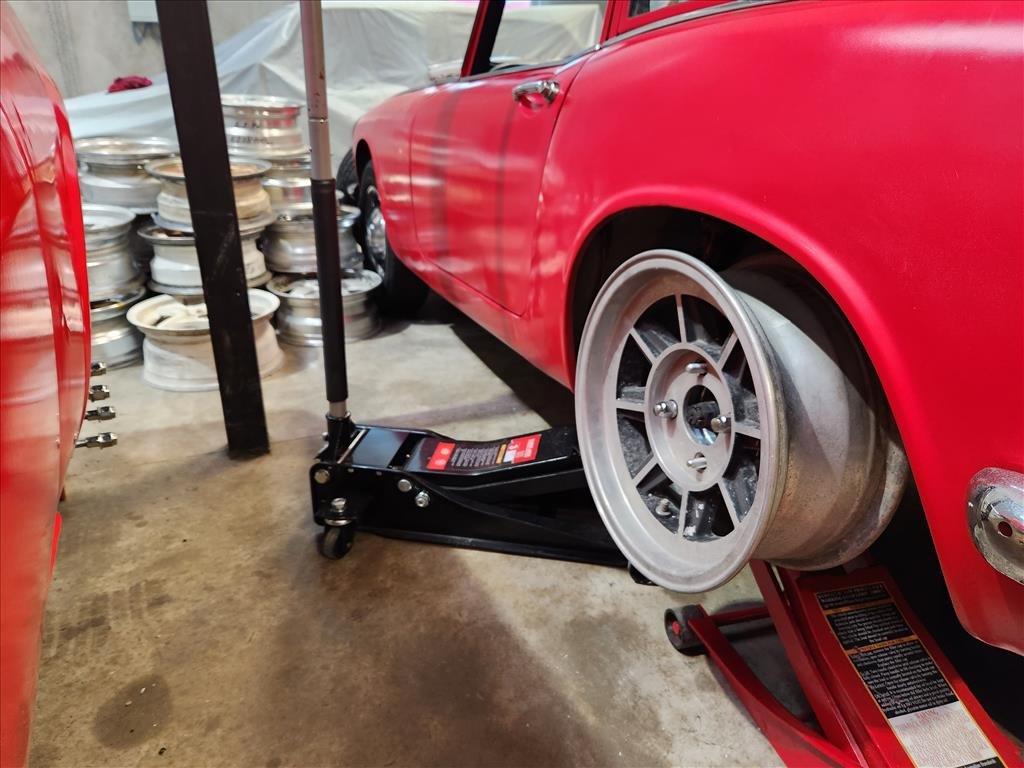
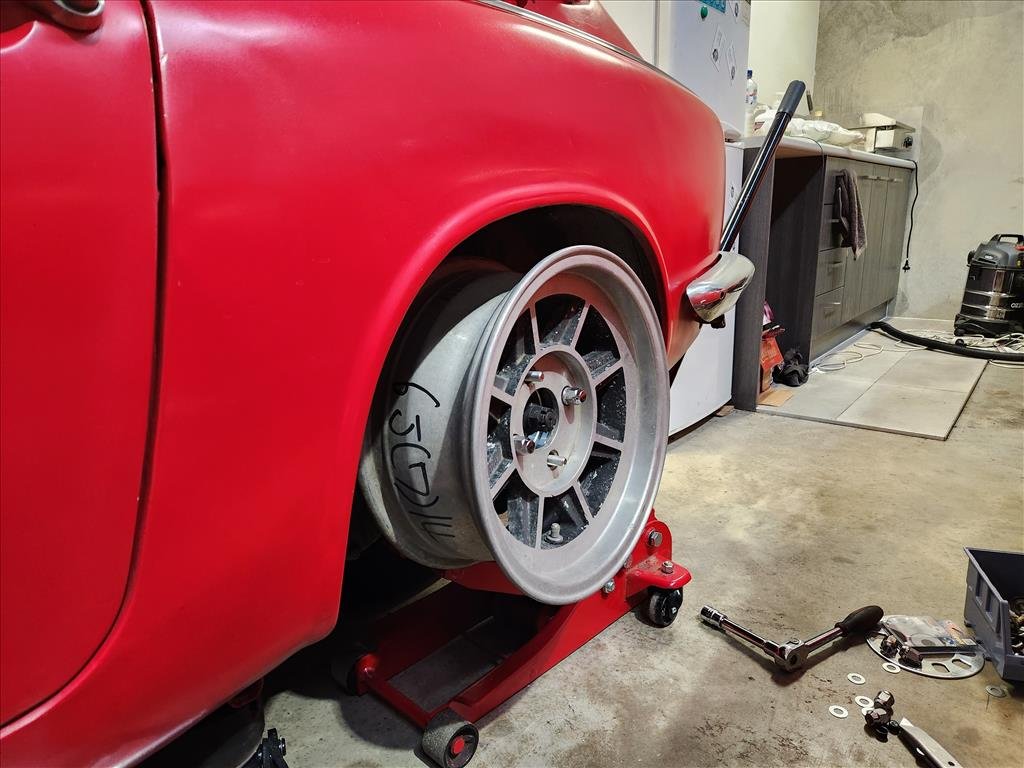
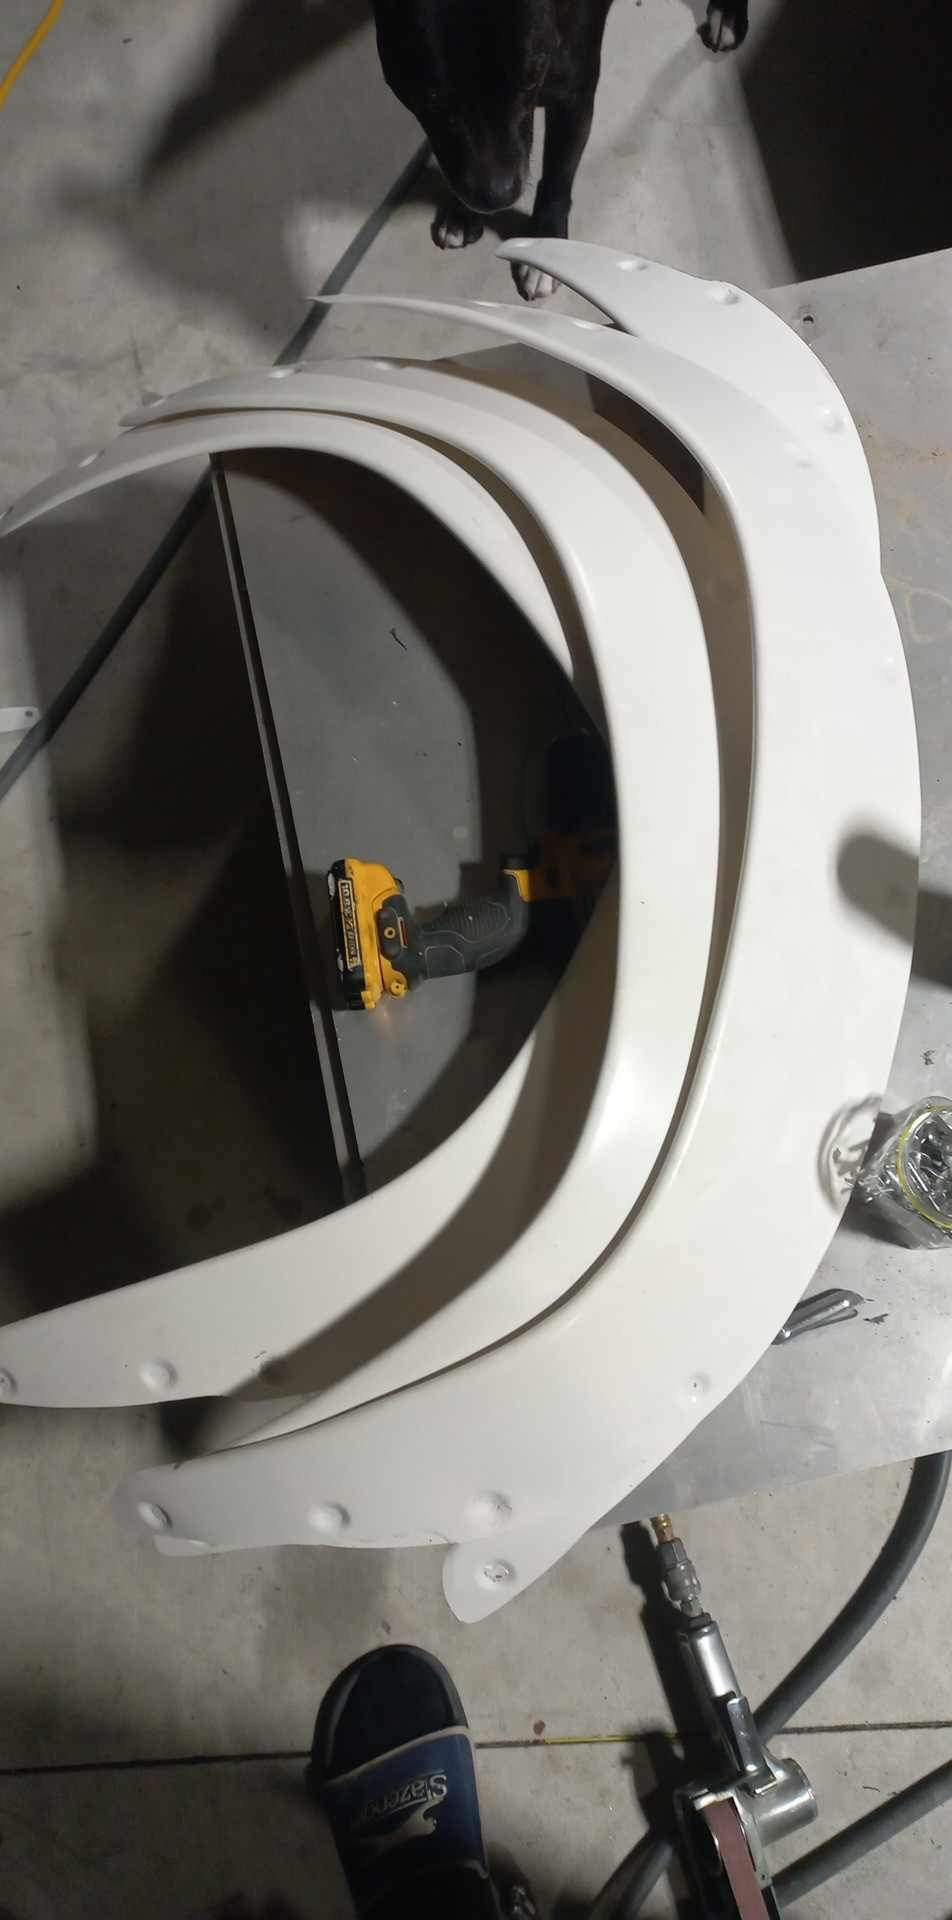
Strap in kids this one is image heavy. I received the spacer adapters during the week and this is how they work. There are two parts with the outer part being bolted to the inner part using those allen head screws. Not super into those allen screws as they have a tendency to round out but probably limited for choice. Apparently in 1965 M12 wheel studs were not invented yet so the S600 just has M10 and the spacer place didn't have a suitable small nut to use however the OEM nuts probably can work but they protrude past the spacer, along with the stud. We cannot machine anything out of the other side of the spacer because of where the studs are for the 4x114 portion so for the purposes of this exercise I've just used some washers. This makes the effective spacer 35mm instead of 30mm. So now, feast your eyes on a large variety of wheel testing in the rear. These are all 6-7 inch wide in varying offsets. Anything more than 6.5 is pretty much a no go due to the width and the spacer so no super deep dish sadly. In the front I knew it'd be a struggle so I didn't go crazy and just mounted up this watanabe which is 14x6 and it still pokes out a bit.. maybe I can find 14x5.5 or find some way to put a little camber up front. I also noticed a lot of grease and fluid up front that I decided to ignore. I like the look of the watanabes as the faded black coating that the used ones usually have matches the 30 year old dulux paint job on the car. I'll have the machine shop make a slightly wider inner spacer portion so I don't have to go cutting studs up I think and we'll go from there. Worst case maaybe I can find a smaller nut and cut stud but would prefer to avoid that.
5 points
-
I went with curved. I thought I had a 16mm/5/8" tube bender but its actually a 1/2" so instead I heated the tube up and bent it carefully... Turned out OK. Not too ovalised or squished at the bend point.. Cut out a small section I needed and welded it in place. Then brazed the Nissan regulator flange on. I now have plenty of clearance around the spark plug hole and the regulator is tucked away a little more from obvious sight. The fuel hose will run neatly over the starter or possibly run it below. I'll decide this when its all being set up in the car. As you can see I had fitted the transmission in place and the starter so I could decide better on the positioning of things. That rail finished I moved onto the other side. I decided I'd run the hose down. Fitted the inlet bit in place, orientated the hose where I wanted and marked it. Brazed in place... Filed the joins and tidied things up as and where I saw fit.. My work area that morning.. Almost getting to the reassembly of this engine But before I stripped it down I marked out the perimeter of the engine crank case onto the rear plate/bellhousing combo. Then I very carefully, with a teeny little slot drill, milled some sealant retention grooves between the bolt holes to a level just above the expected oil line.. Now I could strip the engine. But before I took the crankcase halves apart I gave them a quick tickle with a wire wheel. I'll be painting them soon so I wanted a good smooth surface. It'll never be as smooth as a factory finish because the old paint is too chipped. But it'll look neat enough. Then finally back down to two halves... I pulled the pistons out from their storage spot for a clean. They are actually way cleaner than I remembered with really only the tops having light carbon build up. Interesting and pleasant surprise I discovered. The pistons have press fitted wrist pins. I had always been assuming they would be secured with circlips because I had been told this engine was an '88. In the first year of manufacturing of 1500s, 1988, they had circlips and then they changed to push fit (I'm hazarding a guess that they might have had some engine warranties due to adventurous circlips leaving their allotted slots? ) Anyway. That's nice. There is also one other minor change made to the engine internals around 1990ish, maybe a bit later, when they added needle roller bearings to the valve lash rockers. I'll show that in more detail when I get to it and will discover what type I have. Back to the pistons. I've set up a little cleaning station at the bench and have been getting high on acetone. Too much fumage really - I think will leave the rest until next time and do this job outside. But they are coming up pretty sweet! After they are cleaned up I'll have to make three special piston ring compressors for the assembly of the second crank case half over its 3 pistons. More about this next time4 points
-
As a beginner, I'm picking my arse and bike may not be up to doing the whole thing.....So I'm thinking I'll stop of at Cromwell on the way down and stay with my cousin (married the Publicans Daughter at Bannbockburn), then catch up again in Ranfurly for the ride home. On the day off I'll go walk the Poolburn Gorge section of the rail train (in from Lauder) if I can feel my legs.3 points
-
I dont recall it being too much of an issue, im pretty sure i could wear my steel caps without too much drama. I have been subscribed for a while so have seen it anyway, one of my favourite youtubers....2 points
-
China will put whatever standard they feel like on a lens to sell crappy light to round eyes You will probably find they won't meet wof beam pattern requirements though2 points
-
I'm not sure what's up with redline saying they can't be certified, it may be an ass covering statement, so they don't have to warranty any that fail cert. It's not a loaded arm so should be OK provided the welding is good, sometimes the robot who does the welding at hardrace forgets to turn the gas on or forgets how to weld, then the grinder robot has to come over and grind it out for the welder robot to have another go Also sometimes there are bind issues with hardrace stuff. Generally it's OK though. I'd steer clear of anything aluminium if you can, that can be challenging to certify unless you can get proof of what it's made of and there's no doubts ie don't buy anything that could have been made in China. Lower arms are no good due to them being loaded ie they support the weight of the car , and there's a threaded rod end that has a bending load on it. Can't be certified unless you get an engineer to supply calcs they are suitable, none of the arms checked meet the loading requirements as far as I've heard2 points
-
Got the lighter weight pink spinnaker out last Sunday. It's in great shape. Then Saturday this week, sent it around Karewa Island in perfect conditions. https://i.imgur.com/cMBiU59.mp4 Then the skipper for Sunday's open series race decided to go fishing because his boat wouldn't move in the 5 knot winds... So took the missus out on ours instead. Got the boat at the marina until next weekend's 2 handed race. Then I can tow it home and make some progress and post some more project thread content.2 points
-
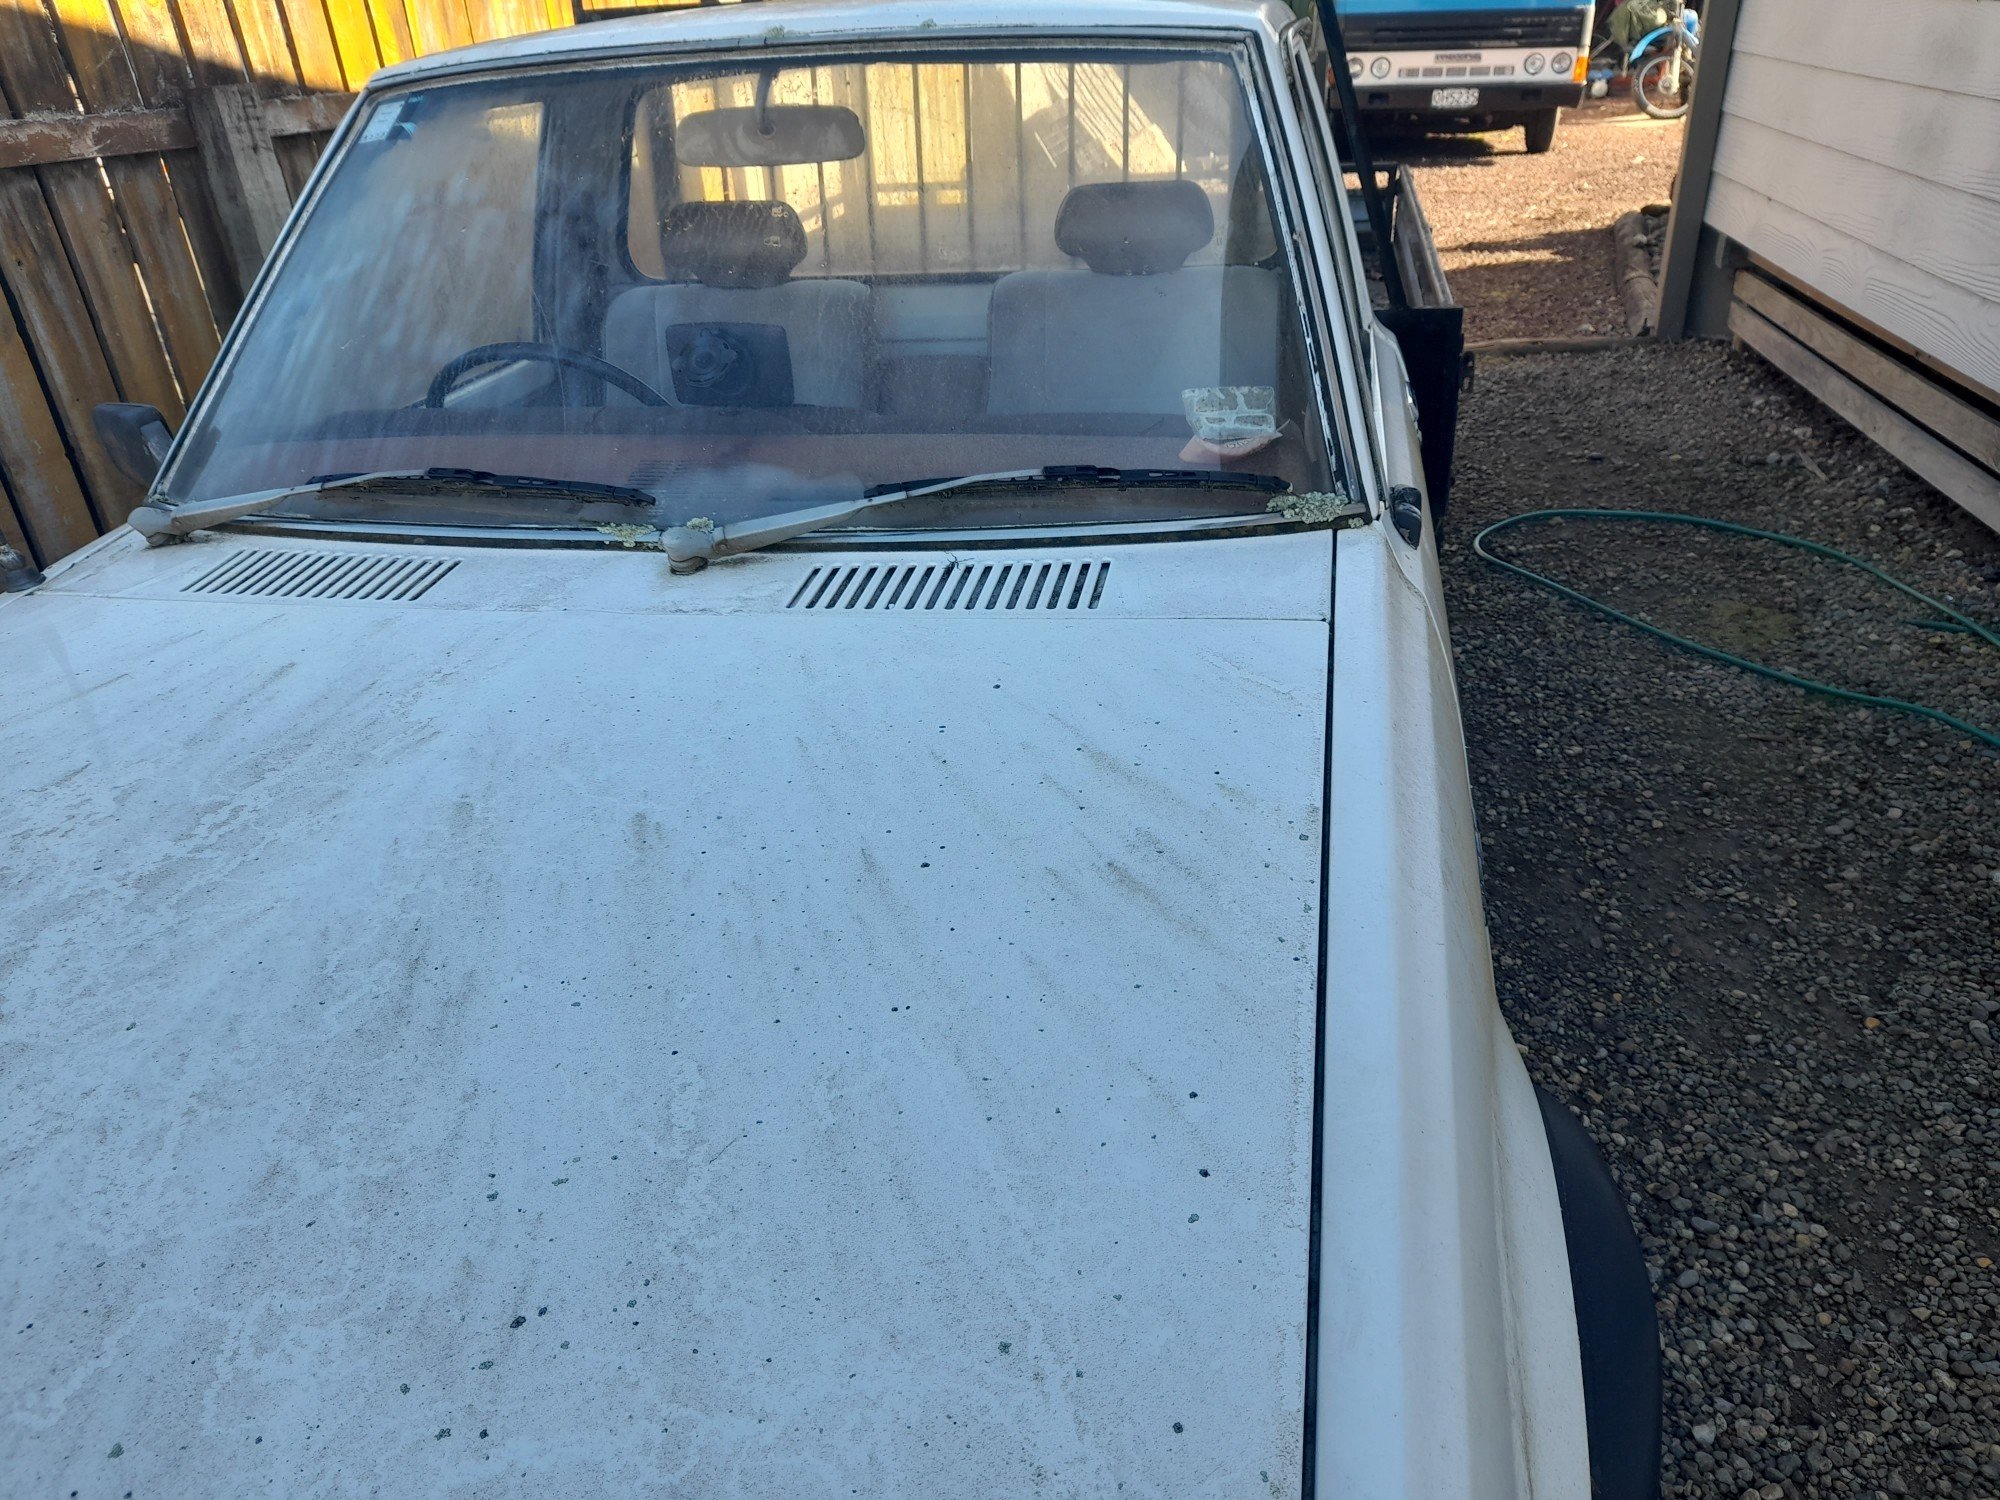
Pre wash. Little bit mossy. Took for a drive up and down the road, gps says speedo is bang on at 50, 1k out at 95. Most accurate car i have! Then went to the local boat ramp for a glamour shot. Which shows a distinct line of where the washbrush couldn't reach lol. Found some rust in the upper b pillar so will have a look at that as the next stage now it is back up and running. And water leak at the heater/bypass pipe, which i knew would happen the second i took it apart to flush it.
2 points
-
Lofty goals, but if you can make the Toyota lump sound 2/3 as good as the Alfa, then my ears will be very happy.2 points
-
My 4 link kit from Kruzin Kustons arrived. quality is on point. Glad I paid more than the low budget imported gear. have got a set of RX3 coupe flares coming from Andy Duffin that he’s dropping off next week. it’ll check fitment to see how they look. might even be able to run a spacer haha so far I have most of the air ride stuff here: bags compressors 5 sensor gauge and switch unit Fbss valve block 5 port air tank just need to sort fittings, water traps and air line, and obviously bag brackets.
2 points
-
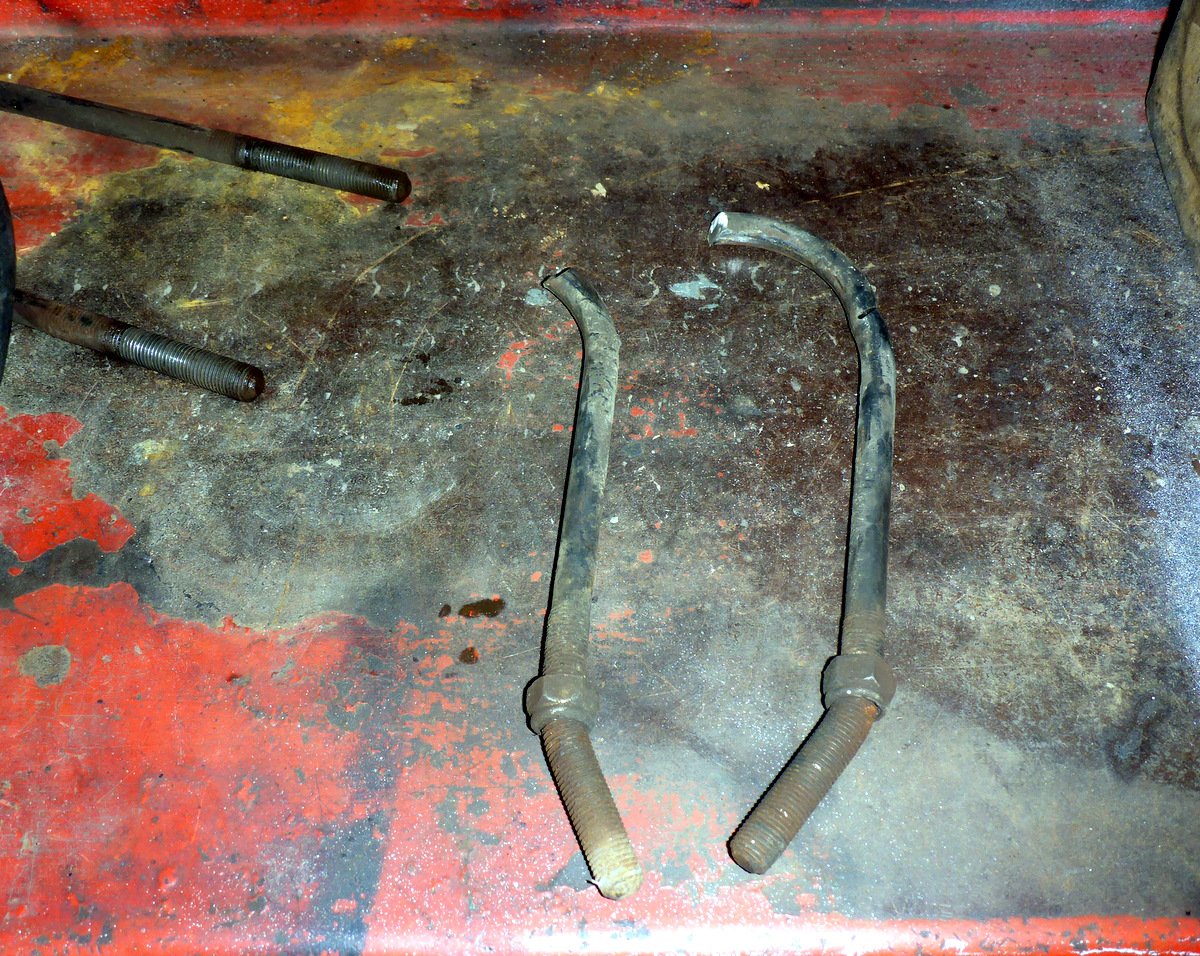
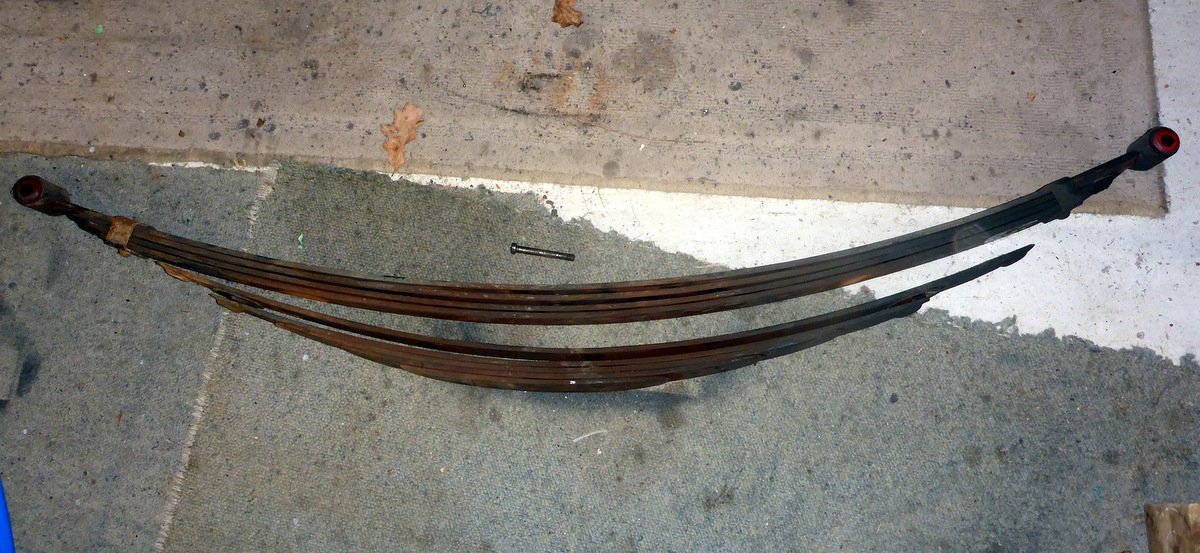
I need to give each coat a couple of days to dry now it is cooler. So, attacked the other leaf spring pivot bolt tonight. A bit loose in there, nearing Al's mum spec. U-bolt might be hard to get off? Nope. The spring centre bolt had lost its nut somewhere along the way, so the lower leaves came apart. This side is only getting a clean and re-paint, no re-arching.
2 points
-
You must think my shed roof has a leak if you're concerned about it seeing daylight in the next 10 years.2 points
-
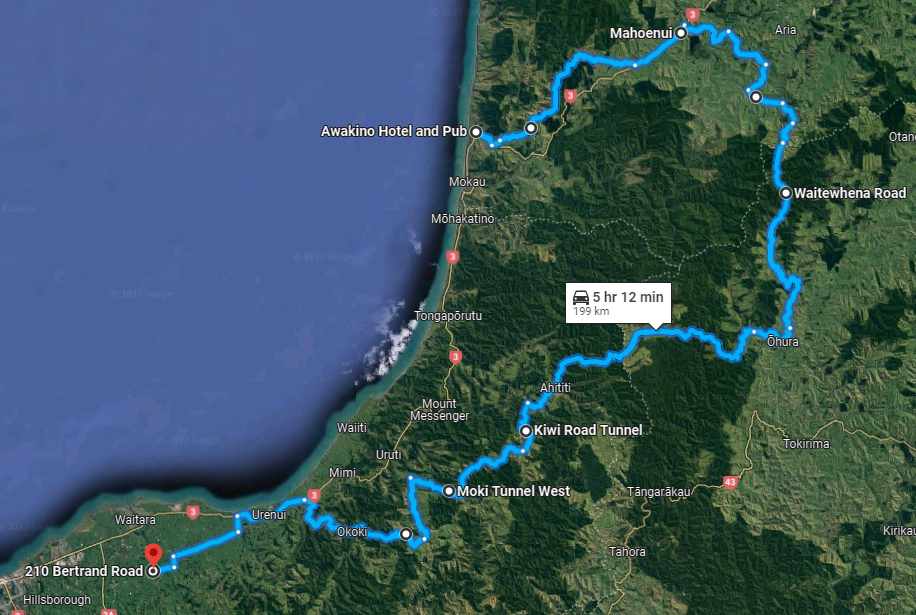
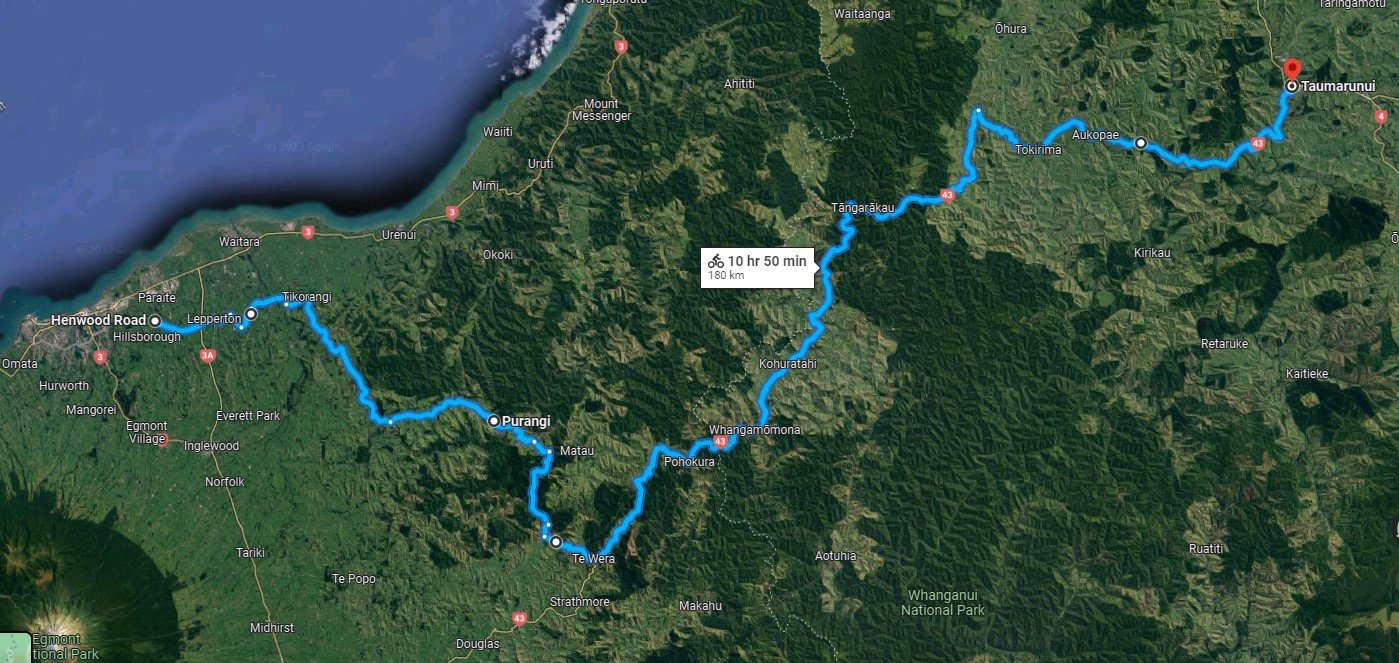
King Country Crusade November 17-19th 2023 J5 is up the duff and Eastcape is off the cards this year. Don’t worry though, @anglia4 and @alfalfa have rubbed each of our braincells together and came up with 600km of twisty backroads, tall and narrow tunnels, smooth and rough gravel, and scenic views spread over 3 days taking in some of the best the West has to offer. Rev up your fizzholes and start prepping those bikes for the King Country Crusade (AKA West-Pest AKA Westcapade AKA Taranaki Tunnel Tour). November 17-19th 2023. If any of you jokers happen to turn up in New Plymouth on the same day and start riding along the same route then wow wouldn’t that be a happy little coincidence. Day 1 180km/220km (depending on route) We head inland from New Plymouth to Taumaranui via the Bertrand road swing bridge (oldest in NZ!), through a few choice tunnels to Whangamomona & Forgotten World Highway. Some gravel, mostly sealed. The famous Forgotten World Highway, a must ride for every self respecting motorcyclist in NZ. Lunch stop at the classic Whanga Hotel for hot chips and a lemonade. There is an option to go via Old Whanga road if conditions allow - this is 18km of unmaintained dirt road challenge! Petrol NP (0km), Taumaranui (180km/220km). This is a big stretch between fuel so you will likely need to carry extra. It might be a good idea to figure out what kind of range your bike gets and plan for how much extra you’ll need. If you can make this leg easily then ask yourself - am I really riding an appropriately terrible bike for this kind of adventure? https://maps.app.goo.gl/xHZrKrMuJRRwFZfu9 Old Whanga Road - Extra for hardcones Part 1 https://goo.gl/maps/BUH3qGTUpXz1H7rQ6 Part 2 https://goo.gl/maps/XR8LUMGDvmnAfiFm8 Whether we attempt this or not will be very weather & pre-ride reccy dependent. The clay/papa rock surface supposedly turns slipperier than eel snot after any rain. It's also only halfway through day 1 so we don't want to have half the pack drop out before lunch! Stay: Taumarunui We’re staying at the Alexander motel but lots of other options exist in town. Twin Rivers Motel is just over the road. There is also the Taumarunui holiday park which is 3km down the road for campers. Or take your pick of abandoned house in town and mancamp in the backyard. The RSA is just round the corner for a refreshing post ride beverage and there are a selection of ethnic eateries nearby to satisfy even the most discerning palate. Day 2 190km Taumaranui to Awakino via Ongarue, Aria, Piopio, Pomarangai, Waikawau Beach Tunnel. The roads today will be a good mix of gravel and sealed. There is a scenic detour along the way to visit a rugged west coast beach accessed via (another) tunnel. Lunch stop at Piopio. Petrol Taumaranui (0km), Piopio (85km), Awakino (190km) I've had to split the route into 2 halves to get google maps to play nicely with following the route. Part 1 Taumaranui - PioPio https://maps.app.goo.gl/gJE2dKd4EhQeVTeW7 Part 2 PipPio - Awakino Hotel https://maps.app.goo.gl/ZY83ypAUv3Q7NGn57 Stay: Awakino/Mokau We’re staying at the Awakino Hotel and Pub. 06 752 9815. There aren’t that many rooms here so get in early. The dude here also reckons he can sort out other accommodation in town if needed so holler at him if the pub is full. Tent-pitchers or cabineeros can stay at the Seaview holiday park (06 752 9708) 3km down the road or at the Whitebait Inn 06 752 9713 in Mokau 5km down the road. Day 3 200km ish Awakino to NP via Mahoenui, Ohura, Ahititi, Urenui. Lots of gravel, lots of corners, sweet tunnels and ride back across the oldest traffic suspension bridge in NZ. We're deep in the wilderness pretty much all day so bring mi goreng and a stove for a hot roadside lunch or stuff ya pockets full of muesli bars and last nights leftover burger and chips. The Ohura Cosmopolitan Club will be opening up their kitchen for burgers & fish'n'chips for us on Sunday from 11:30am! Petrol Awakino (0km), Urenui (185km), NP (205km) Another big stretch between fuel stops so you will likely need to carry extra again. https://maps.app.goo.gl/NfEvUgDpyMo2TW1AA We’ll probably have post ride beers/BBQ/bonfire somewhere in NP? Details to come for where to assemble on Friday morning and leave vehicles and trailers behind. We don’t have a support vehicle and trailer sorted yet so if anyone is keen to volunteer that would be two thumbs up. *There is a trailer just waiting for some champ to hook up and drag along. We have 2 support vehicles and trailer confirmed! Entry Form: https://forms.gle/Ertmwgaqdu6jJFep6 Please make sure you have accommodation sorted for Saturday night in Awakino/Mokau before submitting the form - this is limited and will probably restrict numbers unless you’re going to be a happy camper. Entrants: @anglia4 @alfalfa @Itchybear Bucket Barry @Duke Blackwood @WankBankA100 Dan W @northernal Chris R (Tofa) Alan H-R (Ginga) @Gyrocket @morkster (support) Greg H (gregbop) Connor D Travis K (trav) Richard S Matt N Shaun M Paul M Brian S (Support) Dallas W Karl D @iwanttobeamole @TheGriz Brett H Chris K Darren P Zac B Neil S Jose R Ian D Luke B DNS. Nathan M (Gazza)
1 point
-
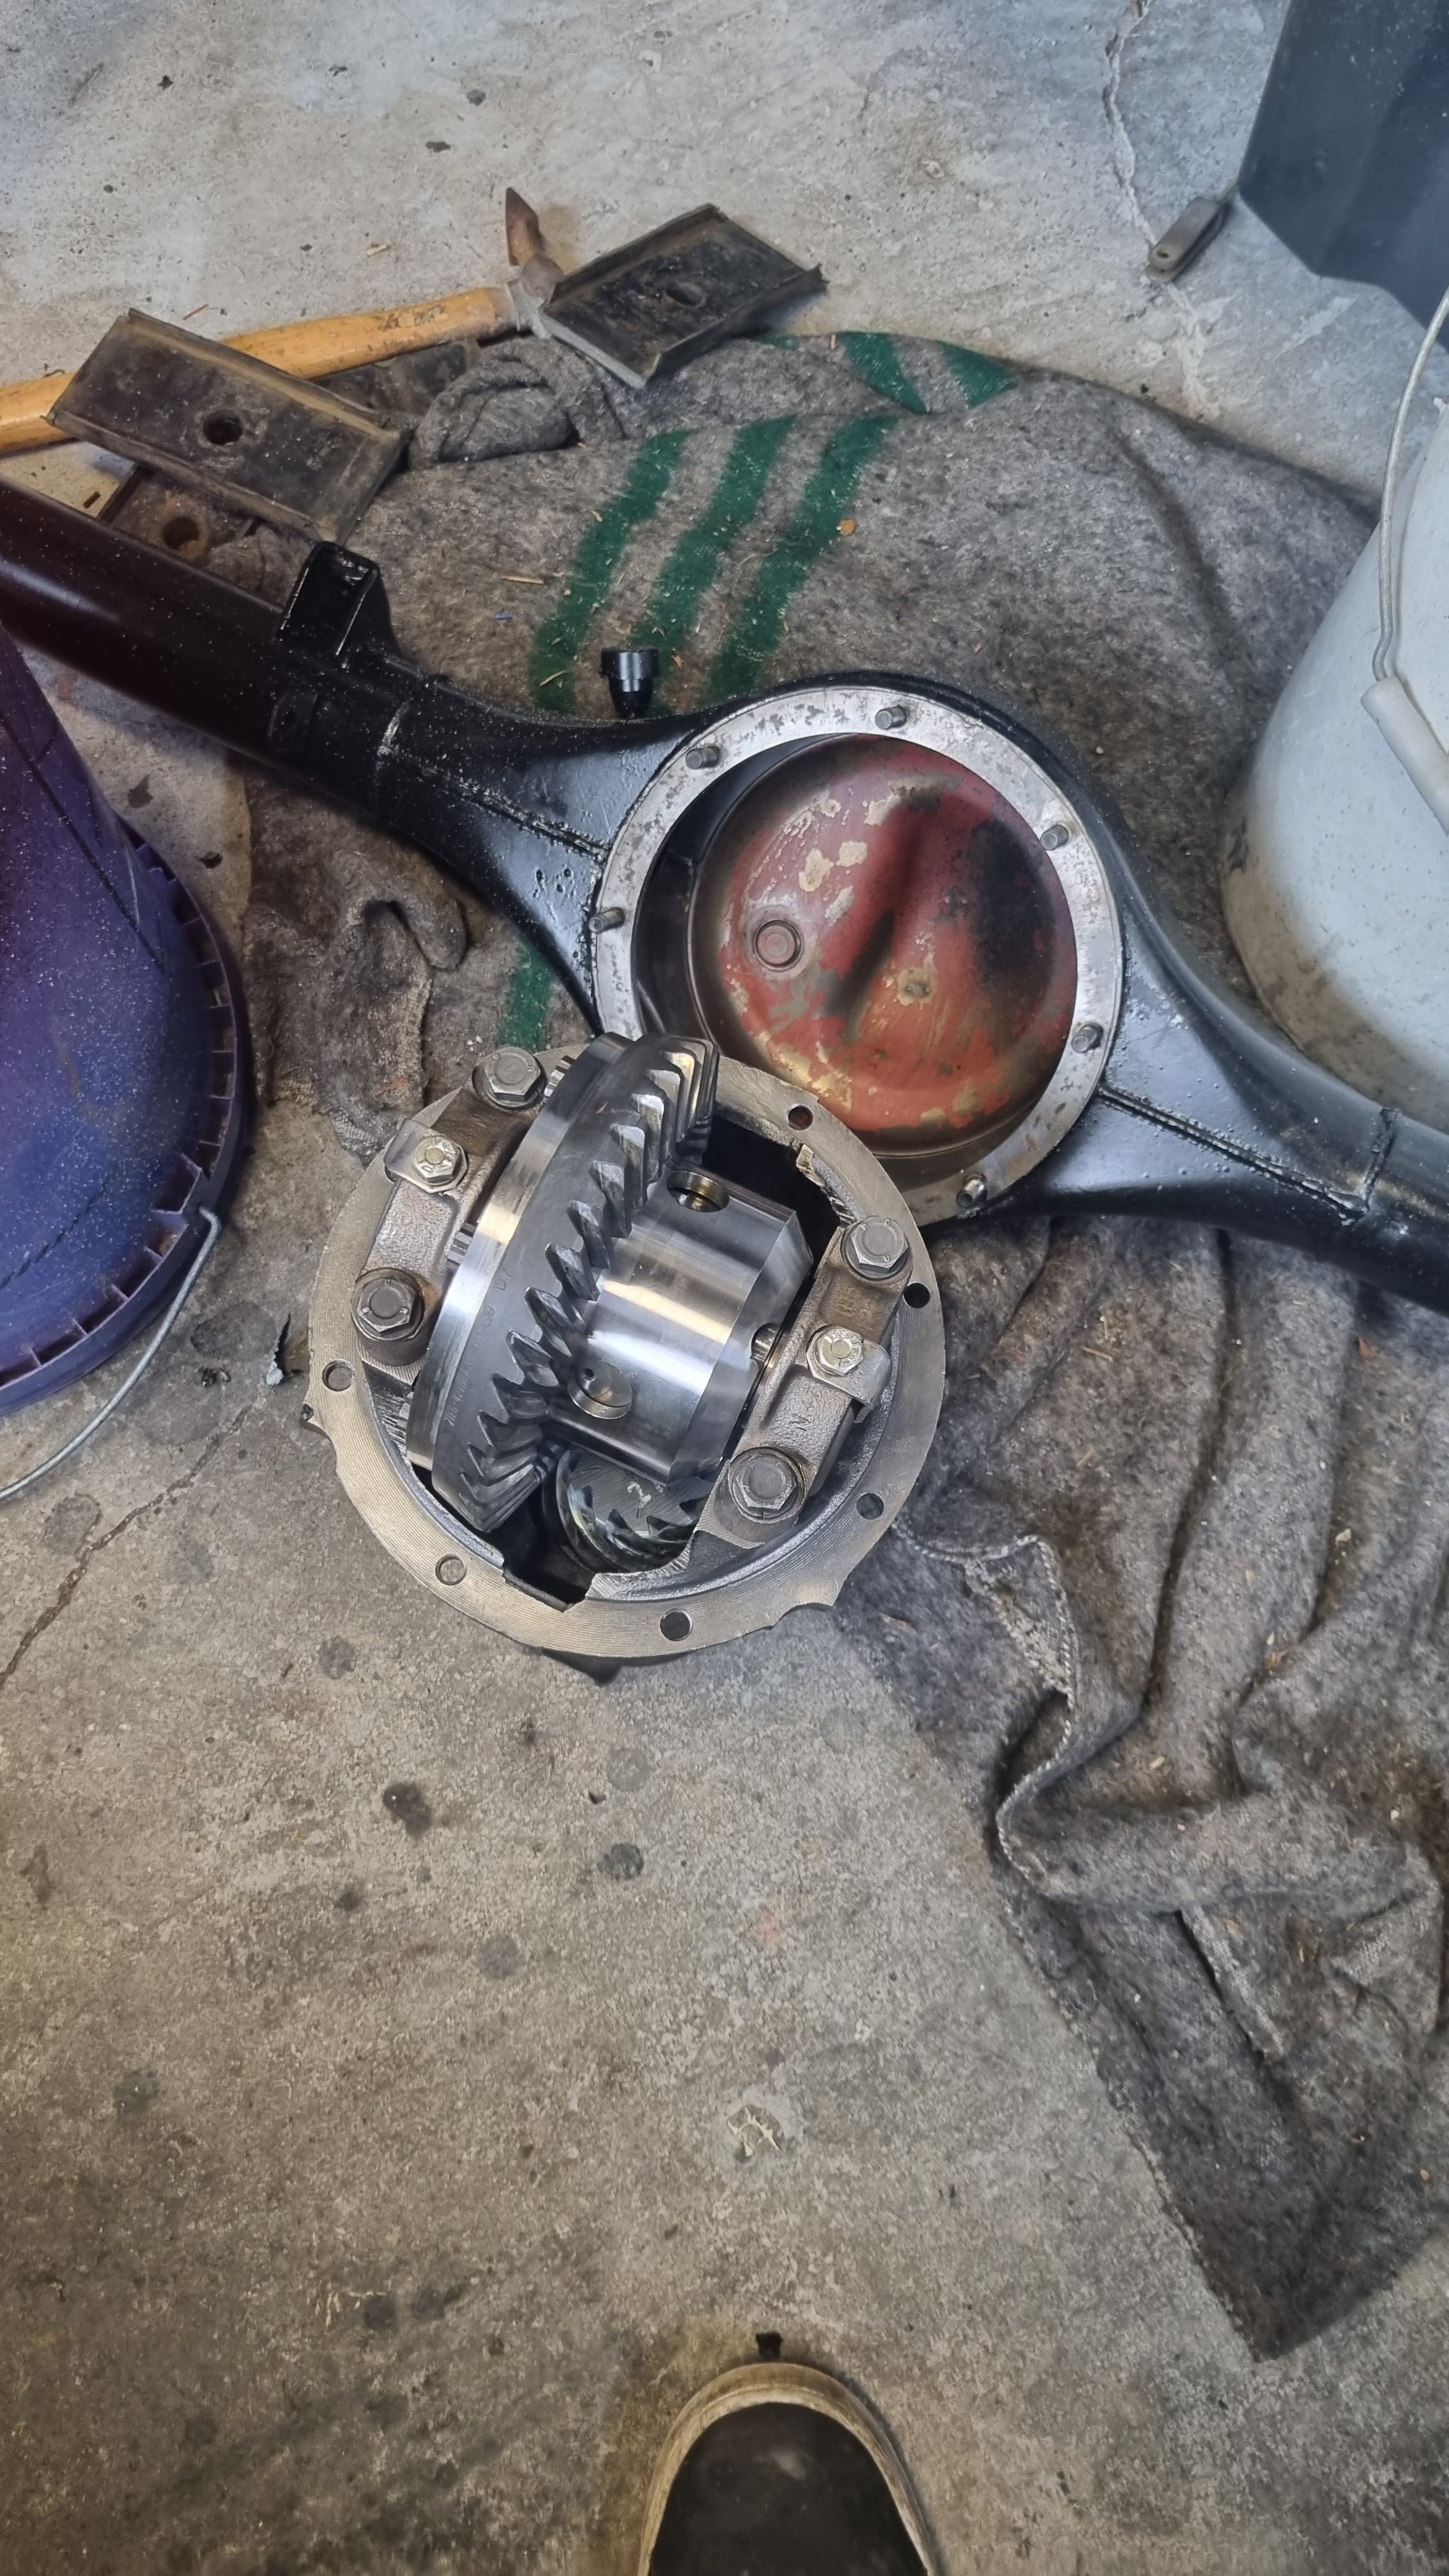
LSD and new bearings installed, meshing was perfect in the end, very happy with my first diff rebuild, more parts to aquire now to keep going!
1 point
-
I might even take a pic or two for everyones viewing pleasure.1 point
-
I just checked, they do not achieve any meaningful standard for beam pattern. They are so shit I am not even sure they are worth selling on.1 point
-
Sounds good man, lock it in! If anyone else is driving a trailer down with bikes on that wants to follow the group along the route that would be sweet, 2 support vehicles should be able to cope with anything that gets thrown at us.1 point
-
No idea, I haven't hooked them up. You have to assume they do the correct job tho, otherwise why buy them...?1 point
-
Only because "Grunty Chicken" didn't enter this series1 point
-
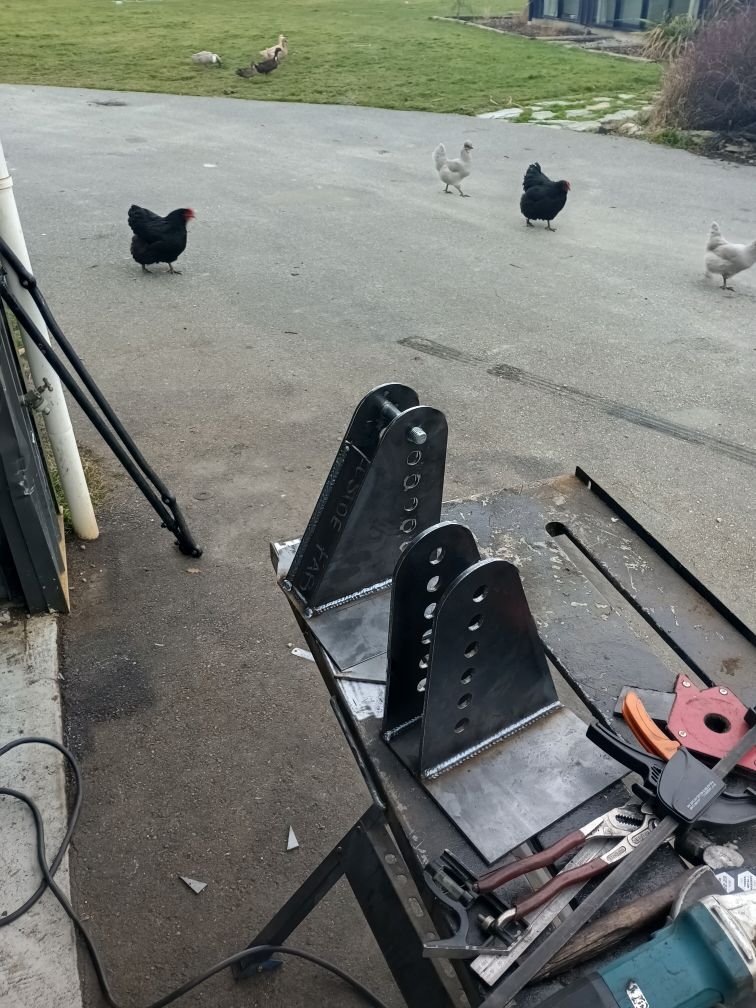
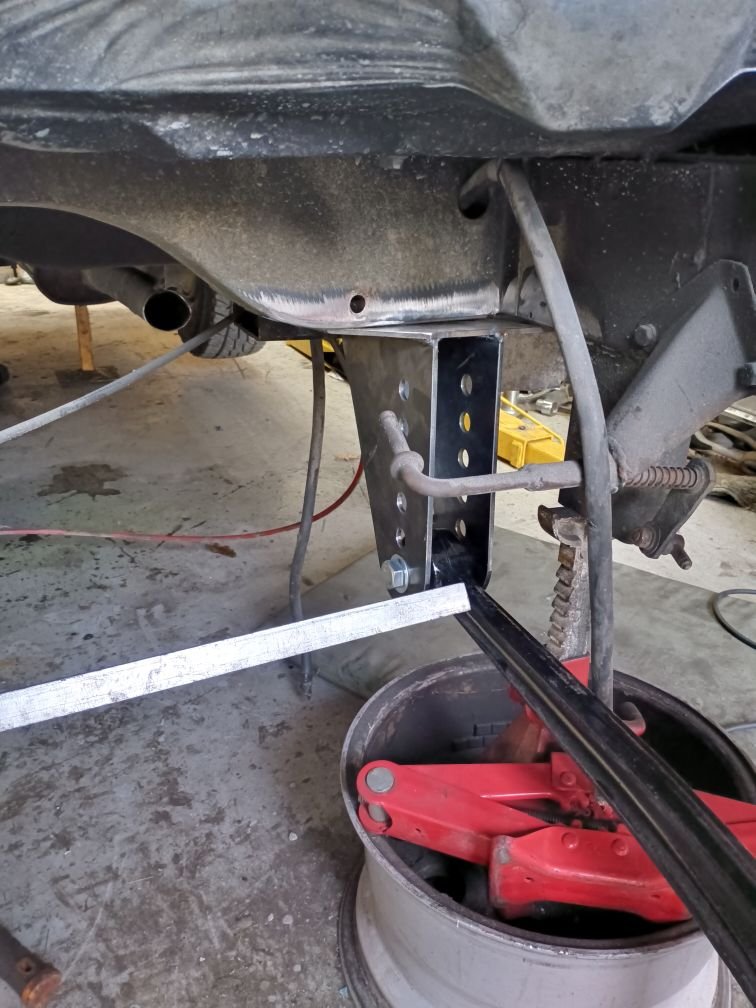
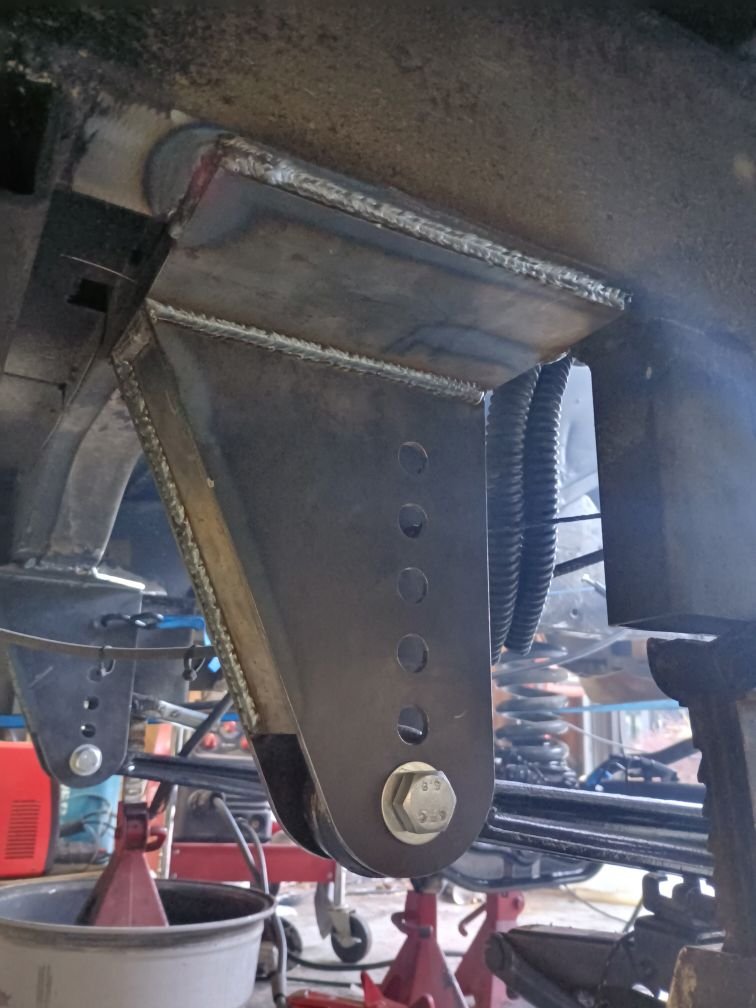
I slipped in a half-day today. I went a visited the machinist this morn to sort a plan for the steering crossover shaft, he's going to cut a 21mm Metric fine left thread onto the chev steering output link and I'll be able to screw it all together and run a damper, easy as. I made up the Radius arm mounts, I've stood up and down 90 times this avo measuring and whacking and tacking etc. Slapped them in, lined everything up again, then again, then again etc. The whole car seems really straight, I've had mixed luck with the last few, up to 15mm off square with one of them. Van is good though, unibody obvs holds strength. Got happy, fully glued them in, plenty of attachment, I'm happy I got not that happy with the upper spring hats, I pulled them back off and moved the axle centre forward 40mm for guard clearance then welded them on as well. One thing that displeases me is the bottom corner, it's a big stress riser and I've had issues with this corner cracking on bagged cars before ( albeit with the older top hat frames ) so I need to brain how to apply triangles or brace it from above, through floor maybe ? Idk
1 point
-
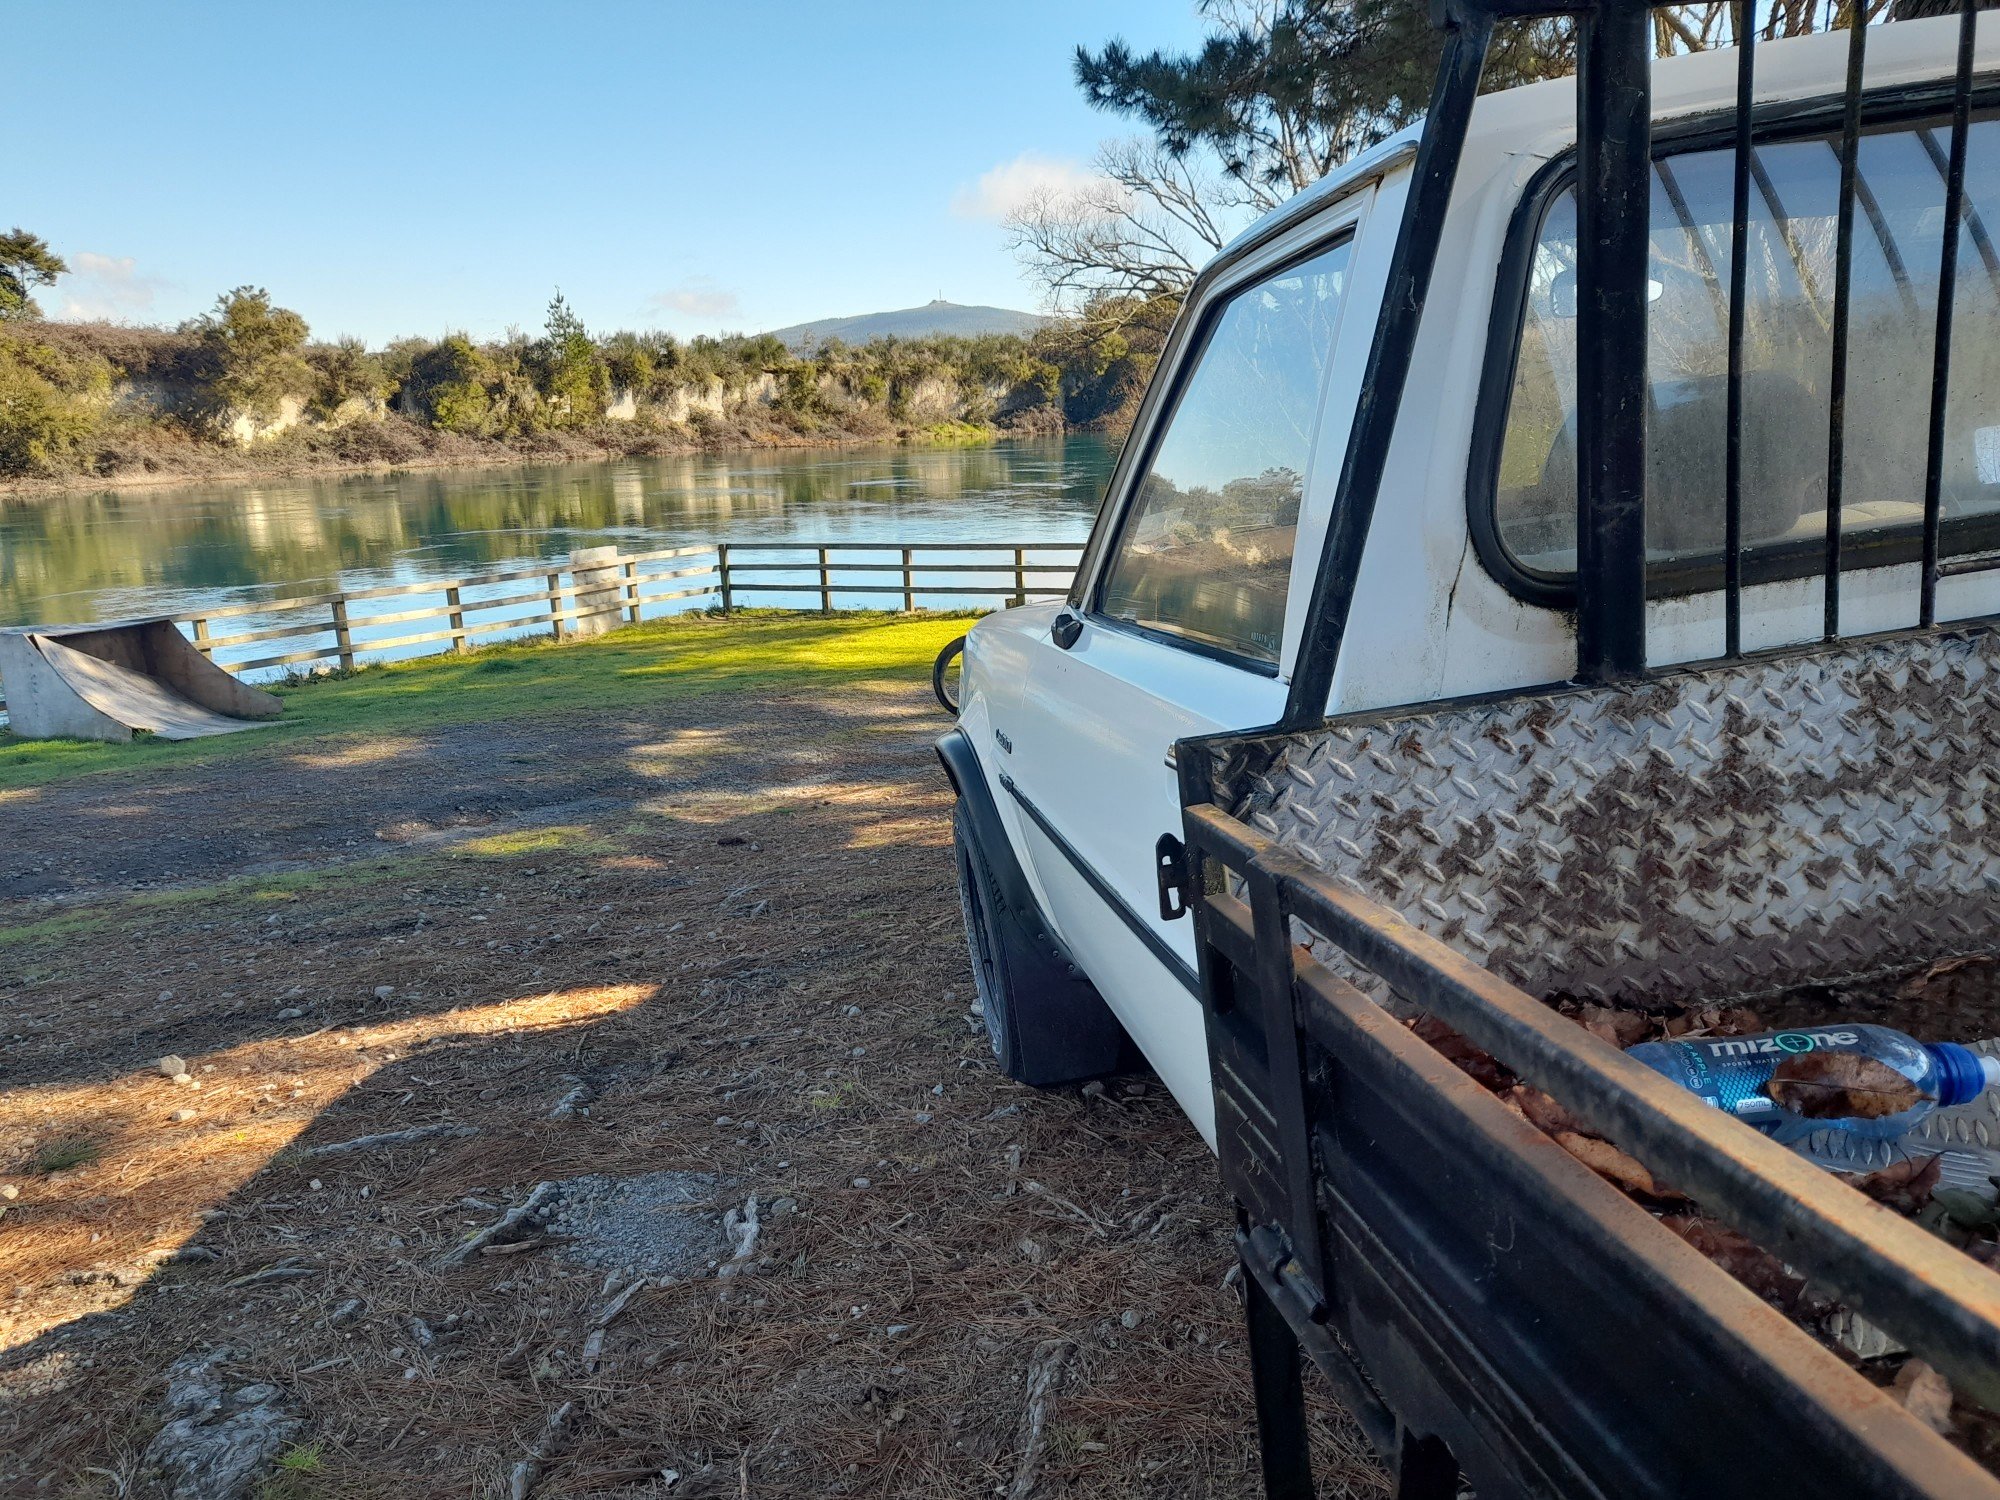
Loaded up Mrs Flash and the hound and took the Thames out for a squirt around our local test track to get a feel for the difference now that she has some weight on board. Very chuffed with the results. She feels nice and solid now and way quieter inside. The extra weight has dropped the ride height by another 10mm and I reckon she is sitting spot on now. It got the stamp of approval from Mrs Flash and our wee dug, so its onwards and upwards.
1 point
-
Ok hear me out...1 point
-
This baton has been passed onto a fellow oldschooler. All the best and hopefully see some updates in the near future.1 point
-
I cut back the old metal ducts and welded in a 3mm plate with another small piece of 3mm welded in behind and drilled and tapped it for the bottom mounting holes. Bolted it into the bottom mounts. Next the top mounts which will need to go through the firewall. They will be in full view above the engine so I need to find a fixture a little more aesthetic than just a normal old bolt head. I also need to remove the dash pad and reglue the vinyl down. The dash pad was badly cracked so I removed the old disintegrating foam and shaped up a piece of Paulownia timber. Put a layer of glass over it and used the spray on contact adhesive to glue the vinyl down. I just needed to use more glue and it would have been a good result. Easily remedied now it's all apart again.
1 point
-
Same place, or pay for a whole new WOF I think.1 point
-
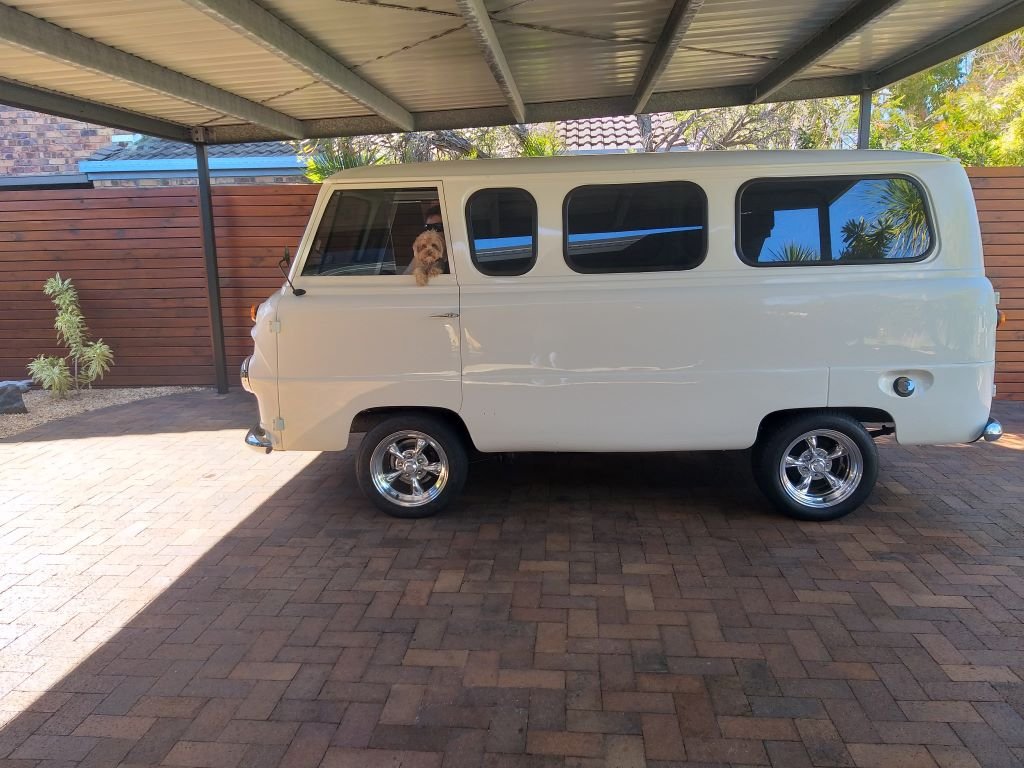
Imp vans are so fucking cool. That's all I have to contribute at this point. Yours, Jealous Alex.1 point
-
Started to build a waste oil burner today out offcuts and scrap parts Couldn't help myself to test the burner with a cup of oil sitting in the bottom ,oil feed will be fitted tomorrow (1 cup =15mins), 1st video is with the leaf blower it burns cleaner but way to noisy, 2nd is with compressed air i1 point
-
This is as low as the factory uncut-anything will go without springs in it. 17s and 15s for reference. needs another 1.5-2” to lay frame, not that I want it bellied, but why do things halfway right.
1 point
-
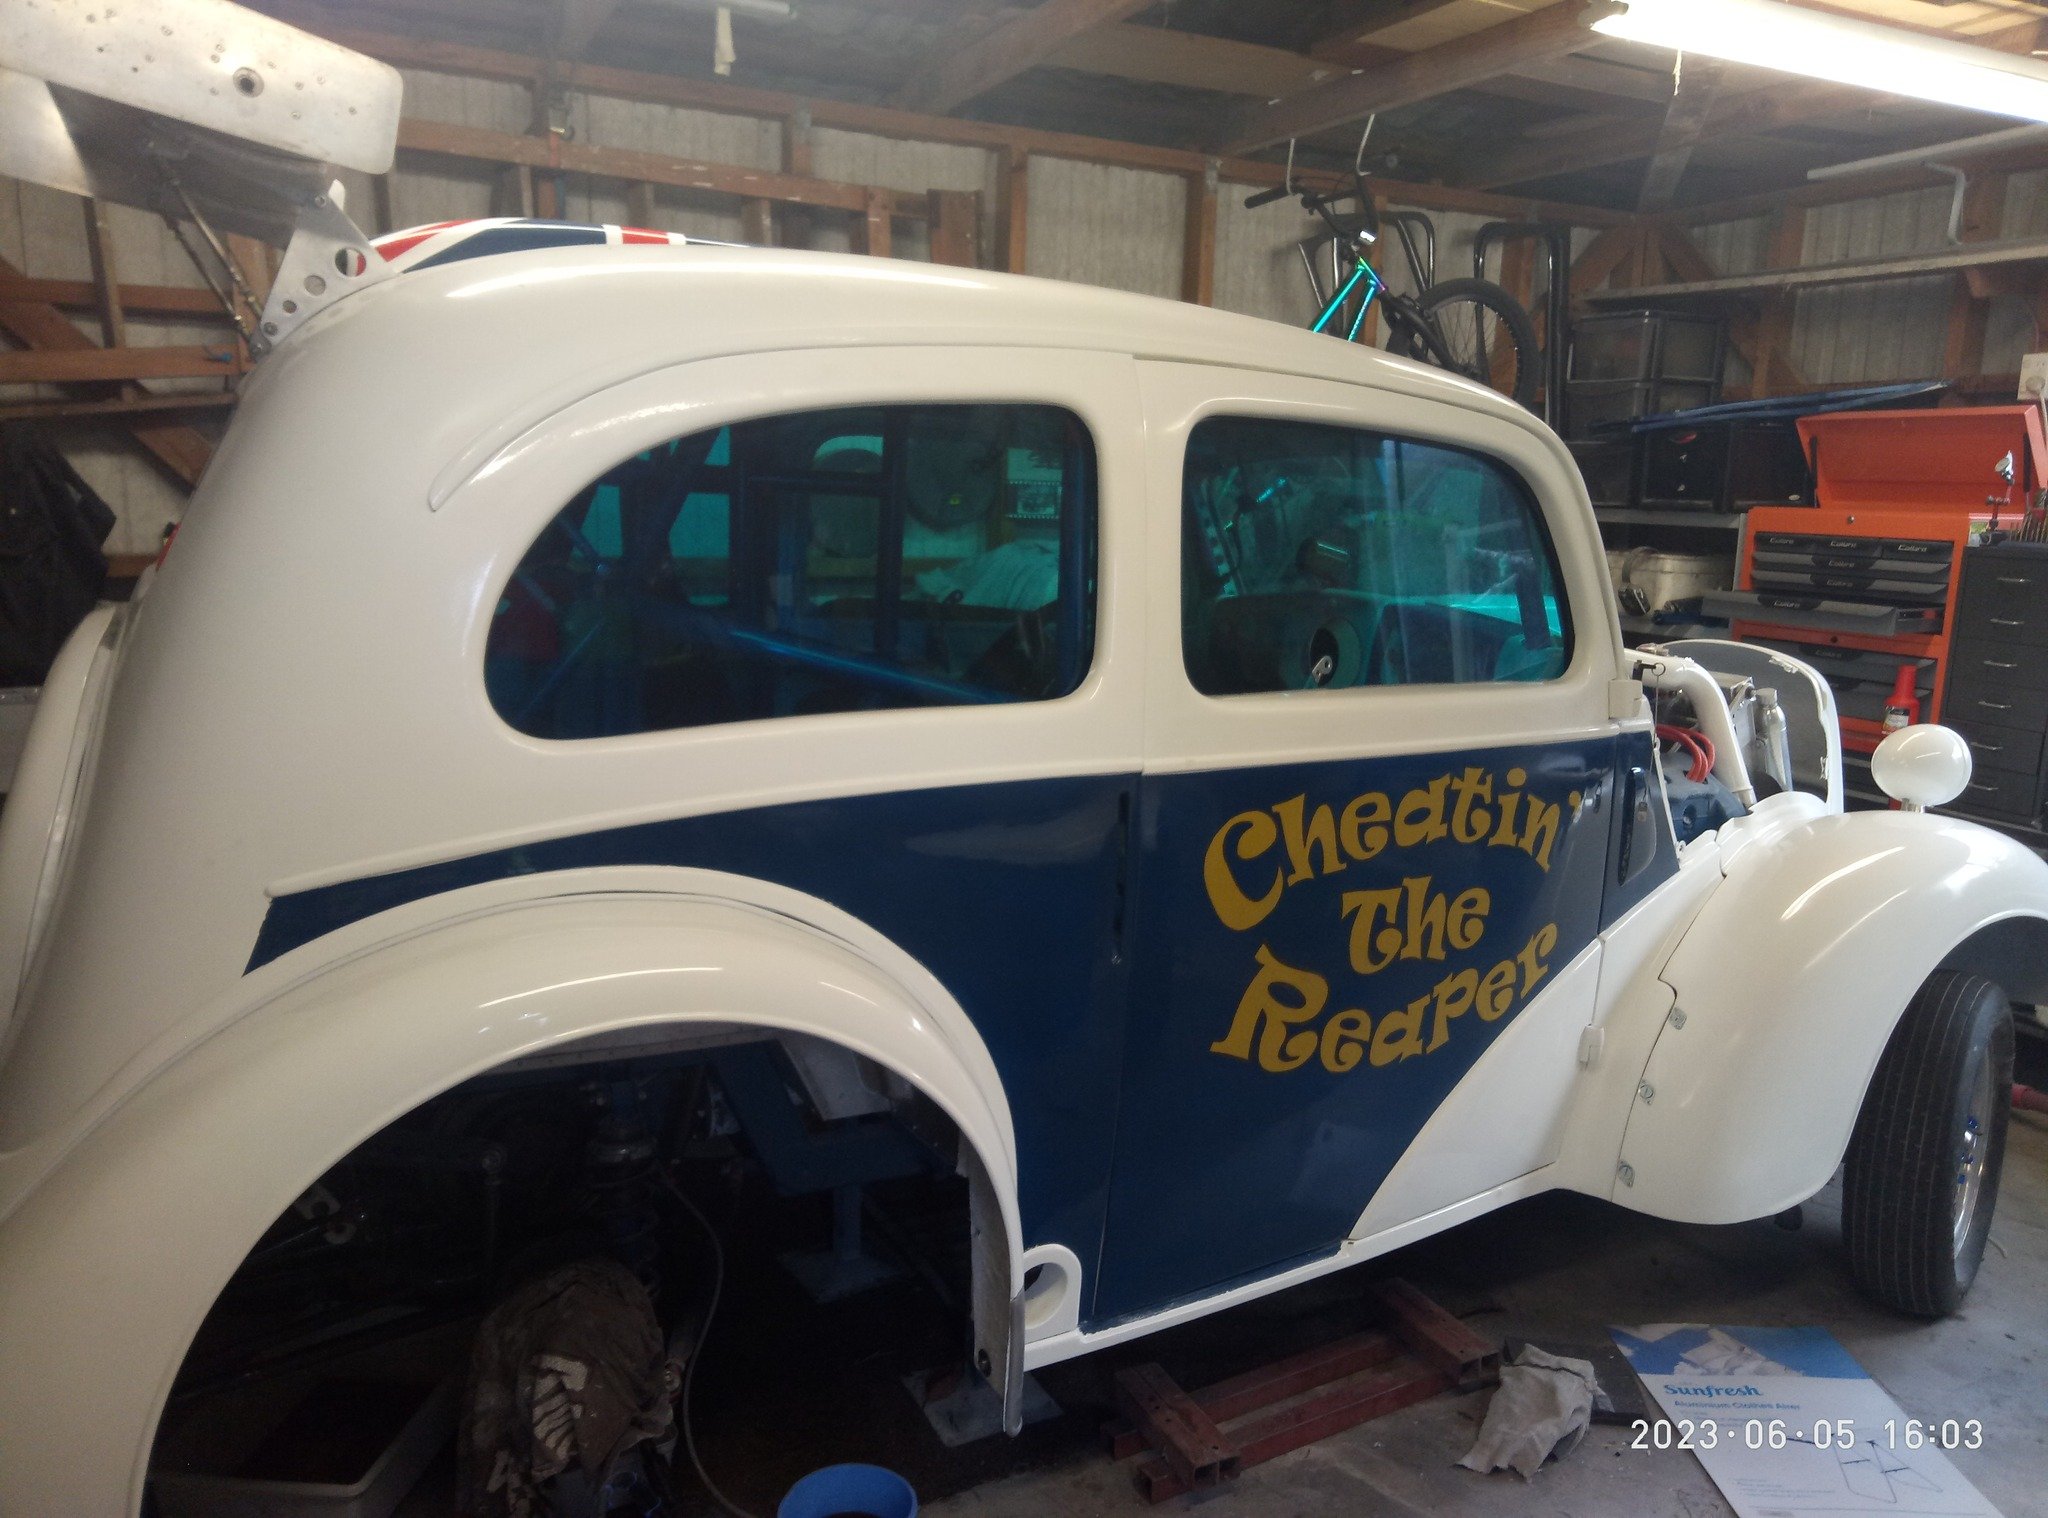
Another year on and it's nearly finished. Outside is painted and signwritten, the seat covers were fitted last weekend, and aside from a small wiring job and a good polish it's pretty well done!
1 point
-
Saturday flex session very tempted to turbo this 4age
1 point
-
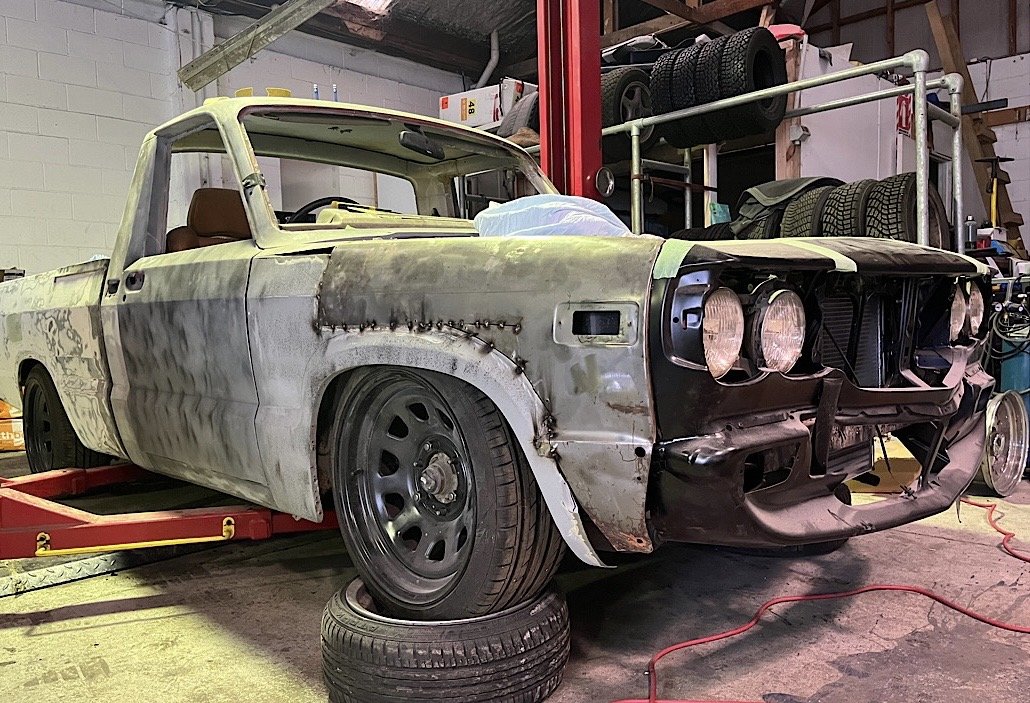
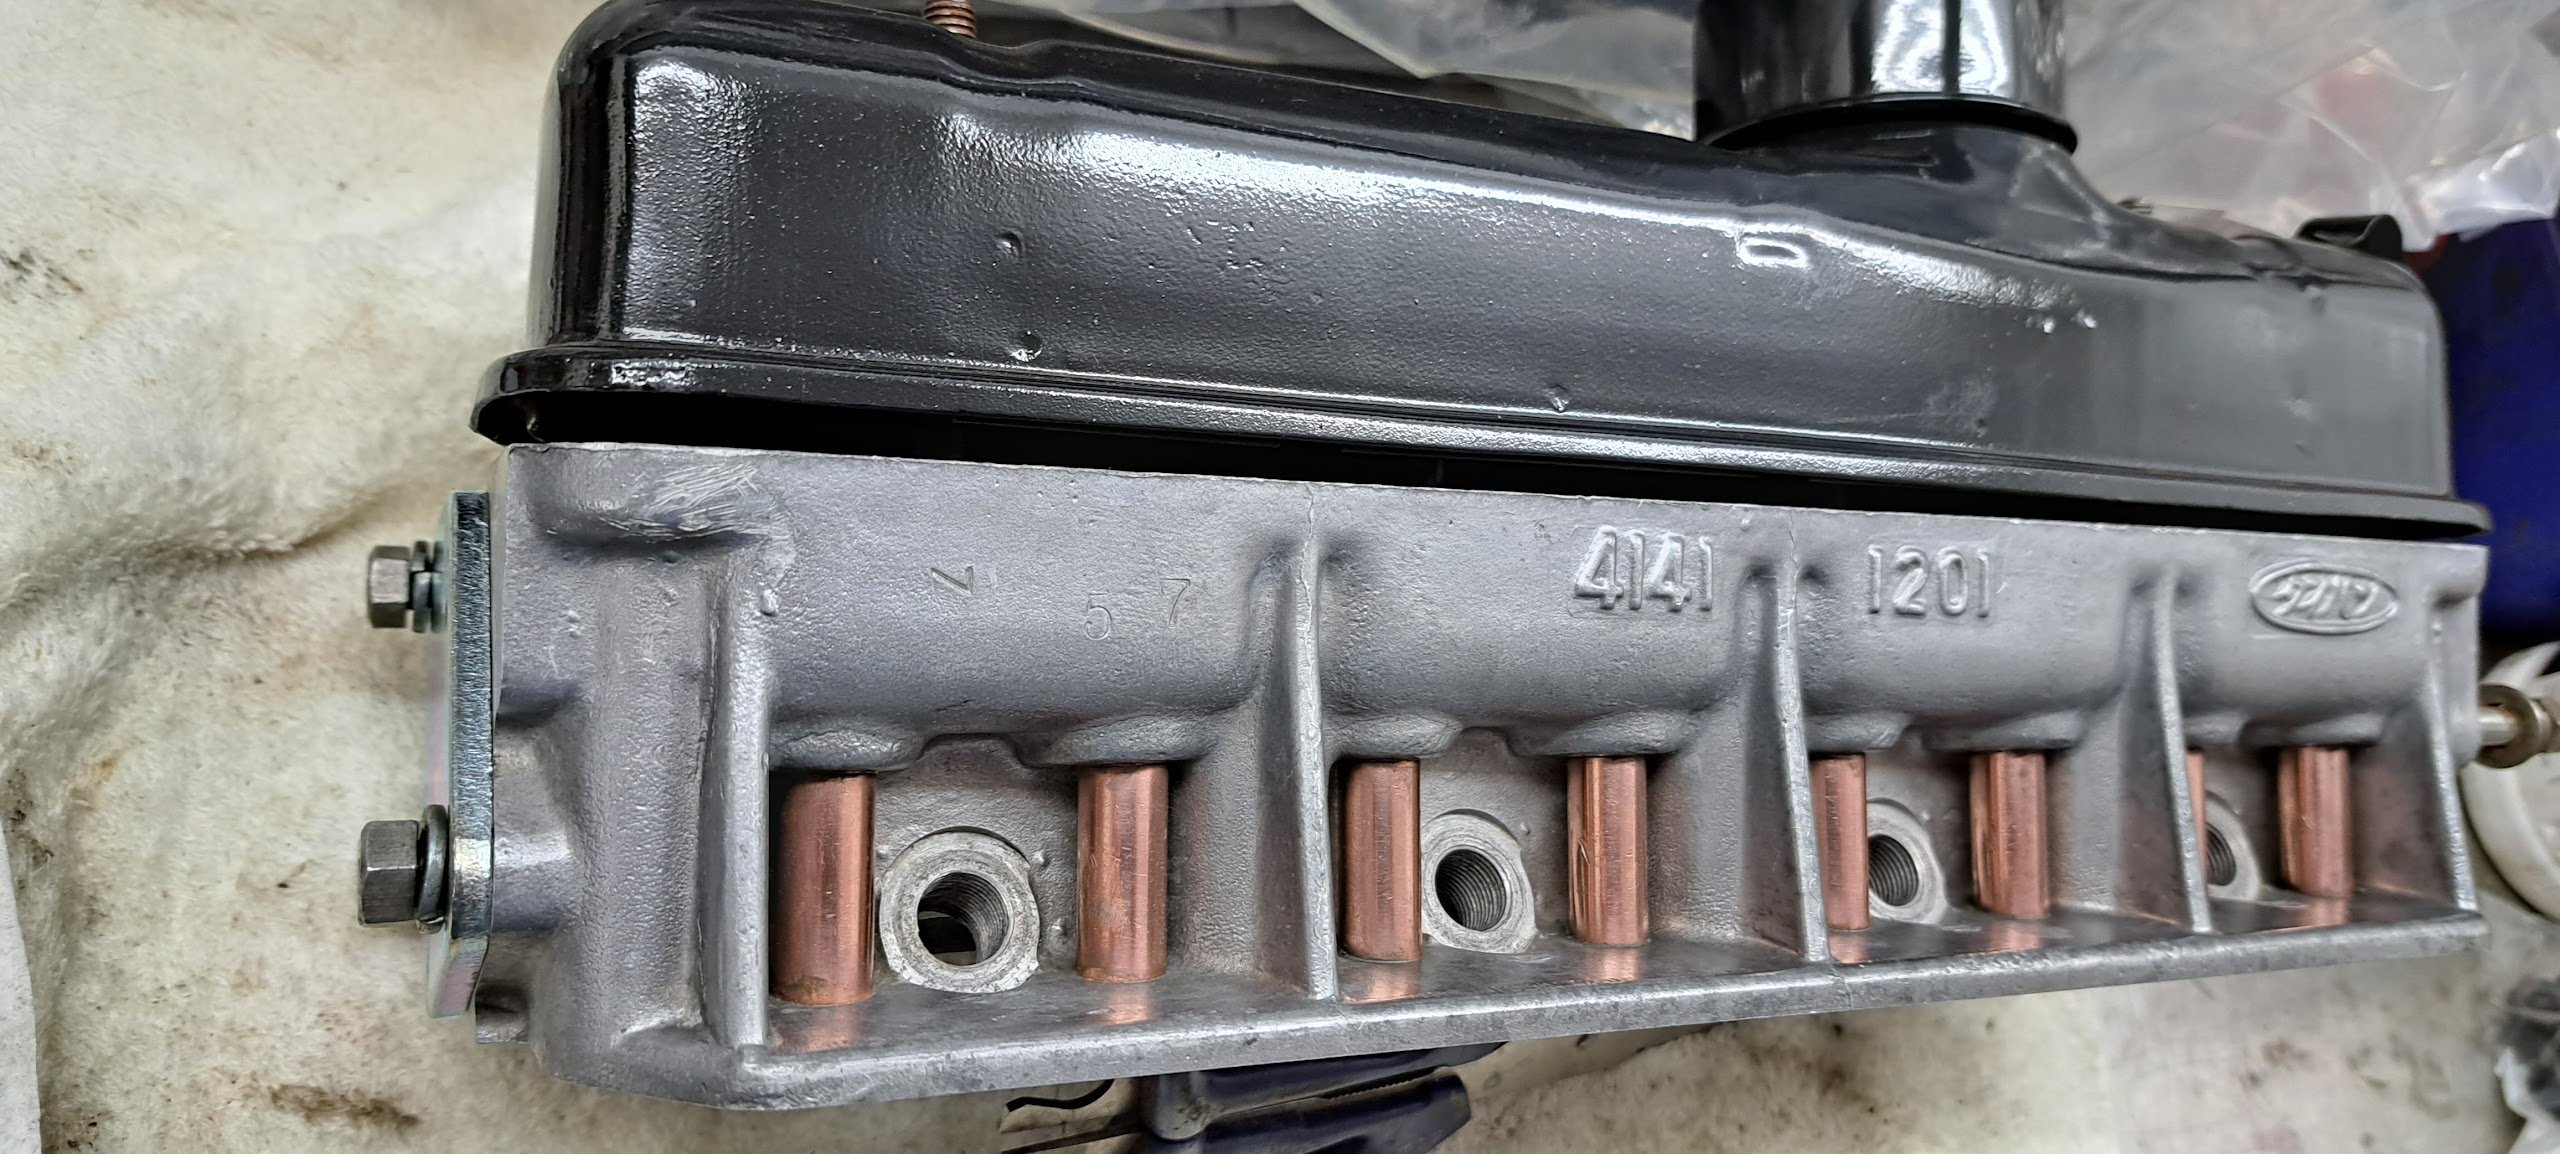
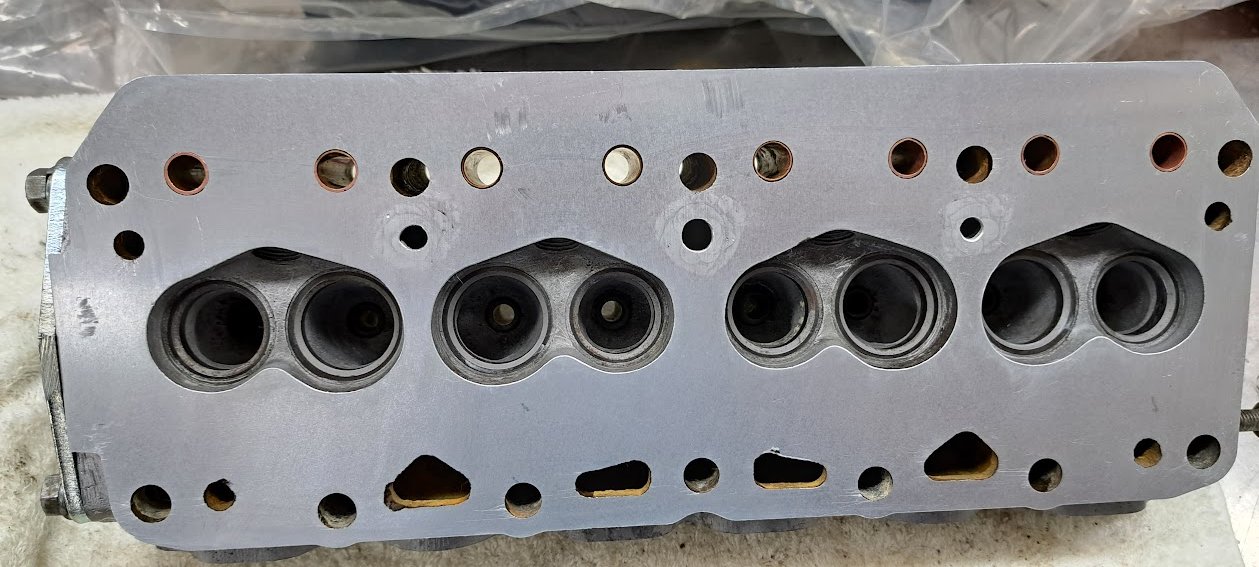
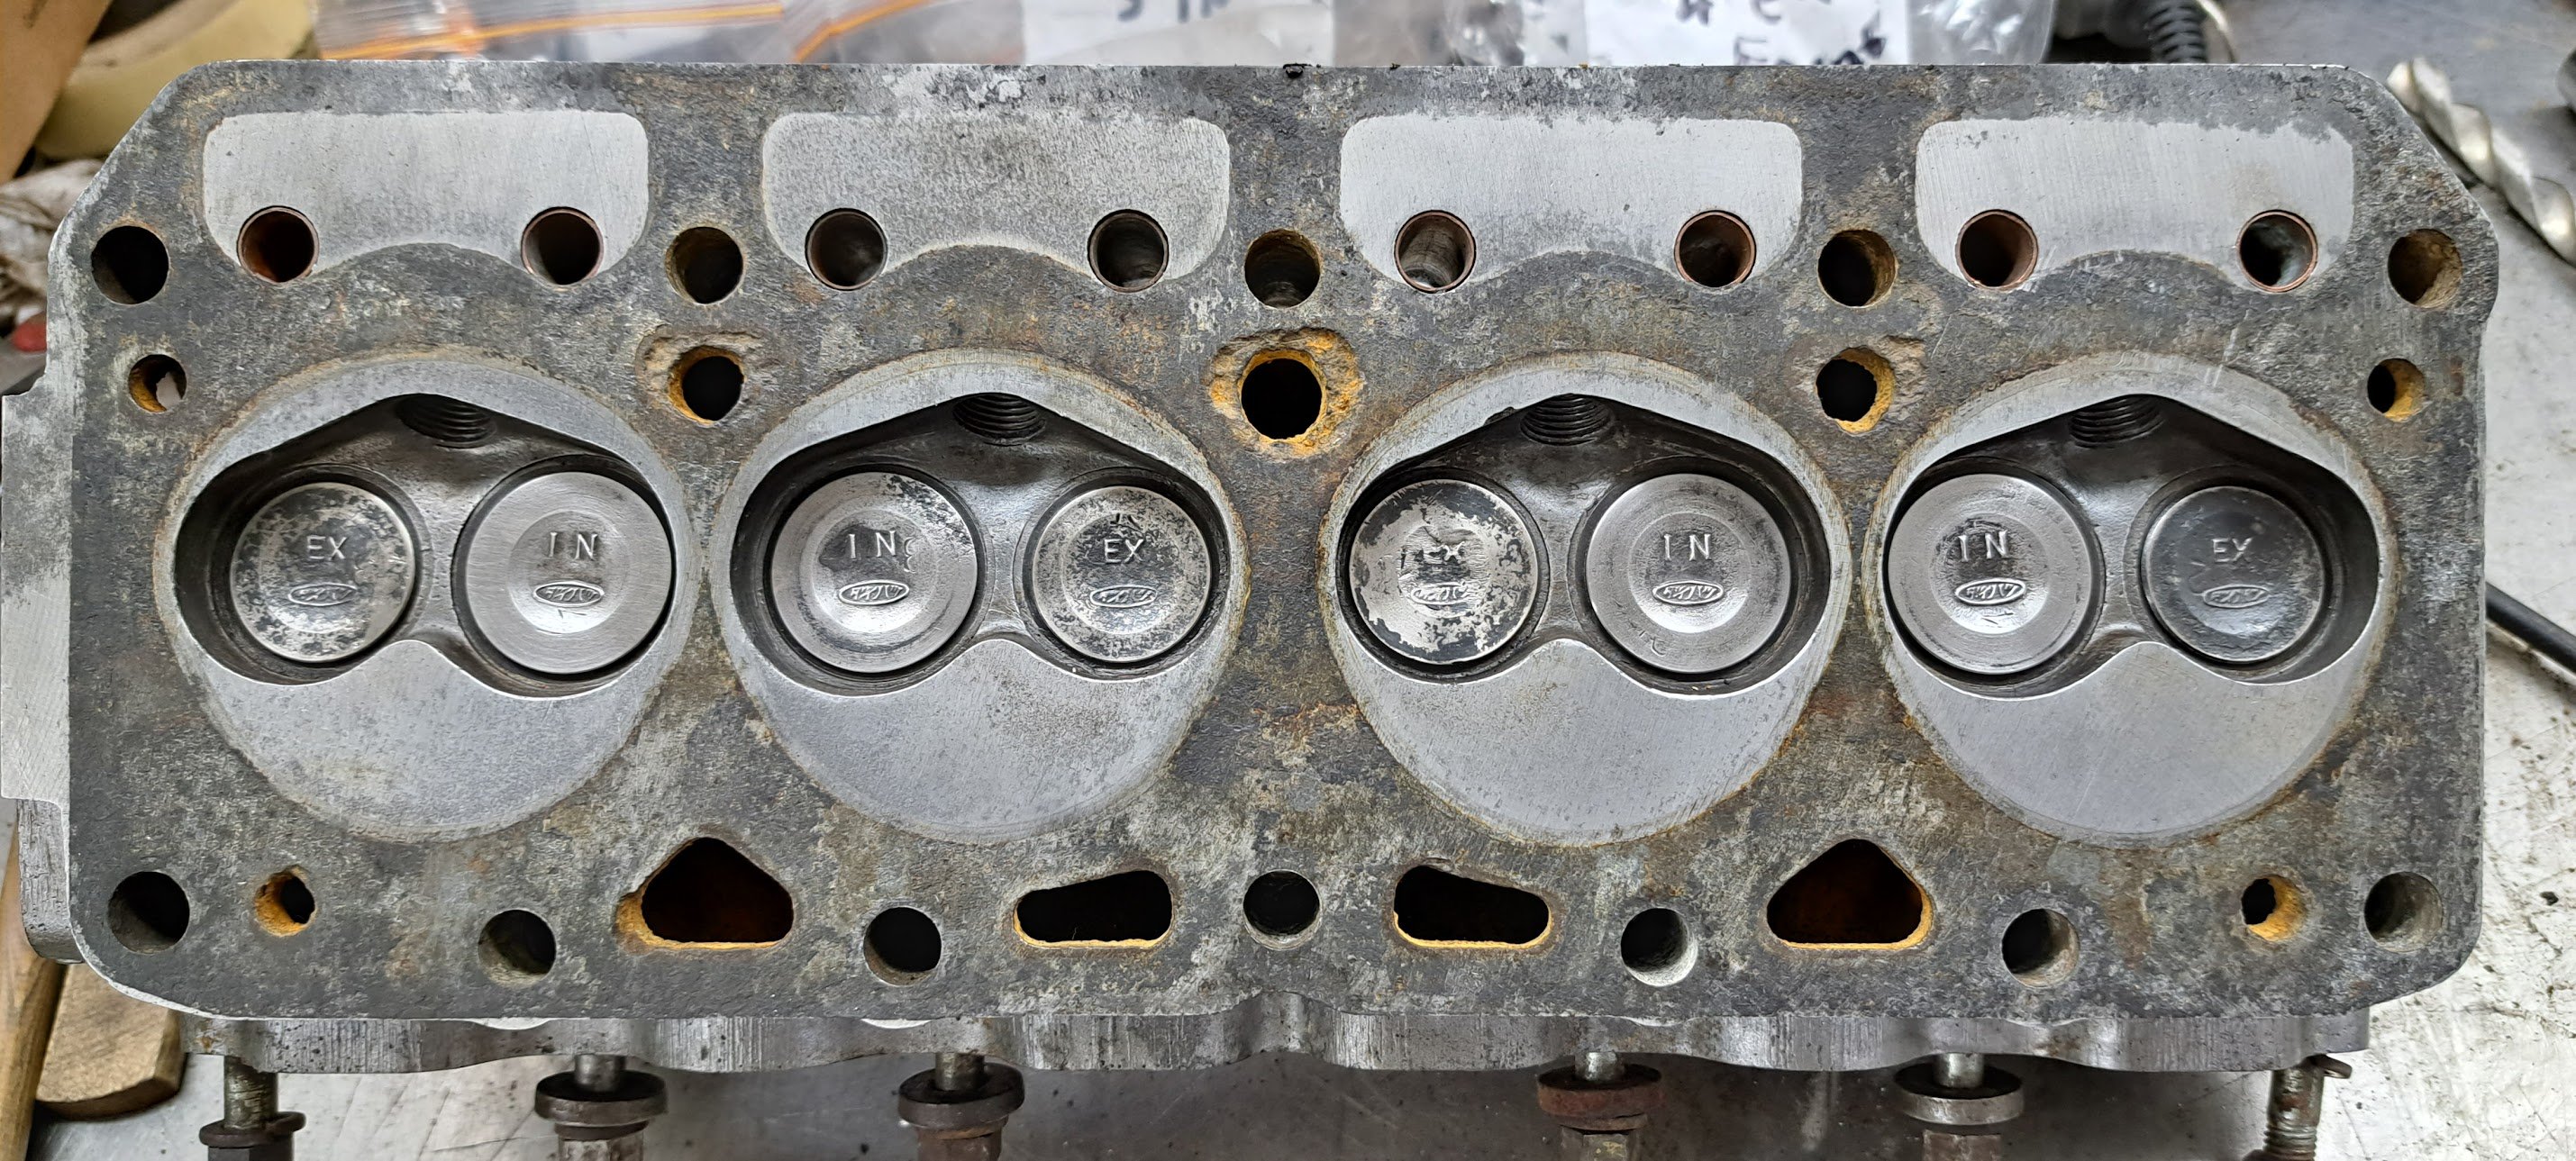
Head's back - headgasket is a little longer to be made Head Before. Head After.
1 point
-
Got it loaded on the trailer and trucked off to @MaxPowers shed this arvo. Even gave it a bath at washworld on the way to get rid of 10 years of barnfind smeg1 point
-
It was definitely interesting when I pulled the 1NZ apart and saw that the piston had ripped in half. Rather than the rods breaking which people usually do. (At much lower rpm, loading motor up with forced induction) I cant find any data on factory 1NZ piston weight. However JUN 1NZ pistons are 232 grams with the pin included! Not sure how much OEM ones are, but they also felt incredibly light. Well, at least the half of one that I was holding... Then the rods are tiny toothpicks as well. Looking through some logs it would bounce to 9200rpm when doing burnouts at the drags.1 point
-
@Roman I hope you appreciate my stunning technical drawing...
1 point
-
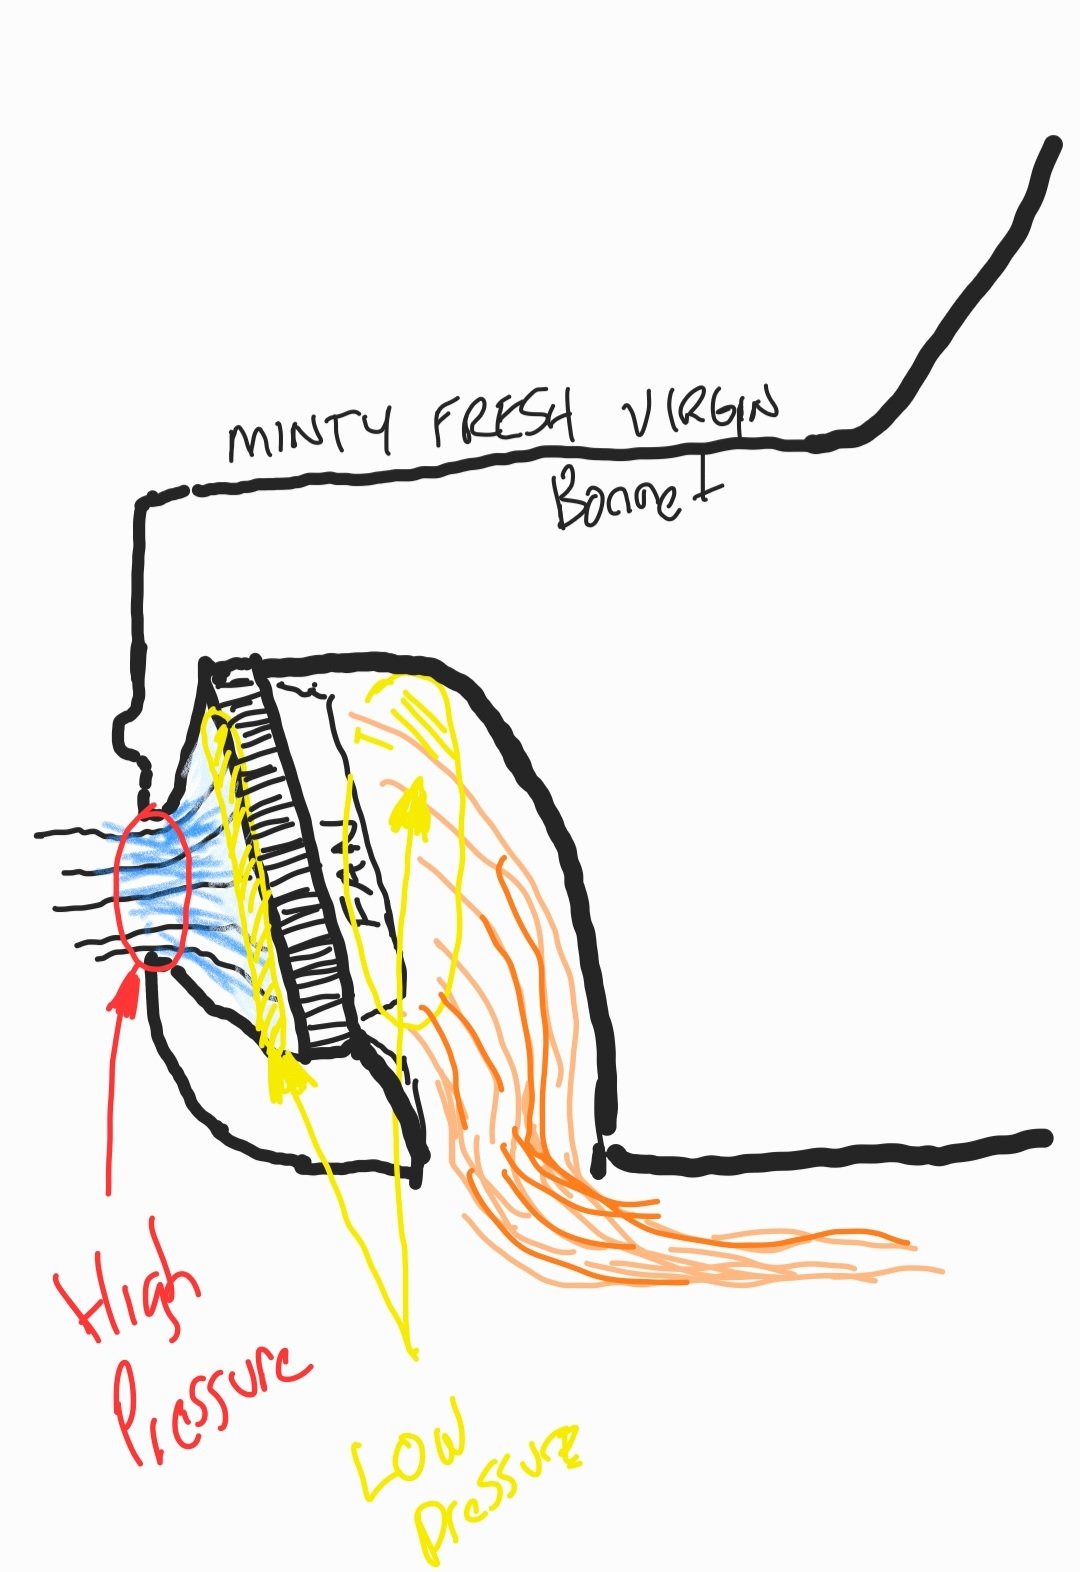
please please please don't do what the lazy folk in the UK do and vent the radiator out the bonnet. Imo it ruins the clean lines and just looks a bit naff. Its very easy to cut a hole in the spare wheel well, brace it and make a nice bit of ducting to feed it out there I'm amazed at how well my setup cools that Datsun down -only a couple of times has the fan had to kick in and that was on stupidly hot days when stopping after a hot run. I think quite a bit of heat is lost just off the pipes heading to the front and back. Your small all alloy scooby motor wont take much to cool either. EDIT : I just read that you've already gone done punctured holes through your bonnet. Might as well add a scooby wrx bonnet vent, pointing backwards then. As for your front inlet- there's heaps of airflow through the opened up hole so just make a simple bit of ducting to spread that flow across the radiator face. You can angle the radiator too which helps as the airflow pulls more off the fins if it has change its angle as it flows through. No more holes!!! Naughty Damian. Bad boy! No pudding for you!1 point
-
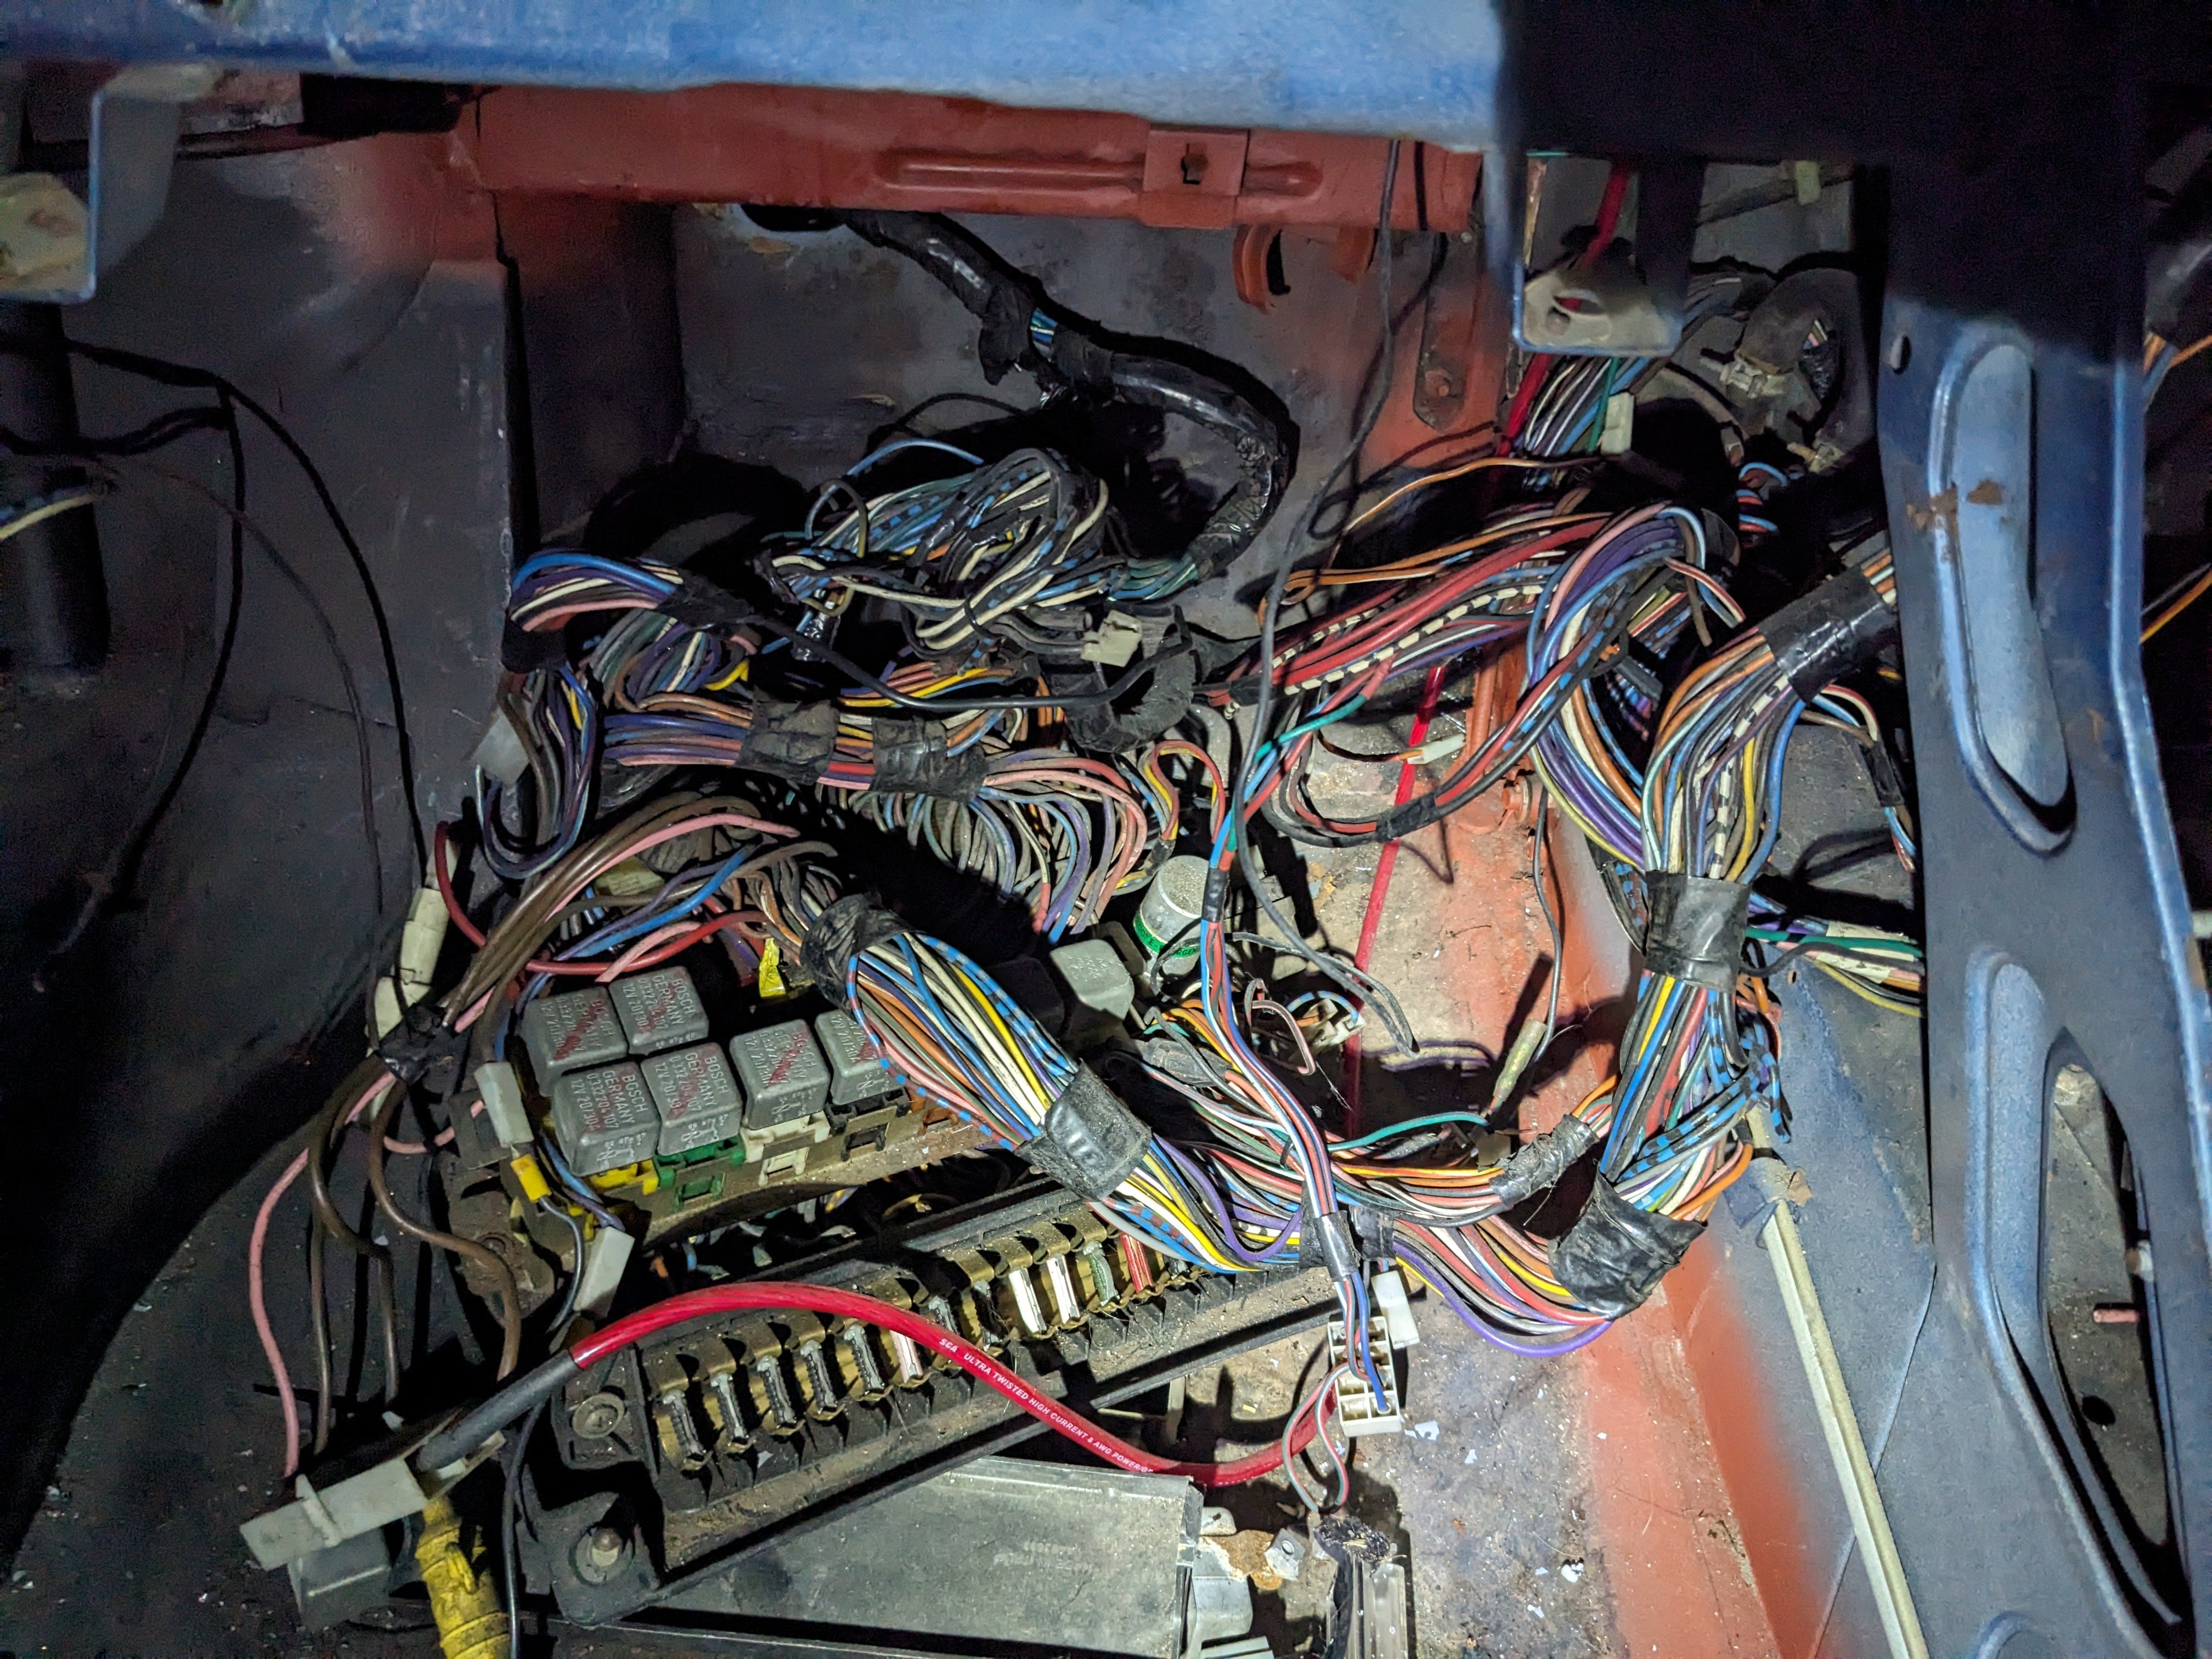
So many wires and relays and fuses. I don't understand, all it needs is lights, indicators and power to the fuel pump and coil....?
1 point
-
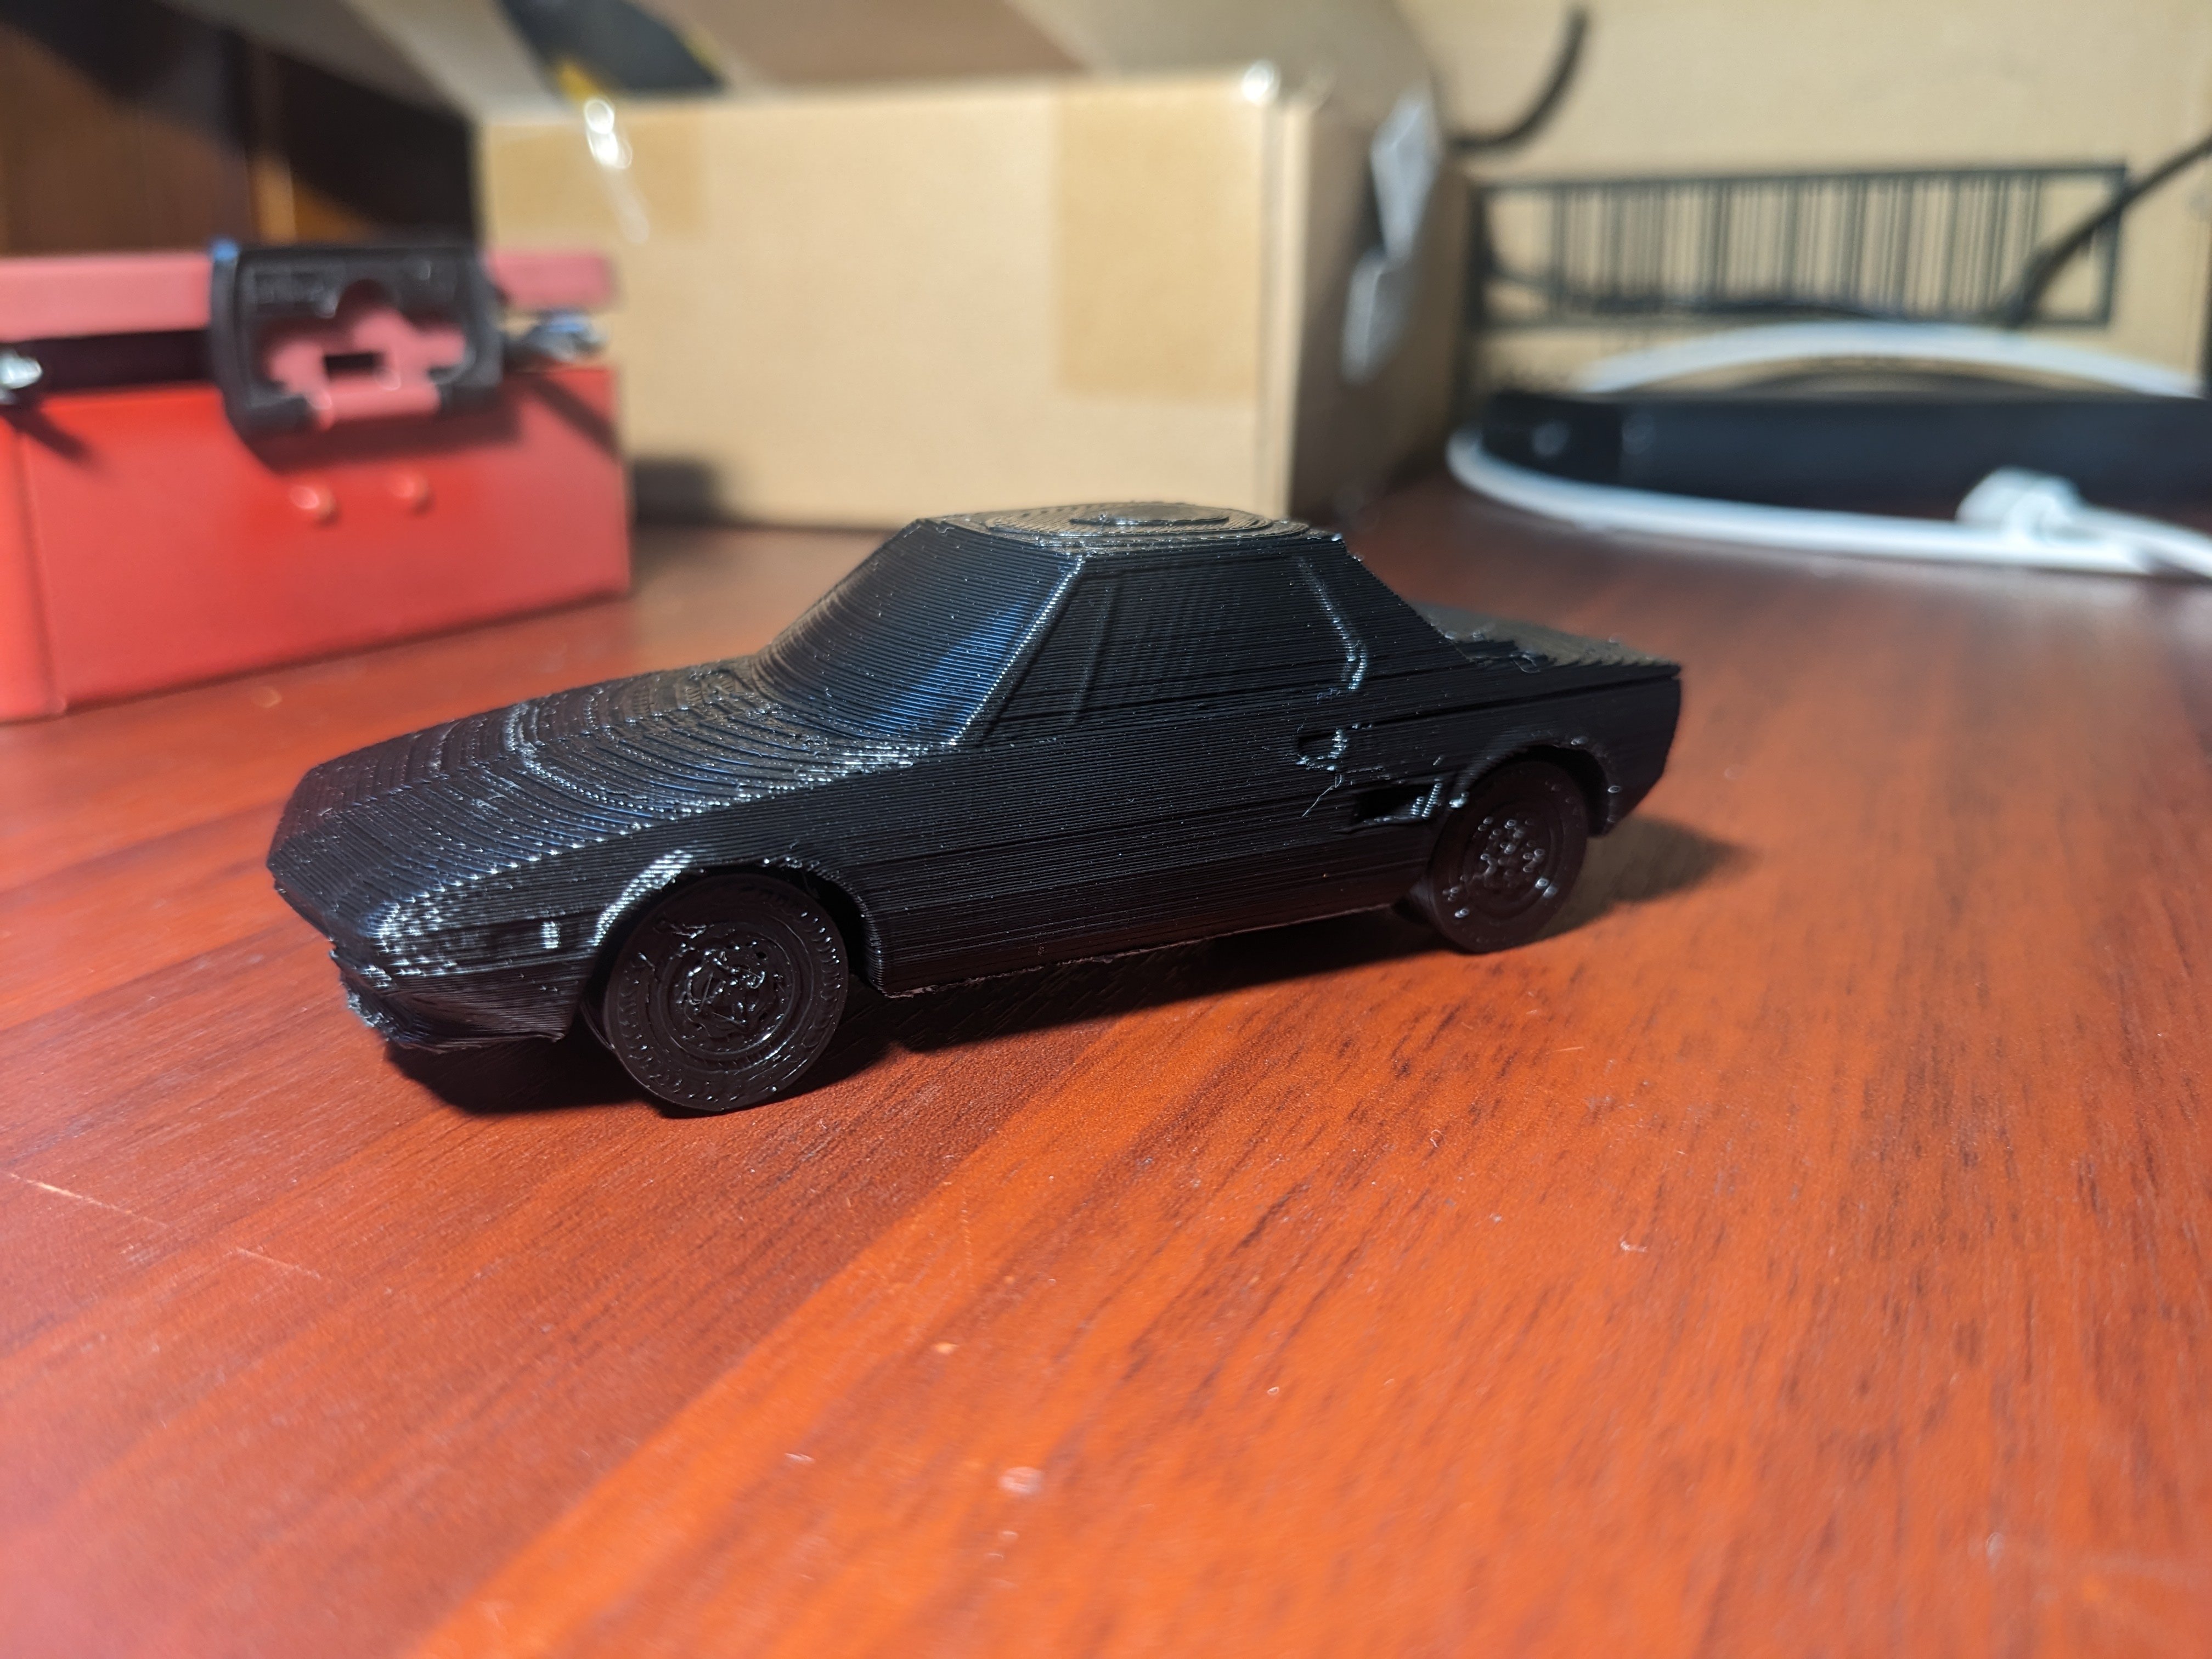
I printed some motivation Also I dreamt last night I was in the X chasing a bright yellow countach down some windy roads, I woke up when I made a desperate passing manoeuvre, pushed them off the road and spun out trying to avoid an oncoming truck. Shits super exciting already. In actual project news I had a look at the wiring situation and it looks a bit of a shitfight. Enough that I might get a wiring kit and redo it. Someone has spliced a new front half loom in but i am not sure it can be trusted. Its all 40+ years old at this point anyway.
1 point
-
Looking like a barn find but atleast the sheds tidy. Found all the bits I need for the engine swap and its ready to get trailered off the fab mans house1 point
-
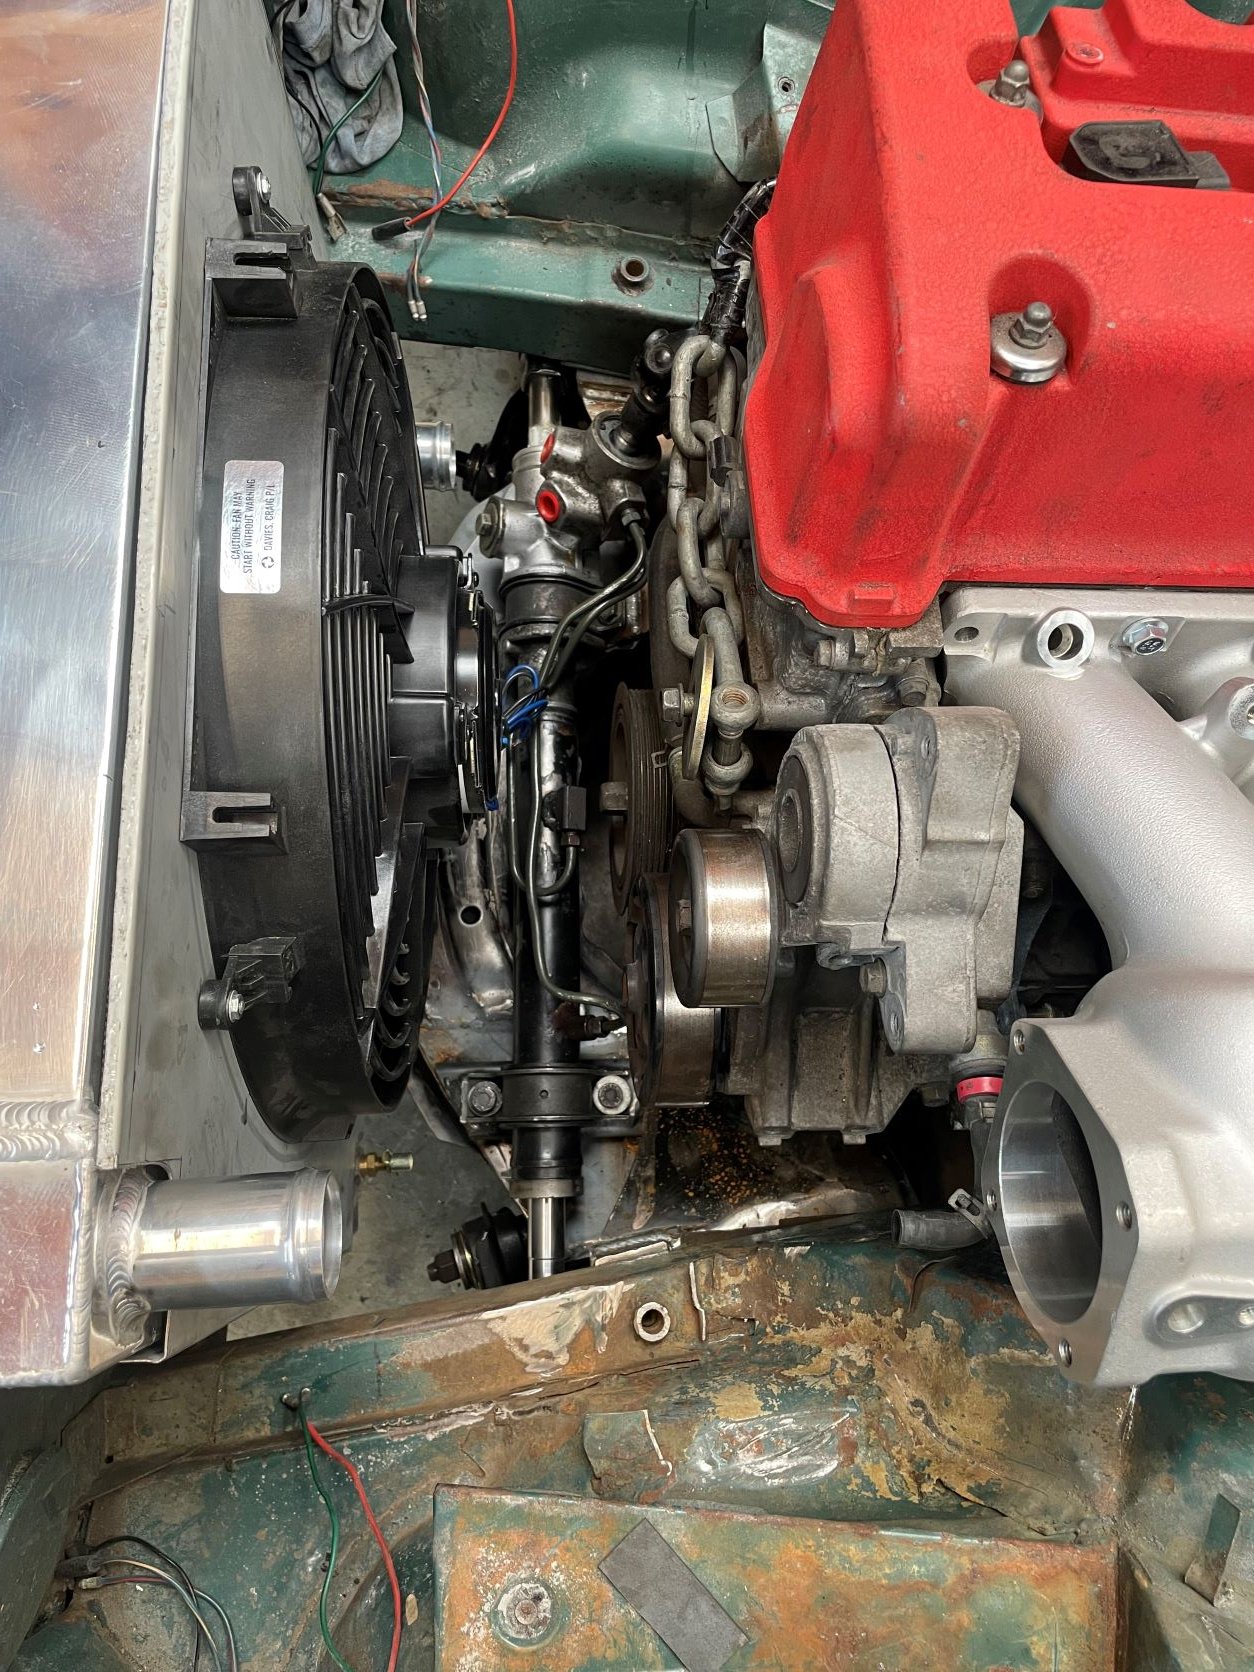
I decided to make up a shroud for the radiator fan which is a 16" Davies Craig so it should provide plenty of air flow when needed. It turned out ok since i don't have a bender for sheet metal, just a couple of pieces of steel and panel beaters hammers. I have also repositioned the center hyd port in the steering rack and had it leek tested and rebuilt. Bolted it all in to check any other clearance issues with the rack and radiator. The aluminum bottom radiator hose is quite long and not giving me enough clearance for the hose to the steering rack. I may get away with it, we will see.
1 point
-
And now it looks like this. Cant complain since it only cost me a box of waikats I helped to drink a feed of Kfry for lunch and a Redbull1 point


.jpg.84329cae040196a0a03c0bf9987c93b5.jpg)


.thumb.jpg.570970b401ac8d26ce9af7c1bf2bd8cd.jpg)
sm.jpg.1484a60c2a73cdb3e84c3e416f9a6e81.jpg)


This leaderboard is set to Auckland/GMT+12:00