
Leaderboard


Popular Content
Showing content with the highest reputation on 12/10/21 in all areas
-
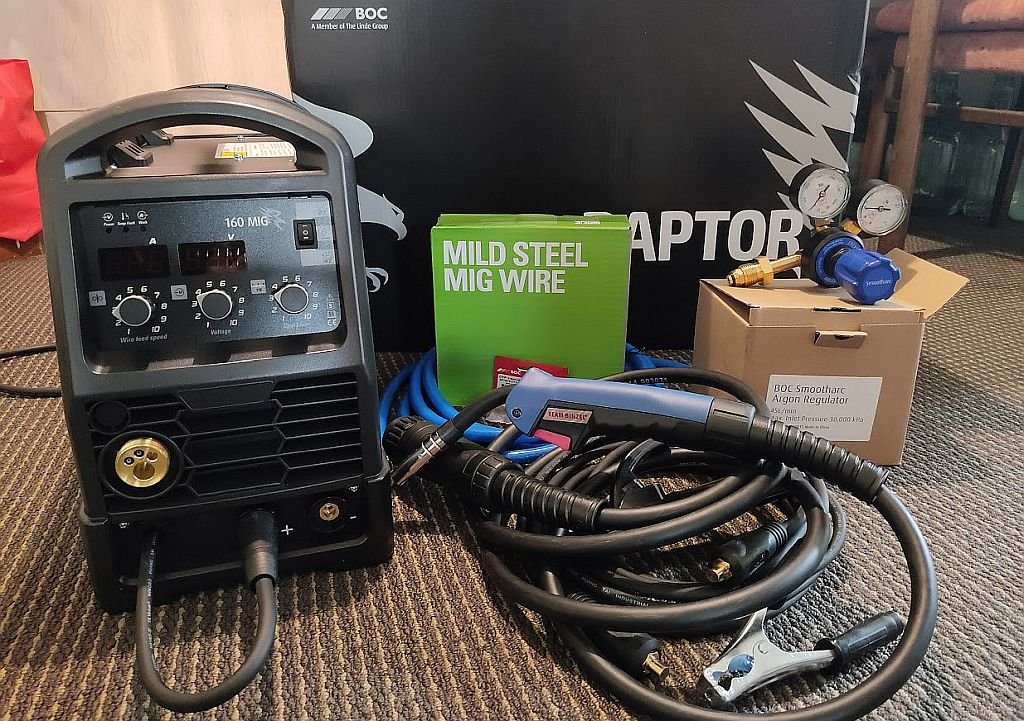
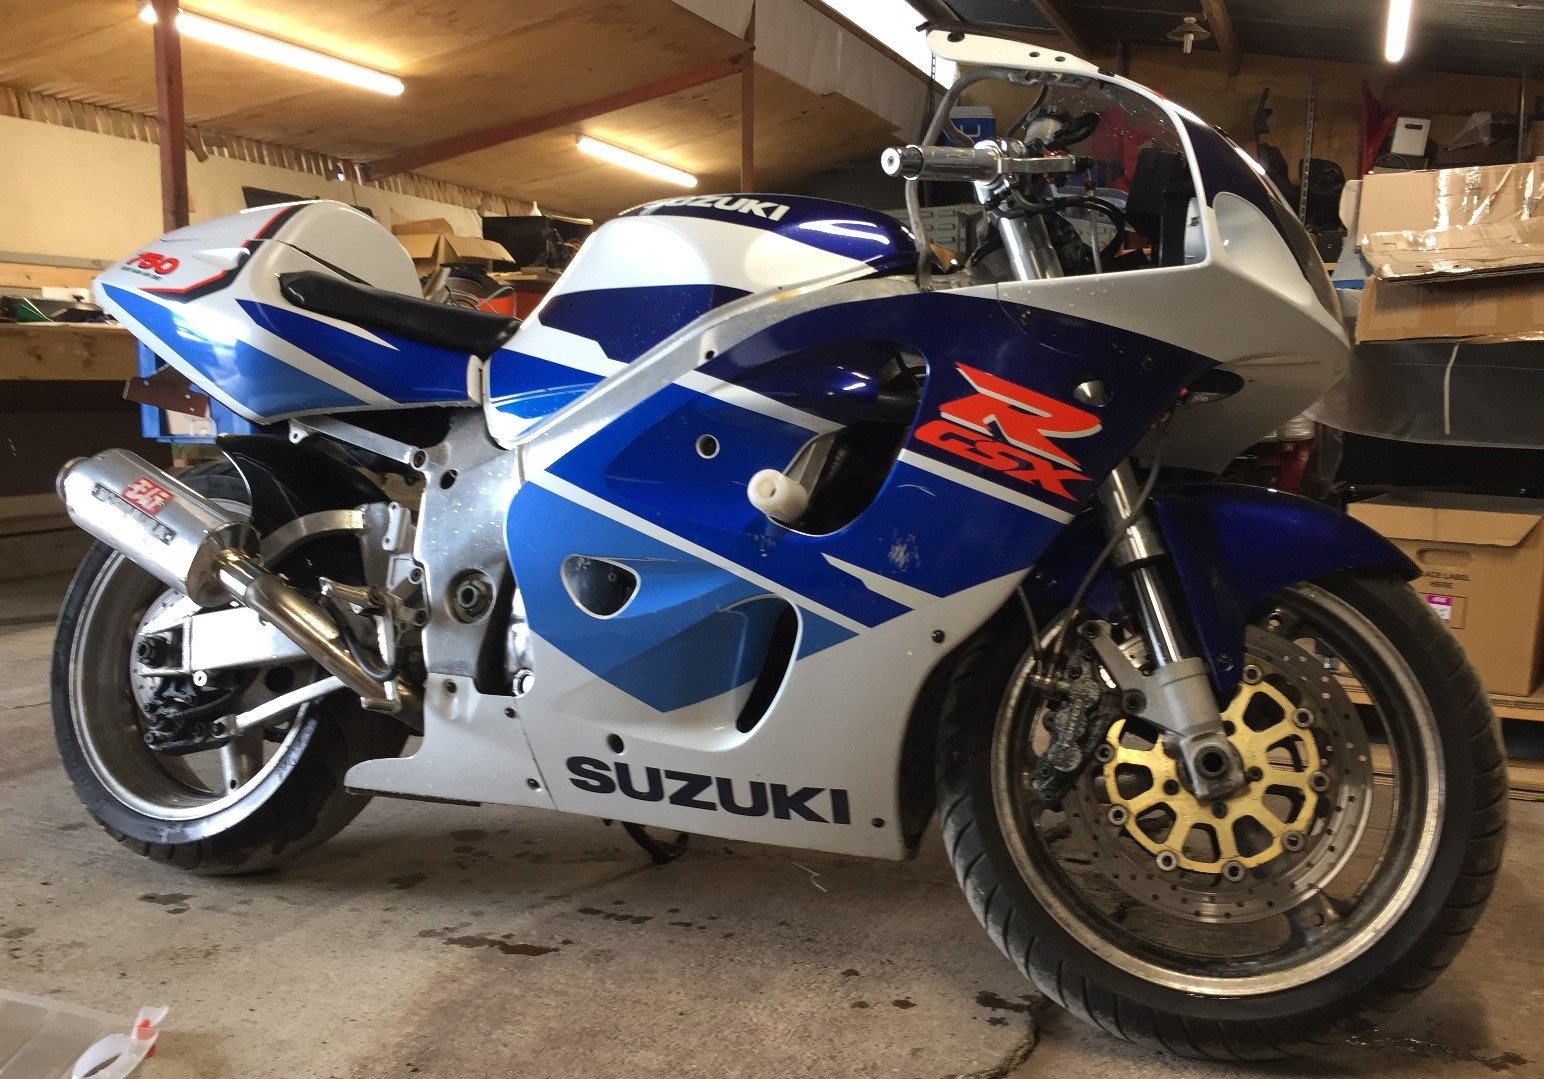
Been kicking the tires of a few MIGs lately, mentioned to a customer of mine that I was in the market for a mig and asked what he would recommend on a minimal budget (he's a welding teacher at EIT), told me to go to BOC and check out the new Raptor ones and to name drop him. So yeah, this happened Chucked in a free 5kg wire and a pack of tips and also knocked close to $200 off the already discounted price!! Bunnings trip for some gas and I'm pretty much ready to make a mess of some steel ha! *fuck I need to give the old van a clean out one day soon*
 8 points
 -
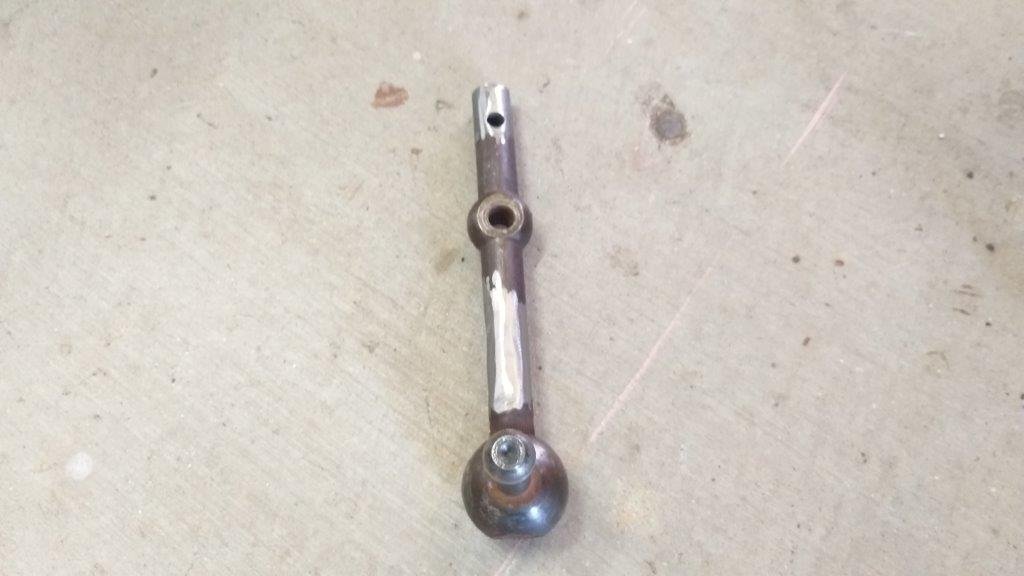
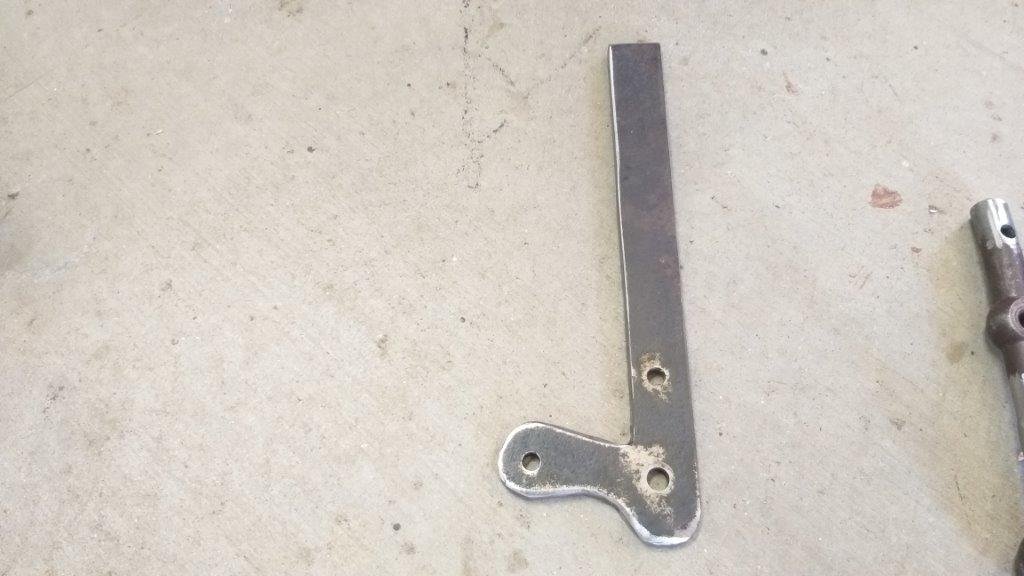
Will do next time I have it on the hoist But for now8 points
-
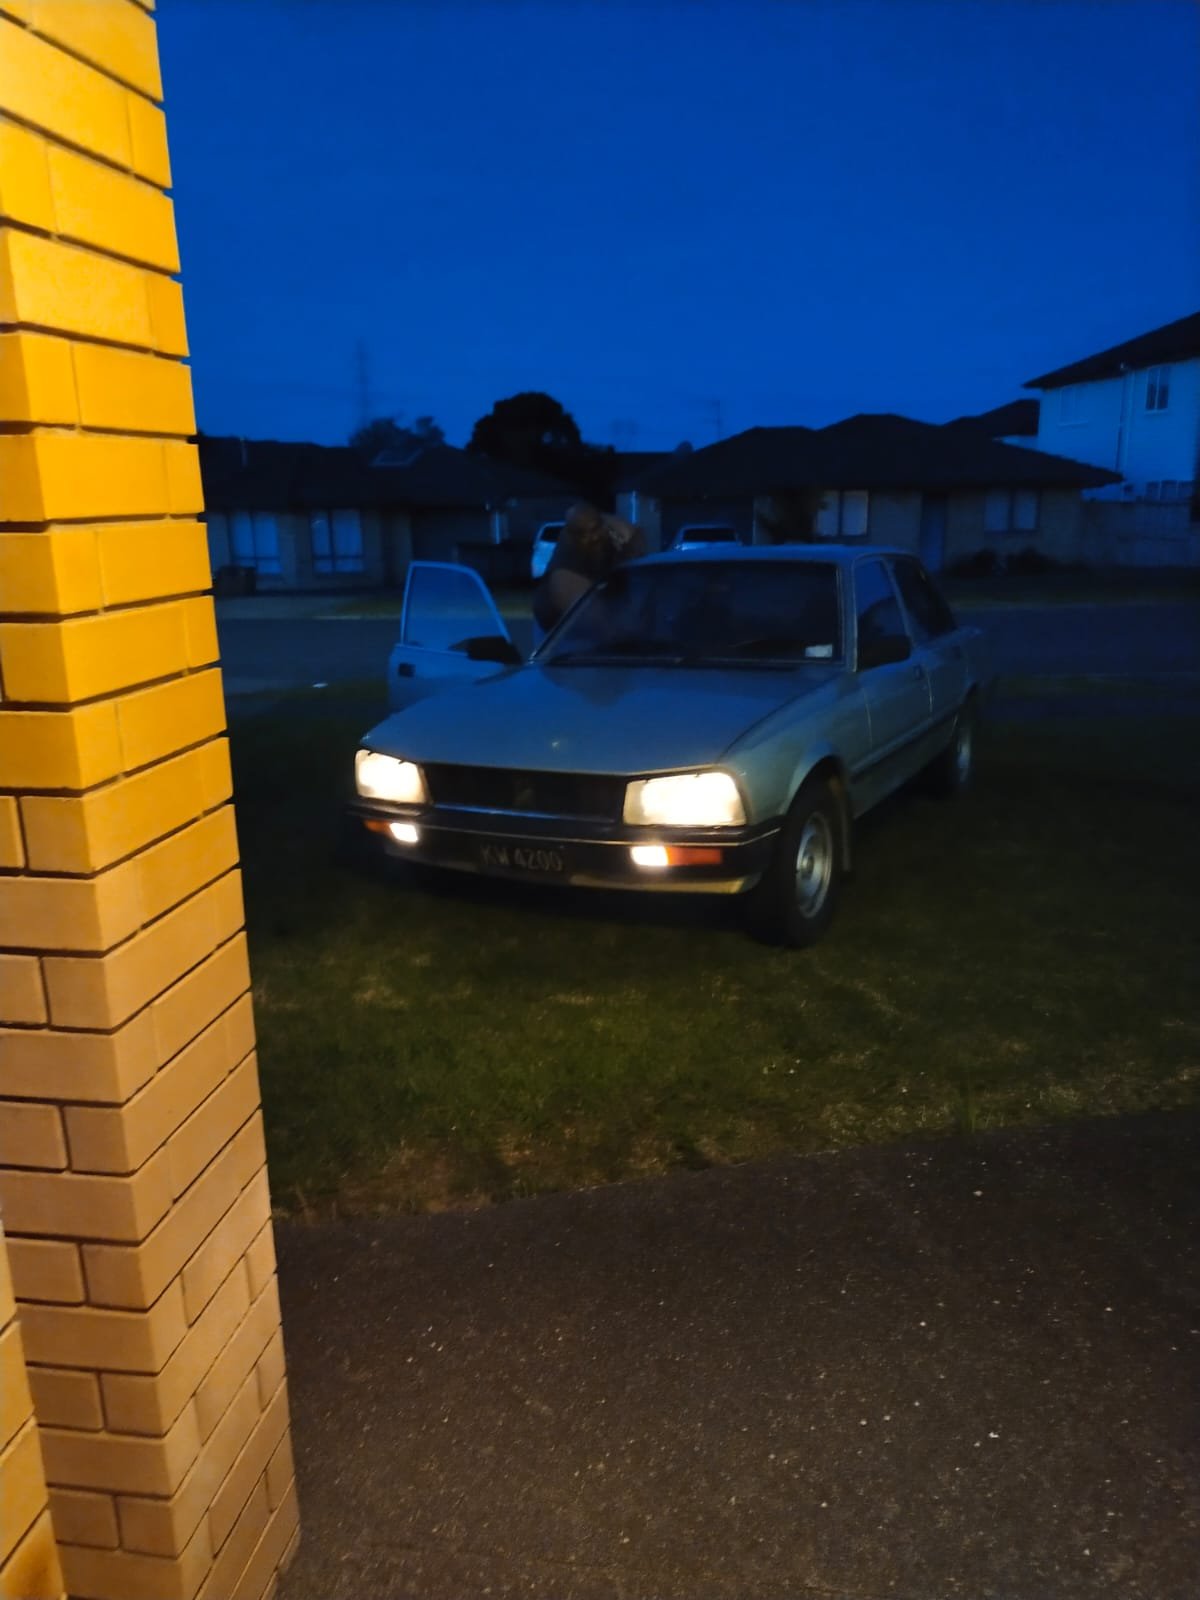
Love driving this thing, work commute: EDIT: photo taken from my desk so excuse the zoomed in blurriness
7 points
-
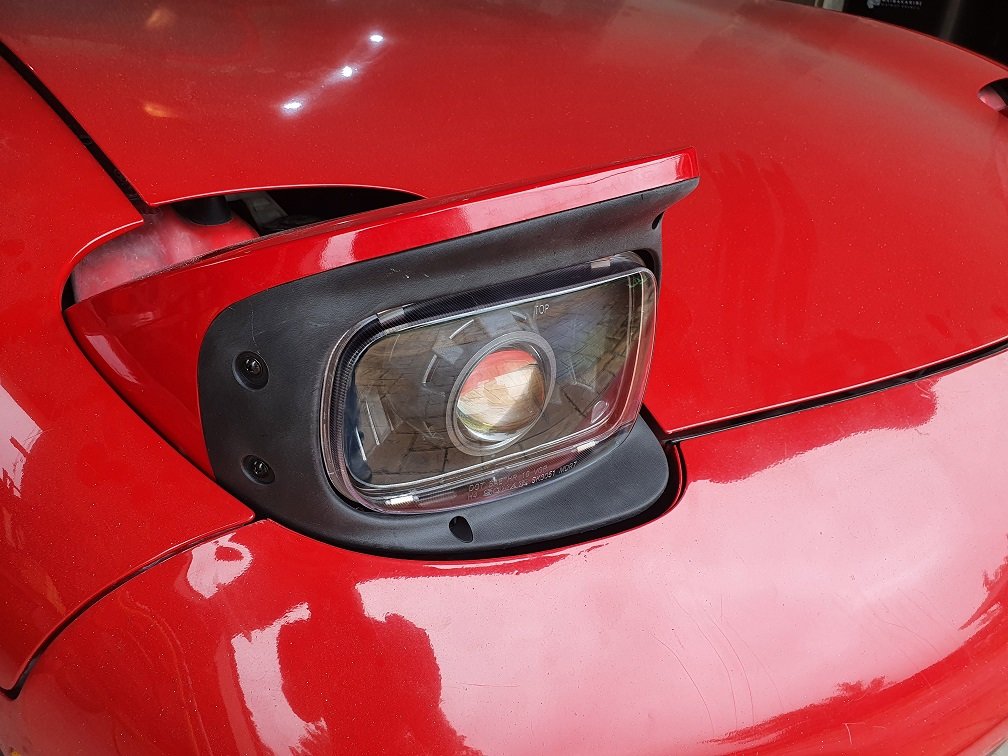
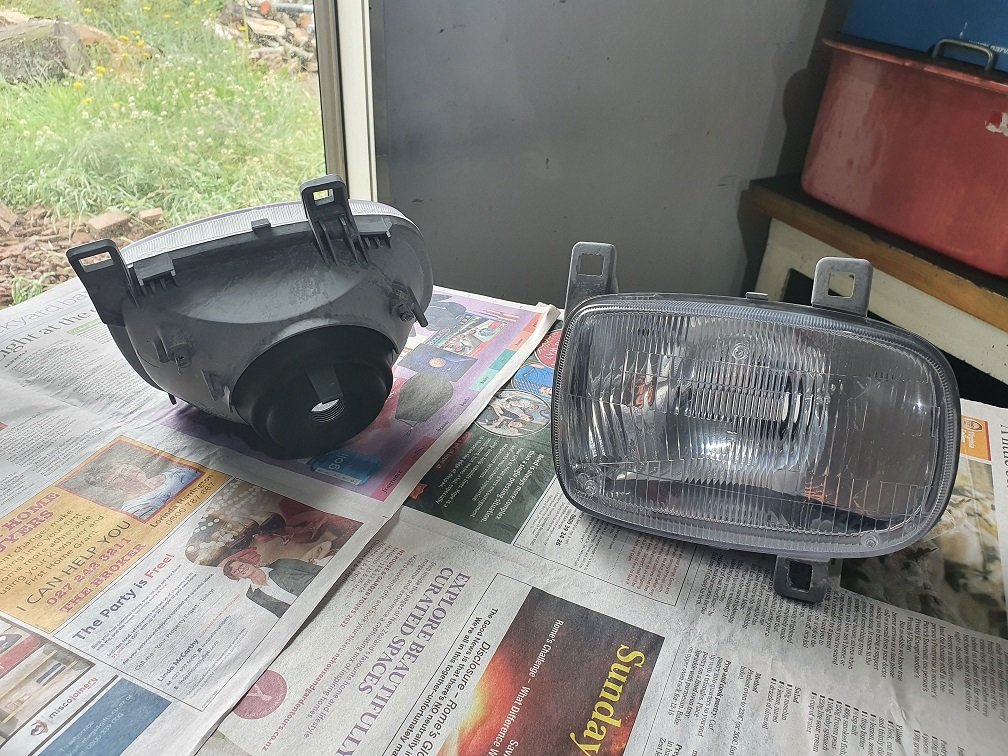
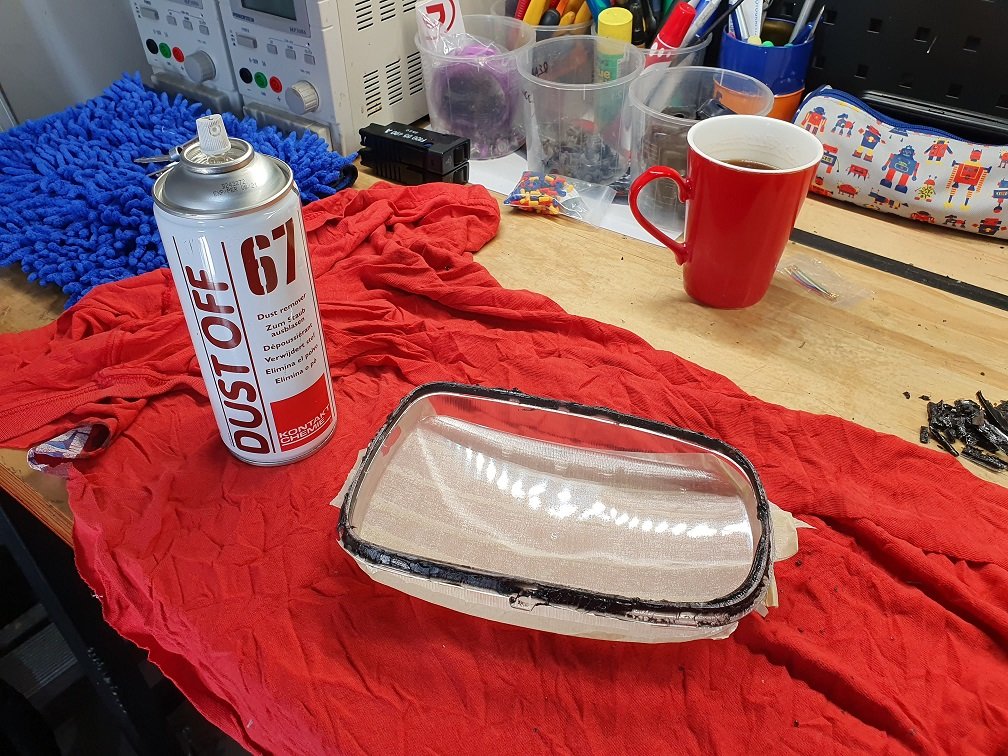
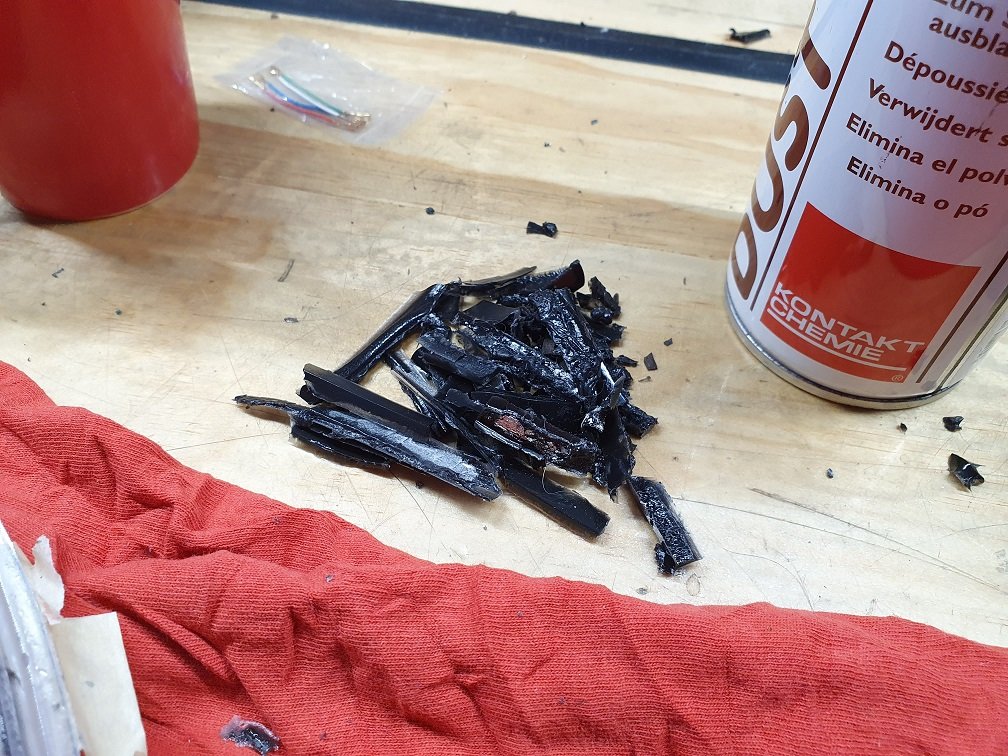
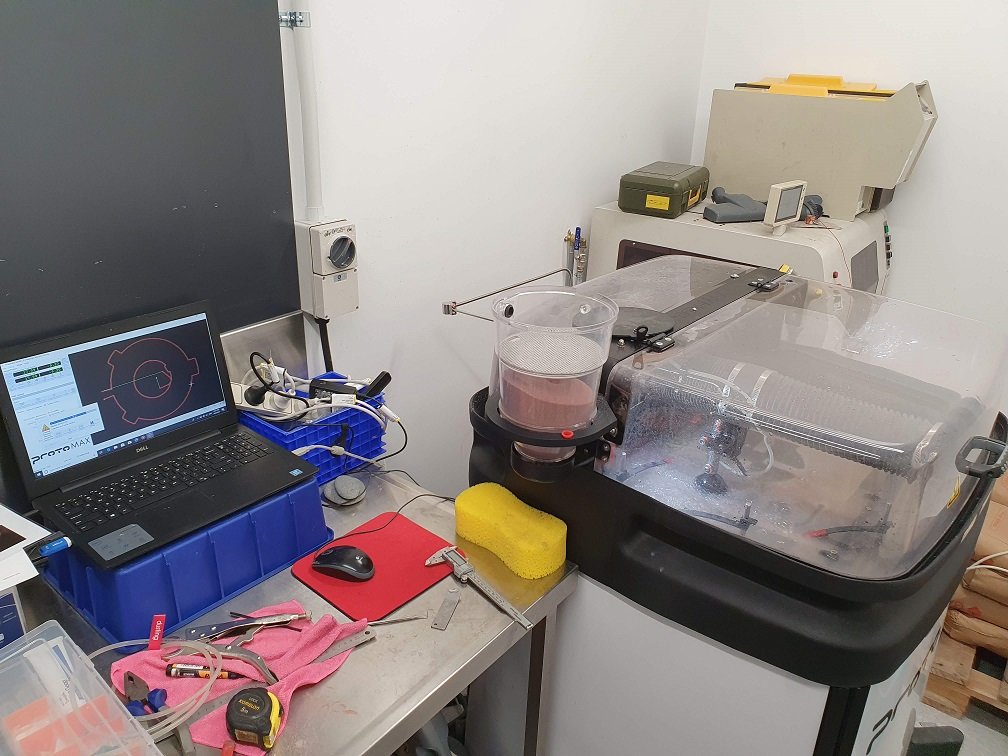
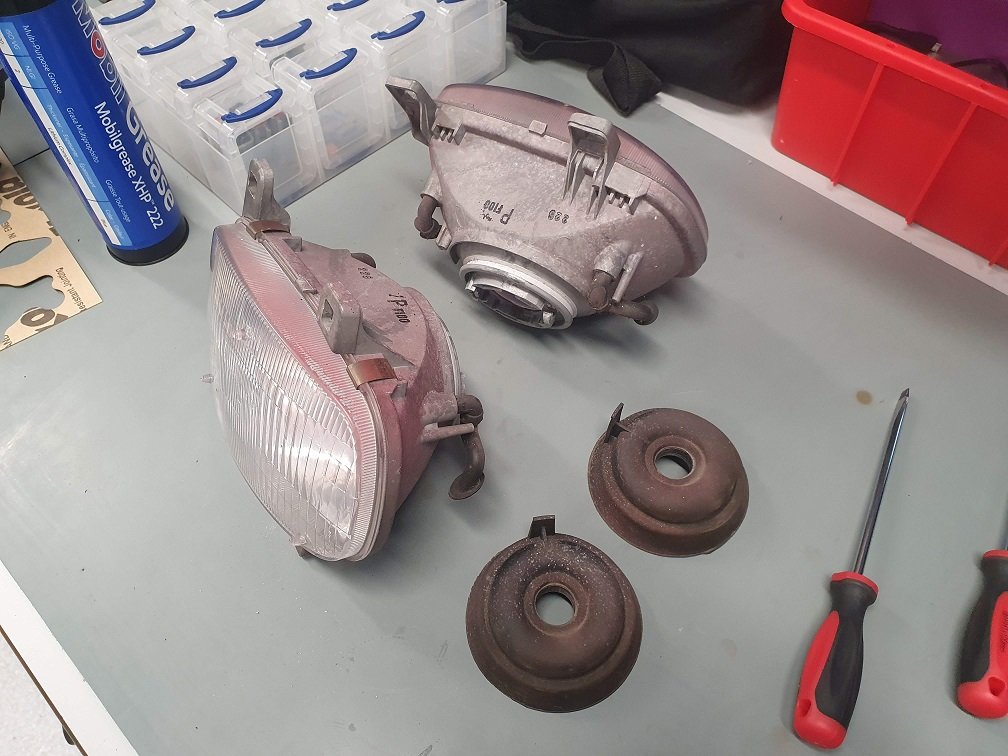
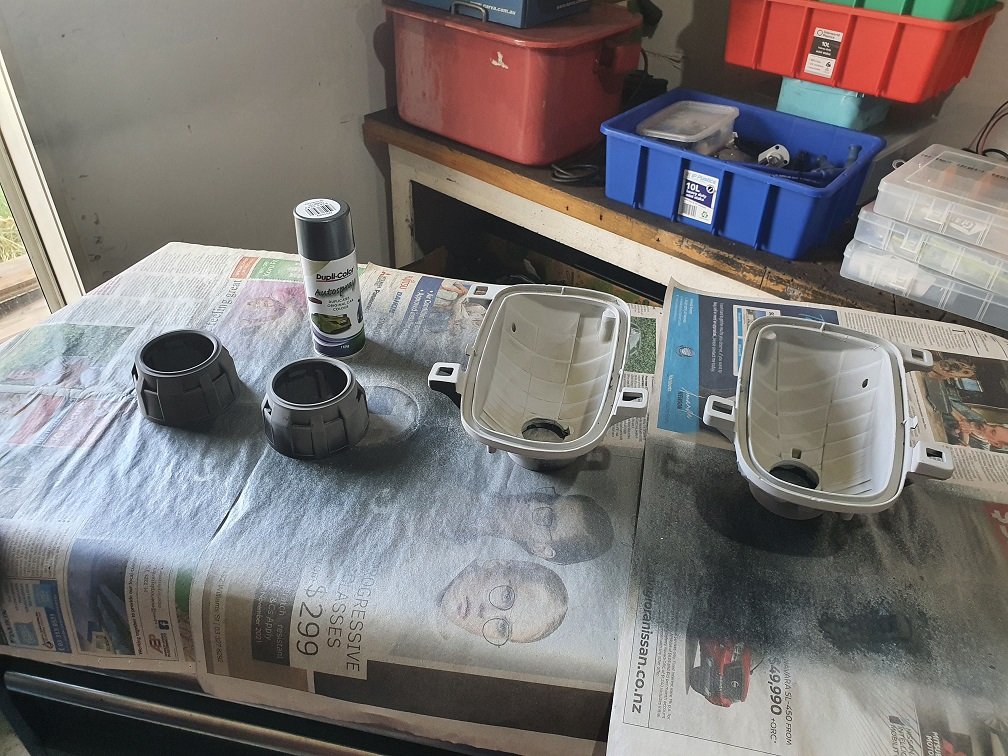
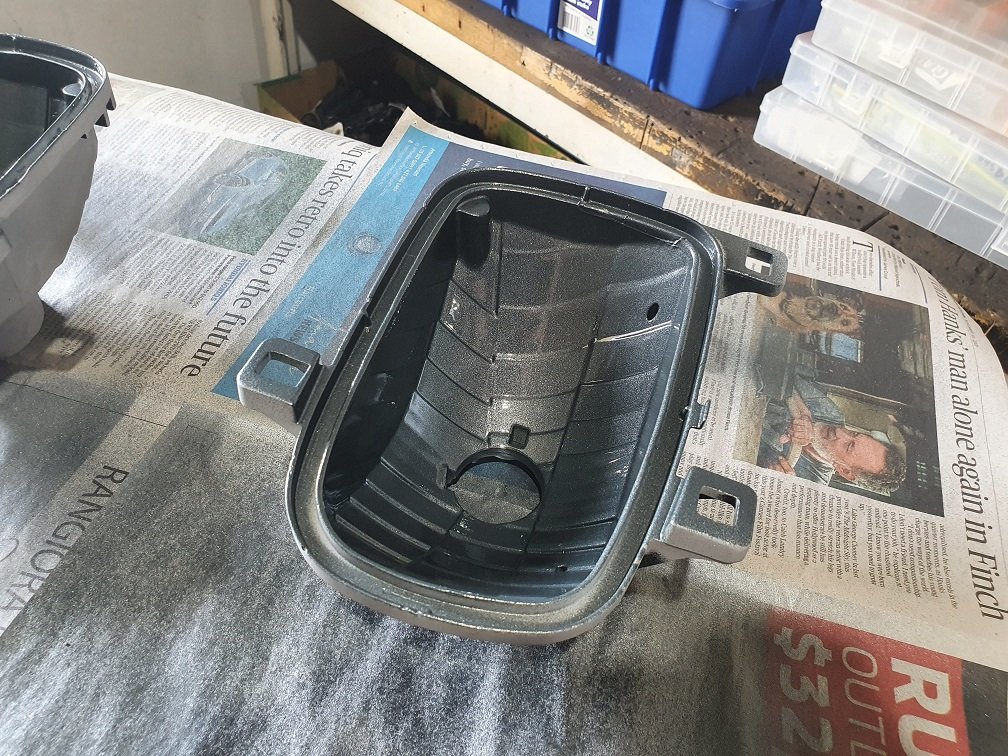
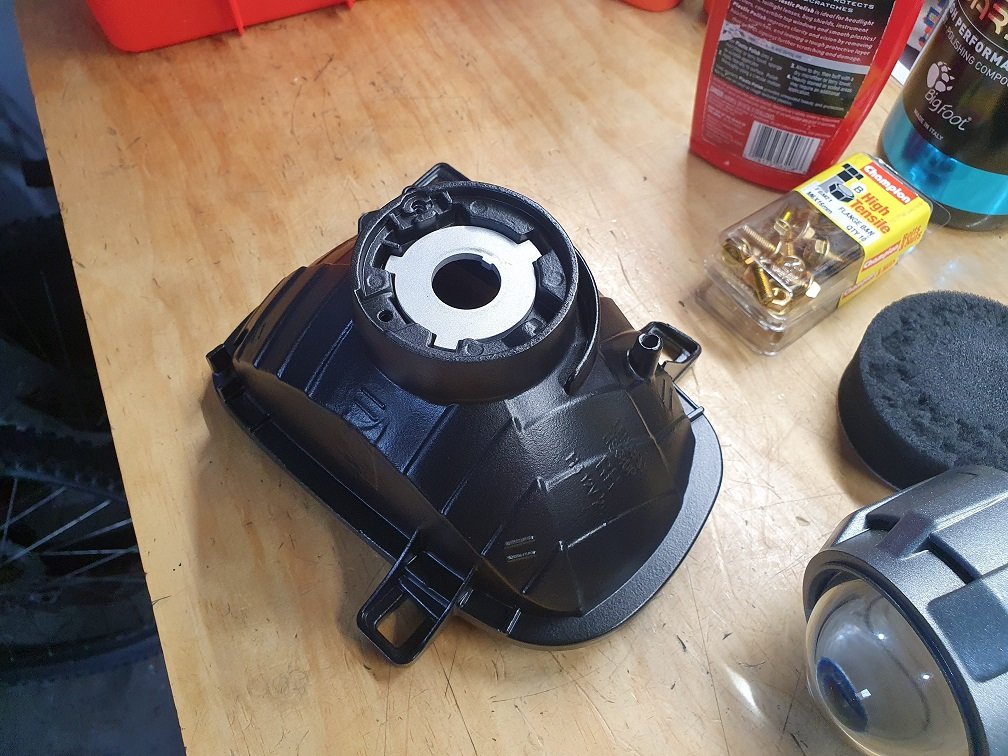
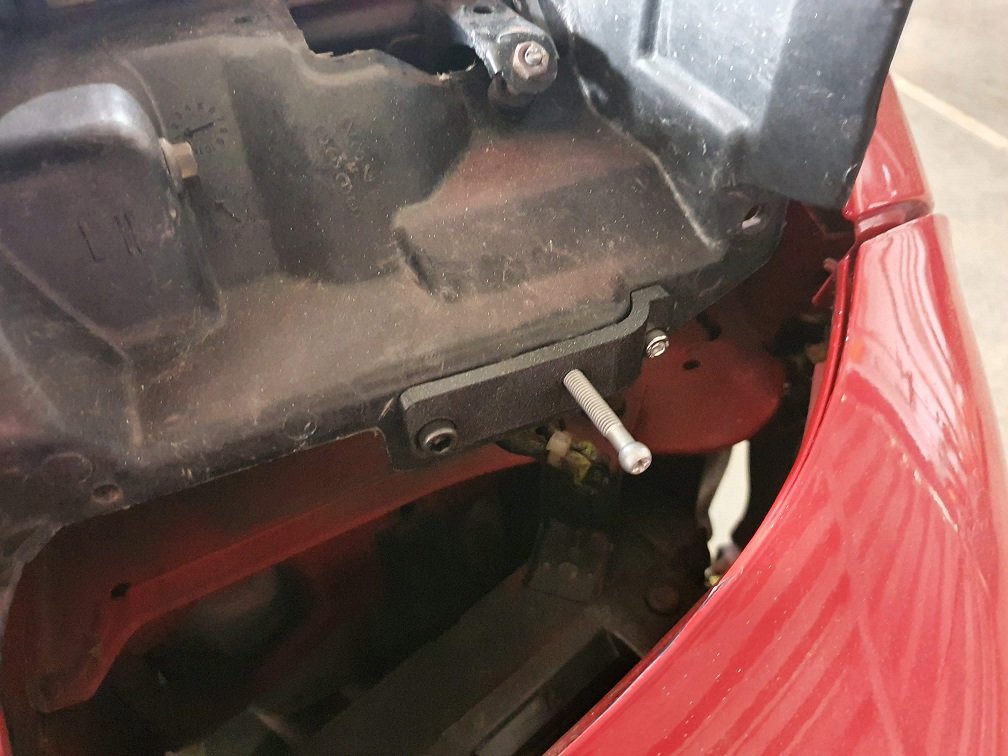
I'm going to technically claim that this counts as working on something the car critically needs to work, as headlights are pretty important, really. As should be pretty obvious, this thing has had a home-based re-spray at some point, and the person doing the job was not exactly clinical with their masking, so its dusty red and dirty clear overspray just.... everywhere. Including all over the headlights. I've sanded and polished a few lights in my time (including every other exterior light for this car...), so was anticipating a relatively smooth, if somewhat tedious job... Instead, I veered hard left (well, actually, I made that turn a long time ago, so I just stayed on the road I'm already on...) and decided to do a projector retrofit. I don't really have any defensible reason for this, other than I think they look cool :-)... Well, and I remember the headlights in my last FD being just terrible, even with replacement higher wattage bulbs. There are a couple of places that sell these ready made for FD's, but I'd be looking at around $1500 kiwi, and that's not money I'm willing to part with for something I can do myself (this is always flawless logic...). After researching a bit on the topic, It looks like the way to go is to use a pair of the available aftermarket headlight housings that shift the beam pattern generation onto the housing itself, and use a totally clear lense. There are a few places selling these, but they're all the same SONAR housing. I found a pair for sale cheap on ebay, so was around $180NZD into things. Getting them apart suuuuuuuuucked. Well, that's not strictly true, it wasn't particularly hard. Remove the spring clips, heat liberally with a heatgun, and pry slowly and gently... what sucked was dealing with the adhesive after the fact. This shit is sticky, and gets everywhere. It is reusable however, so if you can get them apart cleanly, you'd be able to re-heat the glue, reassemble and have them nicely sealed again... This is not what I did because.... reasons. Instead I decided to clean off all the glue, and will re-seal them myself using some butyl tape... I regret this decision. Prying all the old adhesive out with a screw driver took ages, and removed a lot of the chrome finish. Petrol was pretty decent at dissolving the residue left behind. I managed to slip with the screw driver and scratch one of the housings on the inside pretty decently. Guess I'm painting them then! The lenses are polycarbonate (I'm pretty sure, anyway), and solvents will mark them. The best way I found to get the glue off these was to freeze it. It would then chip off pretty cleanly, and the residue could be removed with some citrus goo-gone type stuff. Dispose of this shit while it is still frozen, because once it warms back up to room temperature, its fucking annoying to deal with. With the housings apart and cleaned, I started measuring things up, and settled on some 2.5" bi-LED projector units. These set me back around $80, and a two month wait. Lots of sellers of these on aliexpress, but they all look like they're made in the same factory: https://www.aliexpress.com/item/1005002797444025.html?spm=a2g0o.productlist.0.0.177c7147zgorov&algo_pvid=9558ac48-7b09-434a-802a-155a9e69b03d&algo_exp_id=9558ac48-7b09-434a-802a-155a9e69b03d-4&pdp_ext_f={"sku_id"%3A"12000022229395886"} If you're ordering any, make sure you get them with the correct beam pattern for the side of the road you drive on. Left in this case of course :-). From the measurements, I figured they'd fit inside with a few mm of clearance to the front lense. They come with an adaptor to mount where an H4 bulb originally went, so that's a score. Once they arrived I mocked them up, and immediately found that the adaptor mounts put the projects at totally the wrong angle, and the beam pattern was rotated along the axis of the car by around 20 deg. I 3dprinted some other adaptors and for them nice and level, and things were starting to look good. 3d printed adaptors aren't going to cut the mustard though, as they'd soften and melt with the heat of the projectors. Luckily we got a little waterjet cutter at work a while back, and its just bloody perfect for stuff like this :-). Cool. Now the rotation of the beam pattern was correct, I gave aiming them a go, and discovered that to get them level I was running out of adjustment on the bottom adjuster. Cue some more 3d-printing to make another insert. This bolts on using some existing holes so everything is totally reversible down the track. See all that dusty overspray? It's literally everywhere, that's the shit I'm dealing with. Phew, now I had enough adjustment I could get everything squared up. As I munched the housings pretty good cleaning them up and generally fucking around with them, they needed paint to look presentable again. cue some blasting to prep them... And some gun-metal touch up paint. Side note, seems repco isnt stock these little cans anymore. Shame, its really good paint, dries in like 5 mins with a heat gun, sprays out really well, and is just excellent to work with. It's more of a semi-gloss finish once it's dry, which looks really good in the housings. Time for final assembly and another test-fit! Hmmmmmm, frog eyes. I like them, but... honestly, it was a hell of a lot of work for maybe a questionable result? Hah. At least I had fun. Obviously haven't driven with them yet, but testing at night in the driveway shows a hell of a lot more light, in more distinctly correct places than the factory ones. That being said...... I also restored the factory housings. You know, because the projector ones are probably not even vaguely legal, and maybe these will actually work okay with some of the new-fangled LED replacement bulbs that are apparently not-shit?
6 points
-
installed new headlight and parking light bulbs . many skinned knuckles and the like.
4 points
-
just pop it out the side4 points
-
Nice Xmas list Got tyres swapped from the other wheels So glad we have a hoist at work End links done Tightened wheel bearing and fixed the buckled wheel4 points
-
Did a big mish this last weekend. Took the old beater all the way down to Invercargill to collect this chonker. Was a purely hammer down trip. Ferrys were delayed both ways. Which made for some long days. Got to hang out with this gangsta: Collected this chonker. I can't even touch the ground! And loaded it into the ute. It just fit. A++ would trade again. So now its back in the 04, i can rip into it and get it legal. When loading it onto the ute, we noticed coolant leaking out the left rear exhaust port.... Hmm. BHG hopefully. I've got a gasket set in stock, so will rip the head off this weekend to try and resolve. Plenty to do, will update soon.
4 points
-
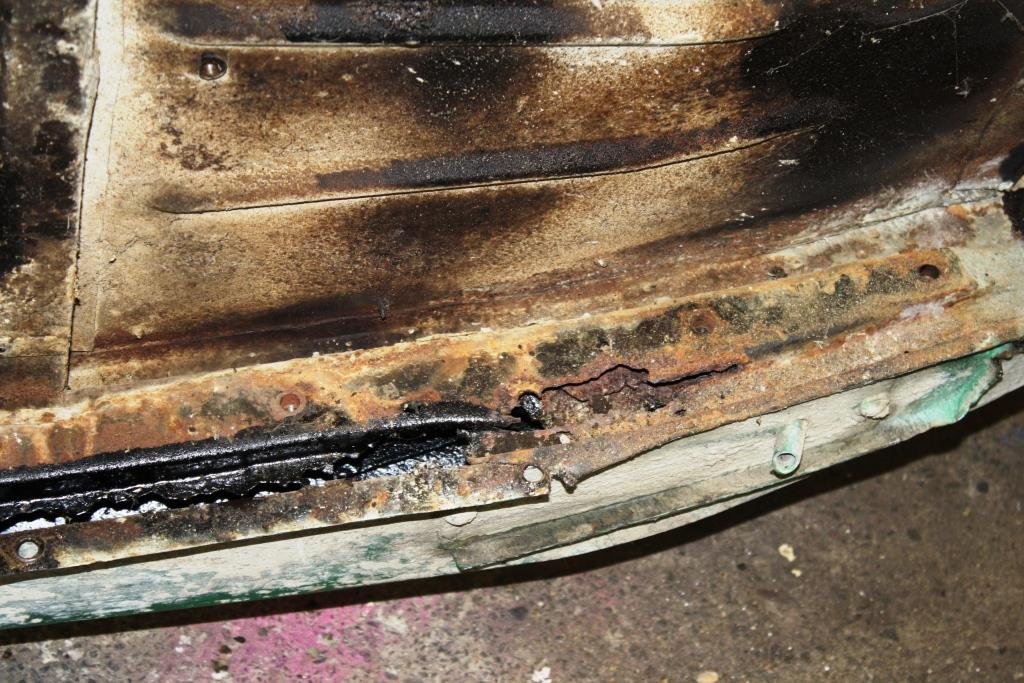
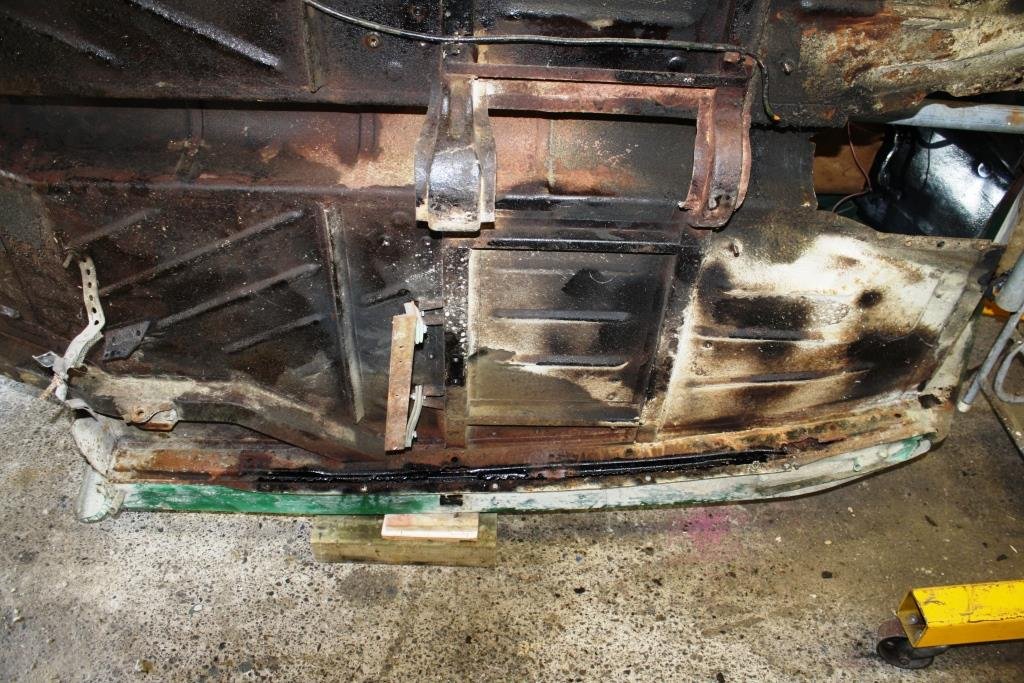
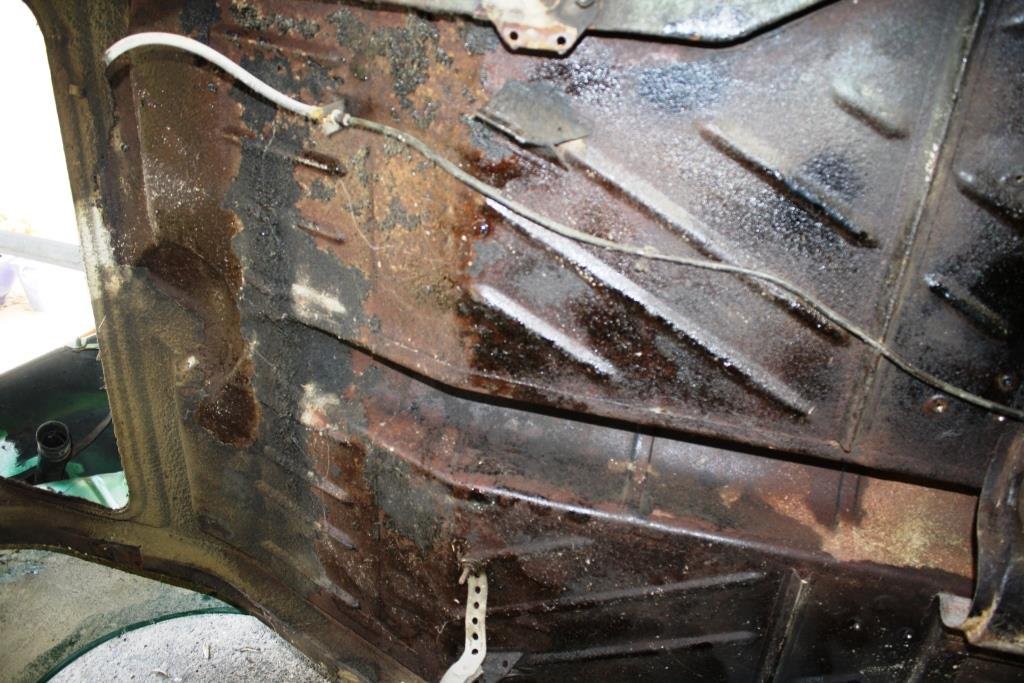
Closer inspection confirmed that getting the car on its side was well worth the effort. 70 plus years of being covered with a chassis rail has left me with a few rust repairs to do. Strangely enough similar to the chassis the starboard side is far more corroded than port, is there a dark chapter in Rigamortice’s chequered history that I’m unaware of? At least the years of “splash lubrication” from the diff has kept the rear underneath relatively rust free!
3 points
-
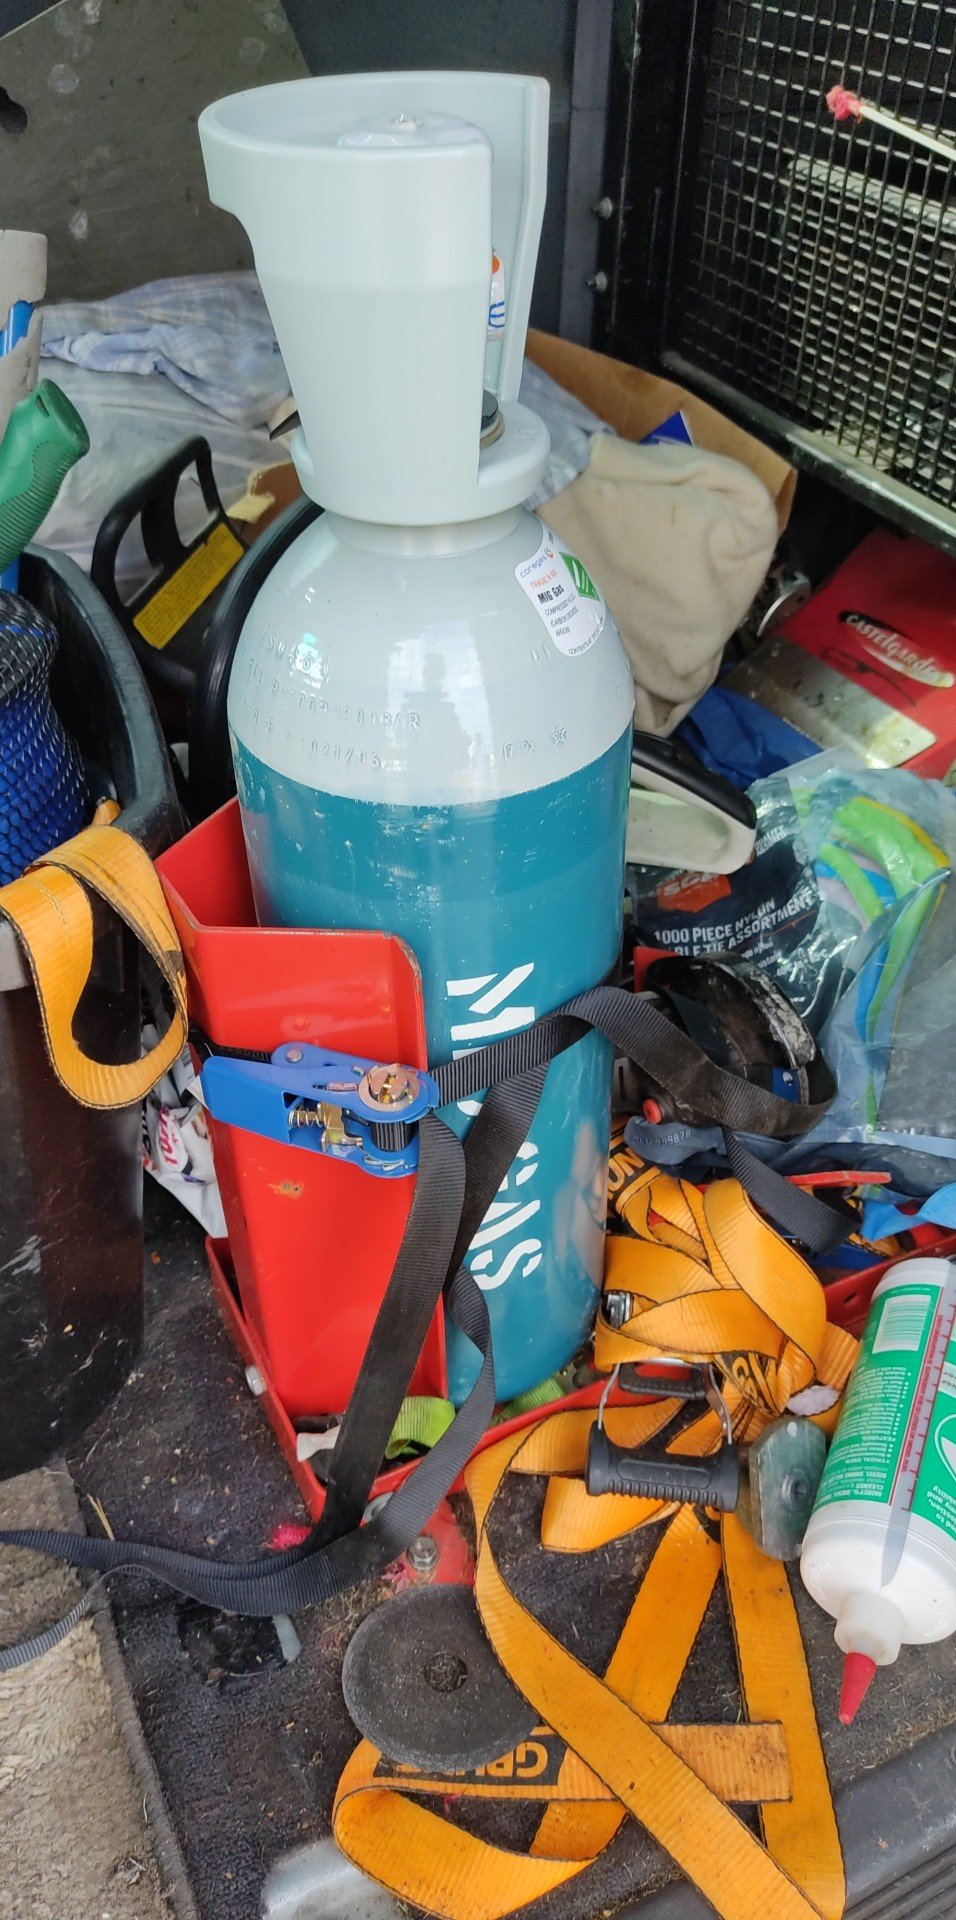
Got my new Tig today much excitement ensued banged everything together smashed some settings into it without reading the manual and turned out this weld on my kids quad frame. Little hot not pretending I was an expert before but shit that's passable. Forgot how rapidly the arc gives you sunburn. Just a tad over $2k for the new setup Strata 200A ACDC Tig ex demo including a bottle I bought from Gaspro Hamilton welder was from Proline in Nelson.
3 points
-
Not the ideal result, but at least that mystery is solved!2 points
-
And Betsy heads off into the sunset. Goodbye my old friend.
2 points
-
Those teddies are amazing2 points
-
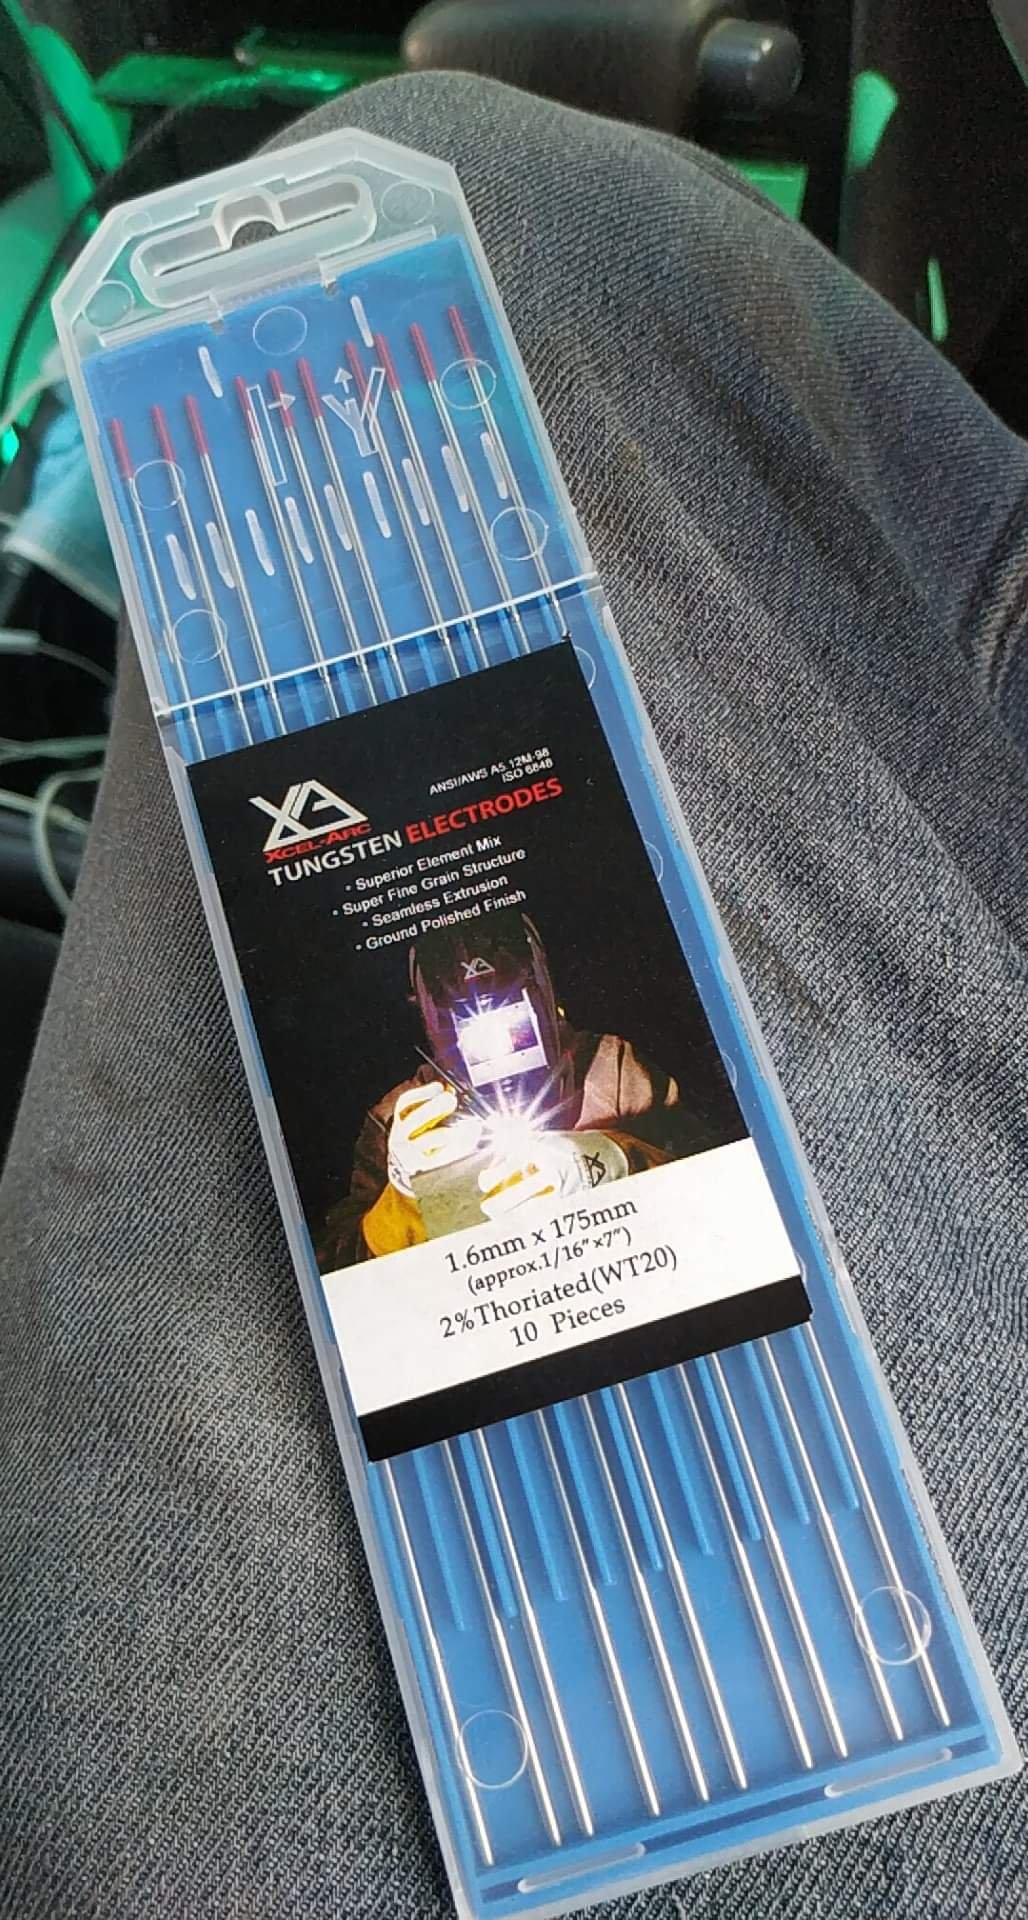
Tungstens acquired, still figuring out what I'm looking at with migs so am holding off for right now.
2 points
-
/That was holding the bike down The tray was fill with fairings, boxes of parts, paniers and all sorts of other bit. Plus yeah, if anything would blow off the bike, be good to catch it Rolled in the drive at 1.40am on tuesday. After smashing out a little over 2000ks in 4 days. Jeah.2 points
-
I like the net to catch any parts when they fall off the bike2 points
-
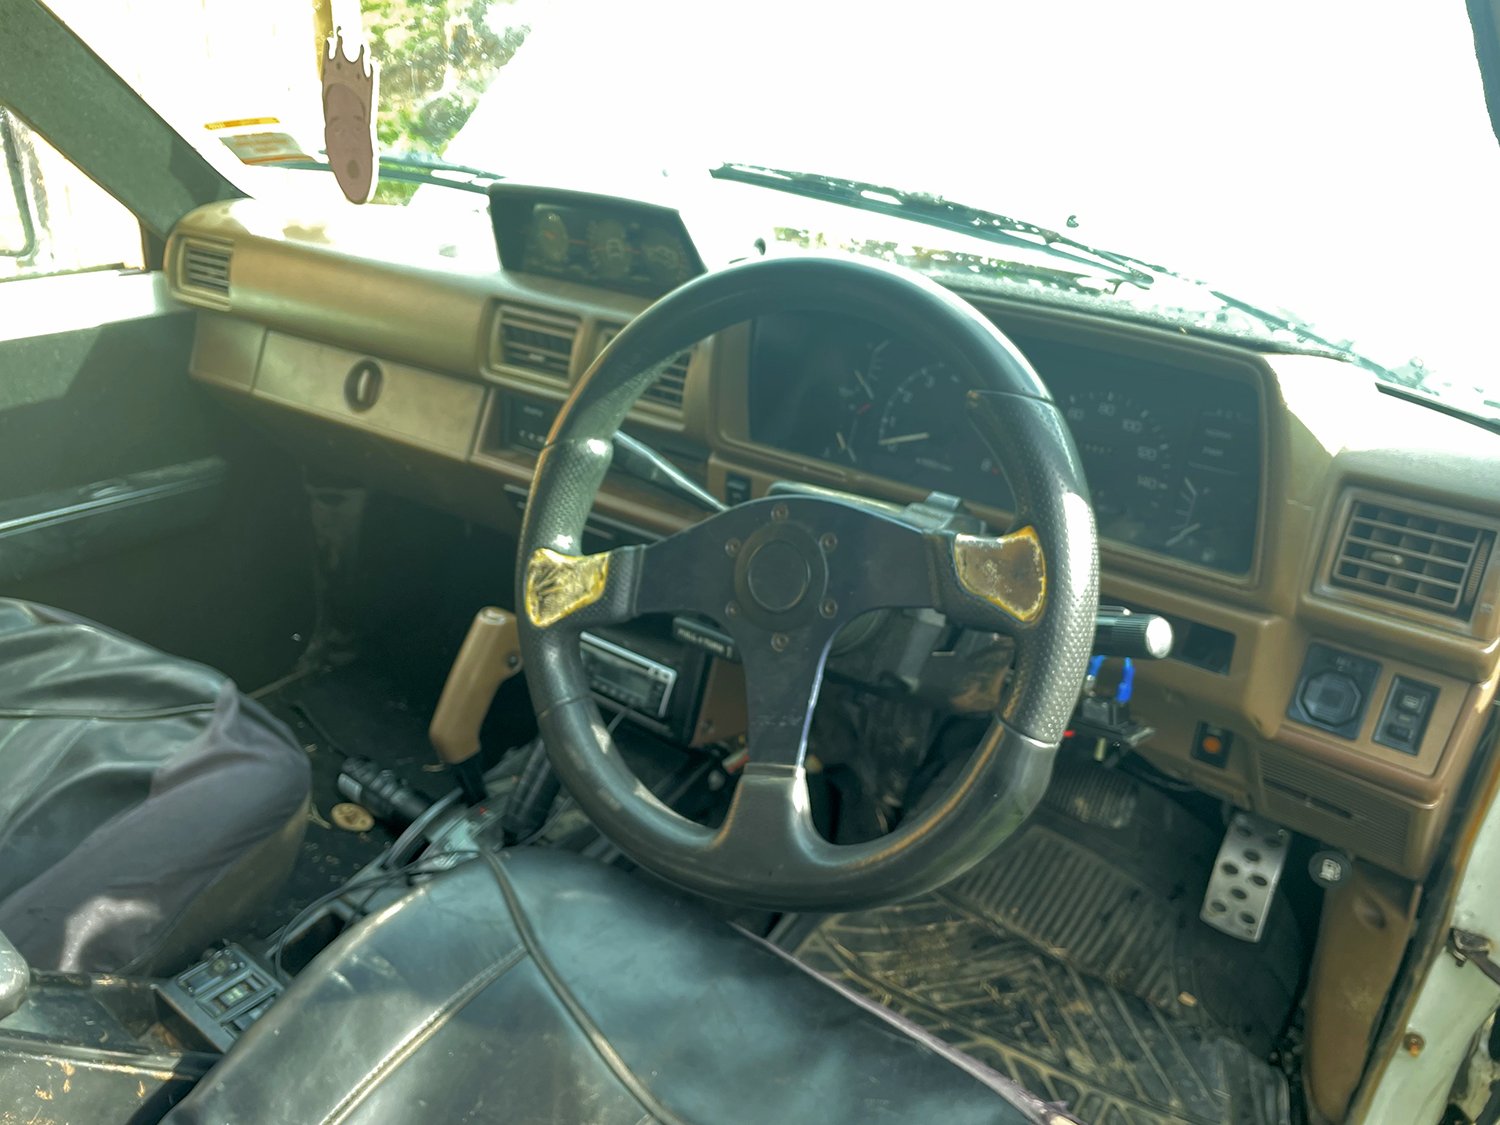
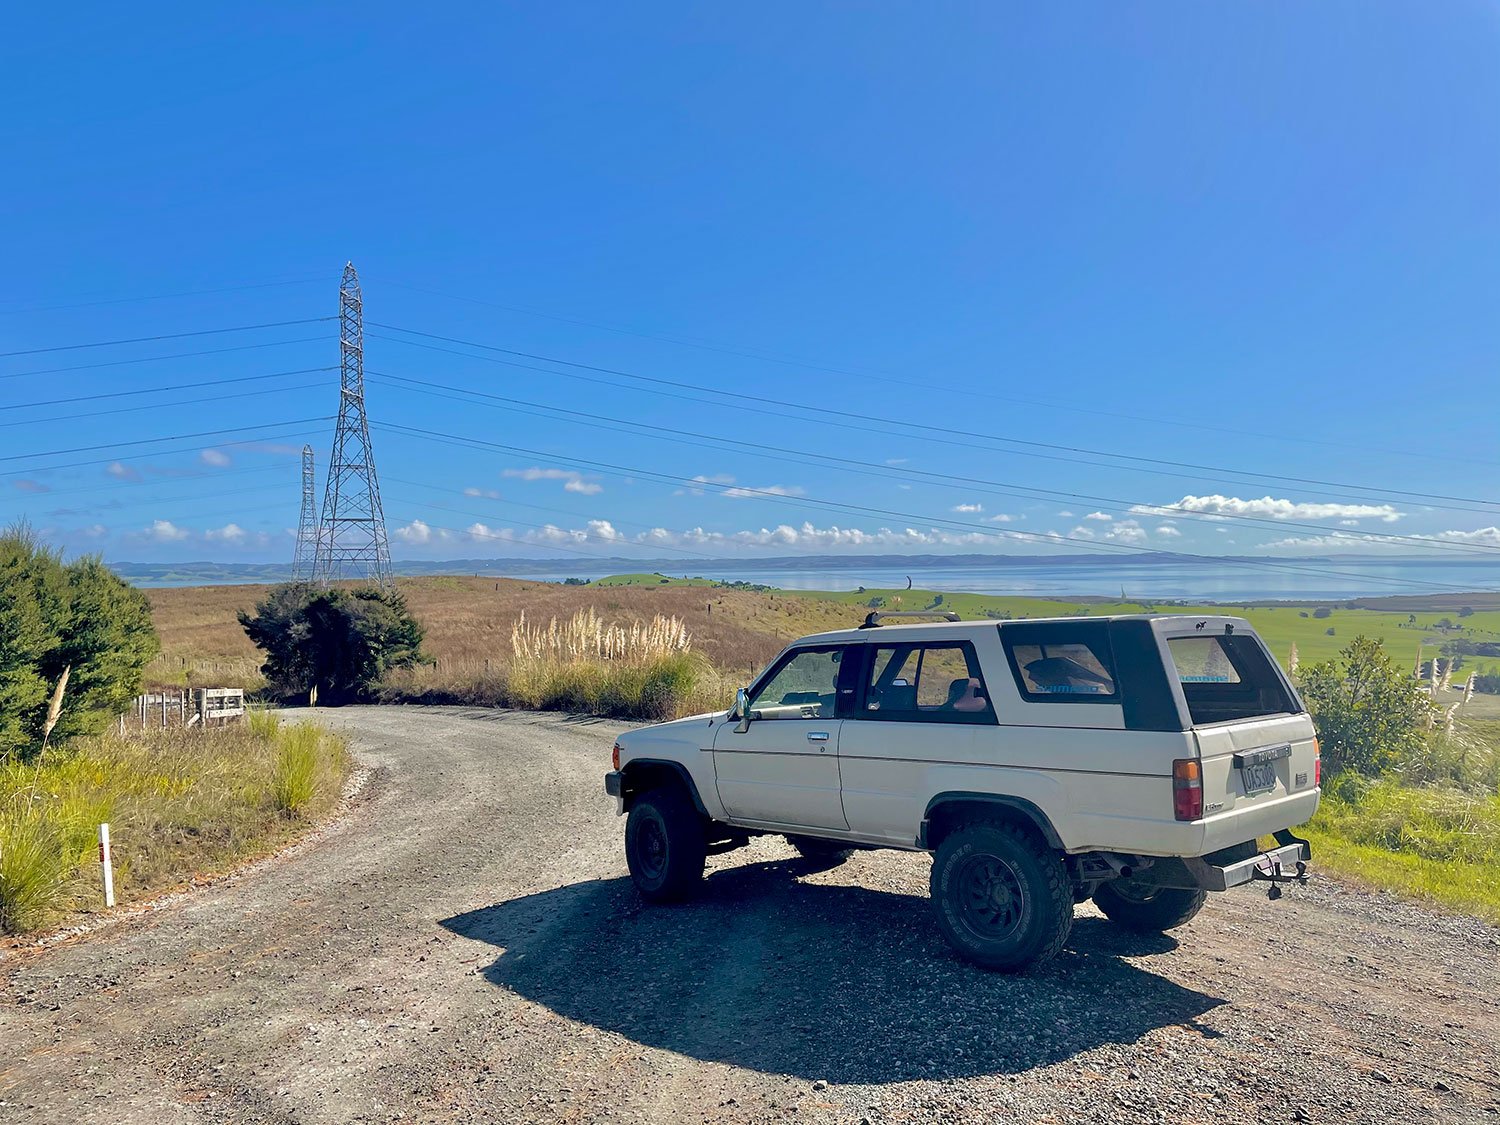
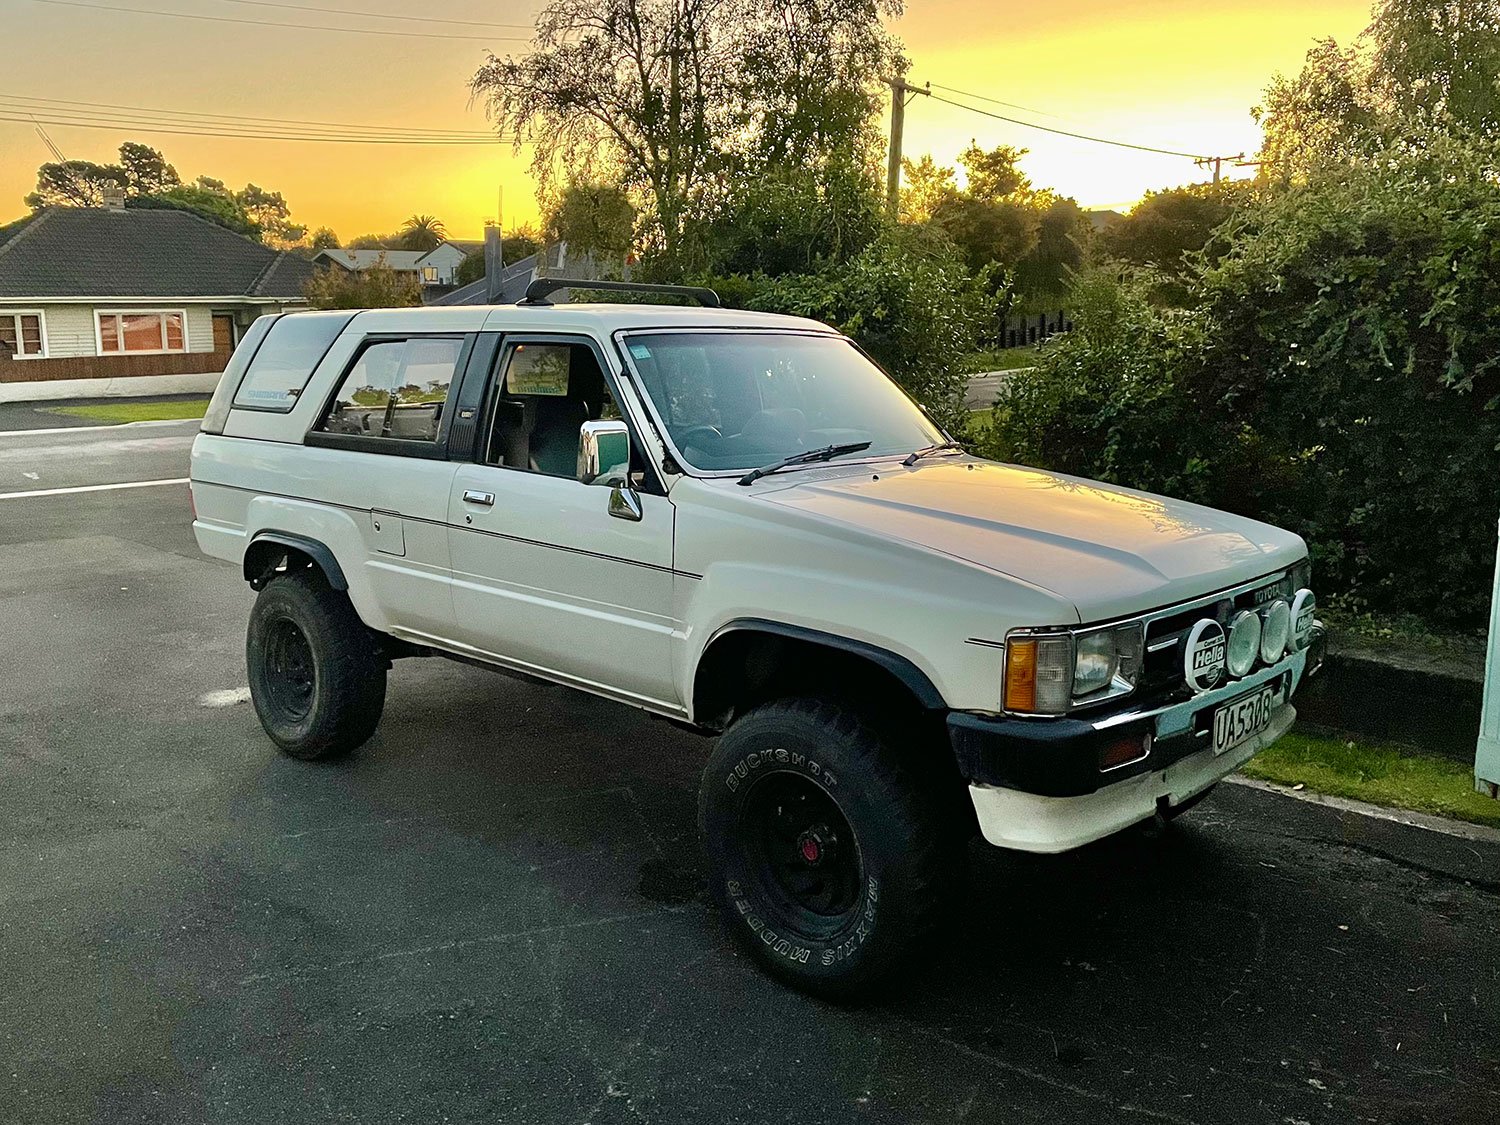
I'm back in the old school Japanese game! I picked up this First Gen Surf back in April. 1989 Toyota Surf 2L Petrol 3Y, Auto Its a little rough around the edges with the interior bombed with a black spray can and rust but overall pretty solid with a live reg. Came with a sweet set of Weds wheels that I plan to restore.
1 point
-
man, that ute has seen some action!1 point
-
The mechanics were laughing when I collected the wheels. "fucking teddies" I didn't know they were real wheels1 point
-
Nice, I used to have an Orthia a few years back, always thought they were one of the better shaped 90's wagons. I spied a manual one the other day, mustn't be very common. http://noriyaro.com/wp-content/uploads/2011/06/noriyaro_honda_orthia_minor_car_002.jpg1 point
-
Yeah it's not too bad access wise, still a bit of a pain getting at the top bolts on the turbo, could be super easy if I took the rear carpet out and pulled the bell housing cover though. It's going over the swaybar + diff + Panhard then snaking around the spare wheel and diesel tank etc that's looking like it'll be the real challenge for me tbh, especially considering I'm using a lift tig on a gravel driveway ha 2.4 petrol version for reference.
1 point
-
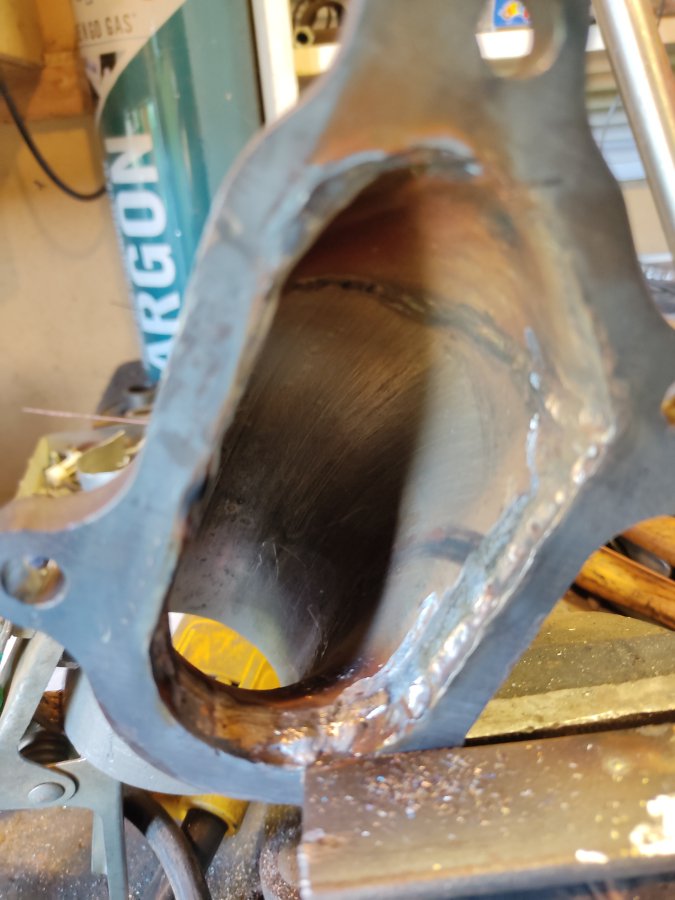
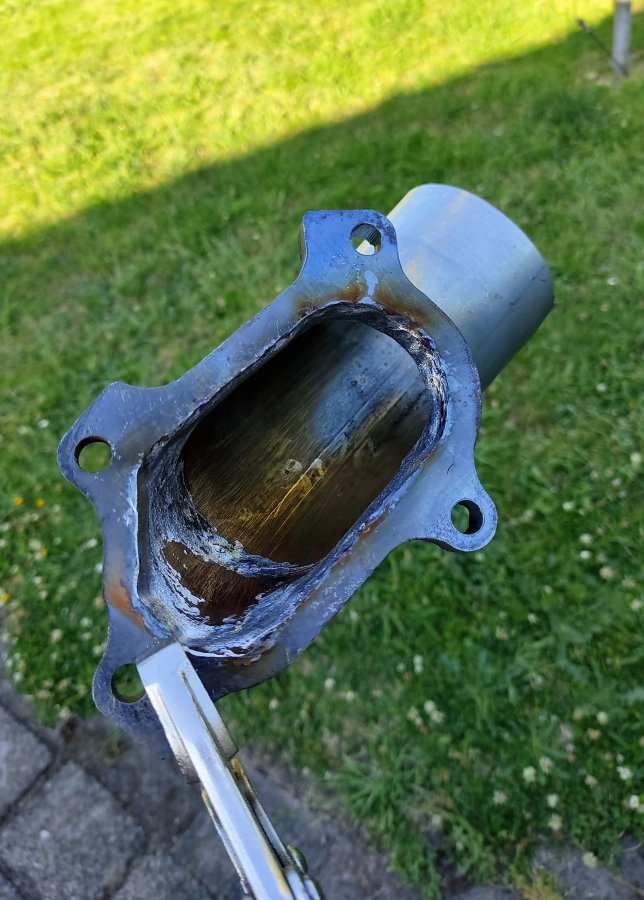
More Progress Larger Radiator fitted and Intercooler Mounted: Manifold Now has Wastegate Fitted: Dump Pipe Completed - except for wastegate plumb back waiting on a bellow:1 point
-
An update on this. I just spoke with Brian and Howat Engineering and he said the best option is to weld up, chop and respline the axles I have - it's like $100 each - and if it goes south make something up later (around $400 per billet axle). His reckoning was that in a small car like the Gem it'll break traction way before it shreds the splines, and mentioned that they had drag cars with welded and resplined axles and that it was all good.1 point
-
Turns out the pump is fucked . Little bits of metal through it holding spill valve open so wasnt making pressure to the Injectors Mds in kaiapoi are currently doing a pump rebuild on it.1 point
-
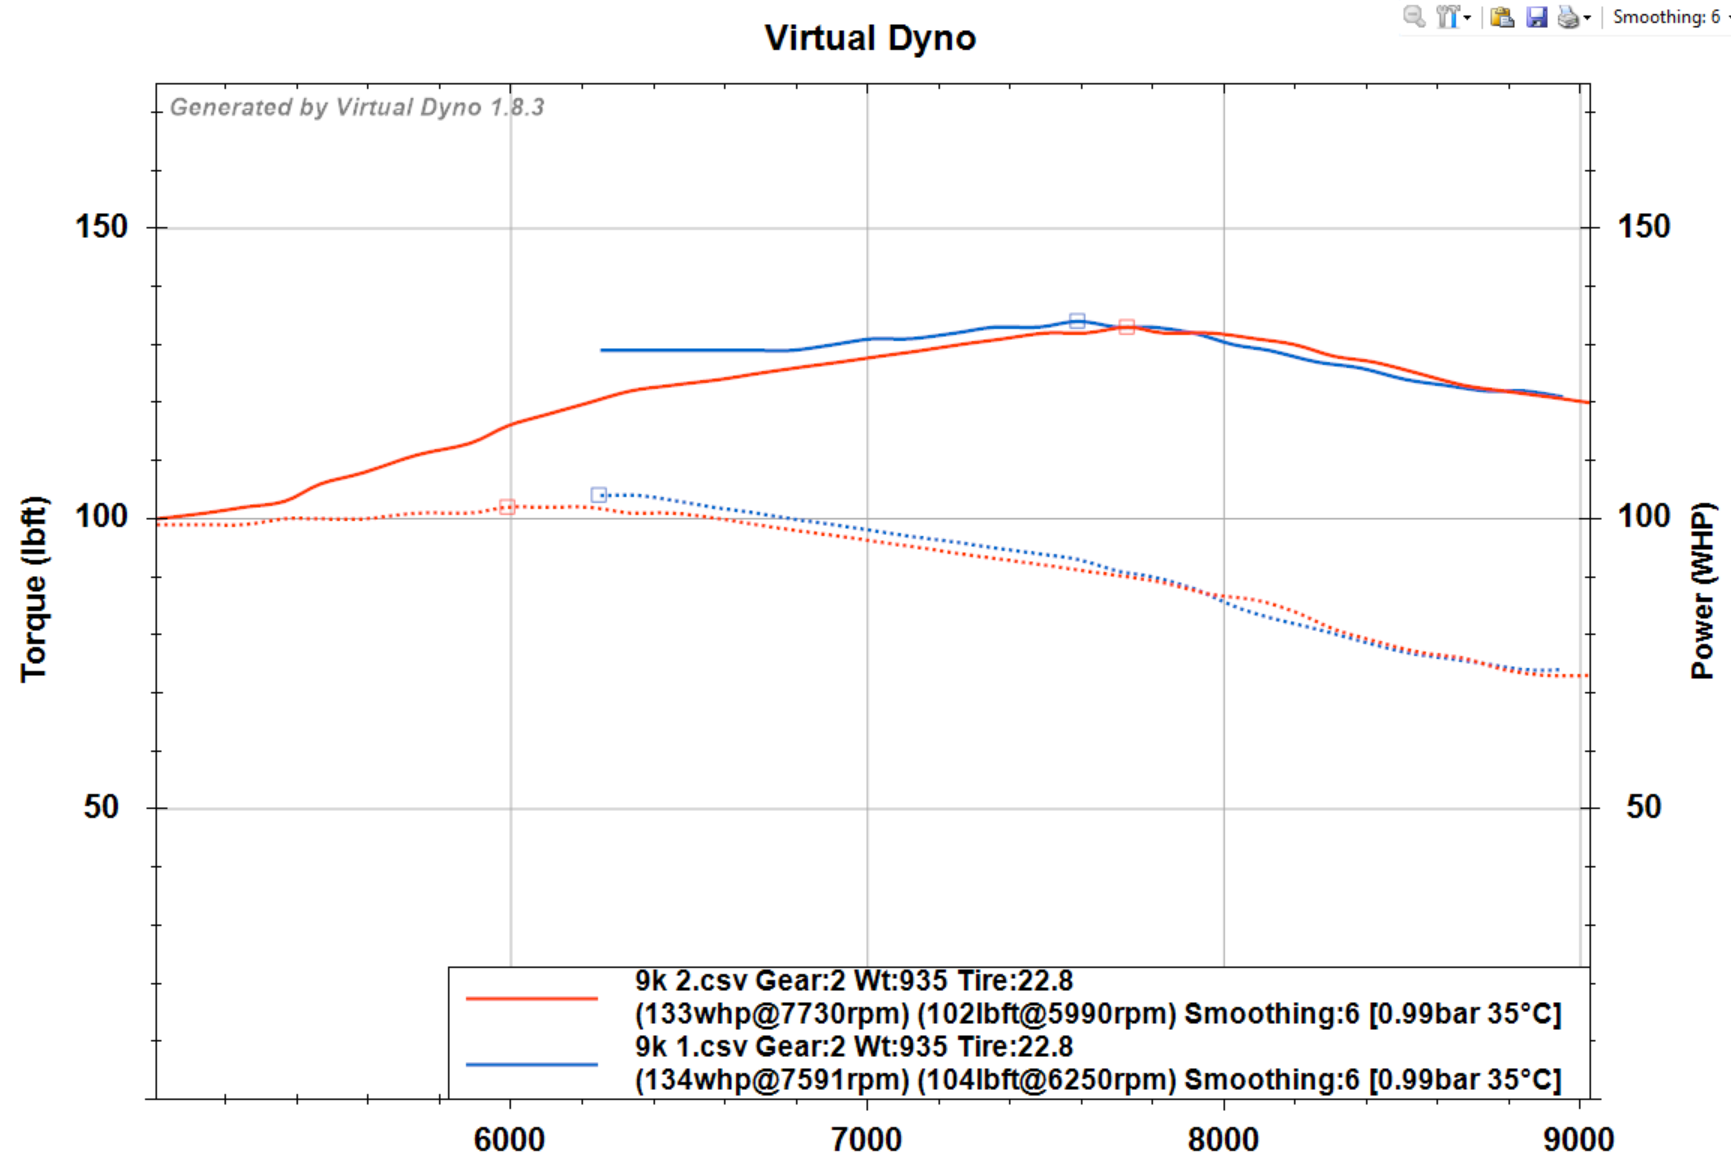
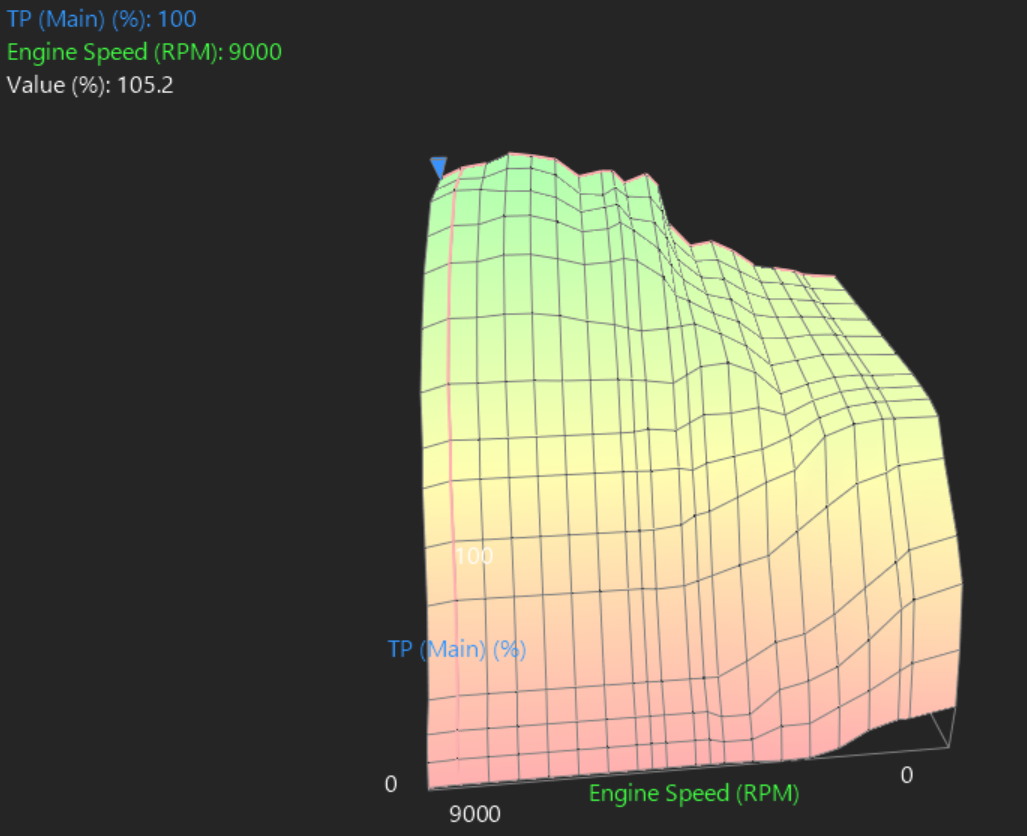
Due to overwhelming peer pressure I decided to set the rev limited to 9100rpm and see what happens Horsepower has peaked earlier but its still worth holding the gear so you drop down closer to peak HP Keep in mind fuel, ignition and vvti angles have fallen off the end of all of the tables haha. So not optimized. Let me explain what it sounds like: fucking excellent. I've added a 9k rpm column to my fuel table, and then adjusted VE values to suit results. It's not falling right on its face, at 8500rpm showing 107.5% VE, now at 105.2% So once stronger rods are in I cant see any good reason not to keep going even past that
1 point
-
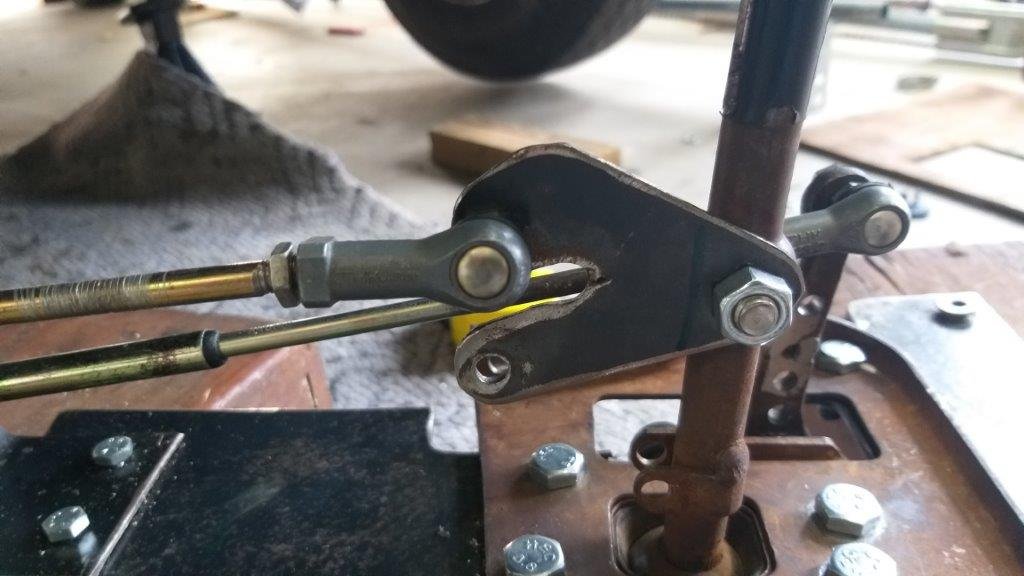
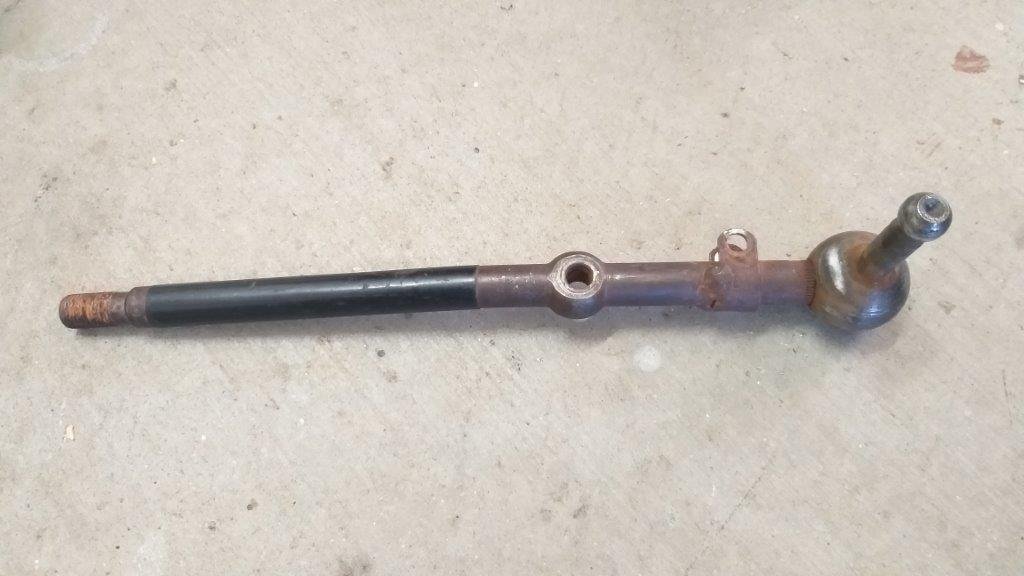
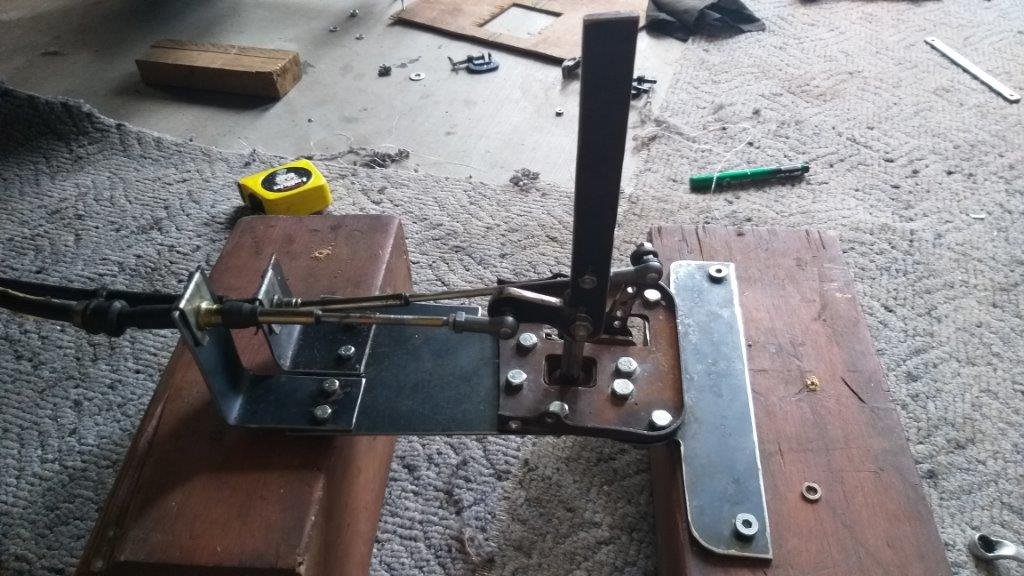
This morning I cracked into the final bit of fabrication on the main gear shift mechanism. First order of business was to create a new gear cable mount to replace the one that is currently only held on with one bolt. I'll be cutting off the round gear stick and replacing it with a flat piece of steel to which I can attach the shift rod for the remote shifter, so I thought I'd tackle that at the same time. I'll let some pics do the talking. Next order of business is the primary gear stick setup. Thanks for looking.
1 point
-
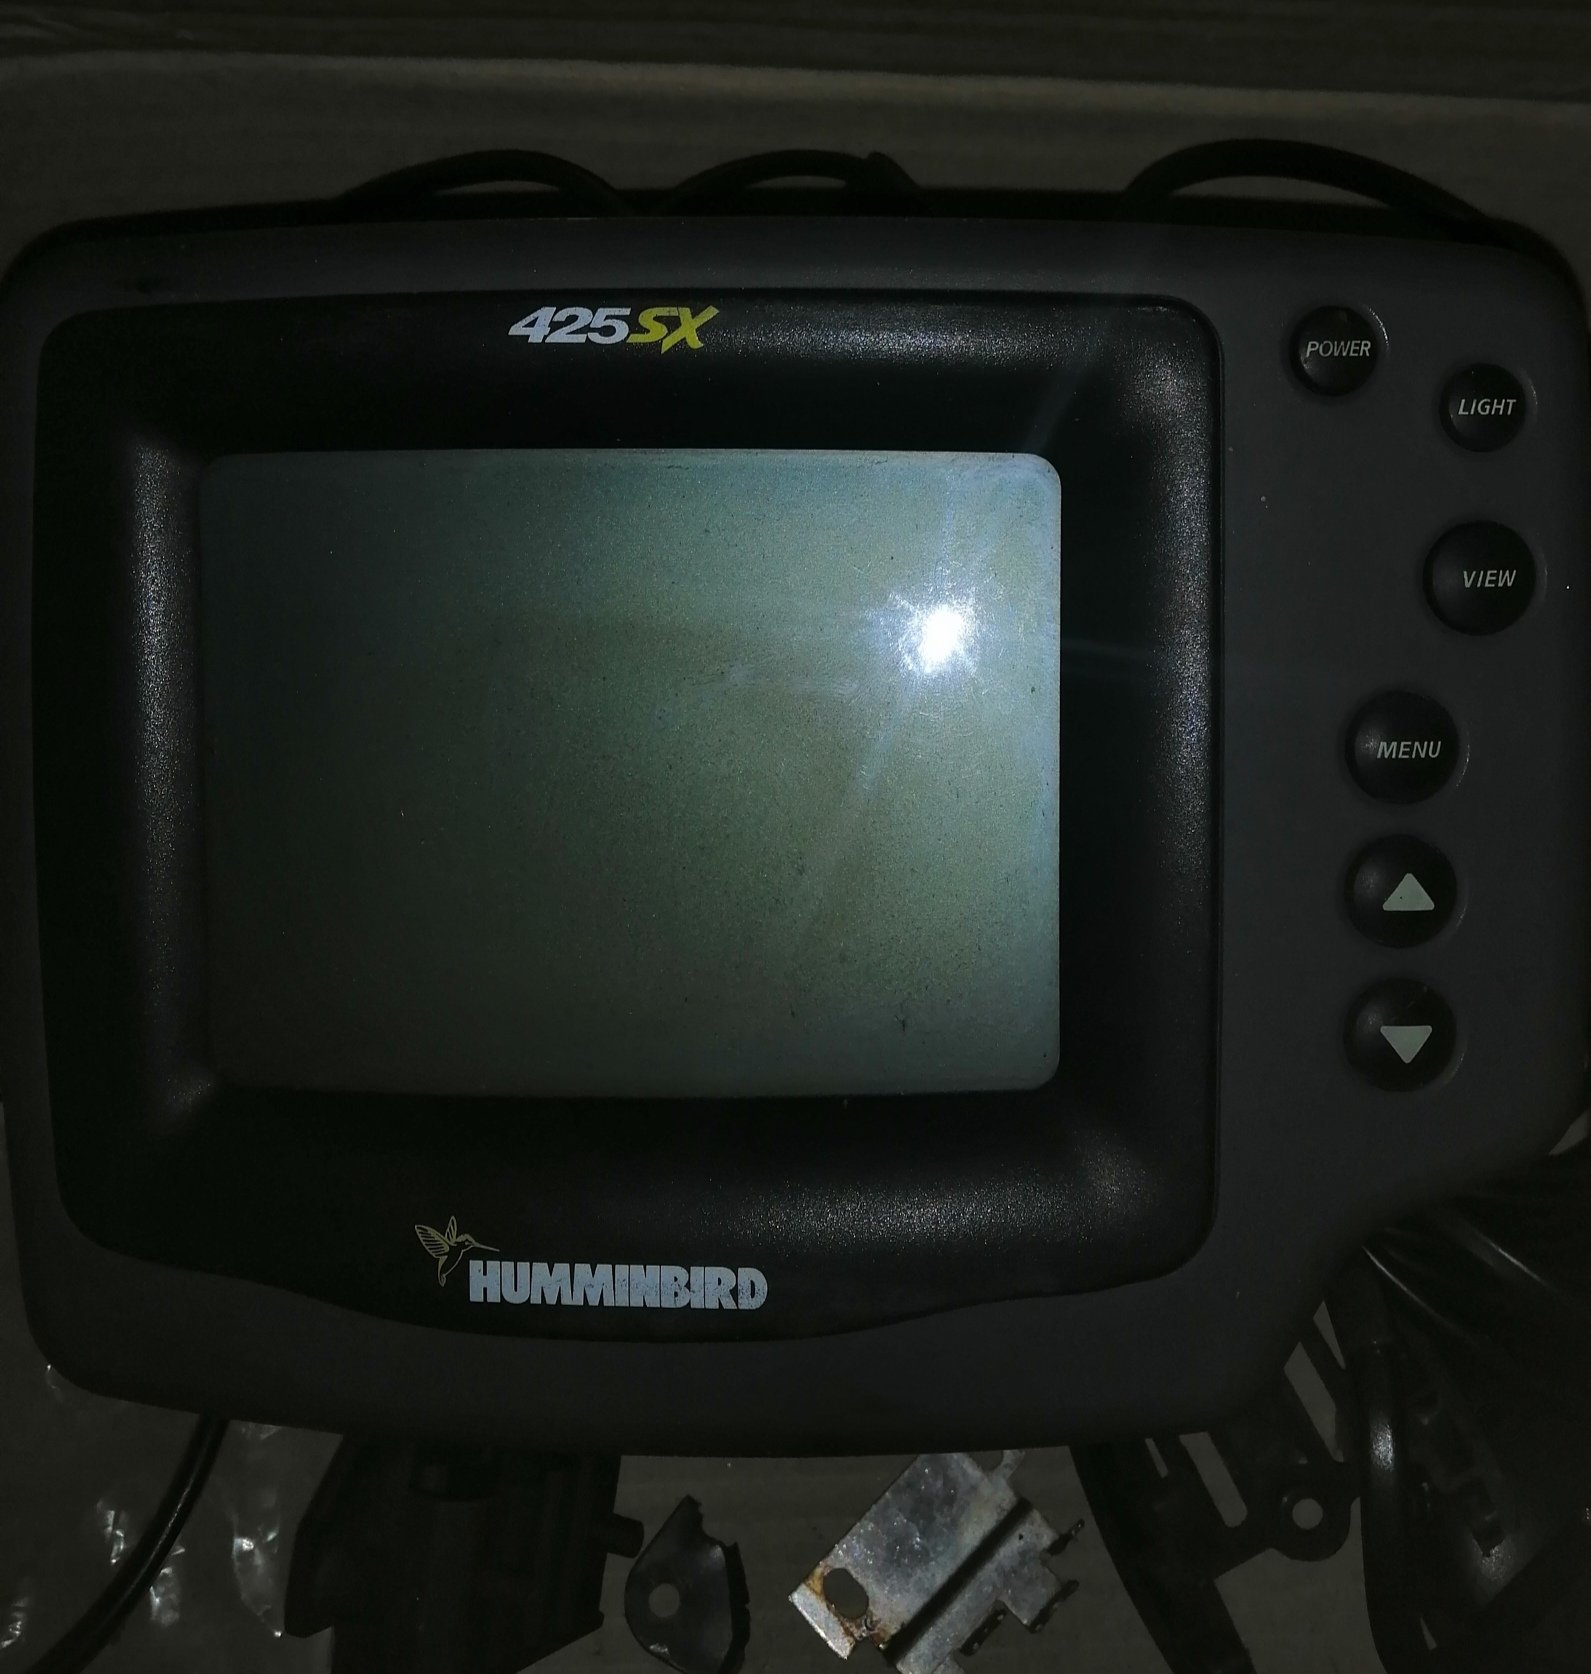
Pic of new (old) sounder. Downloaded a manual for it and it's far superior to the other Garmin. Shed will get a clearout soon.
1 point
-
Spent some time reassembling the GSXR, slowly coming together
1 point
-
Lots of driving, it's sweet as hell. Took it back to the suspension guys to get a check over and tune up. They also brought it down another half inch, which means it is now as low as it can be and still be legal. Pics1 point
-
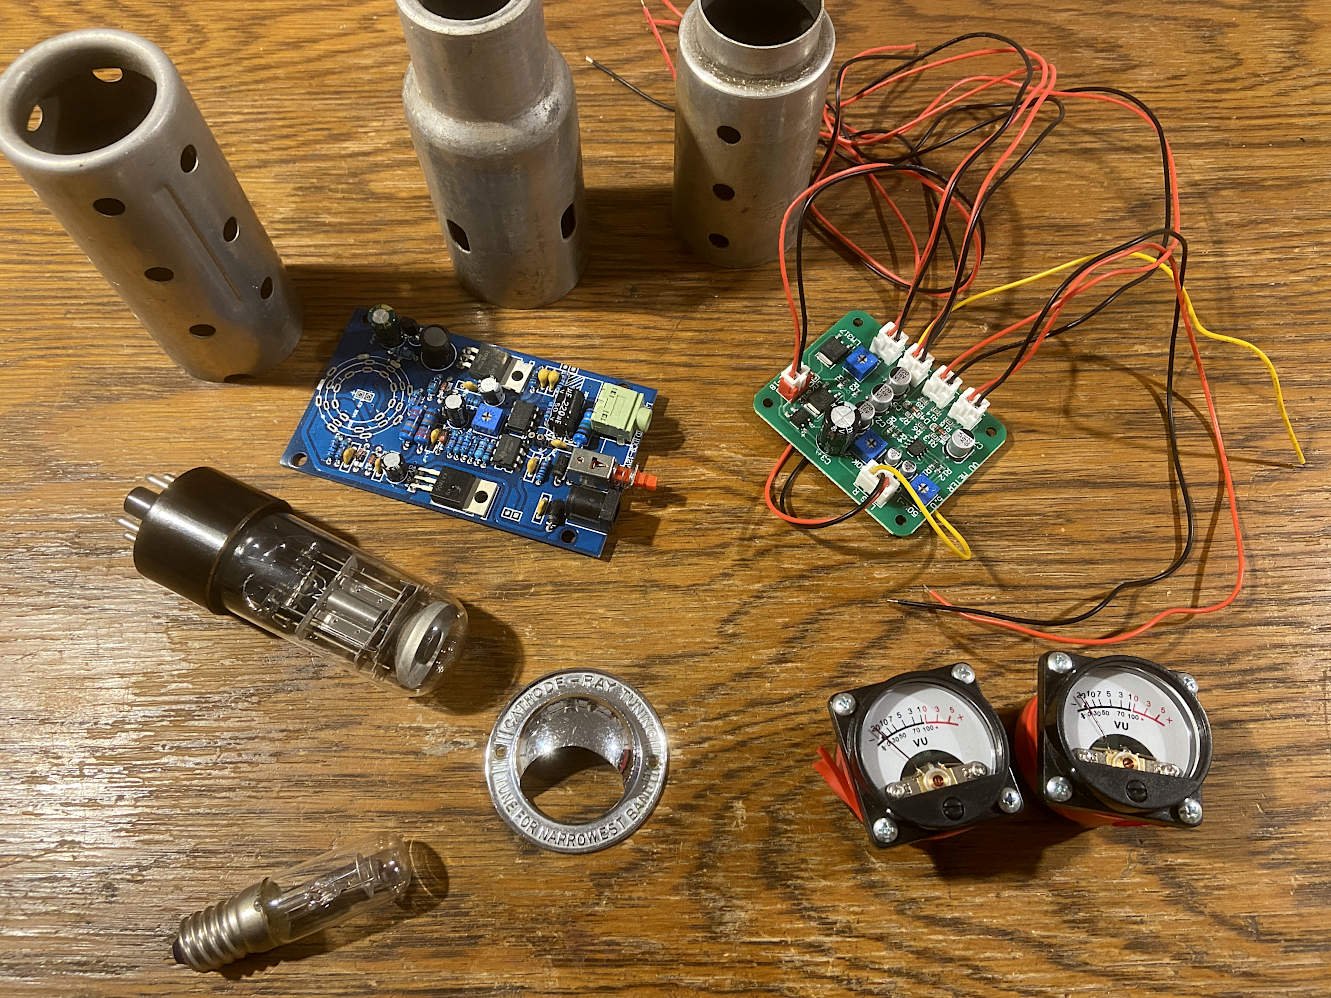
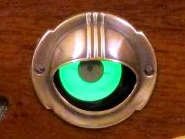
More parts arrived. There's pre-assembled kits to drive analogue VU meters and another magic eye. I've wanted this circular kind of magic eye since I first saw them, cos they're daft and creepy. My radiogram never had one, so I'm adding it, even if it's from slightly the wrong era. The hardest piece to obtain was the eye's trim surround, because the few that come up for sale are attached to 90YO radios that collectors keep outbidding me for. I would have preferred brass or a similar metal: The eye is going to sit on the front face of my radiogram above the display window, and I'll experiment with giving it a direct audio input from the guitar amp or using its mic input to pick up the speaker cavity sound mix. The VU meters will just be installed somewhere inside the display area, trying to look retro despite their LED backlighting. As they're another item that reacts to the music, they'll hopefully help distract from the fact that you're basically looking at a static collection of lights. I've got all the key parts for this project now, so nothing is holding up anything else. I'm hoping to make some progress over summer. =)
1 point
-
So legal size tyres that aren't race tyres don't appear to exist so I'll get some 195 stretched onto the teddies. I'll swap my re003 off the buddy clubs onto them as there's no point in them sitting in the lockup doing zero. On my pick a part mission i grabbed some components. Finally got around to installing them into the accord Annoyingly it sounds better than the stuff in the orthia. That amp sounded crap before so it could be my settings or the amp is just shit. I've got another couple of amps to try so that'll future Chris problem1 point
-
So I've been pining some wheels for a long time now, I found a set in America that had some on s a pre order. covid delayed shipping etc etc. Shop never replied to any communications (lucky I never gave them any money. I found another set on aliexpress but couldn't justify the freight. Nearly gave up on the pine then they popped up on trademe. Mrs Chrisr said I wouldn't shut the fuck up about them so I should get them. So I did1 point
-
I got everything sorted for the cert. Got some new, real white wall tyres and a new, programmable brain for my electric fan, which has also been relocated to inside the radiator, so I could ditch the viscous fan. Here's how the engine bay currently looks, you can see the fan's new location at the bottom. I also got tyres for the Enkei Mosports, which look pretty slick. I've got some centre caps on the way and the height will be coming down another half inch to remove some of the increased guard gap that comes with the smaller rolling diameter. I'm also going to look into spacing the rears out, so they sit more flush with the body, until such time as I can get two of the wheels widened for the rear. Sailed through a warrant last week too, no issues.1 point
-
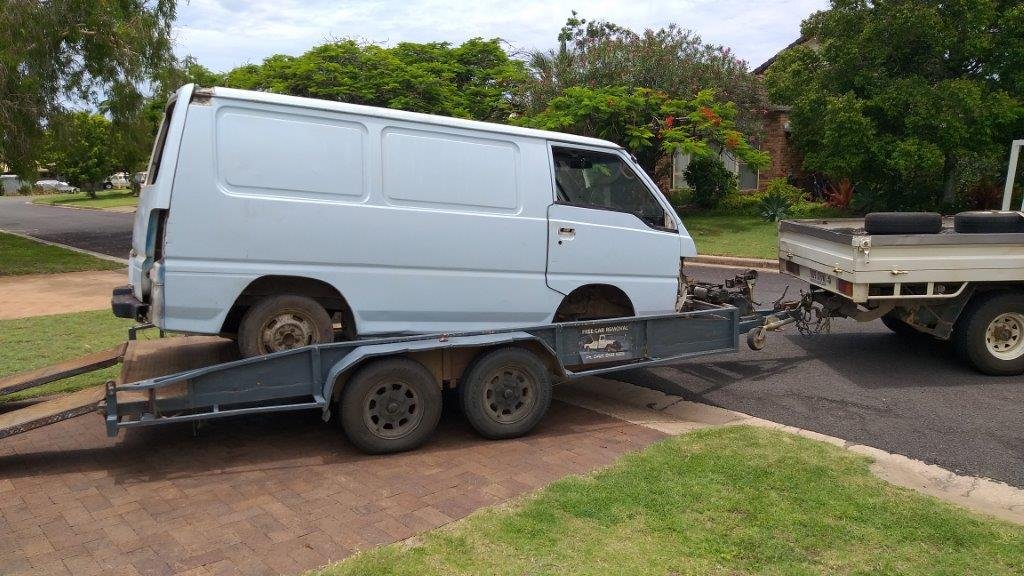
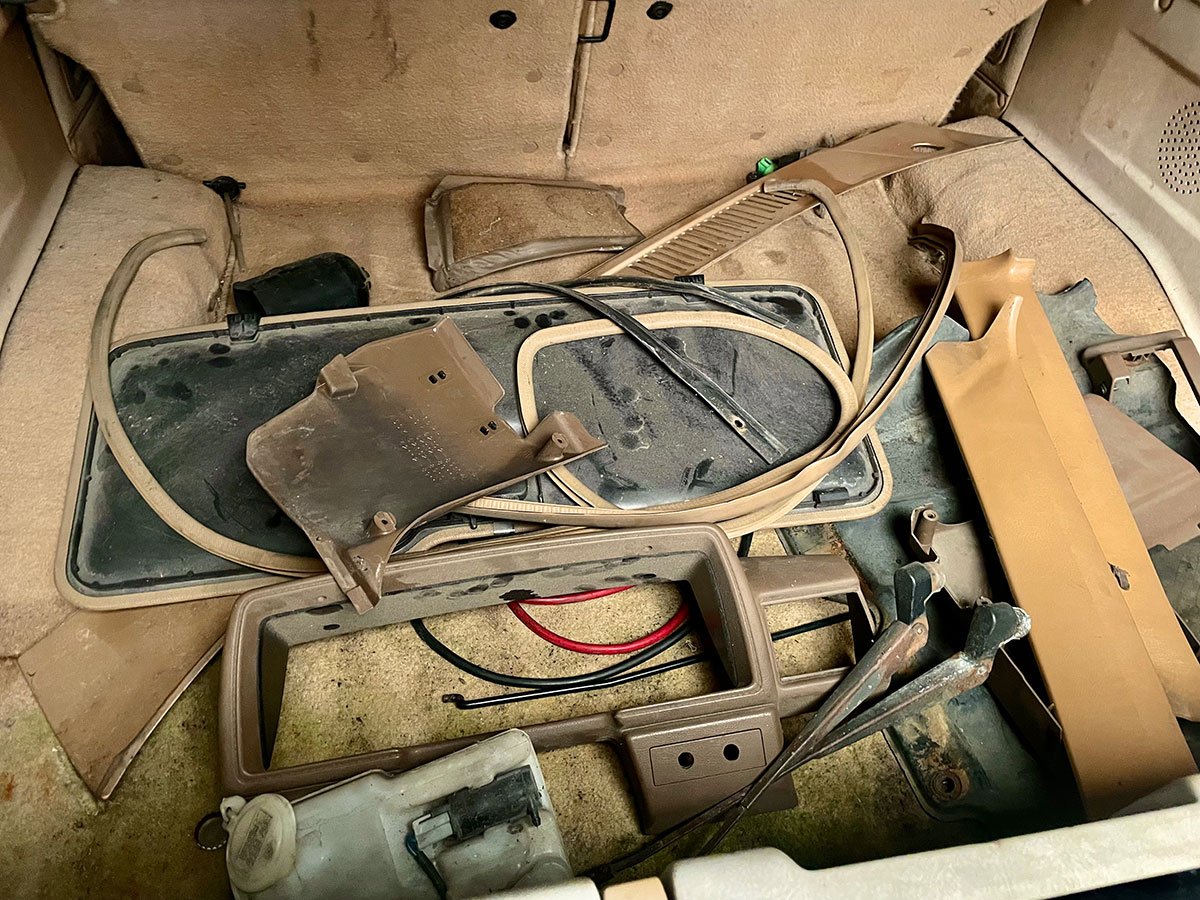
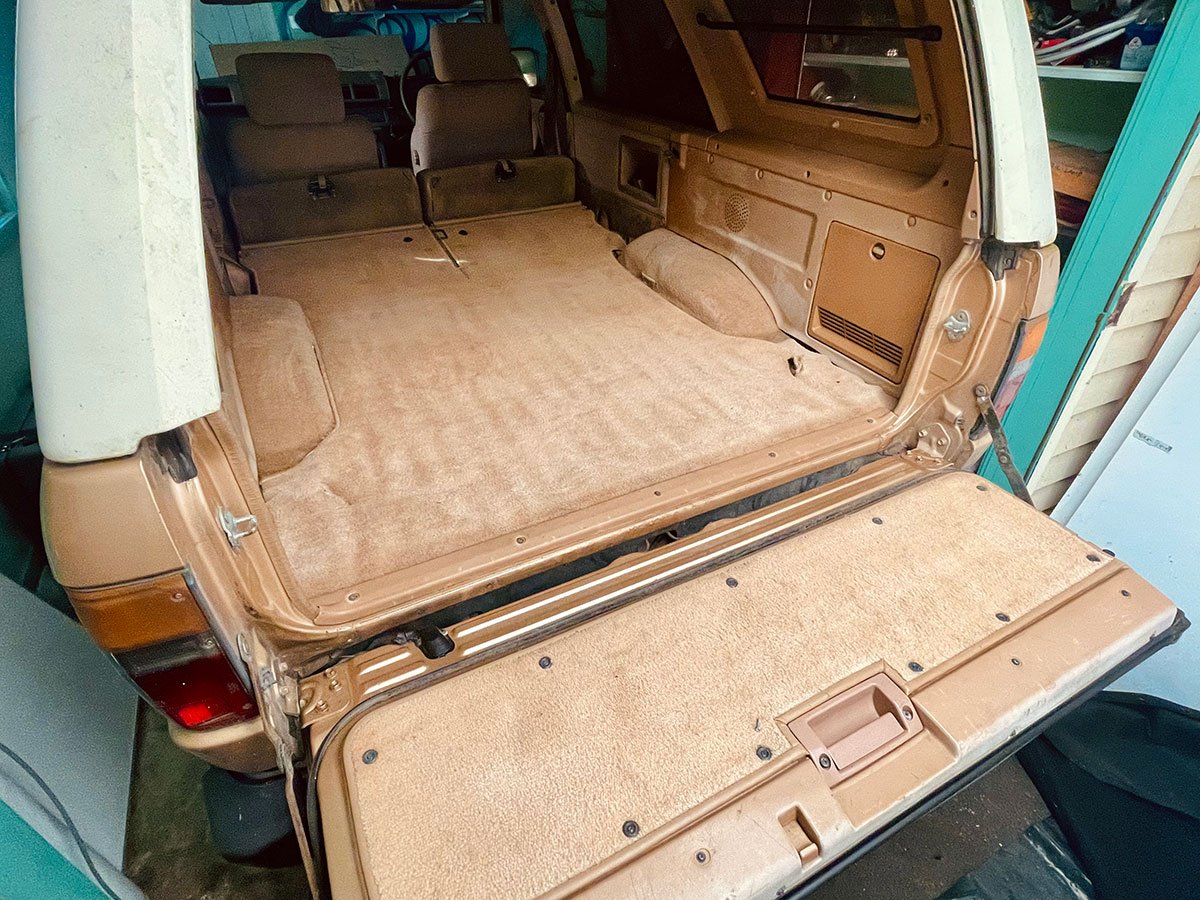
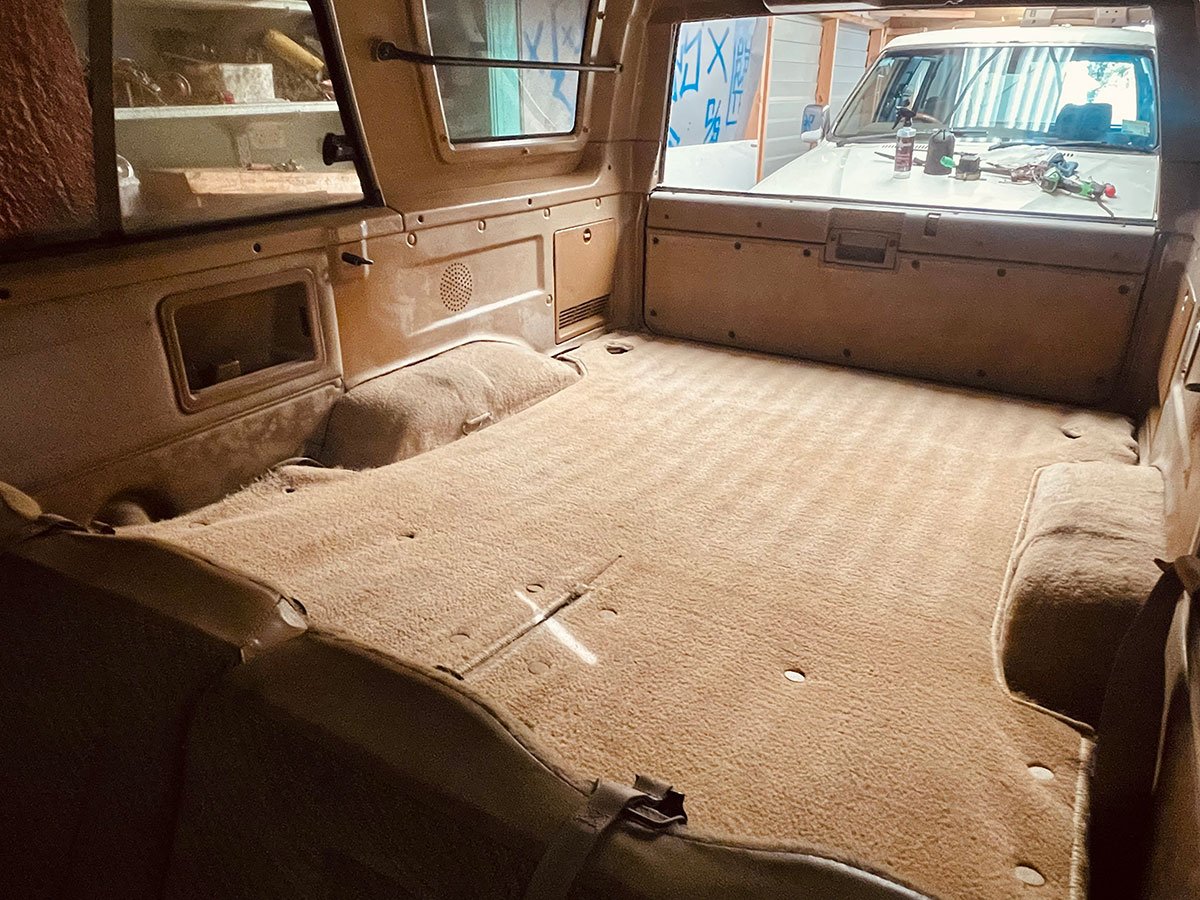
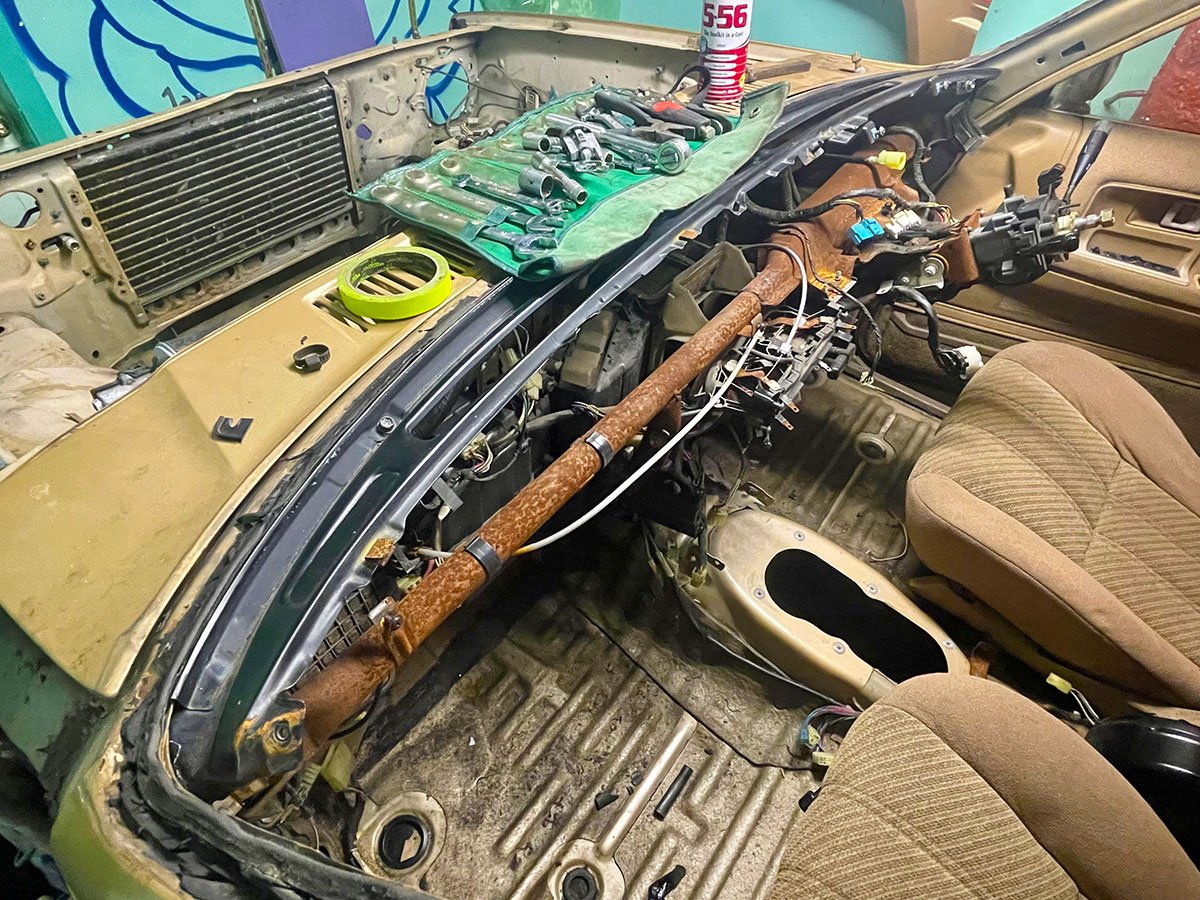
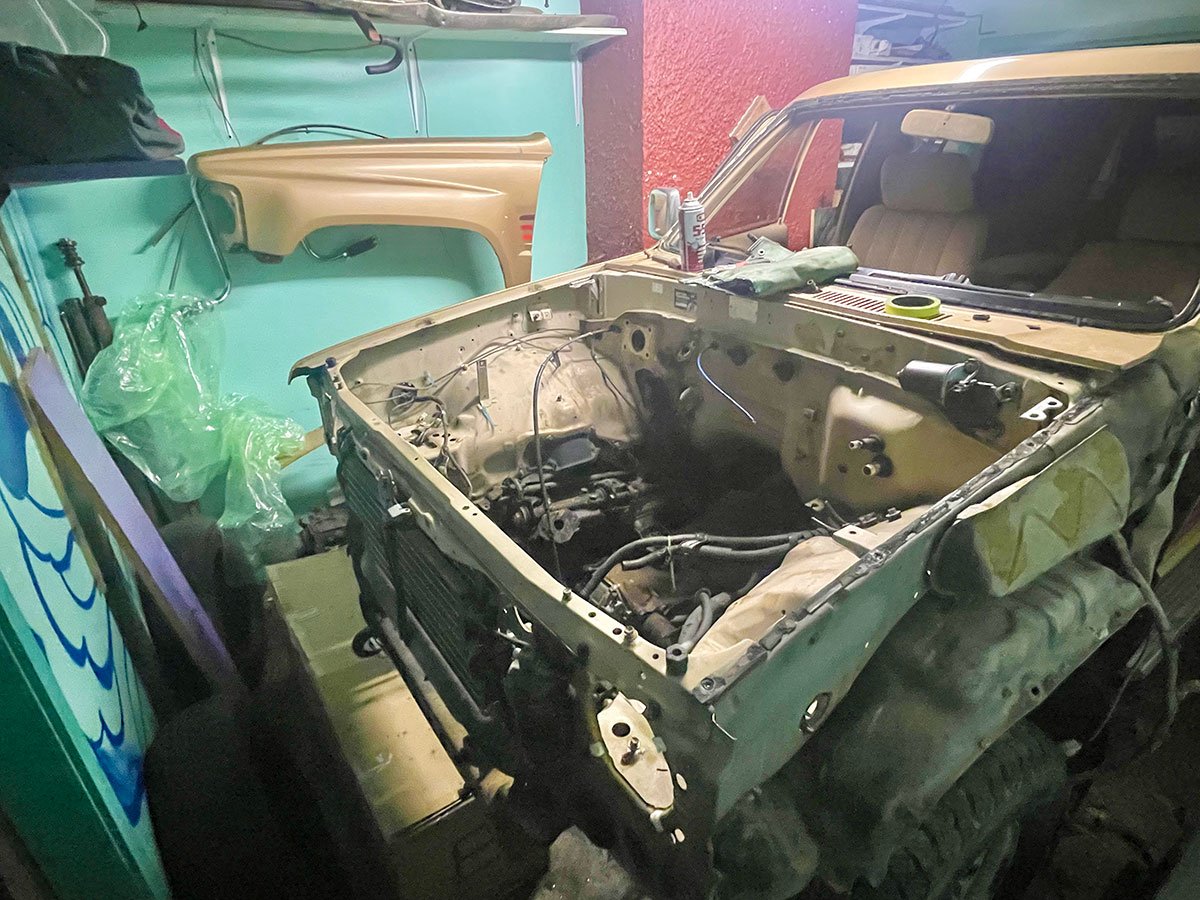
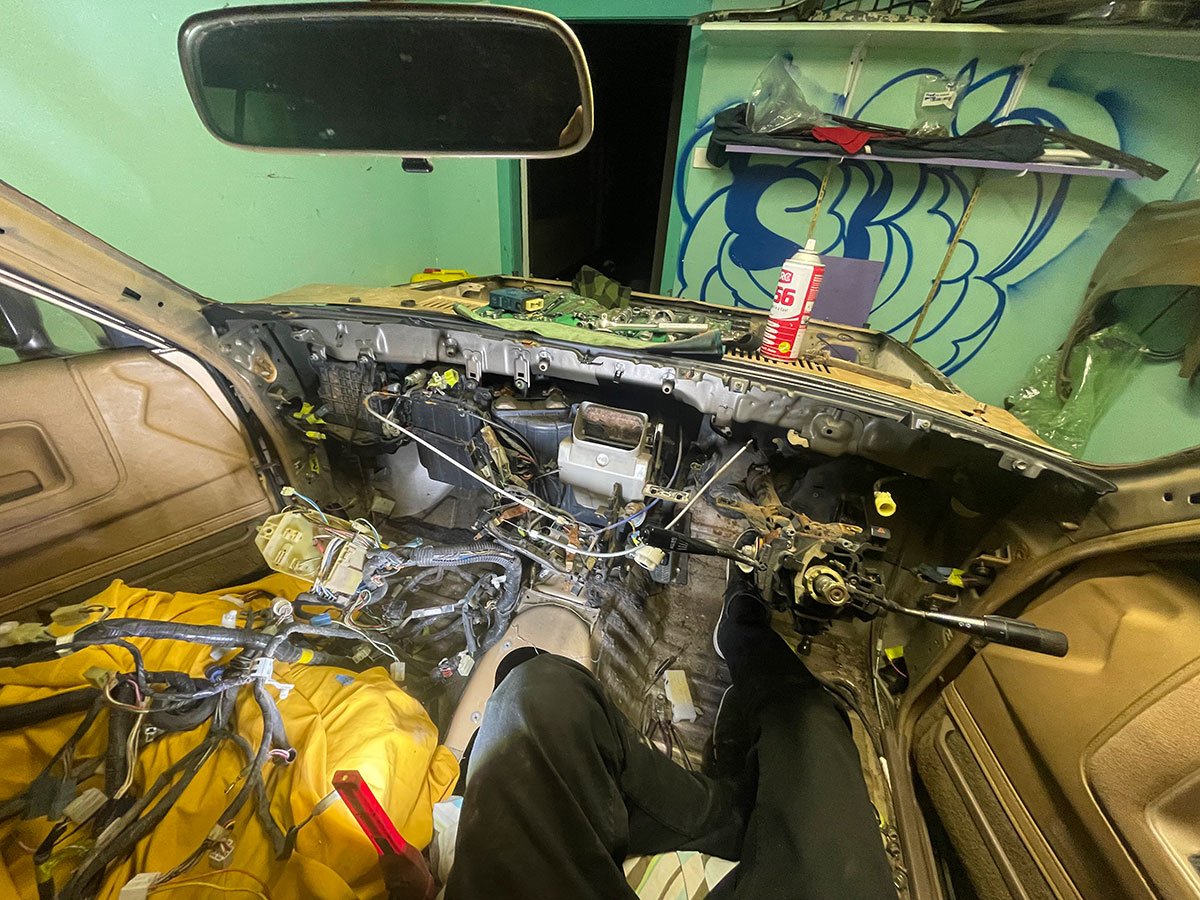
I had a good think about the best way forward with the newly acquired truck and settled on a body swap for a few reasons. Based on that I realised there's a lot of crap to swap over. So, made some pretty good progress through lockdown... Started clearing out the interior of junk and removing the rear carpets to clean. I wish I got a before pic but you can kinda see the state of it was in in the first pic, they came out mint! Also started removing all the unnecessary things from the engine bay and interior. All the diesel parts and looms. Never done anything like before, pretty daunting. Once everything was out it wasn't actually to bad. The last pic is where I sat back and asked myself what the f*%k have I got myself into? haha
1 point
-
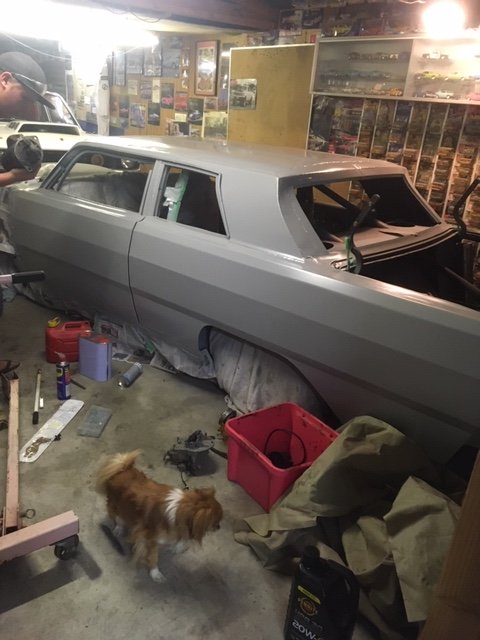
got some primer on
1 point


.jpeg.4c4ad7c7cf73a08342c2adbc3949f467.jpeg)


.thumb.jpeg.e0a4bff61111e0c8c7396950fcc94da1.jpeg)


This leaderboard is set to Auckland/GMT+12:00