
Leaderboard


Popular Content
Showing content with the highest reputation on 06/24/21 in all areas
-
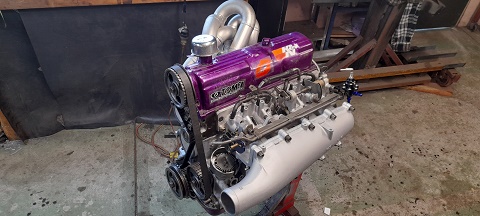
It’s got a bit of a cakel to it now, I put castrol edge 25w50 oil and went for a drive
 13 points
 -
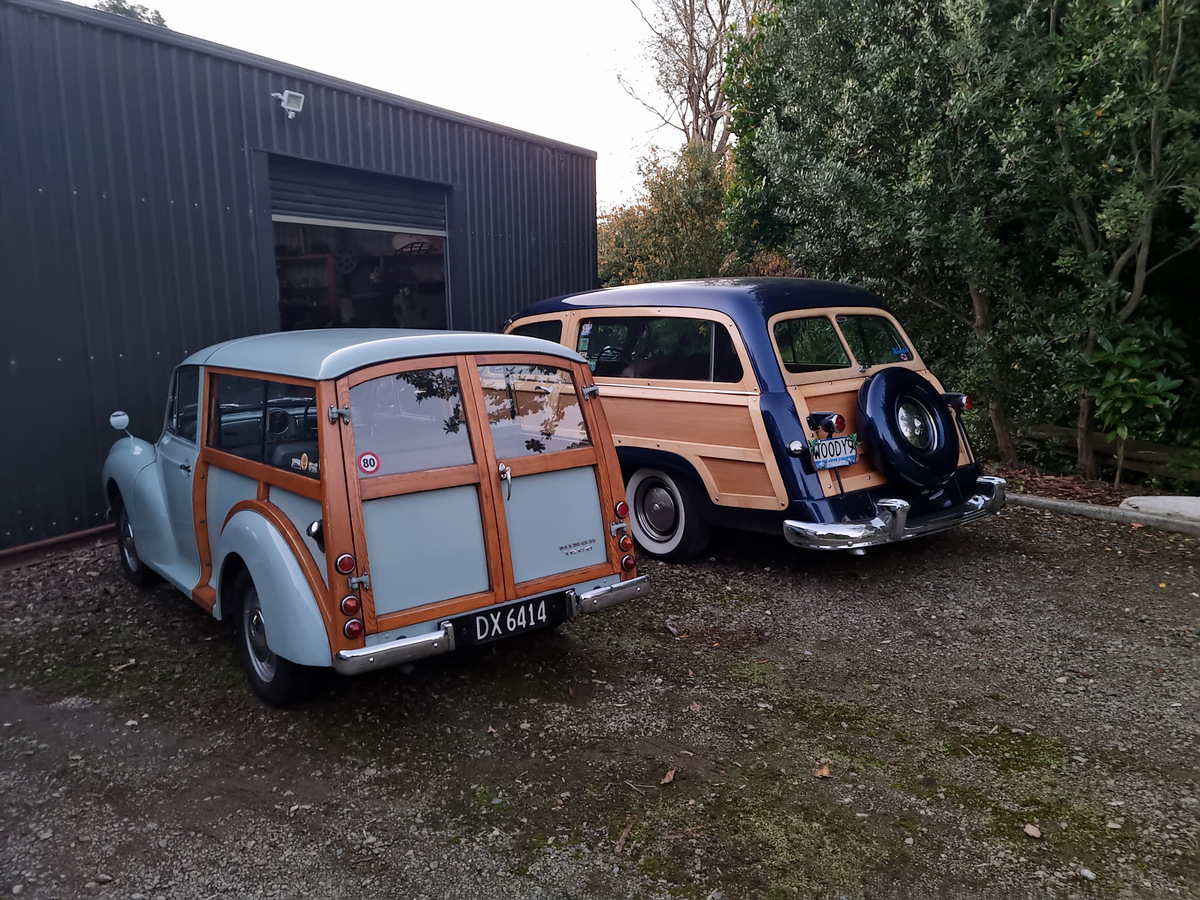
Picked up this other Woody for a parts car for the project, but might be too good to wreck?
11 points
-
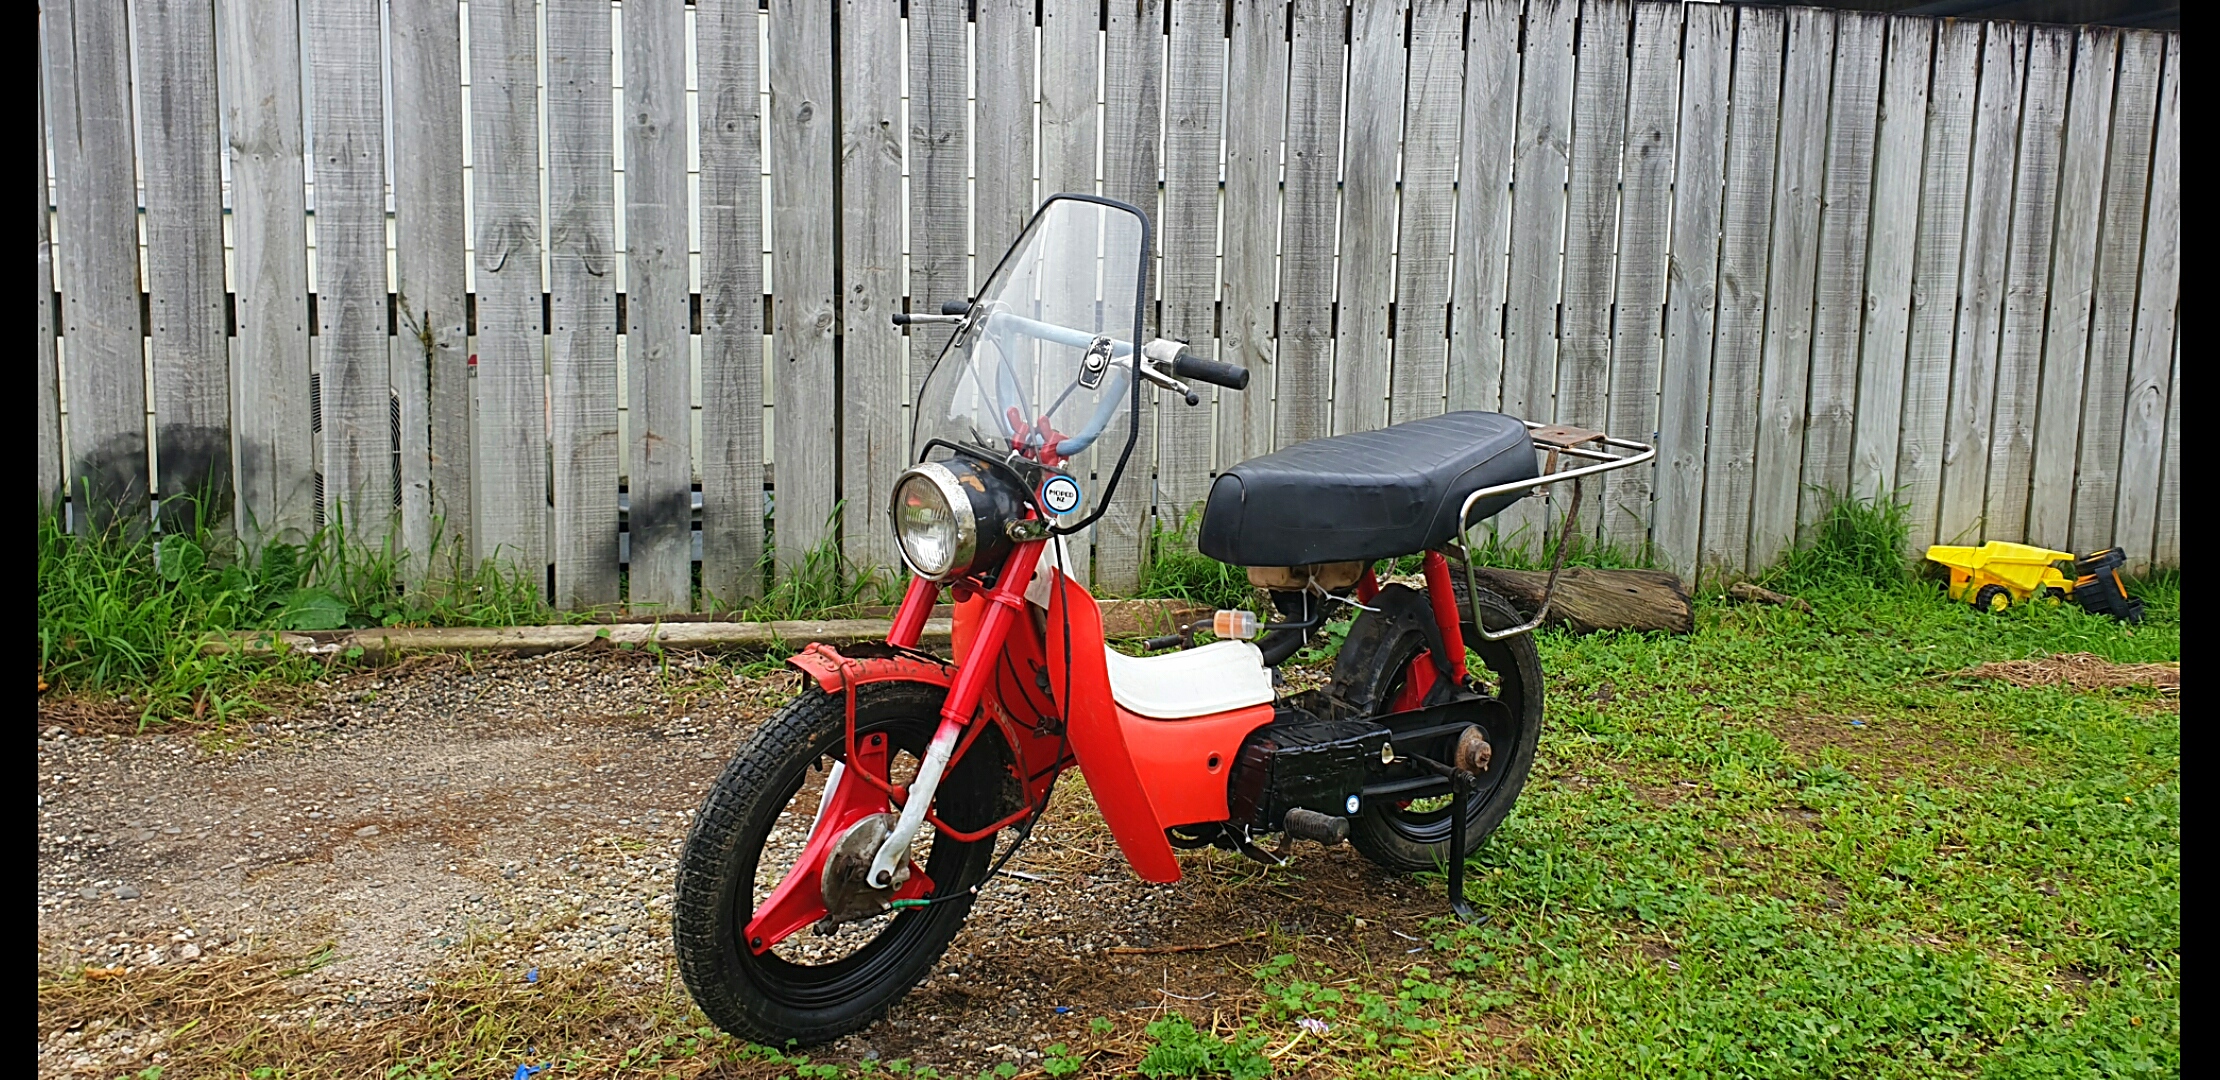
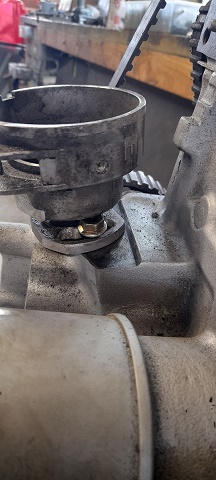
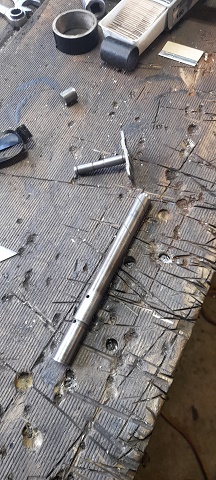
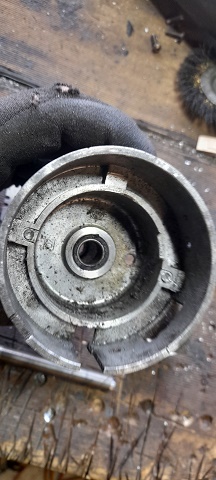
Tear down has revealed that the engine is in great nick considering its sat in the shed for 20odd years, helped by the fact the 2T pump leaks so the bore and crank case were full of oil. Now iv got the case split I can put in the new kickstart shaft, do all the seals including crank seals cause they will be hard and fucked then figure out how everything goes back together. Exhaust pipe was well coked up from years of being idled round a kiwifruit orchard so got spectacular fireworks when I burnt it out with degreaser and the draft from the vacuum cleaner Gasket kits are $$$$$ and overseas only from a quick look so it will be a good old silicone rebuild. Frame is sweet with no major rust. Fuel tank is a bit rusty inside but not bad so its got 10l of vinegar soaking in it Forks need new seals/oil and the jb weld trick to fix a bit of chrome wear, back shocks are coozed but il find some that fit it. AG/TF/CT are looking like good candidates Biggest worry was the rims being only chrome with rust flakes left under it but they are surprisingly solid considering the last time it was ridden when starter snapped I was using it to dig hole on the beach, even the cush drive rubbers are still sweet. Will do new wheel bearings chuck some fresh grease in the headstem bearings fit some new tyres most likely golden boiz and send it This is when it was last running feat 12yo Lux and my first AG100 down the coast on a big station so its only logical to get it going for pesting the back roads of the East Coast10 points
-
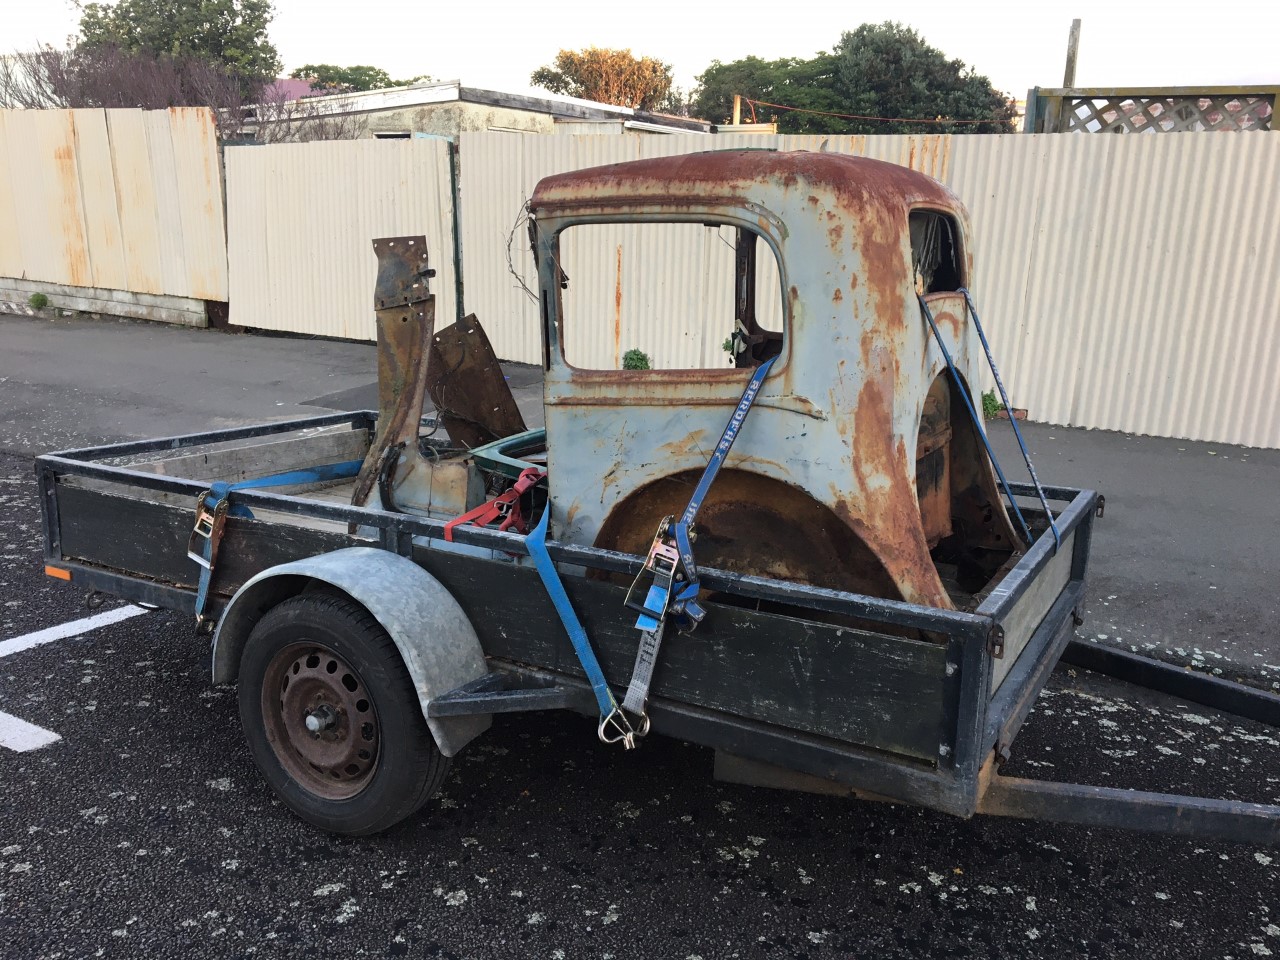
I picked this up yesterday: Its mostly completely fucked... But it does still have the rear apron section which has completely rotted off mine. Unfortunately I think its too dinged up to cut off and use, but it will at least give me a pattern to make a new one.
10 points
-
Time to build a bike for this years adventures7 points
-
This is everything I'm experiencing, no other area of business could operate this way and still have customers. Needless to say I deal with contracts day-in day-out so I can make life difficult. Also, I now understand the relevant legislation of all of the professional boards as well as the commerce comission and may look to make complaints.6 points
-
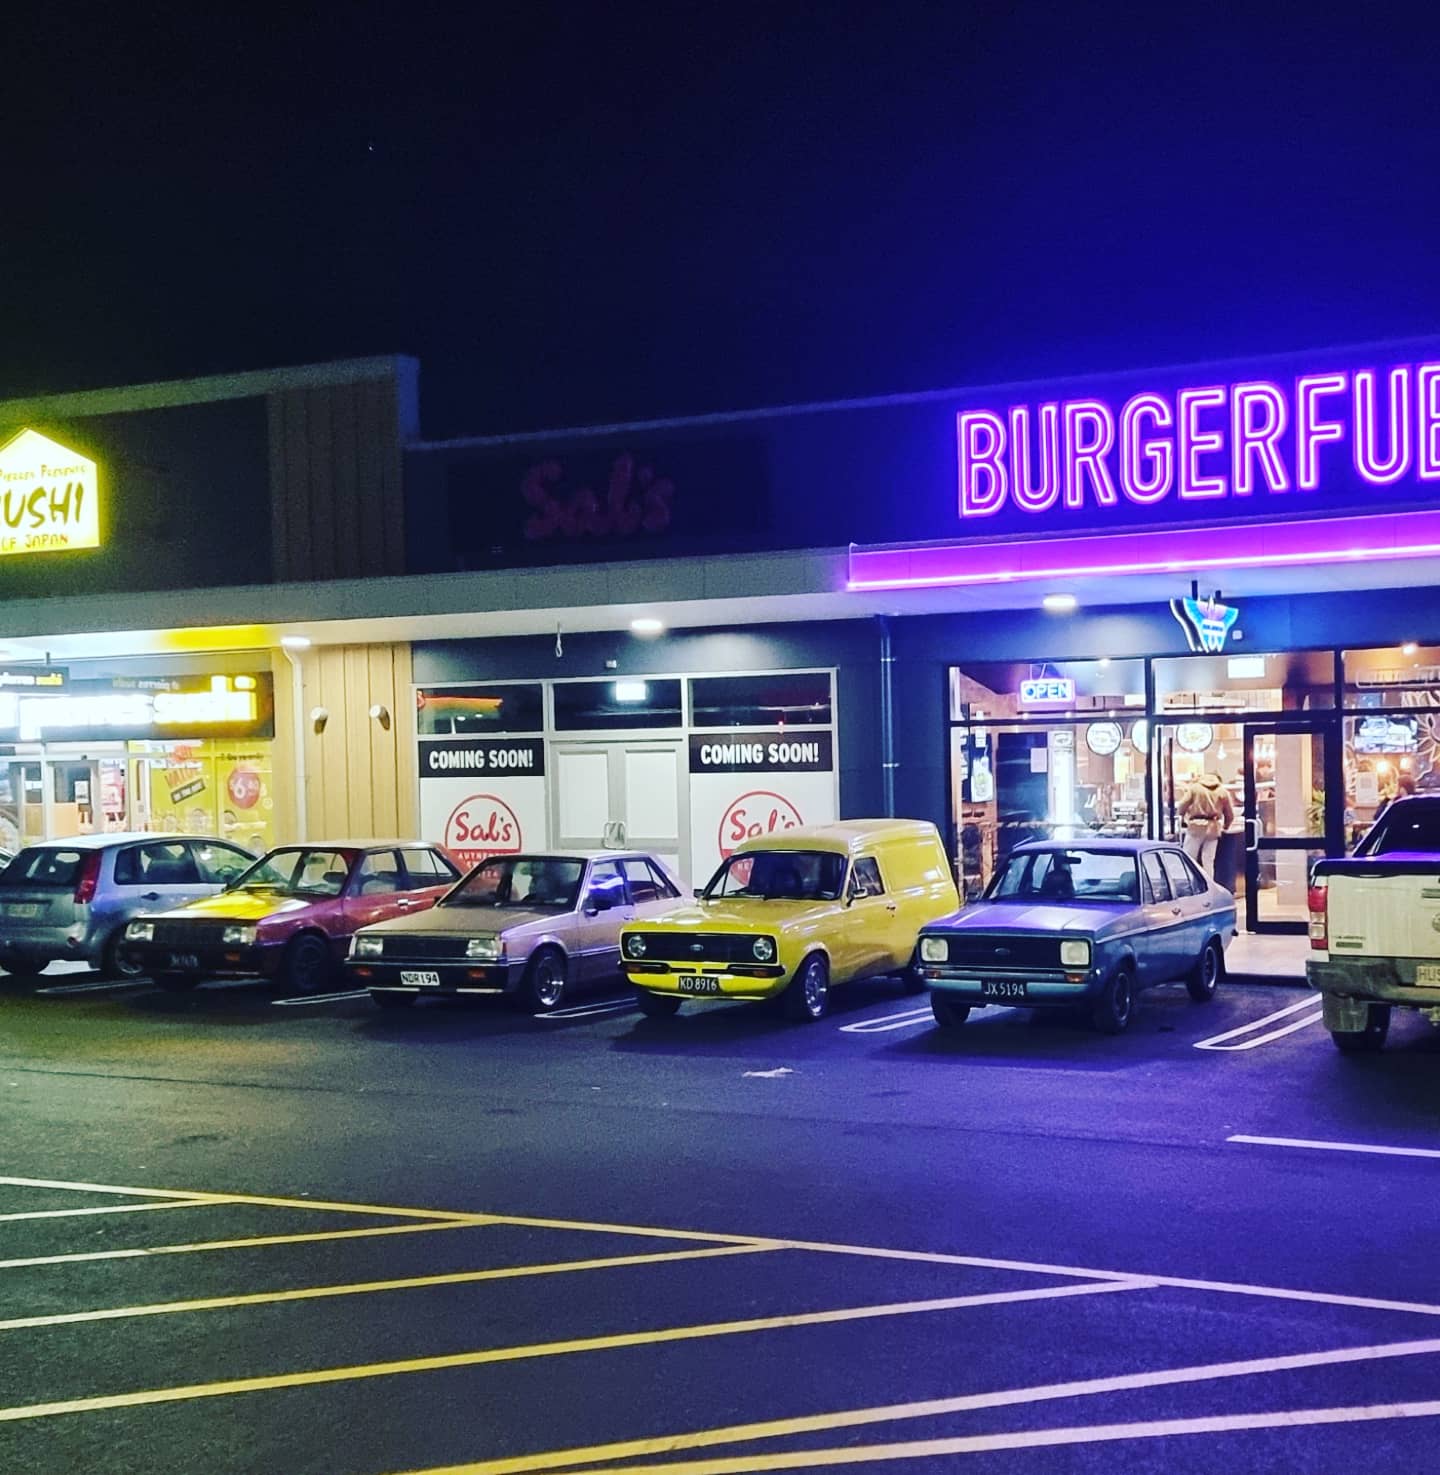
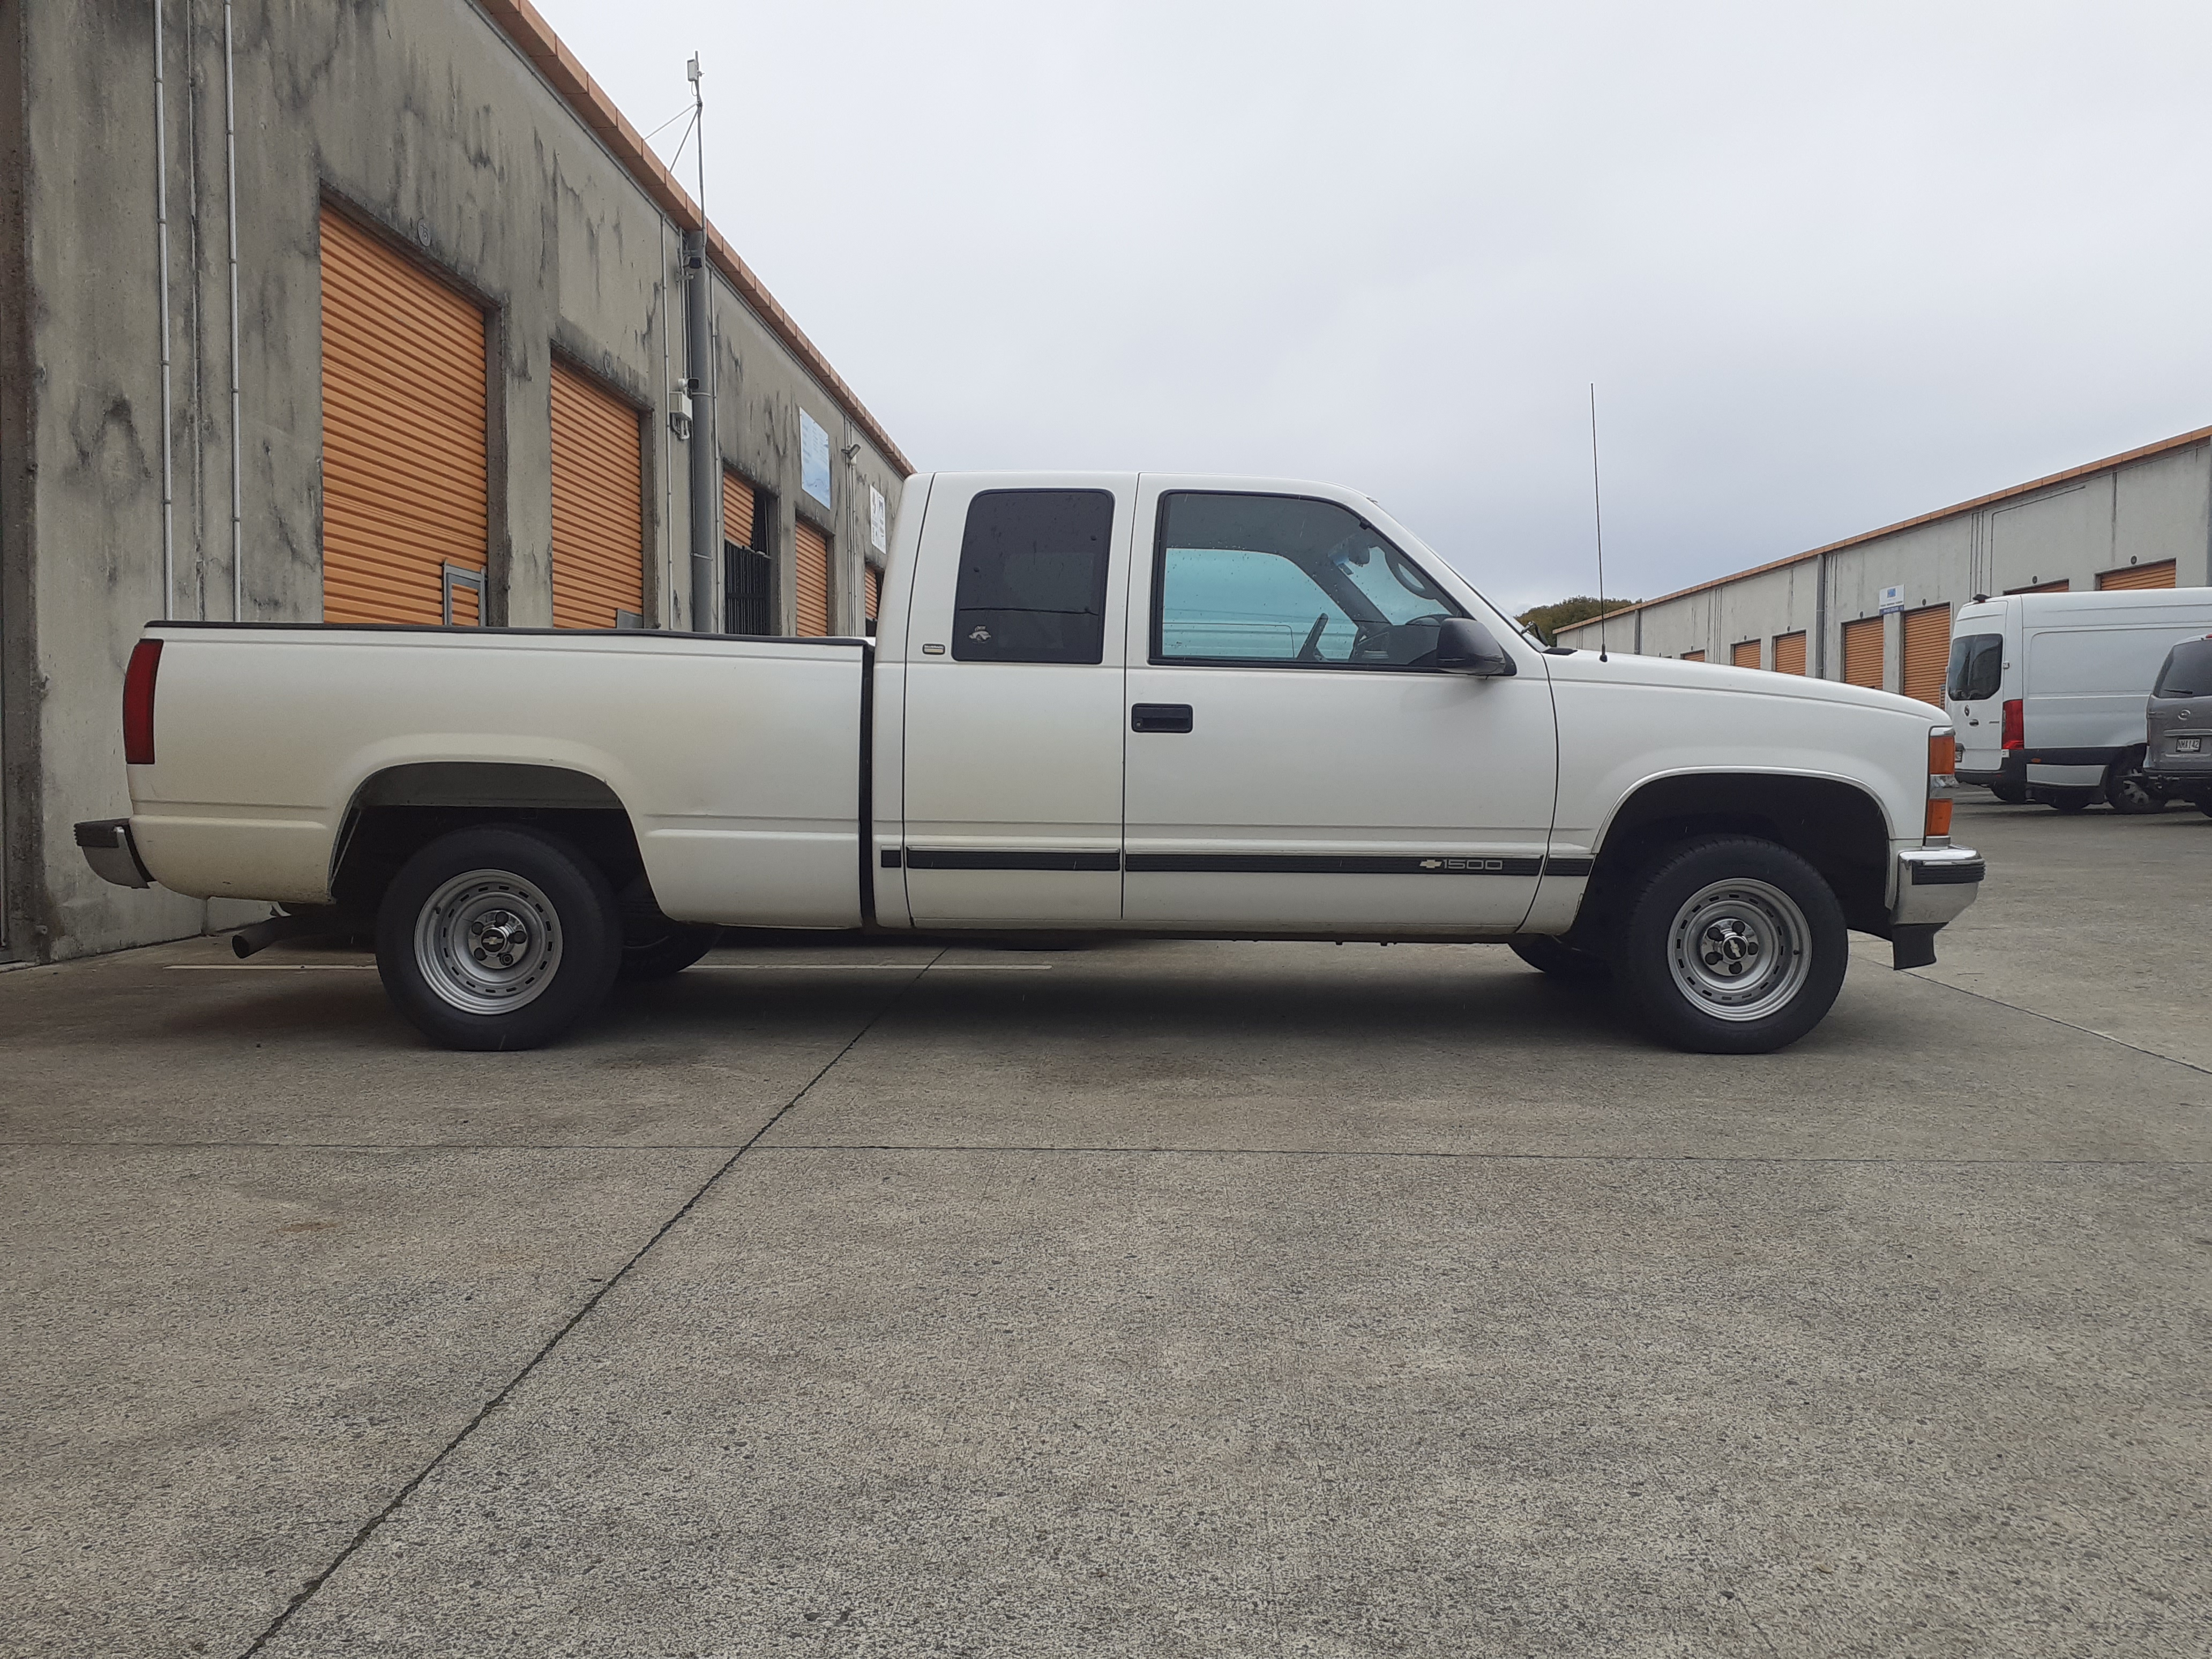
Attend the whangarei oldschool meet and got some sweet pics Also replaced the pitman arm and fresh alignment that's all, I just wanted to share the pics tbh.....
6 points
-
One of the biggest issues in the industry is that building companies are run by builders. Some of them do it really, really well, but I think they're the minority. Guys start businesses because they're good tradies, but they don't know anything about QSing etc. I don't mean to throw shade at tradies, but many of them have pretty minimal education, and now they're trying to create and administer contracts without knowing/understanding the rules. They're mostly learning the professional side of construction through trial and error - at your expense. Edit: Many don't even realise that they're working to a contract if it's a verbal agreement to build a fence etc.5 points
-
Thanks so much for the invite!! It was so great to meet you all, I really enjoyed myself and so did my son. Definitely looking forward to catching up with you all again at the next meeting.4 points
-
Almost time for 2021 thread? I might take my dr200, assuming that's in the spirit of ride? It's maybe too capable and has a huge 200cc engjne, but it is 36 years old I guess Probably will blow up on the way there anyways4 points
-
Had the SCU in work today and I asked him your question, the answer is that they typically won't pull over anyone in an area with no cell phone coverage, because it puts them at too much risk if shit goes bad, so they will typically follow at a distance to somewhere that is safer, or if there is 2 of them, they will pull you over to instruct the driver to a place where it is safer down the road. But he said, not many cops pull over modified cars because they are modified, they simply don't have time for the paperwork, they are nearly always pulled over because they are speeding or being a dickhead on the road and the modified side only becomes an issue where they occupants are failing the attitude test or there is obvious safety or public annoyance issues.4 points
-
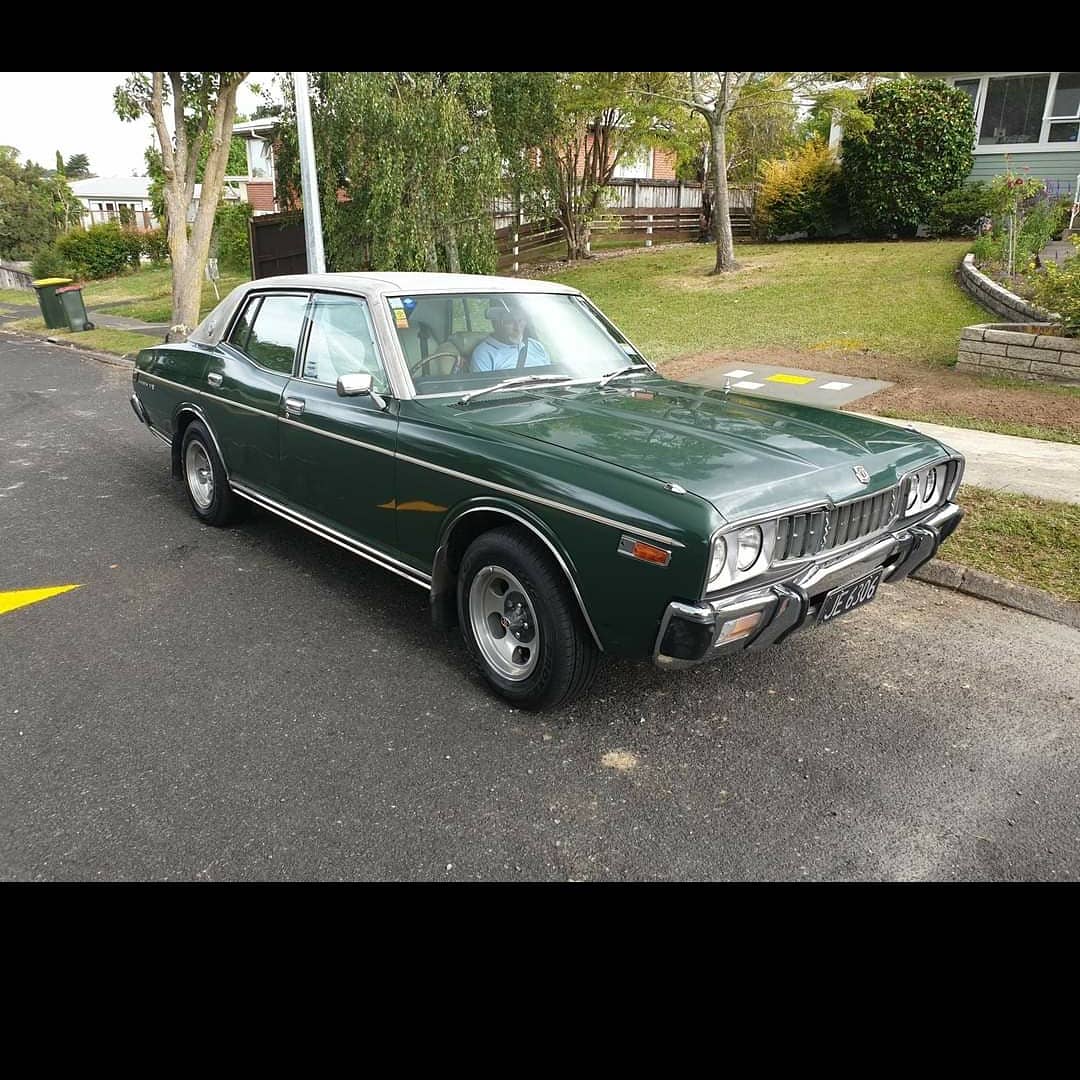
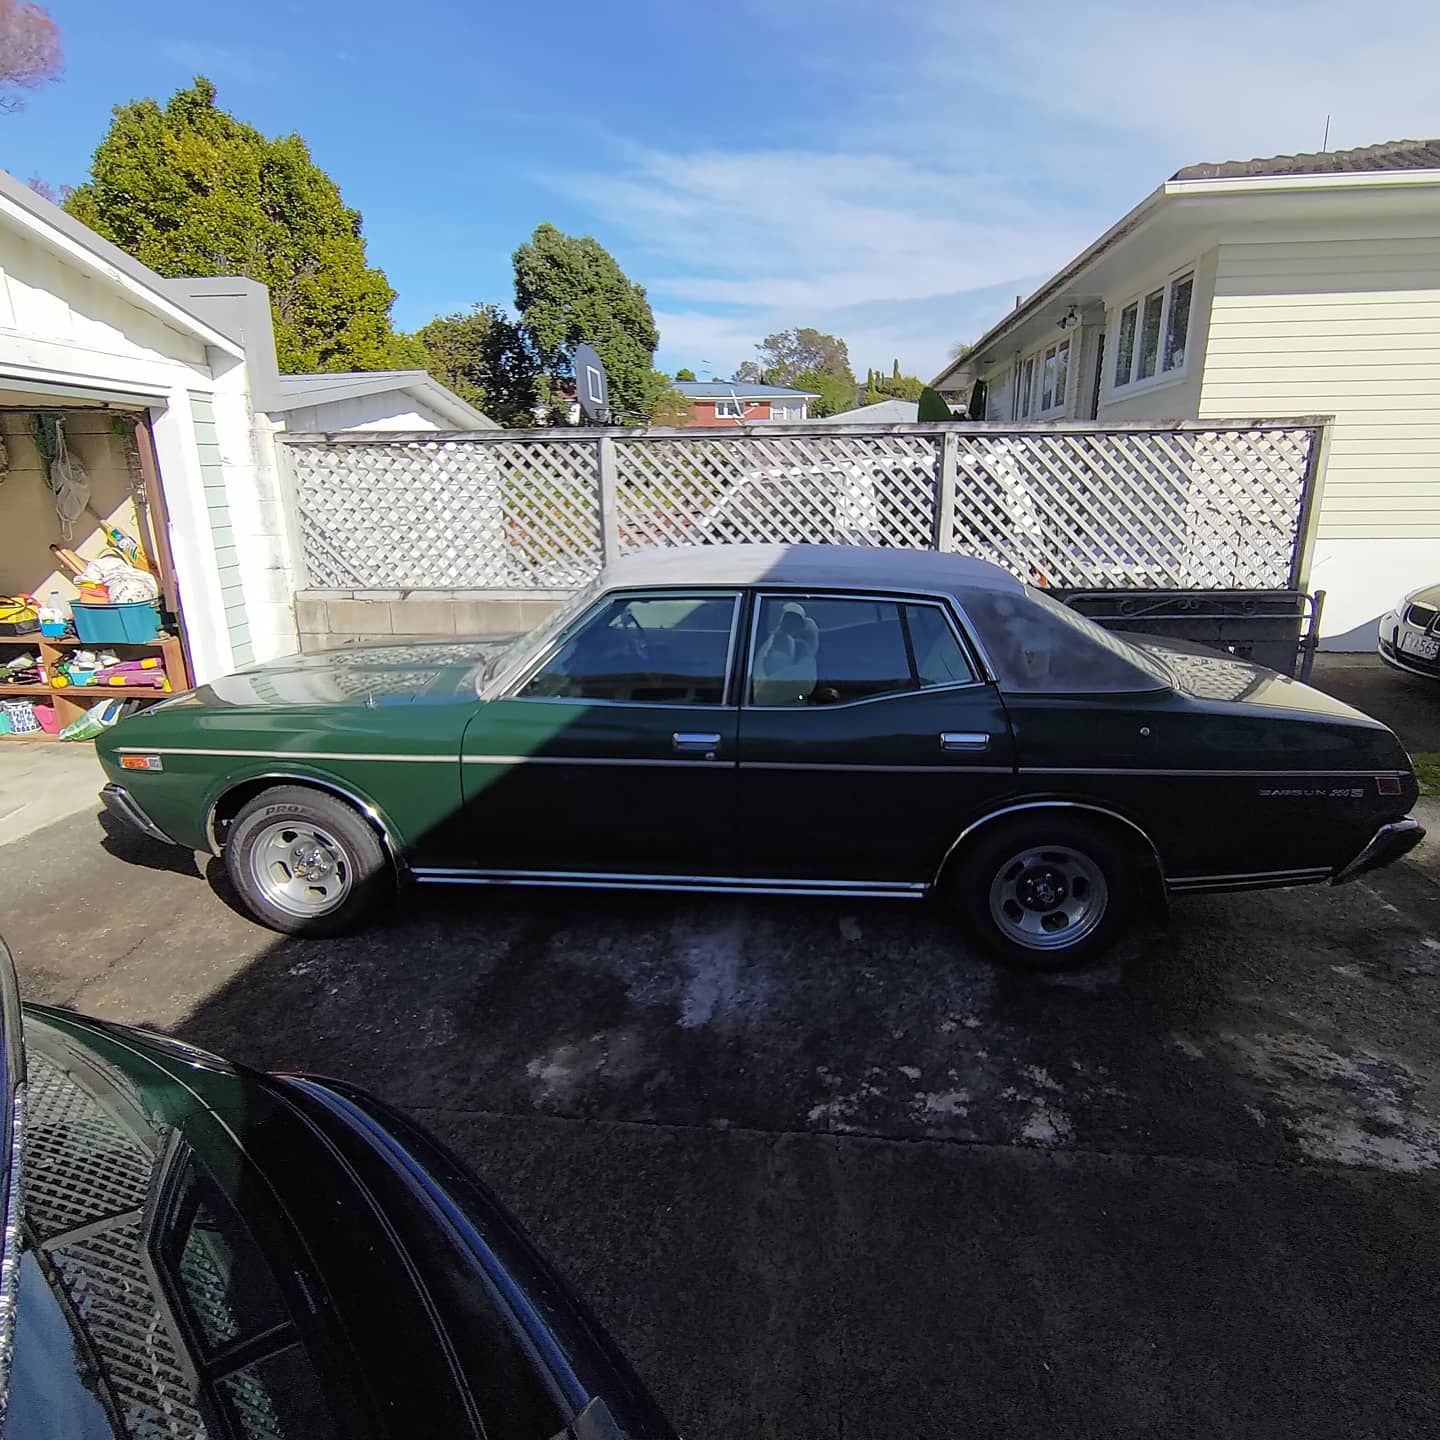
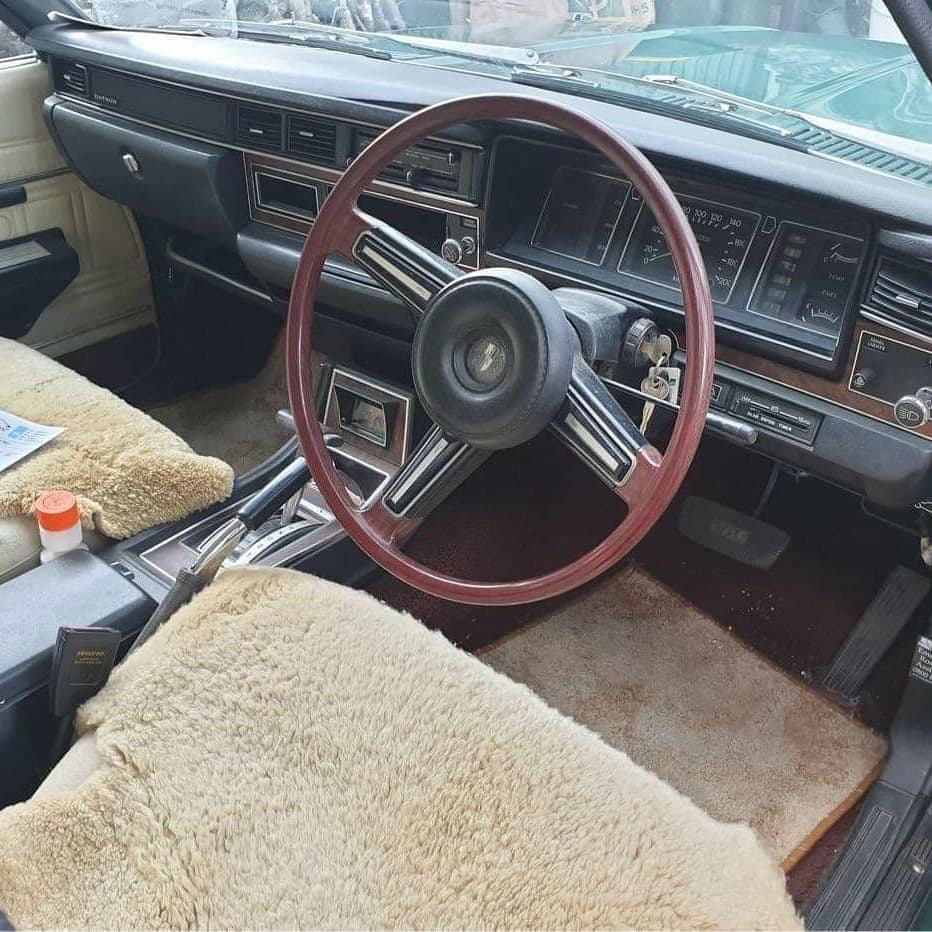
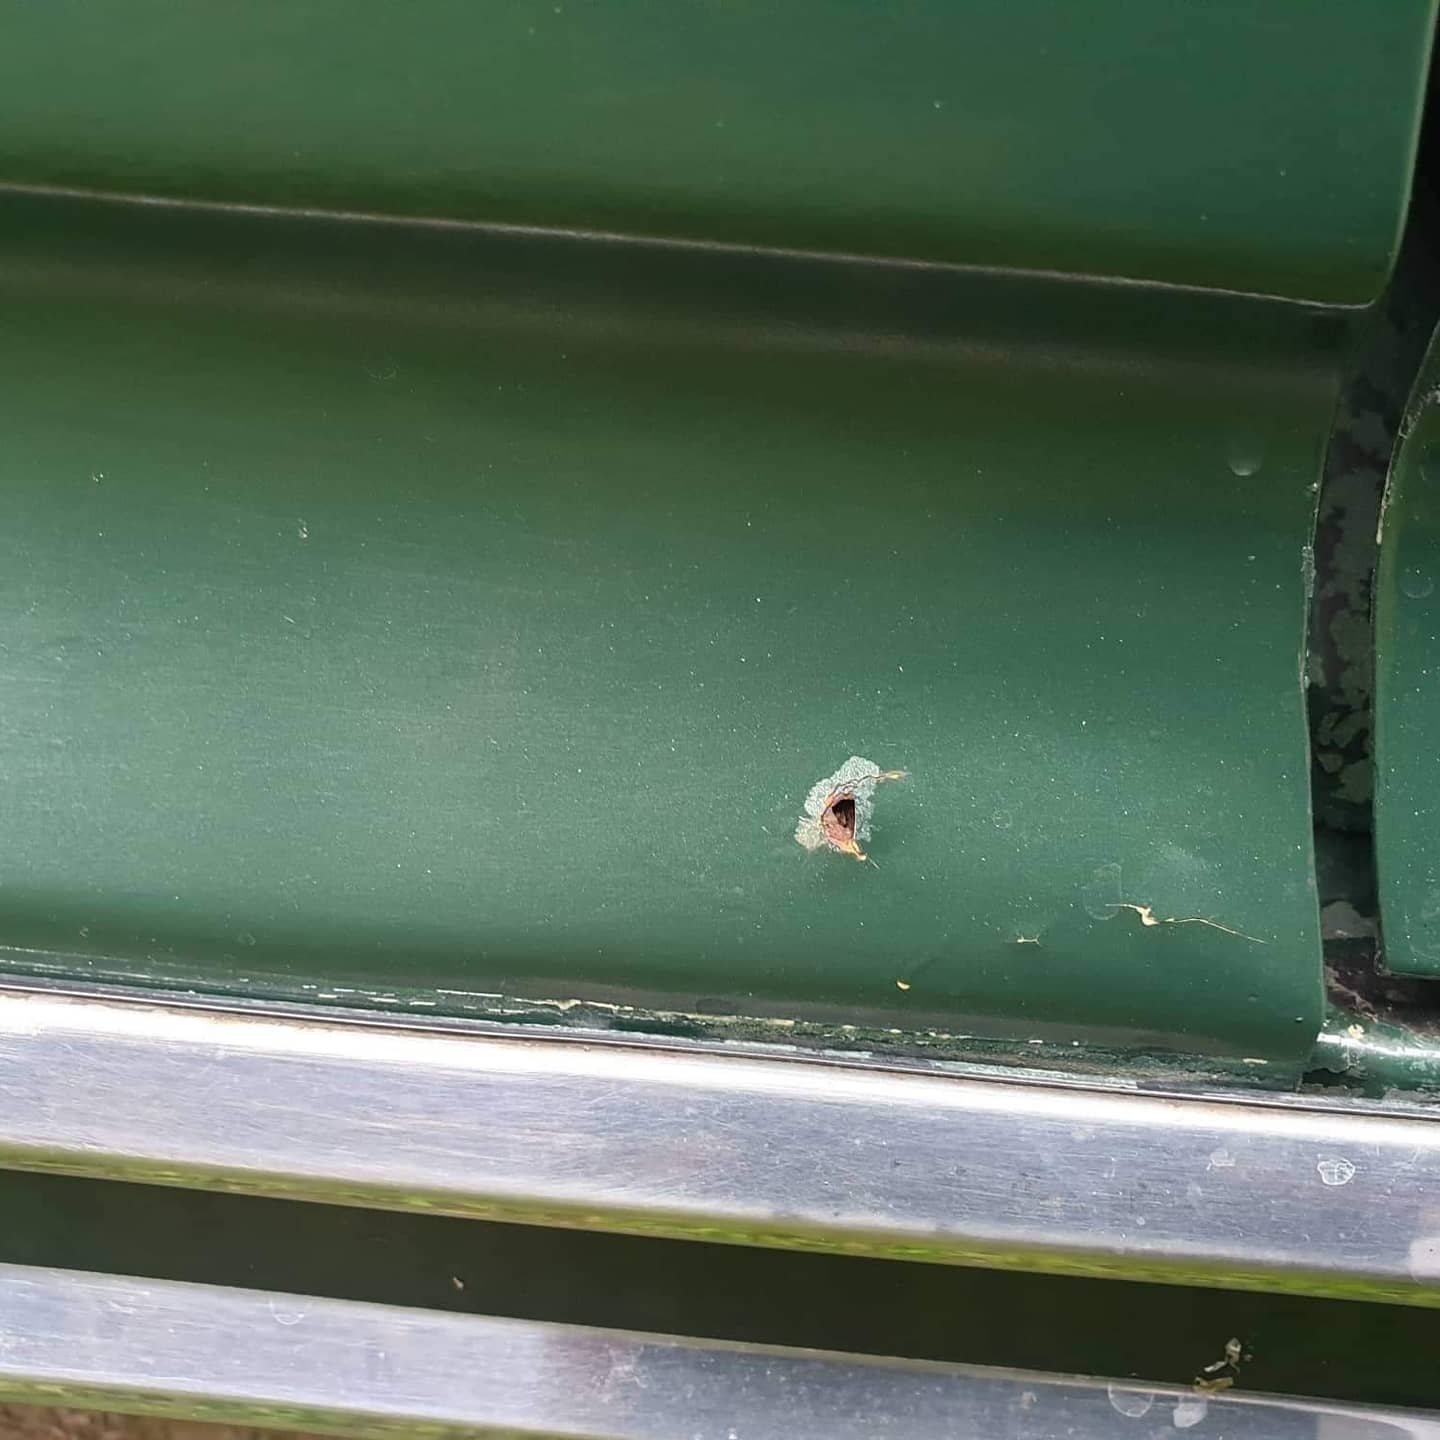
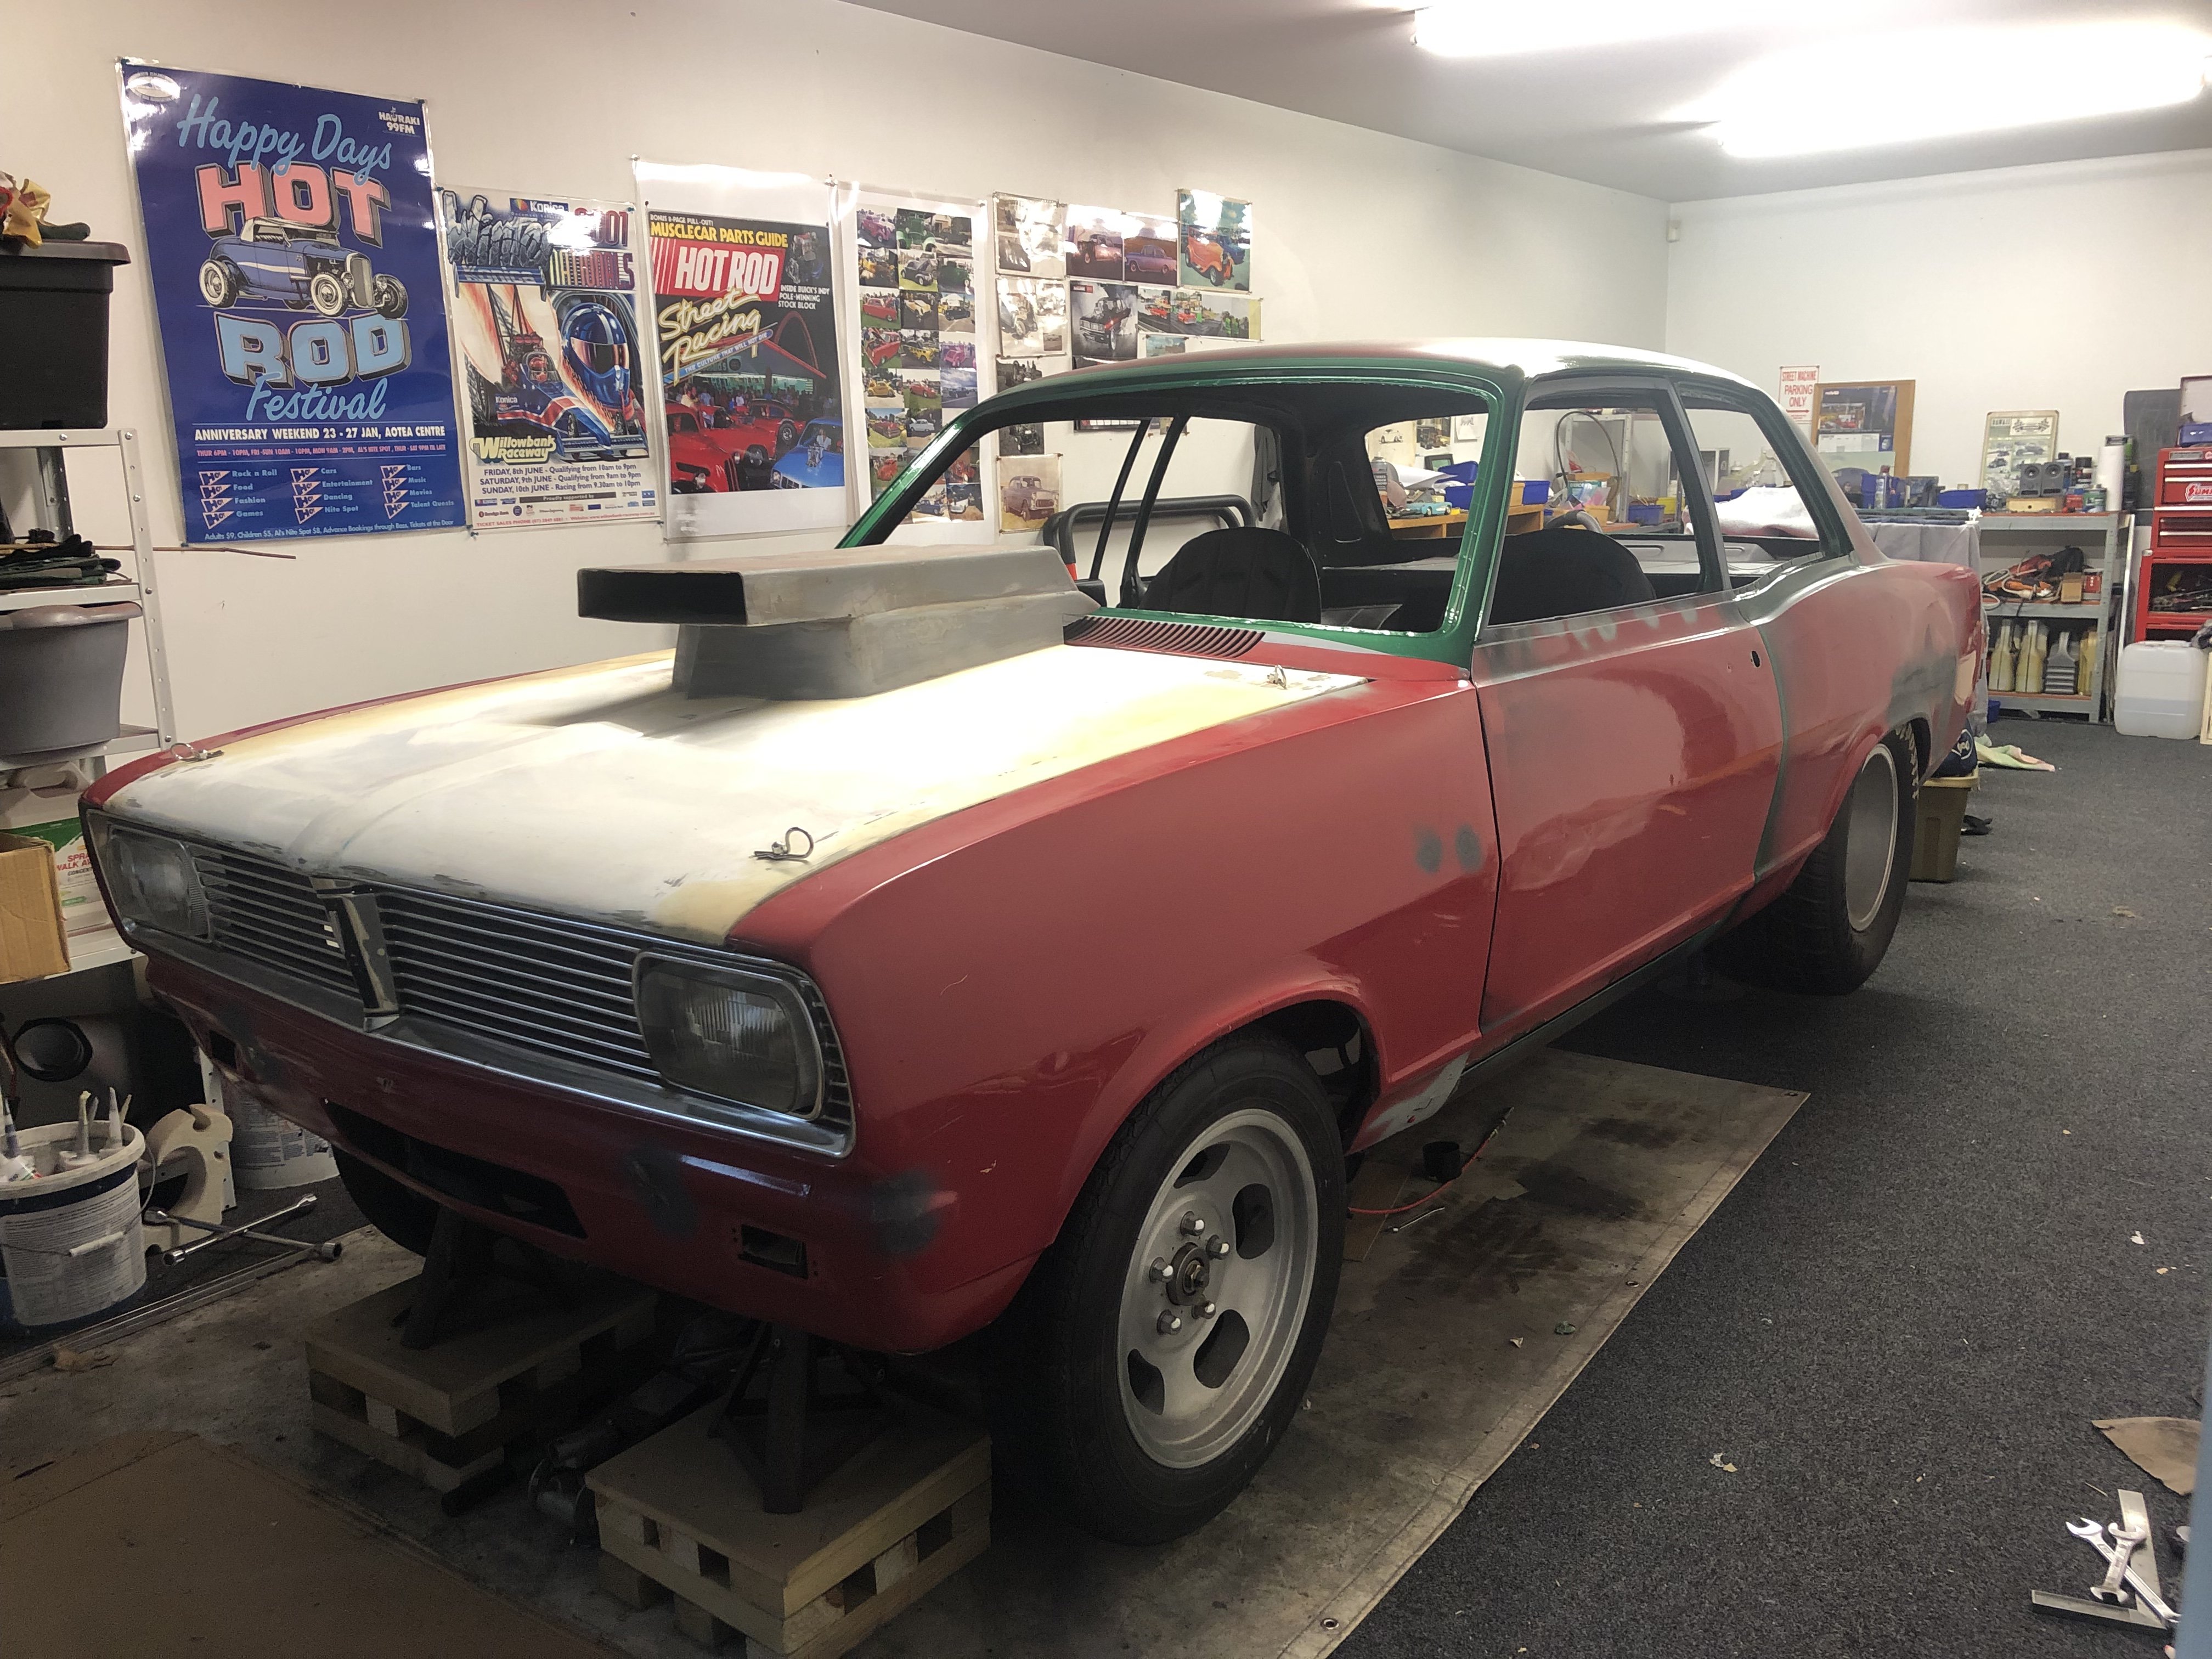
Hi all, So just brought another car meaning another project. Maybe I'm gluten for punishment. This time it's a NZ built 79 Datsun 260c. 2 owner car. First owner brought new and sold in 81 to the family I brought it off. It in full old man state right now with Vinyl roof, sheep skin seat covers and monsoon drivers window sheild, oh and genuine Datsun mudflaps It has a bit of rust comming through as expected. Plans are to repair the rust, remove the vinyl from the roof, throw some period correct wheels in it and more then likely lower it. Also I've sourced a 4 speed auto to swap out the 3 speed auto with just to make things a little more enjoyable to drive rather then listening to the engine ring it's guts out In the mean time hear are a few pictures. We all like pictures.
4 points
-
I hate this stuff. Residential builders working directly for the homeowner are held to a really low standard with regards to transparency. If I were a landowner engaging a builder to build my house, I would expect them to quote everything that was required. If you can't get CCC on a house without a retention tank, then it should be included. It's really not good enough to say "but it's not on the list of inclusions!", the client is not a construction professional who can work through the list and know what's missing. A surgeon wouldn't quote an operation without anesthesia then withhold it because it's an extra. The company I worked for usually worked with a fixed price. We'd often lose jobs to companies who quoted a provisional sum, and several times those people came back and told us that their final cost was (a lot) more than our fixed price. The builders on a provisional sum really don't have the same incentive to be thorough when they're pricing in the first place, and they don't have the same incentive to work to the budget. The numbers are always bigger up front, and you're usually paying for a few more overheads (QS, Admin staff etc), but it's good insurance. On the other hand, some of these items look like either the scope genuinely changed, or the architect didn't provide an adequate design. You can still get cost overruns on a fixed price of course, but there has to be a better reason that "oh, I missed that".3 points
-
Wants to remove rust Everyone says keep the vinyl roof lol2 points
-
Sounds like all the PPSC boys are too soft for small bikes and will bring big blocks also. You’ll fit right in.2 points
-
The FnF craze is long over, stop worrying. Cops don't care about dodgy mods, they care if you're doing 5kph over the speed limit.2 points
-
What's funny about all this is that people will instantly go "yeeeee" at one motor and "pffffft" at the other, yet you could have a redtop smallport with absolute garbage hanging off it, or a perfectly sorted bigtop and they would be completely different engines in the opposite way of what people expect.2 points
-
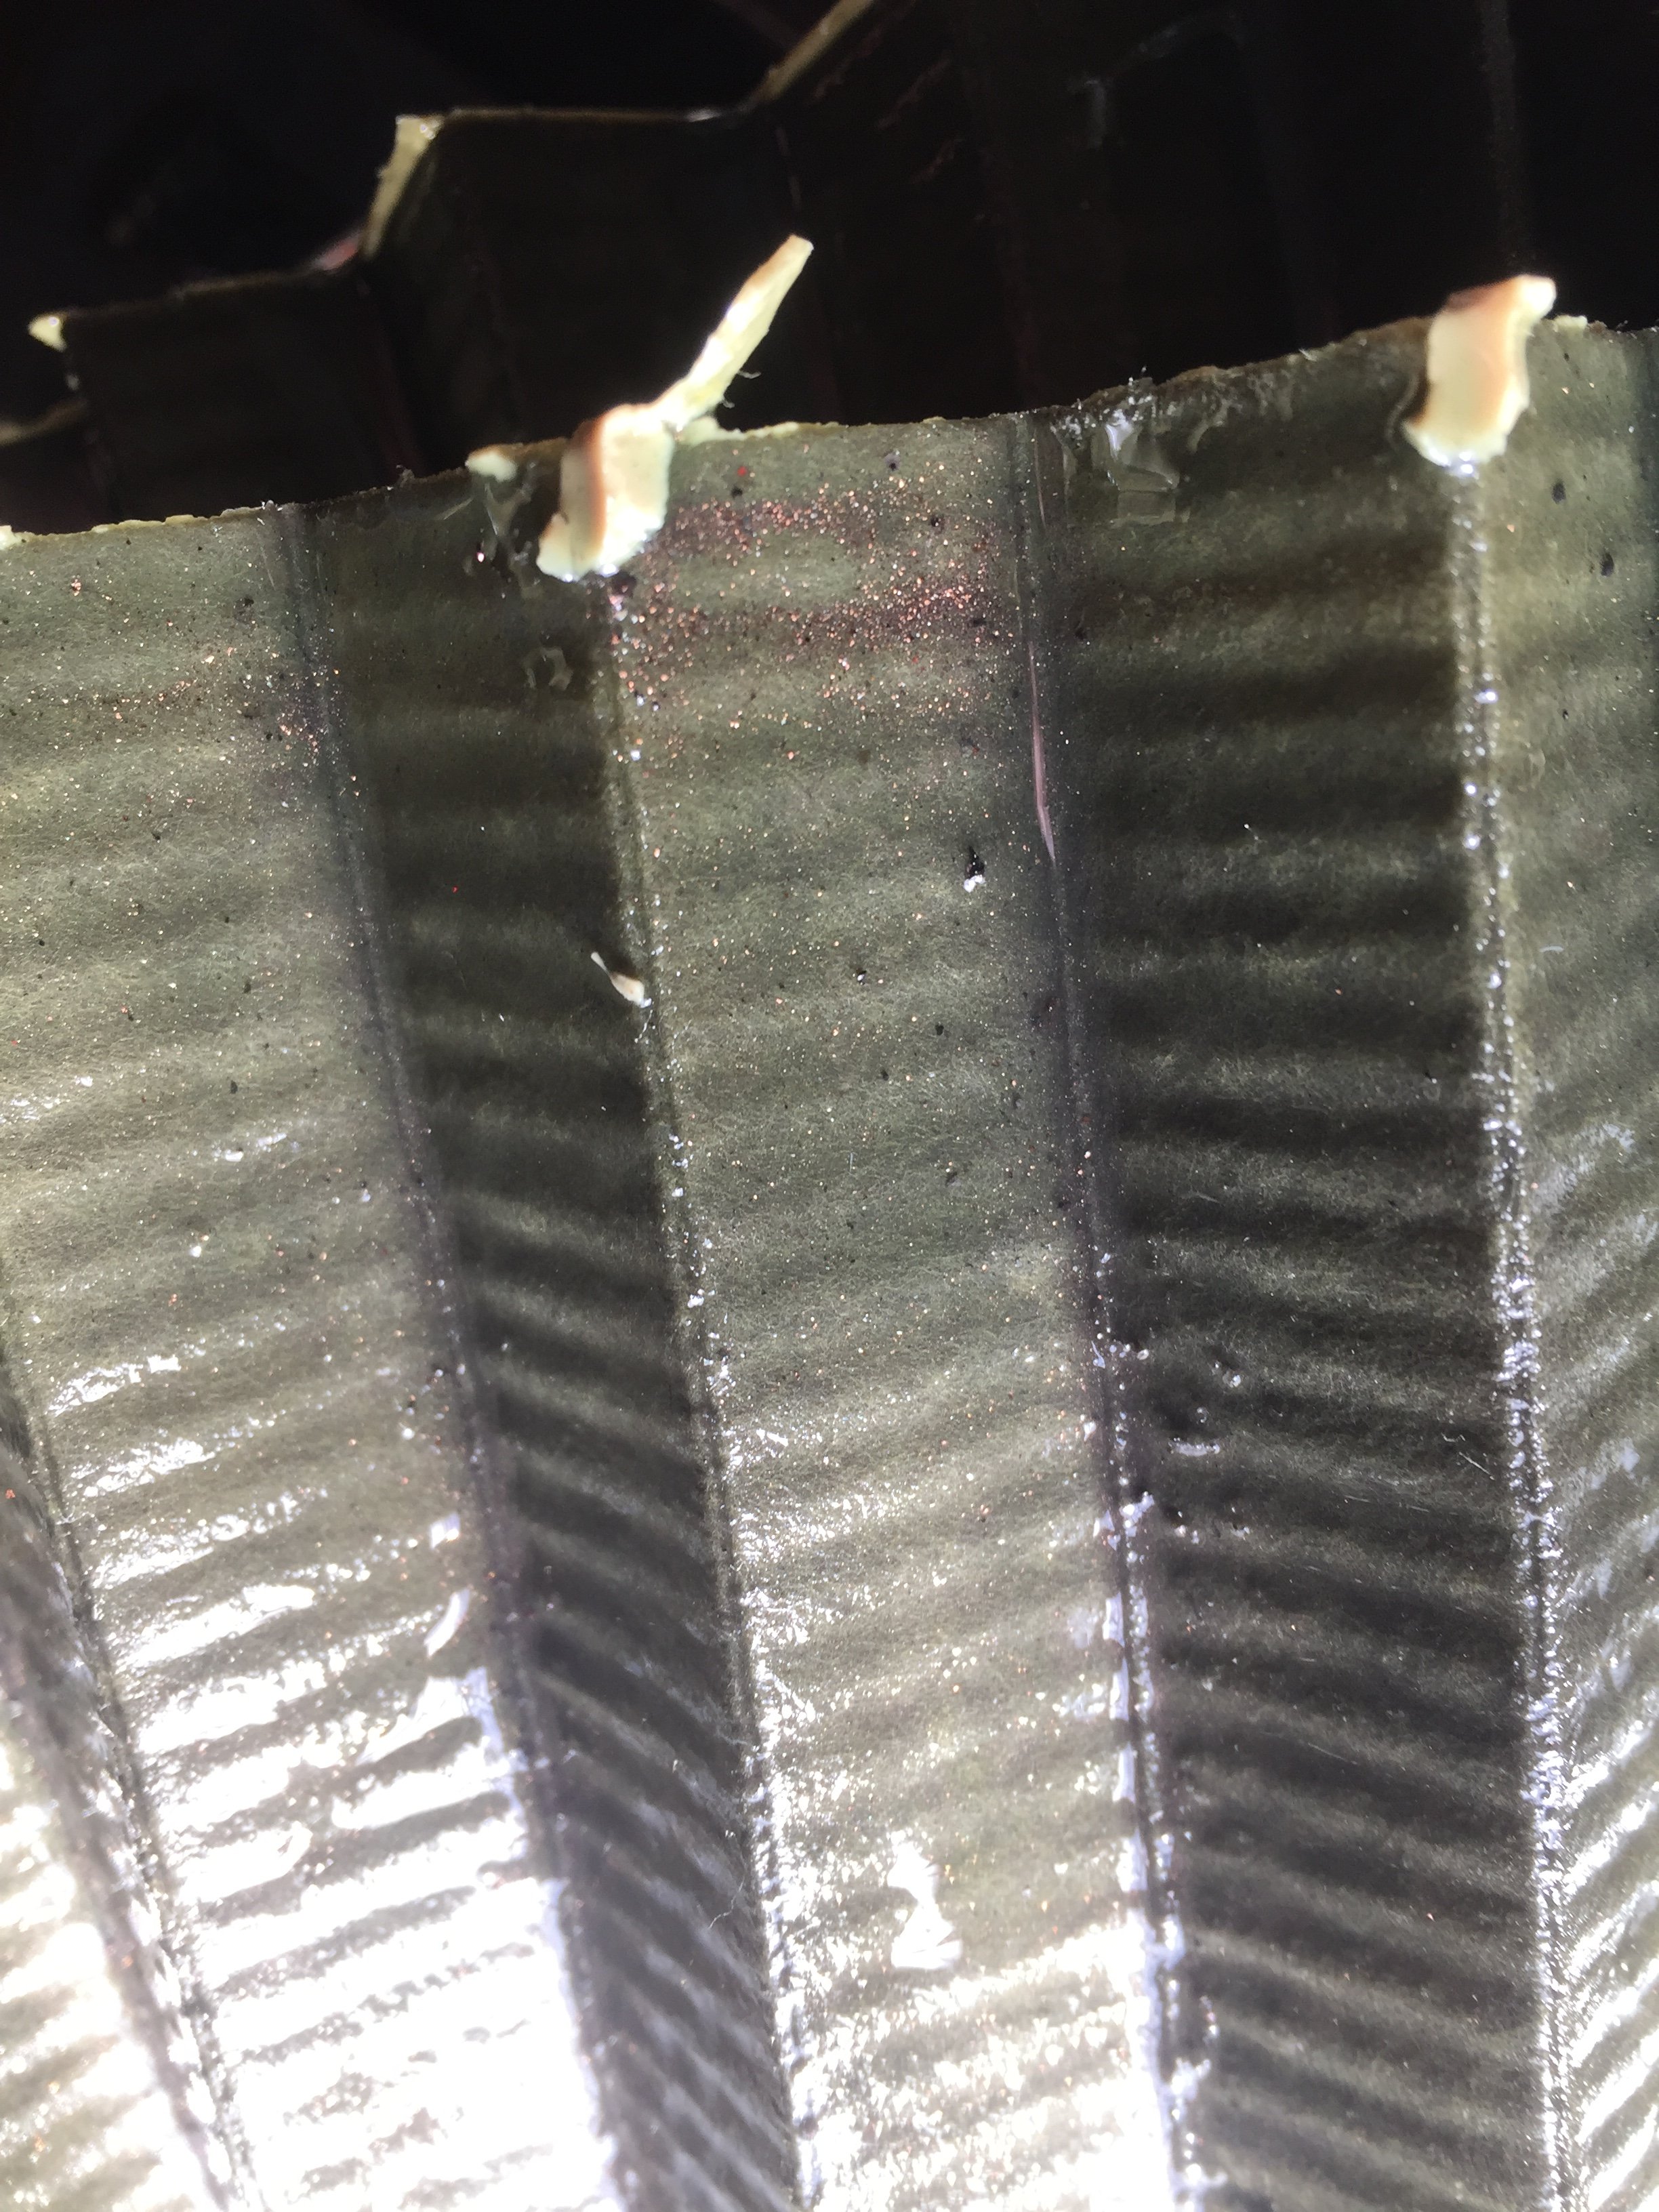
I went for a about a 30 minute drive then drained the oil, there was nothing in the oil but when I cut the filter open there is some bigend bearing metal, they are copper lead full floating type, I guess they have stopped shedding anything because the oil was clear and it was just in the filter, just hope everything is happy and it was just from the running in?
2 points
-
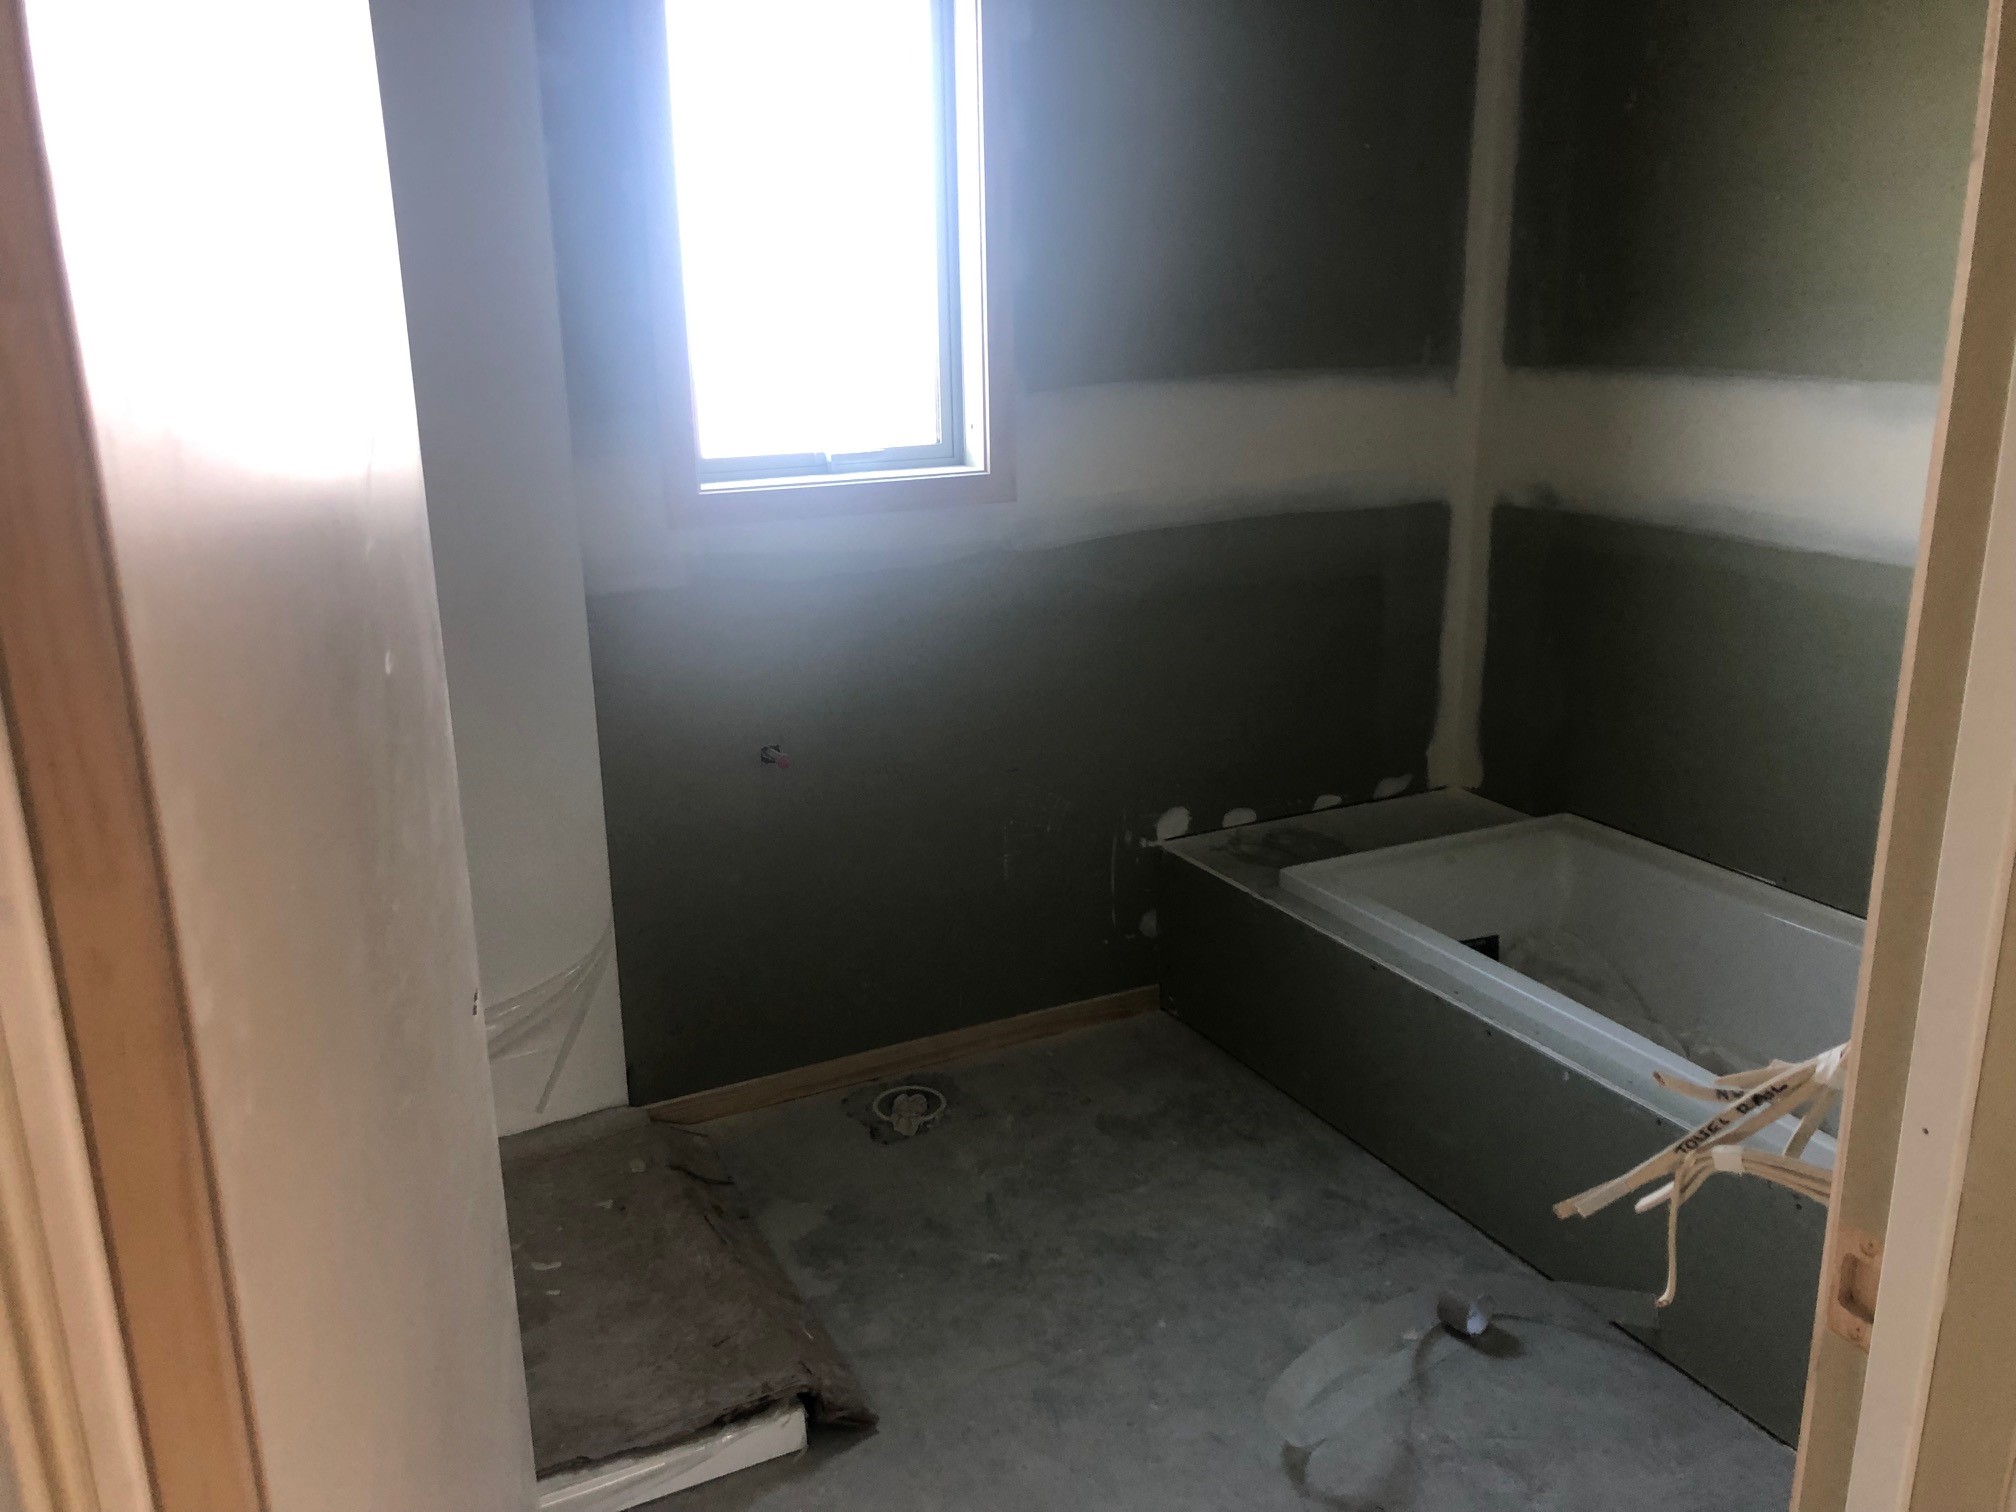
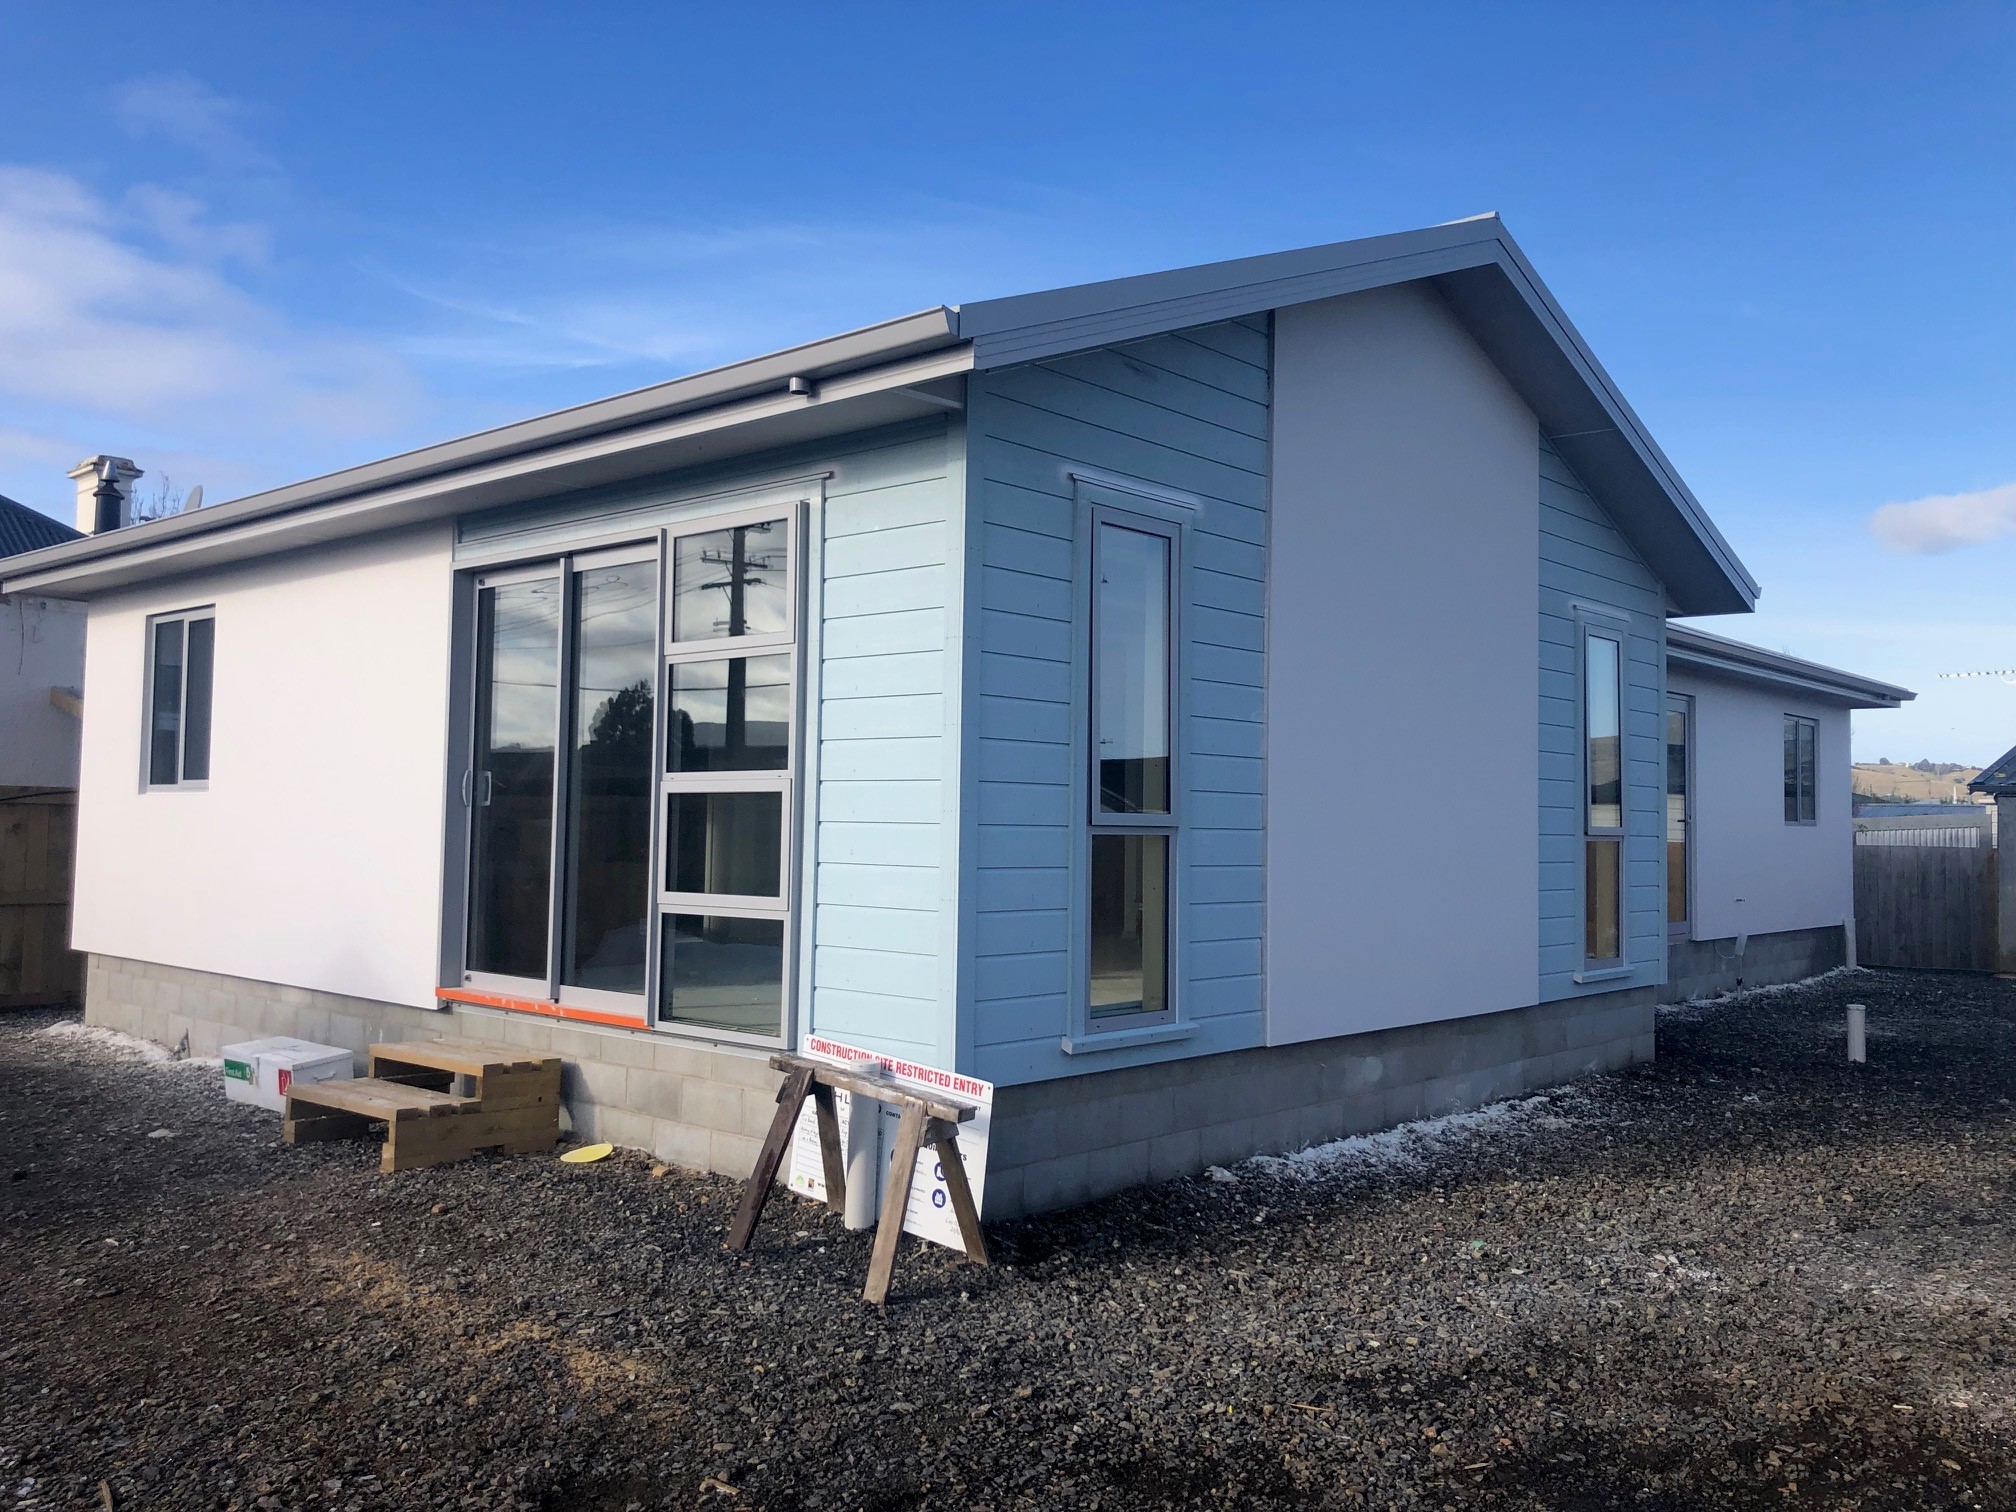
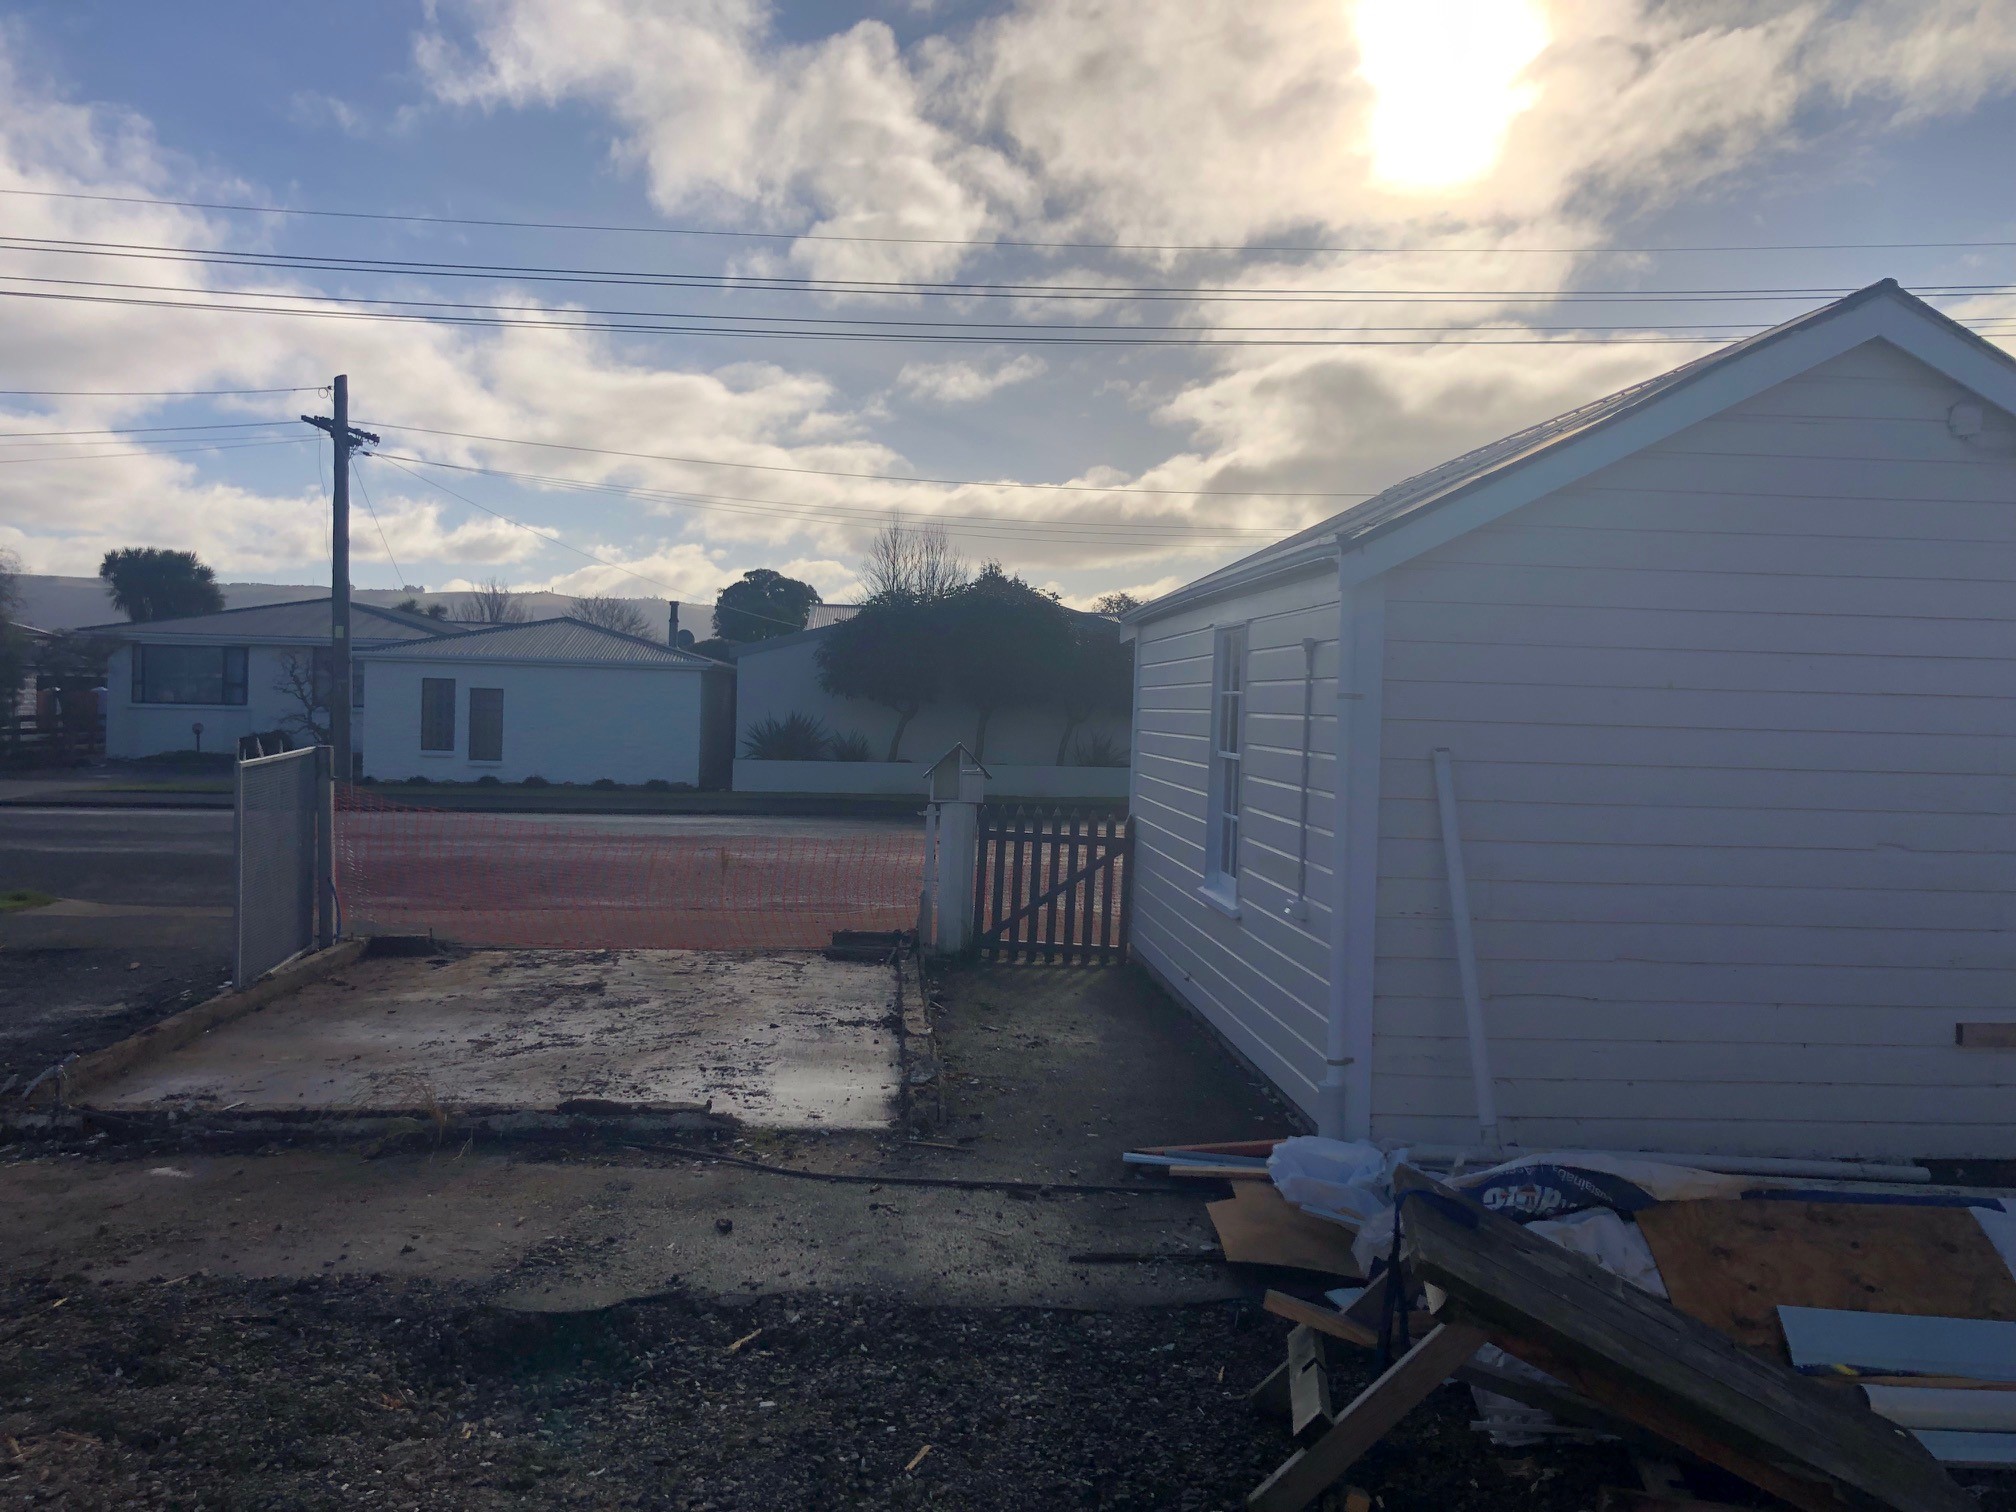
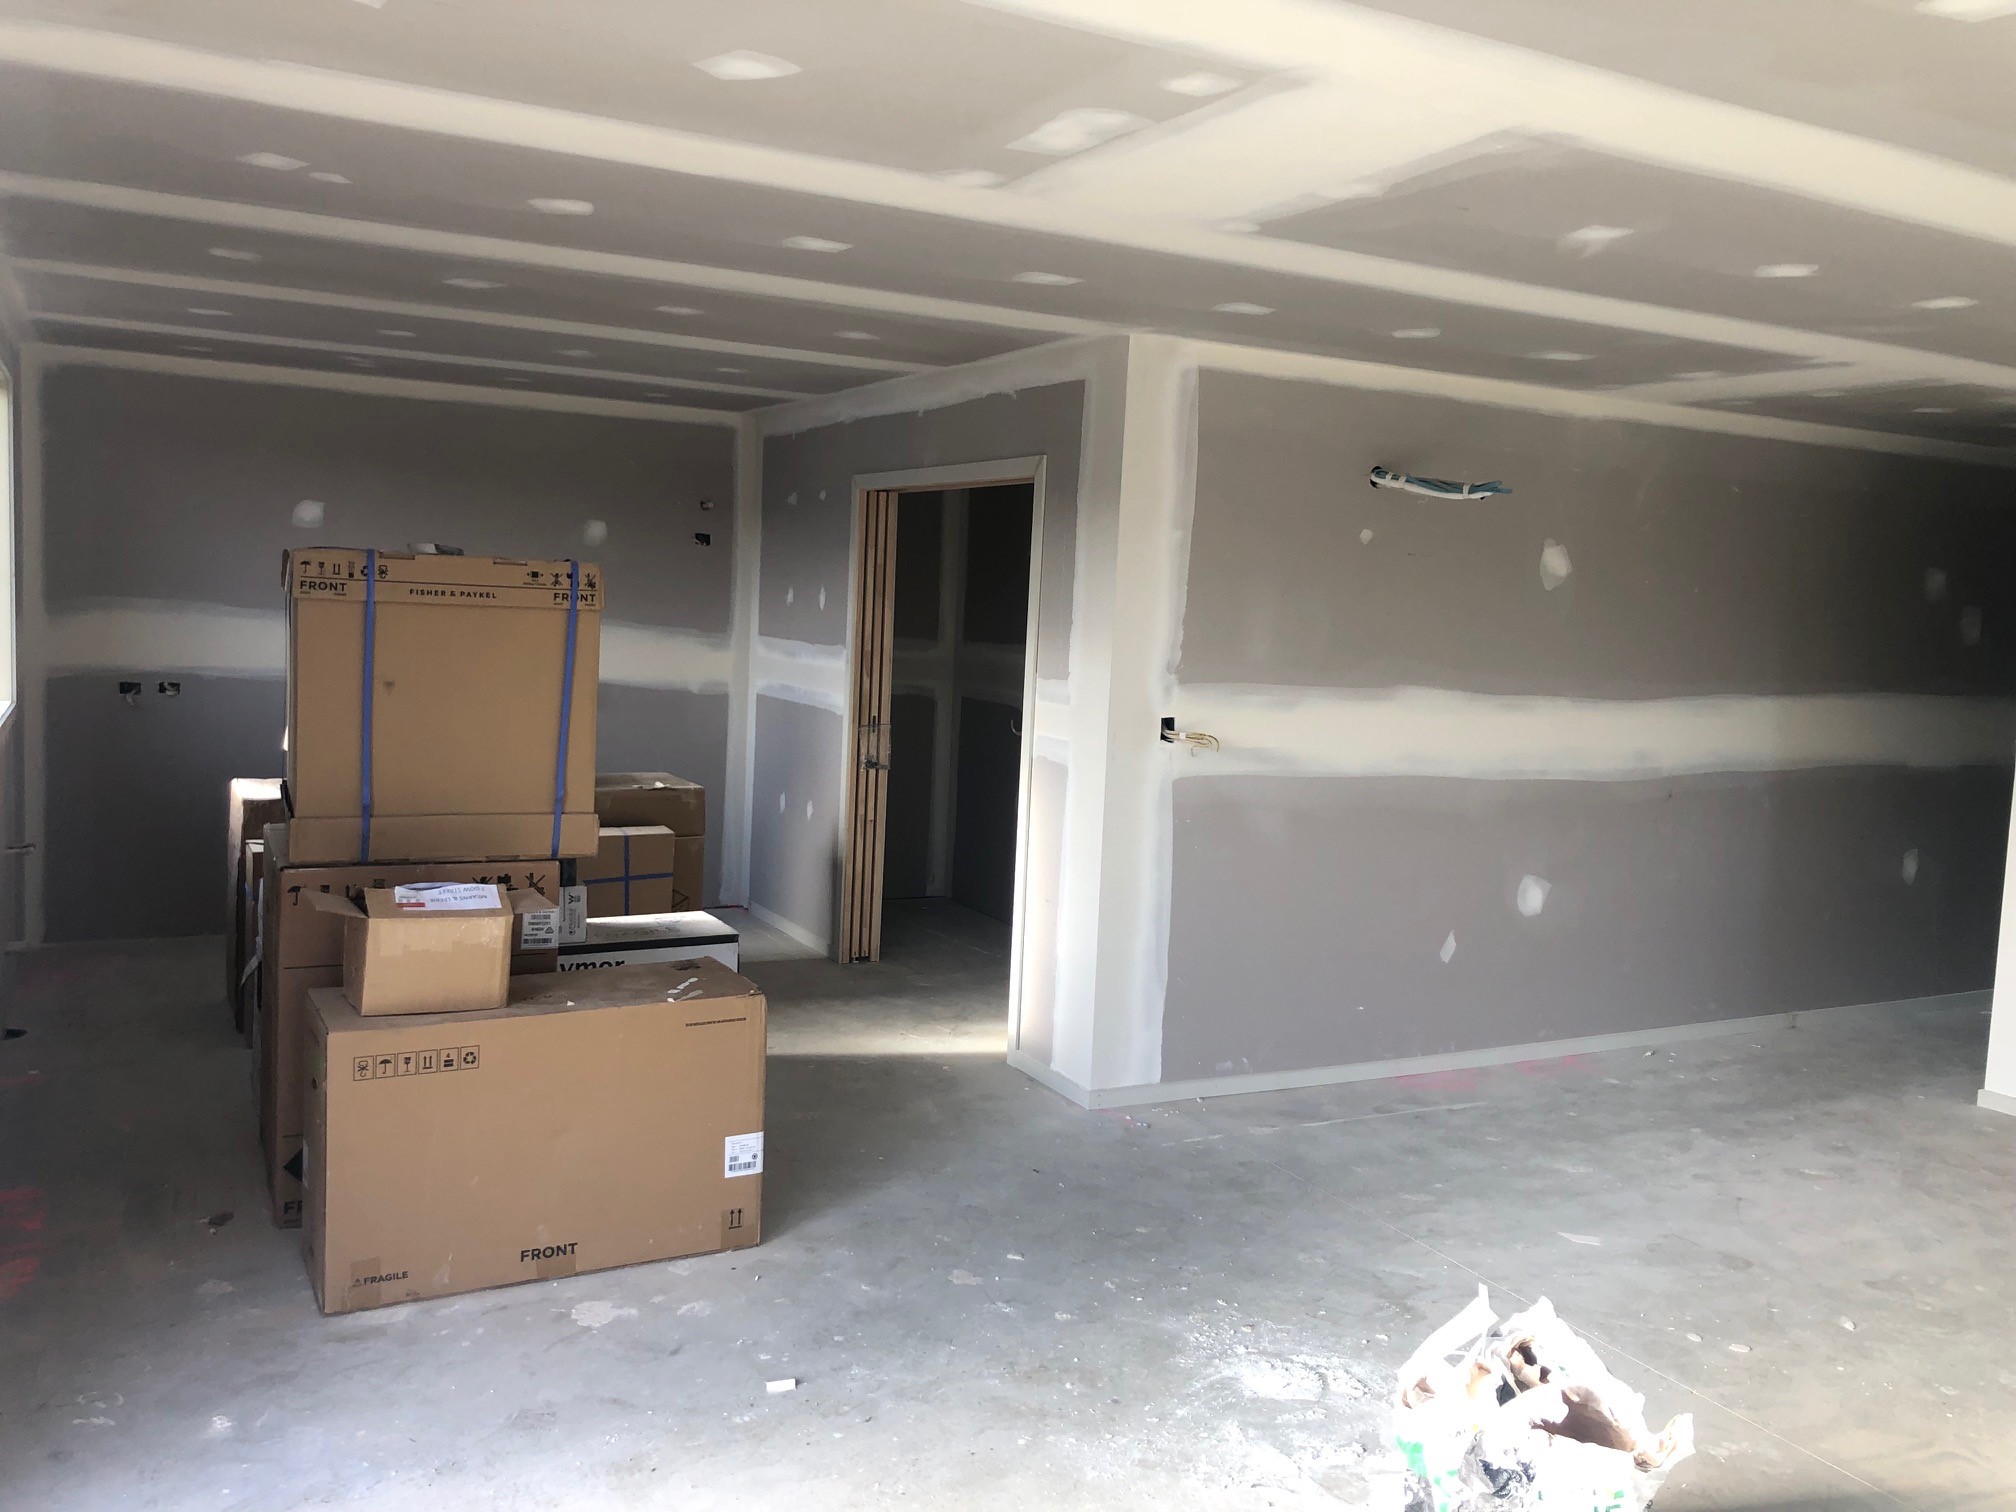
Pic updates, jib done. Painters should be here next week. Also kerb/channel will be done and the nib walls on the old shed can be removed, then can get some new seal down.
2 points
-
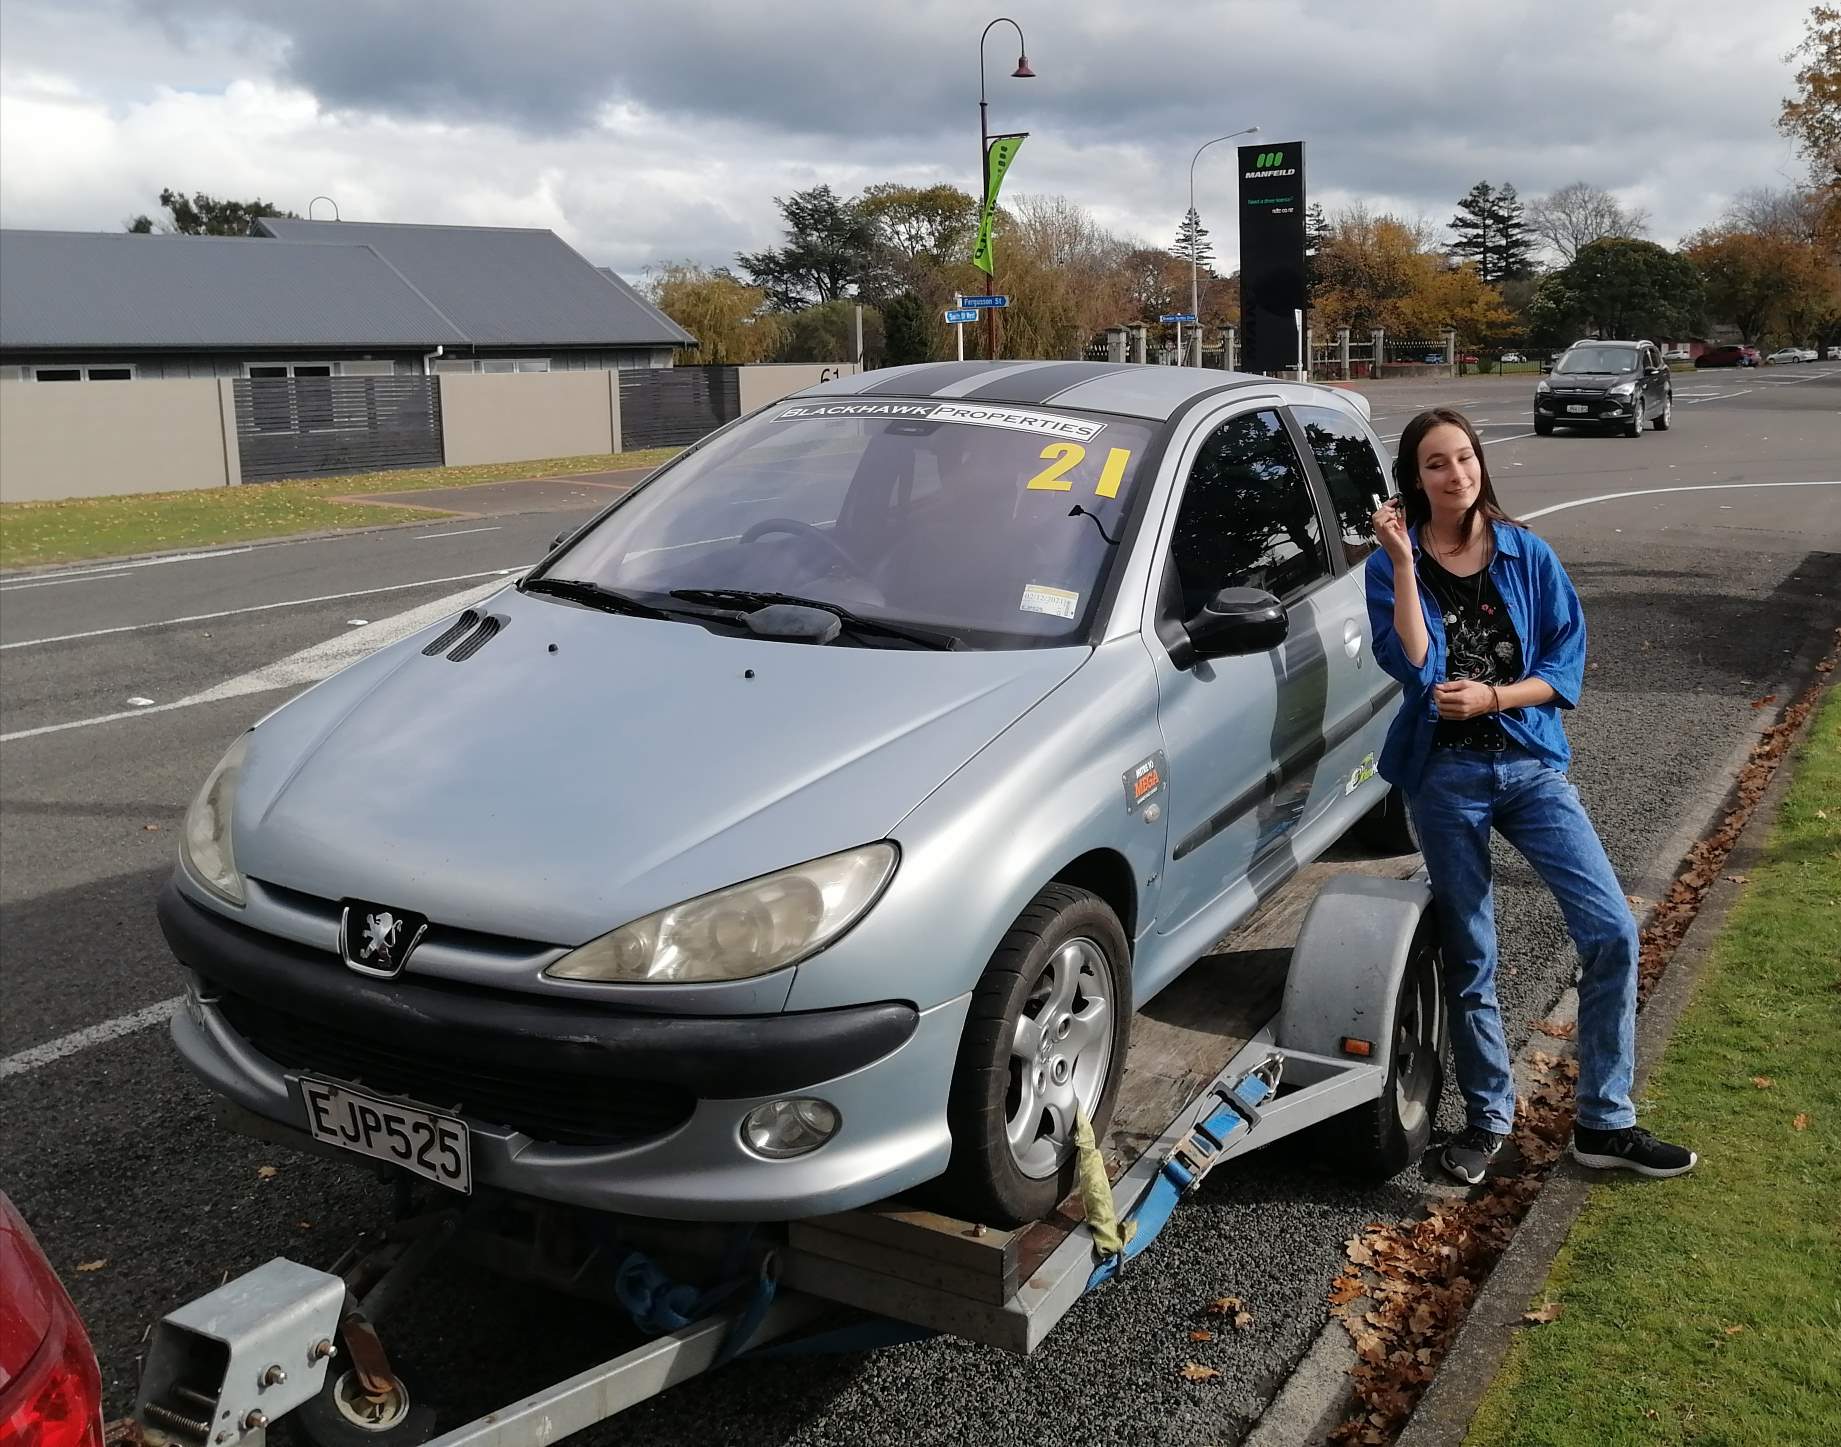
After blowing the old V6 up at Hampton ~2013 I did get distracted when shopping for an engine and buying a nice turboed one that came in a car -the Geisha. And then numerous other escorts, and a 2 year sabbatical on a boat with the family, and move to new town etc etc etc... Yeah, its been far too long. Scary how young the kids look, even just at the top of the current page! Let put it this way the kids were 7 and 5 the last time I drove her and this month I bought the kids their own race car. If they bin the Puglet I will be sad, but no where near as sad as if they bin Felicity the escort. And for a front tugger its so much fun to drive. (Return spring is on the long list )
2 points
-
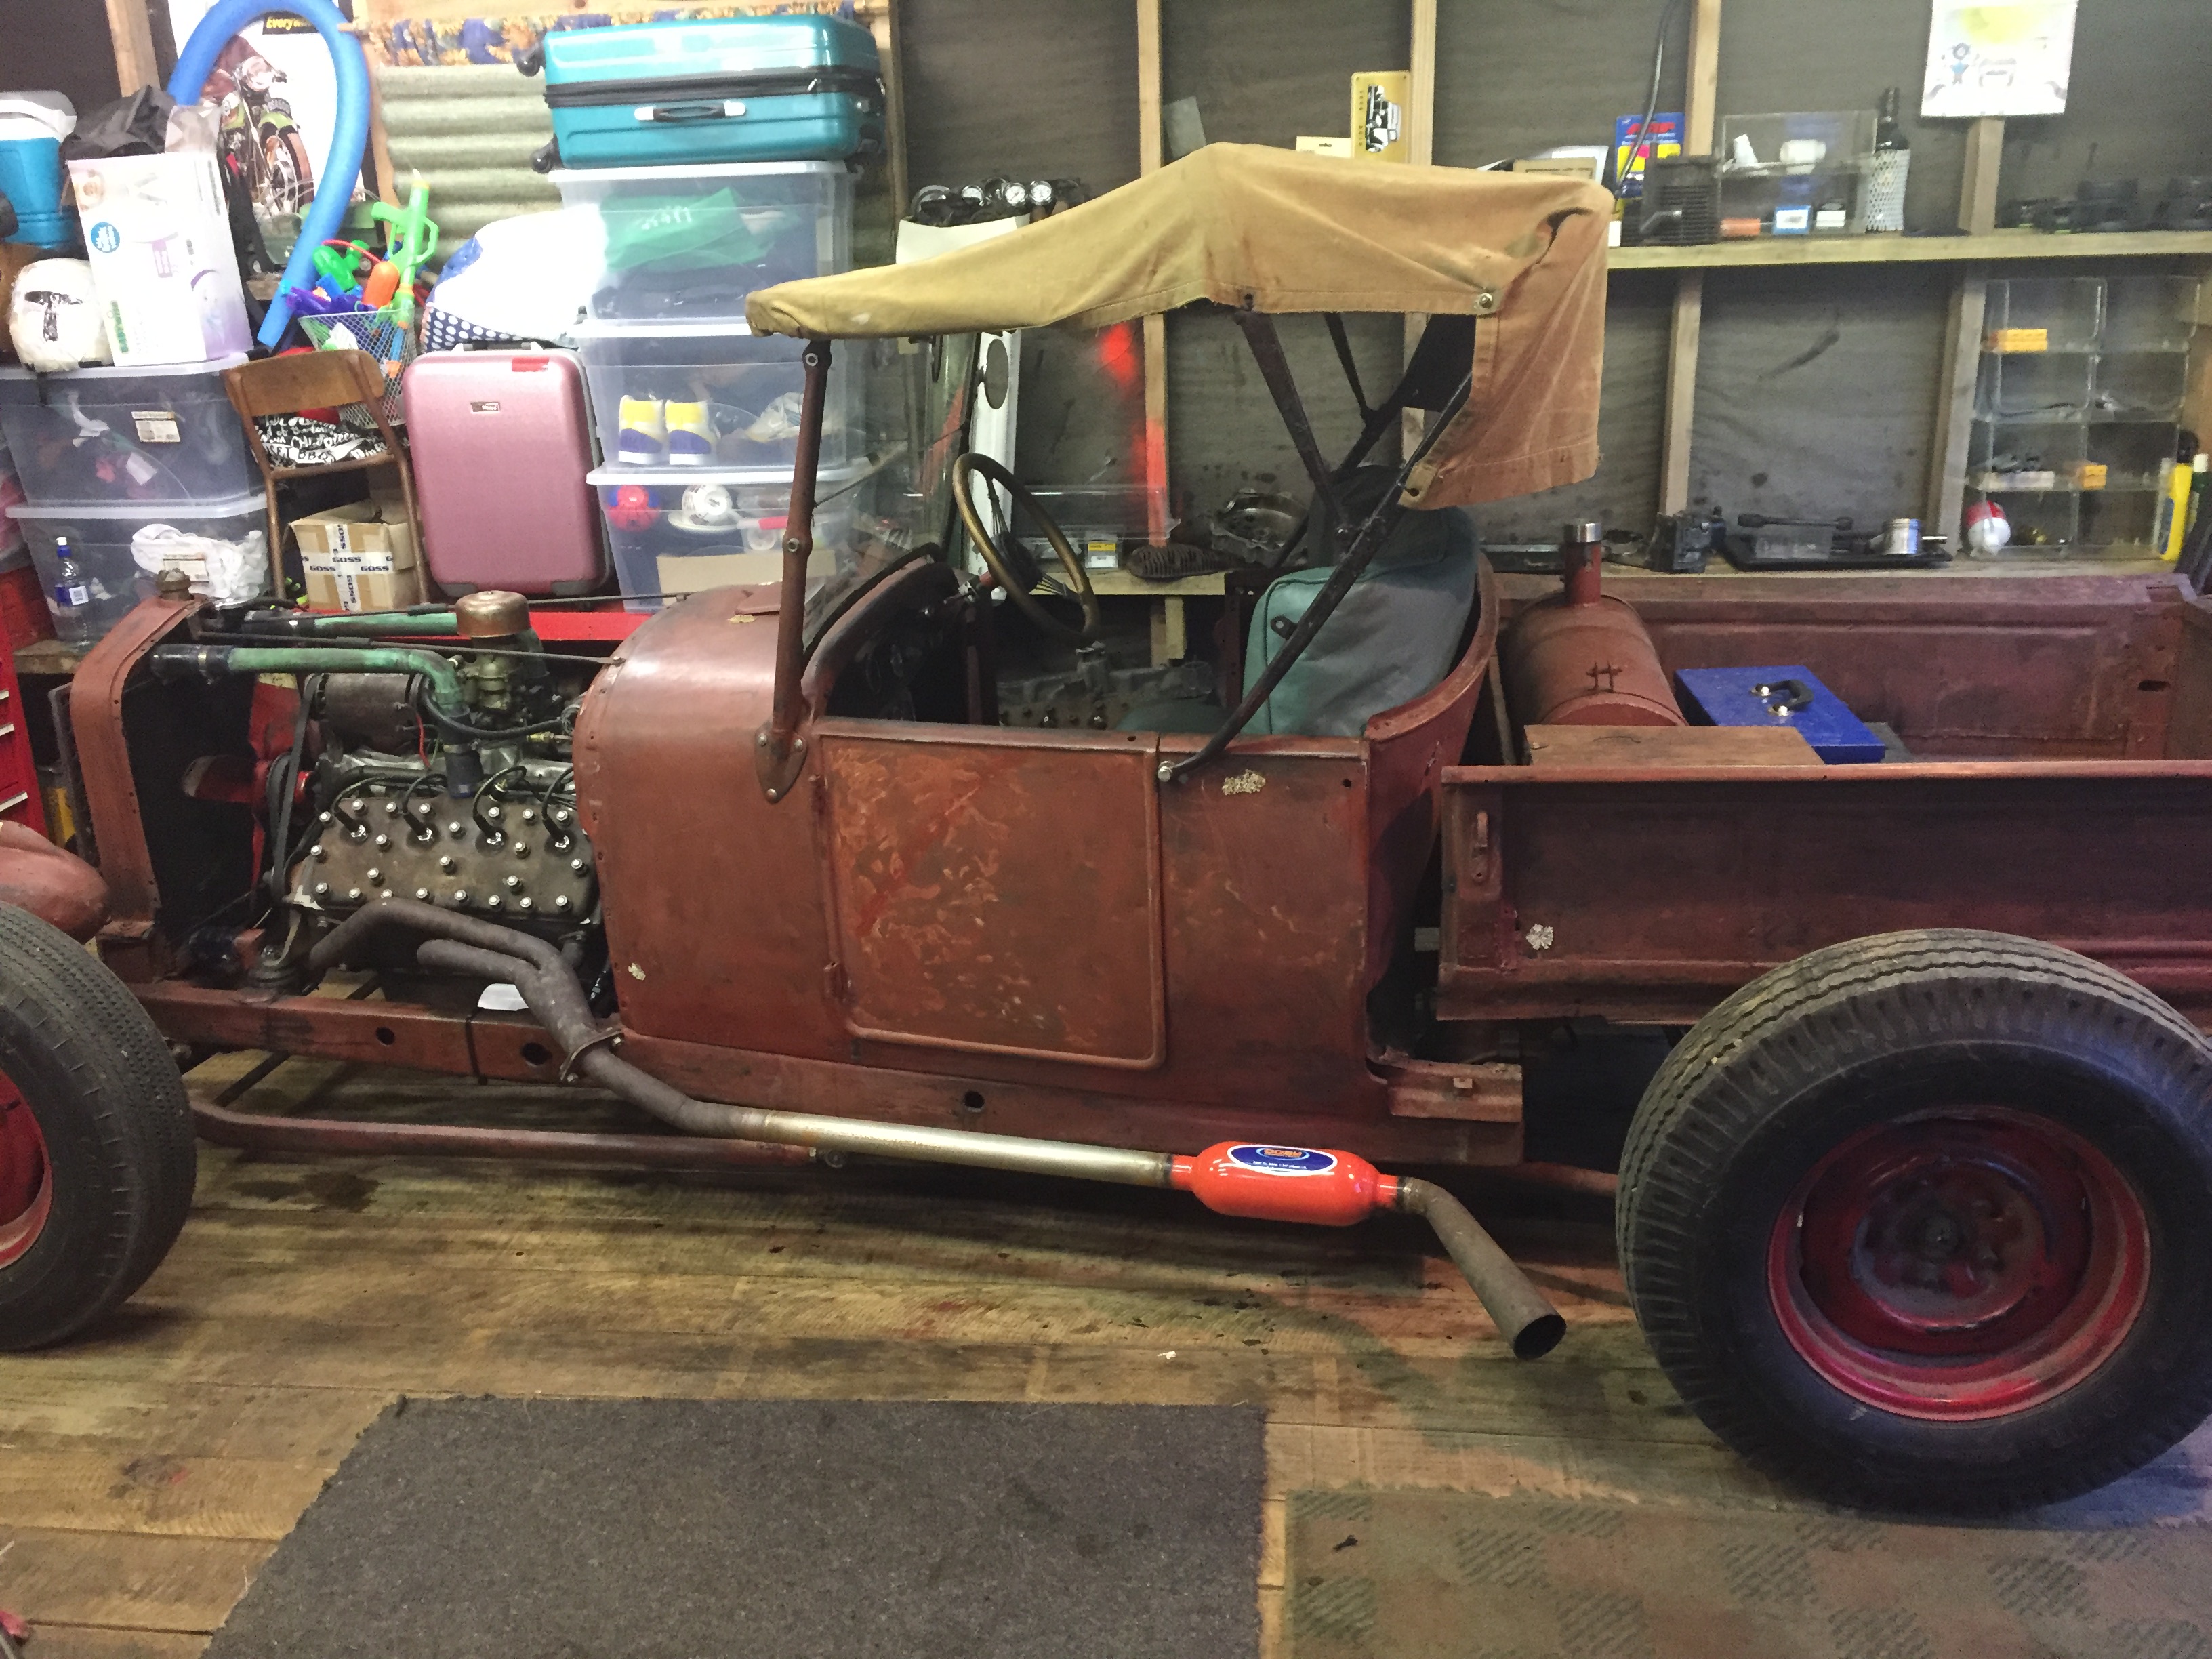
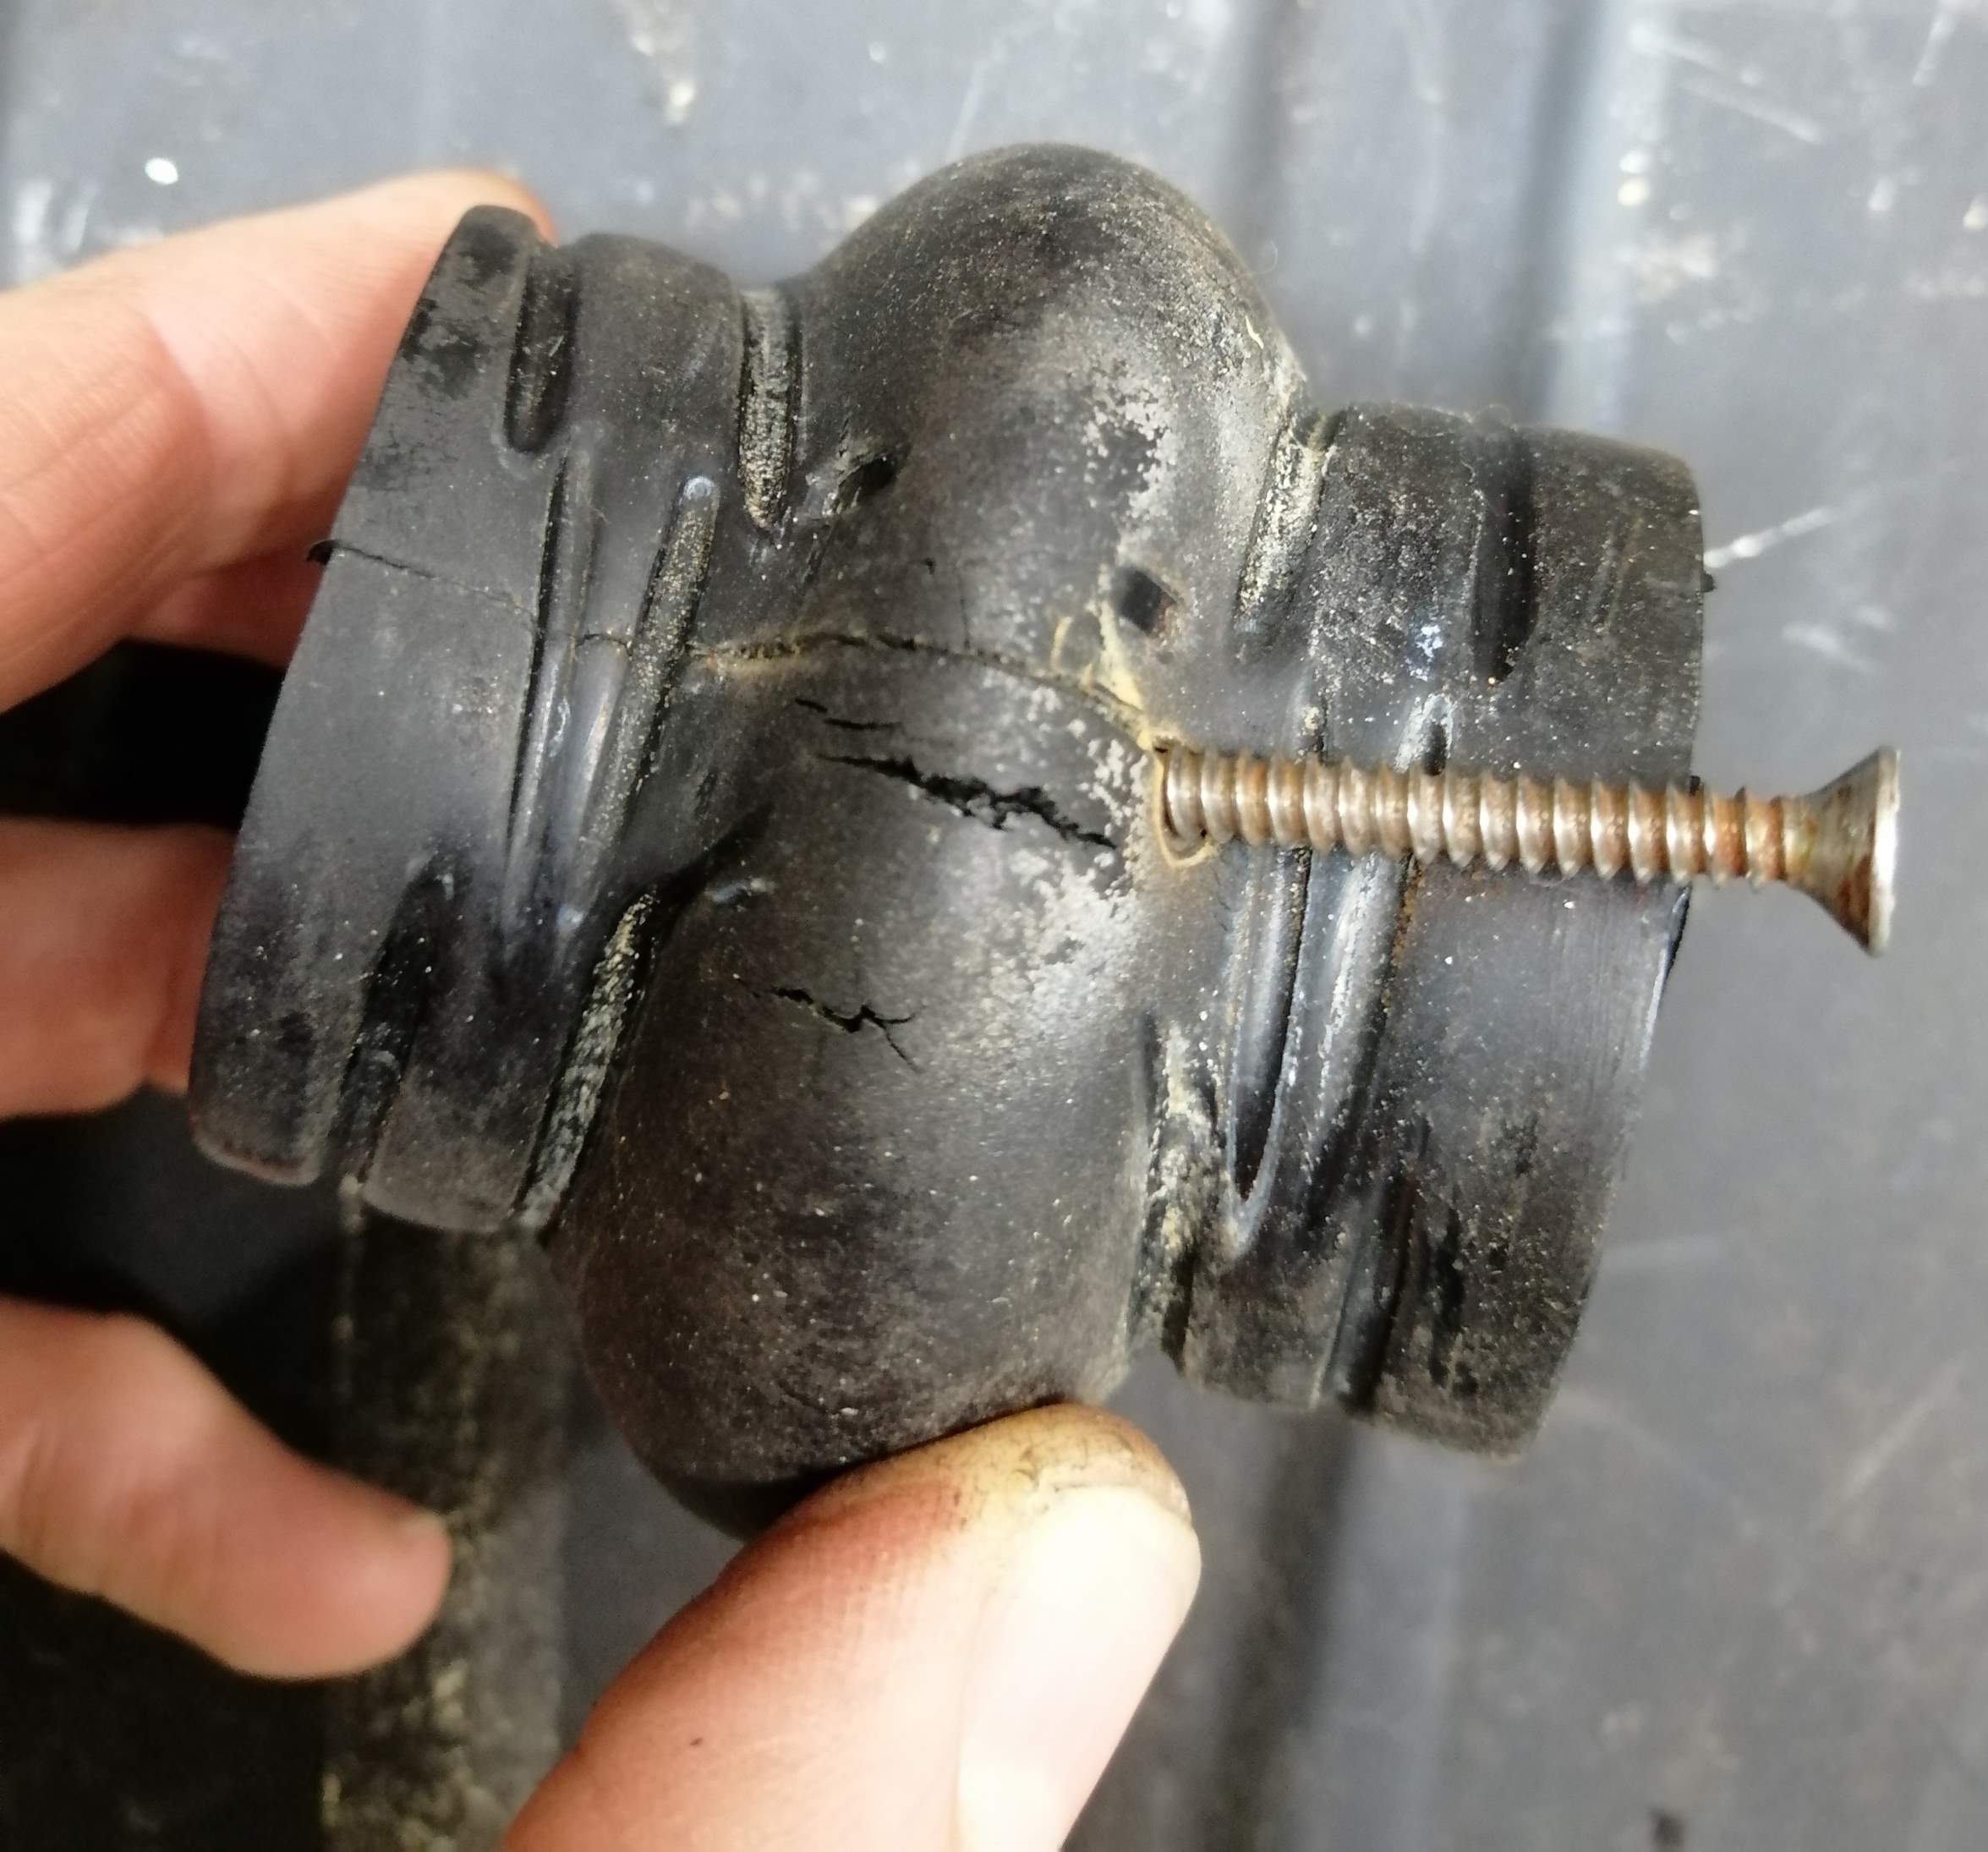
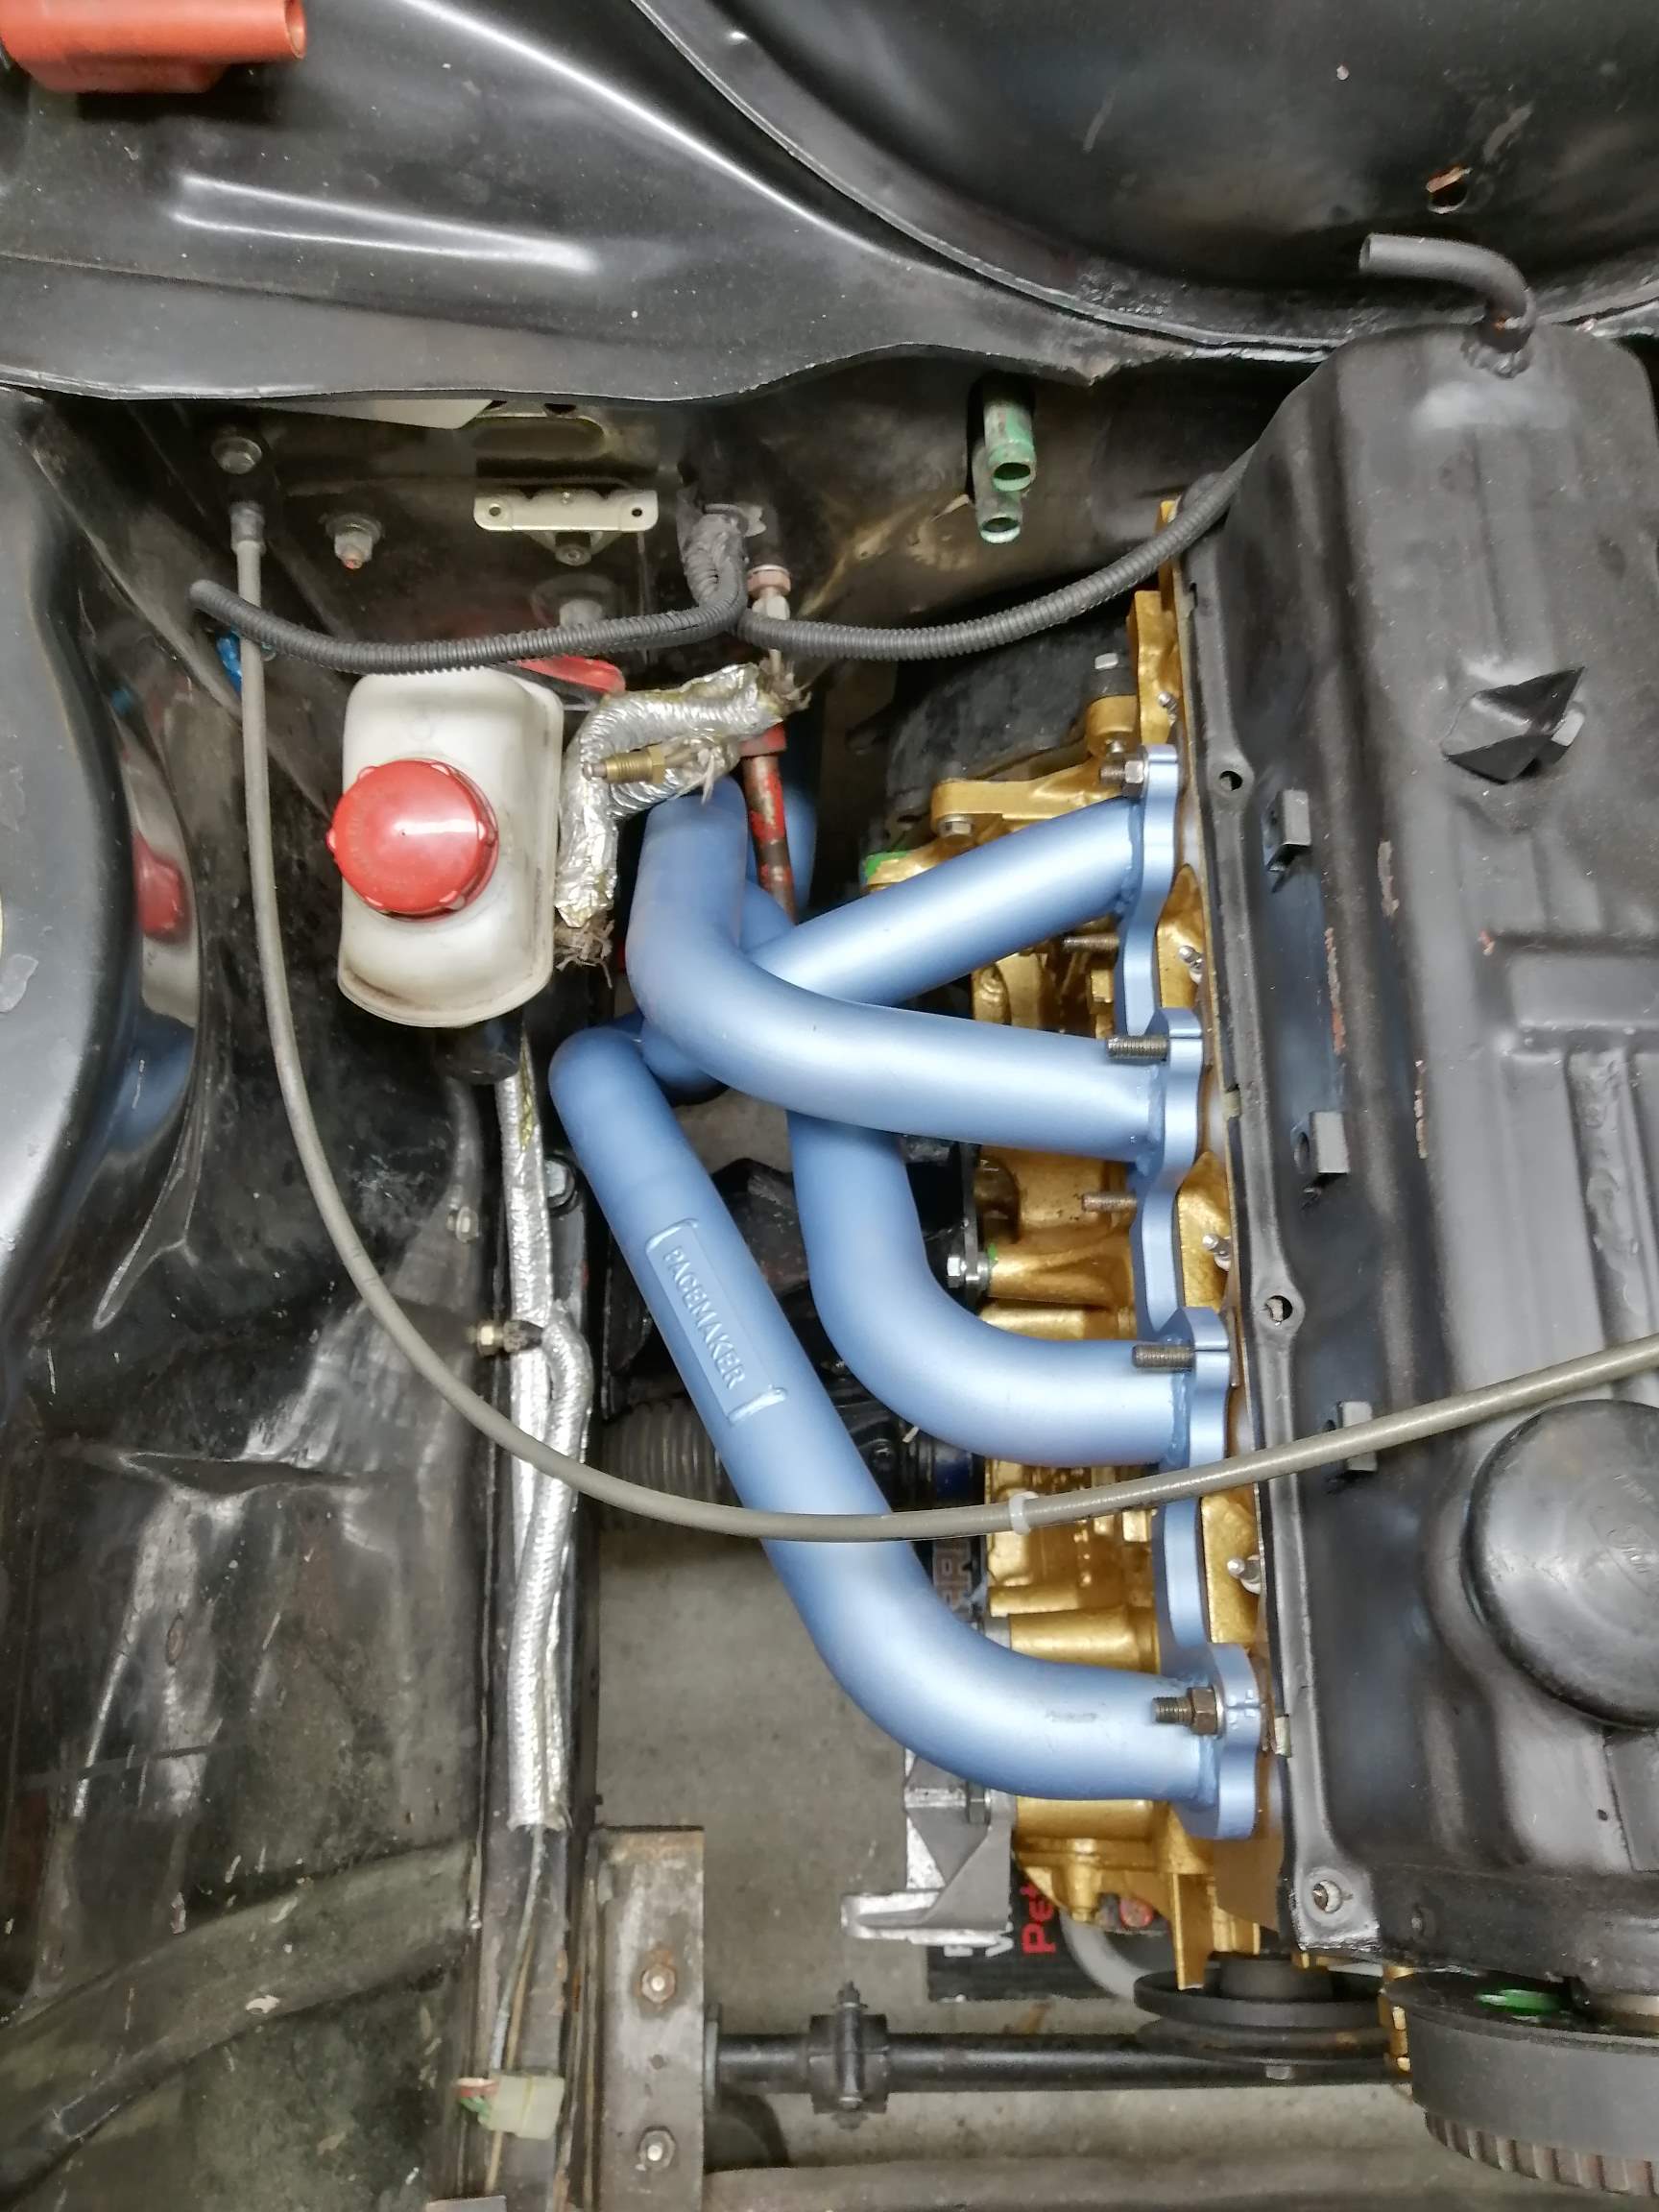
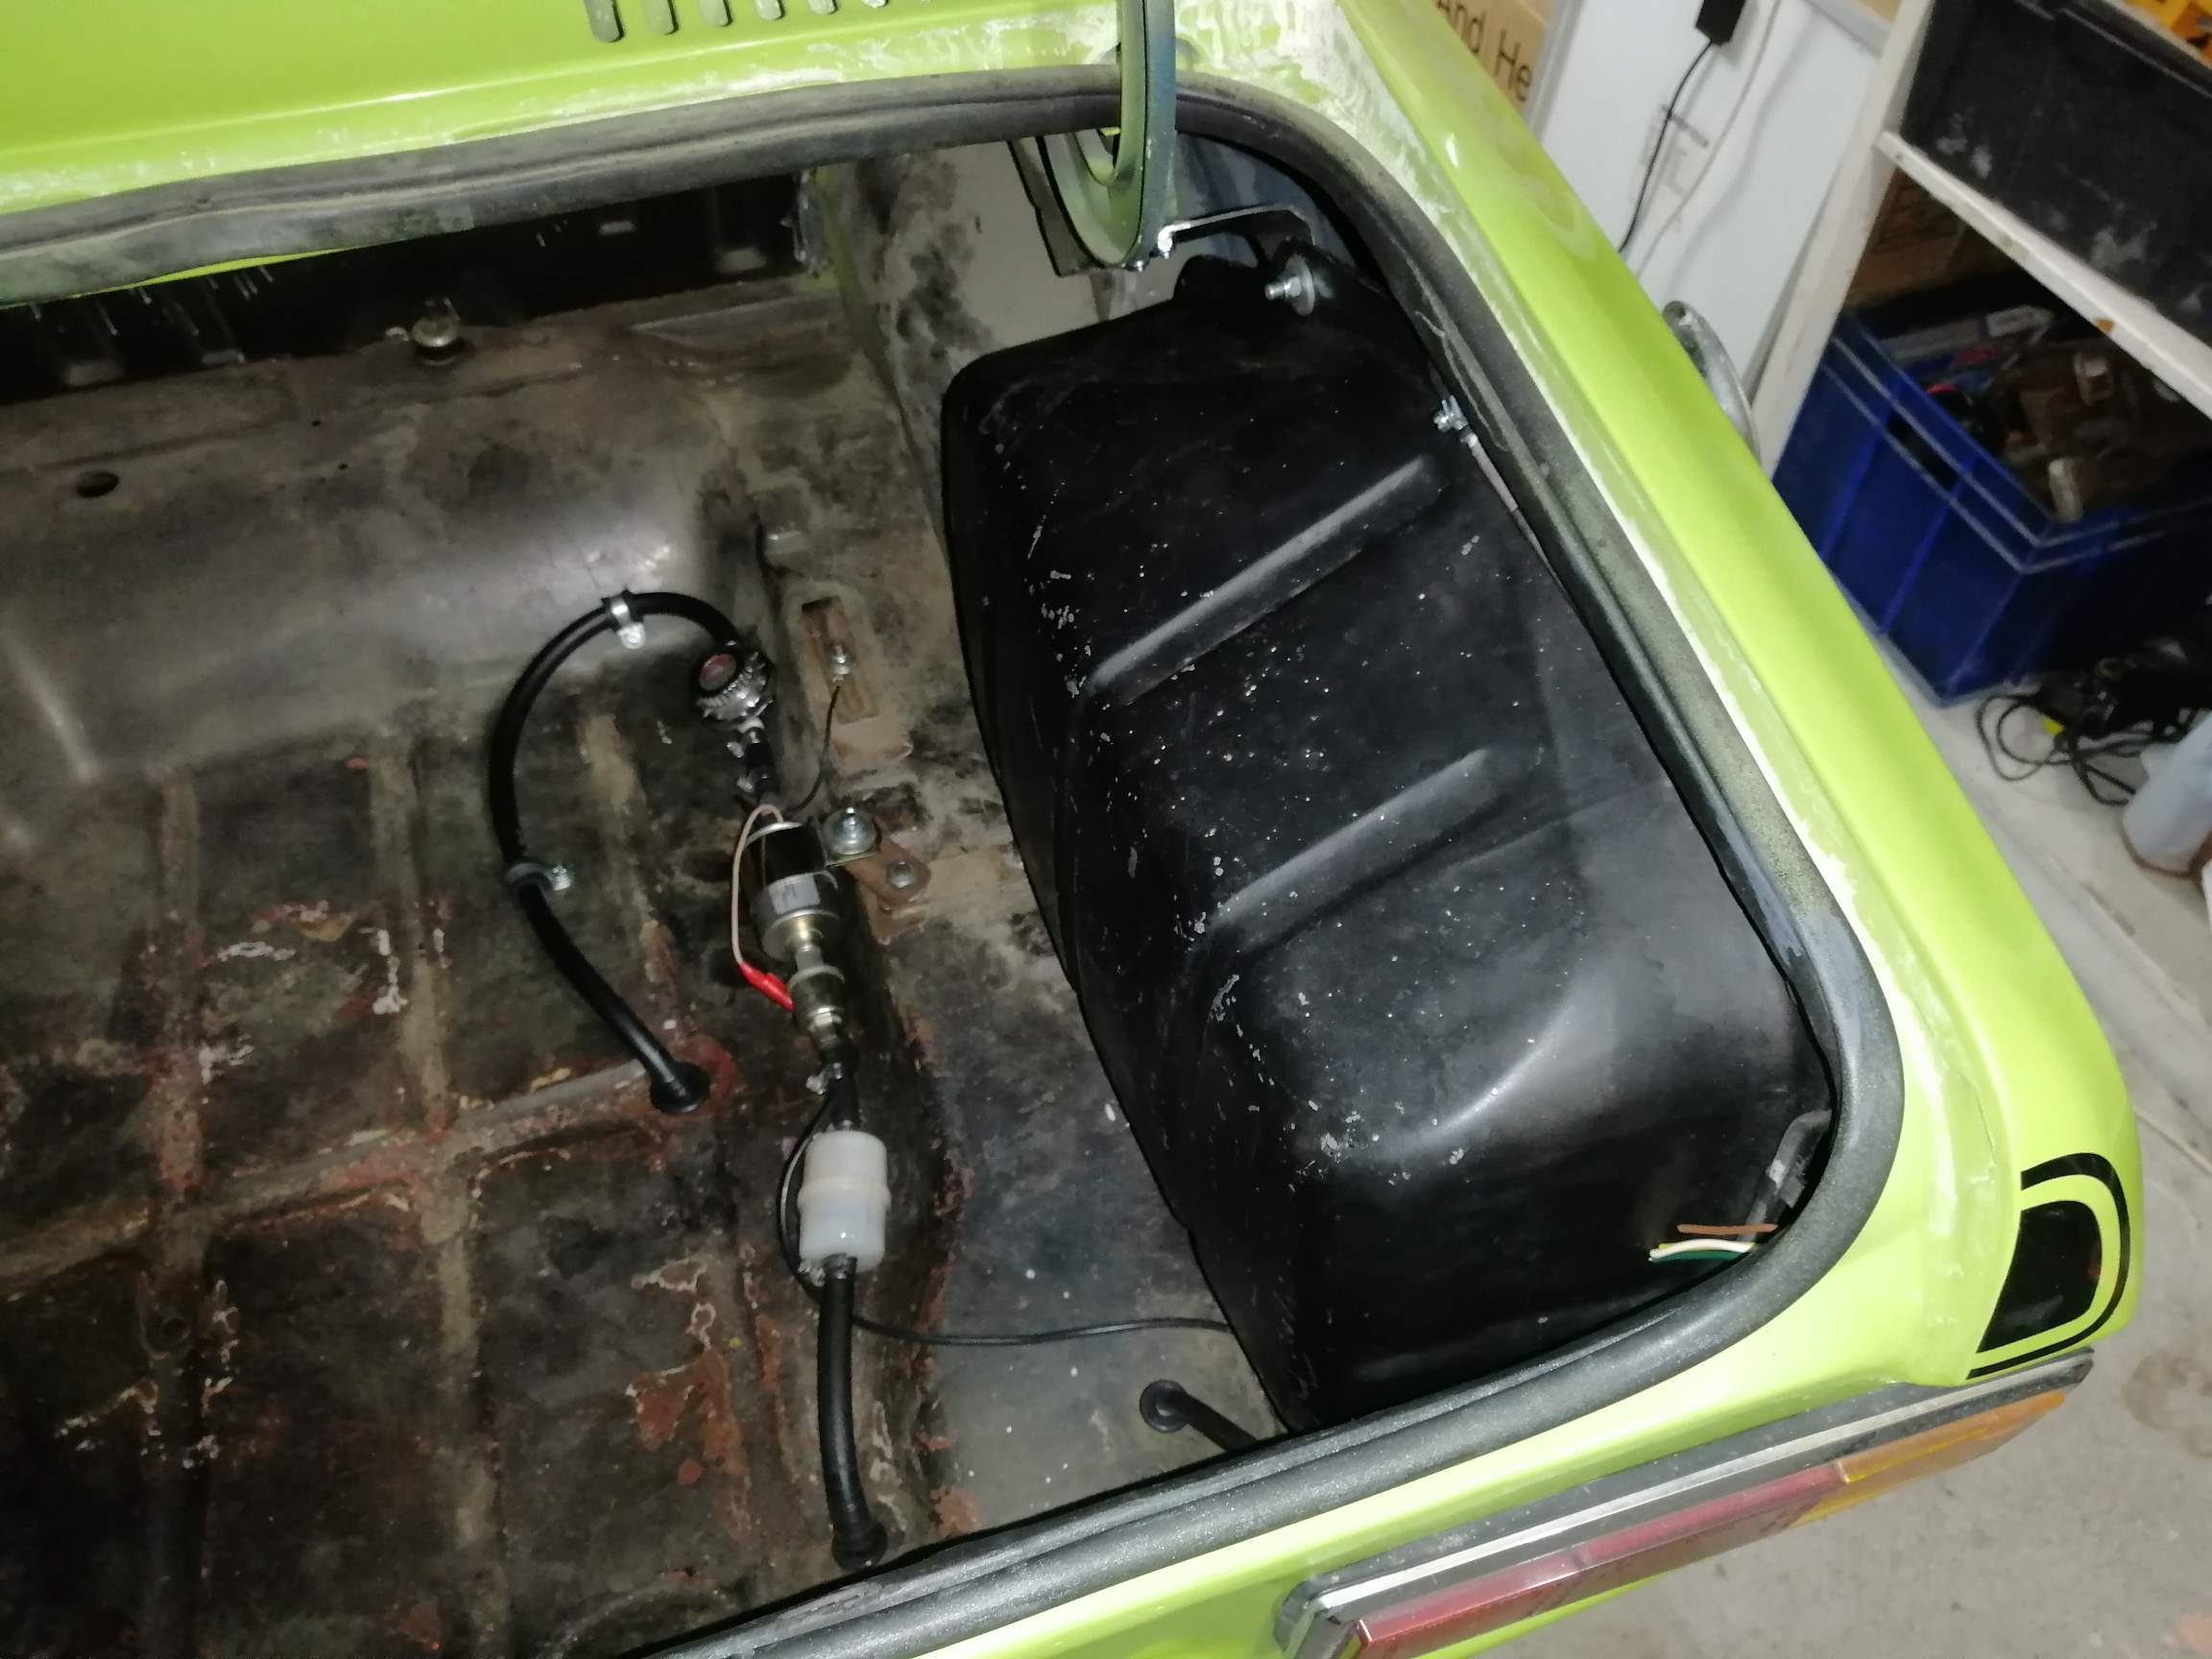
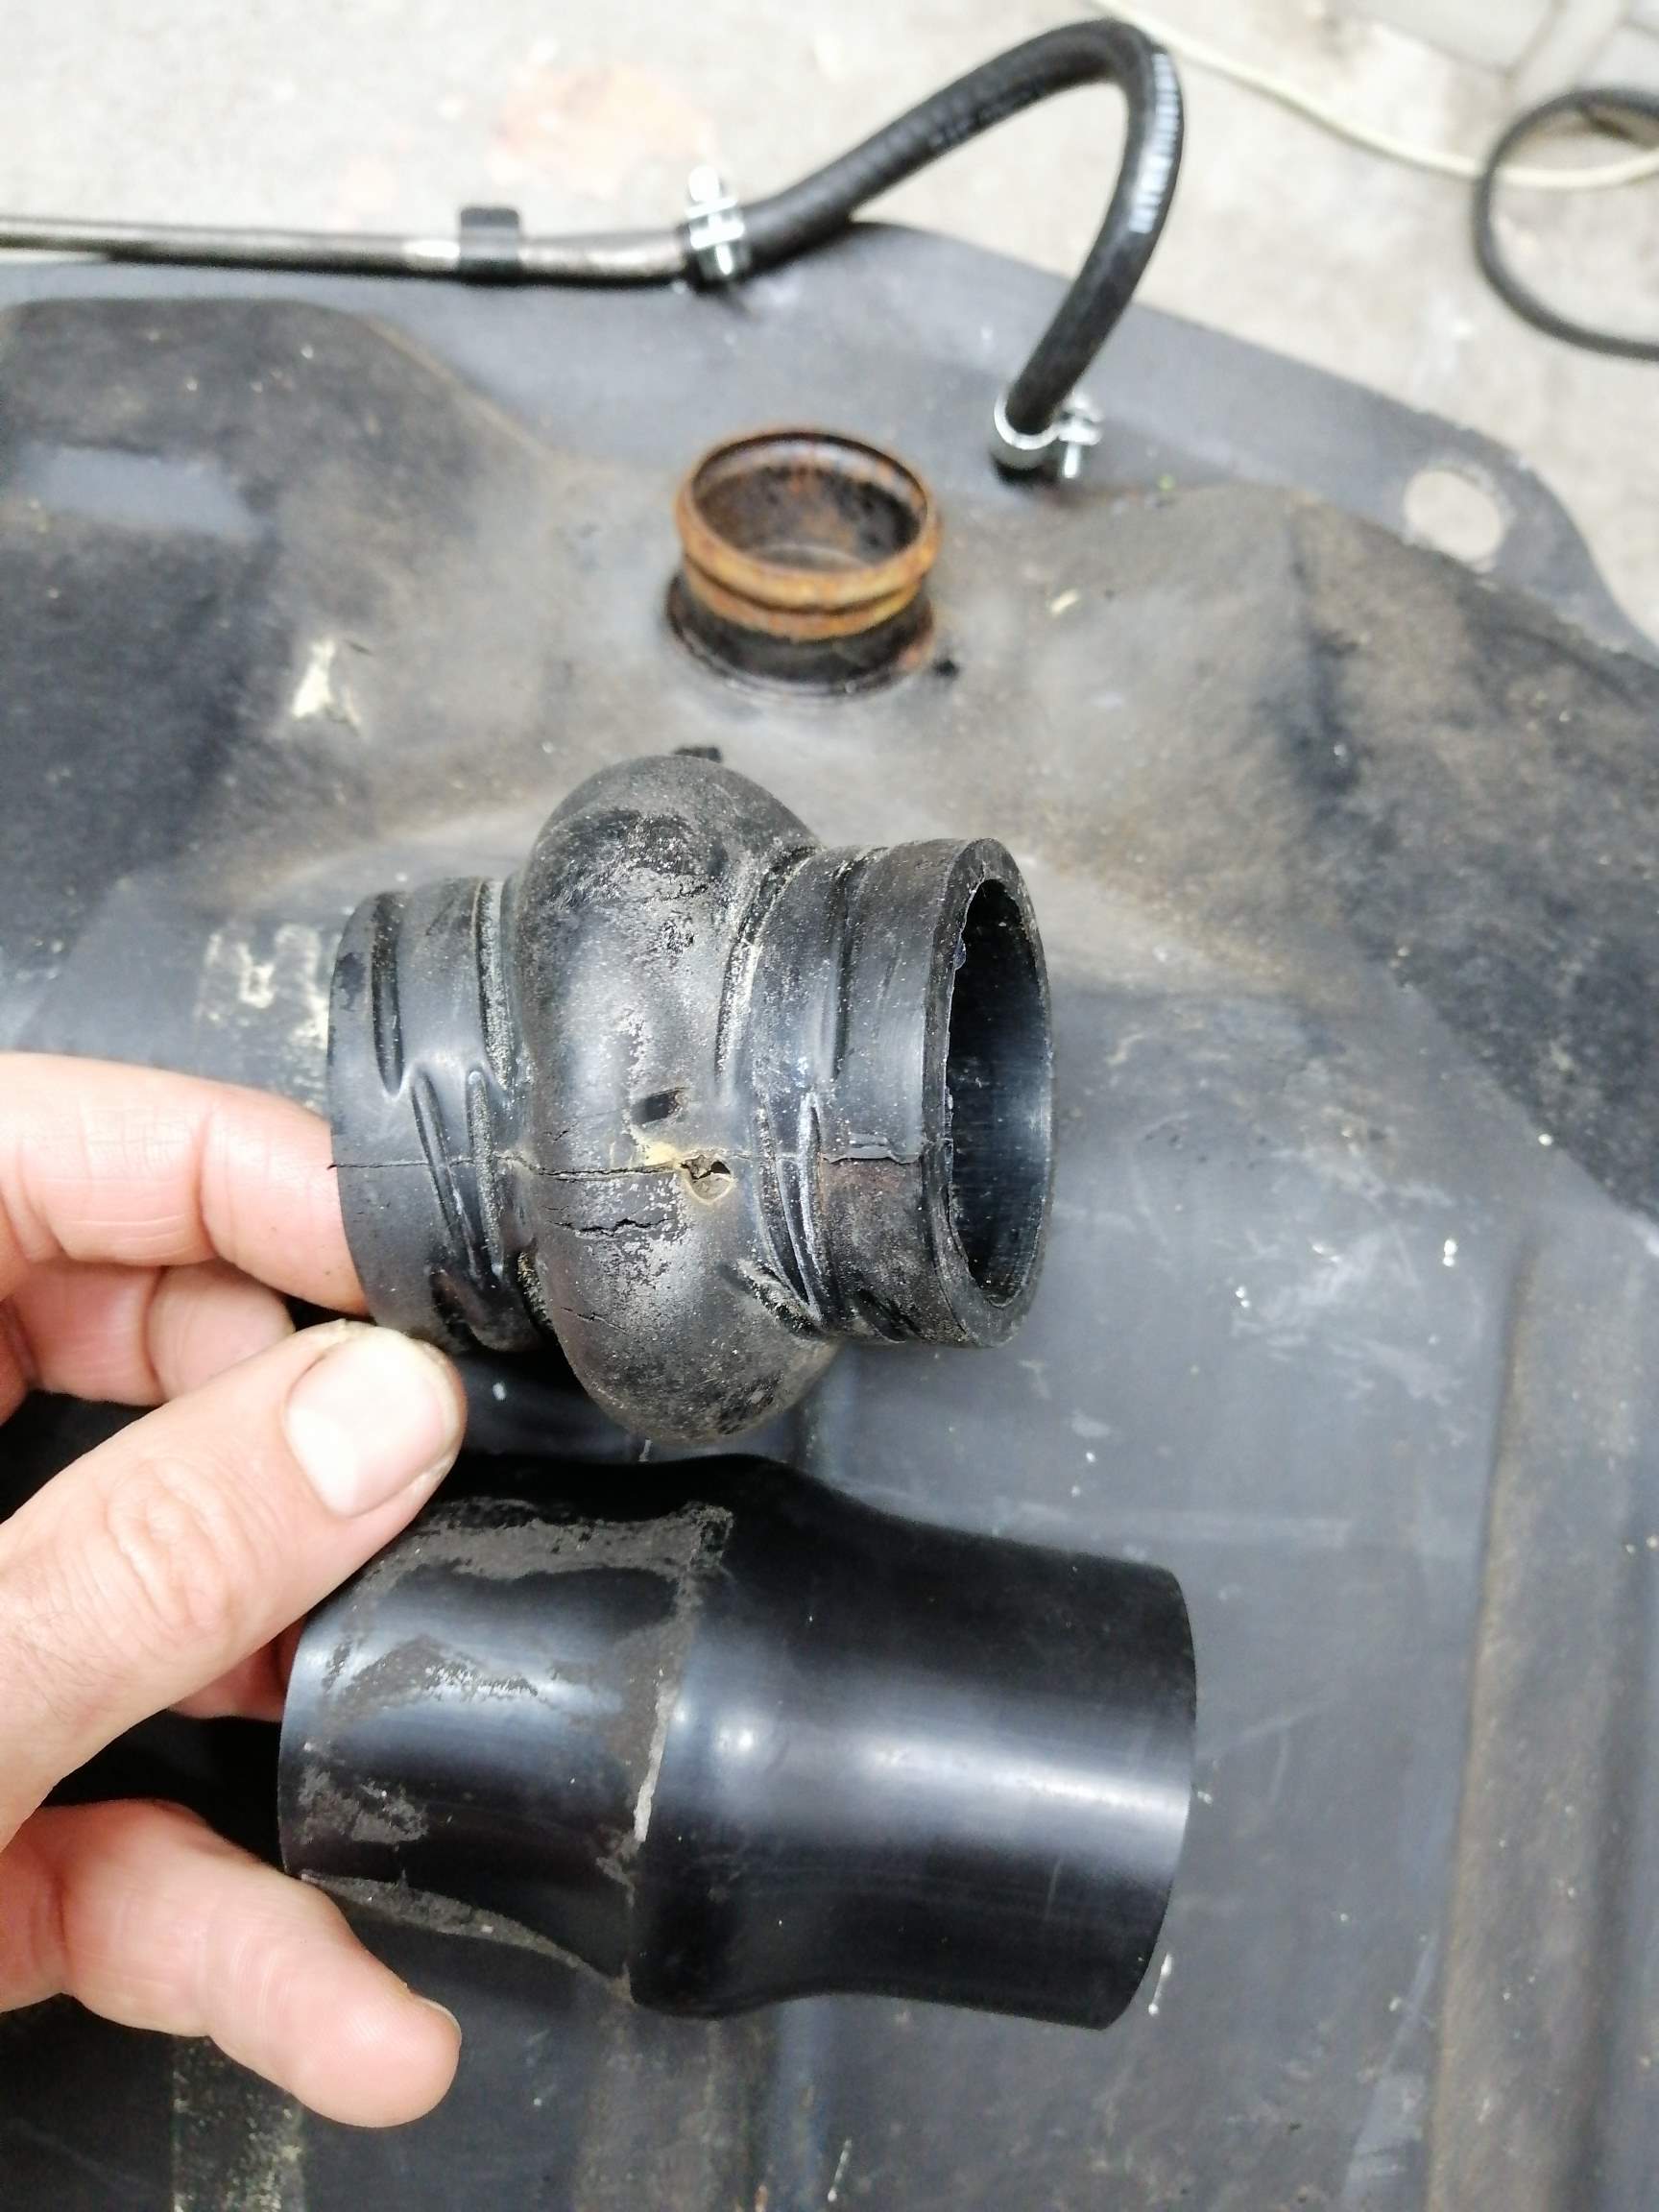
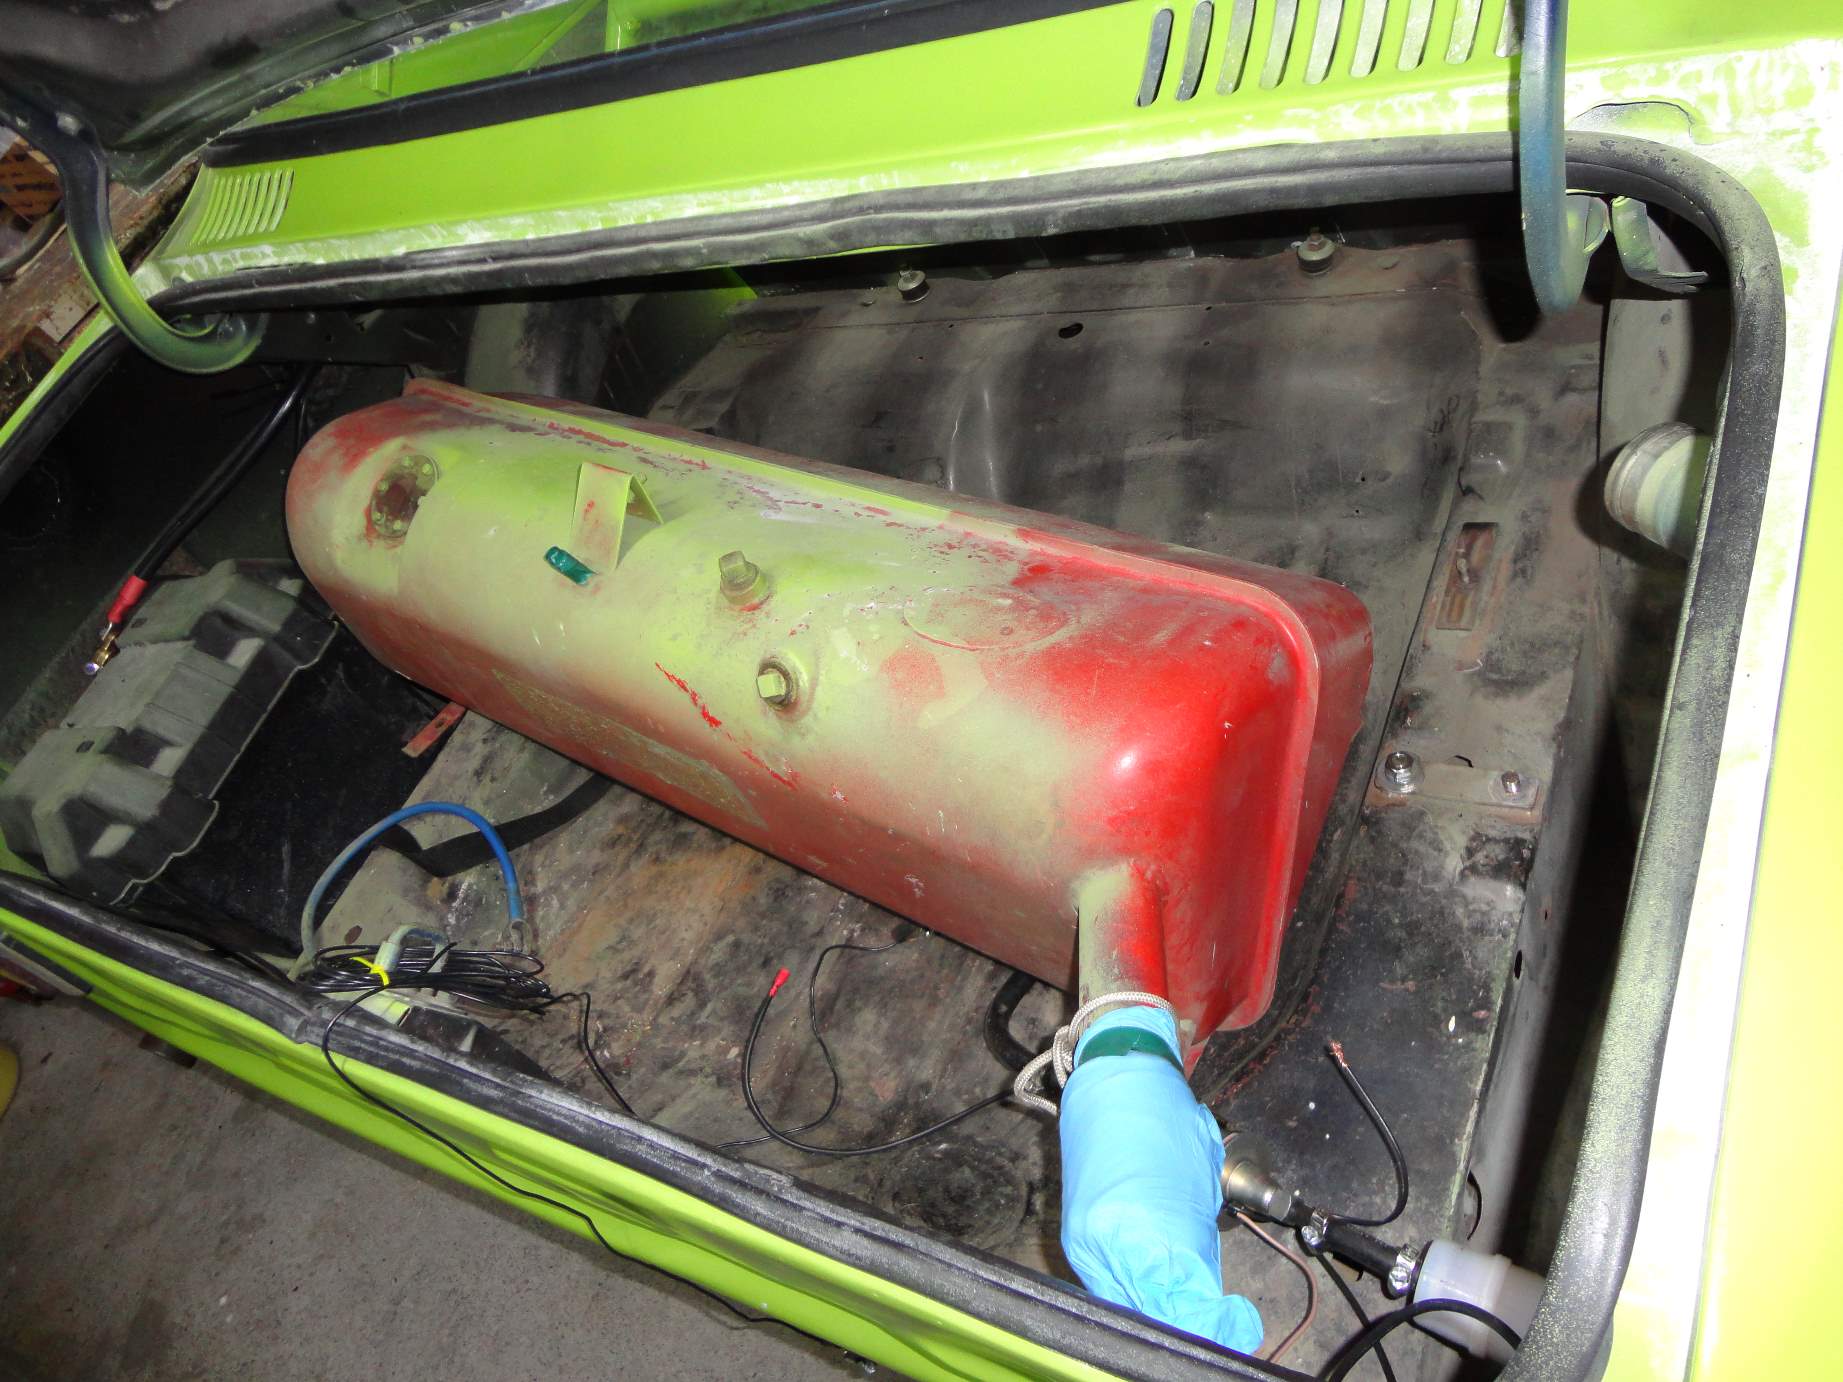
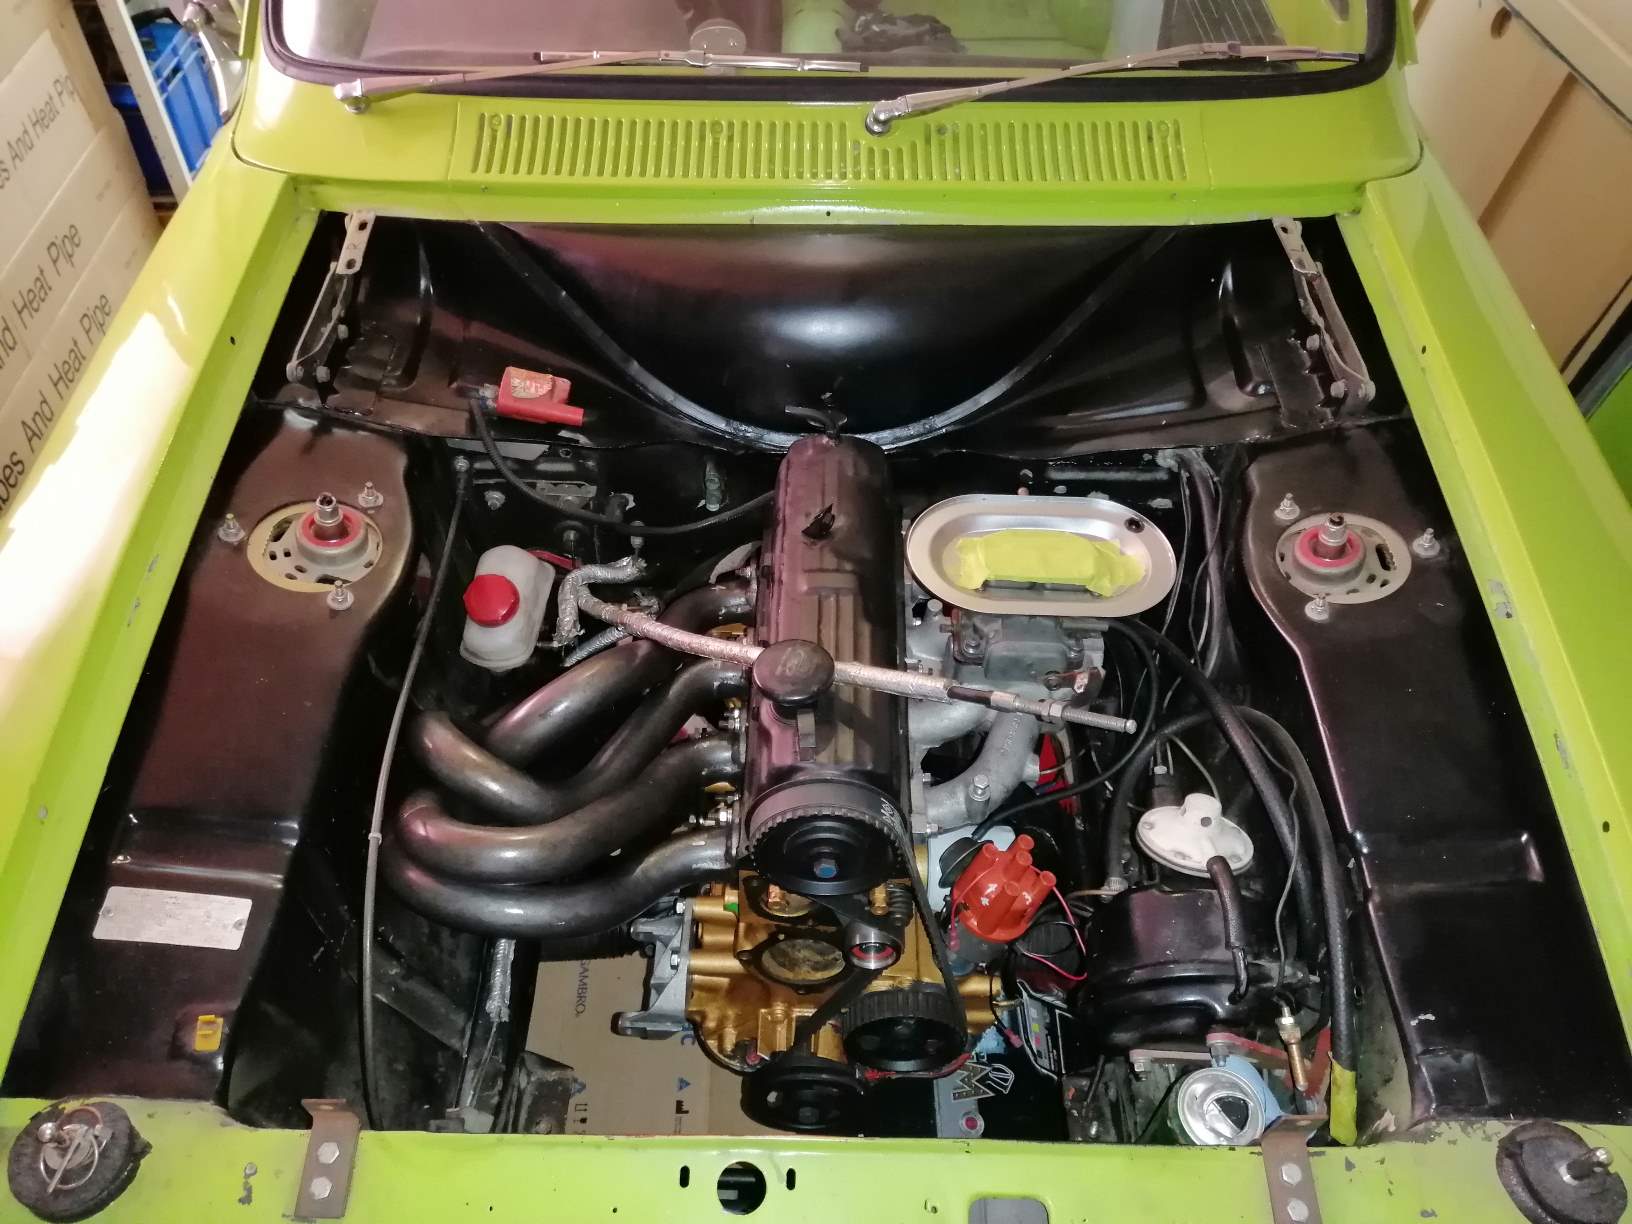
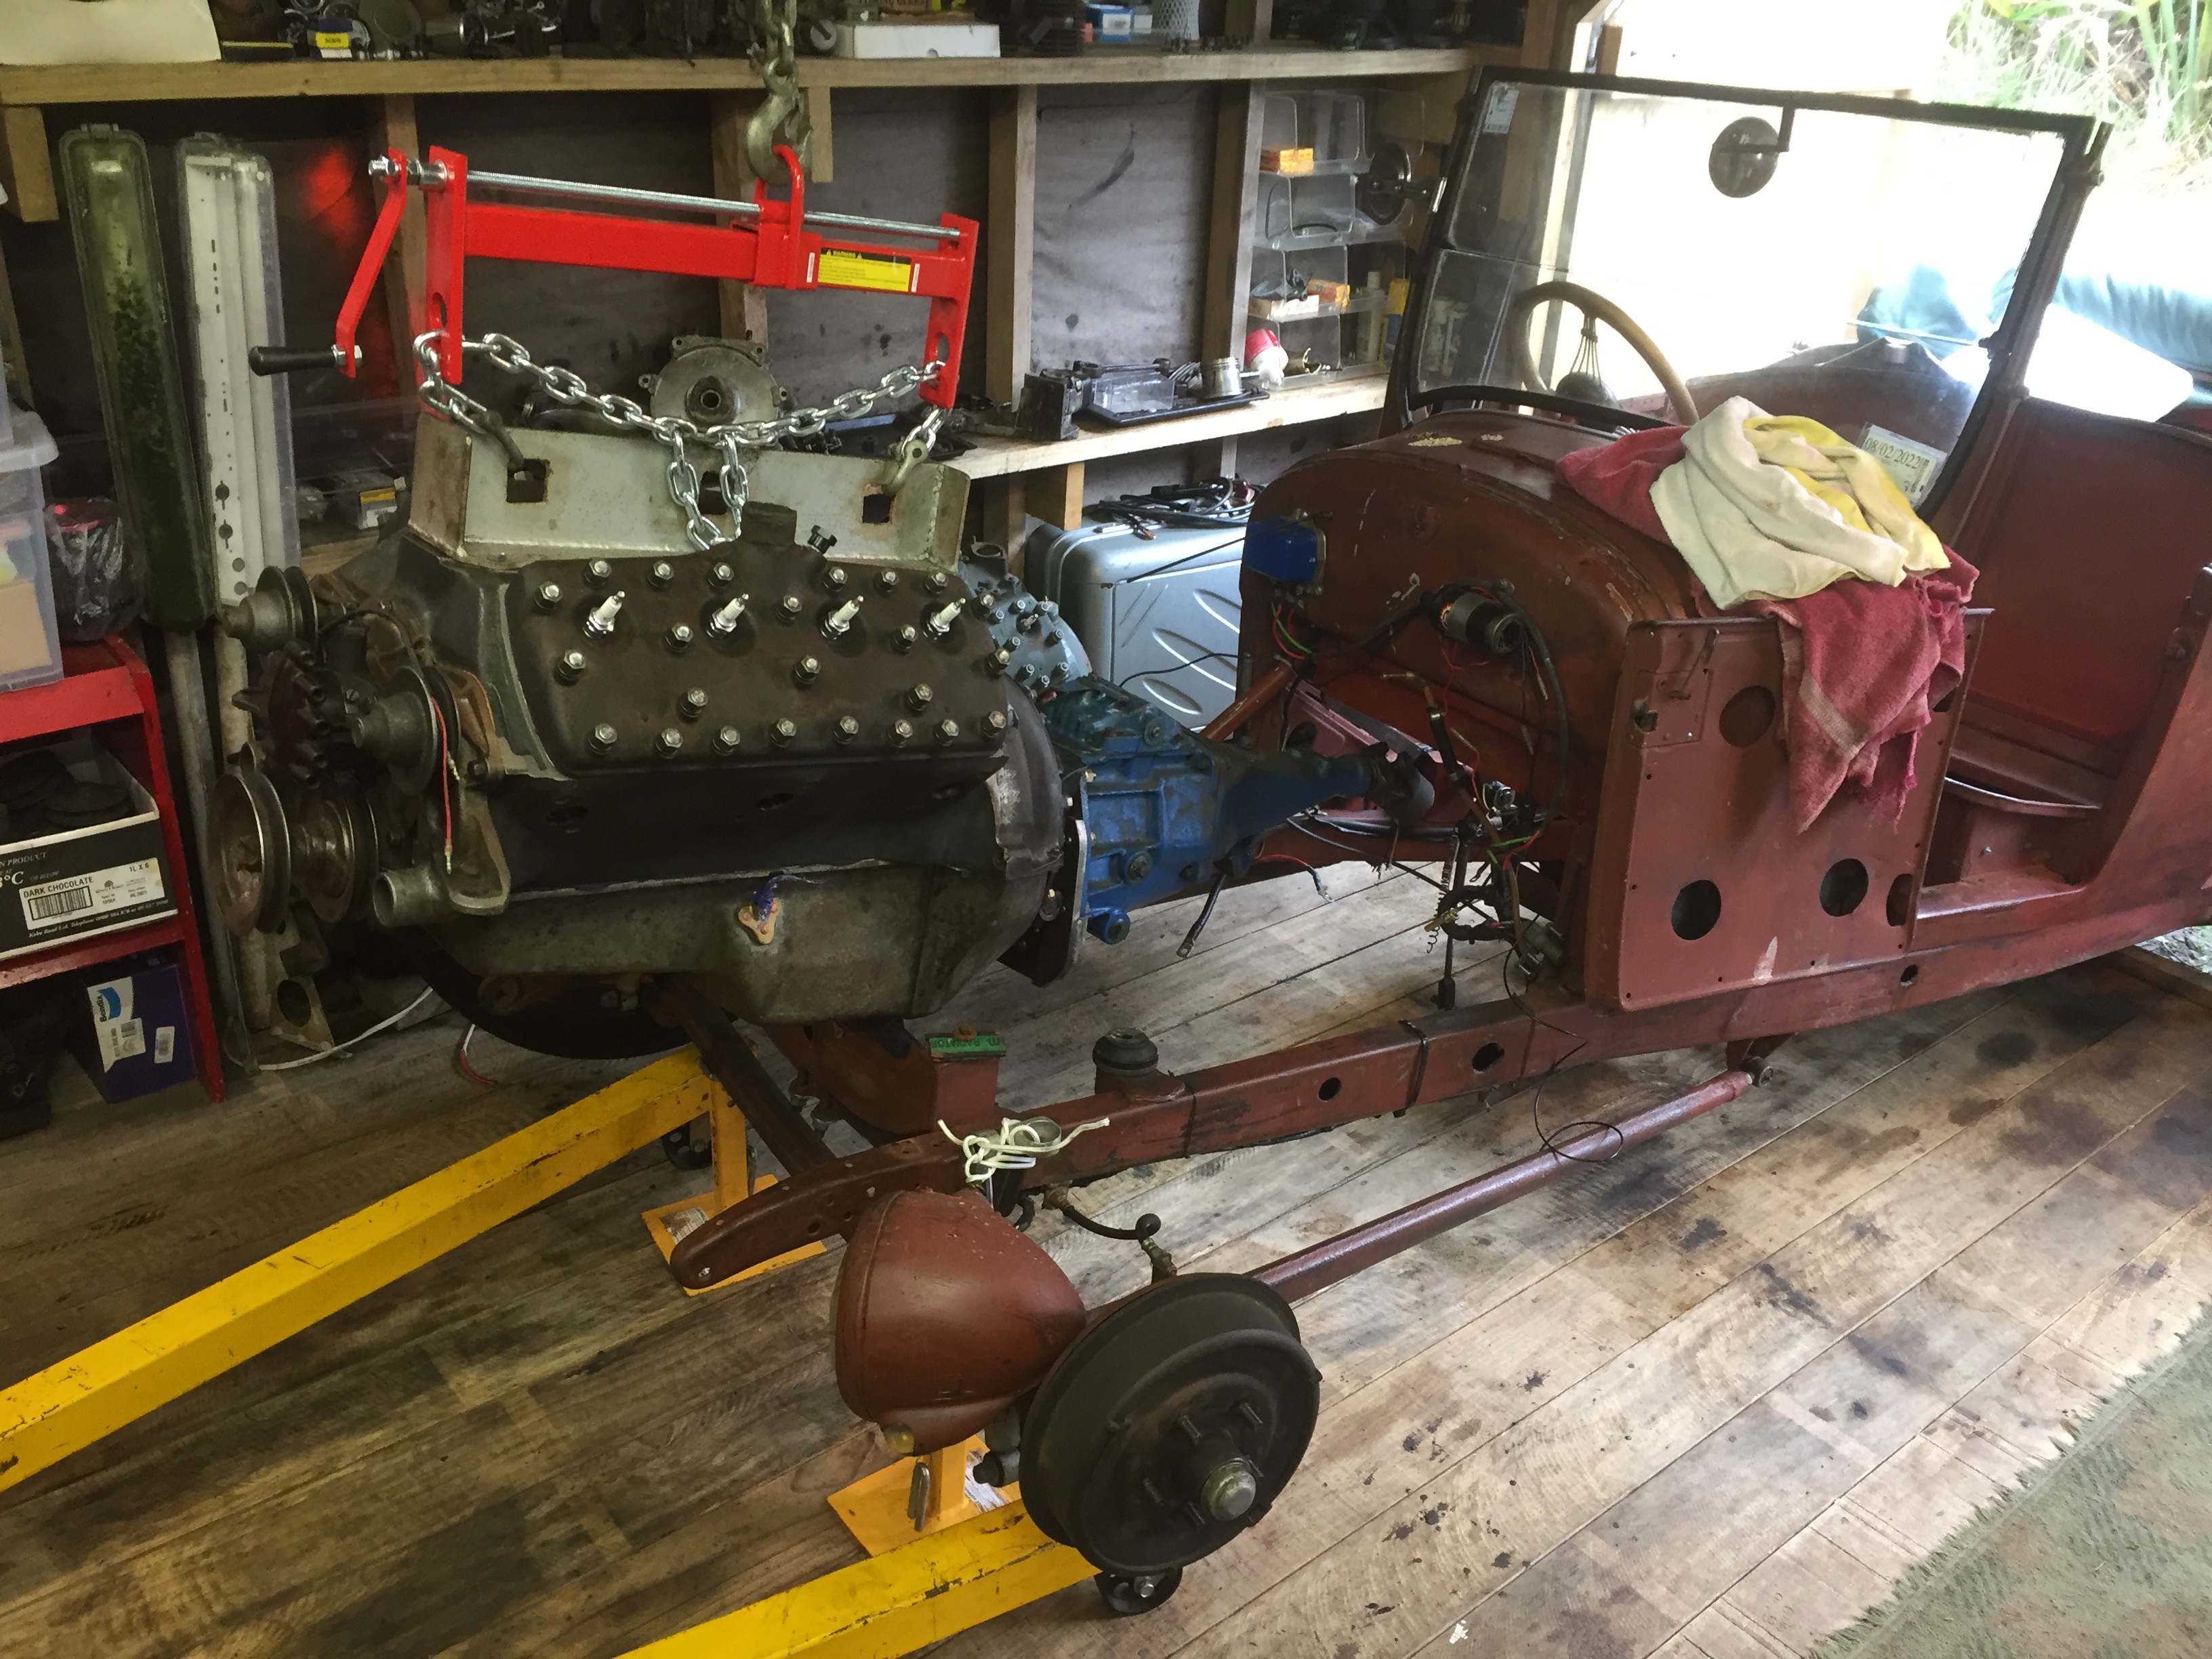
On the list to do was to get rid of the horrible red sausage dog petrol tank. No idea where this thing came from originally. Mounted behind the rear seat and lying across the boot it seemed designed to create fuel surge. And not really tied down properly. Back to a standard escort fuel tank that will be much easier to certify for the future. On the tank I was installing some clever person thought it was a good idea to attached the fuel filler cap with screws long enough to go through the old bellows and nearly out the other side! Combined with the perishing its not really ideal... So time for a new bellows it is then. And hoses and clamps. Disappointing to find my Super Sexy headers were made to fit around a reverse peddle box with the master cylinders inside the firewall. Dam, they look so good. But at over $1,000 for a certifiable peddle box and then still some fettling and sealing issues with the 5 separate pieces I bought some Pacemaker ones and sacrificed the looks and a few hp to get going. Even these ones are making issues trying not to cook the brake master cylinder and brake lines. Timing the dissy and building oil pressure without the spark plugs in, just the #1 plug strapped to the block I found that the coil is making a good spark and was quite happy to earth the other three cylinders through me. Ouch. I don't think I make a good spark plug... And Then She Was Alive!!!! https://youtu.be/Tt31HSOstnM This was the first push of the starter (After I worked out I had the dissy 180 degrees out) So Happy she just fired right up and would even idle when cold and not really tuned! I am sure the neighbors enjoyed the open headers as much as I did. The to do list is still pretty long to get driving. As a mate said, 80% done and 80% to go.
2 points
-
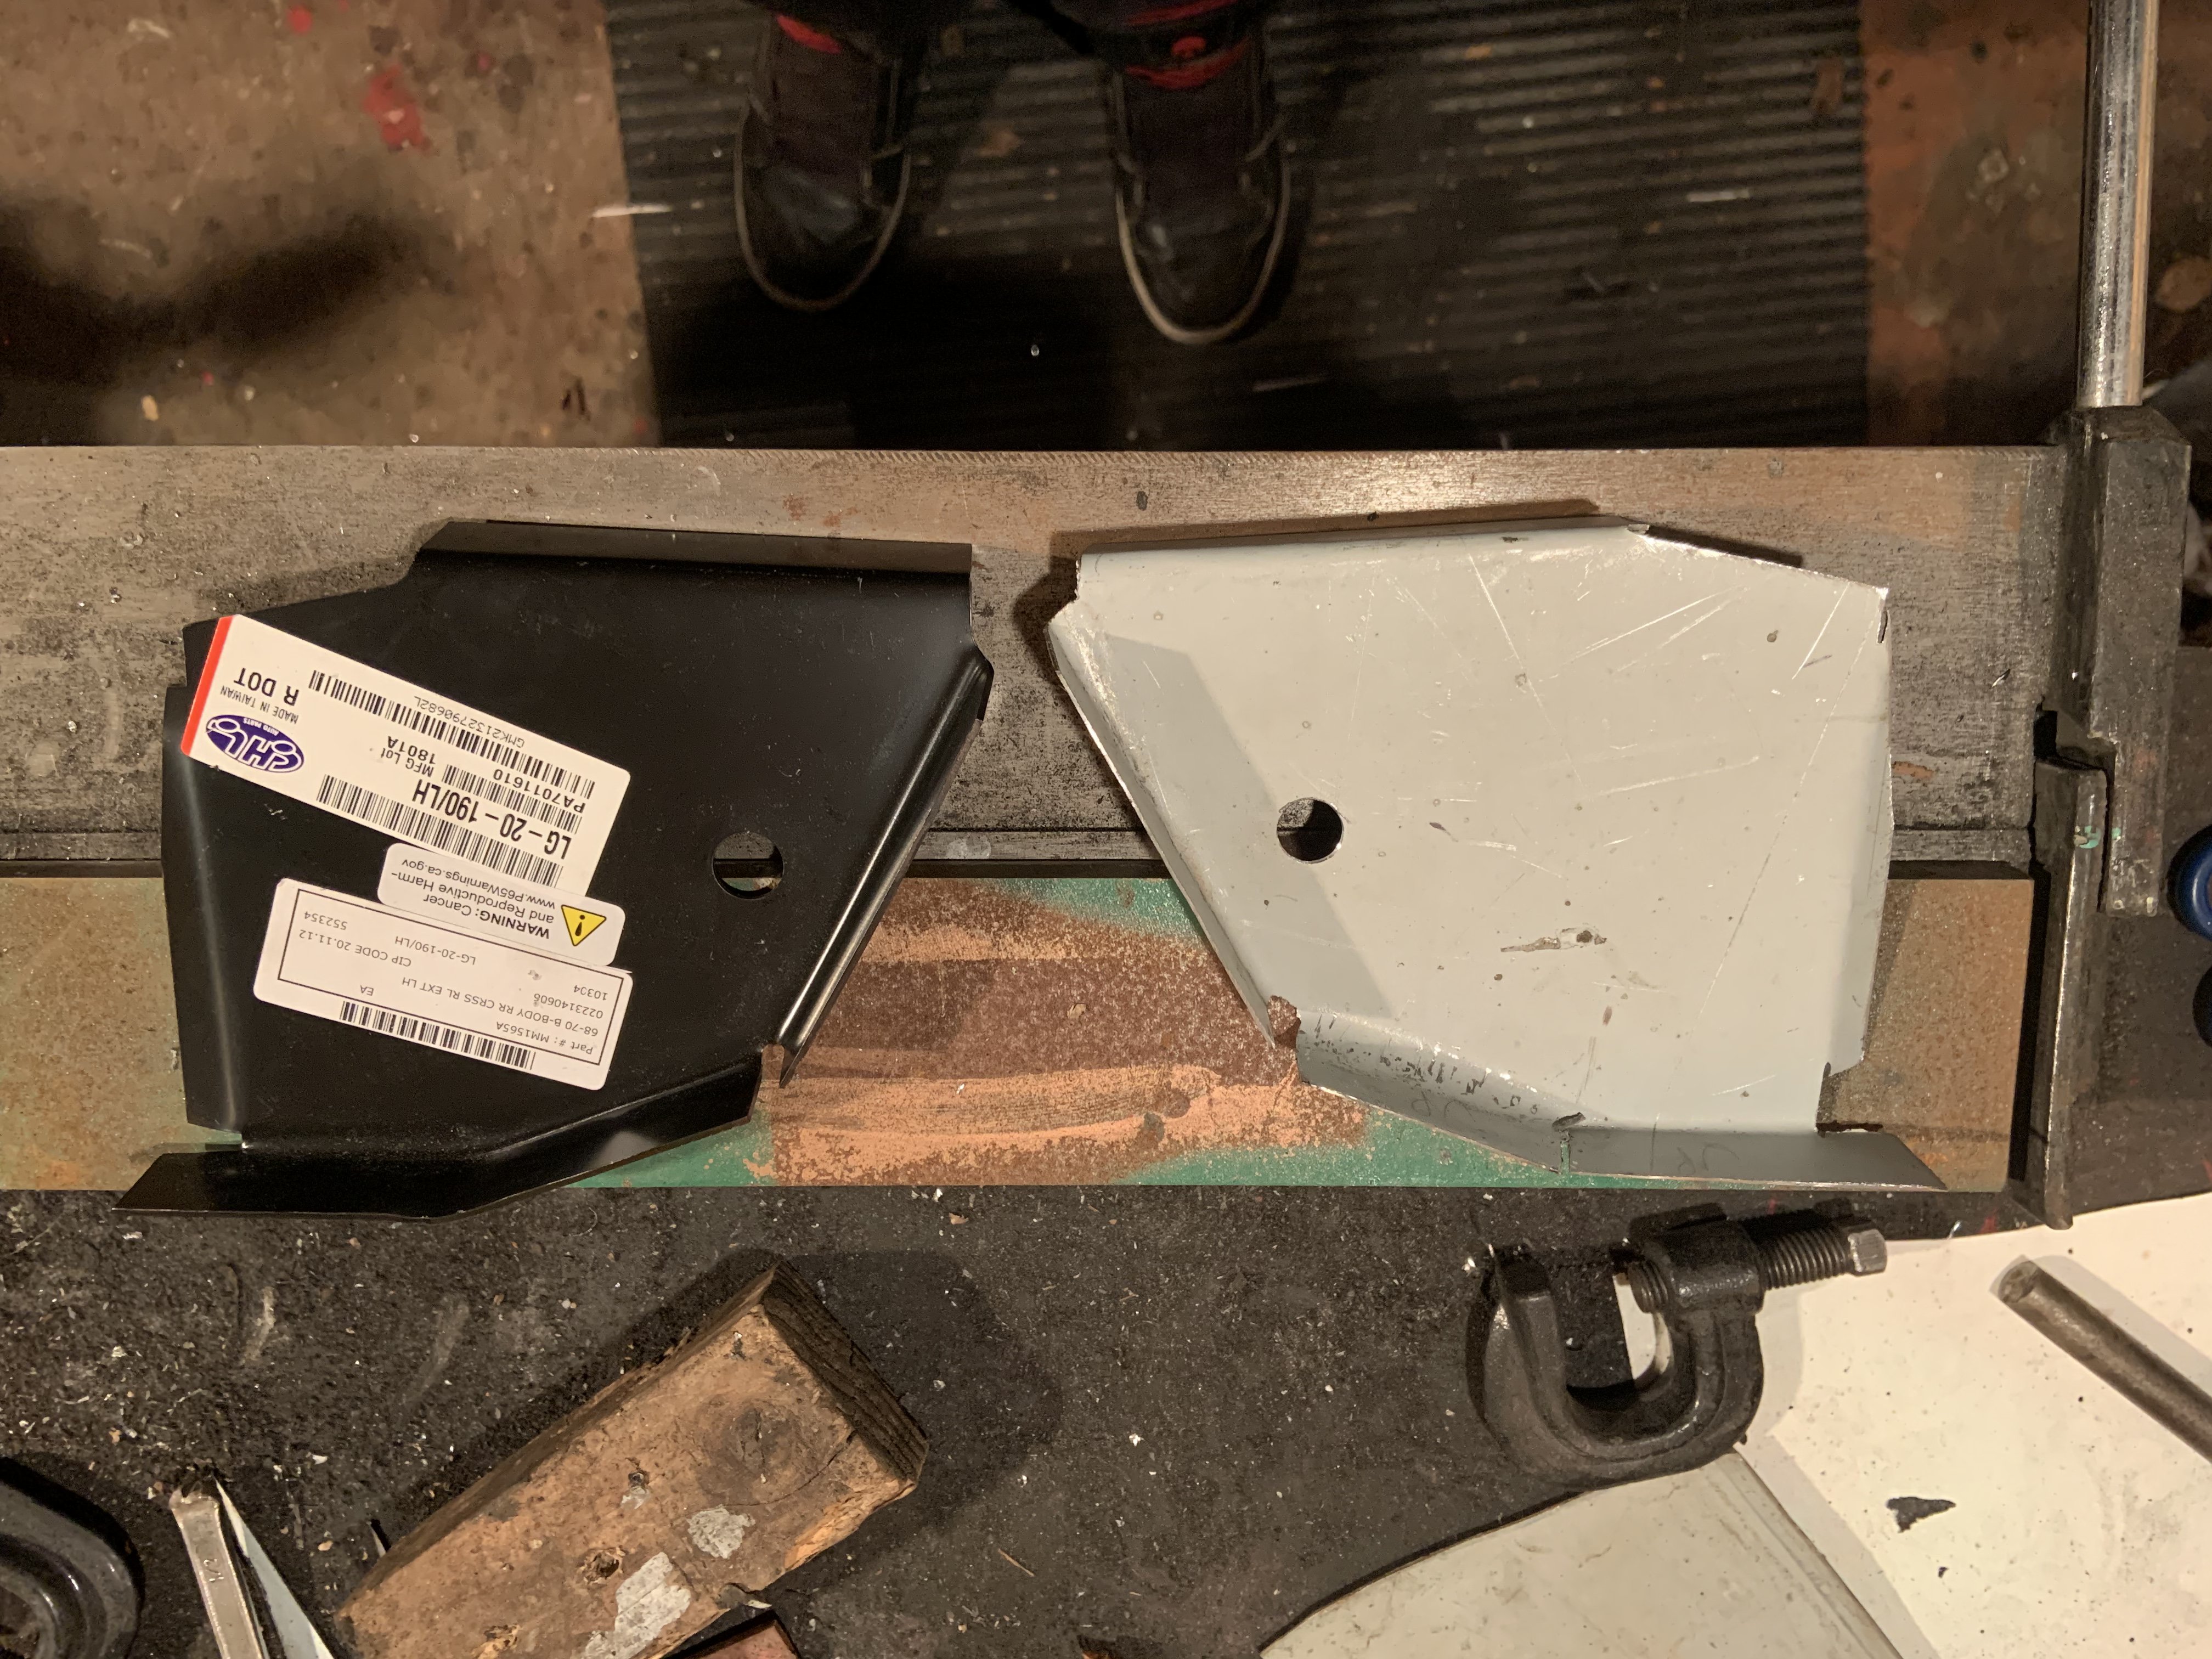
In between bouts of paint stripping some mags, I whipped this filler piece up. It gets buried up amongst the rear bumper mounts and spring brackets. It was cheap but they only had one side available so I traced it and flipped it.
2 points
-
2 points
-
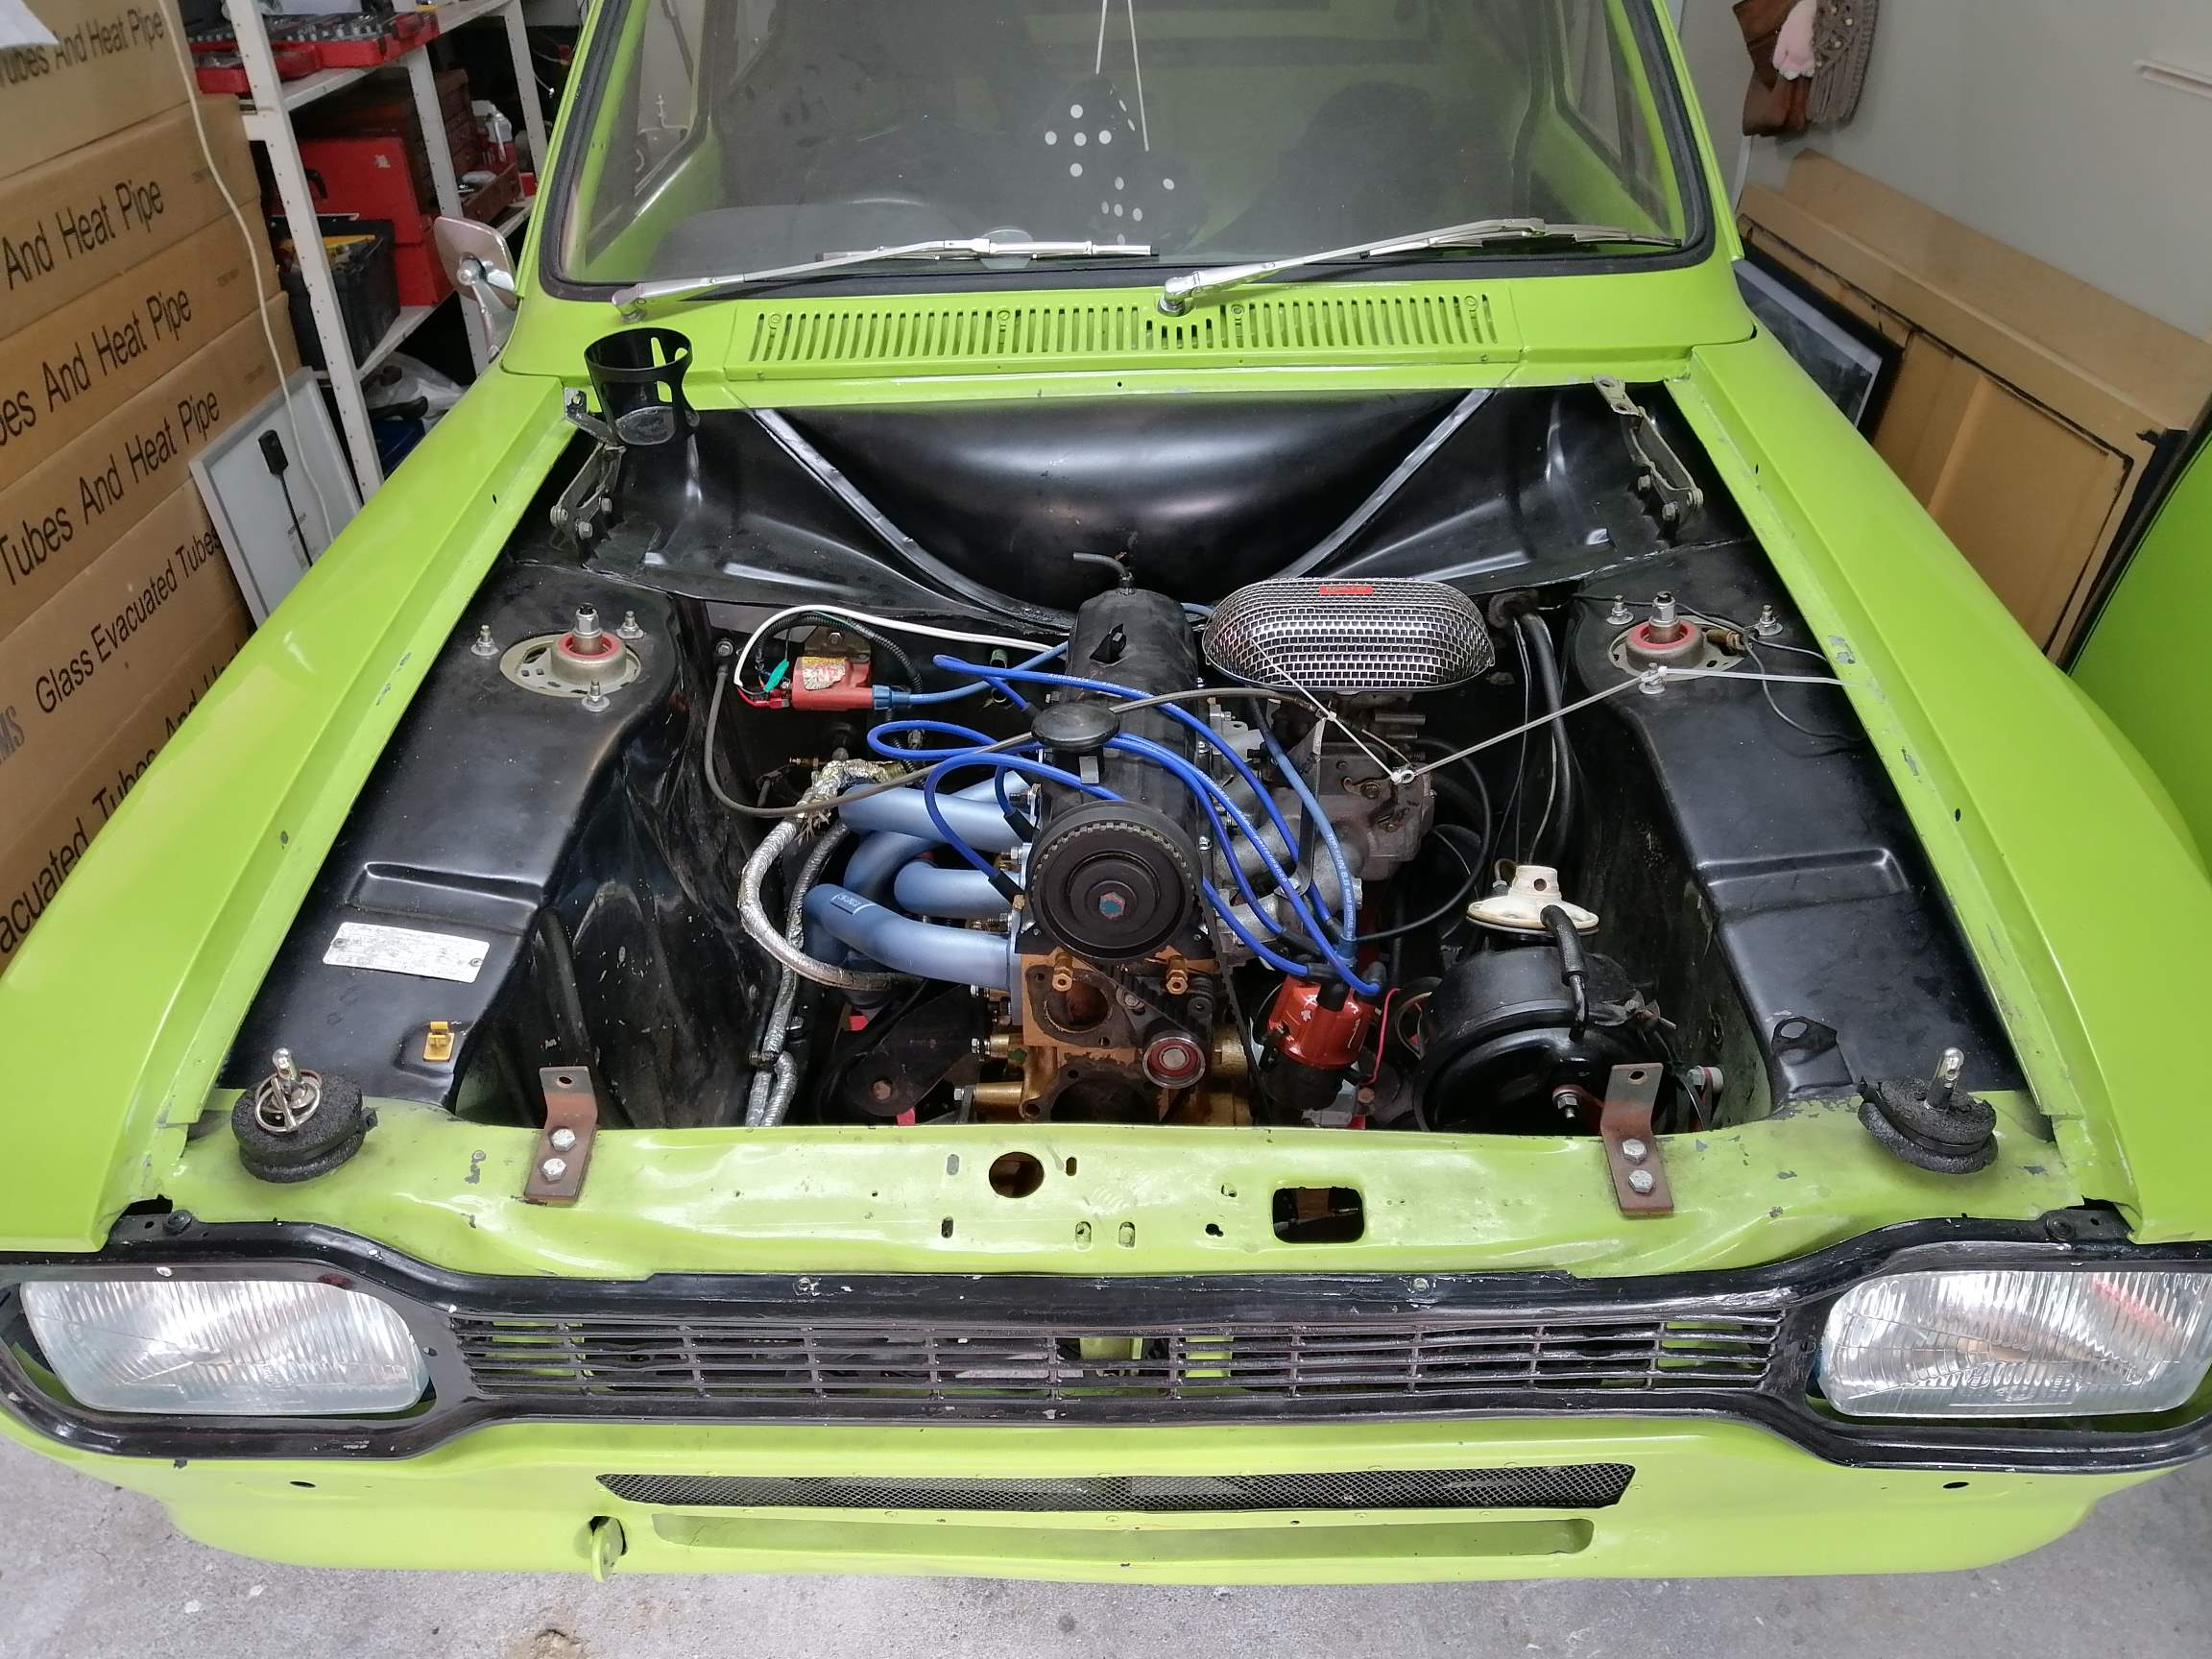
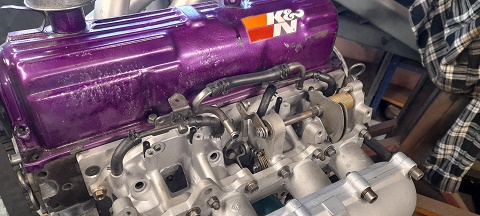
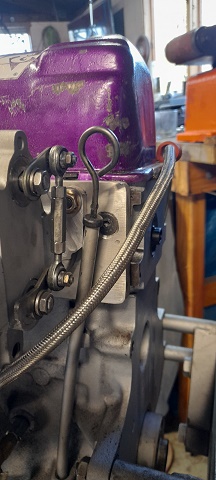
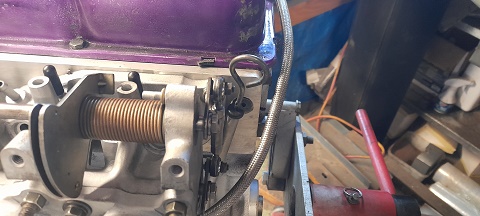
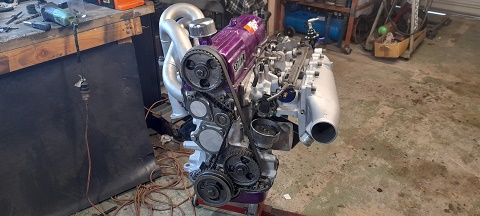
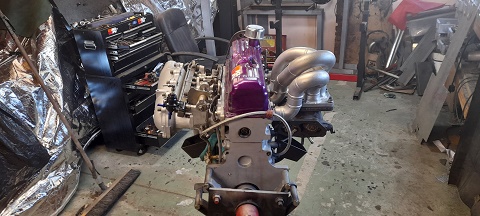
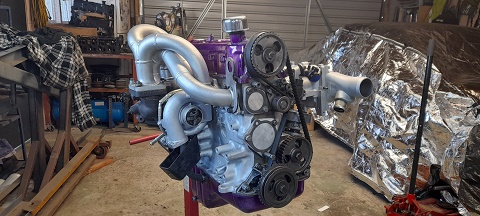
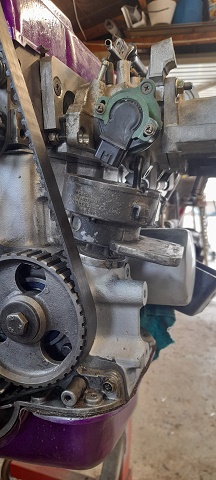
I put this all back together now, I just fired it up and ran it at a 1500 rpm for 20 mins, a few head studs are leaking, when I re torque them I will pull each one out and put some sealer on it, it has around 40 PSI oil pressure witch is good for 30w oil and the kind of pump I am using, after I seal the head studs I will run it again and then change the oil to something elce.
2 points
-
That’s a hell of a vacuum job you did there, almost looks brand new!1 point
-
It's only a couple extra hours to there than going direct to Ohope, so makes sense I guess1 point
-
Years of tv radiation have left our genitals withered and useless so now we ride slightly larger motorcycles to compensate. will ride from palmy and hopefully make it 1500km ish journey. Hey @tortron come down to palmy and bend valves the long way to east cape1 point
-
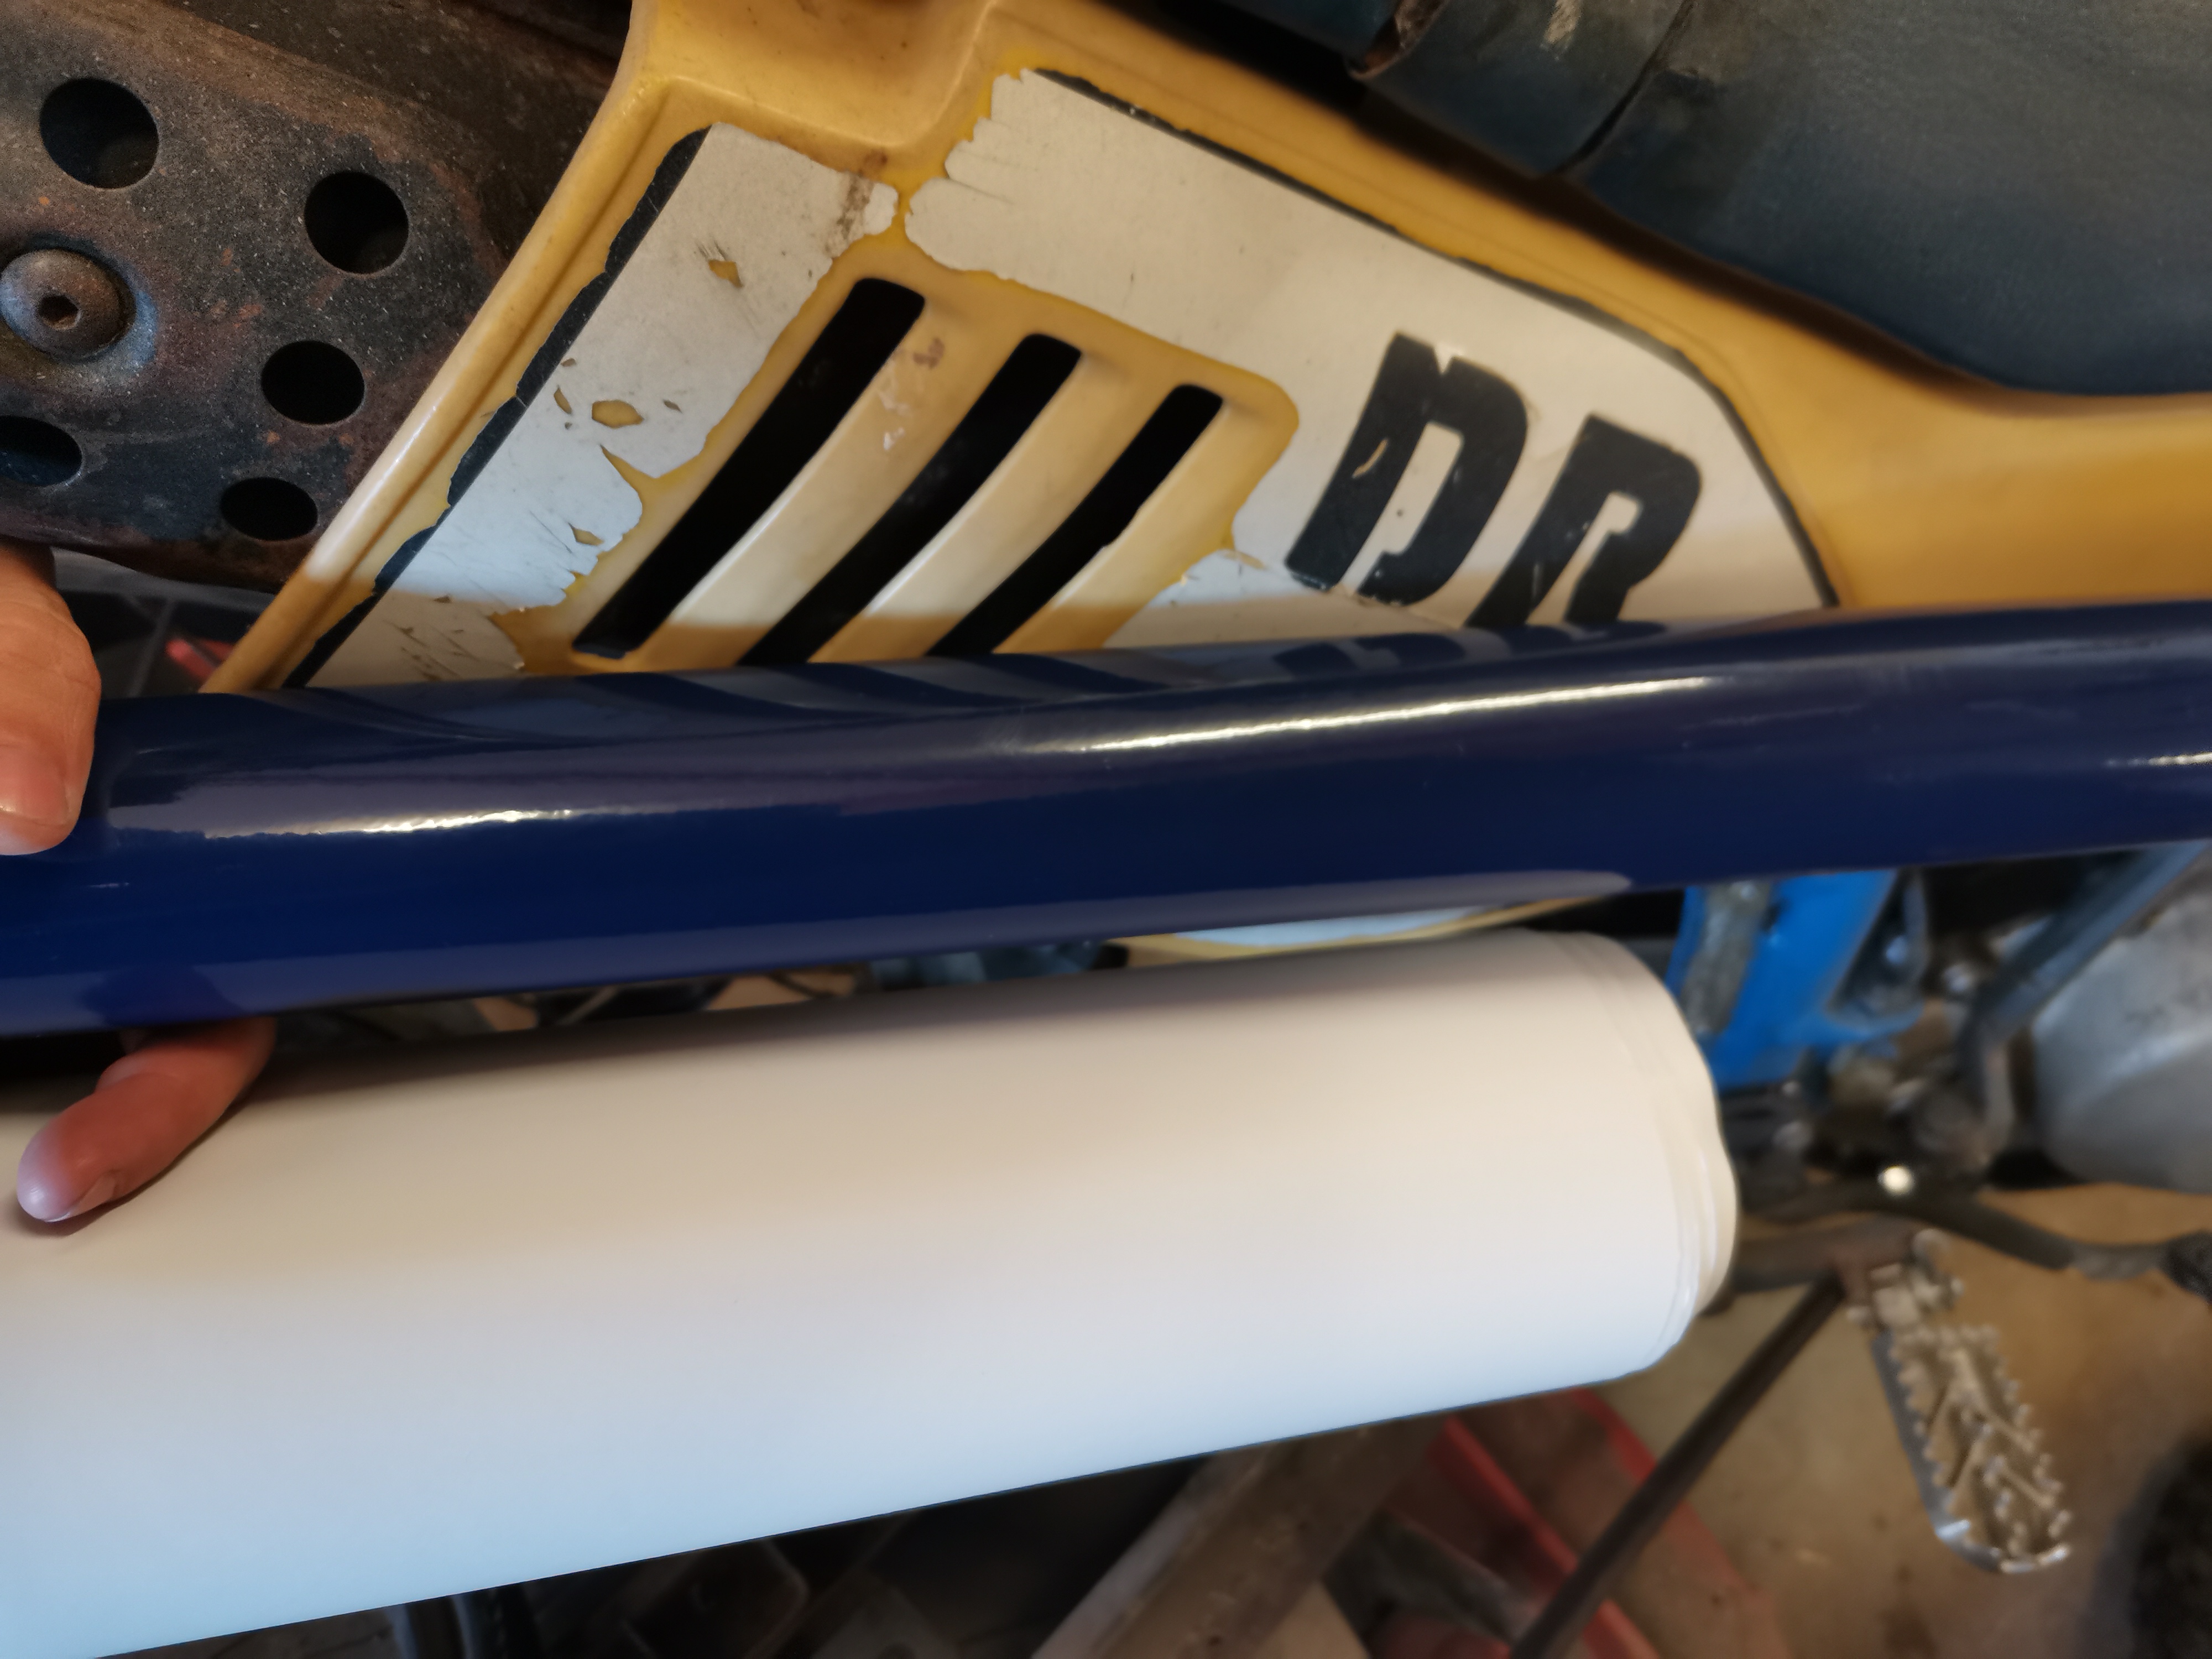
Pretty close match on this vinyl. Will do the sides and the front number panel, no point in sticking anything to an old plastic tank Then I have some graphics to go on top, should be rad
1 point
-
The only time I've ever been pinged for an illegally modified vehicle was when it was legal. Cop was a cock and was on the hunt, stickered me for being too low when it wasn't. Funnily I had been pulled over multiple times both prior and after coz they thought it wasn't legal but only this one cop was enough of a cock to be a dickhead. The system doesn't favour a 19 year old arguing against them either, even when you are in the right. Car was 105 mm with a full tank btw. Never been pinged for any uncerted engine swaps, cut springs, ect that I of course have never done...1 point
-
Large tube of silicon sealant.... For the record, do you still have my torque multiplier thingy ? Or have I misplaced it...1 point
-
Section 6 if you still need any clarification, buy a .5 meter 1 ton roundsling from Cookes and 2x rated bow shackes 2+ ton so they arent too dinky. Should serve you well for decades.
1 point
-
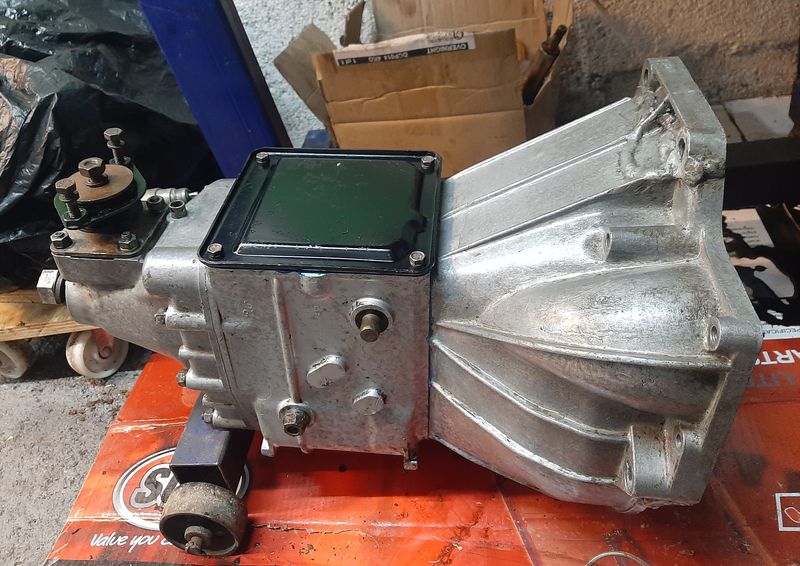
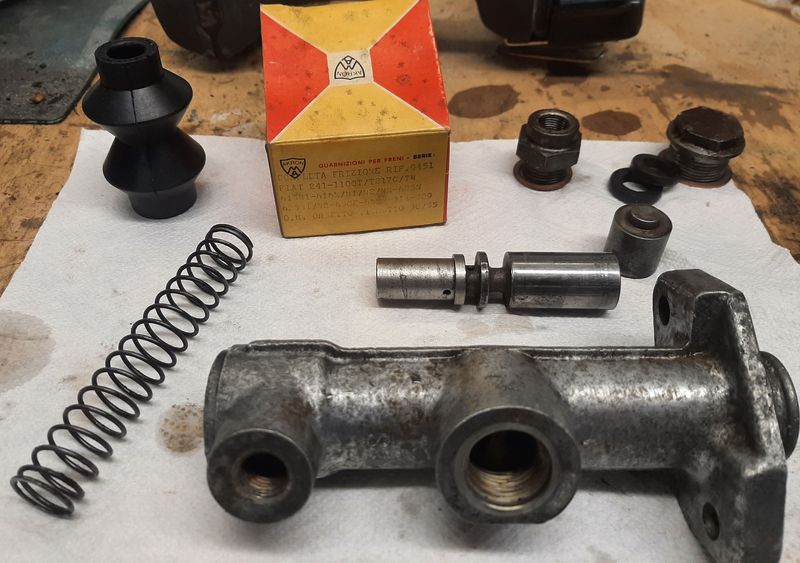
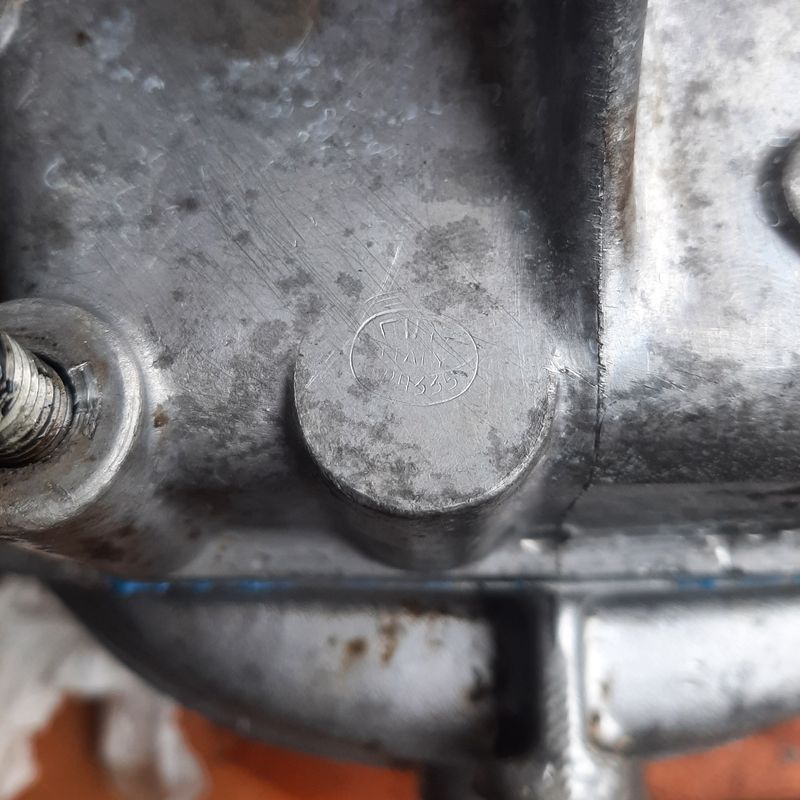
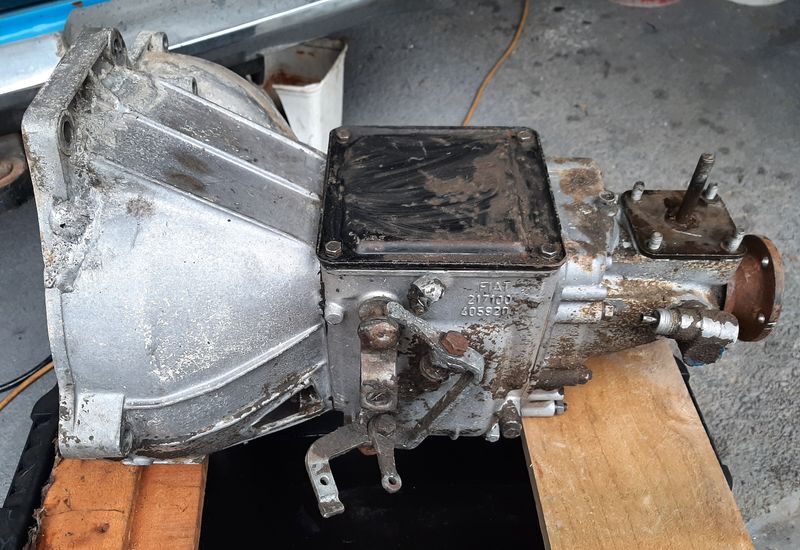
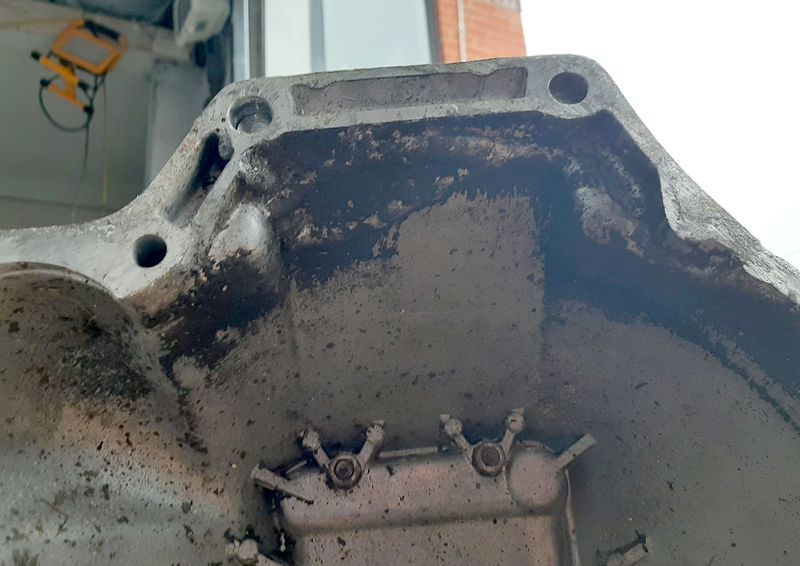
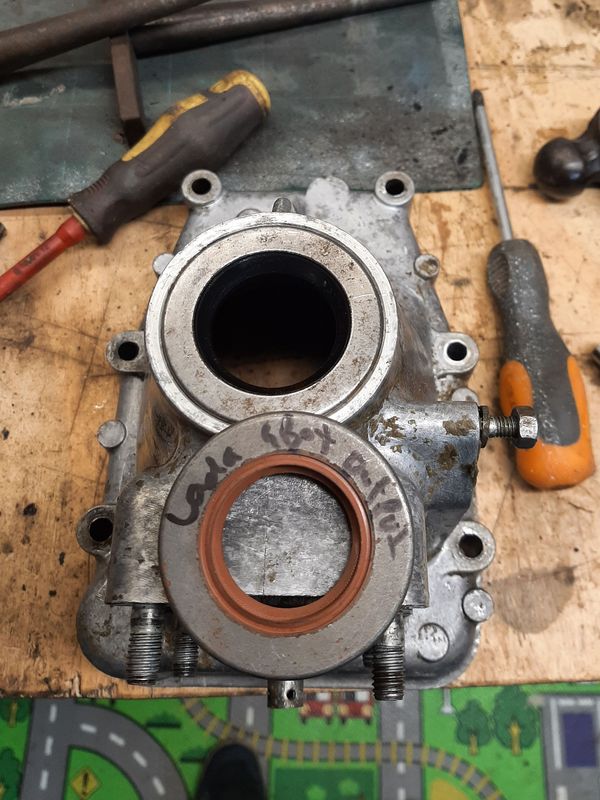
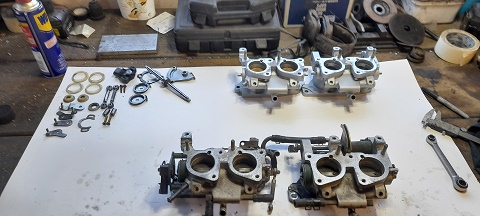
So onto other stuff, Gearbox has been sitting in the corner since being removed It looked pretty suboptimal on initial glace After a waterblast looking better. Box is early 1100 style so pretty light and small. Similar design to my 2300 but that has a steel case and is i bit beefier all round. Linkage has been fuckled with and the top of the bell housing looks to be welded back on. Mounting face is flat and the holes line up, so im letting it be. Insides look ok, i guess? Turns out the output seal is the same as a lada/124/125/1100/1500/2300 which is good as i had one 'in stock' from a past order FIAT ITALY PA335 Removed the bell housing and tail shaft. Nothing seems missing or broken, there is some wear, but nothing i can do anything about. New oil seal and some bloo goo on the original gasket Put back together - ive ordered some more seals for future reference: 1100T 217.000 gearbox output seal - 32x56x10 - same as lada/124/125/1100/1500/2300 input seal - 22x45x8 - shared with other 1100 group boxes selector rod seal - 14x24x7 - shared with 850/1100/2300 Clutch master came apart and cleaned up pretty nicely too - i have already got a NOS rebuild kit ready to go, but i also have also a strong feeling this is a lada compatible part (the slave is) so may drop one in my next ladapower order just in case.
1 point
-
Why are you asking people who are not policeman about what a policeman would do in a highly improbable scenario? I'm sure the first time it happens to someone, we will all hear about it and no matter what we guess right now, we will probably be wrong. The answer will either be the cop will do nothing, and you will scoff at the answer because ACAB, or the cop will do something and you will blow a fuse because ACAB.1 point
-
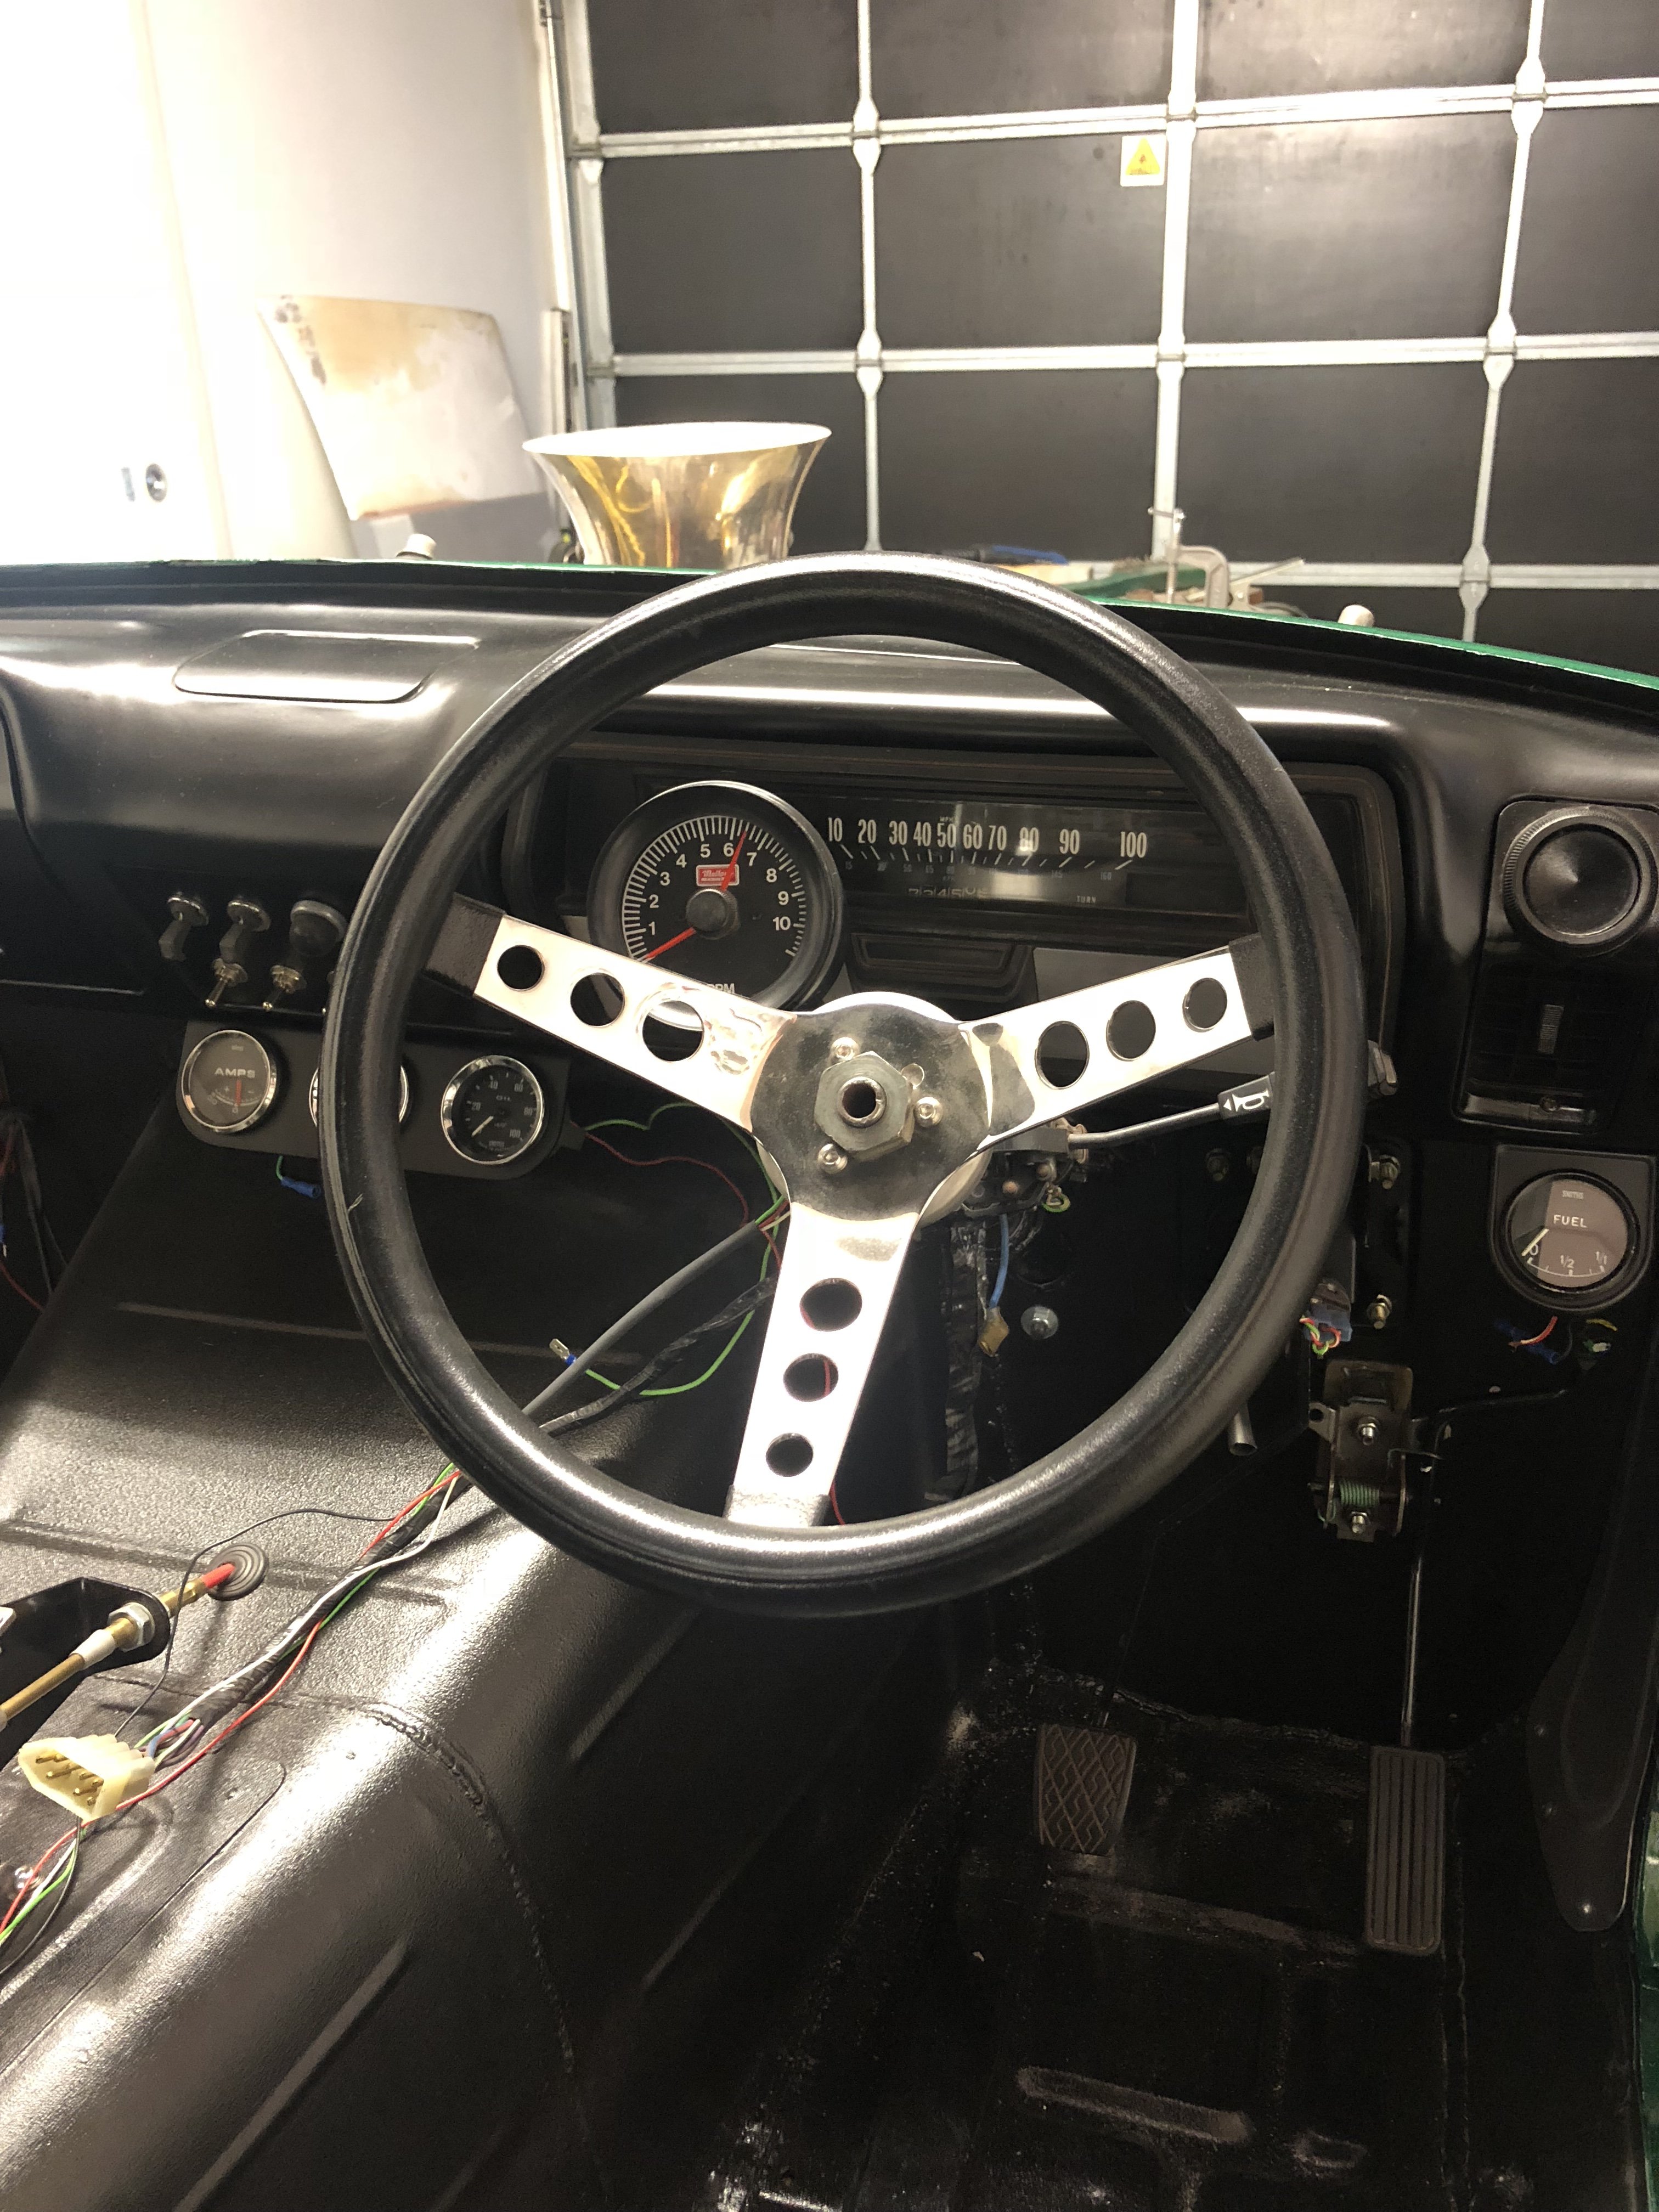
Got the tach mounted today and the front and rear screens cleaned up ready to install. Found a place in the UK that sells all the rubber and trim pieces for a decent price. Cheaper than rare spares. Cars looking like a complete unit.
1 point
-
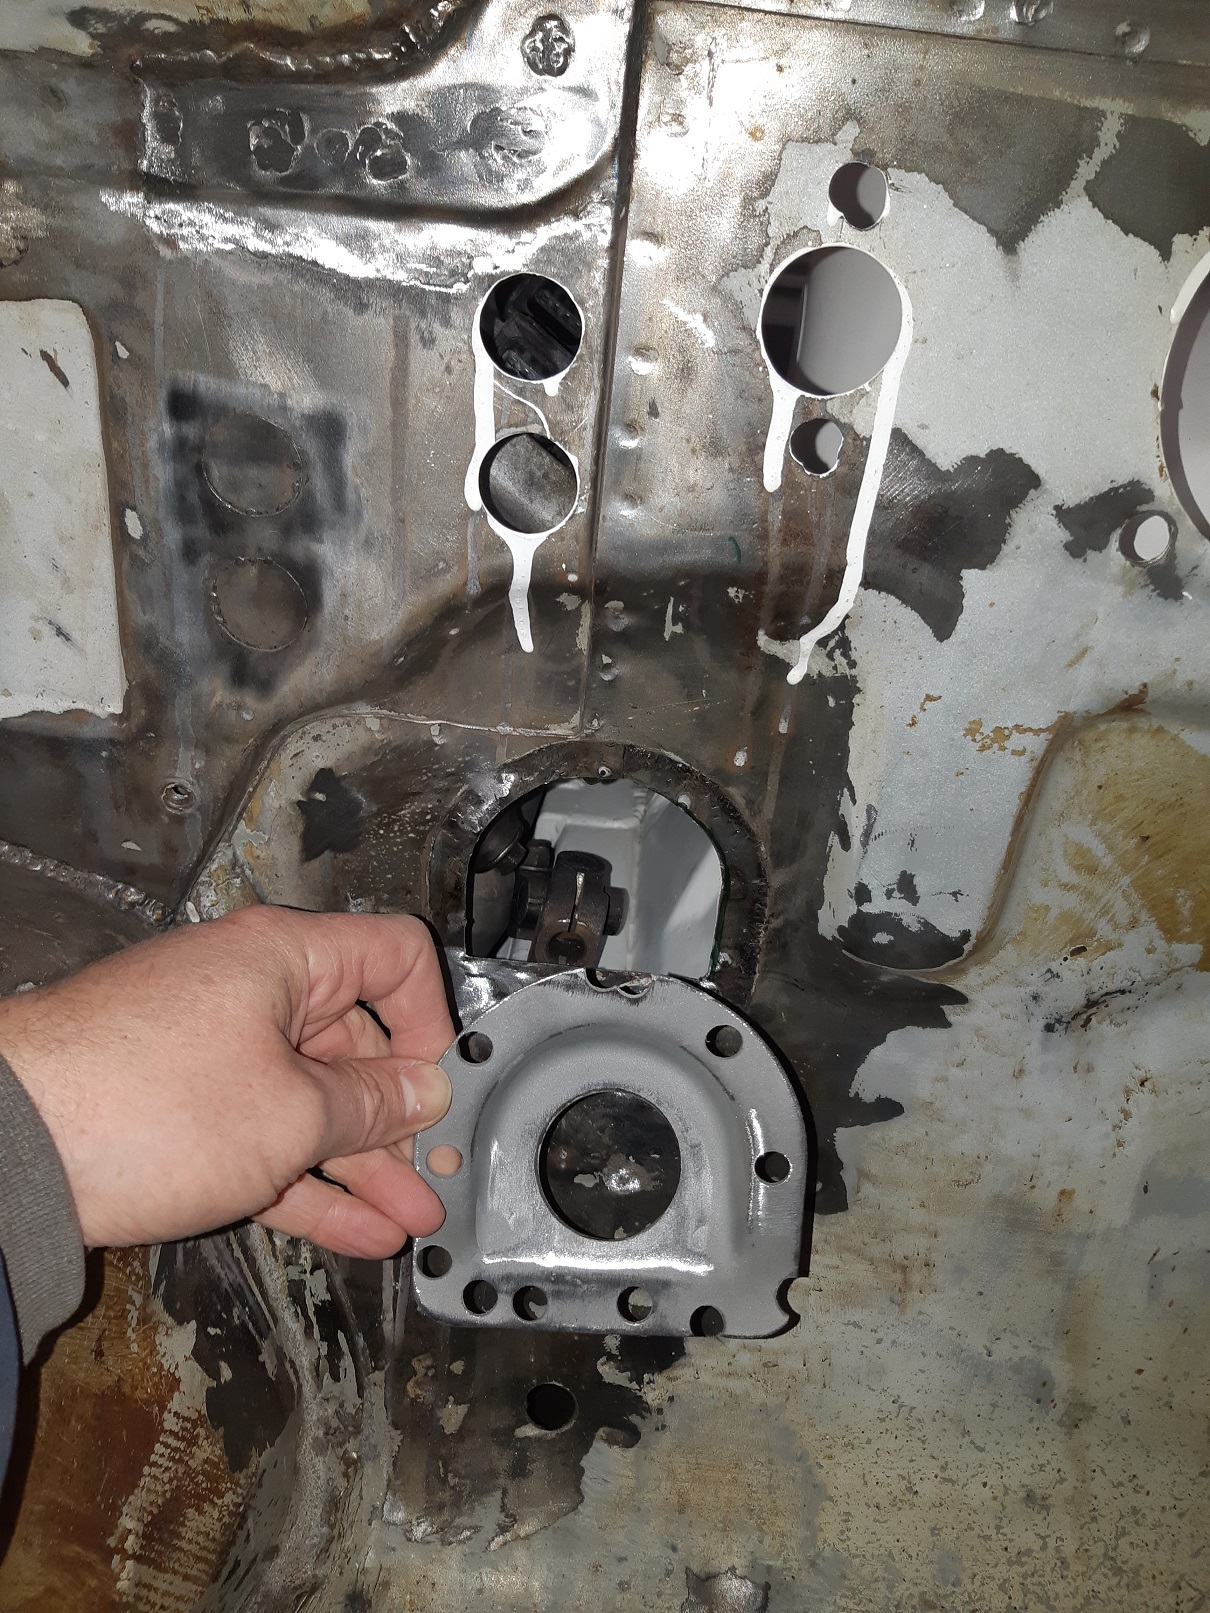
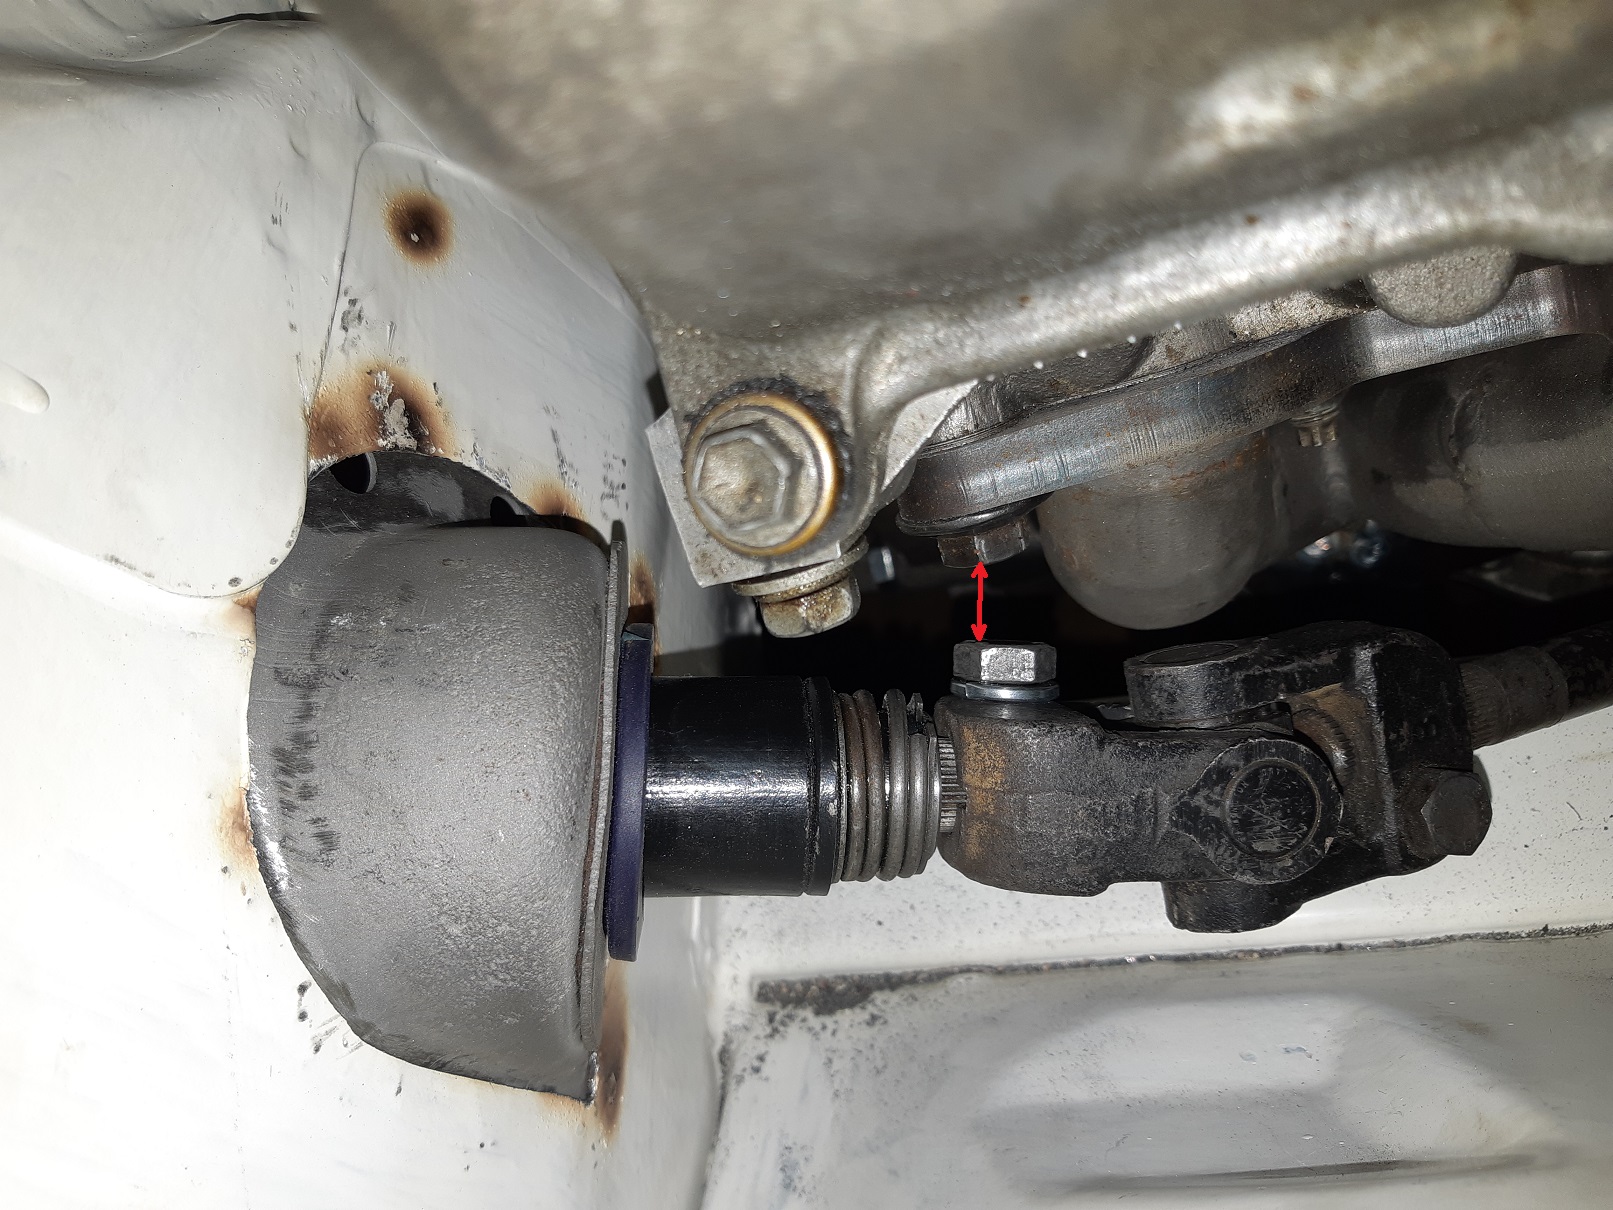
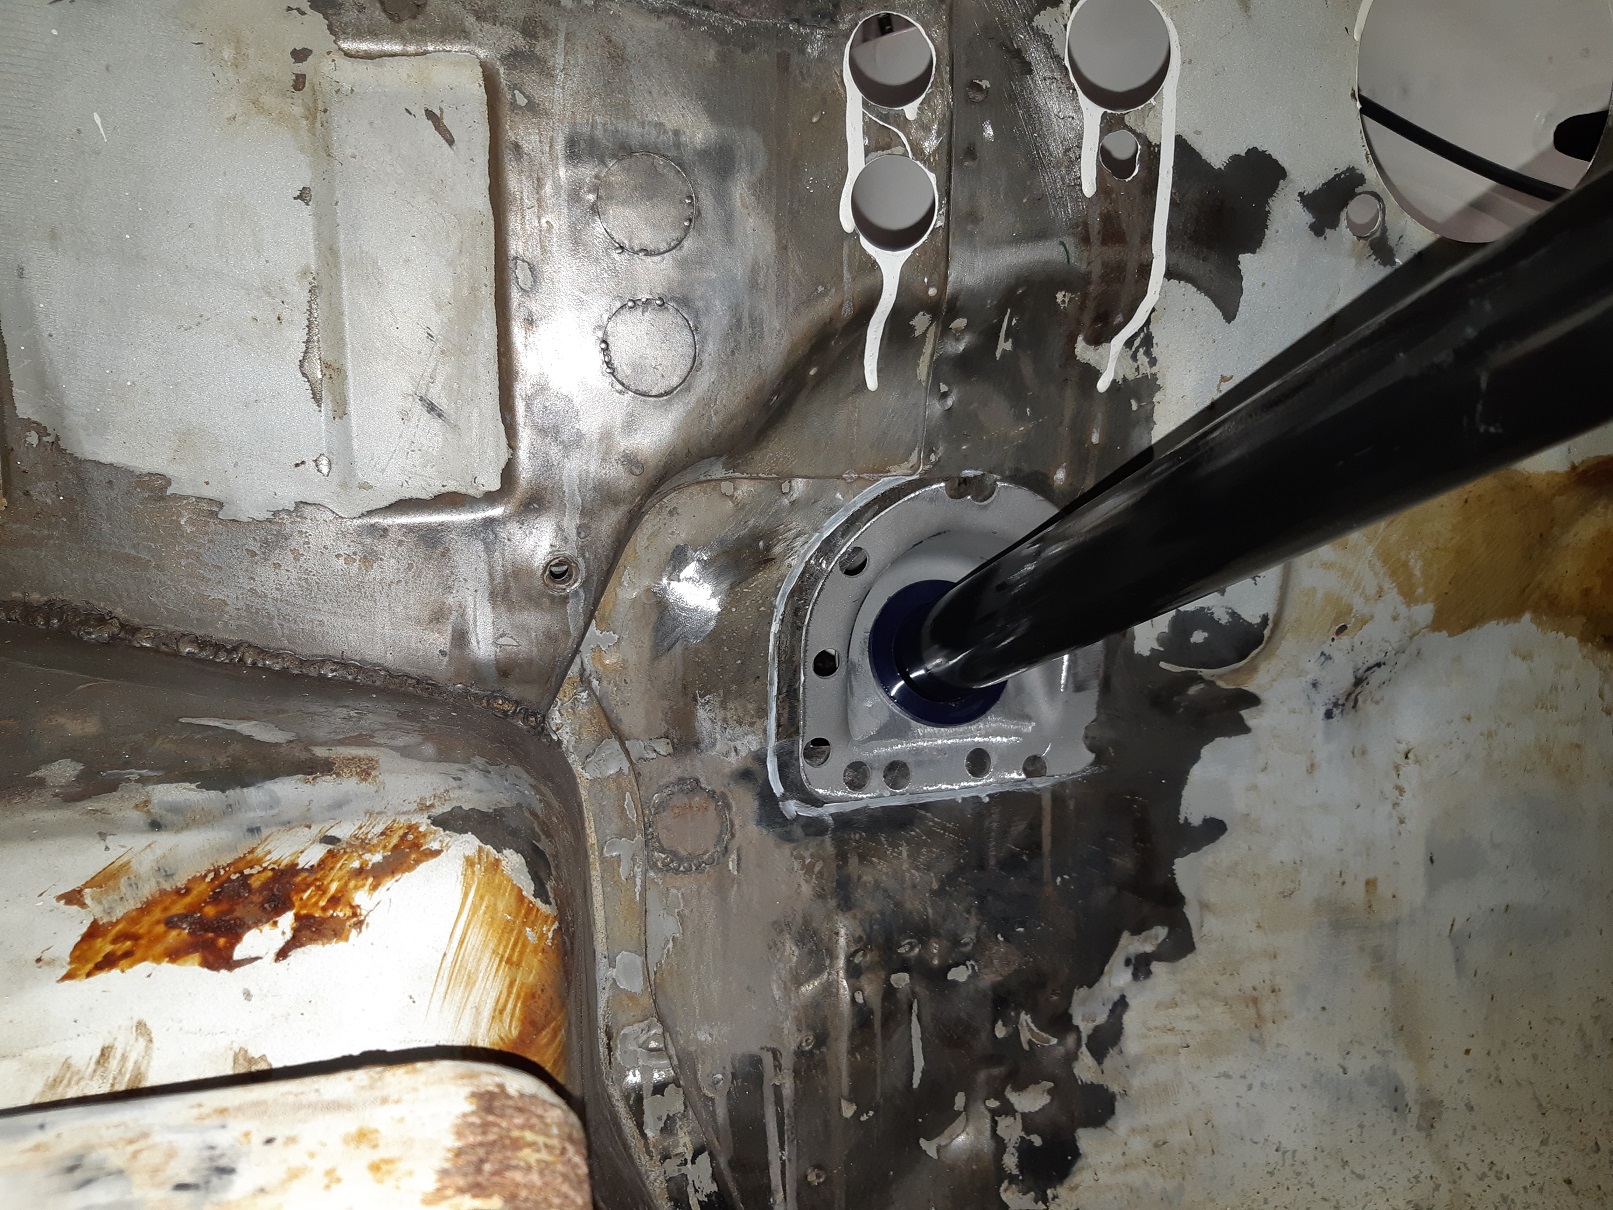
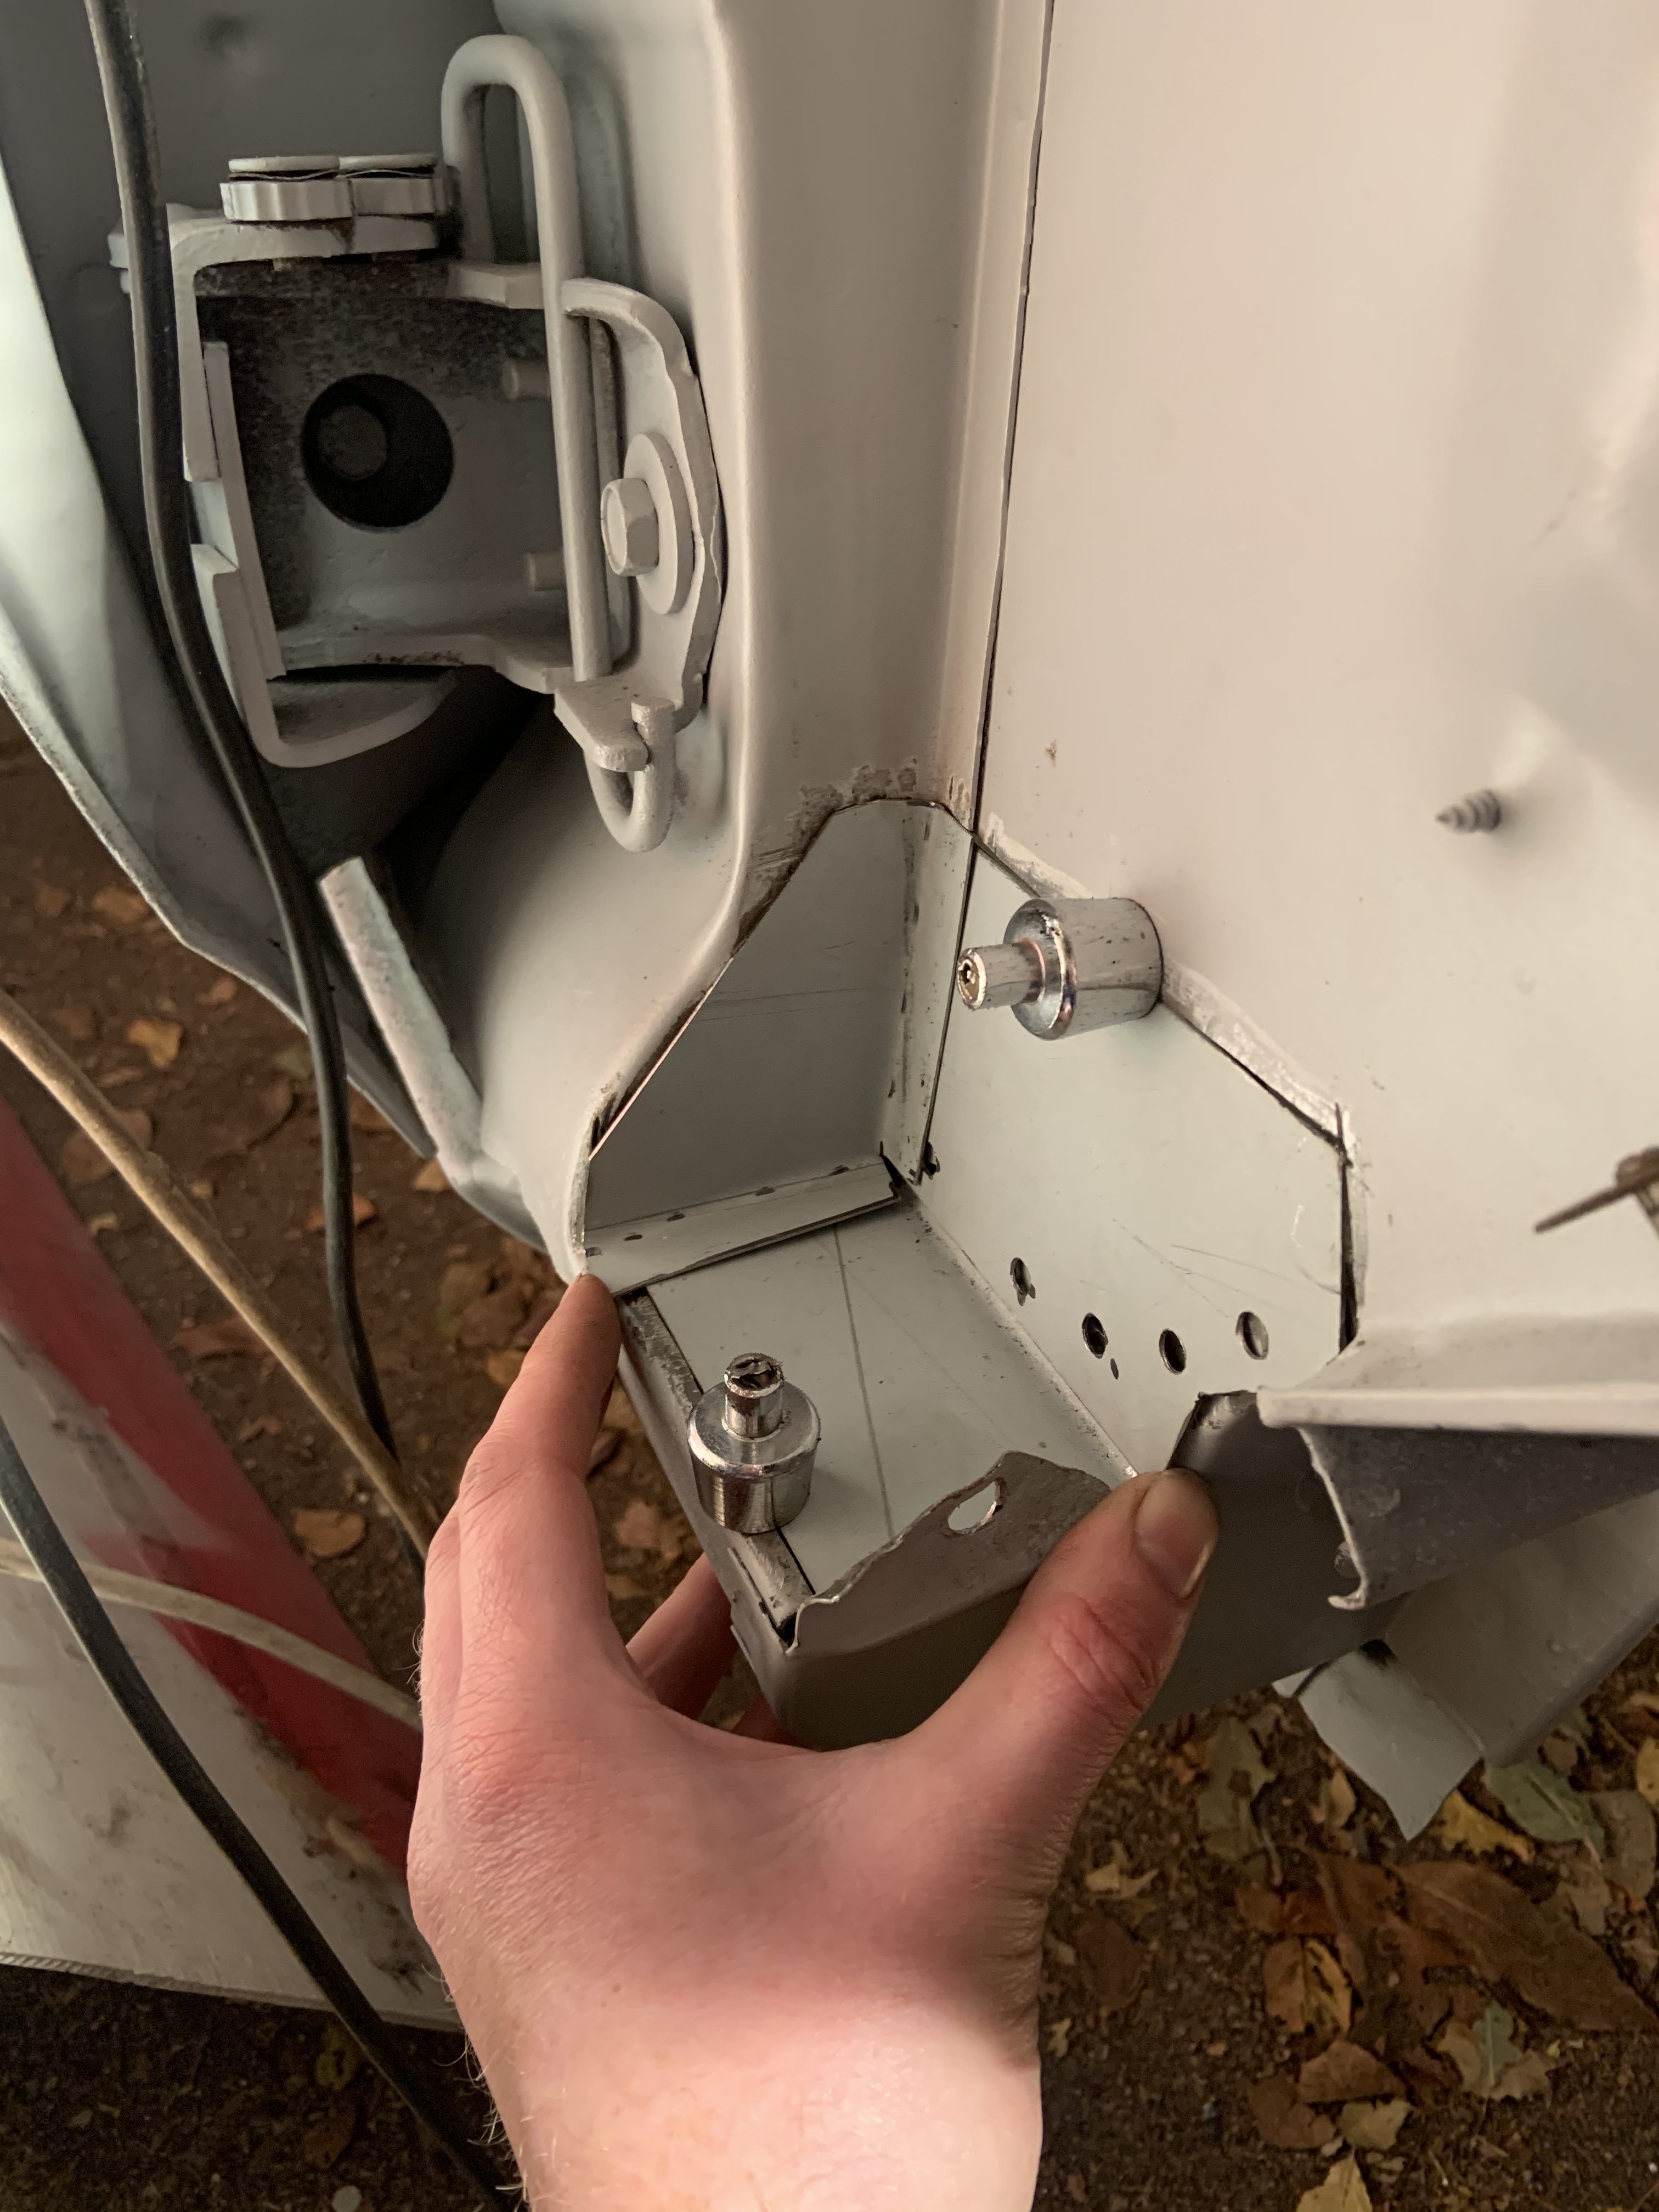
So I've been fighting for clearance for the steering off the rear stud for the exhaust manifold. I first tried replacing the stud with a bolt so it was lower profile. I still had negative clearance. The universal joint has a bolt that goes right through with a nylock nut which sticks out a fair bit. I looked at my starlet, and there is no nut, one side of the hole is threaded so you just use a bolt. I decided to replicate this method. I drilled and tapped it to the next size up UNF thread(I didn't want to mix and metric and imperial in the same assembly). But now the U-groove in the end of the steering column was slightly too small for the bolt to slide through. So stripped down the column and put it in the lathe. Fuck all needed to come off, it's now just the right size to thread the bolt in by hand. I painted it and regreased the bearings too. That got me down to zero clearance... you can turn the wheel, but the corners of the bolt heads just clip. Time to get drastic...er. Move the lower mount of the steering column over. To avoid making a mess of the panel behind, I used the flap disk until it was wafer thin then peeled it off. This intact lower mount is from the rusty car. I also kept part of the panel from the other car to use as a cutting template, and later I'll make a filler piece from it. It only needed to move a little bit, less than 10mm. Using a set of drill bits to measure the gap, the closest it gets is 9.5mm. The intermediate shaft now touches the chassis rail. When the engine is out again I'll make some room there.
1 point
-
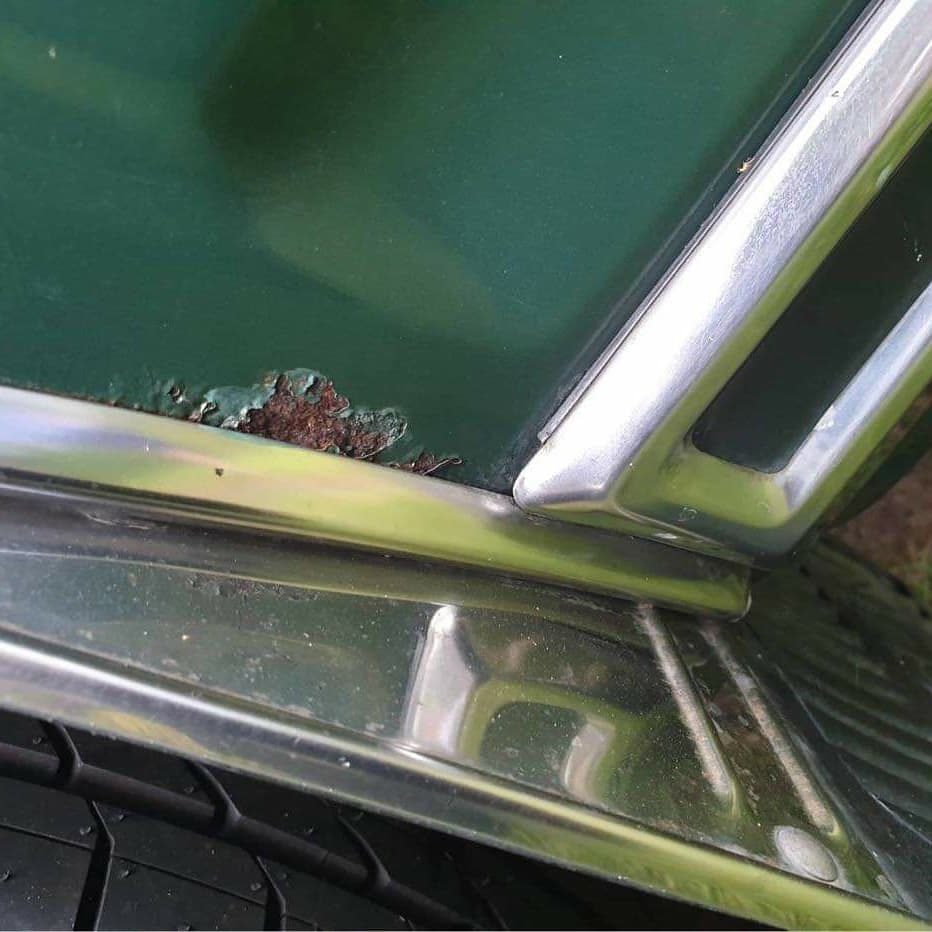
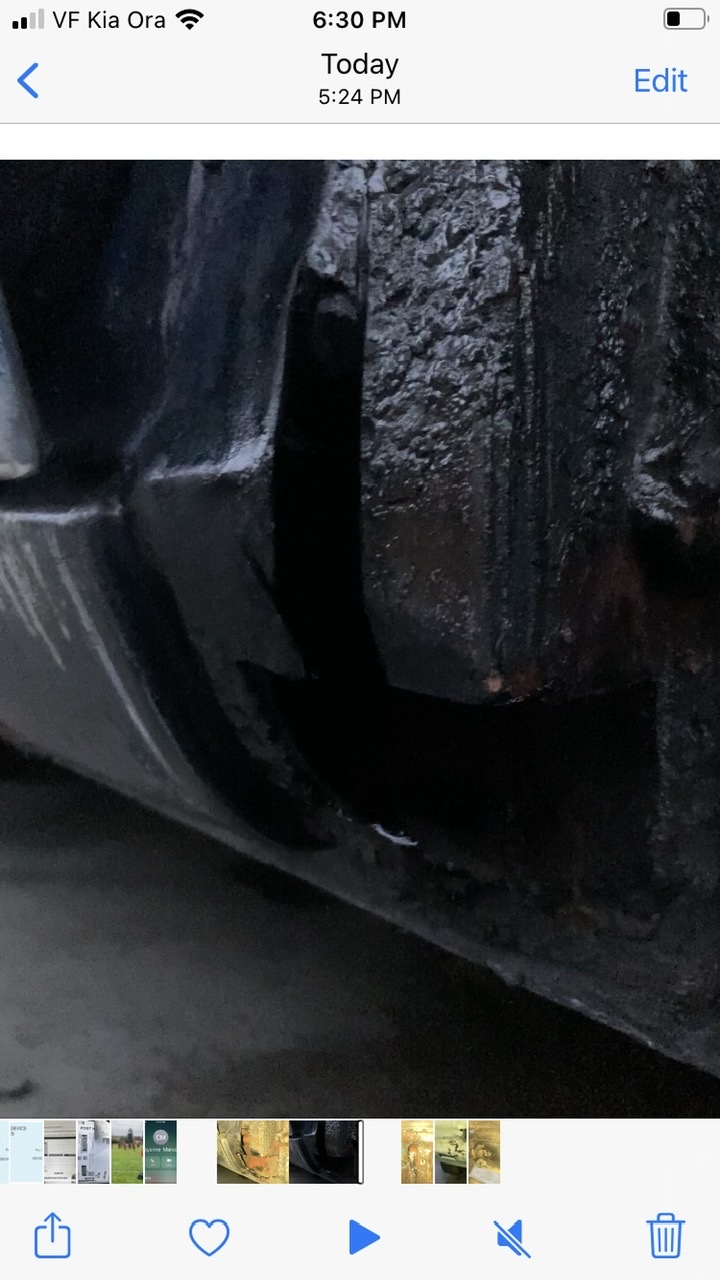
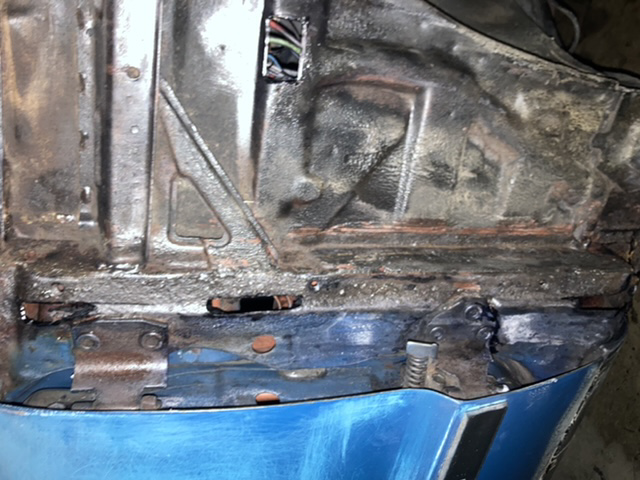
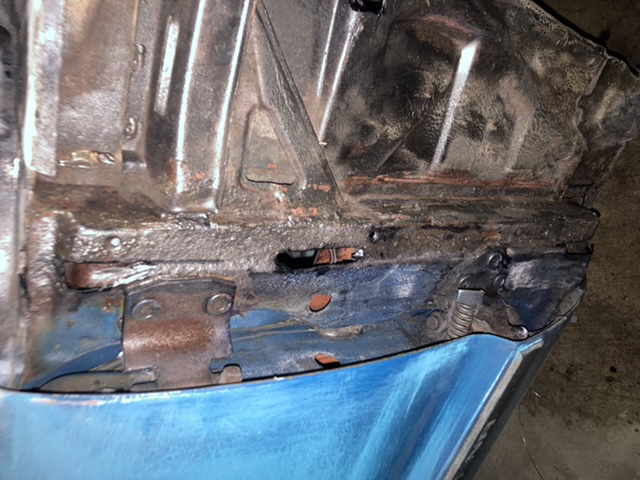
Back into the guts and gore then. Passengers side rear 1/4, rear of door. I thought this side was better but it’s all soft despite being present. Have noticed a few things I’ll have to tweak on the side I’ve already done after seeing the complete area1 point
-
Woohoo! we somehow failed on a boot floor though, oops. Packaged really well, 9 boxes with a holy shitload of newsprint and plenty of bubble wrap. They threw in a catalogue of their Impala range, very thoughtful hahaha1 point
-
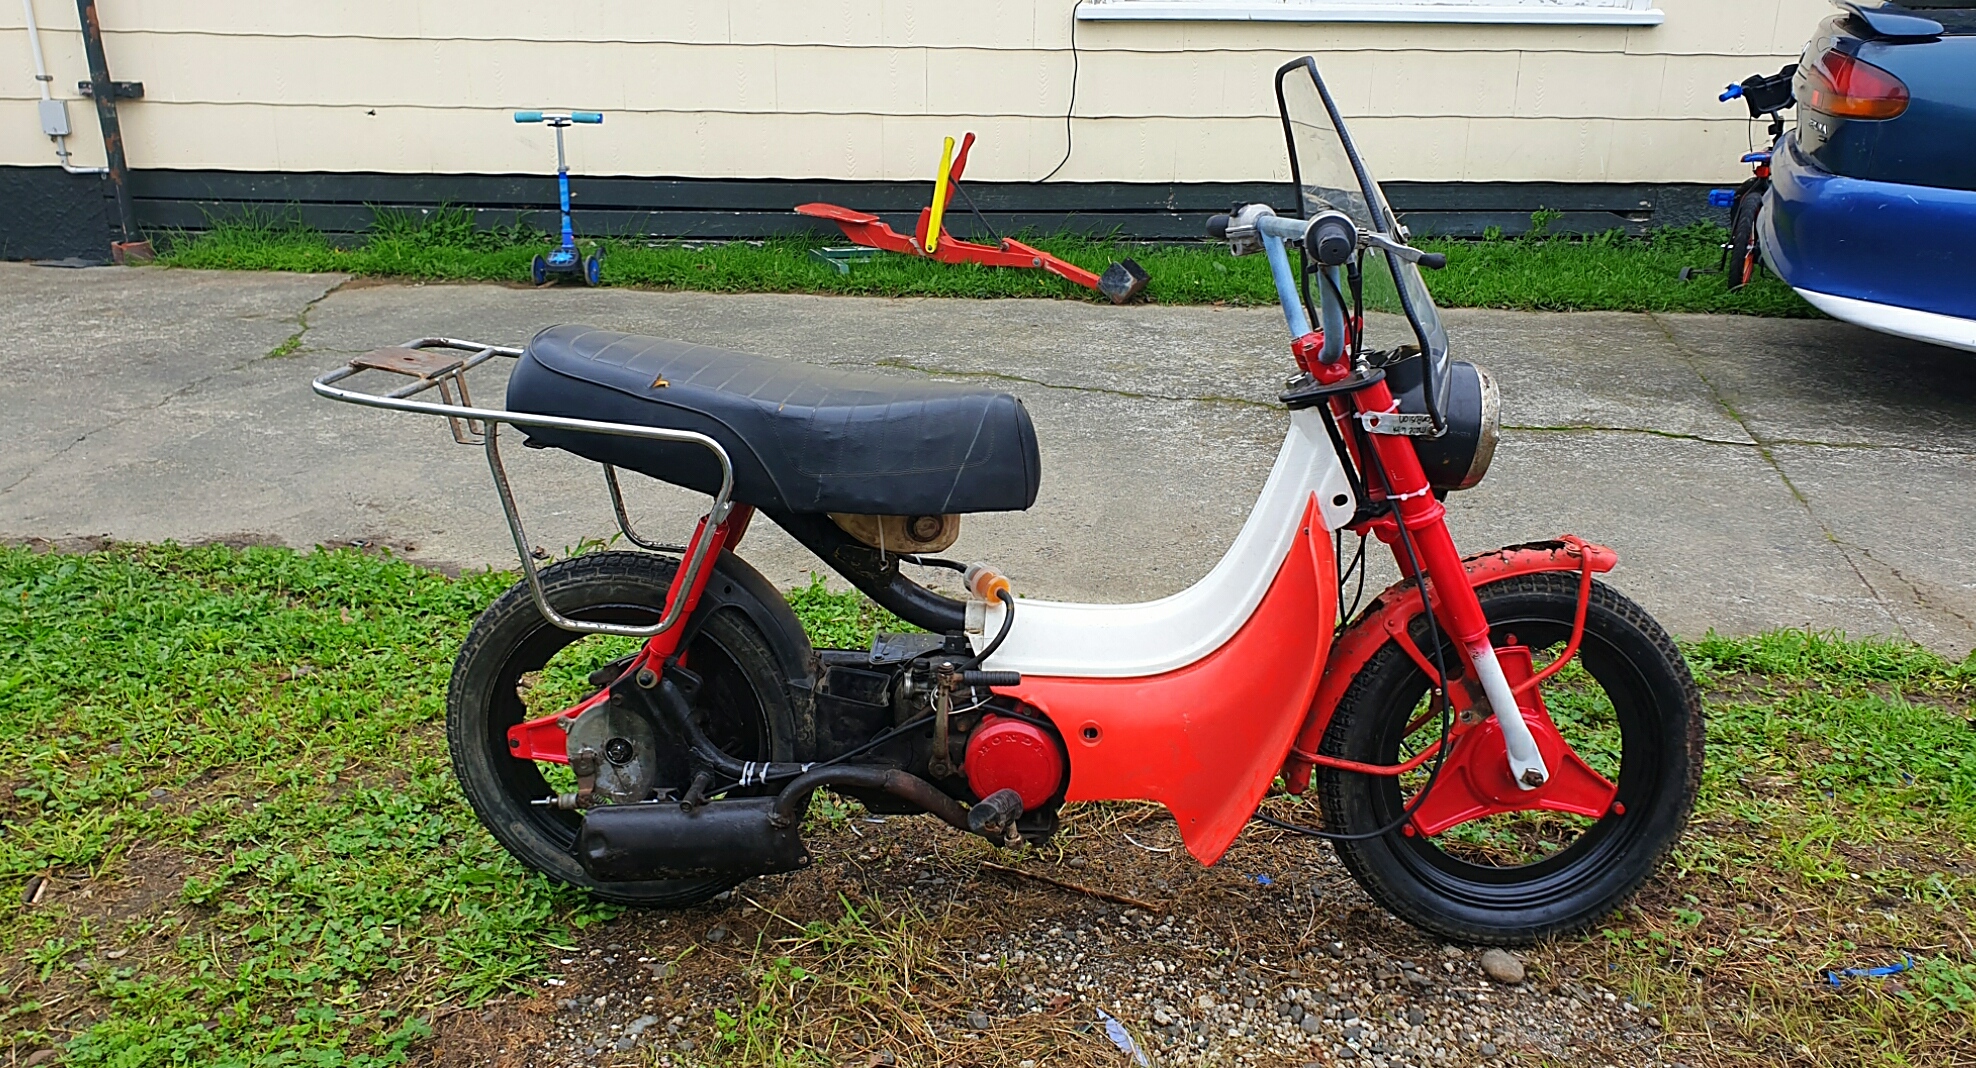
Ohhh my..... She has leg sheilds Windsheilds. Factory seat Rear rack After a tank have a temp one set up.
1 point
-
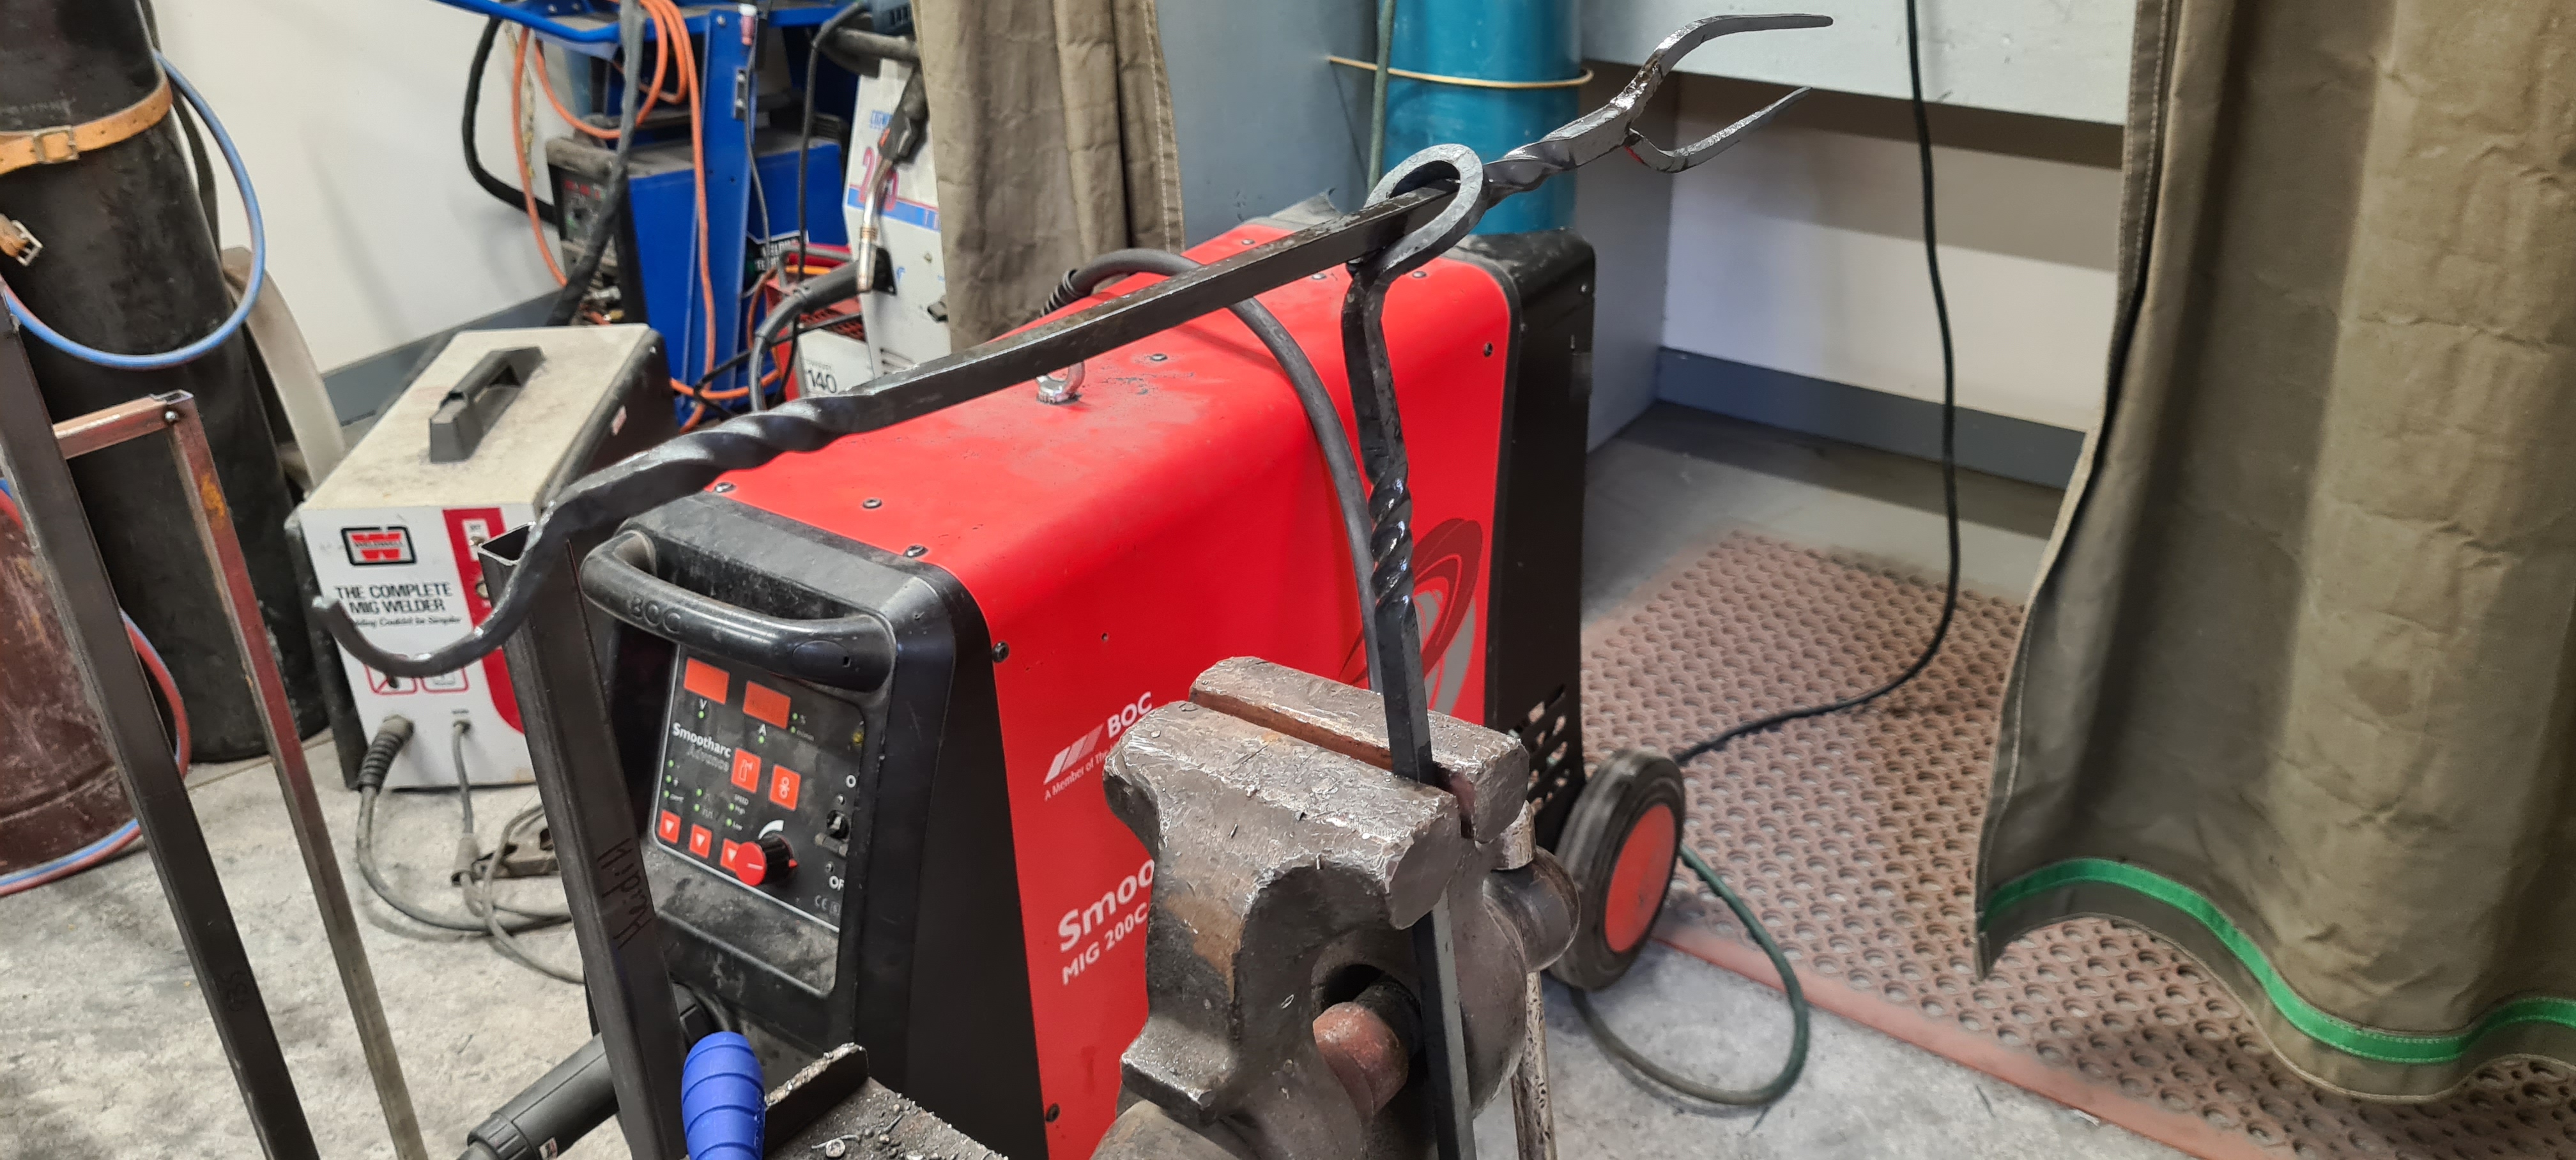
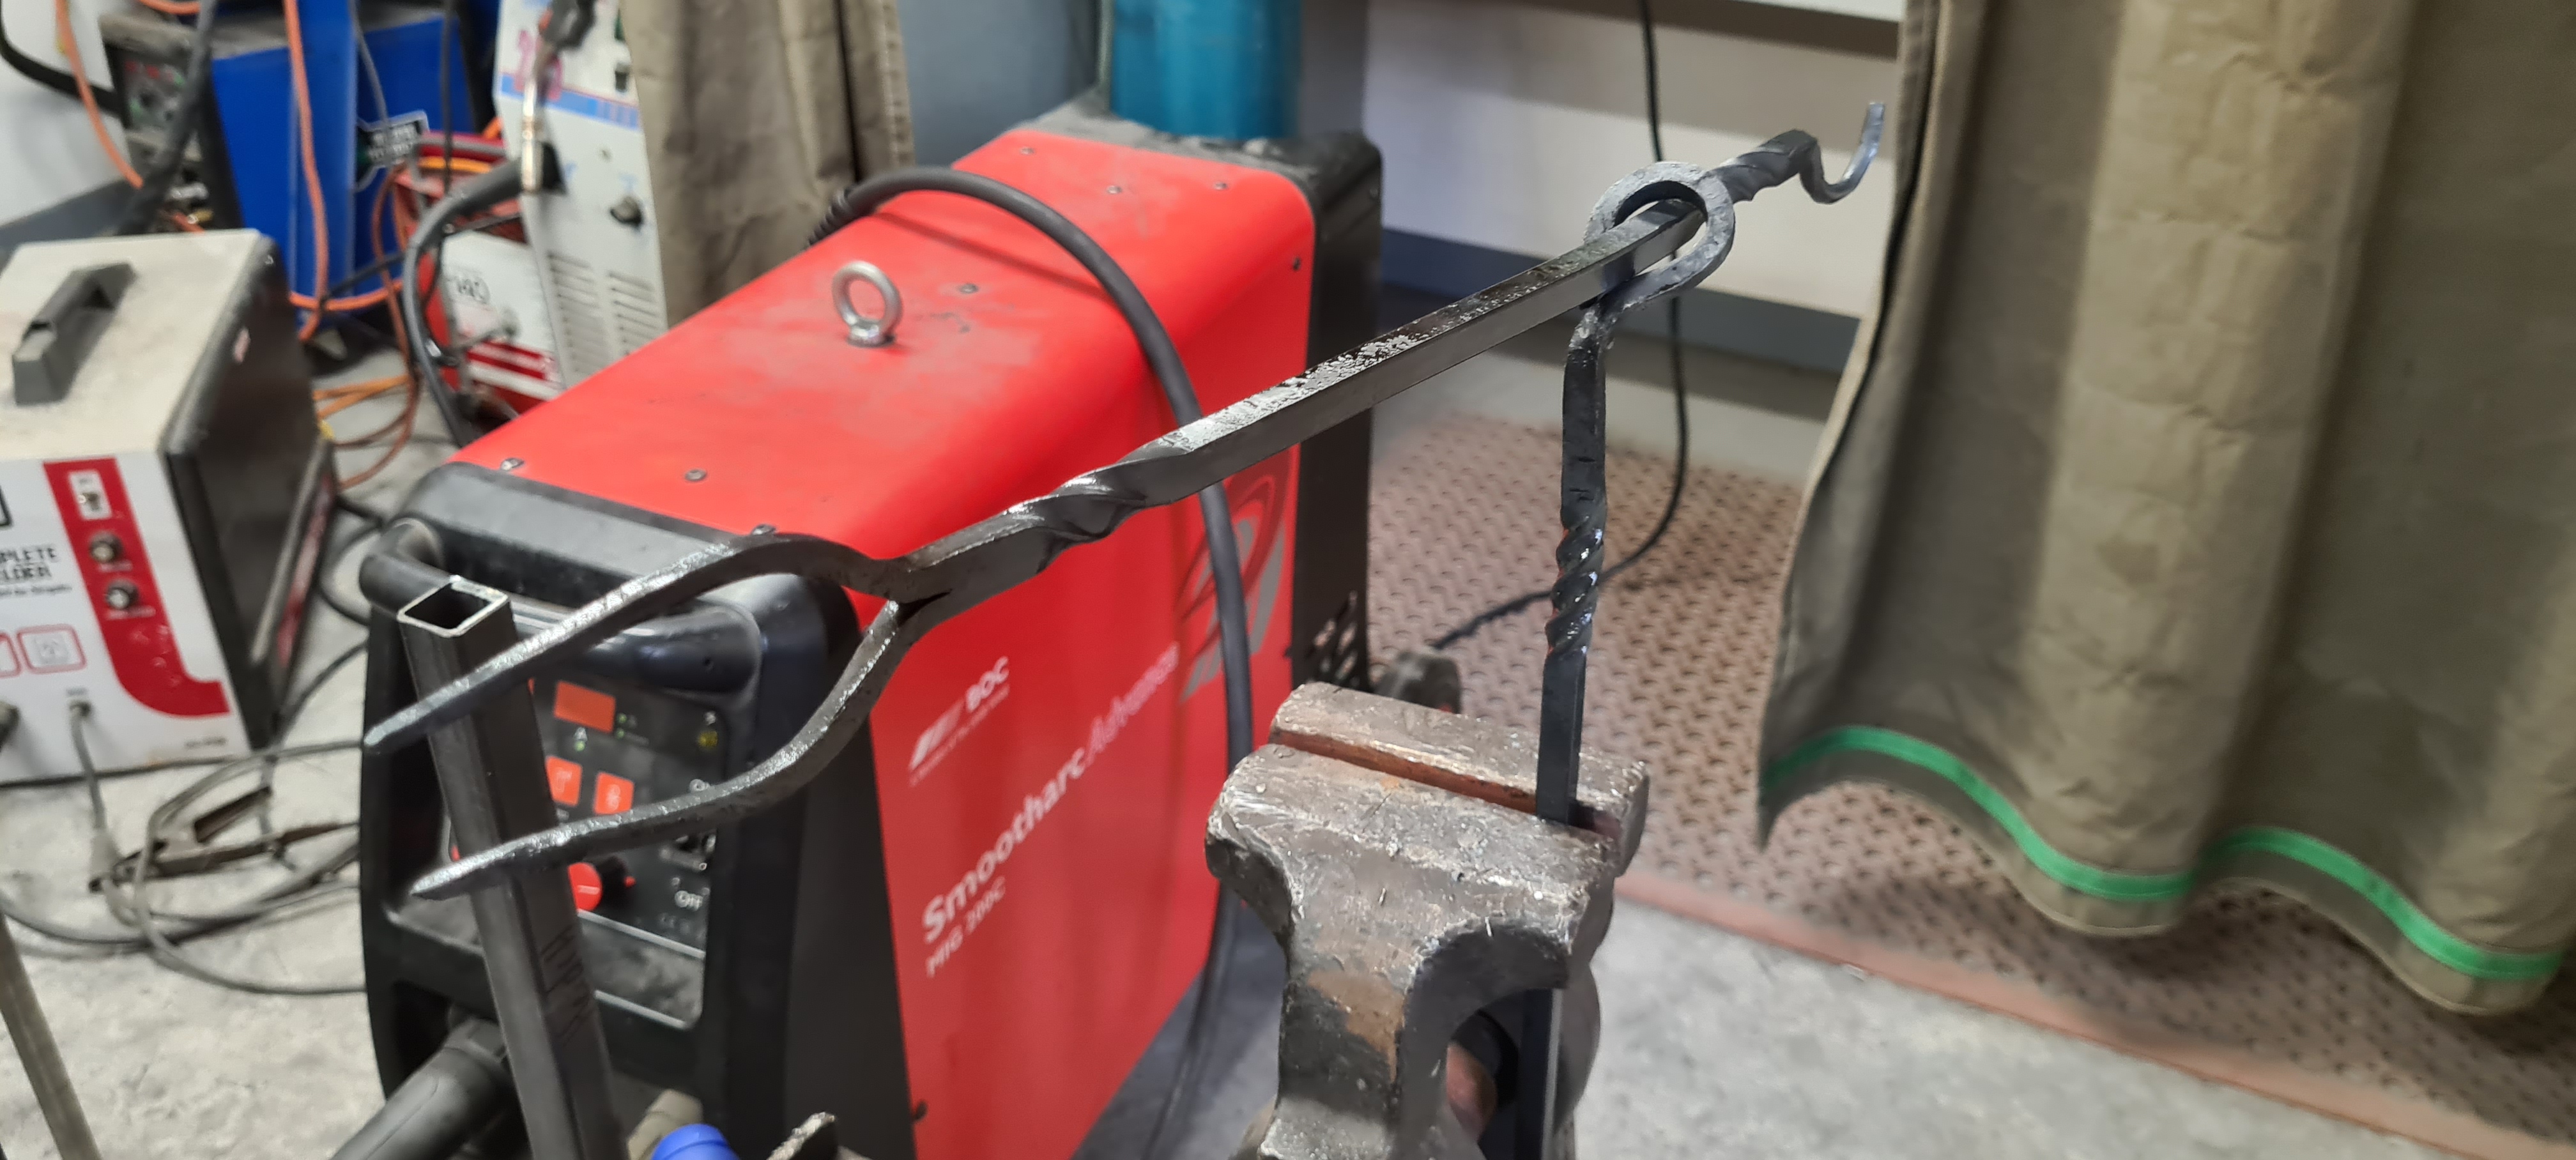
Forged up a squirrel roaster Roasting fork on one end. Billy hook on other
1 point
-
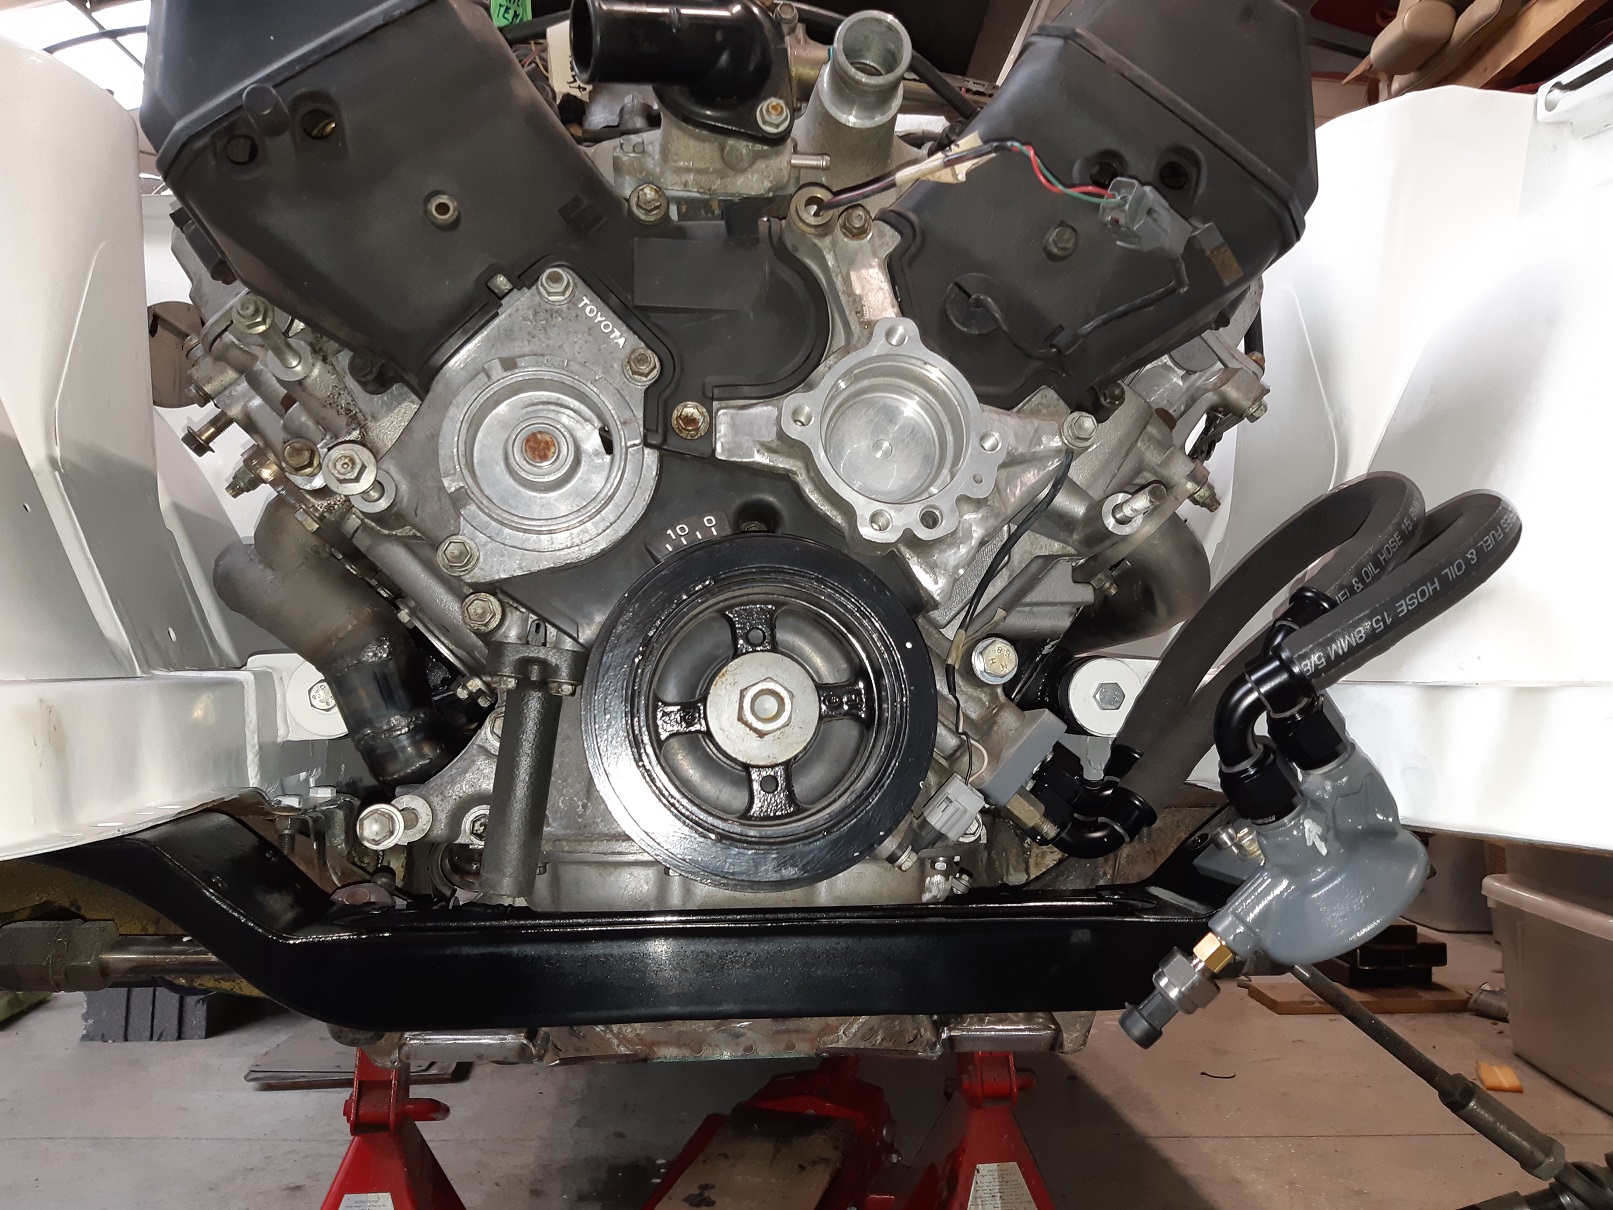
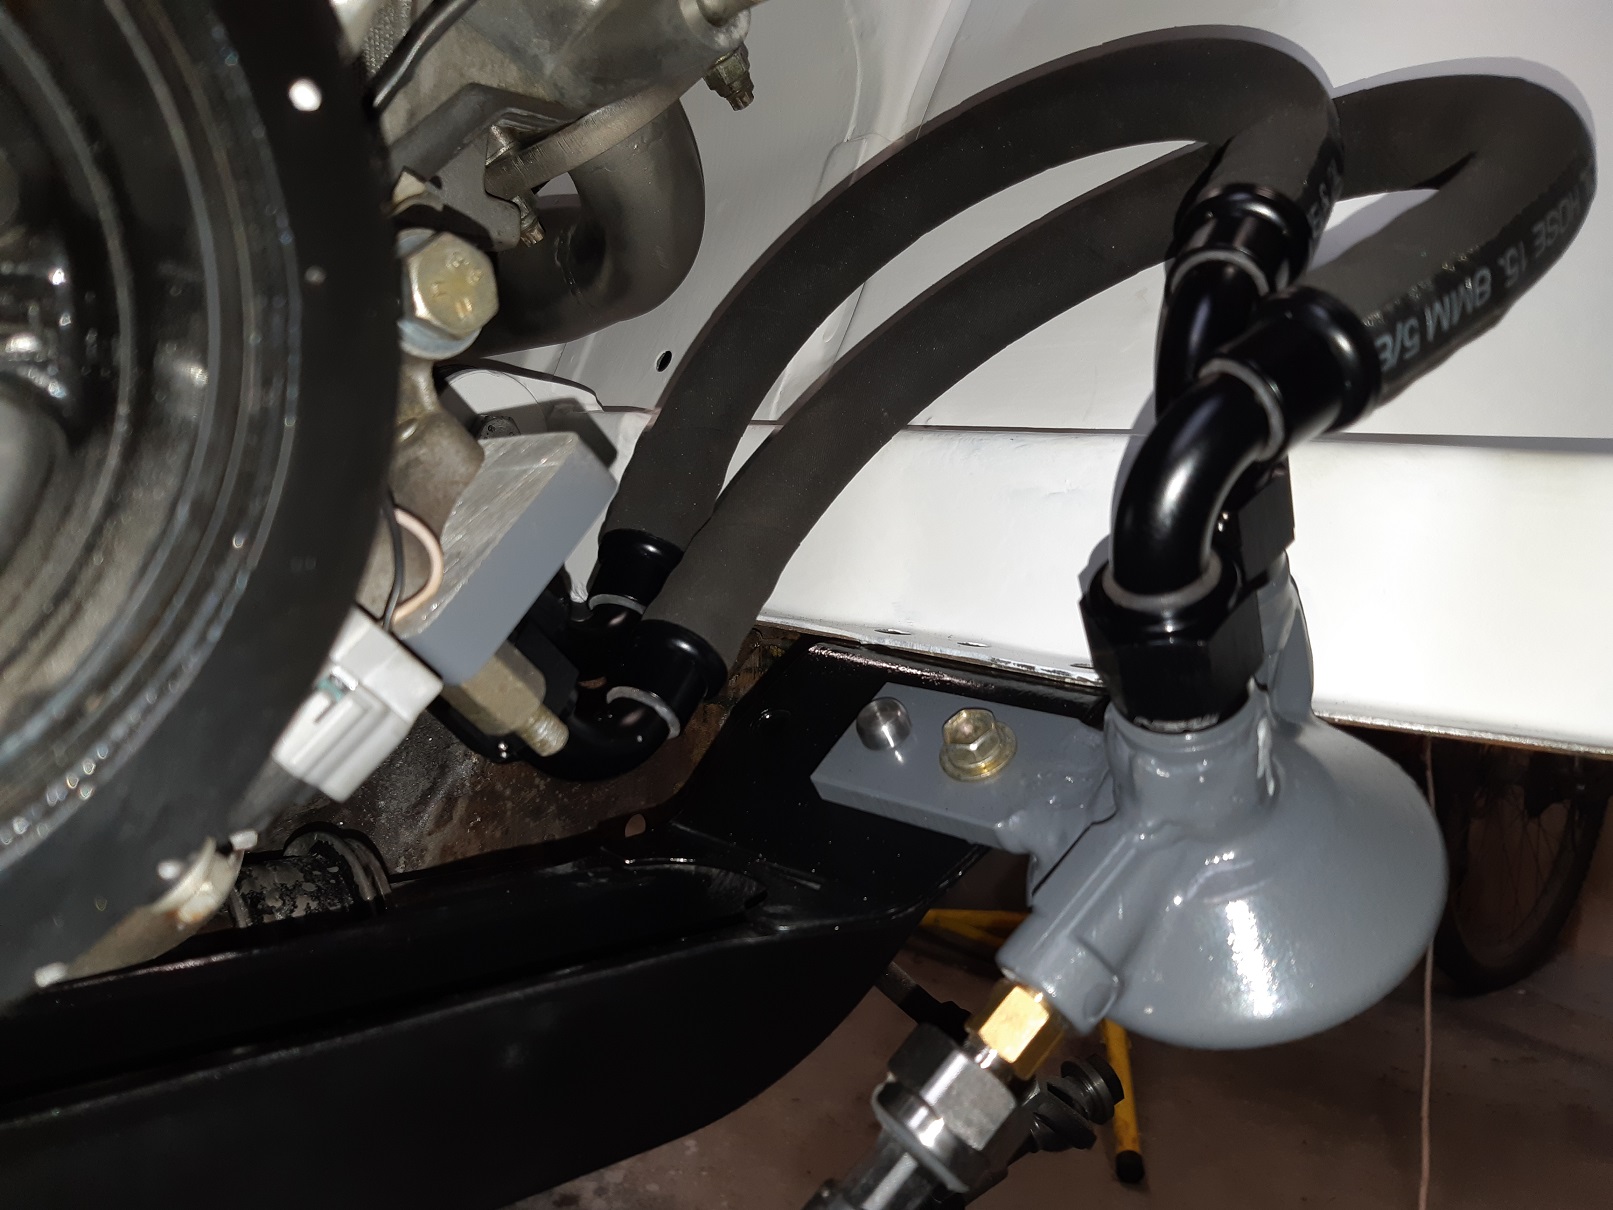
Sorted out the filter mounting. I later realised that the hoses were the wrong way around(when I sprayed myself with oil removing the filter to check if it was circulating). I'm going to mark it with bright paint so I don't make the same mistake again. I had initially intended to point the fittings at each other, so the hoses could be really short, but that didn't work out. When I weld the front panels back on the car, the filter is shielded by those.
1 point
-
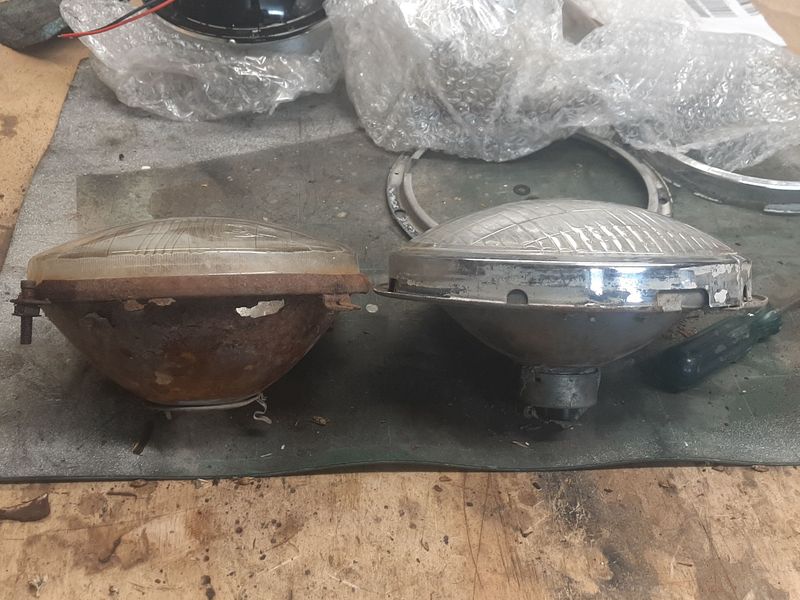
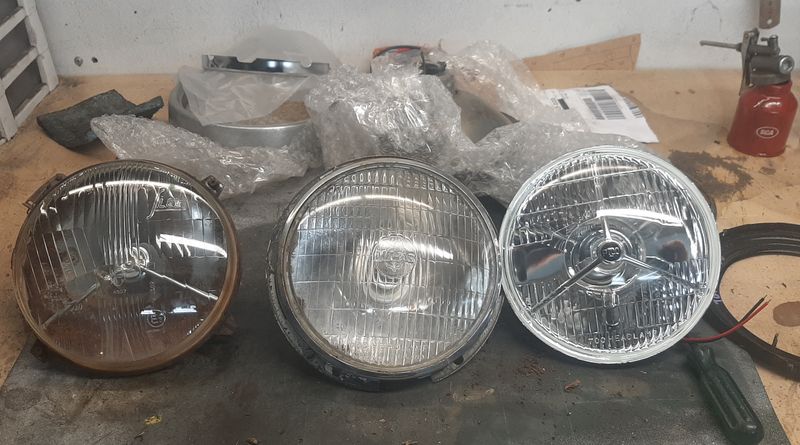
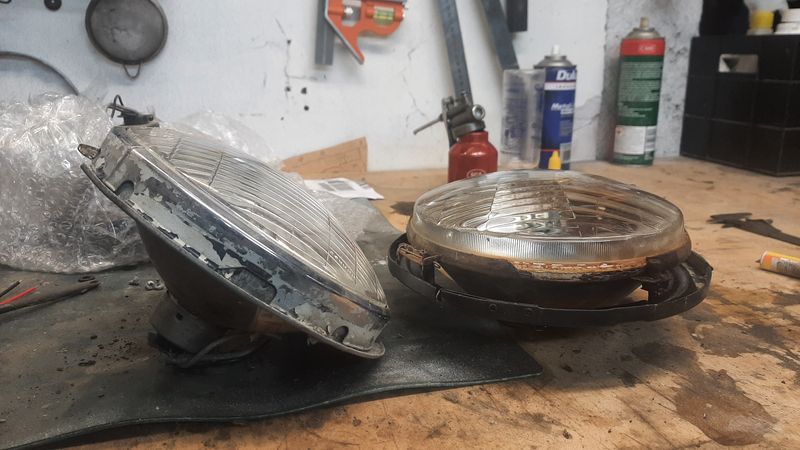
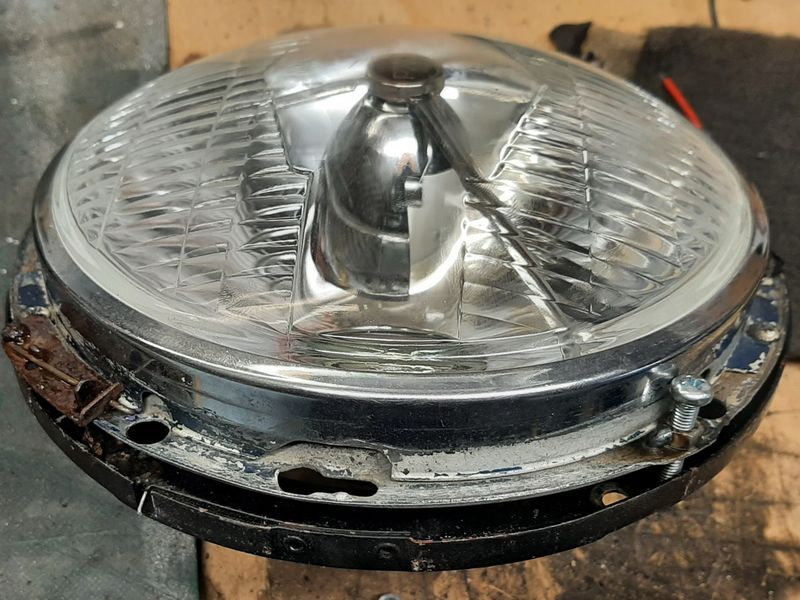
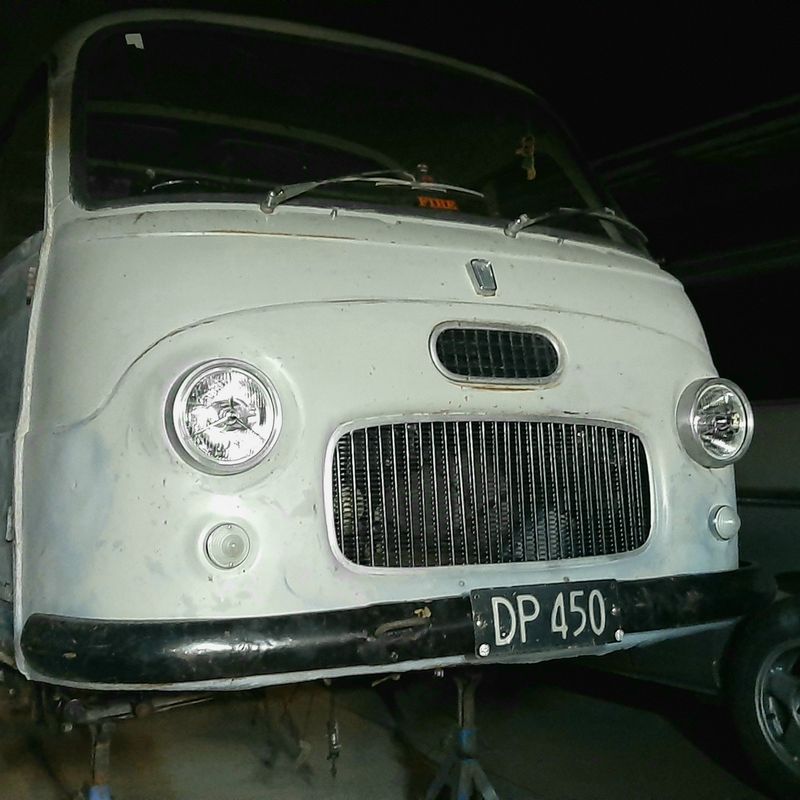
Headlights These take a 7" H1 bulb headlight, which seems common enough, but the bulb housing has the mounting and adjustment built in and clip on to the bucket and are only available NOS, like these for only $500NZ + postage, and these aren't even RHD. https://www.ebay.com.au/itm/124135811511 So i bought the cheapest 7" headlights i could find with a peace symbol which tuned out are Lucas STYLE 700 lamps from here along with some other stuff: https://www.classiccaraccessories.co.nz/collections/lighting/products/classic-lucas-style-p700-headlamps?variant=29025370636376 Unfortunately they didn't mount quite how i imagined but luckily some actual Lucas headlights popped up on FBM and they had the mounting rings too, so I could fabri-cobble something together. OEM SIEM light (H1 bulb), old Lucas 700 with mounting ring (bayonet style bulb) , modern Lucas 'Style' 700 lamp (H4 bulb) The SIEM lamp has a 'long' side glass which gives room for adjustment within the light trim ring. The mounting ring on the lucas makes it a bit tighter Reusing the original mounting buckets (they have small clips for the trim ring built in as well) meant cutting one wee clip off the old headlights, cutting some slots and adding some captive nuts to make some adjusters And they actually fit! Van finally has its face back. H1 and H4 bulb wiring is pretty much the same but ill probably add some relays in for these and a few other things at some point This is normal right? Classic OS, 'saving' money on buying the right thing, by spending almost as much buying old junk that doesn't quite work and spending hours making it fit. Should have probably just bought these, but they were out of stock or I would have https://www.classiccaraccessories.co.nz/collections/lighting/products/7-inch-headlamp-cone-assembly-metal-with-gasket
1 point
-
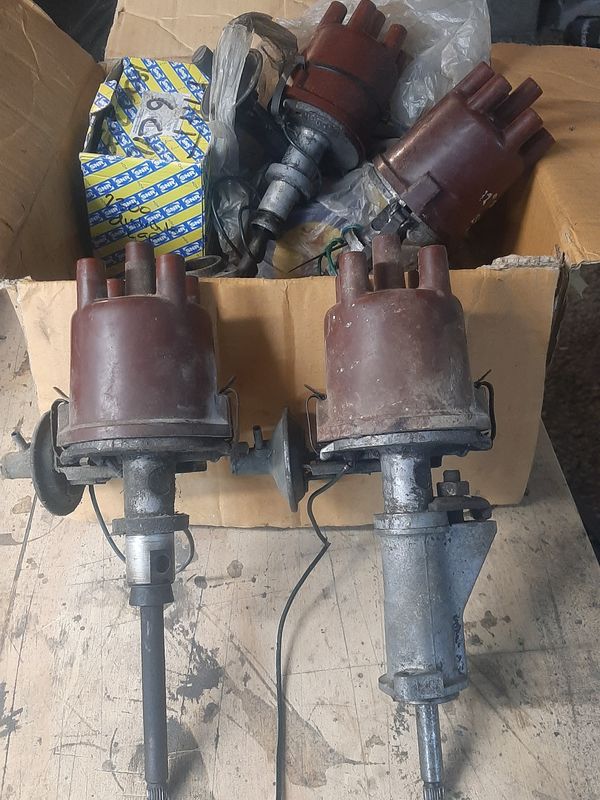
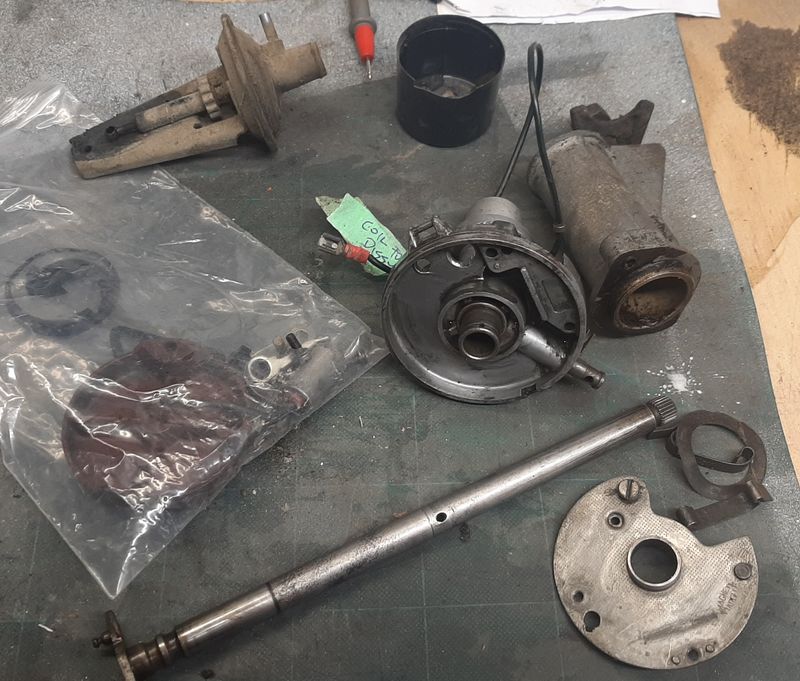
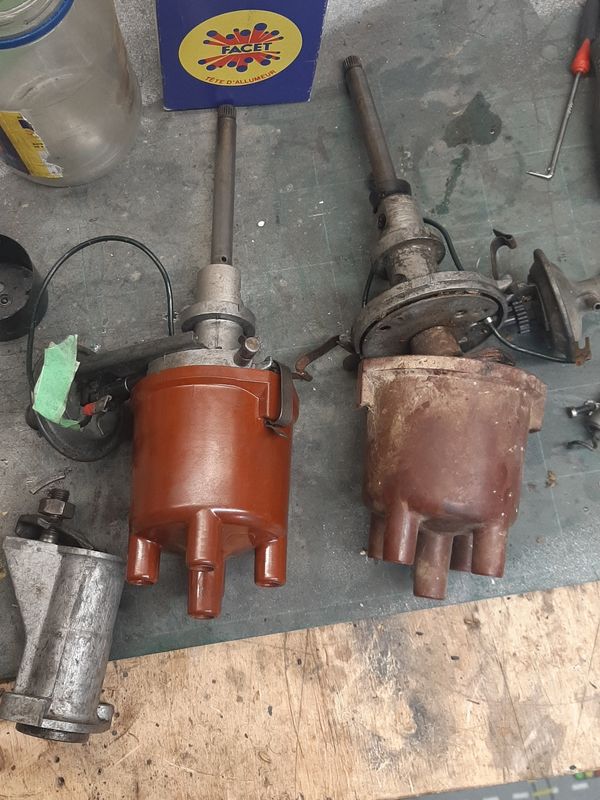
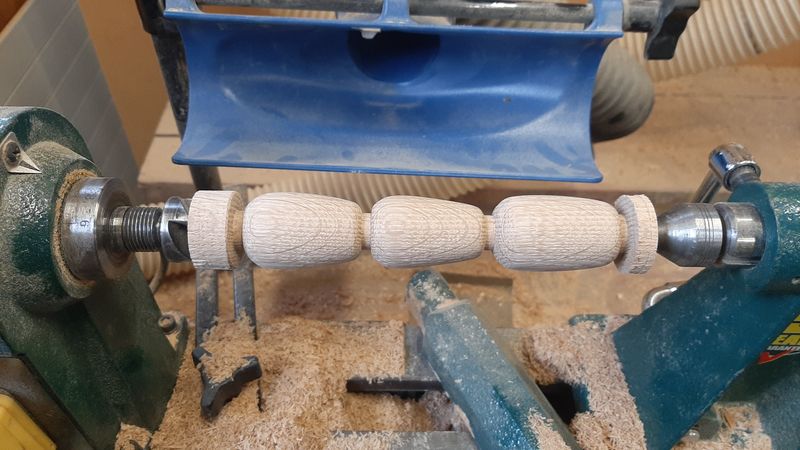
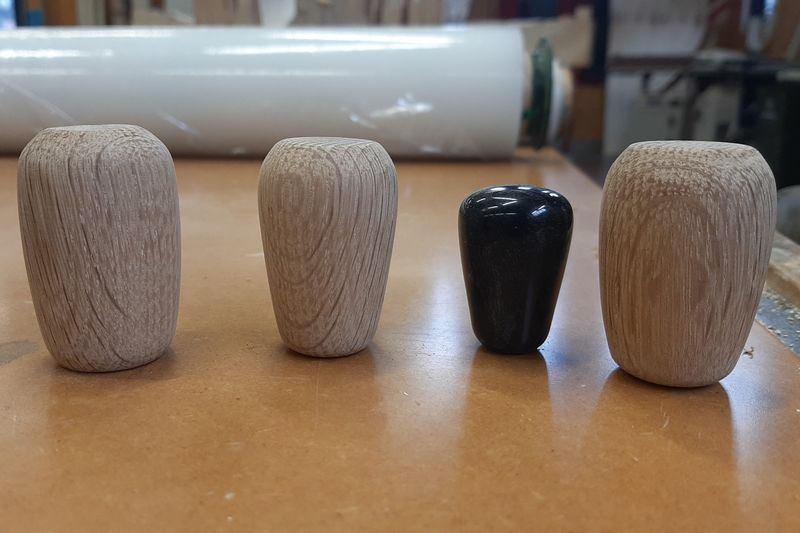
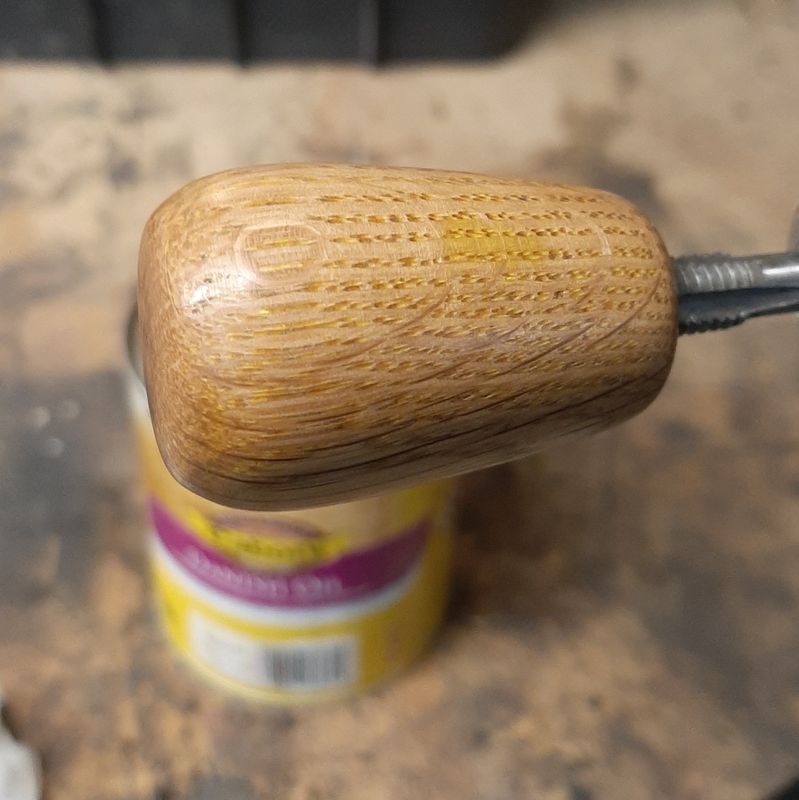
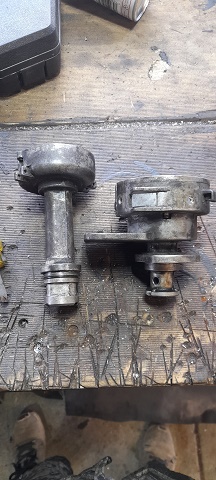
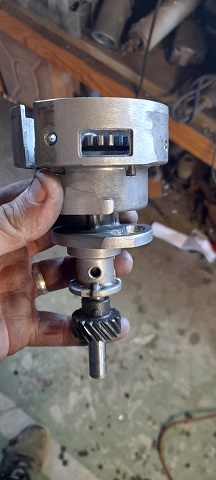
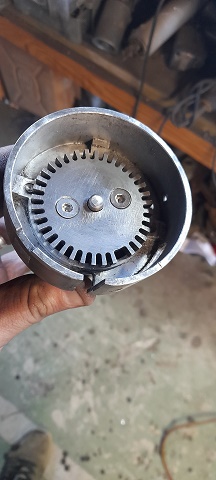
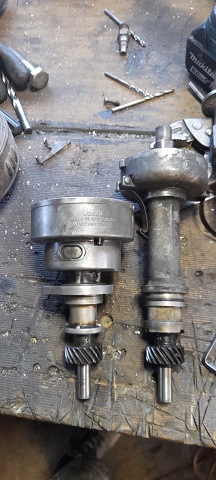
Been poking away at things. Ol' mate runs a Tech room at the local high school, so i did a C+ effort on turning up some oak gear knobs one weekend The black one is the knob off the 2300 wagon, which would be close to if not the exact factory size on the van - ie pretty small, about 25 diameter x 40 long. I havnt been able to find these for sale anywhere, and they are an usuay (for a gear knob) thread The other ones might get used on some other cars. M8 x 1.25 threaded tap into a 7mm drilled hole, and some danish oil. Also tidied up the dizzy. One off each engine, one slightly better nick then the other. Very similar design to the 2300 one (box of bits in the background) but I didnt need to steal any bits. As i managed to make one good one from the two, one set of points was pretty much new, one vacuum advance worked, etc. Reassembled and adjusted up. Got a couple of cheap NOS dizzy caps in a recent order so unboxed that and all looking good.
1 point
-
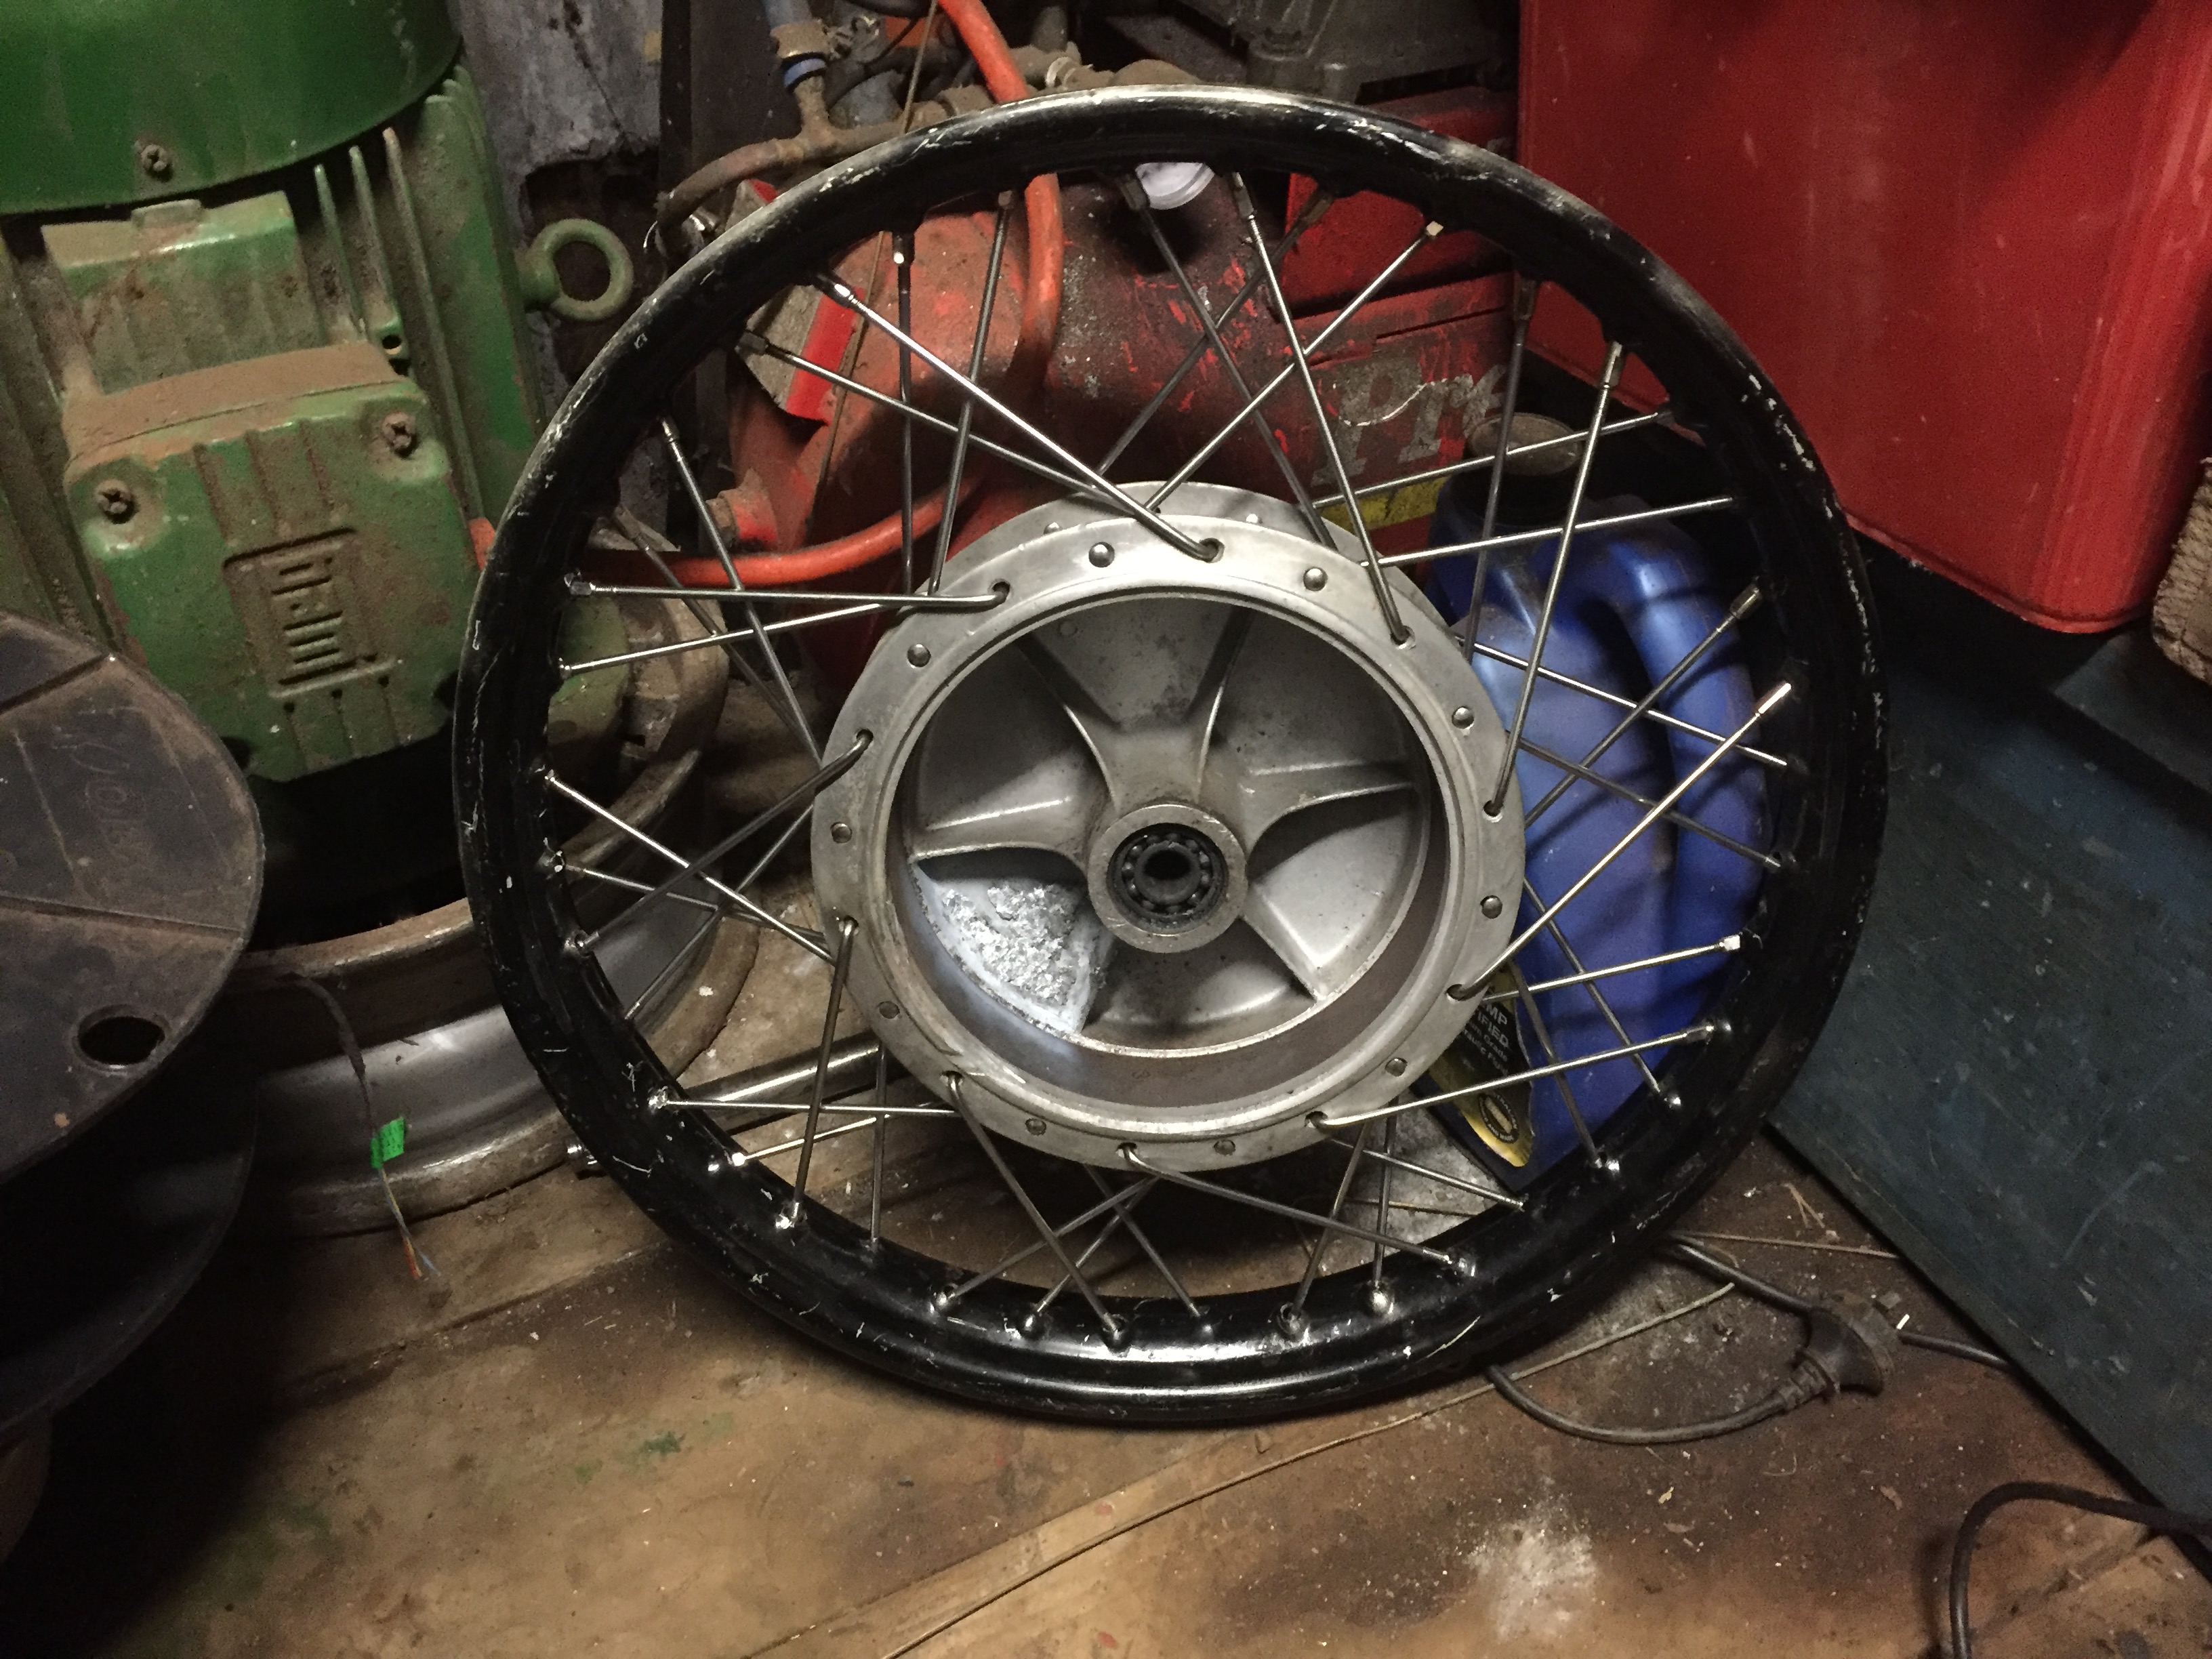
Laced up the front rim but haven’t tightened the nippels, I got a cople extra spokes and because they are aliexpress shit I did some testing on them to see how strong they are and they seem tougher than the old spokes, sparks fly off them when I hit them with an axe.
1 point
-
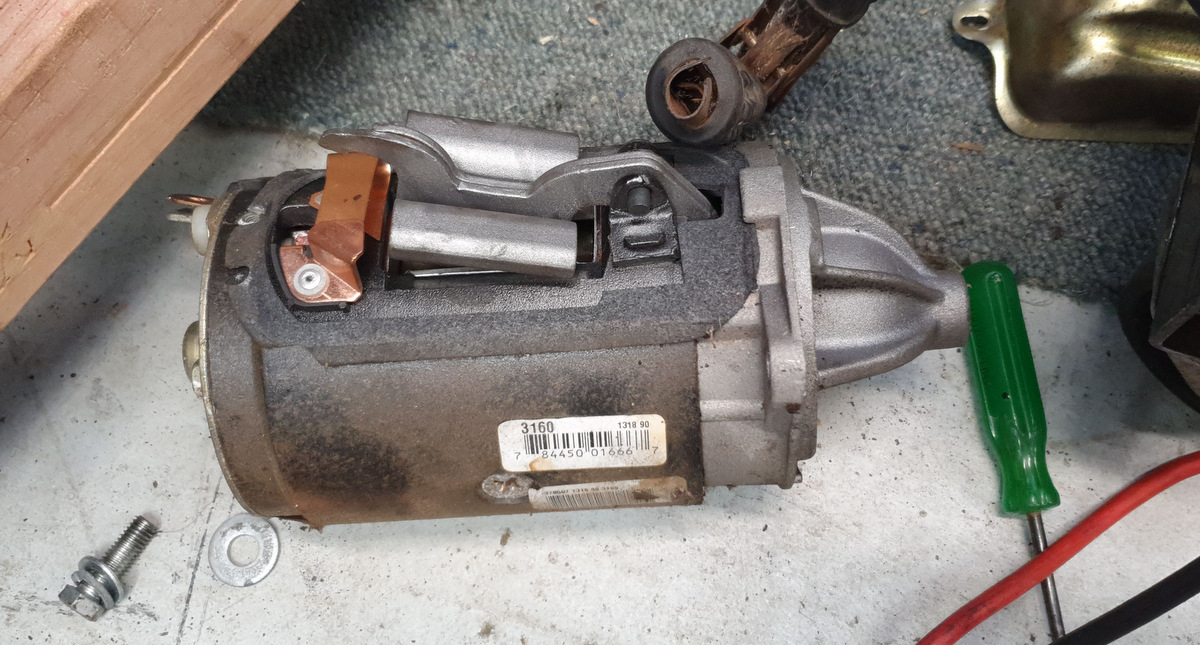
I dicked around with the starter for a bit - it's called a rat-trap style with a mechanical linkage to push the pinion into engagement with the ring gear. It's pretty new actually, to go with the C4 I guess. \ Started up OK after that Since they are both in the same part of the garage I ran both Mercury V8's together. Both pretty dirty looking though.
1 point
-
Suspension partially done, 2" drop spindles, 3" lower springs in the front , and diff put on top of the springs in the back. I drew up a notch and got that laser cut, that's ready to pick up this week so next job is to whip the tray off and glue the notch in and make some shock mounts One of the front shocks fell apart when I took it out , that explains the rattle in the front suspension I'm not sure if the wheels will stay, one has started rusting already and its probably going to rub once the front bumpstops get a trim and the rear has some travel. So I'll probably put the stock wheels back on And waiting for some new front shocks I ordered a couple of weeks ago but I think covid has slowed that down
1 point
-
1 point
-
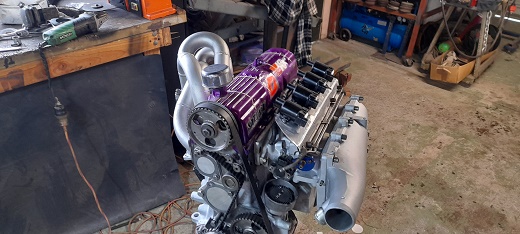
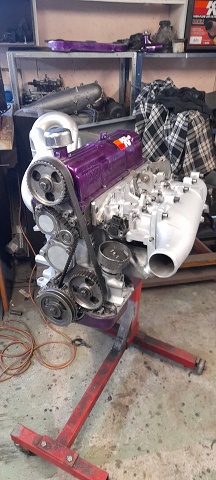
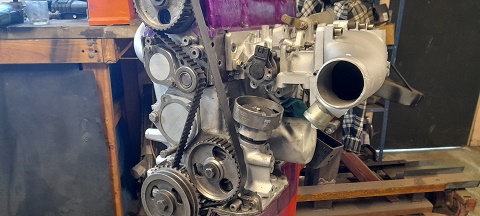
coil packs ..i went for GM/LS cop (coil on plug) with built in ignitors ..just to get things simple lol i looked at the motor for hours wondering where to mount them as the throttle linkage is in a funny place and having 4 intakes theres a lot of moving parts and i had to think about wiring as well. so ended up with this.
1 point
-
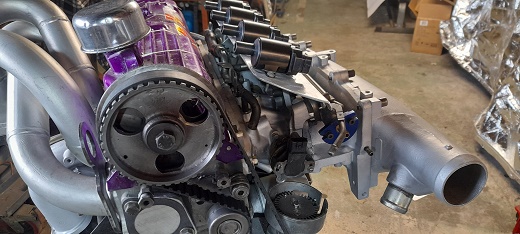
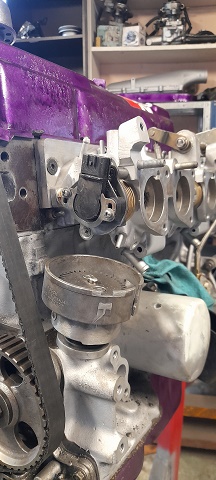
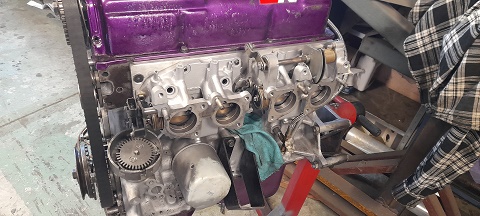
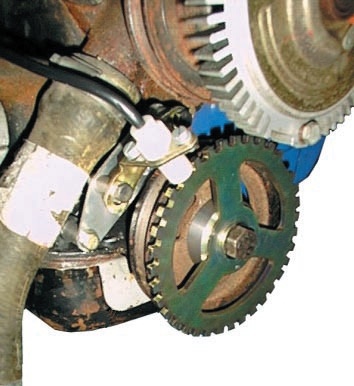
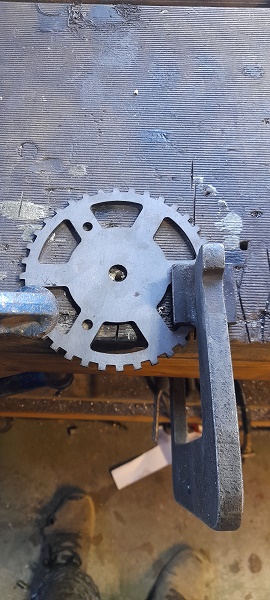
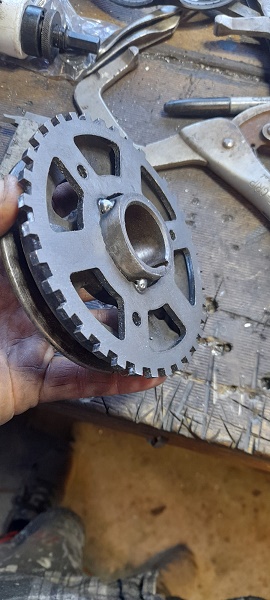
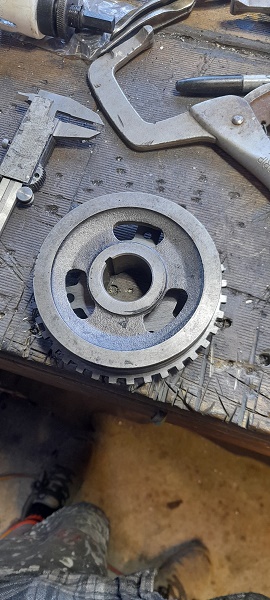
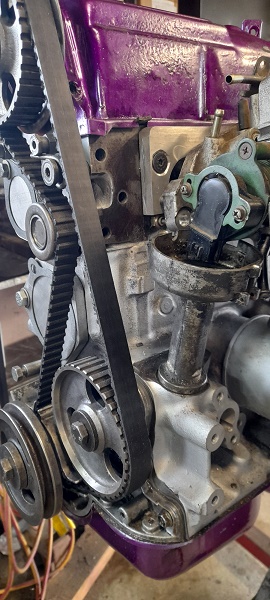
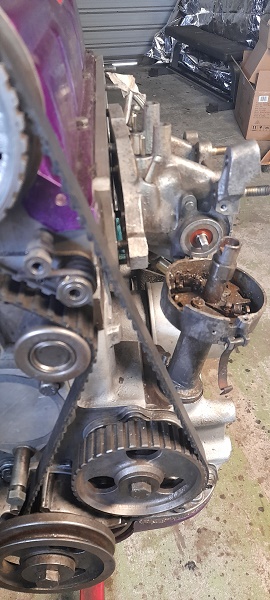
i got a few things ticked off the list today. trigger 1..i bought a 36-1 trigger wheel for the pinto but it bolted in front of the pulley and i didnt like the look of it ...so i made the hole bigger and mounted it on the back...just a few tacks for now till the sensors turn up and i decide where to mount them. then it was on to trigger 2..i bought a 63mm 36-1 trigger wheel as it was just small enough to fit inside the pinto dizzy buuuuut.....didnt even think about the dizzy to inlet manifold being a problem....well it turns out it is. i thought about cuttng it down but remembered i had a xd falcon dizzy on the shelf that i had gutted and used with a drill to pump oil around the 4.1 in the other cortina. turns out it fits the hole in the block for the dizzy and it a wee bit smaller .so i trimmed all the stuff not needed off it and made a slot on the side to be able to bolt it down...i then cut the pinto dizzy shaft down and made a bush for it in the falcon dixy....made a mount to bolt the wheel to and all done...)will make a cap when the sensors turn up and i sort out mounting)....was told i could just use a 1 tooth wheel so see how the sensor works with this small wheel first. both triggers in place i also stripped cleaned and rebuilt the intake manifold repositioned the dipstick got the factory vacuum all together so i can even plum the brake booster in. managed to turn the full TPS setup upside down aswell for more room. still got to sort out idle air control.....the injectors are on the way and i need to mount the coil packs and also sort out a breather for the block under the inlet manifold .....and im thinking some sort of brace for the manifold aswell. but its strating to look pretty good.
1 point
-
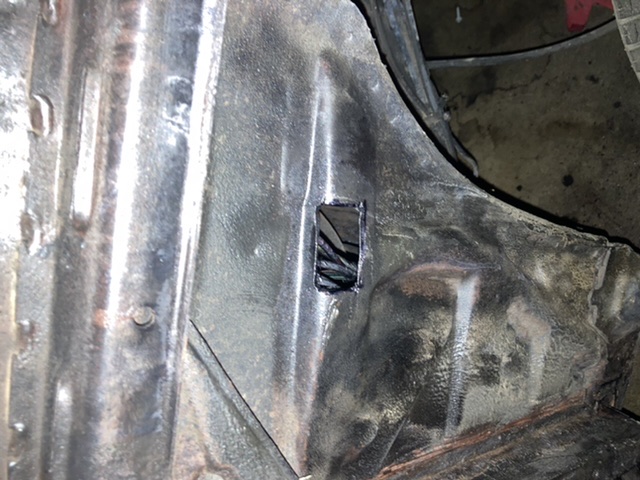
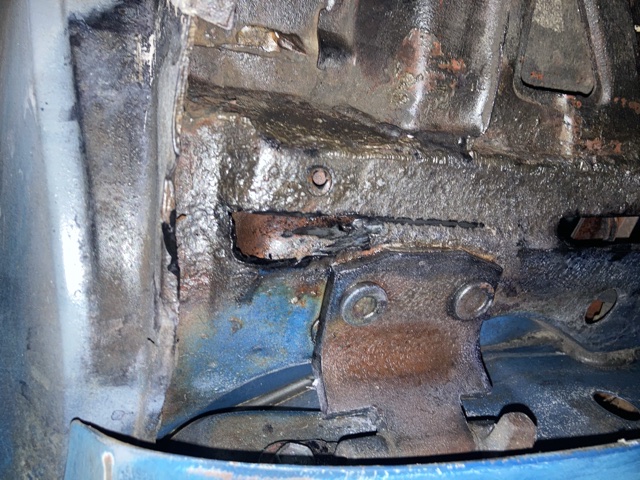
Right front wheel arch rust removal. Four spots. Will weld plates in this week.
1 point
-
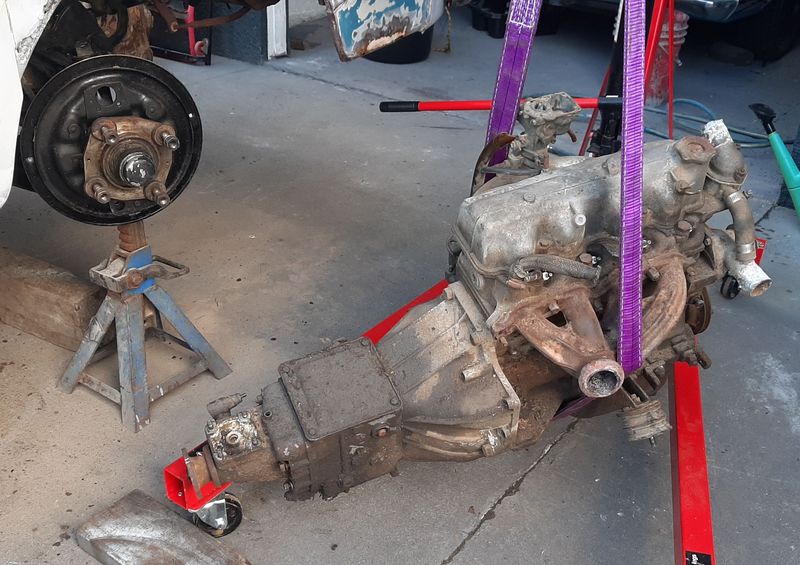
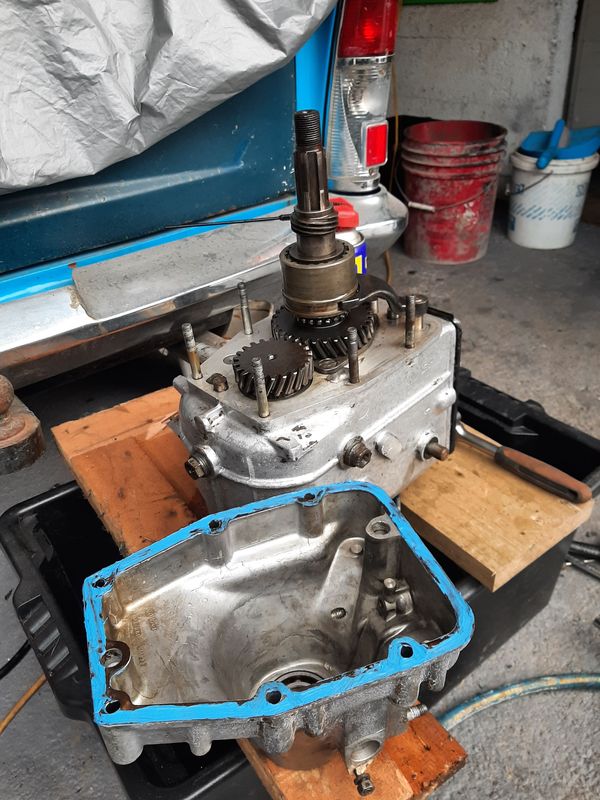
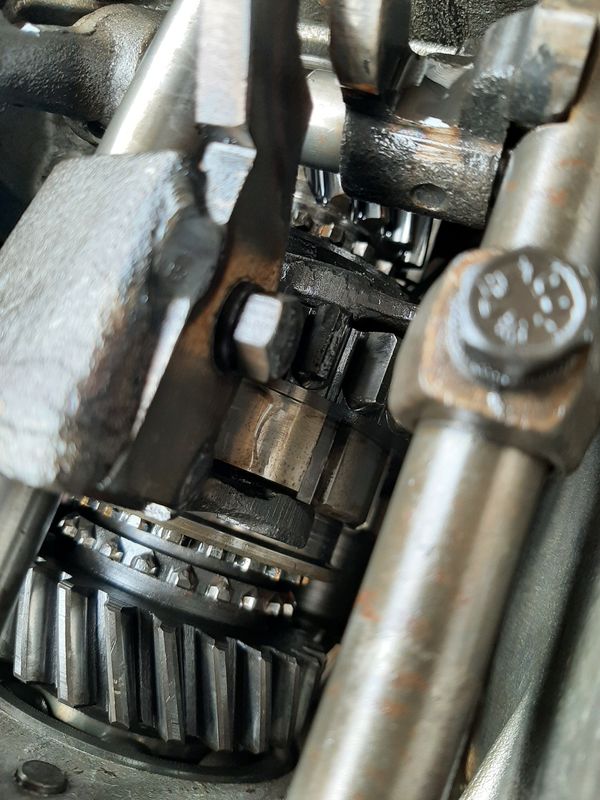
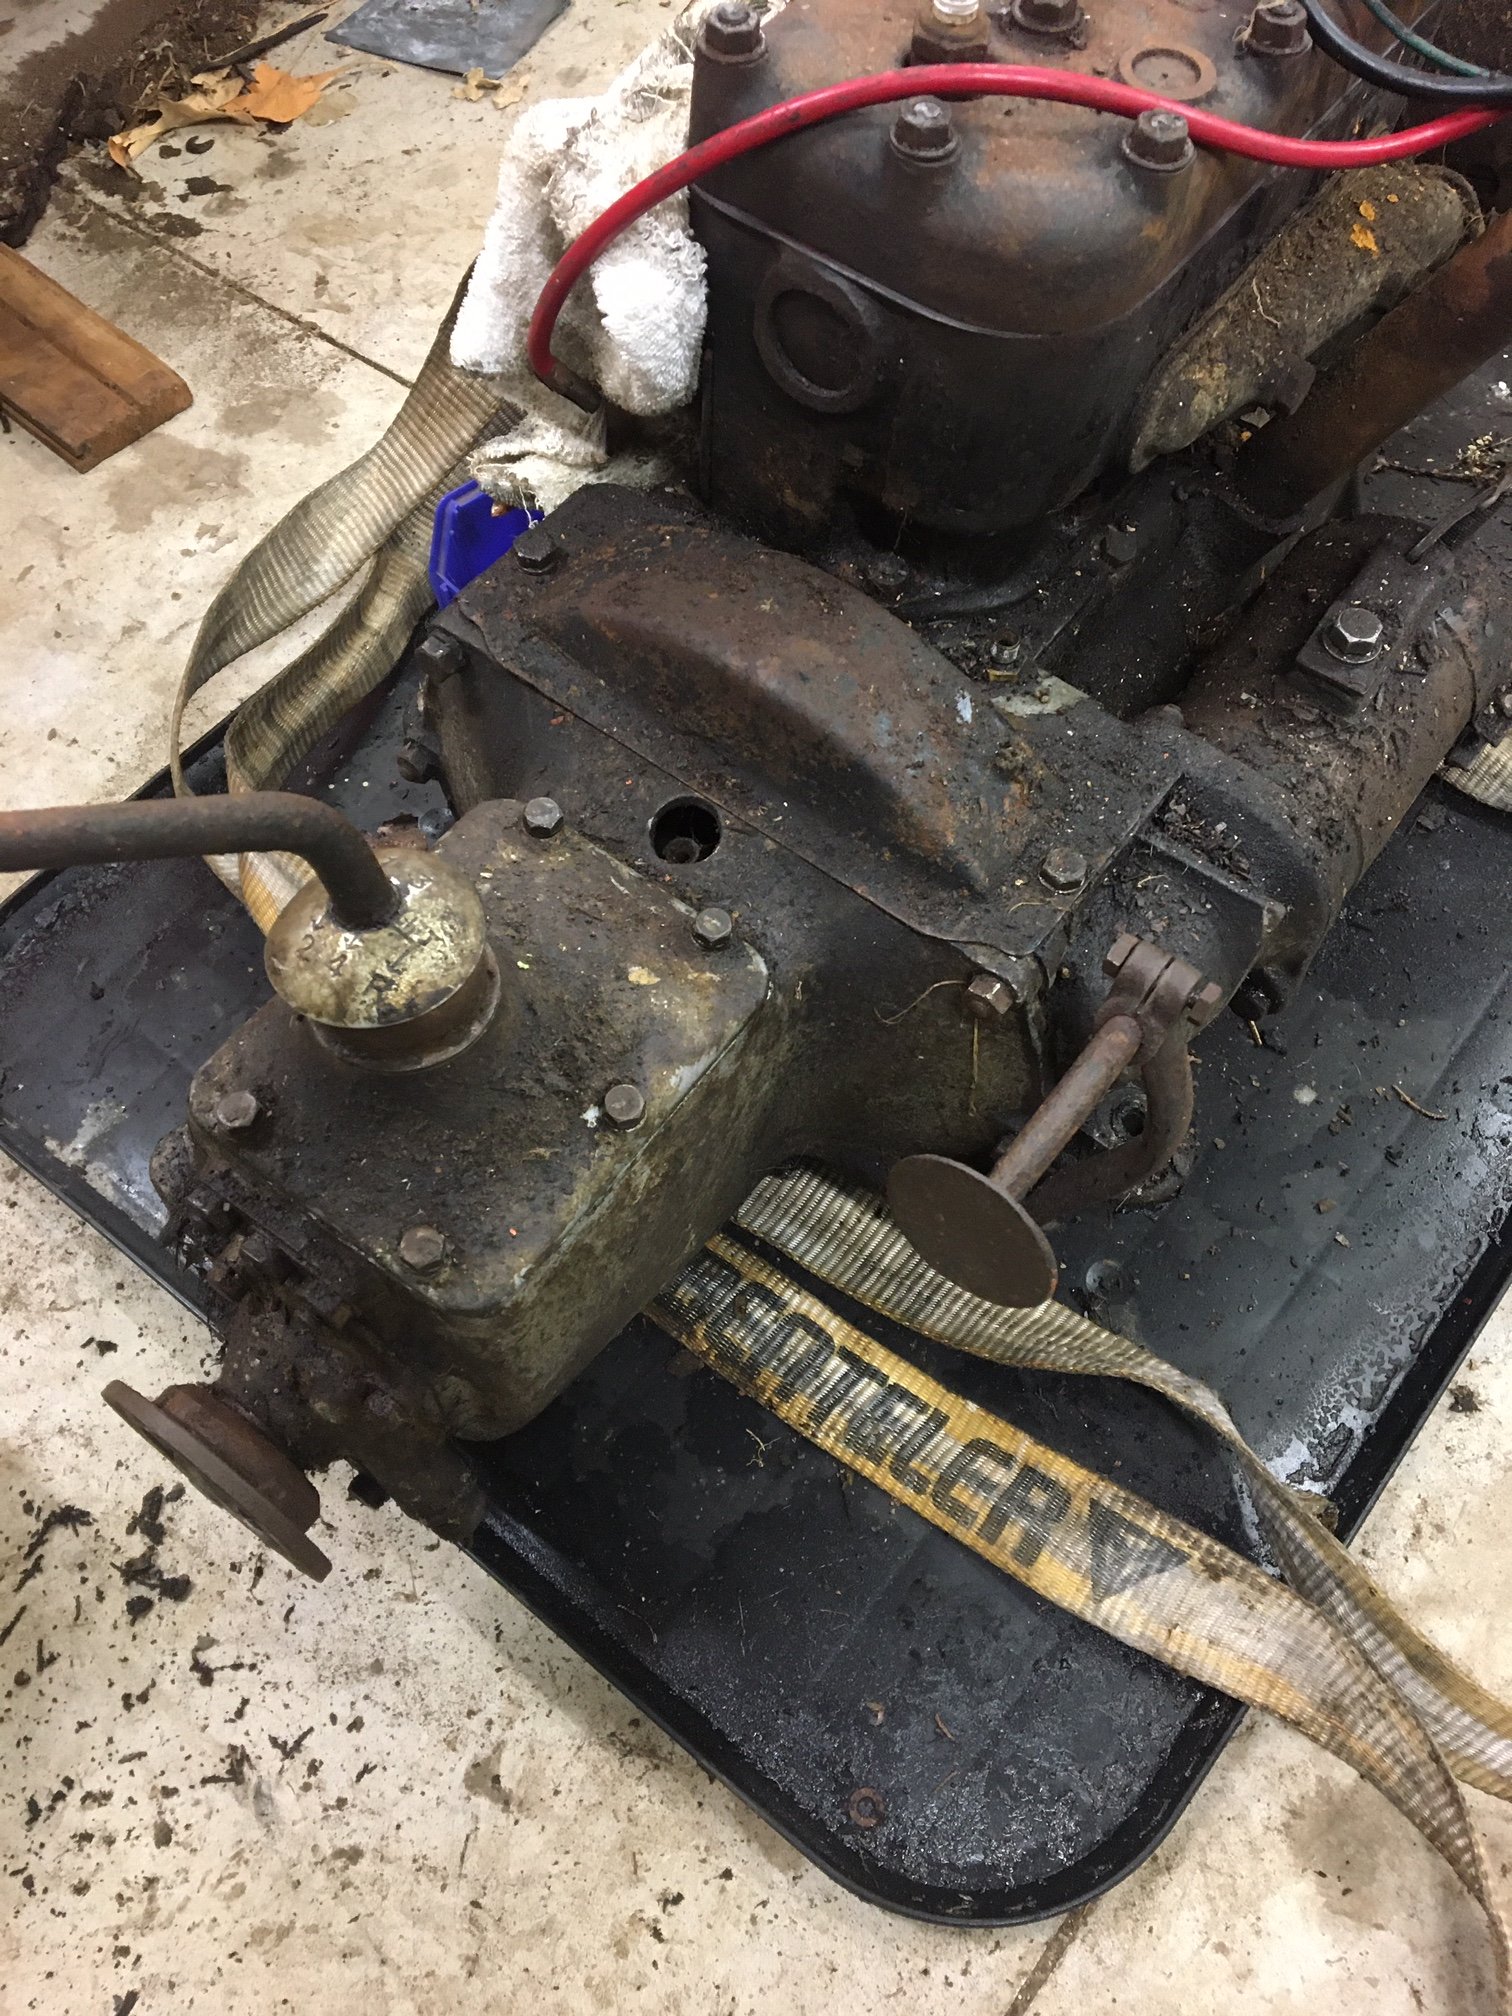
I was expecting to spend a few hours separating the engine and gearbox to free up the frozen clutch. I had about 15 minutes spare last night so went to get started on undoing the bellhousing bolts, then discovered a little cover over the clutch. So I whipped the cover off and found you can get at the clutch bolts there, so I loosened them all off a turn, pressed the clutch pedal a few times, tightened them back up, stuck it in gear, pushed the clutch and viola: clutch is fixed. I also pulled the lid on the gearbox, just to satisfy my curiosity as it completely blows my mind that 4 forward and 1 reverse gears can fit in such a tiny case. It all looks very clean inside. I forgot to take any photos (as I only had the afor mentioned 15 minutes), so here is a picture of the outside of my tiny gearbox and engine. The lever on the right is the whole clutch pedal assembly, the hole in the top is for lubricating the thrust bearing I think.
1 point


This leaderboard is set to Auckland/GMT+12:00