
Leaderboard


Popular Content
Showing content with the highest reputation on 04/05/21 in all areas
-
I don't want to hi-jack your thread mate, but here it is anyway. I don't know the details apart from that it was a 6 cylinder Patrol/Safari and he went mental
 24 points
 -
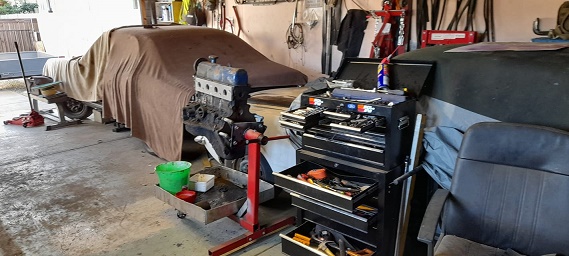
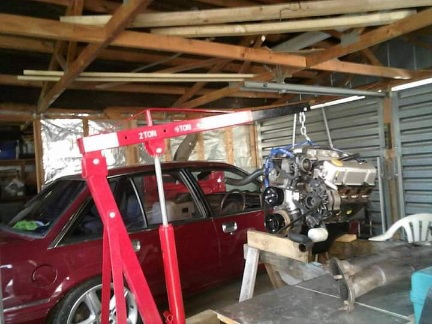
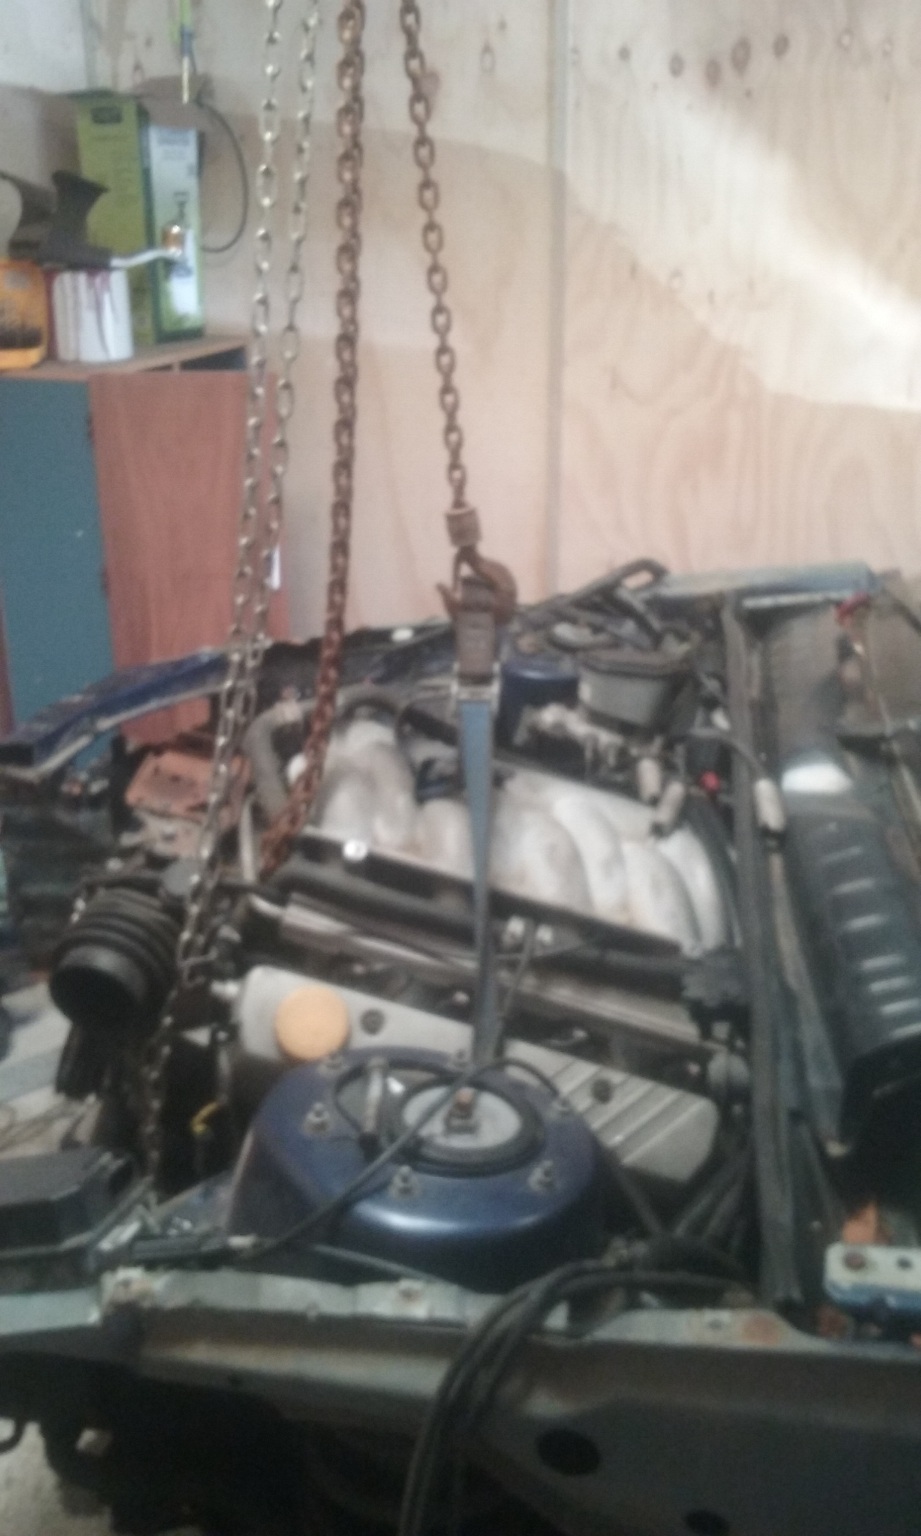
Got the rest filled up. We're at 170kg! . Thats a lot of mixing. Now need to figure out how to turn it over without dropping it!13 points
-
hhmmm page 6 ay... pretty slack. sorry for lack of updates but in my defense i haven't done any work ...at all on them...due to a small health issue and my body letting me down on more than 2 occasions .. and i have taken this year off the cars to get some stuff done around the house.....and if i try and do that and find time to work on cars ill just get fucked off...so year off. the cars are still there i have been playing with pintos tho as less room and just keeps my mind ticking over. i had sorted the falcon CPI for fuel injection and was starting to make a hat for that for boost. .....but ive had a nissan gtir inlet sitting on the shelf that i was planning on using on my focus.....but it got the better of me and i had to see.....(now it does need some cleaning up and i need to do some port matching but this was all by hand with a battary drill...and the socket head bolts cost more than the inlet manifold0 i had a pinto gasket and i made a cardboard one for the gtir..they do share a common bolt hole so that was enough for me. i had some 10mm alloy so i sorted the pinto part first. once i port match the head it will be fine....only had a 44mm hole saw then sorted the gtir side tryed it on the turbo motor......looks awesome.....love it i just need to find a better tool to port match gtir to pinto and back and find a fuel rail and maybe some bracing .....and thats good to go. cheers
12 points
-
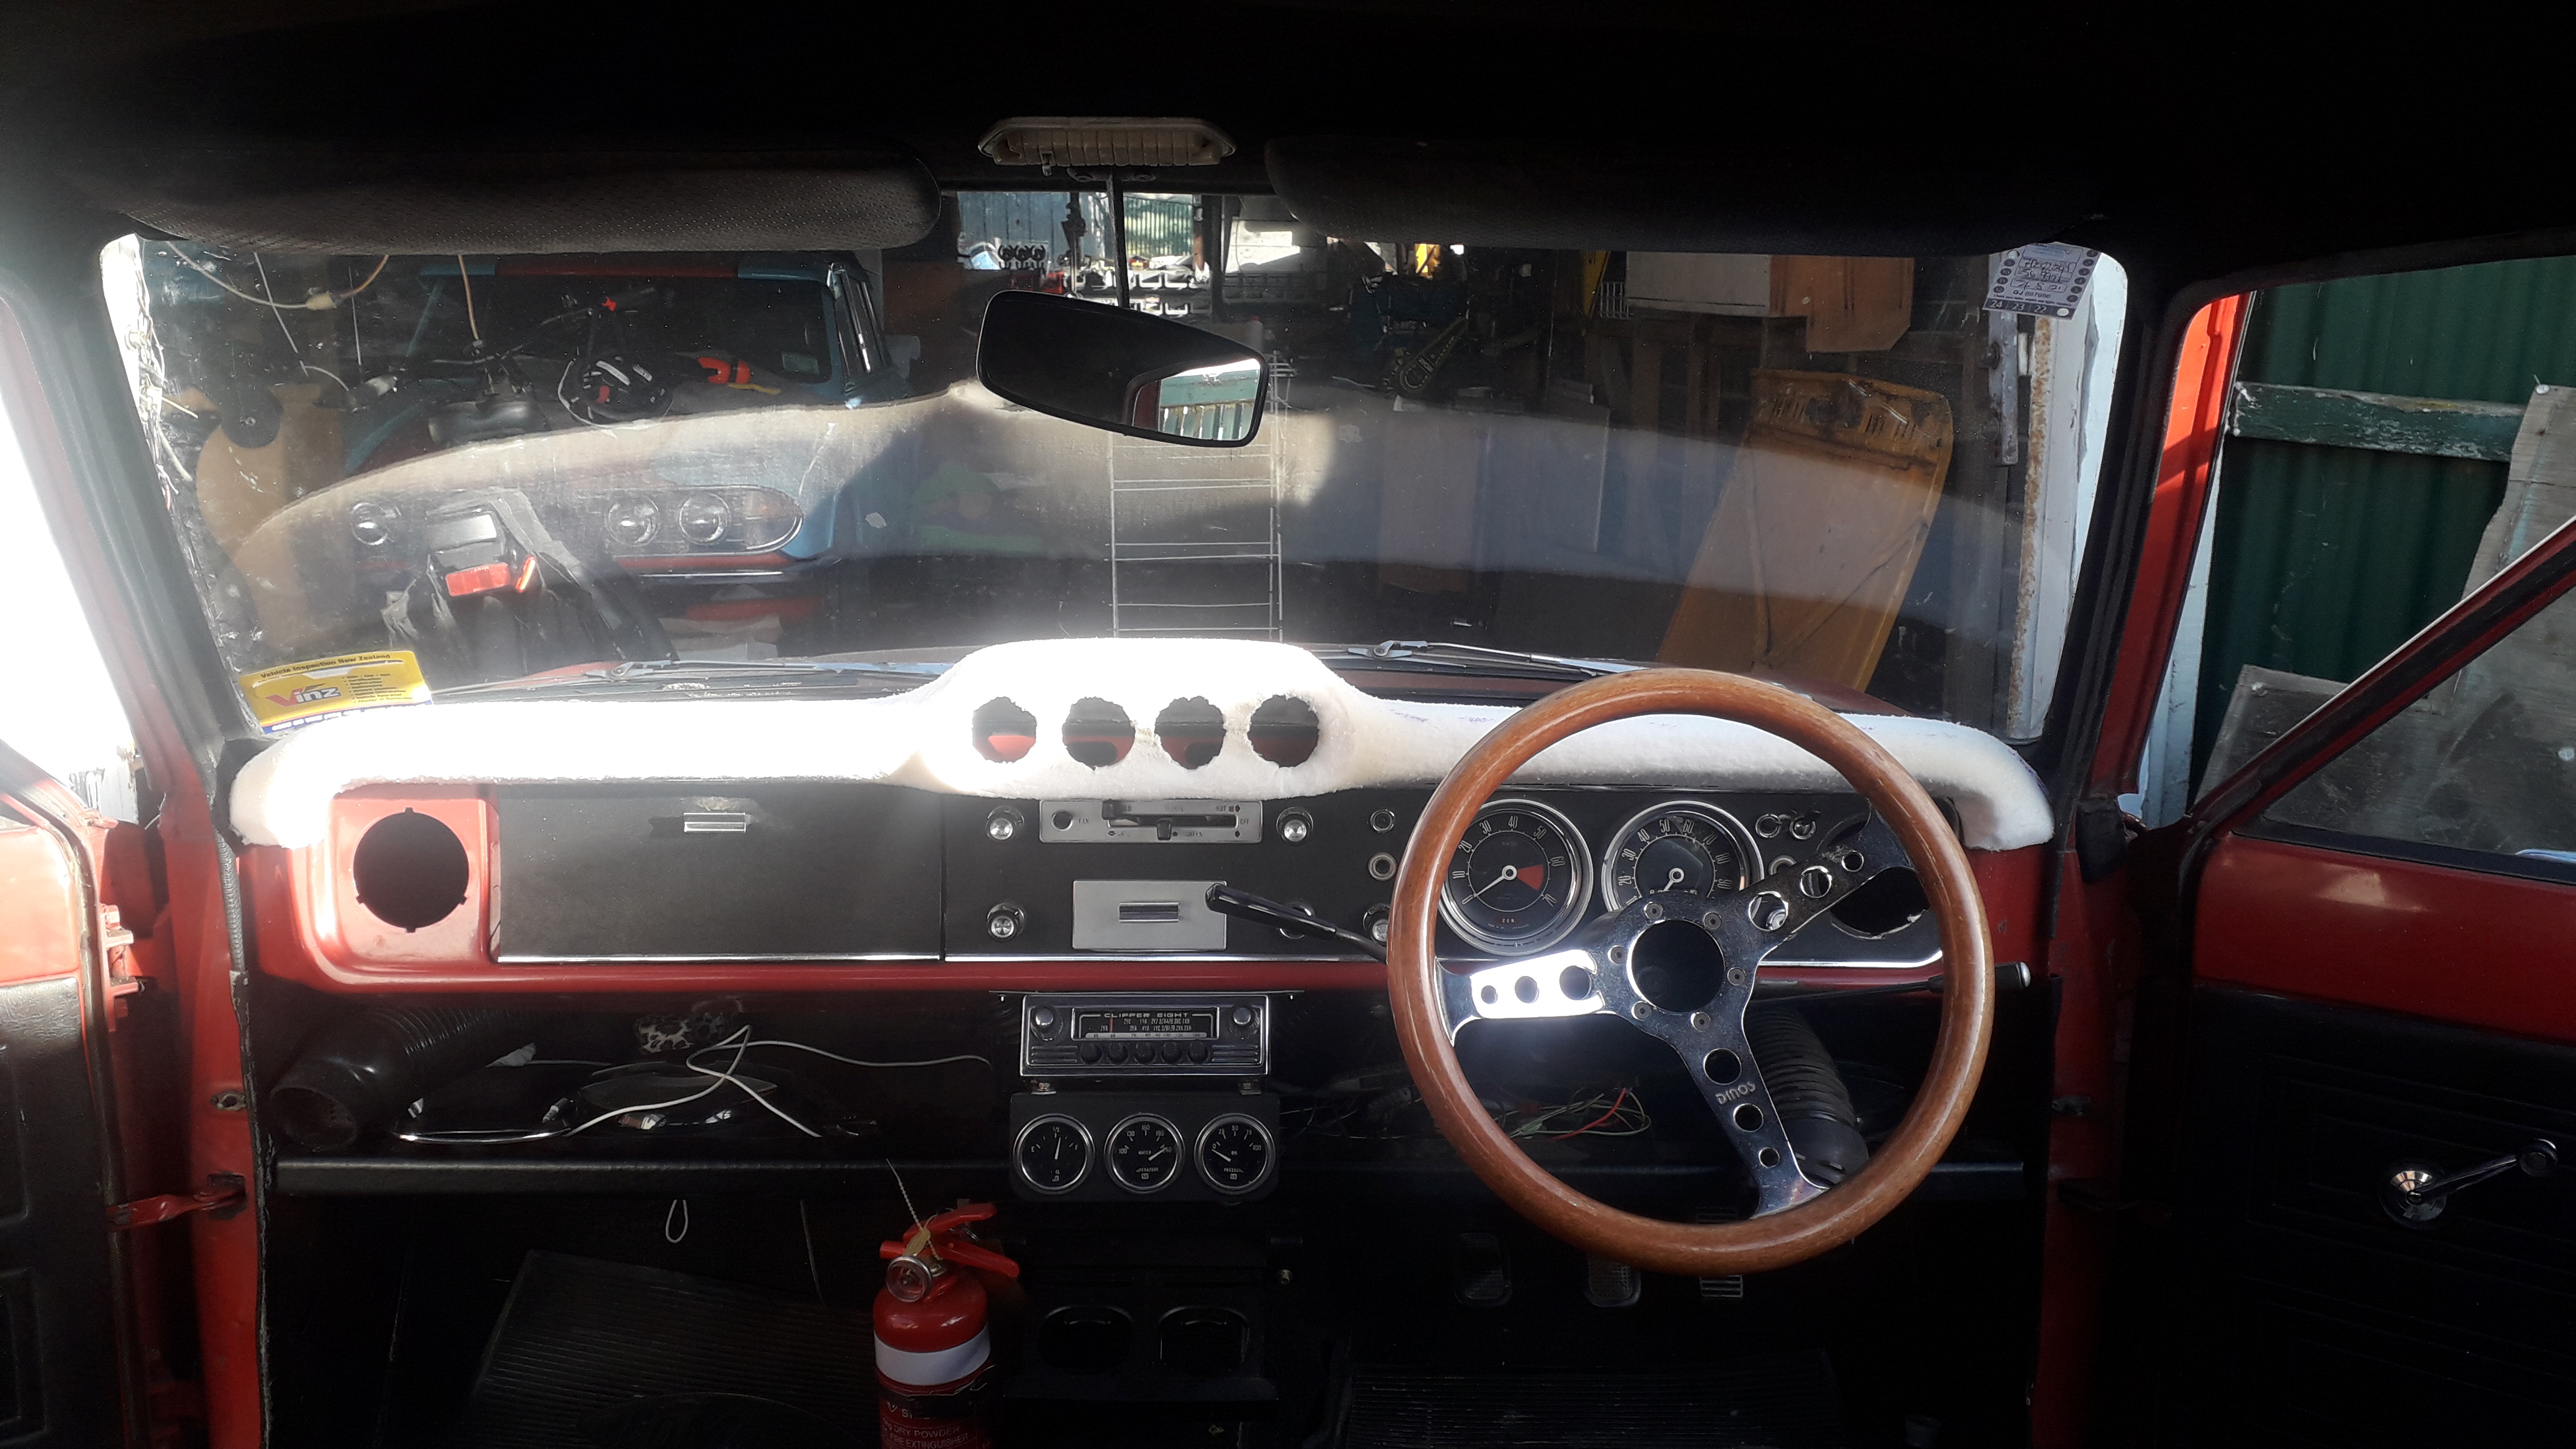
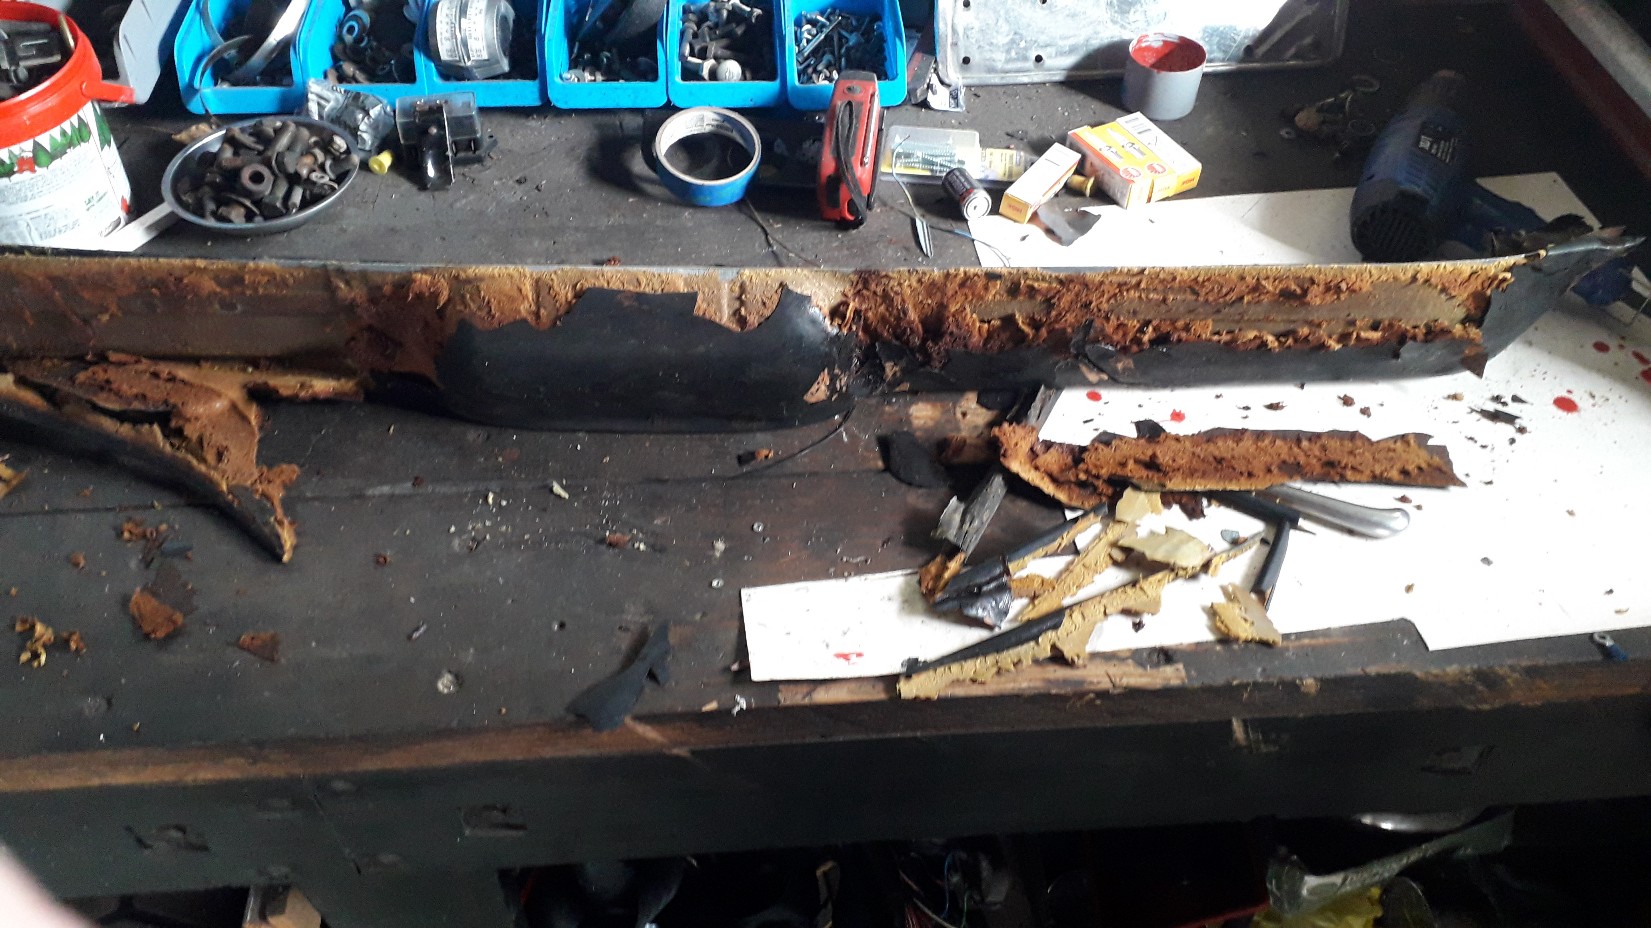
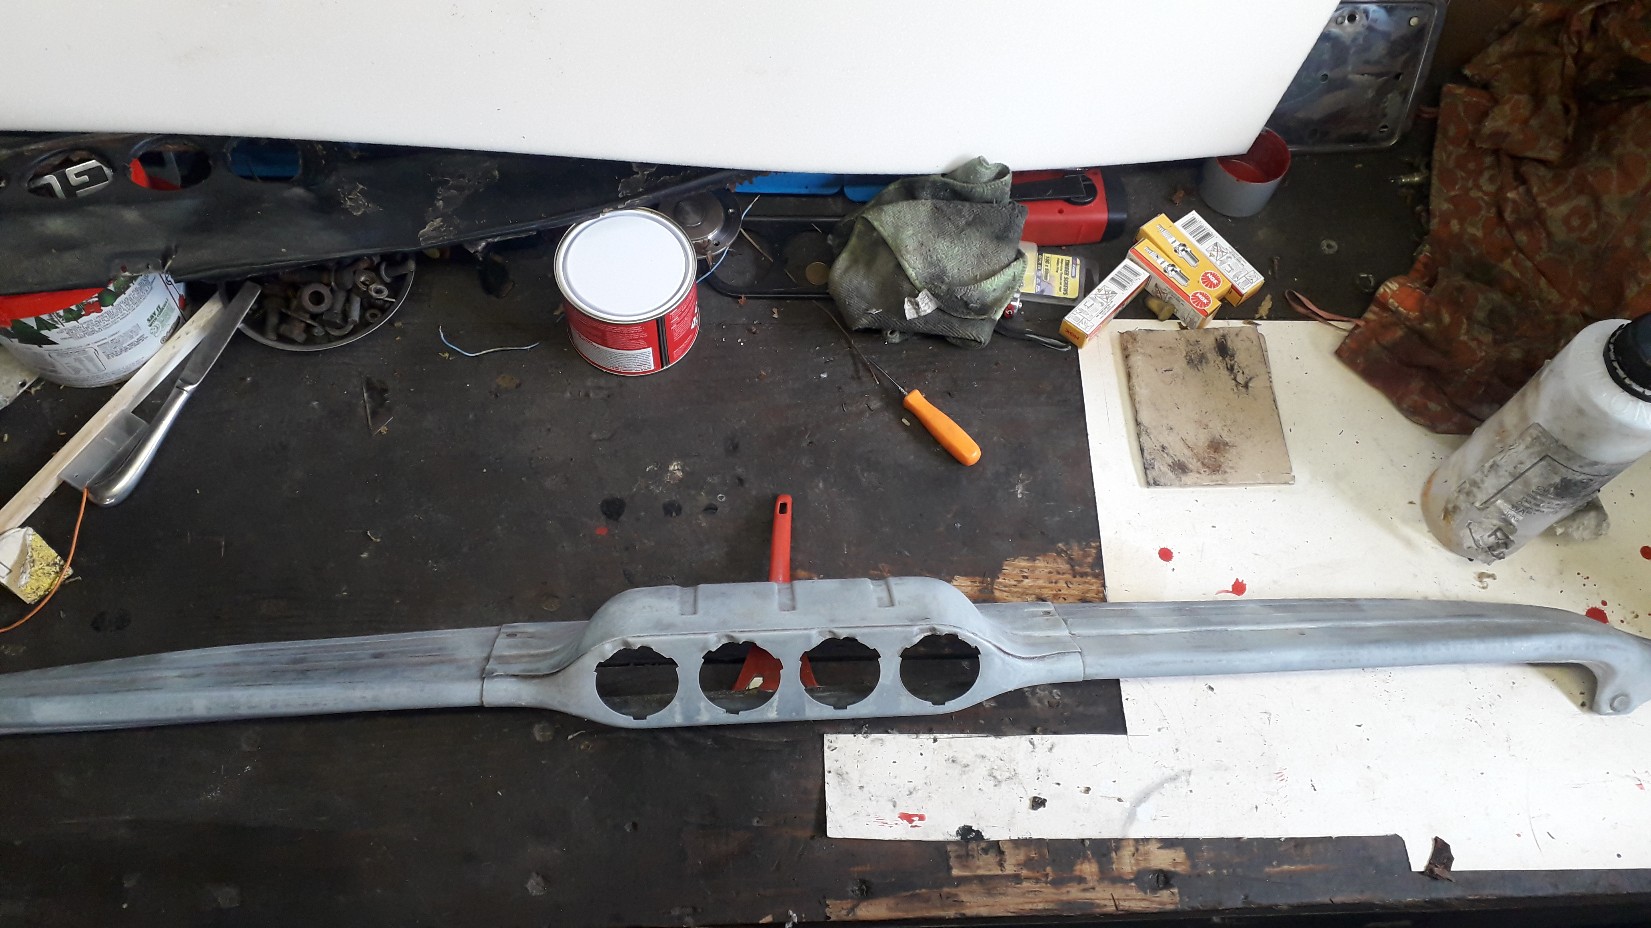
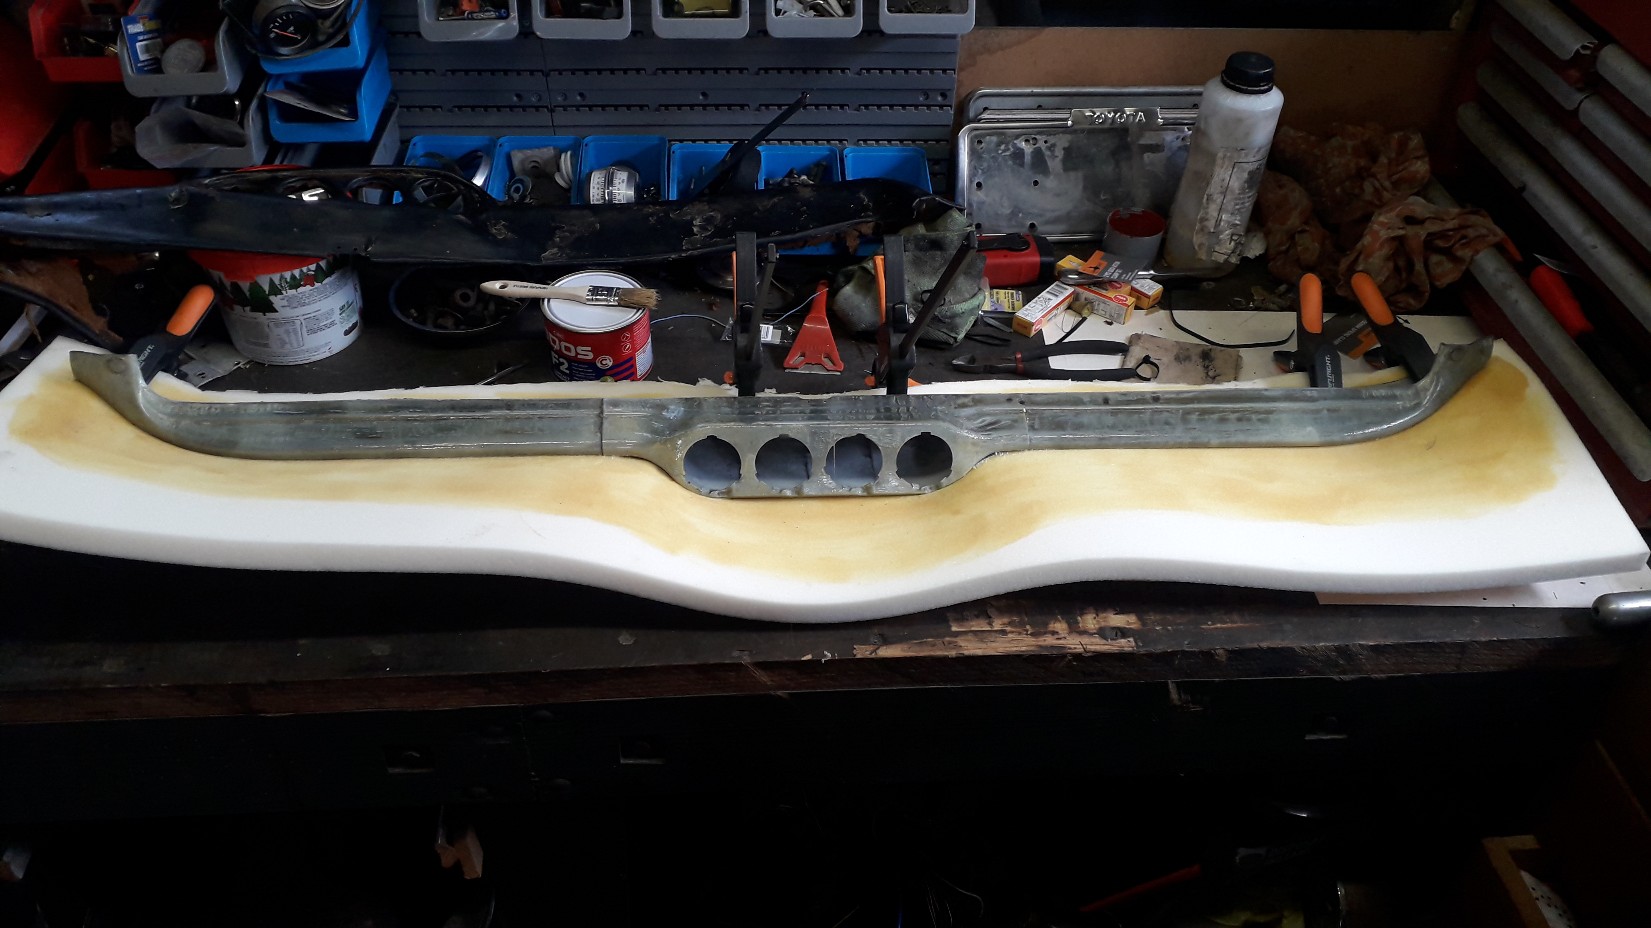
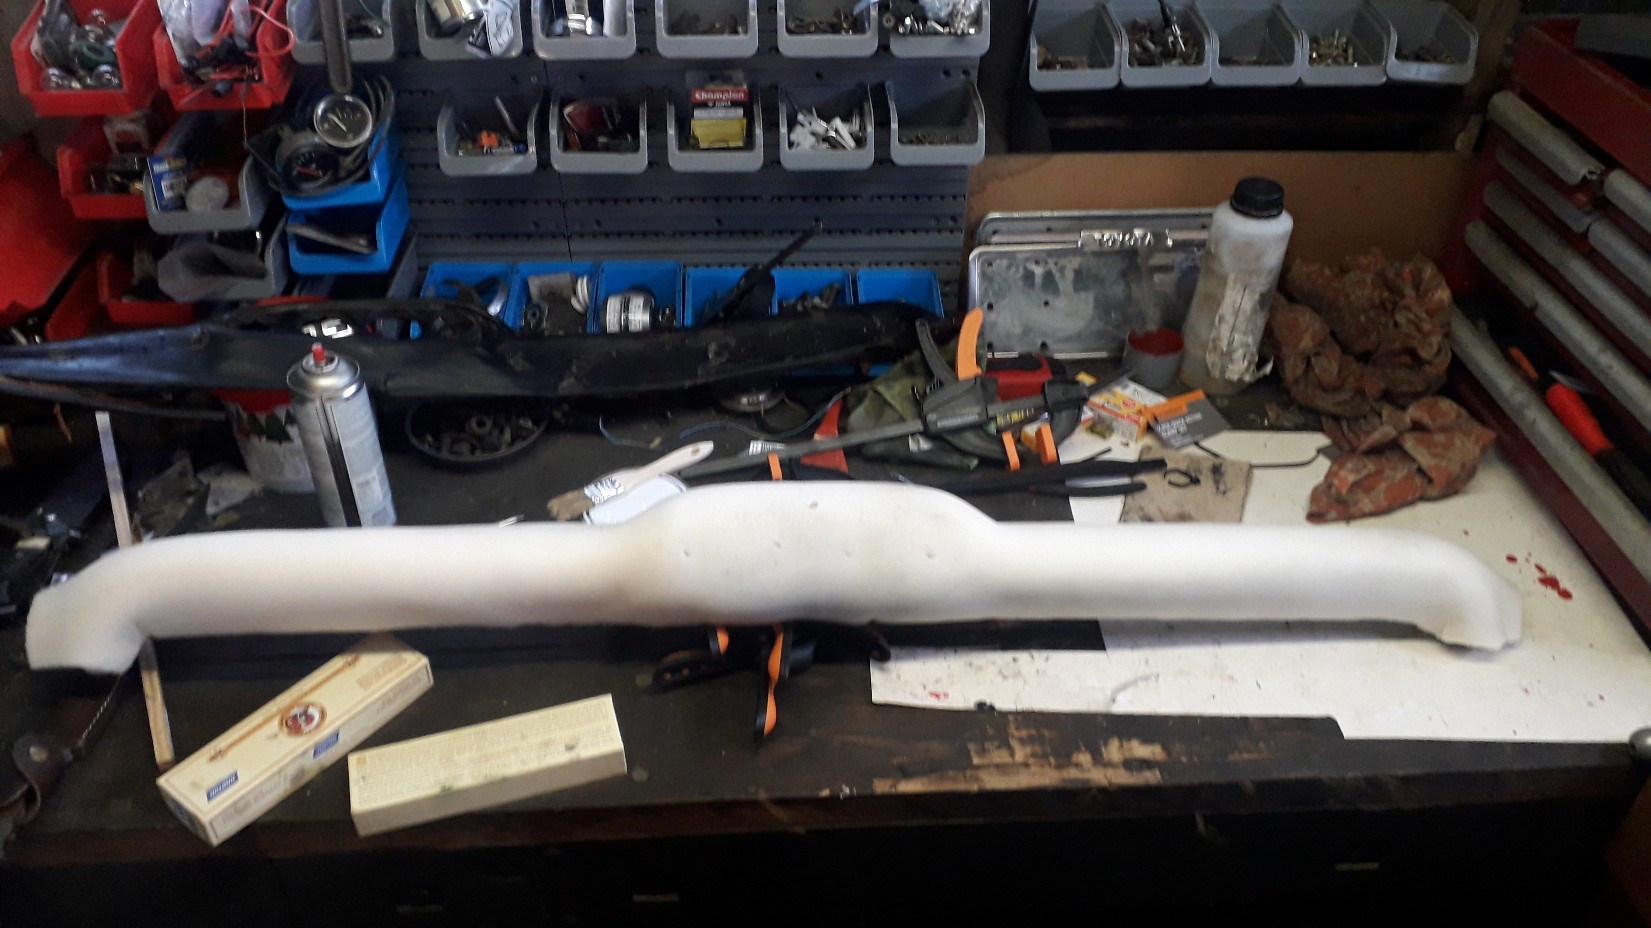
Dash top is Getting there. I bought a rasp after some YouTubing, it's slow work but it's hard to mess up doing it that way.
11 points
-
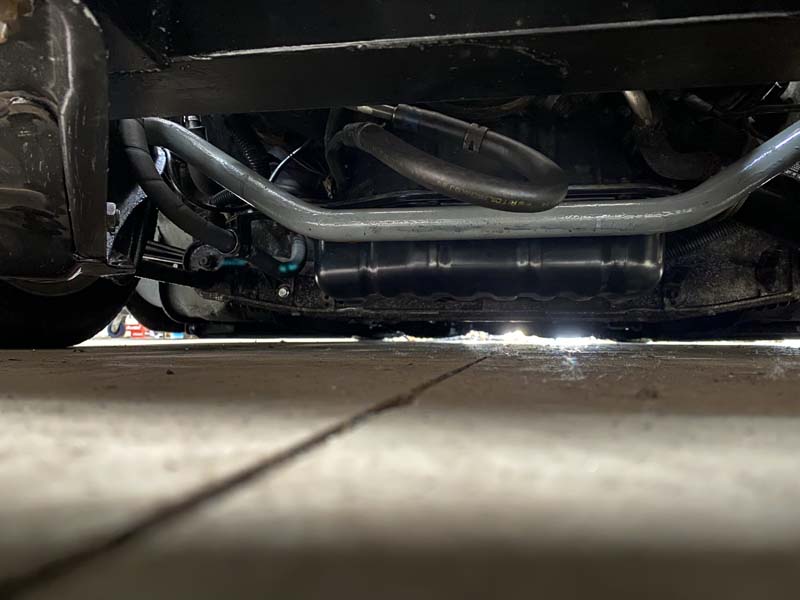
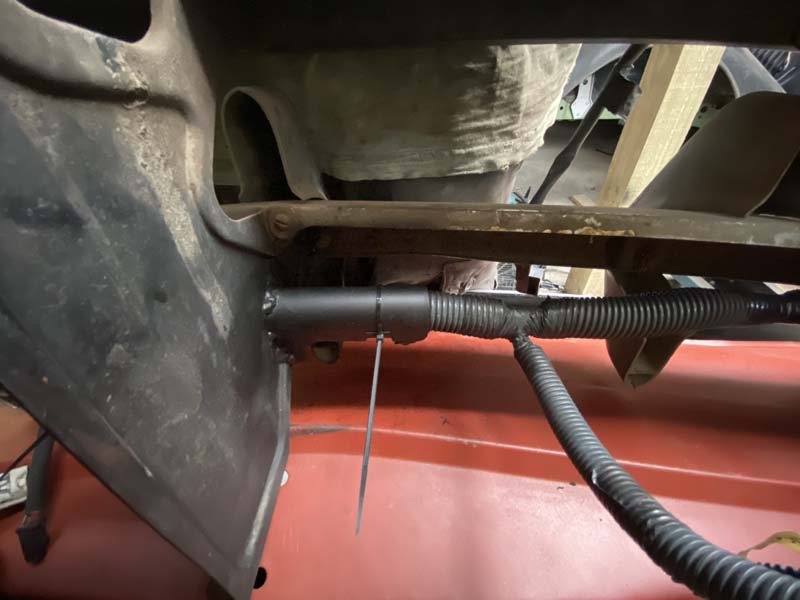
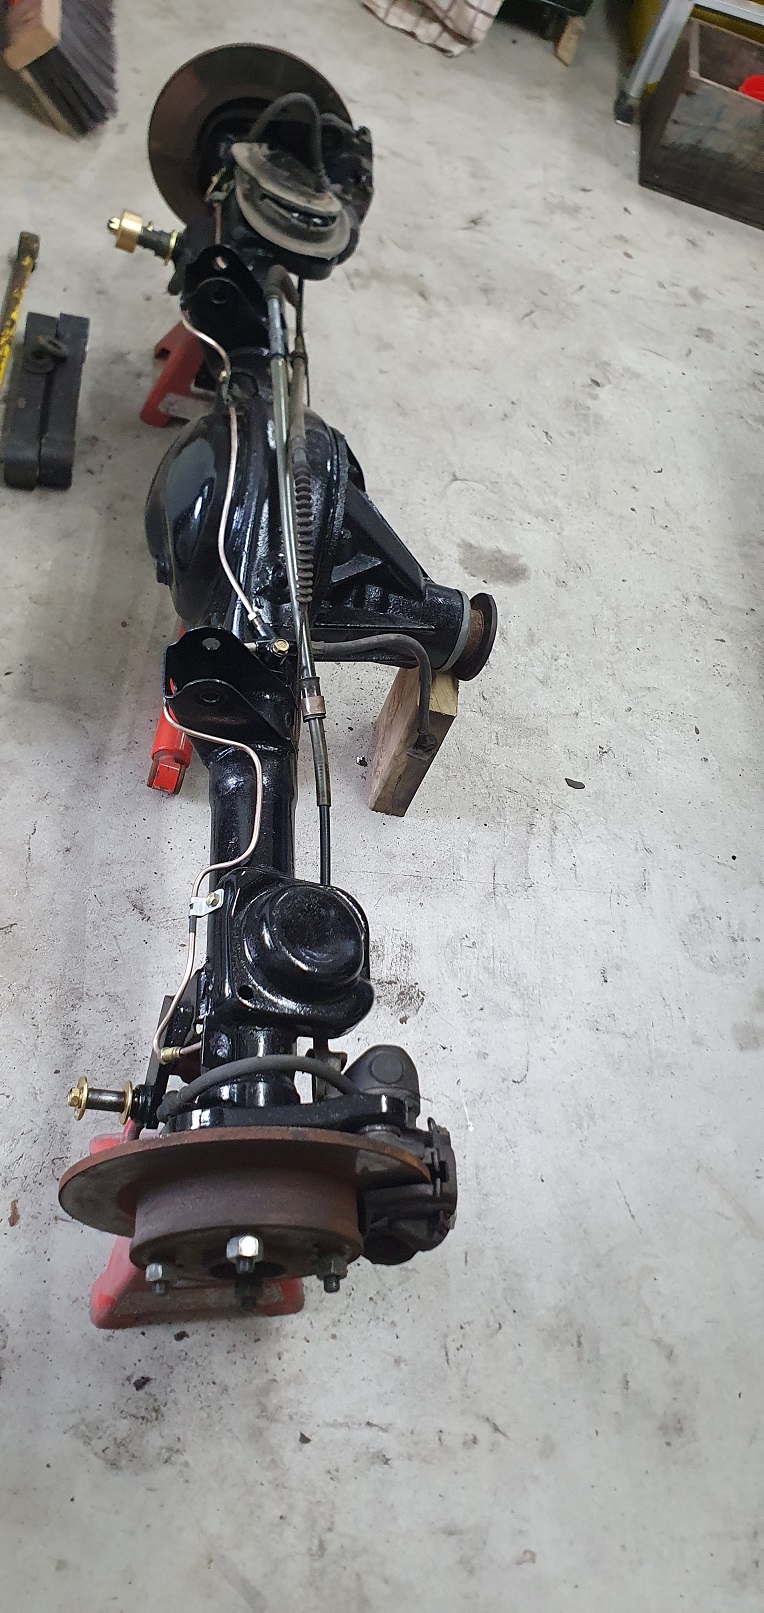
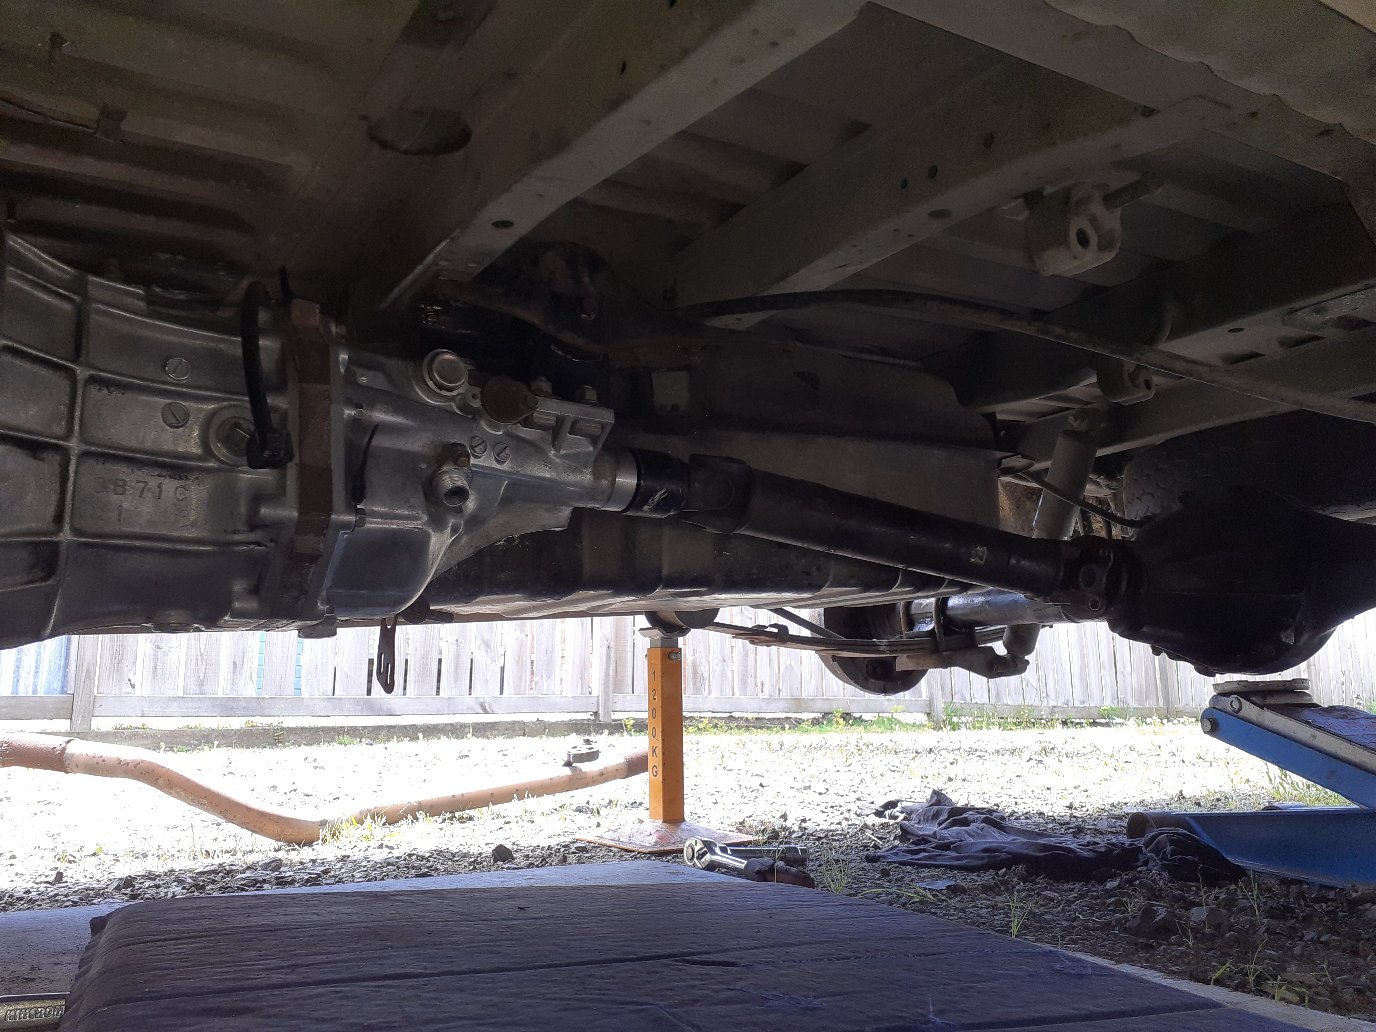
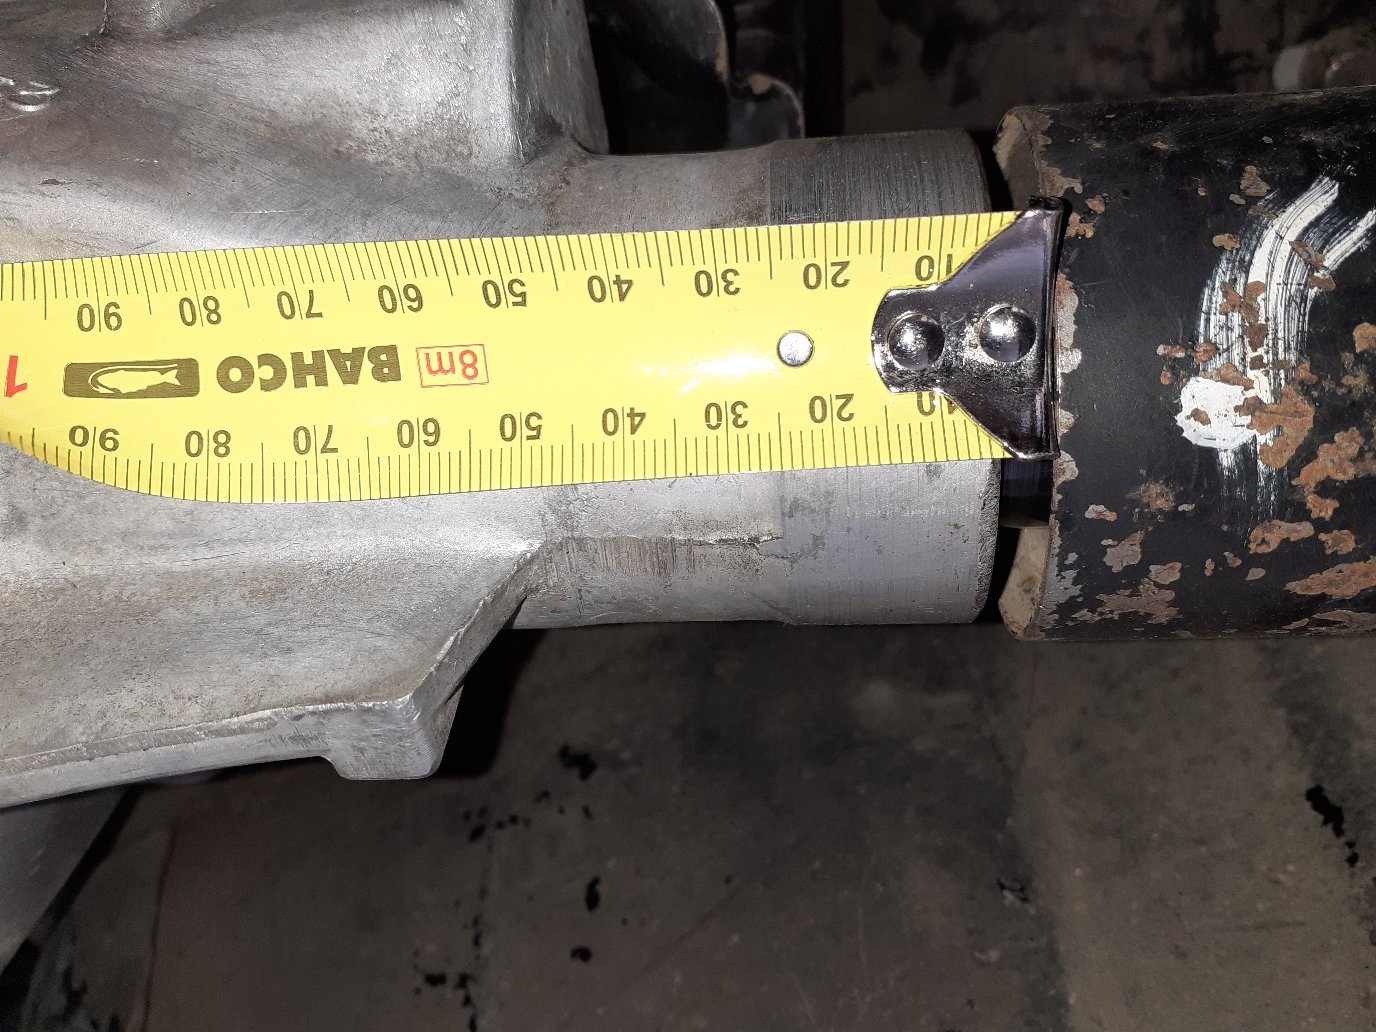
Plumbed up some lines and tee's temporarily. and managed to get her off the hoist. She's not quite touching at the sills. x-member and sump is well up off the ground. above the sill height. The front doesn't seem to have as much travel as I would like. only picks it up about 80mm off the ground?? Moving the strut inboard further on the lower control arm should help this. hopefully without making the front too stiff.
9 points
-
remember a thousand years ago when i bought a link dash for this? well, the instructions for a link dash are fucking shit, if you ever buy one know that the indicator icons are referred to as "warning lights" and the indicator icons that are described in the instruction manual, badly, are just icons that don't work on every display skin. anywho whilst trying to figure this out i powered the wrong pin on the plug and something went bang. it took them two and a half months to fix it but its fixed now so i got on with the job of installing it. its now mounted up and working so now i need to configure the thousands of user definable display options and also get a few parameters that currently dont work, working. 2021-04-04_04-14-47 by sheepers, on Flickr 2021-04-04_05-18-02 by sheepers, on Flickr9 points
-
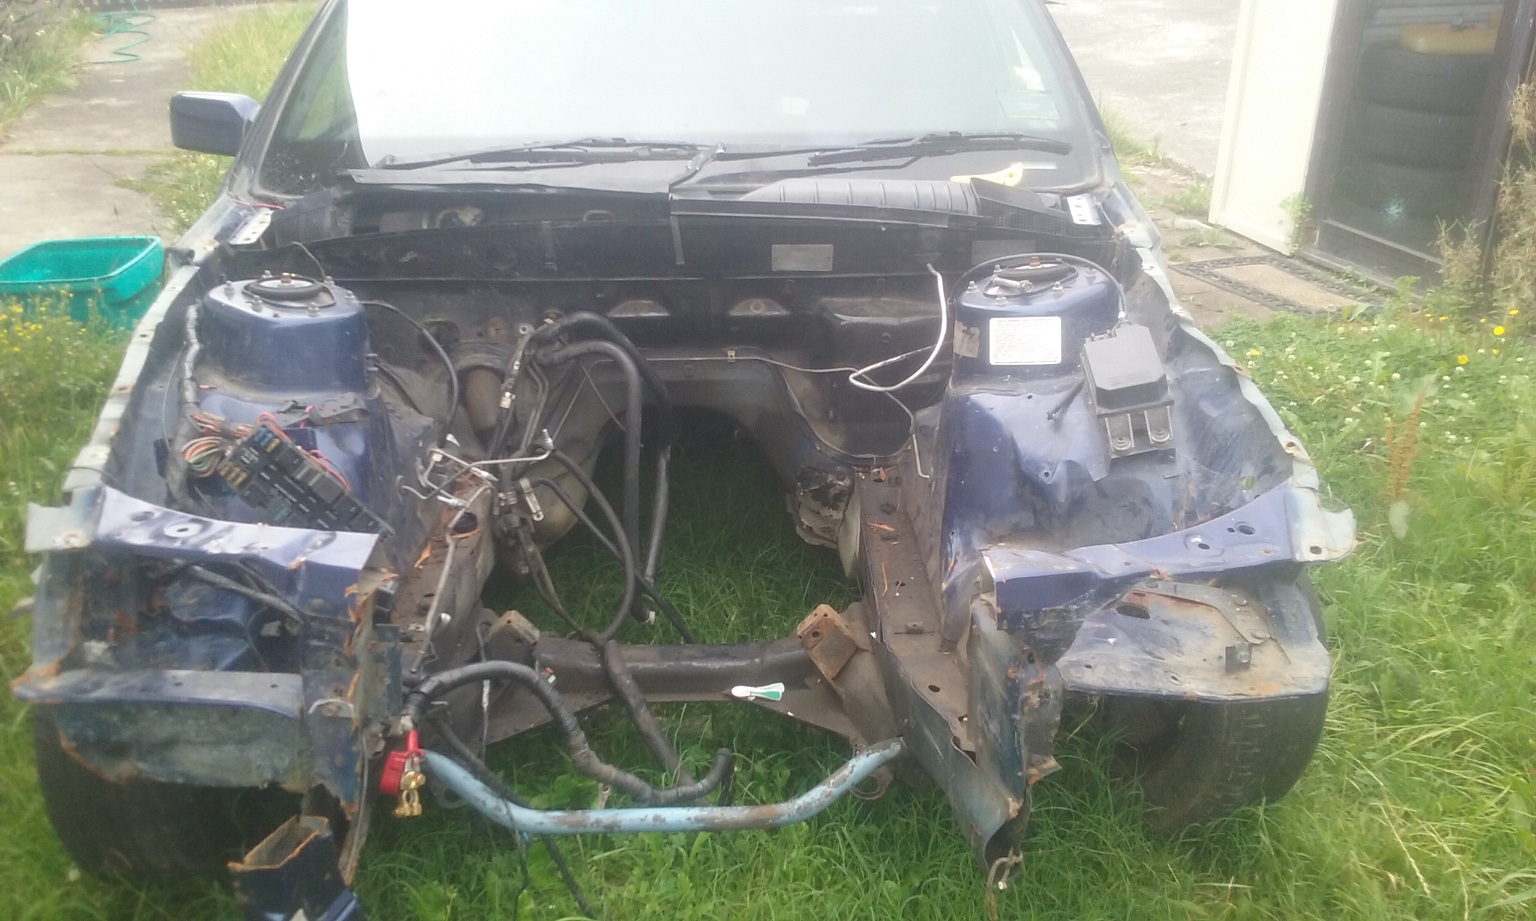
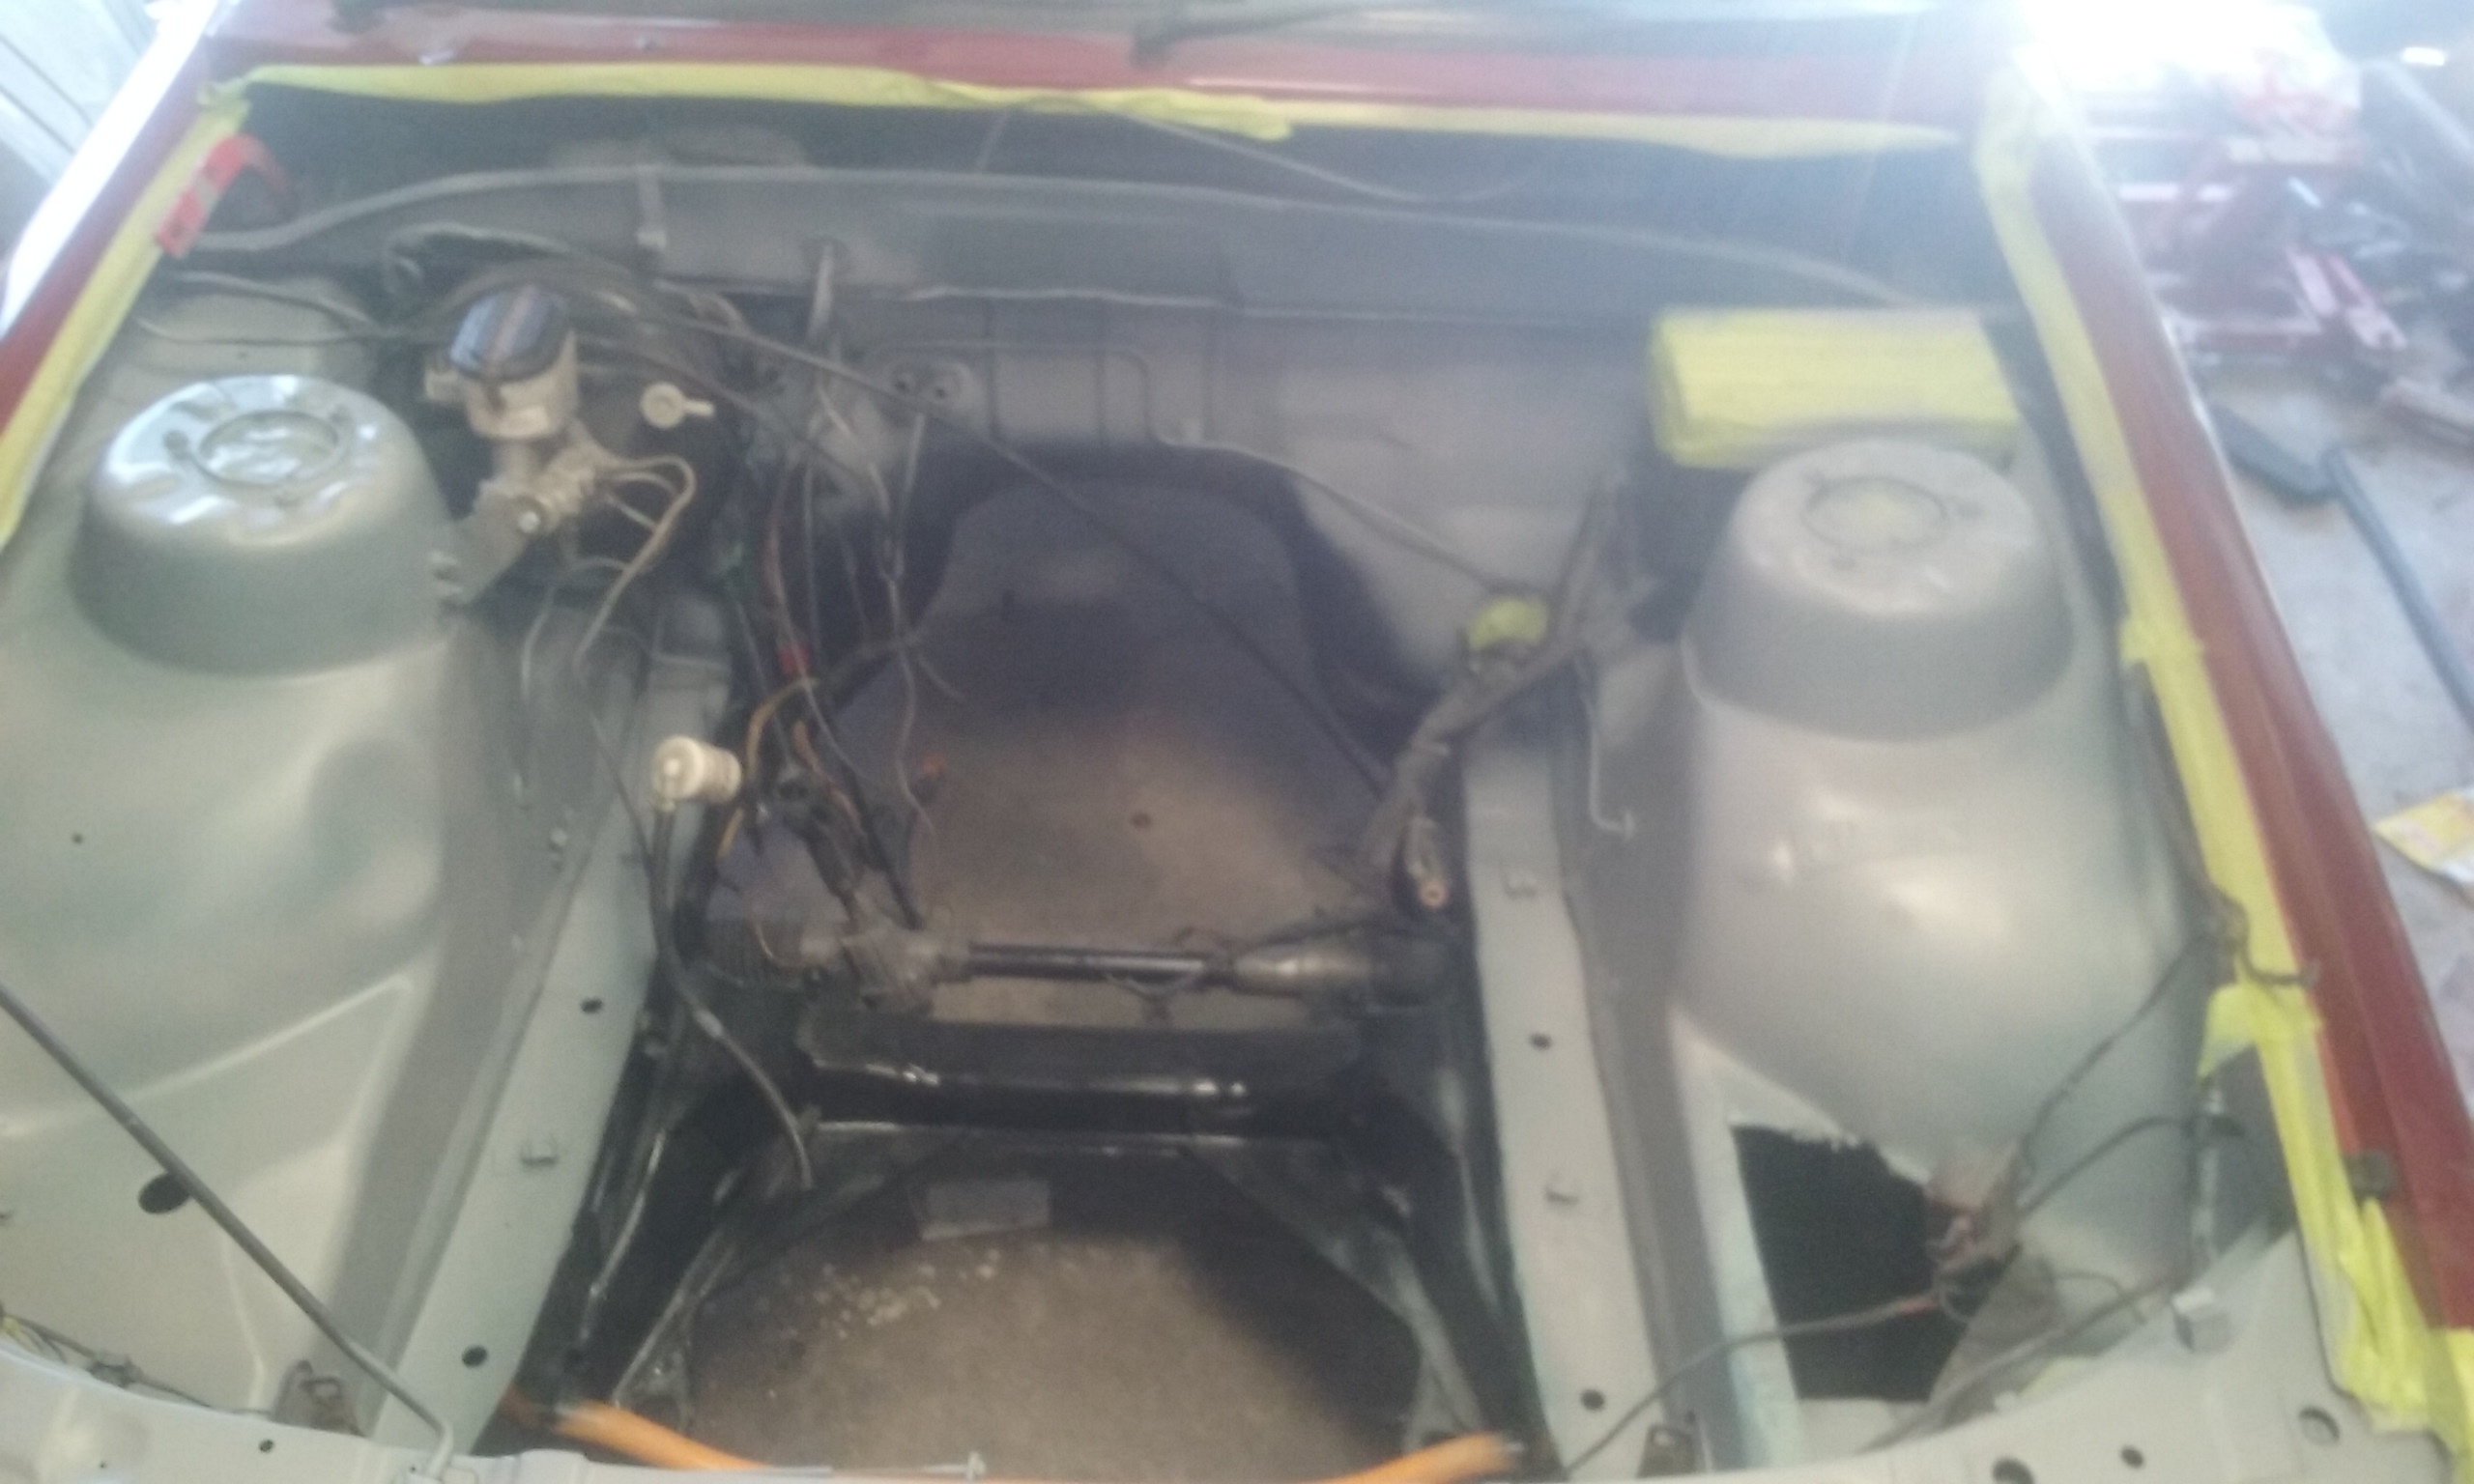
Got the extention/cut and shut bit done today. Very happy with how it turned out. This 200mm filler panel is also replicated the between the front and rear floorpans/tunnel and makes the Kombi (wagon), Pickup and Ambulance (commercial special) wheelbase that much longer than the sedan.
8 points
-
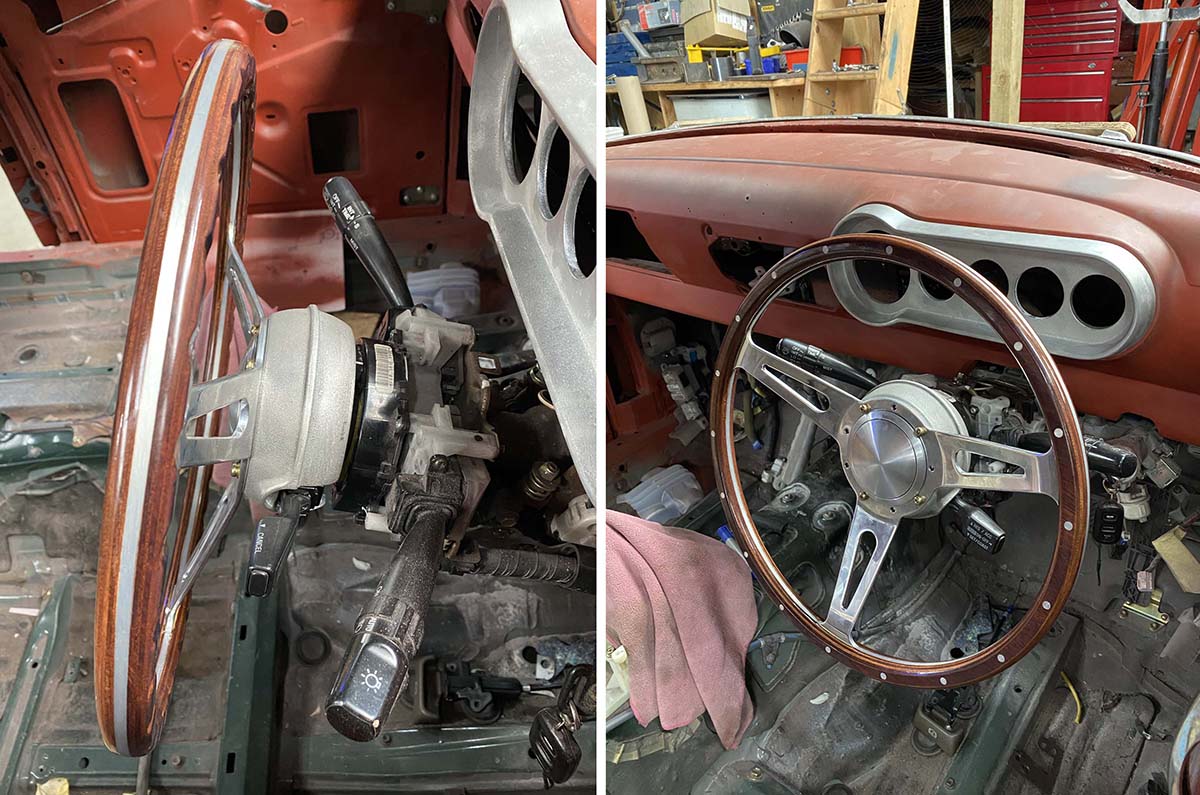
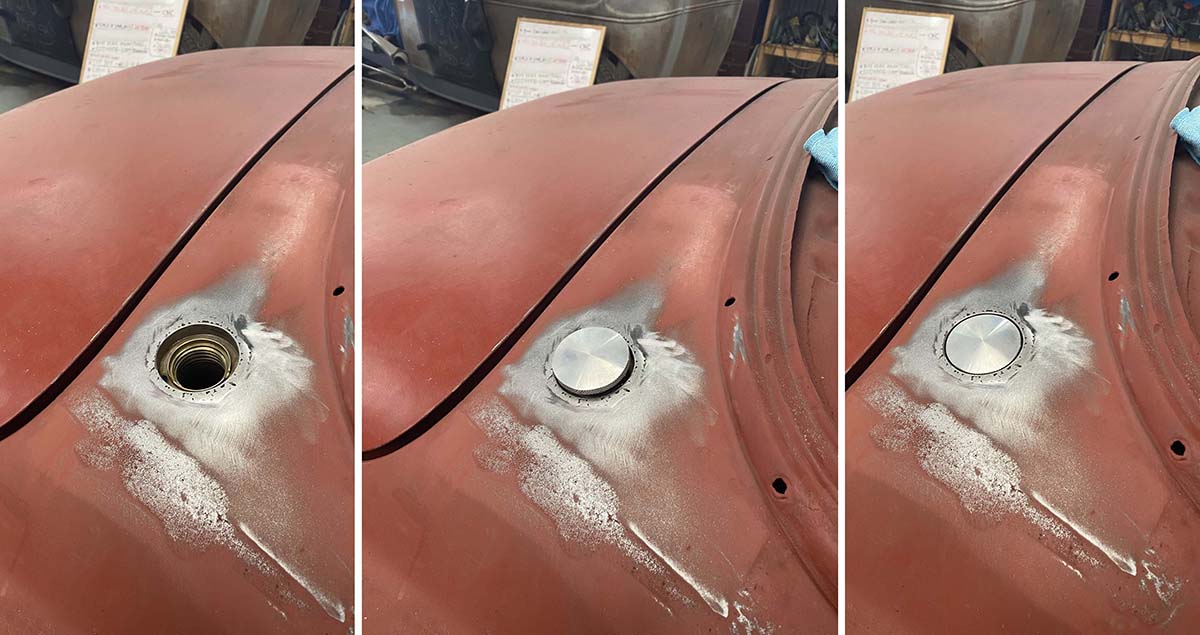
A cast boss kit. With factory lexus cruise control stalk in place. Cast straight off a 3d print with no prep. We didn't even bother putting it on a plate for the foundry. Scaled up to 101.2% Contraction. Came out absolutely perfect to within 1/2 a mm. Dad also cast up the dash cluster a few years back, when he built his belair. Both with be dark rough sandblasted finish, with a polished lip. Finished welding in the gas cap. And shaving all the door handles. Not the flashest. But should do the job.
8 points
-
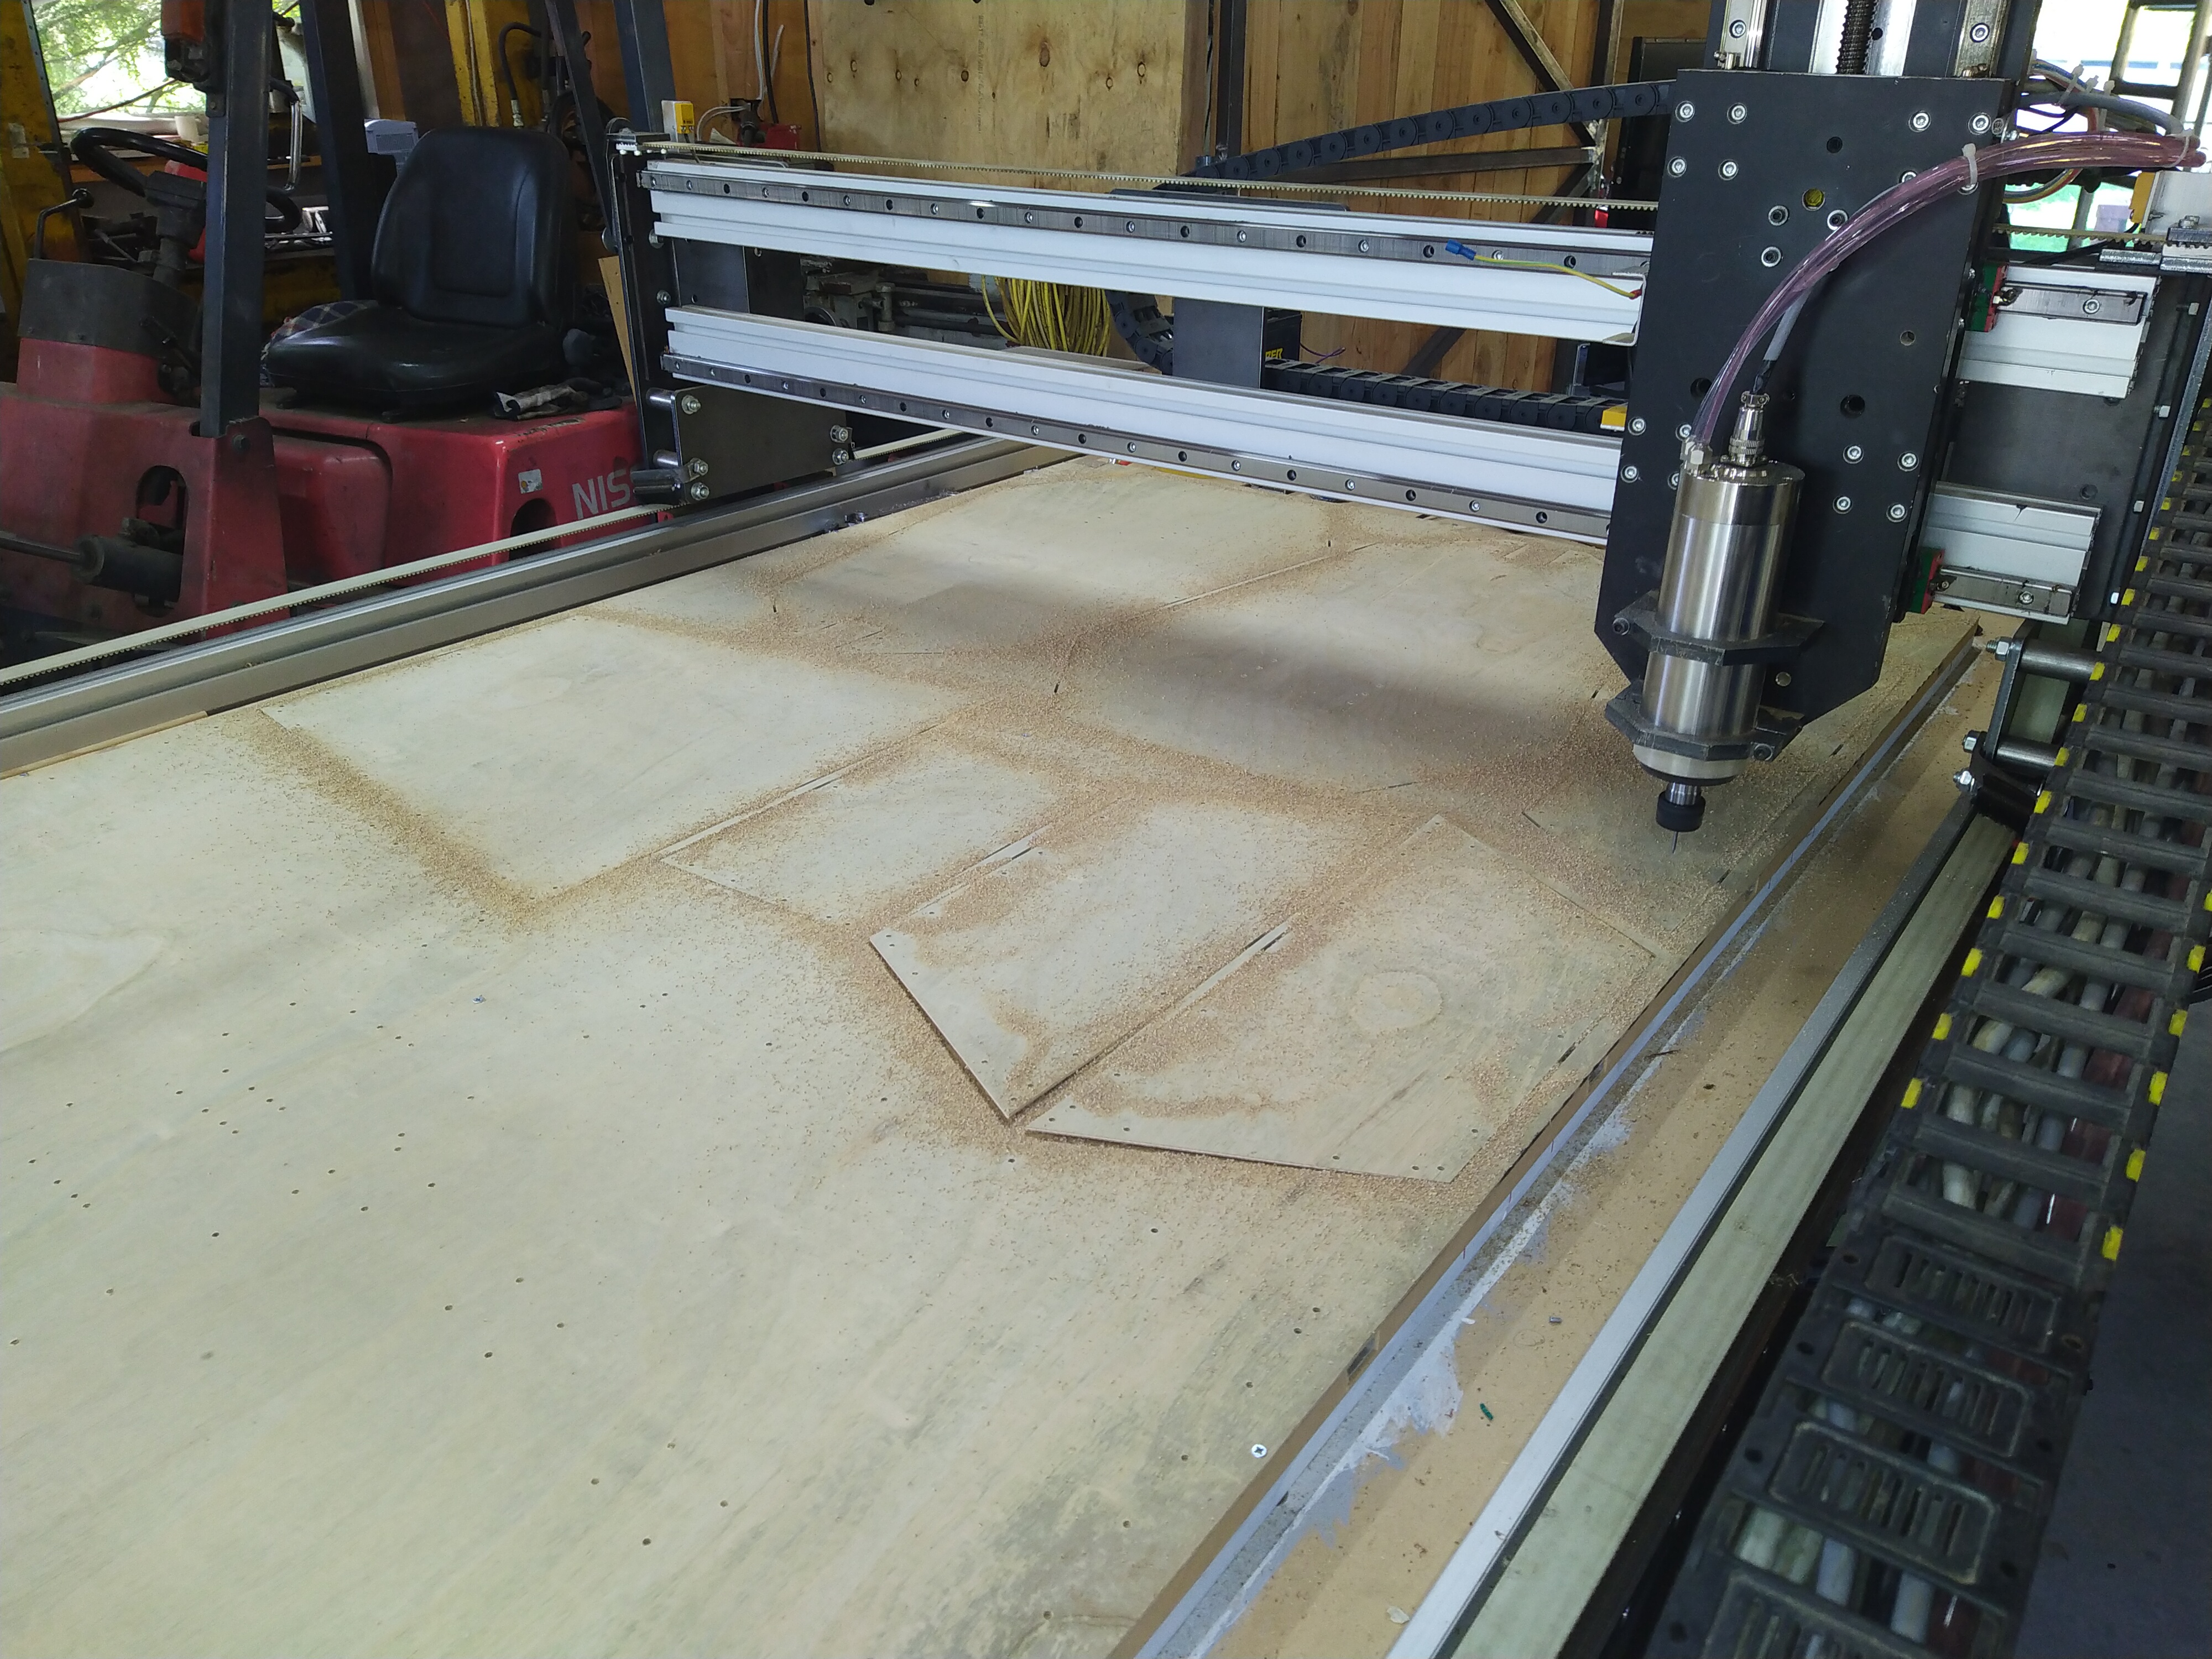
I have been having some dramas with the old girl, basically I cooked either the spindle or the speed drive as it was cutting out with an overcurrent fault. I checked many things but without the ability to swap things out I was a bit stuck. So I took a punt and ordered a new spindle vfd combo from the same AliX place as I got the last one, I did consider buying a local setup but this was 2.5k vs $600, so apart from potential shipping time it was a no brainer. Fortunately the package arrived without too much delay. I mounted the new spindle and got the same error, so I programmed the new vfd and spun it up with no faults. While I was waiting for this to arrived I tidied some things, mostly a cutout switch for the spindle and an aux relay board so the water pump would turn on when the spindle turned on. Something in the new setup was causing issues though, either the spindle or the relay board was causing the prox sensor circuit to false positive when stopping and starting, this would shut things down. I spent a week fucking around with isolating all the various circuits and installing ferrites and caps to clean up the signal from the relay board, but a google search for the same issue solved it for me, which was a 100 microfarad cap across the signal terminals of the prox circuit. Sorted. Before all this happened I had visited @Willdat?'s dad to check out his machine and talk shit for a while, I can see now how Will turned out such a solid citizen. Dave gave me a 1/8th downcut bit that he said was great for profiling ply, and today I finally got a chance to try it out with amazing results; The edges are super clean, no cleanup required at all. I am super stoked. I'll get some 18mm ply soon and try it out on that....
6 points
-
Wire wheeled the whole thing yesterday and got a coat on today.6 points
-
The powerglide by this time was proving pretty good, drove around the block 30 times, couple single peels, so i tried selling it for what i put into it,, took way to long and ended selling for a small loss but it sold to a better place, and then i had money to buy a manual box, and i found the right one a few weeks or months later from a guy who imports them, not some dodgy box that had no history, at 2k i wanted the right deal ya know.. What i ended up with was a vt series one v8 getrag 290 gearbox with 150xxx km, and associated parts needed to install.. brought a new hd clutch and throwout bearing, fluid etc, and got to installing
5 points
-
75x50x3 rhs for new chassis.... got another T bucket chassis and a ford pop gasser to do too
5 points
-
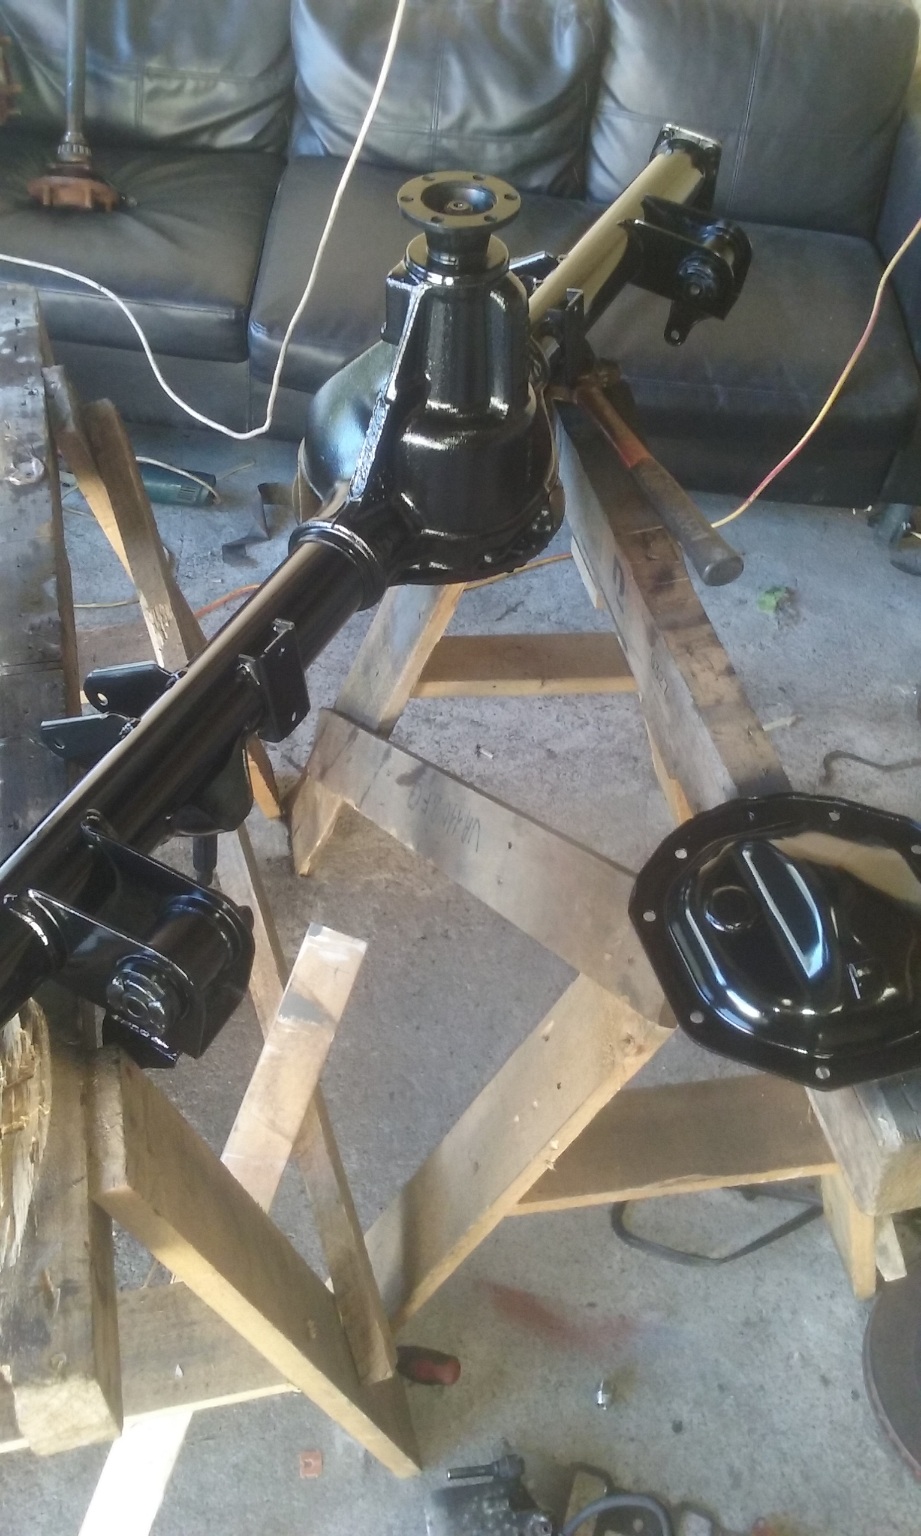
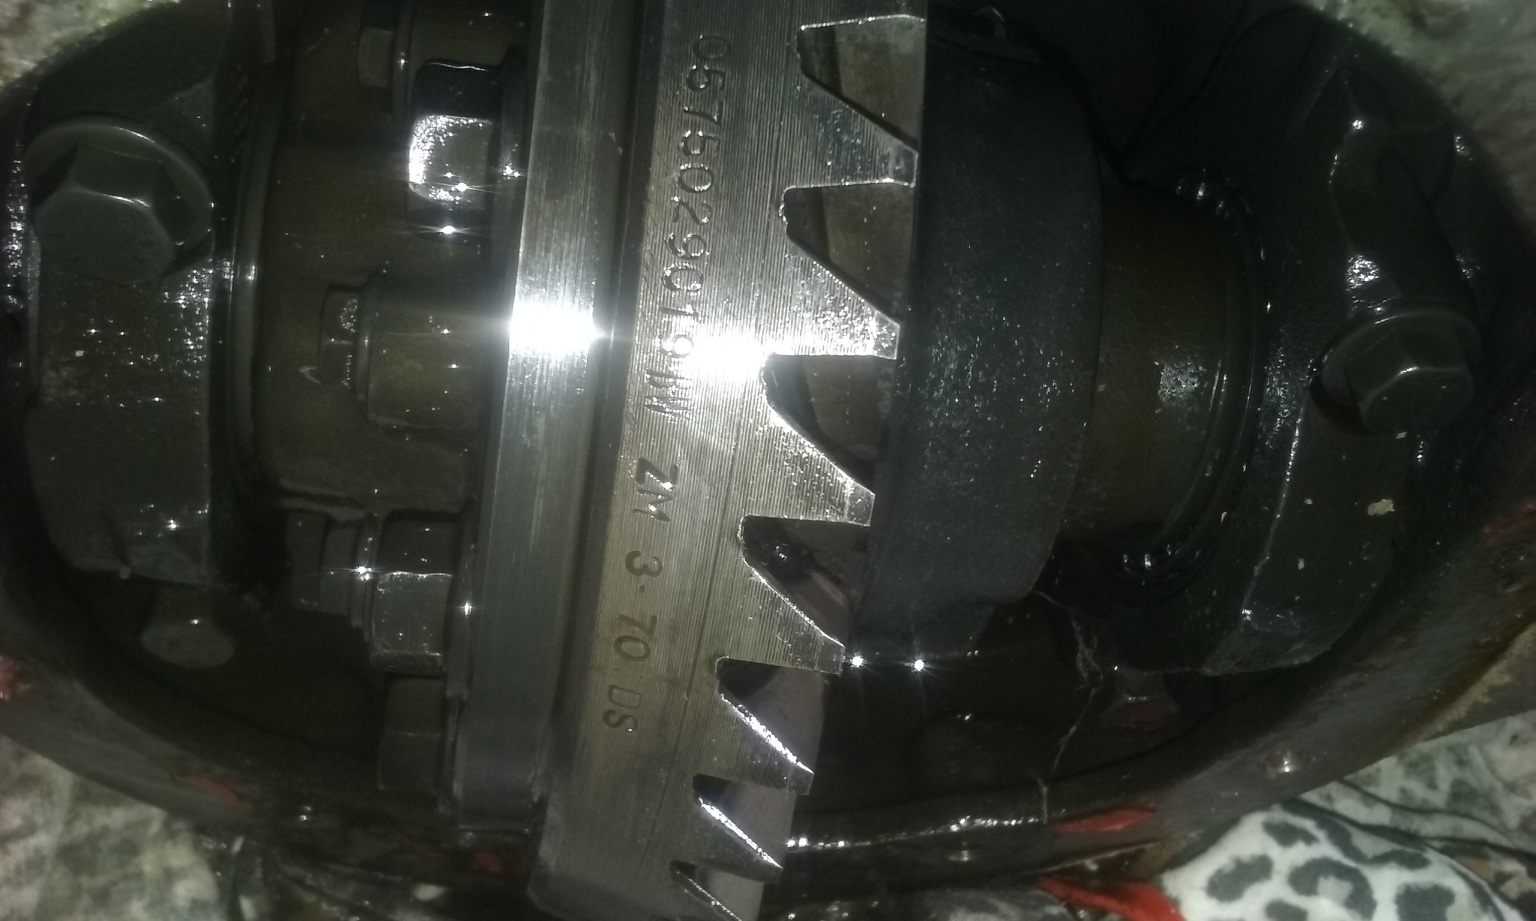
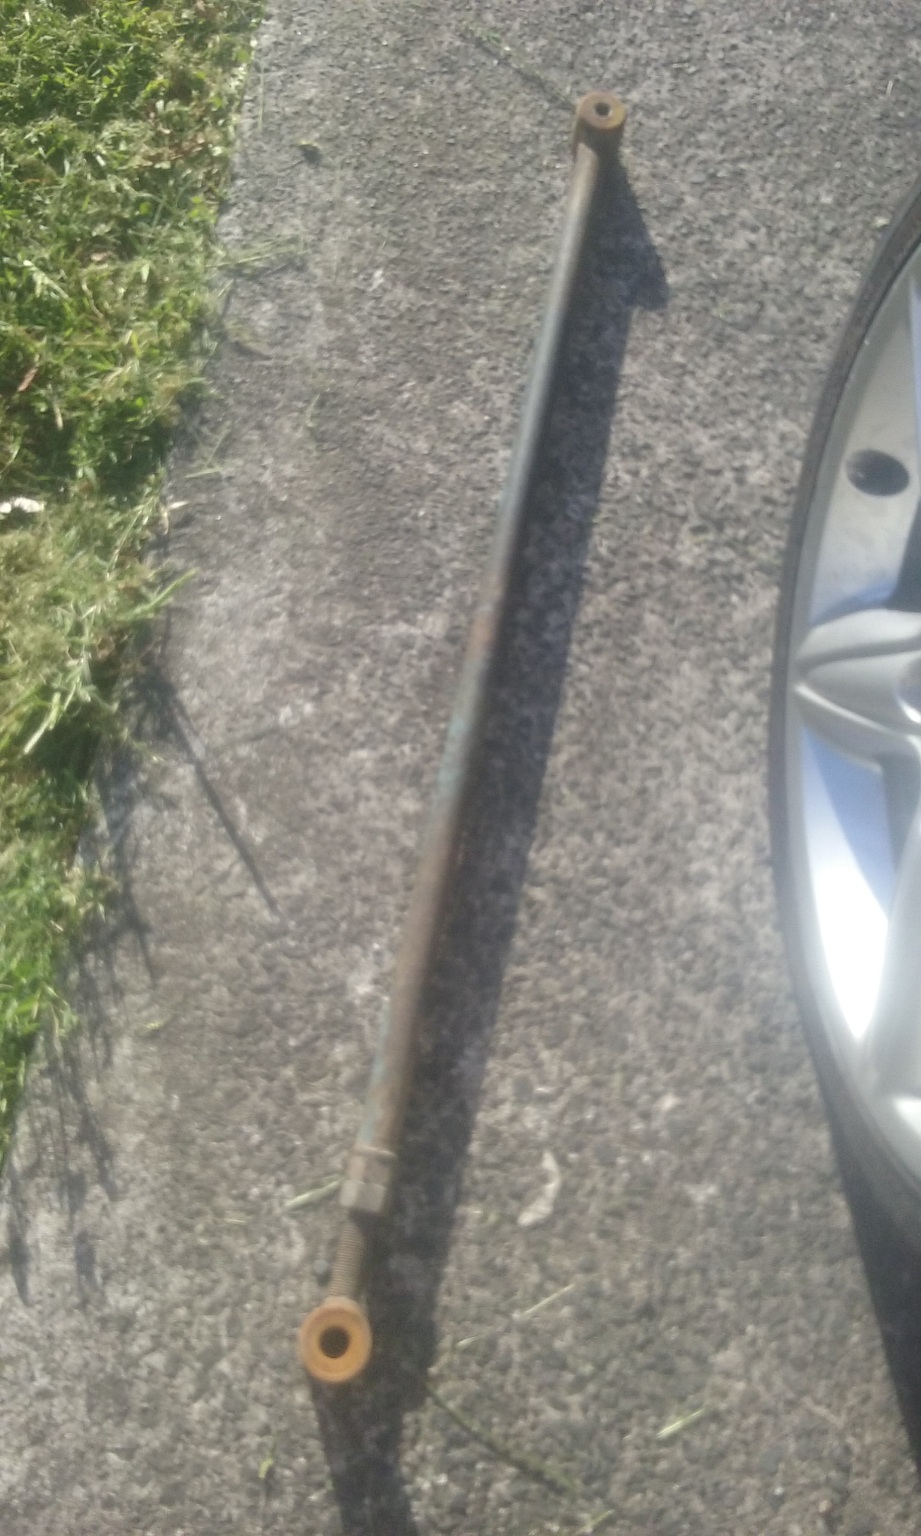
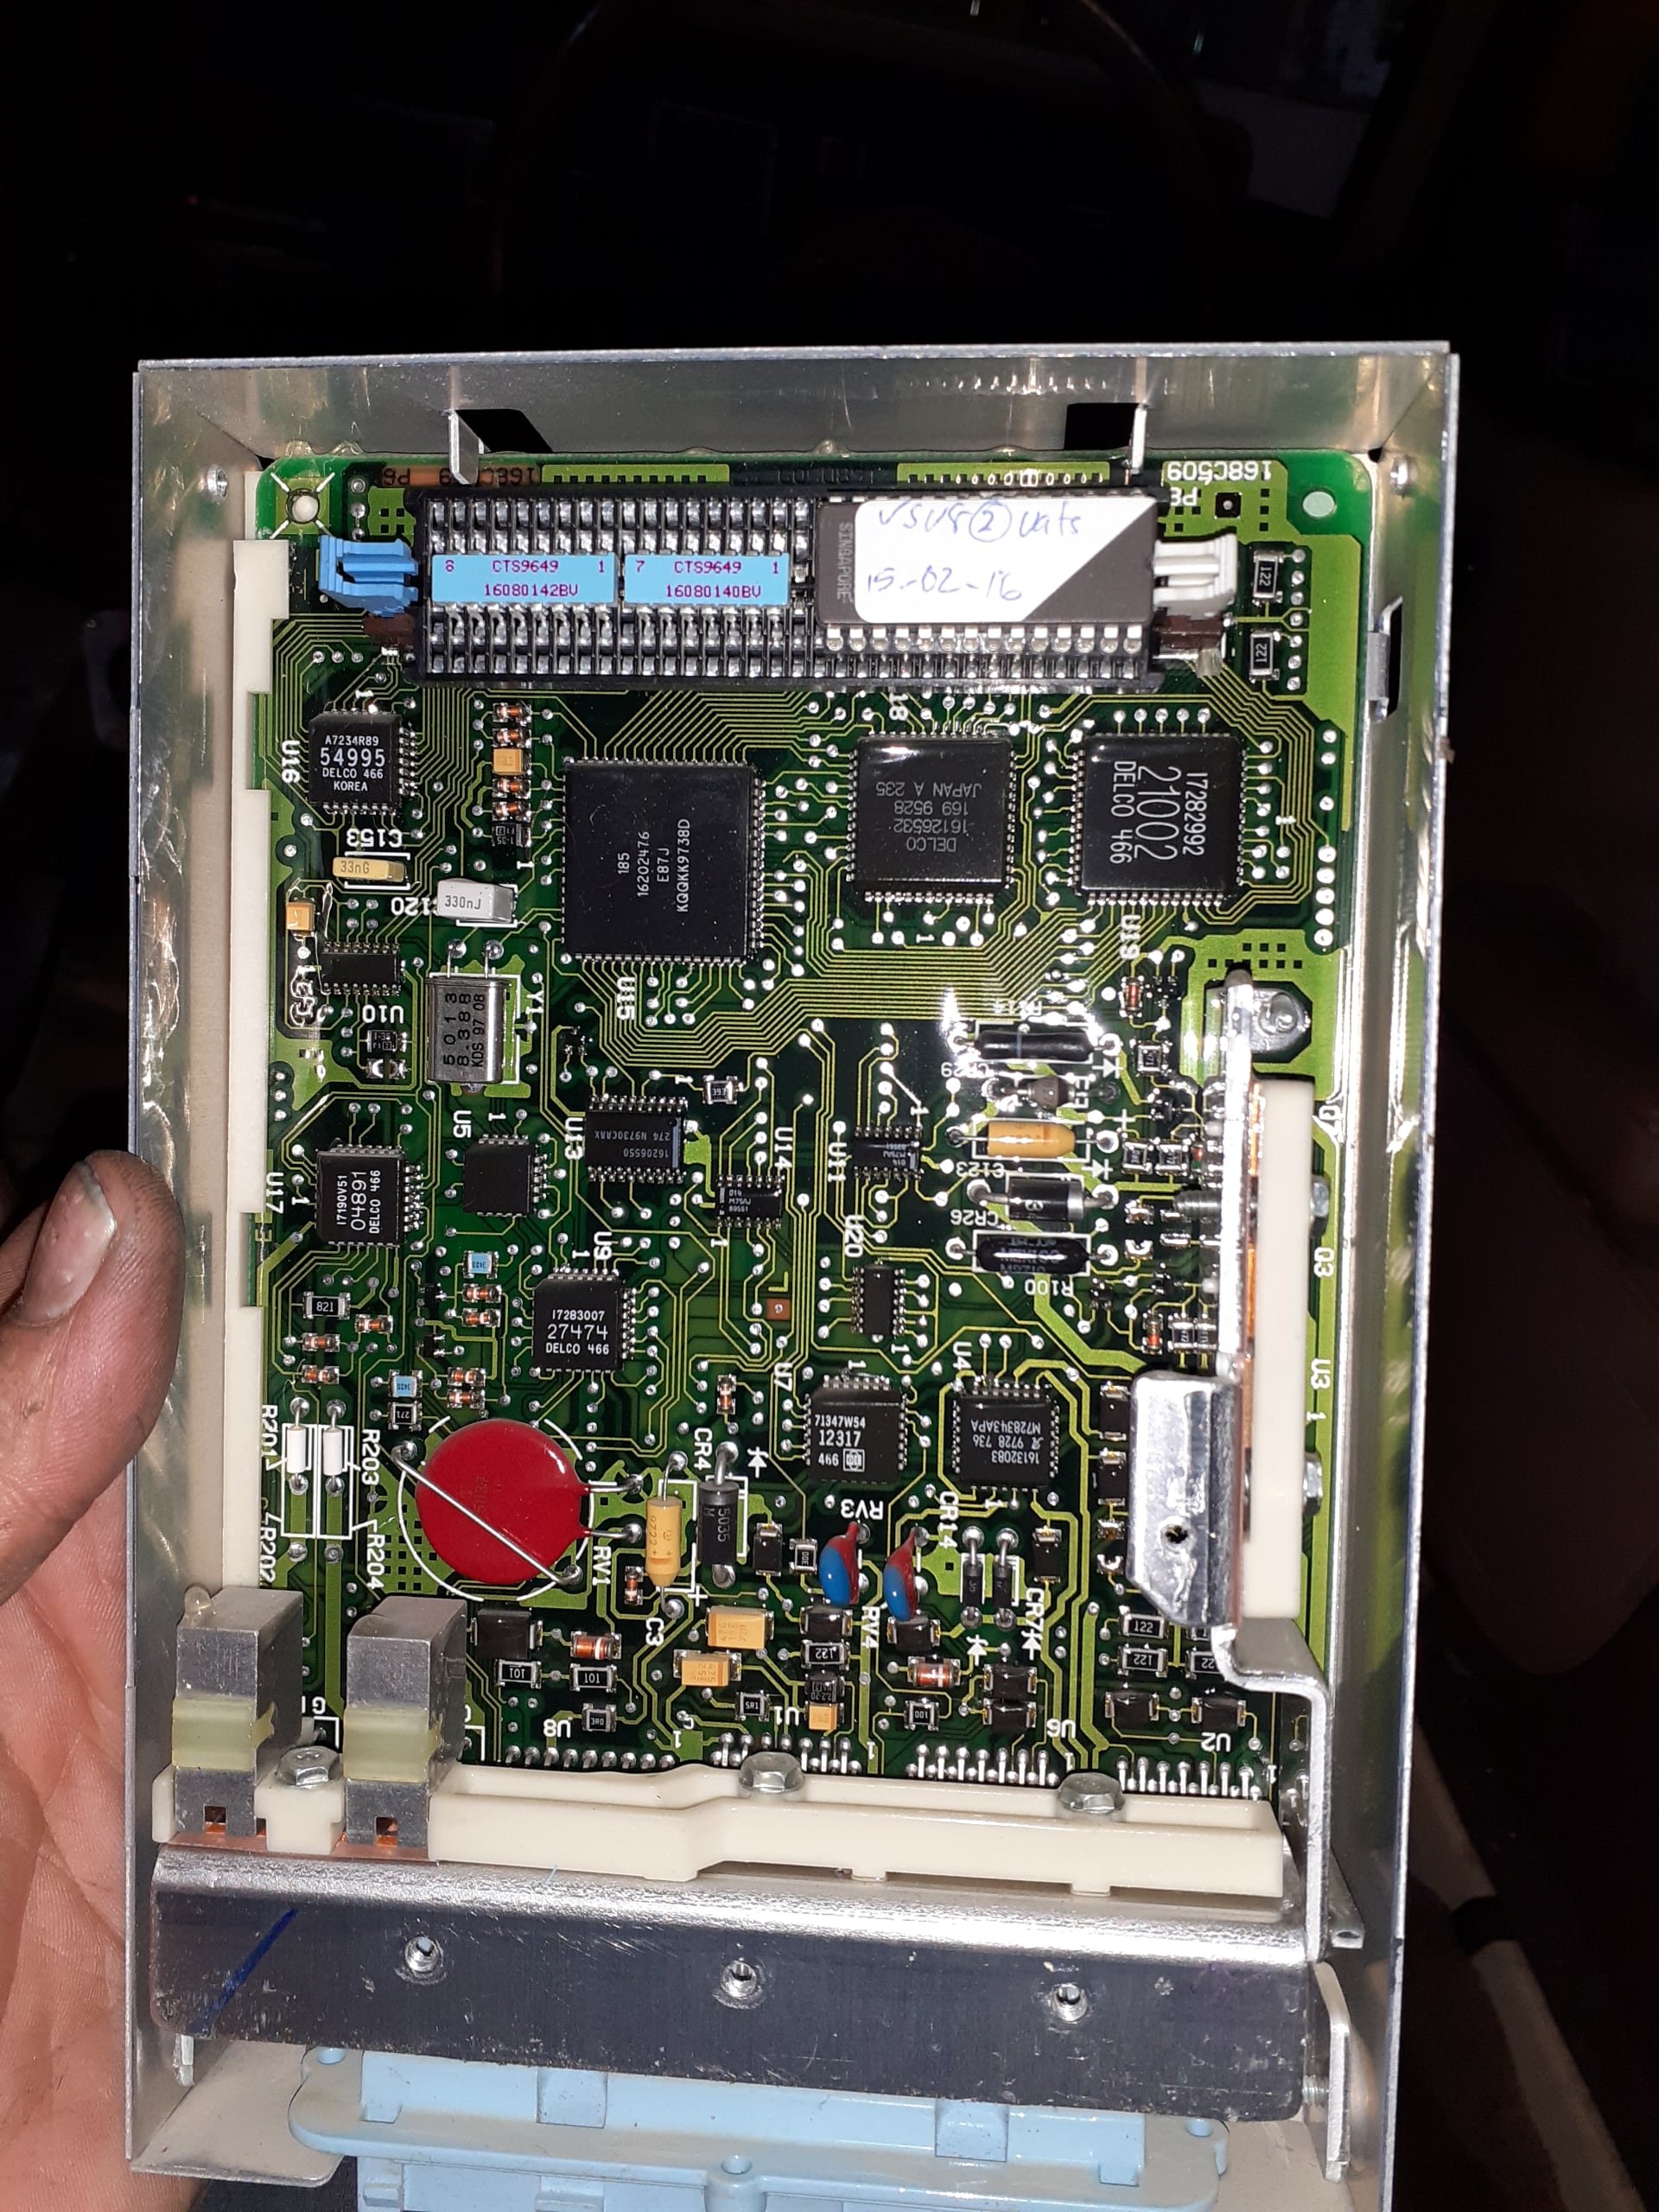
The diff I had put in "vl v8" turned out to be a vs one or something so it was too wide and rubbed a lot on the guards, I got a vk borgwarner one with some vn 28 spline axles with a trim and some dodgyness, well not that dodgy, I trust it, it's now strong and still awaiting the lsd that came out of the ute 3:70... I run it with a 3:08 currently...I think? Some brass frost plugs as it sprung a leak, new plugs, ecu pic showing the vats delete and 'stage 2 tune' I had done same time as wiring wiring. Adjustable rear suspension bar to center the diff Annnd then I had a bit of a break, had other projects and money to save for a gearbox..
5 points
-
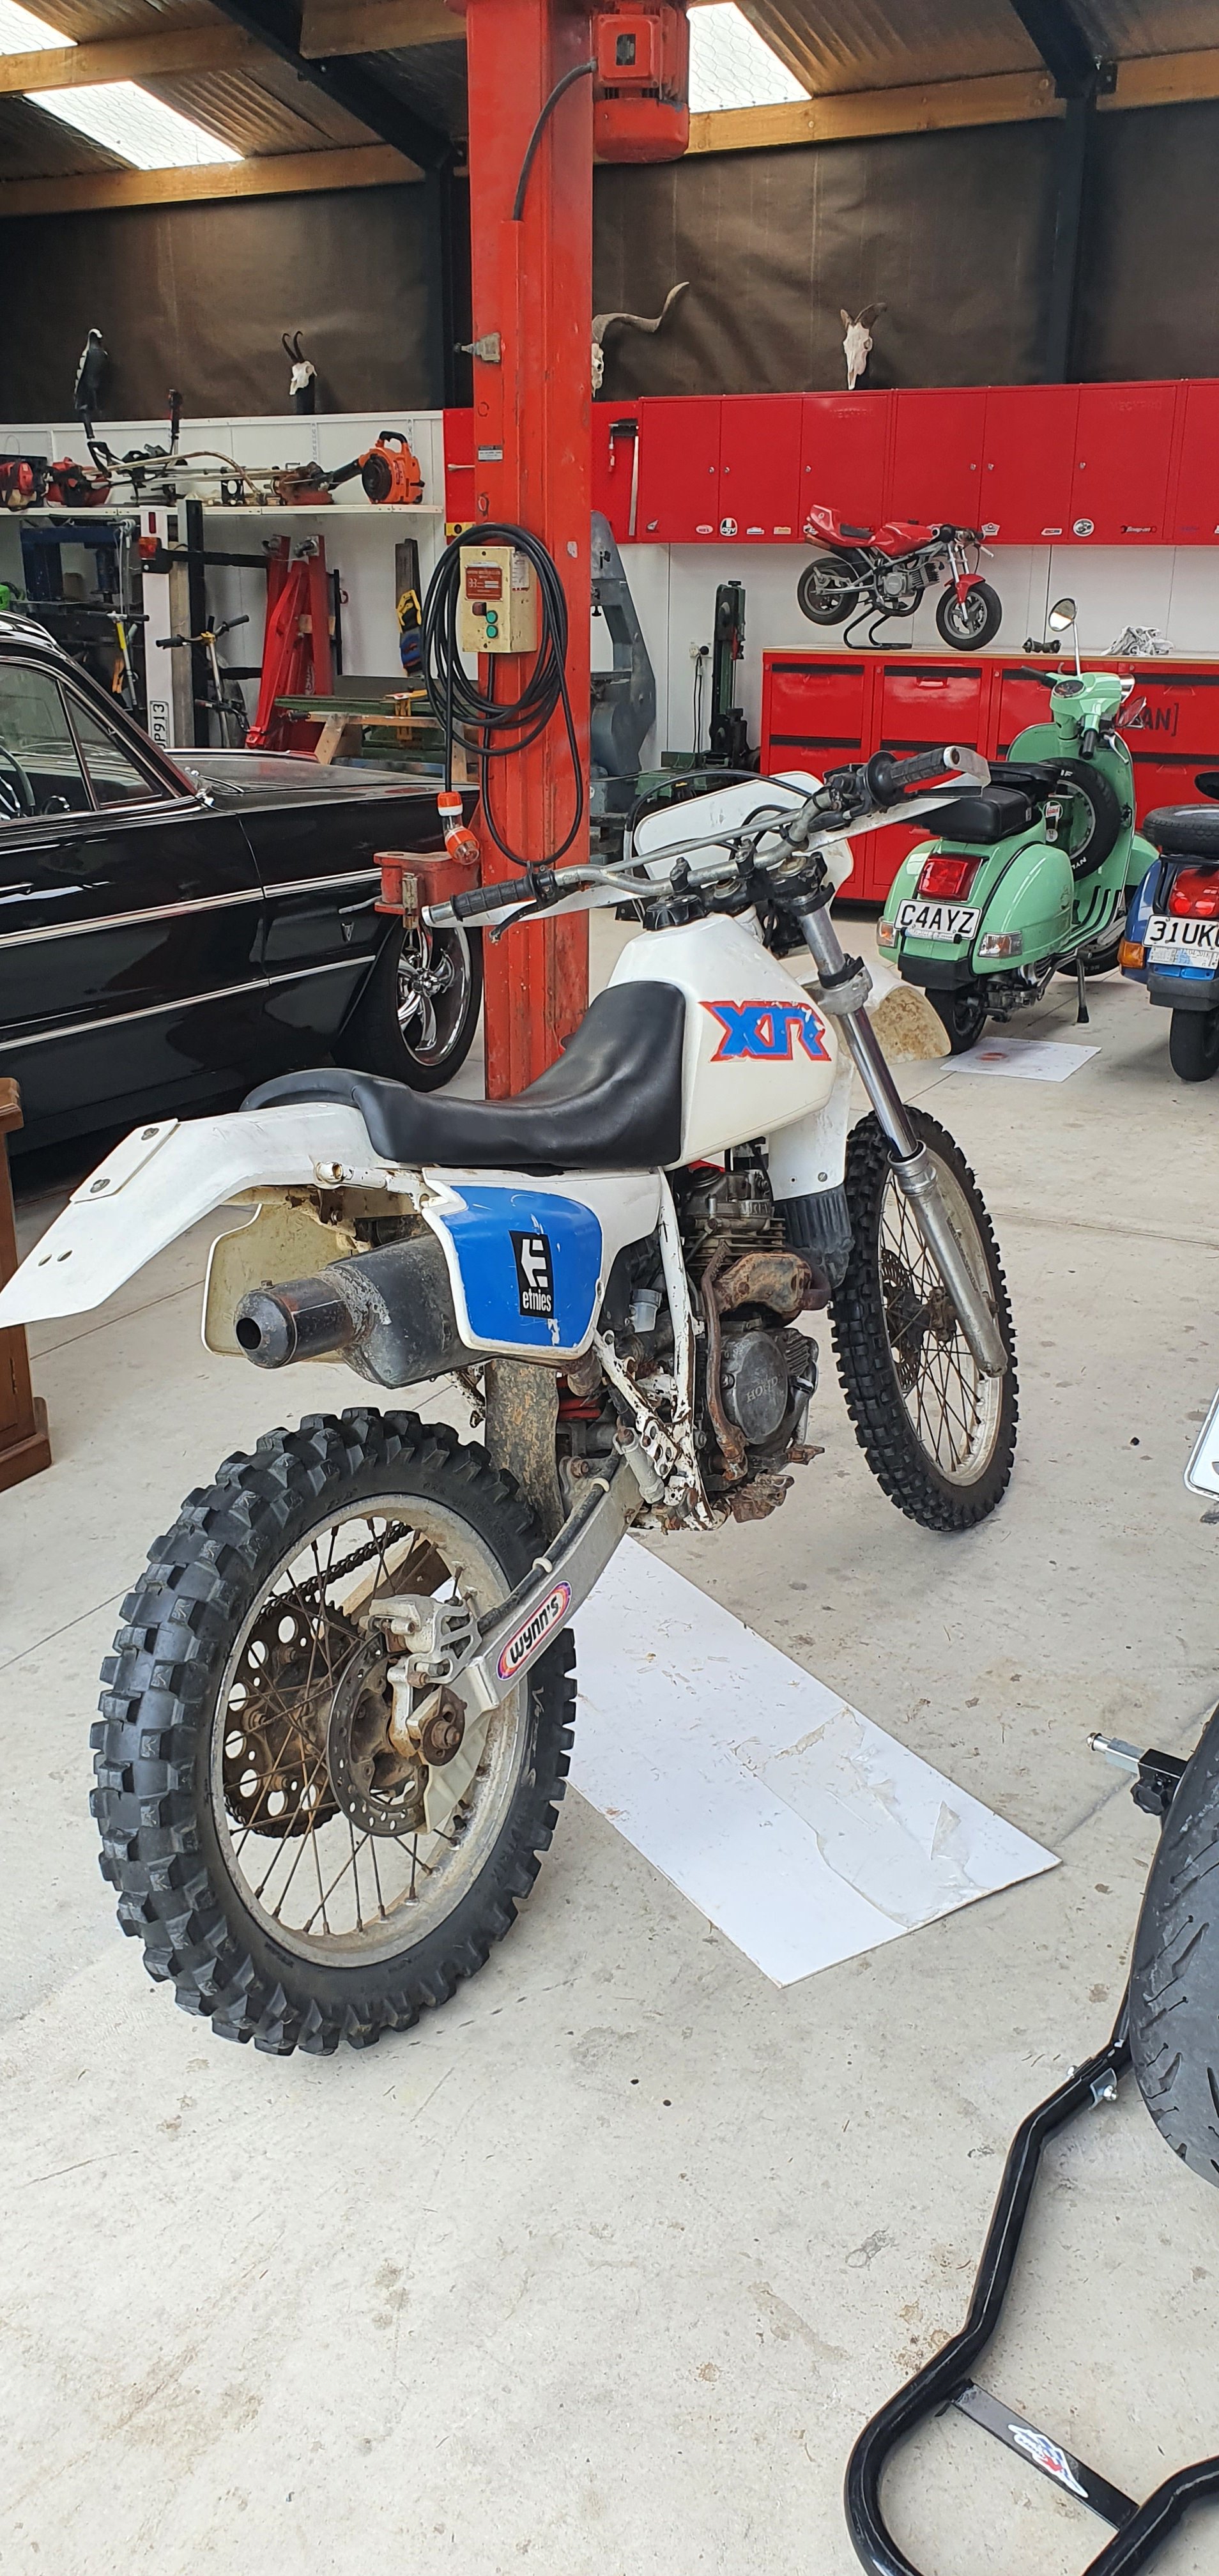
Sweet new toy, well new to me...about 30 years old, but doesn't look a day over 27?? Introducing the 1991 Honda XR250R: Its so cool, like cooler than cool!! Ive been on and off it all day, getting to know it. I don't have a bad word to say about it...its lawnmower reliable, it just works, no bad attitude, just does what it should When it should. Its so perfect for me; old, so slow, reliable and cheap...ticks all the boxes.
4 points
-
Got this motor today, it’s an industrial motor but has the mag out the back witch makes things way more easy, it was from a rotory hoe that had a stuffed gearbox and other problems so I didn’t feel so bad.
4 points
-
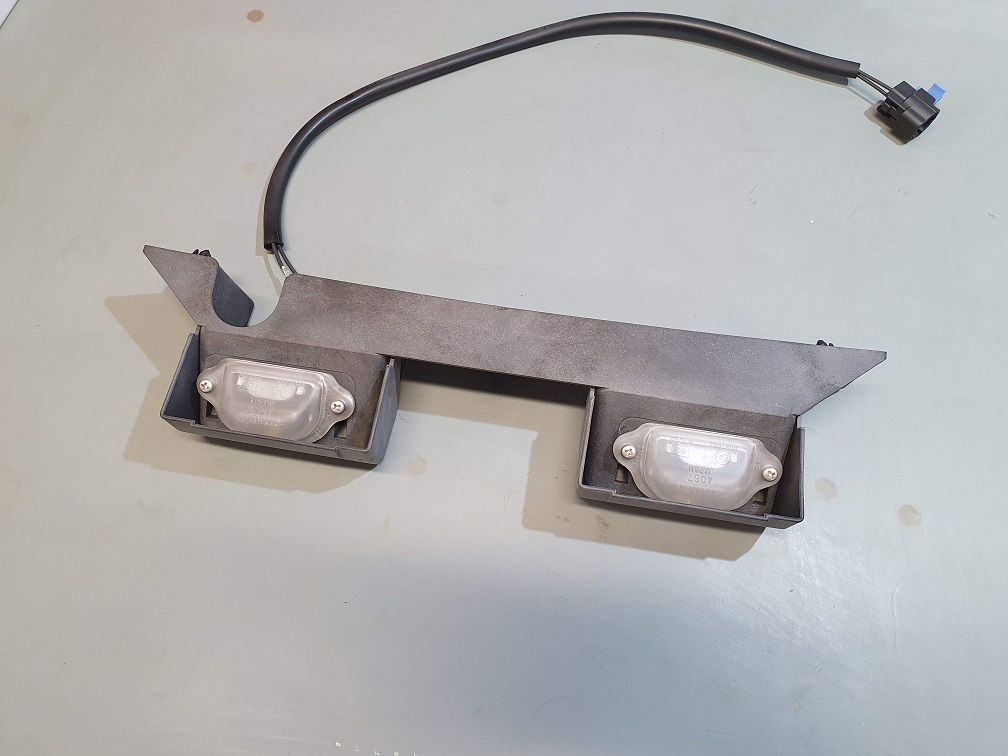
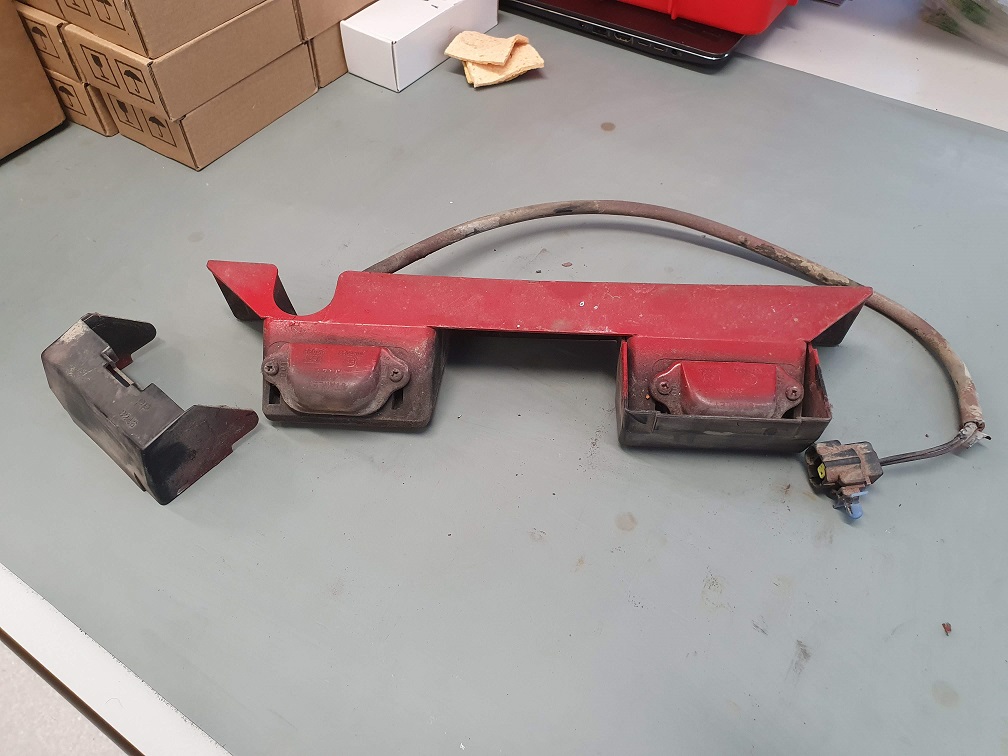
First part restored! Had to come in to work to do some writing, and figured I'd make use of the vapor blaster while I was in here. The numberplate lights were over sprayed to hell and back, definitely not going to put out much light: Dismantled them, set the vaporblaster pressure nice and low and gently cleaned everything. Took about 20 mins all up I'd say. The lenses are now a little cloudy, but I've convinced myself that it means they'll just diffuse the light better. I'll get some LED bulbs for them, as the lenses were a touch melty around the original 5W wedge bulbs. Saved me $130USD on a new set, so happy days.
4 points
-
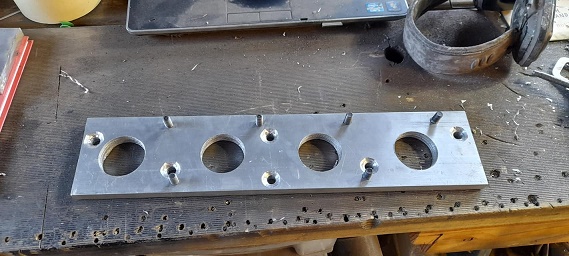
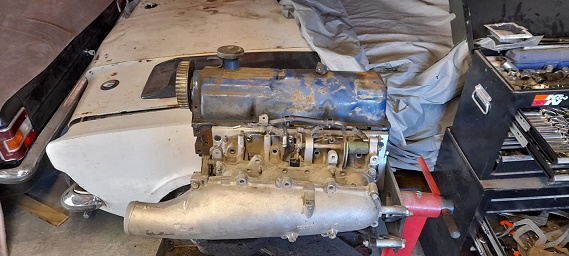
Starting to fill the main pattern. Got about a 1000lbs of sand on hand at the moment. Should be enough to do the sump Also trying out a proper foundry spray on pattern release. Hopefully it works! Because if my pattern doesnt come out that would be a terrible day/4months worth of work! Have the pattern half full now. I had originally planned more sections but Im having a go at doing it in 4 pieces. That means mixing upto 50kg in one go. Thats hard work! 80kg so far. Another 90 to go!4 points
-
I'm off Island for ten days so only have a couple of pics handy, but here you go.. What you've built is EPIC. It'd be perfect for Chatham and wouldn't need to be legal to be used on Island. I am very impressed MrPog. My little brother has recently put a Chev cab and wellside on a Patrol chassis... but he got a bit carried away and made it 6x6 My Dyna needs new (lifted) springs... but that's hard to arrange from a distant Island. I love the truck as it's incredibly strongly built, has virtually no electronics and is easy to work on.. but the ride is shit. New springs will hopefully help if I can ever take it off the road for long enough to get that done
4 points
-
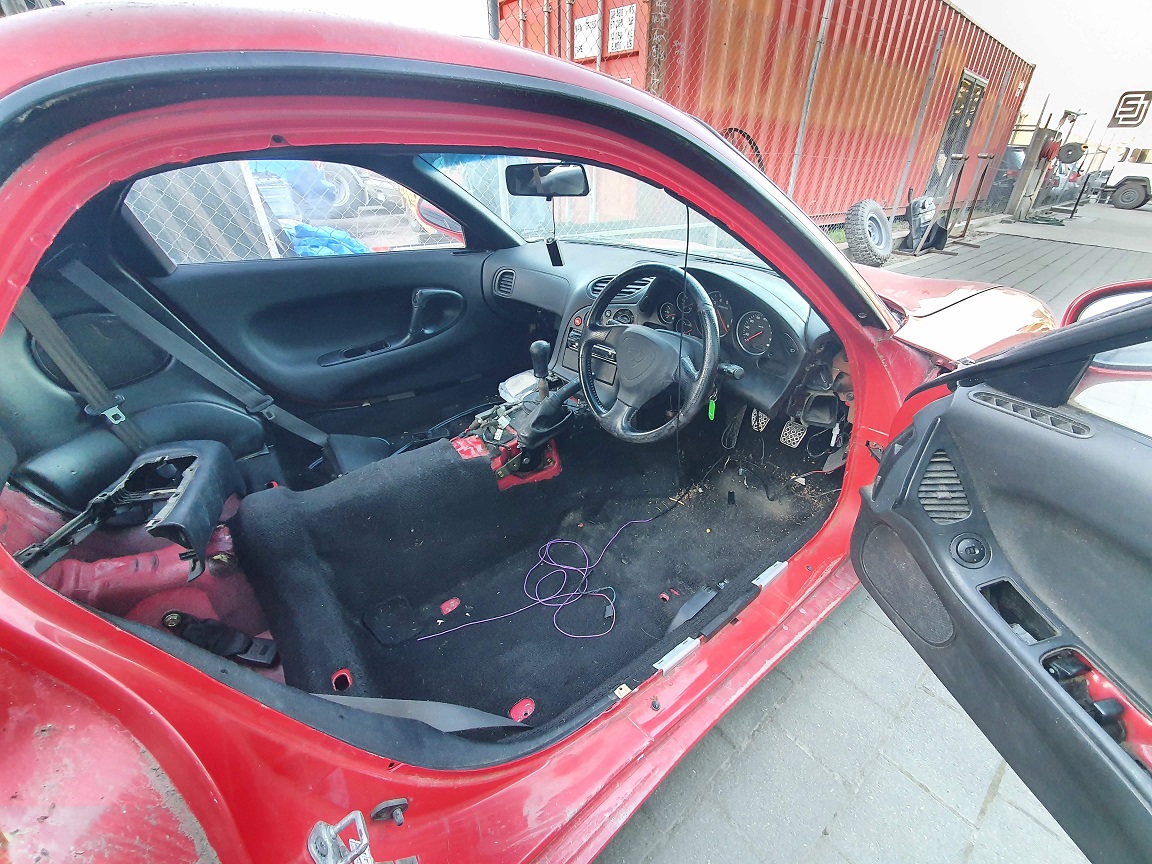
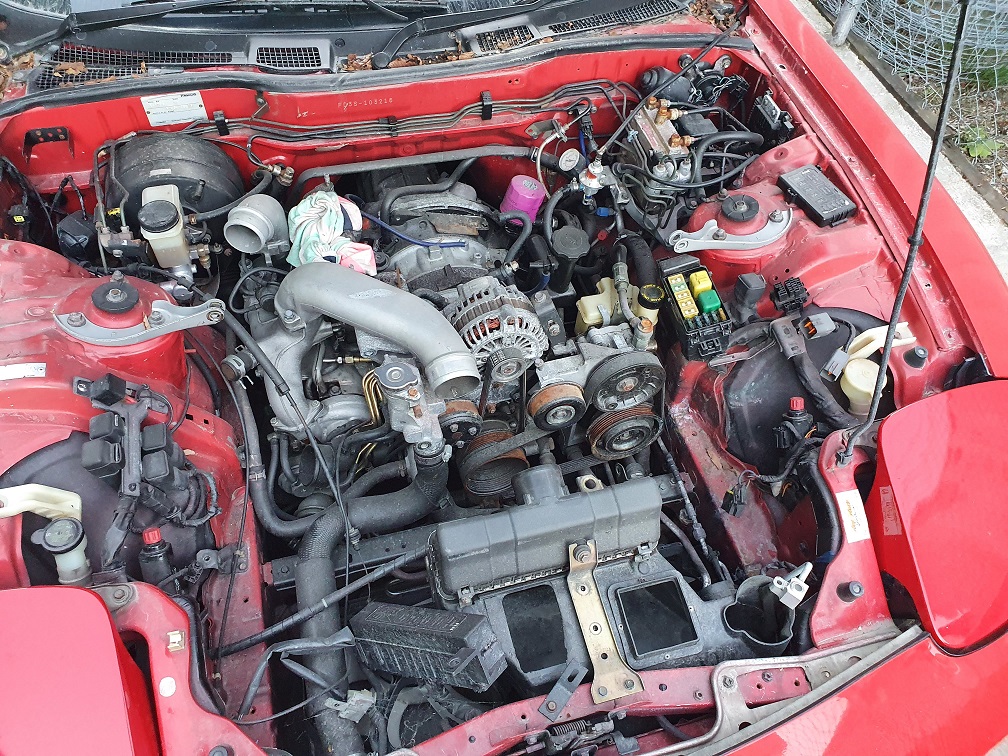
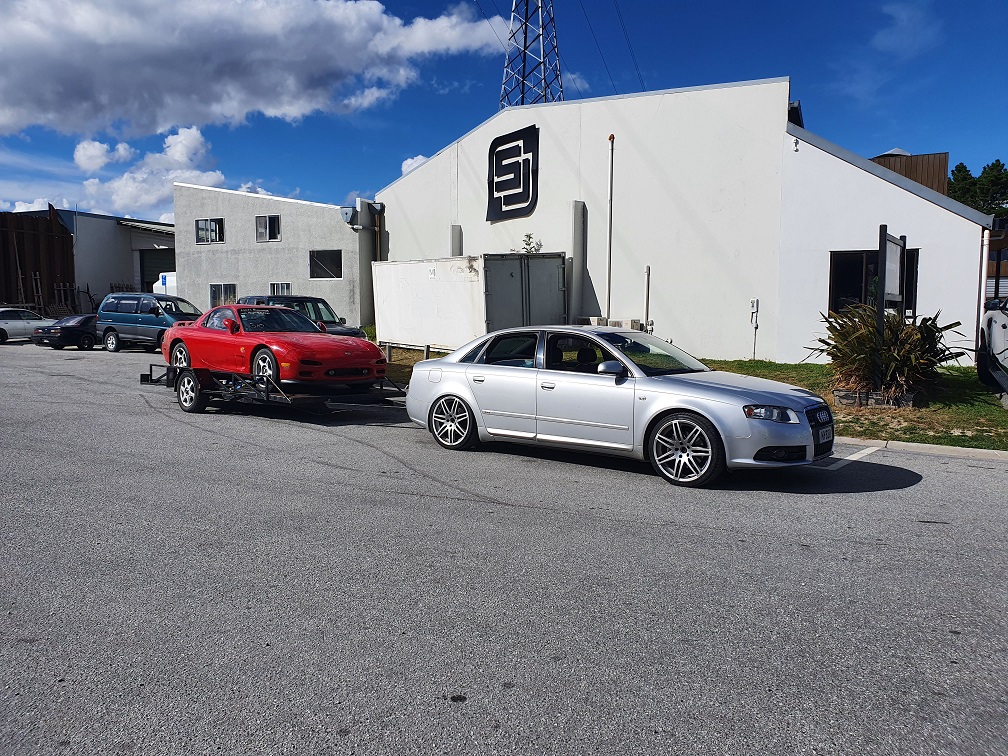
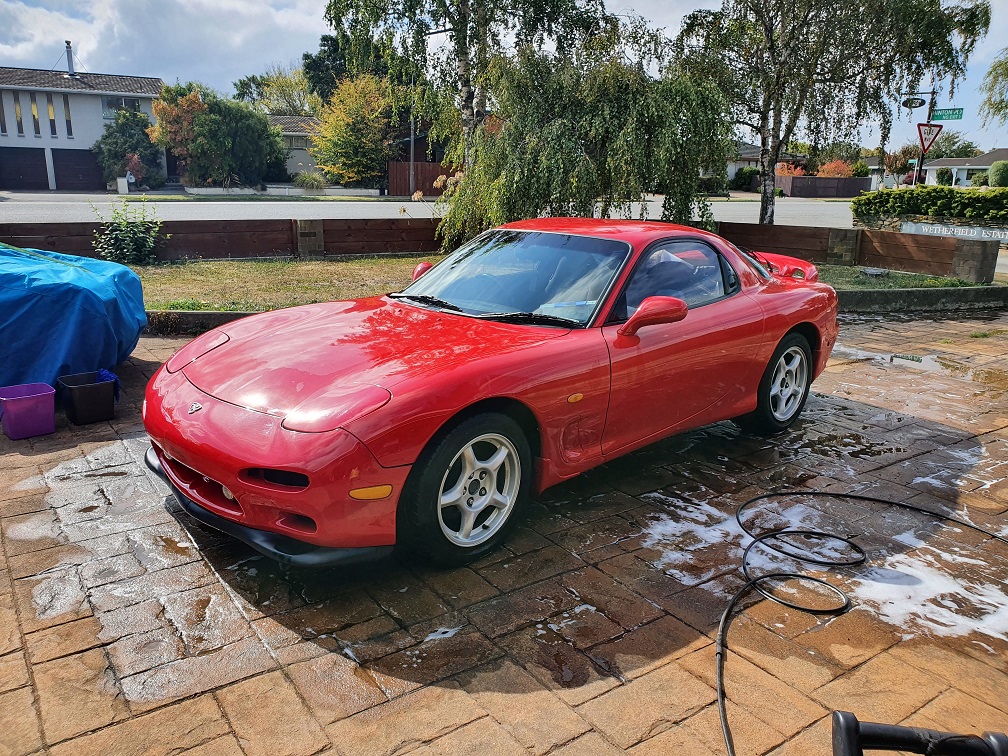
A whiles back I had a nice FD RX7 , and then I sold it, because of reasons. Always thought it was a silly thing to have done, so I have now un-done that decision... Sort of. FD's are in a bit of a bubble at the moment, with asking prices being sky high. It doesn't seem to me that many are actually selling at these inflated prices though... But, you can't argue that the prices on them are going up. I expect the bubble will burst at some stage and prices will fall to something more reasonable, but more than likely still more than I'd be willing to pay. I managed to do a deal with my former employer, High Performance Academy, (whom I still do work for on occasion, they're awesome guys ), to acquire this: They had purchased it to use for their tuning course, as a worked example on a rotary engine, but it just wasn't tidy enough, and would have taken too long to get there for their timeframe. They ended up purchasing the white FD I owned at the time, which was good to go for their needs. Towed it home (Christchurch) from Queenstown last night behind my 3.0TDI A4. Only a little dodgy... But actually towed with no problems. No scrubbing / scraping, and no weird handling, basically didn't know there was anything behind the car, except for the increased fuel usage and lack of usual grunt. Max slam. Spent this afternoon cleaning. So much dirt, bird shit and sap. The cover had blown off the rear corner, and because it was tucked away, no one noticed. Paint is a bit marked (it's had not completely shit re-spray in the original red), but it'll buff out. Plan for this is to tidy it up, replace the interior (most of it is thrashed), and get it going again on some factory(ish) twin turbos. I love the quirkyness of the sequential twins, and I know them inside and out (literally) from my time with my white car, so keeping those is a must. Most of the parts to put it back together are with the car. I'll be doing some hunting and scrounging for sure though. The wiring is roooooooted, but luckily I know a guy. This will probably take priority over the Starion, as it needs much less work, will be good to get it to a nice driver state. HMU if you've got a stash of parts! ;-).
3 points
-
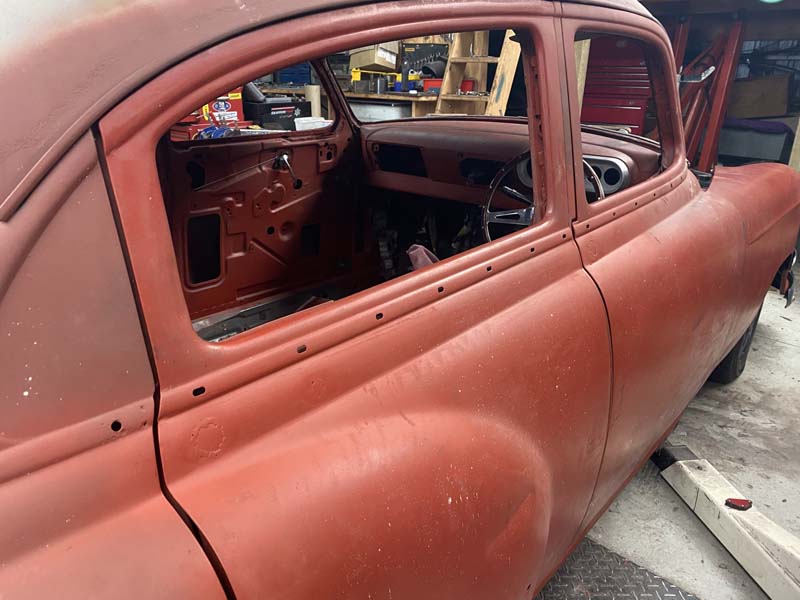
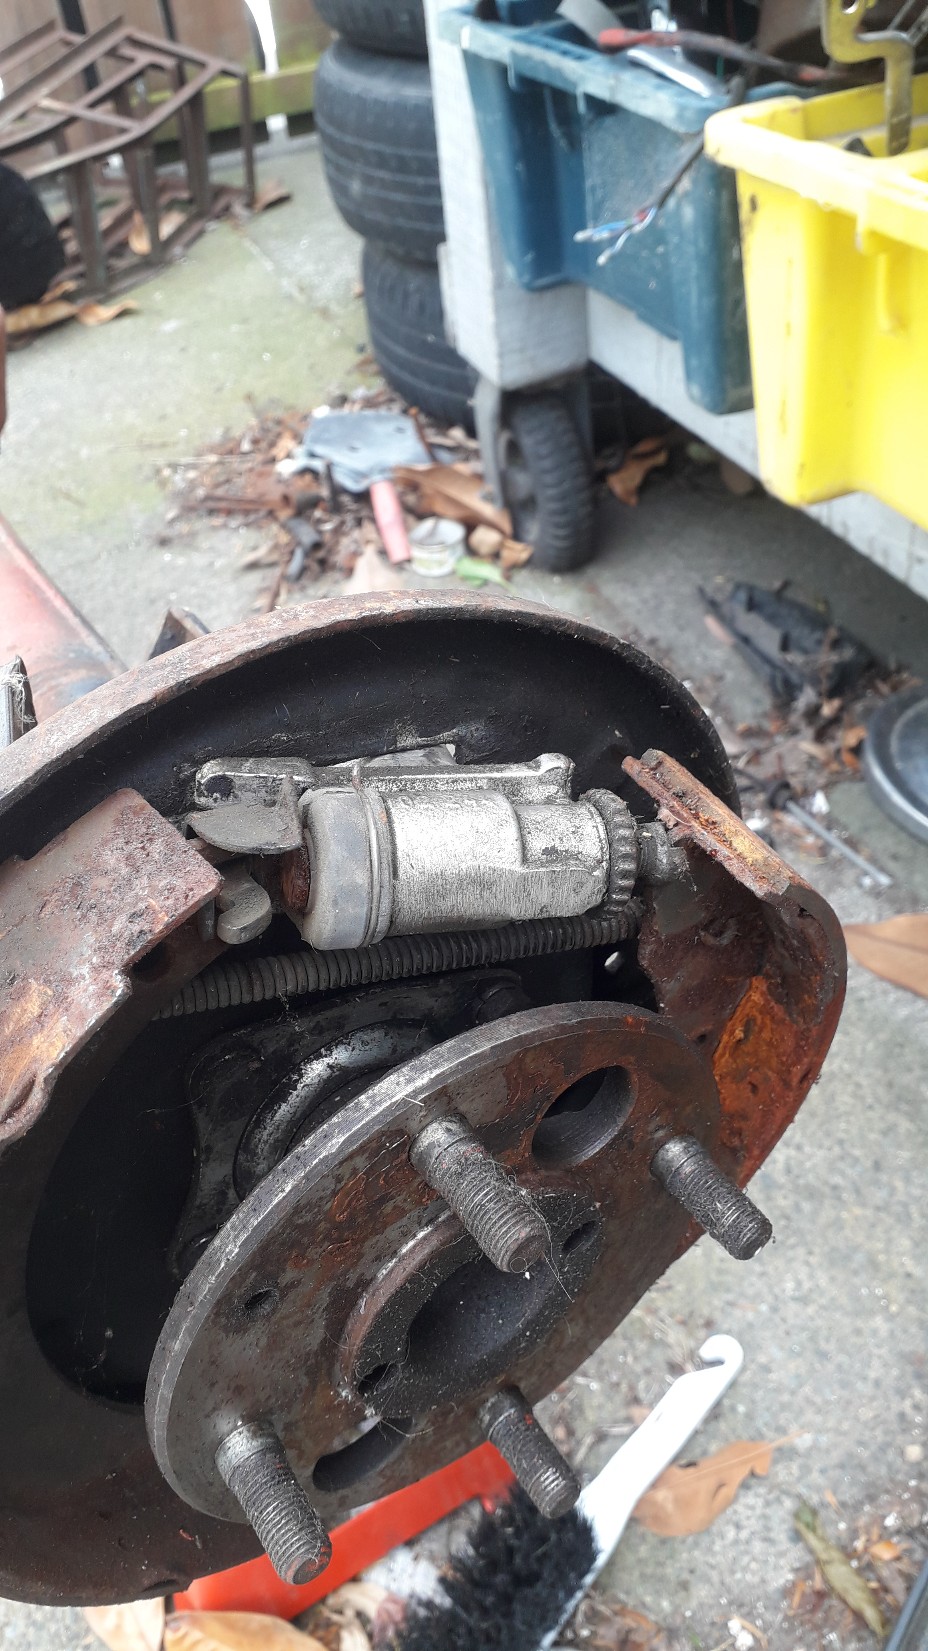
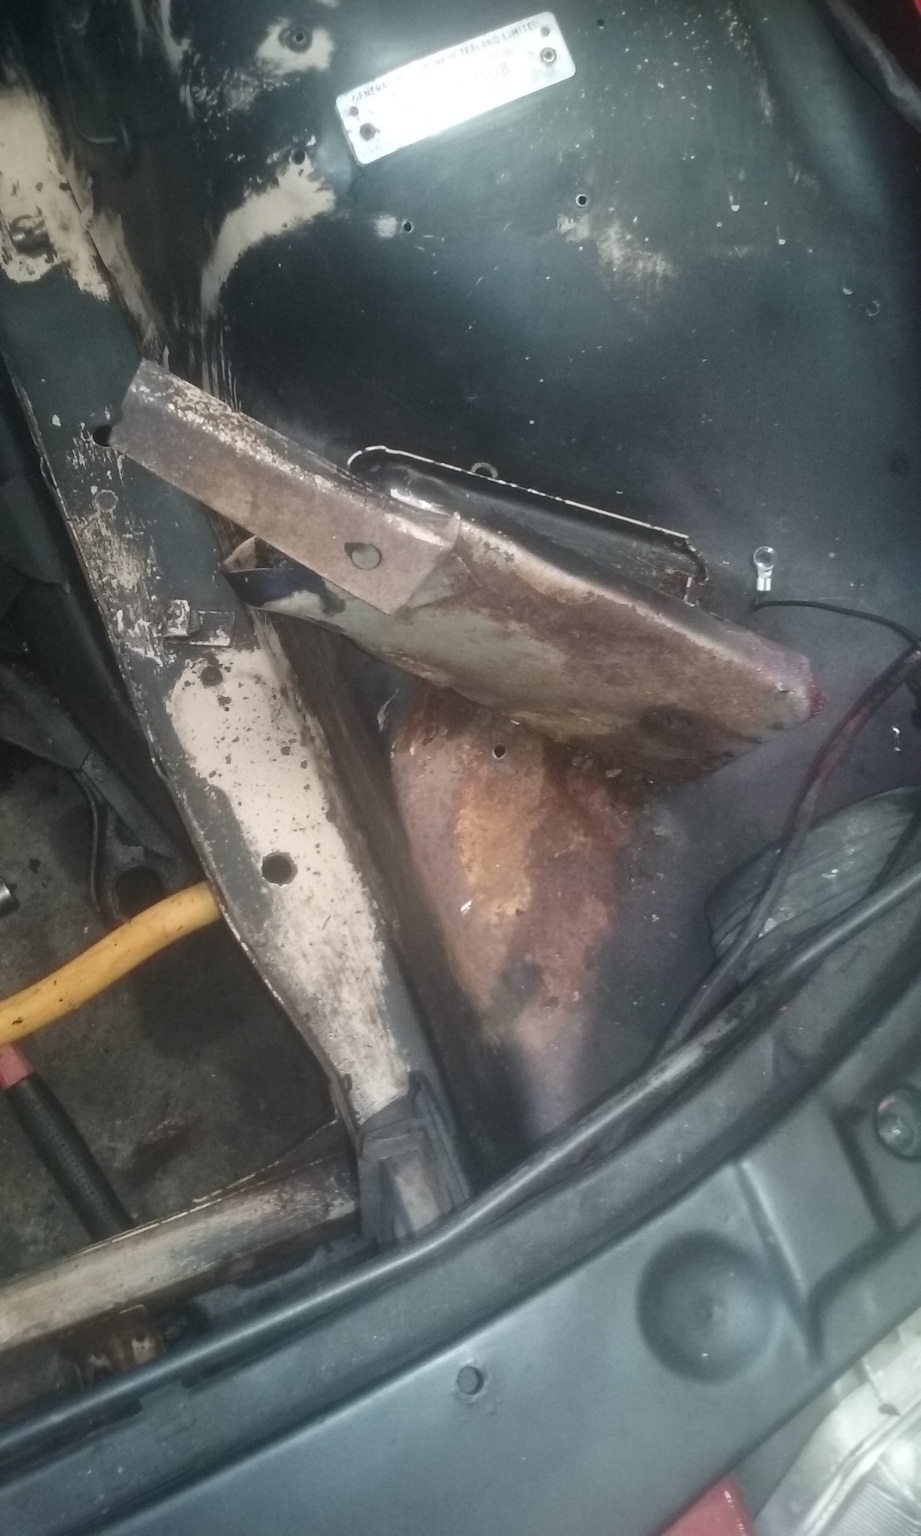
Sill tinkering away. I have removed the brakes for disassembling and cleaning. I also removed the front subframe assembly. i was considering a brake upgrade but to be honest the 5 stud starions have always braked pretty well and with a good set of pads they should be fine. this isn't going to be a track car. Once they were out it was time to tackle the front guards. I have been a little concerned about this part and also knowing i have to cut the guard off the side skirt, but unable to decide where to cut i ended up cutting straight down from the front of the front doors. the passenger side was the first side i did. it wasn't too pretty but could be allot worse. The body isn't too bad. The guard has the majority of the rust but it is hidden behind the fiberglass so the repairs don't have to be to pretty. Drivers side next and for the first time ever for myself the second side was better. i was actually able to unbolt this one and the guard itself was in pretty good knick as well. That's the majority of removing parts for the time being. Now i can get onto cleaning, rust treating and repairing surfaces.3 points
-
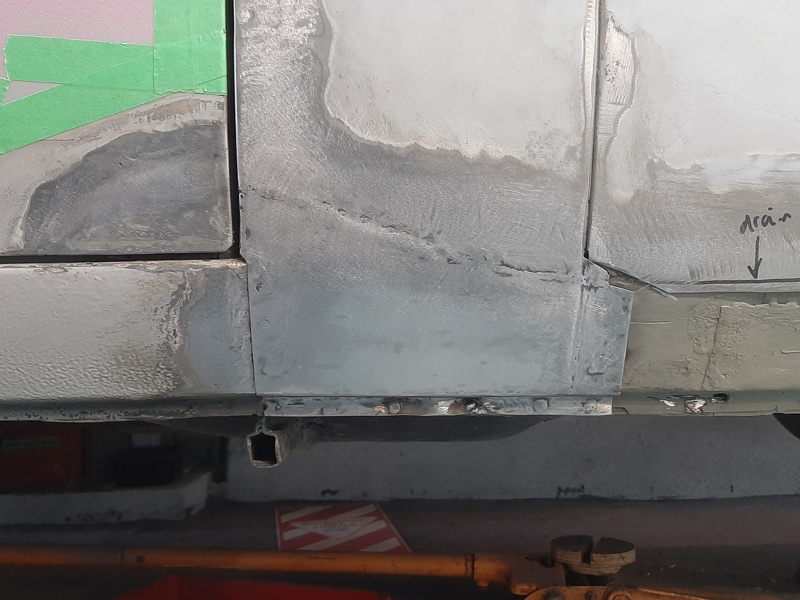
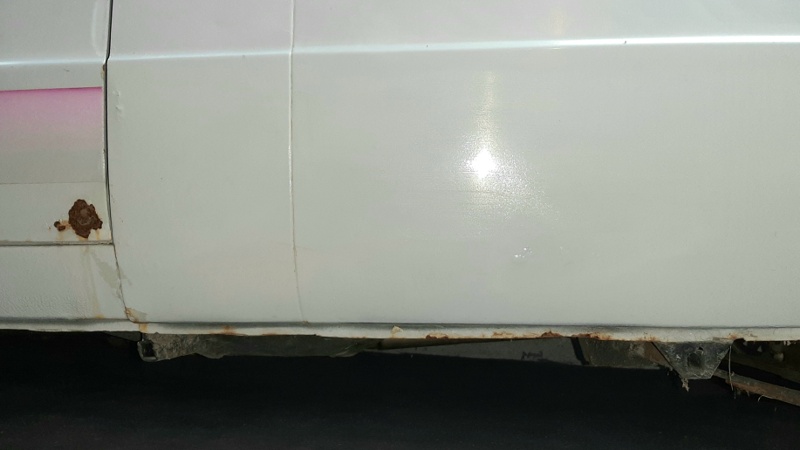
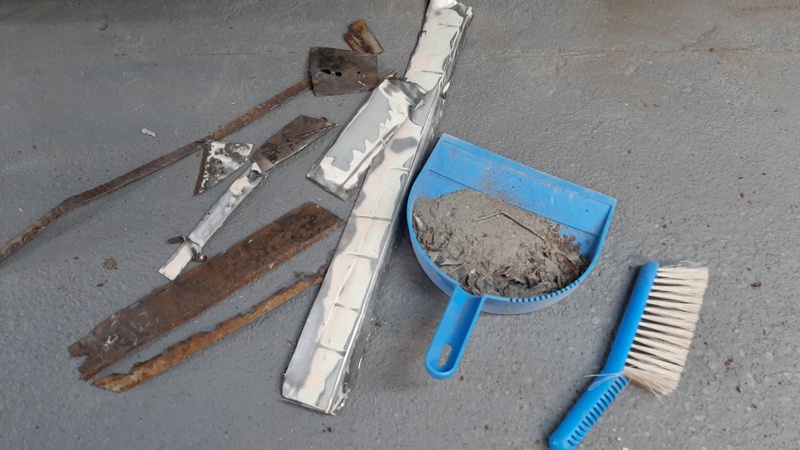
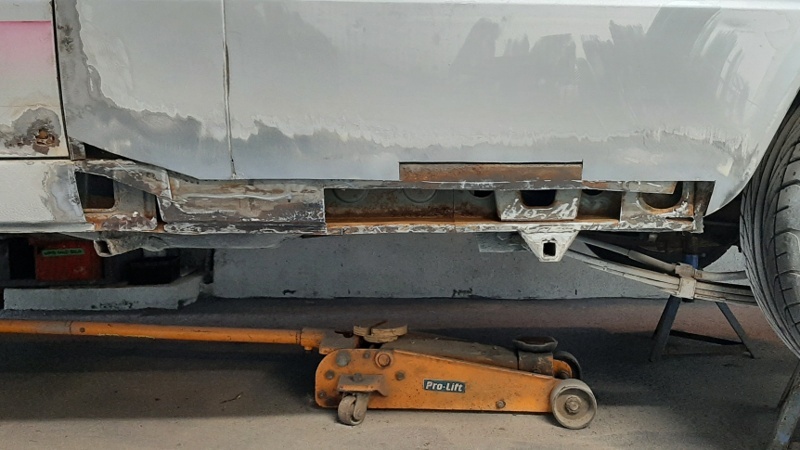
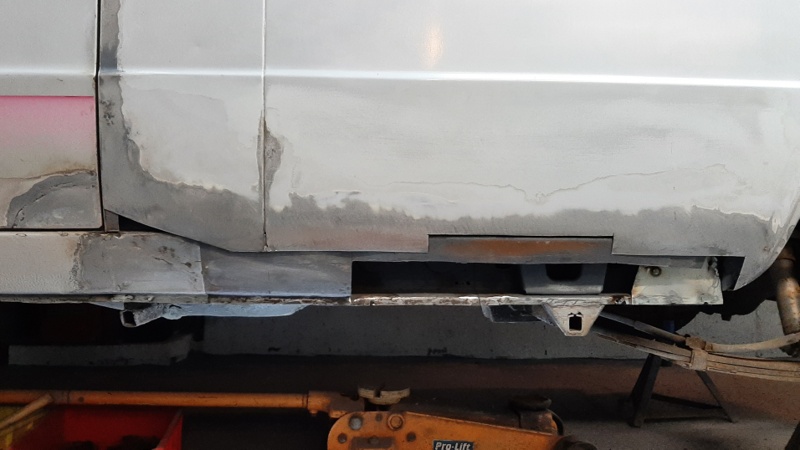
Been using this for dump runs and such but its well overdue for a wof. Unfortunately theres bubbling the sills where it was repaired before i got it, and a patch in the doors and some other nonsense to sort out first. So this morning i put it on stands and dug out the grinding and welding stuff Yes, 'Repaired'. FFS. Chop chop. BTW, new floor paint is holding up well and much easier cleanup than bare concrete Its a car based body, so has the car sill, with the side panel also covering that, so double skinned and open to water and dirt and crap from the tray above. Classic! Inner sill and everything else came up well. Caught it in time. Will remake it so it not quite as such as much of a trap with extra drains. Got this far tonight, will finish off the inner sill tomorrow. Hopefully borrow a folder for the outside so i dont use as much bog as i just took off.
3 points
-
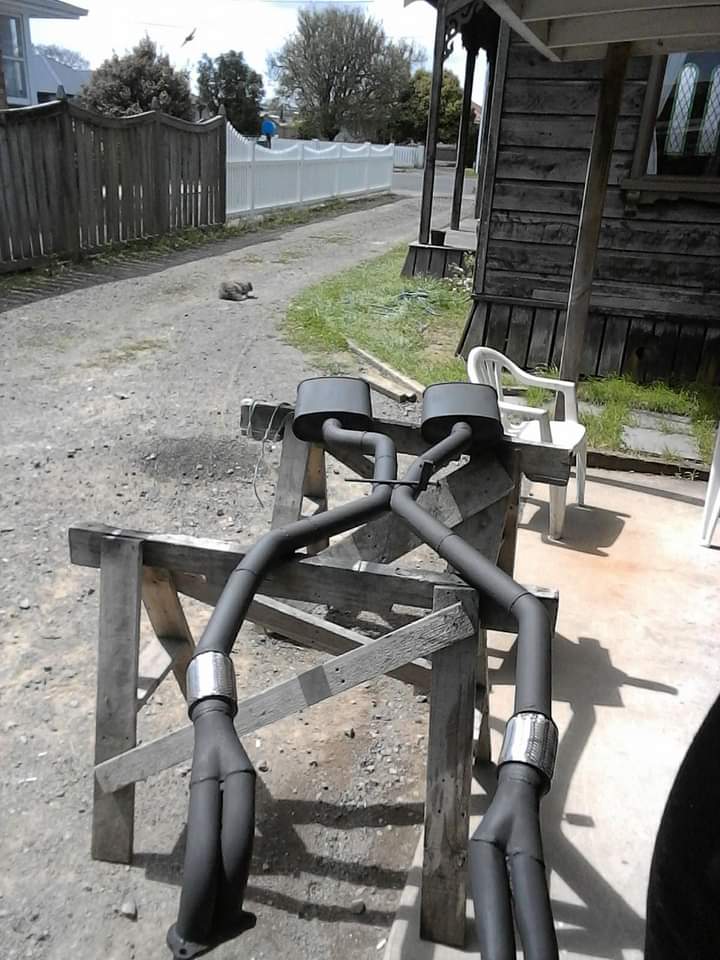
I began to start looking around for the bolt on bits for the water lines, alternator bracket/alternator to get the motor supplied with the car going however another motor popped up removed from an AE85 as a complete running motor. to save me the mucking around sorting the supplied motor, thought it would be a heck of a lot easier just to use this new one! Out came the old motor 20210401_105010 by phillipbaines, on Flickr In went the new motor 20210401_123656 by phillipbaines, on Flickr 20210401_124106 by phillipbaines, on Flickr I'm happy I chose to get the AE86 EFI wiring which differs from AE85 because I literally just plugged everything in. And it started pretty much first pop (had to replace ECU and set timing). For anyone doing an AE85 -> AE86 conversion. don't fuck around with the AE85 wiring. spend a few pennies and get an AE86 loom. it will save you days of prodding and poking around 20210402_191222 by phillipbaines, on Flickr Now that this is going i'm going to book some time with my fab guy in the next few weeks to get the seat mounts sorted and also get an exhaust made. As per the video. she's just heading straight out the coby's at the moment.. heh Parts on the way: Parts Shop Max rear coil overs (spring/shock full coil over, replaces separate shock/spring) BC Gold front coil overs complete AE86 zenki 24mm rear axles T series diff head rear drive shaft of the 2 piece from Japan KAAZ 2-way LSD New from Japan TODO: Buy new wheels. this isn't a rally car anymore Once those arrive, it'll be time to drive it down the road! Project discussion:3 points
-
spent all day fitting some door belt line seals. it goes without saying that i cant buy any seals for the crown so i had to make do with what i could find. i found some generic lengths of belt rubber on "better auto rubber" out of auz which were close enough and i coupled them with some generic felt bump things that are for american cars or something which i got at an american car importer out by the airport. so, now we have some rubber bits, we have to make them stay on the car. i recesses the screw heads into the felt bit by just cutting away the felt part where the screws are. works well and the glass cant touch the head of the screw. drill holes in the door, screw the two rubber bits and the stainless trim on to the door. WAY harder than it sounds but got there in the end. i also put some sound dead material onto the doors while its apart. might get some more tomorrow and chuck some more in the doors. 2021-04-02_04-06-33 by sheepers, on Flickr 2021-04-02_04-06-24 by sheepers, on Flickr 2021-04-02_04-06-16 by sheepers, on Flickr 2021-04-02_04-06-08 by sheepers, on Flickr 2021-04-02_04-06-01 by sheepers, on Flickr 2021-04-02_04-05-52 by sheepers, on Flickr3 points
-
Got the camgear covers sent over. Looks like the real deal.3 points
-
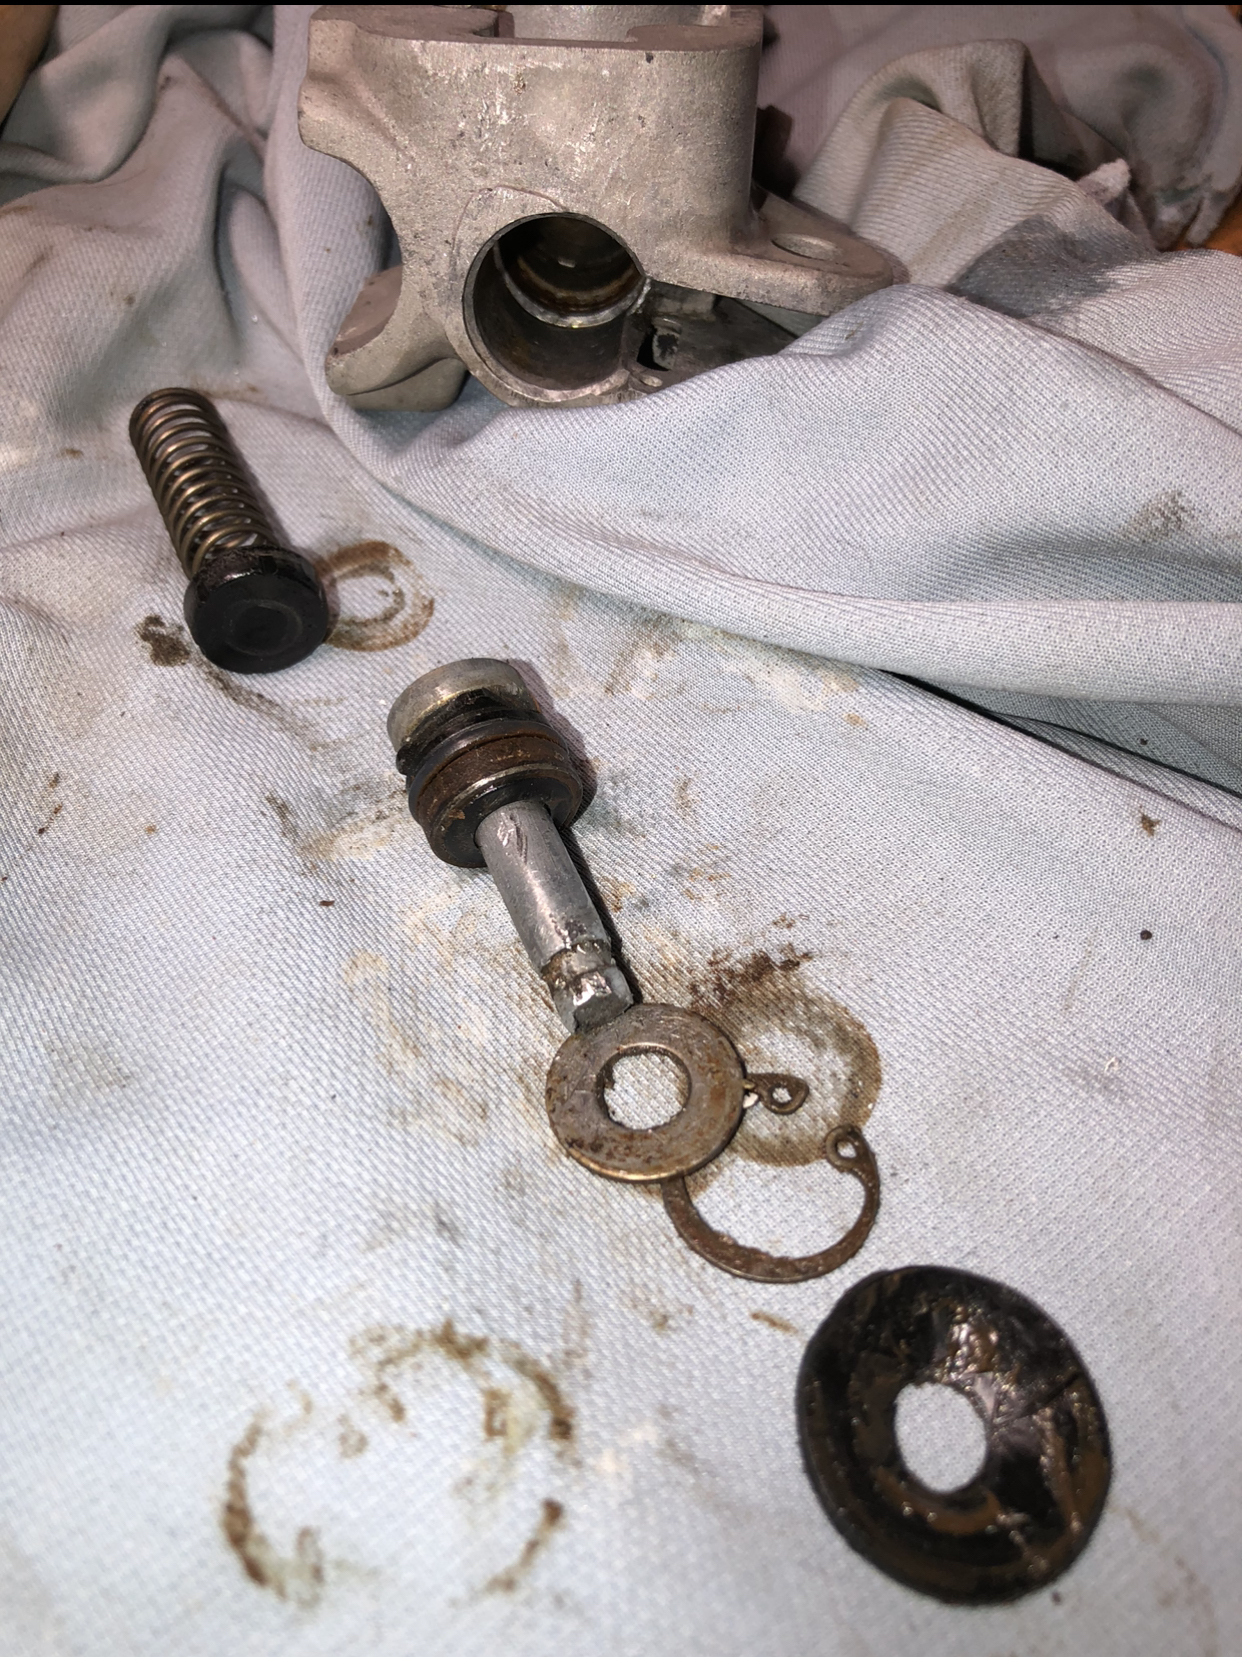
Despite how much I dick around with these old money pits this is the first master cylinder I’m rebuilding. I watched a YouTube video which showed taking the cir-clip out and the insides come out of the bore. In true oldschool fashion that didn’t work. Instead lots of crc, grazed knuckles and heat did! She was jammed in there real tight. I’m still learning a lot and that’s the point isn’t it?
2 points
-
A few years ago I had the chance to own 1 of my dream cars. A big block chevy powered HB viva I saw as a young fulla. It was called River Rat. I brought the car sight unseen after it had been in a crash at Masterton Motorplex. I put a lot of time and effort into the rebuild but sadly had to sell it for personal reasons before I could finish it. Since then I have searched high and low to find another body that I could cut up to build another that I could call my own. I didnt want to cut up a good 1 as have had a bit of shit over the years for cutting up cars... Then while down at Horopito I spied a body that would become my new car. It was to be crushed but I saw potential in it. I have been collecting parts for the build for about 3 years and have now got the car home and have all ready made a start on it. I"ll make sure to put all pics and info as to my journey to get this car back on the road and fully street legal.2 points
-
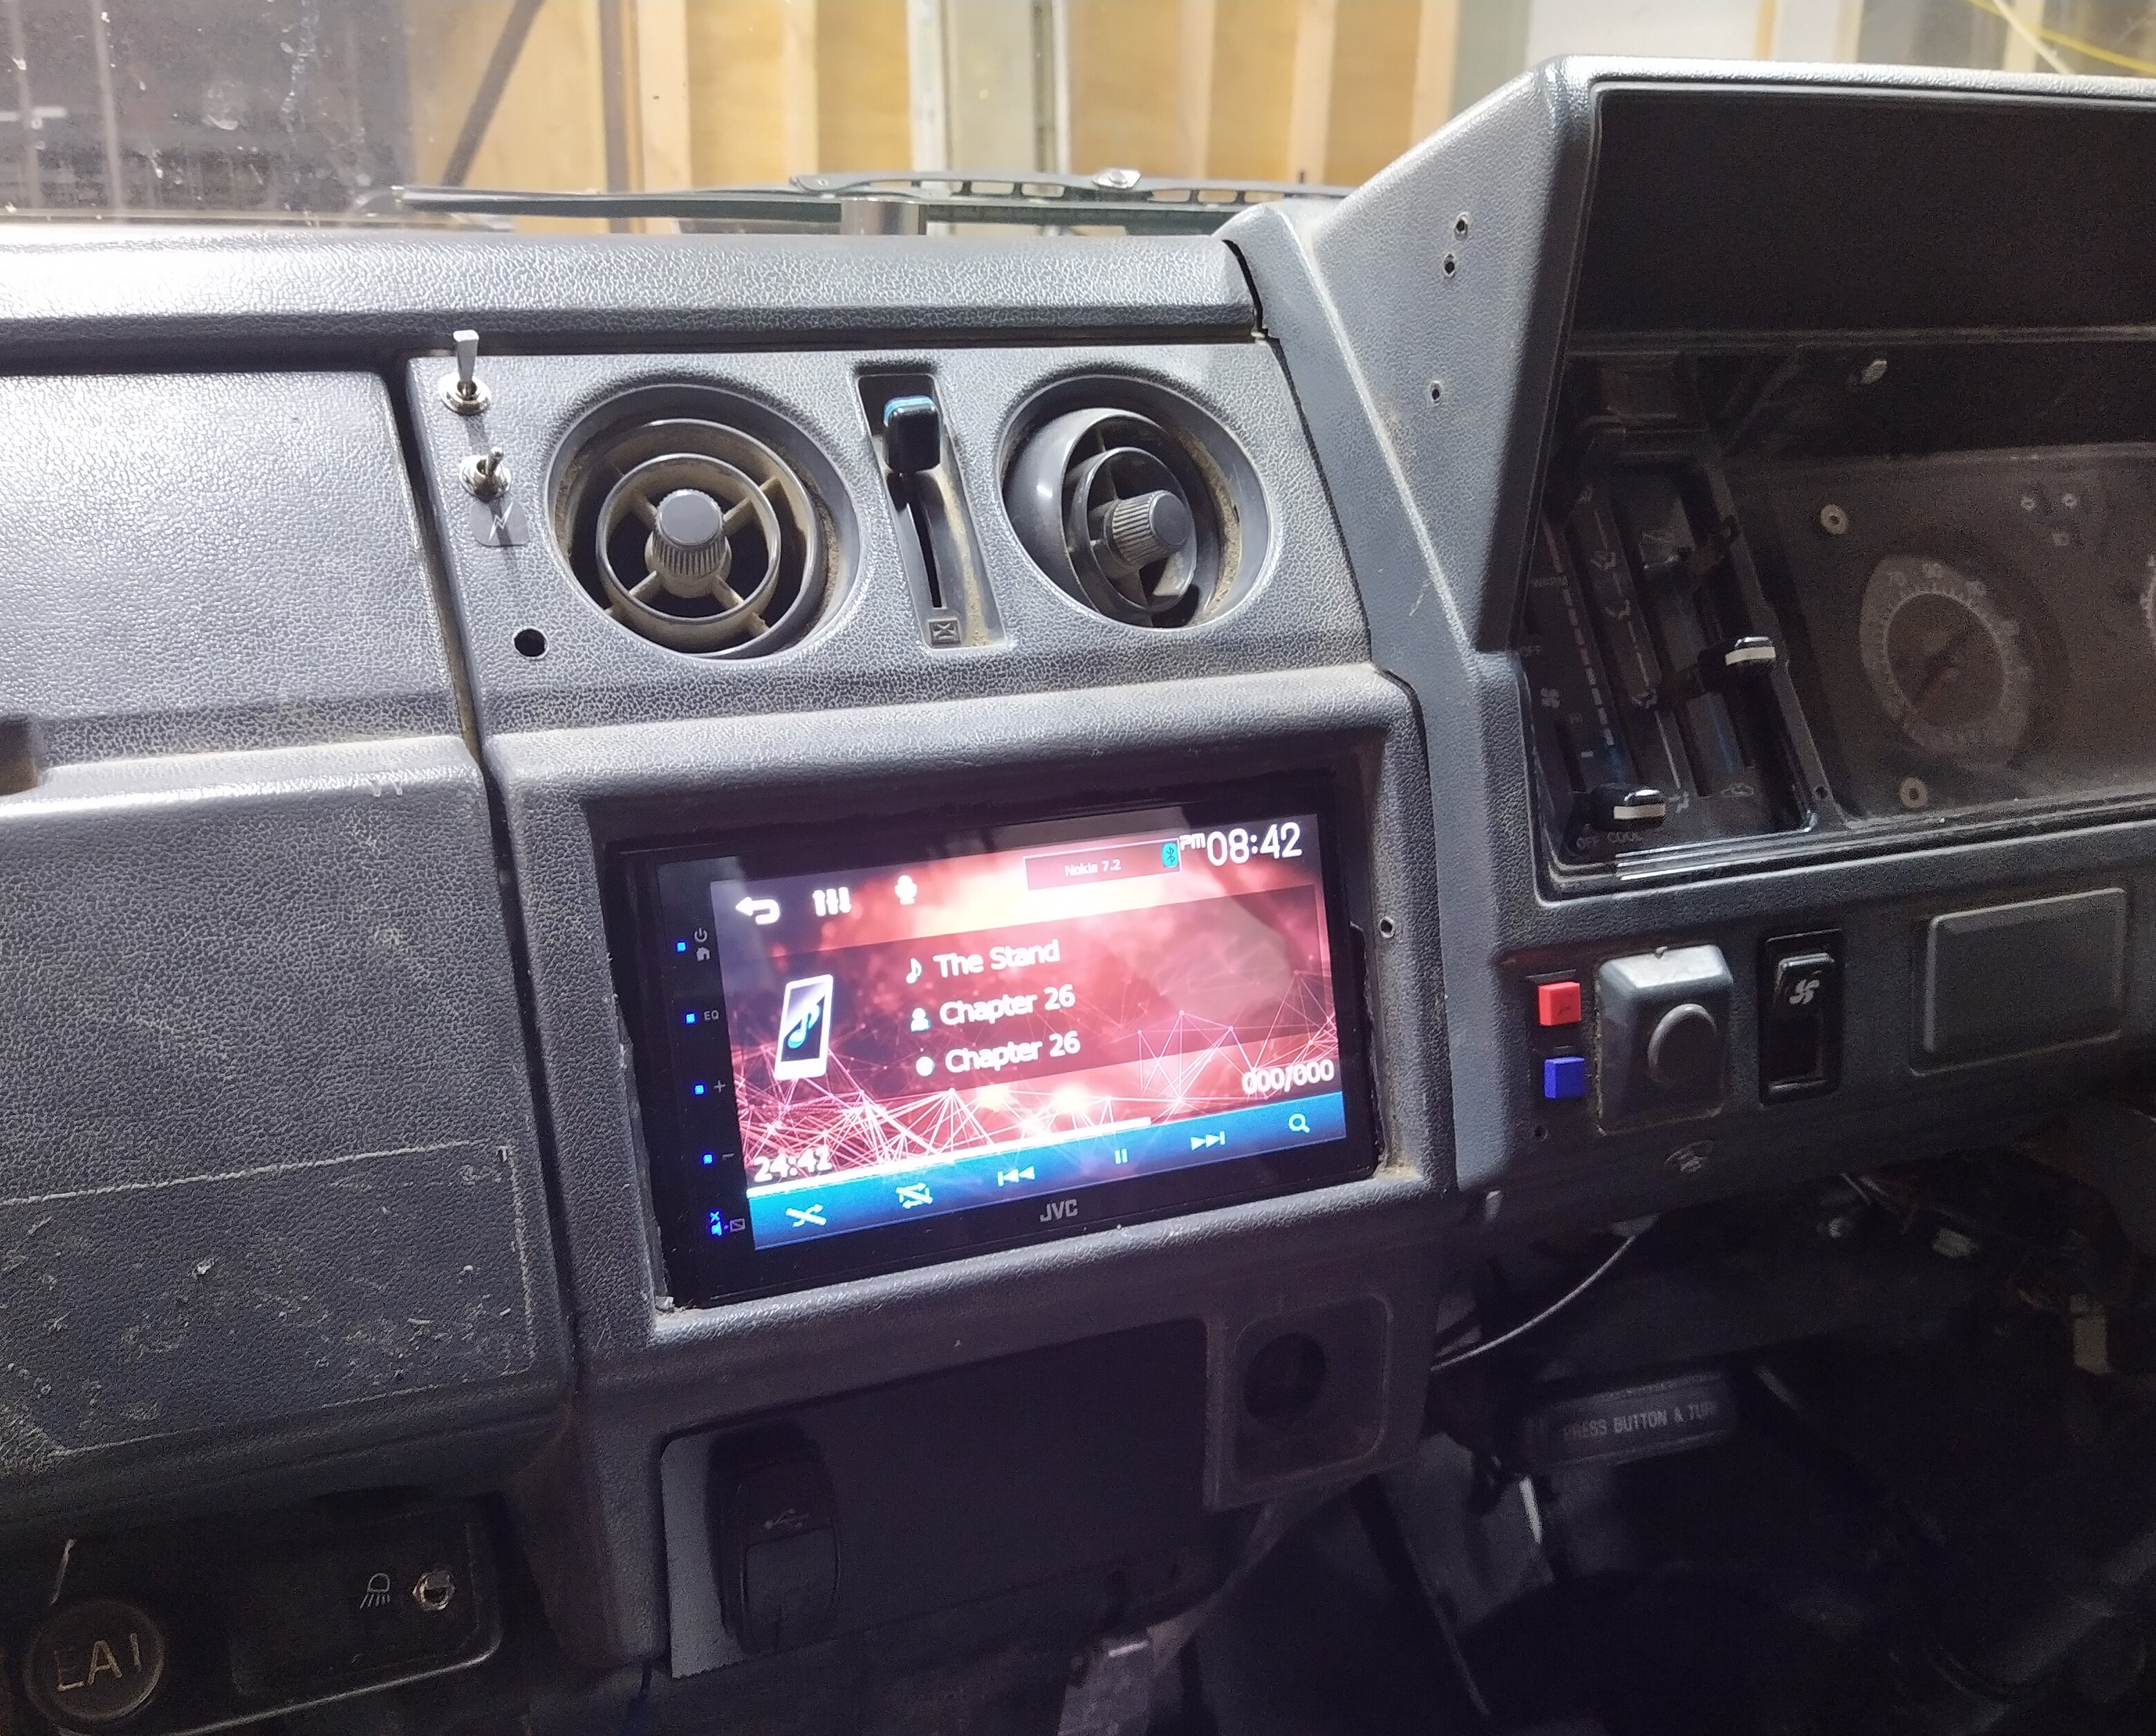
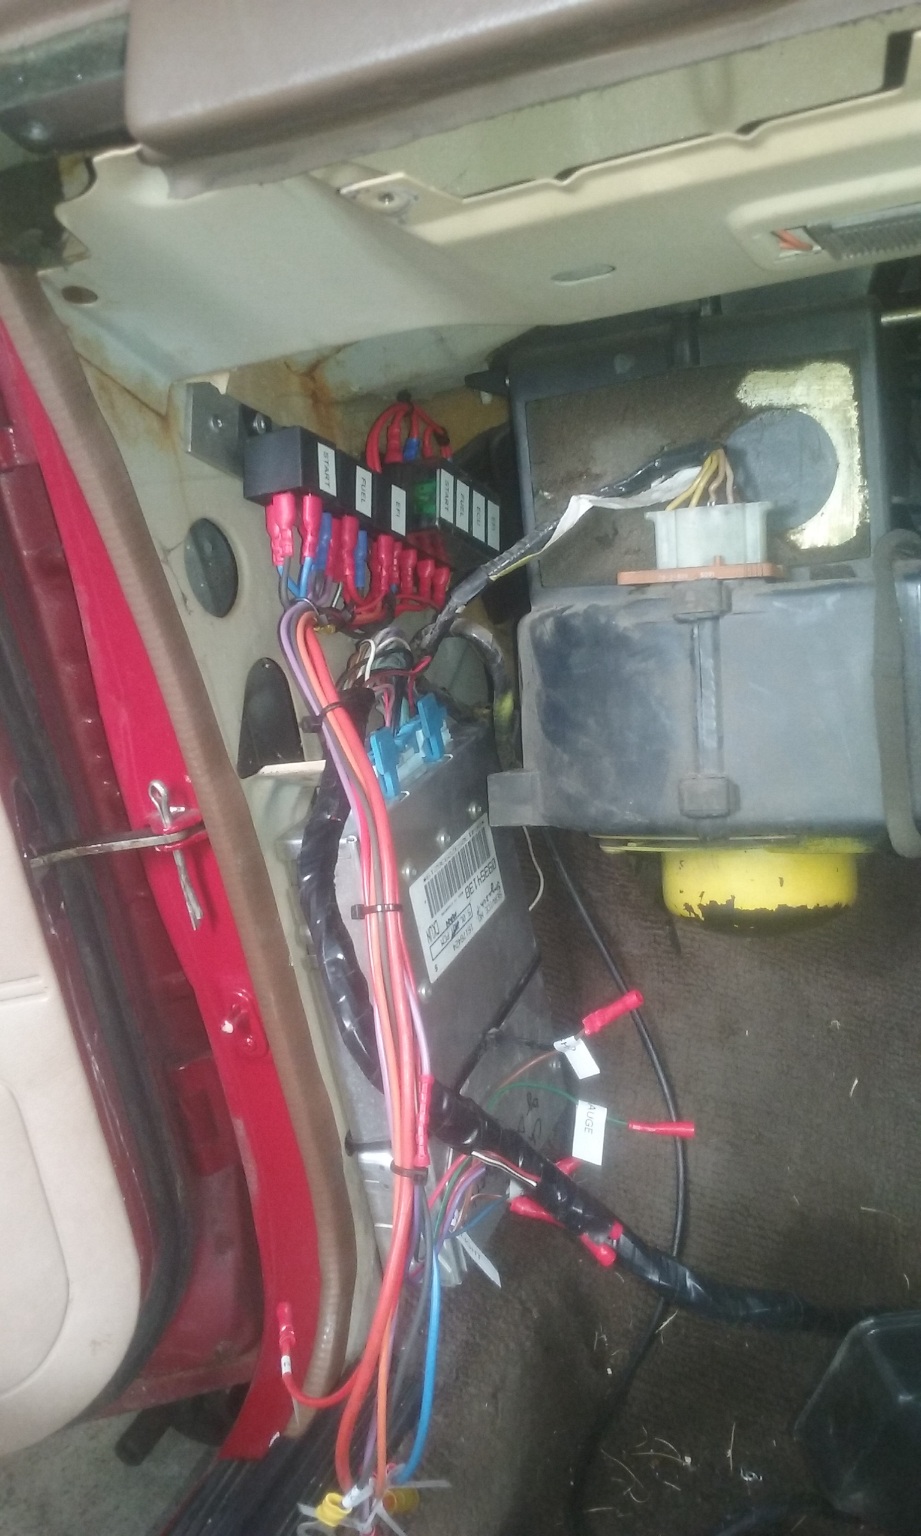
And I tidied some stereo related shit today, I thought it might give some of you a laugh; The red and blue buttons are external volume controls, those were the only two suitable momentaries I had lying around. The top switch by the vent is to switch in the rear view camera cos I couldn't be fucked dropping the 24v reversing signal down to 12v. The switch below it is a 3 position; up is normal, mid is stereo off regardless of key position, down switches the stereo on regardless of key position. The hole below that is for one of those two switches that didn't fit after I drilled it. And I got rid of the digital clock below all that and remounted the usb port there on a panel, it is all too black to see clearly though...
2 points
-
Yea I am surprised how well mine rides, but it is coil sprung so probably was always going to be nicer than leaf sprung. The downside is when I load it up but the airbags seem to help a lot. I should have made my cab do that, it might have been easier.... In other news I have got to the semi finals of 4x categories in the Deboss comp, pretty stoked with that. Edit; I need to see pics of the 6x6 as well...2 points
-
Well , hit whats known as a shock breaker.2 points
-
Single handedly devaluing smallport heads. so i can afford to buy one....2 points
-
So that's where it is so far. I have some vinyl stuff from spotlight but I doubt it's going to have the stretch/shrinkage I need. Dunno yet. I removed the stuck drums on the GT rear axle I bought forever ago and started making a list of stuff I needed. I decided I'll replace it all but haven't bought anything yet. I also have some brackets for the anti tramp bars that need welding to the body. Nice bit of kit, cheap from the uk. And from a few weeks ago at the mustang day at halswell air museum. It was a cracking day with loads of awesome fords, uk, aus and american stuff. hopefully ill have some other small updates soon. joe.
2 points
-
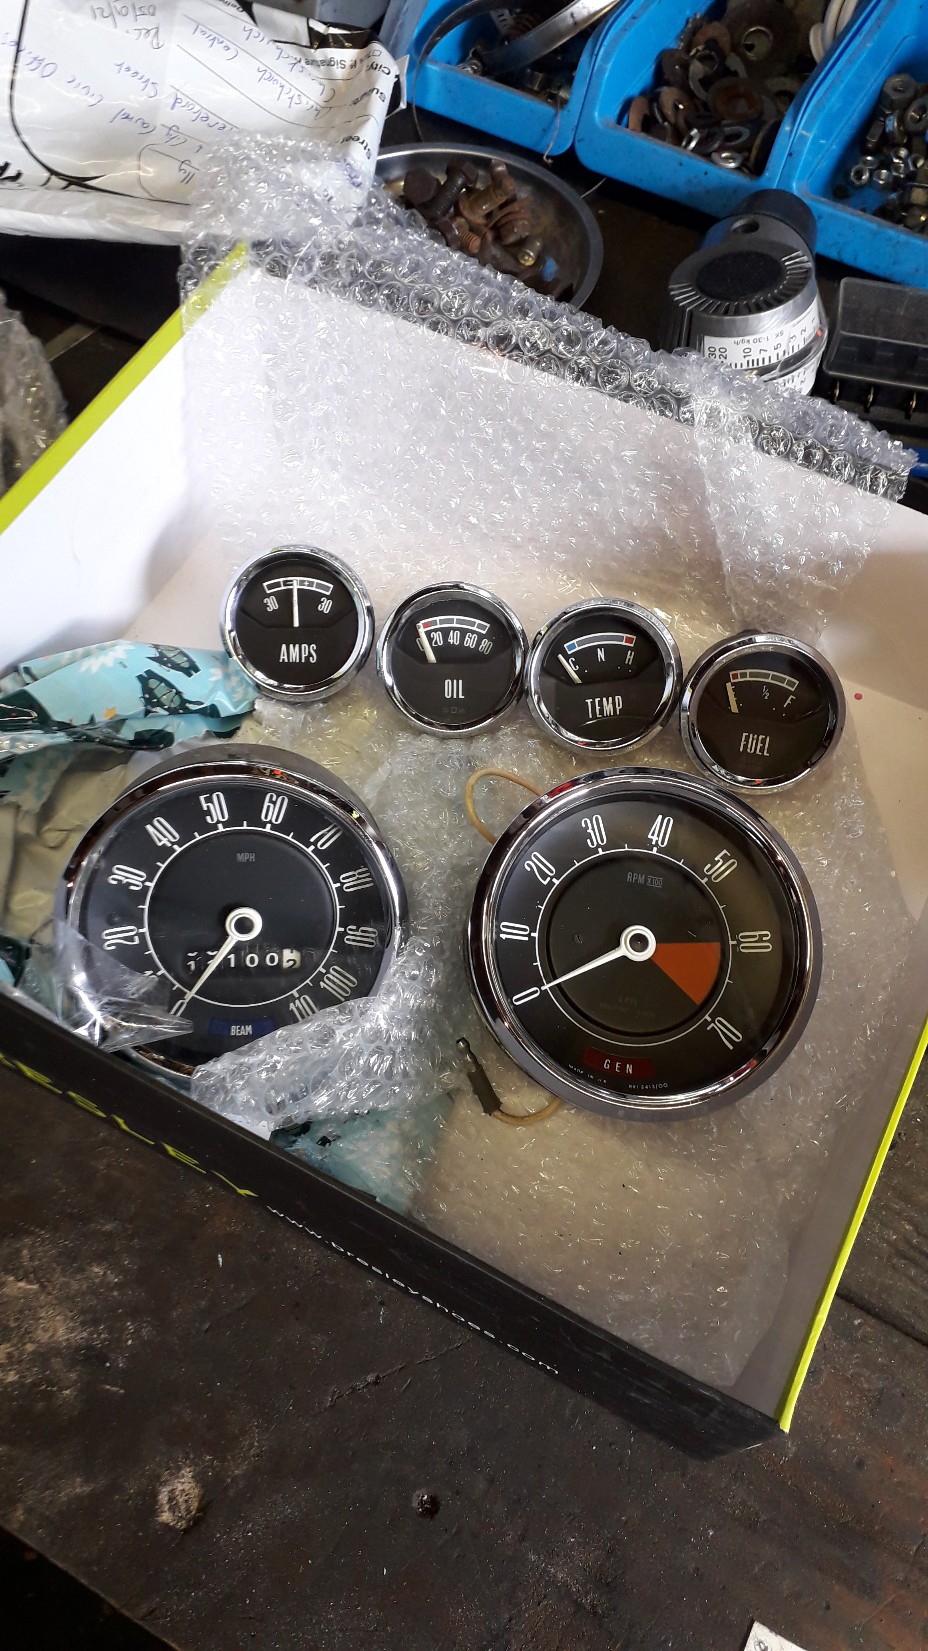
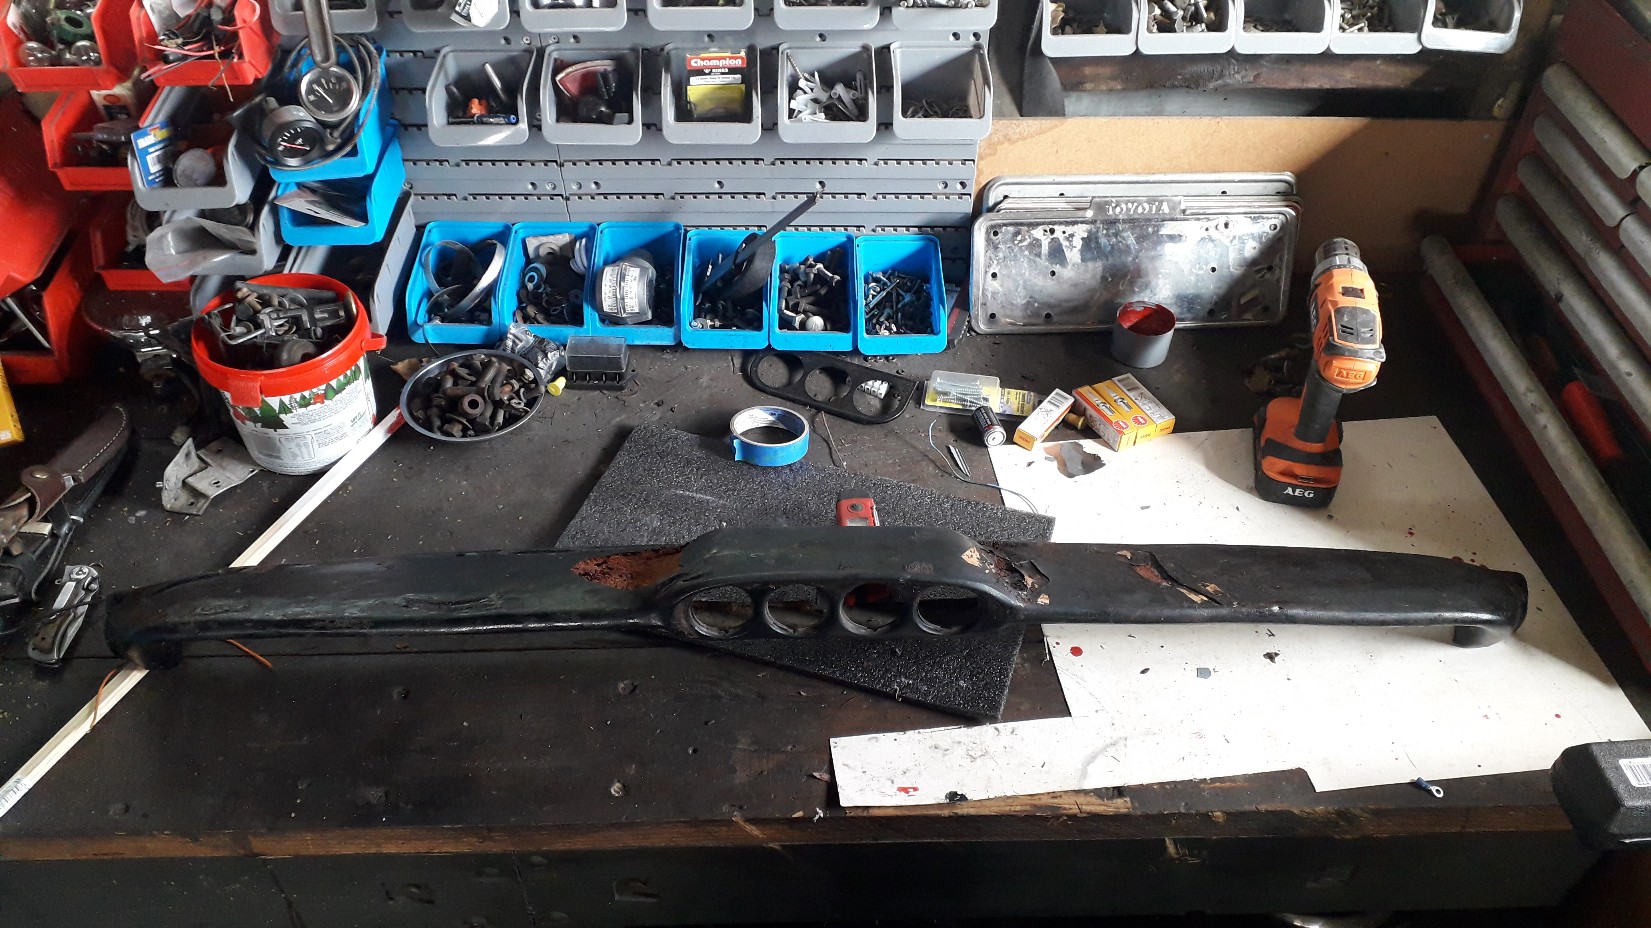
Haven't updated this in forever. After I got the car back, she was looking awesome. Just about the best she ever has. I picked it up on the saturday and took it to work the following wednesday, first time it was out since collecting it, and I got rear ended. Again. Start stop traffic. Got shunted. Fuck I lost my shit right there in the middle of the rd lol. So back to canterbury auto fab it went. Less damage tha the first time but the rear panel and support brace were dented and the bumper was gouged through the chrome so that didnt survive this time. So yeah. Lol. Gotta laugh? Got it back again before xmas. Been tinkering with it but haven't actually finished anything yet. I bought a GT dash top that needs recovering and my missus bought me the gauges for Christmas, cos shes awesome like that. They are very hard to come by these days. I was saving up to buy them off the guy but she had sorted it. I spent some time tidying them up as they aren't mint but I got them looking pretty sweet. Dash is also less than mint but that's ok. Its 53yrs old and they all need work.
2 points
-
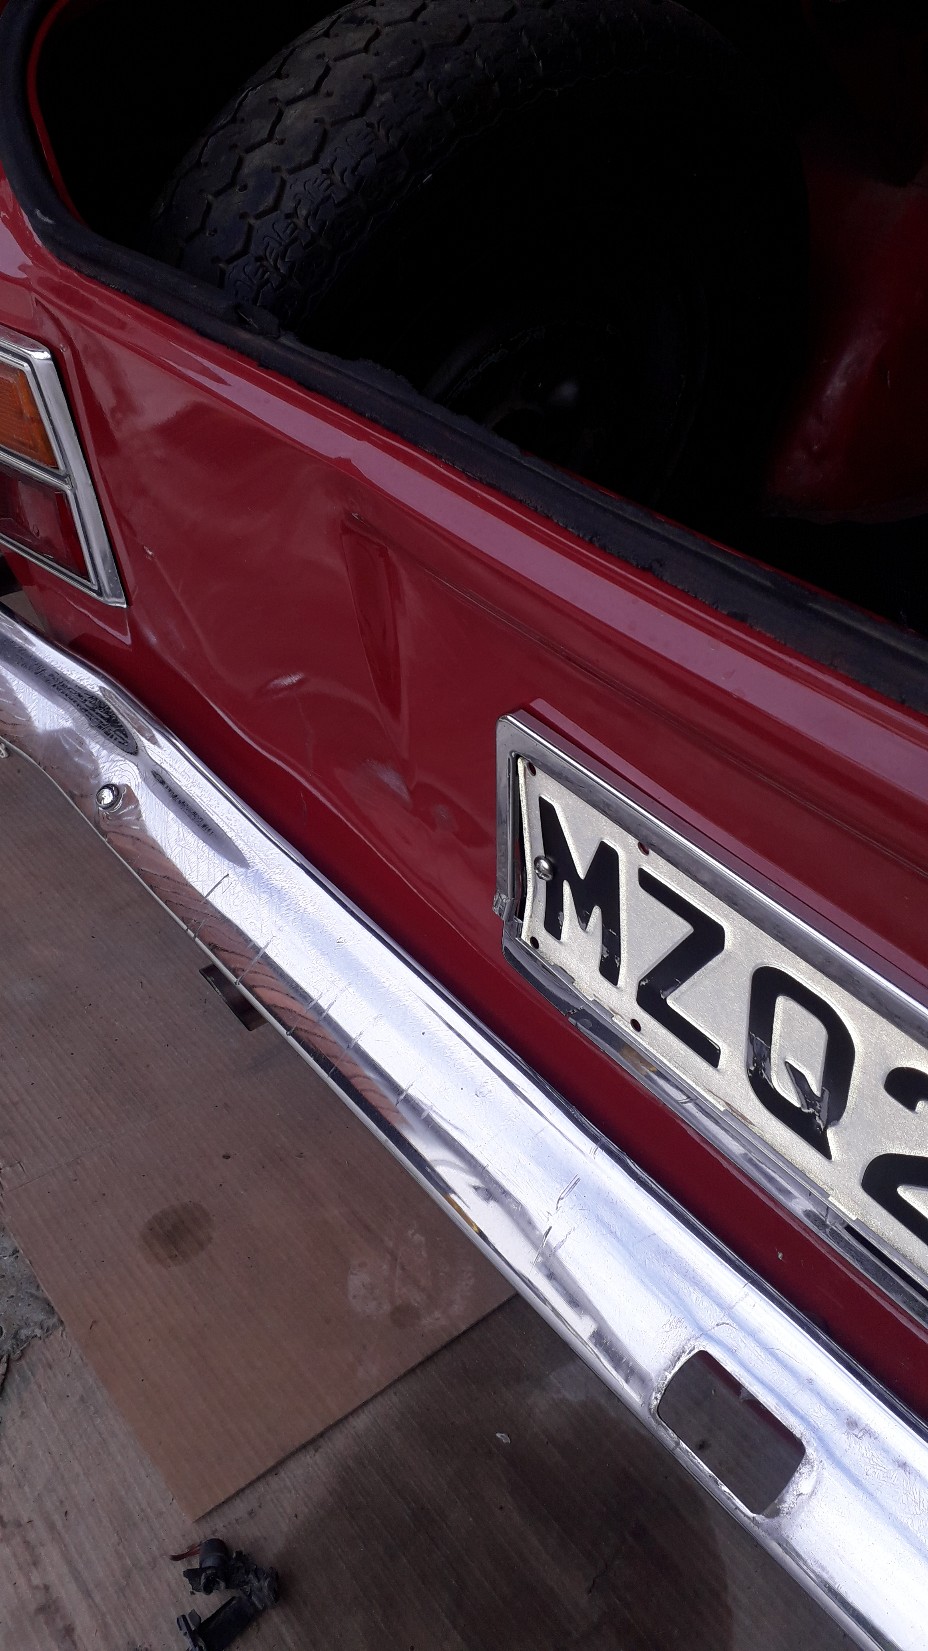
Today’s mish was to clean up and paint the bumper, then it rained. I got a bit done but not the bulk of it as the compressor shat check valve. I wanna do the frame in hammerite but I’ll be patient and let the black zinc cure first. whipped the overspray and sealant off the screen trims and straightened a few bits.2 points
-
you should also enter this in the hotwheels comp. id buy a 1/64th model2 points
-
I went along to Caffeine & Classics on the weekend with the GTO and BMX.2 points
-
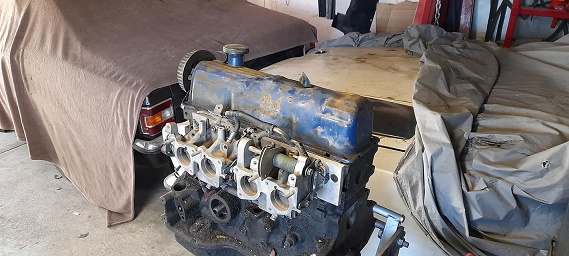
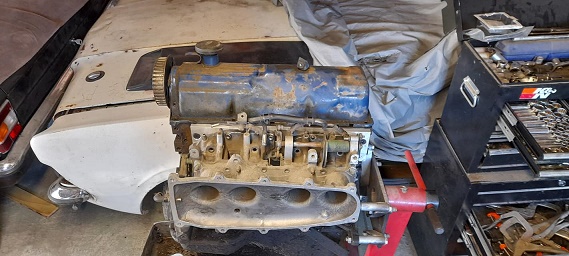
I decided not to go for power or show, neither really achievable any more, so the car became a daily driving v8 reliable runner... so first thing would be to get it running and driving as is, then work on getting a manual gearbox.. After a lot of mucking around learning tuff, I found the engine would not make oil pressure, start engine, 5 seconds in still nothing, repeat x9, I did this a few times untill the lifters were chattering like crazy, pulled the plugs, fuses, wind it over etc., so after much research... Found the 'high volume' oil pump that came with the engine had a broken input shaft, as in, it was turning the shaft but not the oil pump gear but still felt solid and tight untill i twisted it properly .... ...... really??? So I brought a new pump and that fixed my last issue.. The damn F#$*ing shaft had spun in the pressed fit of the pump gear so was spinning on the spot.. took quite a few methods, days if not weeks and vaseline to figure this out, as the Holden v8 pumps are known to have priming issues, which was my initial thinking, i must have had that pump in and out 20 times, sorry no pics, was just relieved when the gauge moved ! Then things started to look up ... https://youtu.be/0Q8boxr26YU https://youtube.com/shorts/Ep8BNbHLJiU https://youtube.com/shorts/IICLjXuLgi4 1 st start and drive No exhaust. more pictures new exhaust, gillies, there's probably a lot of things left out, but it was a lot of work for sure ..
2 points
-
Then after failing to buy carburetor set up, I went for injection, brought a 'vl' v8 or 28 spline diff, and went on trademe and brought a vs v8 s-pac ute, v8, de-registered and crash damaged, but running, all it needed was a battery... $1500 , well I wasn't interested in the motor (which had worn bottom end as I found out later ), just the wiring ecu and all the rest, as well as a limited slip 3:7 diff(a suprise bonus!) , parted the ute out and dumped the shell.. Then a mate, had a power glide for sale, which at the time sounded great, being able to hold upto 800 hp with the right mods and bolt onto my 304 (I diddnt know the limitations of a 304 , or what was involved in making a 500hp 304 holden) So I went on jegs website, brought things like input shaft, clutches and steels, manual valve body,summit 3.5k stall,, basically making a drag gearbox, with the purpose of it being a drag-able vk... got it running, did the wiring and ecu chip, aaand... Then I got married, and brought a house, overseas oe, and yea funds dried up real quick, had to change plans..
2 points
-
Installed my air intake temp sensor into the charger intake. Its fitted on the bottom side Top radiator hose fitted, new thermostat and gasket and started filling her up with coolant, this is how I do it. Some radiator hose with some thread tape around a bottle. Take off the top heater hose till coolant comes out of head then connect back up and take off other end at heater core. Prob 50 odd pumps off the upper and lower radiator hoses with my hand until no more bubbles come up in container. Goes hard for what it is. No leaks so success Managed to get it all assembled again too. Methanol injector is all hooked up, this photo sucks but it's on the bend before the supercharger after throttle body. Still need to install section of exhaust and chuck the windband in then its onto setting up ecu2 points
-
Just like River Rat l want this 1 to be fully street legal and certd.
2 points
-
Got some longer wheel studs for the front. Painted the hubs and installed some new genuine Toyota wheel bearings and seals. Have also changed the front springs to some shorter 5kg ones and added some keeper springs. Need to find some 100-130mm long 4kg springs for the rear, but they're proving hard to find. Painted the inside of the hatch, doors and bonnet. Finally managed to finish prepping the rest of the panels and took them into work this weekend. Had a bit of drama with the base coat being the wrong tint, as I had another 2 litres mixed up since there was only about 1-1.5 litres out of a 4 litre tin left after doing the body and didn't want to run out. Turned out the new mix was a bit darker, but managed to get 2 coats of that on and then one coat of the previous left overs sprayed on top. So hopefully it matches to the body! Stoked with how it turned out! I sprayed the basecoat and then my coworker Justin came and sprayed the clear on, so thanks to him for doing such a good job! Assembled a few bits today. Could just stare at this thing all day!2 points
-
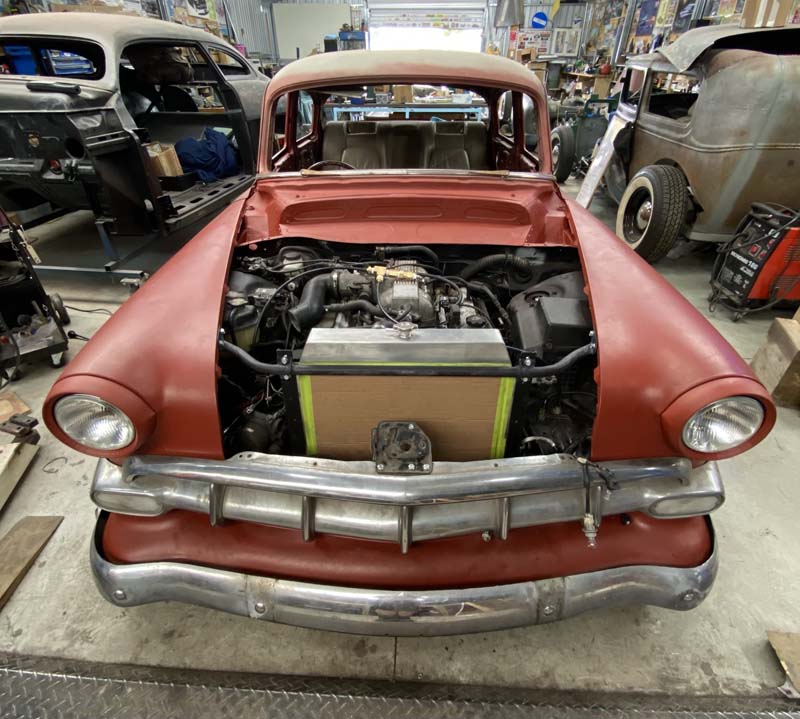
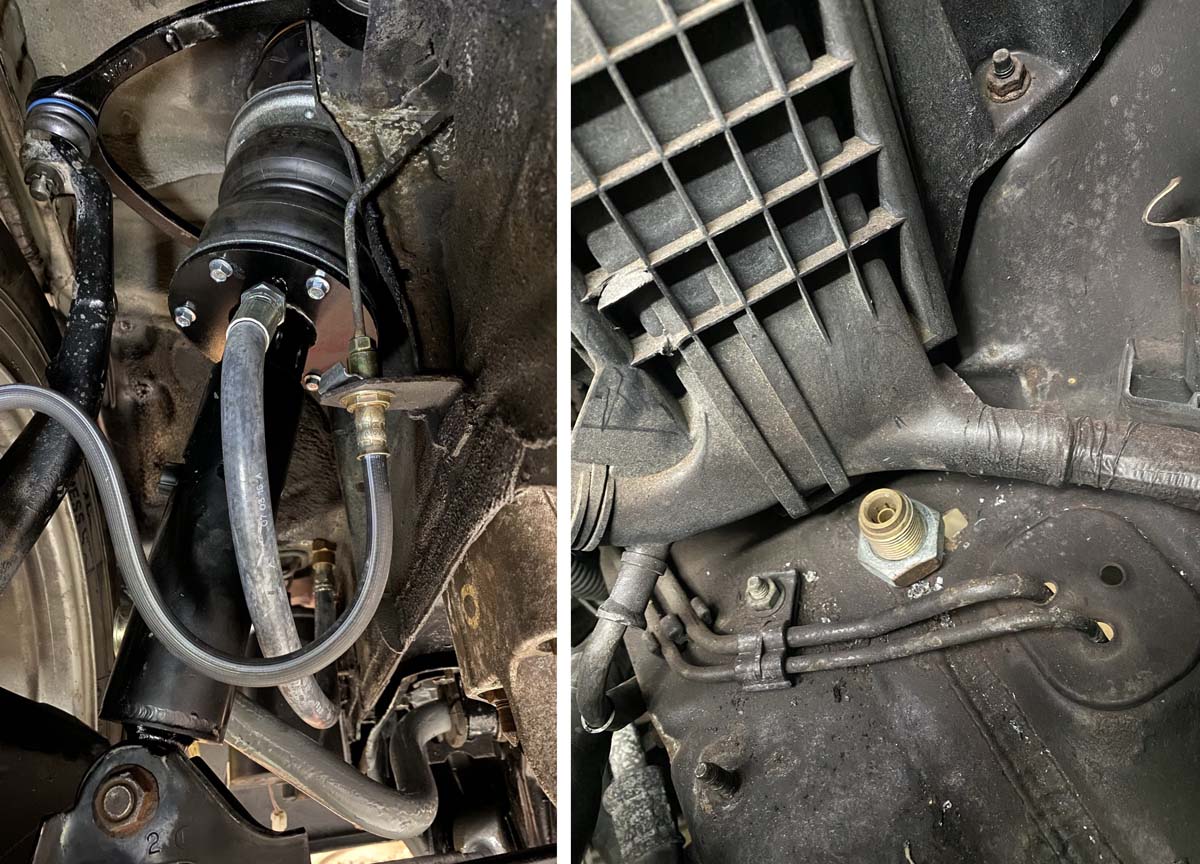
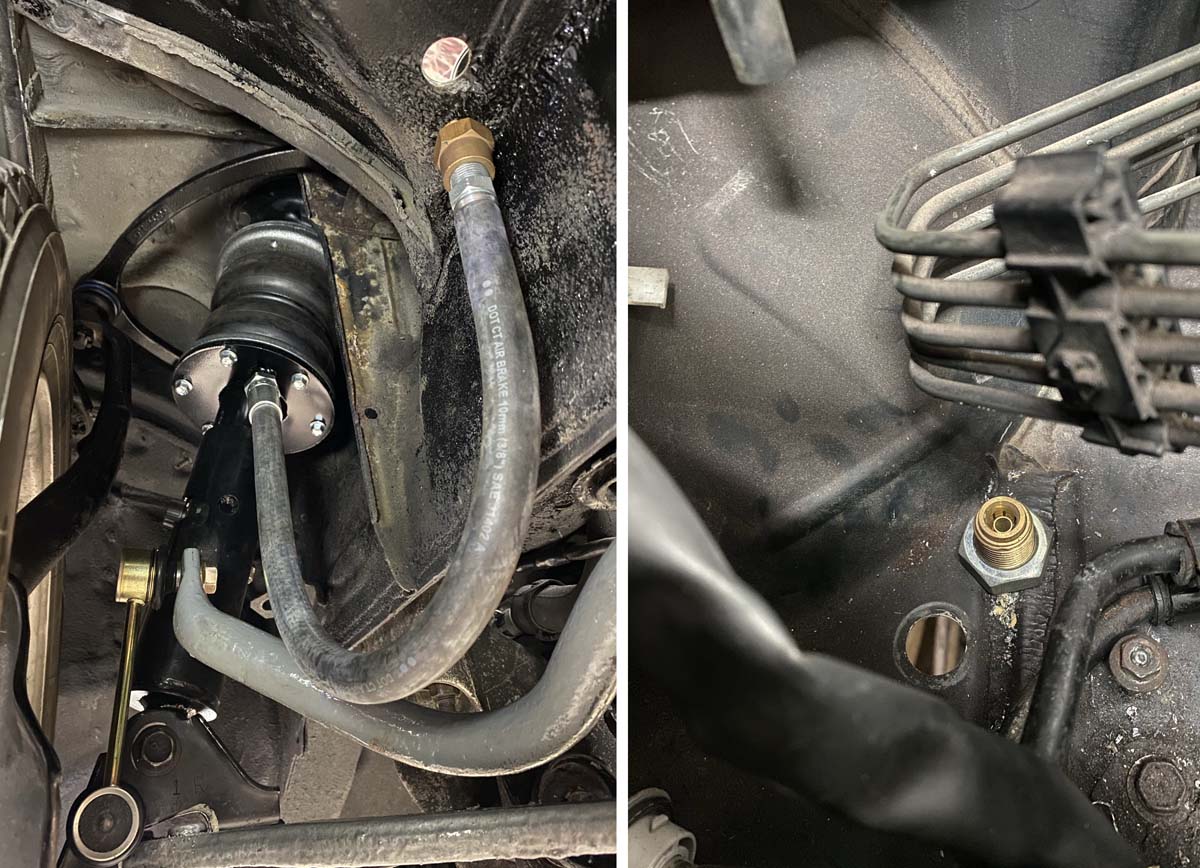
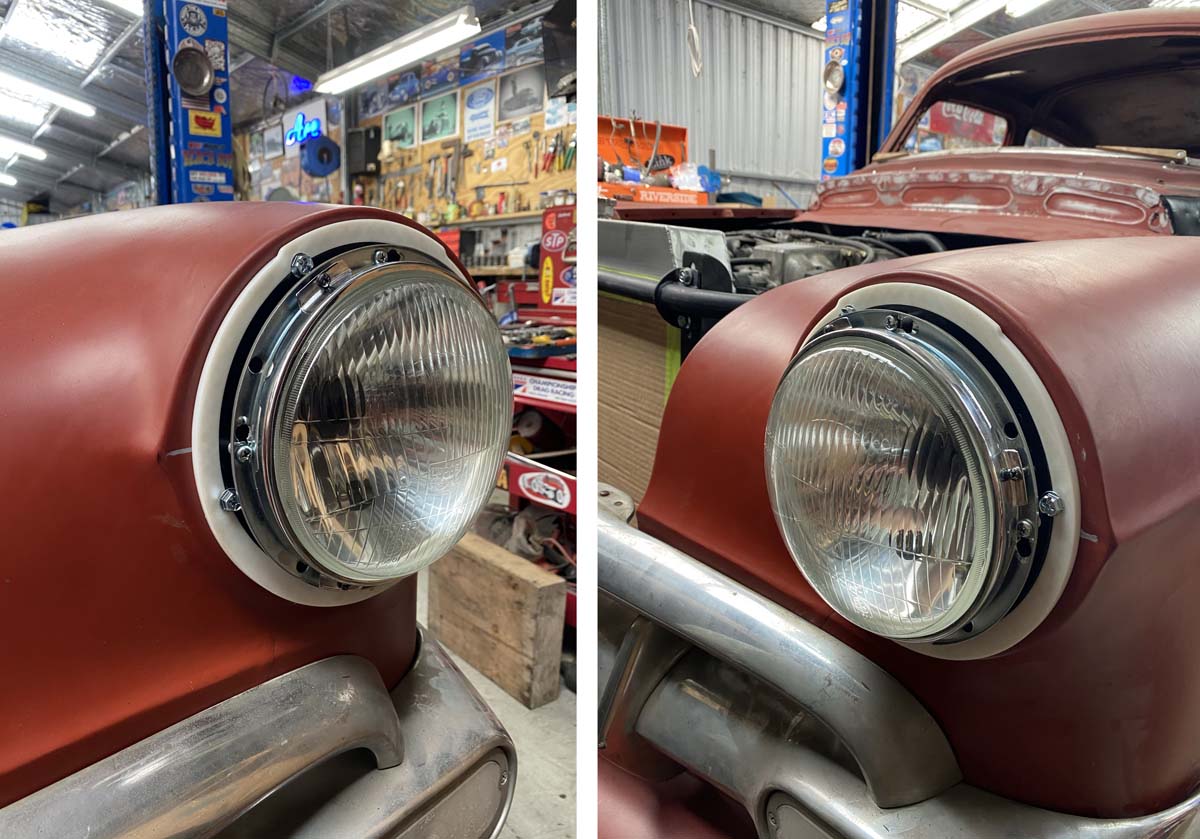
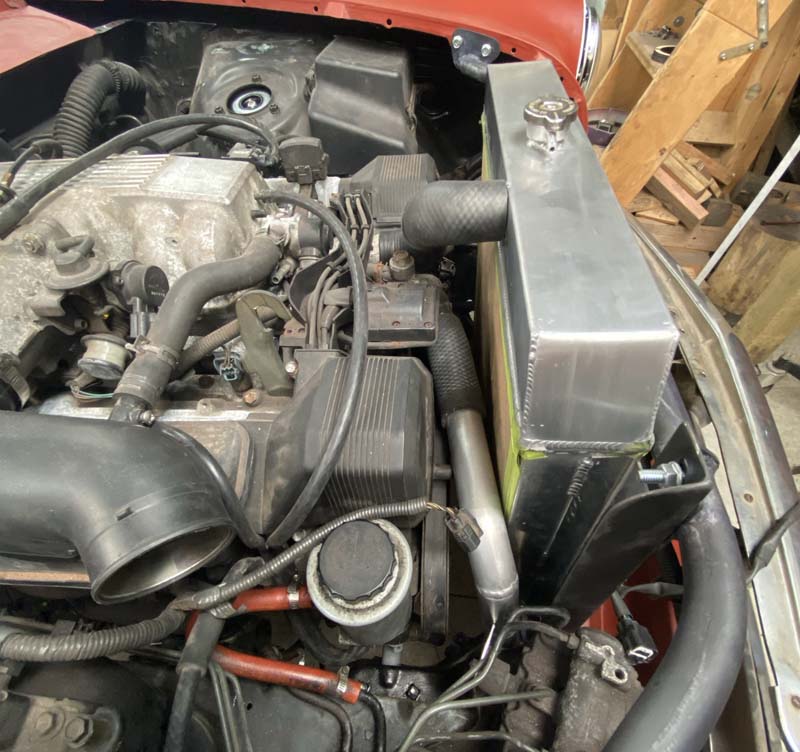
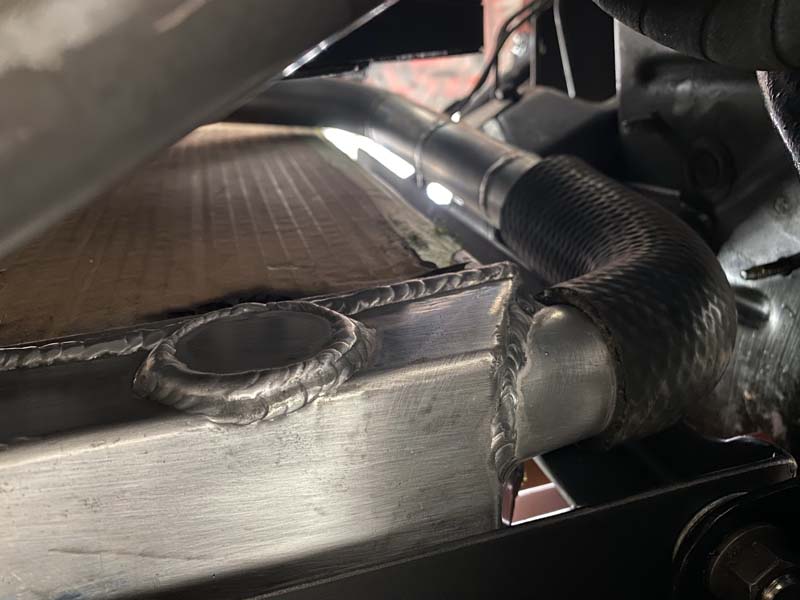
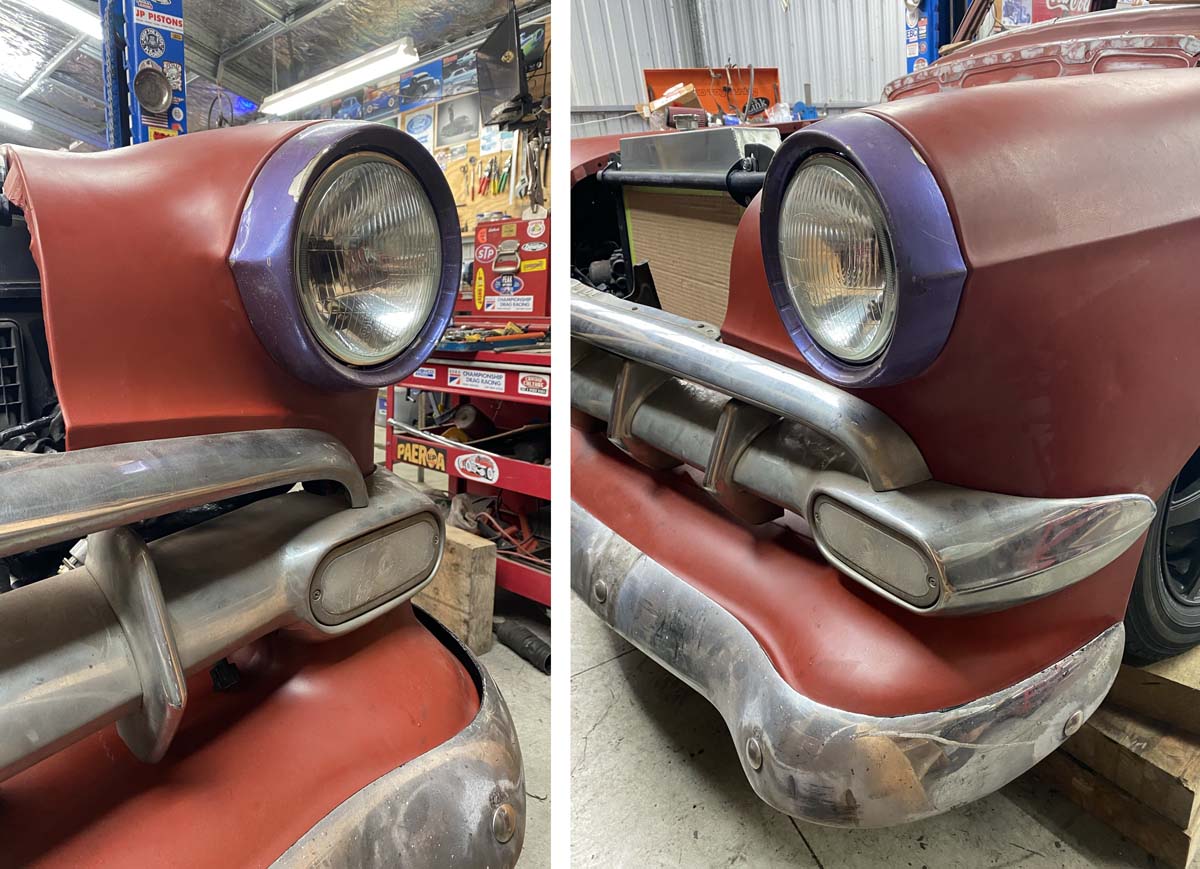
Didn’t have the factory headlight buckets. So brought some Narva plastic universal buckets. They were a little small to fit the screw holes in the guards. And also didn’t accommodate mounting the trim rings. So I 3d printed a couple of adaptors in PLA. Worked well enough for v1. 80s lavender eyeliner trims on. The radiator and hoses are coming together. Seems like it will work. Just a little tight for space. Beneath we relocated the outlet to the side. I Cut a hole in the Grill support bracket, and welded on a "c" shaped tube. So the large lexus loom could be cable tied up behind, and be hidden by the grill. The boss airbags came with some huge 3/8" airbrake hose, with pre crimped ends. They are WAY to long. Almost Twice the length they need to be. So I cut them down. And will add a new barb on the cut end, or a screw on brass air brake fitting, or have a new end crimped on. Unsure yet. This is the Left hand side. Going forward and up through a bulkhead DOT push connect fitting. And this is the Right hand side coming forward and up through the bulkhead. (yes 2nd attempt at position, due to touching tyre.) You may notice the air line passes behind the strut on the left hand side. This is because Boss Suspension decided to make all the struts the same. Not in pairs. Not stoked on this fact. My OCD likes symmetry.
2 points
-
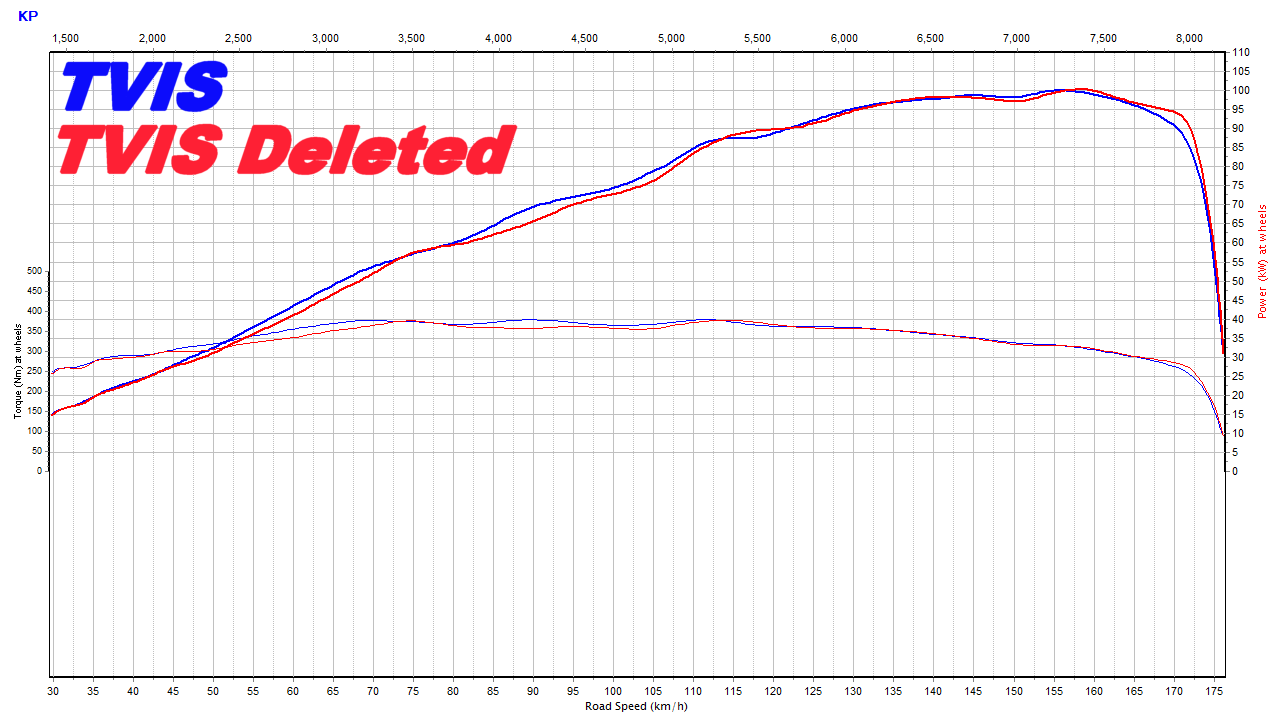
Soo, turns out the tvis wasn't opening all the way. thought results seemed weird... vid has been fixed and reuploaded / heres the graph.
1 point
-
https://www.retwine.co.nz/ This places might sell a more suitable vinyl for recovering your dash. I lined the back of my van with a flexible carpet from them. Very cool car!1 point
-
Hey Internet. What colour are 80s suzuki frames. Ford engine blue But there's lots of Ford engine blues Lots of suzuki blues too DR250 is a close match to duplicolor de1601 Ford blue Modern 2008 suzuki tank is roughly de1606 Ford dark blue 80s Dr200 is inbetween somewhere
1 point
-
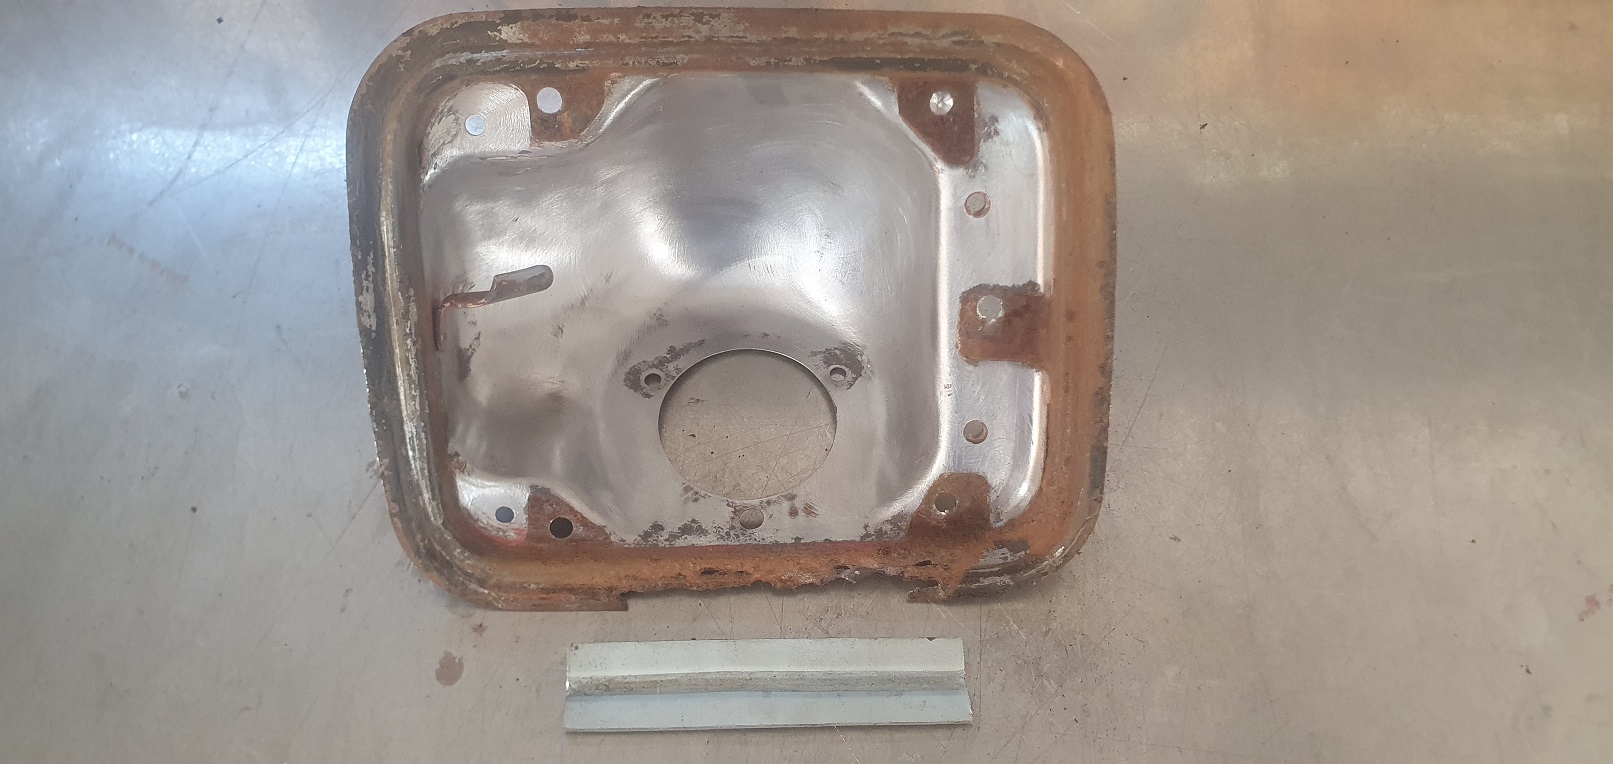
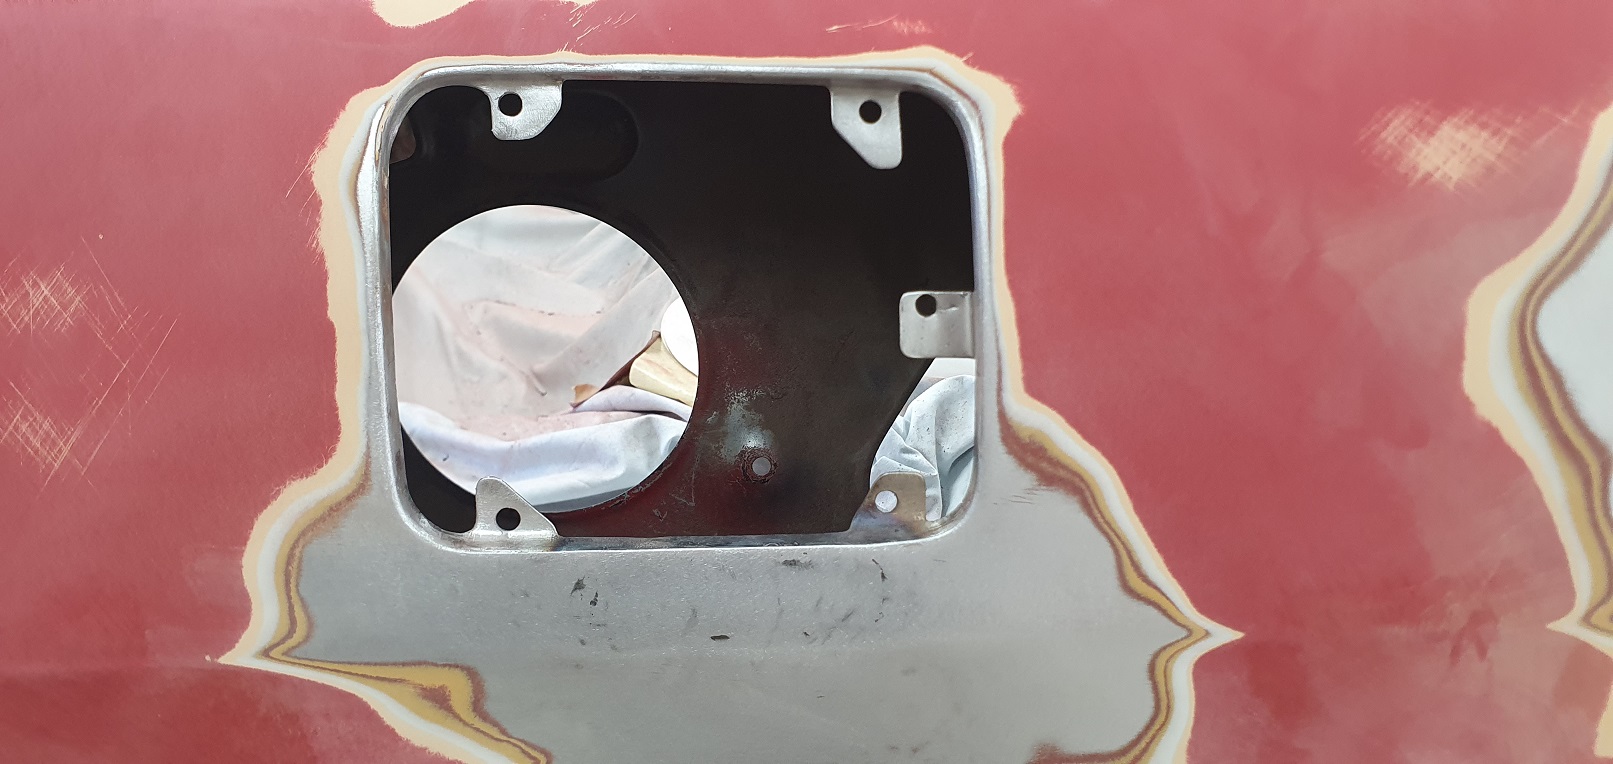
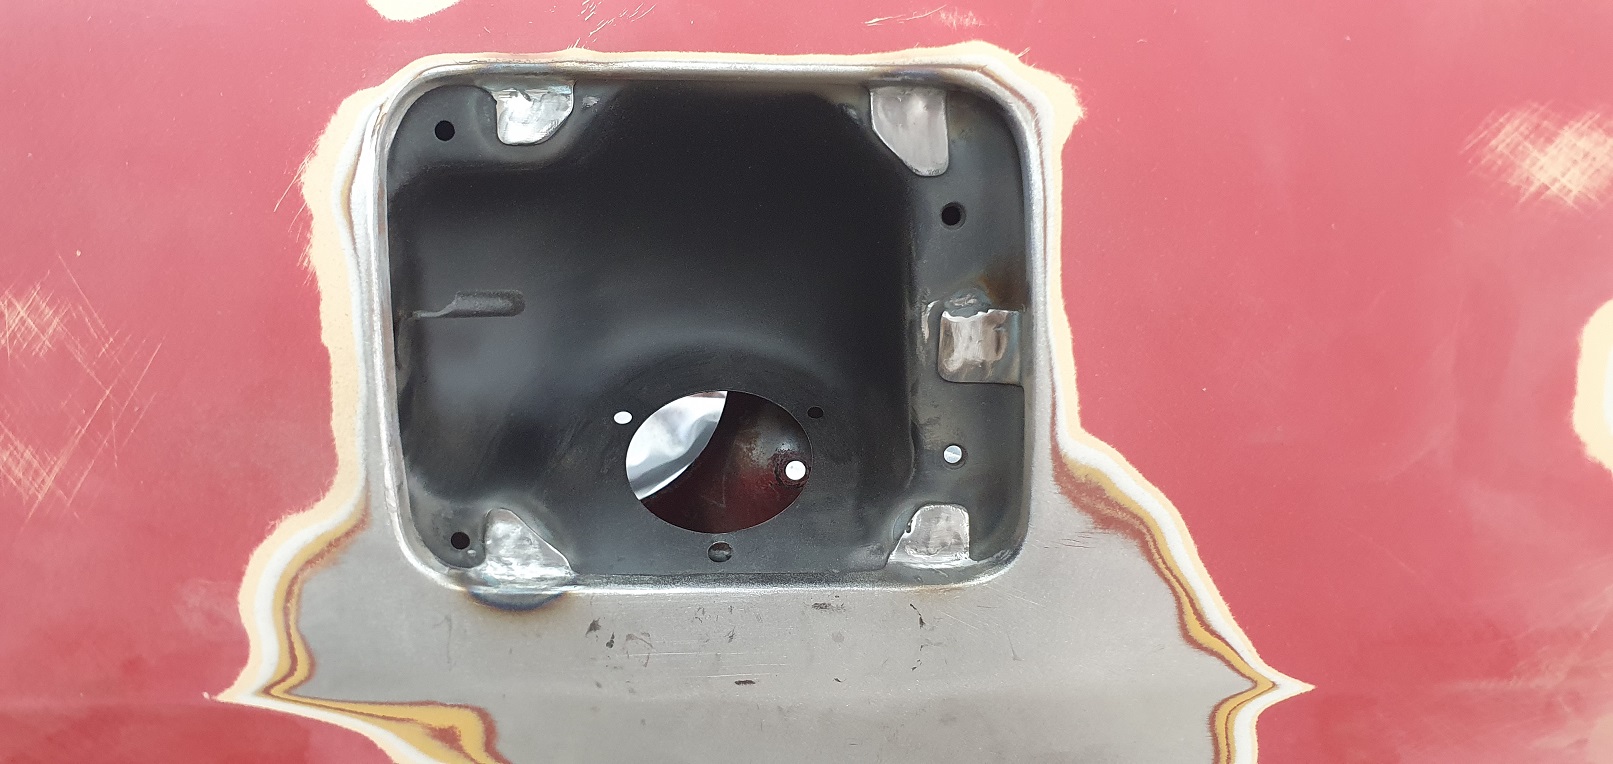
Update on the actual progress.. been a while coming as i had a PC meltdown and lost a lot of data Spare Wheel Finished Whipped the diff out for new bushes and a birthday - and sorting the underside Finally welded in the rear valance/panel Started on the other guard and only found a couple of minor issues common fuel filler rust
1 point
-
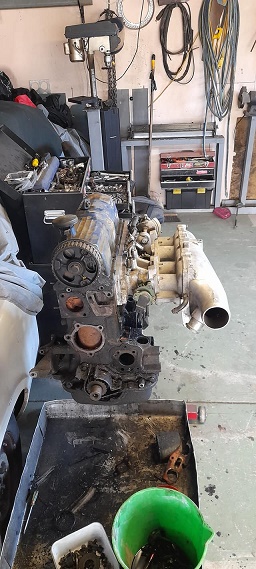
Finished the runner system pattern. So now all the sump patterns are complete, waxed and ready to go! . Only took 4 months.haha1 point
-
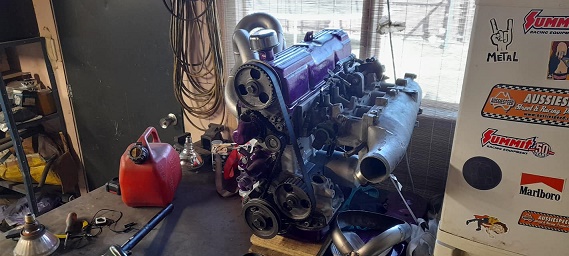
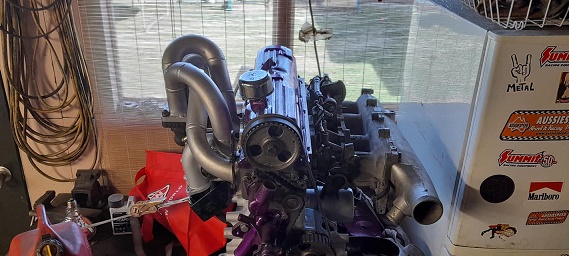
Motivation is still strong so carried on tonight! Ignition system I looked at coil on plug options, yaris, r35 gtr but in the end decided on individual coils from nzefi these have internal ignitors in each coil. Decided to mount it on the rocker cover. Brought some spark plug terminals and shortened my ignition leads. Then started on fuel system. Turns out the injectors I bought are bigger than what I was lead to believe.. 550cc high impedance. See how they go. It's not going to be a daily driver. Fuel rail in, mounted the fuel pressure regulator and ran the fuel lines to it and the return then made a start in the boot. I ran out of hose clamps so decided to call it a night. Thanks for looking1 point
-
Aaand more previous f-ups come to haunt me, the driveshaft was 25mm too short , note the white marker on it, a cert fail, it was like this in the other van too and its symptoms were vibrating under load and a yoke that showed signs of wear due to excess play, and so now I had to fix this... new driveshaft?
1 point
-
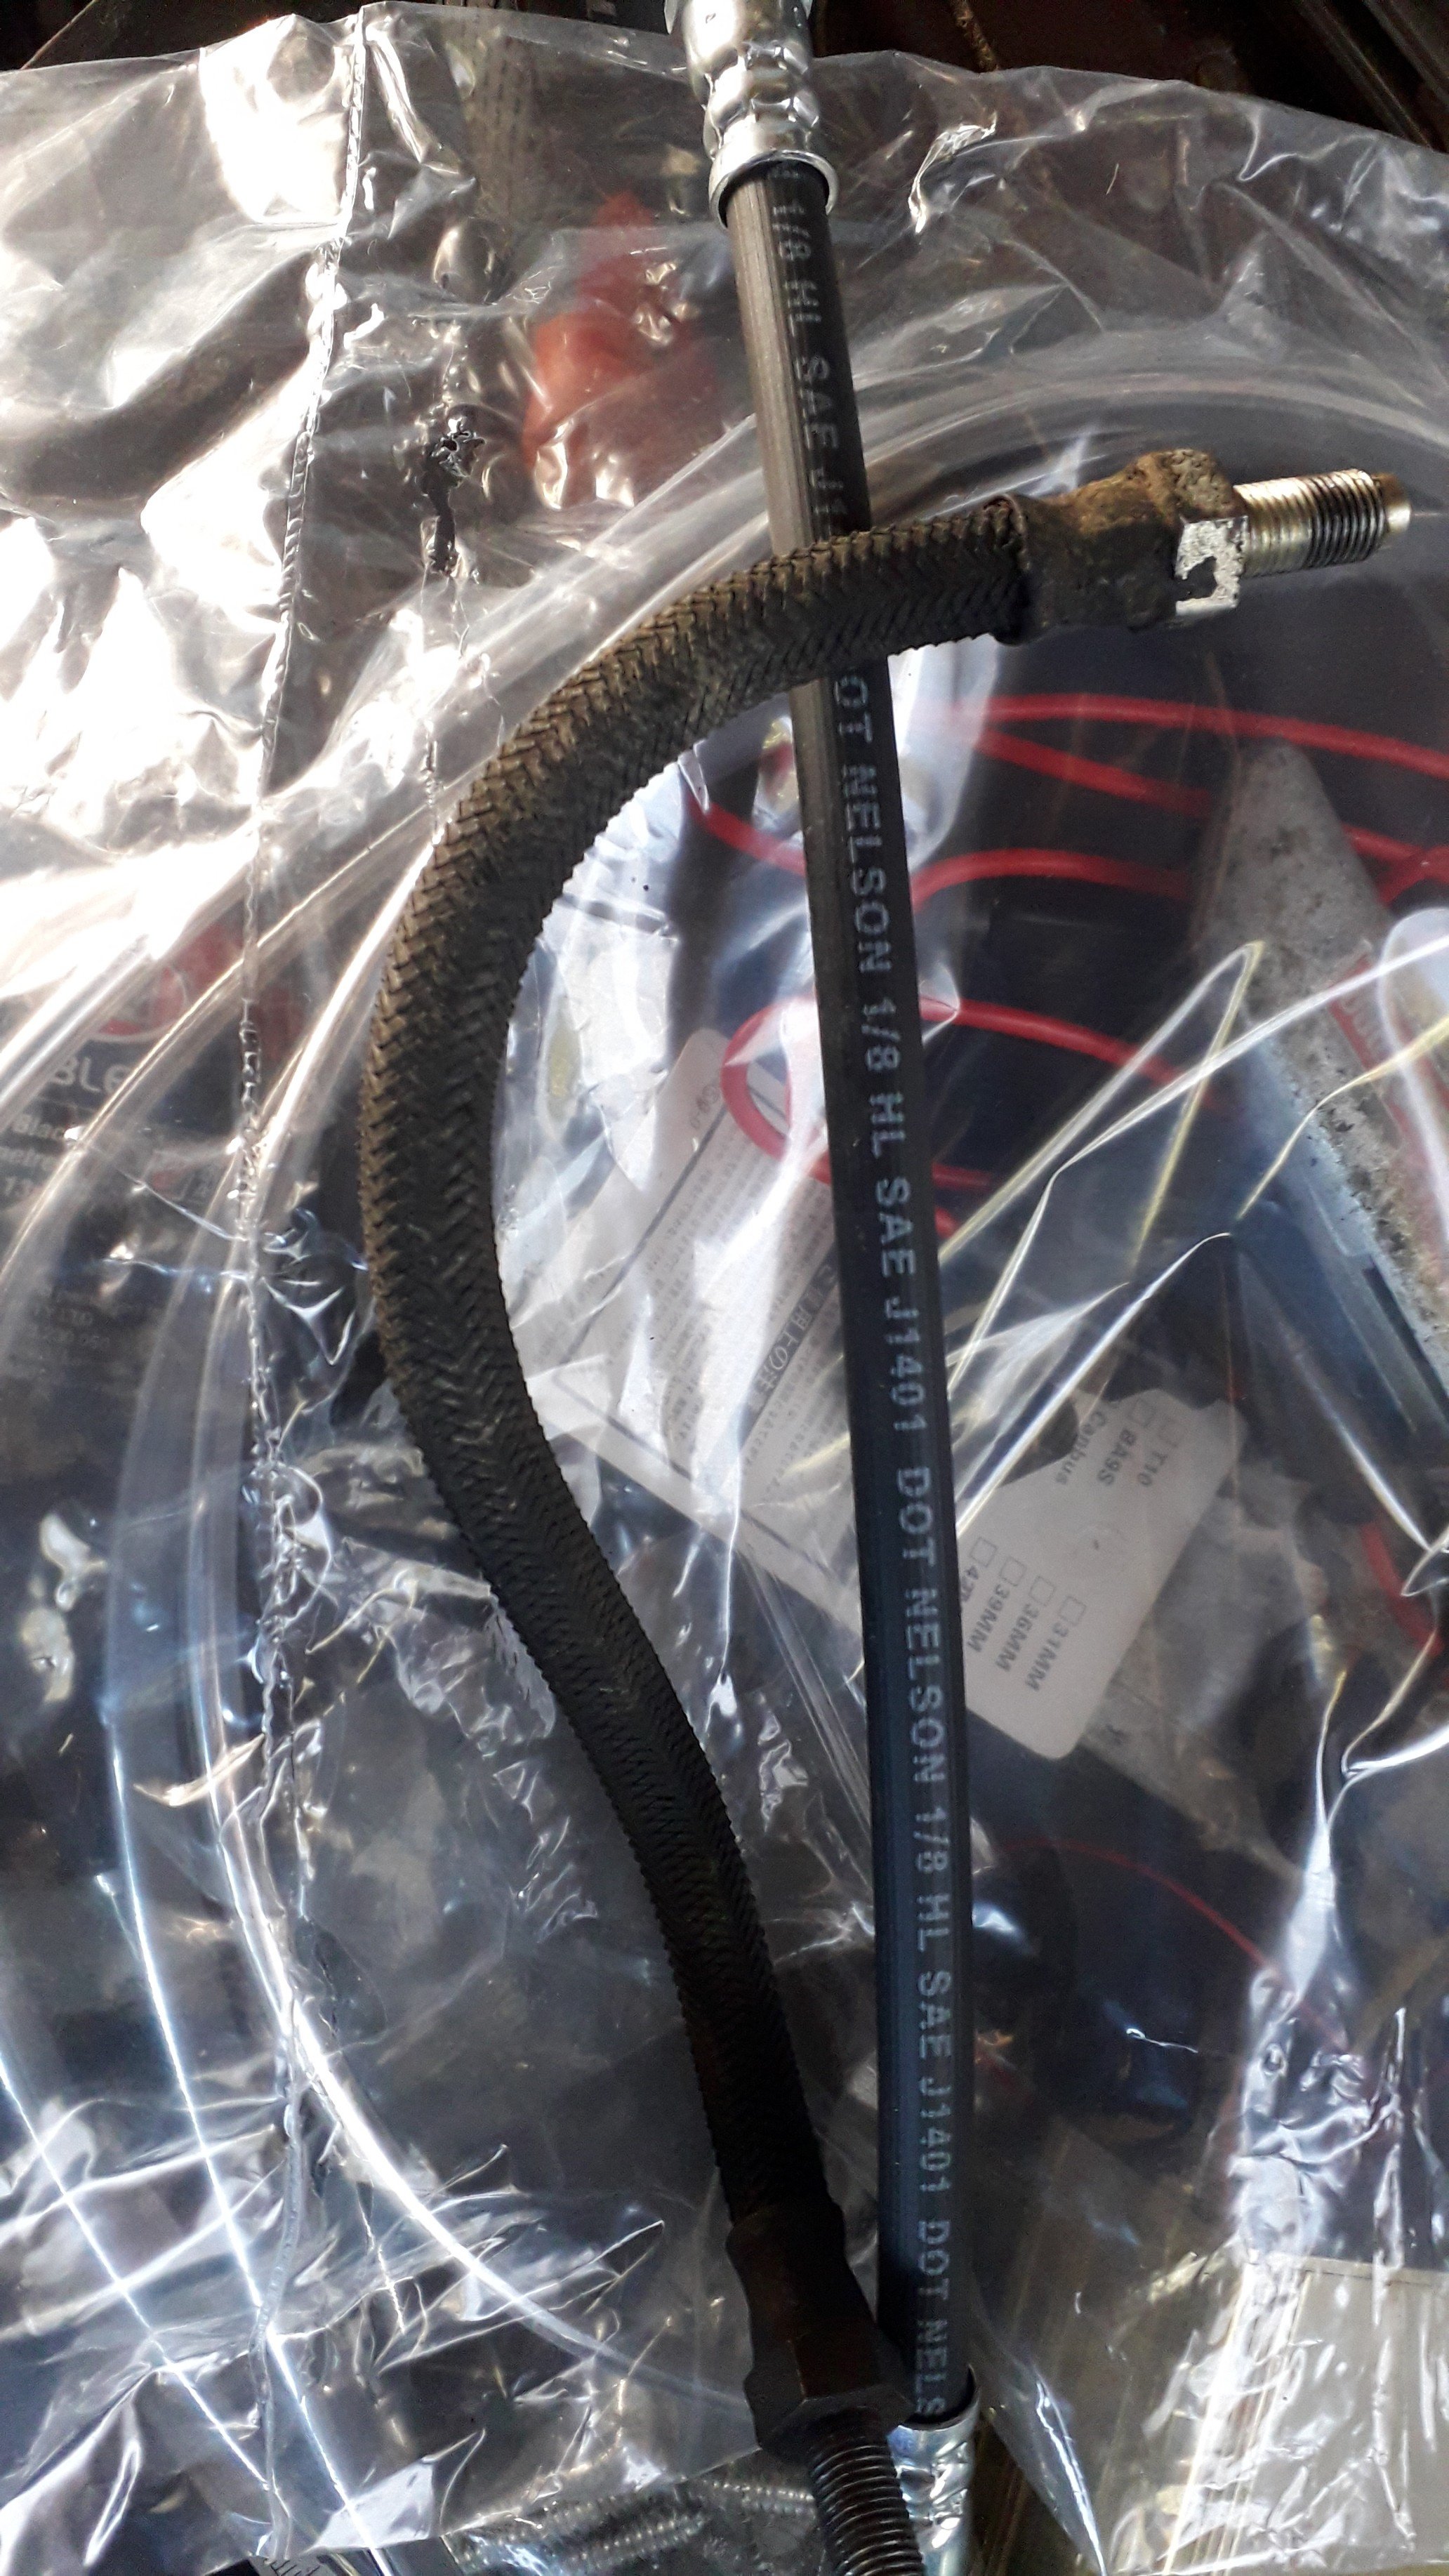
well that was a quick month. shit. kaikoura hop next week so i've been doing small jobs instead of the big ones i should be doing. anyway. i bought some rubber and trim from palmside. Before, After. so good. i bought some new brake flexi hoses as i was sure the old ones were giving me some of the spongey pedal feel, i havent tested them yet but the pedal does feel nice. the front screen rubber was shot so i took it out, and there was some surface rust there which i cleaned up and treated, i'll refit the screen tomorrow with the new rubber and trim. i topped up the diff level and gearbox also, and made an attempt at polishing the wheels... pics to follow
1 point
-
It's been an exciting few weeks getting updates on the car as more gets done. Here's a drop of what's going on at the moment. Not long now! To start with, I deloomed the original headlight hardness, removing odds and ends I won't use on there - Ran another wire which controls the fog lights - Relocated the battery wires to inside the cabin, the battery will sit under the passenger seat. I'll get a professional to do the rest from where I got it to - Relocated the alternator wiring so that I can run it with the engine harness 99399211_272930263826147_7742833918717460480_n by phillipbaines, on Flickr Decided to change the wastegate to a v-band style gate just for a bit more flexibility: 105598043_586600778717591_5386424791277872662_n by phillipbaines, on Flickr 106187882_329482148055910_2925692963242702194_n by phillipbaines, on Flickr 105597849_266782644422515_6616275111710471338_n by phillipbaines, on Flickr Dump pipe beginning to take shape: 105615022_644681836127246_411711451309123783_n by phillipbaines, on Flickr 105556436_270675250862943_1630855409840158444_n by phillipbaines, on Flickr 101563946_1663269867160856_6554872224073908224_n by phillipbaines, on Flickr 105411255_719960381903781_5357733621582254053_n by phillipbaines, on Flickr 105704969_2980500301985349_1671724521810053650_n by phillipbaines, on Flickr Bits and bobs: 101919373_692804254841049_2029492130350628864_n by phillipbaines, on Flickr 106179327_3535786496441321_3516887240554195971_n by phillipbaines, on Flickr 105491203_307504940295190_1570212433508974404_n by phillipbaines, on Flickr filter setup: 105522170_268305891113464_4252985428165995917_n by phillipbaines, on Flickr 105587316_1689267811249447_1407559088842431286_n by phillipbaines, on Flickr BOV to go here: 106248020_2354146954894435_1154358153800778069_n by phillipbaines, on Flickr Money shot: hngggggg 106112383_3220843104625837_1220634764419048857_o by phillipbaines, on Flickr Big plug to Glenn, he's doing a bloody good job! https://www.facebook.com/SyndicateFabrication/ Discussions and feedback is always welcome1 point

.jpg.3412dd98cefda862b7aaf97d5755427c.jpg)


This leaderboard is set to Auckland/GMT+12:00