
Leaderboard


Popular Content
Showing content with the highest reputation on 30/12/20 in all areas
-
today went better. i got the little bit of surface rust of the inside of the scuttle panel and chucked some brunnox on it. poured some brunnox inside the fuel filler flap and then chucked some primer on things. yesterday i primed the car again so only the drivers side needs another coat, the rest of the car is ready for wet sanding. yay, wet sanding. 2020-12-30_02-33-07 by sheepers, on Flickr 2020-12-30_02-32-59 by sheepers, on Flickr 2020-12-30_02-32-45 by sheepers, on Flickr 2020-12-30_02-32-52 by sheepers, on Flickr before priming, 2020-12-30_02-33-43 by sheepers, on Flickr 2020-12-30_02-33-36 by sheepers, on Flickr after priming, 2020-12-30_02-33-29 by sheepers, on Flickr 2020-12-30_02-33-22 by sheepers, on Flickr14 points
-
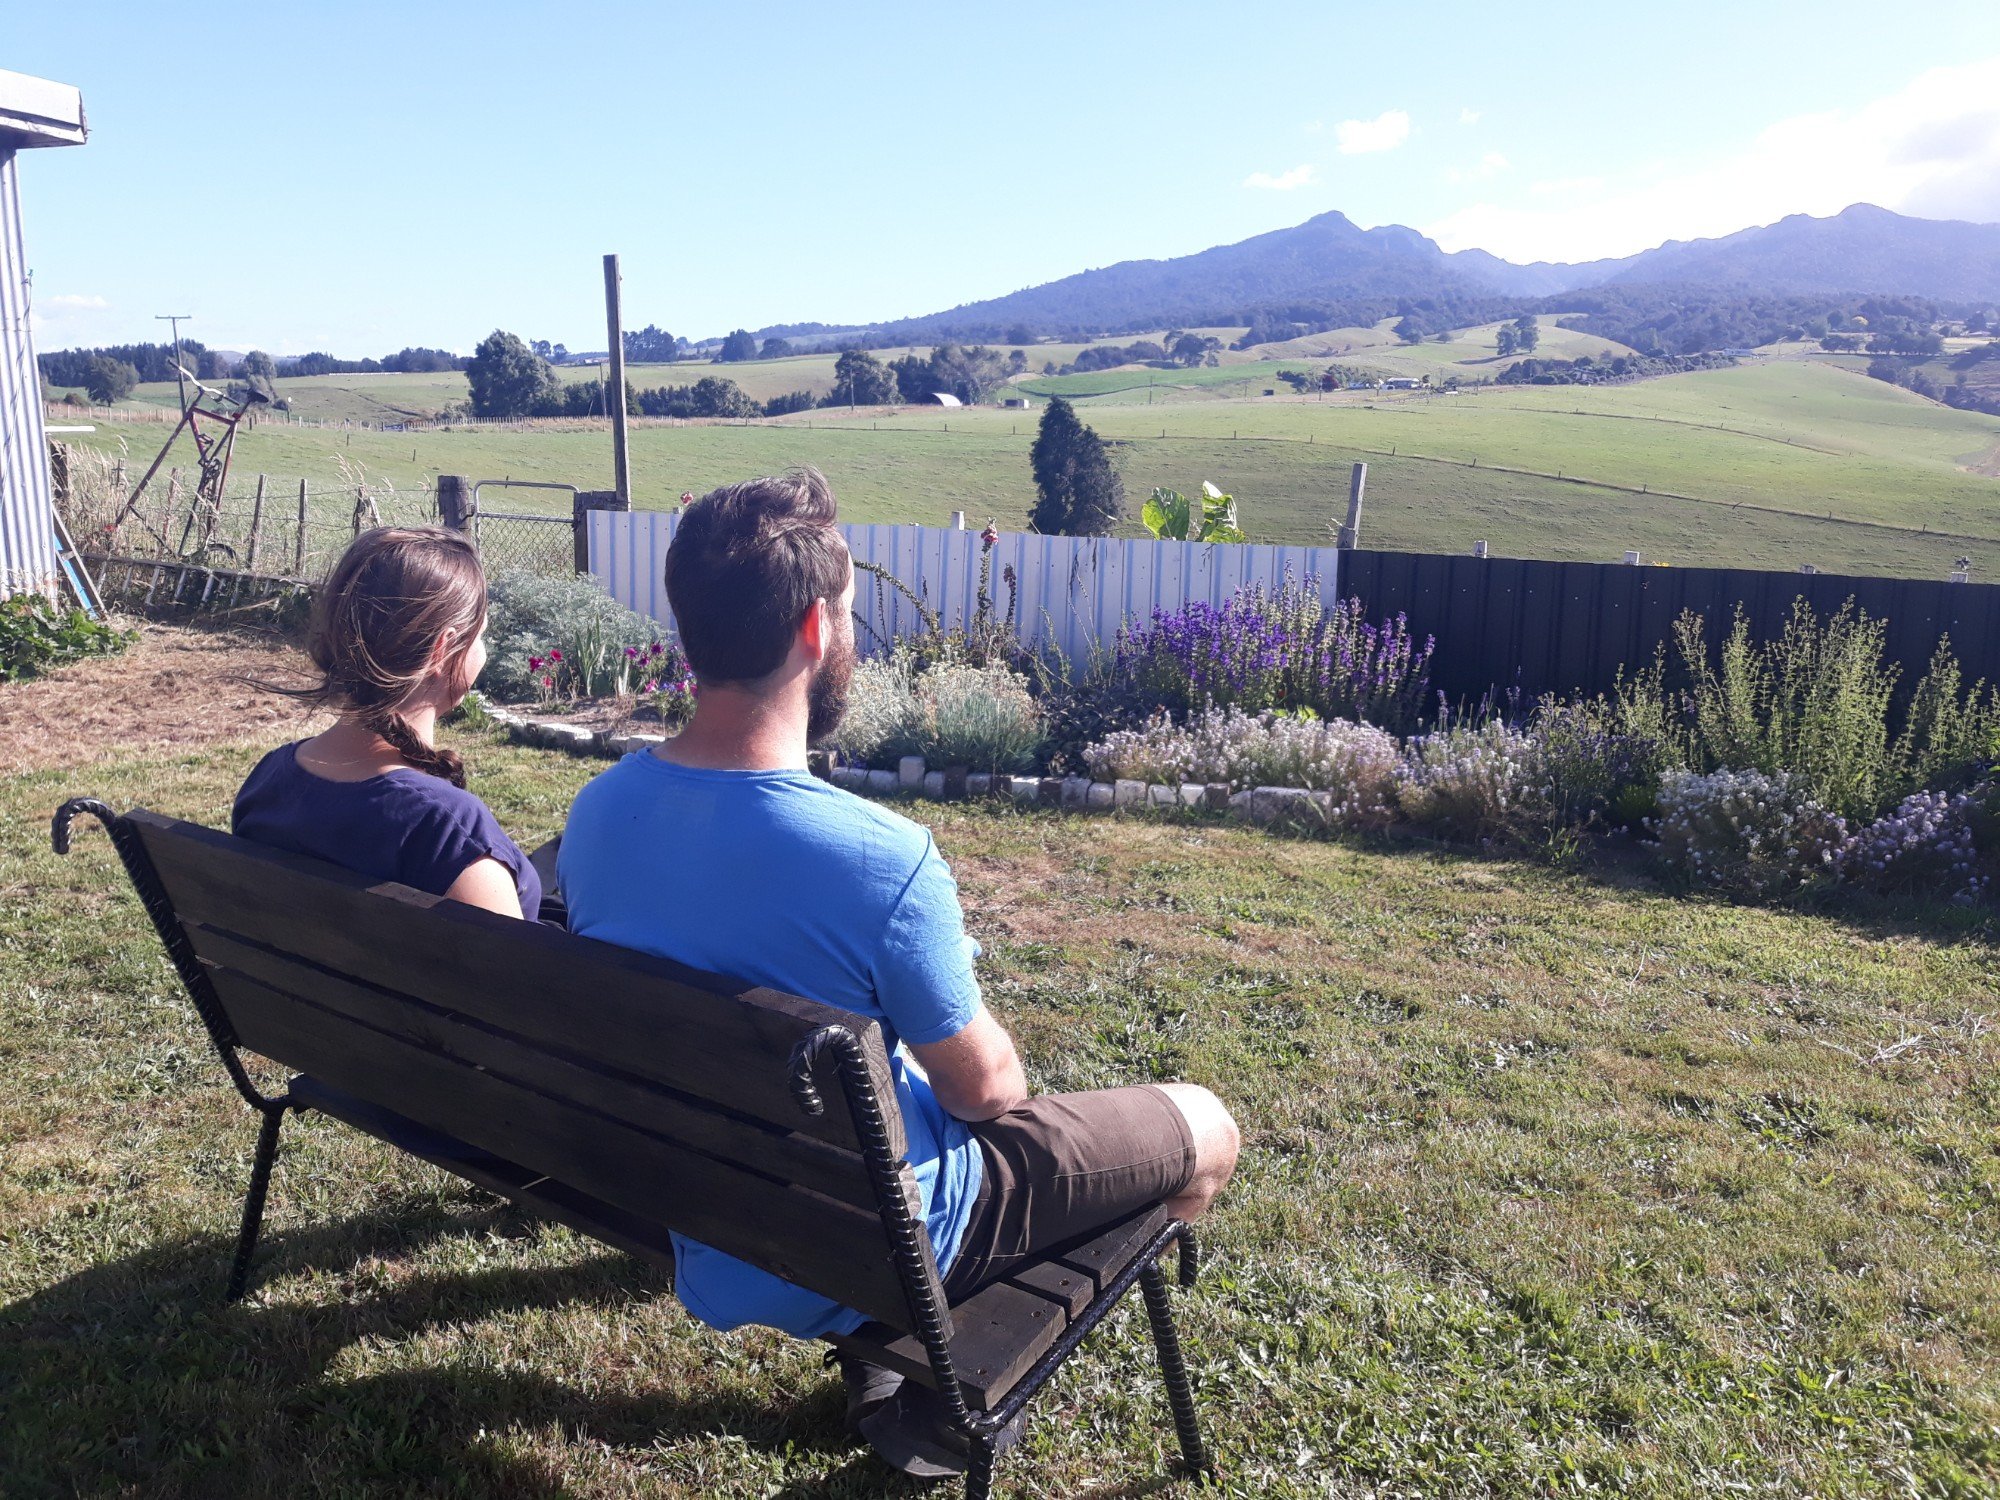
We (well, mostly @Guypie.. I kind of just handed him beers and water blasted the old fence palings) made a chair to take advantage of our view
 12 points
 -
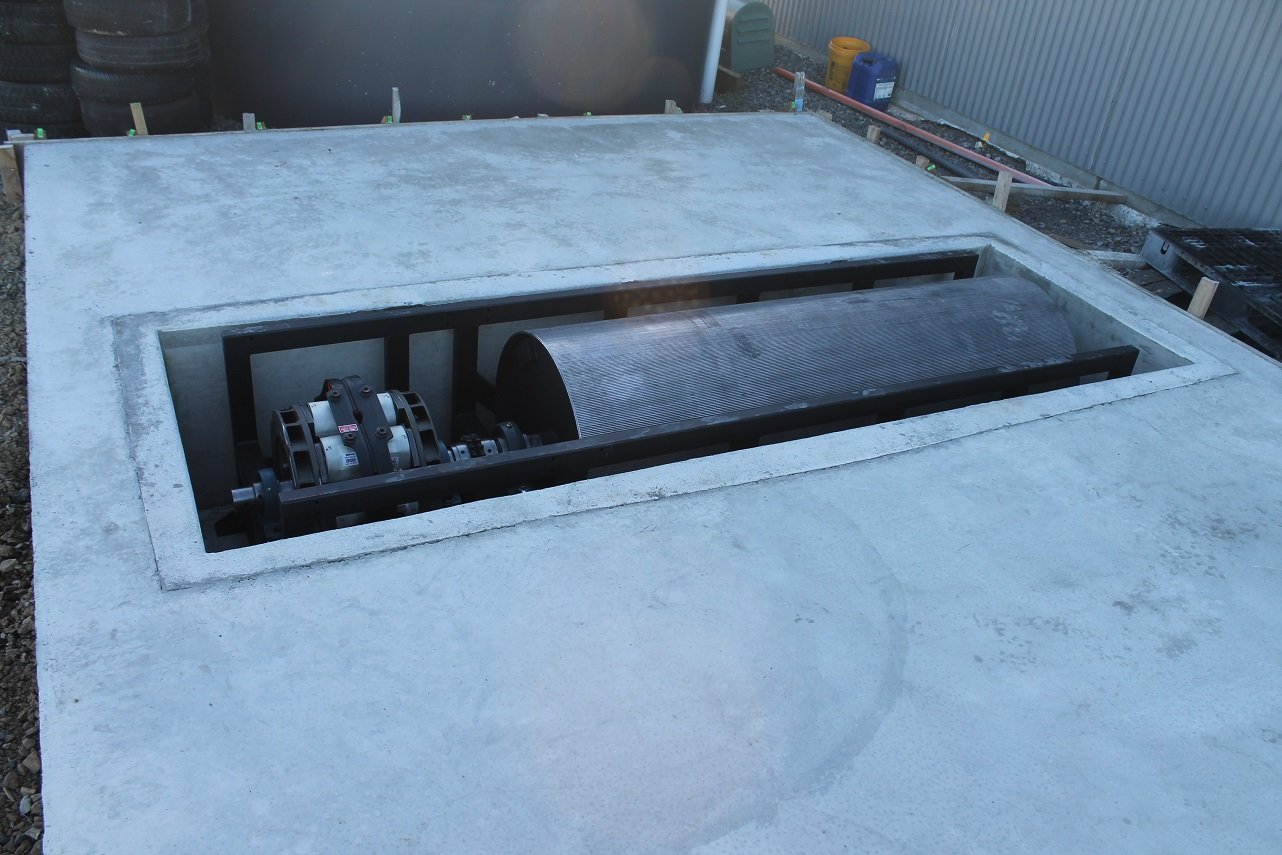
Did some dodgy sparky work and got the retarder working, as well as doing a 4th gear pull to see how everything is looking. So far so good.10 points
-
For some reason I was avoiding buying new wheel nuts for the front as I thought they would be expensive but it was $12 for a set of 10, and now I can ditch the 3 different shapes and sizes of nuts I had on before, got the new tires put on, finding tubes was a little tricky and I had to drive a lot to get them, tire shops look at me funny when I want cross ply tires fitted.
8 points
-
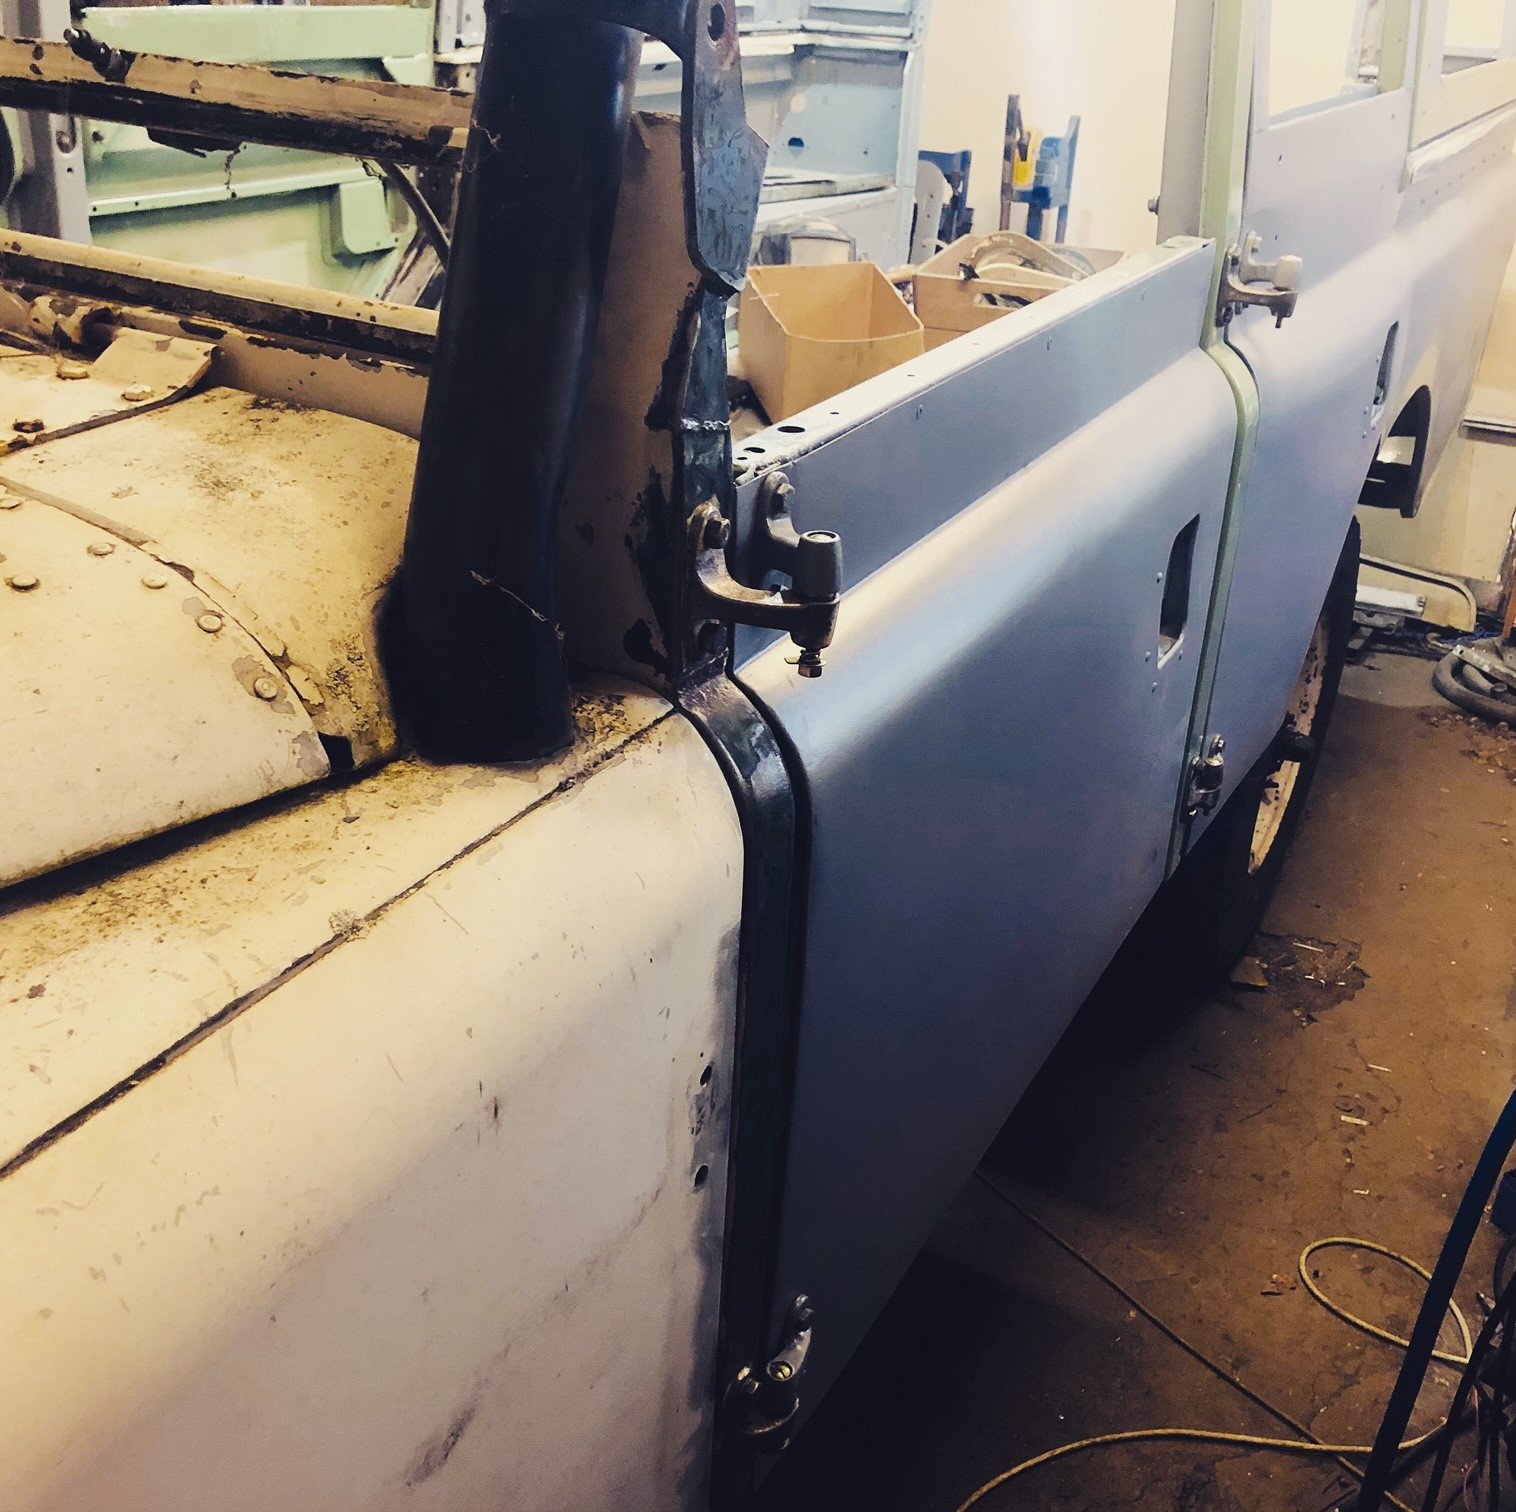
Making some more progress... Welded up these sill/b-pillar/dogleg sections as one Started hanging all of the doors with new hinge pins Need to throw some diesel in it so I can move it to strip the rest of the firewall and get the rest of the colour going.
7 points
-
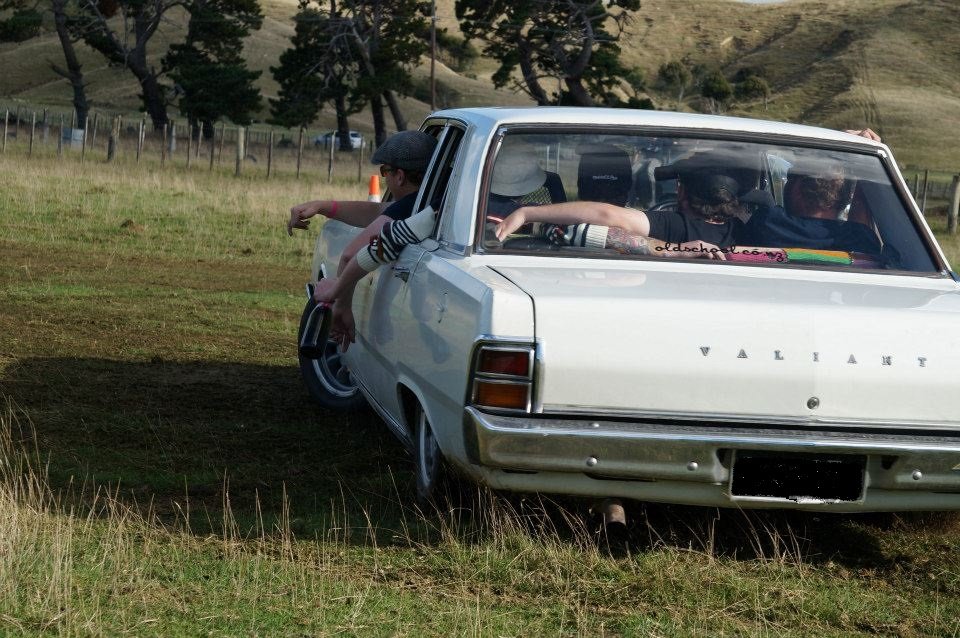
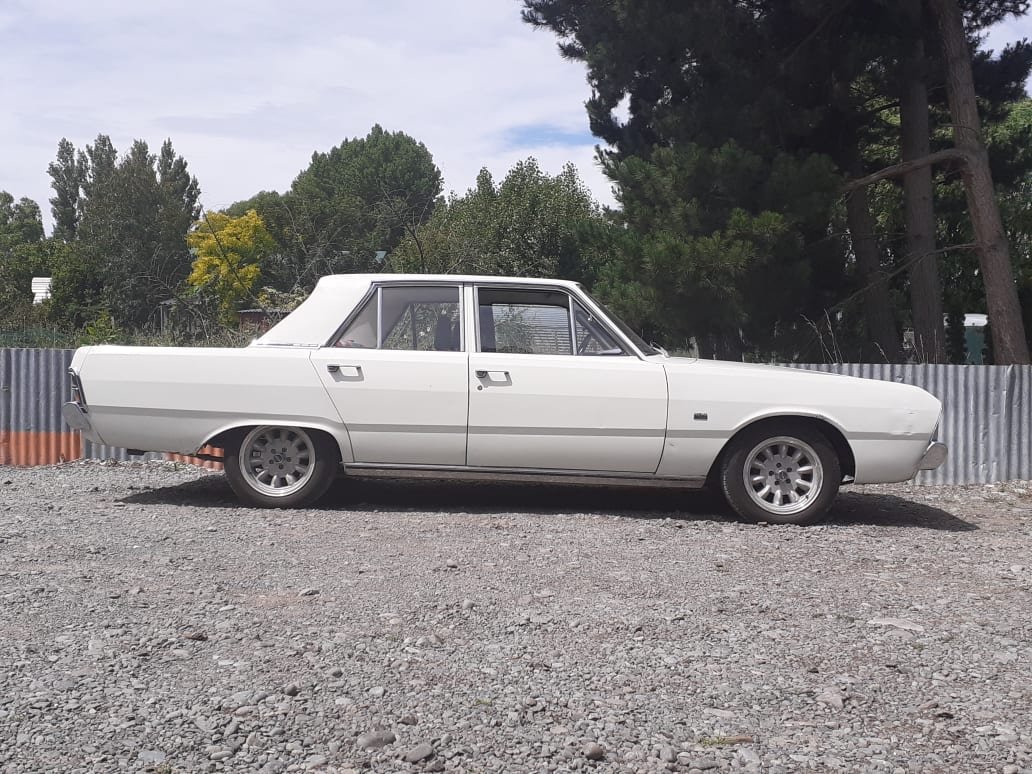
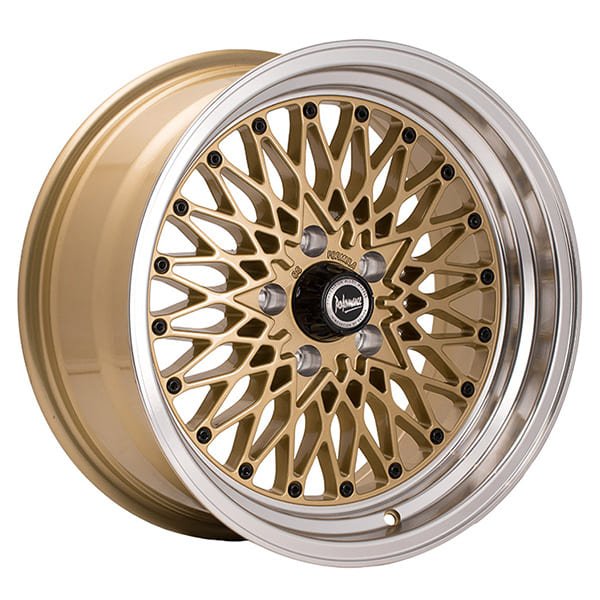
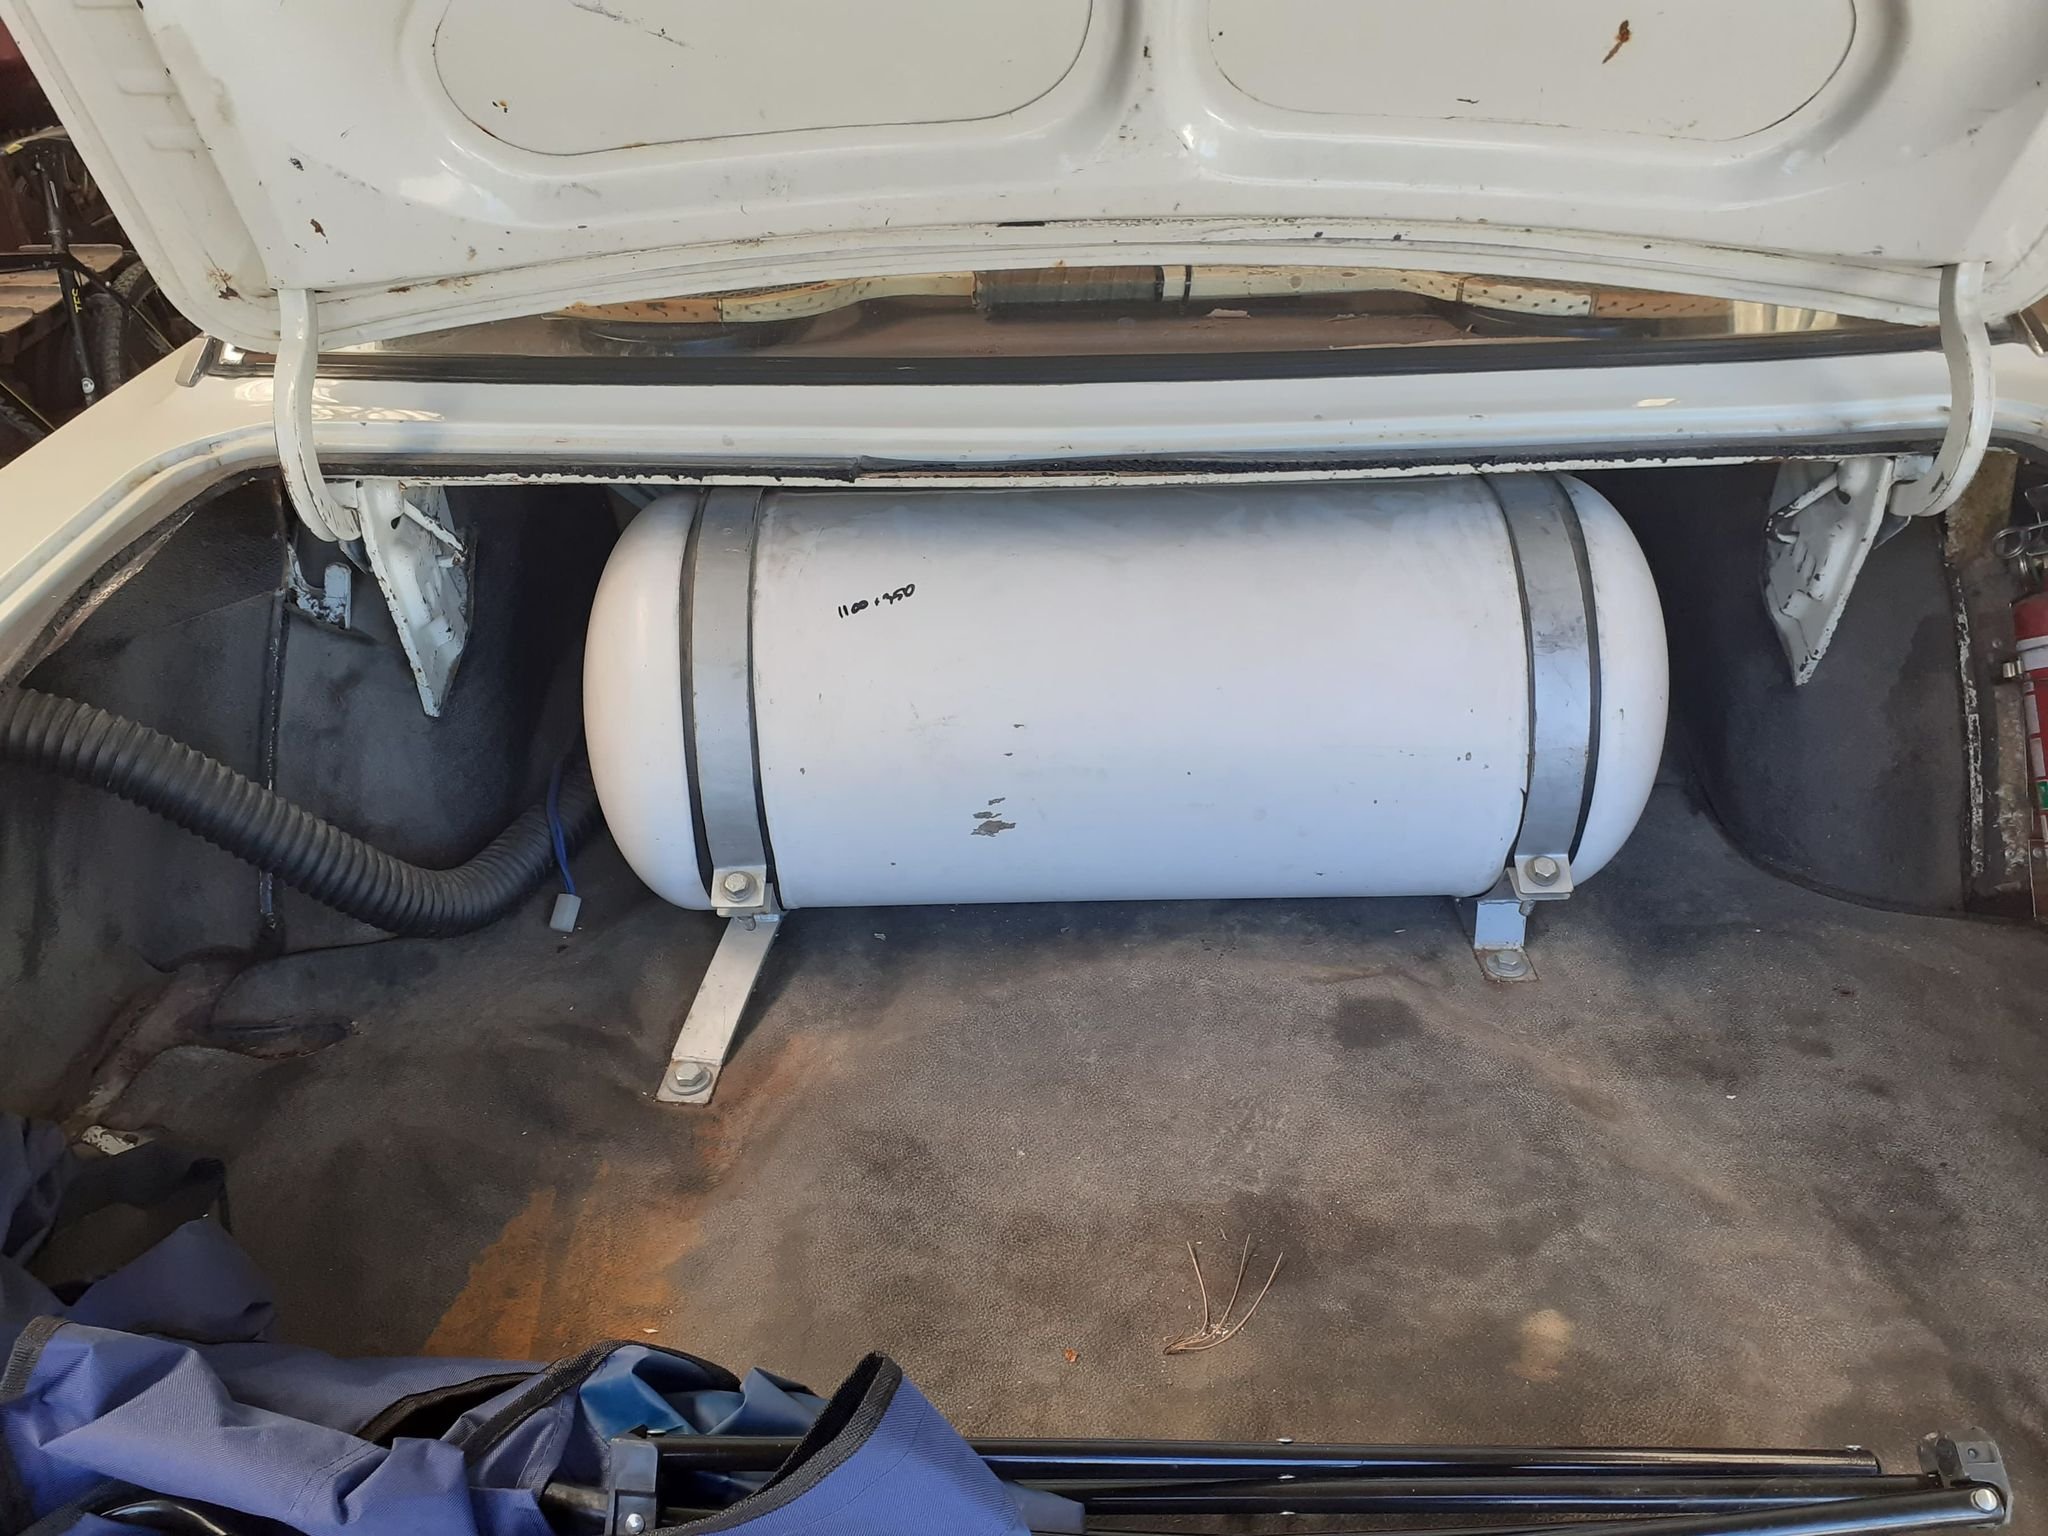
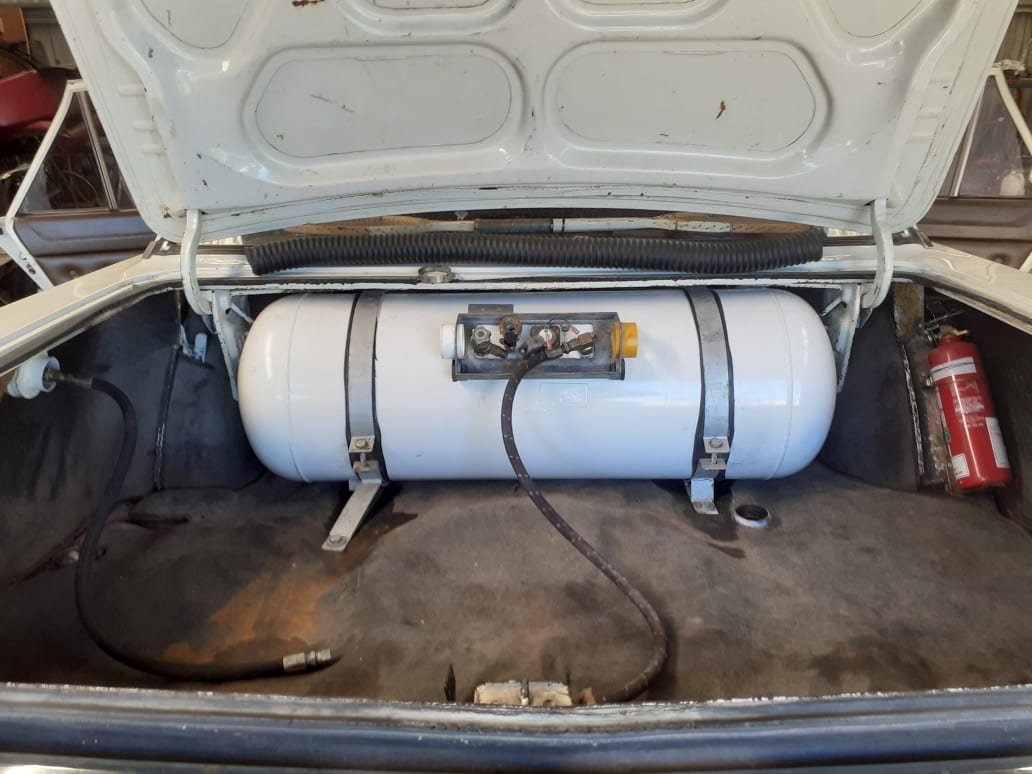
Bushes replaced and the Valiant drives nicely again. One of my boys finished year 8 schooling, they have a formal and parents etc are invited to drop their kids off at in front of the school hall pre formal. The valiant beached quite loudly as I was turning onto the field which my son thought was fantastic. Good boy! He was very keen on some school field paddock work. I exercised the utmost restraint and no circles were done. Here's a pic of some previous grass silliness. I put the Superlites on for the school run. Then decided I didn't like them and took them off the next day. I'd quite like a set of these modernized Cheviot Quattro's but the budget won't stretch that far at the moment. anyway that's enough sharnes. I have done some productive stuff too. I got my big fuel tank re tested, blasted and painted. It's slightly larger in diameter and considerably longer than the old one. My calculations suggest it will hold about 20 Liters more fuel than previous which equates to about %30 more. Luckily I managed to fit it into the old tank straps which was a bonus and saved much fucking about. Old. New. I Need to sort out some new ducting as the tank has is designed for 60mm as opposed to 2 inch as before and I'll be ready to run. This tank has a little magnetic gauge sender unit that is miles different resistances to what the factory sender had. It looks fairly simple and I'd like to see about getting it changed so I can use my factory gauge. Has any one in ChCh delt with E Parrot and Sons since it has changed hands? Are Robinson instruments still around? Suggestions please.
7 points
-
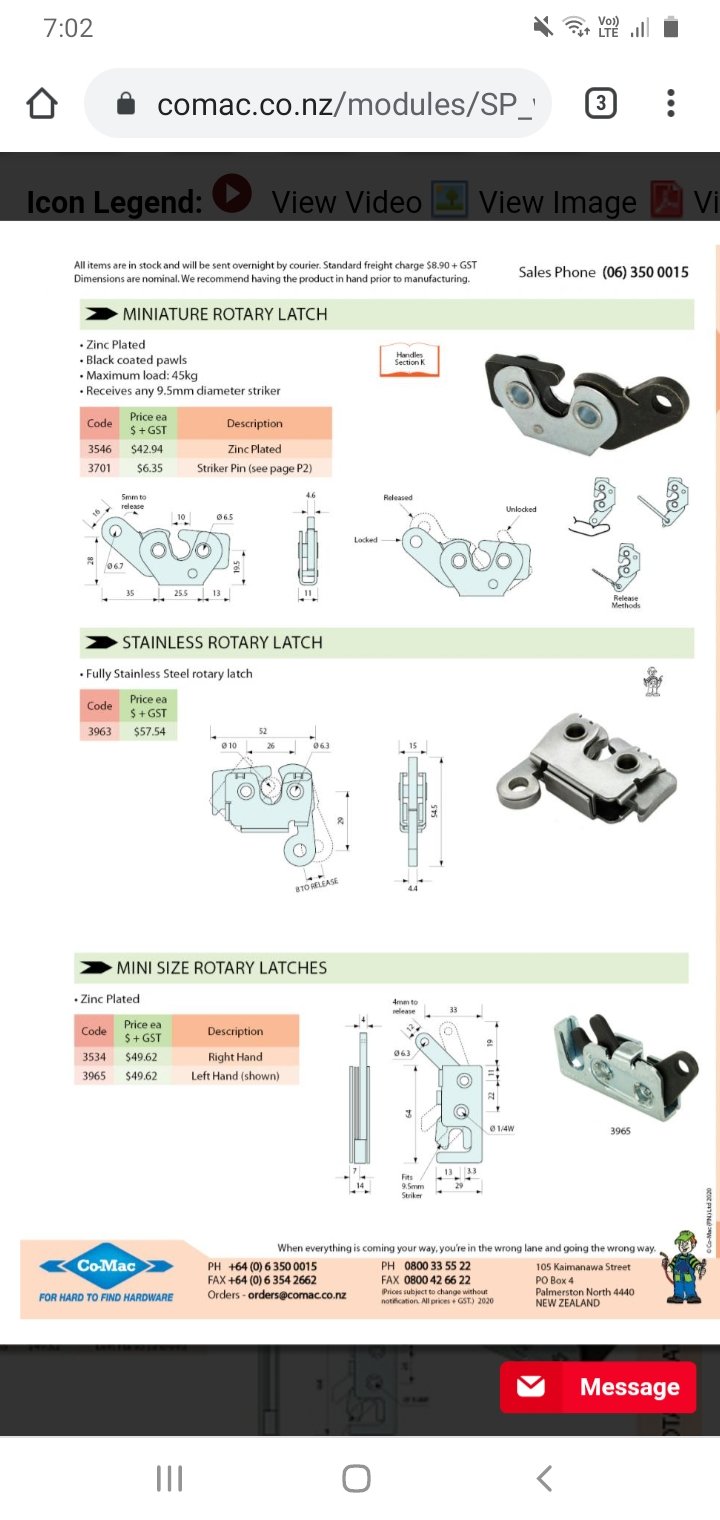
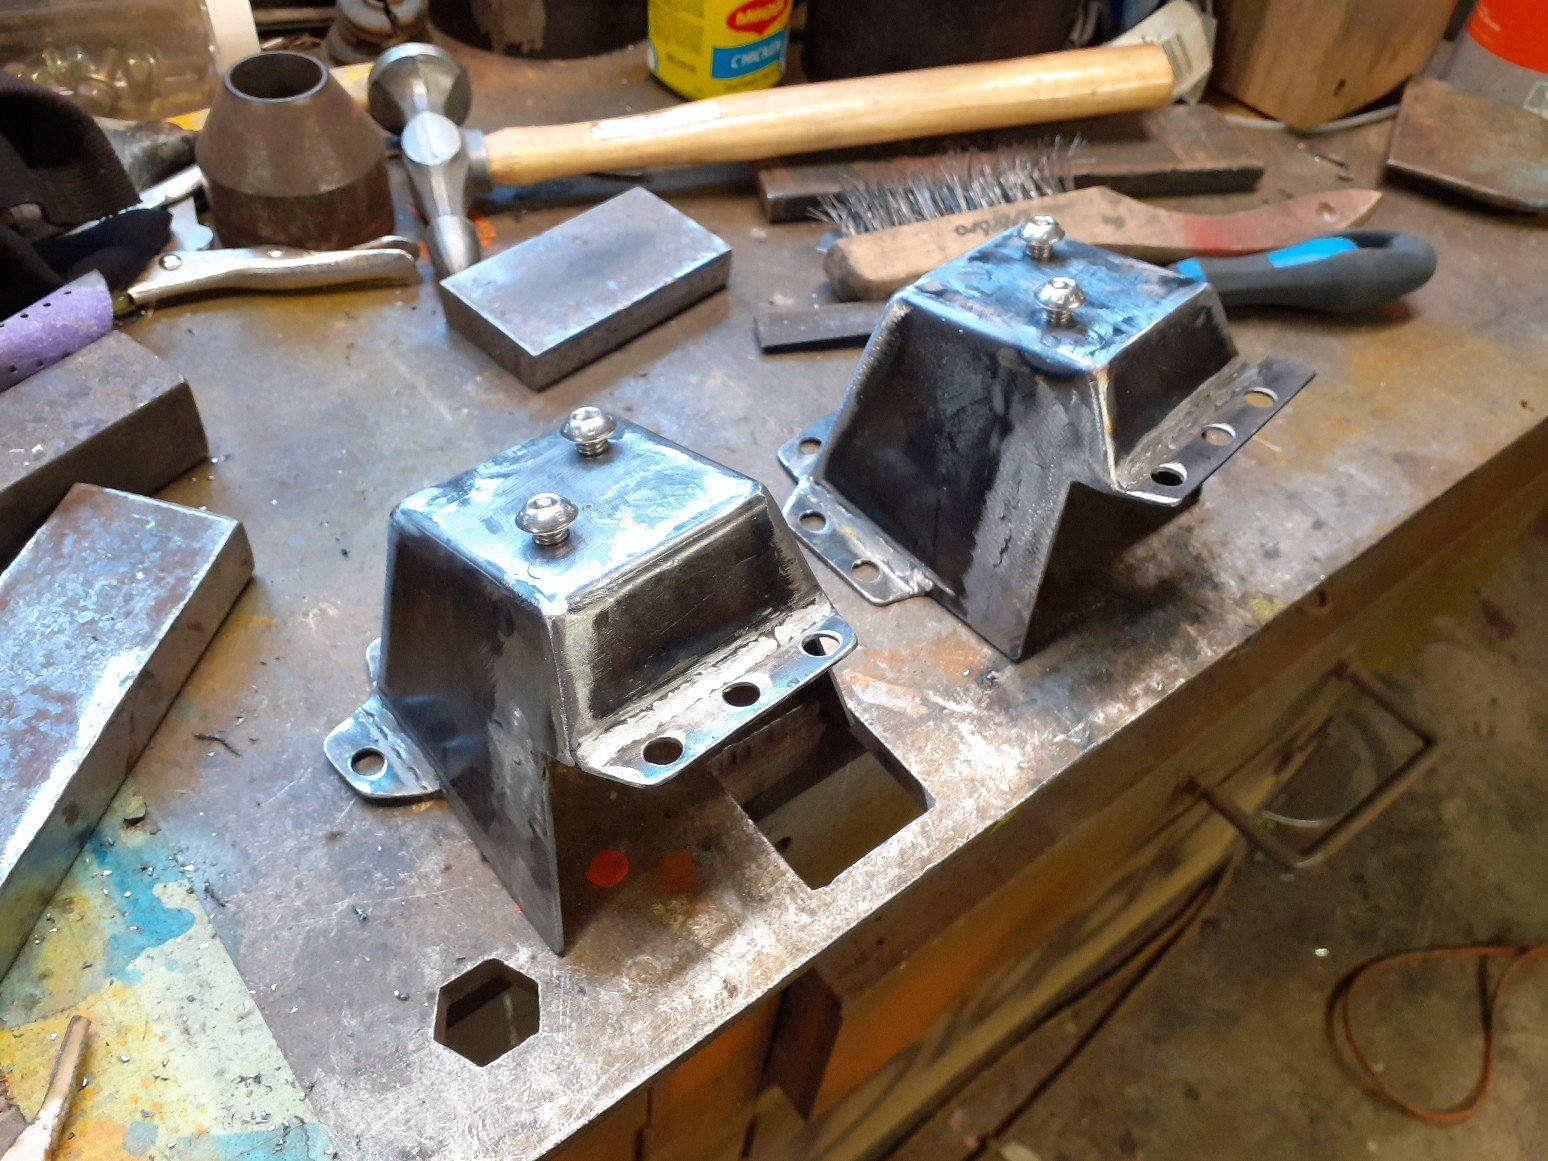
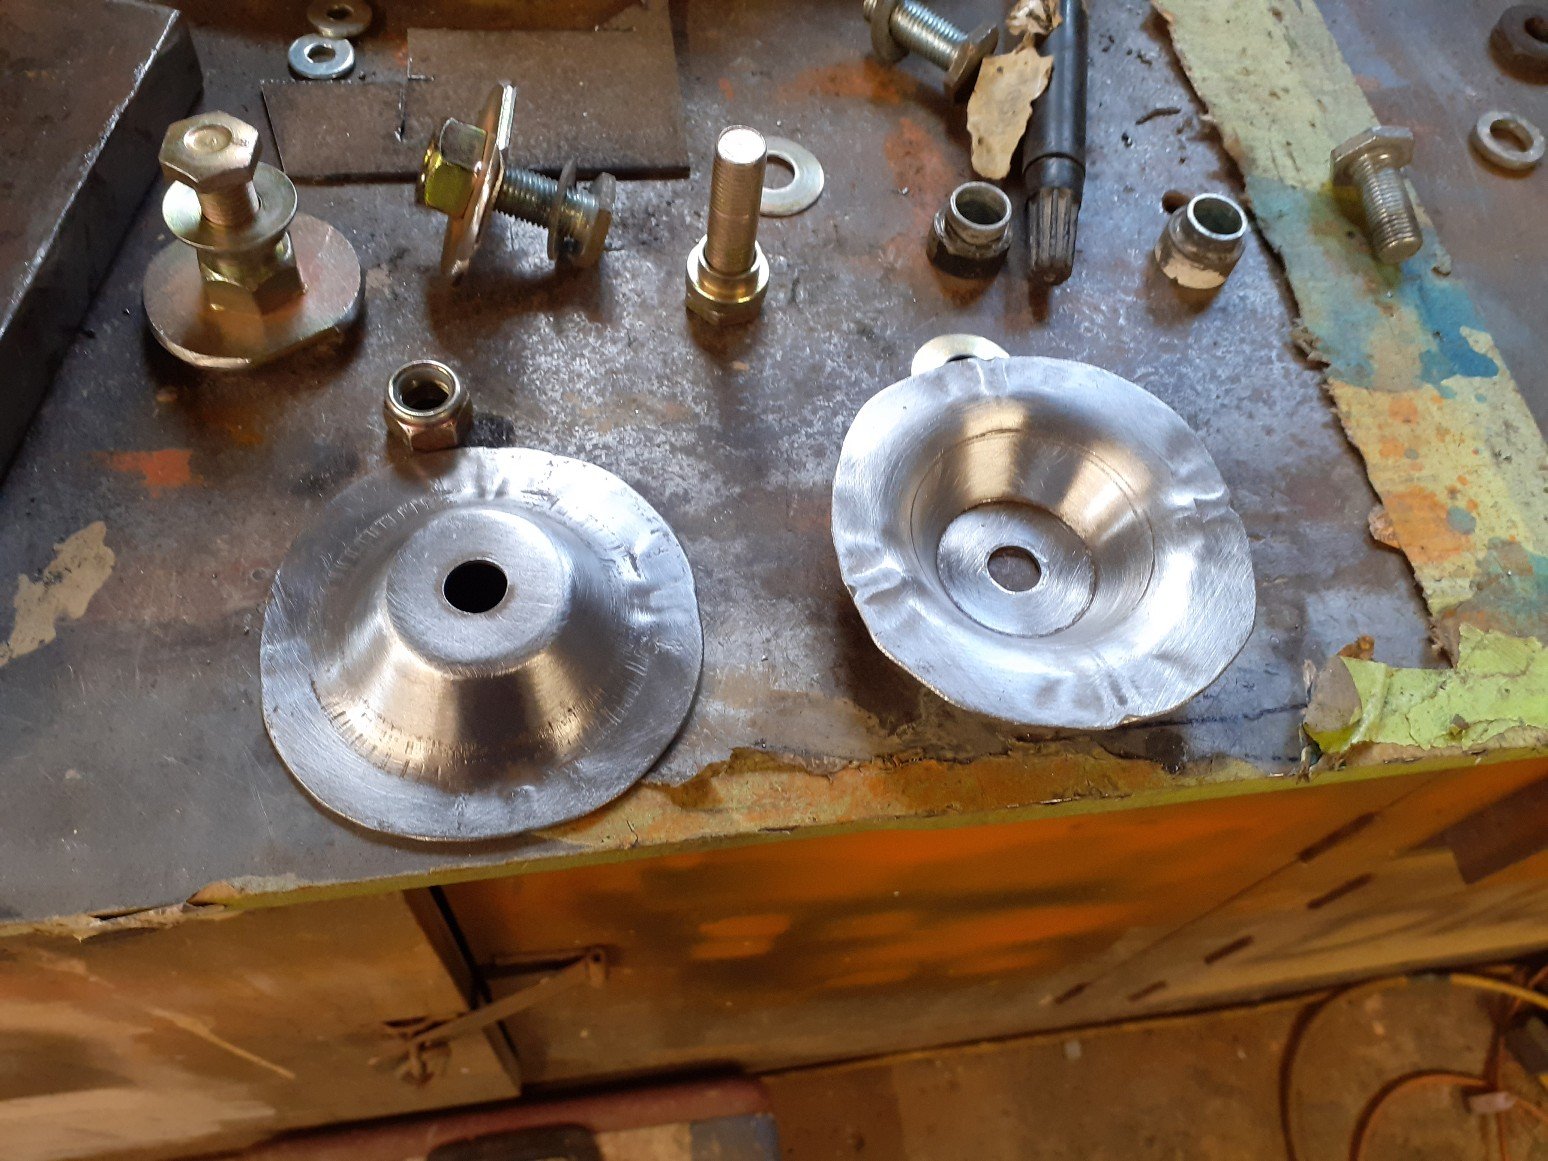
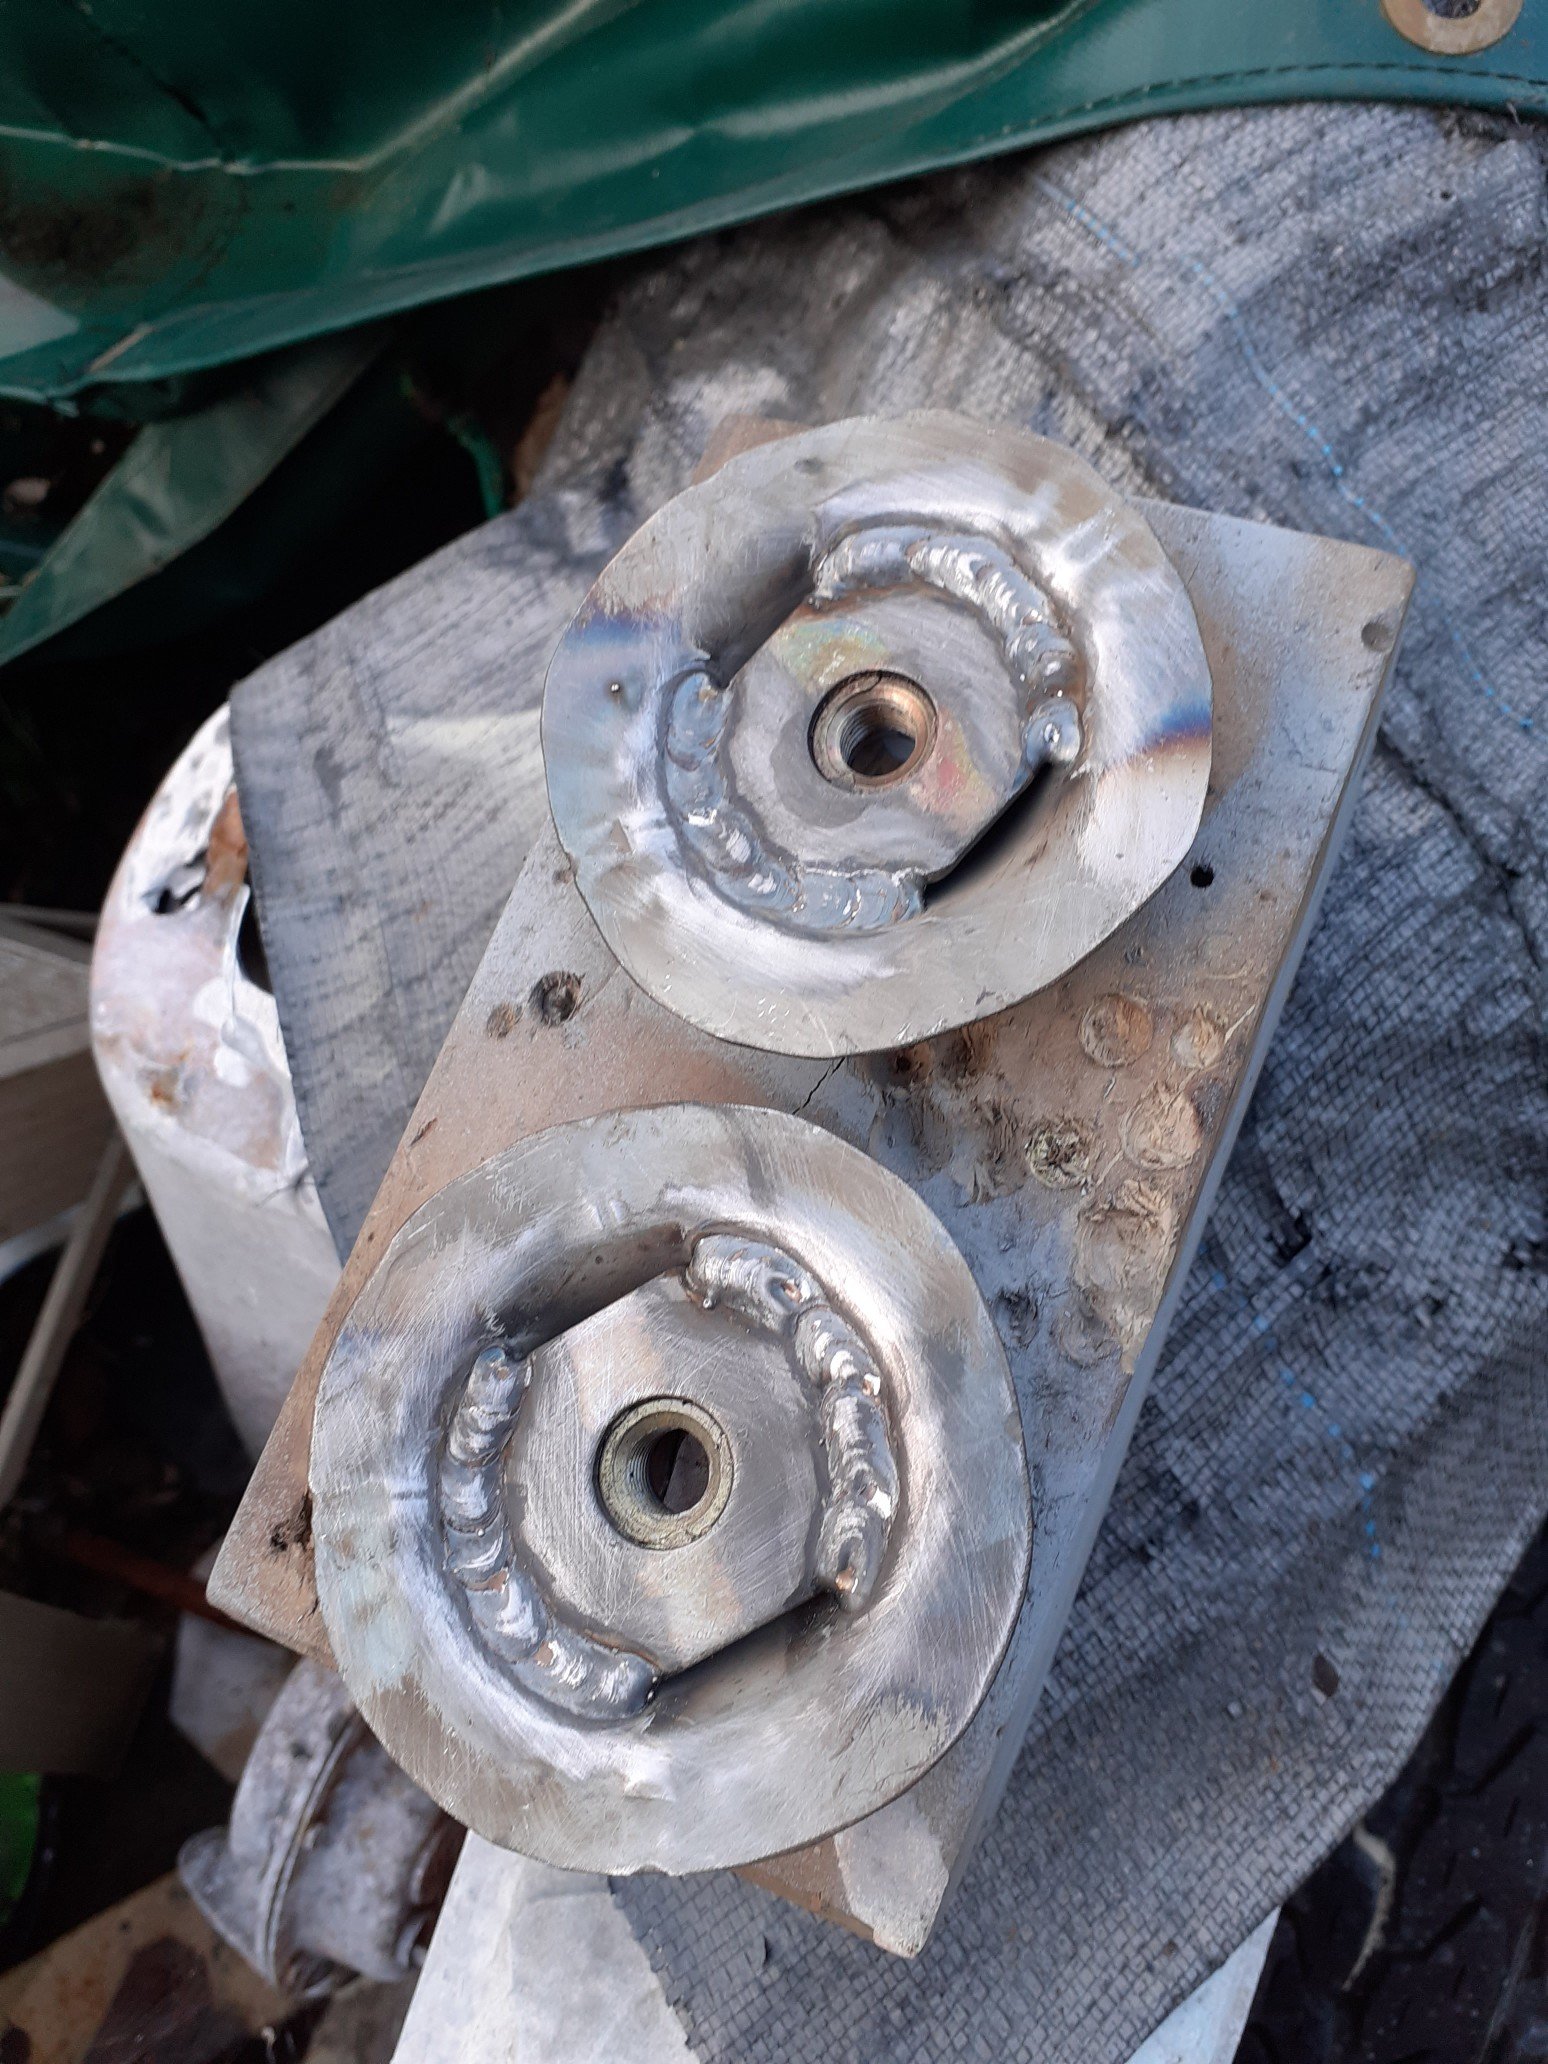
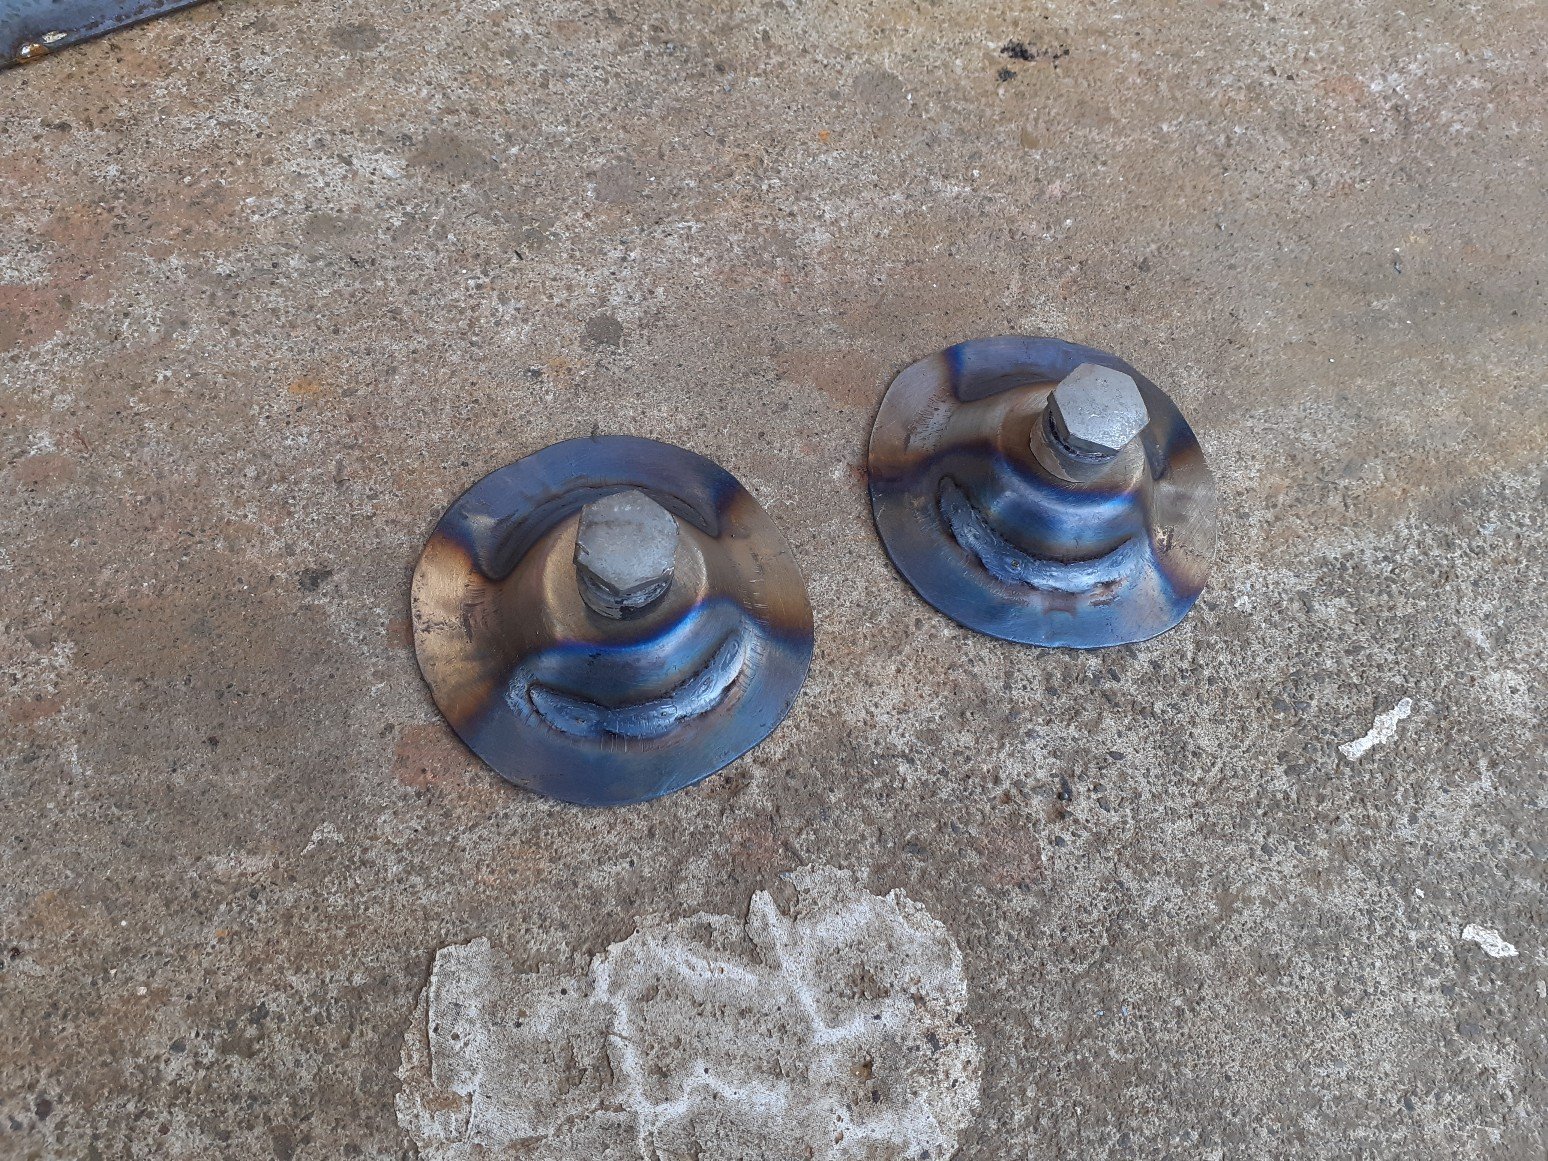
Rounded the cones by hand, had some round pipe as a guide. Found there final spot and temporarily drilled into place to try with the seat. Made some hinges out of 5mm angle line, which will later be trimmed up, driled for counter sunk screws and zinc plated. Primed everything and welded into place. I've maxed out the adjustments to have the seat level with the floor with folded flat. The floor section will be color matched the van, and the upright will be painted black to break it up. Plug welded in place. Will be primed and painted orange. This the last mounting point to be made. It holds the upright in place when in the seating position and should lock in it so in an event of an emergency stop, it shouldn't fold forward. Looks like a big gap but this is the normal and there is no room for adjustment when folded flat. Thinking some post which would encase a locking mechanism like the below would be the go. I like the idea of pulling the seat up and clicking it into place, and having a release lever when needing to fold it flat. Any other ways of doing this? Needs to lock it in place, and support the back rest.
6 points
-
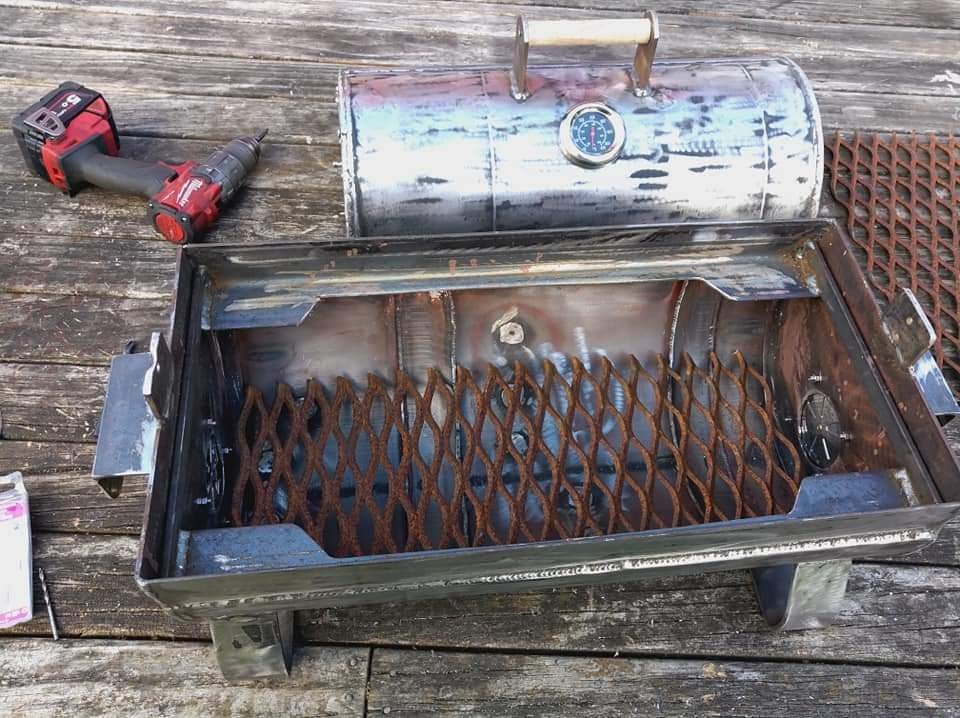
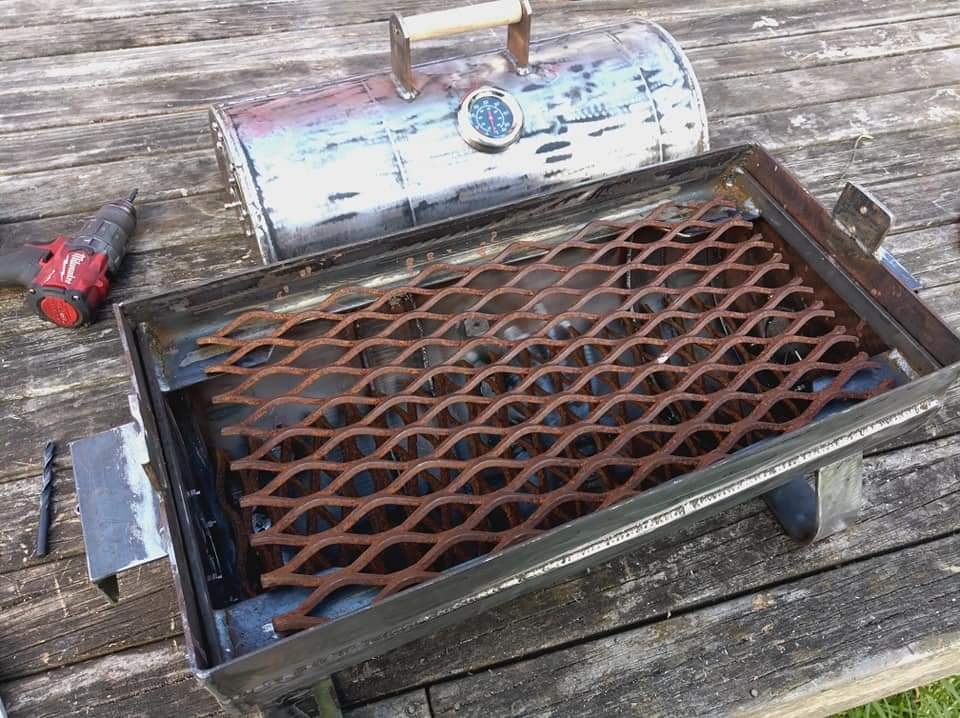
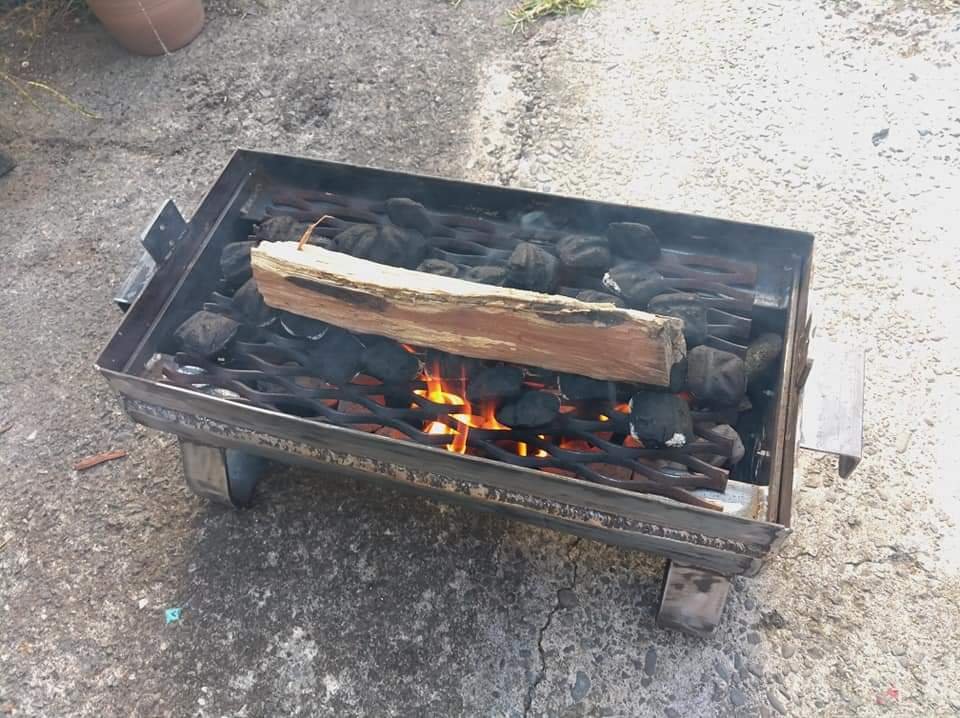
Upper and lower racks sitting in place. Then set it up for it's first burn off to kill off any nasties from the paint and stripper. I added a few more similar size chunks of Manuka and got it cranking. So far it has been sitting at 500f for the last 2 and a half hours with no extra fuel. Seems to be going well enough for something that owes me about $130 and about 10hours. Yeah a Weber GA is only $150 but this is far more rewarding. I might give it another burn off tomorrow morning then I'll be seasoning it, throwing some paint on the outside then throwing in a rolled beef roast. Keep. As to see how it turns out. Will get a picture of the rotisserie tomorrow. Chur
6 points
-
A few months back I bought the 4 items in this link to make it all work https://yourdyno.com/shop/ - I had to wait a couple of weeks for it but it was perfect timing as they had just released their own eddy current power supply. After checking out his youtube and forums it seemed like a good option for a reasonable price. I then bolted some tie down points to the concrete, hooked the speed sensor up to the YourDyno controller and connected it to the laptop. I set it up for inertia mode with a moment of inertia number based on some weight calculations of the roller (educated guess for now). Strapped the trusty old NS250R to the roller and just eased into to things to get an idea of how it was all going. I popped it in 3rd and did a run right out to 10,000 rpm or so. This was a pretty epic moment for me honestly. Everything felt smooth and nothing looked out of place, so the next day I mucked about shimming bearings and coupling the retarder to the roller. Still in inertia mode, I strapped the paddock basher MX5 to the roller and did a test run in 3rd. Once again everything looked pretty good at this stage so I am very happy. Here's a video.6 points
-
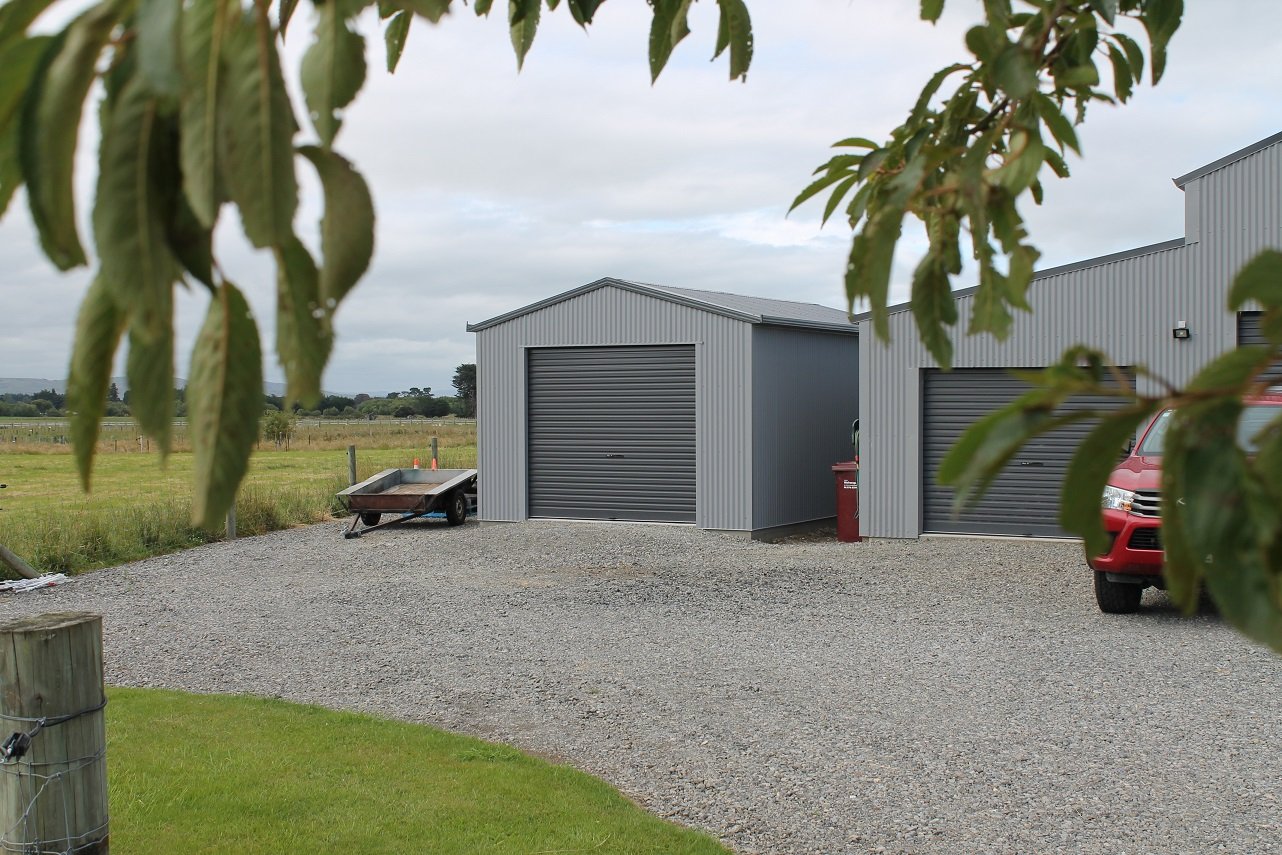
Shed up
6 points
-
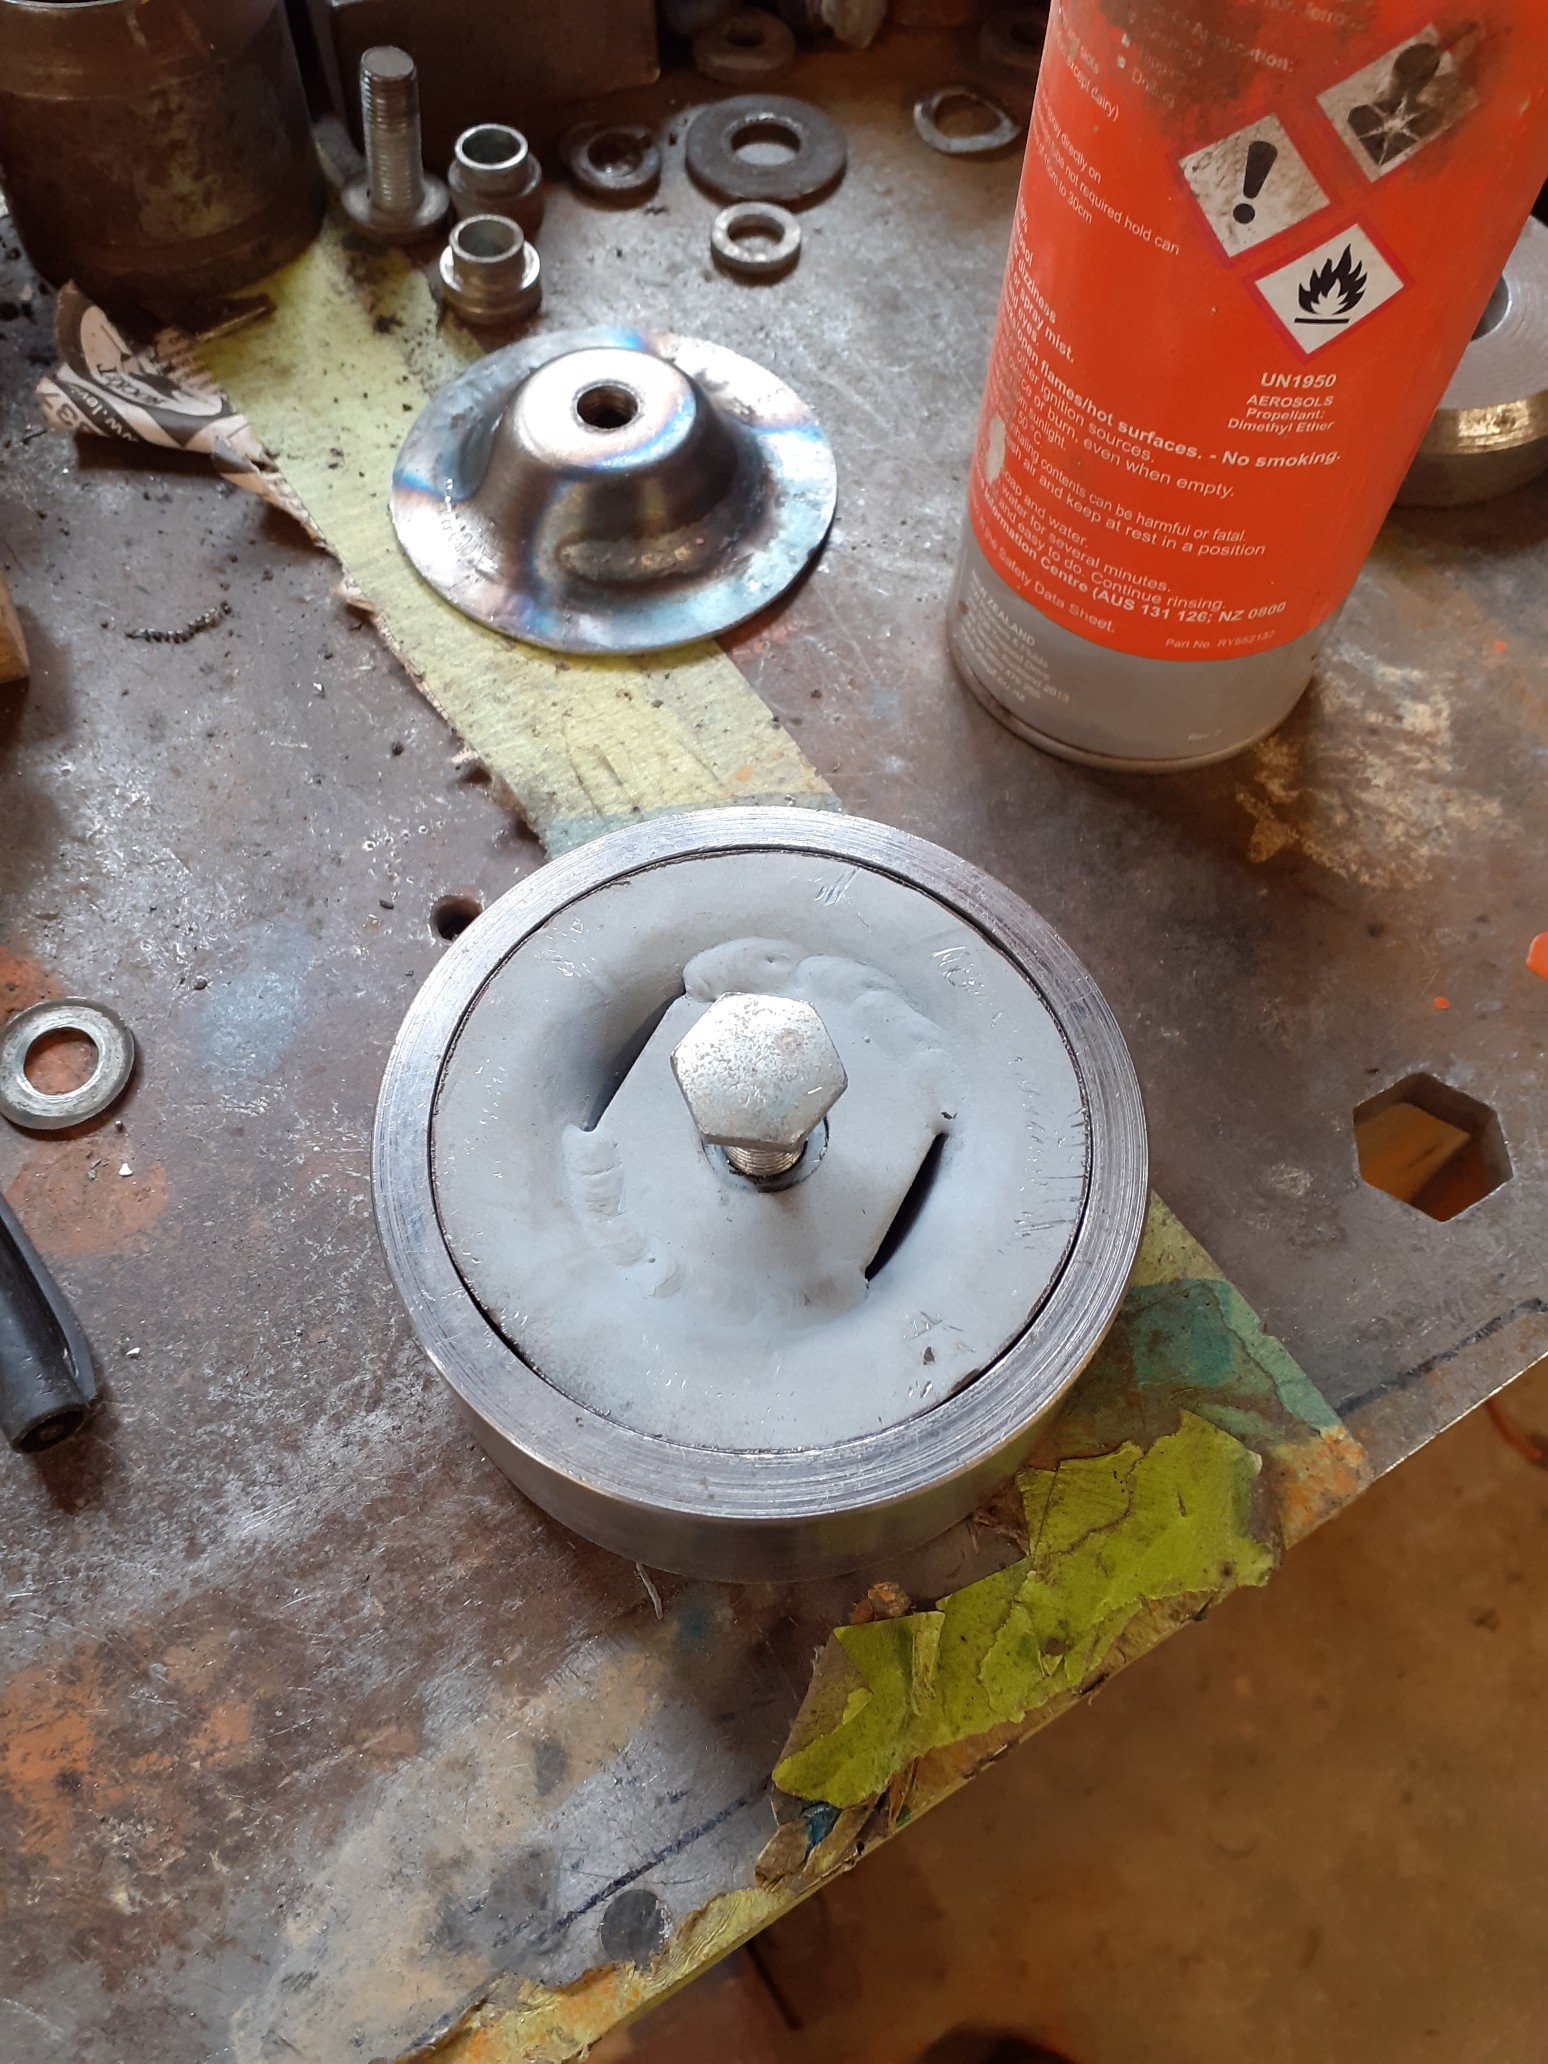
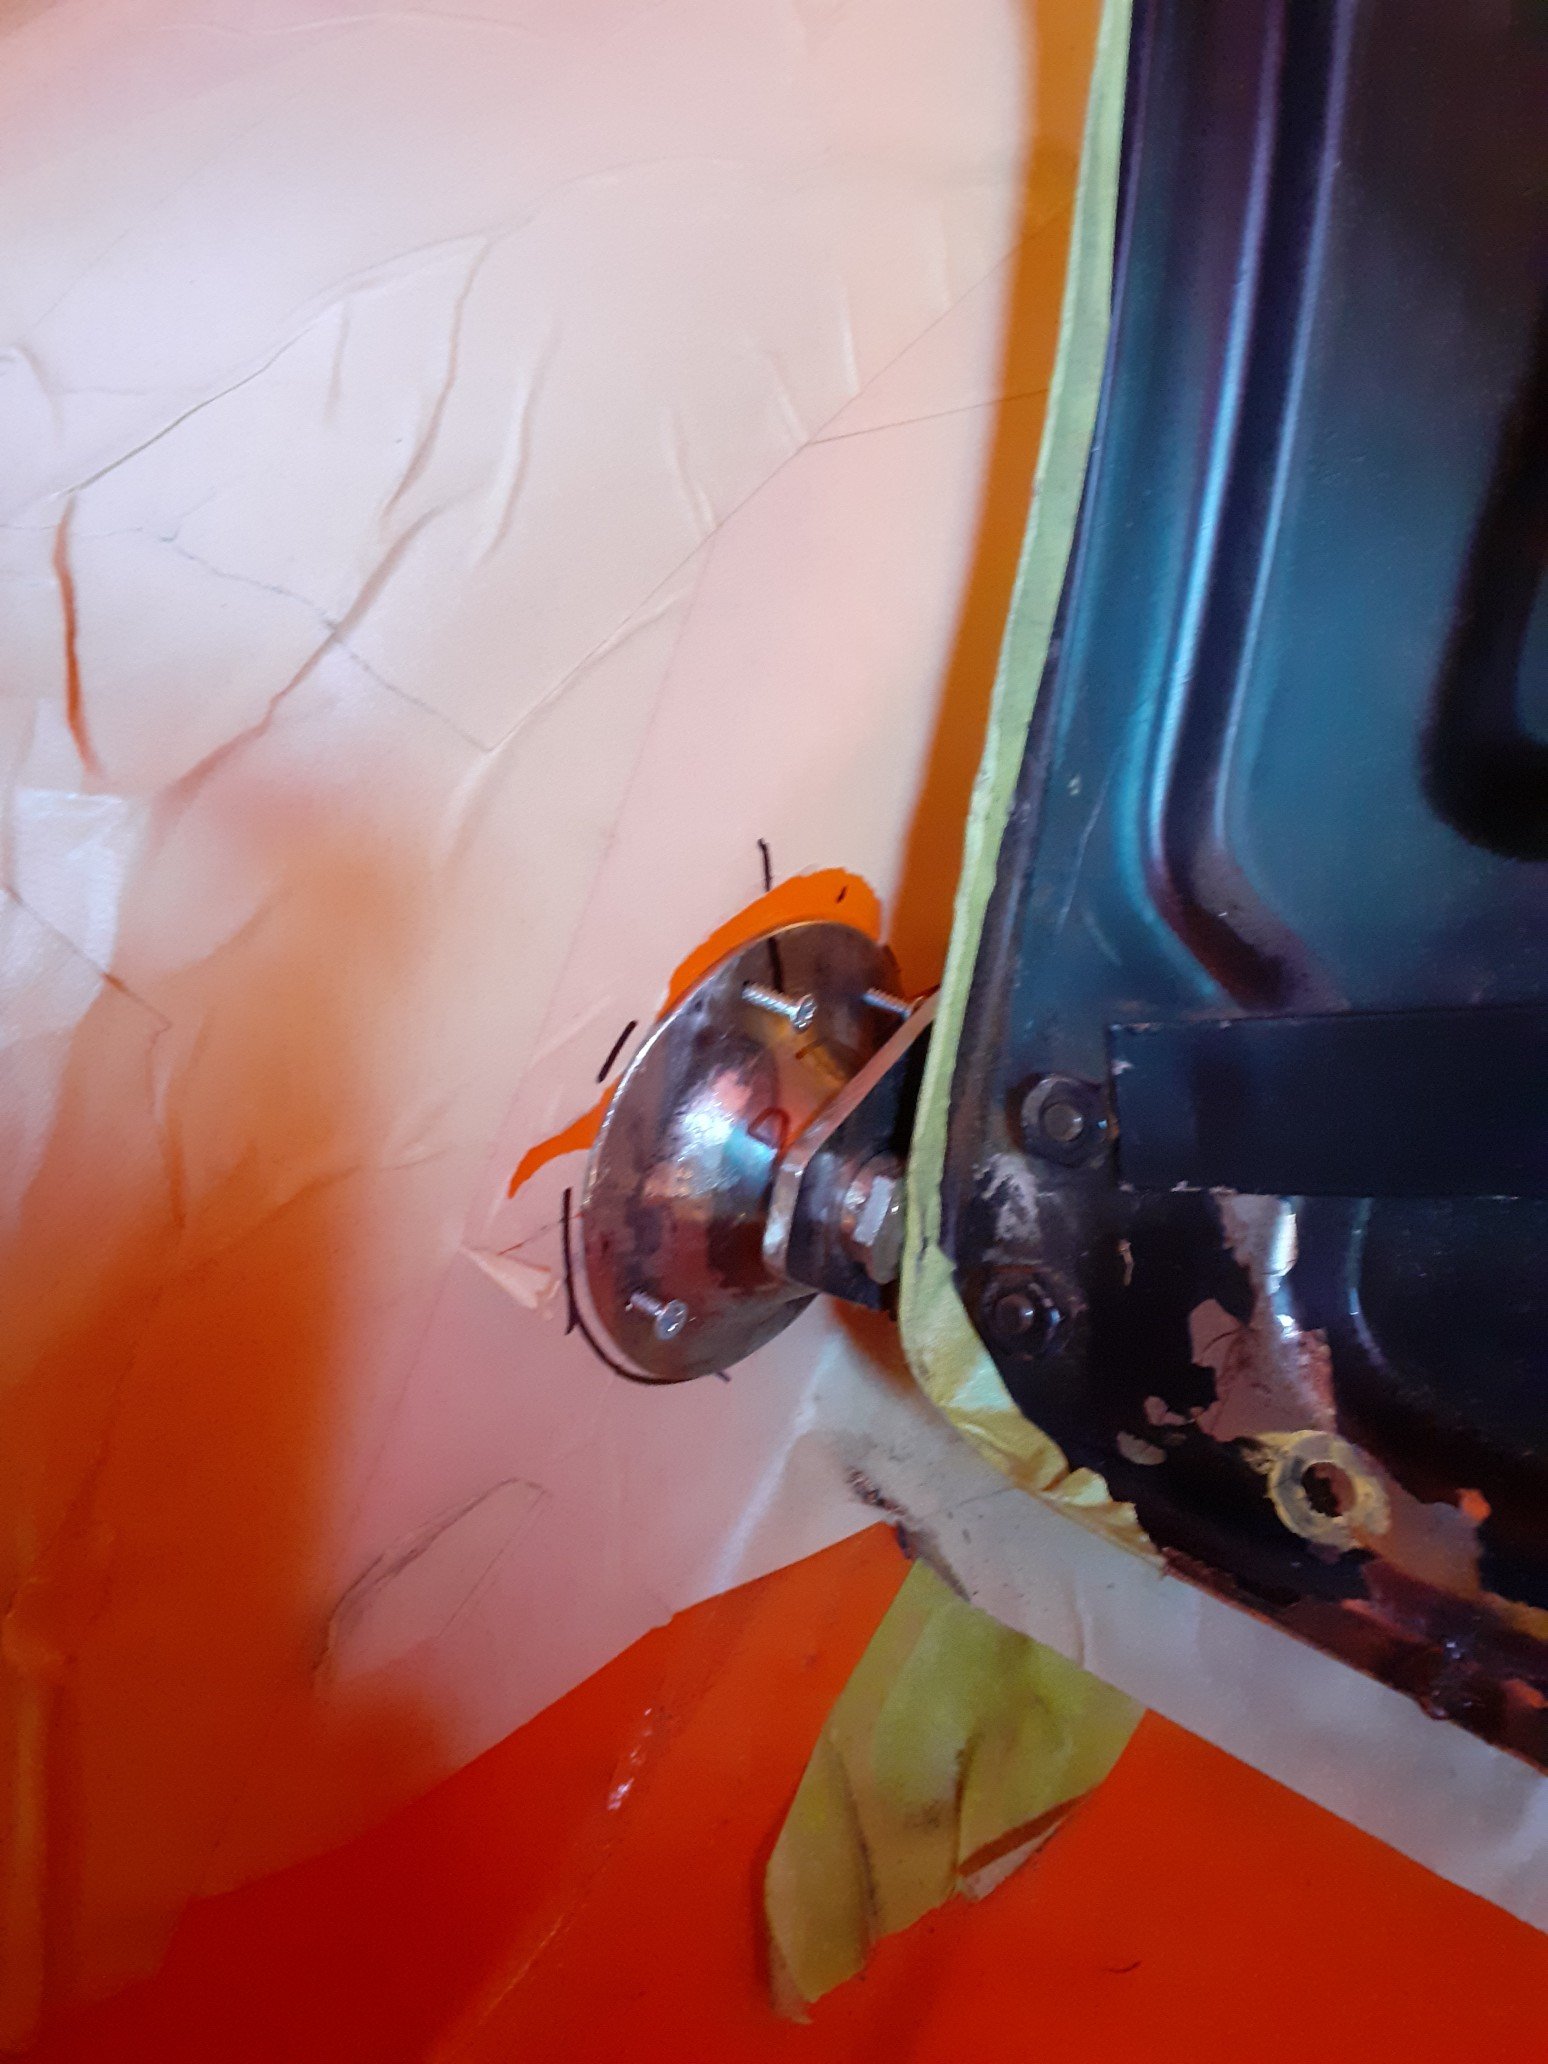
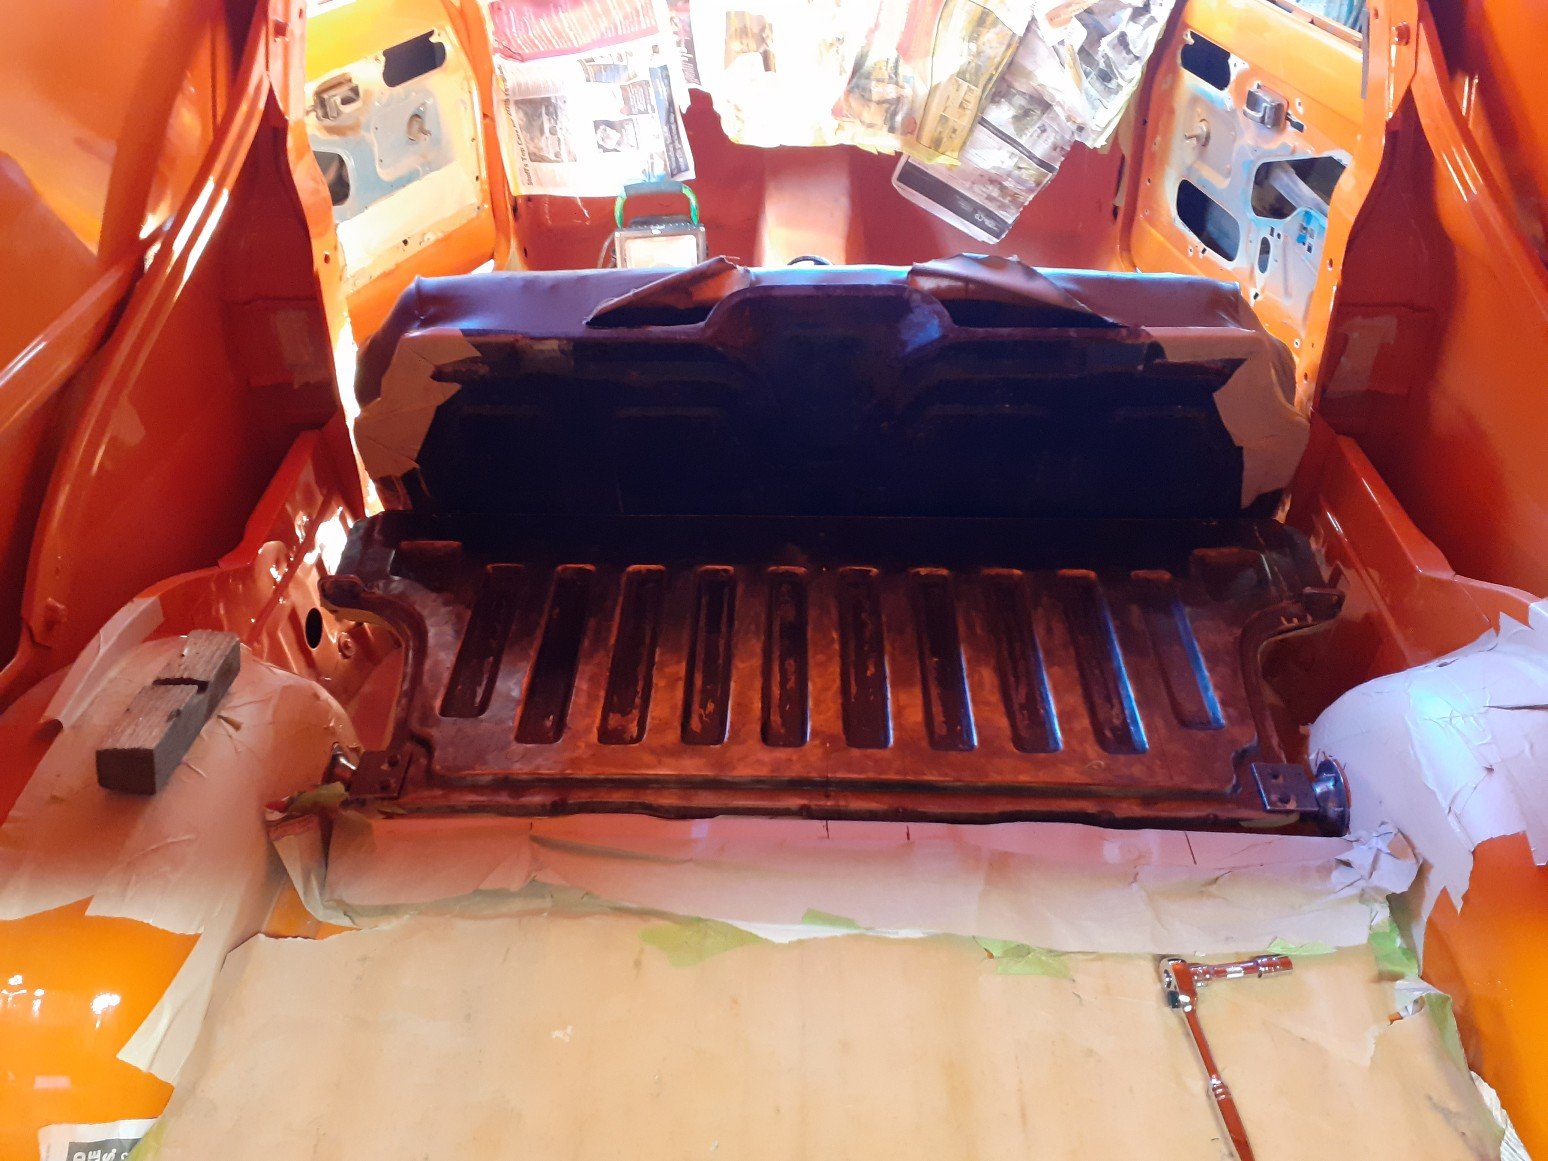
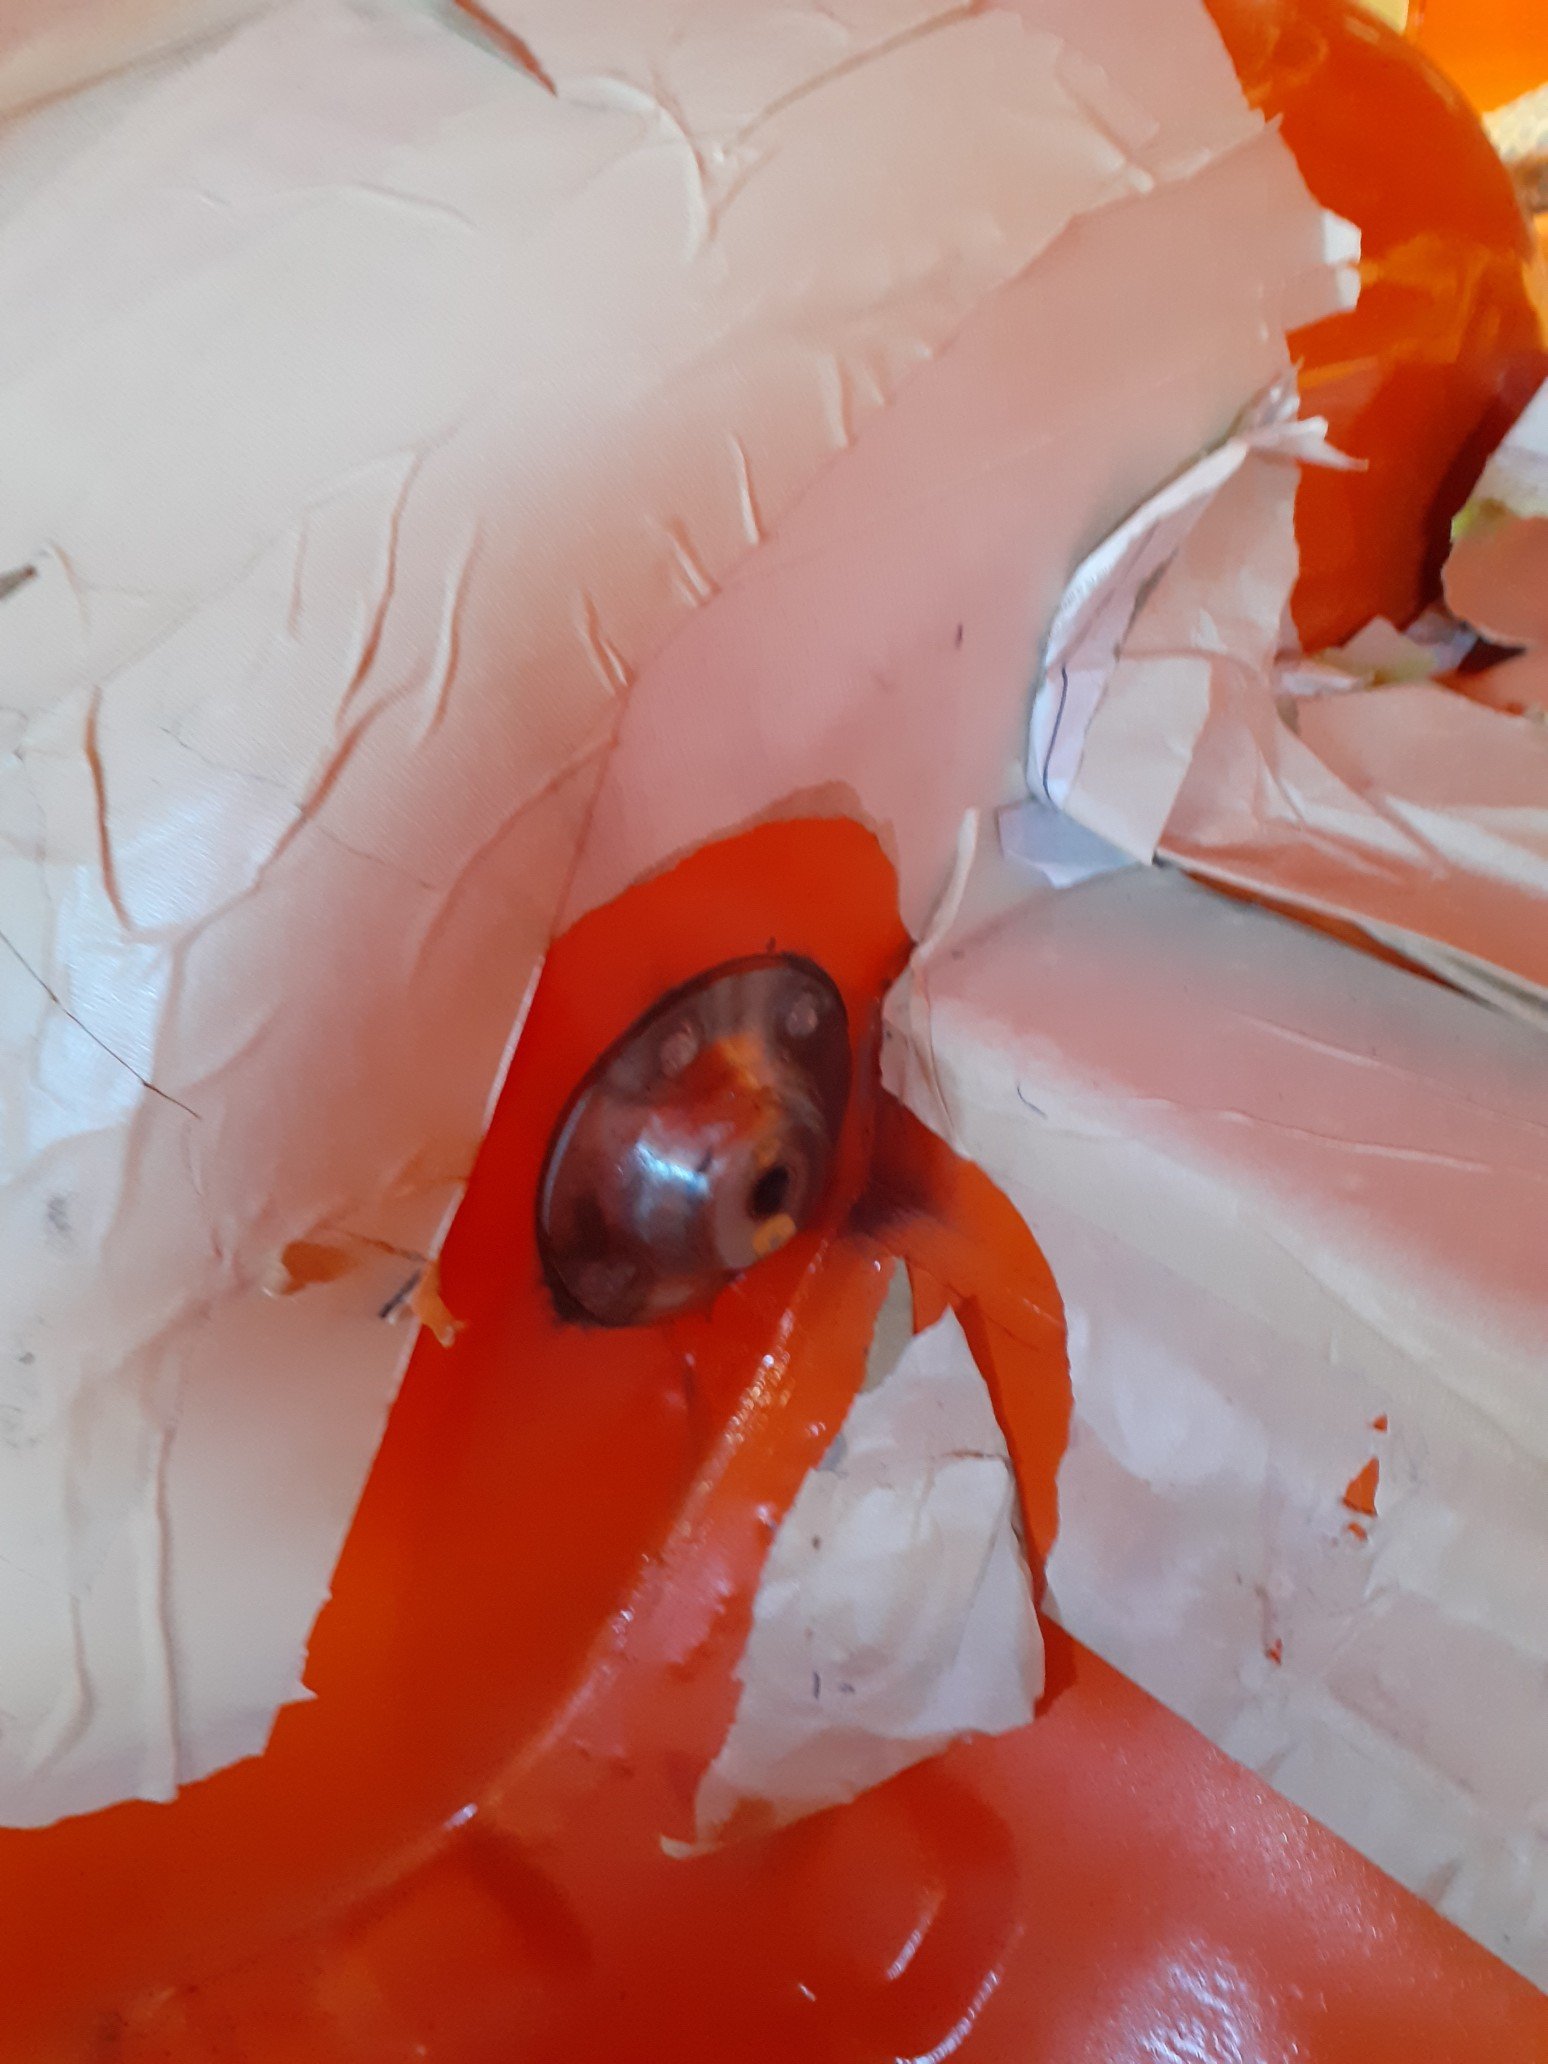
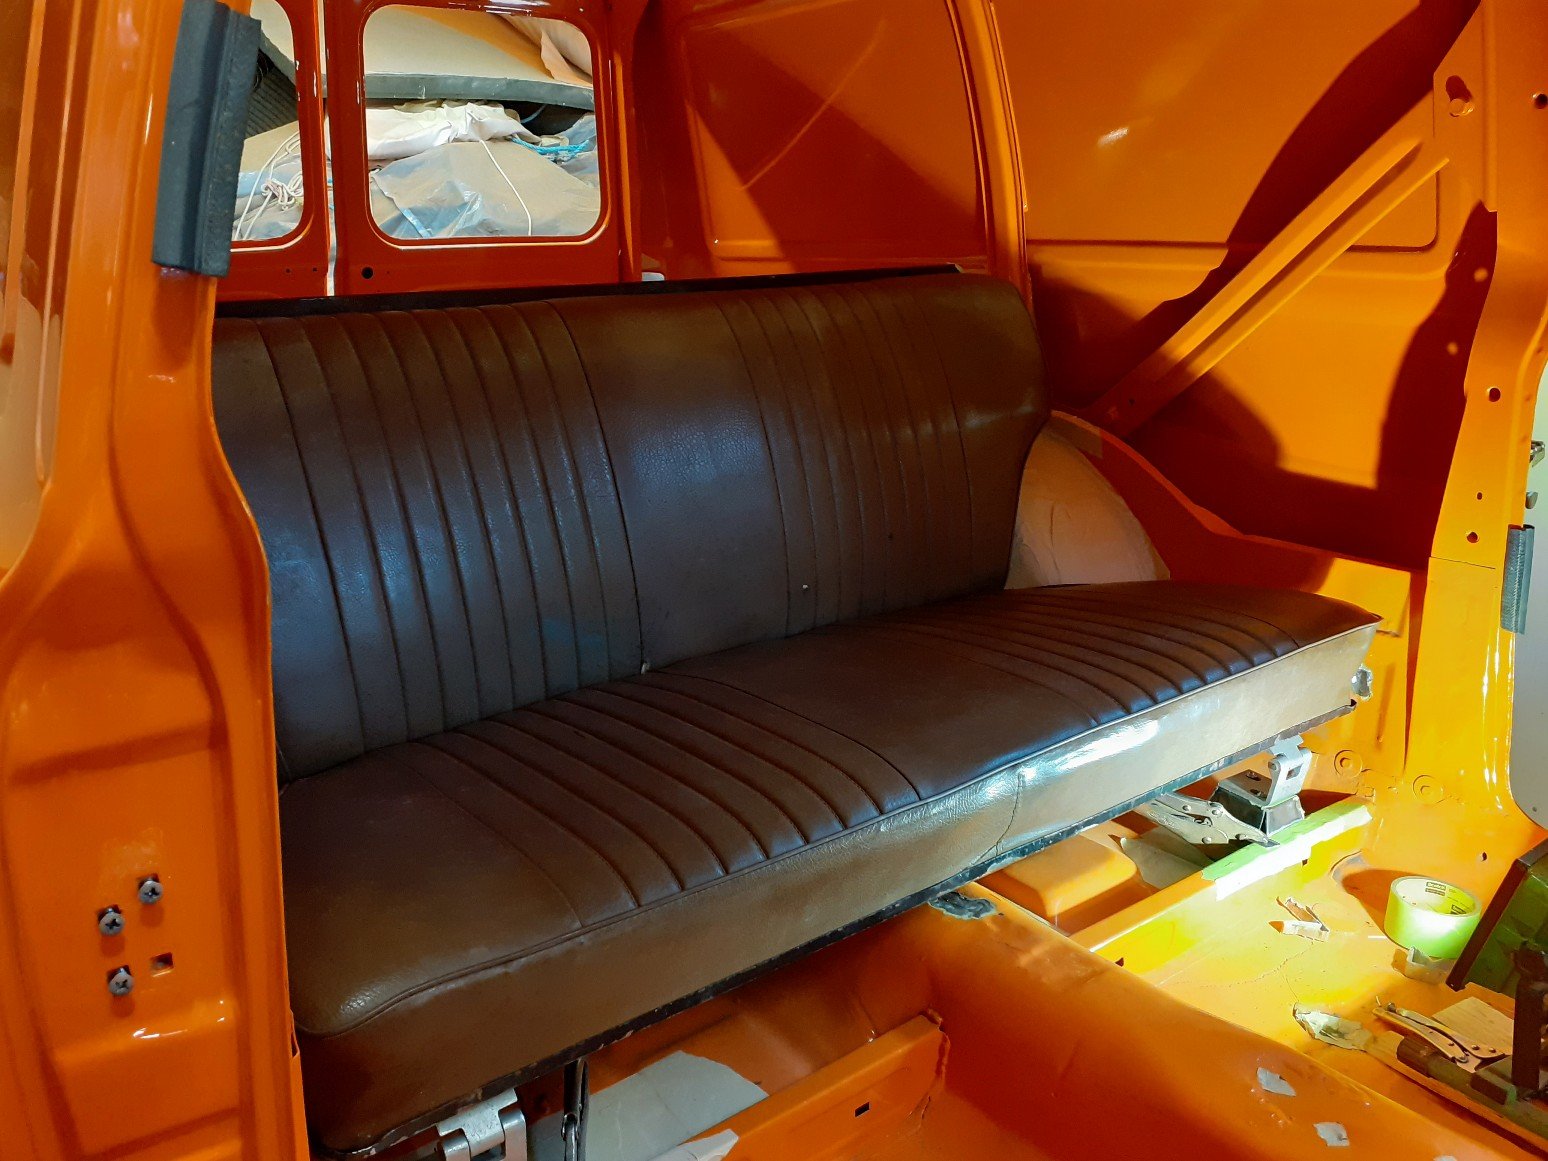
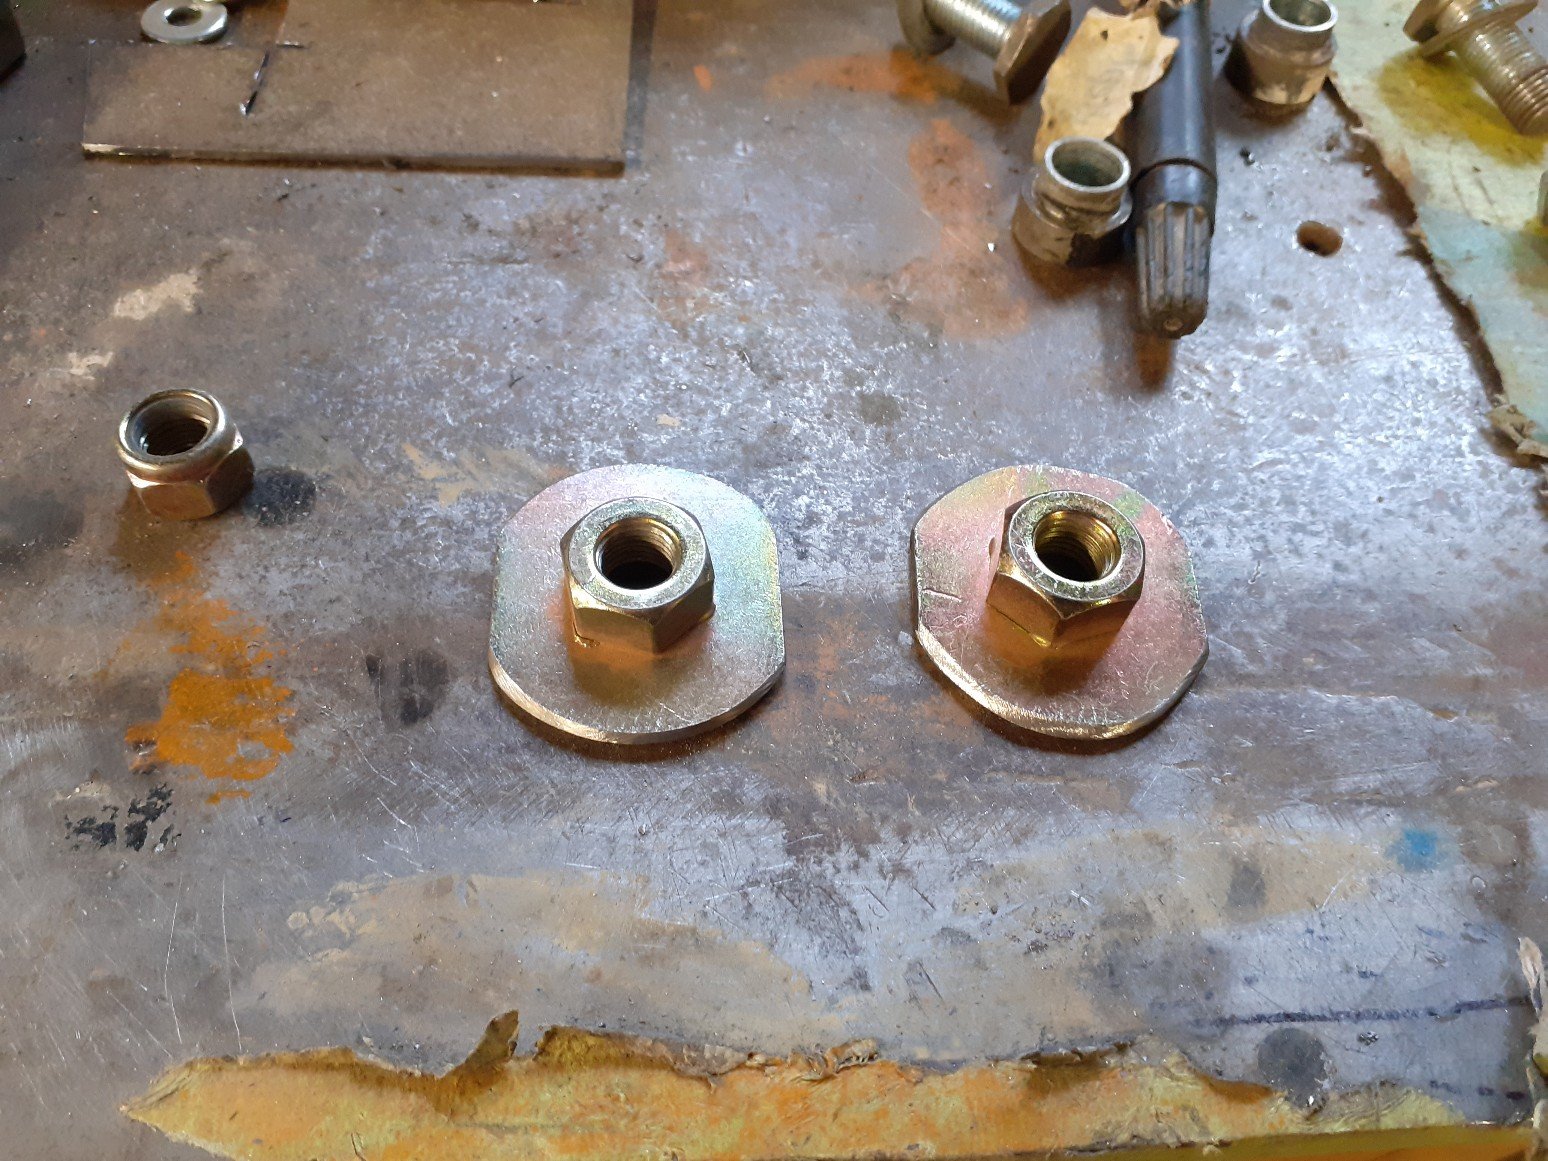
Spent way too long cutting and buffing the entire outside but it was worth it. Super smooth and straight now, just needs a polish. Since then I've been working on fitting the rear seat. Van's never came factory with rear seats but it was very common to cut out the front section of the rear floor and have a rear seat made and fitted. Most seats fitted were home made out of ply wood and were very roughly mounted in, this one was no except. Escort estates had seats were fitted from factory and had a metal floor backing so when folded down and not in use, it looked like it was just an extension of the floor. I have been looking for one of these for years and was hoping to have one before I painted it, as I would have to weld in mounting points. Didnt end up happening and found this one afterwards. Untwisted it and it will need full upholstery at a later date but it fits (Temporarily fixed). Started making mountings for this, the first being the towers at the front of the lower half of the seat. Have made these so I could use the original alloy hinges. Have welded a plate into the bottom and tapped some 8mm threads. Started working on the rear upright half of the seat. The starting point of mounting the seat is based around making the back part completely level when folded down. Some temporary brackets were made to find its final position. After the front towers were made and welded in, I started making the mountings where the upright section would swivel down flat. I made these cups, which will be welded in to close the gaps between the wheel tub and seat frame, using the correct fine threaded seat belt bolts and fixings. Once these are welded in there final spot, I can start working on the last mounting points which sit on top of th wheel tub and hold the upright section in place when in the correct seating position. Again, from factory these were pretty poorly thought about. I have a few ideas of how to improve this with an automatic locking mechanism.
5 points
-
Thread dredge from page 6 haha. Progress has been very slow on this. Lack of room is just a killer. Tonight I pulled the 2l out. One step closer to pulling the cab off the c notch chassis . At least with the motor and box out it will be a little lighter to push in and out of the garage. That's all the progress for now. So here's a boring pic for a boring build
4 points
-
After actualy finding the idle screw (on the back and underneath the TB, and a H2 Allen bolt????? Turns out it never even was touching the throttle. So I adjusted this up. I guess the cable was doing the throttle stopping and I upset it when I removed the kick down cable. Found my timing light is broken, but as it still had a bit of a stumble, advanced it a couple taps and it's pretty acceptable now. Will check what it really it soon. So I guess that's all it really needed.4 points
-
And some photos to stick on the fridge4 points
-
Took the kids to the caroline bay festival today. A solid 4 boring hours of flat out straight road. Well on the way there it was flat out, the way back was full of bloody caravans Done about 1100 or 1200 miles so far. Hasn't missed a beat. Just rolled over 105,000. Still got the sticker on the windscreen saying next service due @105 or june 2010. So hasn't done a lot of work the last 10 yrs Edit, soz upside down pic. Dunno why. Easier to turn ya phone around.4 points
-
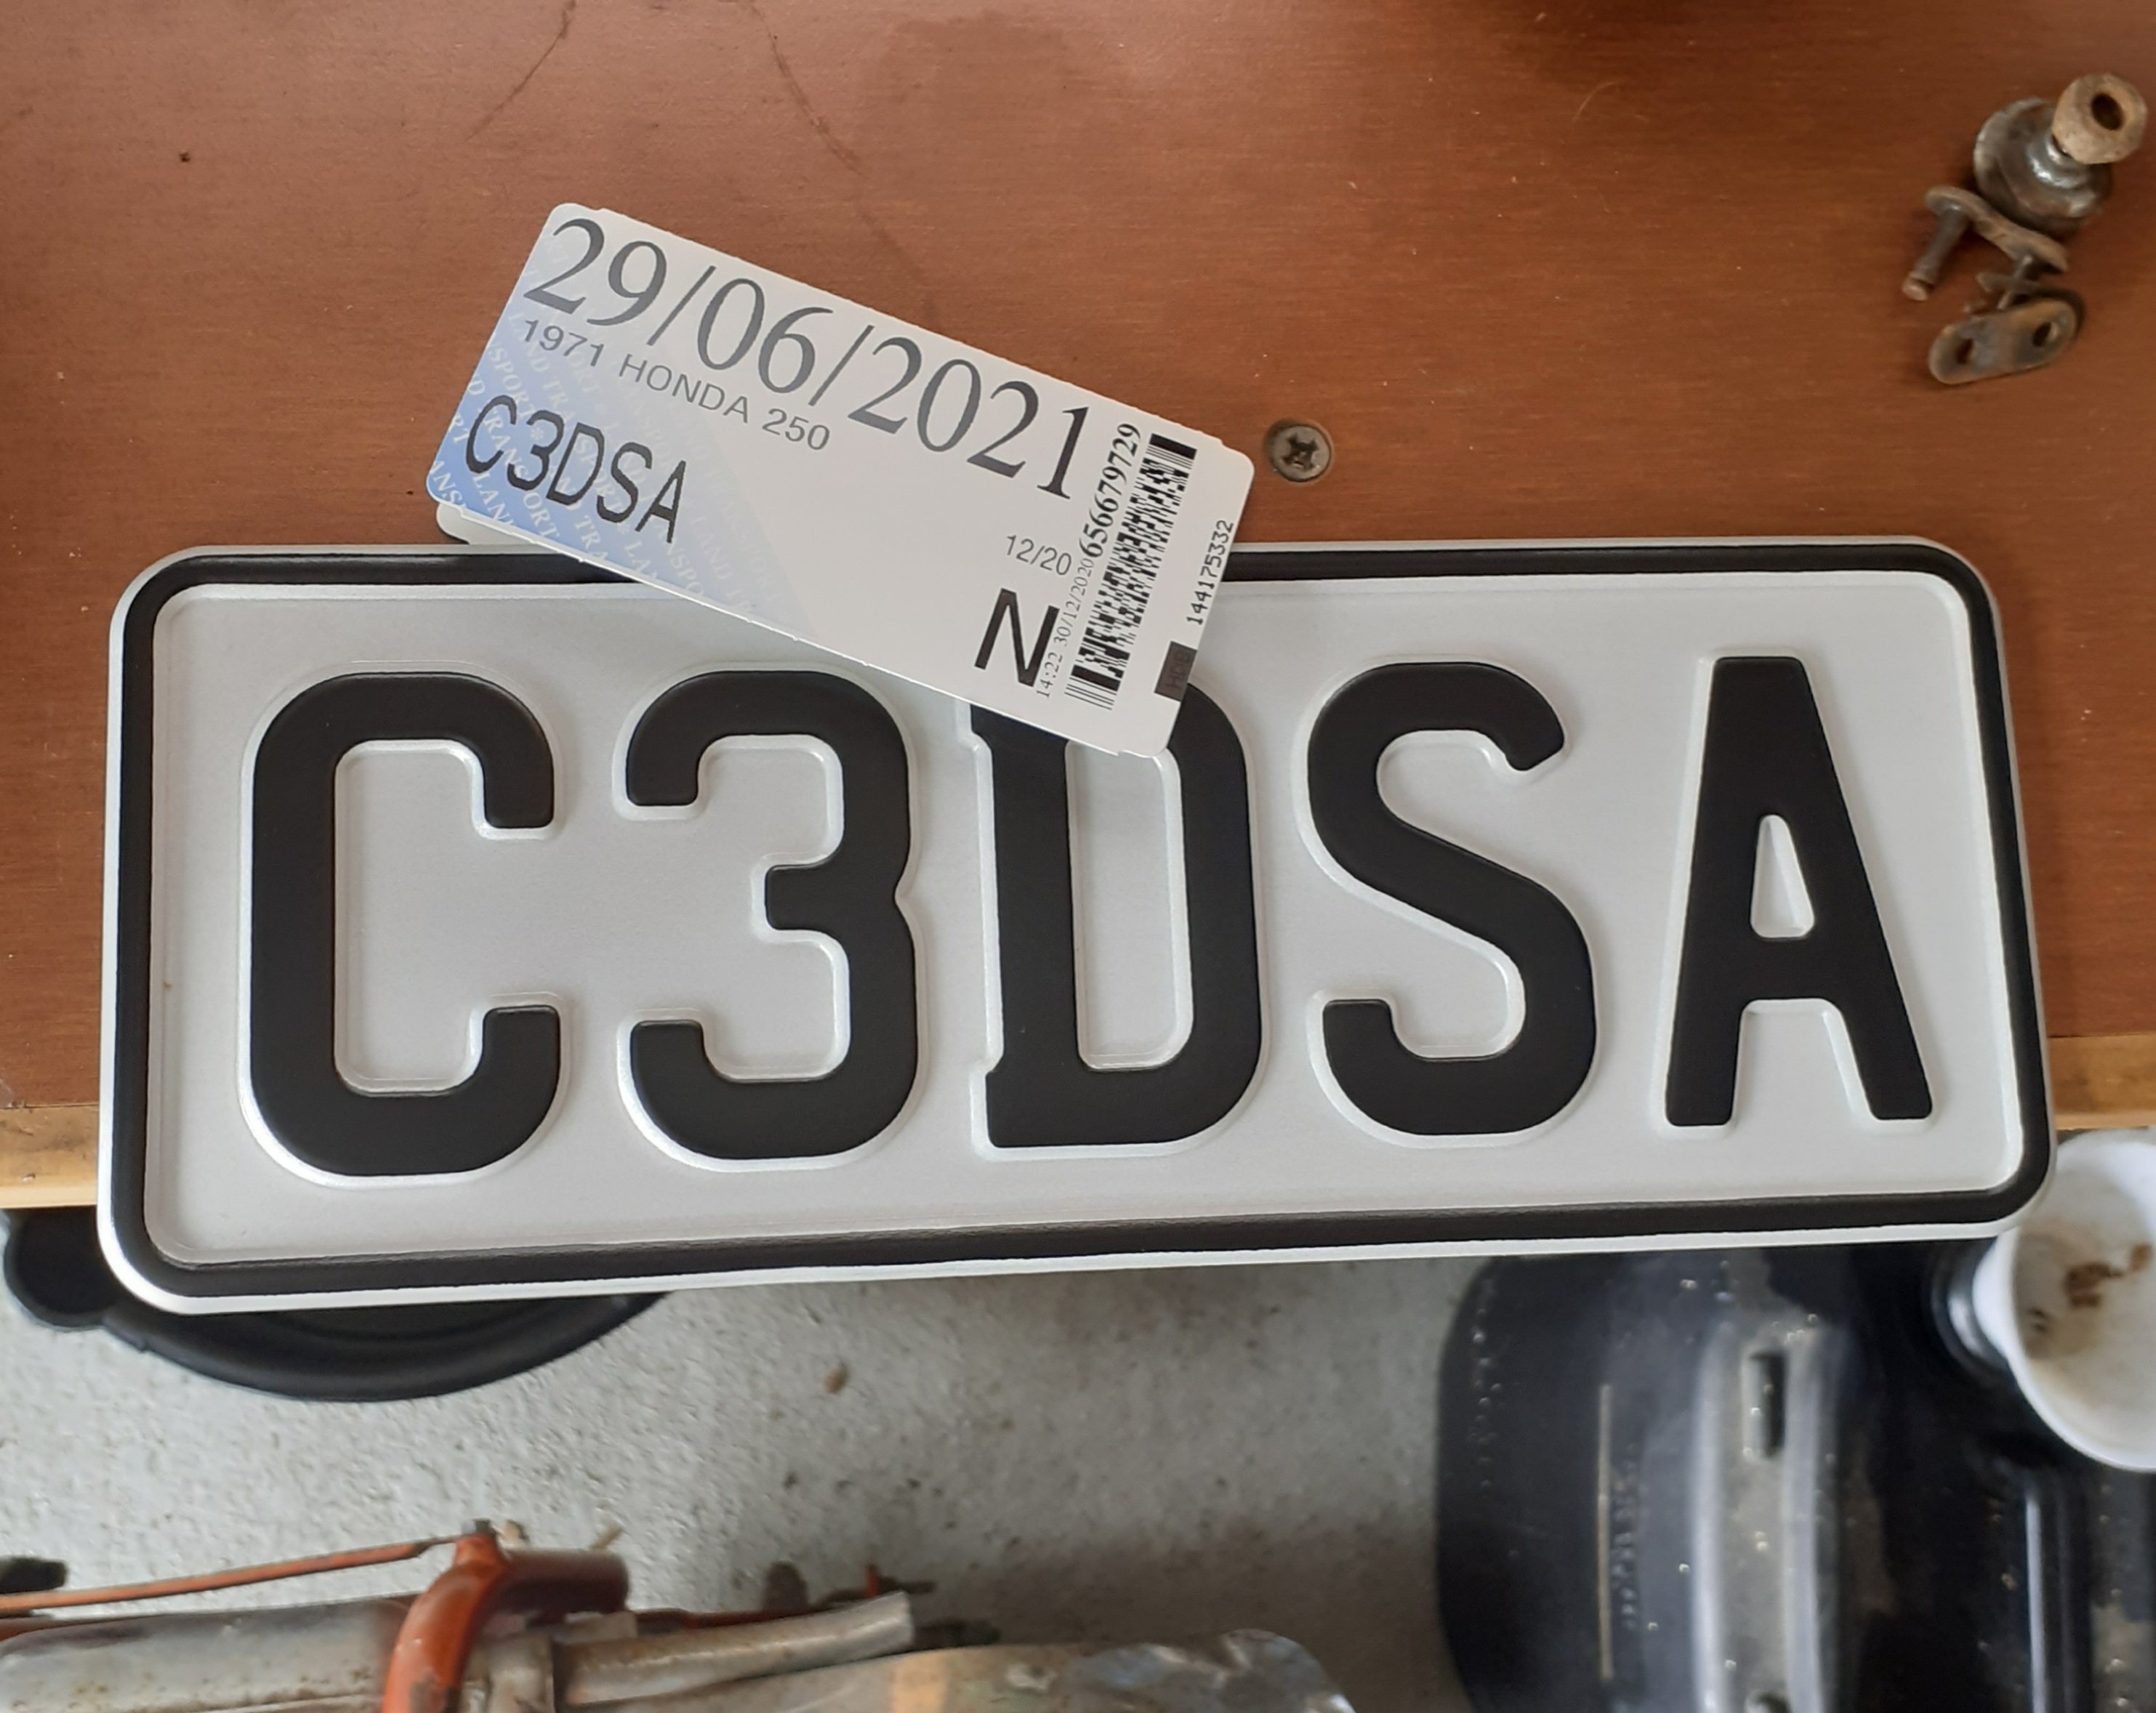
Successful day. Thanks to @BlownCorona and @Raizer for some advice after first attempt was a fail. Shame the lady couldn't read my scrawl and incorrectly typed 2 50 instead of Z 50, but I'll do the paperwork to get that changed.
3 points
-
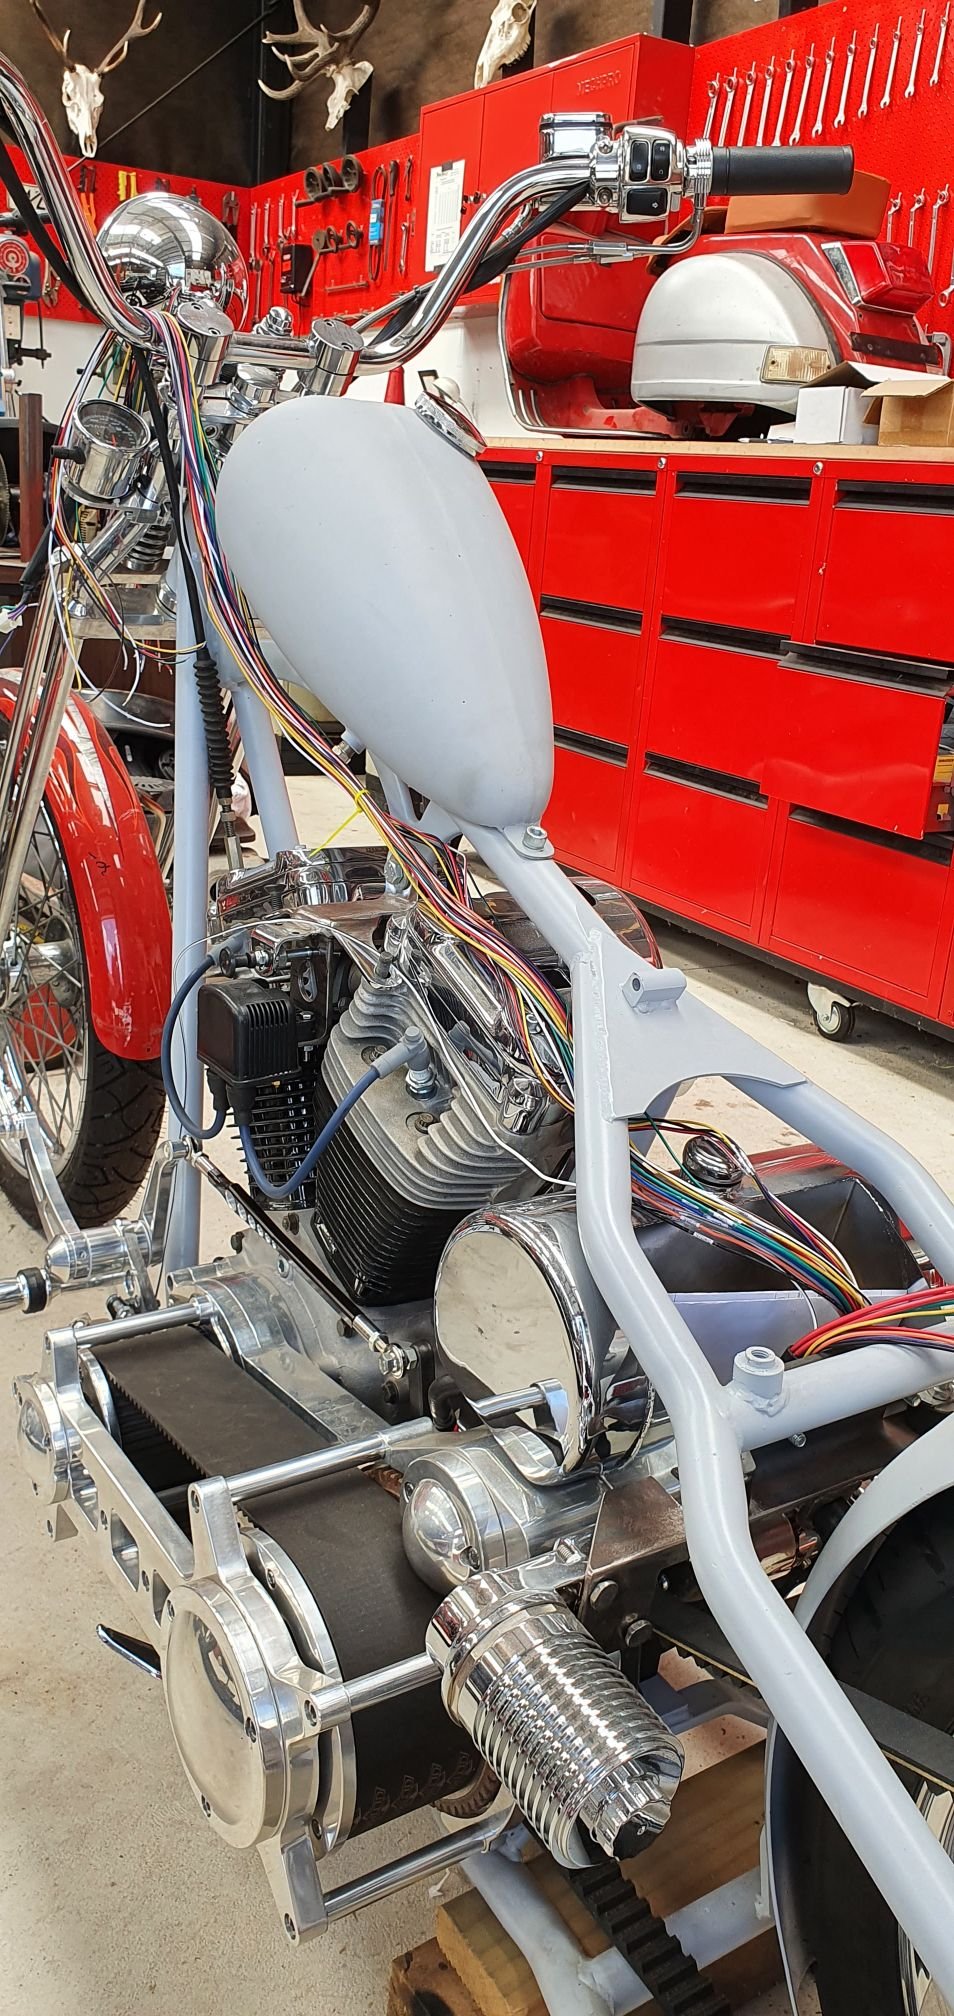
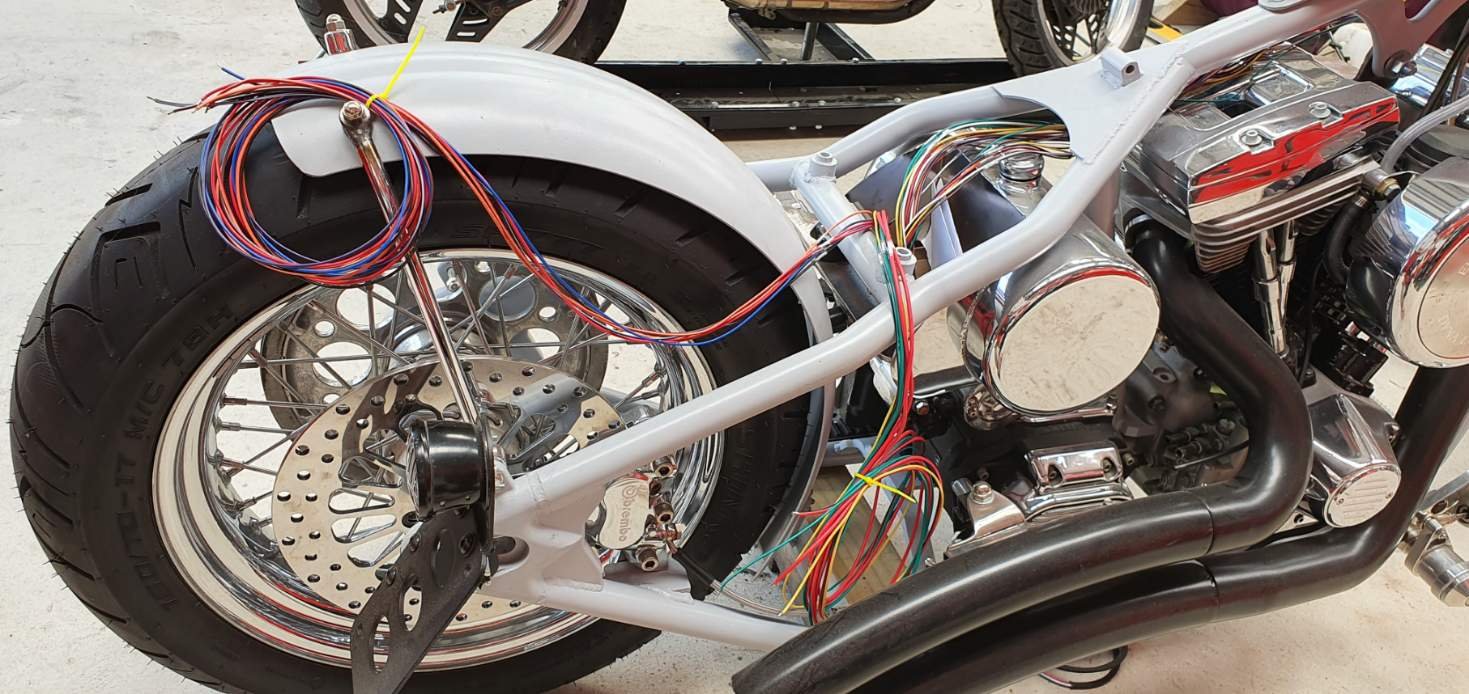
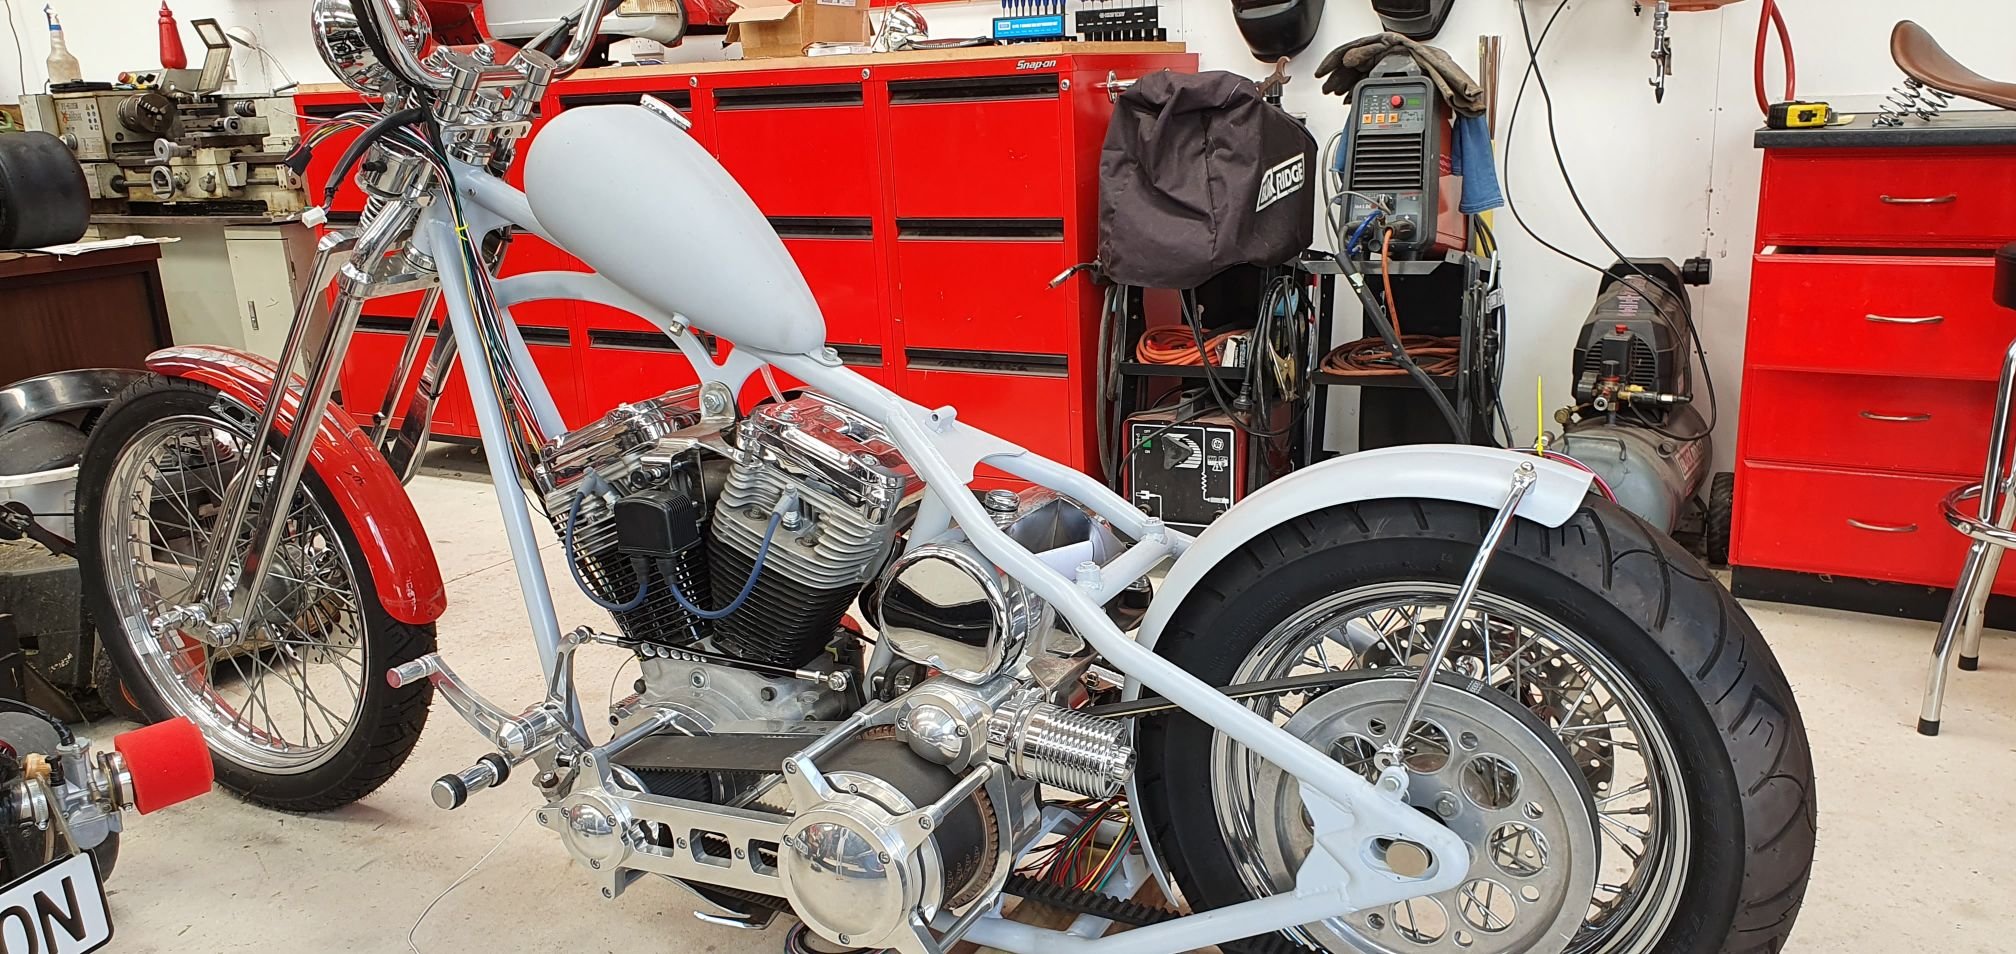
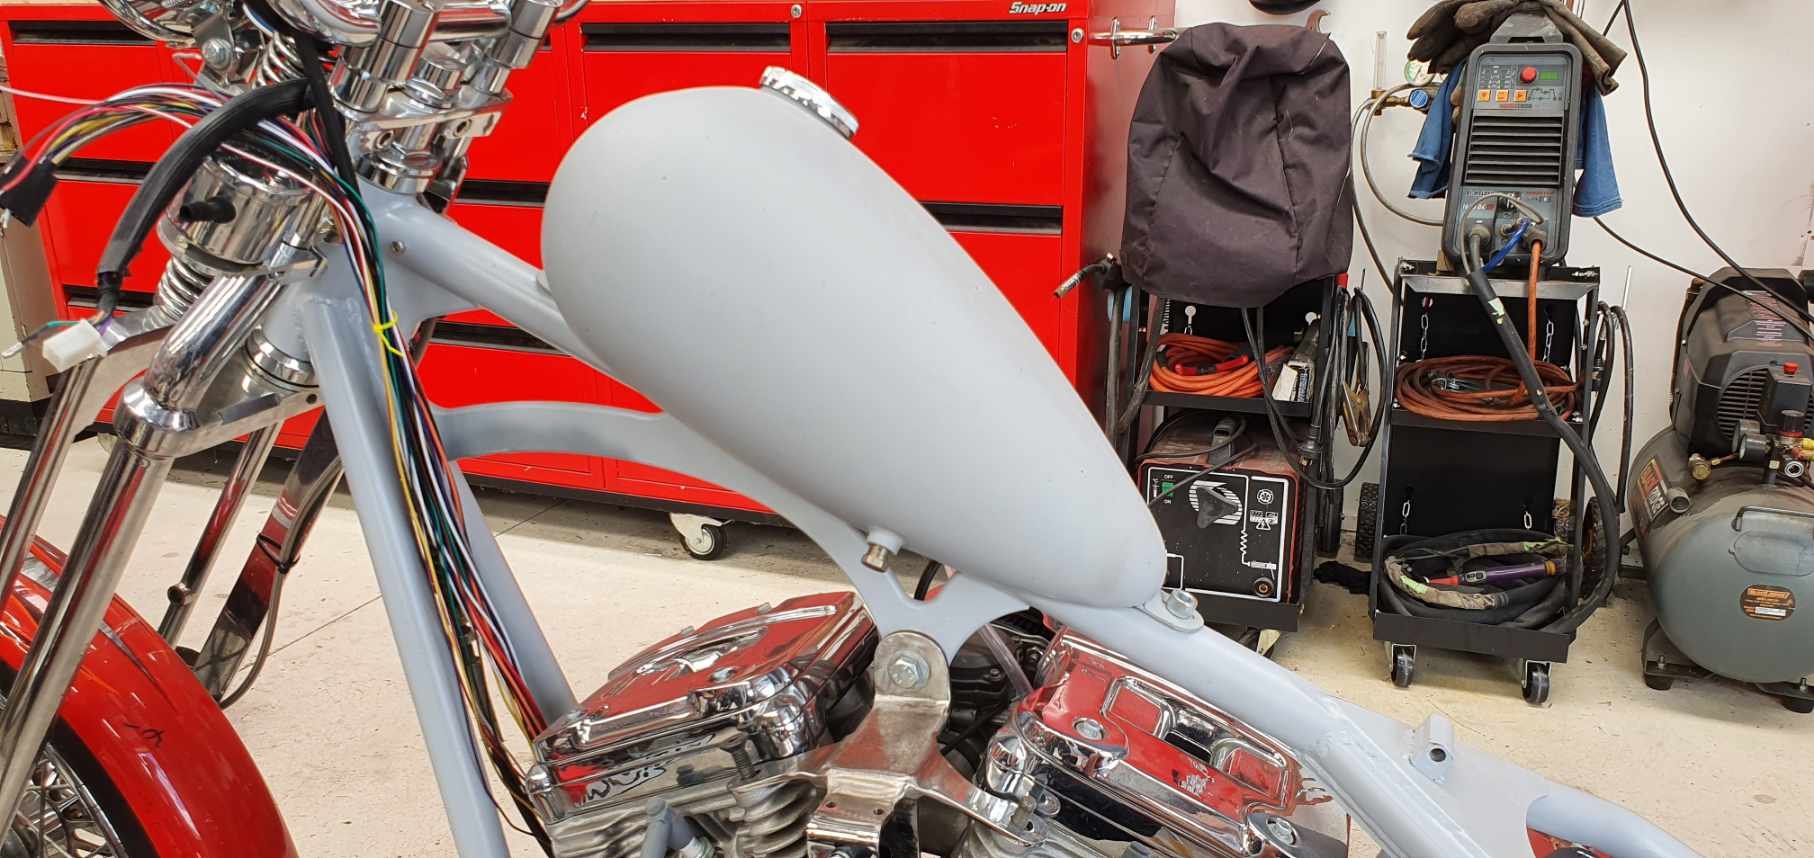
Wiring is for dicks!! I wish I just kept my "Bluetooth" Wiring as it looked much better without real Wiring... Anyway, reality dictates I will actually need to do it, despite how much I want to avoid it. Take 1: Relays in the battery box. Seemed like a good idea, and was reasonably tidy. However I was unable to run the wires internally up the backbone of the bike as I envisioned, as the loom has too many wires to all fit in there with other stuff going on like fuel tank threaded inserts and the way the saddle tube connects and blocks the spines opening...arghhh...grrrr!!! So, take 2: Try shifting everything under the transmission. Sweet, rear wires = very tidy, I can easily hide those. Front wires can be run alongside the clutch cable (heat shrink to keep it all coved of course). I can even use OEM fittings for connecting everything up, which was always my plan if possible. Yip, standing back it looks fine. 100% better than my first attempt, which was just fucking ugly. This is much better, no ugliness along the backbone distracting from the clean lines. The naked spine and tank are this bikes main feature and cable ties and a honking big wiring loom there would have looked shit!! Calling it a win.
3 points
-
Nope spoke too soon, same issue still. Seems a bit better but still not quite right. Need to see if timing is even in the right area though before poking around anything else3 points
-
angery cow moo3 points
-
Stripped the boxing and bucketed all of the water out of the pit. My parents then popped around with their tractor and we managed to get all the heavy bits in the hole.
3 points
-
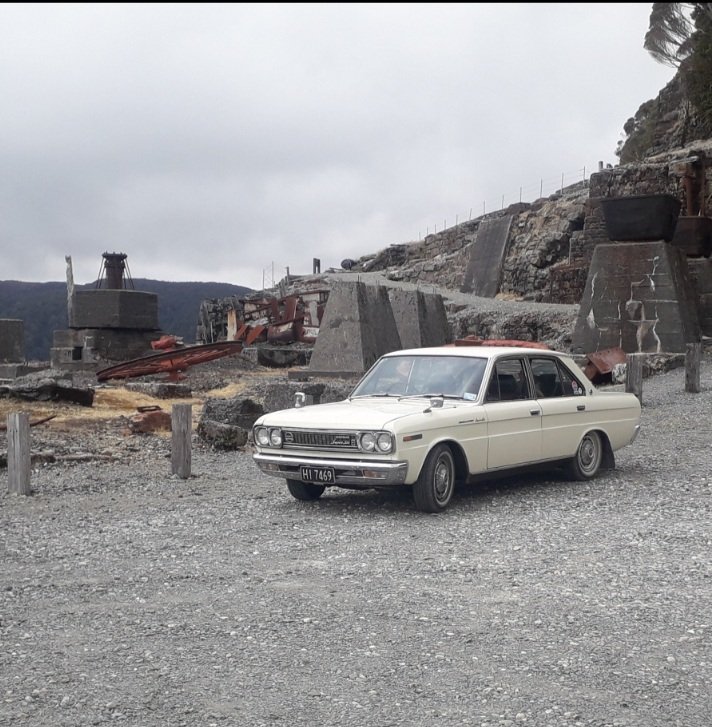
Action shots! Well some photos at least. I'm shit behind a camera, and forget to take them. Currently in chch on a family holiday of the sth island. Been to Nelson for a bit, over to Takaka, down to Westport then Hokitika and across to chch. Went up to the Denniston Mine. Was quiet so snuck through the barrier for some photos. Did some other stuff too. Discovered the rubber boot thing on the wiper on my side leaks and drips on my foot
3 points
-
So yeah, as seen above, took it back to the water yesterday and it does run a lot better when its not breathing its own fart cloud. Picture of failed engine mount and V band that needed toightening. IMG_20201228_170634 by John Bell, on Flickr I'm not completely happy with its performance though now its making full more power, it doesn't 'bite' the water like I would expect, if you feed it more power than it can shift water, it nangs out and feels slower than if you were to nurse it up to speed. You can see/hear this in one of the vids. It handles a quite loosely, but I don't have much reference to compare it to, aside from the donor ski which carved corners like a water-skiing cut cat, comparatively. If you do manoeuvres that are too aggressive or any spins it comes off the plane pretty easily and doesn't pop out of the water like the motor seems capable. So next step is to look at the spare jetunit, if its any better pop it on for testing, and I feel I'll probably wind up giving one of the pumps a birthday. Cute IMG_20201228_182945 by John Bell, on Flickr2 points
-
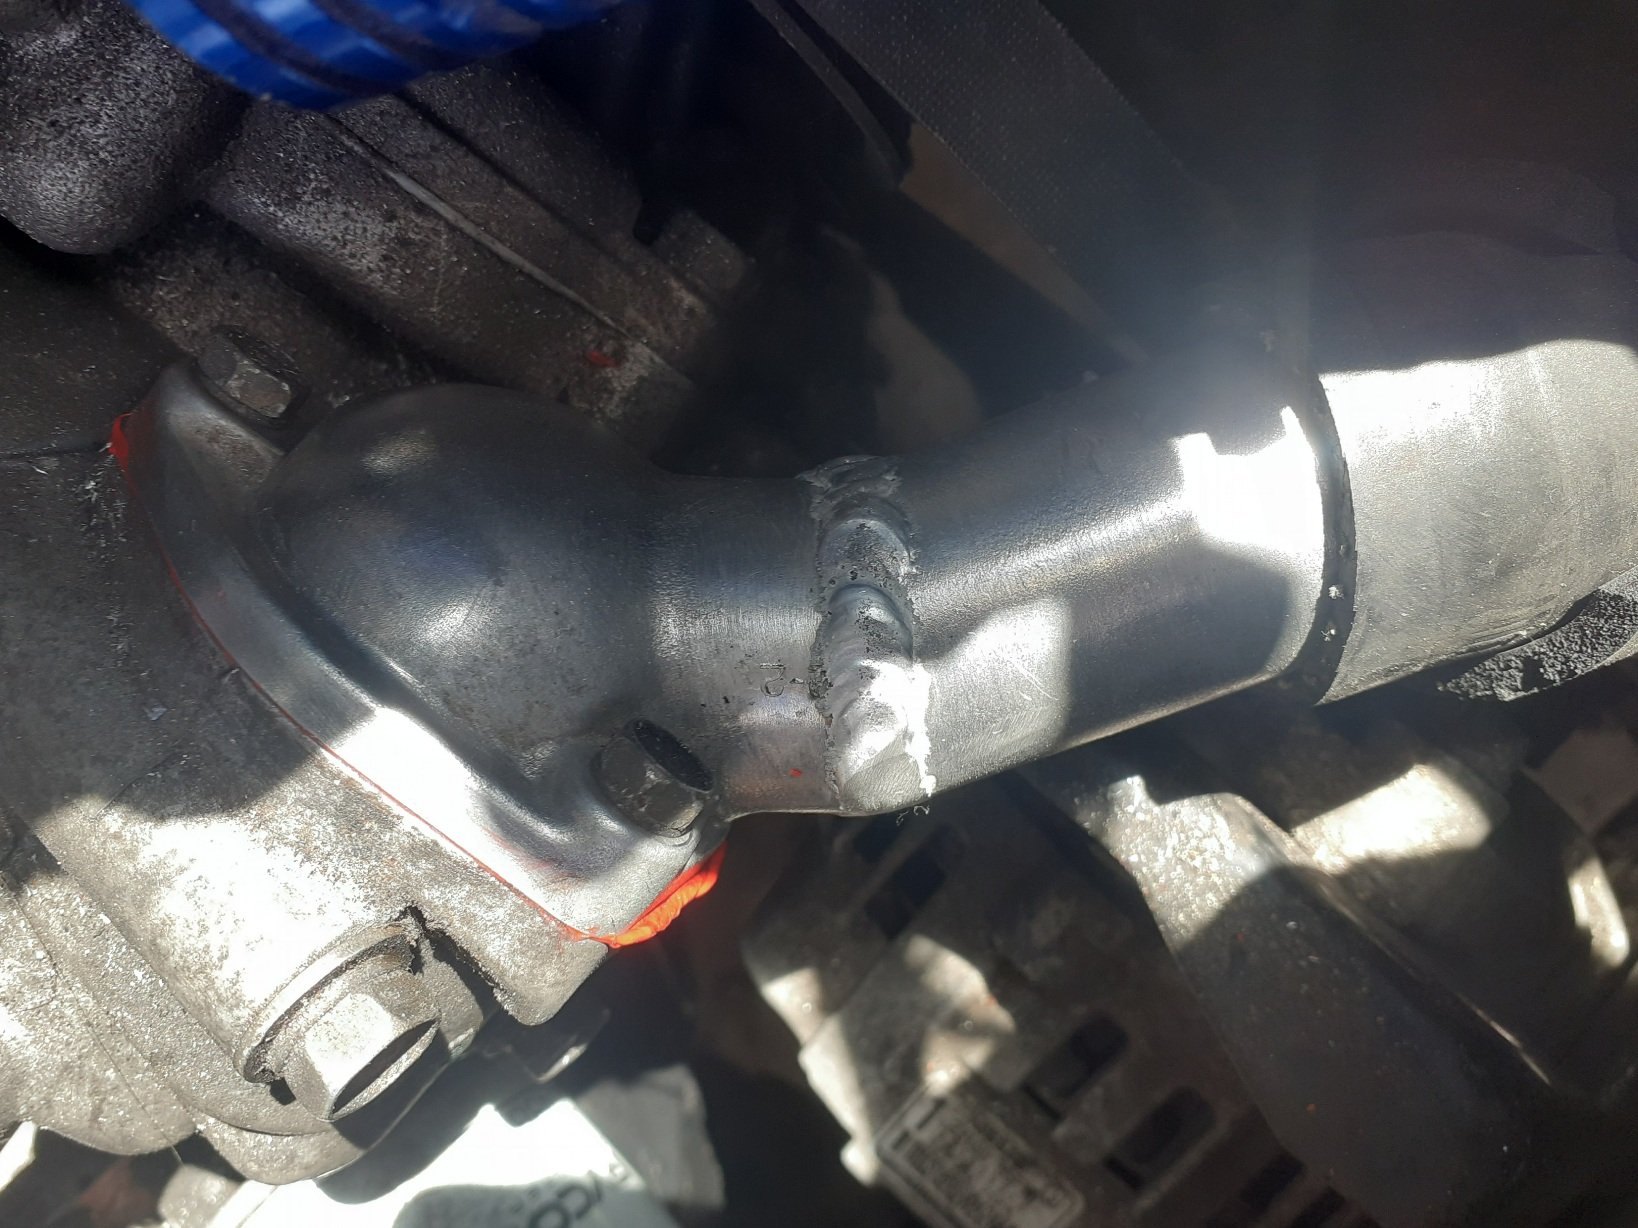
Another vantatstic day hah, got a lot done. Had to move this guy a bit as my intake just missed it but when the throttle cable bracket went on it reminded me that space is not my friend here. No worries though as the radiator hose diddnt like the angle it was on either, so moving the water neck made better space for both.
2 points
-
Thanks man. I think it's the biggest decision when working on a car. I did um and ah for ages and had a few spray outs. A little concerned there may be a bit too much orange with the lack of trim but we'll see when it rolls out. The back seat has no seat belts (pre 77) and no side windows so it's not a great place to be, but atleast the option to have a 3rd or 4th person is a bonus. Think I'll stick with the original brown vinyl color to keep it period.2 points
-
Finally arrived about a week later than i wanted. Look really bloody nice anodized finish looks mint!
2 points
-
Super easy to set up and use so far. I've had a quick play with the retarder and that all seems to be working good, but I need to tweak the PID settings before I can do the proper MOI calibration. Software itself is pretty simple to use also, and seems to have all the features I'd want. Never used a dyno before this, so can't really compare to anything else. Can't do too much more fiddling until I can get my sparky to come wire up some extraction fans etc after the holidays. It gets pretty noxious in there lol.2 points
-
2 points
-
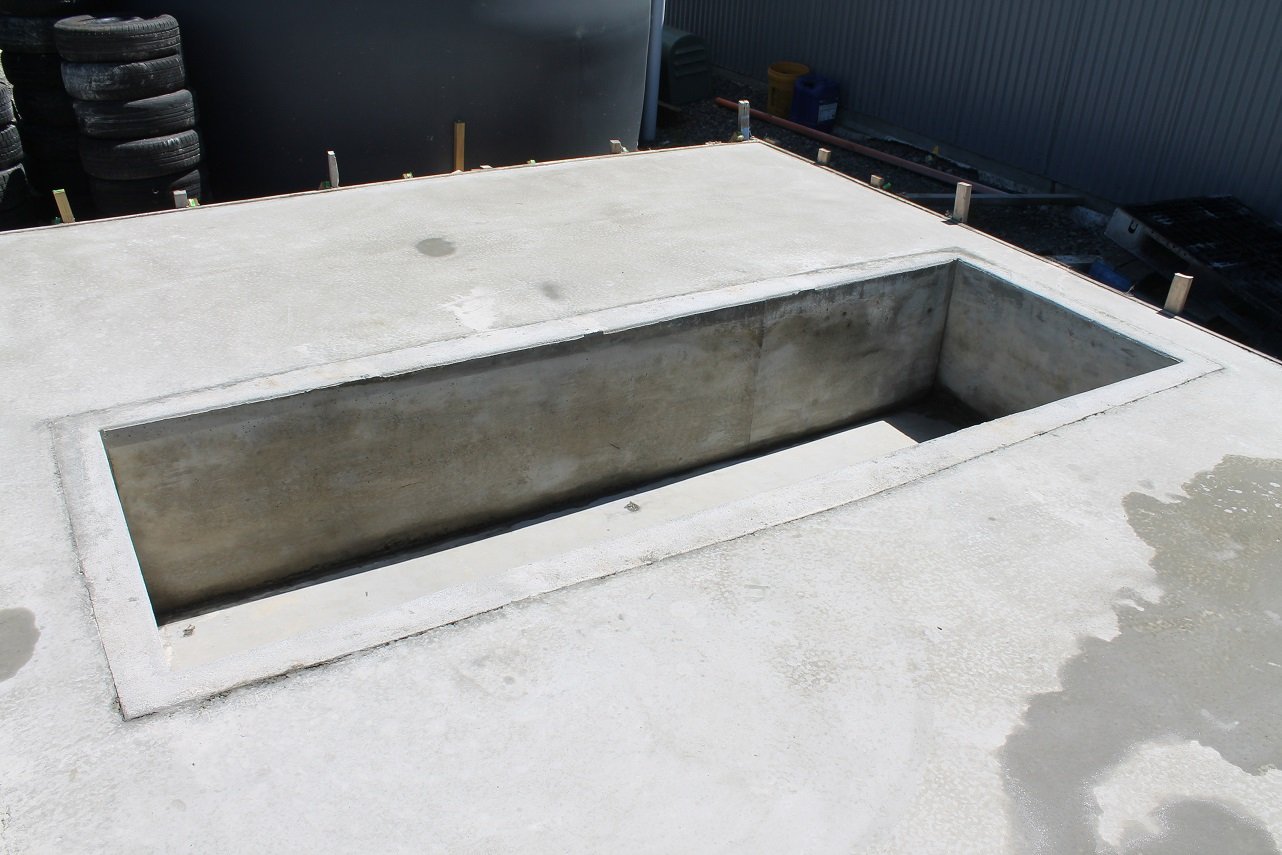
Got the mould box done. Just need to sort the partition mounting.2 points
-
Managed to get some work done on the car over the last couple of days, got the wire wheels out in the boot and surrounding area. Boot floor wasn’t looking too bad (not 100% done brushing back in the photo): Slapped some primer on it (there’s one little rust hole near the drain opening in the spare wheel tray, the cap that sat in there crumbled in my hand lol): There is a bit of rust around where the seal/boot lip runs along near the bumper in the middle, so to get a closer look I removed the rear bumper (came off surprisingly easily, after some of the horror stories I have seen/read about). Was a bit sad to see this rust here, next to the forward bumper support (similar on the other side too), so that’ll need to be sorted: Does anyone know how to get these brackets off? I can see some screws and nuts, but they look fairly rusted on. Likewise, any tips on how to remove the trim here on the C pillar junction, as to finish the survey of the rust in this area: It is a bit disheartening to find more rust, but not surprising, as that’s the nature of the beast when it comes to classic cars. The good news is that there are a few areas which will be hidden once done, so perfect for me to cut my welding/repair teeth on, onwards and upwards.2 points
-
2 points
-
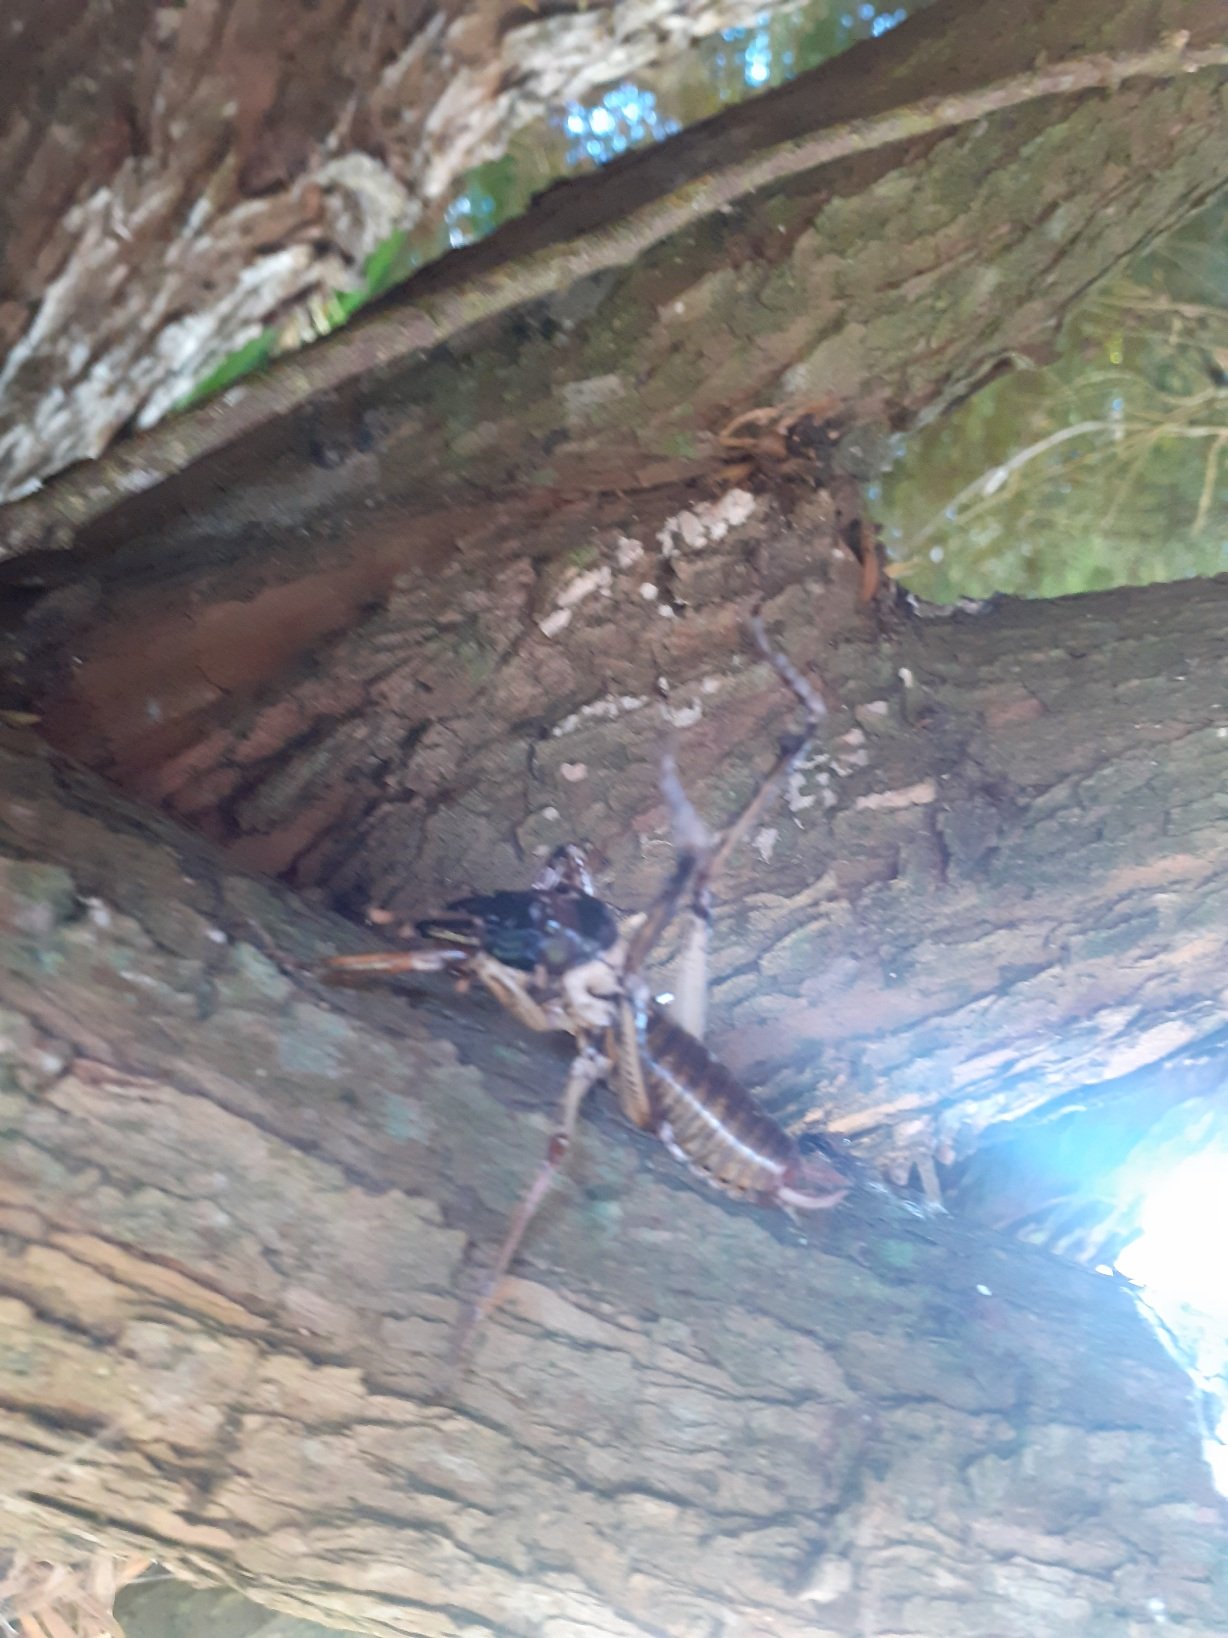
While doing the clutch line this big c*nt crawled on by, right next to my head while on my back under the front of the van, scared the shit out of me... so I put him in the tree and called it a day hah .
2 points
-
Wife wanted a long dinning table bought a 2.4M slab of cherrry? Wood measure twice and it actually test fitted the first time! turns out it’s a bit long once we put it in the lounge..... so have cut shorter belt sanding for hours sucks, maybe 1/3 of the way there now (should of hired a floor sander) recycled some legs from scrap at work2 points
-
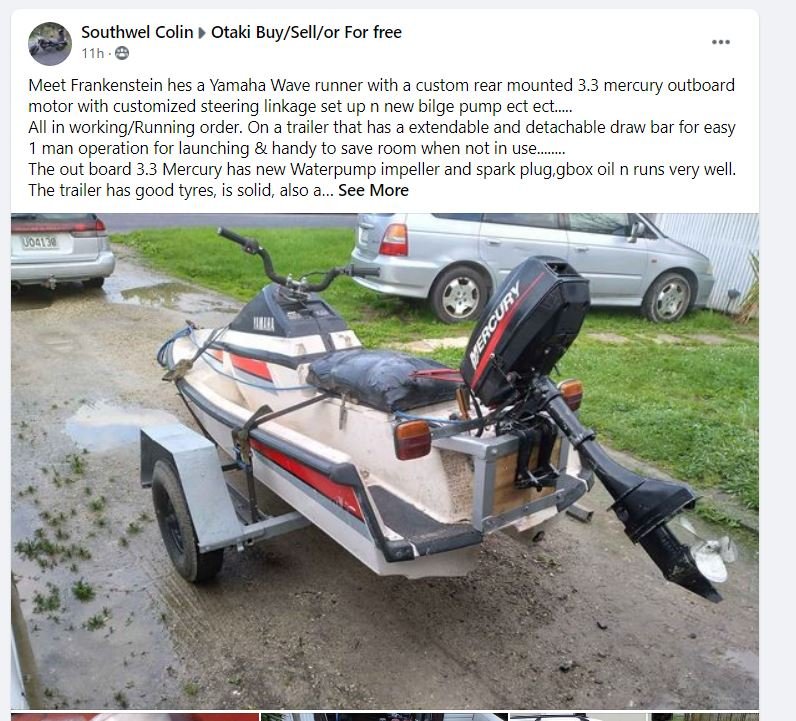
image-20170130_123129 by John Bell, on Flickr So the old man spotted this plastic bath toy at his local WOF spot a few years ago. They (not a marine workshop, a backwater automotive garage) were unable to make it run. The old man pestered them every six months for a while till they sold it to him on behalf of the owner for a reasonable price (for a lump of plastic). He then squirrelled it away in a barn until we built a shed at our place, we then squirrelled it away in my shed. I decided to take ownership of this project, and proceeded to do nothing with it, as is customary. I am far from knowledgeable about boats (or anything), but can run google and the telephone pretty well. It appears to be a Tuff Jet, they were built by a Whakatane based business for a while (now based down south). I believe this one to be a pretty early iteration, likely late nineties, early 2000's. Roto-moulded polyethylene 2.8m 2 seater jetboat. (Yet to put a tape measure over it, but later models are stretched an extra 400mm or so). Just over 300kg (I'd like to weigh it to confirm though), this one is fitted with a 2cylinder 787 Rotax as found in Seadoos of the late ninties. Quoted 110 Canadian HP. Some forum post on the internet says that the plastic hull has a UV warranty of 25 years, so hopefully the fact its been unused in sheds for the last 10 means I have more than 5 years of life in it. I poked around a bit and learnt that Seadoo used a highly advanced (for its time) all in one CDI that included an immobilizer using a security coded lanyard. Cool. My money was on that being quite shit, based on its resistance to do the sparks or allow the cranking. I was reluctant to bring it to a dealer to have its lanyard replaced / diagnosed until I knew the motor was better than it looks. Shorting the starter solenoid said it was quite fucked, and would not rotate, I freed it up, and a compression test confirmed, it was indeed as shit as it looked. IMG_20180926_183501 by John Bell, on Flickr SOMEBODIES BEEN IN HERE IMG_20180926_183510 by John Bell, on Flickr At this point it nothing happened for a few years while we brainstormed compact alternative powerplants that we were capable of making work. This would be a perfect opportunity to fit something modern, more efficient, and in known good condition. Naturally at this point I purchased the cheapest donor Jet-ski with the same engine I could find after trawling trademe and facebook marketplace relentlessly. I'll learn this lession twice. IMG_20200701_143340 by John Bell, on Flickr Amusingly the banana is supposed to make about 40hp more than a Jimny, and weigh about 1/3. IMG_20200701_165559 by John Bell, on Flickr WOAH IMG_20200701_165553 by John Bell, on Flickr RADICAL IMG_20200701_165544 by John Bell, on Flickr I feel (more) like a scumbag instantly. Popped it in the harbour one night after work, to try and assess it's health. 109576785_1549285395257880_4072391247589855252_n by John Bell, on Flickr 110336327_323032162200748_7293717375980309486_n by John Bell, on Flickr As you'd expect it had a dead battery, jumpstarting a thing that is always in gear is a bit awkward. My only experience of Jet-skis being a JS300 childs Jet-ski I was very impressed and thought it to be very good initially. Potato footage. It wasn't running 100% but appeared to go hard, until it stopped abruptly at wide open throttle in what suspiciously seemed like a heat seize, followed by a flat battery, followed by having to push it back about half a K across some oyster beds. NOICE. Speedo reckoned it was good for about 80km/h water speed though. I got a battery and did a compression test on the Banana yesterday, got an even ~130psi across both pistons, which doesn't seem massive, but its even, and it still runs and nangs the limiter so I think I'm gonna send it. So the Green Croc is covered in dust and reeks like 10 year old stale fuel, but now that @keltik and @Vintage Grumble have both purchased jetboats, its time I go and break down on a body of water with company, at some stage before summer I would like to swap powerplant, tidy up the plumbing and wiring, check carbs and fuel/oil system, and go get stranded somewhere. IMG_20201110_144127_1 by John Bell, on Flickr IMG_20201110_144119 by John Bell, on Flickr1 point
-
Project discussion: //oldschool.co.nz/index.php?/topic/40734-voldos-a40-farina/ I've been a fan of these things ever since I was a wee schnitzel and this came up so just had to grab it. Wendy and I went and picked it up today, we are both pretty happy with it! Super rare these days and although being dereg this body is really pretty solid and mostly complete. Sat in a farmers shed for 20years. Has 948cc A series, 8" drums (hydraulic front and mechanical rear). Countryman lift back so perfect for hound transportation. Plans are to get it running, sort the brakes out, quick coat of paint (has a hand brushed paintjob at the moment) and rereg. Then slam & cam and some period mods. A40 Farina's are legendary in classic racing and have quite the reputation as giant killers. Thing is currently at 170mm so will be able to get it decent looking without needing cert, yay. Pretty keen to run wide steels on crossplys and slide around at 30kph. Oh yeah and it has totally sweet tweed seats. Doesn't have original plates or papers so I am hoping I can get it reregistered without jumping through hoops. Have original WOF sticker with number etc on it so hopefully is enough evidence to suggest it was once on the road. Got it in at work so I can play around with it until my garage is built. Jeah.1 point
-
Looks mint. gona insulate the shed for late night pulls? i assume you have lots of mates now1 point
-
I'm pleased to announce this boat has successfully completed stringent reliability and performance trials including but not limited to... Shallow water performance Low speed maneuverability Higher speed spins and dicking around1 point
-
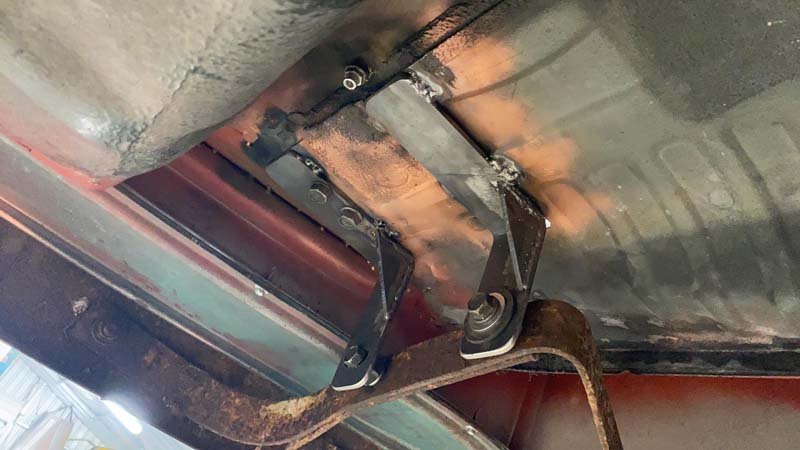
Finished up the bumper mounting brackets. 5x large plug welds down through the floor skins into them. Outer edge also has a strap on each side, which it is also plug welded through. Also filled the last of the holes in the sills. Have now painted a chassis black primer underneath, anywhere underseal did not exist. Seam sealer tomorrow. Then spray on underseal.
1 point
-
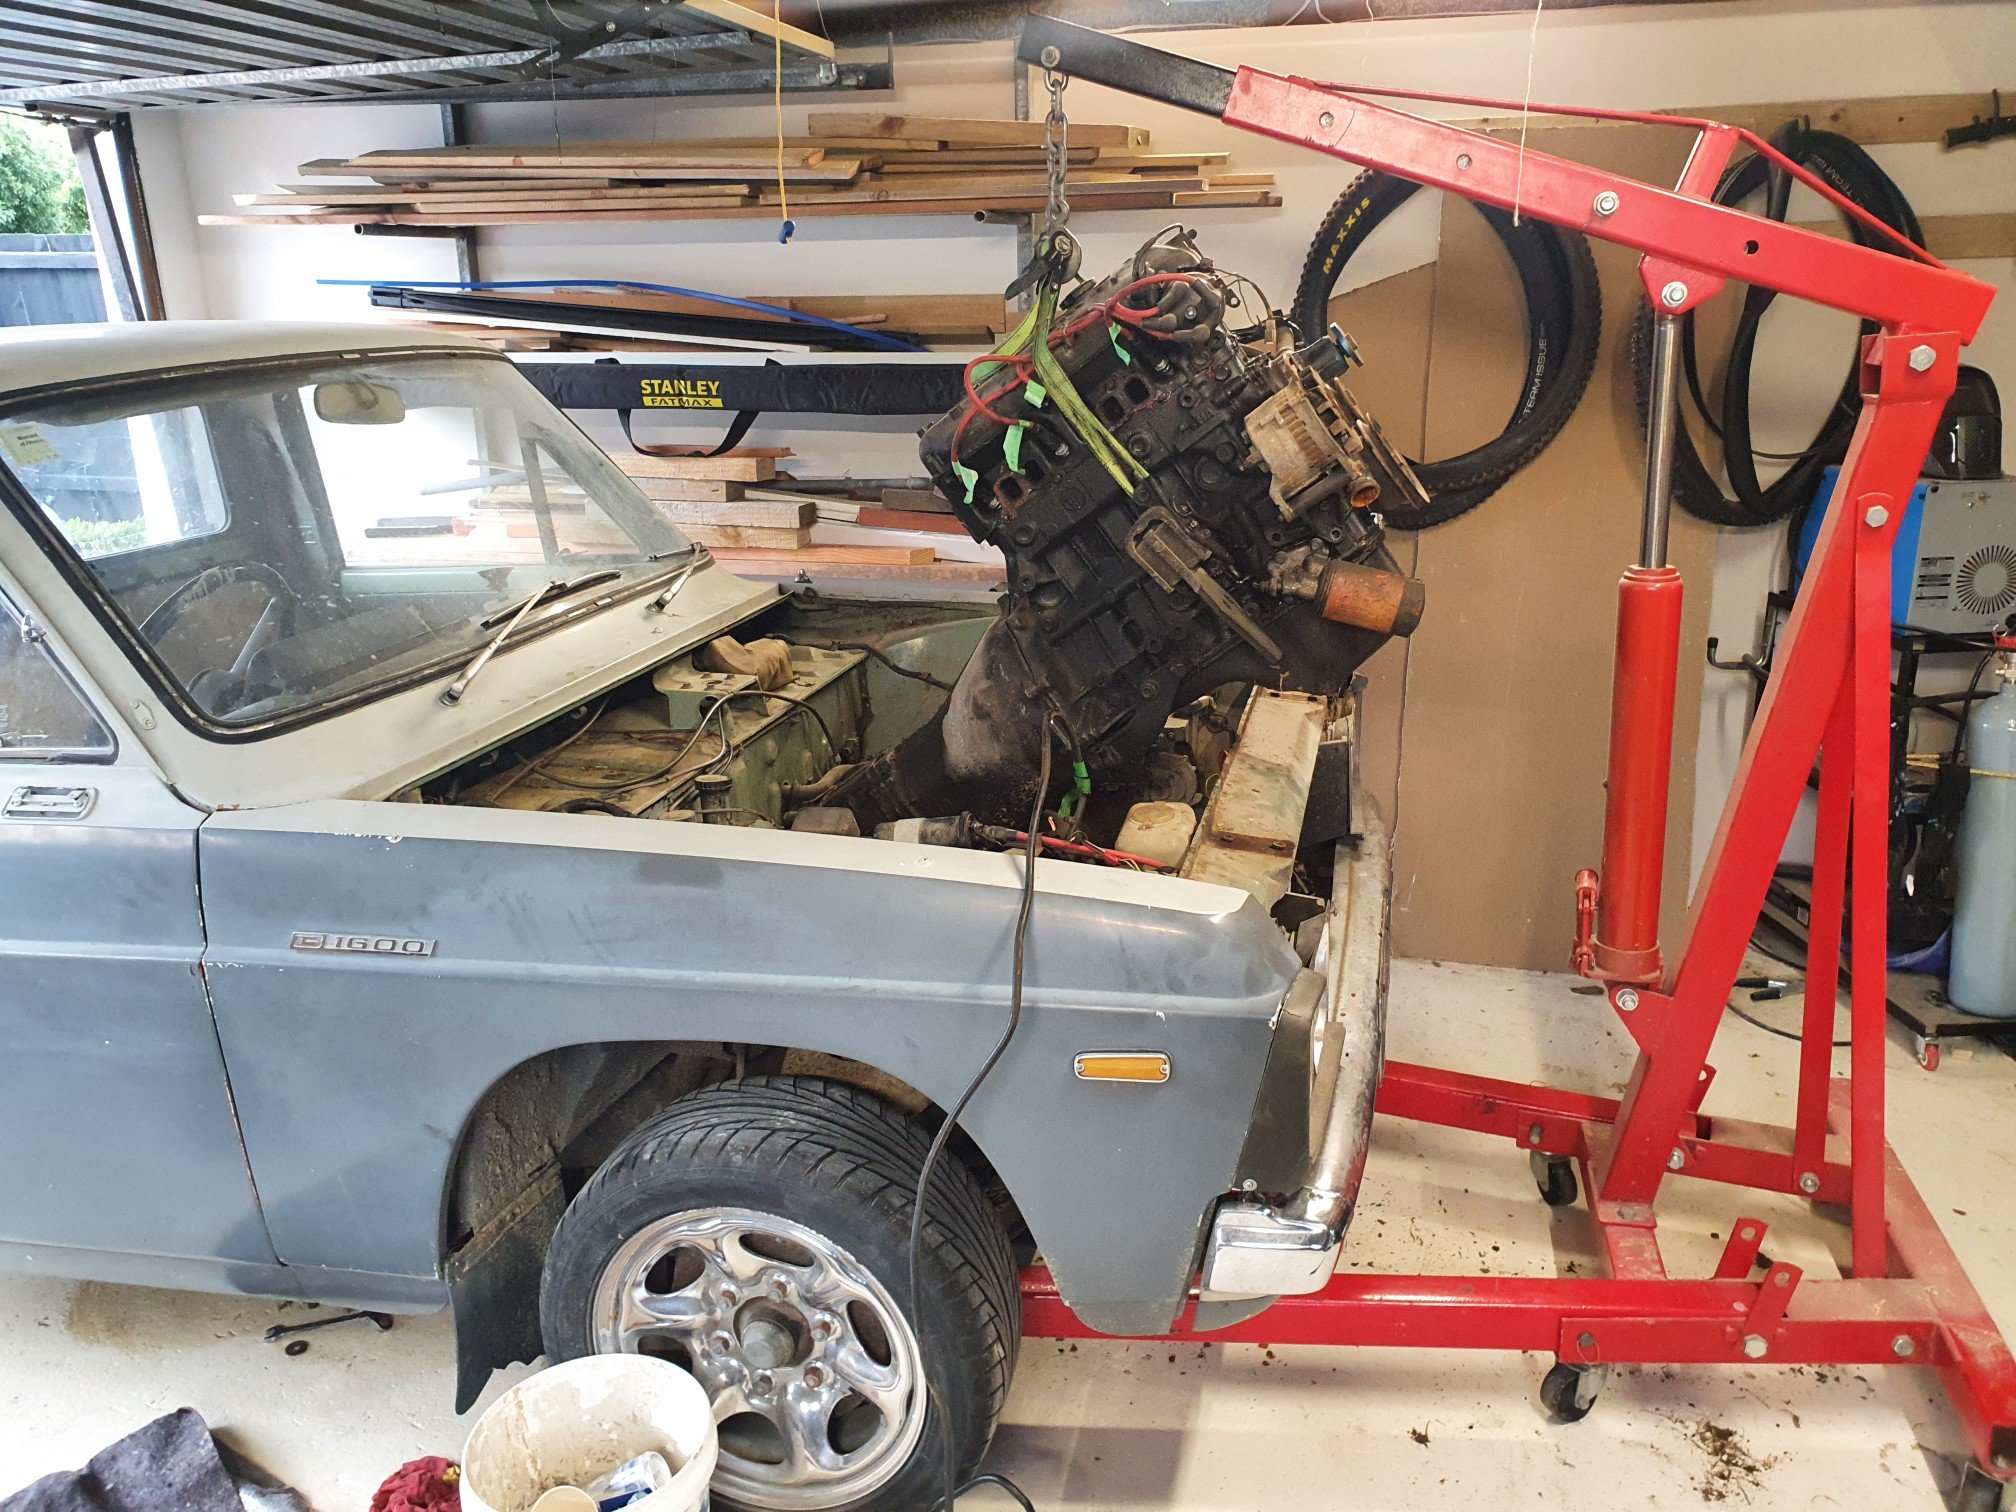
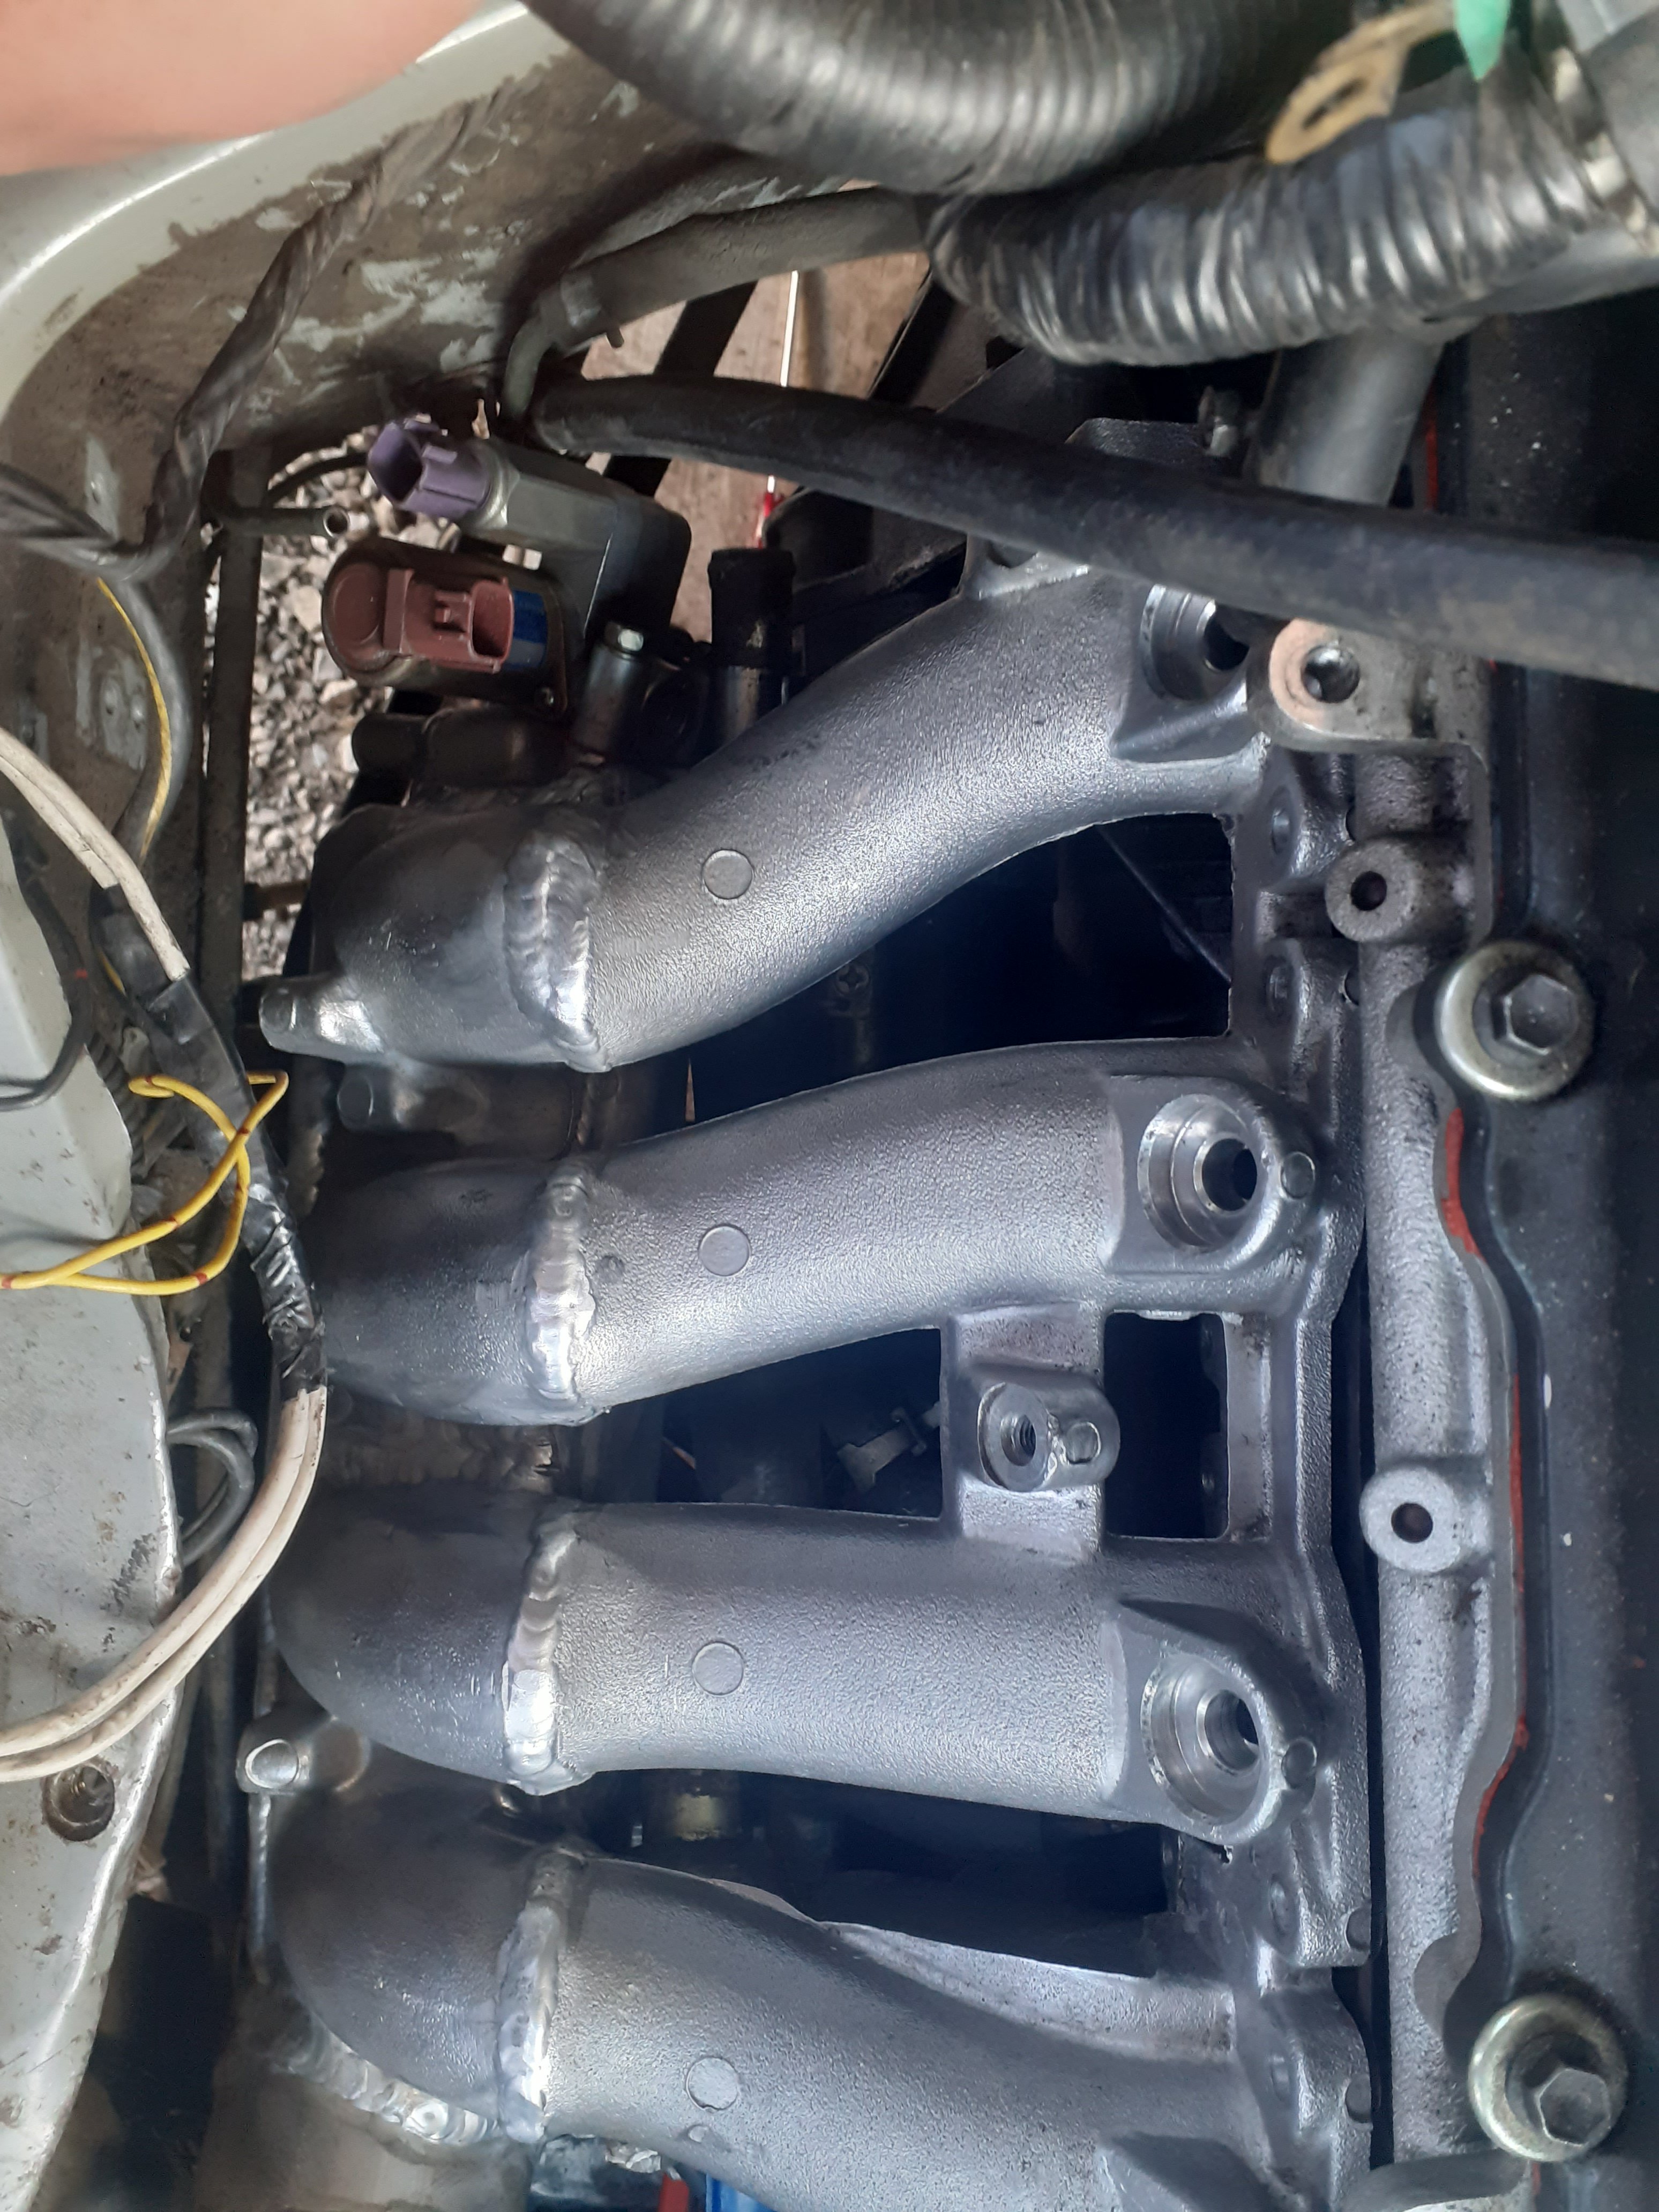
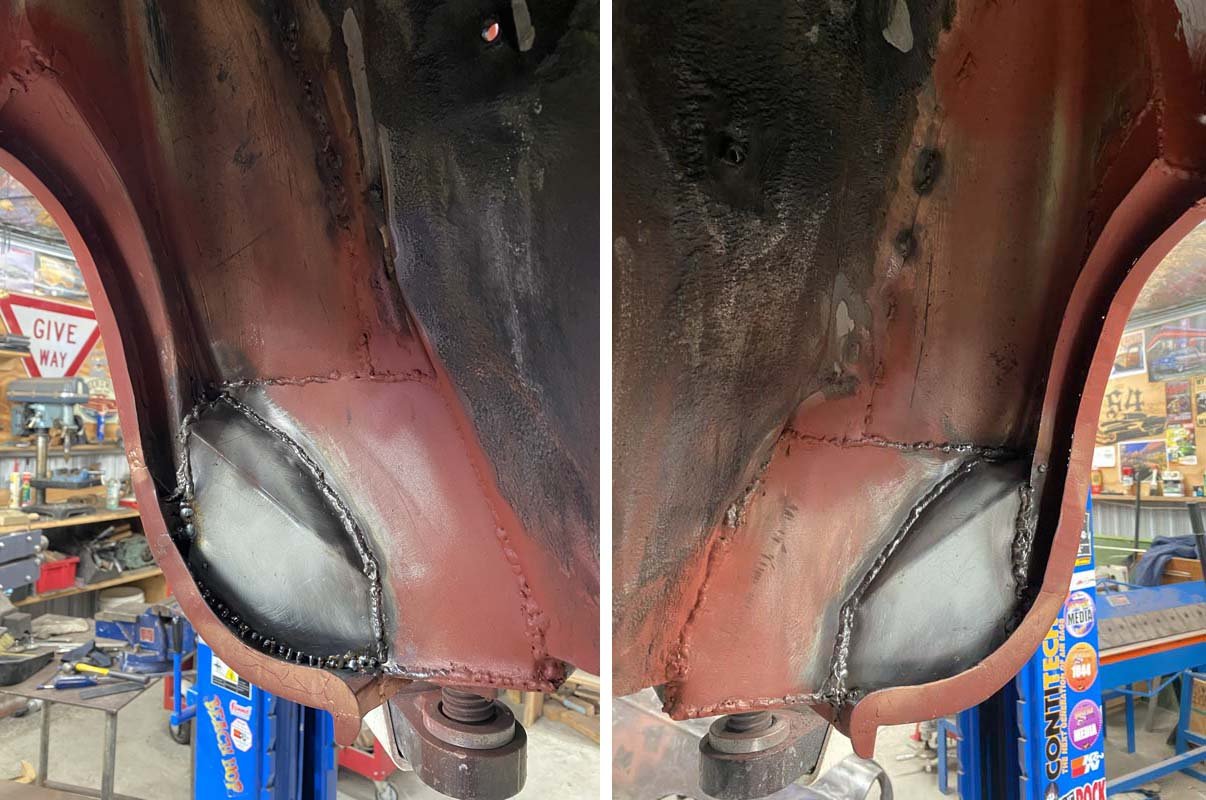
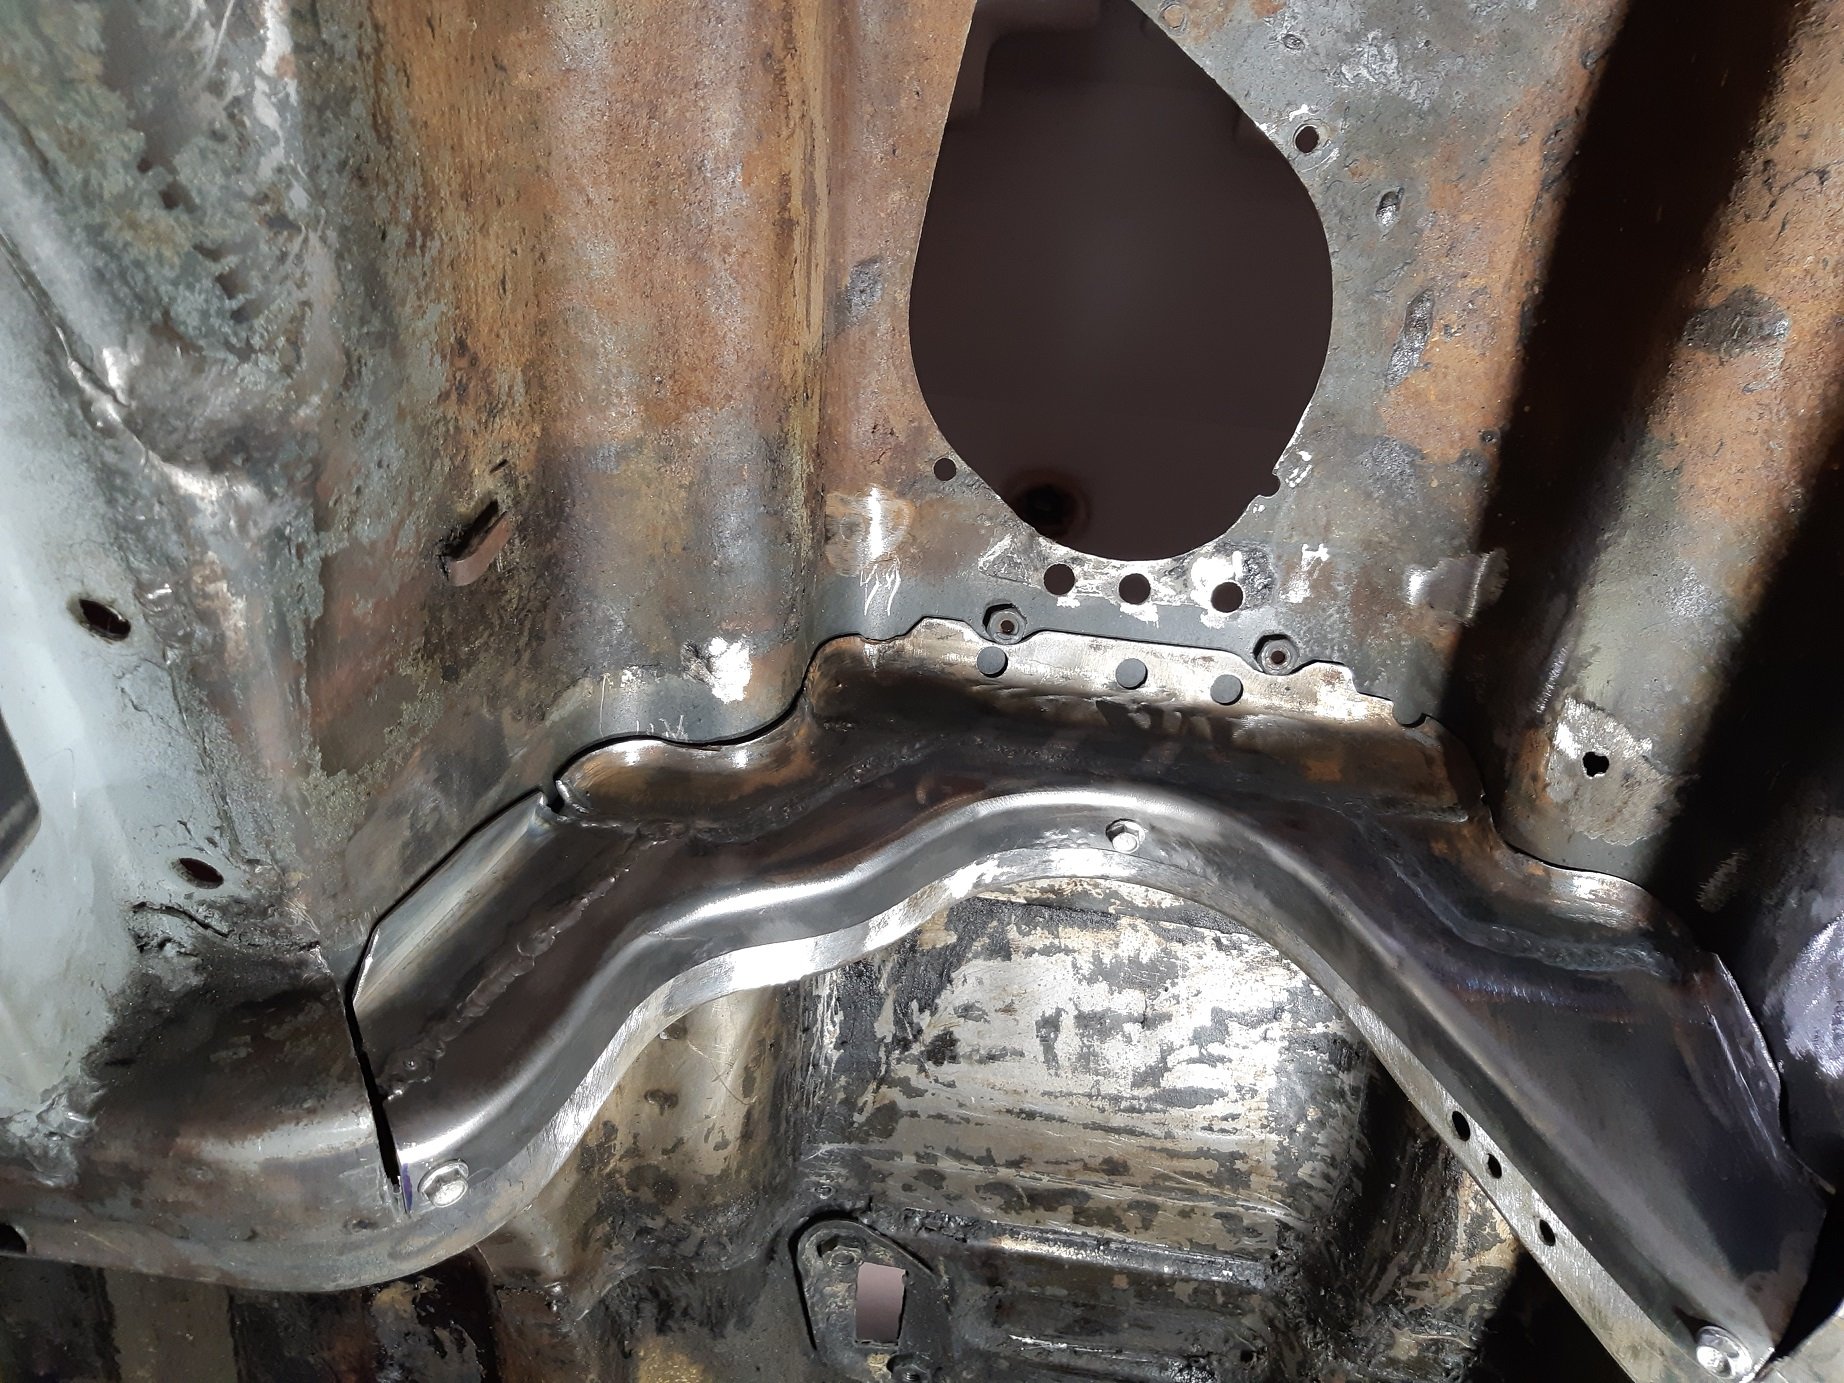
Since I had decided on the path the extractors needed to go to miss the steering, I decided to take the engine out and do the rest of the extractors on the engine stand. I have some stuff to do while it's out. Like fix the one rusty bit on the firewall. Clean up the rest of the tar seam sealer. Remove the big seam where the firewall joins the transmission tunnel, this will get me a bit more room around the back of the engine. I also cut out part of the cross member that makes it really hard to install the gearbox and temporarily tekscrewed in the modified section I made several posts back. Was a filthy job. I was getting showered with dirt and grinding dust. Fortunately it was cold, so I could wear overalls and a beanie and safety glasses and ear defenders without dying of heat exhaustion.
1 point
-
goddam dude, this project just keeps stepping up a notch1 point
-
This side facing Kerb1 point
-
I was probably about ready to pack it in for the afternoon and start looking for problems, when we realised the engine bay was full of smoke and it started pumping out the vents under the dash. It seems to have an exhaust leak, and I think is struggling to run on its own fumes. An engine mount as also failed so its flopping about a bit in there. I wouldn't say 100%, but runs a whoole lot more consistantly with the ute tray taken off. Filming is hard Built in smoker IMG_20201219_171149 by John Bell, on Flickr IMG_20201219_171156 by John Bell, on Flickr Also, kinda liking the look of it with the tray/hood off better. IMG_20201219_181107_1 by John Bell, on Flickr IMG_20201219_181149_1 by John Bell, on Flickr IMG_20201219_162657 by John Bell, on Flickr1 point
-
Between filling the intake grate with lake weed, and intermittently running like a bag of dicks, it was a bit lame initially. It would start off strong but get to the point where you got 100% power or a stumbling surging 20%, but run progressively worse the longer you persevered. When it went well it'd skim along pretty well with two of us in it. IMG_20201219_155248 by John Bell, on Flickr IMG_20201219_155144 by John Bell, on Flickr1 point
-
Had been referring to this as a green croc (distasteful shoe) up until now. But @Vintage Grumble and my wife made the comparison to a council green wheelie bin the other day. I believe its the same material, So currently thinking about garbage related potential names. Considering branding it with 'NO HOT ASHES', or 'GREEN WASTE' or similar. Lets hear your suggestions. I think its customary for boat names to be weak wordplay so keep that in mind. This afternoon I tentatively buttoned up the wiring, threw the ute tray on the back, rinsed the dust off quickly, and met @Vintage Grumble and @keltik up at Bonniedoon to see how quickly it would sink or otherwise fail.1 point
-
So yeah, thanks to Mr @keltik we got the new old motor in the hole and bolted down. Spent a little bit of time reattaching the lines for the oiler, fuel etc etc. Because using the entire electrics from the donor ski with a forward mounted motor and different hull, all the wiring was too short in some places and too long in others, spent a while lengthening some bits (and coiling other bits up in big loops). No speedo in this hull as no spinny wheel speed sensor and I CBF mounting it, have ordered an AliExpress GPS one to bang in the dash. Have managed to get both the trim angle, fuel level gauge and oil low light to function. The fuel sender in both of them were not working, did some bodging, soldering wires to the board on the sender to bypass the problem hiding somewhere in some epoxy. I'm yet to confirm if the oil pump is primed and functioning, but as I'll show soon, I think its working in some capacity. Will shorten and tidy up excessively long battery leads at some point also. Boring picture is boring. IMG_20201219_182000 by John Bell, on Flickr1 point
-
I don't. I used to try and make "booth" with sheets but it makes no difference. The overspray gets everywhere. But, this primer dust doesn't stick and eventually it gets cleaned off everything. I don't spray much clear really. That shit sticks to everything but I don't seem to have to much of a problem with that. So, in summary, Shit goes everywhere.1 point
-
wait till he sprays the red1 point
-
Save the Banana!
1 point
-
@keltik insisted that I pull finger and offered to come give a hand to make some things happen. Today we removed the dead motor from the green one and gave the engine bay a quick wipe down, pulled the fuel tank and rinsed out most of the orange sludge, pulled the oil tank and gave it a slight rinse. Everything is pretty dank. IMG_20201115_120527 by John Bell, on Flickr IMG_20201115_125803 by John Bell, on Flickr We then turned to the donor Banana and set about removing the working motor, and wiring etc. IMG_20201115_140215_1 by John Bell, on Flickr While the donor boat has the same motor, its more mid/front mounted when compared to the Green boat. I've since worked out that there was a hull change between '96 and '97 Seadoo XP models. The problem we found is that the boat required a splined coupling on the end of the crank for the rear mounted engine, and the front mounted donor ski had a different rubber flexi coupling thing for the longboi driveshaft. Spent a bit of time headscratching and bending bars unscrewing coupling from the crank, thankfully it got them swapped over. IMG_20201115_172626_1 by John Bell, on Flickr IMG_20201115_140209_1 by John Bell, on Flickr The donor motor has an aftermarket tune pipe and cute filters, sadly the aftermarket pipe won't easily fit under the seat, and have reverted back to the factory short boi. IMG_20201115_163048_1 by John Bell, on Flickr Got it back into the spot. Going to try the jet unit that is in there for now, and see about swapping the other if something is rooted. Will need to sort out the water plumbing, fuel, oil, the wiring somewhat, and figure out how to shim the motor to get it aligned with the pump properly. Big boi no fit IMG_20201115_172512_1 by John Bell, on Flickr Very pleased with the progress, I would have likely given up for the day when finding those couplings were different.1 point
-
1 point
-
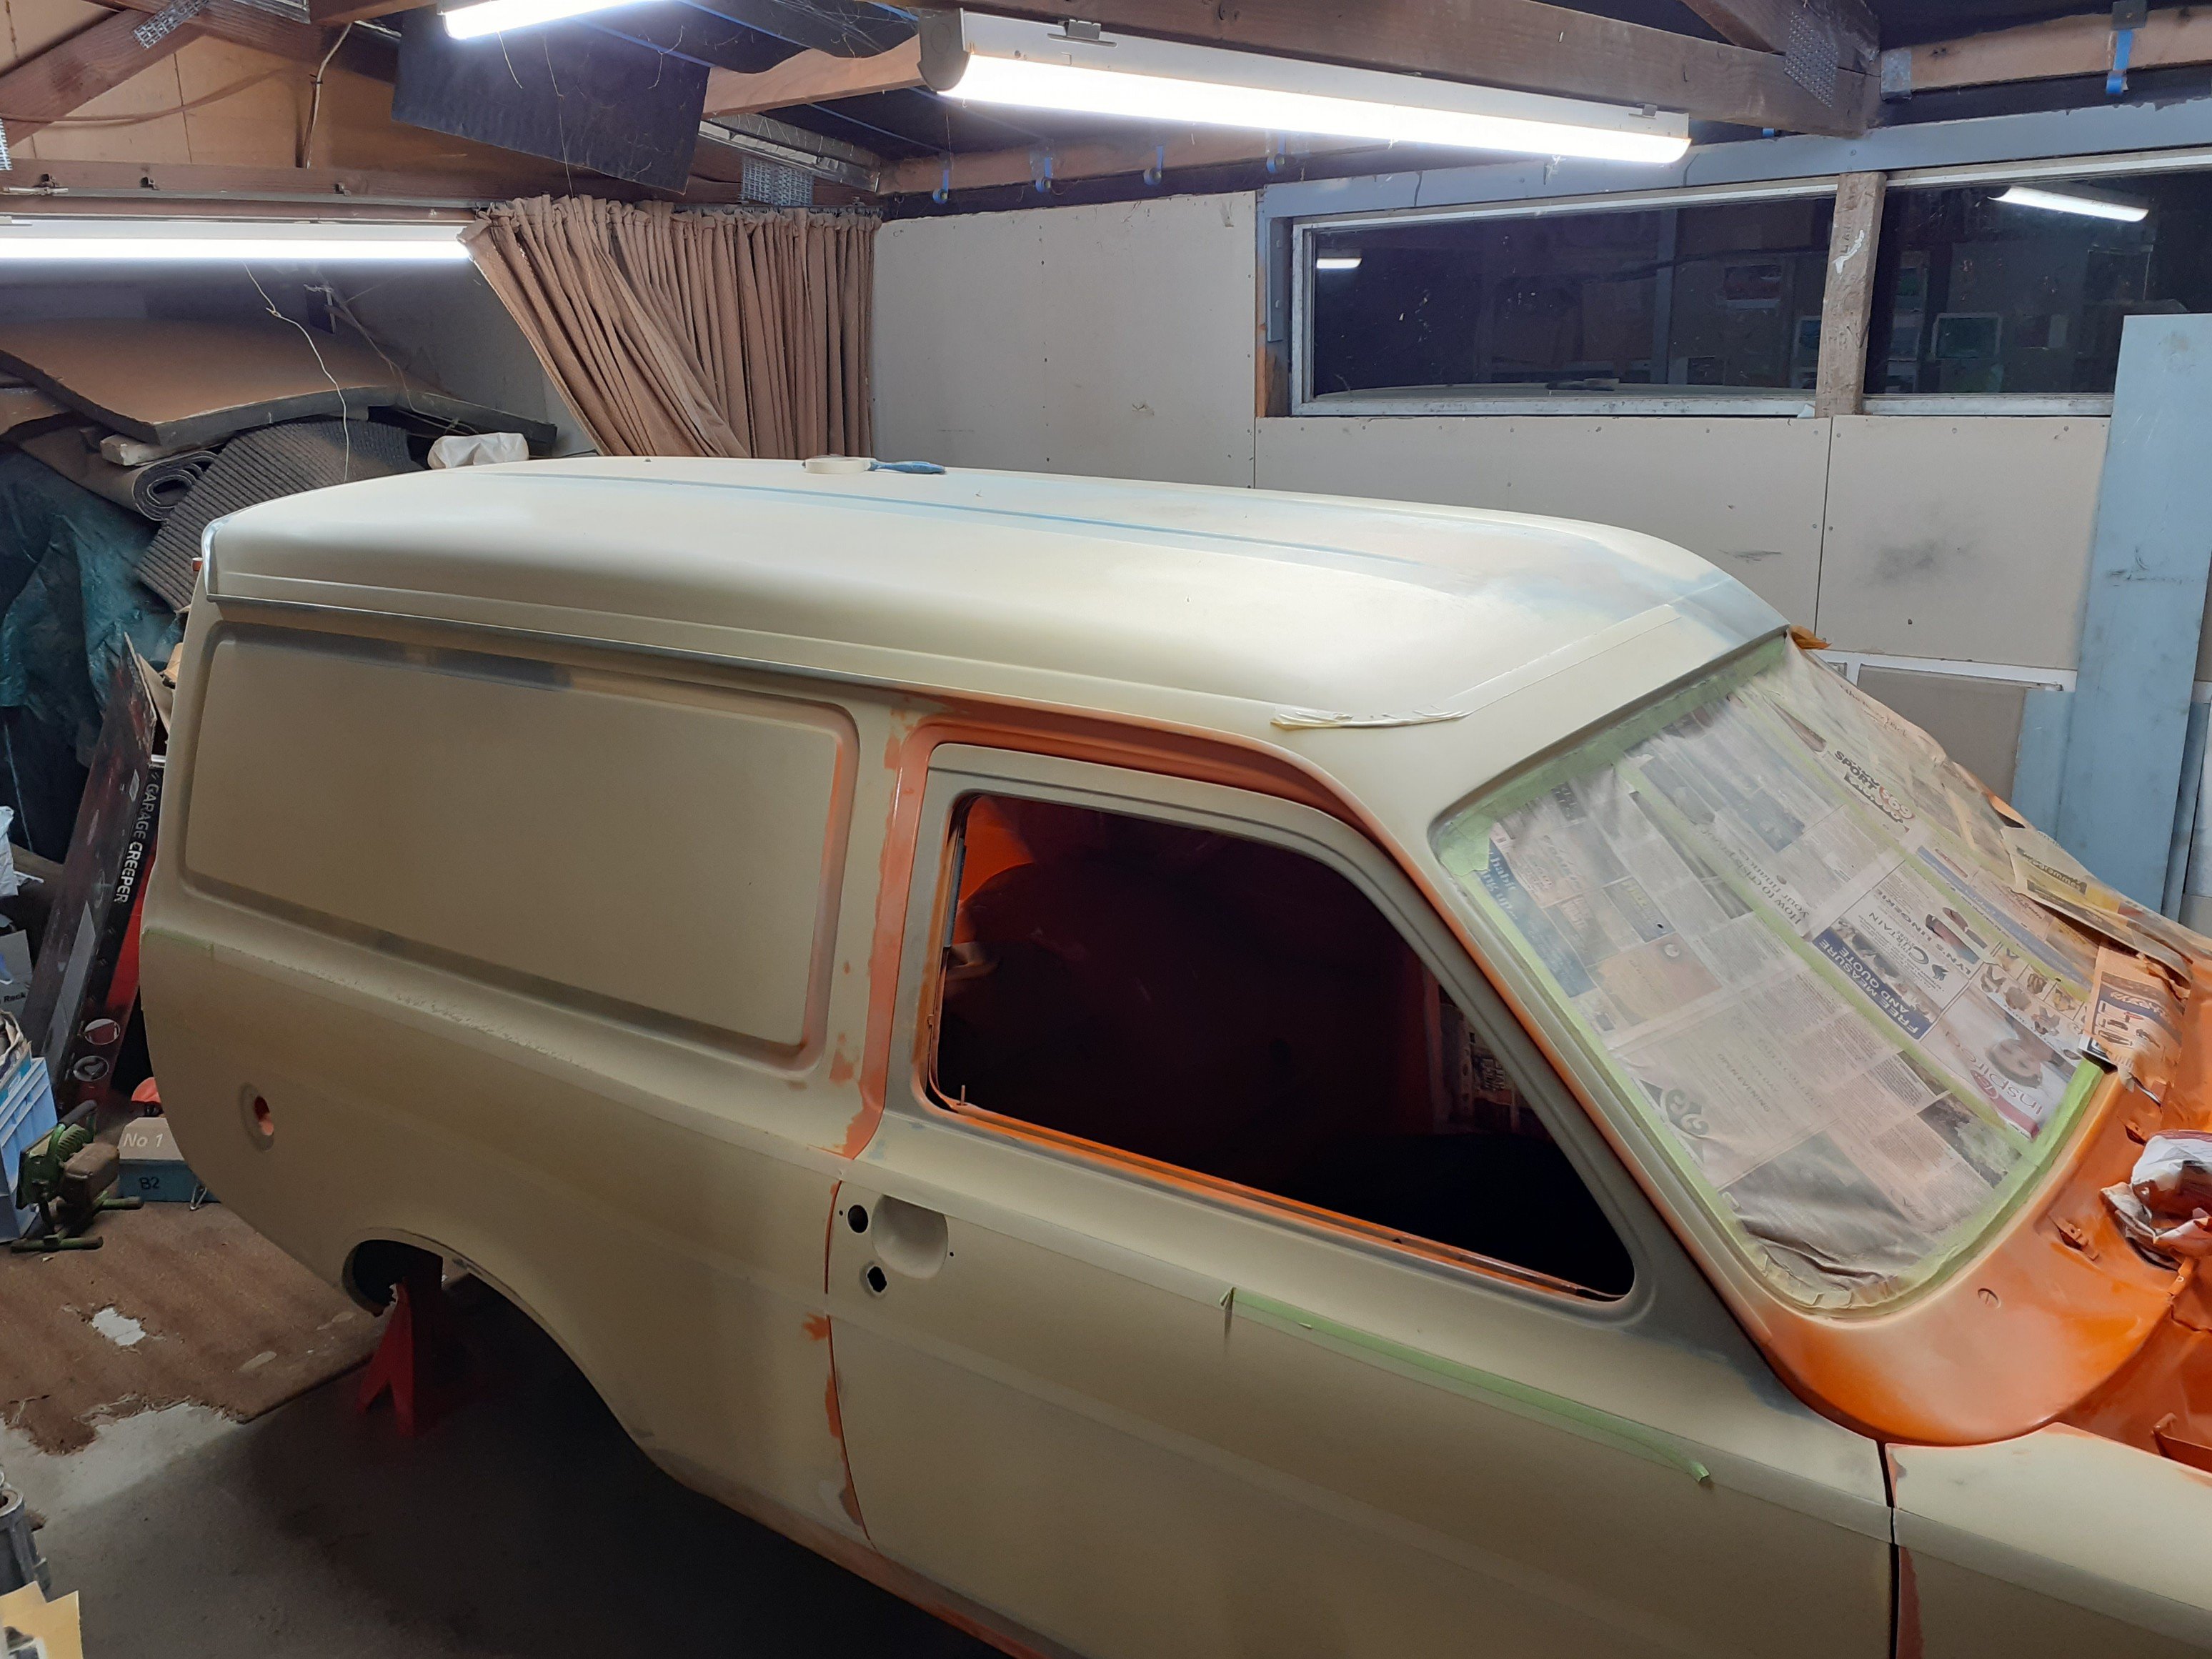
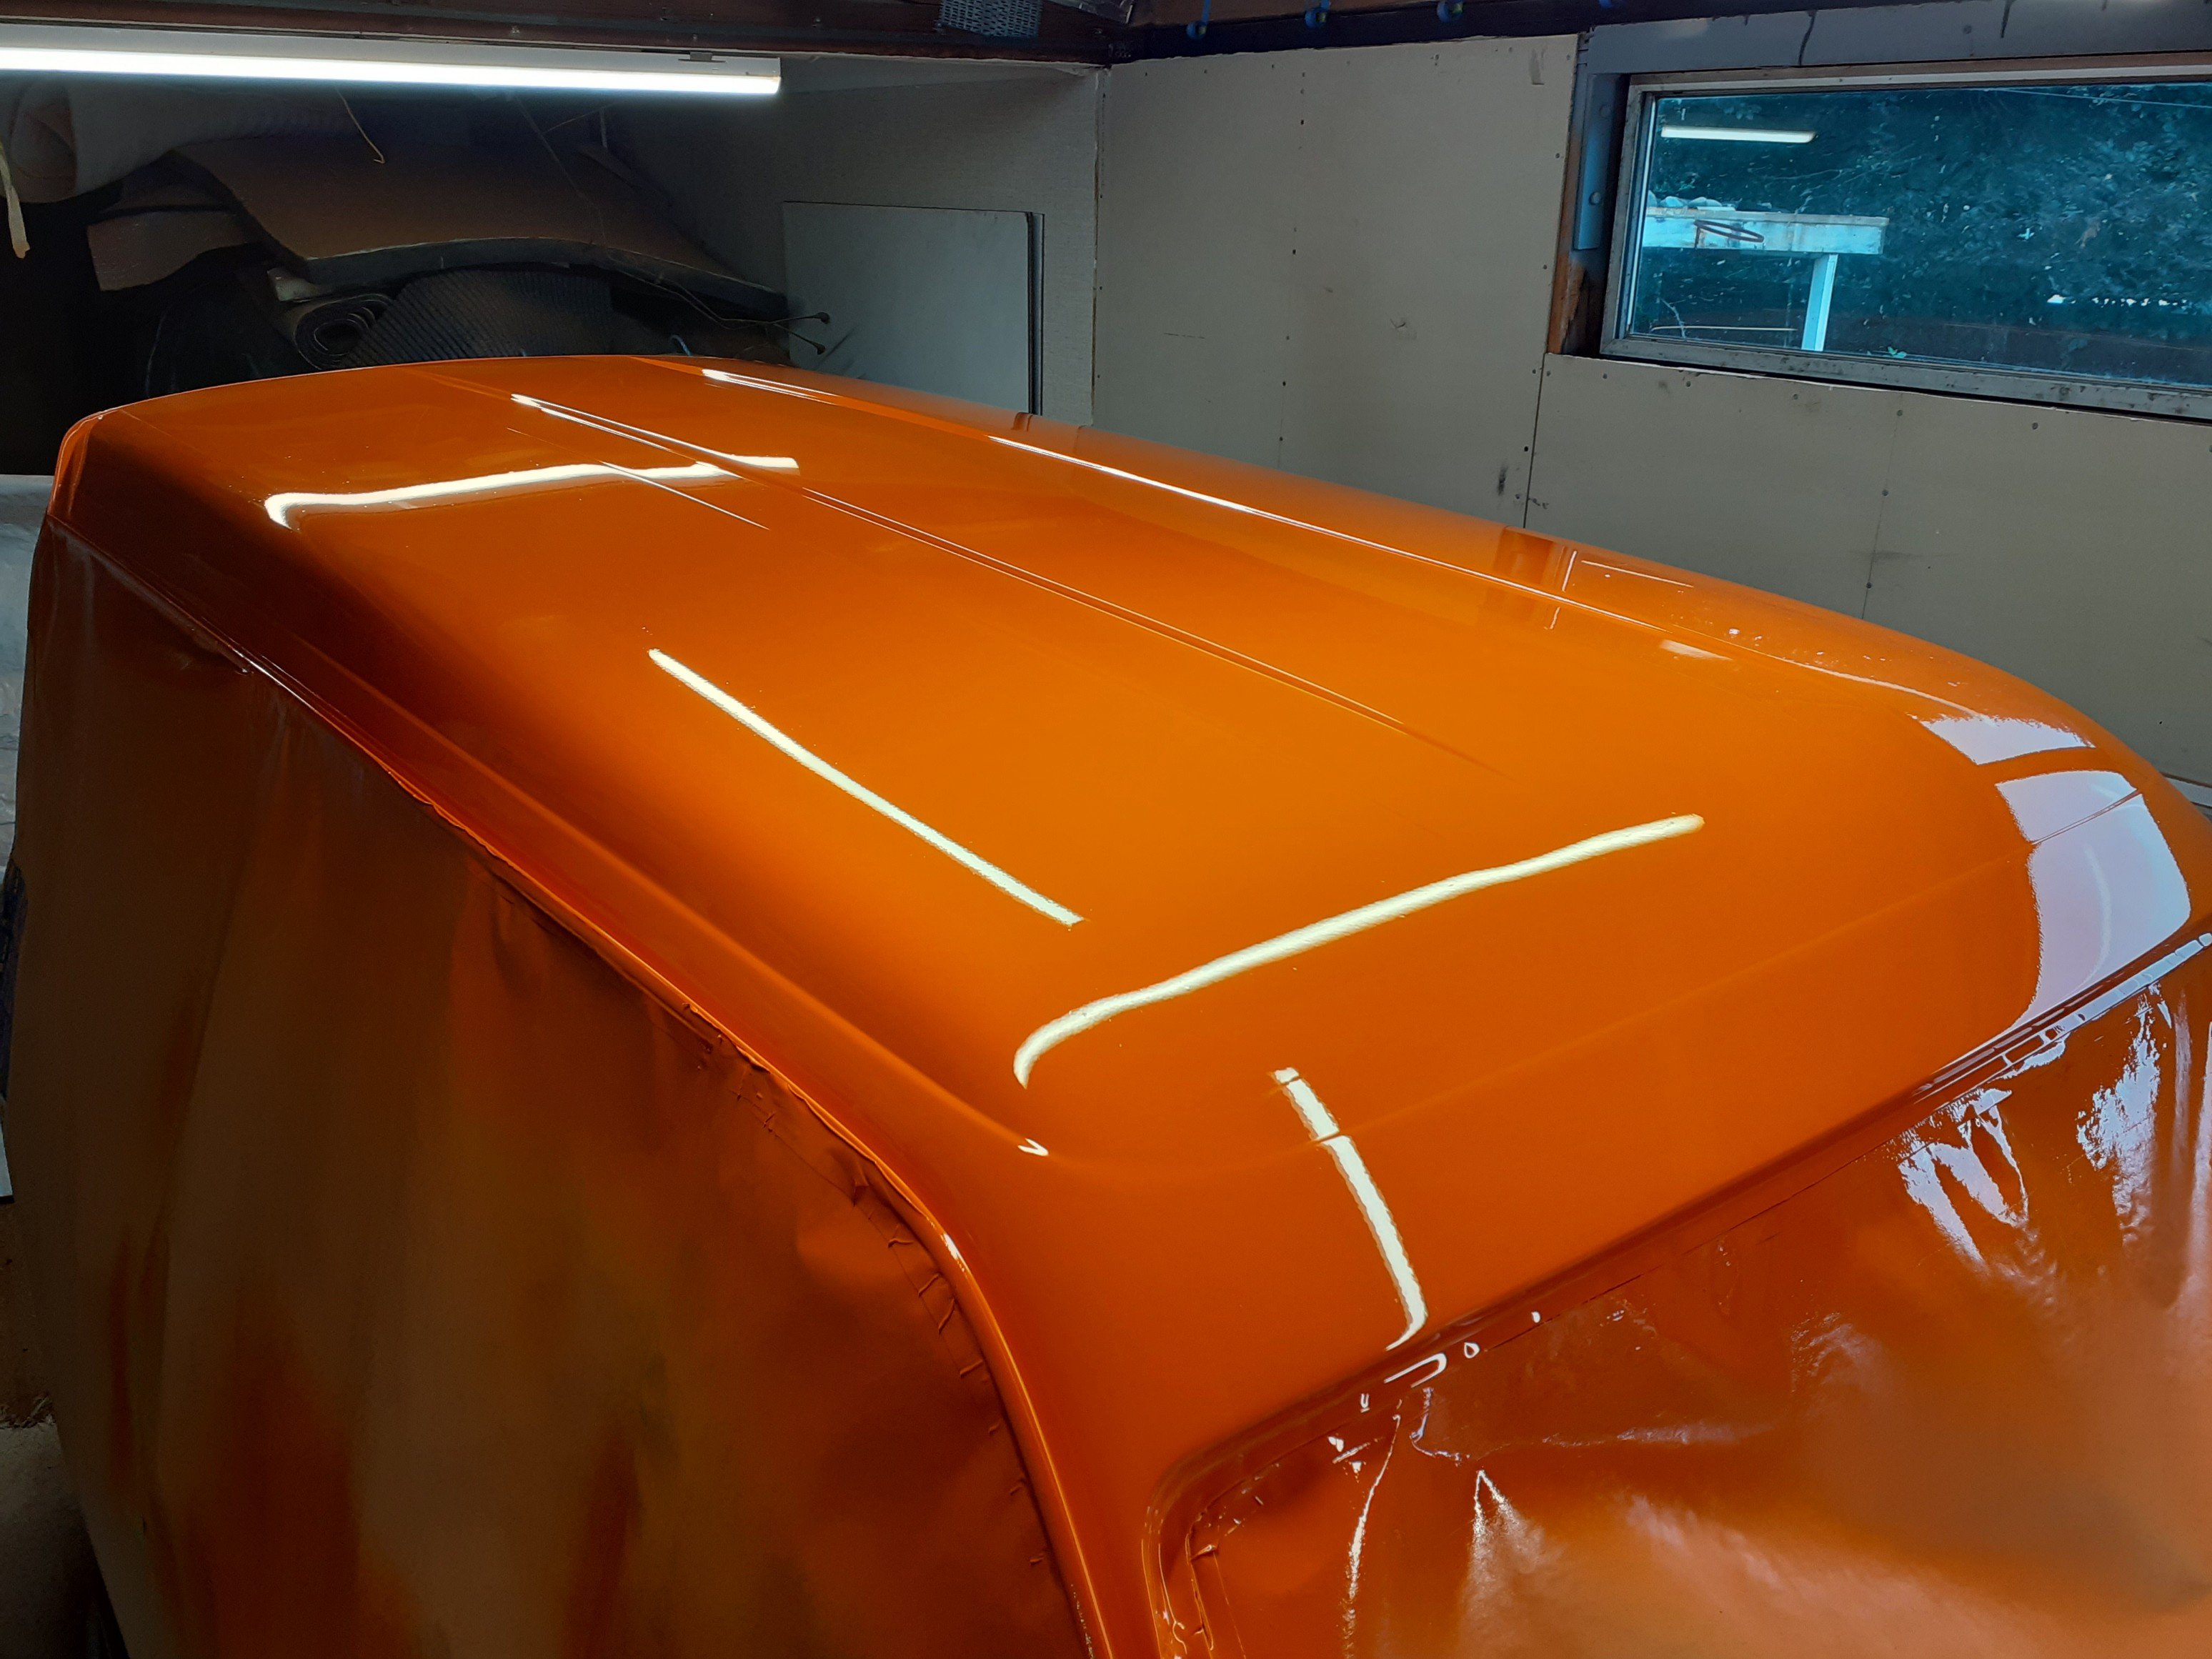
Finally getting back into this after a few months away. Have decided to paint the outside in two sections which hopefully makes it a bit more manageable. The obvious way was to section off the roof. The other reason for doing it this way is to ensure there is plenty of paint in the gutters which are prone to rust. By sectioning it off, it gets painted when the roof is done, and again when the sides get done. This ensures maximum paint without making a mess. Have been sanding for the last couple weeks. My weak little office arms really struggled with painting the roof today but I'm pretty happy with the outcome.
1 point


.thumb.jpeg.b39a639a8ff8a614681c3c9dca730a70.jpeg)


This leaderboard is set to Auckland/GMT+12:00