
Leaderboard


Popular Content
Showing content with the highest reputation on 04/20/19 in all areas
-
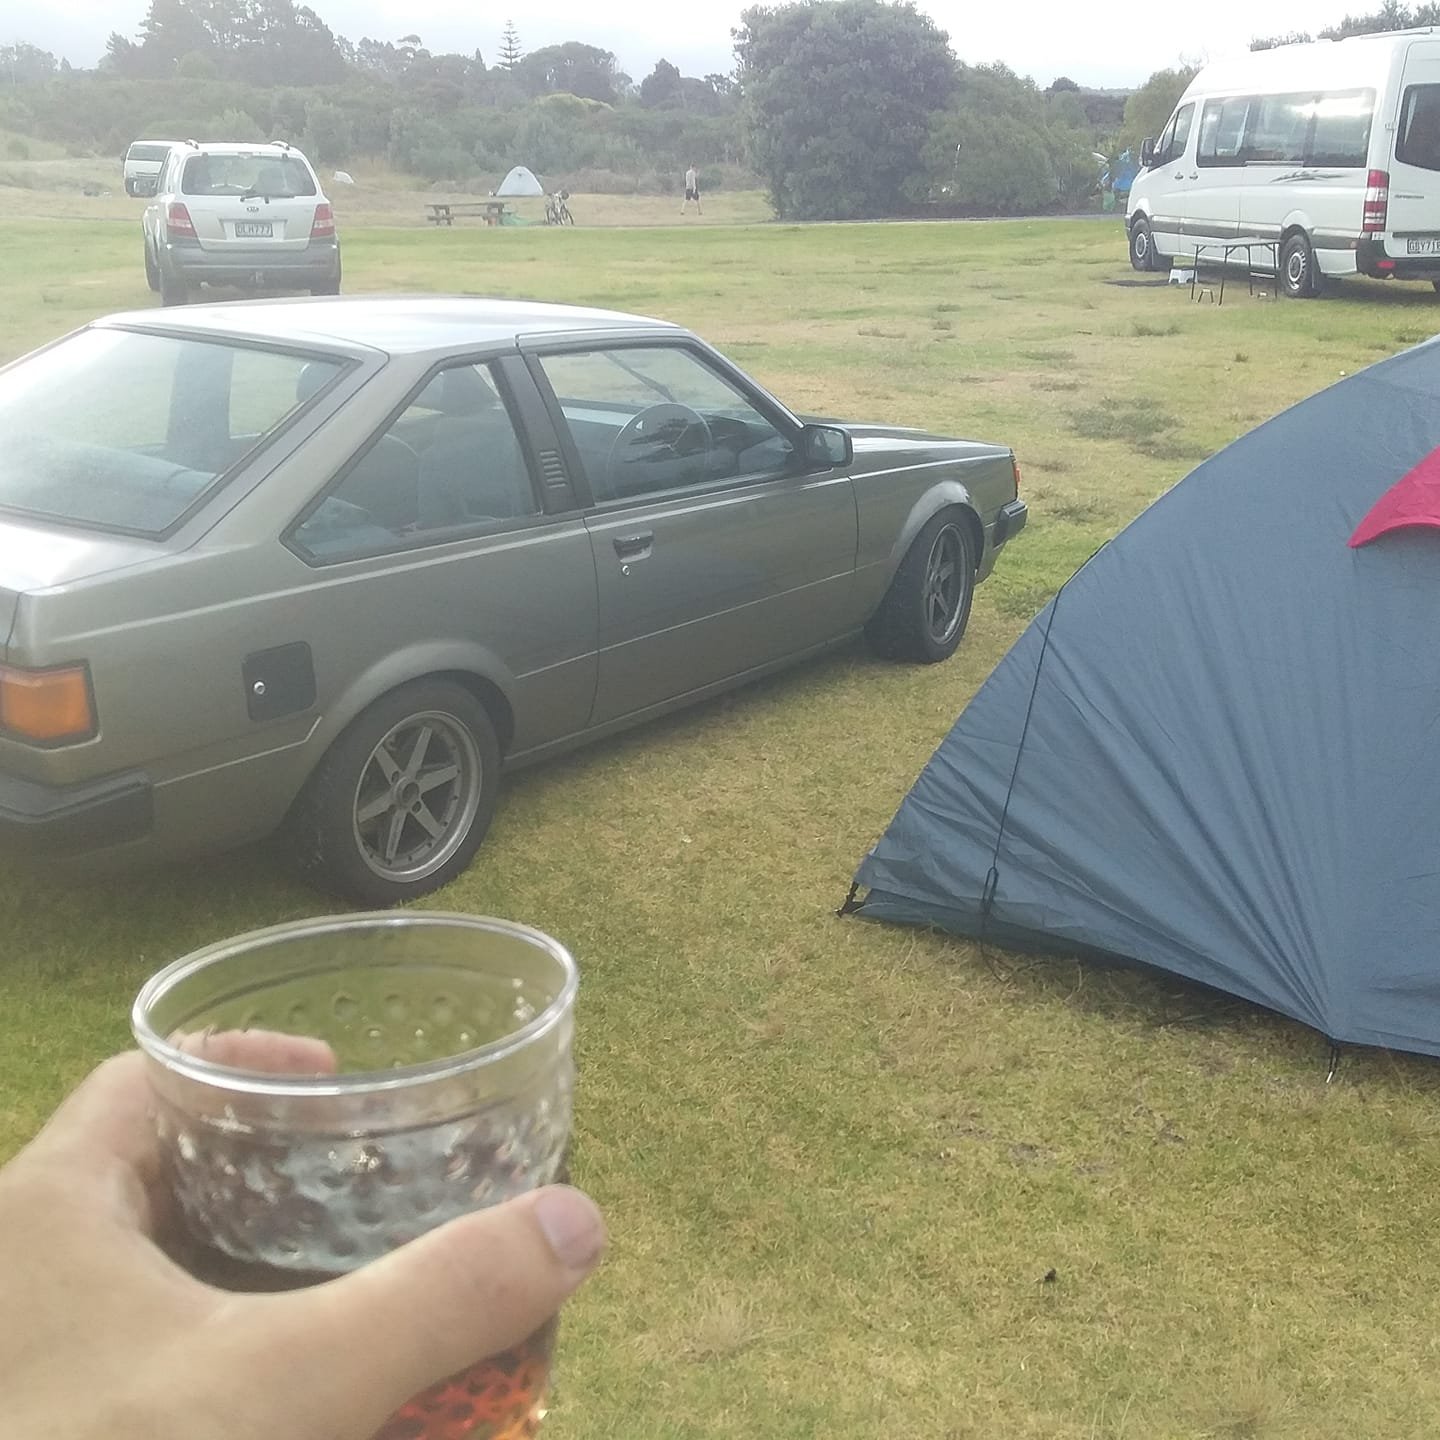
Added a bigdog dirt scooter to the nang collection today although this one does more of a brap than a nang. Im impressed to be honest for my first proper big bike. Has some fancy bits like a Trailtec Vapor Dash thats needs to be mounted so I can see it better plus get the tach working, aftermarket bars and some shiny bits on the engine. Came with a pile of spares and dirt rims with brand new tyres which will be handy when I wanna go adv boomer biking7 points
-
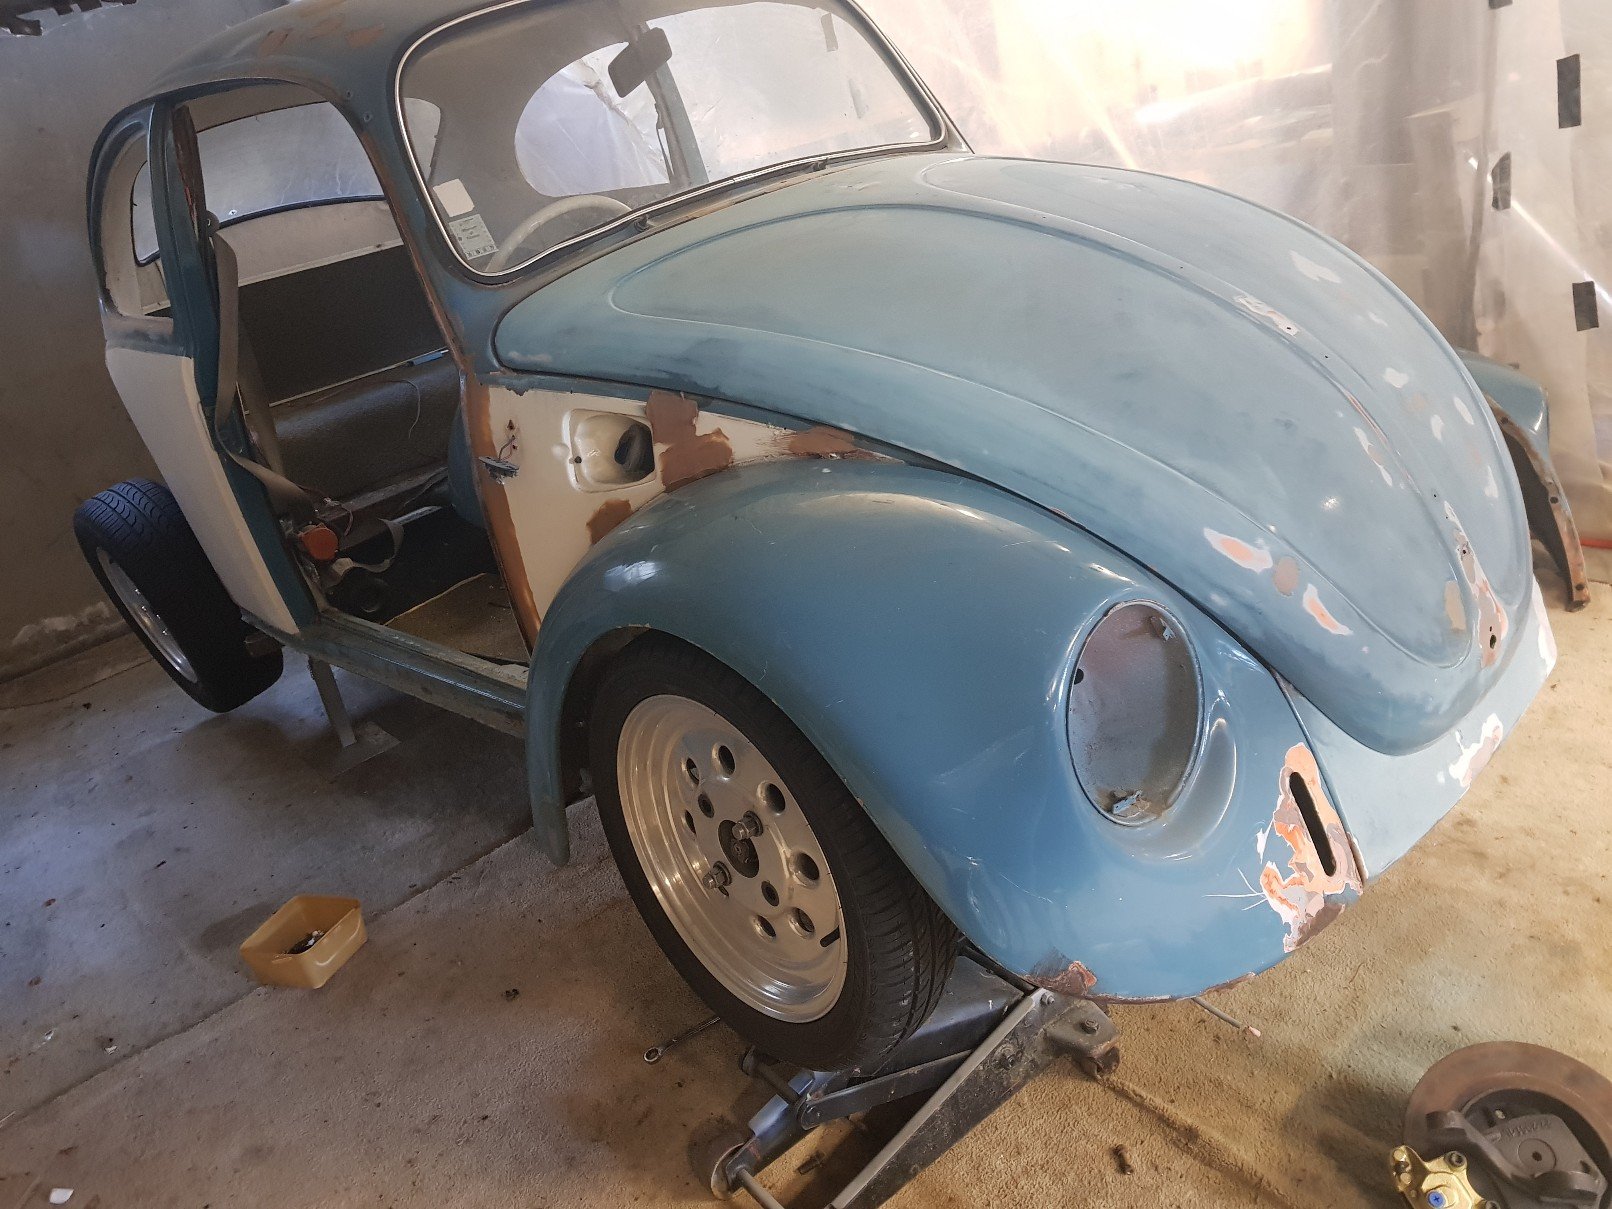
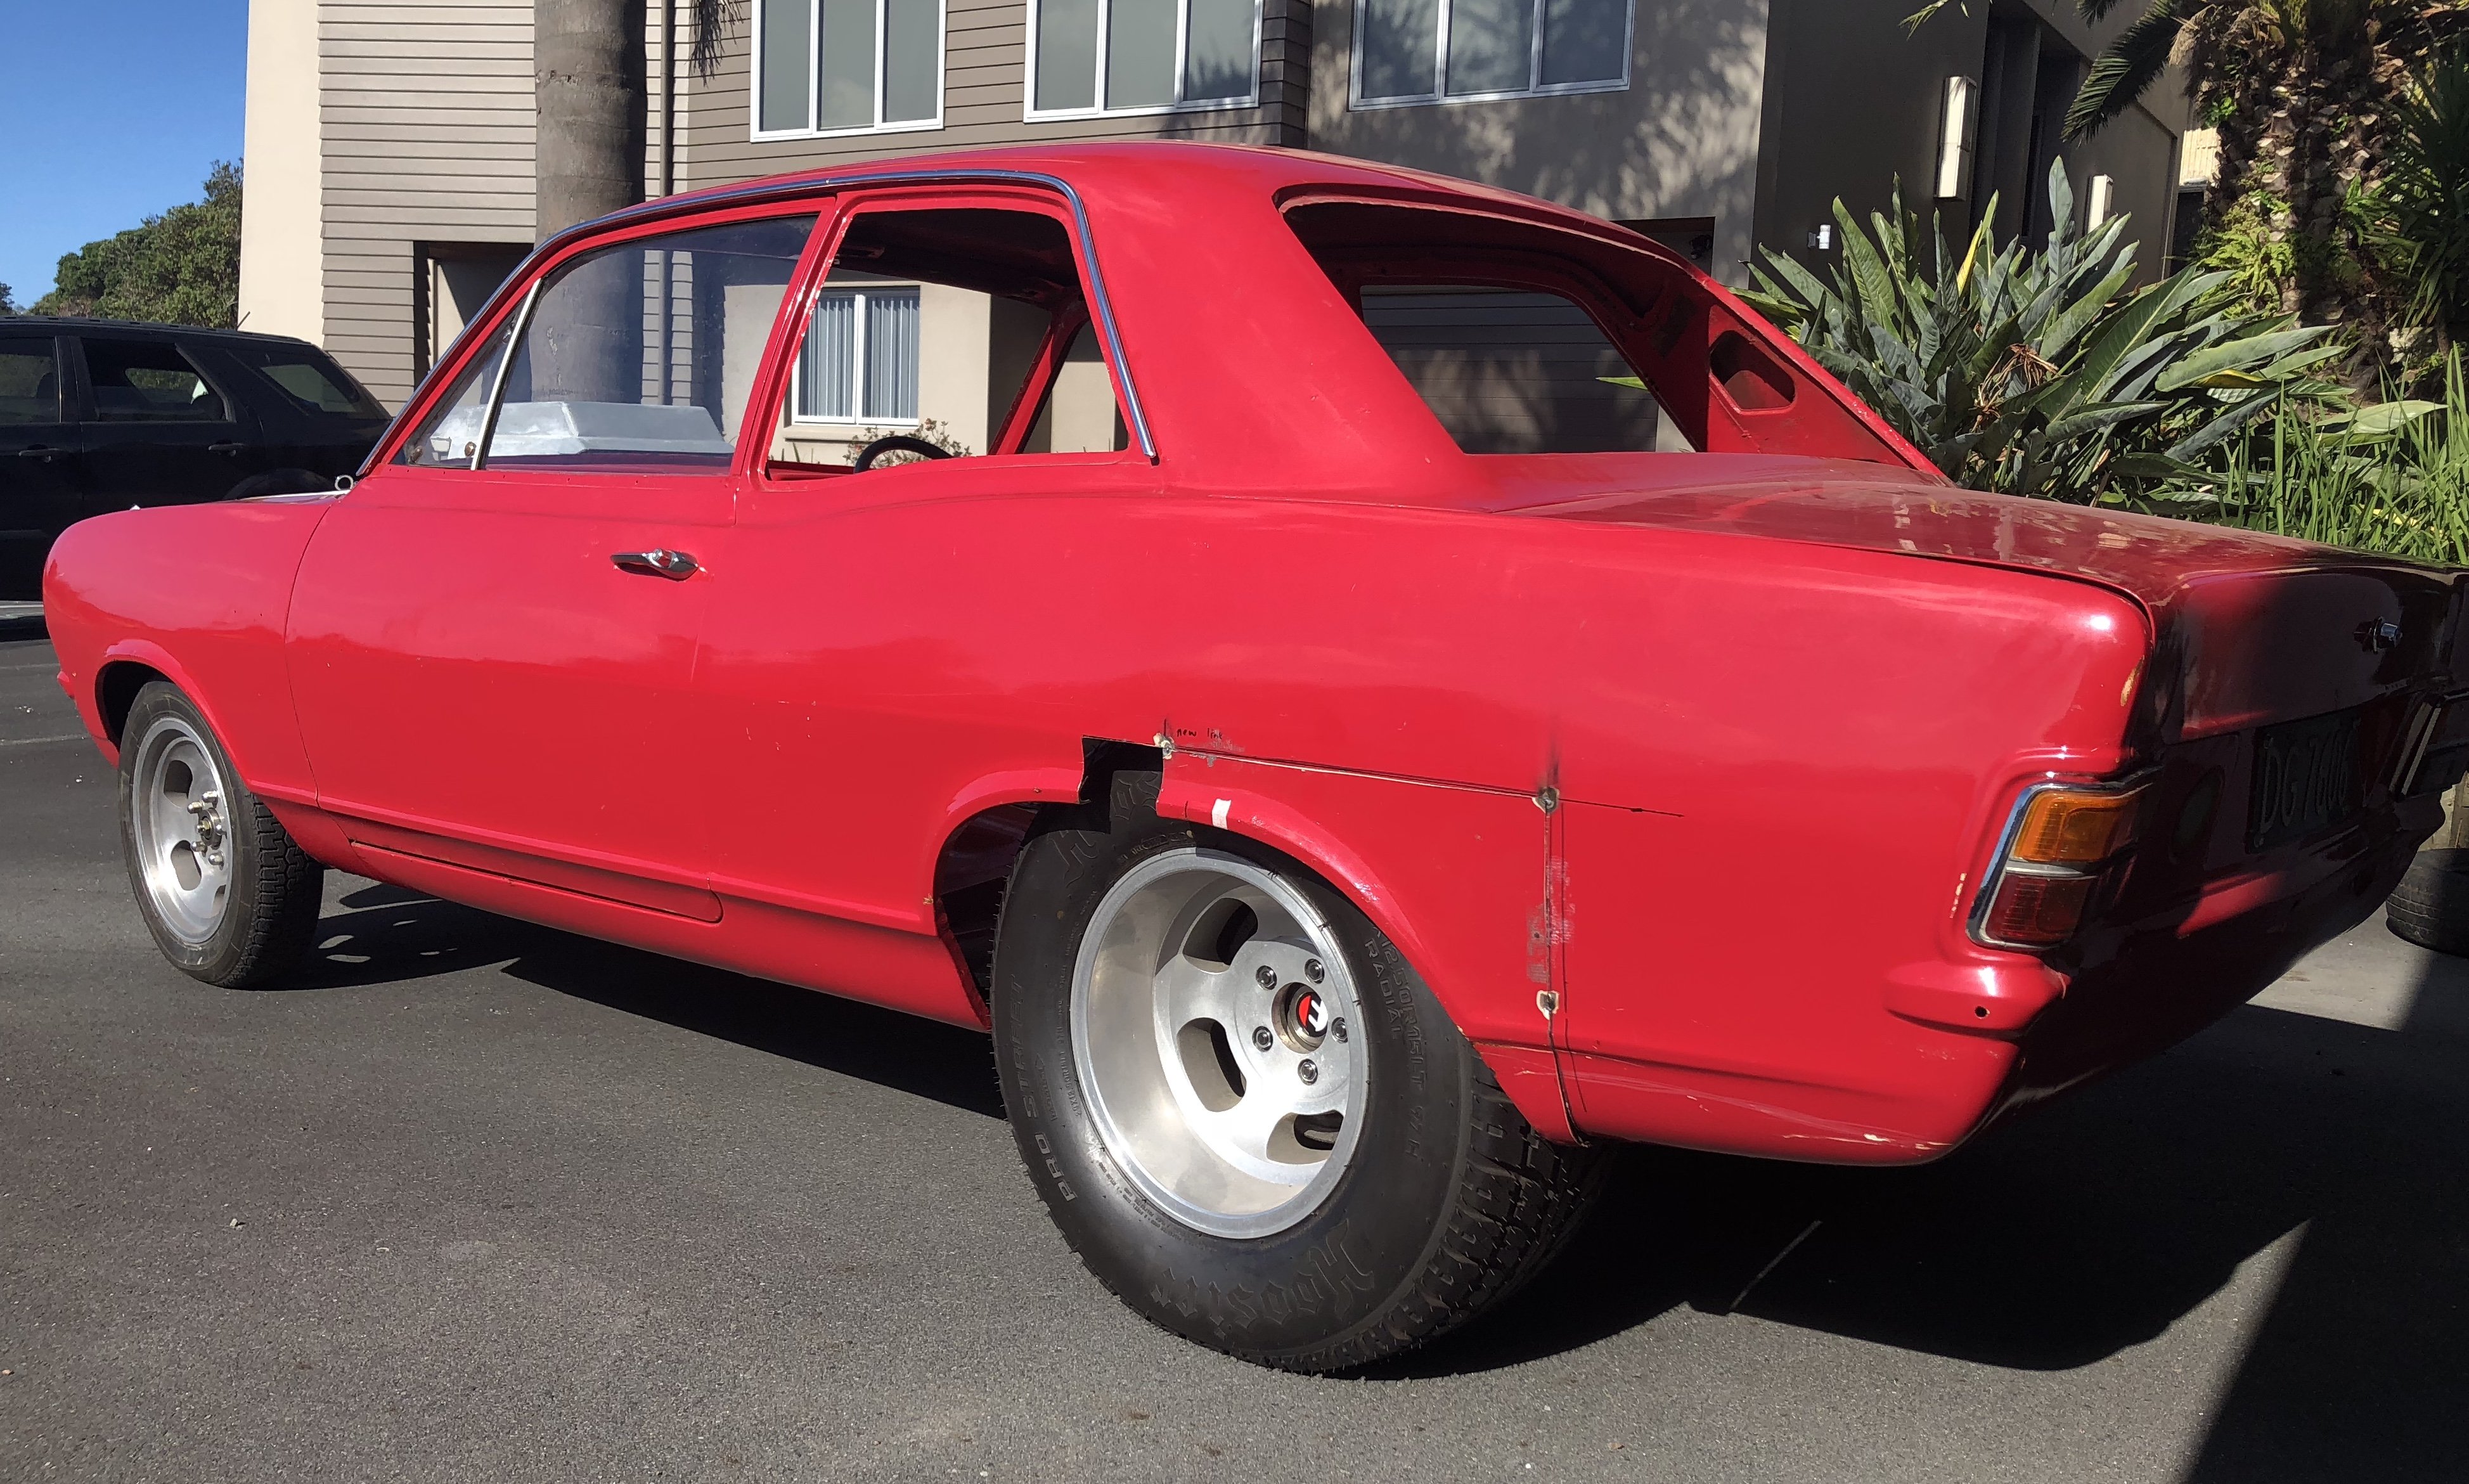
Haters gonna hate.. but i LOVE the 80s/90s drag look. Test fit (was hard as suspension arms werent retained by anything) to see if i need a narrowed beam. I do.
 5 points
 -
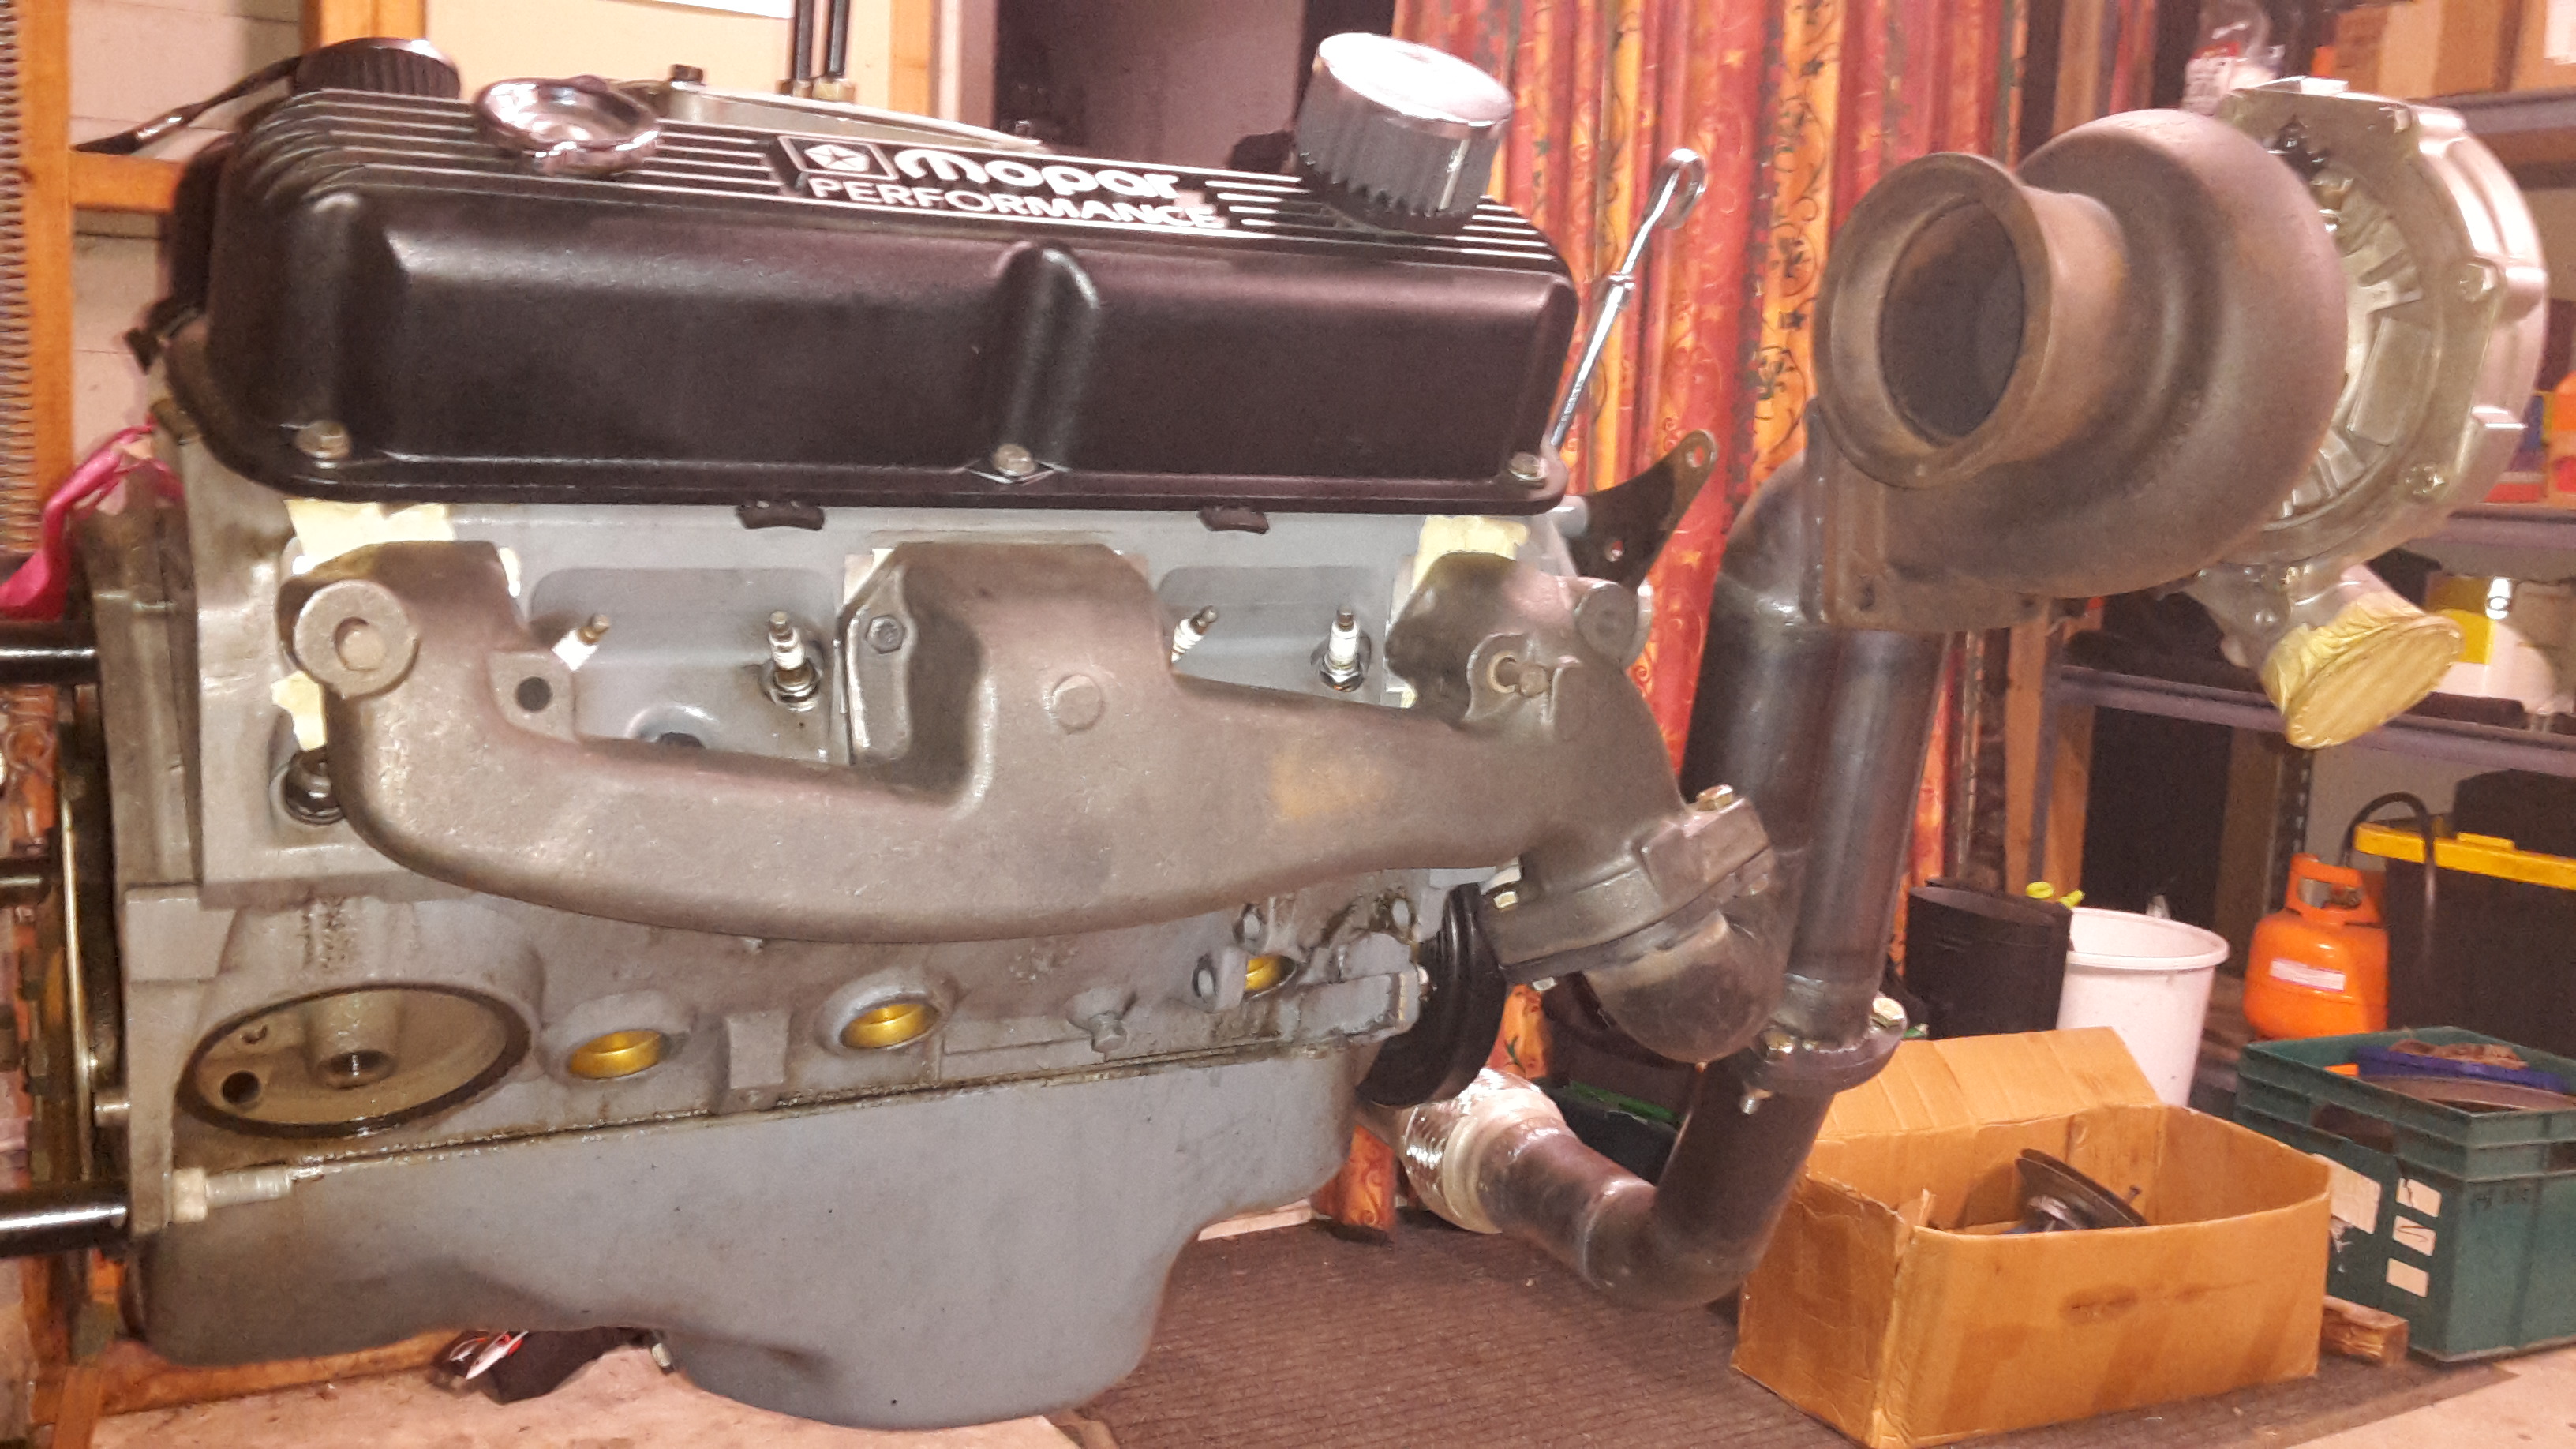
Hot dang! I was having a dig through the box of spares that came with WR and theres a couple of camshafts in there, a quick google of the part number on the exhaust cam and the fact it has an auto decomp mechanism thingy on it make me think its a HotCams aftermarket item which is excellent score as fitting that makes starting these things 10000 times easier than having to fuuuu round with the decomp lever. It has a bit of surface rust on it from storage but a soak in some vinegar should clean it up nicely Along with all the other bits in the parts collection including a factory service manual and some spare front sprockets to change the ratio is making this an even better value for money purchase4 points
-
Replace Gasket with threebond 1207B.4 points
-
Back in the late eighties I built a ford pop which I sold to a guy in Aussie. He contacted me the other day and sent a couple of photos through of it all painted. I had it finished in black primer so all he had to do was tear it down to paint an upholster. I had it roof chopped 3 inches and we channeled the body over the frame 3 inches also. ran a 302 Cleveland c4 and 9 inch. Came out pretty good I thought.
4 points
-
3 points
-
Glue some dirty Do Bro cans into the hole? Puncture bottom of can and drink goodness first and have lovely riptop left intact for full win. See you in a month and I will give you a hand, pretty big job eh.2 points
-
Top of my head says they should be 8-10NM? so barely a flick of the wrist on a 1/4 drive Also, add boost. It'll mask a lot of the issues with sweet sweet turbo whistle2 points
-
Could be worse, it could be a defender.2 points
-
Except for still having a leaky sump, it seems. Someone, at some time in the past, over-tightened the sump bolts and deformed the gasket. (For "someone", read "me") (For "at some time in the past", read "last Saturday") It was fine for a bit & then it wasn't. Still, the chassis definitely isn't going to rust now. Surely I'll get it right in the end with all this practice.2 points
-
2 points
-
.2 points
-
2 points
-
So got a bit distracted with local rotary travel and a rotary storage workshop. First things first, I priced up materials for re-upholstery and bought some tools and foam before realising nobody would just do a stitch job basically wanted all or nothing. So we went to Stephen's old mate who offered a completely mind-boggling irresistible cash price job, so took him up on that offer. He even had the exact fabric. Got the rears back already and they needed completely re-doing due to the heat damage cracking the top piece and subsequently shrinking the fabric elsewhere. So meanwhile we've been busy fiddling around stripping it out completely of wiring, brake lines, and most of the underseal except that one spot over the tunnel that you leave until last and when last comes you go 'why on earth did I leave the worst bit til last' so you just never ever touch it again... someone want a job?? Mostly it's in great condition, although once we finally ground off the welds holding the guards to the body (first WTF moment) we found the RHS front had significant damage as bad as to completely crumple the crush tube and crease the engine bay. The damage is a bit of a financial set-back and obviously means a bigger job for compliance, so it did then require blasting and prep to be repaired. Bonus find this time round, a charming ring down in the door panel over the lock. As things go, I had it set up and masked off to blast myself, and then the compressor died. So after looking around I found C.A. Levien in Henderson to give the underneath, inner guards, engine bay, windscreen channels, and rear quarter rust patches a blast. Yes, everything except the great patina and heinous tagging. (my least favourite side, with BB gun dents and what appears to be acid damage). Even the sandblasters they thought it was hilarious to save the patina, but they made such a huge improvement on the car it actually looks purposeful now. Highly recommended, they even stored it away in it's own shed. The rear quarters were only 5% worse than expected, the underneath is absolutely fantastic, and the weird panel under rear windscreen that was mysteriously primer is happily not bog and is solid steel. Kyle was kind enough to take and send me some pictures of the process too: So after a year of ownership it was transported off again on Monday to it's new temporary home. Thankfully we found an old school repairer who will be able to save it without us finding a new front cut. From what I understand, he will cut from firewall and slowly pull the front back into original shape, beating out the creases. While it's there I may gain the fucks needed to finish off the underseal and chuck some durepox over it but probably won't. He'll also be teaching me a mix of painting and airbrushing to get the touched quarters back to their patina best. And I'll pull apart the twin dizzy to see what the options are. That's all for now folks.2 points
-
Hi folks I have one gutless Nissan LD28 in my lovable Series 2A, SWB. I am interested in hearing from folks that have turbo'ed an LD28 back in tha day.. I am huntin a manifold to suit but keen to confirm what Z car or what ever turbo'ed Nissan manifold is a direct fit with minimal work to an LD28? Many thanks in advance, Bugly...1 point
-
The basic formula is: L20ET manifold TD03 turbo 10 psi wind fuel up The L20ET manifold requires slotting of holes and a bit of port matching. The L28ET manifold doesn't without hogging a shit load of metal out of the head. No.6 does get hot with a turbo so an intercooler and clearing out your coolant passages would be a good idea. 10 psi is a safe level of boost and will give you more kick, decent fuel economy, and only reduce your engine life a bit. The fuel screw on your pump will need adjusting for more fuel but it will smoke like a train off boost. I have heard of people running 20psi but not sure how long engine lasted. We've had a shit load of fun with @- i5oogt -'s LD28T Cedric but due to a crap cooling system its been overheated 1 too many times and the engine is a bit sick. So keep it at a normal operating temp and EGT below 650c and you should be sweet. But just remember you will shorten your engine life.1 point
-
Stop it. If it cant survive a painted sump, a turbo will kill it for sure. /I'll stick with "gutless".1 point
-
The top of your head is correct. I gorilla'd them, relatively speaking That was my next plan if I've fucked the gasket. That or buy a cork tile and cut one out. /old skool.1 point
-
1 point
-
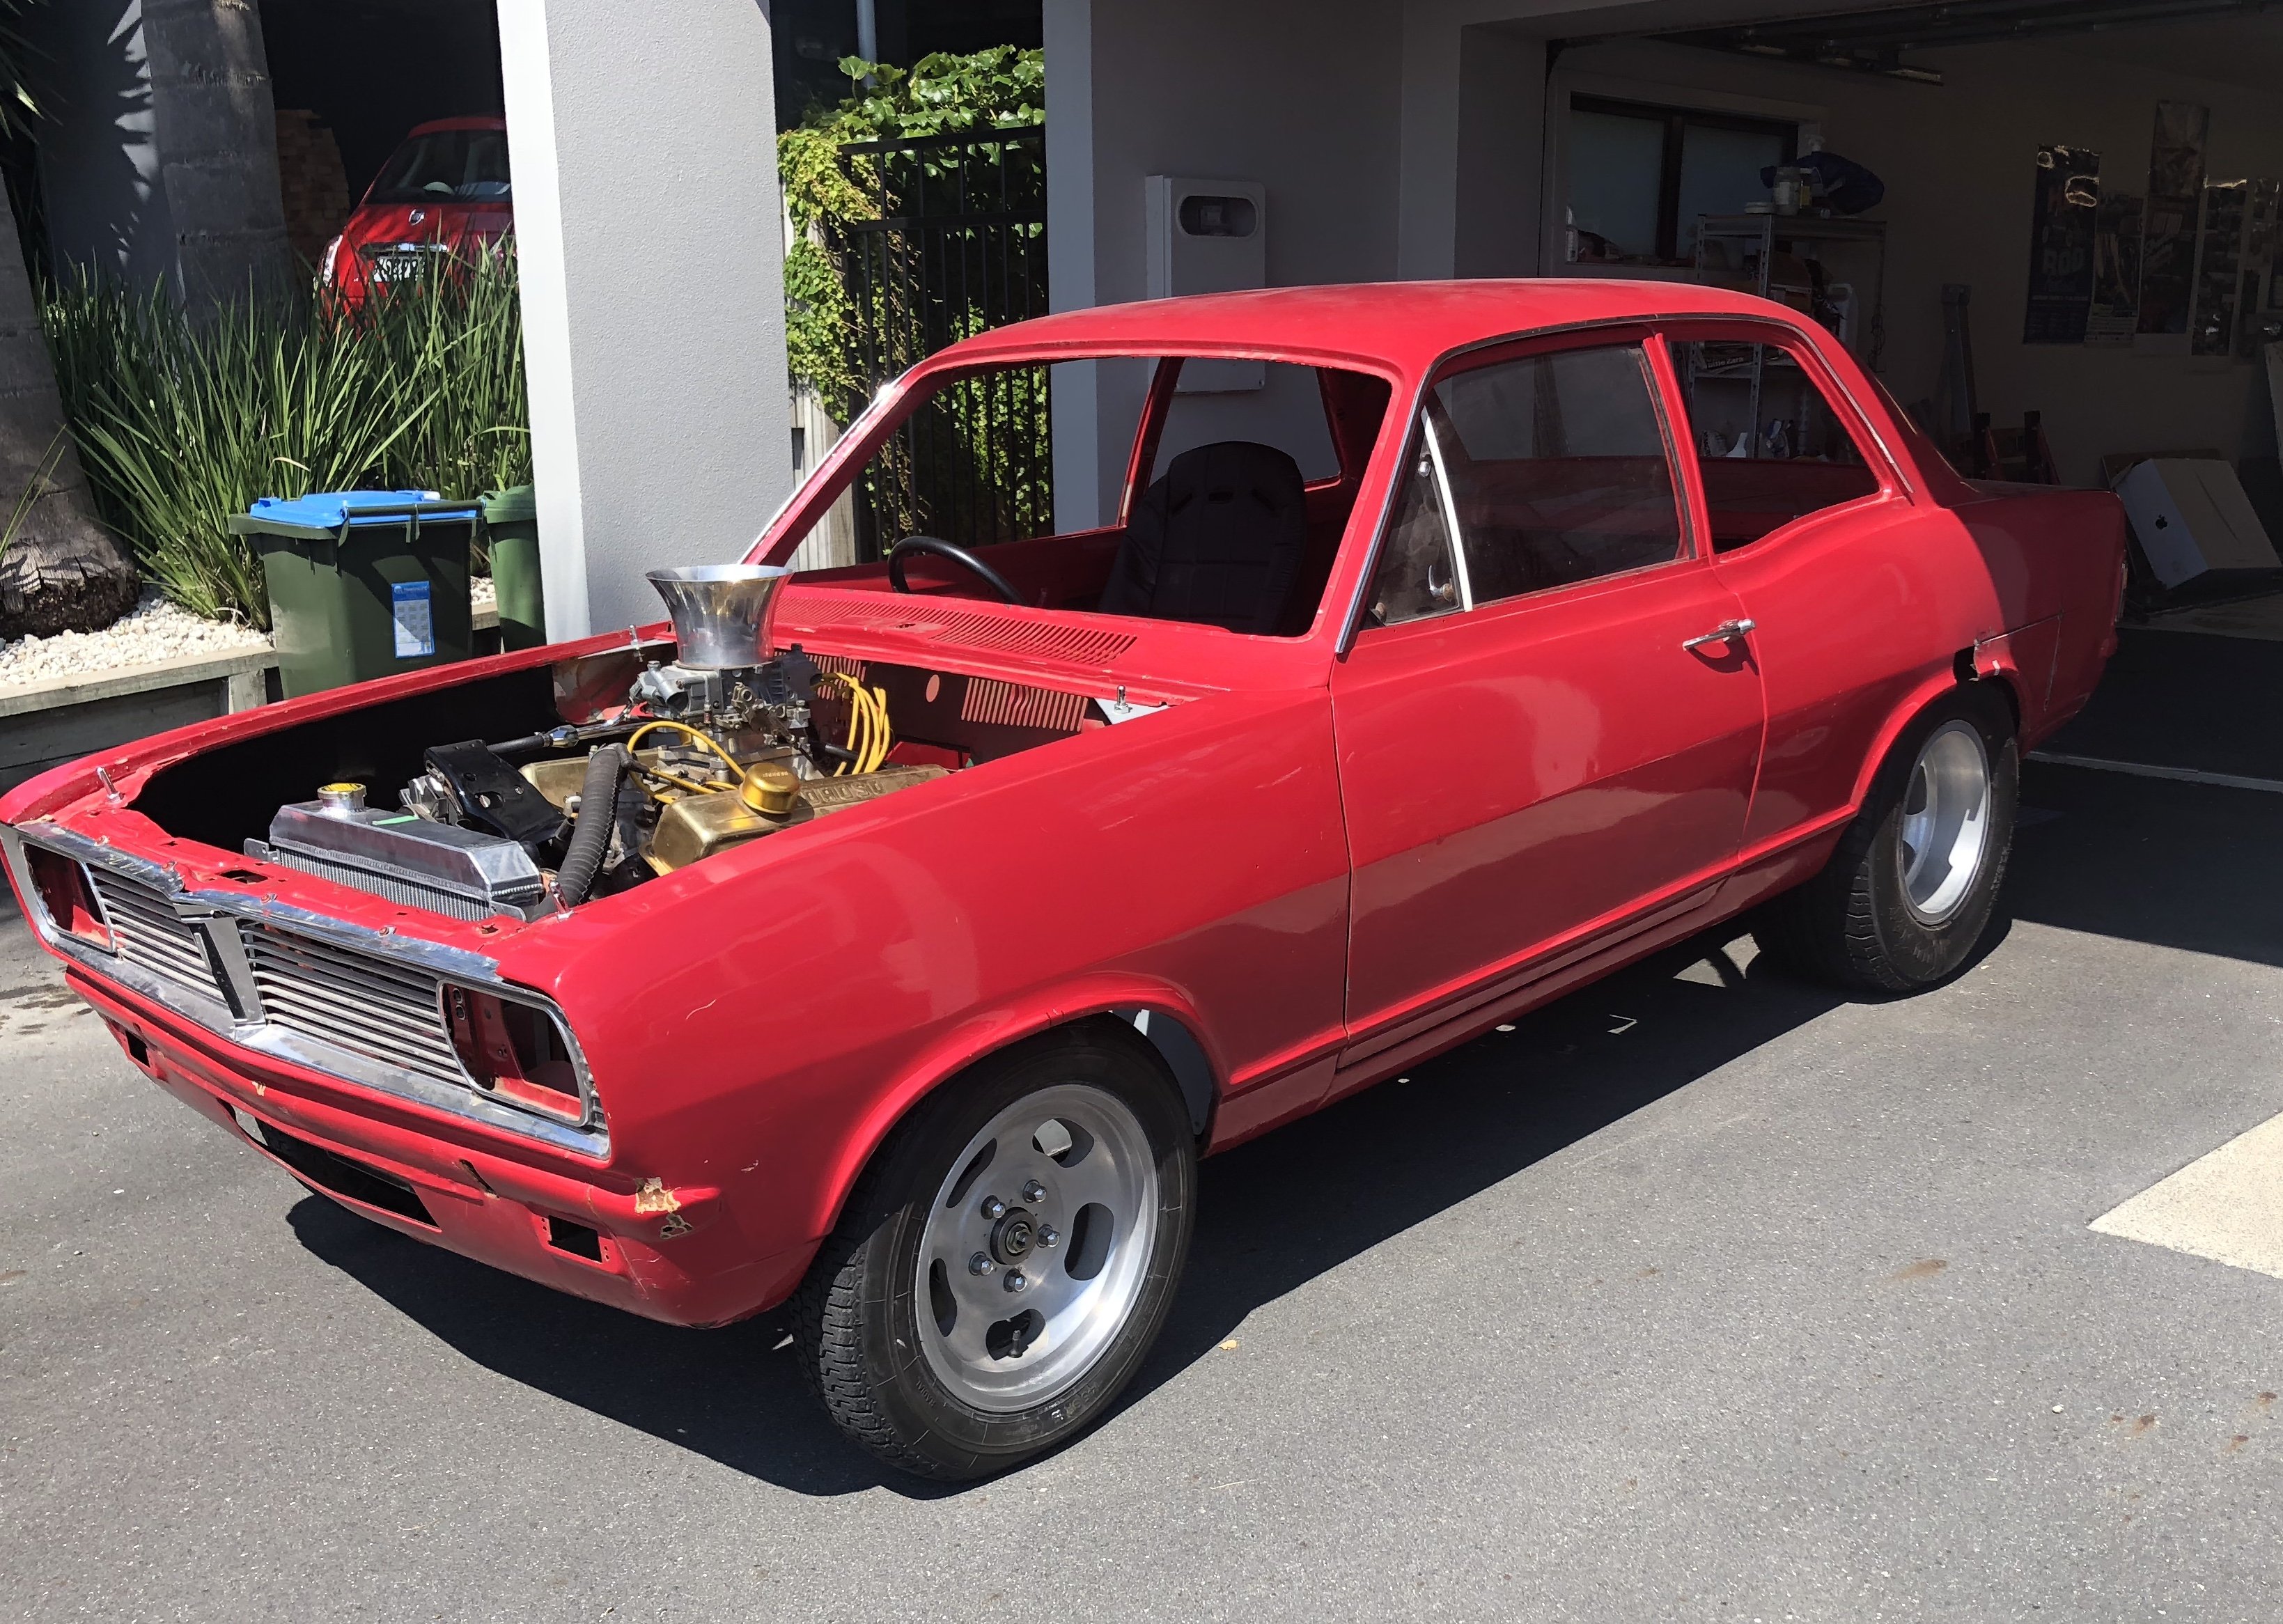
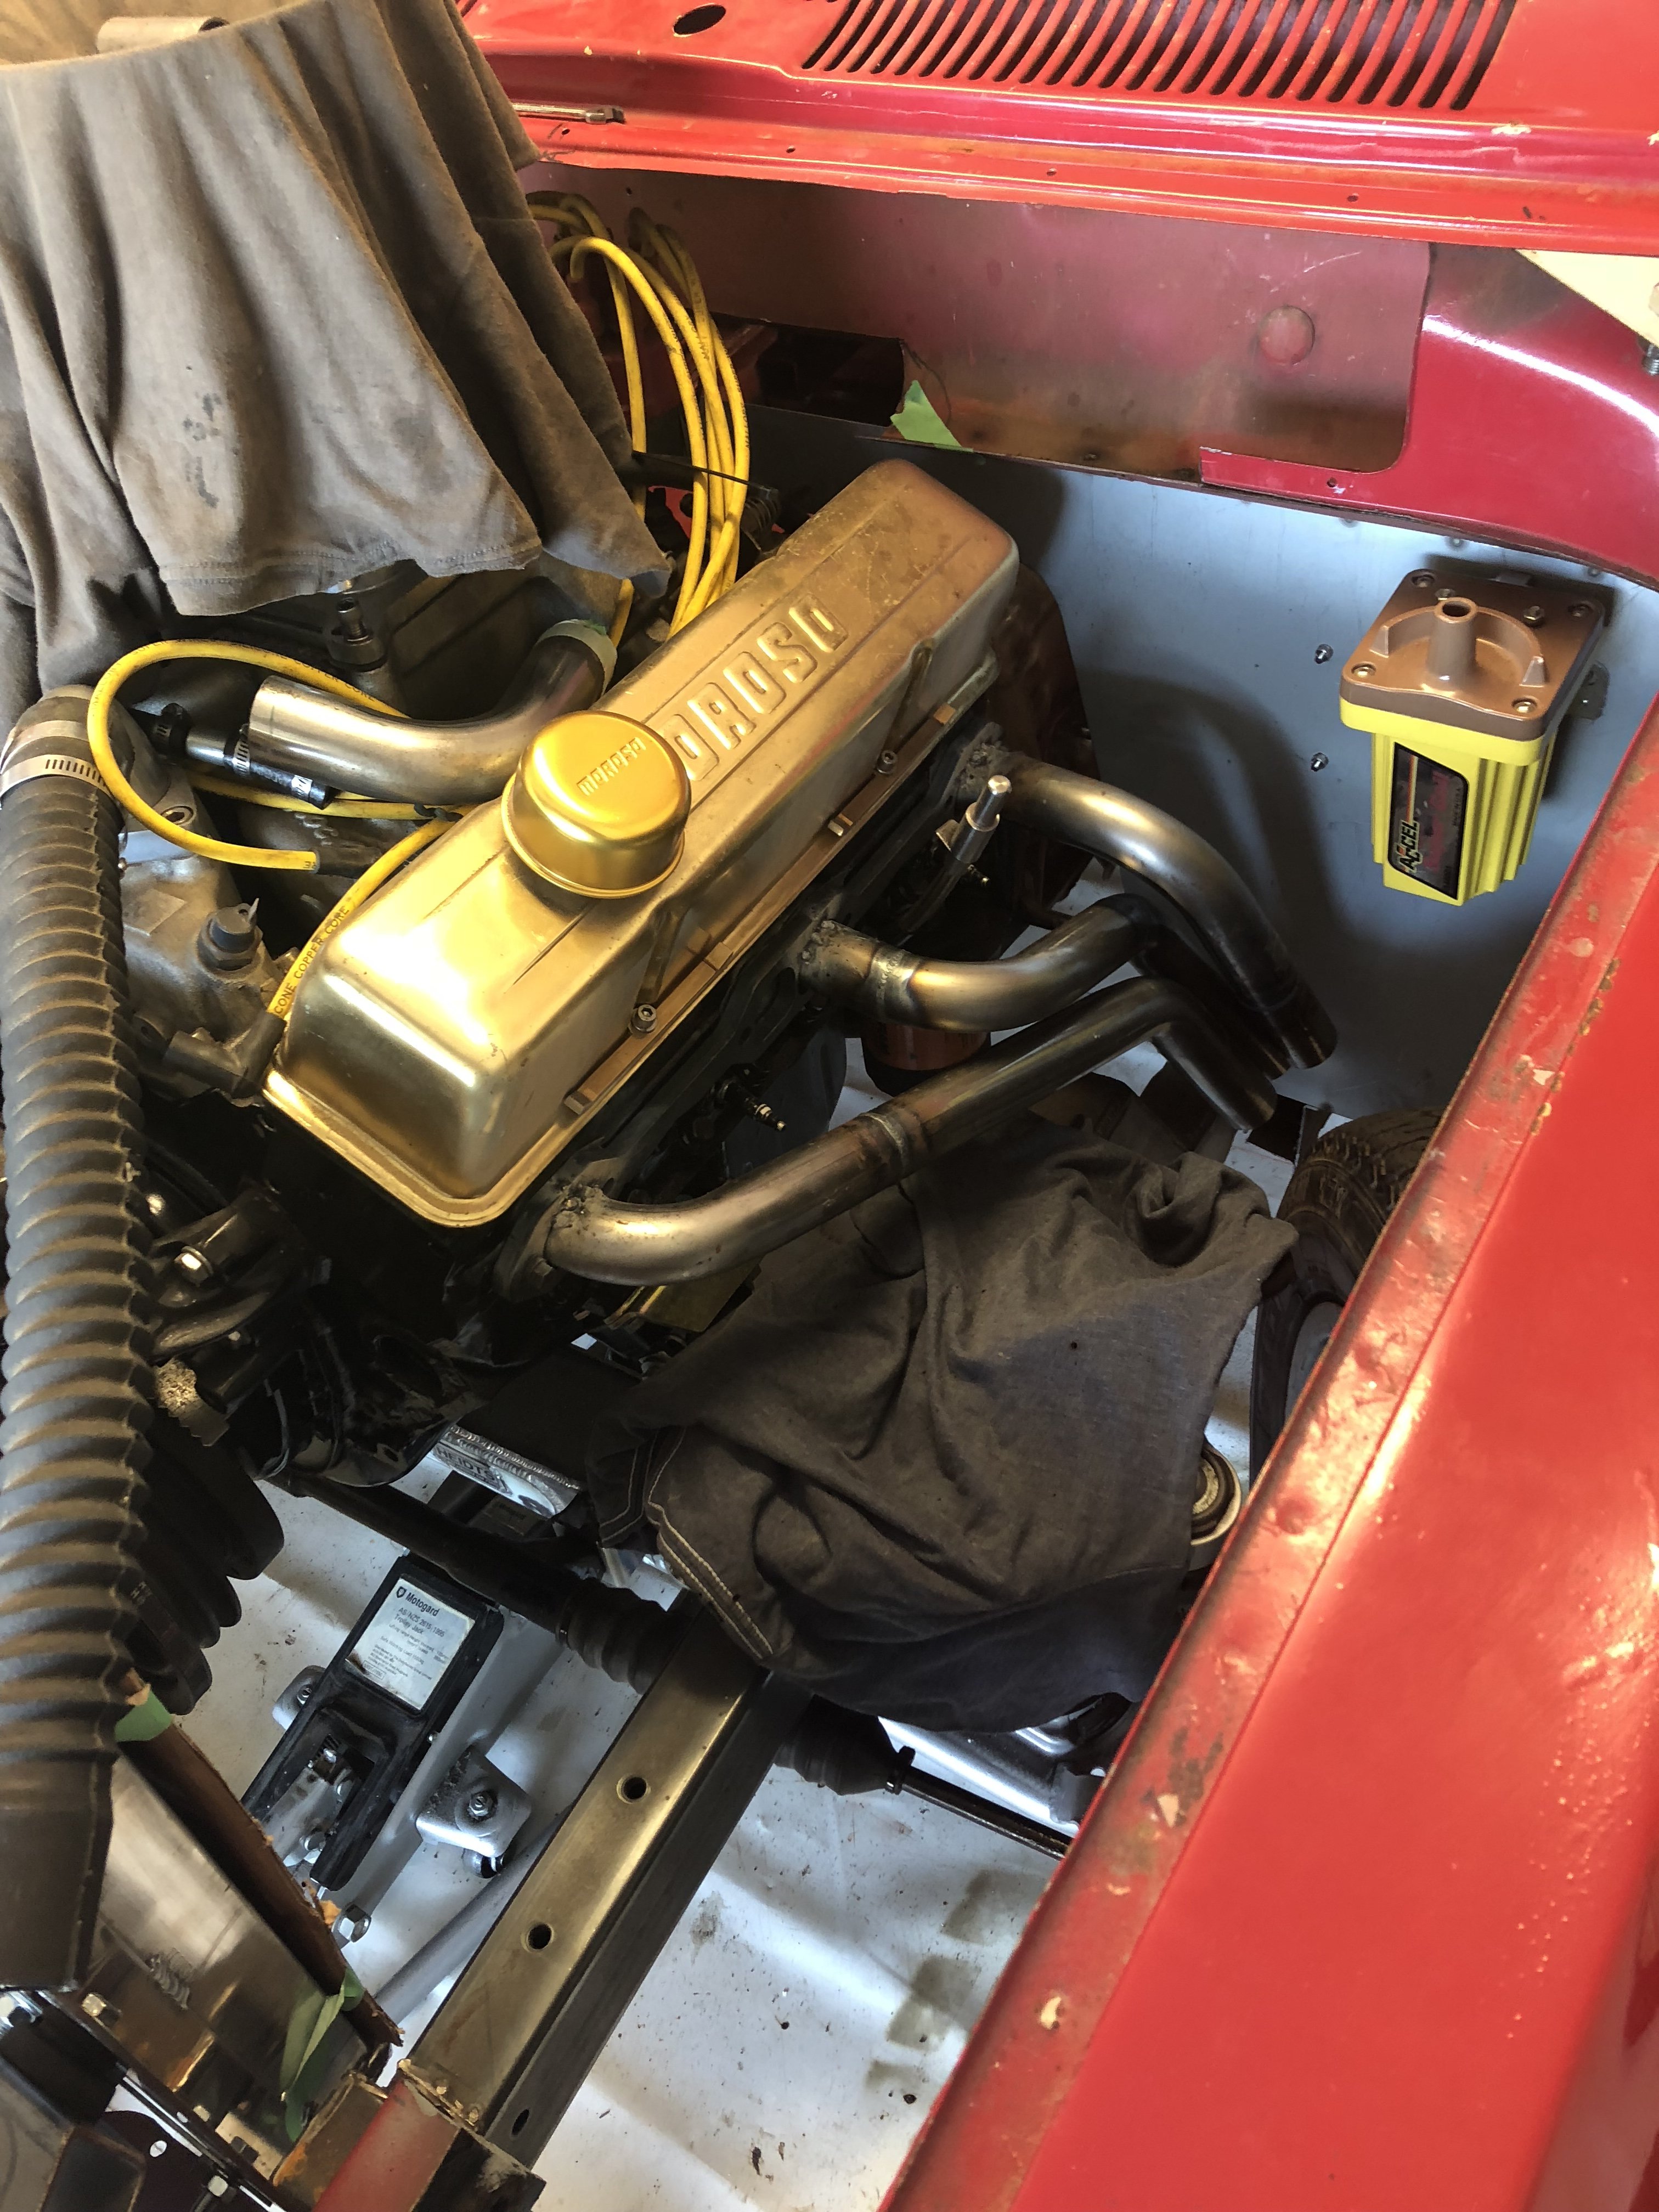
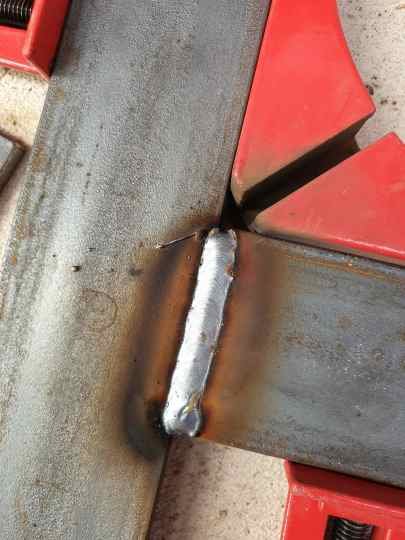
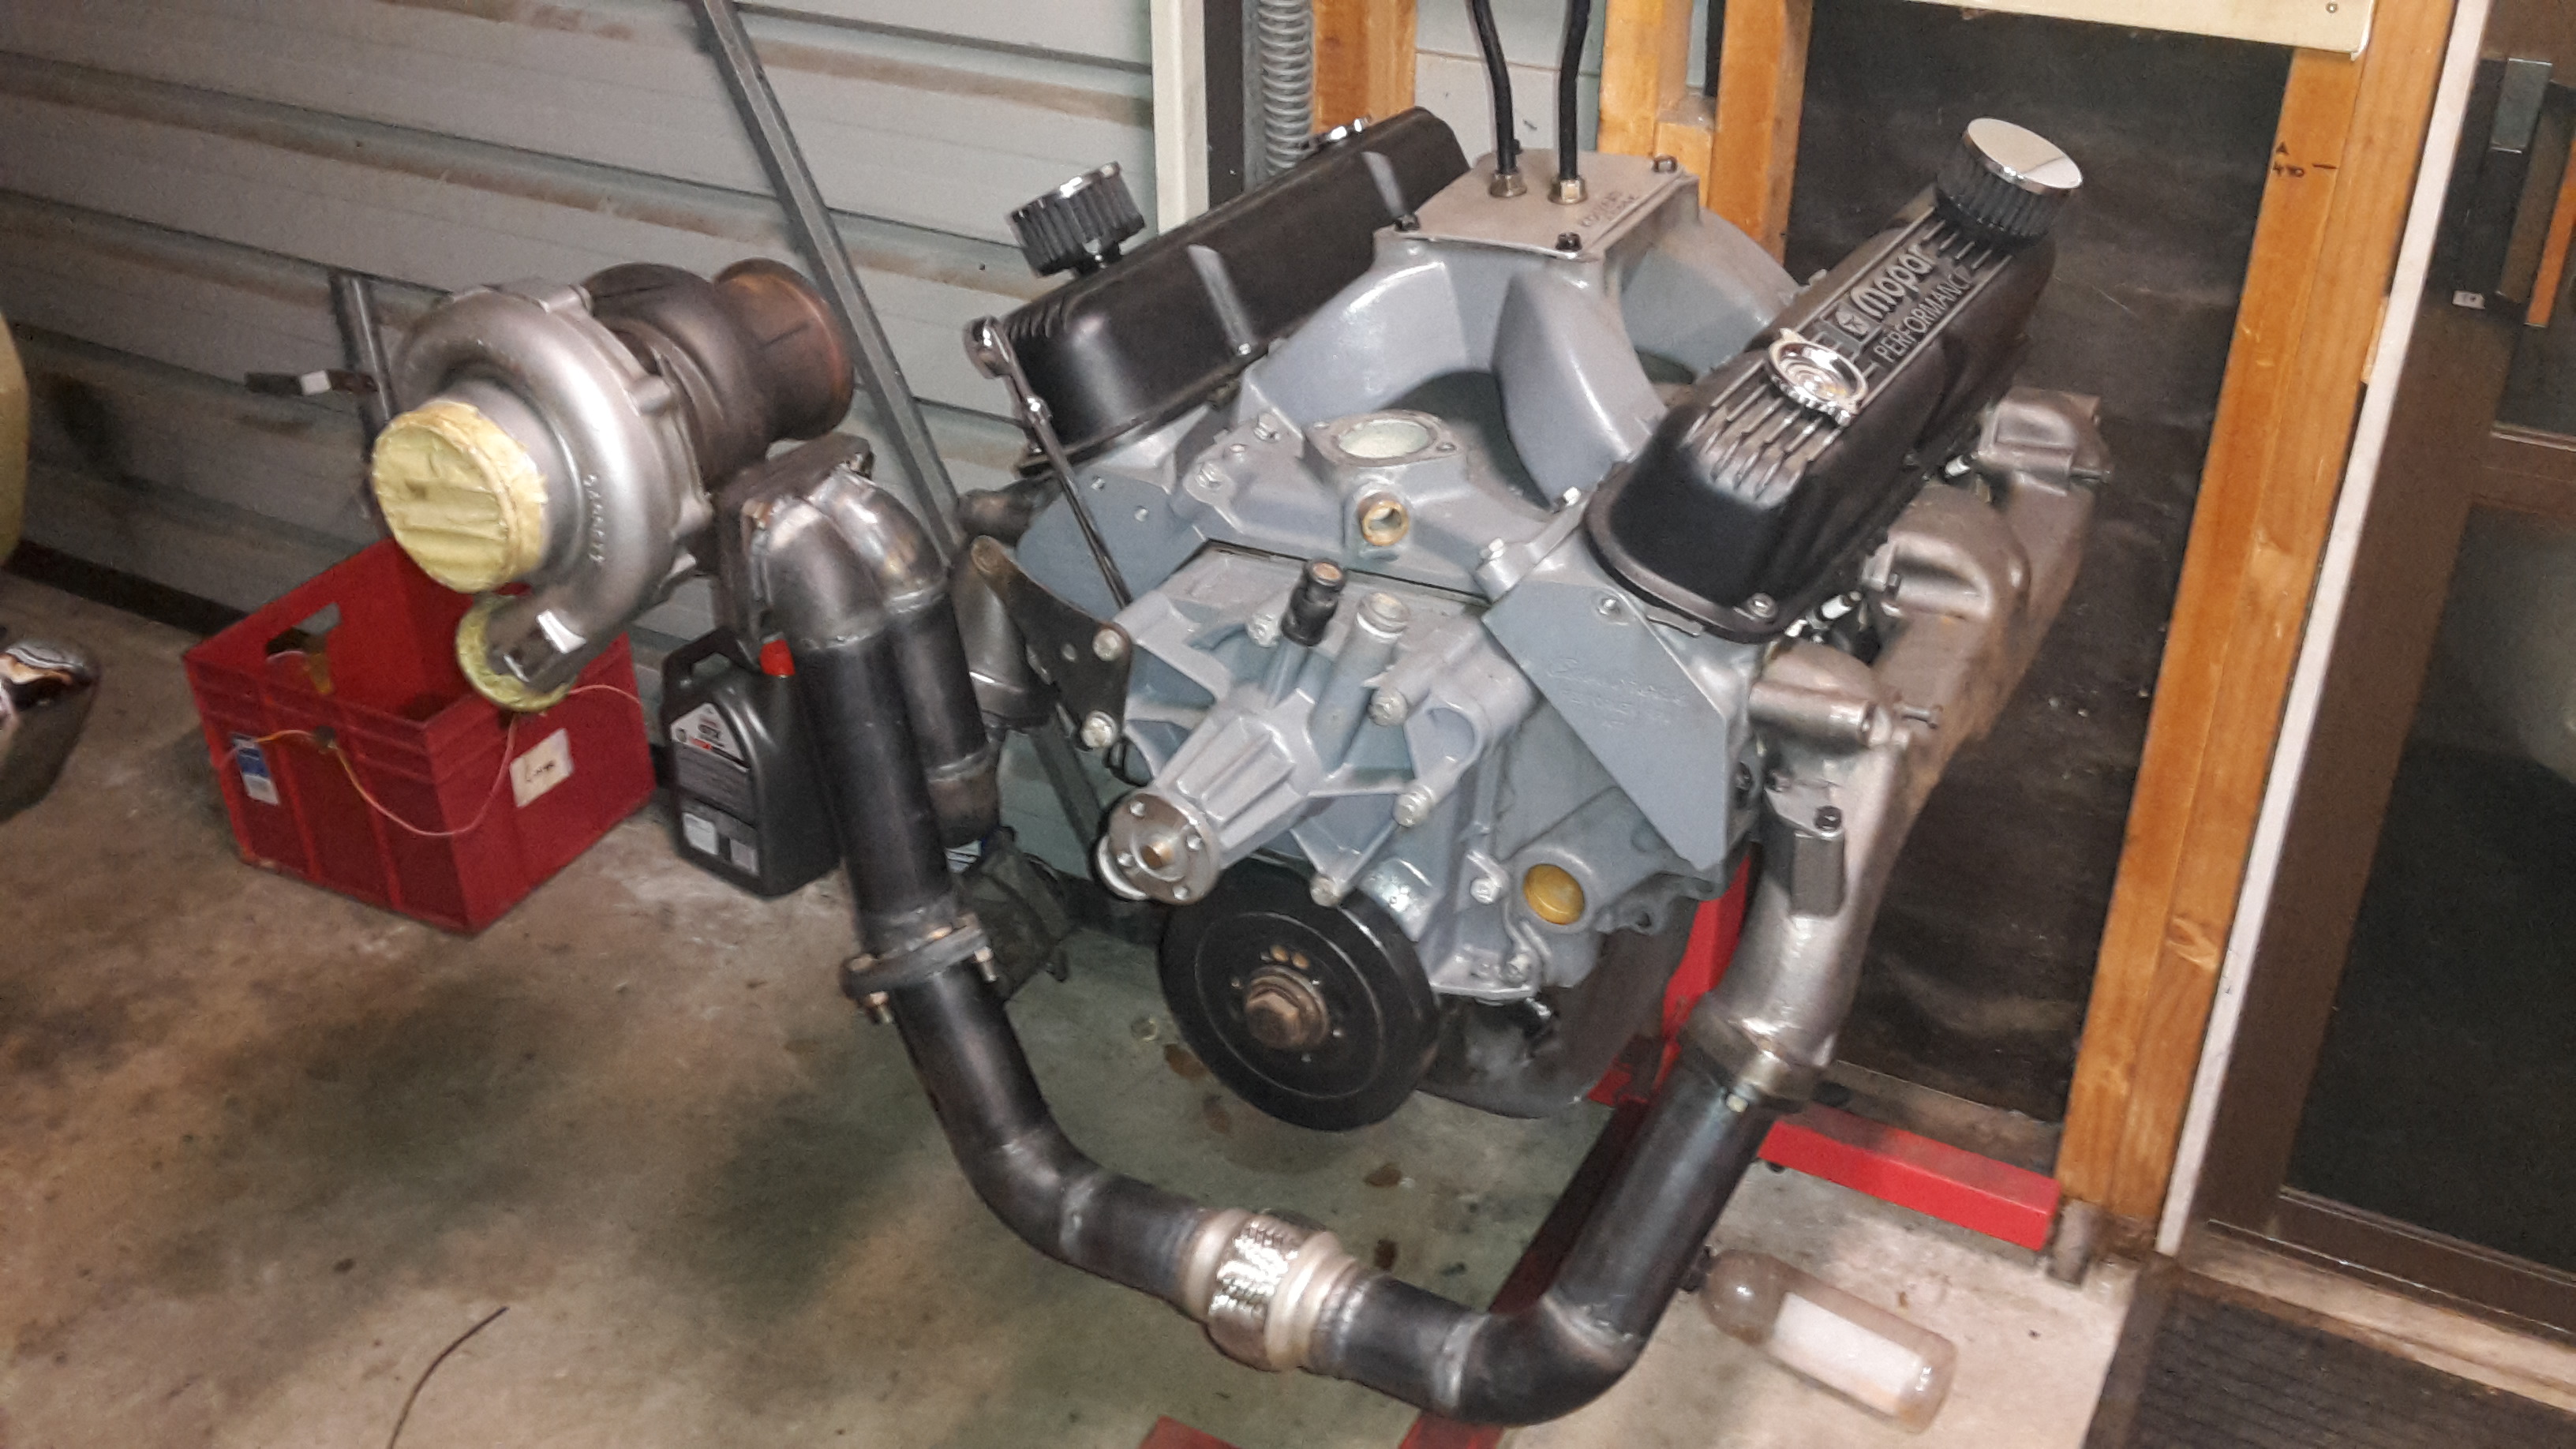
Slow work on the headers but are coming along.
1 point
-
What about Barrel Bros in Aus? Also - this is gonna look so good on those - glad its getting the love it deserves.1 point
-
Get some aluminium round of the appropriate diameter and we could have a go at making some on the lathe? @Archetype could make some decals to go on the flats or we could laser cut a template?1 point
-
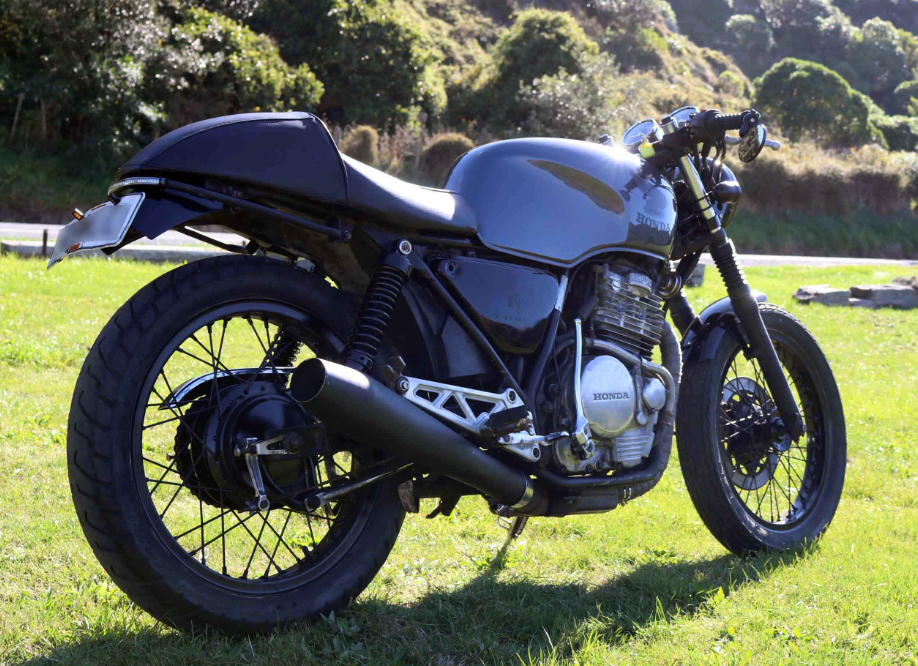
Paint code is KH2 - Show me some photos if you do! Got in some seat time today. Took pics because it doesn't count unless you take a photo, right? I need to do something with the footpegs.. They vibrate a lot at 100kmph.. Wouldn't do my bung knee's any good on a long trip Any suggestions?
1 point
-
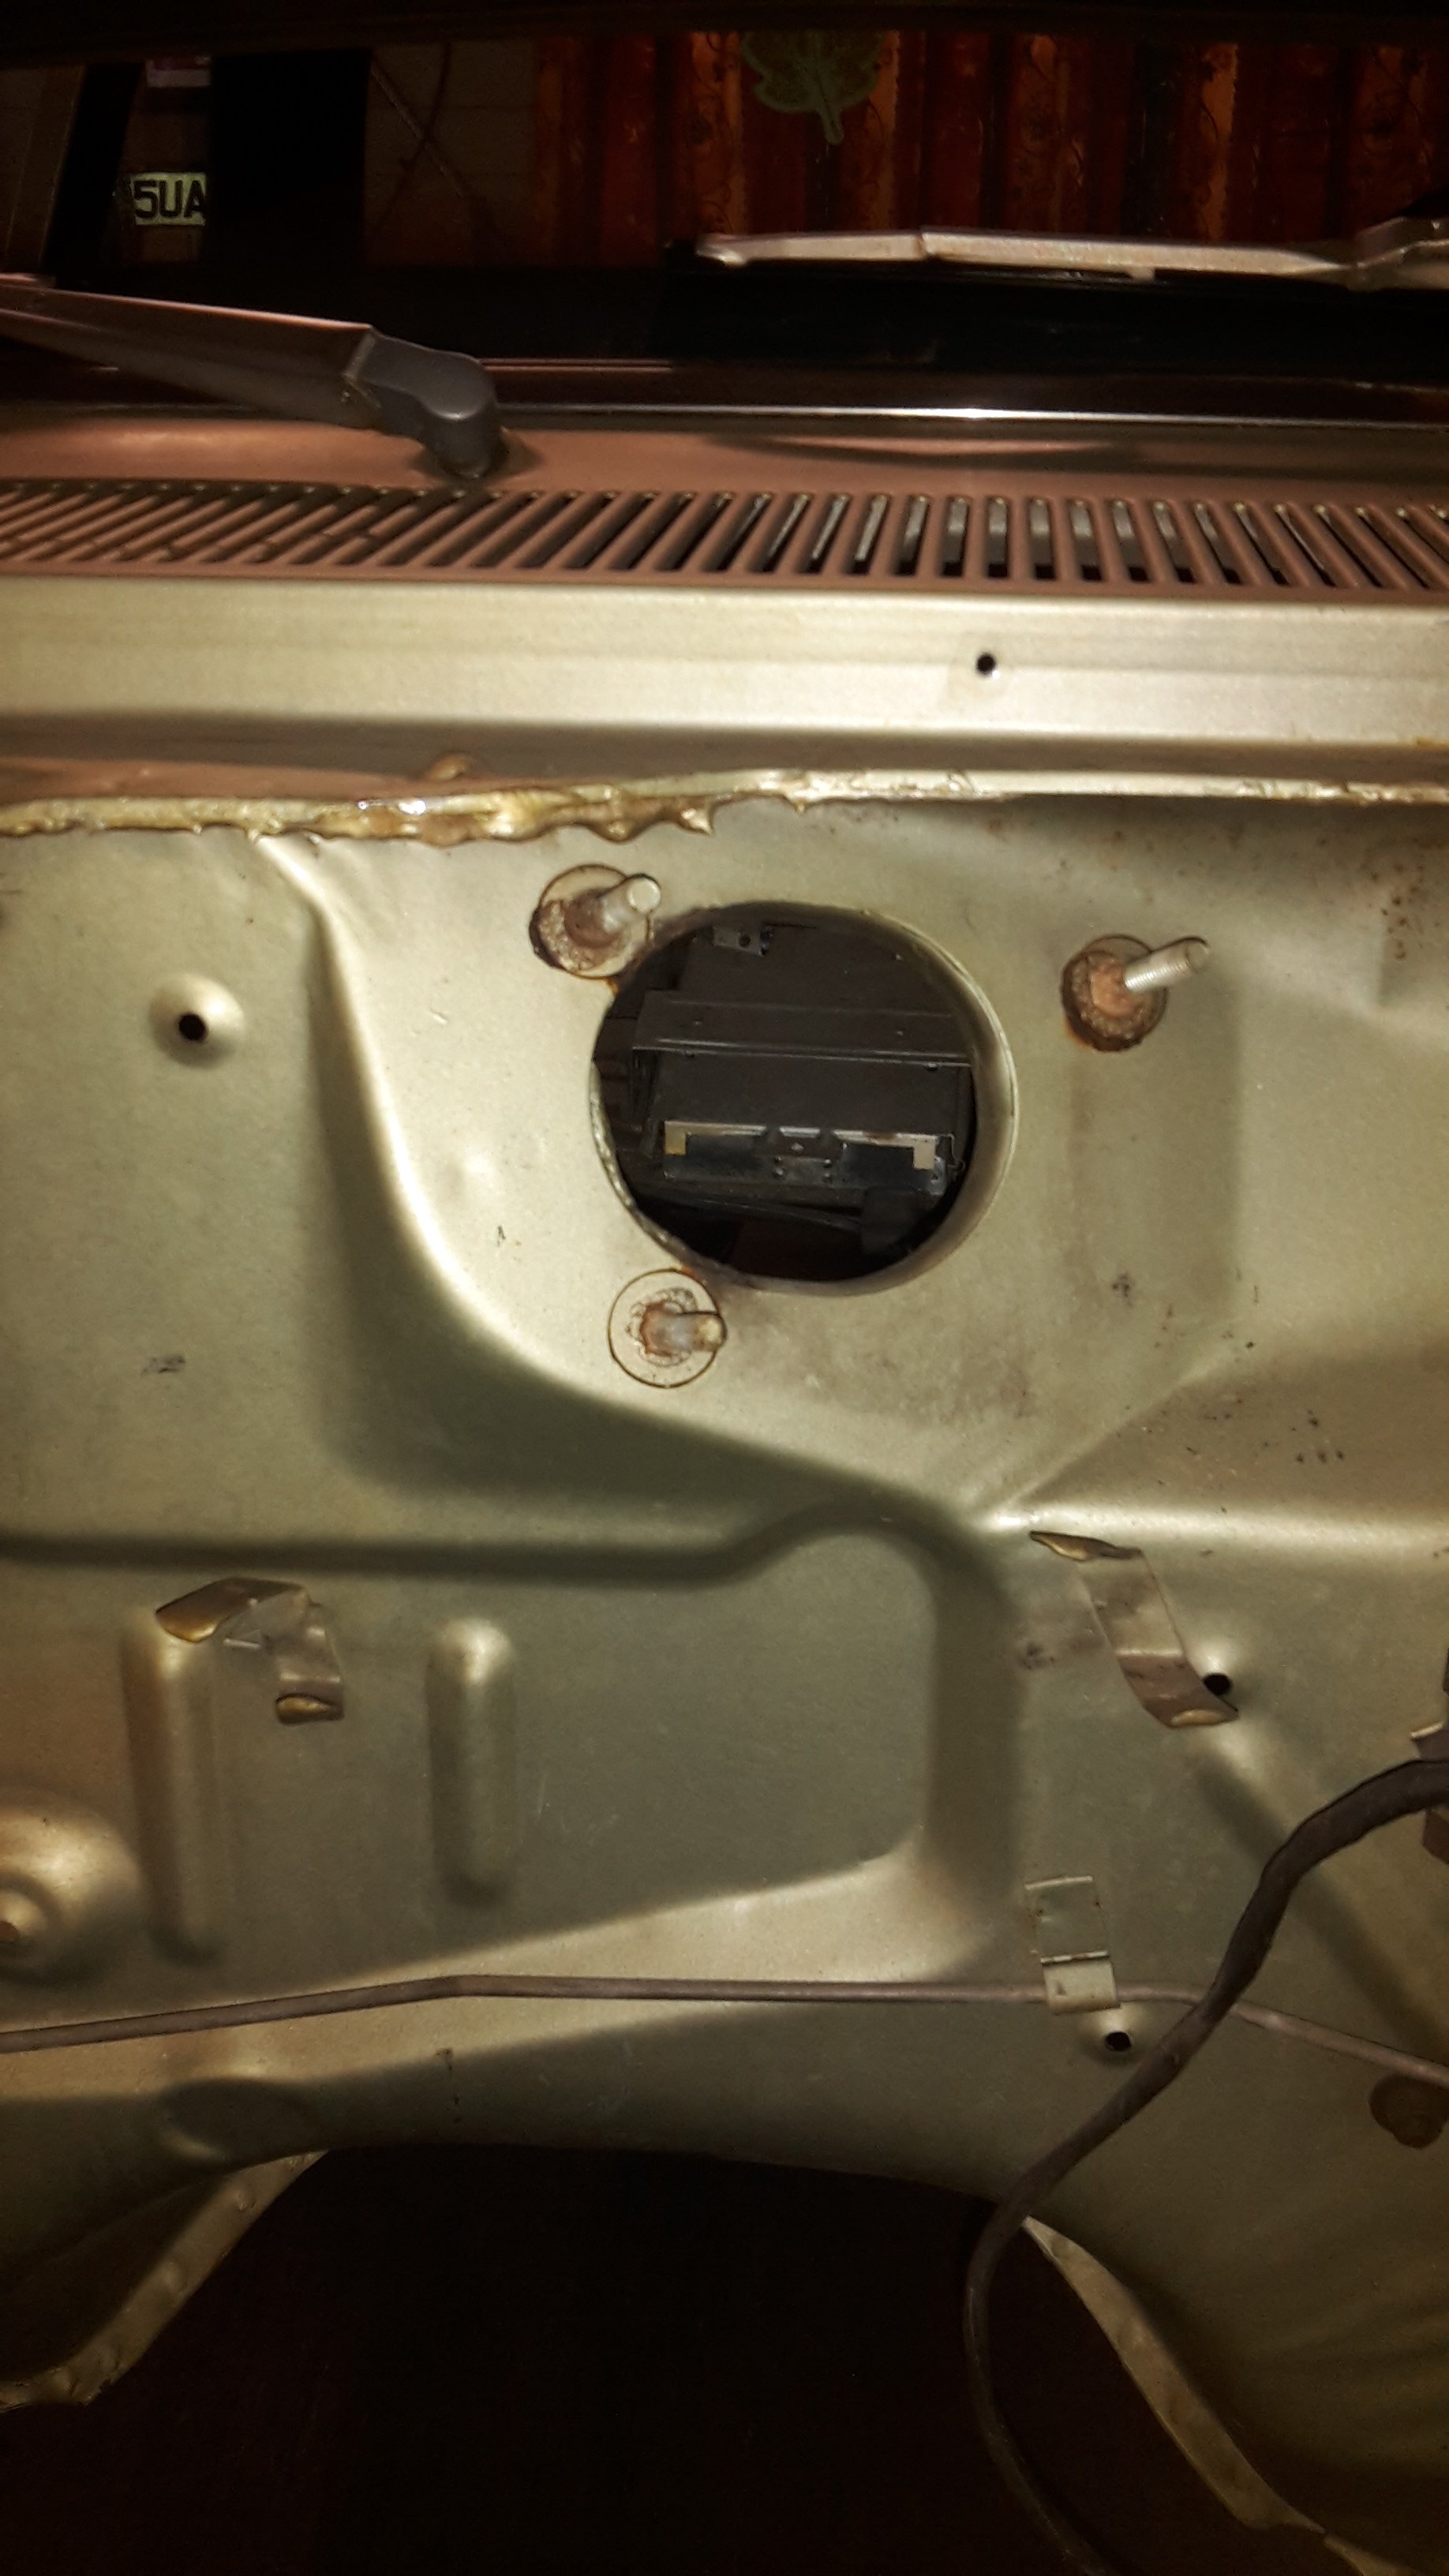
So today I managed to fix some things. Now blower is working on position 3 and 4 - which is a progress. As I assumed, the problem was at blower motor relay, which I couldn't find the other day. I follow workshop manual step by step, checking wires and voltage, and everything is ok now. The problem is still with blower motor resistor. I check ohms on terminals, and couldn't get results from 2 terminals - I assumed that is damaged. So my question now is, where could I find a new one? Any helpful link? Thanks Position of relay One of the connection was broken So I changed all connectors with new p.s. Workshop manual http://www.pmx626.info/US/Mazda 626 & MX-6/Work Shop Manuals/PDF/1992 US Workshop Manual_OCR.pdf1 point
-
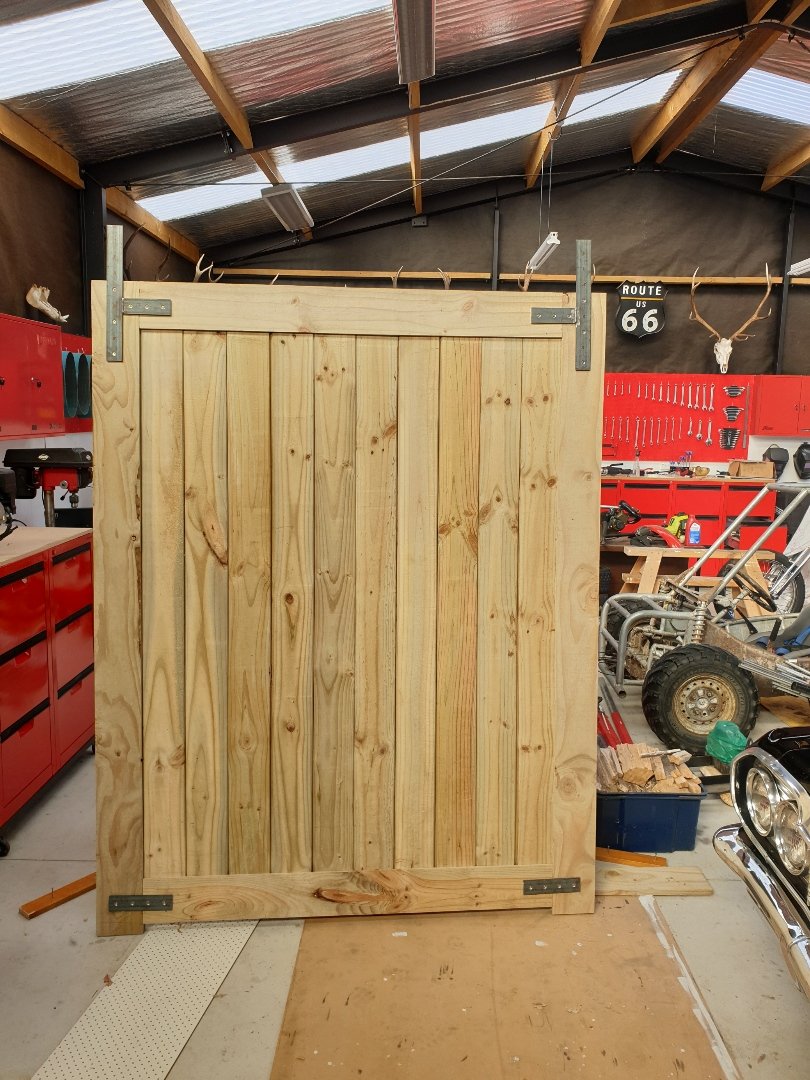
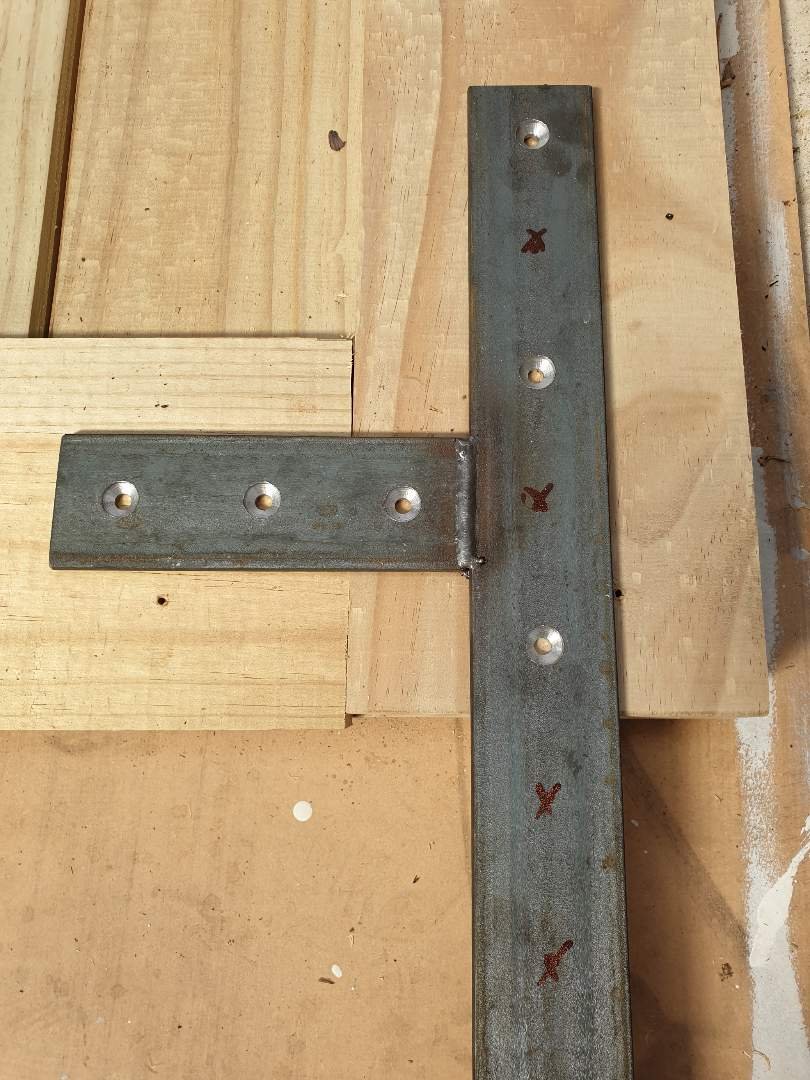
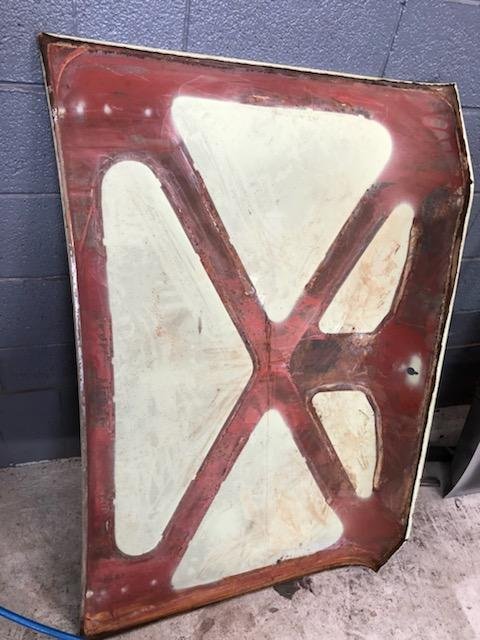
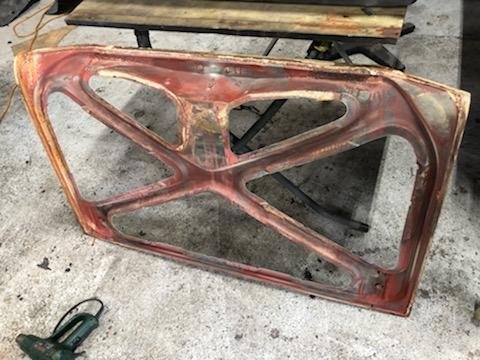
Barn door update. I've been away so much lately that this took a backseat. Anyway, a few more hours spent on getting it done this afternoon Ready to stain and hang on the wall.
1 point
-
Got them early currently they are in the motel room with me.. too paranoid to leave in back of ute, lol.
1 point
-
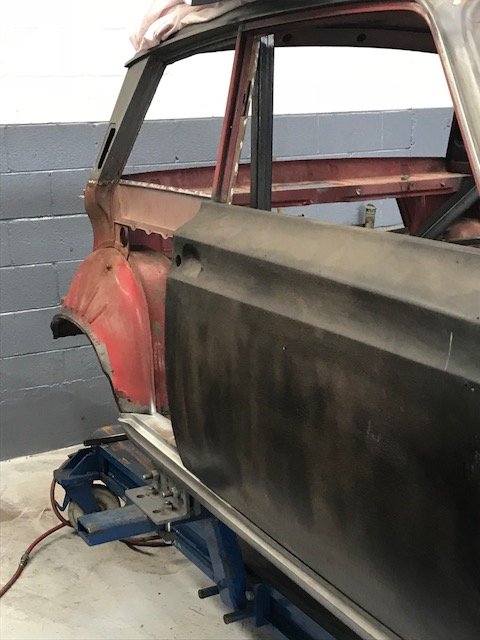
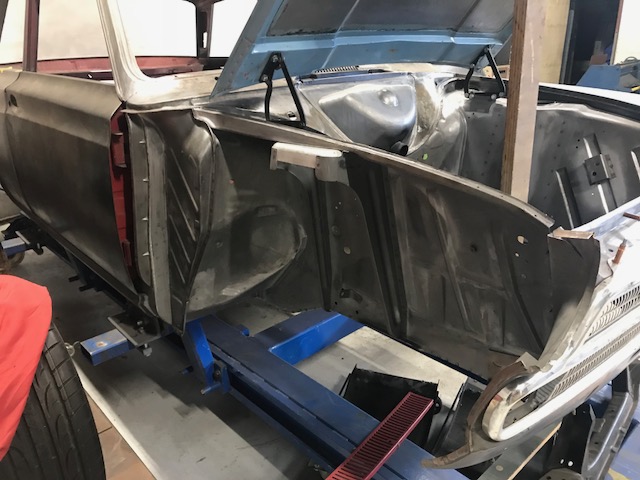
Drivers door complete and only the boot lid to go and body work finished. Still trial fitting parts etc and once done it is off for the final blast and prime then off to paint.
1 point
-
Here is the engine, it was built at Mcintosh racing, it runs well, its around 1100cc, it dropped a valve when the retainer snapped in half but it was ok, I made the exhausts and oils lines, engine plates, mudguards, and half the shit on this bike. it has Hemmings heads, I know a guy who has a KTOR engine on the floor in his shed, I can put you in contact with people but you probable already know them?1 point
-
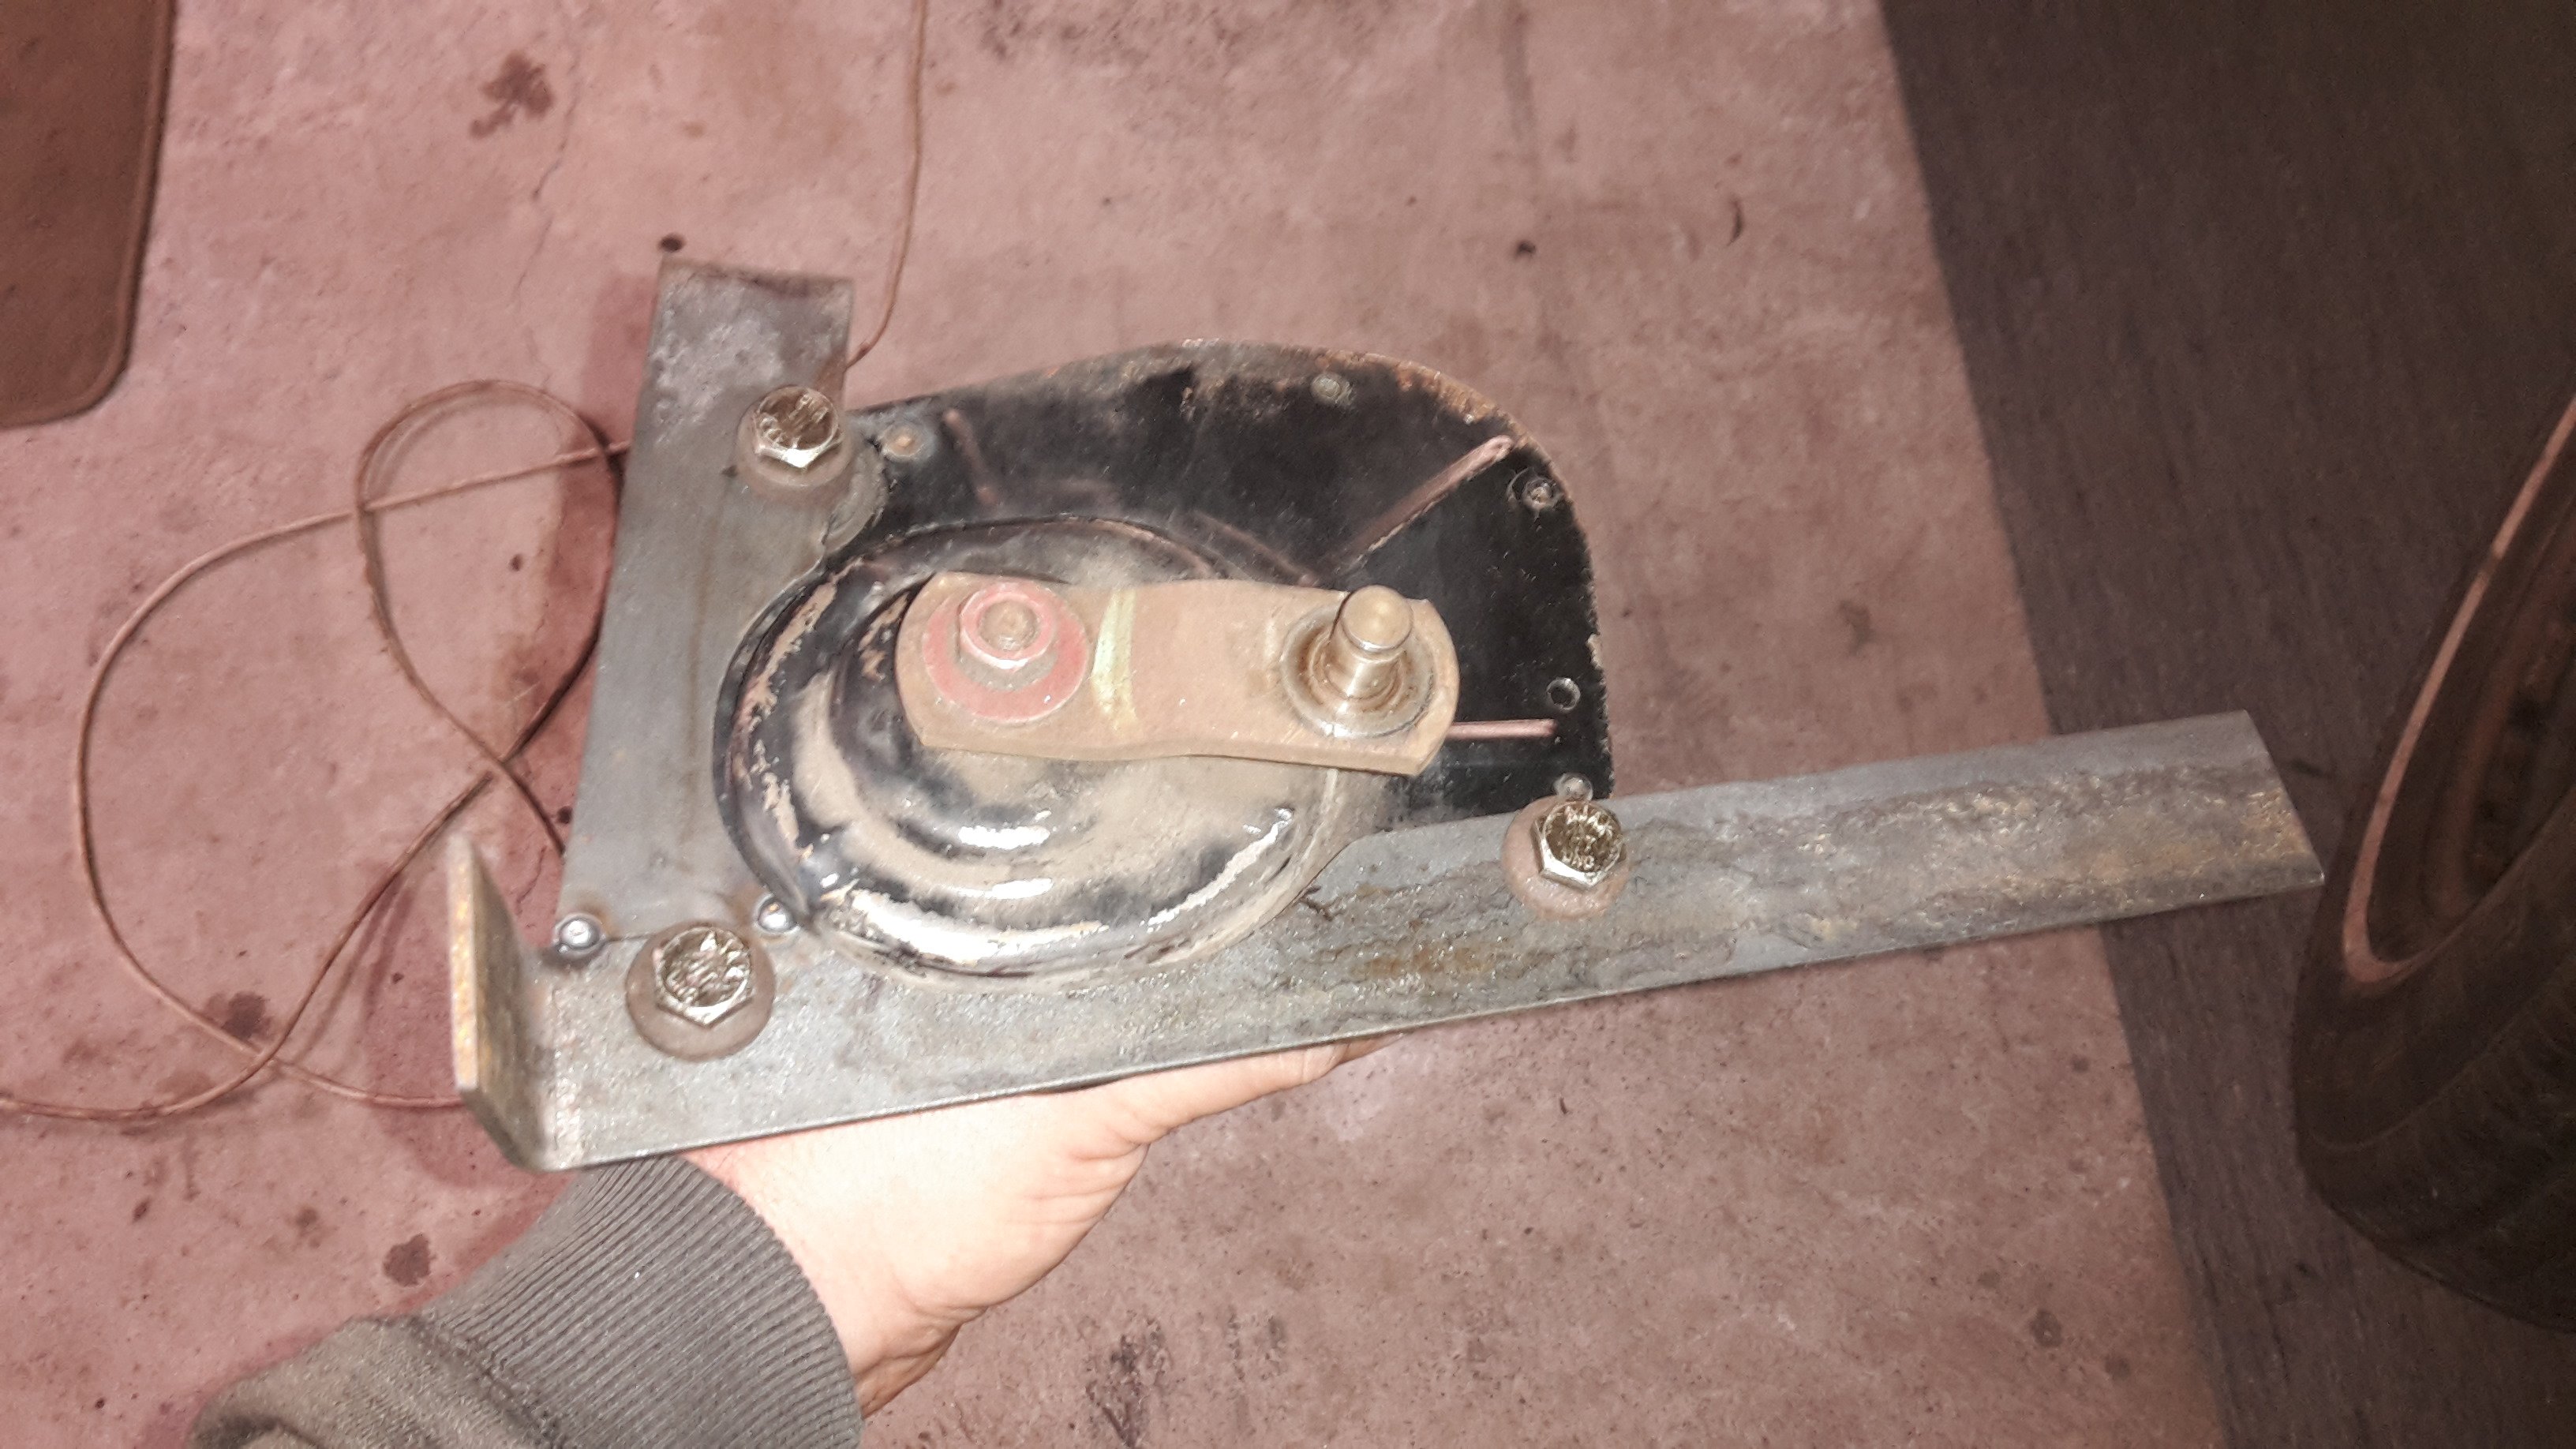
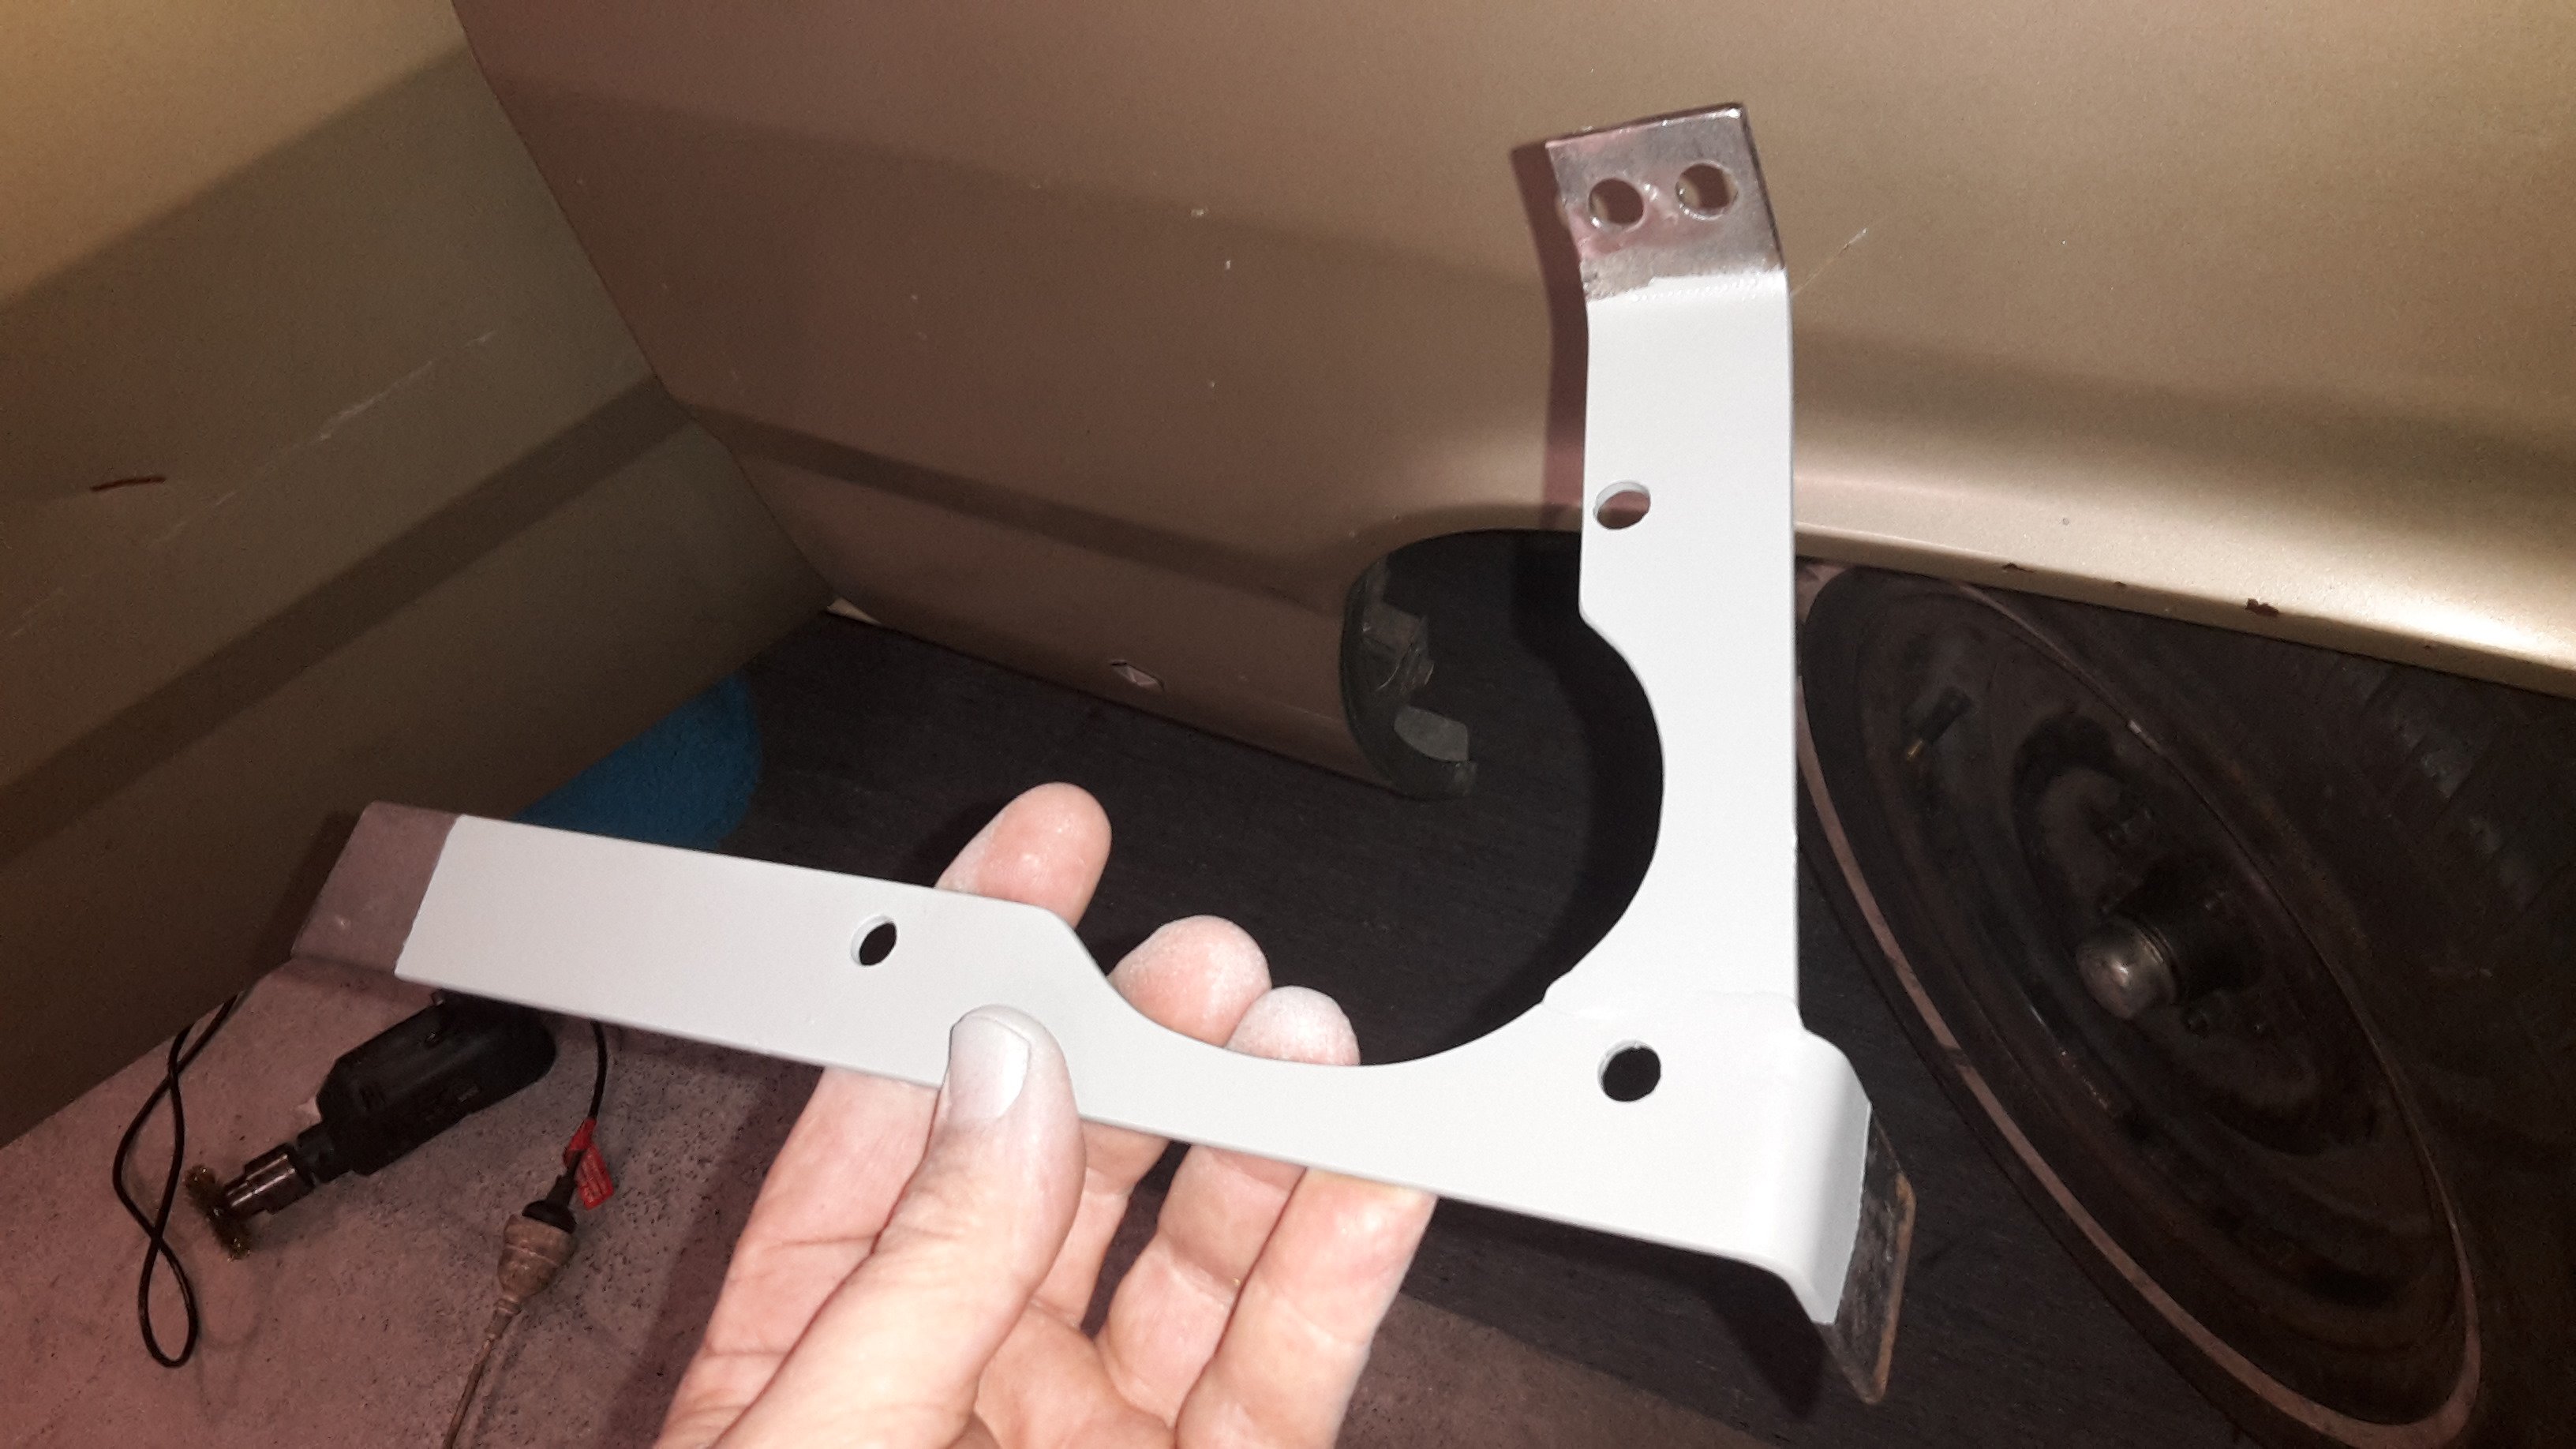
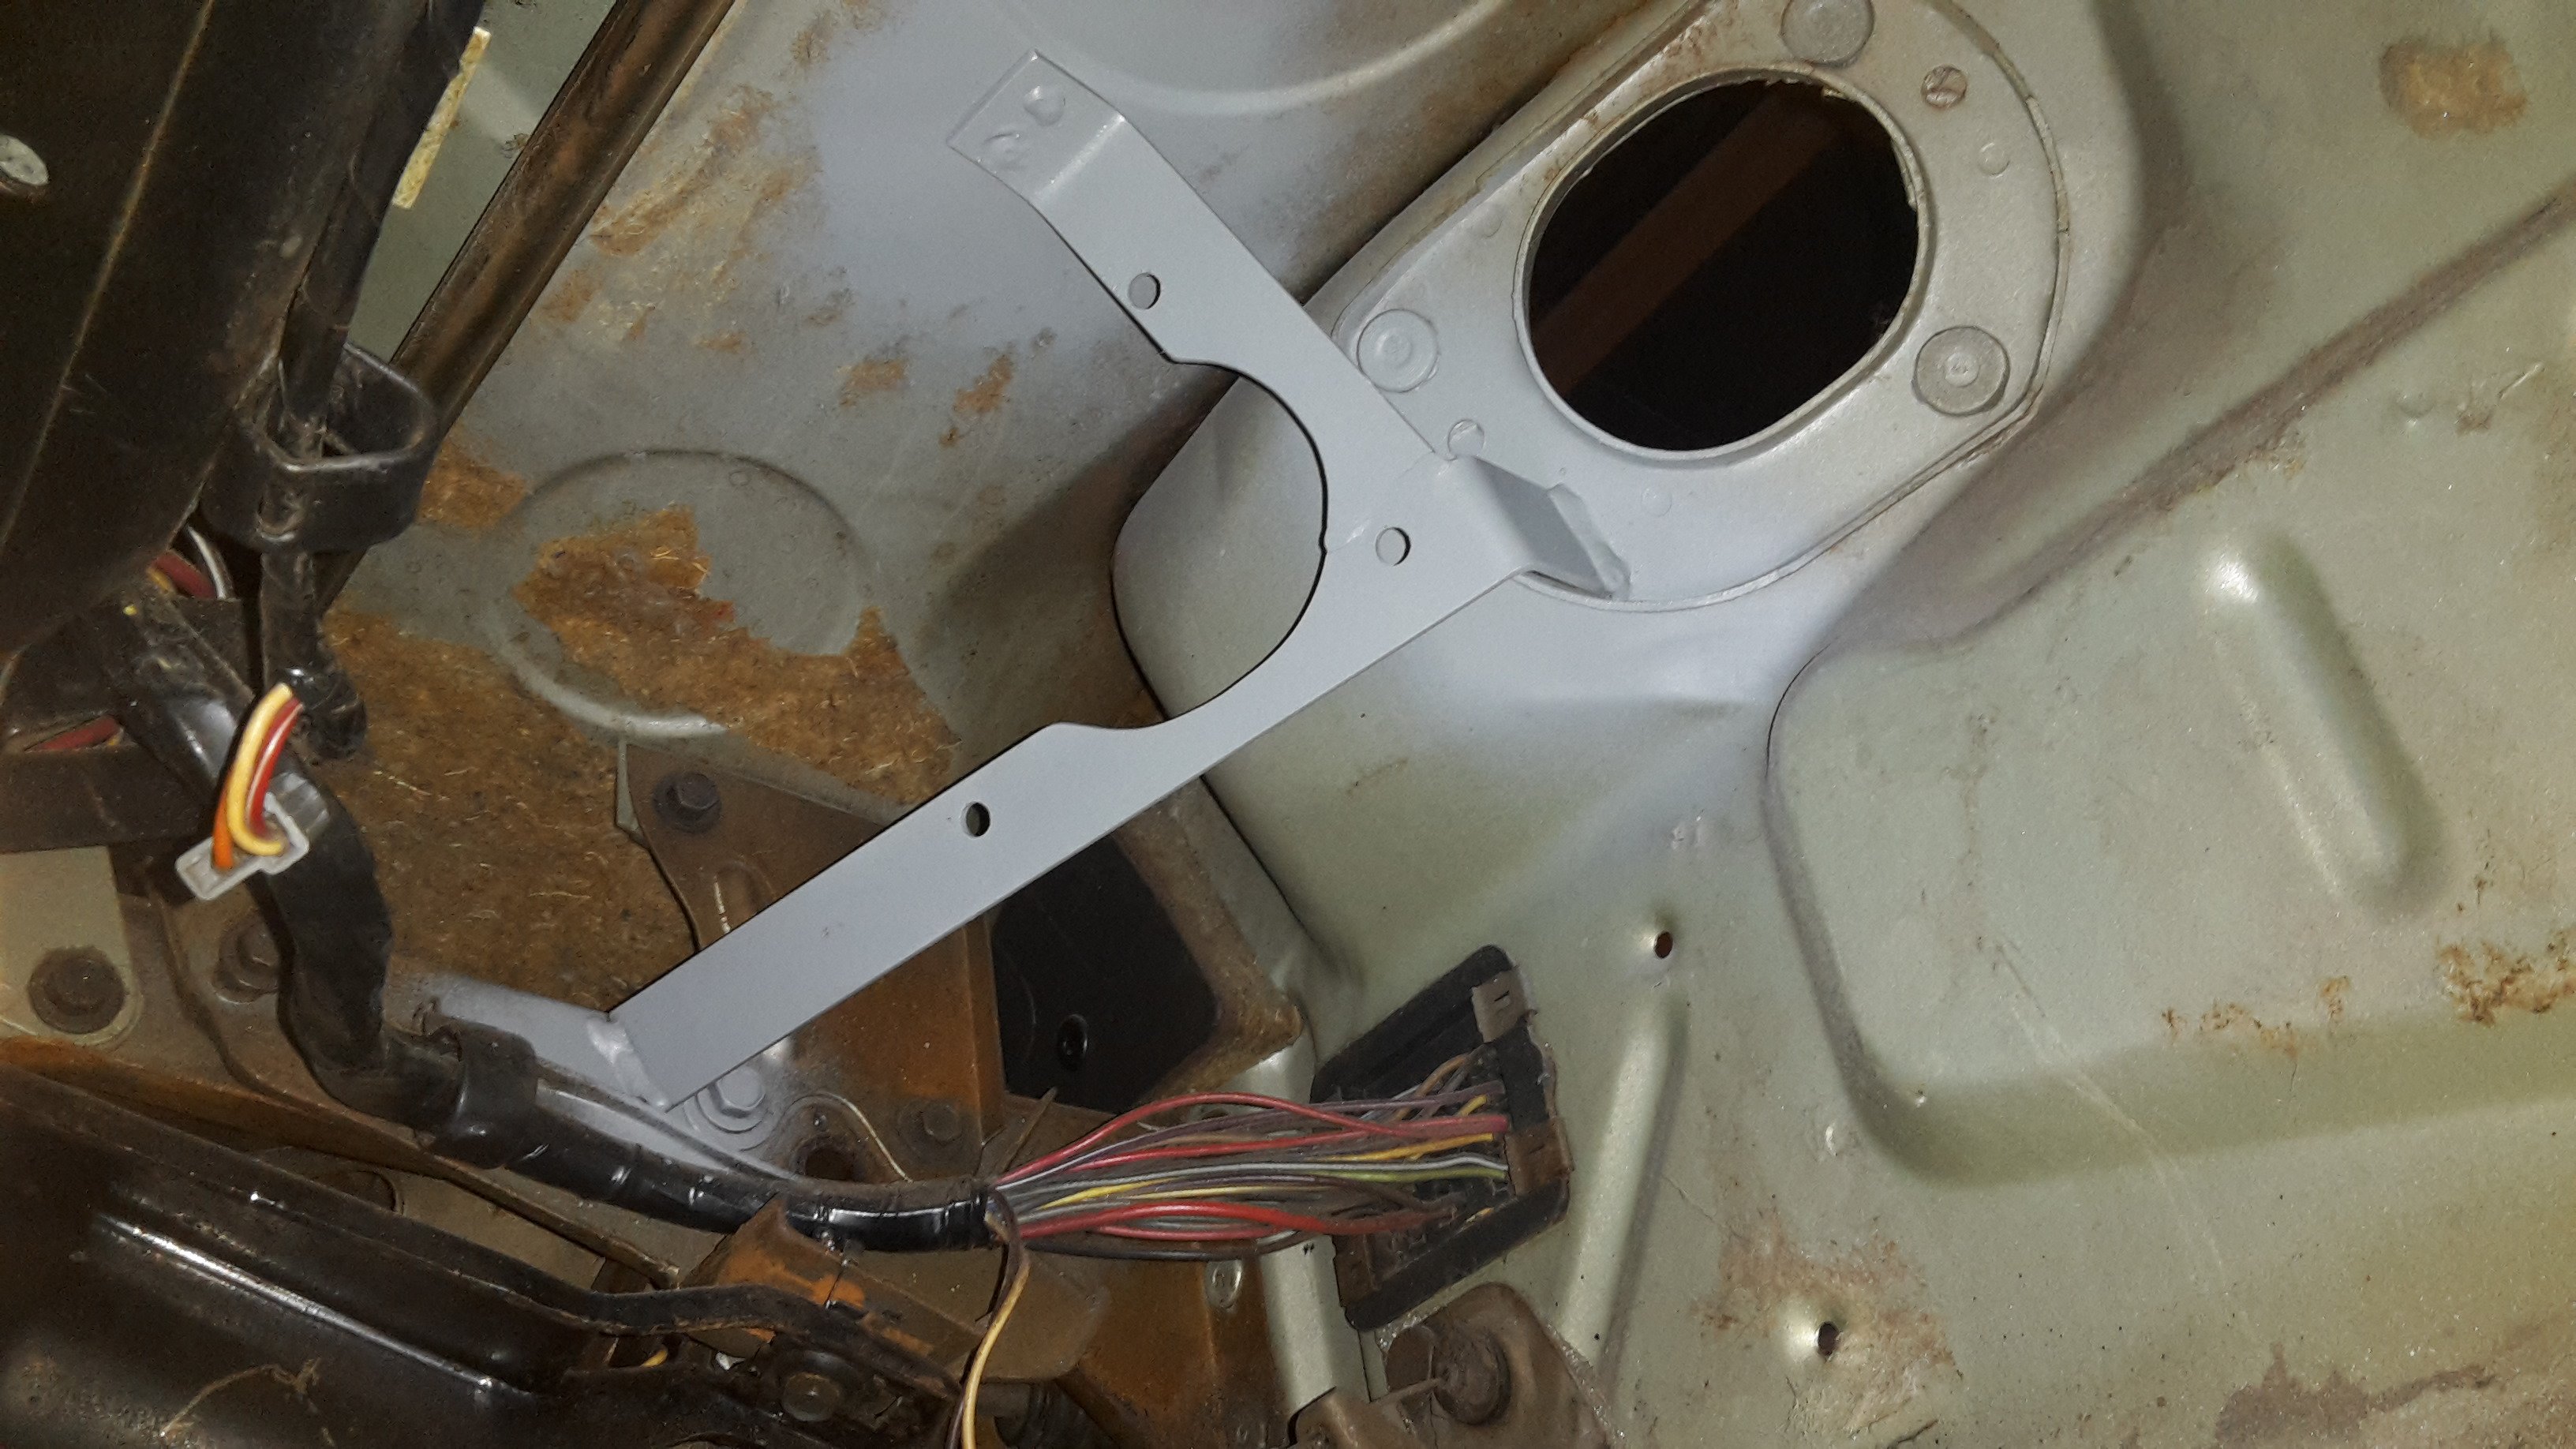
Have decided to use a water air intercooler this time , I'm going to mount it in the passenger side footwell/ up against the firewall where the heater was This means the intercooler pipes can be somewhat hidden. I'll run a pipe from the turbo under the rh guard thru the firewall . Out of the intercooler there will be a pipe thru the hole where the wiper motor was, straight into the carb hat This meant I had to shift the wiper motor to inside the car under the dash which is also a bonus cause it's very ugly. So I mucked around for ages getting the position right and made this thing. Shit update but it's progress at least...
1 point
-
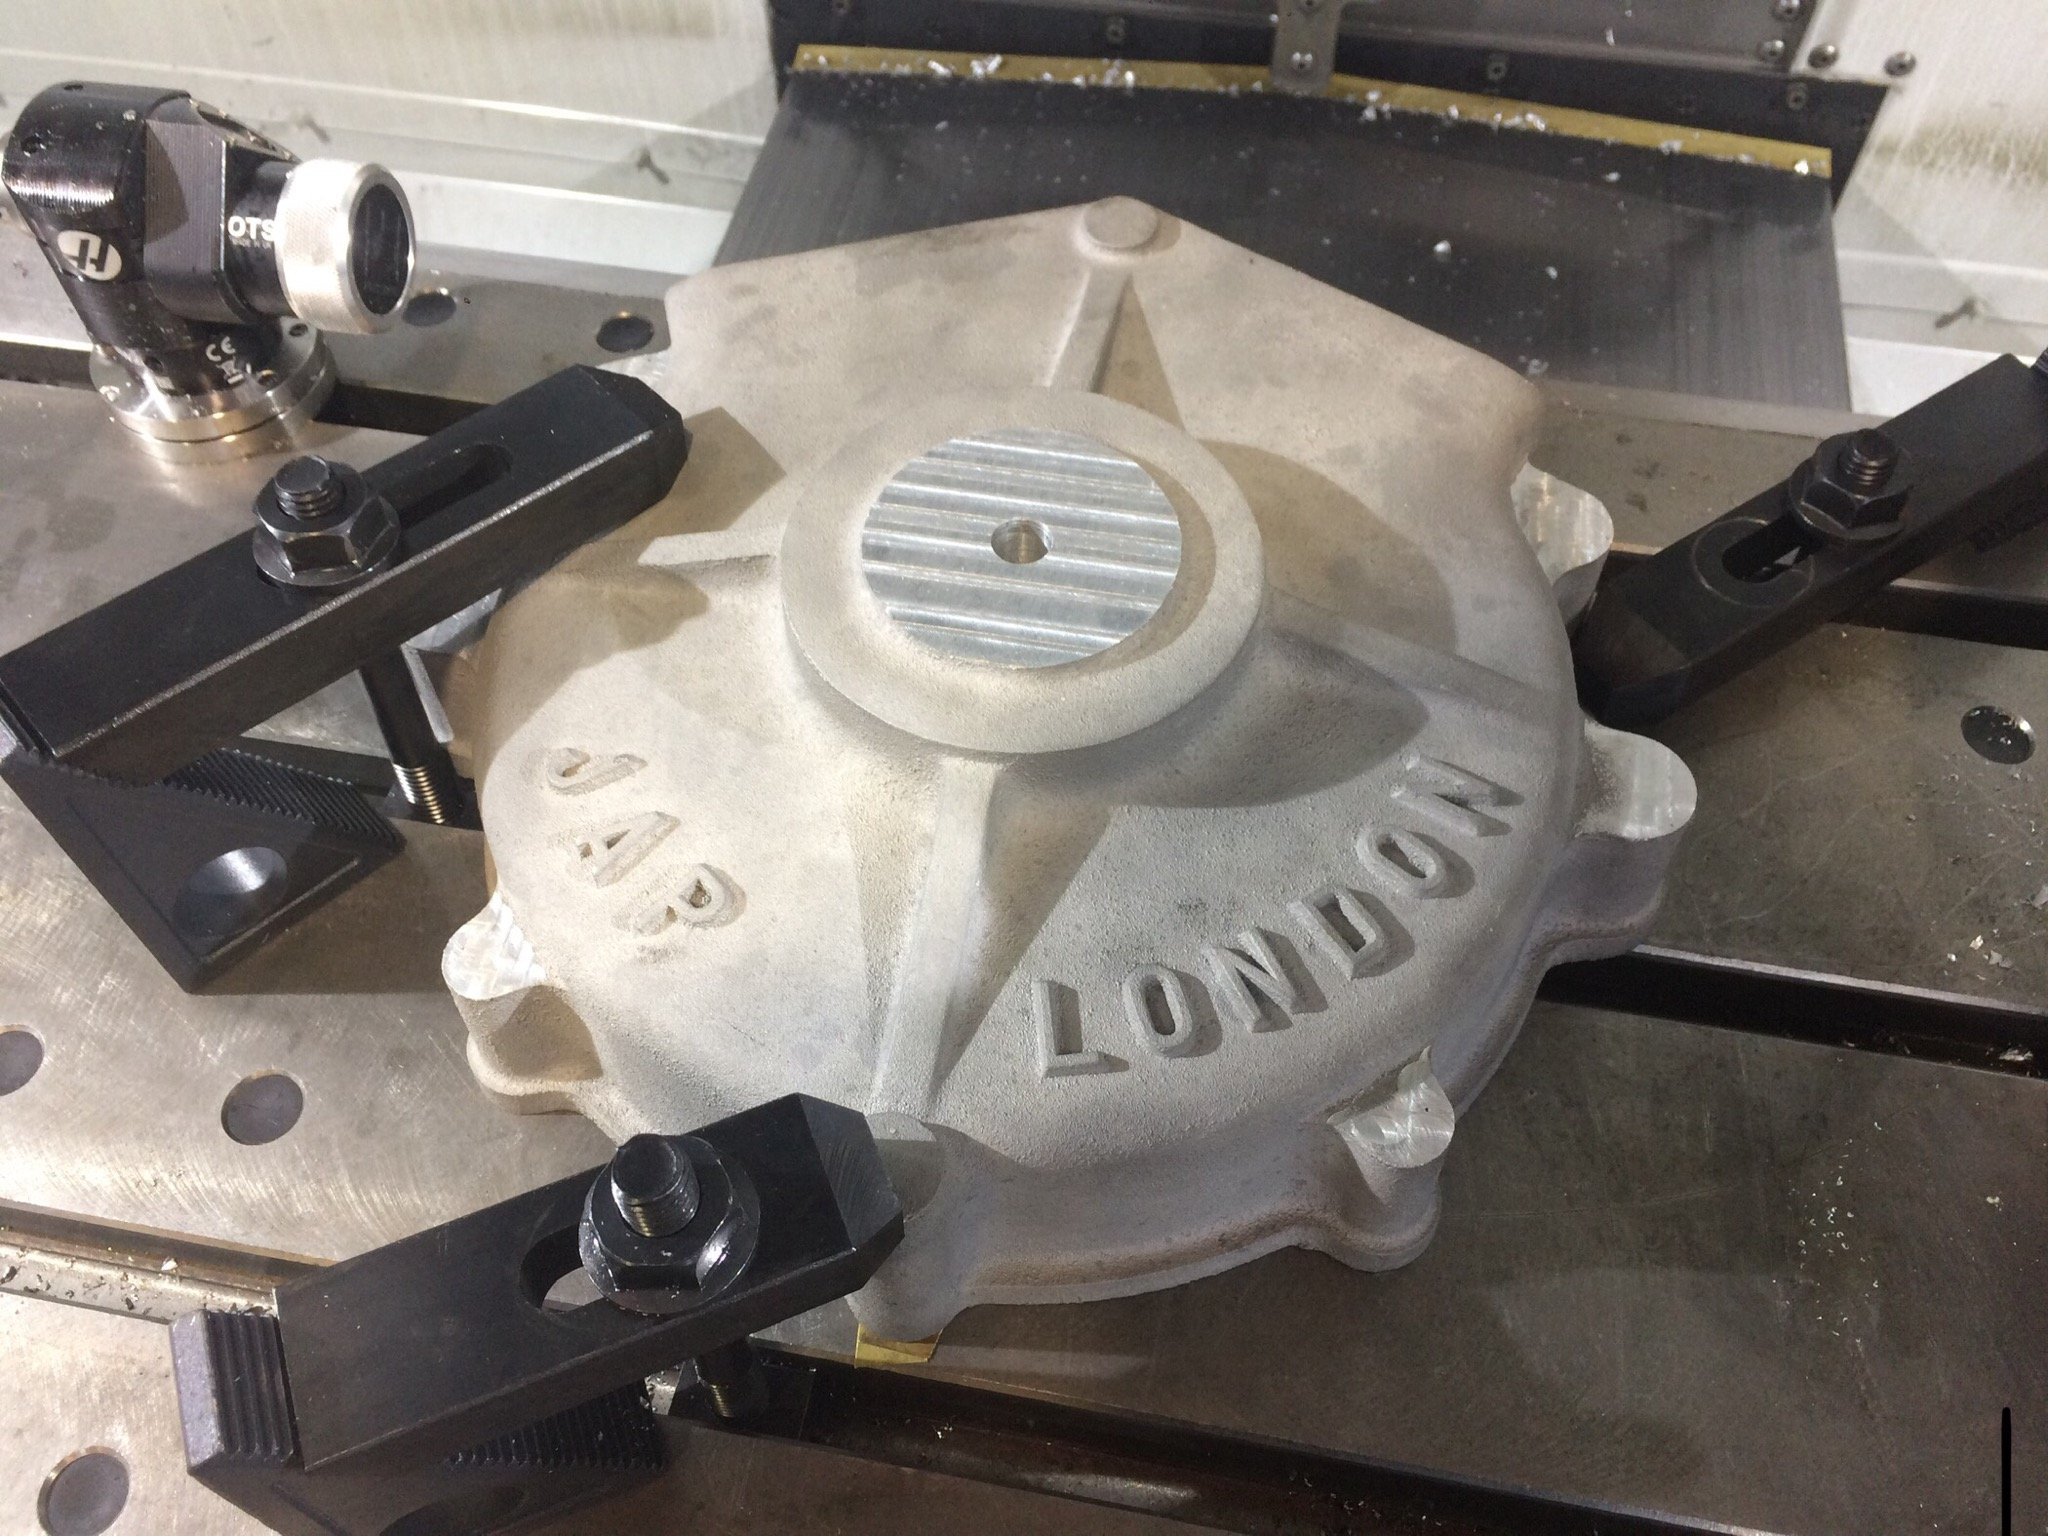
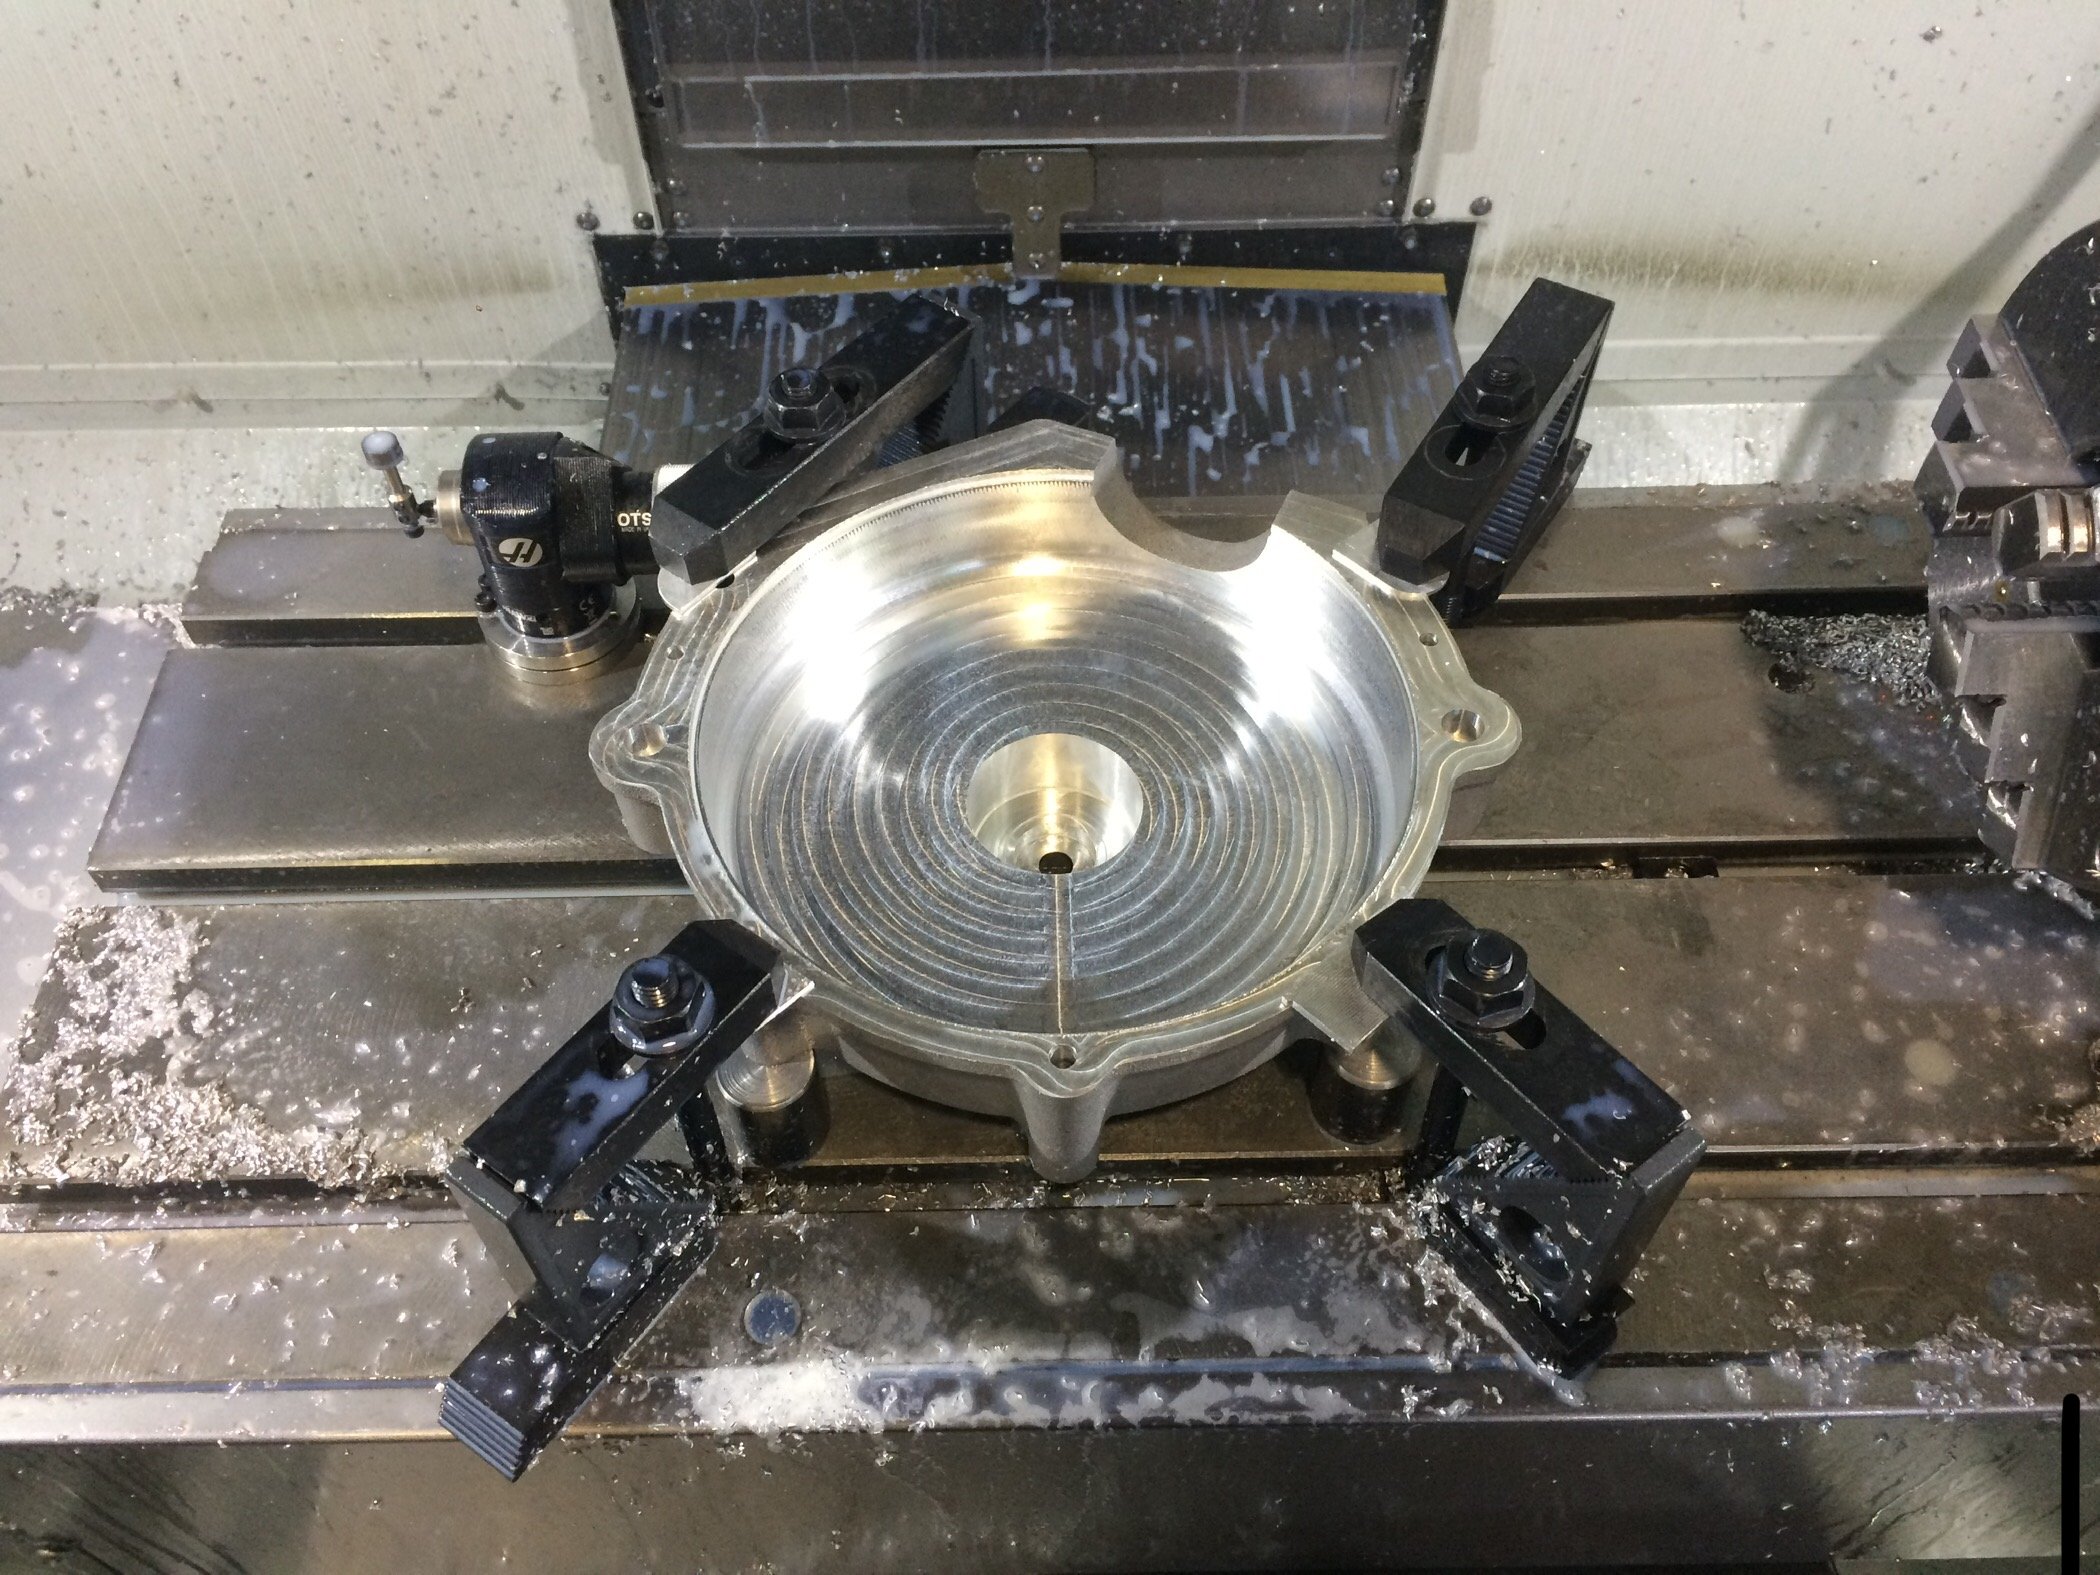
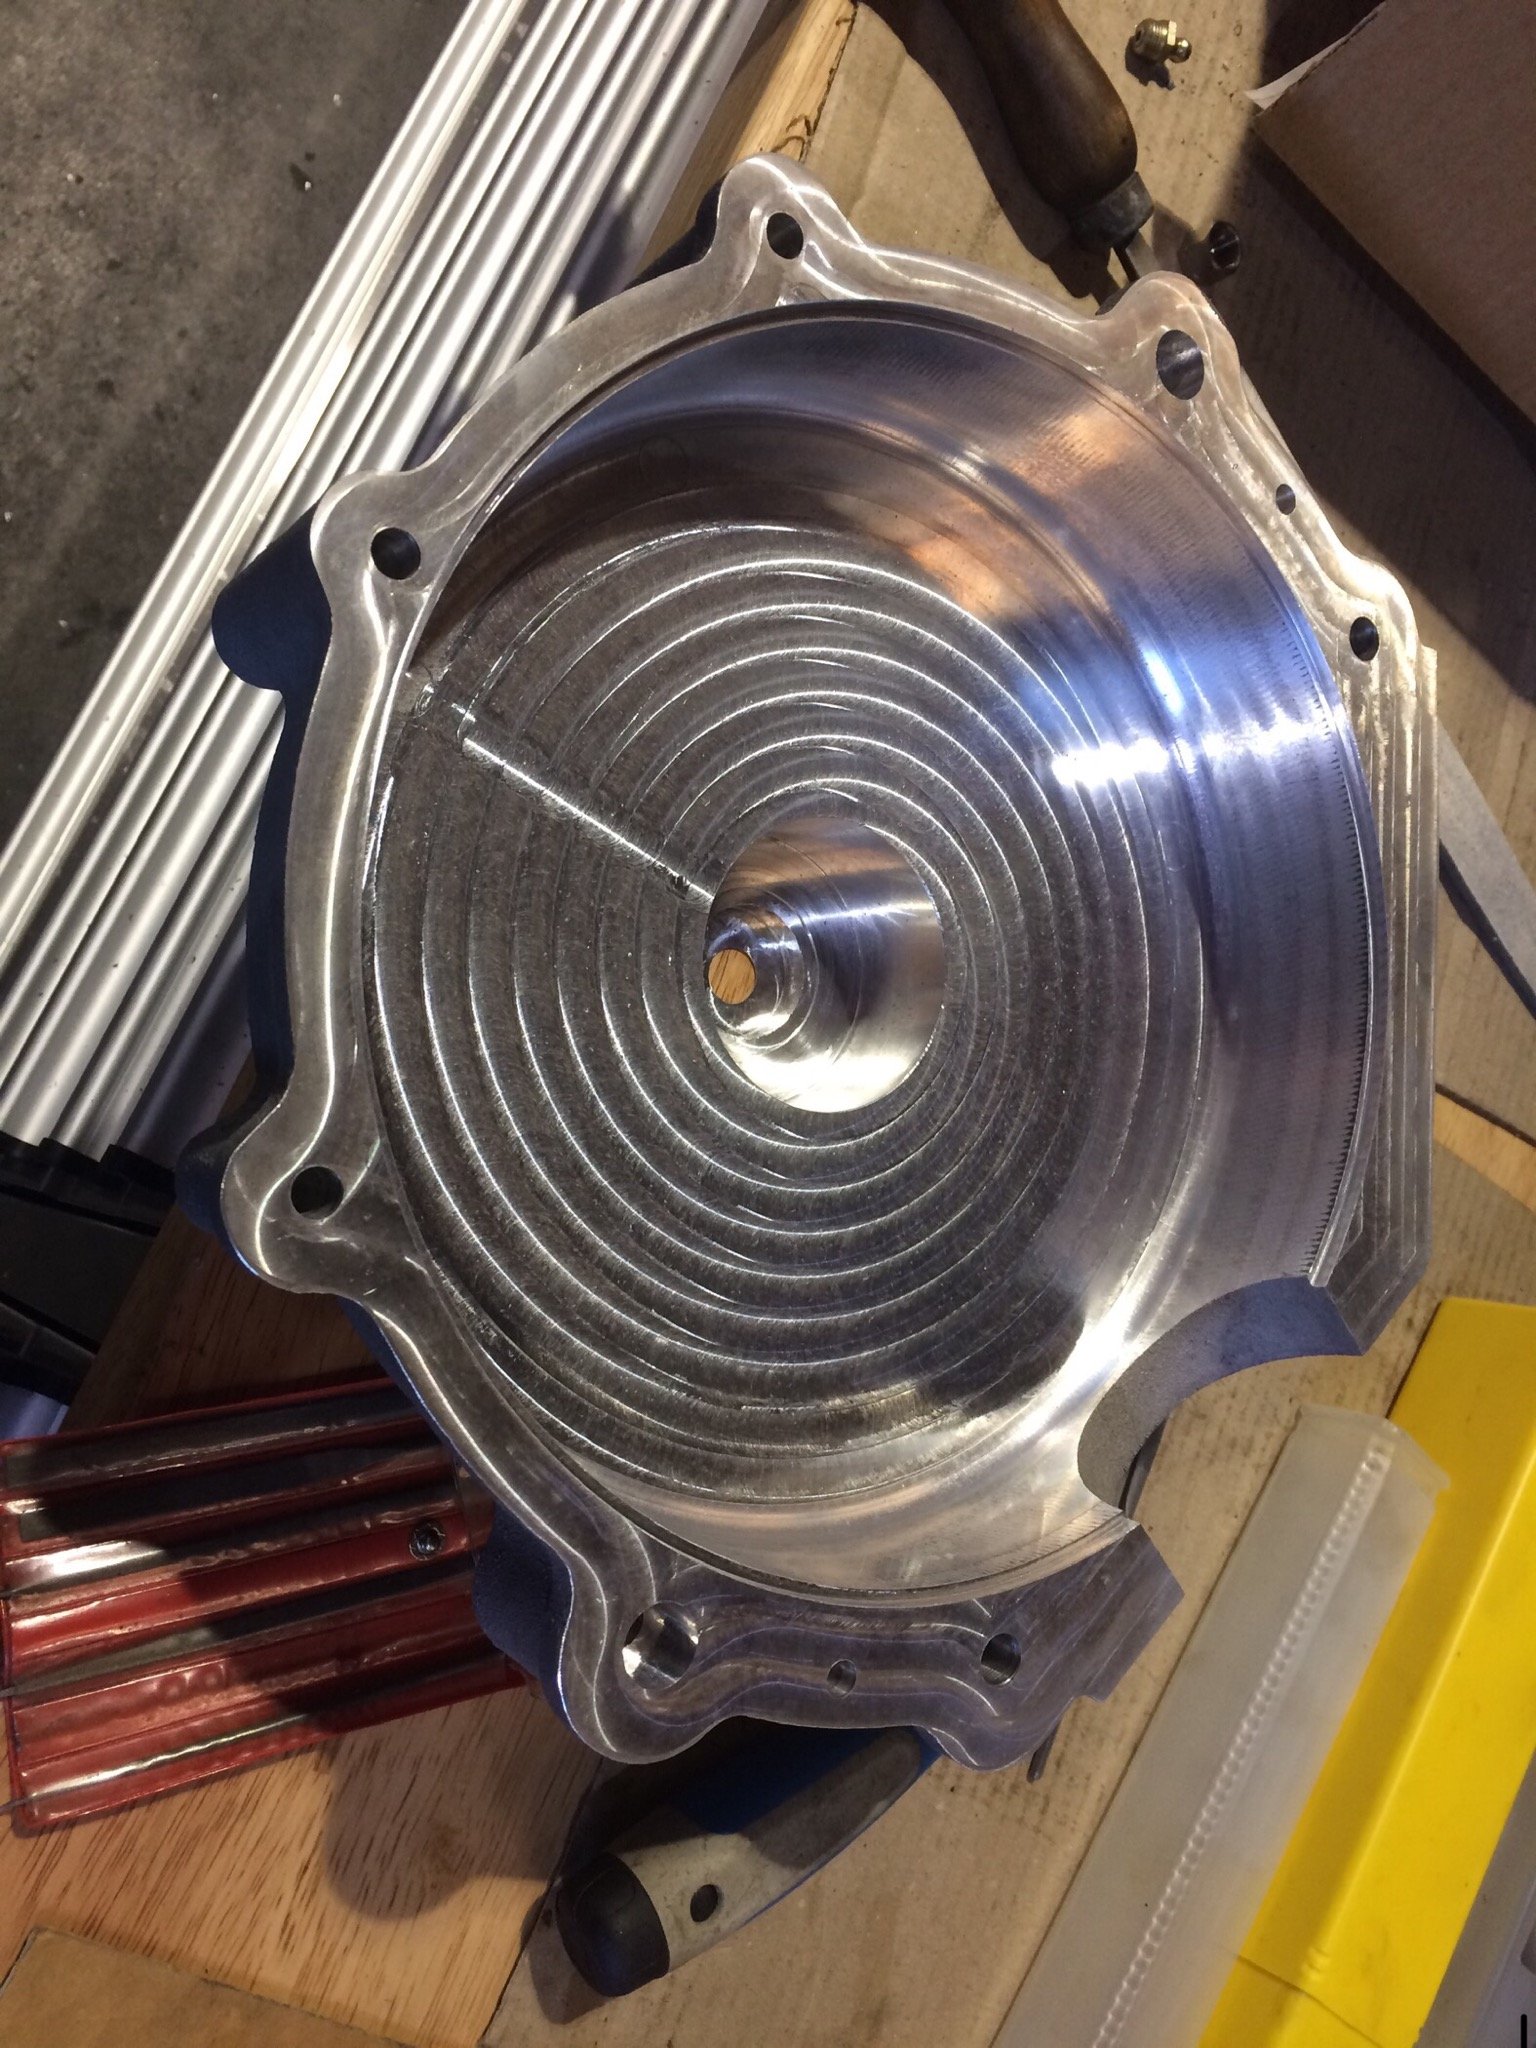
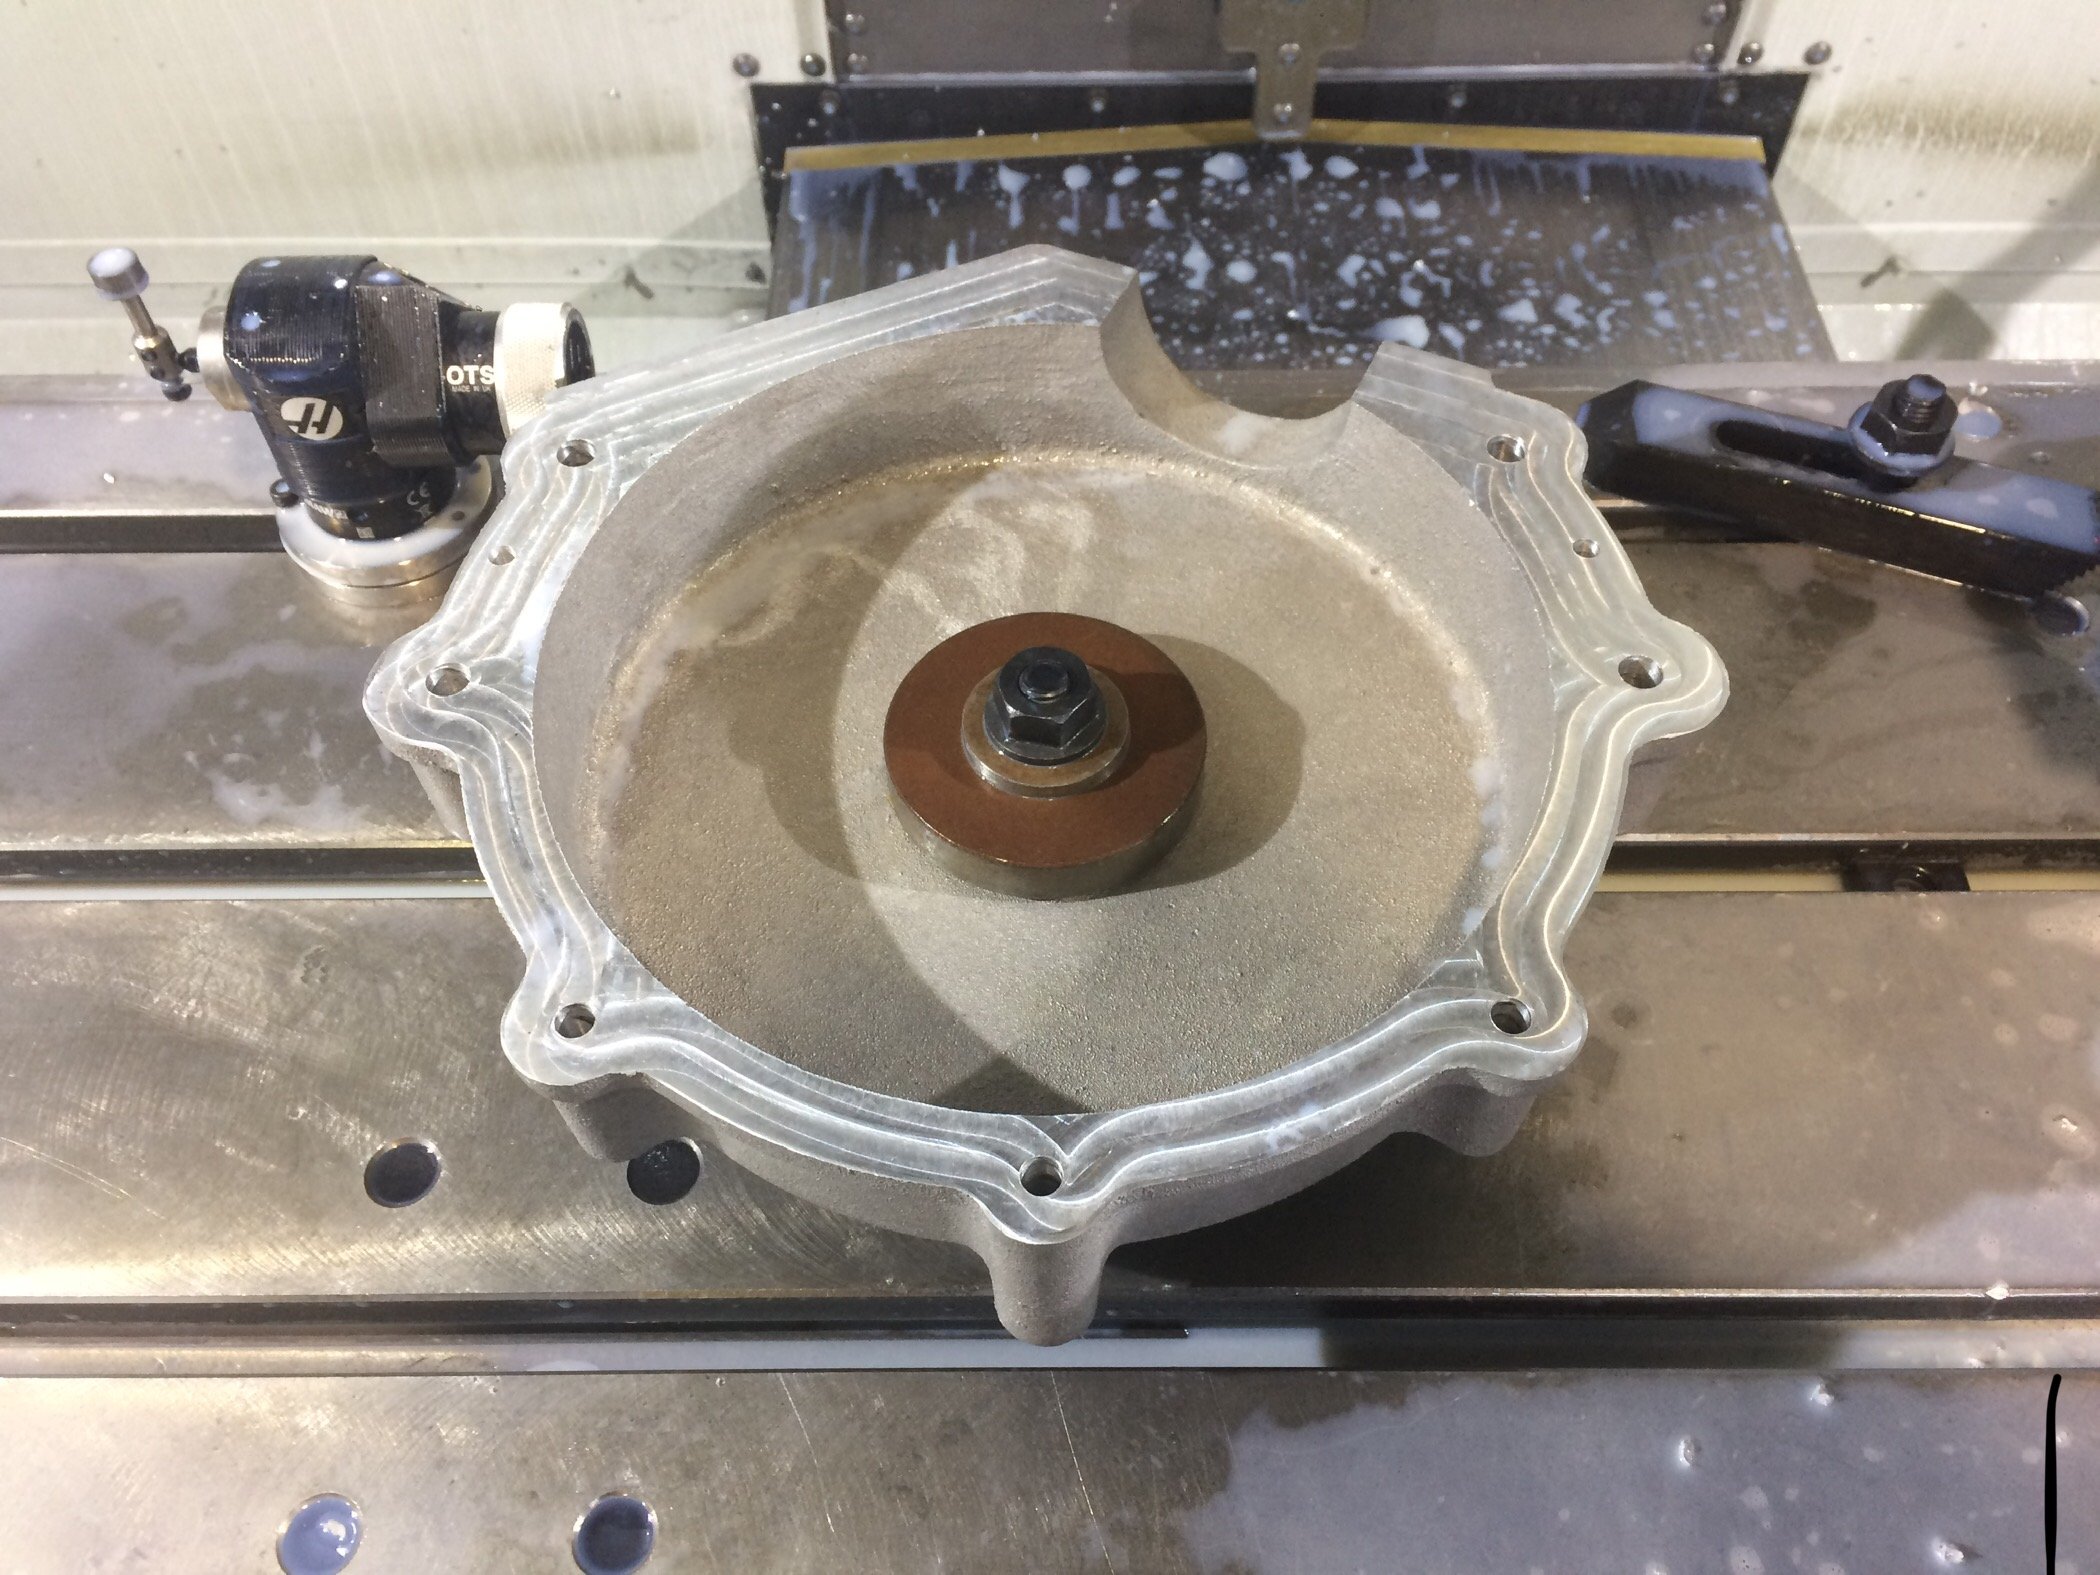
Did you ever see the engine run SOHC? A bit of info on this engine. It’s a 1930 JAP JTOR long stroke racing model of 1000cc. They were used in racing 3 wheel Morgan’s and Brough Superior motorcycles. These v twins are very rare these days and are worth a large amount of money. Lucky a place in the UK has reproduced some accurate castings for anyone mad enough to try make their own. I will be changing a few things with this one to try and get a bit more capacity and power out of it. Made a start on machining the drive side crankcase half. Bearing boss faced off to become the first reference surface Flipped over, mating surface faced and holes drilled. Now clamped down with spacer blocks to machine inner surface and bearing bore Inner features finished Next up timing side
1 point
-
Budget shelter nearly finished. We had to add 4 more ribs today to get the iron to sit better. Aesthetically its quite poor. Practicality, and budget wise it's very good.1 point
-
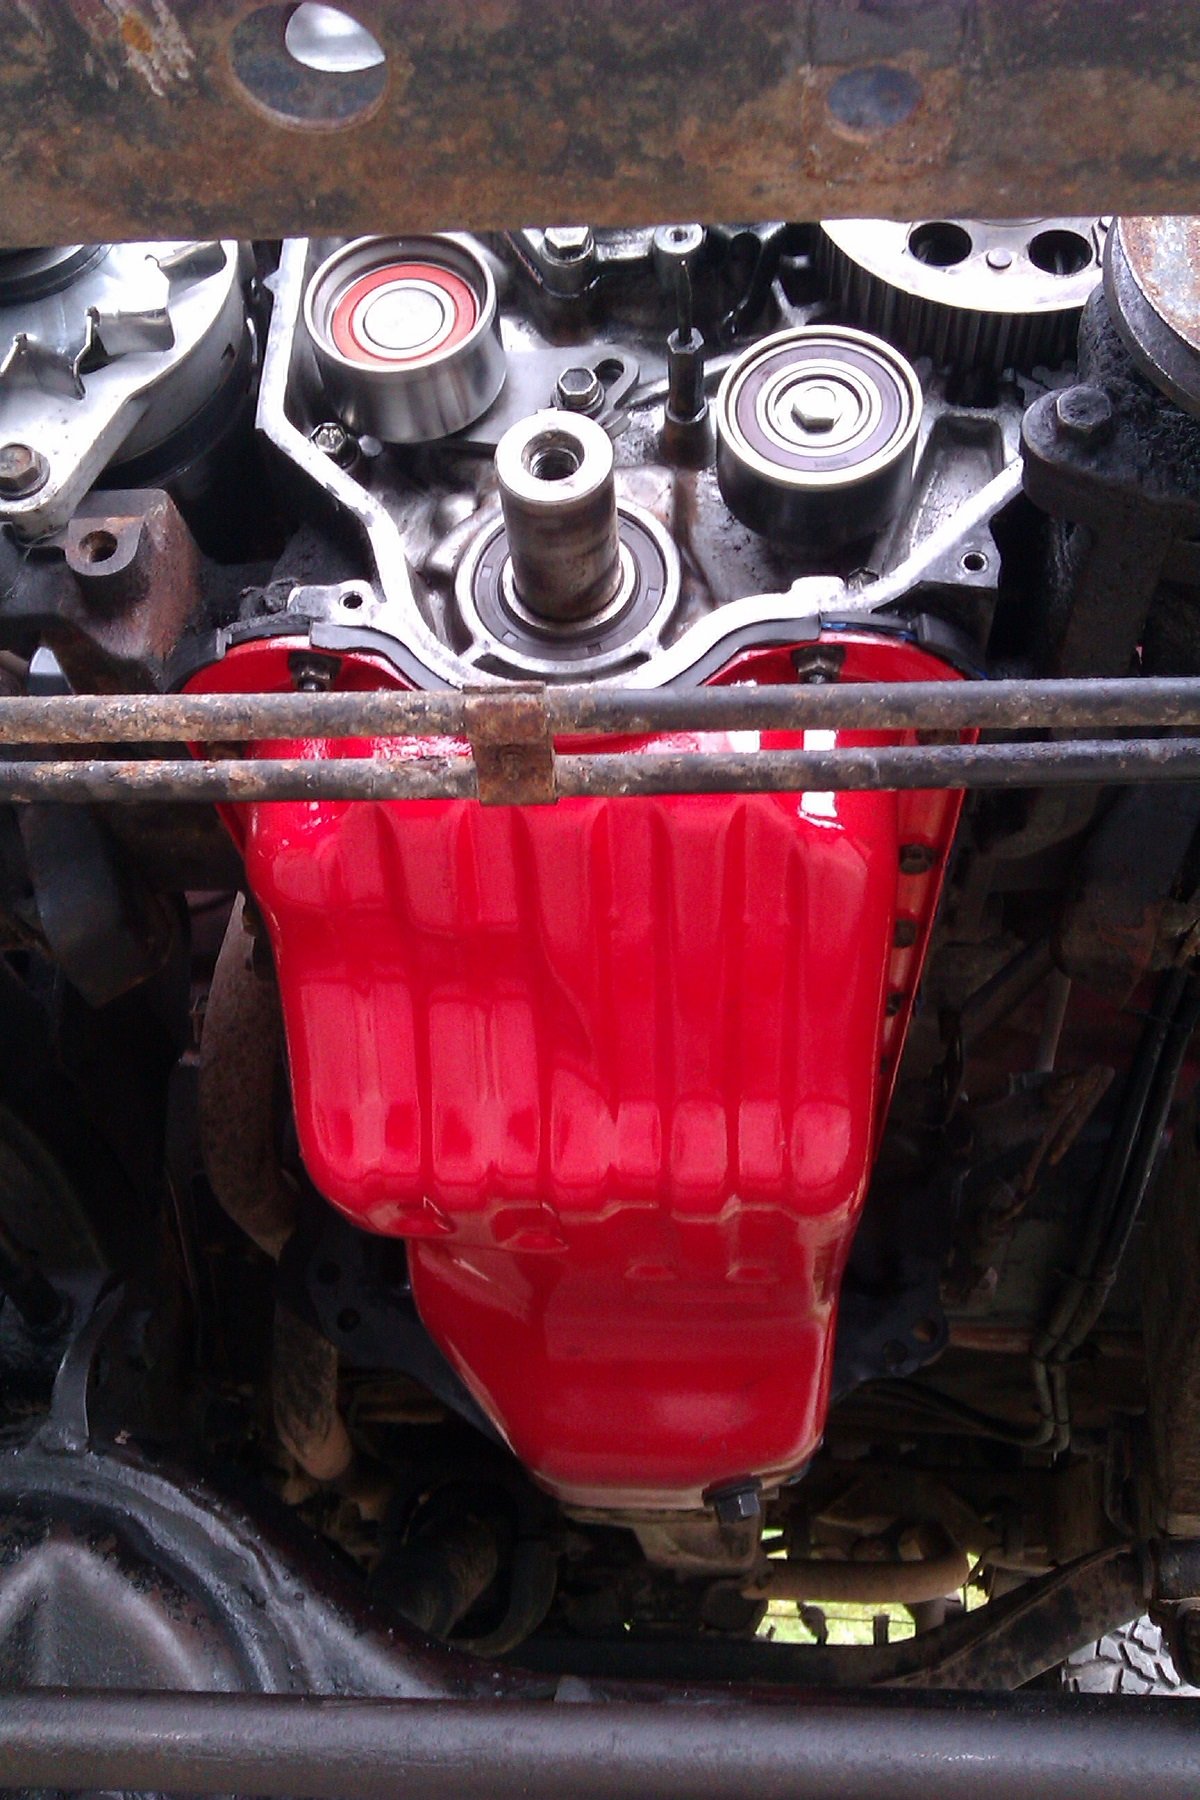
There isn't a single problem in life that cant be improved by painting your sump red. Not a speck of metal in the bottom of the pan, bit pleased after all these years/miles. New gaskets & crank seal fitted, hopefully running leak free in the morning.
1 point
-
Yellow will pop through the laser cut trd red bash plate Trd autocorrected to turd. So you could get that laser cut in too I guess1 point
-
When I was slapping everything together back at the end of 2017 to get this thing on the boat to the UK, I did a bit of a hash job splicing the wiring looms (4age engine and ECU loom, and the Starlet body loom) together, just to get it into a running state to load. It worked, so I left it as it was for 12 months and just enjoyed the car, but it bugged me knowing what a shitfest it was under the dash. Take a look at this mess: So I ordered a nice fuse/distribution box and set about shortening wires, routing them properly, and generally making the whole thing easier to troubleshoot and less of a fire risk and OCD nightmare. Made up a simple backing plate for it that I welded to one of the dash braces: Tucks away under the dash nicely, conveniently close to the body fusebox: The thing I liked about this box is the ability to run 2 +12v busbar lines; one permanent live and one ignition switched. Nice to keep everything in one place and minimise connections. Much happier. Oh, was overdue another run out to Caffeine and Machine, so went there for some demon nachos last Friday1 point
-
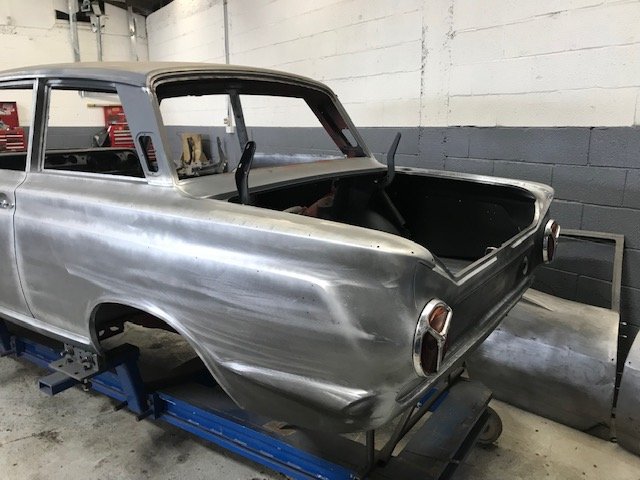
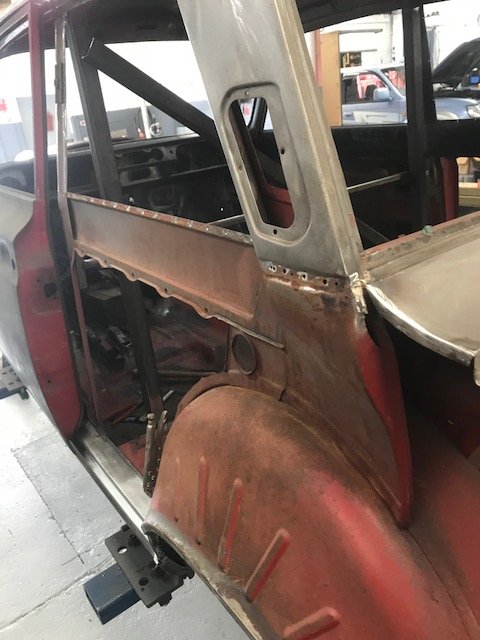
More progress with gapping the doors bonnet and boot. All welded back together again. Trial fitting allthe exterior body parts to check all good and also fitting the front and rear screens and rear quarter windows to check new rubbers all work.
1 point
-
If I can afford the gas I might take my dusty Benz.1 point
-
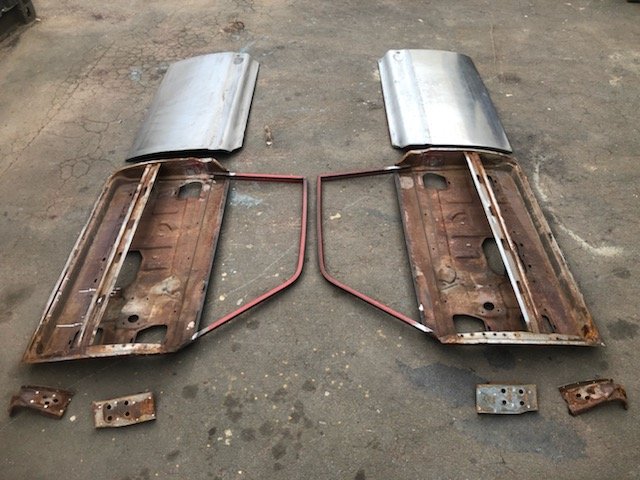
Doors taken apart with skins removed and hinge plates. Frames off to the dippers.
1 point
-
1 point
-
1 point
-
1 point
-
1 point
-
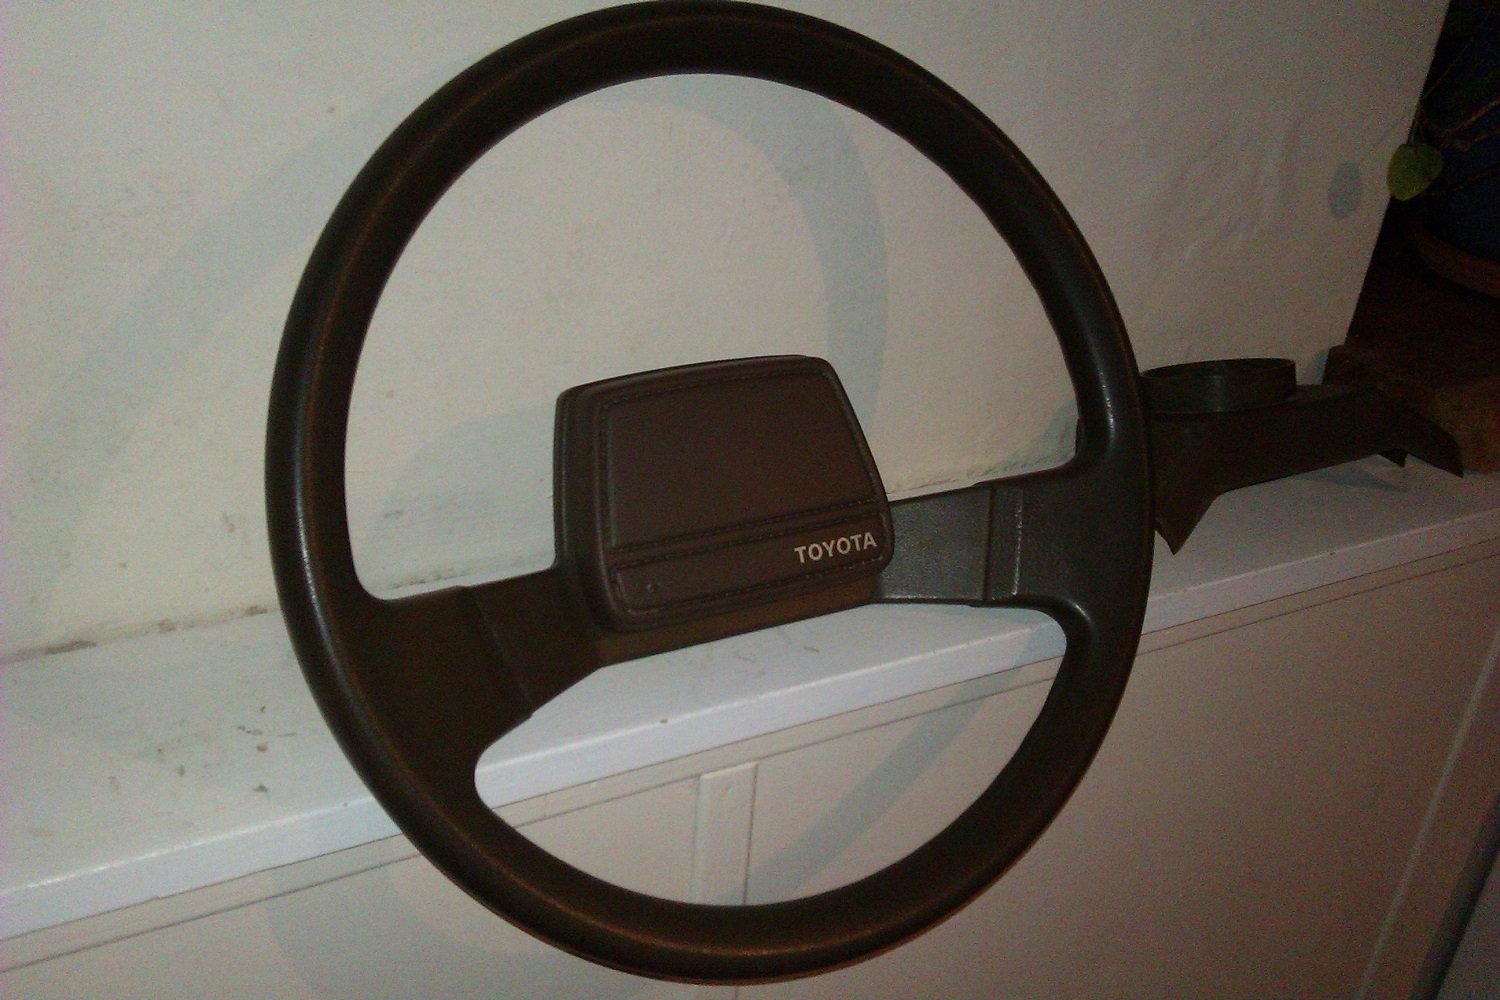
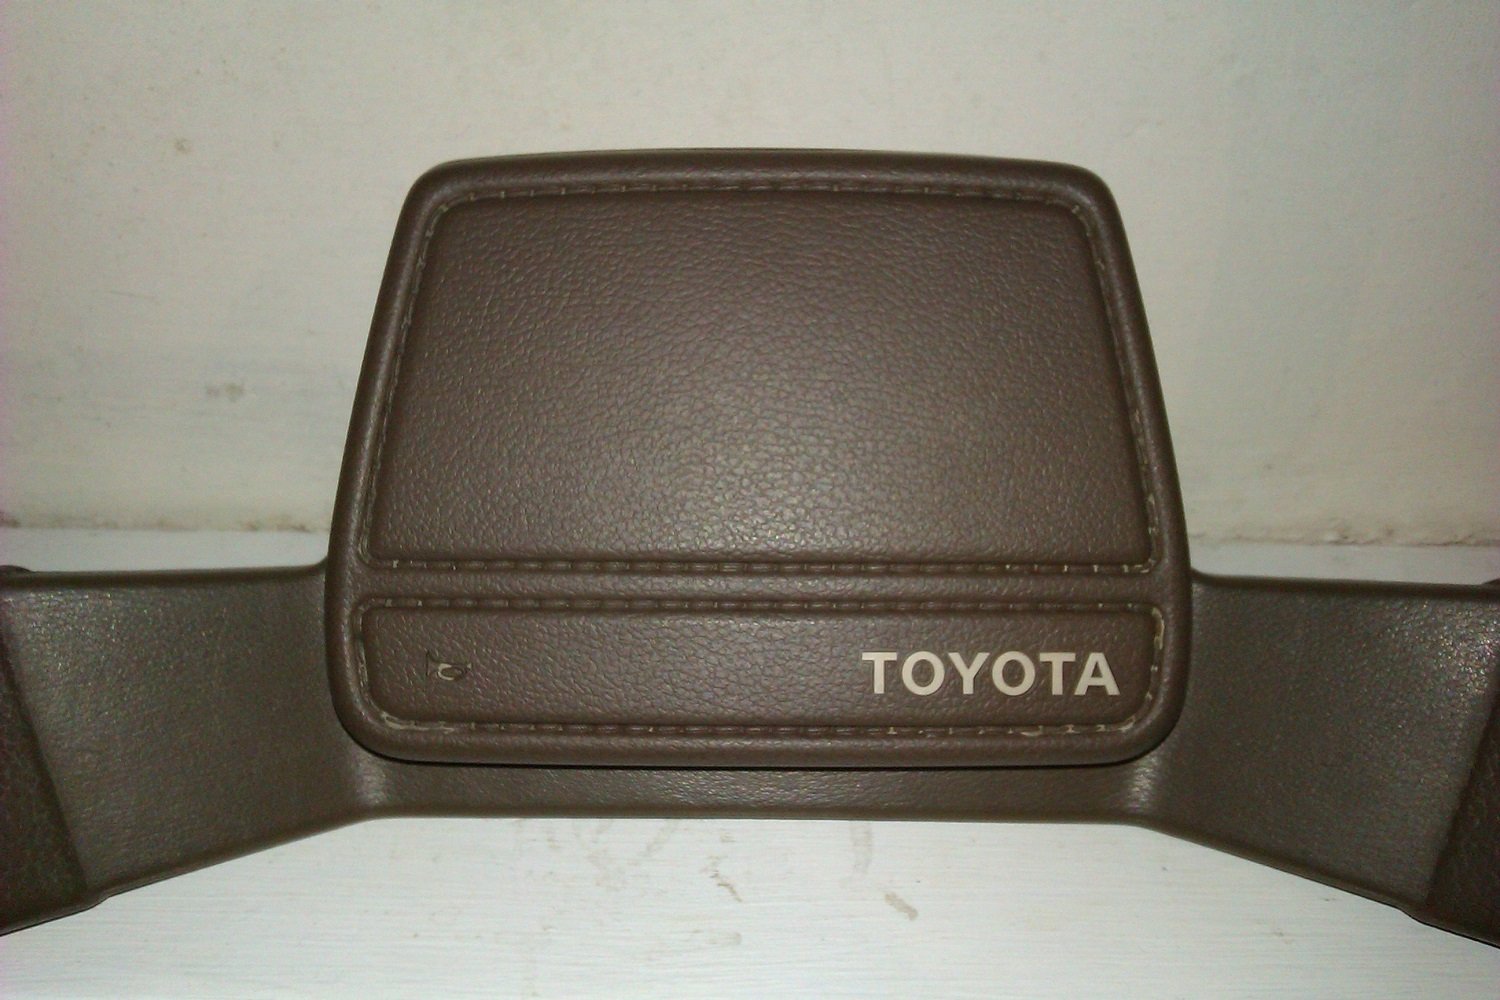
What happened was....... The problem of the sluggish performance has been solved. As has been pointed out the 2.4 litre 2L diesel engine is indeed "gutless". 68 bhp, so I'm told. However, the main problem was the rusty old nut behind the wheel. Too many years of triple diamond four-wheelin' mean't I'd forgotten where the transfer lever goes for 2H on a Hilux. It's not the same as a Mitsubishi. Derp. Autopilot plus hubs locked in and it's no wonder it was struggling. The new tyres weren't ever going to let the box unwind either. Silly Shuzz. MOT tomorrow so got it all ready and then set about tidying up the interior. Just as I finished today, the headlights and fog light packed up. Fuckity balls. Still, the interiors come up ok. 1980's steering wheel FTW /pics Hopefully some good road legal type news tomorrow
1 point
-
IUZ-FE swap will get you going.1 point
-
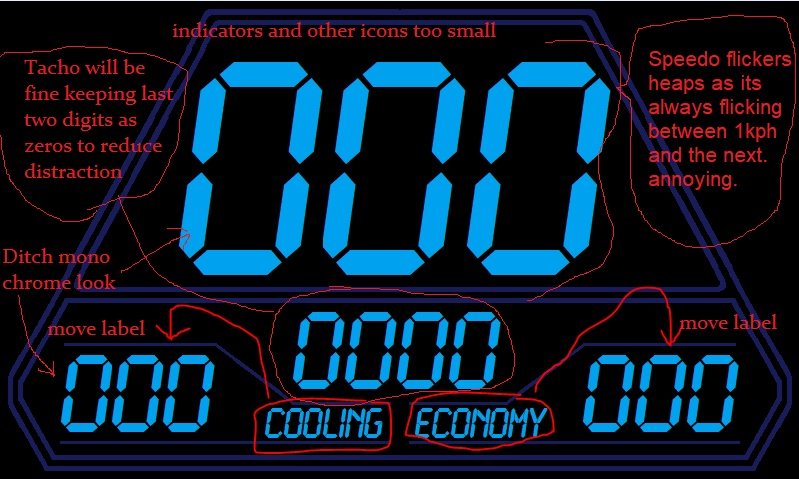
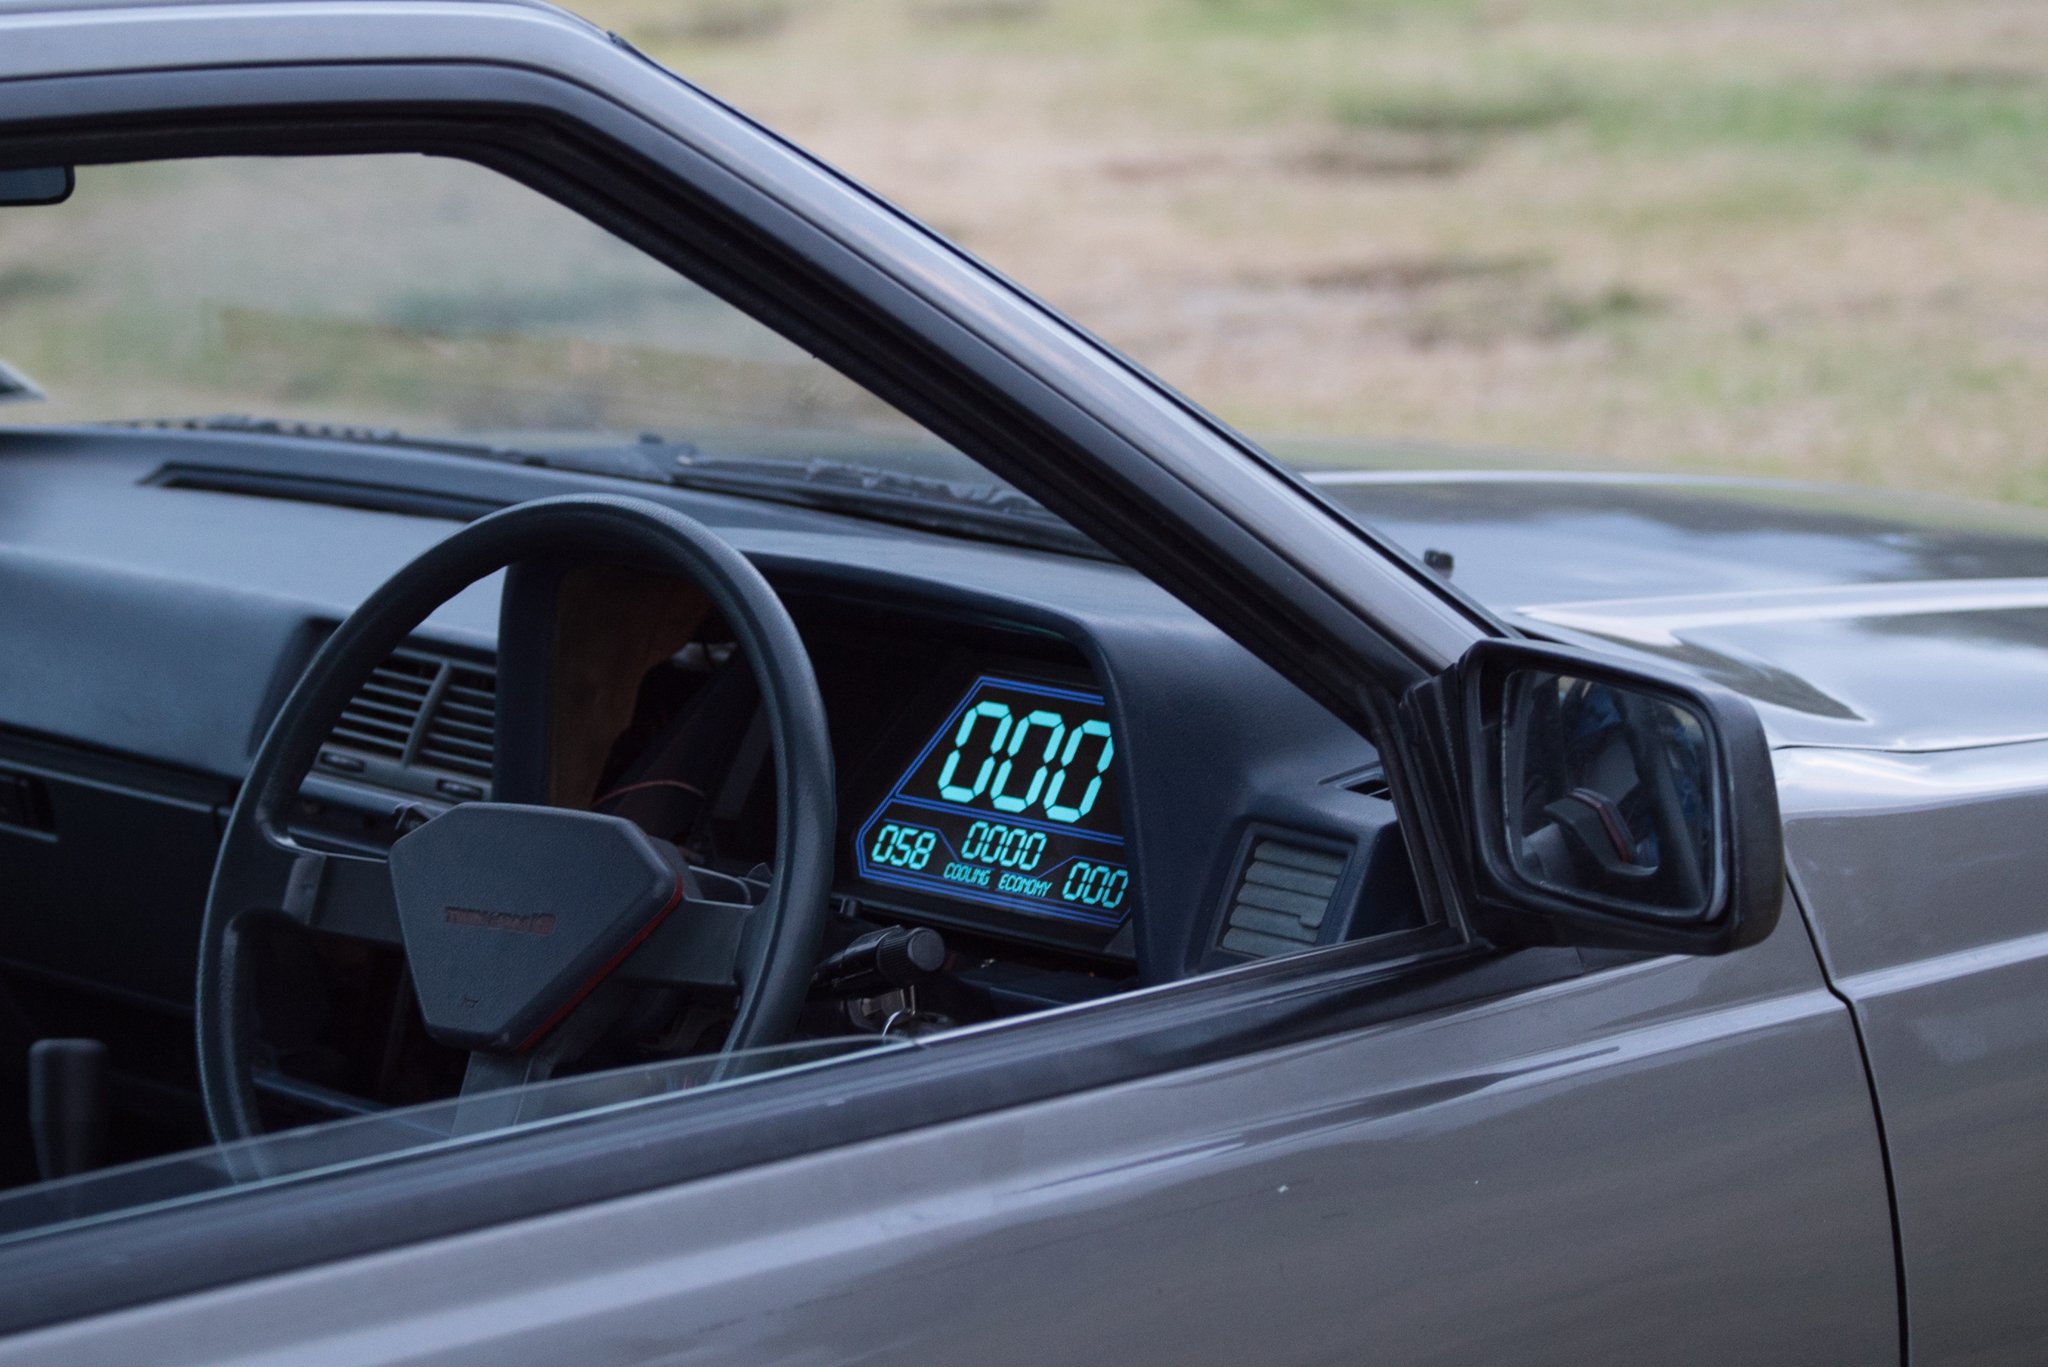
Got a driveshaft sorted until I can get something made up, so went on a roady to test out the dash. Drive up to Uretiti was good! As expected I really need to put some KMs on it and get a feel for what's good or whats annoying or so on. Very quickly a few things became apparent that they are fecken annoying! Also this thread has been severely lacking MSpaint so here we are: So on the plus side, the ~250? Nit screen seemed decent enough even with backlit conditions. I've got a 1000 Nit screen here to try too if I need to burn my eyeballs out! Most of the annoyance came from values flickering. Because you might be hovering on say 89.9kph and then 90.1kph... So it will flicker between 89 and 90. Options here are either that I take a rolling average of the last XYZ amount of speed results and smooth it. Or maybe only change the speedo value if the number goes up or down by 2kph or more. With the tacho, this was annoying for similar reasons in that it can read from the ECU down to a single RPM, so its a constantly moving number which is distracting. I'm thinking that I'll filter it so it only updates the screen in 100rpm increments, so will go 2400rpm, 2500rpm, etc. Because again, does it really matter, do you really need to know that the engine is doing 2451rpm? Not really. Maybe I could make it read in 50rpm increments below 2000rpm or something like that. Also when it was bright you cant actually see any of the outline lines, only the numbers and labels. So will make more sense to move labels closer to the values. I also realised that although a monochrome sort of look is nice. I setup some cruise control displays so that one button goes Red when you've activated CC, and then goes green when CC is turned on. With the colour differentiation you could instantly tell what status the cruise control was in. So I think more colours will make things easier to read. In fairness though this is essentially a low contrast colour scheme that is probably better for night time. Using a white or yellow or whatever text and it's blazingly brigher even with the same backlight settings. I'm also starting to question the merits of having the triangulated sort of face over the screen, when you're driving and it's bright you cant see any of it. Just the values on screen. So may as well just use the extra screen real estate. Good to be making some progress anyway! I'm looking forward to designing some of the more contextually aware screen functions now that the basics are sorted. First on the menu is a secondary screen for when Cruise Control is turned on. Then I'll look at some trackday related stuff and a few diagnostic pages to make life easier. It's cool having all of the standard dash info coming into this, because I can set it so (for example) if you flash the high beams, or push the brake, or whatever, in certain conditions (like while the car is stationary without engine running) you can use those car controls to navigate through menus or switch screens or whatever. Pretty chuffed to have reached that milestone of driving it with a fairly "finished" prototype though.
1 point
-
2 Valve maaaaate1 point
-
More progress! Getting exciting now seeing it coming together
1 point
-
Next will be finding somewhere to put the wastegate
1 point
-
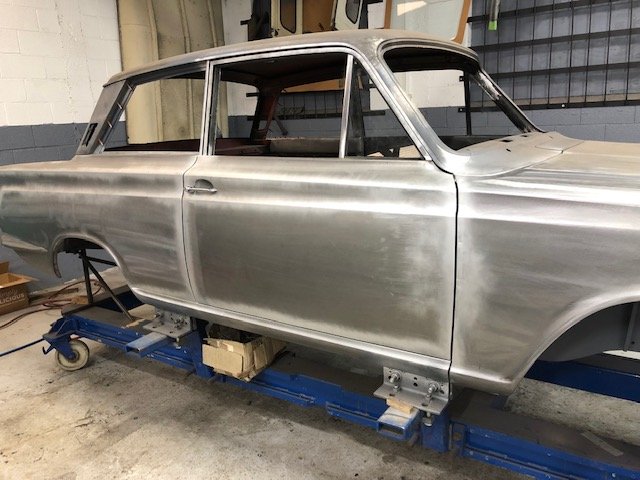
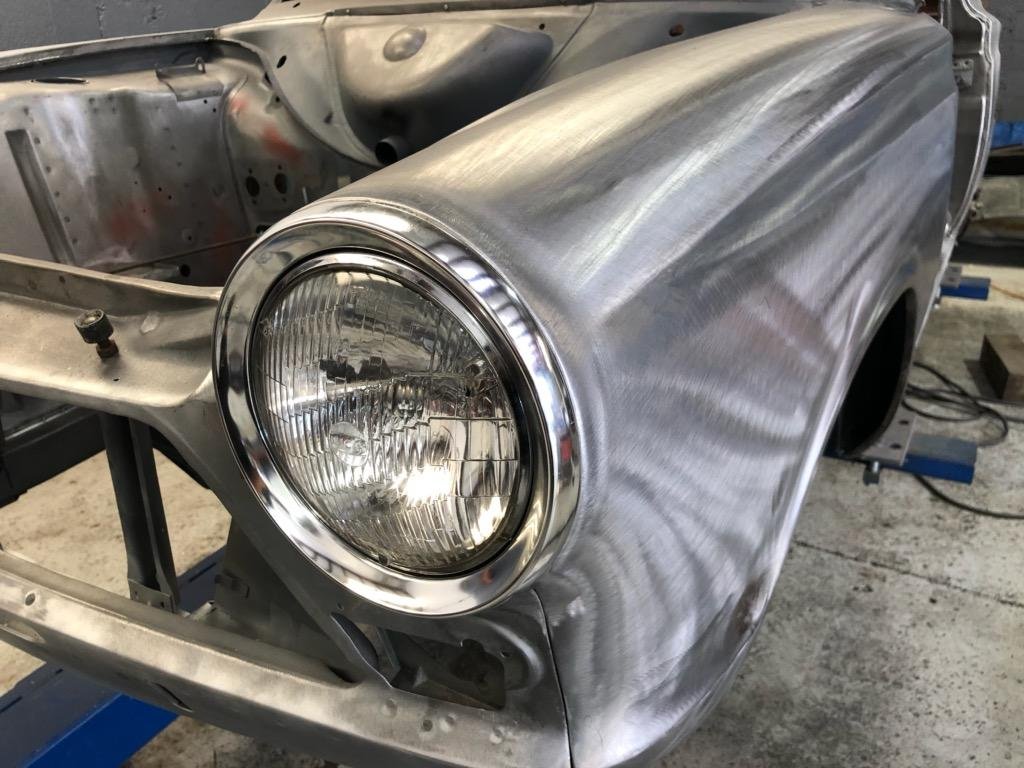
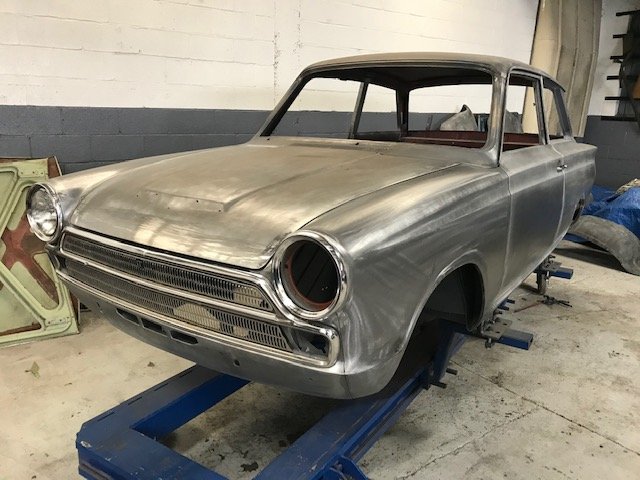
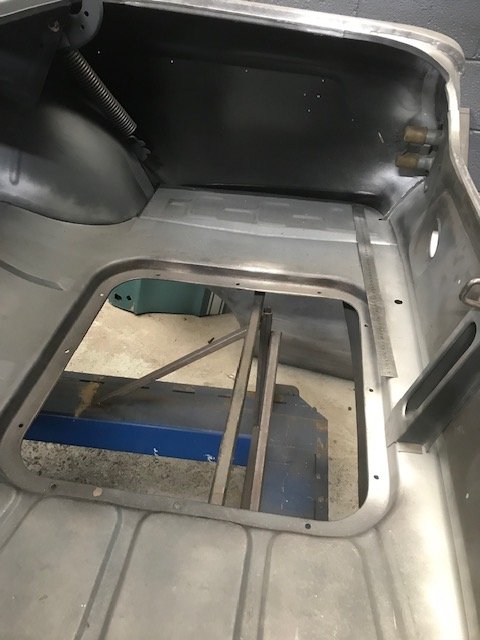
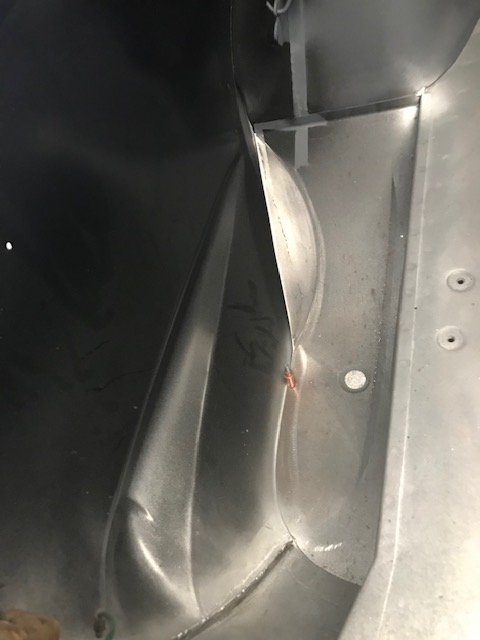
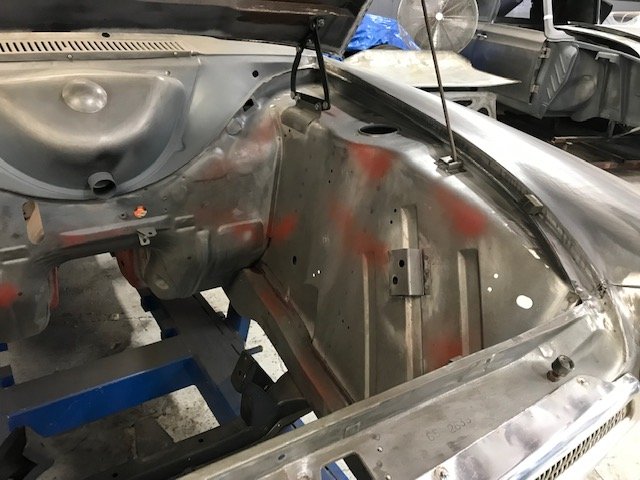
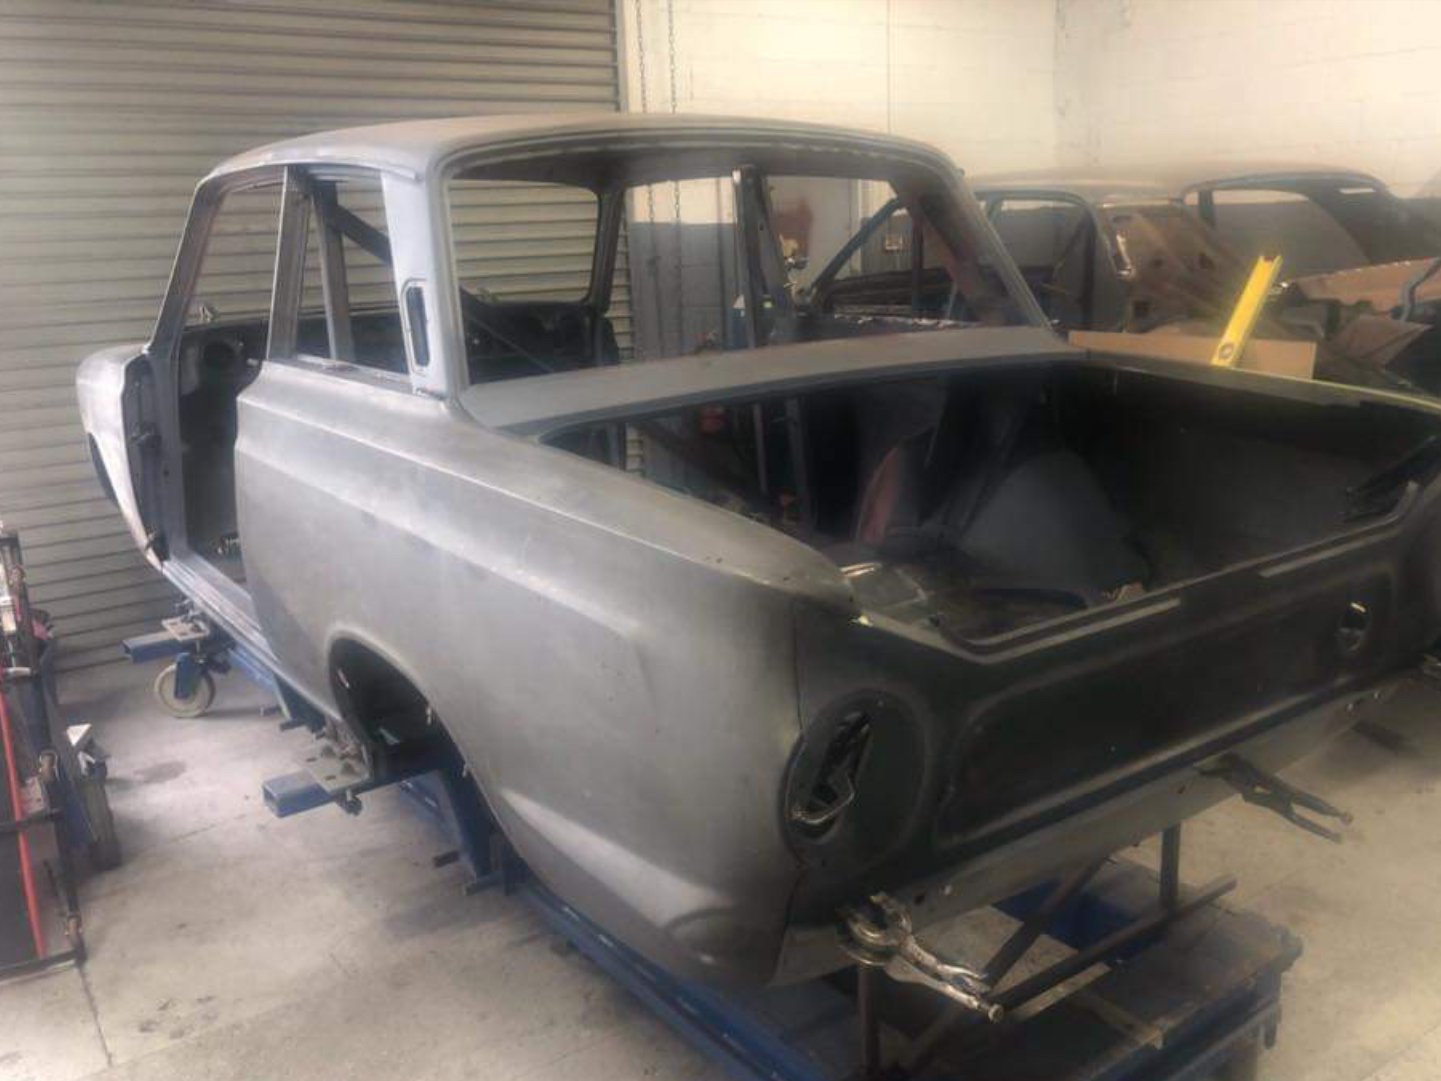
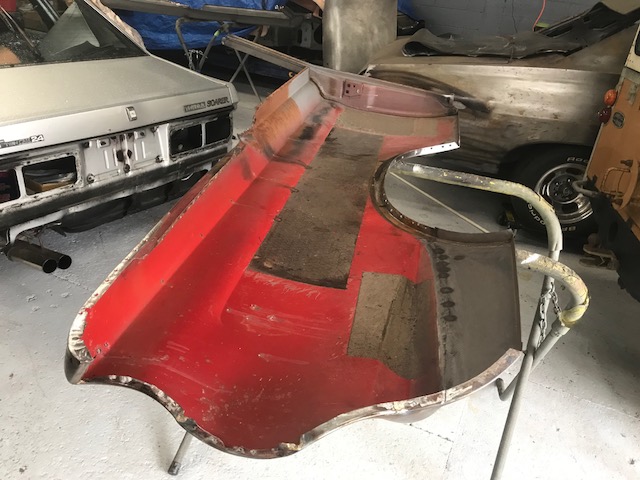
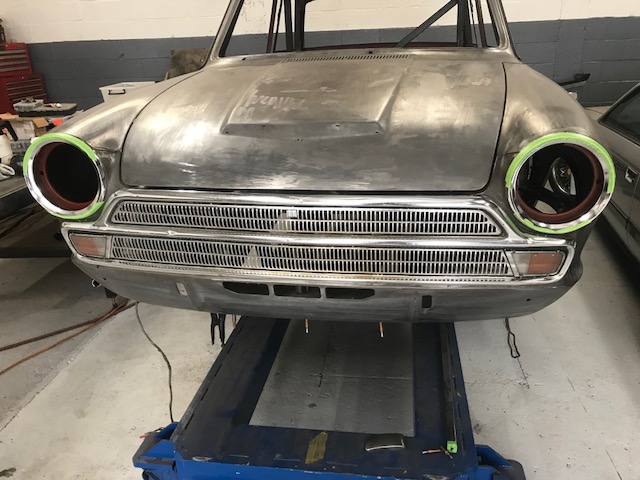
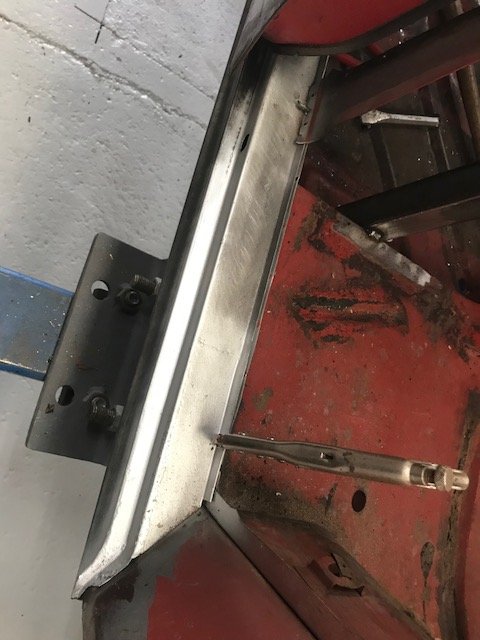
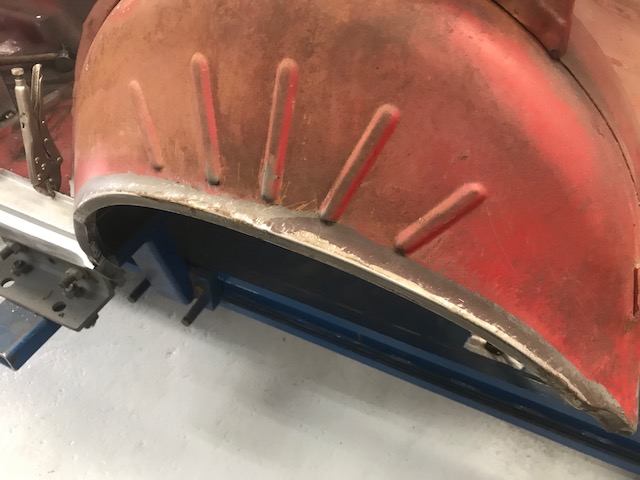
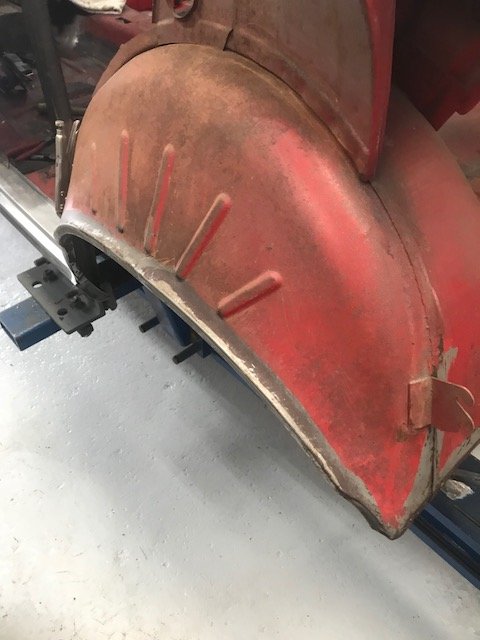
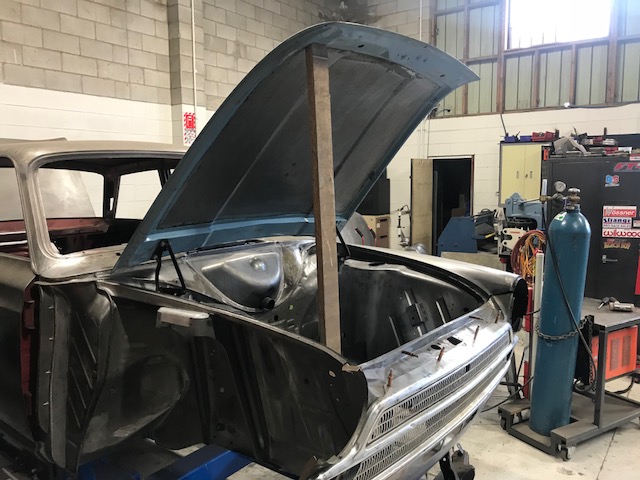
Went to have a look at the Cortina today and more good progress. Front end all fitted off ready for final gapping and welding. Rear quarters removed for dipping and the whole lot very clean underneath so well impressed. RHS boot floor needs a replacement section and then it’s mount the body on the rotisserie for blasting before final rear panel fit off.
1 point
-
Few more pics
1 point


This leaderboard is set to Auckland/GMT+12:00