
Leaderboard


Popular Content
Showing content with the highest reputation on 08/08/17 in all areas
-
This is my inspirational pic Keeps me fizzing
 14 points
 -
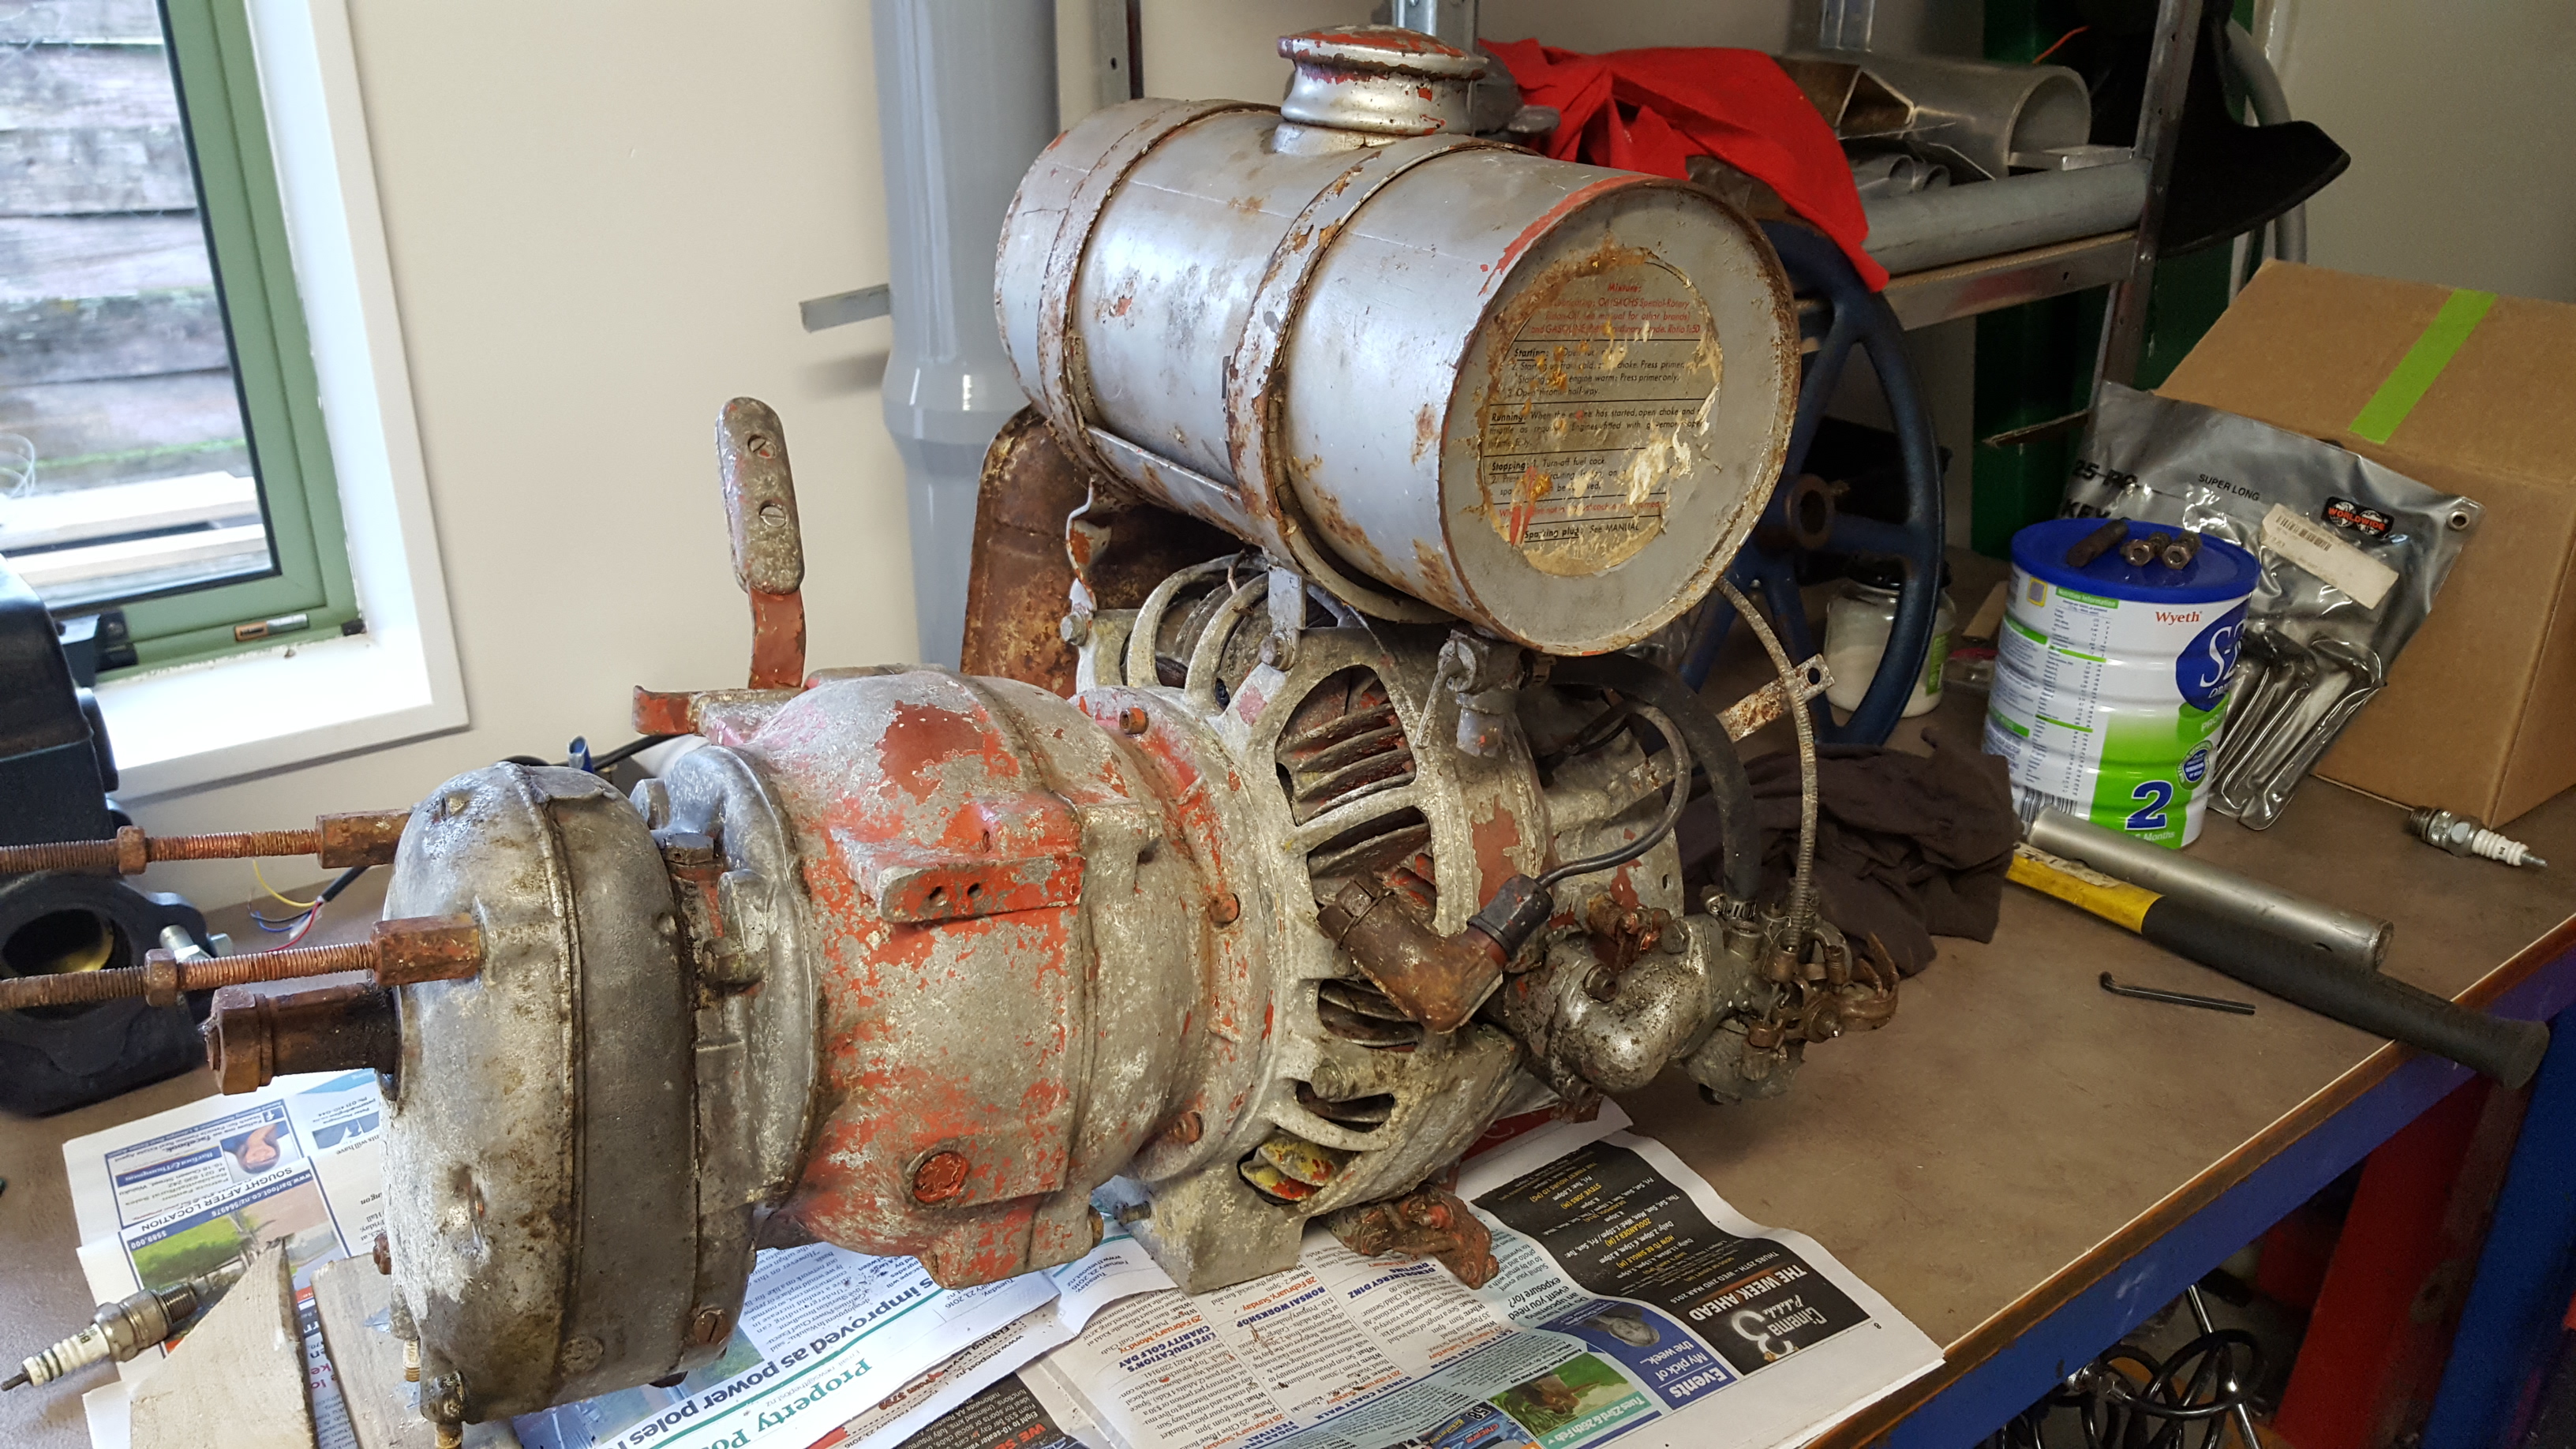
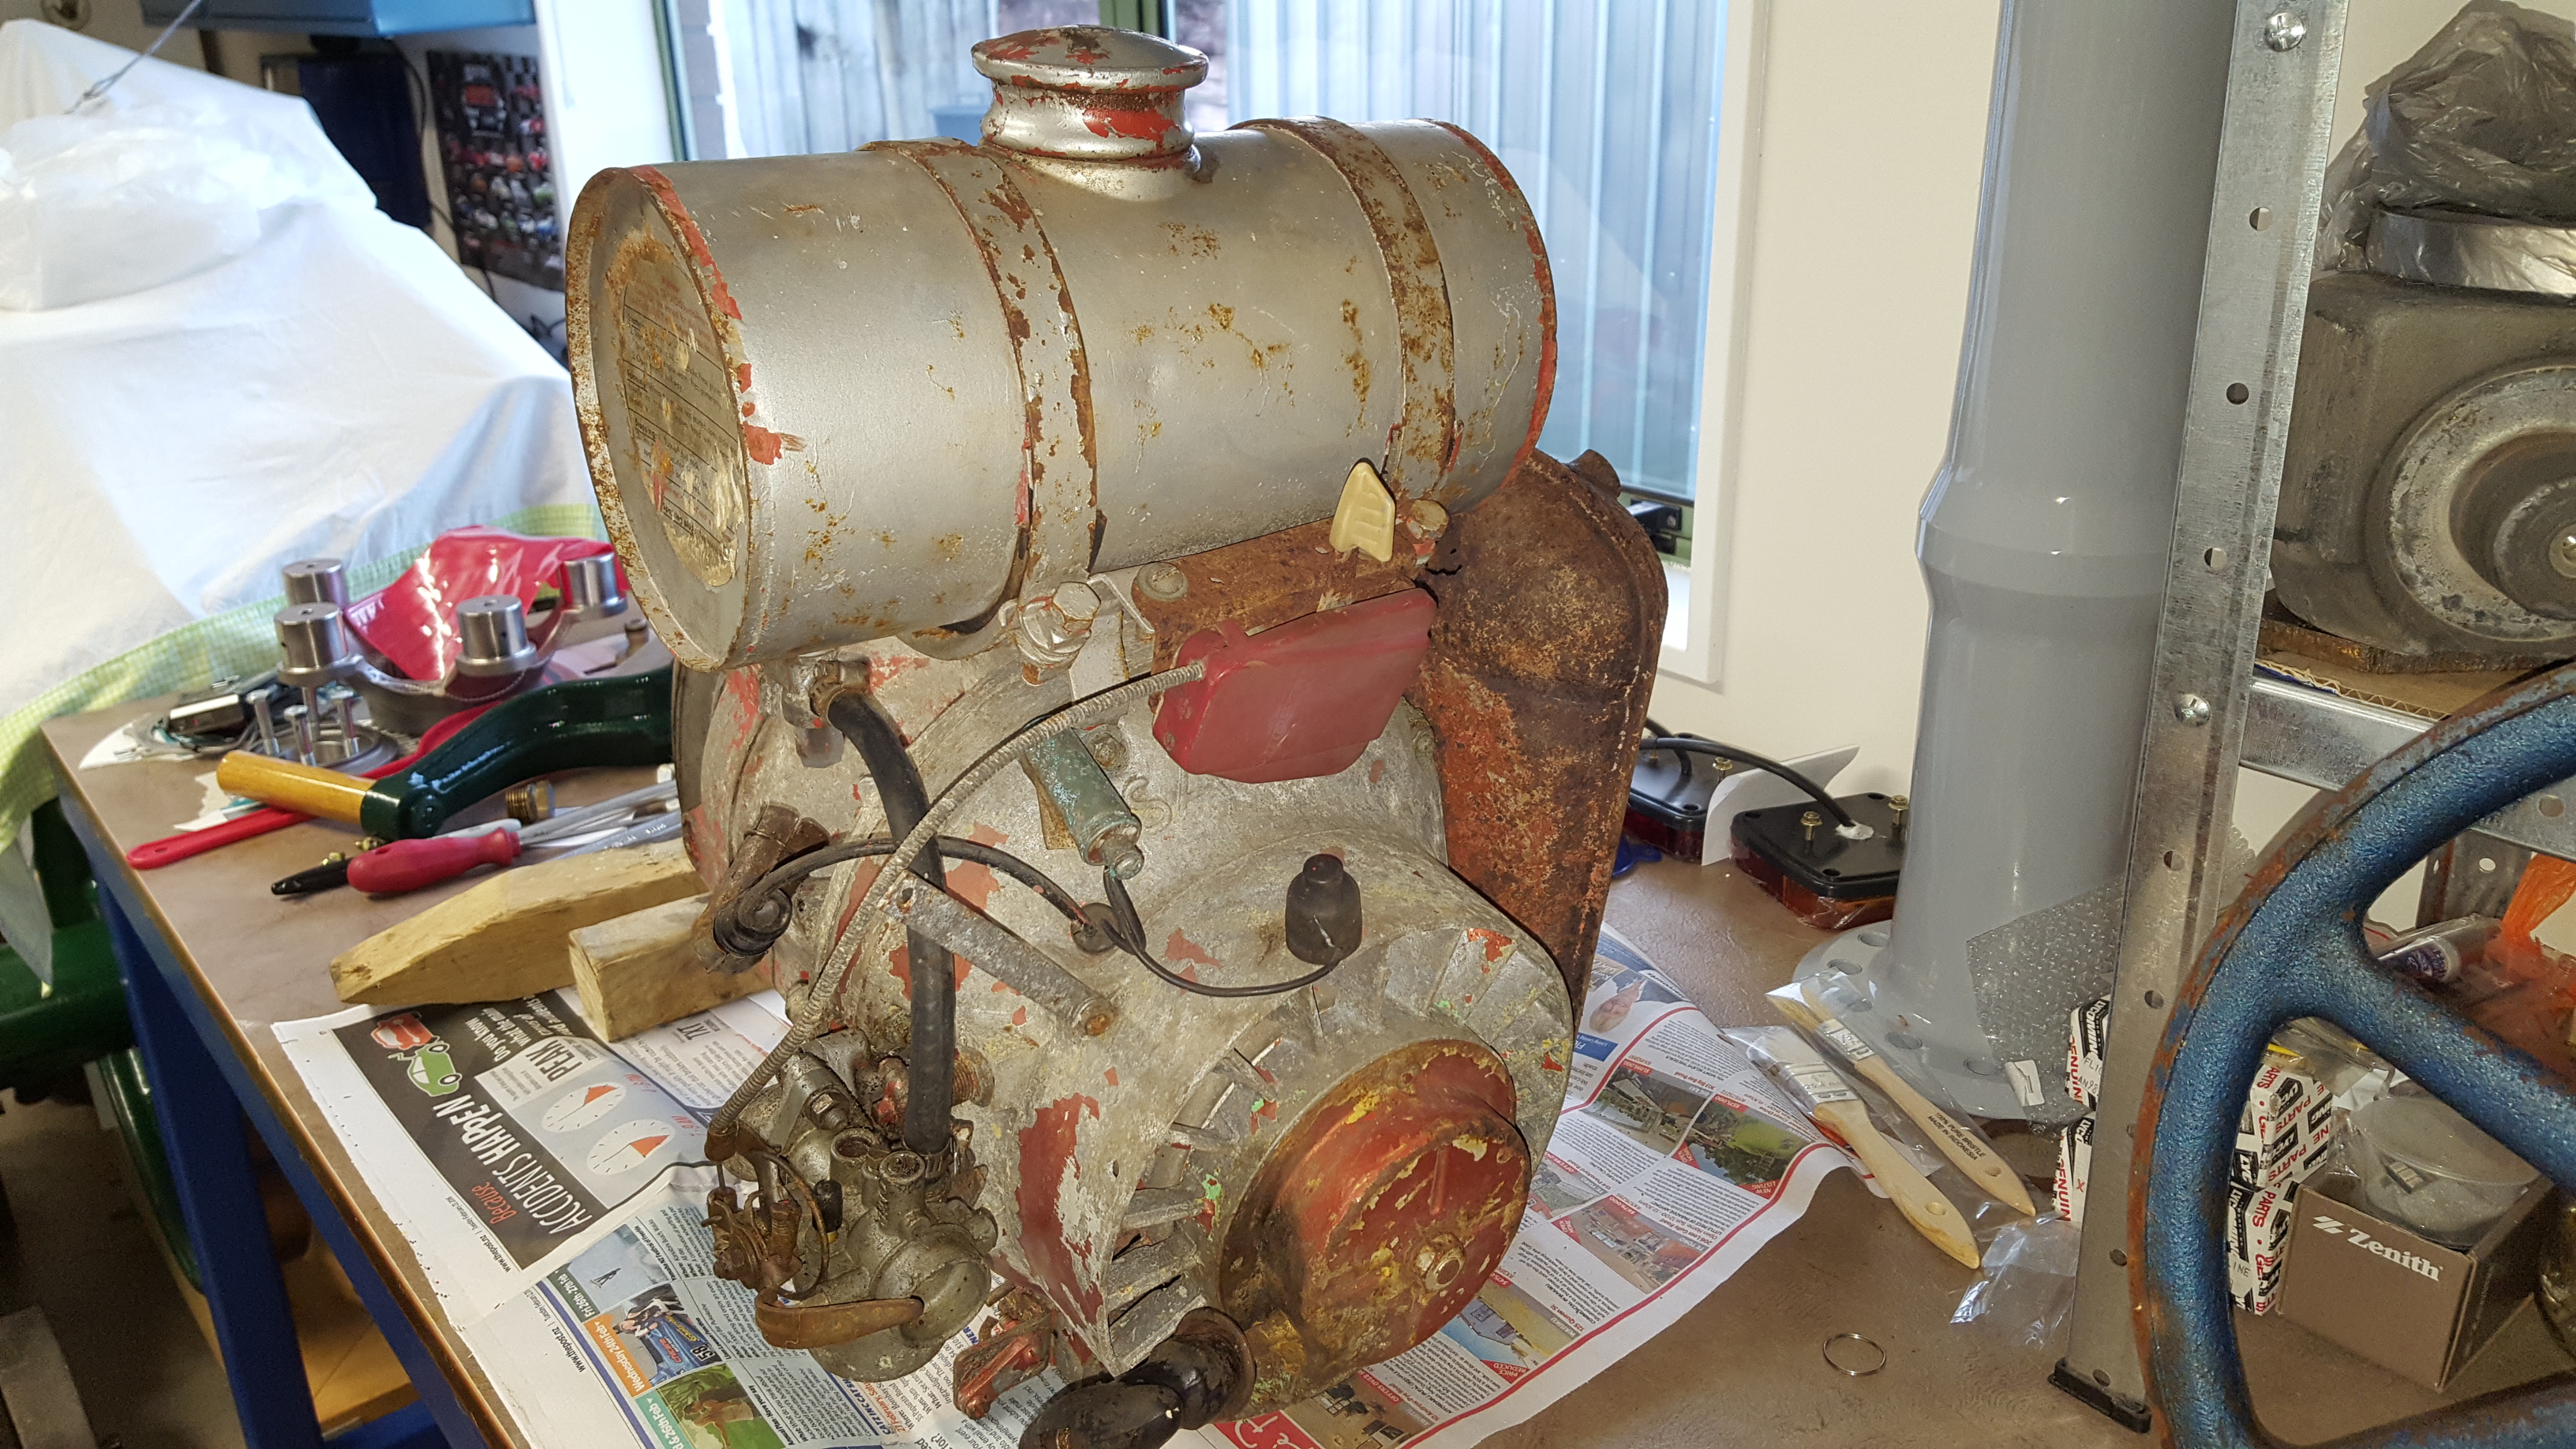
Just purchased a distraction.....
7 points
-
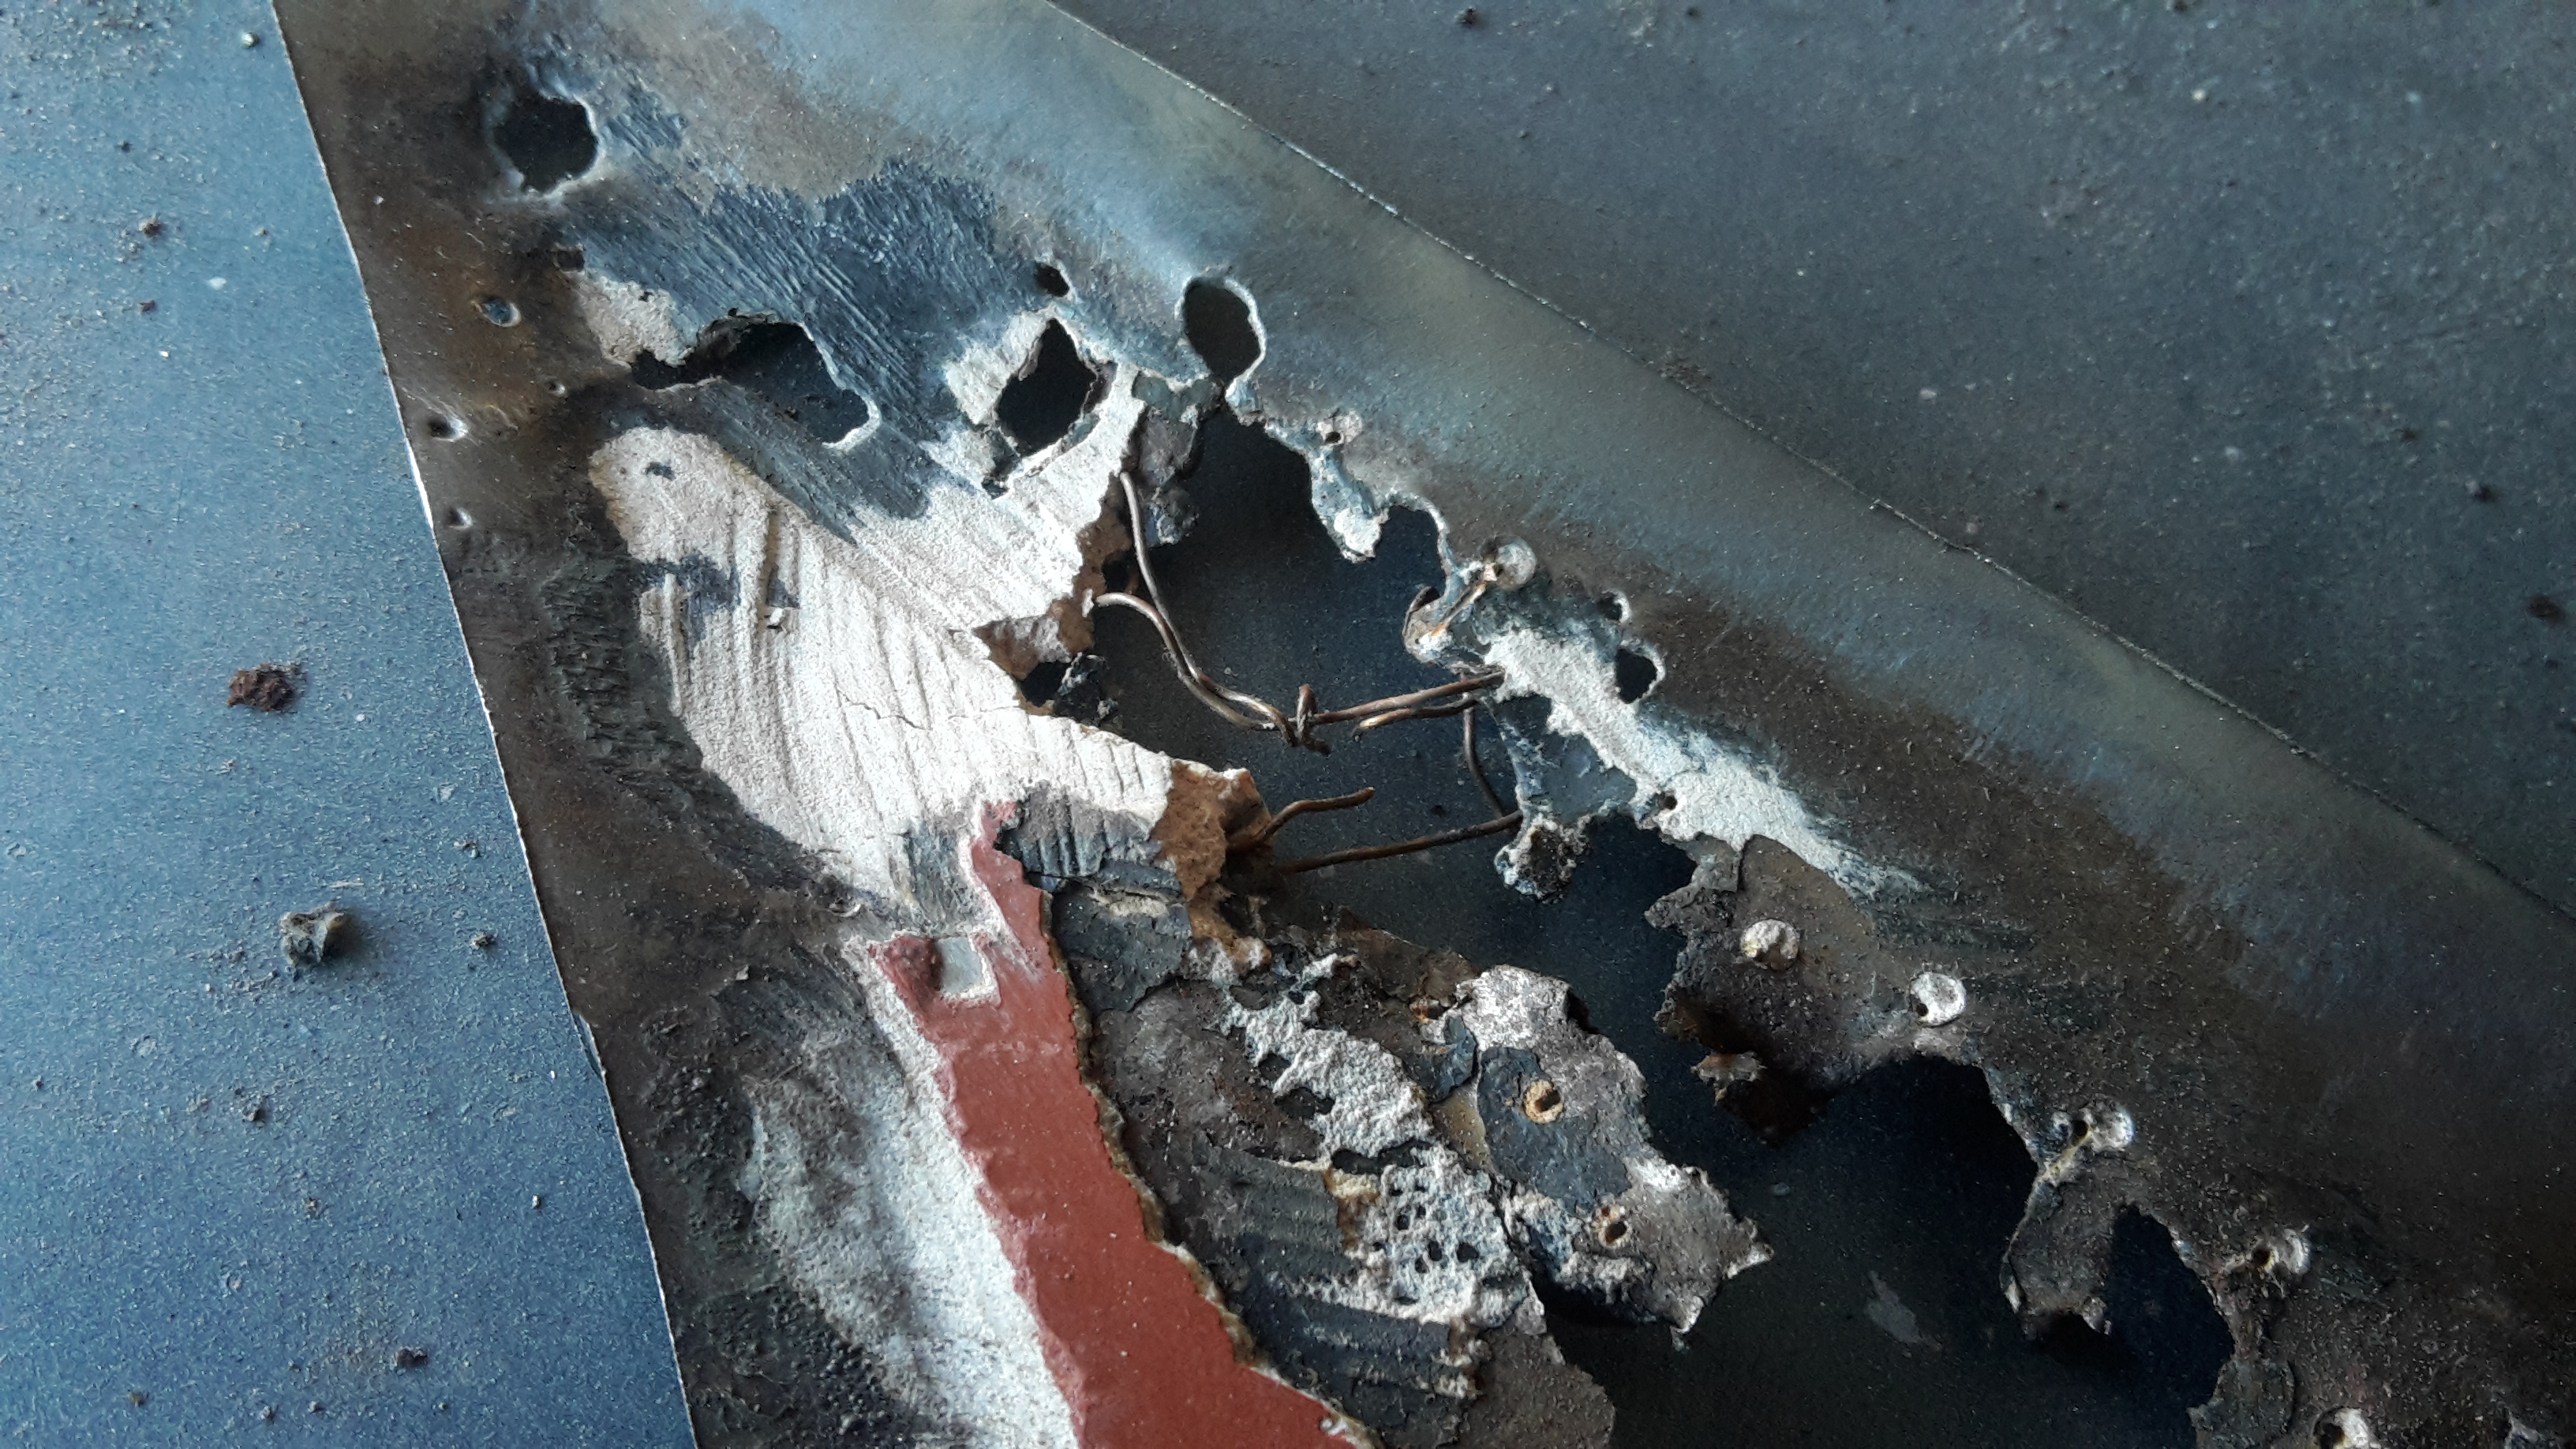
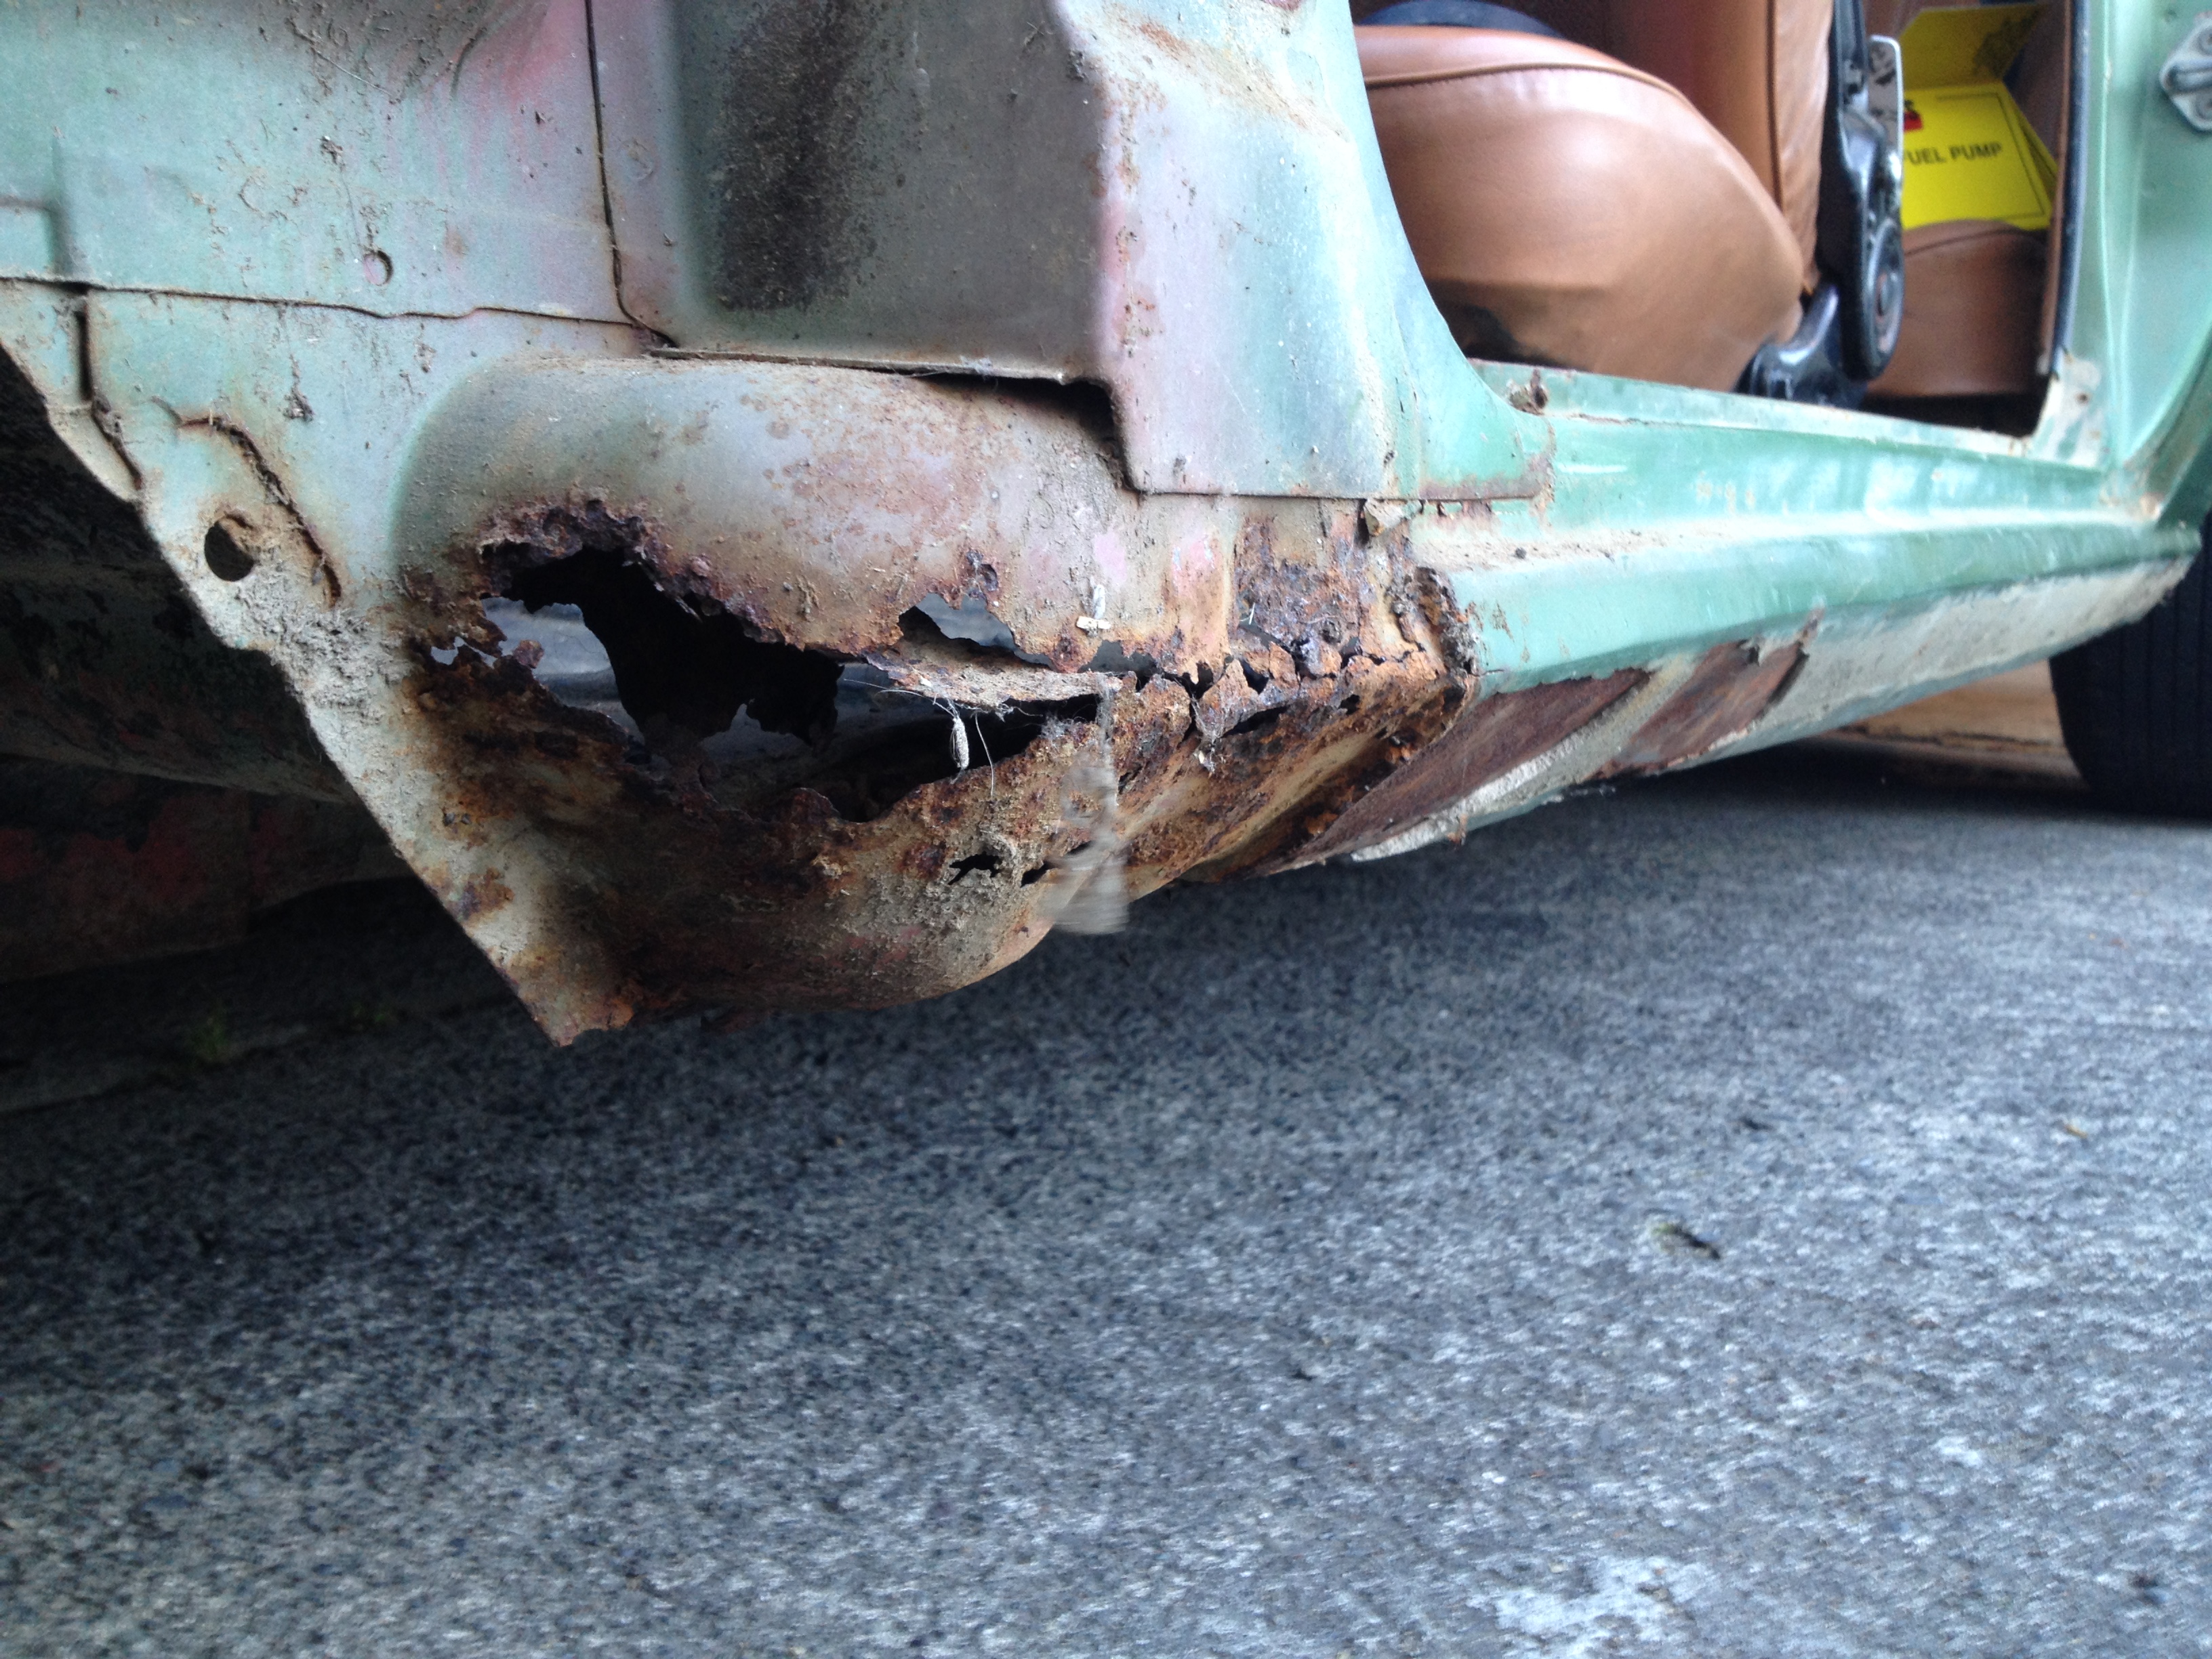
up close pics of Previous guard "repairs" drivers side next....
7 points
-
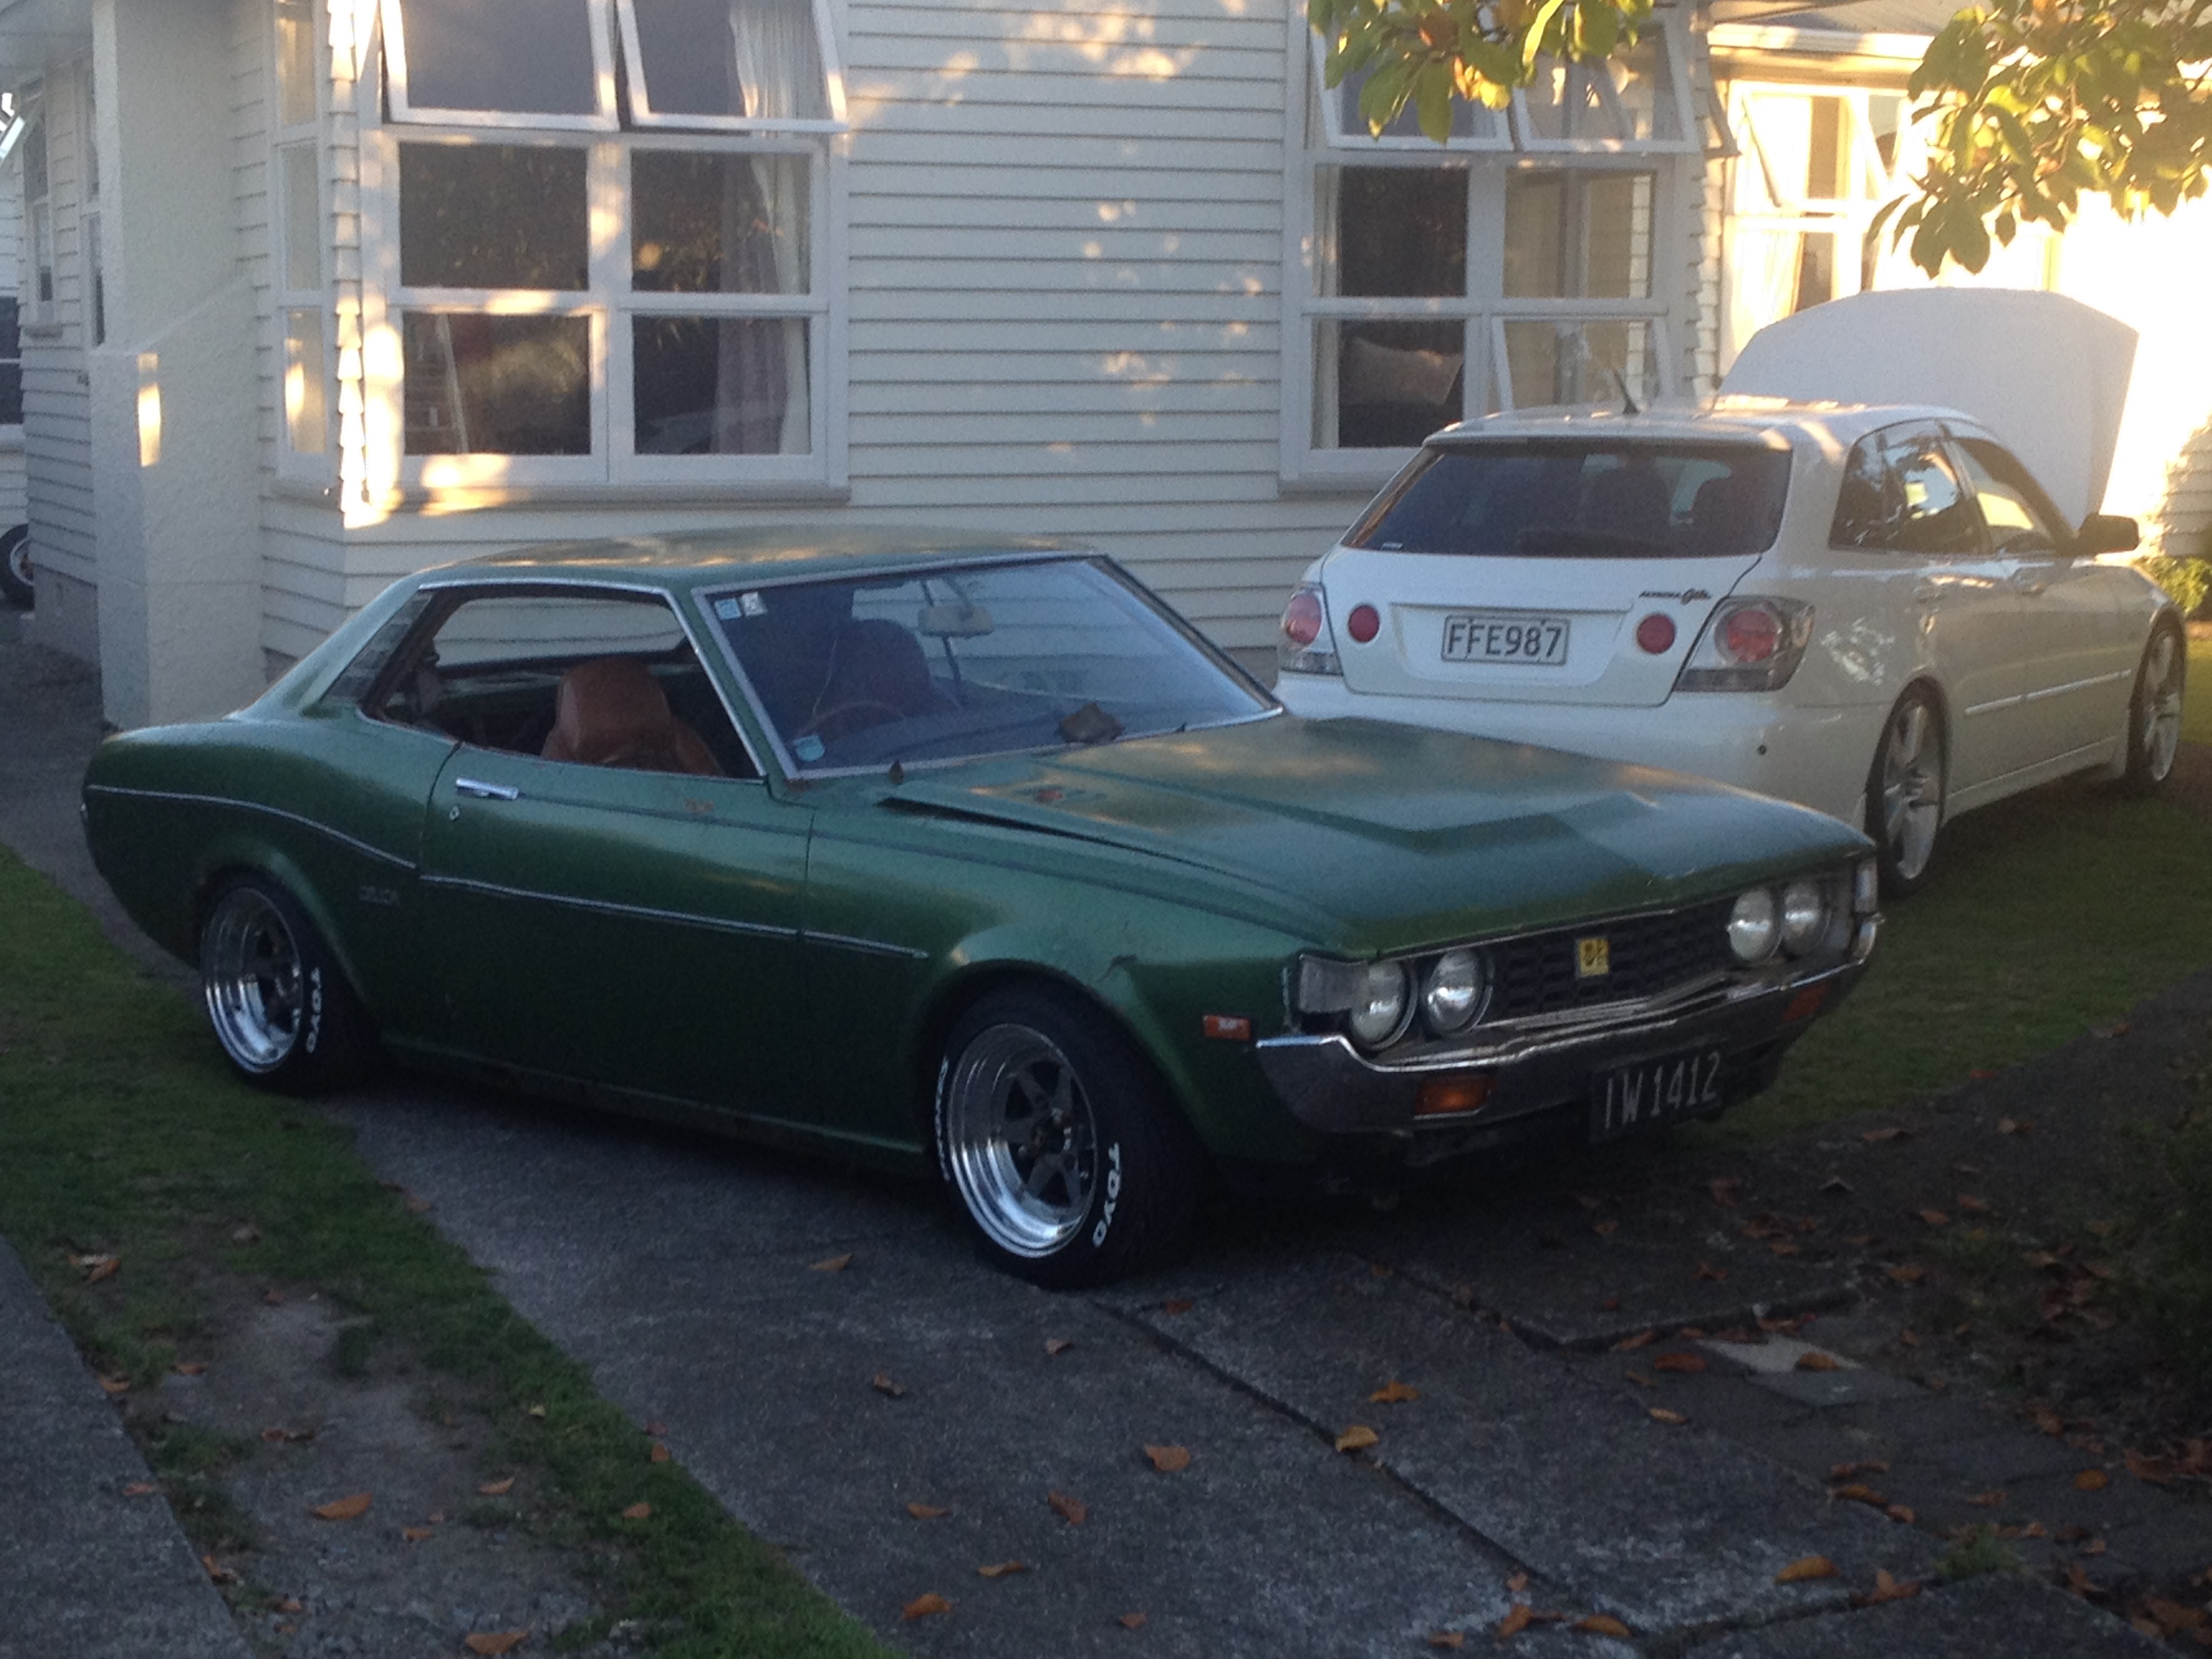
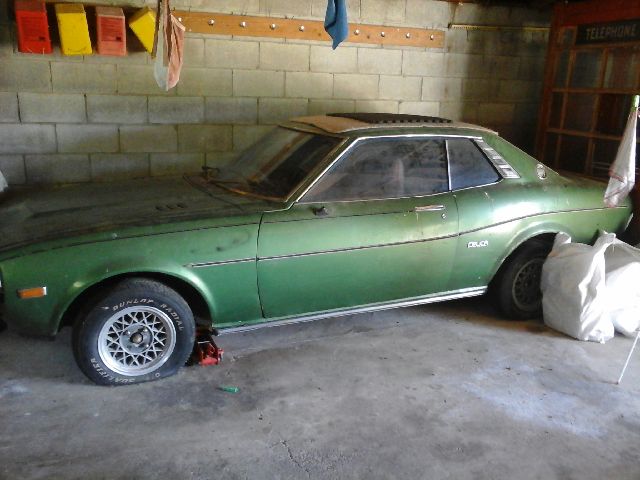
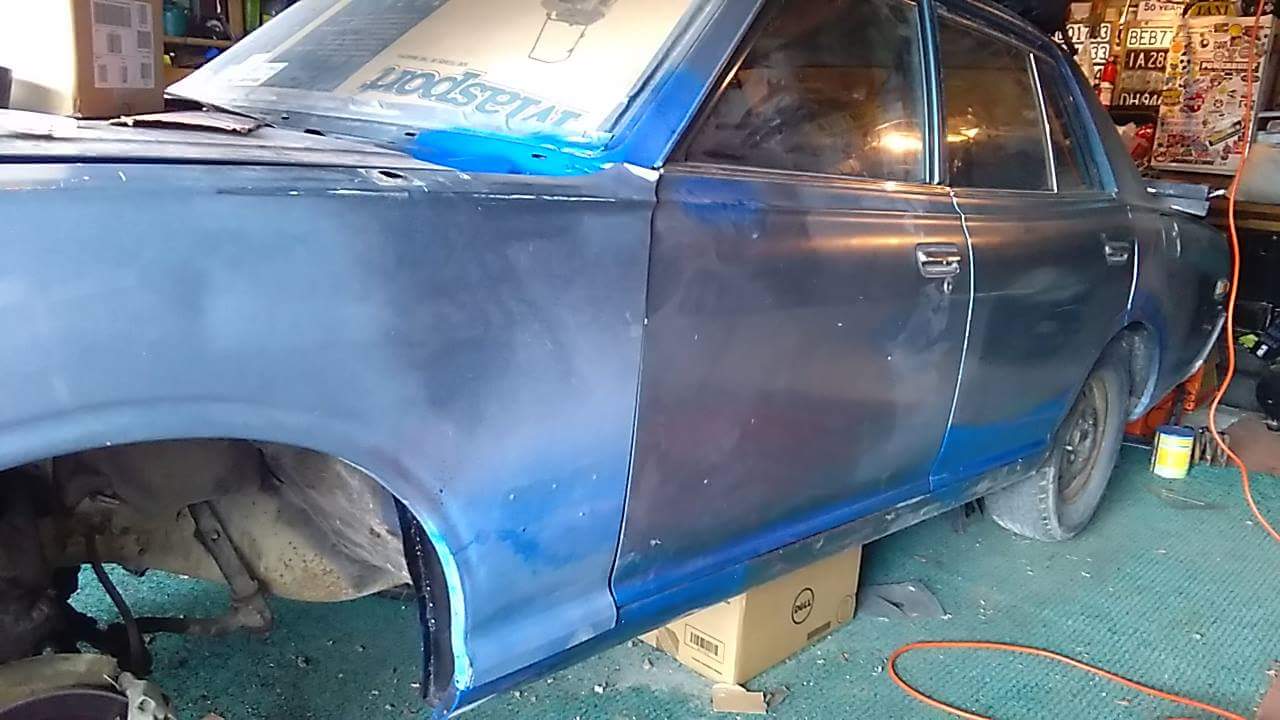
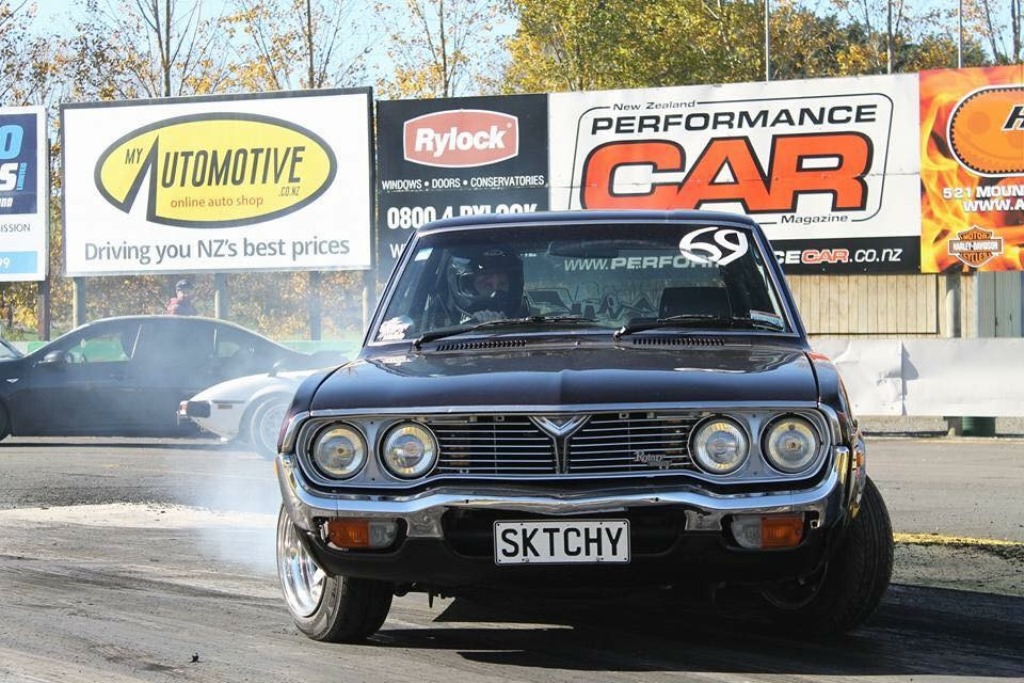
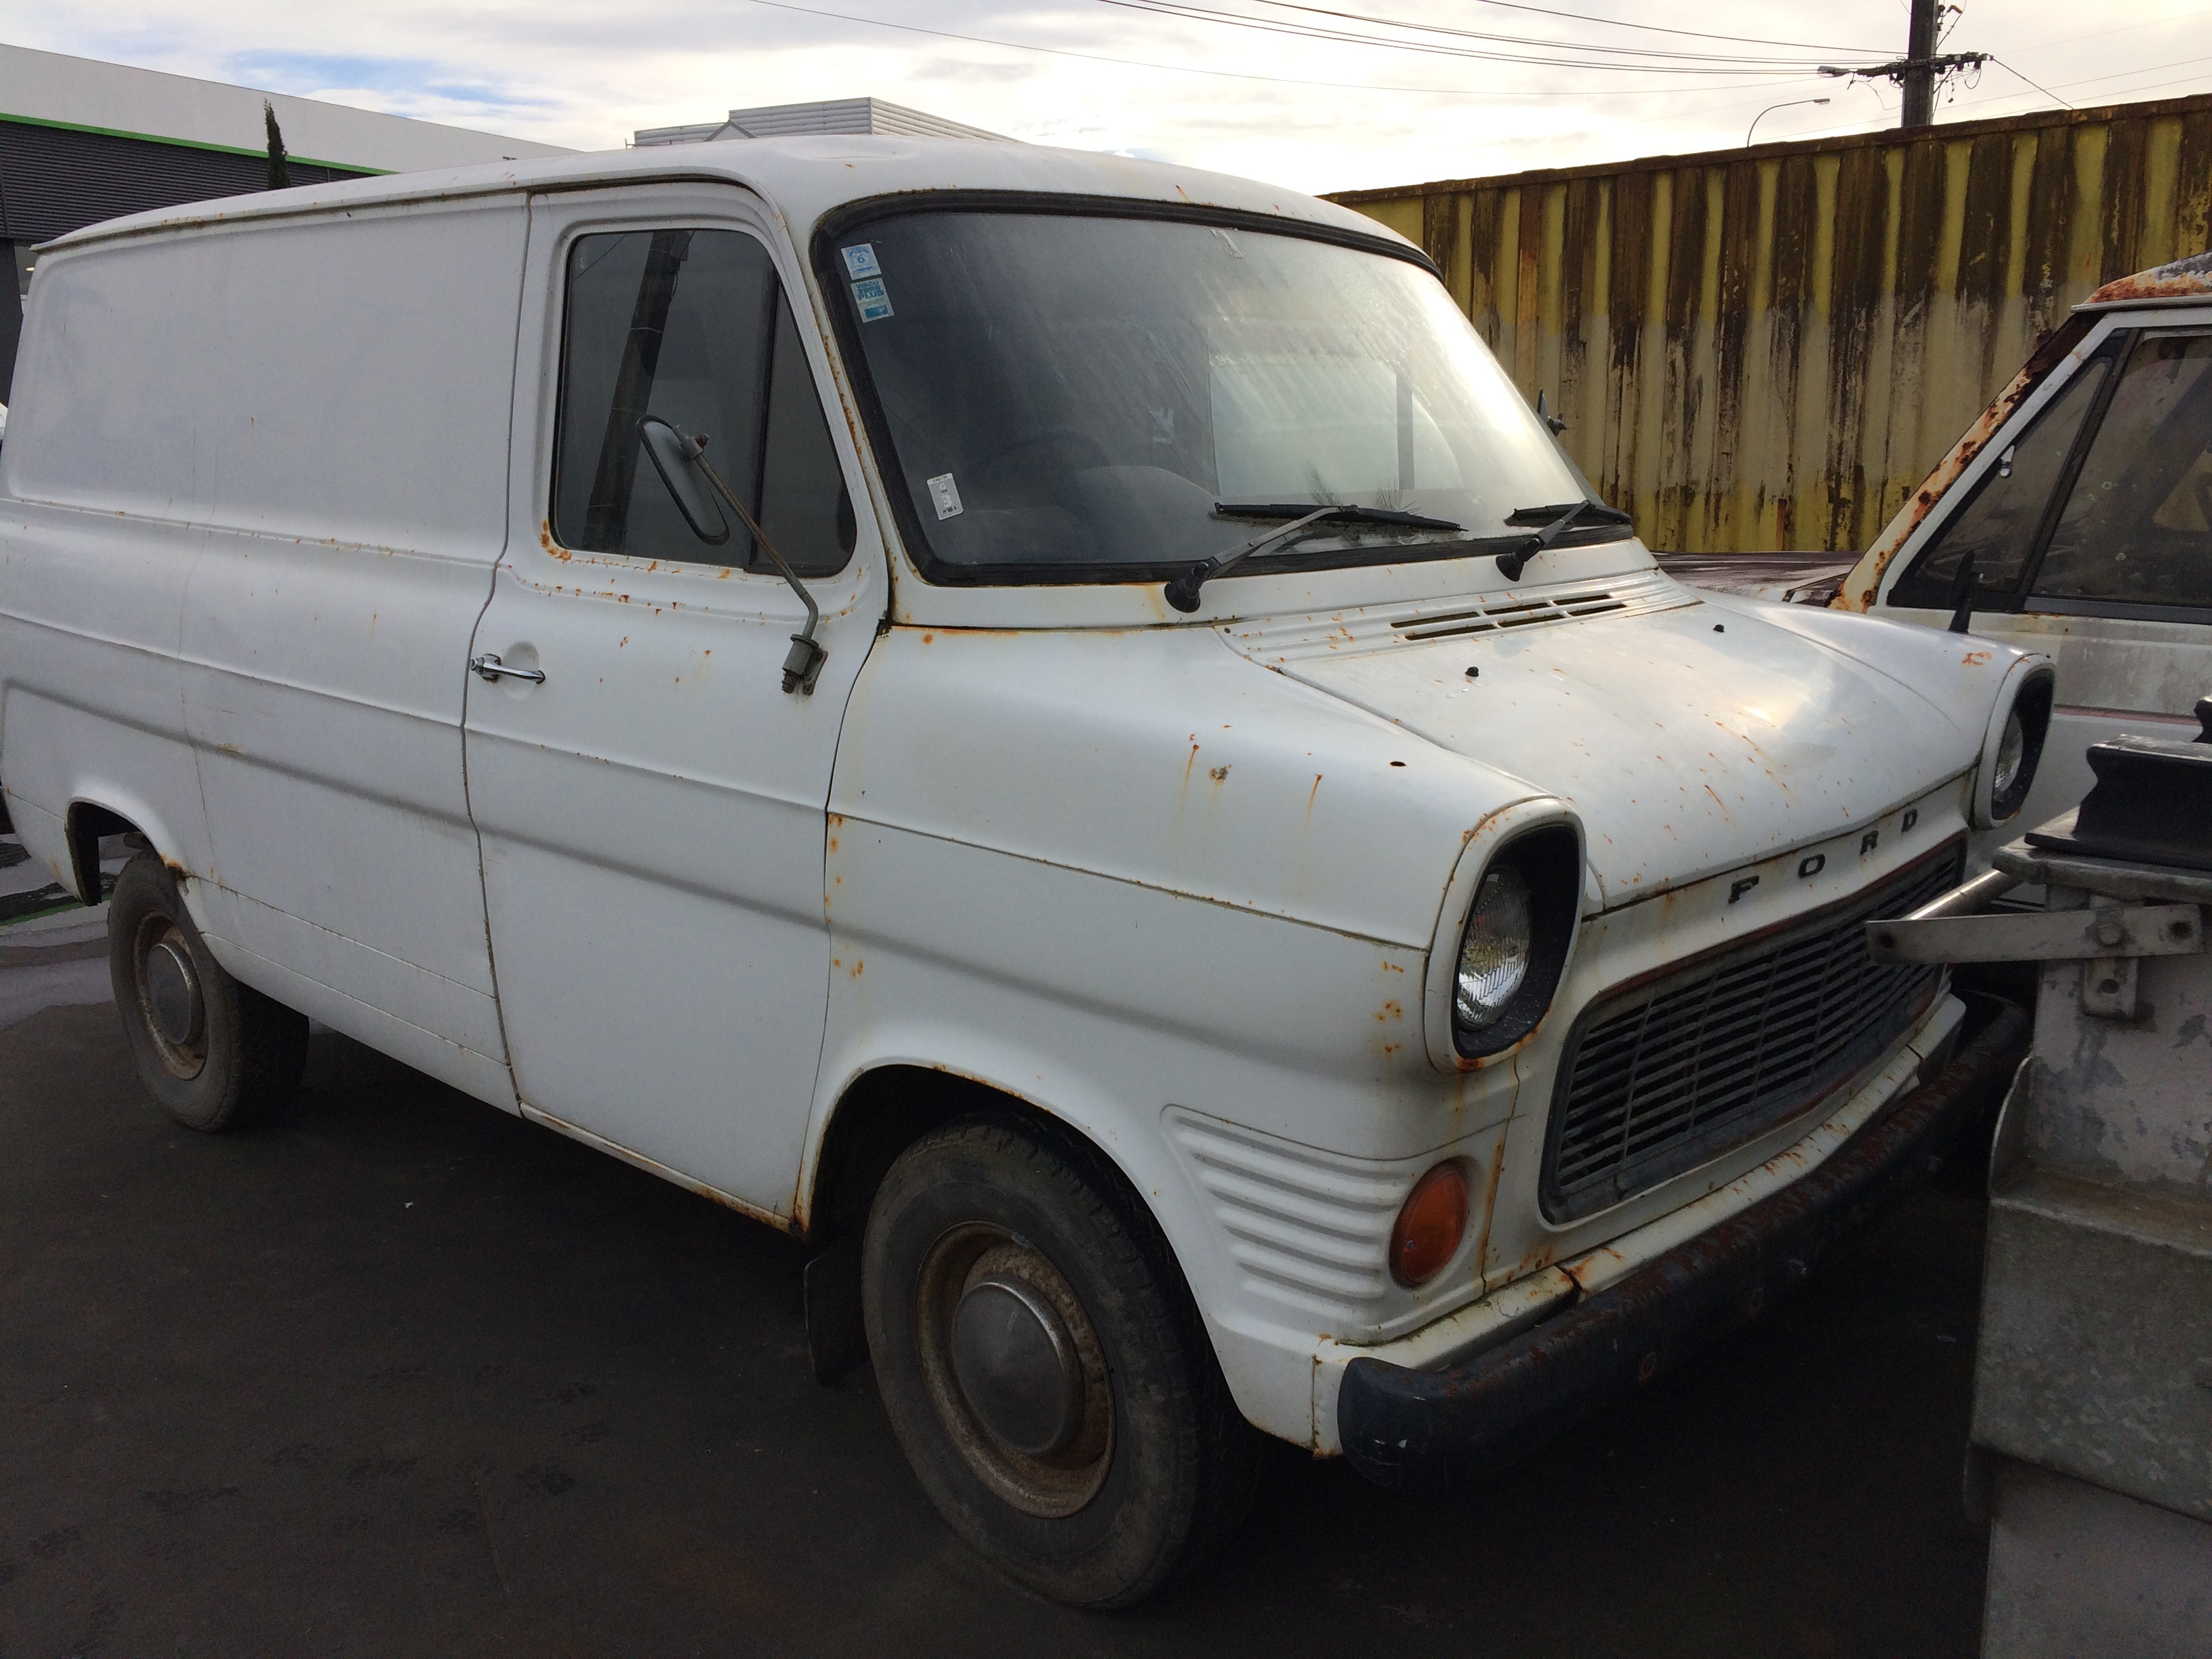
So as the story goes, Older army guy bought her brand new back in 76 in Singapore were he was posted in nz army Cars been well looked after body's rusty but honest,running gears all stock needs sills floor sections boot floor also Easy stuff really,she's done 78000 km, packing a mighty 2tb and a t40 4 speed box twin carbs even!!! Paints seen far better days but packs so much character it's fully staying Plans at this stage are get the major rust sorted get her running mint,plugs,points,condenser, water pump and radiator flush out/rodding out Fuel pumps shot same with clutch hydraulics as I go I'll wire wheel things back and coat with p0r15 Plus the mandatory slam and wheels Got to keep the longchamps off the datsun so they'll go on Never ever thought I'd have one in my possession and if it weren't for @OldNathan it'd still be a dream many thanks bro!!6 points
-
So me dad texts me one day Oy found this
5 points
-
Well the lord taketh away, and the lord hooketh it up. Scored 2x complete 4k engines locally today for the princely sum of $200, one has a reco-ed head, arp bolts etc and flogged rings, the other went hard for what it was. Good score, came with all accessories, manifolds mounts clutches etc
5 points
-
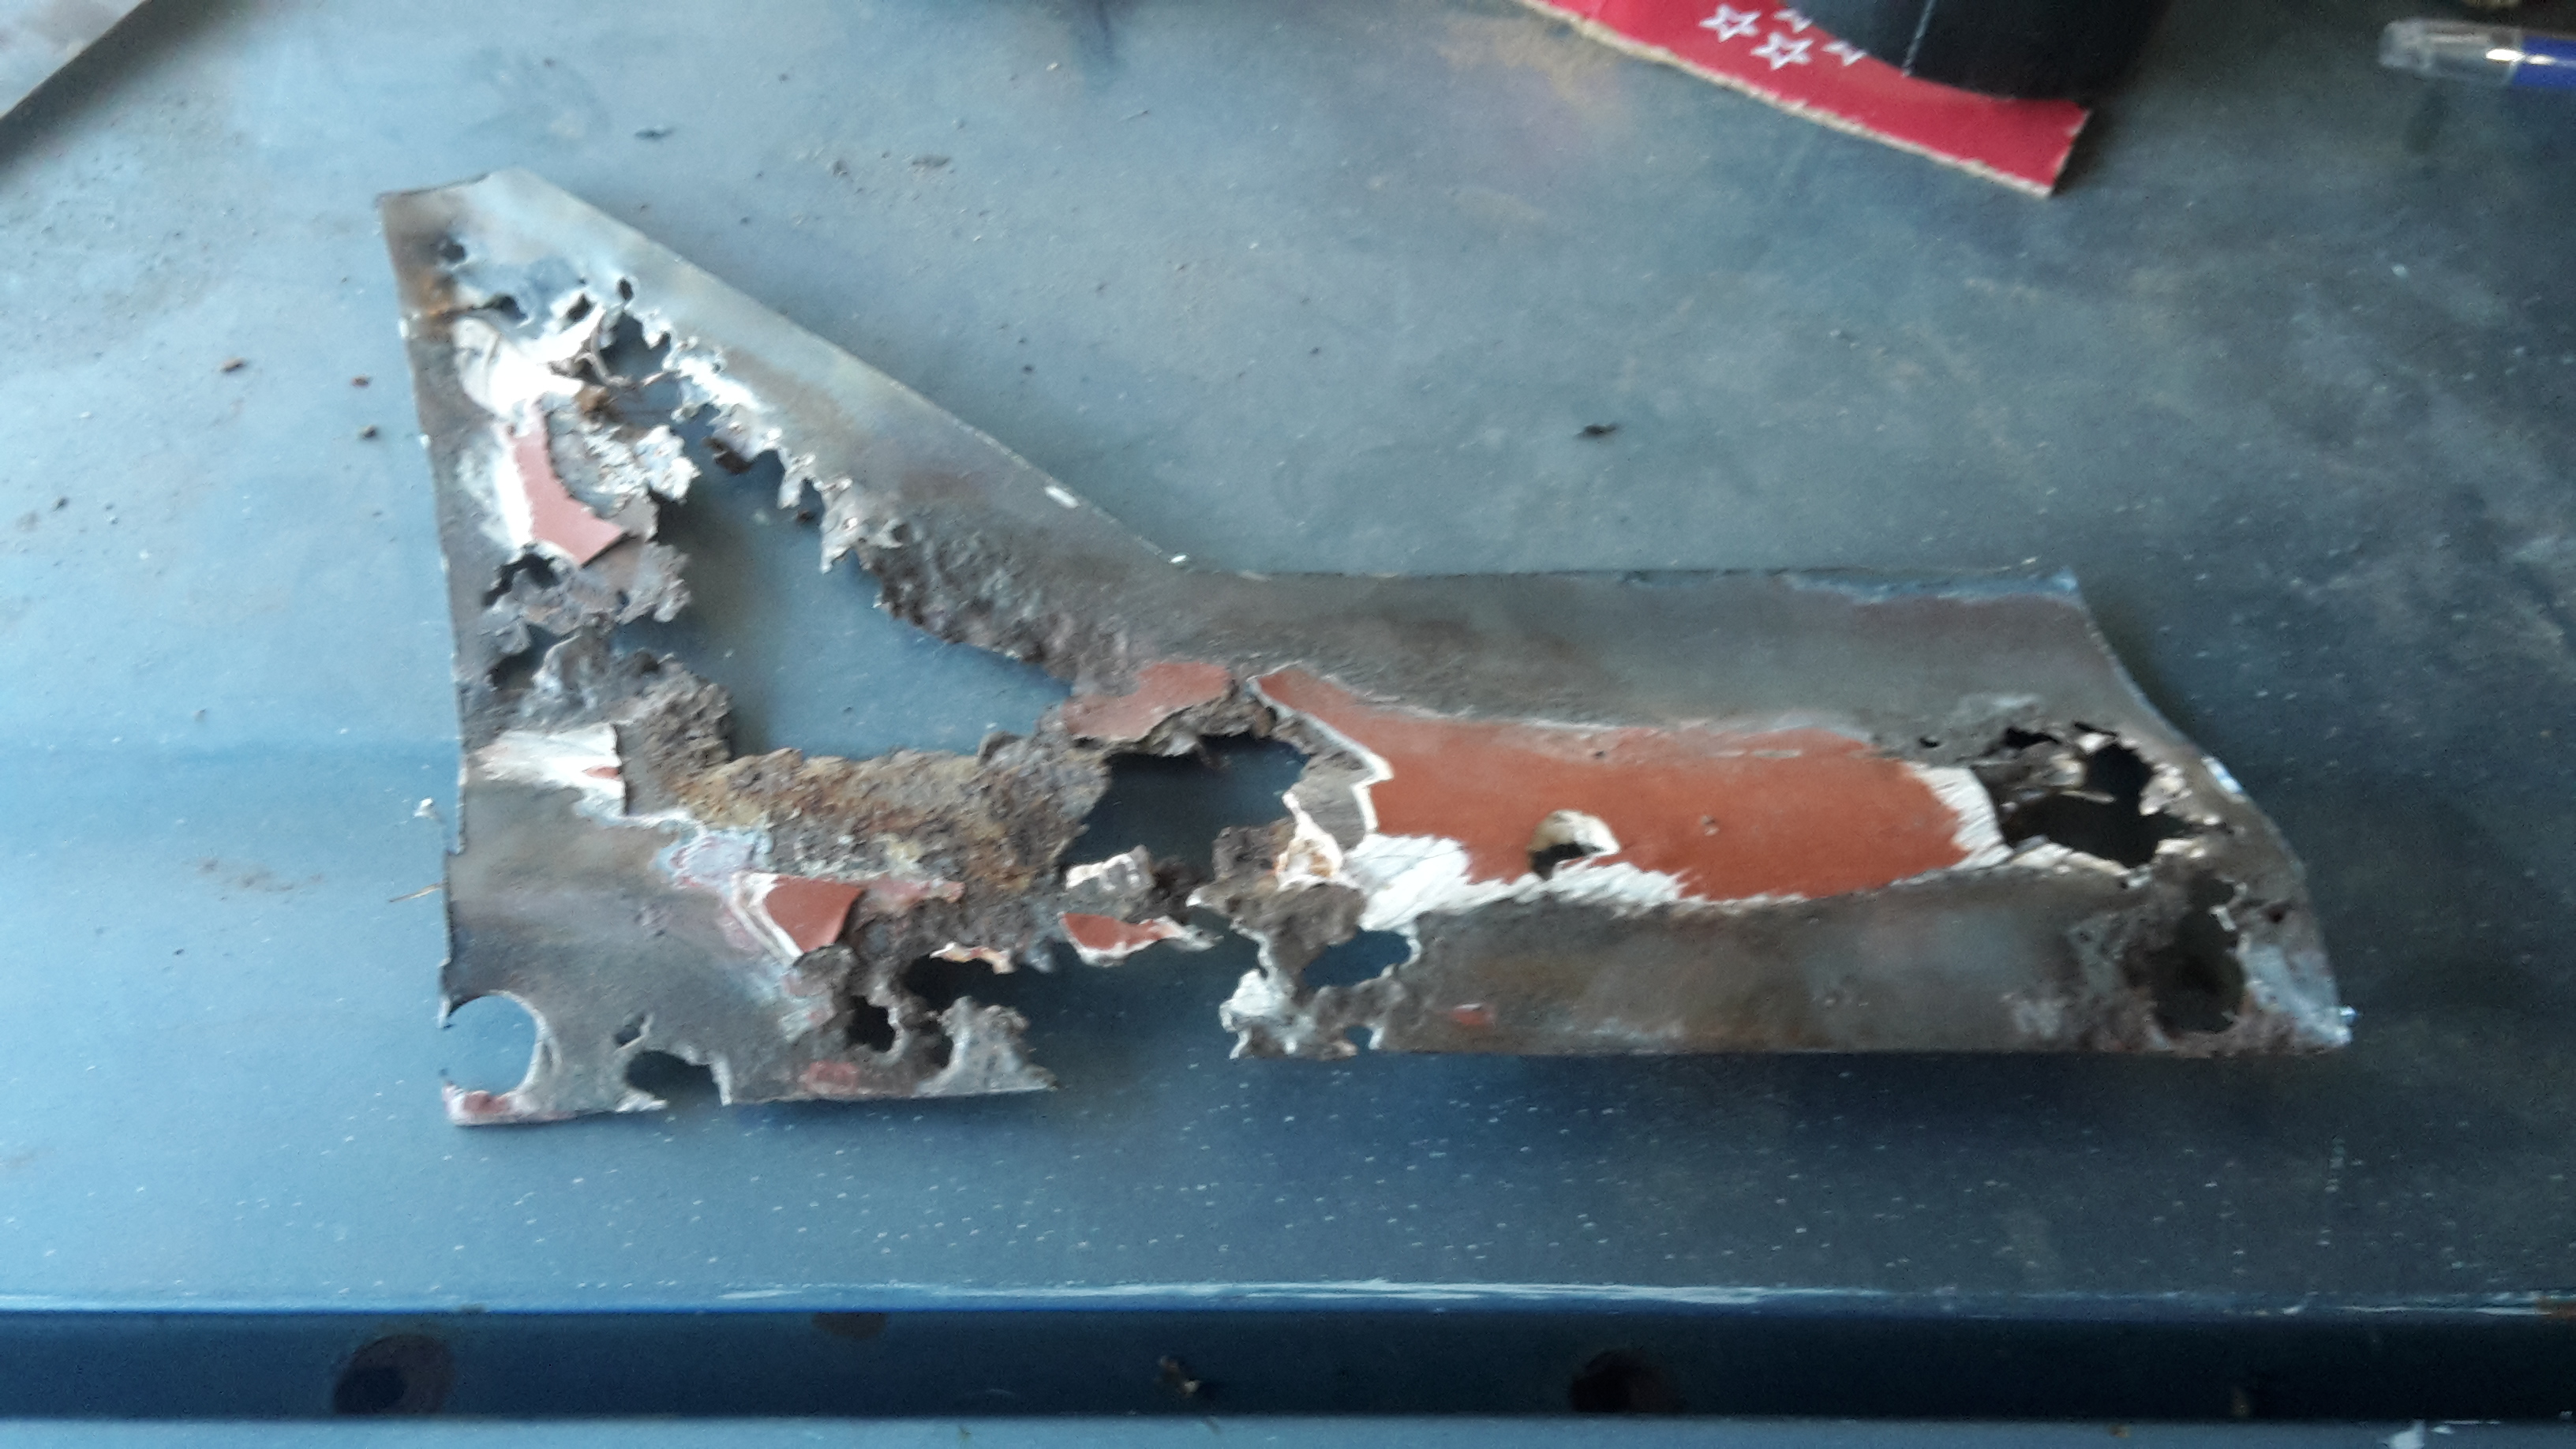
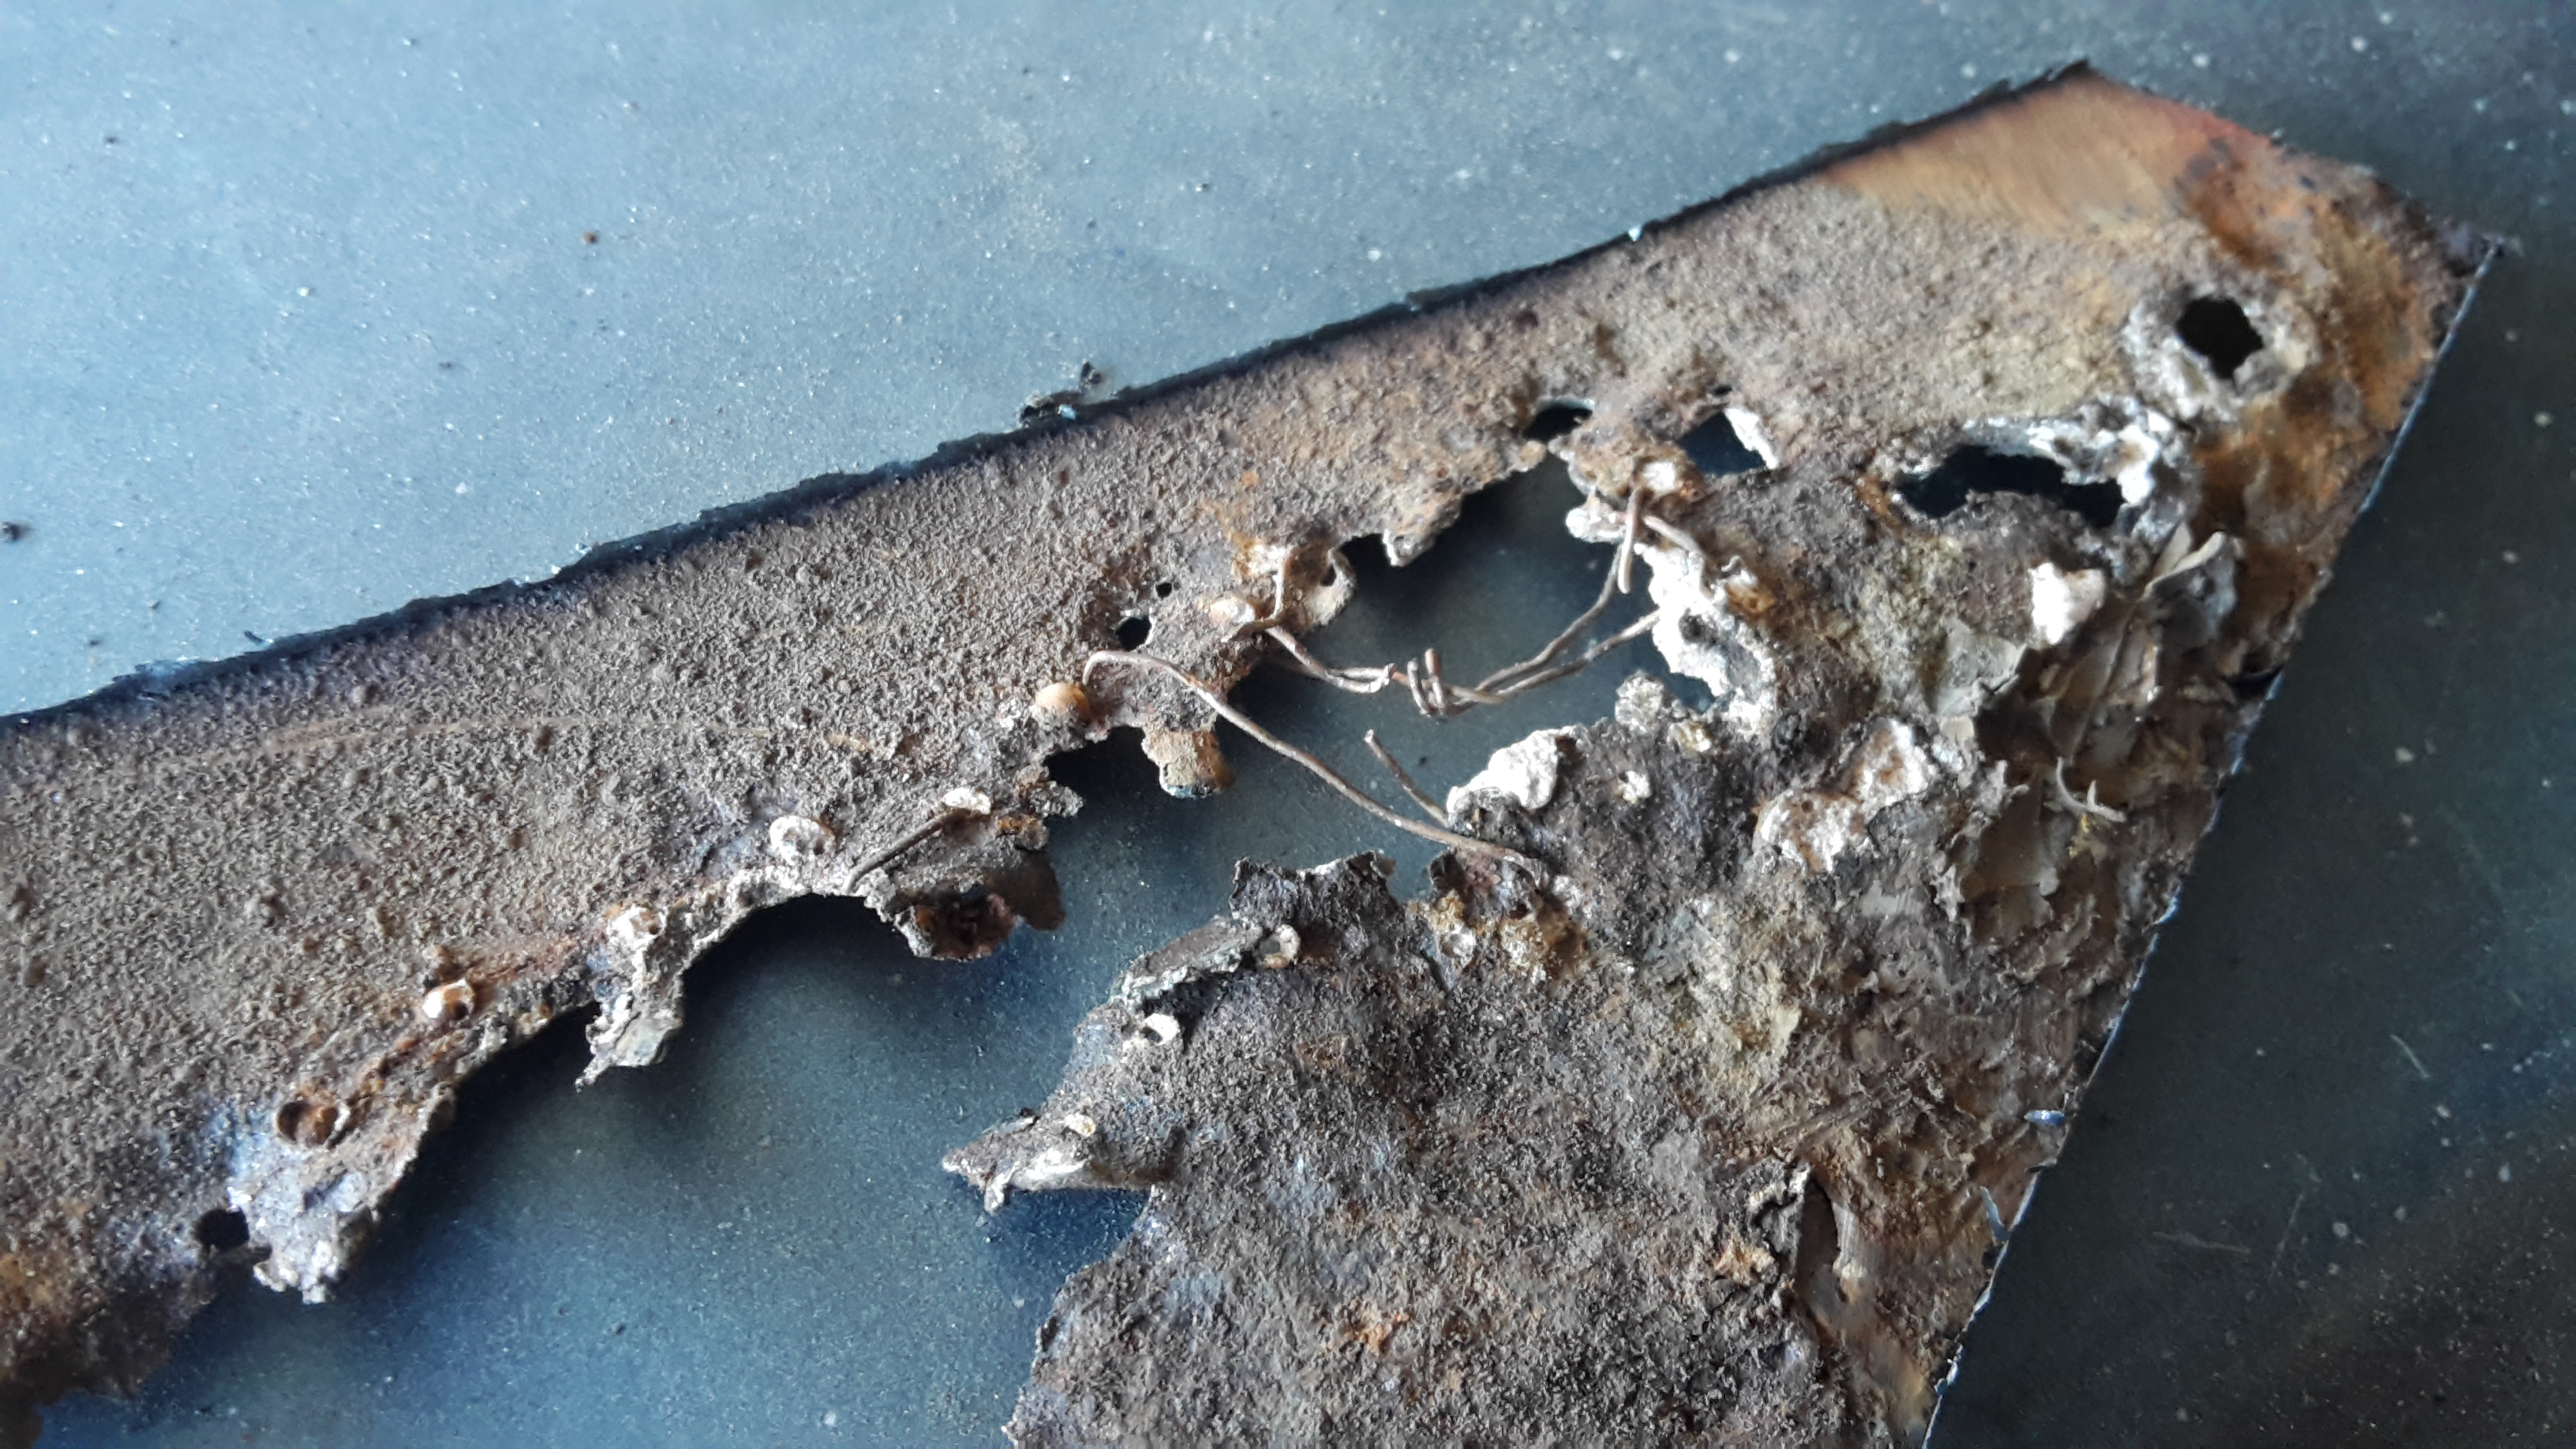
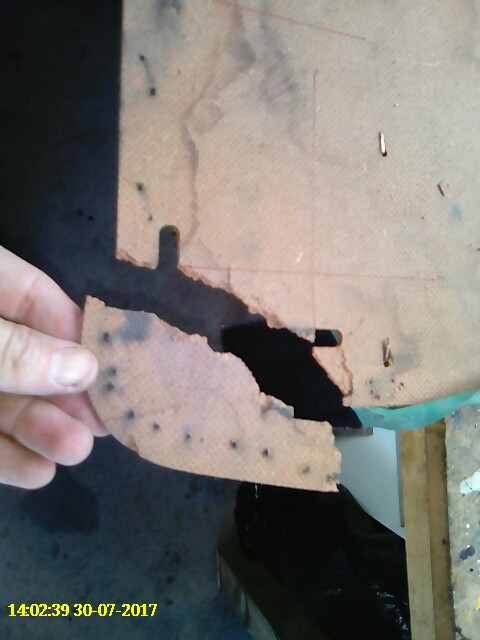
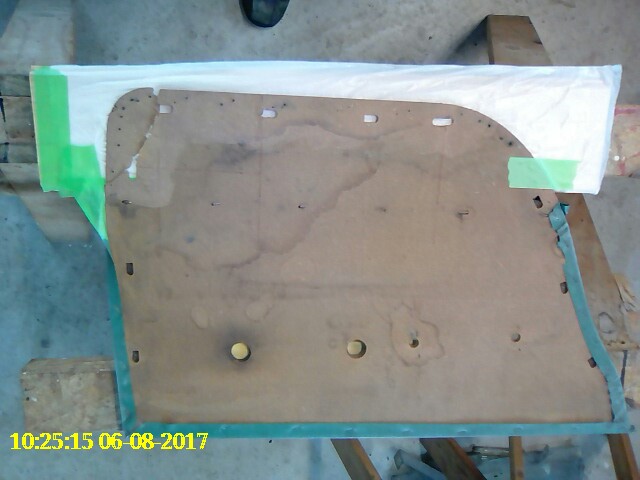
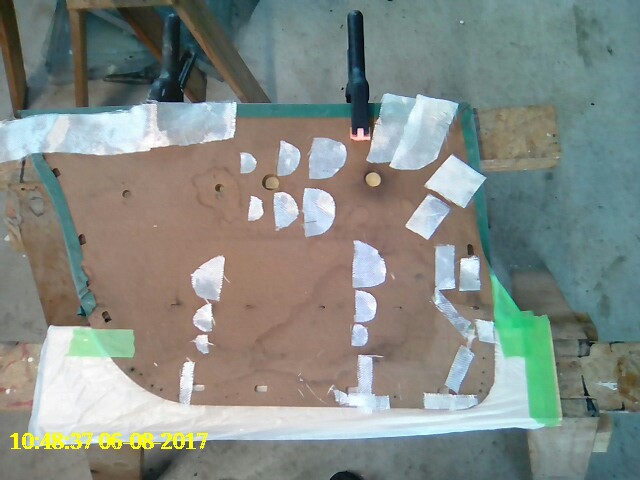
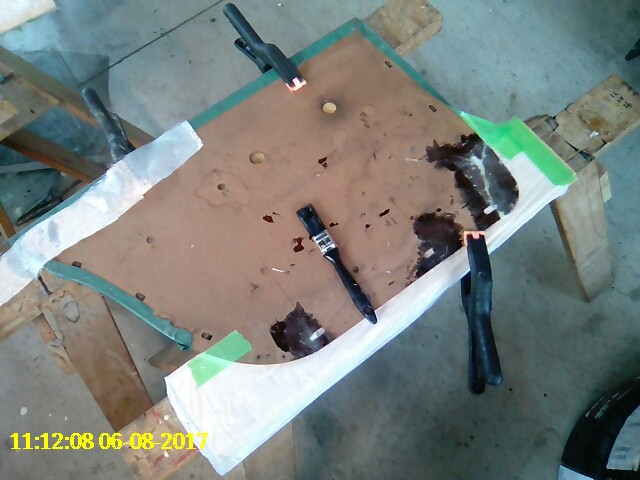
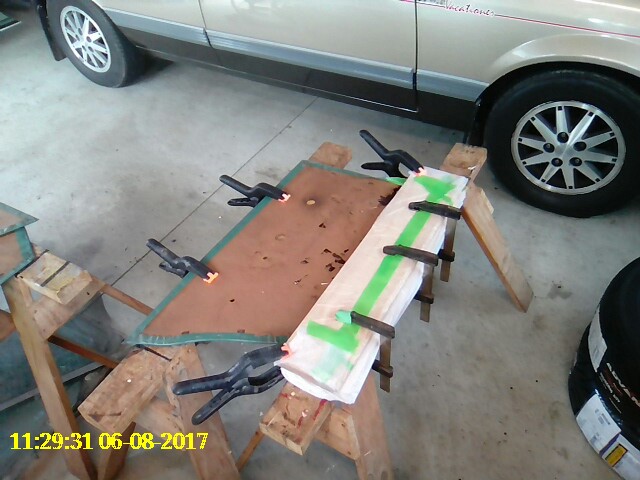
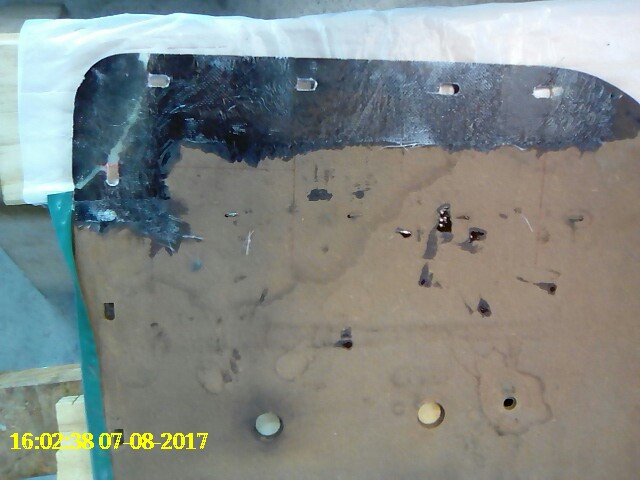
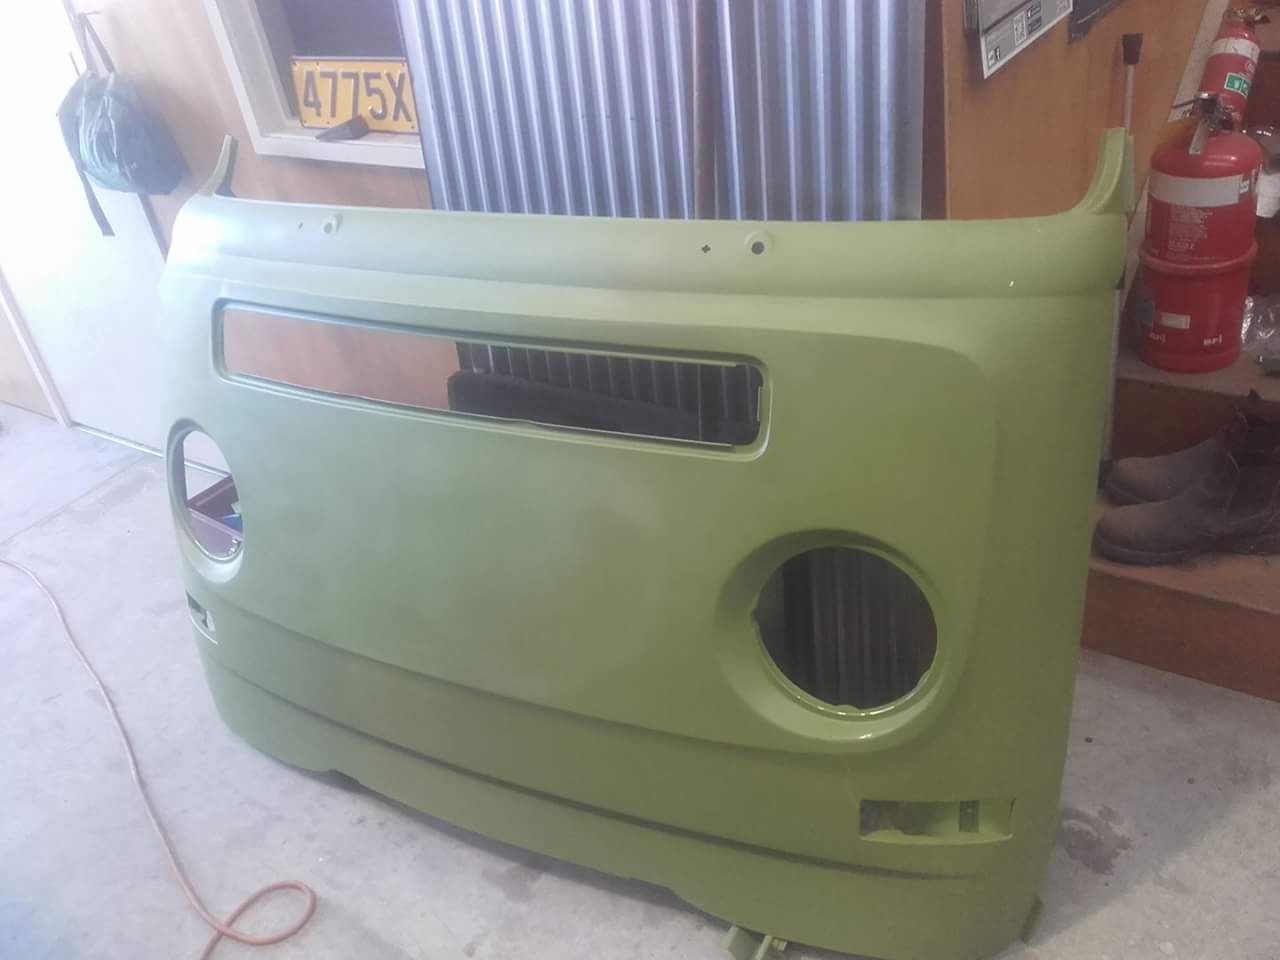
While the car is away having the panel work sorted out I decided to get started fixing up the interior door panels. I started with the left rear, this one actually as a corner broken off completely along with a couple of trim clip locations that can no longer retain the trim clips. I have built a few small boats in the past (you can see them in the background of a few pictures in this thread) and have plenty of fiberglass off cuts in a box in the shed. I decided this would be the perfect material for fixing the door cards so began by cleaning up the areas to be repaired with a sanding disc. Then I cut out a whole lot of little patches from fiberglass cloth so I can build up the damaged areas. Next I set about rebuilding the damaged areas with fiberglass cloth and resin. Finally I put two layers of glass cloth right along the bottom but by this stage my gloves were well coated in resin and I didn't dare try to pick up my phone to take a photo. You can see the strips of glass cloth that I used in the photo above (top left of the pic). I then sandwiched the whole lot together and allowed it all to cure overnight. And the next day it is all cured. Only 3 more to do.
5 points
-
I've had this piece of shit for something like 2 or 3 years now. I wasn't going to make a project thread for it, but I've grown very attached to it, and there are now plans for future resto/modernisation. Don't expect anything too soon, at the moment it's all about rectifying the mistakes made by a previous owner. It's like a how-not-to on car modification. About a year after buying it I'd decided it had a leaking head gasket. Na uh. So I put in a new old engine. It's better, but I have no history on it, it leaks oil from quite a few places (like 1/4 as many as before though), and it's running worse and worse. It has fairly bad blow by, bad valve stem seals, and I've just discovered that it's worn a hole in the side of the dizzy, from the inside. Currently returning 6 km/L and slow af. Blame this when the oil runs out. I'm currently trying to decide whether to start spending money fixing this engine, with the intent to do a turbo with blow through carb/efi conversion in the future, or whether to keep patching it up until I can do a D22 KA24de conversion. (<----- Opinions plz!) Other upcoming jobs: Rebuilt the exhaust - It's currently one piece from engine to (side exit) tip, hard mounted to the chassis, with no flexi. Helicoil exhaust studs - See above Replace plastic vents - previous owner broke the clips on the scuttle vents and bonnet vents, then glued them on the no more nails. All the glue failed within two weeks and the grilles fell out. Small rust jobs - nothing major, just the odd bubble. Repaint - Looks good from far and in the rain (as per pic), but is an off white enamel with copious runs sprayed over original cracked paint. heaps of stuff4 points
-
So got her home washed mucked around rekitting clutch master and slave cylinders Whipped fuel tank out good Descale clean out saw that right brand spanker fuel pump too Run real good in the drive way soon as you'd back out of the driveway temp would creep way up hmmmm flow issue Strip radiator and water pump Impeller wasn't even on the pump had come of shaft so that's a good find rad was blocked with thick brown stuff smelled like puke Got that all back together got it hot Cheeky drive out in the boom box so grouse to drive Happy that it drives this mint for sitting so long Started picking round for some rot to fix
4 points
-
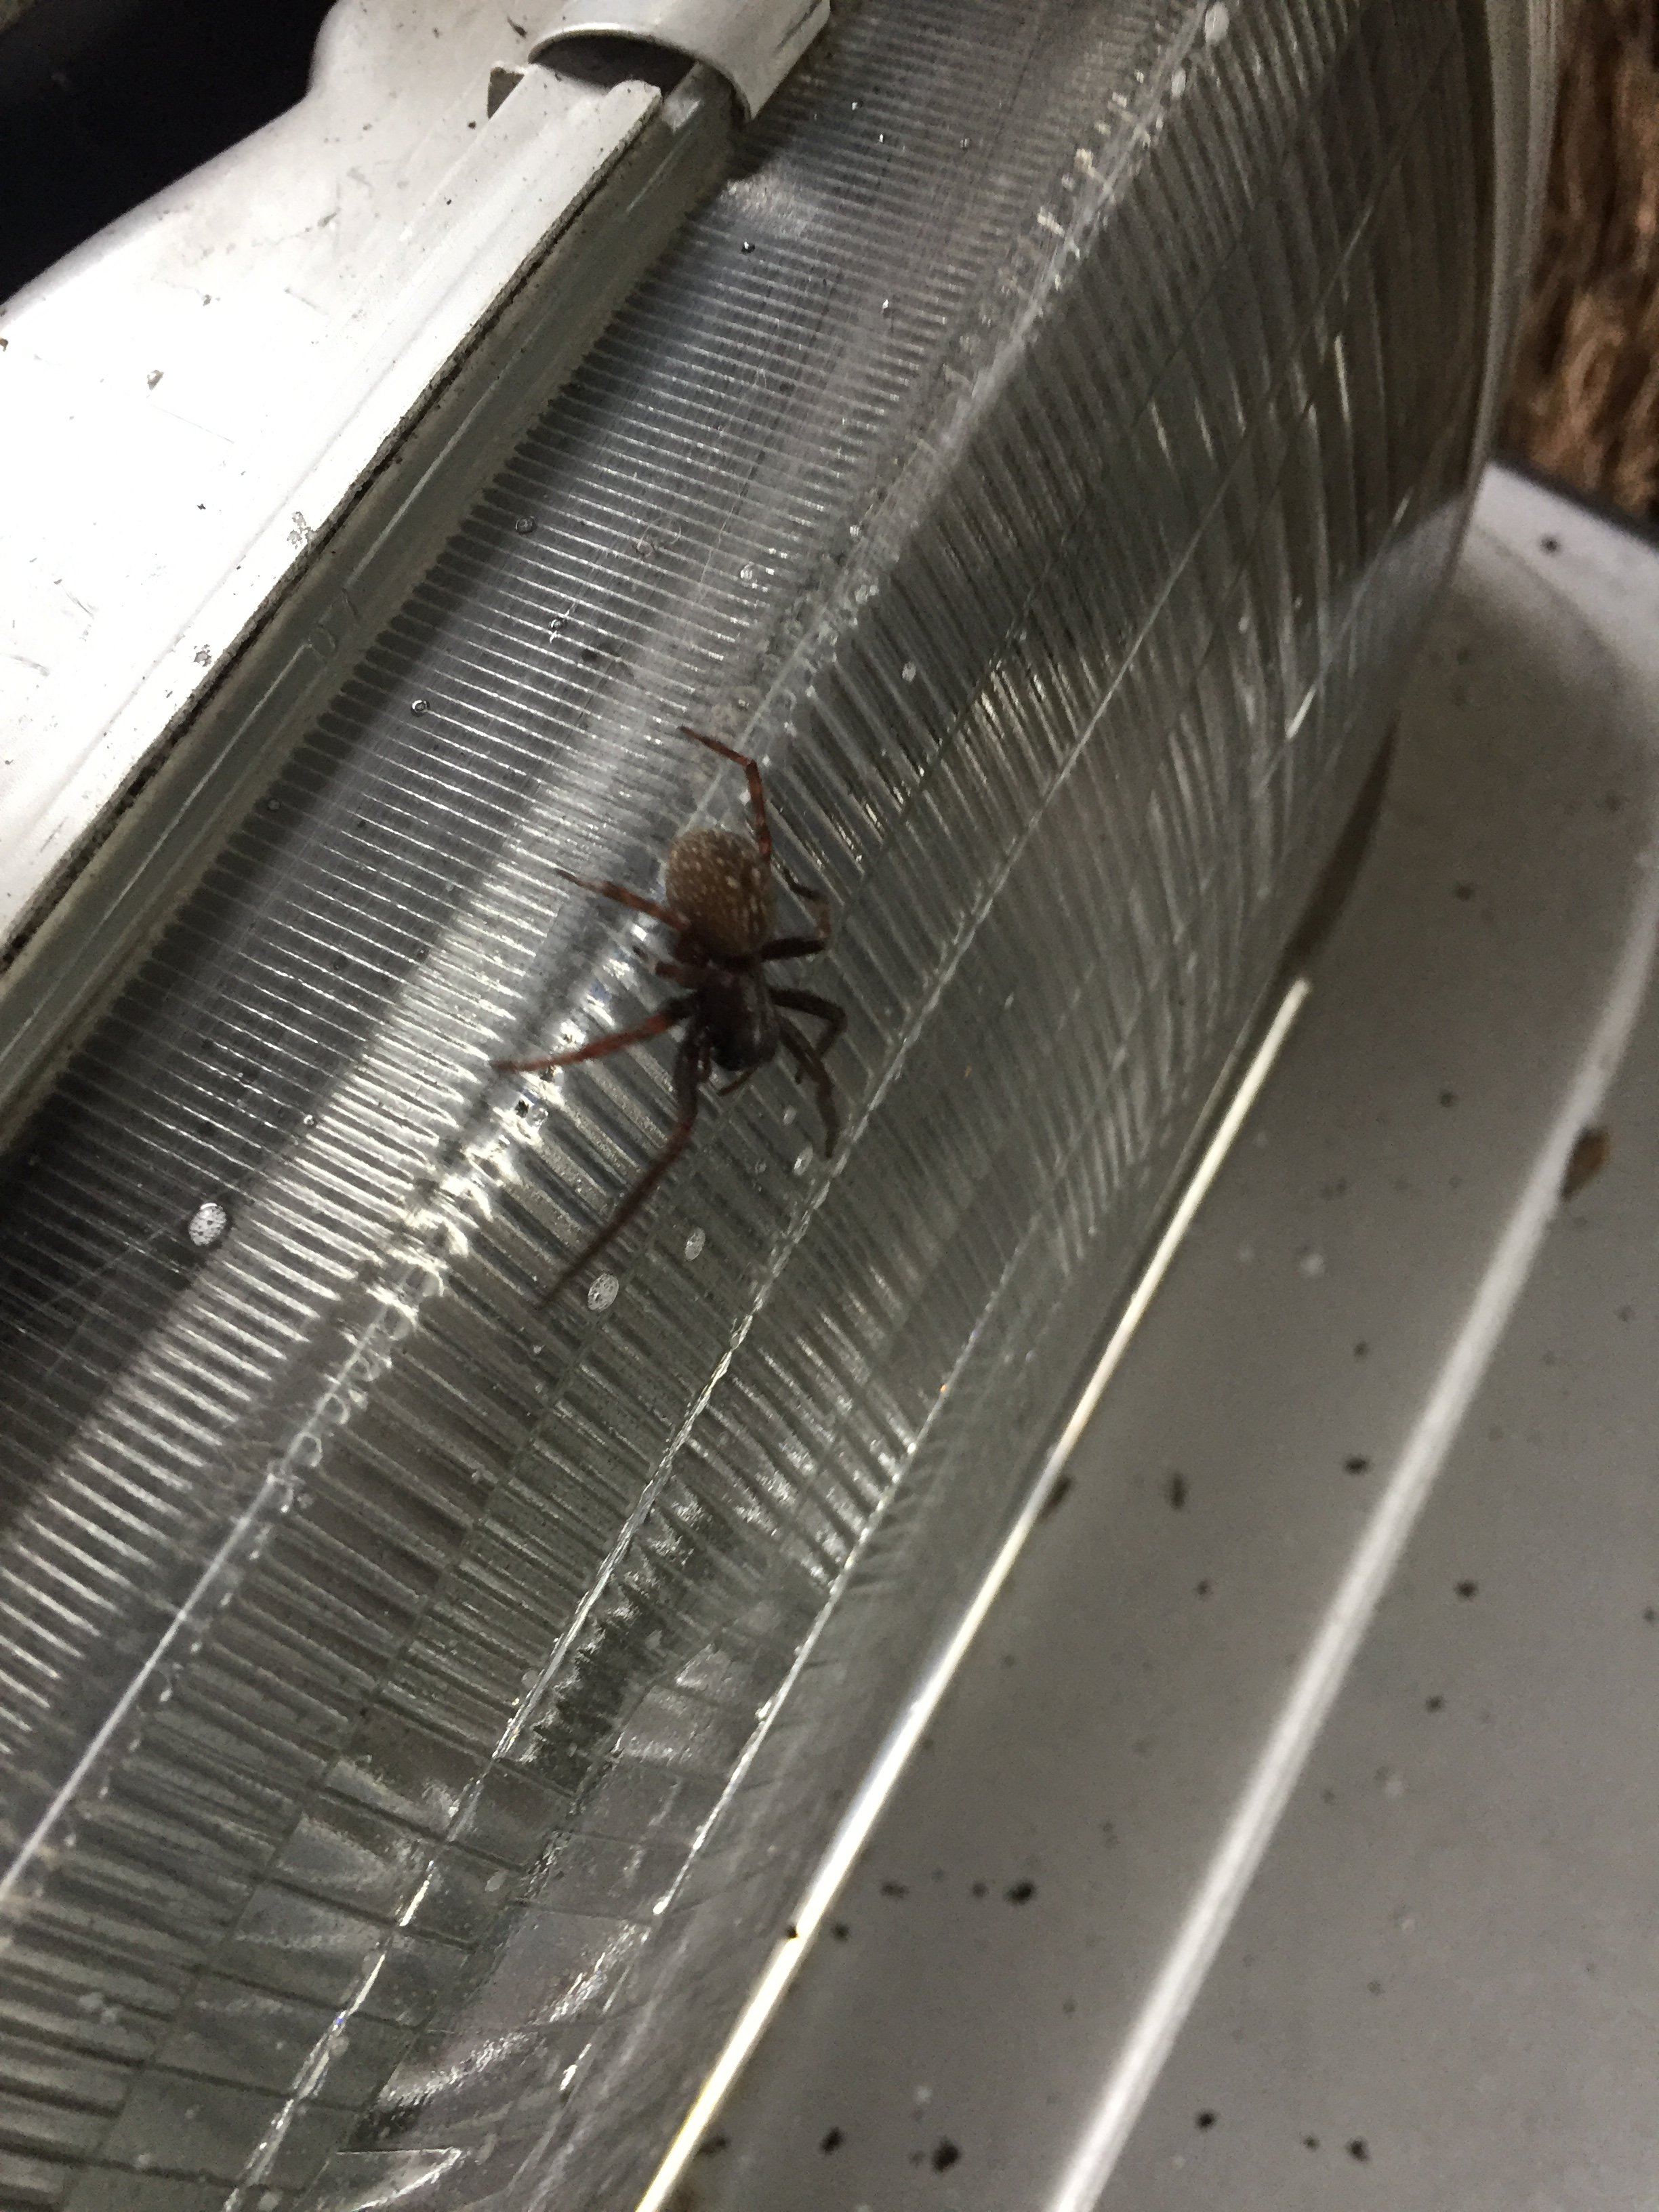
Definitely thinking about the V12 repower but that's a story for another day.. Was meant to take after photos but forgot, so here's a big ass spider that crept out from the engine bay, just to keep y'all posted with the wildlife progress:
4 points
-
So @Mrs 64valiant wrote of her golf the other day. So we now need to buy her a new car. Well why not her buy my subaru out back and I just get the kombi done. Can't be that hard right? Got the beetle driving in 21 days hahahahaha So I've been on trade me tonight found out ej20 engines are actually rather bloody cheap. https://trademe.co.nz/1386690002 Don't know which one I linked now but there where even ones for 300 dollars haha. A crap load cheaper than a rotary conversion. @Evan just said pick a part has engines for like 200. Sounds like I might be off to pick apart.....3 points
-
3 points
-
Went to bnt hillside road today. Asked for points and condensor for a 1977 ford transit. He asked me for the rego number.............. here we go. Left with out points and condensor3 points
-
Been pesting around in this over winter, been sweet, but yet to do a run to the mountain. MIL will be staying in it next week which will be the true test. Went surfin/rallying Doggo! Went up north, Matauri Bay, noone around, mint. Bit of a change from summer to be sure! Absolute Waterfront Sink set up completed, and curtains pretty much done, want to get some of them tiny super magnets and sew them into the corners to hold them in place against the bottom and sides. The last van had dome poppers to do the same job which worked well but were a bit inflexible. Tractors Goals3 points
-
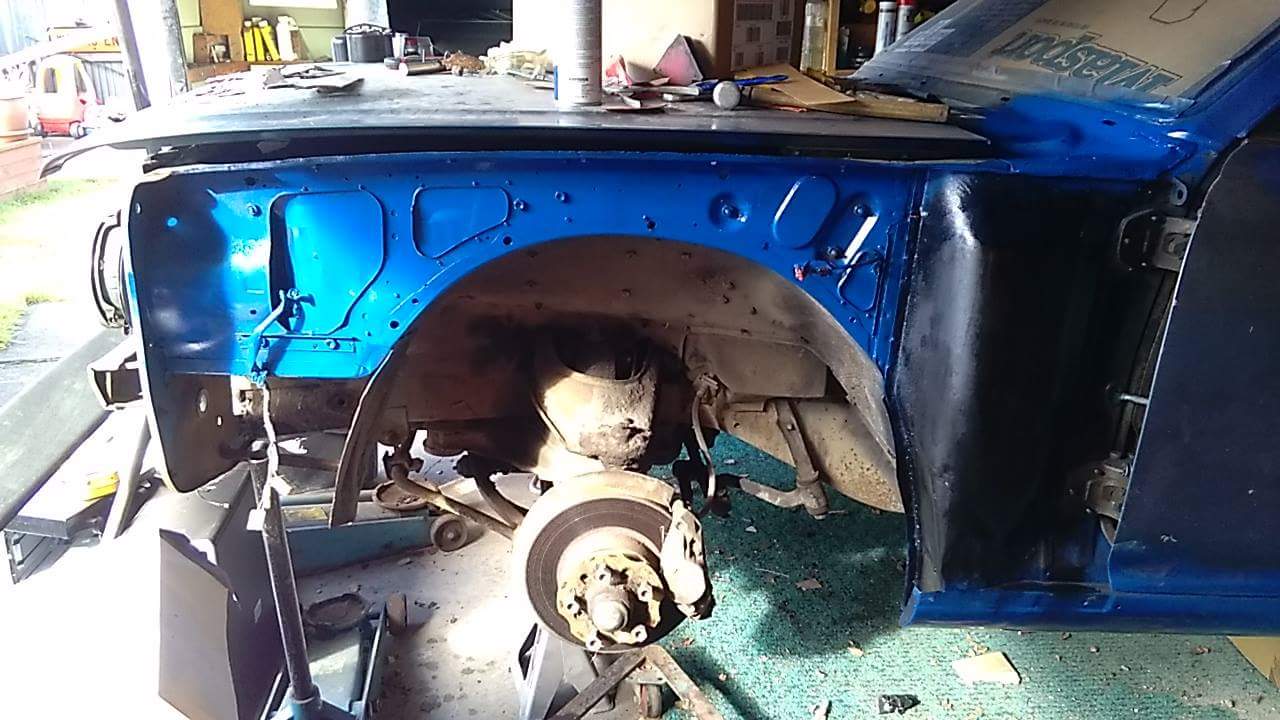
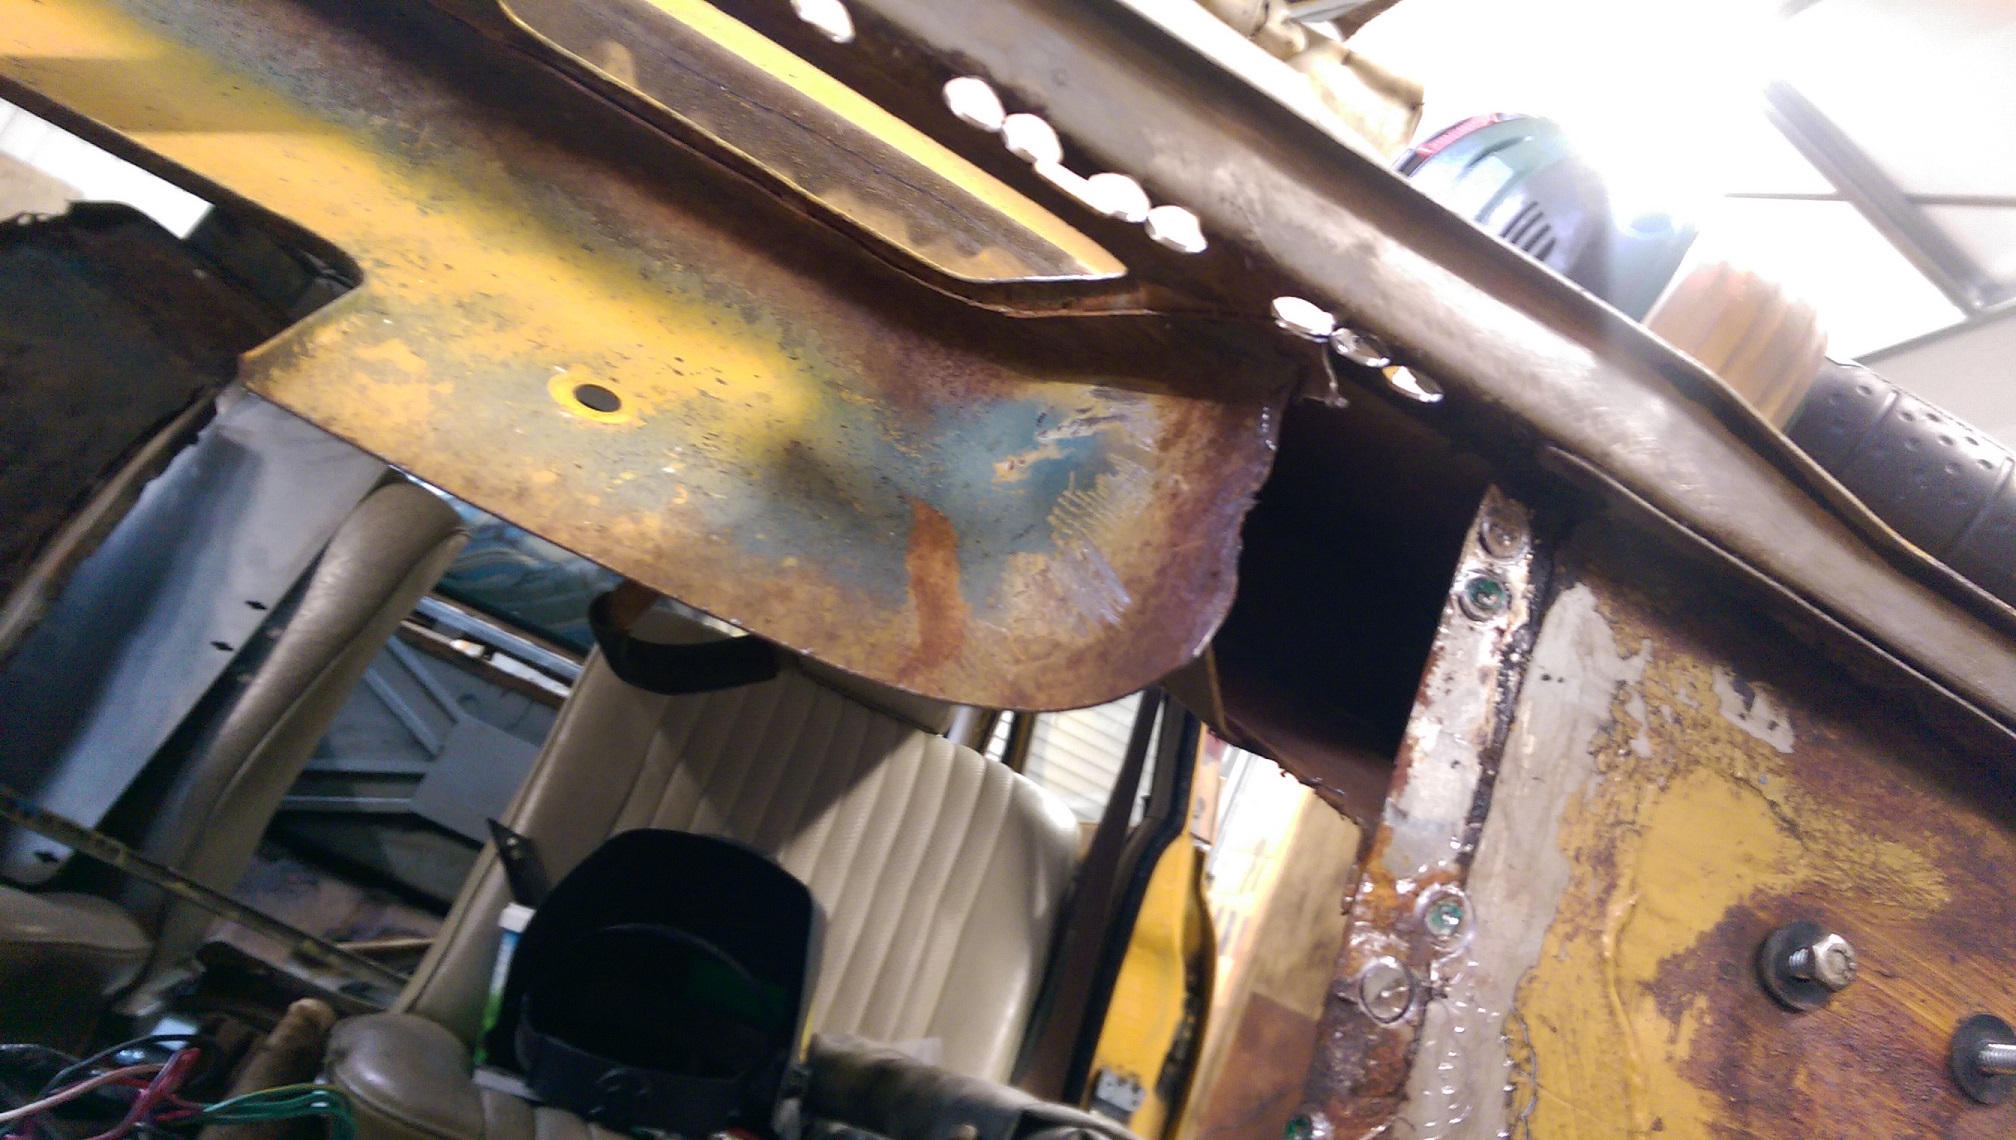
Yeah right So the rust repairs well be doing are ÷ drivers sills inner and outer ÷patch in drivers floor medium ÷passenger sills inner and outer ÷massive patch passenger floor ÷spare wheel well ,wheel will almost drop clean through figure I'll do the bare minimum of repairs so I can get her a wof and re go3 points
-
Because of that it got brand new suspension for round 2. We had to replace the springs too as the previous setup wasn't going to work with the new Bilsteins and the desired ride height. That left the question of spring rates. I prefer my car to be a bit harder in the rear than most, so am running 400lb in the rear and we chose the same spring rate as everyone else for the front - 550lb. Looks good with a bit more slam: Got it to the race meeting and had a bit of action: This one was totally my fault. It's been a while and I'm a bit rusty - didn't expect Derek to be in my blind spot. Jumped for 6th to 2nd at the start of this race, but didn't finish there. Good close racing though! The car felt much better than the previous round, but still not completely right. It felt too soft and roley in the front, so my theory was to go harder in the front. A bit of research showed that the Spec Miata class in the USA runs 700lb in the front and the same tyres as us. So we landed on 670lb as a rate to test (12kg).
3 points
-
a few more progress pics.
3 points
-
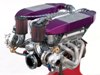
Had a thing. It needed some stuff done do it. Saw manu, tried some stuff, realised we are idiots/I'm an idiot and did it the easy way. Oil line feeds the turbo and the vacuum pump for the alternator. Ordered new engine mounts ex Japan (wallet not happy but I know they will work). Last few things are to fit crank pulley, flywheel and clutch, and pull the stud out of the old block for the sump. then it's time to go back in! Aftet this photo I put the engine mount brackets on and it will be in the way of the factory turbo inlet pipe so will have to bodge something up for that
3 points
-
Testing the CSP linkagejust wanted to check everything fitted and worked together as I bought carbs, manifolds, linkage separately.managed to turn the engine around and get a good look at the flywheel/clutch for the first time in nearly ten years.a bit surface rusty, should be okay??bench looks like this.car still looks like this, sort of.3 points
-
Back at @OldNathan s place Pre check over and wash
3 points
-
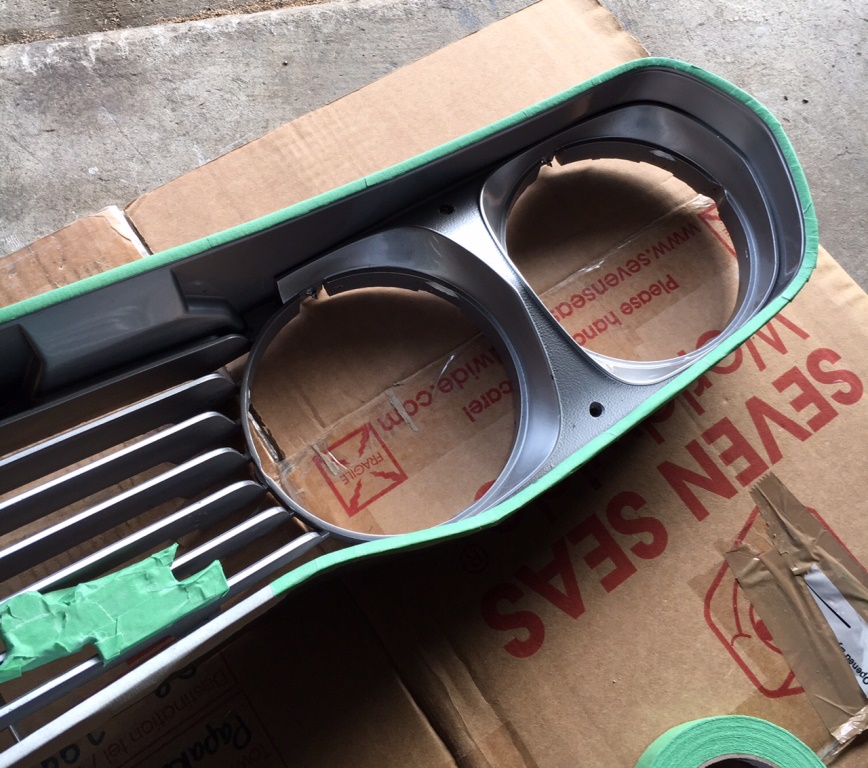
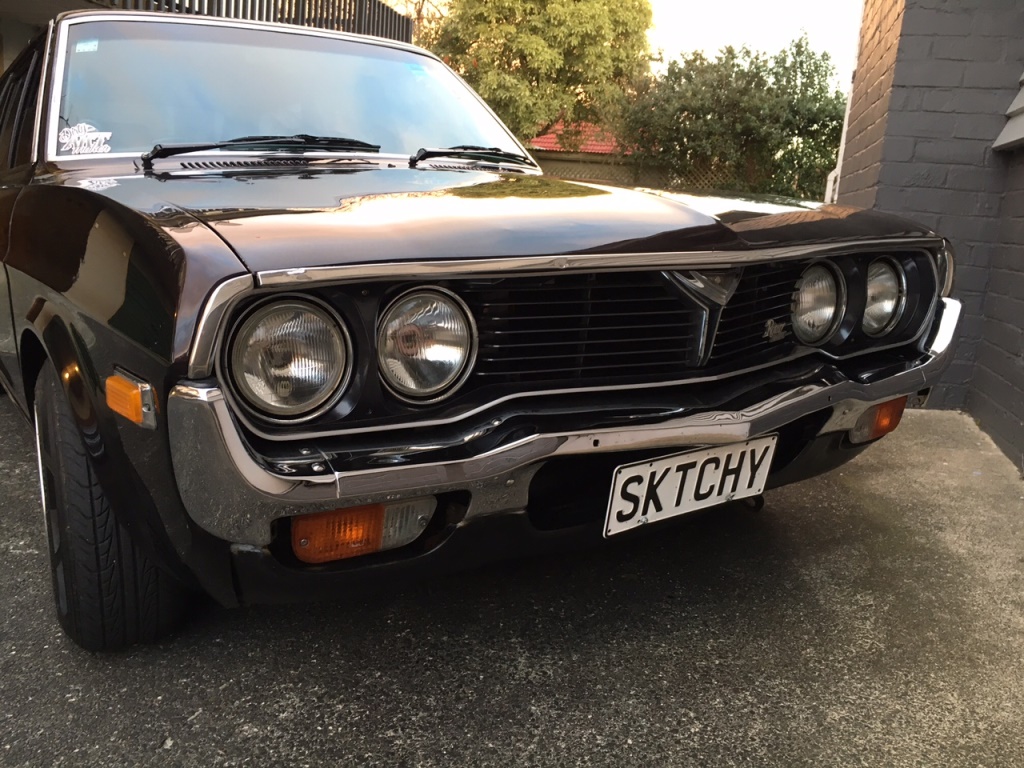
Owned this just over a year now - still going good! Tracked down some head light trims recently and have hopefully tracked down the two sill chrome pieces I'm missing (for not an insane price). From looking at Rx4s at various events I'd noticed that my grill had been painted a light silver, and most I've noticed seem to be a darker gun metal type colour, so I decided to paint it a darker silver and keep the lighter silver as an outline. I recon it looks sweet, in combo with the grill headlight trims changes the front end look a fair bit see pix for a comparison https://oldschool.co.nz/index.php?/topic/53792-oldrx7s-1977-mazda-929-wagon-discussions/
3 points
-
36+1 trigger setup seems to be working good so far. nice smooth rpm plot. Was attempting to check the tune, but fun ended pretty quick. above is a part throttle run, just to check the new trigger setup works thru the rpm range. more than half throttle and the below happens.. Its had a hard life. originally was in my trueno Have also moved the battery to the rear. in an attempt to move the weight rearwards and lower down. I put those ugly spring covers on. as the roost off the front wheels was pumping the whole spring full of a grass/mud combo3 points
-
A project i am currently working on. Hopefully will make it run again once i get parts i need for it. It is a km37. From late 60s to 70s i am guessing.
2 points
-
Hi team. After a bit of attention in the whipping a v4 thread i figure there is some love for a dirty old transhit so here we are First impression Discussion:
2 points
-
2 points
-
2 points
-
I am really jealous.2 points
-
Yes what a finds right good old dad In a shed on the pahiatua track,he went out to find a hot point to run a mitre saw. Spotted that Rest is history lol2 points
-
what a find! & that inspirational pic! god damn that'll look amazing2 points
-
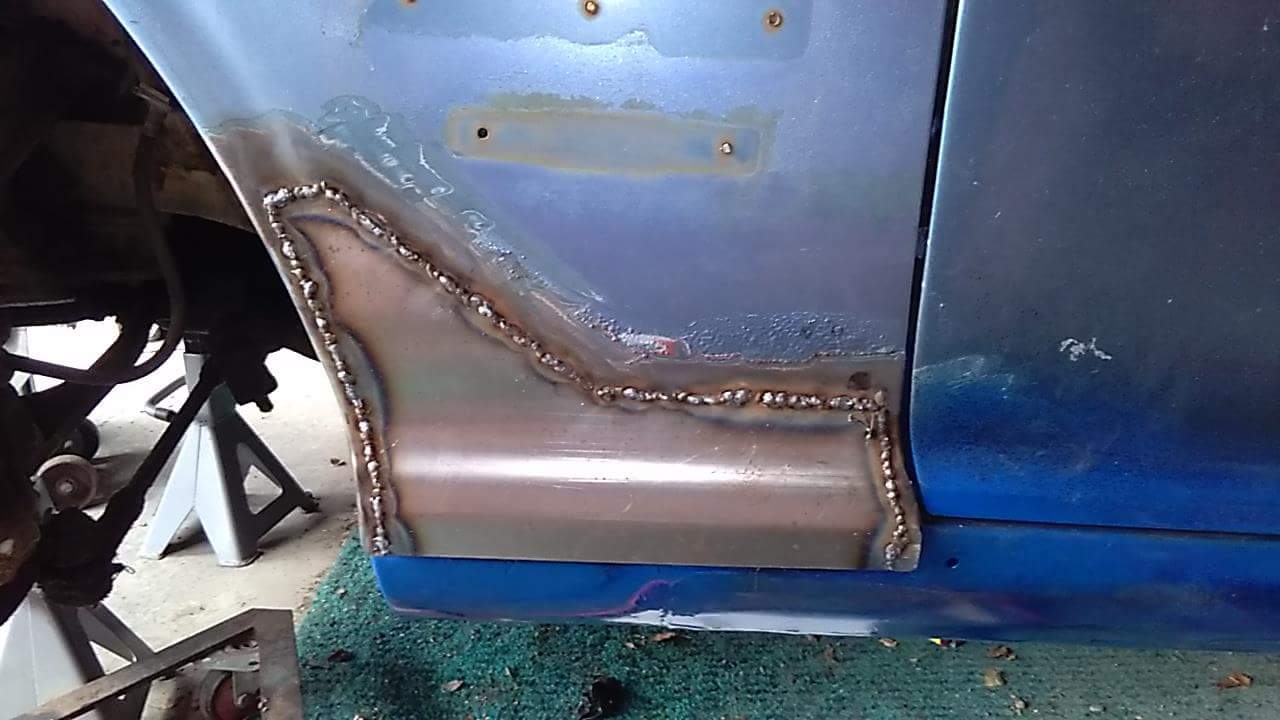
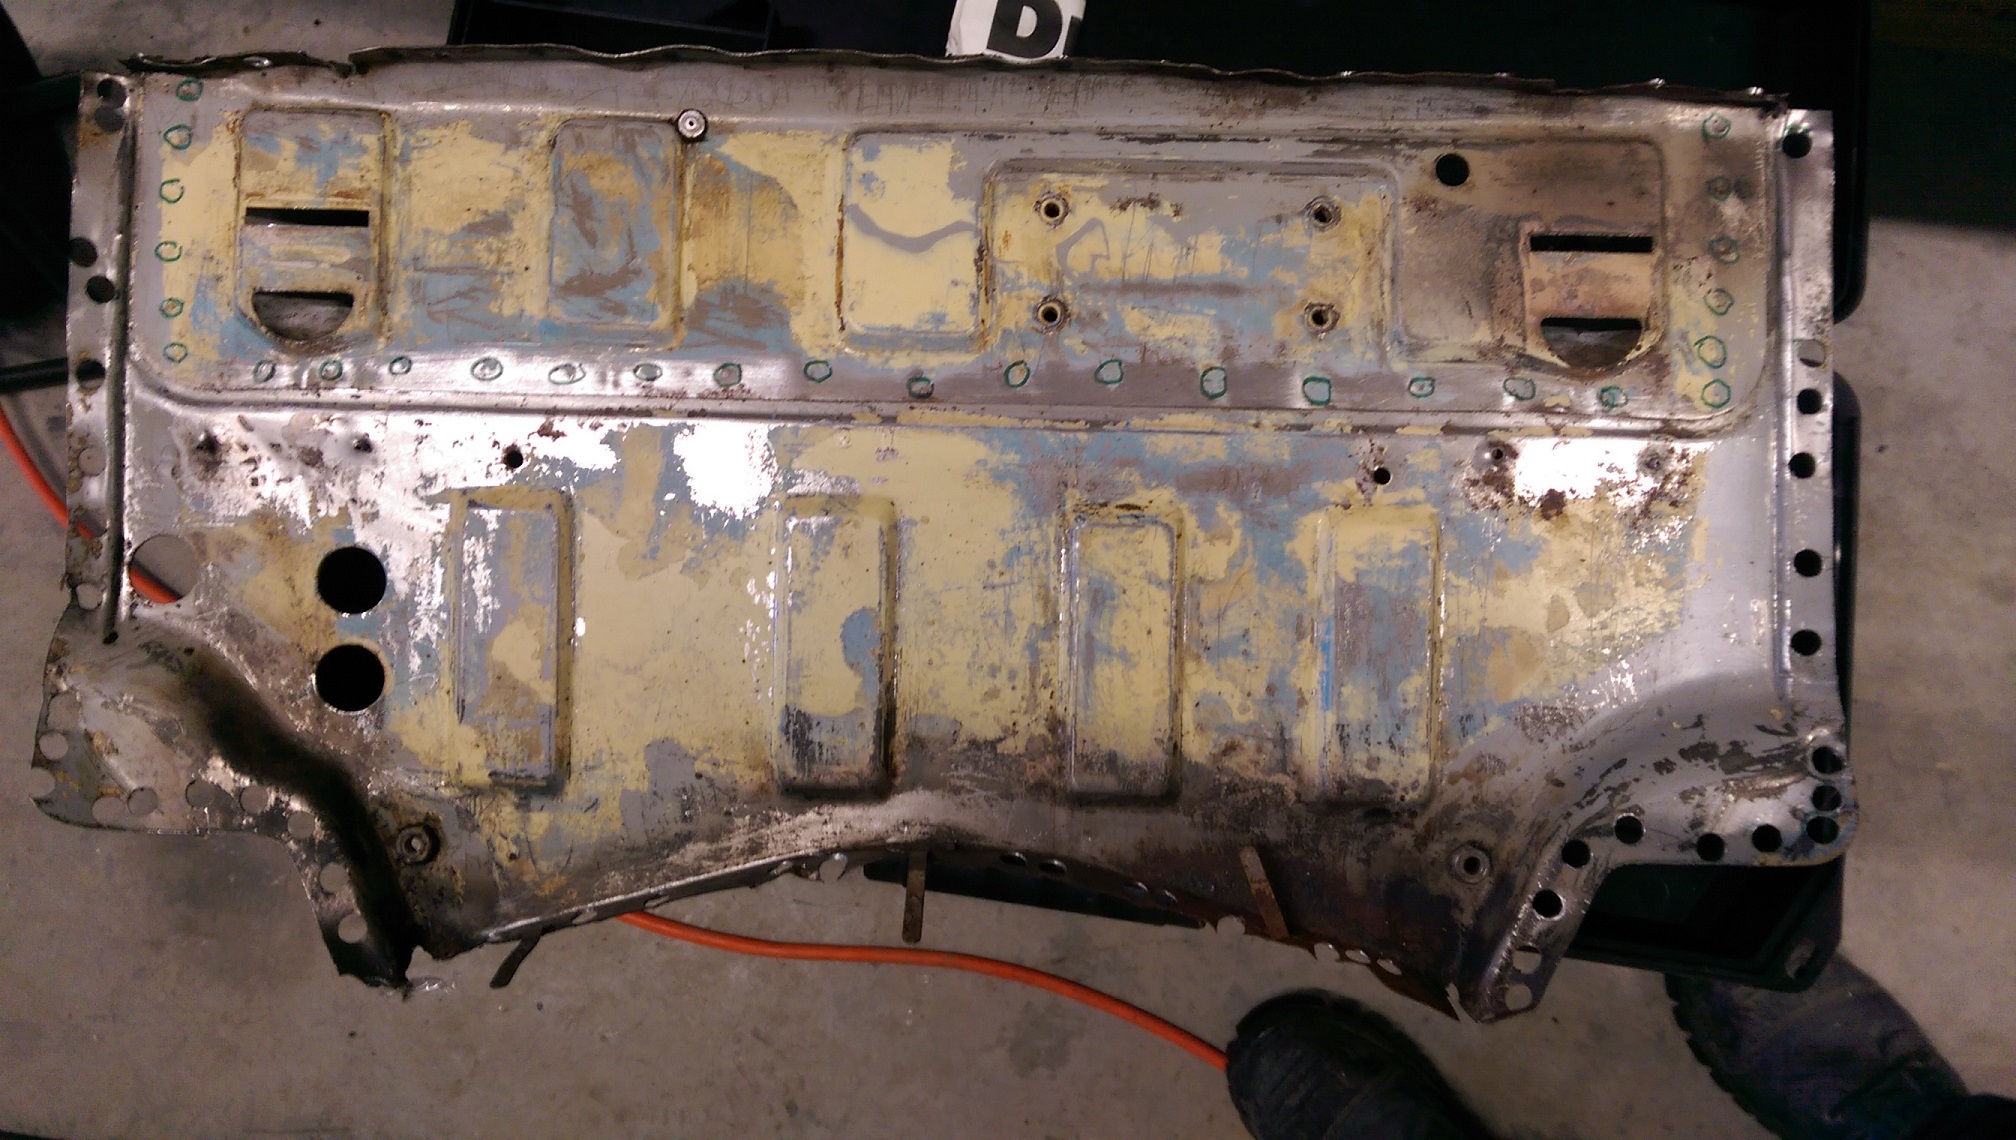
Since the engine was out... And it's the last day of my 4 day weekend. I thought I'd remove the rusty firewall. I still need to remove this bit, I couldn't get in with the spot weld drill, so I just cut it off. The air box thingy for the heater was rusted up the sides too. Fortunately my donor panel does have those bits, but not all of the air box thingy, so I will have to weld it together. Aaaand the donor panel. The edges need some hammering to straighten them out. I'll need to drill out all the circled spot welds to remove the top panel so I have access to weld this to the remains of the air box thingy. I'm considering changing the bottom flange so it's not a shelf for water and crap to sit on. I would bend the end of the tunnel up, to make a flange and cut the flange off the firewall. It will also give me a tiny bit more clearance off the back of the engine.
2 points
-
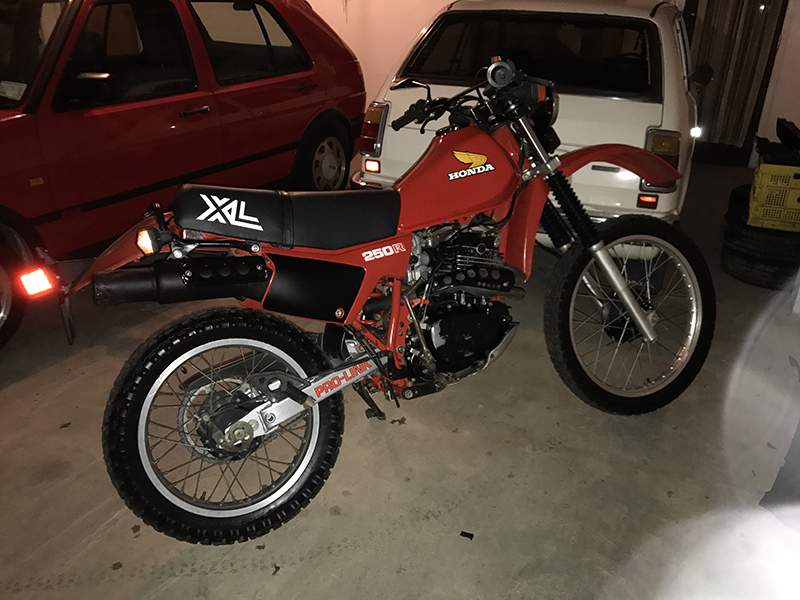
Its easy as if its been legal before, ive got an xr600r im just about to re register after a bit of a tidy up2 points
-
Pics do talking here
2 points
-
Oil pumps move oil harder than a money shot. I ran my sbm one with a drill to purge my remote oil filter lines. It 1/3 filled a baby formula tin in only a few seconds2 points
-
Round 3 took place on August 6th and the new spring rates were proving to be working! I qualified a second faster than any lap from Round 1 or Round 2 with a 1:24.3 which put me in 4th - not bad. The front two guys qualified at a blistering 1:23.3 and 1:23.5! Madness. Race 1 came around it was GREASY. I started 4th and jumped up to 2nd on the start but ended up slipping back to 5th after running wide and getting wheel spin on the exit of the last corner. Not to worry though, two people fell of ahead of me so I still came home in 3rd. Spin: Full race: I also managed to stuff up when trying to record the other two races... So this is the only race on camera. So the setup is getting better! I'm planning to run my AE86 at the next round, so probably won't be campaigning the MX5 at the final.2 points
-
Let tank dry out over night and gave it a good clean out today. Plugged it all back together and put it back in. Confirmed the filler hose was trash. Spose 40 years up to ya bits in leaded petrol will do that. Have got 2 new flexy joiners coming and 2ltr of brake fluid. Could it be a running driving van this weekend? guess we will have to wait for next week on..... im a transit get me out of gear2 points
-
Me and the bro went and picked her up This is were she sat for 22 years
2 points
-
Long time, no update. I haven't done a thing to this, but I do use it when ever I can. Fixed some potholes and graded the drive today. Been getting ready to do some paving which means lots of base to build up. Why shovel when you can Bulldozer? Hid in the garden. I'll add a choke cable in the future but beyond that all is well.2 points
-
Woohoo best day at work ever, I found the Butaketsu Laurel-type indicators that I thought I'd lost forever. Original Years of gunk and nastiness New No more orange ! They don't fit super well because they're not made for this car but with enough trimming and fiddling I could get them to sit flush. They'll do for now. Discuss: https://oldschool.co.nz/index.php?/topic/49704-mlracings-hakosuka/&page=8#comment-18164412 points
-
Also this is what hounds tooth fabric looks like for those who didn't do any googling Also on the hunt for one of these bad bois for the kombi
1 point
-
Id probably invest in some medium strength Loctite for the seat belt bolts. Had one come loose in my car from general vibration even after being torqued up. Ill have a decent range of tools from turning things and levering things to hitting things and electrical stuff. Pretty much emptying my toolbox from work into the car as I need to work on my own crap on Sunday.1 point
-
I have a dream for one of the other FR frames that involves a lifan and normal telescopic style forks...1 point
-
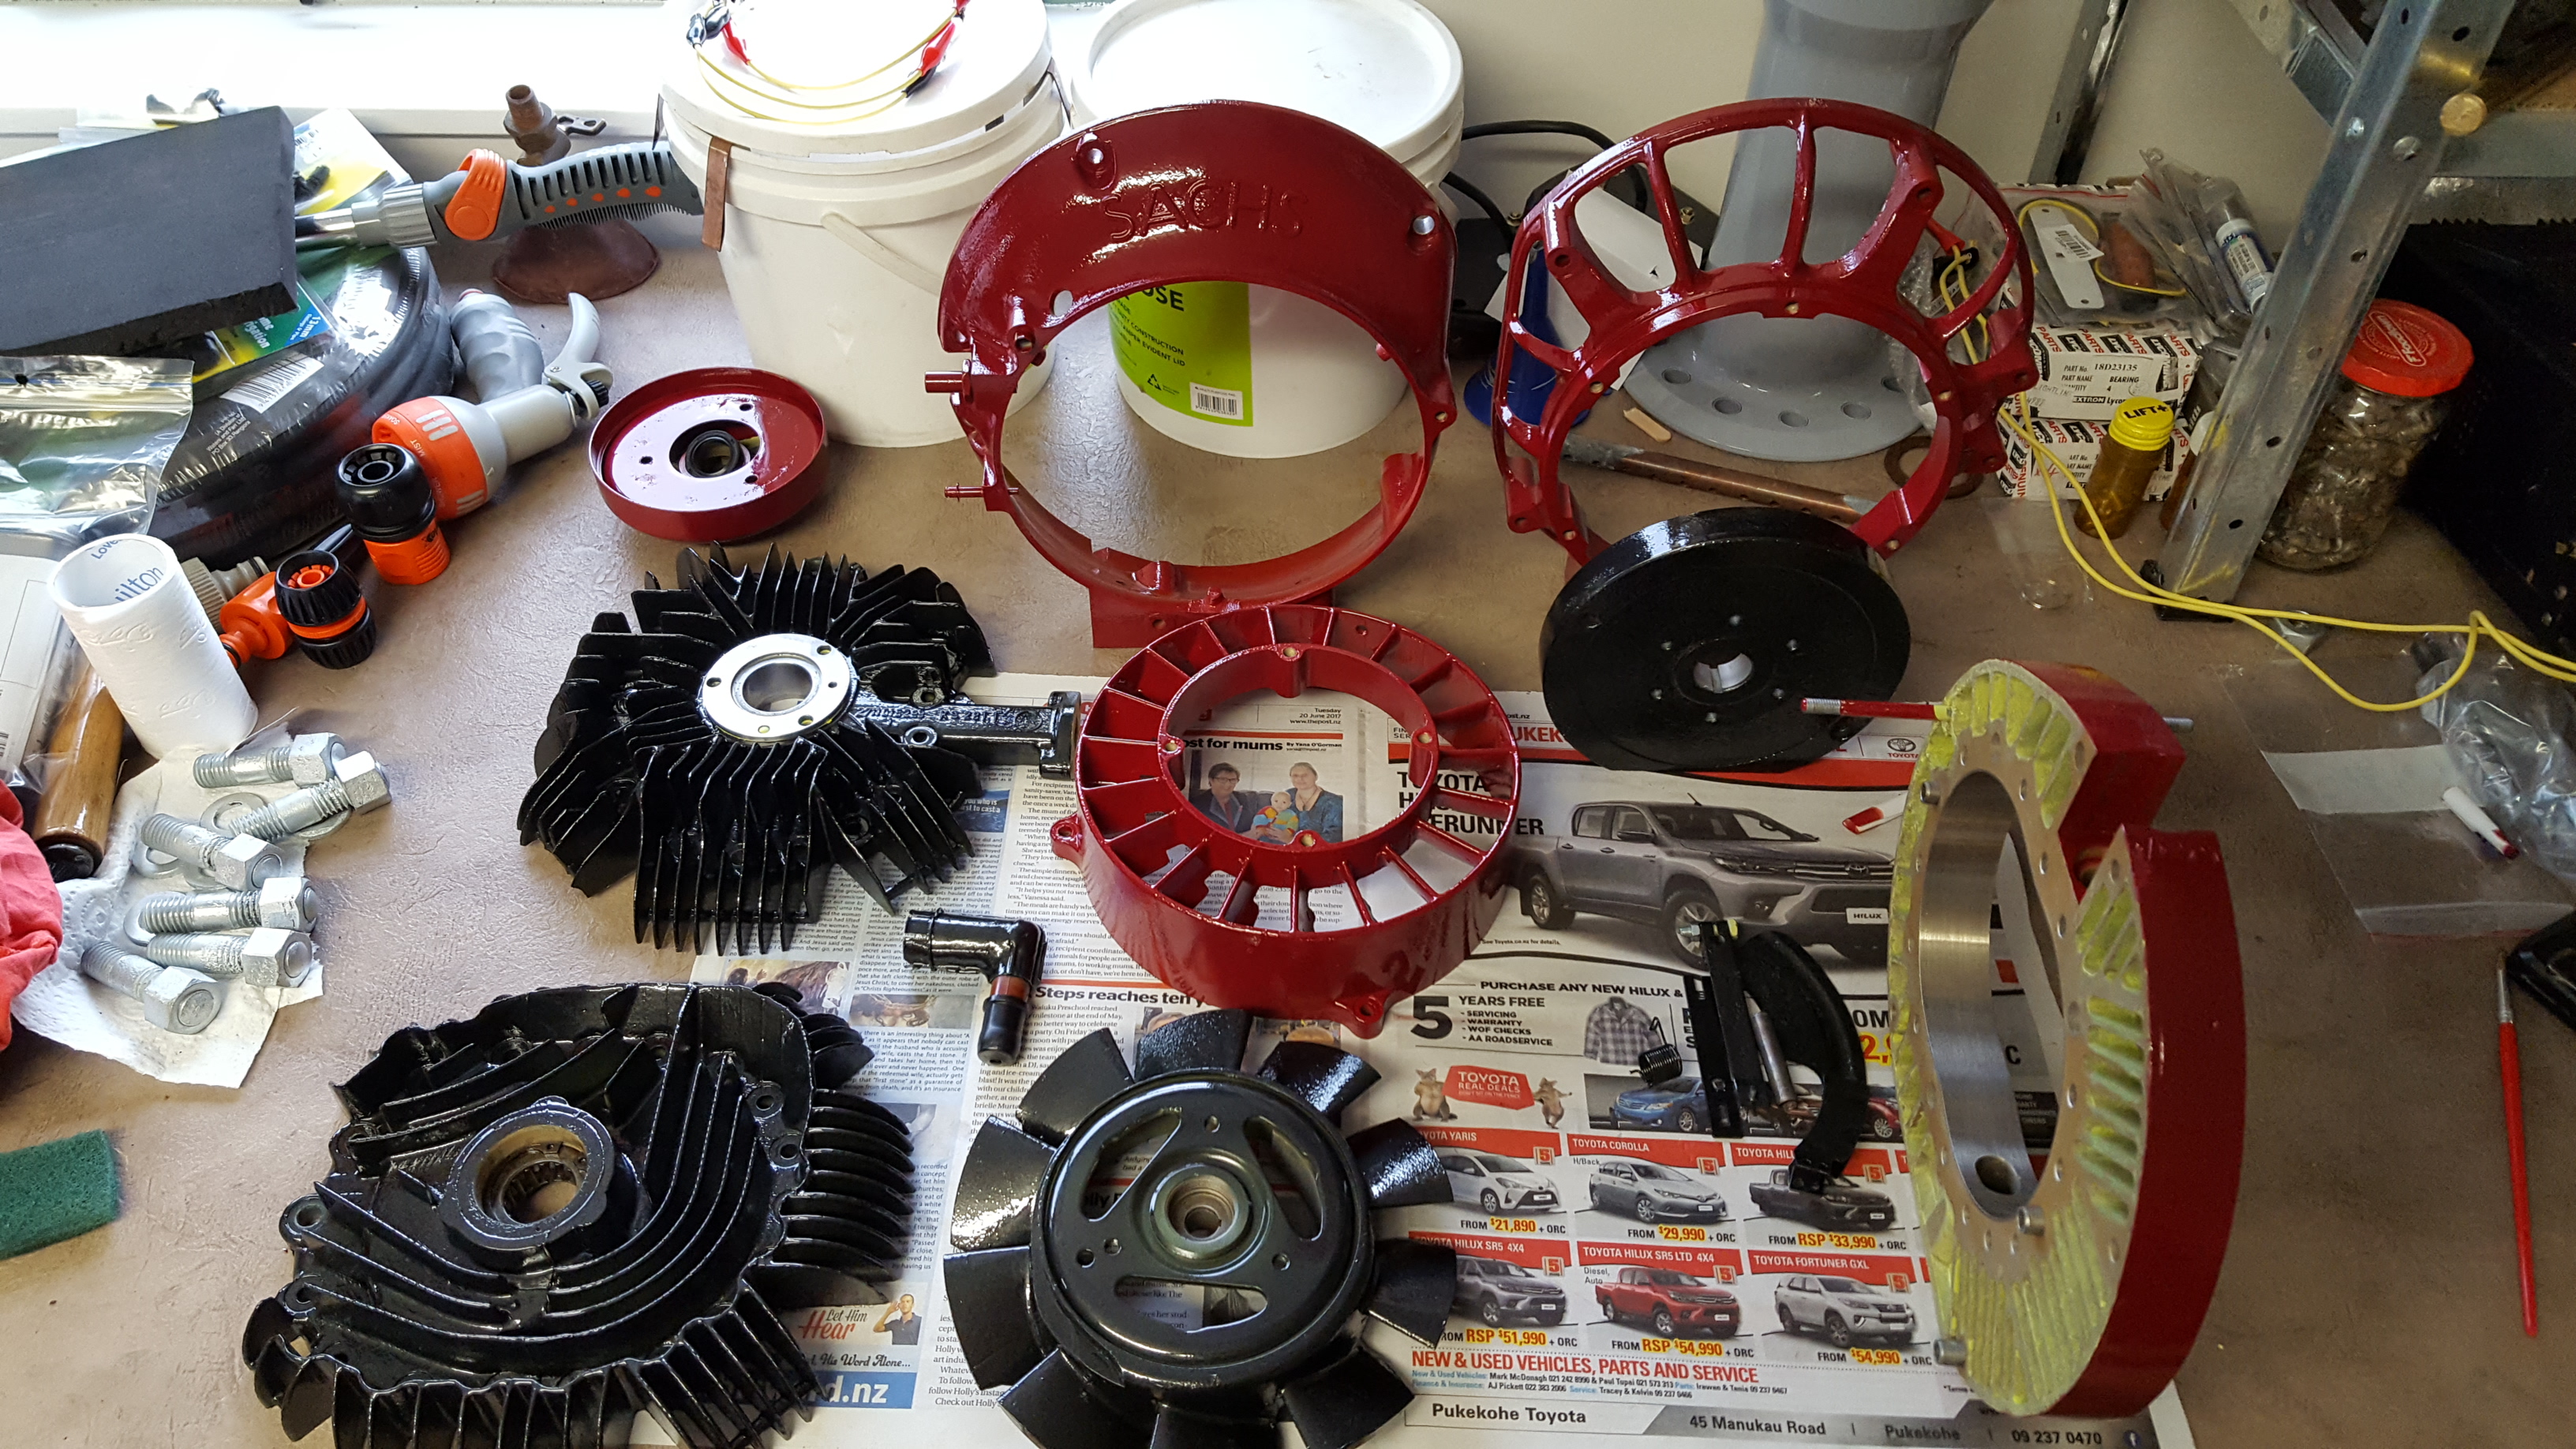
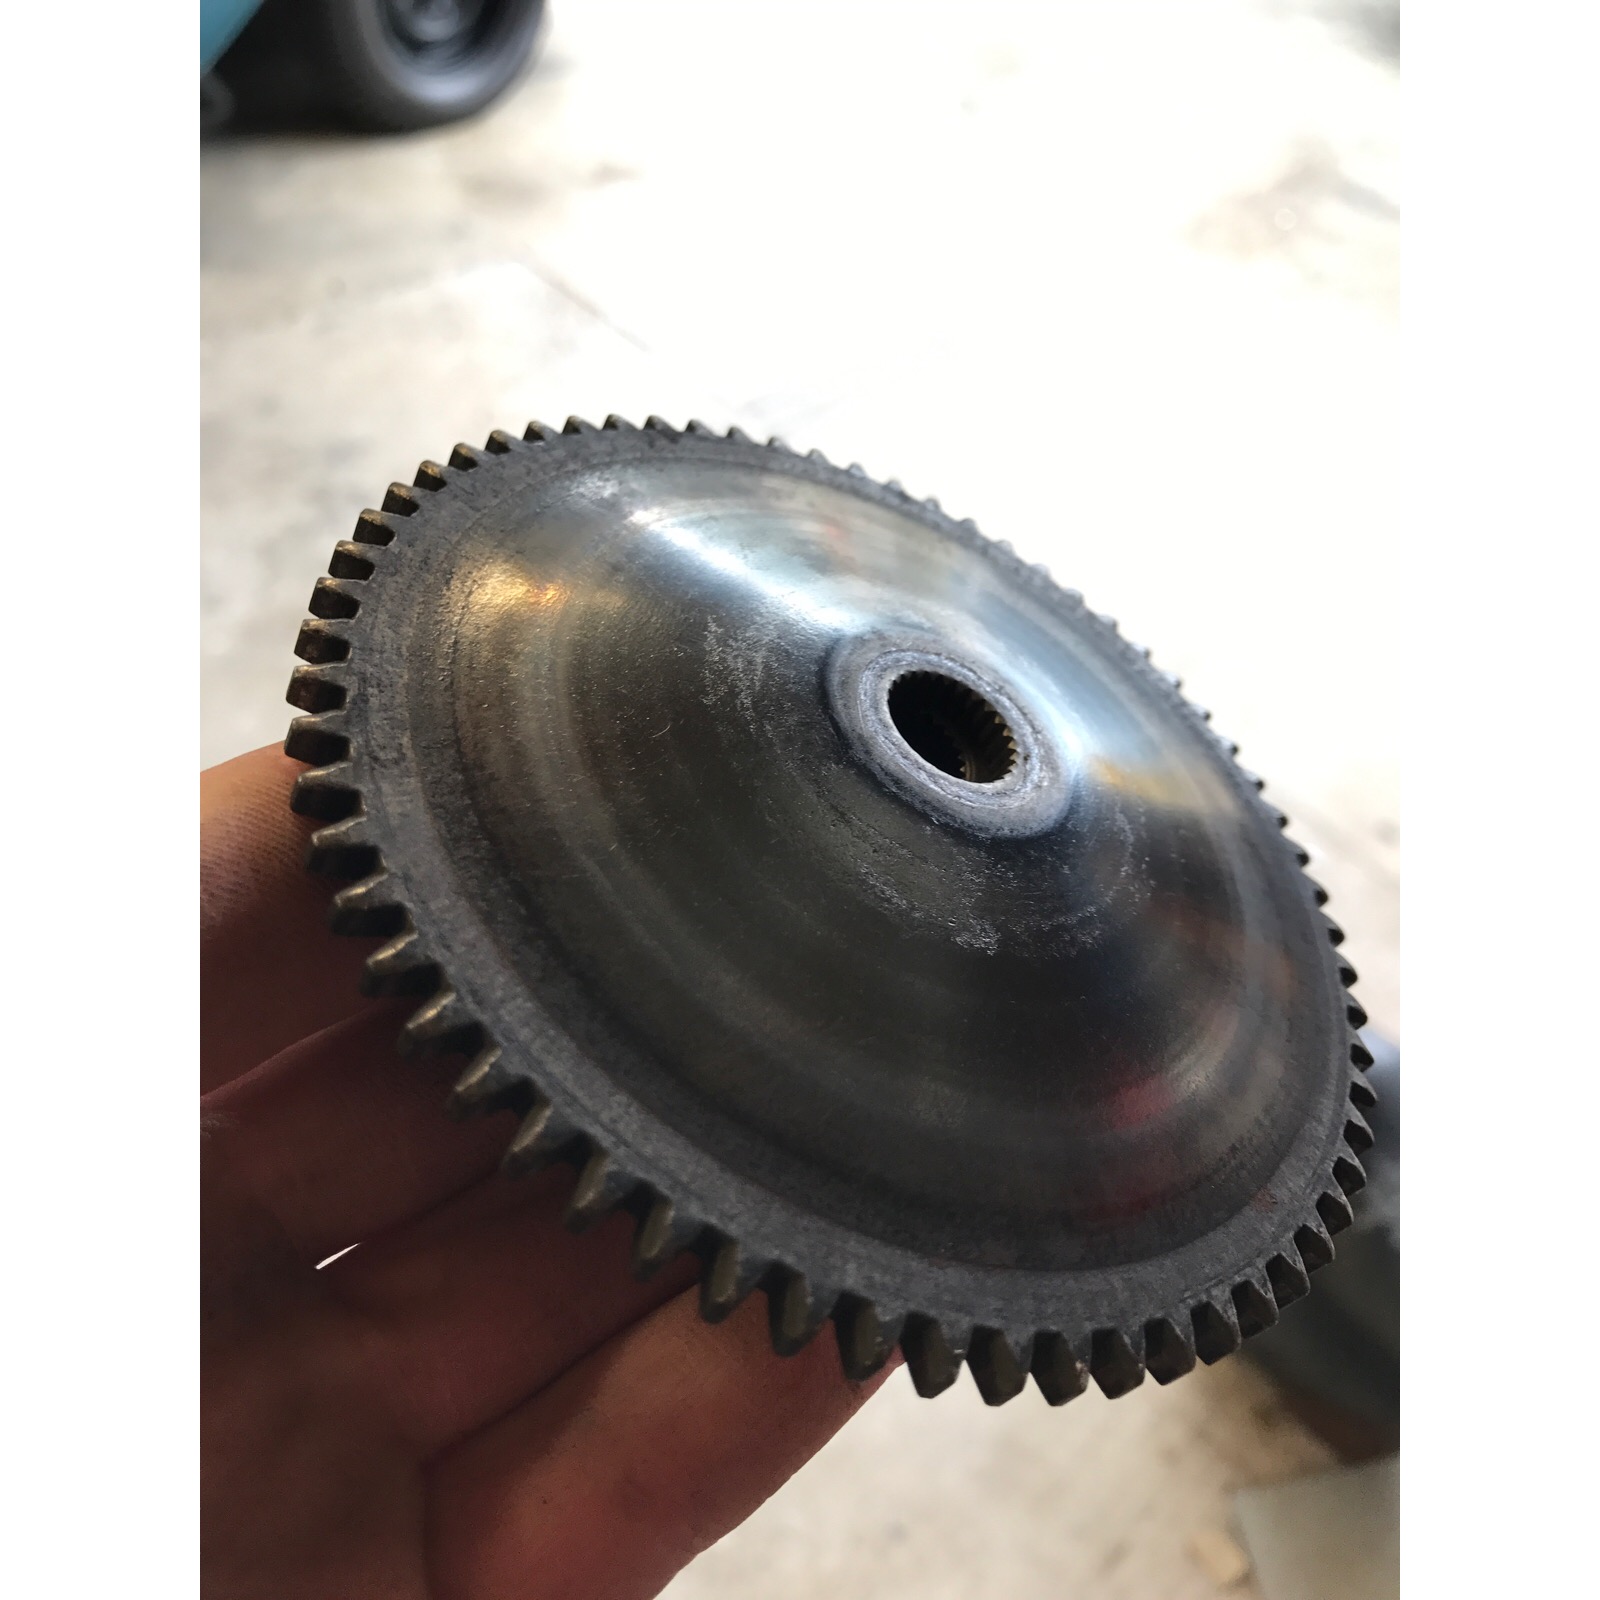
Disassembled the variator and found the roller weights were just slightly square Other side of the front drive pulley is pretty similar to the variator but as these seem impossible to source it should come up fine with a bit of time with some sand paper and clutch looks like it should be fine with a scuff aswell
1 point
-
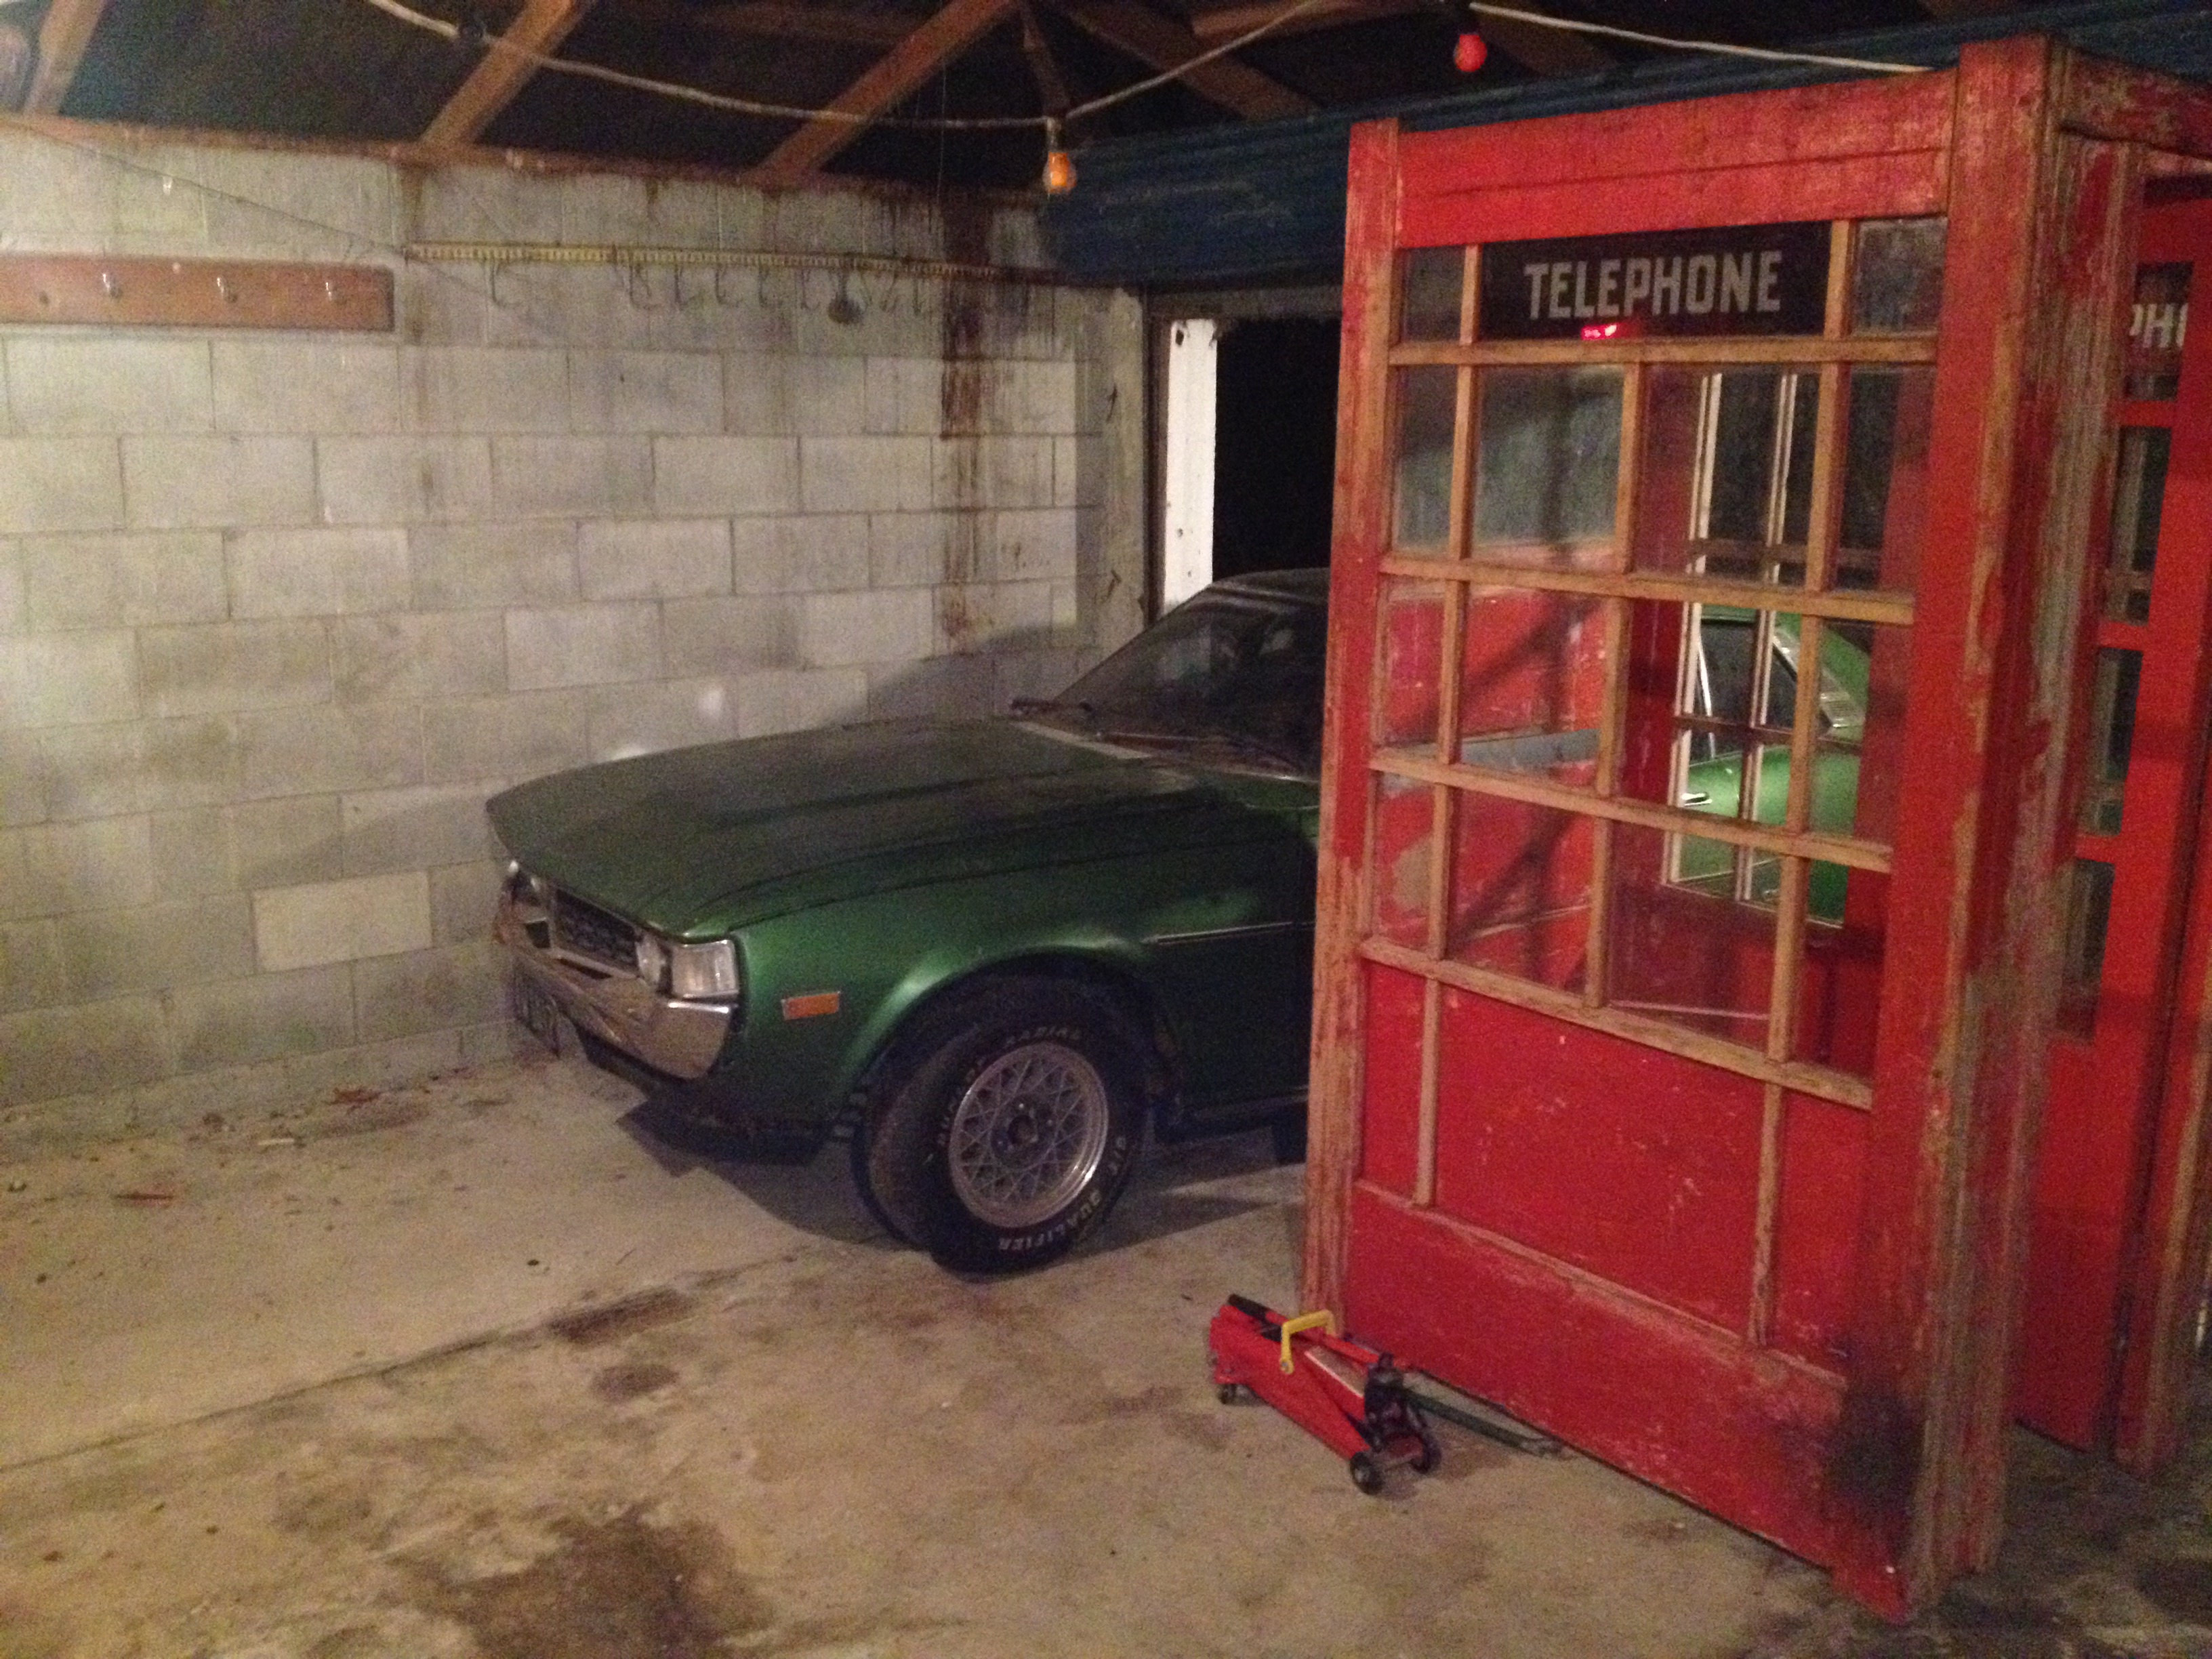
Loving the phone box too
1 point
-
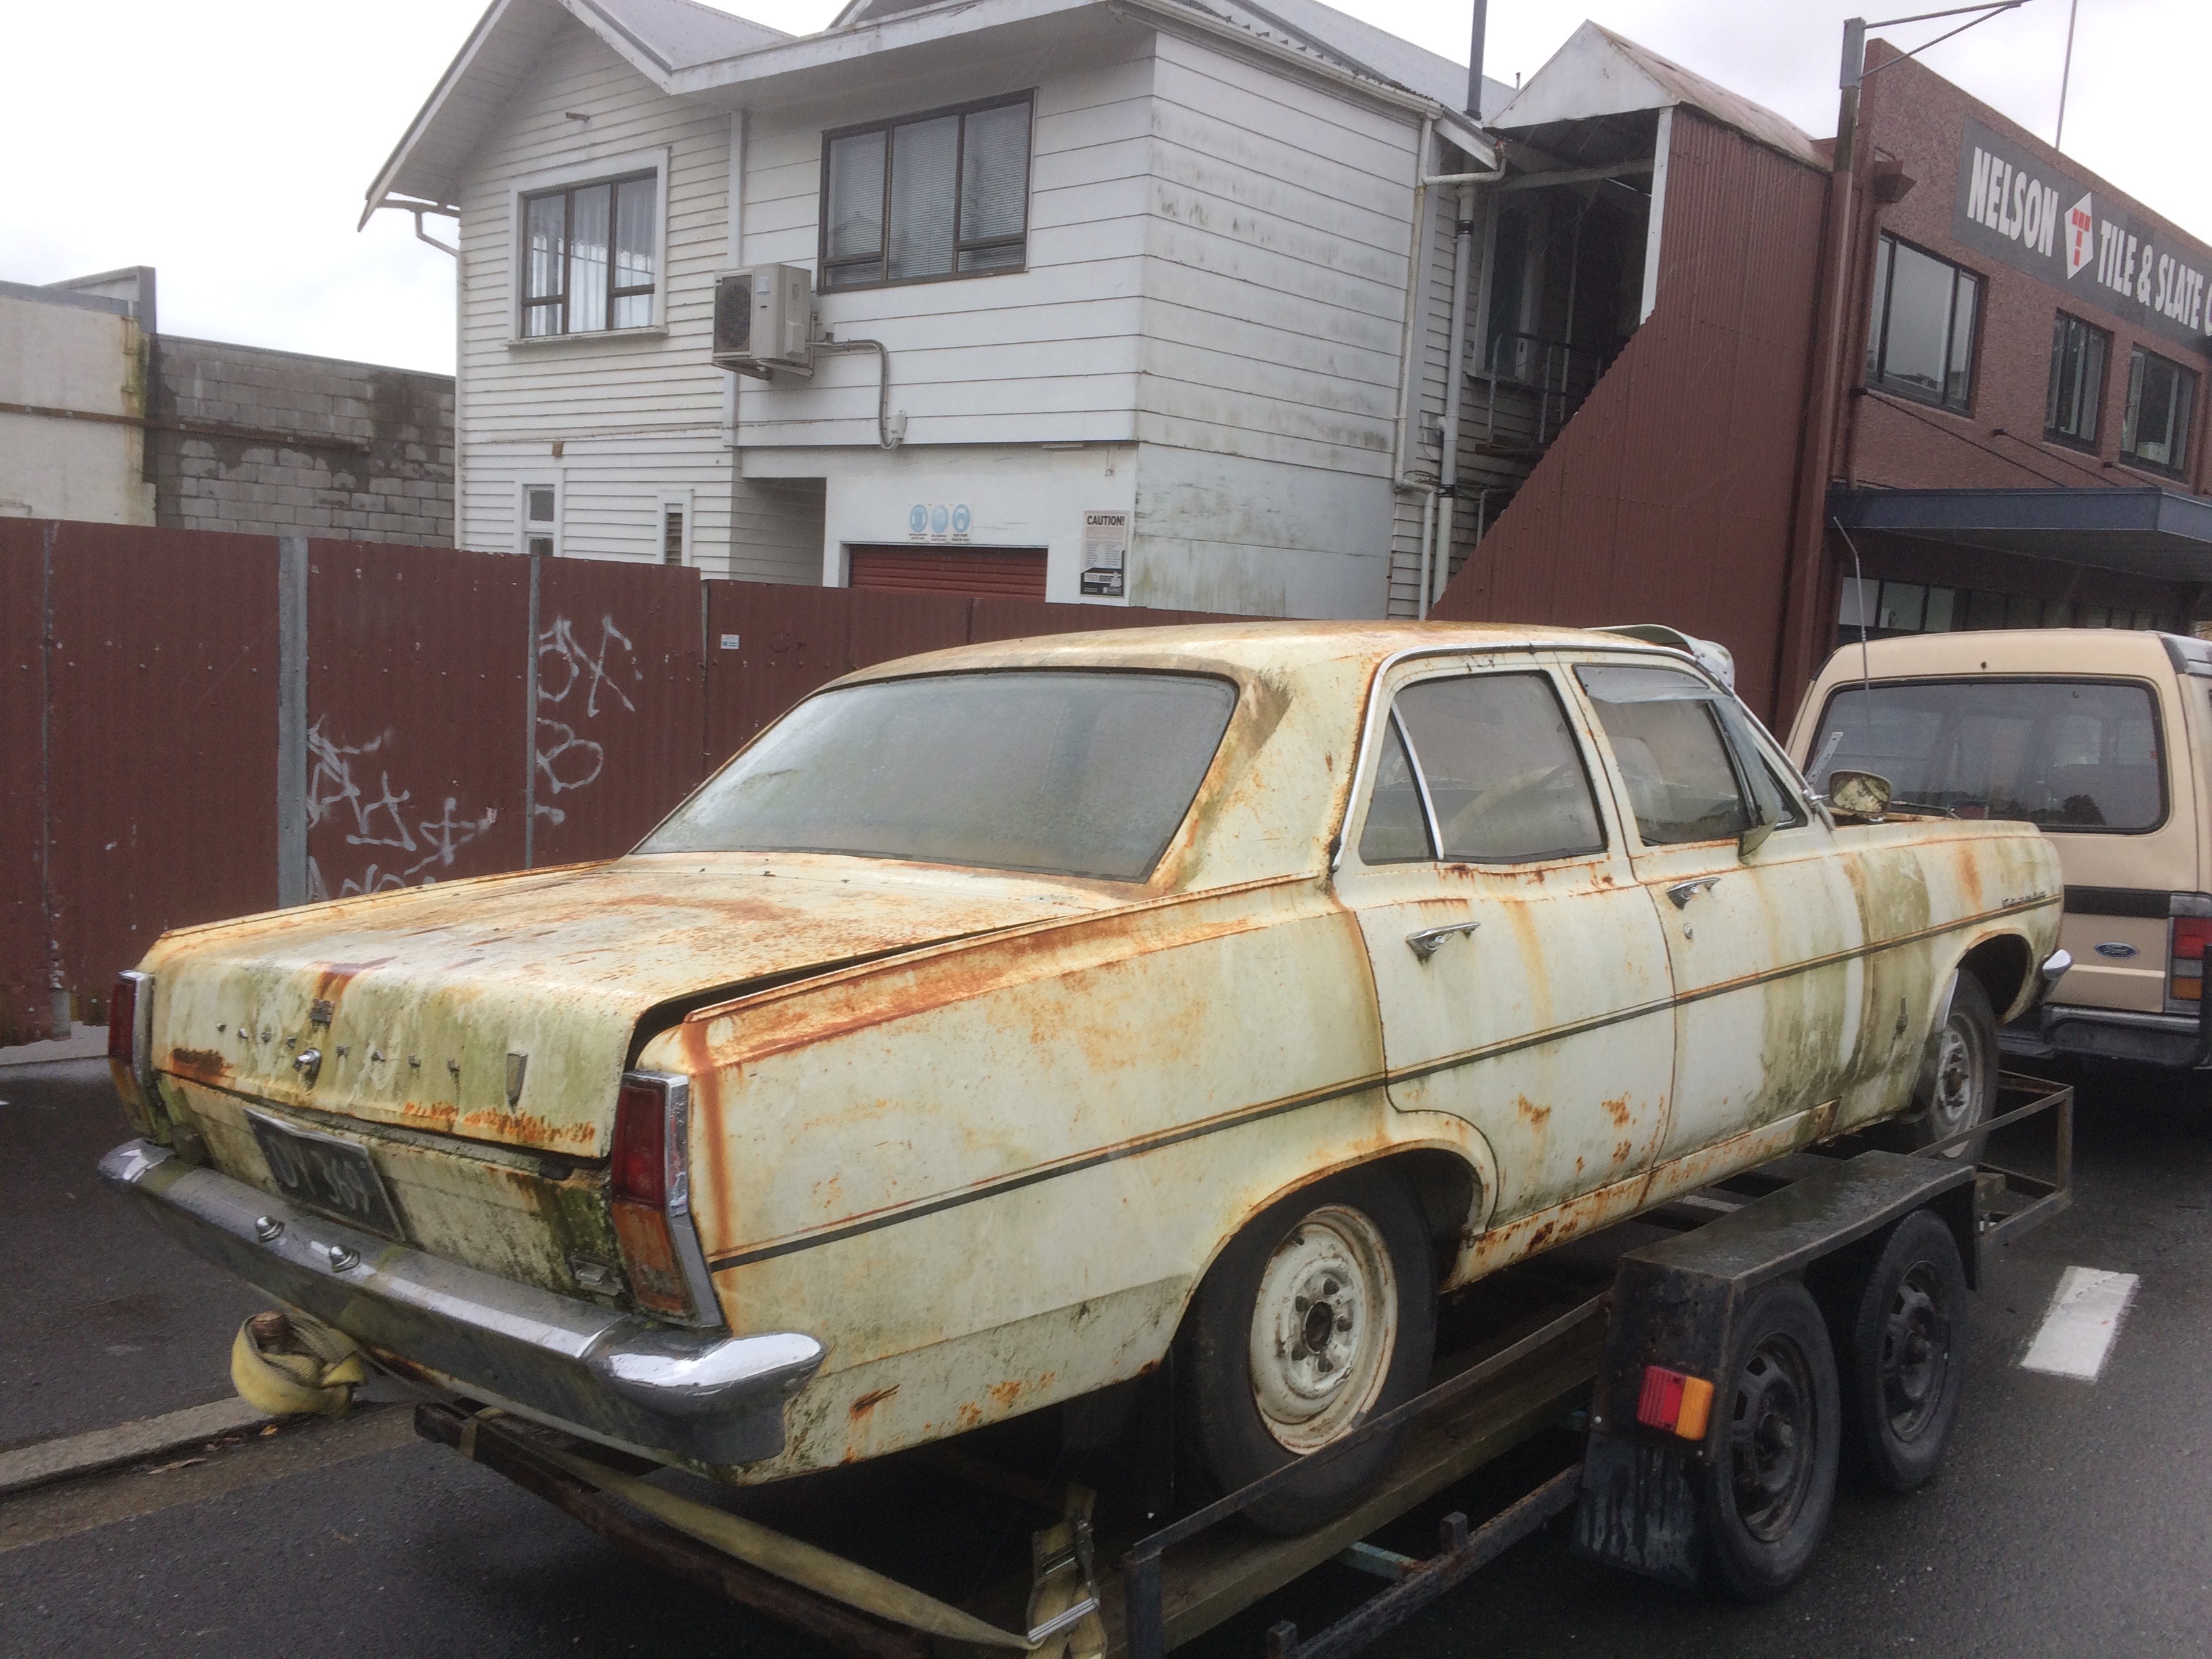
So upon going back to the old guys house i originally brought it off, turns out he had another one in front of the container in the first photo on this thread, Got shift and lift to carry it over the 40ft container next to his house where it sat for years and i was away! 1969, original black plates, reg on hold, huge external sun visor, great chrome. all the extras at the time, unfortunately the paint has seen better days and the motor and box is gone, might try rip into it one day but in the meantime I've got it at my yard waiting lol
1 point
-
Rode this thing at Dirtmasters. The torque! High compression big block goodness.1 point
-
Funny that they are a German vehicle. But also here is a full front. Already in nz.
1 point
-
Hey guys and girls! I'm running an event on November 18 called the Hamilton NerdFest which will be at Zeal (Ward Lane, Hamilton CBD) between 12-4pm which will house a record fair, comic book fair, retro gaming zone, sneaker exhibition etc. Basically a bunch of us nerdy collectors will be there with a LOT of content from the 70s-00s. I think it will be a hit and I'm currenly sorting consent to block off a part of the roadway on Ward Lane What would it take to have a handful of cars park up for part of the afternoon (if the roadway consent goes through) and alternatively on Ward Street which is by the venue? I would really love to have some automobiles that reflect the 'retro' theme so just wanting to know what is required to make it happen! Cheers1 point
-
I thought the torsion bars would be hard to remove and they lived up to all expectations. I love it when the workshop manual says "remove the torsion bar using the special tool" but gives no clue whatsoever as to what the tool might look like or how it is used to remove the torsion bars. I have no idea how people got by before you could do a google search! I did a little research and then set about making my own homegrown torsion bar removal tool. Not exactly rocket science, you just attach it to the torsion bar with the u-bolts and give it a bash with a hammer to knock the torsion bar rearward. The drivers side torsion bar however was perfectly happy where it was and it took some committed bashing to convince it to move. This photo of the "special tool" post torsion bar removal tells the story better than any words possibly could. I decided to reverse the tool for the passengers side so I had a fresh clean end to destroy. I got fully psychologically prepared for the battle ahead, crawled under the car and gave it a clout. In stark contrast to the drivers side the torsion bar popped out with no problems at all. From there removing the lower arms was fairly simple.1 point
-
He knows quite a bit of stuff and he's a good painter but there are many things he does that I shake my head at. The finer the starting paper the less chance of rub through, so I can't see the point in the bog because you're increasing the chance of stuffing it up. But I guess after 34 years in the game there will be a few things I don't agree with lol.1 point
-
So its kind of obvious this is getting a 4 link. While I wasn't planing on a 4 link. One of the guys i go 3wding with, pointed out the diff was about too fly out of my truck. Then an even more scientific conclusion, while me and the bro were leaning on the back of the truck, parked up in the driveway. "hey that diff does move around a bit" when given a gentle nudge. The leaf spring mods above made it ride better, but springs were wrapping up like crazy. kinda expected it to do this but not quite so bad. Some guys add a link from top of diff back to the hanger bearing x-member to solve the problem. looked into it, but was more work than a simple link and more weight.. yeah nar 4 link time front bottom mounts tacked in place, hopefully can get it setup correct using the center or top hole. if so will chop the bottom one off as hangs down a bit All lining up pretty sweet so far. after tacking the mounts to chassis and diff. made up the bottom links, left link was only adjusted 1mm shorter than right, while still in the "jig" have sliced the jig off now. as diff needs to come up 140mm to ride height. so can work out the link angles properly. never thought i would build a triangulated setup, but is meant to be best compromise on 4wd stuff.1 point


.jpg.a1f391ec500b19807931d5b886ee808e.jpg)


_sedan_(23230030334)(1).thumb.jpg.34d765361d66c78db614bae6ea2c156a.jpg)


This leaderboard is set to Auckland/GMT+12:00