
Leaderboard


Popular Content
Showing content with the highest reputation on 06/30/17 in Posts
-
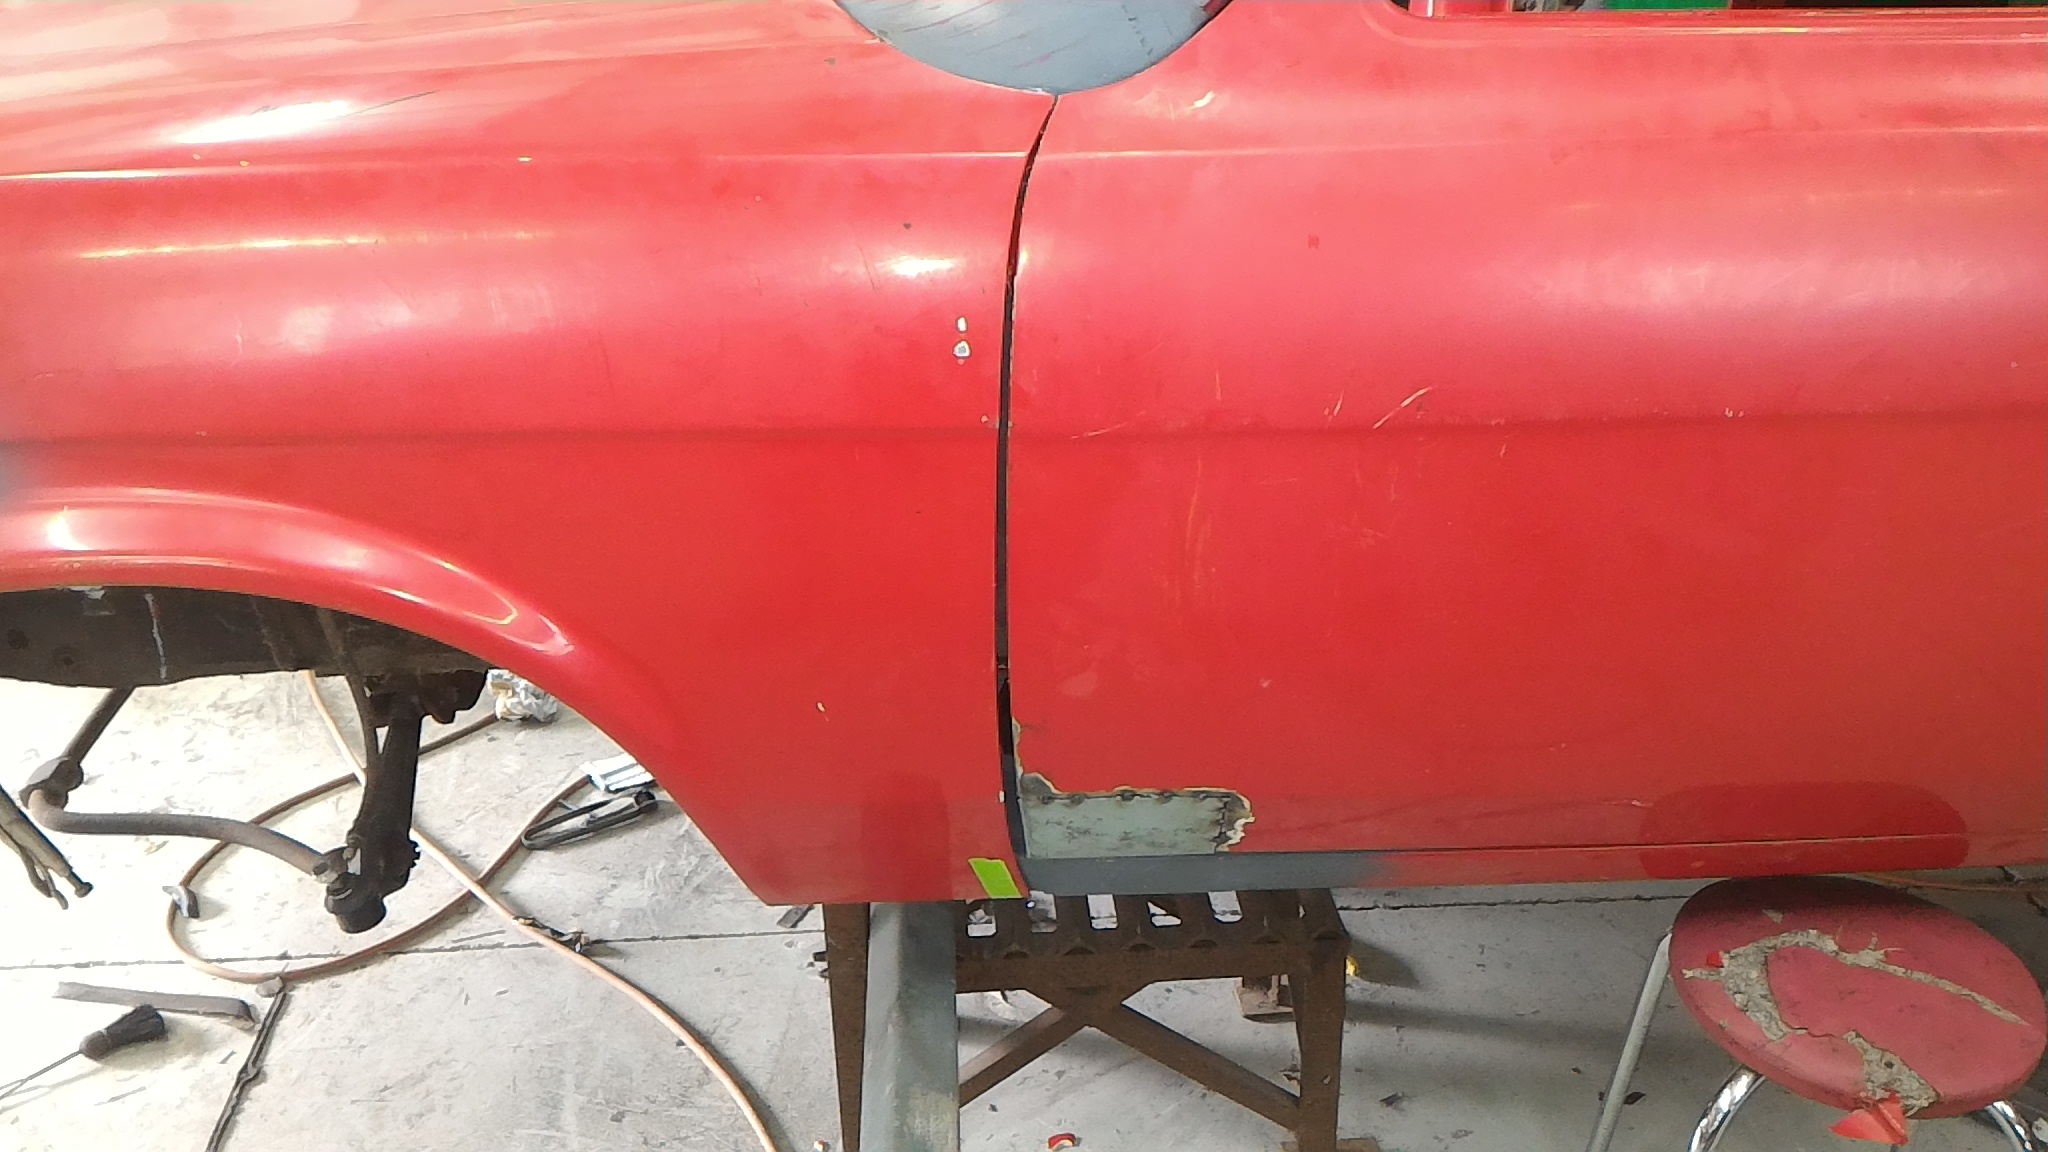
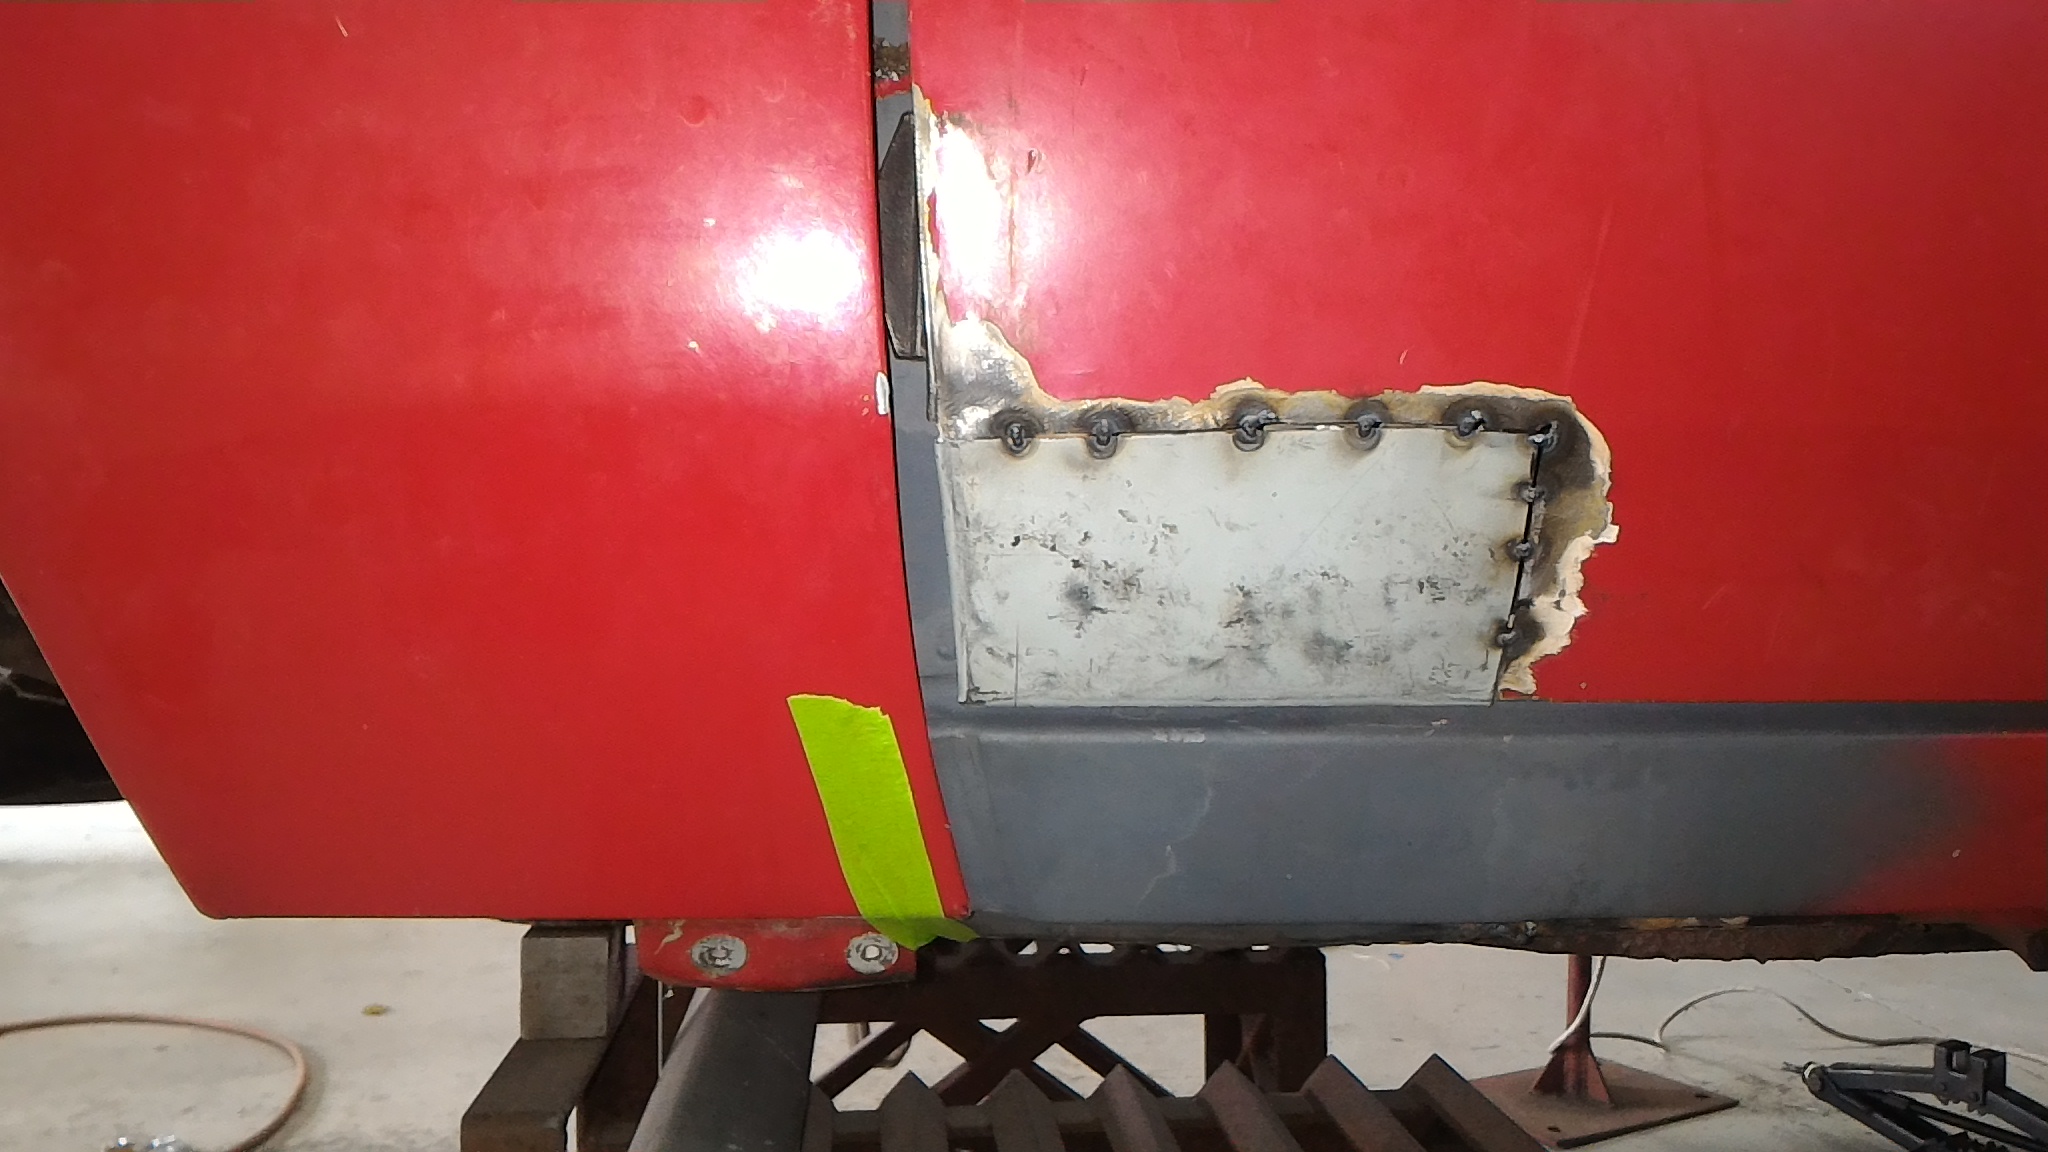
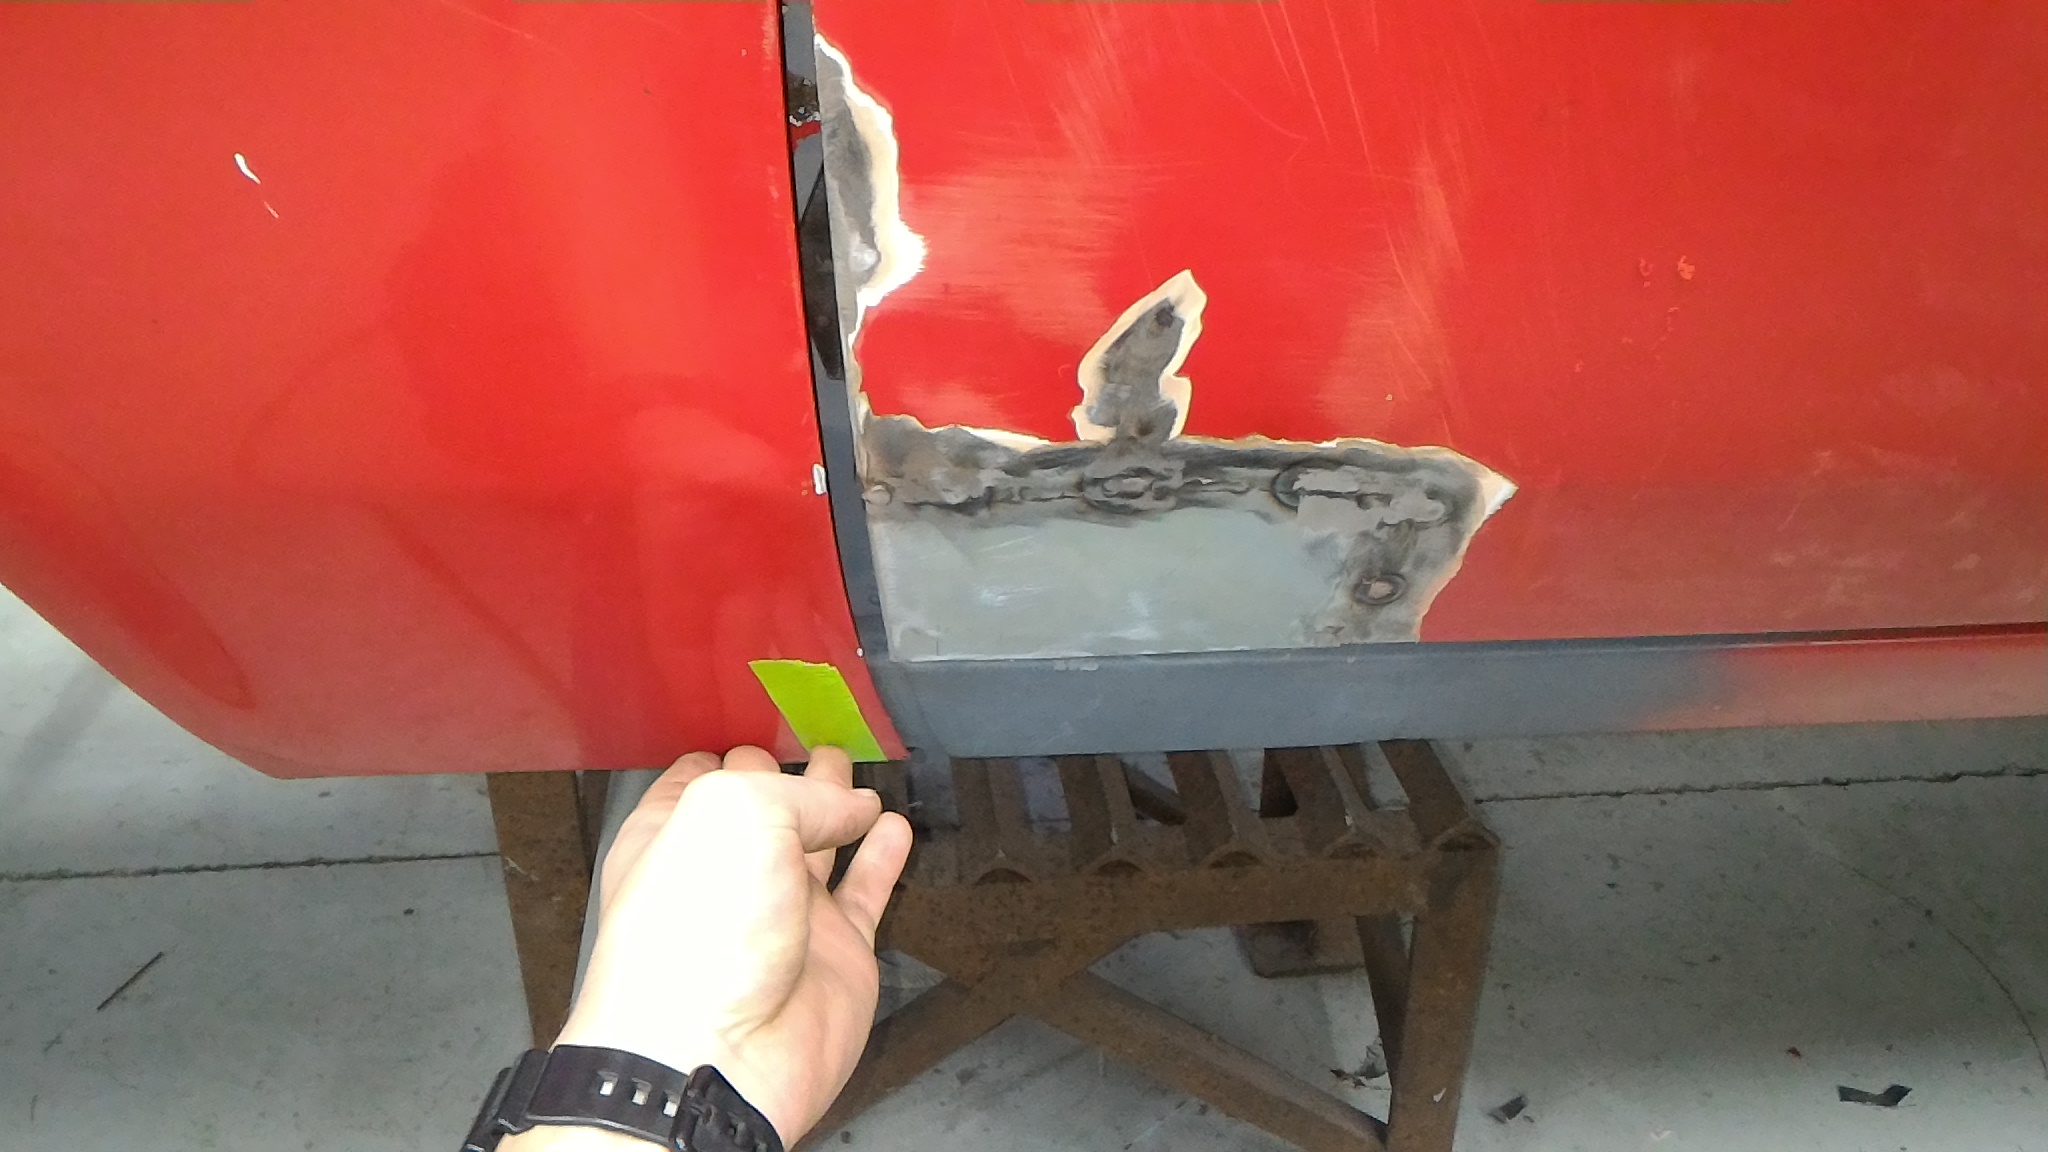
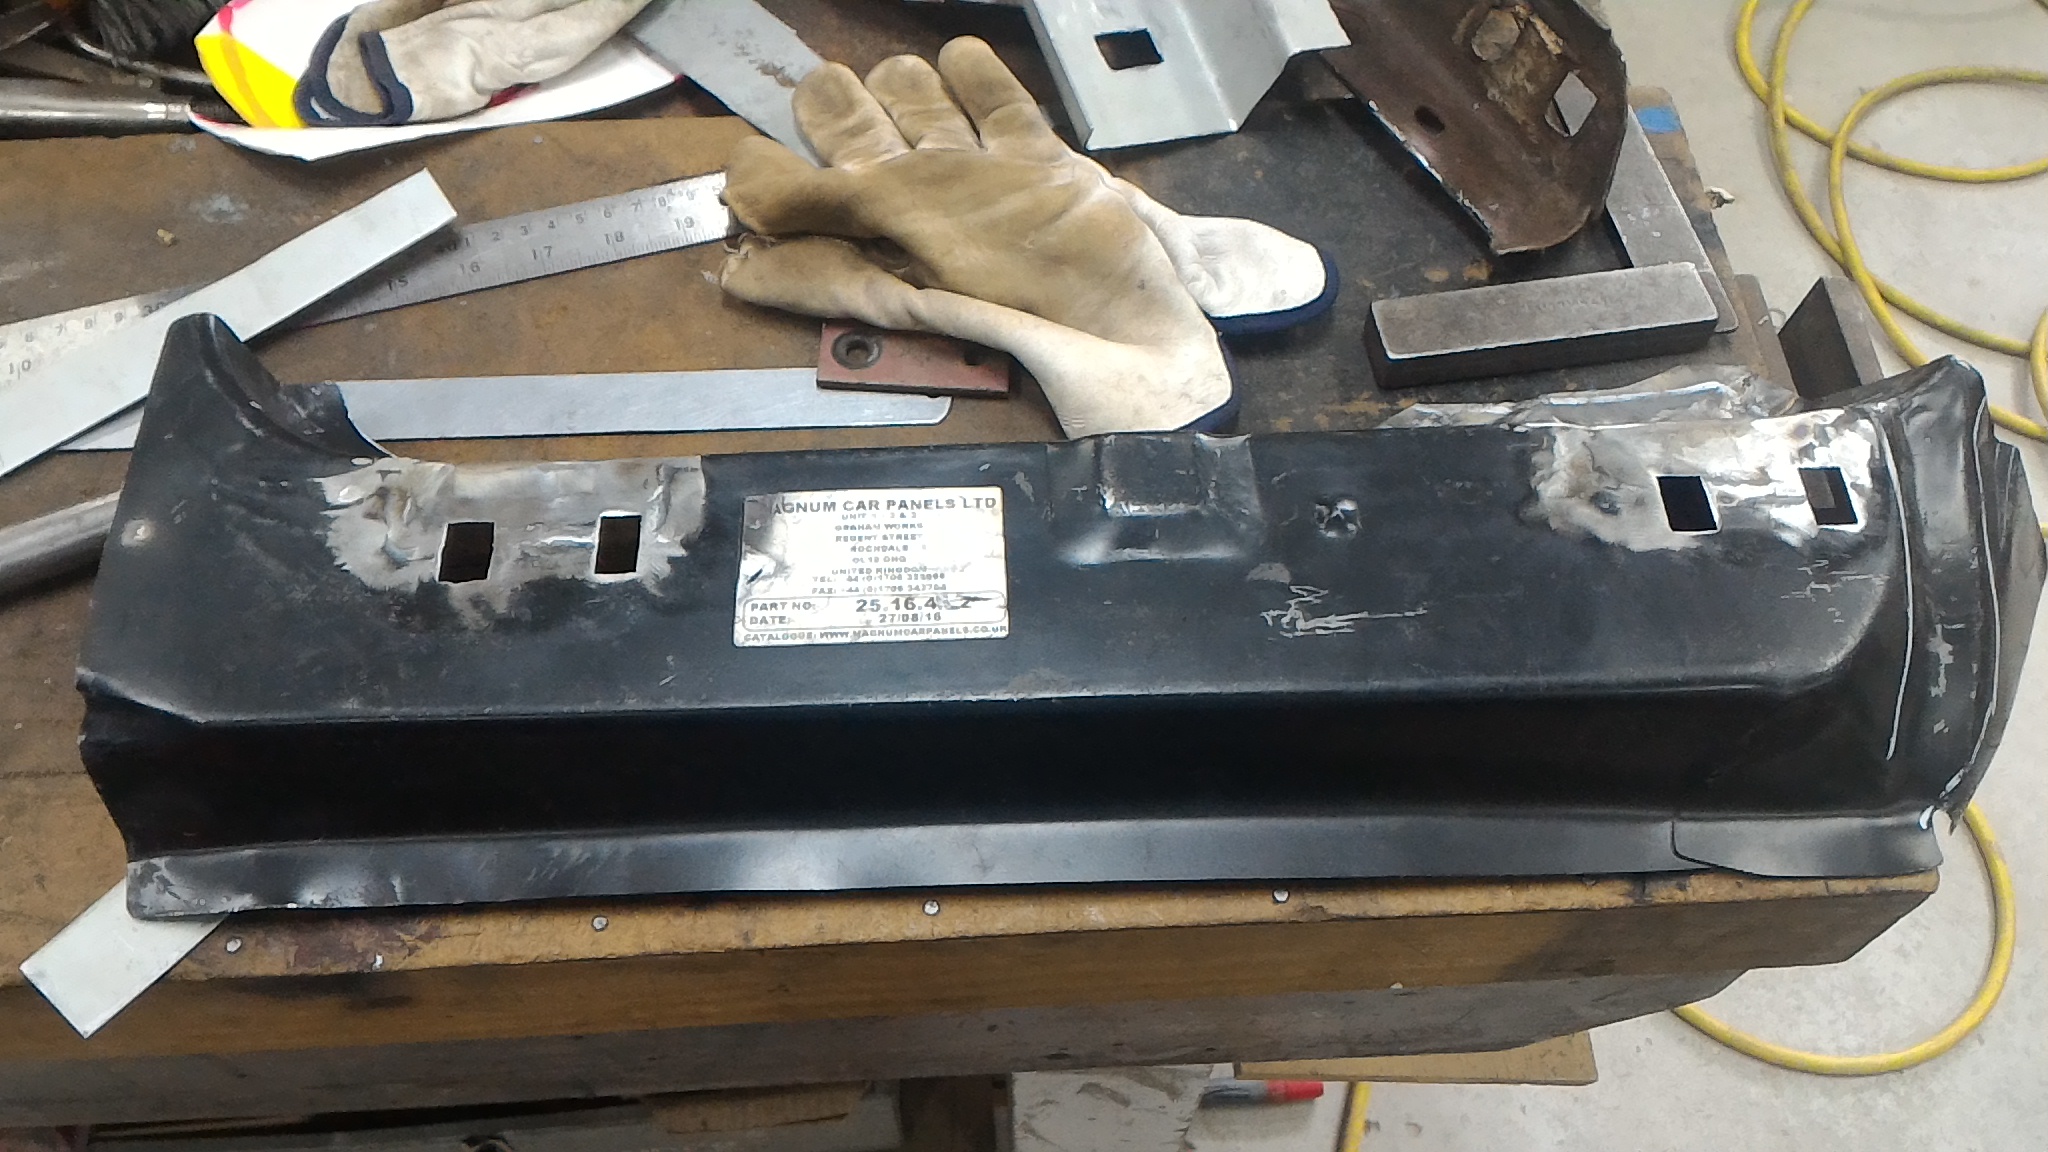
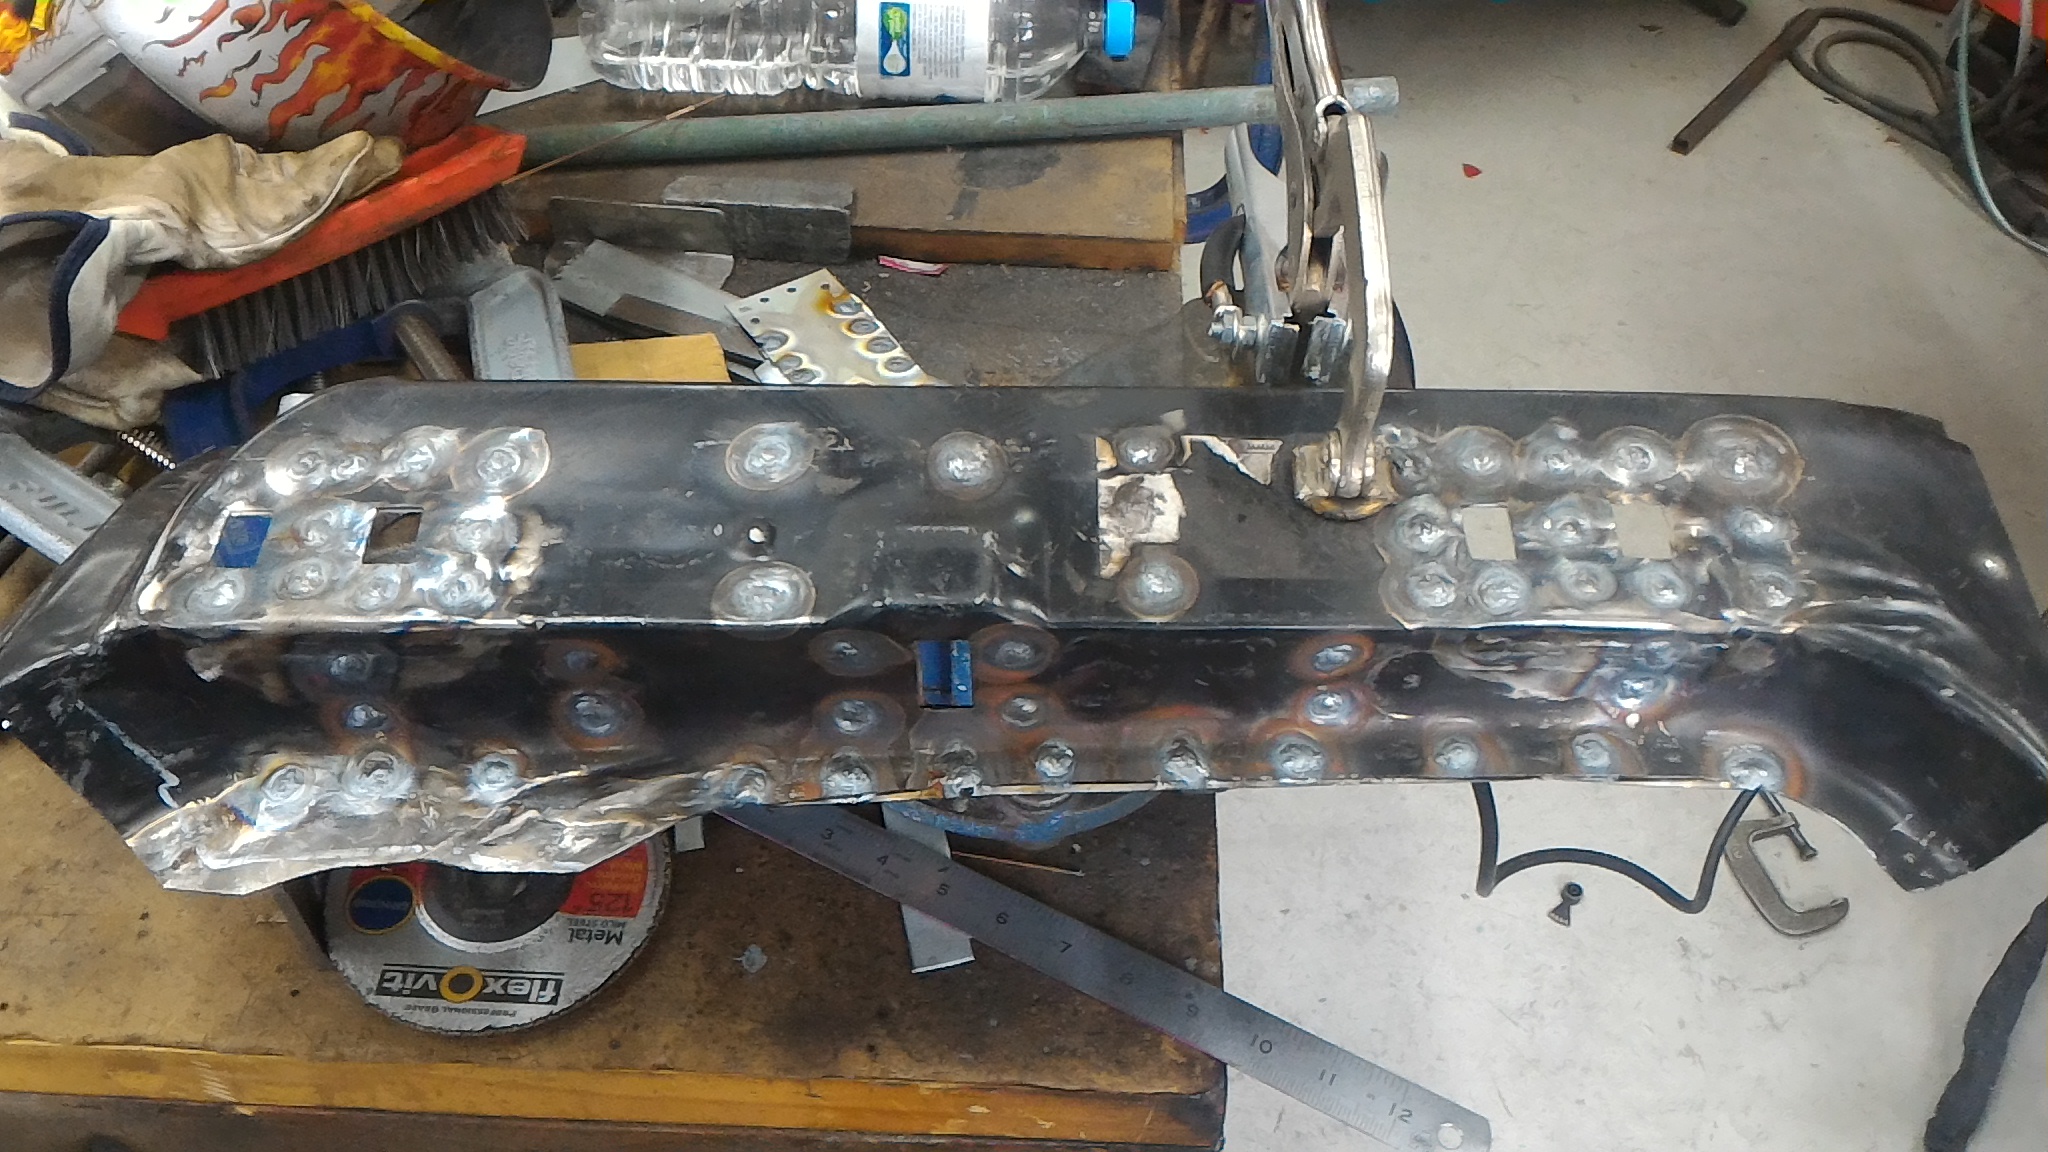
After that was welded in I made up a skin repair panel, tacked it in place and folded it over. The fold didn't turn out great but I should be able to skim the edge with a bit of filler and it should sort it out. It's a similar story with the skin patch too. Because of where it is there isn't really an opportunity to get a dolly behind it so it warped a fair bit from the welding. It was also a bit heavy gauge steel for a skin which didn't help. If I were to do it again I'd probably weld the skin patch in first so I can beat it a bit then weld the inner panel in afterward since it's not as crucial to get it straight. The right way would have been repairing the inner panel and fully replacing the door skin so if anyone has a cheap mk1 escort door skin replacement panel available let me know and I can do the whole lot properly and feel much better about myself. Either way, there's good steel in there now and no issues bog wont fix. Now I'm going to sack up and tackle the guard issues.
 5 points
 -
floor. its glued and screwed and it feels really solid. the bit in the bathroom will be some hardy board shit that is like concrete and the rest will be ply with solid timber over the top 2017-06-29_05-02-41 by sheepers, on Flickr5 points
-
A couple of photos from the last Moped NZ ride in The Mount. Pining for this round in AKL.4 points
-
Rule of two strokes: does it have compression? Yes... It will run4 points
-
When I got home from work tonight, this was waiting in my driveway Came up on Facebook last week, price was right so I grabbed it. It looks like a mess but it's way too good to wreck so it's going to be a long term fix up project. It's an '87 NZ new one, so leather interior, LSD, intercooler etc.
3 points
-
Managed to sneak in a mid week session in the garage and got the upper control arms refitted. And there is nothing like a good comparison pic to make you feel good about your efforts. This weekends job is to remove the lower control arms, torsion bars and radius rods. I have never taken the lower arms out of a Valiant before so I decided to consult the bible. I can tell that Dad never removed the lower arms or torsion bars because the pages in the manual are clean (almost like new). A little different from the more frequently visited pages. Removing parts that haven't been disturbed since 1963 is always fun so good times ahead!3 points
-
that is the pupper. stumpy tailed red healer, or cunt as she's more accurately known. bricks can get fucked, this ain't no fucking warehouse conversion you hipster. and yes getting the thing to this stage is choice. 2 kilometers of timber gets delivered on monday. they are going to frame it on site. they couldn't get the pre-nail frames delivered in time so they're gonna punch it up on the fly.3 points
-
Should have mine ready, keen!3 points
-
I got some semi sealed today but got the wrong ones. I think I got the part number 1 digit off. I was all set up with by Barry table and ready to go. The old headlight wasn't quite sealed.. There is a spot of rust starting so I'll wire brush it and flick some paint on at some point. Like any Barry I can't resist a good dumpster dive and got a few rolls of cable when work was having a clear out a while ago. I started making up a loom for relays so I won't burn out the factory wiring. I'll grab some new headlight plugs and fuse/relay holders when I get the correct headlights3 points
-
I decided double crimps were a bit shit/too hard for someone to replace later so I got some new relays today when I got the correct semi sealed beams. I found the relay bases I got ages ago so it'll look slightly less shit. The cable is way overkill but if you want to go silly and put 1002 bulbs in it'll take it and not melt anything. I've ordered another fuse holder to match as well as I've lost the others. It was also cheaper to get headlight plugs with wires rather than get three crimps and a piece of plastic. I could of saved myself heaps of time by getting china sealed beams but I like having headlights you can see. I pulled some of the wood paneling off in a attempt to pull a wire through for the reverse light. Ol' mate has glued/lined the whole van with polystyrene so if/when we sleep in it it should be less cold2 points
-
The plates were sulphated so I put a tea spoon of epson salts into each cell and it broke it down straight away, silicone the top back on and gave it a boost charge and its now at 12.9v, I don't have a load tester but I gess it should maintain at least 12v with the headlights on for a bit?2 points
-
just wire it without the cap and give it a kick to get it going in the desired direction2 points
-
you probably wont see a huge amount of difference from the outside. it'll look like our house has been freshly painted and has a new roof but it probably wont contrast tooooooo much? our new house still lines up with the gutter lines and its designed to look like a state house from the outside so we'll see. there is a capping flashing on the roof that transitions between our new roof and the neighbours old tiles but thats quite common too. i guess we'll see when its finished.....2 points
-
I received an email from photobucket yesterday, saying 3rd party hosting on my account had been temporarily disabled. Basically they want me to pay $399 to restore this service- they can get f$#ked! Please bear with me while I reload the pictures in this thread. Bastards! Edit: pics uploaded to the OS website, normal service has resumed. photobucket go fuck yourself!2 points
-
So being a gearbox down I needed something that would stand up to a little bit of a hiding. So off I went. To Silverdale. Straight to Hellbm haha. Ray sorted me out with a zf 5 speed and I went to work to install it. We ran into a few hiccups along the way. Between the m50 and the gearbox sit a lightweight M20 flywheel and m20 6 puk clutch. So using the m20 release bearing resulted in multiple slave cylinder failures (because I didn't know what I was doing wrong). A simple measure up and sure enough the combo was too short, causing the slave to "over extend" and burst the slave. I then did a little research on the issue i was having and the answer was on the internet 1x BMW e21 323i release bearing 21 51 1 204 525 was ordered from Gavin @ euroItalian (great place to shop), and that was it. Driving once again. Seems simple and quick when i'm typing this up, but it took a while... I had other stuff on the go while this whole gearbox drama was happening... good stuff! Making sure i can fit big tires at the ride height i want the e30 to sit things were done to make it fit Oh and I moved house sometime between all of this So of course my mates had free reign in my garage (Blasphemy warning) I had a deadline given to me. There was a E30 meet being organised in Taupo and I was super keen to attend but I wanted to be a little different, so I started hunting for flares. I looked at the options from the states but they didn't really do it for me. I wanted something a little more "JDM" but my wife being the great person she is had bought me a birthday present... the flares I had on my eBay watch-list. And with the magic of the internet, THEY'RE ON! (255/40R17 all round, Photo credit : Sam Boucher Photography) I met some fantastic people and their cars at the meet. It was really heaps of fun! (some stolen photos from Facebook) More soon2 points
-
Shit on a BW35 and put it on that guys doorstep2 points
-
Is that good or bad? (Just googled answer...cheers) Just did a quick test to check that caliper geometry is right, Success!2 points
-
been busy but heres pics of concrete 2017-06-21_03-22-28 by sheepers, on Flickr 2017-06-21_03-24-34 by sheepers, on Flickr 2017-06-21_07-59-25 by sheepers, on Flickr 2017-06-21_07-59-12 by sheepers, on Flickr2 points
-
Hi all, as you all can tell i'm new to oldschool.co.nz but I hear you're a great crowed! This is my e30 that i've owned for a few years now. Was bought with a humble m20b20 engine that one day decided it did not like to live anymore. So I was more or less forced to do a m50b25 engine swap. These pictures will span over many years and life events. I feel that I have grown a lot with this car and can look back at the decisions i've made and learn from them. These were the 1st modifications I did, it took a lot longer than it should have and caused much anguish but it was all gone when I stood back and looked at her. The Patches if primer was the cancer (rust) forming - M20b20 (2 liter straight 6) - Manual conversion using 325i getrag 260, m20 lightweight flywheel, exedy clutch - Lowering springs with koni sport adjust shocks - Front and rear 325i sway bars I drove the car around as it was getting a feel for this new to me german vehicle. I did many minor modifications I pulled the trigger on attending my 1st track event. So I bought some things to make it feel more race car. But i had purchased this car for a reason, I wanted to build a rotary e30. A 20b NA powered e30. Ohh how this was gonna change... My girlfriend at the time was getting bored of me taking photos One cold winter's night, I was on my way back from a friends house when the humble m20 had enough. Twas the night before my day at hampton skid pan I have cool friends though and had started a following of e30 friends! Richard let me use his m50b25 powered e30 for the day So after I had a hoon I had to get back to reality. No rotary build for me. I needed a new engine and I needed something that I could do in a relatively short amount of time for a "budget" build... another thing I learnt, the term "budget" is not relative when it comes to cars. But after driving the m50 powered e30 and reading many (not enough) build threads/DIYs I started my search for a M50. Marcus (you'll hear his name a lot) had received a crashed e34 525i and offered me the engine and auxiliaries for a great price, so after checking the engine over, I gave him the thumbs up. I was now the proud owner of a M50b25 (cellphone pic FTL) And after a little more reading on feedback and noticing a trend with M50b25 swapped cars, I looked into selling this engine and find a m52b28. The reason being, most that did the swap found the m50b25 to have little reward for the effort. Until one day a friend asked why i'm not going to stroker it? So I started researching high and low for options and things I should do. I decided on the 2.8 stroker mainly because I had the conrods needed. I got a phone call from my wife (oh yea i got married) that she had bought me a birthday present. F*ck Yup my wife, bless her, pretty much upped my game for me and bought me the rotating assembly from an m54b30 (with help from ray@hellbm). So I guess I was going 3 liter. At this point I said screw it and sent the e30 in for panel and paint, my thoughts were by the time the e30 was finished the engine would be finished. This ended badly for me. I was naive and had put money down before they had finished the job. That is all I am going to say about the body. On a brighter note, PARTS! The apartment we were living in was not going to do, So we moved to a place with a double garage and just bigger in general. The apartment was super cramped, this town house we moved into was bigger, had a double garage and was the exact same price in rent. Auckland FTL Progress was going smooth for the rebuild Factory hone marks FTW while that was getting sorted I started unplugging the loom and disconnecting all the water and fuel lines as well as disconnecting the driveshaft and shifter linkage, work had shut down for the end of year break. I had 3 weeks to do the swap. Later that evening we got started on pulling the boat anchor out After much twisting and turning, prying and swearing it was out. and a me in the engine bay pic while Marcus makes it clear he is tired I prepped the engine bay, gave it a clean and changed the things that needed changing for the swap. I dont have pics, but the night before we dropped the m50 in, we installed the machined lightweight m20 flywheel and a brand new 6puk solid clutch between the engine and getrag 260 gearbox. The next morning we got on to fitting the engine IN after wiring up the engine and spending a few days diagnosing a non start, SUCCESS! https://www.youtube.com/watch?v=0vT7jQQLmbw&feature=youtu.be Between that day and present mistakes were made. I had issues left right and center. Not doing enough diagnosing and trying for the quick fix I bought a "tune" from a company in the united states that claimed to have the right chip for my car. This just made things worse. The tune was so rich averaging 10:1 all over the rev range. This chip was pretty expensive, and the car would still misfire, jerk and barely idle. It sat here for a long time. I was in the gutter, it had been 1.5 years and I couldn't for the life of me figure this car out. I had checked every sensor with a multimeter, bought some new ones just to double check, checked the coils resistances, changed ecus, checked codes. I had checked everything. Makeshift smoke tester Checking tps Double checking sensors It went up for sale, people were coming to view. I had given up on it. Marcus the beautiful yellow man came around one evening and forced me to check everything again, even though we both had gone through everything twice. So we fired her up, to get her warm and I pulled off the plastic ignitor cover... It was like a light from the car gods telling me that my pain and arguments with my wife had satisfied them and this is the cure to my cars' defiance to idle and drive... Only in the darkness we saw the light. The insulation on one of the coils had cracked, so spark was jumping out of the side of the ignitor pack to the rocker cover. I had a spare SET of coils sitting in my garage and the only reason I didn't change them over was that they measured fine. We VISUALLY inspected all the coils I had before installing my spare set. Took her out for a drive, I couldn't believe it. I had a idling, running non misfiring e30. skipping ahead to the present, the mods haven't stopped. 5 stud conversion with bigger brakes from an e46 328i installed with e46 coilovers, whiteline swaybars, an assortment of wheels, wof, regd and certified for everything. I can finally enjoy this car. I've been trying to attend every meet, every event, anywhere I can enjoy this car. Talk to people who have their own projects, their own stories. Here's to the good times Discussion Thread1 point
-
Dave Jackson, LMVD1 point
-
I will not have you say that about yourself mate.1 point
-
$100 cash hard and fast? But seriously quite keen.1 point
-
If someone wants a bike for this I have an F5 Yamaha I'll probably never do anything with sitting awaiting fixing or something.1 point
-
This isnt too bad, use the drill to drive a wood screw into it, then pry it out1 point
-
Started to teardown the motor. It's not pretty, some parts have been beaten like a ginger stepchild! Nothing to lose, going to give it a nudge and see if I can get it going?1 point
-
Re-vin didn't quite go as smoothly as i first hoped, although they didn't find the rust in the front left pillar that we repaired they did find a whole lot more! Heres a what they failed me on: But on my way home i proved to a few of my friends that the trusty 1200 could get to 100kmph after some debate hah Ill ring in a few weeks when their repair certifier is back so i can get that all sorted but until then ill do the rest1 point
-
Does anyone know this morons name, who is complaining. Does anyone have his address? I would have also voted having the meet outside his house. Stoddard is even closer for me. Yay!!!1 point
-
I tidied up the air shock air lines and mounted the fill valve. I mounted a led flood light to use as a spit/reverse light. I'll grab another off Aliexpress because why not. I'll wire them up to a toggle inside so I can have spot or reverse1 point
-
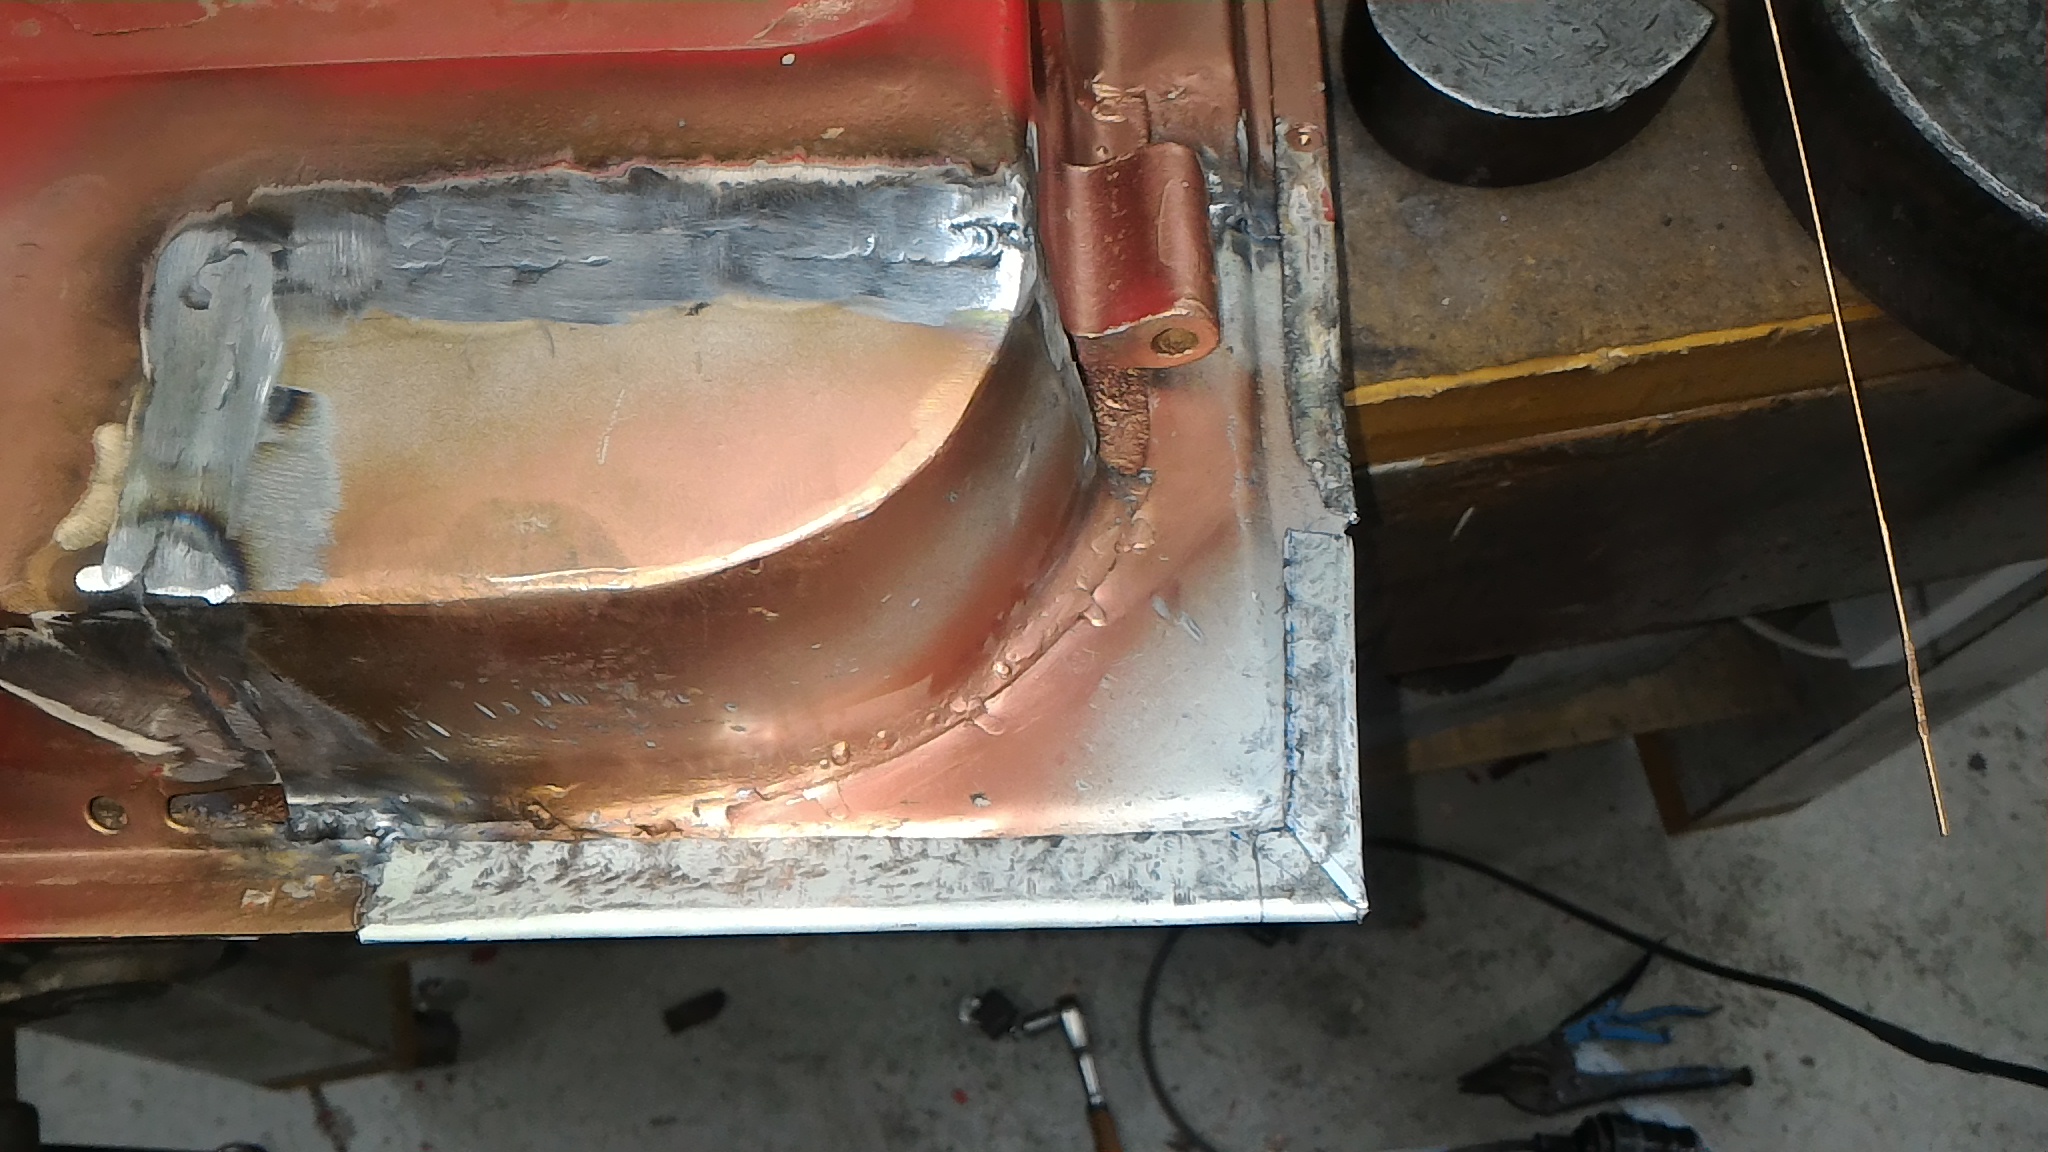
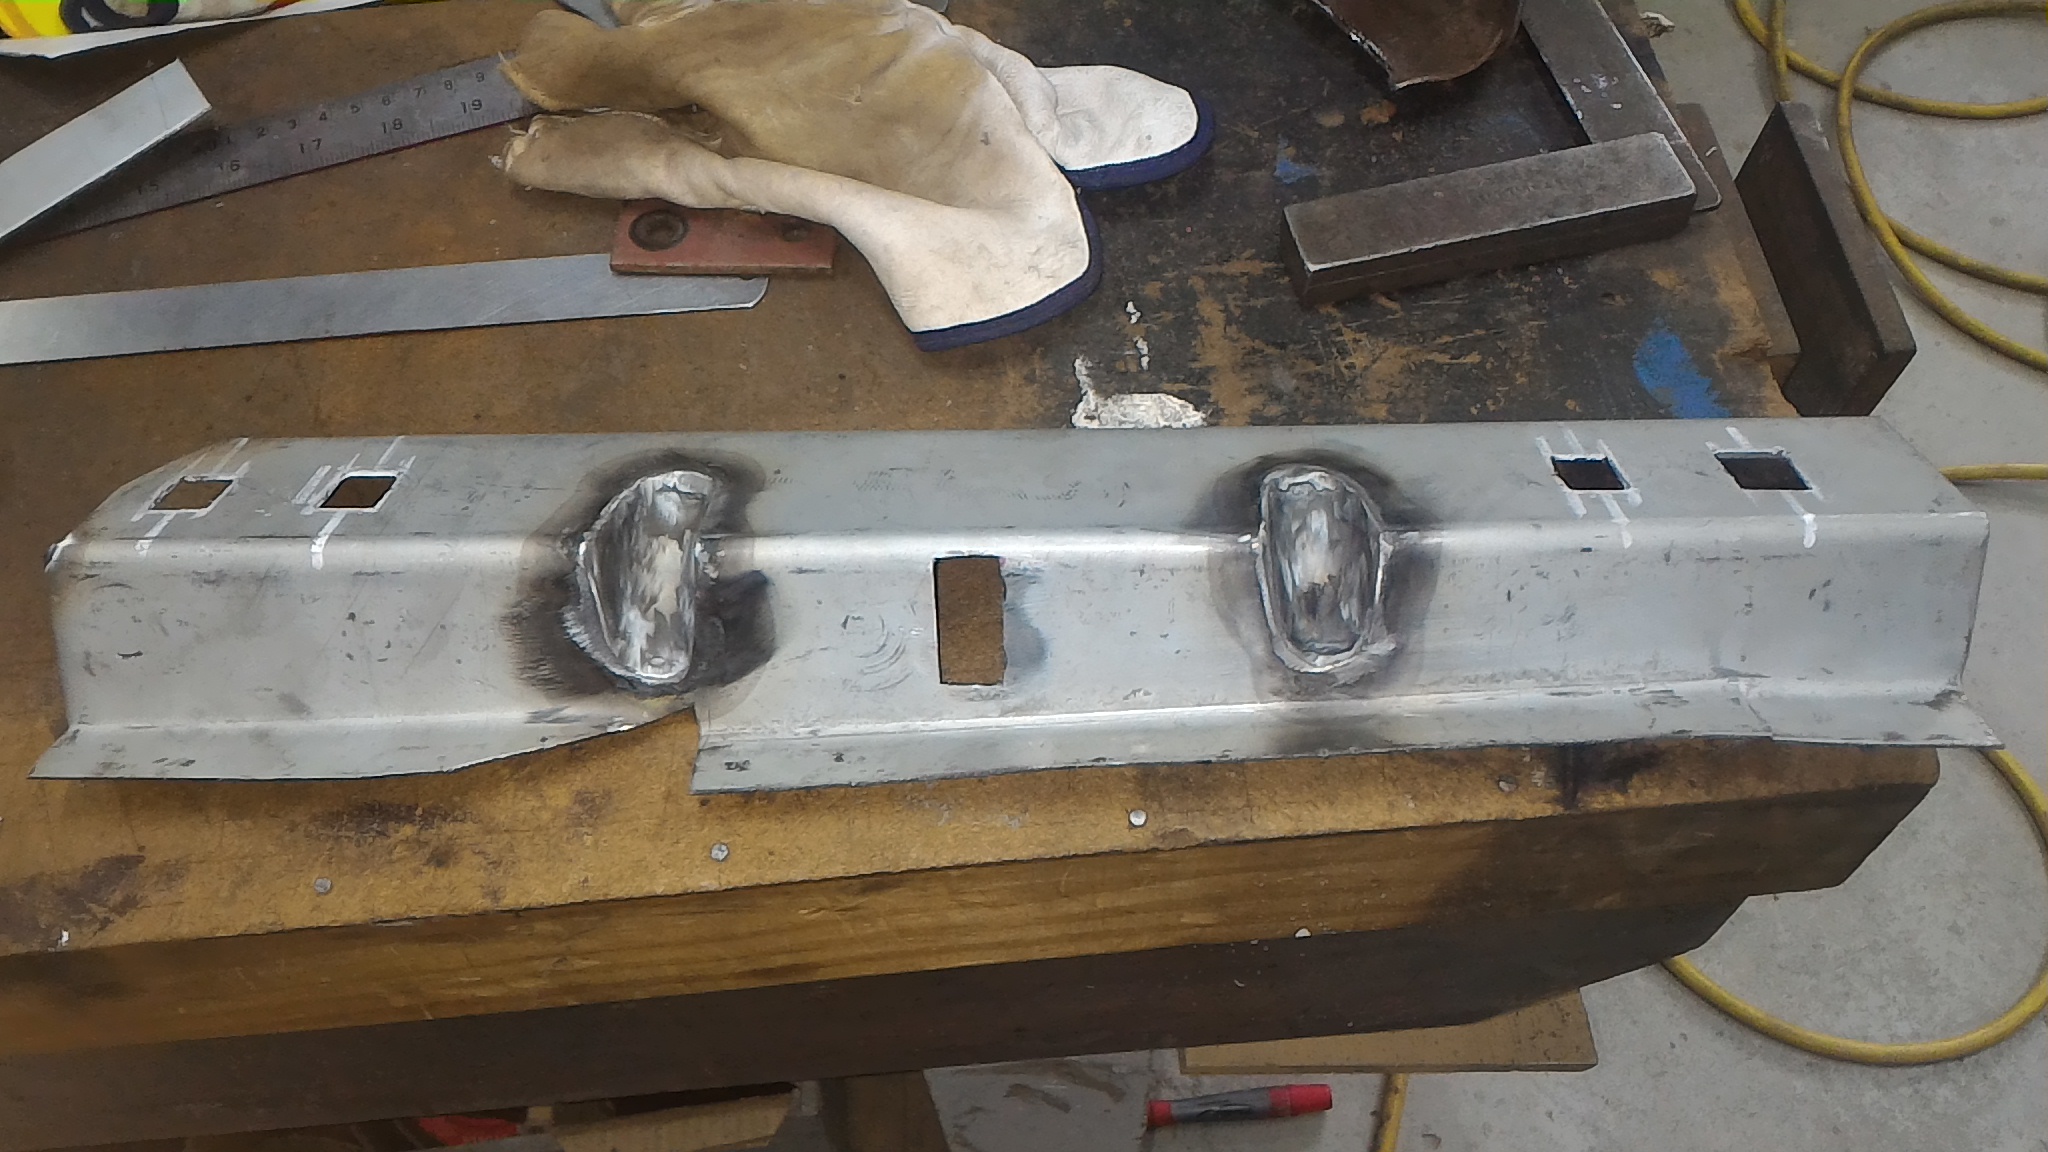
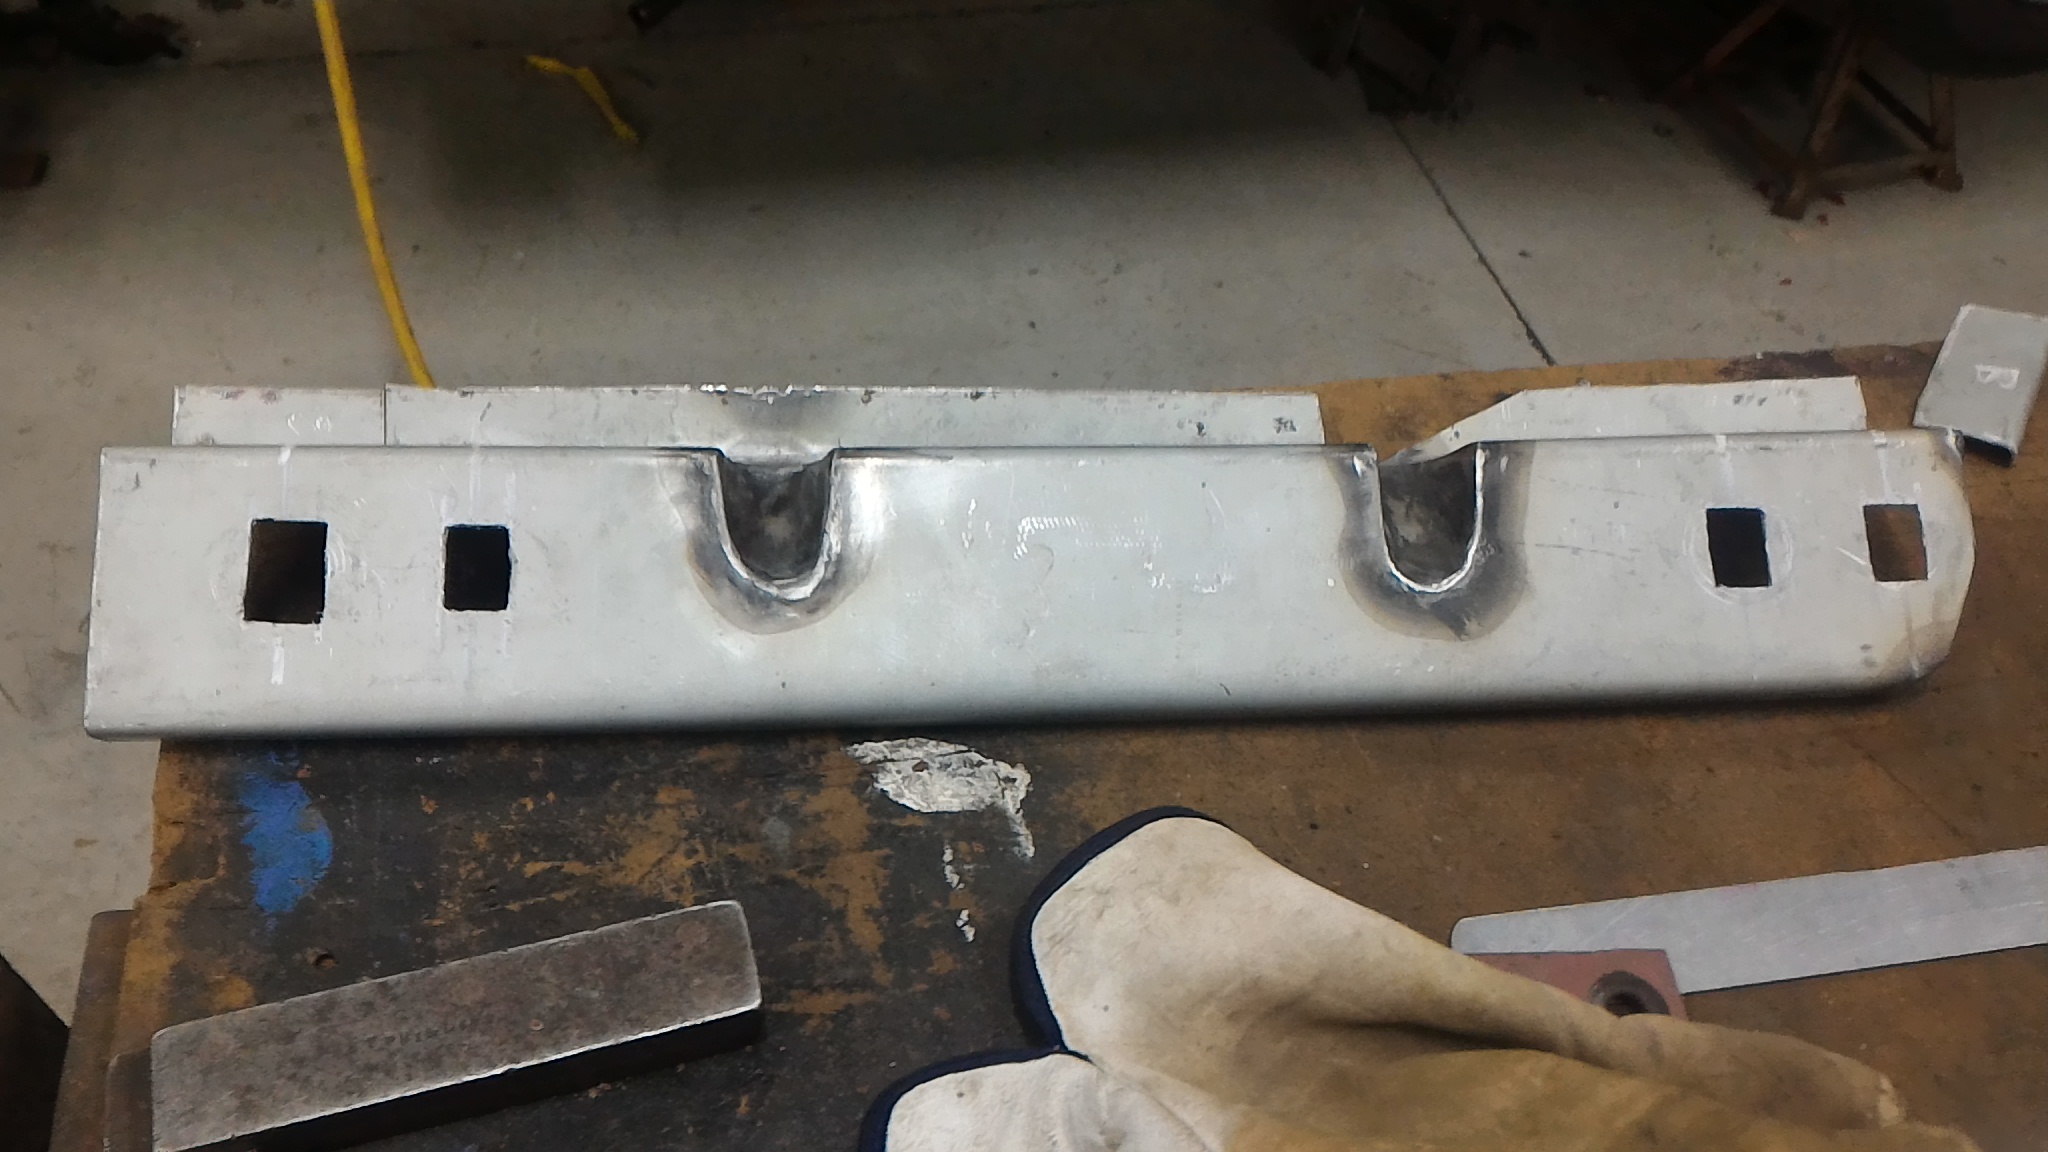
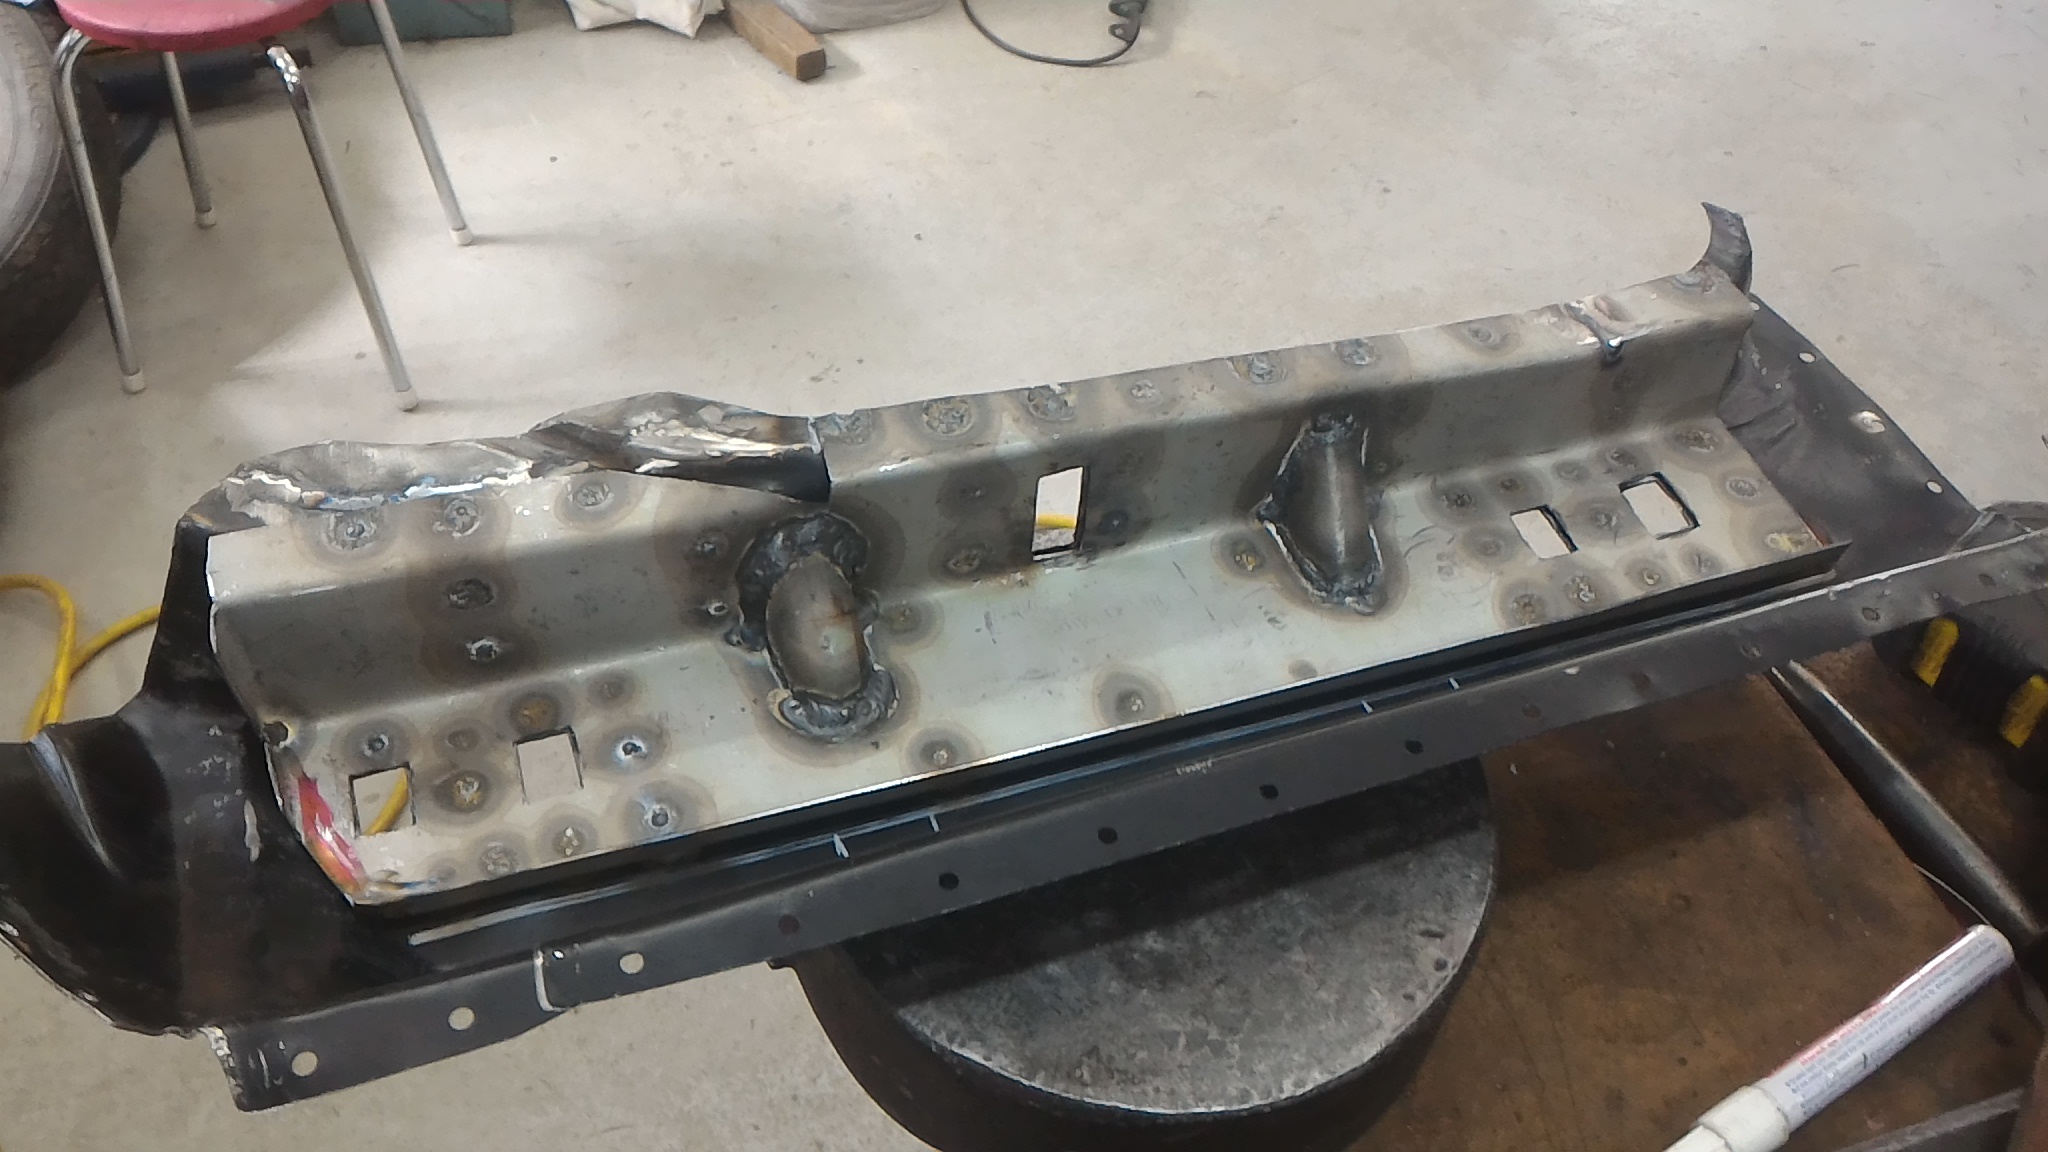
Next job was to prep the new repro A pillar panels for welding in. The original pillar has a reinforcing panel welded in the back side of the outer skin. So I set about reproducing that from some shiny new steel. The gussets are there to replace swages that continued around the fold in the panel. I can tell you first hand that they are a real bitch to try and replicate (read: I fucked one royally and had to start the whole lot over trying to do it) so I opted to do these gusset type things instead. They provide much more stiffness than the stock piece anyway. Then I had to modify a mk1 escort A pillar repair panel because the mk2 estate pillar is very similar but uses mk2 style bolt on door hinges instead of the welded on mk1 style. Like so... Then the two get zapped together with a bajillion plug welds to make sure that shit aint going nowhere. I used the TIG for all these plug welds but it was such a pain in the butt and took so long that I would use the MIG next time. It came out pretty neat though I thought.
1 point
-
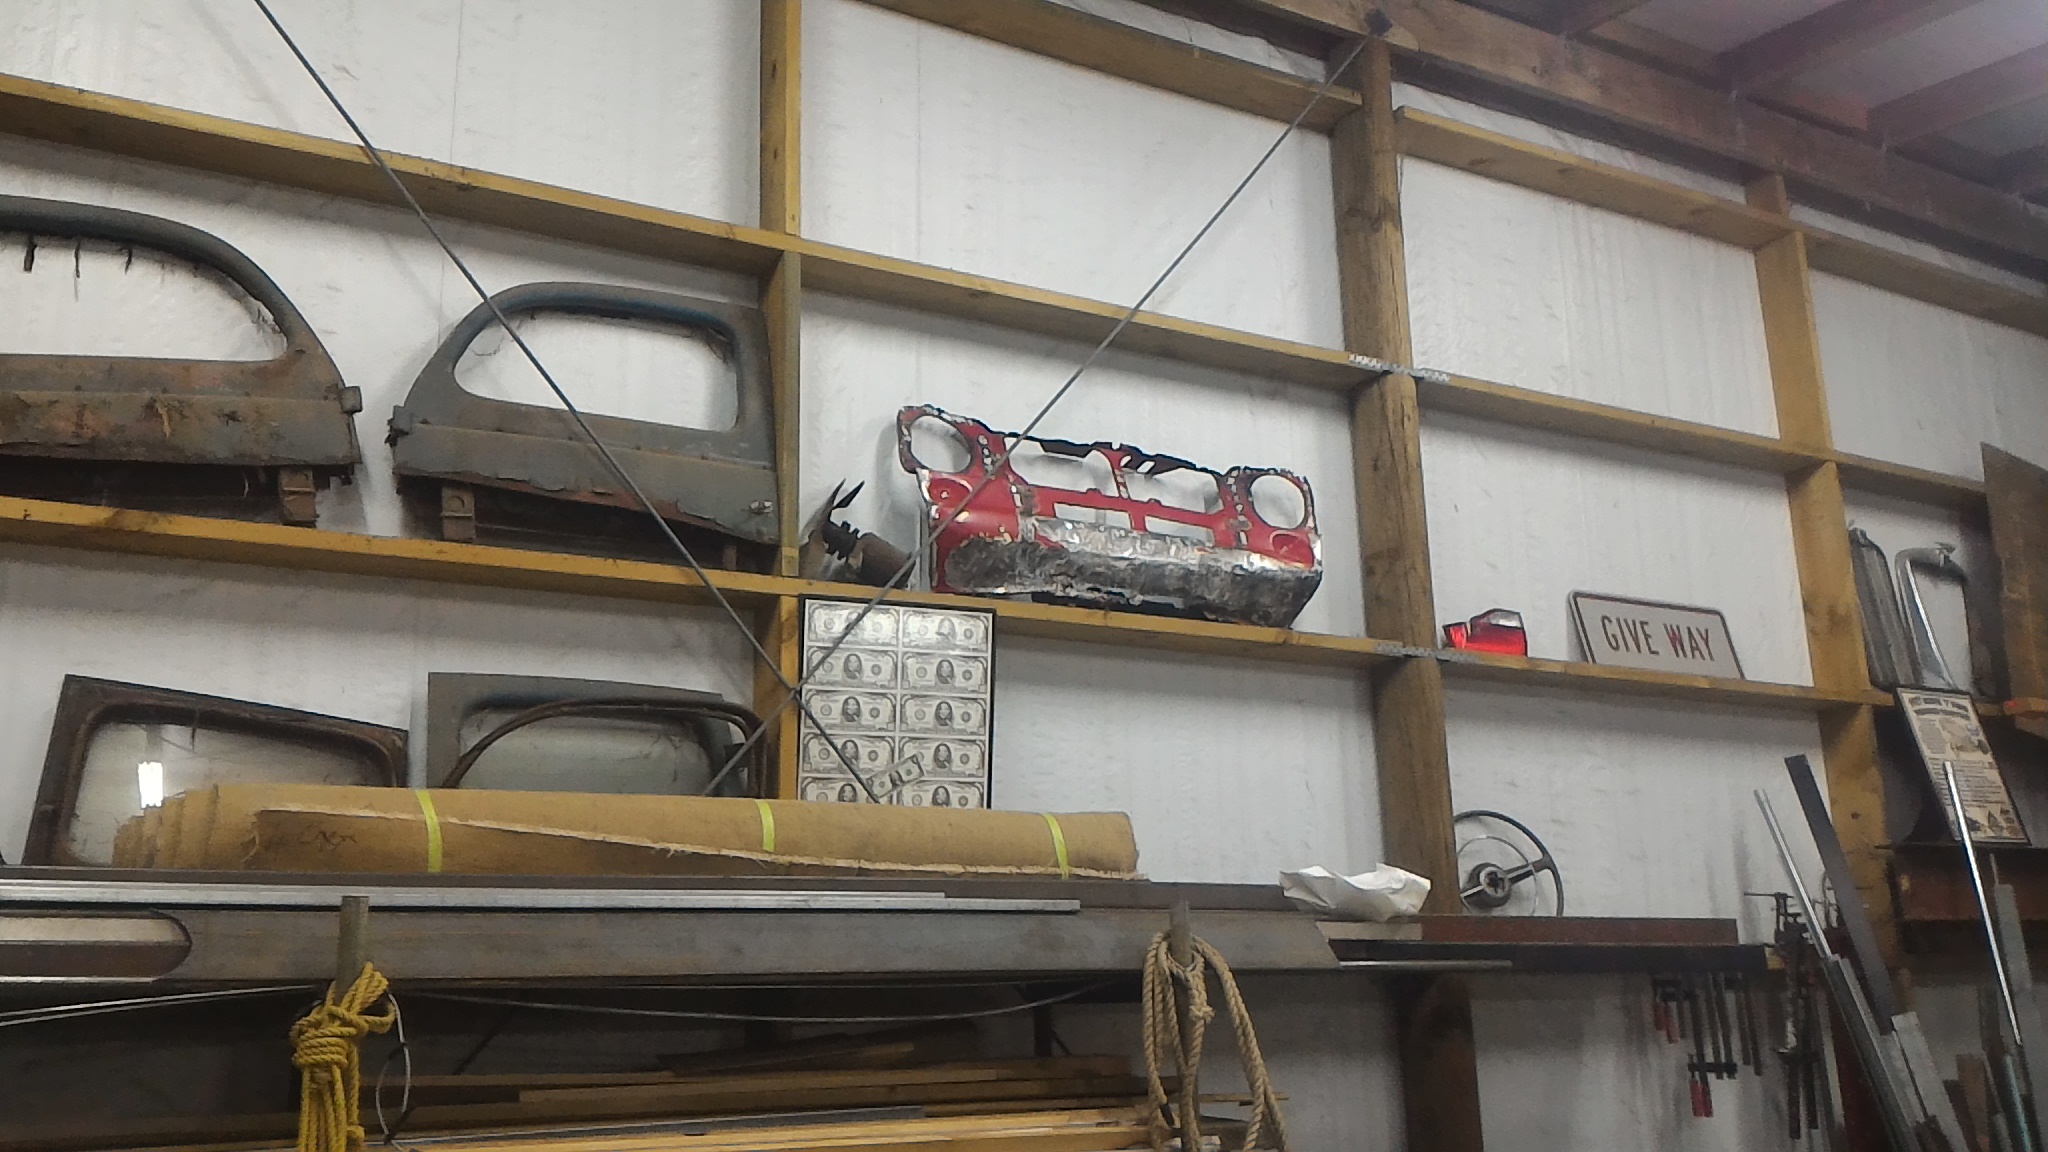
So the only option was to arsehole the whole lot and start again. Banished to the wall of offerings And a pretty new one from palmside I think I'll call it there for tonight. We'll pick up the tale again sometime tomorrow.
1 point
-
Twas a Super Minx. I pulled the door dent out enough for him so he could put his window up. Unusual, as I thought Mustangs usually crash into crowds.1 point
-
Had to make another steering column tube since the first one was too long and the spline didn't stick out from the end. Also made the slot for the shifter longer so it has more gear selection. Laser cut a mount out of 12mm Ali for the steering column, needs a little bit ground out of the main mounting hole as it's a bit small and the triangles could also be polished more. Have also polished the shifter/indicator part of the column, looks heaps better than the silver paint. The steering columns going to be the flashest part of the whole truck haha. Done a bit more to the dash, has come out really well, very happy with it. Wasn't sure how well this would turn out, but so far it's turned out mint. Can't really see from the photos but I also fixed the left gauge surround, as it was terribly deformed, the front face was flared out a bit/not flat and out of round so the gauges didn't fit. It's pretty good now, just has a small rust hole that needs fixing. Not looking forward to welding it as there's so much!1 point
-
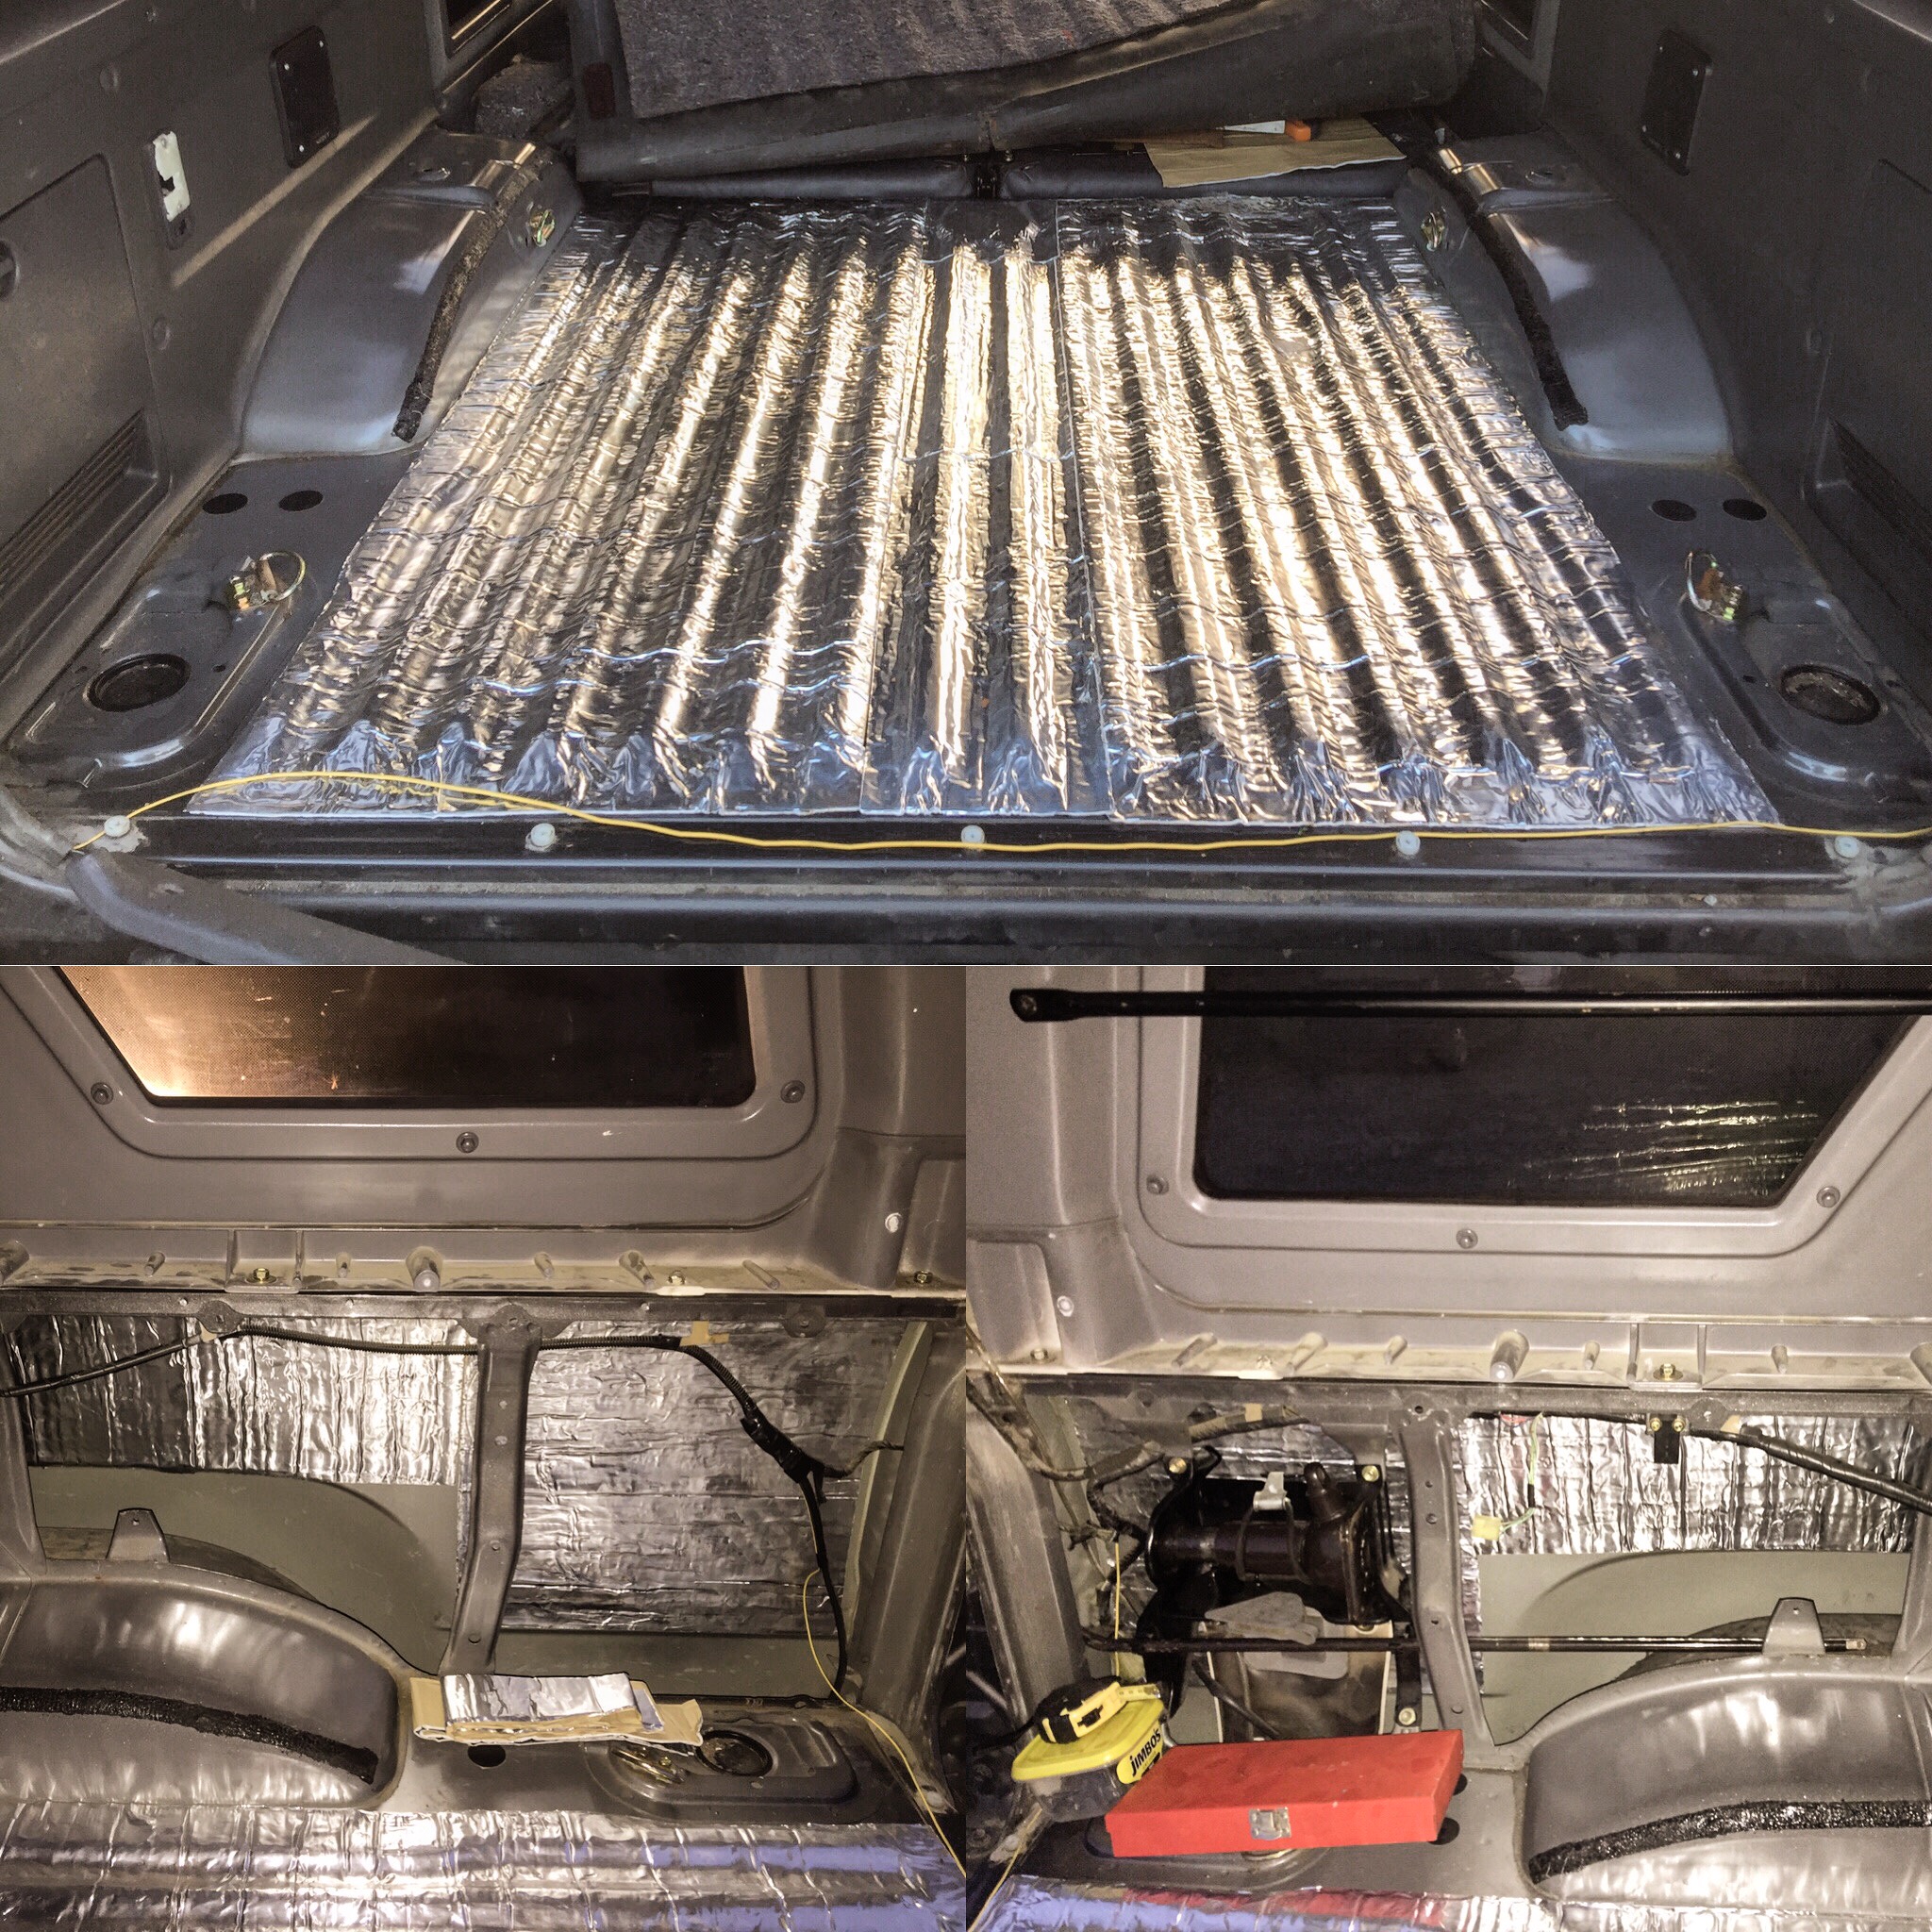
On Friday night my brother and his mate helped me get the engine removed and onto an engine stand. We pulled the sump off and 3 of the four big end bearings were damaged. So this week it's off to the engine reconditioners... In the mean time I'm getting stuck into the interior. During the couple of short drives before it finally died I noticed the truck had a lot of rattles and road noise. The carpets needed a shampoo so I started stripping the interior so I could line all the sheet metal with a sound deadening material and get the carpets cleaned. I've just finished the cargo area and it has made a huge difference already, it's noticeable just working on it. Previously when you tapped on the rear quarters they would ring like a steel drum, now there is just a solid thud. I can't wait to drive it again!
1 point
-
I picked up some brake fluid the other day and thats as far as I got with bleeding the brakes. My rock auto order turned up. I figured the sway bar will get a workout here since we actually have corners so ordered new bushes. I ordered a fuel filter as its easy to change. One headlight adjuster was stripped and I figured they all would be shit if I didn't replace them. I'll order the semi sealed headlights this week and make a start put them in the back of the van with everything else. There isn't a huge difference between sealed beams and these semi sealed so no point in going for the sealed units imo1 point
-
Logic tells me that this should work, but part of brain is not convinced? Logically, the geometry of the caliper is pivoting around the wheel centre as everything is on a fixed radius. So it shouldn't ever bind...well I think that's right? It's a bit of a mind fuck, as the wheel moves twice what the leaf spring does. But I'm sure this caliper is neural??? Ahhhh...hope I'm right??? Other than being crippled by uncertainty, I'm pretty happy with the overall concept. A disc braked leaf spring front end on a velobike. Everything will get a tidy up later, but time to move on to the next challenge.1 point
-
Got to my sister's house in Wisconsin and took the opportunity to wash and wax the van. Really trying to protect the paint and get the dirt off the roof. Also took everything out and vacuumed it. If you live in an area with trees, especially pine trees, it's good to take the black plastic trim around the rear door off and de gunk it every once in awhile, otherwise the lip on the roof under it rusts away. She didn't have a ladder so washing/waxing the roof was fun... Also added in a propane detector. I carry an 11lb bottle inside the van and this was recommended to me. Apparently it's illegal to have a commercial RV with propane without one in the USA. Seemed like a good idea. It's behind my fridge and wired directly to the aux fuse panel so it's away on.1 point
-
1 point
-
Managed to find some time this week to finish tidying up the upper control arms. I got all carried away and gave them a couple of coats of paint and then took them into work and pressed in the new bushes. Looking very flash now. I am going to take the good advice of OS Valiant gurus and do the lower arm and radius rod bushes as well but that will be next weeks fun.1 point
-
new pad skids have been discussed. it'd be pretty hard to get the car onto the pad. imagine the catastrophic fuckup if it went wrong and the car ended up in the old floor framing! so no, we're not doing that.1 point
-
Inadvertently got a good test of my solar system. Last week at Mount Tremblant I met a guy with a Westfalia in the parking lot who killed his batteries overnight. I isolated my house batteries at the switch and jumped him. I was looking at my volt meter today when driving and noticed it wasn't charging the house batteries off the alternator (not showing 14v). I was worried I had blown my charging relay or a fuse when I jumped him but my dumb ass had just forgot to de-isolate the battery banks. Switched it back on and all good. So I've been operating the fridge and other 12v on just solar all week with no issues and didn't even notice.1 point
-
Bit of a lazy day, didn't do a lot. But did achieve a few small steps all leading in the right direction.1 point
-
that right there is a corgi faced douche bag.1 point
-
I wasn't going to start the suspension work for a couple of weeks but I had some time this afternoon and decided to get stuck in. @Valiant was kind enough to send up his homegrown upper ball joint removal tool and I was itching to try it out. I tried to remove the joint with the upper control arm still installed in the car as a couple of members had suggested but it was super tight and I had no hope of moving it. I think this was mostly due to the fact that I was only using a 1/2 inch drive breaker bar and a 3/4 drive adapter. It might have worked if I had a proper 3/4 drive breaker bar. I persevered for a while but I was afraid of slipping and damaging the front wheel arch or guard so out came the control arm and I decided to go big and get some proper leverage happening. The control arm bushes require replacement to I ripped out the guts allowing me to pass a piece of round bar through. Next I held the removal tool in the vice so I could hold the ball joint and had a go at turning the control arm around the ball joint. It took a couple of good swings but I heard a delightful little crack and the joint started to turn in the control arm. Once it started to turn it was easy to remove the joint using the breaker bar and removal tool. After giving the control arm a bit of a clean up I installed the new joint. I had a bit of fun getting the joint to screw in straight but a couple of OS members who have done this job before told me to expect this. After few false starts the new joint started to screw in nice and straight and actually went in fairly easily. While I have the removal tool in the workshop I think I will do the other side so I will see my friends at BNT tomorrow and grab another.1 point
-
A Rokon trailbreaker would be cool.1 point
-
Instead of cleaning it I replaced the cap,coil,rotor, leads, and plugs. The air/smog pump lines are a a bit of a pain to work around but I got there in the end. I wernt to replace the air filter and noticed all the seals around the tbi unit and air filter base were perished/gone and its been eating dust for a while. I'll give it a good clean and see what I can find in the way of seals. I replaced the brake fluid in the master as it was nasty, I'll give it a good bleed another day when I have a helper I replaced all the shocks, that went smoothly. I still need to finish off the air lines for the rear shocks. Front is in And the passengers side rear. I think they were going for longest shock bolt award too. It goes through the frame and into the wheel well. I went to do the drivers side and noticed this. Thoughts on the spring? Be a cheap cunt and pull that leaf out on both sides and use as is? Replace it with a random leaf thats about the same size? Get reset/lowered springs to match? I'll have to arrange getting the tyres flipped so the whitewall is on the outside at some point too1 point
-
Turns out I was lying about it being a treefiddy. I had a look at the build plate and figured out all the codes. It looks like its a povo pack with a few extras. 305? TBI explains why it started and drove so nicely. A01- WINDOW, TINTED, ALL SHADED, W/S A12- WINDOW, RR, STA BACK DR A51- SEAT, FRT BKT PASS, DRIVER A57- SEAT PASSENGER AUXILIARY, ONE, FLDG B3W -TIRE ALL P205/50R 15/N BL RIPE ST TL KW4 C5S-GVW RATING, 6600 LBS C60- HVAC SYSTEM, AIR CONDITIONER FRT MAN CONTROLS D1V- GEAR, SPEEDO DRIVEN D20-: SUNSHADE, WINDSHIELD, PASS SIDE D45- MIRROR O/S, SST E24-WWR SIDE, CARGO, HINGED E5Z-SPEEDOMETER ADAPTER (DELETE) E60-?? E9Z-SPEEDOMETER KEY (DELETE) F59- STABILIZER SHAFT FR, GU6- AXLE REAR, 3.42 RATIO G50- SPRING REAR, HEAVY DUTY, VAR 1 JB5- BRAKE, POWER, DISC/DRUM, 6400 LBS K19- REACTOR SYSTEM, AIR INJECTION K60- GENERATOR, 100 AMP LOD- ?? L03-5.0 LITER V-8 TBI ENGINE MX81-?? M40- Turbo Hydra-matic Transmission NA5-EMISSION SYSTEM, FEDERAL, TIER O NL7-FUEL TANK,I25L, 33 GAL N33-STEERING COLUMN, TILT TYPE N40 - STEERING, POWER, NON-VARIABLE RATIO SLM - ?? V37 - BUUPER, FRT & RR, CHROME V73 - ANTENNA, FIXED XET - TIRE FRONT, P245/75R16-109S BW R/PE ST TL AT YD3 - FRONT AXLE, BASE EQUIPMENT FOR SCHEDULING, GVW PLATE YD5- ?? ZET- ?? ZW9-B0DY EQUIPMENT, BASE BODY OR CHASSIS ZY1 - COLOR COMBINATION, SOLID Z53 CLUSTER, INST, OIL, COOL, TEMP, VOLTS 12U-?? 62I- INTERIOR TRIM, LT SADDLE (I) 62V-TRIM COMBINATION, VINYL, LT SADDLE (V)1 point
-
Perhaps that's more of a Shelbyville idea.1 point
-
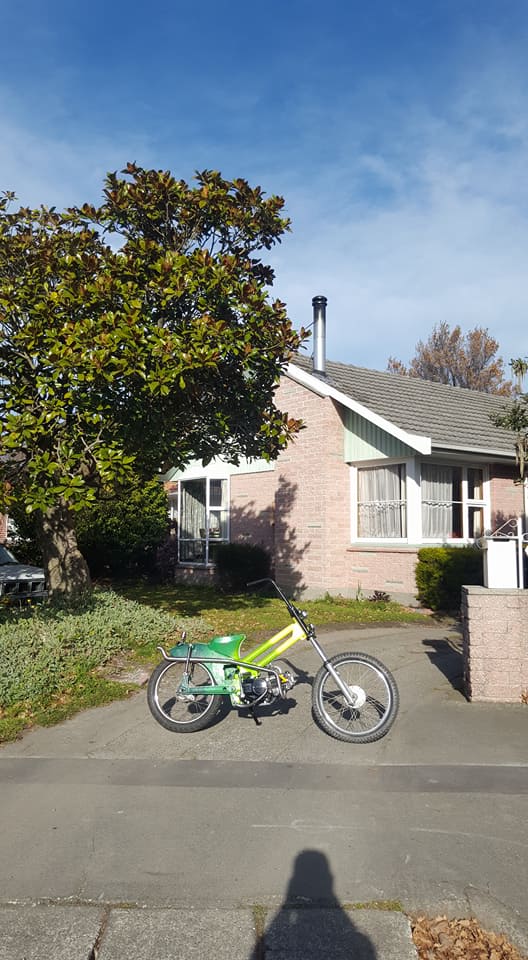
Shit its been awhile since ivbe updated this. Missing a few photos of the adventures this bike has been on. This year from memory Ive ridden to the west coast 250k in one hit on the 50 motor and it loved it. Heaps of local rides too. prob close to 5000k in the last few years on it. For this years Dirtmasters I fitted Suzuki B120 forks and Rear shocks and Dirt tires and it carved up the track and handled the jump all good. Then in October Hogan hooked me up a deal on a YB100 so a new piston and rings and gasket set and this thing was strumming so the following weekend I stole the motor and it bolted into my F5 frame and everything swapped over easy and have done a couple hill rides on it and its so much fun. way more power way more fun I fucking love this bike so much. so much fun for 10 bucks gas and so many trouble free miles.1 point


(Custom).thumb.jpg.50cbfadc2369f551fe14d9ec26aac0d5.jpg)
.jpg.75f2d80e7e3cbcdf8fb1bd2e0226e4e0.jpg)
.jpg.2e5e89bf921da2c6243b259ad22f680a.jpg)


This leaderboard is set to Auckland/GMT+12:00