
Leaderboard


Popular Content
Showing content with the highest reputation on 05/17/17 in all areas
-
It is a winner.11 points
-
I got this golf lip for it, the valence I used had already had one on so I left the holes in when I painted it for this reason. it sits high, not hideous but I will lower it and see. That will change the angle too. i scrubbed clean and painted the sump yesterday10 points
-
how can you say no to that face9 points
-
Have been getting some work done on the upper tailgate. Stripped most of the paint off with stripper, acetone, and wire brushes. Patched the rust holes with new steel. I drilled the spot welds and bent the seal channel out of the way so I could fix the rust under it. The other side wasn't as bad. The lower edges are fairly rusty inside, but I'm not going to dismantle the whole thing, will slosh some paint and cavity wax inside before it goes back on the car. I made the patches fit quite neatly and did some of the welding with the new TIG, then used the MIG to fill the holes I made (bah). TIG means less grinding, but I'm still getting used to it. Also welded up the holes used for the self-tappers that had been holding the glass in, and a few other pinholes. Back on the car for a test fit, it used to rub on one side and I wanted to check that out. It seems like there is enough adjustment to in the mounting holes to fit OK. I needed to tidy up the area where this hinge attaches the frame as it's been bent by a gorilla in the past. I'll also get some hex-socket screws to replace the big phillips head screw which hold the hinges as some have been replaced by hex head bolts in the past.9 points
-
sticky uppy steel things with hats on. 2017-05-17_03-22-07 by sheepers, on Flickr 2017-05-17_03-22-20 by sheepers, on Flickr pouring footings tomorrow.8 points
-
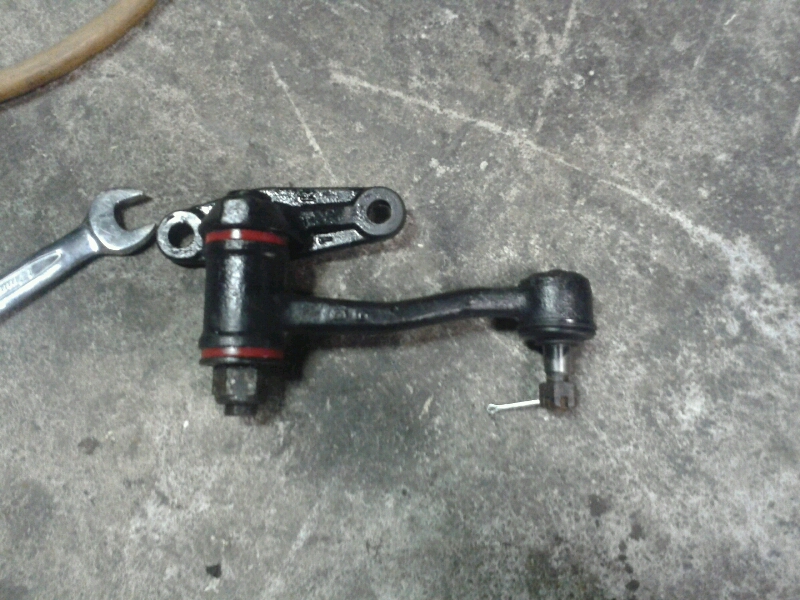
Well wof on Monday never happened, due to a bunch of fucking around with different parts places trying to figure out this steering idler. Anyway way figured out what I needed about 5.25 yesterday evening and much to brad doritos naysaying they turned up today. So hopefully everything is now repaired to vtnz standard. Idler went in this evening. Off to vtnz tomorrow again. Digits crossed.
 7 points
 -
Small update - trying other stuffs: As previously mentioned, engine is running rich enough to kill a set of plugs in a few minutes. The metering unit requires vacuum to control fuel supply. Not enough vacuum = rich. There are three throttle bodies, each used for vacuum supply. 1/2 = dizzy advance, 3/4 = metering unit, 5/6 = vacuum reservoir then to brake master via one way valve. For those playing along at home, the screw on the end is the idle control. In/out etc. You can check if your butterfly's are closing correctly by jamming your finger over it. Stall = good. So, checked throttle bodies for leaks, including balancing pipes, other pipes etc. All seemed ok. Possibly small shaft leakage but I'll leave that for now. Threw a vacuum gauge off a T inline and got a bouncing reading under 6hg. Not good. Factory says 10-12hg. Checked other throttle bodies - same deal. I'd previously checked the tappets with @Threeonthetree and we reset to factory 10 thou just the other day. Then it struck me - has someone put a more aggressive cam in this? A bit of research suggested it might have something like a Piper fast road cam. Opened up the top and changed clearances to 16 thou. Reconnected vacuum gauge and what do you know. 12hg. God knows what cam i've got - this is gonna make setting things up more interesting Anyway, now with the correct vacuum the metering unit has the prescribed travel on the control link (see previous post for pic) but, alas, it was still running too rich. Had a think about adjusting the xmas tree of fuel delivery on the metering unit but knew this might be a tad out of my skill set so tried something a little more creative. Knowing there was likely some wear on the follower and control links of the metering unit, I decided to sacrifice some feeler gauges. Warmed the car up, and slowly started increasing size between the follower and roller on the control link until maximum idle was achieved without stalling the car - the theory that this was backing off the fuel cam. Got to 18 thou and found what I assumed was a sweet spot so cut the gauge in half, stuck it in the metering unit and road tested. Findings so far : car not as rich at idle now = win! Car now has no top end pull = lose. Next steps: Back of the gap a bit more between the control roller and follower and try and find a compromise between idle and full noise, check ignition advance, play with fuel load fuel setting screw. PI Lyfe.7 points
-
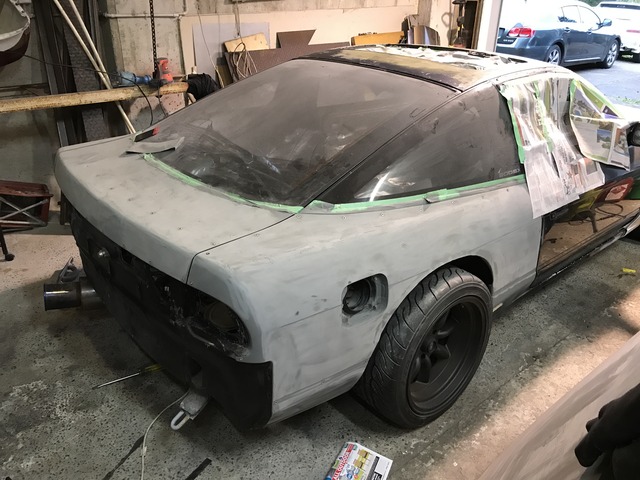
Limit straps on may have an issue with inner guard clearance. fine when the suspension is fully compressed on both sides. but at full flex, have tyre to inner guard contact. because of where bumpstops are mounted. will likely never get this much travel,, so maybe a non issue. putting a rubber bumpstop on shock shaft, or cutting the inner guard some more will fix it, if it turns out to be a drama currently getting the outer towers sorted. passenger side almost ready for paint on bumps7 points
-
at best you only have the engine block left (at worst the whole car is left)7 points
-
A small but substantial update to bring this post back from the dead.. After saving for a good long while i was able to quire enough to go down to turners and purchase a 2001 Ford Mondeo. Bidding in an auction was an experience on its own, i was the only one to bid getting it for a mere $630.00. Driving it home that same day (/definaltey not driving it because its de-reg) It will be paired with a sierra 5 speed box i have from a previous deal.5 points
-
Thanks KK, I've just about drunk away the memories of the bodywork , lol. The box seems fine/stereo/I've got used to it now. But while donk is out I'd do the bearing..
5 points
-
Yea but holy shit what about the MS paint skillz?5 points
-
OK so the SAFC is working, I can change fuel percentage at idle and see the AFR's change, as well as hear the engine note change. Not sure if the Knock reading is working, will recheck that. The weather has been wet so I can't test drive with primered rear quarters that want to suck up water. So I've bought some White Autothane paint, primer, thinner, filler, mixing cups, filters, proper mask etc etc. I've welded up the Aerial hole, wiper hole and high stop light since it is covered by the wing. Lots of sanding etc. Sanded rear quarters, yay sanding. Don't have to worry too much here since it's covered by fibreglass panels. Finally got the damn tail lights out, they were silicon sealered in there and I couldn't get to it. But finally off after making a weird shaped knife blade and some levering to break the bond. Surprisingly didn't break the lights, cool. The roof has been painted with terrible black paint, no prep and looks shit. So I took it back as far as I could with the orbital sander, dust every where. Love sanding. But the original paint underneath wasn't in good condition so time for the paint stripper. Fck off shitty paint: Started sanding rear: Primered overfenders, used special primer for fibreglass. The colour is actually pretty cool, would look good with clear coat.... Also trimmed the rear fibreglass arches because wide wheels are wide: Where it will sit until ready to paint:
5 points
-
I'd take the Falcon 'FOR SALE'. by Riley, on Flickr4 points
-
Nissan Pike cars are lush. I've hooned a Figaro before but never a Pao or BE-1. The S-Cargo I'm less keen on. Do it pls CDL4 points
-
So so easily.4 points
-
This is a question probably been asked 7894 times. But can I import any car from japan pre 1997 now? Ie. Nissan paos?4 points
-
Today was a good day! I got my head back from Barry at MRP. Here are some photos he sent me of the head. No need to take my own. The head had to have some extra work done on it so that the 10mm+ lift cams were able to rotate without hitting anything. With receiving my head I also received the last few gaskets and bolts that I was after. Especially for the intake side of things so I could get these beauties bollted together. I installed the front input shaft seal, the output shaft seal, and also the spacer ring between the box and the input shaft that I forgot to install first time round. Nice new slave cylinder I am using OEM head studs so I have used the Toyota torque specs, so need to do the +90 +90. I just did it by eye with my last engine, decided to do it properly this time round. [ Fastforward an hour of fiddling around I got everything bolted together. I am still waiting on some new shims to arrive from Australia so I will have to wait a little bit before I can install the cams etc. [ With that, not long to go before i drop it down the guts into the KE25 and can finally start on another task. I am thinking diff shortening next. Hopefully less expensive than this engine! Discussion //oldschool.co.nz/index.php?/topic/52401-pbaines-1971-toyota-corolla-ke25/4 points
-
fuck if engines were seizing after a year of garage life I would be fucked.4 points
-
Fucking showoff3 points
-
It's neat. I'm keen to drive it once when you get it, Al. So sweet.3 points
-
I had a similar problem till I noticed a plastic film on the lens that I was supposed to remove3 points
-
hmmmm............3 points
-
No, that's one of the main reasons I've never got involved with them, there is very little in the way of rules for bikes. And trikes. I've only driven one and felt like it was going to kill me at any second. Yuck.3 points
-
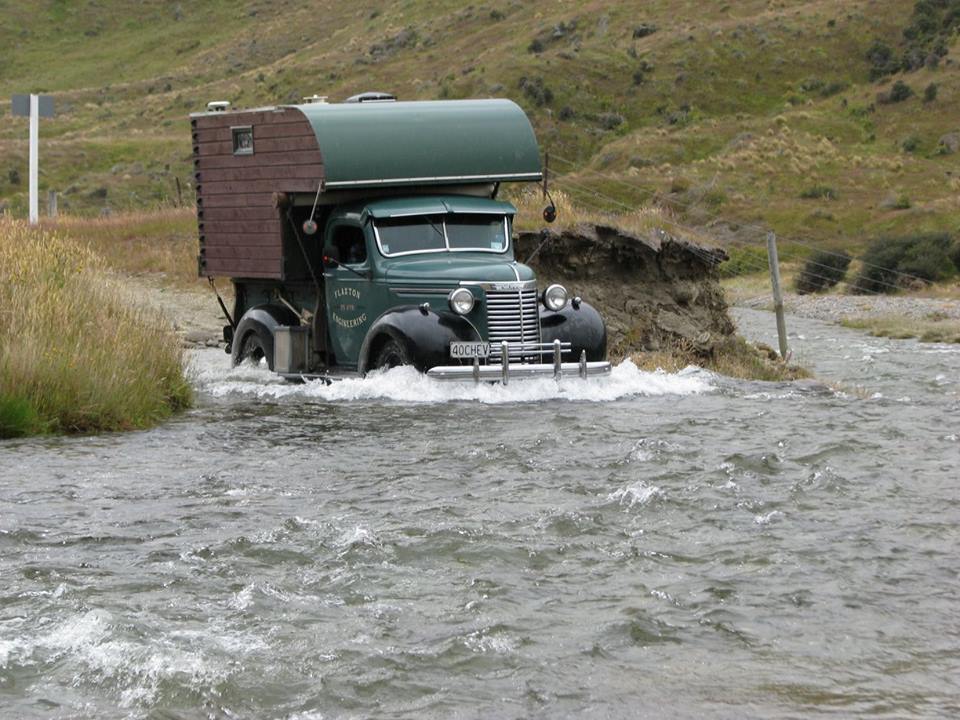
For inspiration January on the Nevis Road.
3 points
-
^ sums up my issues as well so I'm interested to hear peoples recommendations2 points
-
Shit yes. Awesome. Planning on using your services a fair bit once she's running - seen what you can do with throttle bodies - awesome result. The whole engine bay looks like the Exxon Valdez used it as a port for a while .2 points
-
pop over and bring your extra sets of plugs. We will give them a clean up in the blaster, get them super clean.2 points
-
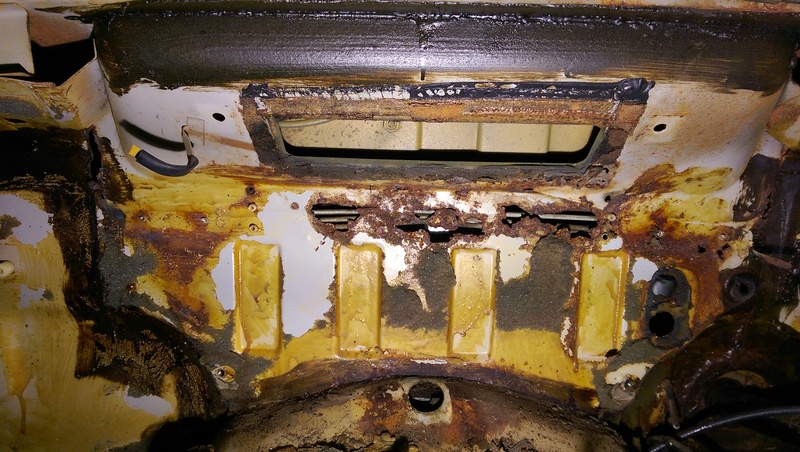
Removed the dash and the heater and that horrible foam rubber pad thing. Found the heat tap is seized, not sure if on or off, so had been disconnected. Also, I think I will need to use that whole patch panel. All the rust is in that one panel as far as I can see.
2 points
-
Fucking hell Joshy, what a fucking weapon From this... to this in 2 months... Loooooooooooooooooooong whistle and let's be honest - the first picture is doing it justice...2 points
-
Indeed, I only have the one cock. I googled and there is no separate chassis, time to break out the tinfoil, chicken wire, rivets and bog.2 points
-
I've got an ADO16 that last ran in the winter of '96. Hasn't been cranked over since '99. Prob should check it.2 points
-
This is the thread of my 105e Ford Anglia, last year we got it to the point to be drive-able up to Kaikoura from Christchurch. Its nearly been a year now and i now have my learners license. So i decided to do it up properly as my first car. My discussion: //oldschool.co.nz/index.php?/topic/53164-105e-ford-anglia-shannon-discussion/ My Brothers Anglia Fourm: http://oldschool.co....105e/?hl=jorden Here is my dads Ford Falcon (XP) http://oldschool.co....l-supercharged/ Here is the link to the proper journey to Kaikoura in two weeks. http://oldschool.co....glia/?hl=anglia Below is how we bought it for $1000 with nearly everything with it. It has around 86-7ish thousand miles on the clock. Before we drove it to Kaiakoura. Once we had it ready we got it registered and we put a warrant on the day we left. After we got home my dad used it for a run about car for a while and then it got parked up for a few months. Now im happy to say that in those few months i drove the car. This was the first car i had ever driven by myself (On the property of course). Now after another few months of sitting there it was my turn to do it up properly so i started the strip down. Everything came off the exterior except the handles and the window washer/wiper motors and also the chrome. And this is how it stood. We took the motor out this weekend. We put the motor in my brothers so it could get re-vinned. This is the only real rust on the car, theres also some on the boot: Im looking for Mk2 Cortina struts (Disc Brake Setup) message me please if you know of any The whole car is now bare metal excluding the roof and the engine bay so it will soon be ready for undercoat. Engine bay almost done My brothers wheels on my car Some pretty exciting news! while cleaning out the garage we found some undercoat. Its in a massive barrel. We tested it to make sure it was fine and it is. So im going hard out on my car at the moment finishing out all of the nitty stuff that i dont want to do A bit of surface rust, i guess this just shows that its been a while... Door jams The under small bit under the front and back guards/wheel wells. And finally the bit above the windows, thats really hard to get into with the wire wheel. So exciting time ahead!1 point
-
I agree. Once I have had everything put in, all the engineering work done to it, the electrical work and the run in etc, then when I take everything back out for the panel and paint I will go through with a fine pick comb to pretty everything up as much as possible.1 point
-
I had a closer look at the Cigweld helmet, turns out it has a grinding switch and delay hidden inside. That didn't help with the visual issue (actually made it worse when I accidentally welded on the grinding setting). Not sure that I'm ready to drop $$$ without being able to try one out to see if it is better. Will do some more research.1 point
-
My old helmet (about 18 years old actually) had the internal batteries die. I replaced them with a couple of C-cells inside the helmet in a holder. Currently has a couple of AA's stuck in there. Still works OK. Harbour Freight makes some quality gear!1 point
-
As long as she didn't have the Torrey Canyon and the Amoco Cadiz travelling in company.1 point
-
I said the same to Hayden actually1 point
-
1 point
-
The second set of 540cc injectors arrive over the weekend so I professionally cleaned them: Checked for sameness: Also used a multimeter to do a resistance check on all 8 ST215 injectors, they were all the same which is nice. Also the same as the old JZX100 injectors, not sure what this really proves... So I went ahead and installed them, checked for leaks and it started up first try, fckn yay. Idle'd perfectly fine, rev'd it a bit and saw a bit of black smoke which I was expecting. The battery had been disconnected for a few days which might explain why the AFR's were super rich at idle with 10.6:! But it then surprisingly sorted itself out, whether it was just cold start rich, I'm not sure but when it was warm it idled at around 14:1 which isn't much different to the standard 370cc's. Next was to test drive it to see what the AFR's did under low boost, but I then found a fuel leak from the rear. Which turned out to be the fuel tank o-ring which looks to have expanded so it doesn't sit right. Have now ordered a new genuine one, for fcking $51.11 11 cents!
1 point
-
So head is taking a big longer than initially planned as a sensor on the CNC that was being used to port the head died so next week sometime I am expecting to receive the head so can finally piece it all together! Today to make me feel like things were still progressing I bolted up the flywheel... yeah. Exciting... I also made sure I put the sandwich plate on too as I have done it a couple of times where I bolted on the gearbox/flywheel/clutch to find I forgot to do it and have also seen a couple of others do it too Socket makes a great flywheel stopper too. Think the flywheel is 3.8kg's. Probably not ideal for a street car, but this won't be a daily so will still be fun when I get it out on the occasions. After driving the new spiggot bearing into place I thought it would be best to actually see how much contact was made on the input shaft. I just put vivid on the end of the shaft, slipped the box on and gave it a few rotations Looks like I drove the bearing in a bit too much... I whipped everything off and pulled the bearing out a bit. No need to recheck now, a few mm would have done the job I have chosen to go with SSR MK2 feet too. If you know of any, let me know! Thinking of going 8J in the rear and 6.5J in the front Mingling //oldschool.co.nz/index.php?/topic/52401-pbaines-1971-toyota-corolla-ke25/&page=21 point
-
All the red1 point
-
Today I finished the main bogging and sealed her up. Photos on this side are a bit ham cause it's a lot darker.1 point
-
Both rear sills in and out. Both front caps, drivers not as bad. C pillar vent, one side only thankfully! And after about 80 hours day after day, 54 patches were chopped, made, welded and ground. marathon, but had to do it now rather than try patch it up as I'm driving it. I've got in with a tight group of 1200 owners, and they have been feeding me cheap and free spares! Fuckin awesome! Always liked the factory sedan grille more so,was amped when this showed up, bit of a scrub, paint and polish and I'm happy enough to rock it until I get a better one. Need the appropriate surrounds however. Also bits like badges, interior stuffs, brackets that have been cut or modified. Yesterday was hot, was waiting for the few layers of bed-liner to set in the roof after heat-shrinking and hammering so I can sand it easier, and I couldn't be assed sanding bog so I cleaned up and refurbished the bumpers, tail light surrounds, number plates, headlight surrounds etc. Already did the indicators and lenses before Xmas, test fit a stereo, general tidying and painting of stuff, cut a piece of underlay for the roof, seam sealed and under sealed the rear guards and spare tyre well, made a cover for the fuel tank in the boot. Broke a few of the tail-light fixed bolts, found if I snapped them off completely and drilled them out, I could fit some spare speaker mounting machine screws in there, weld them and trill off the excess. worked out really well, then wire wheeled and doused in black zinc. Common practice on this car1 point
-
The rear arches had been hacked to fit drag slicks and it was high on my agenda to make them more original looking. As you can see it was shy about 30mm of arch. So I made these out of sections of some rooted front guards cause I just don't have the gear to shrink and stretch new steel. In saying that, it was everying BUT the arch that was rooted on the spare guards. Half of these pics are just quick 'end of the day' photos for a timeline, don't freak out if you see holes and things still, I got them. I worked my way from that front guard all the way round back to it. I took photos of the lot but it's depressing so I won't post them all. fair bit of time spent with the magnet and air gun extracting the rust scale, then doused it in rust kill, zinc and another sealant. Everywhere. Inside both rear doors were Chooched, nice repairs from the outside but had blown out on the inside.1 point
-
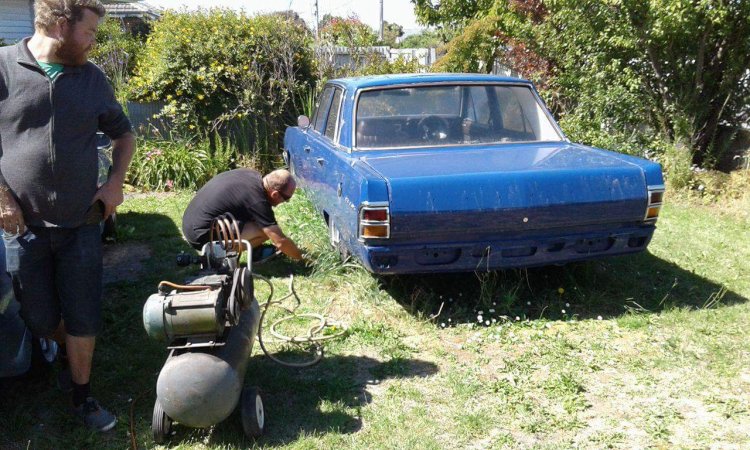
step 2 inflate tyres
1 point
-
it works1 point


This leaderboard is set to Auckland/GMT+12:00